



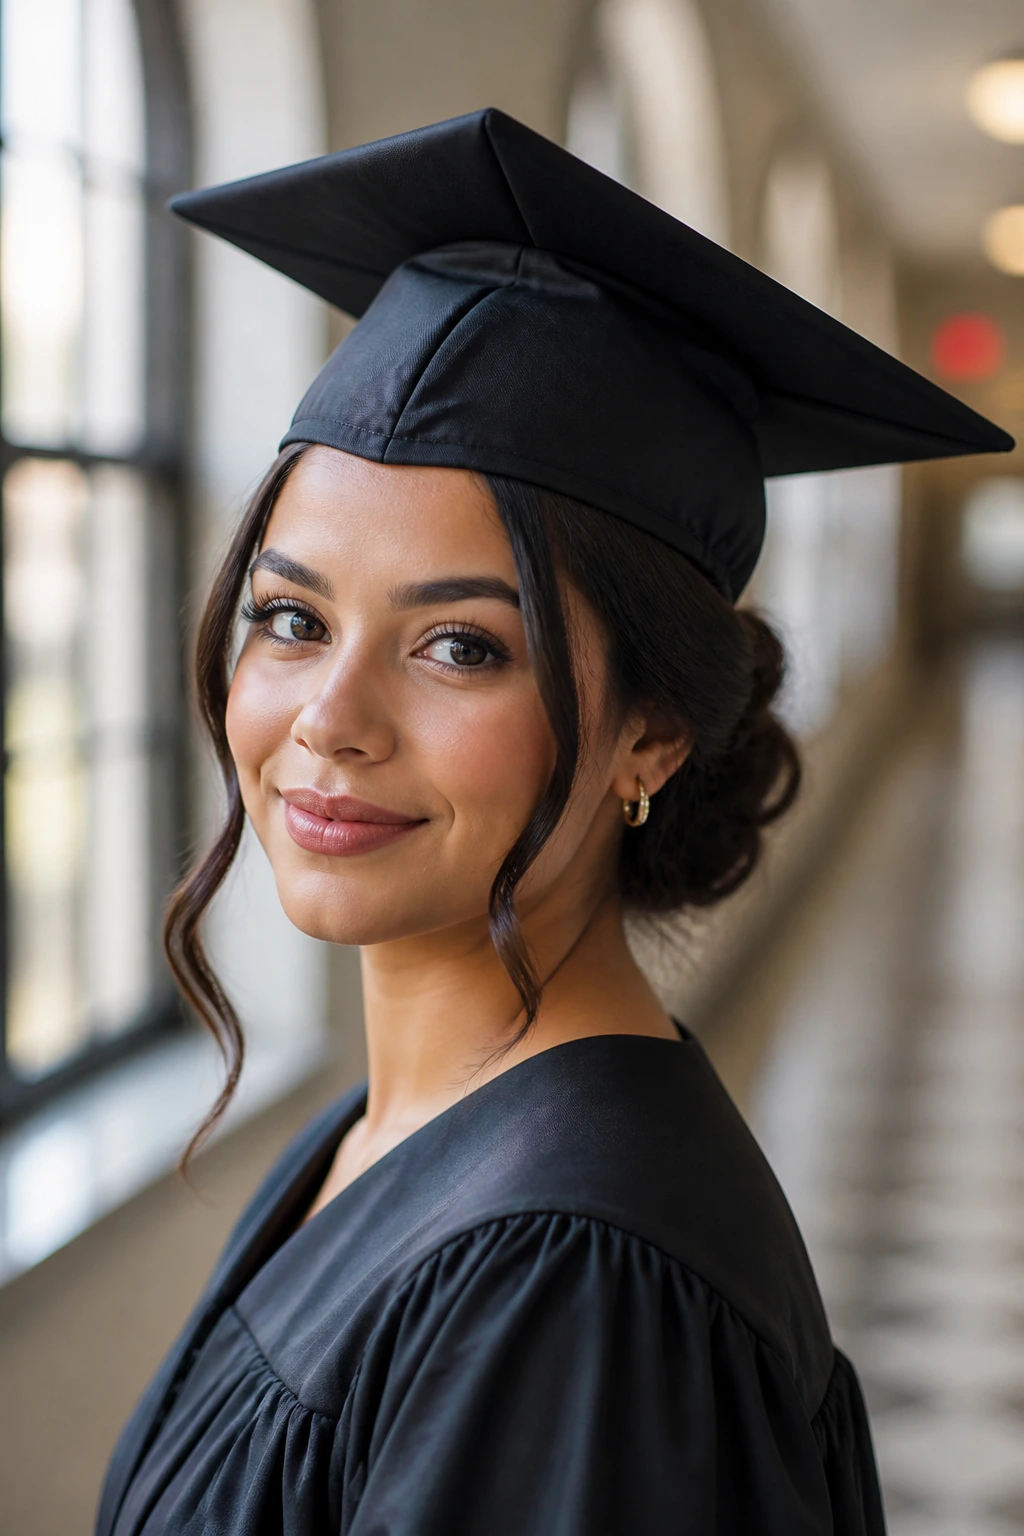
Graduation hairstyles have one job: survive the cap, the handshake line, and the hundred photos that happen before you even make it back to your seat. A polished look is not about piling on curl and spray until the hair feels shellacked. It’s about placing shape where the cap won’t crush it and smoothing the hairline so the whole style reads clean from every angle.
The cap is rude to hair. It flattens the crown, rubs the fringe, and exposes every stray piece the second you step into bright light. That is why styles that sit low, tuck close to the nape, or keep movement around the shoulders tend to look more finished than lofty styles that fight the mortarboard.
The cap tells on you.
Some of the best graduation looks are the quiet ones: a low bun with a glassy finish, a braid that stays neat at the back, a wave pattern that still looks soft after the tassel moves. The styles below lean polished, not fussy, and that is usually the sweet spot when you want to look pulled together without spending the whole day fixing your hair.
Why These Graduation Hairstyles Earn Their Place
-
Cap-Friendly: These styles keep the bulk low, tucked, or controlled, so the mortarboard sits level instead of wobbling on a knot of hair.
-
Photo-Friendly: A clean hairline and a settled shape matter more in flash photography than big volume ever will.
-
Texture-Smart: Straight, wavy, curly, and coily hair all behave differently, and these looks give each texture a lane that makes sense.
-
Fast to Refresh: A small brush, a few pins, and a mist of hairspray can bring most of these styles back after the cap comes off.
-
Accessory-Ready: Pearl pins, ribbons, combs, and slim clips can sit on top of these looks without making them feel crowded.
-
Comfortable Enough to Wear All Day: Nothing here should give you a headache by the first ceremony speaker.
1. Sleek Low Bun
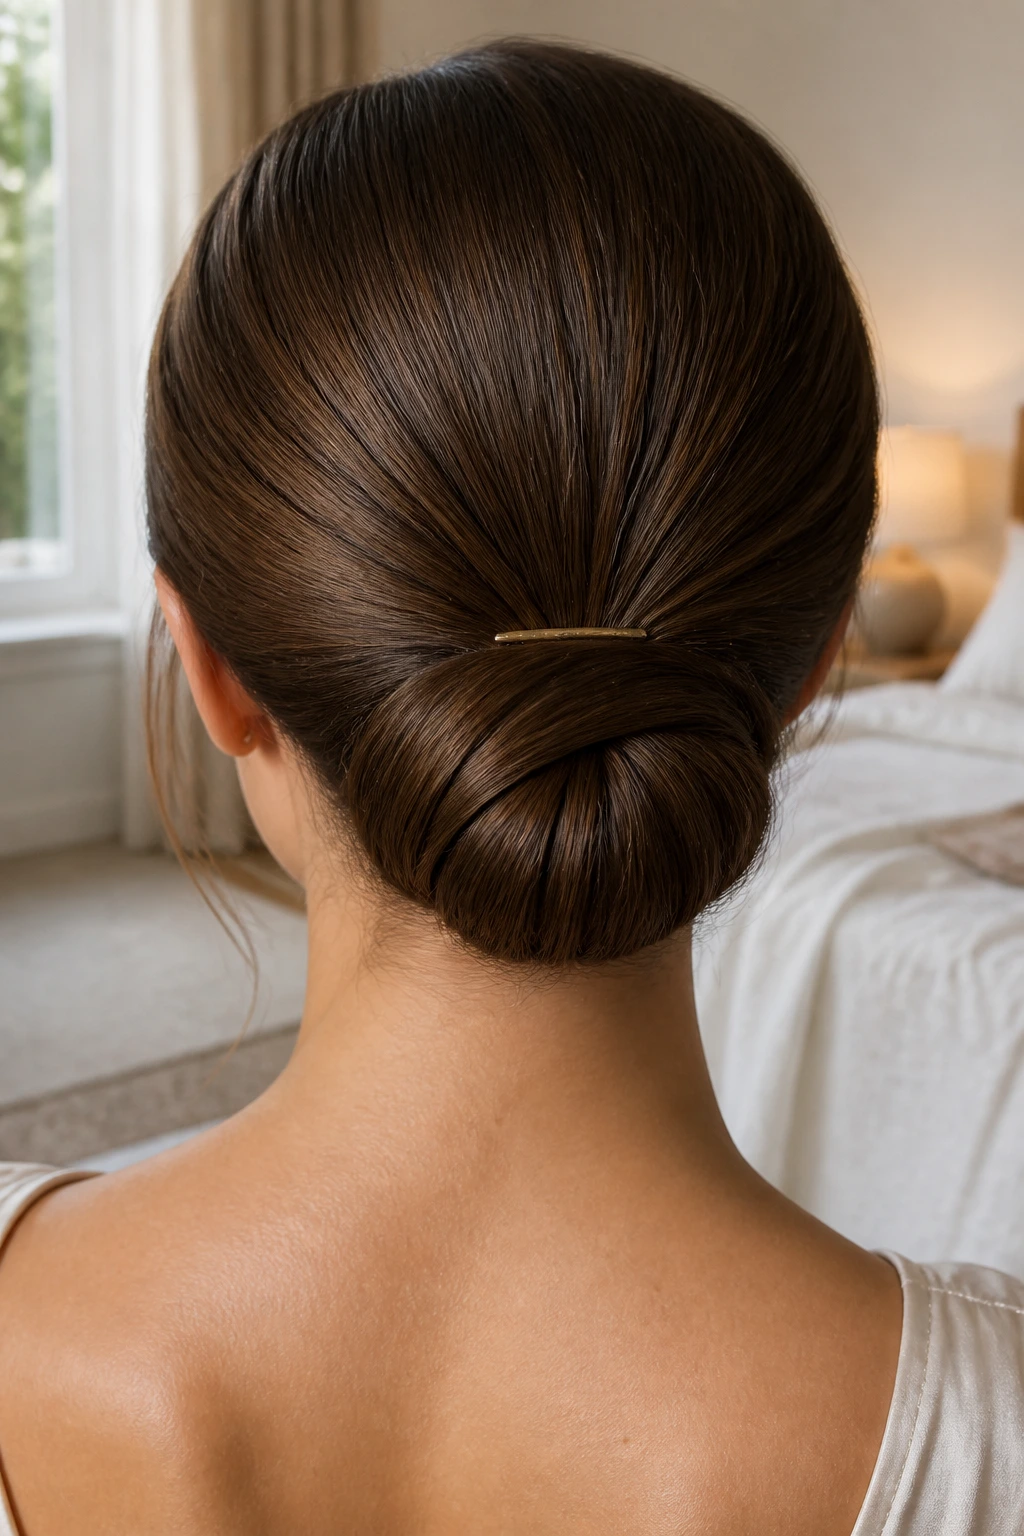
A sleek low bun is the style I reach for when the cap has to sit flat and the rest of the day still needs to look elegant. It keeps the silhouette tidy, shows off earrings, and avoids the top-heavy shape that gets crushed the second the cap goes on.
Why It Works Under a Cap
The bun sits at the nape, which means the cap can rest without fighting a bulky crown. Smooth the hair back with a light cream or gel, part it cleanly, and keep the bun compact rather than oversized. If your hair is fine, a little texturizing spray at the roots helps the pins grip. If your hair is thick, section it first and pin the bun in layers so it stays flat instead of puffing outward.
A low bun also photographs well from the side, which matters more than people think. The neck line stays open, and you do not get the half-collapsed puff that a high style can create under a cap.
Best for: medium to long hair, straight or lightly wavy textures.
Pin it this way: cross the bobby pins in an X so the bun does not shift when you hug people.
Finish: a toothbrush sprayed with hairspray tames the baby hairs at the temples.
2. Soft Twisted Chignon
A chignon feels dressed up without turning stiff, and that balance is exactly why it works for graduation. The twists add shape, the low placement keeps the cap friendly, and the finished style still looks relaxed enough that it does not scream “salon trial run.”
The best version starts with two or three loose twists gathered at the nape, then tucked into a soft knot. Keep a few pieces smooth around the face so the whole style reads intentional, not accidental. If your hair is slippery, rough it up first with a dry texture spray; if it is layered, pin the shorter ends under the twist instead of trying to force them into the knot.
A chignon can lean classic or slightly undone depending on how neat you make the front. That’s the whole trick.
Keep the knot low and wide rather than tall and tight. Tall chignons start arguing with the cap. Low ones cooperate.
3. Bubble Ponytail
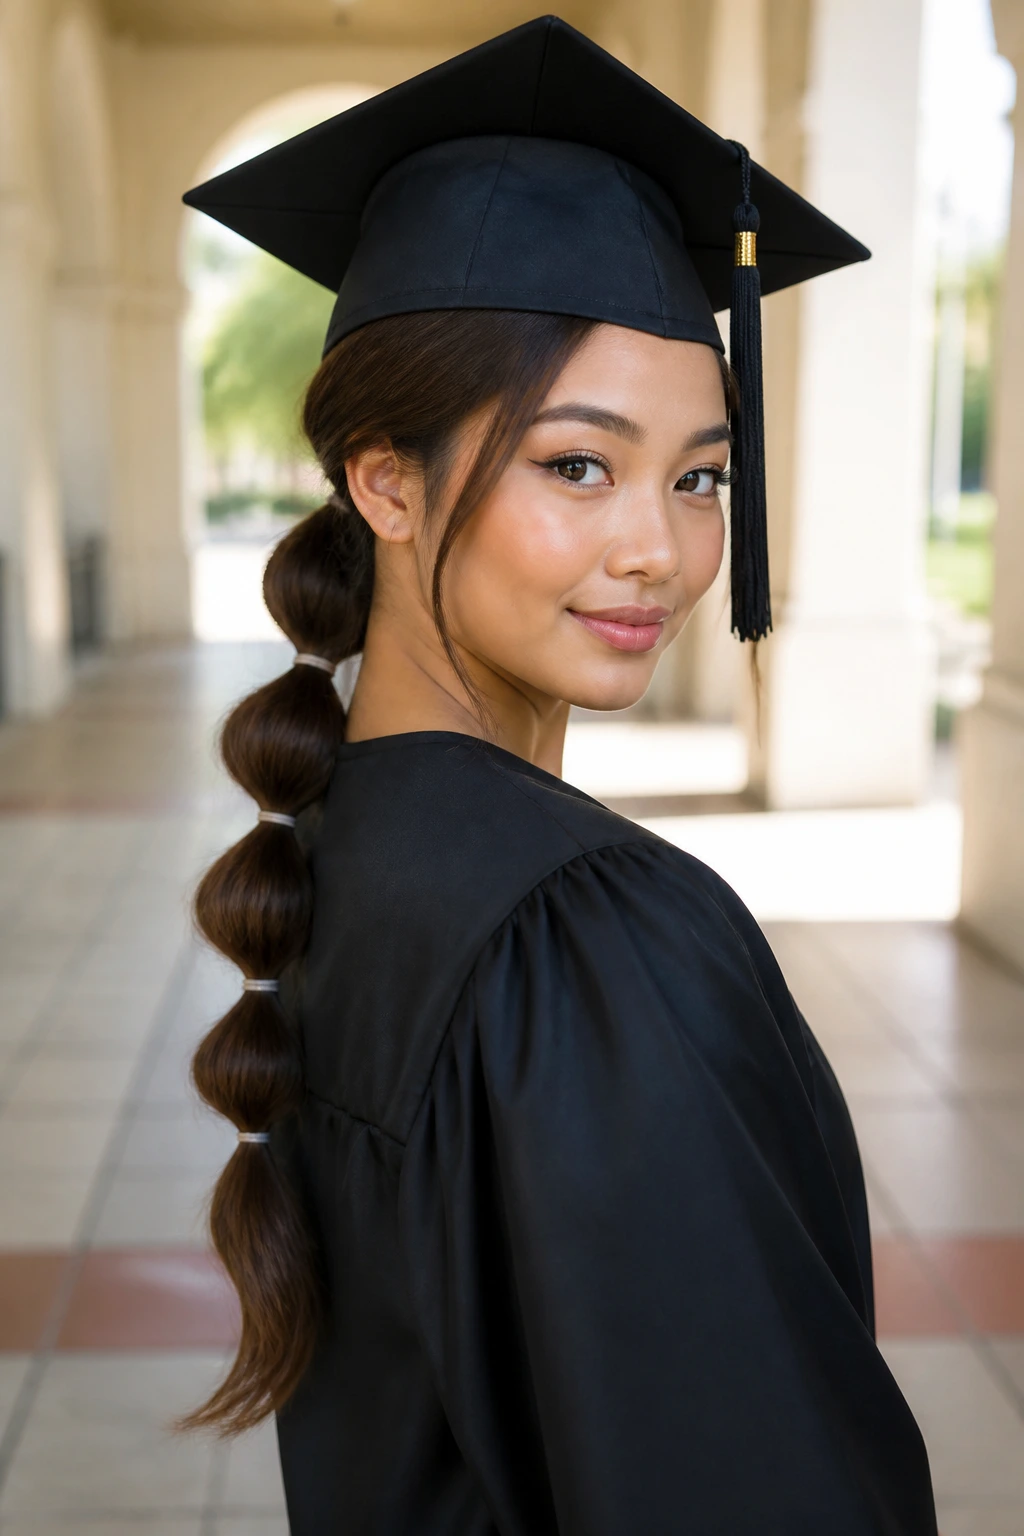
Can a ponytail look formal enough for graduation? Yes, if the bubbles are even and the base is smooth. This style gives you length, motion, and a little personality without turning into a loose mess by the end of the ceremony.
The polished part comes from the top section. Smooth the crown first, secure a ponytail at the mid-back of the head, then add small elastics every 2 to 3 inches down the tail. Gently tug each section outward to form the “bubble” shape, but do not pull so hard that the elastics show through.
How to Wear It with a Cap
Keep the ponytail low enough that the cap does not sit on top of it. A bubble tail that starts too high can make the mortarboard tilt backward, which looks awkward in every photo you’ll hate later.
This style works especially well on long hair that holds shape. If your hair is layered, mist the tail lightly with flexible hairspray before you bubble it so the ends do not fray.
4. Half-Up Crown Braid
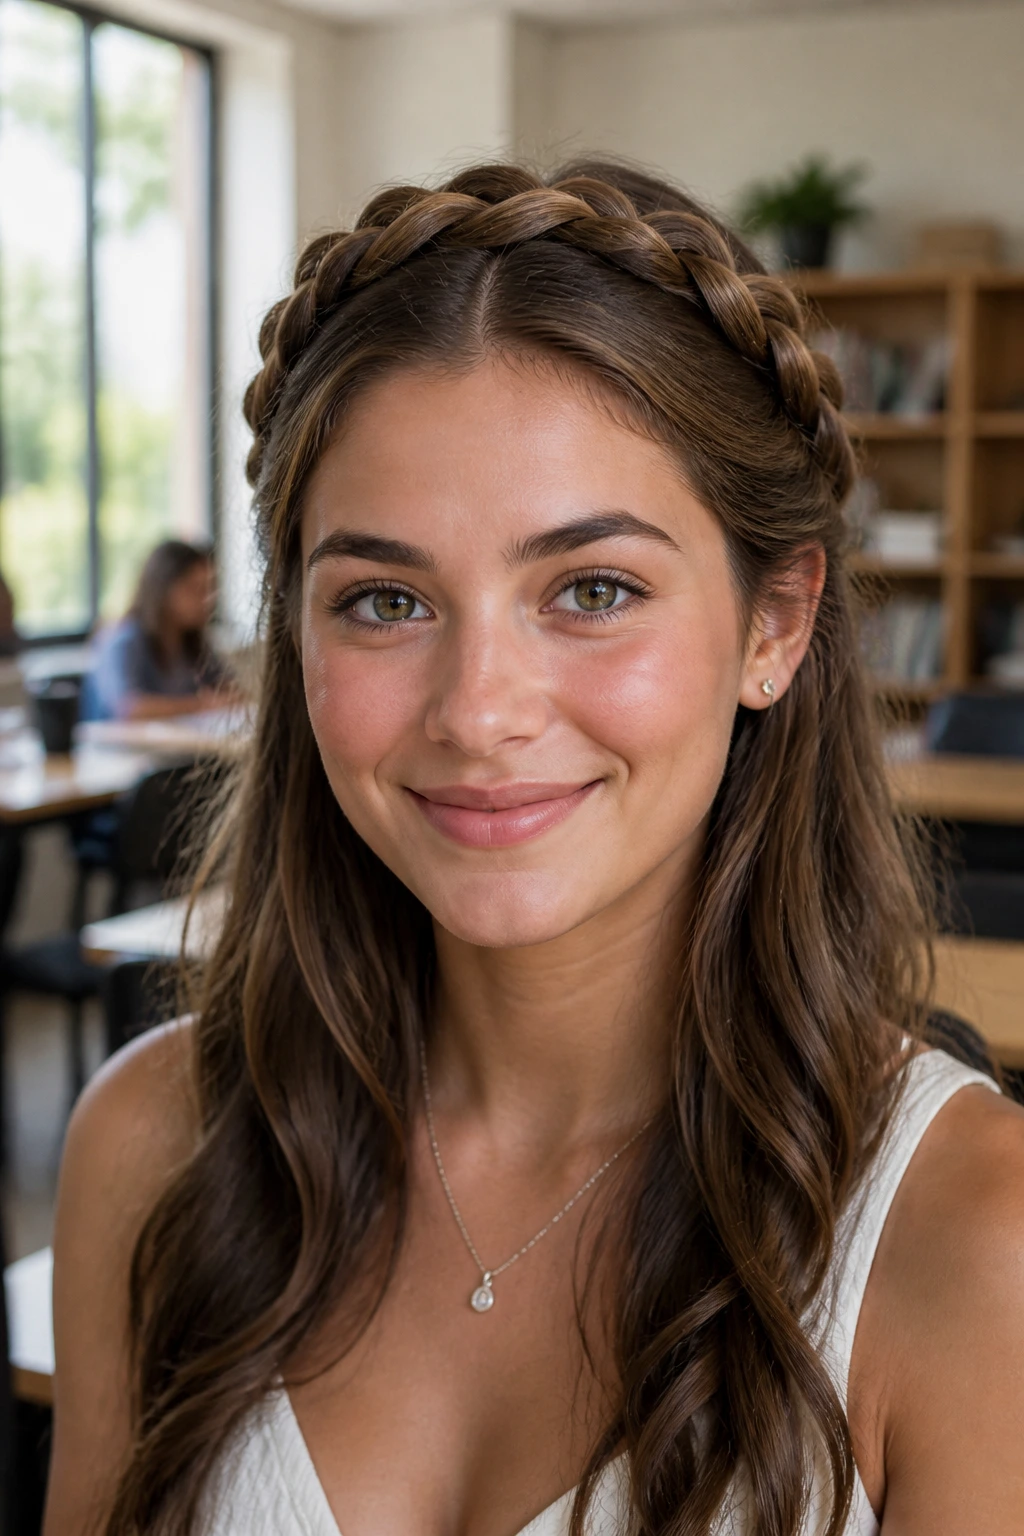
If you want hair down but not in your face, the half-up crown braid is a smart compromise. It clears the temples, keeps the front neat under the cap, and leaves the rest of the length to move naturally once the cap comes off.
The braid can be small and neat or wider and looser, depending on how much detail you want at the front. I prefer a braid that travels from one temple to the other and disappears behind the head. It holds the front in place without making the whole style feel heavy.
Best hair lengths: shoulder-length and longer.
Works well with: soft waves, straight hair with a little grip, and layered cuts that need structure near the front.
Good note: tuck the braid ends into the hair behind the ears instead of letting them poke outward. Tiny pokes show up in close photos.
5. Loose Hollywood Waves
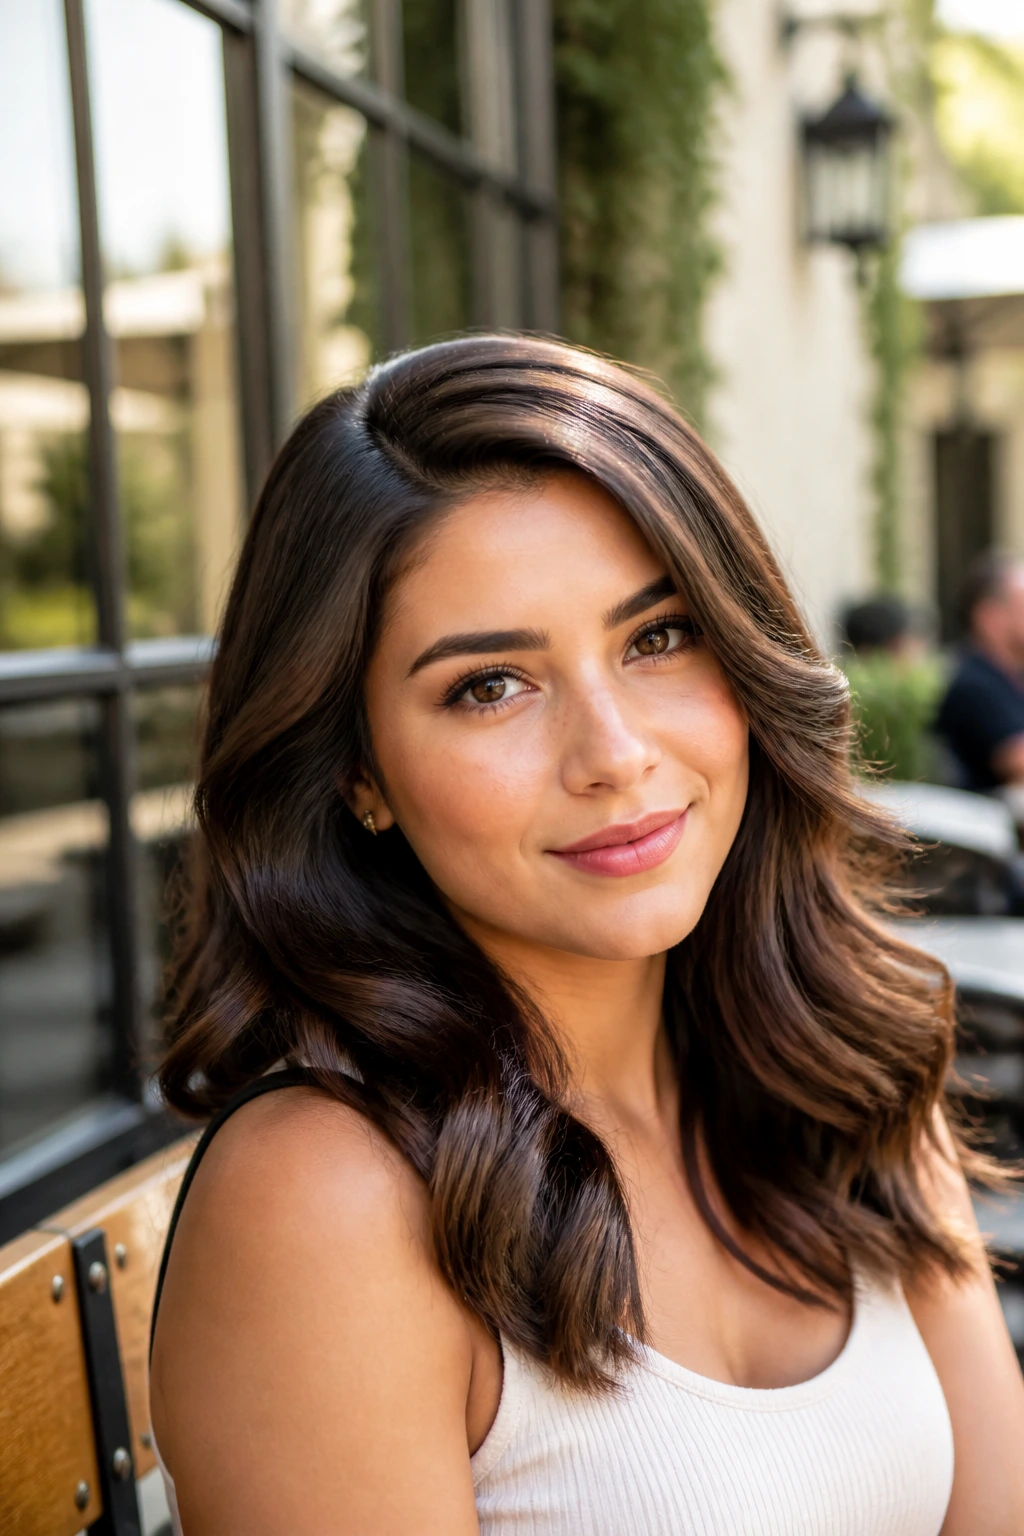
Loose waves look polished because the shape is controlled, not because the curls are tight. That matters on graduation day. Tight ringlets can frizz, drop, or spring up under the cap; a softer wave pattern sits flatter at the crown and still gives you movement around the shoulders.
Start with a 1 to 1.25-inch curling iron, wrap each section away from the face, and pin the curls until they cool. That cooling step matters. Skip it, and the wave falls before the first picture. Brush the curls out with a soft boar-bristle brush or your fingers, then mist the mid-lengths with a light shine spray. Keep the roots smooth and the ends soft.
This is one of those styles that looks more expensive when it is slightly imperfect. Too much product makes the hair look greasy under flash. Too little, and the waves separate into frizz.
A side part gives it a little old-school polish. A center part reads cleaner. Pick the one that suits your dress neckline, then leave the rest alone.
6. Polished Mid-High Ponytail
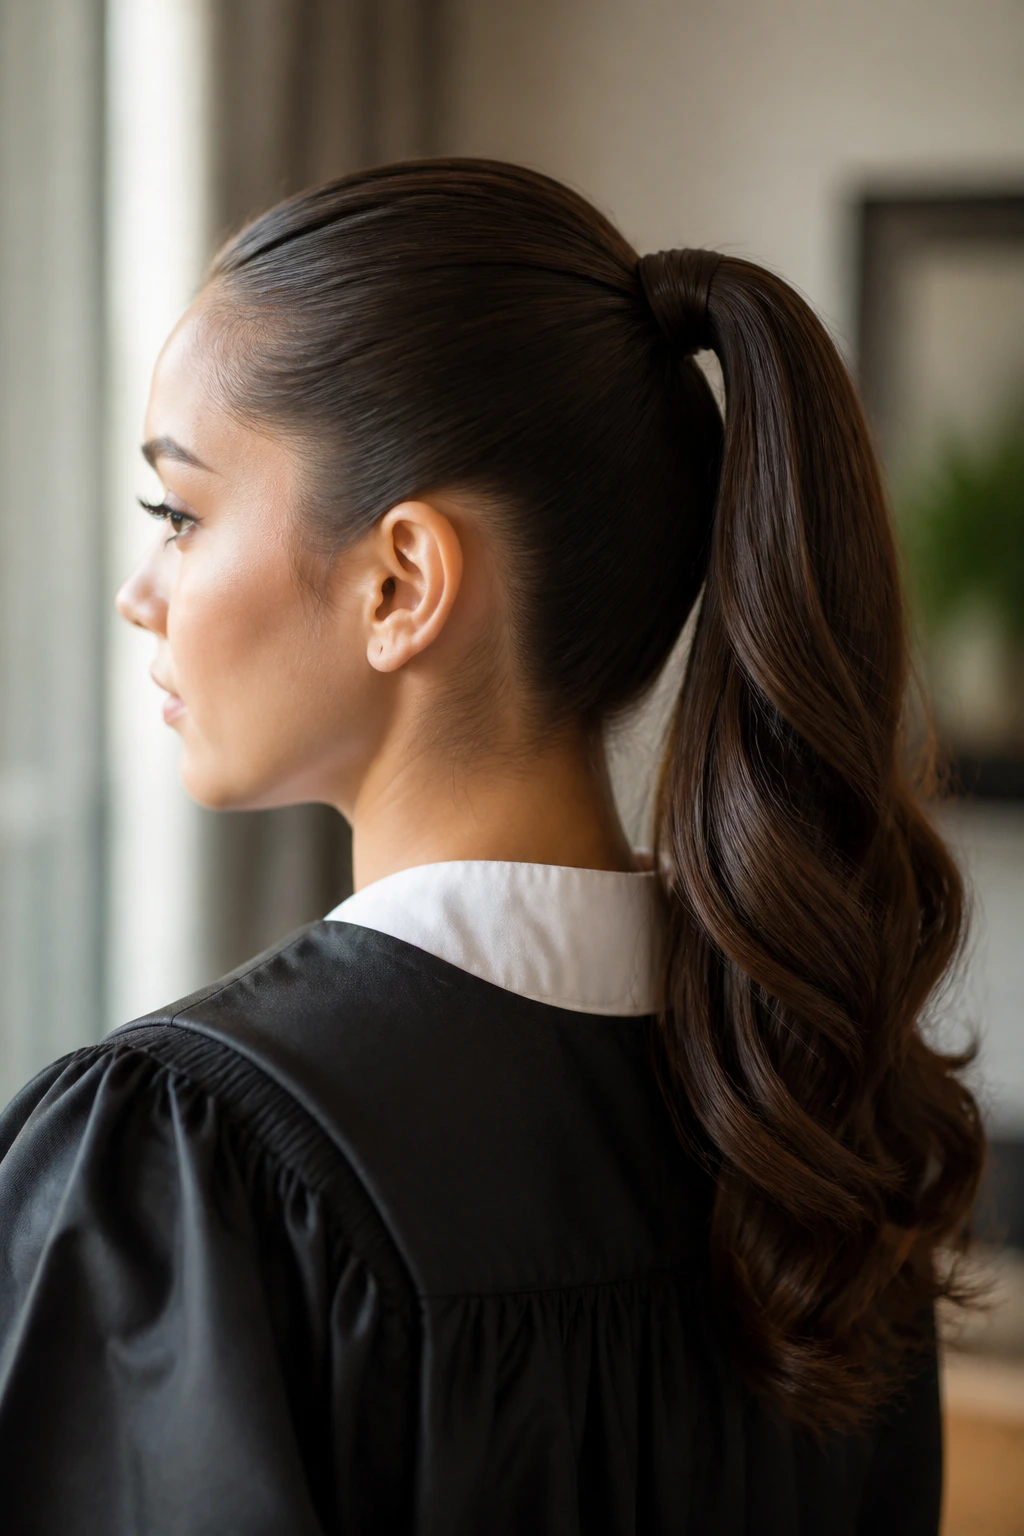
A ponytail gives the sharpest outline of the bunch, but it needs to sit just low enough that the cap does not fight it. I like a mid-high ponytail better than a sky-high one for graduation because it keeps the crown smooth and the tail visible once the cap comes off.
The base should be sleek. Brush the hair back with a smoothing cream, secure it firmly, then wrap a small strand around the elastic to hide it. You can wear the tail straight, curled at the ends, or lightly waved; all three work as long as the base stays clean.
This style is a nice answer if you want a sharper look than loose waves but do not want a bun. It also keeps the neck open, which matters when the gown collar sits high.
A ponytail with a blunt, heavy shape can look a little harsh in ceremony photos. Softening the ends changes everything. A flat iron bend or loose curl at the bottom is enough.
7. Braided Low Ponytail
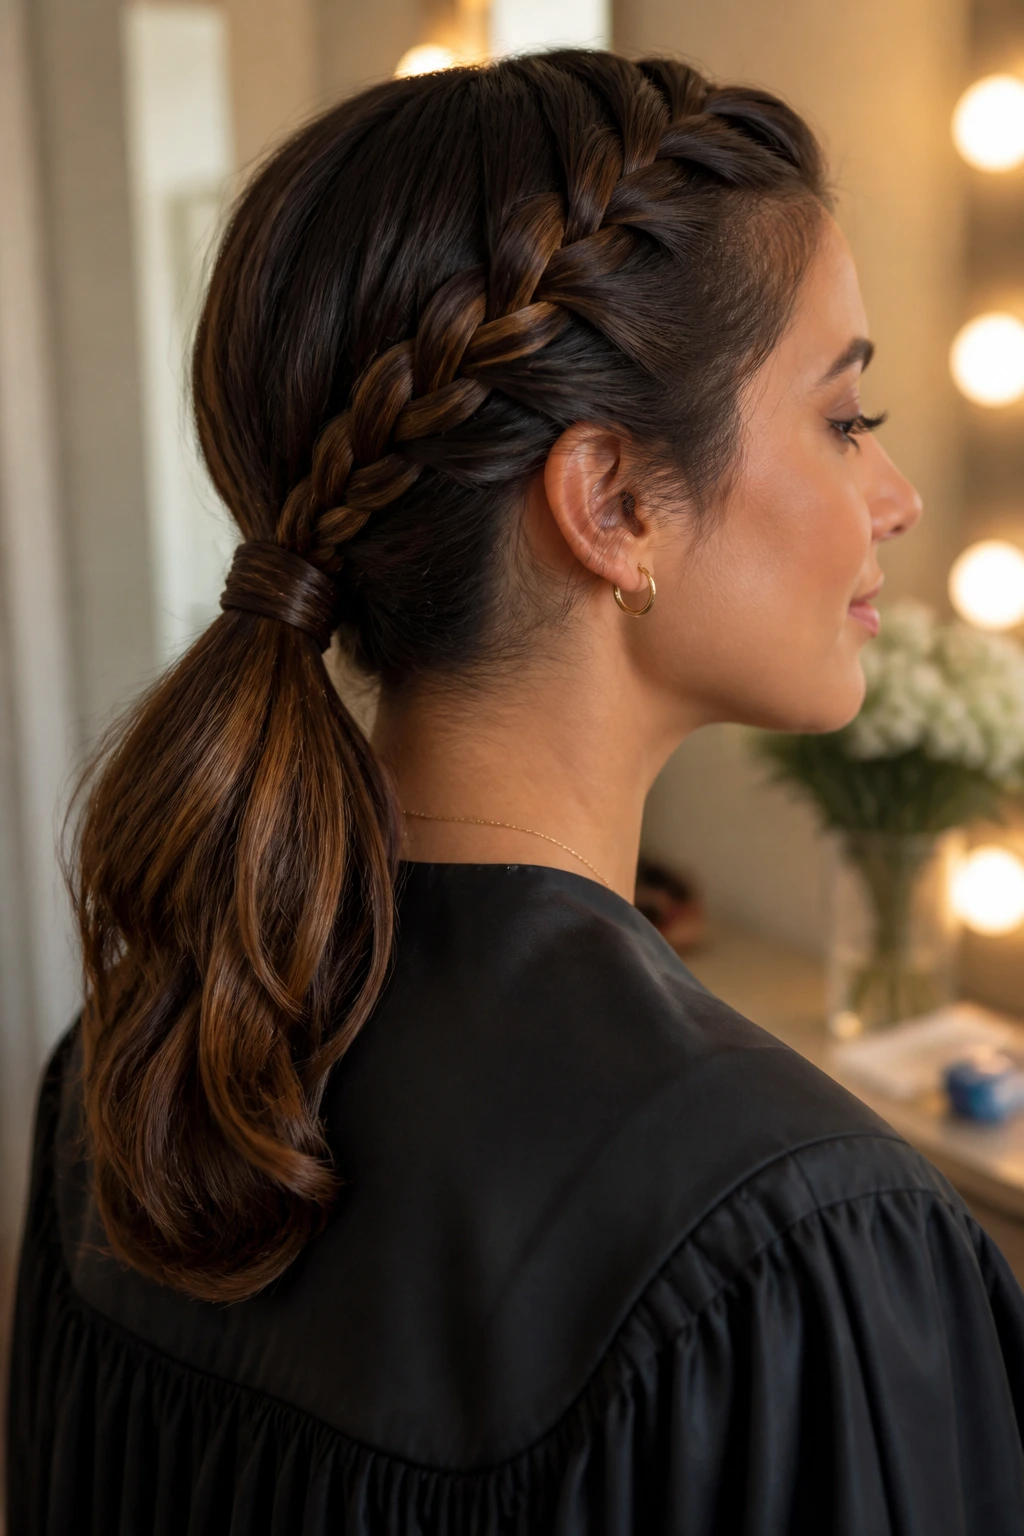
Why does a braided low ponytail read polished so easily? Because the braid gives the style structure, and the low placement keeps the cap steady. You get the neatness of an updo with the length of a ponytail, which is a useful little trick when you want both.
A classic three-strand braid is enough, but a loose Dutch braid or a rope braid gives a bit more texture. If your hair layers tend to escape, braid it a little tighter at the top and relax it lower down where the ends live. That keeps the braid from swelling into a fuzzy rope halfway through the day.
A low ponytail braid is especially good for hair that does not hold curls for long. Once the braid is pinned and lightly sprayed, it stays put better than loose waves.
One small detail makes it look finished: wrap a strand of hair around the elastic at the base. It hides the tie and keeps the style from feeling gym-class plain.
8. French Twist
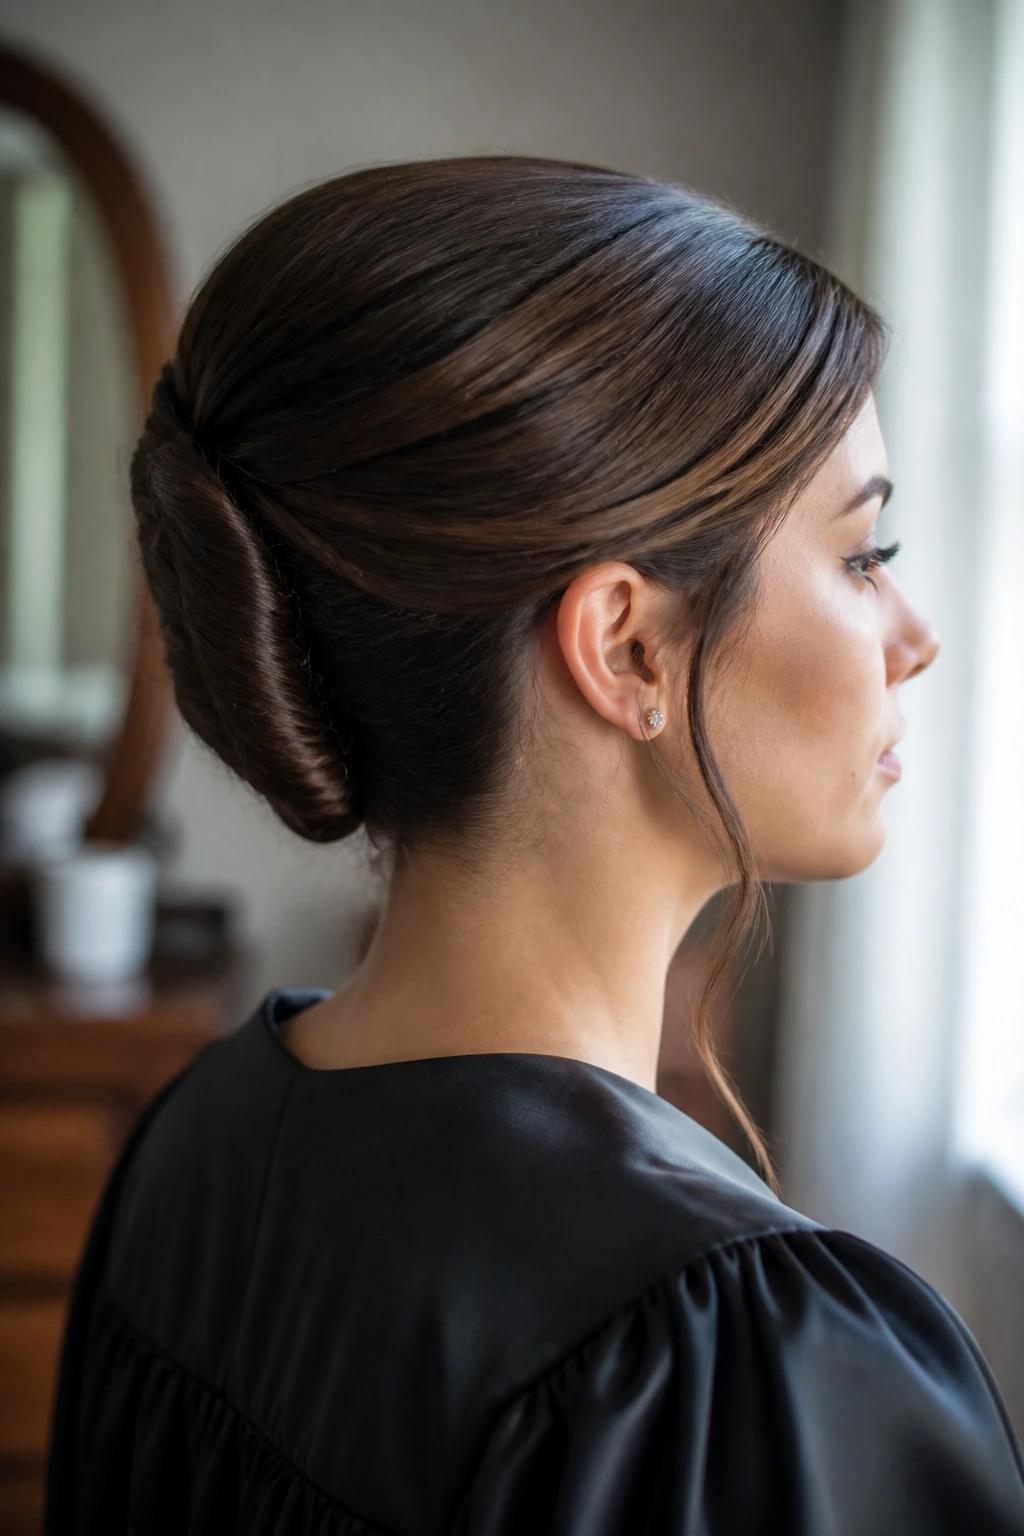
The French twist is the cleanest answer if you want something old-school and sharp. It gives the back of the head a long, elegant line, and it clears the collar beautifully. For graduation, that matters. The gown already adds visual weight; the hair should not compete with it.
Build the twist low and secure it with U-pins or strong bobby pins. The shape should roll inward, not bulge outward. A bulky French twist gets awkward under a cap fast, while a slim one sits close and looks deliberate.
It does not need to look severe. Leave the front smooth, yes, but soften the side near the ear if your face needs a little movement. A slim clip or one small pearl pin near the base can keep it from feeling too formal for a daytime ceremony.
If you have medium-length hair, this style is easier than it looks. Longer hair just gives you more to tuck. Shorter layers may need extra pins, but the result can still be neat.
9. Textured Low Knot
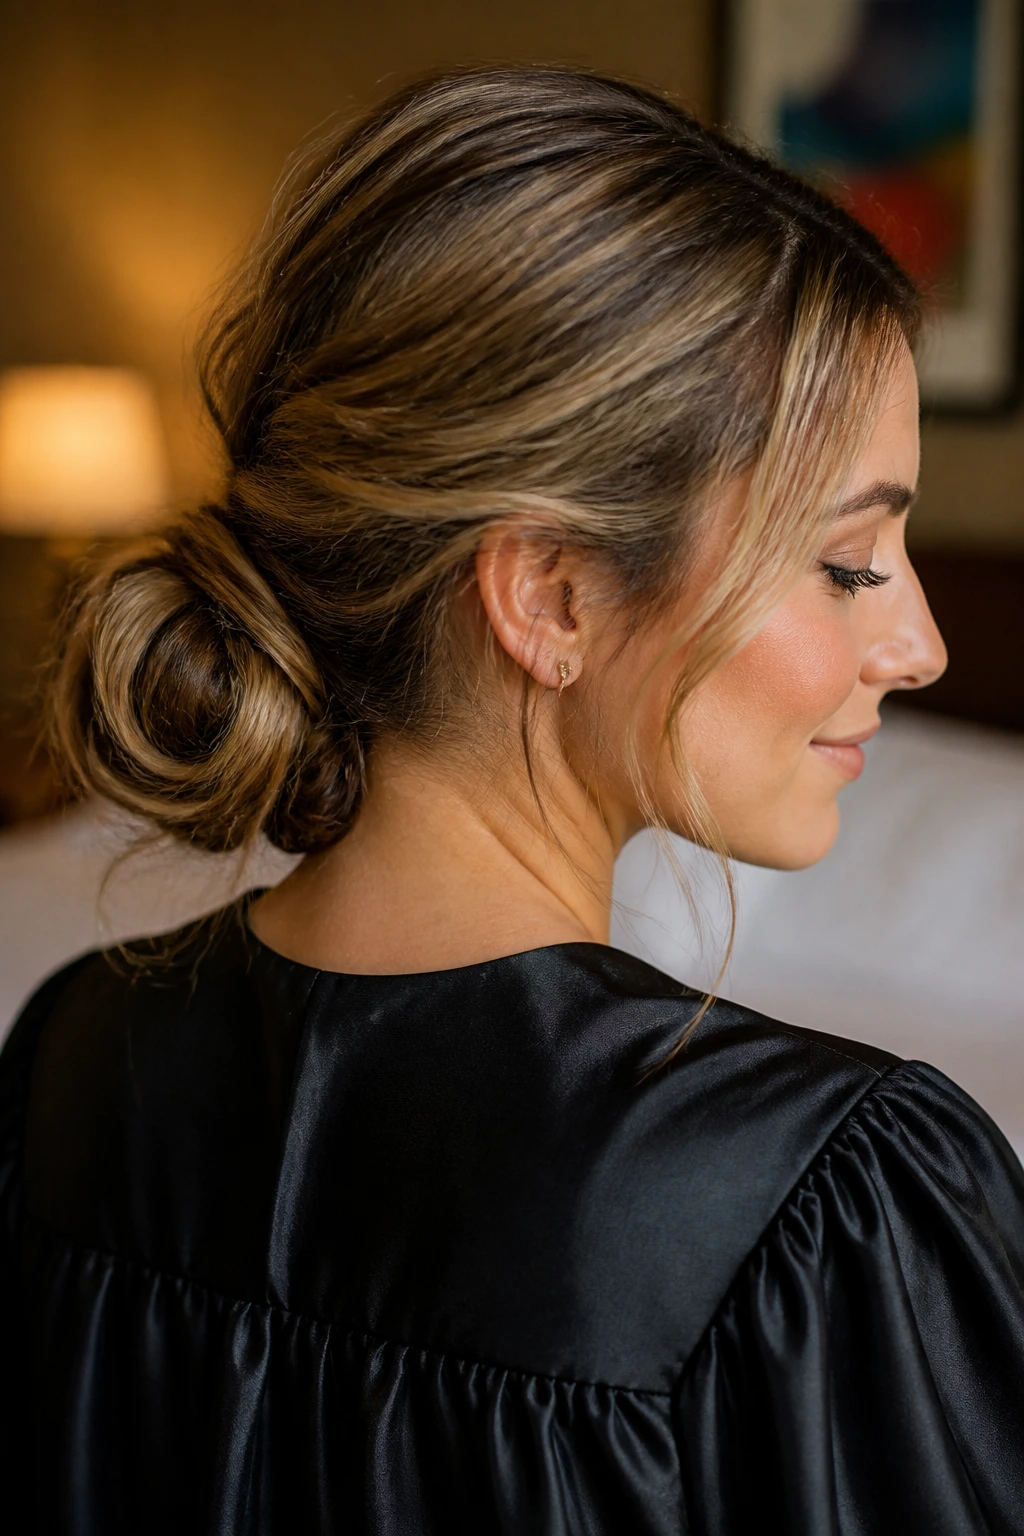
Hair that was washed yesterday and has a little grip can become this style’s best friend. A textured low knot sits somewhere between effortless and polished, which is a good place for graduation because it never looks overworked.
Pull the hair into a low ponytail, twist the length loosely, then wrap it into a knot at the nape. Leave a few tiny pieces at the temples or the nape if your hair usually looks too severe when everything is pinned back. The point is control, not stiffness.
A texture spray or a light dusting of volume powder at the roots helps the knot stay put. If your hair is slippery, braid the ponytail first, then wrap the braid into the knot. That extra grip saves you from pins sliding out halfway through the ceremony.
This is the style I recommend when the hair needs to look tidy but not formal. It’s a little softer than a chignon and less fussy than a full updo. Sometimes that’s the right note.
10. Side-Swept Curls
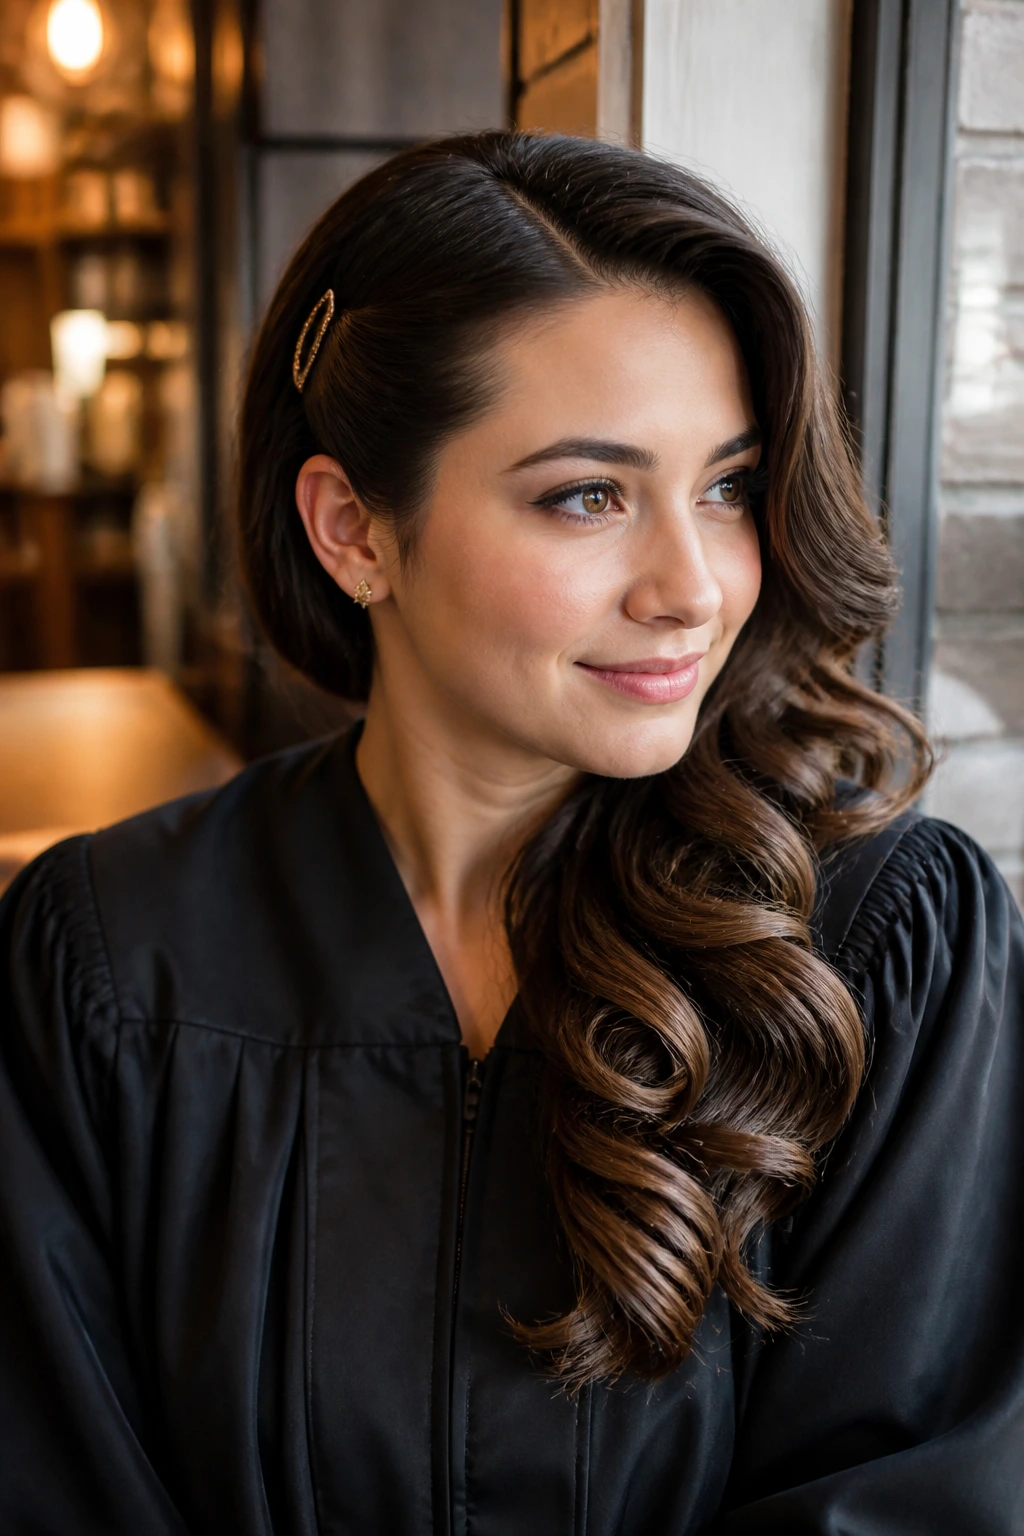
A side-swept curl pattern looks especially good when your dress has an asymmetrical neckline or a visible collar detail. The sweep brings attention to the face and keeps the hair from hiding the gown, which matters more than most people admit.
Set the curls with a large-barrel iron, then brush them into soft S-shapes rather than springy coils. Pin the heavier side behind one ear with a slim clip or a decorative barrette. The other side can fall over one shoulder, but keep it controlled so it does not slide into your face in every indoor-outdoor photo shift.
The polished piece here is the parting. A clean side part looks more deliberate than a random off-center split. Keep the root area smooth and let the movement start lower down.
One warning: if your hair is very layered, side-swept curls can lose shape fast at the shortest layers. Use a little setting spray before and after curling, and do not brush them too much once they cool.
11. Rope-Braid Halo
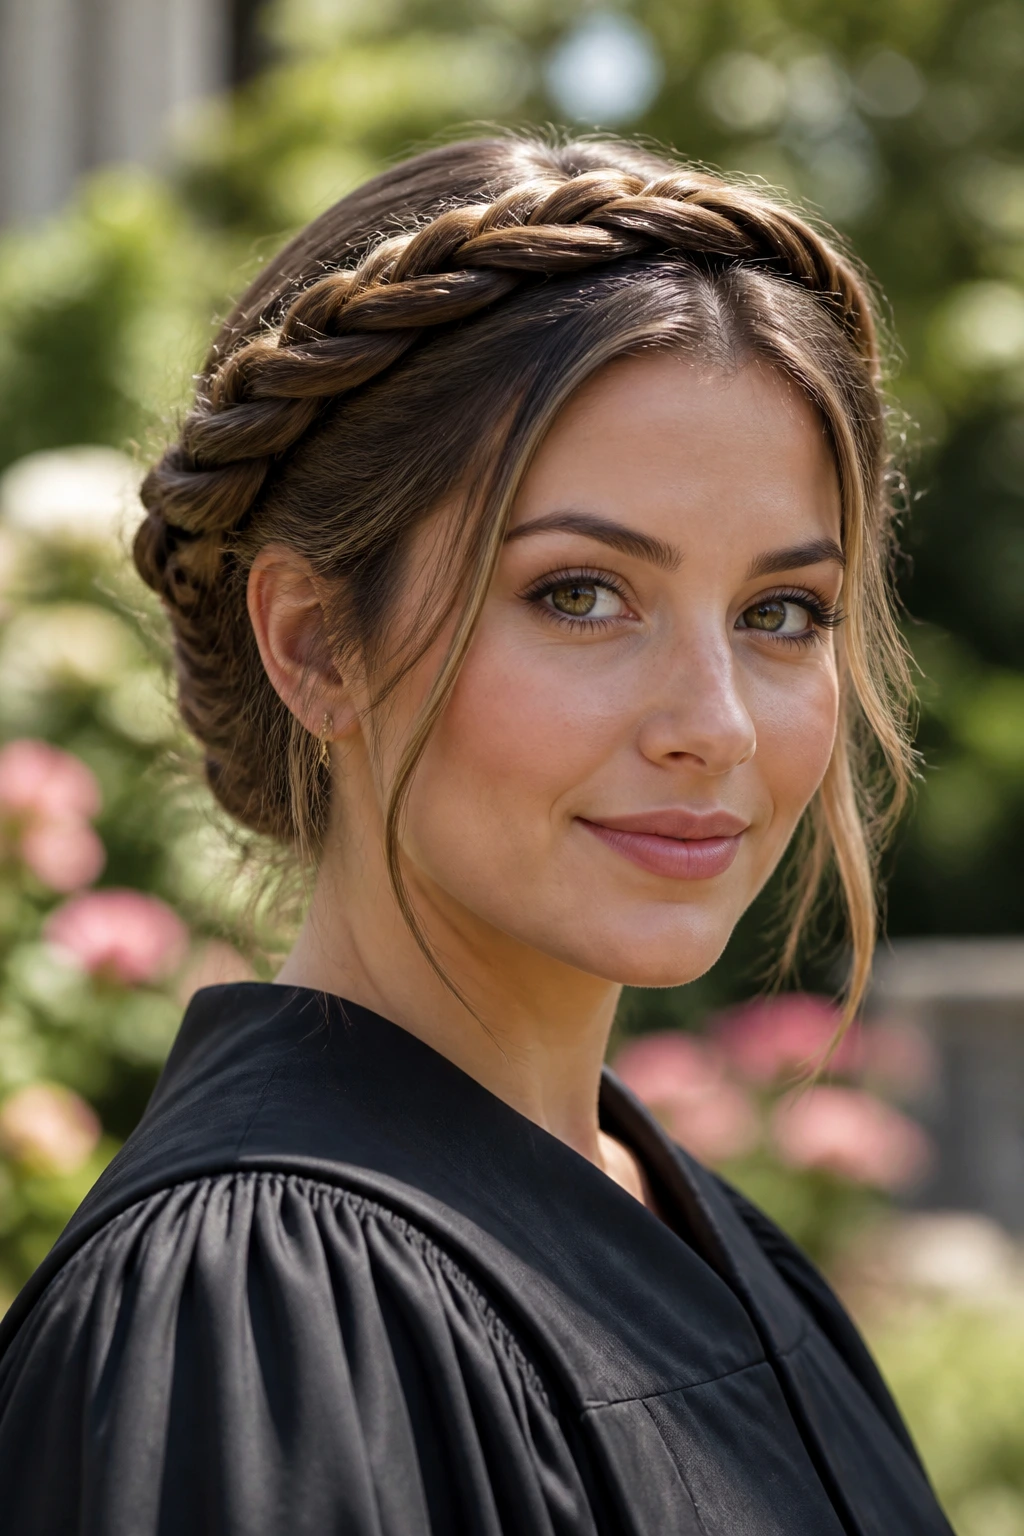
Rope braids are quicker than a traditional crown braid, and they hold a little smoother on layered hair. That makes the rope-braid halo a sneaky good graduation choice if you want something detailed but not overbuilt.
Split sections near the temples, twist each one into a rope braid, then guide them around the head and pin them low at the back. The result has a clean, wrapped look without the density of a full braid crown. It also works nicely on medium-length hair that would feel swallowed by a heavier braid.
What Makes It Different
A rope braid uses two sections instead of three, so it can feel less bulky and more controlled. That thinner profile helps under a cap, especially if you want the hairline to stay smooth.
Use it when you want the braid to be visible but not the star of the whole outfit. The halo should frame the face, not compete with it. A few loose ends near the ears are fine. Too many, and the style loses the clean line that makes it work.
12. Sleek Center-Part Straight Hair
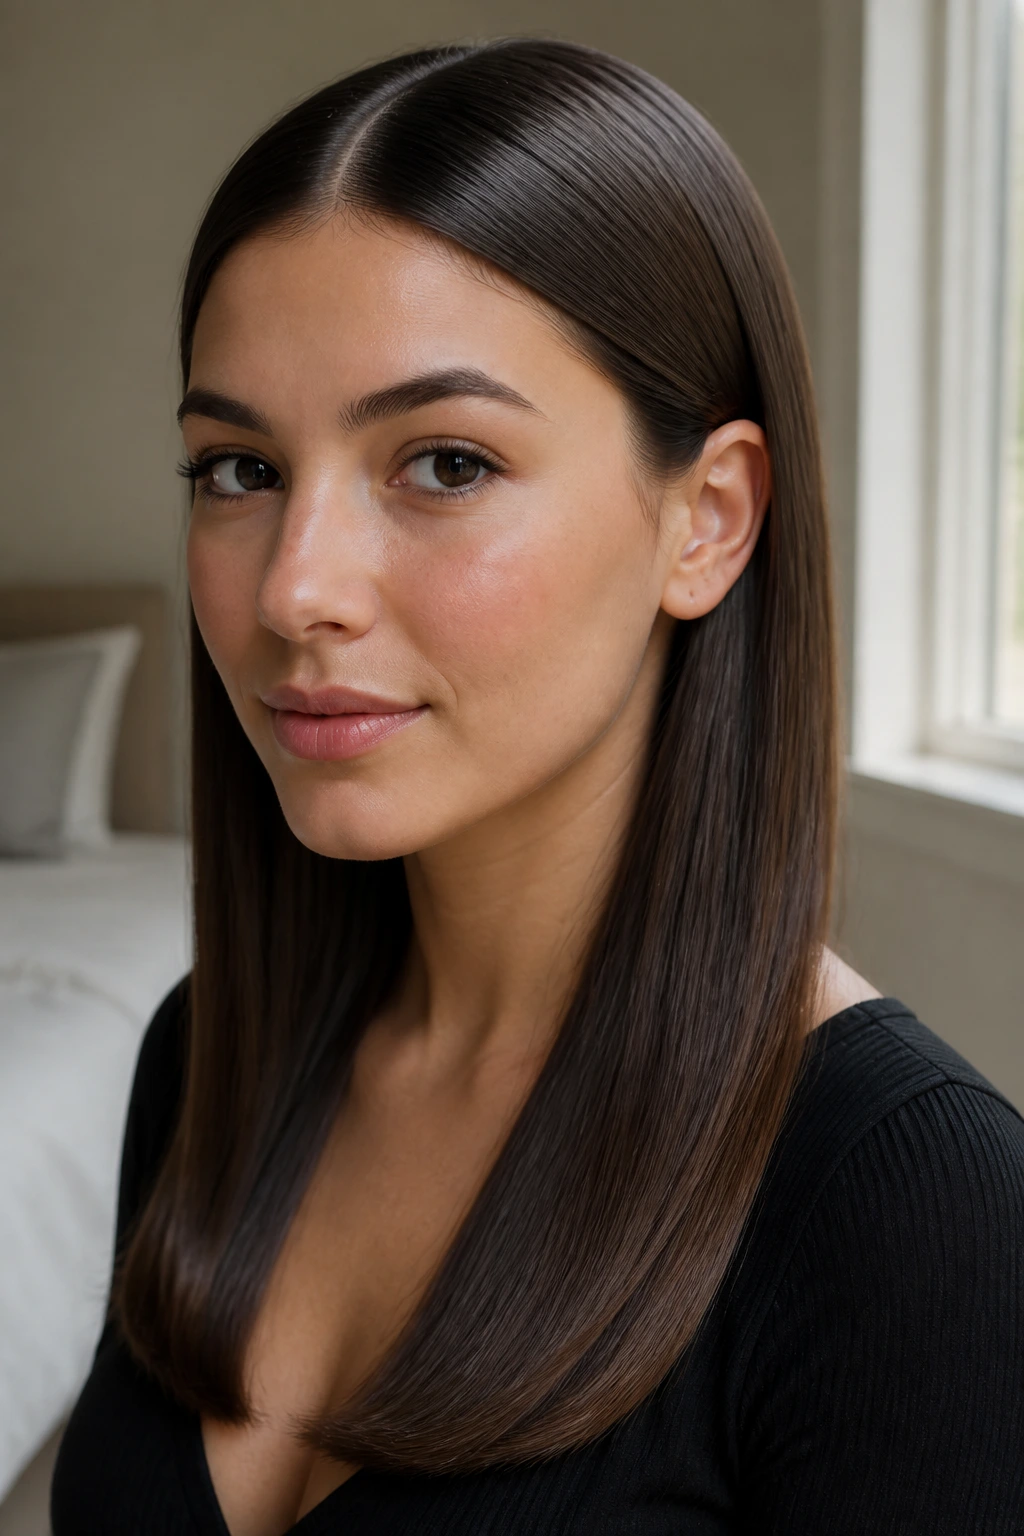
Straight hair can look dressier than curls if the finish is glassy and the ends have a tiny inward bend. That’s the whole appeal of this style. It reads sharp, modern, and calm, which is not a bad mood for a long day of photos and handshakes.
Start with heat protectant, then blow-dry or flat iron the hair in sections. Keep the center part precise. The difference between “sleek” and “flat” is usually just a few millimeters of parting and a little lift at the roots. Tuck the front sections behind the ears if you want the face fully open, or leave one side forward if your dress needs more softness.
This style is one of the best choices for satin, structured dresses because it lets the clothing speak. Too much hair can crowd the neckline. Straight hair does not.
A drop of serum on the mid-lengths is enough. Do not flood the roots with oil or the whole thing will collapse before the ceremony starts.
13. Defined Curly Puff
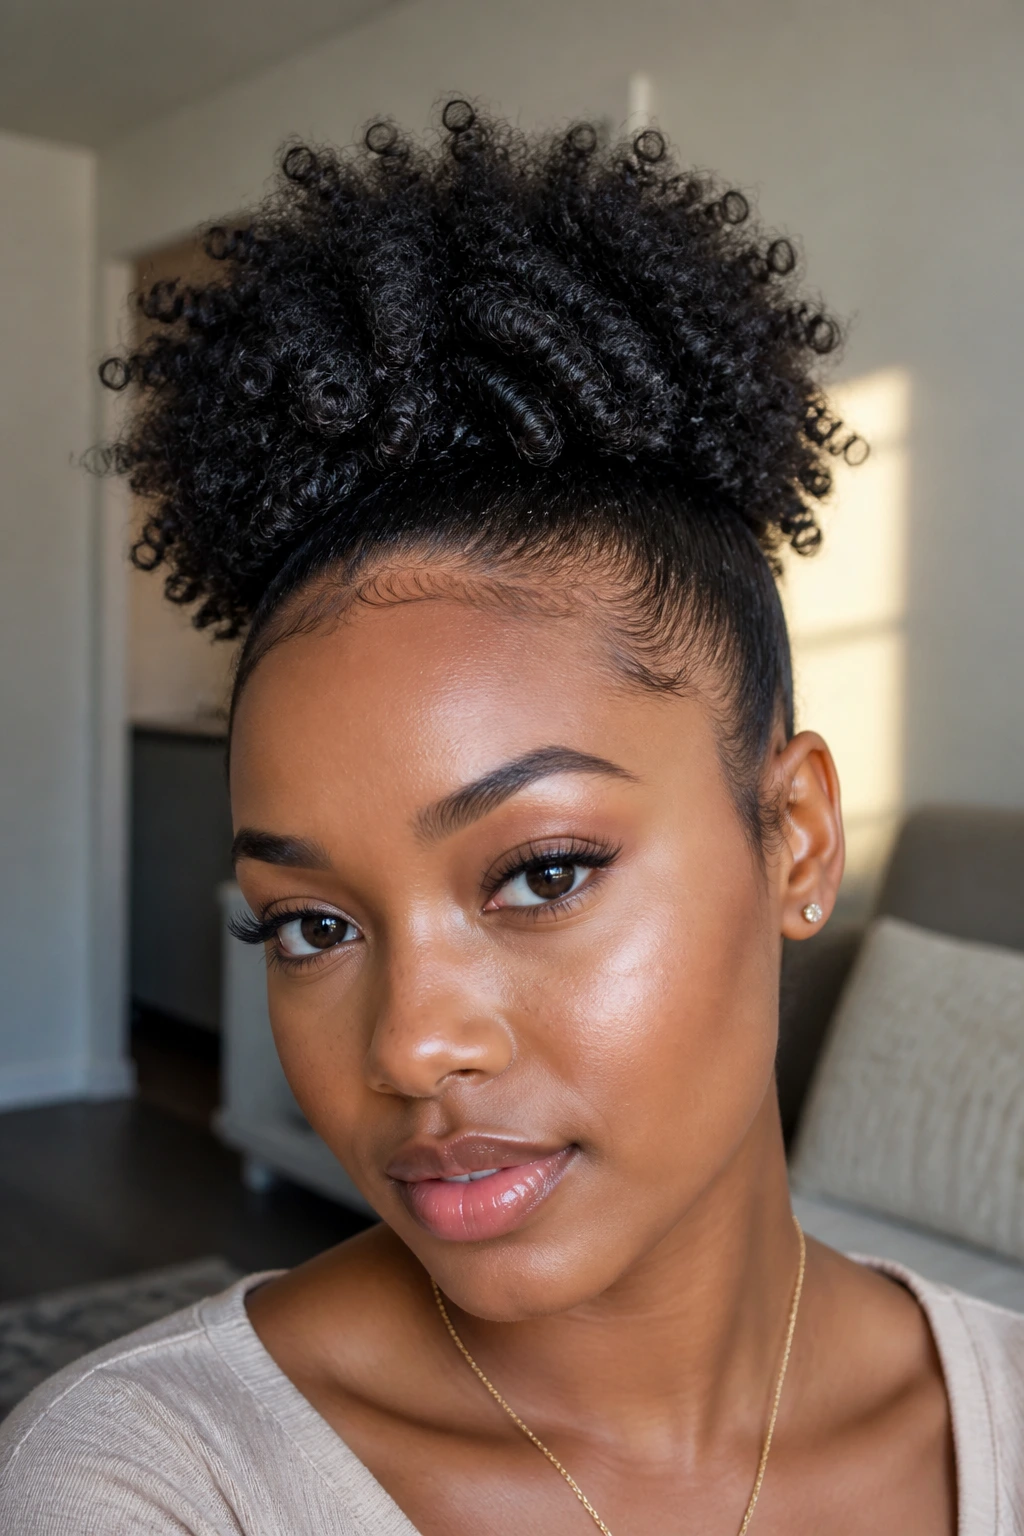
What if your curls are the accessory? Then a defined curly puff is the move. It gives coily and curly hair a strong silhouette, keeps the face open, and looks polished without flattening the texture that makes the style work in the first place.
Smooth the sides with gel or edge control, gather the hair into a puff at the crown or mid-head, and shape the curls with your hands rather than a brush. A little lift at the roots makes the puff look full, not scraped. If your hair shrinks a lot, stretch it lightly with twists or a banding method beforehand so the shape reads clearly in photos.
Edges, Shape, and Lift
The edges should look intentional, not over-drawn. A soft swoop at the temples is enough. The point is to frame the face and keep the style neat enough for the cap to sit comfortably.
This is one of the few graduation styles where texture should stay visible. Don’t hide it. Let it sit up and out a little. That shape looks strong in photos and feels natural once the cap comes off.
14. Waterfall Braid into Loose Length
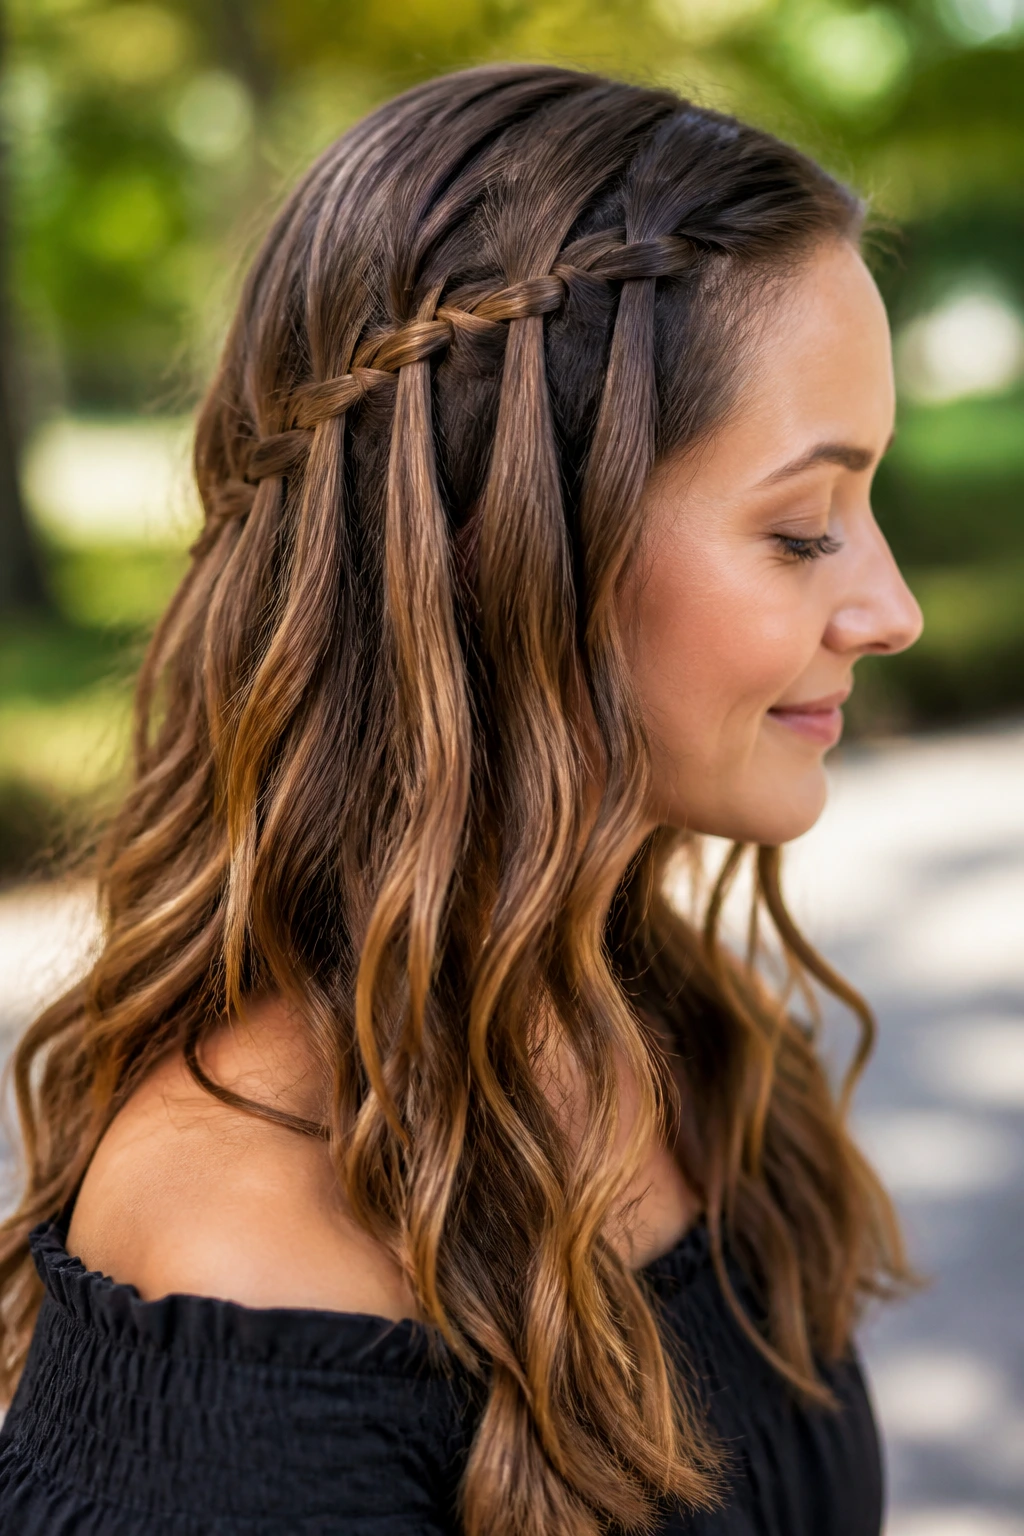
This is the style that gives you one neat line of braid and then lets the rest fall loose. It feels a touch romantic, but the braid keeps it from drifting into messy territory. For graduation, that balance works.
A waterfall braid looks best when the loose hair beneath it is curled or softly waved. The braid adds structure across the side or back of the head, while the free lengths keep the style from looking stiff. It is especially good on layered hair because the braid helps hold some of the shorter pieces where they belong.
The key is keeping the braid tidy and the drop sections even. If the braid gets loose at the top, the whole thing starts to look unfinished. Pin the braid firmly, then mist the wave pattern lightly so it keeps shape without crunch.
This style is more about detail than drama. That’s why it works. Under a cap, it still leaves enough visual interest to feel special once the cap comes off for portraits.
15. Tucked-Under Faux Bob
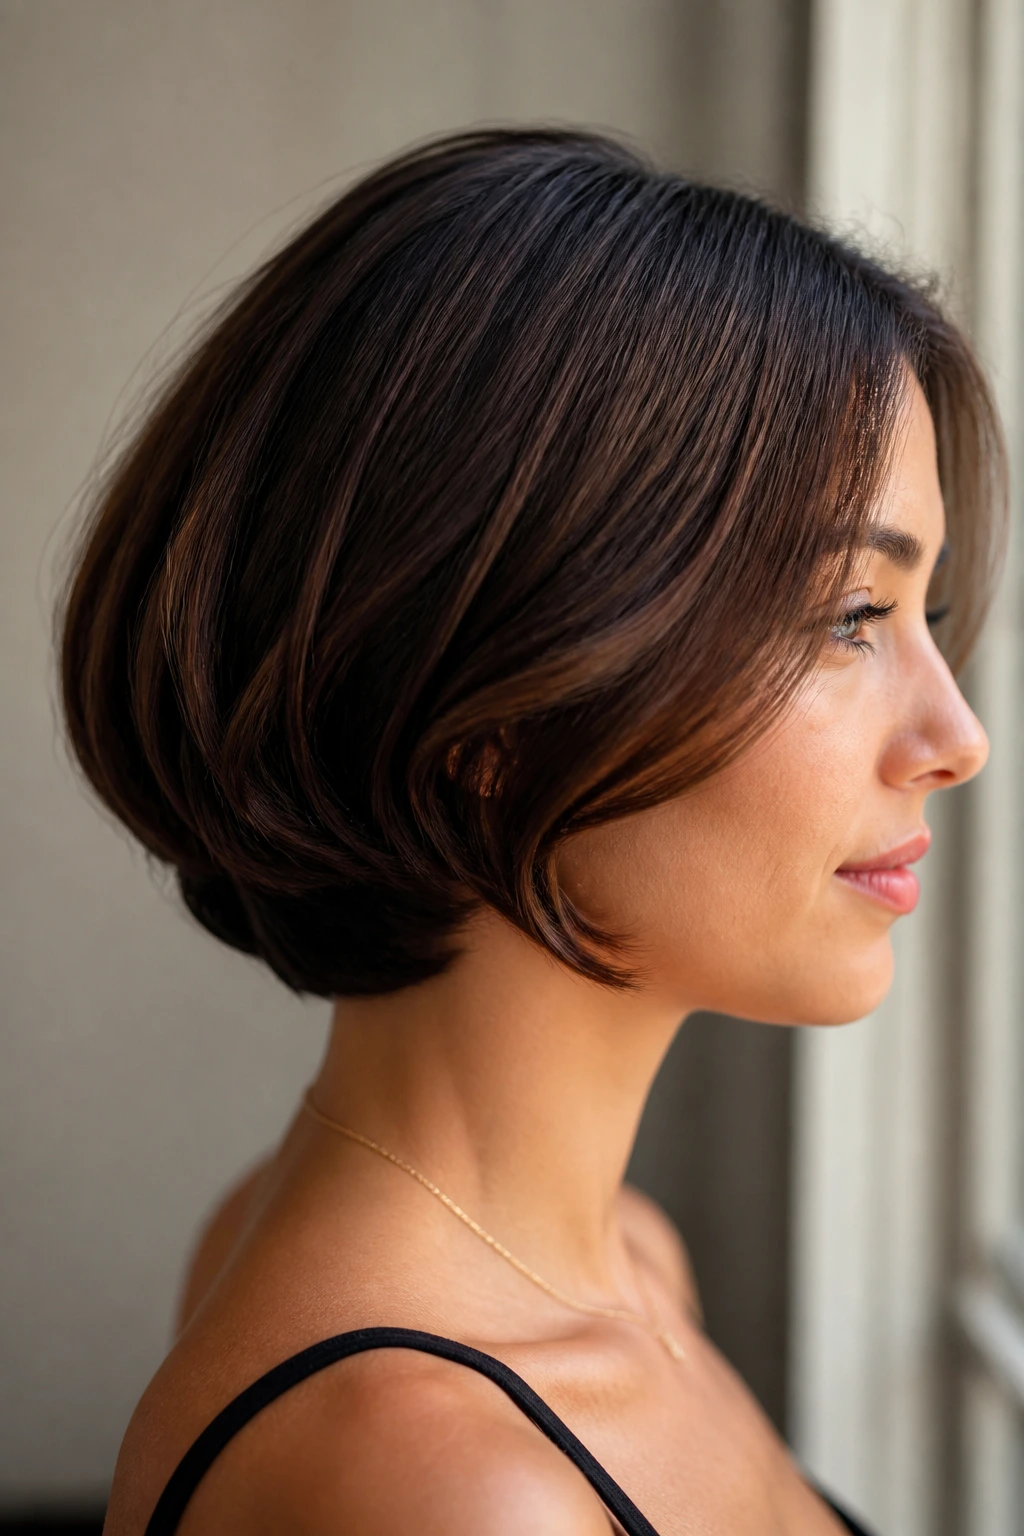
A faux bob is the move when you want short-hair polish without cutting a thing. It gives you a neat neckline, a clean shape, and a more sculpted silhouette than loose length often does.
The trick is to curl or bend the ends first, then tuck them under and pin them into a rolled shape at the nape. Longer hair needs more structure, but even shoulder-length hair can be turned into a convincing faux bob with enough pins and a few hidden anchors. The result looks crisp from the front and surprisingly elegant from the side.
This style is handy if your dress has a detailed back or a strong collar. The shortened line keeps the focus on the outfit. It also behaves well under a cap because there is less bulk to flatten once the mortarboard goes on.
One practical note: do a test tuck before the big day. Some hair lengths roll beautifully. Others need a little teasing underneath so the shape stays put.
16. Slicked-Back Bun with Pearl Pin
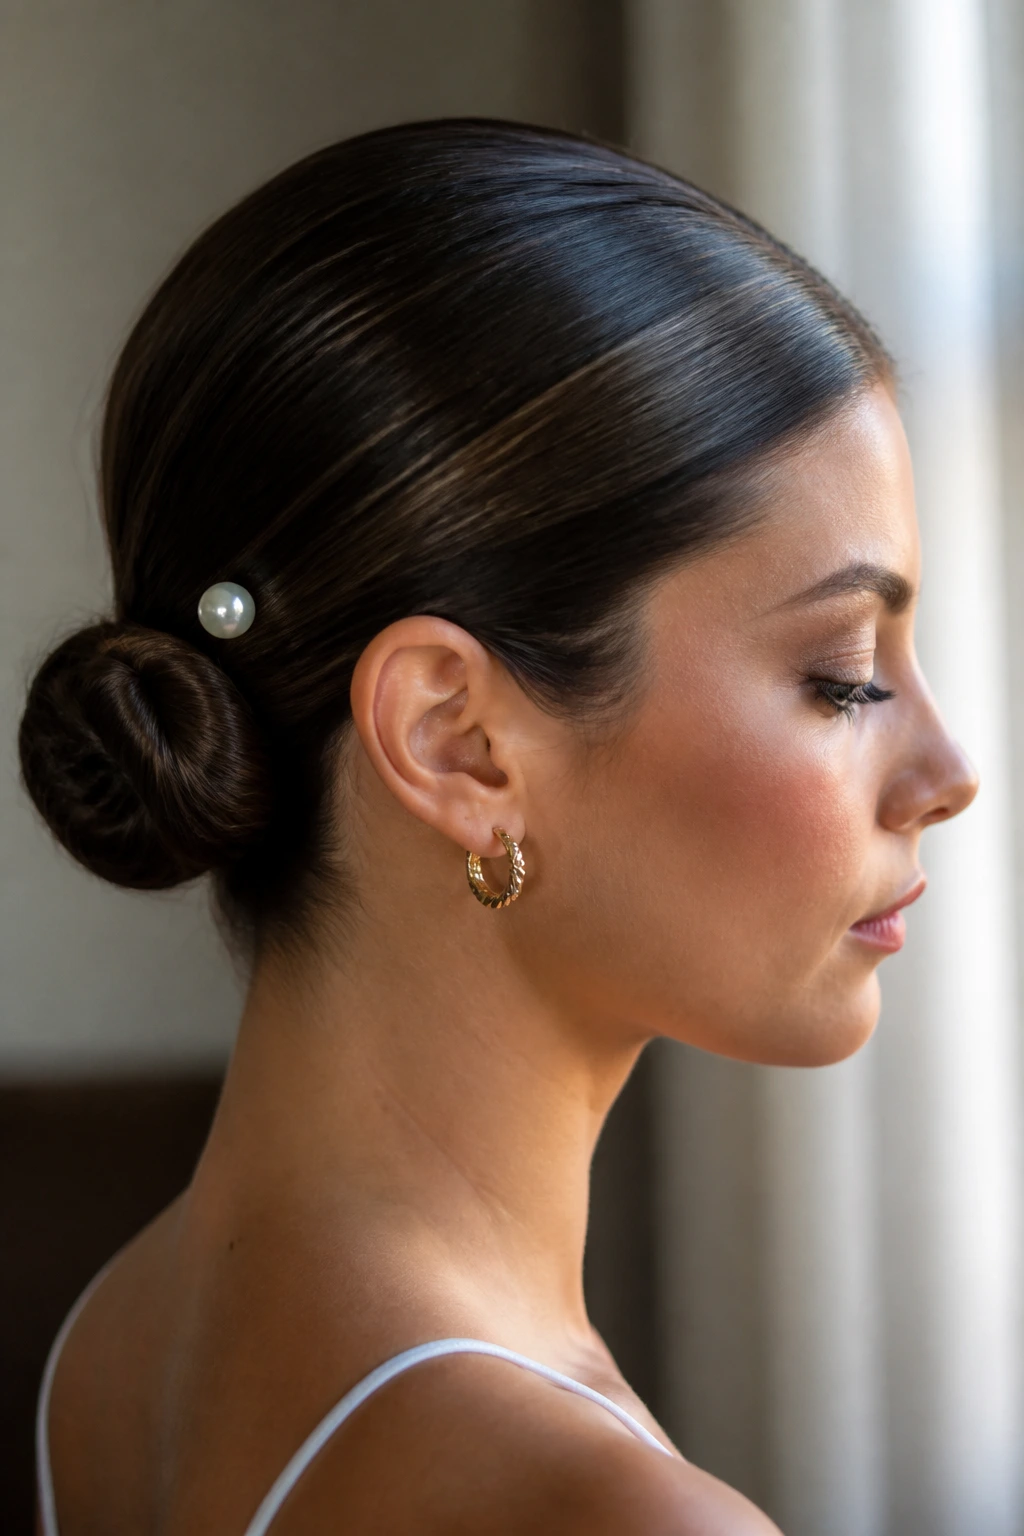
If your dress is already doing the talking, a slicked-back bun keeps the hair clean and lets the neckline breathe. I like this style with a single pearl pin or a slim decorative clip because the accessory gives it just enough interest without turning the head into a jewelry store display case.
Use gel or a strong smoothing cream on damp or dry hair, comb everything back tightly, and form a low bun close to the nape. The front should look glossy and controlled, not soaked. That matters. Too much product turns the hair heavy and makes the style look greasy under flash.
A pearl pin placed just above the bun gives the style a finished edge. One piece is enough. More than that starts to feel crowded fast.
This is the style for someone who wants no loose pieces around the face and no surprises in windy outdoor photos. It is clean. It is sharp. It behaves.
17. Fishtail Side Braid
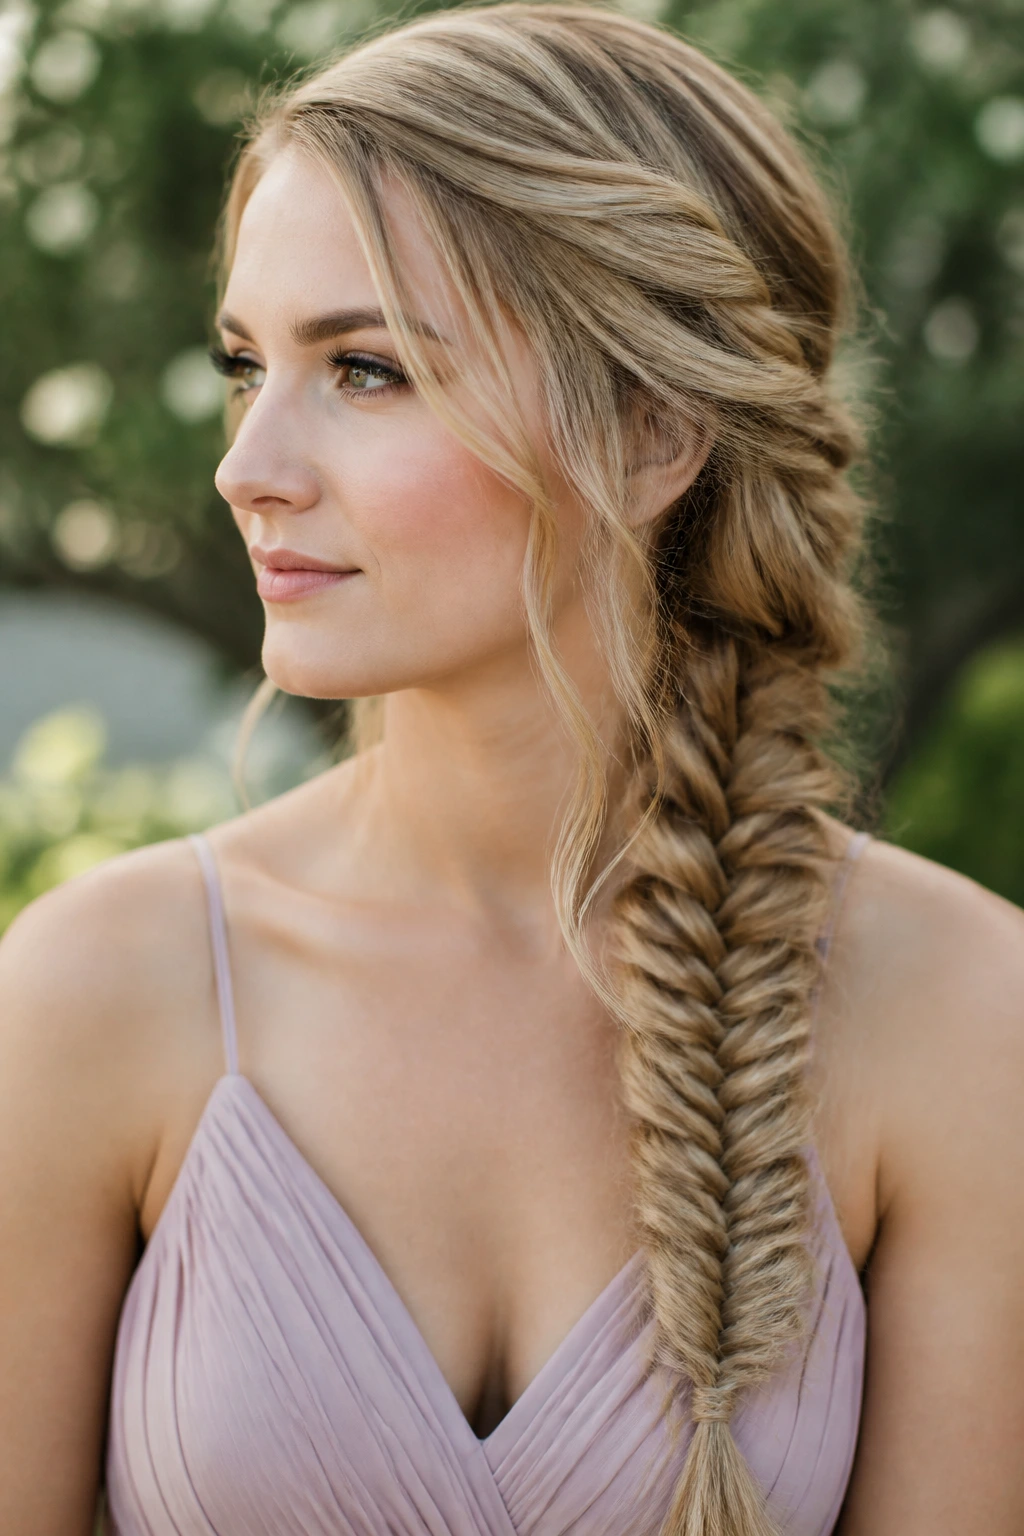
Want texture without curls? A fishtail braid gives you that ropey, intricate look with less fuss than it seems. It’s a good graduation hairstyle when you want something a little more interesting than a standard braid but still easy to keep in place.
Pull the hair to one side, split it into two sections, and take tiny pieces from the outer edge of each section to cross over. The smaller the pieces, the finer the braid detail. Once the braid is finished, tug it open gently so it looks fuller and softer. That “pancaking” step is what keeps it from looking too tight or too school-assembly plain.
A side fishtail works well on long hair and on hair with some natural texture. The braid itself does the styling heavy lifting, so you do not need to curl the whole head first.
Secure the end with a clear elastic and hide it with a ribbon or a small wrap of hair if you want a more finished look. Keep the braid low enough that the cap still sits comfortably.
18. Soft Blowout with Face-Framing Pieces
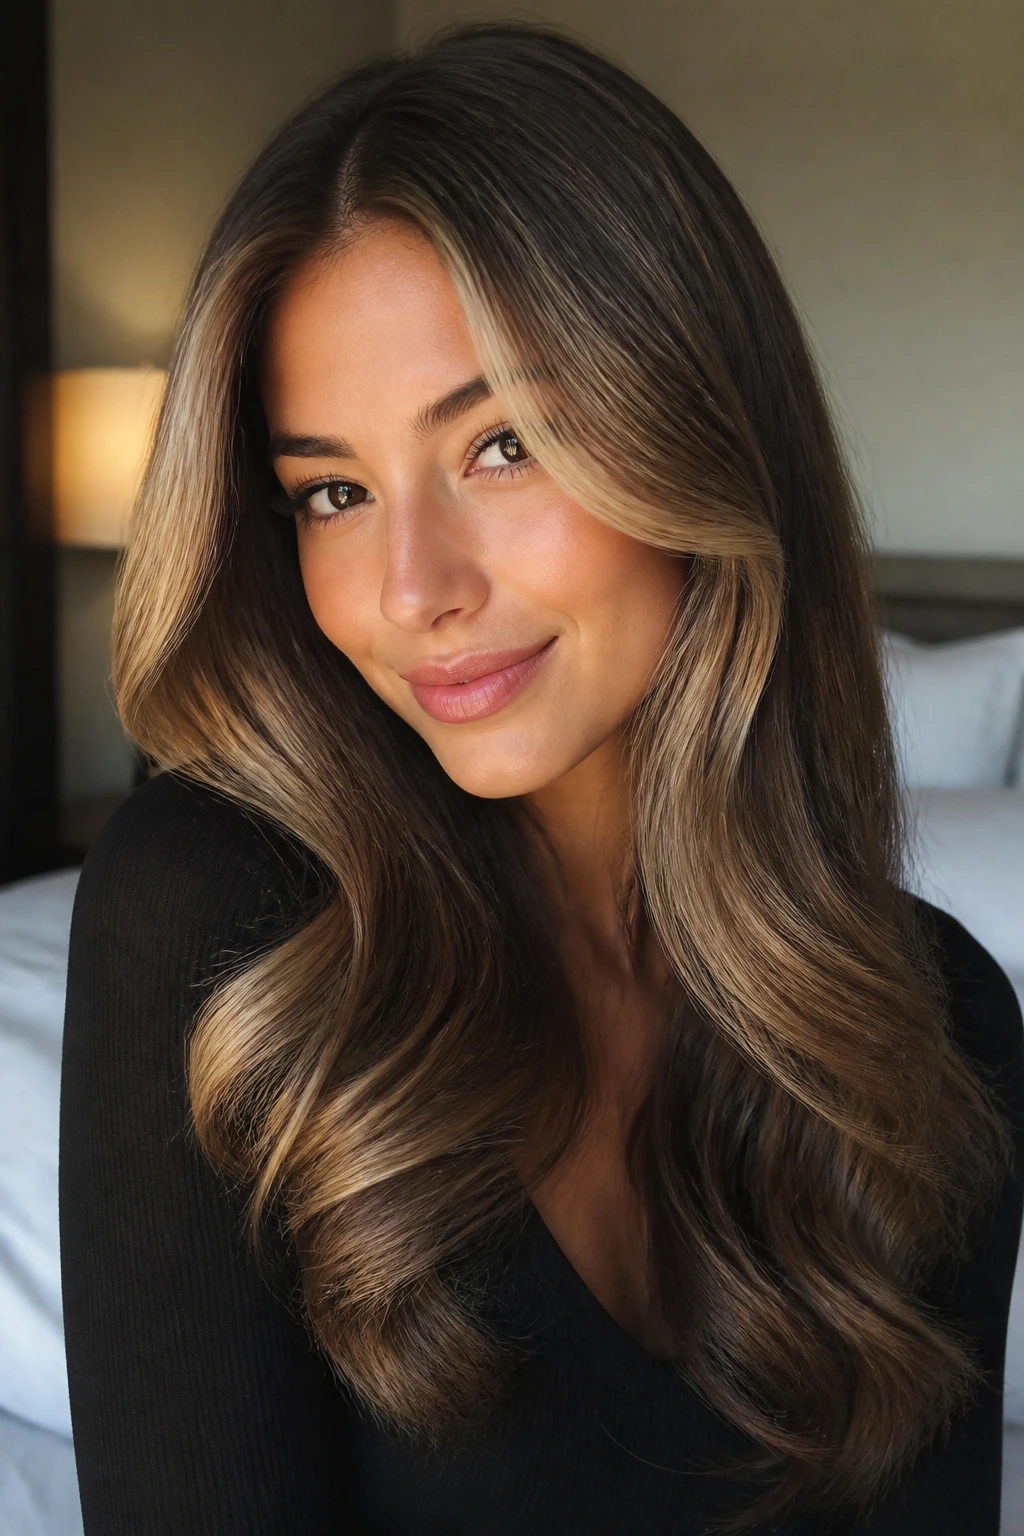
A soft blowout is the easiest polished style if you want movement rather than an updo. The hair still looks styled, but it stays relaxed enough to avoid that overdone, can’t-wait-to-touch-it feeling that some formal styles create.
Round-brush the hair away from the face, give the ends a subtle bend, and leave two face-framing pieces slightly lighter than the rest. That small difference helps the style breathe. If you go too smooth at the front, the look can feel stiff; if you go too voluminous at the crown, the cap will crush it. The sweet spot sits somewhere in the middle.
This style works especially well for layered cuts and medium-length hair. The movement reads beautifully in portraits, and once the cap comes off, the full shape comes back with a quick finger comb and a spritz of dry texture spray.
One small warning: do not overload the roots with oil. A blowout needs some lift to survive the day.
Smart Ways to Keep the Finish Polished
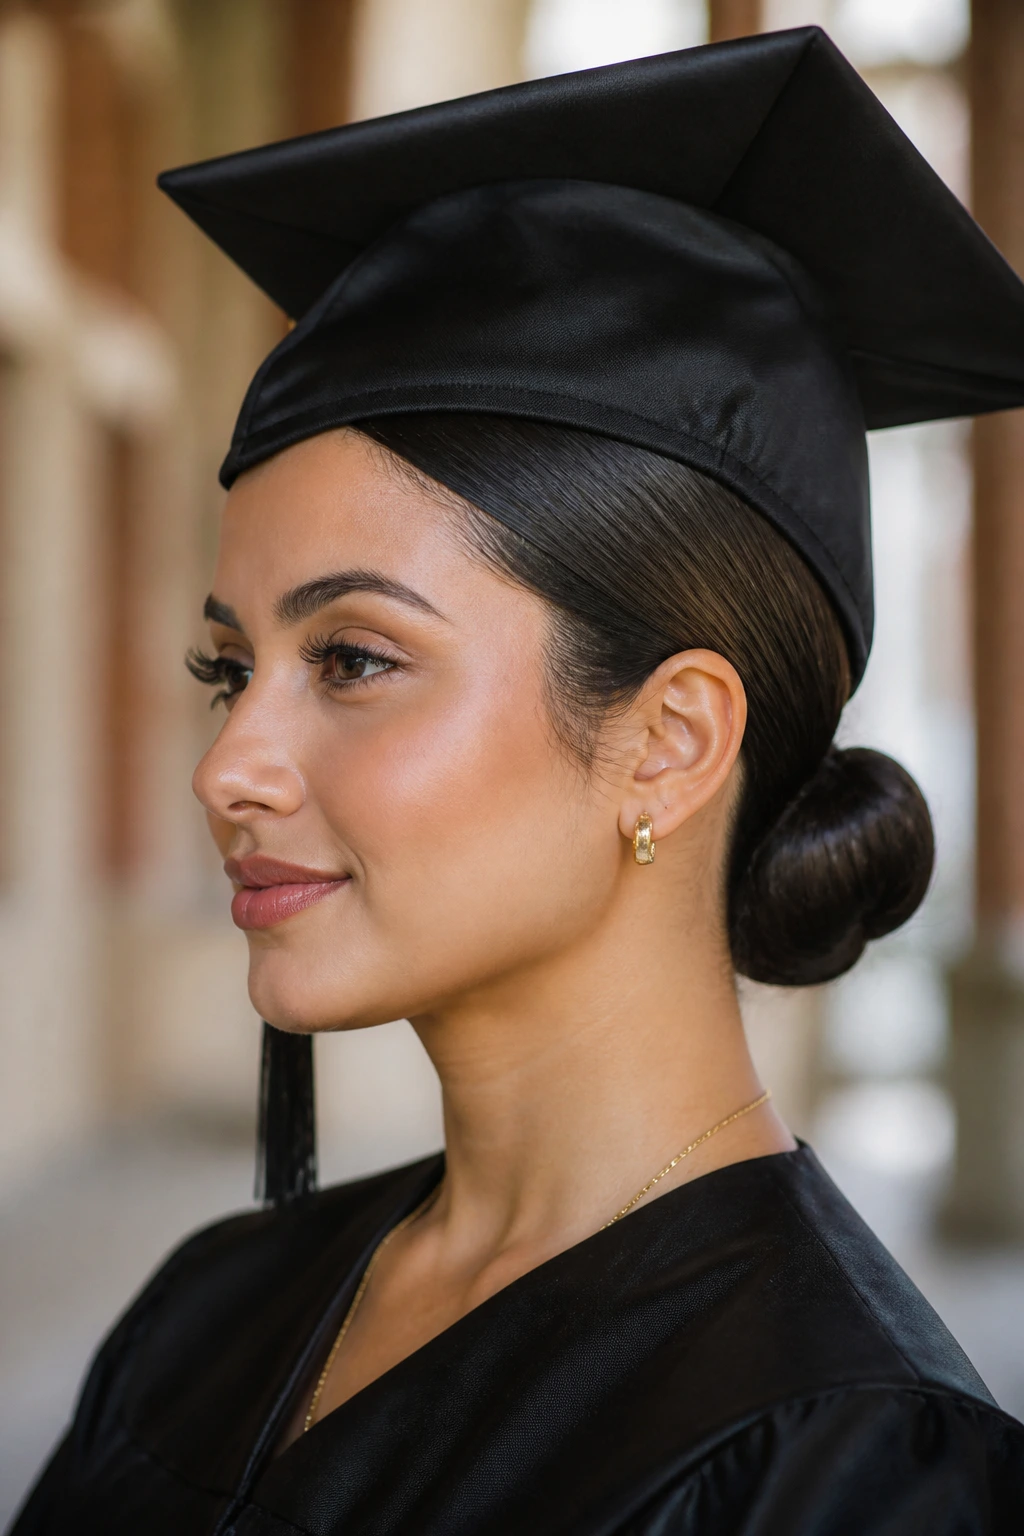
Cap Prep: Put the cap on after the style is set, not while it is still soft from heat or damp from product. Hair that has not cooled properly will flatten in the worst way possible.
Grip Matters: Fine hair usually needs texture spray, a light teasing at the crown, or pins crossed in an X. Thick hair needs sectioning and stronger anchoring so the style does not balloon.
Photo Fix: Keep a pocket comb, a few bobby pins, and a travel spray in a small bag. The second you remove the cap, smooth the part, tap the roots, and check the back with your phone camera.
Accessory Rule: Use one focal accessory or none. A braid plus a pearl clip plus a ribbon plus glitter pins is too much. The eye has nowhere to land.
Temperature Check: Heat-styled waves hold better when they cool completely before the cap goes on. Rushing that step is the quickest route to limp hair.
What to Gather Before You Start Styling
-
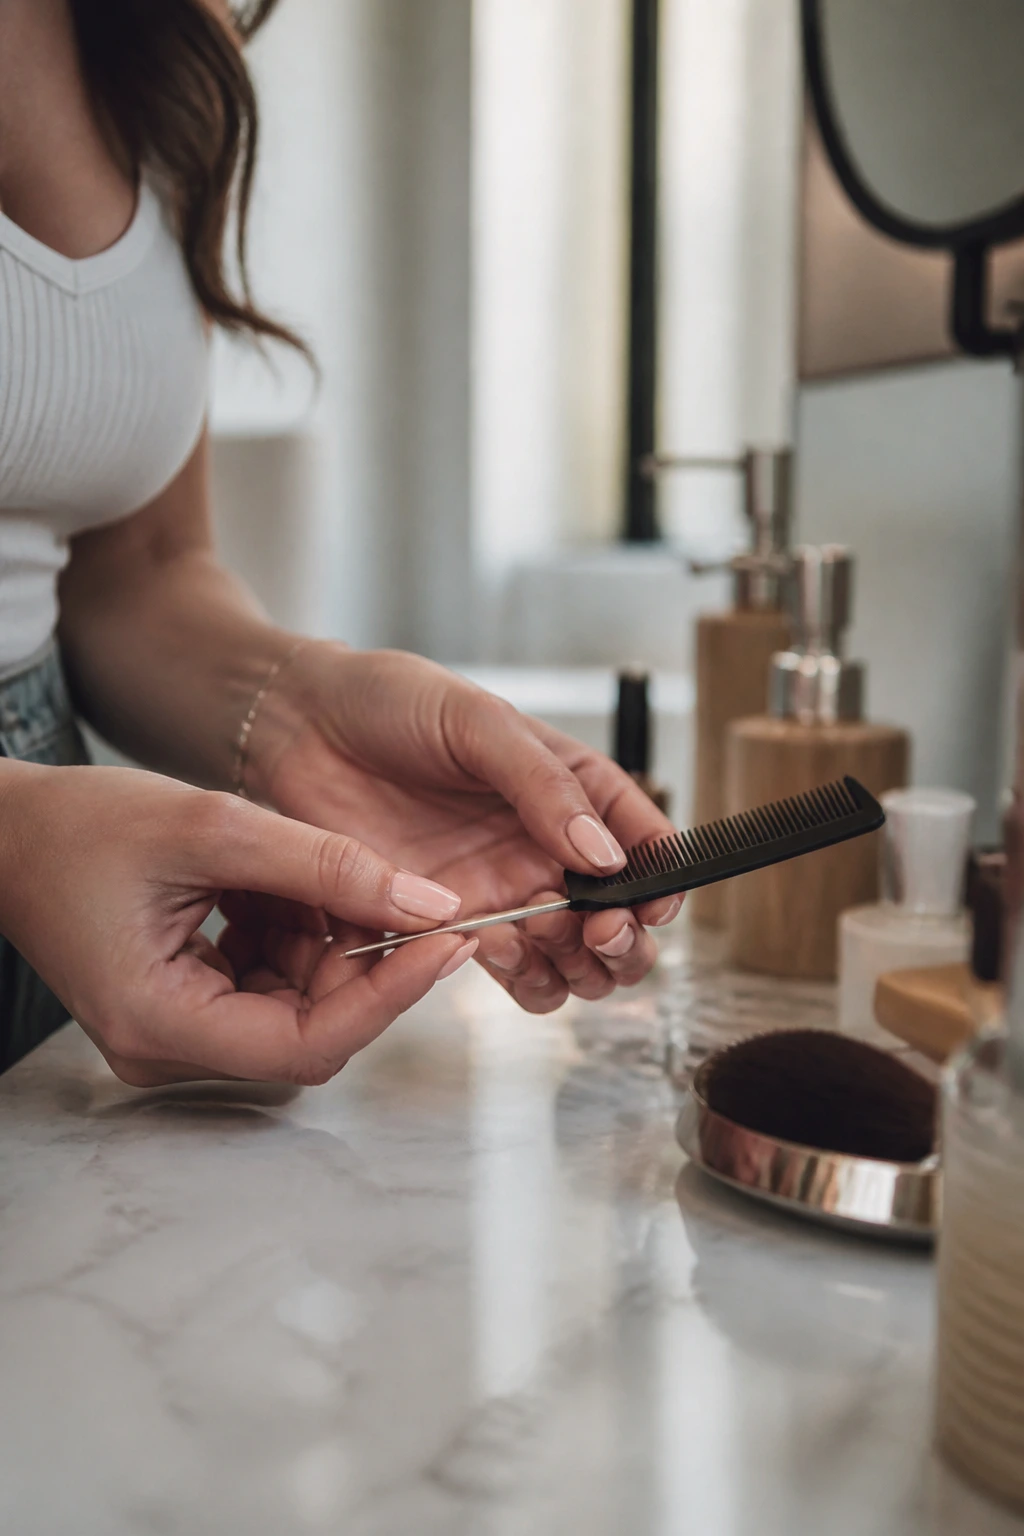
Tail comb: Gives you a clean part and helps section hair without tearing it up.
-
Bobby pins: Choose pins close to your hair color; they disappear better in photos and hold loose pieces in place.
-
U-pins: Useful for buns, chignons, and French twists because they hold shape without leaving a row of visible pins.
-
Hair elastics: Clear or color-matched ties work best for ponytails and braids.
-
Texturizing spray: Adds grip to clean hair and helps styles stay put under the cap.
-
Hairspray with flexible hold: Keeps flyaways down without turning the style stiff.
-
Heat protectant: Necessary for blowouts, waves, and straight styles.
-
Curling iron or wand: A 1 to 1.25-inch barrel gives the most flexible graduation waves.
-
Flat iron: Handy for sleek straight hair, beveling ends, and taming awkward bends.
-
Blow dryer with nozzle: Makes it easier to smooth the hairline and control frizz before styling.
-
Boar-bristle brush: Good for sleek buns, ponytails, and blowouts because it smooths without puffing up the cuticle.
-
Small finishing clip or decorative pin: Optional, but useful when you want one polished focal point.
Common Graduation Hair Mistakes That Show Up in Photos
-
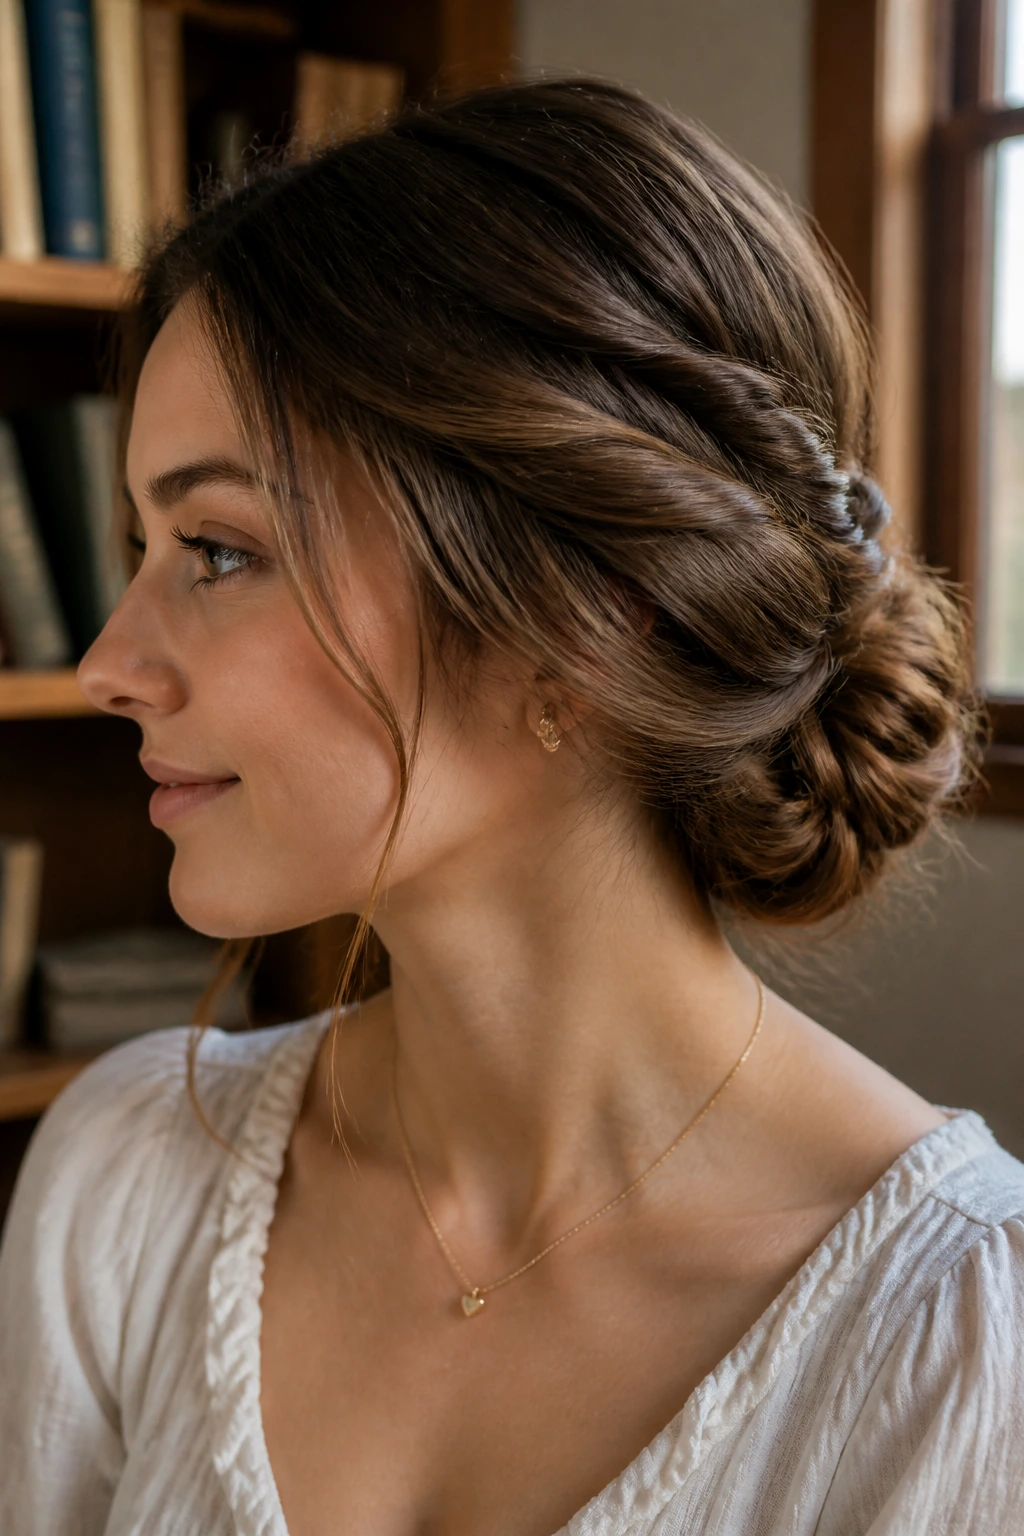
Building too much height at the crown: The cap sits unevenly, and every photo from the side looks off. Keep the volume lower unless the style is meant to be tall and controlled.
-
Using too much oil near the roots: Hair looks flat and shiny in the wrong way, especially under indoor lighting. Put serum on the ends, not the scalp.
-
Skipping cooling time after heat styling: Waves drop, curls sag, and the style loses shape before the tassel even moves. Let each section cool fully before brushing it out.
-
Forgetting about the back: A style can look clean in the mirror and still have a pin sticking out at the nape. Check the back with your phone camera or a hand mirror.
-
Overloading with accessories: One good clip is enough. Too many pieces compete with the cap and make the whole look feel busy.
-
Choosing a style that fights your hair texture: If your hair is slippery, a loose knot will slide. If it is curly and dry, a sleek style needs more prep than a quick brush-through.
Easy Tweaks for Different Hair Lengths and Textures
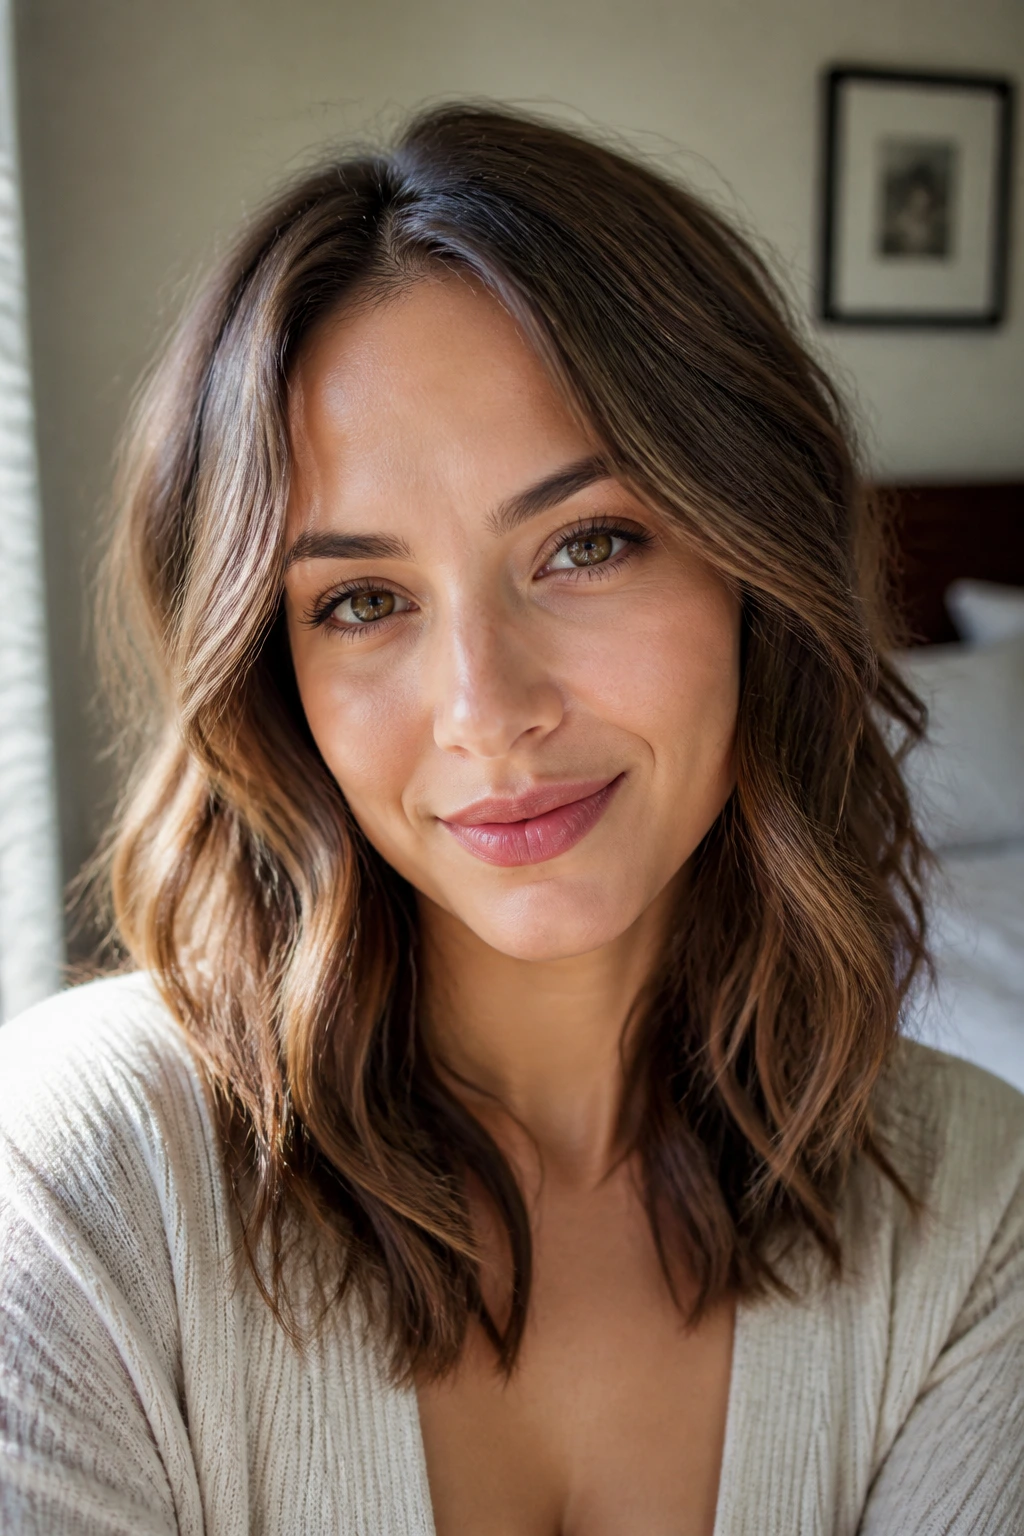
Short-Hair Sweep and Pin: Short hair looks polished with a deep side part, soft wave, and one visible clip. The shape stays close to the head, which keeps it friendly under a cap.
Natural-Curl Definition Set: For curls and coils, twist or finger-coil the front pieces, then gather the rest into a puff, braid, or low knot. The goal is controlled shape, not flattened texture.
Fine-Hair Lift Without Collapse: Fine hair needs dry shampoo or texture spray at the roots before it is styled. Tiny hidden pins and a lower placement keep the look from sagging by afternoon.
Thick-Hair Taming Plan: Thick hair behaves best when it is sectioned first and smoothed in layers. Low buns, French twists, and braided styles usually handle the bulk better than high, loose shapes.
Humidity-Guarded Version: If the air is damp, keep the style closer to the head and finish with flexible hairspray rather than a soft cream. Loose waves still work, but they need a stronger set and less brushing.
Frequently Asked Questions About Graduation Hairstyles
Which graduation hairstyle works best under a cap?
Low buns, chignons, French twists, and low ponytails sit closest to the head, so they usually work best. If you want hair down, choose a half-up style or soft waves with a smoothed crown so the cap does not flatten the whole top.
How do I keep my hair from getting flat where the cap sits?
Do not put the cap on until the style is fully cool and set. A little root texture spray, a light tease at the crown, and a smooth base underneath the cap line help the hair rebound when you remove it.
Can I style my hair the night before graduation?
Some styles can be set the night before, especially braids, buns, and pinned waves. Leave a little room for a morning refresh, though, because sleep crushes the shape around the temples and nape no matter how carefully you pin it.
What works best for short hair?
A sleek side part, soft pinned waves, or a tucked faux-bob effect usually looks polished without needing extra length. Decorative clips can help, but keep them slim so they do not interfere with the cap.
How do I style curly hair without losing definition?
Work with the curl pattern instead of brushing it out. Define the curls with cream or gel, shape the sides neatly, and pick styles like a puff, a low knot, or a half-up braid so the texture stays visible.
What if my hair is very fine and slippery?
Build grip first. Dry shampoo, texture spray, and a little backcombing at the root help more than extra hairspray sprayed on the surface. Pins crossed in an X will hold better than single pins placed straight across.
Should I wear accessories with a graduation hairstyle?
Yes, but keep them restrained. One pearl pin, one ribbon, or one slim barrette is enough to add polish without crowding the cap or turning the style fussy.
How much hairspray is too much?
If the hair feels crunchy before you leave the house, you’ve gone too far. Use enough to lock down flyaways and help the style hold shape, then stop before the hair loses movement entirely.
The Final Pin
The nicest thing about a polished graduation hairstyle is that it does not ask for much drama. It just needs smart shape, a steady base, and a little respect for the cap that’s about to sit on top of it. Get those three things right, and the whole look settles into place.
Pick the style that fits your hair texture, your neckline, and your patience. That choice matters more than chasing the fanciest braid in the room. When the photos are over and the cap comes off, you want hair that still feels like yours — only tidier, smoother, and ready for the rest of the day.
