



Beach wave looks for brides only work when the shape is controlled from the roots down. Loose does not mean random. The best versions keep the crown smooth, start the bend below the cheekbones, and let the ends move just enough that the whole style still feels alive when you turn your head.
That balance matters more on a wedding day than it does anywhere else. A bride is hugged, photographed, adjusted, veiled, un-veiled, and usually talked into standing in a breeze for “just one more shot.” Hair that is too stiff reads like prom. Hair that is too soft falls flat by the time the cake shows up. Bridal waves sit in the sweet spot when they’re built with a little structure and a little softness.
I’ve always liked this category of styles because they do not fight the dress. A clean satin neckline can take a glossy wave. Lace can handle something looser and more lived-in. A low-back gown often looks better when the hair has movement at the shoulder blade instead of being glued into a severe updo. That’s the real appeal here: these styles look intentional without looking sealed in place.
Why These Bridal Waves Earn Their Place
- They keep the crown calm: The top stays smooth, so the hair reads polished even if the lengths are loose and touchable.
- They work with veils instead of against them: A veil comb or clip has a cleaner anchor point when the upper section is tucked and set.
- They photograph with movement: Soft bends catch motion in a way that straight hair and stiff curls usually do not.
- They fit more than one dress shape: Satin, lace, crepe, and tulle all tolerate different amounts of texture, and these waves can be tuned up or down.
- They are easier to refresh than a full updo: A front piece can be re-curled in 4 minutes, which is a small mercy when the schedule gets messy.
- They feel bridal without looking overworked: There’s enough shape to read special, but not so much lacquer that the hair stops moving.
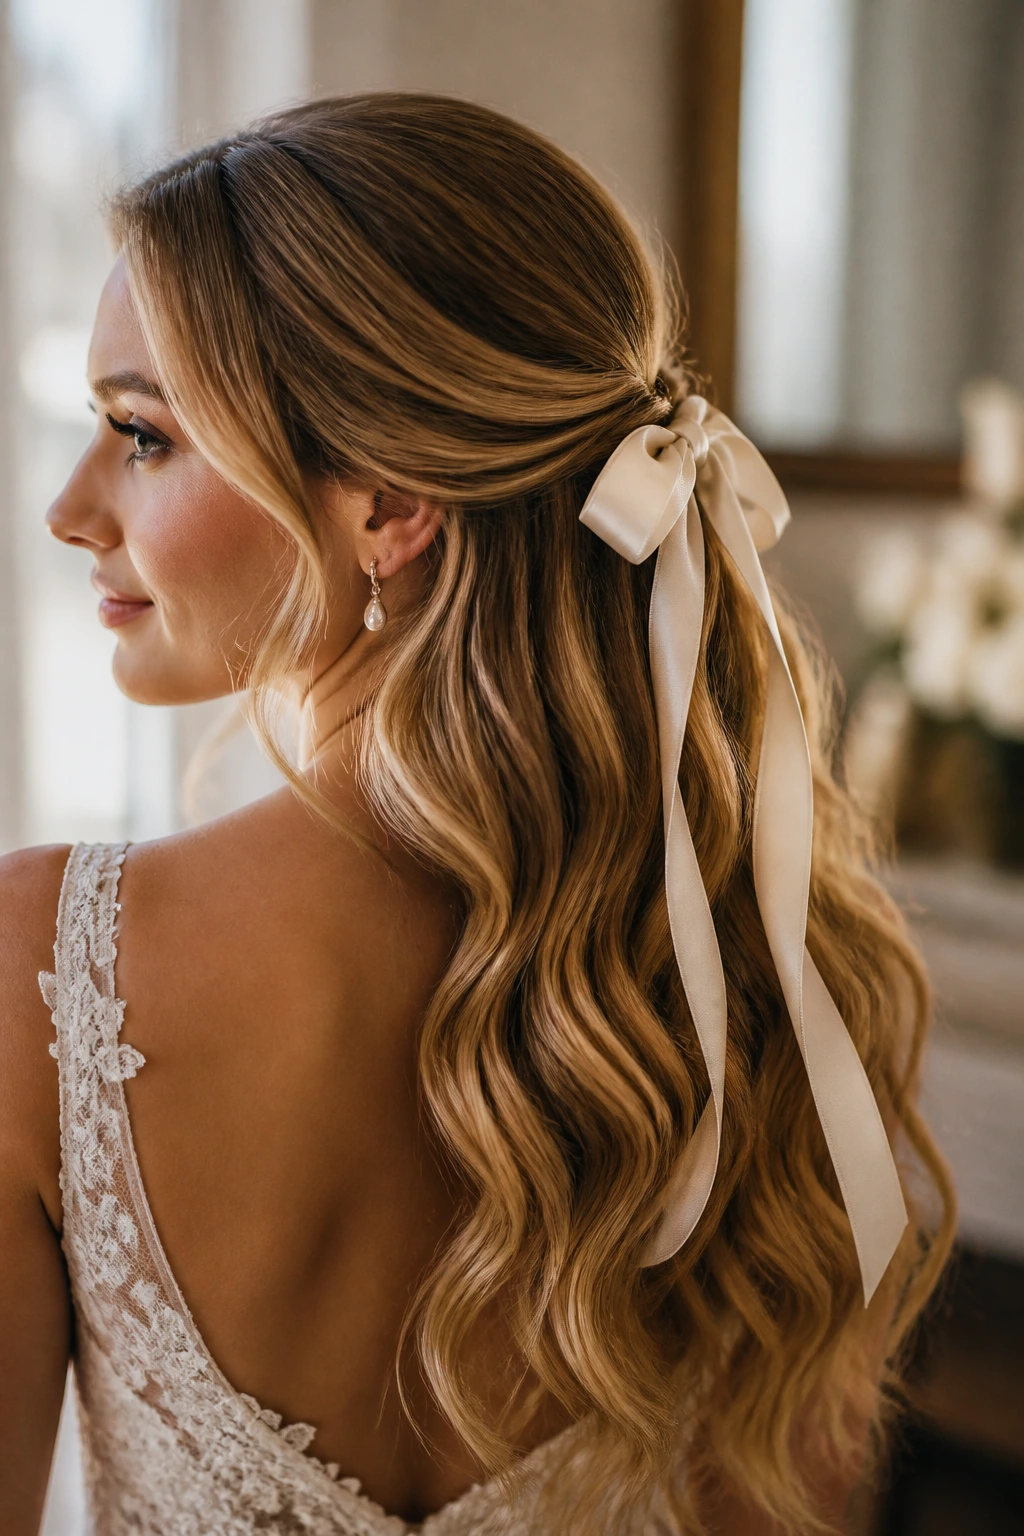
1. Soft Ribbon-Tail Waves
A silk ribbon tied at the nape changes the whole mood of this look. The hair stays loose through the lengths, but the ribbon gives it a finish that feels deliberate, not accidental. I like this best on brides who want softness around the face and a little romance in the back without turning the whole style into a half-up sculpture.
The trick is keeping the wave pattern relaxed and the crown smooth. Curl with a 1.25-inch wand, leave the last inch of each section out, and brush the waves lightly once they cool. Then tie the ribbon low, just above the top of the dress line, so it doesn’t fight the bend in the hair. Satin and silk work better than stiff grosgrain because they drape instead of jutting out.
Best with: square necklines, minimalist gowns, and long veils that need a tidy anchor.
Avoid if: you want a very structured, high-gloss finish. Ribbon hair wants a little movement.
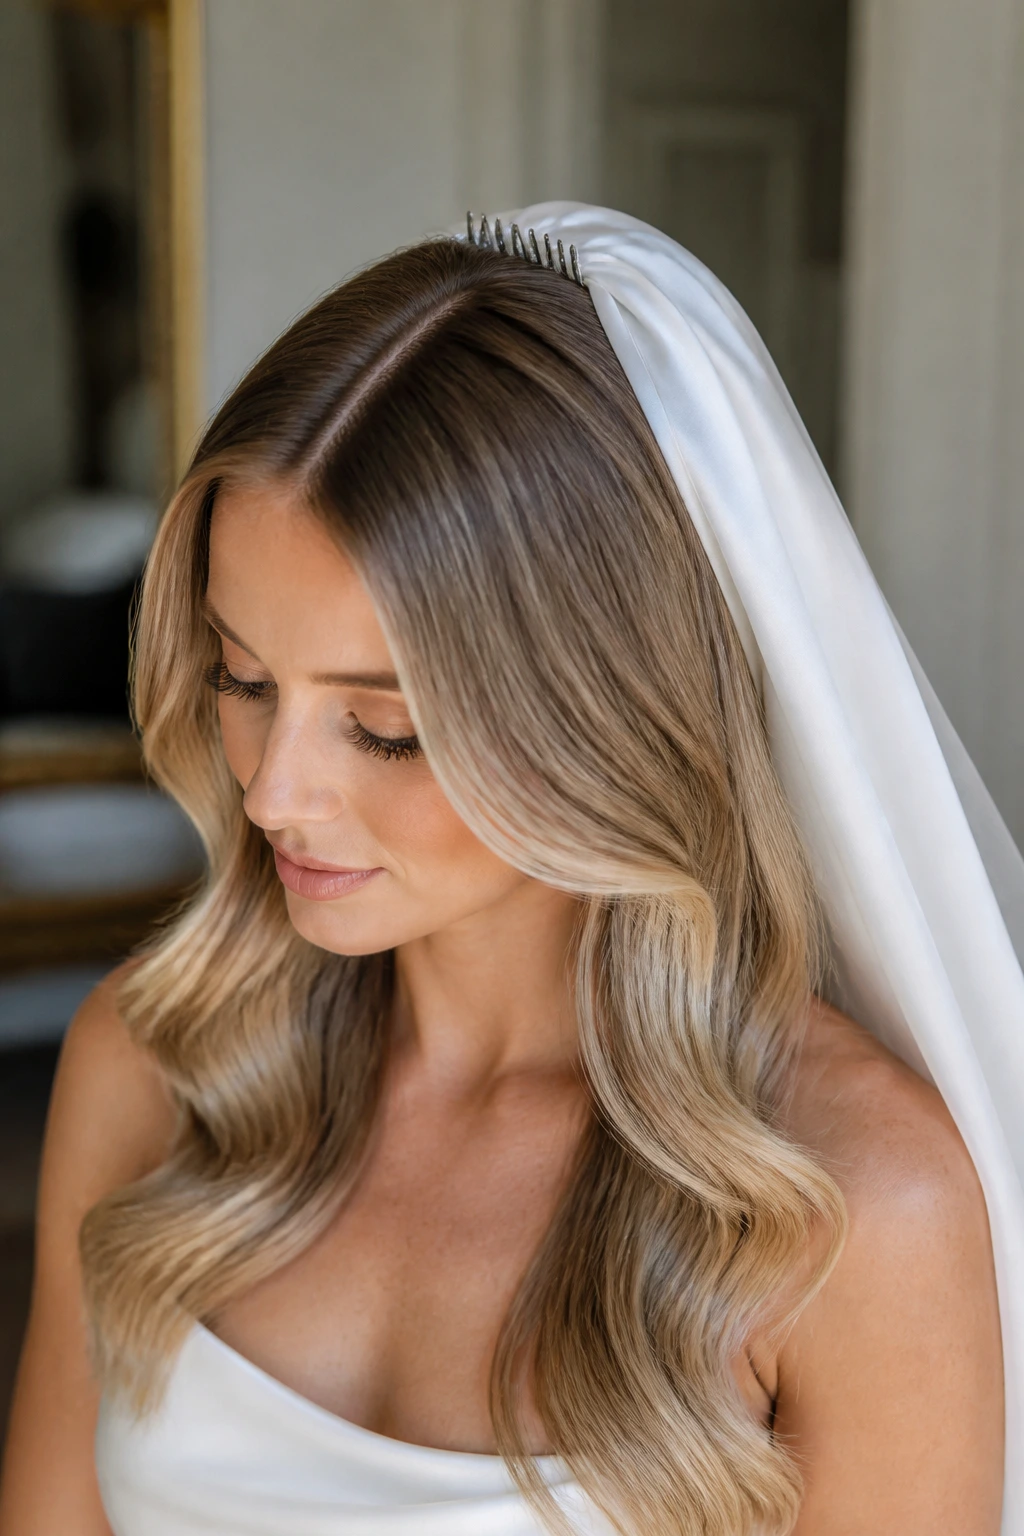
2. Center-Part Waves With a Satin Veil
Can a middle part and a veil work together? Absolutely — if the top section is clean and the wave starts low enough. This is one of those bridal beach wave looks that can look almost too simple on a hanger, then suddenly make sense once the veil comb sits in and the ends start moving.
What matters here is placement. Set the veil comb into a smooth zone 1 to 2 inches behind the hairline, not directly into the fluffy part of the wave. The part should stay crisp, and the waves should begin around the cheekbone or lower jaw. That keeps the style from puffing up under the veil netting.
A satin veil likes glossy hair more than gritty texture. Use a heat protectant with a bit of slip, curl in horizontal sections, and finish with a light mist of flexible-hold spray rather than crunchy hairspray. The result is calm at the top and soft everywhere else. That contrast is doing most of the work.
3. Side-Swept Glam Waves
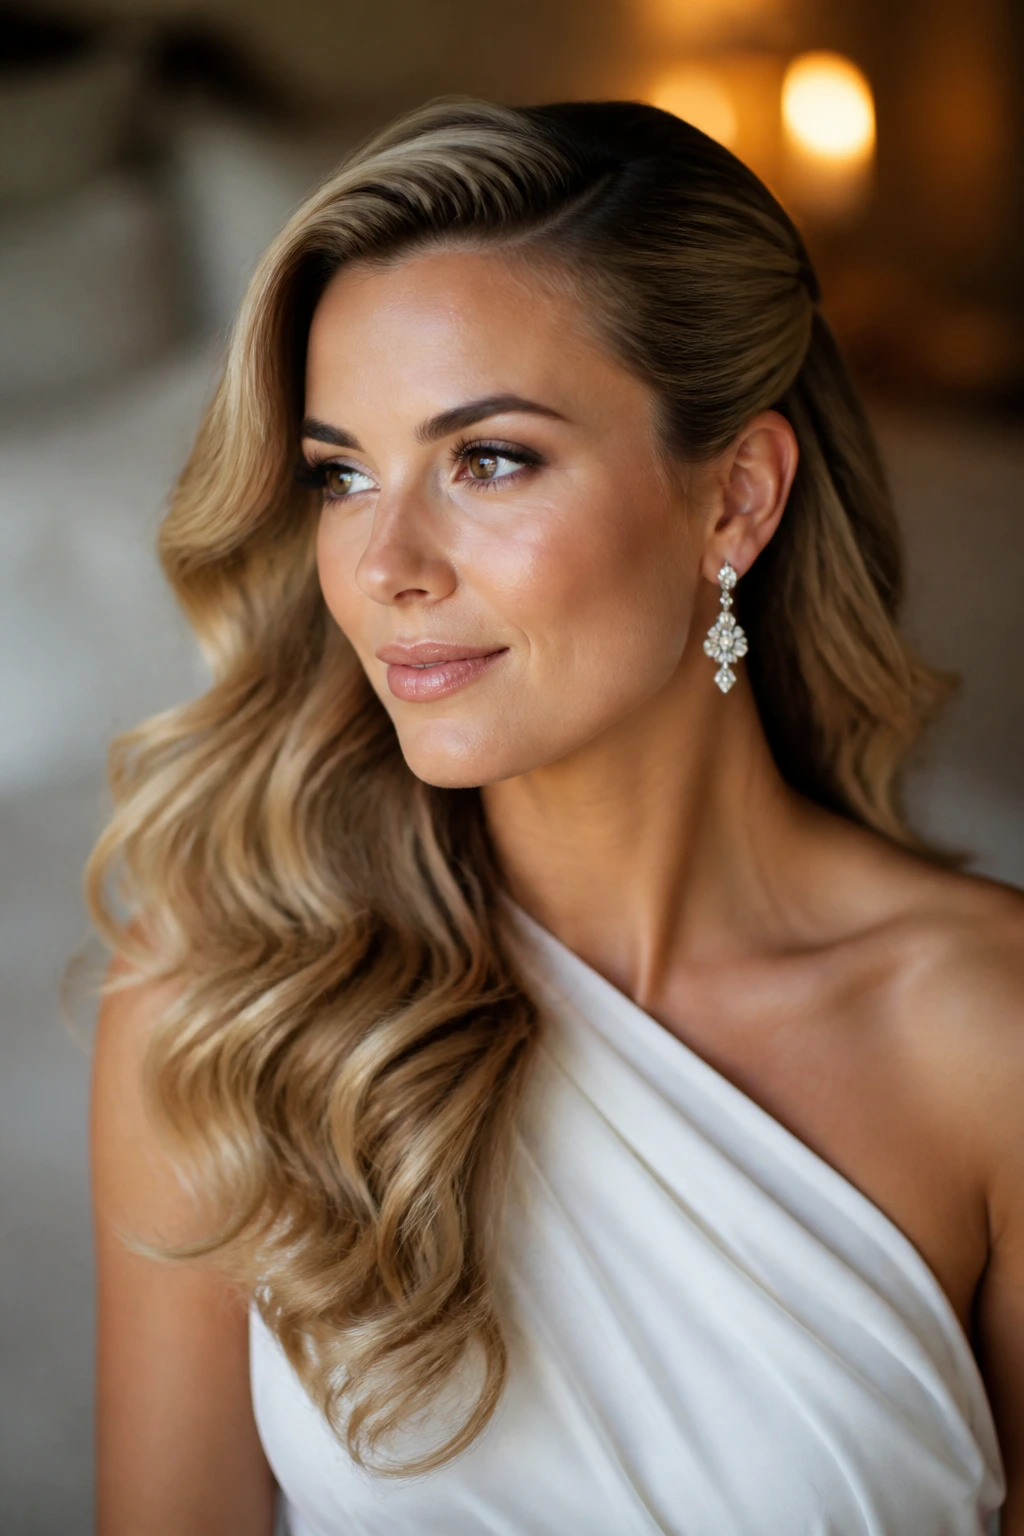
A deep side part changes the whole face of the style. Suddenly the hair has a little old movie confidence, even if the actual wave is loose and beachy. I prefer this on brides wearing one-shoulder gowns, asymmetric necklines, or anything with a bold earring that deserves a clear view.
The sweep matters more than the curl count. Set the heavier side behind the ear or tuck it at the collarbone with a hidden pin, then let the opposite side fall forward in broad bends. Use a 1.25-inch barrel and curl away from the face on the heavy side, but alternate directions through the back so it does not look too uniform.
This one likes a bit of root lift at the part. A touch of mousse at the roots before blow-drying helps, and a tiny bit of dry shampoo at the crown can keep the part from collapsing halfway through photos. If the hair is fine, do not overload it with oil. The style needs swing, not slip.
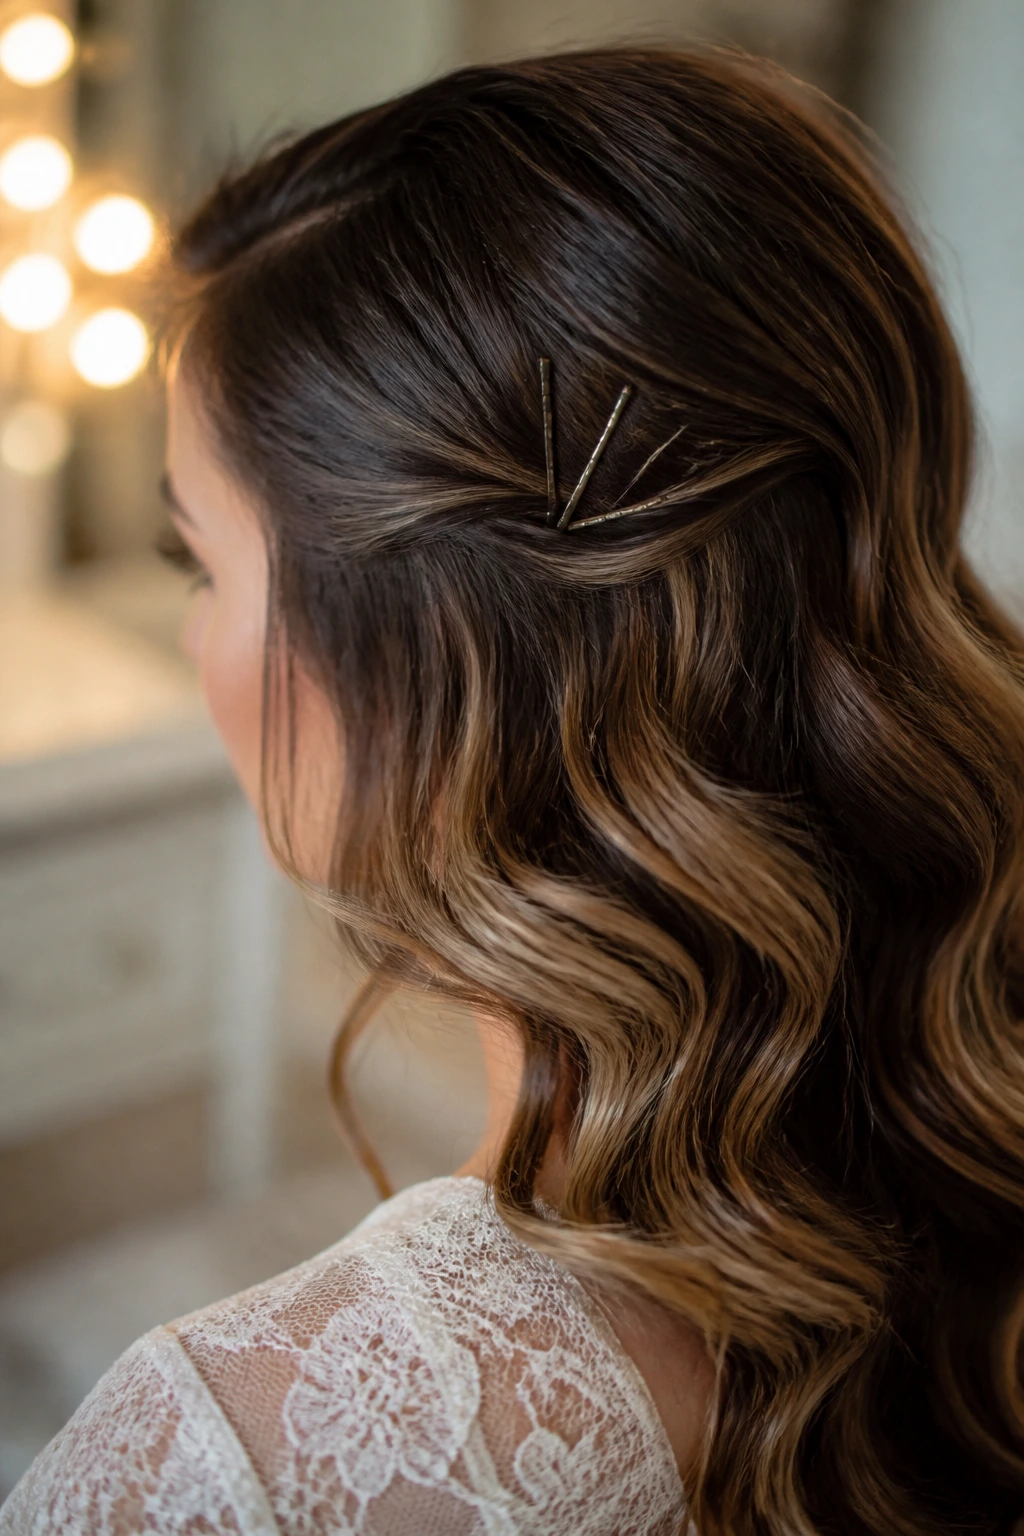
4. Half-Up Waves With Pearl Pins
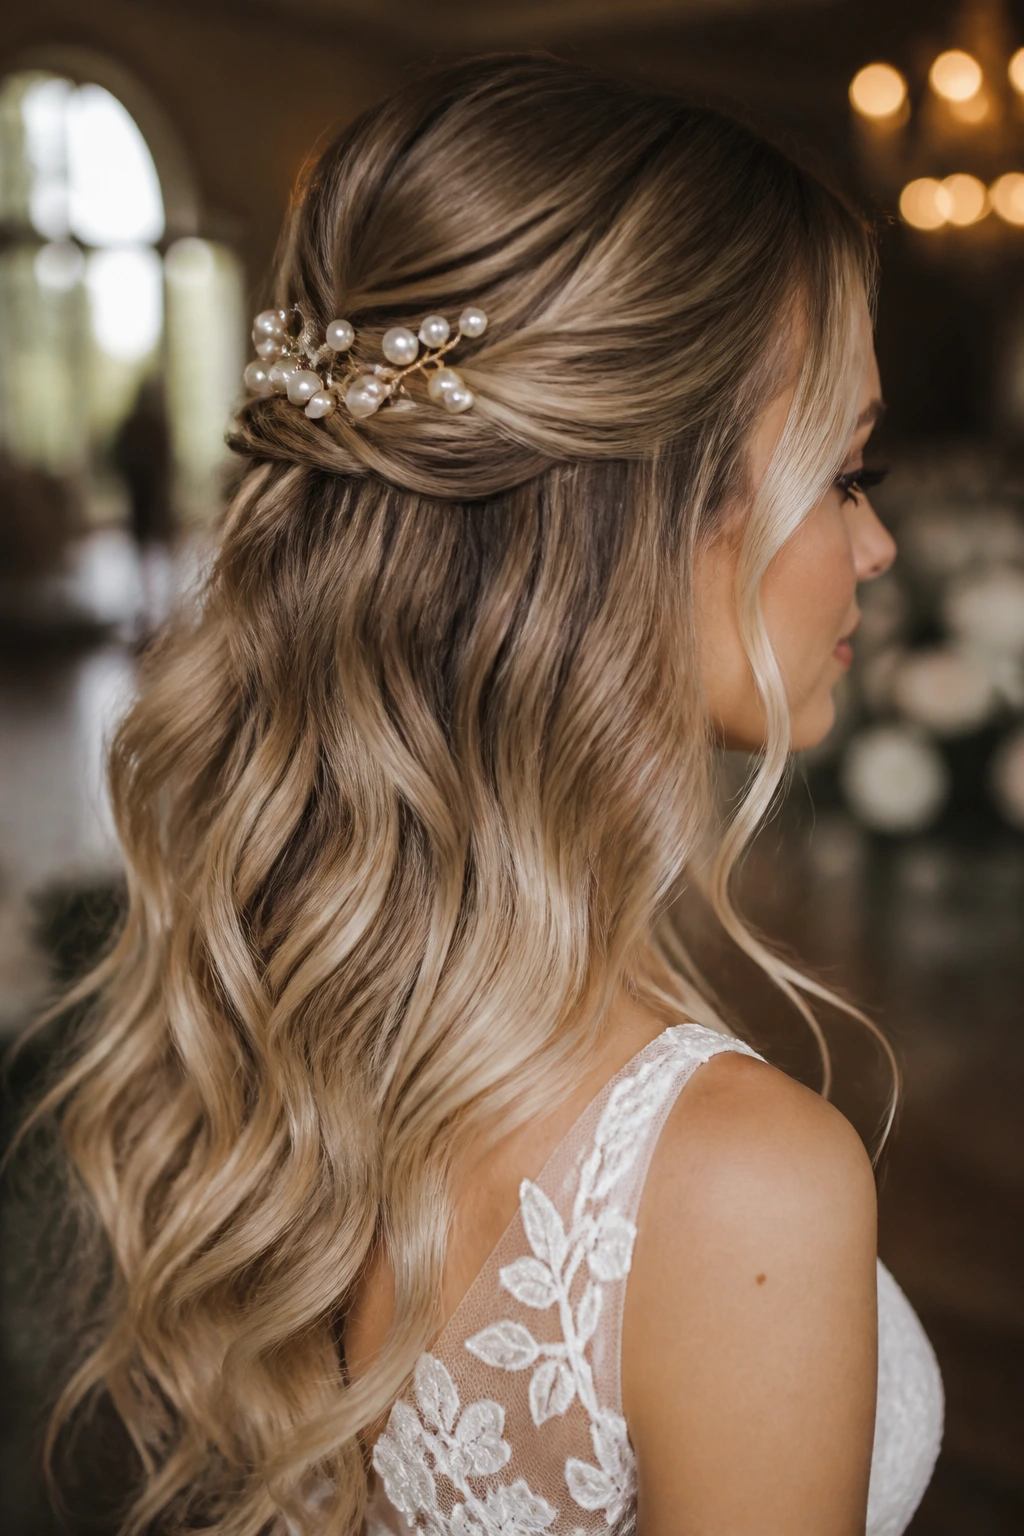
Pearl pins are one of those details that can save a style from feeling too casual. They catch the eye, yes, but more importantly they hold the upper section in a clean line while the rest of the wave stays loose. This is the look I’d point to for brides who want a softer version of an updo without giving up length.
The half-up section should sit high enough to show the shape of the face, but low enough that it doesn’t pull the wave pattern out of the mid-lengths. Pin the back with two or three pearl-tipped clips, spaced slightly apart rather than stacked in one lump. That little spacing keeps the back from looking heavy.
The lower half can be brushed into soft S-waves or left a touch more textured. Either way, the ends need to stay airy. If the curls are too tight, the pearls start feeling formal in a way that fights the rest of the style. Loose pins, loose movement. That’s the formula.
5. Low Twisted Bun With Loose Wave Ends
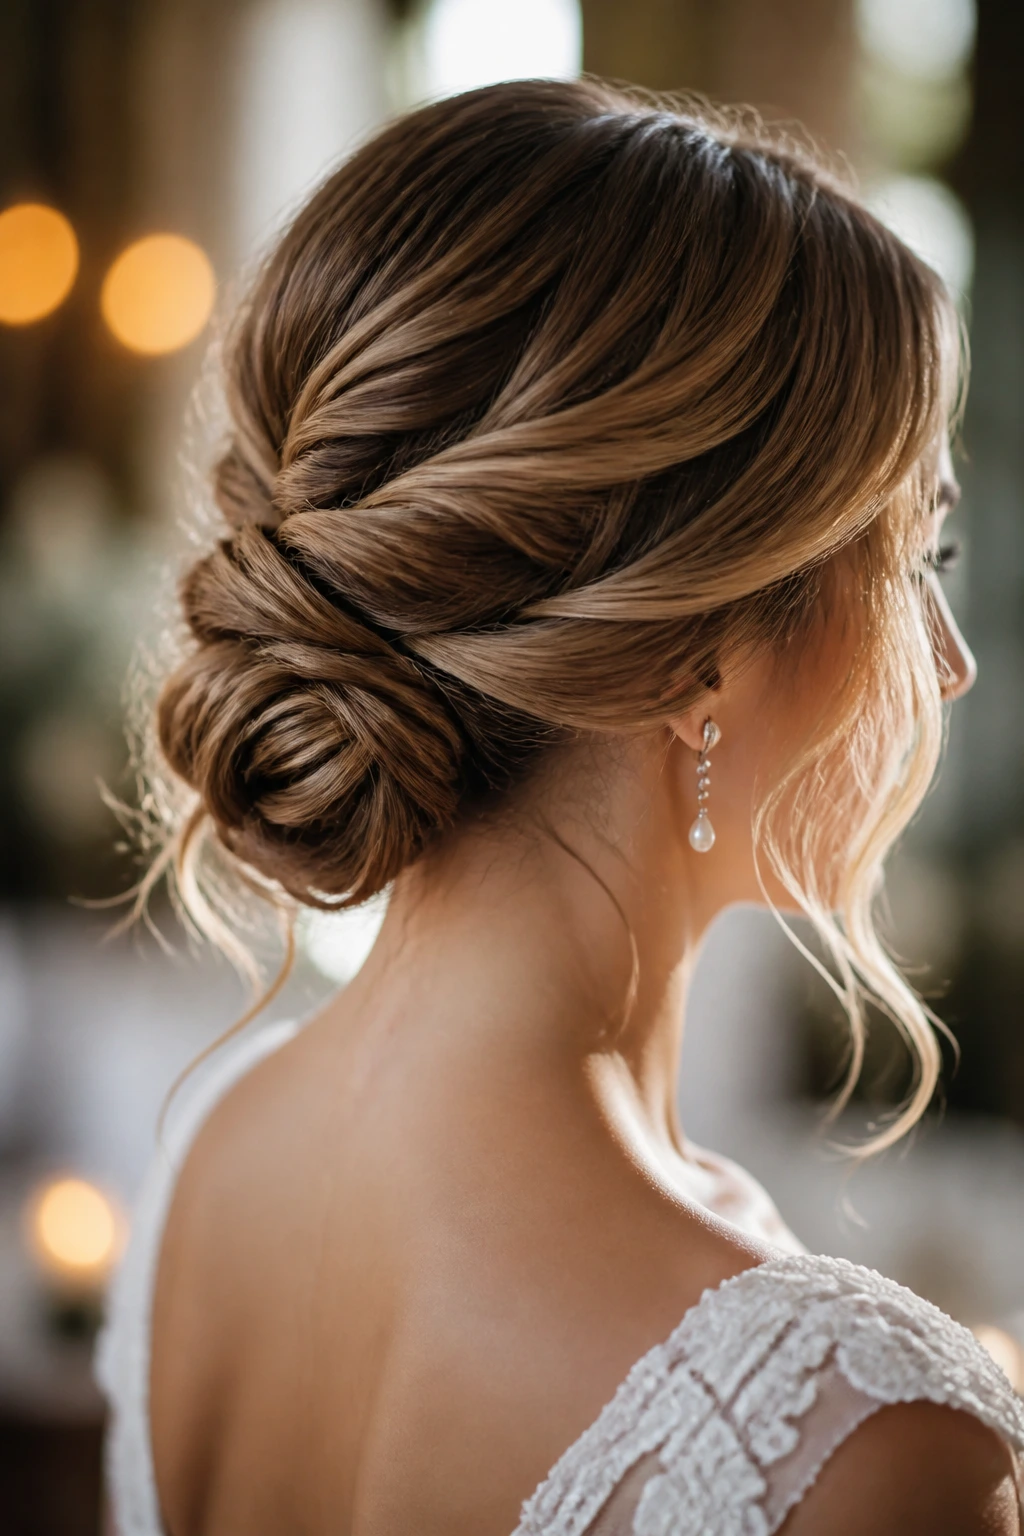
This is the bride’s compromise when she wants her neck free but refuses to give up soft movement. The top and sides are swept into a low twist or knot, then a few wave-shaped lengths are left out to fall against the shoulders. It reads like an updo from the front and a softer style from behind.
The important part is restraint. The knot should sit low, almost at the nape, and the loose ends should be pieces with intention, not leftovers. Curl those face-side pieces first, then twist the bun around the smooth crown so the hairline looks clean. If you leave too much volume on top, the style can drift into bridal beehive territory very quickly.
I like this one for dresses with a dramatic back. The exposed shoulders and open neck get room to breathe, but the wavy ends keep the whole look from feeling severe. It also solves the “I want my hair up, but I hate feeling bare” problem better than most traditional buns.
6. Boho Crown Braid And Waves
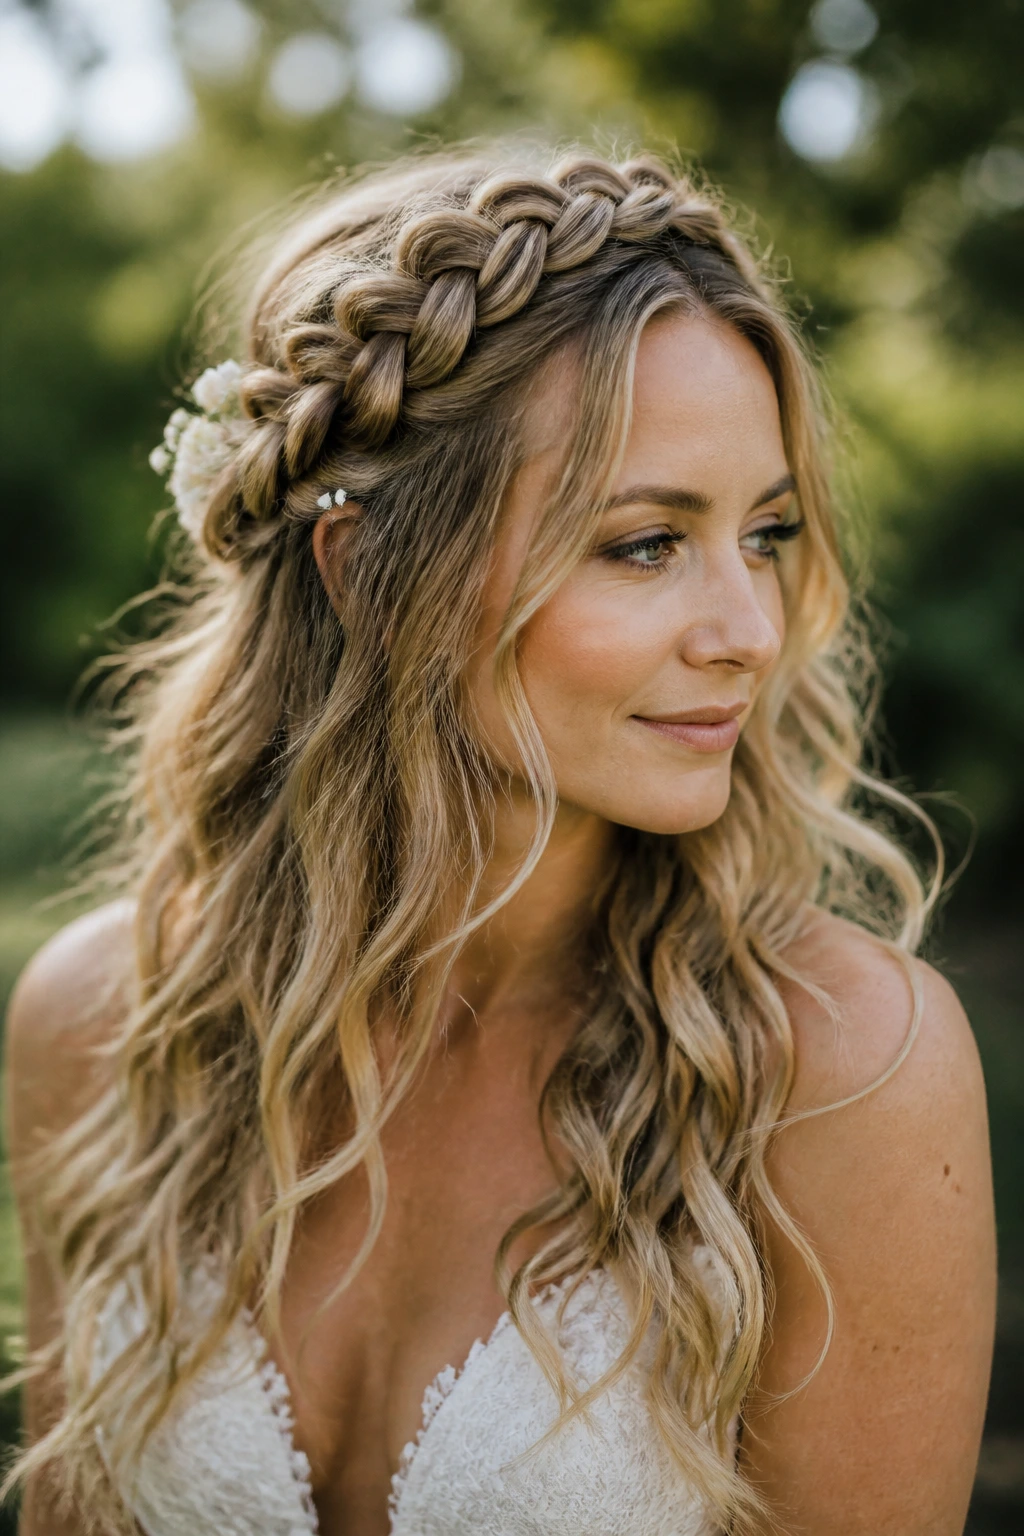
A crown braid does not need to be thick to matter. In fact, the softer and flatter it sits, the better it works with bridal waves. This look wraps a braid around the top or side of the head, then lets the rest fall in loose, imperfect bends. It has more character than a plain half-up style and less fuss than a full braided crown.
The braid itself should be pancaked just a bit — pulled wider with your fingers so it looks lived-in, not tight and school-pageant neat. That widened braid is what gives the style its texture against the smoother waves underneath. If the hair is layered, let a few shorter pieces break free near the temples. They soften the line and keep the braid from looking like a helmet.
This is one of my favorite options for outdoor ceremonies. The braid gives the top some security, and the lengths can move in the wind without the whole style falling apart. Fresh flowers sit nicely here too, but keep them small. Big blooms can steal the braid’s shape.
7. Old Hollywood Beach Waves
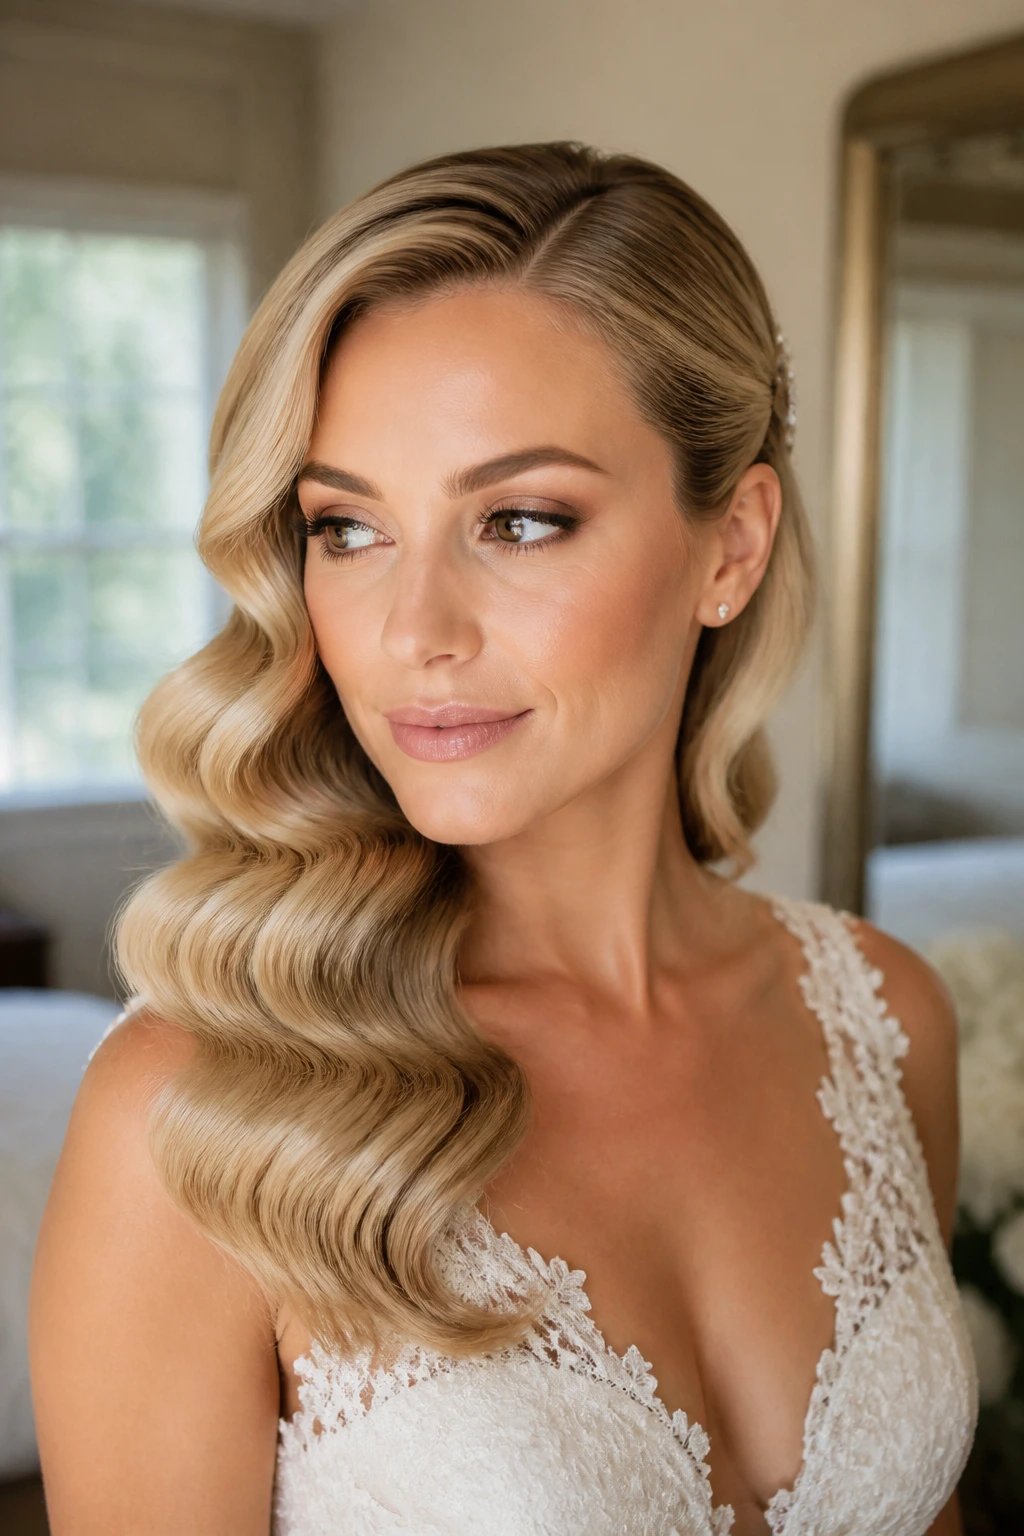
These are not the loose, windswept waves people usually mean when they say beach waves. They’re smoother, more polished, and a little more shaped — like a wave that got dressed up and learned to behave. For brides, that distinction matters. The style still has movement, but it also has the clean curve and gloss that satin, silk, and beaded gowns love.
The side part should be deep and decisive. Curl with uniform sections, let everything cool fully, then brush the waves into one continuous flow with a boar-bristle brush. The result should be a soft S-shape rather than separate curls. A touch of shine serum on the mid-lengths gives the hair that reflective, polished finish, but stop before the roots. Oily roots ruin the line.
This look works best when the dress is already doing a lot. If the gown has structure, shine, or strong architecture, a more glamorous wave keeps the hair from feeling too plain. It also photographs beautifully against a dark lip or dramatic earrings — not because it shouts, but because it knows where to stop.
8. Textured Lob Waves For Shorter Hair
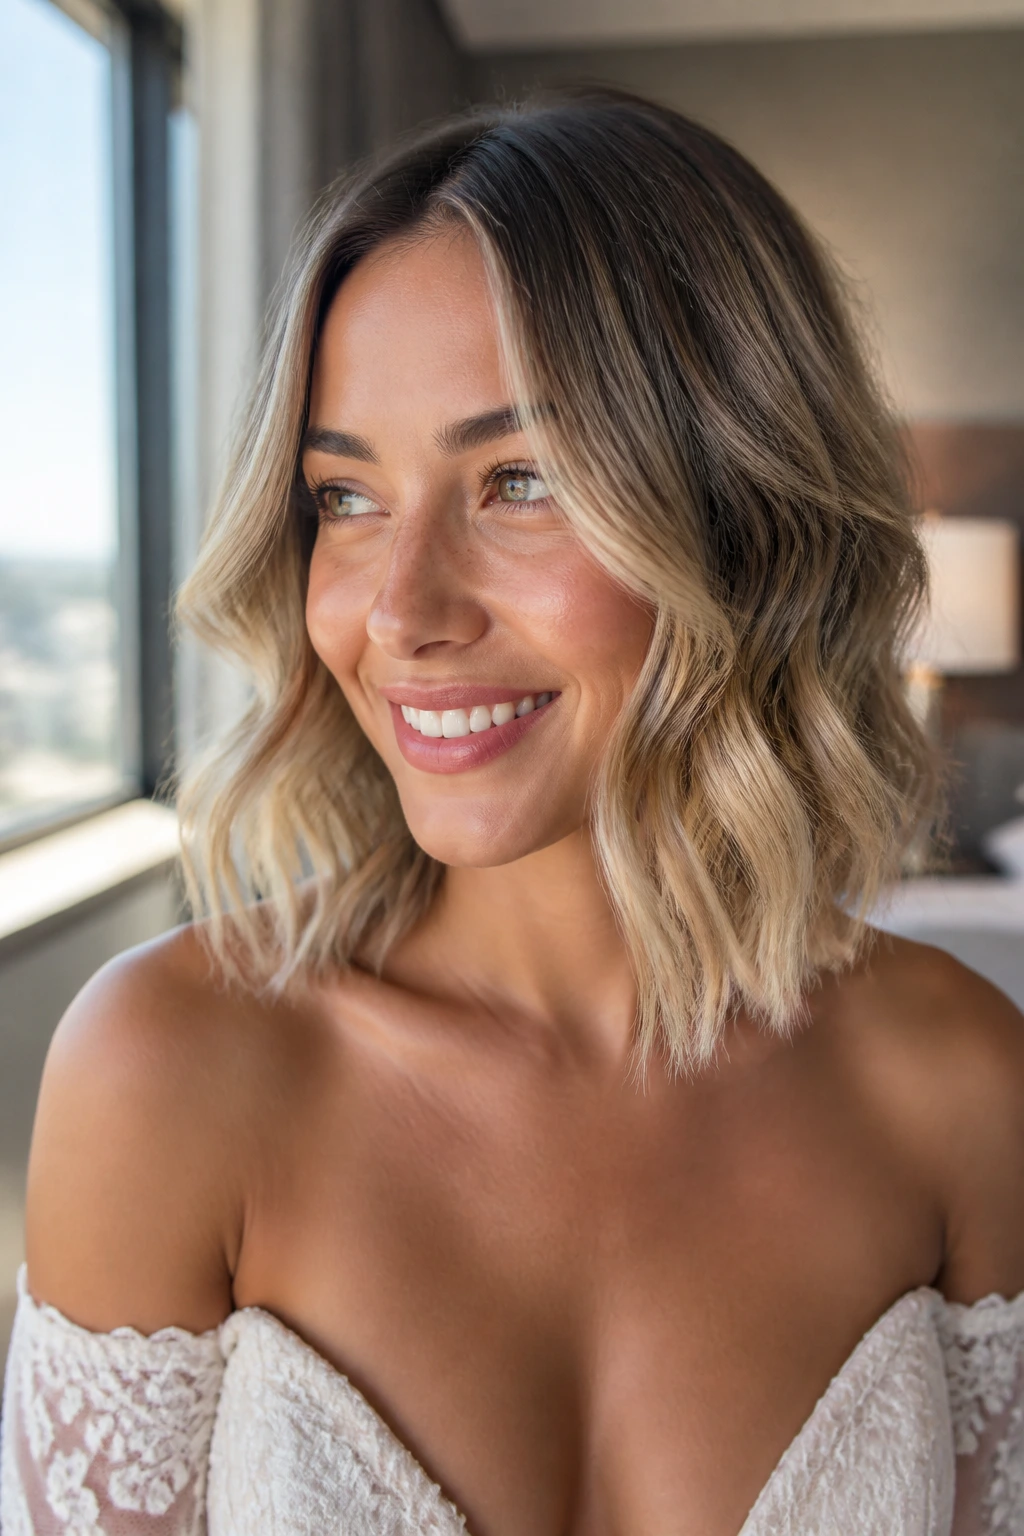
A bridal lob can be just as expressive as long hair. Maybe more so. The shorter length makes the wave pattern visible all the way through, so every bend matters. If the cut sits around the collarbone or a little above, soft textured waves keep it from flipping under the jaw in a way that feels dated.
Use a smaller barrel here — 1 inch usually works better than a 1.25-inch wand — and curl away from the face around the front. Keep the end sections slightly straighter so the whole shape doesn’t become one giant loop. Then shake the waves apart with your fingers, not a brush. Short hair can go from polished to puffy in about thirty seconds if you overwork it.
This look has a modern, easy energy that suits brides who do not want to spend the whole day managing long lengths. Add a small comb, a single pearl pin, or nothing at all. The cut itself does the talking.
9. Mermaid-Length Waves With a Deep Side Part
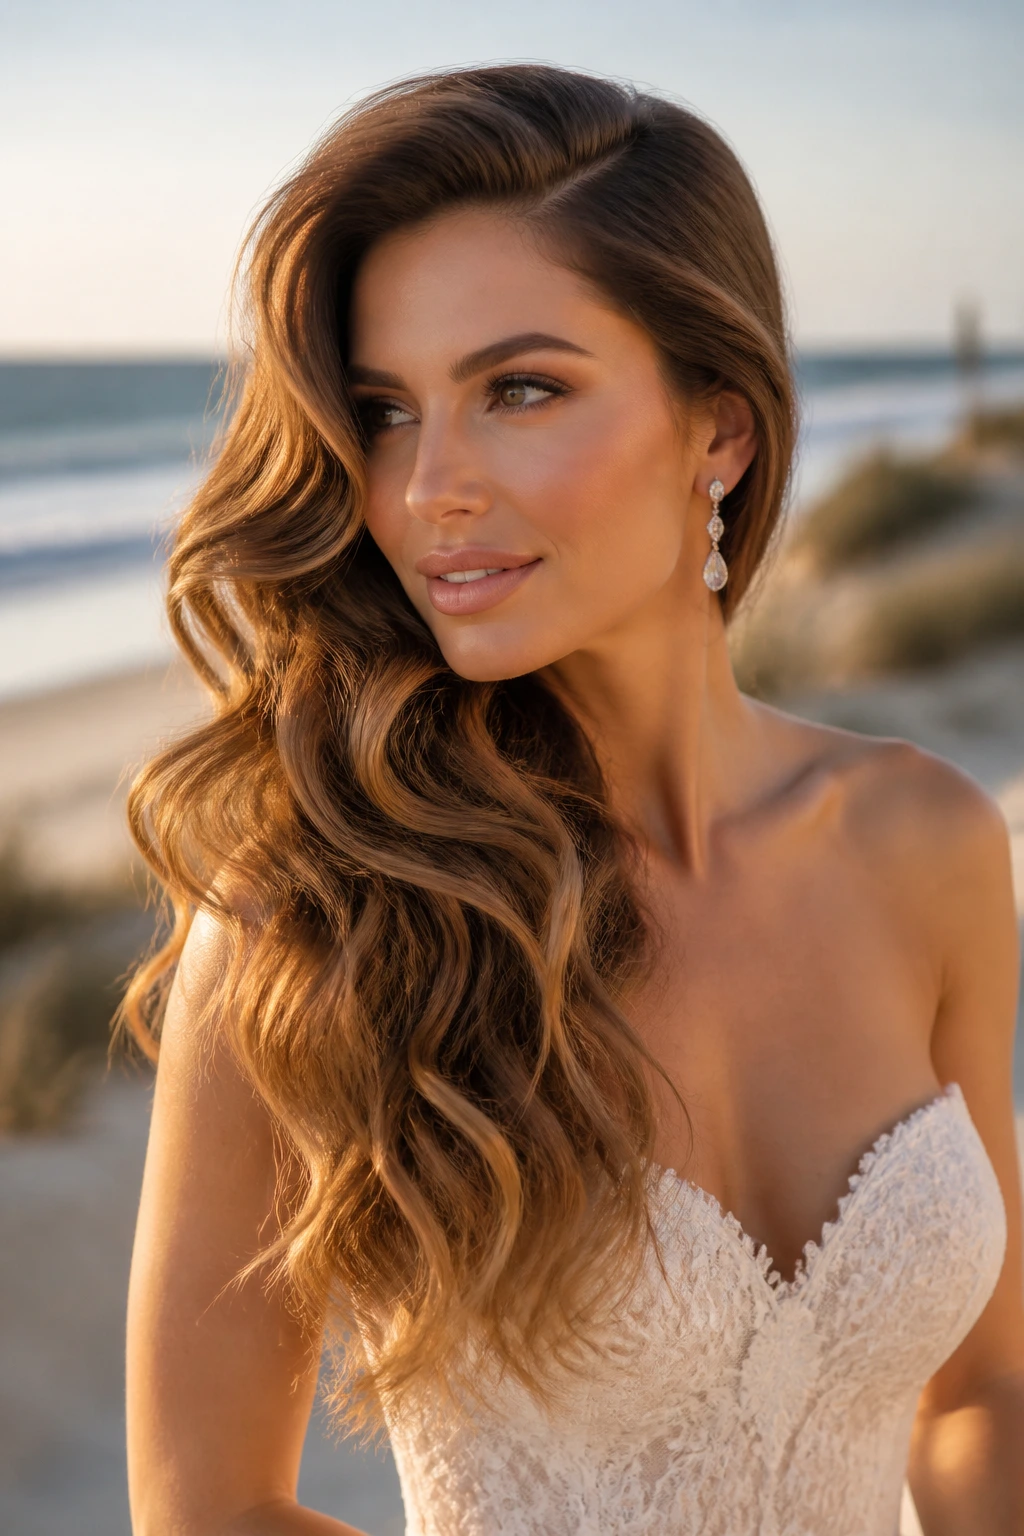
When the hair is long enough to move like fabric, the wave pattern can become part of the dress. Mermaid-length bridal waves look best when they are big, soft, and spaced apart so the whole mass of hair doesn’t collapse into one heavy curtain. The deep side part gives the style direction and keeps it from feeling too flat across the top.
Here’s the part most people miss: long hair needs bigger sections than short hair, or the style turns into too many curls stacked on top of one another. Use sections around 1.5 inches wide, wrap them loosely around the barrel, and leave the ends out for a little air. Once it cools, run your hands through the lengths once or twice, then stop. The goal is movement, not froth.
This is the look for brides who want presence. It is not subtle. It is also not fragile when it’s built properly. The wave should fall in long, visible lines, especially when the bride turns her shoulders or walks down a long aisle.
10. Polished Waves With Face-Framing Pieces
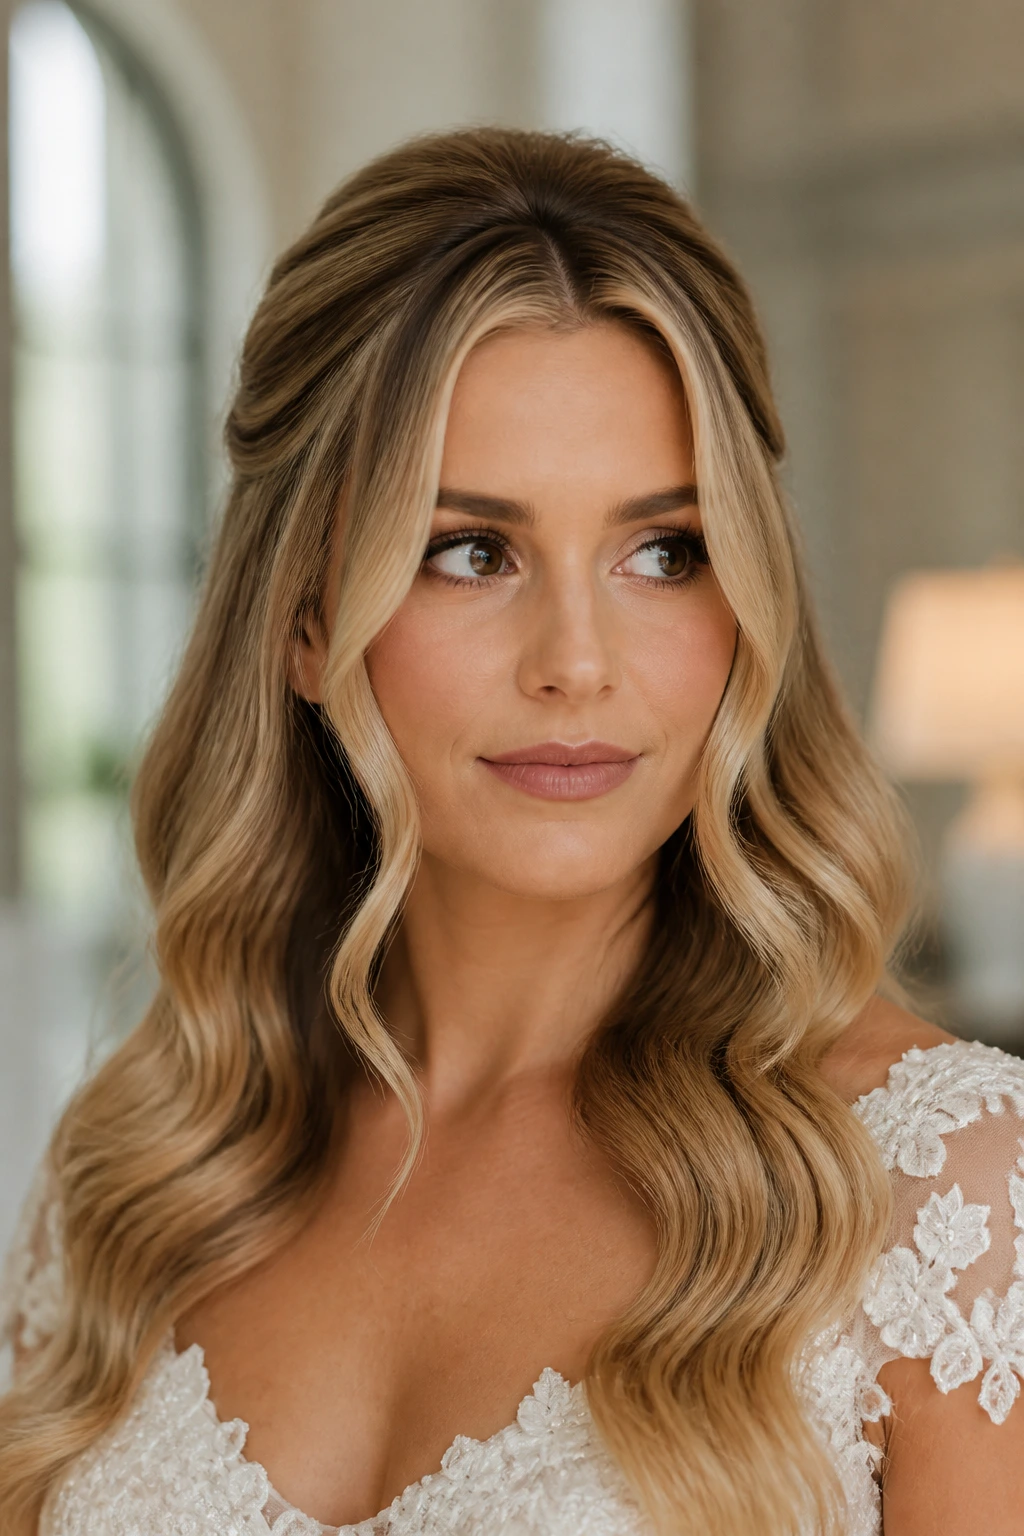
Face-framing pieces can make a wave look softer without making the whole style messy. They create a small break around the face, which is useful when the rest of the hair is kept more controlled. I like this when the dress has a higher neckline or when the bride wants earrings and makeup to show cleanly.
The front pieces should be narrower than the back sections. Curl them away from the face, then pinch the bend while they cool so they keep a gentle curve instead of a ringlet. The back can stay smoother and more brushed out. That contrast is the whole point. It keeps the face open while the lengths still feel bridal.
A lot of stylists miss the temperature balance here. The front pieces need slightly less heat than the back because they’re thinner and more visible. If you overcook them, they frizz first. If you undercook them, they fall before the ceremony ends. Tiny sections. Controlled heat. That’s the game.
11. Loose Wave Ponytail for Ceremony-to-Reception Flow
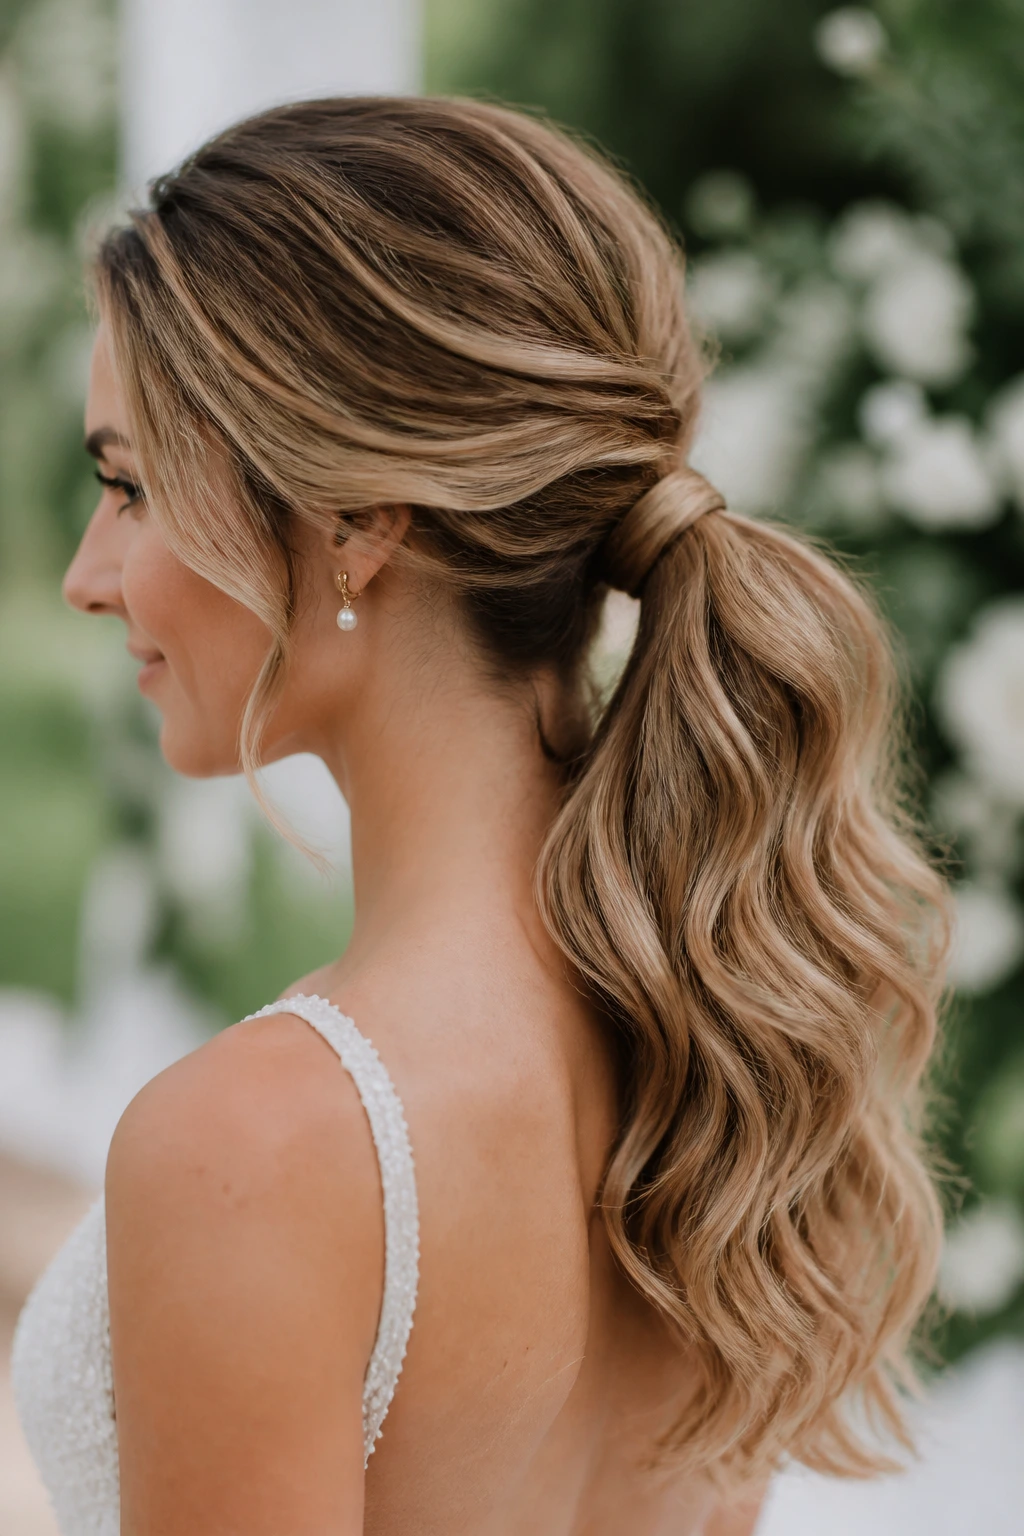
A wave ponytail is the bride’s answer to “I want my hair up later, but not yet.” The top stays gathered and neat, while the ponytail itself holds soft wave shape through the lengths. It’s practical, yes, but it also has a clean line that works with modern dresses and sculptural necklines.
The pony should sit low to medium-low, never at the crown unless you want a more fashion-forward result. Smooth the top first, then secure the tail with a clear elastic and wrap a small strand around the base. Curl the pony after it’s secured, not before, so the shape hangs naturally. If you curl first and tie later, the base gets dented. Ugly little dent. Easy to avoid.
This style makes the transition from ceremony to reception less annoying. You can loosen the base a touch after photos, tuck in a second pin, and keep moving. It also plays nicely with longer earrings, because the neck and jawline stay open.
12. Waterfall Braid Into Waves
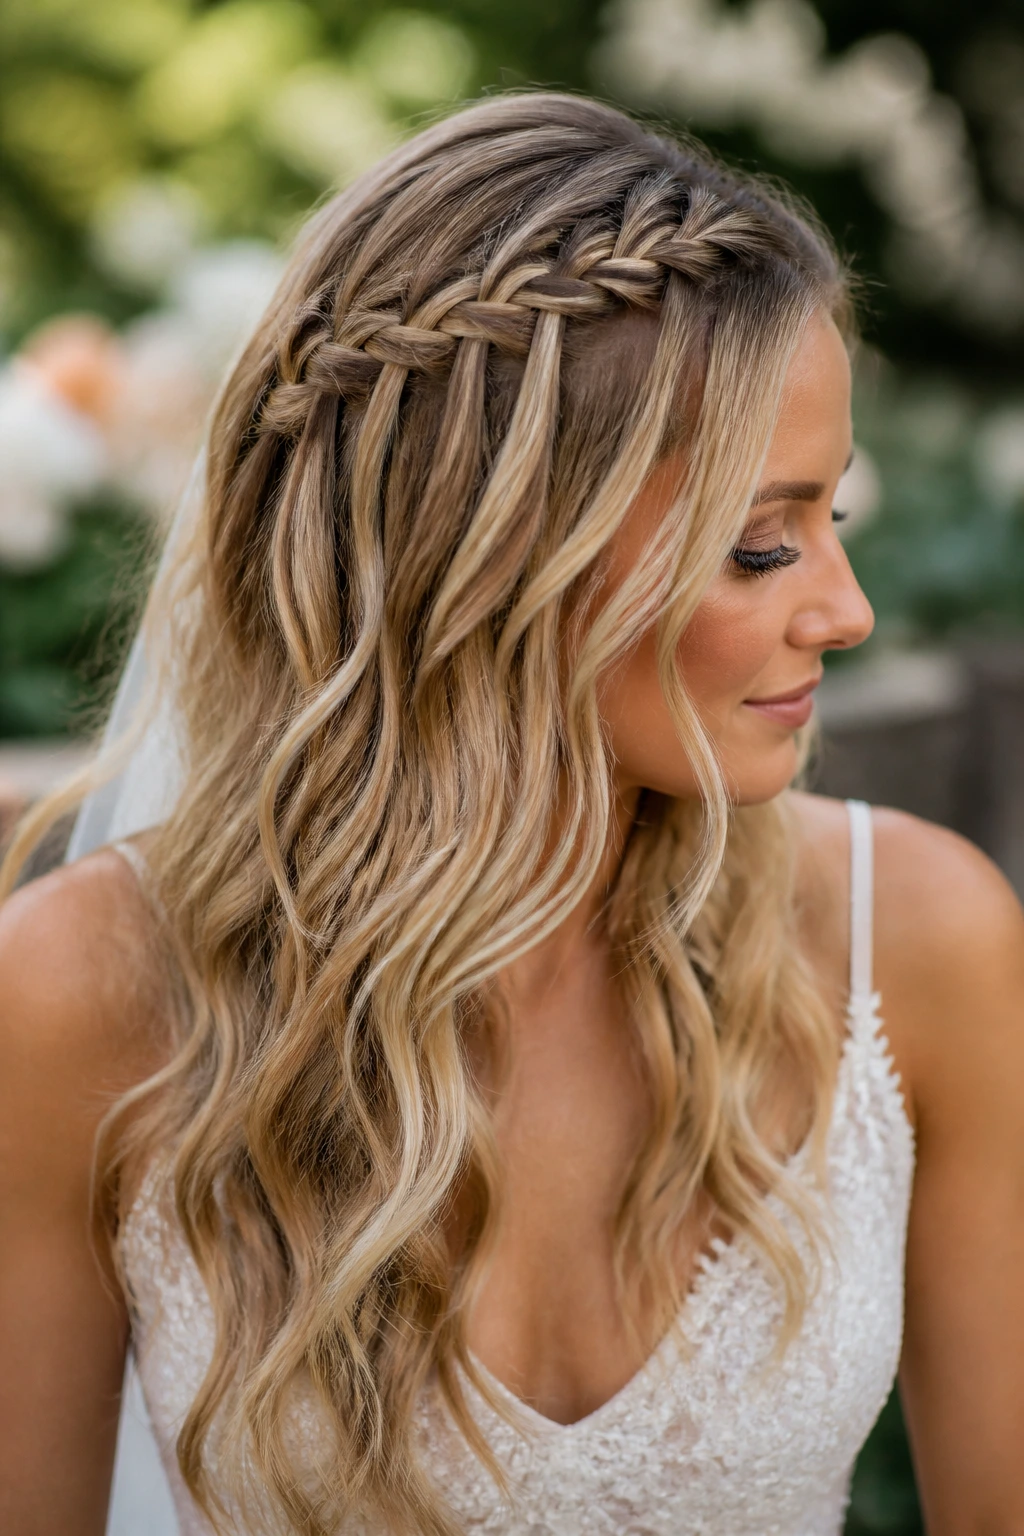
A waterfall braid has a built-in sense of motion, which is why it pairs so well with bridal waves. Instead of sitting on top of the hair like a separate piece, it seems to pour into the lengths. That soft line across the head gives structure without pinning everything down.
What I like here is the balance between detail and freedom. The braid starts near the temple or crown, then releases into waves that can be loose, brushed, or a little more textured depending on the dress. If the braid is too tight, the whole thing gets precious. Keep the sections thin and let the dropped strands blend into the wave pattern, not sit on top of it.
This is also one of the better looks for brides who want to show color dimension. Highlights and balayage patterns show up beautifully when the braid and waves break the hair into visible pieces. The style has enough shape to feel styled, but enough drift to feel soft.
13. Soft S-Bend Waves for Fine Hair
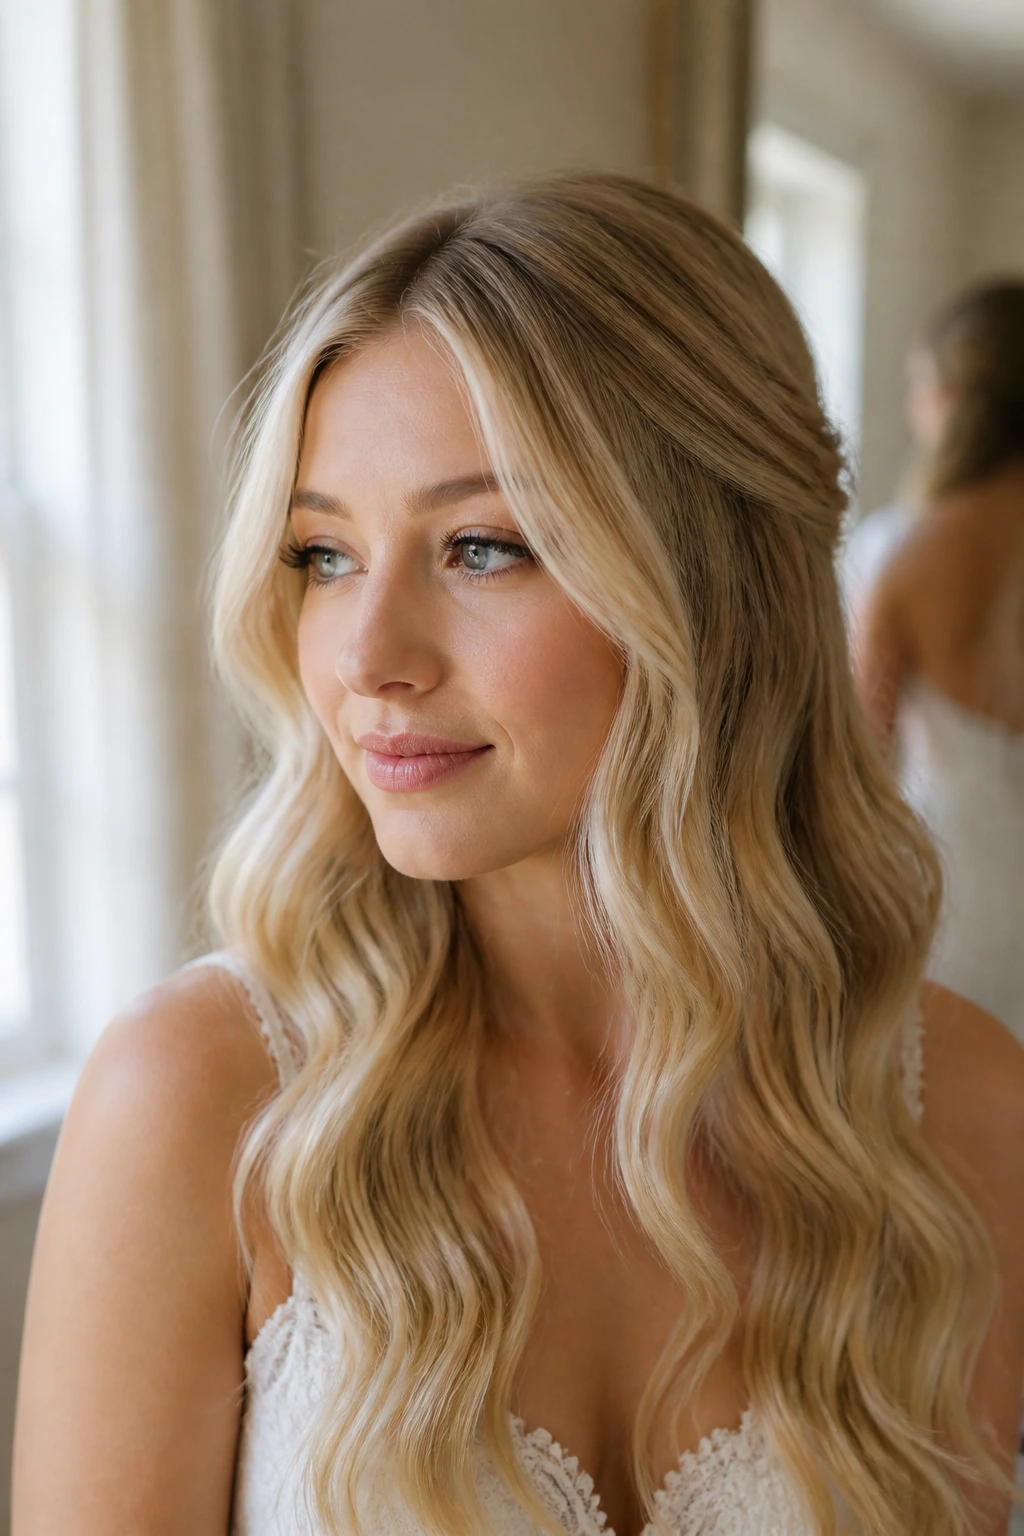
Fine hair often looks better in S-bends than in big barrel curls. Why? Because the bend sits flatter and gives the illusion of more density without requiring a heavy pile of product. If the hair is soft and slippery, this may be the bridal wave that actually stays put.
Use a flat iron or a waving technique rather than a large curling barrel. Bend the hair in alternating curves, leaving the ends a little straighter, then let each section cool in your hand for a few seconds before releasing it. A light mousse at the roots and a pinch of powder at the crown can make a major difference. Not glamorous advice. Extremely useful advice.
The finished style should look airy, not deflated. That means you don’t brush it much. You lift it with fingers, tip the head slightly, and let the pieces settle where they want. Fine hair can absolutely hold wedding waves, but it usually needs more prep and less handling than people expect.
14. Glossy Barrel Waves With Minimal Texture
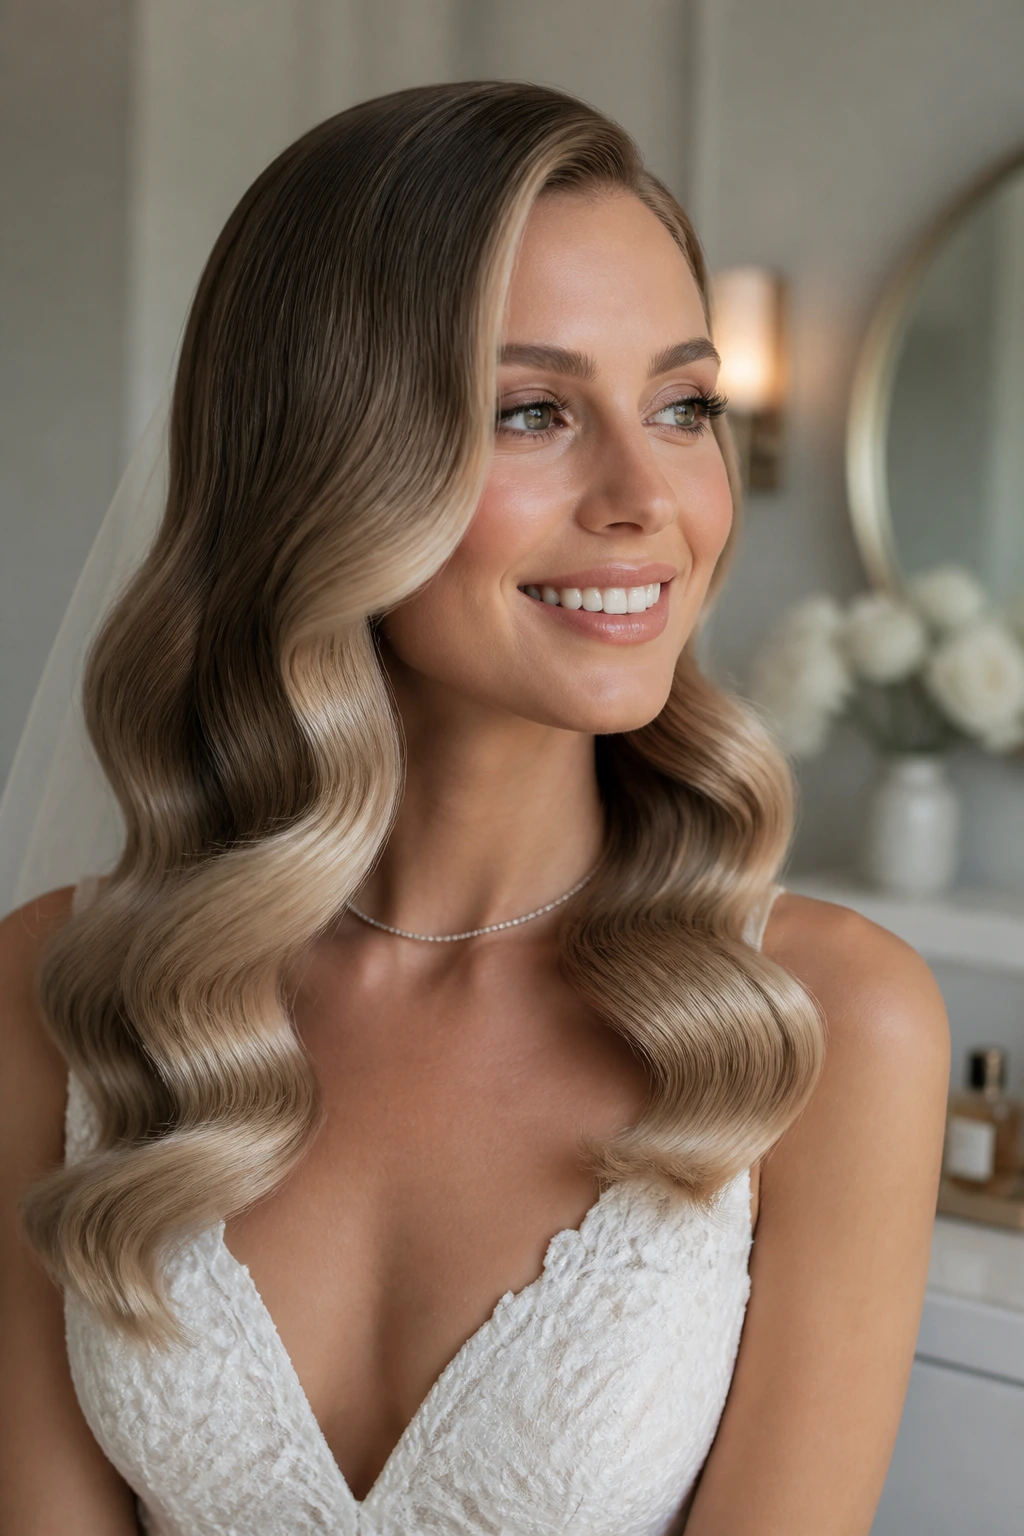
Not every bride wants that slightly tousled, salt-spray look. Some dresses ask for cleaner hair, and some faces just look better with gloss instead of grit. Glossy barrel waves sit in that lane: smooth, reflective, and defined enough to catch light without turning crunchy.
The sections need to be medium-sized and wrapped in the same direction for a more uniform finish. After cooling, brush them into one soft line, then add a tiny amount of serum to the mid-lengths. A lot of people overdo the texturizing spray here. Don’t. Once the surface gets too rough, the shine disappears and the whole style starts looking dry.
This works especially well with minimalist gowns, clean lines, and modern veils. The wave becomes part of the silhouette rather than a separate decorative element. It’s not a beachy style in the surfboard sense. It’s the polished cousin.
15. Tousled Waves With Fresh Flowers
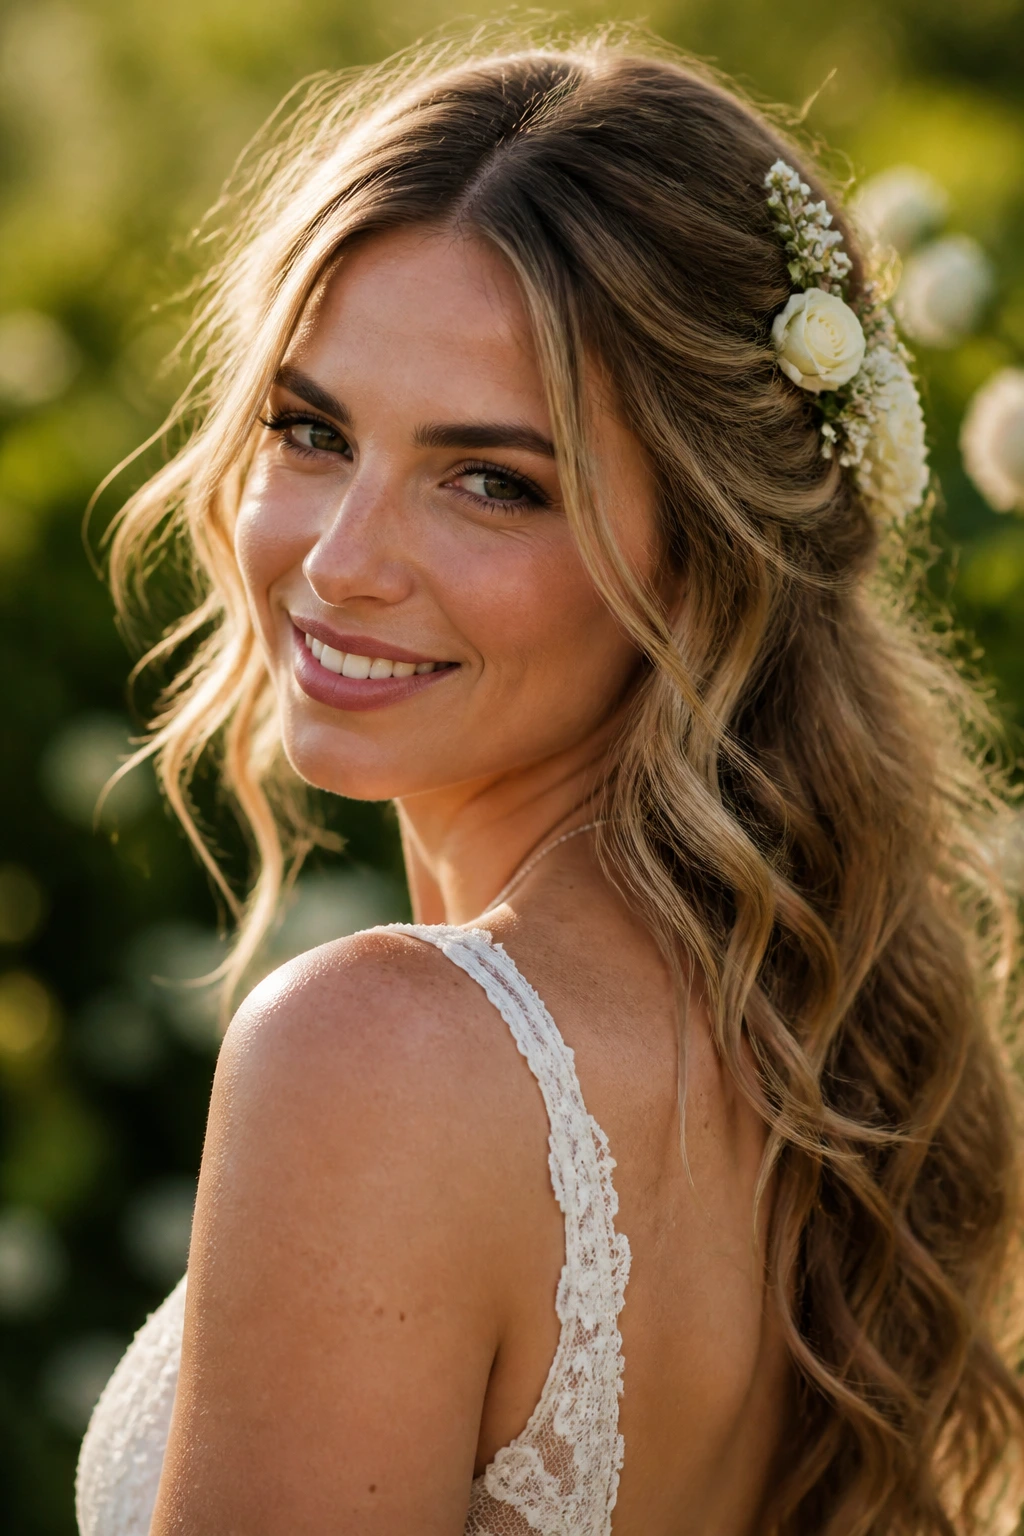
Fresh flowers can either make bridal hair look lush or make it look like a florist dropped by in a hurry. The difference is placement. A few small blooms tucked near the ear, at the back of the braid, or along one side of the half-up section can soften the waves without covering them.
The wave pattern should stay loose and touchable. I’d avoid very tight curls here, because flowers plus tight hair can tilt the whole thing toward prom. Choose blooms that hold their shape for a long day — spray roses, tiny orchids, waxflower, or baby’s breath all work in different ways. Wire the stems or secure them in small pins so they sit flush.
This look is strongest when the bride wants something romantic but not too formal. It also pairs well with outdoor settings, where the hair can move a little and the flowers feel like part of the scene instead of an afterthought.
16. Retro Side Part With Finger-Waved Front
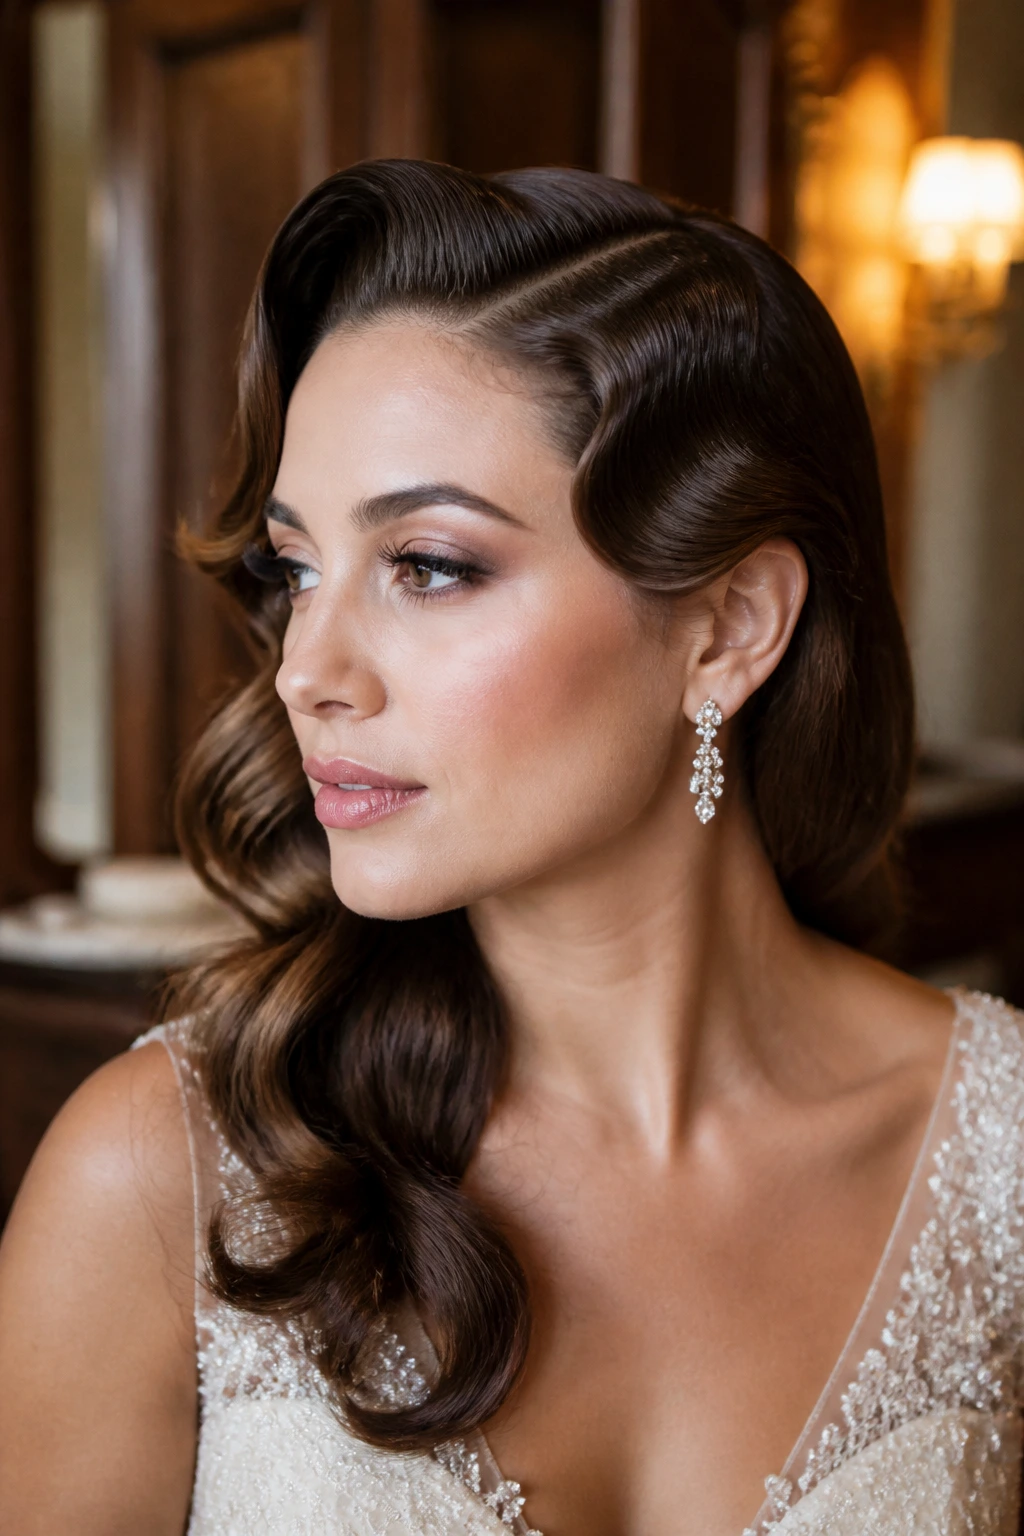
This one has spine. The front section gets finger-waved or molded into a smooth, vintage bend, while the rest of the hair falls into softer waves. That contrast is what makes it feel bridal instead of costume-y. The style nods to old Hollywood without copying it too literally.
The front needs patience. It should lie flat, curve cleanly, and sit close to the head so the wave pattern around the face has a sculpted edge. The rest of the hair can be less rigid, even slightly tousled, which keeps the look from feeling precious. If every section is equally perfect, the style gets stiff fast.
I like this for brides wearing vintage-inspired gowns, beaded dresses, or anything with a real waistline and a bit of shape. The hair has to meet that mood halfway. A little polish. A little attitude. A lot of structure at the front.
17. Braided Halo With Airy Wave Ends
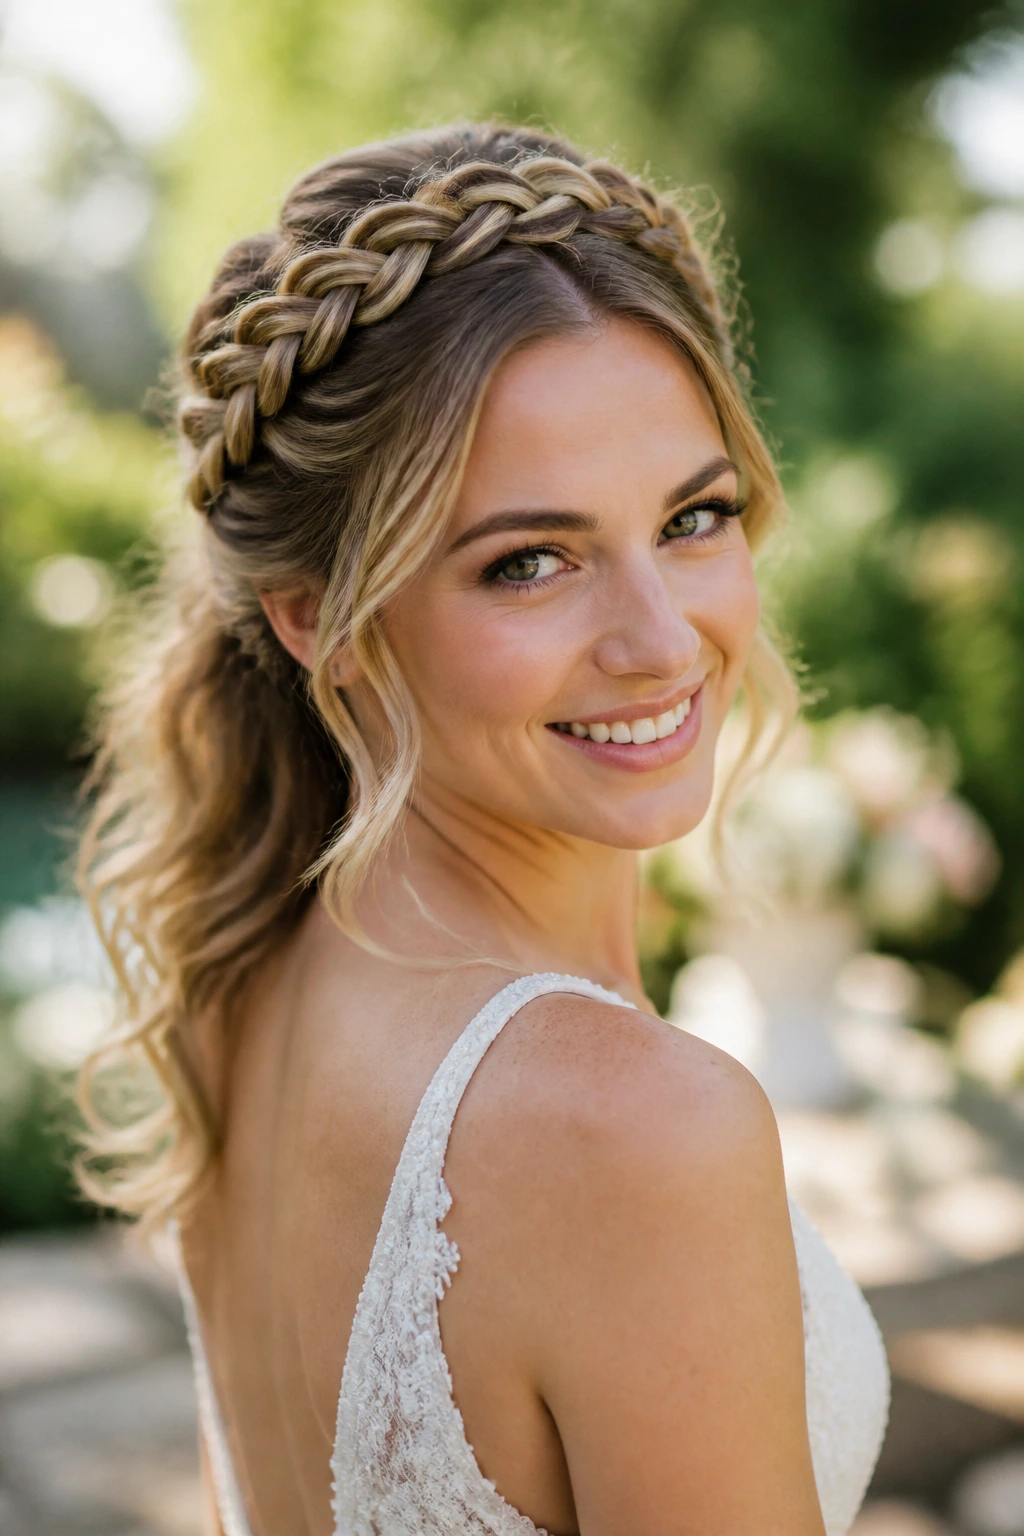
A halo braid gives the top of the head a frame, and that frame makes the loose ends look even softer. Unlike a full crown braid, this version can sit lighter and leave more hair free at the back. It’s a nice choice when the bride wants something secure but not heavy.
The braid should sit just above the hairline and curve around the head without swallowing it. Then the remaining lengths can fall in wide, gentle waves. Keep the ends airy and don’t over-brush them; the braid already gives enough order. Too much smoothing takes away the contrast that makes this style interesting.
This is one of those looks that survives a long day because the structure is built into the top. The waves below can relax a little and still read as intentional. A smart style. Not a fussy one.
18. Low Knot With Cascading Waves
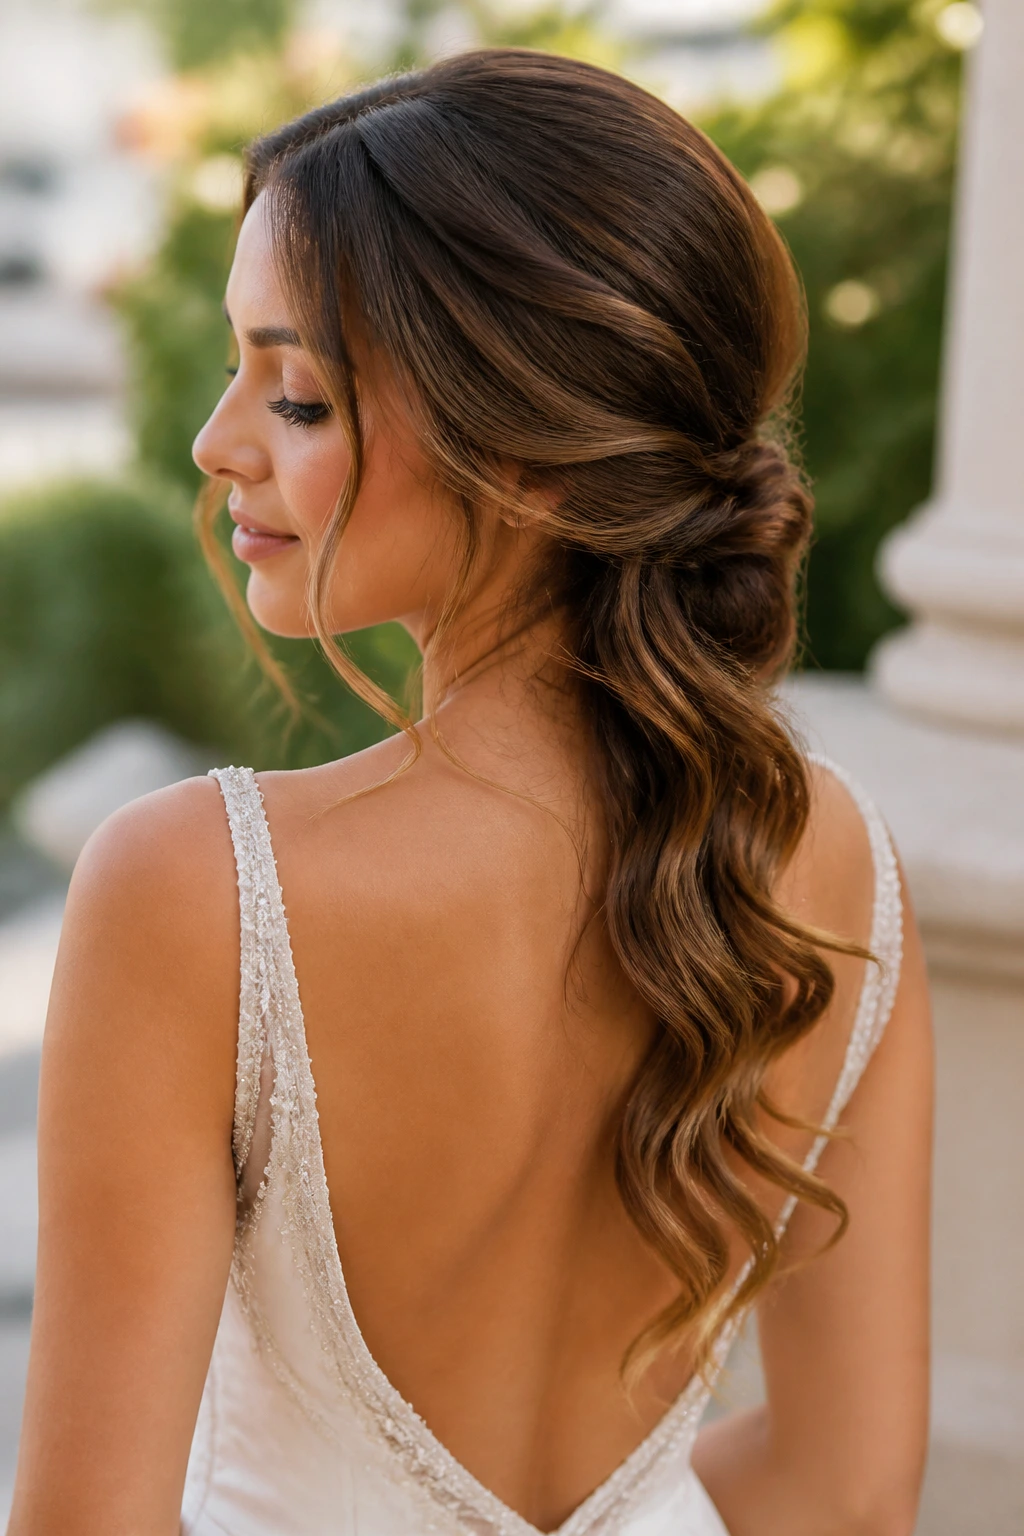
This version is quieter than the twisted bun in item five. The knot sits lower and more asymmetrically, often just off center, and the cascading waves spill from one side instead of hanging evenly. It feels softer, almost like the hair decided to gather itself on the way down.
The knot should be compact but not tight. Pull a few pieces loose around the ears, leave a longer tendril or two in front, and let the wave pattern do the rest. This is especially good for dresses with a slashed back or an open shoulder, because the line of the hair echoes the line of the gown.
I like this on brides who want softness around the neckline without losing the safety of an upstyle. It has a little more shape than a half-up look and a little more ease than a full bun. Somewhere in between. That’s usually where the best bridal hair lives anyway.
19. Windswept Beach Waves With Veil-Friendly Volume
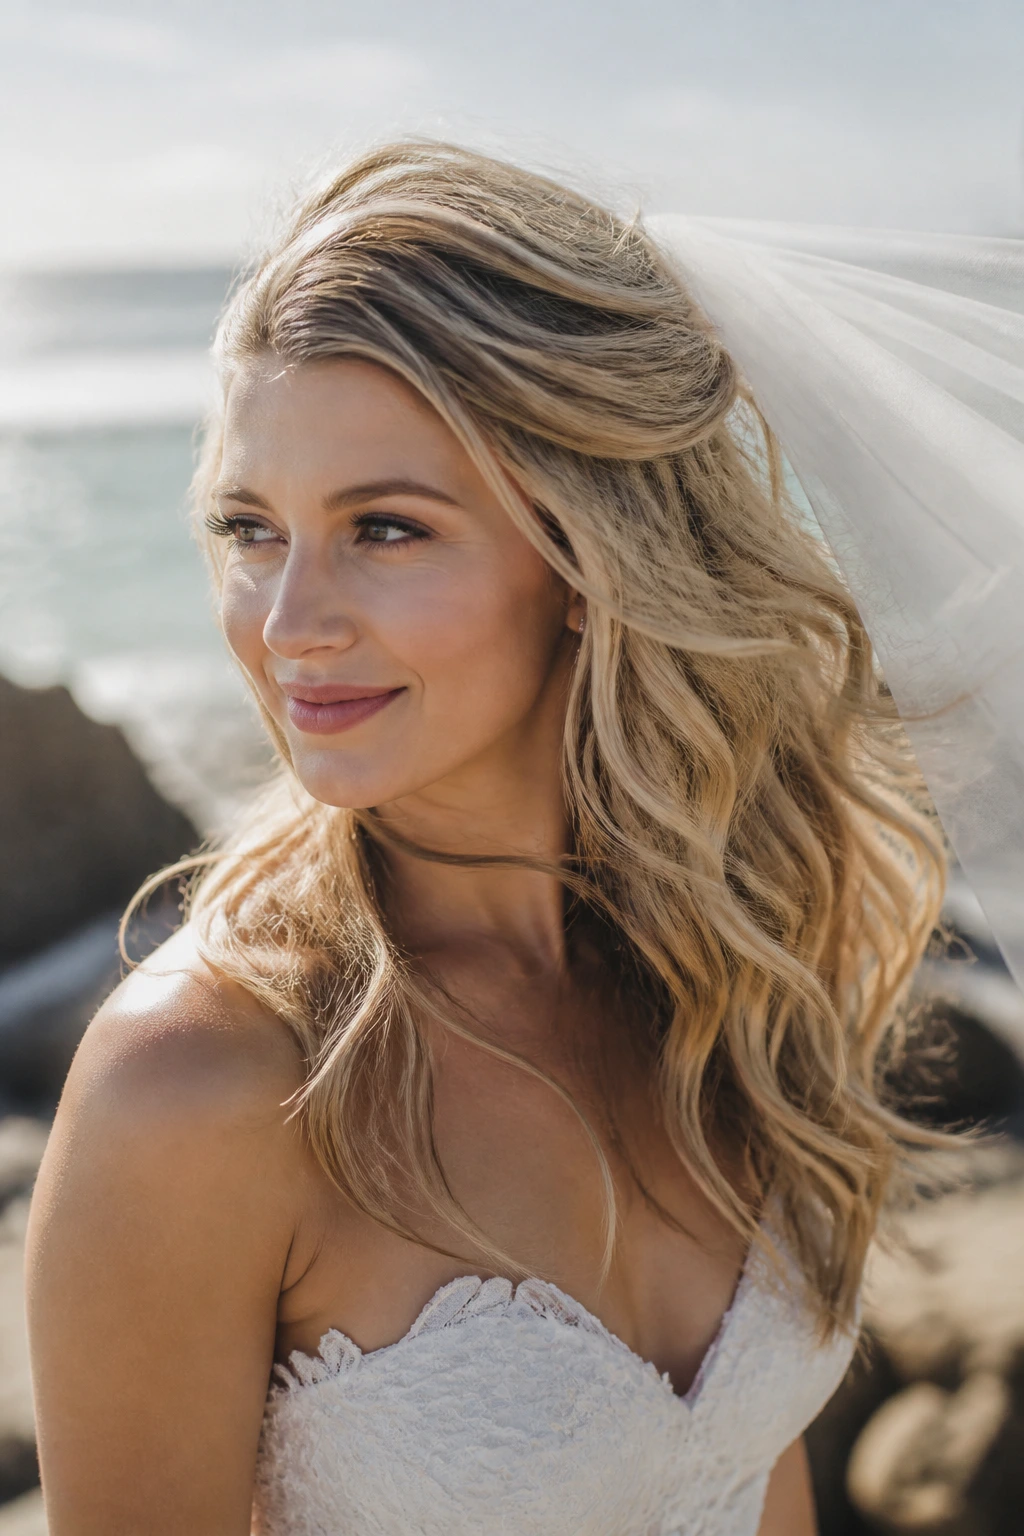
This is the most natural-looking version of the bunch, and it’s not an accident. The crown stays airy but controlled, the mid-lengths get broad bends, and the ends keep enough movement that the whole style still looks good if the weather turns rude. For outdoor ceremonies, it’s the one I trust most.
The veil needs a calm anchor point, so the top section should be lightly set and pinned before any accessories go in. The waves themselves can be looser than usual, but they still need shape at the root and around the front. If the hair is all fluff and no structure, the veil comb will sink into it like a spoon into whipped cream. That is not the look.
What I love here is the honesty. It looks like hair on a real person, not a frozen sample. The bride can walk, laugh, hug, and move her shoulders without the style fighting back. Sometimes that’s exactly the right energy.
Why Bridal Waves Hold Up Better When They’re Built in Layers
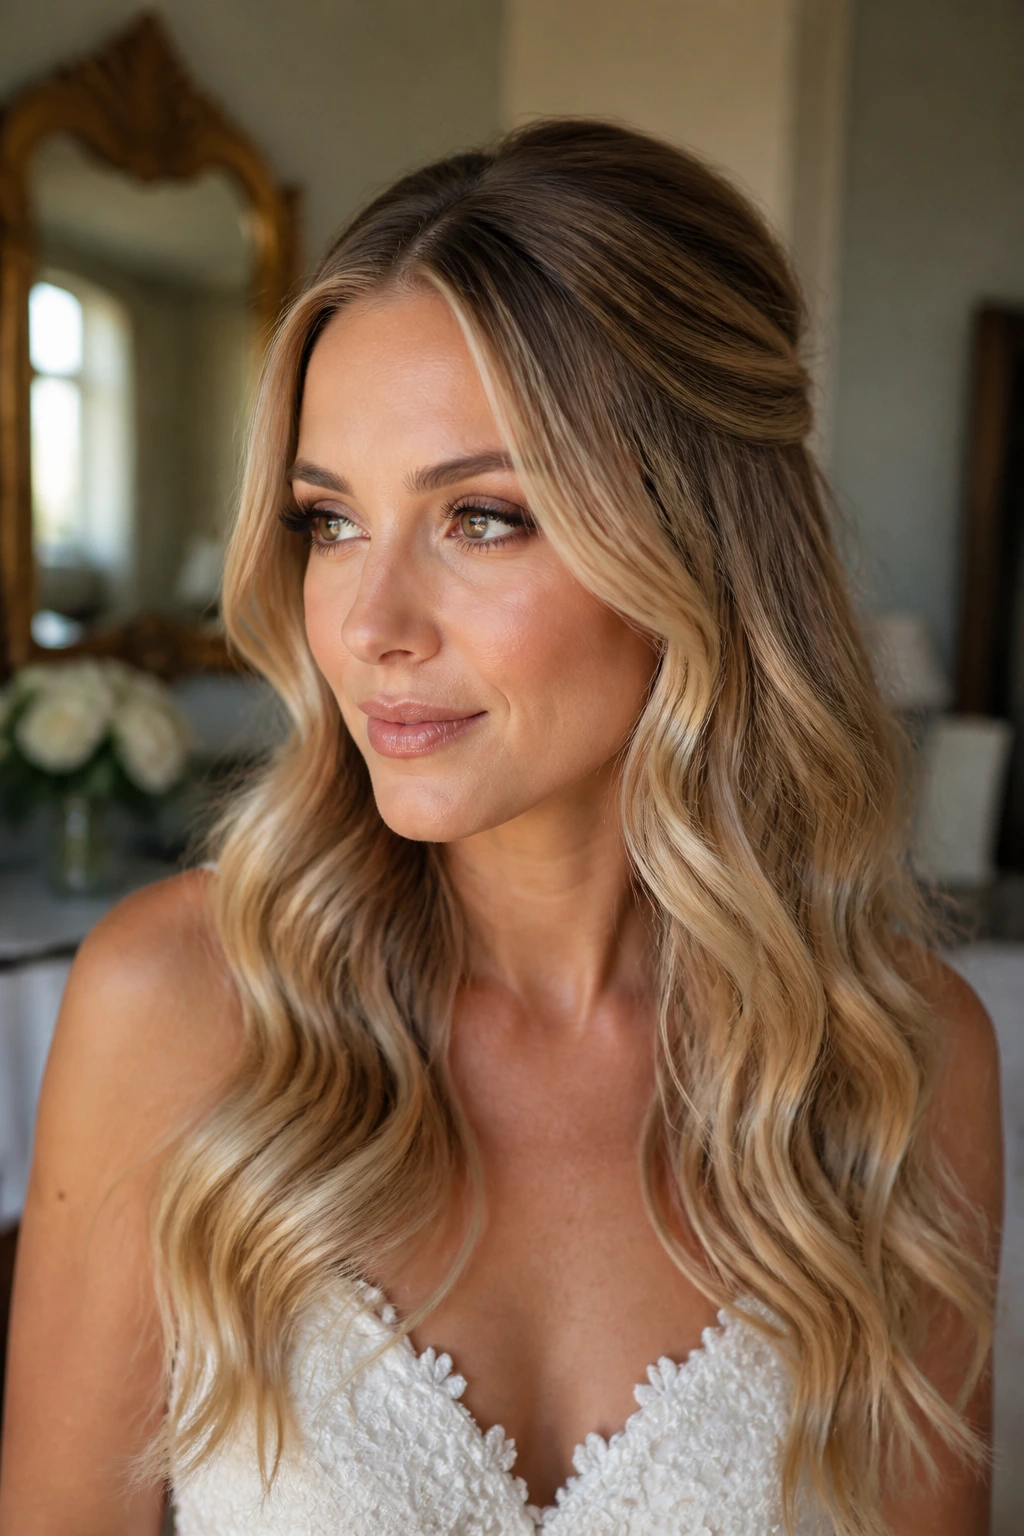
A wave that lasts through a wedding day usually has three things going for it: a clean base, a set shape, and a flexible finish. Miss one of those, and the style starts getting tired before the photographs are done. The crown tells the first story. The mid-lengths tell the second. The ends decide whether the whole thing feels airy or weighed down.
That’s why I’m fussy about prep. A little root support matters more than another round of curling. A light mousse or root spray on damp hair gives the style something to cling to. Heat protectant keeps the outside of the strand from getting scorched and frayed. And once the waves are cool, they need time to settle. If you brush them hot, they lose their memory fast.
The last piece is finish. Flexible spray beats helmet hair every time for bridal waves. The hair should move when you touch it, not crack. That’s the sweet spot.
Essential Tools for These Looks
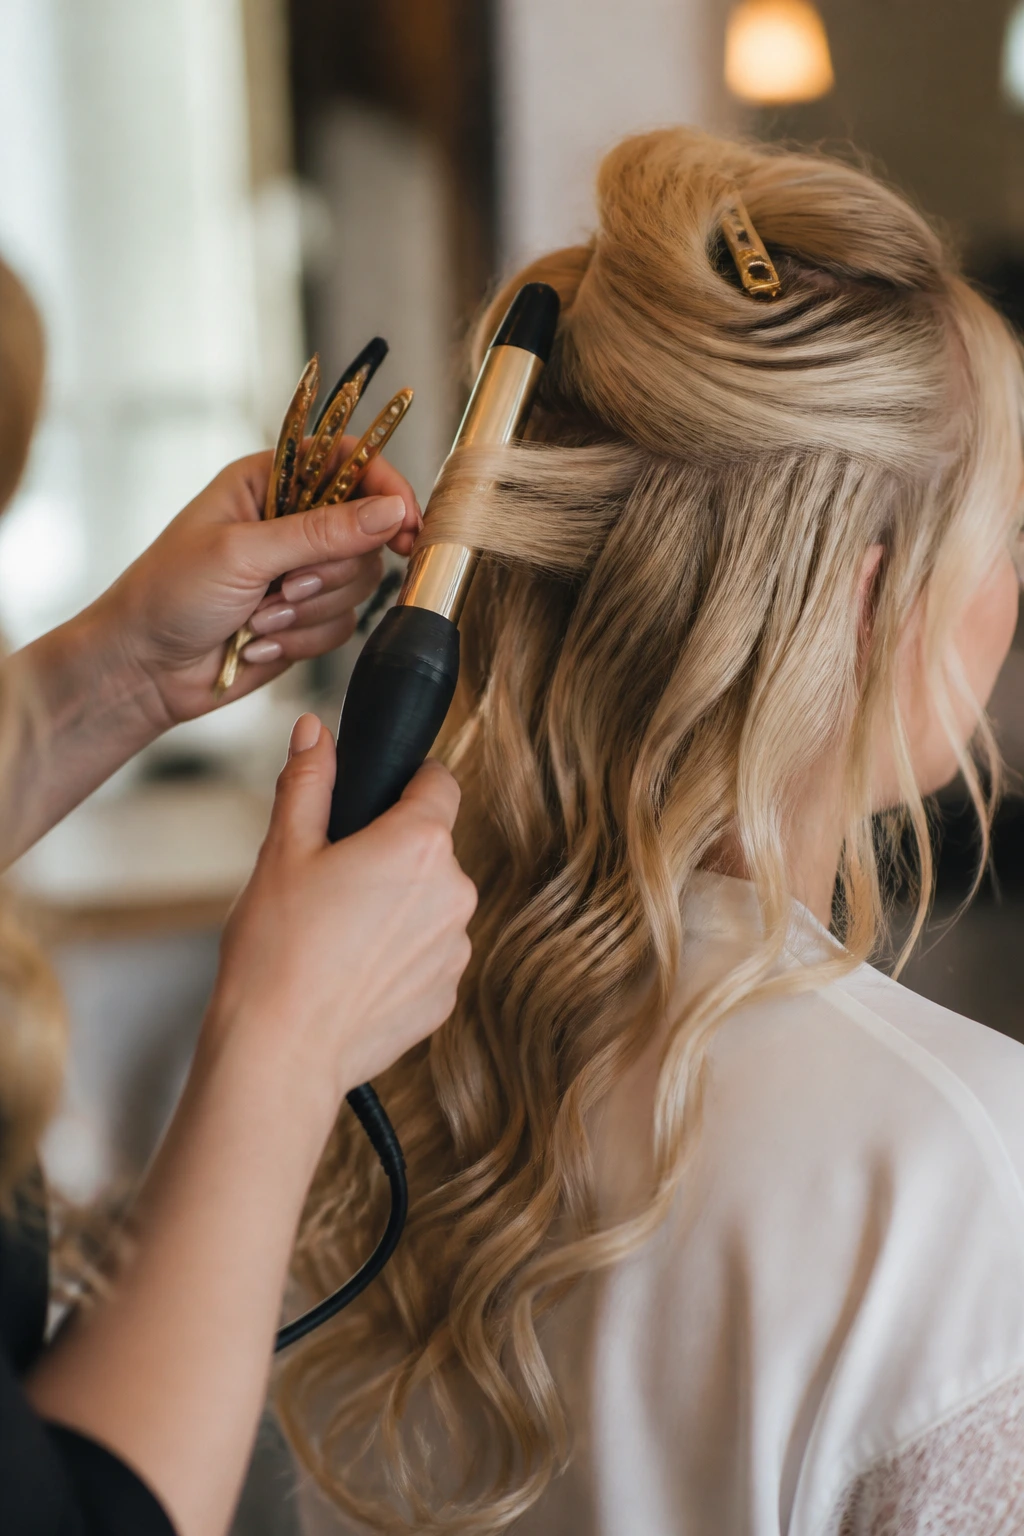
- 1-inch curling wand: Best for shorter hair, tighter control around the face, and styles that need a little more hold.
- 1.25-inch curling wand: The workhorse size for most bridal wave patterns; it gives a soft bend without tiny ringlets.
- Flat iron with rounded edges: Useful for S-bends, polished front pieces, and wave patterns on lobs or fine hair.
- Heat protectant spray: Keep this light and even; it should coat the hair, not soak it.
- Sectioning clips: Duckbill or alligator clips make a cleaner wave because you aren’t fighting the rest of the hair.
- Tail comb: Helpful for crisp parts, veil placement, and small face-framing sections.
- Boar-bristle brush: Great for brushing out curls into smooth waves when you want a glossy finish.
- Wide-tooth comb or fingers: Better for softer, undone looks that should keep a bit of texture.
- Flexible-hold hairspray: Enough grip to last, not so much that the hair freezes.
- Texturizing spray or dry shampoo: Useful at the roots and through the lengths when hair slips too fast.
- Shine serum: Apply sparingly to the mid-lengths and ends only.
- Hairpins and bobby pins that match the hair color: Keep them close. You’ll use more than you think.
- Veil comb or accessory clips: Needed for trials, not just the wedding day.
- Blow dryer with concentrator nozzle: Makes prep smoother and keeps the crown from puffing up.
Smart Prep and Product Choices for Bridal Waves
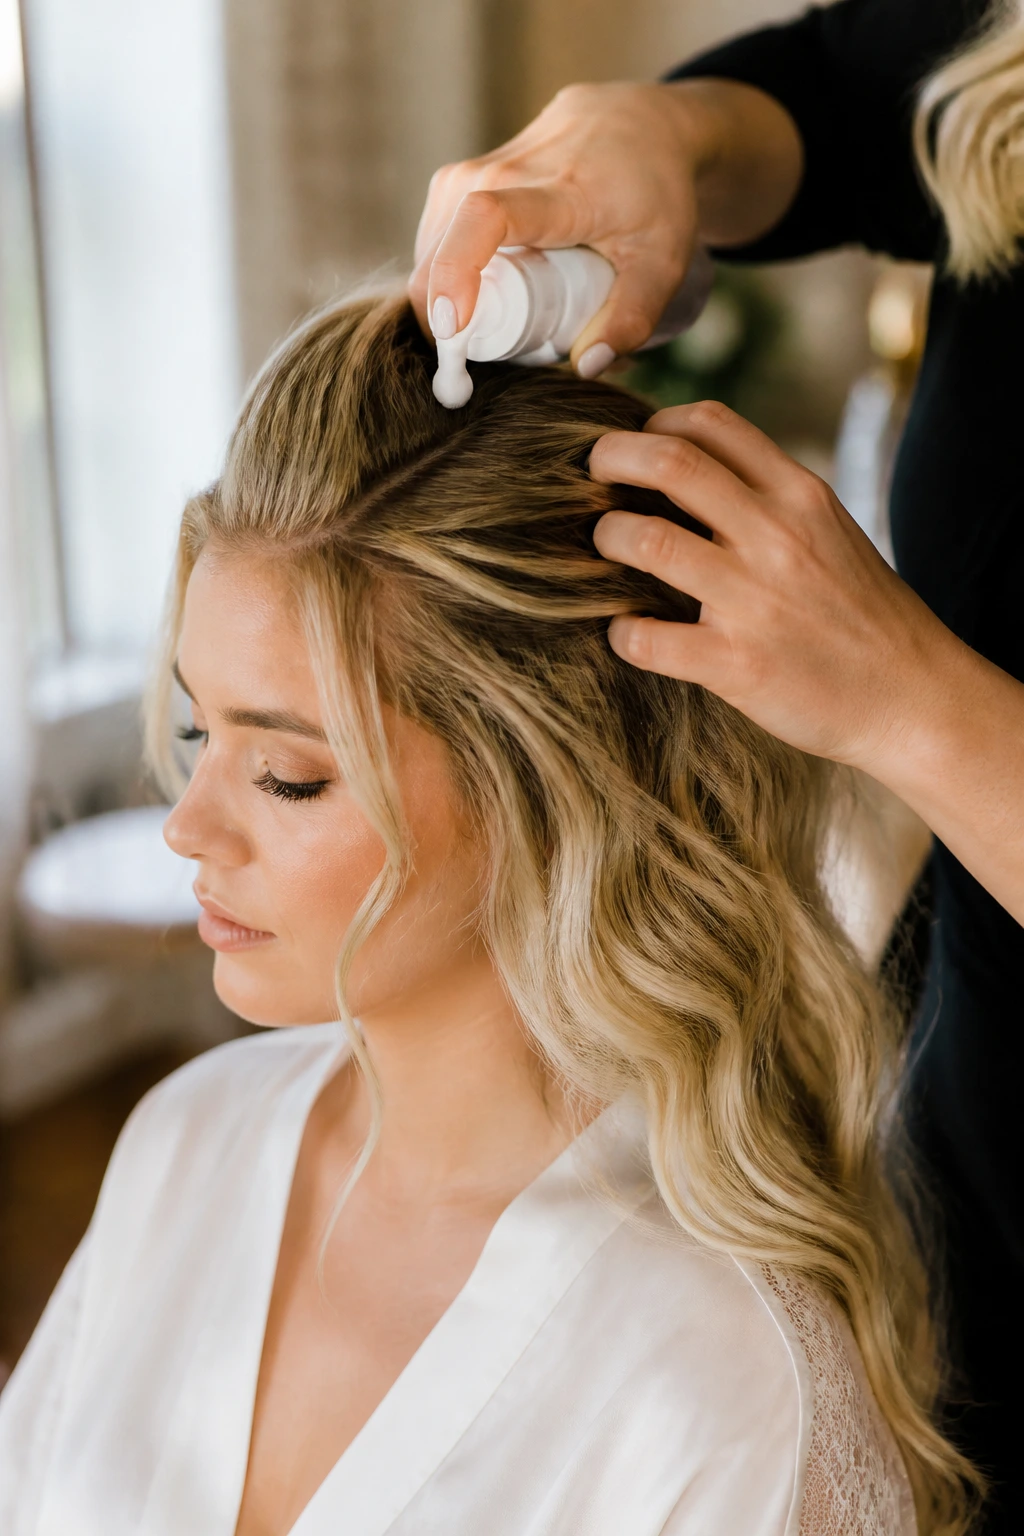
The wave itself is only half the job. The hair has to be ready to hold it. Clean hair can be too slick, especially if it’s fine or freshly conditioned, while very dirty hair can clump and resist shape. For most brides, hair washed the day before works best. It has enough grip to hold a bend, but not so much buildup that the style feels dull.
Product choice should match the texture, not the fantasy. Fine hair usually needs mousse at the roots, a light heat protectant, and a little dry shampoo once the style is finished. Thick or coarse hair often likes a smoother base — a cream or cream-spray combo that cuts down on puff and helps the wave sit flat where it should. If the hair is color-treated or fragile, lower the heat and take smaller sections. It takes longer. It also keeps the ends from looking fried by noon.
Extensions are common here, and they can help a lot, but only if they match the hair’s wave pattern and sheen. Too shiny, and they show. Too matte, and they disappear in a bad way. Curl the extensions together with the natural hair so the texture blends in one pass.
How to Wear These Beach Wave Looks With Veils, Tiaras, and Flowers
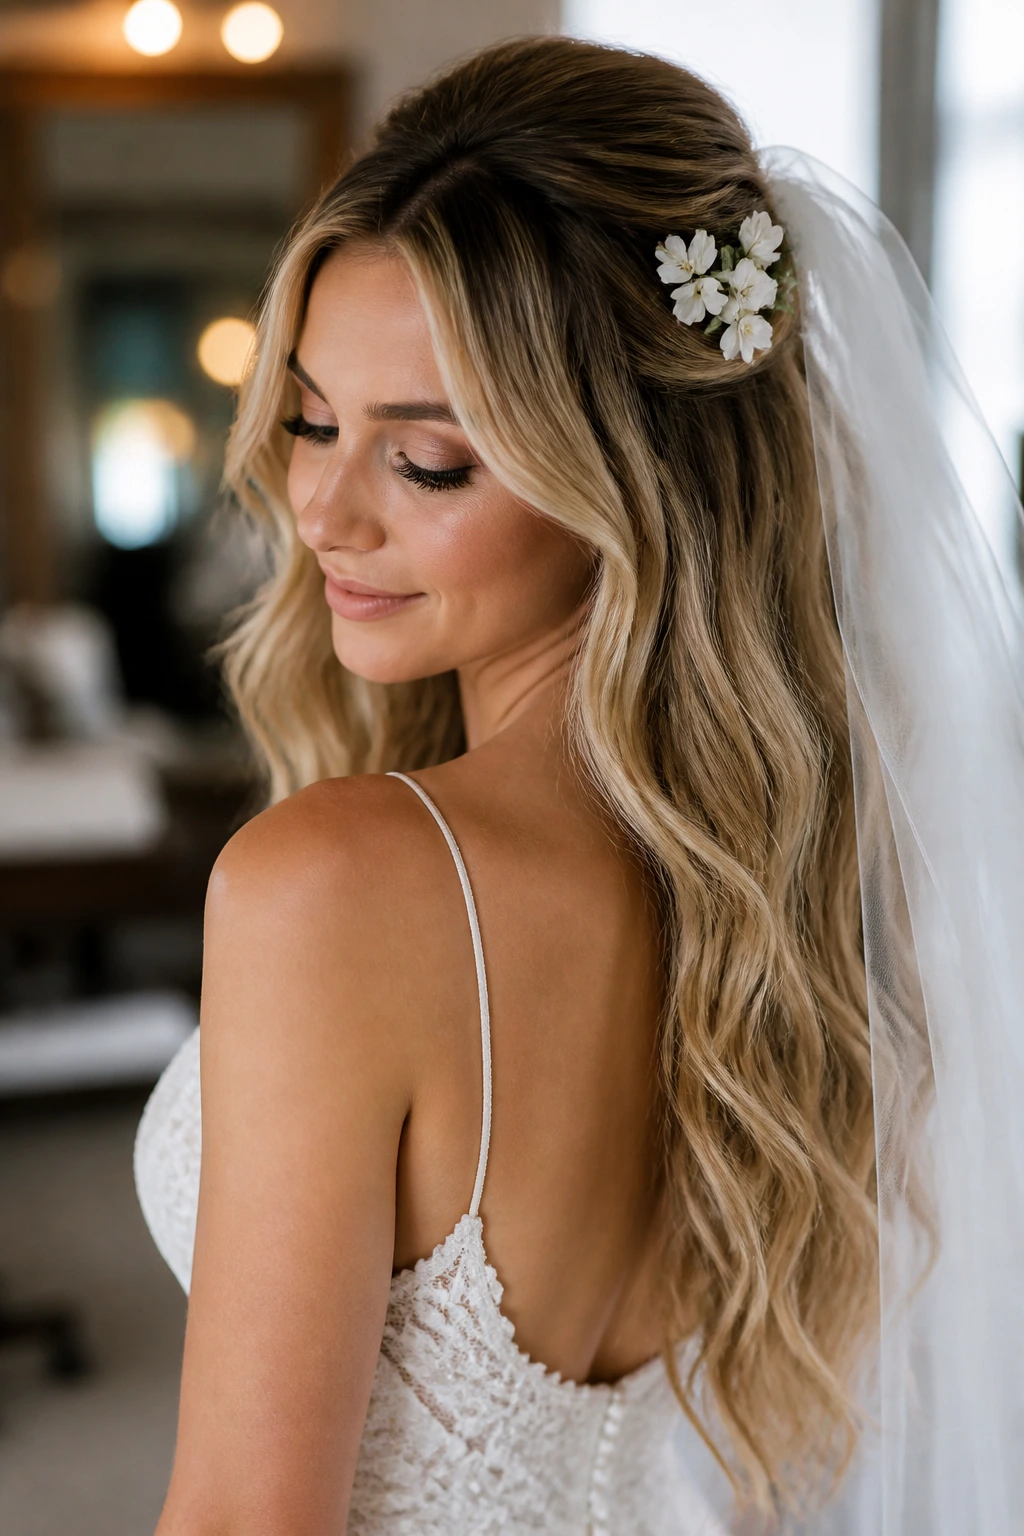
Placement: Put the veil comb or clip into a calmer section of hair — usually the crown or upper back of the head — rather than into the loosest part of the wave. If the comb sits inside the wave itself, the hair dents and the veil slides.
Accessories: Pearls, small crystal pins, combs, and fresh flowers all work here, but use them as punctuation, not wallpaper. One strong accessory near the temple or low back usually does more than four scattered pieces.
Balance: Match the weight of the accessory to the dress. A clean crepe gown can handle a polished side part or a simple comb. A lace dress with more texture often looks better with softer, slightly tousled waves so the hair doesn’t compete with the fabric.
Photos: Think about how the hair will move from the side, not just the front. Side-swept styles show earrings. Center parts show symmetry. Half-up styles reveal the back of the dress. A good trial should include at least one photo from behind, because that’s where a lot of bridal hair surprises people.
Additional Tips and Shine Boosters
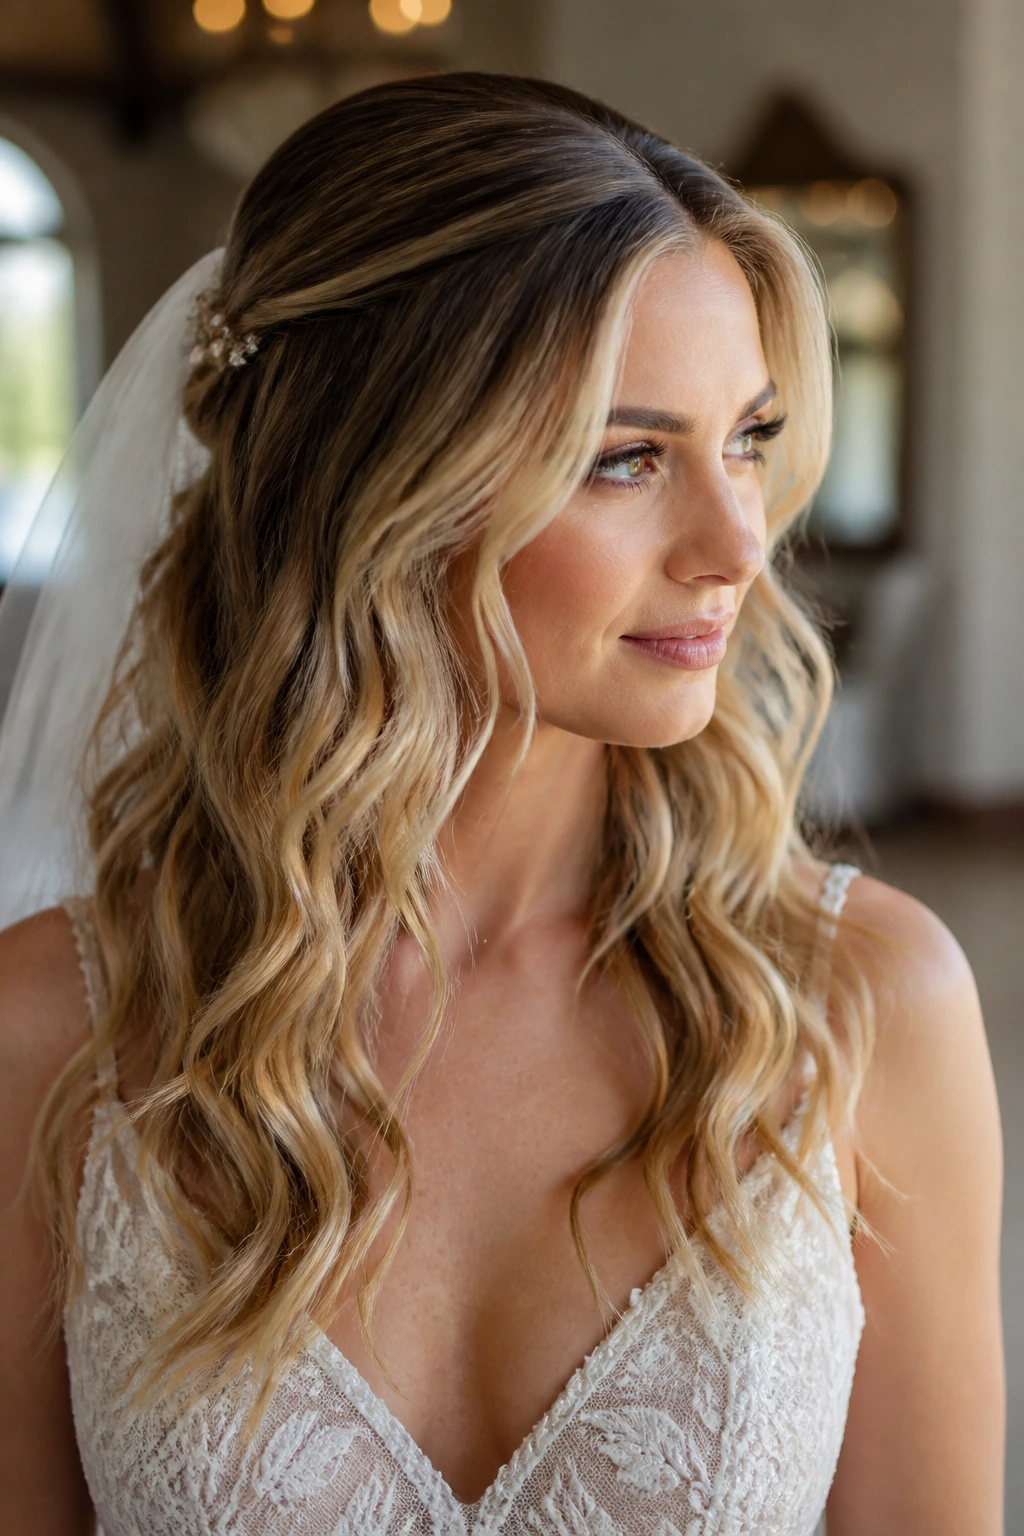
Heat Control: Fine or damaged hair usually behaves best around 300–320°F, while thicker hair may need 330–375°F to actually hold the bend. If the hair smells scorched, the tool is too hot or the section is too small.
Shape Memory: Pinning each warm curl into a loose coil and letting it cool for 10 to 15 minutes makes the style last longer. It’s a little annoying. It also works.
Shine Boost: Use a pea-sized amount of serum on the ends after the style is set, not before. Pre-loading the hair with oil makes it slip before the wave has time to hold.
Customization: If the dress is ornate, keep the waves looser and the accessories smaller. If the dress is plain, give the hair more visible texture or a stronger side part so the style carries some of the visual weight.
Make-It-Yours: Brides who want a softer, more modern feel can leave the front pieces freer and skip the heavy teasing. Brides who want a formal finish can smooth the crown with a light pomade stick and keep the ends more uniform.
Common Mistakes to Avoid
- Curling every section the same way: The result is a tidy row of loops, not a beach wave. Alternate direction through the back and keep the front pieces controlled so the pattern feels loose but not random.
- Brushing too soon: Hot curls fall apart if you brush them while they’re still warm. Let the shape cool first, then break it up with fingers or a soft brush.
- Using too much product at the start: Heavy cream, oil, or too much texturizing spray can flatten the style before it starts. Start light. Add more only where the hair actually needs it.
- Placing the veil in the wrong spot: A veil comb shoved into textured lengths creates a dent and a sag. Anchor it in a smoother section near the crown or upper back.
- Ignoring humidity: Soft waves without enough hold can wilt fast in warm air. A flexible-hold spray with a bit of grip is better than a soft finishing mist that disappears in an hour.
- Leaving the ends too perfect: Bridal waves look stiff when every end is identical. Leave a few tips straighter and vary the section sizes so the finish has movement.
Variations and Adaptations to Try
Humidity-Ready Waves: Use a stronger mousse at the roots, a little less serum, and a firmer flexible spray at the end. This version is better for outdoor ceremonies or any setting where the air feels heavy.
Fine-Hair Lift Waves: Work in small sections, pin each curl as it cools, and keep product light. The goal is not big texture everywhere — it’s a wave that reads thicker because it keeps its shape.
Natural-Curl Harmony: If the bride already has curls or coils, shape a few front pieces with a diffuser or curling tool and let the natural pattern stay visible. Forcing every strand into the same wave often looks less polished than preserving what’s already there.
Short-Hair Bridal Bend: Use a flat iron or small barrel to create soft bends on a bob or lob, then tuck one side with a pin or comb. Shorter hair needs more precision and less volume, which is actually a relief on a long day.
Glossy Modern Waves: Skip the gritty texturizing spray and brush the hair into a cleaner, shinier finish. This version works well with satin, crepe, and more architectural dresses.
Soft-Boho Texture: Add a small braid, a few fresh flowers, or a ribbon at the back and keep the wave pattern relaxed. It suits outdoor weddings and dresses that already have a softer feel.
Make-Ahead, Touch-Up, and Aftercare Guidance
Bridal waves behave best when they’re planned a little ahead of time. For most hair types, washing the day before works better than washing the morning of the event. That gives the hair enough grip to hold curl while still feeling clean. If the hair is very fine, a same-day wash can work, but only if you build the base with mousse and rough-dry it well.
A trial run should happen at least once before the wedding, not because the style is complicated, but because veil placement, accessory placement, and wave size can change the whole look. If the hair needs to survive several hours, set the style with pins or clips and let it cool fully before removing them. That extra cooling time is not glamorous, but it matters.
For touch-ups, keep a small wand, a compact hairspray, and a couple of pins nearby. The front pieces usually need the first refresh, especially around the face and temple where people keep touching the hair. A quick 3- to 4-minute re-bend is usually enough to bring the style back. After the event, sleep on a silk pillowcase or loosely braid the lengths so the waves don’t flatten into a tangle.
Frequently Asked Questions
Can beach waves actually last through a full wedding day?
Yes, if they’re set properly. The difference is in the prep: cleanish day-old hair, heat protectant, a cooling step, and a flexible spray with enough grip to hold shape without turning stiff.
Should bridal waves be done on clean hair or dirty hair?
Most of the time, hair washed the day before behaves best. Freshly washed hair can be too slippery, while hair that’s gone too long without washing can clump and look dull.
What barrel size works best for bridal beach waves?
A 1.25-inch wand is the safest starting point for medium to long hair. Use a 1-inch tool for shorter cuts or finer hair, and go larger only if the wave needs to stay very soft.
Can I wear a veil with loose waves?
Yes, but the veil needs a stable anchor. Put the comb into a smoother section of hair near the crown or upper back, not directly into the loosest texture.
How do I keep the style from falling flat at the roots?
Set the root area with mousse or a root-lifting spray before drying, then avoid piling oil or serum near the scalp. A little dry shampoo at the crown can help the part stay open.
What if my hair is naturally curly or frizzy?
Work with the hair’s texture instead of flattening it completely. Shape the front and top pieces, then define the lengths so they look controlled, not erased.
Do these looks work for short hair?
Absolutely. A lob or bob can wear some of the nicest wave patterns in this group because the shape stays visible all the way through. Just use smaller sections and keep the ends a little loose.
How much should I brush the hair after curling?
Less than people think. Once the curls are cool, break them up with your fingers or a soft brush if you want a smoother finish. Over-brushing turns waves into puff.
Can I add flowers or a comb after the hair is styled?
Yes, and that’s usually the right order. Place the accessory after the shape is set so you don’t flatten the wave pattern while you’re working.
A Soft Finish That Still Feels Like You
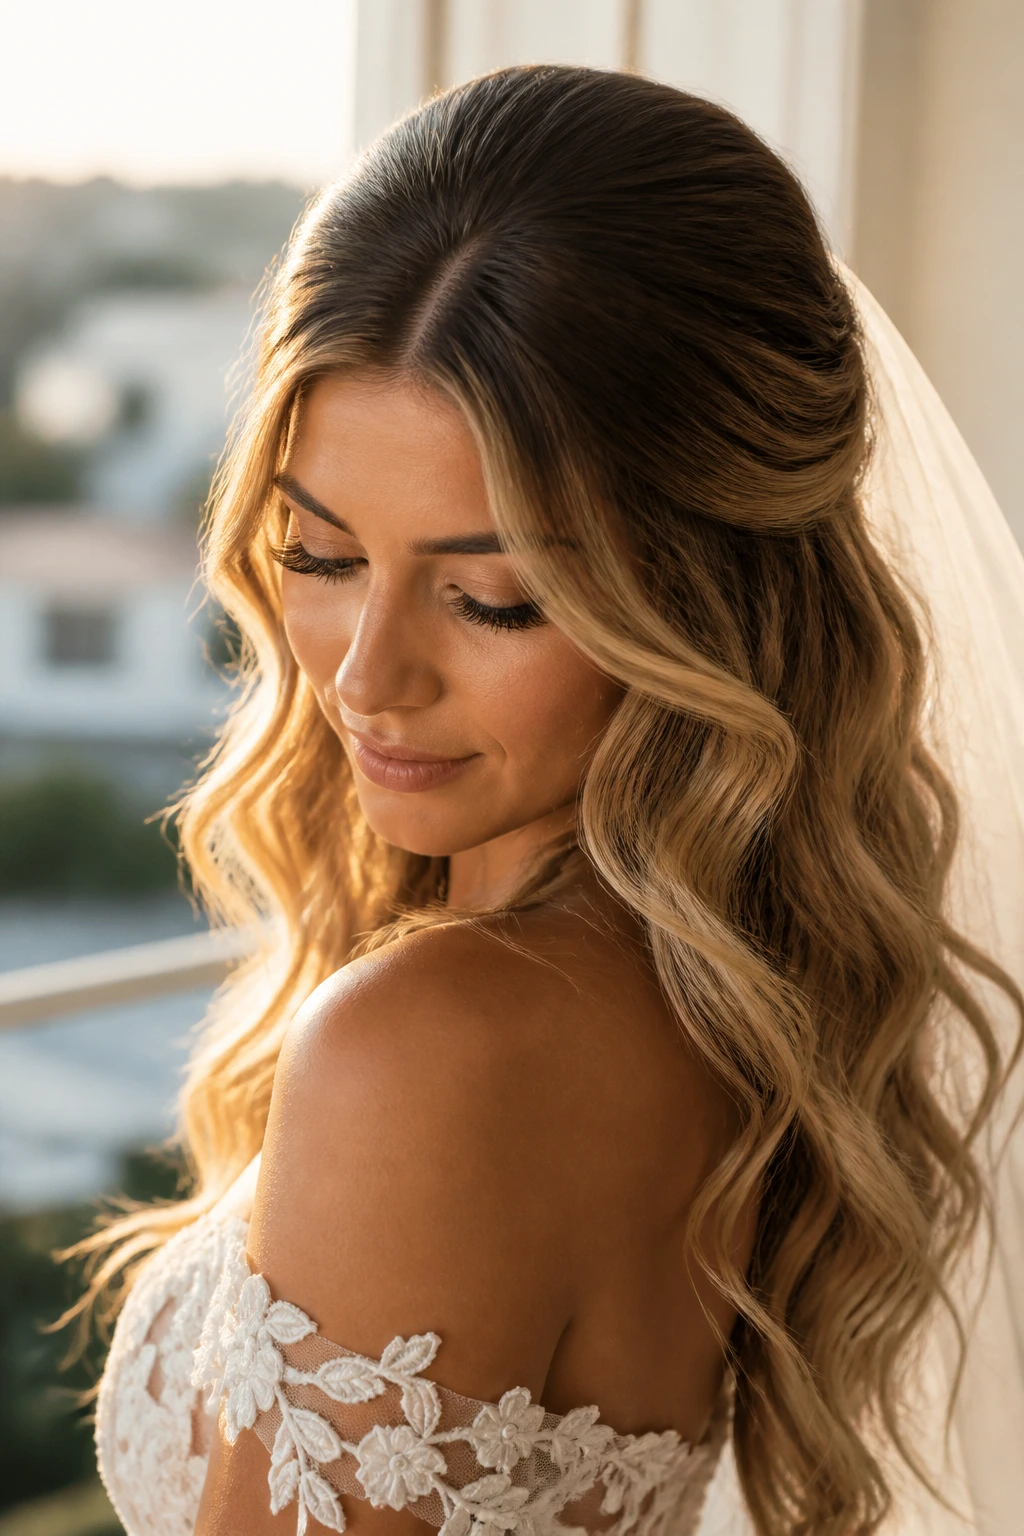
The best bridal waves are not the ones with the most curl. They’re the ones that stay calm at the top, keep their shape in the middle, and still move when you turn toward the light. That’s a small thing on paper. In real life, it’s the difference between hair that looks styled for the ceremony and hair that still looks good after the last toast.
Pick the version that matches the dress, the veil, and the way you actually wear your hair when you want to feel like yourself. Some brides need gloss. Some need texture. Some need the braid, the pin, or the ribbon to make the whole thing click. Get that part right, and the waves take care of the rest.
