



Prom updo hairstyles live or die on one detail: whether they still look intentional after dinner, a hundred phone flashes, and one too-enthusiastic spin on the dance floor.
The styles that work best are rarely the most complicated. They usually have a clean anchor at the nape or crown, a little softness around the face, and enough pinning to survive humidity, dancing, and the simple chaos of taking a jacket on and off in a crowded room. If the base is weak, the whole look starts to slide. If the crown is too flat, the style reads tired before the night even begins.
I’ve always liked an updo for prom because it does real work. It clears the neckline, gives earrings space, and lets the dress keep its shape instead of fighting with a curtain of hair. The trick is choosing the right structure for your texture and your dress — not just piling hair up and hoping the bobby pins hold a grudge.
Why You’ll Love These Styles
-
They keep the neckline open: A lifted shape shows off strapless, one-shoulder, halter, and sweetheart dresses instead of swallowing them.
-
They hold up better than loose curls: Hair that’s pinned in sections tends to survive dancing, hugging, and warm rooms with less collapse.
-
They work with more hair textures than people think: Straight, wavy, curly, and coily hair all have their own version of a good updo.
-
They make accessories look smarter: Earrings, hair combs, and statement makeup read more clearly when the hair isn’t competing for attention.
-
They can be soft or sharp: You can go polished, romantic, sculpted, or slightly undone without changing the basic idea.
-
They give you control: If you don’t want hair on your neck, in your lip gloss, or stuck to your shoulders, an updo solves that fast.
How to Match Prom Updo Hairstyles to Your Dress and Hair Texture
A prom hairstyle should work with the dress, not just sit on top of it. That sounds obvious, but I see a lot of styles that ignore the neckline and end up fighting the whole outfit. A sharp bun can make a beaded dress feel cleaner. A braided crown can soften a plain satin gown. A side-swept updo can echo an asymmetrical shoulder and make the whole look feel deliberate.
Neckline:
A strapless or sweetheart dress can handle more hair around the sides, so soft chignons, side buns, and braided crowns tend to look balanced. High necklines and halters usually want something tighter and cleaner at the back, because too much width around the head can crowd the shape of the dress.
Hair texture:
Fine or slippery hair needs grip first — dry shampoo, texture spray, and a bit of root lift make a huge difference. Thick hair can carry larger buns and braids without looking bulky. Curly hair looks best when the style respects the curl pattern instead of flattening it into something that belongs on a mannequin.
Face shape:
More height at the crown lengthens the face. More width around the temples softens a long face. A low side bun usually eases a sharper jawline, while a sleek middle-part knot gives a round face a little extra length.
Accessories:
If the dress already has heavy beading, one hair accessory is enough. If the dress is plain, the hair can carry more shine, more braid, or a pin cluster without looking crowded.
Start there, and the rest gets easier. The wrong updo usually looks wrong because it ignores the clothing, the texture, or both.
1. The Soft Low Chignon
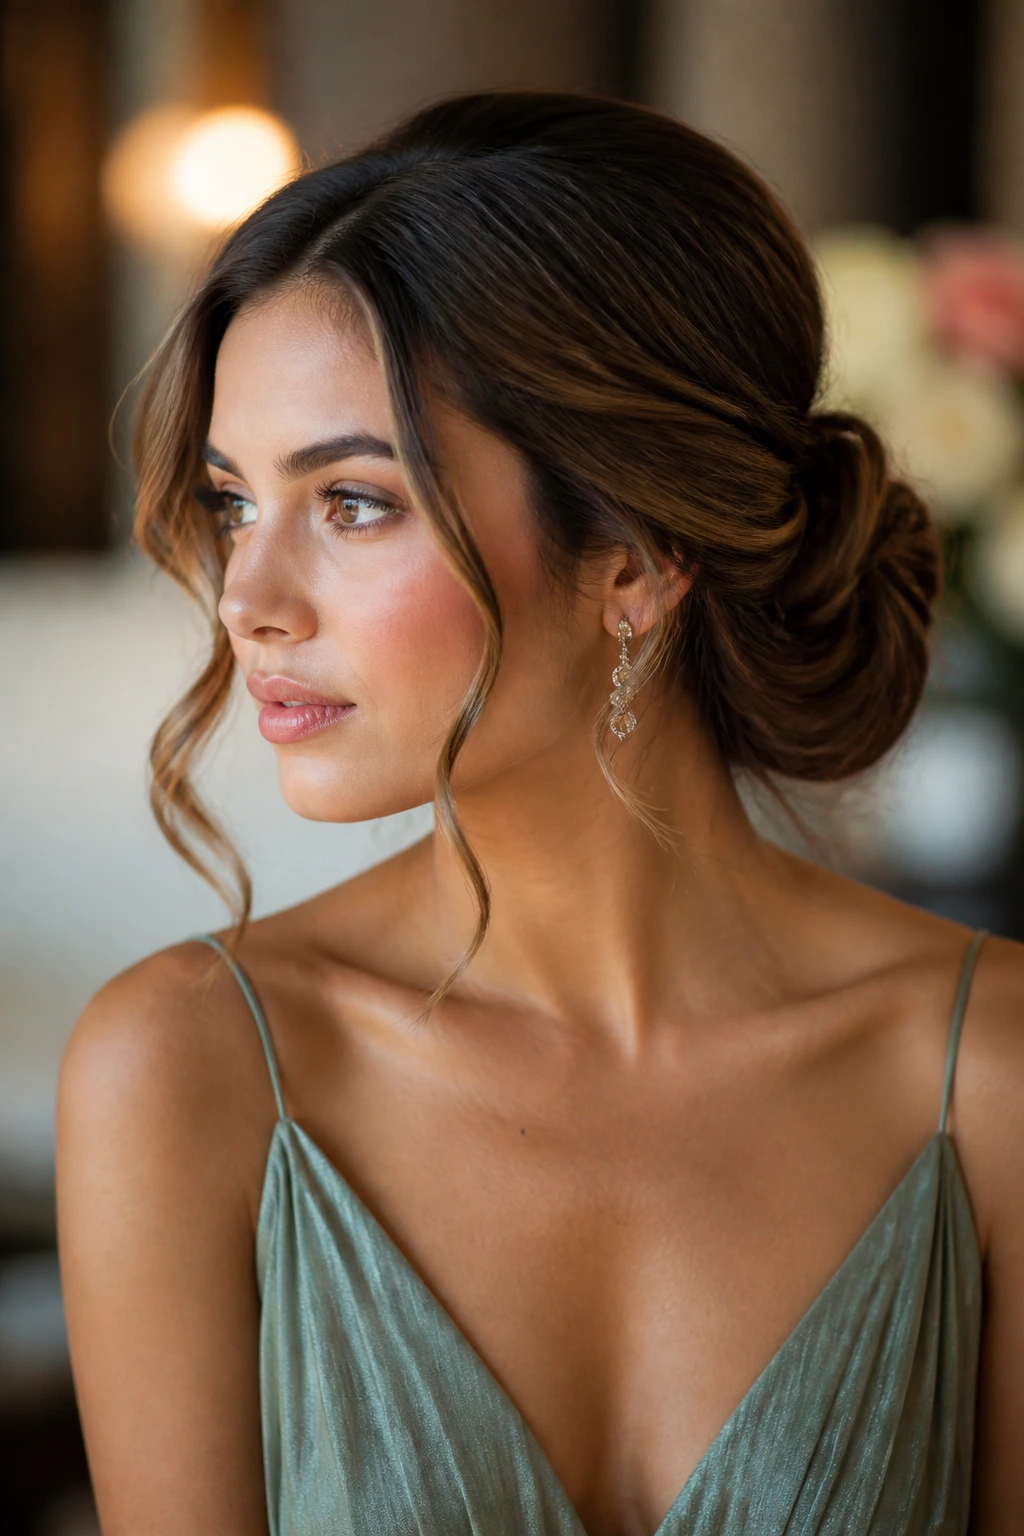
A soft low chignon is the prom updo I recommend when someone wants polish without stiffness. The bun sits at the nape, wrapped into a compact roll with just enough looseness at the edges to keep it from reading like a recital hairstyle from the side. It’s calm. Very calm. And that’s the point.
The best version keeps the crown smooth, not flat. A little lift at the top gives the face some air, and the front pieces — if you choose to leave any out — should curve toward the cheekbones rather than hang straight down. I like this with satin, crepe, and minimalist dresses because the bun doesn’t compete with the fabric.
Where it shines
- Strapless and square necklines
- Drop earrings and pearl studs
- Medium to thick hair with a little natural bend
The chignon also hides small imperfections well. If one side sits a touch higher, nobody notices once the hair is wrapped and pinned correctly. That’s one reason this style shows up so often in formal work: it’s forgiving, but it still looks composed.
2. A Braided Crown Bun That Frames the Hairline
Why does a braid make a bun look richer? Because it gives the eye something to follow before it reaches the knot. The braid acts like a frame, and the bun becomes the center of the picture instead of just a pile of pinned hair. That small shift changes the whole feel of the style.
This one works especially well when you want texture near the hairline but not full volume all over the head. A Dutch braid or soft French braid across the front keeps flyaways under control and gives the style enough detail to look finished from every angle. If your hair is layered, braid slightly tighter than you think you need to. Layers always try to escape.
The bun can sit low or mid-level, but I like it best when it stays compact. Too large, and the braid-bun combination starts looking busy. Keep the braid soft at the edges, not pancake-flat, so it doesn’t feel too hard against the face.
3. The Sleek Ballet Bun
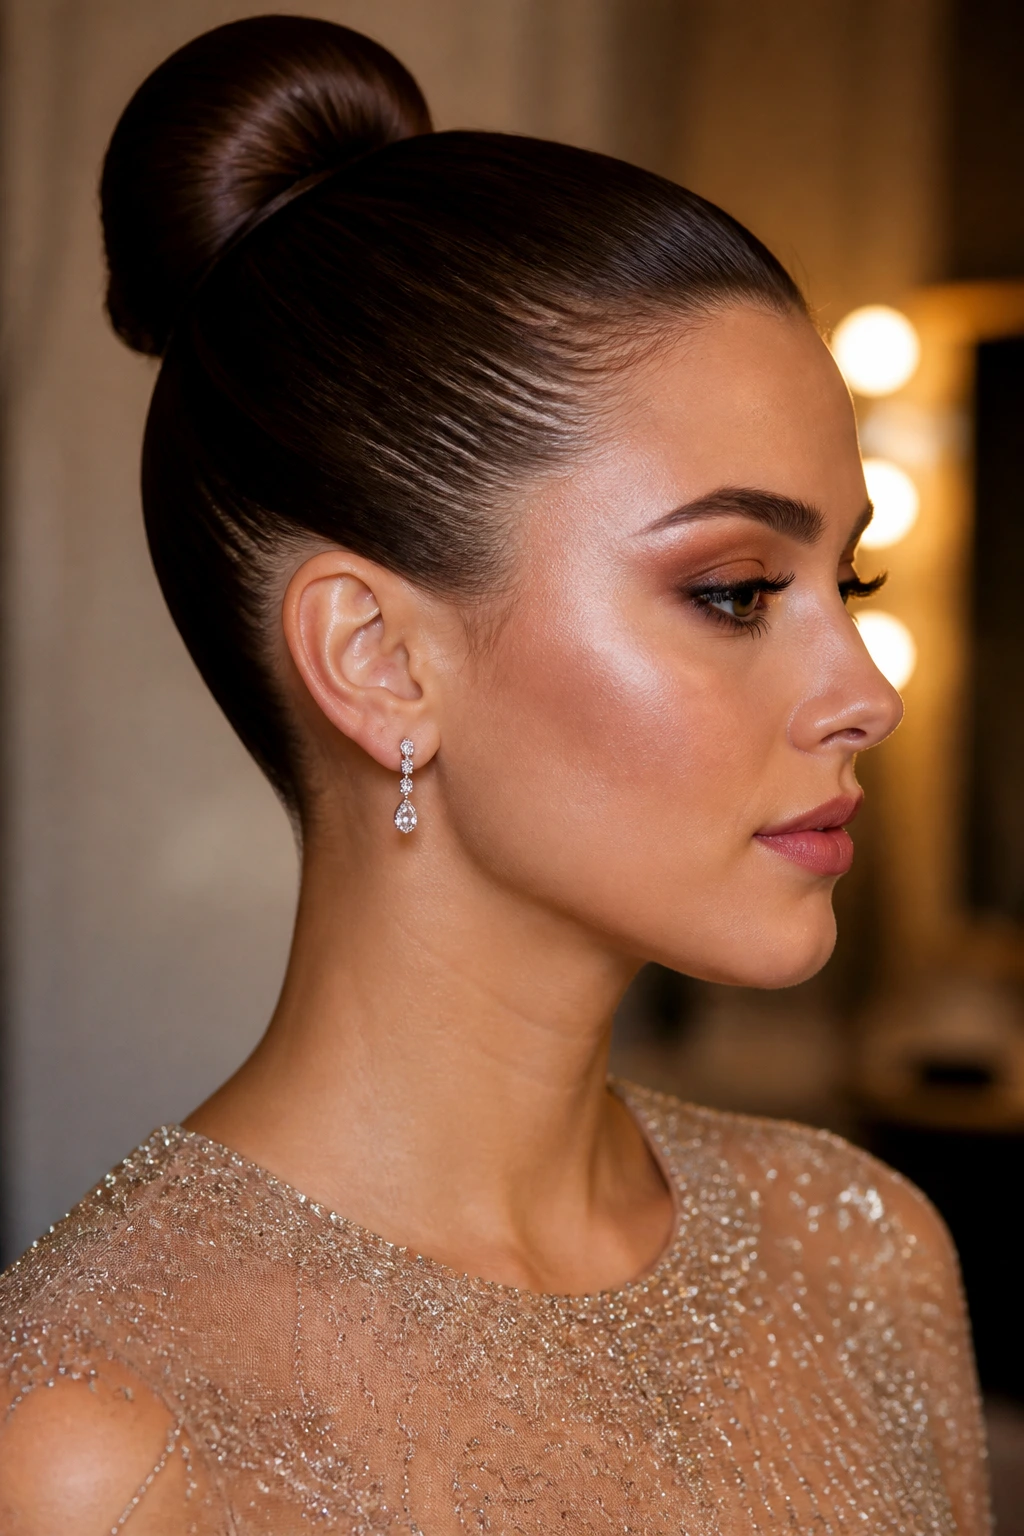
The sleek ballet bun is for the person who likes a clean line and doesn’t want stray pieces flirting with the flash. It’s centered, tight, and neat, with the kind of symmetry that makes a dress look more architectural. If your gown has beading, feathers, or an unusual neckline, this is the style that steps back and lets the outfit speak.
What makes it work is control. The roots are smoothed with a comb, the bun sits at a precise point on the head, and the finish stays glossy without turning greasy. I’d use a small amount of shine cream on the surface only, not at the roots, because roots that look oily read flat in photos. Flat is the enemy here.
This is one of the few prom styles that looks even better when it’s a little severe. That clean edge is the appeal. Just make sure the bun is anchored properly — a ballet bun that starts wobbling after twenty minutes is not elegance. It’s a warning.
4. Twisted Low Bun With Face-Framing Pieces
A twisted low bun with face-framing pieces is the style I reach for when a dress has a softer shape. Instead of one large knot, the hair is split into sections, twisted back, and pinned into a low bun with a little space between the loops. It looks relaxed, but not careless. Those are not the same thing.
The face-framing pieces matter. Curl them away from the face with a 1-inch iron or a wand, then leave them loose enough to move. If they’re pinned too tightly, the style starts feeling overworked. If they’re too long and straight, they look accidental. The sweet spot is a soft curve that skims the jaw.
This one is good for people who want the updo to feel a little warmer and less rigid. It pairs well with lace, chiffon, and dresses that already have movement in the fabric. If the dress has a sharp neckline, this softens it without making the whole look sleepy.
5. The Textured Messy Bun Done on Purpose
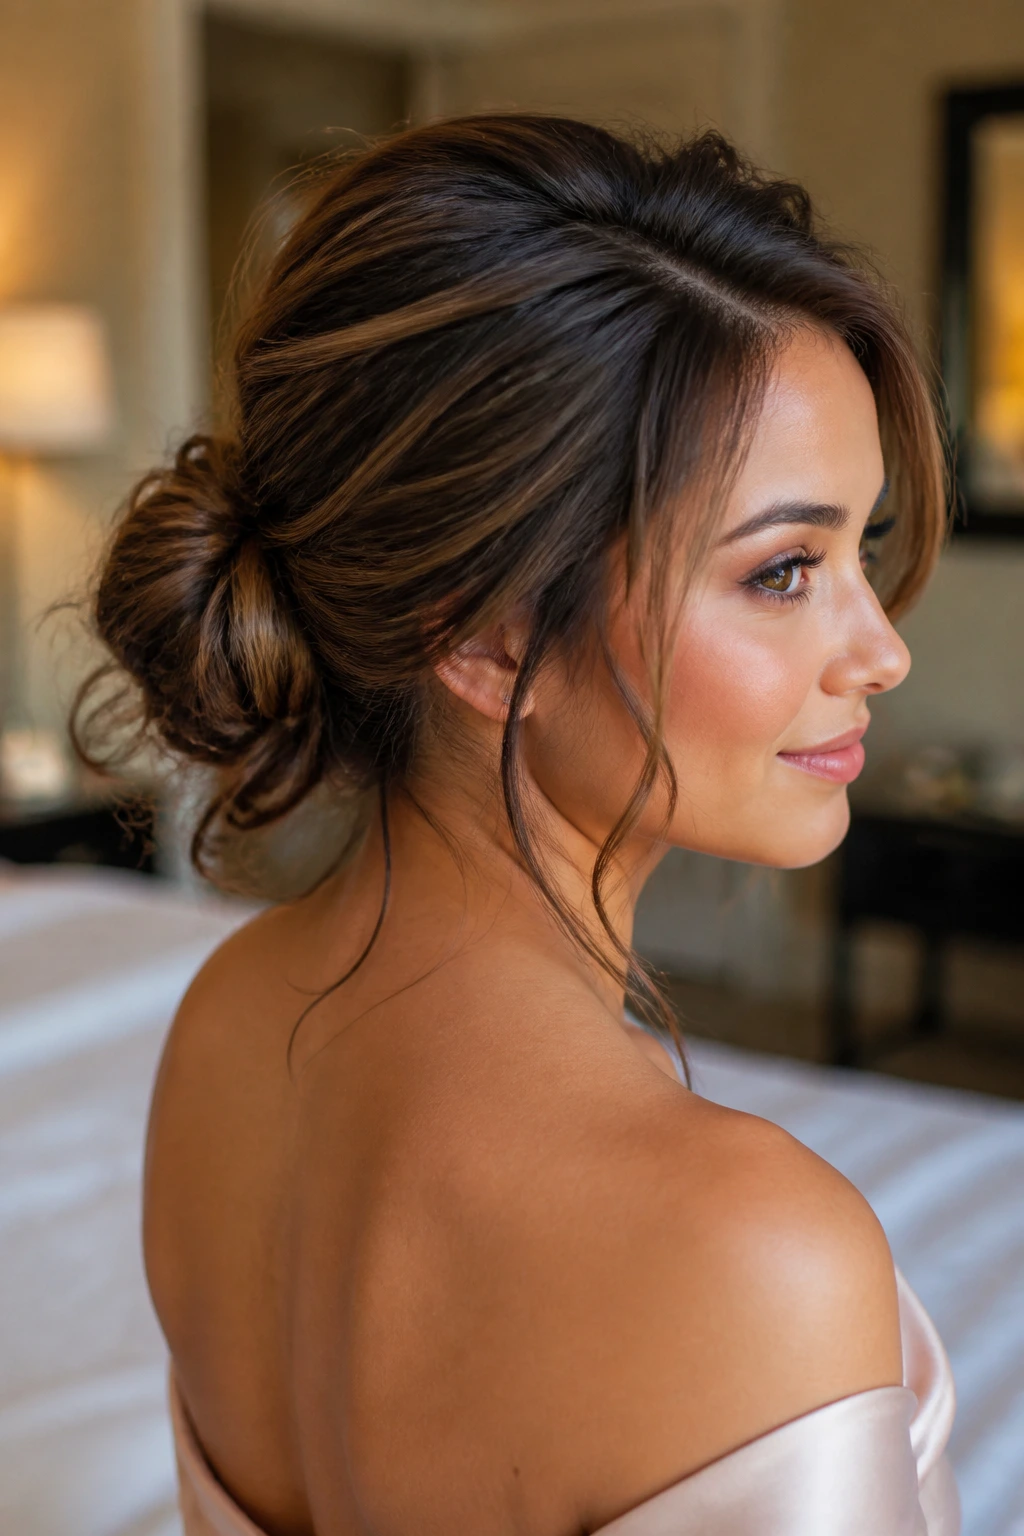
This bun should feel touchable, not sloppy. That’s the line. The “messy” part belongs in the texture and the shape, not in the structure. The base still needs pins. The crown still needs some lift. The ends should be tucked where they can be seen just enough to look intentional.
I like this style when the dress is simple and the hair needs some personality. A little backcombing at the crown, a bit of texture spray at the lengths, and a few pieces left airy around the face are enough. The bun itself should sit where the head naturally starts to curve inward — not too high, or it turns into a top-heavy knot.
Do not make the mistake of calling any loose bun “messy” and leaving it there. A real textured bun has shape. You should be able to point to where the volume lives and where the hair is anchored. If you can’t, the style will wilt before the photos are over.
6. Curly High Pineapple Updo
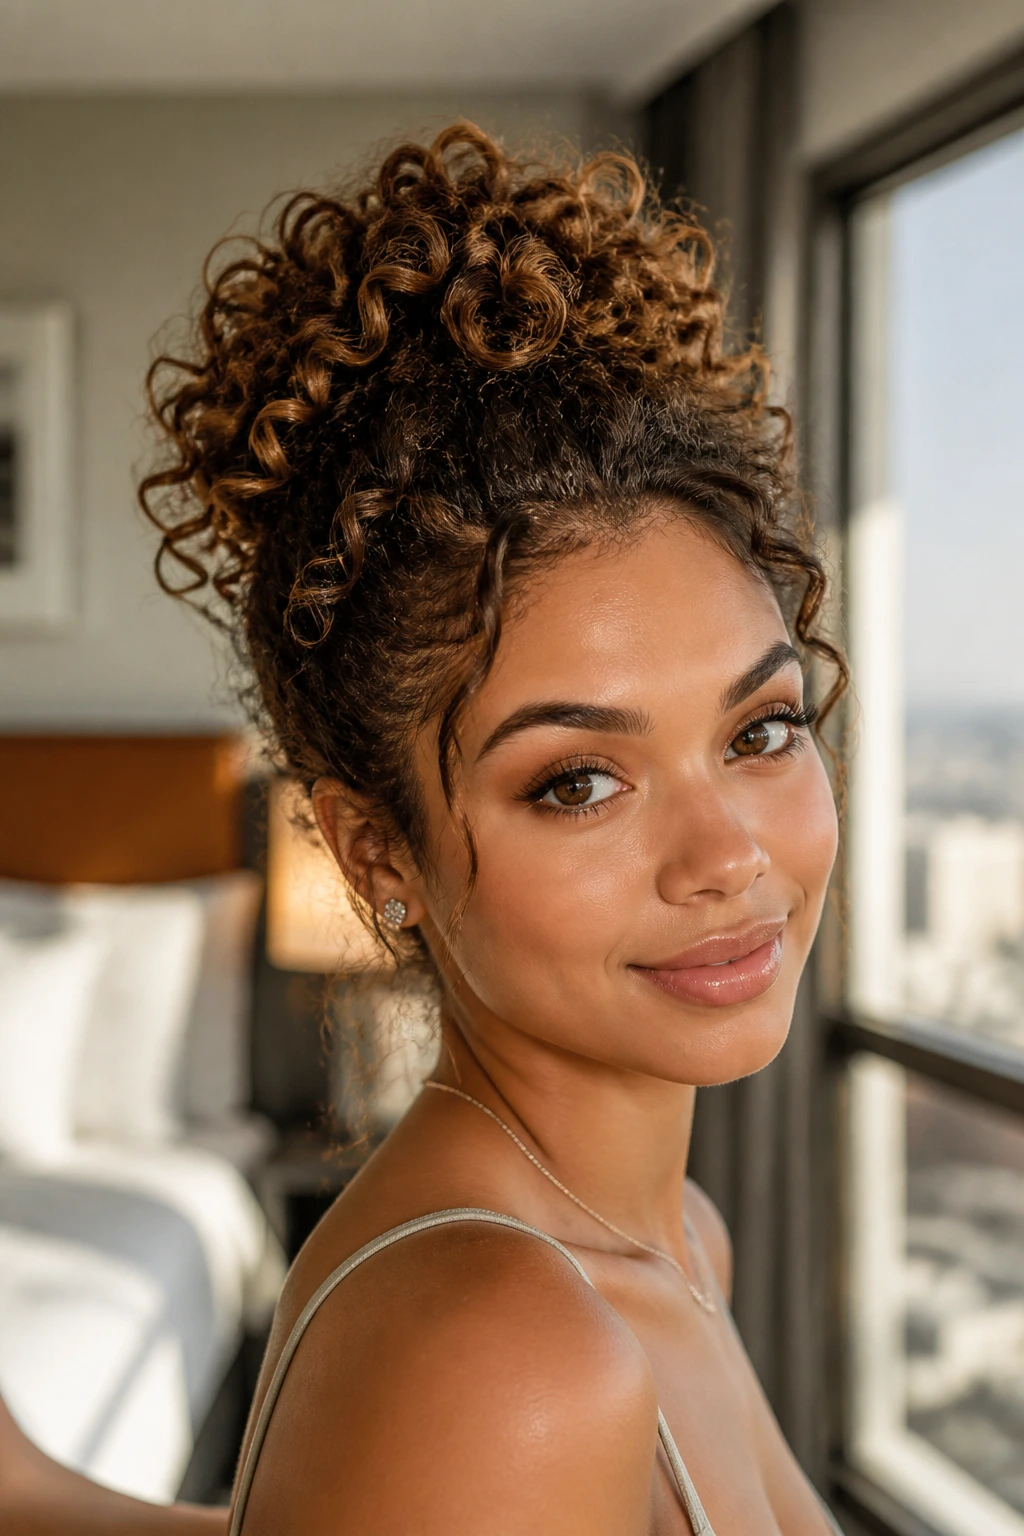
Curls deserve their own architecture. A curly high pineapple updo keeps the curl pattern visible while lifting the length away from the neck and shoulders. It’s one of the best prom updo hairstyles for natural curls because it doesn’t try to flatten the hair into a shape that doesn’t belong to it.
The trick is to gather the curls high enough to show off the face, but not so high that the style becomes a cartoonish puff. Pin the sides back loosely, let the top retain its spring, and use edge control only where you actually want the line to be clean. Over-smoothing the whole head kills the point.
Best if you want:
- A shape that honors natural curl definition
- A neckline that stays open for a strapless or sweetheart dress
- Less time fighting the hair and more time finishing the makeup
A pineapple updo can look gorgeous with bold earrings because the curls create height without adding heaviness. It also photographs well from the side, which matters more than people admit. A lot of hair looks fine from the front and collapses into nothing once the profile gets involved. This one doesn’t.
7. Side-Swept Rolled Bun
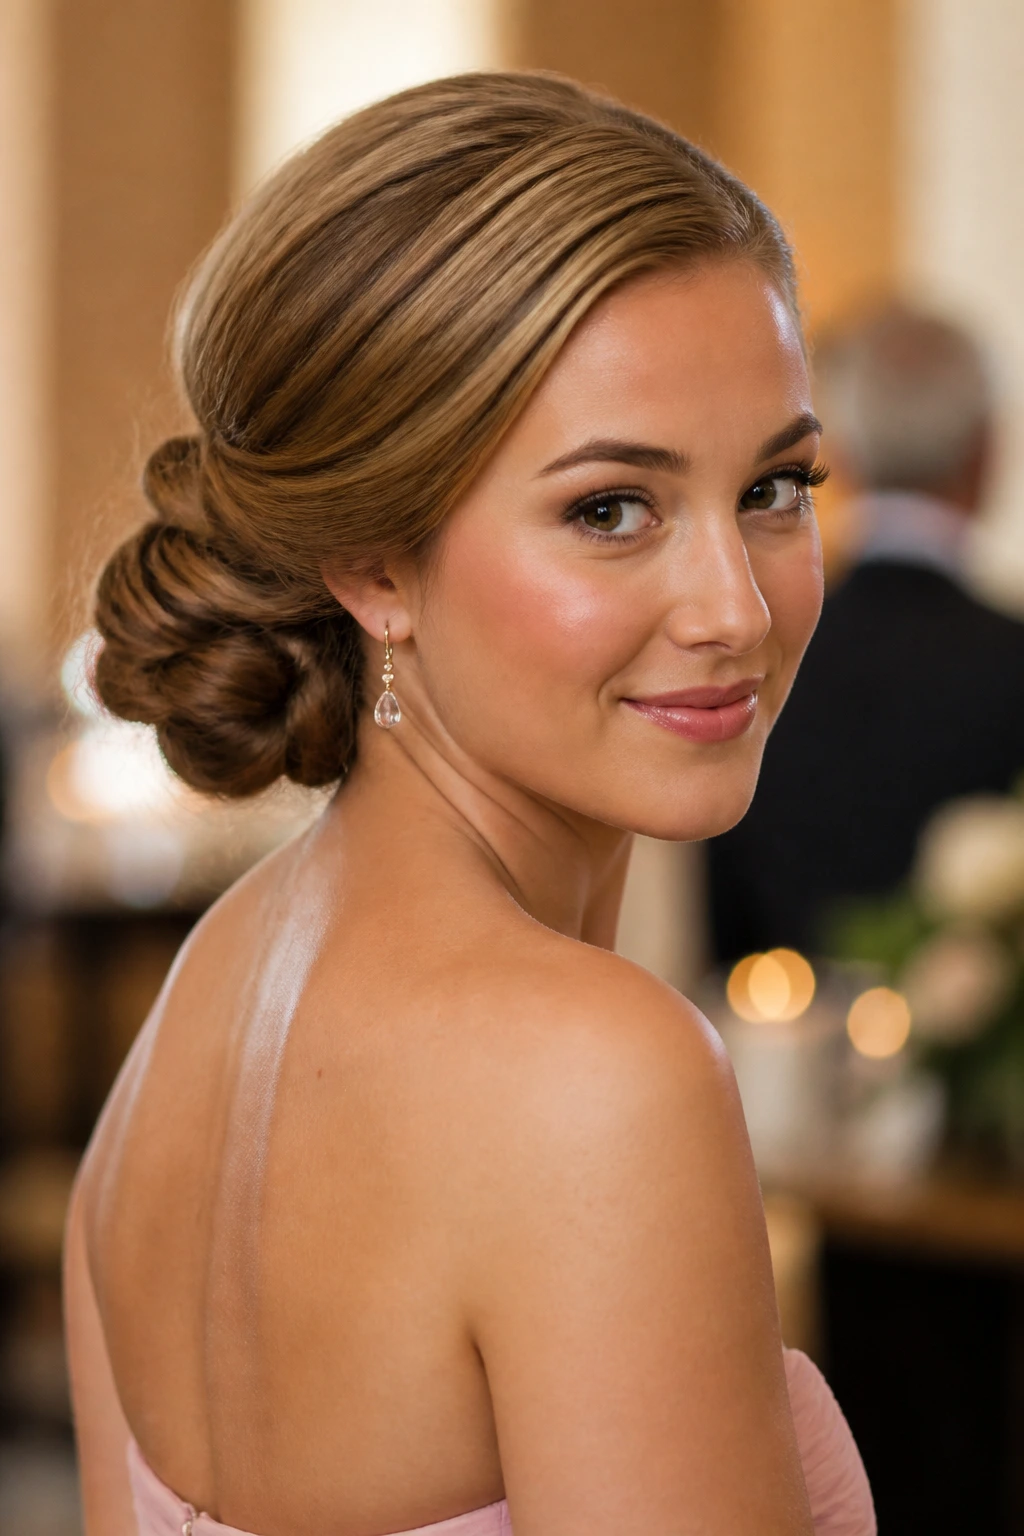
A side-swept rolled bun changes the whole silhouette of the head and shoulders. Instead of centering the style, it pushes the visual weight to one side, which makes it a natural match for one-shoulder dresses, asymmetrical necklines, and gowns with a lot of movement in the fabric.
I like the way this style feels a little unexpected without becoming dramatic for the sake of it. The hair is swept across, rolled inward, and pinned just off-center at the nape. That offset does a lot of work. It makes the neck look longer and gives the face a softer frame on the open side.
Keep the sweep smooth at the top, but not lacquered. A little texture at the rolled section gives it life. If the side bun starts to feel too bulky, flatten the base first and move some of the visual weight lower. That fixes the shape faster than adding more pins to the outside.
8. Braided Bun With Ribbon Weave
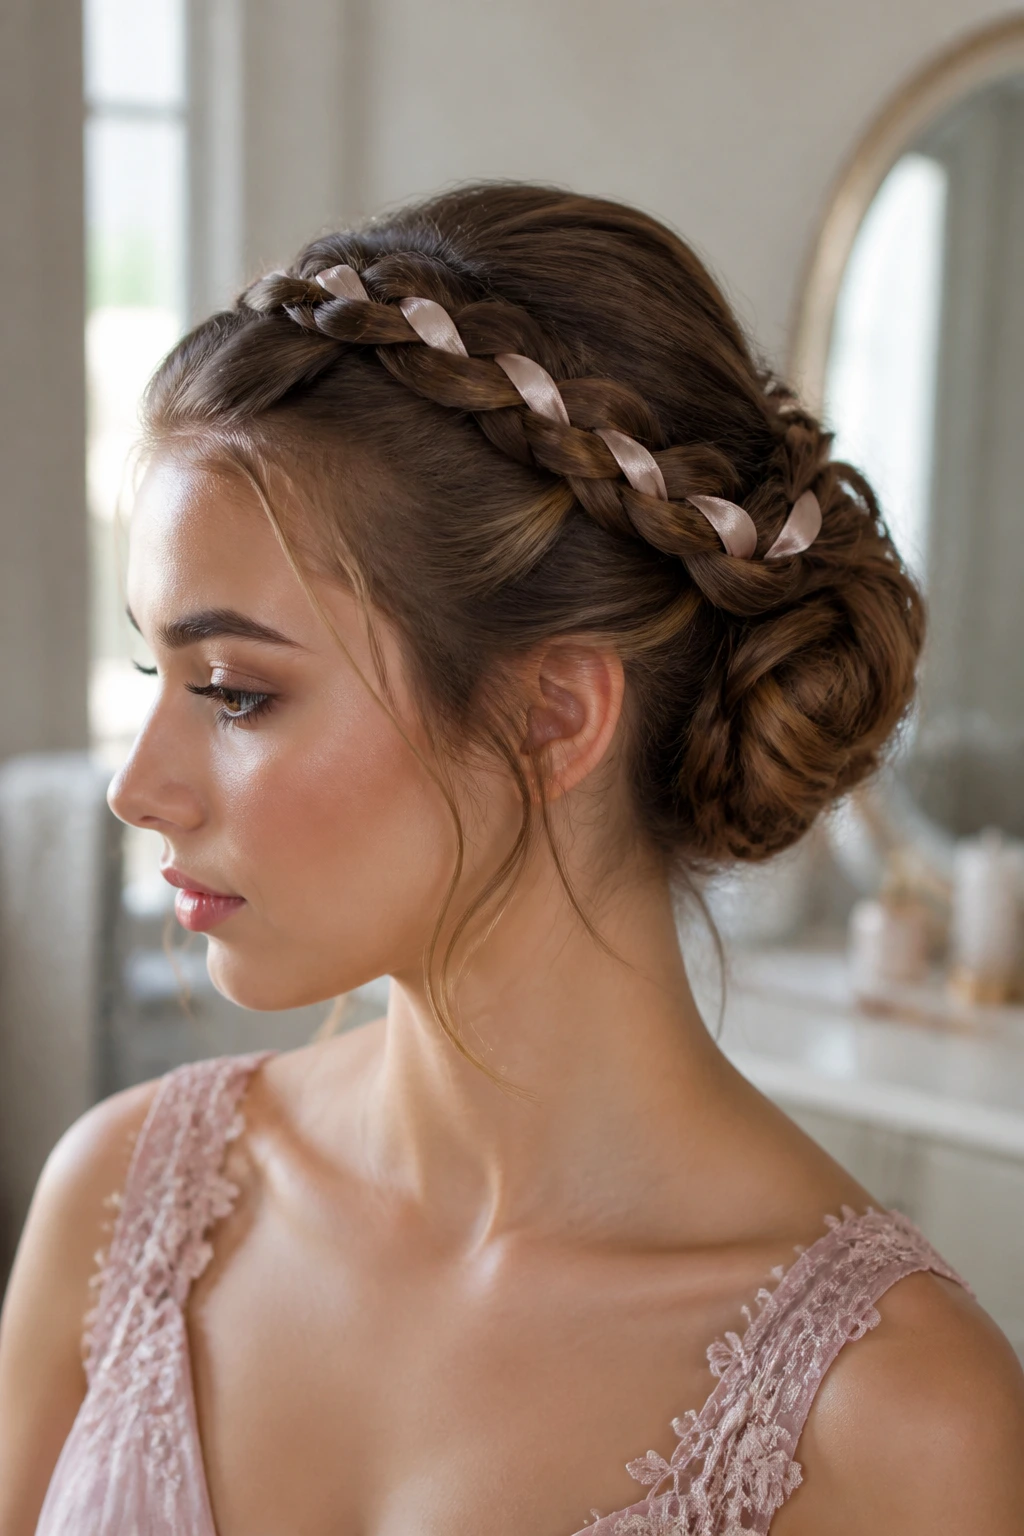
Ribbon sounds fussy until you see what it does to a simple braid. A thin satin ribbon woven through a plait gives the whole style a custom look without needing a huge amount of hair or product. It’s especially good if your dress has a small color accent you want to echo — not match exactly, just nod to.
I’d keep the ribbon narrow, around half an inch or less, if you want it to disappear into the braid. Wider ribbon reads more costume than formal unless the rest of the outfit is equally dramatic. Satin tends to lie flat better than velvet or grosgrain, which can stick out in awkward little ridges.
The bun itself should stay simple so the ribbon has space to matter. You want the braid to be the detail, not one element among five other competing details. When this works, it feels personal in a way a plain bun often doesn’t.
9. The French Twist With Crown Volume
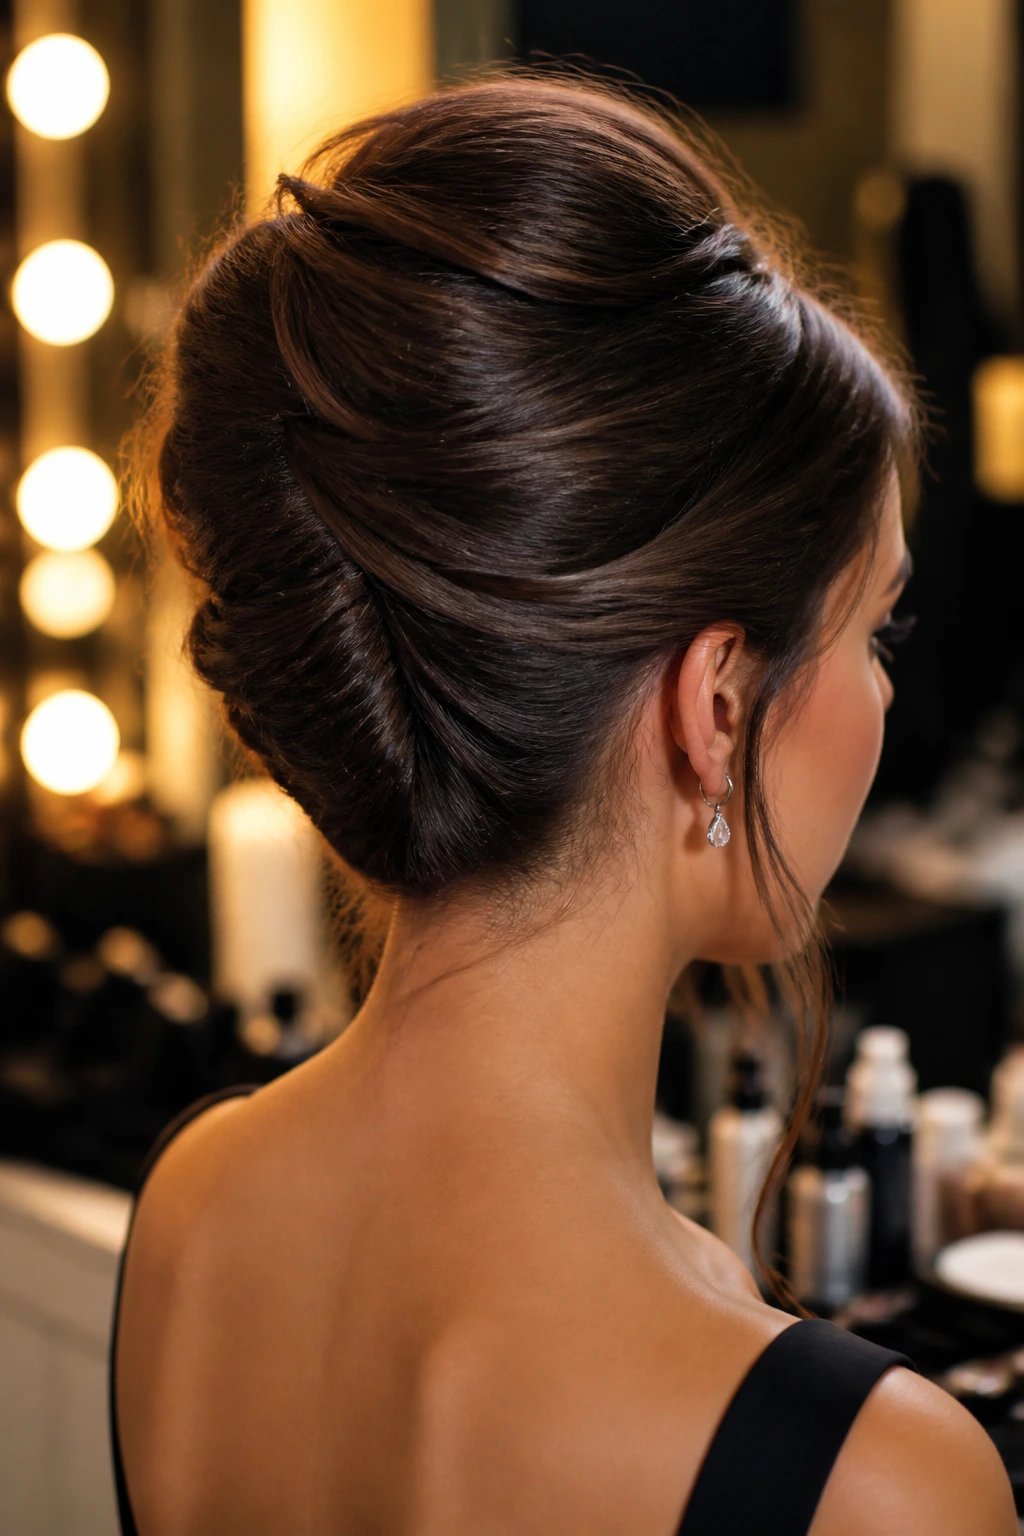
A French twist can feel severe if it’s too smooth. Add crown lift, and the whole thing loosens up. That’s the version I prefer for prom because it keeps the clean vertical line of the twist but softens the shape enough to feel youthful.
The crown volume is the important part. A little teasing at the roots, brushed back gently, creates height before the hair is tucked and pinned into the twist. Without that lift, the style can look pulled down by its own neatness. That’s not what you want. You want the hair to rise a little before it folds in.
This style works especially well with long earrings, off-the-shoulder dresses, and makeup that already has a defined eye or lip. It also gives you a lot of room at the back of the neck, which is useful if the dress collar sits high. The twist itself should be hidden enough to look elegant, but not so tight that it loses shape.
10. Halo Braid Updo
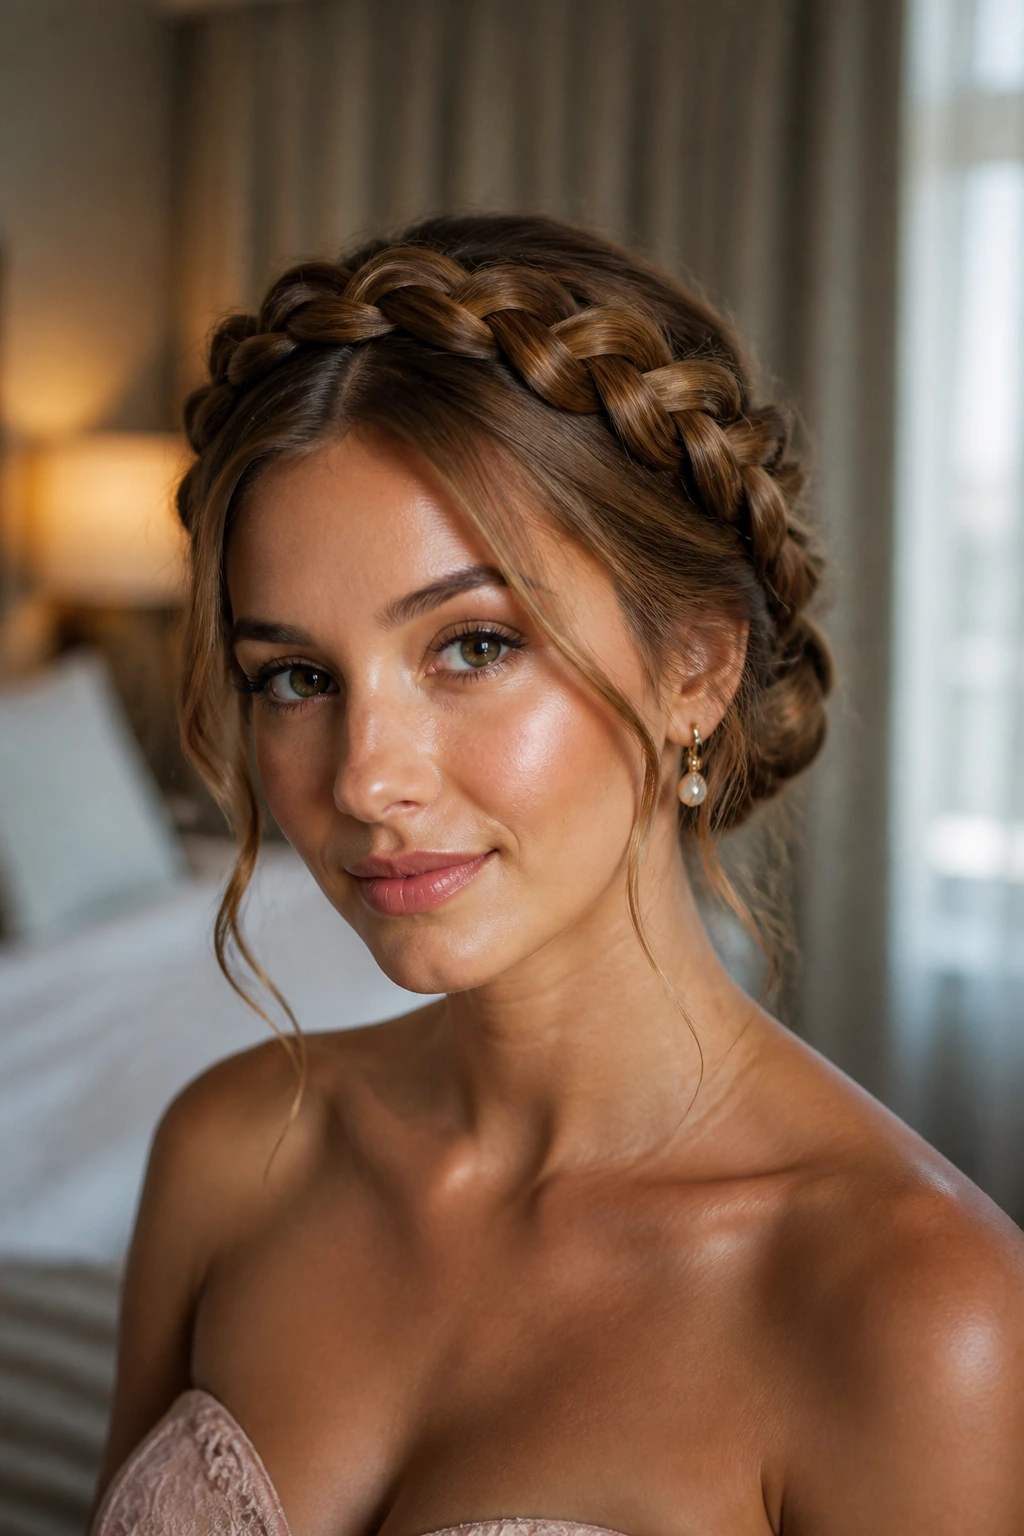
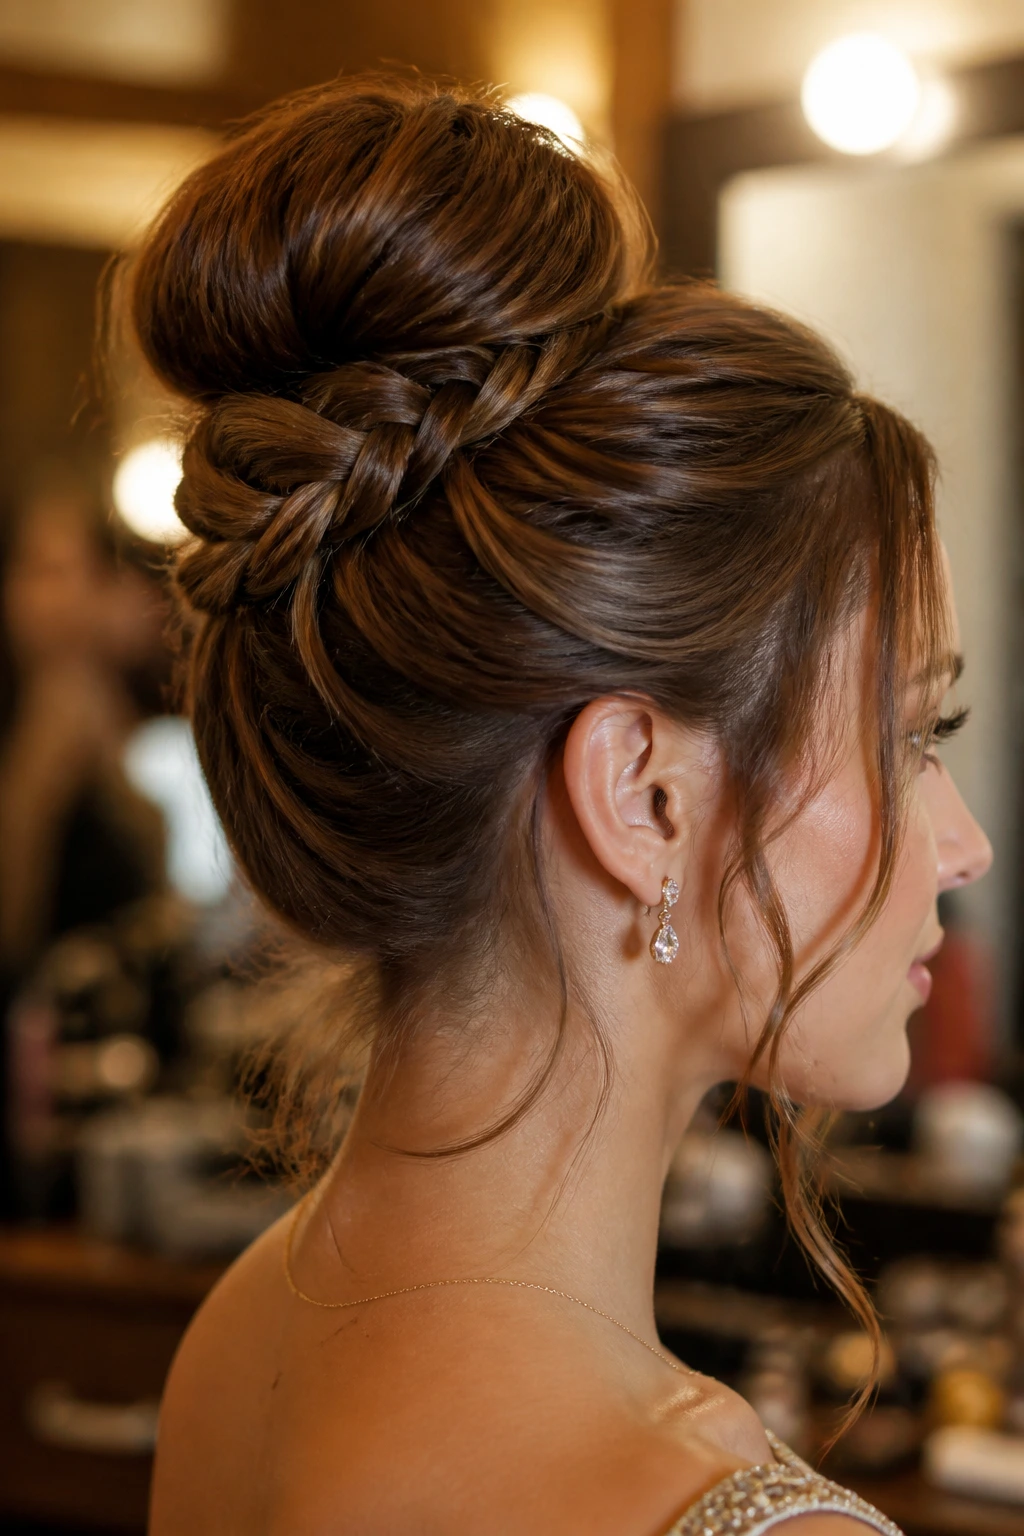
The halo braid keeps the hairline busy and the rest of the head calm. That is its magic. The braid circles the head, which gives a built-in frame, and the remaining length tucks low into a bun or coil. It’s secure, romantic, and a little more structured than it looks from a distance.
I like halo braids for dresses with lace, soft tulle, or anything that already leans romantic. The braid can be full and chunky or finer and more delicate, but it should read as a clean line around the face. If the braid gets too tight, the style starts to look severe around the temples. Leave it with a little give.
This one also handles humidity better than many softer styles, because the braid itself acts like scaffolding. If you know you’ll be inside a warm venue, that matters. A style that keeps its shape without constant fixing is worth more than a hairstyle that looks fragile in photos.
11. Double Twisted Bun
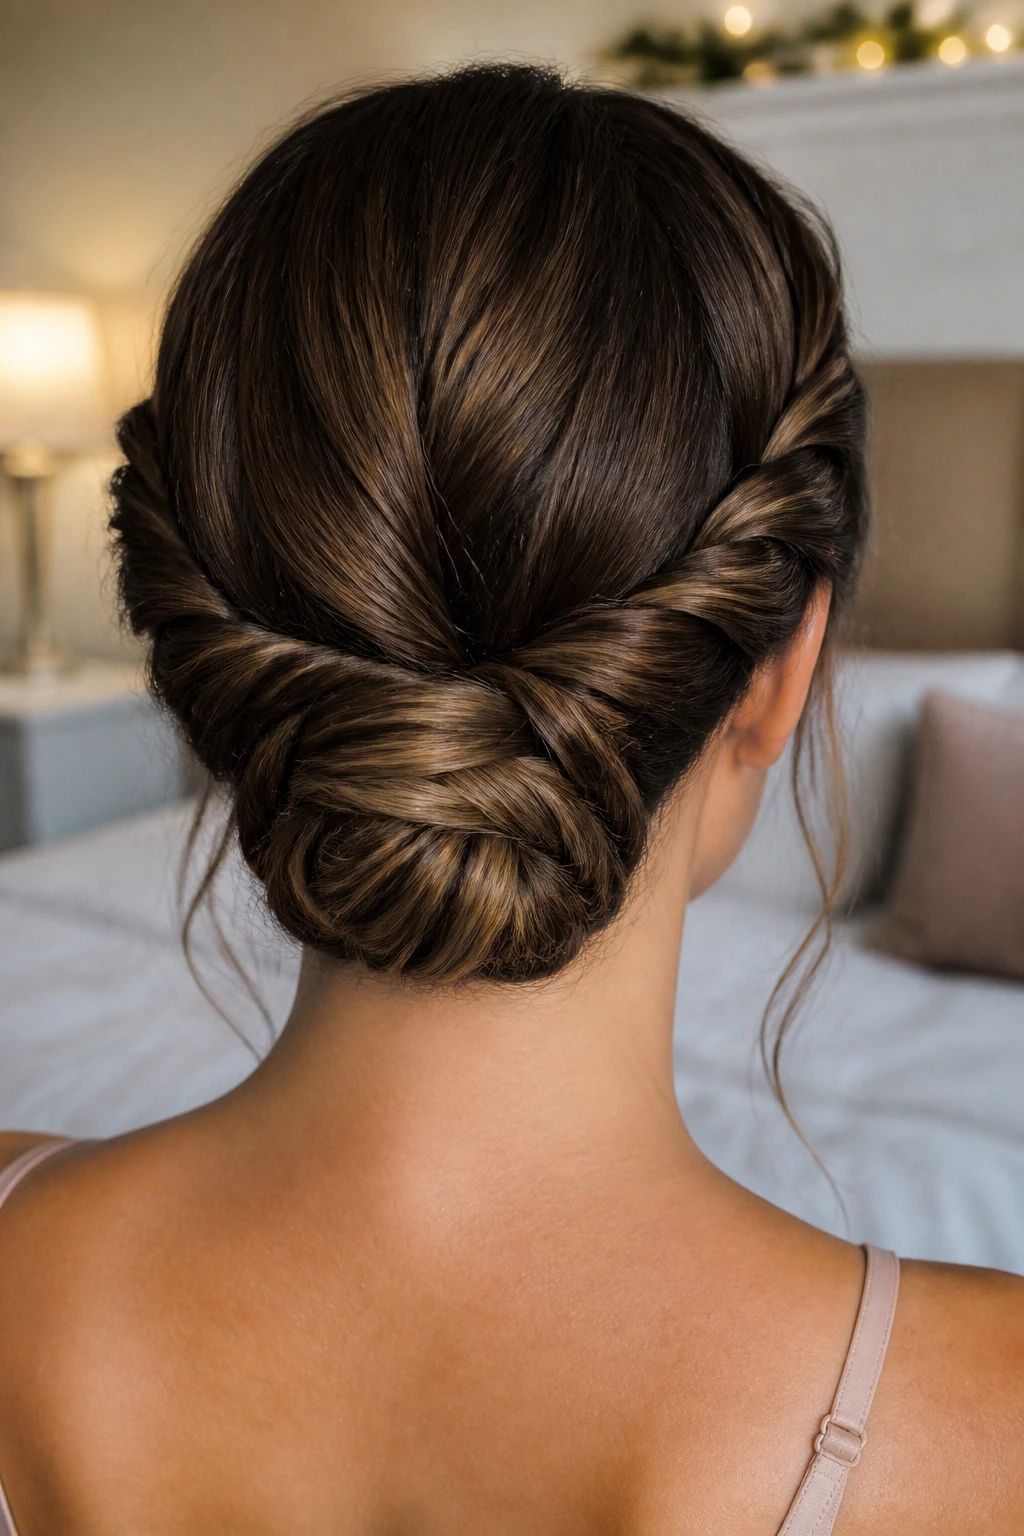
Two twists are easier to control than one elaborate braid, and that makes this style useful for people who want structure without a lot of fuss. The hair is split into two sections, twisted from each side, and joined into a low bun or knot at the back. Clean. Symmetrical. No drama unless you want it.
The appeal here is the line. The twists create a visible path from the sides to the center, which looks neat on camera and keeps the style from feeling empty. If your hair is thick, this gives you a way to manage volume without building a giant mound at the back of the head.
A detail I like: twist the sections tightly at first, then loosen the outer edge slightly before pinning. That keeps the texture visible. If the twists are too tight all the way through, the style can look ropey in a bad way. You want rope-like structure, not string cheese.
12. Knotted Updo With a Sculpted Finish
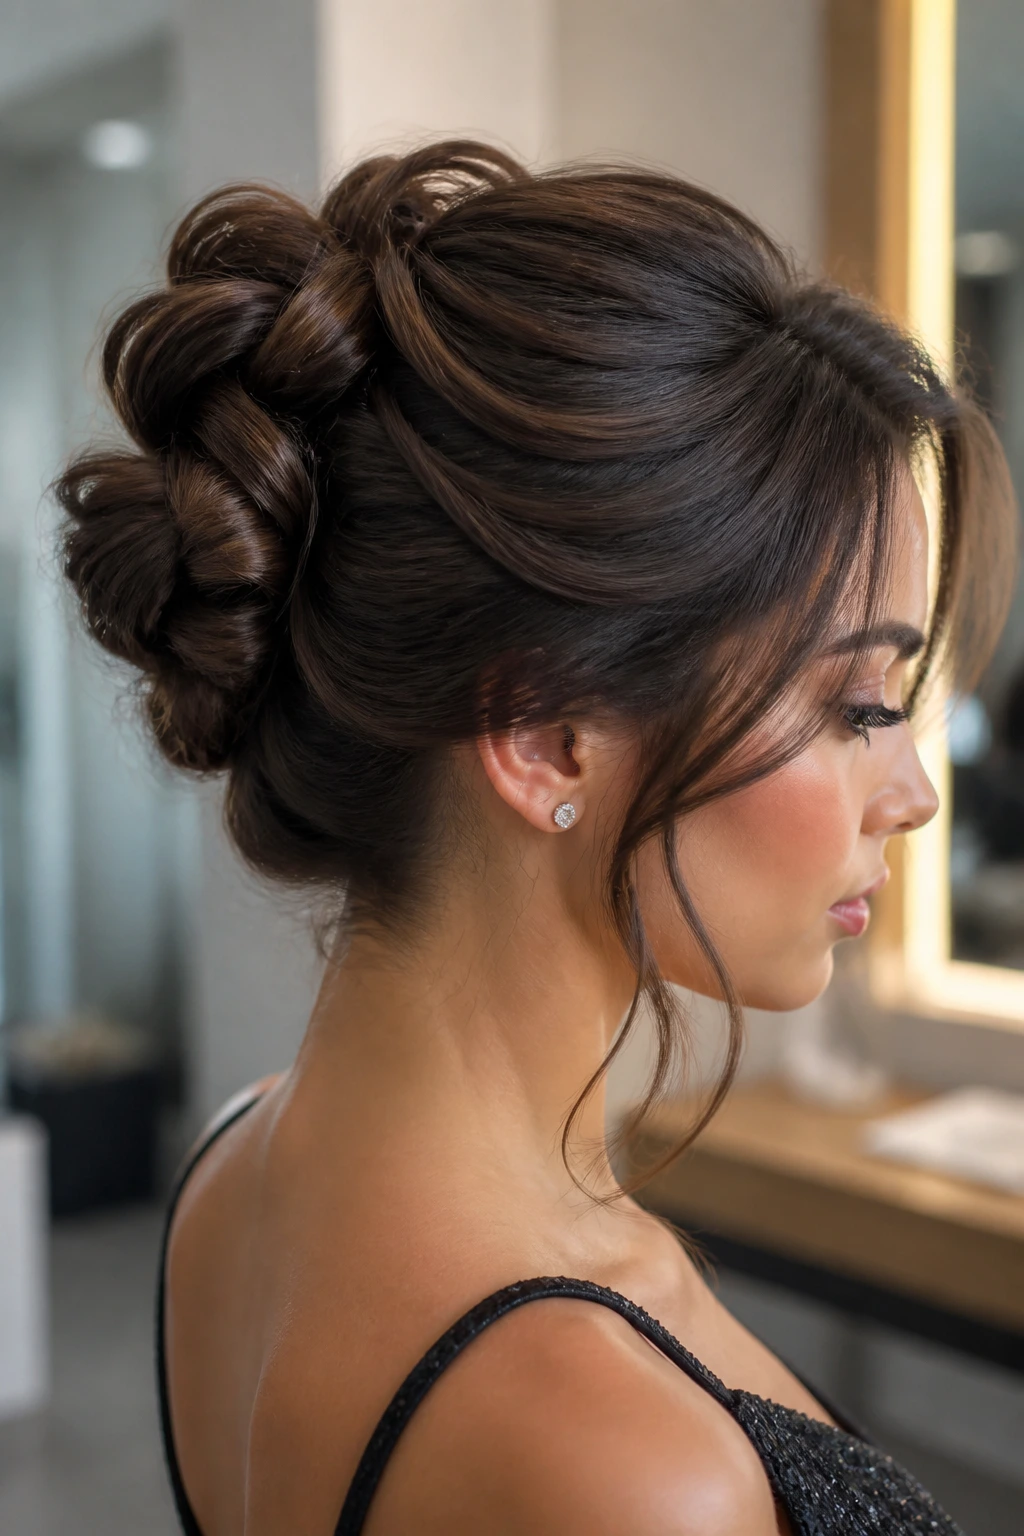
What if the knot itself is the design? That’s the whole idea here. Instead of hiding the structure, this updo builds visible loops and folds that look almost like fabric. It’s a little more modern than the usual bun, and it works well when the dress is simple enough to let the hair take the lead.
The finish should be sculpted, not puffy. Each knot sits where it can be seen, and the ends are tucked cleanly under the overlapping sections. A few hidden pins hold the shape from below, while the surface stays smooth enough to read as one deliberate form.
This style is especially good for medium-length hair, because the shorter length gives the knots some firmness. If the hair is very long, it can start to overwhelm the shape unless you tuck the ends carefully. Keep the volume focused at the center, and the whole thing feels sharper.
13. Fishtail Braid Bun
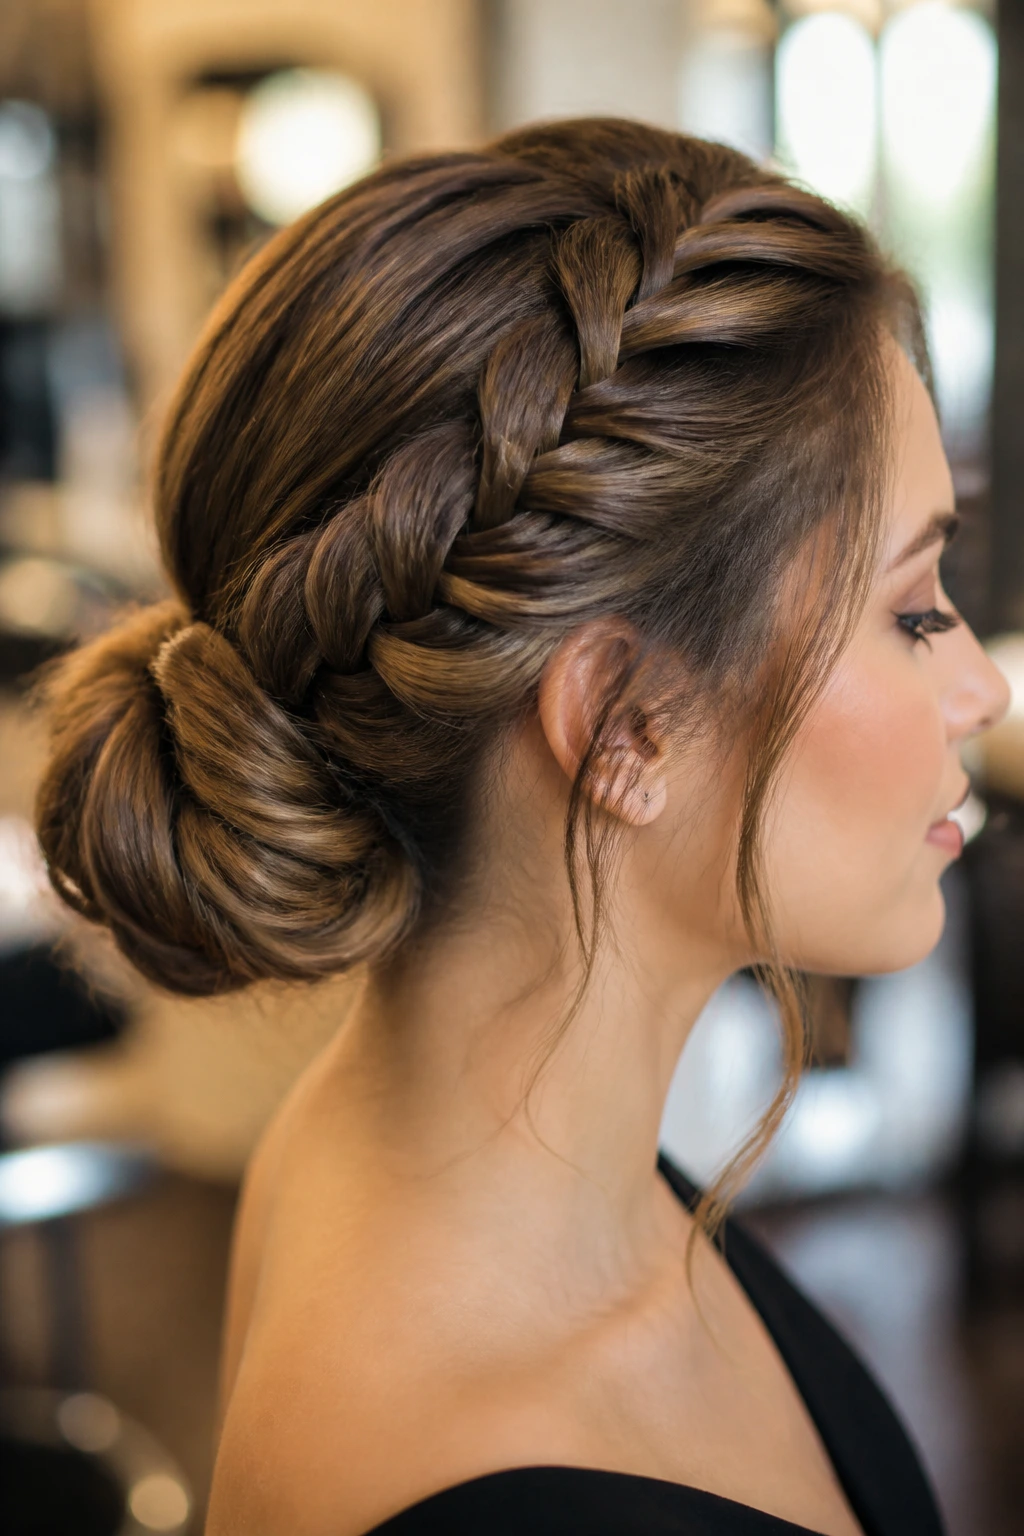
A fishtail braid already does half the work. The tiny woven sections give the style a texture you can see from across a room, so the bun itself can stay compact and clean. That’s a useful trick if you want detail without building a giant hairstyle.
This one suits thick hair especially well, but it can help finer hair too because the braid gives the illusion of density. If your strands are slippery, prep with texture spray first. A fishtail on glassy hair tends to unravel at the edges, and once the braid loses grip, the bun follows.
I also like this for dresses with a lot of surface detail. Sequins, embroidery, beadwork — all of that can handle a braid with a bit of texture because the two elements speak the same language. The fishbone pattern looks more intricate than a standard three-strand braid, and it earns that visual effort.
14. The Gibson Tuck
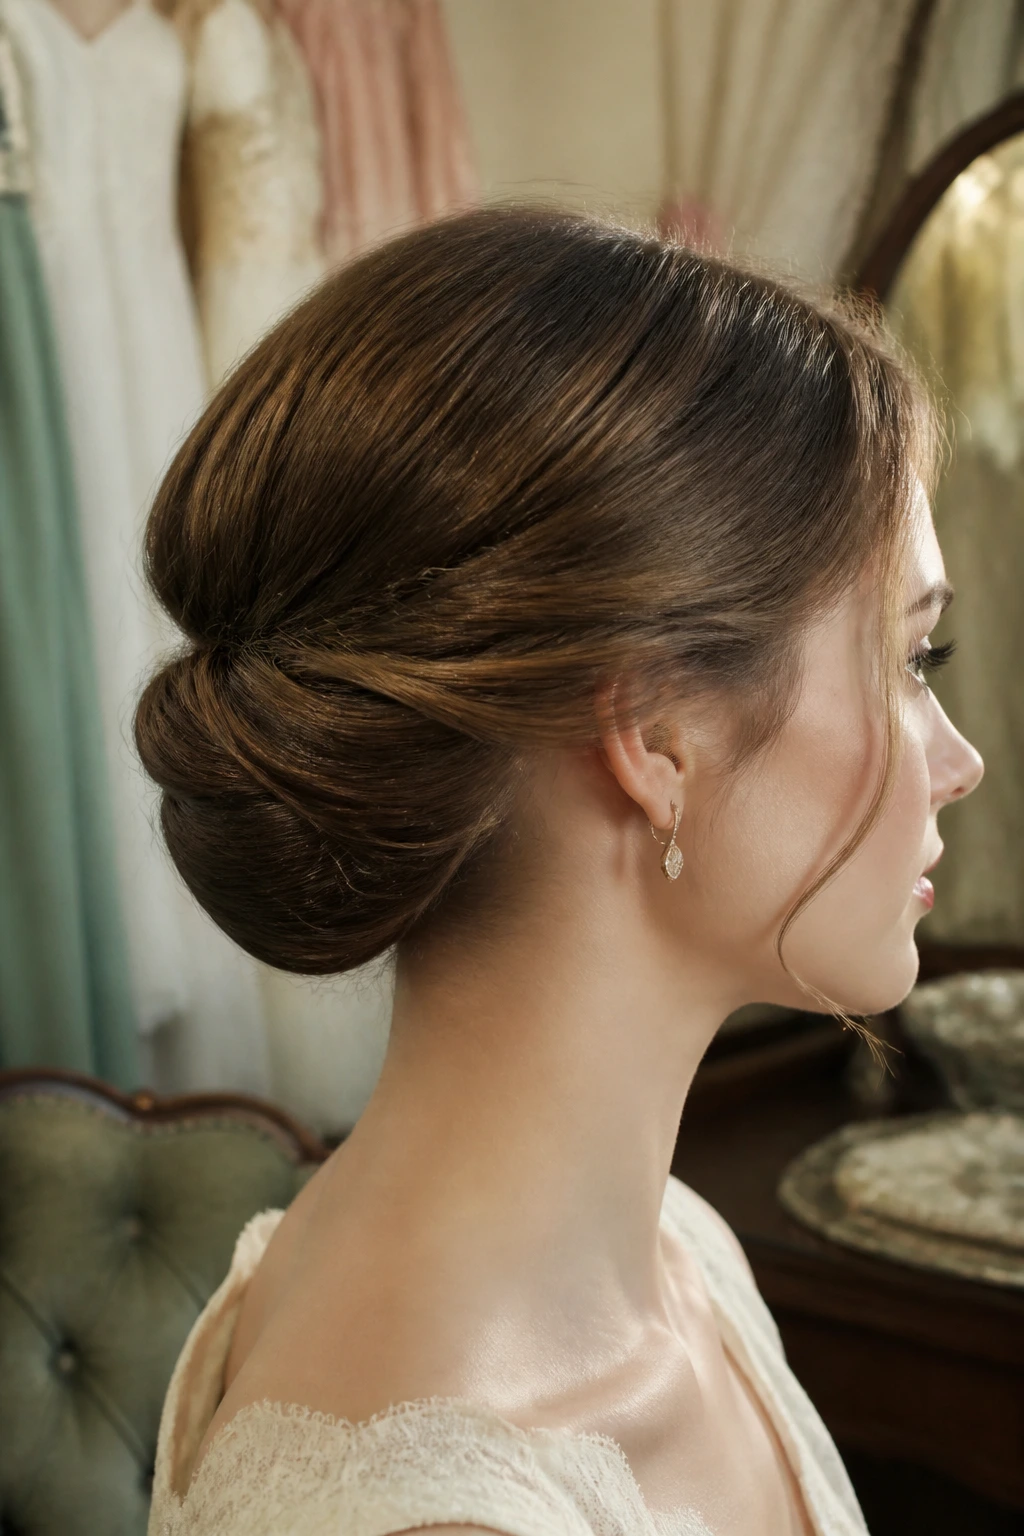
Old-fashioned isn’t the same as dated. The Gibson tuck has that vintage line that works beautifully with pearls, satin gloves if you’re going full formal, or a dress with a little nod to another era. The hair is rolled inward at the nape and tucked so the silhouette stays soft and smooth.
This style is especially useful for shoulder-length hair, which can be awkward in more elaborate updos. A Gibson tuck makes that length look intentional instead of compromised. I like it with a side part, though a center part can look sharp if the dress is clean and simple.
There’s a nice practical side to it, too. Because the hair is folded under, you can hide a decent amount of pinning without the style looking overworked. That matters if you want something neat but don’t want to stand there building a tower of bobby pins.
15. Waterfall Braid Into a Low Bun
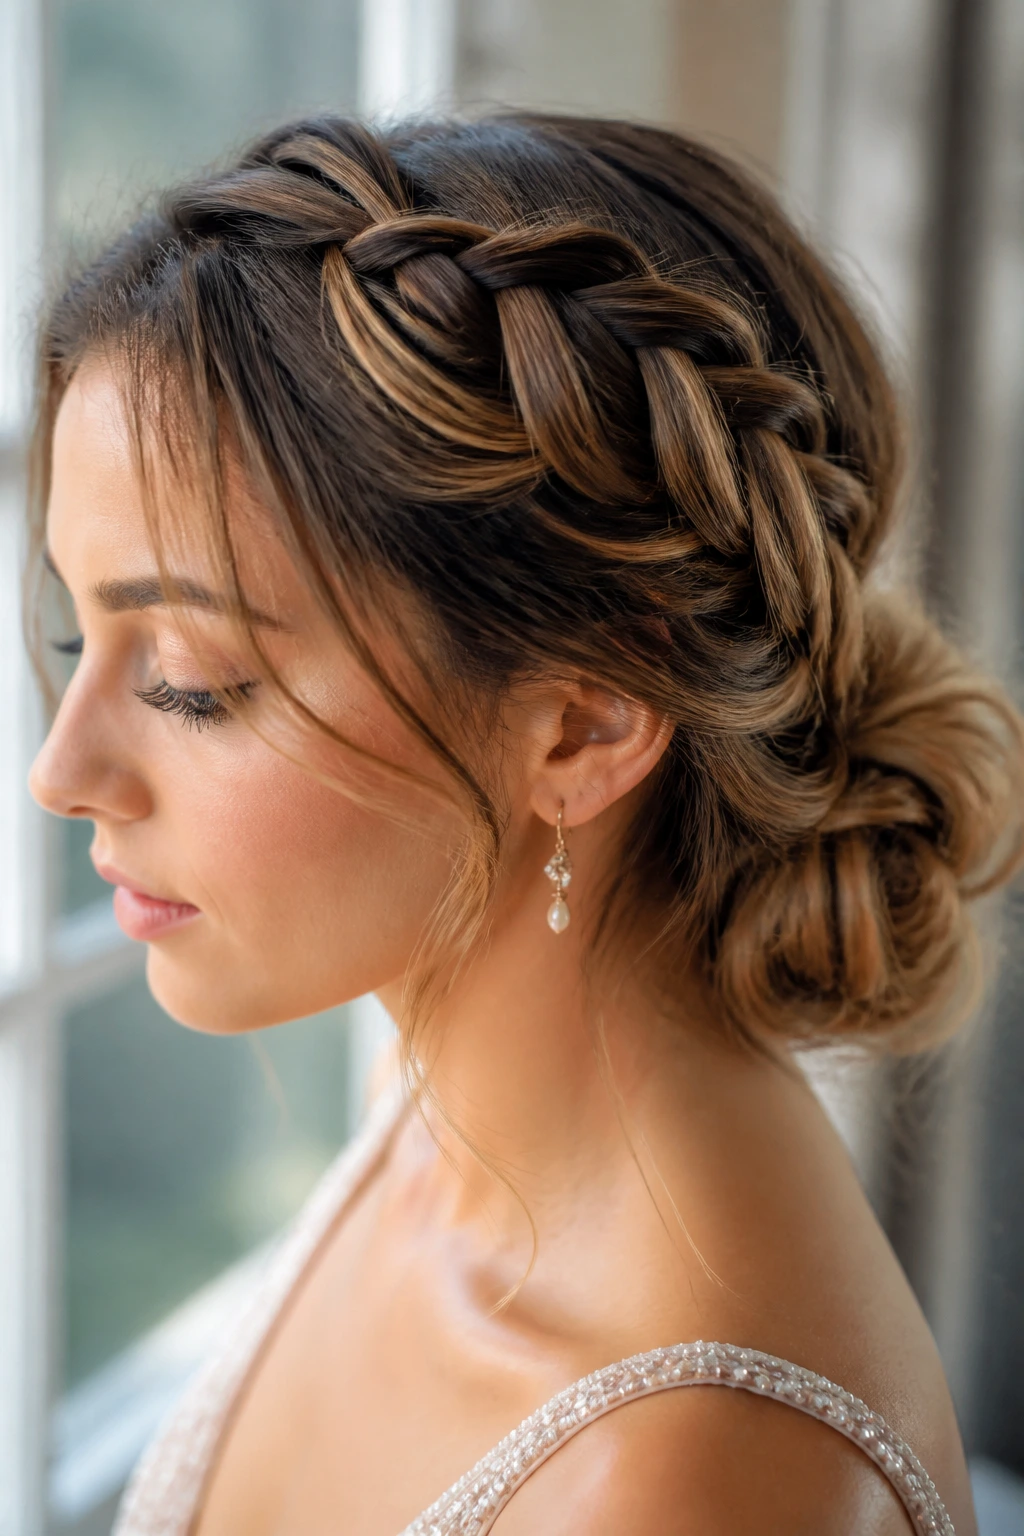
A waterfall braid into a low bun starts with movement and ends with restraint. That combination is why it works. The braid sends little sections across the top of the head, leaving a soft line behind it, and the remaining length gathers into a low bun or coil at the back.
This is one of the prettiest choices for dresses that already have a dreamy feel. It adds motion without turning the head into a hair sculpture. If your hair is layered, the waterfall effect can look especially good because the pieces that fall through the braid create a soft edge.
The key is not to make the braid too tight. Waterfall braids can go hard fast if the hand is heavy. Keep the tension even, and pin the bun low enough that the braid line still reads clearly. The whole style should feel like one motion leading into another, not two separate hairstyles bolted together.
16. Braided Mohawk Updo
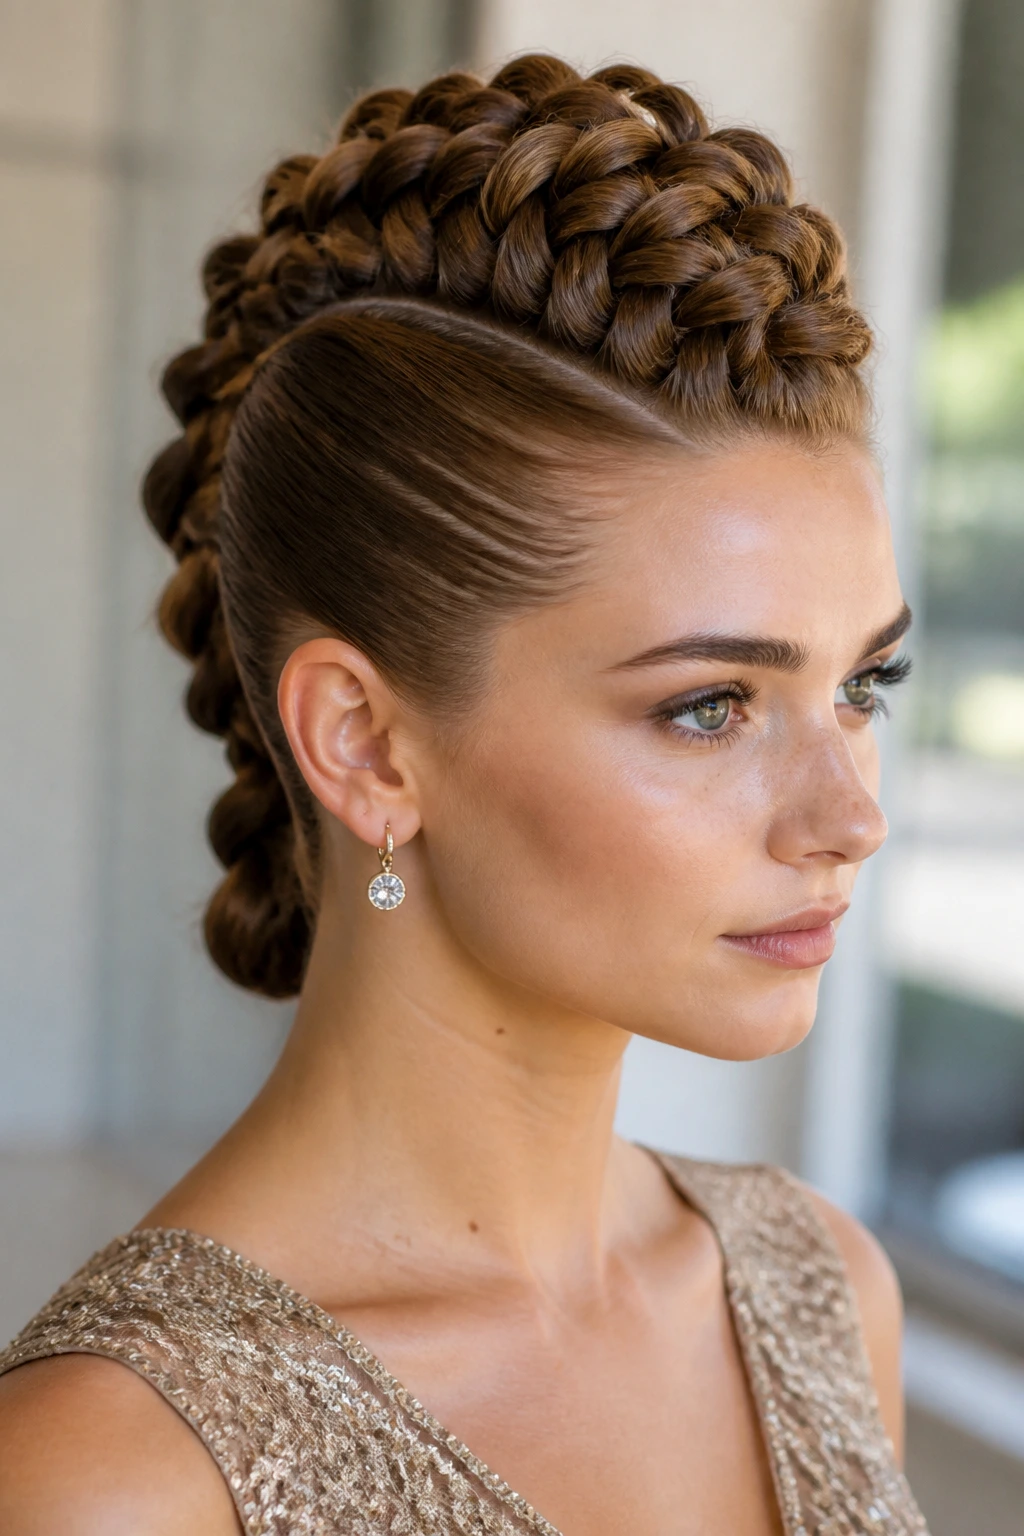
If you want height without a full hair tower, this is the one. A braided mohawk updo keeps the volume centered from front to back while the sides stay sleek or softly pinned. It has a little edge to it, which can look excellent with a fitted dress or a neckline that already has shape.
The center braid — Dutch, French, or a rope-based version — becomes the spine of the style. Everything else supports that line. I like this with thick hair because the braid has enough substance to stay visible, but it can work on fine hair if you build the center section with a bit of texture first.
This style also solves a common prom problem: hair that feels too small against a dramatic dress. A braided mohawk gives the head some presence. Not giant, not theatrical. Just enough to keep the styling from disappearing.
17. Low Knot With a Sharp Middle Part
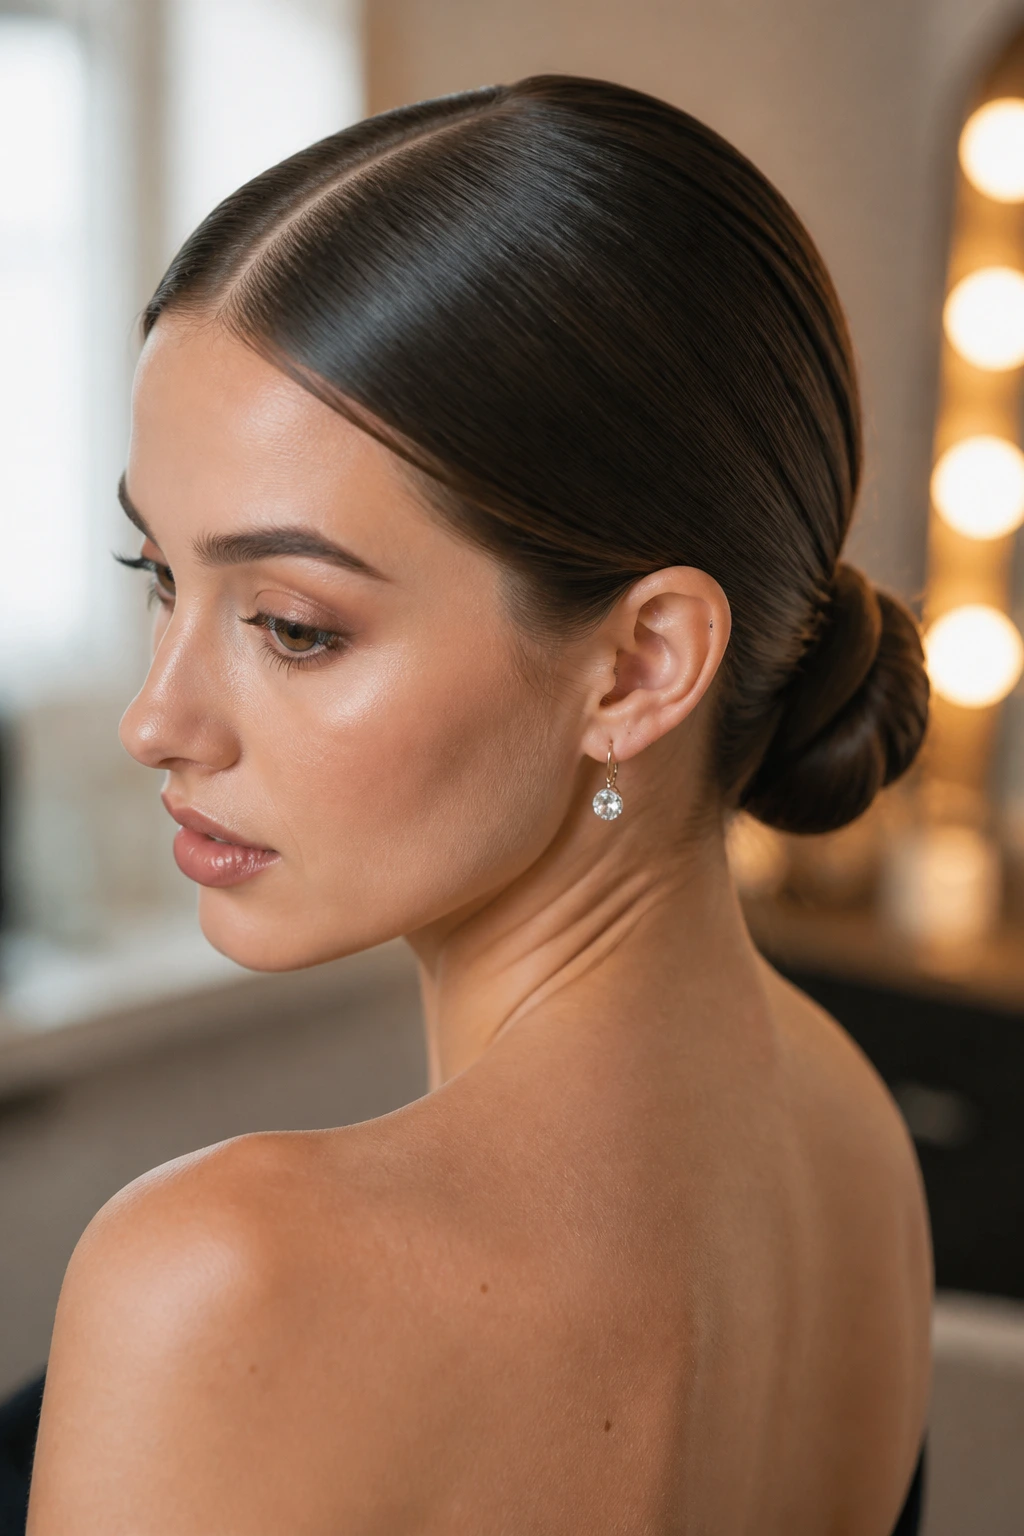
Can a plain knot still feel special? Absolutely, if the part is sharp and the surface is clean. A low knot with a middle part is one of the most modern looks in this whole lineup, and it works because the shape is disciplined. No fluff. No excess.
The middle part gives the face balance, and the knot at the nape keeps the neck open. That combination pairs well with minimal gowns, sleek fabrics, and jewelry that’s meant to be noticed. If the dress has a lot of structure, this hairstyle won’t fight it. It will echo it.
I’d keep the knot compact and the roots smoothed with a small amount of cream or spray. Don’t load on shine to the point that the part looks greasy. You want the hair to look precise, not wet. There’s a difference, and it shows.
18. Voluminous Curly Updo
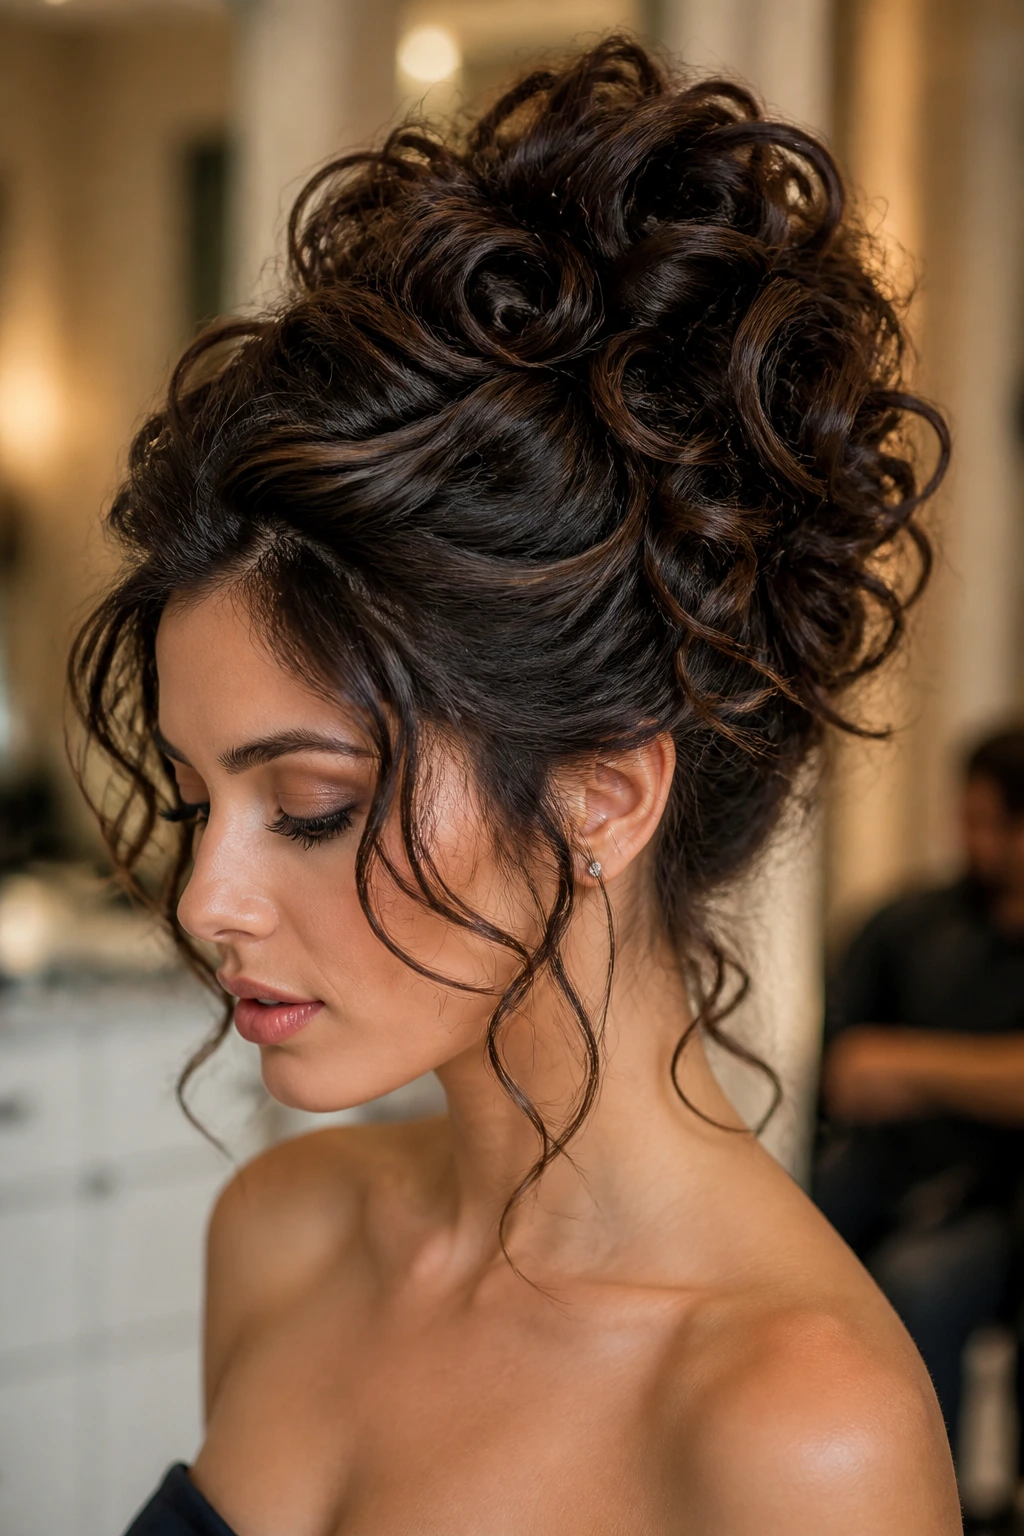
Curly hair looks best when the updo respects its shape instead of forcing it into a pin-straight plan. This version keeps the curls clustered loosely and lifts them high enough to show the neck and shoulders. The result is full, airy, and a little dramatic in the best way.
The volume belongs at the crown and upper back of the head, while the sides stay controlled. If you pull curls too tightly, the whole style loses its character. A few curls can spill outward on purpose, but the base still needs to be secure so the shape doesn’t collapse during the event.
This is the kind of style that can look expensive with very little ornament. A pair of good earrings and clean makeup are enough. The curls themselves supply most of the visual interest, which is a relief for anyone who doesn’t want to spend an hour adding extra decoration.
19. Accessorized Bun With Pearl Pins
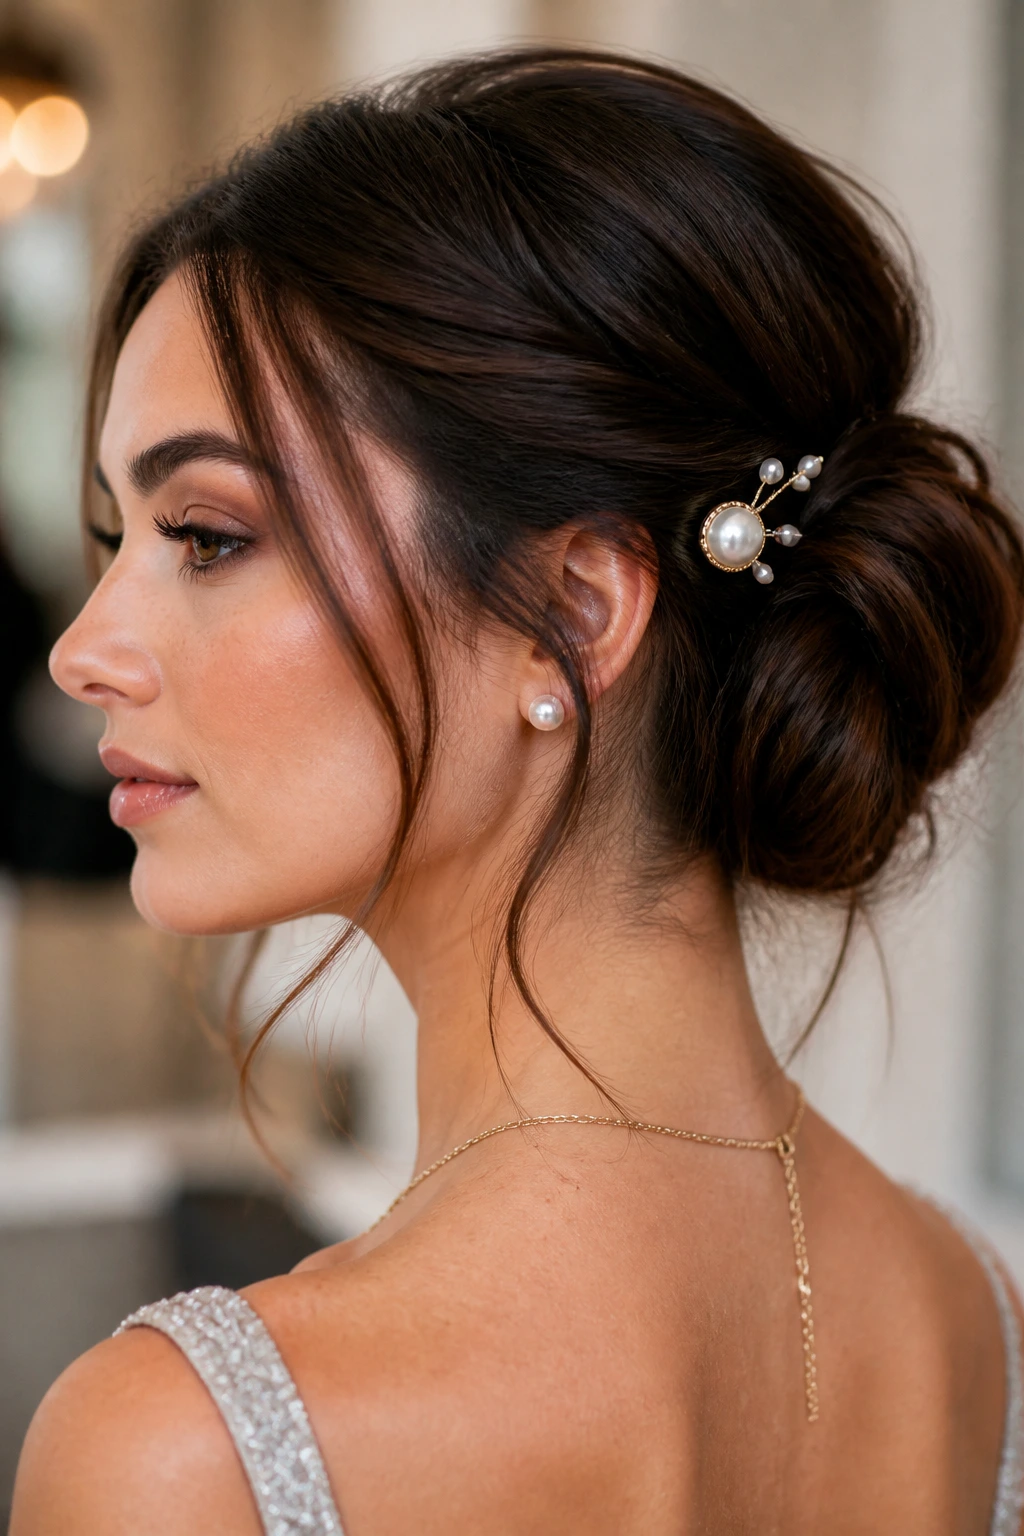
Sometimes the bun can stay simple and the accessories can do the talking. A low or mid bun with pearl pins, a crystal comb, or a slim metallic barrette feels finished without requiring a complicated structure underneath. That’s useful if you’re short on time or if your dress already has enough visual detail.
The secret is restraint. One statement comb and a few supporting pins usually look better than scattering little shiny bits across the whole head. The accessory should land where the eye naturally moves — off to one side, above the bun, or tucked into the braid line. If it ends up in the middle of nowhere, the effect gets muddy.
Pearl pins work especially well with soft fabrics and classic jewelry. Crystal pins read sharper and are good when the dress has sequins or a cool-toned finish. Match the mood, not every color exactly.
20. Romantic Side Bun
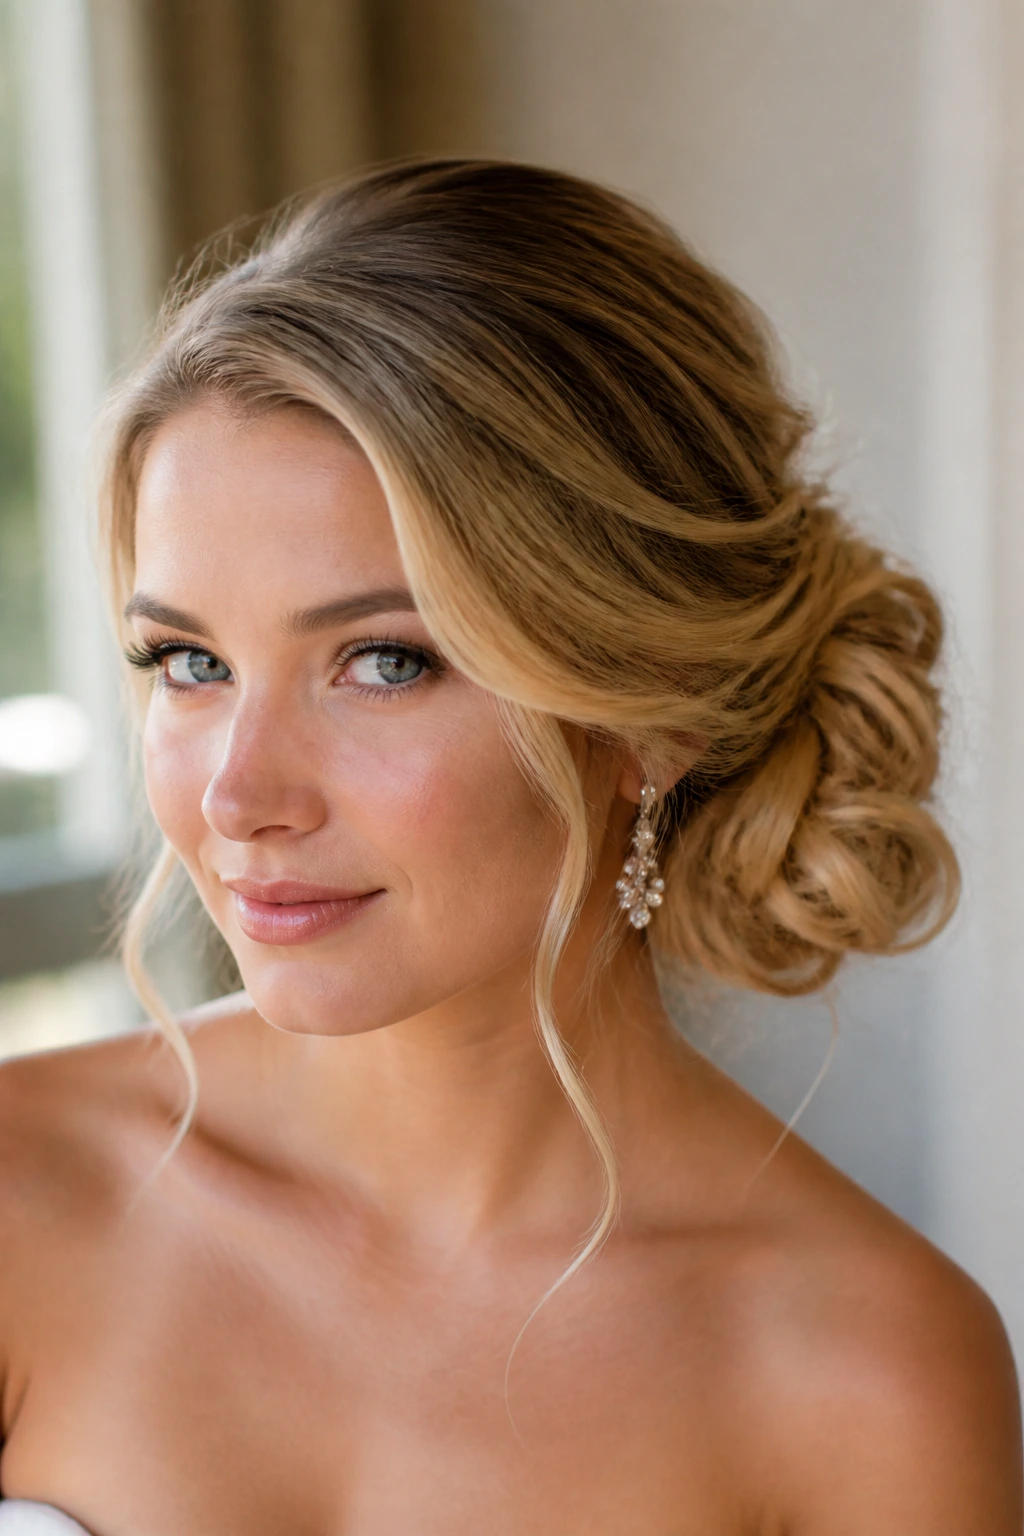
A side bun is a small bit of drama that doesn’t get in the way of the dress. It sits low and off-center, which gives the look a slight sweep and keeps the line from feeling too rigid. If the gown has a one-shoulder cut or a sweetheart neckline, this shape usually feels right immediately.
The soft pieces around the front matter here. They should bend gently, not hang like leftover hair. A loose wave at the cheek and a low, rounded bun at one side create a shape that feels elegant without looking overworked. That balance is hard to fake and easy to ruin with too much spray.
I like this style because it feels friendly in photos. The angle is flattering, the bun has presence, and the whole thing reads as intentional from the front and side. It’s the kind of style that looks calm even when the rest of the night is not.
Why Prom Updo Hairstyles Hold Their Shape Better Than Loose Hair
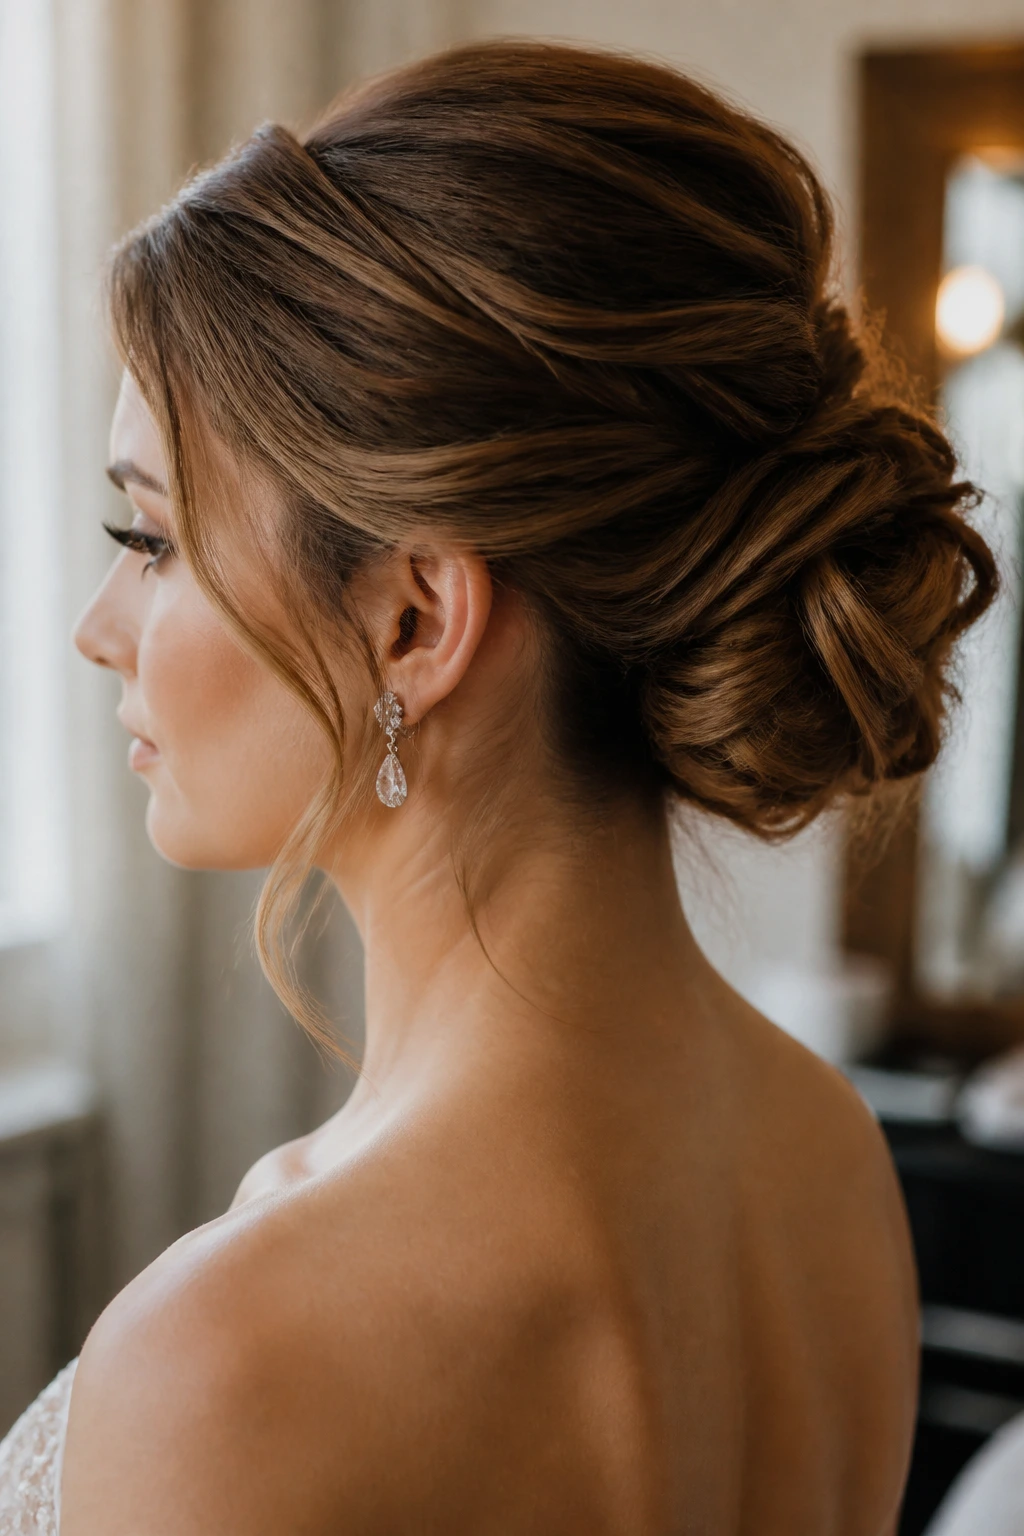
A good updo is built on anchor points. That sounds technical, but it’s simple in practice: the hair is pinned where the head naturally has the most support, usually near the nape, crown, or behind the ears. Once the base is secure, the style can move a little without falling apart. Loose hair doesn’t have that luxury. Gravity has more room to work on it.
There’s also the matter of surface area. Hair that’s left down has more ends exposed, more places for humidity to hit, and more opportunities to tangle against a dress or a necklace. An updo reduces that. It keeps the length contained and gives the hair less chance to collapse when the room warms up or when someone hugs you a little too hard.
And then there’s the visual side. Pinned styles let the face and neckline carry the outfit, which is why they often look cleaner in photos. You can still have softness. You can still have curls. But the shape stays where you put it, and that alone saves a lot of stress.
Essential Tools for These Styles
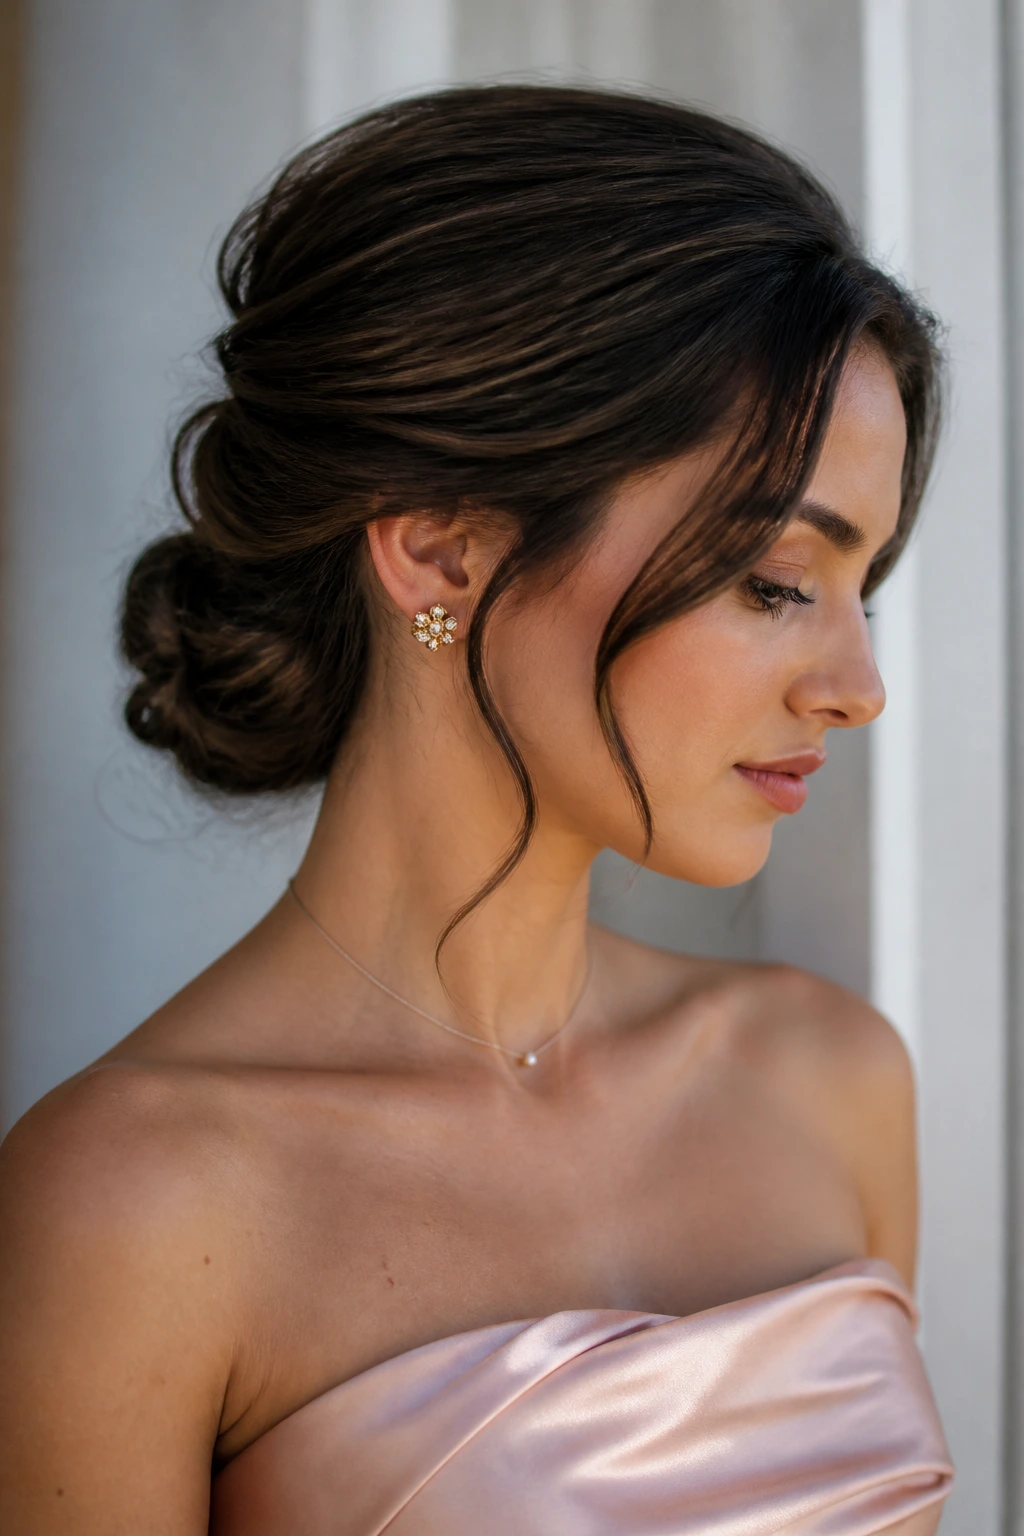
A good updo starts with the right gear. Not a mountain of it. Just the right few pieces.
-
Rat-tail comb: Parting and sectioning are much easier with a fine tip, especially for clean parts and tight sections.
-
Teasing brush: Useful for creating crown lift without shredding the surface of the hair.
-
1-inch curling iron or wand: Great for face-framing pieces, soft bends, and setting loose texture before pinning.
-
Bobby pins in two shades: Hair-colored pins blend in better, and a backup shade is handy when the perfect match disappears.
-
U-pins: Better than regular bobby pins for large buns or thicker sections that need deeper support.
-
Mini clear elastics: Good for braids, rope twists, and tight sectioning before pinning.
-
Strong-hold hairspray: Use it in layers, not all at once, or the style gets stiff on the outside and weak underneath.
-
Texturizing spray or dry shampoo: Gives fine or slippery hair enough grip to stay in place.
-
Smoothing cream or light pomade: Best used sparingly on the top layer or part line for clean finish.
-
Sectioning clips: They keep the rest of the hair out of your way while you work on one side.
-
Hair net: Optional, but useful for a ballet bun or any very neat style that needs hidden support.
-
Mirror with good side view: The back of the head is where a lot of “almost right” styles go wrong.
Smart Product Prep for Prom Updo Hairstyles That Last
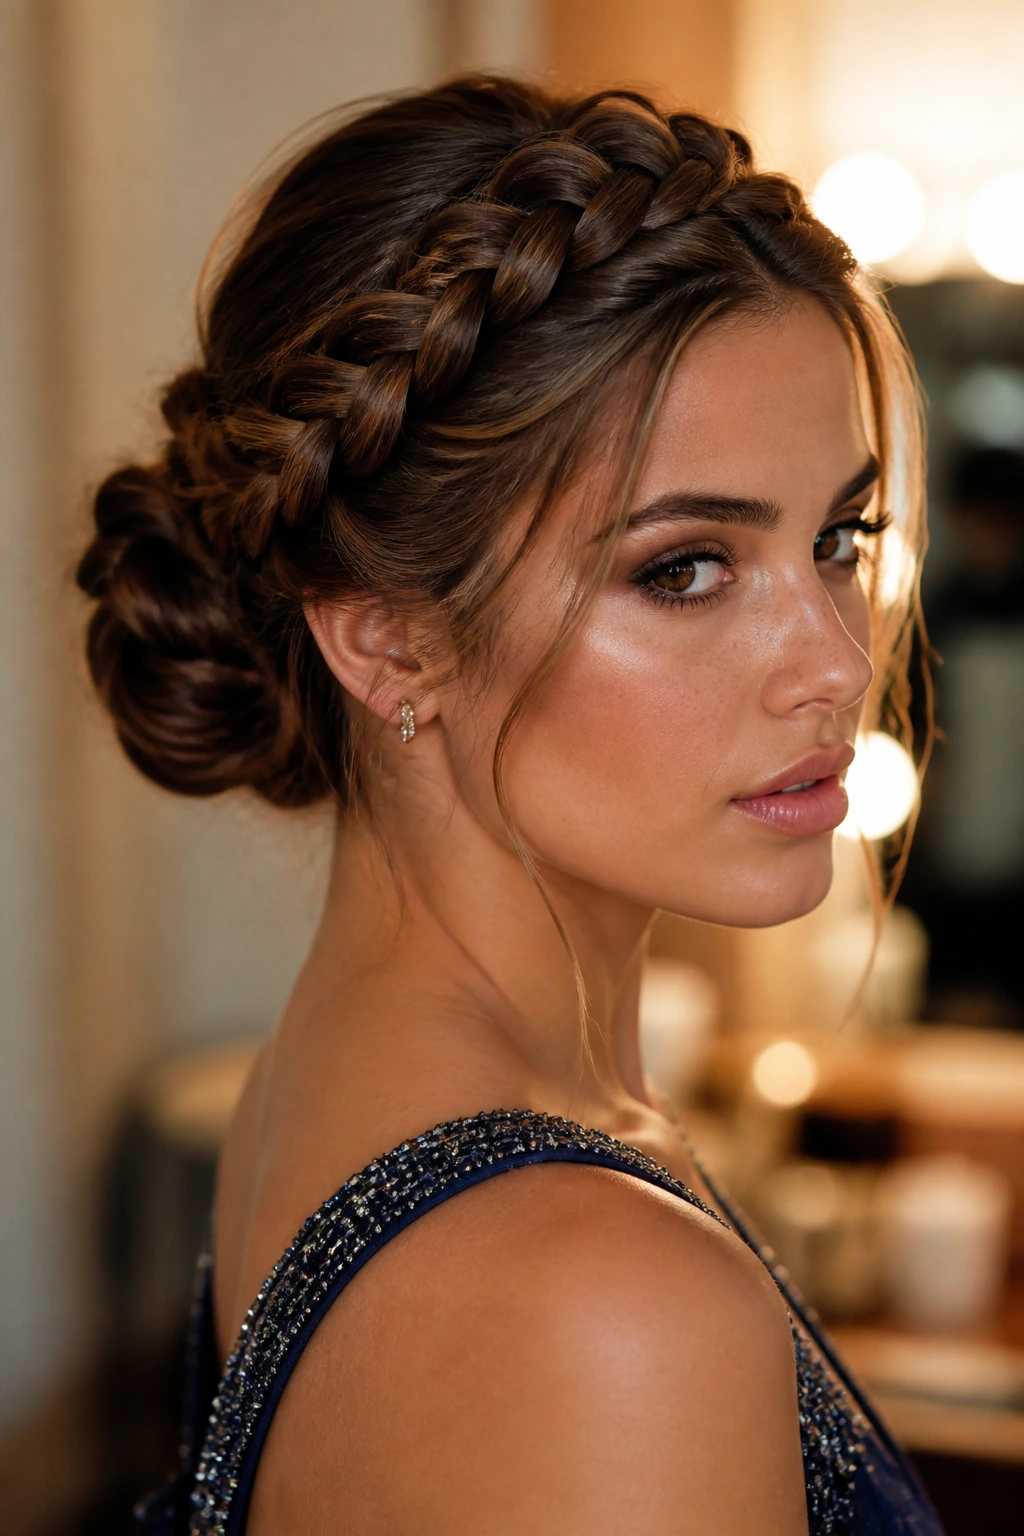
Hair that’s too clean can be a problem. It tends to slip. Freshly washed strands often look nice for about five minutes and then become hard to pin because there’s nothing for the pins to grab. Day-old hair usually behaves better, and if you need a little freshness, dry shampoo at the roots gives you texture without that heavy, coated feeling.
Start with products that create control before you think about shine. A light mousse or root-lift spray at the crown, dried in fully, gives the hair some memory. Heat protectant matters if you’re curling face-framing pieces or setting texture with a wand, but don’t drench the hair. Too much product can make the surface slick.
For fine hair, texture spray is your friend. For thick hair, sectioning matters more than product overload. For curly hair, a leave-in cream at the ends and a little gel where the shape needs to be clean is usually enough. Put the shine where it will be seen — on the top layer, the braid surface, or the bun shell — not at the roots, where it can make the whole style slide.
Pins, Pearls, and the Little Details That Finish a Prom Updo
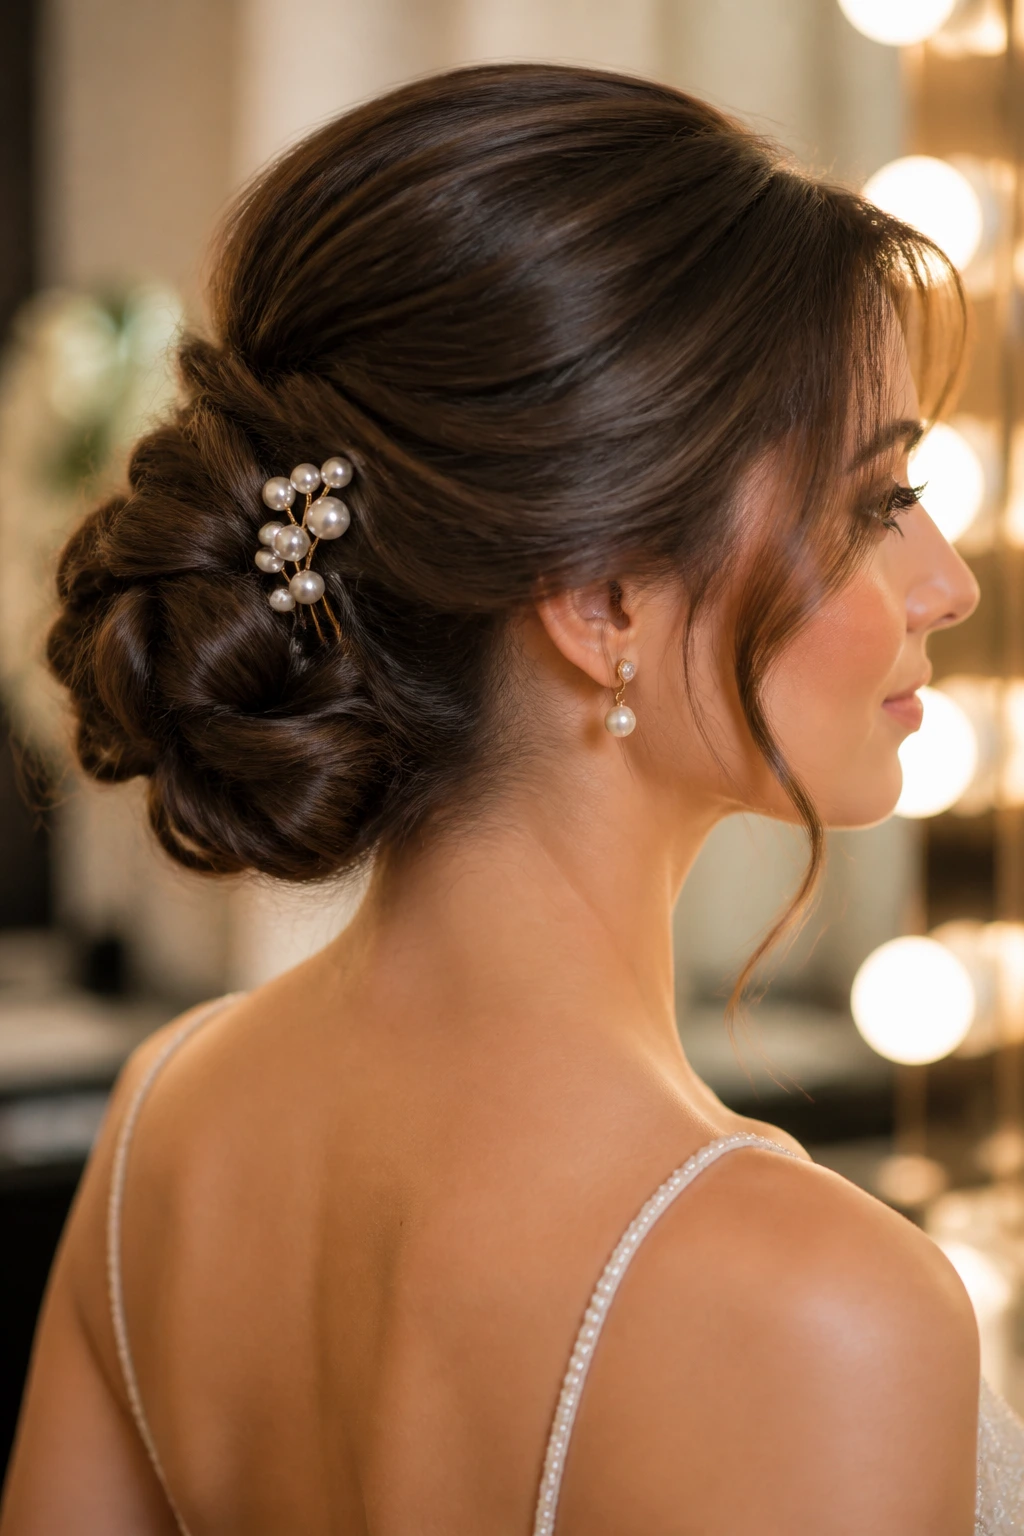
The tiny details are what keep a formal style from looking plain. A braid without a pin cluster can feel unfinished. A bun with one well-placed comb suddenly looks like someone cared. That’s the difference between “hair is up” and “the hairstyle is done.”
Accessory Strategy: Pick one main accent and let it lead. Pearl pins, a comb, a ribbon, or a crystal clip are usually enough on their own. If you pile all of them together, the eye stops knowing where to rest.
Texture Control: A little looseness around the hairline softens the face, but it should be deliberate. Pull a few pieces free with a tail comb, then mist them lightly with hairspray from a distance so they move but don’t frizz apart.
Face-Framing Pieces: Curl them away from the face, not toward it. That tiny shift opens the eyes and makes the profile cleaner. Straight pieces can work in a sharp minimalist style, but they need to be clean enough to look intentional.
Make-It-Yours: If the dress is simple, the hair can carry more visual interest. If the dress is already busy, trim back the braid, accessory, or volume and let the fabric do the talking.
How to Keep the Style Fresh From First Photo to Last Dance
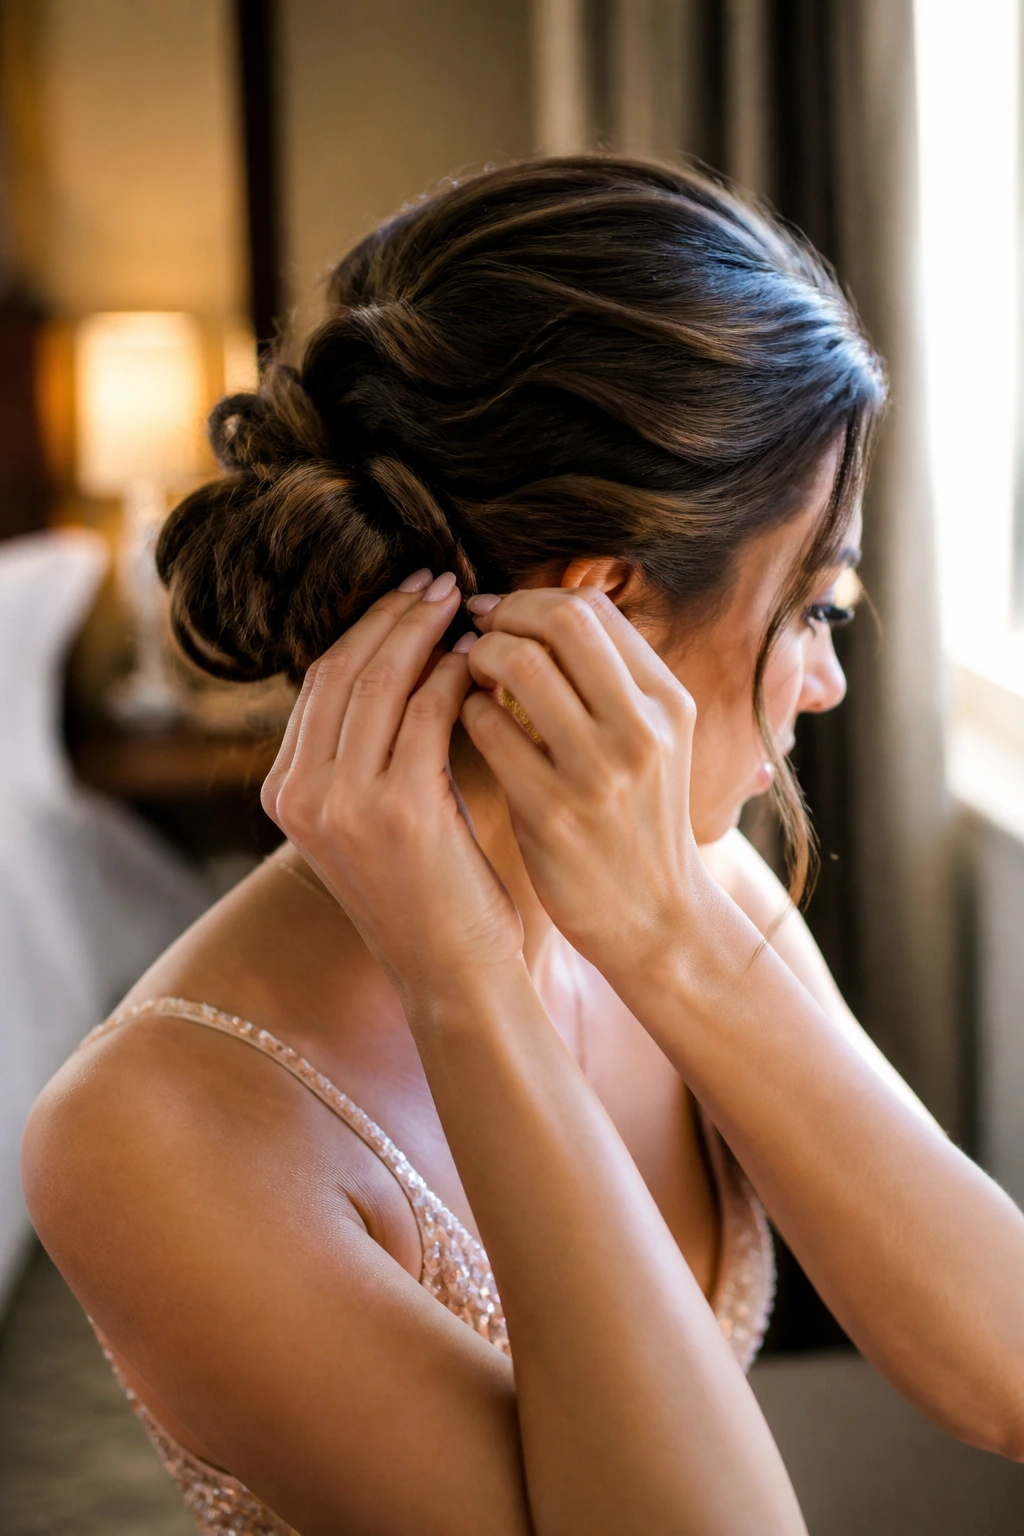
A prom updo needs a small survival kit. Not a suitcase. A few pins, a travel-size hairspray, and a tiny comb are enough for most emergencies. Keep the pins in the same hair color as your style, or as close as you can get, because shiny silver pins in dark hair catch the light in the worst way.
If the style starts to loosen, fix the base first. Don’t keep spraying the surface and hoping the problem goes away. Re-pin the knot or twist where the structure begins, then smooth the top lightly with your fingers. A comb can be useful, but over-combing at mid-event flattens everything and makes the style look older than it is.
For curly styles, resist the urge to brush. Separate curls with your hands and a touch of serum on the ends if they need softening. For sleek styles, a dab of smoothing cream on the palms is enough. If you’re keeping the look into the next day, sleep on a satin pillowcase or wrap the hair loosely with a silk scarf and remove pins gently in the morning. The less you disturb the shape, the easier it is to revive.
Common Mistakes to Avoid With Prom Updos
The first mistake is building the style on hair that’s too slippery. If the roots are freshly washed and overloaded with conditioner, pins slide right out. The fix is simple: use day-old hair when you can, or add dry shampoo and texture spray before you start pinning.
The second mistake is making the bun too low or too heavy for the neckline. A big knot at the wrong height can crowd a high dress or drag down a delicate one. Place the bun where the dress leaves room for it, and check the shape in a mirror from the side, not just straight on.
The third mistake is treating flyaways like a failure instead of a design choice. A few soft pieces around the face can look lovely. Random frizz across the crown is another story. Smooth only the areas that need polish, and leave the rest alone once the shape is set.
The fourth mistake is over-spraying the outside and ignoring the inside. Hair can look frozen on top and still fall apart underneath if the pins never got enough support. Build the style with pins first, spray second.
The fifth mistake is skipping a trial run. If you know you’ll be wearing a statement dress, a deep neckline, or big earrings, test the style with those pieces on. A hairstyle that looks fine alone can feel wrong once the whole outfit is in place.
Variations and Adaptations to Try
Soft-Romance Edit: Keep the same bun or twist, but loosen the face-framing pieces and brush out the braid edges a touch more. This version suits chiffon, tulle, and dresses that already feel light in the body.
Glass-Sleek Finish: Smooth the roots with a little cream, use a center part, and keep the bun compact. This is the version that works with satin, sharp tailoring, and bold makeup.
Braided Statement Version: Add a Dutch braid, fishtail braid, or halo braid to the base of any bun. You get more texture and a stronger visual line, which helps if the dress itself is simple.
Curly-First Build: Let curls define the silhouette and shape the updo around them rather than against them. This works beautifully for natural texture and avoids the stiff, flattened look that ruins so many curly formal styles.
Short-Hair Workaround: Use mini twists, tucked pieces, and hidden padding near the nape to create the illusion of a fuller updo. Shorter hair often needs more pins and less ambition; that’s not a problem, it’s a strategy.
Frequently Asked Questions
Which prom updo works best for thin hair?
A low chignon, a twisted bun, or a sleek knot usually gives thin hair the cleanest shape. The trick is to prep with texture spray or dry shampoo before pinning so the style has something to hold onto.
How do I keep bobby pins from slipping out?
Cross two pins in an X shape where the hair needs the most support, and push them into the scalp, not just through the surface layer. Pins grip better when they catch both the hairstyle and a bit of the hair underneath it.
Should I curl my hair before doing an updo?
Usually, yes. Even a light bend gives the hair more body and helps the sections sit where you want them. Straight hair can work for sleek looks, but most softer updos look fuller when the lengths have been pre-shaped.
Can curly or coily hair be styled into a formal updo without losing definition?
Absolutely. The better plan is to build around the curl pattern, not over it. Use sectioning, light hold at the roots, and keep the ends visible when that suits the style — curls look best when they’re respected, not flattened.
What’s the easiest prom updo for beginners?
A low knot, soft chignon, or simple side bun is usually the easiest starting point. They need fewer complicated braids, and the structure can be hidden more easily if one section sits a little unevenly.
How far ahead can I prep the hair?
You can curl, section, and even partly pin the hair a few hours ahead if needed, but the final shaping should happen close to the event so the style stays crisp. If you’re doing a full trial, that can be done earlier just to test shape and pin placement.
What if my updo looks flat at the crown?
Lift the top section slightly with the tail of a comb and add a couple of hidden pins at the base rather than piling on more hairspray. Crown height is a shape issue first, not a product issue.
Can short hair still look like a true updo?
Yes, but the style usually relies more on twisting, tucking, and hidden support than long wrapped sections. A good stylist can build a convincing shape with bobby pins, small pads, and a few well-placed accessories.
The Style That Stays Beautiful Through the Last Song
The best prom updo isn’t the one that looks most complicated from across the room. It’s the one that still looks deliberate after an hour of movement, a too-warm dance floor, and the inevitable moment when someone leans in for a photo from the side. That’s where shape matters more than decoration.
Pick the style that fits your neckline, your texture, and the kind of night you actually have in mind. Some dresses want a clean knot. Some want a braid. Some need a bun with a little looseness at the temples so the whole look breathes. Once the structure matches the outfit, the rest feels easier — and a lot more like you.
