



A bridal bun can look severe on a hanger and soft in motion. Low bun styles for brides fix that problem because they keep the shape close to the neck, where it feels anchored instead of floating around the head like a separate object.
That low placement does real work. A veil comb has somewhere solid to sit, chandelier earrings get room to move, and the back of the dress stays visible instead of getting buried under hair. I’ve always liked that low buns can read polished from ten feet away and still look gentle up close, which is a rare trick.
They also forgive a little wedding-day chaos. A pin can be hidden. A twist can be tightened. A loose tendril can be left alone if it suits the dress. The styles below cover sleek knots, braided shapes, softly undone buns, and a few fixes for thin hair, thick hair, curls, and shorter lengths — because bridal hair should fit the head it’s on, not some fantasy photo.
Why These Low Bun Styles Earn Their Keep on Wedding Day
-
They keep the neckline visible: A bun parked near the nape leaves room for lace collars, illusion necklines, square necks, and off-the-shoulder straps to do their thing.
-
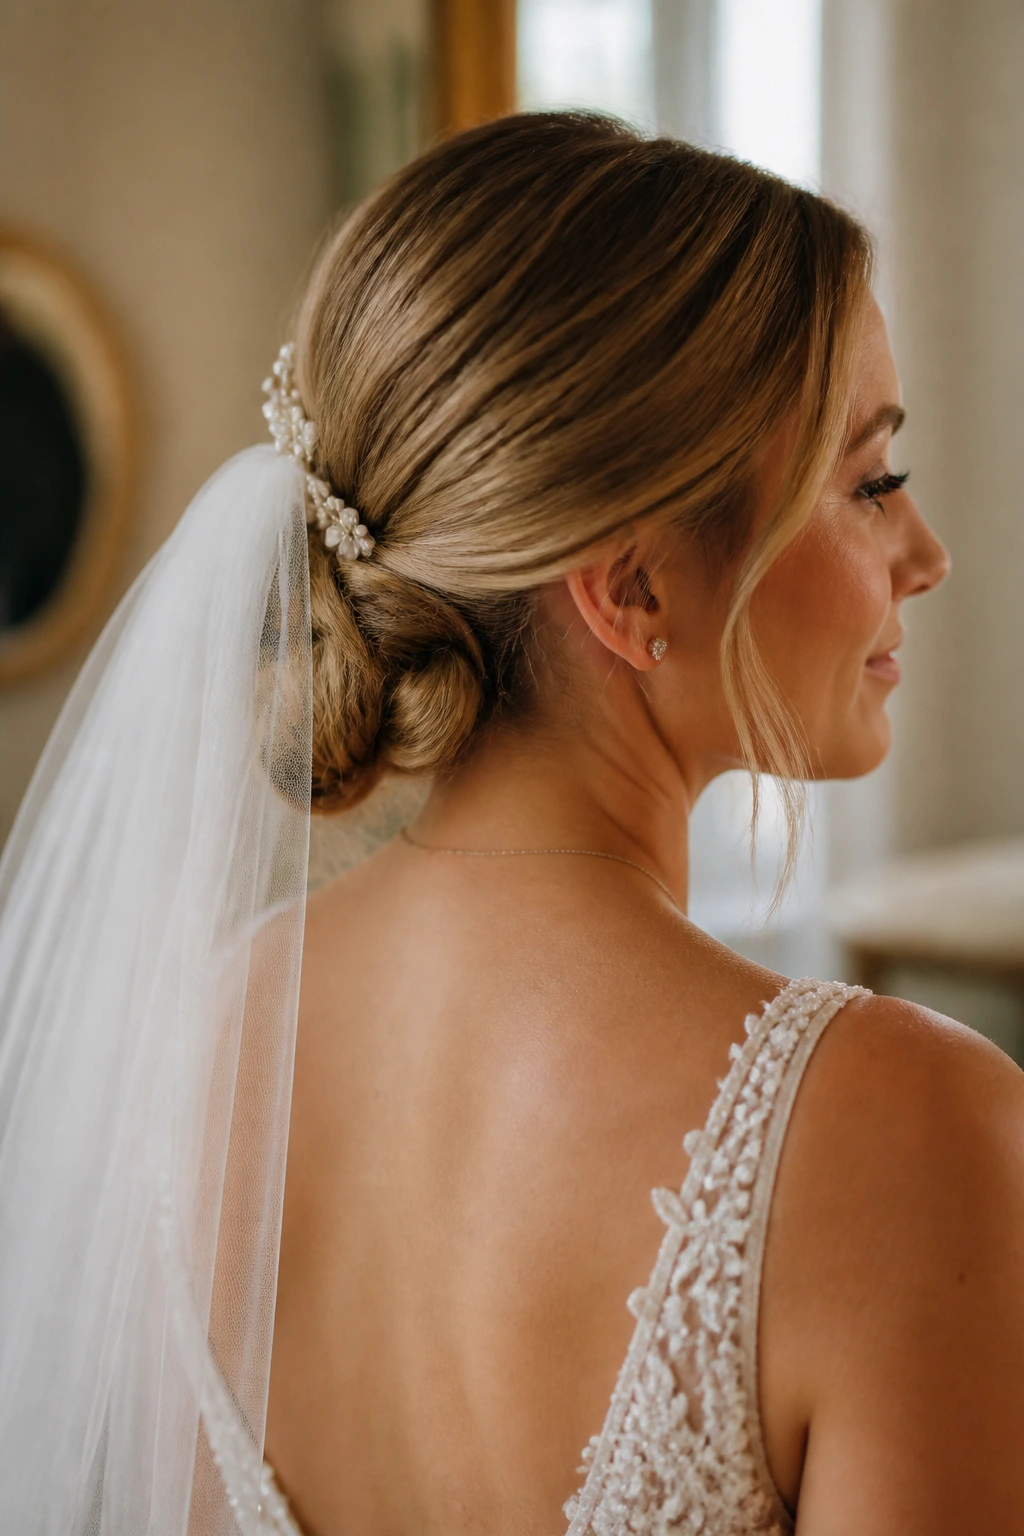
They play nicely with veils: A comb veil, blusher, or cathedral-length piece can anchor above or just into the bun without fighting a mountain of hair.
-
They survive after the ceremony: Once the veil comes out and the hugging starts, a low bun usually keeps its shape better than a loose curl set.
-
They work with accessories instead of against them: Pearls, pins, fresh flowers, and a ribbon can sit in the bun without feeling crowded.
-
They can be softened or sharpened: The same base can look sleek, romantic, modern, or old-Hollywood depending on how you part, twist, and finish it.
-
They give the back view something to say: Guests, photographers, and anyone behind you will notice the shape. That matters more than people admit.
1. Polished Center-Part Chignon
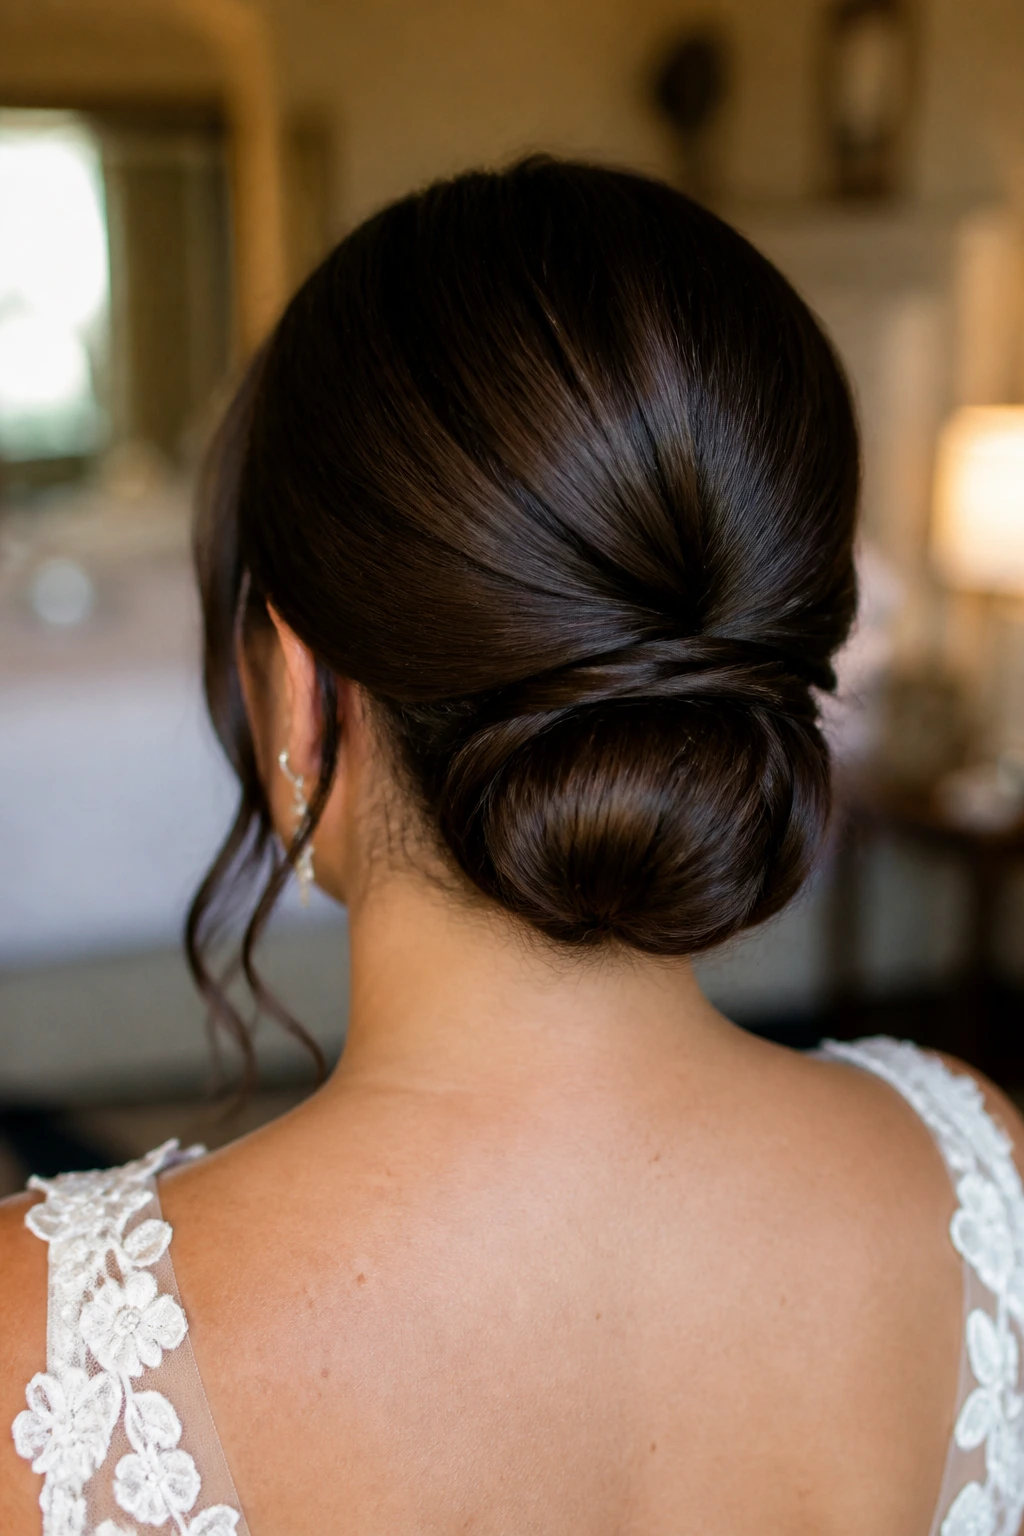
A clean center part with a low chignon has a kind of calm authority to it. The shape sits close to the nape, the front stays smooth, and the whole style looks like it was planned with the dress, the earrings, and the veil in mind.
This is the bun I reach for when the gown already has texture or detail. Satin, mikado, beading, a sharp square neckline — all of those can start to feel crowded if the hair gets too busy. The middle part creates symmetry, and the tucked chignon keeps the silhouette tidy from every angle. It also makes the back of the head look finished, which sounds small until you see wedding photos from behind.
Best on medium to long hair with some natural bend. A little serum through the front, a blow-dry with a round brush, and a few pins crossed under the bun are enough if the hair has a bit of grip.
2. Soft Twisted Nape Knot
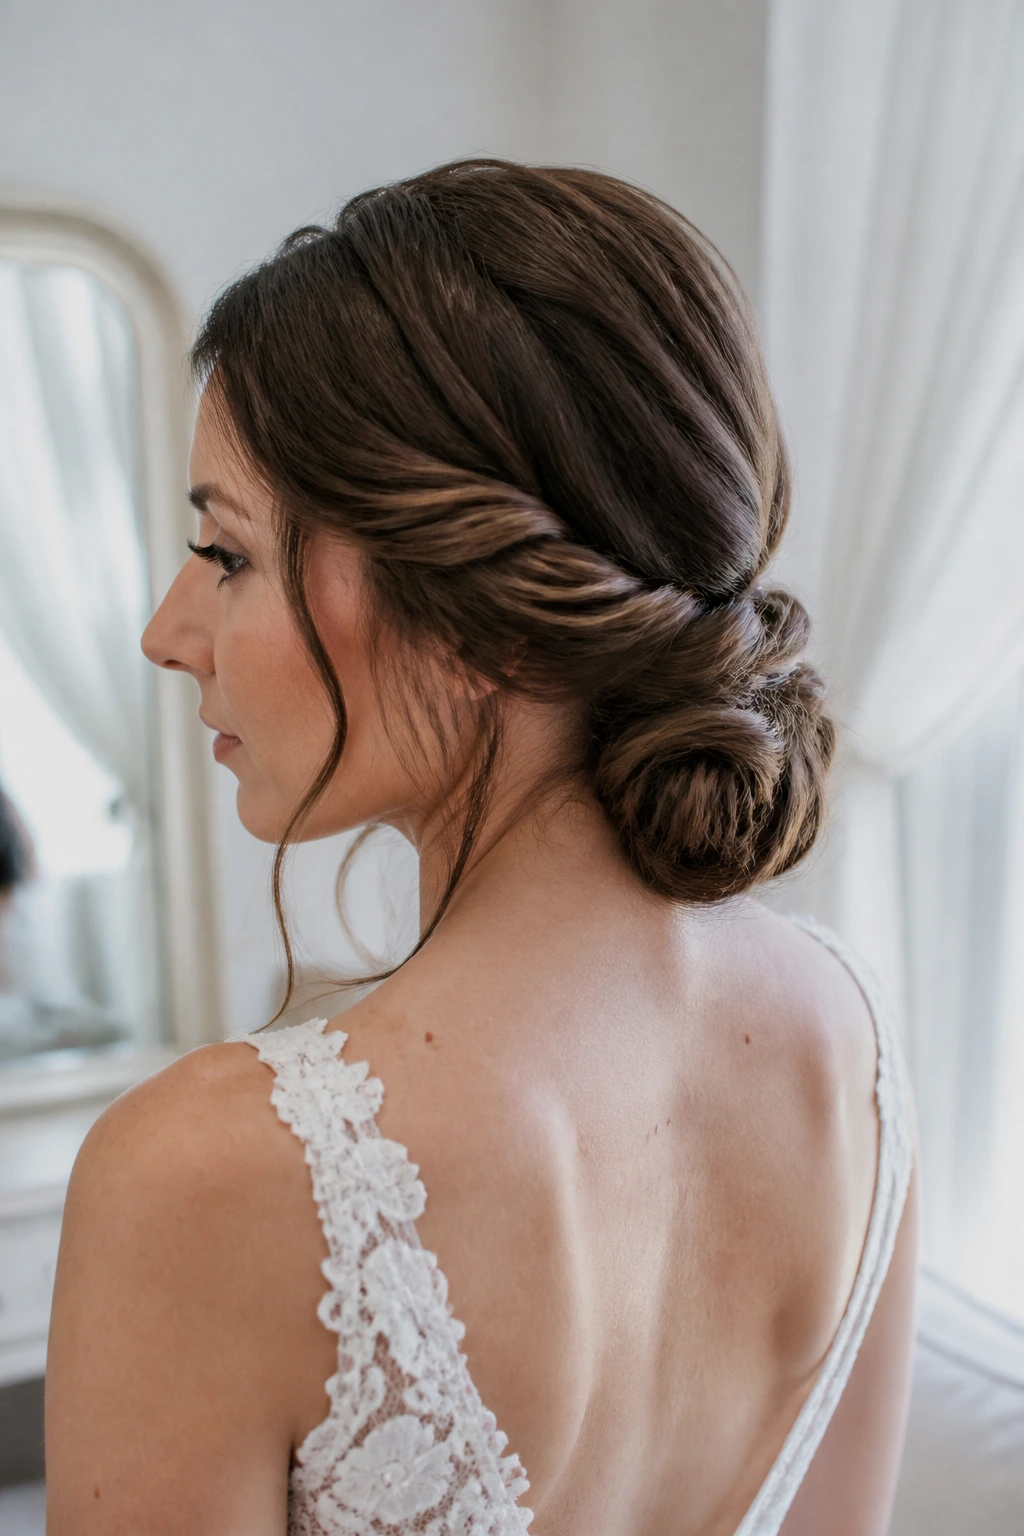
This version feels less formal and more lived-in, though it still belongs in a bridal trial, not a gym mirror. Two sections of hair are twisted from each side and gathered low, then folded into a knot that sits just above the neckline.
I like this for brides who want the hair to move a little when they turn their head. The twist adds shape without looking braided or fussy, and the low placement keeps the focus on the face and dress. If the gown has chiffon, soft sleeves, or a draped back, this shape makes sense.
The trick is not to twist too tightly. Leave a touch of slack in the rope sections so the bun has softness instead of looking like a knot tied on purpose and then regretted. A light mist of flexible hairspray before pinning helps the twist hold without turning it into a helmet.
3. Braided Crown Low Bun
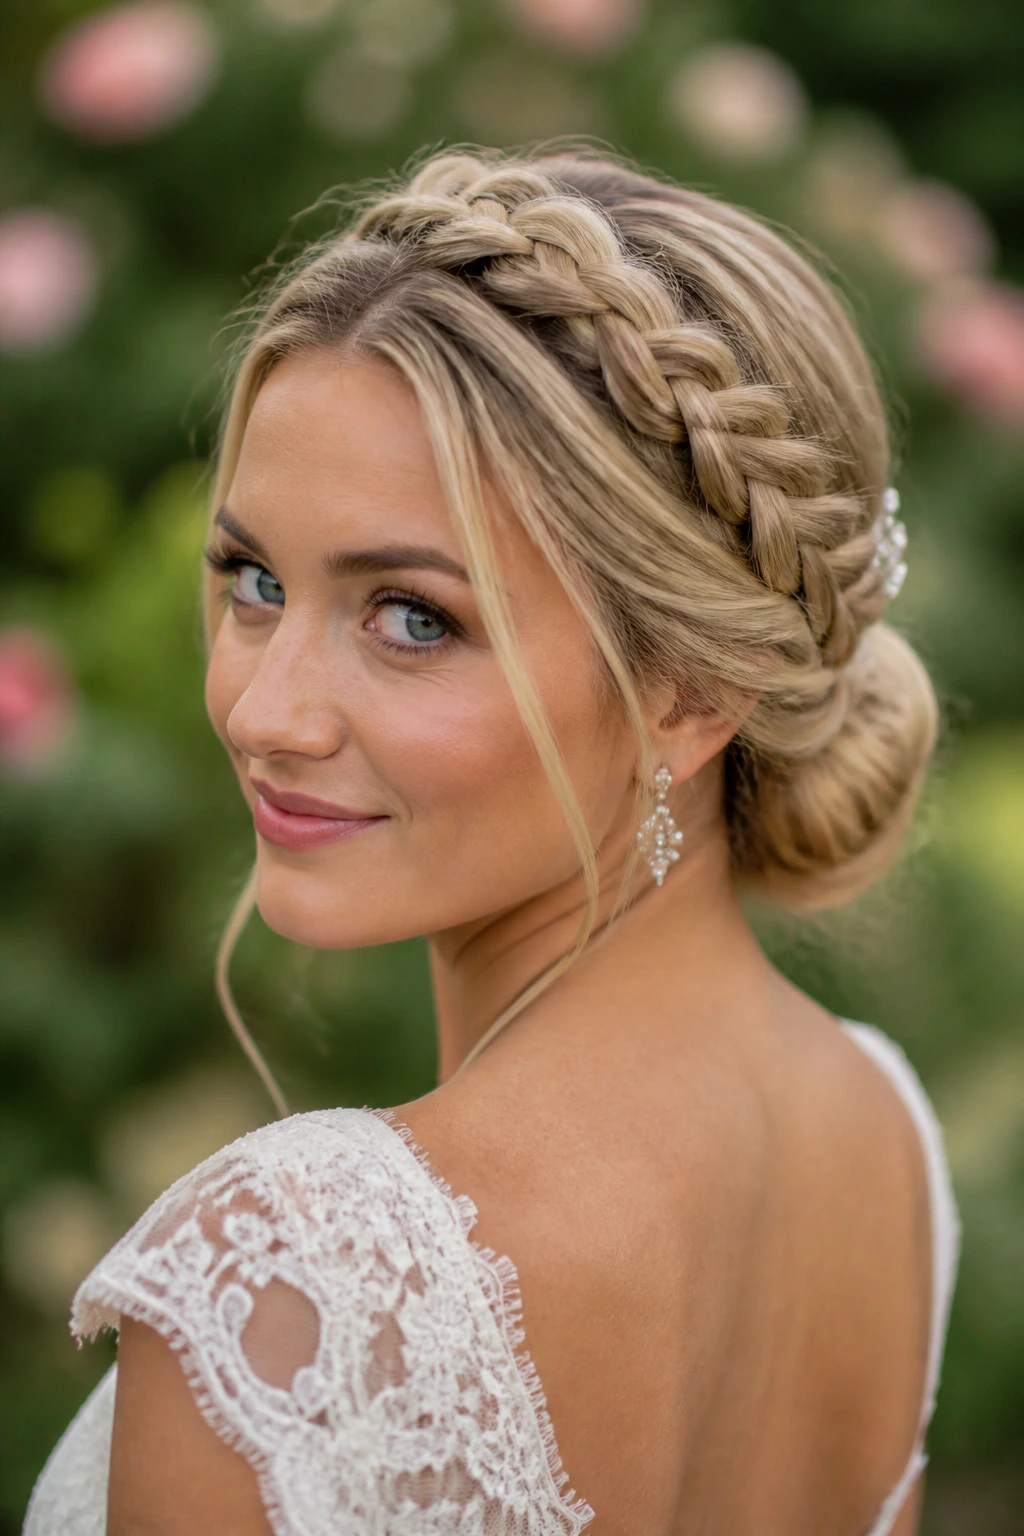
A braid running from the temple or hairline into a low bun gives you structure up top and softness at the nape. It’s the kind of style that looks detailed even if the rest of the dress is simple.
Why It Stays Neat
The braid acts like a track. Hair is less likely to slip because it’s already woven into sections, and that makes this one especially useful for long portraits, outdoor vows, or a bridal party that starts early and runs late.
A few things make it sing. Keep the braid slightly elevated near the crown so it doesn’t collapse into the head, and tuck the bun low enough that the braid can fan into it naturally. This works particularly well with garden weddings, lace sleeves, and floral combs because the texture feels intentional, not added on.
If you want to keep it from reading too bohemian, smooth the front with a fine-tooth comb and use pins in the braid itself, not only in the bun. That’s the part people miss.
4. Sleek Wrapped-Base Knot
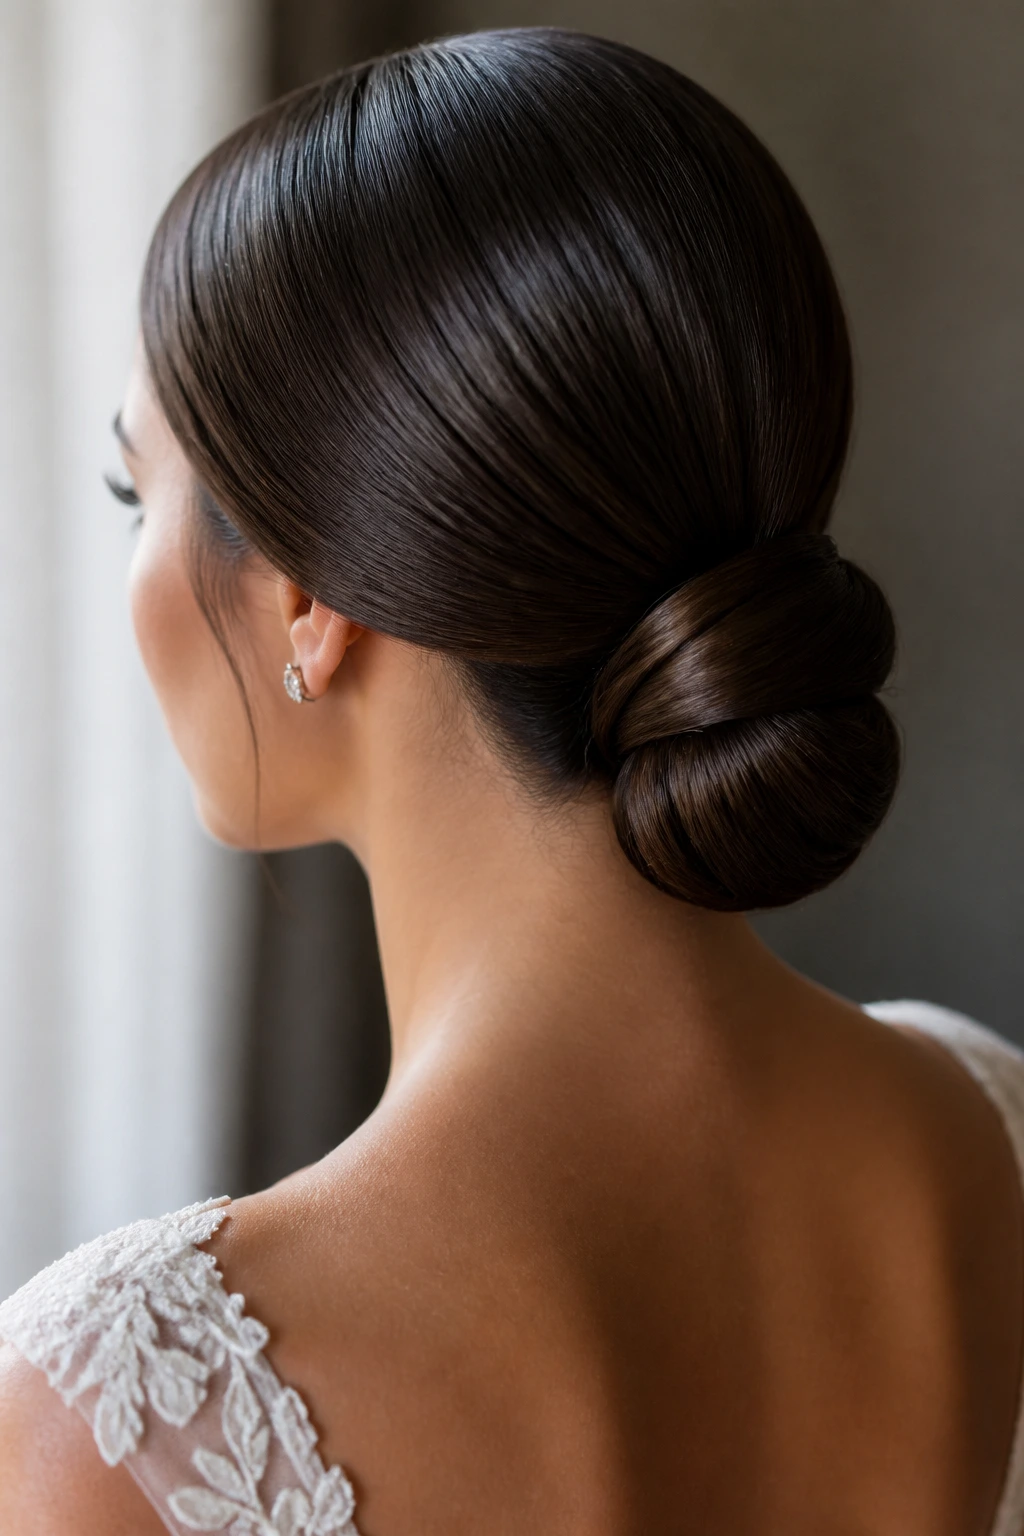
This is the clean, polished cousin of the bridal bun world. Hair is brushed back tight, gathered low, and wrapped around its base so you don’t see the elastic or the structure underneath.
The appeal is blunt and simple: it looks expensive because every line is controlled. No flyaway halo. No loose pieces drifting onto the cheeks. Just shine, shape, and a compact knot that works beautifully with minimalist gowns or dramatic earrings.
I’d use a wax stick or smoothing cream at the hairline, then finish with a boar-bristle brush so the surface lies flat before the bun is pinned. If the hair is layered, a small hairnet underneath can save you from tiny ends poking out by the end of the night. That little net is not glamorous. It is useful. There’s a difference.
5. Side-Part Bridal Chignon
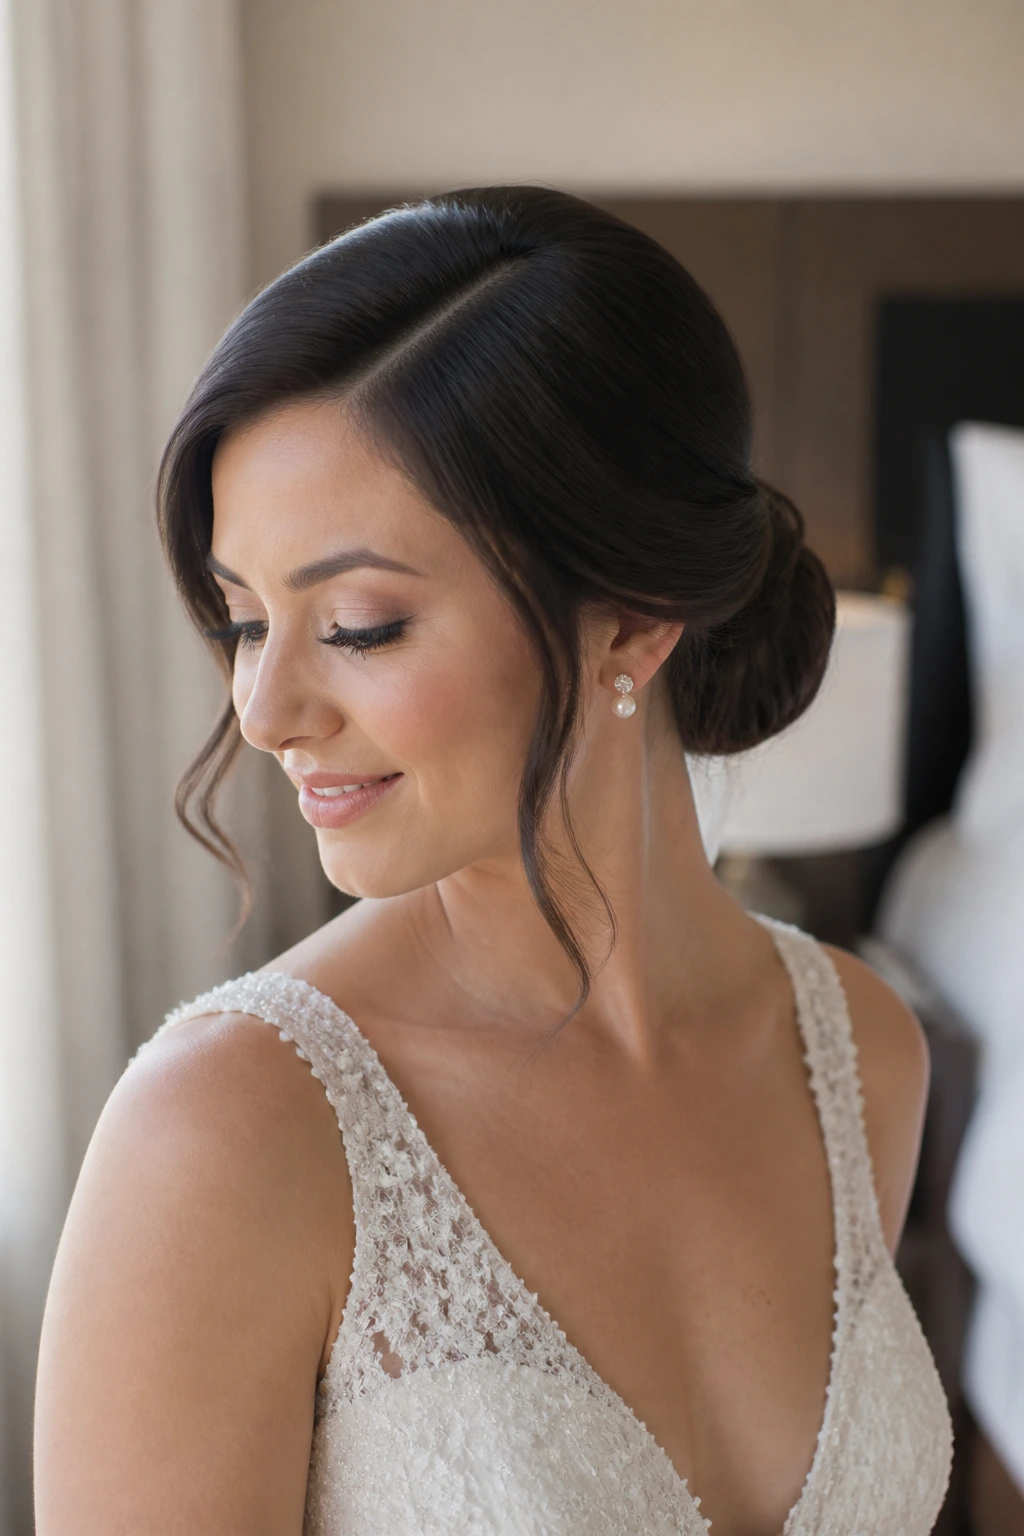
A deep side part changes the whole mood of a low bun. Suddenly the style has a sweep, a bend, a little more attitude. It feels less school-photo and more red-carpet, which is a nice place for a wedding hairstyle to live.
This version is especially good if your dress has a one-shoulder line, asymmetrical neckline, or a big earring moment on one side. The side part lets the front hair act like a frame, while the bun stays low and balanced near the base of the neck.
Don’t overbuild the top. A slight lift at the crown is enough. If the roots get teased too high, the style starts to look dated fast. Keep the part clean, smooth the front toward the bun, and let the asymmetry do the talking.
6. Textured Low Bun With Face-Framing Pieces
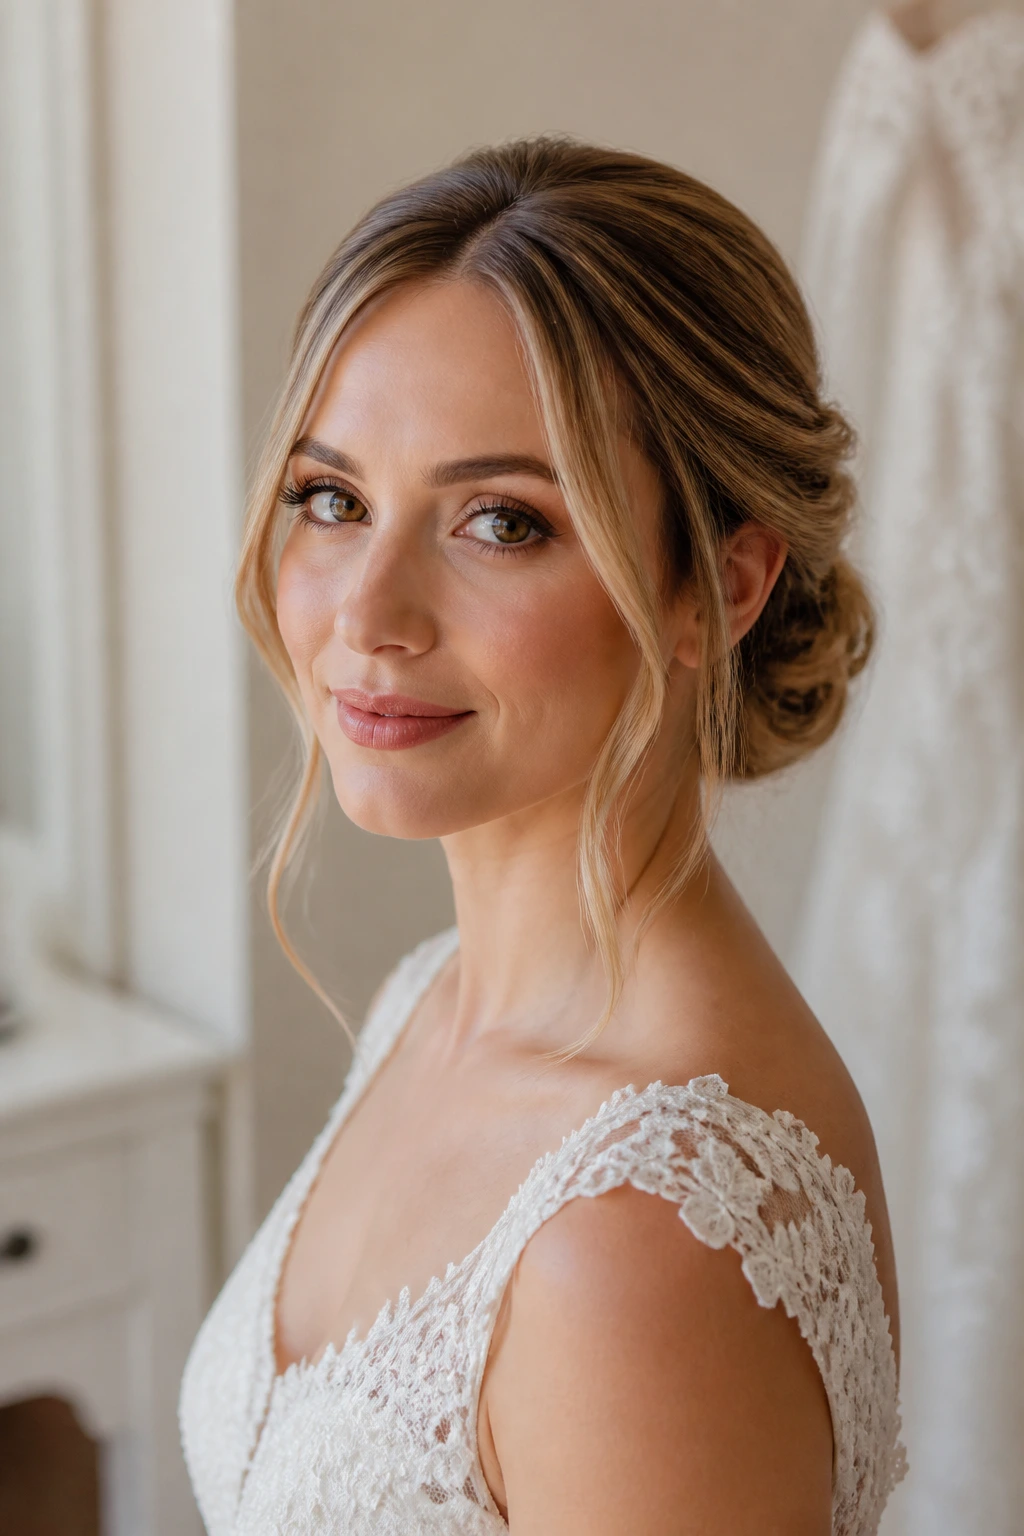
This is the soft-focus version of a bridal bun. The hair around the crown stays gently lifted, the bun itself has a little texture, and two face-framing pieces fall forward without turning into a full curtain.
I like this style when the dress feels romantic but not precious. Tulle, lace, soft draping, painted florals — that sort of thing. The texture keeps the bun from looking too hard, and the face pieces give the profile a little movement in photos. Leave the front pieces at cheekbone length or just below; much longer and they start brushing lipstick, which is annoying by hour two.
Use a 1-inch curling iron or wand before pinning, then loosen the waves with fingers, not a brush. A brush turns the texture to fluff. Not the same thing.
7. Pearl-Pinned Low Bun
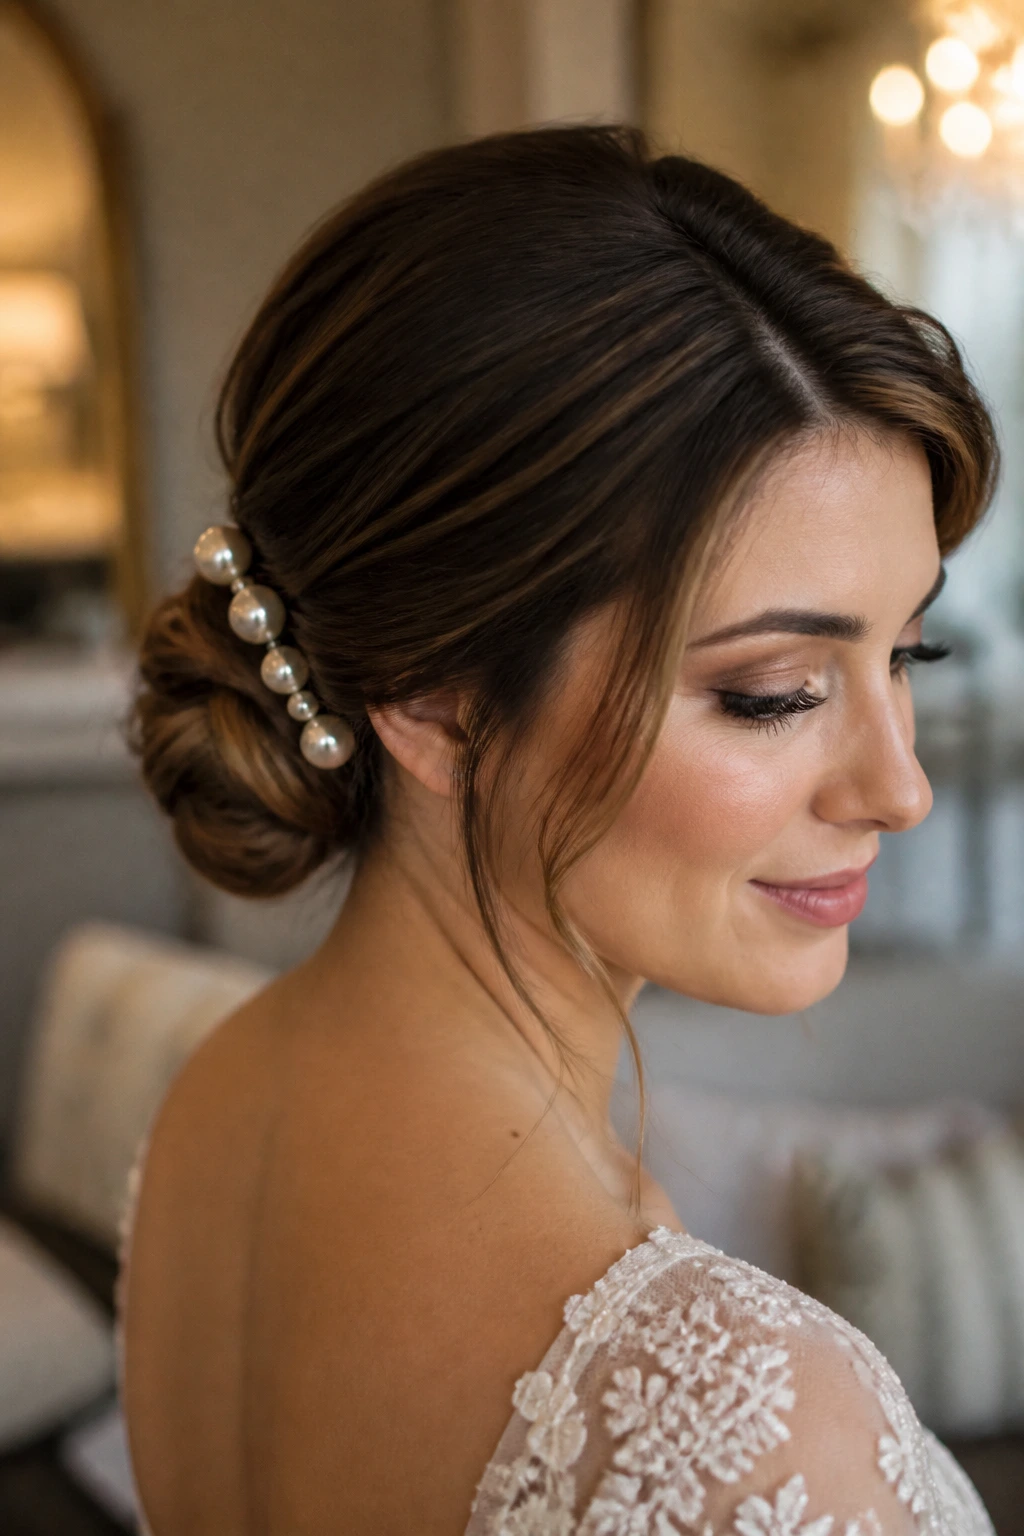
Pearls change the mood of a bun fast. A simple knot can go from plain to polished just by clustering pearl pins along one side or tucking a single row into the base.
Best Way to Place the Pearls
Put the bun together first. Always. Then place the pearl pins once the shape is locked. If you add them too early, they shift while you keep pinning and you end up chasing them around the bun like loose beads on a kitchen floor.
I prefer an uneven cluster rather than scattering them all around the perimeter. A few pins near the bun’s seam create a focal point, and the style still feels light enough for a veil or comb. Pearls work especially well with clean dresses, satin ribbons, and simple veils because they bring detail without noise.
This one can go sweet or modern depending on the size of the pearls. Tiny pins read delicate. Bigger pins feel bolder and a little more fashion-forward. Both are fair game.
8. Knotted Ballet Bun
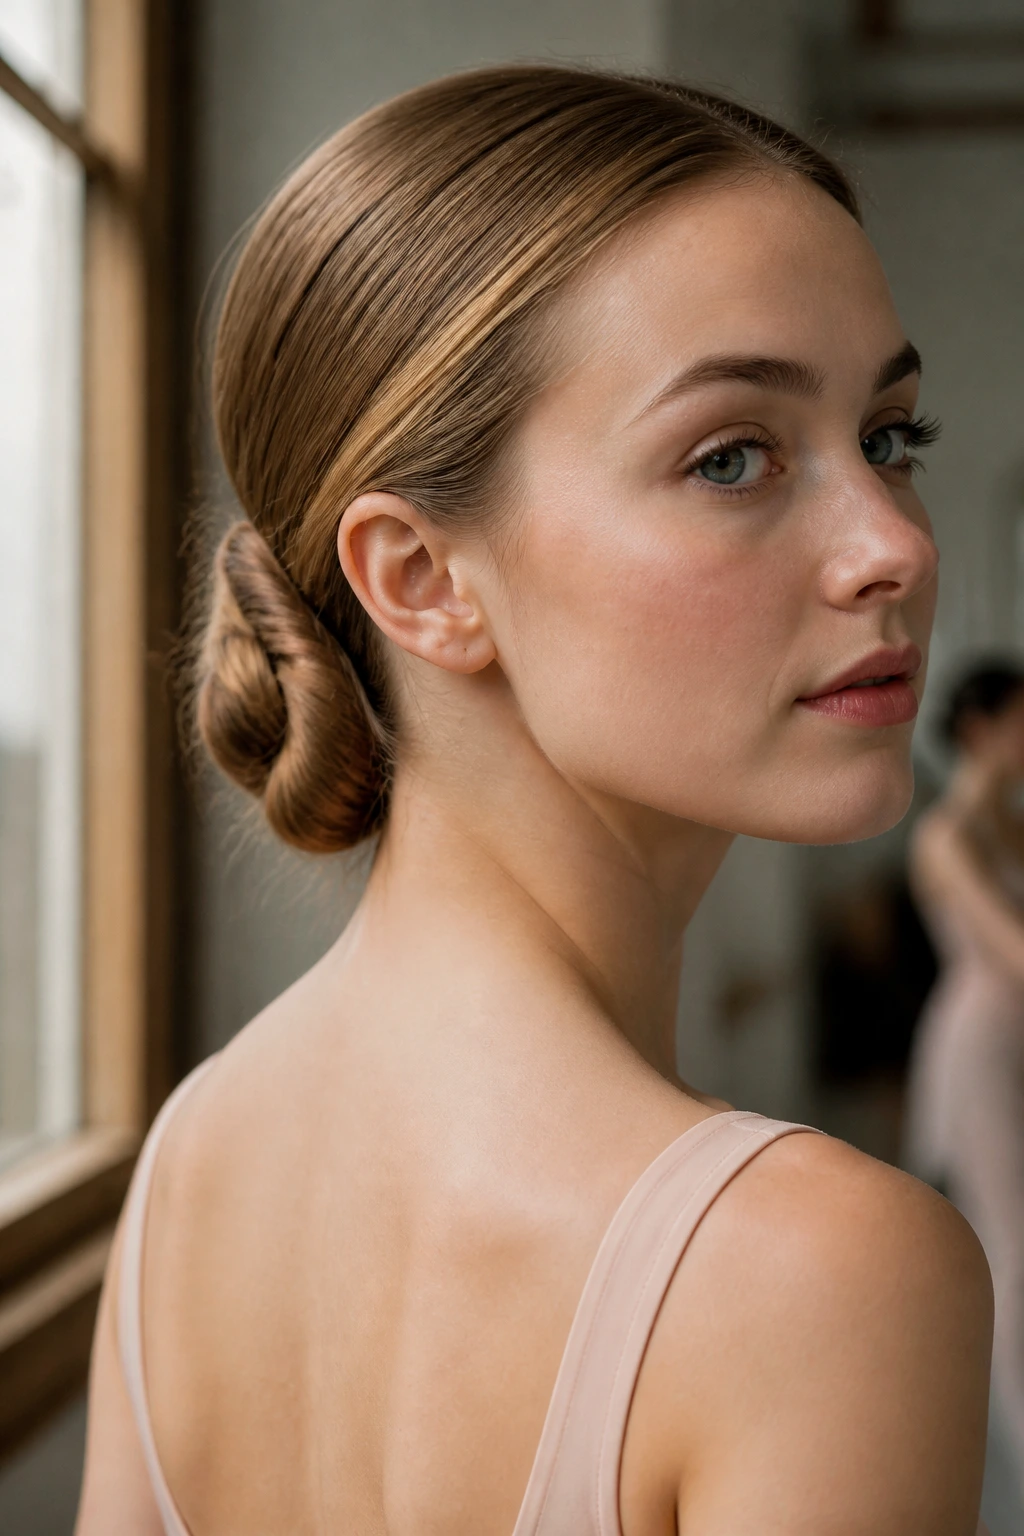
A knotted ballet bun has the neatness of a dancer’s hairstyle, but bridal versions usually sit softer and lower. The hair is divided into sections, looped, and tucked so the bun reads as a real knot instead of a rolled-up donut.
That shape suits thicker hair especially well. There’s enough weight in the sections to hold the form, and the finished bun looks full without needing a big padding ring. It also has a nice clean back view, which matters more than people think when the ceremony aisle is short and the photos are long.
For a bridal version, keep the edges smooth and skip anything too slick at the front. A subtle side part or center part both work. The bun should look disciplined, not severe.
9. Halo Braid Into Low Bun
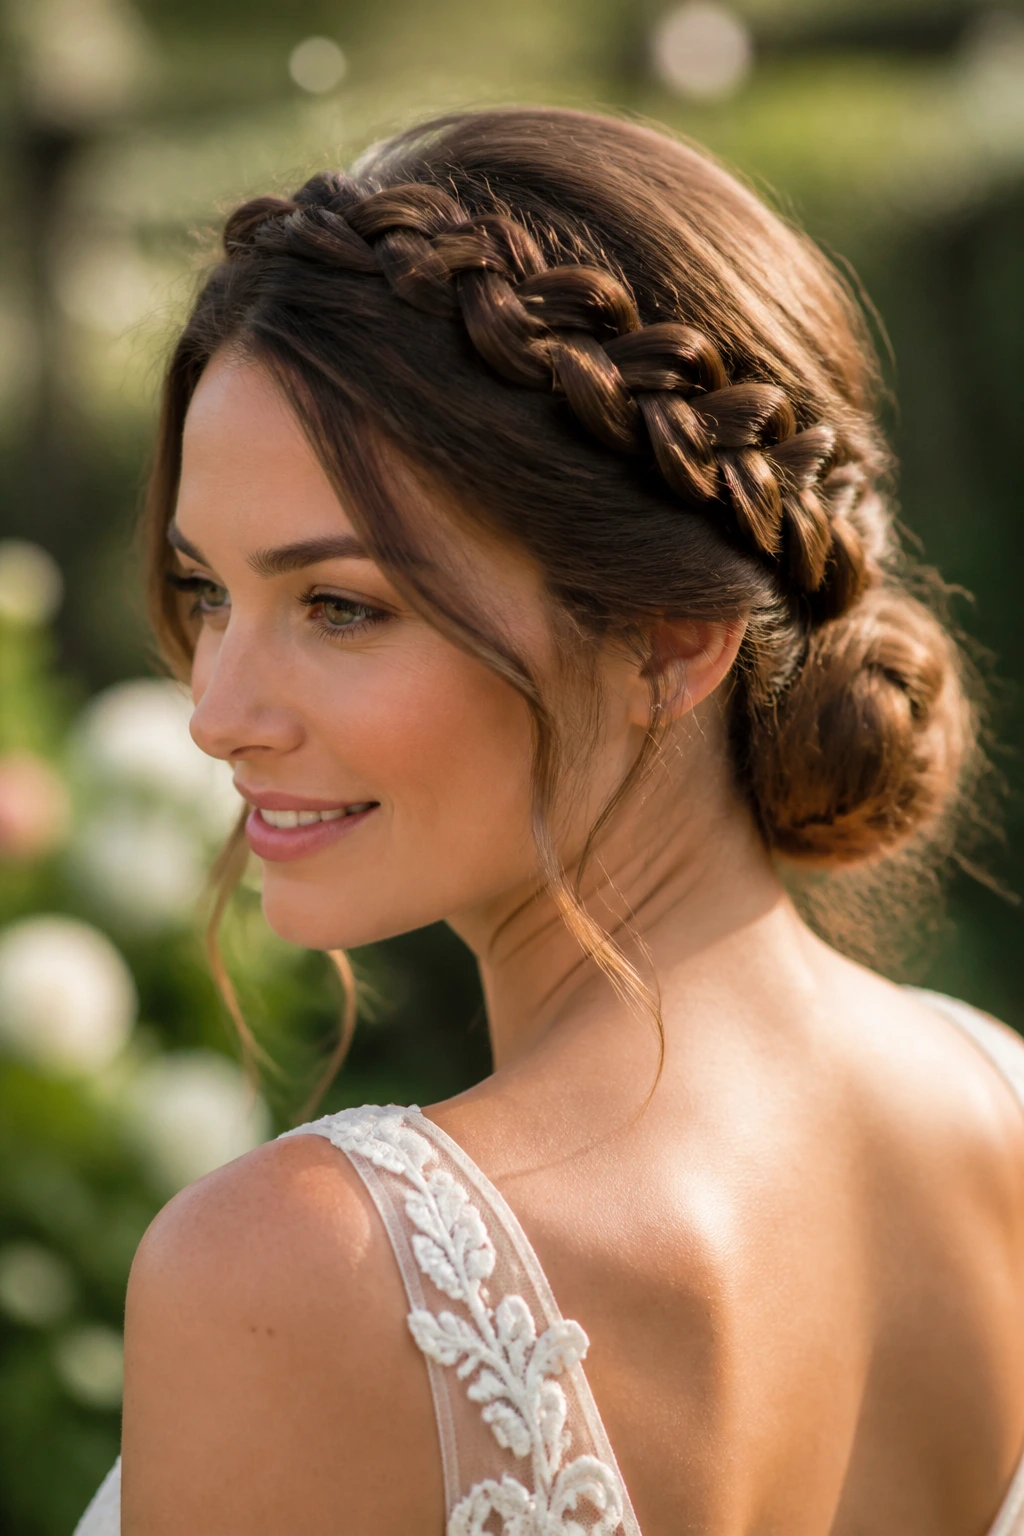
A halo braid curling around the head and finishing in a low bun gives you a built-in frame before you even get to the bun itself. It’s a smart choice if you want the front hair controlled and the nape to carry the softness.
The braid can start at one temple and sweep back, or it can circle the crown and join at the base. Either way, the braid holds the outline in place, while the bun keeps the weight low and comfortable. That combination makes it useful for long ceremonies and outdoor settings where loose pieces would turn on you.
This is one of those styles that looks more complicated than it is, which I’m not complaining about. A little braid detail carries a lot of visual weight. The bun underneath can stay quite simple.
10. Padding-Boosted Bun for Fine Hair
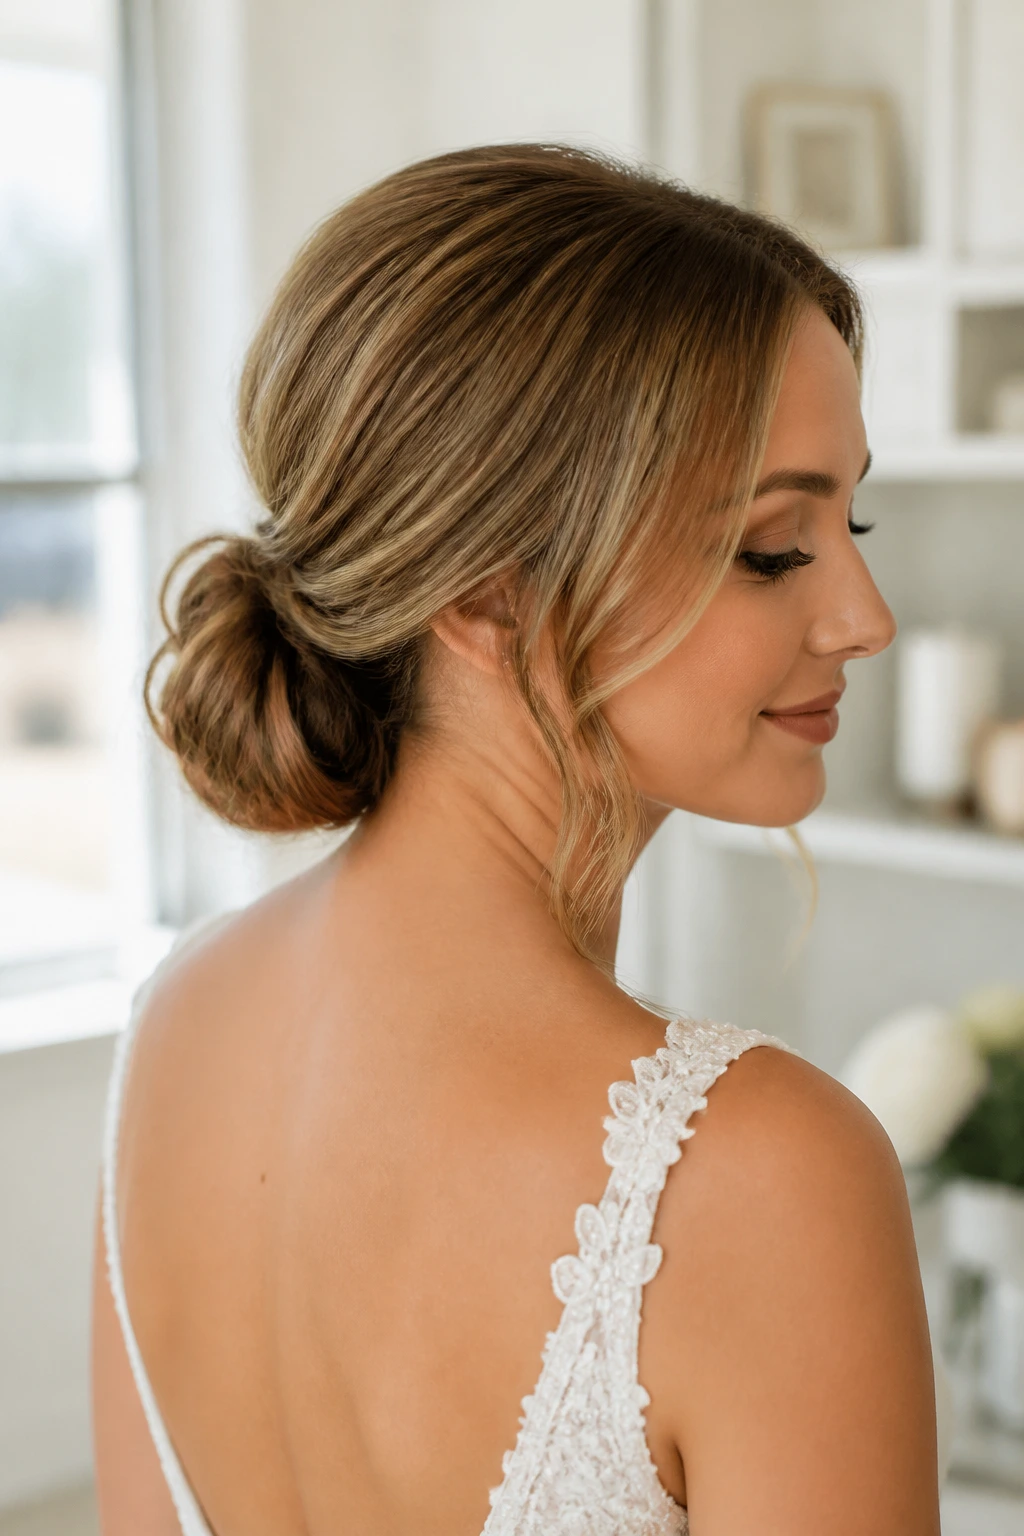
Fine hair can make a bridal bun look too tiny if you just gather it and hope for the best. Padding solves that. A small bun maker, a mesh donut, or even a rolled cushion of teased hair can give the shape enough body to look deliberate.
What Makes It Work
The secret is not volume everywhere. It’s volume in the right place. Tease the roots at the crown, mist a texturizing spray near the mid-lengths, and shape the bun so it looks compact but full. If you add too much hairspray too soon, the hair gets stiff before you can sculpt it, and the bun ends up flat on one side.
This style loves a rehearsal. Fine hair can collapse when it’s freshly washed and silky, so I’d plan the trial with hair that has at least a bit of grip. A tiny hidden pin cushion under the bun can make a surprising difference when the hair wants to slip.
11. Veil-Anchor Chignon
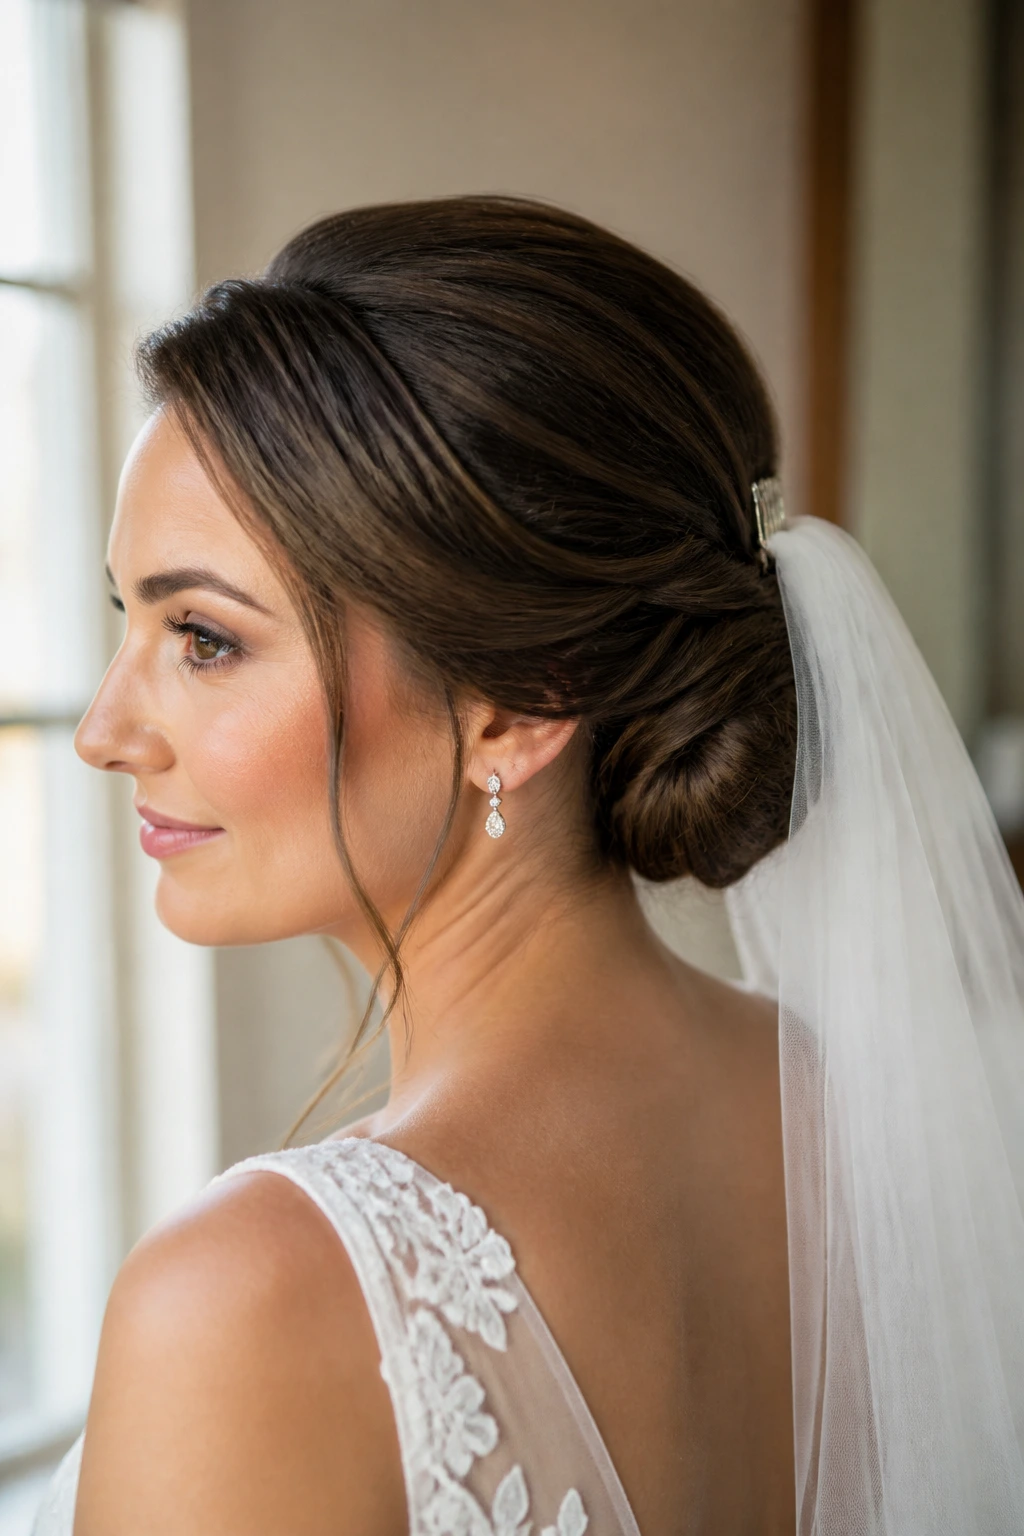
A veil-anchored chignon is built with one thing in mind: the veil has to come off without taking the bun with it. That means the bun sits low and sturdy, with pin placement planned around where the comb will bite into the hair.
This is one of the most practical low bun styles for brides, and I mean that in a flattering way. The style works because the comb can sit above the bun without crowding it, and the bun itself has enough structure to survive the removal moment. That matters after the ceremony, when somebody’s hands are usually moving faster than they should.
During the trial, actually remove the veil once or twice. Don’t skip that. If the comb drags or the bun loosens, you want to know before the wedding shoes are on.
12. French Twist to Nape Bun
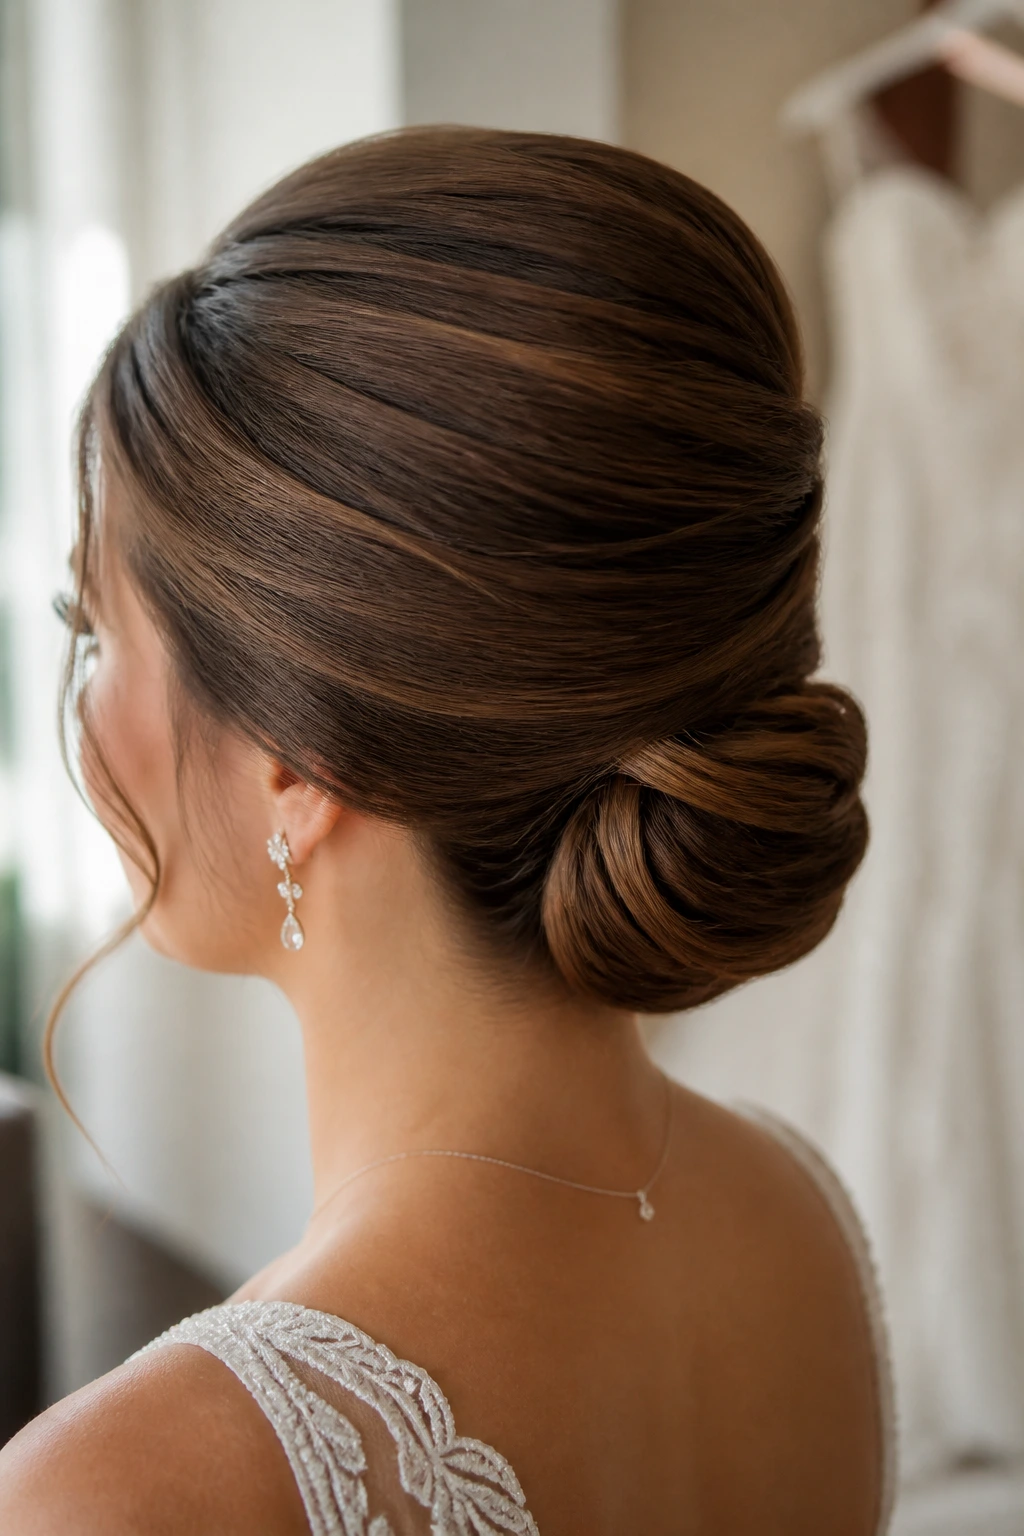
This style borrows from the classic French twist but stops short of going full vertical. The hair gets swept upward, rolled, then tucked into a low bun at the nape instead of ending in a tall shell.
The result has a faint old-Hollywood feel without becoming too formal. It works with gowns that have structure — a sharp bodice, a fitted sleeve, a clean column — because the hair matches that sense of shape. The twist gives lift through the back of the head, while the low finish keeps the look wedding-appropriate instead of cocktail-party strict.
If the bride has medium-length hair, this is a useful route because the twist can help make shorter layers behave. Long hair can feel a bit heavy here, so secure the roll in sections and pin from inside the fold, not only around the outside.
13. Loose Garden Bun
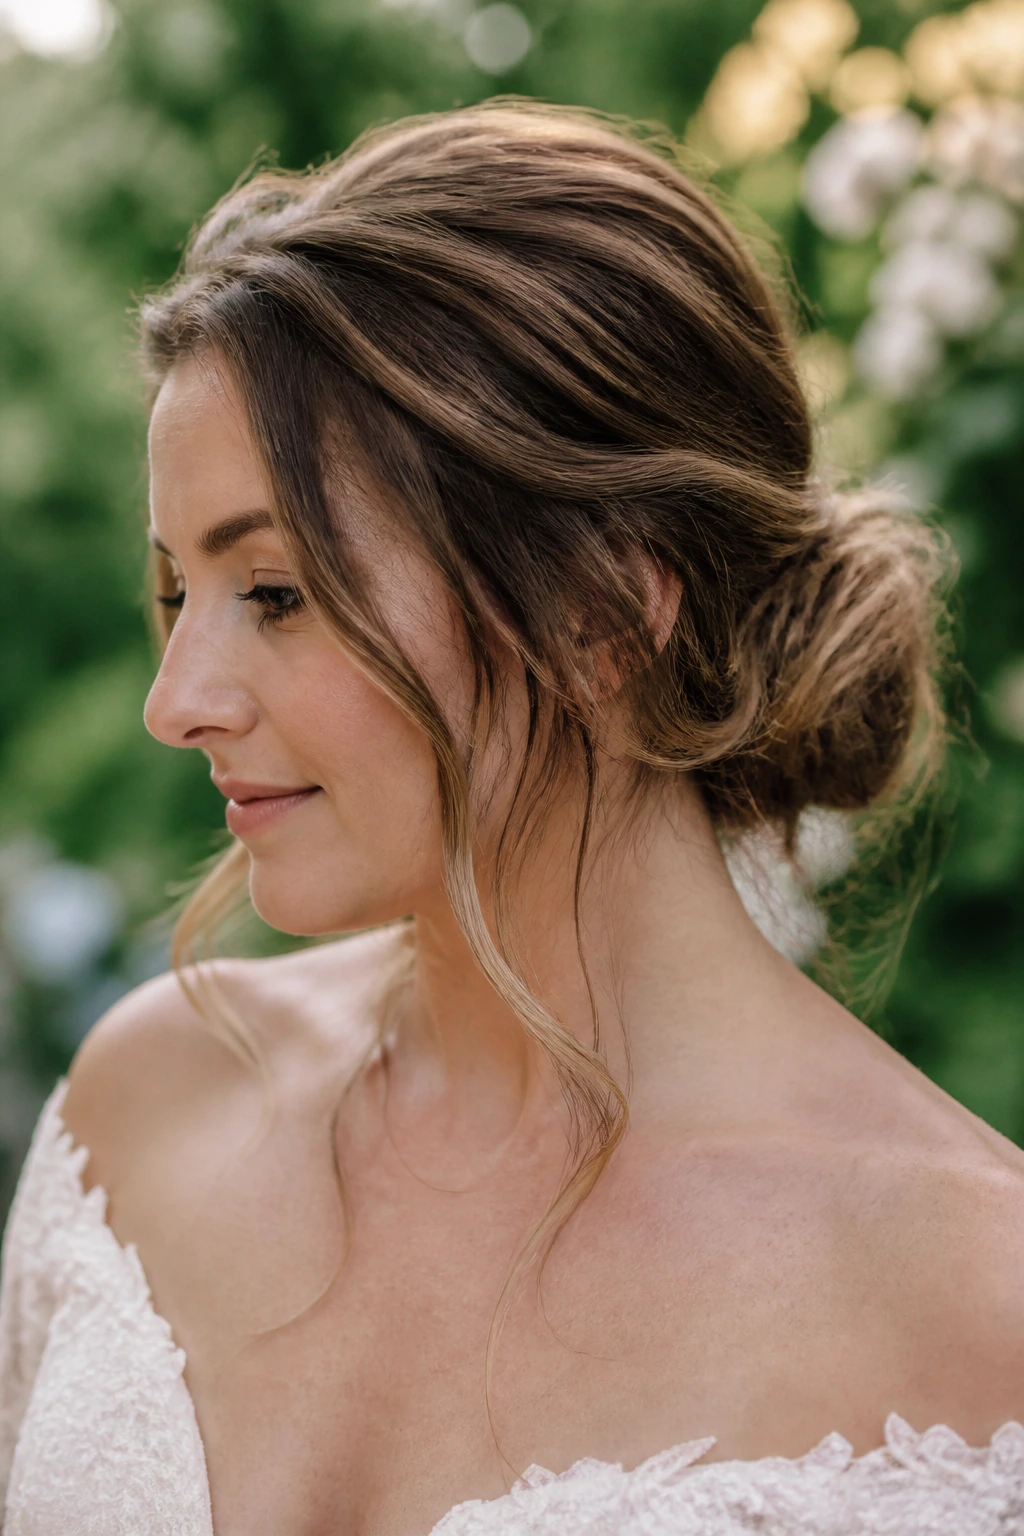
A loose garden bun lives in the space between undone and careless. That’s a narrow line, but it’s worth walking. The bun sits low and soft, a few pieces are left to bend around the cheeks, and the finish looks like it could hold a flower stem or two without complaint.
This is the style I’d pair with a dress that has movement — chiffon, soft lace, a skirt that sways when you walk. The texture feels more natural than polished, which is useful if the venue is outdoors and the bride wants the hair to match the setting instead of fighting it.
The catch is humidity. A loose bun can lose its shape if it’s built too airy for the weather, so the base still needs to be pinned well. Loose does not mean weak. Those are different jobs.
14. Double-Twist Low Bun
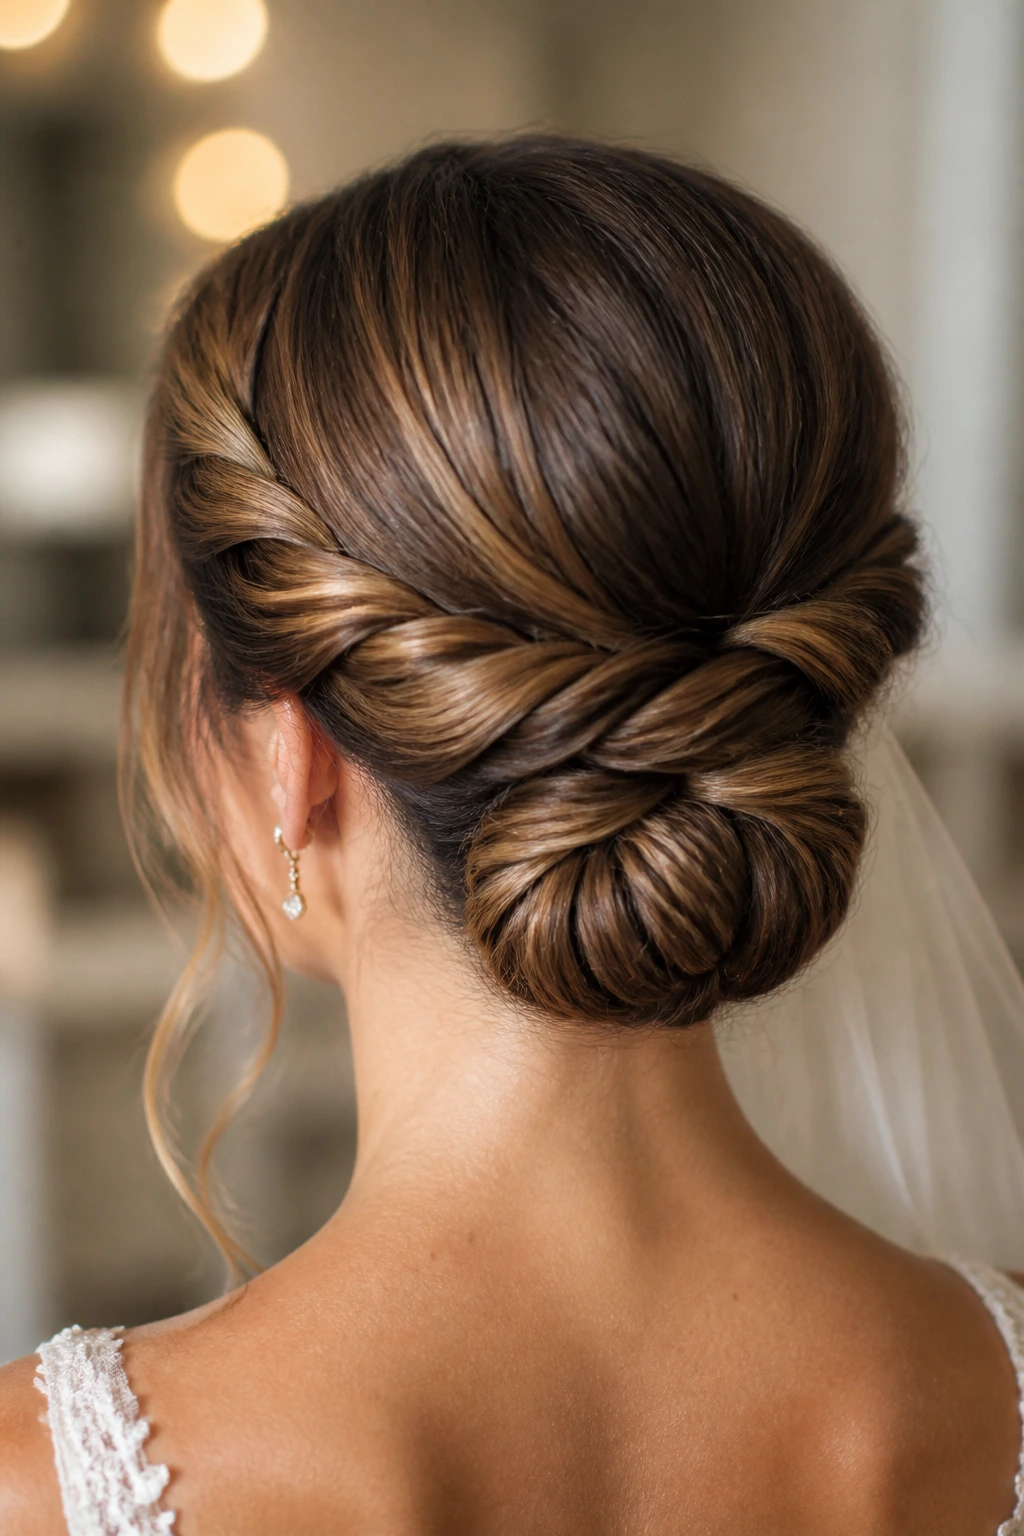
A double-twist low bun uses two thick sections swept from each side and brought together at the nape. The finish is balanced and symmetrical, but not stiff. It looks like the hair found its own center and settled there.
I like this when the bride wants the bun to feel soft but still structured enough for photos. Because each twist carries its own shape, the bun tends to hold better than a style built from loose ends alone. Thick hair behaves nicely in this setup, and medium hair can look fuller than it really is.
You can keep the twists tight for a cleaner line or loosen them slightly for a gentler edge. The two approaches change the whole mood. That’s useful, because not every dress wants the same kind of hair.
15. Bubble-Braid Low Bun
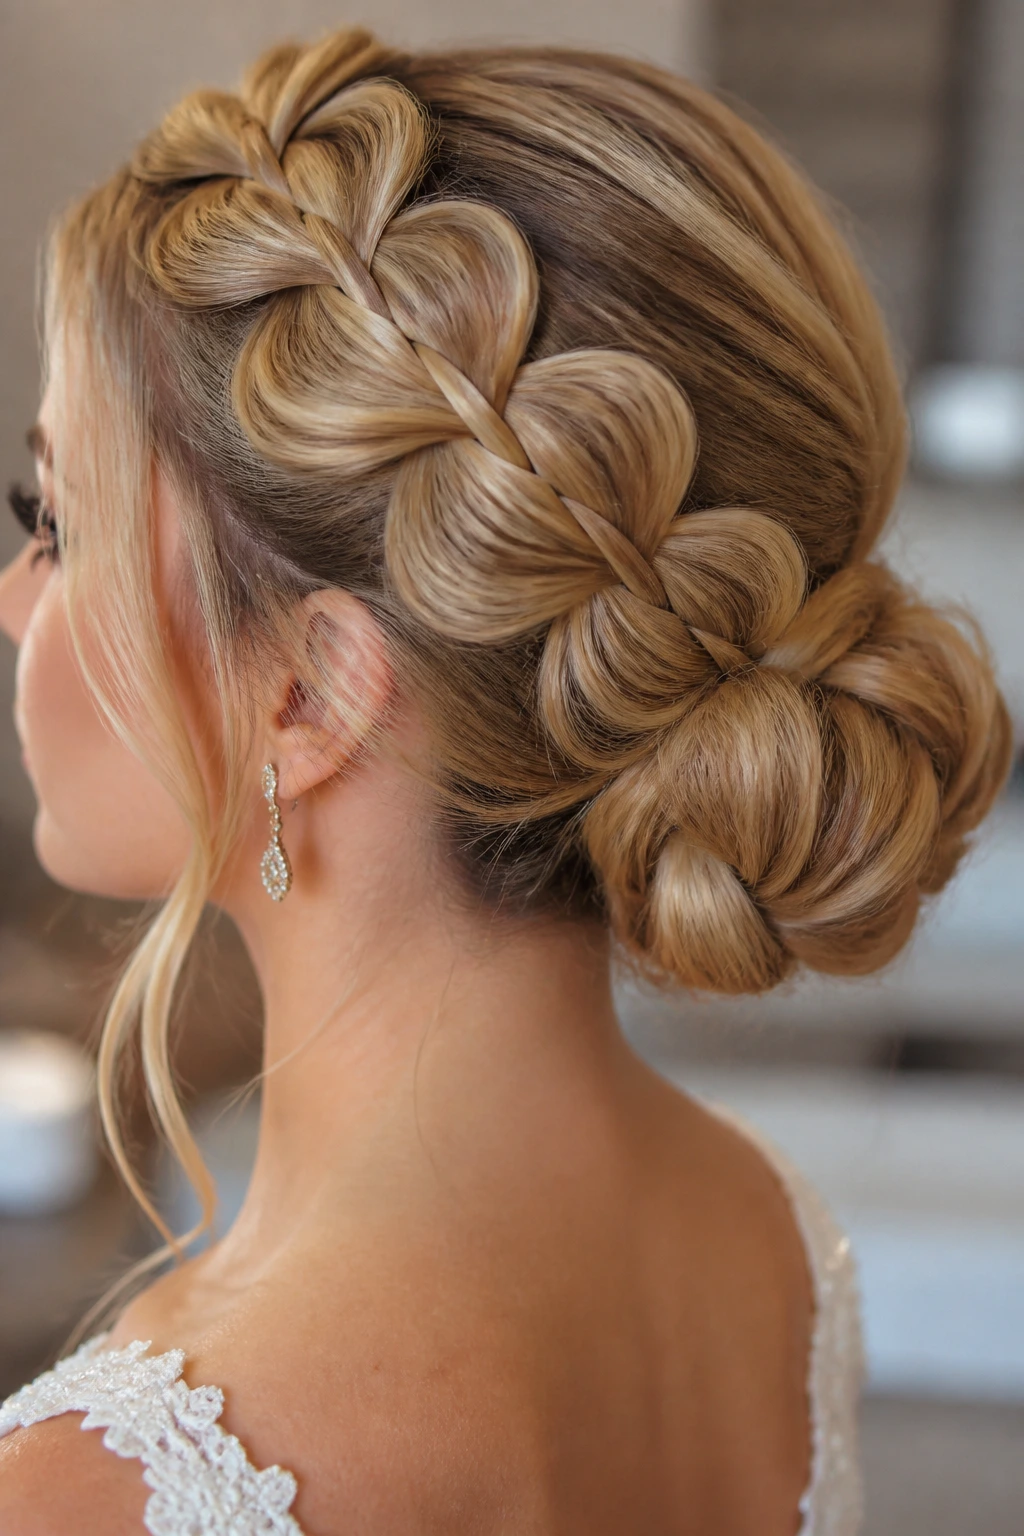
A bubble braid folded into a bun gives the style a modern edge without going full runway. The braid itself makes little rounded sections, then those sections are tucked or looped into a low bun that still reads bridal.
When It Makes Sense
This is for brides who want detail they can actually see from a distance. A regular braid can disappear in photos. Bubble sections keep their shape a little more clearly, especially if the hair is long and shiny.
I’d keep the rest of the hair smooth so the bubble structure doesn’t get lost in texture. Clear elastics should be hidden under the folds, and the bubbles need gentle puffing so they look intentional rather than squashed. It’s a sharper style than people expect, and that can be a good thing when the dress is simple.
16. Wet-Look Sculpted Bun
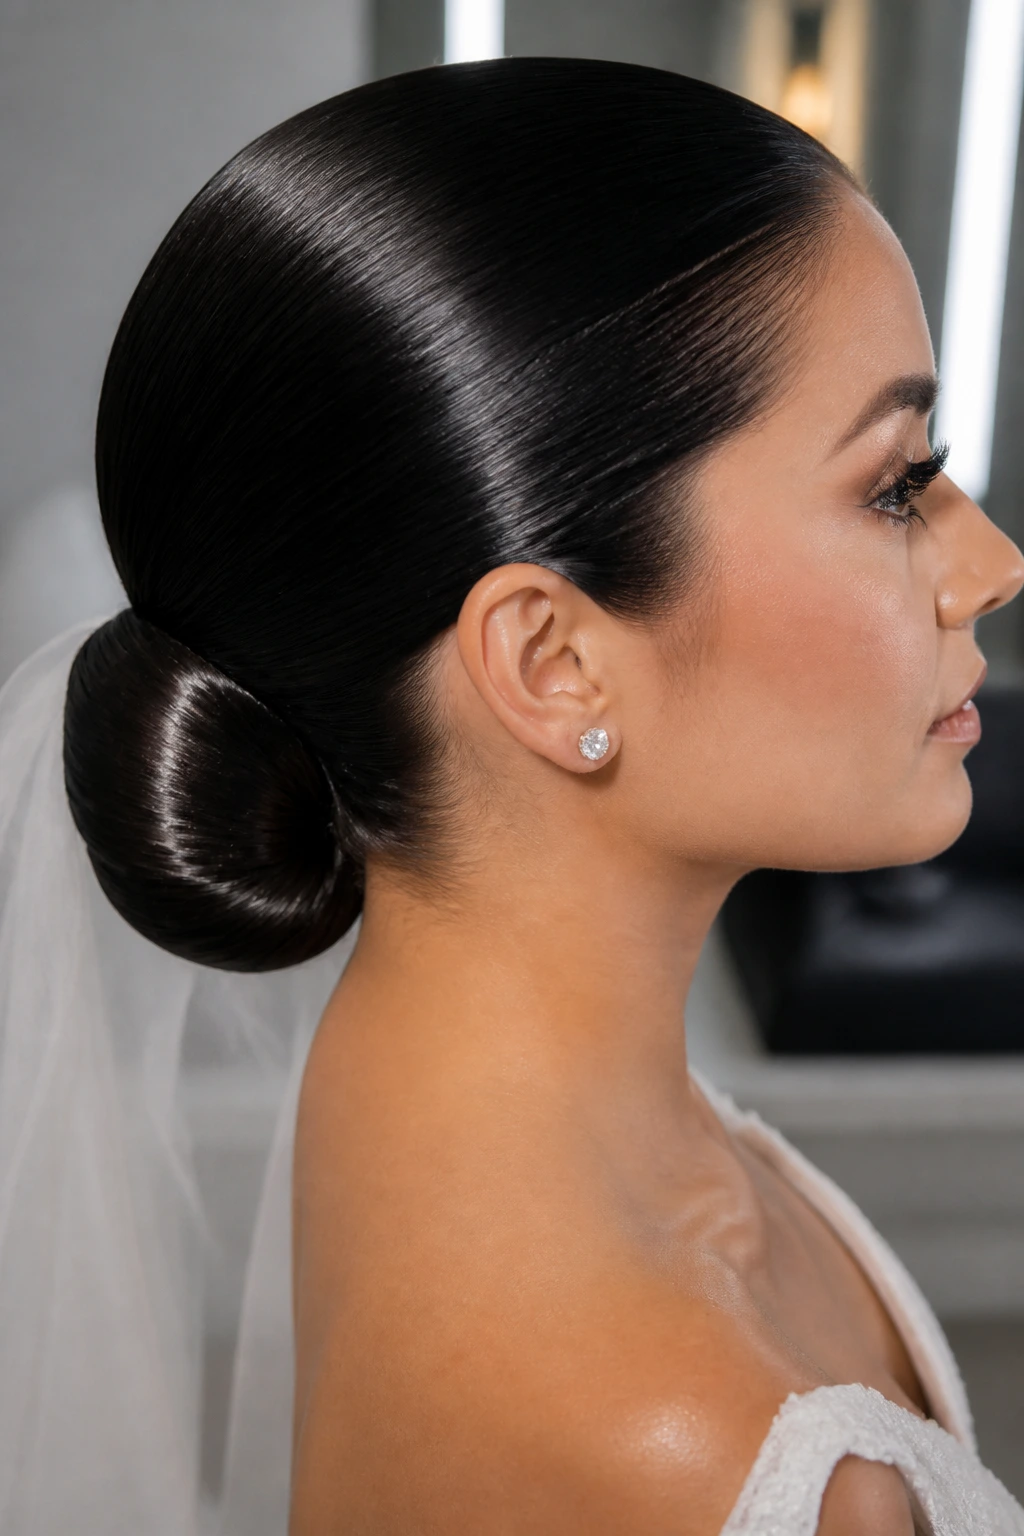
A wet-look bun brings a fashion-editor mood to bridal hair. The surface is glossy, the shape is firm, and the finish looks sculpted rather than soft. It’s not for every dress, and that’s part of the charm.
This works best with sharp necklines, dramatic earrings, or makeup that already has some edge to it. The shine makes the bun feel modern, but it also means the shape has to be clean because every pin line and ridge shows more easily. If the bun is lopsided, the gloss will tell on you.
Use gel or a cream gel at the roots and smooth everything down before pinning. Once the style is set, the veil comb should be tested carefully, since slick hair can let hardware slide if the anchor point is weak.
17. Curly Texture Low Bun
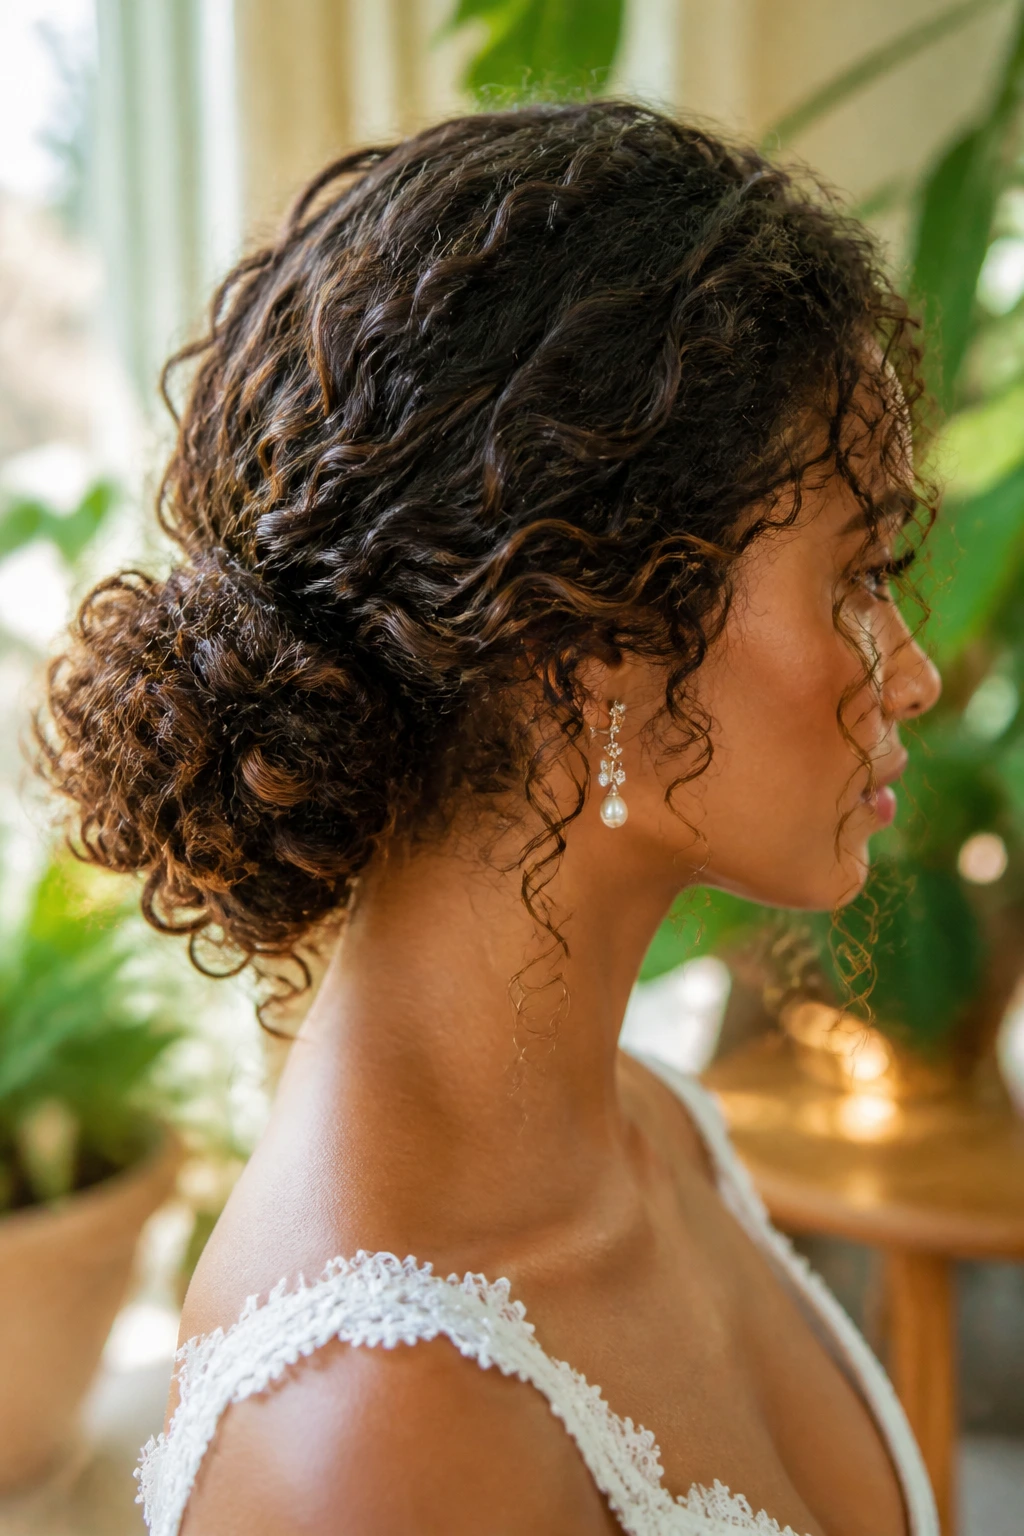
Curly hair doesn’t need to be flattened to become bridal. A low bun built from curls can keep the ringlets intact, then pin them in a way that lets the texture show instead of hiding it under spray.
This style is at its best when the curl pattern has been defined first. Don’t brush it out. Don’t. A diffuser, a curl cream, and a few curl-friendly pins preserve the shape far better than trying to force the hair into something straight and smooth. The bun can be loose at the edges, but the curl clumps should still be recognizable.
I like a few curls left near the nape or sideburn area. Not too many. Just enough to keep the style from feeling boxed in.
18. Coily Hair Low Bun
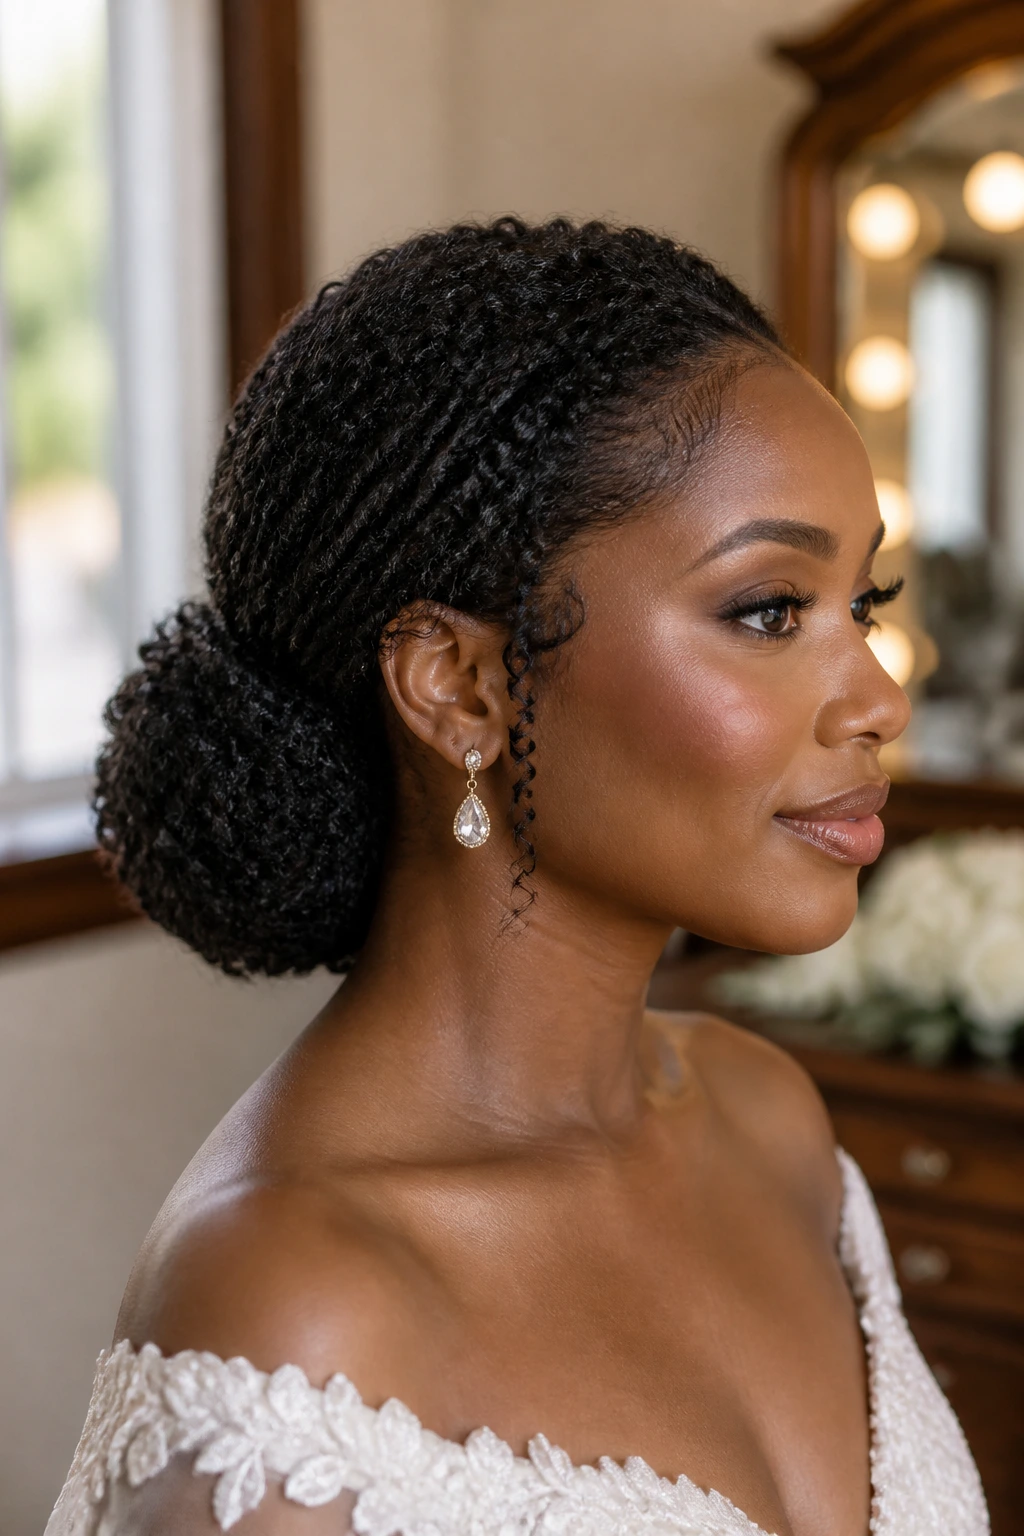
Coily hair has its own logic, and the best bridal buns respect that. The hair can be stretched lightly, shaped into sections, and pinned low so the bun feels full and textured instead of forced into a straight-hair silhouette.
The finish can be polished or soft, depending on how much definition you want to keep. What matters is moisture and grip: a hydrating cream helps the hair stay supple, while good pins hold without shredding the shape. Standard bobby pins are not always enough on coily textures, so pick pins that grab well and test them before the wedding day.
A smooth edge at the hairline can sharpen the style, but it should not erase the texture. The point is to frame it, not argue with it.
19. Side-Swept Waves Into Bun
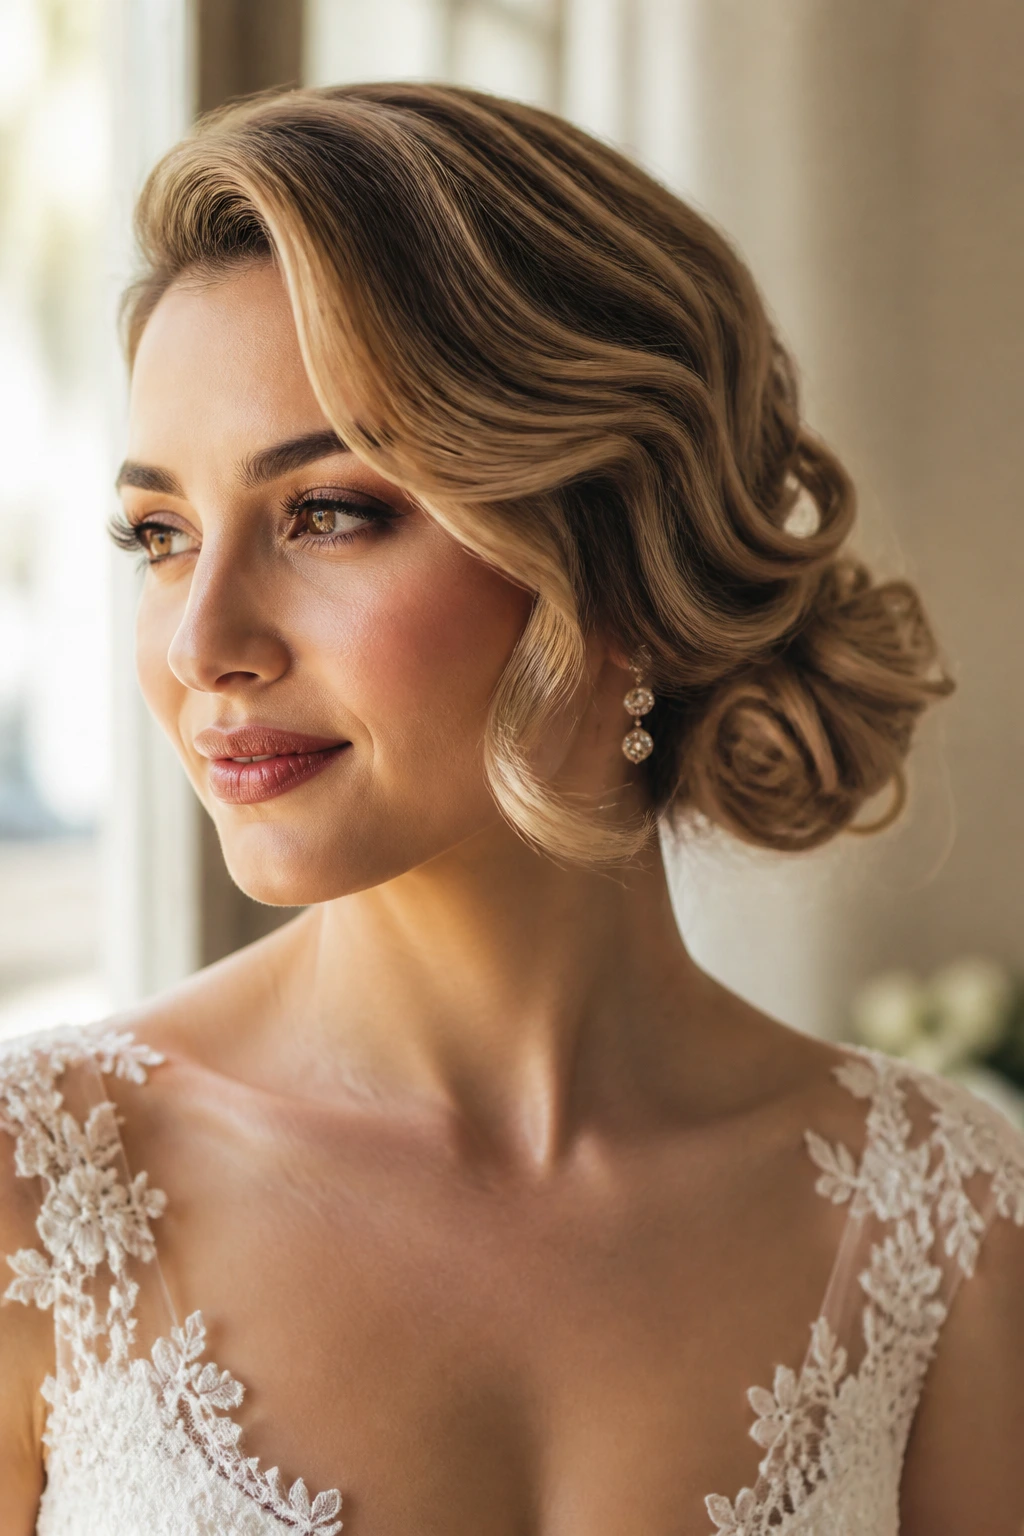
Side-swept waves feeding into a low bun give the style a little drama before the bun even starts. One side gets more visible wave, the hair curves across the back, and the bun lands slightly off-center for a softer profile.
This is useful if the bride wants a hint of vintage glamour without going full finger-wave. The side sweep keeps the front interesting, while the low bun avoids the bulk that a larger styled wave set can create. It suits earrings with movement, a dress with a clean back, or a neckline that opens on one side.
The front wave should be brushed into shape while it’s still warm, then pinned once it cools. If you pin too early, the wave loses its bend and the whole thing goes limp. Hair is fussy like that.
20. Deep Side-Part Classic Bun
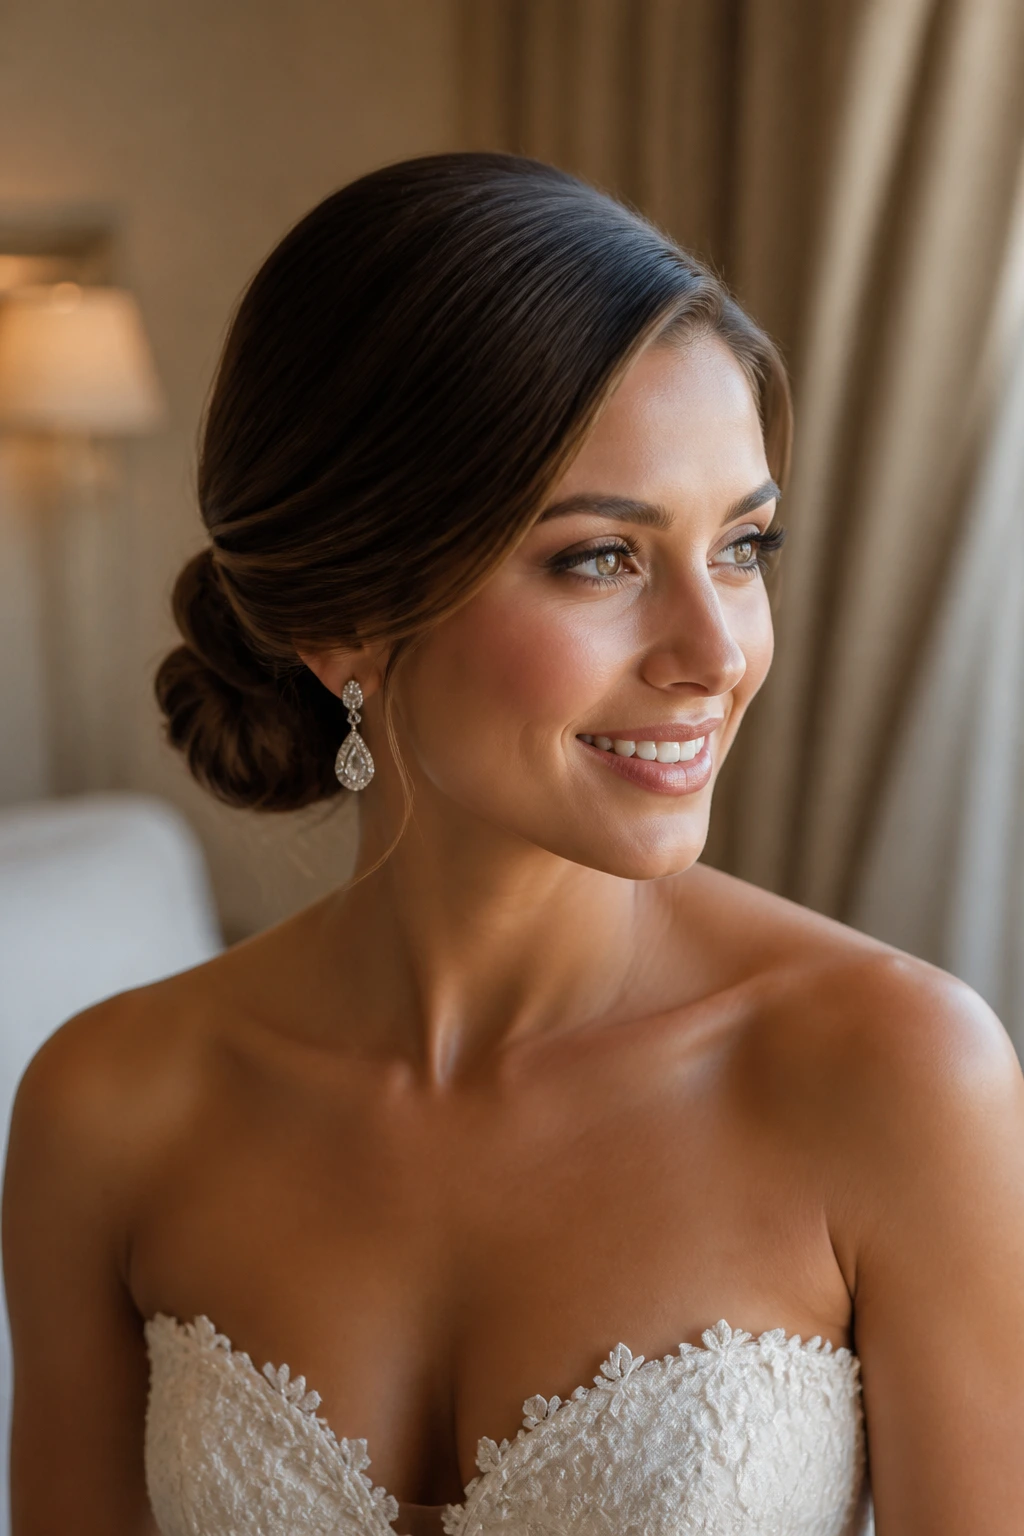
A deep side part paired with a classic low bun feels formal in the nicest way. It gives the face a slant, opens one side of the forehead, and lets the bun sit low and clean without looking plain.
The shape works with chandelier earrings, structured bodices, and gowns that need a touch of tradition. A deeper part brings instant polish, but it also makes the crown more important, so a little root lift there keeps the hair from lying too flat. That lift should be soft, not puffy.
This is the style for brides who want the look to age well in photos. Ten years from now, it will still look composed. That matters more than chasing a loud shape.
21. Ribbon-Wrapped Low Bun
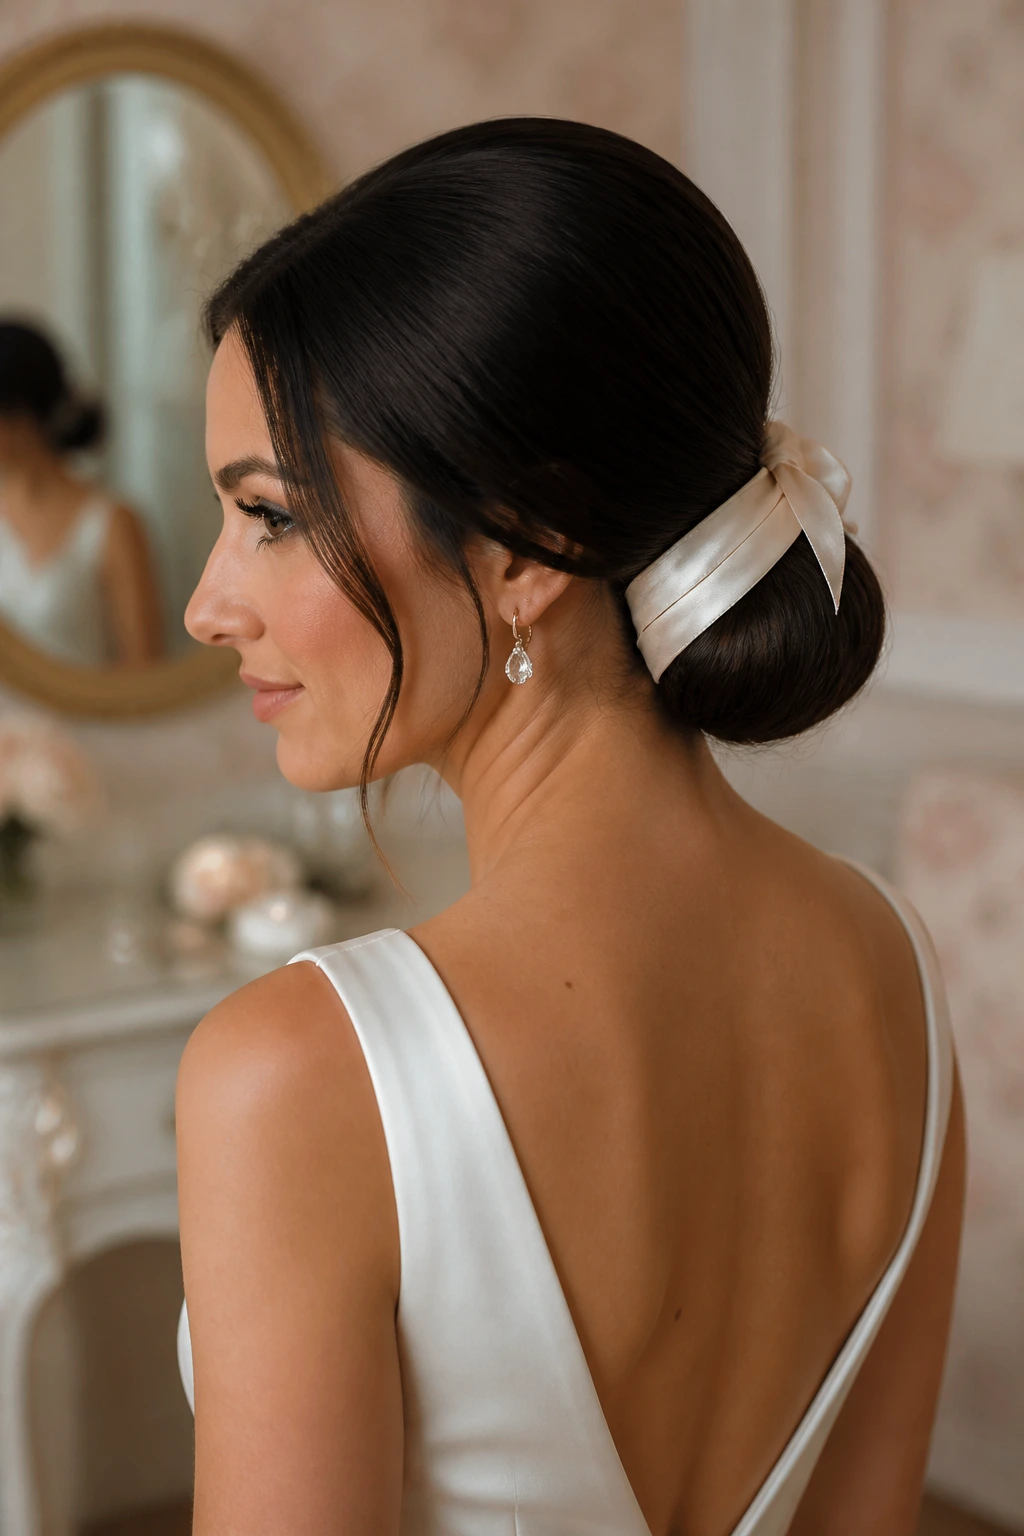
A ribbon wrapped through or around a low bun changes the whole mood with one move. Satin looks formal, velvet looks richer, and a narrow silk ribbon can soften a sleek bun without adding bulk.
I like this best when the ribbon color ties into something else — bouquet stems, shoe lining, a sash, maybe the flowers in the room. The ribbon should feel intentional, not random, and the width needs to match the size of the bun so it doesn’t overpower the shape. Half an inch to one inch is usually enough.
Tie the ribbon after the bun is set, not before. If you weave it too early, the pinning gets messy fast. Nobody needs that on a wedding morning.
22. Floral Sprig Bun
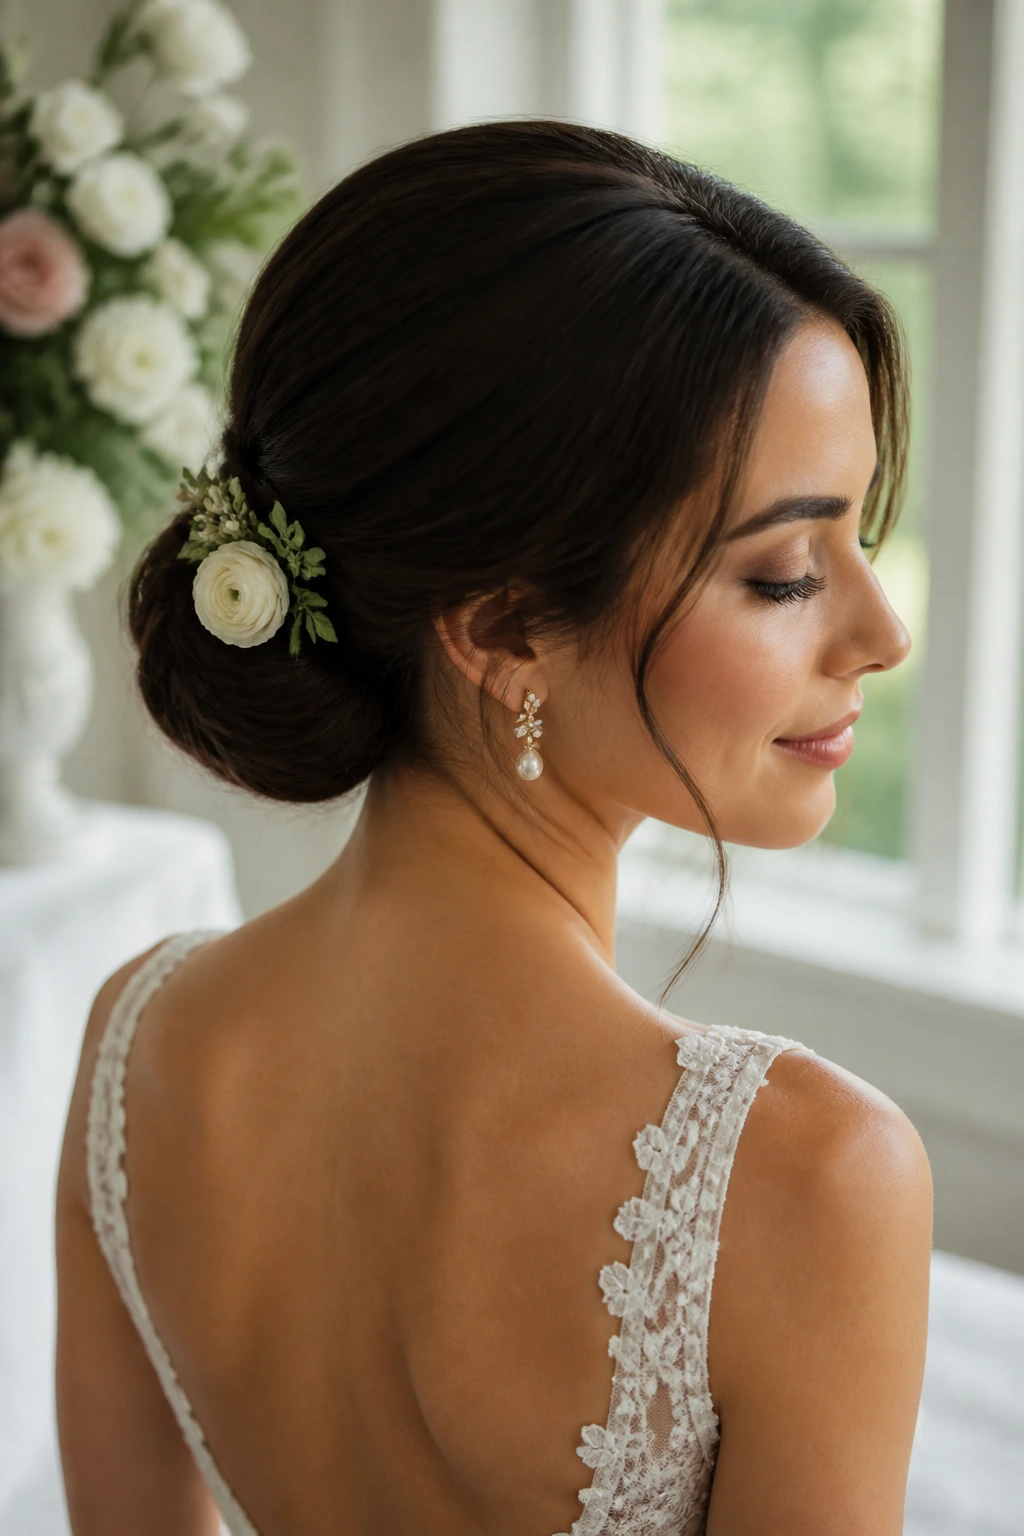
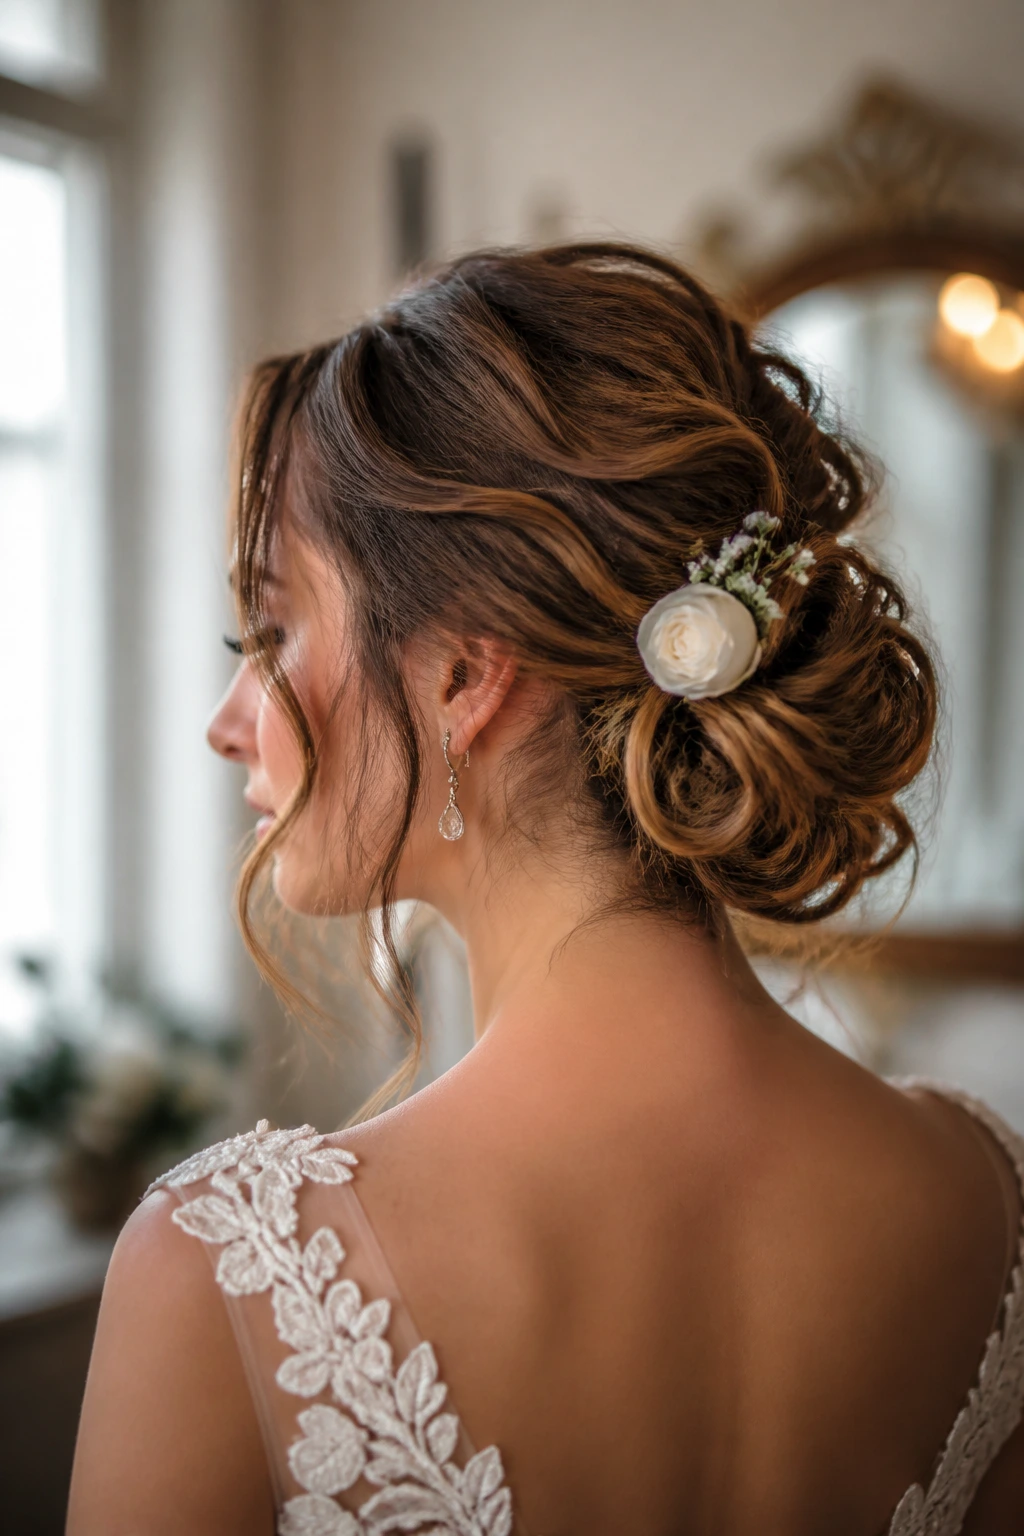
Fresh florals in a low bun can be lovely, but the trick is restraint. A few sprigs of greenery, one bloom, or a small asymmetrical cluster can turn a bun into something that feels alive without looking like a bouquet fell into the hair.
Small Flower Notes
Use short stems, florist tape, or wired blooms. Long stems want to slide. Wet stems can also dampen the hair around them, which is not the look. The bun itself has to be secure first, because flowers should sit in the seam of the style, not carry the weight of it.
This one makes sense with garden settings, outdoor vows, or dresses that already have a little softness in the fabric. If the gown is clean and architectural, a floral bun can feel too sweet unless the flowers are tiny and carefully placed.
23. Lob-Length Low Bun
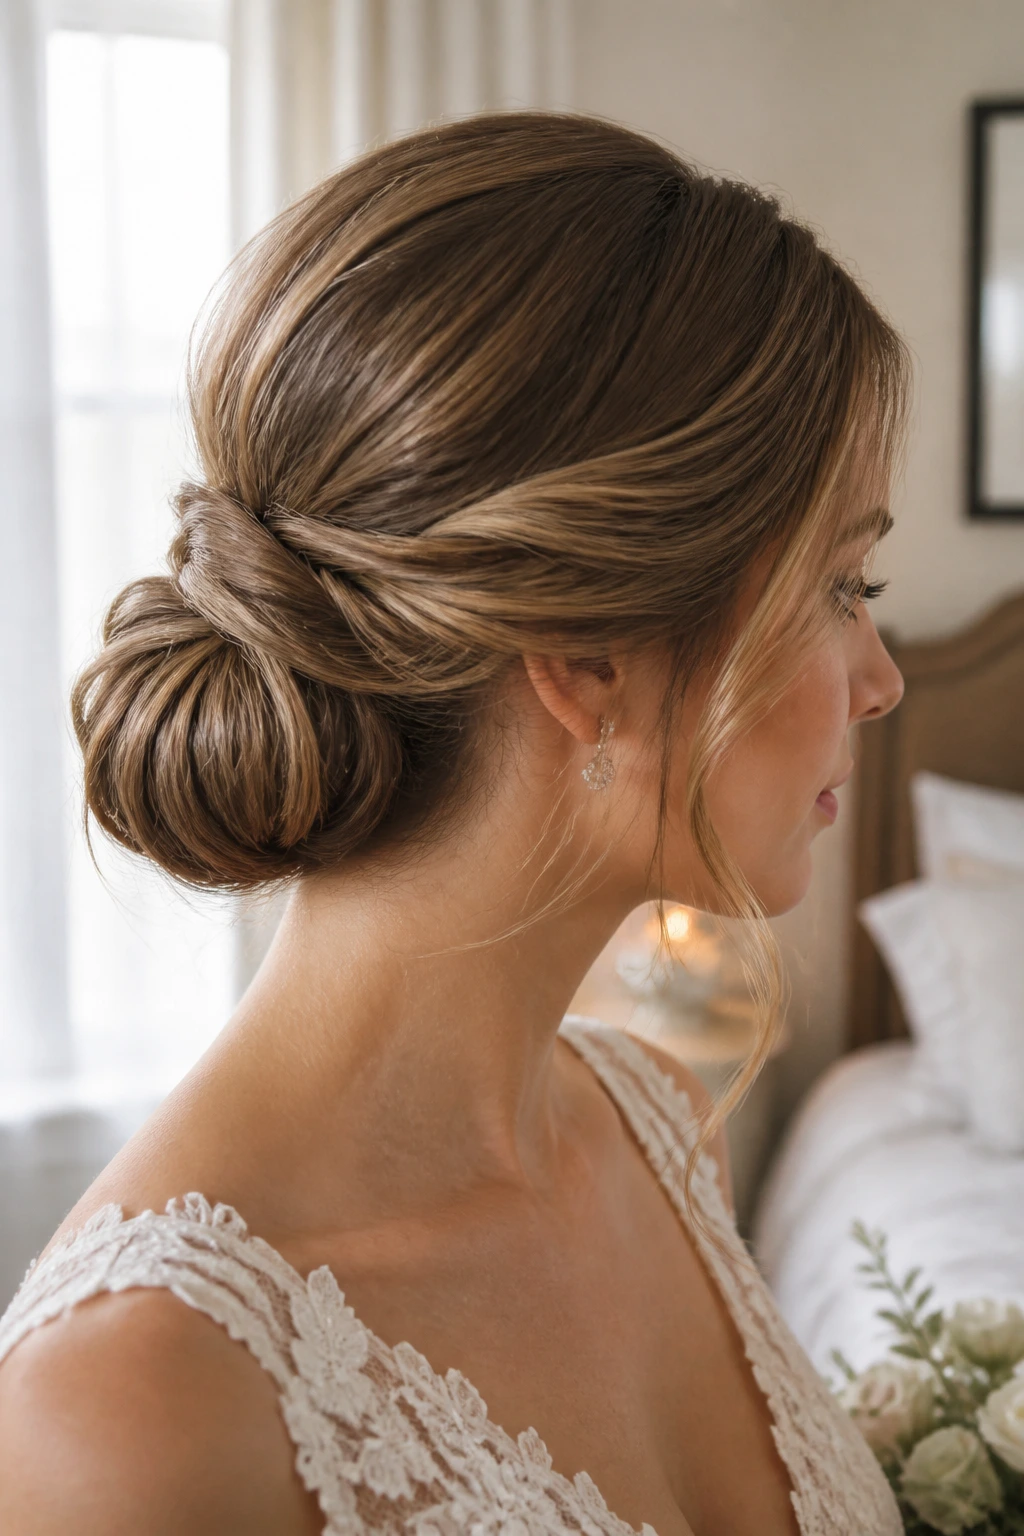
Shorter hair can still become a low bun if the style is built with twists, tucked ends, and a little hidden support. A lob or shoulder-length cut usually needs a bit of planning, but the result can be every bit as bridal as a longer style.
The key is not pretending the hair is longer than it is. Instead, you use the ends where they naturally fall, fold sections upward, and pin them in a shape that reads like a bun from the side and back. Clip-in pieces can help, but they should blend with the texture, not float above it.
This is one of those styles that rewards a trial run. Shorter hair behaves differently when it’s freshly washed versus day-old. The difference can be enough to change the whole strategy.
24. Braided Accent Chignon
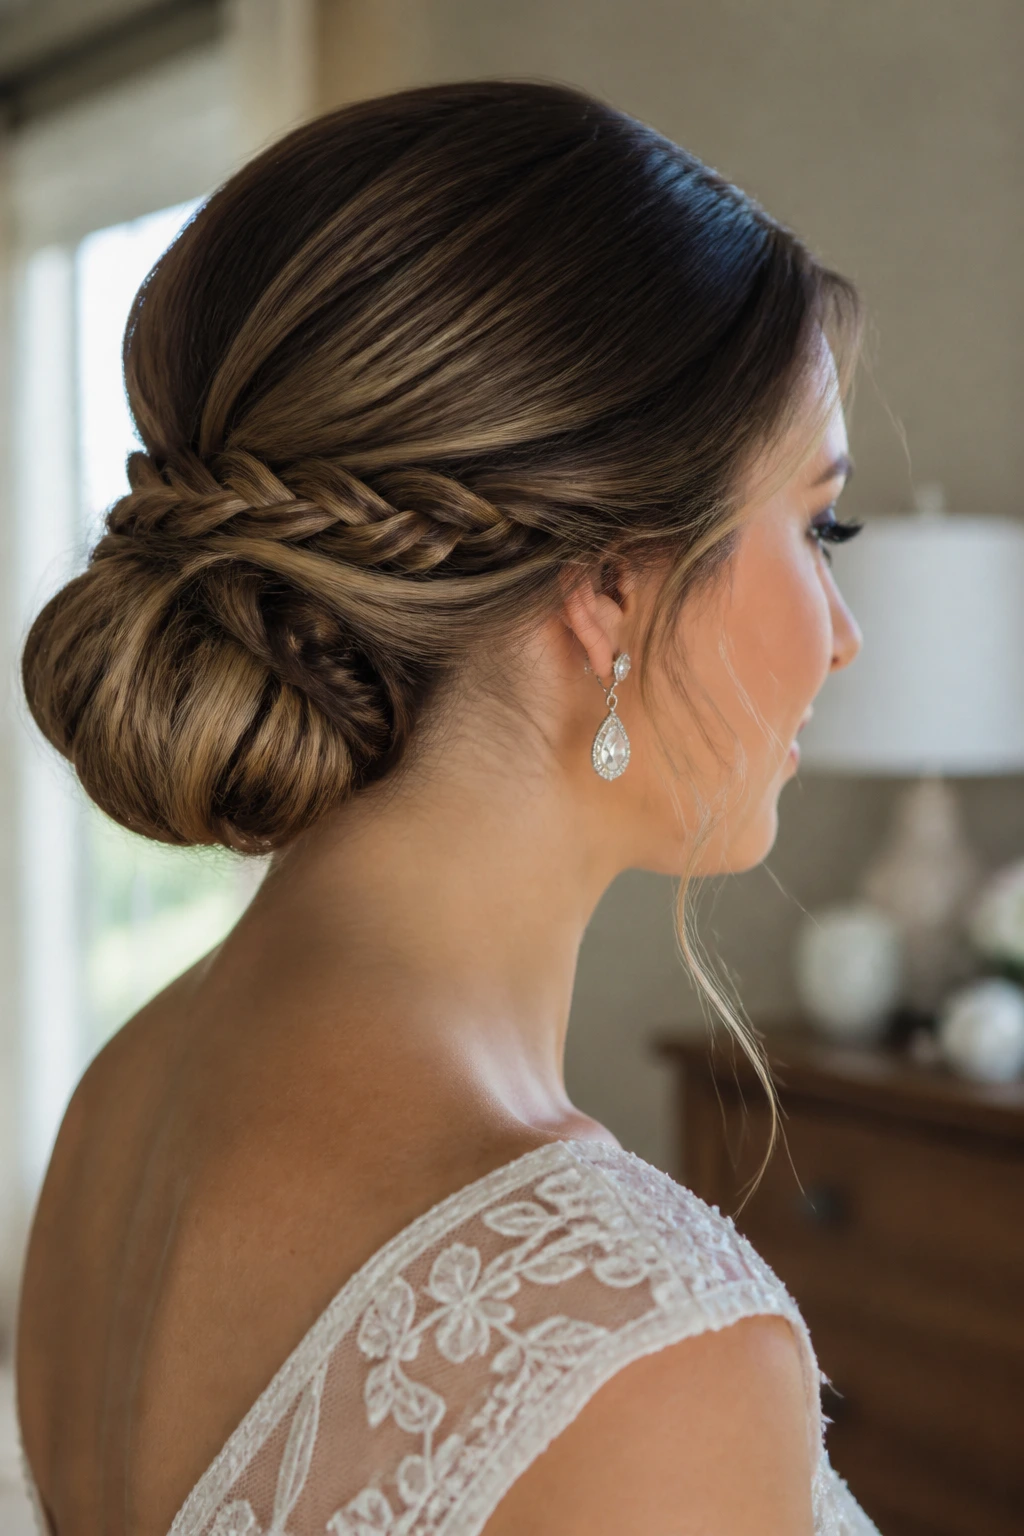
A single braid wrapped into or pinned beside a chignon is the quiet detail brides often end up liking best. It doesn’t shout. It just gives the bun a little edge and a visible pattern when someone looks at the back of the head.
I like this for brides who want one detail, not five. One braid is enough to break up a smooth bun, and it keeps the style from feeling too plain without turning into a full braid look. If the dress has beading or a detailed back, this kind of accent keeps the hair interesting without competing.
A small braid tucked into the seam is cleaner than a thick one wrapped all the way around. That keeps the bun itself in charge.
25. Minimal-Pin Low Bun
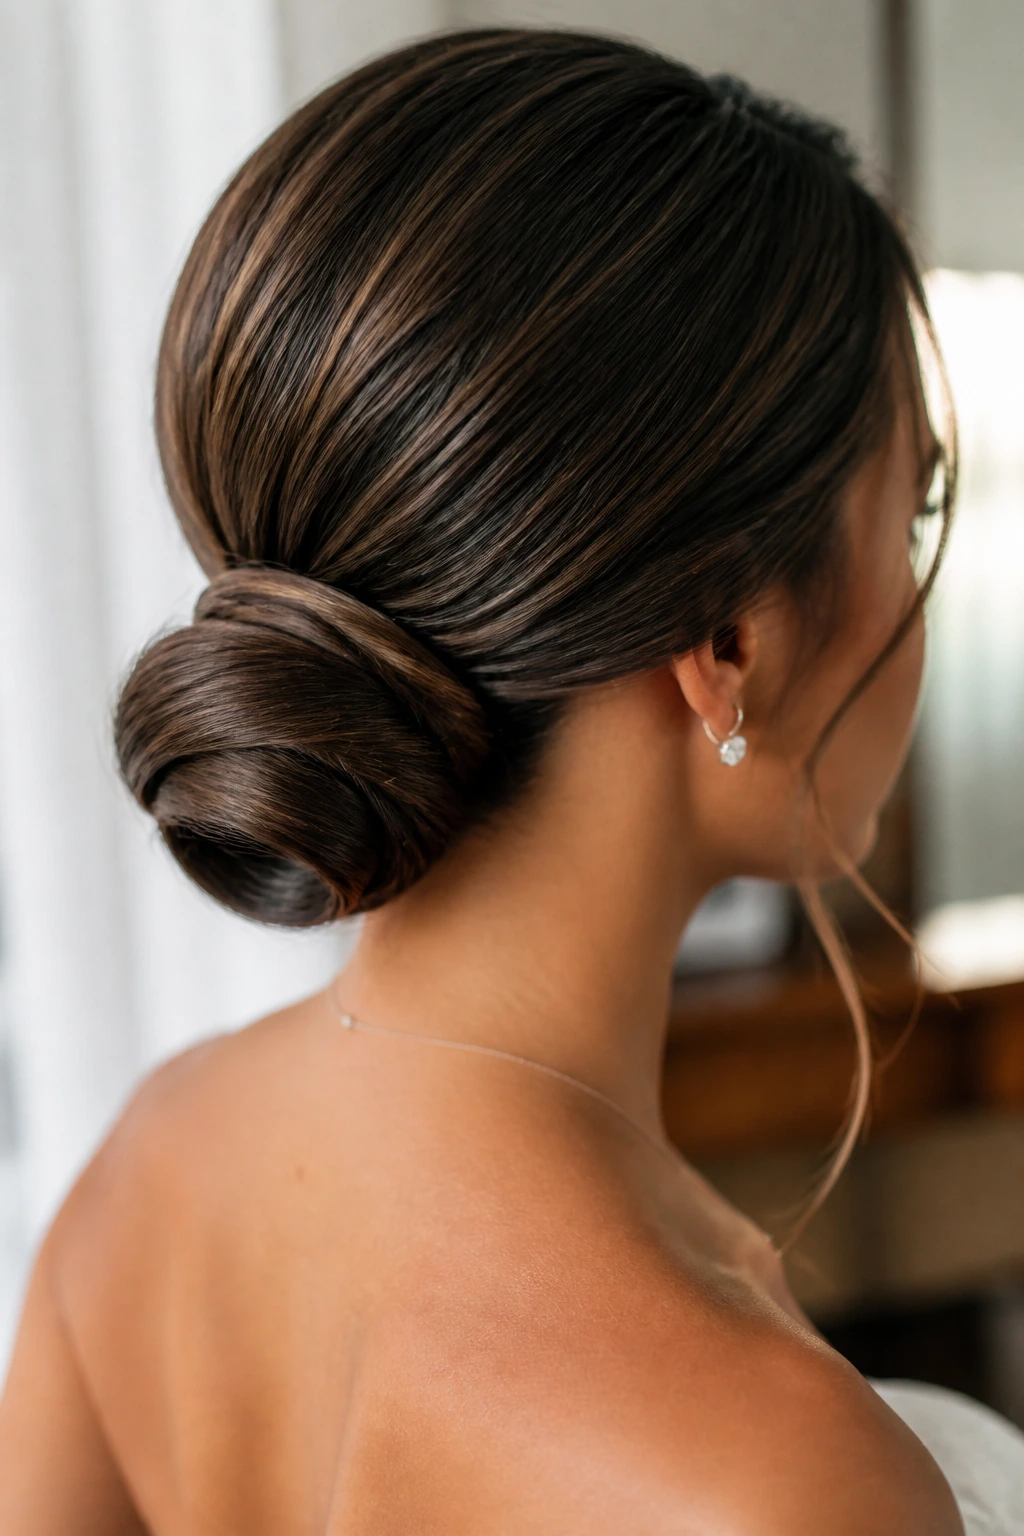
A minimal-pin bun looks almost too simple at first glance, and that’s exactly the point. The shape is compact, the finish is smooth, and there’s little to distract from the dress, makeup, or veil.
This is the style for brides who hate fuss. No pearls. No flowers. No ribbon. Just clean form and enough hold to survive the day. It works especially well when the gown has strong lines or the jewelry is already doing the decorative work.
To keep it from looking empty, the bun should have a clear shape from the side and back. A tight little knot with a polished surface can look better than a bigger bun that has no discipline. Small is fine. Sloppy is not.
26. Crown-Volume Low Bun
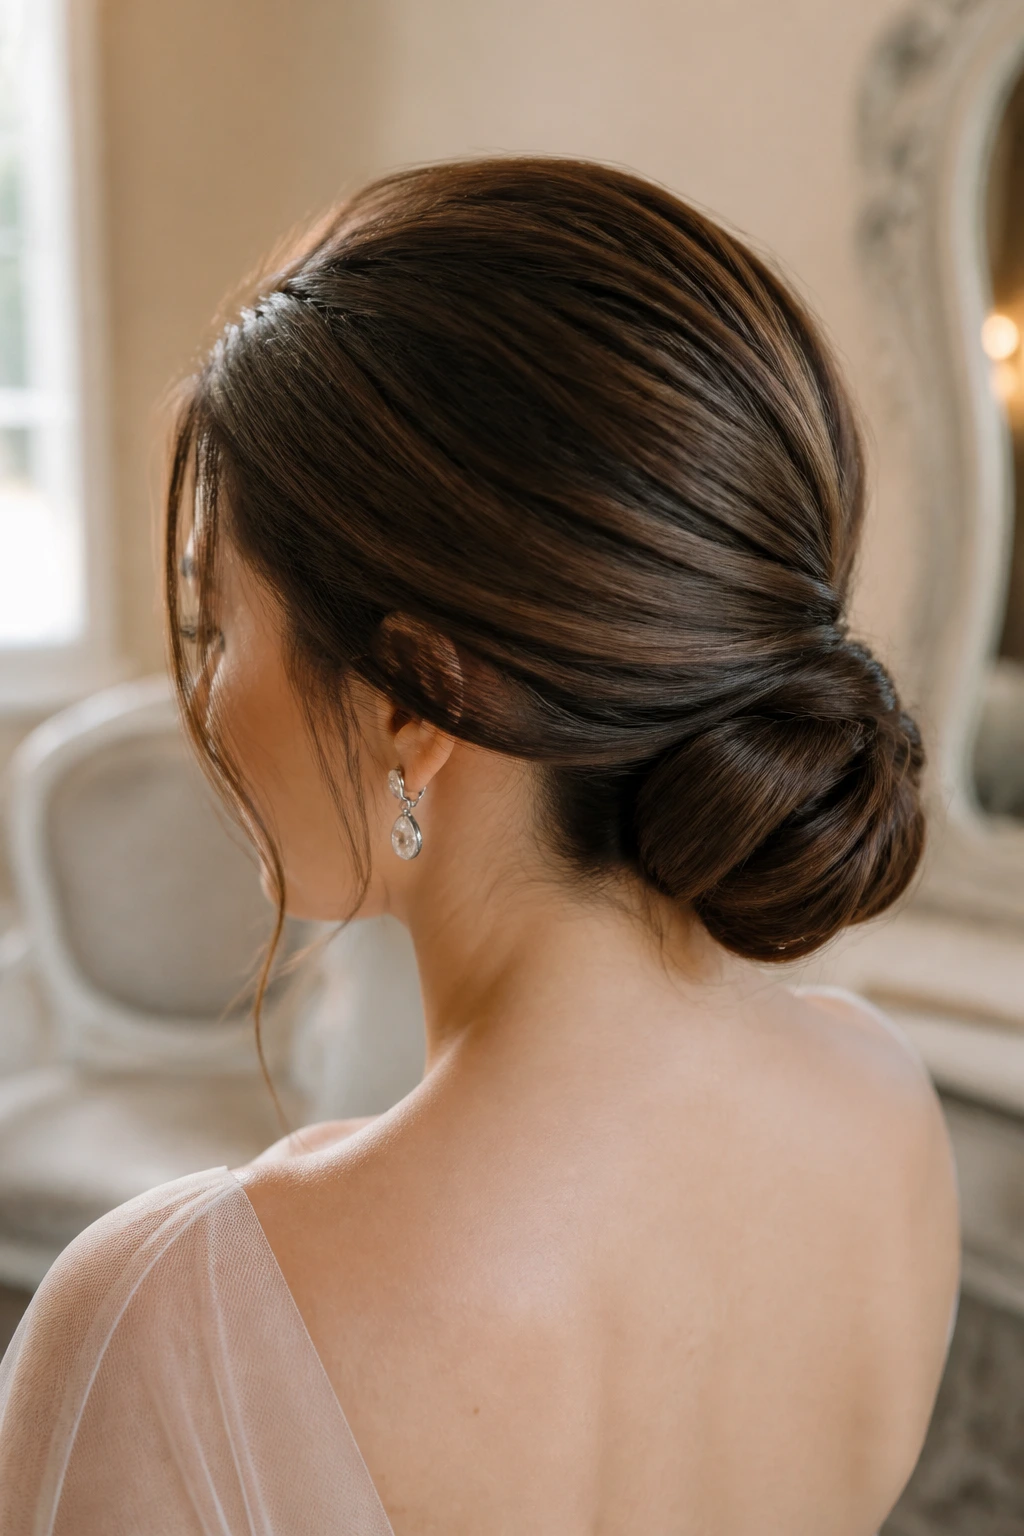
A little lift at the crown can make a low bun feel balanced instead of flattened. The volume sits where the eye naturally goes, then the hair narrows into the bun at the nape, which is a nice profile for photos.
This is the one I’d consider if the dress neckline is high or if the veil adds weight above the bun. The crown volume keeps the head from looking squashed, and the low bun stops the whole style from getting too tall. It’s a small adjustment with a big effect.
Backcombing is useful here, but not in a wild way. You want support, not a nest. A root clip during cooling can help hold the lift while the rest of the style is pinned.
27. Sculpted Petal Low Bun
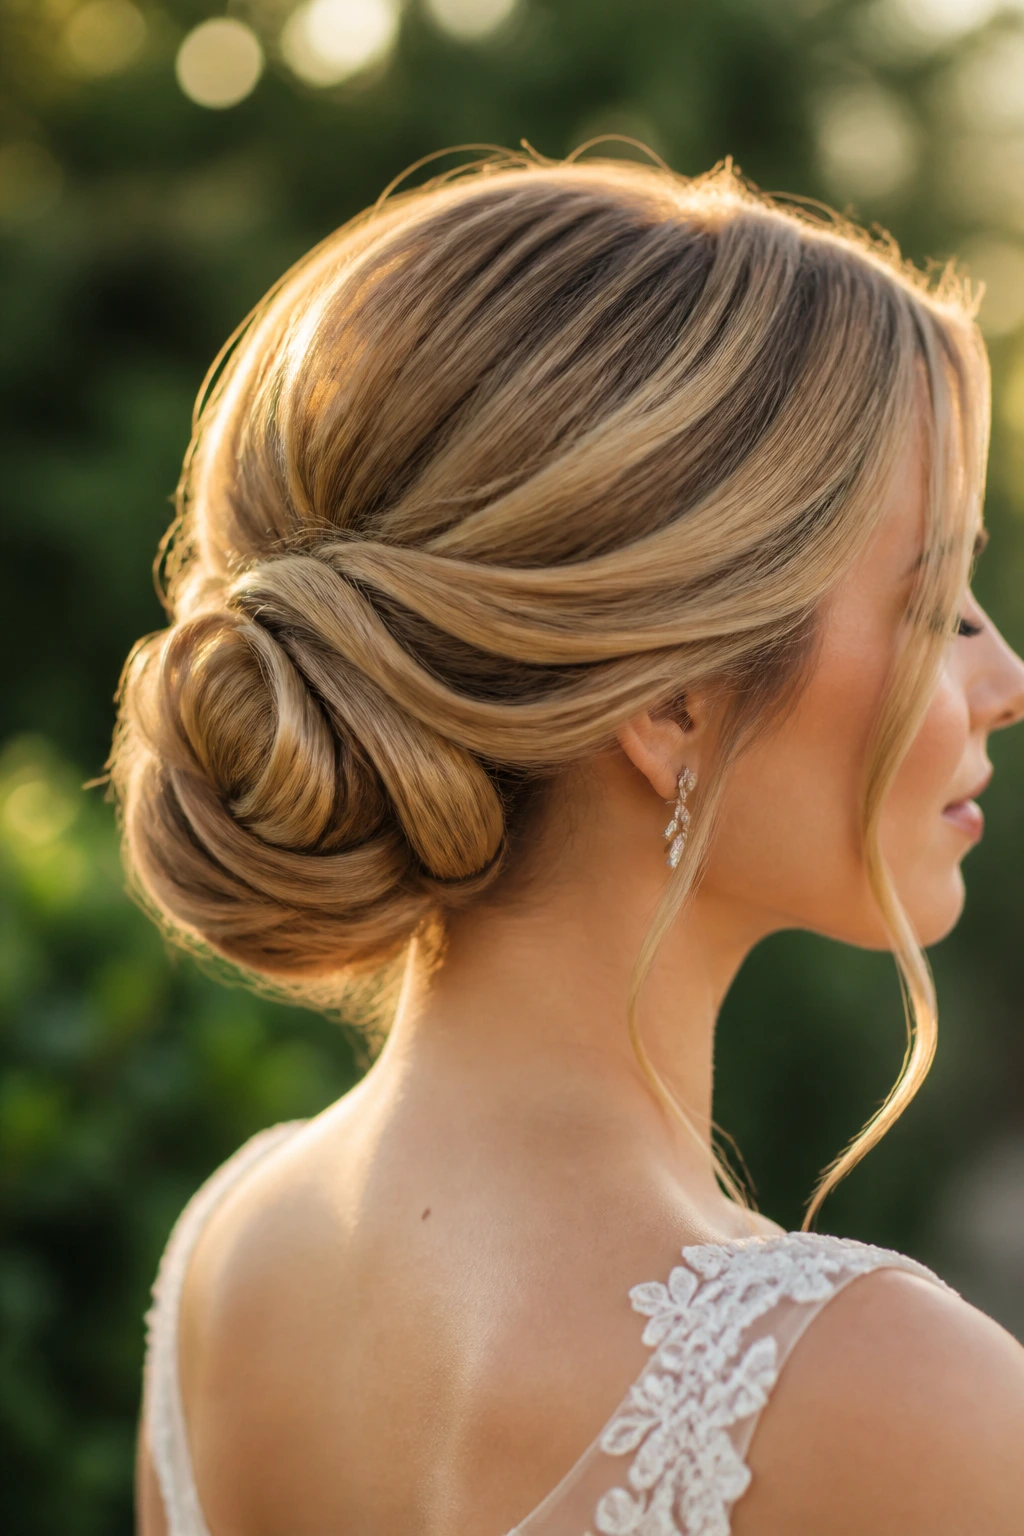
A sculpted petal bun folds sections of hair so they overlap like soft petals around a low center. It’s a little more editorial than a classic chignon, but still bridal if the lines are clean and the finish is controlled.
This is the style for brides who want the bun itself to be the accessory. The folded sections create shadow and shape, which looks especially good in side photos and back portraits where a flat bun would disappear. It needs a practiced hand, though. The folds have to stay even, and the pins need to disappear inside the shape.
I’d pair it with simple jewelry and a dress that doesn’t already have too many visual ideas. Let the bun have its moment. That’s the whole point.
Why Low Buns Hold Up So Well in Bridal Hair
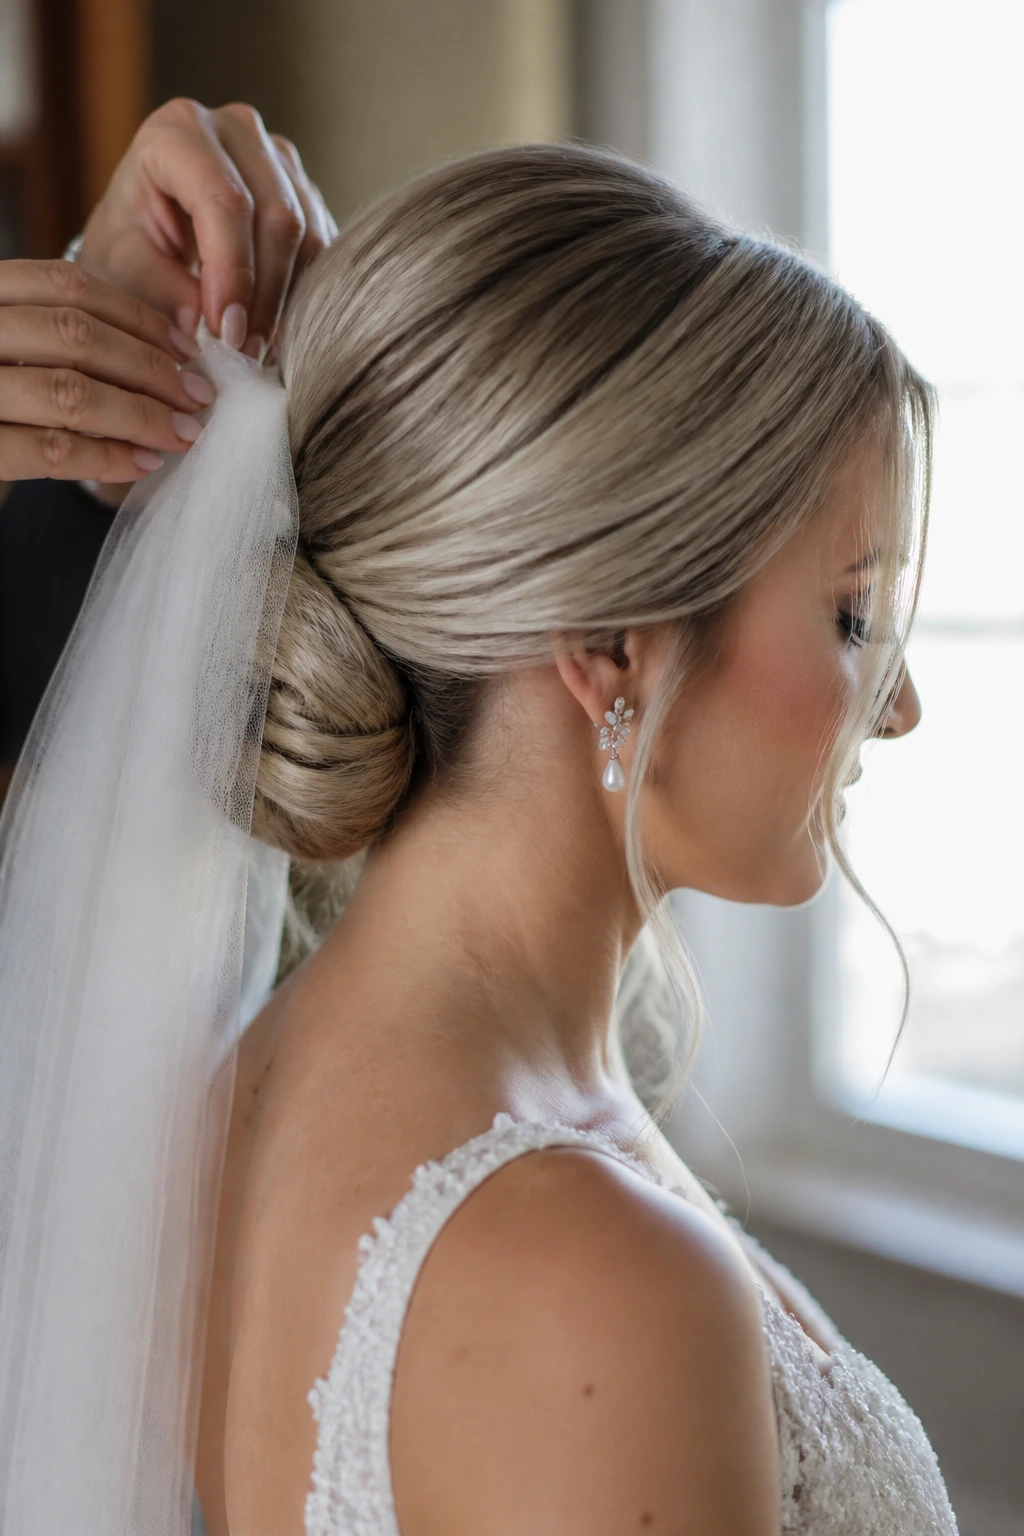
A low bun sits at the center of gravity for the head and neck. That sounds technical, but it shows up in a simple way: the style feels anchored, not perched. When pins go in close to the nape, they have less hair weight trying to pull them loose.
That placement also makes the bun friendlier to veils, combs, and hairpieces. A veil can rest near the crown while the bun stays low and separate. The result is less tugging, fewer strange bumps under fabric, and a shape that still makes sense after the veil comes off.
I also think low buns work because they leave room for the rest of the outfit to breathe. Brides spend a lot of time choosing necklines, earrings, and veils. Hair that sits right on top of all that can feel like a fourth thing fighting for attention. A bun near the nape solves that. Quietly.
Essential Tools for These Low Bun Styles
-
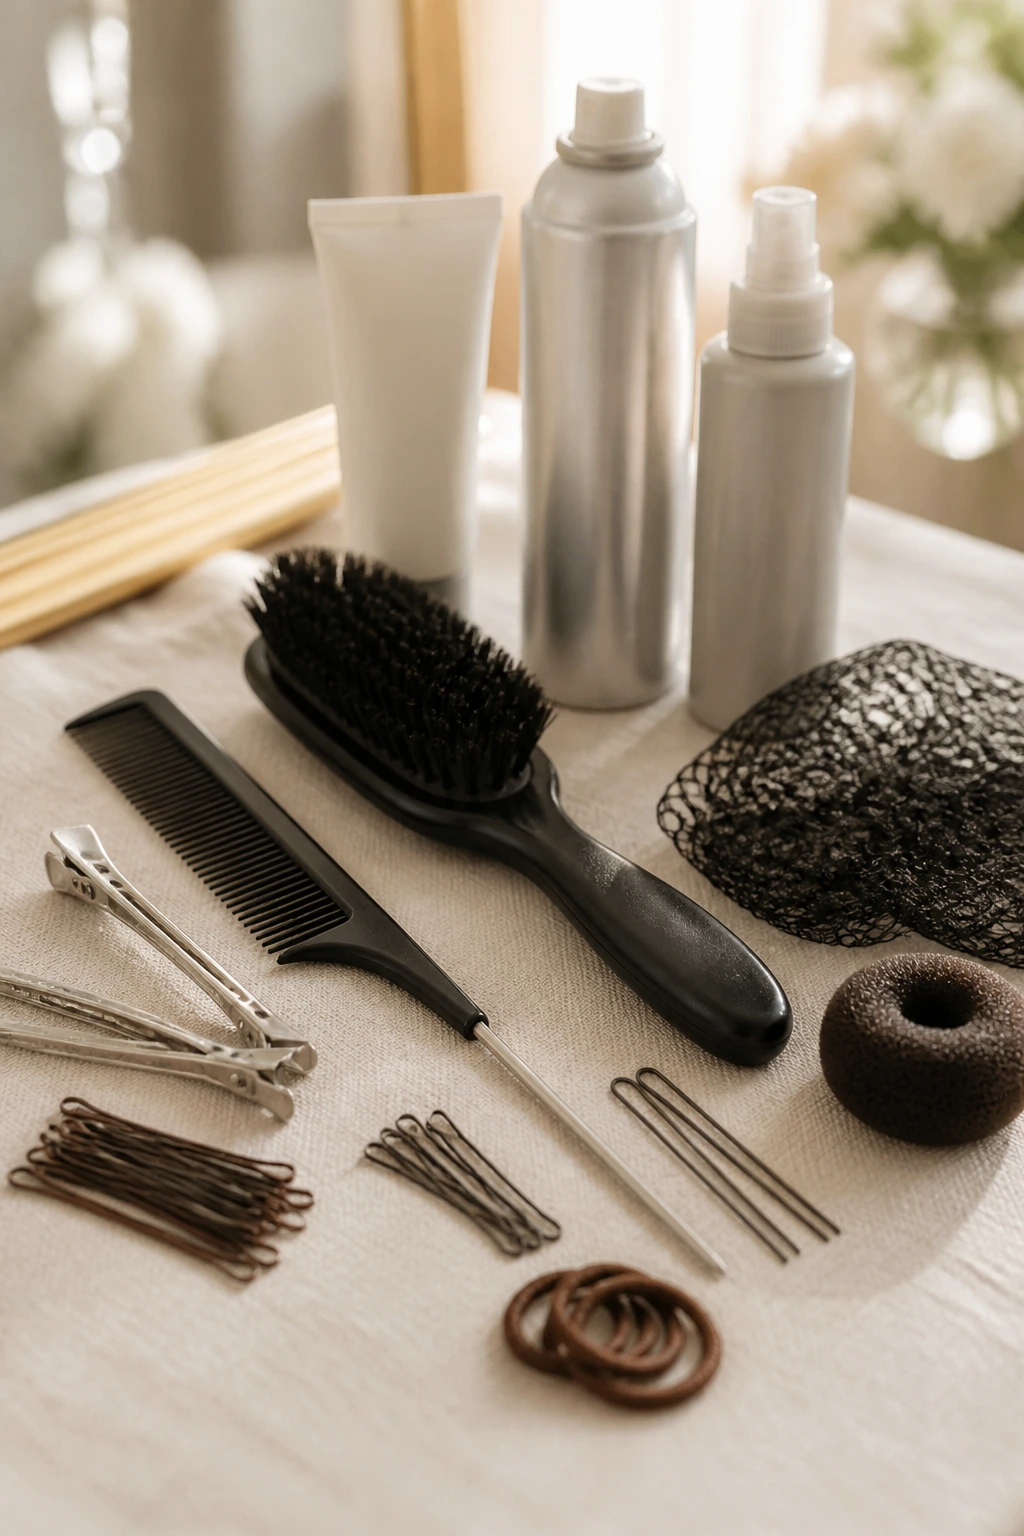
Fine-tooth tail comb: Useful for clean parts, smoothing the front, and tracing precise sections before pinning.
-
Boar-bristle brush or smoothing brush: Helps flatten flyaways and guide hair into a polished shape without making it look wet.
-
Sectioning clips: Keep twists, braids, and crown sections out of the way while you build the bun.
-
Bobby pins in two sizes: Short pins are good for detail work; longer pins grip heavier sections and padding better.
-
U-pins: Handy for thick buns or folded styles where you need hold without a lot of visible metal.
-
Hair elastics that match the hair color: A small, plain elastic gives the bun a base before pinning.
-
Texturizing spray: Adds grip to freshly washed or silky hair, which is often the difference between “held” and “slipped.”
-
Flexible-hold hairspray: Sets the shape without turning it stiff; useful when you still need to adjust a curl or twist.
-
Smoothing cream or wax stick: Great for edges, part lines, and sleek styles where the hairline needs to stay neat.
-
Small bun maker, donut, or padding: Optional, but helpful for fine hair or for brides who want a fuller silhouette.
-
Hairnet: Not glamorous, but excellent for hiding short ends and keeping smooth buns tidy.
-
Hand mirror or phone camera: A back-view check is not optional; the bun lives at the back of the head, after all.
Smart Prep and Product Choices for Bridal Hair
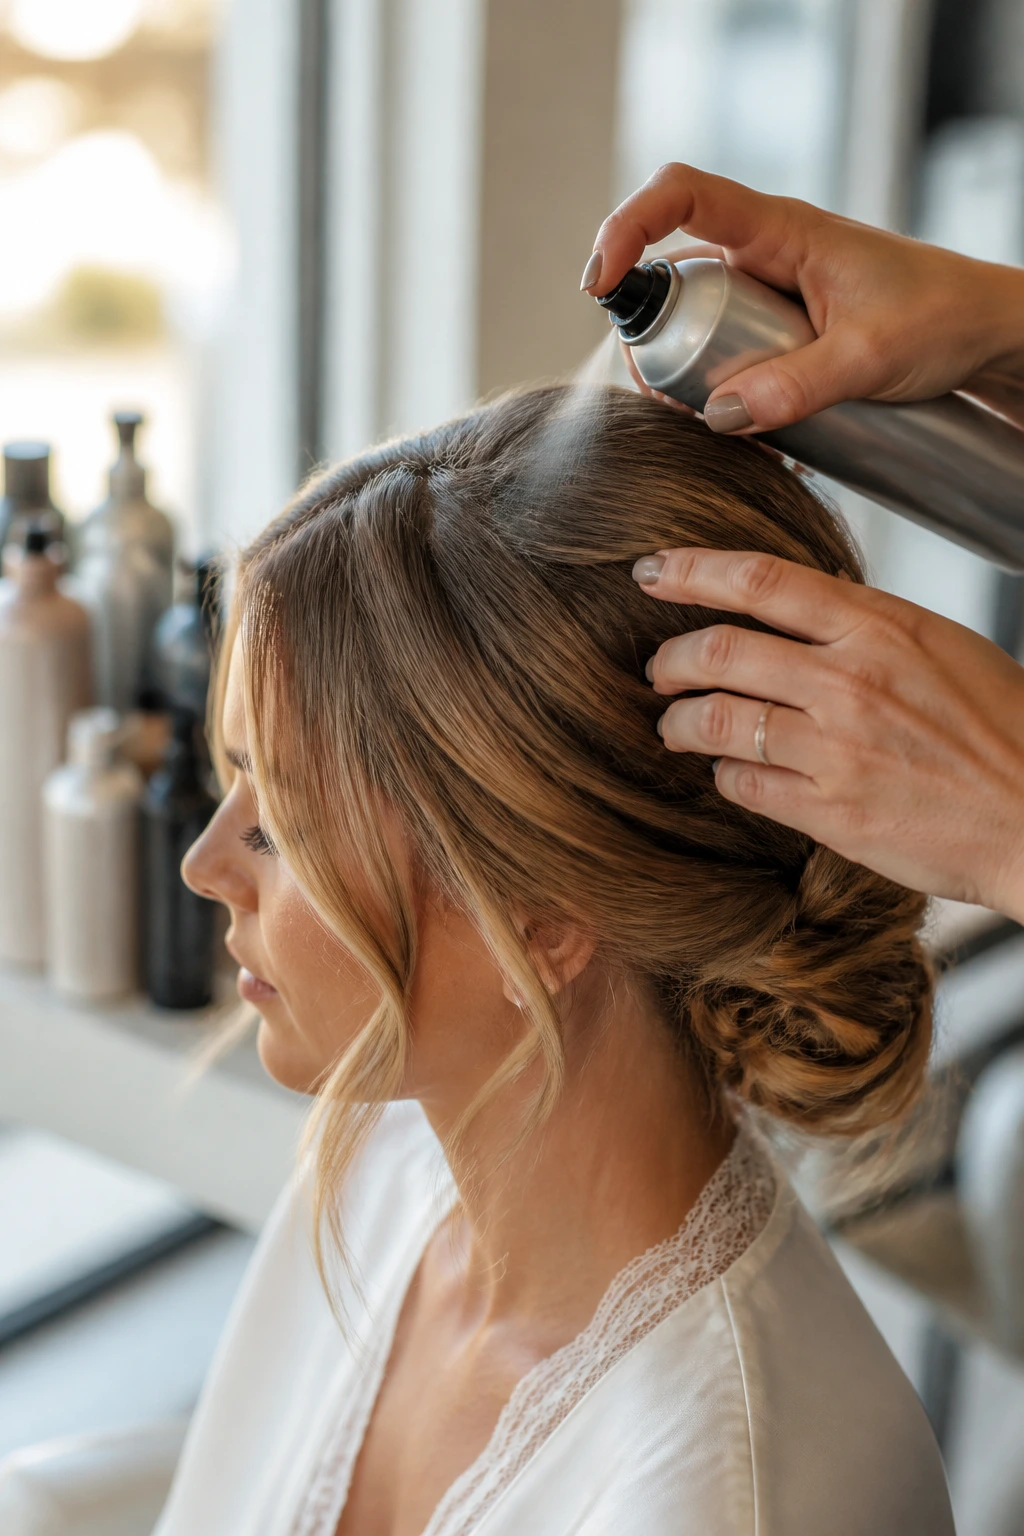
The best bridal low bun starts before the pins ever show up. Hair that is too fresh tends to slide, especially if it has been washed with a heavy conditioner and left silky from root to tip. Hair with a little texture — usually one day old, sometimes two for very fine hair — gives the pins something to bite into.
That does not mean dirty hair. It means workable hair. If the roots are oily, a small amount of dry shampoo at the scalp can help, but too much turns the surface dusty and dull. The sweet spot is hair that feels clean enough to move, but not so slippery that every twist wants to unravel.
Products should match the finish. Sleek bun? Use smoothing cream, a wax stick, and a light gloss spray at the end. Soft bun? Reach for texturizing spray and flexible hairspray, not a heavy lacquer. Curly and coily styles usually need moisture first, then hold. If the product stack is wrong, the bun fights you before the veil even goes on.
A trial run matters because wedding hair changes under pressure. Heat, humidity, and a dress with a heavy collar can all change the shape. Bring the actual earrings and veil if you can. Hair behaves differently when it knows it has company.
How to Match a Low Bun With the Rest of the Bridal Look
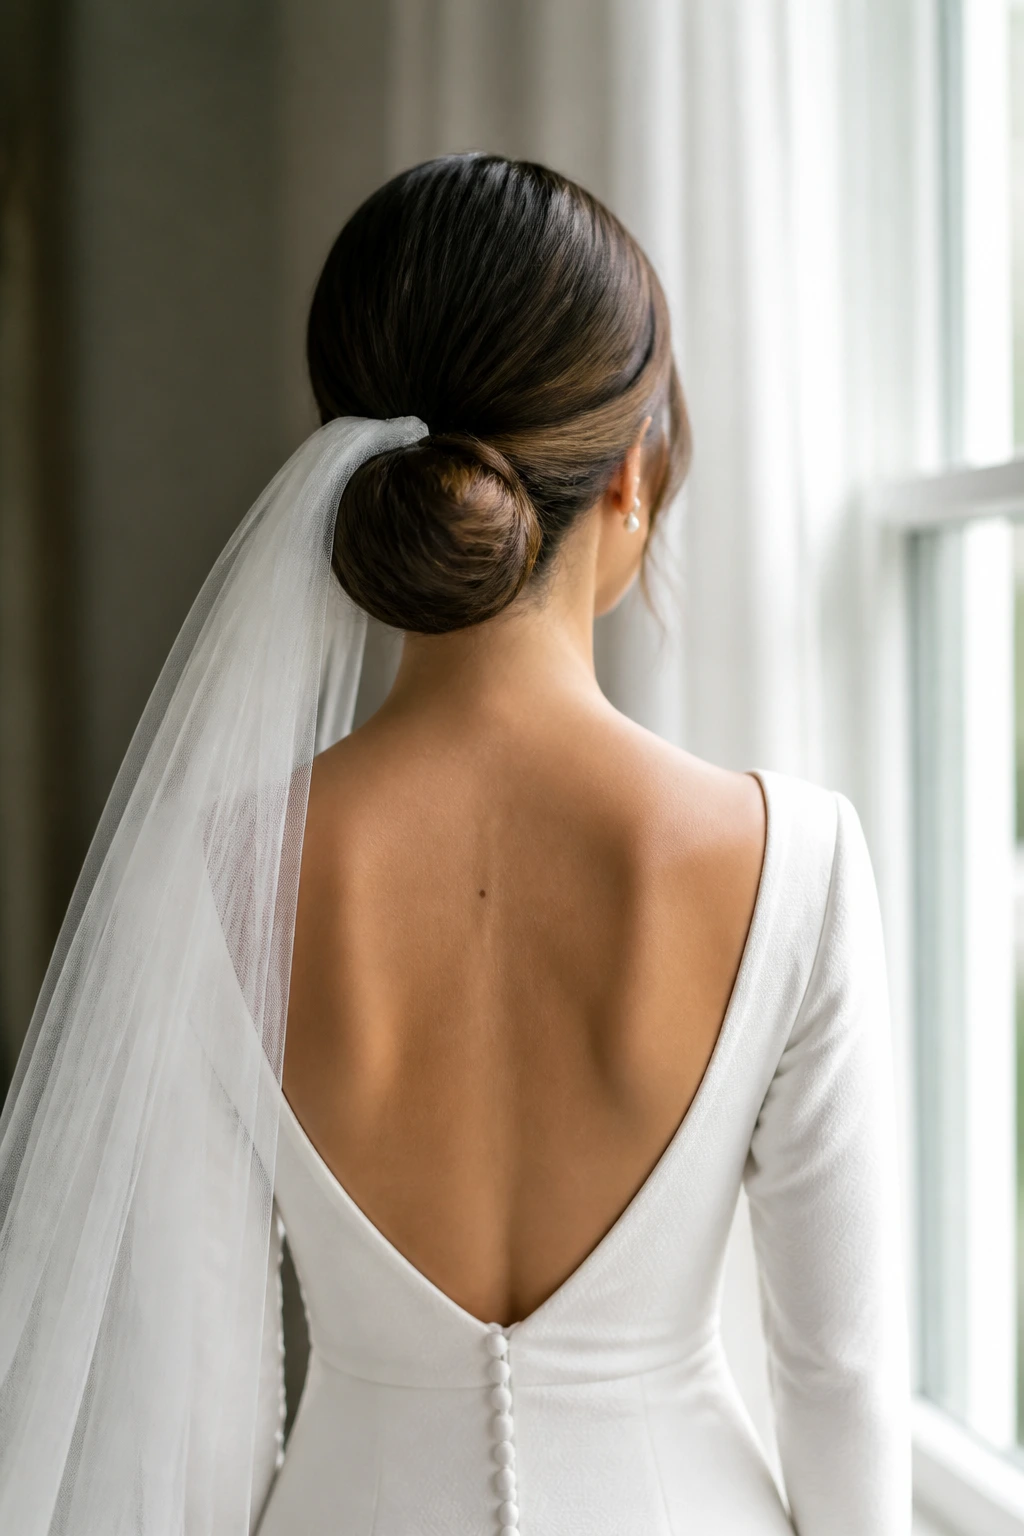
Silhouette: A sleek chignon suits sharp necklines, matte satins, and gowns with clean architecture. A textured or braided bun works better when the dress already has softness, like tulle, lace, or drape.
Veil Placement: A comb veil usually sits easiest just above the bun or slightly into it, where the structure can support the weight. If the veil is cathedral length, the bun should be sturdy enough that removing it later does not leave a dent.
Jewelry: Long earrings look clean with a polished bun because the neck stays open. If the earrings are small, the bun can carry more detail — pearls, florals, braids, or ribbon — without making the face look bare.
Dress Back: If the gown has buttons, lace, illusion mesh, or an open back, keep the bun shape neat enough to show those details. Hair that spills too far downward can swallow them whole.
Photography Angle: Back views matter. A bun that looks lovely from the front but collapses in profile is not doing its job. Ask for a mirror check from behind, not just the front-facing glam moment.
Additional Tips for a Bridal Trial That Saves the Morning
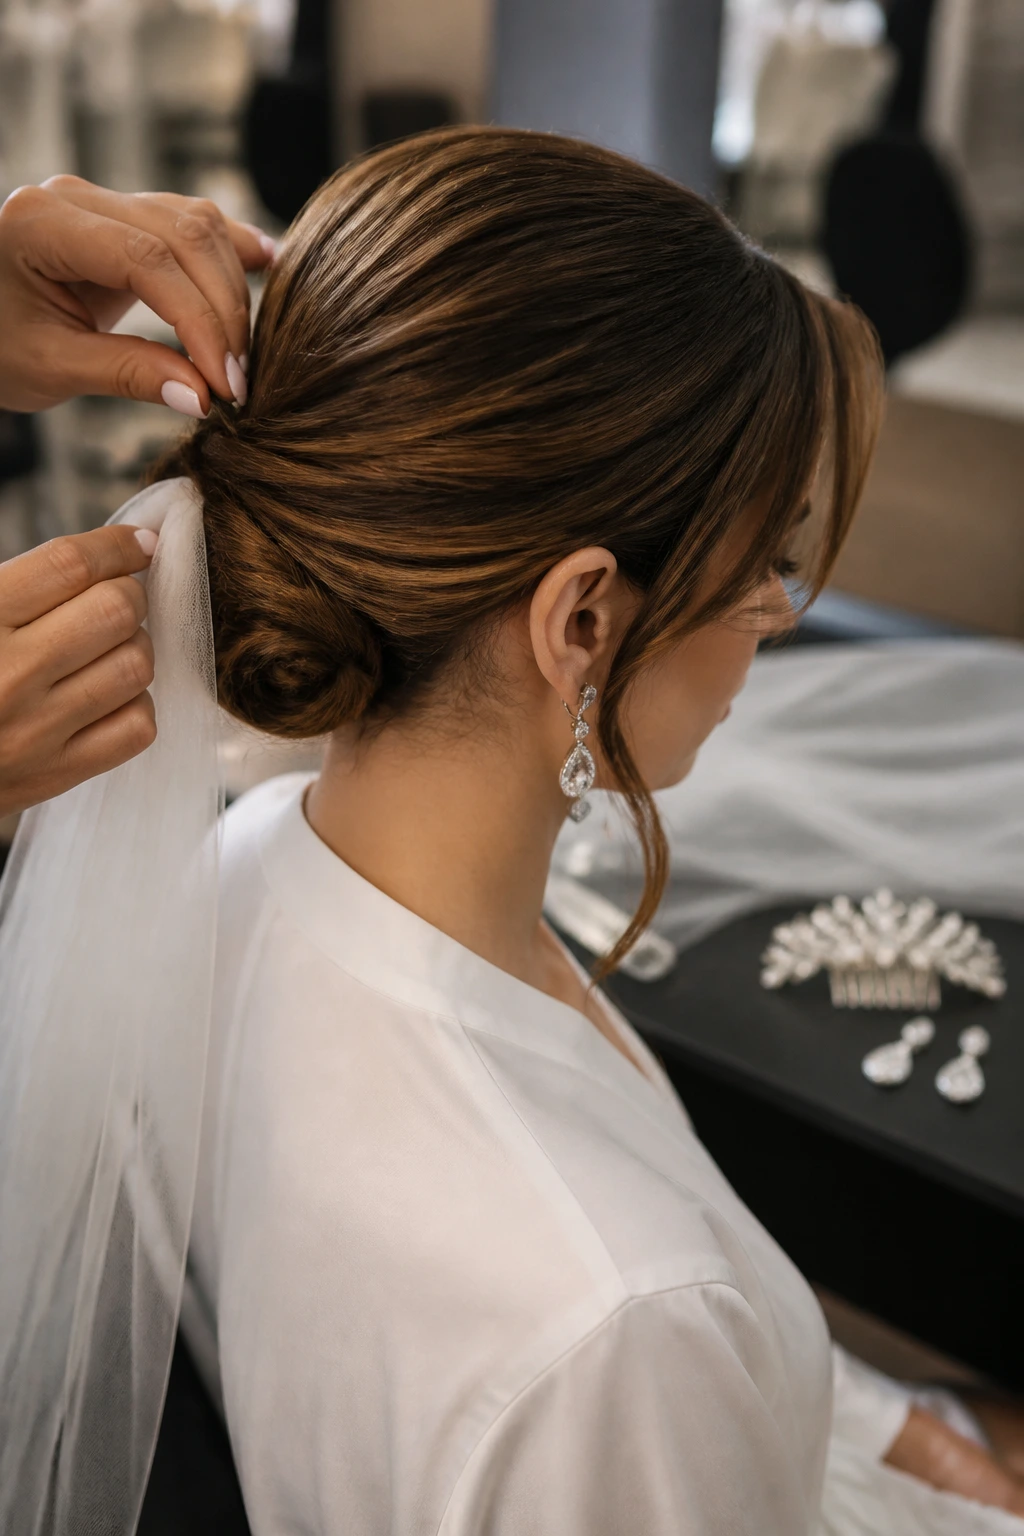
Trial Note: Bring the veil, earrings, and neckline photo to the trial. A low bun can change dramatically once a comb, a crystal pin, or a high collar enters the picture.
Hold Check: Ask the stylist to build the base first, then wait ten minutes before the final spray. If the style starts to soften while you sit, it was pinned too lightly or at the wrong point on the head.
Weather Plan: For outdoor vows or humid conditions, keep the face-framing pieces shorter and the bun a little tighter. Soft is good. Drifting apart is not.
Backup Kit: Pack four bobby pins, two U-pins, a travel hairspray, and one tiny comb in the bridal emergency bag. That is enough to fix almost any small shift without hauling a salon chair to the venue.
Comfort Check: Turn your head, smile, laugh, and tip your chin down during the trial. If the bun pinches behind the ears or digs into the scalp, it will bother you all day. Hair should look nice. It should also let you breathe.
Common Mistakes Brides Make With Low Buns
-
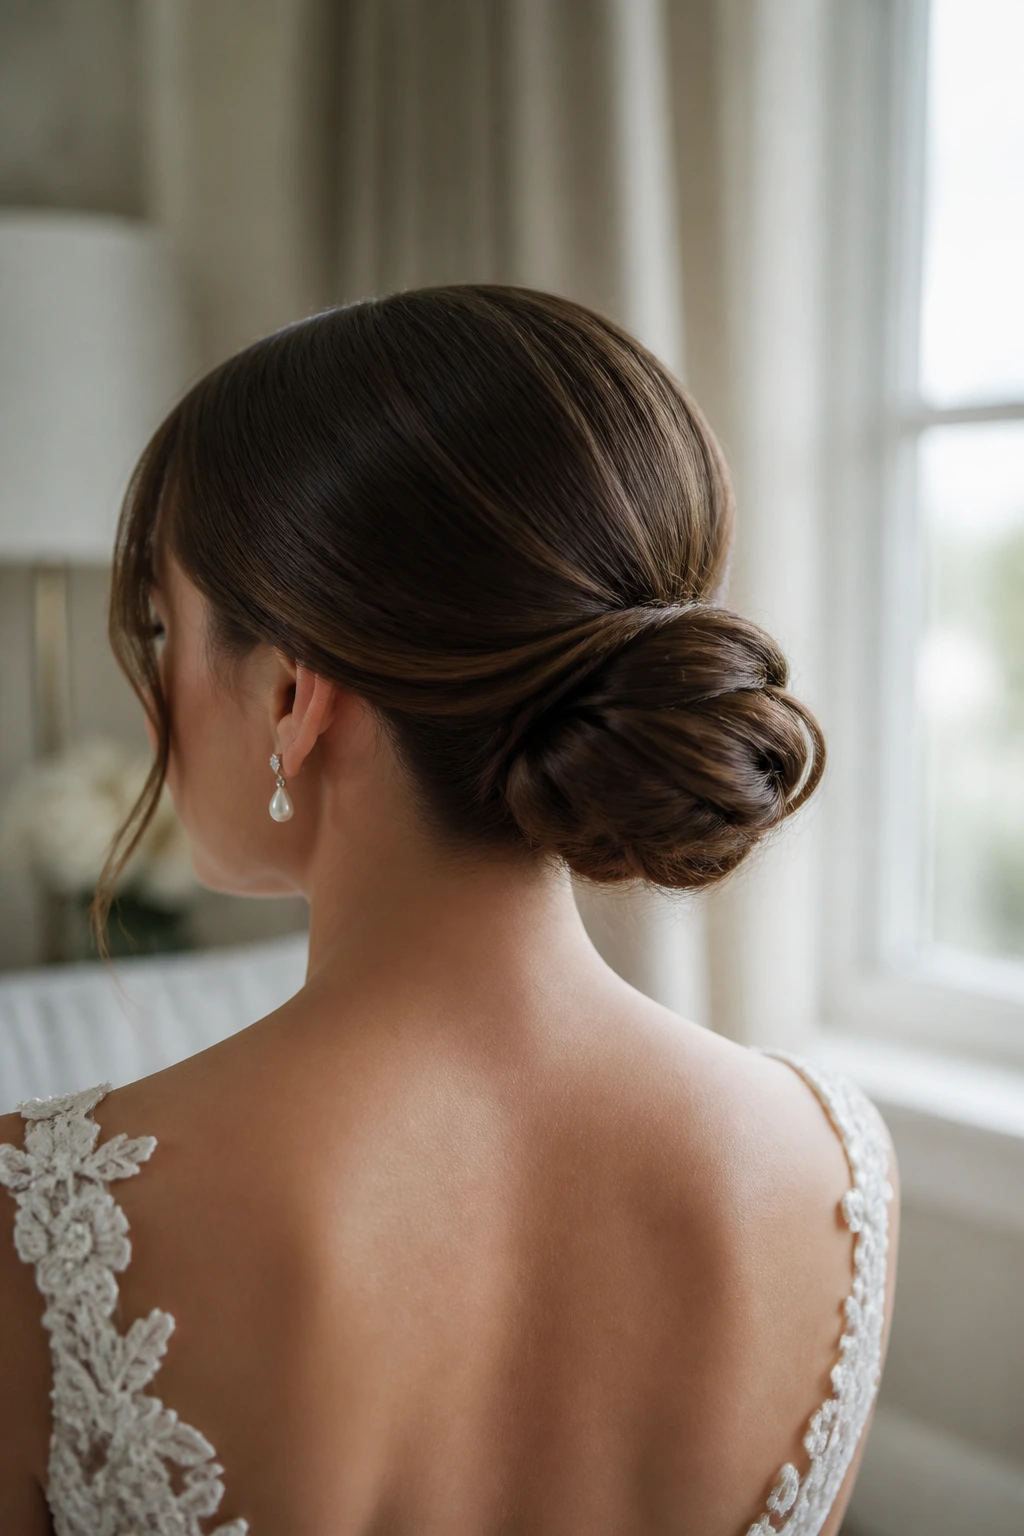
Starting on hair that is too silky: Freshly washed, slippery hair can look beautiful for five minutes and then slide loose. The fix is simple: add texture with dry shampoo, texturizing spray, or a little day-old grit before pinning.
-
Making the bun too small for the hair thickness: Thick hair shoved into a tiny knot can look squeezed and messy from the side. If the hair is dense, spread the weight across a wider base or use padding so the bun has room to breathe.
-
Placing the bun too low: A bun sitting at the very bottom of the neck can disappear under a veil or feel droopy in photos. The better spot is usually the upper nape, where it can stay visible and still feel low.
-
Loading on accessories before the shape is set: Pearls, flowers, and ribbon should come after the structure is pinned. Add them too early and they shift while you keep working.
-
Ignoring the back view: A style that looks tidy in the mirror can leave ends poking out at the back. Check the bun with a second mirror or a phone camera before calling it done.
-
Using one kind of pin for everything: Bobby pins are useful, but they are not magic. Thick buns, curls, or padding often need U-pins and crisscross placement to stay locked.
Variations and Adaptations to Try
For Fine Hair: Add a small bun maker, tease the crown lightly, and keep the bun compact. Fine hair often looks best when the shape is small but clearly defined, not when it’s stretched into a puff.
For Thick Hair: Divide the hair into sections before gathering it. Twisting or braiding each section first spreads the weight and keeps the bun from becoming a single heavy lump at the nape.
For Curly and Coily Hair: Keep the natural pattern visible where possible. Stretch the roots a little if needed, but do not brush the texture out before pinning. The shape usually looks richer when the texture stays intact.
For Outdoor Weddings: Choose a tighter base, fewer face-framing pieces, and a stronger spray hold. Wind loves loose tendrils. It does not care that you spent an hour placing them.
For Minimalist Dresses: Go sleek, low, and accessory-light. A clean chignon or wrapped knot can echo a simple dress far better than a bun packed with pearls and flowers.
For Romantic Dresses: Add soft braids, wispy pieces, or a single floral accent. Keep the detail concentrated in one zone so the style feels gentle instead of busy.
Keeping the Bun Fresh From Ceremony to Last Dance
The first hour is easy. The challenge starts when the veil comes off, the hugging begins, and somebody decides the back of your head is the best place for a congratulatory squeeze. A low bun usually holds up, but it still likes a little attention.
Check the nape once before photos and again after the veil comes off. If a loop has loosened, slide a bobby pin in horizontally from the inside edge of the bun. That angle matters more than the pin itself; straight pins tend to skate out when the hair warms up. Keep a travel hairspray nearby, but use it sparingly. Too much can make the hair crunchy right when you want it to move.
If the event runs long or the weather is humid, a stylist or trusted friend can smooth the hairline with a tiny amount of cream on the fingertips. Not a lot. Just enough to tame the new flyaways that show up halfway through dinner. Hair always finds a way to surprise people after midnight.
Questions Brides Ask About Low Buns
Can a low bun work with a veil?
Yes, and it often works better than a higher updo. The bun gives the comb or clip a stable spot near the nape, while the veil can sit above it without crowding the shape. The main thing is testing the removal so the bun doesn’t get dragged out with the fabric.
What face shapes suit a low bun best?
Almost any face shape can wear one if the parting and front shape are chosen carefully. Center parts tend to lengthen, side parts soften, and face-framing pieces can balance a stronger jaw or a wider forehead. The bun itself matters less than the front and crown treatment.
How dirty should hair be for a bridal low bun?
Slightly lived-in hair usually behaves better than freshly washed hair. One-day-old hair often has enough grip for pins and twists, while very silky hair may need texturizing spray or dry shampoo. If your hair gets greasy fast, wash it the day before and keep conditioner away from the roots.
Can thin hair hold a low bun without looking tiny?
Yes, but it usually needs padding or a small bun maker. Fine hair can make a neat bun look underfed unless you build width at the base or add a little lift at the crown. The goal is not fake volume everywhere. It is shape.
What if the bun keeps slipping during the trial?
The problem is usually either too-clean hair, poor pin placement, or a base that’s too low and heavy. Add texture first, then pin the bun in sections with crossed bobby pins and a few U-pins if the hair is thick. If it still slips, move the bun slightly higher at the nape.
Do low buns work for curly or coily hair?
Absolutely. In fact, they can be some of the most striking bridal looks because the texture stays visible. The key is respecting the curl or coil pattern and using pins that grip the texture without flattening it into submission.
Should the bun sit dead center or off to one side?
Either can work. Centered buns usually feel more formal and balanced, while slightly off-center buns read softer and more relaxed. The neckline, earrings, and veil usually decide this more than the face shape does.
Can a low bun survive humidity and dancing?
If it’s pinned well, yes. The safer version for humidity has a tighter base, fewer loose strands, and more structure inside the bun. Softness can still be there, but it should live in the shape, not in pieces that wander off on their own.
After the Last Pin
A good bridal low bun does something sneaky: it makes the rest of the look feel settled. The dress has room. The veil has a home. The face gets the attention it deserves. That’s why these styles stay useful no matter how many hair trends come and go around them.
Pick the version that fits the neckline, the texture of the hair, and the mood of the dress, then let the bun do its quiet work. A style like that doesn’t need to shout to be memorable. It just has to stay in place and look like it belongs there.
