



Shoulder-length hair is the sneaky sweet spot for an updo. It’s long enough to twist, braid, tuck, and pin, but short enough that the finished style usually feels lighter and cleaner than a bun built from waist-length hair. That’s why updo hairstyles for shoulder length hair can look sharper than people expect — the shape shows up fast, the ends don’t drag the whole thing down, and the style often stays closer to the head instead of sagging by dinner.
There’s also a practical side to this length that gets ignored. Shoulder-length hair has enough movement to soften a bun or twist, which means you don’t need perfect symmetry for the style to look intentional. A few loose pieces around the face, a small roll at the nape, a braid that fades into a knot — these details read as polished because the cut itself has a bit of natural give. Long hair can swallow those details. Very short hair can fight them. Shoulder-length hair sits right in the middle and behaves.
I’ve always liked working with this length for event hair because it rewards a little bit of texture. Freshly washed hair can slip. Day-old hair usually holds. Add a bit of grit at the roots, and suddenly a style that looked impossible in the mirror starts pinning in place with half the effort. That’s the trick with shoulder-length updos: they don’t need more hair, they need better structure.
Some of the best styles below are sleek and formal. Some are loose, messy, and fast. A few lean on braids or twists because those are the easiest ways to make shorter lengths feel fuller. And a few are the kind of styles I reach for when I want something that looks deliberate without spending an hour in the bathroom mirror.
Why You’ll Love This Collection
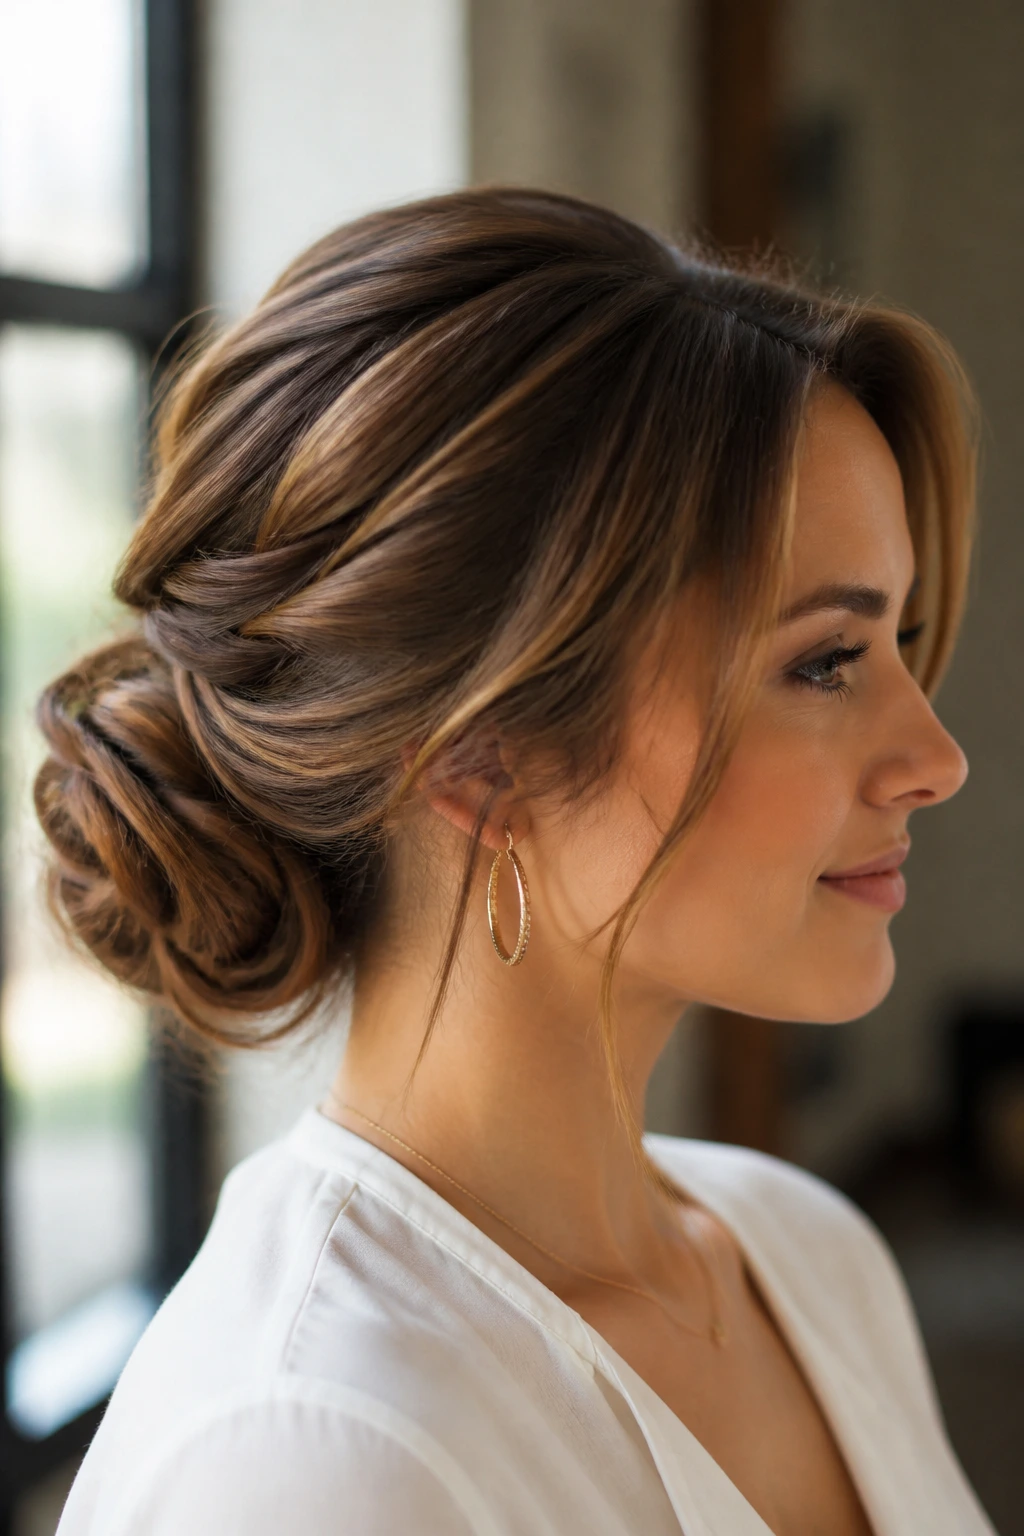
- Shoulder-length hair has usable grip: Hair that lands around the shoulders gives bobby pins enough length to catch, without the heavy pull that makes longer updos droop.
- Most of these styles work on second-day hair: A little natural oil gives the roots more hold, which is why these looks usually sit better after a day out of the shampoo bowl.
- Layers become part of the style: Instead of fighting shorter pieces, these updos tuck them into twists, braids, and low knots where they read as softness.
- You can dress them up or down fast: The same base can look office-clean with smooth roots or more relaxed with a few pulled-out pieces.
- They do not need salon-level hair: Good pins, a comb, and a little patience matter more than having endless length.
- Accessories actually stay put: Shoulder-length hair supports pearl pins, small clips, and combs without the extra weight pulling them sideways.
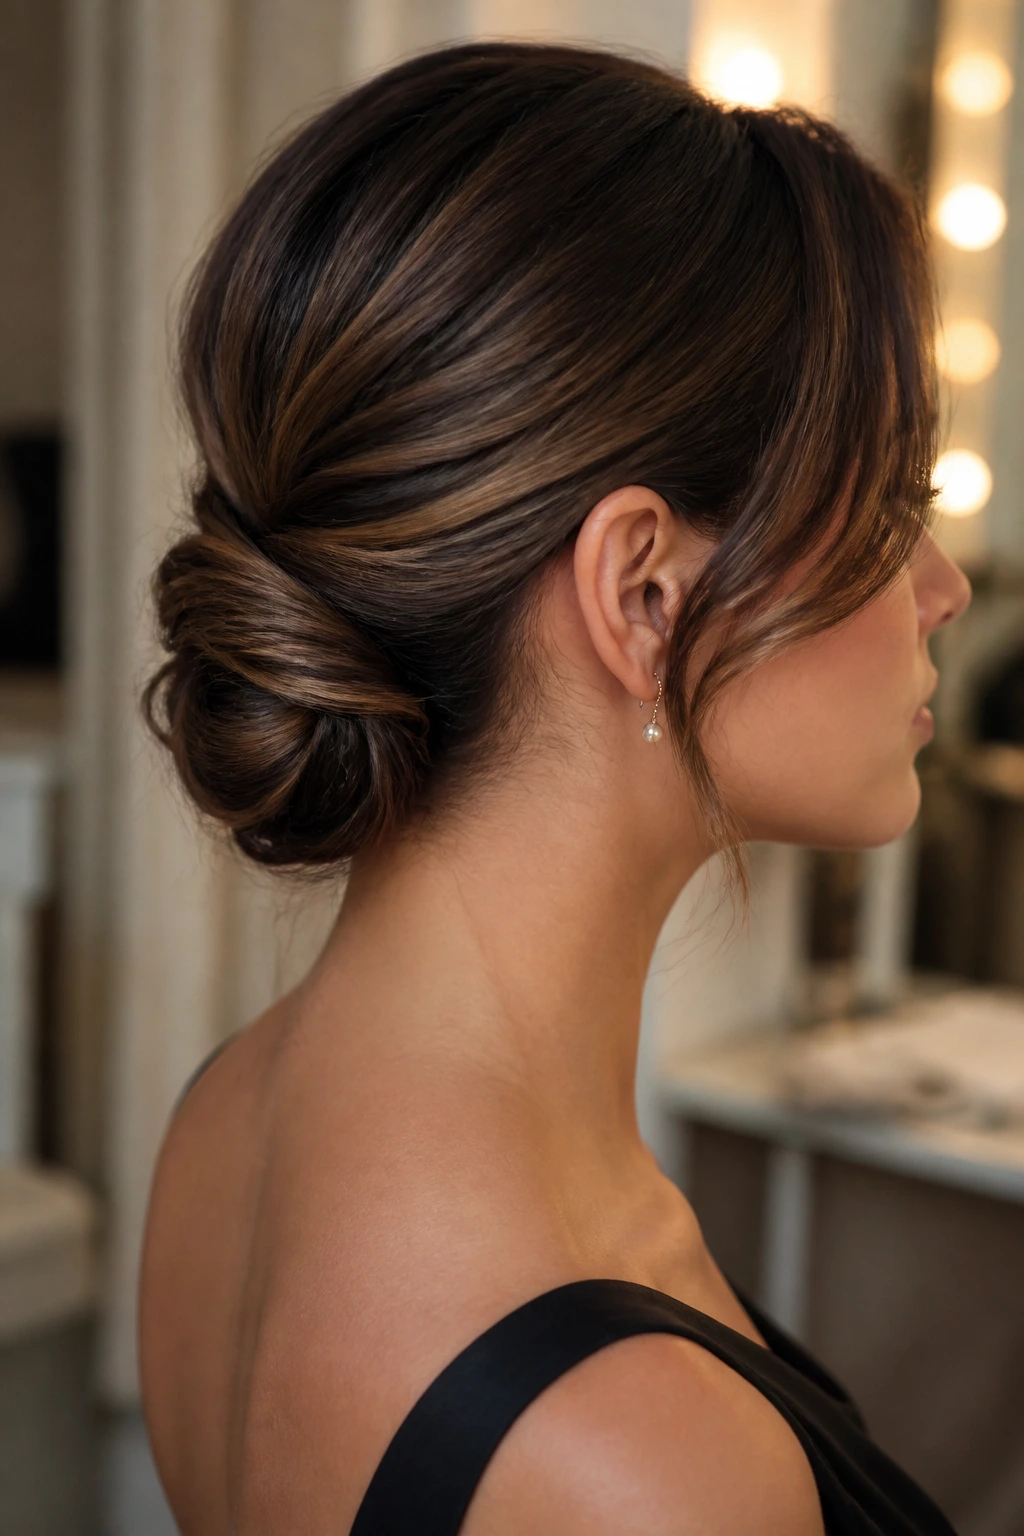
1. Low Twisted Chignon at the Nape
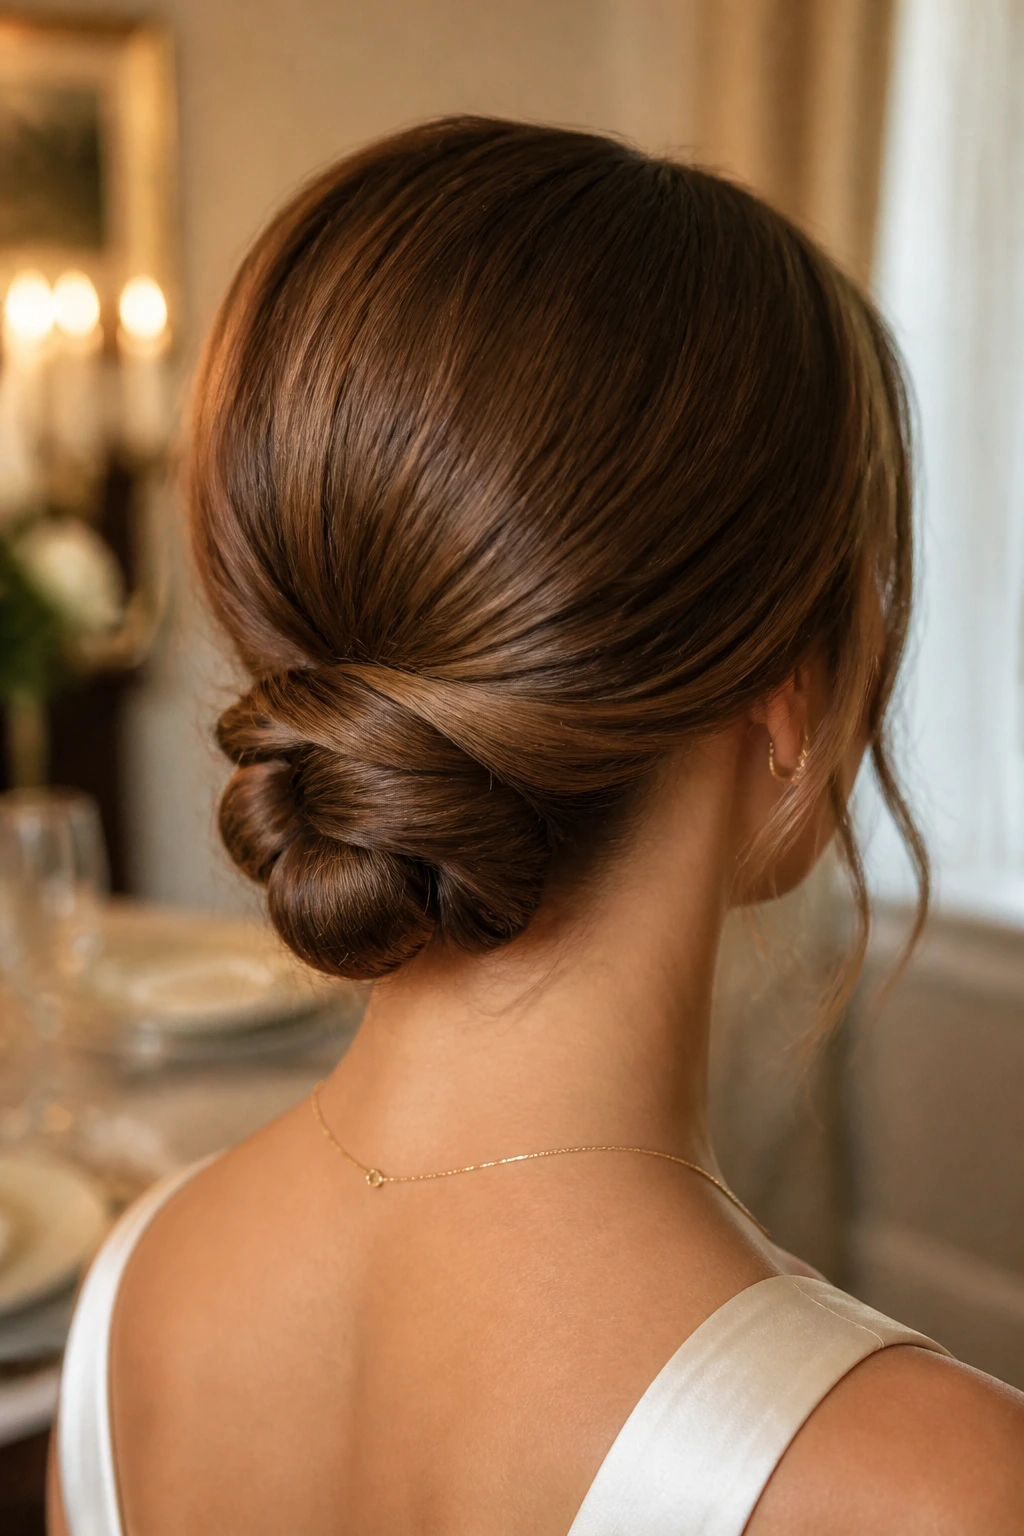
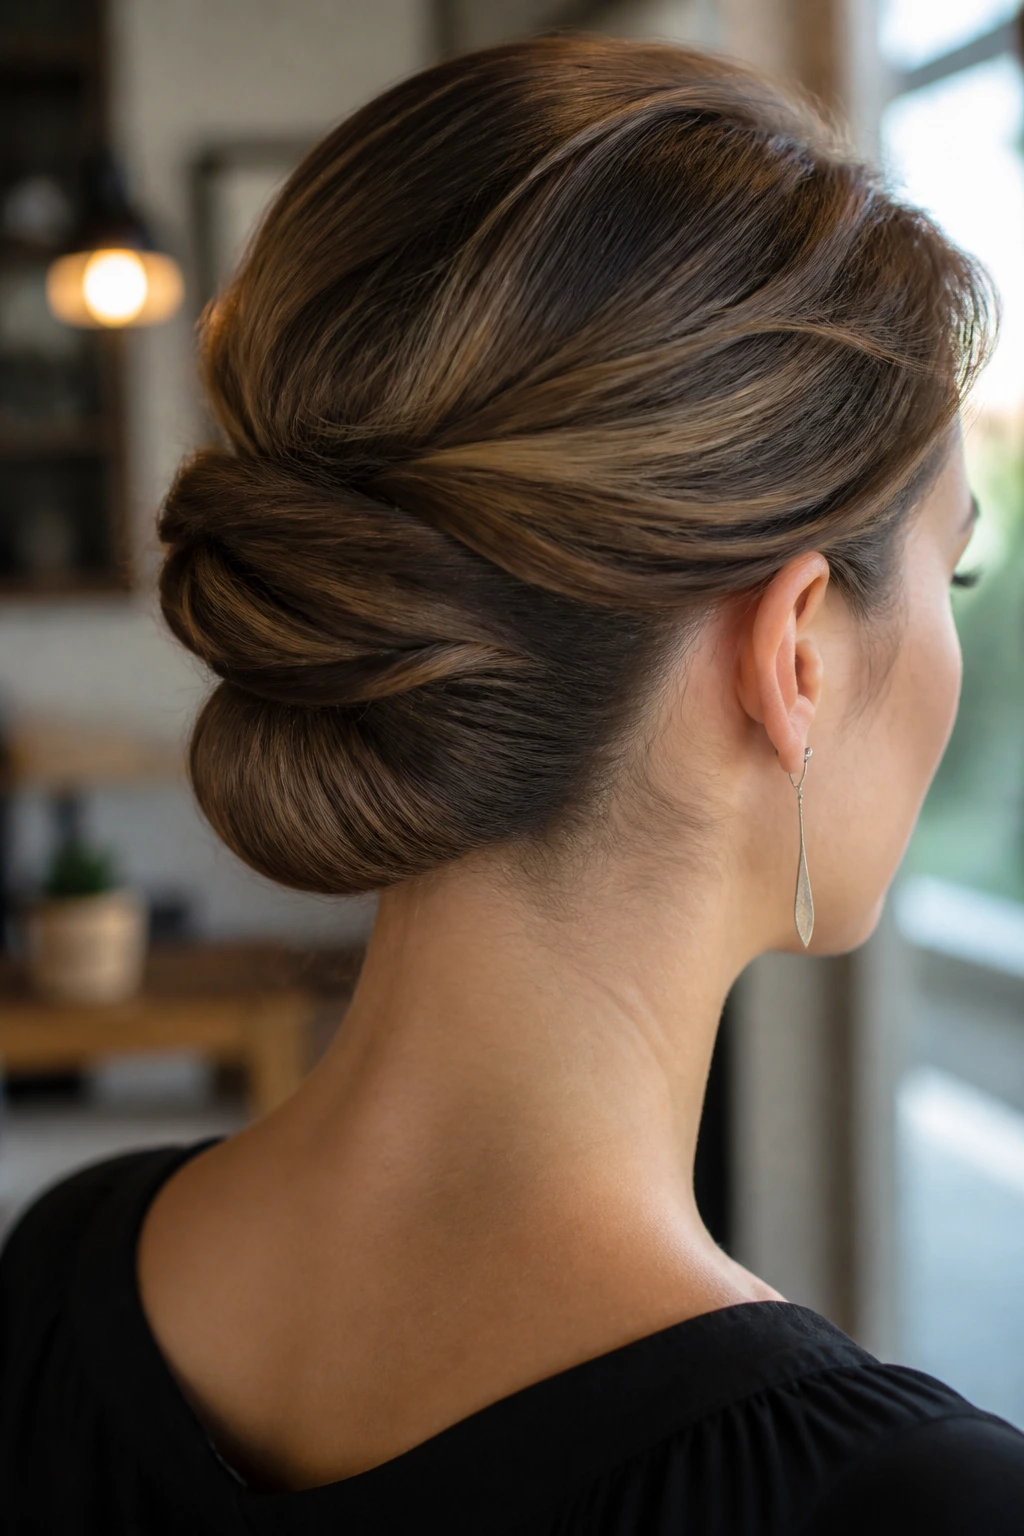
A low twisted chignon is one of those styles that looks more complicated than it is. The hair sits close to the neck, twisted back from both sides, then folded into a compact knot that feels elegant without being stiff. On shoulder-length hair, the ends disappear neatly, which is half the battle. You don’t get the bulky knot you see on longer hair. You get a small, controlled shape that sits where the head naturally narrows.
Why it holds so well on shoulder-length hair
Shoulder-length strands are long enough to wrap once or twice, which is all a chignon really needs. That shorter length also keeps the bun from spreading out and sliding down the nape. I like this one for dinners, work events, and any situation where you want your hair off your neck but not sprayed into a shell.
- Best starting point: hair with a little bend, not freshly washed silk.
- Pin strategy: cross two bobby pins over the center of the knot, then tuck one more under the base.
- Finish: a light mist of hairspray, not a helmet.
Pin trick: slide the bobby pins in with the wavy side facing the scalp. That tiny detail matters more than people think.
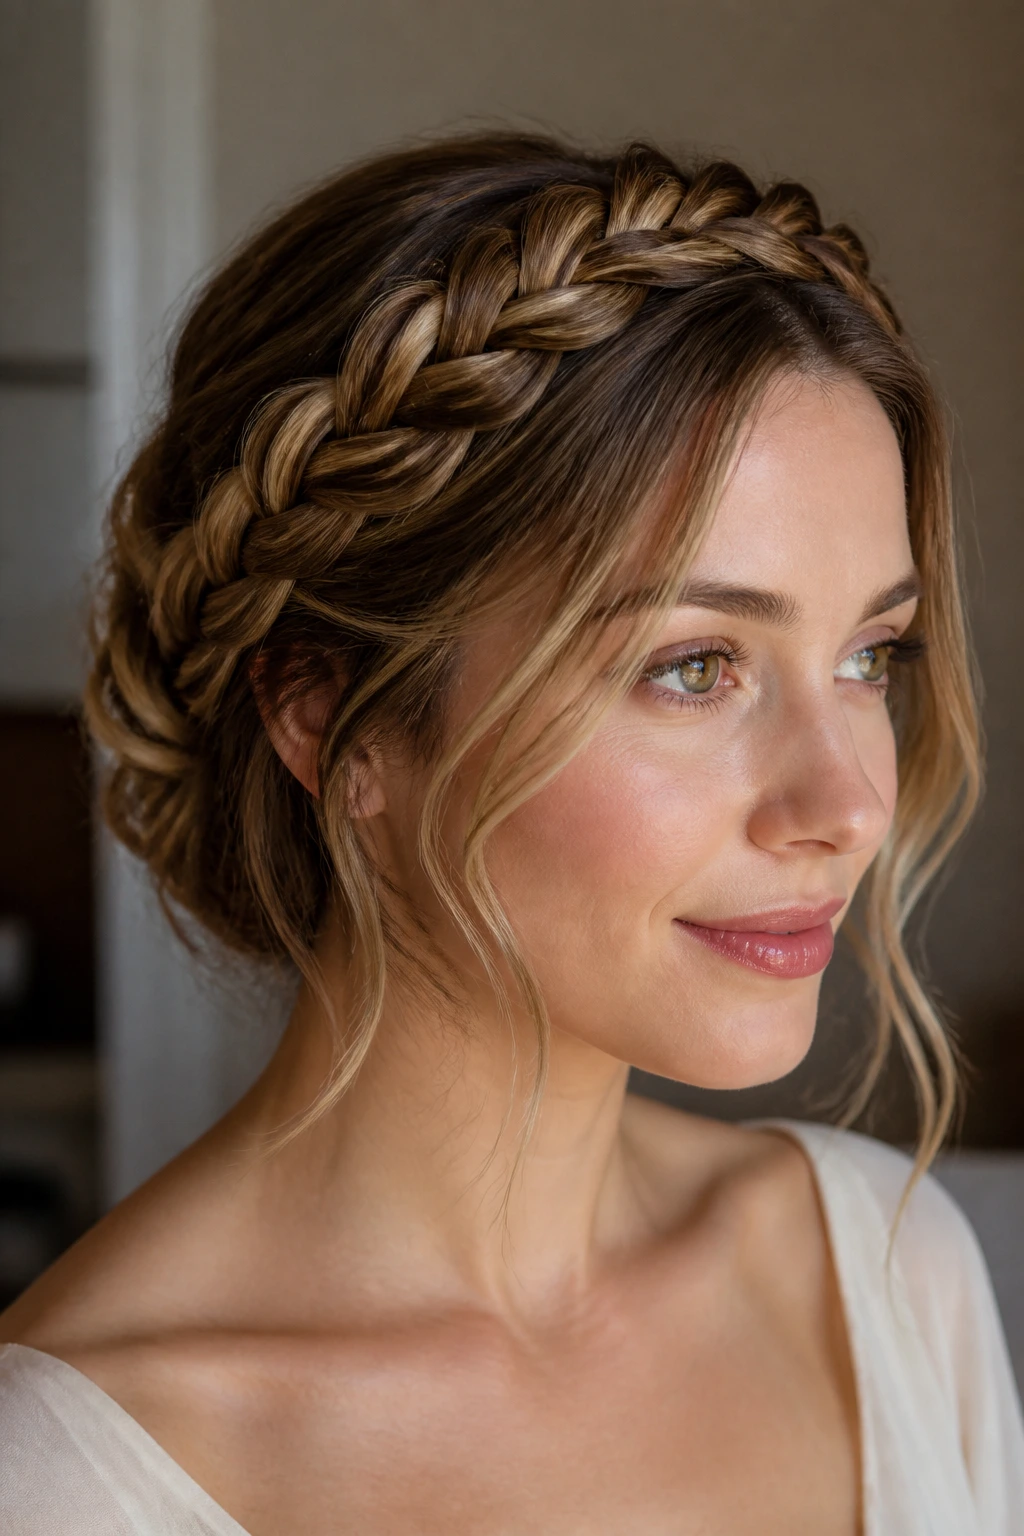
2. Braided Crown Halo
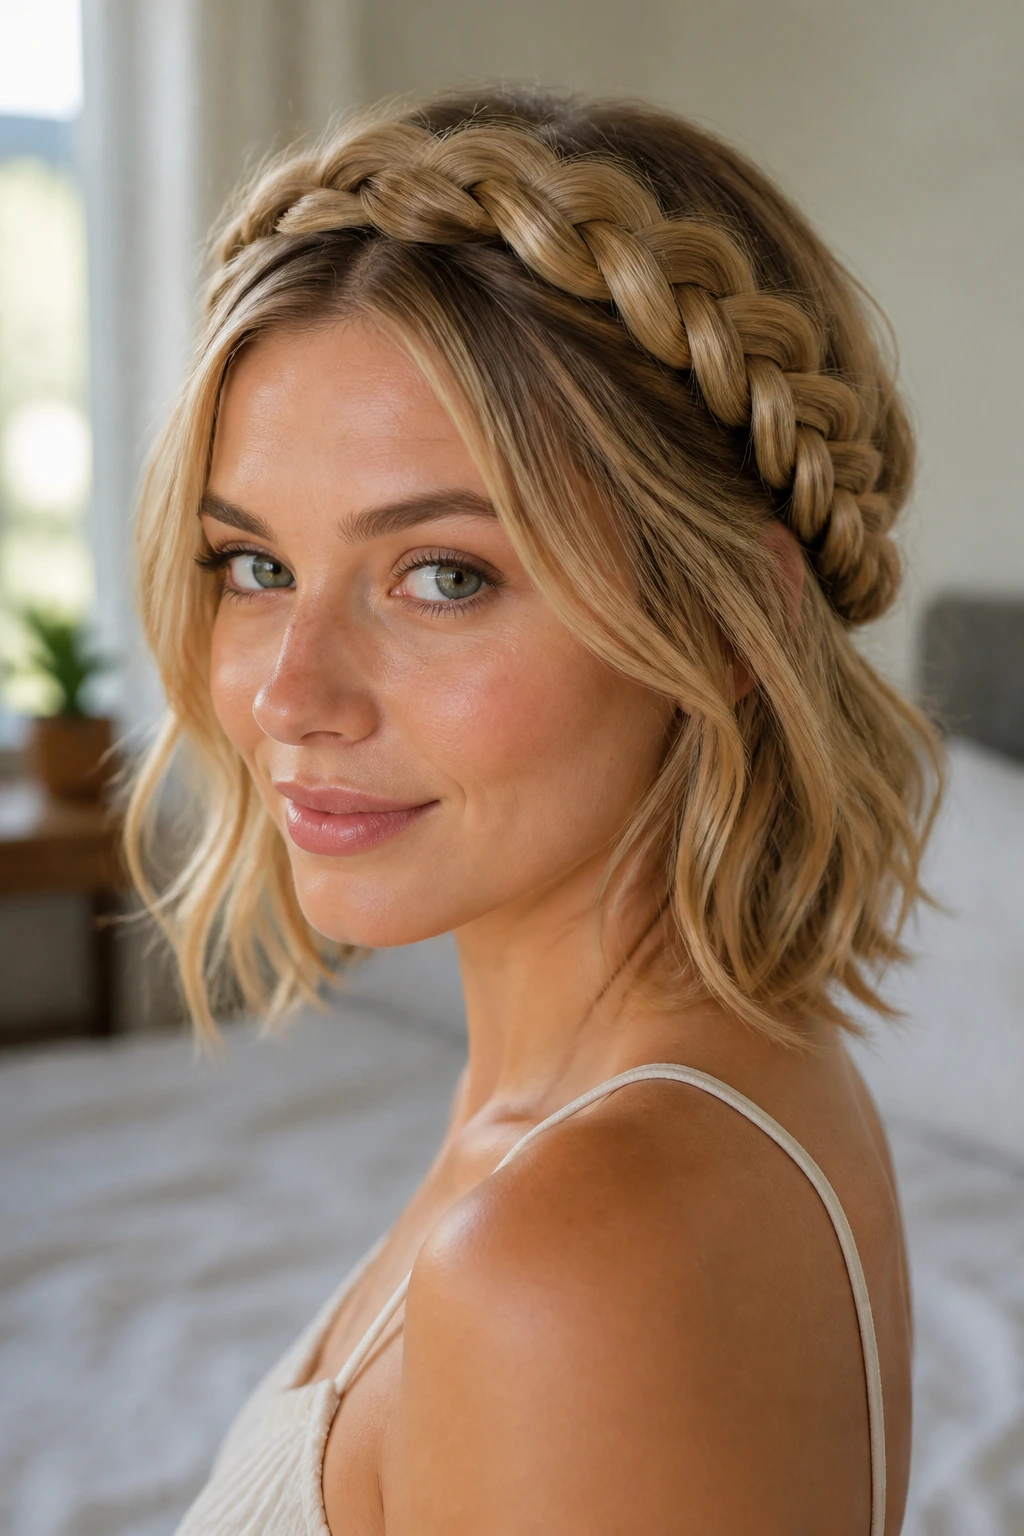
A braided crown halo gives shoulder-length hair a lot of presence fast. The braid runs along the hairline like a frame, then disappears into pinned ends at the back or just behind one ear. It’s especially nice when your haircut has layers, because the braid gathers those shorter pieces instead of leaving them loose and fussy.
The reason I like this style is simple: it makes medium-length hair look deliberate. Not “trying to be long,” just styled. The braid should stay fairly close to the head, especially at the temples, or it starts to puff and lose the neat halo shape. A little texture spray at the roots helps here, and a tail comb makes the parting cleaner than using your fingers.
How to keep the braid flat
Start the braid slightly above the ear and keep tension even the whole way around. If the braid loosens near the crown, the halo turns lumpy. That’s the one spot to watch. Finish by tucking the tail under the braid line and pinning it in two places, not one.
This one looks best with soft makeup and earrings that don’t fight the braid. It has a romantic feel, but it’s not fragile. It can handle a long day.
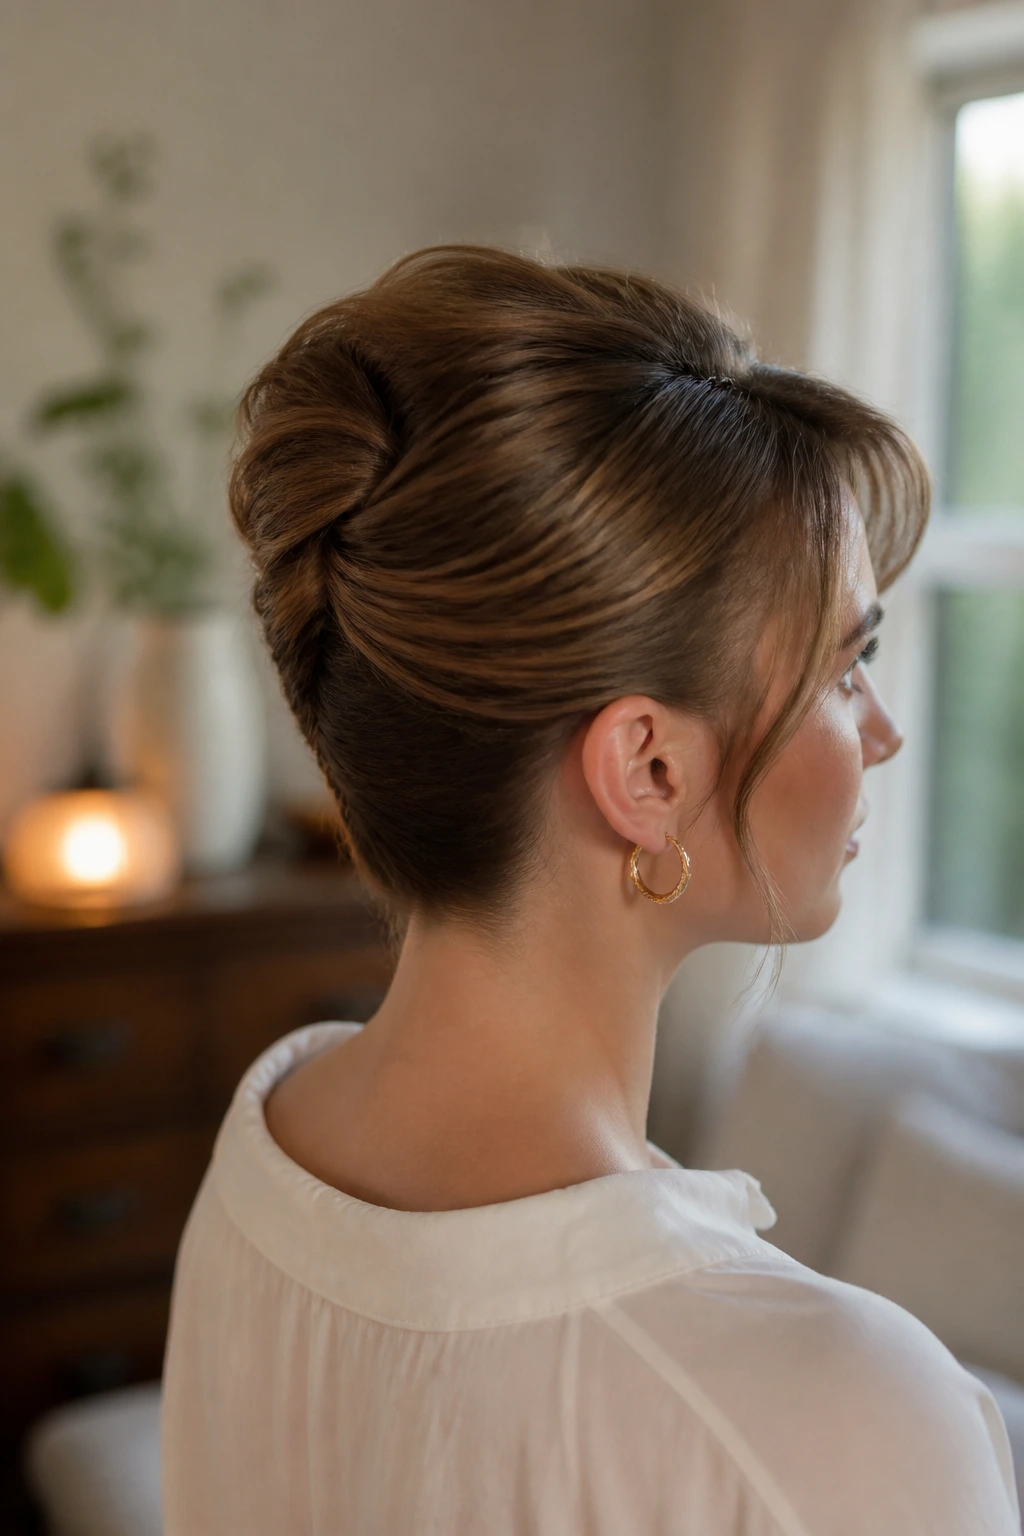
3. French Twist with Soft Volume
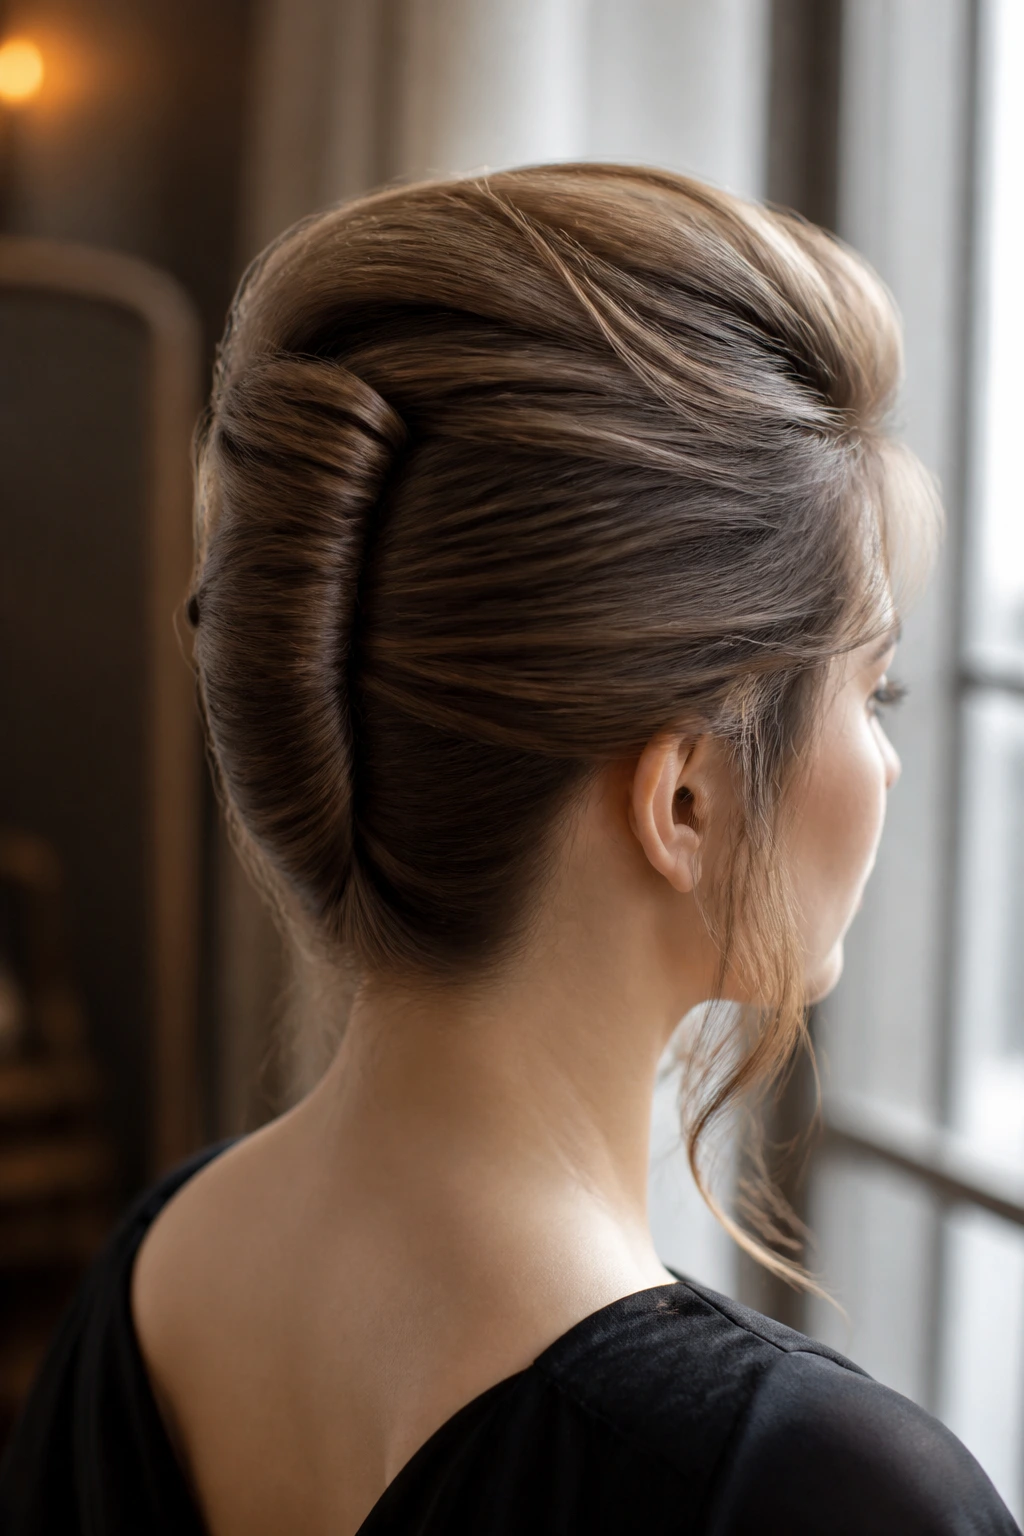
Can shoulder-length hair really do a French twist? Yes — and in some ways, it does it better than long hair. The shorter length creates a tighter roll, so the twist sits closer to the head and looks clean instead of oversized. Add a little lift at the crown, and the style gets shape without turning into a helmet.
I prefer this version with soft volume at the top rather than a flat, severe finish. Tease just the crown section lightly, smooth the outer layer over it, and roll the hair upward until it tucks into that vertical seam. If the hair is layered, let a few wisps escape around the ears. That softness keeps the twist from looking too formal for everyday wear.
Best for: dinners, interviews, weddings, or any moment when you want the back of your hair to look polished from every angle.
What to watch: if the twist feels loose before you spray it, it will not magically tighten later. Hold it in place with pins first, then spray.
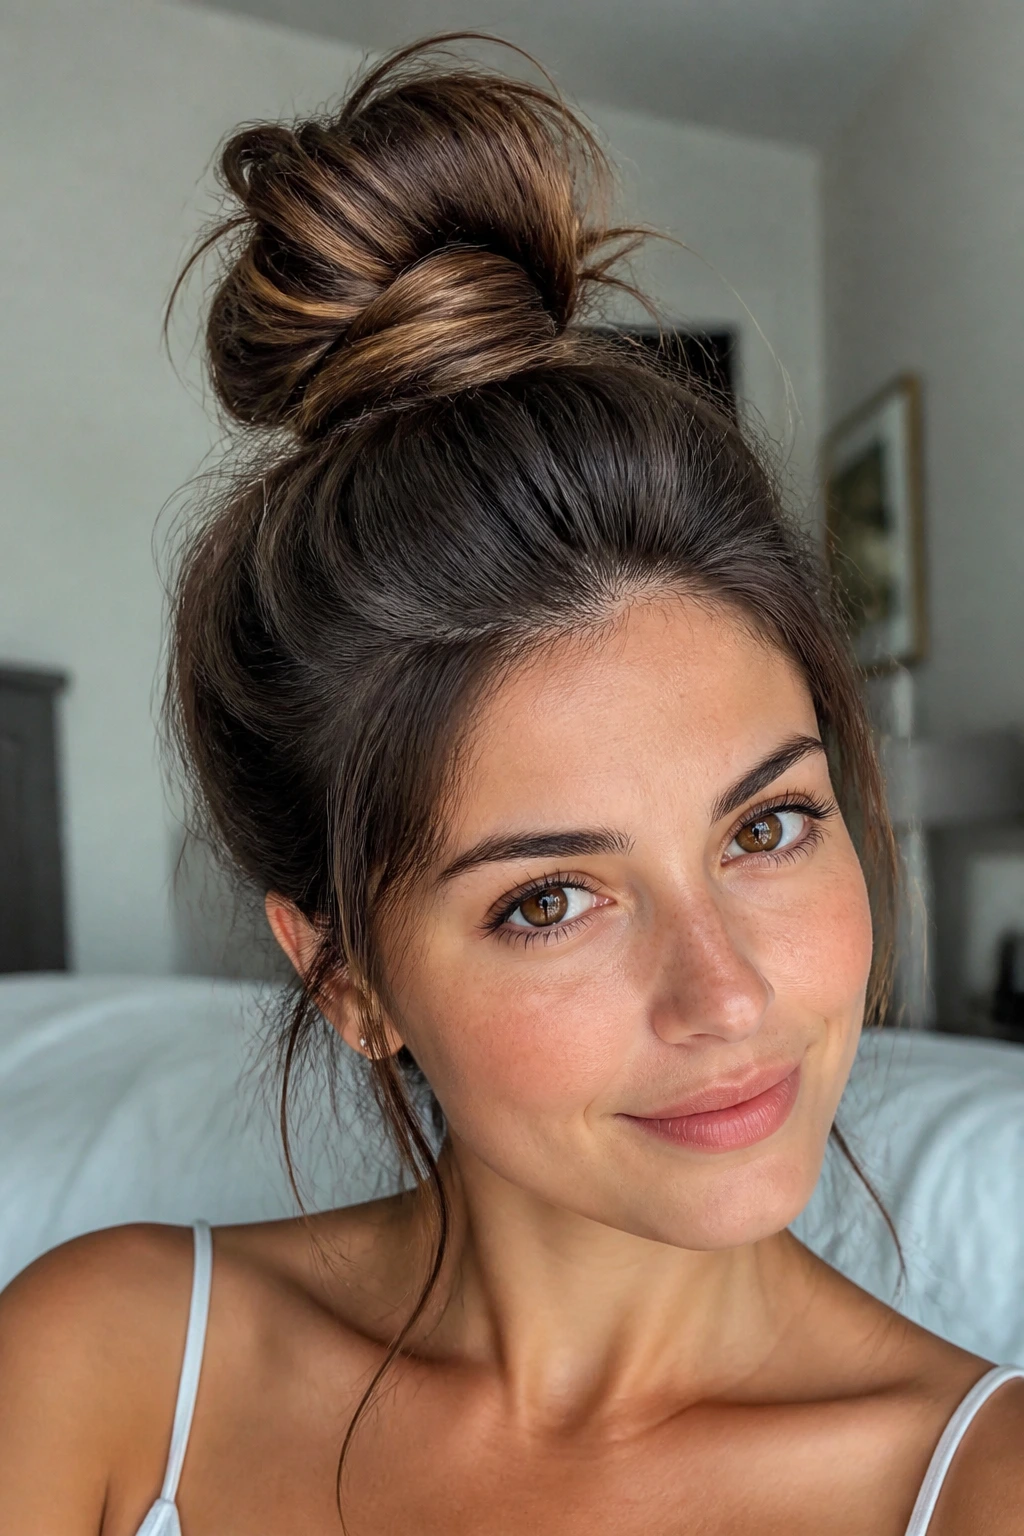
4. Messy Top Knot with Hidden Pins
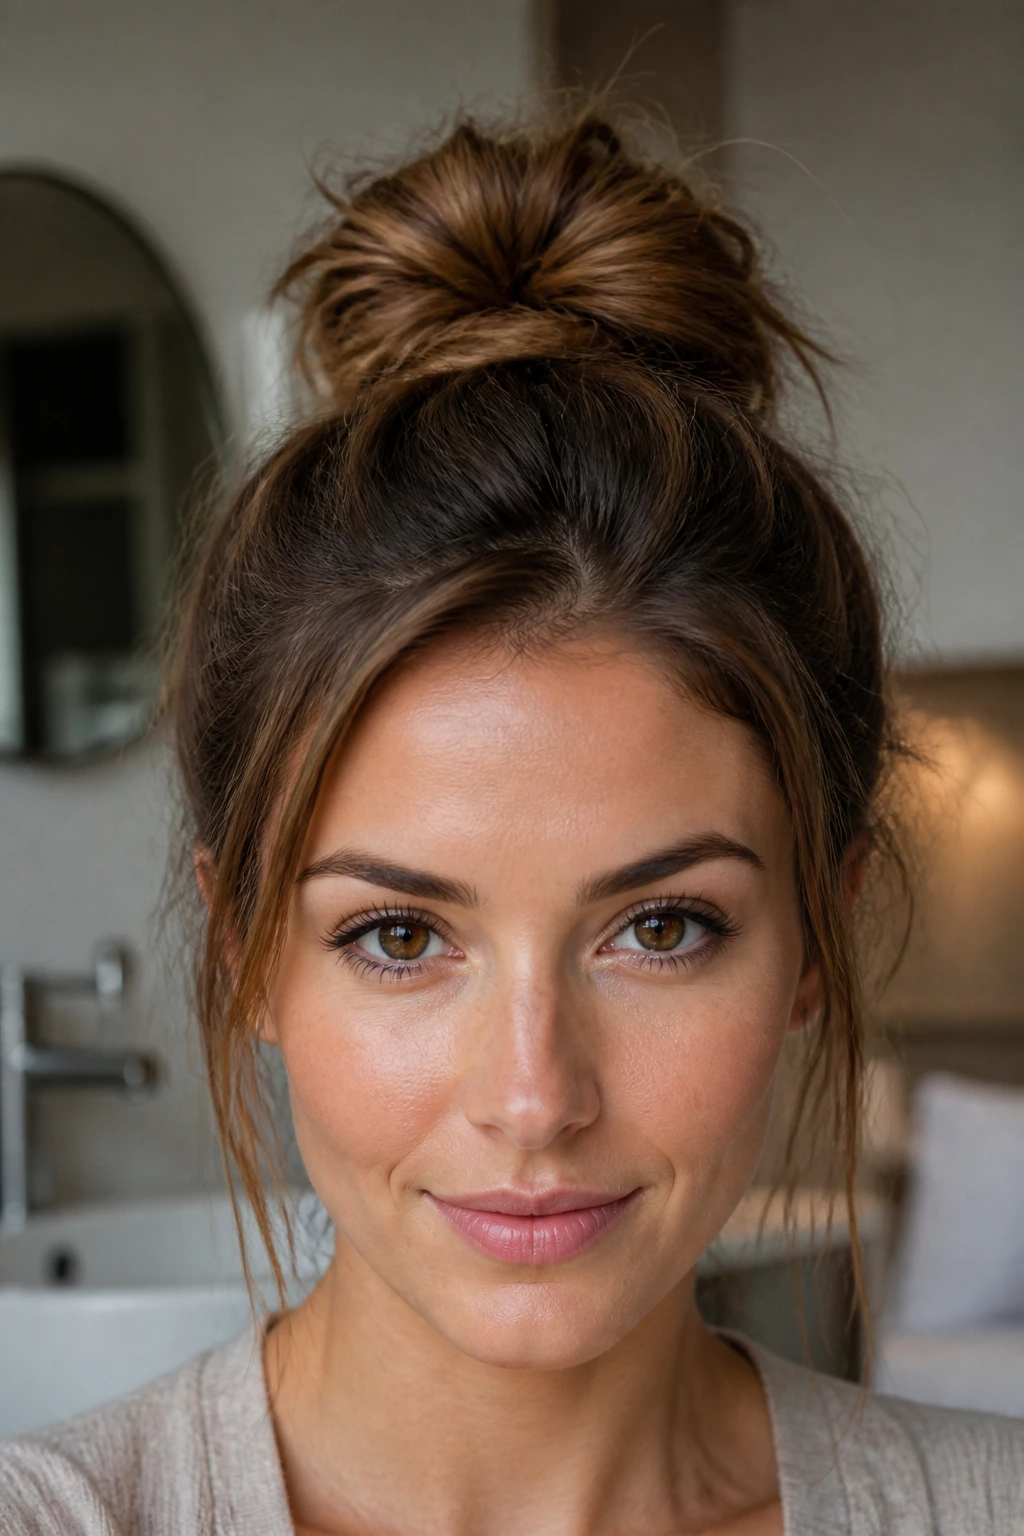
A messy top knot on shoulder-length hair has a different personality than the giant knot you get from very long hair. It’s smaller, lighter, and a little more lifted off the crown. That makes it perfect when you want height without the weight. The trick is to keep the knot compact and let the ends disappear inside the wrap instead of hanging out like a rushed gym bun.
This style works because shoulder-length hair gives you just enough reach to pull up, wrap, and pin. You can tease the crown first if the hair is fine, or leave it flatter if you want a cleaner shape. Either way, the bun should sit on top like a small coil, not a loaf.
- Anchor point: use one elastic first, then build the bun around it.
- Shape note: leave the front slightly loose so the style doesn’t look pulled too tight.
- Best texture: second-day hair or hair with dry shampoo.
Hidden pins are the whole game here. Push them in under the bun, not through the top, so the shape looks effortless even though it’s doing a lot of work.
5. Tucked-In Roll Updo
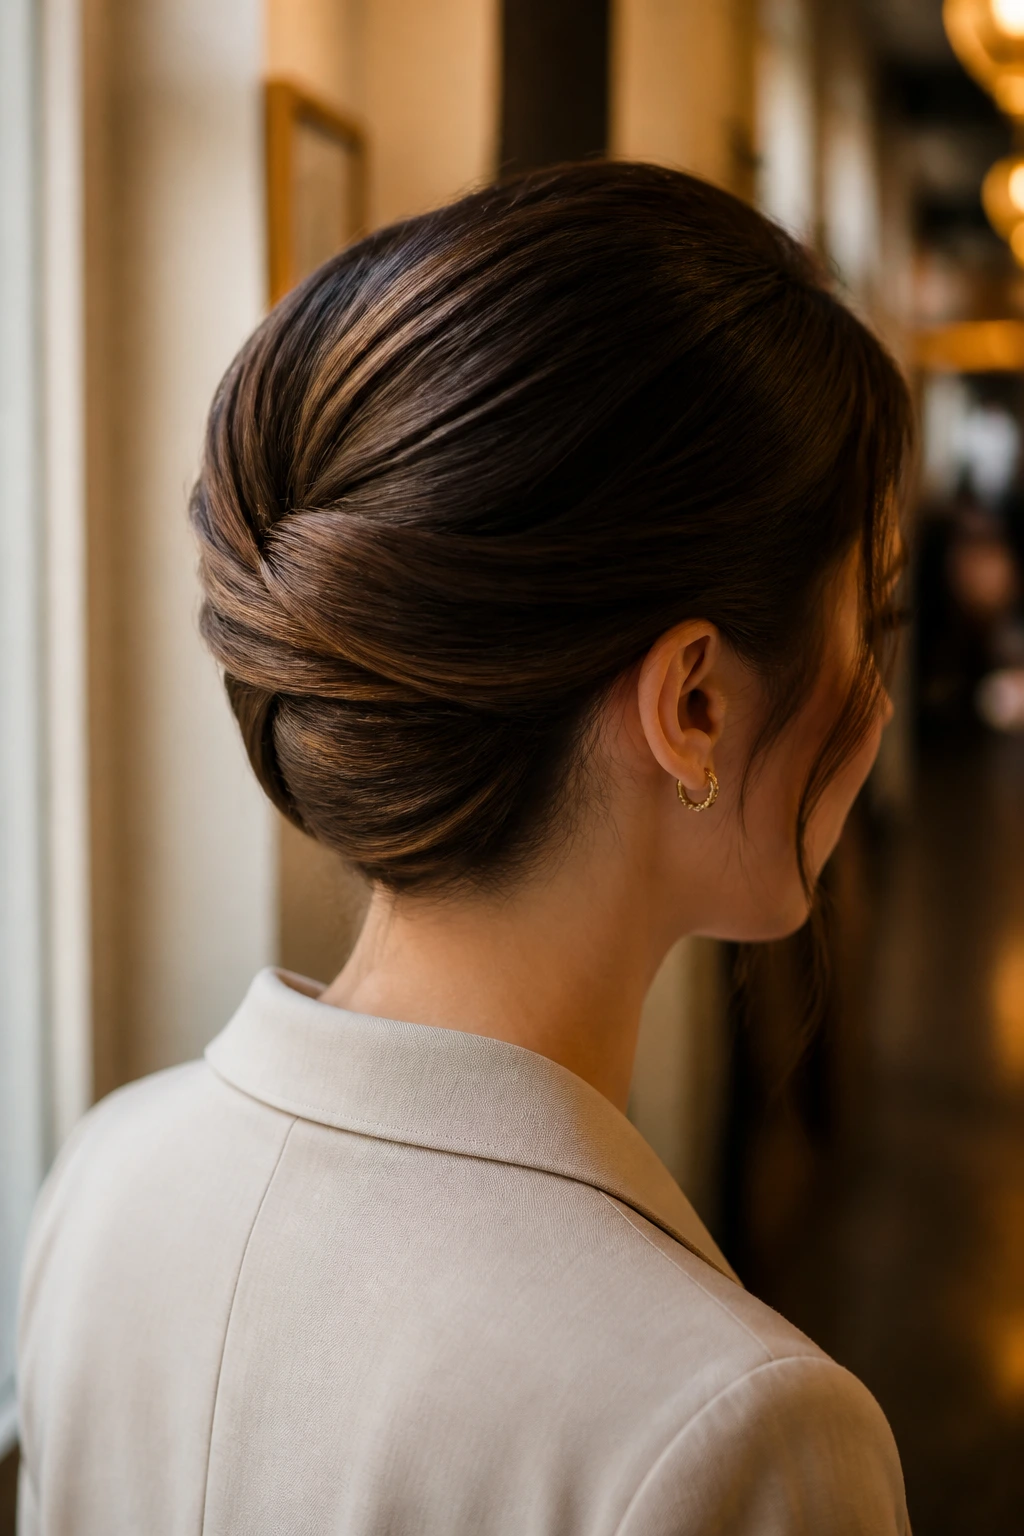
The tucked-in roll is one of the most useful updos for shoulder-length hair because it solves the “what do I do with the ends?” problem without turning into a fight. You gather the hair low at the back, roll it inward toward the neck, and pin it into a smooth fold. The result sits flat and tidy, which is ideal when you want the style to behave under a coat collar or a high neckline.
I like this style for its quiet, unfussy feel. It doesn’t demand volume. It doesn’t need curls. And if your hair is layered, the tuck hides the shorter pieces where they’re least annoying. A little smoothing cream on the top section helps keep flyaways down, but don’t load up the ends — they need a bit of bend to fold cleanly.
When this one makes sense
It’s the style I’d pick for humid weather, for a workday, or for anyone who hates hair touching the neck. If you need something that stays low and close, this is a solid choice. Add a barrette at the seam if you want a touch of polish.
6. Half-Up Braided Bun
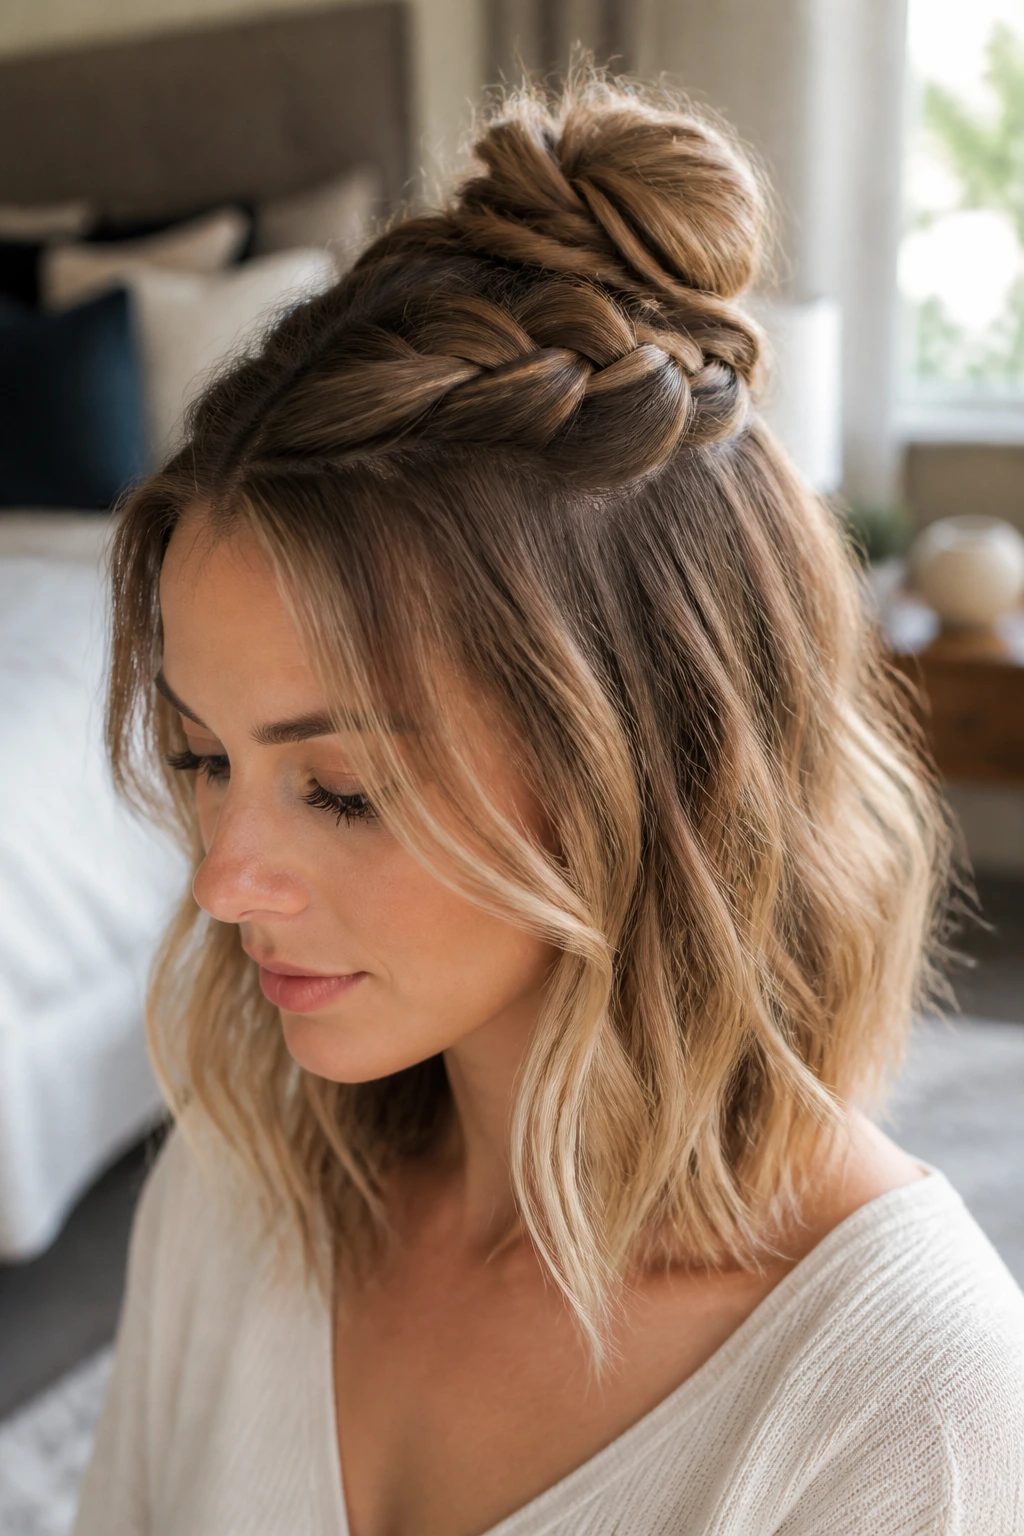
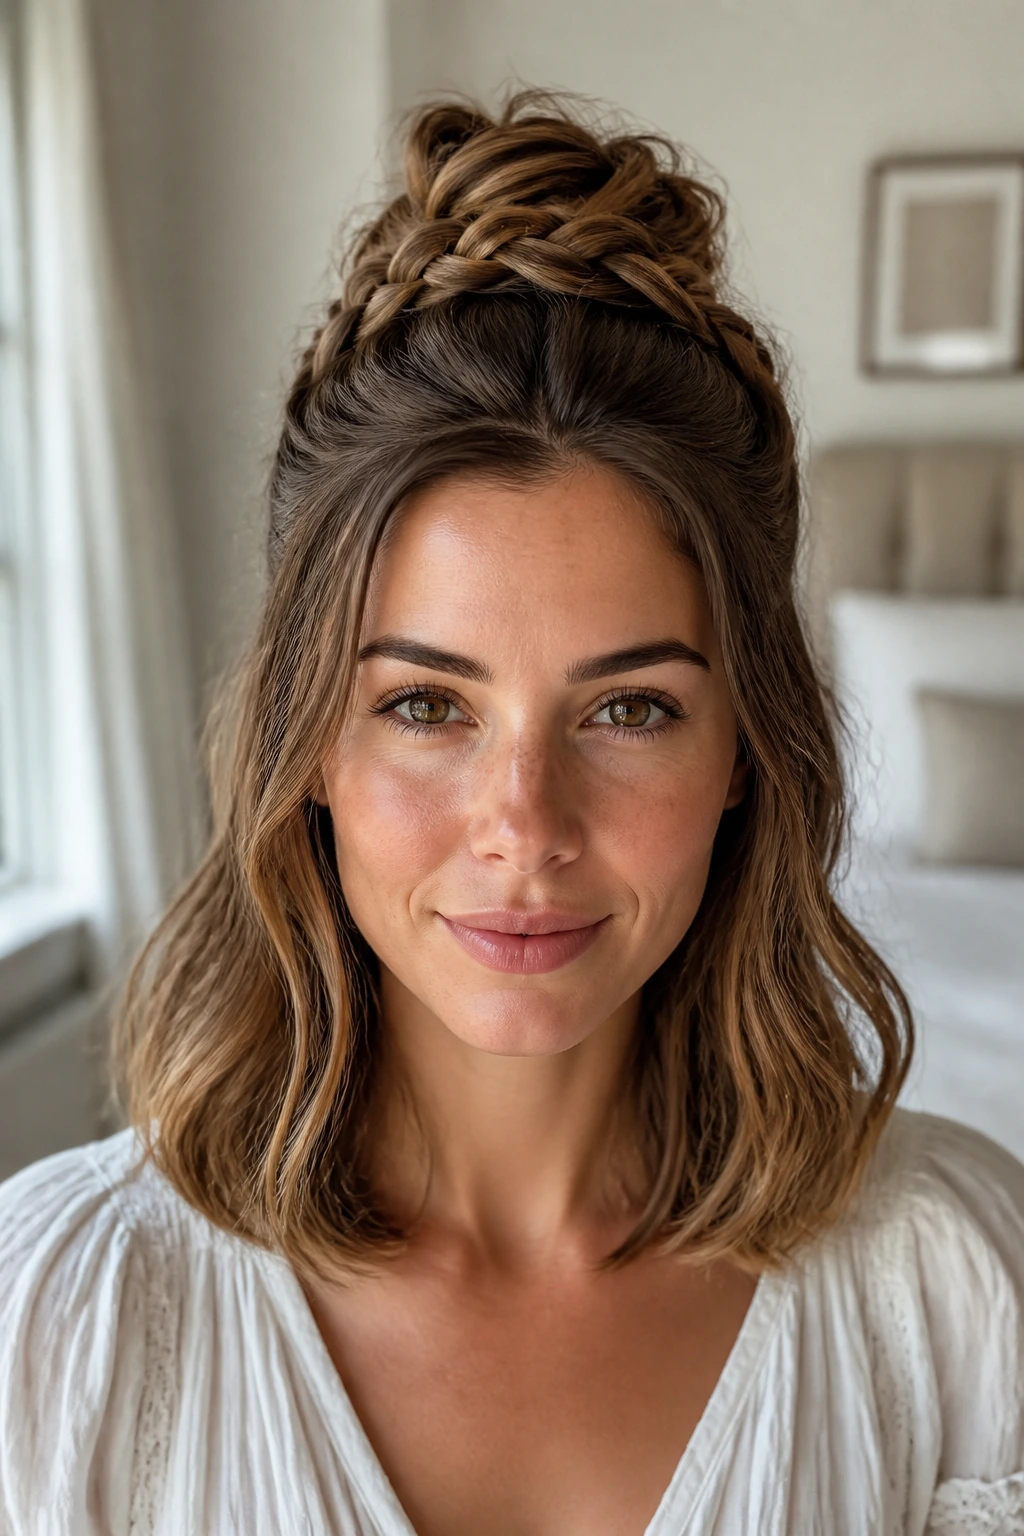
A half-up braided bun gives you the best part of an updo without losing all the movement in the rest of the hair. You braid the top section, twist that braid into a small bun at the crown, then leave the lower half down. On shoulder-length hair, the contrast looks especially nice because the bun doesn’t compete with a long waterfall of hair underneath.
The style has a nice built-in balance. The top stays controlled, and the bottom keeps the look soft. That makes it a smart choice for hair that is layered or a little uneven at the ends. You can even cheat the fullness by pancake-broadening the braid slightly before you wrap it — pull the outer edges of the braid gently to make it look thicker.
A clean half-up braid also works well if your hair is too short for a full bun but too long to leave totally loose. That awkward middle range? This style was made for it.
7. Double Mini Buns
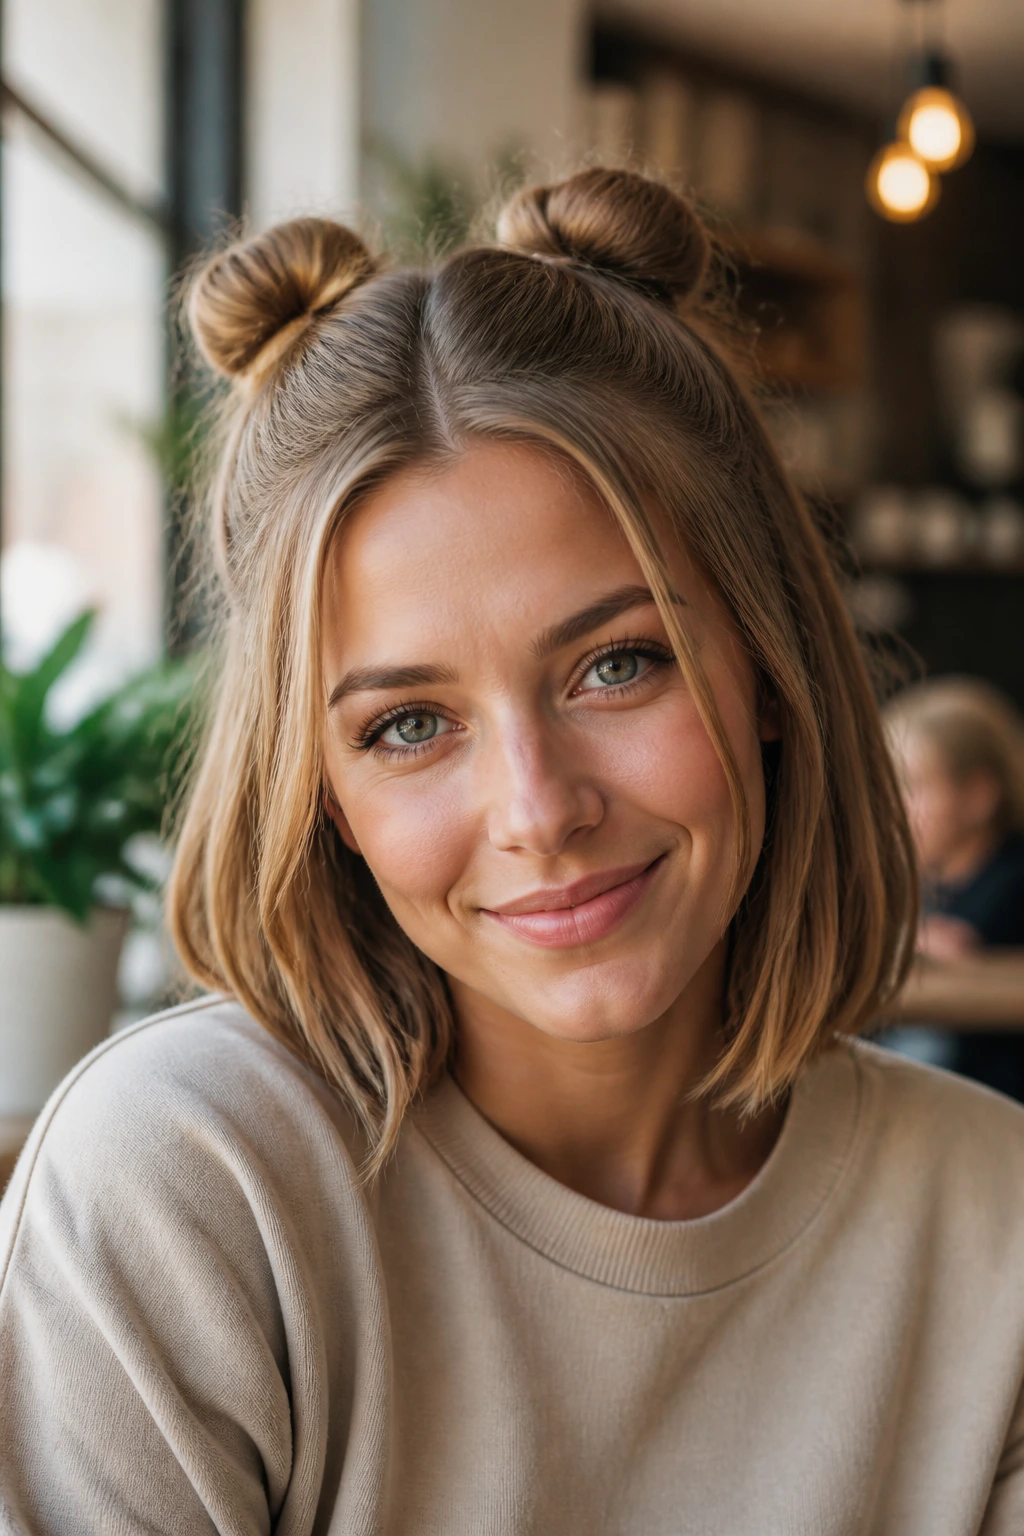
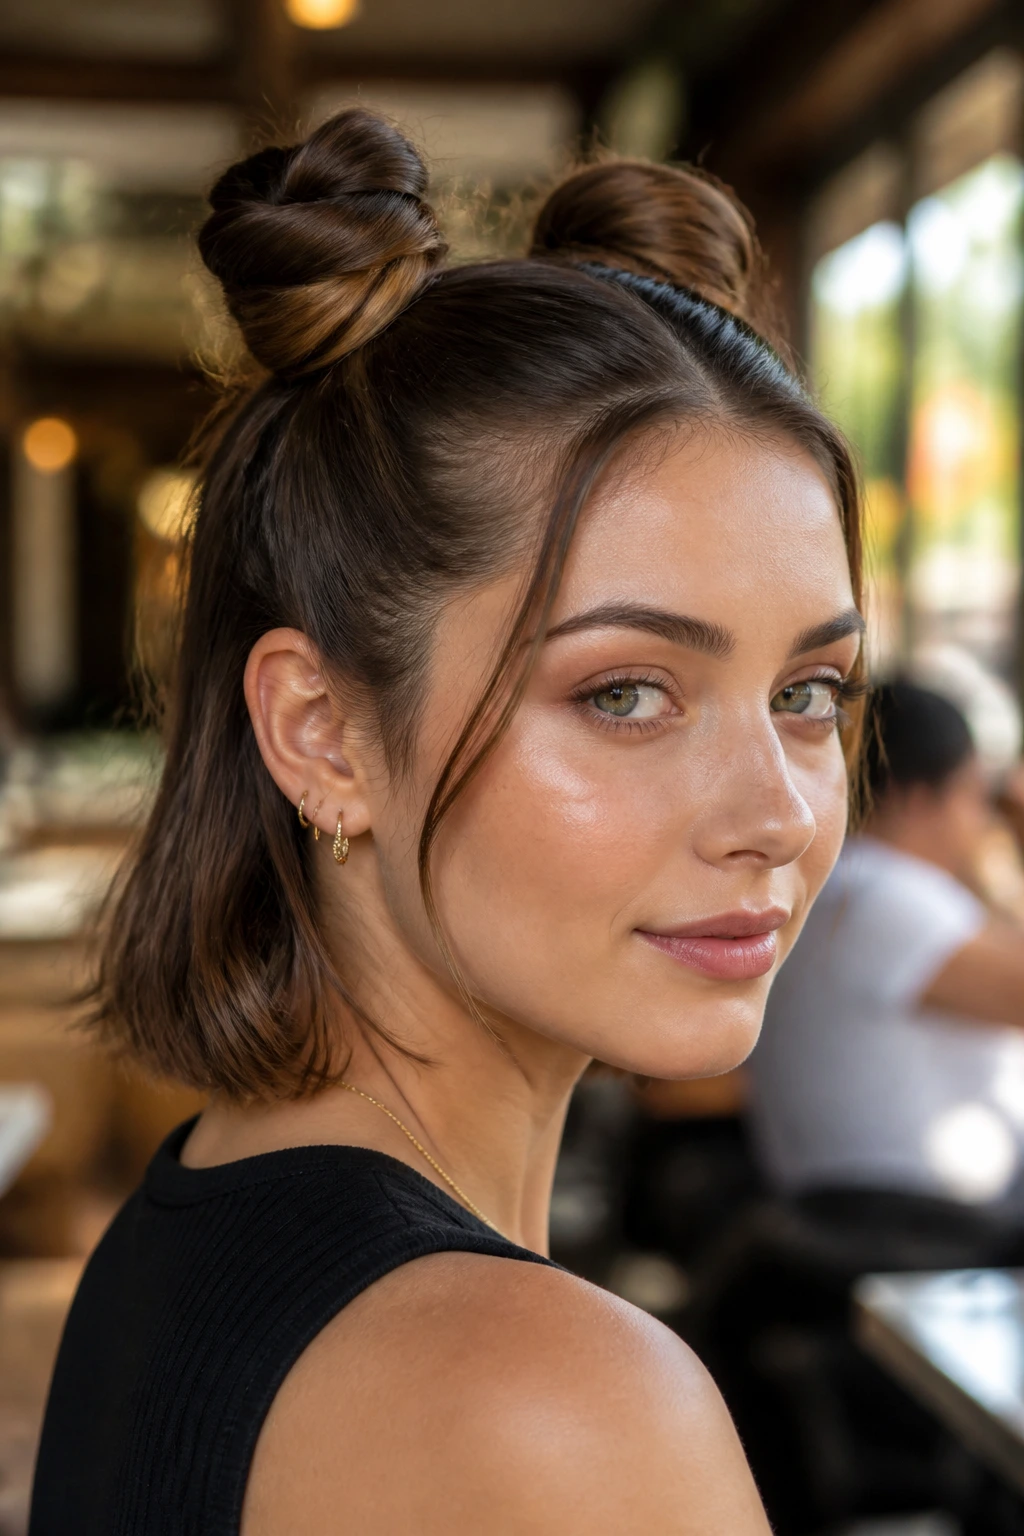
Two small buns can look playful, but they can also look surprisingly neat when the parting is straight and the buns are tight. Shoulder-length hair makes this style easier than very long hair because the buns stay small and don’t flop around. You can place them high near the crown, low near the nape, or slightly off-center for a softer feel.
The best version starts with a center part and two low ponytails. Twist each one into a small coil and pin it flat. If the hair is thick, keep the buns compact. If it’s fine, loosen them a touch so they don’t look pinched. Either way, the style works best when the scalp line is clean and the buns are balanced.
Good for: concerts, casual parties, weekends, and any day when you want a bit of edge without sacrificing control.
Pin tip: use two pins per bun, crossed in an X. One pin rarely holds a mini bun for long.
8. Side-Swept Low Bun
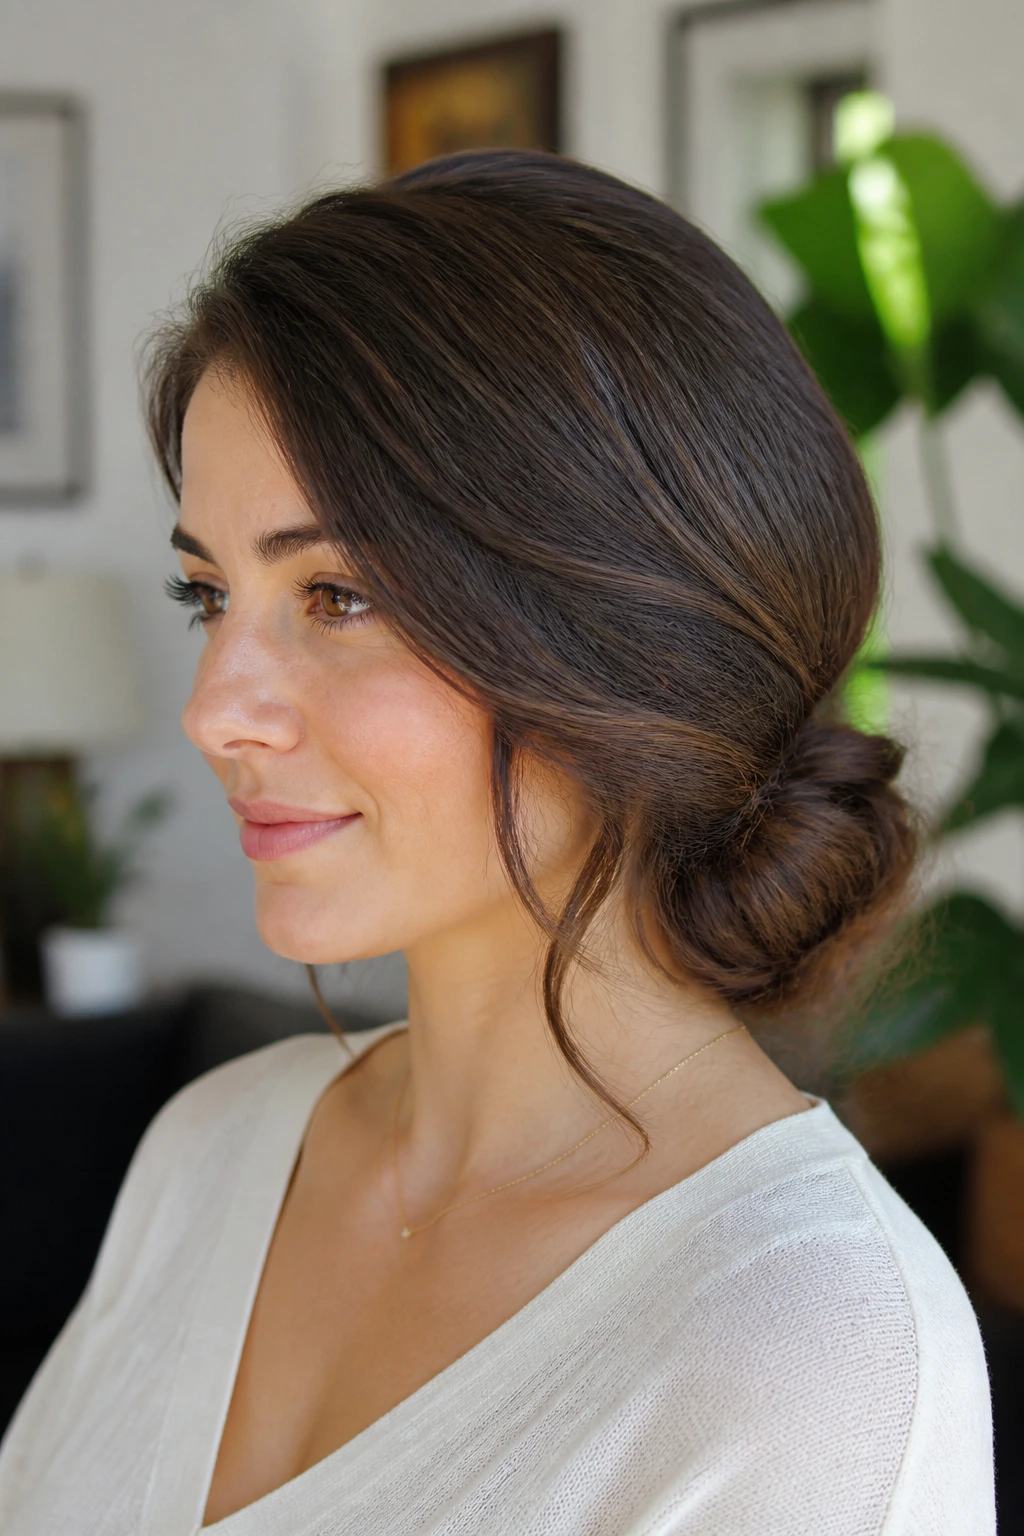
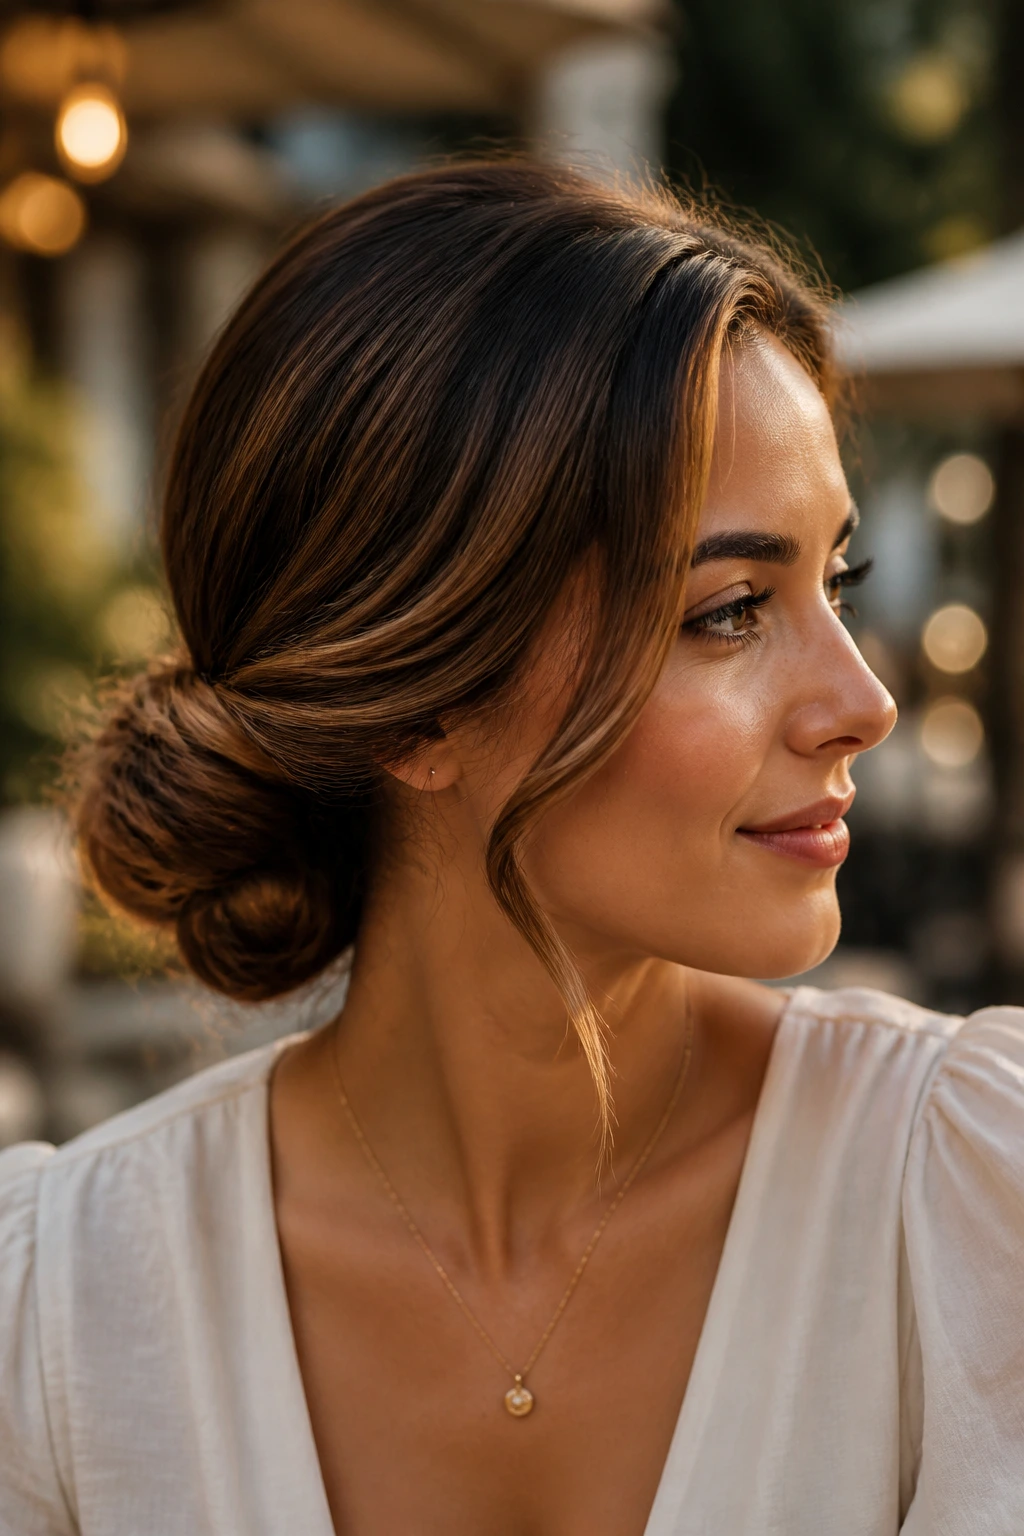
A side-swept low bun gives shoulder-length hair a softer, more deliberate shape than a centered knot. The hair gathers over one shoulder or toward one side of the nape, then wraps into a bun that feels a little vintage, a little romantic, and a lot easier to make than it looks. The side placement also helps if one side of your haircut has more layers than the other.
I like this style because it flatters necklaces and off-the-shoulder tops without competing with them. It also hides a blunt cut beautifully, which is useful if your ends don’t all sit at the same length. The bun itself can be smooth or lightly tousled. Either version works.
A quick trick: sweep the hair toward the side before you twist, not after. That keeps the base from getting bulky. If you wait too long, the shape can turn lopsided in a way that feels accidental instead of styled.
9. Rope-Braid Updo
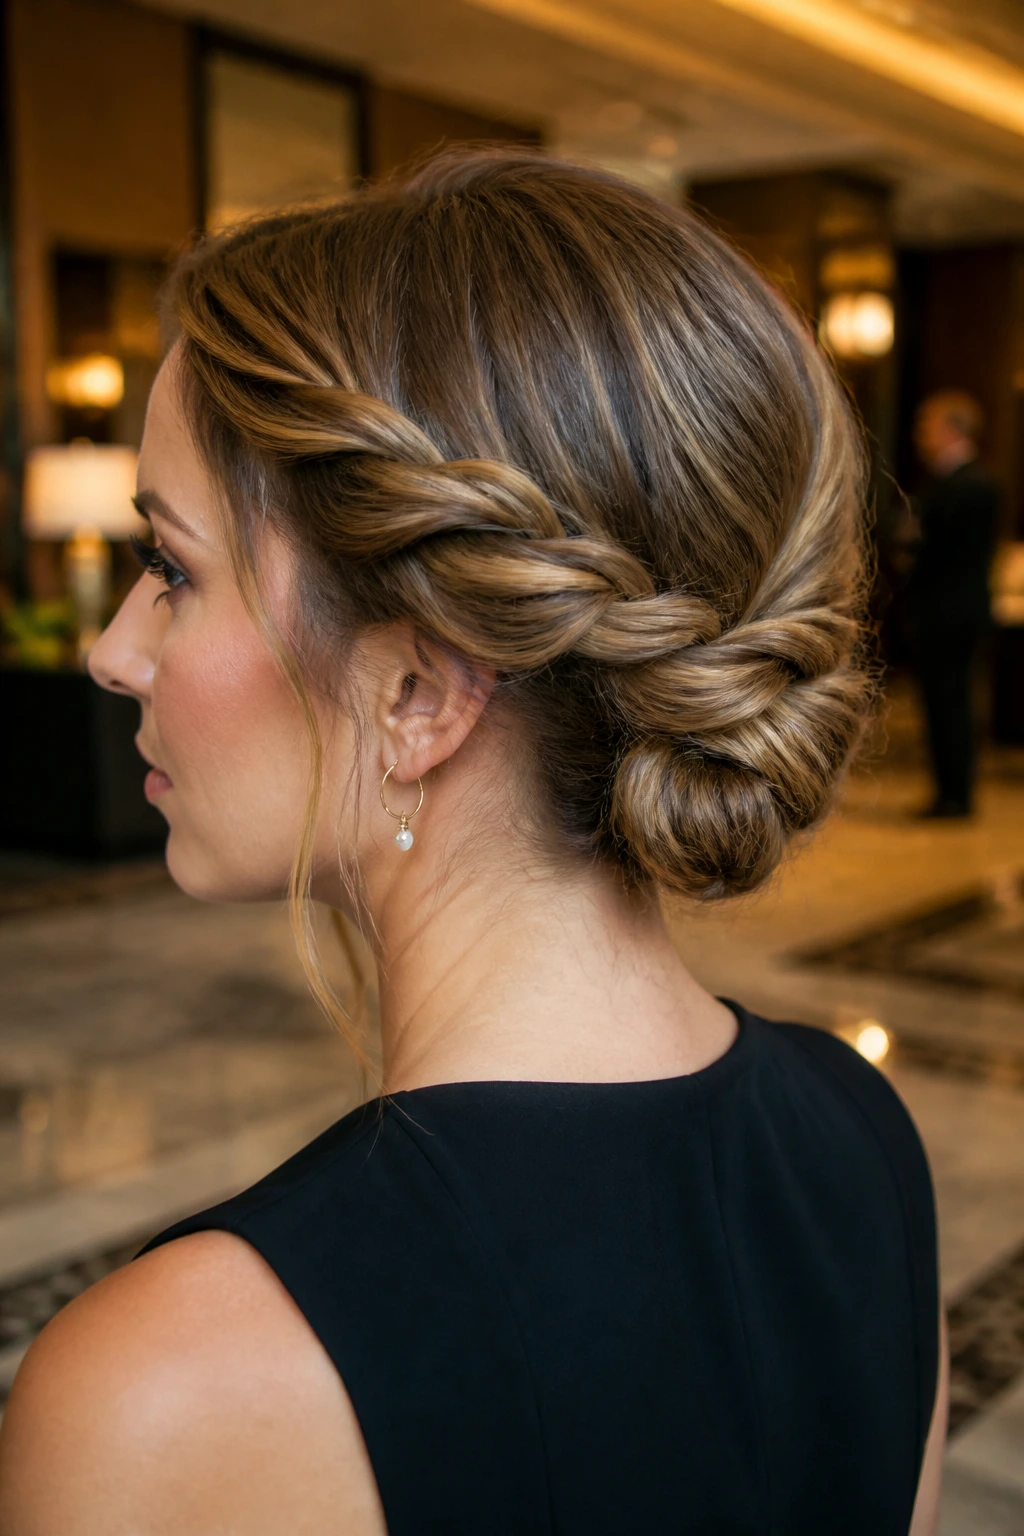
Rope braids have a cleaner, tighter look than three-strand braids, and that makes them useful on shoulder-length hair. Twist two sections around each other from the sides or the back, then pin the ends into a low knot or a tucked roll. The texture is neat, almost polished, but not fussy.
This style is one of my favorites for hair that’s a little slippery. A rope braid grips itself better than a regular braid in some hair types, especially if the hair is fine and tends to slide out of pins. It also shows off subtle highlights well because the twists catch light in little bands instead of one flat sheet.
How to keep it from unwinding
Keep the sections even. If one side is thicker, the twist loosens faster. And don’t skip the texture spray at the roots. That light grit gives the braid something to hold onto.
If you want the style to read a little softer, pull the rope braid apart just a touch after pinning. Not much. Enough to make the twist visible, not enough to unravel it.
10. Gibson Tuck
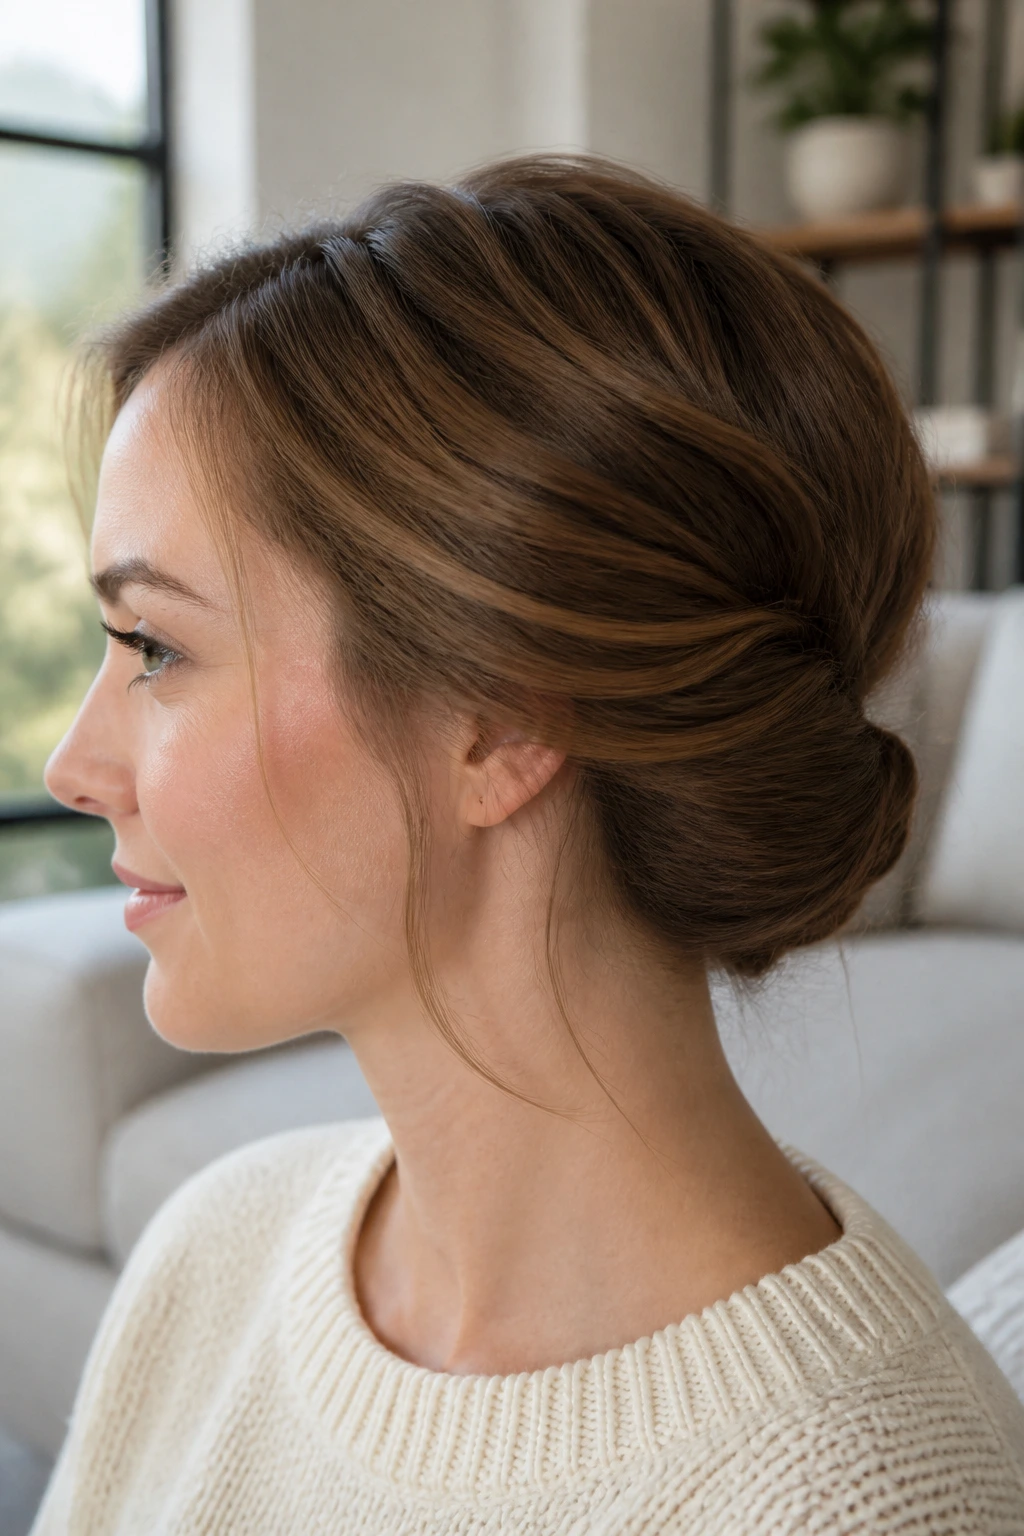
The Gibson tuck is one of those old-fashioned styles that still earns its place. The hair is pulled back low, tucked into itself above the nape, and pinned so the ends disappear into a soft fold. On shoulder-length hair, it sits especially well because there isn’t too much length to stuff in, which keeps the shape neat instead of bulky.
This style is lovely when you want a calm, finished look without a visible bun. It feels more like a polished fold than a knot. Use a ribbon or soft headband if you want a prettier finish, or keep it plain if you prefer the shape itself. Curly hair does this beautifully, but straight hair can do it too if you give the roots a little texture first.
The one thing that matters here is balance. If the tuck sits too high, it can look odd. Too low, and the ends don’t stay hidden. Aim for the natural dip just above the nape. That’s the sweet spot.
11. Faux Bob Updo
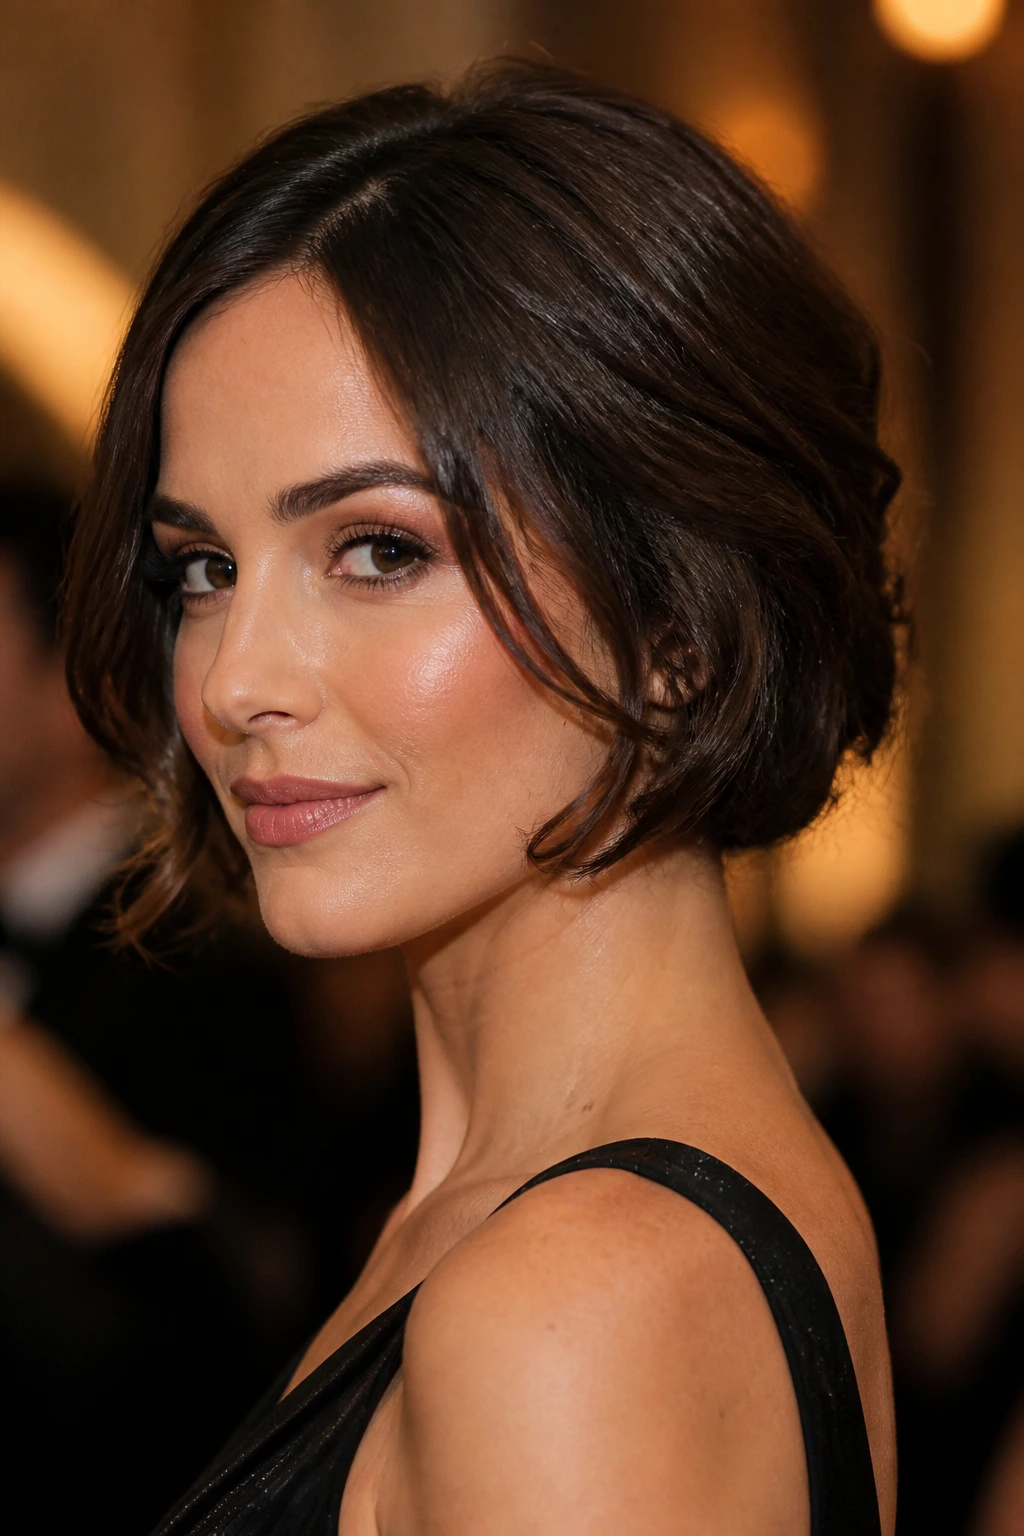
A faux bob is a good trick when you want the drama of shorter hair without actually cutting anything. The ends are tucked under and pinned so the hair appears to stop at the jaw or chin, depending on how much length you hide. Shoulder-length hair is perfect for this because it has just enough length to fake the shape without fighting you at every turn.
This style is especially useful for events where you want to show off a neckline, earrings, or makeup. It also works well if you have a blunt cut and want a cleaner shape for the night. The key is to curl or bend the ends slightly before pinning. Straight, stiff ends tend to poke out. Soft bends fold much more naturally.
Best use: formal dinners, weddings, photos, or any situation where you want the haircut to look more sculpted than it really is.
Small warning: pin the hidden ends in layers. One giant tucked bundle tends to slip. Two or three smaller pins hold better and stay flatter.
12. Braided Low Bun
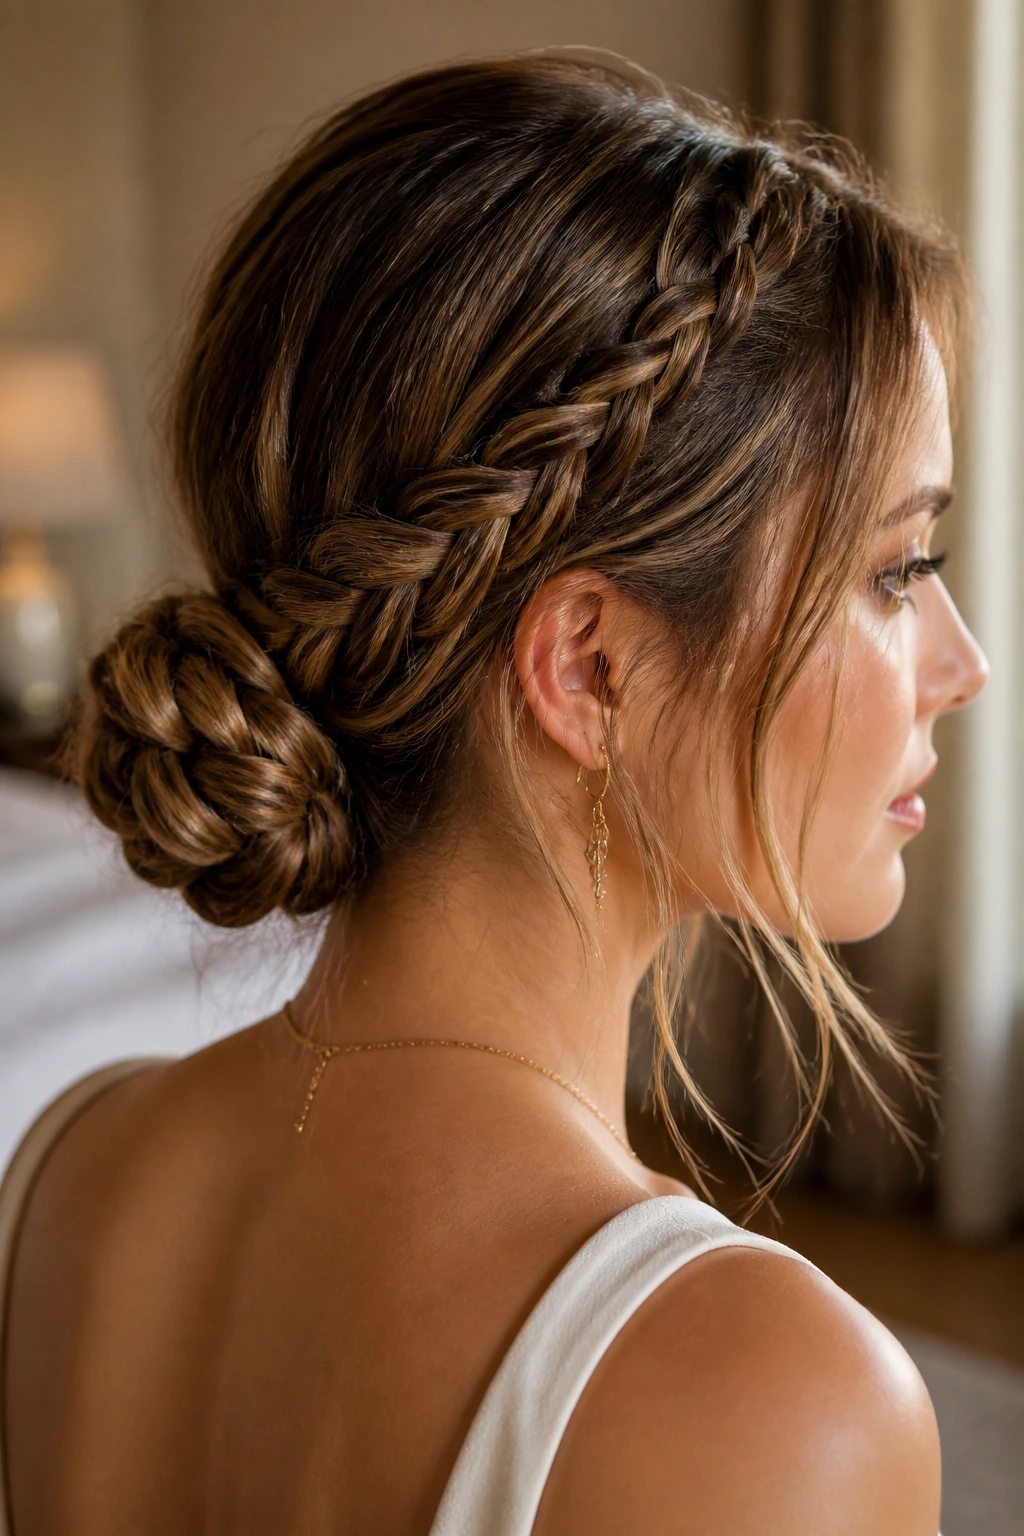
If your shoulder-length hair feels too short for a full bun, braid first and bun second. That’s the whole logic here. A braid gathers the length into one thicker rope, then the braid wraps into a compact low bun that holds its shape more easily than loose hair would. It’s one of the smartest ways to get a fuller-looking updo from a cut that stops at the shoulders.
This style is useful because it hides the usual awkward bits — the shorter layers, the blunt ends, the pieces that won’t stay tucked. Once the braid is wrapped, the bun looks denser and more finished than a plain coil. I like it with a little texture at the crown and a few pins hiding under the bun, not all around it.
If you want a more formal feel, braid tightly and keep the surface smooth. If you want softness, loosen the braid slightly before wrapping. That one choice changes the whole mood.
13. Knotted Ponytail Bun
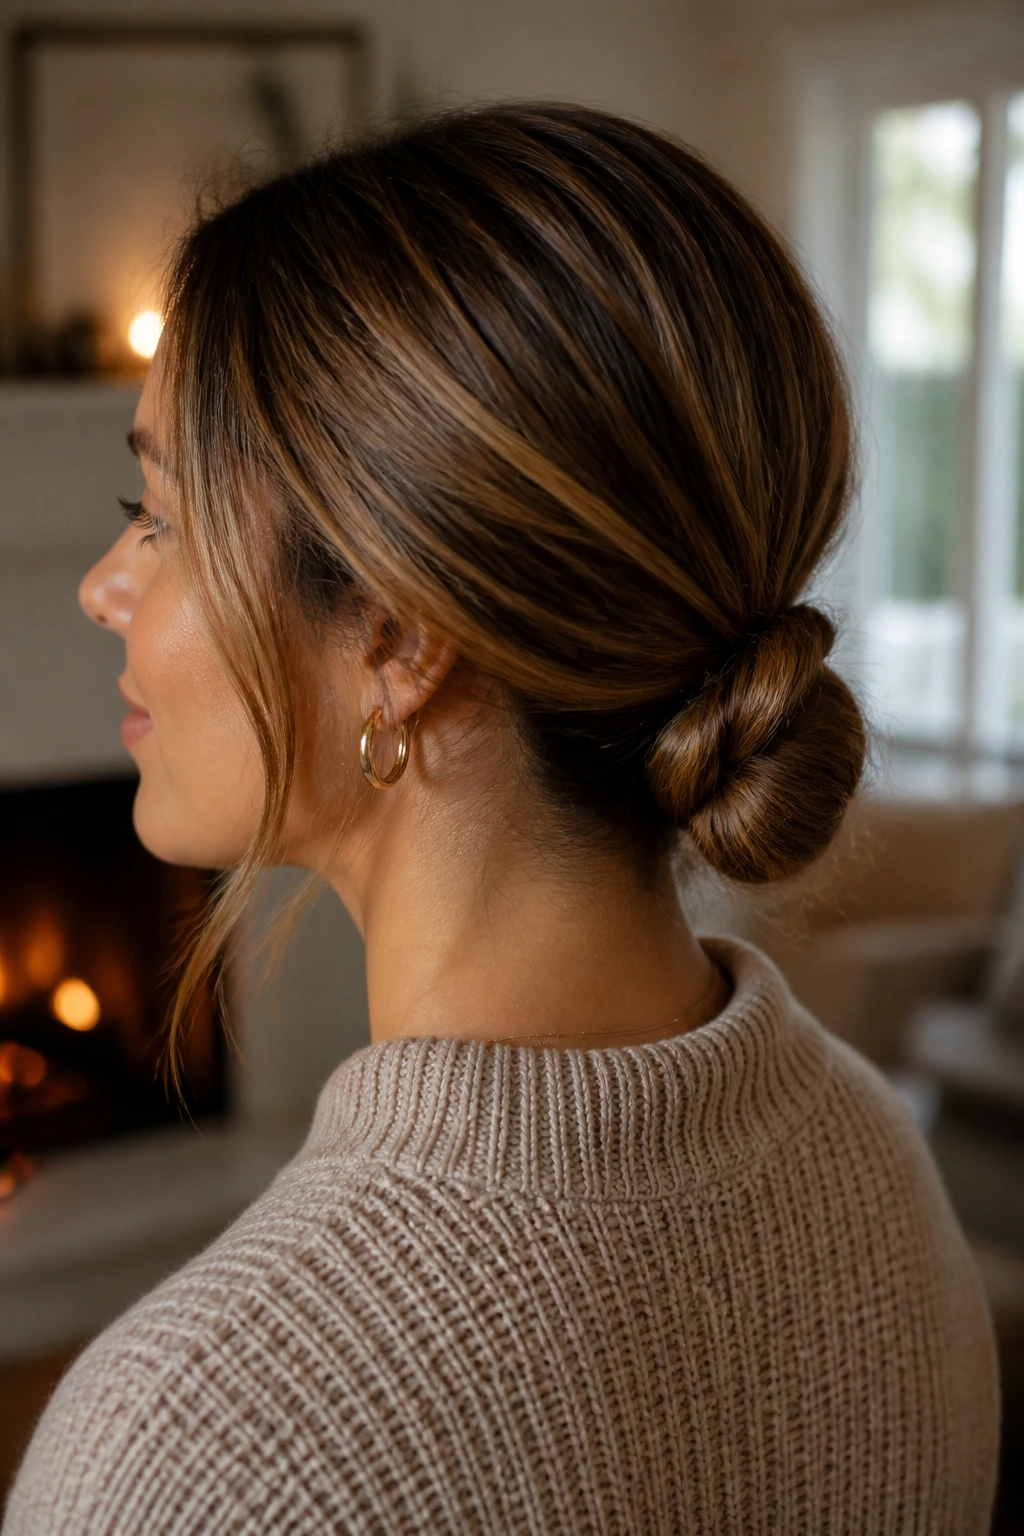
A knotted ponytail bun looks modern without trying too hard. Start with a low ponytail, split the tail into two sections, knot them once or twice, and pin the remaining ends under the knot. On shoulder-length hair, this style can be a life saver because it uses the natural length instead of forcing the hair into a shape it doesn’t want to hold.
It has a nice sculptural look, almost like the hair did the styling itself. That’s why I reach for it when I want something clean but not severe. It also works well with texture — waves, bends, and light curls all add interest without making the knot bulky.
What makes it work
The base ponytail should sit low and snug. If the base is loose, the knot shifts and the whole thing starts sliding. Wrap a small elastic around the ponytail first, then knot. That extra anchor makes a difference.
A tiny bit of smoothing cream on the top section helps, but leave the ends dry enough to fold. Wet-looking hair and knots do not get along.
14. Twisted Side Updo
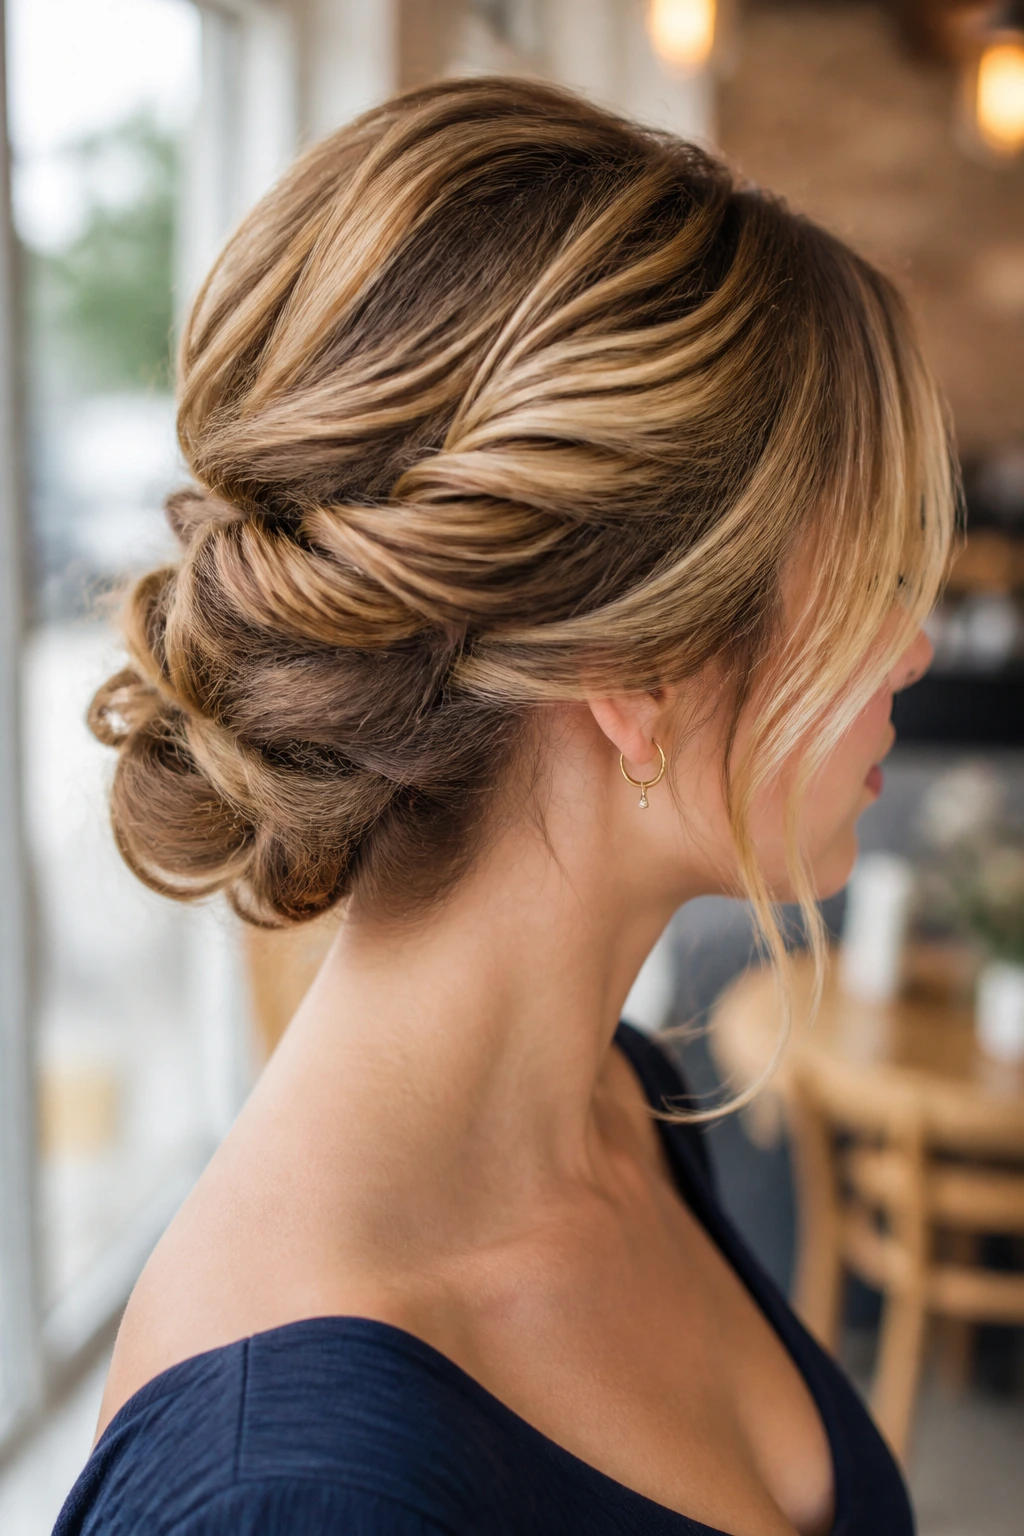
A twisted side updo feels a little softer than a centered bun and a little more casual than a French twist. The hair is gathered to one side, twisted upward, and pinned so the twist travels diagonally along the back of the head. On shoulder-length hair, the side angle makes the style look fuller because the hair doesn’t have to travel as far.
I like this for date nights and dinners where you want movement near the face. One side can stay a little looser, which creates a flattering line along the cheek and jaw. If your hair has layers, this is also an easy way to tuck in the shortest ones without making the style feel too tight.
The trick is to keep the twist slightly lifted at the crown, not plastered flat. A bit of height keeps the side line elegant. Too flat, and the whole thing reads like an afterthought.
15. Space Bun Half-Up
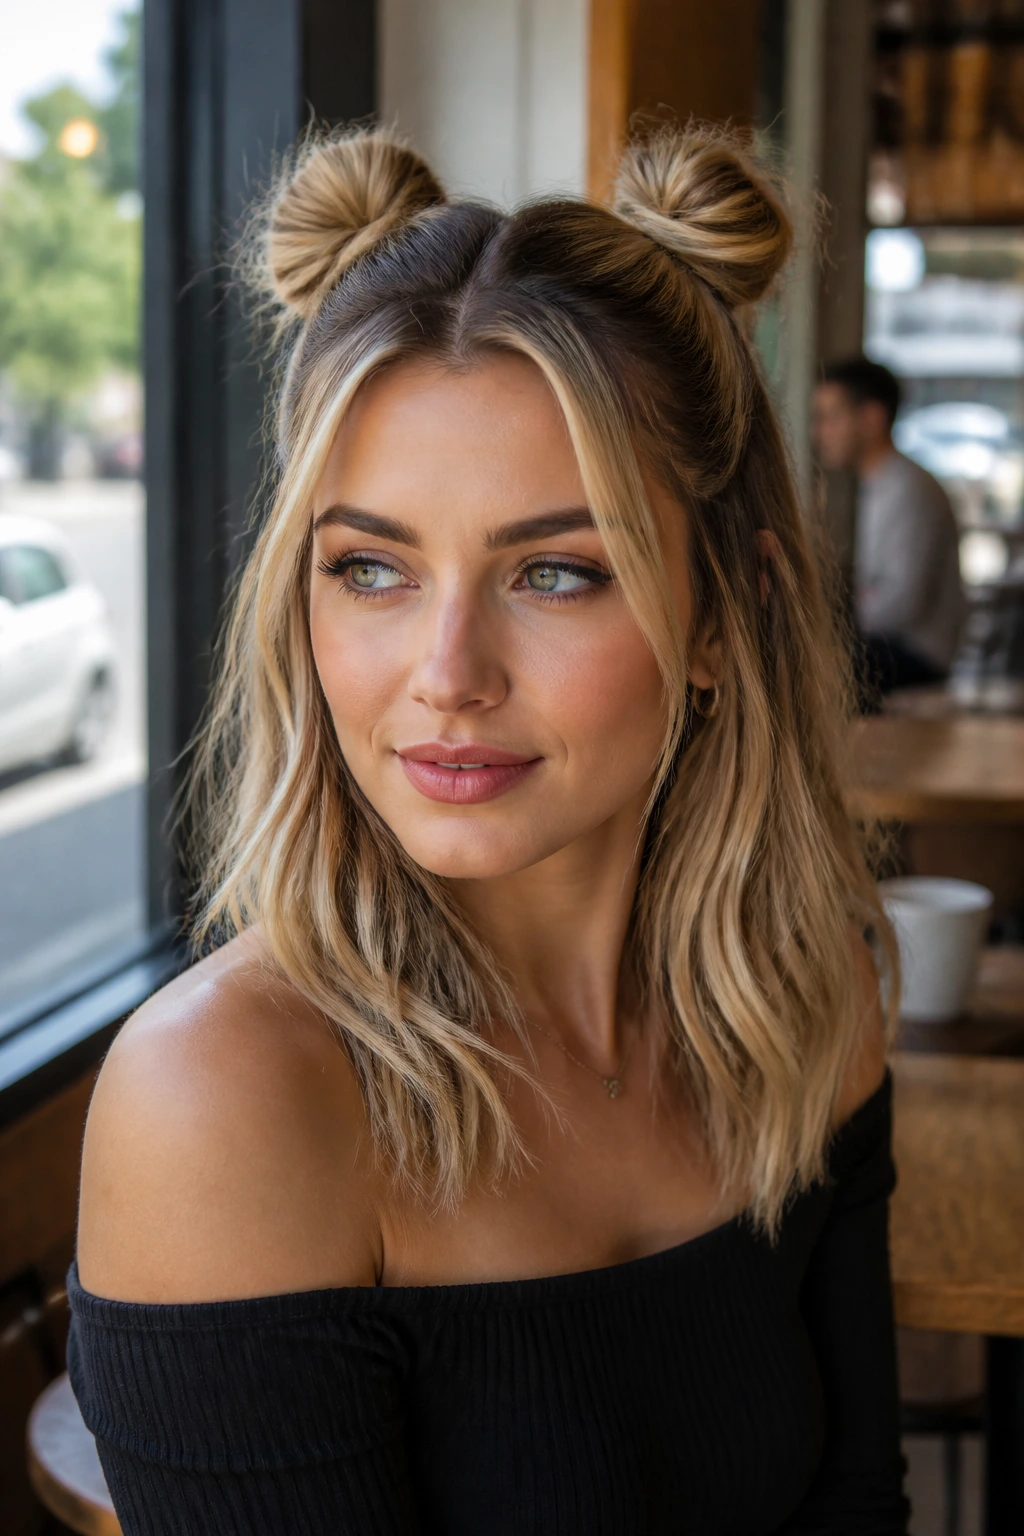
Space buns do not have to be childish. On shoulder-length hair, two small buns worn half-up can look crisp and cool, especially if the rest of the hair is smooth or softly waved. The buns sit high enough to create shape, but they leave the bottom section free, which keeps the style from feeling heavy.
This is one of the easiest styles to modify. Put the buns closer together for a more refined look, or farther apart for a playful one. If your hair is thick, keep each bun tiny and tight. If it’s fine, puff the buns out a little so they read from the front. I also like this style when the top layer has a lot of texture and the lower layer is left loose and clean.
It’s not the first style I’d choose for a formal wedding, but for concerts, weekends, and creative events, it has real personality.
16. Sleek Wrapped Bun
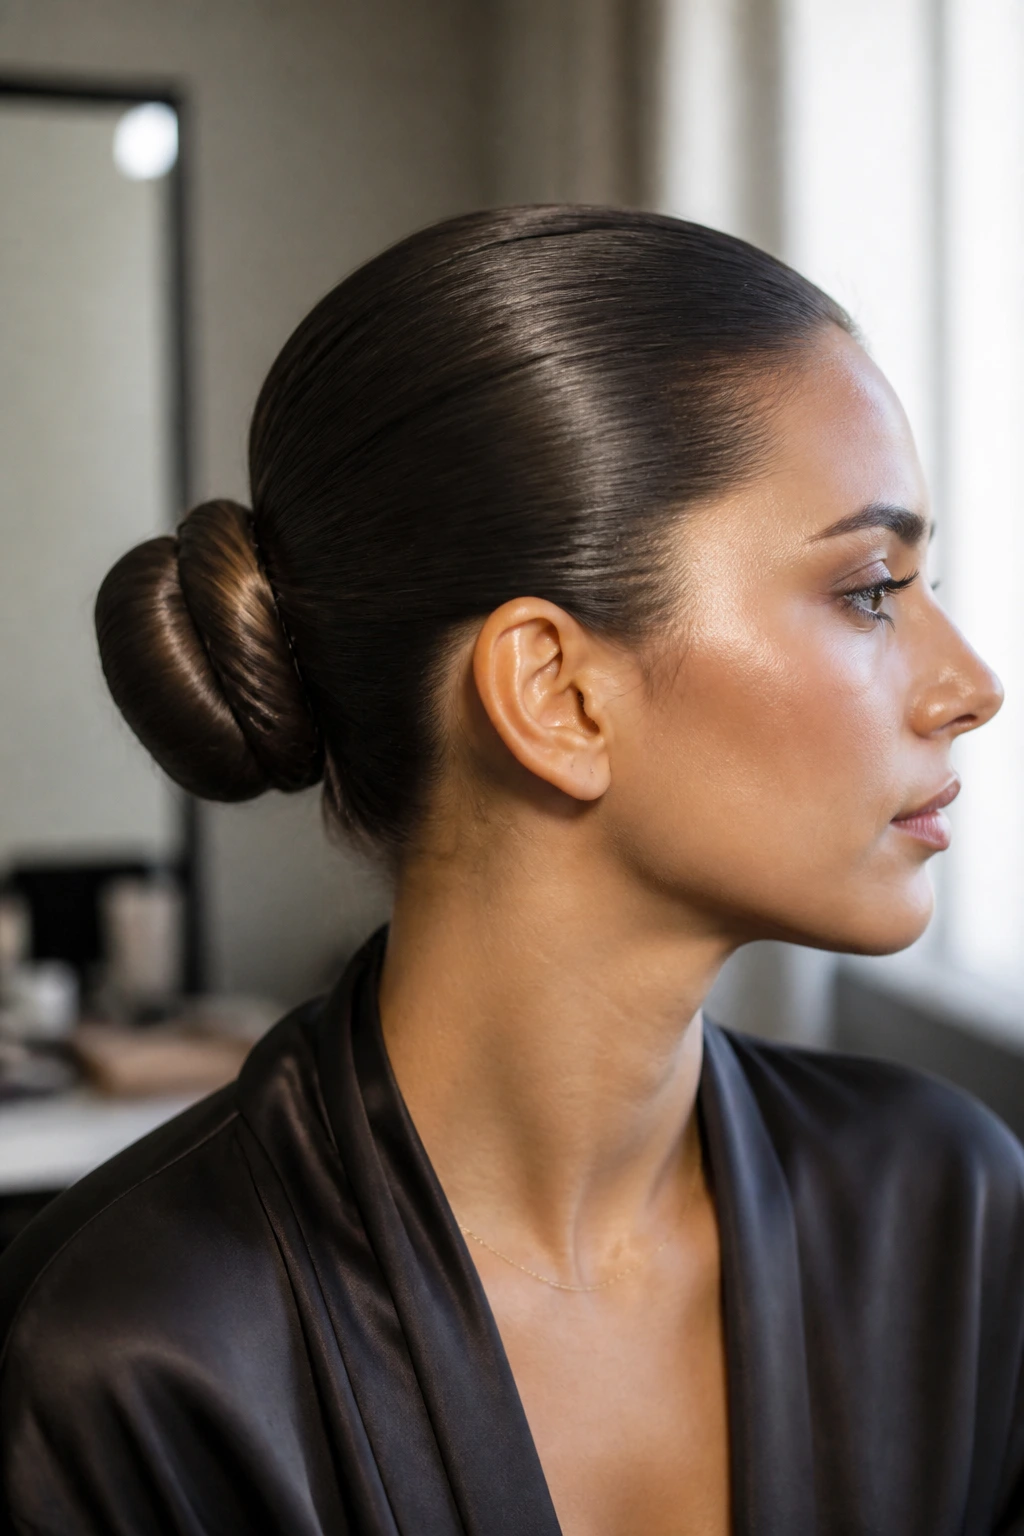
A sleek wrapped bun is the style I pull out when I want the hair to look expensive without looking overworked. The surface is smooth, the part is clean, and the bun is wrapped neatly so no ends stick out. Shoulder-length hair is actually helpful here because the bun stays compact and close to the head instead of growing into a heavy lump.
The style depends on prep. Brush the hair into place with a little styling cream or gel on the roots, then secure the ponytail tightly before wrapping the length around itself. If the hair is layered, use a net-like pinning pattern under the bun so the shorter pieces disappear first. That prevents the annoying little ends that stick out at the edge of a sleek style.
This one is all about finish. A shine spray at the end helps, but do not drown the roots in product. You want reflective, not greasy.
17. Loose Curly Pin-Up
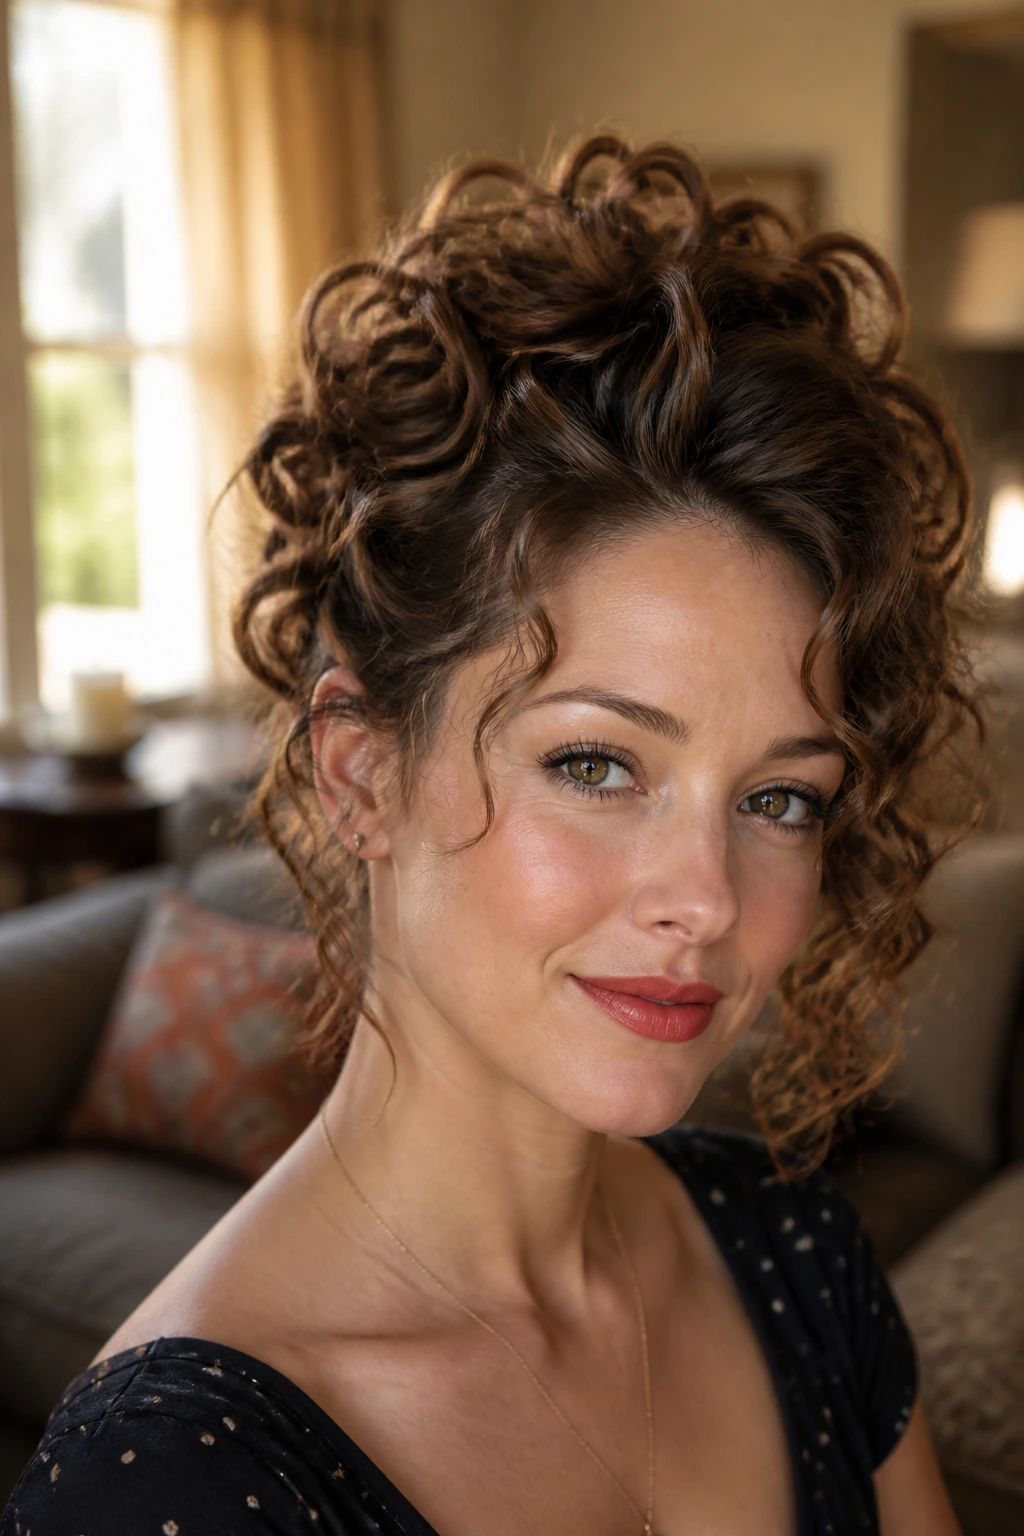
Curly shoulder-length hair makes a beautiful pin-up style because the curls already give you shape. Instead of forcing every strand into a tight knot, pin sections upward and let the curls pile softly at the back or crown. The style looks full without needing a lot of extra teasing.
I like this one because it respects the curl pattern. That matters. Curly hair often looks better when you guide it than when you try to flatten it. Pin the larger curls first, then tuck the smaller ones where they fit. A few ringlets can stay loose around the face and neck. That softness is the point.
If your curls tend to spring out of pins, use U-pins or long bobby pins and insert them where two curls overlap. The curl itself becomes part of the anchor. That little shift makes the style last longer and look less forced.
18. Braided Milkmaid Updo
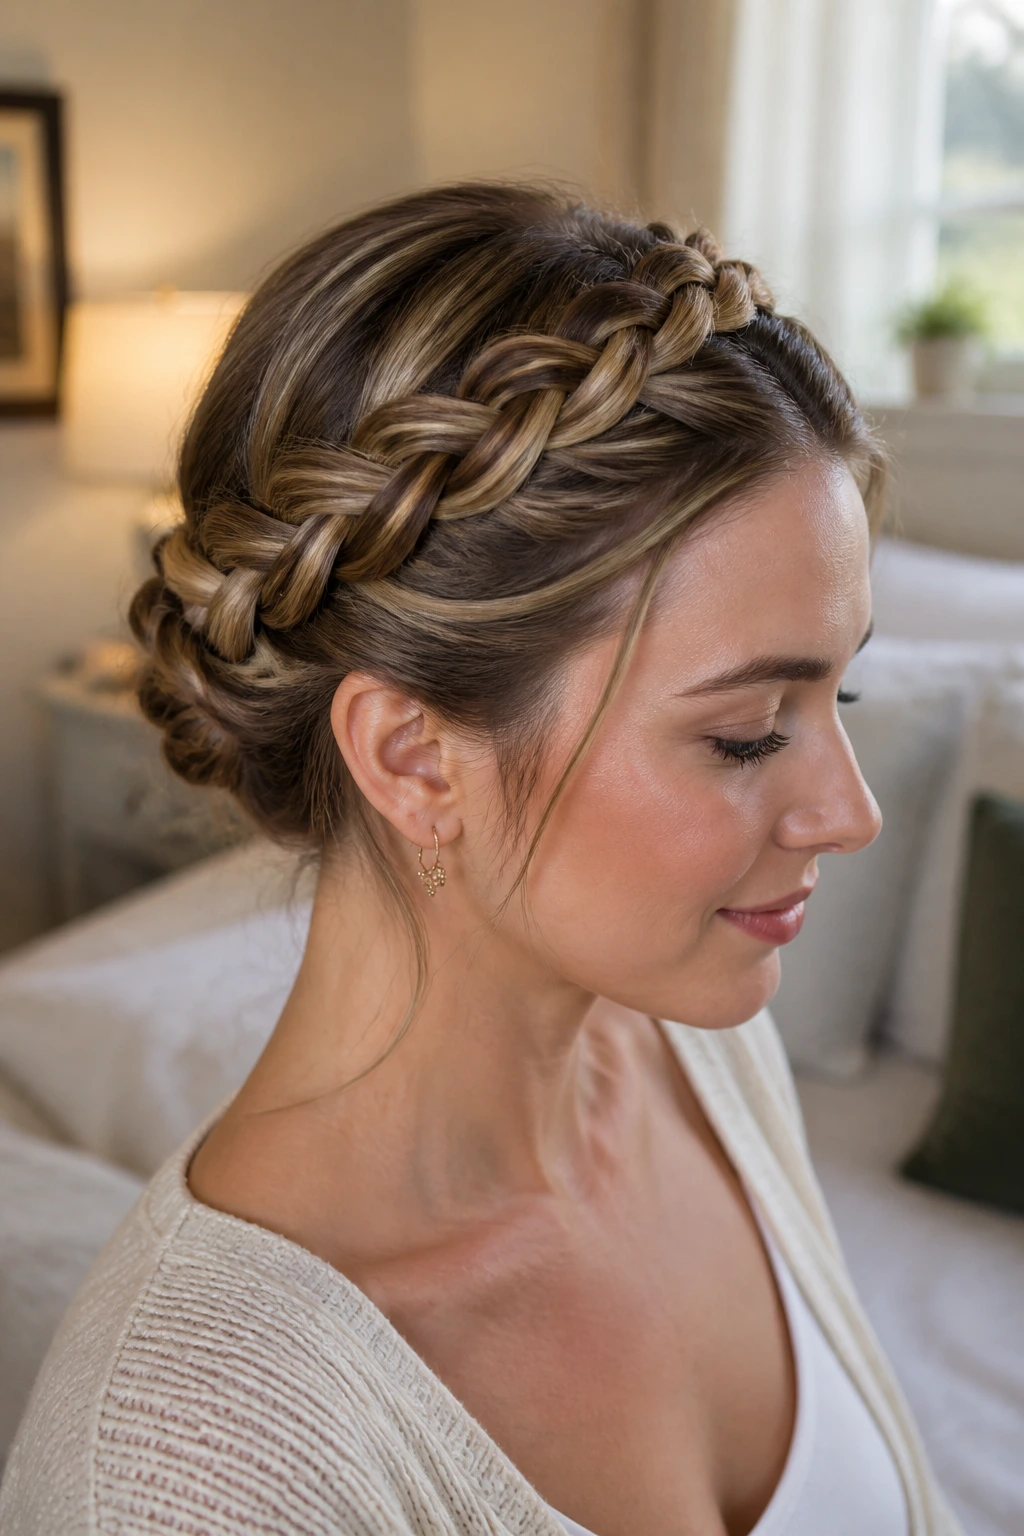
A braided milkmaid updo wraps two braids across the crown like a headband made from your own hair. For shoulder-length hair, it works best when the braids are snug and the ends disappear under each other at the back. The shape is charming, but it’s also practical because it keeps every layer controlled.
This style has a full, rounded look that reads well from the front and the back. It’s good for people who like their hair off the neck but don’t want a tight, severe bun. If the hair is fine, pancake the braids lightly after braiding to give them a little more visual thickness. If the hair is thick, keep the braids tighter so the crown doesn’t get too bulky.
A milkmaid style can drift into costume territory if the braids are too perfect. Leave a tiny bit of softness around the hairline and it feels much more wearable.
19. Claw-Clip French Twist
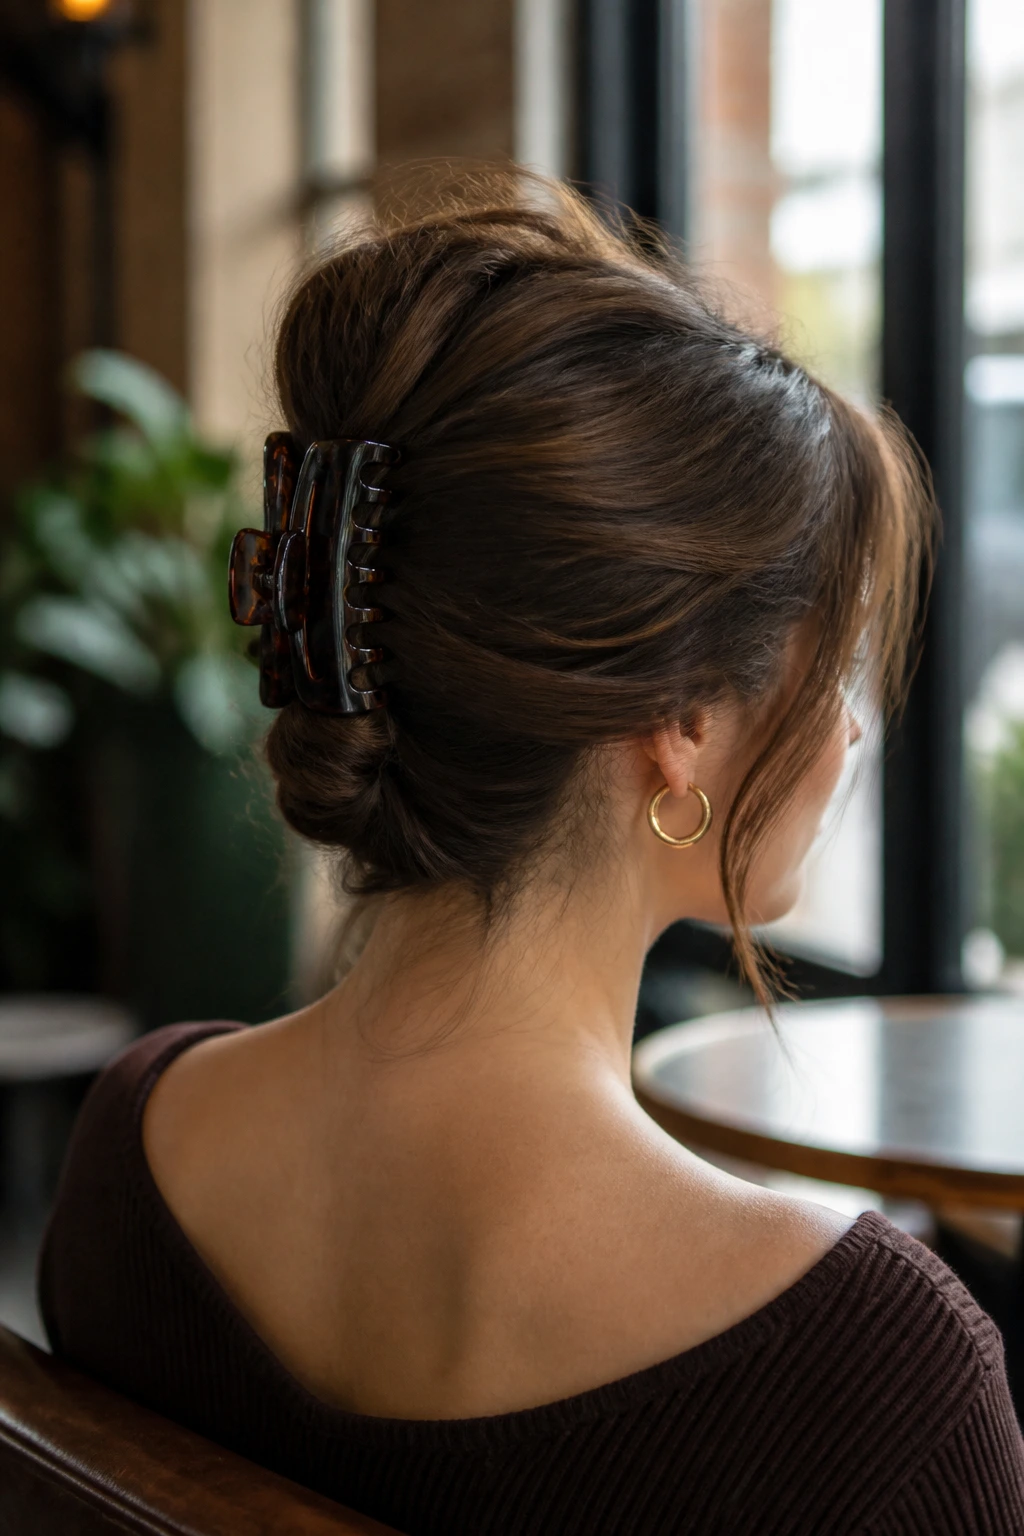
Can a claw clip hold a French twist on shoulder-length hair? Sometimes, yes — and when it works, it’s one of the fastest polished styles in the group. Twist the hair upward, fold the length in on itself, and clamp it with a large clip that grips the full twist, not just the outer shell. This is the style I reach for when I want the look of an updo without the commitment of a fully pinned finish.
The shoulder-length cut helps here because there’s enough length to twist, but not so much bulk that the clip has to fight the whole head. Pick a clip with strong teeth and a deep curve. Tiny fashion clips tend to slip on this style. The hair should feel secure when you tug the twist lightly at the base. If it moves, start again.
Use this one for quick dinners, desk days, or anything where you may want to take the style down and reset it later.
20. Crown Twist into Low Knot
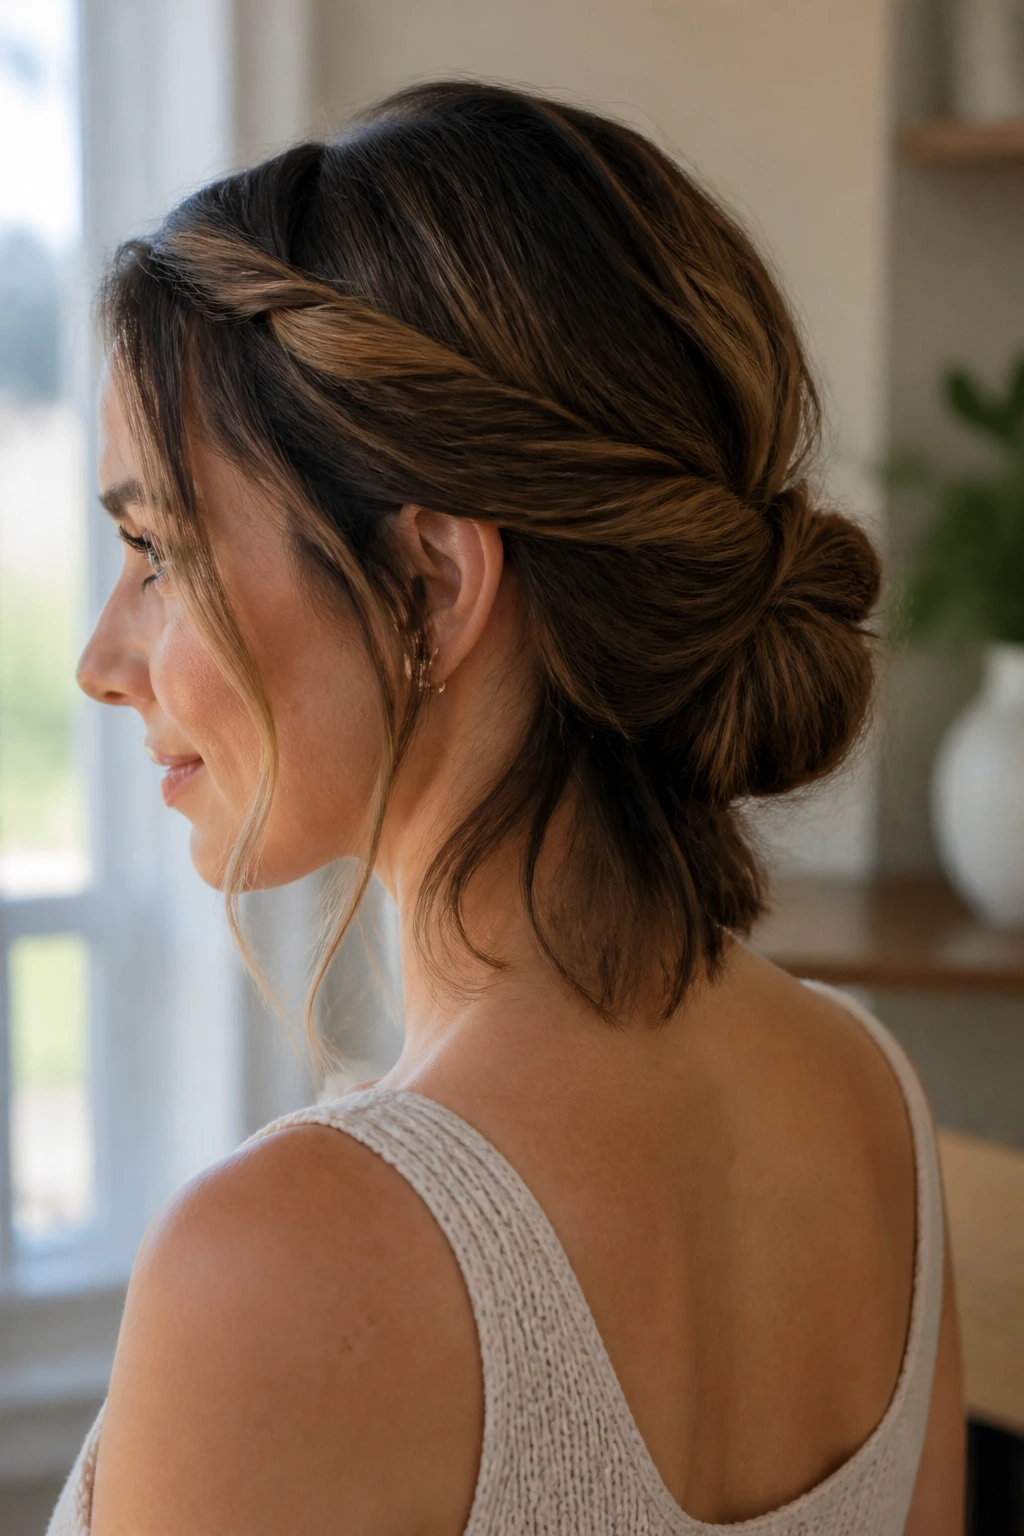
A crown twist into a low knot is a strong finish for shoulder-length hair because it uses the top section to create shape before everything gathers at the nape. The front pieces twist back from the temples, meet near the crown, and feed into a small knot low in the back. That gives the style a lifted line at the top and a controlled knot below.
It’s a nice compromise between loose and formal. You get some face-framing softness, but the back still looks properly put together. I like it for hair that falls just at the shoulders because the twists help guide shorter layers into the knot instead of letting them drift loose. If you have a bit of wave, even better. The texture gives the twist more body.
A little teasing at the crown helps, but don’t overdo it. You want lift, not a bump. The best version of this style looks shaped from the front and quietly secure from the back.
Why Shoulder-Length Hair Is the Sweet Spot for Updos
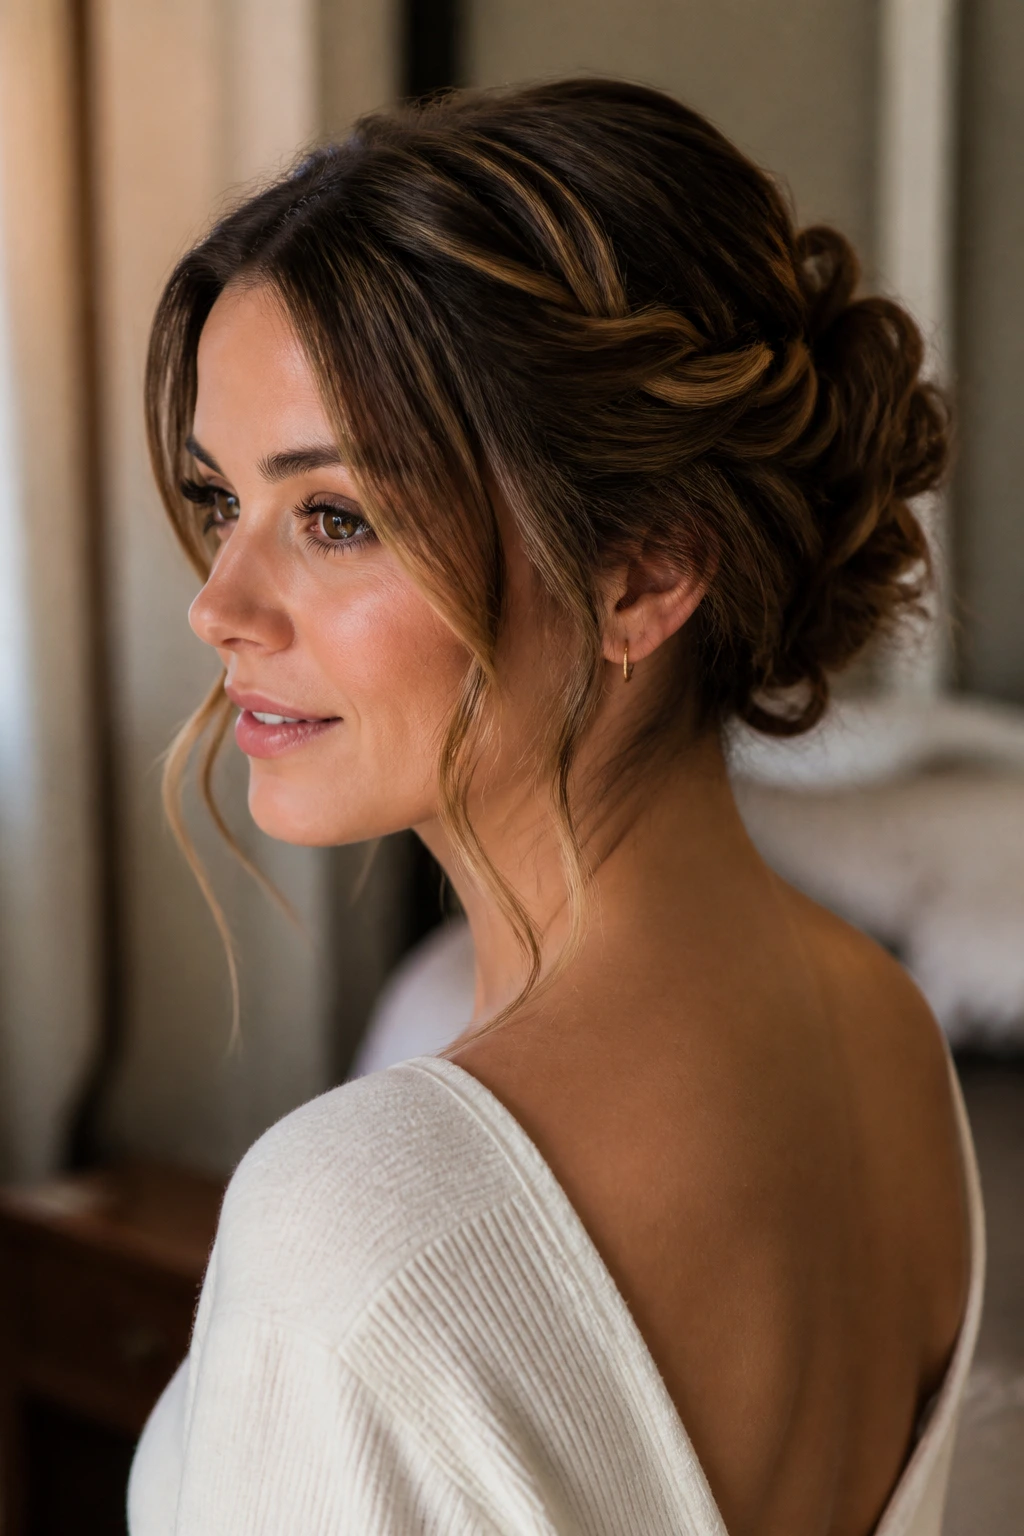
Shoulder-length hair gives updos something longer cuts often lose: control. The weight is lower, so twists stay where you place them. Buns sit closer to the head. Braids do not collapse under their own length. That means a style can look finished with fewer pins and less product, which is a blessing if you’ve ever spent twenty minutes pinning a knot only to watch it sag by the time you put on earrings.
The other advantage is shape. Hair that lands around the shoulders has enough length to make visible loops, folds, and braid lines, but not so much that those shapes disappear into a heavy mass. A French twist actually looks like a twist. A chignon keeps its outline. A tucked roll holds a cleaner curve. You get the architecture without the bulk.
Layers matter here too. On longer hair, layers can scatter and escape. On shoulder-length hair, they’re easier to trap under a braid or twist. That makes this length a little forgiving, which is one reason so many medium-length updos look better in real life than they do in the mirror before you pin them.
A lot of people think shoulder-length hair is awkward because it’s not long enough for the giant buns they see online. I think that’s backward. This length is better for styles that need structure, not size. And structure ages well over the course of a day.
Essential Equipment for These Hairstyles
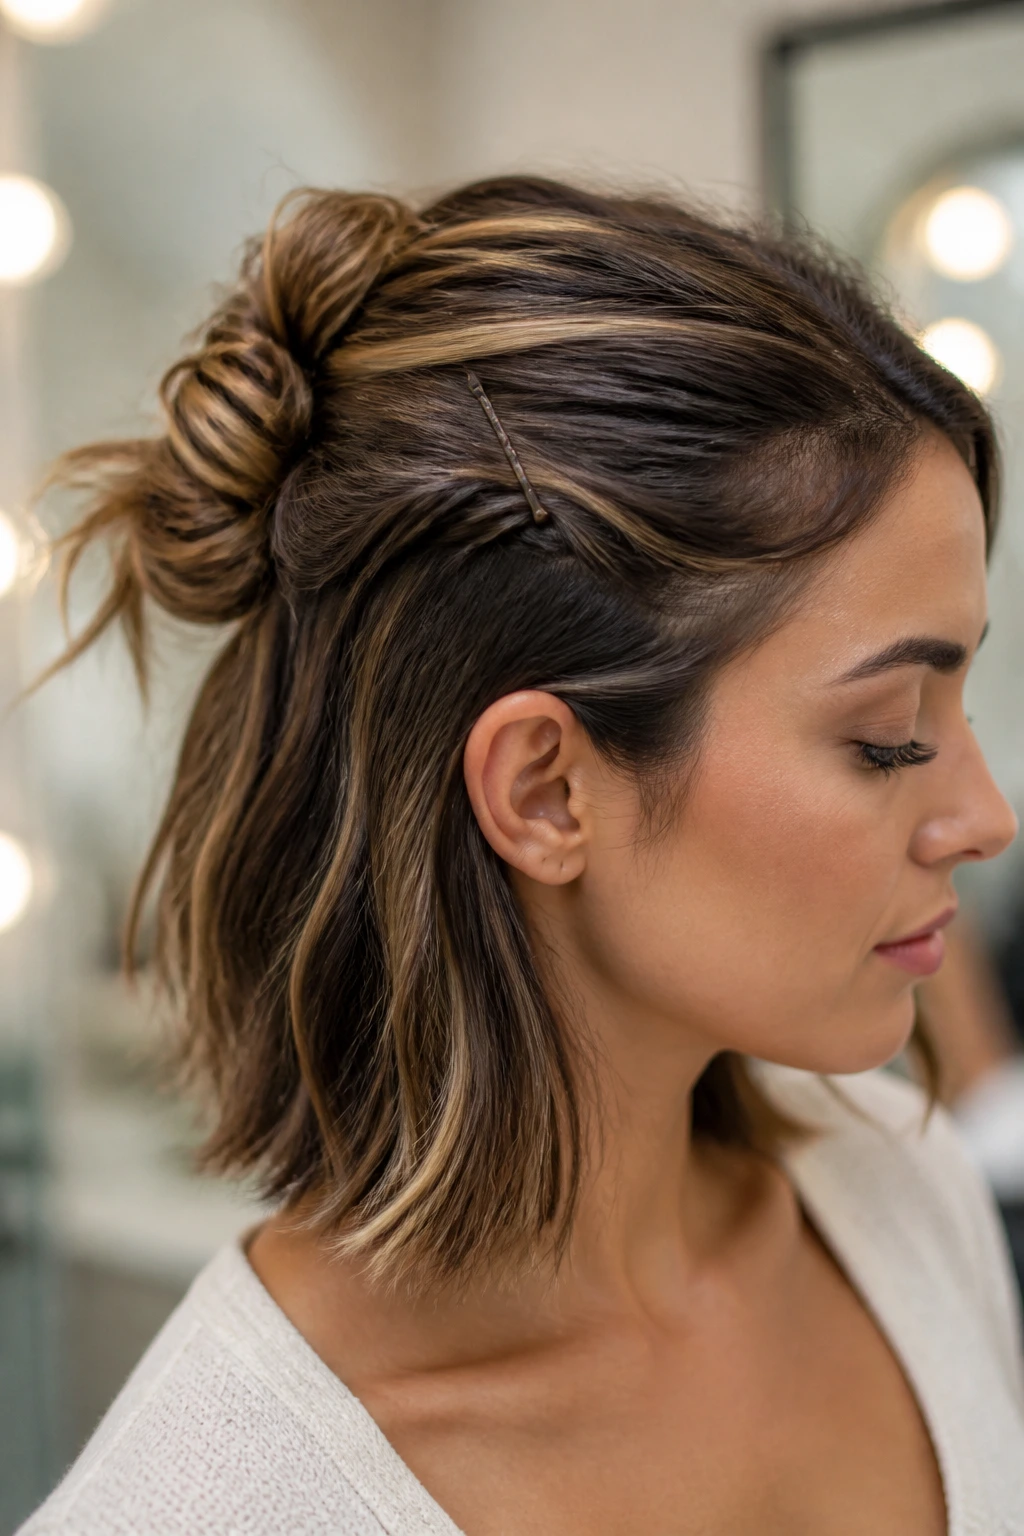
- Bobby pins in two shades if possible: Match your roots and a slightly lighter tone if your hair has highlights; the pins disappear better.
- U-pins: These hold buns and rolls without flattening them the way some bobby pins do.
- Tail comb: Clean parts and sectioning lines make a huge difference in updos on shoulder-length hair.
- Boar-bristle or smoothing brush: Useful when you want the surface sleek without puffiness.
- Texturizing spray or dry shampoo: Adds grip at the roots and helps styles stay in place longer.
- Medium-hold hairspray: Flexible enough for softer styles, but still firm enough for twists and buns.
- Clear elastics: Best for half-up styles, ponytail bases, and braid anchors.
- Small claw clip: Handy for the claw-clip French twist and for temporary sectioning while you pin.
- 1-inch curling iron or flat iron: Helpful if you want a bend in the ends before tucking them under.
- Hand mirror: A back view saves you from discovering loose ends at the worst possible time.
Smart Shopping and Product Tips for Better Hold
The biggest difference between a style that lasts and one that slips is not talent. It’s product choice. Buy bobby pins with a real grip finish, not the shiny ones that feel slick right out of the package. The wavy side should face the scalp when you slide them in. That small detail gives you more friction, and friction is the whole game when you’re pinning shoulder-length hair.
Texturizing spray and dry shampoo are not the same thing, and it helps to know which one you need. Texturizing spray gives the hair a rough, airy feel that works well for braids, twists, and loose buns. Dry shampoo is better when the roots are a little oily and need lift. If your hair is fine and freshly washed, texturizing spray usually wins. If your scalp gets slick by midday, dry shampoo first, texture spray second.
Pick hairspray based on the style, not the bottle promise. A flexible spray works better for messy buns, curly pin-ups, and loose twists. Strong hold makes sense for sleek buns, French twists, and anything that needs a sharp part. I like brushable sprays because they let you redo a section without turning the hair into stiff wire. That matters when you’re still shaping the updo and not ready to lock it down.
Accessories should be light. Heavy clips pull on shoulder-length hair faster than they do on long hair because there’s less length to distribute the weight. Pearl pins, narrow combs, and slim barrettes usually behave better than big ornamental pieces unless the style is very compact. And if your hair is layered, buy a few extra pins. Layers eat pins. It’s rude, but true.
How to Wear These Updos Without Fussy Styling
Presentation: Keep the silhouette clear. A good shoulder-length updo looks best when the base is easy to read — low bun, diagonal twist, crown braid, or wrapped knot — and the flyaways are intentional instead of accidental. If the front is sleek, let the back do the talking. If the back is soft, keep the part and hairline neat so the style doesn’t drift into “I gave up halfway.”
Accompaniments: These styles pair well with high necklines, open collars, statement earrings, and hair accessories that sit close to the head. A sleek bun can carry bigger earrings. A braided halo looks lovely with simpler jewelry. If you’re wearing a high collar or turtleneck, keep the bun low so the neckline isn’t crowded. For a formal event, pearl pins or a narrow comb can be enough. You do not need to pile on extras.
Portions: Aim for a bun or knot that stays roughly lime-sized to small orange-sized on shoulder-length hair. Bigger is not automatically better here; oversized shapes can start to look forced and slide more easily. If your hair is fine, build a slightly fuller crown so the style doesn’t vanish. If your hair is thick, keep the base tighter and let the texture show in the braid or twist.
Beverage Pairing: A slick French twist feels right with coffee and a quick morning spritz of hairspray. A loose curly pin-up fits a glass of sparkling water or a weekend mimosa. It’s a silly label, but the idea is useful: choose the style that matches the pace of your day, not the other way around.
Additional Tips and Styling Boosters
Texture Enhancement: If your hair is clean and slippery, mist the roots with texturizing spray, then rough-dry for 30 to 45 seconds before you start pinning. That tiny bit of grit changes everything. For sleek styles, keep the roots controlled and add texture only to the hidden sections.
Customization: A thin velvet ribbon can soften a low bun, while a single pearl comb turns a plain chignon into something more dressed up. If you like a cleaner finish, skip accessories and use one well-placed pin with the twist line visible. If you like a softer look, pull out two face-framing pieces and curl only the ends.
Serving Suggestions: Think of the front and sides as the frame. A side part makes a low bun feel richer. A center part makes a braided crown feel more balanced. For curls, leave a few tendrils around the temples so the style doesn’t turn into a solid block.
Make-It-Yours: Fine hair usually benefits from more crown lift and smaller sections. Thick hair does better when you divide the hair into several anchored sections instead of trying to force one huge twist. Curly hair should keep some of its texture intact; flattening it all the way down makes the style lose its best feature. Straight hair often needs more grip at the roots, not more spray on the ends.
Common Mistakes to Avoid
- Starting with hair that’s too clean: Freshly washed hair often slips out of pins and elastics. If the roots are glassy, add dry shampoo or wait a day.
- Using too few pins: One pin in a bun is wishful thinking. Use two or three in crossed directions so the style has actual support.
- Pulling the style too tight at the hairline: Tight styles can leave the front flat and sore. Leave a little slack near the temples so the updo still looks like hair, not a helmet.
- Ignoring the ends: Shorter layers and blunt ends poke out when they’re left loose. Tuck them under early, then pin them in layers so they stay hidden.
- Overloading with hairspray too soon: If you spray before the shape is set, the hair turns stiff before you finish pinning. Build the style first, then lock it down at the end.
- Making the bun too large: Shoulder-length hair usually looks better in a compact bun than in a puffed-up one. A giant shape can slide and start to look tired halfway through the day.
Variations and Adaptations to Try
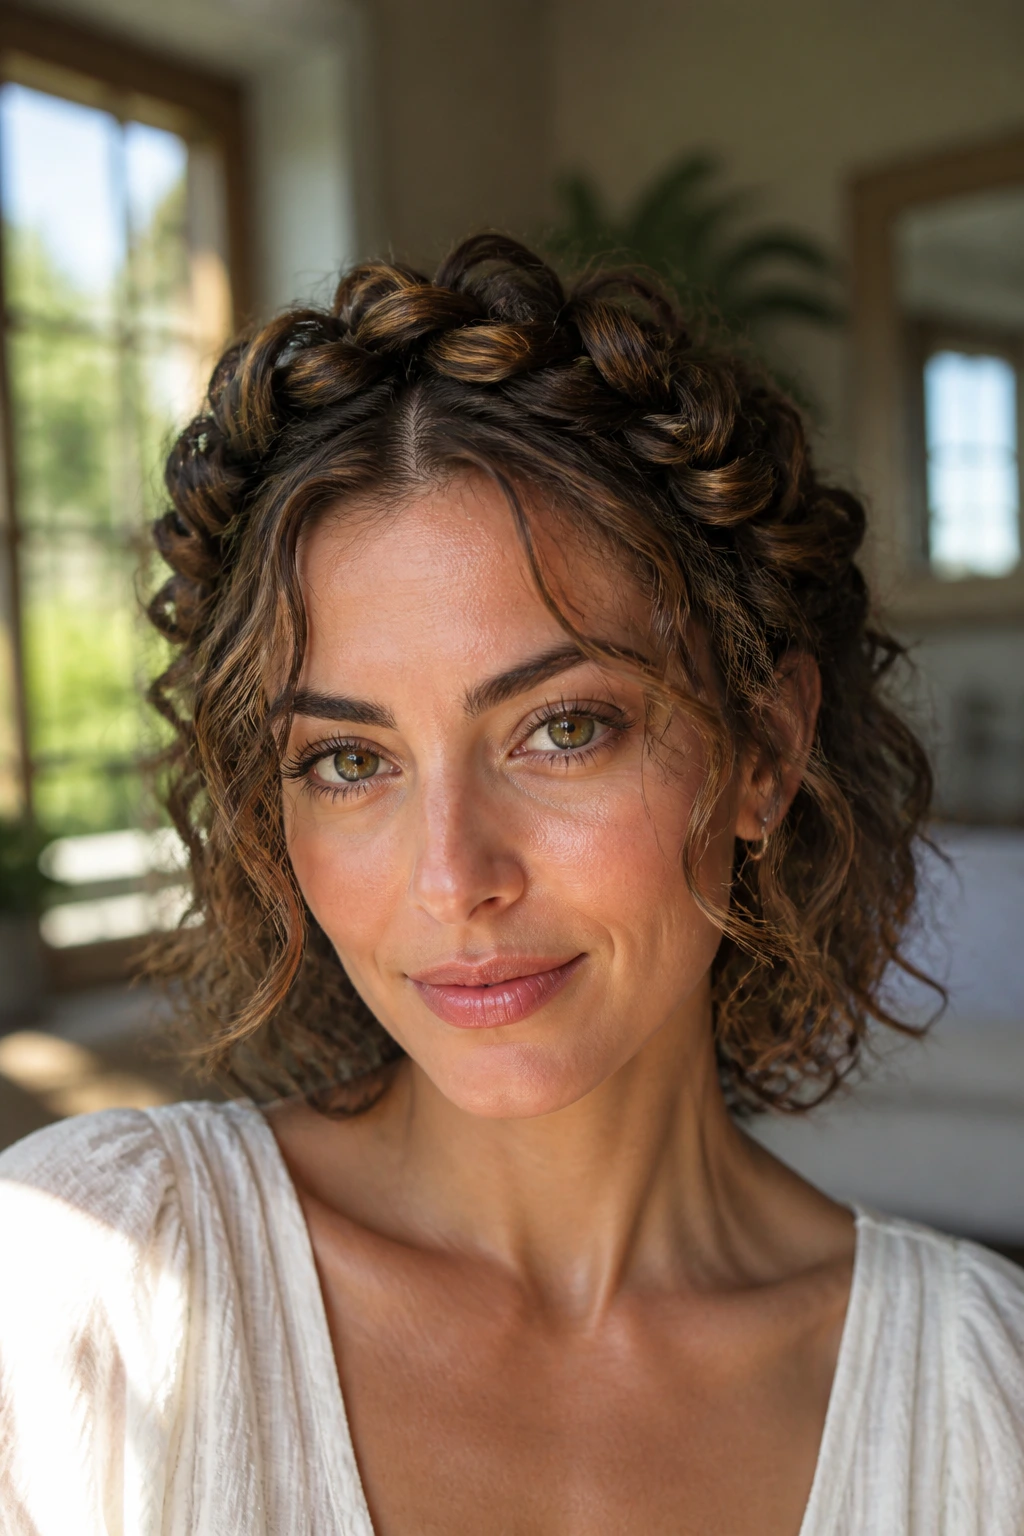
Curly Halo Twist: Keep the curls intact and pin them into a halo or low roll instead of brushing them smooth. The texture gives the style a fuller outline, and you avoid the frizz that comes from overhandling.
Fine-Hair Lifted Bun: Tease just the crown and use a texturizing powder at the roots before building a small bun. The goal is to create enough structure that the bun does not shrink to the size of a coin.
Thick-Hair Wrapped Knot: Divide the hair into two sections, wrap each one separately, and pin them into the same low base. Thick hair behaves better when it is managed in smaller pieces, not one giant twist.
No-Heat Braided Style: Start with slightly damp hair, braid or twist it, let it dry, then shape the finished braid into a crown, bun, or tucked roll. This works well when you want a soft, lived-in look and don’t want to touch a hot tool.
Wedding-Ready Finish: Add a pearl pin, comb, or narrow ribbon to a low chignon, French twist, or braided milkmaid style. Keep the accessory close to the base so it feels integrated rather than perched on top.
Shorter Lob Adaptation: If your hair barely grazes the shoulders, use half-up buns, tucked rolls, and crown twists. Those styles need less length at the nape and usually stay cleaner than full buns.
Make-Ahead, Storage, and Refreshing Guidance
A shoulder-length updo usually holds well for 6 to 10 hours if the base is pinned properly and the hair has enough texture. Sleek styles tend to look freshest earlier in the day, while messy buns and braided looks can hold their shape longer because a little looseness is part of the design. If you need the style to survive an evening event, build it a little tighter than you think you need, then loosen only the visible pieces.
If you’re prepping ahead, wash the hair the night before rather than right before styling. That gives the roots time to lose the slippery, fresh-wash feel. You can also rough-dry the roots, add texture spray, and section the hair with loose clips in advance. For formal events, I like to do the base structure 20 to 30 minutes before getting dressed, then add final pins and hairspray at the very end.
Overnight care matters if you want to reuse the style or rescue part of it the next day. Sleep on a silk or satin pillowcase, and if there are decorative pins or clips, remove them before bed. Buns, twists, and braids can be revived in the morning with a few spritzes of water, a touch of dry shampoo at the roots, and one or two fresh pins where the shape has loosened. If the style collapsed completely, do not keep stuffing pins into the same spot — take it down, re-texturize the roots, and rebuild the base.
A small storage tip that people forget: keep your pins in a lidded tin or shallow dish near your styling area. Nothing slows you down like hunting for twelve bobby pins under the sink while one side of your hair is already half-twisted.
Frequently Asked Questions
Can shoulder-length hair really hold a true updo?
Yes, if the style is chosen with the length in mind. Low buns, twists, braids, and tucked rolls usually work better than giant top-heavy shapes because they keep the weight close to the head.
What’s the easiest updo if my hair has layers?
A low twisted chignon or a tucked-in roll is usually the least annoying. Both styles hide shorter pieces inside the shape, so you’re not trying to force every layer into the same line.
Do I need to curl my hair first?
Not always. Curling helps if the hair is very straight, very fine, or freshly washed, because the bend gives the pins something to catch. If your hair already has wave or texture, a little dry shampoo may be enough.
How do I keep bobby pins from sliding out?
Insert them with the wavy side facing the scalp and catch a little hair from the pin’s path, not just the surface. If the hair is slippery, spray the pin lightly before using it. That small bit of grip helps more than people expect.
What if my updo keeps collapsing at the nape?
The base is probably too loose or too smooth. Tighten the initial ponytail or twist, add more texture at the roots, and pin the lowest point of the style first so the weight has something to rest on.
Can these styles work on curly or coily hair?
Absolutely, and in many cases they look better because the texture gives the updo more body. Curly hair usually needs more section control and slightly stronger pins, but the shape holds well when you pin where the curls overlap.
What’s the best style for a formal event?
A sleek wrapped bun, French twist, or low chignon usually gives the cleanest finish. If you want a little softness, add one face-framing piece or a small accessory instead of changing the whole shape.
How do I make an updo look less tight around my face?
Pull out two small pieces near the temples and soften them with a curling iron or your fingers. Then gently loosen the crown a touch — not enough to ruin the shape, just enough to keep it from looking pulled back too hard.
Styles That Stay Put
Shoulder-length hair gives you more room than people think. Enough to twist, enough to braid, enough to tuck, and not so much that every style collapses under its own weight. That balance is why these updos work so well: they use the cut instead of fighting it.
The best ones are the styles that look finished from every angle but still move a little when you turn your head. A low knot that sits cleanly at the nape. A braid that keeps the layers in line. A French twist that doesn’t try to be bigger than the haircut. Those are the shapes worth keeping around.
And if one style gives you a headache, skip it. Shoulder-length hair has enough range that you never need to force the wrong shape. Try another twist, another braid, another tuck — the good ones are usually the ones that settle into place without a struggle.
