



Updos for long thin hair work best when they stop pretending the goal is sheer size. The prettiest versions I’ve seen on fine, long lengths are usually the ones that understand the assignment: keep the shape compact, use texture where the pins need grip, and put the weight low enough that gravity does not flatten the whole thing by lunch.
That’s the real game with long, fine hair. Not volume in the cartoon sense. Volume in the useful sense — a little bend at the roots, a little friction from second-day texture, a little tension from a braid or twist that gives the style some backbone. If you’ve ever made a bun that looked full for three minutes and then collapsed into a sleepy knot, you already know why the details matter.
The good news is that long thin hair gives you more length than density, and that’s a useful trade. You can wrap, loop, braid, tuck, and pin in ways thicker hair sometimes refuses to do neatly. The trick is choosing styles that use that length without asking the hair to hold a giant, top-heavy shape it can’t support.
Why These Styles Earn Their Keep
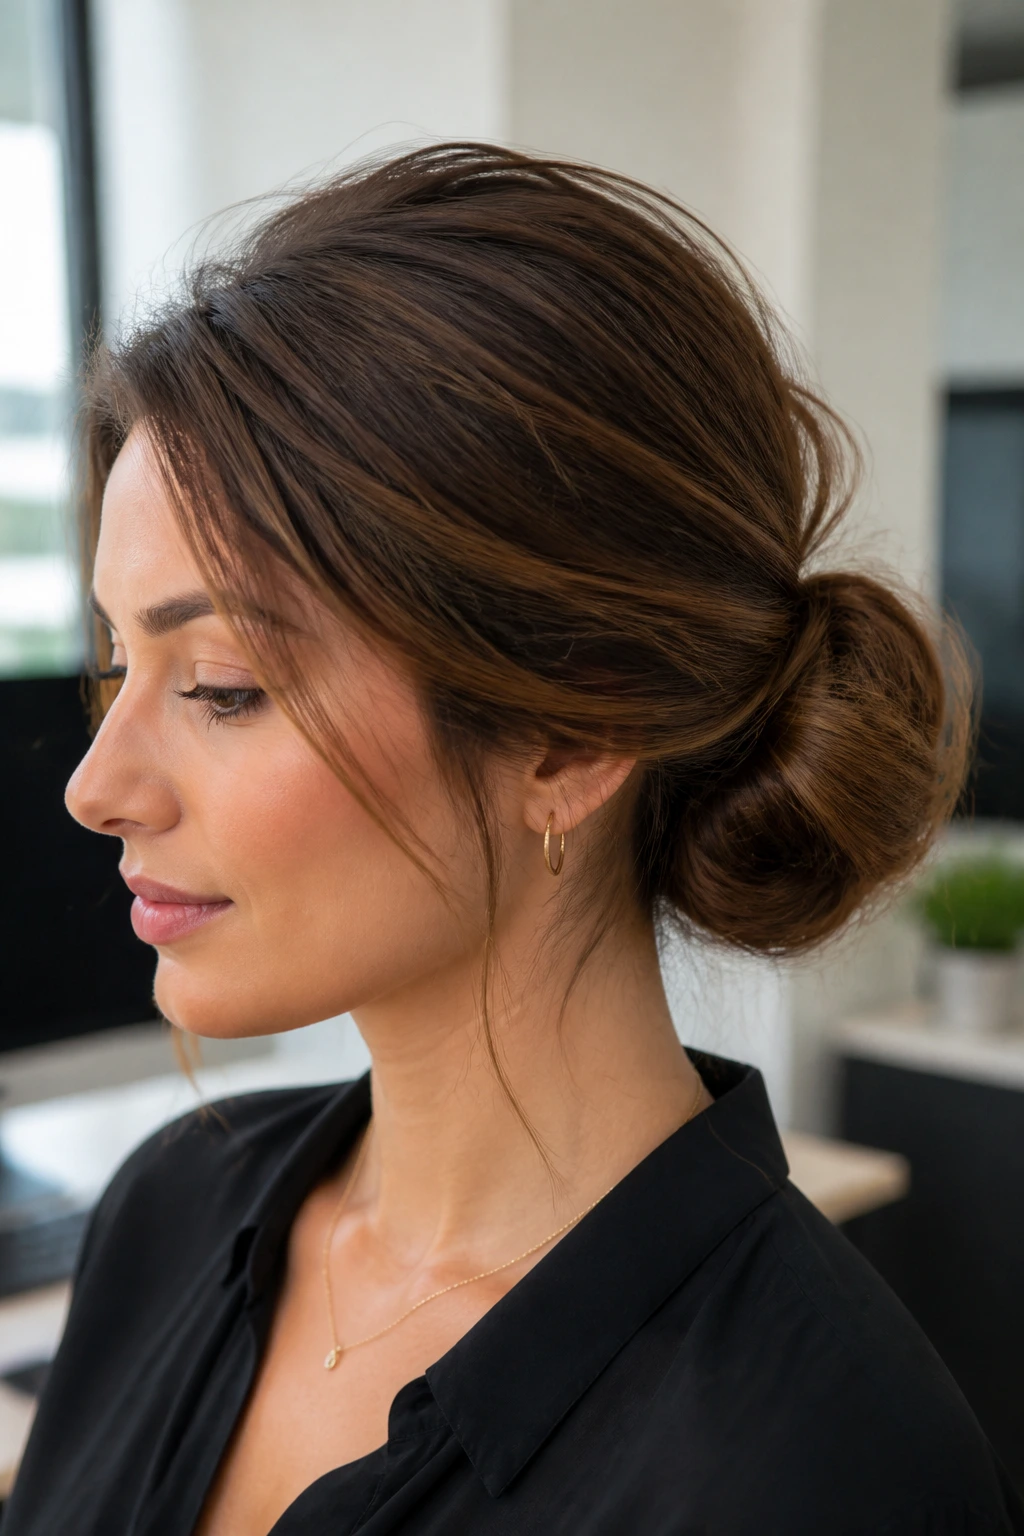
- They use length as structure: Long strands give you enough material to twist and wrap, even when the ponytail itself feels small.
- They hide a sparse-looking crown: Styles that sit low or use crossing sections keep the top from looking flat and overworked.
- They hold better with a little grit: A mist of dry shampoo or texture spray gives fine hair something for bobby pins to grab.
- They stay lighter on the scalp: Compact buns, knots, and braids pull less than oversized teased styles, which matters when your hair is fine and long.
- They work with day-old hair: Slightly lived-in hair usually behaves better than squeaky-clean strands that slip apart at the roots.
- They can look polished fast: A clean part, two pins, and one well-placed wrap can make a style look intentional without a full 40-minute battle.
1. Textured Low Chignon
A low chignon is the safest place to start because it doesn’t ask your crown to do all the work. On long thin hair, the magic is in keeping the knot compact and slightly irregular, so it looks soft instead of deflated.
Backcomb a 2-inch section at the crown, smooth the top lightly, and gather the rest into a low ponytail at the nape. Twist the length into a coil, pin it in a flat oval, and let the ends tuck under rather than sticking out. If the bun looks too small, pinch the edges and loosen just the outer layer, not the whole thing.
Best for: office days, dinners, and anything where you want neat without looking stiff.
2. Rope-Twist Half-Up Crown
This one works because rope twists add visual thickness without needing a huge amount of hair. Two twisted sections pulled back from the temples create a soft crown effect, and long thin hair usually has enough length to make the twists look full.
Take a section from each side, split it into two, twist each piece clockwise, then wrap them around each other counterclockwise. That direction matters. It keeps the twist from unwinding while you pin it at the back of the head. Leave the lower half loose and bend the ends with a 1-inch iron if they fall poker-straight; a slight wave helps the twist look deliberate.
3. Braided High Ponytail Wrap
If you want height without teasing your whole head, this is the smarter route. A high ponytail gives long thin hair a little lift at the roots, and the braid wrap around the elastic makes the base look thicker than it really is.
Slick the top with a brush, secure a high ponytail at the crown, and braid the tail into a standard three-strand braid. Wrap a 1-inch section around the base to hide the elastic, then pancake the braid gently by pulling the outer loops outward. Don’t overdo the pancaking or the braid starts to look airy in a bad way.
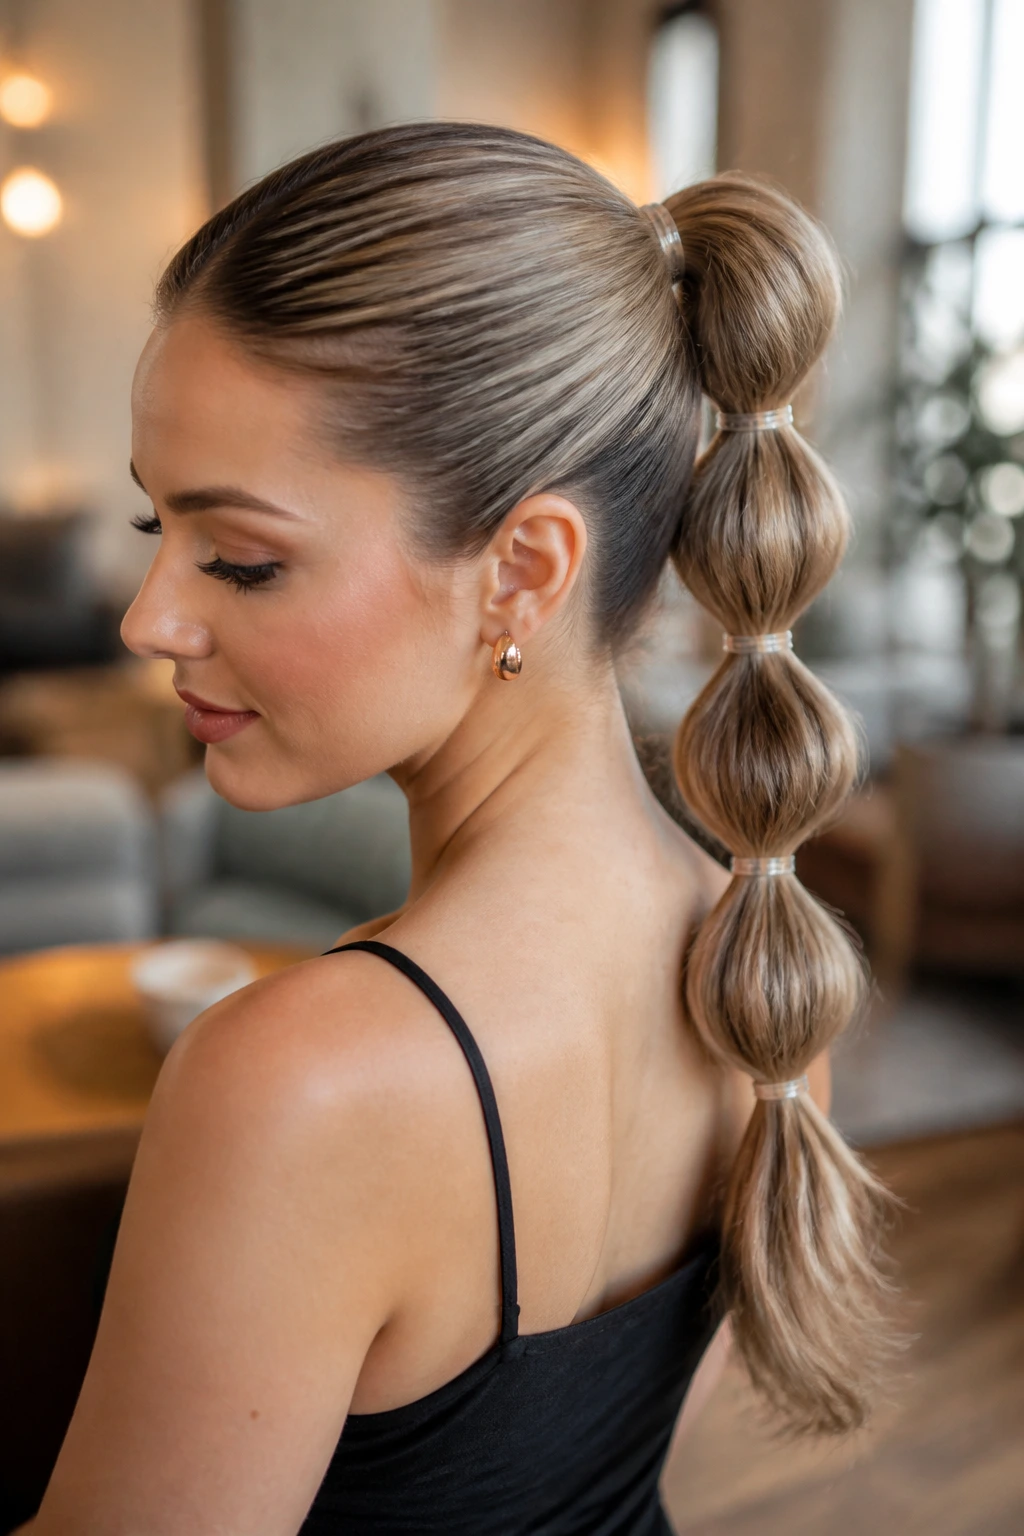
4. Bubble Ponytail With a Polished Base
Bubble ponytails are friendly to thin hair because they create shape through spacing, not density. You get a chain of rounded sections that reads fuller than a single skinny ponytail ever could.
Start with a smooth ponytail, then add small clear elastics every 2 to 3 inches down the length. After each tie, tug the section between elastics outward so it forms a soft bubble. A tiny mist of hairspray on your palms helps smooth the outer layer without crushing the shape.
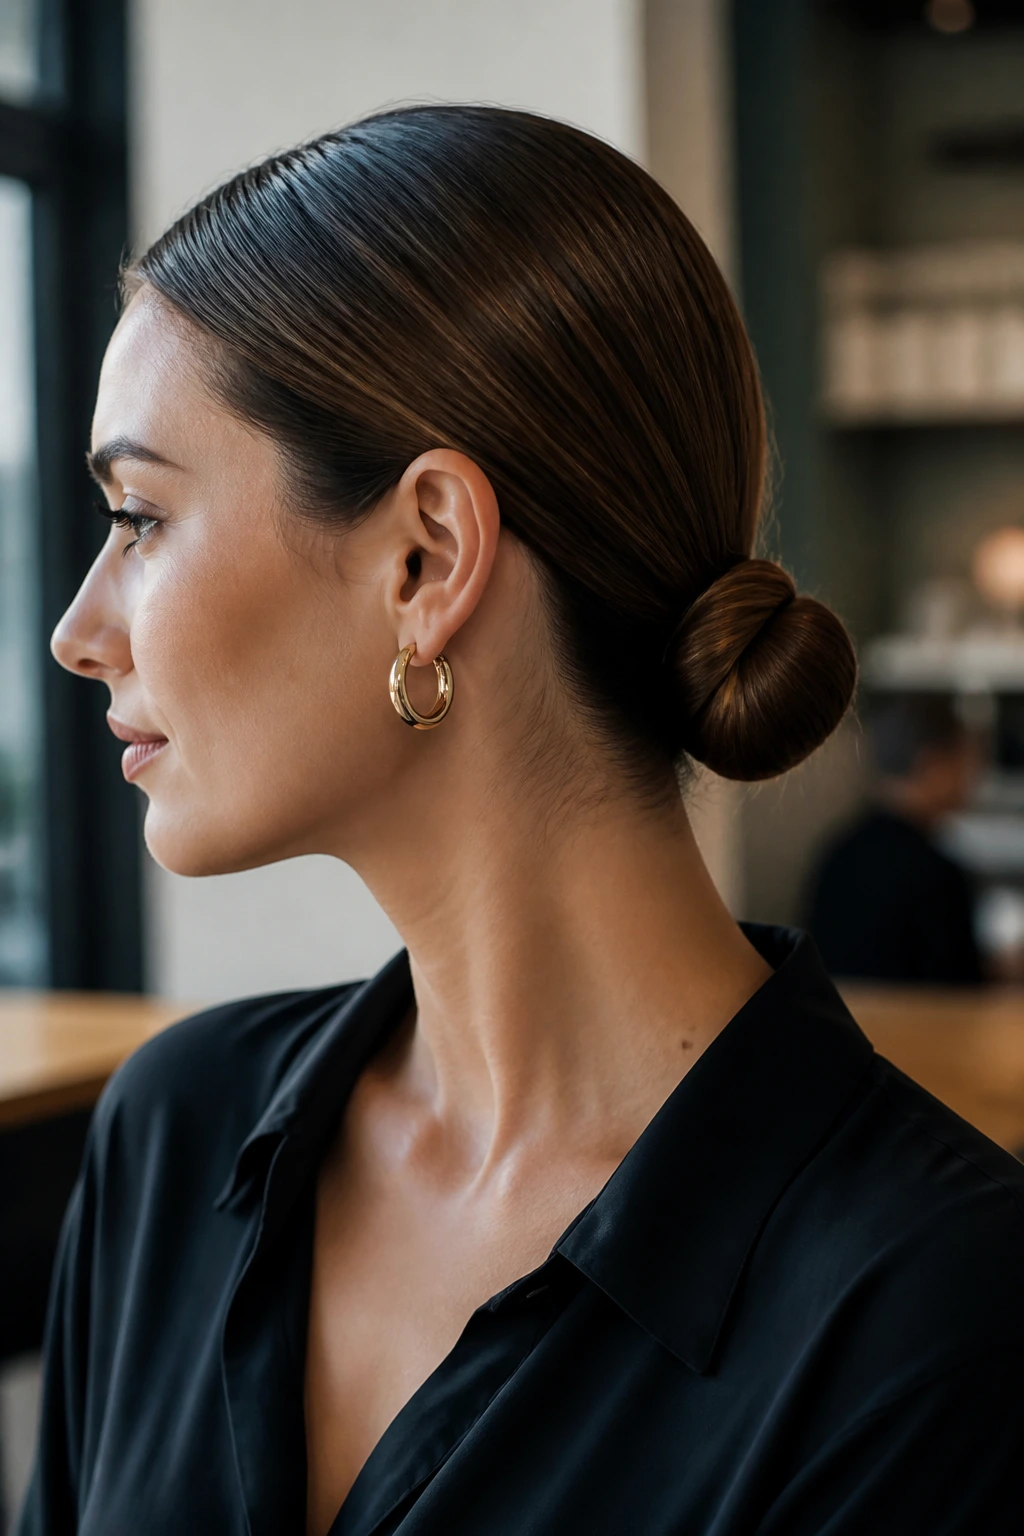
5. Sleek Low Bun With Wrapped Ends
This is the bun I reach for when the outfit is doing the talking. The bun itself is tight, low, and clean, which means the hairline looks tidy even if the actual ponytail is modest.
Brush everything into a low ponytail, divide the tail into two sections, and twist them around each other before wrapping them into a coil. Hide the last inch of the ends under the bun and pin from underneath, not just from the outside. If the hair slips, mist the underside with texturizing spray before you start.
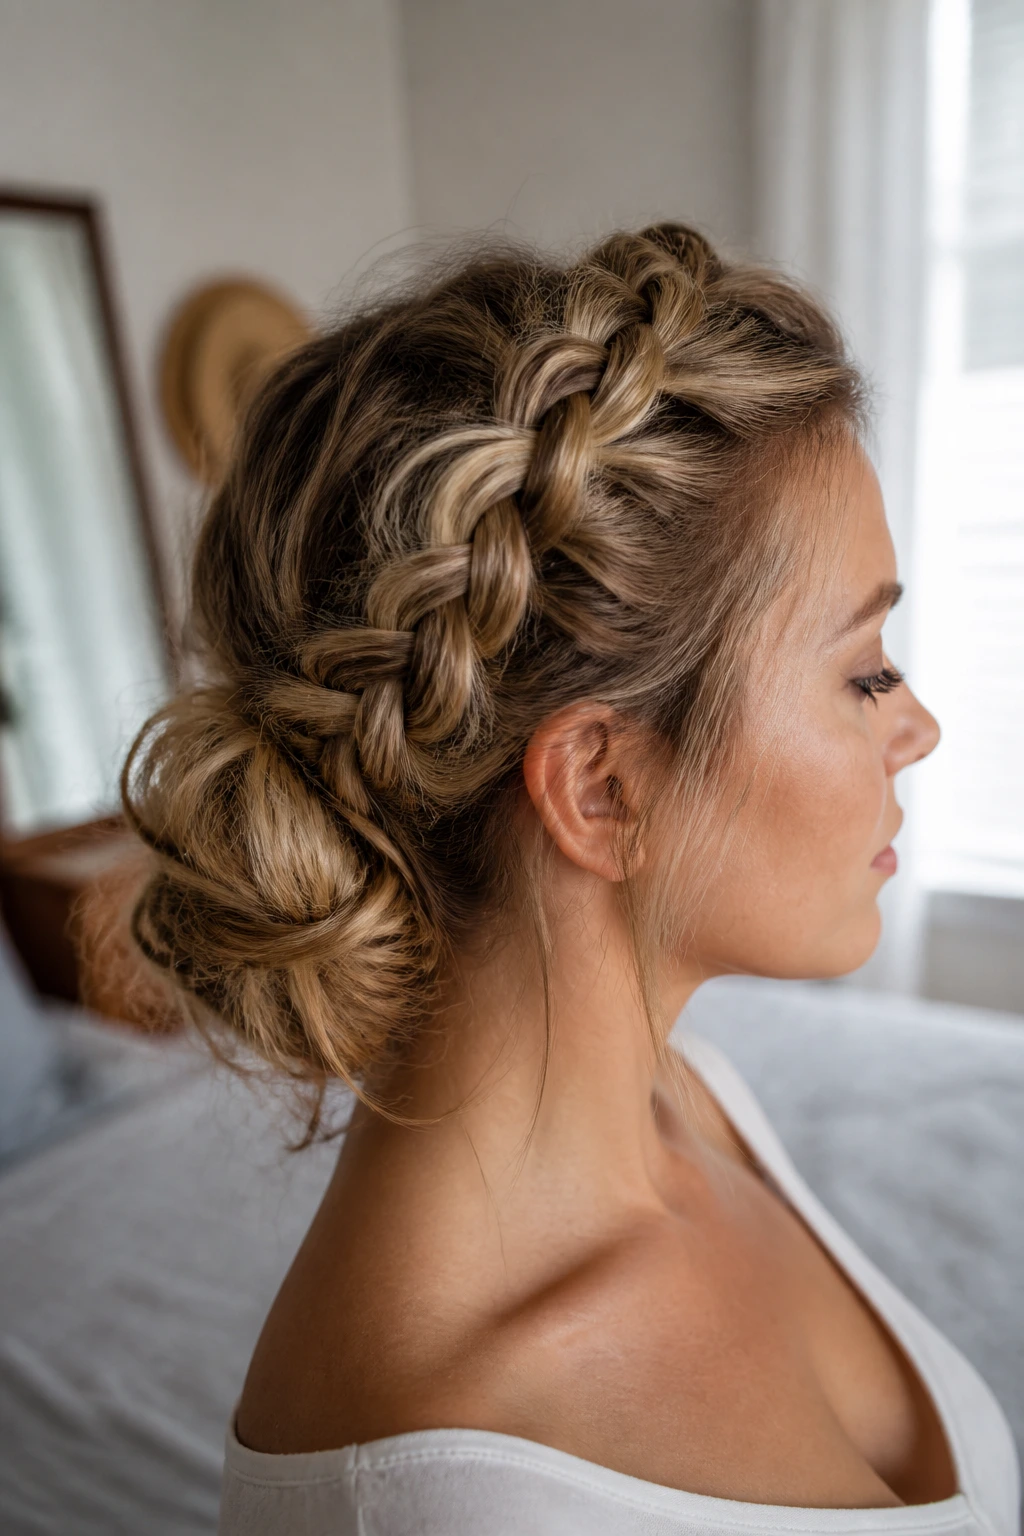
6. Dutch-Braid Messy Bun
A Dutch braid gives thin hair a raised ridge, which is gold here. The braid creates the illusion of fullness before the bun even enters the picture, so the finished style looks far denser than a plain knot.
Braid from the crown to the nape, then gather the remaining hair into a loose bun and pin the knot just below the braid tail. Pull one or two braid loops wider with your fingertips. A soft, imperfect finish is the point; if every strand is locked down, the style loses the bit of volume that makes it work.
7. Rope-Braid Halo Bun
A halo around the head can flatten fine hair if it’s too tight, so keep this one loose and slightly lifted. Rope-braiding gives the halo more texture than a standard braid, and texture is what keeps thin hair from looking stringy.
Part the hair in a circle from temple to temple, braid both sections into rope twists, and bring them around the back to form a crown. Tuck the ends into a low bun or hidden pin nest. One good trick: place the braid slightly above the hairline instead of right on it; that tiny lift makes a big difference.
8. French Twist With Soft Lift
The French twist is one of those styles that gets treated like it’s fussy, but it’s really just a vertical tuck. On long thin hair, it works because the shape is narrow and the pins are doing the heavy lifting.
Brush the hair to one side, roll it upward against the back of the head, and pin vertically from the center outward. Use a comb to nudge a little lift at the crown before you start rolling. The twist should look smooth but not shellacked. If it feels too severe, pull a few tiny pieces around the ears.
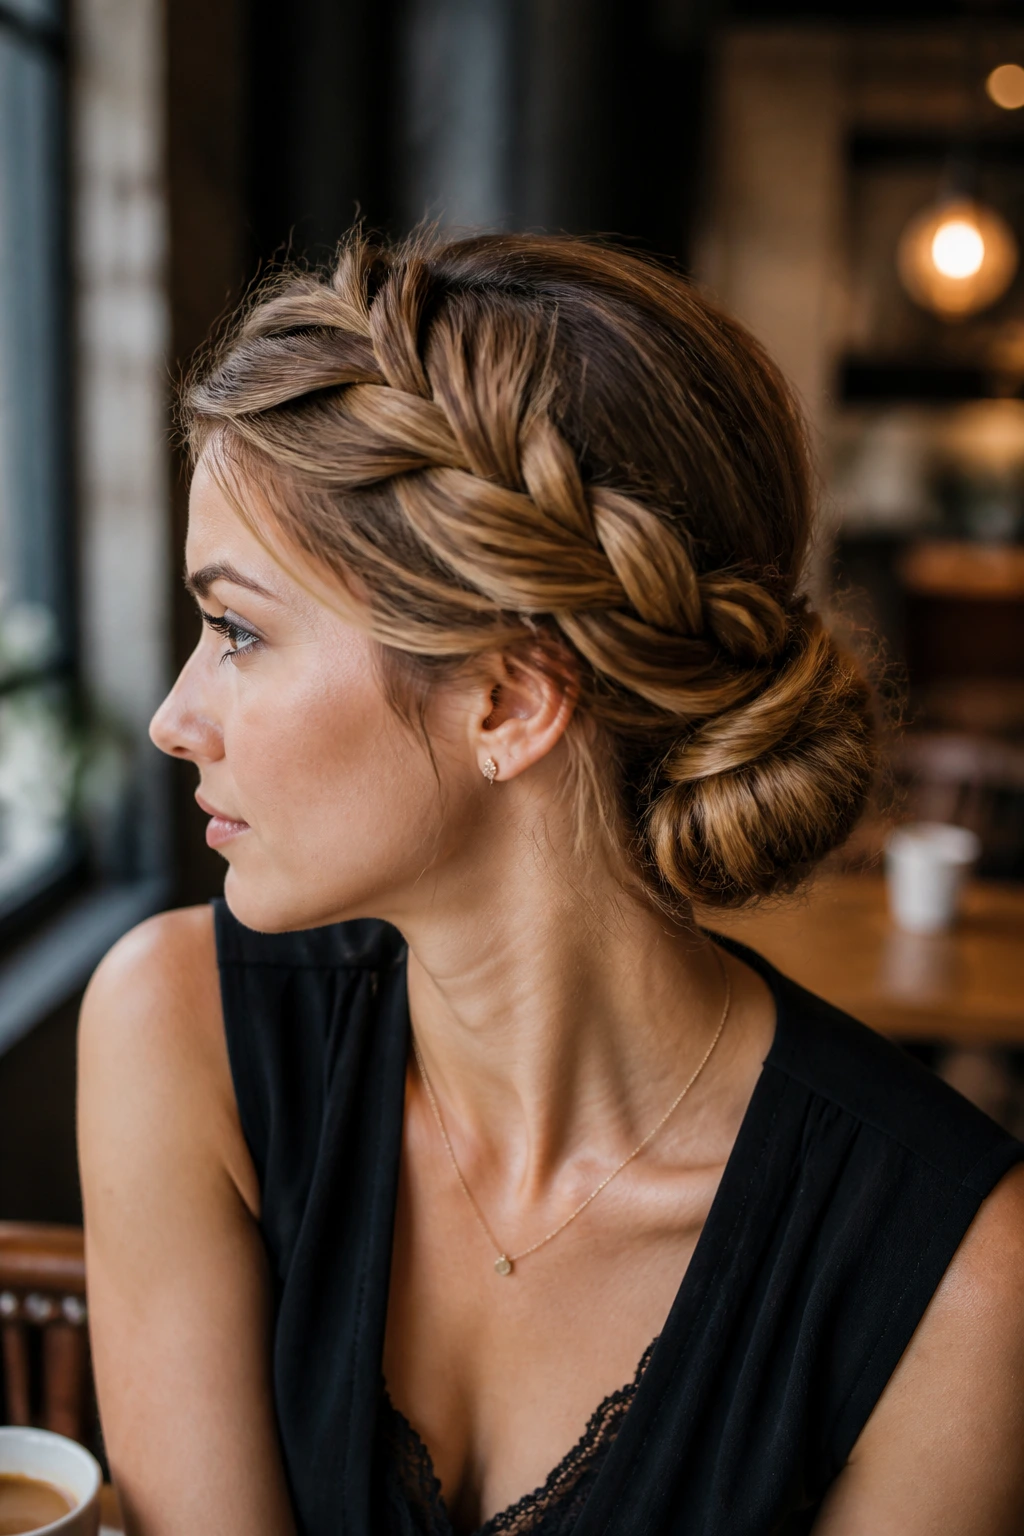
9. Side-Swept Braid Chignon
A braid that starts off to one side gives the front some interest before the chignon even shows up. Long thin hair often looks better when the visual weight sits asymmetrically; it keeps the style from reading as flat and centered.
Braid from one temple, sweep the braid across the back, and coil the rest into a chignon at the opposite nape corner. Pin the braid under the bun so the line disappears into the knot. This one is especially good if your hair is layered, because the side sweep hides shorter pieces that would otherwise pop loose.
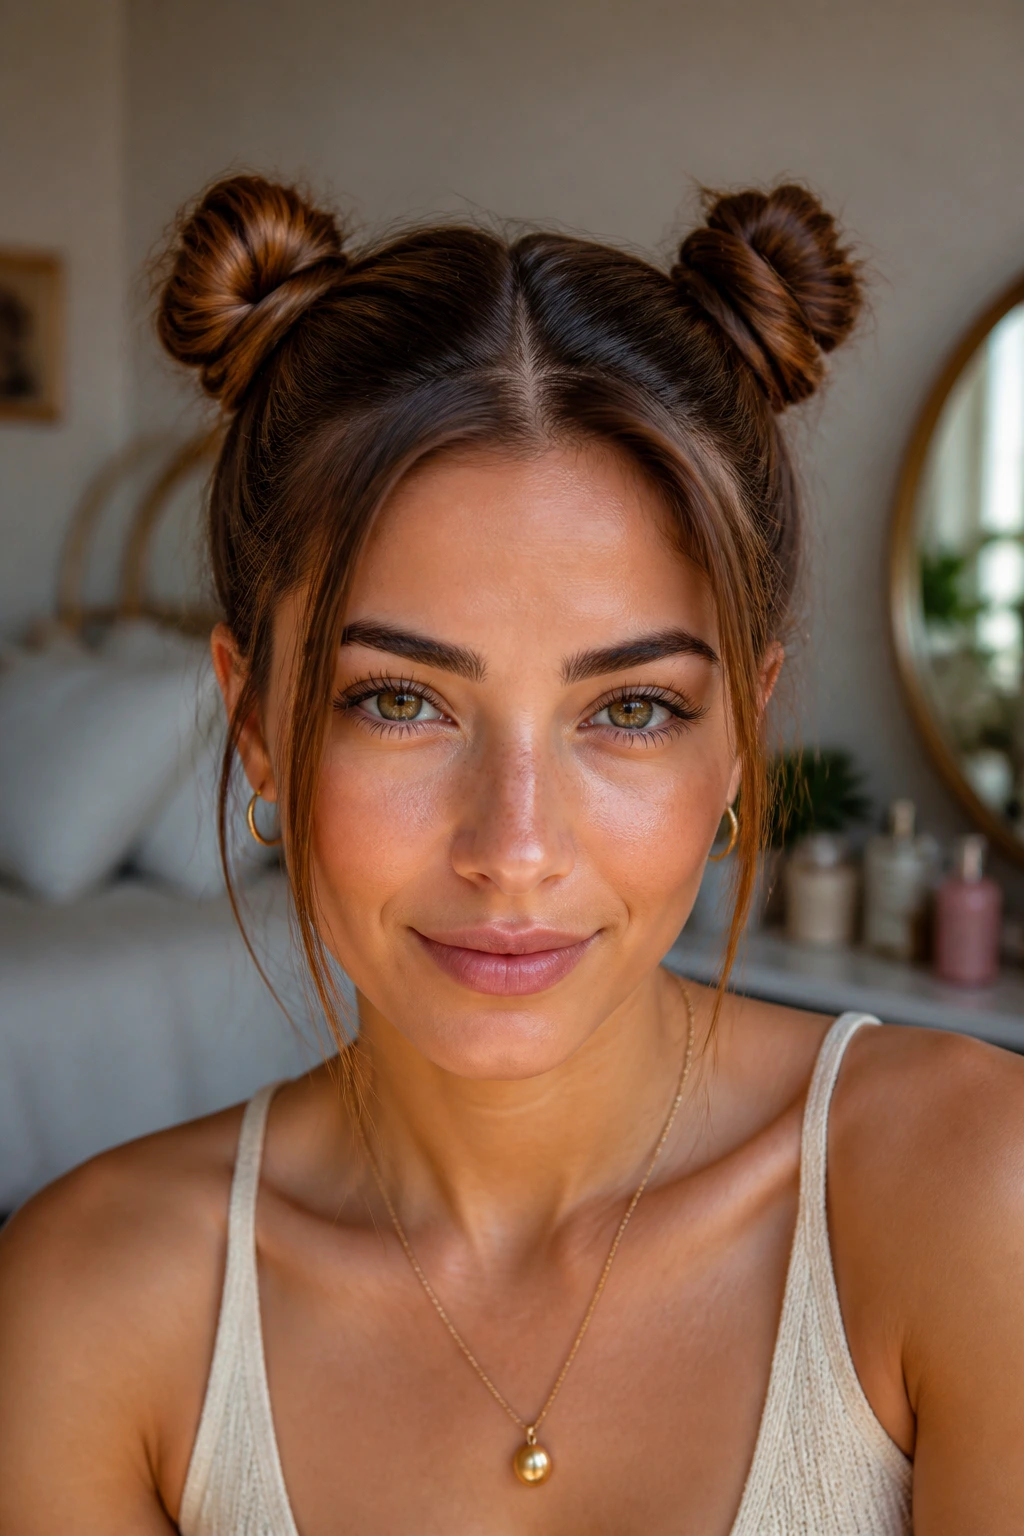
10. Twin Mini Buns
Two buns are more forgiving than one oversized bun. Each knot gets less hair, less tension, and less chance of collapsing under its own weight.
Split the hair into two ponytails, one on each side of the crown or low near the nape, then twist each into a small bun and pin tightly. Keep the parts clean and the spacing even, or the style can look accidental. With long thin hair, symmetry helps the eye see intention where the ponytails themselves don’t have much bulk.
11. Knotted Low Ponytail
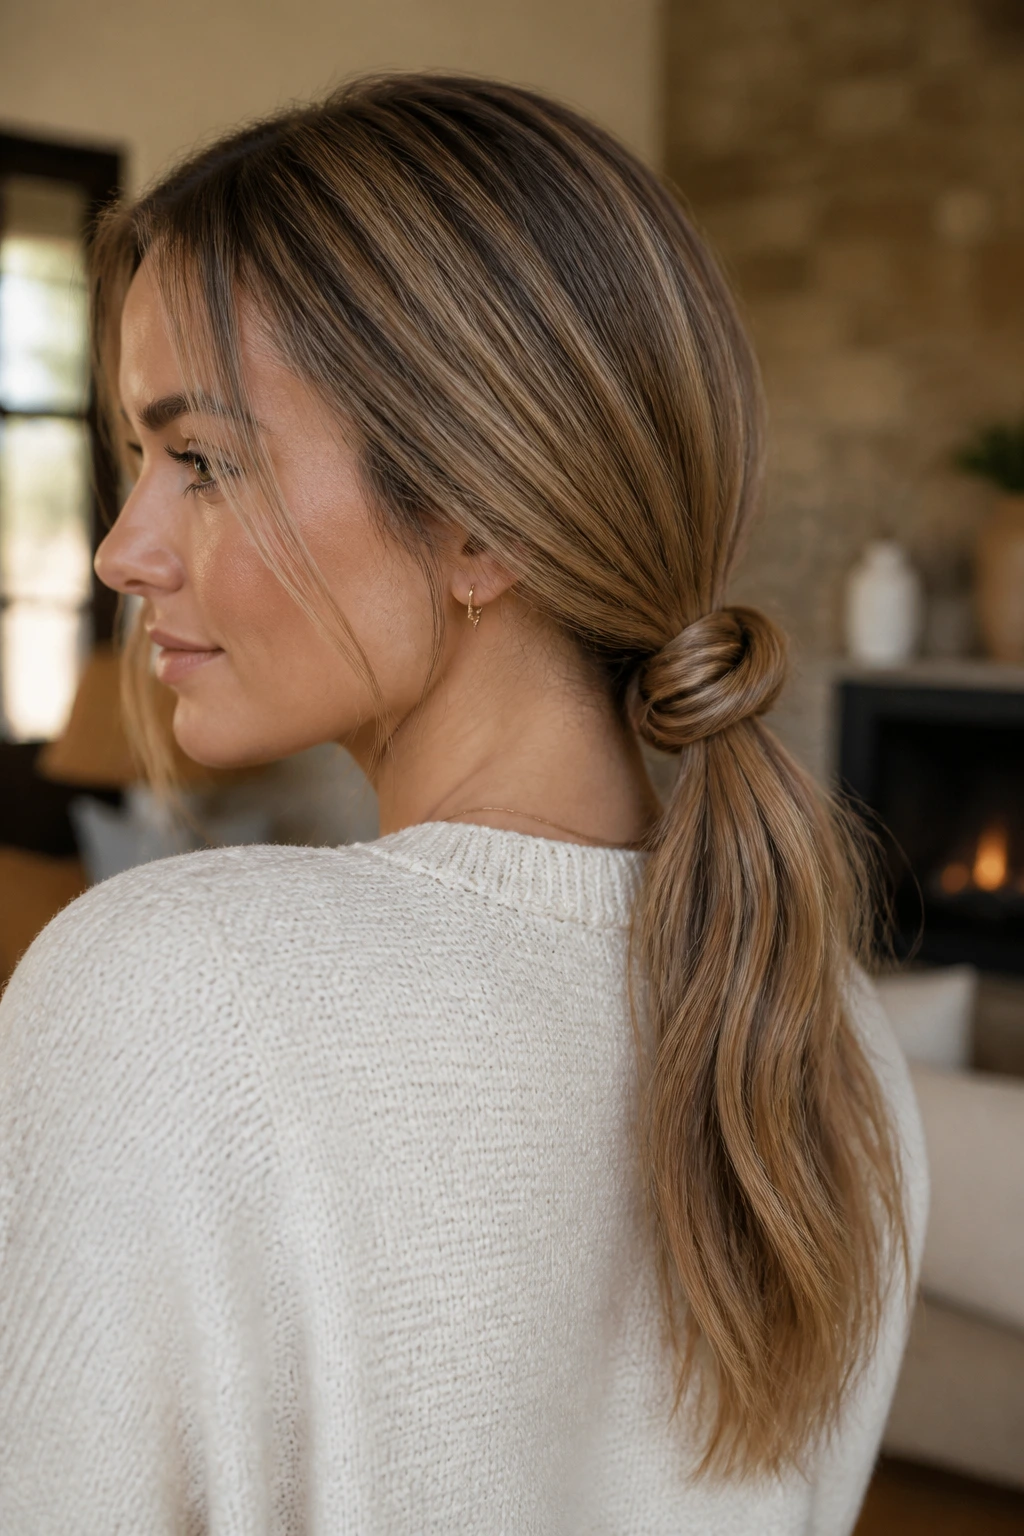
This is a good choice when you want texture without braiding. A simple knot through the length of the ponytail gives long thin hair more shape than a plain tie, and it takes less time than a braid.
Make a low ponytail, split the tail into two pieces, and tie a basic knot one time. If the hair is very slippery, add a second hidden elastic below the knot to lock it in place. Tug the sides of the knot just a little so it feels softer. Too much pulling and the shape gets ropey.
12. Topsy-Tail Bun
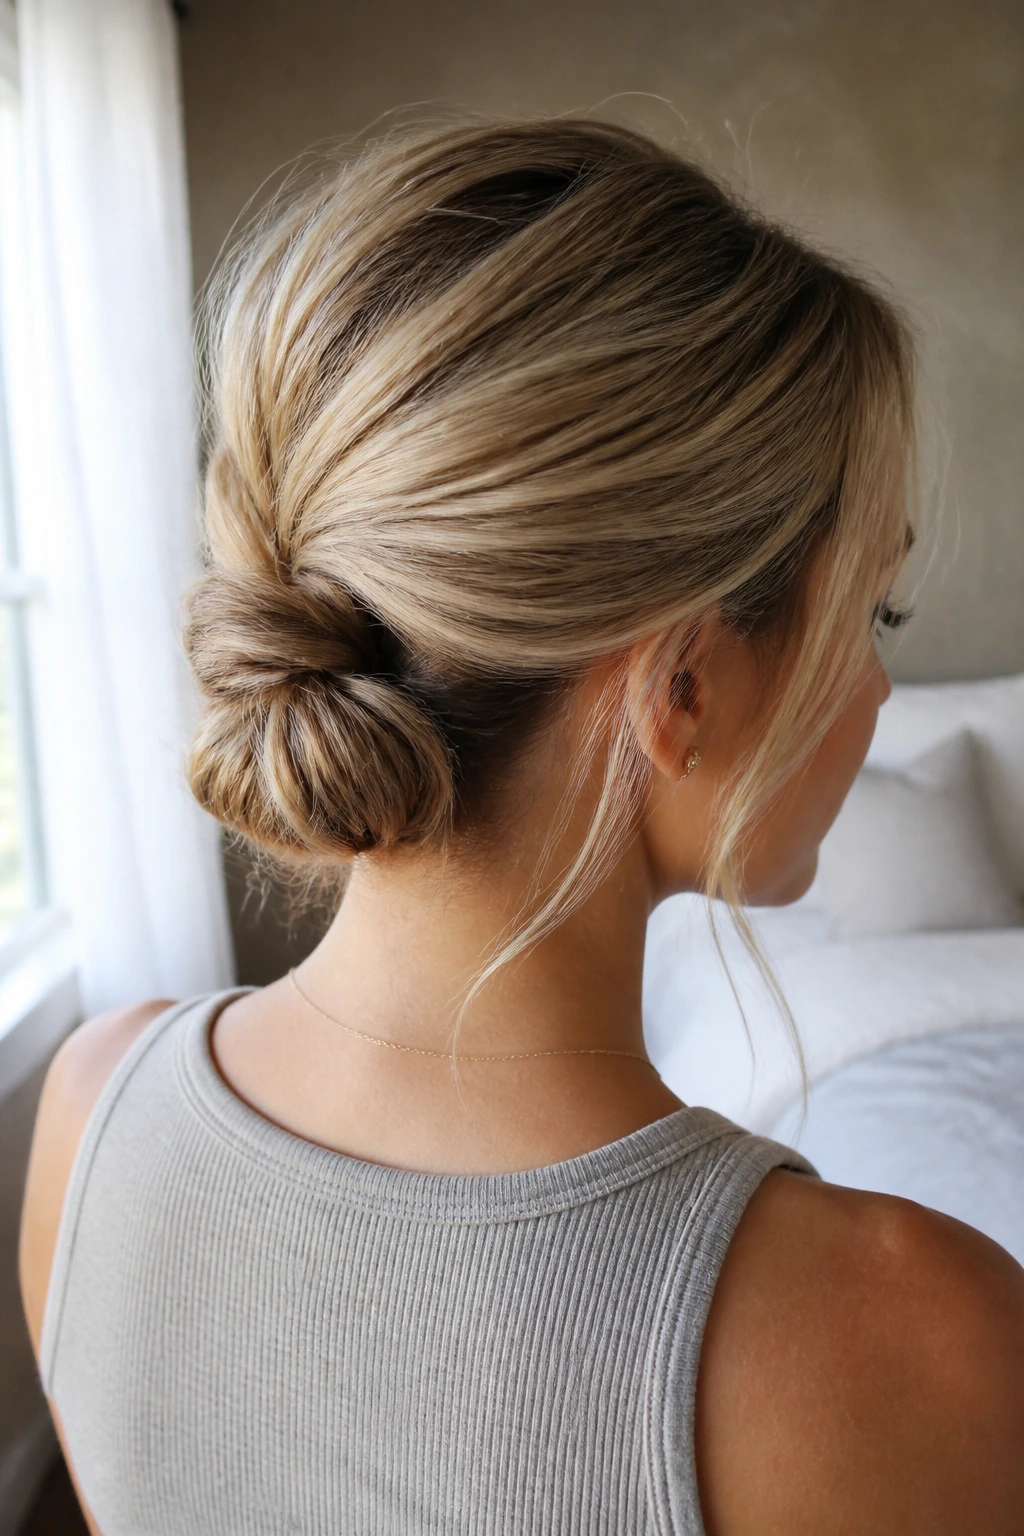
A topsy-tail bun is neat, fast, and oddly flattering on fine hair because the twist creates a little lift right where the bun starts. It looks more complicated than it is, which is always a nice bonus.
Make a low ponytail, split the hair above the elastic, and flip the tail through the gap. Do that once more if the hair is long enough, then coil the remaining length into a bun and pin. The twist creates a pocket of volume at the base, which keeps the bun from lying completely flat against the head.
13. Gibson Tuck
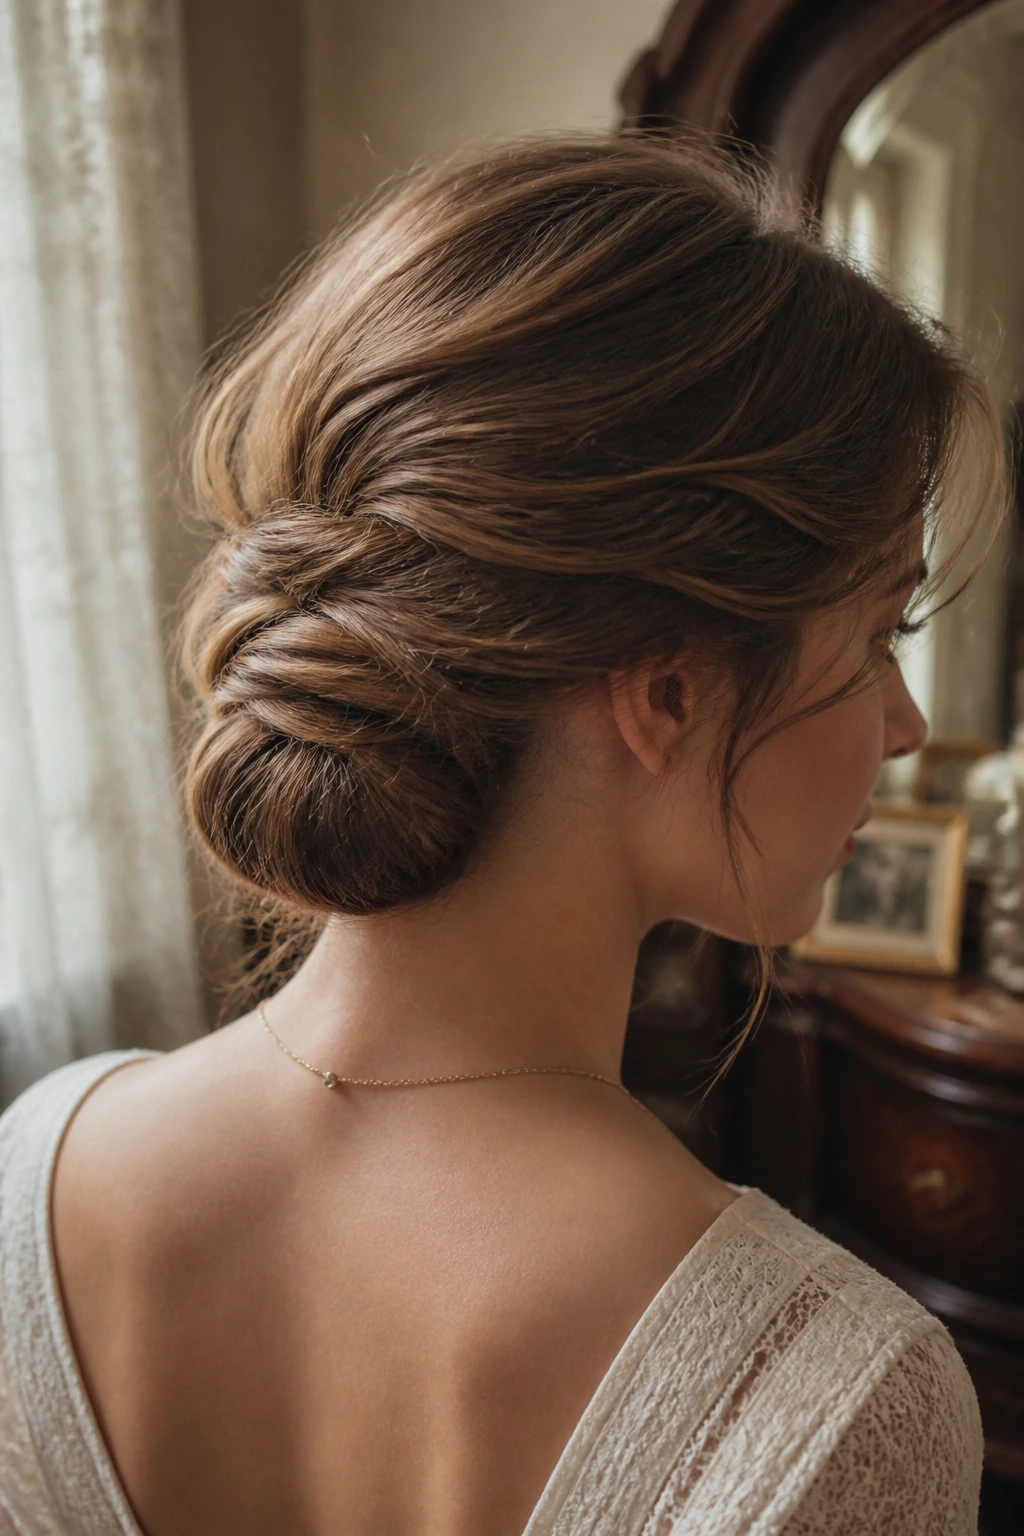
The Gibson tuck has an old-fashioned softness that suits fine hair beautifully. It’s one of the few styles that looks better when it’s not packed too tight, because the roll itself creates the shape.
Leave a soft section loose near the crown, make a low horizontal gap above the nape, and tuck the length upward into the roll. Secure it with pins along the curve. A little face-framing piece near the temples keeps it from looking stern. If you like vintage collars or square necklines, this one behaves especially well.
14. Waterfall Twist Half-Up
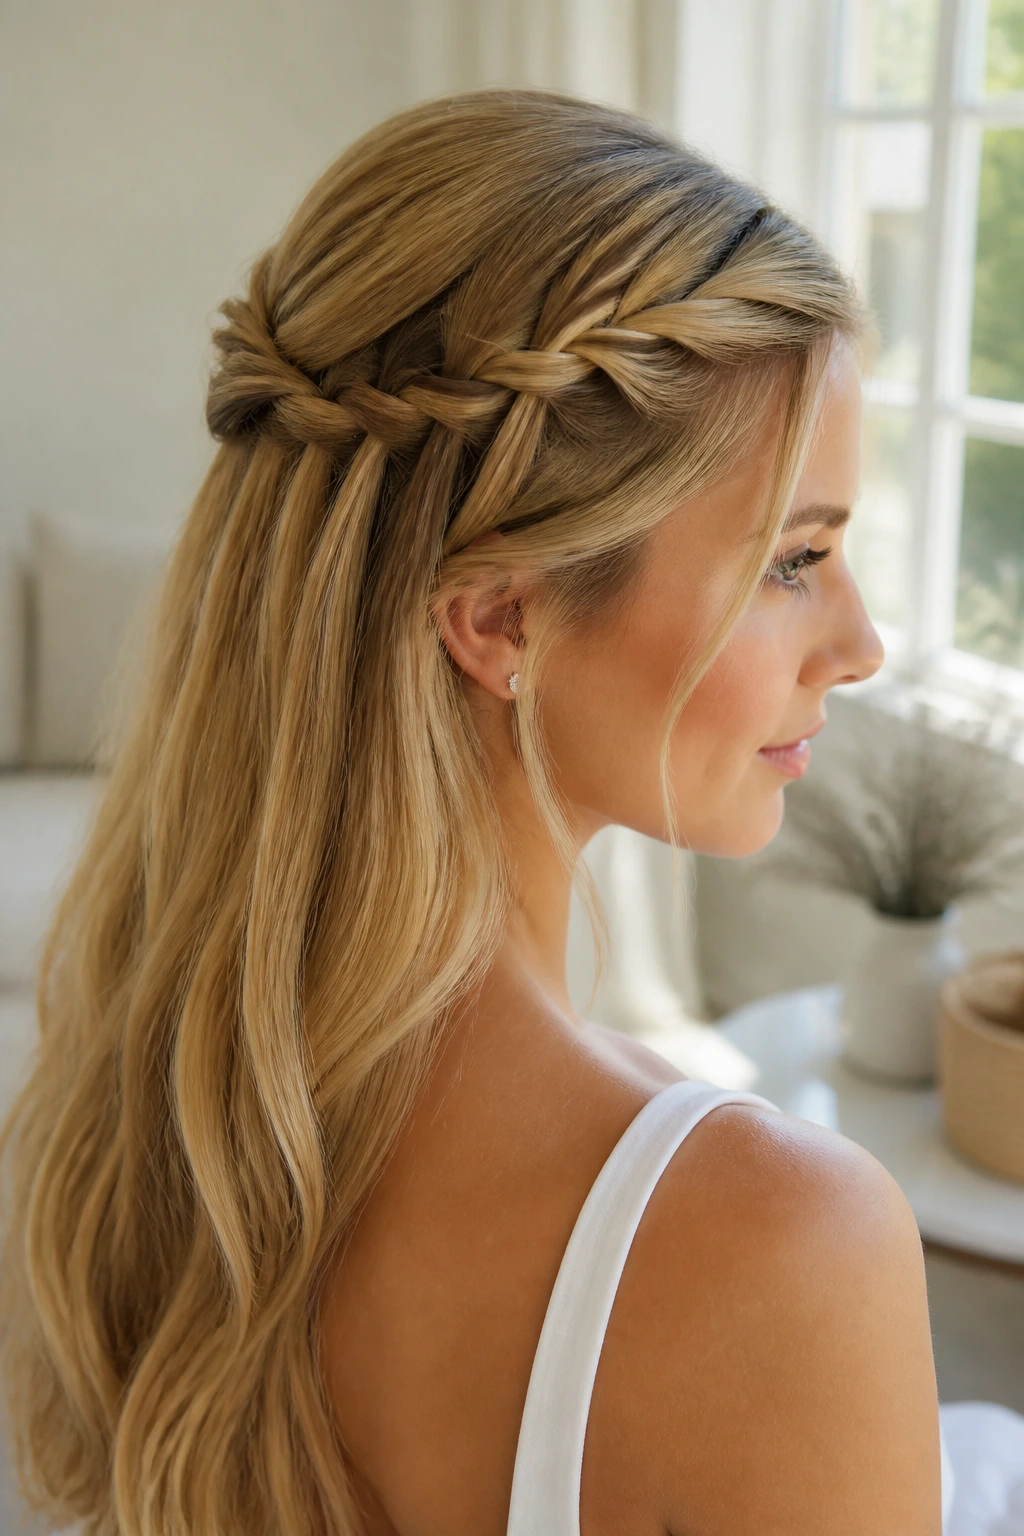
A waterfall twist gives you movement on top without forcing the whole head into an updo. On long thin hair, that matters. The lower length stays loose and can be bent slightly for better shape, while the twist adds just enough interest to the crown.
Take a side section, twist it backward, and drop a small section through the twist each time you move down the head. Pin the twist behind the ear. The loose lengths should stay sleek or softly waved; tight curls can fight the structure and make the style look busier than it needs to be.
15. Pull-Through Braid Ponytail
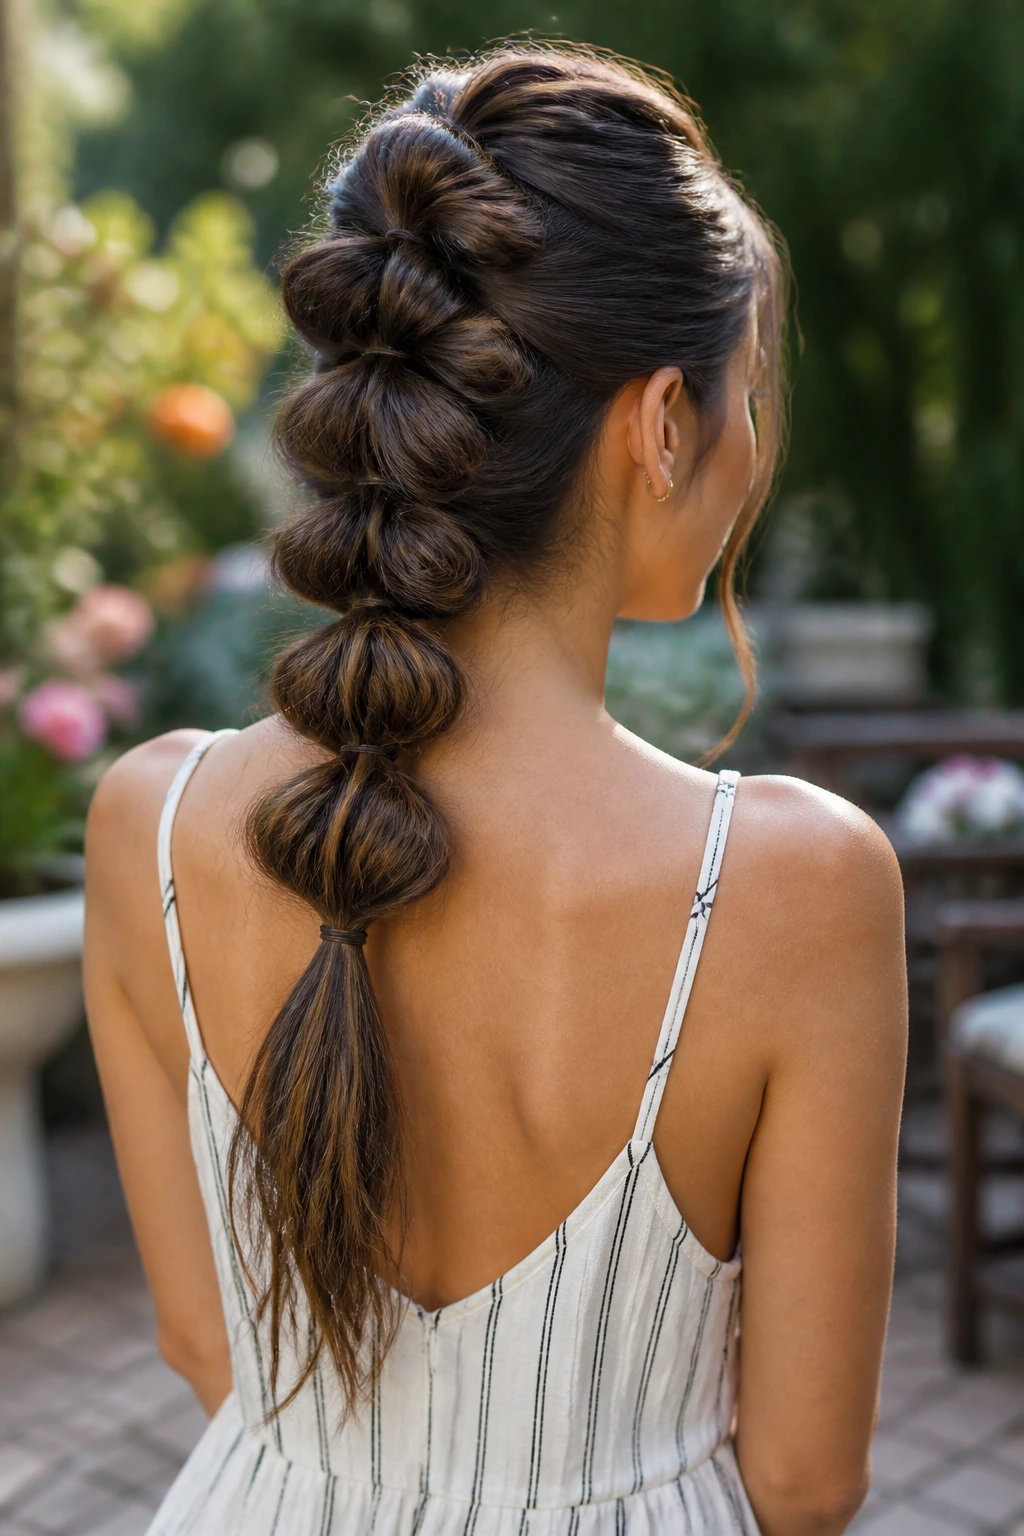
If you want a braid with more body than your hair naturally gives, this is the one to pick. Pull-through braids fake fullness by stacking small ponytails, which is a clever trick for thin lengths.
Create a series of tiny ponytails down the center back, then split and pull the sections around the next elastic in sequence. Each loop gets a gentle tug so it puffs outward. The style holds best when each section is about 1 to 1½ inches thick; too much hair in each section makes the braid look lopsided, not fuller.
16. Faux Hawk Pin-Up
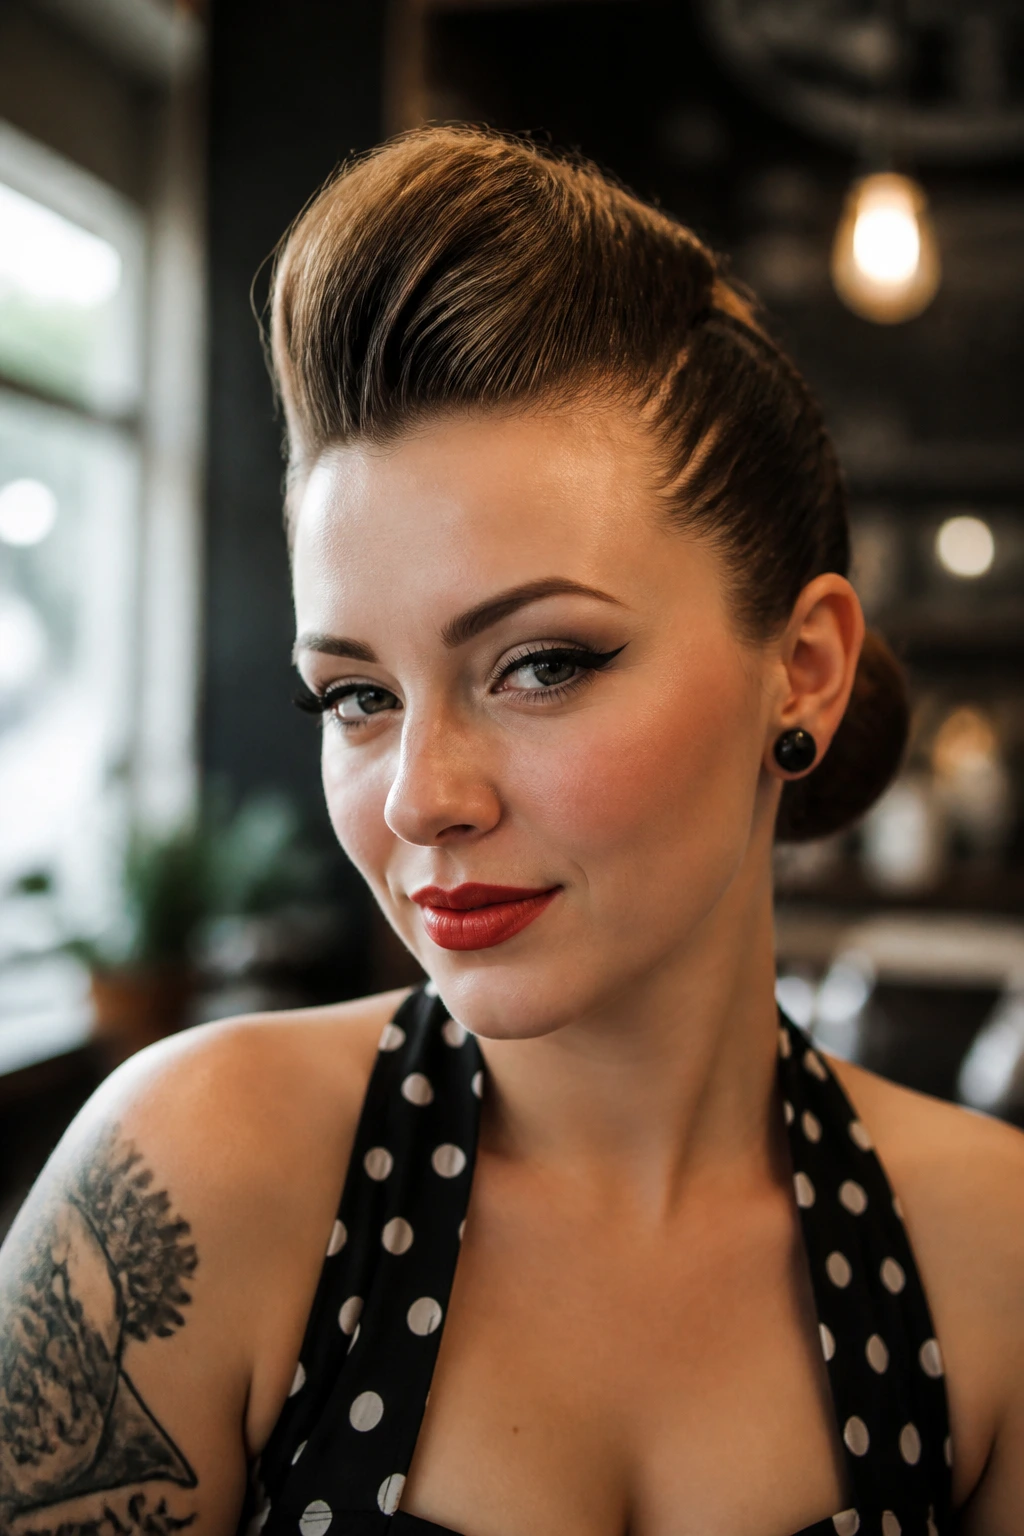
A faux hawk has built-in drama, and long thin hair actually helps here because the sides can stay tight while the center ridge does the work. The result feels bold without needing a ton of hair.
Tease a narrow strip from the front to the crown, pin it into soft ridges, and smooth the sides back toward the middle. You can finish with a small knot or tucked coil at the nape. This is one of the few styles where a little edge looks better than perfect polish. Keep the pins hidden in the ridge so the shape reads clean.
17. Milkmaid Braid Bun
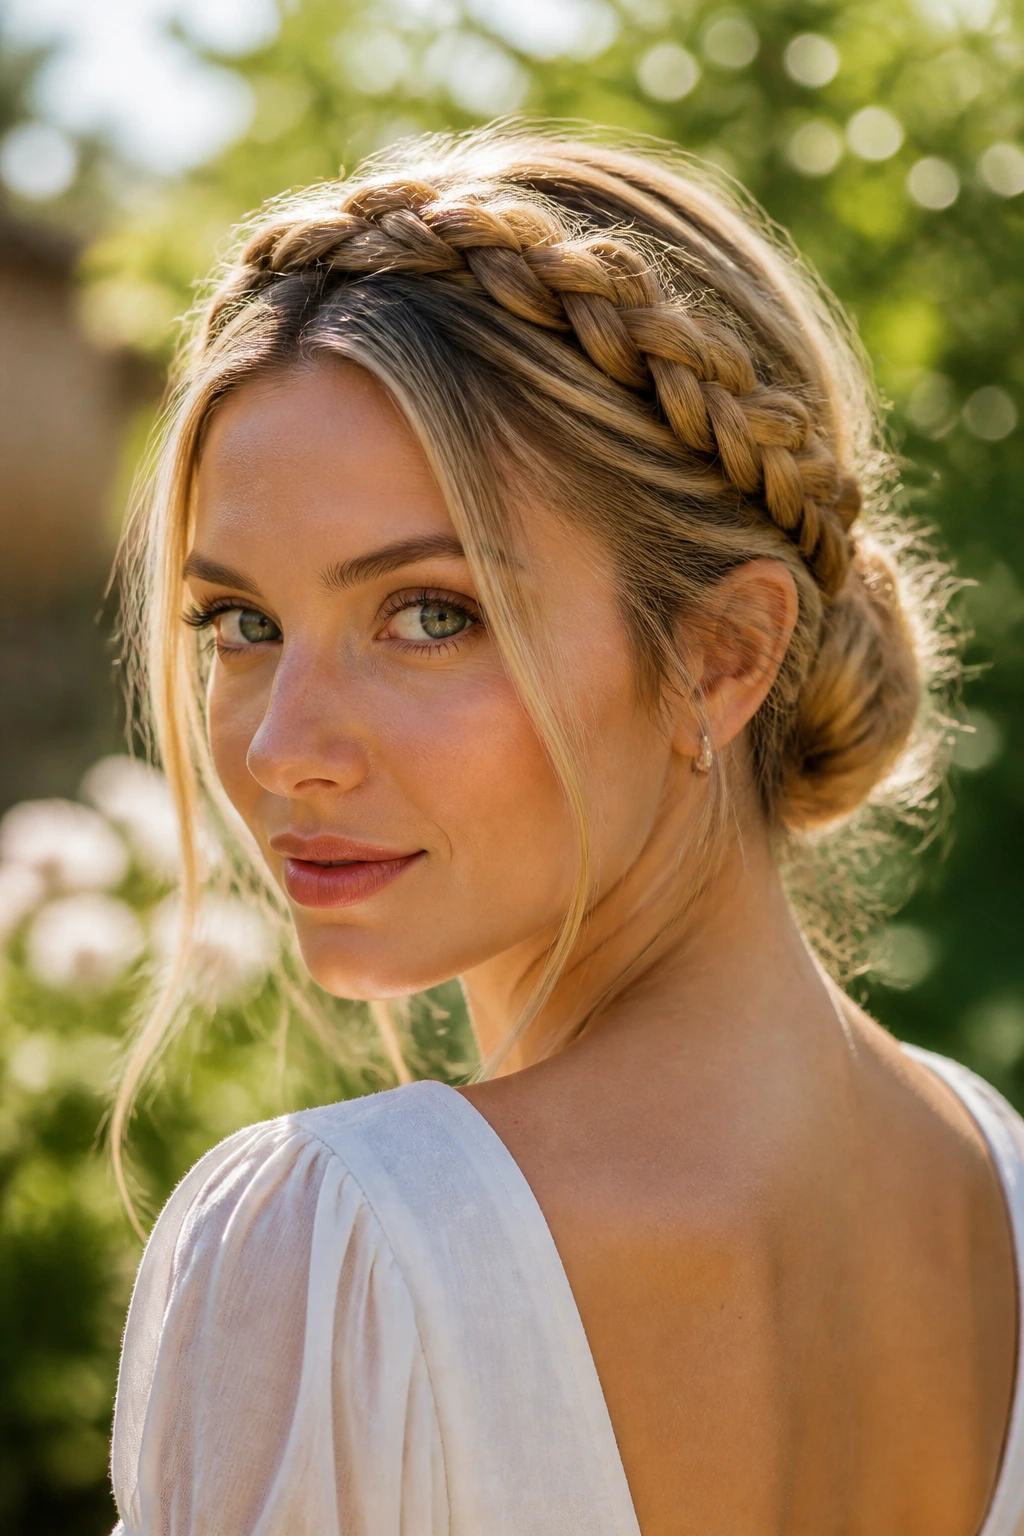
A milkmaid braid tends to look prettier on longer hair because the braids have enough length to wrap cleanly around the head. Thin hair benefits from the built-in frame along the hairline.
Braid two pigtails, bring them over the crown, and pin them so they meet behind the ears or at the back. Tuck the leftover ends into a low bun or fold them under the braid line. If the braids look too small, pancake the outer edges only. That raises the profile without turning the braid fuzzy.
18. Scarf-Wrapped Low Knot
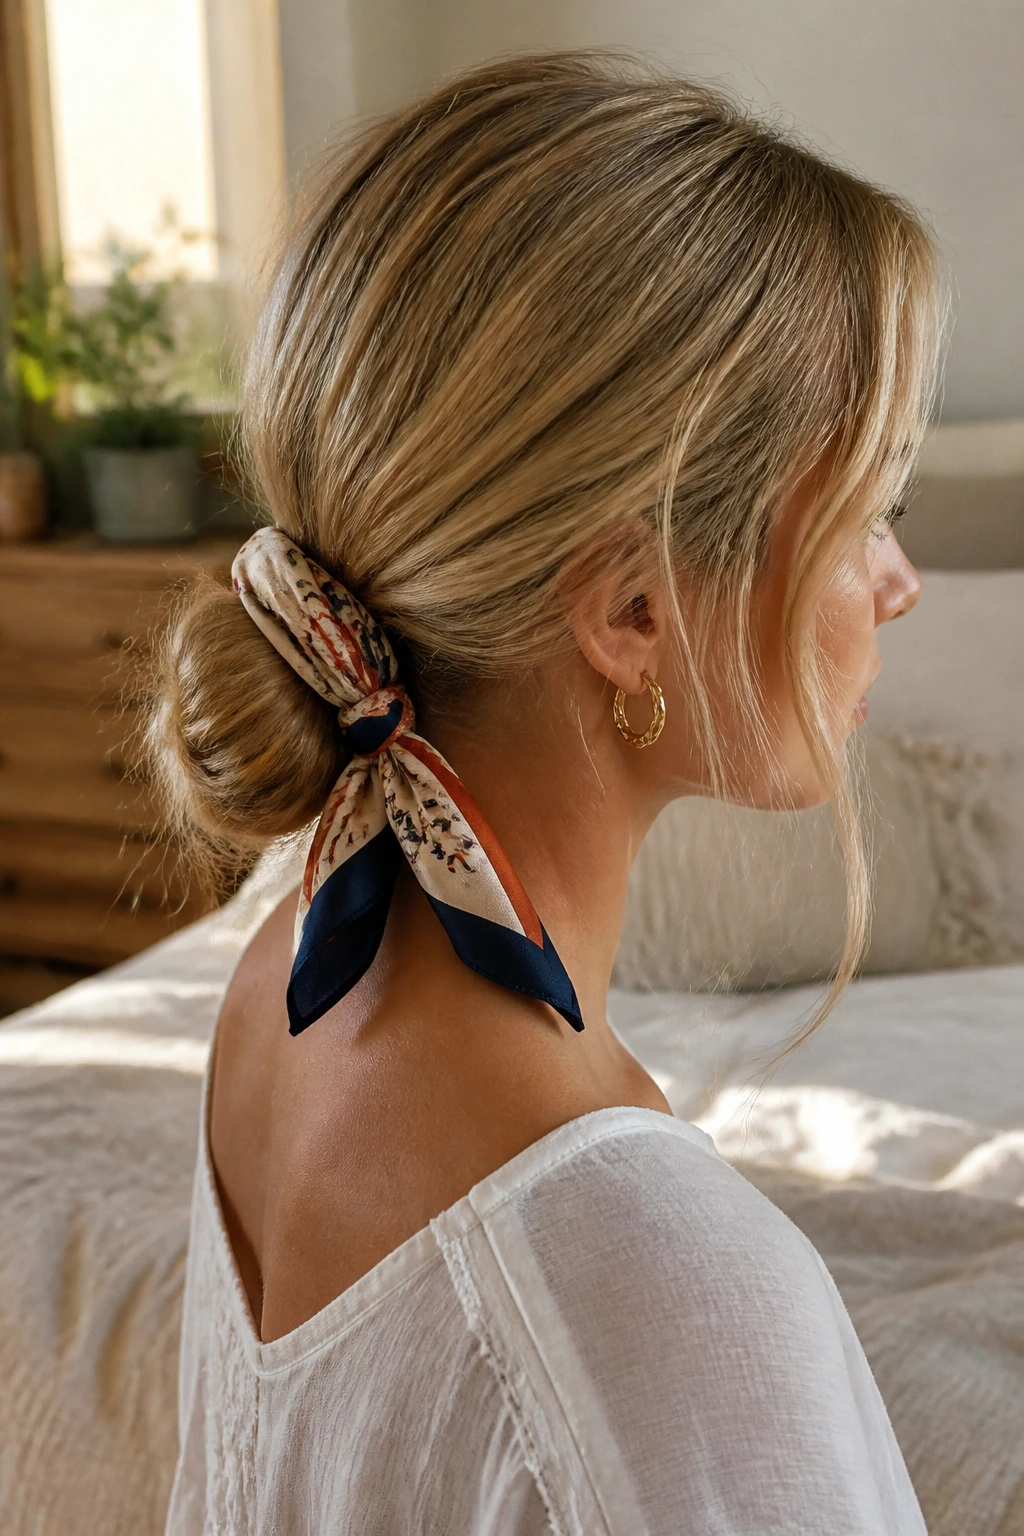
A scarf does a lot of work for fine hair. It adds color, hides a small bun, and gives the whole style a little shape where the hair alone might look plain.
Tie the hair into a low knot, then wrap a slim silk scarf around the base and knot it off-center. Choose a scarf with some body; a slippery one can slide around on very fine hair. I prefer this style when the hair has been smoothed straight, because the scarf gives it something the texture can’t.
19. Twisted Halo Updo
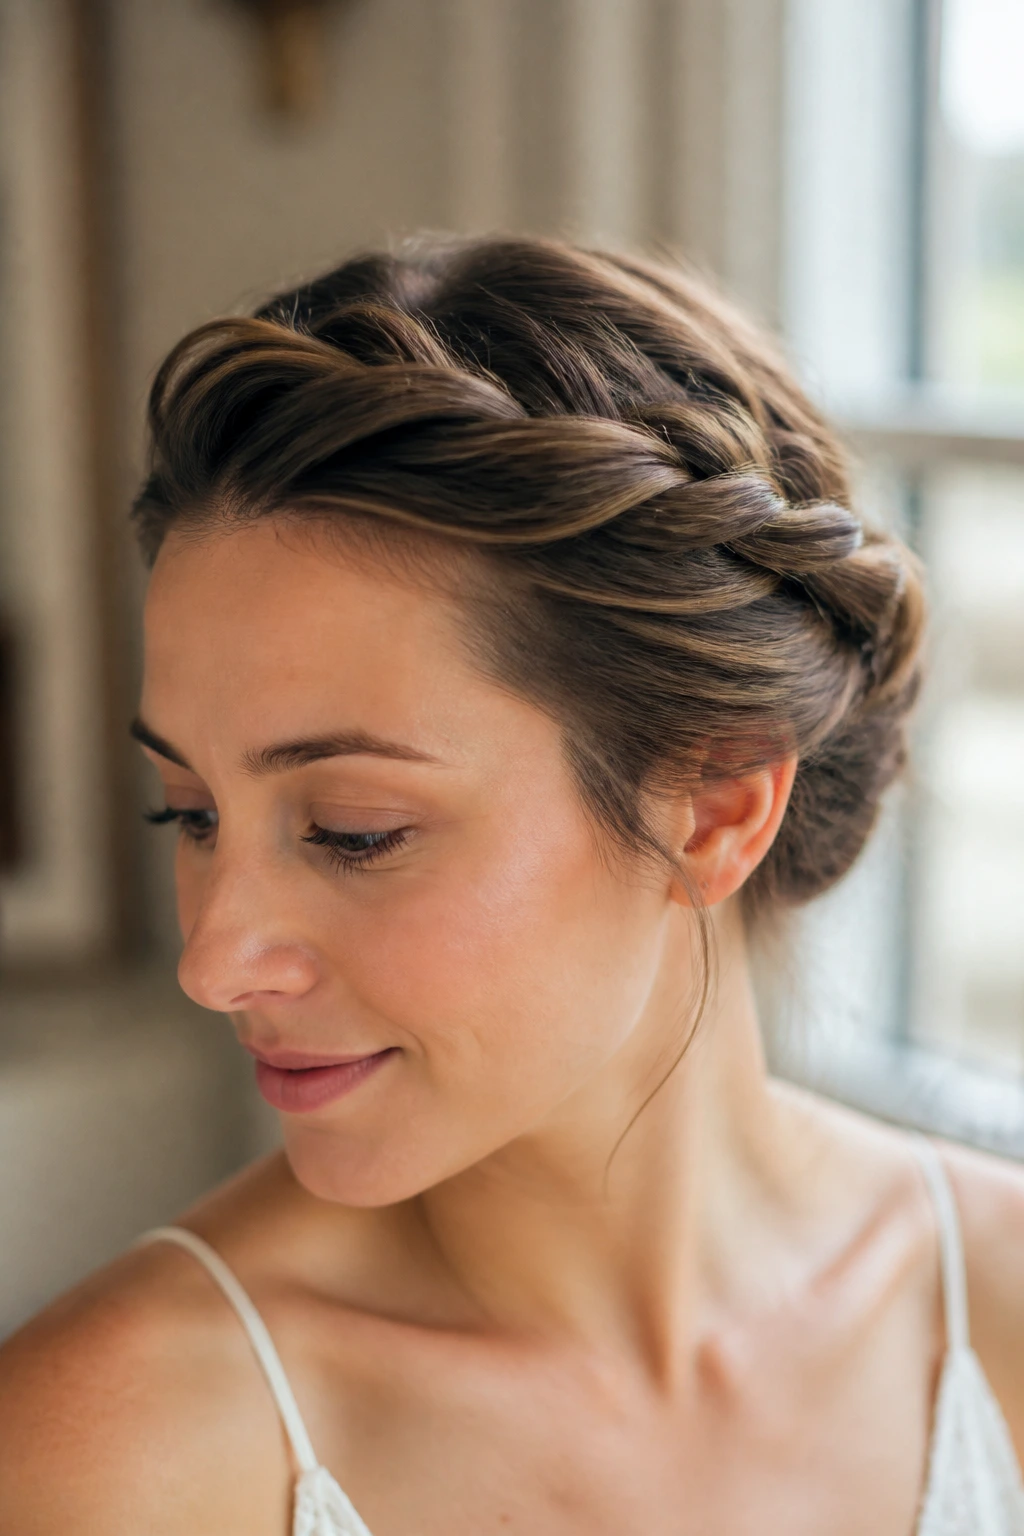
A twisted halo is softer than a braid crown and usually easier on long thin hair because twists need less hair to look substantial. The shape traces the head in a clean curve, which keeps the style from feeling bottom-heavy.
Take two side sections, twist each away from the face, and bring them across the back so they meet. Pin the ends under the opposite twist or fold them into a tucked coil. The halo should sit about an inch above the ears, not mashed flat against them. That little lift keeps the style from disappearing into the head.
20. Soft Topknot With Face-Framing Pieces
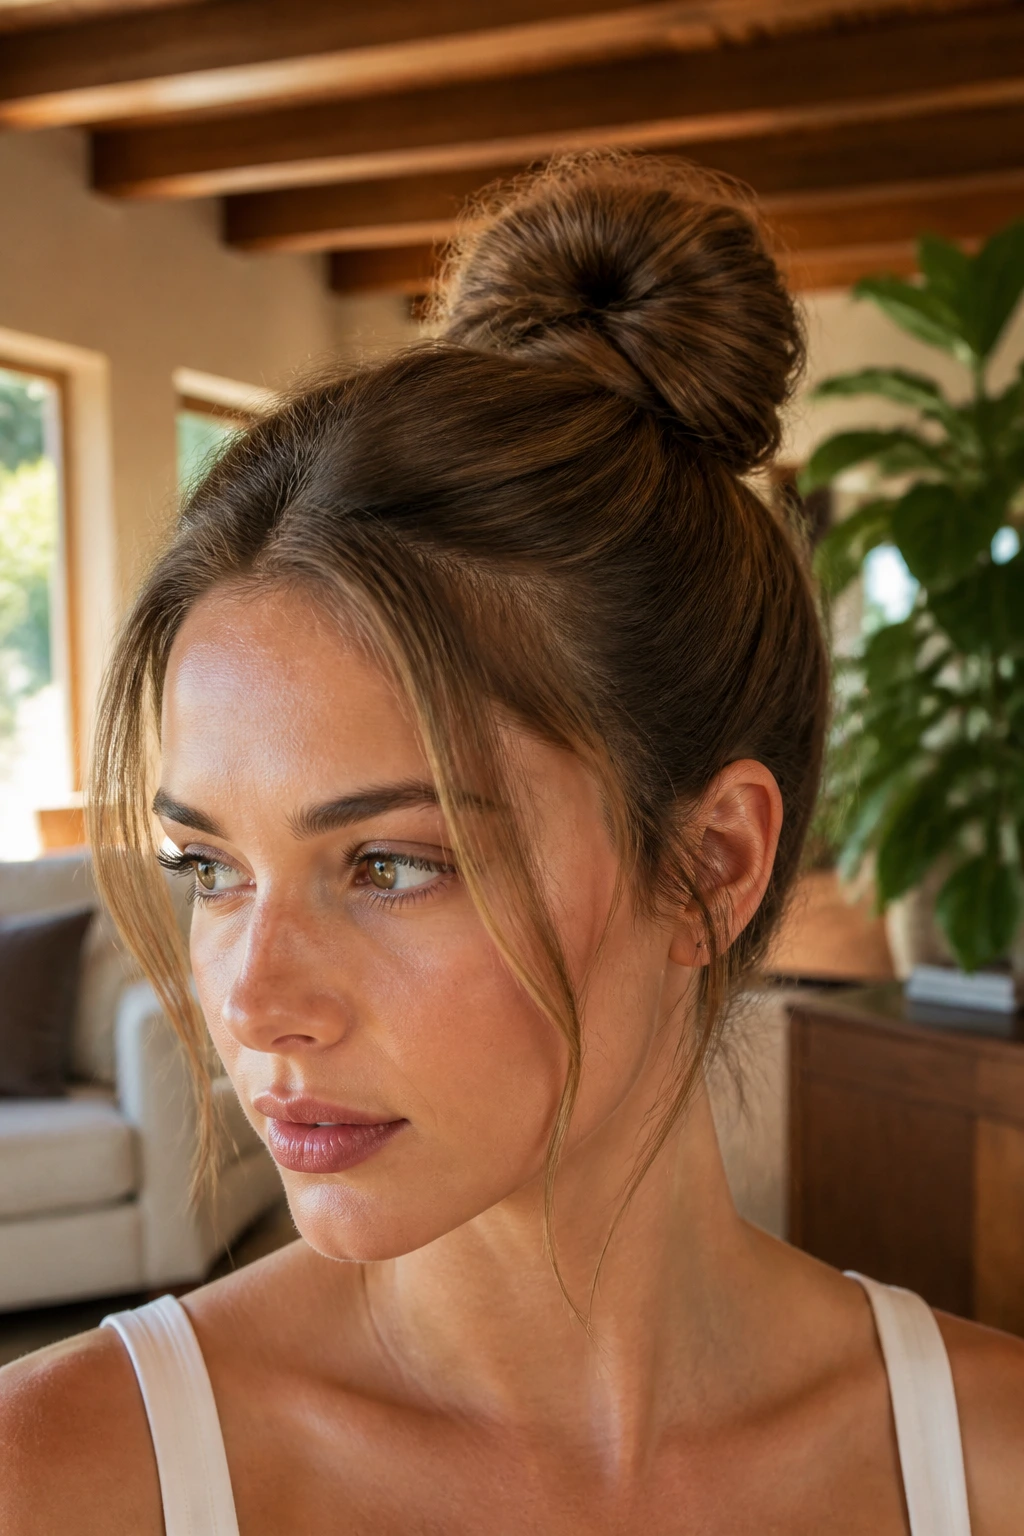
A topknot can work on thin hair if you stop trying to make it giant. The trick is to keep the knot high, compact, and a touch undone at the hairline so the face doesn’t get swallowed by the style.
Gather the hair at the crown, leave out two slim front pieces, and twist the ponytail into a knot. Pin through the base in a crisscross pattern. Then pull the knot apart just enough to open the surface. If your hair is extra fine, a tiny bun donut can help, but don’t make the knot so big that it looks separate from the head.
21. Fishtail Wrap Bun
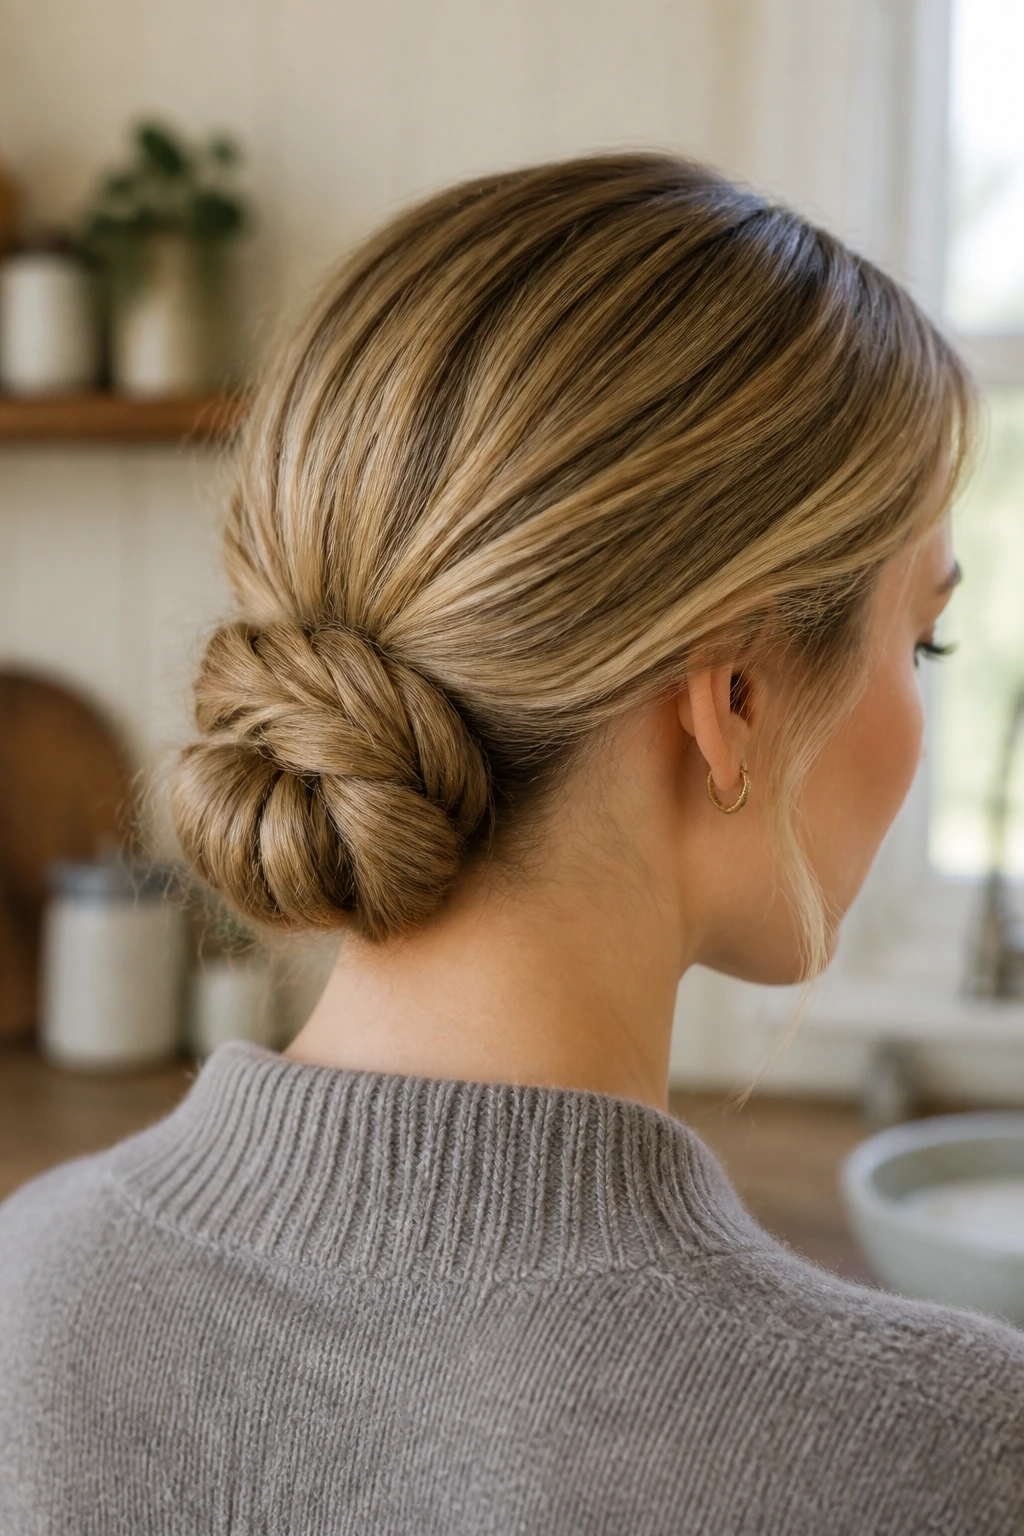
A fishtail braid reads denser than a regular braid because the weave has more tiny movements. Wrapped into a bun, it gives long thin hair a detailed finish that looks richer than it is.
Make a low ponytail, fishtail braid it to the end, then wrap the braid around the base into a coil. Pin the outer edge at several points so the braid doesn’t spring loose. This style likes a matte texture spray, not heavy serum. Too much shine makes the weave look slick in a way that exposes thinness instead of hiding it.
22. Half-Up Bubble Braid
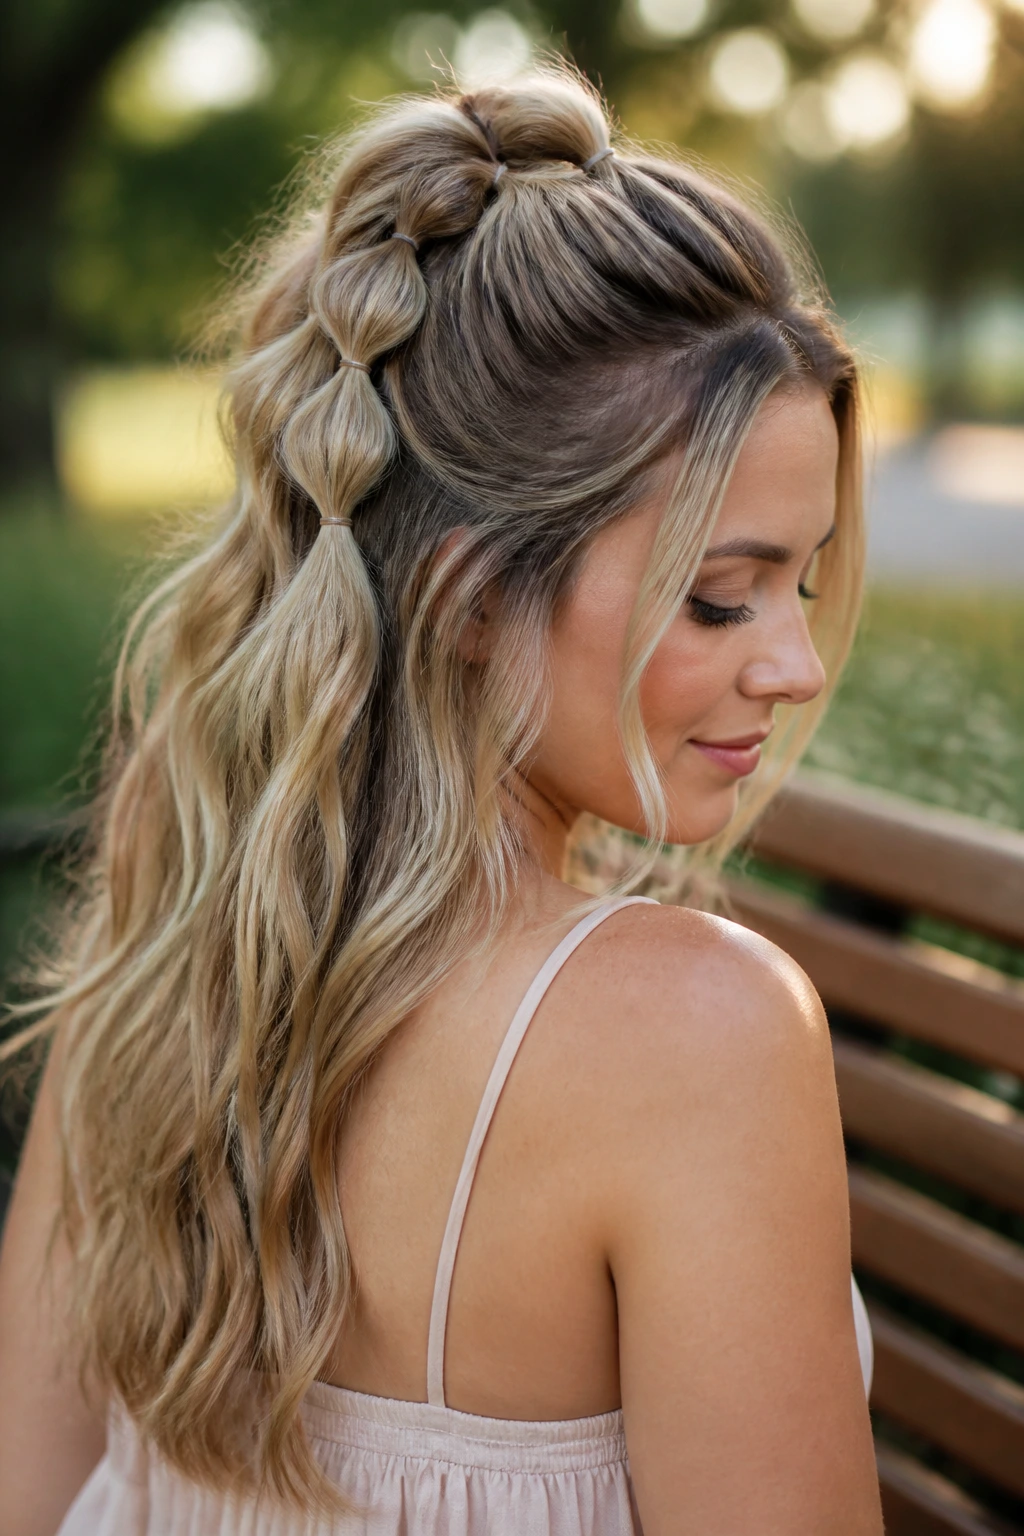
If your hair is long enough for a ponytail but doesn’t hold heavy braids well, this is a smart middle ground. The bubbles add shape, and the half-up placement keeps the lower lengths free.
Take the top half from temple to temple, secure a ponytail, then add a few small elastics down the tail every couple of inches. Tug each section out gently. You can leave the lower hair straight, waved, or bent under at the ends. Fine hair often looks better when the style uses contrast like that — controlled on top, freer below.
23. Low Rolled Tuck
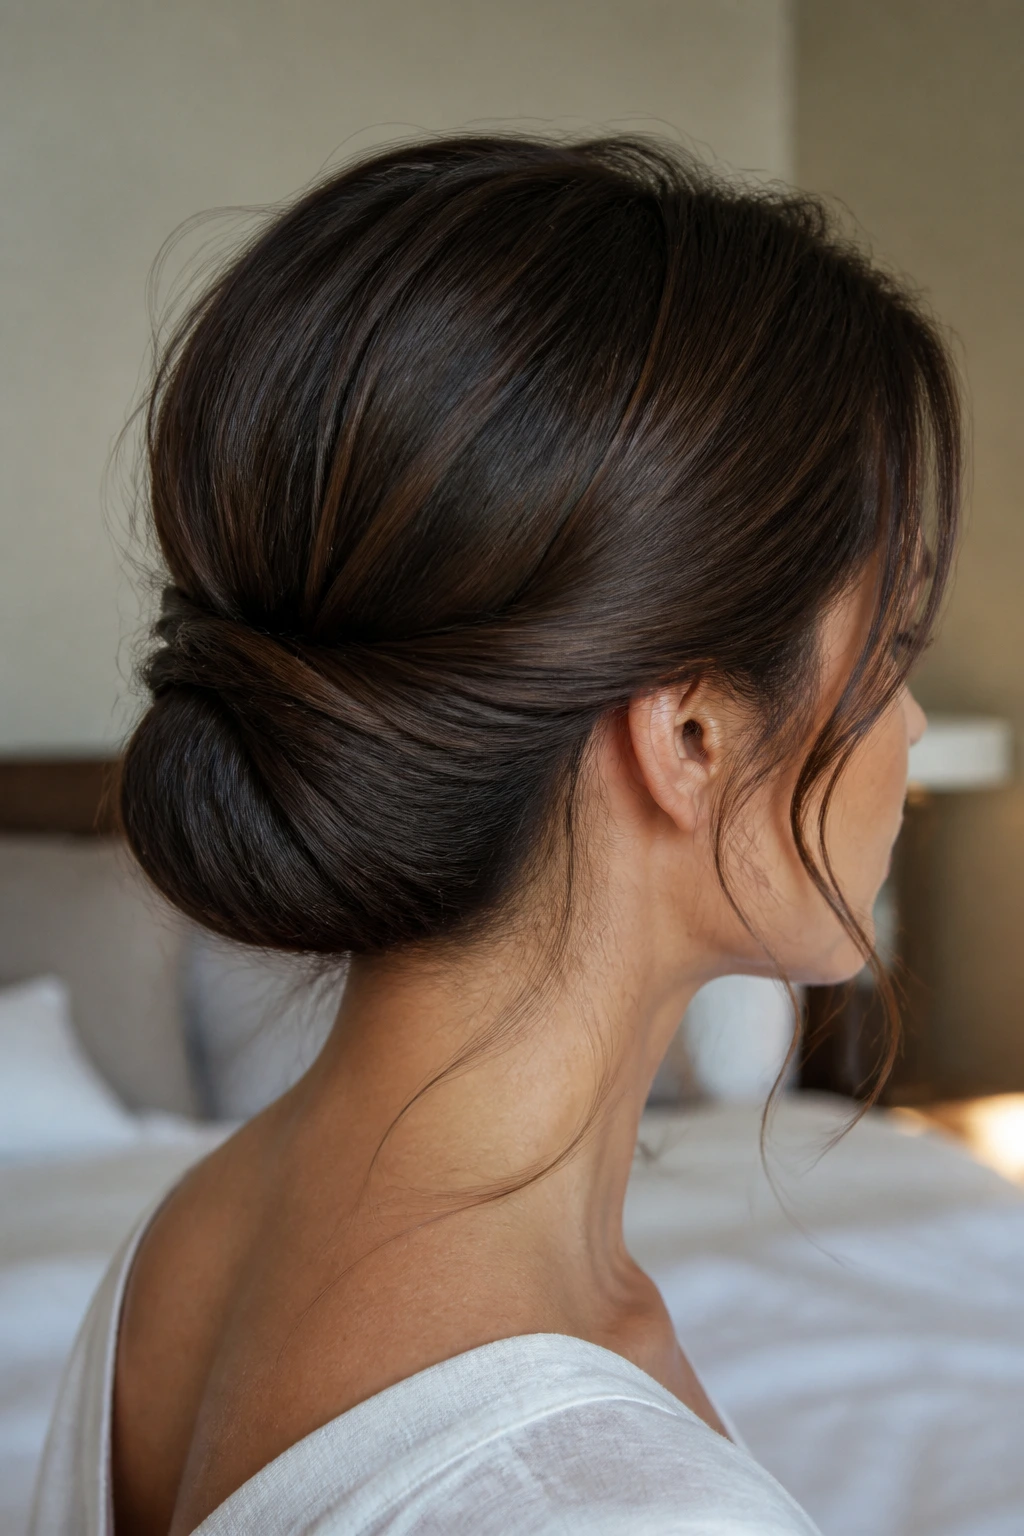
This style is almost absurdly simple, which is why it deserves a spot here. A rolled tuck uses the full length of long hair without demanding bulk, and it holds well when the hair has a little grip.
Create a low ponytail, open the hair just above the elastic, and roll the tail upward into the hollow between the head and the rest of the hair. Pin along the roll from the inside edge first. It works especially well with hair that has been lightly waved the night before. The tiny bend helps the roll stay tucked instead of slipping straight out.
24. Cascading Twisted Ponytail
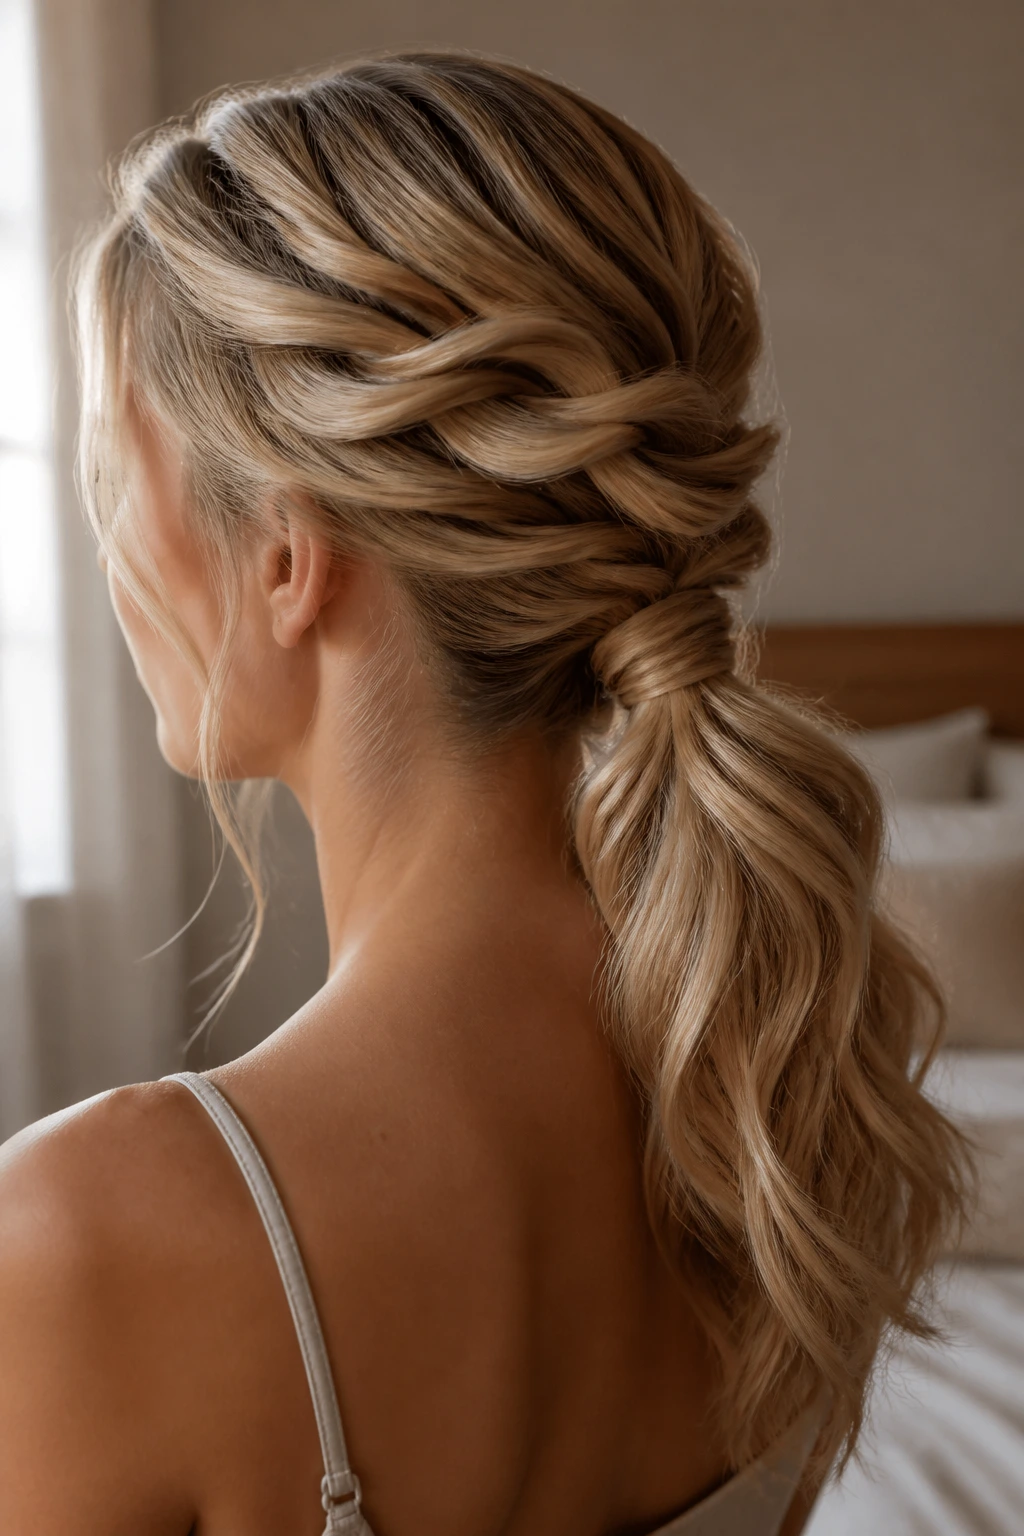
This one gives you movement, but controlled movement. Several twisted sections feed into one low ponytail, which creates layers of shape without forcing the hair into a tight braid.
Take two or three sections from the sides, twist them backward, and gather them with the back section into a ponytail. Wrap one small piece around the elastic to hide it, then lightly tug the twists so they sit like soft ribbons. It’s a nice option when you want the feel of an updo but not the full commitment of a bun.
25. Chain-Link Ponytail
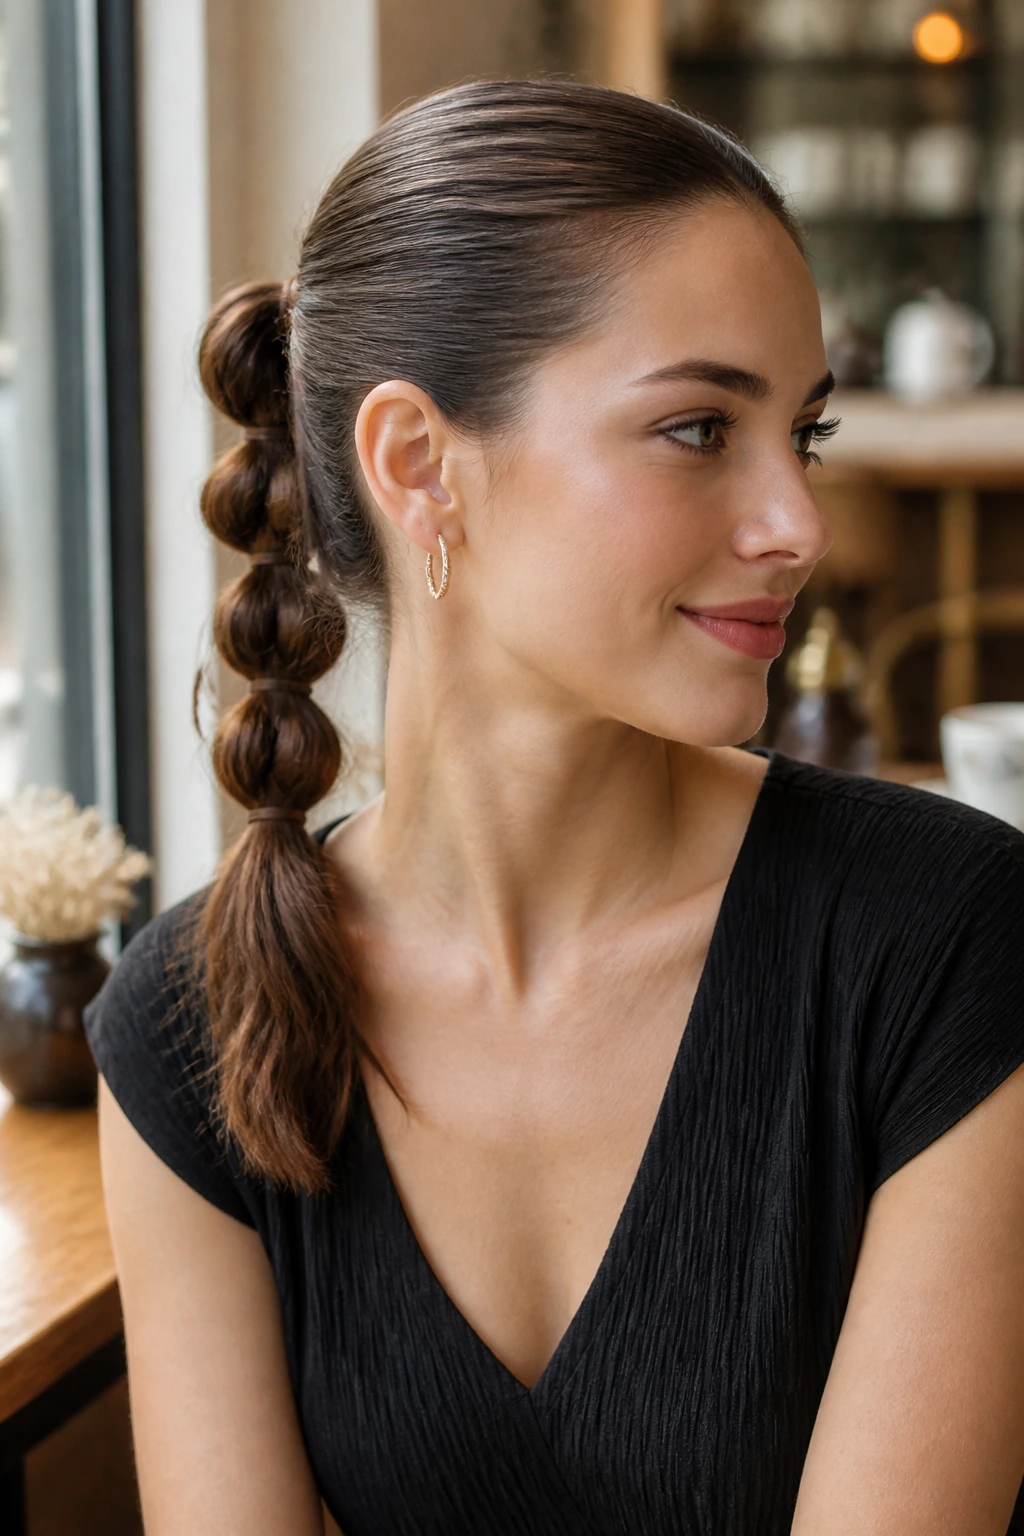
Chain-link ponytails work because the sections link rather than stack. That gives long thin hair a more architectural look, which can be a blessing when the ponytail itself isn’t naturally thick.
Divide the length into a few even sections and fold each one through the next to create linked loops. Secure each loop with a tiny elastic if your hair is especially silky. This style likes precise parting and a clean surface at the crown. It’s less forgiving than a bun, but when it lands well, it looks sharp.
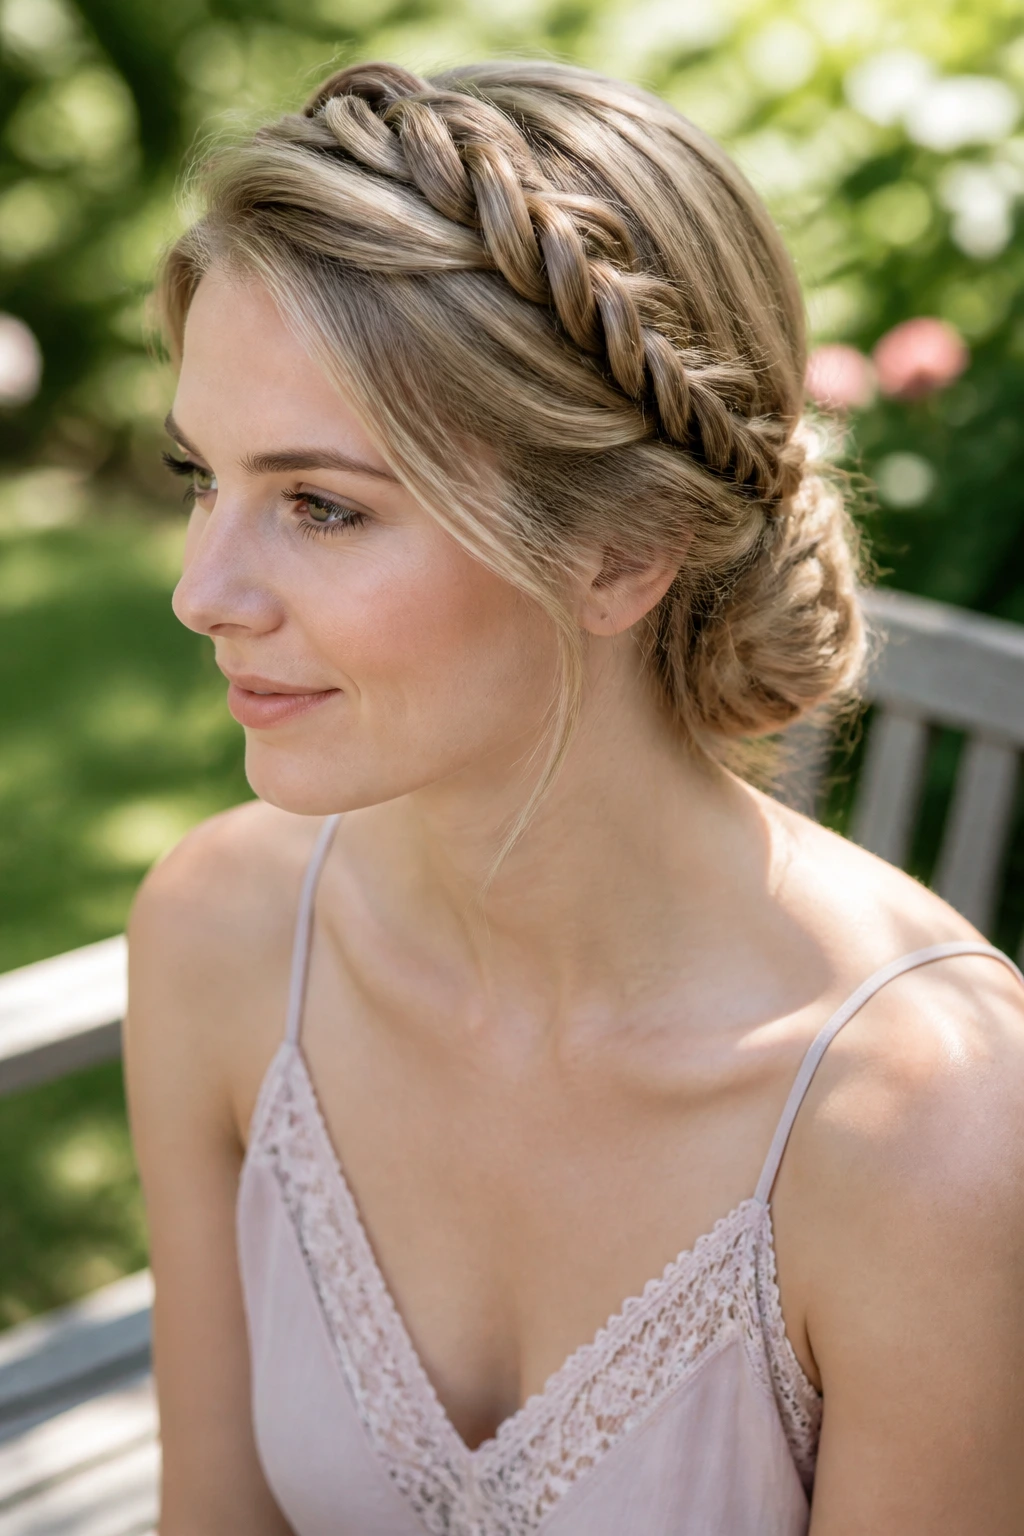
26. Braided Crown Into Low Bun
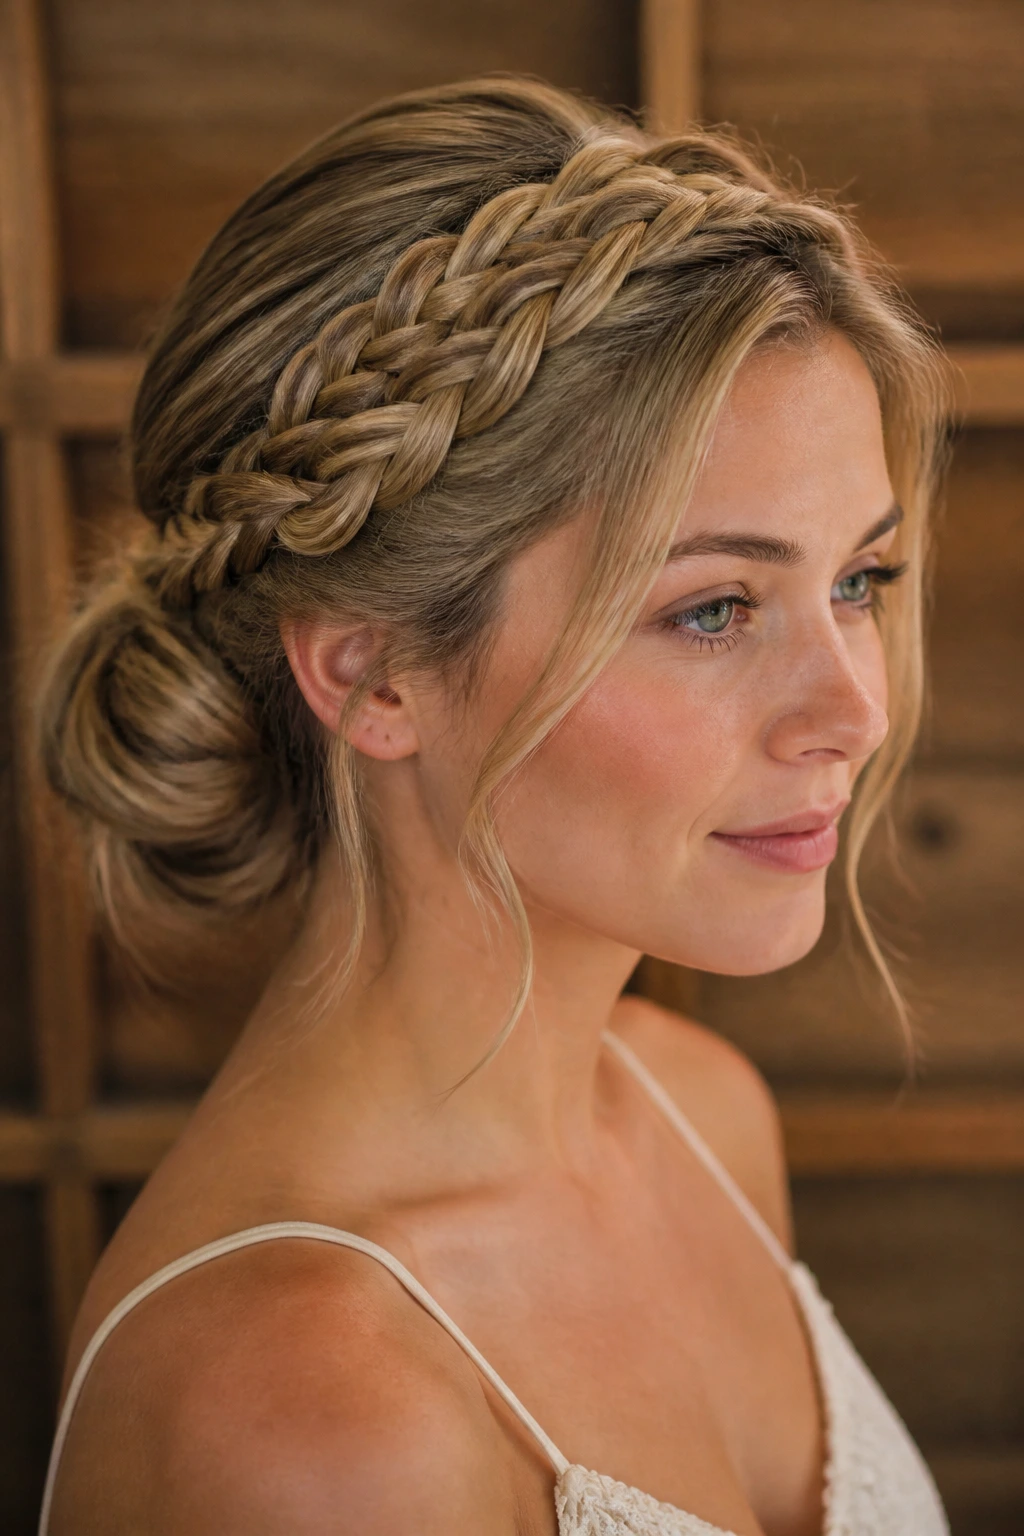
A braided crown gives the top a frame, while the low bun keeps the rest grounded. That balance matters for thin hair, because too much height can make the top look airy in a bad way.
Braid along the hairline from one side to the other, then gather the remaining length into a bun at the nape. Tuck the braid ends under the bun so there’s no obvious seam. If your hairline is soft or uneven, this style is forgiving. The braid acts like a border, and borders are useful when the center is a little sparse.
27. Ballerina Bun With Hidden Pad
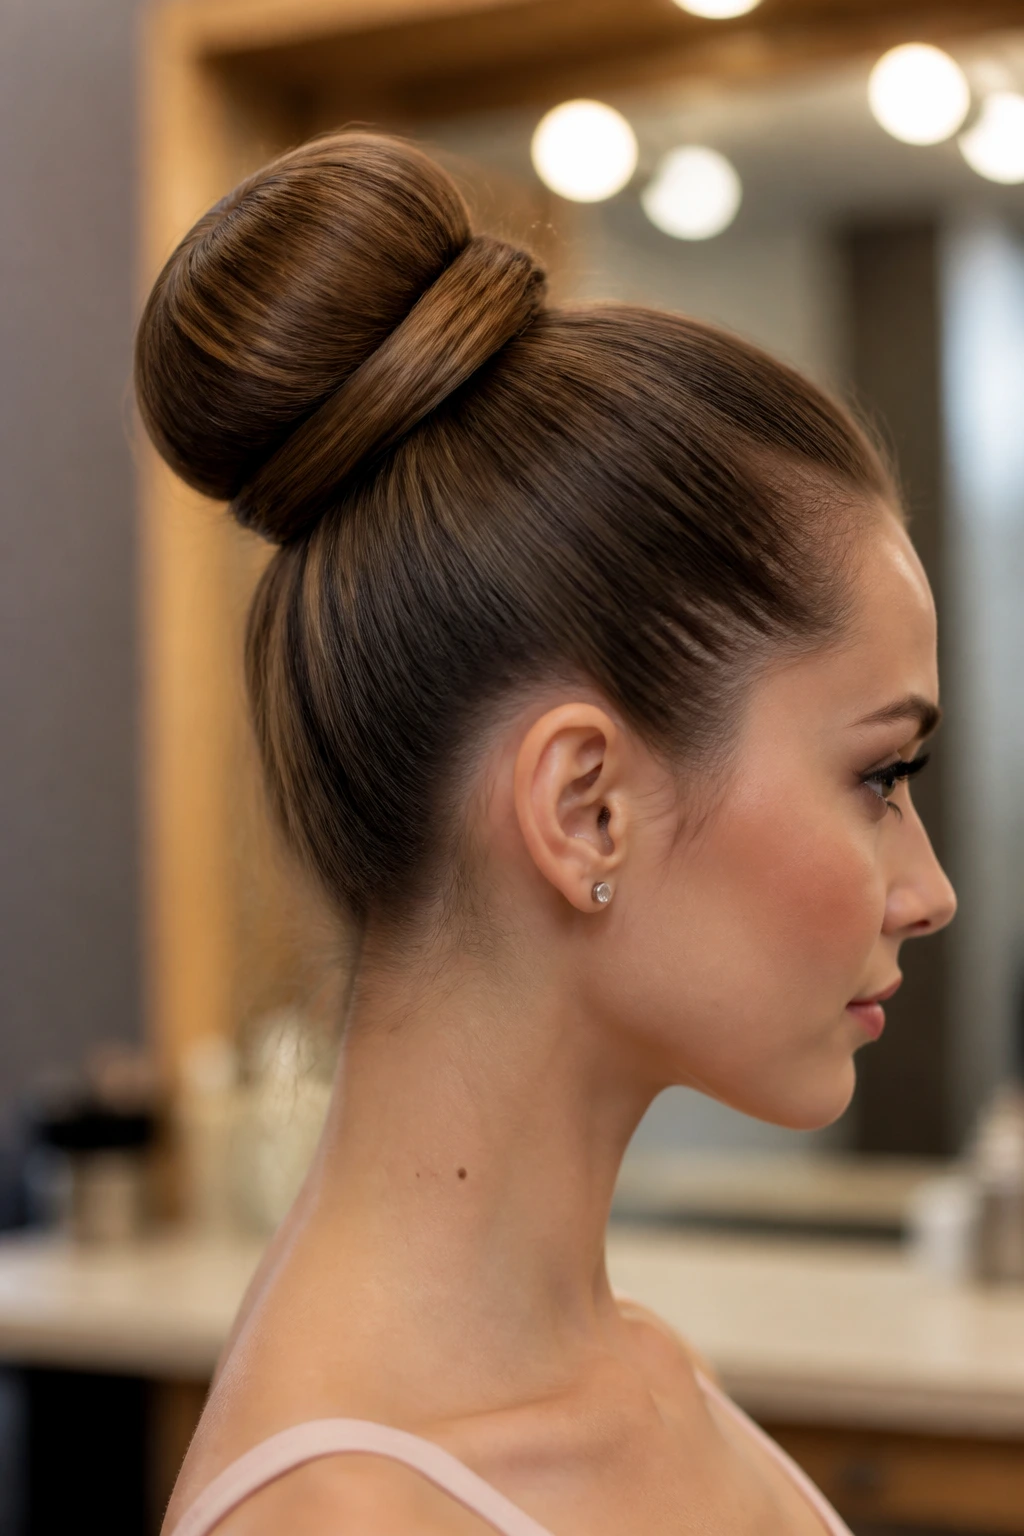
Yes, a bun pad can help. No, it does not have to look fake. On long thin hair, a hidden pad gives the bun a rounder shape and stops the style from collapsing into a flat coin.
Wrap the hair around a small donut or bun pad that matches your color as closely as possible, then smooth a thin layer of hair over it. Pin the edges underneath, not across the top where they can show. This style is best when the bun sits firmly at the crown or slightly lower; if it drifts too high, the base can start to look empty.
28. Double Twist Low Bun
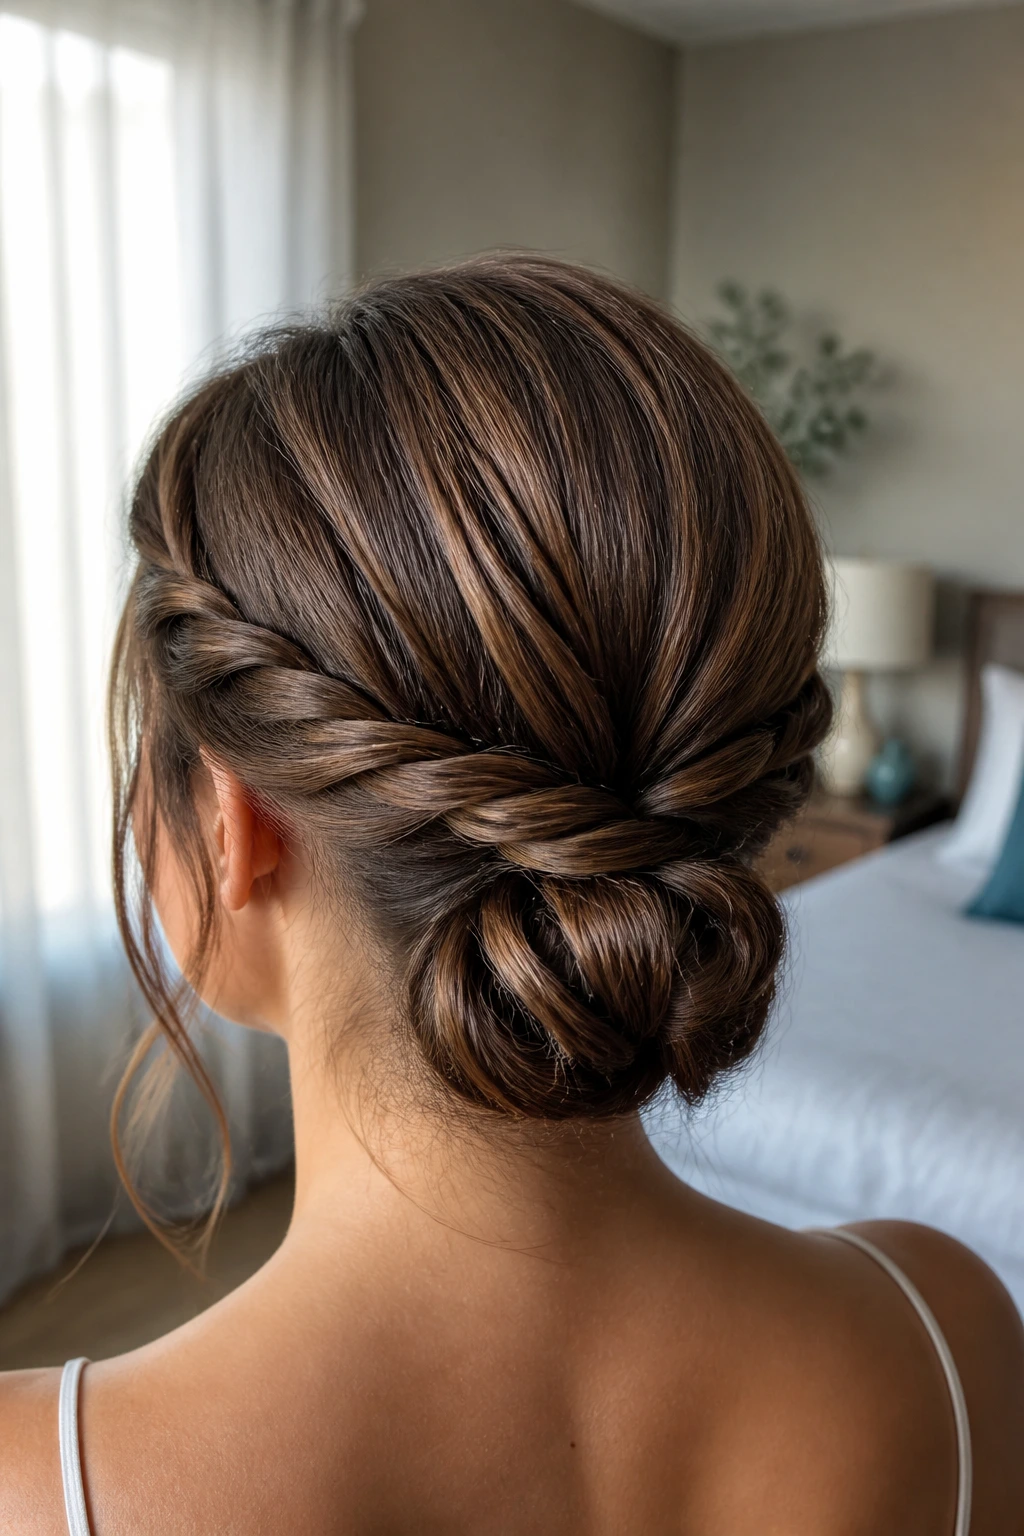
Two twists feeding into one bun create a fuller base than a single twist ever could. That’s the whole reason it works so well for long thin hair.
Part the hair down the middle or slightly off-center, twist each side toward the nape, then wrap both twists together into a low bun. Secure the twist lines so they sit side by side, not stacked on top of each other. The result looks more substantial because the eye sees several shapes at once — a trick thin hair appreciates.
29. Side Knot Ponytail
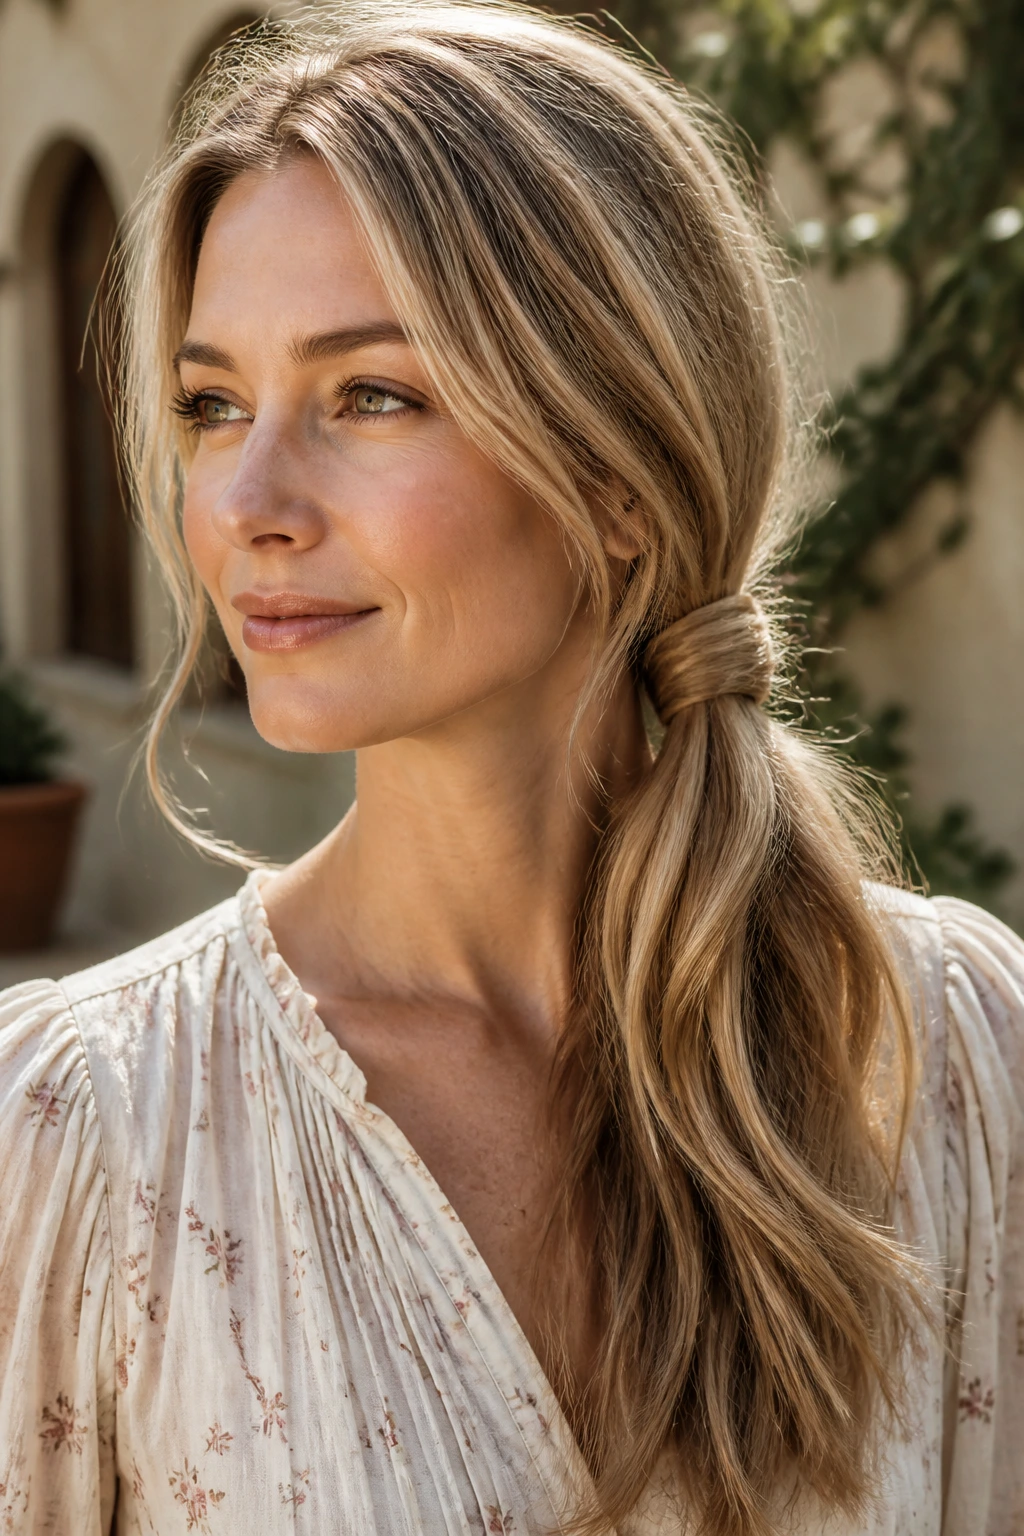
A side knot ponytail gives you a bit of movement and keeps the overall shape relaxed. It’s especially good when the hair falls flat at the back, because the knot shifts the visual focus off the center line.
Gather the hair slightly behind one ear, tie it into a low side ponytail, then knot the length once or twice and pin it. Let the tail drape over the shoulder or tuck it into the knot depending on the mood. It’s not a severe look. That’s the point. Fine hair often looks better when the style doesn’t demand total perfection.
30. Crown Braid Ponytail
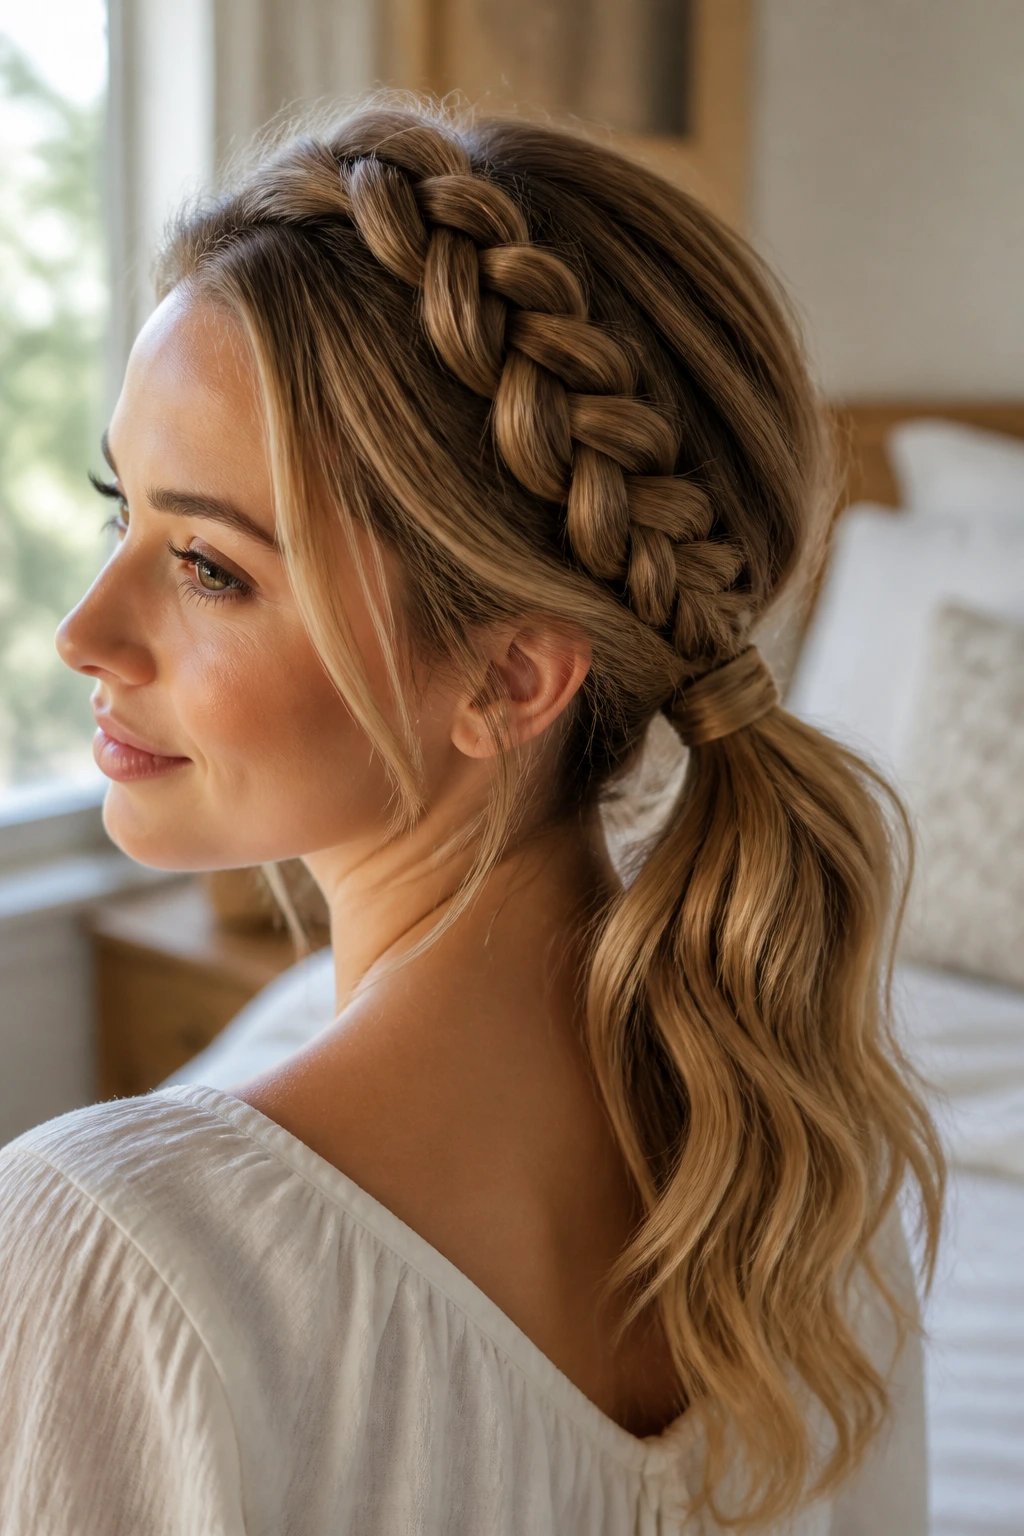
A crown braid leading into a ponytail is one of the easiest ways to make thin hair look styled from every angle. The braid frames the head, and the ponytail keeps the length visible instead of stuffing it all away.
Braid along the top of the head from one side to the other, then let the rest fall into a low or mid ponytail. Add a small wrap of hair around the elastic for polish. If the braid feels too narrow, pull the outer edges wider with the tip of a tail comb. Small change, big payoff.
31. Ribbon-Laced Updo
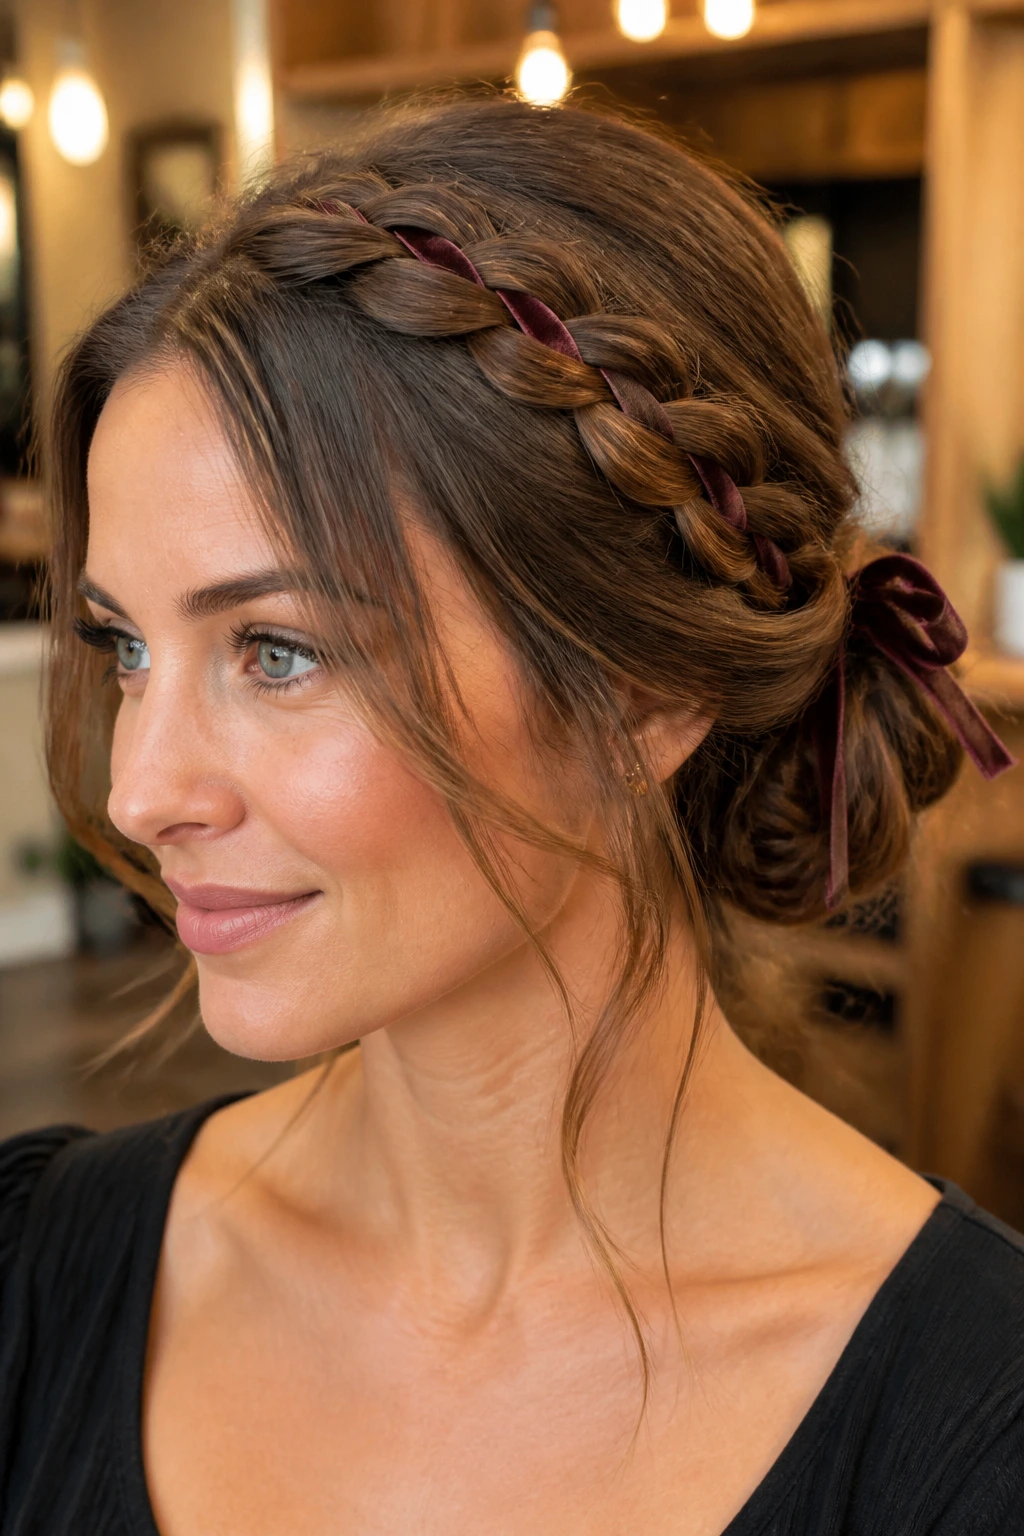
A ribbon changes the whole character of a style without asking more of the hair. That’s why it’s such a good match for long thin hair. The ribbon gives the eye something to follow, which makes the hair seem fuller by comparison.
Choose a narrow velvet or satin ribbon and weave it through a braid, knot it around a bun, or tie it through a ponytail base. Keep the ribbon snug, not strangling tight. A ¼- to ½-inch ribbon is enough for most styles; anything wider starts to compete with the hair instead of supporting it.
32. Four-Section Rope Bun
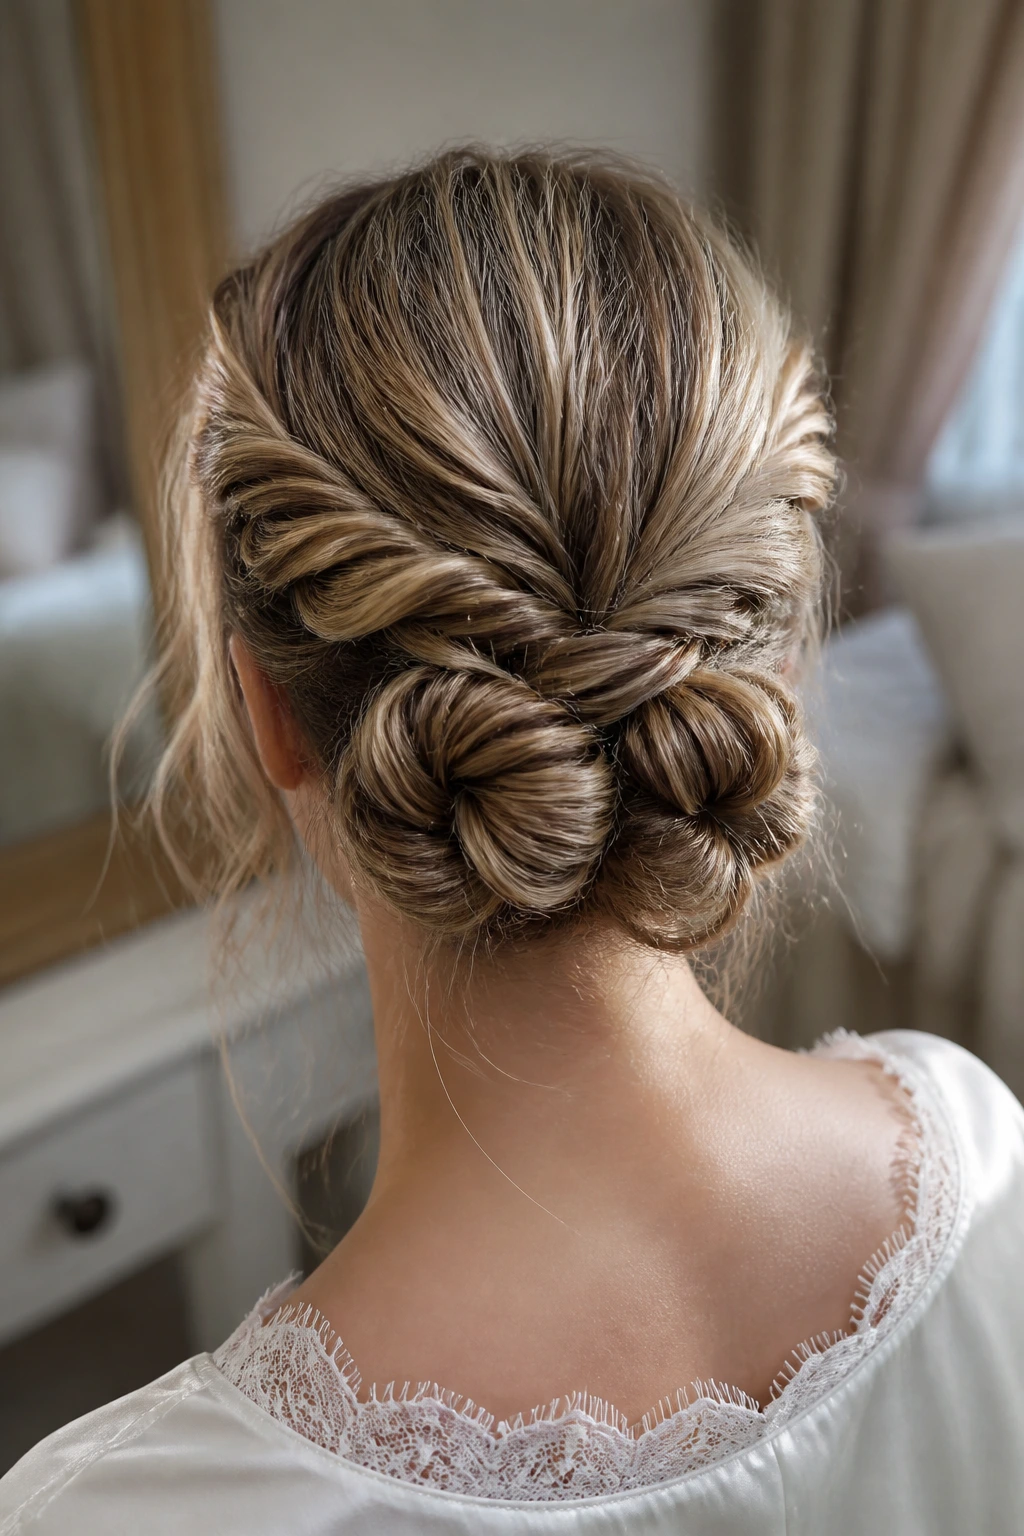
This is one of the better ways to make a small amount of hair look deliberate. Four twisted sections create a bun with a lot of surface texture, and texture is what keeps fine hair from reading as flat.
Split the hair into four loose sections, rope-twist each one, then coil them together into one bun at the nape. Pin each quadrant as you go so the bun doesn’t loosen while you finish. It sounds fussy, but the result is more dimensional than a standard single twist. If your hair is layered, this is a forgiving style because the twists hide shorter ends.
33. Twisted Pony Chignon
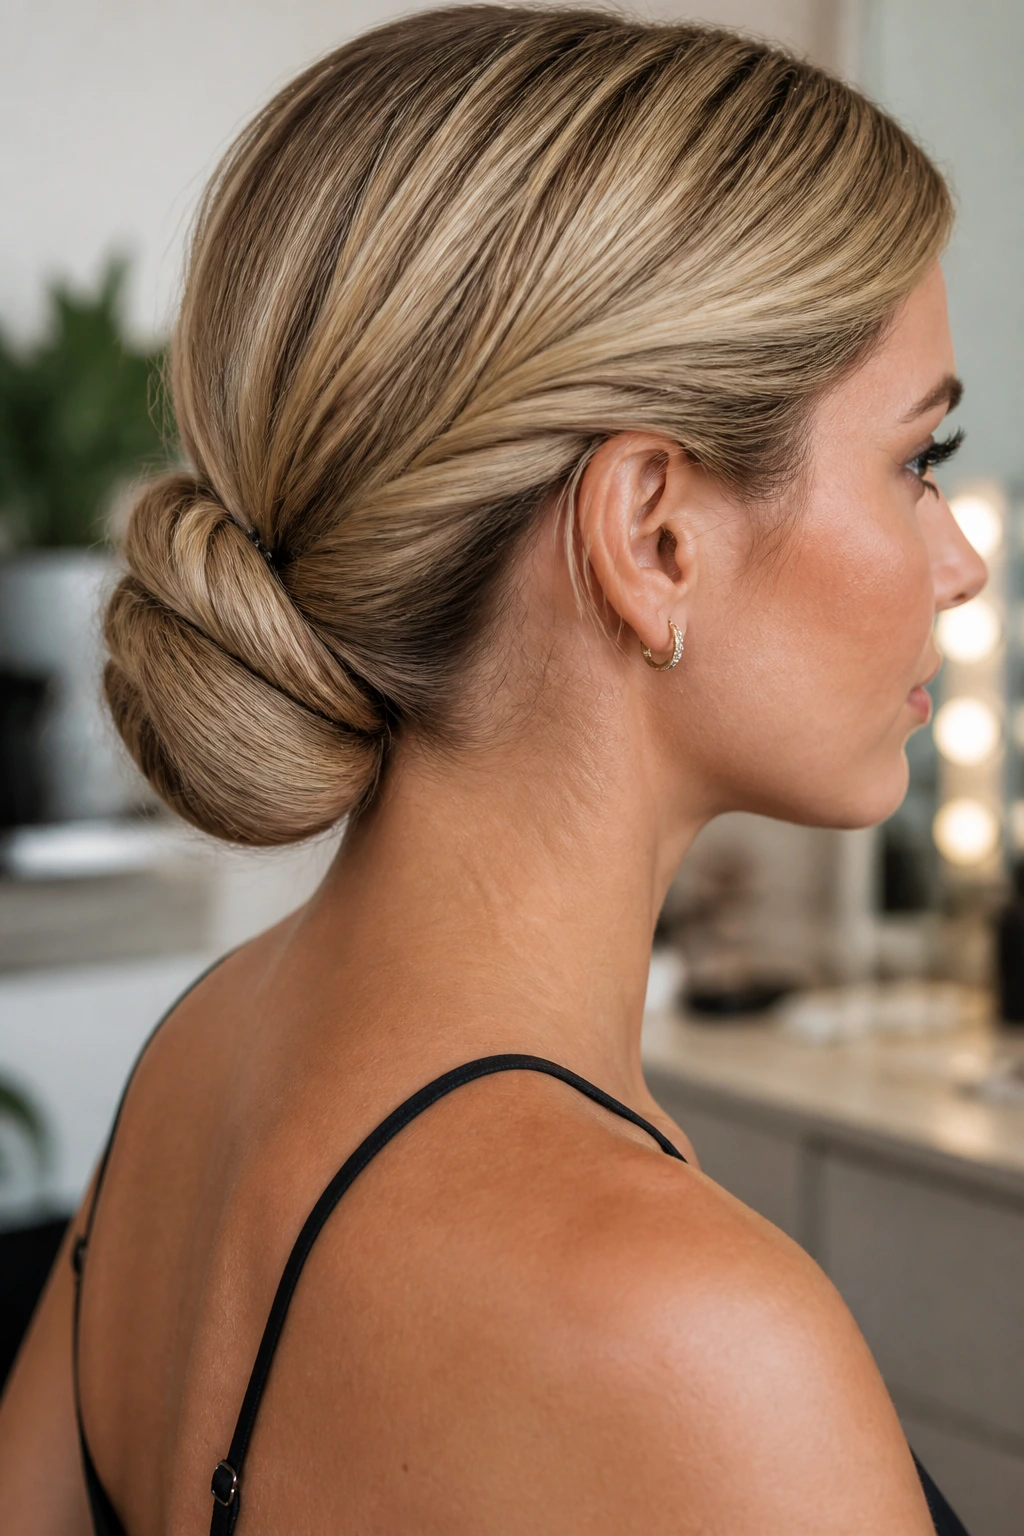
A ponytail can turn into a chignon with one extra move, and on long thin hair that extra move matters. The twist adds density, while the low placement keeps the shape calm and controlled.
Make a low ponytail, split it into two pieces, twist them together, and fold the twist upward into a round chignon. Pin from the bottom edge first. The style works best when the ponytail sits at the nape, not halfway up the back of the head. Lower placement means less visible tension, which is a nice thing when the hair is fine.
34. Half-Up Knot Halo
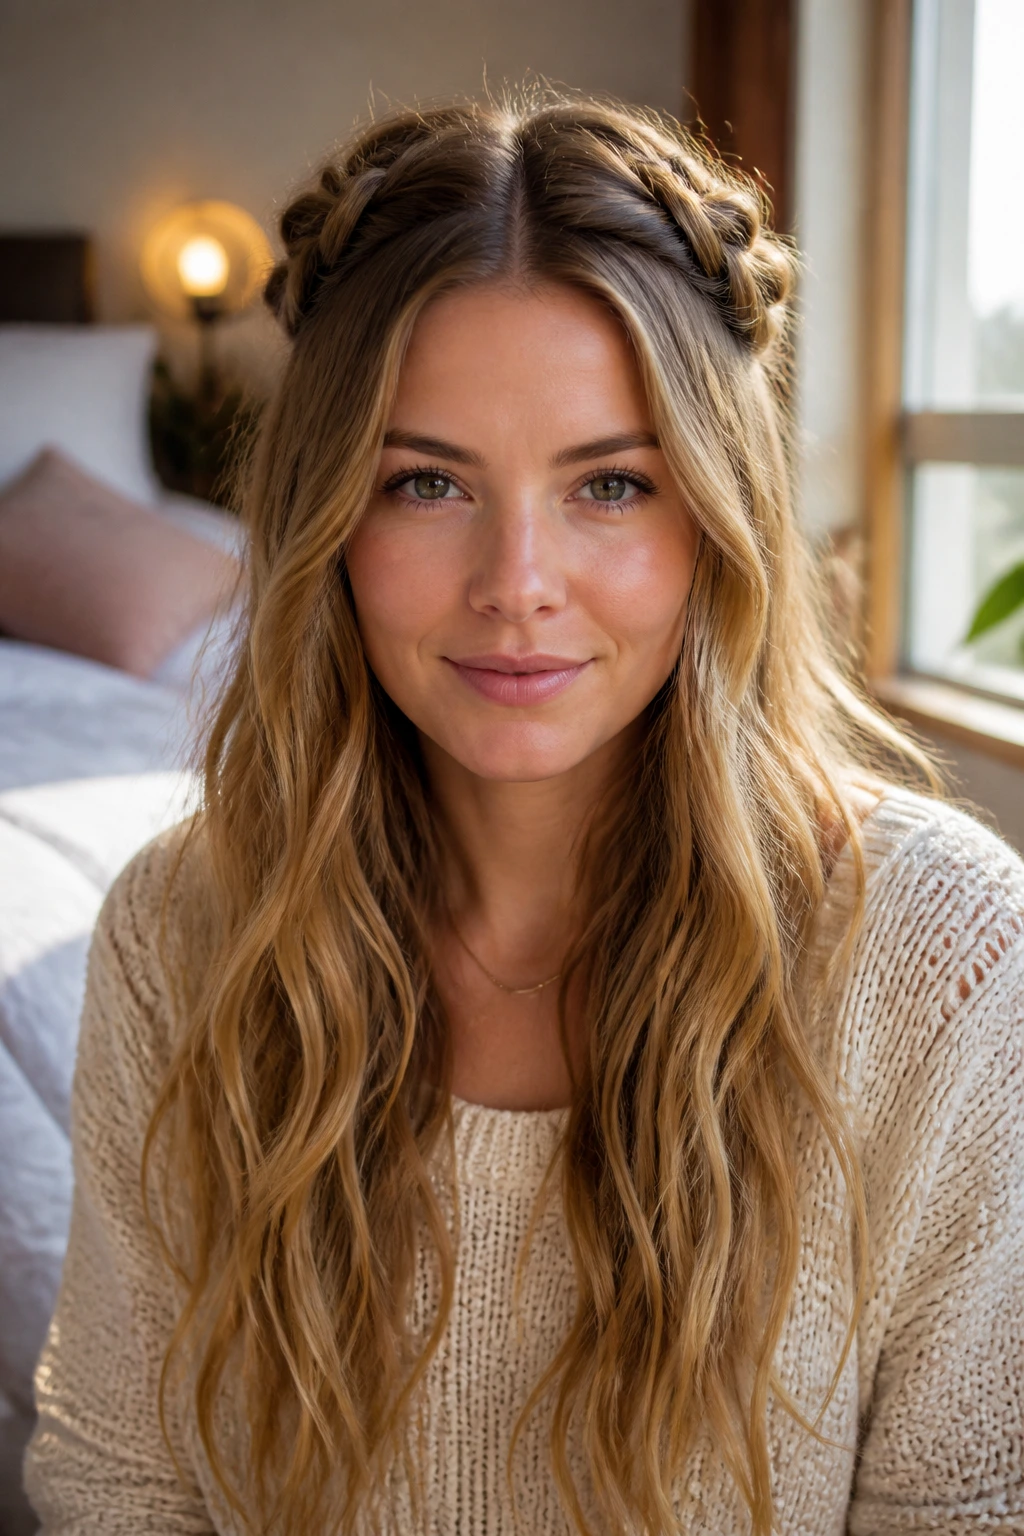
This one sits somewhere between playful and polished. A small knotted halo across the crown gives the front enough structure, while the rest of the hair stays down and can carry a little wave or bend.
Take a section from each temple, knot them once at the back, then repeat with another pair beneath it if the hair is long enough. Pin the knots flat so they form a soft band. It’s a good fix for hair that separates at the crown, because the knot line disguises the sparse spots while leaving the rest loose.
35. Woven Pin Bun
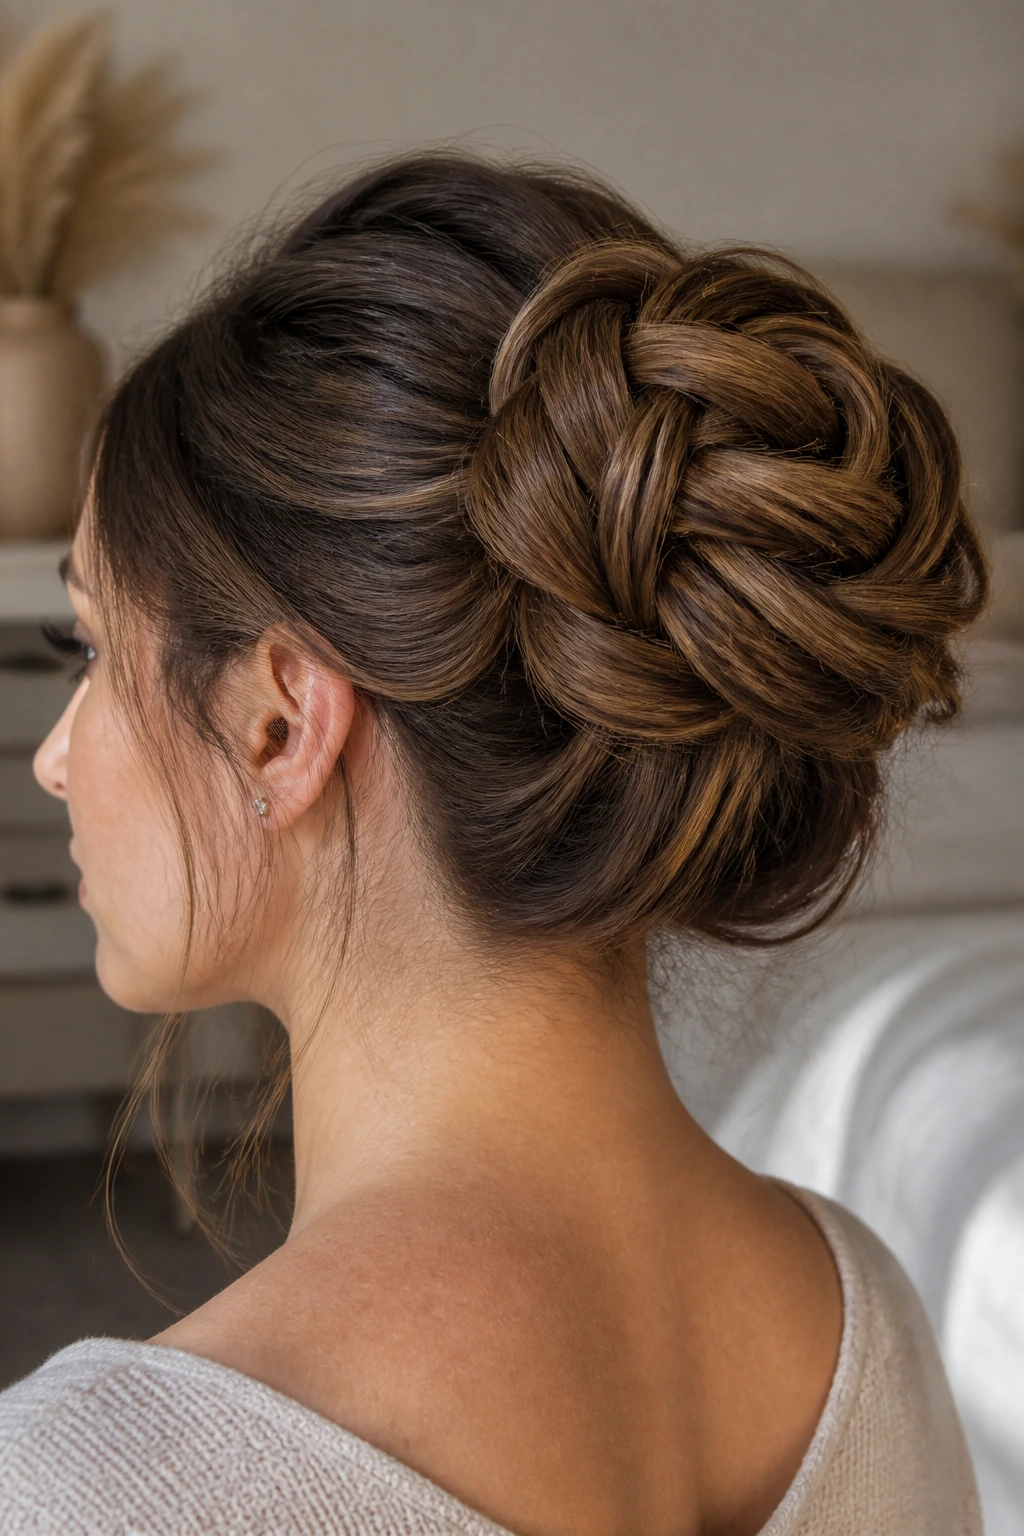
A woven pin bun is the style I’d pick when the hair is too fine for a heavy bun but long enough to build a pattern. Instead of one thick knot, you layer small sections and pin them in a woven circle, almost like stitching hair into place.
Divide the hair into several narrow sections, fold each one over the next, and secure with U-pins as you build the bun outward. Keep the center flat and the outer edge a little raised. It takes a few more minutes than a basic twist, but the finished shape looks much fuller because your eye reads the weave, not the strand count.
Why Long Fine Hair Needs a Different Kind of Structure
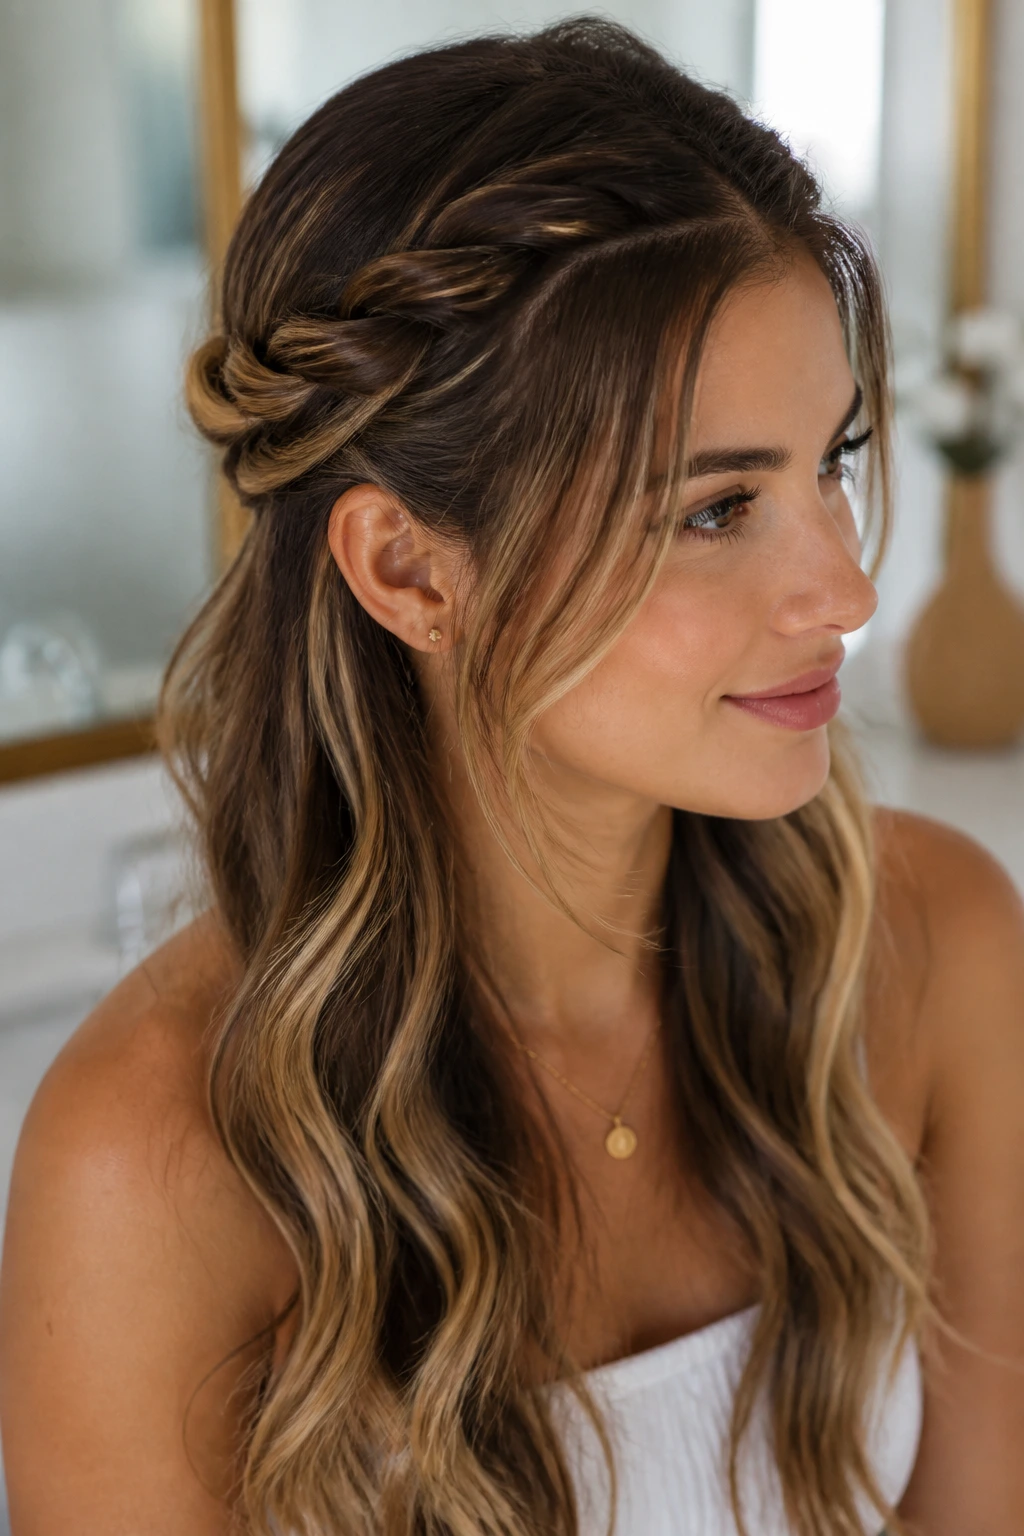
A lot of bad updo advice assumes more hair automatically means more control. Long thin hair works in the opposite direction. It needs smaller anchors, tighter bases, and shapes that do not collapse under their own weight by the time you’ve found your shoes.
The best styles use friction as much as volume. A tiny bit of grit from dry shampoo, a bend at the roots, or a braid that crosses over itself gives pins something to bite into. Smooth hair can still work, but it needs help, and that help usually comes from prep, not brute force teasing.
I’m also a fan of low placement for fine hair. High buns can be lovely, but they can expose the crown if the hair is sparse there. A nape knot, a side chignon, or a braided halo tends to hold its outline longer because gravity has less leverage on it.
Essential Tools for These Styles
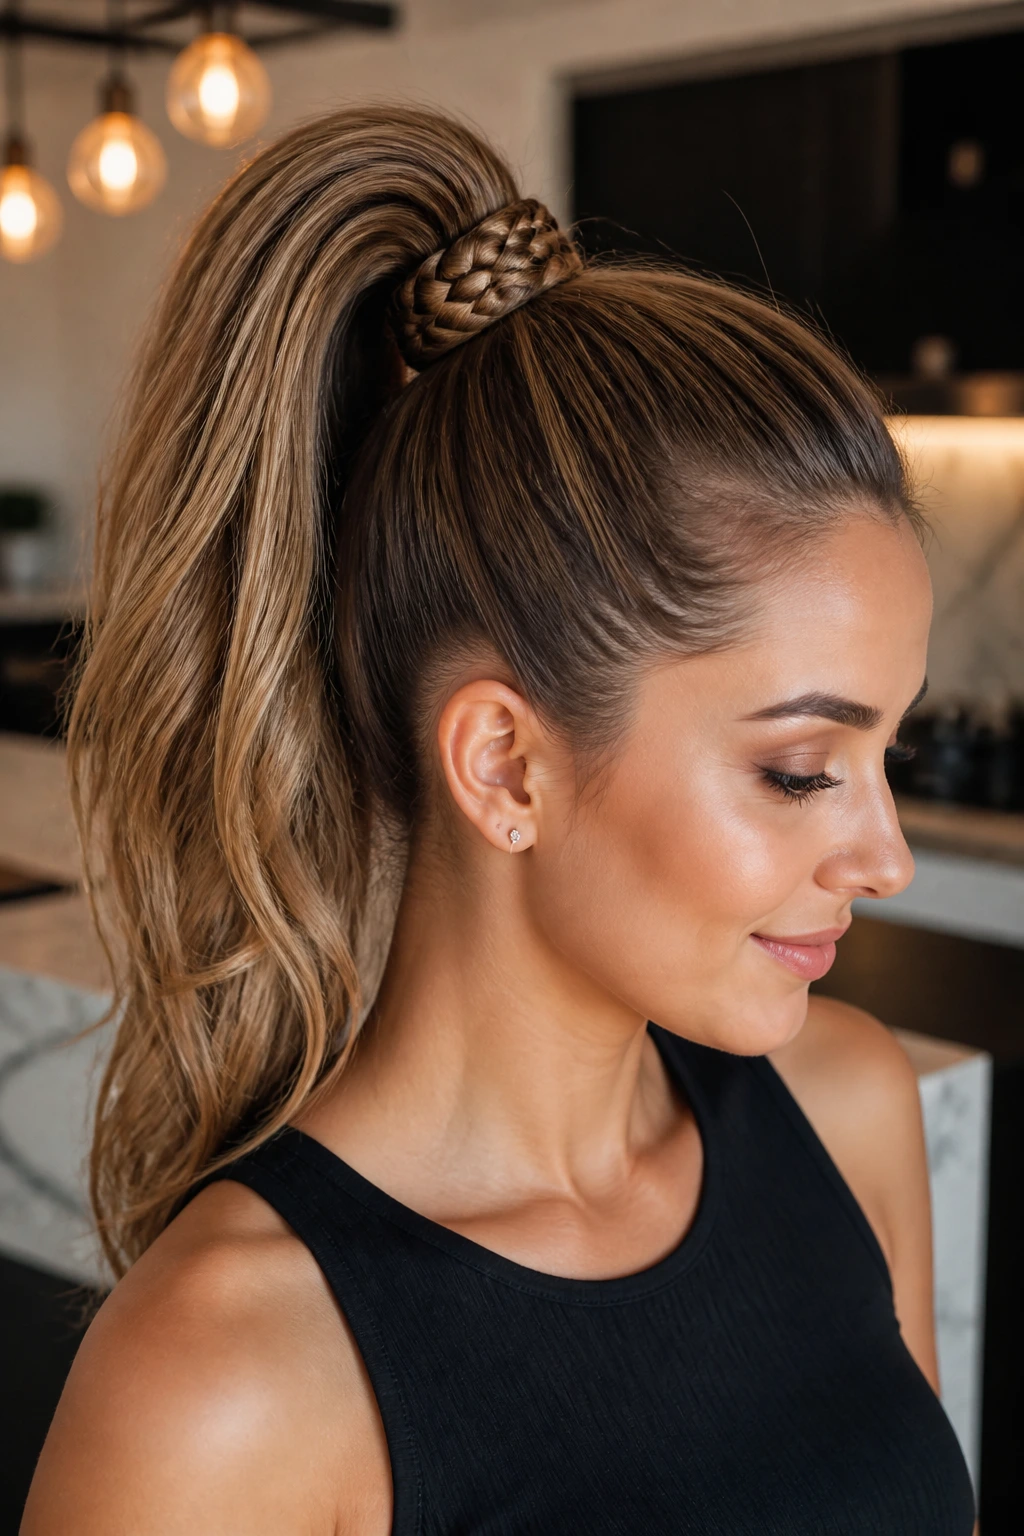
- Fine-tooth tail comb: Best for clean parts, tiny sections, and lifting a few crown strands without wrecking the surface.
- Soft bristle brush: Helps smooth the top layer before pinning, especially for sleek buns and twists.
- Small clear elastics: These disappear better than chunky ties and hold small sections more securely.
- Bobby pins in two sizes: Short pins work for hidden anchors; long pins are better for buns that need to catch more hair.
- U-pins: Useful for chignons, rolls, and woven buns because they hold shape without flattening it.
- Texturizing spray: Gives fine hair a little tack so pins do not slide right out.
- Dry shampoo: Useful even on clean hair when you need grip at the roots.
- Teasing brush or fine comb: Best for a small lift at the crown, not a full rat’s nest.
- Hair net or bun pad: Optional, but helpful for ballet buns and wrapped knots that need shape support.
- Mini claw clip or sectioning clips: Keeps side pieces out of the way while you build the style.
Smart Prep Tips That Make Fine Hair Behave
Long thin hair usually looks better when it is not freshly washed and slippery. If you washed it that morning, a few sprays of dry shampoo at the roots can change the whole story. Work it in, wait 30 seconds, then brush the excess through so the texture feels soft instead of dusty.
Heat styling helps, but not in the heavy, barrel-curl everything sense. A small bend through the mids and ends gives twists and buns something to sit on. Even a quick pass with a 1-inch iron, left in for 5 to 8 seconds per section, can stop the ends from slipping straight out of a knot.
Product choice matters more than volume claims. Look for lightweight mousse, root lift spray, and texturizing mist rather than glossy serums near the scalp. A pea-sized amount of serum on the very ends can tame flyaways, but too much anywhere near the roots makes fine hair slide out of pins like it was coated in oil.
How to Wear These Updos Without Overthinking the Rest
Presentation: Keep the finish aligned with the shape. Sleek styles want a clean part and smooth temples; softer styles look better with a few pulled-out pieces around the ears and a tiny bit of bend in the ends.
Accessory Pairing: Small hoops, studs, pearl pins, and narrow ribbons all work with these looks because they do not fight the size of the hair. Chunky clips can overwhelm fine hair fast, so use them sparingly unless the style is intentionally playful.
Neckline Pairing: Low buns and twists sit nicely with open necklines, square necks, and collarbones on display. Higher knots and ponytails tend to work with crew necks and higher collars because they clear the fabric and keep the back from feeling crowded.
Occasion Fit: A braided halo or French twist feels right for formal settings; a bubble ponytail or side knot handles casual days; a woven bun or rope-twist crown sits somewhere in the middle and can move either way with the right accessory.
Extra Tweaks That Add Shape Without Adding Fuss
Texture Boost: Dust a little dry shampoo at the roots, then mist texturizing spray through the mid-lengths before you start pinning. That combination gives fine hair a grippy, matte surface that holds braid loops and bun edges better than silky-clean strands.
Customization: If your hair is very layered, leave a few shorter pieces out on purpose around the temples and nape. Those pieces soften the outline and keep the style from looking patchy where layers would otherwise pop loose.
Accessory Swap: One silk scarf or narrow ribbon can change a basic bun into something that looks finished. Tie it around the base of a ponytail, weave it into a braid, or knot it around a low chignon for a quick shift in mood.
Low-Effort Version: On days when you do not want to fight the crown, go lower. A nape twist, side knot, or tucked roll usually lasts longer than a tall bun on thin hair, and it takes less time to fix if one pin starts to slip.
Mistakes That Make Fine-Hair Updos Fall Apart
Teasing the whole head is the fastest route to a style that looks big for 10 minutes and frizzy for the rest of the day. The fix is to tease only where the style needs lift — usually a 1- to 2-inch strip at the crown or just above the ponytail base.
Using elastics that are too large or too stretchy is another common problem. They let the hair move, and fine hair needs tension, not bounce. Small clear elastics or tight mini bands hold the sections more securely and leave less bulk under the surface.
A lot of people also pin the visible top layer instead of the hidden base. That feels secure at first, but the style slides because the anchor point was never strong enough. Put the first pins into the underside of the knot, the ridge of the twist, or the braid line itself.
Overloading the hair with serum is sneaky trouble. The surface looks smooth, sure, but the pins skate right off. If you want shine, keep it on the ends only and save the roots for dry shampoo, texturizing spray, or nothing at all.
Variations and Adaptations to Try
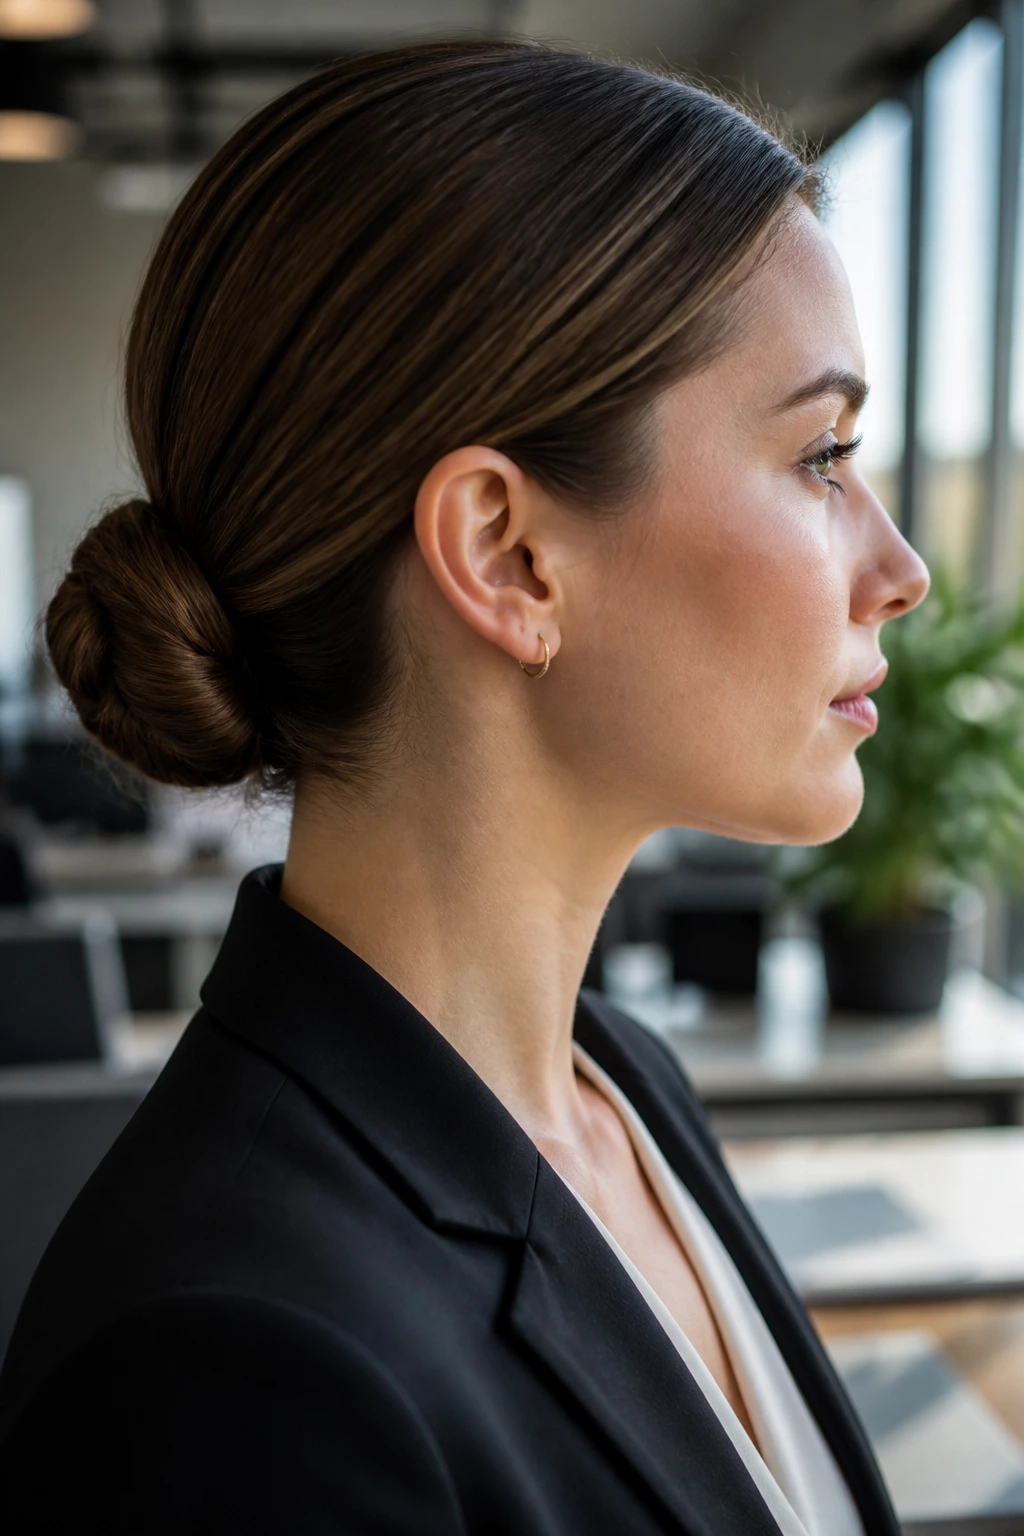
Extra-Sleek Office Version: Choose the low chignon, ballerina bun, or French twist and keep every flyaway brushed flat. Use a lightweight hairspray at the end, but only after the pins are fully in place.
Soft Romantic Version: Pull out a few face-framing strands, loosen the outer braid loops, and add a ribbon or pearl pins. The goal is shape with a little movement, not a rigid shell.
Very Fine Hair Fix: Add a bun pad, hair net, or a small clipped-in bump under the crown. These tools give the style a base without making the actual hair do all the work.
Second-Day Hair Version: Skip extra washing. Work with the hair as it is, add dry shampoo to the roots, and build either a bubble ponytail, knotted pony, or woven bun. Day-old texture usually holds better than freshly cleaned hair.
High-Neck Outfit Version: Go for low styles — chignons, rolls, side knots, or tucked buns. They keep the back of the neck clear and make the outfit feel finished instead of crowded.
How to Keep the Style Fresh All Day and Into Tomorrow
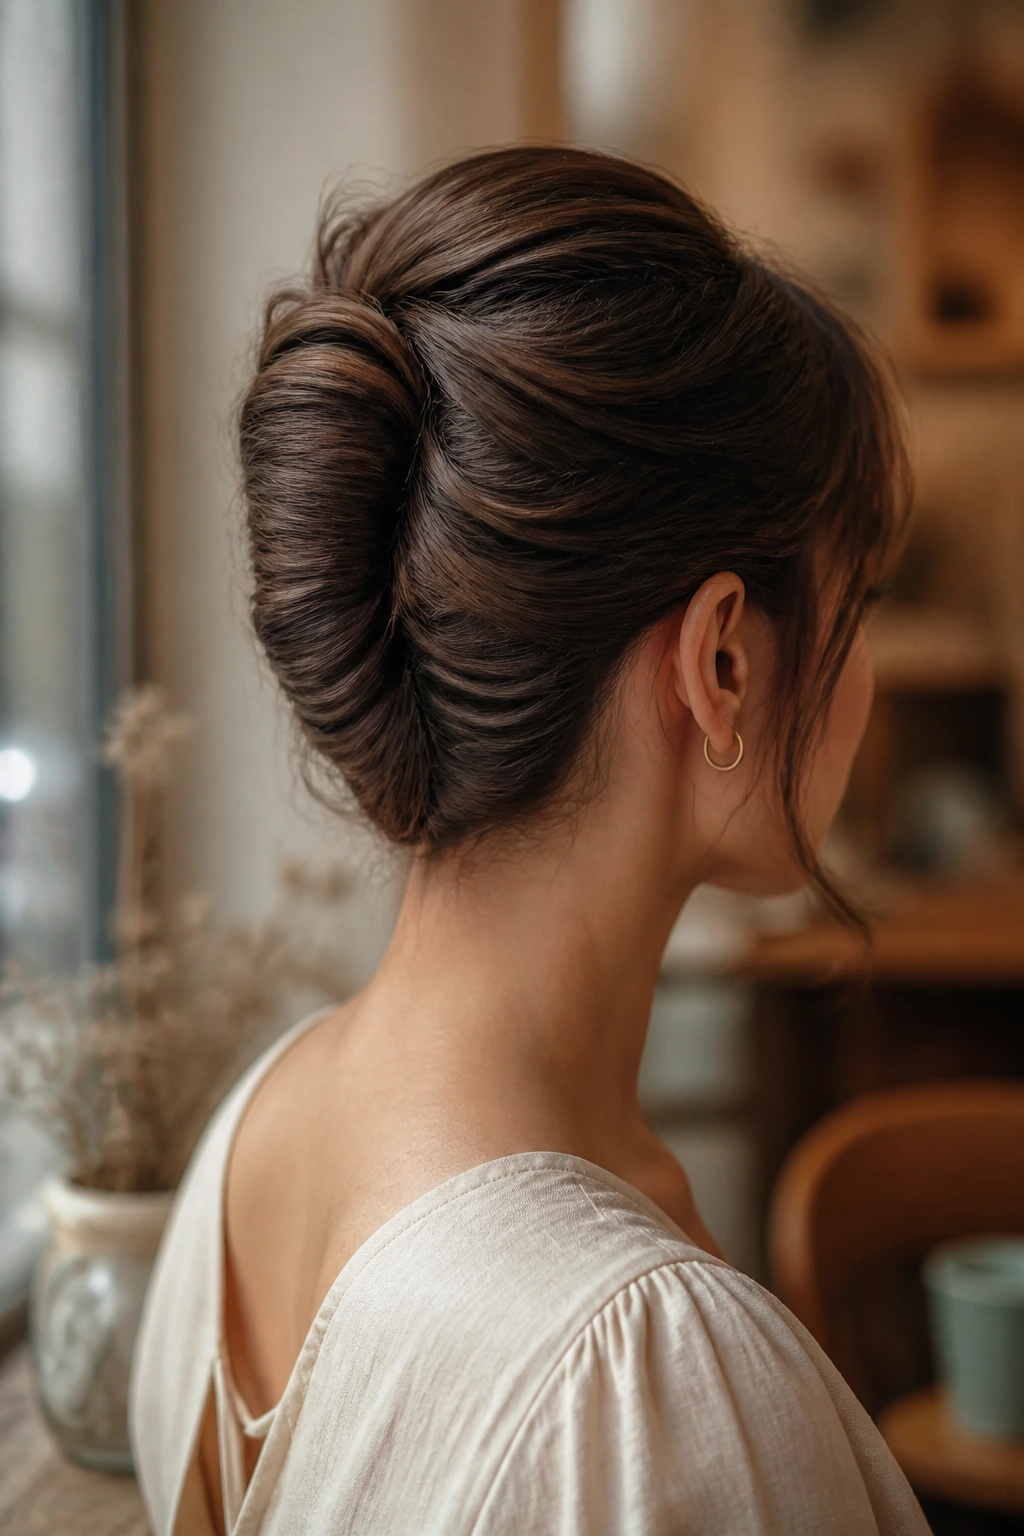
Most of these updos hold better if you do not touch them every time you pass a mirror. Fine hair loosens in tiny ways, and repeated smoothing usually makes it looser. If a section shifts, press it back into place once and leave it alone.
For overnight wear, a loose silk scarf or a satin bonnet helps a lot. It cuts down on friction, which means the crown stays smoother and the pins are less likely to snag. A low bun, twist, or wrapped ponytail is easier to sleep in than a high structure, so if you know you’ll wear it into the next morning, start low.
To refresh the next day, remove the outermost pins, shake the roots lightly, and re-pin only the pieces that lost shape. A tiny spray of water on the hands, then a quick pass over the surface, can revive a chignon without soaking it. If the hair has gone flat at the crown, a pinch of dry shampoo and a 30-second blow-dry at the roots can wake it back up.
Frequently Asked Questions
Can long thin hair really hold an updo all day?
Yes, if the style is built with enough grip and not too much weight on top. Low buns, braid-based styles, and twists usually hold better than tall, fluffy shapes because they spread the tension out.
Is second-day hair better than freshly washed hair for these styles?
Usually, yes. Slightly dirty hair has more texture and less slip, which helps pins stay put and keeps braids from sliding apart. If your hair feels greasy, dry shampoo at the roots is enough to make it workable again.
Do hair donuts and bun pads help fine hair or make it look fake?
They help when they match the hair color and stay hidden under a thin layer of hair. The mistake is using one that’s too large, which makes the bun look disconnected from the head. A small pad is often enough.
What’s the best updo if my hair is long but very silky?
Start with styles that use multiple anchors, like a pull-through braid ponytail, a woven pin bun, or a Dutch-braid chignon. Silky hair needs more friction, so texture spray and small elastics matter more than they would on rougher hair.
How do I keep the crown from going flat?
Lift a narrow strip at the roots before you pin, then secure the style low enough that the crown is not carrying the whole weight. A bit of backcombing at the top section can help, but do not turn the whole head into a tease-fest.
Can I wear these styles with layers or short face-framing pieces?
Yes, but pick styles that welcome a few loose pieces, like soft topknots, half-up twists, and side-swept braids. Use the shorter pieces as part of the look instead of trying to force them back into a severe slick style.
What if my bobby pins keep sliding out?
That usually means the hair is too smooth, the pin is upside down, or it isn’t catching a firm anchor. Spray the pin lightly with hairspray before inserting it, and slide it into the base of a twist or braid line, not across a slick surface.
Are braided styles better than buns for long thin hair?
Braids often look fuller because they show pattern, but buns hold better when you need the hair up and off the neck. The best choice depends on whether you want visible texture or the cleanest possible outline.
Can I make these styles without heat?
Absolutely. Use dry shampoo or texturizing spray for grip, and build the style on air-dried hair with a little natural bend. If the ends are too straight and slippery, twist them around your finger for a minute or two before pinning.
The Shape That Does the Heavy Lifting
The nicest thing about long thin hair is that it doesn’t need to be bullied into looking finished. It needs structure, a little grit, and a style that understands how to work with length instead of pretending density will appear if you tease hard enough.
Pick the shape that matches the day. A low chignon when you want quiet polish. A bubble ponytail when you want easy volume. A woven bun, braid crown, or French twist when you want the hair to look like it had a plan from the start.
And if one of these feels a little too delicate on the first try, that’s normal. Fine hair often looks best after one round of adjusting the pins, loosening the edges, and letting the style settle into itself.
