



A sleek ponytail can rescue a chaotic hair day, but the best ones don’t look like a rescue mission. They look deliberate. Roots pressed smooth, part line clean, elastic hidden, ends either glassy or bent on purpose — that’s the difference between “I threw my hair up” and “I chose this on purpose.”
I keep coming back to sleek ponytails because they work in so many directions without changing their basic shape. They can look expensive with a blazer, low-effort with a white tee, sharp with a strong middle part, or a little dangerous in the best possible way when the crown is tight and the tail swings at the shoulder blade. The trick is never one single product. It’s the order: prep first, smooth second, fasten with intention, then stop before the whole thing starts looking helmet-like.
The nice part is that sleek ponytails forgive more than people think. Hair that’s a little dirty can hold better. Fine hair can look fuller if you build a tiny cushion at the crown. Coily hair can be smoothed at the root and still keep its own texture where it matters. Once you stop treating the ponytail as an afterthought, the whole style opens up.
Why These Sleek Ponytails Earn Their Place
-
They work on more than one hair texture: A good sleek ponytail can be built on straight, wavy, curly, coily, fine, or thick hair with the right prep and a little restraint.
-
They move from daytime to evening without a full restyle: Change the part, add a ribbon, swap a matte elastic for a wrapped strand, and the whole mood shifts.
-
They keep the face clear: That matters when you want your makeup, earrings, collar, or neckline to do some work too.
-
They’re easier to keep polished than loose styles: Once the roots are controlled, you’re not fighting flyaways at every turn of the head.
-
They can be tailored to the event: Low and sharp for a meeting, high and lifted for a workout, side-swept for a dinner, braided for long wear.
-
They make shape visible: The neck, jaw, shoulders, and part line all become part of the look, which is why these styles can feel so intentional.
1. Ultra-Glass Low Ponytail
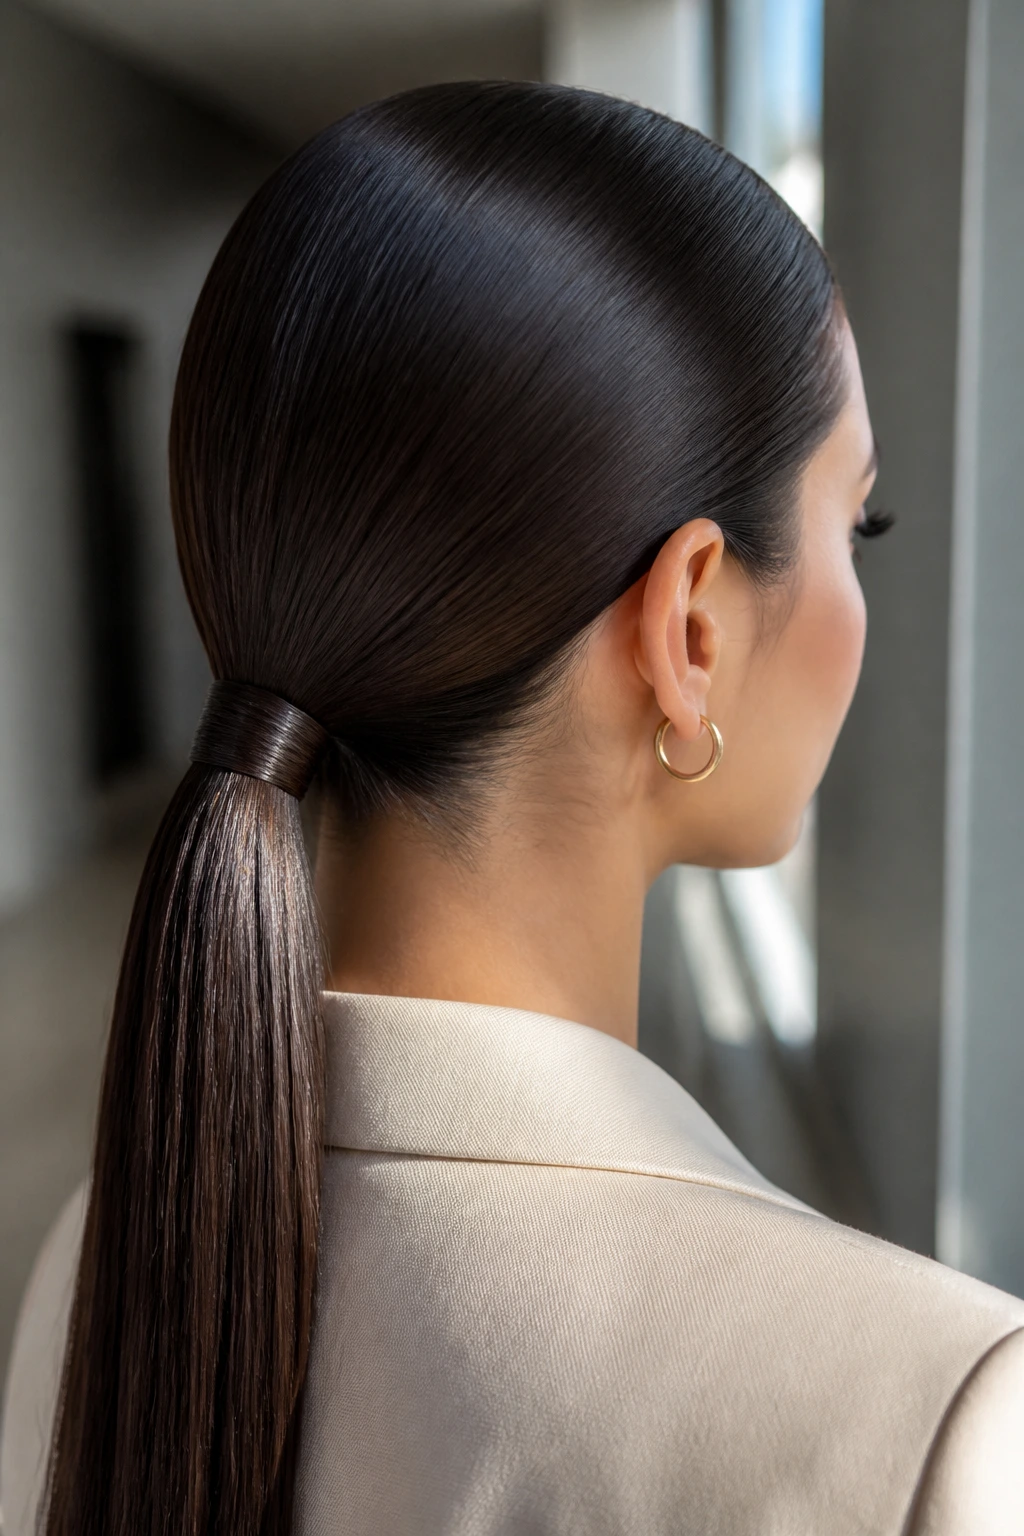
What It Looks Like: This is the ponytail with the cleanest possible finish — low at the nape, roots pressed flat, lengths smooth enough to catch the light. It has that exact “nothing is moving unless I want it to” feeling.
Why It Works: The low placement keeps tension even, which helps the style sit close to the head instead of puffing out around the crown. It also pairs well with sharp collars and simple earrings because the silhouette stays quiet.
What You Need:
- 1 smoothing cream, about a nickel-size amount
- 1 strong elastic
- 1 boar bristle brush
- 1 light shine serum, 2 to 3 drops
Quick Steps:
- Work smoothing cream through damp or freshly brushed hair, focusing on the outer layer.
- Part the hair cleanly, then brush everything down toward the nape in short, firm strokes.
- Secure the elastic low and wrap a thin section of hair around it, pinning the end underneath.
Tools for This Style:
- Tail comb for the part
- Hair clips to hold the front sections
- Fine bobby pins for the wrap
How to Wear It: Best with structured jackets, knit tops, or anything with a clean neckline. It reads polished without needing height or drama.
Pro Tips for This Style:
- Mist the brush, not the hair, if you need a final smoothing pass.
- Keep shine serum off the roots; one slippery patch at the hairline ruins the whole illusion.
Variations on This Style:
- Center-Part Glass Line: Use a strict middle part for a sharper, more modern finish.
- Soft Side Sweep: Shift the part one inch off-center if your face benefits from a little asymmetry.
Common Mistakes to Avoid with This Style:
- Don’t overload the crown with product. It will separate into greasy sections.
- Don’t place the elastic too high. That turns the whole style into a half-hearted mid pony.
2. Middle-Part Snatched Ponytail
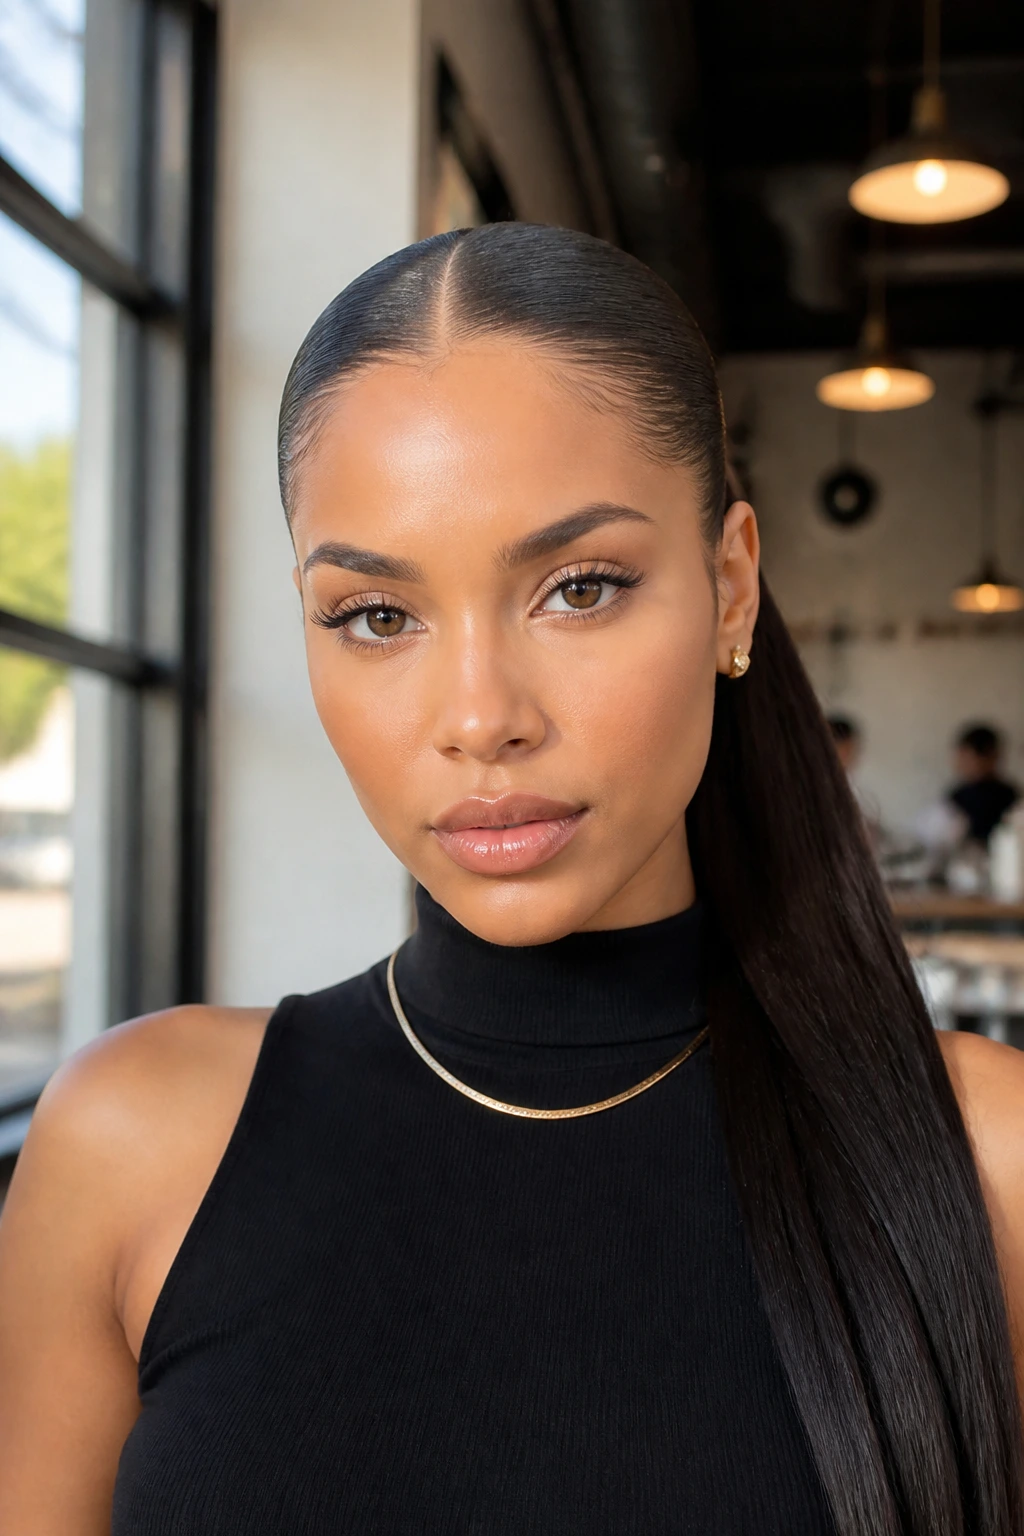
What It Looks Like: This version is taut at the roots, parted straight down the middle, and pulled back with almost architectural precision. It has a clean, lifted line that makes cheekbones look more defined.
Why It Works: The middle part creates balance, and the tight root pull keeps the front smooth long enough to stay in place through a long day. It’s one of those styles that looks harder than it is, which is a nice trick to keep in your back pocket.
What You Need:
- 1 edge control or firm styling gel, pea-size amounts
- 1 tail comb
- 1 elastic
- 1 medium-hold hairspray
Quick Steps:
- Draw a straight middle part with a tail comb and clip both sides.
- Smooth gel along the hairline, then brush each side straight back with tension.
- Fasten the ponytail at the height you want and lock the front with a light mist of spray.
Tools for This Style:
- Small styling brush for the hairline
- Sectioning clips
- Optional blow dryer on cool if you want the gel to set faster
How to Wear It: This one looks especially good with clean makeup, a strong brow, and a neckline that doesn’t fight the part. Think office, dinner, or an event where you want crisp instead of soft.
Pro Tips for This Style:
- If your part wanders, mark it with the tail comb while the hair is still slightly damp.
- Apply gel in thin layers. One thick slab flakes; two thin passes hold better.
Variations on This Style:
- Braided Crown Middle Part: Braid a tiny section at each temple before pulling back.
- High Snatched Version: Raise the ponytail to the crown if you want more lift and attitude.
Common Mistakes to Avoid with This Style:
- Don’t brush gel through the whole head. The lengths will look stiff.
- Don’t rush the parting. A crooked center line is all you’ll see once the ponytail is up.
3. Deep Side-Part Low Ponytail
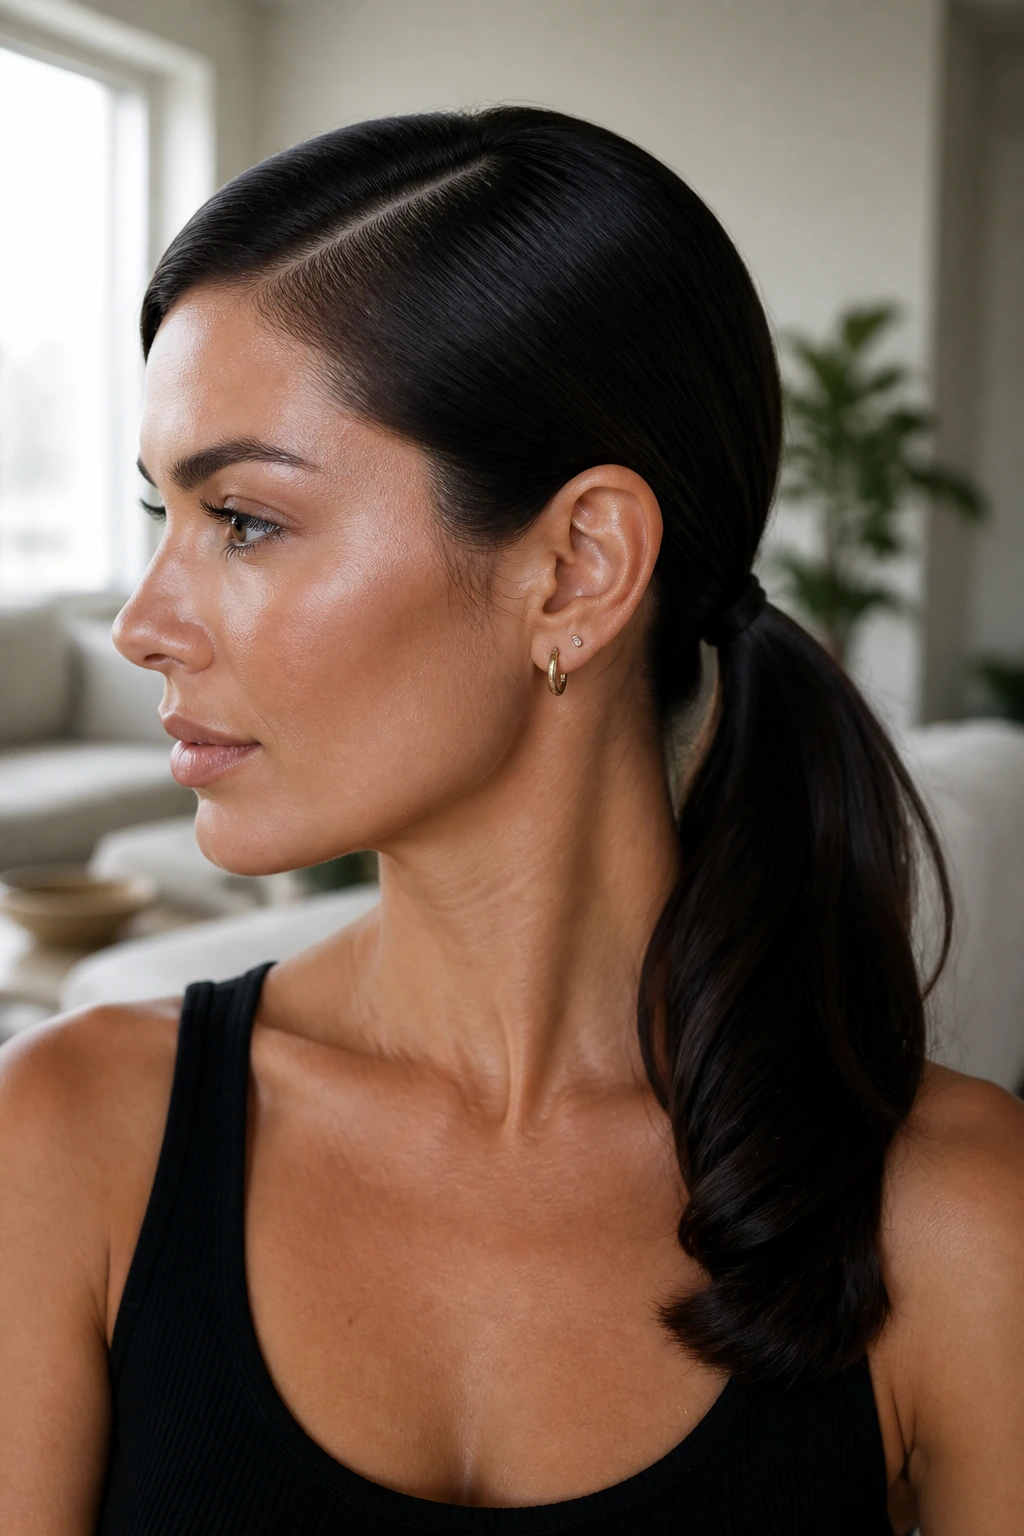
What It Looks Like: A deep side part gives the front some sweep, then the ponytail settles low and smooth behind the ear. It has a softer, slightly old-Hollywood feel without tipping into costume.
Why It Works: Side parts shift attention upward and across the face, which can be kinder than a hard center line when you want a more relaxed shape. The low tie keeps it wearable for long hours.
What You Need:
- 1 smoothing cream
- 1 rat-tail comb
- 1 elastic
- 2 bobby pins
Quick Steps:
- Create a deep side part, usually about two-thirds of the way over.
- Brush the hair low and back, keeping the front section sleek but not glued down.
- Secure low, then pin back any little slips near the temple.
Tools for This Style:
- Paddle brush
- Edge brush for the hairline
- Optional curling iron for the ends if you want bend
How to Wear It: It works with gowns, blazers, or a plain top that needs a little shape near the face. The whole thing feels calm, not stiff.
Pro Tips for This Style:
- Let the part sit in the direction your hair naturally wants to fall, then sharpen it.
- A tiny bend on the tail keeps it from looking flat against the back.
Variations on This Style:
- Low Side Knot Wrap: Hide the elastic with a twisted strand on the parted side.
- Smooth Wave Finish: Curl just the last 2 inches of the tail for a softer end.
Common Mistakes to Avoid with This Style:
- Don’t make the part too shallow. It loses the whole point of the style.
- Don’t drag the front so tight that you get a dent at the temple.
4. High Ponytail with Wrapped Base
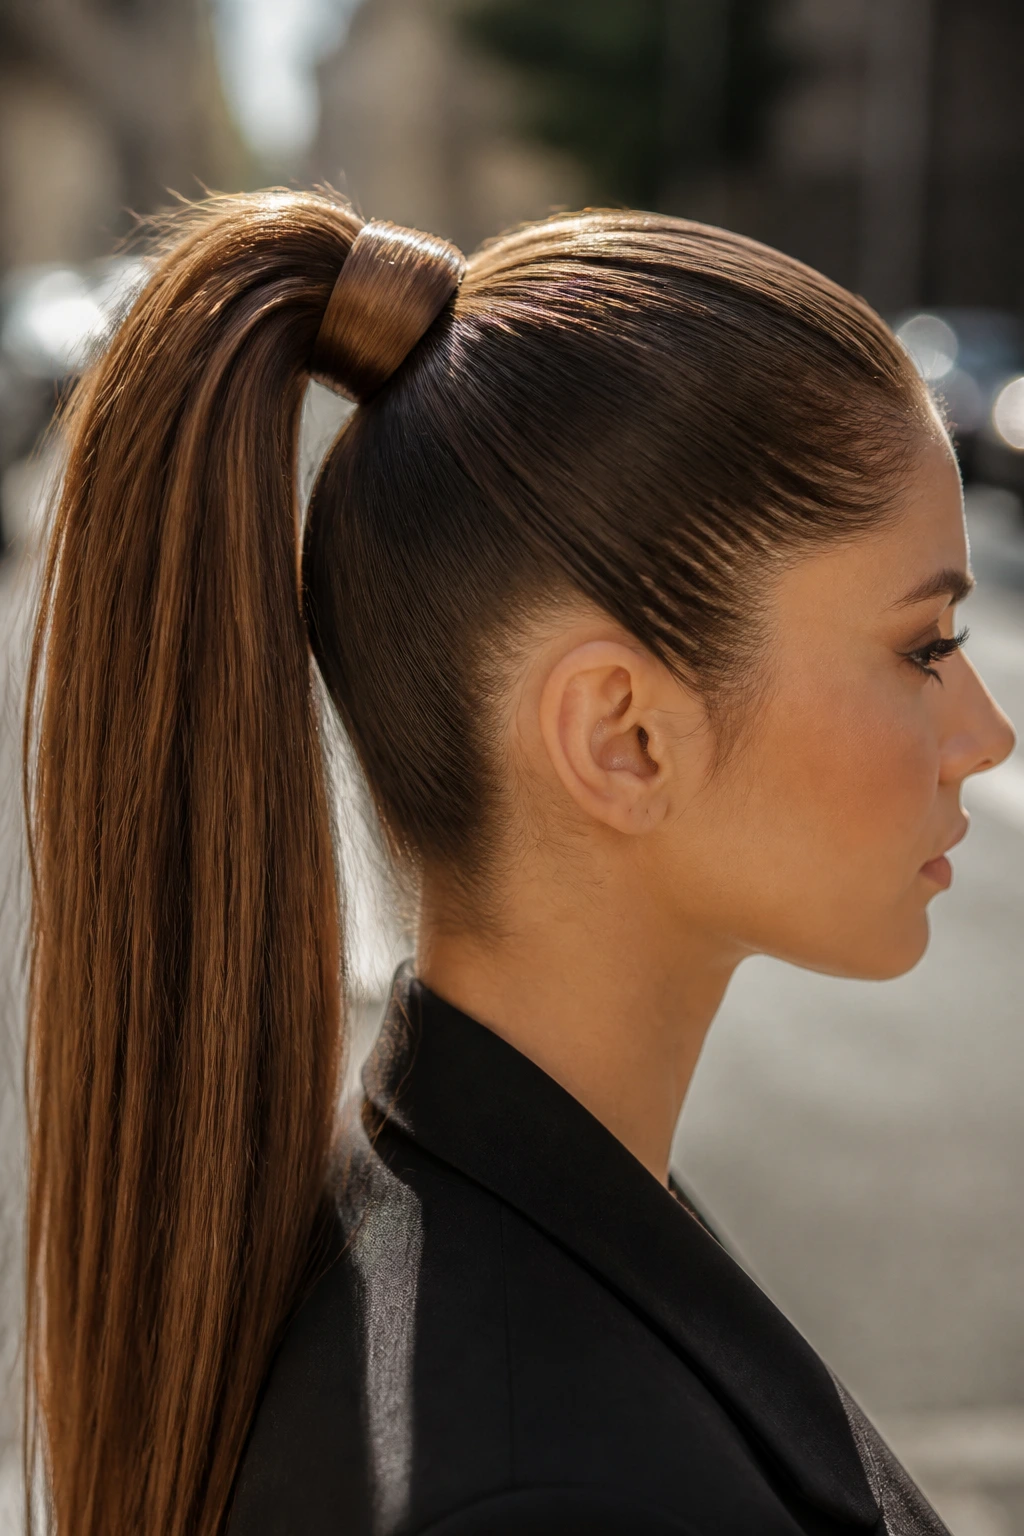
What It Looks Like: This is the classic high ponytail, but cleaner and more dressed up because the elastic disappears under a wrapped strand of hair. The base sits high enough to lift the face and show off the jaw.
Why It Works: High placement gives natural bounce, and the wrapped base makes the style look finished instead of gym-bound. It’s one of the easiest ways to make a ponytail feel intentional.
What You Need:
- 1 firm elastic
- 1 small section of hair for the wrap
- 1 smoothing gel
- 1 strong-hold hairspray
Quick Steps:
- Brush hair upward toward the crown with gel along the front.
- Fasten the elastic tightly, then smooth the top with your hands or a brush.
- Wrap a thin strand around the elastic and pin it underneath.
Tools for This Style:
- Paddle brush
- Fine bobby pins
- Optional teasing comb at the crown for fine hair
How to Wear It: It’s strong with sleeveless tops, high necks, and anything that benefits from a lifted neckline. It also photographs nicely from the side because the base sits in a flattering spot.
Pro Tips for This Style:
- Use the first elastic to secure the shape, then a second one if the hair is thick.
- If the tail feels too stiff, bend the ends with a wide iron, not a tight curl.
Variations on This Style:
- Athletic Sleek High Pony: Skip the wrap and use a matte elastic for a sportier feel.
- Red-Carpet Lift: Add a tiny crown cushion before pulling up for more height.
Common Mistakes to Avoid with This Style:
- Don’t pull the hair straight up if your crown has short layers; they’ll poke out.
- Don’t wrap the strand too loosely or it slips within an hour.
5. Bubble Ponytail
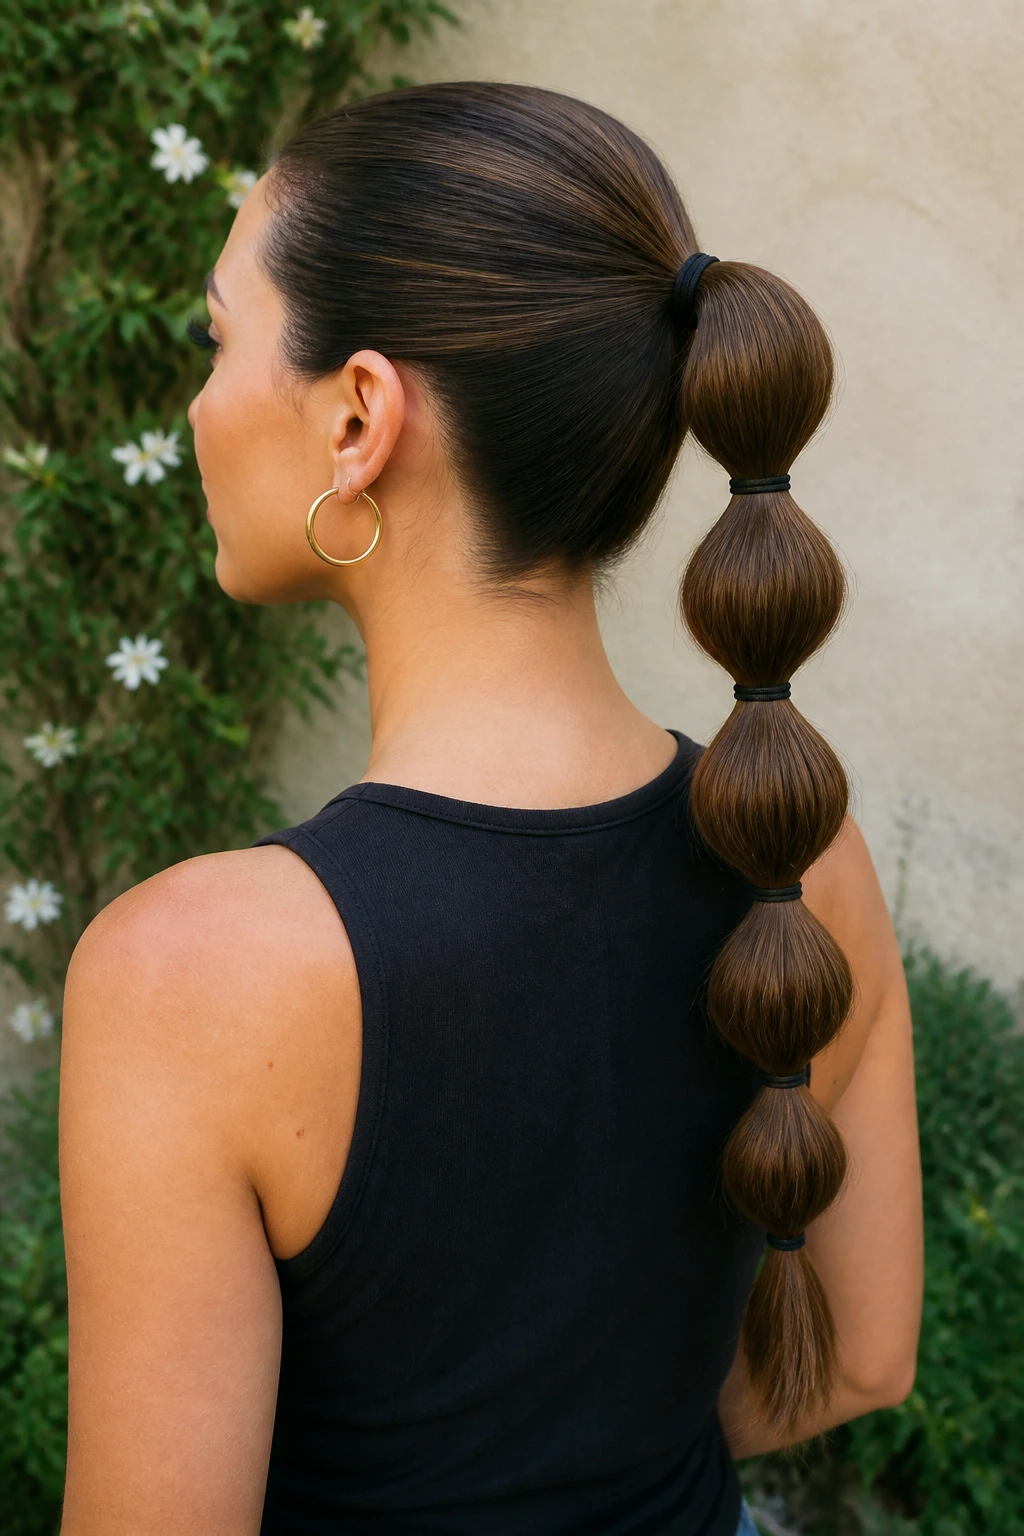
What It Looks Like: A sleek base with rounded sections down the length makes this ponytail feel playful without losing polish. It’s the style that turns a simple low or mid pony into something with rhythm.
Why It Works: The elastics spaced down the tail create shape where straight hair would otherwise fall flat. That structure makes this a smart choice for long hair that needs a little personality.
What You Need:
- 1 base elastic
- 3 to 6 mini elastics
- 1 smoothing cream
- 1 shine spray
Quick Steps:
- Build a smooth low or mid ponytail and secure the base.
- Place mini elastics every 2 to 3 inches down the tail.
- Gently tug each section outward until the bubbles puff slightly.
Tools for This Style:
- Tail comb
- Small clear elastics
- Optional ribbon if you want to hide the first tie
How to Wear It: It works for parties, casual dinners, and days when a straight tail feels too plain. The bubbles make the ponytail look fuller even if your hair is fine.
Pro Tips for This Style:
- Keep the spacing even or the bubbles start looking accidental.
- Mist the tail before tugging it out; dry hair can frizz at the sections.
Variations on This Style:
- Sleek Micro-Bubbles: Use tighter spacing for a sharper, more editorial look.
- Oversized Bubbles: Leave more room between elastics if your hair is long and thick.
Common Mistakes to Avoid with This Style:
- Don’t over-puff each section. It should look rounded, not exploded.
- Don’t use elastics that snag; you’ll see breakage along the tail.
6. Ribbon-Tied Sleek Ponytail
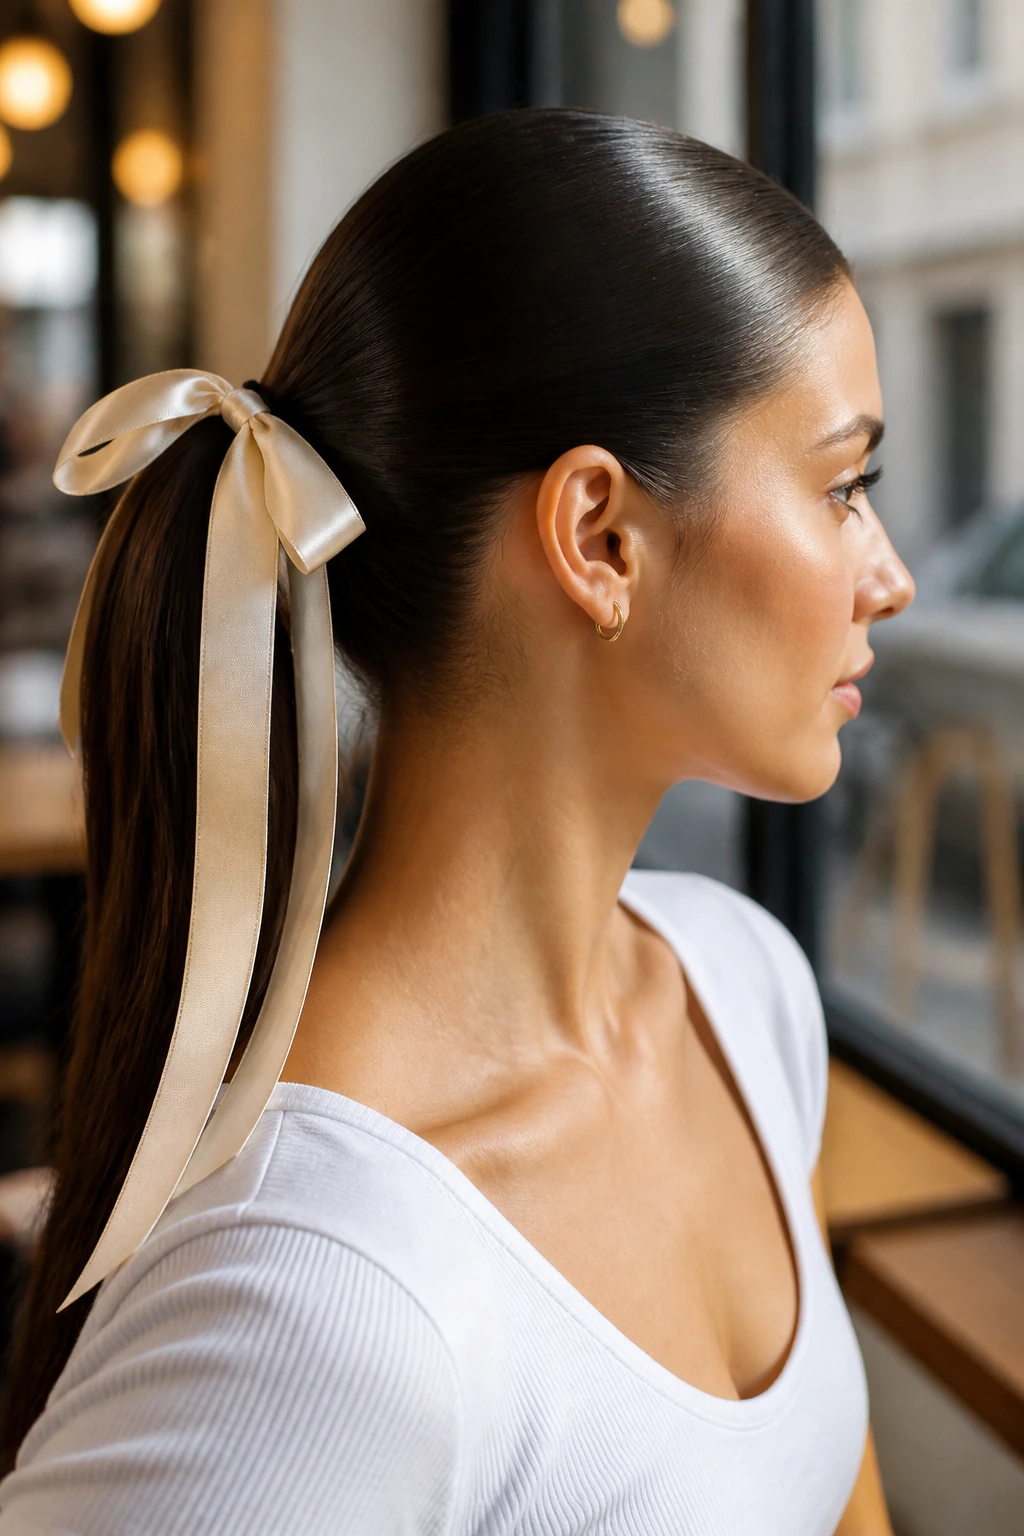
What It Looks Like: A smooth ponytail finished with a ribbon at the base turns a simple style into something softer and more deliberate. The ribbon brings in color, texture, and a little old-fashioned charm.
Why It Works: The ponytail stays clean and structured, while the ribbon gives the eye a focal point right at the tie. It’s an easy upgrade when you want the hair to feel dressed up without extra effort.
What You Need:
- 1 ribbon, about 12 to 18 inches long
- 1 elastic
- 1 smoothing cream
- 1 flat brush
Quick Steps:
- Smooth the hair into a low or mid ponytail and secure it.
- Tie the ribbon over or around the elastic in a neat bow or long tails.
- Let the ribbon ends fall straight or curl them slightly with a warm iron if the fabric allows.
Tools for This Style:
- Scissors for trimming ribbon ends
- Bobby pins if you want the ribbon anchored
- Tail comb for cleaning the part
How to Wear It: Good for brunch, daytime events, and outfits that need one soft detail. It pairs well with knit dresses, crisp shirts, and anything with a plain neckline.
Pro Tips for This Style:
- Pick a ribbon with enough weight to hang properly; flimsy satin can twist.
- If the bow feels too sweet, tie a narrow knot and leave the ends long.
Variations on This Style:
- Velvet Evening Tie: Use a narrow velvet ribbon for more texture.
- Silk Strip Wrap: A long silk scarf looped once around the elastic gives a looser, fashion-editor feel.
Common Mistakes to Avoid with This Style:
- Don’t use a ribbon that’s too wide unless the ponytail is very thick.
- Don’t tie the bow so tightly that it pulls the elastic sideways.
7. Wet-Look Ponytail
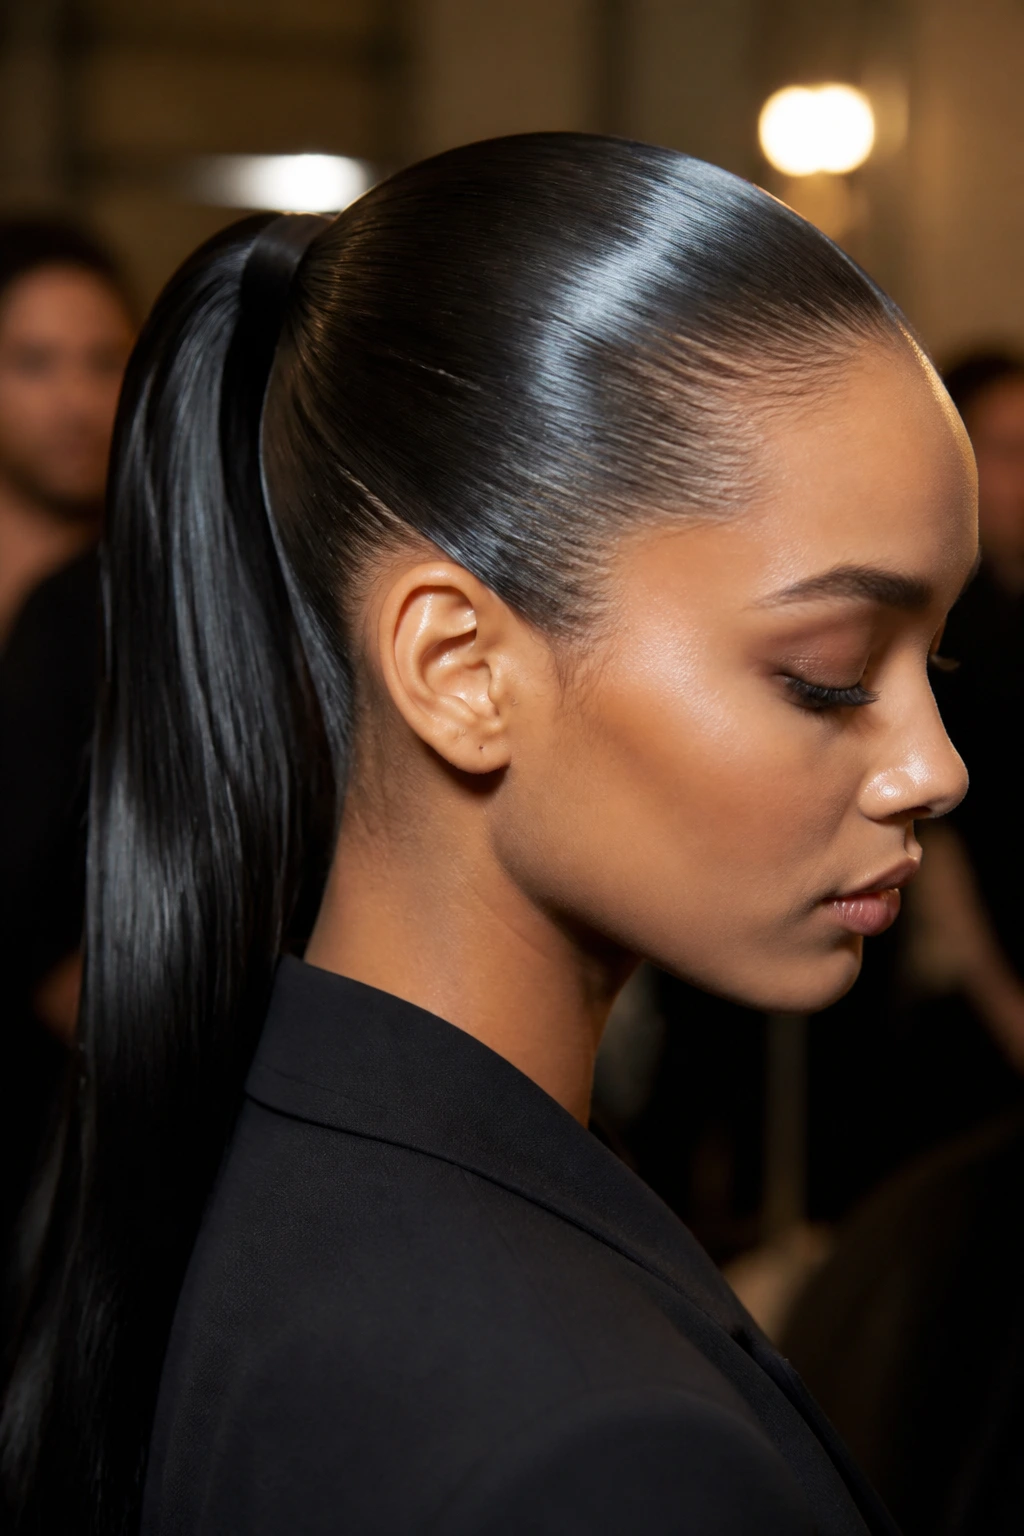
What It Looks Like: Glossy, close to the scalp, and intentionally shiny, the wet-look ponytail leans dramatic instead of merely neat. The finish should look smooth enough to feel almost lacquered.
Why It Works: Gel keeps the hair packed together, which stops flyaways from breaking the silhouette. It’s especially useful when you want the ponytail to hold its shape through a long evening.
What You Need:
- 1 strong gel, enough for thin layers through the top
- 1 elastic
- 1 fine brush
- 1 shine spray
Quick Steps:
- Apply gel to damp hair in thin layers, especially around the hairline.
- Brush the hair back tightly and secure the ponytail.
- Add a final mist of shine spray to the tail, not the roots.
Tools for This Style:
- Spray bottle with water
- Fine-tooth comb
- Hair clips to section the front
How to Wear It: This style reads bold with evening clothes, minimalist dresses, or sharp tailoring. It can feel a little serious in daylight, which is part of the fun.
Pro Tips for This Style:
- Work on damp hair, not soaking hair, or the gel dilutes and slides.
- Keep the ends a little separate so the tail doesn’t look like one heavy rope.
Variations on This Style:
- Slick Center-Line Wet Pony: Pair it with a strict middle part.
- Side-Swept Wet Finish: Sweep the front to one side for a softer, more romantic shape.
Common Mistakes to Avoid with This Style:
- Don’t overdo the gel at the crown or it will dry in hard ridges.
- Don’t touch the style too much after it sets; that’s how the shine turns patchy.
8. Braided-Base Ponytail
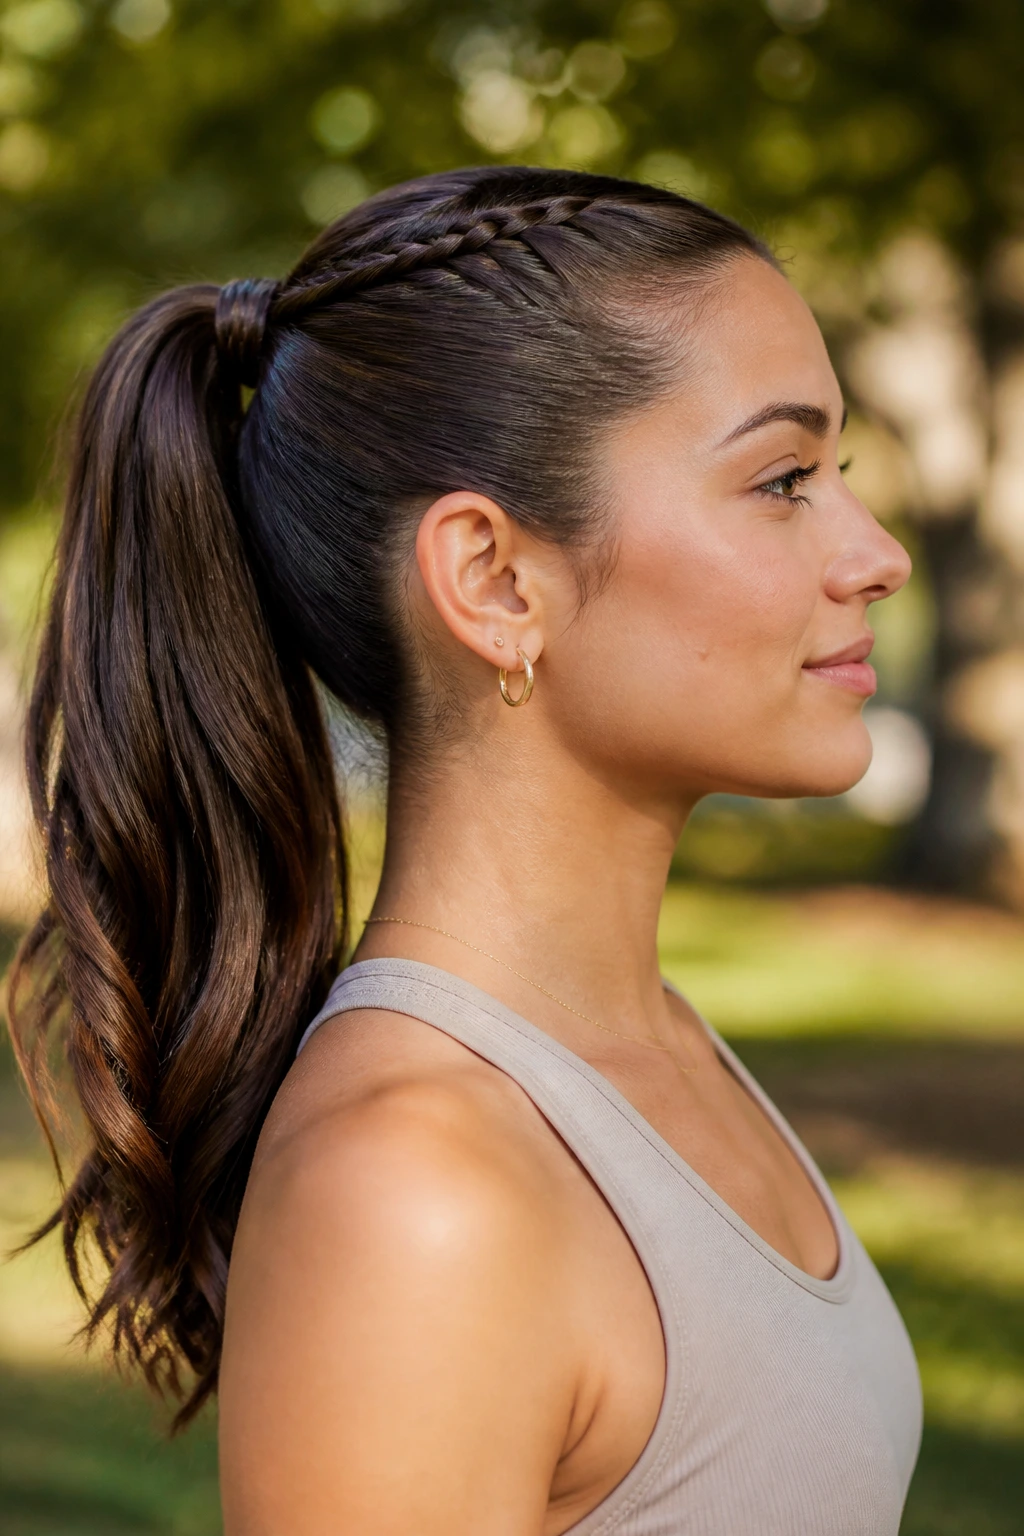
What It Looks Like: A small braid at the base, or along the front hairline, gives the ponytail some texture before the tail begins. The result feels polished with a bit of detail hiding in plain sight.
Why It Works: The braid adds grip and structure at the root, which helps keep finer sections from slipping. It also breaks up an all-smooth look in a way that still reads clean.
What You Need:
- 1 elastic
- 1 small braid section, about 1 inch wide
- 1 smoothing cream
- 2 bobby pins
Quick Steps:
- Section off a strip near the front or one side and braid it tightly.
- Pull the rest into a low or mid ponytail and secure it.
- Wrap the braid around the base or tuck it along the side with pins.
Tools for This Style:
- Tail comb
- Small clear elastic for the braid
- Paddle brush
How to Wear It: Nice for daytime events, campus days, or any situation where plain sleek hair feels a little too bare. It works especially well with denim, linen, or simple jewelry.
Pro Tips for This Style:
- Keep the braid narrow so it reads like detail, not the whole hairstyle.
- If your hair is slippery, braid on slightly dirty hair for better hold.
Variations on This Style:
- Single Side Braid: Braid one temple section and leave the rest smooth.
- Braided Wrap Base: Use the braid to hide the elastic completely.
Common Mistakes to Avoid with This Style:
- Don’t make the braid bulky unless the rest of the hair is very thick.
- Don’t tug the braid apart too much; it can fray the clean finish.
9. Flipped-End Ponytail
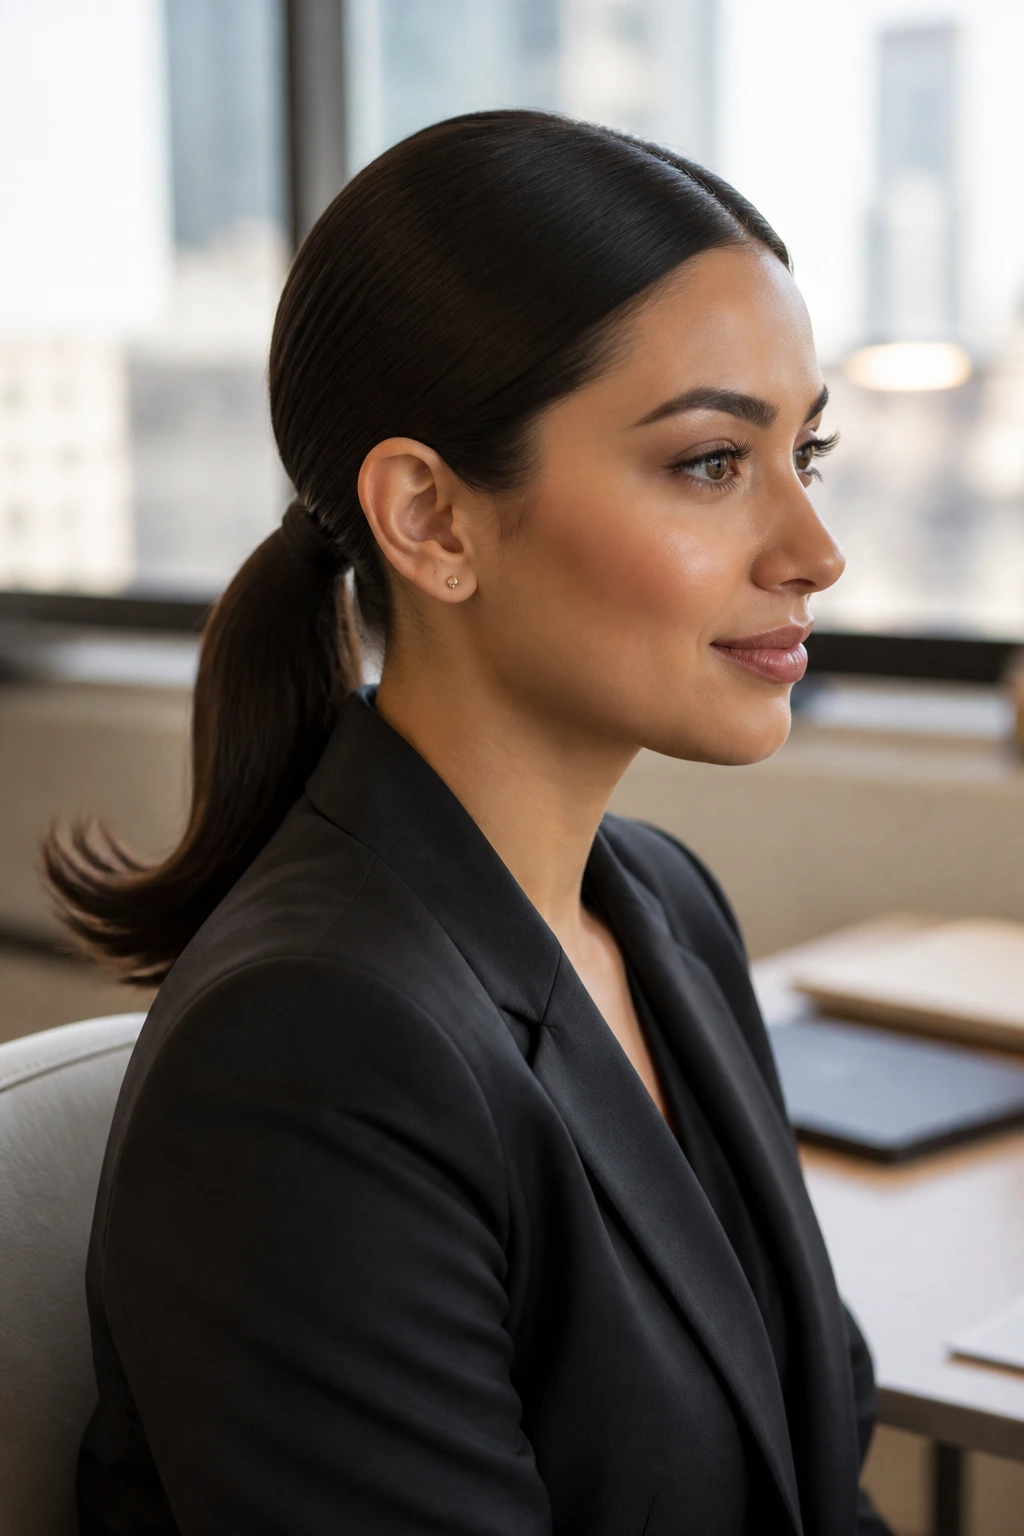
What It Looks Like: The base stays sleek, but the ends bend upward or outward with a soft flip. That little change makes the ponytail feel retro without turning into a costume piece.
Why It Works: The flip gives motion to the ends and keeps long lengths from hanging straight and heavy. It’s a good fix for ponytails that look too stiff once they’re tied back.
What You Need:
- 1 smoothing cream
- 1 elastic
- 1 flat iron or round brush
- 1 heat protectant
Quick Steps:
- Build a smooth low or mid ponytail.
- Apply heat protectant to the tail only.
- Bend the last 2 to 4 inches upward with a flat iron or round brush.
Tools for This Style:
- Heat-resistant comb
- Sectioning clips
- Optional smoothing serum for the tail
How to Wear It: It looks especially good with collars, turtlenecks, and office clothes that need a little lift. The flipped ends keep the look from feeling too strict.
Pro Tips for This Style:
- Flip only the ends; curling the whole tail makes the style lose its clean line.
- If the hair is very long, bend the final section in two passes so it doesn’t kink.
Variations on This Style:
- Outward Flip: Bend the ends away from the neck for a breezier shape.
- Inward Flip: Curl them slightly toward the back for a quieter finish.
Common Mistakes to Avoid with This Style:
- Don’t use high heat on dry, sprayed hair. The ends will scorch and frizz.
- Don’t overdo the bend if your hair is short; it can make the tail look chopped off.
10. Side-Swept Red-Carpet Ponytail
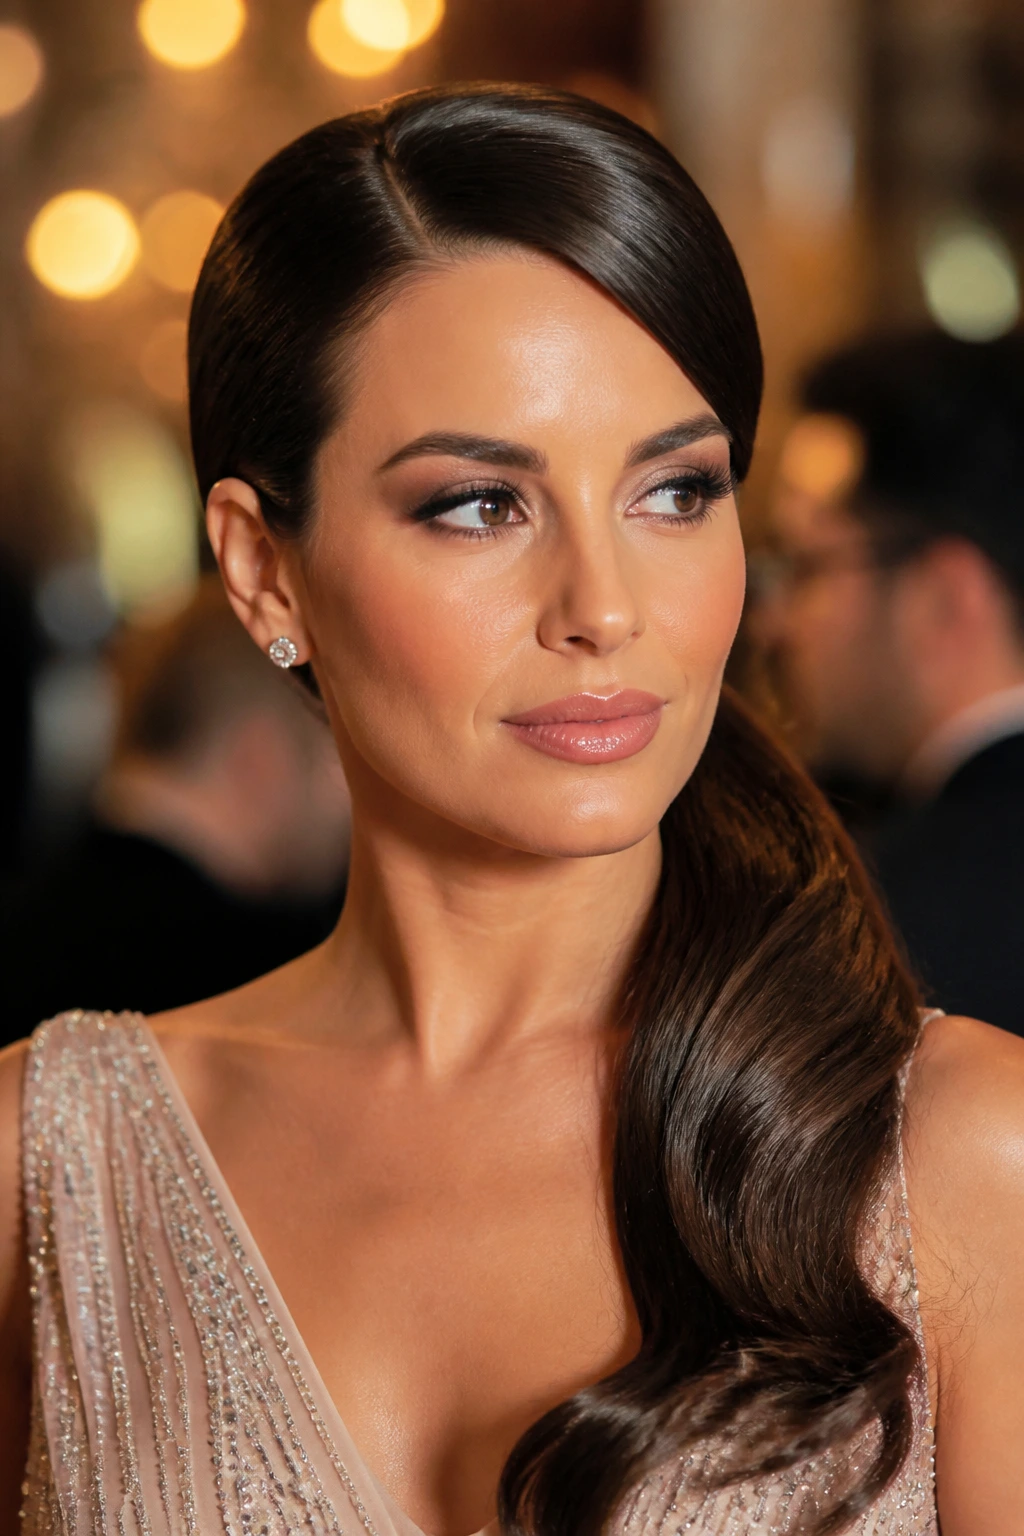
What It Looks Like: Swept to one shoulder, this ponytail has a dramatic line and a little movement through the tail. It feels dressed up without needing curls everywhere.
Why It Works: Side placement changes the whole silhouette, and the shoulder becomes part of the style. That makes it a good choice when you want a polished look that still feels soft around the face.
What You Need:
- 1 elastic
- 1 shine spray
- 1 smoothing cream
- 1 bobby pin or two
Quick Steps:
- Create a side part and brush the hair toward the opposite shoulder.
- Secure the ponytail low behind the ear or slightly lower.
- Bring the tail forward over one shoulder and pin any loose sections behind the ear.
Tools for This Style:
- Tail comb
- Soft brush
- Optional large-barrel iron for a gentle bend
How to Wear It: Best for formal dinners, parties, or any event where you’ll be photographed from the front. It works with one-shoulder tops in particular.
Pro Tips for This Style:
- Keep the front sleek but not frozen; a tiny curve near the temple looks better than a severe wall.
- Set the tail on the shoulder before the final spray so it falls where you want.
Variations on This Style:
- Loose Side Sweep: Soften the front strands for a gentler finish.
- Pinned Side Sweep: Hide the top side with a discreet pin for a cleaner shape.
Common Mistakes to Avoid with This Style:
- Don’t let the ponytail sit too far back or the side sweep gets lost.
- Don’t overload the shoulder with spray before you position the tail; it can stick oddly.
11. Office-Ready Low Ponytail

What It Looks Like: Neat, low, and quietly polished, this is the ponytail that doesn’t fight with blazers, shirts, or a long workday. It should look calm even if the morning was not.
Why It Works: The low tie keeps the profile small, and the smooth crown reads tidy without being severe. It’s the kind of style that survives emails, commuting, and one too many coffee runs.
What You Need:
- 1 smoothing cream
- 1 elastic
- 1 brush
- 1 neutral hair tie cover or wrapped strand
Quick Steps:
- Part the hair as you usually wear it or slightly off-center.
- Brush everything low and secure at the nape.
- Wrap the elastic or hide it with a thin strand.
Tools for This Style:
- Tail comb
- Hairpins
- Small mirror for checking the back
How to Wear It: Pair it with collared shirts, knit sweaters, or anything that needs a neat frame around the neck. It’s tidy, not dull.
Pro Tips for This Style:
- Keep the tail smooth but don’t over-iron it; one soft bend at the end looks more human.
- If you’re wearing glasses, leave a whisper of softness near the temples so the look doesn’t get too severe.
Variations on This Style:
- Low Tucked Tail: Fold the tail under for a cleaner, shorter look.
- Soft Office Pony: Leave a little face-framing piece for a less rigid finish.
Common Mistakes to Avoid with This Style:
- Don’t pull the crown so tight that it creates a hard line.
- Don’t make the tail too shiny for a daytime office setting; it can look overworked.
12. Wedding Guest Low Ponytail
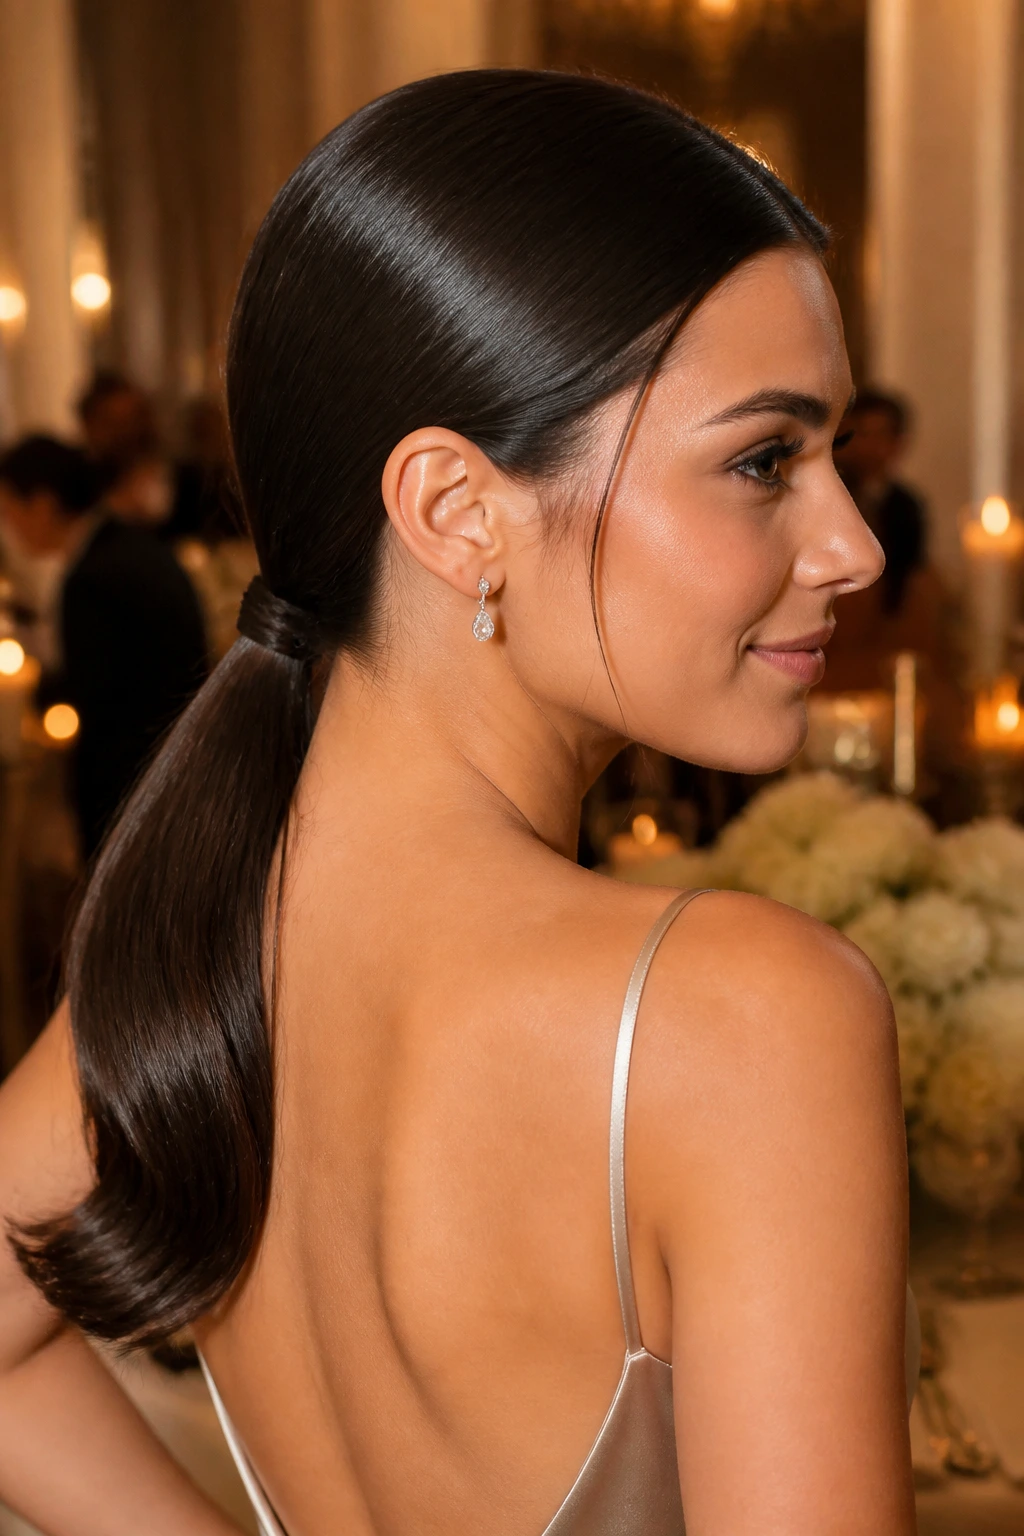
What It Looks Like: Smooth at the root with a soft finish through the tail, this ponytail can handle dressy clothes and still feel relaxed. It’s elegant without trying to outshine the bride, which is the point.
Why It Works: The low placement keeps it classic, and a gentle bend or accessory gives it enough detail for a formal setting. It’s one of the easiest styles to keep neat through a ceremony and dinner.
What You Need:
- 1 elastic
- 1 shine serum
- 1 decorative pin or comb
- 1 curling iron or flat iron for the tail ends
Quick Steps:
- Create a clean low ponytail and smooth the top until it lies flat.
- Add a soft bend through the tail or leave it straight if the dress is busy.
- Place a pin, comb, or small accessory near the base.
Tools for This Style:
- Fine-tooth comb
- Bobby pins
- Hairspray with flexible hold
How to Wear It: It works with dresses that have open backs, statement earrings, or detailed necklines because the hair stays out of the way. The style reads polished in photos and in person.
Pro Tips for This Style:
- Use one accessory only; too many decorations fight the clean line.
- If the event runs long, keep a small brush in your bag for the tail ends.
Variations on This Style:
- Pearl Pin Finish: Add one slim pearl barrette near the elastic.
- Twisted Base Finish: Twist the side sections back before fastening for a softer formal look.
Common Mistakes to Avoid with This Style:
- Don’t pile on glitter spray unless the outfit is plain; it can skew costume-y fast.
- Don’t leave the front too flat if your hairline is delicate — a tiny lift helps.
13. Date-Night Soft Sleek Ponytail
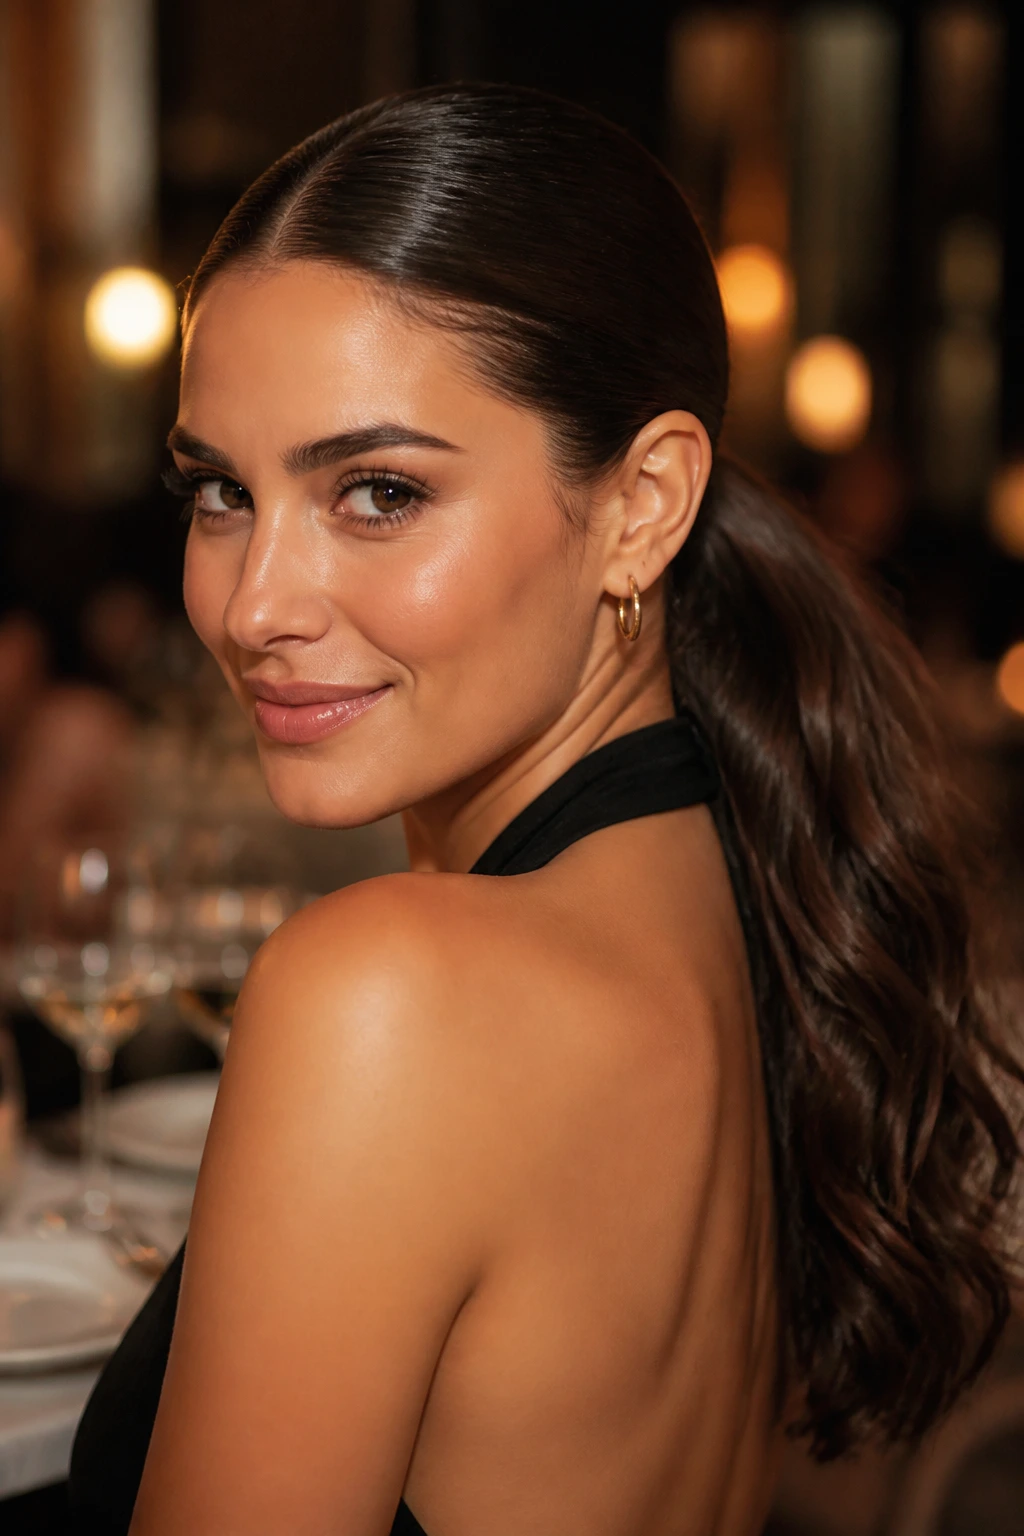
What It Looks Like: Clean enough to feel polished, but soft enough to feel a little romantic, this ponytail usually sits mid or low with gentle movement in the tail. Think gloss, not stiffness.
Why It Works: A softer crown and a little bend in the lengths give the style warmth. It’s the ponytail version of speaking quietly in a room where everybody else is trying too hard.
What You Need:
- 1 lightweight smoothing cream
- 1 elastic
- 1 curling wand or iron
- 1 light shine spray
Quick Steps:
- Brush hair into a mid or low ponytail with only a light touch of product.
- Secure the base, then curl the tail in one or two loose sections.
- Finger-comb the curls so they fall into soft bends.
Tools for This Style:
- Paddle brush
- Heat protectant
- Clip for separating the tail while you curl
How to Wear It: Lovely with slip dresses, fitted tops, or anything with a little neckline space. It keeps the focus on the face without looking severe.
Pro Tips for This Style:
- Leave a narrow face-framing piece if you want more softness around the jaw.
- Curl away from the neck so the tail doesn’t collapse inward.
Variations on This Style:
- Loose Wave Tail: Use a larger barrel for bigger bends.
- Ribbon Softener: Tie a narrow ribbon at the base for a gentler finish.
Common Mistakes to Avoid with This Style:
- Don’t load the front with heavy gel. It cancels the soft part of the look.
- Don’t curl every inch of the tail; the style needs some straight sections to feel sleek.
14. Party Pony with Rhinestone Pins
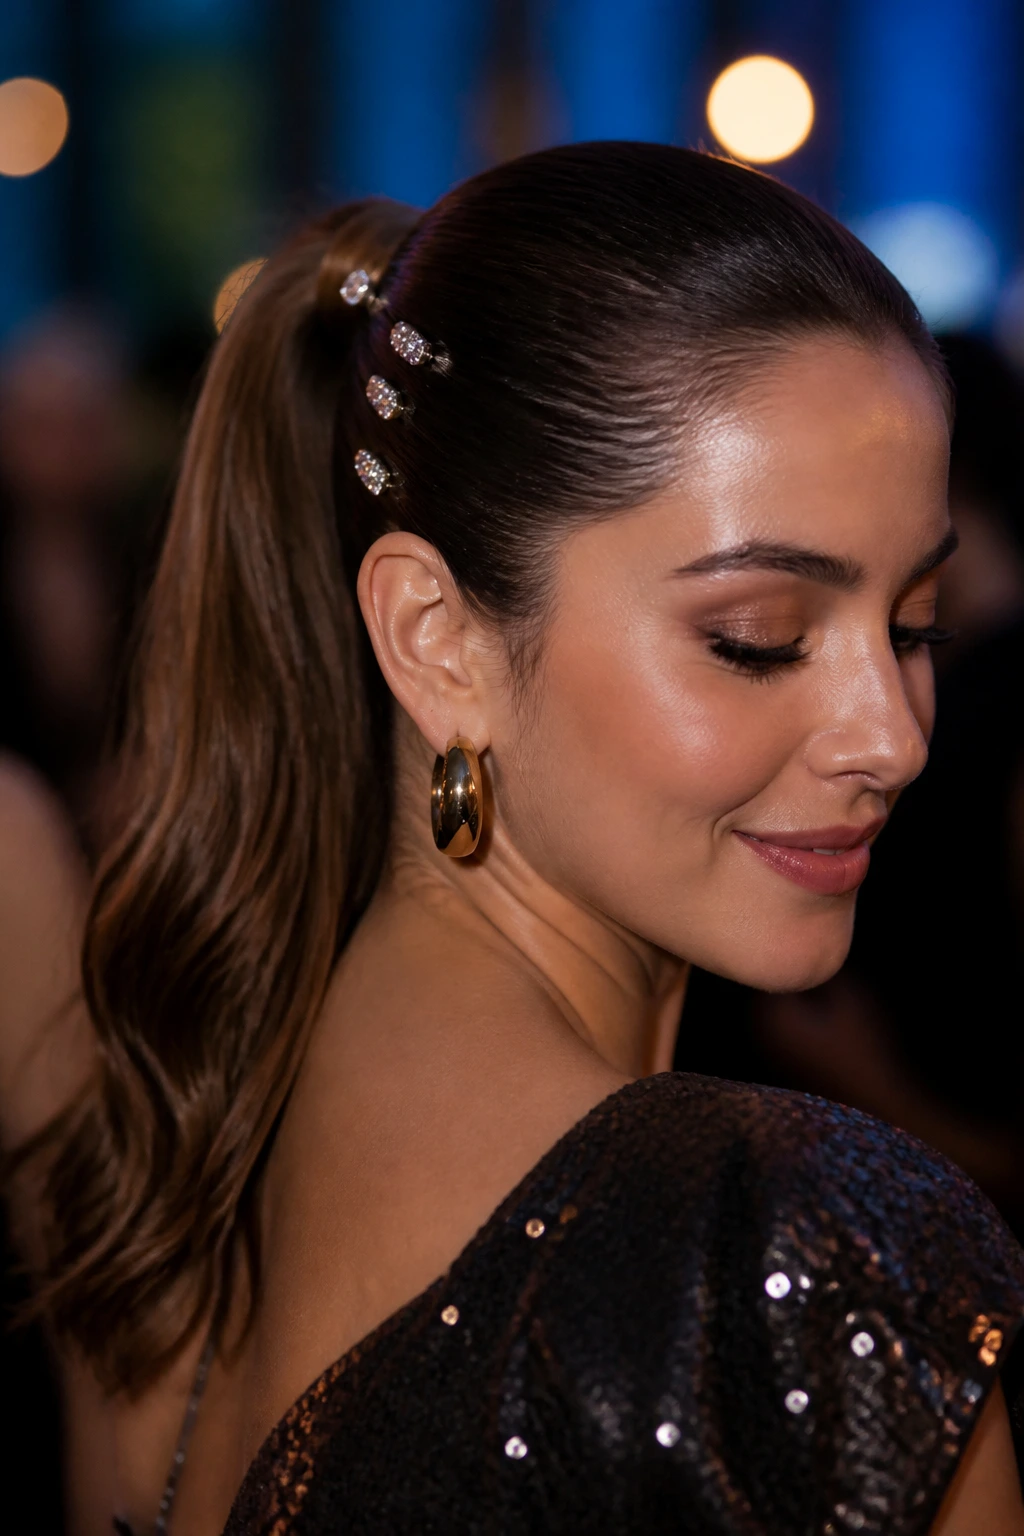
What It Looks Like: Same smooth base, more sparkle. A few rhinestone pins or clips near the side or base turn the ponytail into something that catches the eye without needing a full glam updo.
Why It Works: The sleek surface gives the accessories a clean backdrop, so the sparkle doesn’t feel scattered. It’s a smart move when the outfit is simple but you still want the hair to carry some weight.
What You Need:
- 1 elastic
- 3 to 5 rhinestone pins
- 1 smoothing gel
- 1 strong-hold hairspray
Quick Steps:
- Build a low or mid sleek ponytail and smooth the crown flat.
- Place the pins along one side of the base or in a small cluster.
- Spray lightly so the pins stay where you put them.
Tools for This Style:
- Tail comb
- Pin cushion or small dish for the accessories
- Mirror for balanced placement
How to Wear It: Good for birthdays, parties, and nights when the dress is plain but the hair can do a little more. It looks best when the sparkle is concentrated, not scattered everywhere.
Pro Tips for This Style:
- Use an odd number of pins. It tends to look less staged.
- Keep the rest of the ponytail simple so the pins stay the focal point.
Variations on This Style:
- Single Spark Pin: One barrette near the base for a quieter shine.
- Pinned Side Sweep: Cluster the pins above one ear for a more asymmetrical look.
Common Mistakes to Avoid with This Style:
- Don’t scatter too many clips. It starts reading like a craft project.
- Don’t place pins on hair that’s still slippery with serum.
15. Sporty Sleek Gym Ponytail
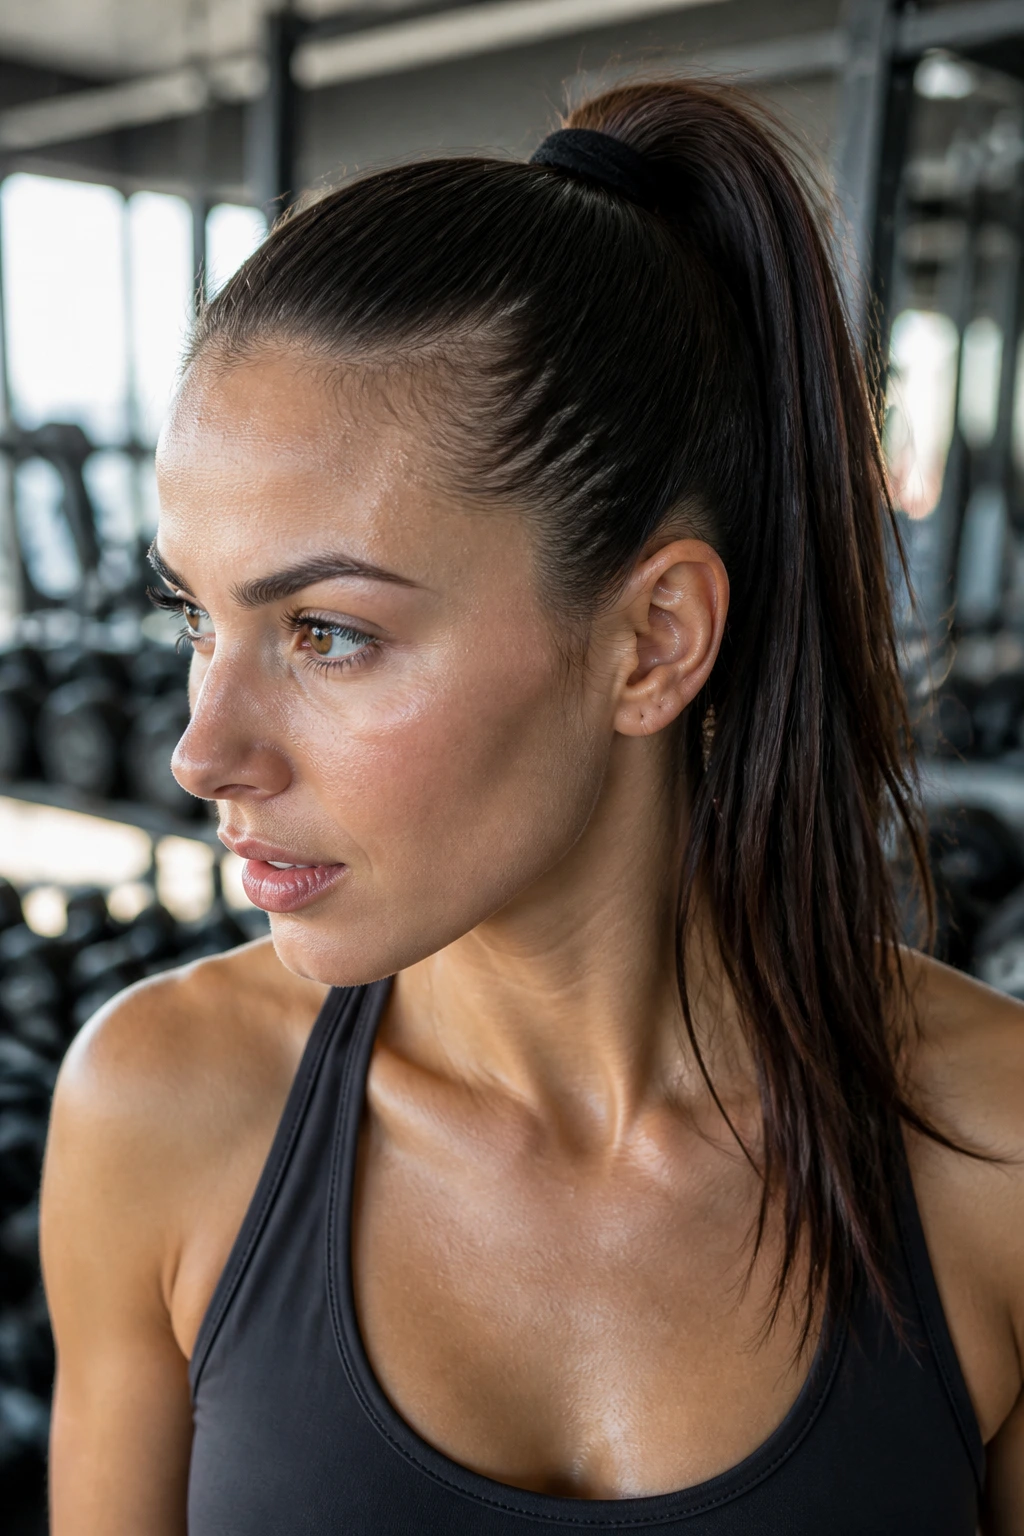
What It Looks Like: High enough to stay off the neck, smooth enough to avoid annoying flyaways, and firm enough to last through movement. It is the practical ponytail that still looks deliberate.
Why It Works: A tight base keeps the hair from swinging into the face, and a clean root finish reduces the frizz that heat and sweat can bring out. It’s the style you reach for when you need function but hate looking messy.
What You Need:
- 1 strong elastic
- 1 sweat-resistant gel or cream
- 1 brush
- 1 small towel for drying the hairline
Quick Steps:
- Brush dry hair back with a small amount of gel at the hairline.
- Secure the ponytail high or mid-high, depending on your activity.
- Press down stray hairs with the brush handle or edge brush.
Tools for This Style:
- Headband if you want extra sweat control
- Bobby pins for short layers
- Optional second elastic for thick hair
How to Wear It: Best for workouts, errands, travel, or any day with more movement than patience. It also survives well under a cap or hood.
Pro Tips for This Style:
- Don’t make the base painfully tight; that just gives you a headache.
- A little dry shampoo at the root before styling can help fine hair stay less slippery.
Variations on This Style:
- High Bounce Gym Pony: Place it at the crown for more movement.
- Braided Workout Pony: Braid the tail so it stays neat longer.
Common Mistakes to Avoid with This Style:
- Don’t use too much conditioner at the root before styling; it slides.
- Don’t skip the front smoothing if you want the style to look clean after a workout.
16. Travel-Day Anti-Frizz Ponytail
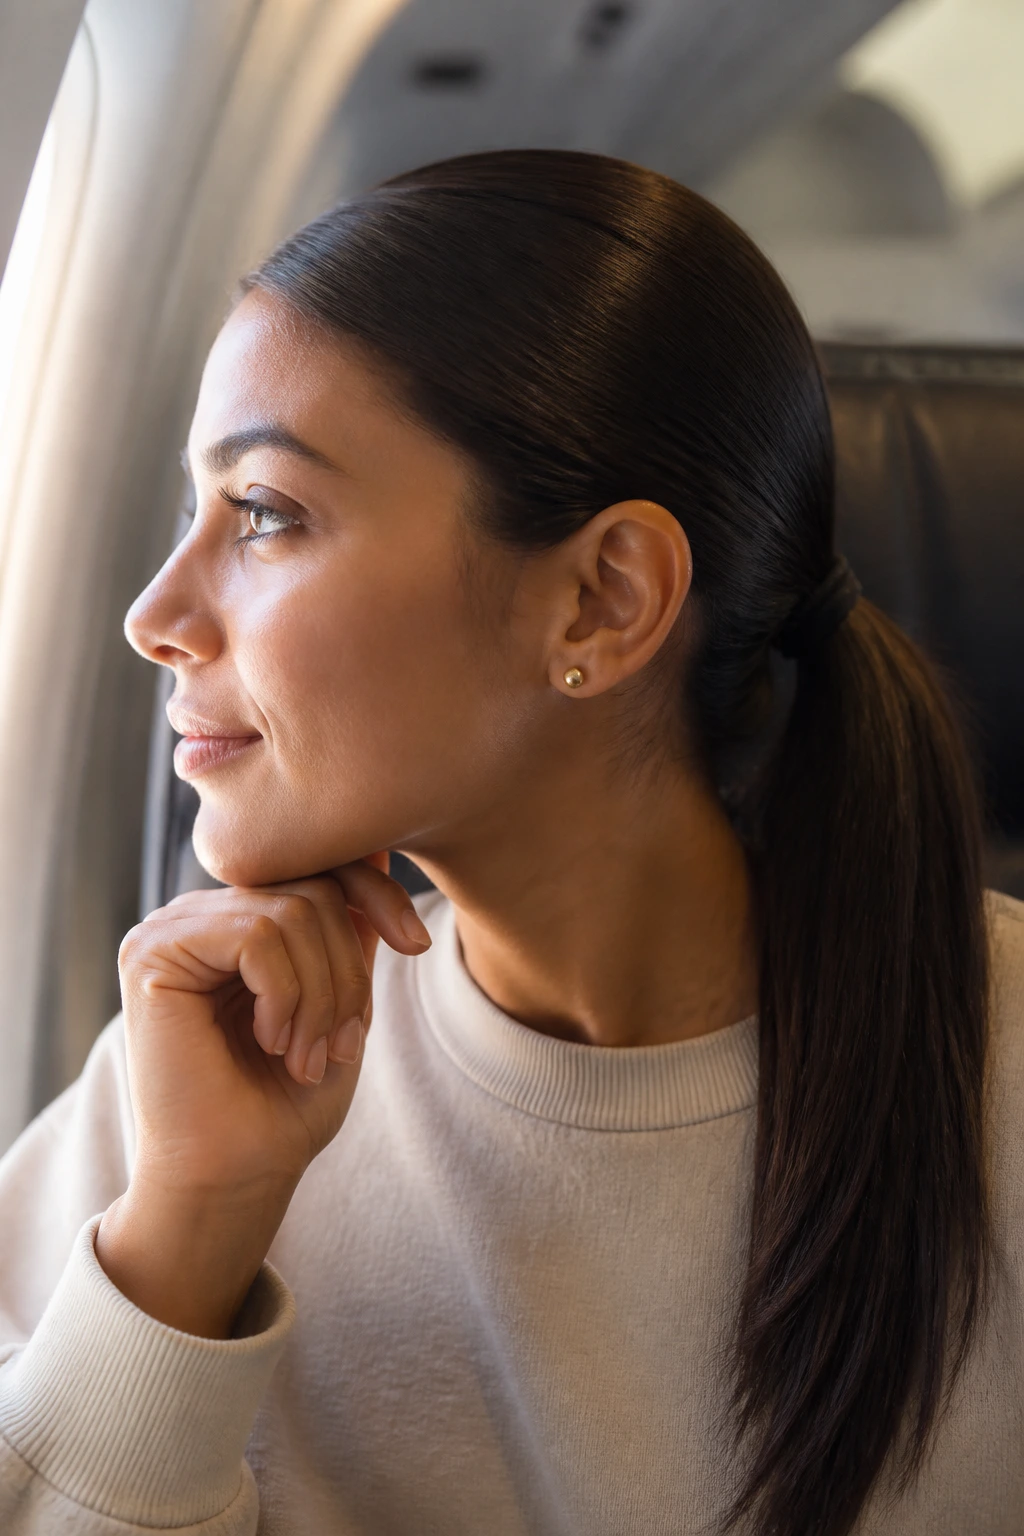
What It Looks Like: Controlled, low-maintenance, and built to survive dry air, seatbacks, and a long day of being touched and retouched. The finish should look neat even after a few hours.
Why It Works: Keeping the style simple means fewer points of failure. A smooth low ponytail with a protected base is easier to refresh than loose hair that’s been rubbed by scarves, jackets, and headrests.
What You Need:
- 1 anti-frizz cream
- 1 elastic
- 1 travel-size hairspray
- 1 compact brush
Quick Steps:
- Smooth anti-frizz cream through the outer layer of hair.
- Pull the hair back into a low ponytail and secure it firmly.
- Pack the tail into one loose fold or braid if you want less tangling.
Tools for This Style:
- Wide-tooth comb
- Satin scrunchie as an alternate tie
- Small clip for a temporary reset at rest stops
How to Wear It: Good for planes, cars, trains, and all those in-between hours where you need the hair to cooperate. It looks neat with sunglasses and layers, which helps more than people admit.
Pro Tips for This Style:
- Fold the tail under your coat collar instead of leaving it exposed to static.
- Keep a tiny serum vial for the ends only, not the roots.
Variations on This Style:
- Loose Braid Travel Pony: Braid the tail to prevent knots.
- Twisted Low Tail: Twist the length once before tying it off for less friction.
Common Mistakes to Avoid with This Style:
- Don’t pack the ponytail too high in a seatback or it will wrinkle.
- Don’t overdo the product; travel hair gets heavy fast.
17. Curly Hair Smoothed-Root Ponytail
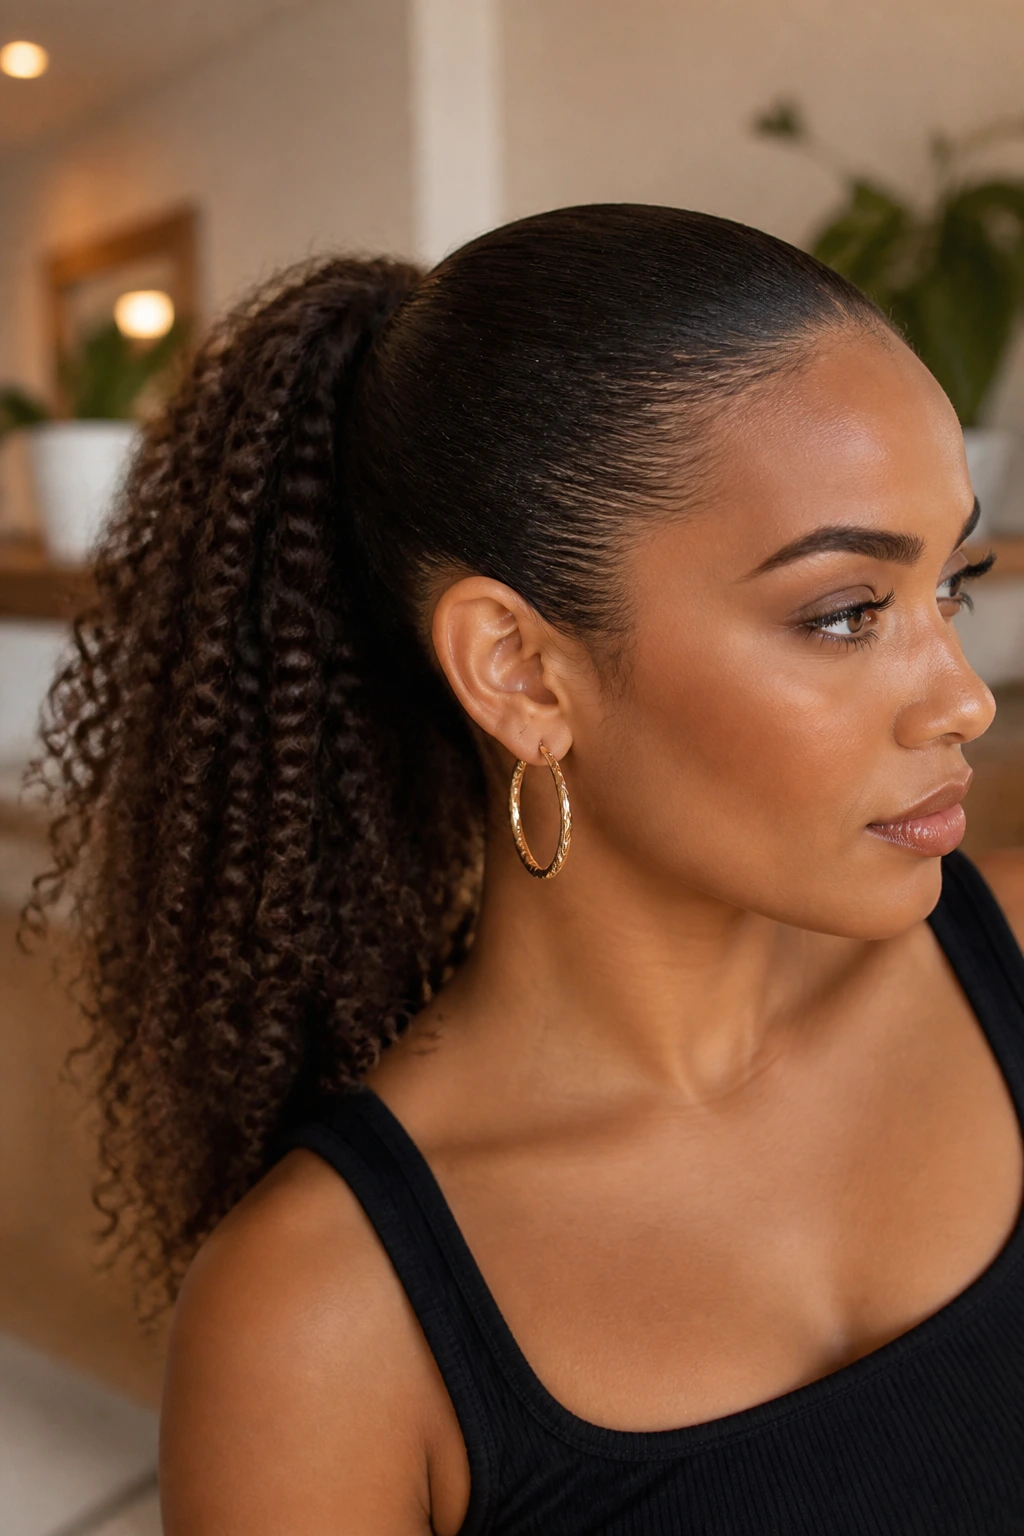
What It Looks Like: The roots are sleek, but the tail keeps its curl pattern or a softened version of it. That contrast is the point. It looks controlled at the scalp and alive at the ends.
Why It Works: Smoothing only the root area preserves texture where it matters and avoids that flat, overpressed look curly hair can get when the whole head is forced into one mold. The curls at the tail give the ponytail shape without making it puffy.
What You Need:
- 1 curl cream or leave-in
- 1 gel for the root area
- 1 elastic
- 1 diffuser or air-dry time
Quick Steps:
- Define curls first, then smooth only the top and sides into the desired ponytail shape.
- Secure the base while leaving the tail’s curl pattern intact.
- Scrunch the ends lightly to bring the curls back after tying.
Tools for This Style:
- Tail comb
- Edge brush
- Satin scrunchie if your curl pattern is fragile
How to Wear It: It’s strong for dressy and casual settings because it shows texture instead of hiding it. The contrast feels clean and modern.
Pro Tips for This Style:
- Don’t comb curls through the tail after the ponytail is secured; that’s how you get frizz.
- Refresh the tail with a drop of leave-in rather than more gel.
Variations on This Style:
- Curly High Pony: Raise the base if you want more lift.
- Curly Wrapped Low Pony: Use a wrapped strand for a smoother base.
Common Mistakes to Avoid with This Style:
- Don’t flatten the curl pattern trying to make the tail “sleek.”
- Don’t use a fine brush on dry curls; it will puff the lengths.
18. Natural Hair Sleek Low Ponytail
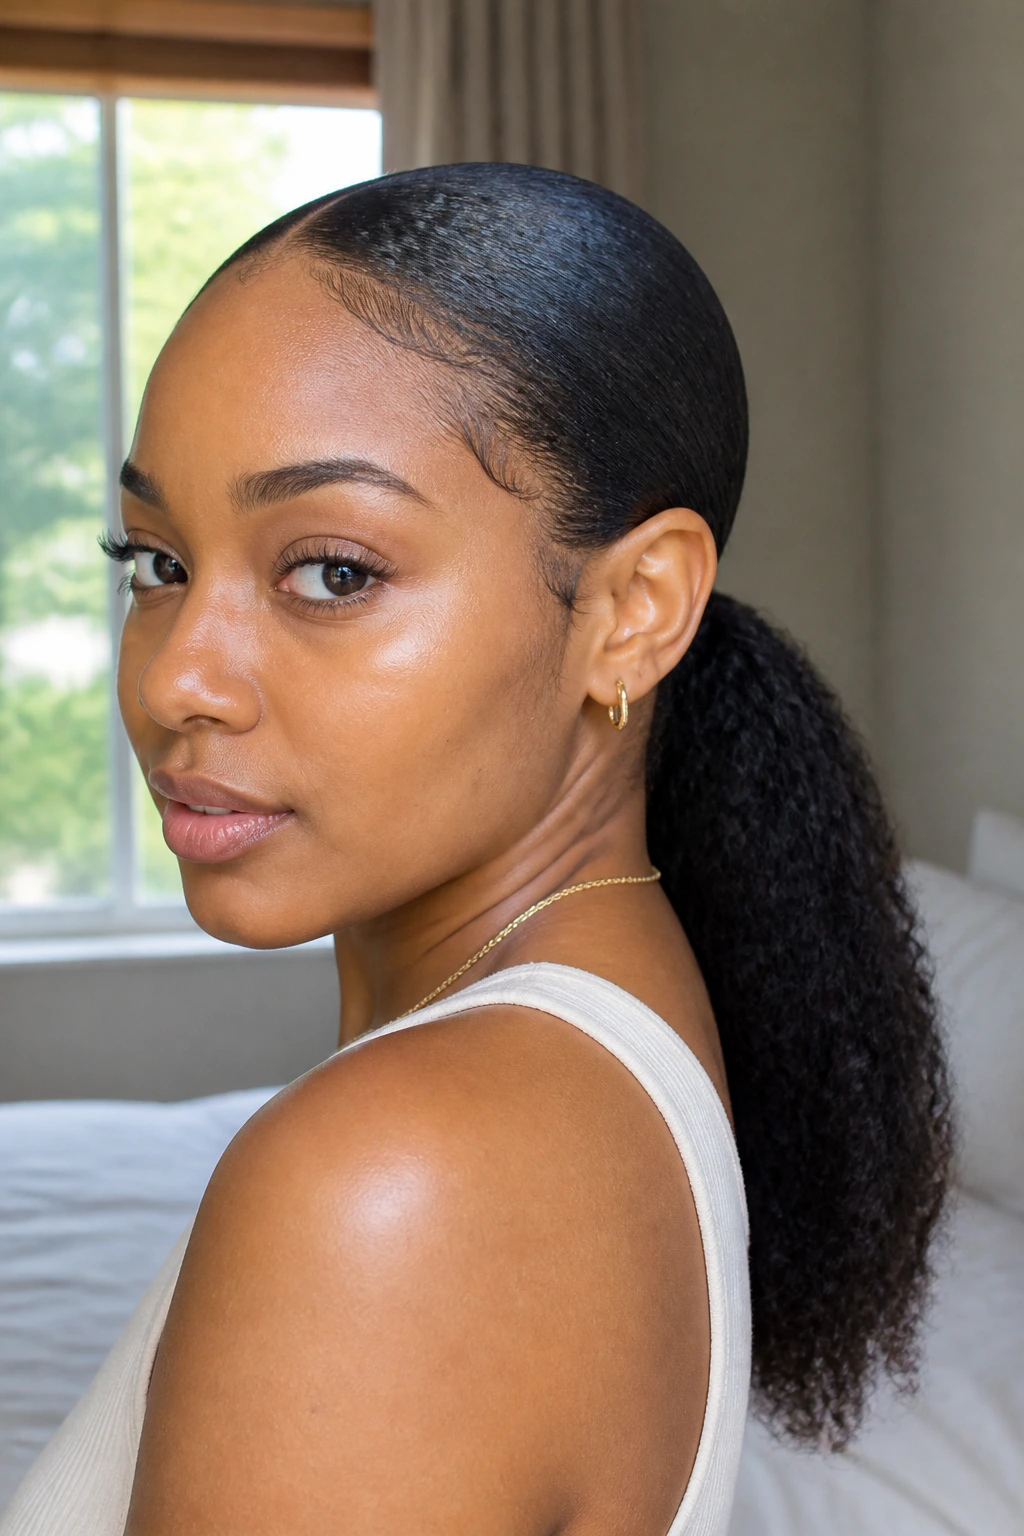
What It Looks Like: Smooth at the root with the hair gathered low and clean, this version respects natural texture instead of trying to erase it. The finish should feel polished, not shellacked.
Why It Works: Natural hair often needs a little more moisture and a stronger grip at the roots, but a low placement keeps the style stable. You get a neat silhouette without asking the hair to do something it won’t hold.
What You Need:
- 1 moisturizing cream
- 1 strong gel or edge control
- 1 elastic
- 1 soft brush and 1 edge brush
Quick Steps:
- Apply moisture first, then a controlled layer of gel at the root.
- Brush the hair down and secure it low with steady tension.
- Smooth the hairline with the edge brush and set with a light spray.
Tools for This Style:
- Satin scarf for setting
- Sectioning clips
- Wide-tooth comb for pre-detangling
How to Wear It: It works beautifully with clean necklines and large earrings because the sleek base gives the face room. It can be casual or dressed up depending on the finish.
Pro Tips for This Style:
- Use moisture underneath the hold product or the hair can feel dry and flaky.
- Wrap the hair at night to keep the roots from lifting.
Variations on This Style:
- Side-Part Natural Pony: Shift the part and keep one temple softer.
- Puff-Ended Pony: Leave the tail fuller instead of stretching it bone-straight.
Common Mistakes to Avoid with This Style:
- Don’t use a harsh gel over dry, unmoisturized hair; it flakes.
- Don’t skip the overnight wrap if you want the style to last.
19. Fine Hair Lifted-Crown Ponytail
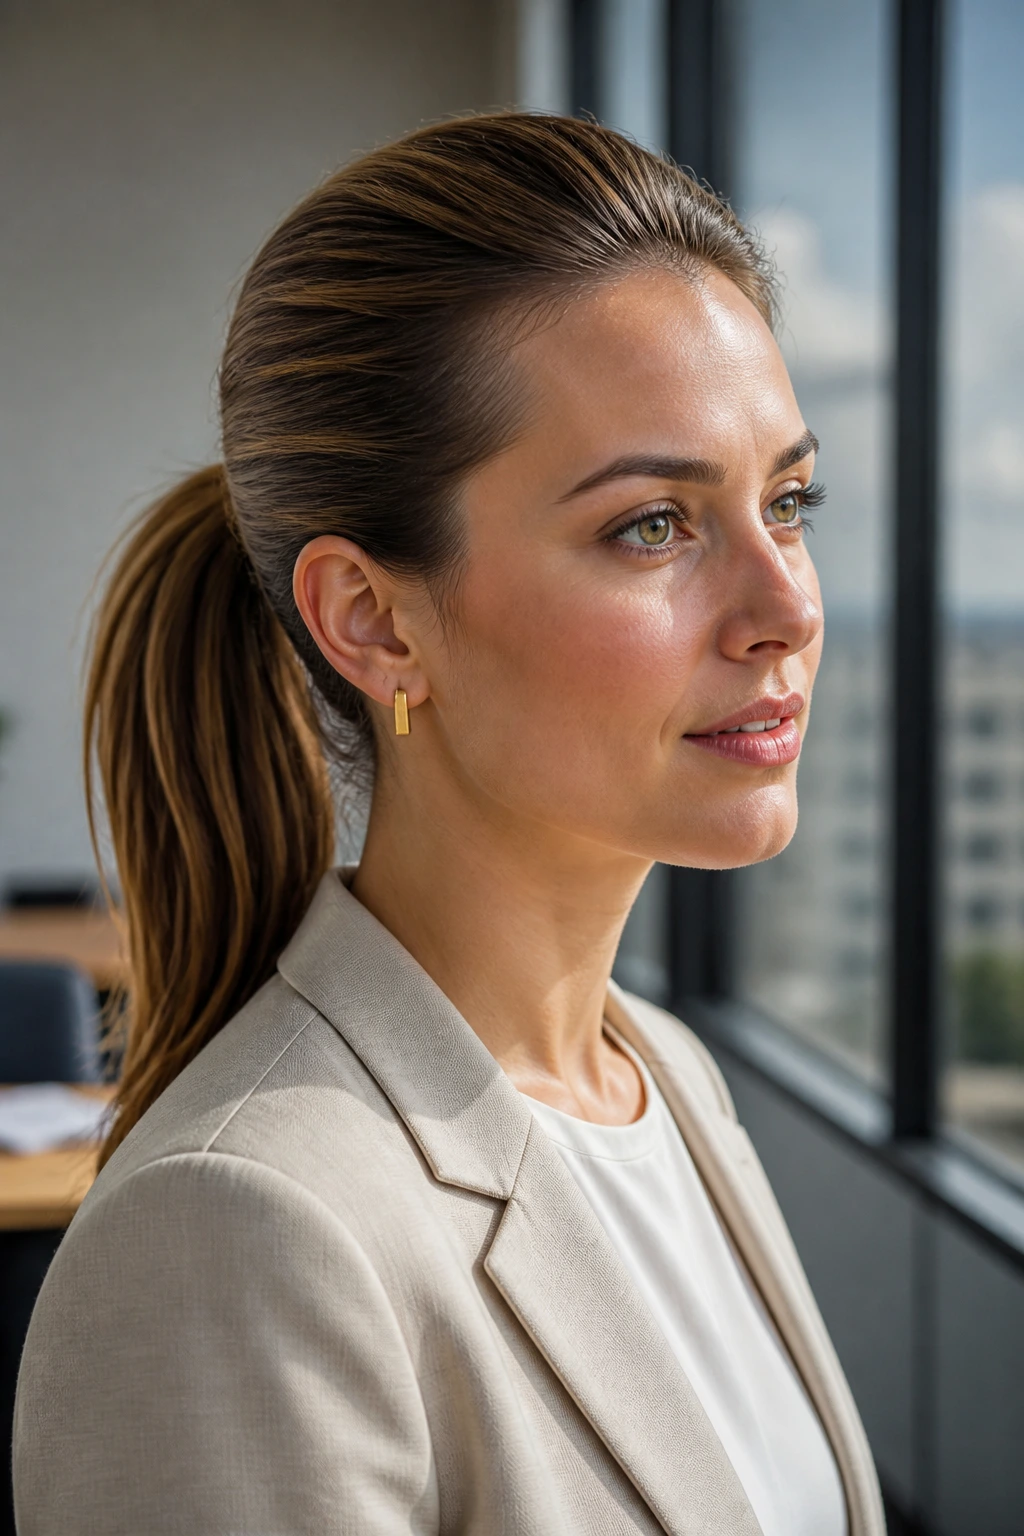
What It Looks Like: The crown has a small bit of lift, the ponytail sits cleanly, and the whole style looks fuller than the amount of hair on the head might suggest. That’s the trick.
Why It Works: Fine hair can go flat fast, so a little crown lift keeps the profile from collapsing. The ponytail still reads sleek, but the root area gains enough shape to look intentional.
What You Need:
- 1 lightweight mousse
- 1 teasing comb
- 1 elastic
- 1 light-hold hairspray
Quick Steps:
- Apply mousse at the roots and blow-dry with a lift at the crown.
- Tease a tiny section at the back crown if needed.
- Gather the hair into a low or mid ponytail and smooth only the top layer.
Tools for This Style:
- Round brush
- Tail comb
- Small clip for holding the lifted section
How to Wear It: Good for office wear, casual dinners, or any day your hair needs to look a touch fuller without obvious volume tricks. It sits neatly under coats and scarves.
Pro Tips for This Style:
- Tease only the hidden layer so the top stays smooth.
- Use a matte elastic if your hair is slippery; shiny ties can slide.
Variations on This Style:
- High Lift Pony: Place the tie higher and keep the crown airy.
- Soft Wrapped Pony: Cover the base with hair to make the tail look denser.
Common Mistakes to Avoid with This Style:
- Don’t use heavy cream at the roots. It crushes the lift.
- Don’t tease the top layer where it can show.
20. Thick Hair Tamed High Ponytail
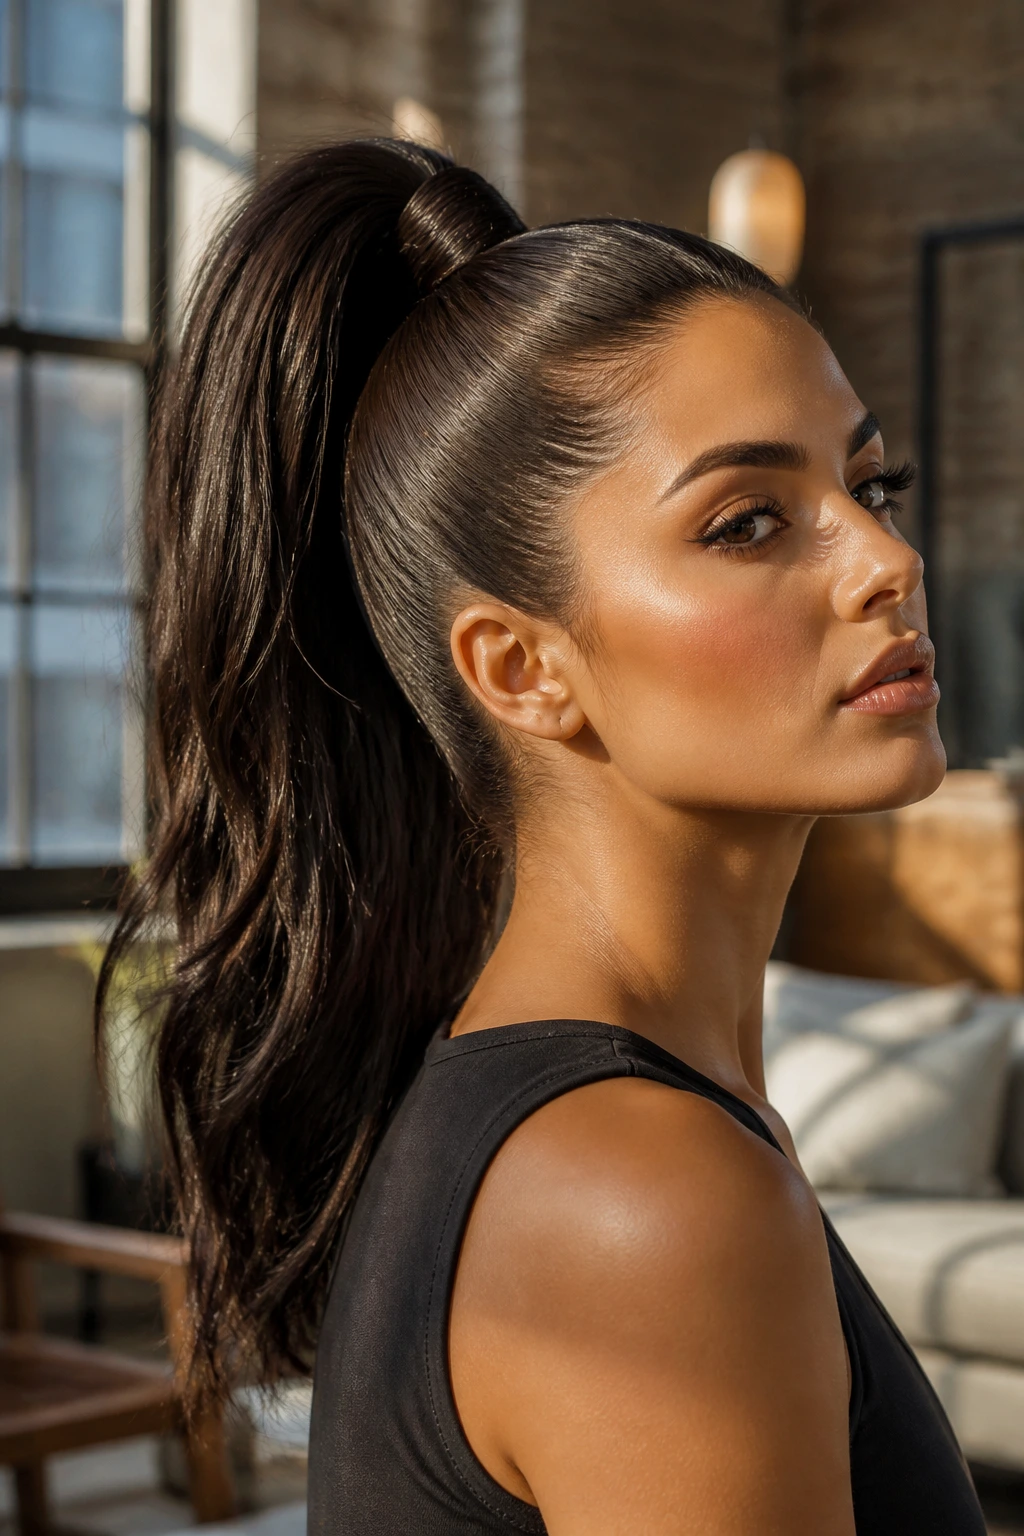
What It Looks Like: Big, smooth, and firmly controlled, this ponytail uses thick hair’s own body without letting it explode outward. The base should feel secure, not strained.
Why It Works: Thick hair needs anchoring and sectioning, not brute force. Once the top is controlled and the base is locked, the tail can hold an impressive shape all day.
What You Need:
- 2 strong elastics
- 1 smoothing cream
- 1 large paddle brush
- 1 wide-tooth comb for the tail
Quick Steps:
- Divide the hair into top and bottom sections if needed.
- Gather the top section first, then add the rest and secure with a second elastic if the hair is dense.
- Smooth the outer layer and leave the tail full rather than overbrushed.
Tools for This Style:
- Heavy-duty clips
- Bobby pins for reinforcing the wrap
- Optional smoothing balm for the ends
How to Wear It: Great for nights out, long days, or any style where you want volume with control. It’s strong enough to hold its shape even when the hair is heavy.
Pro Tips for This Style:
- Use two elastics if one is trying to do too much.
- Don’t flatten the tail completely; thick hair looks best with some body.
Variations on This Style:
- Wrapped Power Pony: Add a hair wrap around the base.
- Braided High Pony: Braid the tail to keep bulk in place.
Common Mistakes to Avoid with This Style:
- Don’t try to smooth thick hair with a tiny brush; you’ll get drag and breakage.
- Don’t make the base too high if the weight of the tail pulls it down.
21. Short Hair Faux Ponytail
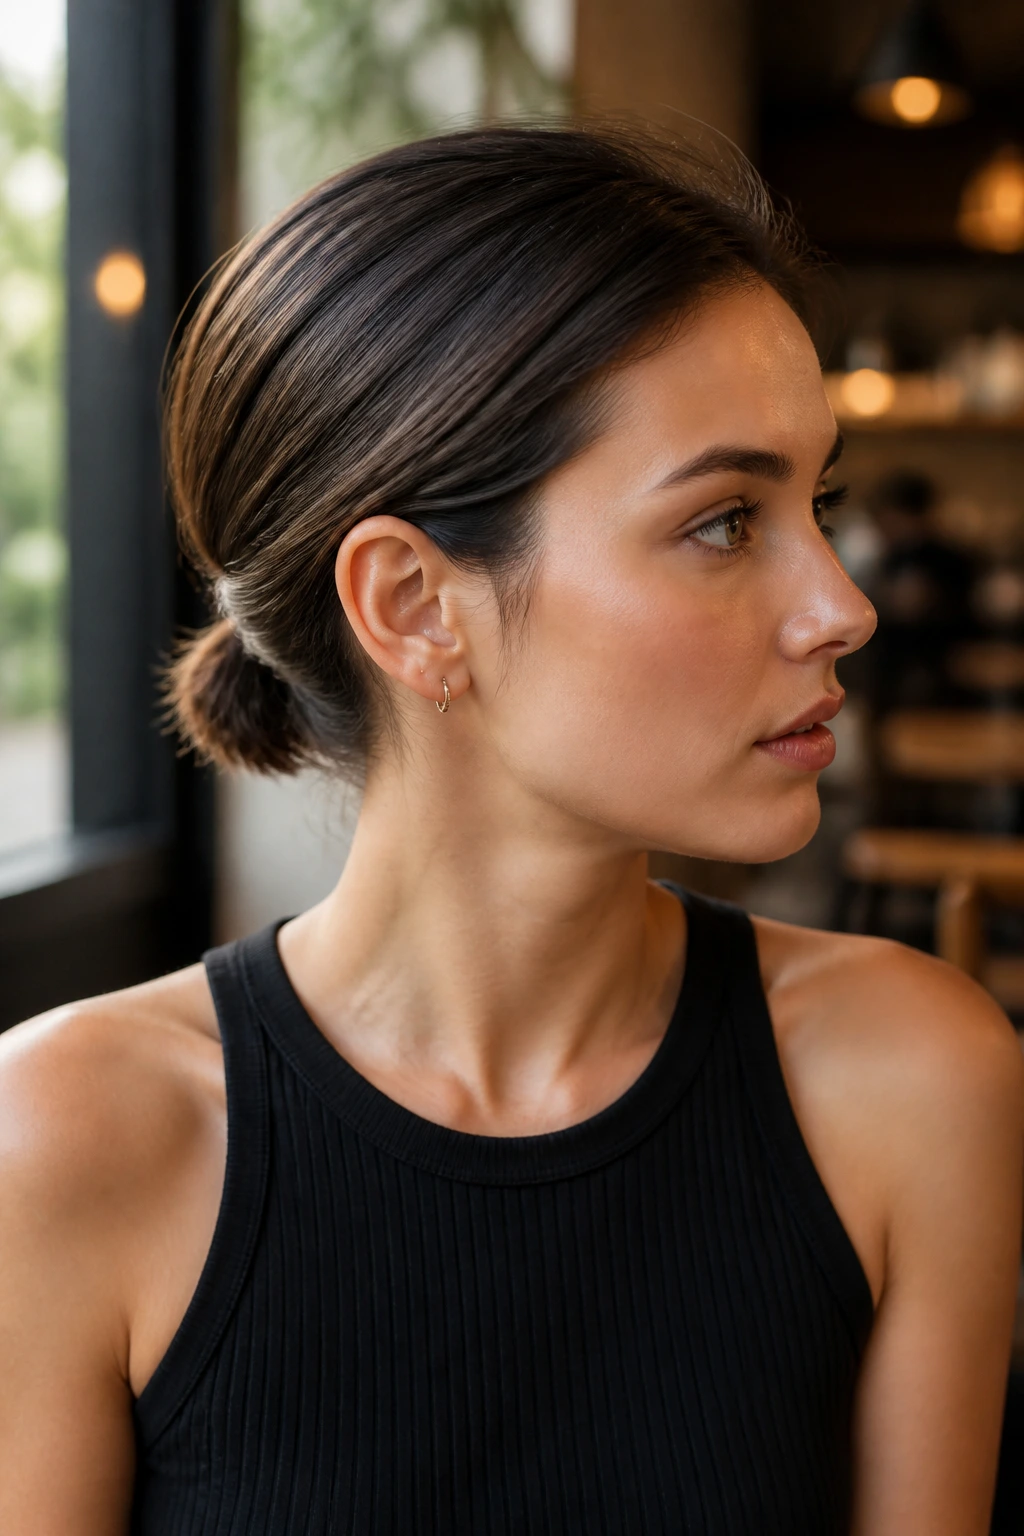
What It Looks Like: A clever tucked or pinned ponytail that gives shorter lengths the feeling of a full tie-back. It usually uses hidden pins and a small gathered tail, not a true long ponytail.
Why It Works: Short hair often needs a structural trick instead of a standard elastic. By folding and pinning the hair in a low shape, you get the look of a ponytail without fighting layers that won’t reach.
What You Need:
- 4 to 6 bobby pins
- 1 small elastic
- 1 texturizing spray
- 1 flat brush
Quick Steps:
- Smooth the top layer and gather what you can into a small low tail.
- Tuck the shorter layers underneath and pin them flat.
- Spray lightly so the shape holds without crunch.
Tools for This Style:
- Tail comb
- Pin grip if your hair is slippery
- Mirror for checking the back
How to Wear It: Good for bob-length and collarbone-length cuts when you want hair off the neck for a bit. It looks neat under jackets and works especially well with side parts.
Pro Tips for This Style:
- Hide the pins under the top layer, not through it.
- Use texture spray sparingly; too much makes the hair stick out.
Variations on This Style:
- Mini Low Tail: Leave a tiny tail at the nape instead of hiding everything.
- Pinned Loop Pony: Fold the lengths into a loop for a chic short-hair finish.
Common Mistakes to Avoid with This Style:
- Don’t force a true high ponytail if the layers won’t reach.
- Don’t use oversized elastics; they overwhelm short hair fast.
22. Bob-Length Mini Ponytail
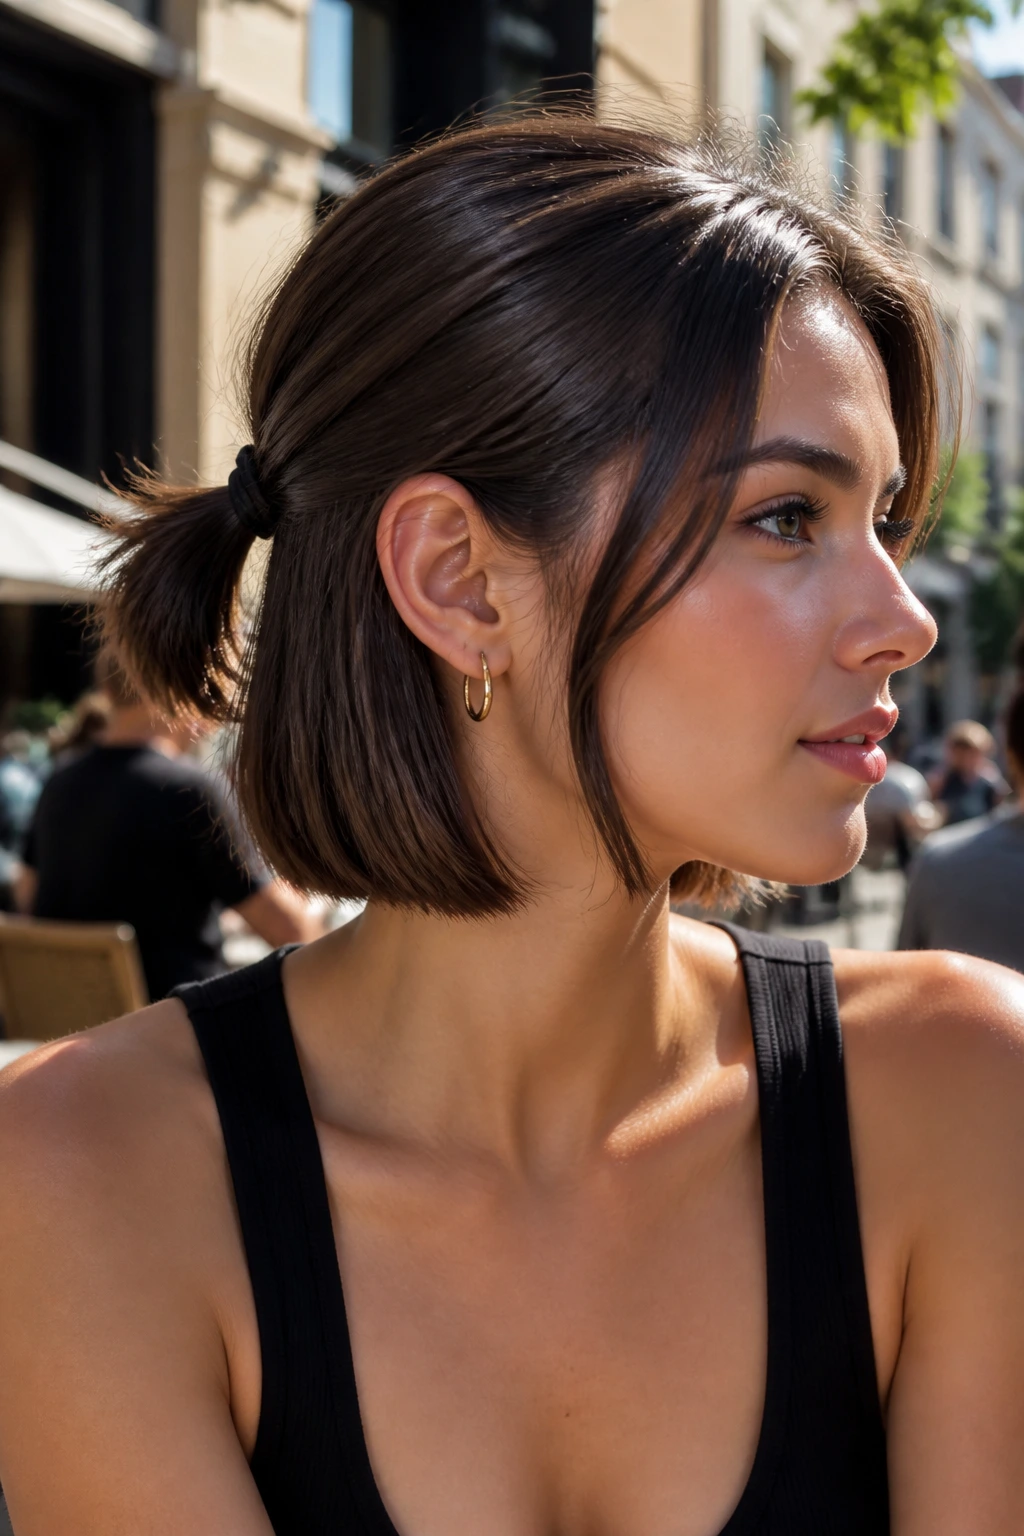
What It Looks Like: A small ponytail sitting low and neat, usually with the rest of the bob still framing the face. It’s cute, but more useful than cute — and that matters.
Why It Works: A mini pony keeps hair out of the eyes and off the neck while still letting the cut keep its shape. It’s especially good when you want to break up a bob without pinning everything flat.
What You Need:
- 1 small elastic
- 1 smoothing balm
- 1 tail comb
- 1 or 2 bobby pins
Quick Steps:
- Gather just the top or back section into a small ponytail.
- Keep the rest of the bob loose around the face.
- Pin any short pieces under the elastic if they slide out.
Tools for This Style:
- Small clear elastics
- Fine brush
- Optional mini claw clip for backup
How to Wear It: Works for casual days, errands, or a simple lunch outfit. It’s one of those styles that looks more intentional than it sounds.
Pro Tips for This Style:
- Don’t grab too much hair or the ponytail fights the bob shape.
- A little bend at the ends makes the style feel softer.
Variations on This Style:
- Half-Up Mini Pony: Raise it to the crown for a younger, cheekier look.
- Twisted Mini Pony: Twist the gathered section once before tying it off.
Common Mistakes to Avoid with This Style:
- Don’t flatten the bob into one plane. The cut needs some movement.
- Don’t use a heavy elastic that pulls the small section down.
23. Long Hair Lengthy Sleek Ponytail
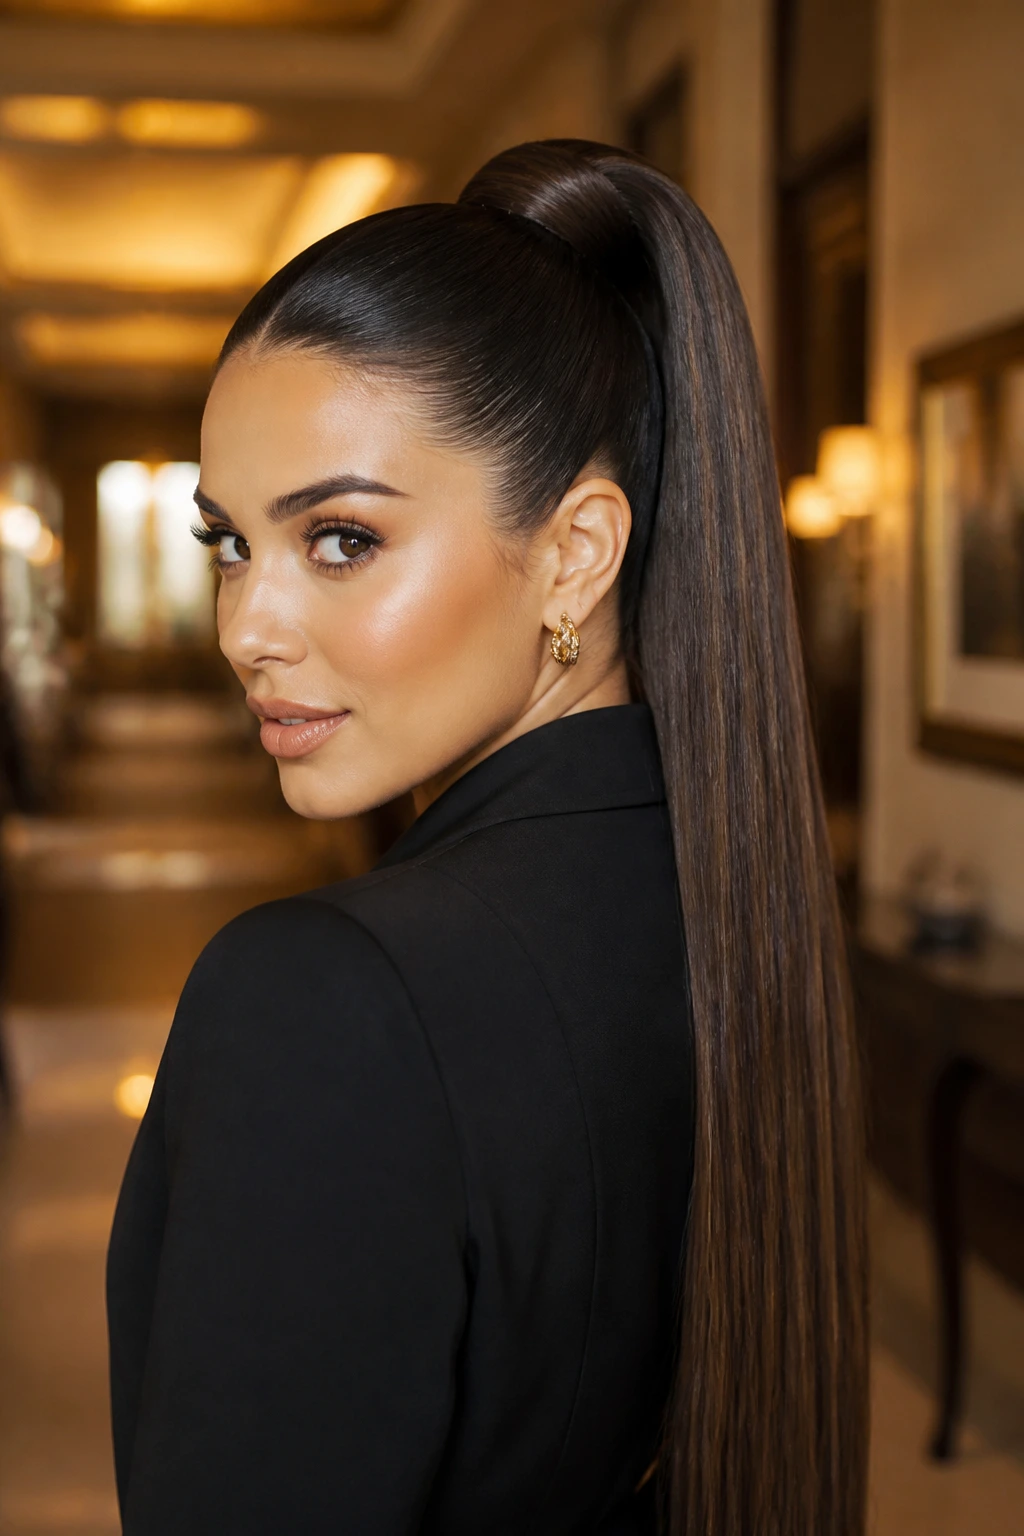
What It Looks Like: Long, smooth, and slightly dramatic, this ponytail lets the length do the talking. The key is to keep it sleek enough that the tail doesn’t look like a loose bundle.
Why It Works: Long hair carries shine well, so a clean root and controlled ends create a strong line. It’s one of the easiest ways to make length feel intentional instead of simply loose.
What You Need:
- 1 smoothing cream
- 1 elastic
- 1 wide brush
- 1 anti-frizz serum, a few drops
Quick Steps:
- Brush the hair in sections so the length stays tangle-free.
- Secure the ponytail low, mid, or high, depending on the look you want.
- Smooth the tail with a tiny bit of serum, focusing on the last third.
Tools for This Style:
- Long-handled brush
- Section clips
- Wide-barrel iron if you want a soft finish at the ends
How to Wear It: Great for formal looks, simple outfits, and any setting where the hair length should be part of the silhouette. A long tail can carry an outfit all by itself.
Pro Tips for This Style:
- Brush from ends upward before tying to avoid drag.
- If the tail is heavy, split it into two hidden elastics for support.
Variations on This Style:
- Extra-Long Wrapped Pony: Wrap the base and leave the tail pin-straight.
- Bent-End Length Pony: Add a tiny curve at the bottom so the length doesn’t feel severe.
Common Mistakes to Avoid with This Style:
- Don’t overload the tail with oil. Long hair already shows shine easily.
- Don’t ignore the underside of the ponytail; that’s where tangles hide.
24. Curtain Bangs Sleek Ponytail
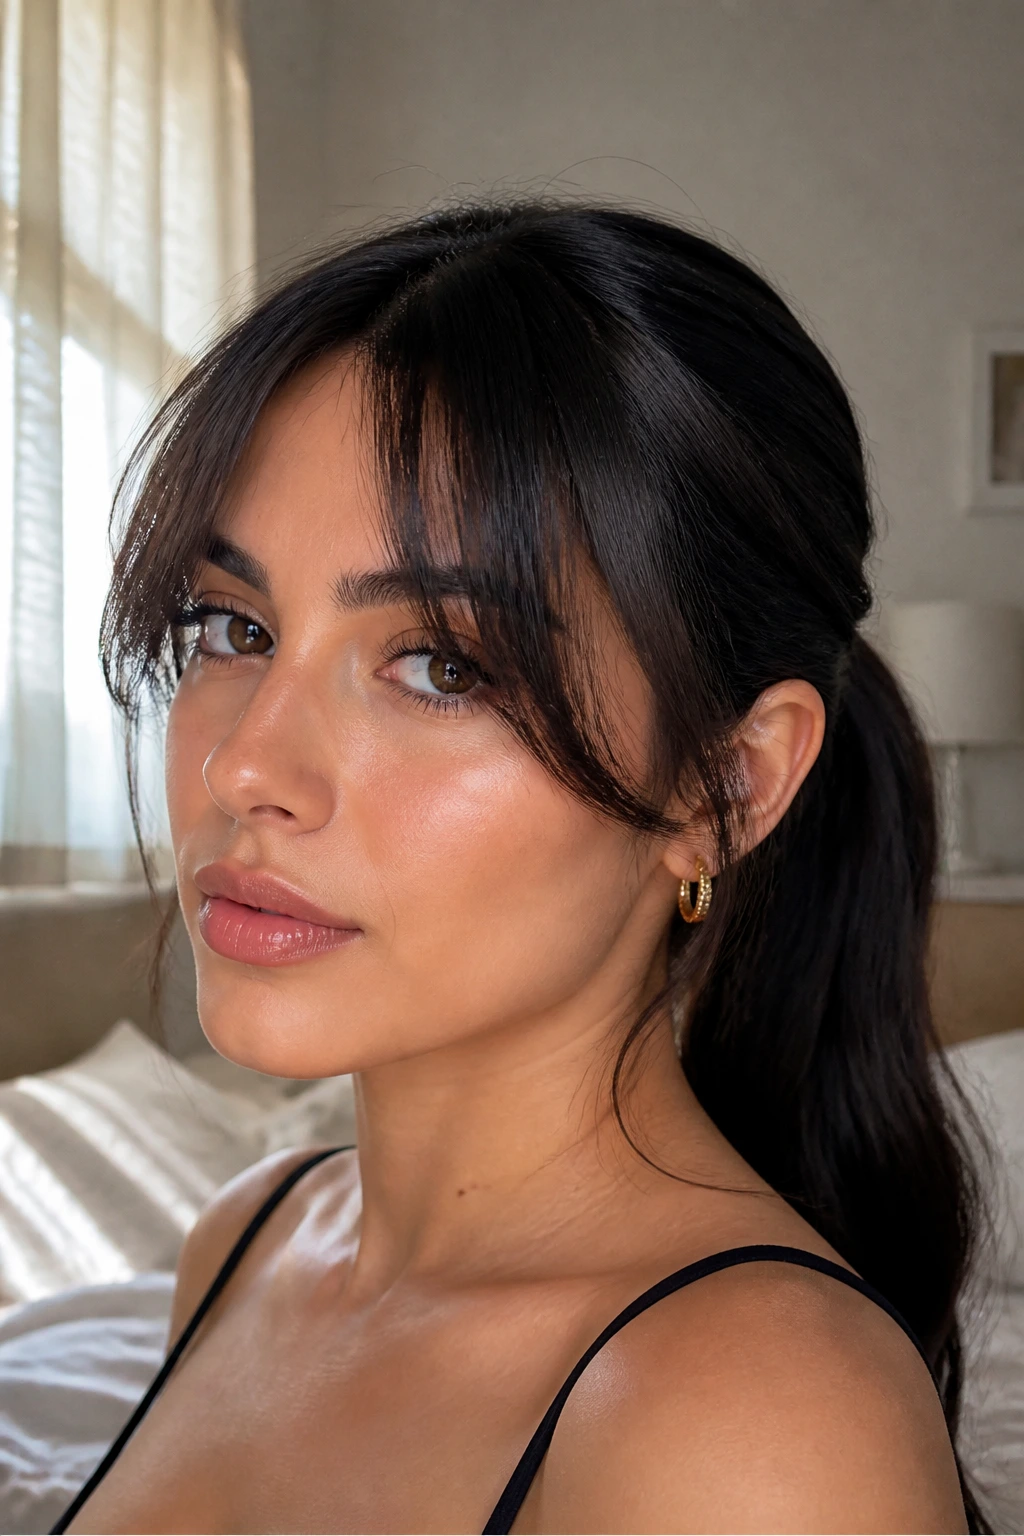
What It Looks Like: Curtain bangs stay out in front, softly framing the face, while the rest of the hair pulls back in a sleek line. That balance keeps the style from feeling too strict.
Why It Works: The bangs add motion around the eyes and cheekbones, which softens the clean ponytail behind them. It’s a nice compromise when you want polish but not a full hair pullback.
What You Need:
- 1 smoothing cream
- 1 elastic
- 1 round brush or blow dryer for the bangs
- 1 light hairspray
Quick Steps:
- Style the curtain bangs first so they fall in their usual sweep.
- Smooth the rest into a low or mid ponytail.
- Keep the bangs soft, not stiff, so they frame the face naturally.
Tools for This Style:
- Round brush
- Blow dryer with nozzle
- Tail comb for the ponytail part
How to Wear It: Good with dresses, casual tops, or work clothes when you want some face movement. The bangs keep the look from becoming too severe.
Pro Tips for This Style:
- Don’t spray the bangs heavily. They should move when you turn your head.
- Blow-dry the bangs separately before tying the ponytail.
Variations on This Style:
- Soft Side Bang Pony: Sweep the bangs to one side instead of splitting them.
- Pinned Bang Pony: Pin the bangs back for a cleaner, more formal look.
Common Mistakes to Avoid with This Style:
- Don’t flatten the bangs into the ponytail; they lose their whole purpose.
- Don’t let the ponytail sit too high if the bangs are meant to soften the look.
25. Face-Framing Tendril Ponytail
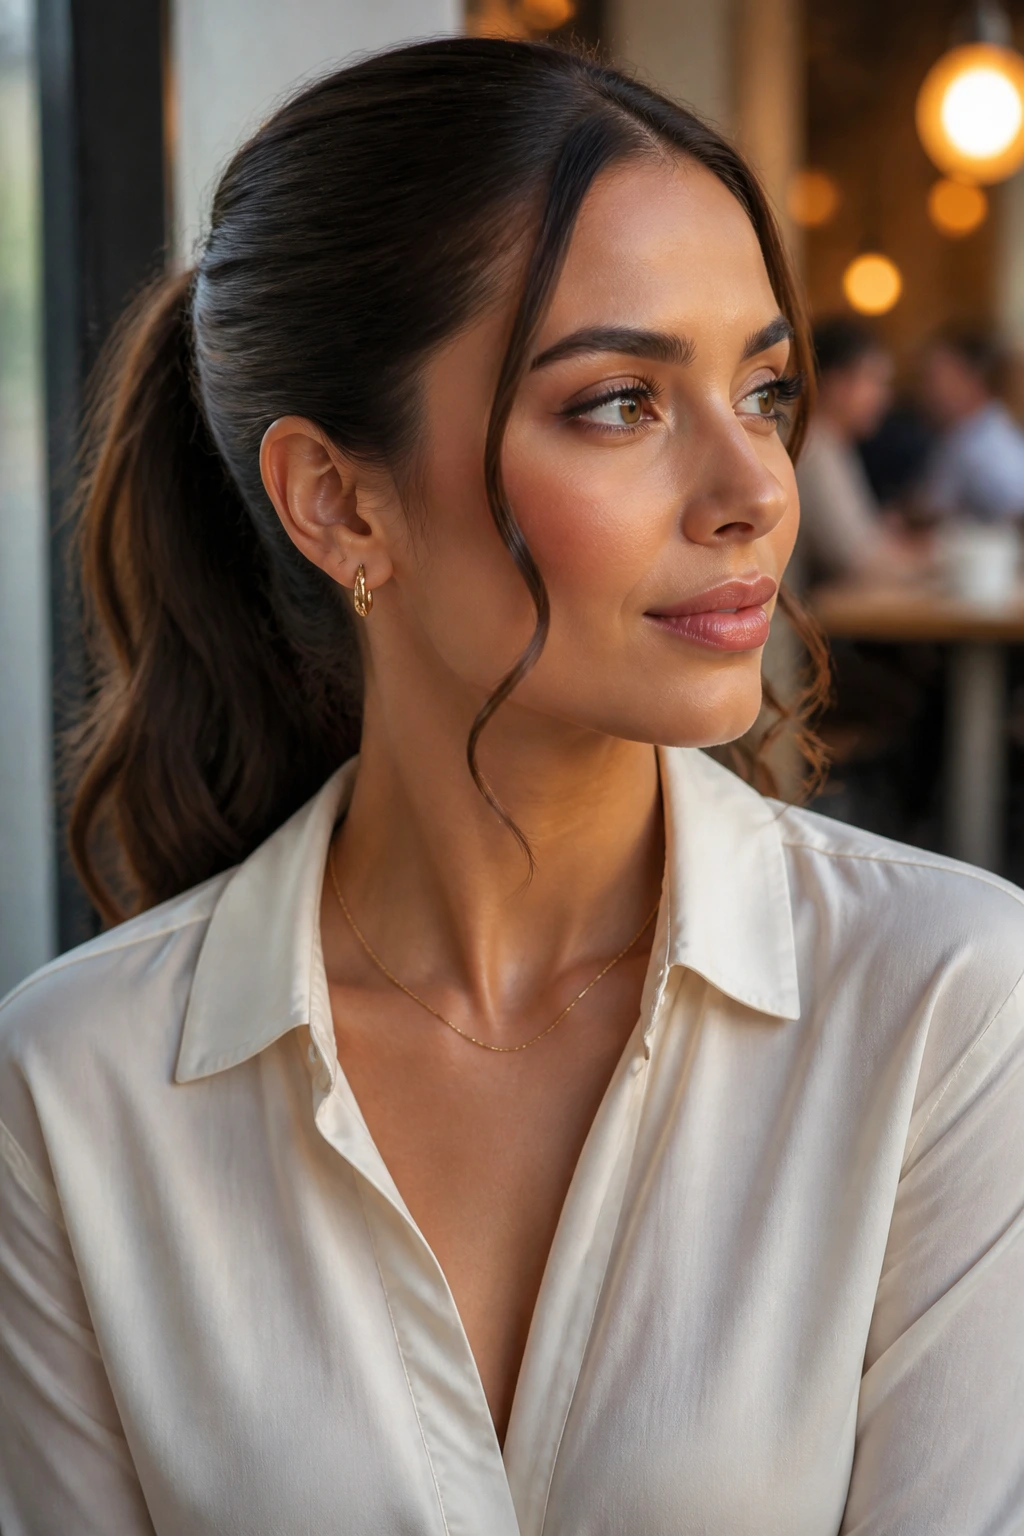
What It Looks Like: The ponytail stays smooth, but one or two fine tendrils stay out around the face. It gives the style a lighter, less severe finish.
Why It Works: Face-framing pieces break up the smoothness just enough to soften strong features or sharp collars. They also keep the style from feeling too pulled back for longer wear.
What You Need:
- 1 elastic
- 1 smoothing cream
- 1 curling iron for the tendrils
- 1 light spray
Quick Steps:
- Leave out one slim section on each side of the face.
- Gather the rest into a sleek ponytail.
- Curl the tendrils away from the face with a small barrel.
Tools for This Style:
- Tail comb
- Section clips
- Bobby pins if the pieces are too short to stay put
How to Wear It: Works for brunch, events, and days when you want the ponytail to feel a little less formal. It pairs nicely with open necklines and soft makeup.
Pro Tips for This Style:
- Keep the tendrils thin; thick face pieces can look dated fast.
- Curl them lightly and let them cool before touching.
Variations on This Style:
- Double Tendril Pony: Leave out two pieces per side for a fuller frame.
- Wavy Tendril Finish: Use a looser bend instead of a tight curl.
Common Mistakes to Avoid with This Style:
- Don’t leave the tendrils too thick or they overwhelm the face.
- Don’t spray them before curling; heat and hairspray together can make them stiff.
26. 90s High Ponytail
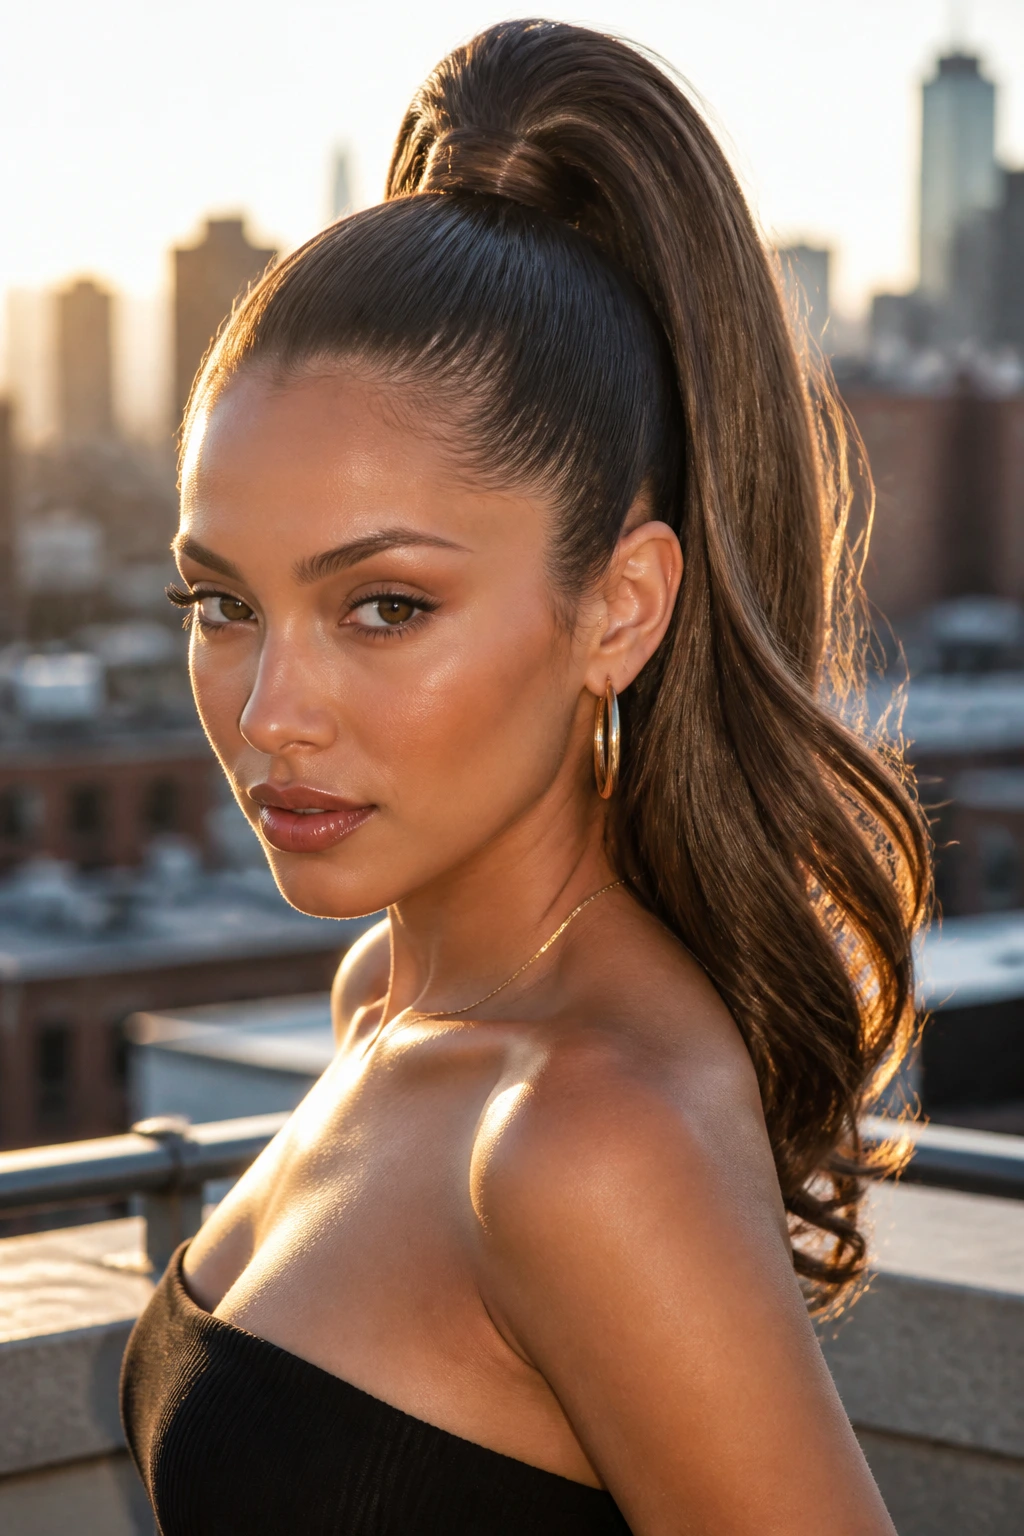
What It Looks Like: High, lifted, and a little nostalgic, this ponytail has that crisp crown and swinging tail that feels pulled straight from a glossy magazine spread. The shape should be energetic, not childish.
Why It Works: Height creates instant drama, and a smooth crown keeps it from looking messy. A slightly curled tail or flipped end adds the throwback feel without overdoing the reference.
What You Need:
- 1 strong elastic
- 1 smoothing gel
- 1 round brush
- 1 curling iron or hot brush for the tail
Quick Steps:
- Brush the hair high with a strong smoothing product at the front.
- Secure the ponytail at the crown.
- Add a bend or flick through the tail for movement.
Tools for This Style:
- Tail comb
- Sectioning clips
- Hairspray for the crown
How to Wear It: Great for parties, concert nights, or anything that benefits from a bit more edge. It also lifts the face in a way that feels immediate.
Pro Tips for This Style:
- Leave the tail too straight and it can read flat; one bend makes the style.
- If the crown is puffy, smooth it with the back of the brush after tying.
Variations on This Style:
- Soft 90s Pony: Loosen the crown slightly for less severity.
- Extra-High Pony: Place it a touch higher if you want more lift.
Common Mistakes to Avoid with This Style:
- Don’t make the base too low; the whole reference disappears.
- Don’t leave frayed ends visible at the elastic.
27. Scarf-Wrapped Ponytail
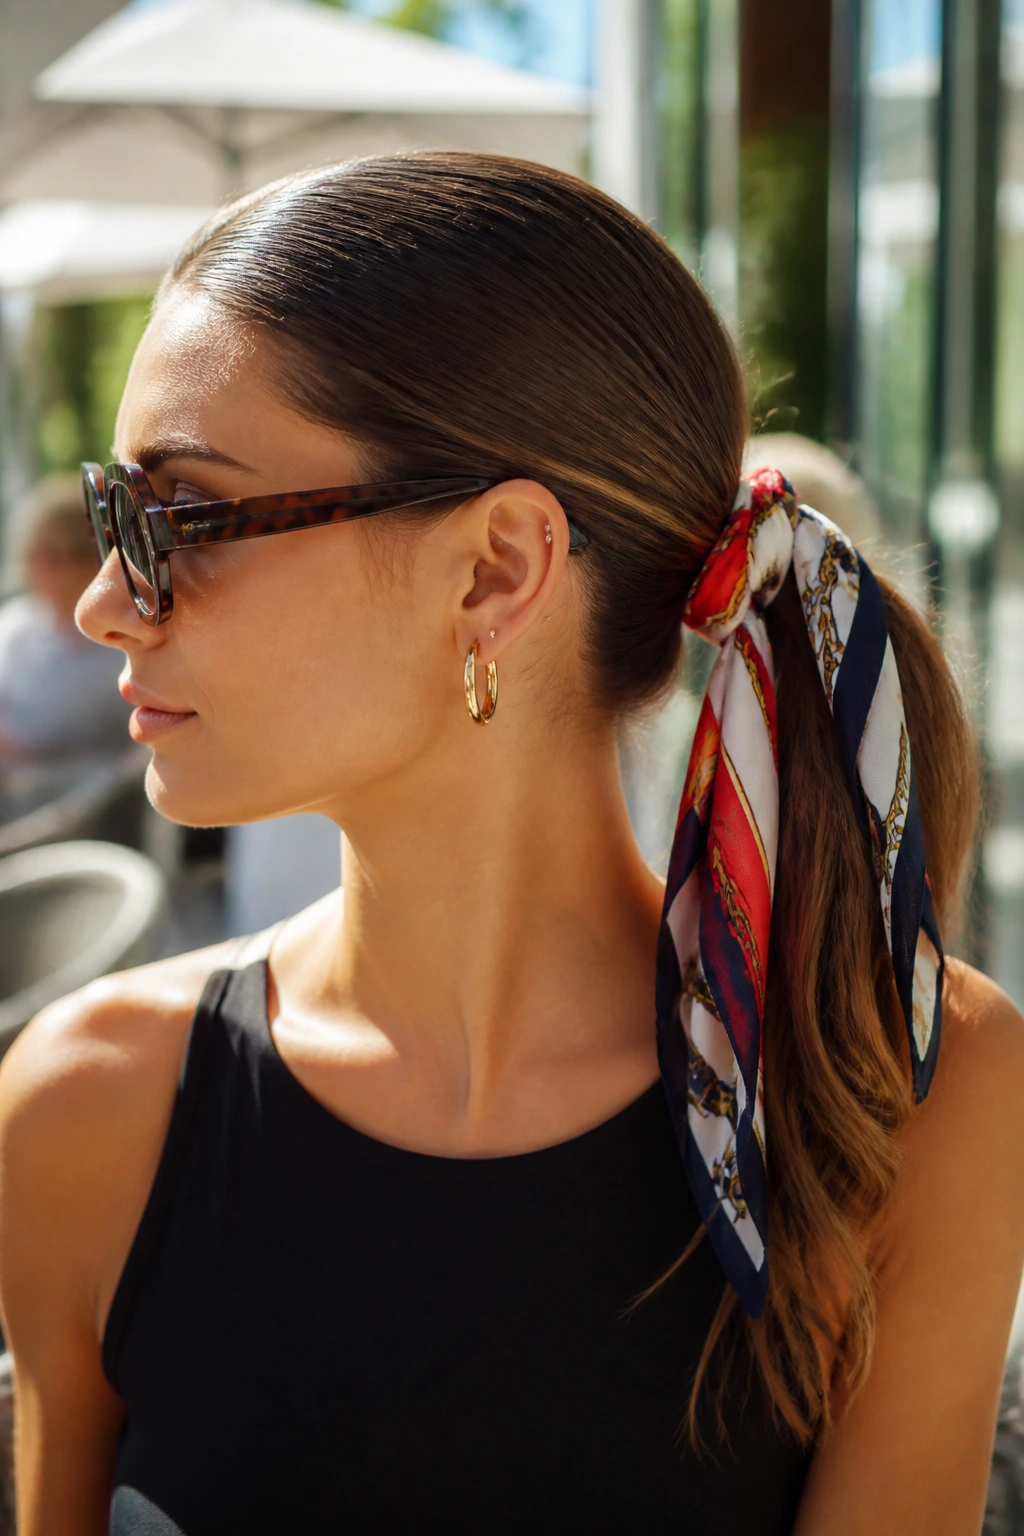
What It Looks Like: A sleek ponytail with a scarf tied around the base or woven into the tail. The scarf adds movement and color, and it can make a plain hairstyle feel styled in 30 seconds.
Why It Works: The scarf becomes the focal point, which means the ponytail underneath only has to be clean and simple. That’s a relief on days when the outfit needs the extra work, not the hair.
What You Need:
- 1 silk or cotton scarf
- 1 elastic
- 1 smoothing cream
- 1 pin or two if needed
Quick Steps:
- Tie a low or mid ponytail and smooth the base.
- Knot the scarf around the elastic or thread it through a section of the tail.
- Let the ends hang or twist them once around the base.
Tools for This Style:
- Tail comb
- Bobby pins
- Small safety pin if the scarf slips
How to Wear It: It pairs well with plain tops, denim, and summer dresses because the scarf supplies the color. Keep the outfit simple and let the hair do the talking.
Pro Tips for This Style:
- Choose a scarf that isn’t too thick or it bulks up the base.
- If the scarf is slippery, anchor it with one hidden pin.
Variations on This Style:
- Half-Scarf Tie: Tie only a small knot at the base and let the tail stay visible.
- Braided Scarf Pony: Braid the scarf into the tail for more texture.
Common Mistakes to Avoid with This Style:
- Don’t choose a scarf with a stiff fold if you want movement.
- Don’t put the scarf on a sloppy base; the ponytail underneath still matters.
28. Pearl-Studded Ponytail
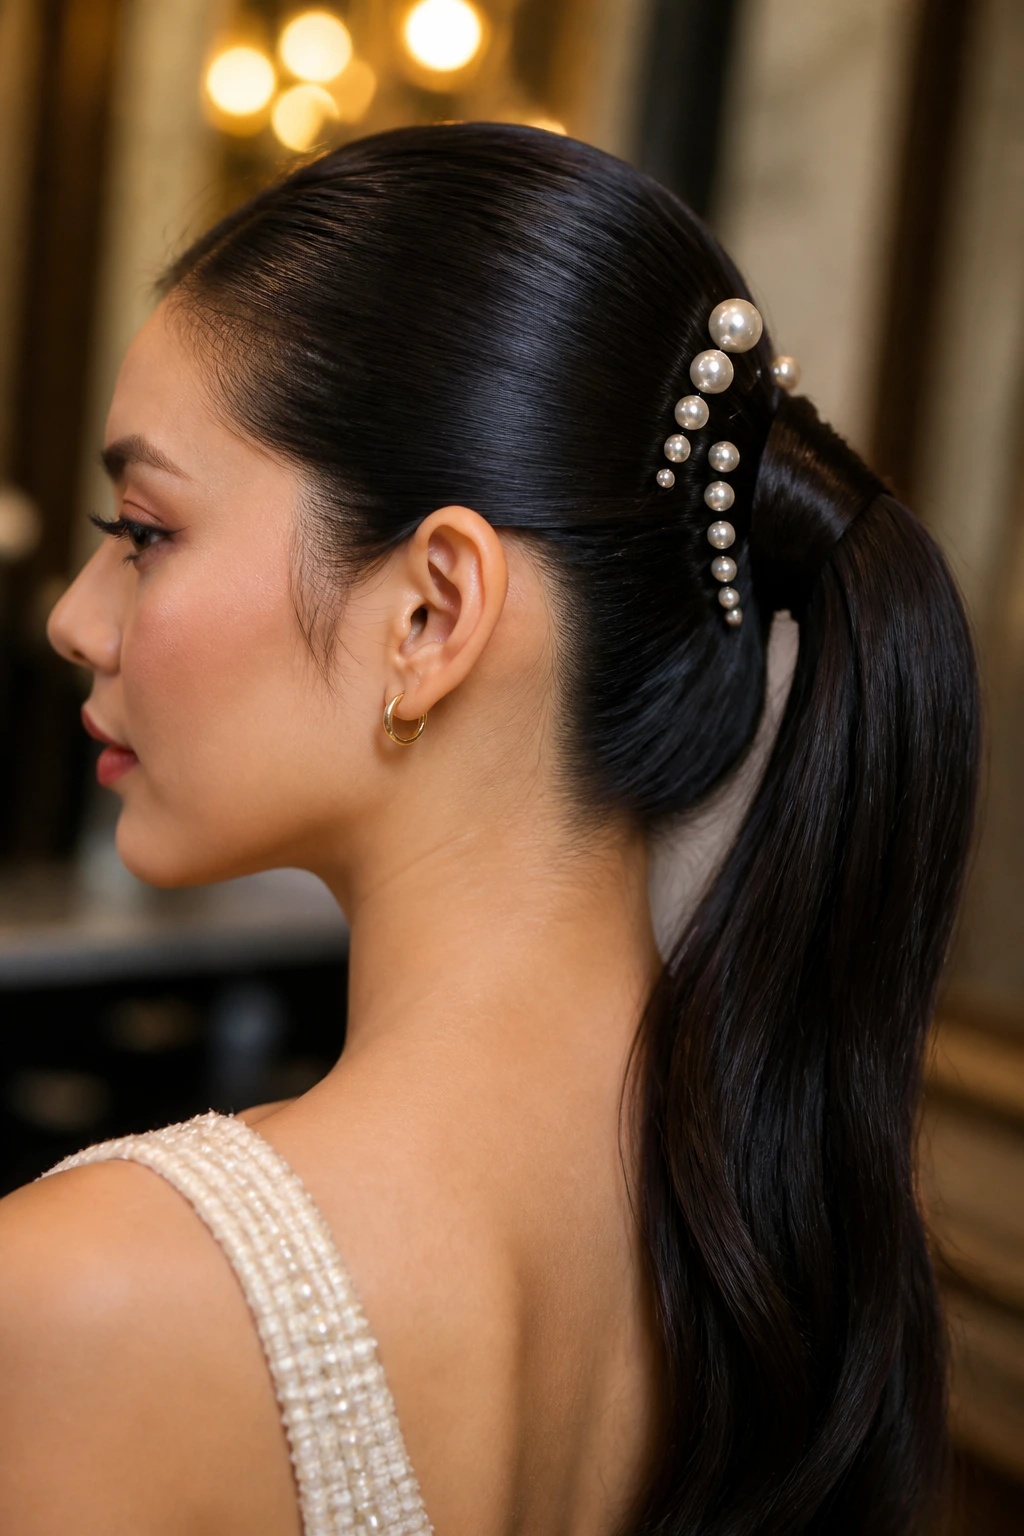
What It Looks Like: Smooth and neat with pearl pins, clips, or a pearl comb placed near the base or along one side. It’s dressy in a quiet way.
Why It Works: Pearls soften the shine of a sleek ponytail and give it a formal finish without heavy sparkle. They work especially well when the outfit already has some texture.
What You Need:
- 1 elastic
- 1 pearl accessory set
- 1 smoothing cream
- 1 flexible-hold spray
Quick Steps:
- Build a low or mid sleek ponytail.
- Place the pearl pieces where they can be seen but won’t pull on the hair.
- Smooth the tail once more so the accessories sit against a neat surface.
Tools for This Style:
- Mirror for placement
- Bobby pins if using a comb
- Tail comb
How to Wear It: Nice for weddings, dinners, and formal settings where you want polished details. The pearls read softer than crystals.
Pro Tips for This Style:
- Use one pearl cluster instead of scattering them everywhere.
- Keep the tail simple and straight if the accessory is detailed.
Variations on This Style:
- Pearl Side Sweep: Move the accessory to one side for more asymmetry.
- Pearl Wrap Base: Hide the elastic under a slim pearl clip.
Common Mistakes to Avoid with This Style:
- Don’t overload the hair with too many decorative pins.
- Don’t place heavy accessories on very fine hair without extra pins.
29. Claw-Clip Hybrid Ponytail
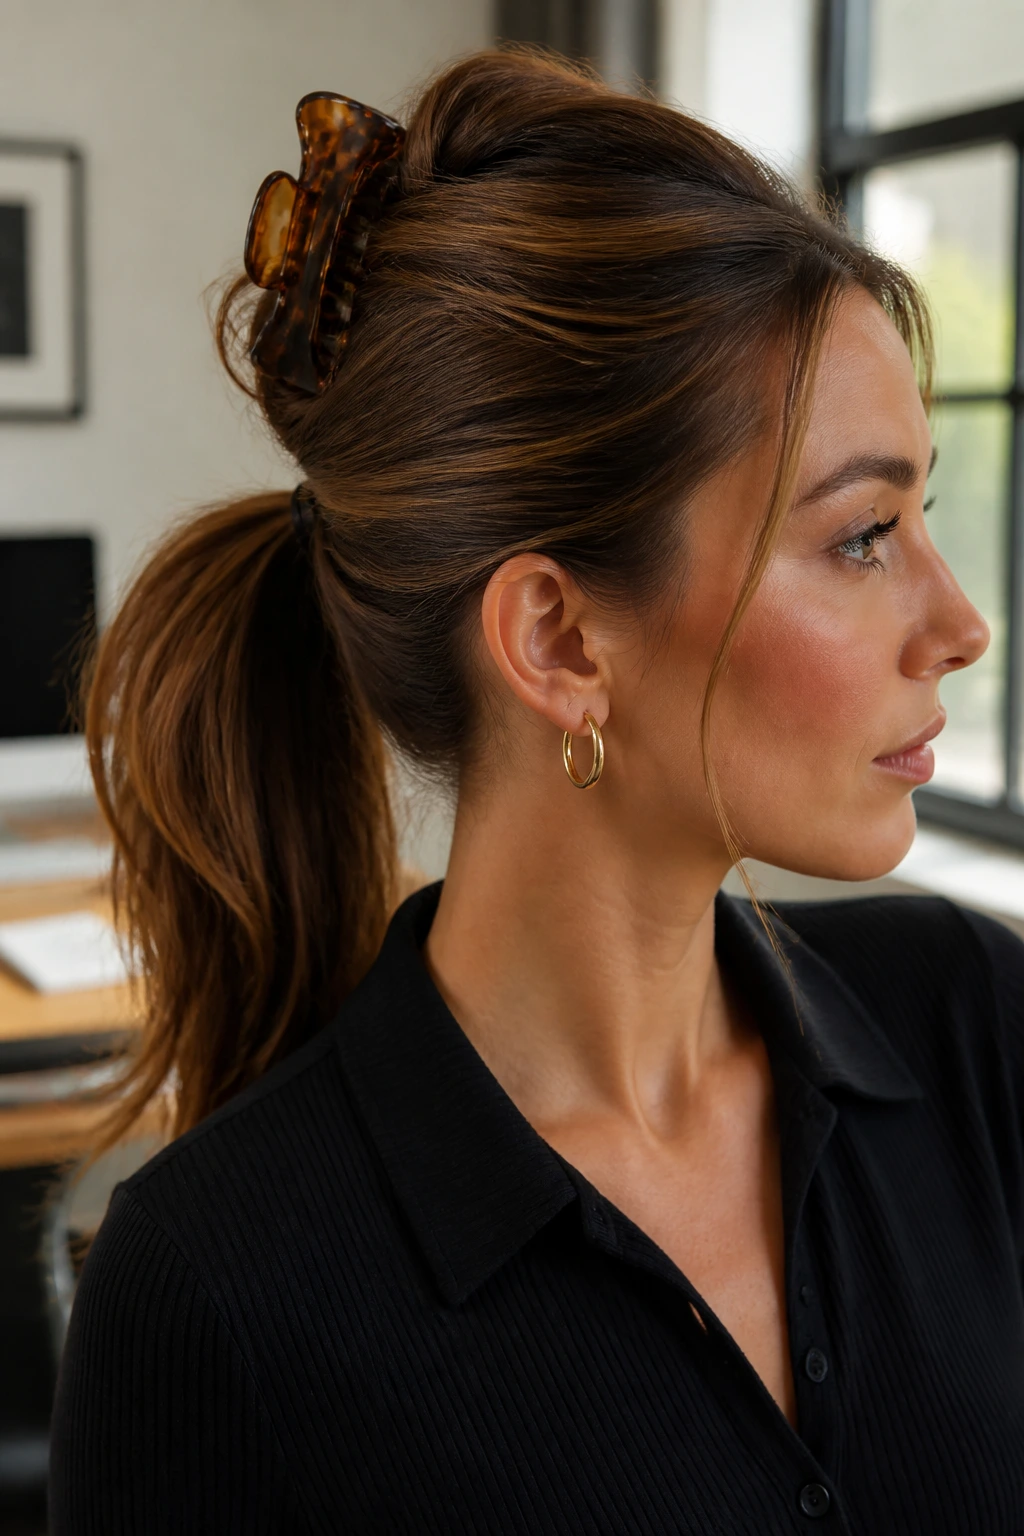
What It Looks Like: Part ponytail, part clip-up, this style leaves some of the hair pinned higher while the lower section is gathered neatly. It’s casual, but with enough shape to look thought through.
Why It Works: The clip creates lift without a full pullback, and the ponytail keeps the lower lengths controlled. It’s handy when you want movement but hate the feel of a tight elastic all day.
What You Need:
- 1 medium or large claw clip
- 1 small elastic
- 1 smoothing cream
- 1 brush
Quick Steps:
- Gather the top section loosely and secure it with the clip.
- Pull the remaining hair into a lower ponytail.
- Smooth the visible sections so the hybrid looks deliberate.
Tools for This Style:
- Sectioning clips
- Tail comb
- Optional hairpin for extra grip
How to Wear It: Good for casual office days, errands, or relaxed lunches. It gives a little lift without the full commitment of a high ponytail.
Pro Tips for This Style:
- Choose a clip with teeth that grip well, not one that looks nice and slips.
- Keep the clip hidden behind the crown section so it doesn’t dominate the look.
Variations on This Style:
- Half Clip Pony: Leave more of the tail loose for a softer version.
- Twisted Hybrid: Twist the top section before clipping it.
Common Mistakes to Avoid with This Style:
- Don’t use a clip that’s too small for your density. It will pop open.
- Don’t let the ponytail underneath get messy; the contrast will show.
30. Braided Accent Ponytail
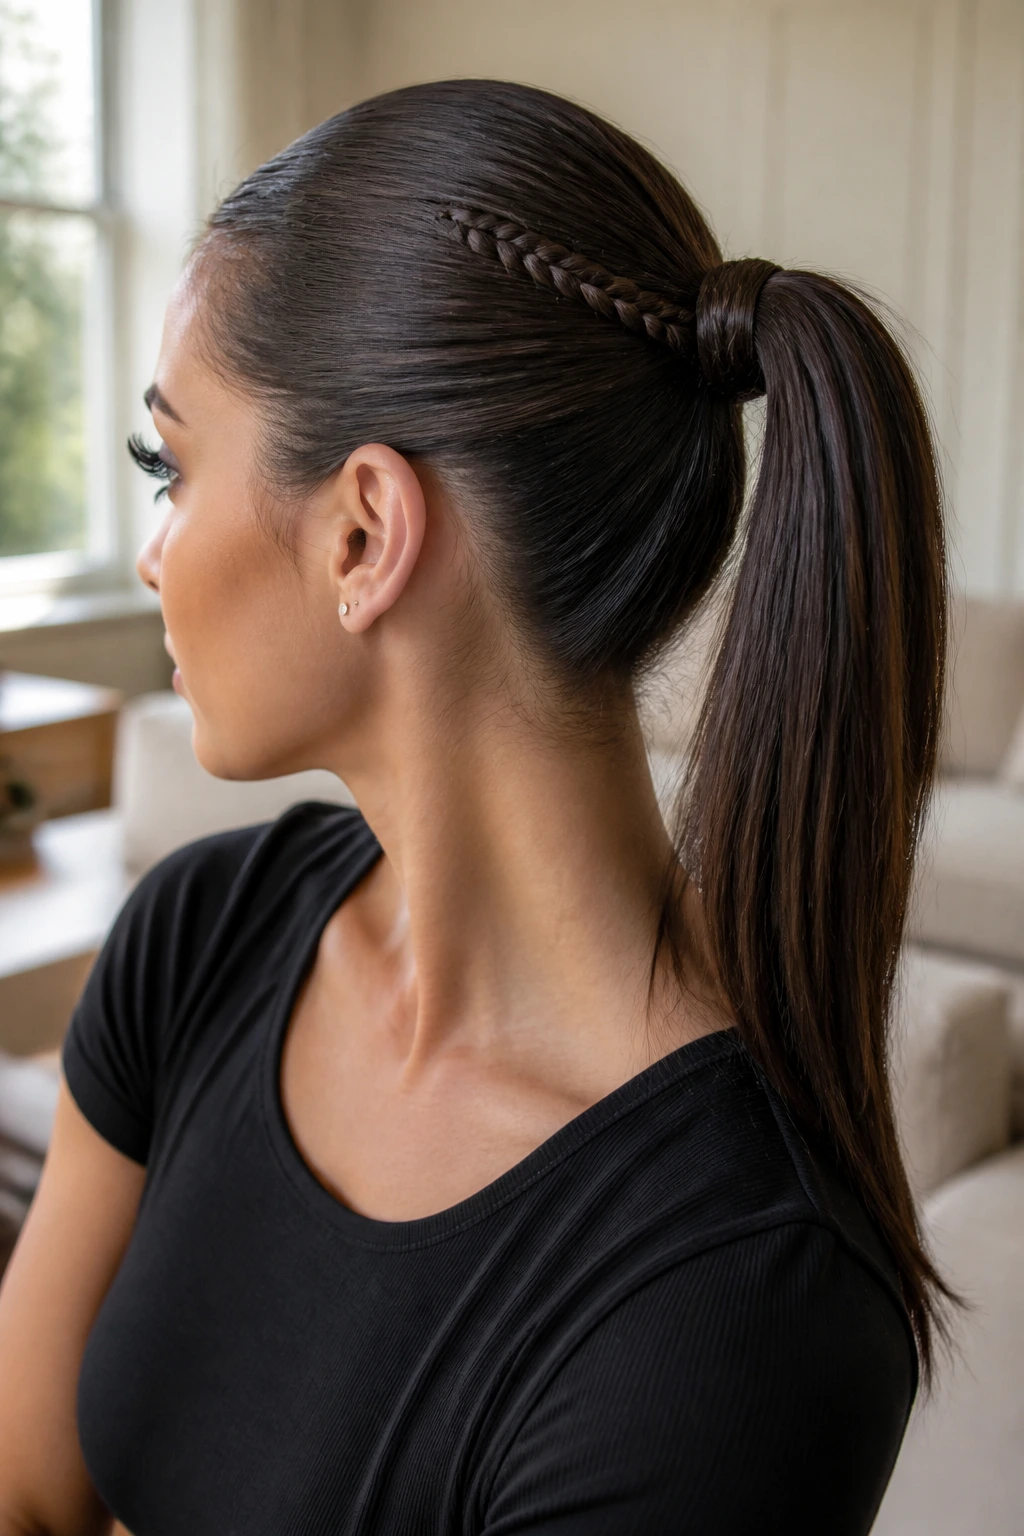
What It Looks Like: A sleek ponytail with one small braid woven into the side or tail for texture. It’s subtle enough to feel grown-up, but it still changes the shape.
Why It Works: The braid adds visual rhythm without disturbing the smooth base. It’s a smart choice when you want detail but don’t want to add accessories.
What You Need:
- 1 elastic
- 1 small clear tie for the braid
- 1 smoothing cream
- 1 compact brush
Quick Steps:
- Braid a narrow section from one side or from the tail itself.
- Gather the hair into a sleek ponytail.
- Let the braid sit on top of the tail or wrap it around the base.
Tools for This Style:
- Tail comb
- Small pins
- Optional texturizing spray for the braid only
How to Wear It: Nice for day events, concerts, or any outfit that feels a little too plain on its own. The braid adds a hand-made feel that reads intentional.
Pro Tips for This Style:
- Keep the braid narrow so it stays like an accent.
- If the tail is very smooth, braid one section of it after tying so the texture pops.
Variations on This Style:
- Side Accent Braid: Braid only one temple section.
- Tail Braid Detail: Braid the bottom third of the ponytail for contrast.
Common Mistakes to Avoid with This Style:
- Don’t braid too much hair or the ponytail loses its clean line.
- Don’t make the braid fluffy unless the rest of the style is soft too.
31. Asymmetrical Low Ponytail
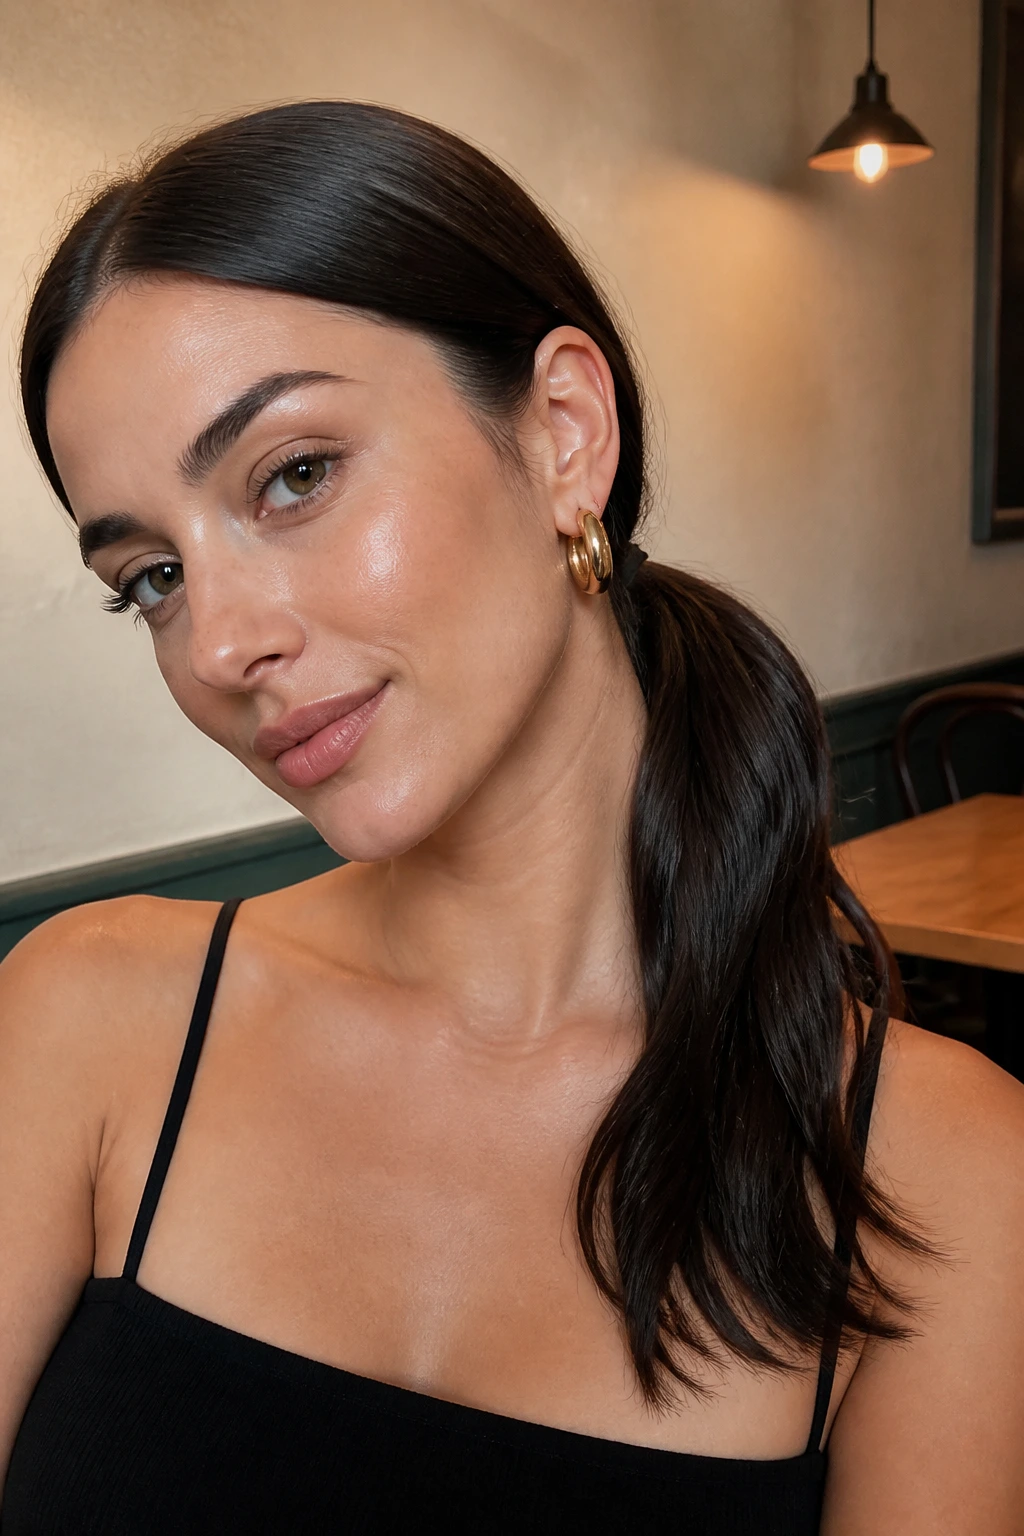
What It Looks Like: The ponytail sits low but slightly off-center, usually closer to one side of the neck. The result feels modern and a little unexpected.
Why It Works: Small asymmetry changes the visual weight without needing an entirely new structure. It’s a useful trick when a centered ponytail feels too plain or too strict.
What You Need:
- 1 elastic
- 1 smoothing cream
- 1 tail comb
- 2 bobby pins
Quick Steps:
- Part the hair slightly off-center.
- Gather the ponytail low and a few inches to one side.
- Smooth the crown toward the tie and pin any loose side pieces.
Tools for This Style:
- Soft brush
- Mirror for balance
- Optional curl tool for the tail ends
How to Wear It: Works well with asymmetrical necklines, one-shoulder tops, or outfits that already have visual movement. It feels more styled than a centered pony without getting fussy.
Pro Tips for This Style:
- Shift it only a little; too far over and it becomes a true side pony.
- Keep the front smooth so the asymmetry stays the main change.
Variations on This Style:
- Deep Off-Center Pony: Move the tie farther toward one shoulder.
- Low Twist Offset: Twist one side back before fastening.
Common Mistakes to Avoid with This Style:
- Don’t make the part random. The asymmetry should look chosen.
- Don’t let one side sag; the ponytail needs even support.
32. School-Run Fast Sleek Ponytail
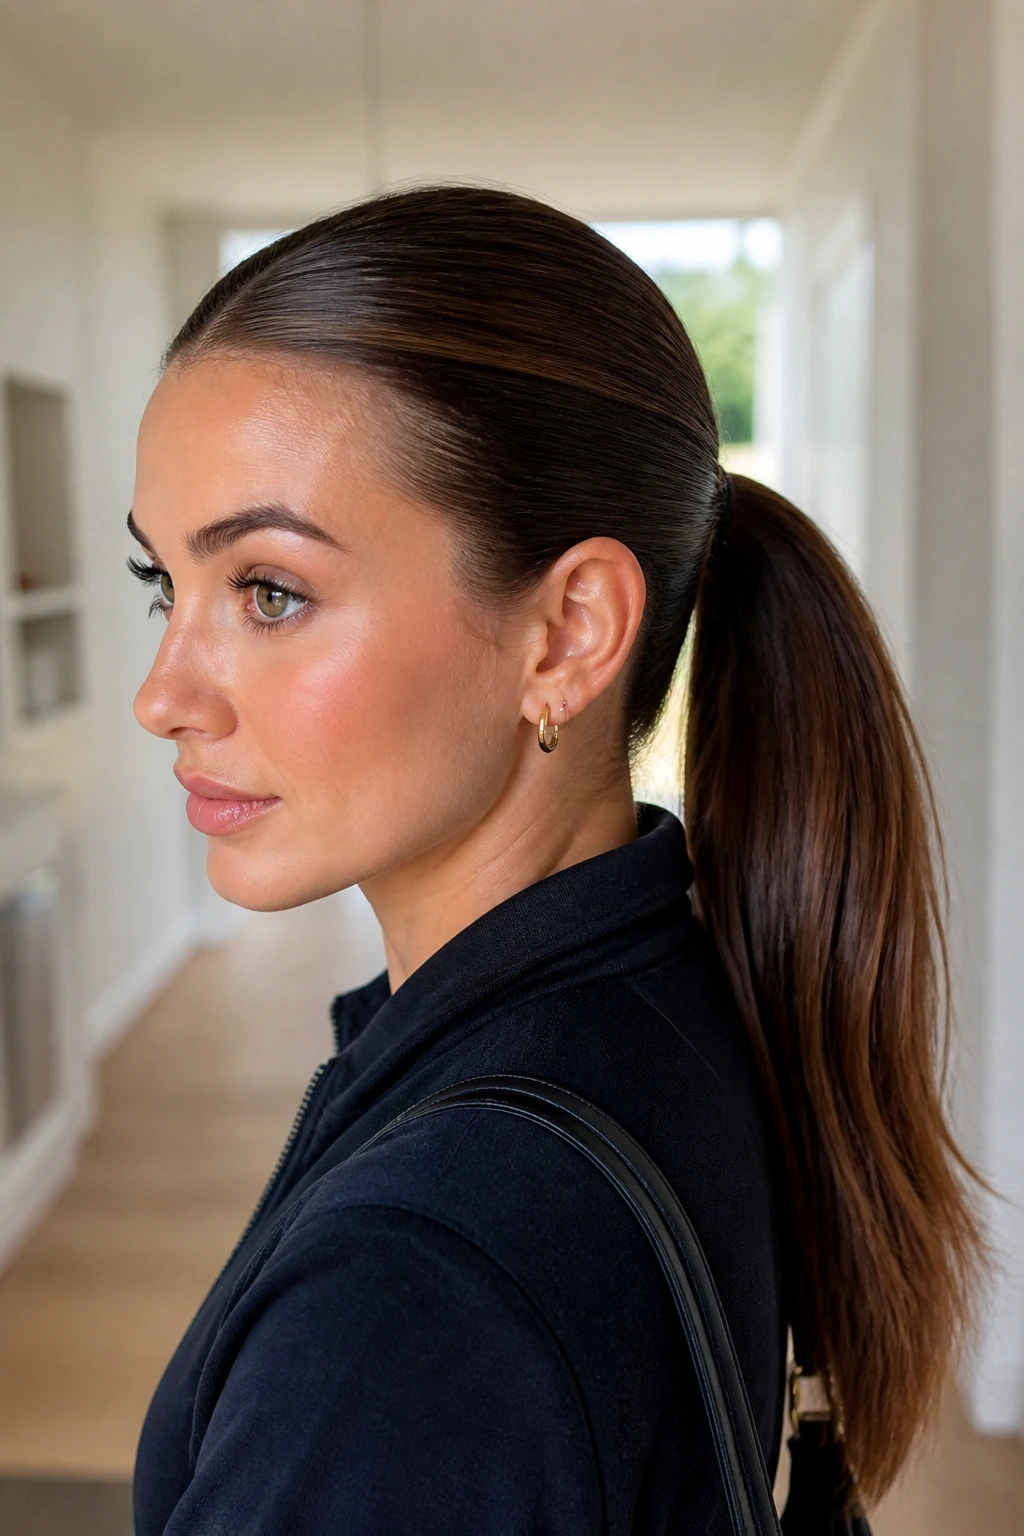
What It Looks Like: Clean, quick, and ready in minutes, this ponytail is simple enough for a rushed morning but still neat enough that you don’t feel underdressed. It’s the dependable one.
Why It Works: The shape is basic on purpose. A quick smoothing pass and a low or mid tie keep the hair under control without the kind of prep that steals ten extra minutes.
What You Need:
- 1 elastic
- 1 smoothing cream or leave-in
- 1 brush
- 1 small clip
Quick Steps:
- Brush in smoothing cream through the top and sides.
- Gather the hair into a low or mid ponytail.
- Pin back one front section if needed and go.
Tools for This Style:
- Tail comb for the part
- Pocket-sized hairspray
- Optional scrunchie for a softer finish
How to Wear It: Best for busy mornings, school runs, and quick errands where you still want the hair to look intentional. It goes with almost anything.
Pro Tips for This Style:
- Keep one favorite elastic in your bag so you don’t have to hunt.
- A tiny side part can make the style look less rushed.
Variations on This Style:
- Low Quick Pony: Easier if your hair is thick.
- Mid Clip-Assist Pony: Use a clip to keep the front sections steady.
Common Mistakes to Avoid with This Style:
- Don’t let the crown stay puffy because you skipped the brush.
- Don’t overcomplicate it on a rushed day; the clean version is the point.
33. Interview-Ready Low Ponytail

What It Looks Like: Calm, tidy, and almost understated to the point of looking thoughtful. Nothing should distract from your face.
Why It Works: A low ponytail keeps the hair controlled and signals neatness without feeling severe. In a setting where people are watching how you handle yourself, that quietness helps.
What You Need:
- 1 elastic
- 1 smoothing cream
- 1 fine-tooth comb
- 1 neutral hairspray
Quick Steps:
- Part the hair neatly and brush it low with controlled tension.
- Fasten the ponytail at the nape.
- Smooth the top again and keep the tail simple and straight.
Tools for This Style:
- Compact mirror
- Bobby pins for slips
- Small brush for touch-ups
How to Wear It: Good for interviews, presentations, and meetings where you want the hair to be present but not memorable. That sounds harsh; it’s actually a compliment.
Pro Tips for This Style:
- Avoid anything shiny or decorative.
- If your hairline is prone to fuzz, a tiny amount of gel on the brush helps.
Variations on This Style:
- Side-Part Interview Pony: Softer around the face.
- Tucked Tail Version: Fold the end slightly under for a shorter profile.
Common Mistakes to Avoid with This Style:
- Don’t make the ponytail too high. It can read casual.
- Don’t add too much volume at the crown; you want clean, not towering.
34. Cocktail Hour Side Ponytail
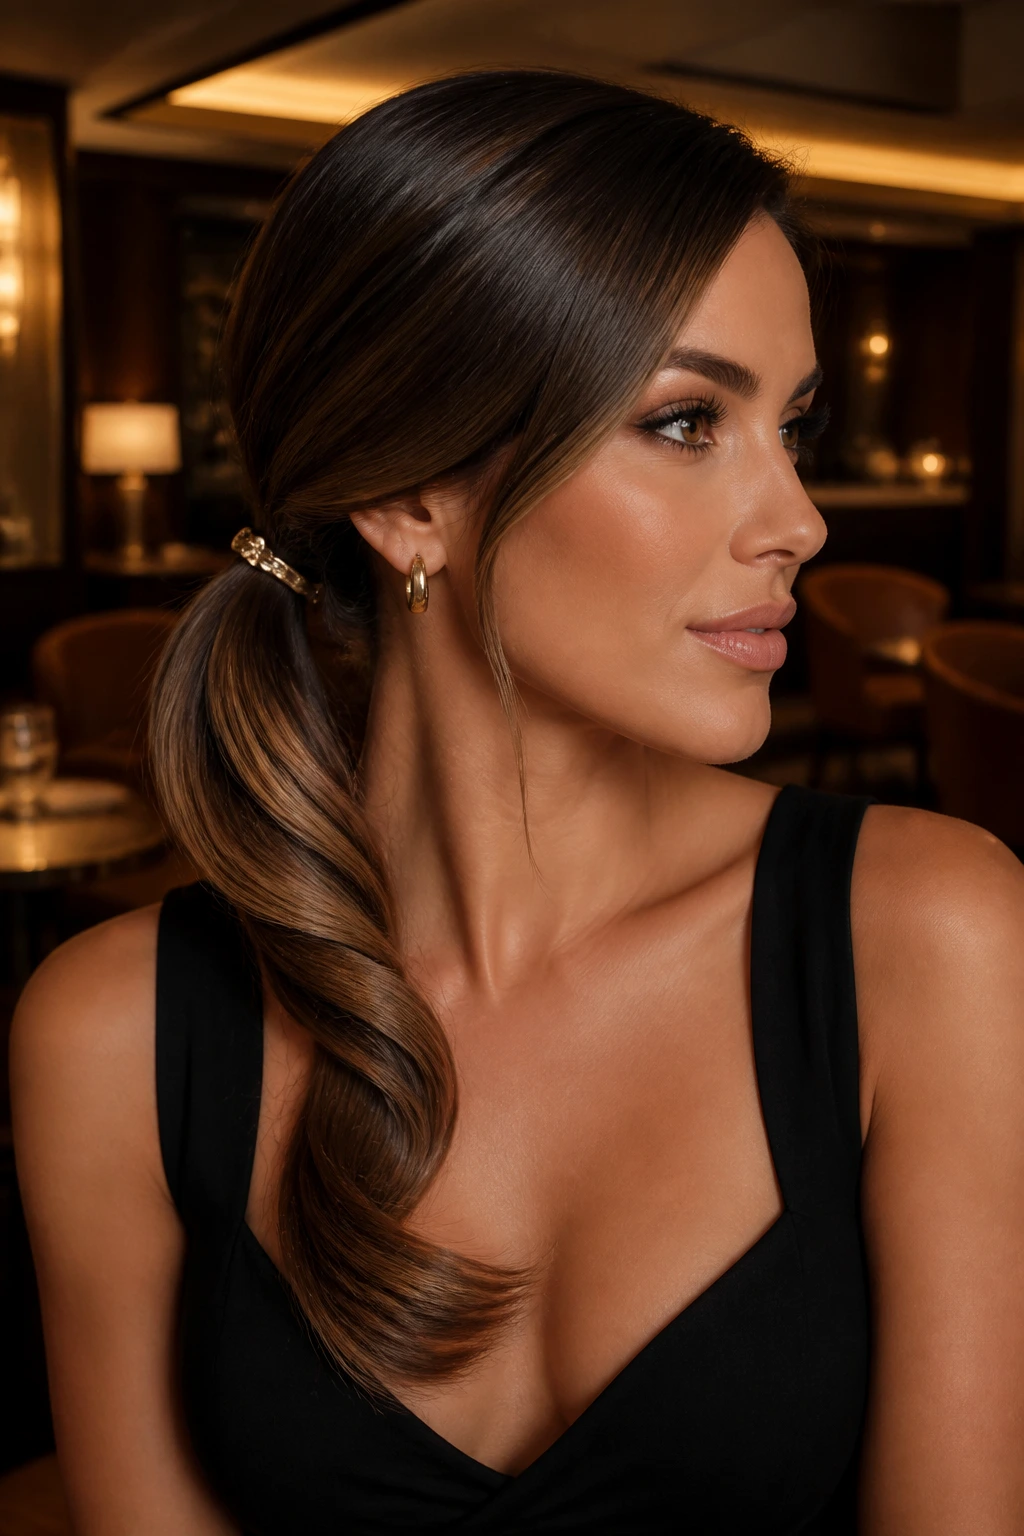
What It Looks Like: Low and swept to one side, often with a little bend in the tail or a polished accessory near the base. It feels dressier than a centered ponytail without needing curls everywhere.
Why It Works: Side placement softens the profile and lets earrings or a dress neckline stay visible. The asymmetry feels intentional and a little fun.
What You Need:
- 1 elastic
- 1 shine spray
- 1 large-barrel iron or flat iron for a soft curve
- 1 pin or accessory
Quick Steps:
- Sweep the hair low to one side and secure it near the nape.
- Smooth the front and tuck any stray sections behind the ear.
- Add one curved bend through the tail or a small clip at the base.
Tools for This Style:
- Tail comb
- Hairspray with flexibility
- Small brush for shaping
How to Wear It: Great with cocktail dresses, jumpsuits, or one-shoulder tops. It lets the face stay open while the hair does the styling work.
Pro Tips for This Style:
- Keep the side sweep low enough to hug the collarbone.
- One accessory is enough; too many and the ponytail starts competing with the outfit.
Variations on This Style:
- Pinned Side Pony: Hold the side with a decorative pin.
- Soft Wave Side Pony: Add loose wave through the tail.
Common Mistakes to Avoid with This Style:
- Don’t center the ponytail and call it a side style. The shift has to be visible.
- Don’t let the tail sit stiffly on the shoulder; it should curve naturally.
35. Rain-Ready Sleek Ponytail
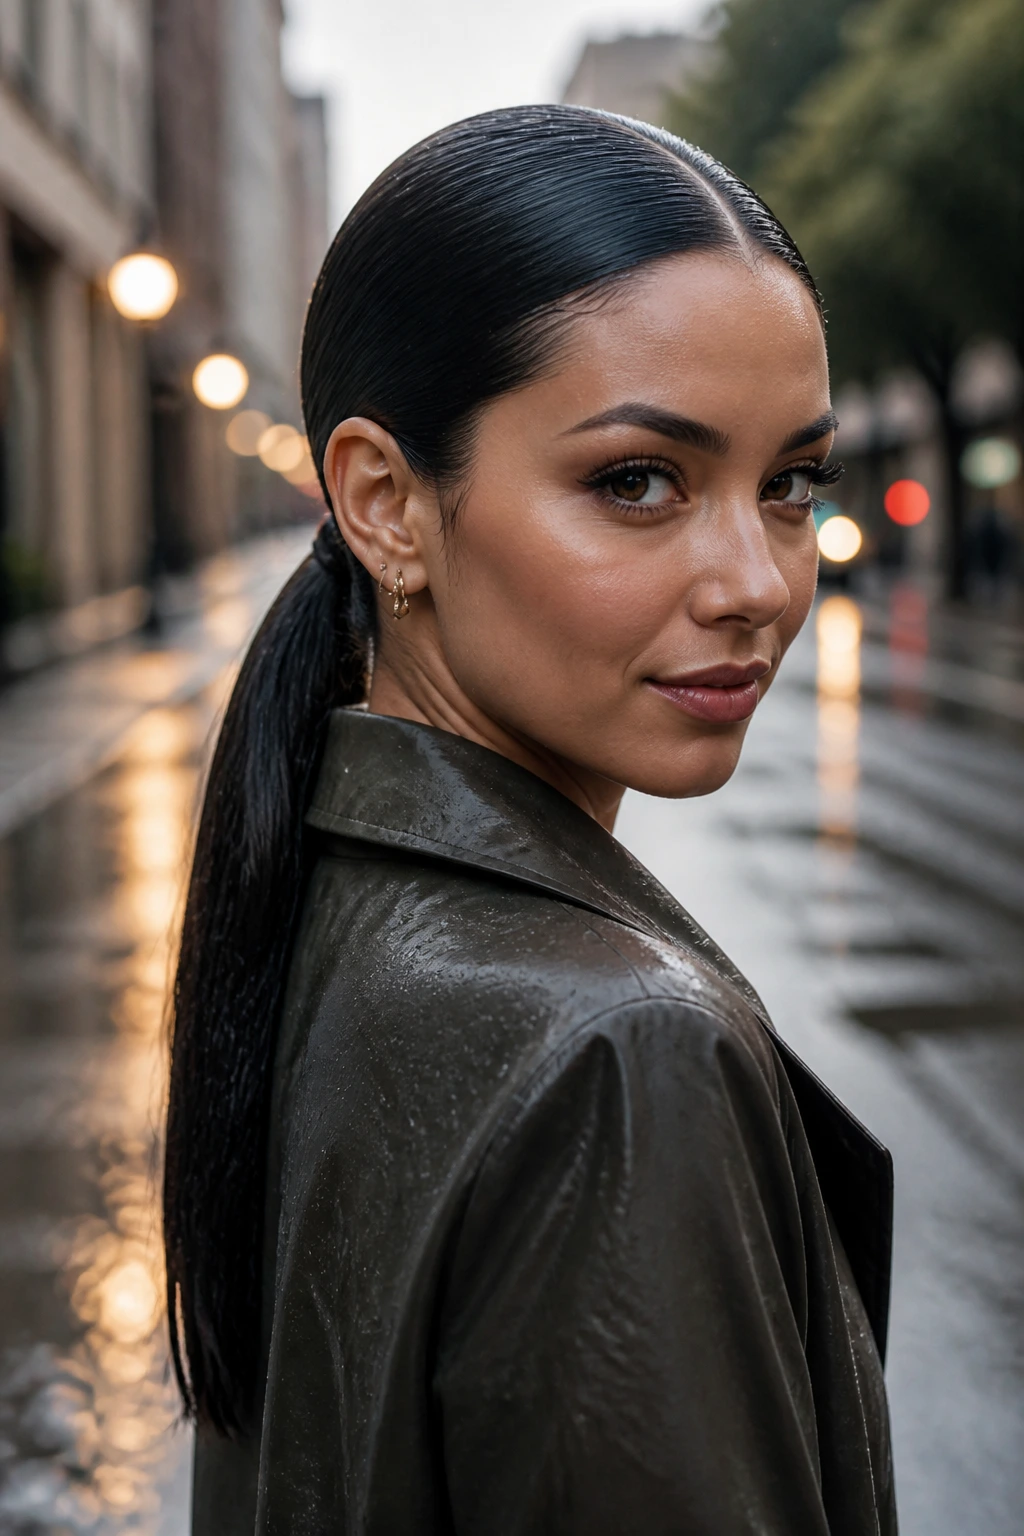
What It Looks Like: Tight at the crown, controlled through the lengths, and designed to survive moisture better than loose hair. It’s practical, but not sloppy.
Why It Works: A low or mid pony with strong hold product keeps the hair compact, which means less surface area for frizz to attack. You can’t outsmart rain completely, but you can make it work harder.
What You Need:
- 1 humidity-resistant gel or cream
- 1 elastic
- 1 anti-humidity spray
- 1 compact brush
Quick Steps:
- Apply a thin layer of hold product through the outer layer.
- Fasten the ponytail low or mid and smooth the crown firmly.
- Seal the finished style with anti-humidity spray.
Tools for This Style:
- Travel brush
- Satin scarf for backup
- Small towel for quick root blotting
How to Wear It: Good for rainy walks, commutes, or travel days when your hair has to behave outside. It keeps the look neat even when the weather doesn’t cooperate.
Pro Tips for This Style:
- Keep the product light; too much and moisture only makes the hair heavier.
- Bring a scarf or hood that won’t scrape the crown.
Variations on This Style:
- Low Rain Pony: Best for maximum control.
- Braided Rain Tail: Braid the tail to avoid knotting in wet weather.
Common Mistakes to Avoid with This Style:
- Don’t use heavy oils right before going out in humidity.
- Don’t skip the anti-frizz step at the front; that’s where weather shows first.
36. Heatless Volume Crown Ponytail
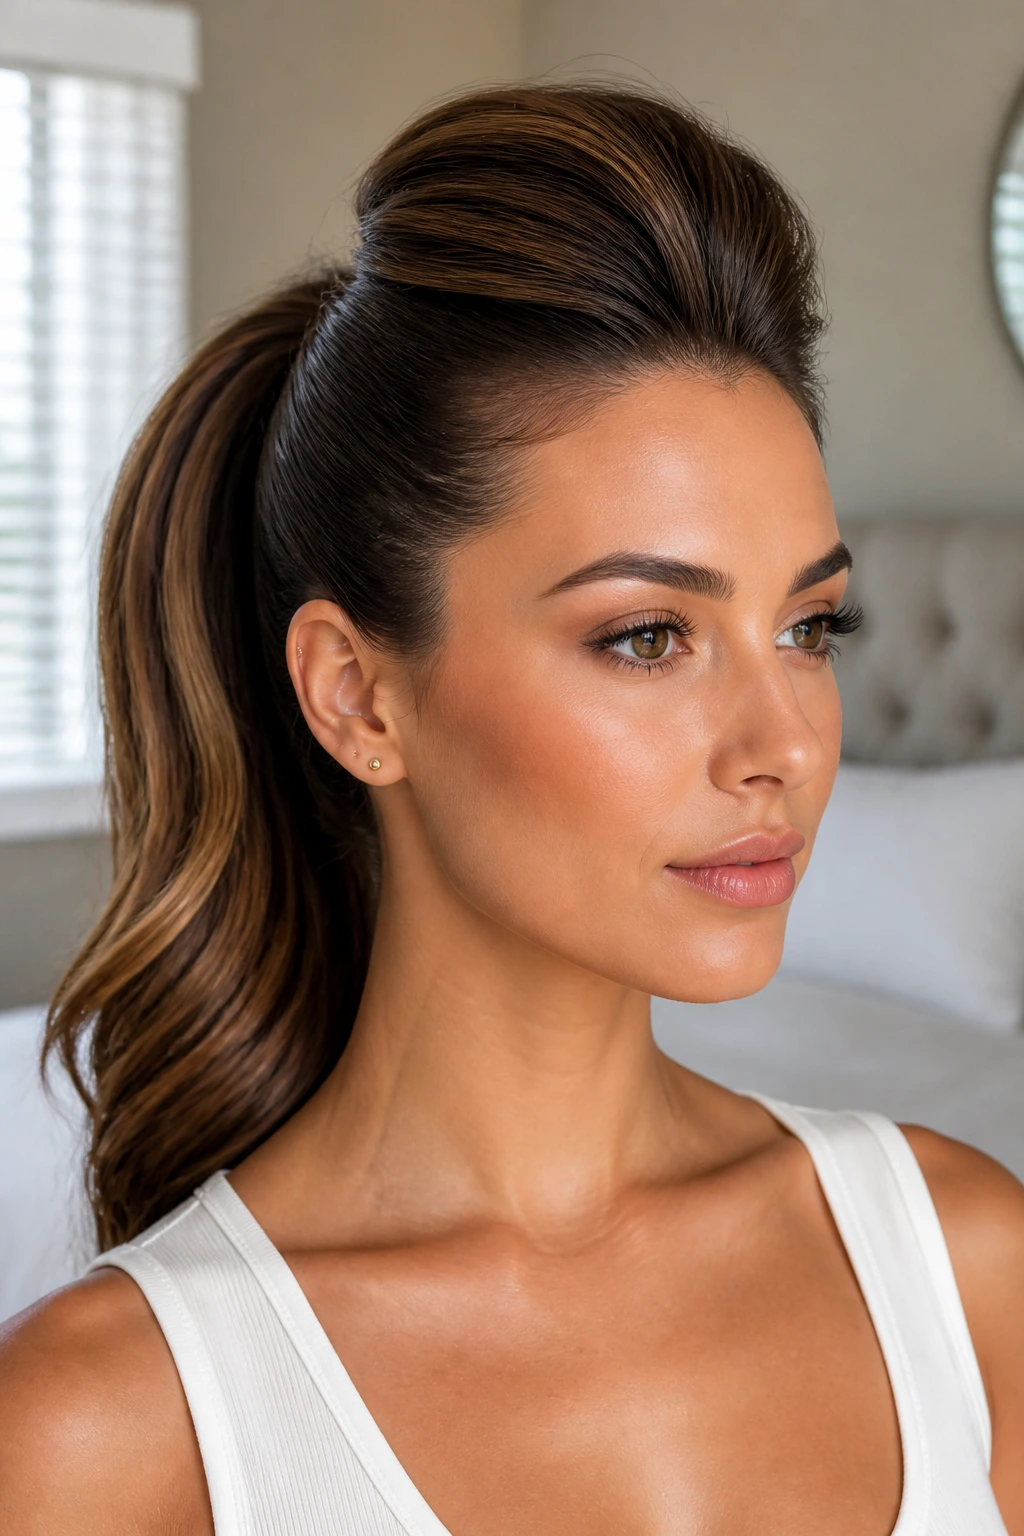
What It Looks Like: A sleek base with a little extra lift through the crown, built without hot tools. The style keeps the front smooth but doesn’t let the top collapse.
Why It Works: A hidden clip, a small cushion of lift, or overnight setting at the roots creates volume without needing a curling iron or blowout. That matters when you want shape but not heat.
What You Need:
- 1 volumizing mousse
- 1 elastic
- 1 large clip or root-boosting pin
- 1 brush
Quick Steps:
- Apply mousse at the roots and set the crown with a clip while hair dries.
- Smooth the top into a ponytail once it has lift.
- Keep the tail simple so the crown stays the focus.
Tools for This Style:
- Drying clip
- Wide brush
- Satin headband if you’re setting it overnight
How to Wear It: Nice when you want body without heat damage or extra time. It can look casual or polished depending on the tie height.
Pro Tips for This Style:
- Lift the roots before they dry flat. That’s the whole battle.
- A slight bend in the tail balances the volume above.
Variations on This Style:
- Overnight Crown Lift: Set the roots while sleeping.
- Mid Lift Pony: Keep the crown softer if you want less drama.
Common Mistakes to Avoid with This Style:
- Don’t apply mousse only to the lengths; the crown won’t budge.
- Don’t flatten the top with a heavy brush after you’ve built the lift.
37. Low Knot-Detail Ponytail
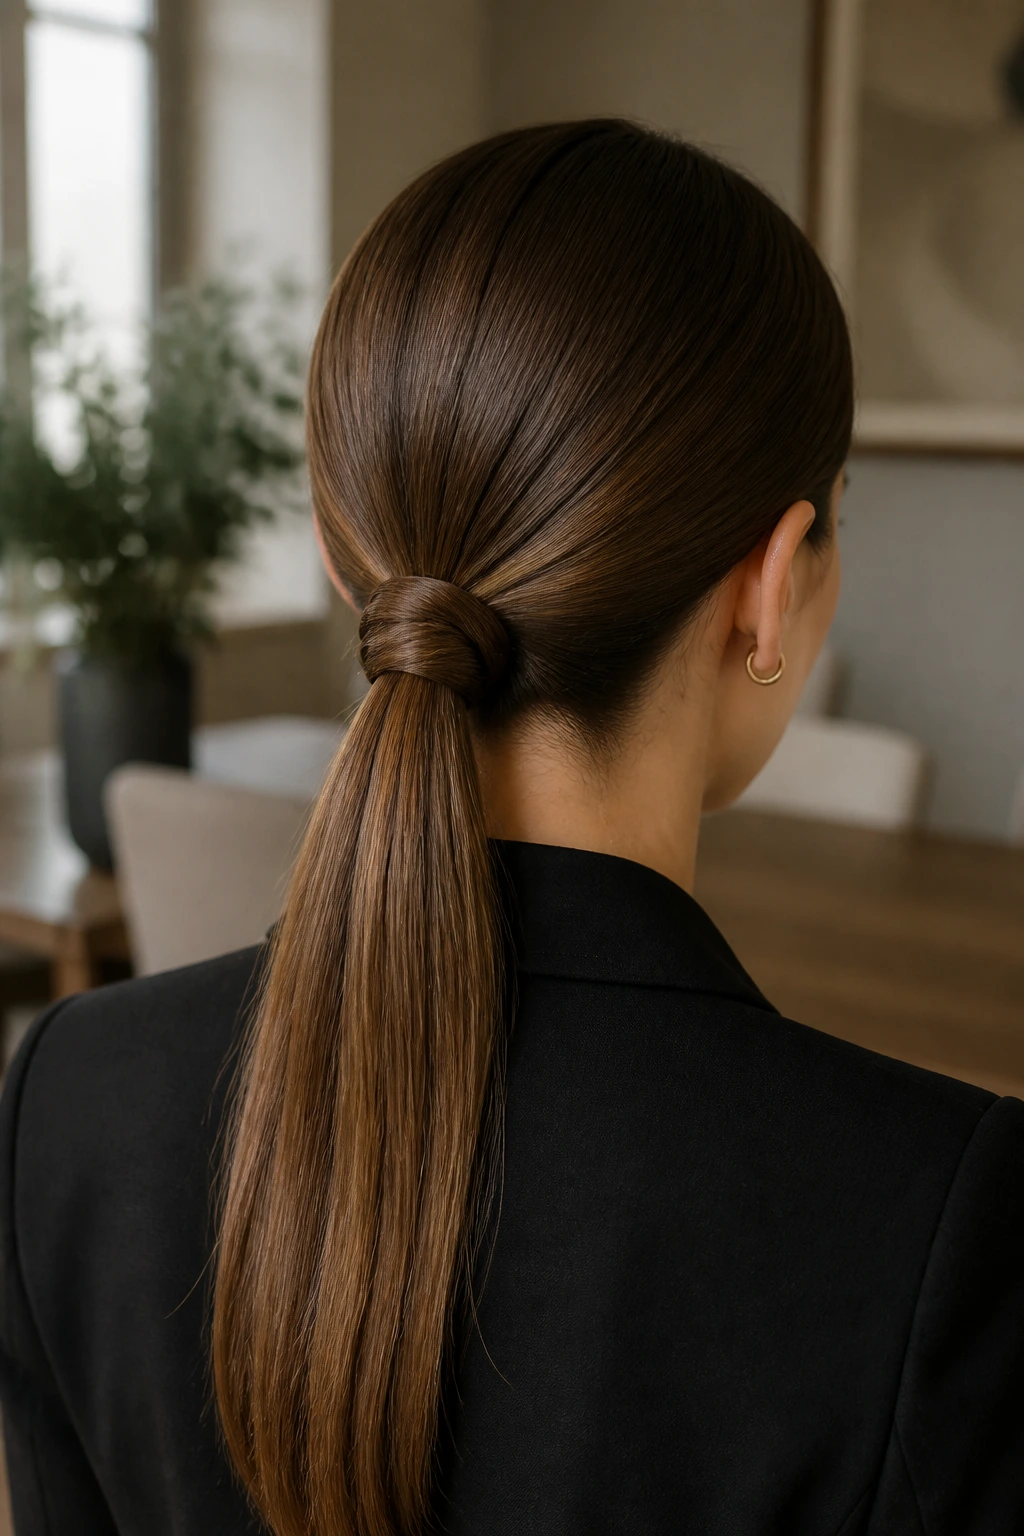
What It Looks Like: The ponytail base has a twist or knot-like detail before the tail drops. It looks tailored and a bit more intricate than a plain tie.
Why It Works: The detail at the base gives the style a custom feel even when the rest of the hair is smooth. It’s a good move when you want something neat but not standard.
What You Need:
- 1 elastic
- 1 smoothing cream
- 2 bobby pins
- 1 tail comb
Quick Steps:
- Separate two side sections at the front.
- Cross or knot them at the back before gathering the remainder into a ponytail.
- Pin the detail flat and keep the tail sleek.
Tools for This Style:
- Section clips
- Mirror for the back
- Light hold spray
How to Wear It: Useful for work dinners, family events, or any day when plain low hair feels too plain. The detail reads well from the back and side.
Pro Tips for This Style:
- Keep the knot section tight enough that it doesn’t loosen.
- Use pins that match your hair color so the detail stays clean.
Variations on This Style:
- Twist-Back Detail: Twist the side pieces instead of knotting them.
- Double Knot Base: Add a second small twist if the hair is very long.
Common Mistakes to Avoid with This Style:
- Don’t make the detail too bulky.
- Don’t leave the tail underneath messy; the base detail needs a neat partner.
38. Sleek Ponytail for Layers
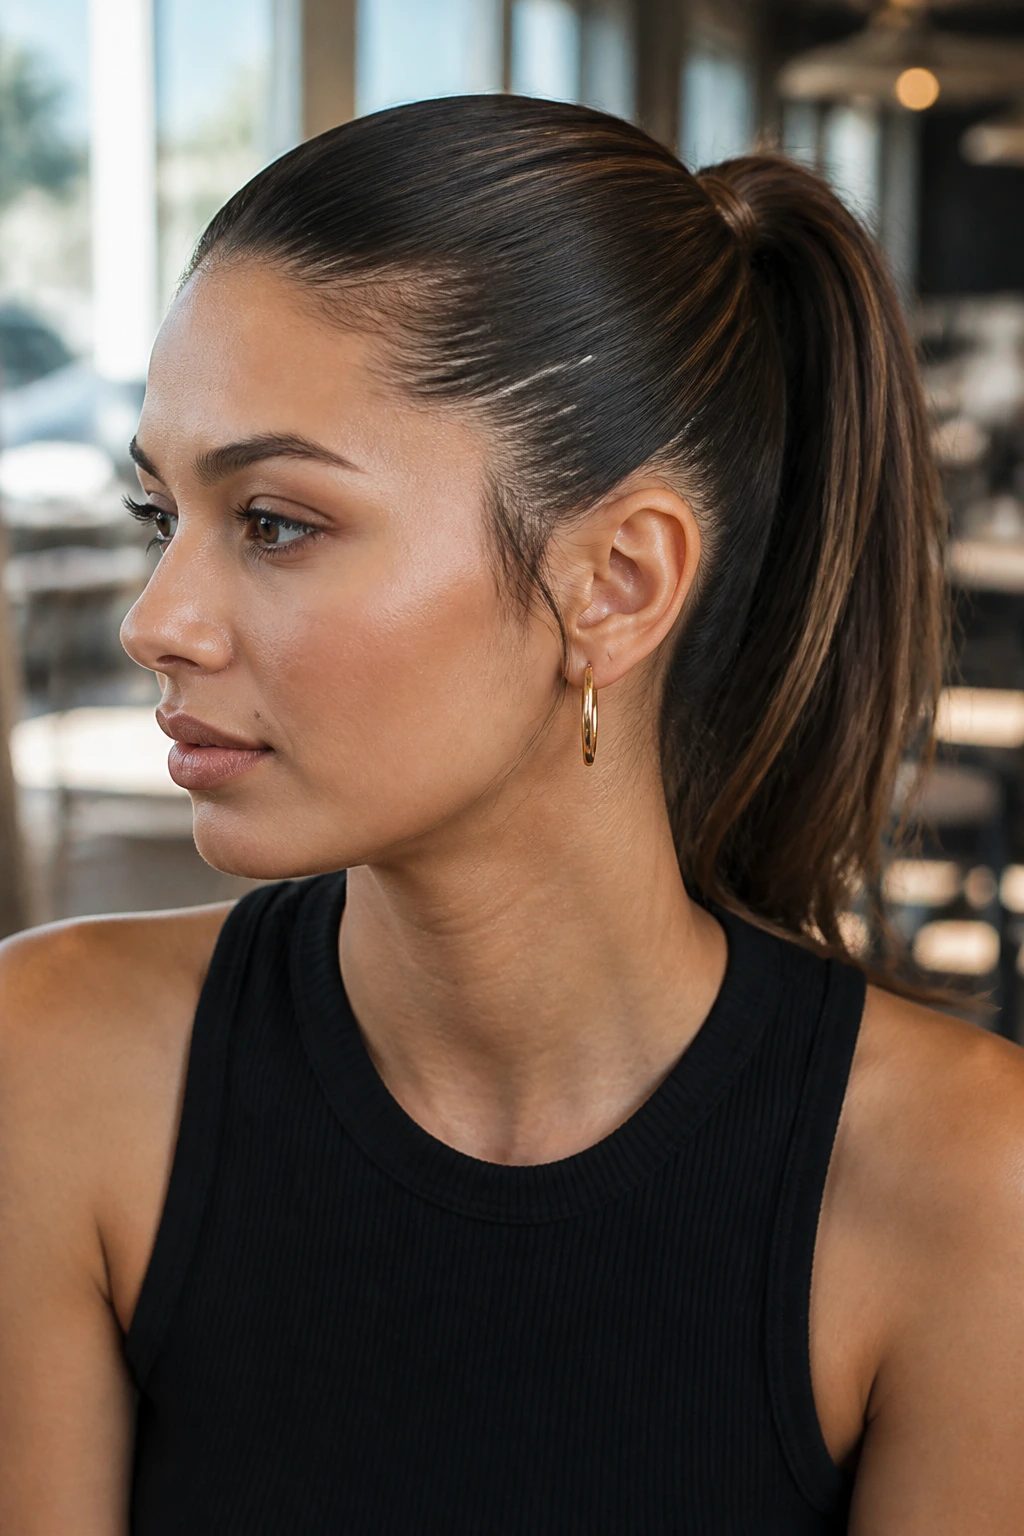
What It Looks Like: Smooth at the crown, but with layered ends that need a little care so they don’t poke out like little flags. The style should look intentional, not like the layers escaped.
Why It Works: Layers need direction and a bit of extra anchoring. When the top is smooth and the ends are handled with care, the ponytail still looks clean even with uneven length.
What You Need:
- 1 smoothing cream
- 1 elastic
- 1 flat brush
- 1 or 2 bobby pins for stray pieces
Quick Steps:
- Brush the layers flat and decide whether you want low or mid placement.
- Fasten the ponytail and smooth the top again.
- Pin back the shortest layers or let them frame the face if they’re useful there.
Tools for This Style:
- Tail comb
- Heat tool for the ends if needed
- Light hairspray
How to Wear It: Good for everyday wear because it works with the haircut you already have instead of trying to ignore it. That’s a useful quality.
Pro Tips for This Style:
- Use a slightly softer hold product so the layers don’t separate.
- If the ends look choppy, curl them all in the same direction.
Variations on This Style:
- Face-Frame Layer Pony: Leave short pieces around the face.
- Pinned Layer Pony: Tuck the shorter layers under for a cleaner profile.
Common Mistakes to Avoid with This Style:
- Don’t pull layered hair into a high pony without checking the shortest pieces.
- Don’t use too much oil on the ends; layers show separation fast.
39. Sleek Ponytail for a Blunt Cut
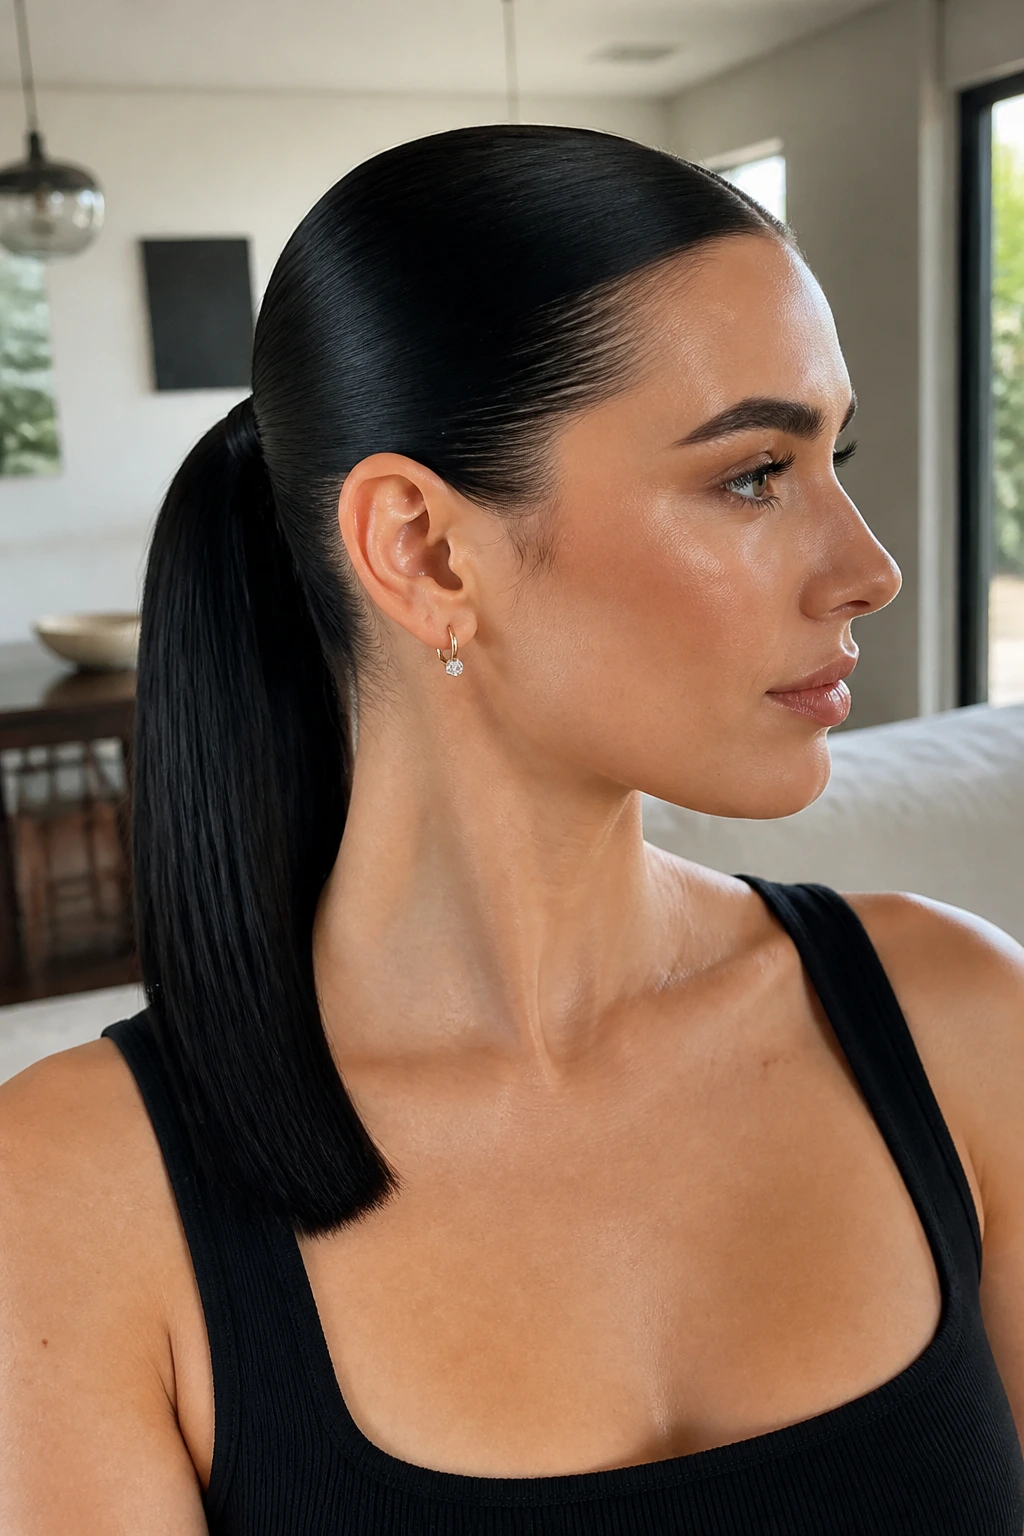
What It Looks Like: Smooth, straight, and crisp from root to end, this version lets a blunt cut keep its sharp edge even when the hair is tied back. The line should feel clean all the way through.
Why It Works: Blunt cuts already have a strong shape, so the ponytail doesn’t need extra fluff. Keeping the ends straight emphasizes the cut instead of hiding it.
What You Need:
- 1 smoothing cream
- 1 elastic
- 1 flat iron if you want a glassy finish
- 1 shine spray
Quick Steps:
- Brush the cut into a smooth ponytail at low, mid, or high height.
- Keep the tail straight and aligned so the blunt edge stays visible.
- Add a whisper of shine spray to the last few inches.
Tools for This Style:
- Paddle brush
- Tail comb
- Heat protectant for the tail
How to Wear It: Great for sleek outfits, minimal makeup, and clothes with simple lines. The haircut becomes part of the style rather than disappearing.
Pro Tips for This Style:
- Don’t curl the ends unless you want to soften the blunt line.
- If the cut is very precise, keep the ponytail base equally clean.
Variations on This Style:
- Centered Blunt Pony: Use a straight middle part.
- Wrapped Blunt Tail: Hide the elastic but keep the tail straight.
Common Mistakes to Avoid with This Style:
- Don’t bend the ends too much or the blunt shape disappears.
- Don’t let layers around the face puff out and ruin the clean edge.
40. Satin-Smooth Bridal Ponytail
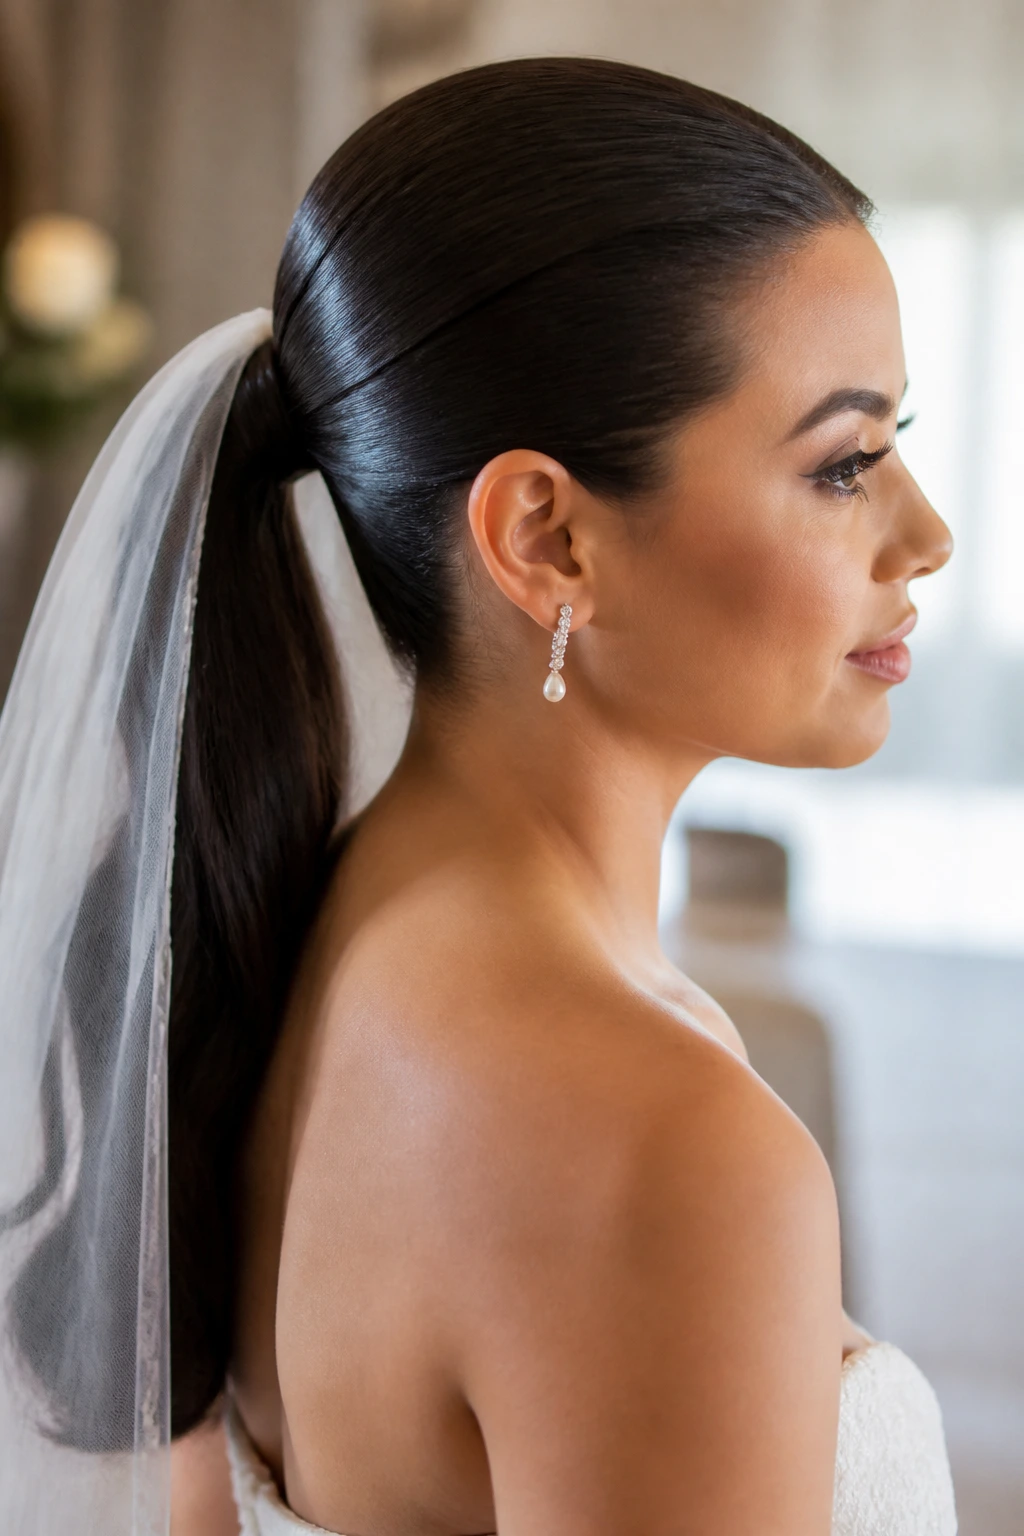
What It Looks Like: Smooth, elegant, and carefully finished, this ponytail is the one that can sit under a veil, sparkle with pins, or stay simple and glossy on its own. It should feel soft but secure.
Why It Works: The low or mid placement gives it staying power, while the clean crown and polished tail make it suitable for a formal setting. It’s a sensible wedding style, which is a nicer compliment than it sounds.
What You Need:
- 1 smoothing cream
- 1 strong elastic
- 1 decorative comb or pin set
- 1 flexible-hold hairspray
Quick Steps:
- Smooth the crown thoroughly and secure the ponytail in the chosen position.
- Add the accessory near the base or along the side.
- Finish the tail with a soft bend or leave it straight if the dress is detailed.
Tools for This Style:
- Tail comb
- Bobby pins matched to hair color
- Compact mirror for final checks
How to Wear It: Best with bridal dresses, rehearsal looks, or formal white or ivory outfits. It leaves room for the dress and makeup to do their part.
Pro Tips for This Style:
- Keep one backup pin in case the accessory shifts.
- Test the placement with your veil or earrings before the day.
Variations on This Style:
- Veil-Ready Low Pony: Position the base so the veil can sit cleanly above it.
- Pearl Bridal Pony: Add a slim pearl comb for a softer finish.
Common Mistakes to Avoid with This Style:
- Don’t make the ponytail too tight and unflattering just for security.
- Don’t crowd the base with too many accessories; the dress should still breathe.
Why Sleek Ponytails Stay Sharp When the Prep Is Right
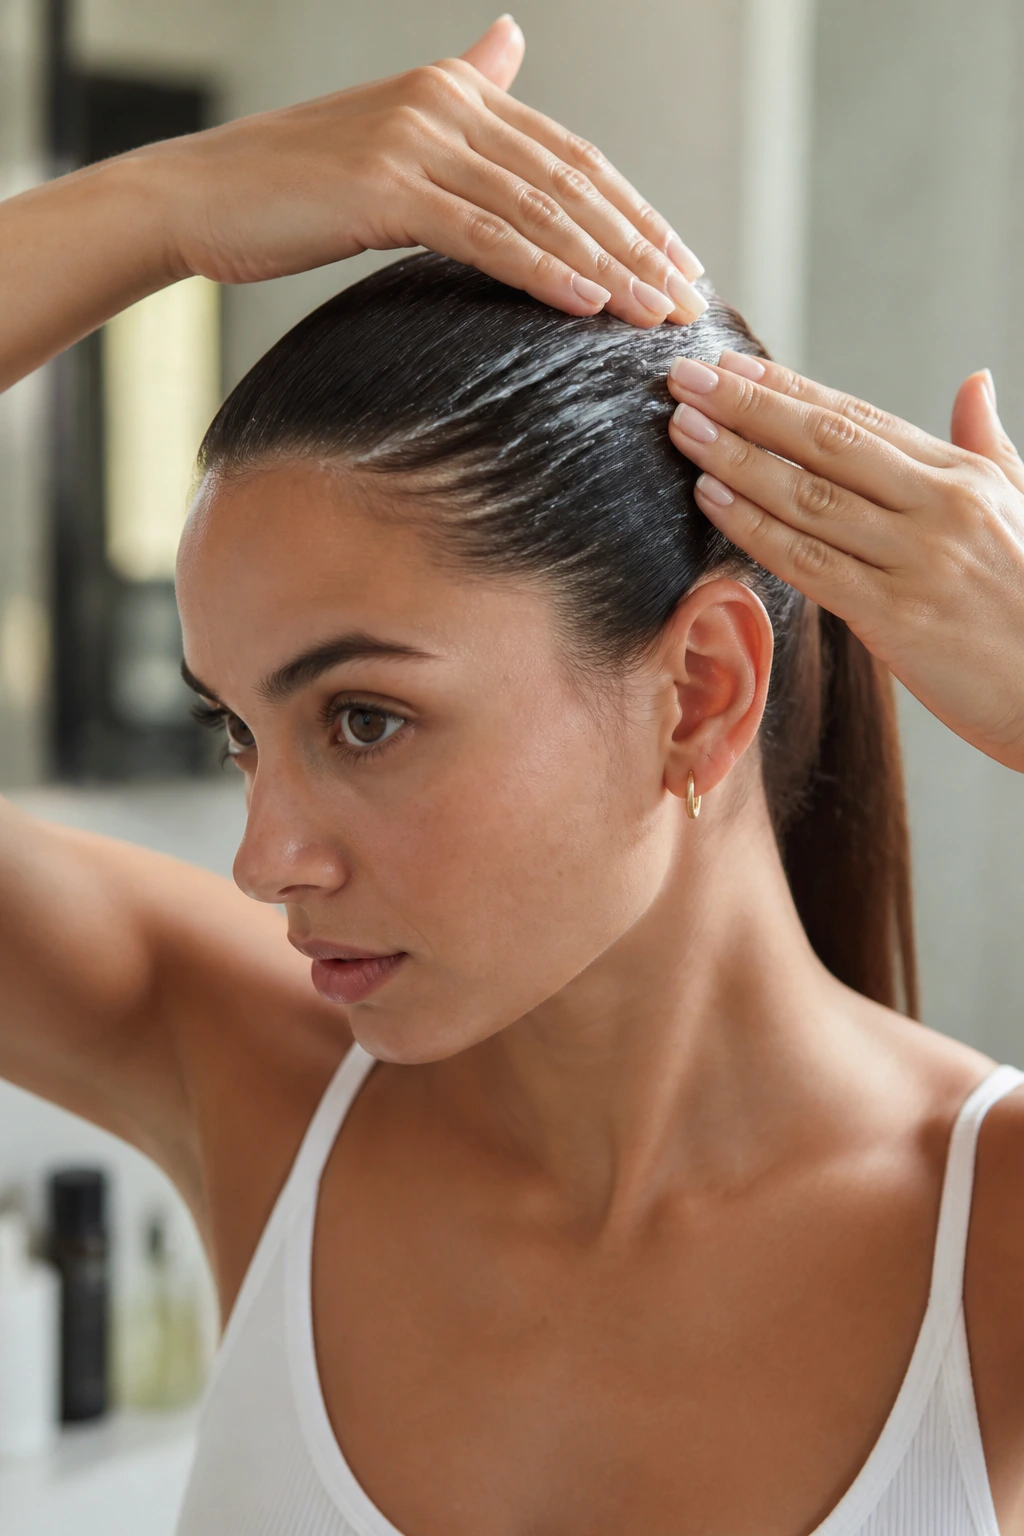
The ponytail itself is the easy part. The prep is where the style either stays smooth or starts misbehaving by lunchtime. Hair that’s slightly smoothed, lightly sealed, and brushed in the right direction behaves very differently from hair that’s yanked into shape and hoped for the best. That’s the part people skip, then blame the elastic.
A good sleek ponytail starts with a sensible amount of product. Too little, and the flyaways win. Too much, and the hair turns sticky, flat, or flaky. I prefer layering: a smoothing cream or leave-in for softness, then a gel or control product near the hairline, then a final spray after the ponytail is set. The product goes where the job is. Not everywhere.
The base height matters too. Low ponytails look calmer and survive longer. High ponytails need more tension and more support, especially if the hair is thick. Mid ponytails sit in the middle, obviously, but they’re often the easiest to wear because they don’t pull as hard on the scalp and they still look deliberate.
The Crown Decides the Mood
If the crown is smooth, the ponytail looks expensive. If the crown is puffed up in the wrong spots, the style starts looking like a rush job. I like using the brush in short passes toward the tie rather than trying to force everything at once.
Ends Need a Decision
Straight, flipped, waved, braided, or left natural — pick one. The biggest mistake I see is a sleek root with a confused tail. That mismatch makes the whole hairstyle look unresolved.
Tools That Make These Ponytails Easier
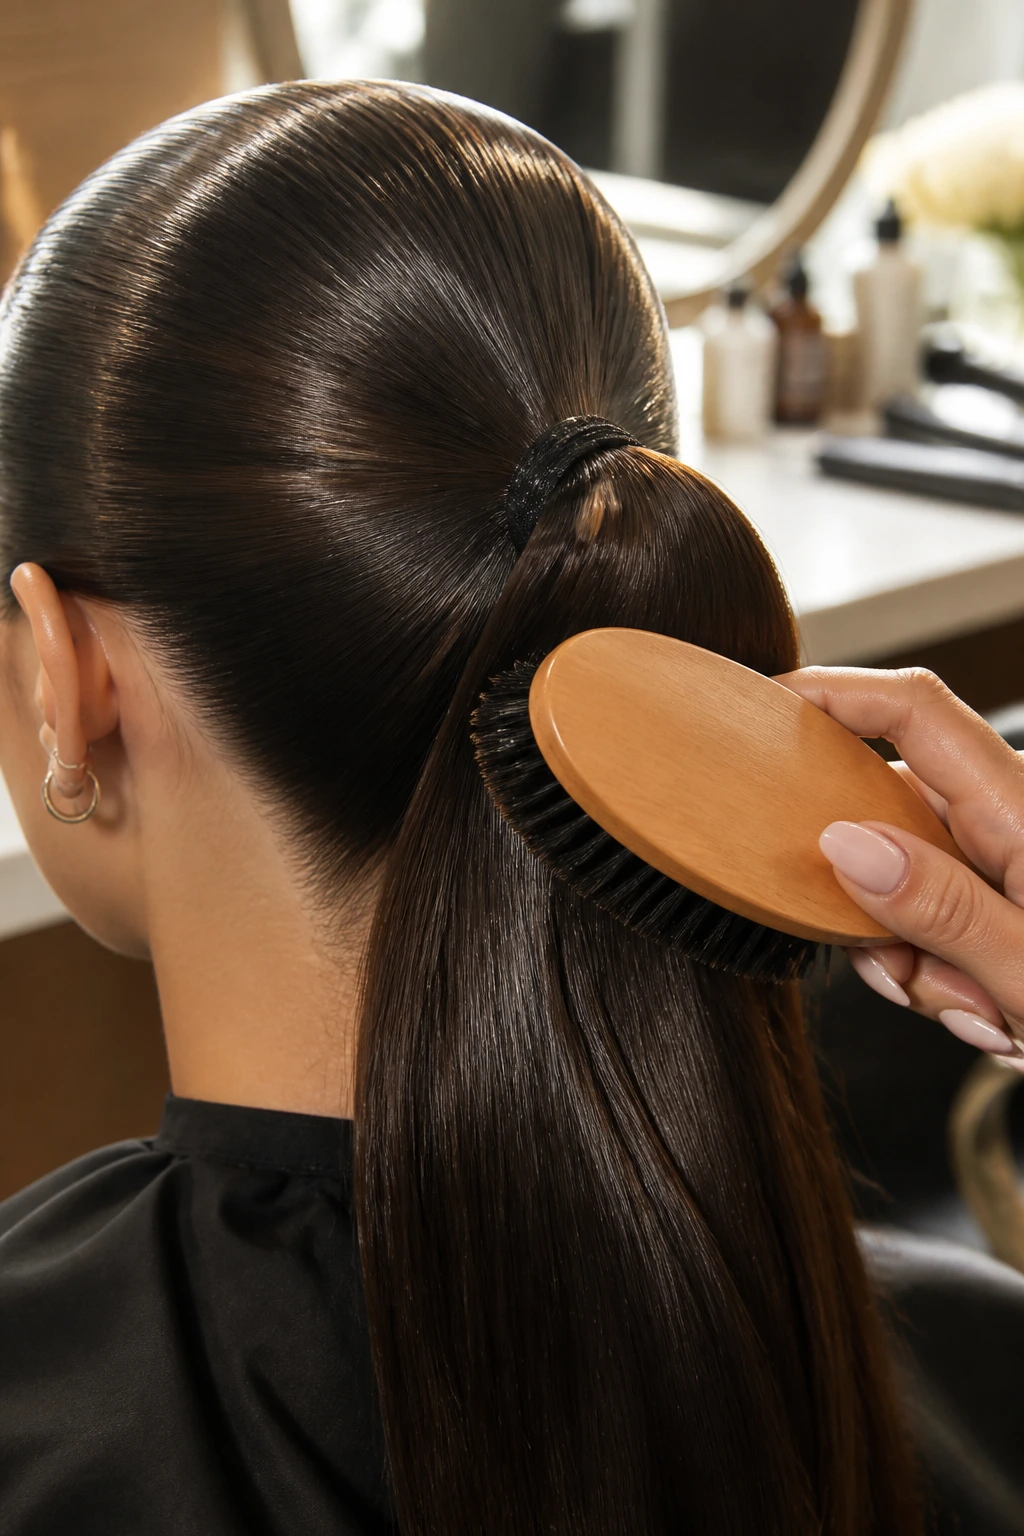
- Boar bristle brush: Best for the final smoothing pass because it presses flyaways down without over-teasing the hair.
- Tail comb: Useful for clean parts and sectioning the front before you tie anything back.
- Strong elastics: The plain, sturdy kind hold better than decorative ties when the hair is heavy or slippery.
- Bobby pins: These save the day for wrapped bases, side details, and shorter layers.
- Edge brush or small styling brush: Good for the hairline and temple area where bigger brushes are clumsy.
- Satin scarf: Helpful for setting the style, preserving it overnight, or keeping roots flat while you finish makeup.
- Heat tool with a small barrel or flat iron: Optional, but handy for tail ends that need bend, flip, or a little polish.
- Flexible-hold hairspray: Keeps the finish in place without turning the ponytail into a helmet.
- Anti-frizz serum or shine spray: Use lightly on the tail, not on the scalp, unless you want slippery roots.
Product Picks and Prep Moves That Actually Matter
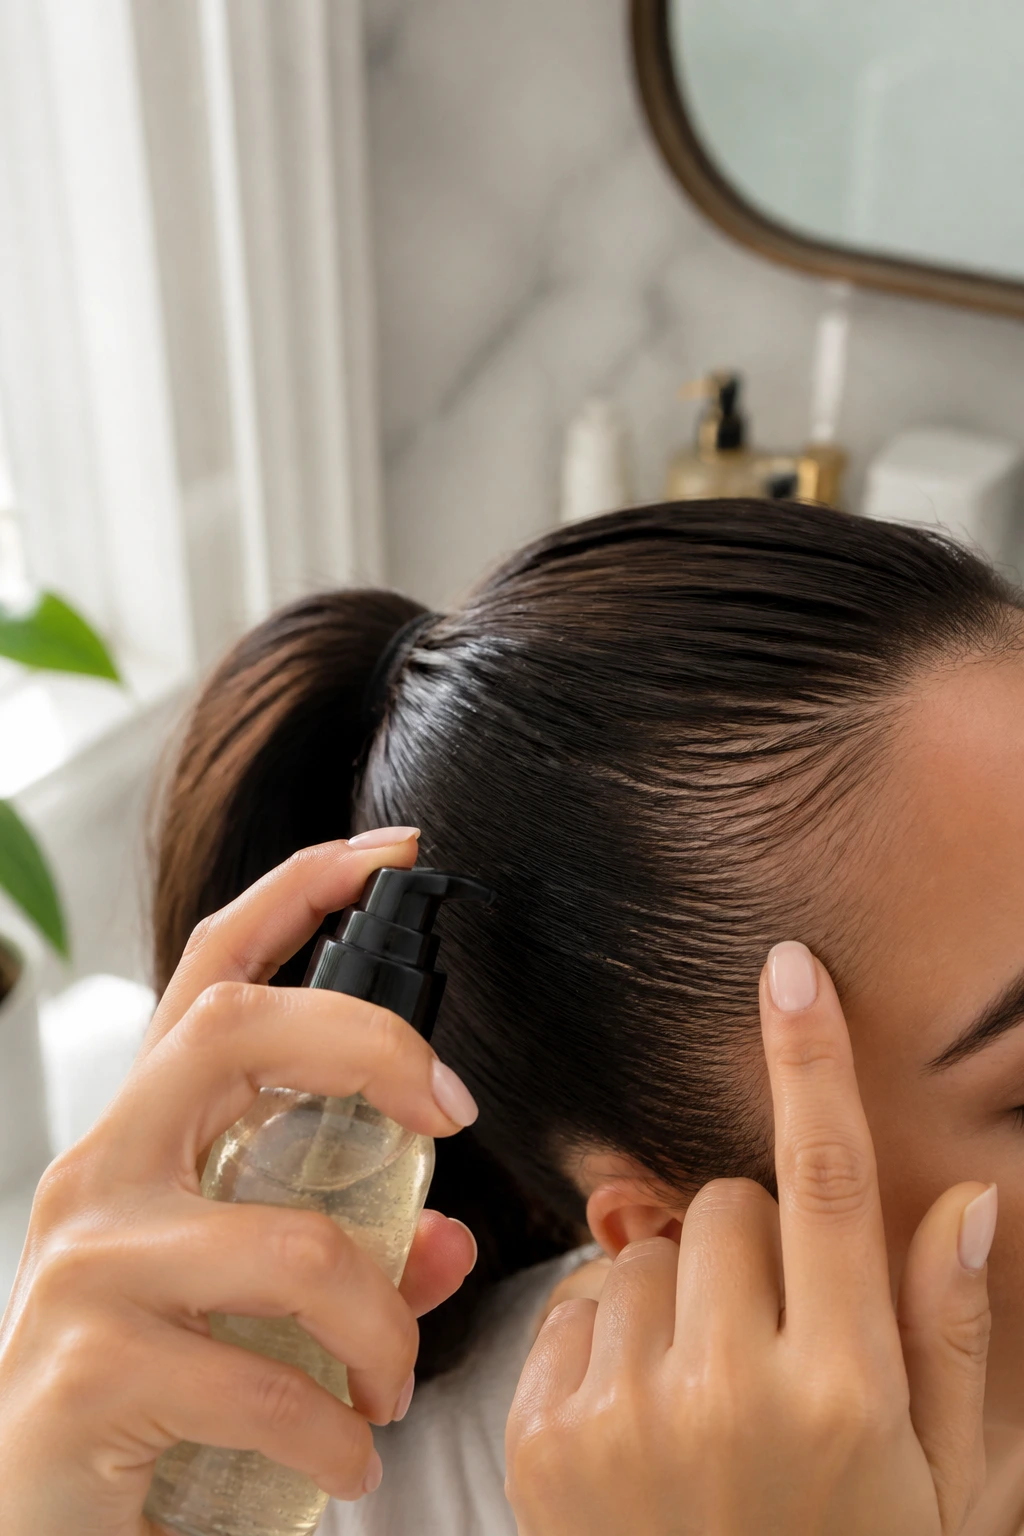
A sleek ponytail doesn’t need a pile of products. It needs the right ones in the right places. For the roots, I like a gel or control cream with enough hold to keep the front quiet, but not so much that it dries in little white flakes. If your hair is fine, a lightweight mousse at the roots can give a bit of lift before the smoothing pass. If your hair is thick or coarse, a richer cream usually helps the brush move through the top layer without dragging.
The ends are a different story. That’s where shine belongs. A few drops of serum or a mist of shine spray can make the tail look finished, but keep it away from the scalp unless you enjoy the “why does my hair look greasy?” mirror check. Heat protectant matters if you’re curling or flipping the ends, even if the rest of the style is heatless. Dry hair at the tail is easier to polish than scorched hair.
Dirty hair isn’t always a problem here, which is convenient. One-day-old roots often grip better than fresh, slippery hair. That said, if the scalp feels coated, you’re fighting a losing battle. A quick root refresh with dry shampoo and a brush can help, but if there’s visible buildup, wash it.
How to Match the Ponytail to the Day
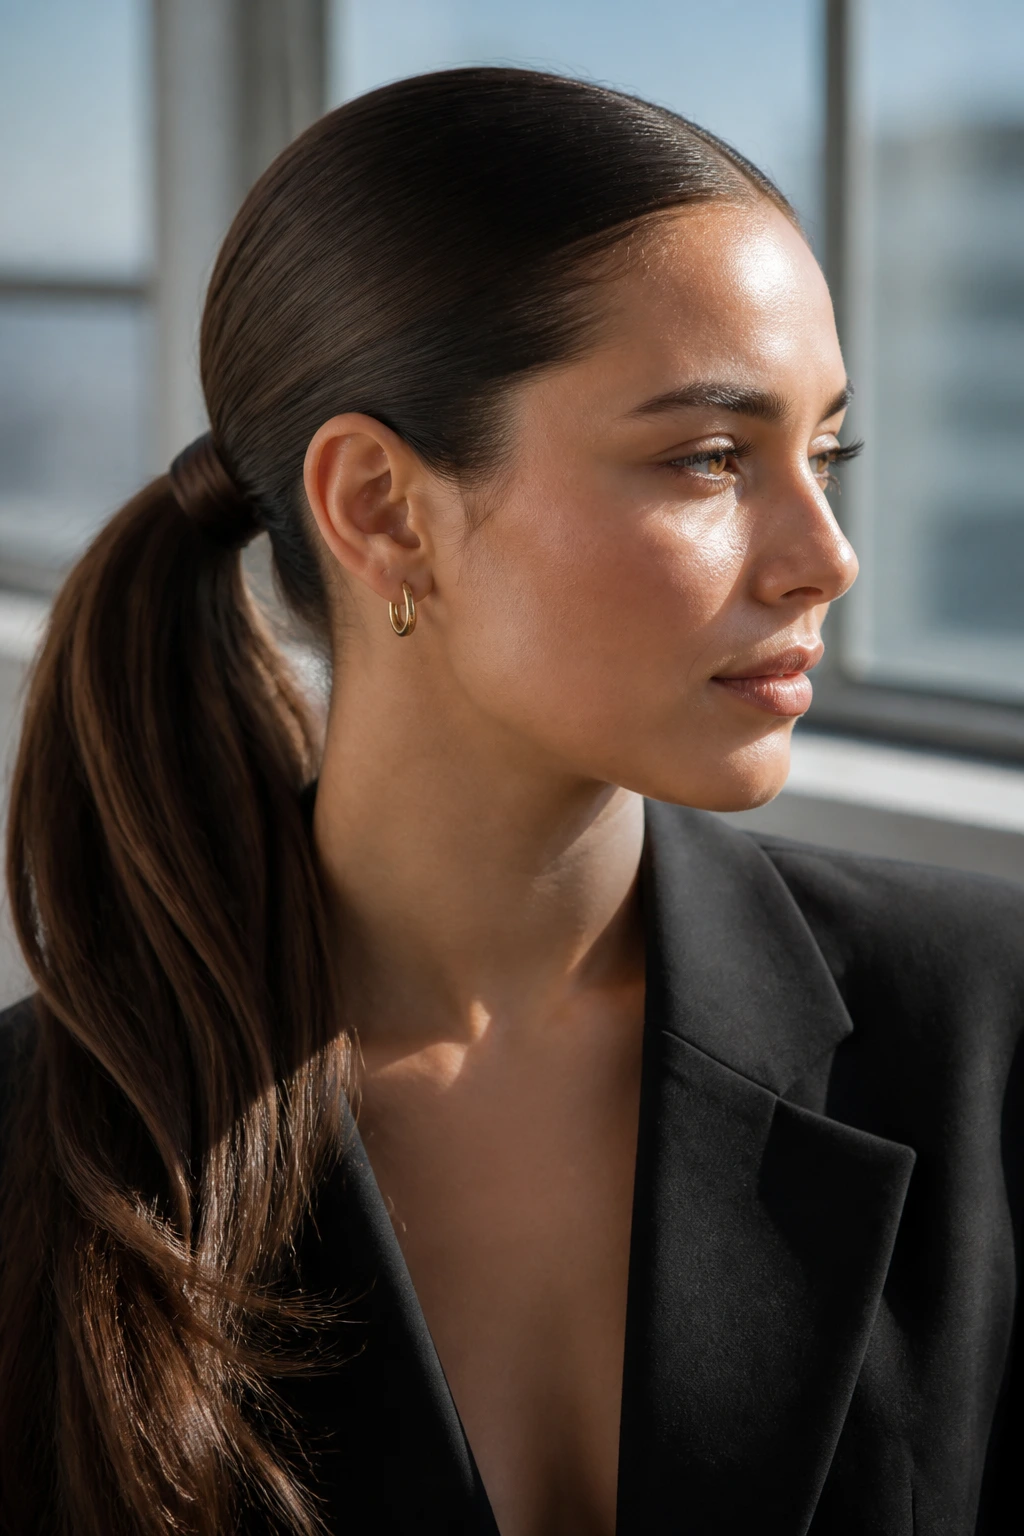
Office Days: A low or mid ponytail with a wrapped base reads tidy, not distracting. Keep the finish smooth and the tail simple.
Events and Evenings: Side-swept, pearl-studded, ribbon-tied, or wet-look versions bring more personality. The hair can carry one decorative detail; it does not need three.
Casual Wear: Bubble ponytails, scarf wraps, and claw-clip hybrids sit nicely with denim, tees, and relaxed knits. They feel styled without making the outfit work too hard.
Workout and Movement: High or mid-high ponytails with a firm base stay out of the face and move well. Keep the front controlled so sweat doesn’t change the whole look halfway through.
Formal Settings: Low bridal, wedding guest, or satin-smooth versions leave space for dresses, earrings, and necklines. If the outfit already has texture, keep the ponytail simpler.
Extra Tips and Finishers That Lift the Whole Look
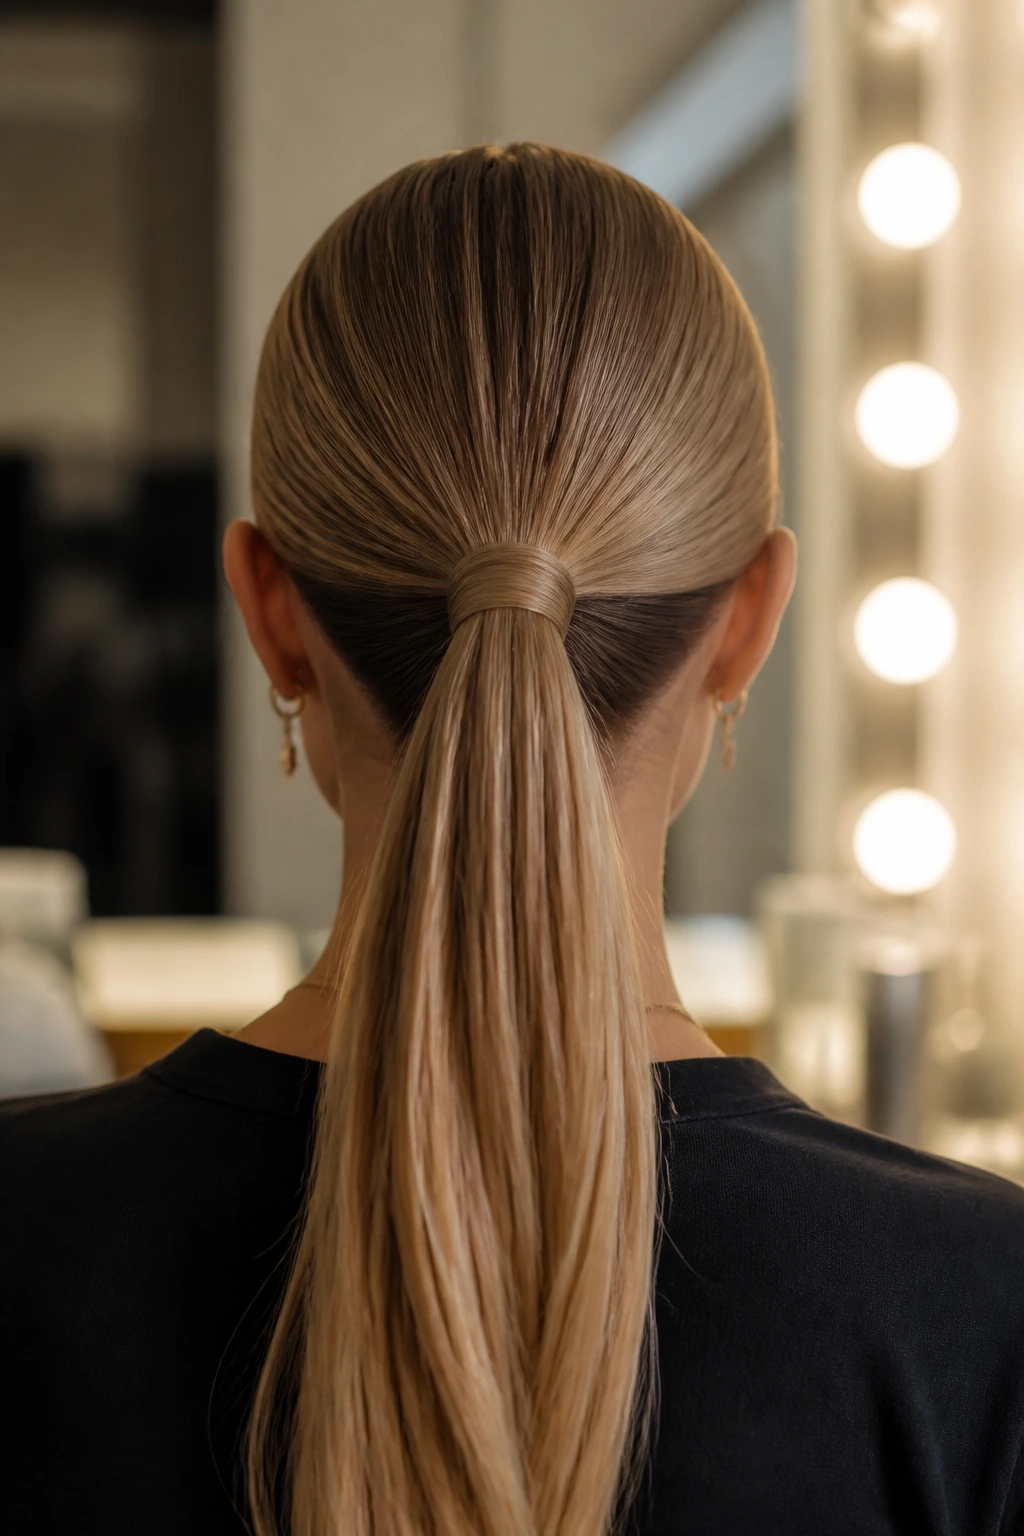
Finish Enhancement: A tiny amount of serum on the last third of the tail gives the hair a smooth finish without making the crown slippery. Start with less than you think; one extra drop is usually enough to ruin the root.
Customization: Change the mood with the part before you touch the elastic. Middle part for sharpness, deep side part for softness, slightly off-center for something less predictable.
Accessory Ideas: Ribbon, pearl pins, slim cuffs, or one decorative comb are enough. I’d rather see one good accent than five small ones fighting for attention.
Hair-Type Tweaks: Fine hair benefits from a little root lift and a lighter product. Thick hair needs stronger hold and more anchoring. Curly or coily hair often looks best when the root is sleek but the tail keeps its texture.
Small Upgrade I Like: Wrap a thin strand around the elastic every time. It’s a tiny thing, but it makes the style read finished even when everything else is simple.
Keeping Sleek Ponytails Fresh Overnight and Between Washes
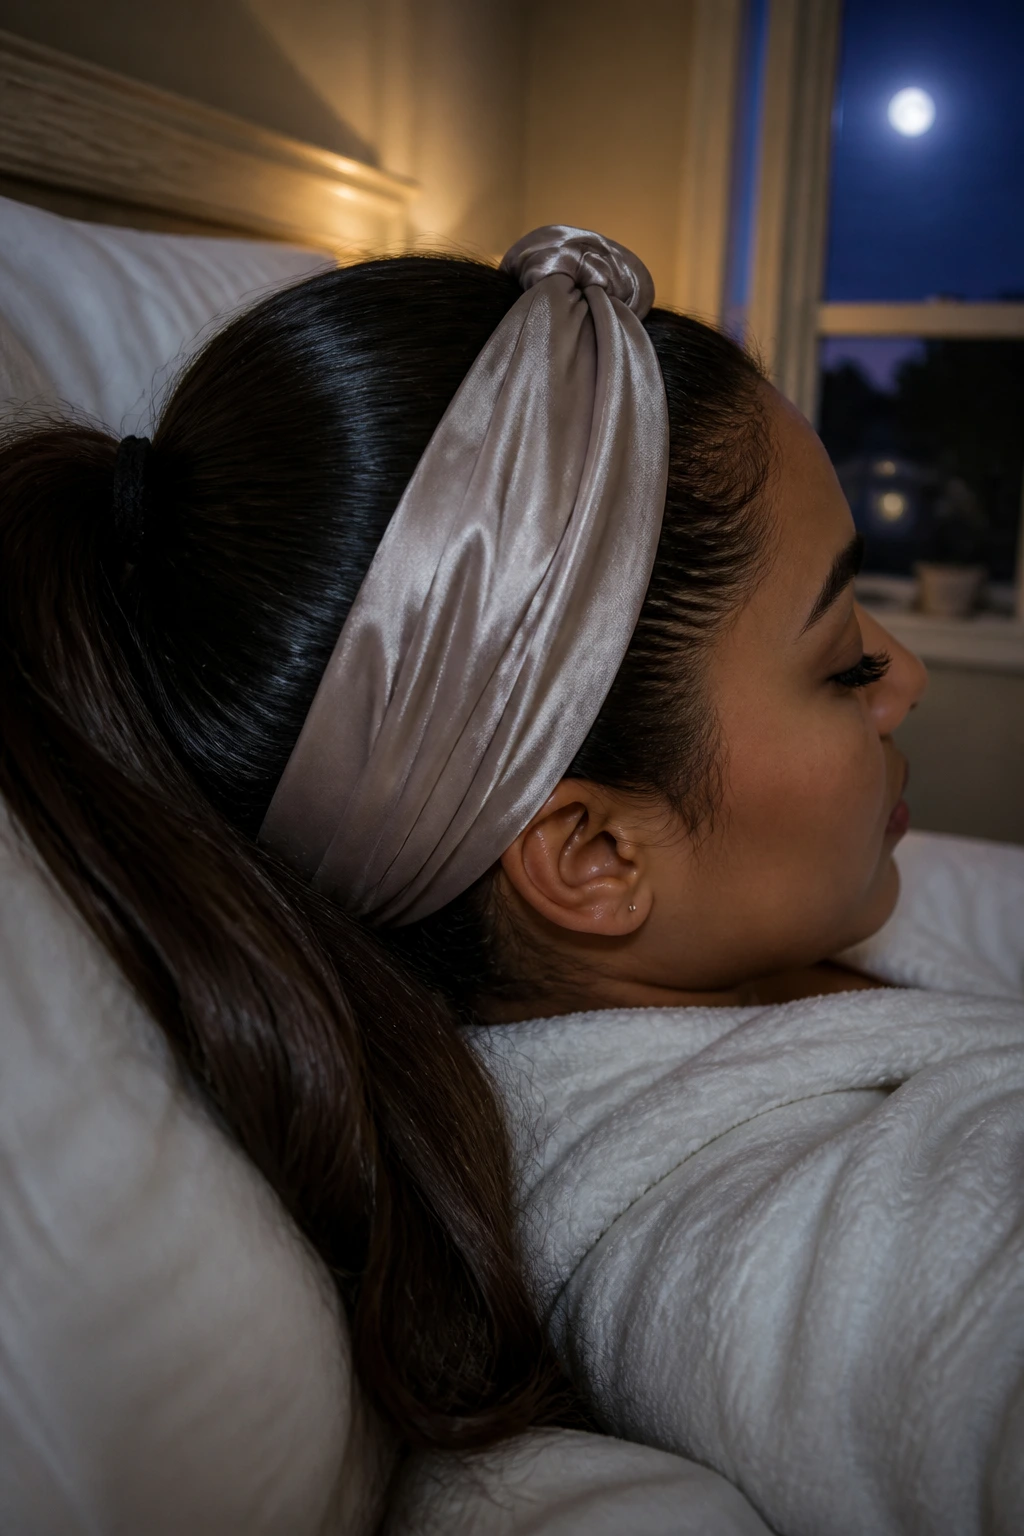
A sleek ponytail usually looks best the day it’s styled, but that doesn’t mean it falls apart overnight. If you’re keeping it for a second day, wrap the roots with a satin scarf before bed and use a soft scrunchie or loose tie if the ponytail feels strained. The goal is to keep the crown flat and stop the lengths from rubbing against pillowcase fabric.
For a next-day refresh, start at the hairline. A quick mist of water or leave-in spray on the surface, followed by a brush, usually does more than another round of heavy product. If the roots look fuzzy, a tiny touch of gel on the brush handle can tame the halo without coating the whole head. The tail may need a drop of serum on the very ends, especially if you curled or flipped them the day before.
These styles tolerate short-term wear better than loose waves do, which is why they’re useful for event prep. Still, I wouldn’t try to stretch a heavily gelled ponytail for four days and pretend it’s thriving. Two days is a reasonable window for many hair types if the scalp is comfortable and the style is kept covered at night. After that, wash it. Your roots will thank you.
Variations and Adaptations to Try
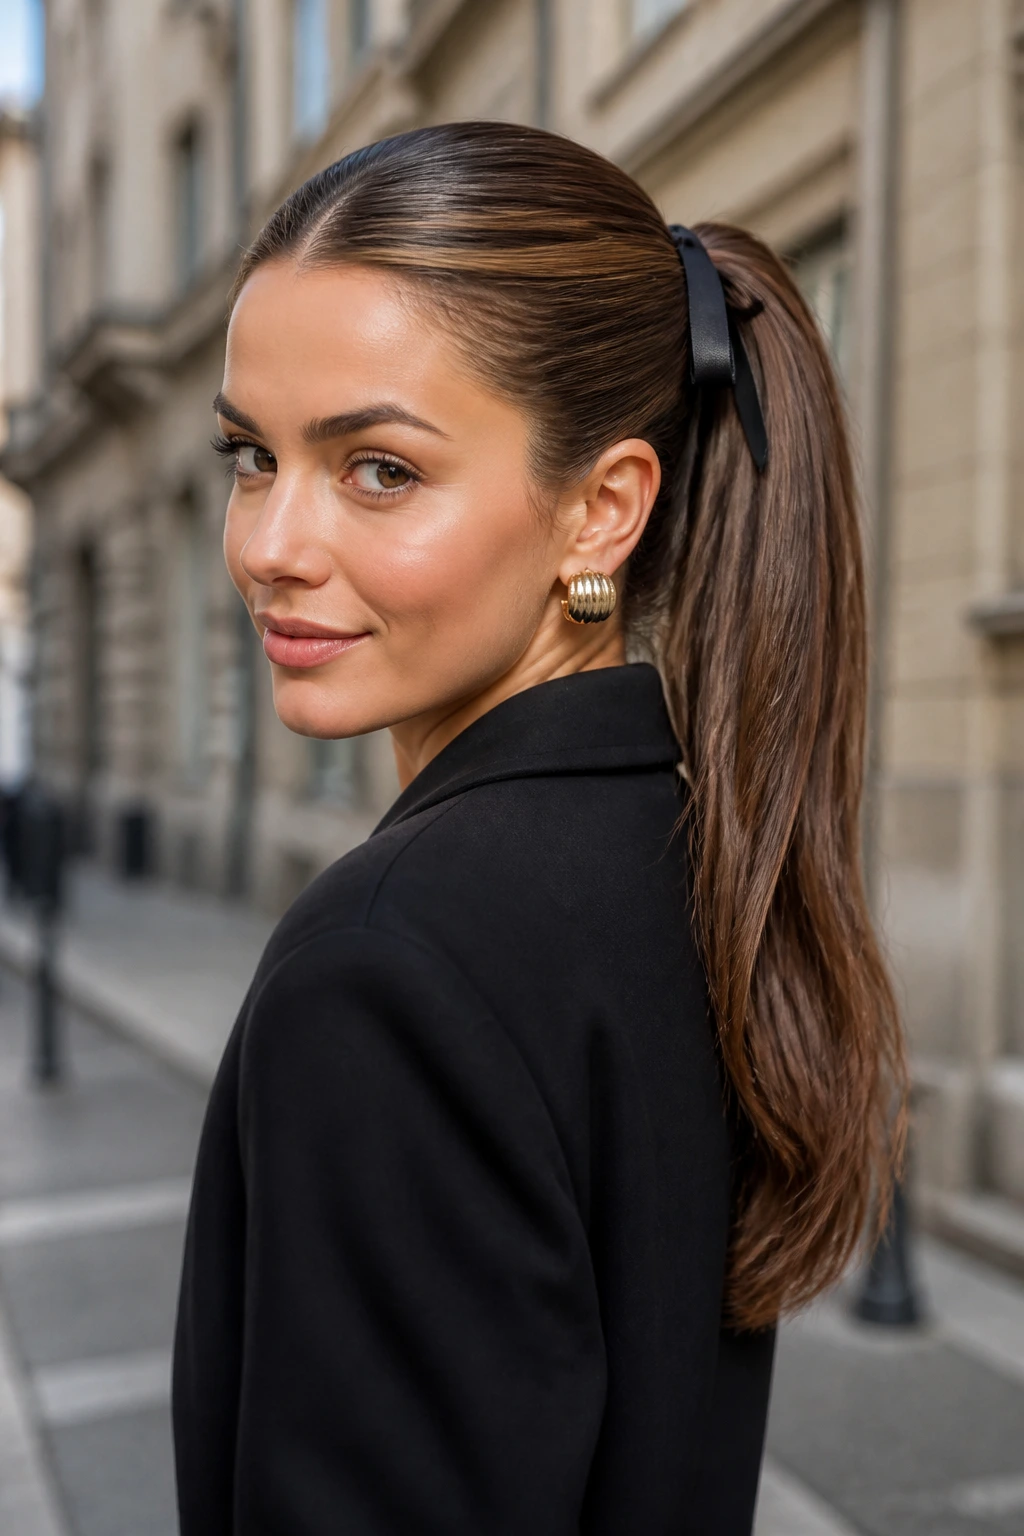
Humidity Shield Pony: Add a stronger anti-frizz spray to the finished crown and keep the tail simple. This version is smart for damp weather or long outdoor hours, where fine frizz tends to show first around the hairline.
Texture-Forward Sleek Pony: Smooth only the root area and leave the tail’s natural texture mostly intact. It gives the style a cleaner silhouette without sanding away what makes the hair yours.
Minimalist Black-Tie Pony: Choose a low base, no accessories, and a very polished tail. The restraint is the point; it lets formal clothes and earrings do more of the work.
Everyday Soft Pony: Loosen the crown just a touch and leave one slim face-framing piece. It takes the edge off the style without making it sloppy.
Short-Hair Support Pony: Use pins, tiny elastics, and a little tucked shaping instead of forcing a full-length tie-back. This adaptation is often more flattering than pretending the hair is longer than it is.
Bold Accessory Pony: Add one bright ribbon, one crystal pin, or one metallic cuff. Choose one lane and stay there.
Common Mistakes to Avoid with Sleek Ponytails
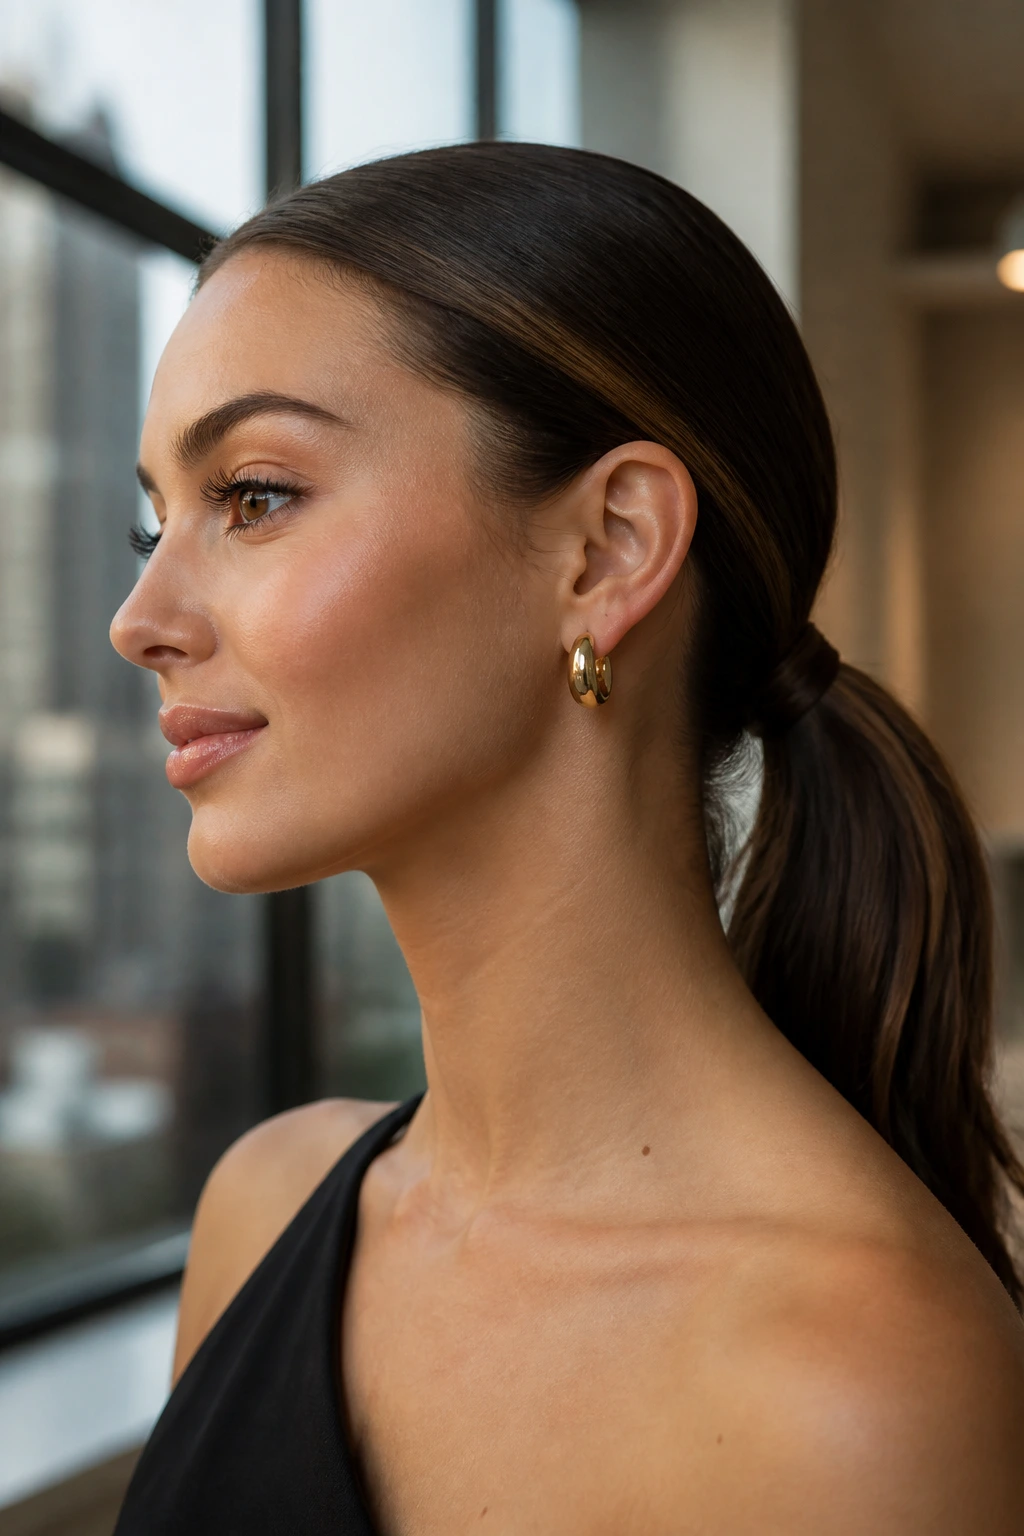
The first mistake is loading the crown with too much product. You get flakes, slick spots, and a base that separates by the time you leave the house. Use less than you think, then add only where the hair actually needs control.
The second mistake is choosing the wrong height for the hair type. Very thick hair can drag a high ponytail downward if the base isn’t anchored well. Very fine hair can look sparse if you pull it too high without any crown lift. The tie should suit the hair, not fight it.
The third mistake is ignoring the tail. A messy, puffy, or oddly bent tail can undo all the work you put into the roots. Decide early whether you want straight, flipped, braided, waved, or natural ends, then finish them on purpose.
The fourth mistake is tugging the ponytail too tight. Yes, tightness keeps the style in place, but scalp pain is not a styling technique. If you feel the tension in your temples or the back of your head, loosen it a notch.
The fifth mistake is forgetting the back view. From the front, everything can look clean. From behind, the elastic might sit crooked, a section might sag, or the wrap might be loose. Use a second mirror or your phone camera before you leave.
Questions People Ask Before They Wear a Sleek Ponytail
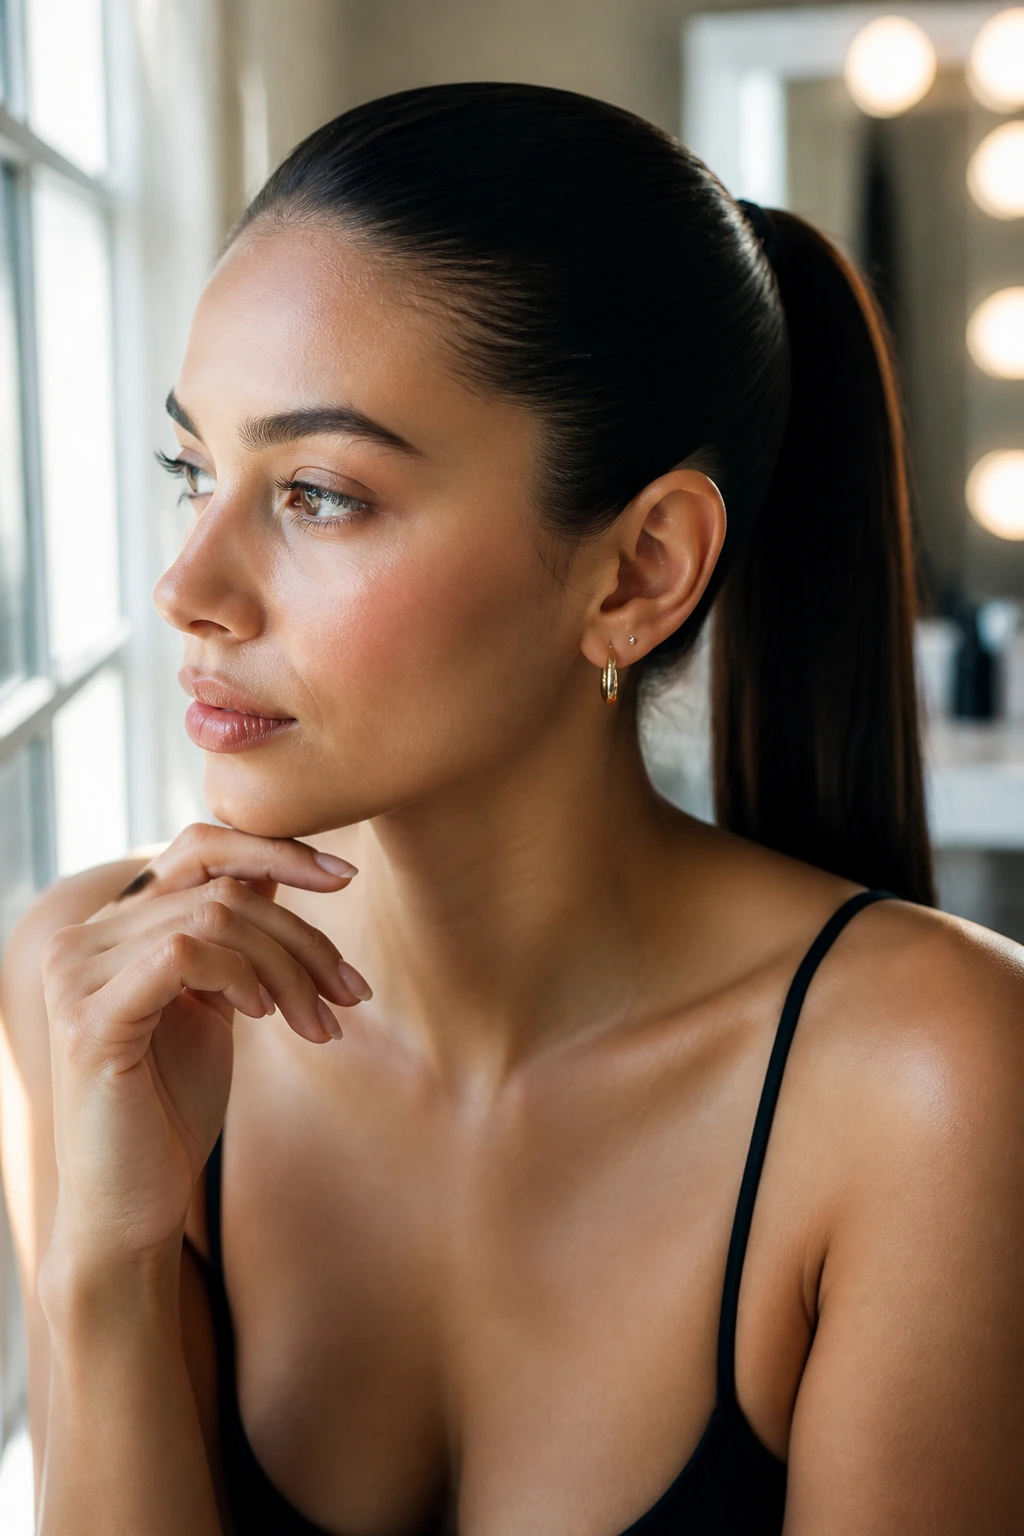
How do I keep a sleek ponytail from getting frizzy at the hairline?
Use a small amount of gel or control cream on the hairline and smooth it with a brush, not your fingers. Fingers add warmth and drag, which can make tiny flyaways worse instead of better.
Can I do a sleek ponytail on second-day hair?
Yes, and often it holds better than fresh-washed hair. If the roots feel oily or coated, add a small amount of dry shampoo first, then brush it through before you style.
What’s better for a sleek ponytail, gel or hairspray?
They do different jobs. Gel or edge control shapes the hair before the ponytail is tied, while hairspray locks the finished style. If you only use one, the hair usually needs both types of control at different points.
How do I make the ponytail look fuller without adding extensions?
Use a slightly lifted crown, a wrapped base, and a tail that isn’t over-brushed into nothing. A low bubble pony or a gently curled tail can also make the length look denser.
What if my hair is too short for a real ponytail?
Go for a faux ponytail or a mini low pony with pins and tucked layers. That usually looks better than forcing hair that doesn’t reach.
How do I keep the elastic from showing?
Wrap a thin strand of hair around it and pin the end underneath, or use a decorative cuff that covers the tie. Just make sure the strand is pinned into the base, not hovering over it.
Will a sleek ponytail damage my hair?
Not if you keep the tension reasonable and avoid repeating the same tight placement every day. Rotate the height, use a smooth brush, and give the scalp a break when it starts feeling sore.
Can I wear this style with curly or coily hair?
Absolutely. Smooth the root area, keep the hold product targeted, and let the tail keep some texture. That contrast often looks better than trying to flatten everything.
The Pull of a Good Ponytail
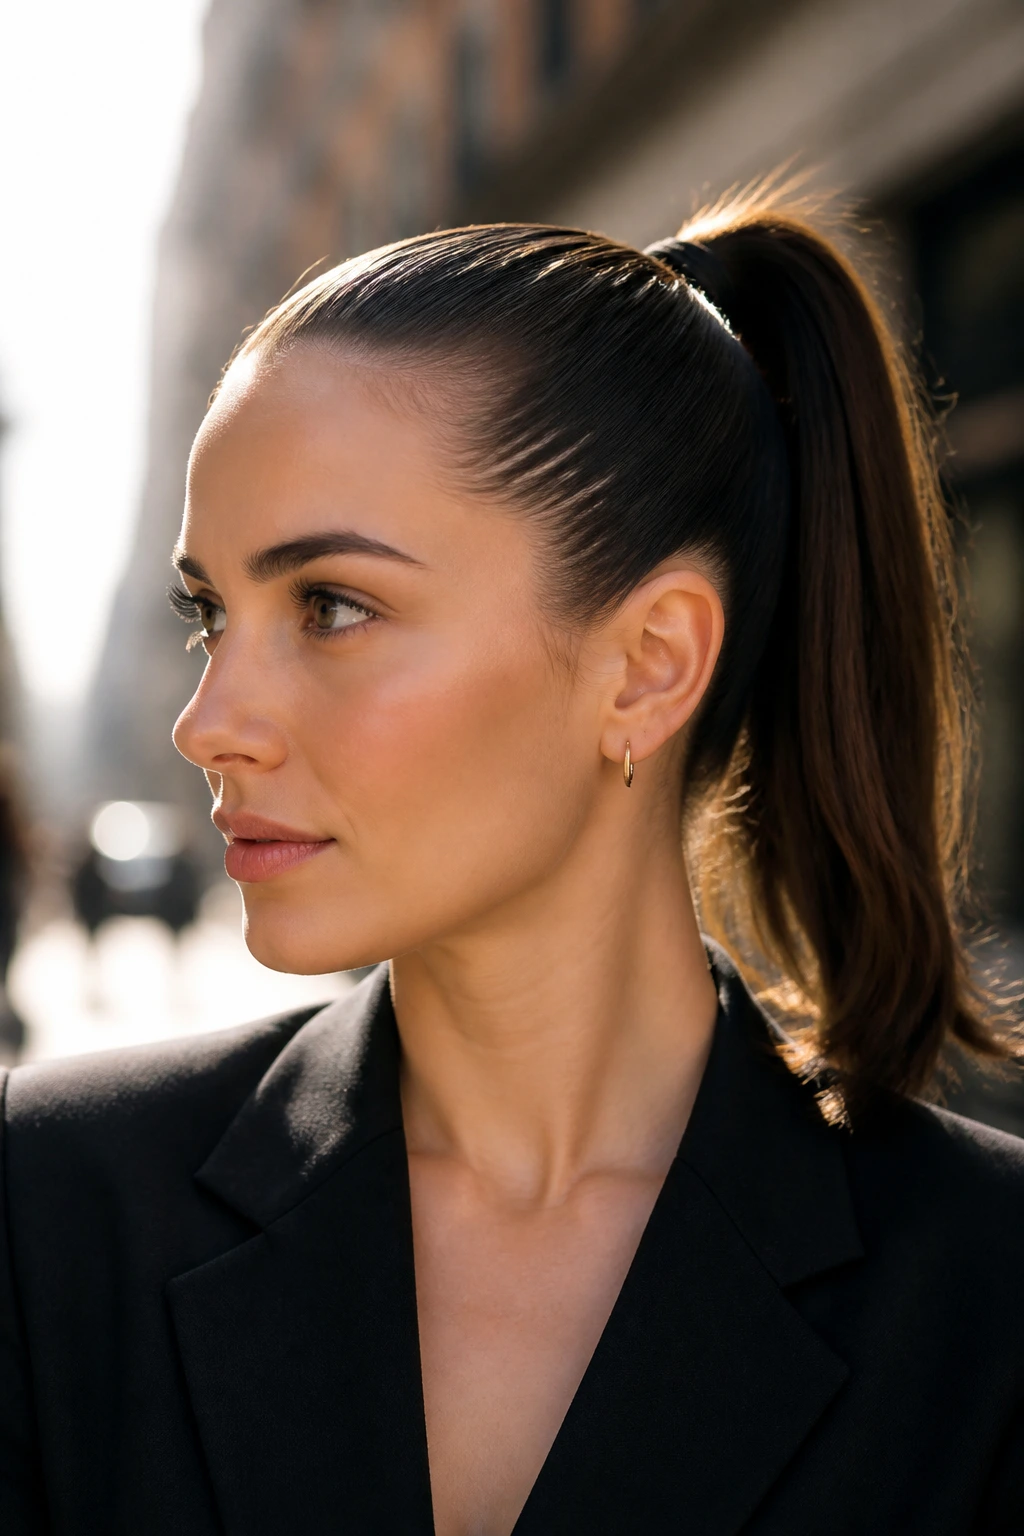
There’s a reason sleek ponytails keep coming back into rotation. They’re fast when they need to be, sharp when the outfit asks for it, and flexible enough to survive almost any setting without looking out of place. That mix is rare.
The best part, honestly, is that the style doesn’t reward perfection so much as good judgment. A cleaner part, a smarter elastic, a more thoughtful tail finish — those little choices change everything. Once you learn which version suits your hair and your day, you stop treating the ponytail like a backup plan and start using it like a real style.
