



The best half up half down hairstyles do one thing very well: they make hair look deliberate without pinning every strand to your head like you’re headed into a wind tunnel. A clean crown section, a wrapped elastic, and a little softness through the lengths can read polished in five minutes flat. That balance is why the style keeps showing up everywhere from office mornings to weddings to the plain old Tuesday when your hair needs to cooperate.
The trick is not making it look “done” in the heavy-handed sense. It’s making the top half neat enough to sharpen your features while leaving the bottom half relaxed enough to keep movement. Too tight, and it starts to feel severe. Too loose, and it looks unfinished. The sweet spot sits right in the middle, which is exactly where this style earns its keep.
Texture changes the game more than people expect. Fine hair wants grip and smaller sections. Thick or curly hair needs anchor points and pins that disappear into the base. Once you start thinking in those terms, half-up hair stops being a vague Pinterest category and becomes a set of styles you can actually repeat on yourself without a mirror in every corner of the room.
Why These Half-Up Styles Earn Their Place
-
They tame the crown without flattening the rest: The top section gives you structure, while the loose lengths keep the style from looking stiff or helmet-like.
-
They work on clean hair and second-day hair: A little grit at the roots helps the style hold, so you do not need a freshly washed blowout to make them work.
-
They can be dressed up or down fast: Swap a clear elastic for a satin ribbon, or trade a simple twist for a braid, and the whole look changes tone.
-
They’re kinder to growing-out bangs and layers: The front pieces can blend into the style instead of fighting it, which saves a lot of awkward face-framing drama.
-
They give you control where you need it: The hair around the face stays put, but the back still moves, which is a nice trade when you want polish without a full updo.
-
They suit a wide spread of hair textures: Straight, wavy, curly, and coily hair all have half-up versions that look intentional rather than forced.
1. The Clean Twisted Half-Up Crown
A clean twisted crown is the style I reach for when I want the hair to look calm and shaped, not decorated. Two slim sections are twisted back from the temples, then pinned where they meet at the center back of the head. The finish should feel tidy at the top and loose through the lengths, with the twists sitting low enough to look elegant instead of juvenile.
Why it works
The whole point is tension control. If you take sections about 1 to 1½ inches wide from each side, twist them back snugly, and pin them where the head starts to curve, you get lift without a bump. That placement matters. Too high, and the style looks like it’s trying too hard.
How to use it
This one flatters straight or slightly wavy hair best, especially if you want a polished office look without curling anything. A light mist of texture spray at the roots gives the twists something to bite into, and one hidden bobby pin per side usually isn’t enough for heavy hair — I’d use two crossed pins if your hair is past the shoulders.
The cleanest version leaves the ends untouched. Just smooth the top, twist, pin, and let the lower half stay soft.
2. The Sleek Half-Up Ponytail with a Wrapped Elastic
A sleek half-up ponytail is one of those styles that looks more expensive than it is. The crown is brushed smooth, the top section gathers tightly at the back, and a small strand wraps around the elastic so nothing obvious interrupts the line. It’s sharp, but not harsh.
This is the half-up style for people who hate fussy hair. You can do it with a tail comb, a brush, one elastic, and a bobby pin. The result lands somewhere between “clean ponytail” and “intentional blowout,” which is a useful place to live.
For the best shape, keep the section from temple to temple narrow enough that the back half still drops freely. If you take too much hair, the style starts creeping into full ponytail territory. A little shine serum on the crown goes a long way here, but only half a pea-sized amount — too much and the hair separates in thin, greasy-looking strings.
3. Soft Half-Up Waves with Two Face-Framing Pieces
This is the version that looks like you did almost nothing, which is precisely why it works. The top section pulls away from the face, but two soft pieces stay out front, usually one on each side of the cheeks or jawline. The loose waves do the rest. Nothing about it screams effort, yet it still reads tidy.
What makes it different
Unlike a sleeker half-up look, this one depends on bend and softness rather than perfect smoothness. The waves can be loose barrel curls, heatless bends, or even natural wave pattern that’s been refreshed with a little water and cream. The front pieces matter because they break up the shape and keep the style from looking too square at the top.
Best for
I like this on medium to long hair, especially if the layers around the face are already there. The style is forgiving, which means you do not need every wave to be identical. Pin the back section lightly, then tug the crown just a touch with your fingertips so it sits a little higher and doesn’t cave in.
4. The Braided Crown Half-Up
A braided crown half-up style gives you structure without the heaviness of a full braid halo. You braid each side from the temple back, then meet the braids at the back and pin them across each other. What you get is a neat frame around the head and loose length underneath, which is a strong combination for anything that needs a little more polish.
The braid itself can be a simple three-strand braid. No need to get theatrical. In fact, simple braids hold better on hair that has a bit of texture from day two styling powder or dry shampoo. If the braids are too tight, they can pull the hairline and look severe, so keep the tension even and let the edges stay soft.
This is one of the few half-up styles that looks better when it’s not perfect. A tiny bit of unevenness in the braid makes it look hand-finished instead of factory-made. Nice, frankly. Much nicer.
5. The Half-Up Top Knot with Loose Ends
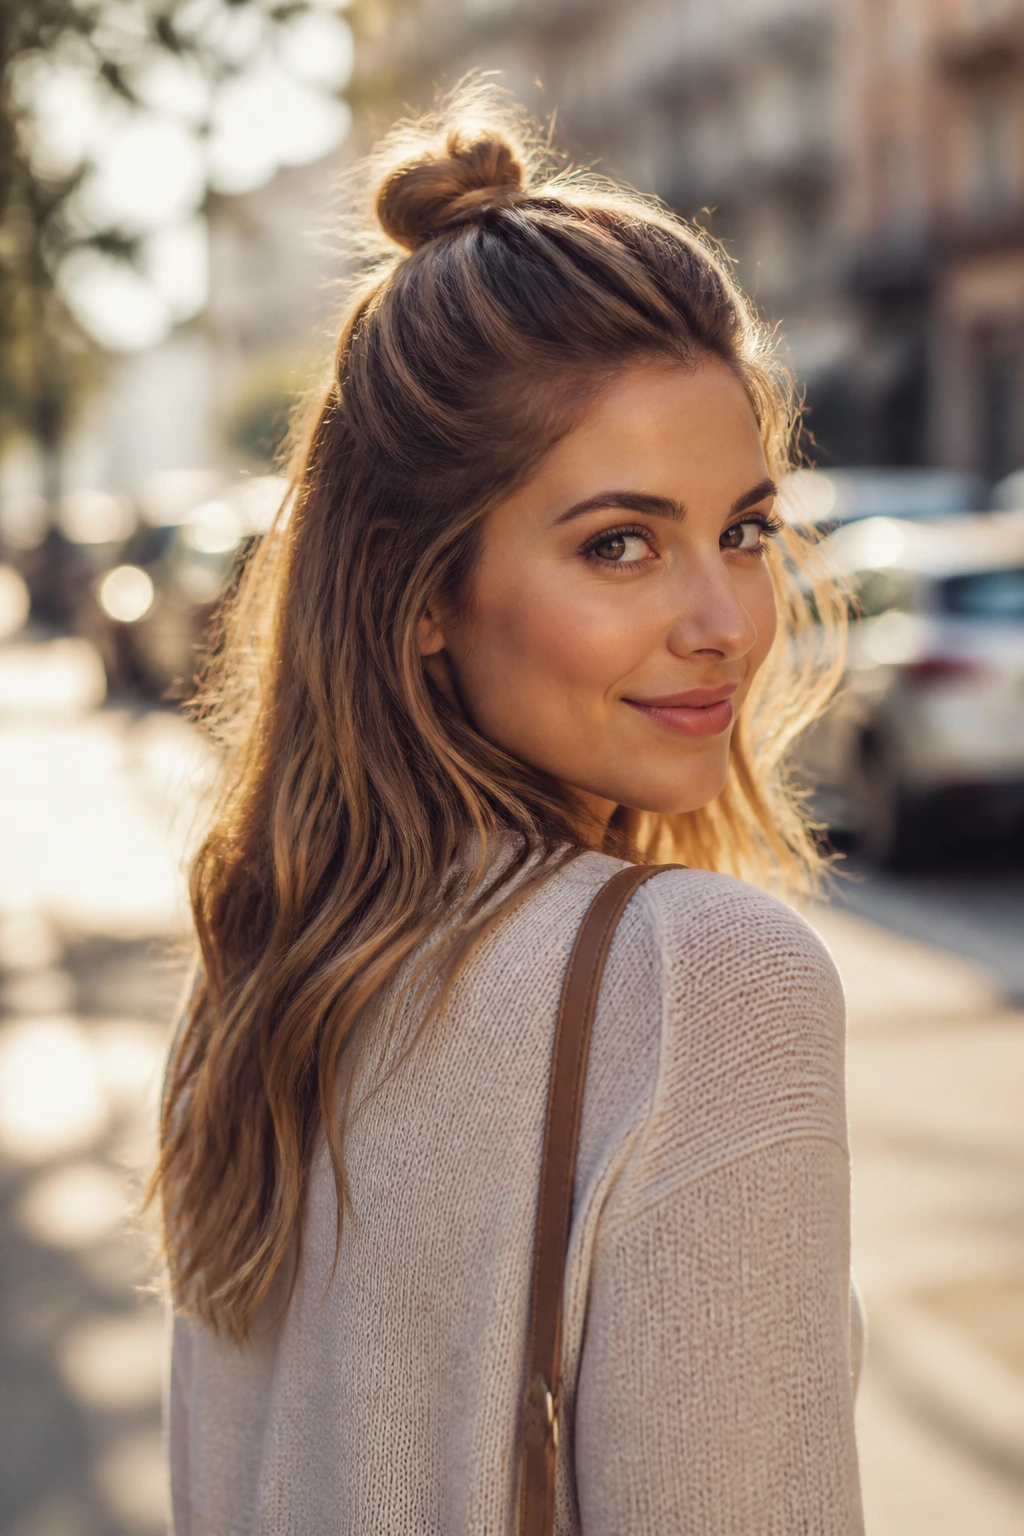
A half-up top knot gives you the tidy feel of a bun without sacrificing the length you want to show off. Gather the top half into a small knot at the crown, twist it once or twice, then pin or elastic it so it sits compactly. The lower half stays down, which keeps the shape modern rather than severe.
Why it works
The knot lifts the eyes upward and clears the face, but because the bottom section is left alone, the style still feels soft. I like this when the hair is textured or slightly bent already — the contrast between the tight knot and the loose lengths is what makes it look intentional.
A useful detail
Keep the knot smaller than you think. If the bun gets too big, the shape can tip backward and start looking like a top-heavy parcel. Two U-pins crossed through the center usually hold better than one chunky elastic, especially on thick hair.
6. The Rope-Twist Half-Up with a Low Clip
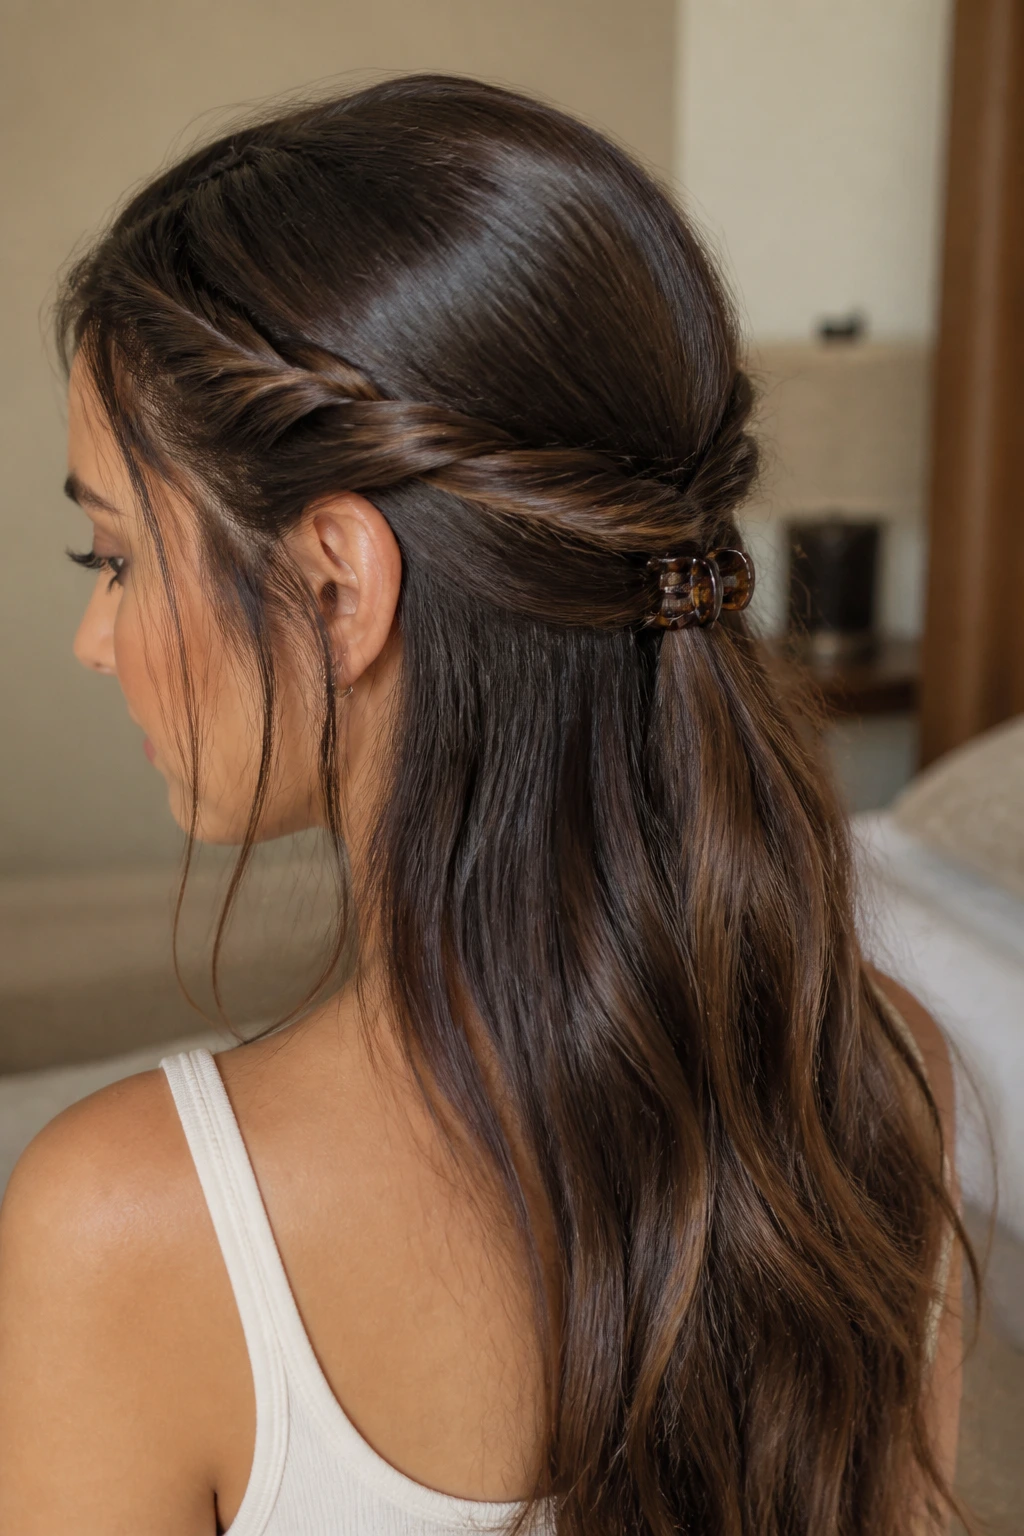
Rope twists have a cleaner, sleeker look than a plain twist because the strands spiral around each other in a way that catches the eye. Pull back two sections from the temples, twist each section tightly, then twist them around each other before clipping them low at the back with a barrette or claw clip.
What makes it different
The rope twist gives the style a little polish without requiring braiding skills. It also sits flatter against the head, which is handy if your hair tends to puff up at the crown. The low clip makes the whole shape feel calmer and less “prom.”
This one shines on medium-density hair. If your hair is very fine, mist the sections with a grip spray first. If it’s very thick, pin the twist in place before clipping it so the hardware isn’t carrying all the weight.
7. The Bubble Half-Up Ponytail
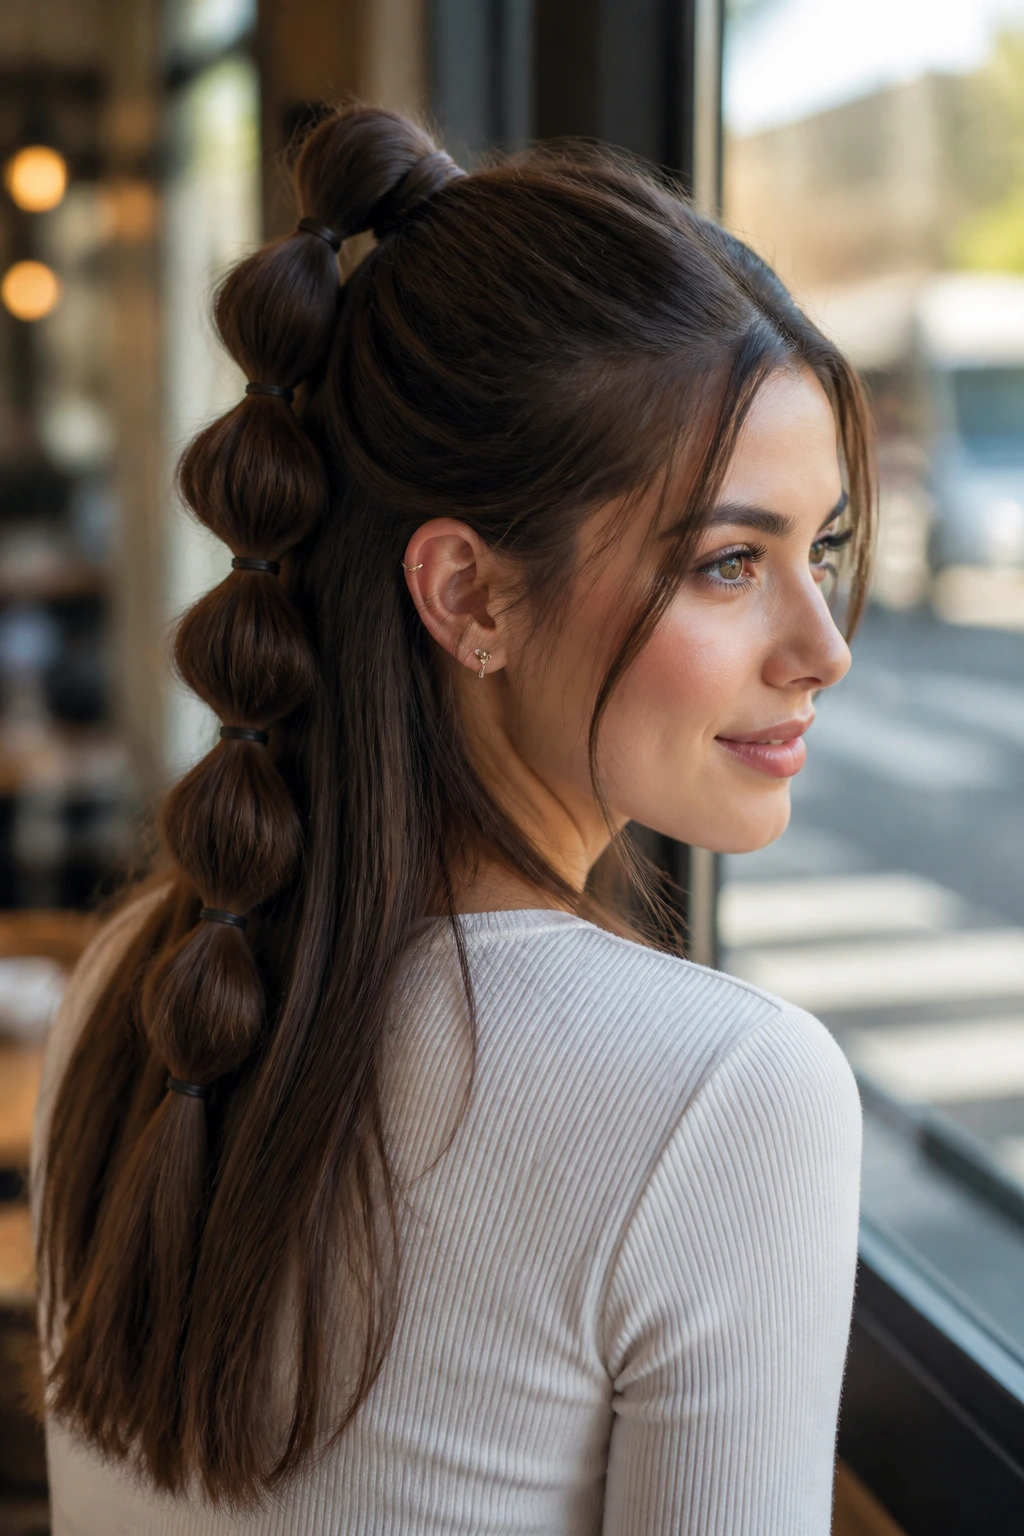
The bubble half-up ponytail has a crisp, playful shape that still looks neat when the bubbles are kept equal. Start with a half ponytail, then add small clear elastics down the tail every 2 to 3 inches. Gently tug each section outward to form rounded bubbles.
The key is spacing. Too close together and the bubbles bunch into a lumpy rope. Too far apart and the style loses its shape. I like three or four bubbles on shoulder-length hair, and five or six if the length reaches the middle of the back.
This is one of the easiest ways to make a half-up style feel styled even when the rest of the hair stays loose. It’s especially handy on straight hair, where a simple ponytail can look flat fast. Bubble sections fix that problem almost immediately.
8. The Half-Up Fishtail Panel
A fishtail panel gives the top half a little more detail than a standard braid, but it doesn’t need to be a full head of braiding. Take a narrow section from each side, fishtail them back, and join them into a small ponytail or clip at the center back. The result feels intricate without eating your entire morning.
Why it works
The fishtail pattern reads decorative even when the braid itself is tiny. That makes it useful for thinner hair, where a chunky braid can sometimes look too bulky. It also keeps the crown neat while leaving the lengths available for waves, curls, or straight shine.
My preference
Use a tiny bit of texturizing spray before you start. Fishtails slip faster than plain braids on glassy hair, and the spray gives the sections a little drag. If you want it extra neat, flatten the braid with your fingers after tying it off rather than trying to braid harder.
9. The Claw-Clip French Twist Half-Up
This is the half-up for people who want a grown-up finish without a pile of pins. Sweep the top section back, twist it upward once, then tuck the twist into a medium claw clip so the ends disappear inside. The loose lower half stays down and helps the clip look balanced instead of bulky.
A good claw clip makes or breaks this style. If the clip is too small, it slips. Too large, and the shape sags. You want the teeth to hold the twist at the crown without crushing the head flat. On thick hair, a matte clip usually grips better than a glossy one, which sounds trivial until you spend half the day adjusting it.
This style is excellent for mornings when you want a neat profile fast. It also leaves enough movement around the shoulders that it doesn’t look overworked. That’s the whole appeal.
10. Two Mini Braids Pulled Back at the Temples
Two mini braids at the temples make a clean half-up style feel a little more detailed without turning into a full braid situation. Braid each temple section tightly, then pin or tie them together at the back. The rest of the hair stays loose, which keeps the look light.
How to use it
This is especially good on layered cuts, because the little braids help keep shorter pieces from wandering into your face. You can keep the braids very thin for a delicate look, or make them slightly wider if you want them to show more clearly. Either way, the style reads neat and controlled.
What to watch for
Do not start the braids too far back. You want them to lift from the front hairline just enough to clear the face, not so far back that the style loses its point. And if your hair is slippery, braid the sections with a touch of dry shampoo in your fingertips. Old trick. Works.
11. The Half-Up Bow Detail
A half-up bow sounds fussy until you try it on hair that already has a little texture. The top section is gathered into a loop, then split and pinned so it resembles a soft bow rather than a giant gift ribbon. It’s charming, yes, but when done small and close to the head, it can also look tailored.
The size matters more than the technique. Keep the bow compact — roughly the width of your palm, not a dinner plate. That proportion keeps it from taking over the head. If your hair is very thick, secure the center of the bow with two bobby pins hidden beneath the middle wrap.
I like this for events where you want something that feels a touch dressed up but not formal. The lower lengths can be curled or straight, but the bow itself should stay neat. If it droops, tighten the center and pin closer to the base.
12. The Curly Half-Up with Crown Lift
Curly half-up hair lives or dies by the crown. The curls should keep their shape, and the top section should rise just enough to show off the face without crushing the curl pattern. Gather the top half loosely, let the curls sit on top of each other, and pin them so the lift feels airy rather than pressed down.
Why it stands out
Curly hair already gives you texture. Don’t fight it. The polished part comes from the balance between a controlled top section and curls that still move freely below. If you smooth the crown too hard, the whole thing turns into a flat helmet. Nobody wants that.
Practical note
Use pins instead of a tight elastic if the curls are dense. Elastics can distort the curl bundle and create a hard line in the middle of the style. A few hidden pins and a light mist of flexible-hold spray usually do the job better.
13. The Half-Up Low Knot
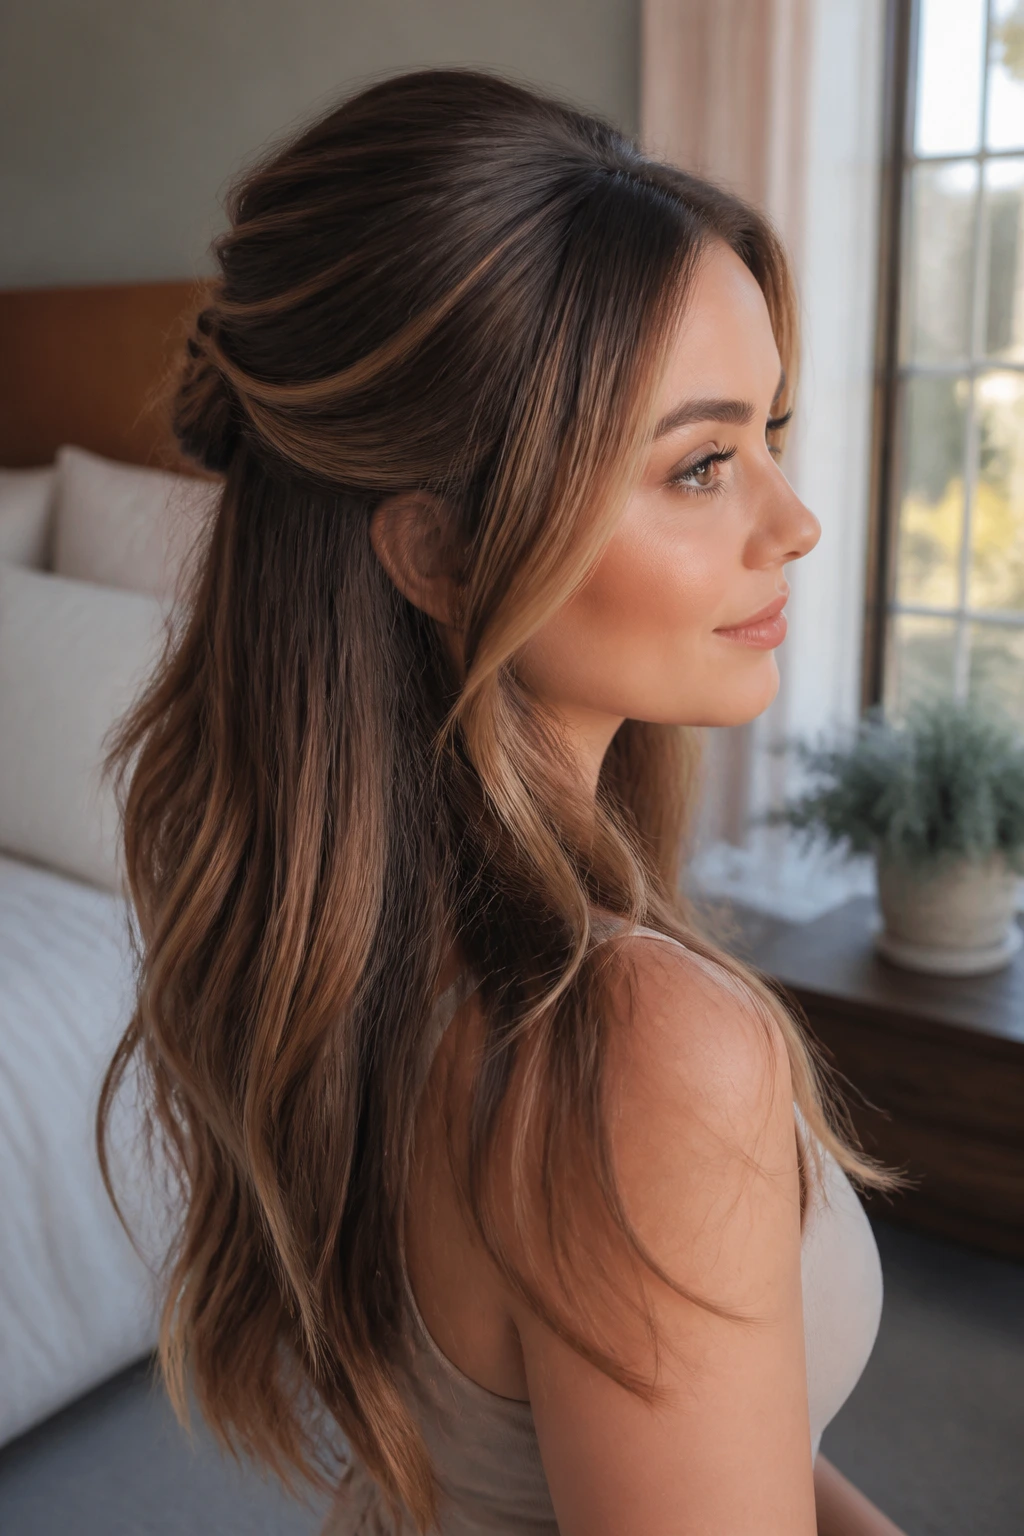
A low knot version is quieter than a top knot and often more flattering on longer hair. Pull the top section back to the middle of the head, twist it into a small knot, and pin it low enough that the loose lengths still fall cleanly over the shoulders. It gives shape without crowding the crown.
The lower placement is the whole trick. It keeps the style from becoming top-heavy and makes the transition from pinned hair to loose hair feel smoother. If you have long layers, this version keeps them from flaring out around the face in a way that can look messy fast.
This is one of my favorites for workdays because it doesn’t fight with collars or earrings. It sits neatly under a coat, too, which matters more than people think. Hair that survives a jacket collar earns extra points.
14. The Barrette Stack Half-Up Side Sweep
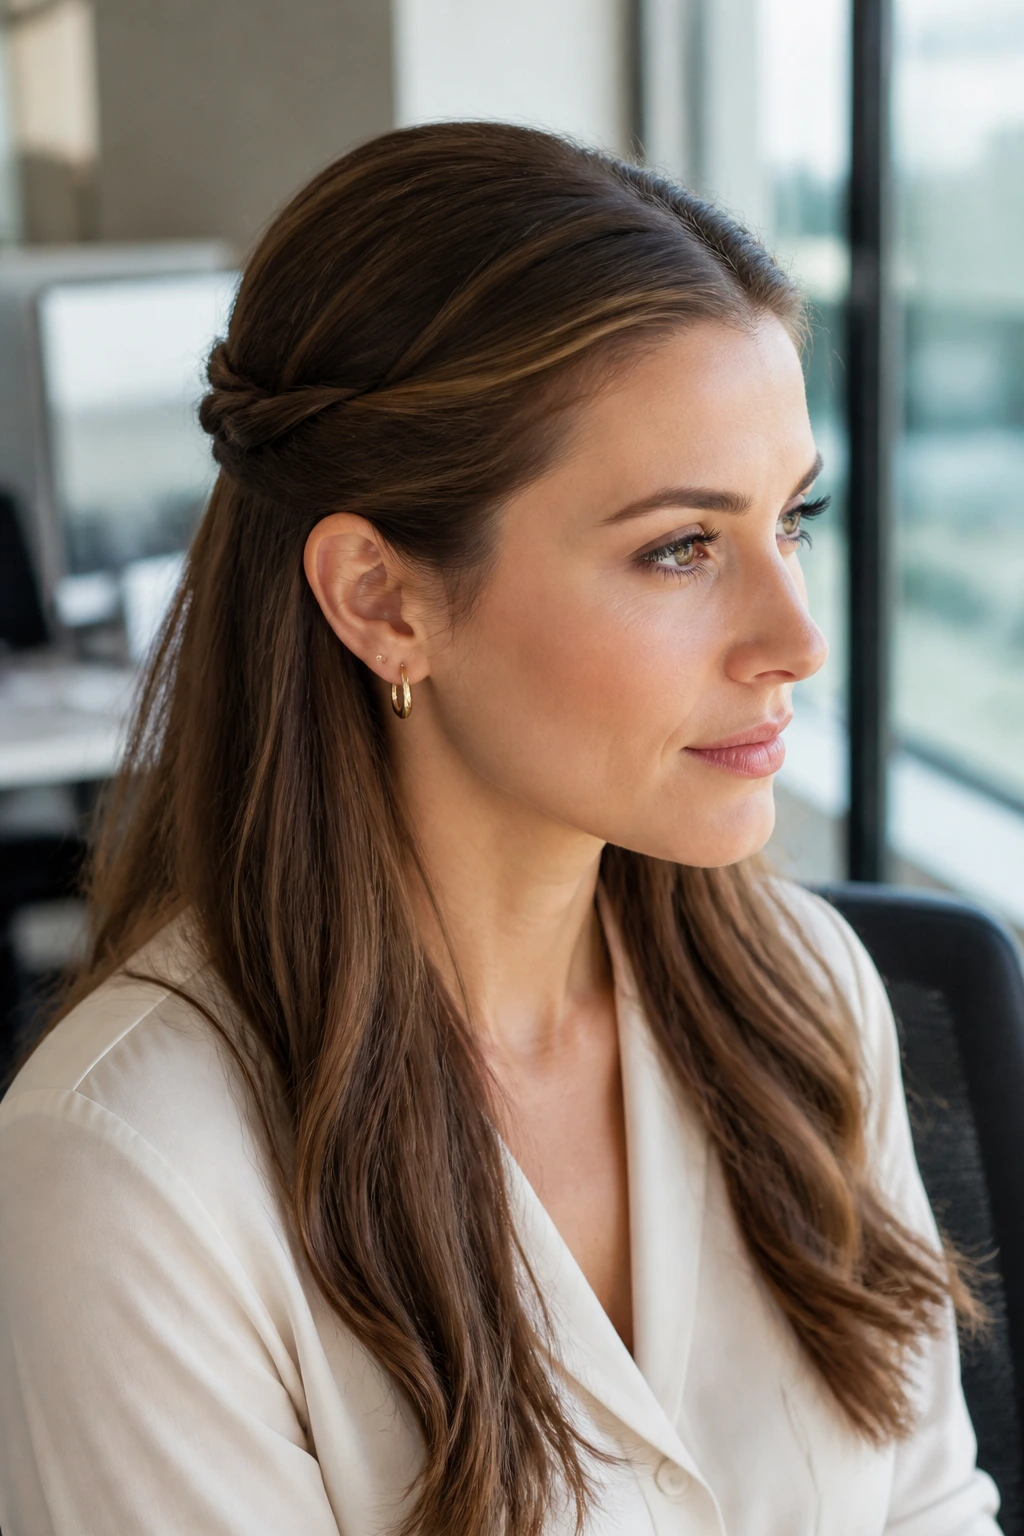
A barrette stack makes even very simple hair look finished. Sweep the top section to one side or slightly back, then secure it with two or three barrettes in a line. The stack can be matched metal, mixed pearls, or plain tortoiseshell; the real point is that the clips create shape without requiring much styling.
You get the best effect when the hair is smoothed first and the barrettes are spaced with a little intention. If they’re crowded together, the style looks accidental. If they’re too far apart, it starts to feel incomplete. About half an inch between clips is enough for the eye to read them as a group.
This is a nice option for medium hair that doesn’t hold braids well. The hardware does the work. Honestly, sometimes that’s the smartest move.
15. The Ribbon-Tied Half-Up Ponytail
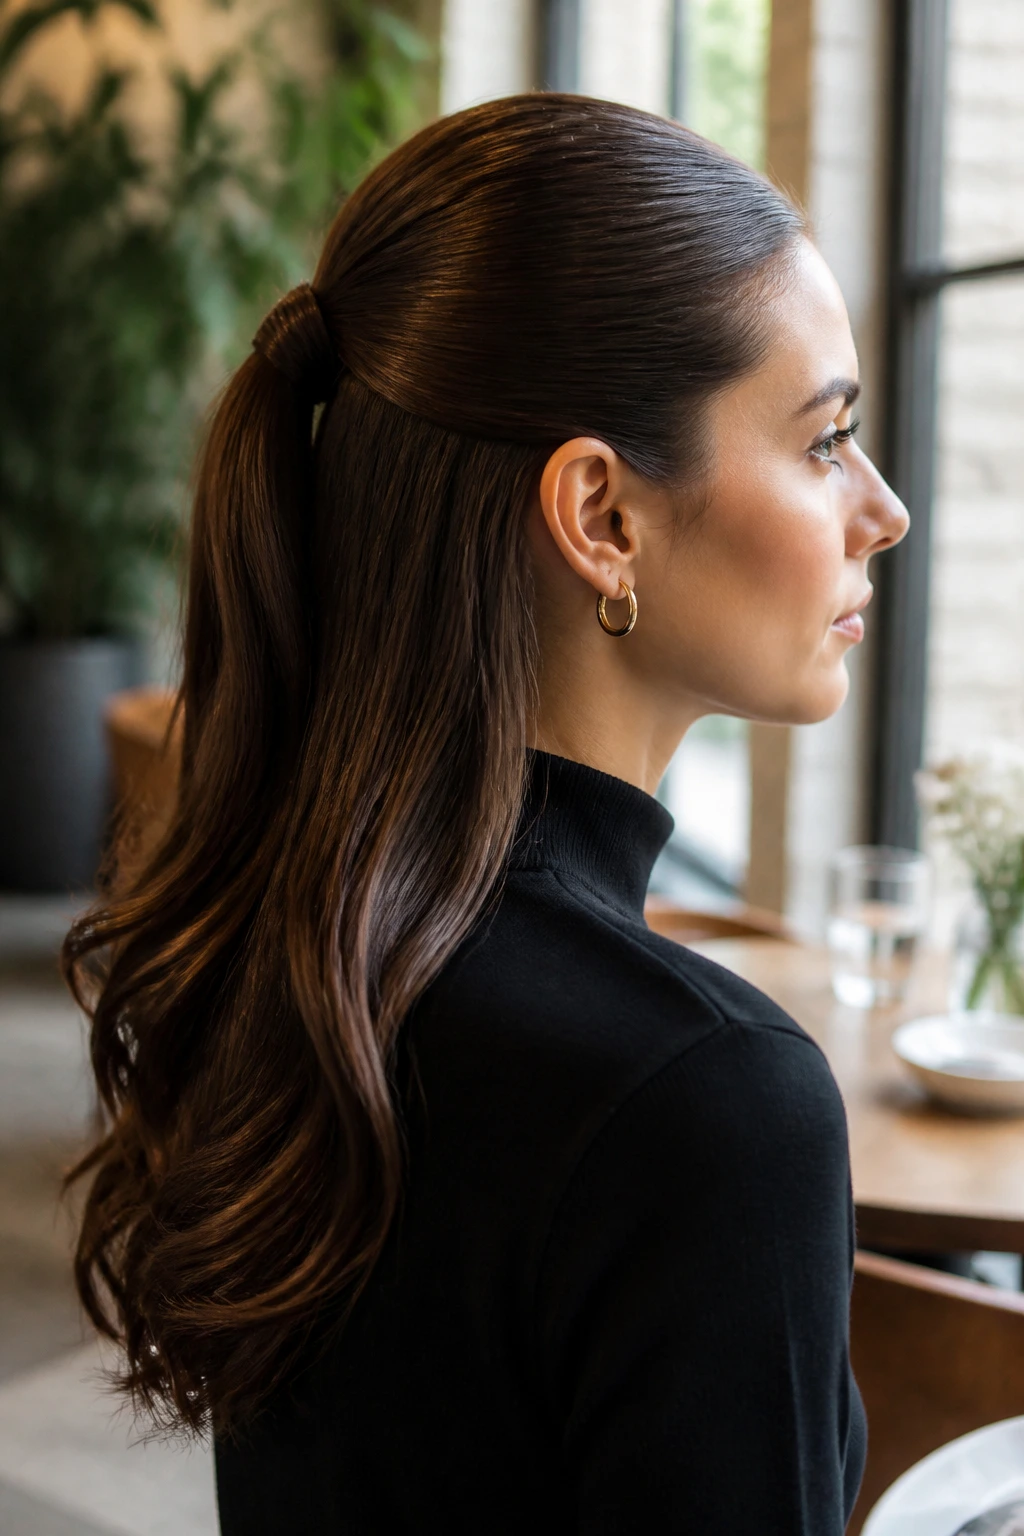
A ribbon-tied half-up ponytail softens the style immediately. Gather the top section into a small ponytail, tie over the elastic with a ribbon, and leave the ends of the ribbon long enough to fall alongside the hair. Satin gives a smoother finish. Grosgrain gives a more structured one.
Why it works
The ribbon hides the utilitarian part of the style, which is half the battle with half-up hair. It also gives you an easy way to make the style feel more intentional without changing the actual sectioning. The hair can be straight, wavy, or curled — the ribbon will still do a lot of the visual work.
Small detail, big difference
Tie the ribbon just below the elastic, not above it. That keeps the knot secure and the bow from sliding upward. If your hair is very slippery, use a clear elastic first, then tie the ribbon over it so the ponytail doesn’t unravel.
16. The Half-Up with Flipped Ends
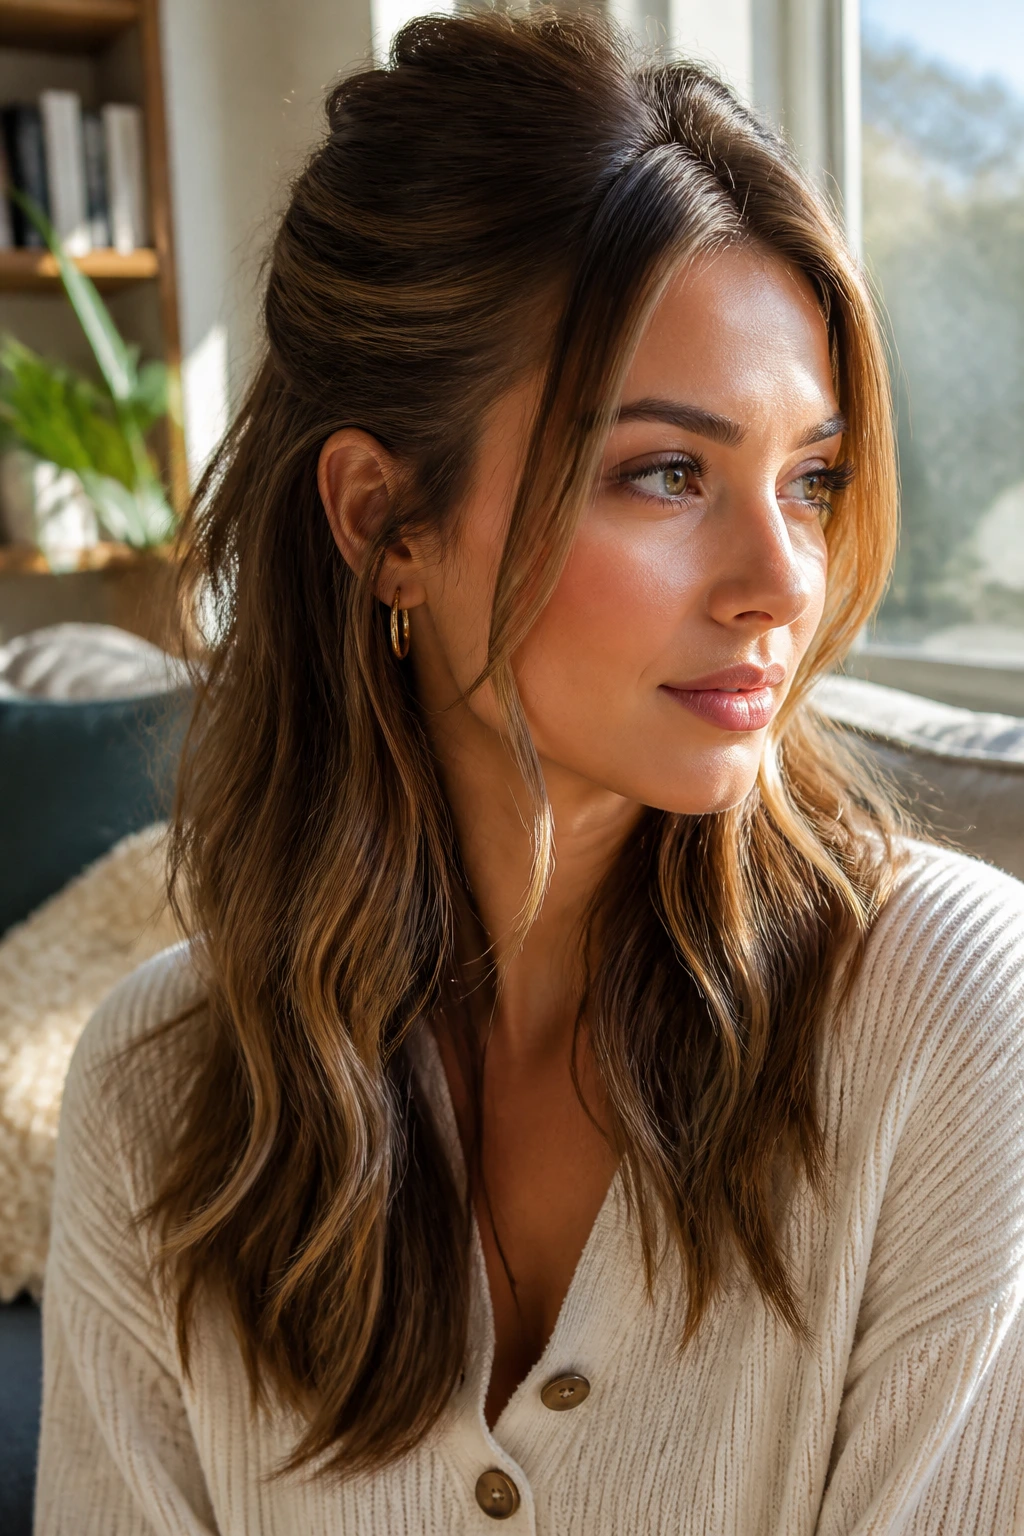
Flipped ends give half-up hair a little retro shape without turning it into costume. Pull the top section back cleanly, then style the lower lengths with turned-out ends using a round brush or flat iron. The half-up section stays neat while the ends do the talking.
This is a strong choice for shoulder-length hair, where flipped ends create a visible outline. On longer hair, the effect is softer, but still useful if you want the style to feel deliberate. I like a center part with this one, though a side part works if you want more lift at the crown.
Keep the flip smooth rather than extreme. If the ends curve too sharply, the style starts shouting. A gentle bend at the ends looks cleaner and wears better throughout the day.
17. The Half-Up Space Buns
Half-up space buns walk a line between playful and neat, which is harder to pull off than people think. Split the top section in two, twist each side into a small bun above the ears, and pin or elastic them securely. The lower hair stays loose, keeping the look from becoming too cartoonish.
Where it works best
This style looks sharp on straight or wavy hair with some texture in the roots. It also makes layered hair behave a little better because the buns hold the front pieces in place. Keep the buns modest in size. Pea-to-golf-ball sized, not giant. That keeps them polished.
My blunt take
If the buns are too high or too messy, the style turns costume-y fast. Keep them symmetrical, keep them compact, and let the rest of the hair stay smooth. That’s what saves it.
18. The Waterfall Braid Half-Up
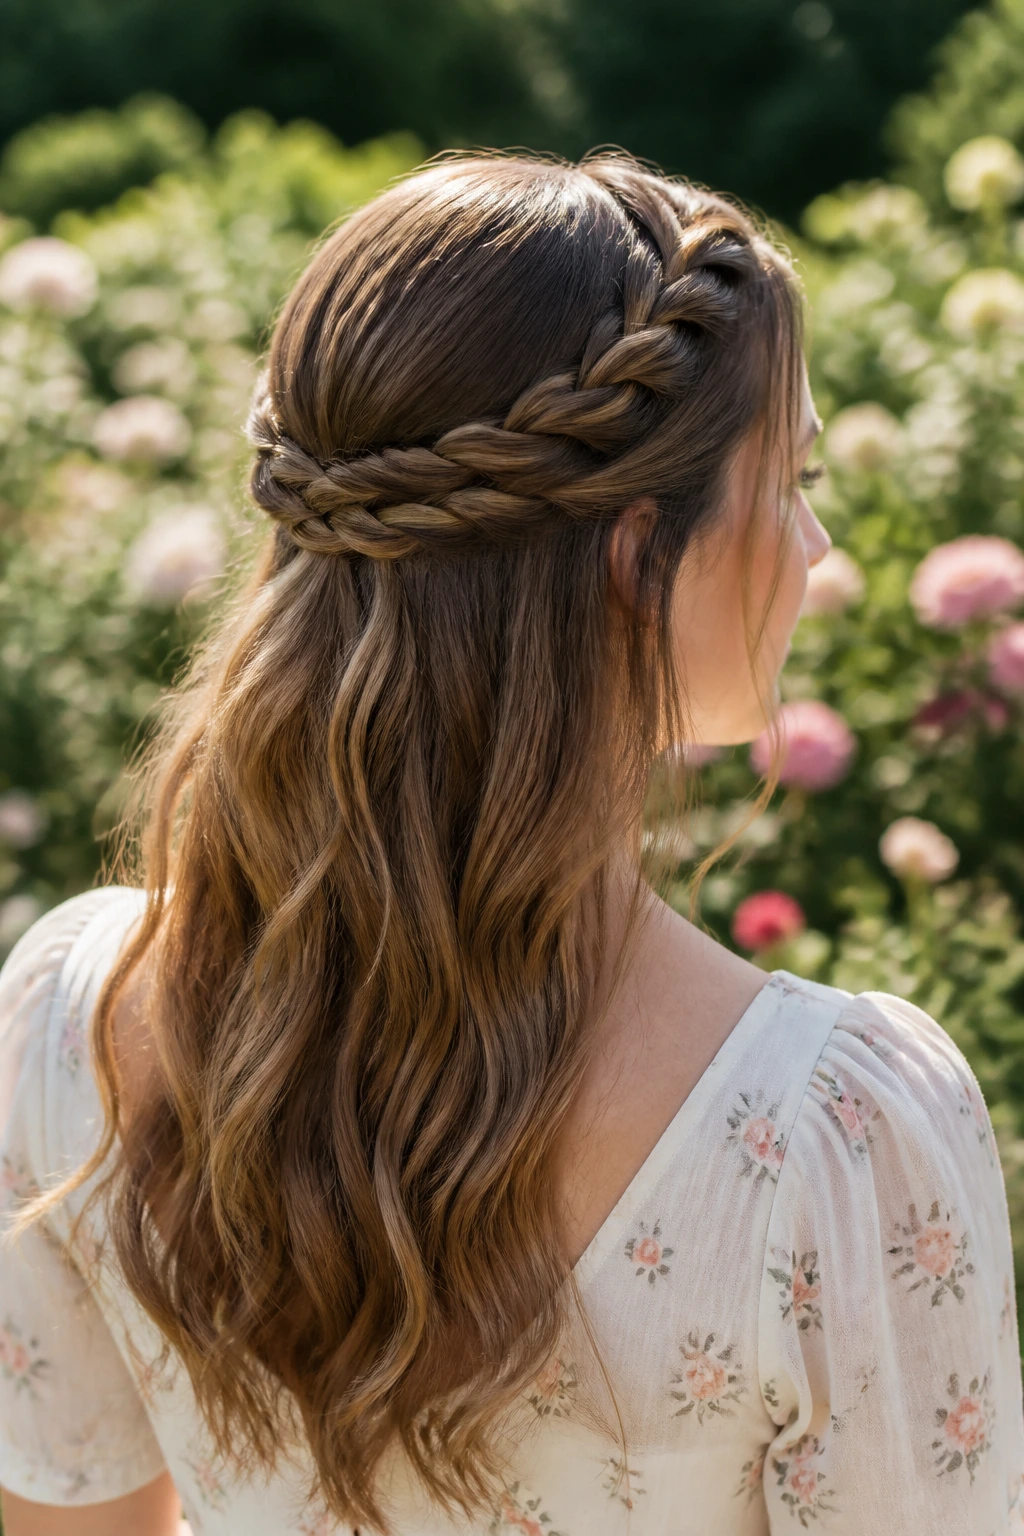
A waterfall braid is the fanciest-looking style on this list, but it’s less complicated than it appears once your fingers get used to the pattern. The braid runs across the back of the head, dropping strands as it moves so the loose hair seems to spill through it. That visual line looks beautiful on wavy or curled hair.
The reason it works so well is contrast. The braid gives structure, and the released strands keep movement in the style. If you have layers, the waterfall effect can look especially pretty because it gives each layer a chance to show instead of hiding them all under one thick braid.
This style does take a little more time than the others, so I’d reserve it for when you want the hair to be the point of the outfit. A touch of curl at the loose ends helps the braid read cleanly. Straight ends work too, but the waterfall effect feels softer with bend.
19. The Side-Twist Half-Up for Shorter Hair
Shorter hair can absolutely do half-up styles. The key is to use side twists instead of trying to gather too much length from the back. Take small sections from each temple, twist them toward the back, and secure them low with pins or a small clip. The loose hair should still hit the shoulders or just above them.
Why it’s useful
This is the style that keeps shorter layers out of your mouth without demanding more length than you have. It also works when a full ponytail would look thin or awkward. The side twist adds shape right where short hair usually needs help: around the face and ears.
One detail I’d protect
Use smaller accessories. Tiny barrettes, narrow clips, and short pins sit better on shorter hair than oversized hardware. A huge claw clip swallows the style and makes the back look empty.
20. The Polished Half-Up Pony with Soft Volume
This is the closest thing to a default polished half-up look, and I mean that as a compliment. Tease the crown lightly, smooth the top layer over it, then pull the upper half into a ponytail that sits high enough to lift the face but not so high it turns into a cheerleading style. The lower lengths stay loose and soft.
What makes it work is the volume under the surface. A little lift at the crown keeps the style from lying flat against the head, especially on fine hair. Wrap a small strand around the elastic if you want the finish to look cleaner. It takes ten seconds and makes a surprising difference.
If you want one half-up style to learn well, this is the one. It’s flexible, quick, and easy to adjust depending on how sleek or soft you want the final result to feel.
What Makes Half-Up Hair Hold Its Shape
The styles that last all day share the same basic logic: the crown needs anchor points, the loose lengths need room, and the hairline shouldn’t be fighting the style. That sounds obvious until you watch someone gather too much hair from too low down and wonder why the top collapses by lunch.
A good half-up style starts with sectioning. I like to think in terms of a clean horizontal line from temple to temple, then a little extra if the hair is very thick. Pulling the section too low adds weight. Pulling it too high can expose the parting in a strange way. The right line usually sits somewhere above the ears, not at the top of the head.
The other quiet factor is texture. Hair that’s too silky tends to slide. Hair that has a little grit from dry shampoo, mousse, or day-two oil behaves better. That’s why the same style can feel stubborn on freshly washed hair and cooperative on hair that’s had a little time to settle down. Not magic. Just friction.
Essential Tools for These Styles
-
Tail comb: Makes clean partings and helps you pick up precise sections at the temples and crown.
-
Soft brush or boar-bristle brush: Smooths the top layer without leaving the hair puffed out and fuzzy.
-
Clear elastics and small snag-free ties: Best for wrapped ponytails, bubbles, and styles where the tie should disappear.
-
Bobby pins and U-pins: Needed for twists, buns, braids, and anything that has to sit flat against the head.
-
Texturizing spray or dry shampoo: Adds grip at the roots and helps the top section hold without slipping.
-
Light-hold hairspray: Keeps flyaways in check without turning the style stiff or crunchy.
-
Small claw clips and barrettes: Useful for quick half-up looks and styles that rely on hardware instead of lots of pinning.
-
1-inch curling iron or flat iron: Optional, but handy if you want loose bends or flipped ends rather than straight hair.
-
Silk or satin scrunchie: A nice backup for loose, low-tension half-up ponytails when you want less denting.
Smart Product Choices and Sectioning Tips
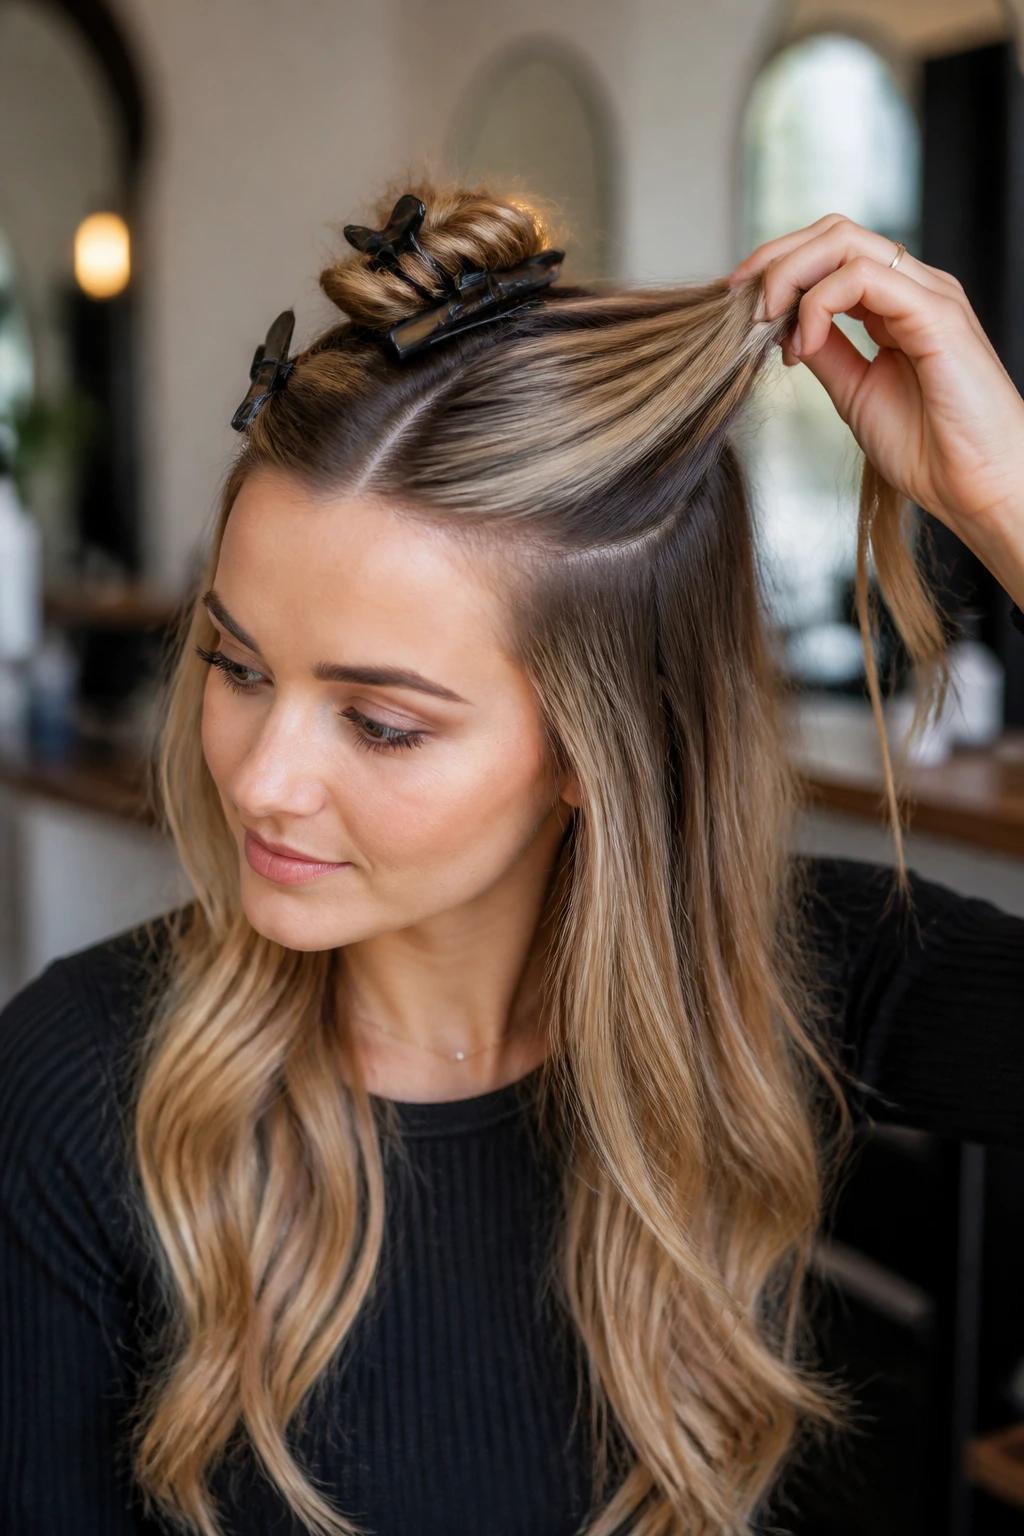
The products that matter most for half-up half-down hairstyles are usually the least glamorous ones. A good elastic is worth more than a fancy styling cream if the goal is hold. Look for snag-free ties that don’t shred the cuticle, especially on fine or color-treated hair. If the elastic is already stretched out in the package, skip it.
Dry shampoo and texturizing spray do different jobs, and the distinction matters. Dry shampoo lifts oil at the roots. Texture spray adds grit and a little visible separation. On slippery hair, I like a quick pass of both: dry shampoo first at the crown, then a light mist of texture spray through the section you plan to pin or braid.
Pins should match the job. Tiny bobby pins disappear best in twists and barrette styles. Longer U-pins hold buns and rolled sections more securely because they lock into the hair instead of just sitting on top of it. If you need the style to survive a long day, two crossed pins are usually better than one heroic pin trying to do everything alone.
How to Wear These Looks
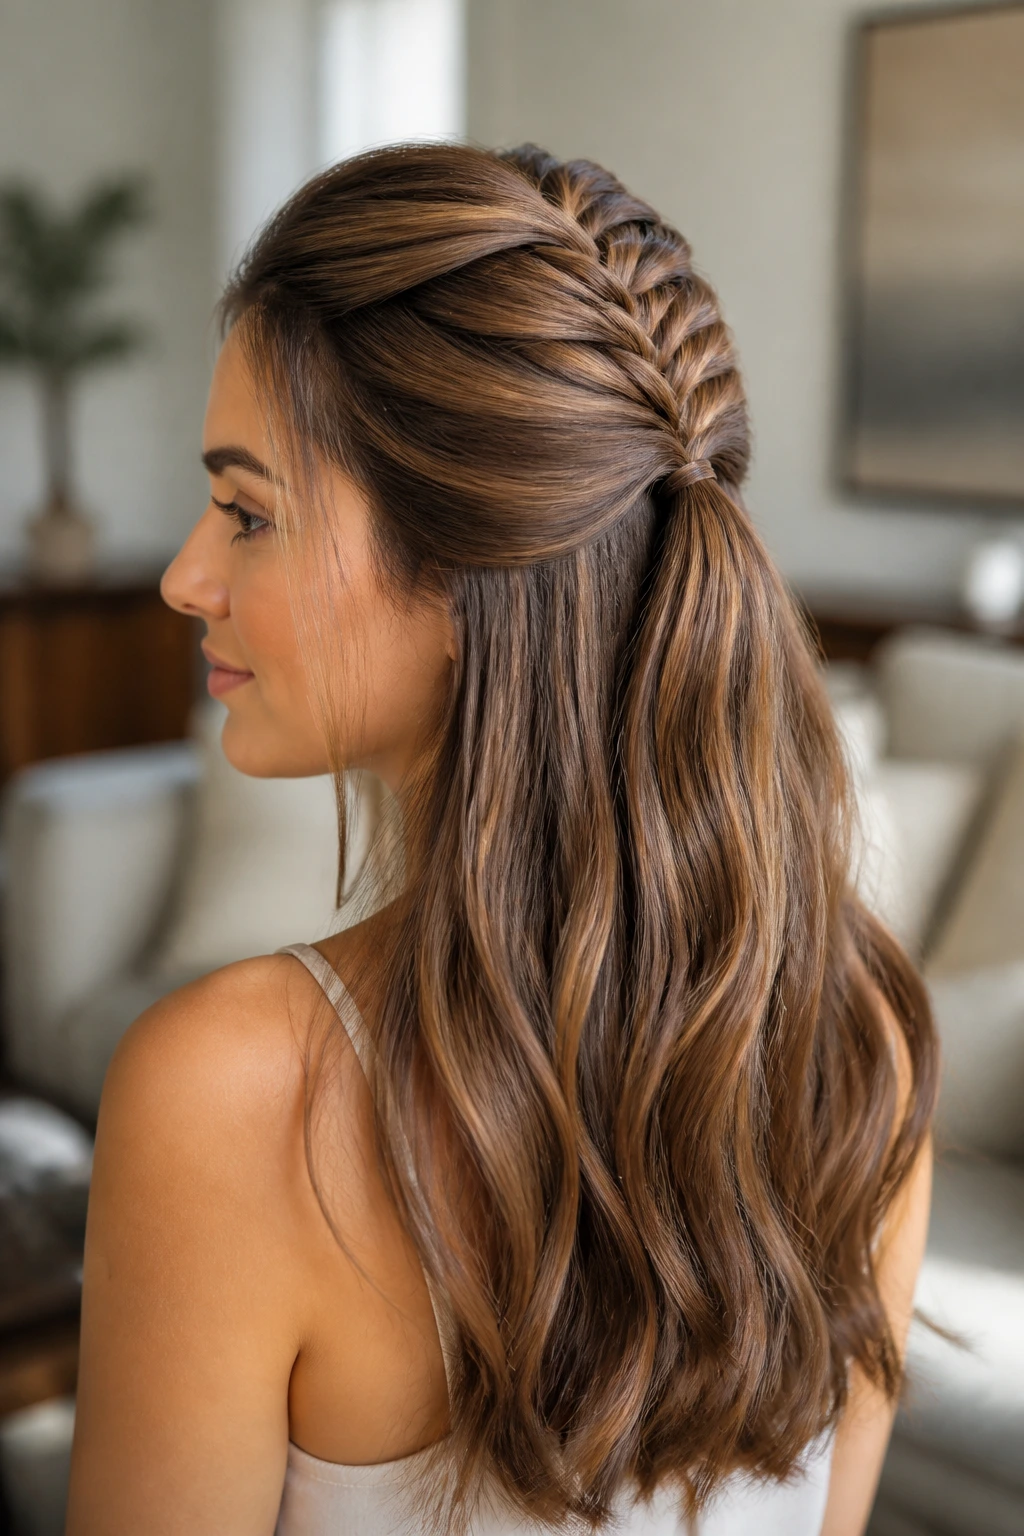
Presentation: Keep the half-up section clean enough that the shape is obvious from the front and side. The easiest way to do that is to smooth the crown first, then loosen only the pieces you want to soften around the face.
Accompaniments: These styles sit well with hoops, collarbones, turtlenecks, open necklines, and simple studs. If the hairstyle is braided or clipped, I’d keep the earrings smaller; if the hair is sleek, you can get away with a bigger accessory.
Portions: For fine hair, a smaller top section usually looks better than a heavy half-up that steals too much volume from the bottom half. For thick or curly hair, take a wider section so the style feels balanced and doesn’t look like the top is pinched off from the rest.
Beverage Pairing: A polished half-up style likes an equally clean finish around it — soft makeup, brushed brows, and one strong choice such as a lip color, an earring, or a bold neckline. Too many extras start competing with the hair, which is never the point.
Small Upgrades That Change the Finish
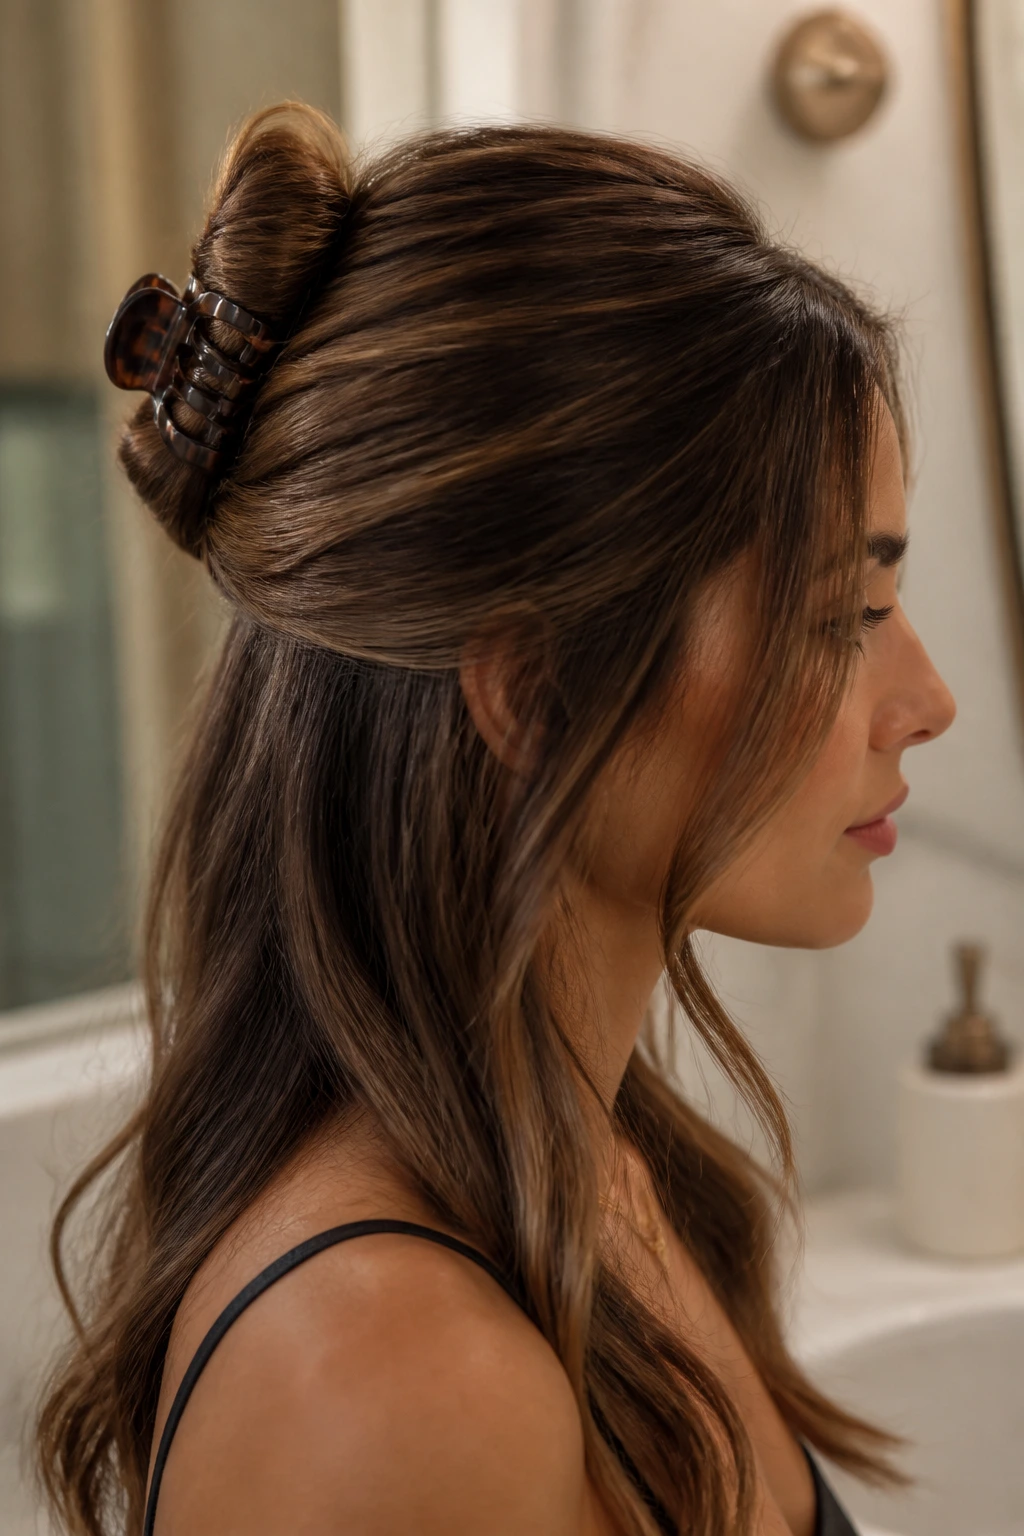
Finish Boost: A touch of shine cream on the mid-lengths, not the roots, can make straight or wavy hair look smoother without flattening the top section. One pea-sized amount is enough for most hair past the shoulders.
Customization: Swap the elastic for a satin ribbon, a pearl clip, a matte claw clip, or a stack of slim barrettes depending on how dressed up you want it. The sectioning can stay the same while the mood changes completely.
Serving Suggestions: Pull a few face-framing pieces free with the tip of a tail comb, then bend them slightly with a flat iron so they sit softly against the cheekbones. That tiny curve is often what separates “nice hair” from “finished look.”
Make-It-Yours: If you wear your hair naturally curly, leave more of the texture alone at the bottom and use pins instead of tight ties. If your hair is pin-straight, give the loose lengths a bend so the half-up section doesn’t float above an empty sheet of hair.
Common Mistakes to Avoid
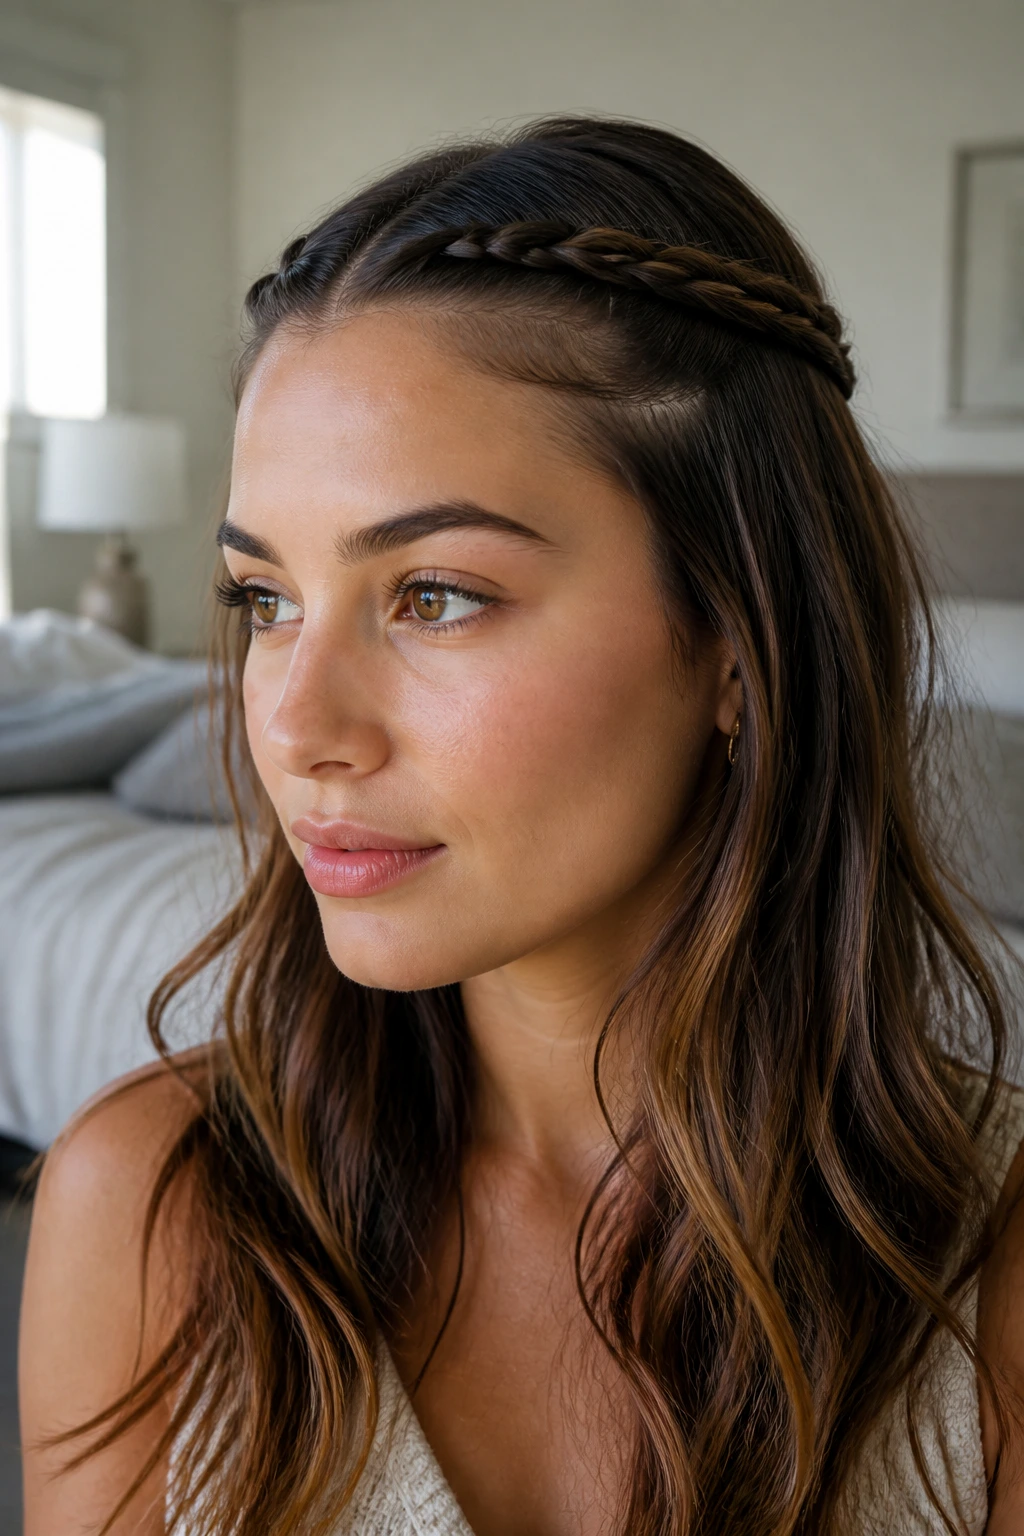
The first mistake is taking too much hair into the half-up section. The symptom is simple: the bottom half goes flat and the top starts sagging under its own weight. Keep the section narrower, and if your hair is thick, use more anchoring pins instead of just grabbing more hair.
Another easy miss is smoothing the crown too aggressively. You get a slick, shiny top that looks good for exactly one angle and then exposes every bump and tension line the second you turn your head. Light brushing is enough. You want control, not scalp maps.
A third problem is using the wrong accessory size. Oversized clips on fine hair slip. Tiny clips on thick hair snap shut on air and do nothing useful. Match the hardware to the density of the hair, not the look on the packaging.
Too much product causes its own trouble. Heavy oil near the roots makes the style collapse faster, while too much hairspray turns twists and braids into brittle little wires. A light hand wins here. Always.
Variations and Adaptations to Try
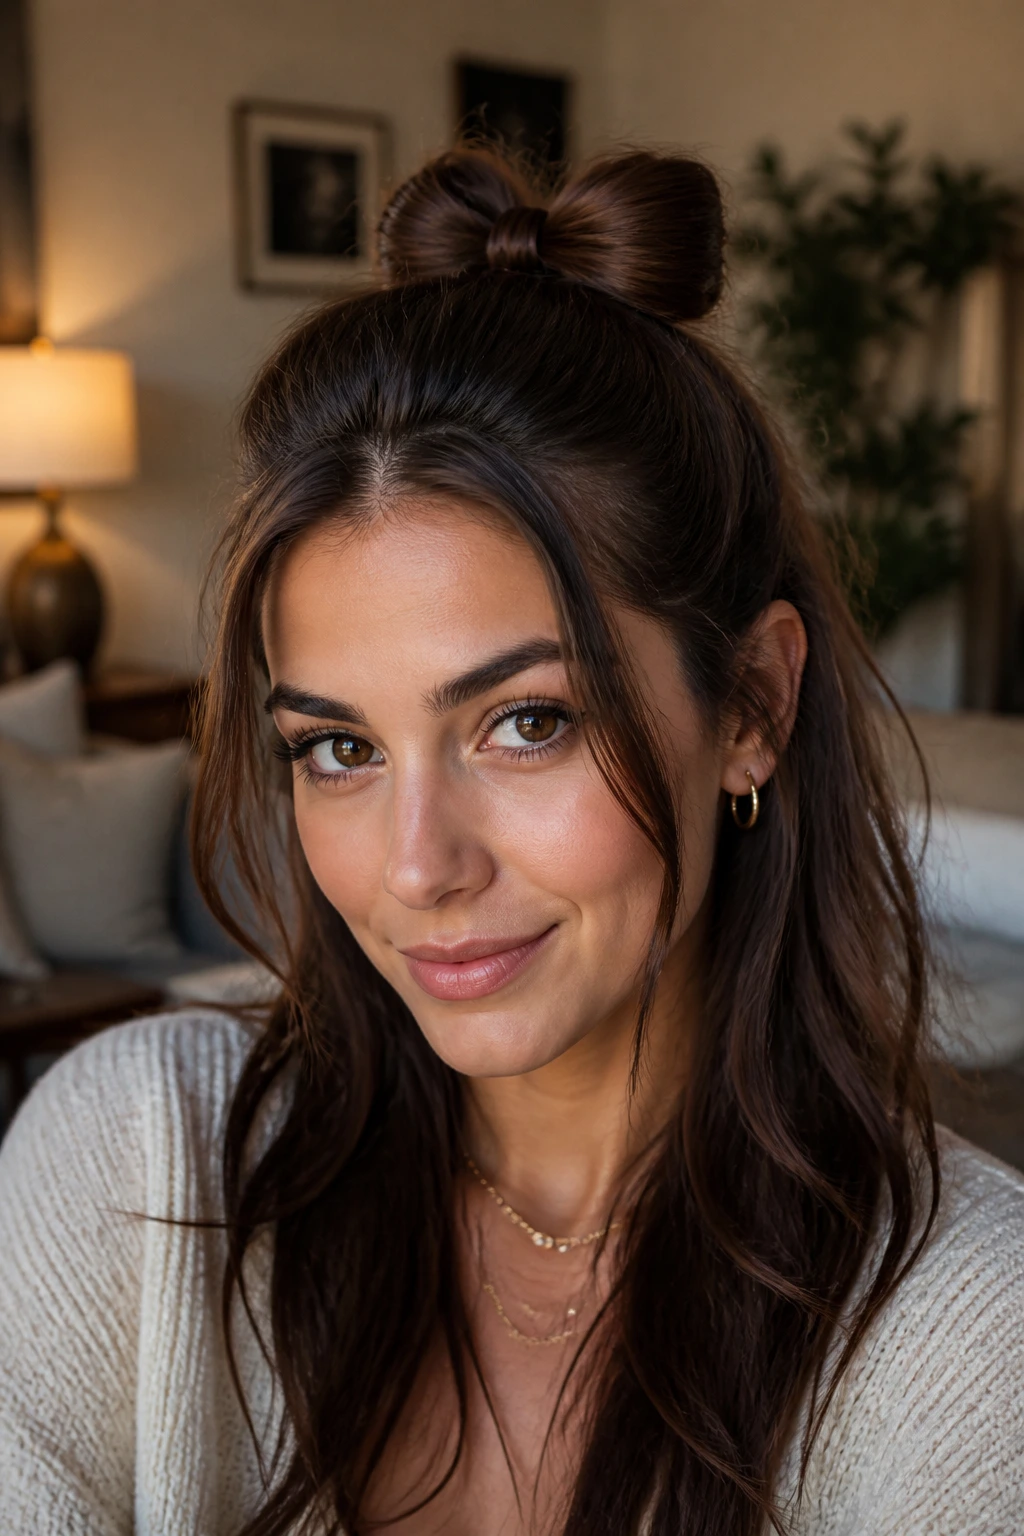
The Fine-Hair Lift: Add a small amount of root powder or texture spray at the crown, then tease only the underside of the top section before smoothing the top layer back over it. It gives the style a little body without making the surface look rough.
The Curly-First Version: Work with the curl pattern instead of flattening it. Pin the top section loosely, let the curls stack naturally, and use a flexible-hold spray so the shape stays soft instead of crunchy.
The Short-Hair Sweep: On shoulder-length or shorter hair, shift the focus to the sides. Twist the temple sections back, secure them with small pins, and let the lower hair stay as it is. That keeps the style readable even when there isn’t much length to gather.
The Formal Finish: Replace elastics with hidden pins, add a wrapped strand at the base, and use pearl or gold accents sparingly. The shape stays the same, but the whole style reads wedding-guest instead of weekday.
The Heatless Bend: Set the loose lengths in braids, twists, or rollers the night before, then release them and pin the top section the next day. It gives the half-up shape more movement without reaching for a hot tool.
How to Keep the Style Looking Fresh
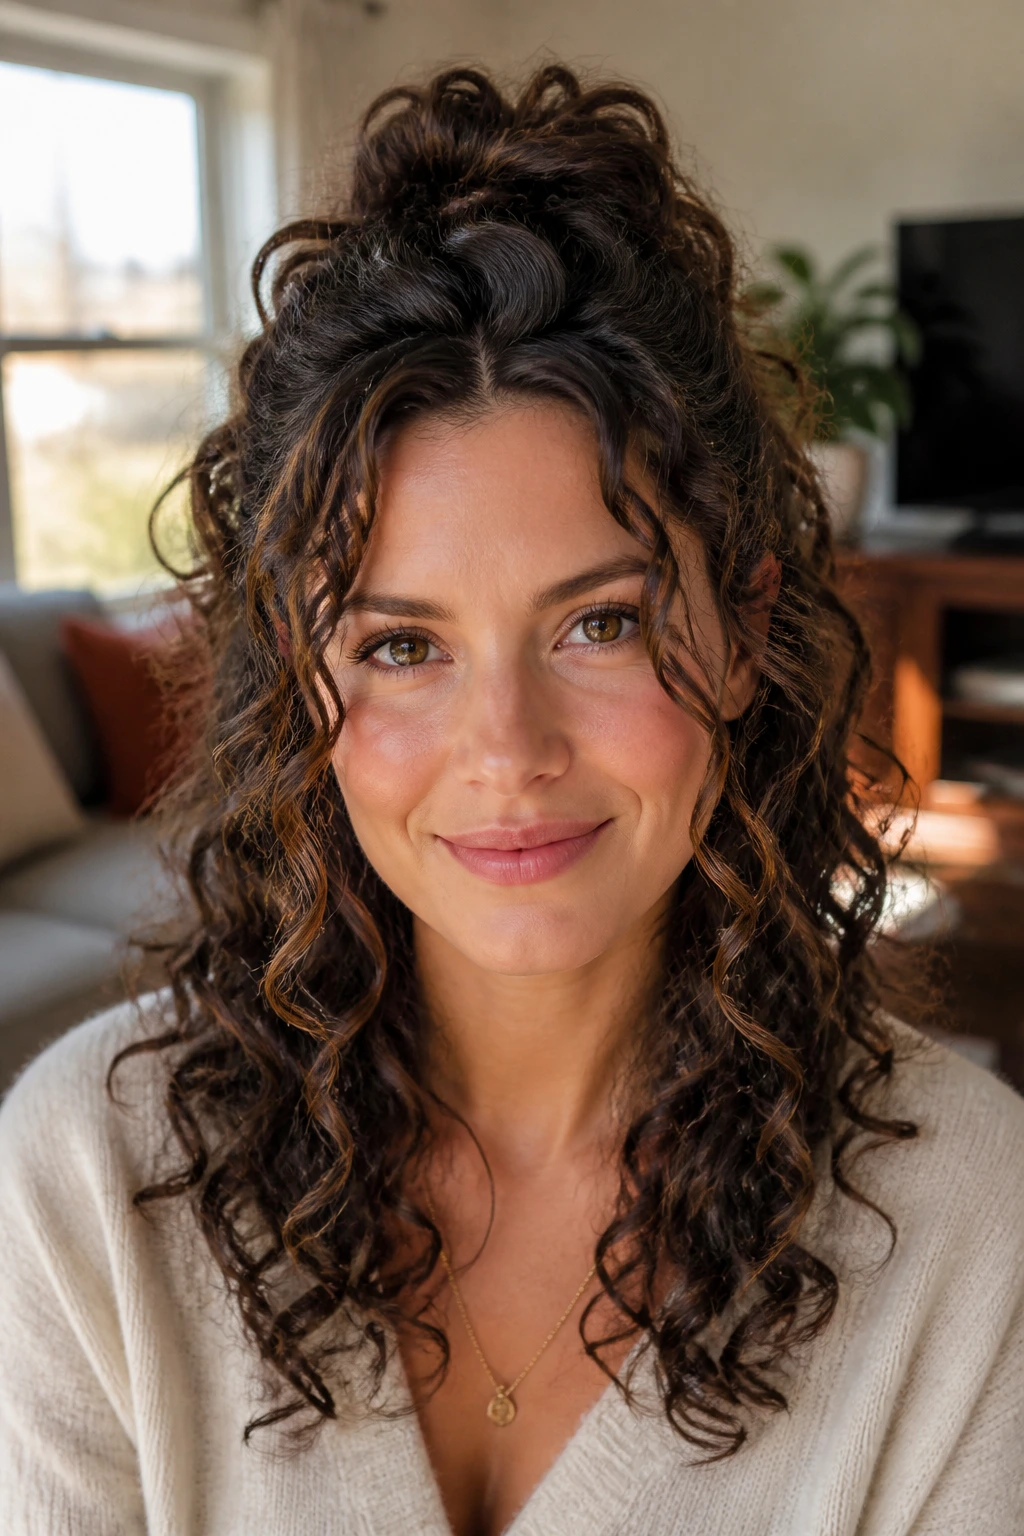
Half-up styles usually hold best for one day, though the simpler twisted or clipped versions can often survive into a second day if you’re gentle with them. If you want to reuse the style the next morning, take the pins out before bed and let the hair rest on a silk or satin pillowcase. That keeps the crown from getting crushed into a strange ridge.
For a same-day refresh, aim at the roots first. A quick puff of dry shampoo at the crown, followed by finger-combing and one or two replacement pins, usually brings the style back. Don’t overload it with more spray unless the hair has actually lost its shape. Too much product during a refresh can make the front pieces look dusty.
If the loose lengths have gone flat, bend just the last few inches with a curling iron or flat iron rather than redoing the whole head. You usually only need the ends to wake up a little. The half-up section is doing the visual heavy lifting anyway.
Frequently Asked Questions
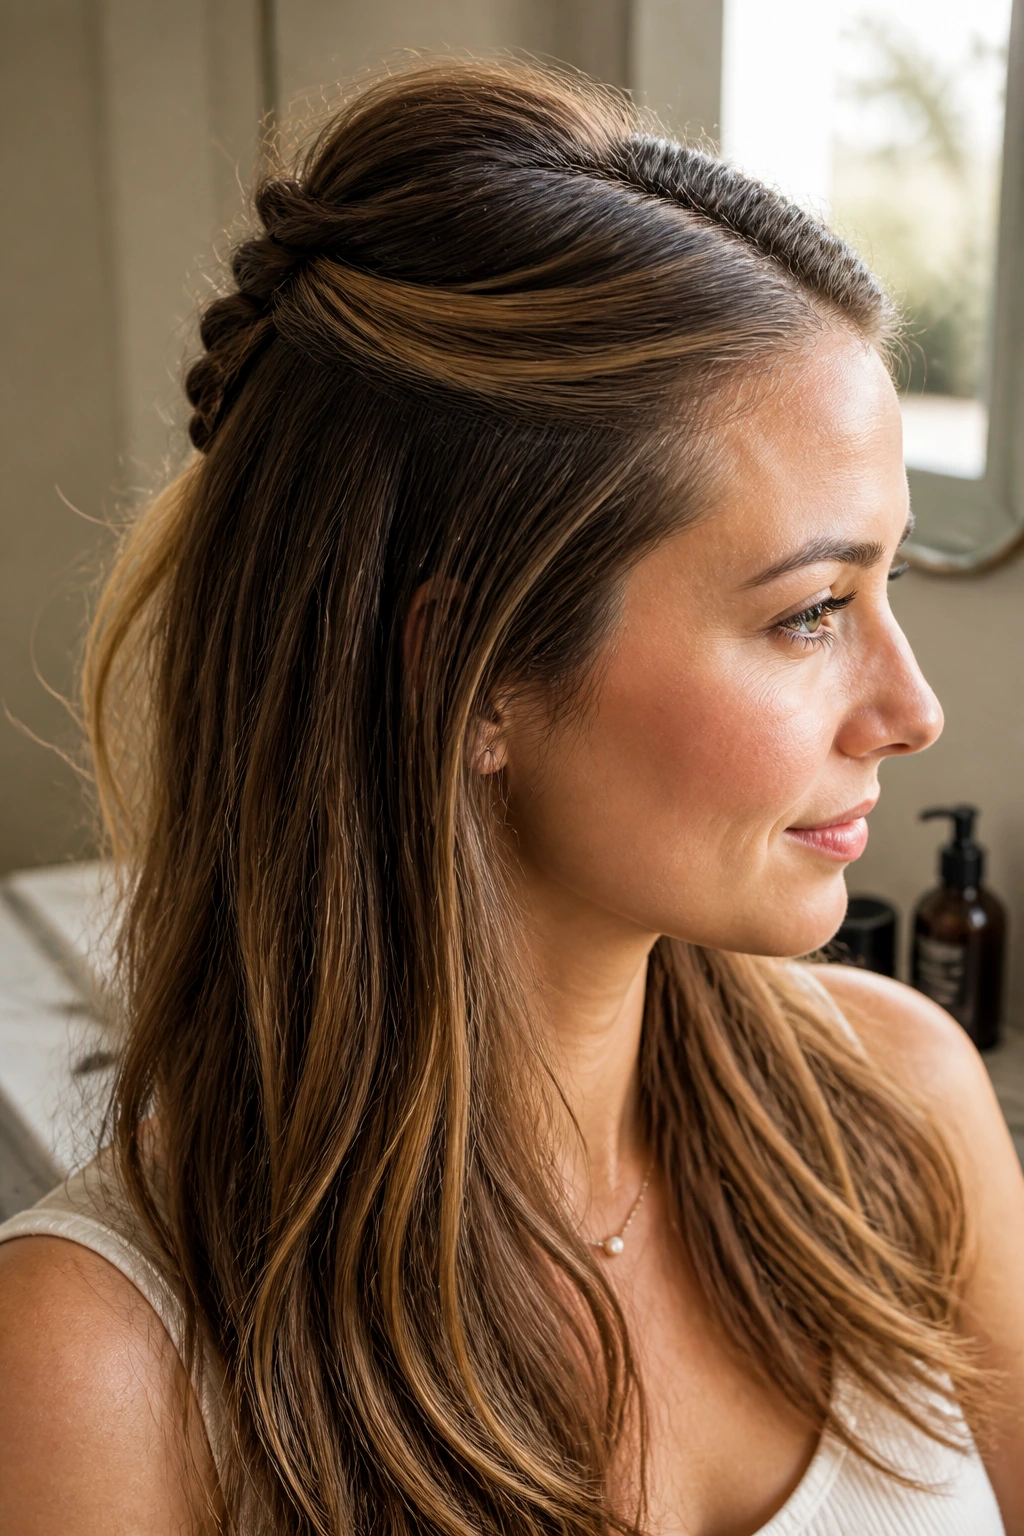
How much hair should I leave down in a half-up style?
Usually, about half the hair, though that’s more of a visual rule than a math problem. If the style looks balanced from the front and side, you’ve probably taken the right amount. On thick hair, a slightly larger top section can help the style sit evenly.
What if my hair keeps slipping out of the style?
You probably need more grip at the roots and better section control. Dry shampoo, texture spray, or a very light backcomb under the top layer can help, but the biggest fix is using smaller pieces and anchoring them with crossed pins.
Can I wear these styles on short hair?
Yes. Shorter hair often does better with side twists, mini braids, or a small clipped-back crown rather than a full ponytail shape. Use smaller accessories so the style doesn’t get swallowed.
Do half-up styles work on curly hair without flattening the curls?
They do, as long as you pin loosely and keep the tension low. Curly hair usually looks better when the top section is lifted and pinned rather than squeezed into a tight elastic. Let the curl pattern keep its shape.
How do I hide the elastic?
Wrap a small strand of hair around it and pin the end underneath the ponytail with a bobby pin. If the hair is too short to wrap, use a decorative clip or ribbon instead. Both look cleaner than a visible band.
What should I do if the crown looks bumpy?
Undo the section, smooth it with a brush or fingers, and start again with smaller subsections. A single big grab often creates those awkward ridges. If the bump is tiny, a little texture spray and gentle finger pressure can flatten it without rebuilding the whole style.
Are these styles okay for work or formal events?
Yes, and that’s part of the appeal. A sleek twist or wrapped ponytail reads office-ready, while braids, ribbons, or a polished claw-clip finish can move the same base shape into wedding or evening territory.
How do I keep the front pieces from frizzing out?
Use a tiny bit of smoothing cream on the lengths, not the roots, and avoid touching the pieces once they’re set. If your hair frizzes easily, a soft bend with a hot tool helps the front pieces sit in a cleaner line.
The Half-Up Sweet Spot
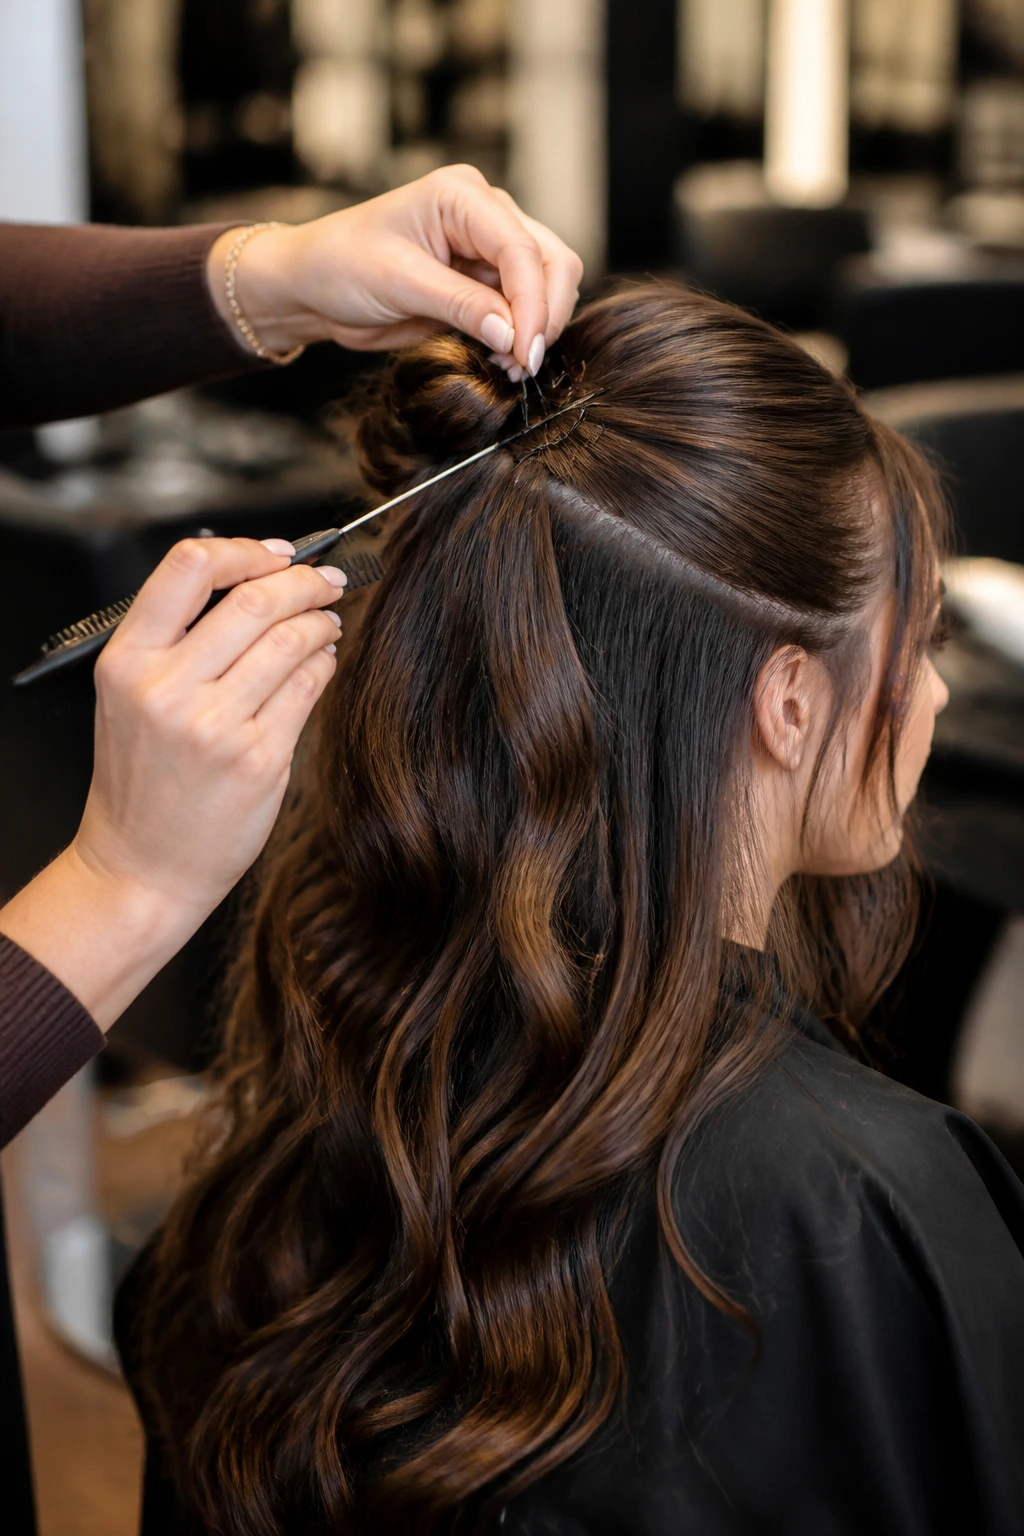
Half-up hair keeps earning its place because it solves a real problem: you want the face-framing control of an updo without giving up the movement of loose hair. That middle ground is useful, and on the right day it’s the most useful place of all.
The styles that hold up best are the ones that respect the hair’s natural texture instead of bullying it. A clean part, the right amount of tension, and a sensible accessory can do more than a pile of extra product ever will. Start there, and the rest of the look tends to behave itself.
