



Short shaggy hair with mullet layers has a funny habit of looking relaxed while doing a lot of work. The crown sits light, the sides lose that blunt, helmet-y edge, and the nape keeps just enough length to make the whole shape move when you turn your head. If a pixie feels too neat and a full mullet feels too loud, this is the sweet spot where the cut gets a little rebellious without turning into costume.
The reason it keeps hanging around in salons is simple: it fixes two common short-hair problems at once. Flat roots? The shorter layers at the top can lift. Too much bulk around the ears? The shaggy interior can break it up. And the back—if it’s handled with a bit of restraint—keeps the silhouette from collapsing into a regular crop. I’m partial to versions that look slightly torn at the ends, not over-thinned. Too much razor work and the whole thing starts to feel wispy in the wrong way.
What makes this haircut useful is how many directions it can go. It can read soft, edgy, feathered, curly, sharp, or deliberately messy, depending on where the fringe lands and how much length you leave at the nape. These 25 takes are all built from that same basic idea, but each one leans a little differently.
Why These Short Shaggy Mullet Layers Work So Well

-
They keep the crown from going limp: shorter top layers create lift without needing a round brush every morning, which matters if your hair tends to lie flat by noon.
-
They soften the sides without turning them bulky: the shaggy cut breaks up the area around the ears, so the shape stops reading like a box cut.
-
They give the back a point of interest: even a small tail at the nape changes the whole silhouette; the cut stops at the jaw instead of dead-ending there.
-
They’re easy to adjust to your face and texture: the same cut can look softer with curtain pieces, sharper with micro bangs, or looser with a bit of wave.
-
They grow out with less drama than blunt short cuts: the layers blur the line between “freshly cut” and “three weeks past a trim,” which is useful if you hate constant salon visits.
-
They handle imperfect texture better than polished crops: a little cowlick, bend, or frizz can look intentional here instead of like a styling failure.
1. Feathered Crown Mullet
This is the version I reach for when someone wants movement without a heavy fringe. The crown is cut short and feathered, the sides skim the cheekbones, and the nape keeps a slim tail that sits just above the collar. It has a soft, lifted feel—more wind-tossed than punk.
What makes it work
The feathering removes weight where short hair usually falls flat, so the top gets a little airy lift. A blow-dry with a small round brush at the roots is enough; you do not need to sculpt the whole head.
A pea-size bit of texture cream through the ends keeps the layers separated. Too much product and the feathers clump together fast.
2. Piecey Micro Mullet
A micro mullet looks tiny until it’s cut correctly. Then it starts making sense: the fringe is short and broken, the sides are cropped close, and the back hangs just long enough to register as a mullet rather than a pixie.
Why the shape feels different
The trick is keeping the top chunky, not smooth. The texture should look separated, almost like you pinched it apart with your fingers after drying.
Styling note
- Use a matte paste on dry hair.
- Twist a few front pieces between your fingers.
- Leave the nape slightly uneven; that rough edge is the point.
3. Curly Shag Mullet
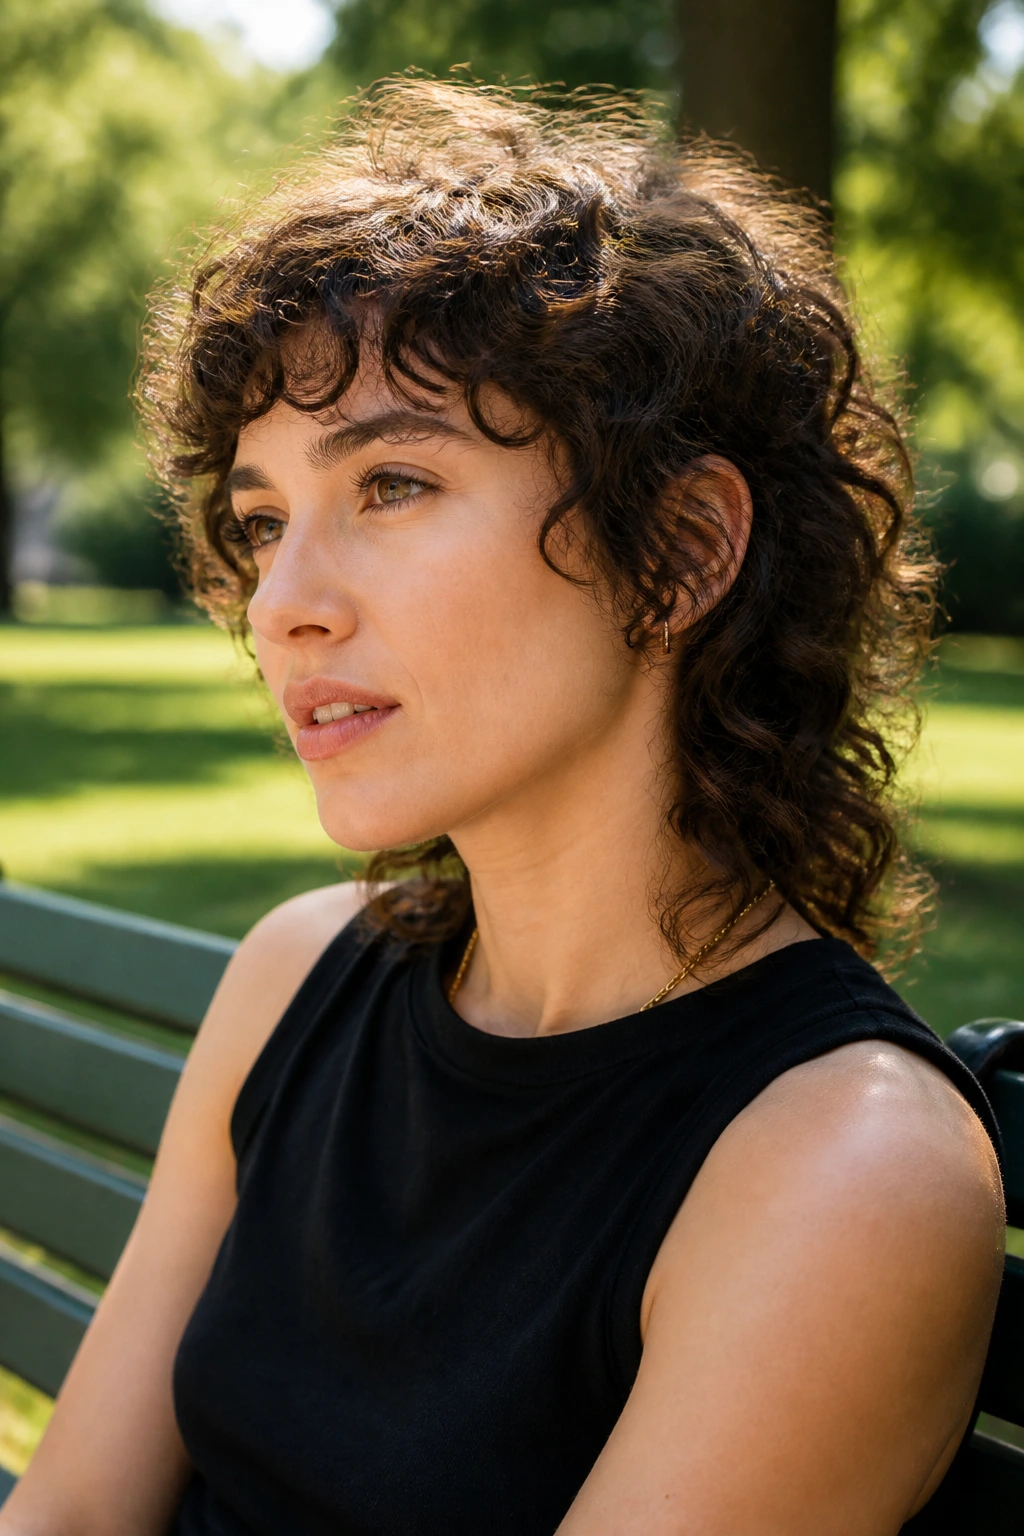
Curly hair changes the conversation. A short shaggy mullet with curls should keep the curl pattern intact, not shred it into frizz. The best versions have longer internal layers and a softer back, so the curls stack instead of exploding outward.
The bad version gets thinned to death and ends up looking triangular. Skip that.
Use a diffuser on low heat and stop drying when the curls are still a little cool and springy. A curl cream with a light hold works better than a greasy butter here, because the cut already carries plenty of shape.
4. Brow-Grazing Bangs Mullet

If you like bangs but hate the feeling of full-on commitment, this is the safer lane. The fringe sits right at the brows, the sides are shaggy and broken, and the back is short enough to keep the whole cut lively.
It’s especially good if your face needs a little vertical lift. The brow line draws the eye upward, while the mullet layers keep the sides from feeling heavy.
The key is to keep the fringe soft at the edges. Hard, blunt bangs make this cut feel bossy. A little point cutting fixes that fast.
5. Razor-Cut Pixie Mullet
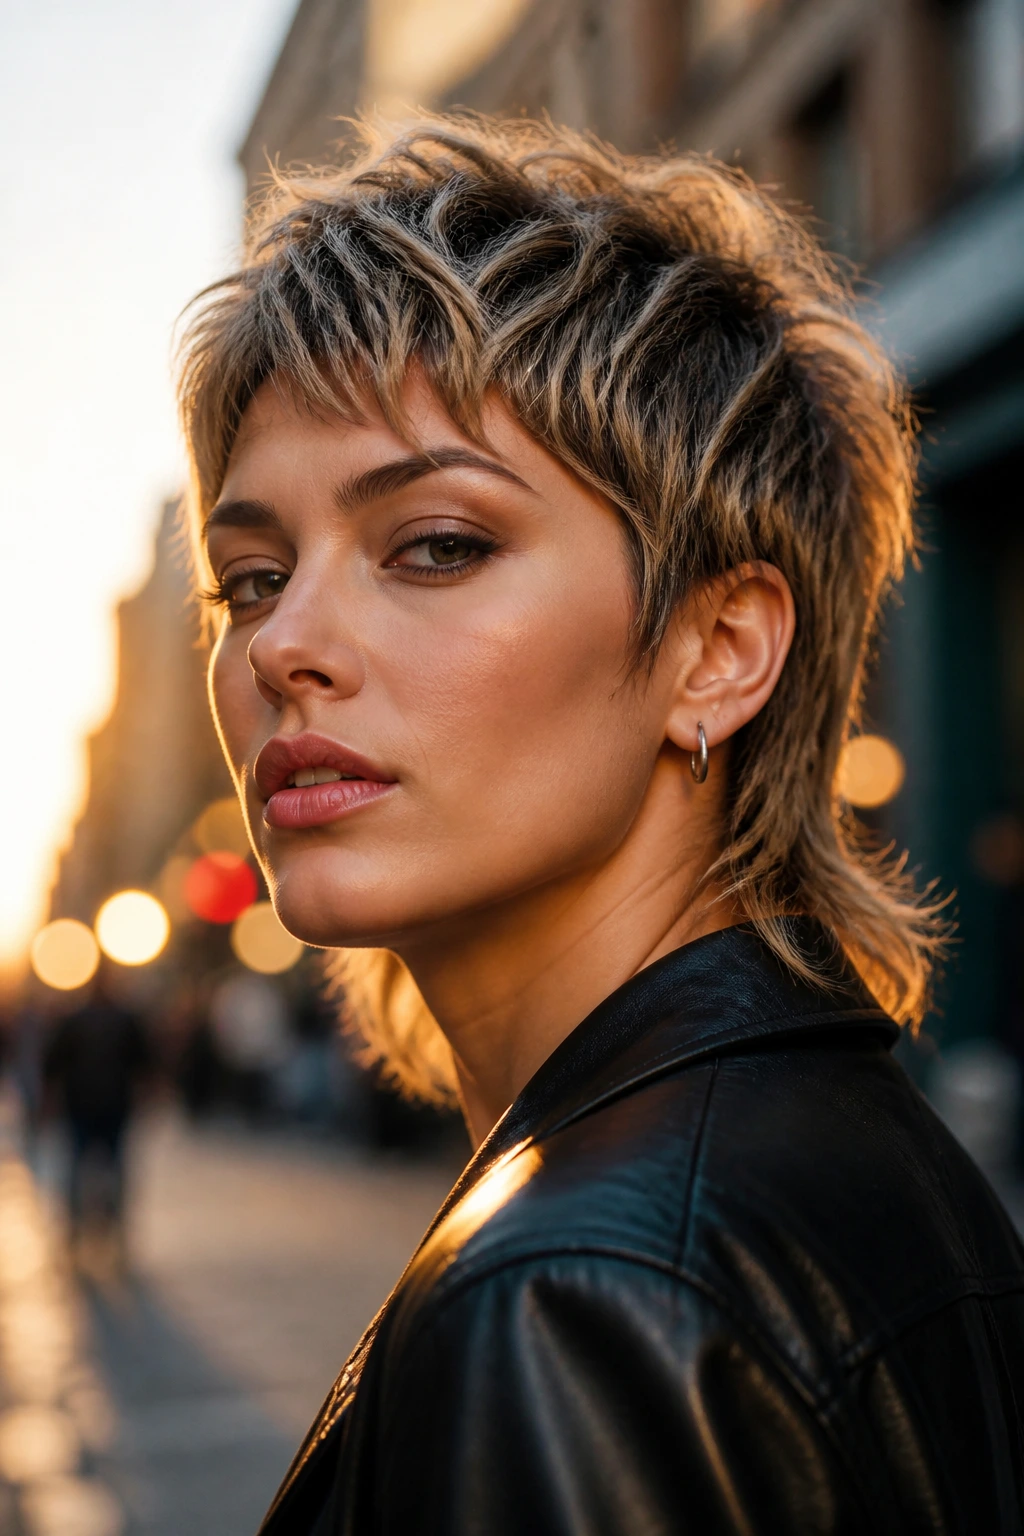
This one has attitude, and it knows it. The sides sit close, the top is sliced with a razor or point-cut to create airy ends, and the back has enough length to stop it from becoming a standard pixie.
Best for dense hair
Thicker hair takes well to this because the razor work removes bulk. On fine hair, though, too much slicing can make the ends look ragged in a weak way, so ask for softer texturizing instead.
A tiny dab of clay at the crown keeps the top piecey. That’s it. More than that and you’ll lose the lightness that makes the cut interesting.
6. Tapered Nape Crop
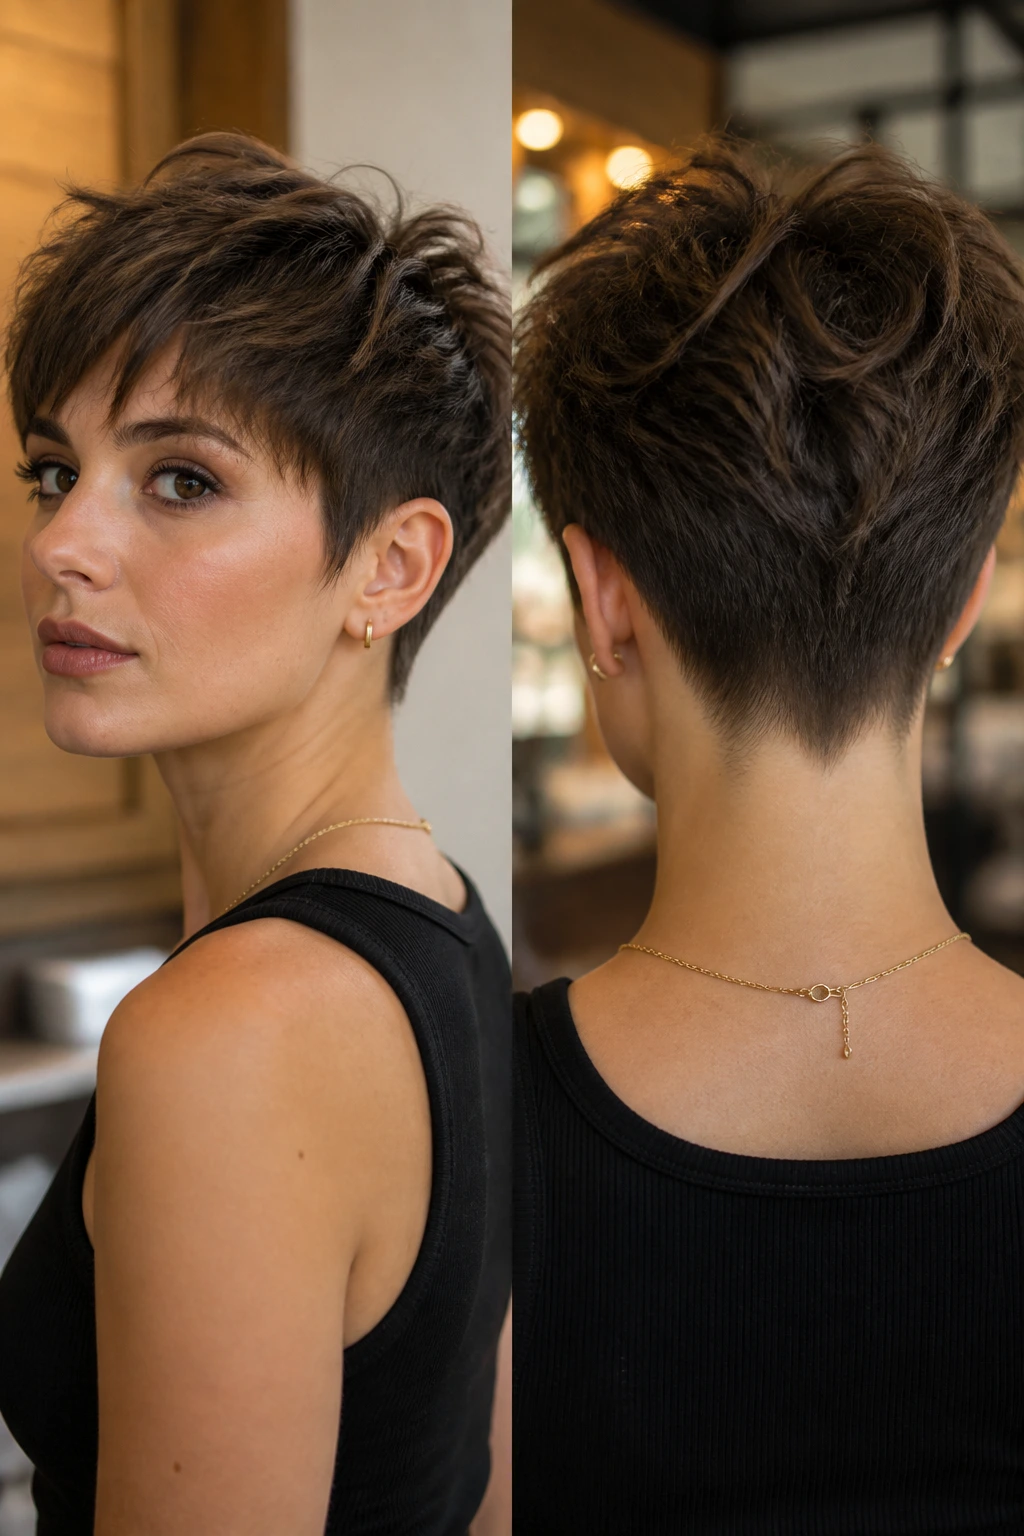
This is the cleaner cousin in the family. The top still has shaggy layers, but the nape is tapered tighter so the back sits neat against the neck. It reads polished from the front and a little mischievous from the side.
Where the shape sits
The visual line should land just below the jaw in front and tuck in more tightly behind. That contrast gives the cut its edge without making the back feel shaggy for the sake of it.
If you wear collars, scarves, or jackets with a raised neck, this shape behaves better than a longer tail. It doesn’t snag, and it doesn’t puff out as much.
7. Side-Swept Cowlick Mullet
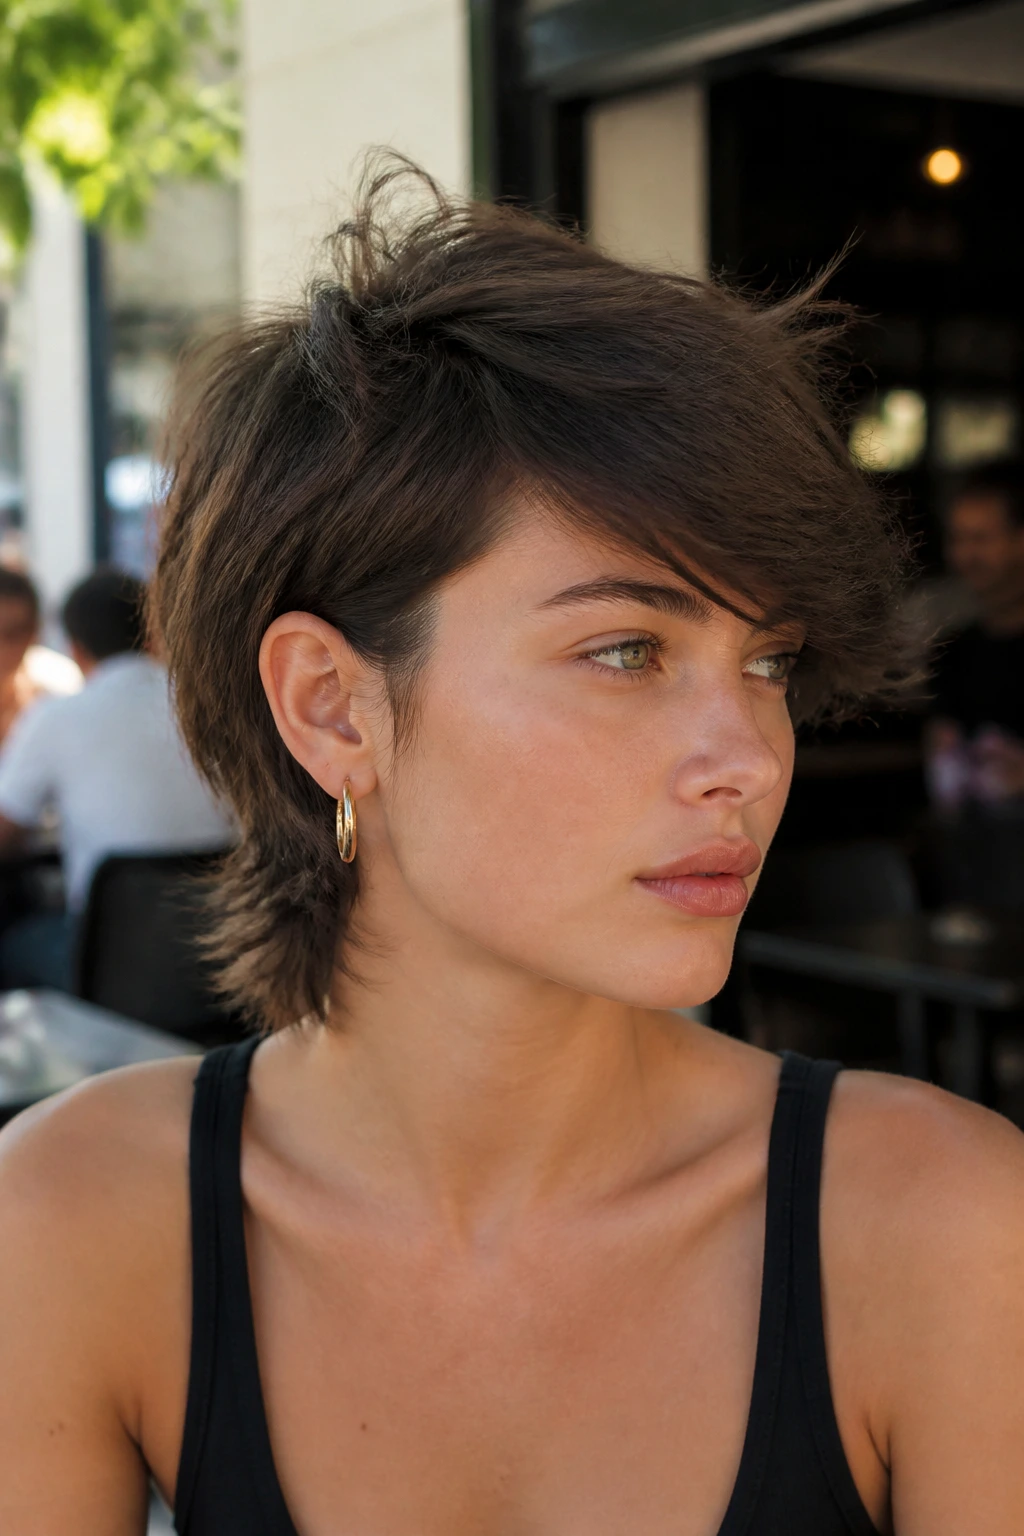
Cowlicks stop being a problem when you work with them. This version uses a deep side part and a sweeping fringe to guide stubborn growth patterns instead of fighting them. The back stays short and shaggy, so the front gets to do most of the talking.
A side-swept mullet is one of the easiest ways to make the style feel less “look at me” and more lived-in. The sweep also softens sharp features.
Dry the front in the direction you want it to live. If you let it set the wrong way, it will keep arguing with you all day.
8. Soft Wolf-Edge Cut

This is the quieter version of a mullet. The layers connect more smoothly from crown to nape, so the shape leans shaggy first and mullet second. If you want the idea of the cut without the full contrast, start here.
The silhouette looks best when the ends are soft, not blunt. I like this version on hair that has a little natural bend, because the movement helps the layers blur together.
The whole point is restraint. Leave the drama to the texture.
9. Bob-Mullet Hybrid
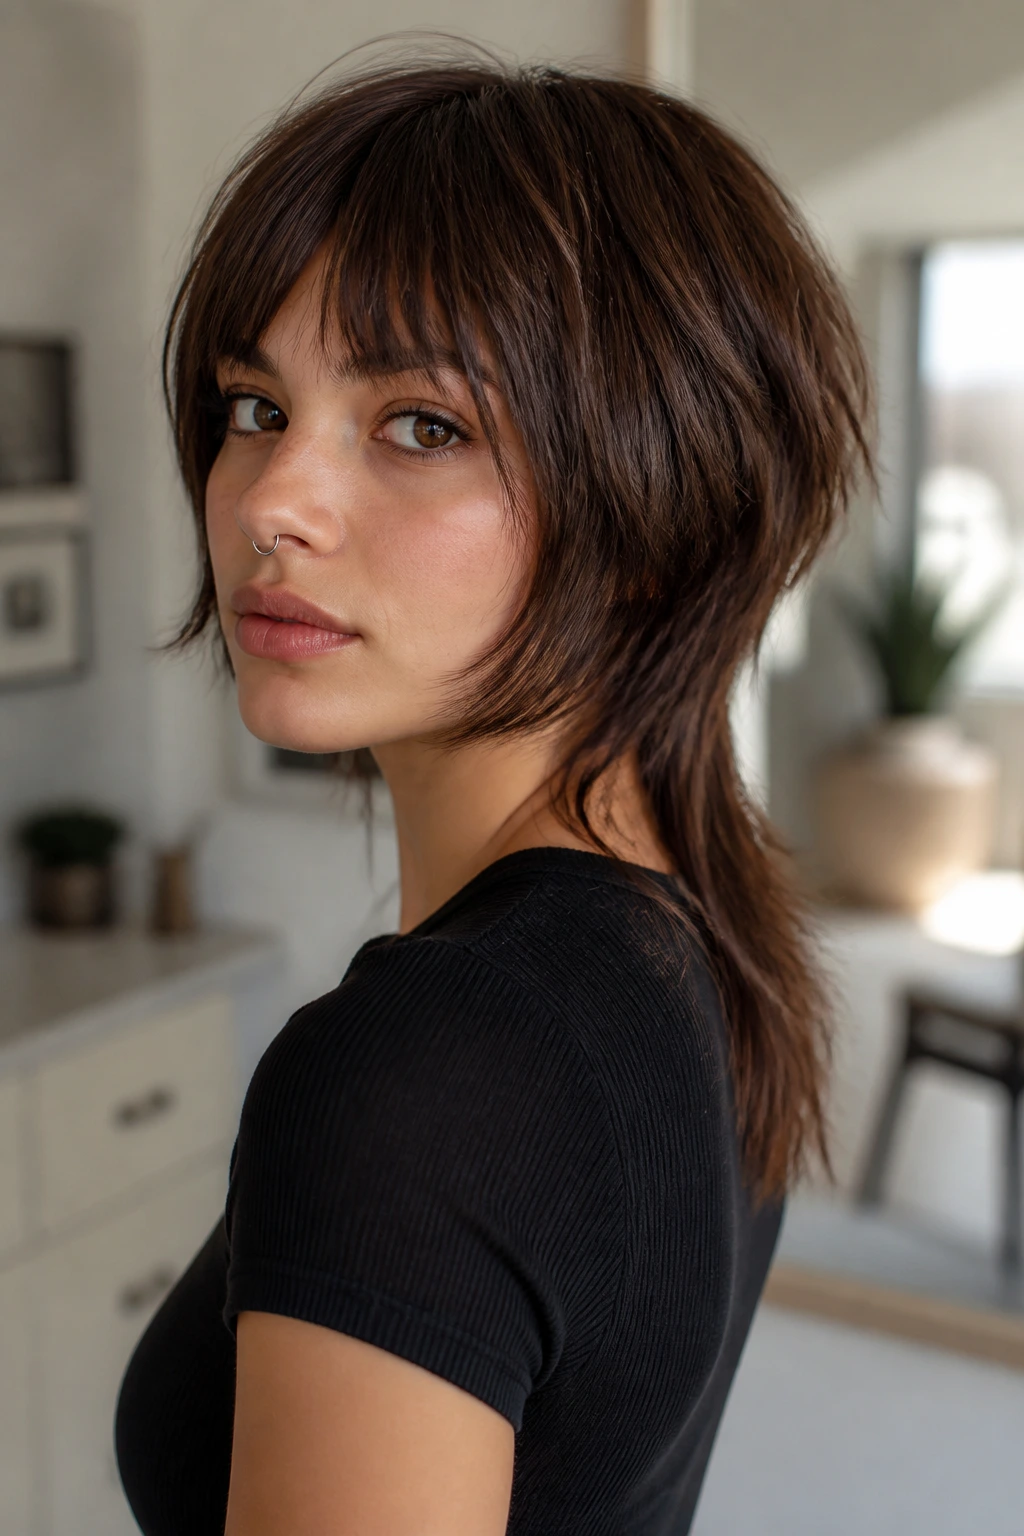
A bob-mullet hybrid is exactly what it sounds like: a short bob in the front, a little more length in the back, and enough choppy layering to keep it from feeling too tidy. It’s the best bridge cut for someone who likes the mullet shape but wants to stay close to familiar territory.
The front pieces should still touch the jaw or cheekbone. If the back is the only part with length, the cut can look disconnected.
This one works especially well if you want a short haircut that can pass in more conservative settings. It has edge, but it’s not shouting.
10. Copper Layer Mullet

Color changes the whole read of a shaggy mullet. Copper, auburn, or warm ginger tones make the layers show up harder, because the light catches the broken ends and the shorter crown pieces differently.
That means you can keep the cut itself fairly simple and still get a lot of visual movement. A single-tone brunette version can go flat if the layering is subtle; copper gives it more life.
If you color your hair, ask for dimensional pieces around the crown and fringe. The cut and the color should argue a little, not blend into one blur.
11. Air-Dry Wave Mullet
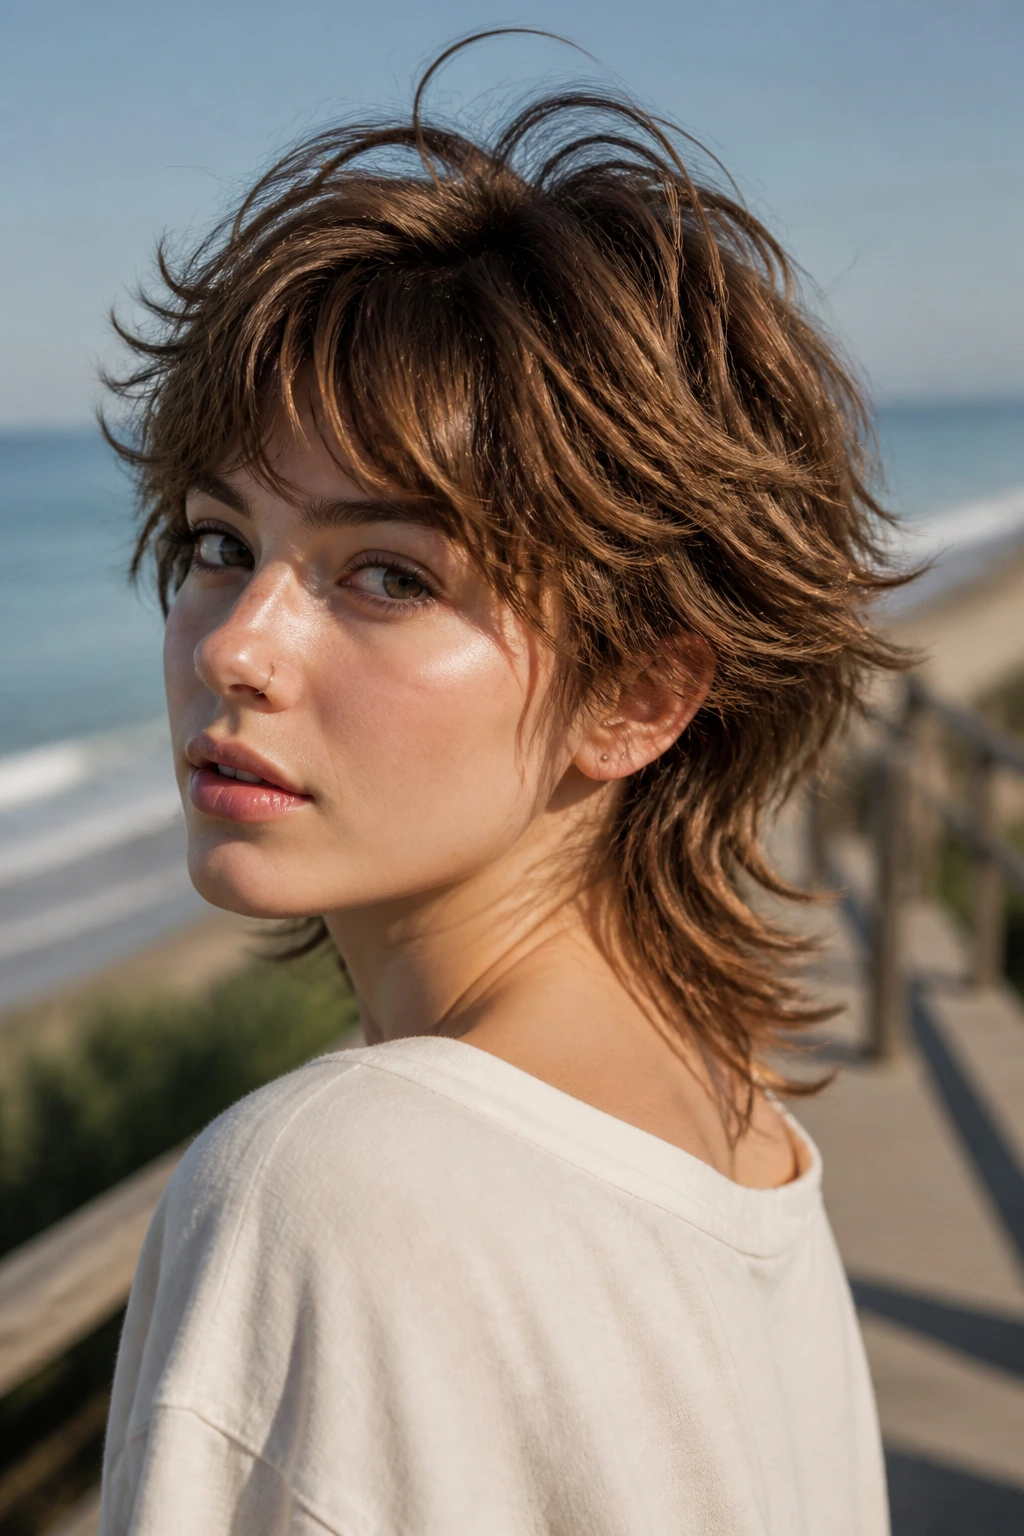
Some cuts are needy. This one isn’t. A short shaggy mullet on wavy hair can be set with a little leave-in, a scrunch, and patience. The result is loose, tousled, and a bit uneven in the best possible way.
How to get the most from it
- Mist damp hair with a lightweight wave spray.
- Scrunch from the ends upward.
- Let the crown dry with a little lift at the roots.
- Avoid brushing once it’s dry unless you want the wave to stretch out.
The charm here is that it looks better with a small amount of mess. Over-polishing kills it.
12. Hidden Undercut Mullet
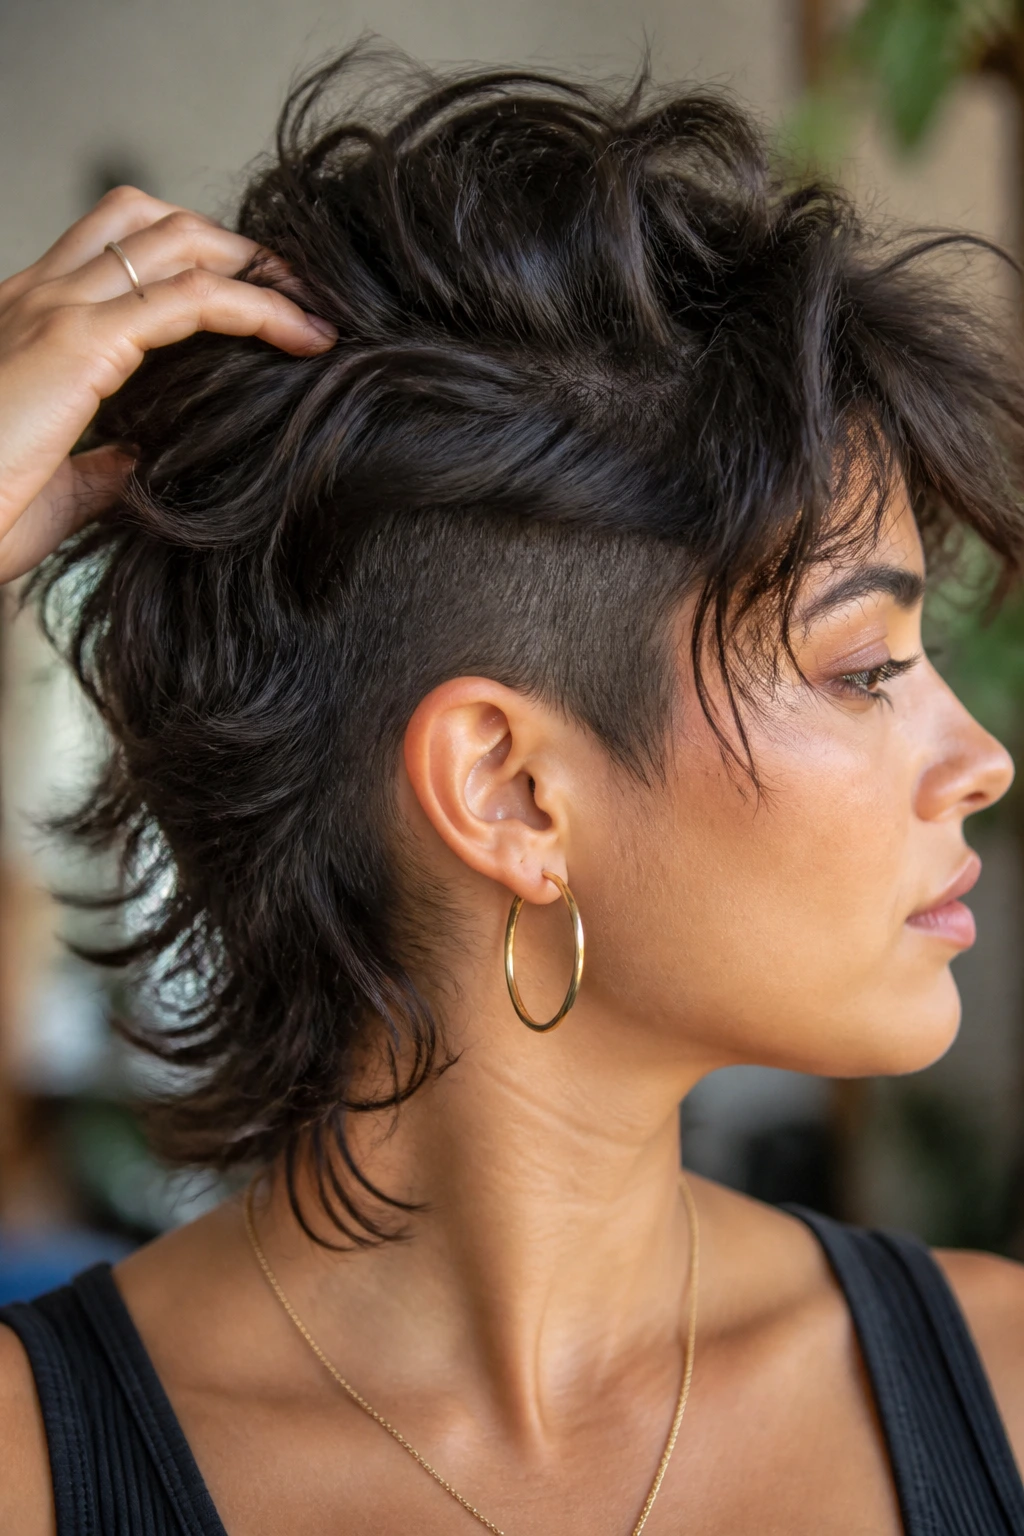
This is the version for thick hair that seems to expand the moment humidity shows up. A hidden undercut removes weight underneath, while the shaggy top and back keep the shape visible. You get movement without the bulk.
The undercut should stay concealed unless the hair is lifted. That keeps the style from reading too hard-edged unless you want it to.
It’s one of the smartest choices for people who hate the triangle effect. That shape can sneak in fast with short layered hair, and this cut blocks it.
13. Fine-Hair Lift Mullet
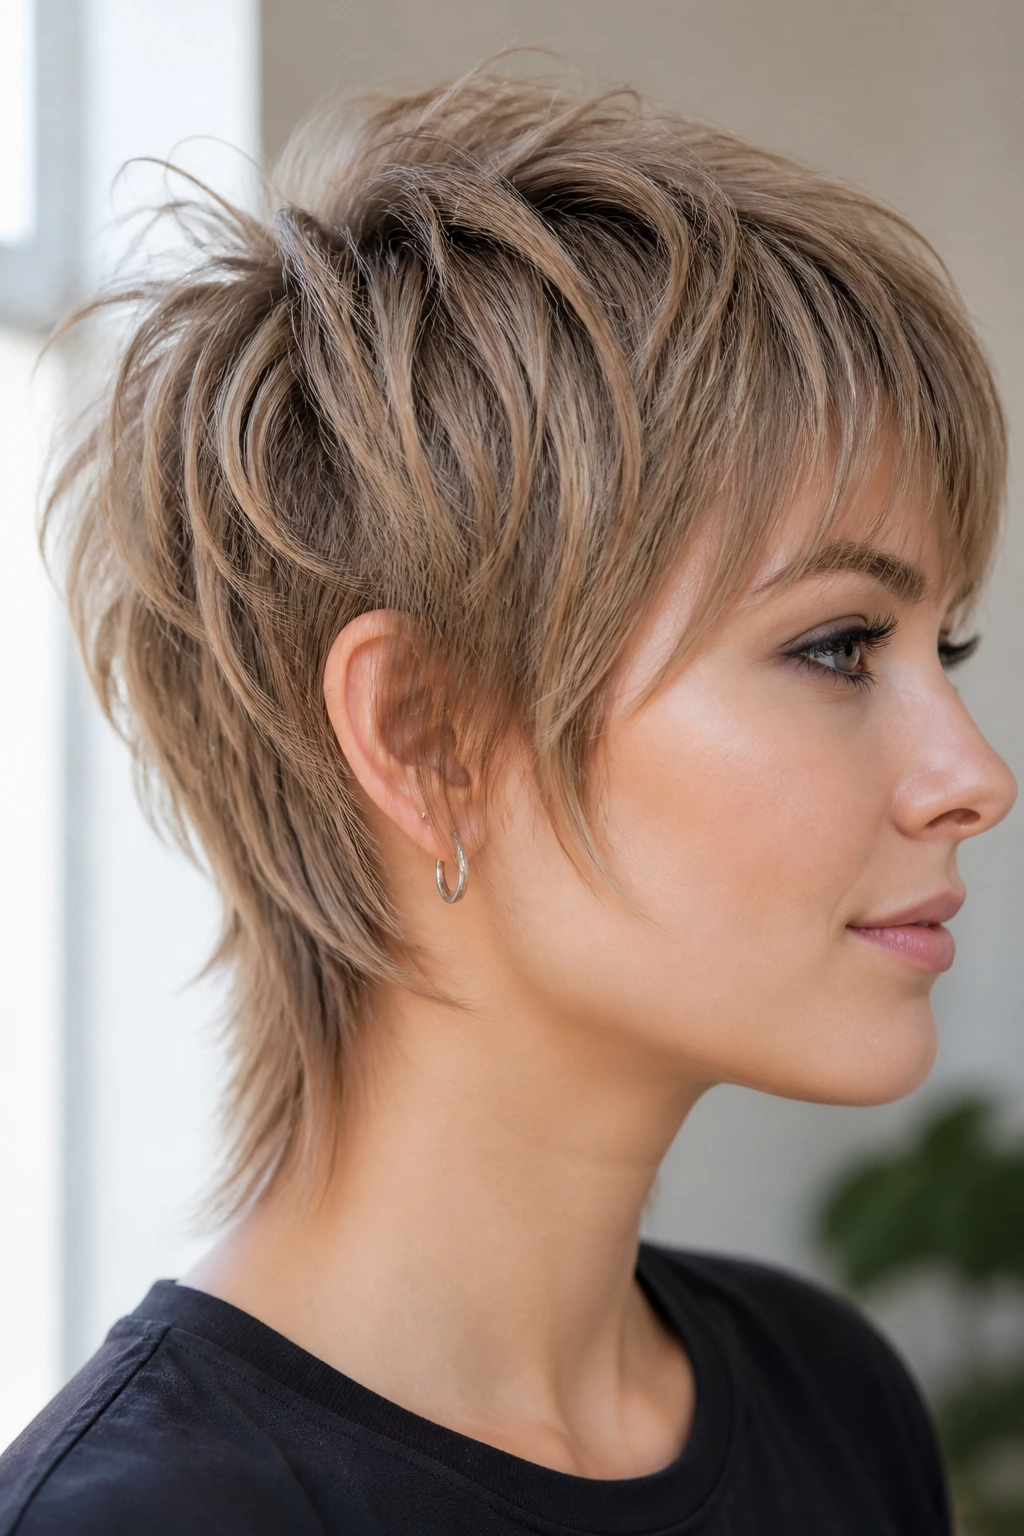
Fine hair needs a lighter hand, not a more aggressive one. With this cut, the crown is lifted through short, careful layers, but the ends are not shredded so much that they vanish. The nape still has a little tail, just enough to make the silhouette feel deliberate.
Why it stays fuller
The stylist should remove weight selectively, not everywhere. Too much texturizing makes fine hair look see-through at the ends, and that’s a mistake people make all the time.
A root-lifting mousse at the crown and a quick blast with the dryer are usually enough. Skip heavy oils. They flatten the whole thing before lunch.
14. Thick-Hair Debulk Mullet
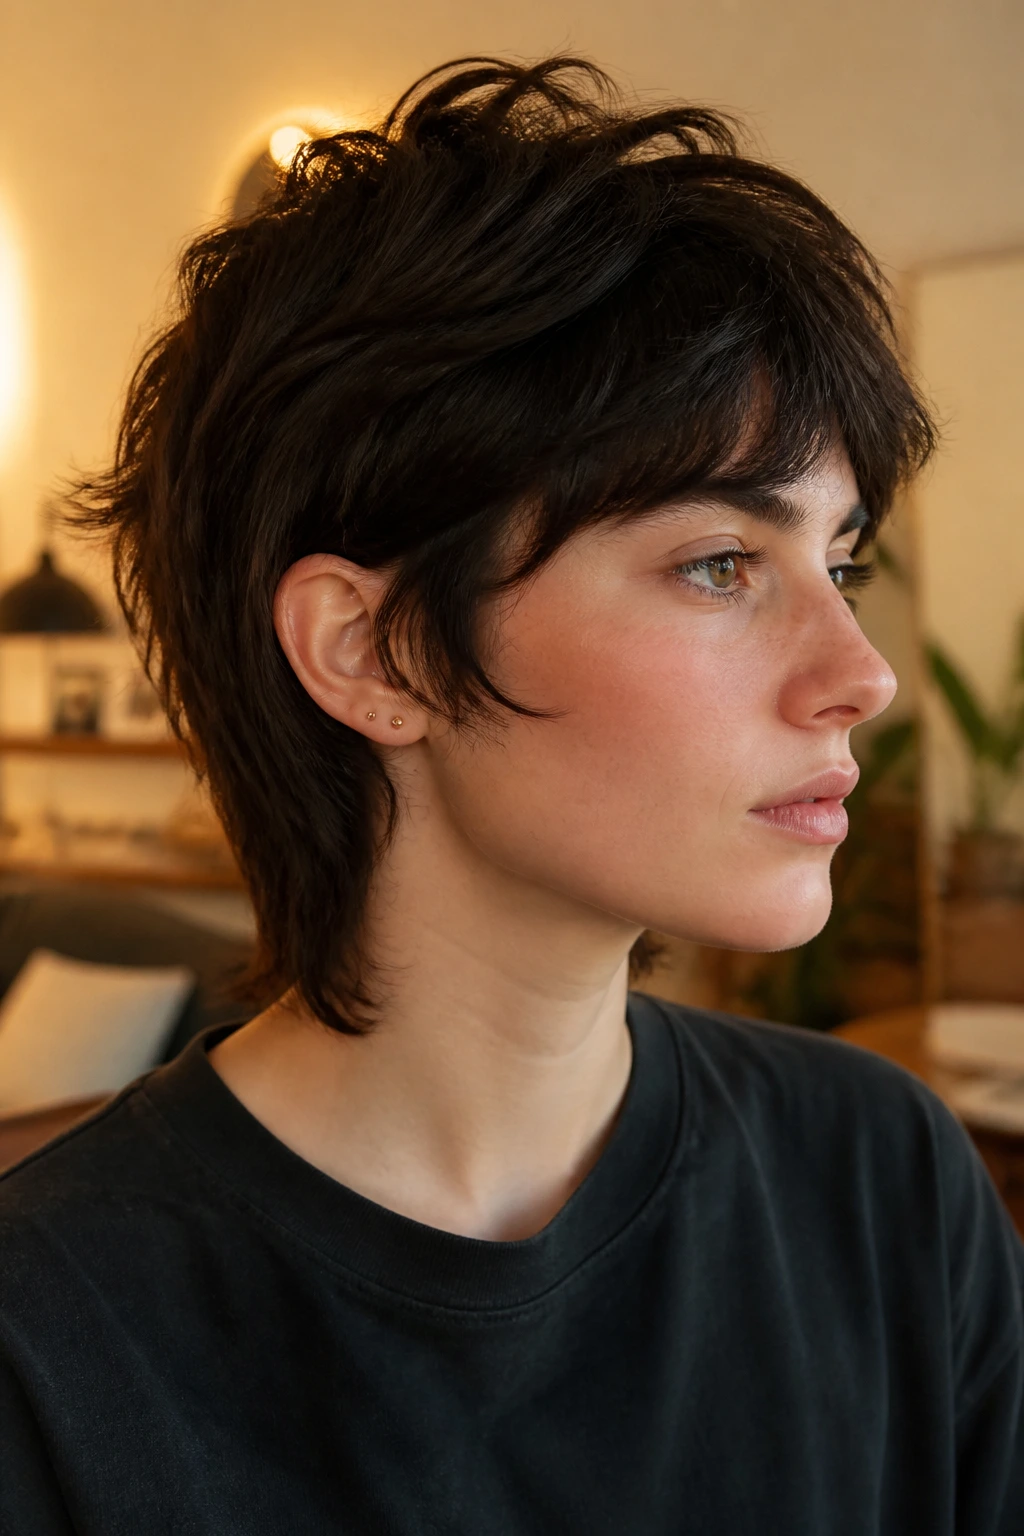
Thick hair can wear this style beautifully when the bulk is cut out from the inside instead of hacked away on the surface. Internal layers and a smart taper around the nape keep the shape from turning into a wedge.
The best version still feels touchable. It should move when you run your fingers through it, not sit there like a solid block with a few strays on top.
If your hair poofs in humidity, ask for the ends to be softened with point cutting. Blunt, thick ends on a short shag always look heavier than expected.
15. Baby Bangs Mullet
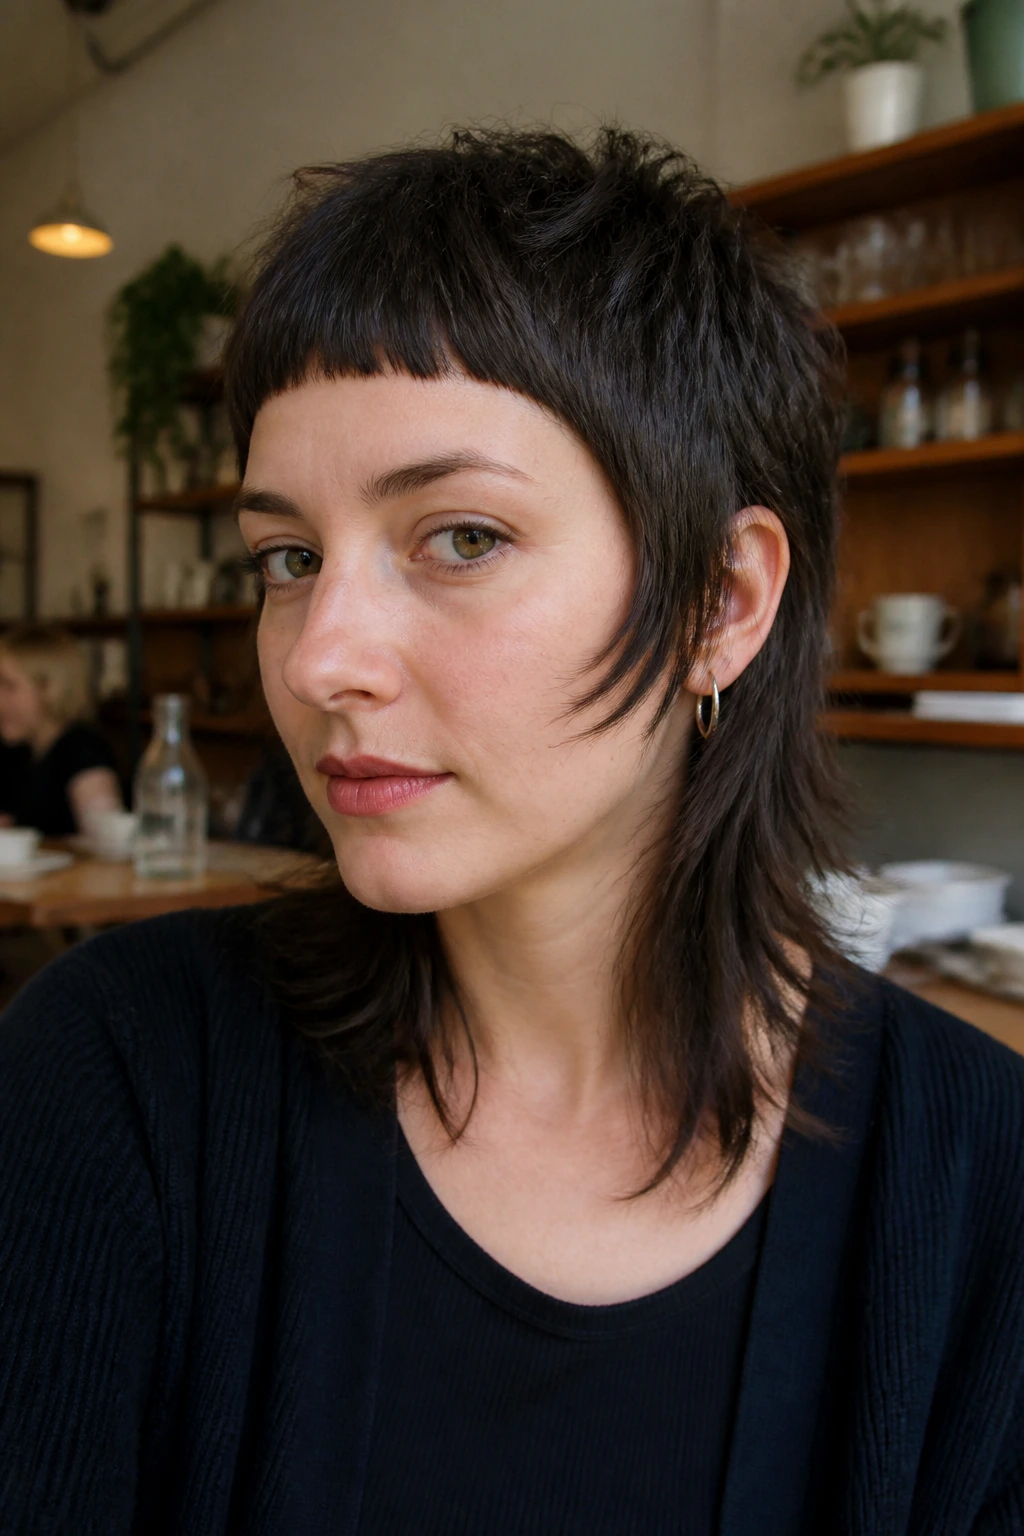
Baby bangs change the energy immediately. The fringe sits high on the forehead, the sides stay shaggy and broken, and the back keeps that mullet tail that makes the cut feel a little mischievous.
What to watch for
Baby bangs do not forgive sloppy balance. If the nape is too long, the cut can look costume-y. If the bangs are too thick, the face gets boxed in.
A light wax on the fringe can help it sit where you want. Just use a tiny amount. Baby bangs go greasy fast.
16. Curtain Fringe Mullet

Curtain fringe is the softest way to pull the mullet shape toward something wearable every day. The part opens in the center or just off-center, the fringe falls away from the face, and the layers in back keep the cut from feeling too sweet.
This is a good option if you want your cheekbones framed without covering your entire forehead. It also works better than blunt bangs on hair that likes to separate on its own.
Keep the front pieces long enough to tuck behind the ears. That small detail makes the style feel less fixed and more lived in.
17. Asymmetrical Mullet
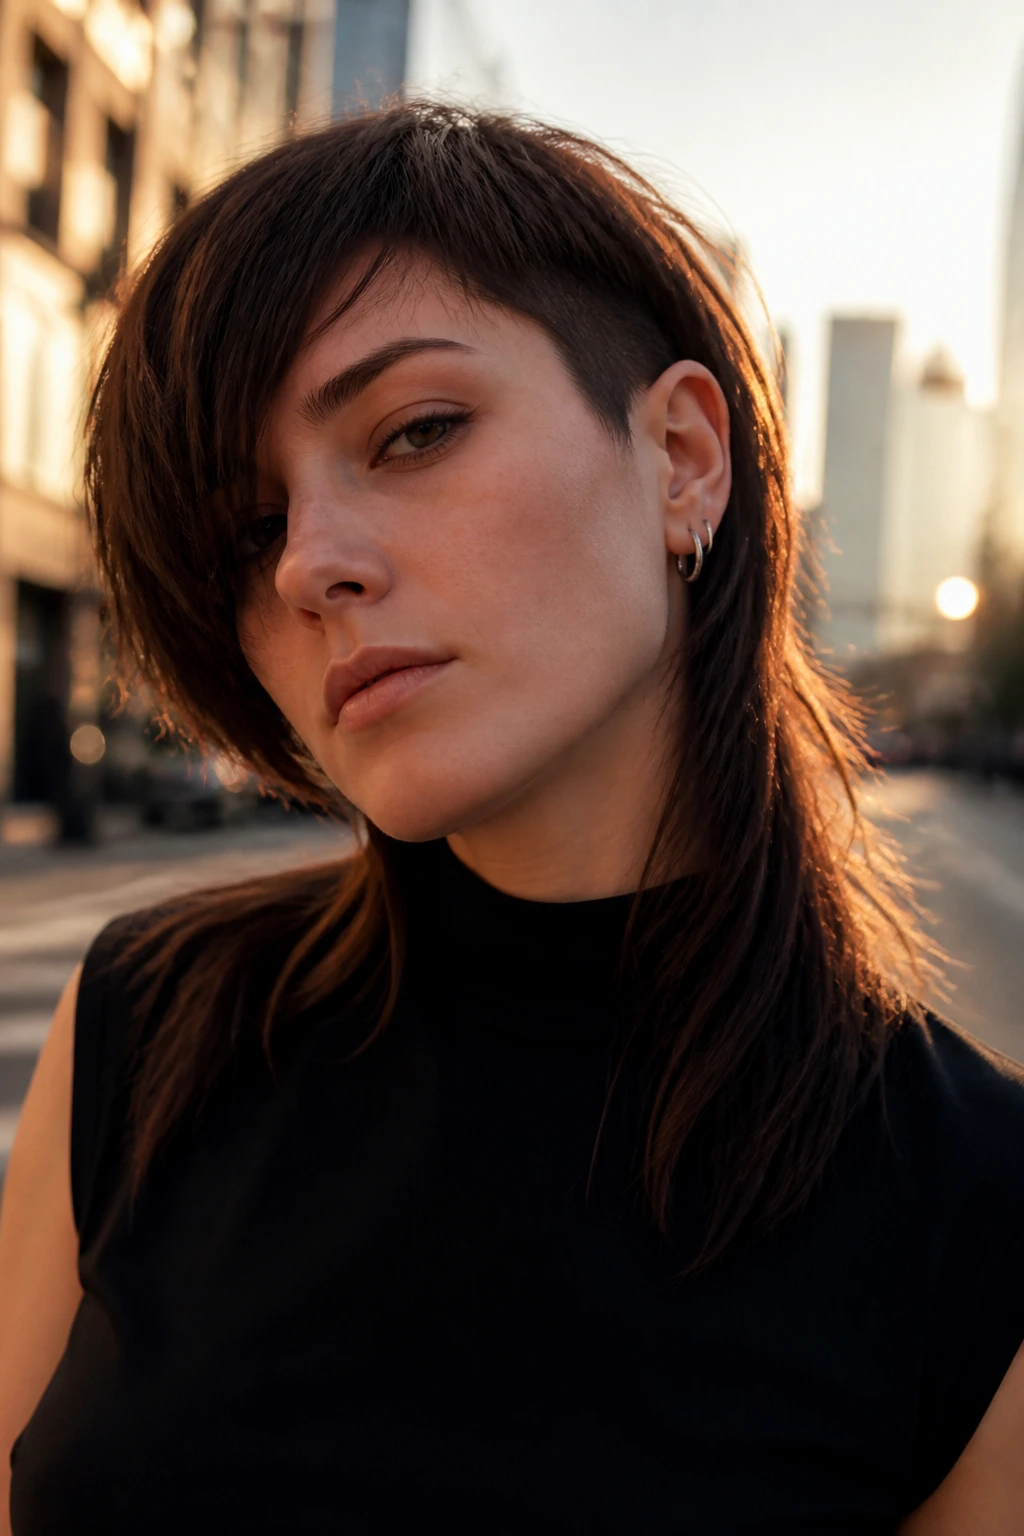
One side a touch longer. That’s all it takes to make this feel sharp. The asymmetry gives the short shag a directional edge, and the mullet layers in back make the shape feel intentional instead of crooked.
I like this on straight or slightly wavy hair, where the different lengths are easy to see. On very curly hair, the asymmetry can disappear unless it’s cut with a stronger length difference.
If you wear one side tucked behind the ear most of the time, this is a nice way to build the shape around that habit.
18. Grown-Out Pixie Mullet
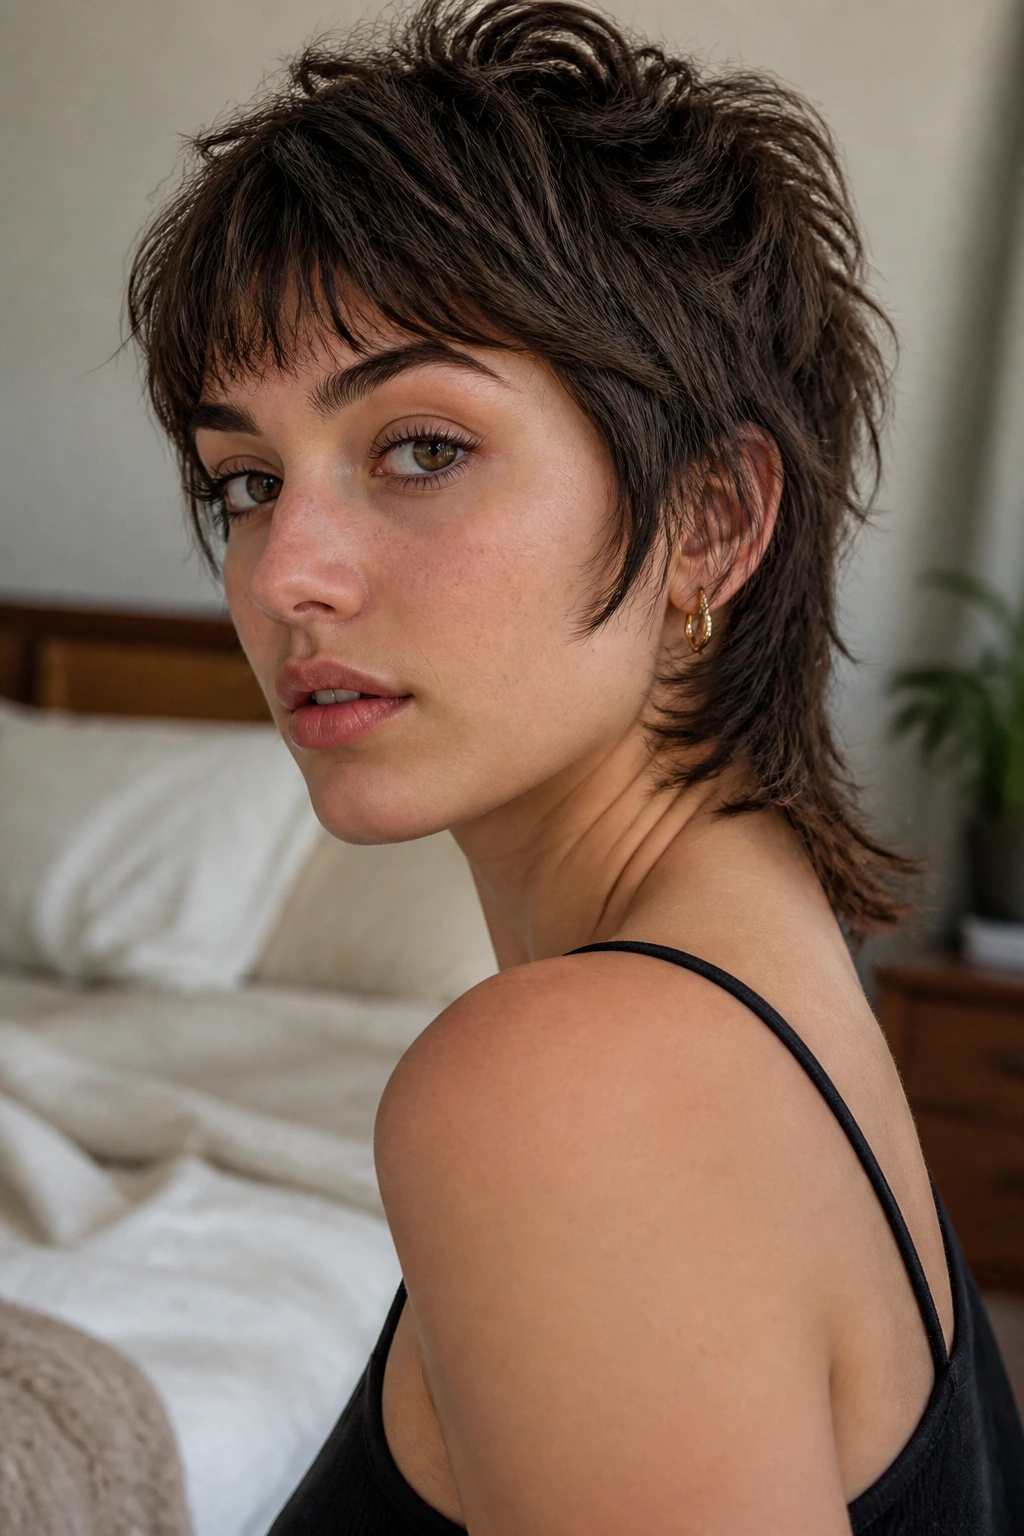
This is the cut for the awkward in-between stage, and I mean that in a good way. A grown-out pixie can be shaped into a shaggy mullet with a softer crown, longer nape, and pieces around the face that feel less clipped.
The magic here is that it doesn’t pretend to be a fresh, severe haircut. It embraces the slightly messy grow-out and makes it look designed.
Ask your stylist not to overclean the perimeter. A little irregularity keeps the cut from snapping back into pixie territory.
19. Soft Face-Frame Mullet
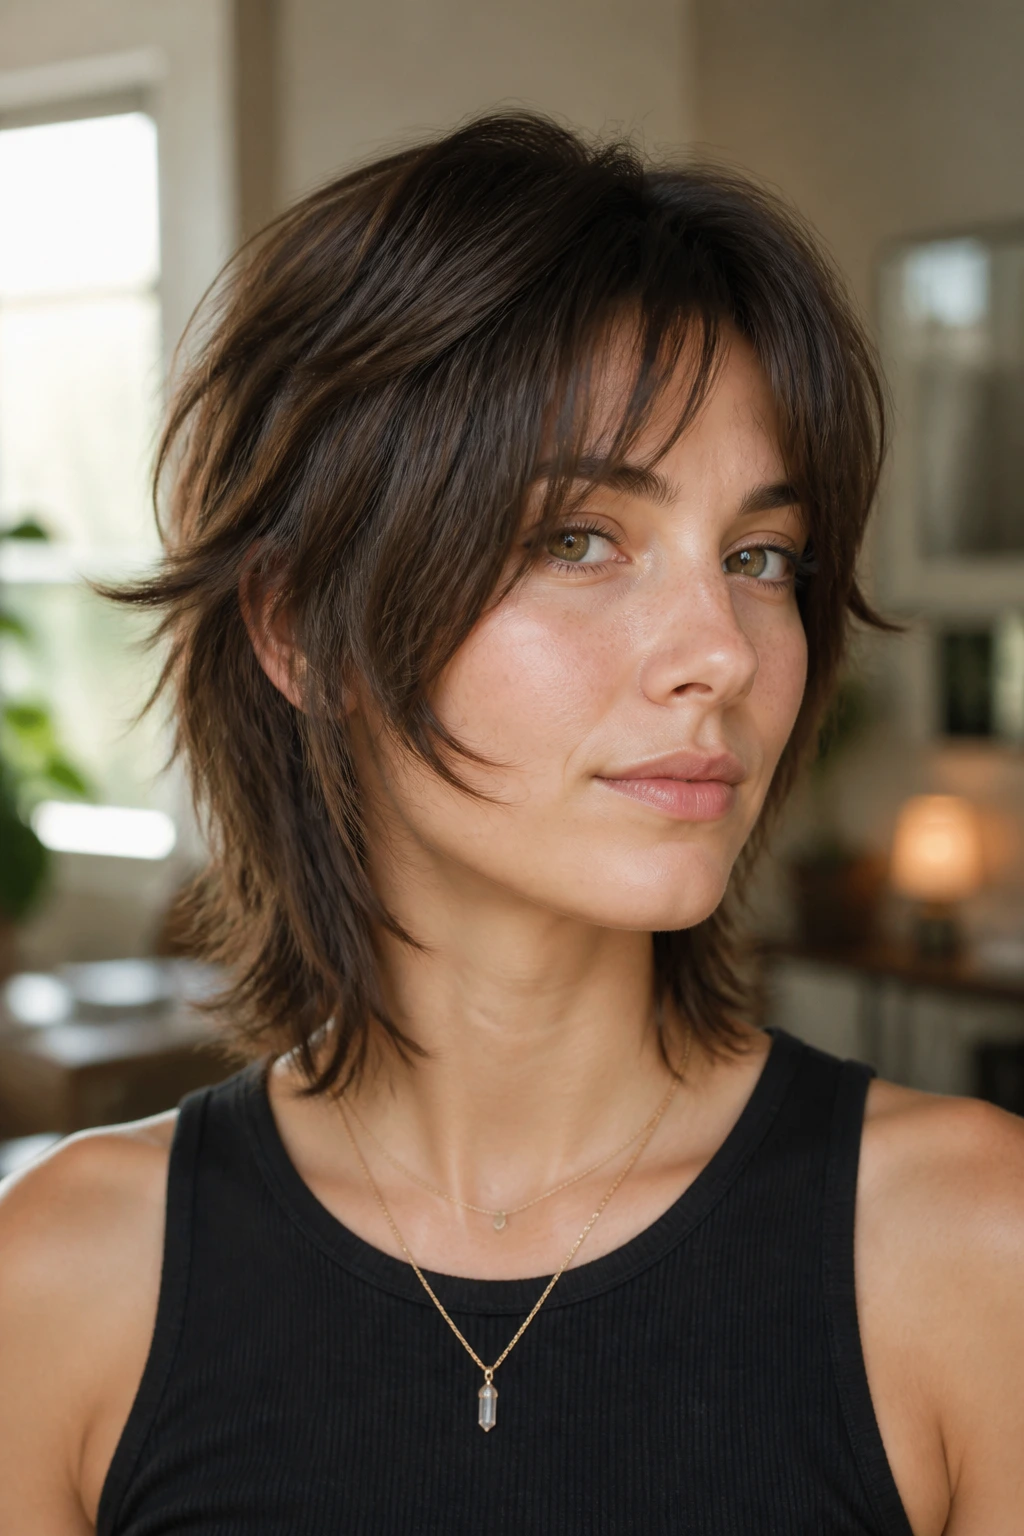
If you want the mullet idea but dislike hard lines, this is the version to keep in your pocket. The face-framing pieces are longer and softer, the crown is still shaggy, and the back stays shorter than the front but not dramatically so.
The result feels gentle around the cheeks and jaw. That matters if you’re nervous about short hair making your face look wider or sharper than you want.
A light cream or serum on the front pieces can keep them from sticking out. The finish should look touched, not shellacked.
20. Square-Face Softener Mullet
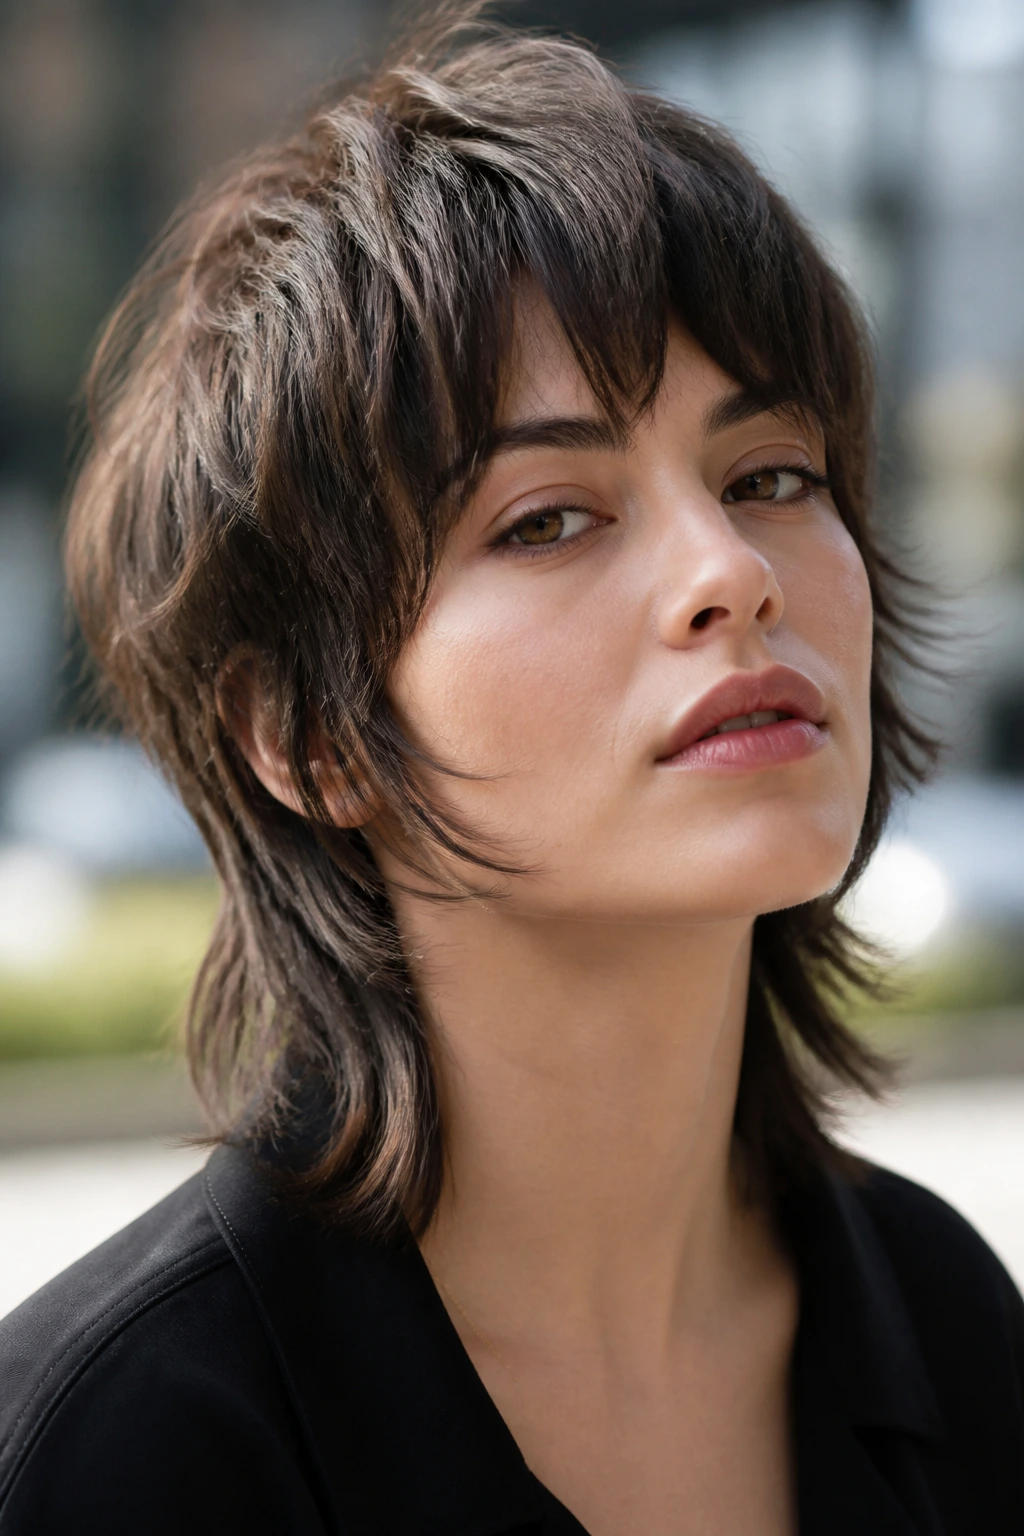
Square jawlines look best here when the corners are broken up. The cut should curve around the face a bit, with wispy ends near the jaw and enough crown height to lengthen the silhouette.
The shape to ask for
- Keep the fringe soft, not blunt.
- Let the side layers skim the cheekbones.
- Avoid a heavy, boxy edge at the nape.
That mix keeps the haircut from echoing the jaw too aggressively. It’s a small adjustment, but it changes the whole read.
21. Round-Face Lift Mullet
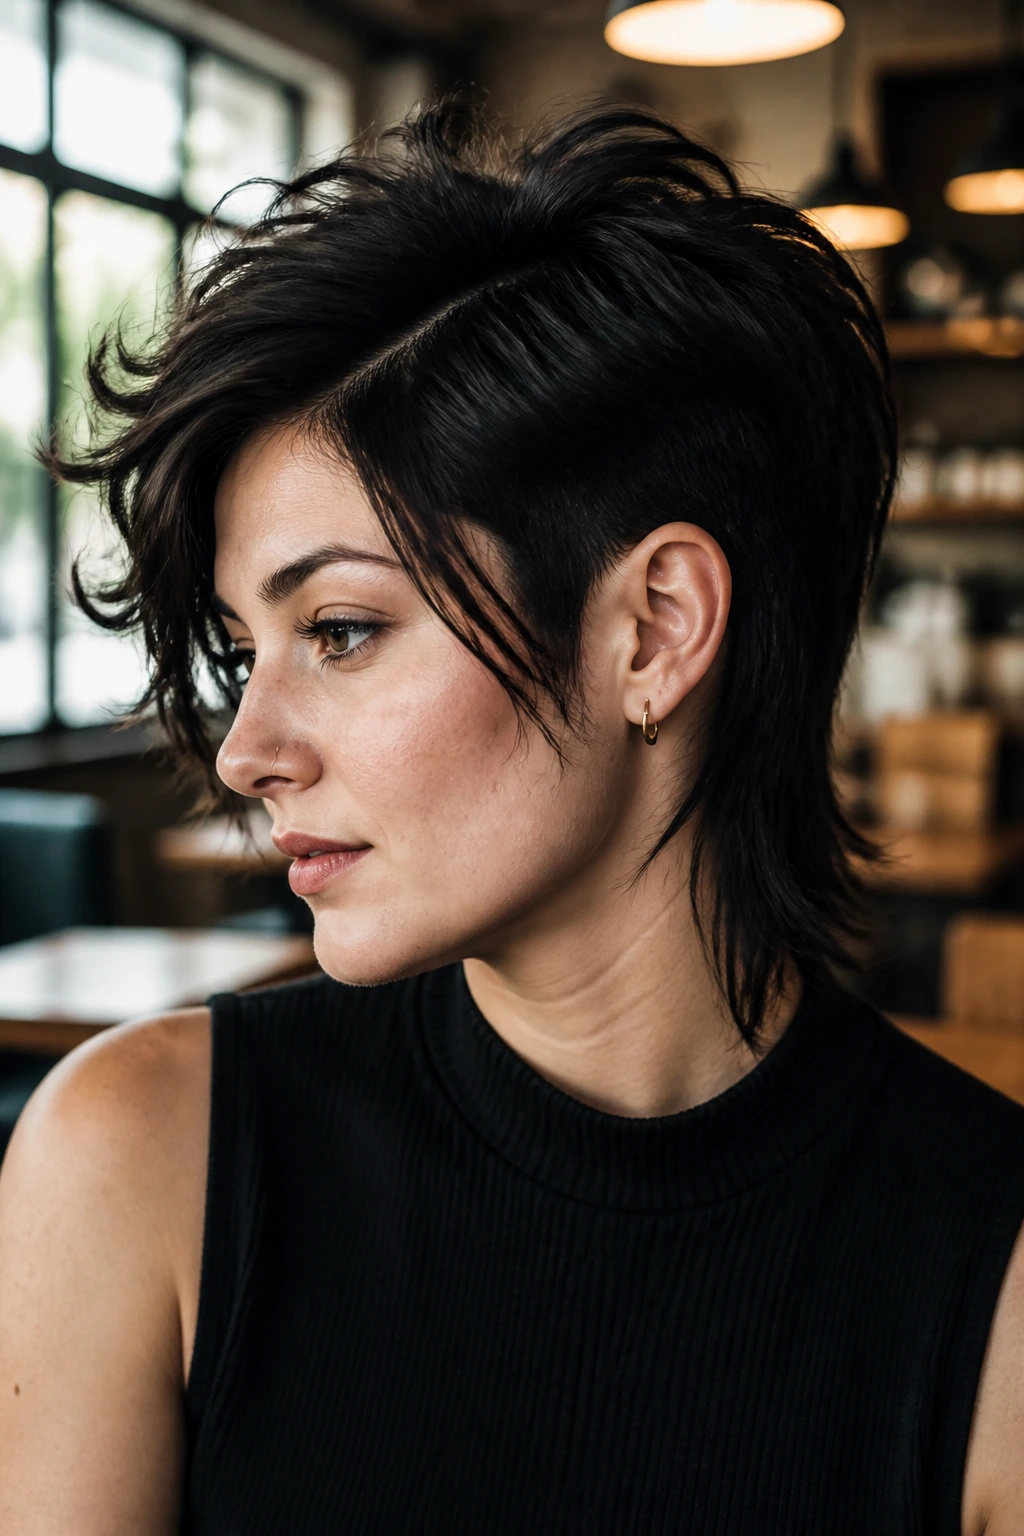
Round faces usually benefit from height at the crown and a bit more length through the front pieces. This cut does that without stretching the back too far. The top layers lift, the sides stay slim, and the mullet tail gives the shape a narrow line down the neck.
A deep side part can help even more. So can drying the roots upward with a small brush.
Keep the cheeks from getting too much volume. That’s the trap. If the widest part of the haircut sits right at face level, the shape works against you.
22. Heart-Shape Balancer Mullet
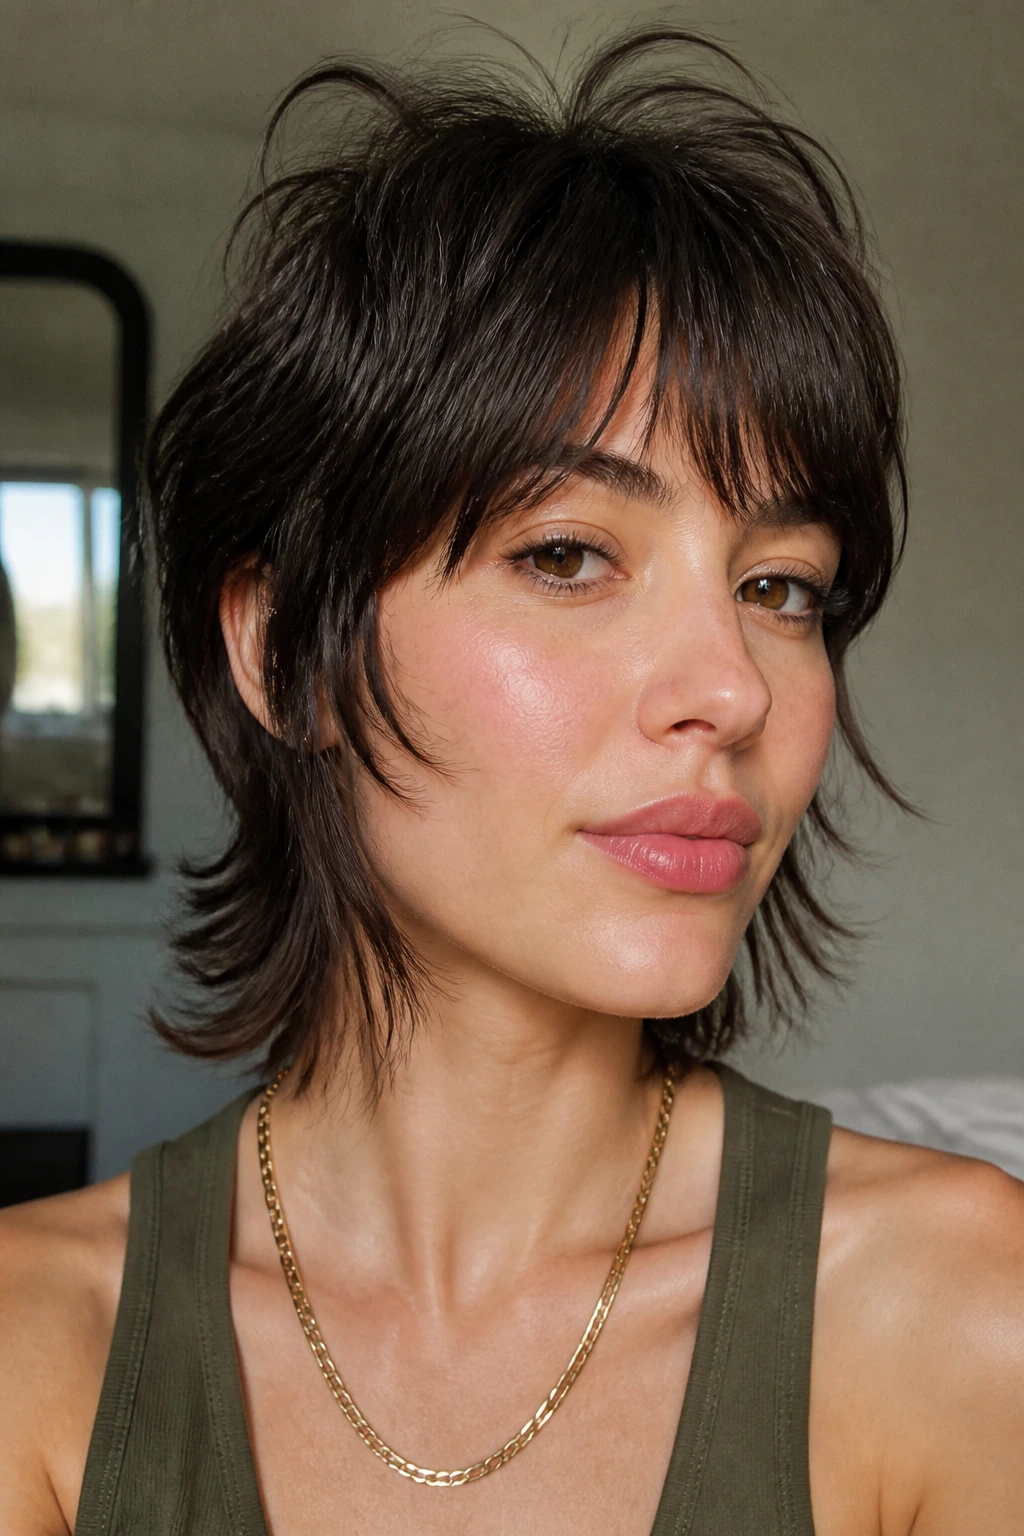
Heart-shaped faces often need less width at the forehead and more softness lower down. This version brings that balance by keeping the fringe airy, letting the sides fall in small broken pieces, and leaving a little extra length near the jaw and nape.
The back should not be too skinny. A slight tail gives the lower half of the haircut some visual weight.
If you like accessories, this shape plays nicely with earrings because the cut leaves room around the face. That small detail matters more than people think.
23. Wet-Look Editorial Mullet
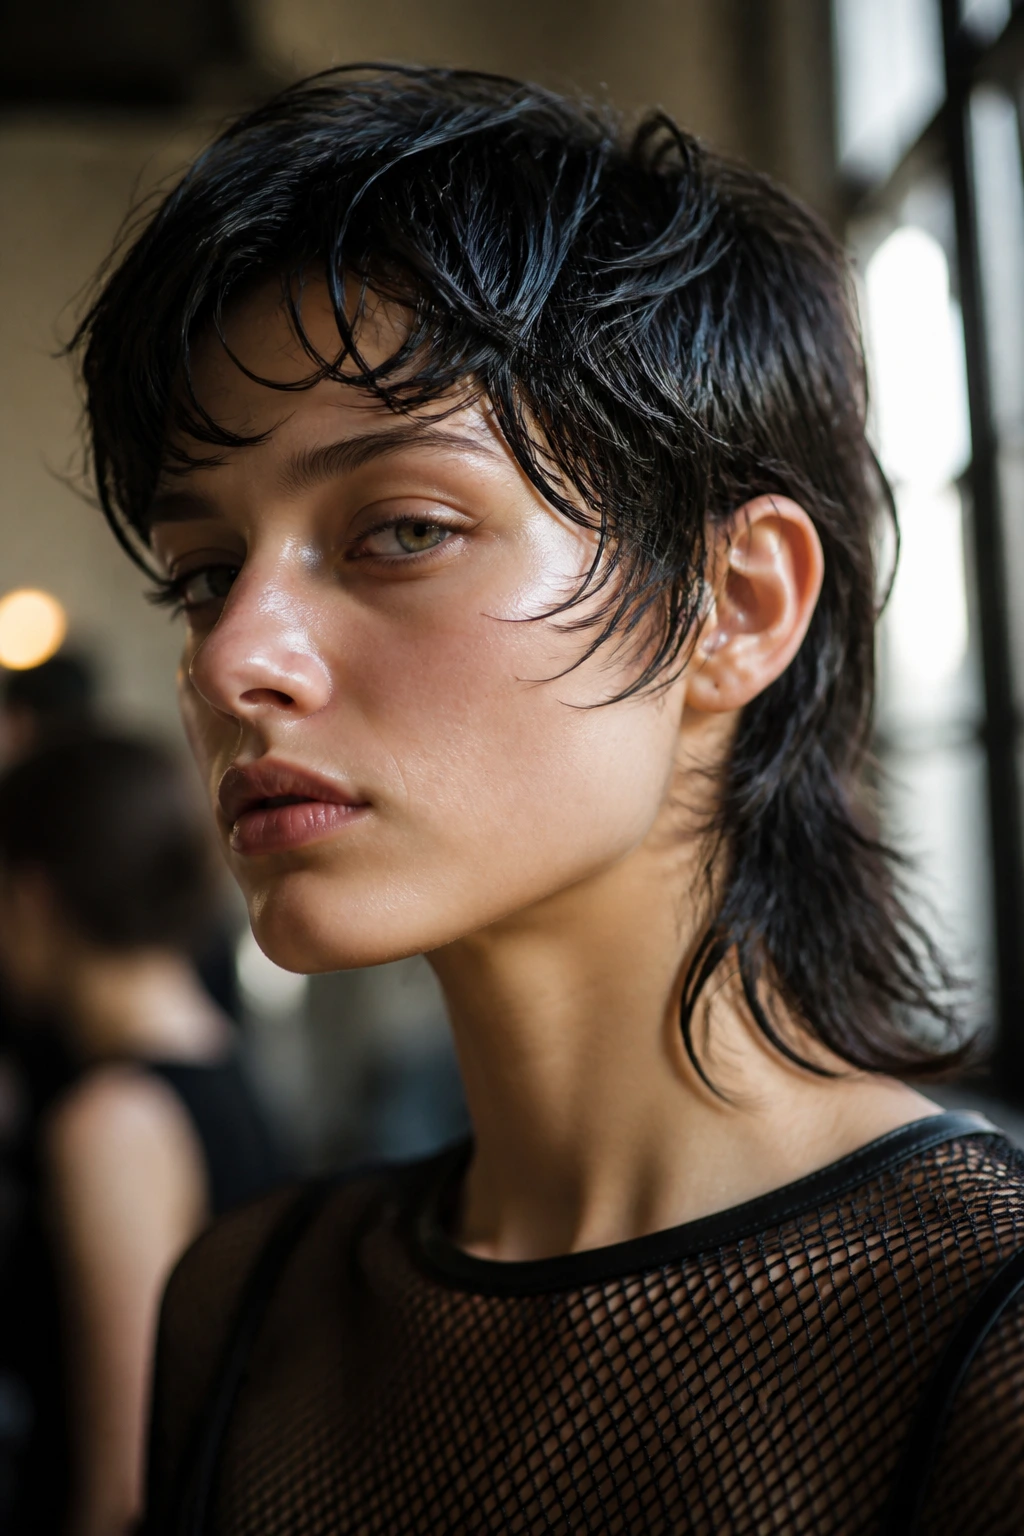
Here’s the polished one. The layers are still shaggy, but the finish is sleeker, with gel or styling cream pushed through damp hair so the cut reads glossy instead of fluffy. It’s a good choice for nights out or days when you want the shape to feel more deliberate.
Use less product than you think. Wet-look hair can go from chic to greasy in a minute.
The back still needs some separation. If you slick everything down too hard, the mullet part disappears and the whole cut collapses into a flat crop.
24. Low-Key Everyday Mullet

This is the version I recommend to people who keep saying, “I want the idea, not the drama.” The layers are short but not extreme, the fringe stays flexible, and the back only extends a little past the neckline.
Why it stays wearable
It doesn’t require perfect styling. A rough dry, a bit of paste at the ends, and maybe a quick lift at the crown are enough.
It’s the cut you can wear to work, then mess up with your hands before dinner and somehow it looks better. That’s not an accident. The shape was built to take a little chaos.
25. Starter Mullet for the Fence-Sitters

If you’re still unsure, start here. Keep the nape only slightly longer than the front, leave the shag layers soft, and avoid anything too short at the fringe. You’ll get the feel of a short shaggy haircut with mullet layers without making the back the whole story.
This is the version that lets you test the waters. You can always go sharper on the next trim if you want more edge.
I like this as a first pass because it grows out gracefully. It does not corner you into a big maintenance mood.
Why Short Shaggy Mullet Layers Hold Their Shape
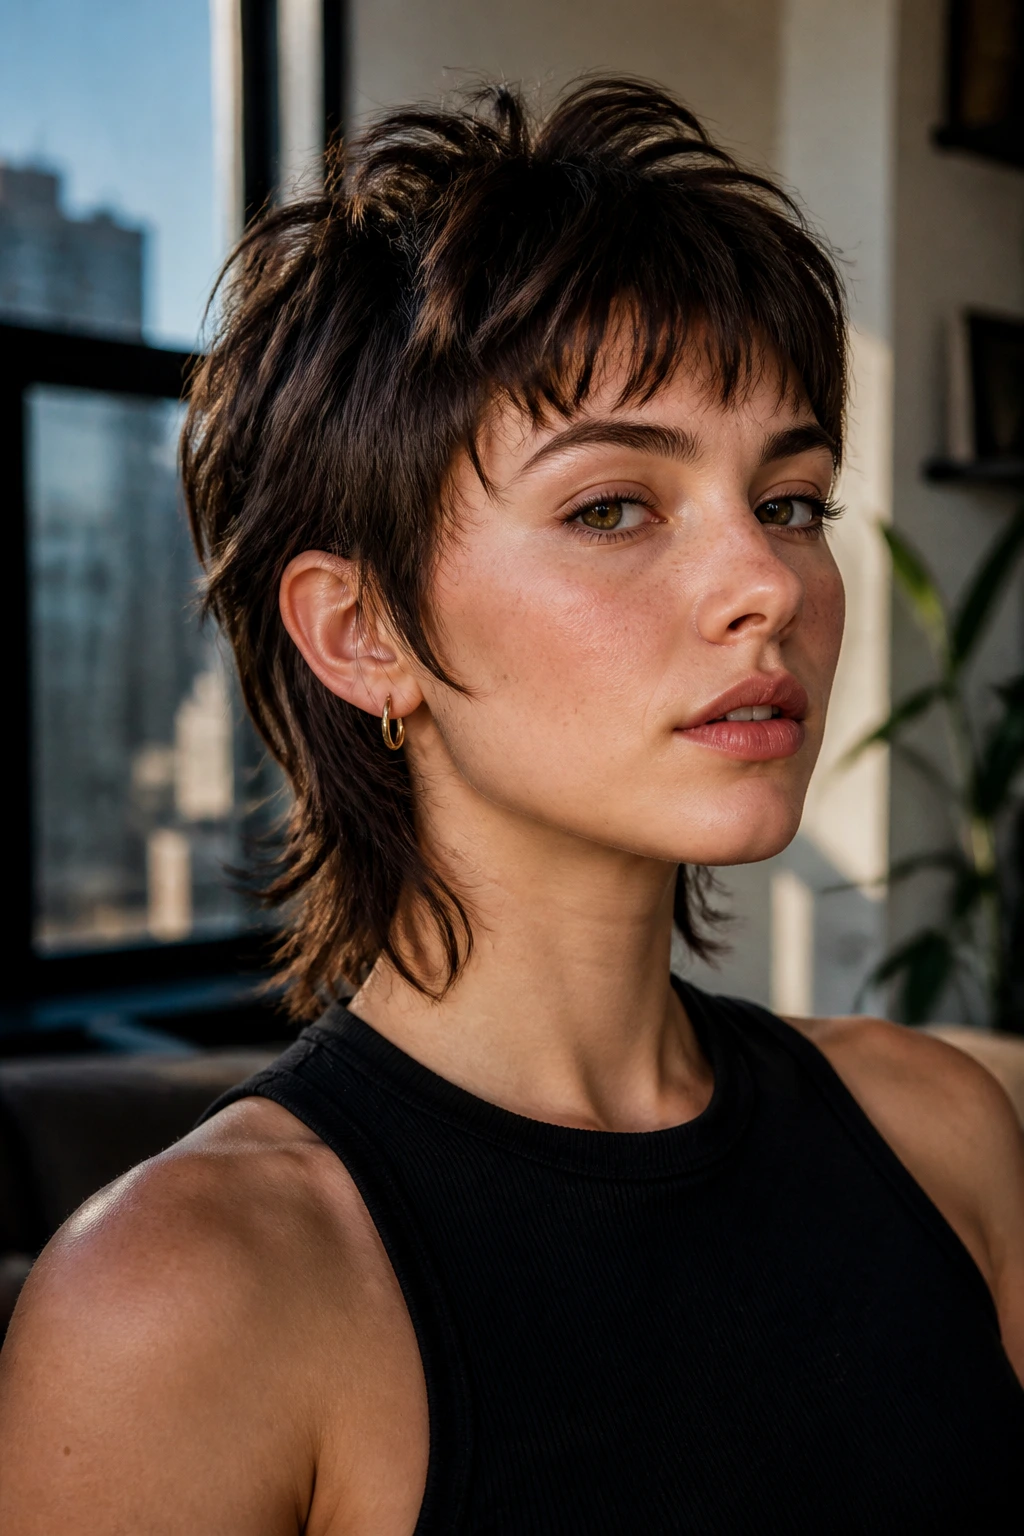
The haircut works because the silhouette is built in three different zones, and each one does a different job. The crown creates lift, the sides break up weight, and the nape extends the shape so the cut doesn’t end in a blunt line. That’s the whole trick. Remove too much from one zone and the balance starts to wobble.
The crown
Shorter top layers keep the hair from lying flat. That matters more on fine hair, but thick hair needs it too, or the top sits like a cap.
The sides
The shaggy pieces around the temples and ears soften the shape. If those pieces are cut too blunt, the whole haircut starts feeling boxy.
The nape
A little extra length at the back changes the read from “short crop” to “mullet layer.” Even a half-inch makes a difference, especially after the hair dries and shrinks.
What to Tell Your Stylist Before the First Snip
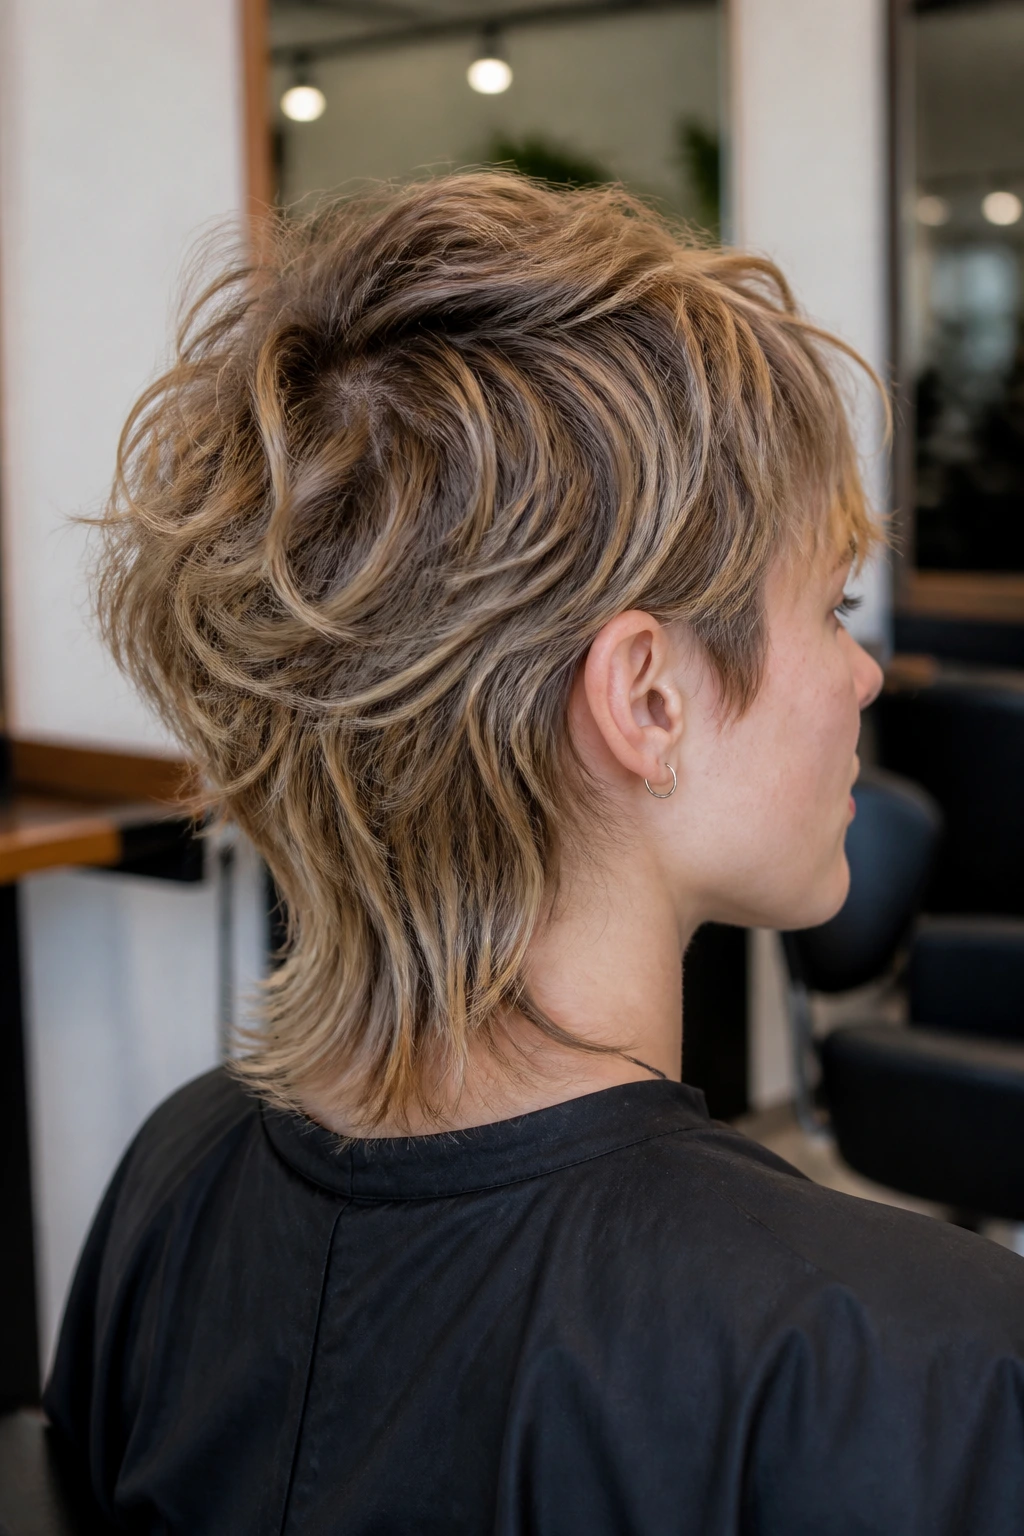
Bring photos, but bring the right photos. A front view tells only half the story. You want a side angle and a back shot too, because the nape length and crown height are where the cut either lives or dies.
Say where you want the shortest pieces to sit: above the brow, at the cheekbone, or around the ear. That one detail changes the whole frame around your face. Then point out whether you want the back to just graze the neck or sit more obviously longer.
If your hair has a cowlick, mention it. If it shrinks when dry, mention that too. And ask how much texturizing they plan to do—because on fine hair, too much thinning is a mess you’ll be styling for weeks.
Essential Tools and Products for the Cut
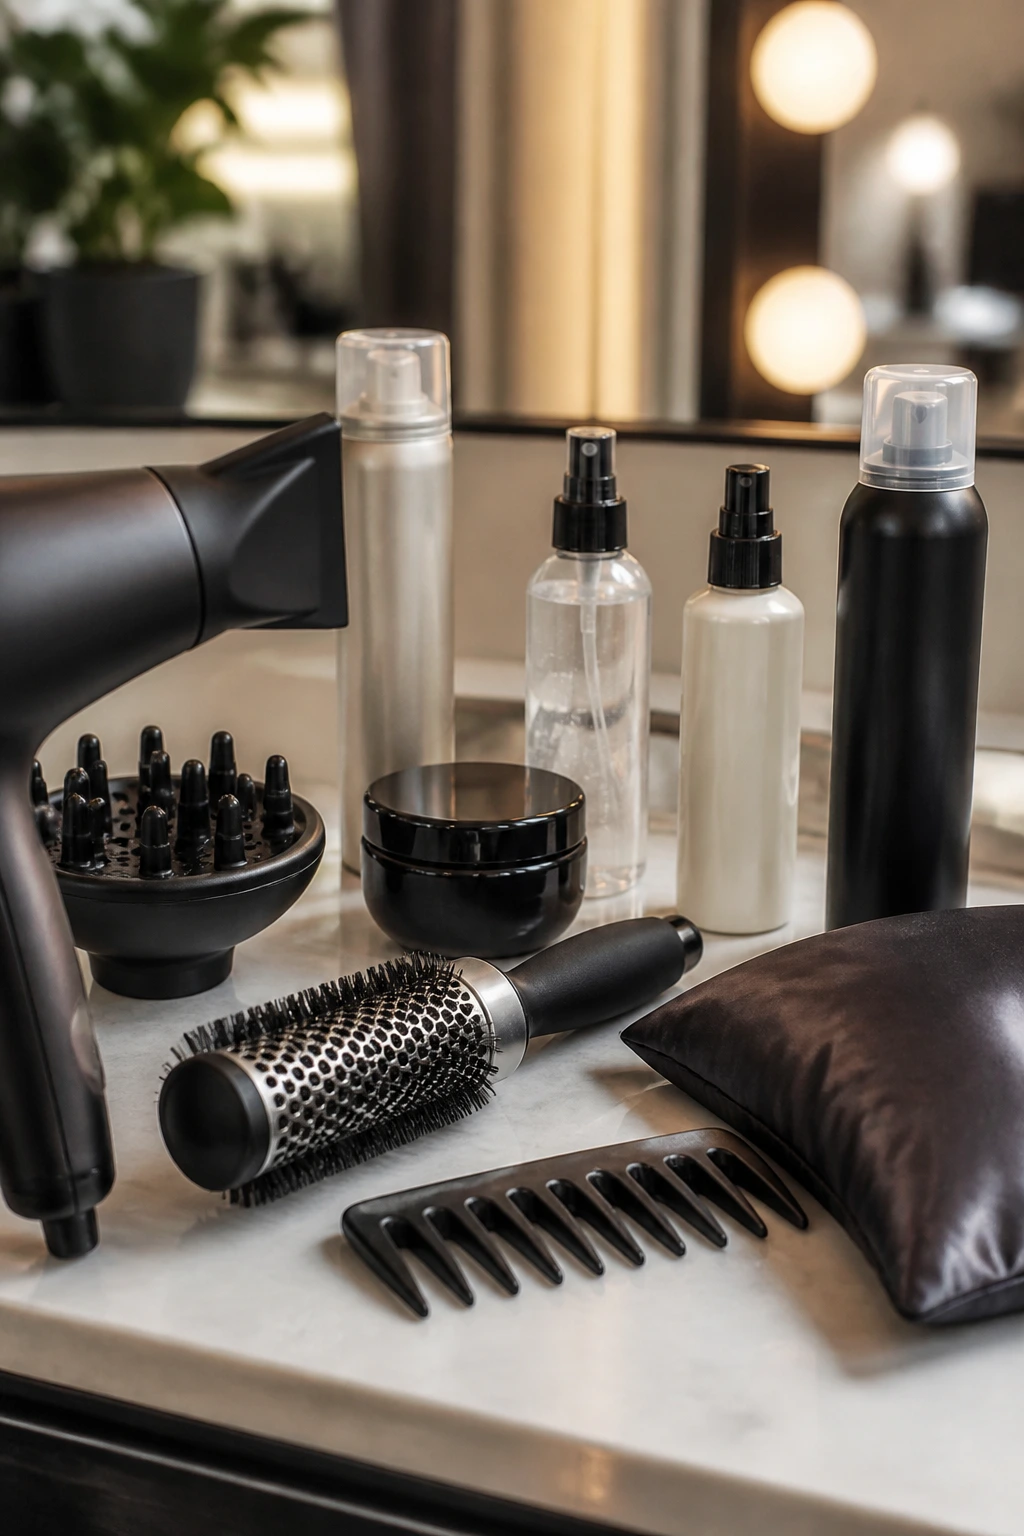
-
Blow dryer with a nozzle: directs airflow at the crown so the roots lift instead of drying flat against the head.
-
Diffuser attachment: the tool that keeps curls and waves intact without blasting them into frizz.
-
Small round brush: useful for nudging the fringe and crown into place without making the shape too polished.
-
Wide-tooth comb: kinder than a fine comb when you’re working through damp shag layers.
-
Lightweight mousse: gives the top a bit of body without the heavy feel of a cream.
-
Texture paste or matte clay: best for separating the ends and making the layers visible.
-
Sea salt spray: good on wavy hair, or on straight hair when you want a rougher finish.
-
Heat protectant: non-negotiable if you touch the front with a dryer, brush, or iron.
-
Dry shampoo: useful on day two when the crown starts losing lift.
-
Satin pillowcase: not glamorous, but it keeps the ends from looking crushed by morning.
How to Style It Without Flattening the Crown
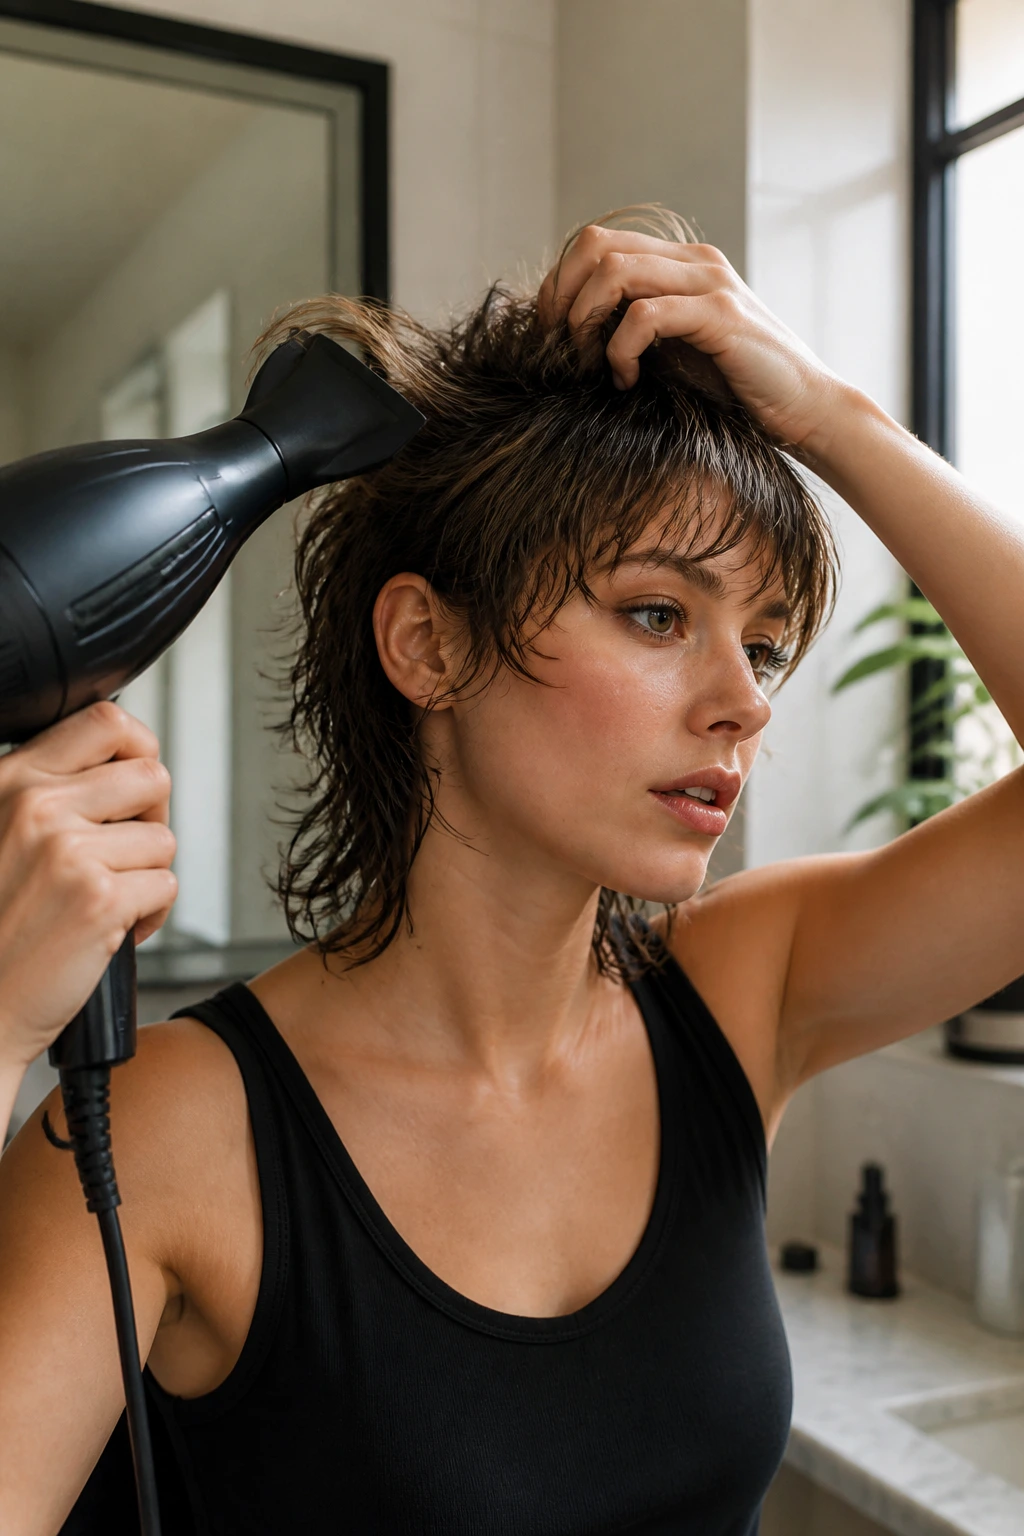
Start with hair that’s damp, not dripping. That matters. If the roots are soaked, the style takes forever to dry and usually falls flat before you finish.
Work a small amount of mousse or lightweight cream into the roots and mid-lengths, then rough-dry with your fingers until the hair is about 80 percent dry. After that, direct the crown upward with the nozzle and use your hand or a small brush to keep the lift. You do not need to smooth every strand.
Finish by pinching a little paste through the ends. The goal is separation, not stiffness. If the cut starts to look too soft, add a tiny bit more product to the back pieces and let the rest stay airy.
Common Mistakes That Make the Shape Go Limp
-
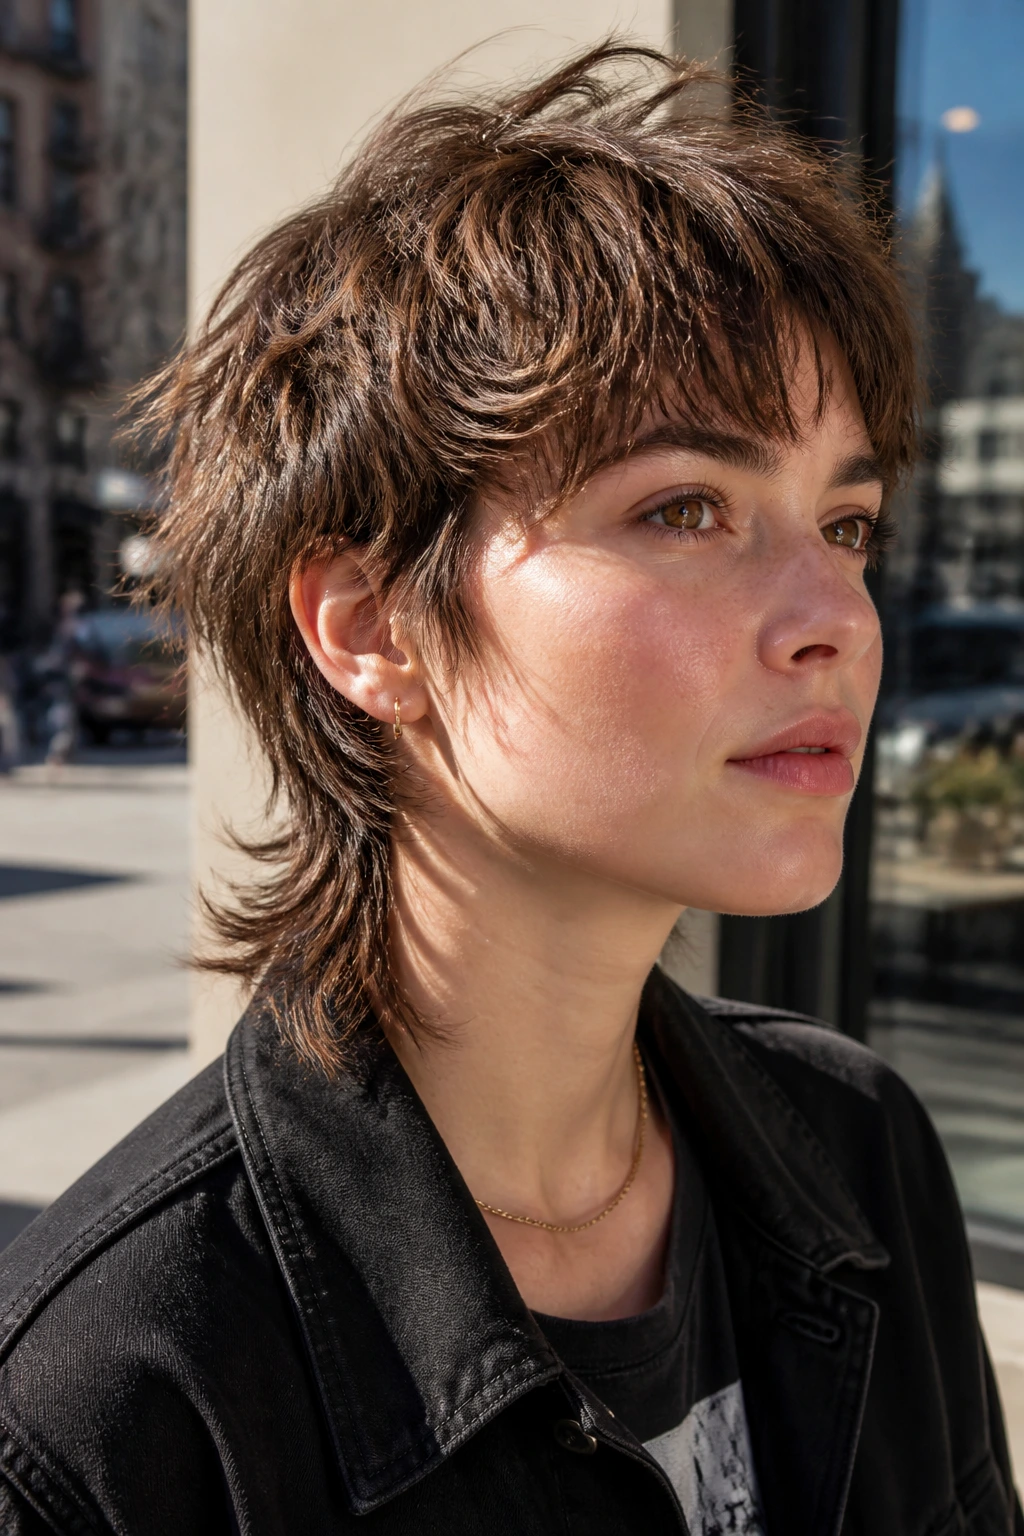
Cutting the nape too short: if the back barely clears the neck, the mullet part disappears and the cut turns into a shaggy pixie. Ask for a clear length difference.
-
Thinning the ends too aggressively: the haircut can go see-through fast, especially on fine hair. If the ends look weak after drying, the texturizing was too heavy.
-
Using heavy cream everywhere: the top collapses, the fringe separates into greasy strands, and the whole style looks tired. Put heavier products only where the hair needs control.
-
Ignoring the cowlicks: a stubborn front section can kick the fringe the wrong way if you don’t dry it into place. Fix the direction while it’s damp.
-
Skipping trims for too long: the shag layers grow into one long blob if you let them go. The silhouette needs maintenance to stay visible.
Variations and Adaptations to Try

-
Soft Office Version: keep the fringe long enough to tuck, taper the nape gently, and avoid the sharpest piecey ends. This works when you want the shape to stay readable without drawing too much attention.
-
Curly Cloud Version: let the curl pattern set the volume, keep internal layers longer, and use a diffuser only until the curls are dry at the surface. The goal is roundness with movement, not a frizz halo.
-
Fine-Hair Lift Version: shorten the crown a touch more, leave the ends blunt enough to hold weight, and rely on root spray rather than heavy texturizing. Fine hair needs structure more than it needs slicing.
-
Edgy Editorial Version: add a micro fringe, keep the sides tighter, and finish with clay or gel for a slightly broken, sharper silhouette. This is the one that reads most fashion-forward.
-
Grow-Out Friendly Version: keep the side pieces long enough to sweep behind the ears and avoid extreme contrast between front and back. It buys you another few weeks before the shape gets awkward.
Keeping the Cut Fresh Between Salon Visits
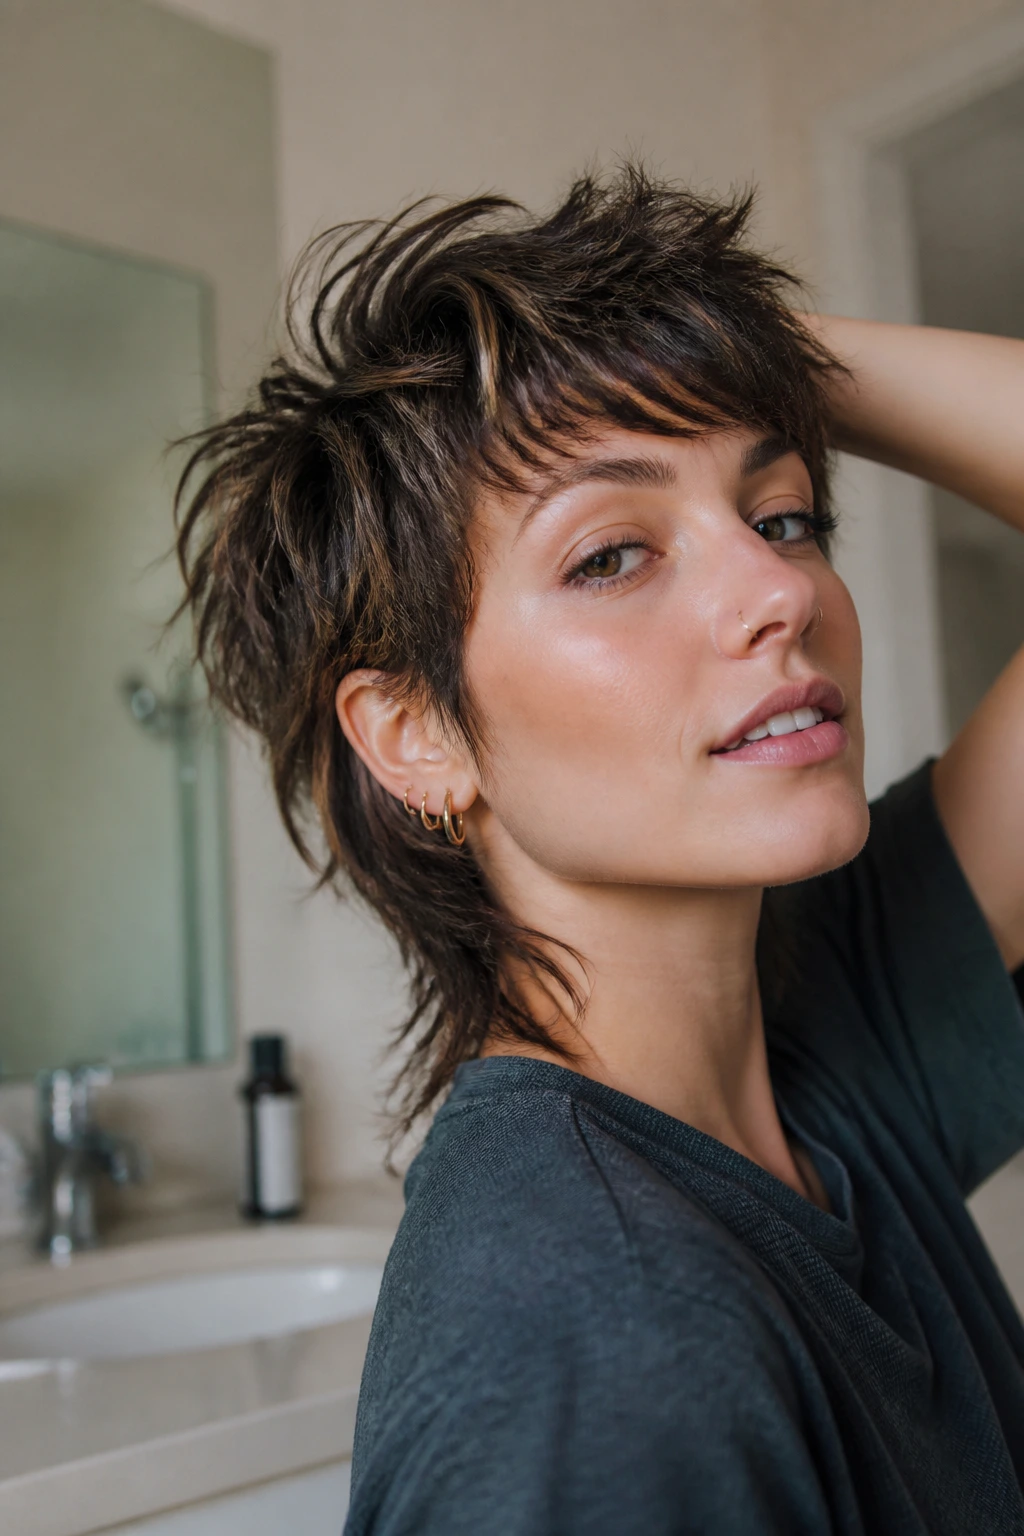
Most short shaggy mullet layers need a trim every 6 to 8 weeks if you want the silhouette to stay clean. If you wear bangs, the fringe may need a touch-up every 3 to 4 weeks, because that’s the first part to start annoying you. The nape can usually go a little longer, but once it starts hitting your collar in a heavy way, the shape changes.
At home, don’t wash away the texture every day unless your scalp really needs it. A light refresh with water, a bit of leave-in, and a quick blast from the dryer can bring the crown back to life. Dry shampoo helps, but it should support the cut, not replace styling forever.
Sleep matters too. A satin pillowcase keeps the top from getting flattened into a strange little mound, and if your hair is wavy or curly, you’ll wake up with fewer kinks at the ends. On the mornings when the cut looks off, rewetting just the fringe and crown is usually enough.
Questions People Ask Before They Cut It Short
Will short shaggy hair with mullet layers work on fine hair?
Yes, if the cut is kept light and not over-thinned. Fine hair usually needs a little crown lift and some bluntness at the ends so it doesn’t go wispy.
Is this too edgy for work or school?
It can be toned down easily. A softer fringe, a gentler nape, and a less piecey finish make it much more wearable.
Do I need bangs for this cut to work?
No. Bangs change the mood, but side-swept pieces or curtain fringe can do the same job without a hard line across the forehead.
How often should I trim it?
About every 6 to 8 weeks is the sweet spot for most versions. If the fringe is part of the look, trim it sooner.
Can curly hair pull this off?
Absolutely, but the layers should respect the curl pattern. If you cut it too short and too aggressively, curls can puff instead of falling.
What if I hate the mullet look after a week?
Ask for a softening trim around the nape and longer face-framing pieces. That usually moves it back toward a shag or a short crop without starting over.
Should I blow-dry it or air-dry it?
Either can work. Blow-drying gives the crown more control; air-drying gives the cut a messier, more lived-in finish.
Can I grow this out without an ugly stage?
Yes, if the layers were cut with growth in mind. The trick is keeping the front and back from being too disconnected in the first place.
The Shape That Keeps Moving
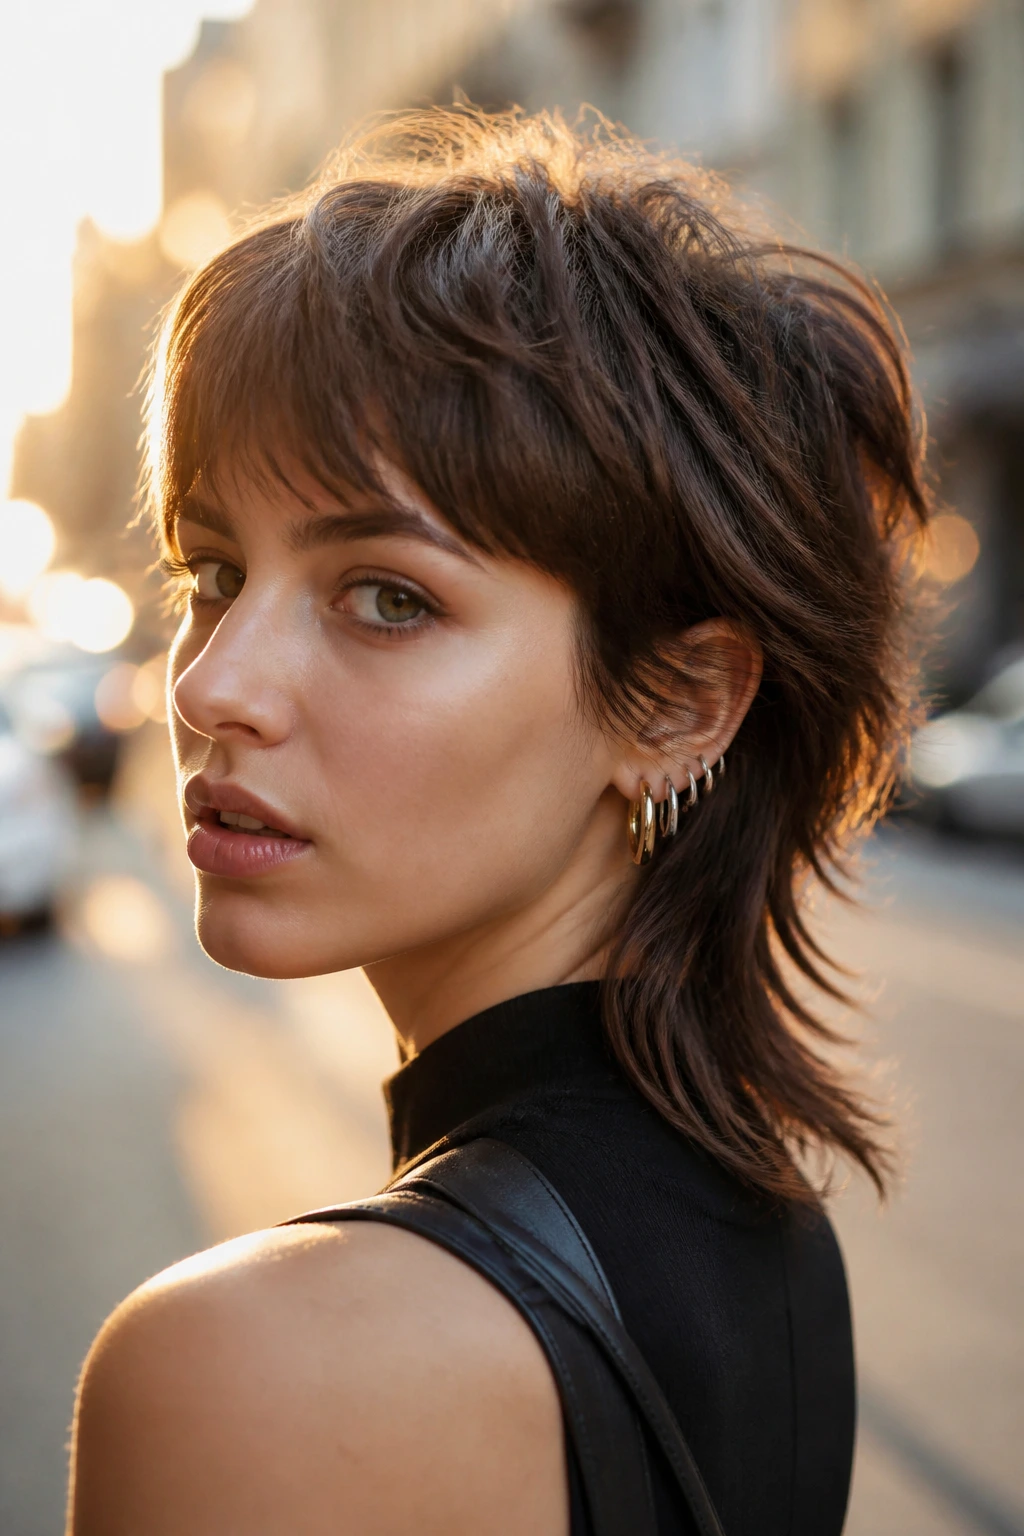
The nicest thing about short shaggy hair with mullet layers is that it rarely sits still in the same way twice. Some mornings it looks sharp and broken up, other mornings it leans soft and fuzzy, and both versions can be good if the structure underneath is sound. That’s the part people miss when they chase a photo and ignore the actual haircut.
If you want one cut that can live in the space between polished and unruly, this is a strong place to start. Keep the crown light, the sides broken, and the nape honest, and the shape does the rest.
