



Wedding hair has a way of exposing every weak spot in a style. If a twist is going to slip, if a curl is going to wilt, if a pin is going to dig into your scalp by hour six, a wedding will find it. That’s why hairstyle ideas for Black brides have to do more than look pretty in a chair for ten minutes. They need to hold through hugs, heat, a veil, a few tears, and one stubborn aunt who is determined to rearrange your train.
What makes Black bridal hair so interesting is that there isn’t one “correct” answer. There’s texture to respect, length to work with, edges to protect, and a dress neckline that can completely change what looks best. A sleek low bun does one job. A halo braid does another. A puff, a loc petal bun, a pressed bob, and a set of brushed-out waves all bring their own kind of presence. The good styles are the ones that look intentional from every angle, not just front-on.
I keep coming back to this: the best bridal hairstyle is the one that can survive a long day without making you think about it. You want the style to disappear into the background once you’re dressed. No scalp pulling. No constant mirror checks. No panic when the photographer says, “Turn just a little more.” That’s the real test. And it’s exactly why the next 35 looks are worth your attention.
Why These Looks Work for Black Brides
-
Texture-first choices: These styles make room for coils, curls, locs, braids, relaxed hair, and silk presses instead of forcing one hair type into the same shape.
-
Veil-ready structure: A lot of the looks here leave a clean anchor point at the crown, nape, or side so a comb, pin, or clip veil sits where it should.
-
Comfort built in: Several styles keep tension off the hairline and weight off the crown, which matters when you’re wearing the look for 10 to 14 hours.
-
Photo-friendly angles: Side parts, wrapped bases, and sculpted buns give the photographer something clean from the front, profile, and back.
-
Accessory room: Pearls, combs, cuffs, florals, and pins can be added without the style collapsing under the weight of too much decoration.
-
Bridal range: There’s something here for short hair, long hair, natural texture, pressed hair, protective styles, and brides who want a softer or sharper finish.
1. Sculpted Low Bun With Deep Side Part
A low bun can look plain if it’s rushed. Done right, though, it has that polished, expensive stillness that reads beautifully in photos and doesn’t fight with earrings or a veil.
Why It Works: The deep side part gives the style shape right away, so the bun does not have to do all the work. A low placement keeps the weight near the nape, which is kinder to the scalp than a high, tight pull.
Key Ingredients:
- 1 silk-pressed or stretched base, shoulder-length or longer
- 1 3-ounce jar of firm-hold edge control
- 12 bobby pins and 4 U-pins
- 1 tail comb for parting
- 1 pearl comb or crystal pin for the finish
Quick Steps:
- Part the hair deeply on one side and smooth the roots with a light layer of edge control.
- Brush the hair into a low ponytail at the nape, keeping the front flat but not painful.
- Twist the ponytail around itself into a compact bun, then pin it from the underside in a crisscross pattern.
- Tuck any loose ends under the bun and set the style with a satin scarf for 10 to 15 minutes.
Equipment for This Recipe:
- Tail comb for a sharp part
- Boar-bristle or paddle brush for smoothing
- 12 to 16 bobby pins
- Satin scarf to set the shape
How to Serve This Dish: This one sits best with a cathedral or fingertip veil clipped just above the bun. Drop earrings and a gown with an open back make the shape stand out without crowding it.
Pro Tips for This Recipe:
- Use less gel than you think. A hard shell at the front can crack once you start dancing.
- Pin from the inside out so the bun does not sit on a lump of bobby pins.
- If your hair is thick, build the bun in two loops instead of one tight coil.
Variations on This Dish:
- Pearl-Studded Version: Add 5 to 7 pearl pins along the side part for a softer finish.
- Braided Nape Version: Braid the ponytail before wrapping it for extra grip and texture.
- Veil-First Version: Leave a small flat section at the crown so the comb can anchor cleanly.
Common Mistakes to Avoid with This Dish:
- Pulling the ponytail too tight and causing a sore scalp by the reception.
- Setting the bun before the roots are smooth, which leaves bumps that show from the side.
- Using a bulky accessory at the exact point where the bun sits, which makes the whole shape feel lopsided.
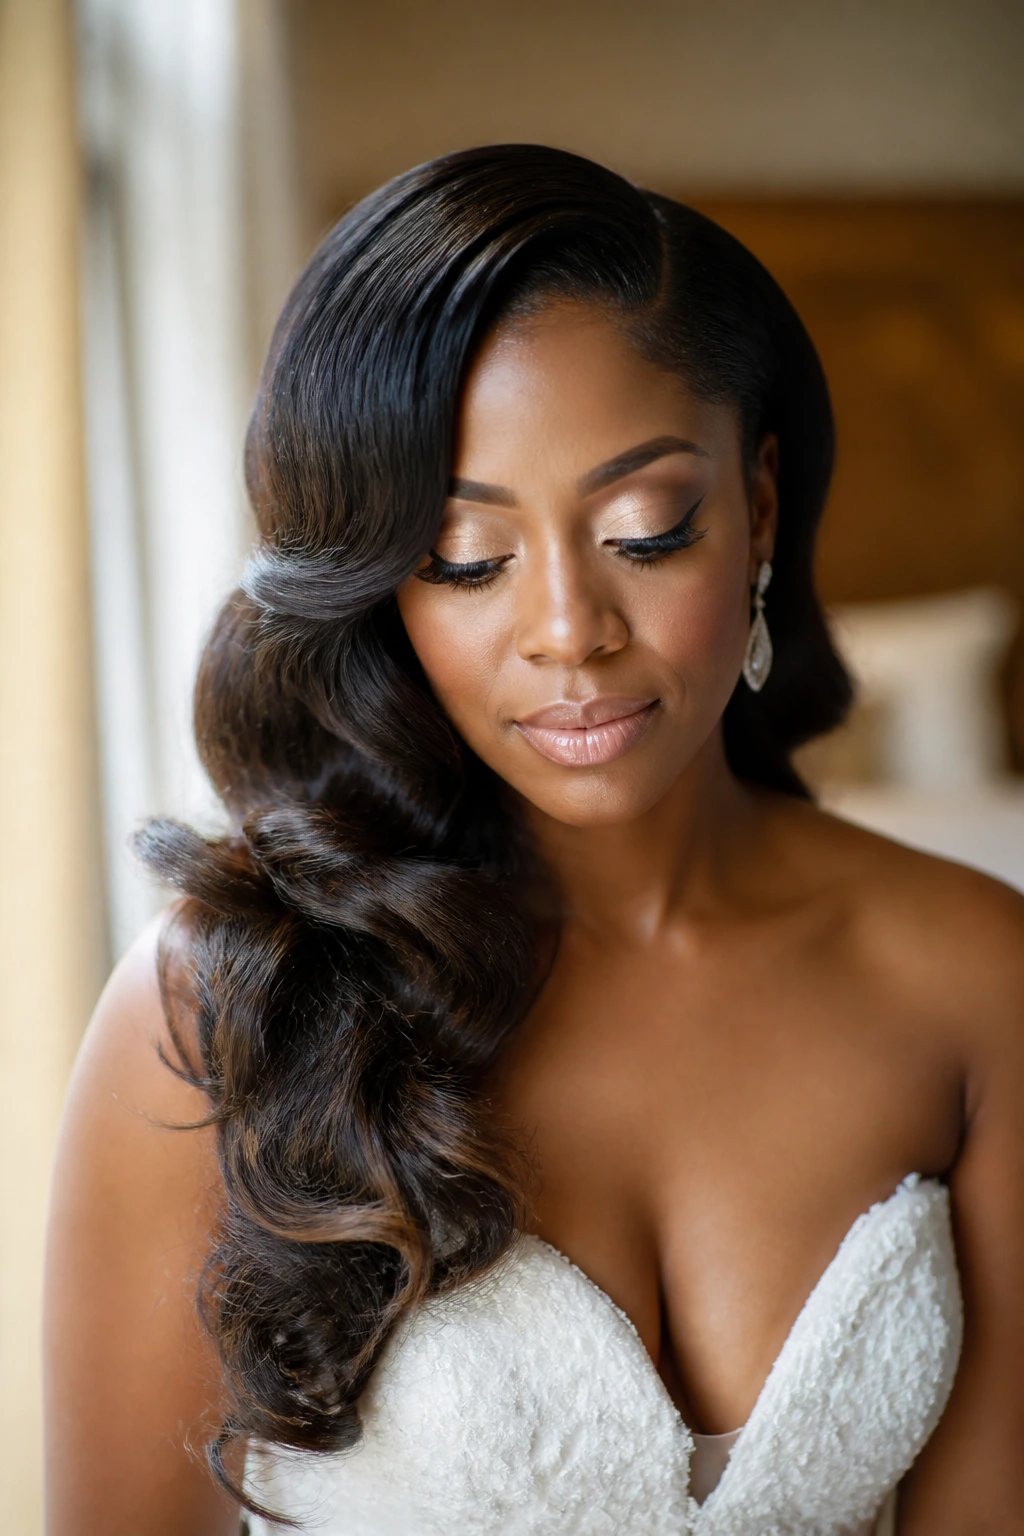
2. Soft Hollywood Waves Draped to One Side
If you want motion, shine, and a little old-school glamour, this is the look that keeps showing up for a reason. The wave pattern photographs well from the front and the side, and the brushed finish softens the whole face.
Why It Works: The deep side sweep creates drama without needing a lot of height. The waves are set in sections, then loosened, which gives you that glossy ribbon effect instead of stiff ringlets.
Key Ingredients:
- 2 bundles of 18- to 22-inch human hair extensions or a full sew-in
- 1.25-inch curling iron or wand
- 1 heat protectant spray, about 2 ounces
- 6 section clips
- 1 light shine spray
Quick Steps:
- Apply heat protectant to dry hair and part it deeply on one side.
- Curl 1-inch sections away from the face, pinning each curl flat until it cools.
- Brush the curls out with a soft bristle brush until the wave pattern connects.
- Sweep the heavier side over one shoulder and pin the back discreetly behind the ear.
Equipment for This Recipe:
- Curling iron or wand
- Section clips
- Soft brush for brushing out waves
- Hairspray with flexible hold
How to Serve This Dish: This style loves strapless gowns, one-shoulder dresses, and off-the-shoulder necklines. If you’re wearing a veil, place it higher on the part so it doesn’t flatten the wave line.
Pro Tips for This Recipe:
- Curl the top layer in the exact same direction or the wave pattern turns choppy.
- Let each curl cool fully before brushing; warm hair frizzes faster.
- Pin the side sweep after dressing, not before, so your neckline and jewelry stay visible.
Variations on This Dish:
- Midnight Gloss Version: Finish with a tiny drop of serum on the ends for a slicker shine.
- Soft Barrel Wave Version: Use a larger iron for broader bends and less wave tightness.
- Pinned Back Version: Tuck one side behind the ear with a jeweled clip for a cleaner frame.
Common Mistakes to Avoid with This Dish:
- Curling with damp hair, which leaves the inside of the section flat and the outside frizzy.
- Brushing before the curls cool, which erases the wave pattern fast.
- Loading on hairspray too early and making the hair feel crunchy before the ceremony even starts.
3. Defined Twist-Out Halo With Gold Pins
Want texture that looks touched, not overworked? A twist-out halo gives the hair softness around the face and enough structure to stay put through the day.
Why It Works: Twist-outs keep natural texture visible while still giving shape around the head. The halo effect frames the face, and gold pins can turn the style from everyday to bridal in two seconds flat.
Key Ingredients:
- 1 head of stretched natural hair, medium length or longer
- 1 leave-in conditioner, about 4 ounces
- 1 styling cream, about 2 ounces
- 1 lightweight oil, 1 teaspoon at a time
- 8 gold or silver pins
Quick Steps:
- Start with hair twisted the night before and fully dry.
- Separate the twists gently with oiled fingertips so the curl clumps stay defined.
- Pin the front and sides back into a loose halo shape, leaving a few face-framing pieces out.
- Set the crown with a light mist of sheen spray and let the texture breathe.
Equipment for This Recipe:
- Rat-tail comb
- Satin scarf for setting overnight
- Small pins or hair clips
- A wide-tooth comb, if you want a bigger halo
How to Serve This Dish: This style looks best with lace, beading, or a dress that already has detail at the neckline. Keep the jewelry simple; the texture does enough talking.
Pro Tips for This Recipe:
- Separate the twists only once they’re dry. Half-dry hair turns fuzzy fast.
- Use a tiny amount of oil on your fingers, not the whole palm, or the front can get limp.
- If the halo feels flat, lift the roots with a pick instead of adding more product.
Variations on This Dish:
- Chunky Twist-Out Version: Leave the sections larger for a fuller, more sculpted halo.
- Tucked Temple Version: Pin the sides tighter and keep more volume on top.
- Beaded Crown Version: Add 3 to 5 gold cuffs near the temple for a brighter finish.
Common Mistakes to Avoid with This Dish:
- Pulling the twists apart too aggressively, which causes frizz and uneven curls.
- Trying to add too much product on the wedding morning, which dulls the texture.
- Forgetting to set the shape at the roots, so the crown falls flat by photos.
4. High Puff With a Jeweled Comb
A high puff can look bold, soft, and very bridal all at once. The trick is making it feel lifted rather than casual.
Why It Works: The puff shows off texture and keeps the face open, which is useful if you want your makeup, earrings, or neckline to stay visible. A jeweled comb gives it the right amount of polish without forcing the hair into a hard shape.
Key Ingredients:
- 1 puff cuff or strong satin scrunchie
- 1 leave-in moisturizer, about 2 ounces
- 1 edge control gel, about 2 ounces
- 1 jeweled comb or barrette
- 1 soft brush
Quick Steps:
- Stretch or fluff the hair first so the puff has body.
- Smooth the perimeter upward with gel and a brush, keeping tension snug but not harsh.
- Gather the hair high at the crown and secure it with a puff cuff or scrunchie.
- Fluff the puff with both hands, then place the comb off-center for a little movement.
Equipment for This Recipe:
- Puff cuff or oversized scrunchie
- Soft brush for the perimeter
- Tail comb
- Satin scarf to lay the front after styling
How to Serve This Dish: This is a strong match for a clean, modern dress with an open neckline. If you’re wearing a veil, clip it under the puff so the shape stays visible from the side.
Pro Tips for This Recipe:
- Don’t over-slick the front. A puff needs some softness at the edges to look balanced.
- Place the puff where the head naturally feels comfortable, not where it looks highest in the mirror.
- Tuck a few baby hairs only if they already cooperate; fighting them on the wedding morning is a waste of energy.
Variations on This Dish:
- Halo Puff Version: Add a thin headband or floral crown around the base.
- Tapered Puff Version: Keep the sides lower and the crown fuller for more shape.
- Ribbon-Tied Version: Wrap the base with satin ribbon that matches your dress lining.
Common Mistakes to Avoid with This Dish:
- Pulling the puff so tight that it gives you a headache before the ceremony.
- Choosing a cuff that is too small for your hair volume.
- Smoothing the front so much that the style loses all texture and looks stiff.
5. Braided Crown Into a Low Bun
This one has a built-in bridal feel. The braid gives the head a frame, and the bun keeps the back neat for a veil or comb.
Why It Works: A crown braid creates structure at the top, which means the rest of the style can stay calmer. The low bun balances the braid, so the overall effect looks finished instead of busy.
Key Ingredients:
- 1 stretched base or relaxed hair, medium length
- 1 braiding cream or gel, about 2 ounces
- 10 to 12 bobby pins
- 1 tail comb
- 1 veil comb or decorative pin
Quick Steps:
- Part the hair from ear to ear and braid both sides toward the crown.
- Cross the braids over the top of the head and pin them securely at the back.
- Gather the remaining hair into a low bun at the nape.
- Hide the braid ends under the bun and set the style with a satin wrap for 15 minutes.
Equipment for This Recipe:
- Rat-tail comb
- Small elastic bands, if needed
- Bobby pins
- Edge brush for the hairline
How to Serve This Dish: This looks lovely with a veil placed just behind the crown braid or a hair vine woven along the braid line. It works especially well when the dress has detail at the shoulders or back.
Pro Tips for This Recipe:
- Braid on slightly stretched hair so the crown sits smoothly.
- Pin the braids where they cross, not just at the ends.
- Keep the bun compact; a huge bun can crowd the braid and throw off the balance.
Variations on This Dish:
- Pearl Path Version: Add tiny pearl pins along one side of the braid.
- Side Crown Version: Sweep the braid diagonally instead of straight across the head.
- Nape Knot Version: Fold the bun into a twist knot for a softer back view.
Common Mistakes to Avoid with This Dish:
- Leaving the braids too loose, which makes the crown sag by the end of the ceremony.
- Using pins that are too short for thick hair.
- Placing the veil too low and covering the braid detail you actually want people to see.
6. Knotless Braids Wrapped Into a Clean Bun
Knotless braids give you a clean base, which makes a bridal bun look sleek instead of bulky. They also take accessories well, especially cuffs or a delicate pin.
Why It Works: The braids already carry their own structure, so the bun needs fewer pins than loose hair. That means less time fussing and fewer pressure points on the scalp.
Key Ingredients:
- 1 full head of knotless braids, medium or long length
- 1 mousse, about 6 to 8 ounces
- 12 bobby pins
- 1 hair tie or braid-friendly elastic
- 1 set of cuffs or one sparkly clip
Quick Steps:
- Smooth the braids with mousse and let them sit for 5 minutes so flyaways settle.
- Gather the braids low at the nape and twist them into a bun.
- Wrap the loose lengths around the bun and pin them in place.
- Add cuffs or a clip once the shape is secure.
Equipment for This Recipe:
- Mousse dispenser or foam bottle
- Wide-tooth comb for the roots, if needed
- Bobby pins
- Satin scarf for setting the edges
How to Serve This Dish: Keep the bun low if you plan to wear a veil, because it gives the comb a place to anchor. Statement earrings look especially good here because the braids open the neck and frame the face cleanly.
Pro Tips for This Recipe:
- Do not overload the braids with heavy oil the day before; they can get slippery.
- If the bun feels thick, split the braids into two wrapped loops instead of one giant coil.
- Wrap the base with a small section of braid before pinning the rest so the ponytail holder disappears.
Variations on This Dish:
- Sculpted Side Bun Version: Shift the bun to one side for a softer silhouette.
- Beaded Accent Version: Keep the braids plain and add 6 to 8 cuffs near the front.
- Veil Pocket Version: Leave a flat patch at the back for a comb veil to sit flush.
Common Mistakes to Avoid with This Dish:
- Tying the braids with a thin elastic that snaps under the weight.
- Forcing the bun too tight and creating a stiff, round lump.
- Adding accessories before the bun is settled, then having to redo the whole shape.
7. Goddess Locs Swept Over One Shoulder
There is something striking about locs draped to one side in soft, loose lengths. The look has movement, but it still feels anchored enough for a wedding.
Why It Works: Goddess locs already bring texture and visual line, so sweeping them across one shoulder creates a graceful diagonal. That diagonal helps the face look open and gives the dress neckline room to breathe.
Key Ingredients:
- 1 full set of goddess locs, medium or long
- 10 to 12 bobby pins or loc-safe clips
- 1 mousse, about 6 ounces
- 1 edge gel, small amount for the hairline
- 2 decorative cuffs
Quick Steps:
- Refresh the locs with mousse and let them dry for 10 minutes.
- Sweep the heavier side across the shoulder and pin the back just behind the ear.
- Lift a few locs at the crown to keep the style from looking flat.
- Add cuffs near the front or at the end of one visible loc.
Equipment for This Recipe:
- Loc-friendly pins
- Wide-tooth comb for the roots, if needed
- Satin scarf
- Lightweight sheen spray
How to Serve This Dish: This style belongs with a gown that has shape at the collarbone, especially one-shoulder or sweetheart necklines. A veil can sit high or be skipped entirely if you want the locs to carry the look on their own.
Pro Tips for This Recipe:
- Use only a little mousse; locs can look dull if they’re soaked.
- Pin the locs under the top layer so the side sweep doesn’t drift back.
- If you want more height, fluff the roots before moving the lengths.
Variations on This Dish:
- Half-Up Sweep Version: Pull the top third back and let the rest fall.
- Pearled Length Version: Add a few pearls to the ends for softness.
- Wrapped Nape Version: Gather the locs low and let only a side section spill over.
Common Mistakes to Avoid with This Dish:
- Sweeping the locs too far forward and hiding the neckline completely.
- Pinning too few points, which makes the side collapse by the end of portraits.
- Using heavy grease at the roots, which makes the style look flat and dusty.
8. Faux Loc Top Knot With Face-Framing Pieces
A top knot made from faux locs has presence. It gives height, shows off the face, and keeps the neck free, which is a blessing if your dress already has a lot going on.
Why It Works: The knot lifts the eye upward, while the loose front pieces soften the look and keep it from feeling severe. It’s also a smart pick if you want a style that can handle dancing without falling apart.
Key Ingredients:
- 1 full head of faux locs, medium length or longer
- 1 strong elastic or loc ponytail holder
- 12 bobby pins
- 1 decorative wrap or cuff
- 1 edge brush
Quick Steps:
- Gather the locs into a high ponytail at the crown.
- Twist the lengths around the base, building a knot with the bulk spread evenly.
- Pin the knot in several directions until it feels secure.
- Pull out 2 to 4 face-framing pieces and smooth the hairline.
Equipment for This Recipe:
- Large bobby pins or U-pins
- Edge brush
- Tail comb
- Satin scarf for the perimeter
How to Serve This Dish: This style loves a clean neckline and strong earrings. If you’re wearing a veil, place it beneath the knot rather than on top so the silhouette stays sharp.
Pro Tips for This Recipe:
- Spread the locs around the knot base before pinning; a lopsided knot shows in side photos.
- Keep the front pieces narrow and deliberate, not random.
- If the knot feels heavy, build it slightly lower at the crown so it sits more comfortably.
Variations on This Dish:
- Tight Sculpture Version: Keep the front completely pulled back for a more modern shape.
- Soft Curl Version: Add curled ends to the loose pieces if the locs allow it.
- Wrapped Crown Version: Wind one loc around the base to hide the elastic fully.
Common Mistakes to Avoid with This Dish:
- Making the knot too small for the weight of the locs.
- Leaving the front pieces too thick, which can make the style look unfinished.
- Forgetting to secure the base with enough pins, so the knot starts to lean.
9. Vintage Finger Waves on a Short Bob
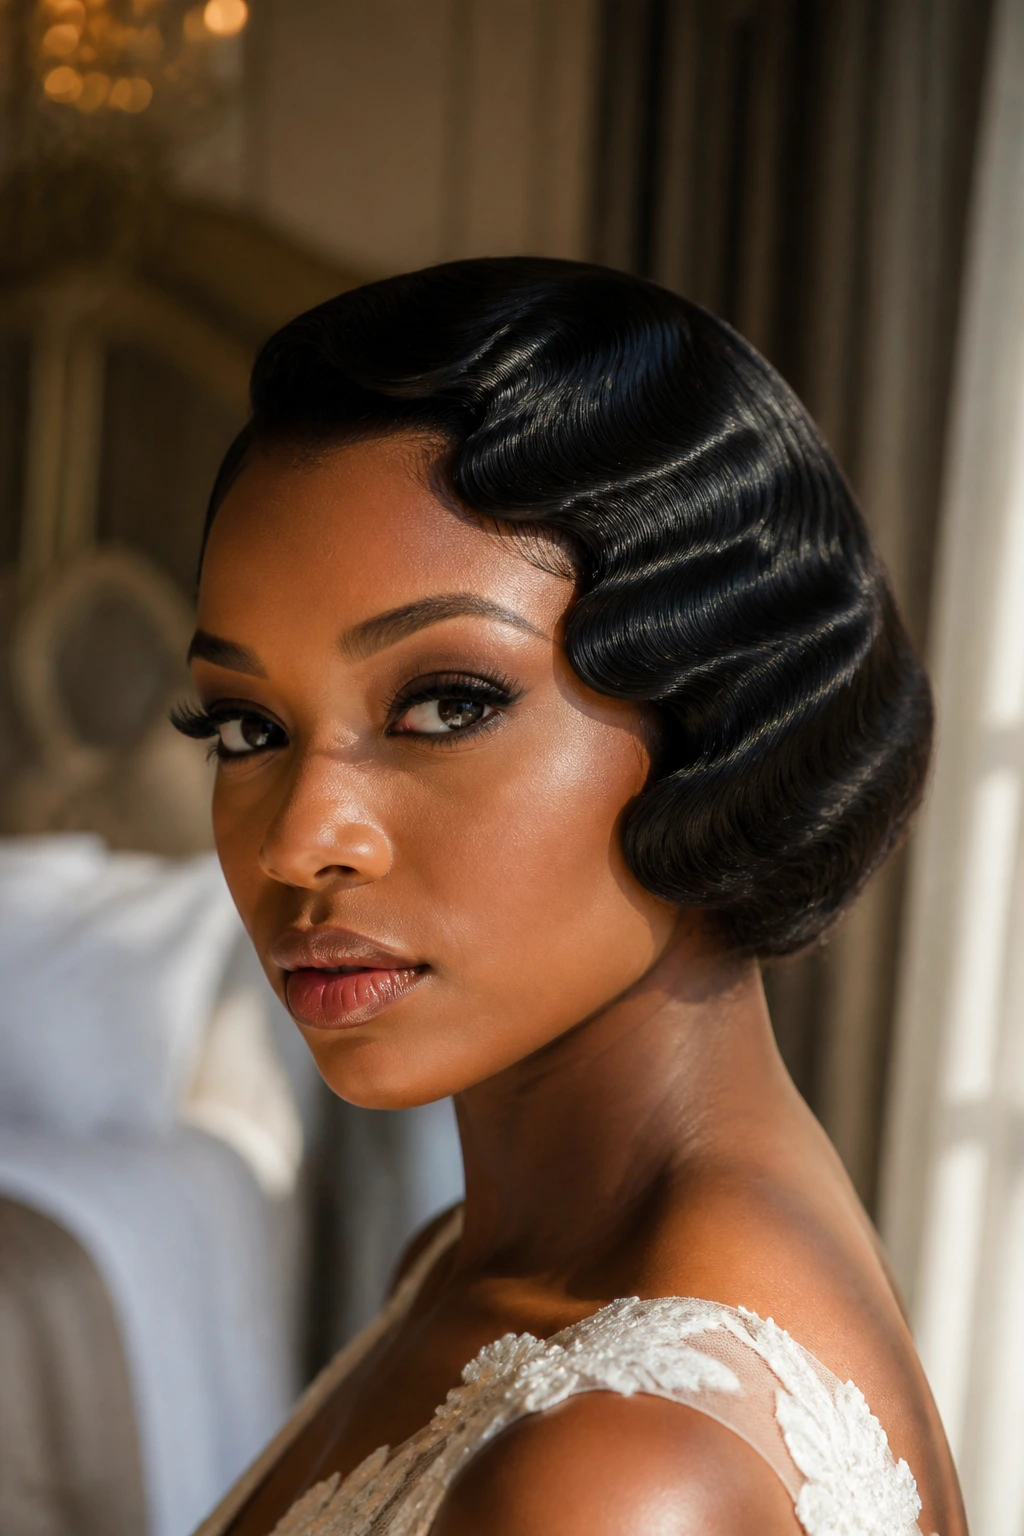
Finger waves bring drama in a restrained, precise way. If you love a short style that feels polished and intentional, this one has real presence.
Why It Works: Finger waves shape the hair close to the head, which means the silhouette stays clean and controlled. The wave ridges also catch light in a way that gives short hair more dimension than a flat press ever could.
Key Ingredients:
- 1 short relaxed or silk-pressed bob
- 1 wave gel or setting lotion, about 2 ounces
- 6 to 8 duckbill clips
- 1 fine-tooth comb
- 1 hooded dryer or setting scarf
Quick Steps:
- Create a deep side part and apply wave gel in small sections.
- Form the waves with your comb and finger, clipping each curve in place.
- Dry under a hooded dryer for 15 to 20 minutes or until fully set.
- Brush lightly around the edges once the waves are dry and firm.
Equipment for This Recipe:
- Fine-tooth comb
- Duckbill clips
- Hooded dryer or strong setting wrap
- Soft brush for edge cleanup
How to Serve This Dish: Pair it with a dress that has a clean neckline or vintage detail. A bold lip and sculptural earrings look right at home here.
Pro Tips for This Recipe:
- Keep the sections small. Big waves look loose, not defined.
- Let the gel set completely before touching the hair.
- Use a satin scarf after drying to calm flyaways without flattening the wave shape.
Variations on This Dish:
- Side-Swept Wave Version: Push the front wave more dramatically to one side.
- Gloss Finish Version: Add a tiny amount of serum after the set for extra shine.
- Short Crop Version: Adapt the pattern to a pixie if the bob is too short for full waves.
Common Mistakes to Avoid with This Dish:
- Rushing the drying time, which makes the waves slump.
- Using too much gel so the hair dries into hard flakes.
- Trying to brush out the set before it has cooled completely.
10. Tapered Frohawk With Sculpted Sides
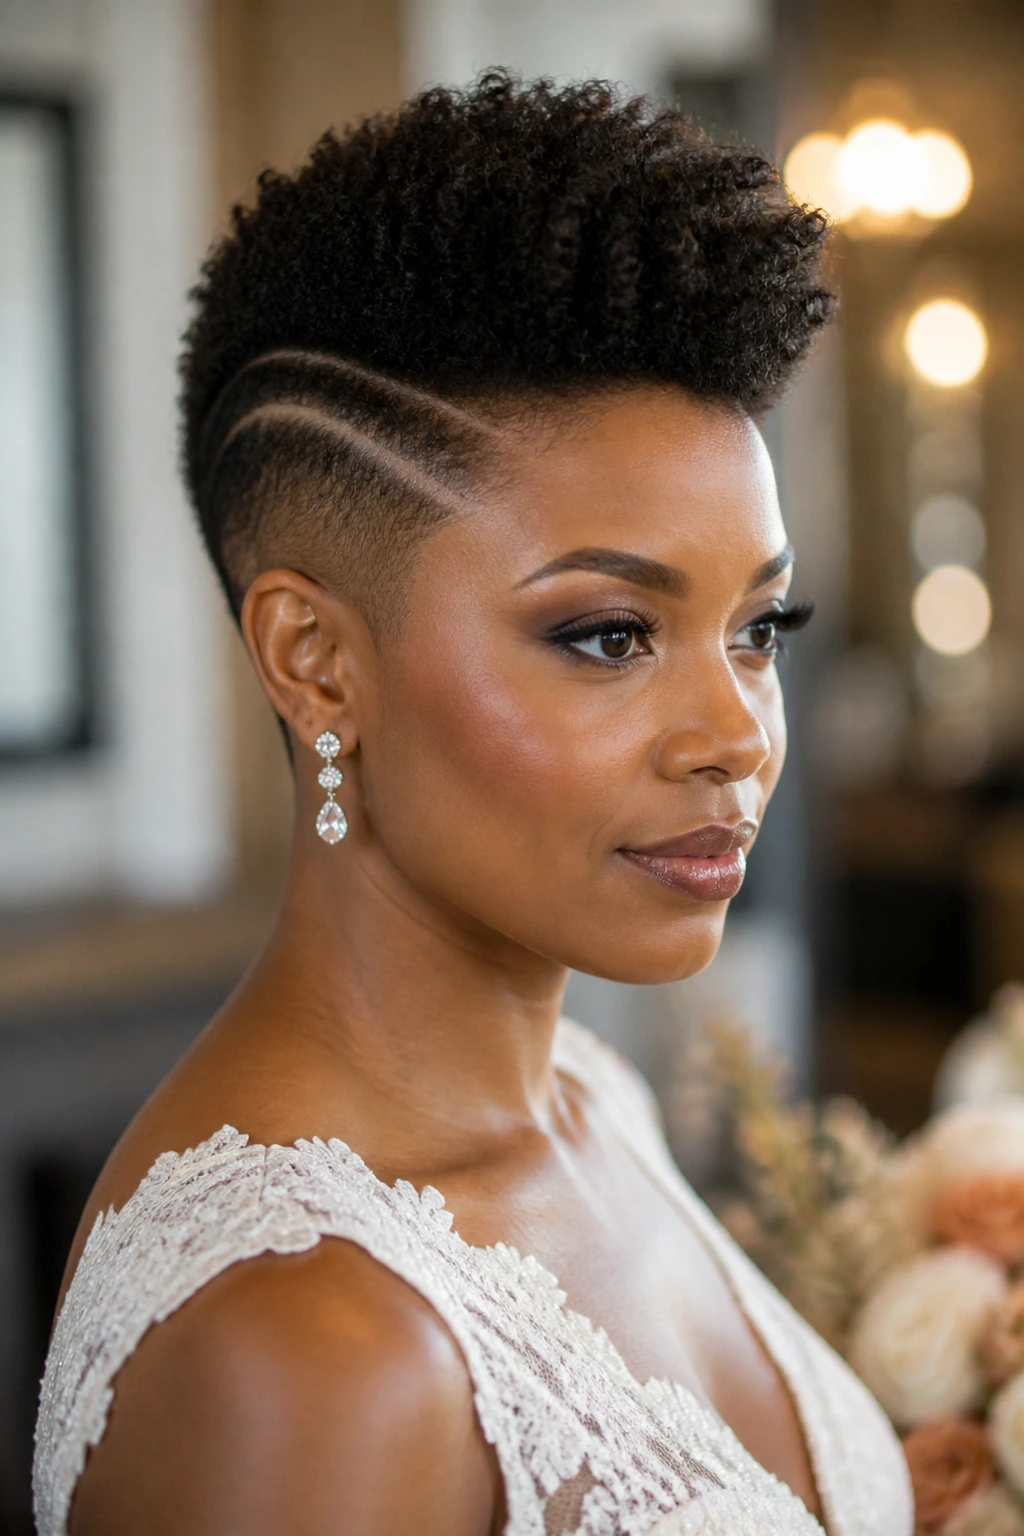
This is the style for a bride who wants shape and edge without losing softness at the center. It has bite, but it still reads bridal when the finish is clean.
Why It Works: The sculpted sides create a sleek frame, while the lifted center gives the hairstyle height and energy. That contrast is what makes the frohawk look deliberate instead of accidental.
Key Ingredients:
- 1 tapered or short natural cut
- 1 curl cream, about 2 ounces
- 1 edge control gel, about 2 ounces
- 1 pick or small afro comb
- 1 decorative hair vine or comb
Quick Steps:
- Define the curls in the center strip with cream and a small amount of water.
- Smooth the sides down with gel and a brush, keeping them close to the head.
- Lift the center upward with a pick for shape and height.
- Add a hair vine or comb near the temple for a bridal finish.
Equipment for This Recipe:
- Small brush
- Rat-tail comb
- Curl pick
- Satin scarf for the sides
How to Serve This Dish: This style looks especially sharp with sleeveless gowns or structured shoulders. Keep the earrings medium-sized so they don’t compete with the height in the center.
Pro Tips for This Recipe:
- Work the sides in thin layers instead of one thick coat of gel.
- Shape the center with your hands first, then use the pick only for final lift.
- If your curls shrink hard, stretch them slightly with a diffuser on cool air before styling.
Variations on This Dish:
- Softer Hawk Version: Leave more texture on the sides instead of slicking them down fully.
- Beaded Temple Version: Add a small row of pins or beads near one side.
- Defined Coil Version: Separate the center curls for a fuller, more fluffy shape.
Common Mistakes to Avoid with This Dish:
- Over-smoothing the sides until the style loses all contrast.
- Piling product onto the center and weighing the curls down.
- Letting the shape lean backward, which makes the profile awkward in photos.
11. Flat-Twist Updo With a Soft Nape Roll
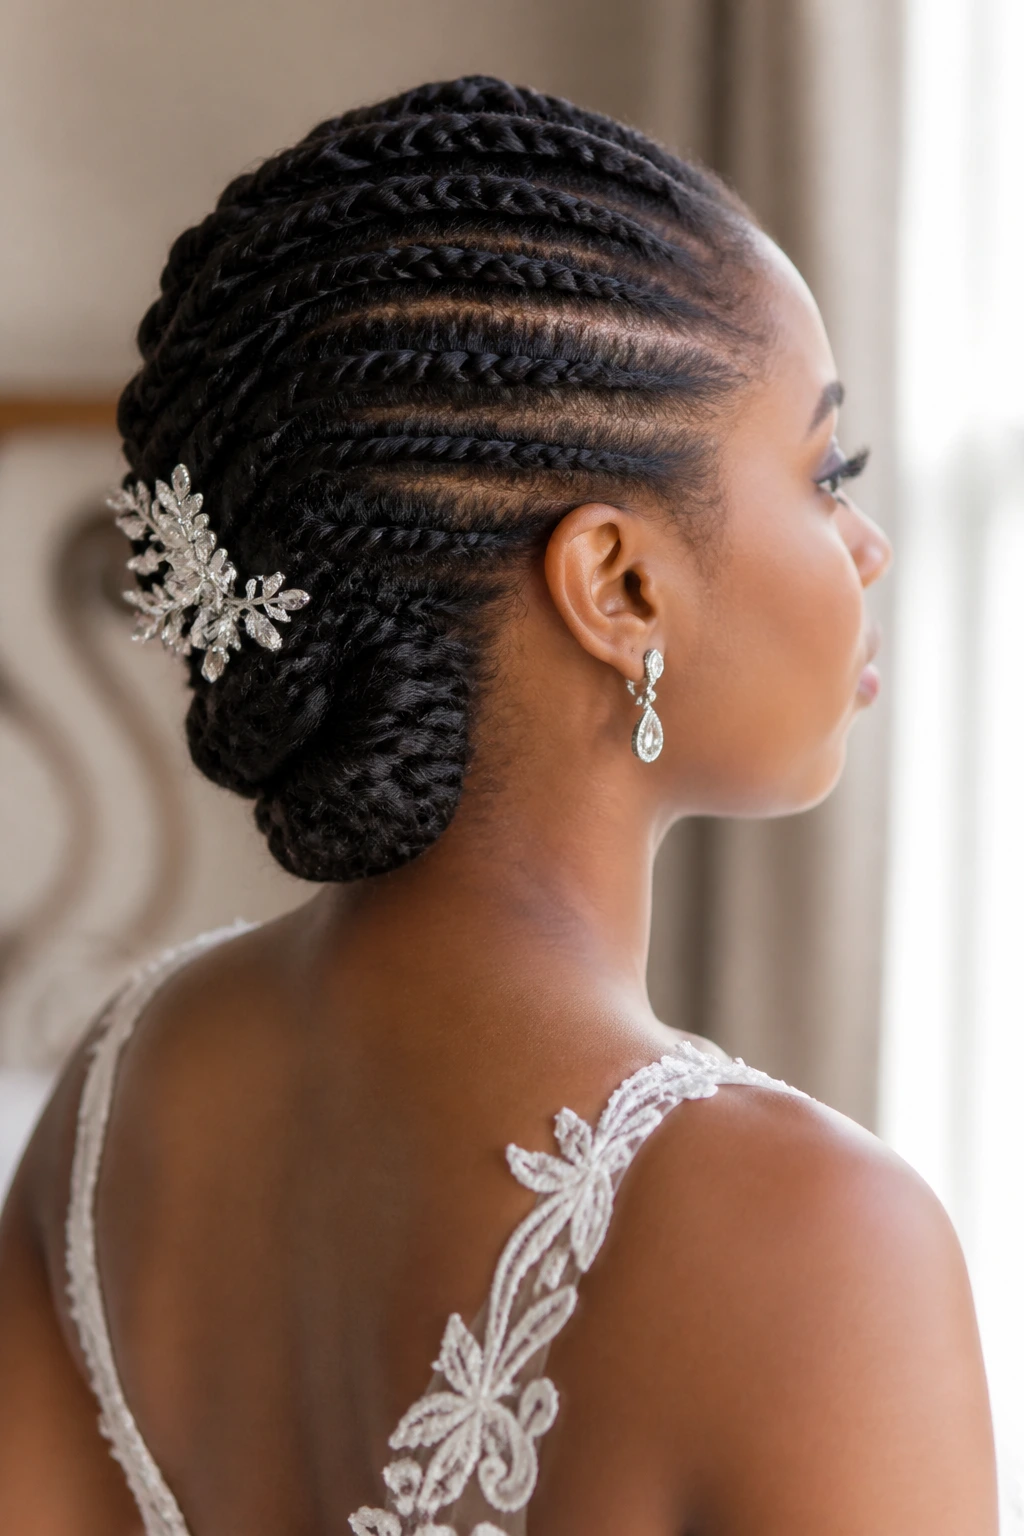
Flat twists are underrated for weddings. They hold hair close to the scalp, feel secure, and can be shaped into something soft instead of severe.
Why It Works: Flat twists create a neat pattern along the head, which gives the updo its structure without needing a lot of heat or tension. The nape roll adds a gentle finish that looks elegant from the back.
Key Ingredients:
- 1 stretched natural base
- 1 twisting cream, about 2 ounces
- 8 to 10 bobby pins
- 1 rat-tail comb
- 1 shine spray, light use only
Quick Steps:
- Part the hair into 4 to 6 sections and flat-twist each one toward the back.
- Gather the ends into a small roll at the nape.
- Pin the roll flat against the head, hiding the ends underneath.
- Smooth the hairline and lightly mist the finished style with shine spray.
Equipment for This Recipe:
- Rat-tail comb
- Wide-tooth comb
- Bobby pins
- Satin scarf
How to Serve This Dish: It works beautifully with veils, since the twist pattern gives the comb something to hold onto. Pair it with a dress that has detail near the shoulders or back so the nape roll doesn’t disappear.
Pro Tips for This Recipe:
- Keep each twist even in size so the pattern stays balanced.
- Pin the roll in two directions, not one, or it can shift.
- Do the style on hair that has been lightly stretched; fresh shrinkage makes flat twists less tidy.
Variations on This Dish:
- Side-Swept Twist Version: Pull the twists diagonally instead of straight back.
- Rolled Bun Version: Turn the nape roll into a tighter bun.
- Accessory Path Version: Thread a slim comb or vine along one twist line.
Common Mistakes to Avoid with This Dish:
- Twisting sections that are too thick, which makes the style bulky.
- Forgetting to secure the ends under the roll, causing pieces to poke out.
- Using too much cream, which can make the twists feel greasy by the reception.
12. Feed-In Braided Ponytail With Wrapped Base
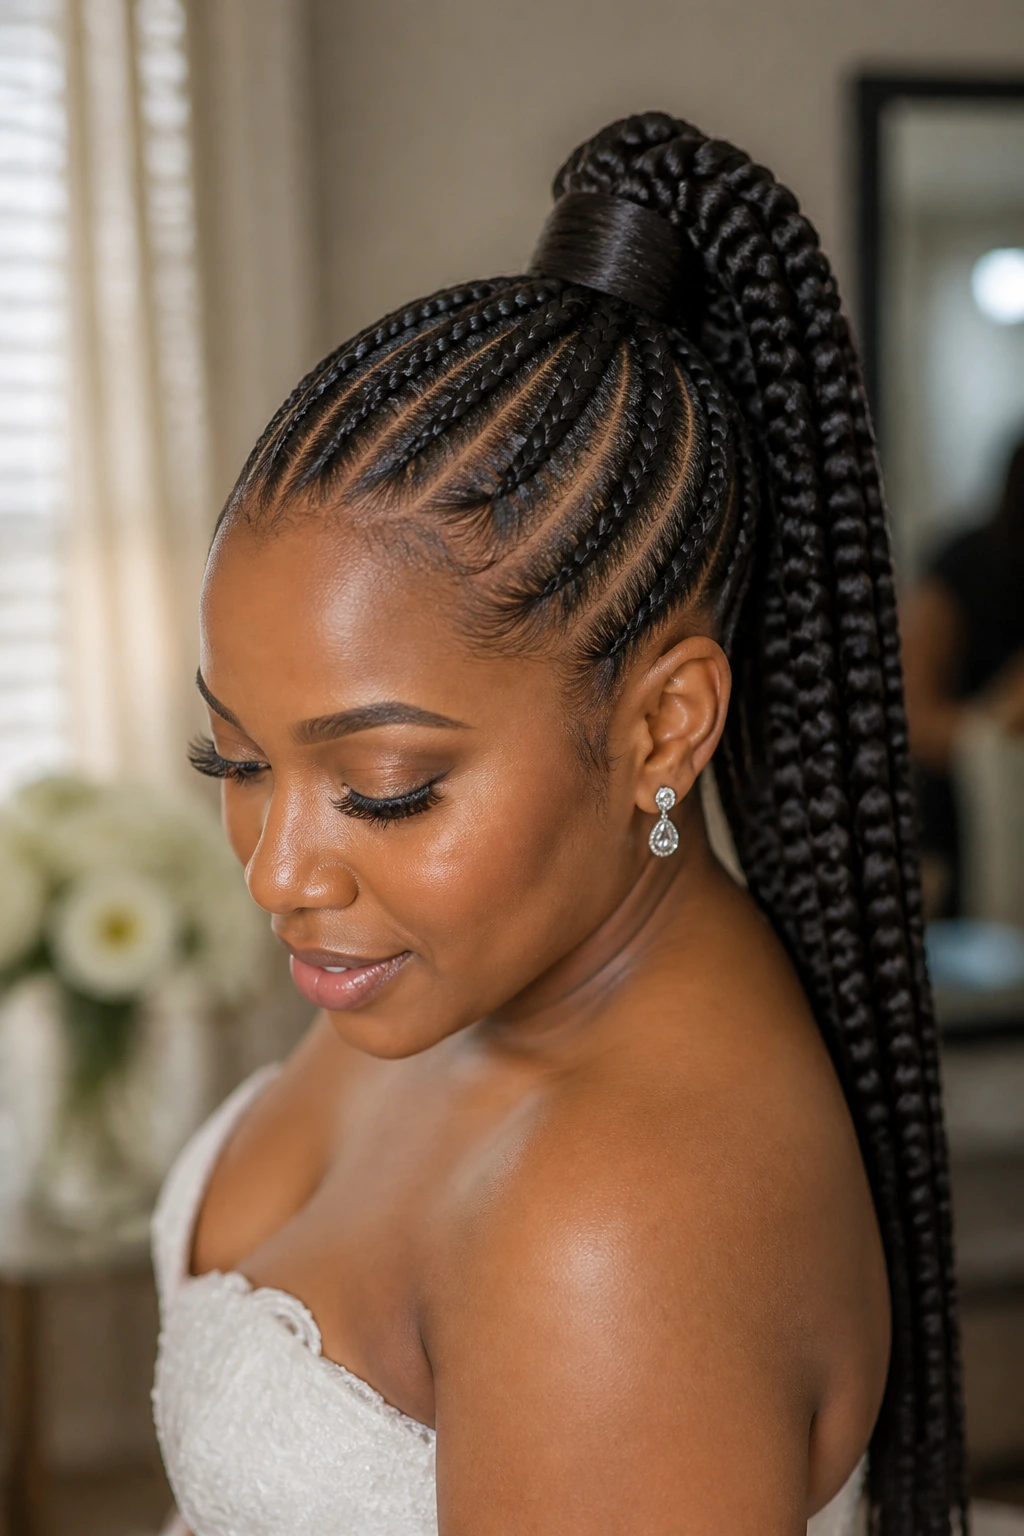
A feed-in ponytail gives you length, line, and a strong profile. It’s one of those styles that can look fresh from the front and dramatic from the back.
Why It Works: The feed-in technique keeps the braids flat at the scalp before building the ponytail, which makes the style feel clean instead of heavy. The wrapped base hides the elastic and turns the whole thing into one polished shape.
Key Ingredients:
- 2 to 4 packs of braiding hair, depending on fullness
- 1 firm braiding gel, about 2 ounces
- 1 strong ponytail holder
- 10 bobby pins
- 1 hair wrap strand for the base
Quick Steps:
- Part and feed in the braids close to the scalp, directing them into a high or mid ponytail.
- Secure the ponytail tightly with a strong holder.
- Wrap one braid or hair strand around the base until the elastic disappears.
- Shape the tail smooth and add a cuff if you want a brighter finish.
Equipment for This Recipe:
- Tail comb
- Braiding clips
- Hair tie that can hold weight
- Edge brush
How to Serve This Dish: This style pairs well with dresses that have open backs or square necklines. If you want a veil, place it beneath the ponytail base so the length stays visible.
Pro Tips for This Recipe:
- Don’t start the ponytail too high unless your scalp is comfortable with that weight.
- Wrap the base firmly; a loose wrap can unravel by the end of portraits.
- Keep the feed-in rows even so the ponytail sits centered.
Variations on This Dish:
- Low Ponytail Version: Drop the ponytail lower for a softer finish.
- Curled Tail Version: Add curled ends to the ponytail if you want movement.
- Cuff-Heavy Version: Add 5 to 8 cuffs along the rows for more shine.
Common Mistakes to Avoid with This Dish:
- Using too much tension in the first rows and irritating the scalp.
- Choosing braiding hair that’s too coarse for your finish.
- Forgetting to smooth the edges before the braids set, which makes cleanup harder later.
13. Fulani Braids With Pearls and Cuffs
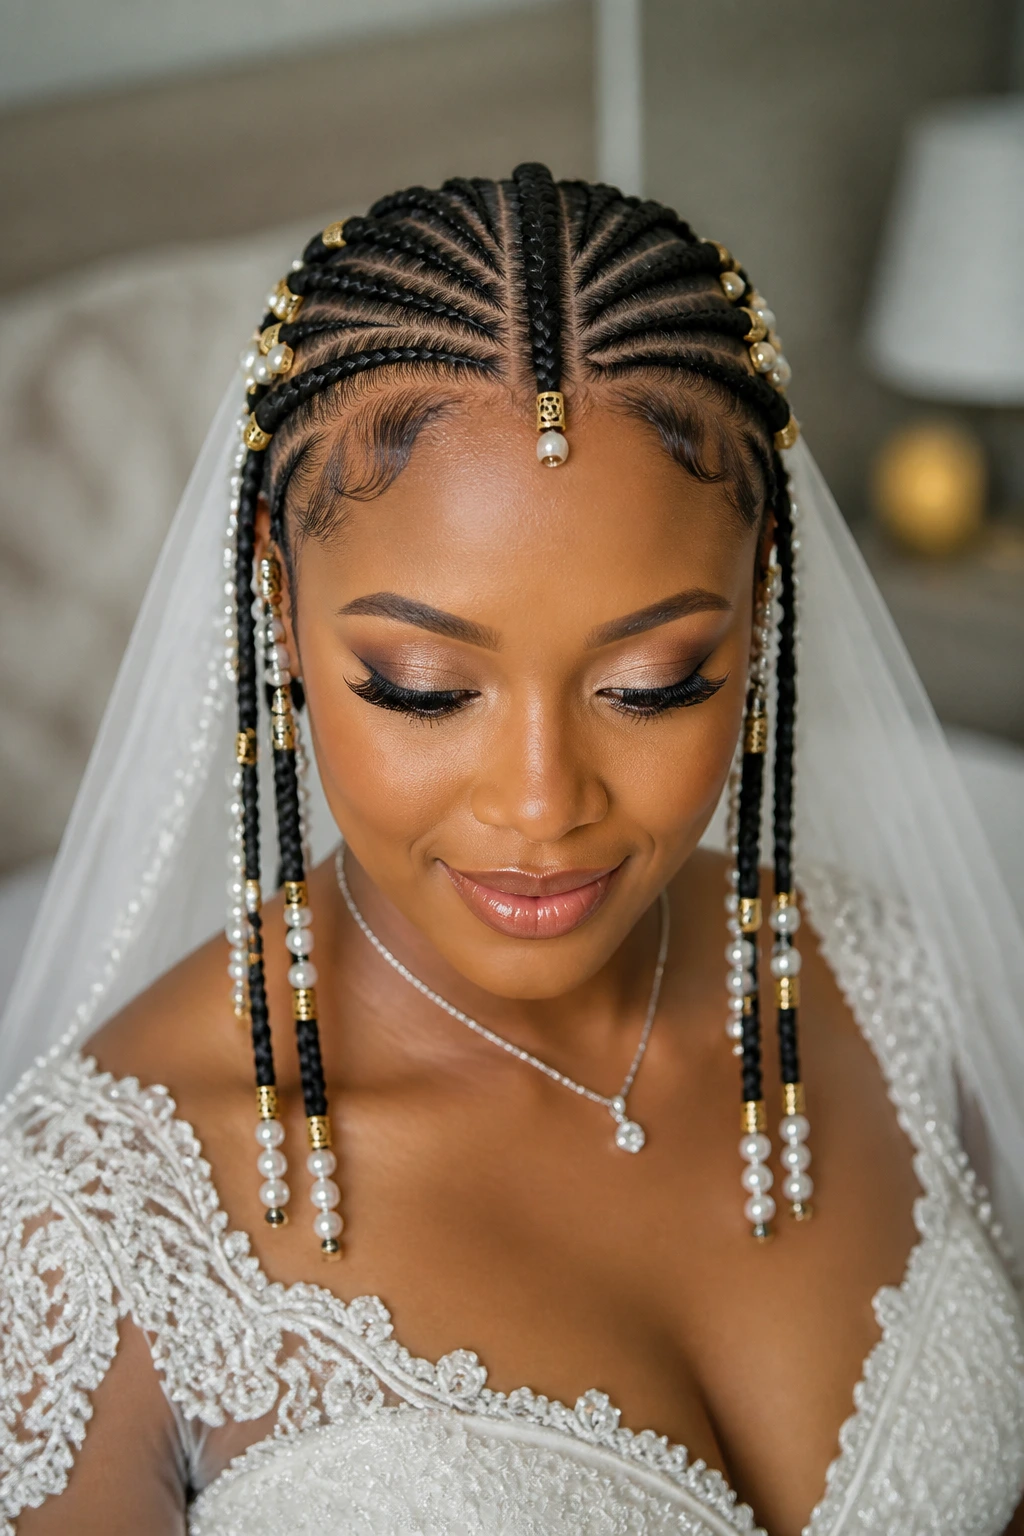
Fulani braids bring pattern, movement, and a bit of ceremony on their own. Add pearls or cuffs, and the style shifts from everyday braid pattern to something that feels right for a wedding aisle.
Why It Works: The center braid and side braids create a strong frame for the face, while the accessories break up the lines and add sparkle. It’s one of the best ways to build texture into the whole look without piling on volume.
Key Ingredients:
- 4 to 6 packs of braiding hair
- 20 to 40 pearl beads or 6 to 10 metal cuffs
- 1 braiding jam or gel, about 2 ounces
- 1 rat-tail comb
- 1 hair oil, a few drops for the scalp
Quick Steps:
- Part the hair into a center braid and side rows with clean, even lines.
- Braid the sections close to the scalp and feed in the hair evenly.
- Add pearls or cuffs once the braids are set and dry.
- Smooth the baby hairs lightly, keeping the front controlled but not overdrawn.
Equipment for This Recipe:
- Braiding clips
- Bead threading tool if needed
- Edge brush
- Satin scarf for overnight protection
How to Serve This Dish: This style works with gowns that are simple enough to let the braids lead. If you’re wearing statement jewelry, keep it to one metal tone so the pearls and cuffs don’t fight with the neckline.
Pro Tips for This Recipe:
- Keep the part lines clean; crooked rows show fast in this style.
- Don’t overload the braids with beads near the ends or they’ll pull.
- Use accessories in groups of 3 or 5, not random scatter, so the finish looks intentional.
Variations on This Dish:
- Pearl Trail Version: Place pearls only on the front-facing braids for a softer effect.
- Copper Cuff Version: Choose warm metal cuffs if your dress has gold-toned details.
- Loose-End Version: Leave 2 to 4 braid ends unadorned for a cleaner silhouette.
Common Mistakes to Avoid with This Dish:
- Making the side braids too thin, which leaves the style unbalanced.
- Adding too many accessories and turning the braids noisy instead of polished.
- Ignoring scalp comfort; tight braid work can ruin the rest of the day if it’s done badly.
14. Rounded Afro With a Floral Side Comb
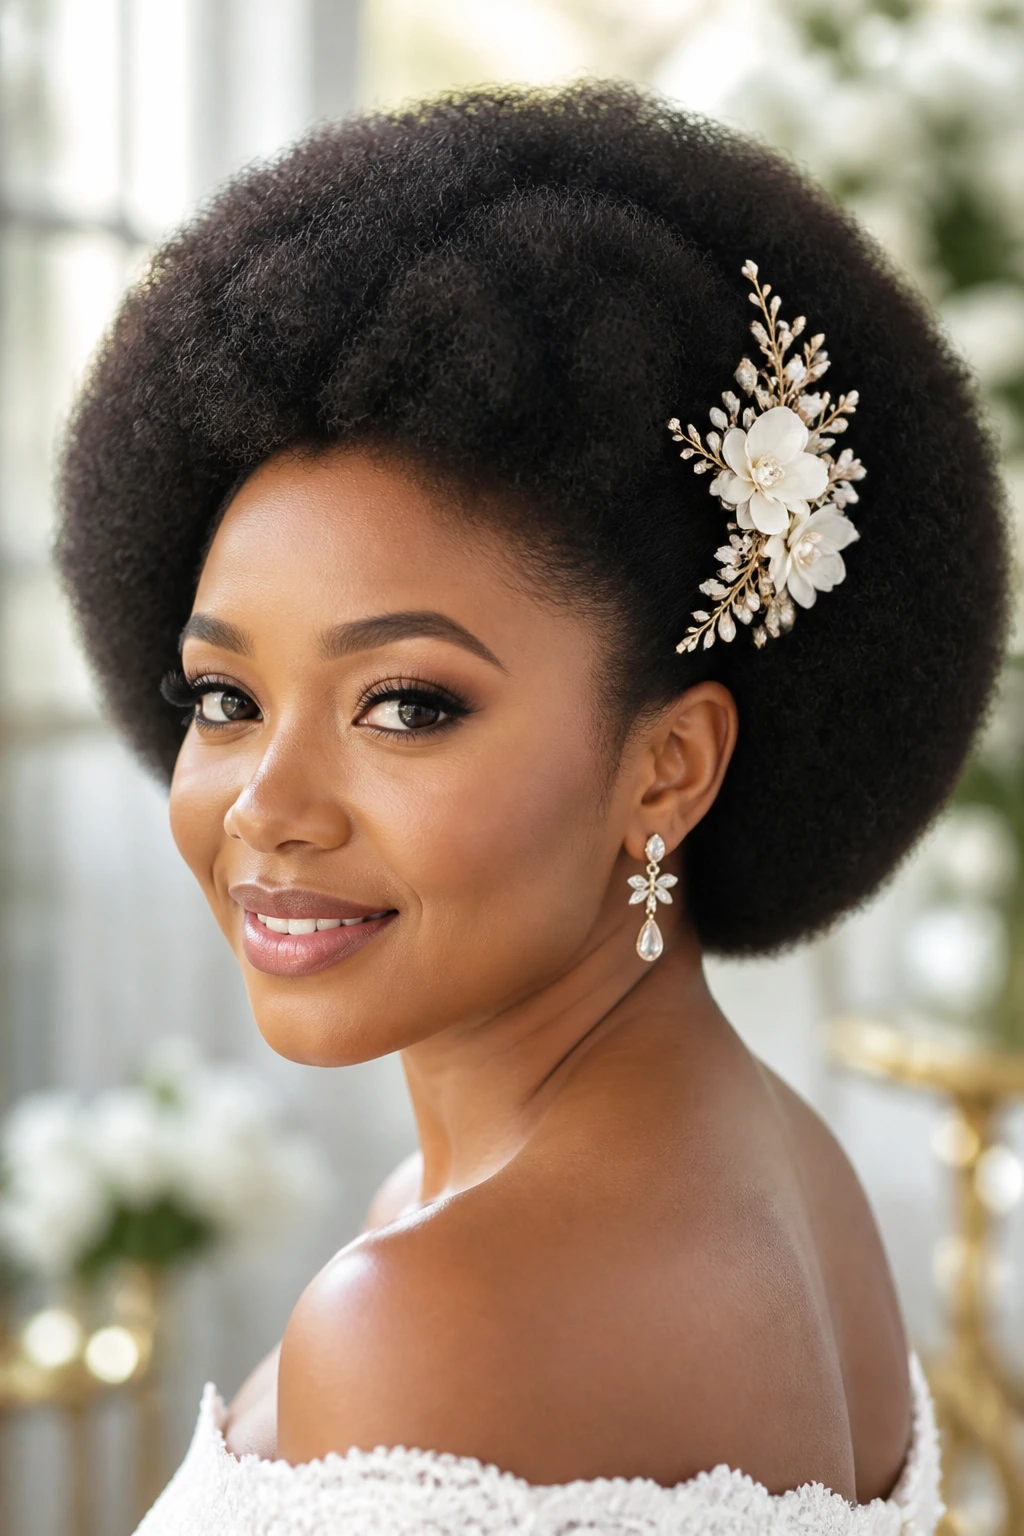
A full afro is not a compromise. It can be the whole statement. When it’s shaped well and finished with one strong accessory, it feels deeply bridal.
Why It Works: The rounded shape gives the hair a sculpted outline, and the flowers or comb add a single point of focus. You get texture, movement, and a frame that feels honest to natural hair.
Key Ingredients:
- 1 moisturized natural afro, medium or large
- 1 pick
- 1 leave-in conditioner, light amount
- 1 lightweight oil, a few drops
- 1 floral comb or 3 to 5 flower pins
Quick Steps:
- Fluff the hair with a pick and shape it into a soft round form.
- Smooth the outer edge lightly so the silhouette looks even.
- Place the floral comb on one side, slightly above the ear.
- Add a tiny amount of oil to the top layer for a healthy finish.
Equipment for This Recipe:
- Afro pick
- Wide-tooth comb
- Decorative comb or floral pins
- Satin bonnet for protection before the wedding
How to Serve This Dish: This style likes simple necklines and clean lines in the dress. Keep the accessory on one side so the shape stays visible from the front and the profile.
Pro Tips for This Recipe:
- Shape the afro on dry hair, not wet hair, or it can collapse.
- Place the comb after the hair has settled for a few minutes.
- If one side is larger, trim the outline slightly with the pick rather than over-manipulating the whole head.
Variations on This Dish:
- Mini Bloom Version: Use 1 or 2 small flowers instead of a cluster.
- Golden Comb Version: Swap the flowers for a gold comb if the dress already has embellishment.
- Tall Round Version: Lift the crown a bit higher for more vertical balance.
Common Mistakes to Avoid with This Dish:
- Over-oiling the hair and losing the airy texture.
- Flattening the sides too much while trying to make it “neat.”
- Placing the accessory too low, where it gets lost in the volume.
15. Half-Up Curly Cascade With Loose Ends
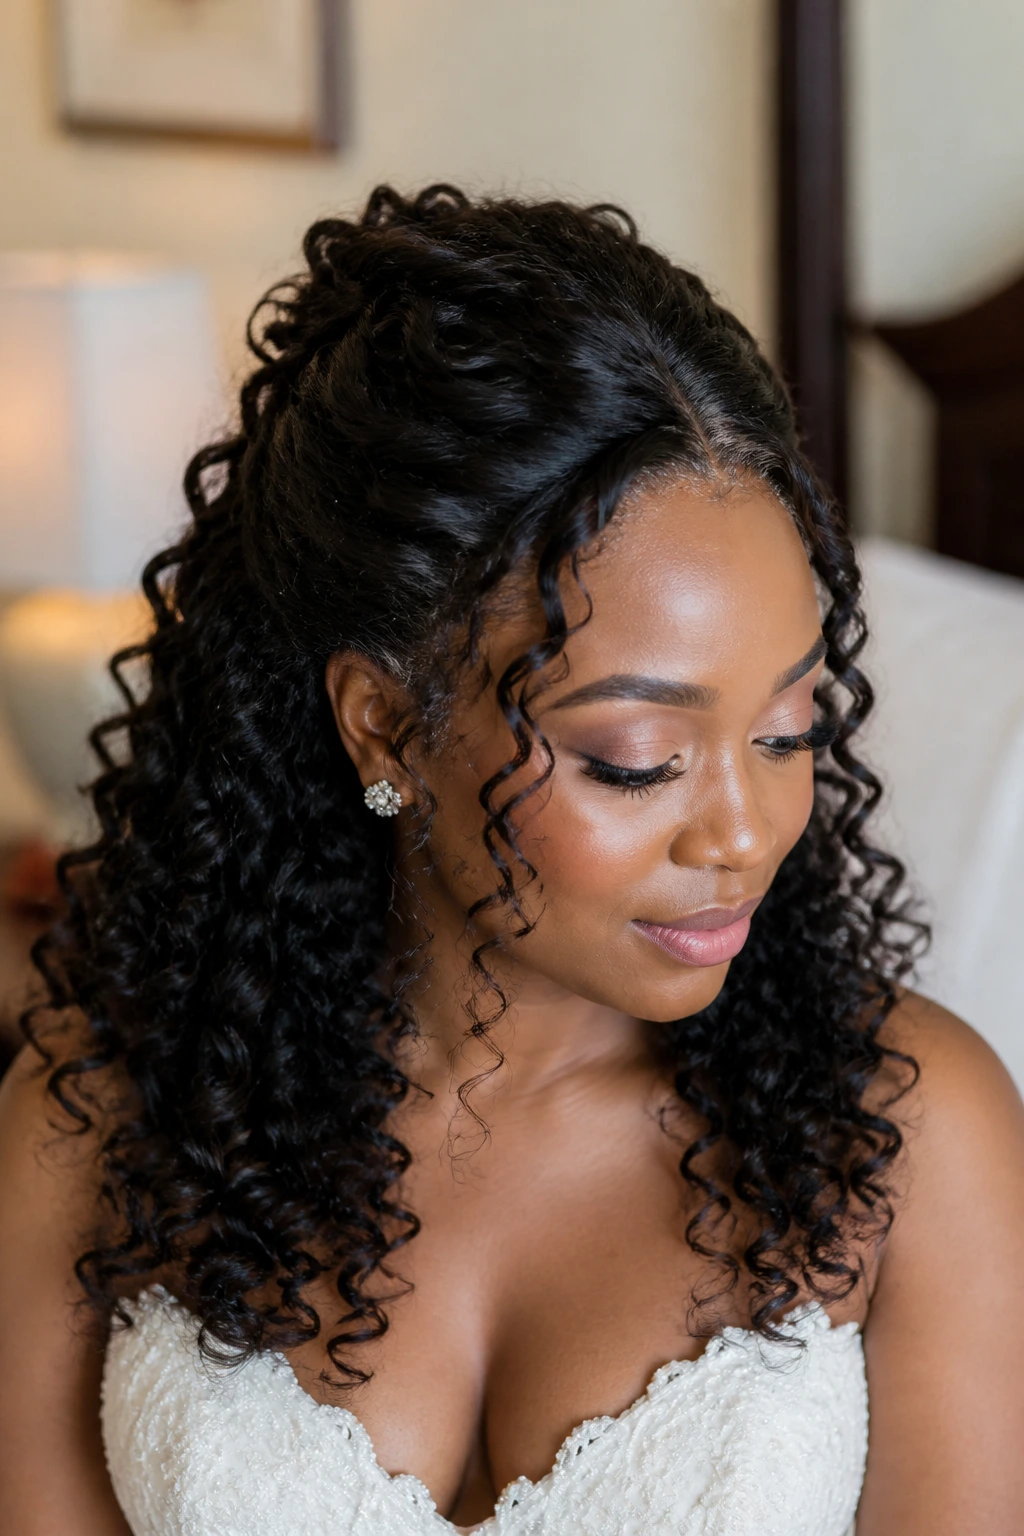
If you want movement and romance, half-up curls are easy to love. The style keeps the face open while letting the rest of the hair move freely.
Why It Works: Pulling only the top section back creates a focal point without stealing the softness from the length. The loose curls below give the look motion that keeps showing up well in candids.
Key Ingredients:
- 1 set of defined curls, natural or with extensions
- 1 curling wand, 1.25 inches if needed
- 6 bobby pins
- 1 mousse or curl foam, about 6 ounces
- 1 small decorative clip
Quick Steps:
- Curl or refresh the lengths, then let them cool fully.
- Pull the top half back from temple to temple and secure it softly.
- Pin the gathered section flat enough to hold but not so tight that it dents.
- Separate the lower curls with your fingers and place the clip where the top section meets the loose hair.
Equipment for This Recipe:
- Curling wand
- Section clips
- Bobby pins
- Shine serum or curl refresher
How to Serve This Dish: This style works with almost any dress neckline, which is why brides reach for it so often. A veil can go above the half-up section if you want the curls to stay visible underneath.
Pro Tips for This Recipe:
- Don’t make the top section too high or it starts to look like a prom style.
- Keep the curls uniform in size so the half-up part doesn’t feel lopsided.
- Finger-comb the curls, not brush them, or you’ll lose the shape.
Variations on This Dish:
- Twisted Half-Up Version: Twist the top section instead of pinning it straight back.
- Side Half-Up Version: Move the pull-back to one side for a softer profile.
- Accessory Crown Version: Add a vine or comb across the pinned section.
Common Mistakes to Avoid with This Dish:
- Curling the hair at different tightness levels, which makes the cascade uneven.
- Overpinning the top and flattening the crown.
- Skipping the cool-down time, then wondering why the curls fall by the first toast.
16. Sew-In Glam Waves With a Deep Part
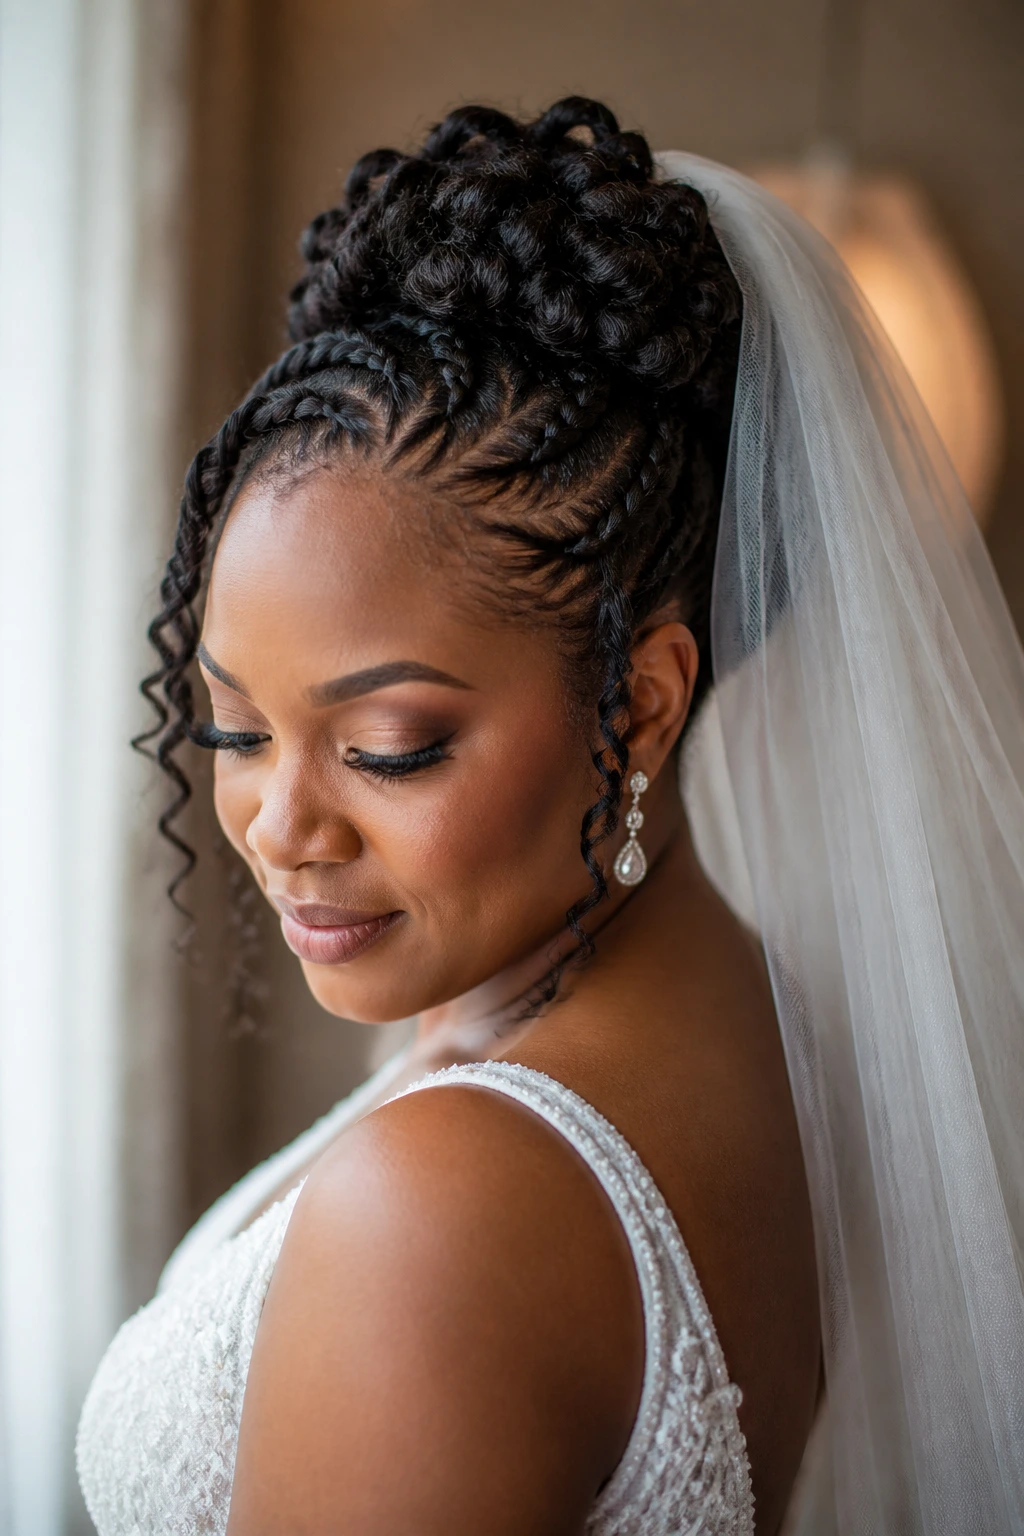
A good sew-in is a serious bridal tool. It holds shape well, gives you fullness, and can be styled into waves that stay put longer than loose curls usually do.
Why It Works: The sewn foundation supports the wave pattern, so the hair has less chance of slipping or losing body. A deep part creates direction and makes the whole style feel intentional from the first glance.
Key Ingredients:
- 2 to 3 bundles of human hair extensions
- 1 closure or leave-out section, depending on the install
- 1.25-inch curling iron
- 1 heat protectant spray, 2 to 4 ounces
- 1 shine serum, tiny amount only
Quick Steps:
- Install or prepare the sew-in with a deep side part.
- Curl the hair in sections and pin each curl to cool.
- Brush the curls out into smooth waves.
- Finish with a small amount of serum on the ends and part line.
Equipment for This Recipe:
- Curling iron or wand
- Duckbill clips
- Brush for wave shaping
- Flat iron if leave-out needs smoothing
How to Serve This Dish: This style looks especially strong with formal gowns and a veil that sits high enough to preserve the part. If the dress has a lot of texture, keep the waves smooth and controlled.
Pro Tips for This Recipe:
- Use a hair type that matches the sheen of your natural hair or leave-out.
- Pin-curl sections while they cool so the waves last longer.
- Keep serum off the roots; only the ends need that gloss.
Variations on This Dish:
- Barrel Wave Version: Use a larger iron for broader movement.
- Side-Sweep Version: Push the front over one shoulder for a softer line.
- Soft Body Version: Keep the curls loose instead of brushing them into full waves.
Common Mistakes to Avoid with This Dish:
- Using extensions that are too shiny compared with your natural texture.
- Brushing the curls before they’re cool and set.
- Adding too much oil, which can make the style slip in humid air.
17. Braided Crown With a Veil-Friendly Center
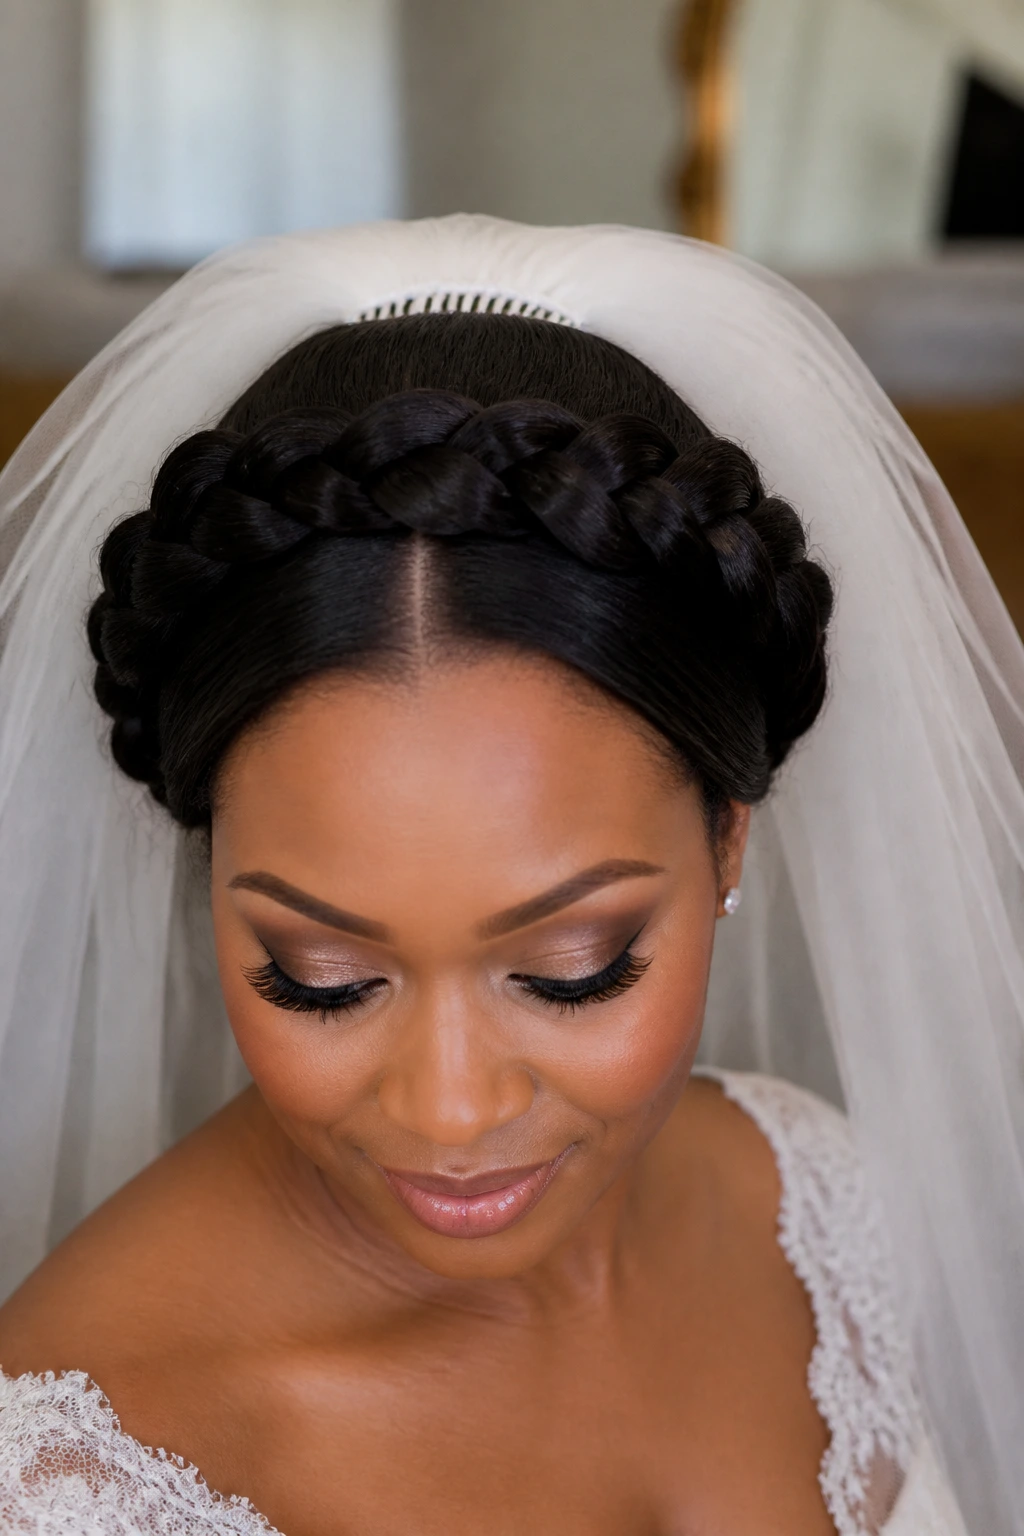
This is one of the cleanest ways to wear a veil with braids. The crown gives a bridal frame, and the middle stays open enough for a comb to rest without fighting the braid pattern.
Why It Works: Braiding around the perimeter creates a secure anchor, while the center remains available for accessories. It’s structured enough for a ceremony but not so rigid that it feels stiff.
Key Ingredients:
- 1 head of braids, or stretched hair with added braid sections
- 1 braiding gel, about 2 ounces
- 10 to 12 bobby pins
- 1 veil comb
- 1 small set of floral pins, optional
Quick Steps:
- Create a braid that travels around the hairline like a crown.
- Pin the braid in place as it crosses the nape and temples.
- Leave the center top smooth for the veil comb.
- Add small flowers or pins only after the veil sits correctly.
Equipment for This Recipe:
- Tail comb
- Bobby pins
- Strong veil comb
- Edge brush
How to Serve This Dish: This style is made for veils. A cathedral veil will drape cleanly, but a shorter veil can also sit neatly at the center and show off the braid line.
Pro Tips for This Recipe:
- Test the veil placement before the final pins go in.
- Keep the braid thickness even so the crown reads as a circle, not a lopsided band.
- If your hair is fine, tuck a little padding under the braid for support.
Variations on This Dish:
- Side Crown Version: Let the braid wrap lower on one side.
- Flower Path Version: Thread tiny flowers at intervals along the braid.
- Minimal Crown Version: Keep the braid plain and let the veil do the talking.
Common Mistakes to Avoid with This Dish:
- Filling the center with too much volume and leaving nowhere for the veil to anchor.
- Pinning the braid too tightly around the ears, which gets uncomfortable fast.
- Adding accessories before checking the veil height.
18. Pineapple Puff With an Embellished Headband
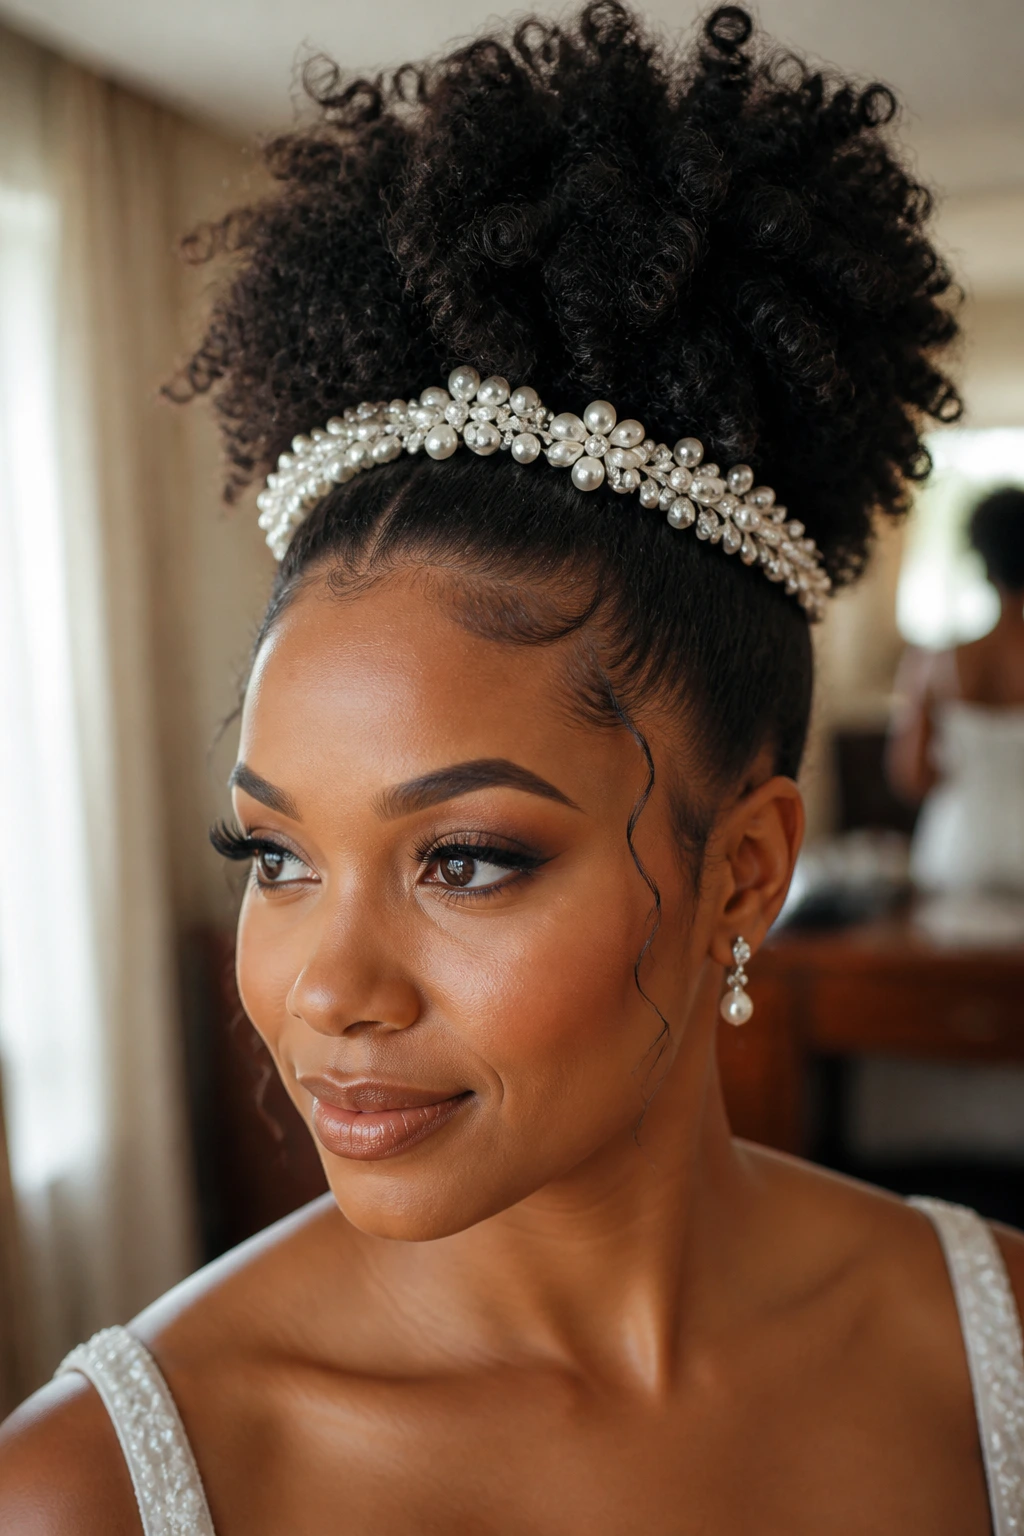
A high pineapple puff can look playful and formal at the same time, especially when the accessory is the right one. The headband gives the style a bridal edge without crushing the curls.
Why It Works: The high placement shows off the curl pattern and creates height that balances fuller gowns. The headband draws a clear line across the hairline, so the style looks finished even if the curls themselves stay loose.
Key Ingredients:
- 1 puff cuff or large satin band
- 1 headband with pearls, crystals, or satin wrap
- 1 curl refresher spray, about 4 ounces
- 1 light leave-in conditioner
- 1 pick or wide-tooth comb
Quick Steps:
- Refresh the curls and shape the puff high on the crown.
- Secure the base with a puff cuff or soft band.
- Place the headband just behind the hairline so it doesn’t squeeze.
- Fluff the puff with your hands and define the front curls.
Equipment for This Recipe:
- Puff cuff or big elastic
- Headband
- Pick
- Edge brush if you want a cleaner front
How to Serve This Dish: This is a good fit for brides who want less formality and more personality. It works especially well with a simple gown or a dress with a detailed bodice.
Pro Tips for This Recipe:
- Keep the band wide enough that it doesn’t disappear into the hair.
- Don’t stretch the puff too tightly; the shape should feel full, not compressed.
- Use the headband only after the puff is already shaped, or it can flatten the crown.
Variations on This Dish:
- Pearl Band Version: Choose a pearl headband for softer shine.
- Side Puff Version: Push the puff slightly off center for asymmetry.
- Lush Curl Version: Add a few finger-shaped curls around the face for softness.
Common Mistakes to Avoid with This Dish:
- Choosing a band that slides instead of grips.
- Putting the puff too low, where it loses the lift that makes it work.
- Skipping curl refresh and ending up with flat, sleepy texture.
19. Passion Twist Chignon at the Nape
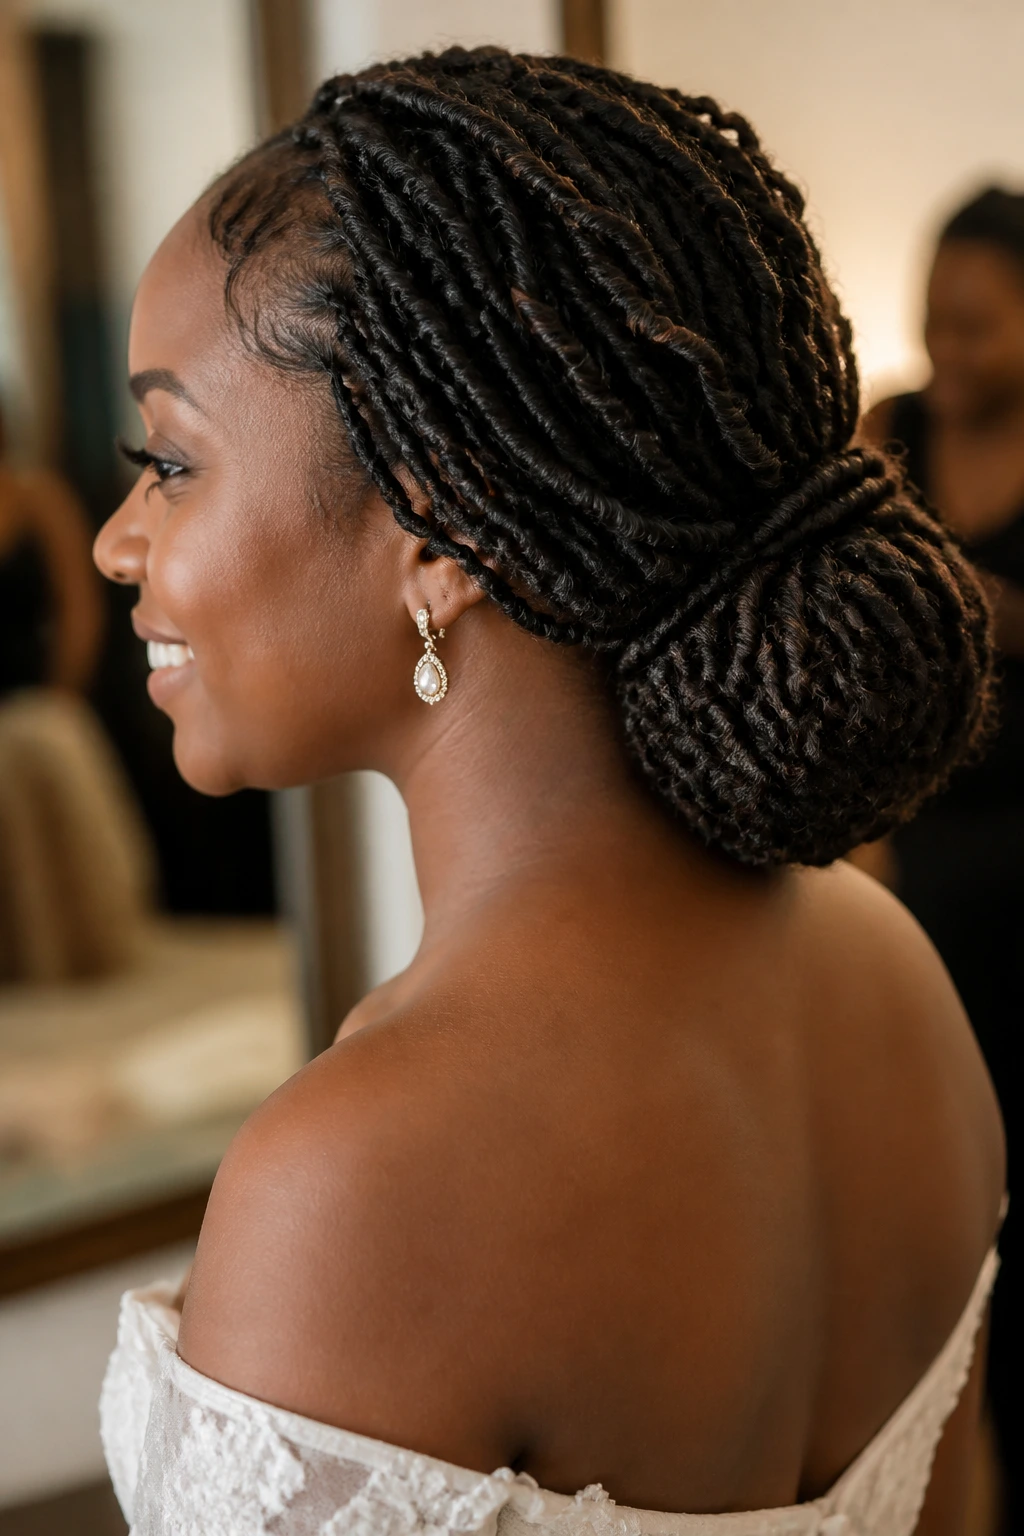
Passion twists already have softness built in. Gathered into a chignon, they become sculptural and calm, with enough texture to keep the style from feeling formal in a stiff way.
Why It Works: The twists create visual interest without needing extra decoration. The low chignon keeps the shape controlled and gives the neck a clean line, which works with many bridal necklines.
Key Ingredients:
- 6 to 8 packs of passion twists, depending on fullness
- 10 to 12 bobby pins
- 1 mousse, about 6 ounces
- 1 decorative comb or one floral pin
- 1 elastic for the base
Quick Steps:
- Gather the twists low at the nape and secure them with an elastic.
- Wrap the lengths around the base into a soft chignon.
- Pin the twists from several directions so the shape doesn’t roll loose.
- Add a comb or floral pin where the twist arcs are most visible.
Equipment for This Recipe:
- Large bobby pins
- Elastic holder
- Mousse bottle
- Satin scarf for smoothing overnight
How to Serve This Dish: This style is strong with earrings and a veil that sits above the bun. If the gown has detail at the neck, keep the accessory near the back so the front stays clean.
Pro Tips for This Recipe:
- Don’t force every twist to point the same way; the slight variation looks better.
- Use enough pins to hold the weight, but place them under the texture so they disappear.
- If the twists feel bulky, shape the bun in a wide oval instead of a tight circle.
Variations on This Dish:
- Side Chignon Version: Move the bun off-center for a softer profile.
- Twist Loop Version: Leave a few twist ends looping upward for a more relaxed finish.
- Veil-Ready Version: Keep the top flatter and the bun lower for easy veil placement.
Common Mistakes to Avoid with This Dish:
- Building the chignon too high, which fights the natural weight of the twists.
- Pinning only the outer layer, so the inside shifts by the reception.
- Adding too much mousse and making the twists stiff.
20. Side-Swept Loc Bob With a Clean Part
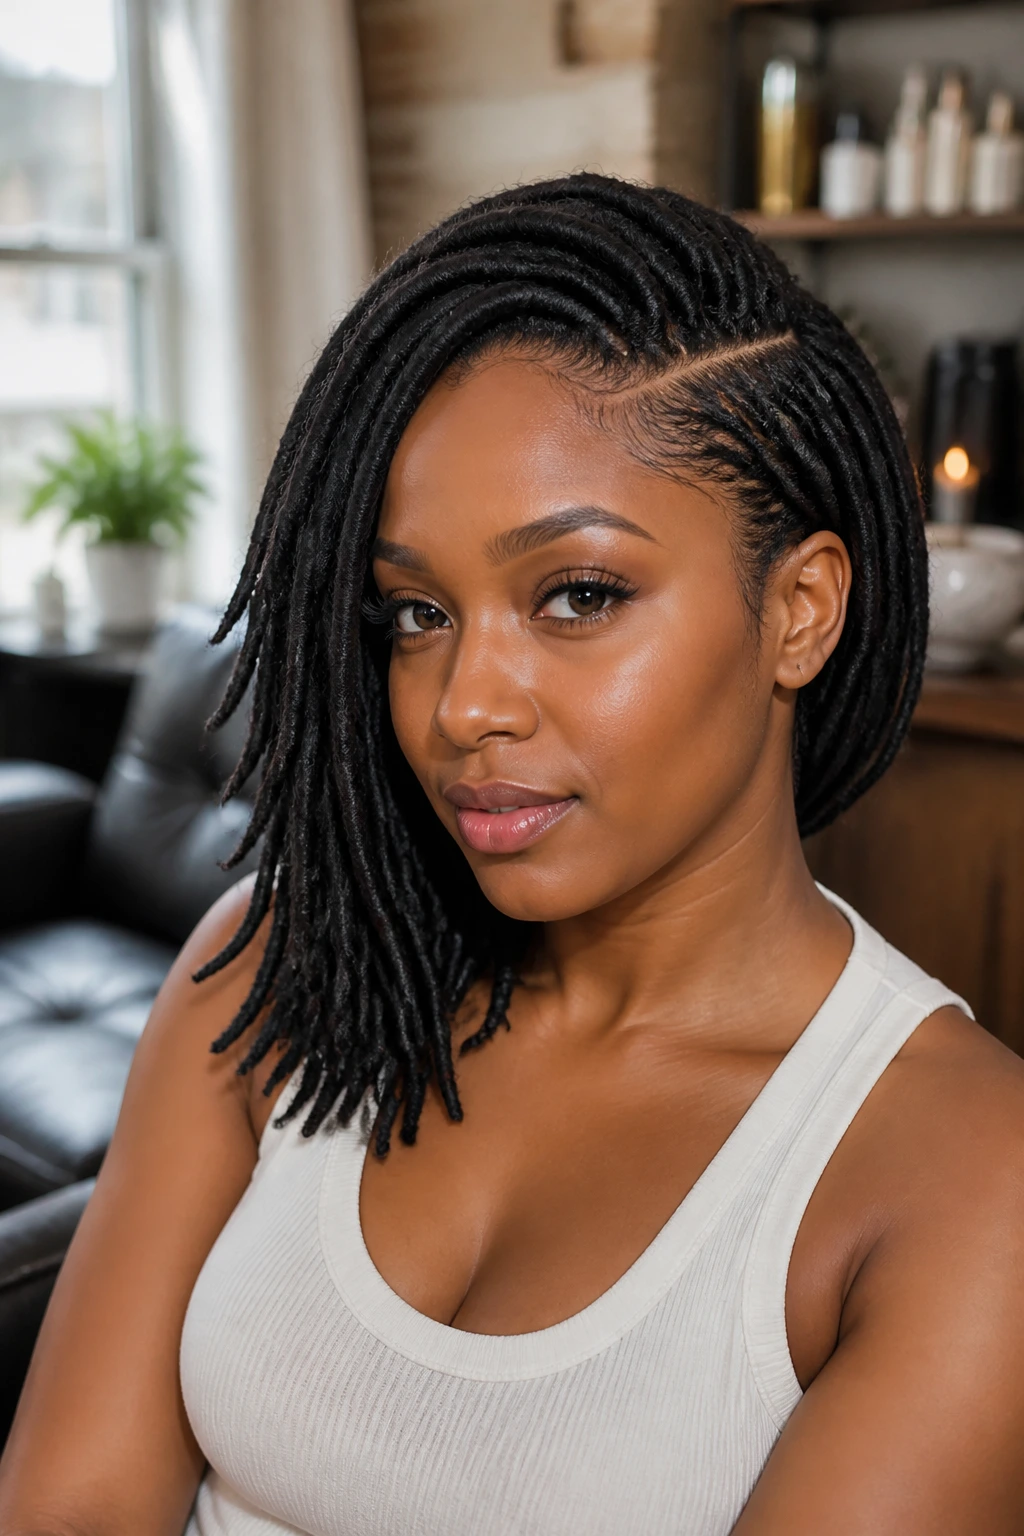
A loc bob can be refined in a way that surprises people. Sweep it to one side, and the look becomes softer, especially if the part is crisp.
Why It Works: The bob length keeps the silhouette neat, while the side sweep adds movement and direction. This is a smart pick when you want locs to stay the focal point without swallowing the face.
Key Ingredients:
- 1 shoulder-length loc bob
- 8 to 10 bobby pins
- 1 mousse, light use
- 1 tail comb
- 1 shell, pearl, or metal clip
Quick Steps:
- Create a clean side part and smooth the roots.
- Sweep the heavier section across one shoulder and pin the back near the nape.
- Tuck the opposite side neatly behind the ear.
- Add one clip where the sweep begins for a finished point.
Equipment for This Recipe:
- Rat-tail comb
- Loc-safe clips
- Mousse
- Satin scarf
How to Serve This Dish: This style works well with a dress that has one strong detail, like an asymmetrical neckline or a single sleeve. Keep the jewelry balanced on the opposite side of the sweep.
Pro Tips for This Recipe:
- Pin under the top layer so the locs still move.
- Keep the part line razor clean; it gives the bob its shape.
- If the locs fray, smooth them lightly with mousse instead of oil.
Variations on This Dish:
- Deep Sweep Version: Push more locs to one side for stronger drama.
- Center Frame Version: Keep two locs at the front and sweep the rest back.
- Accessory Clip Version: Swap the simple clip for a jeweled one near the temple.
Common Mistakes to Avoid with This Dish:
- Letting the bob sit too evenly on both sides, which kills the shape.
- Using too many pins and flattening the loc texture.
- Forgetting to clean up the part, which is the first thing photographers notice.
21. Silk-Pressed Blunt Bob With Tucked Ends
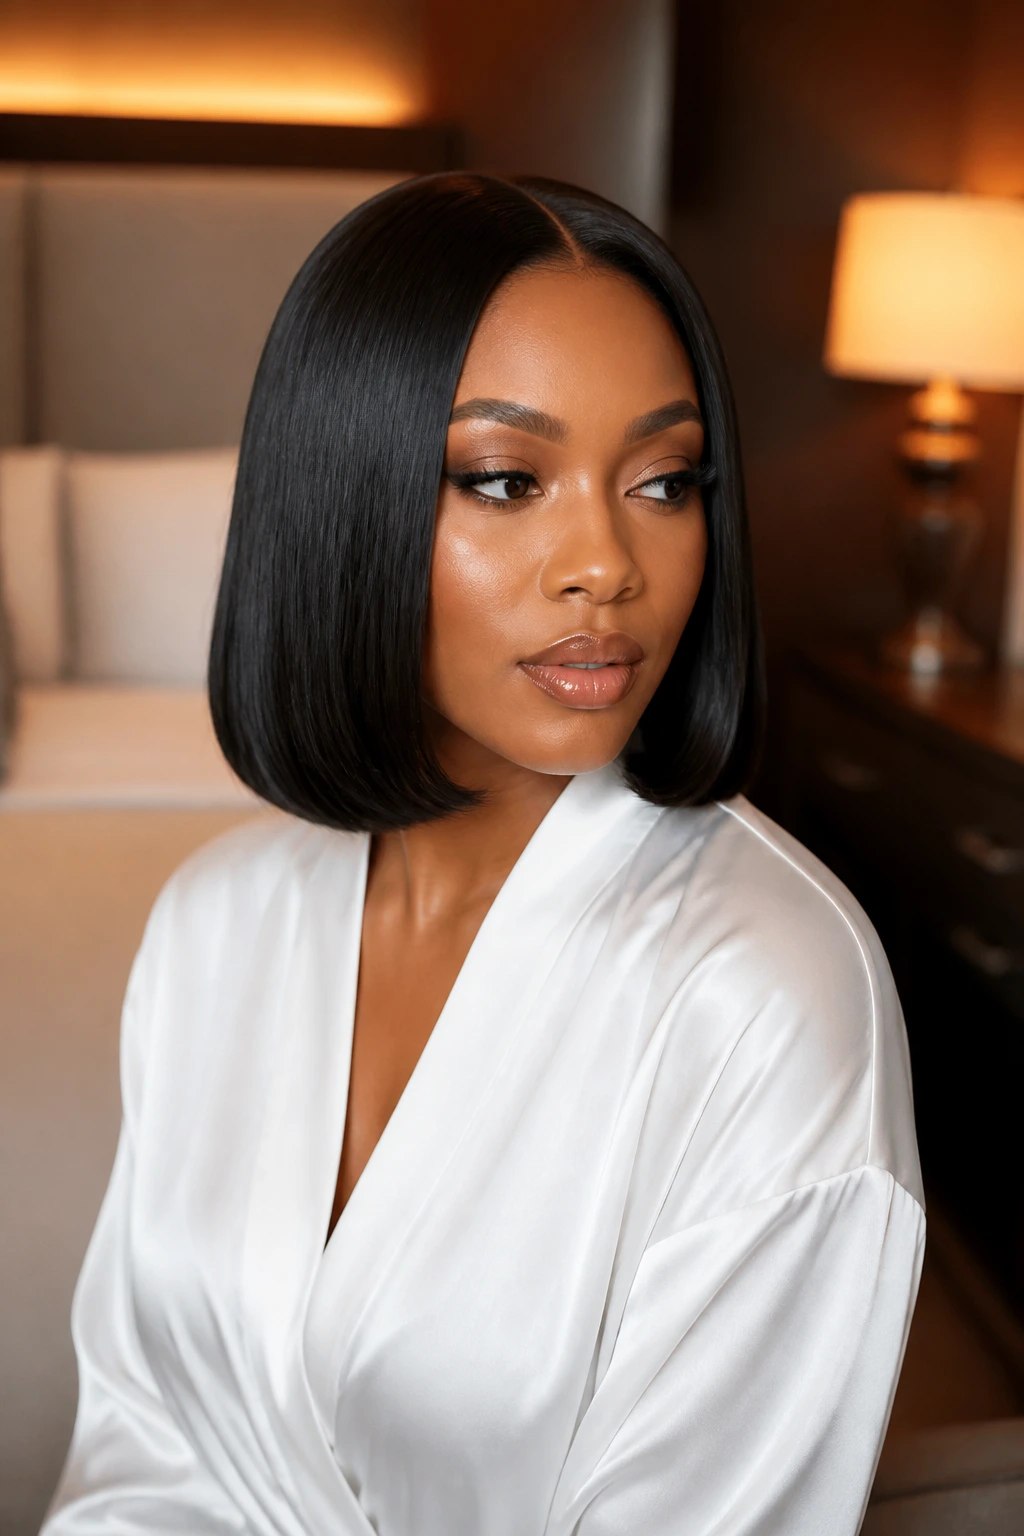
A blunt bob has a sharpness that can look almost architectural. When the ends are tucked under slightly, the style feels softer and more bridal than severe.
Why It Works: A silk press gives the hair a smooth surface that reflects light cleanly. The blunt line at the bottom creates a strong frame for the face, and the tucked ends keep it from feeling too rigid.
Key Ingredients:
- 1 silk-pressed bob, jawline to collarbone length
- 1 heat protectant, about 3 ounces
- 1 flat iron
- 1 serum, a few drops
- 3 section clips
Quick Steps:
- Blow-dry and press the hair in small sections.
- Tuck the ends under with the flat iron or a round brush pass.
- Make a clean part, center or side, depending on the dress.
- Smooth the finish with a tiny amount of serum.
Equipment for This Recipe:
- Flat iron with even heat
- Blow dryer
- Clips
- Fine comb for the part
How to Serve This Dish: This bob looks strongest with a dress that has line and structure. A drop earring and a veil comb tucked behind the part can turn it from sleek to bridal in one move.
Pro Tips for This Recipe:
- Press in thin sections so the ends stay smooth instead of puffing back out.
- Stop adding heat once the bob is glossy; repeated passes only dry it out.
- Use serum on the surface, not the roots, or the bob can look greasy in photos.
Variations on This Dish:
- Center Part Version: Keep the part straight down the middle for symmetry.
- Side Tuck Version: Tuck one side behind the ear with a jeweled clip.
- Flip-Under Version: Roll the ends under a bit more for a softer contour.
Common Mistakes to Avoid with This Dish:
- Pressing too fast and leaving faint bends in the bob.
- Flat ironing over damp hair, which is a fast way to lose both shine and shape.
- Putting too much serum on the crown and making the style collapse.
22. Textured Low Roll and Tuck
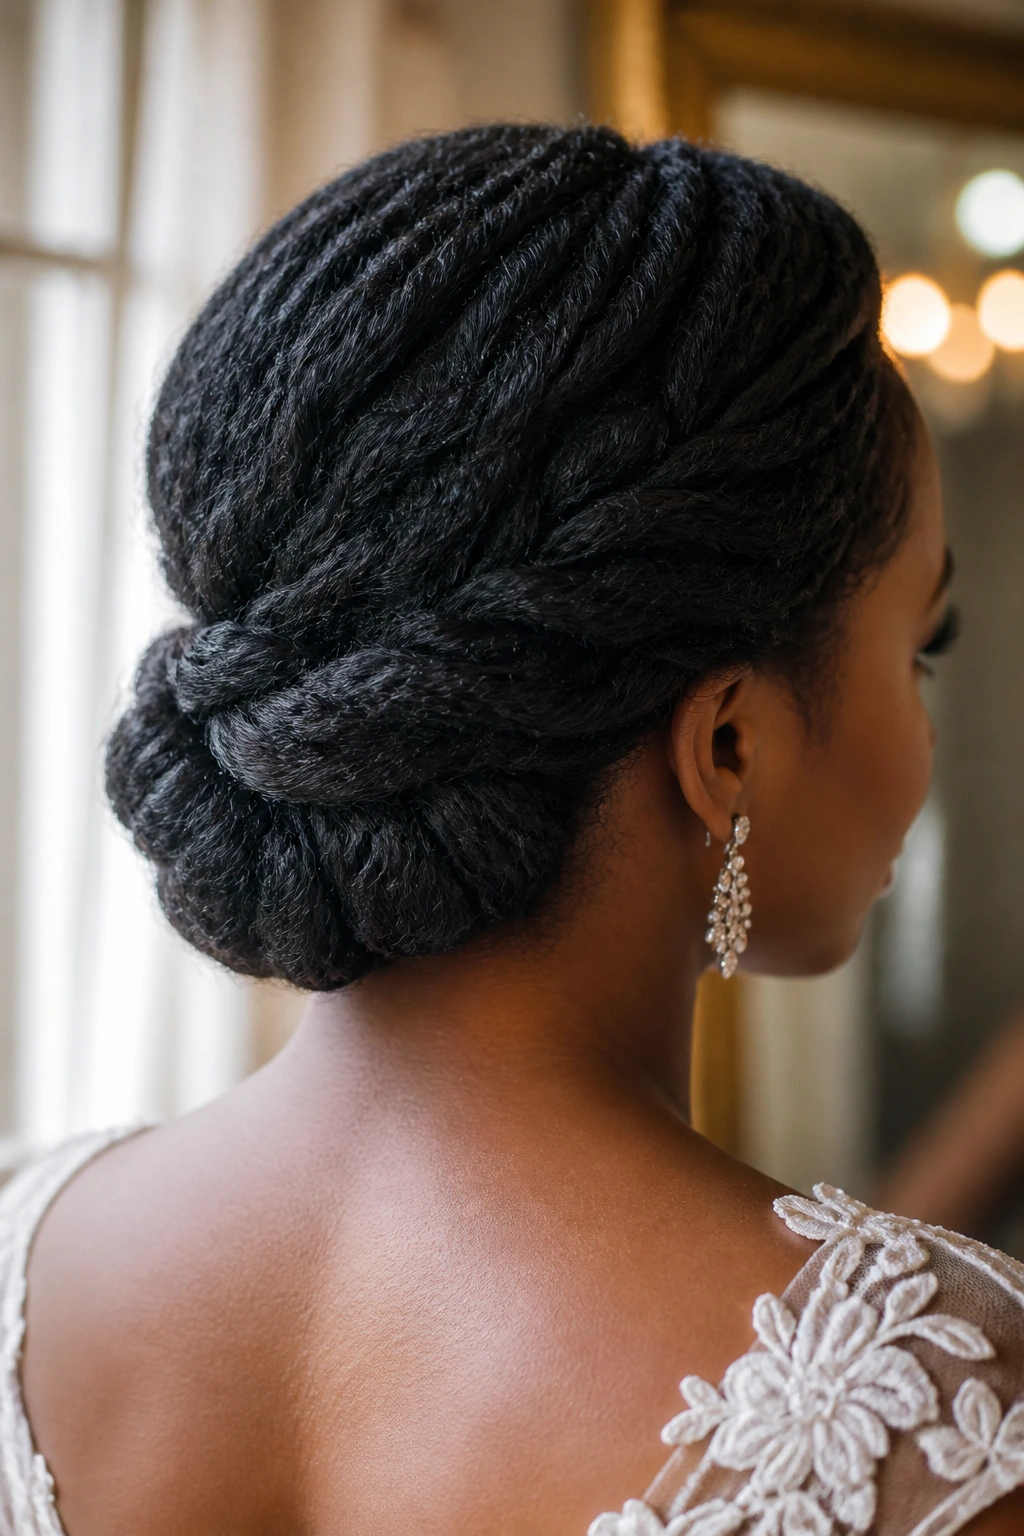
This is a sleeper hit. It looks simple at first glance, then the camera catches the tucked folds and suddenly it has dimension.
Why It Works: The roll and tuck keeps the hair low and secure, which makes it comfortable for a long event. Texture at the surface keeps it from looking too hard or too formal.
Key Ingredients:
- 1 stretched natural base or relaxed hair
- 1 styling cream, about 2 ounces
- 8 to 10 bobby pins
- 1 tail comb
- 1 veil comb, optional
Quick Steps:
- Smooth the hair back into a low gather at the nape.
- Roll the length upward and tuck the ends under the roll.
- Pin the roll flat against the head in several places.
- Loosen the top slightly with your fingers so it has a soft finish.
Equipment for This Recipe:
- Bobby pins
- Rat-tail comb
- Soft brush
- Satin scarf
How to Serve This Dish: This style pairs easily with veils because the back stays low and flat. It also works with dresses that have heavy detail because the hair won’t compete with the gown.
Pro Tips for This Recipe:
- Keep the roll broad rather than narrow; it lies flatter.
- Hide the pin openings under the outer layer so they don’t show.
- If the hair is thick, split the roll into two sections and tuck them together.
Variations on This Dish:
- Side Roll Version: Shift the tuck to one side for a softer line.
- Sculpted Version: Smooth the top more closely for a sharper effect.
- Accessory Path Version: Thread one pin or vine along the roll.
Common Mistakes to Avoid with This Dish:
- Making the tuck too tight, which causes the shape to buckle later.
- Forgetting to smooth the top before pinning.
- Choosing pins that are too short for dense hair.
23. Bantu Knot Set Styled for the Ceremony
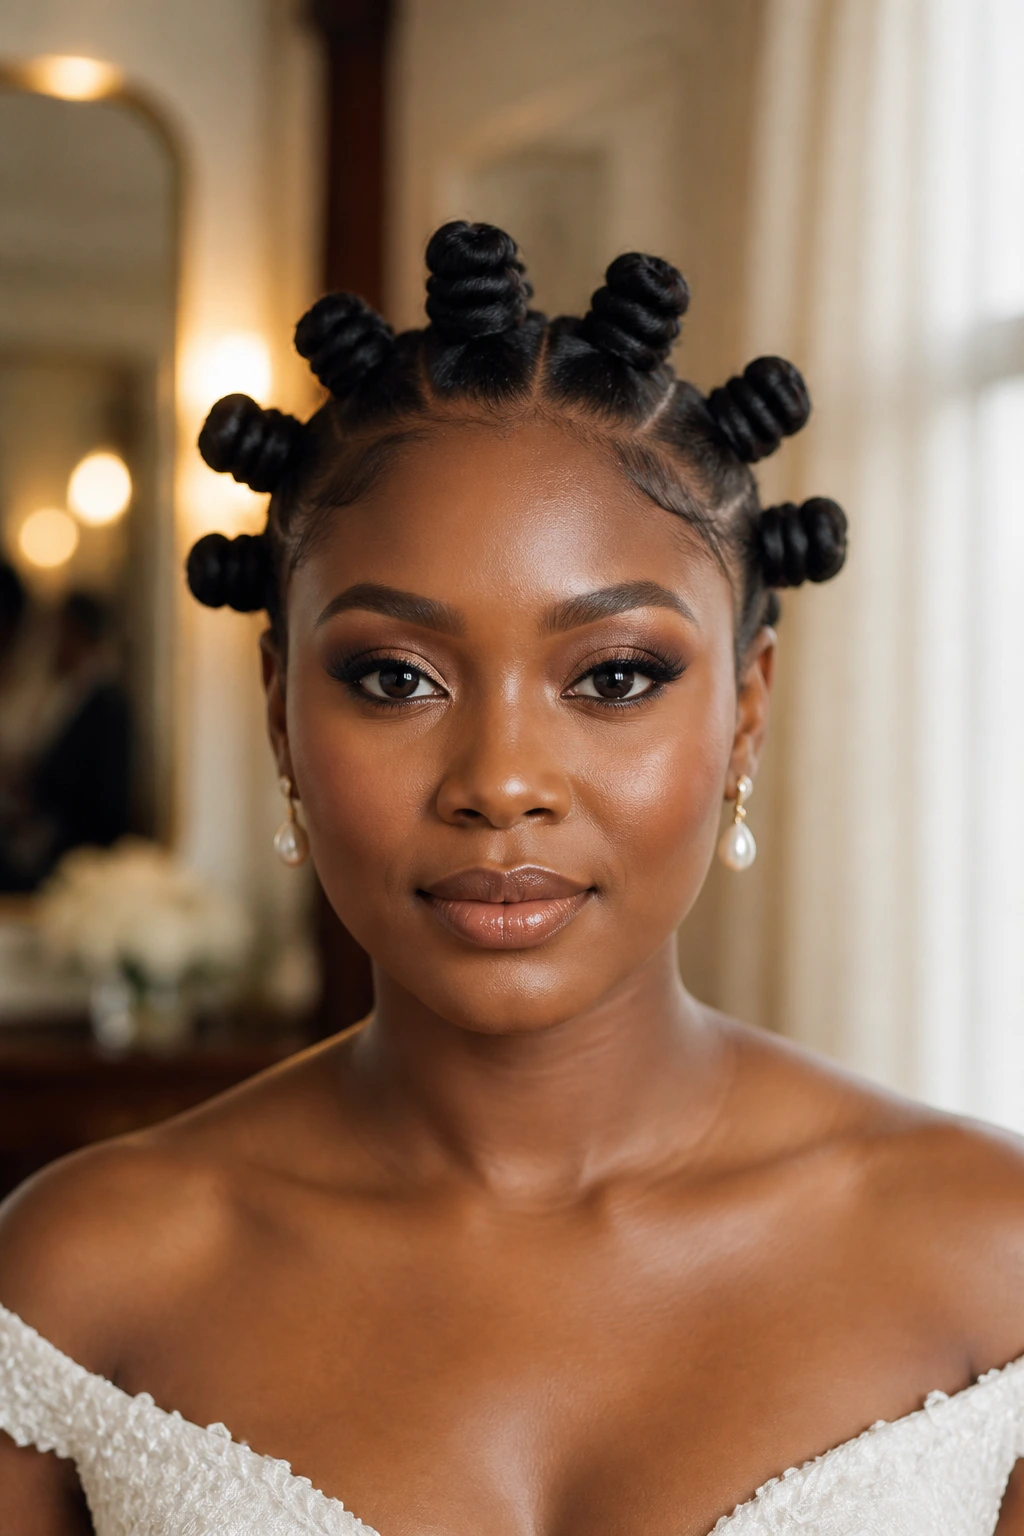
A Bantu knot set can be a full bridal statement, especially if you love texture and shape. It can also become a knot-out if you want more curl later in the day.
Why It Works: The knots create a clean, rhythmic pattern that looks intentional and sculptural. If you wear them as a set, the style reads bold; if you release them later, you get a second look without redoing your hair.
Key Ingredients:
- 1 moisturized natural base
- 1 setting foam or curl cream, about 4 ounces
- 8 to 12 small elastics or enough tension from twisting alone
- 1 edge control gel, light amount
- 1 decorative pin or comb
Quick Steps:
- Section the hair evenly and apply styling product from roots to ends.
- Twist each section tightly, then coil it into a knot close to the scalp.
- Secure each knot so it stays flat and centered.
- Add one decorative pin only if you want the set itself to feel more bridal.
Equipment for This Recipe:
- Rat-tail comb
- Small elastics, if your hair needs them
- Satin bonnet
- Light mist bottle
How to Serve This Dish: If you plan to keep the knots visible, let them be the whole look and choose a simple gown or minimalist jewelry. If you want a knot-out later, wear the set for the ceremony and release it only after photos.
Pro Tips for This Recipe:
- Keep the parts neat; messy sections make the whole set read unfinished.
- Let the knots dry completely if you plan to wear them as a release later.
- Don’t make them too small if you want a visible shape from a distance.
Variations on This Dish:
- Knot-Out Version: Unravel the knots for a soft curl pattern.
- Cluster Version: Combine smaller sections into slightly larger knots.
- Accent Knot Version: Leave a few front knots with beads or cuffs.
Common Mistakes to Avoid with This Dish:
- Twisting uneven sections, which makes the pattern look off balance.
- Unraveling too early and losing definition.
- Using too much product, which keeps the knots wet for hours.
24. Curly Ponytail With a Wrapped Base
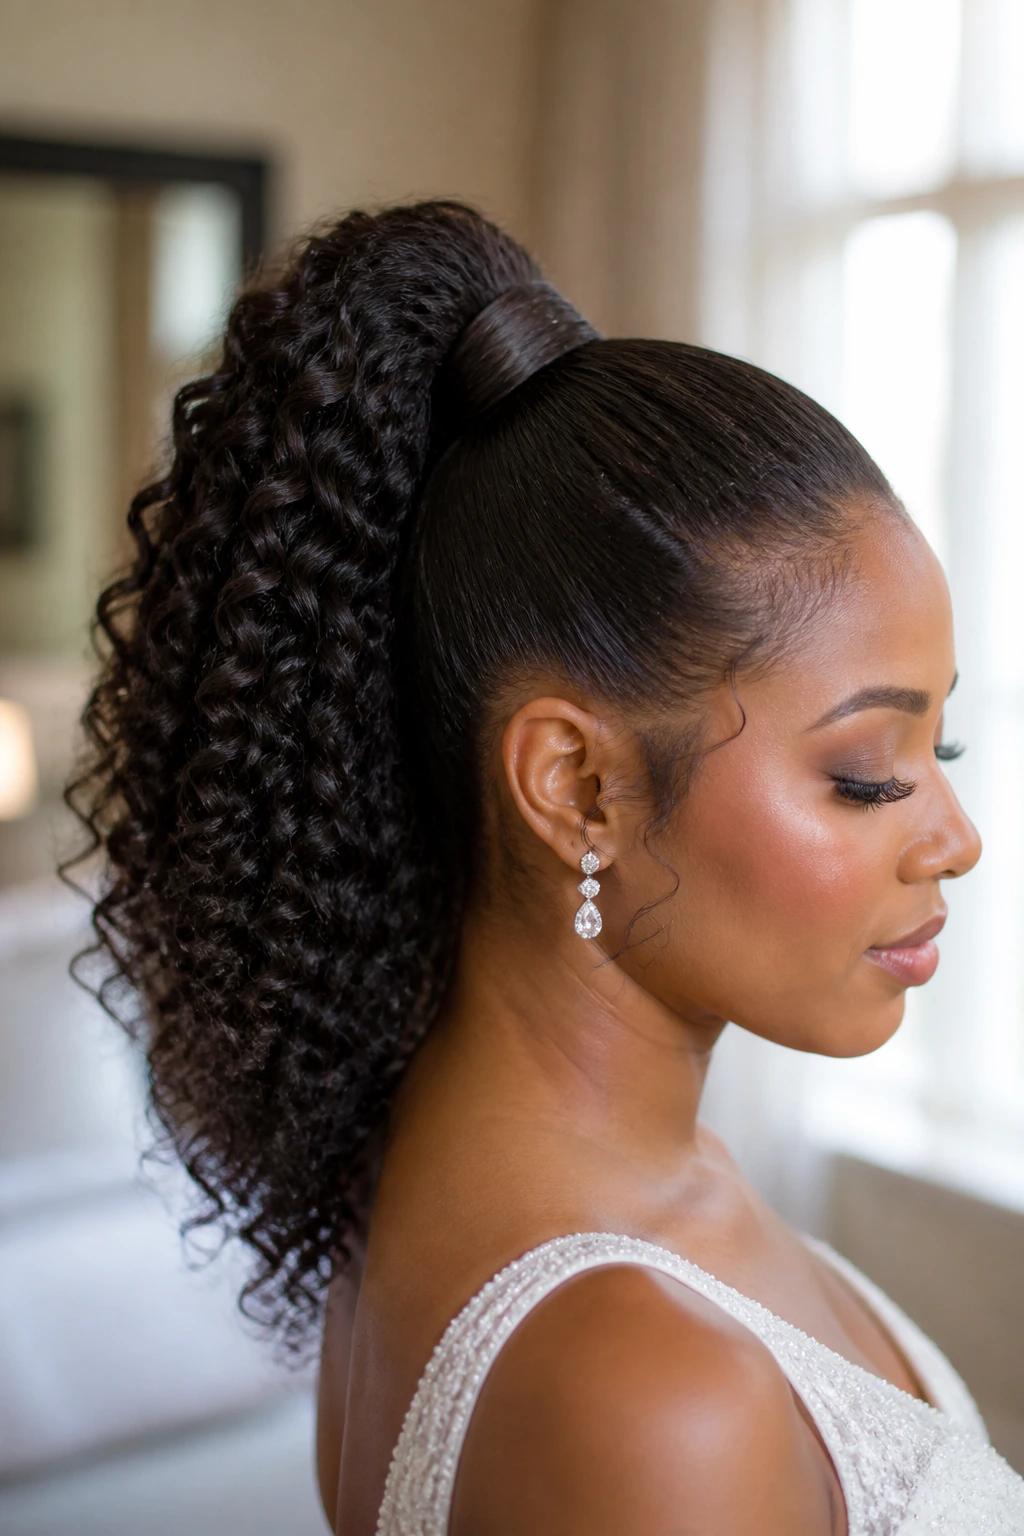
A curly ponytail is one of those styles that feels lively without losing its shape. The wrapped base makes it look finished instead of gym-simple.
Why It Works: The ponytail gives length and movement, while the curls keep the style soft. Wrapping the base hides the tie and adds the clean line that makes it bridal.
Key Ingredients:
- 1 curly ponytail extension or natural curls gathered back
- 1 strong elastic
- 1 wrap strand or braid around the base
- 8 bobby pins
- 1 curl refresher spray, about 4 ounces
Quick Steps:
- Pull the hair into a sleek ponytail at the crown or mid-back of the head.
- Attach the curly ponytail and secure it firmly.
- Wrap a small strand around the base until the elastic is hidden.
- Separate the curls with your fingers and pin any flyaways under the tail.
Equipment for This Recipe:
- Elastic holder
- Bobby pins
- Curl wand, only if the ponytail needs extra shaping
- Edge brush
How to Serve This Dish: This style sits well with dresses that have clean necklines or open shoulders. A small comb or pin at the base can add polish without stealing the movement of the curls.
Pro Tips for This Recipe:
- Match the curl pattern of the ponytail to your natural texture if you want the transition to disappear.
- Keep the base smooth, but don’t yank it tighter than your scalp likes.
- Refresh the tail with a little mist before the ceremony so the curls don’t look dry.
Variations on This Dish:
- High Bounce Version: Place the ponytail higher for more lift.
- Low Soft Version: Keep it at the nape for a gentler profile.
- Pinned Curl Version: Pin one curl over the shoulder to frame the gown.
Common Mistakes to Avoid with This Dish:
- Hiding the base poorly so the elastic shows in profile.
- Using a ponytail piece that is much shinier than your natural hair.
- Making the crown too flat, which removes the energy from the style.
25. Side Bun With a Clean Gel Swoop
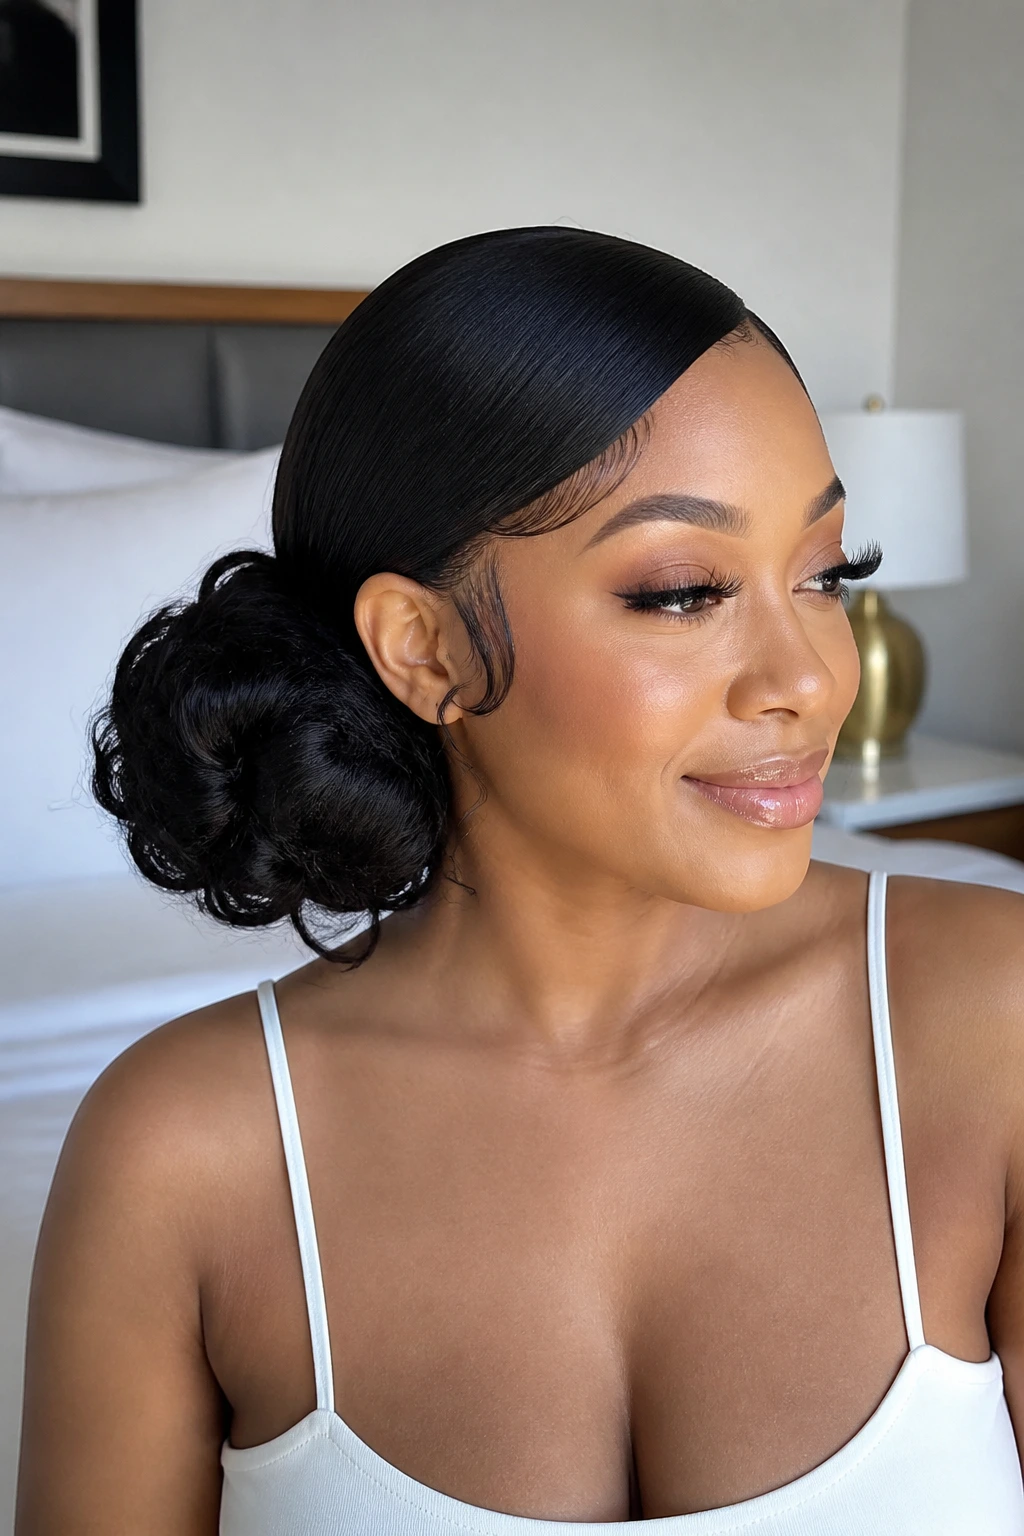
A side bun gets more interesting when the front is shaped with a clean swoop. The result is classic, but not dull.
Why It Works: The side placement gives the bun softness, and the swoop creates a smooth frame that works well with face-framing makeup. It is a strong choice if you want a style that stays low and secure.
Key Ingredients:
- 1 stretched or relaxed base
- 1 firm gel, about 2 ounces
- 10 bobby pins
- 1 soft brush
- 1 decorative pin or comb
Quick Steps:
- Create the swoop on one side and smooth it back with gel.
- Gather the hair to the opposite side or low near the ear.
- Twist the hair into a side bun and pin it flat.
- Shape the swoop with the brush until the line looks clean.
Equipment for This Recipe:
- Tail comb
- Brush for smoothing
- Bobby pins
- Satin scarf for the front
How to Serve This Dish: This one works with one-shoulder gowns and dresses with asymmetry. Add a single pin near the bun and leave the rest clean, or the style loses its line.
Pro Tips for This Recipe:
- Build the swoop while the gel is still workable.
- Keep the bun compact so the side placement stays elegant.
- Use a brush with soft bristles so the front doesn’t get scratched up.
Variations on This Dish:
- Gloss Swoop Version: Finish the front with a touch of shine spray.
- Braided Side Version: Braid the front swoop before curving it back.
- Low Earline Version: Set the bun lower for a softer line.
Common Mistakes to Avoid with This Dish:
- Swooping too much hair and hiding half the face.
- Making the bun too bulky on one side.
- Letting gel dry before the swoop is shaped.
26. Rope Twist Updo With Sculpted Volume
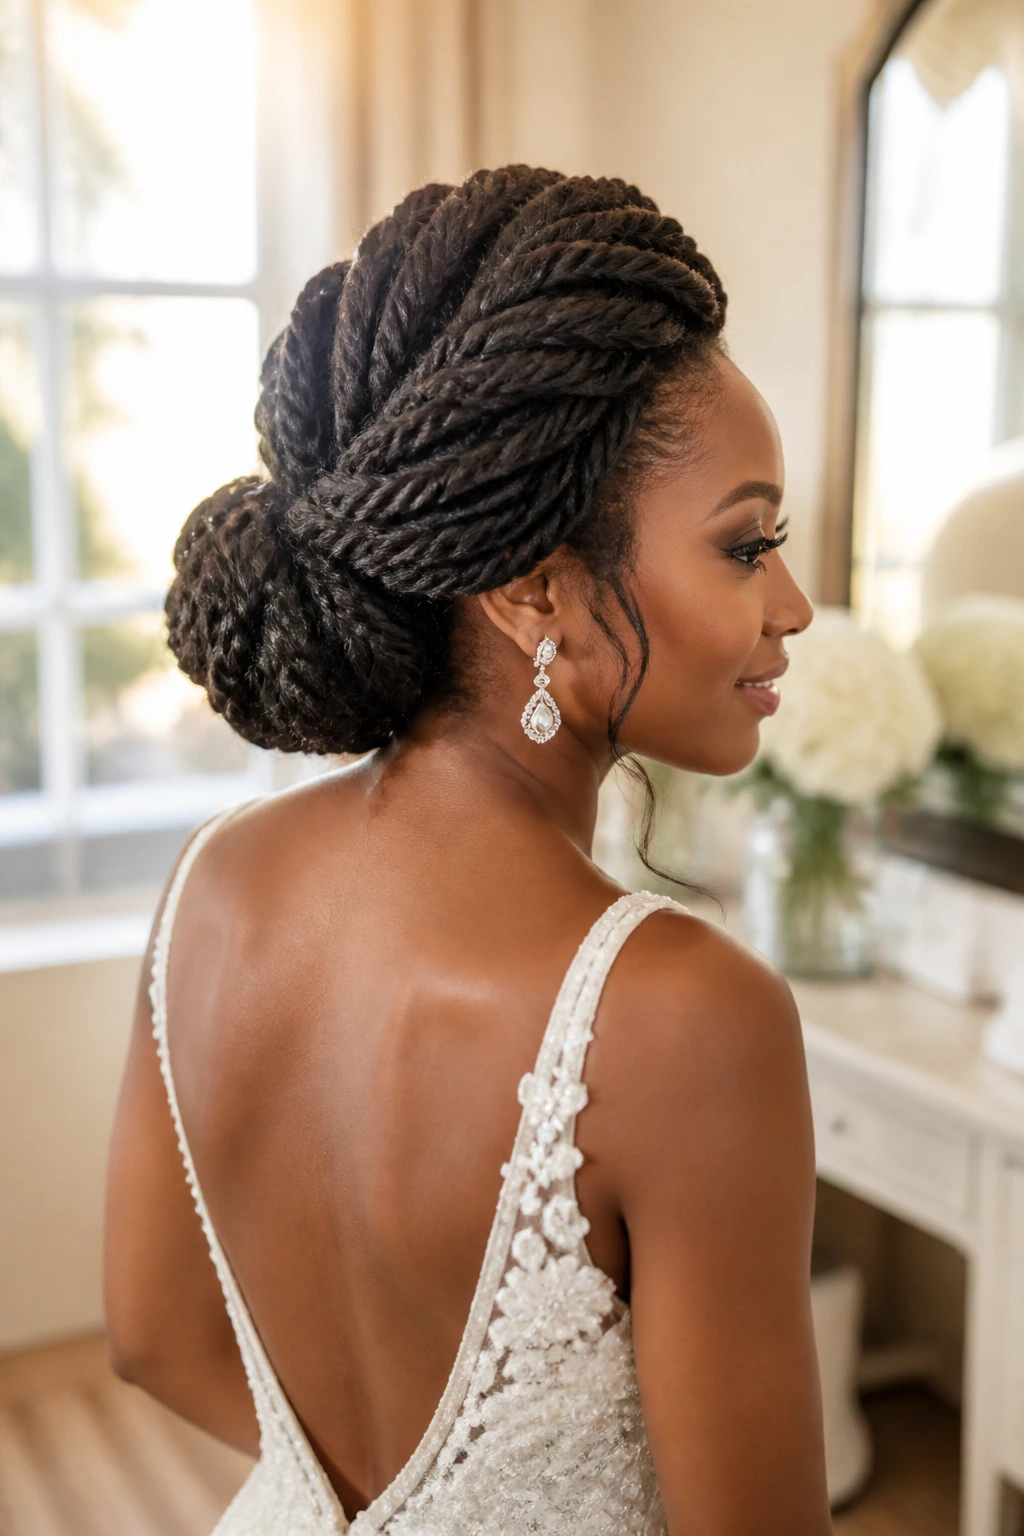
Rope twists have a crisp line that reads well in formal hair. When they’re pinned into an updo, they feel orderly but still textured.
Why It Works: The twist pattern gives the style depth without the weight of full braids. Pinned at the back, the twists create volume exactly where the eye expects it.
Key Ingredients:
- 1 stretched natural base
- 1 twisting butter or cream, about 2 ounces
- 10 bobby pins
- 1 tail comb
- 1 small hair ornament
Quick Steps:
- Create rope twists in medium sections from front to back.
- Gather the twists into a low updo and begin pinning from the center.
- Spread the twist ends in a fan or coil before pinning them down.
- Smooth the sides and add one ornament where the twists meet.
Equipment for This Recipe:
- Rat-tail comb
- Bobby pins
- Small clips for sectioning
- Satin scarf
How to Serve This Dish: This is a clean match for structured dresses and high necklines. It also works if you want the back of the head to carry the style while the front stays calm.
Pro Tips for This Recipe:
- Keep the rope twists even in tension, or the updo sits crooked.
- Pin the base first before arranging the decorative top layer.
- If you want more volume, fluff the twist sections before pinning.
Variations on This Dish:
- High Twist Bun Version: Move the updo higher for more lift.
- Side Fan Version: Push the pinned twist ends off to one side.
- Minimal Twist Version: Leave the twist texture visible instead of burying every end.
Common Mistakes to Avoid with This Dish:
- Twisting too tightly and creating scalp strain.
- Pinning only at the ends instead of anchoring the base.
- Overdecorating the style so the twist pattern gets lost.
27. Crochet Braids With a Side Part and Sweep
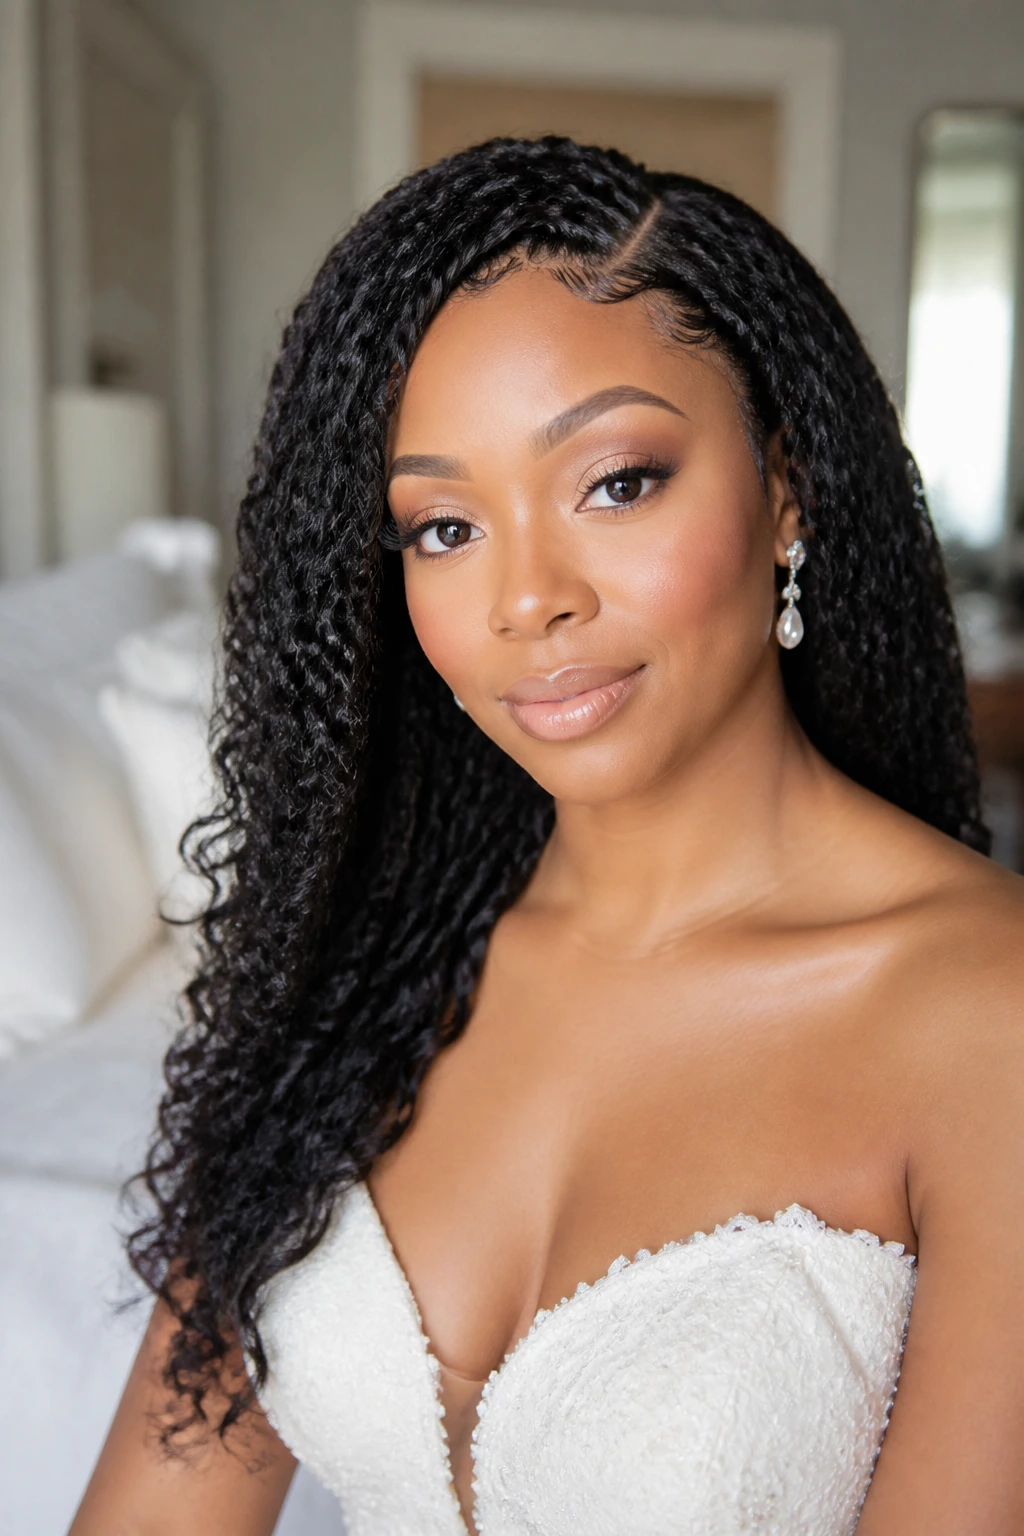
Crochet braids can be bridal if the texture is chosen well and the part is clean. A side sweep gives them movement and keeps the look from feeling too uniform.
Why It Works: Crochet installs give you fullness without a long daily styling session. The side part breaks up the volume and makes the shape easier to wear with a gown and jewelry.
Key Ingredients:
- 5 to 7 packs of crochet hair, depending on fullness
- 1 crochet needle
- 1 mousse, about 6 ounces
- 1 tail comb
- 1 decorative clip
Quick Steps:
- Install the crochet base neatly and create a side part.
- Sweep the chosen side over the shoulder and pin the back if needed.
- Shape the texture with mousse and fingers once the hair is dry.
- Place the clip near the part or temple to finish the look.
Equipment for This Recipe:
- Crochet hook
- Rat-tail comb
- Mousse bottle
- Satin bonnet
How to Serve This Dish: This style can work with a simple gown or a fuller one, depending on the texture you pick. For bridal photos, keep the front soft and avoid hiding the face with too much hair.
Pro Tips for This Recipe:
- Choose crochet hair that mimics the finish you actually want, not just the length.
- Keep the braids underneath flat so the part sits cleanly.
- Use a small amount of mousse instead of heavy creams to keep the texture airy.
Variations on This Dish:
- Curly Sweep Version: Use curly crochet hair for a softer finish.
- Marley Texture Version: Choose a coarser texture if you want a fuller silhouette.
- Pinned Back Version: Secure one side behind the ear with a clip for cleaner photos.
Common Mistakes to Avoid with This Dish:
- Installing too much hair at the crown, which makes the part puff.
- Picking a texture that is too shiny compared with the rest of the look.
- Forgetting to flatten the base enough for the part to sit properly.
28. Lemonade Braids With Accent Cuffs
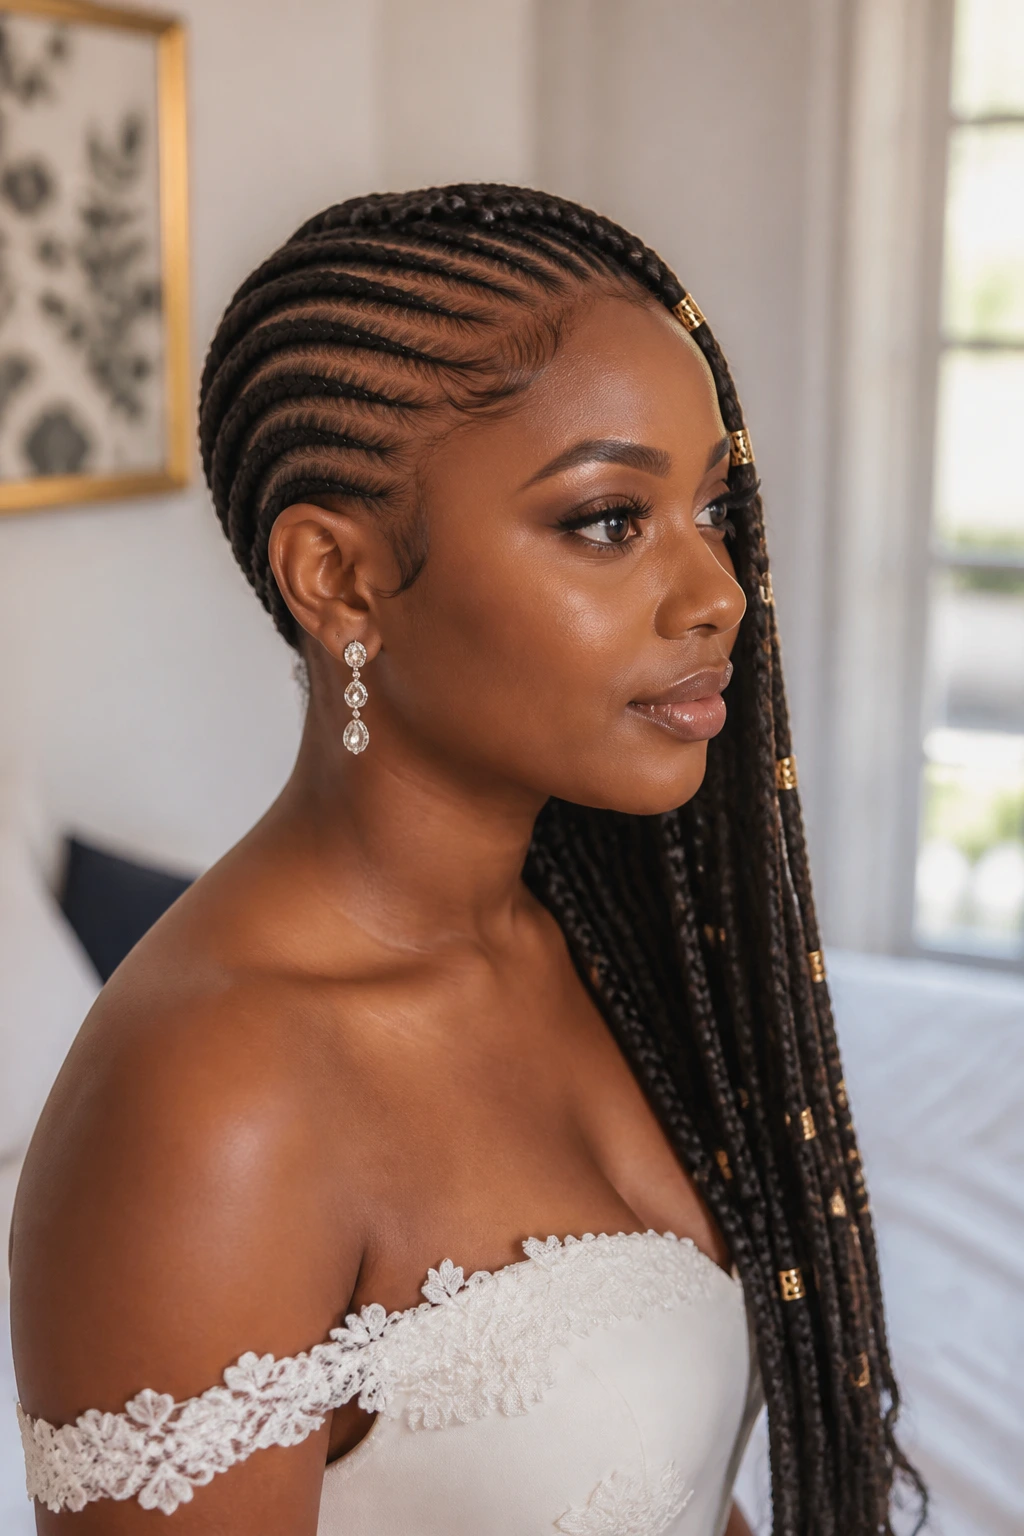
Lemonade braids bring strong lines and a little edge. For a bride, the key is keeping the finish crisp and adding just enough bridal detail to soften the sharpness.
Why It Works: The side-swept direction frames the face and exposes the neckline, which is useful with jewelry or a veil. Accent cuffs turn the braids into a deliberate style choice, not just a protective one.
Key Ingredients:
- 6 packs of braiding hair
- 1 braiding gel, about 2 ounces
- 10 to 20 accent cuffs
- 1 rat-tail comb
- 1 edge control gel
Quick Steps:
- Part the hair into side-swept rows with even spacing.
- Braid the rows close to the scalp and keep the direction clean.
- Add cuffs along 3 to 5 braids, not all of them.
- Smooth the hairline and let the braids hang naturally along one side.
Equipment for This Recipe:
- Braiding clips
- Small bead tool for cuffs, if needed
- Comb
- Satin scarf
How to Serve This Dish: This style likes simple gowns with shape at the shoulders. Keep the earrings long or minimal, but not both; the braids already carry a lot of the visual weight.
Pro Tips for This Recipe:
- Leave some braids cuff-free so the eye has a place to rest.
- Keep the rows tight enough to stay neat, but not sharp enough to hurt.
- Place cuffs at different heights so the finish feels distributed, not clumped.
Variations on This Dish:
- Pearl Cuff Version: Swap metal cuffs for pearl ones if the dress leans soft.
- Low Side Version: Let the braids rest lower on the shoulder for more movement.
- Feed-In Accent Version: Add tiny feed-in braids at the front for more line detail.
Common Mistakes to Avoid with This Dish:
- Overdecorating every braid and turning the style noisy.
- Braiding too tightly around the temples.
- Forgetting to match the braid size from front to back.
29. Loose Defined Curls With a Deep Side Part
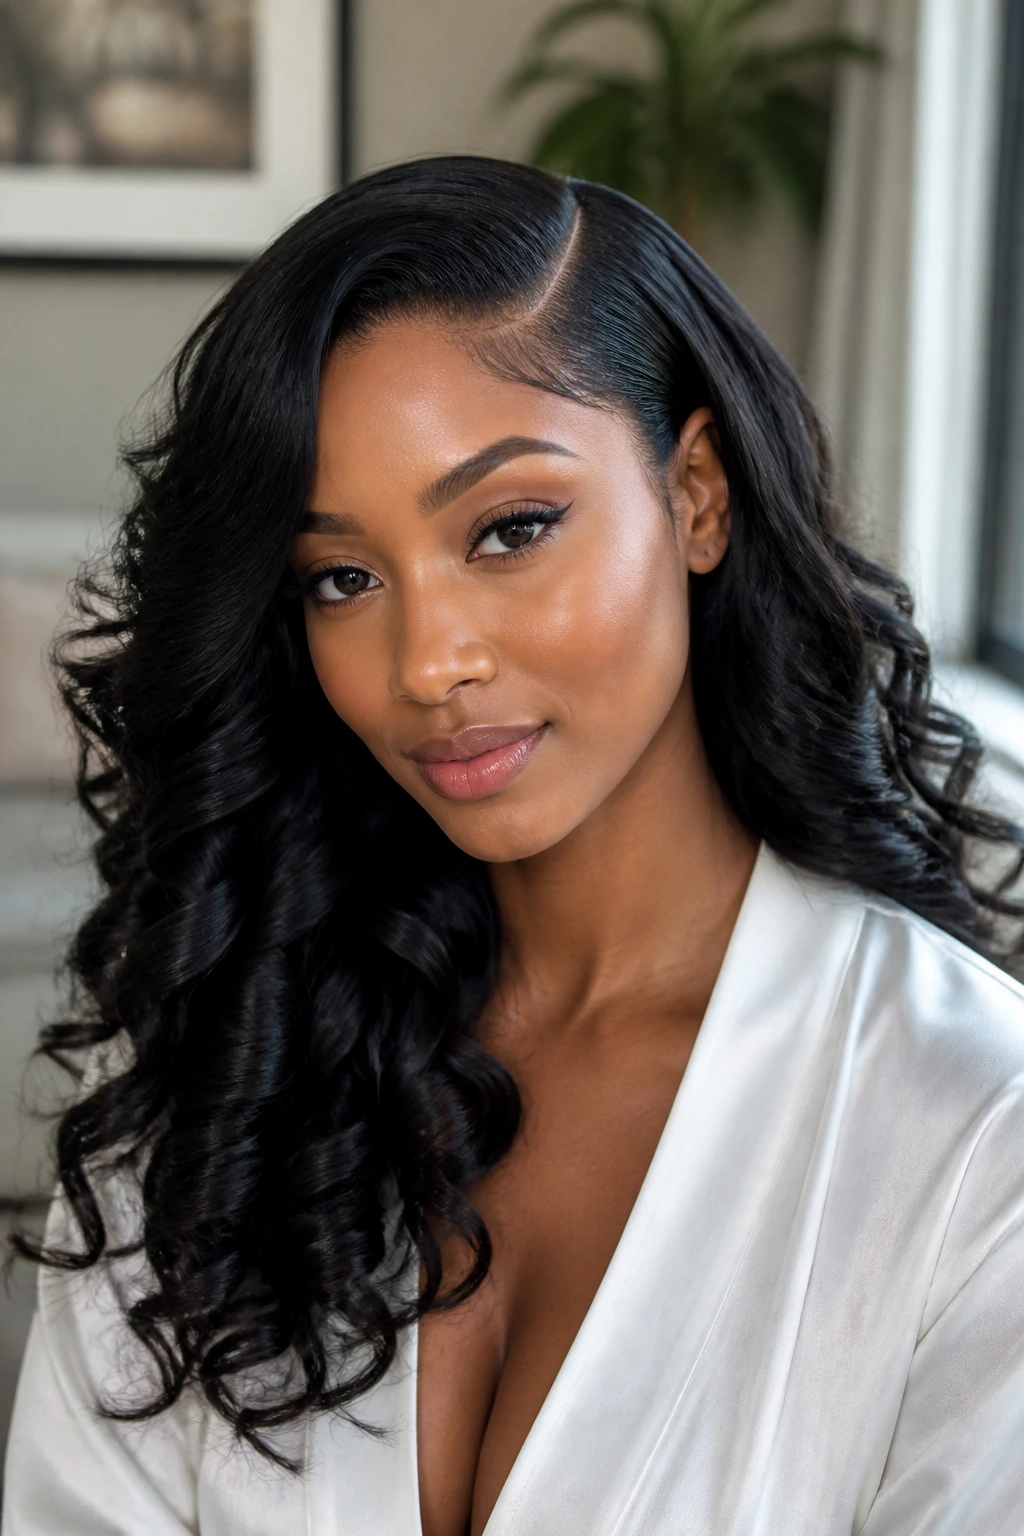
Loose curls are easy to underestimate. With a deep part and a careful finish, they can look rich, touchable, and very wedding-ready.
Why It Works: The side part gives the curls direction, while the definition keeps them from collapsing into one fuzzy shape. That balance makes the style feel soft without losing structure.
Key Ingredients:
- 1 natural curl set or 2 bundles of curly extensions
- 1 curling wand, 1.25 inches, if needed
- 1 heat protectant, 2 to 3 ounces
- 1 curl cream or foam
- 1 lightweight serum
Quick Steps:
- Part the hair deeply and define the curls in medium sections.
- Let the curls cool fully, then separate them lightly with oiled fingers.
- Sweep the front over one side and secure it discreetly behind the ear if needed.
- Finish with a tiny amount of serum on the ends only.
Equipment for This Recipe:
- Curling wand
- Clips for sectioning
- Soft brush, if you want a looser wave
- Shine spray
How to Serve This Dish: This style works with almost any dress, which is why it’s so practical. Pair it with earrings that move a little, because the curls and the jewelry can echo each other nicely.
Pro Tips for This Recipe:
- Use the same curl direction across the head if you want a smooth finish.
- Don’t separate too much; a little definition is what keeps the style elegant.
- Keep the front section pinned only after the hair has fully cooled.
Variations on This Dish:
- Soft Brush-Out Version: Brush the curls into a gentler wave.
- Extra-Volume Version: Lift the roots with a pick for more body.
- Pinned Temple Version: Tuck one side with a crystal clip for a cleaner frame.
Common Mistakes to Avoid with This Dish:
- Curling sections that are too thick, which leaves the center under-set.
- Adding serum too close to the roots and flattening the part.
- Skipping the cool-down time and then blaming the curl pattern for falling apart.
30. Mini Twisted Half-Up Buns With Curls
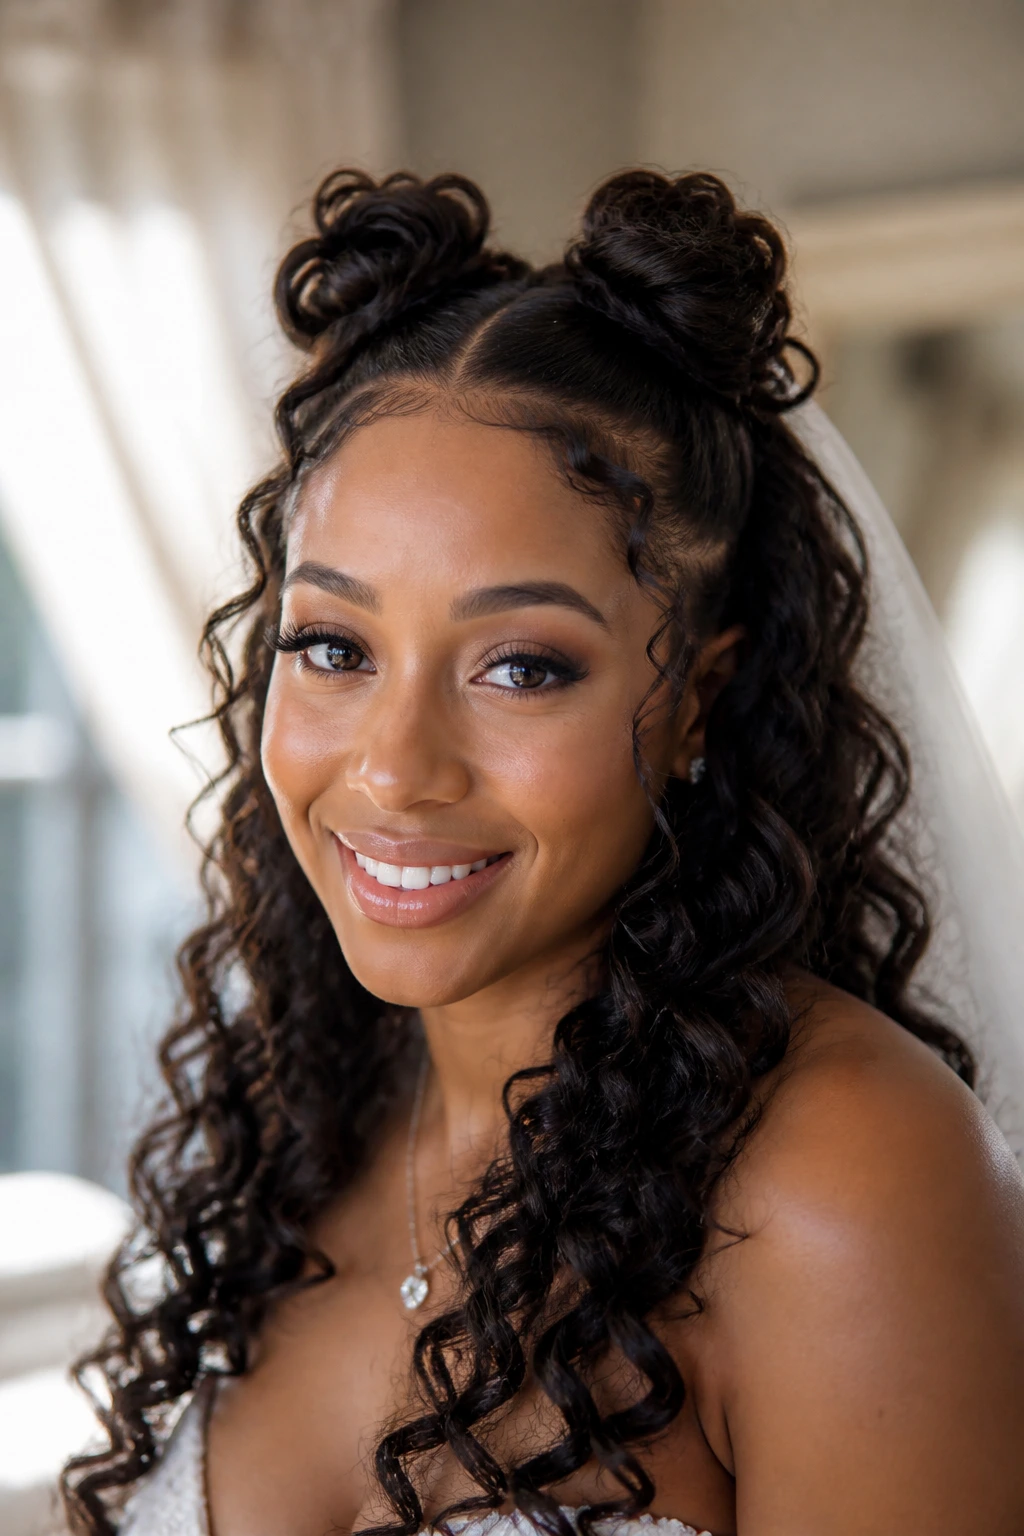
This one is a little playful, but it can still read bridal if the finish is neat. The mini buns create interest, and the curls keep the look soft.
Why It Works: The half-up shape keeps hair off the face while letting the rest move freely. The twin buns give the top section enough structure that it doesn’t look like an afterthought.
Key Ingredients:
- 1 curly base, natural or with extensions
- 2 small elastics
- 6 bobby pins
- 1 mousse, about 4 to 6 ounces
- 1 decorative clip or two tiny pins
Quick Steps:
- Separate the top section into two even parts.
- Twist each section into a small bun and pin them close together.
- Let the curls below fall naturally and separate them lightly.
- Add a clip where the buns meet if you want a more formal finish.
Equipment for This Recipe:
- Rat-tail comb
- Bobby pins
- Curl wand, if needed for touch-ups
- Soft brush for edges
How to Serve This Dish: This look works best when the gown is simple enough to let the hair have some personality. A veil can sit above the buns if you want the curls to remain visible underneath.
Pro Tips for This Recipe:
- Keep the buns small or they start to look heavy.
- Make the center part clean so the twin shapes read on purpose.
- Use the same curl size in the lower section so the whole style feels balanced.
Variations on This Dish:
- Side-Bun Pair Version: Shift both buns slightly to one side.
- Twist-Only Version: Leave the top twisted instead of bun-shaped.
- Pearl Clip Version: Place a tiny pearl clip between the two buns.
Common Mistakes to Avoid with This Dish:
- Making the top section too large and crowding the crown.
- Pulling the curls below too tight, which kills the soft finish.
- Leaving the buns uneven, which shows in every photo from the front.
31. Side-Part Pixie With Finger Waves
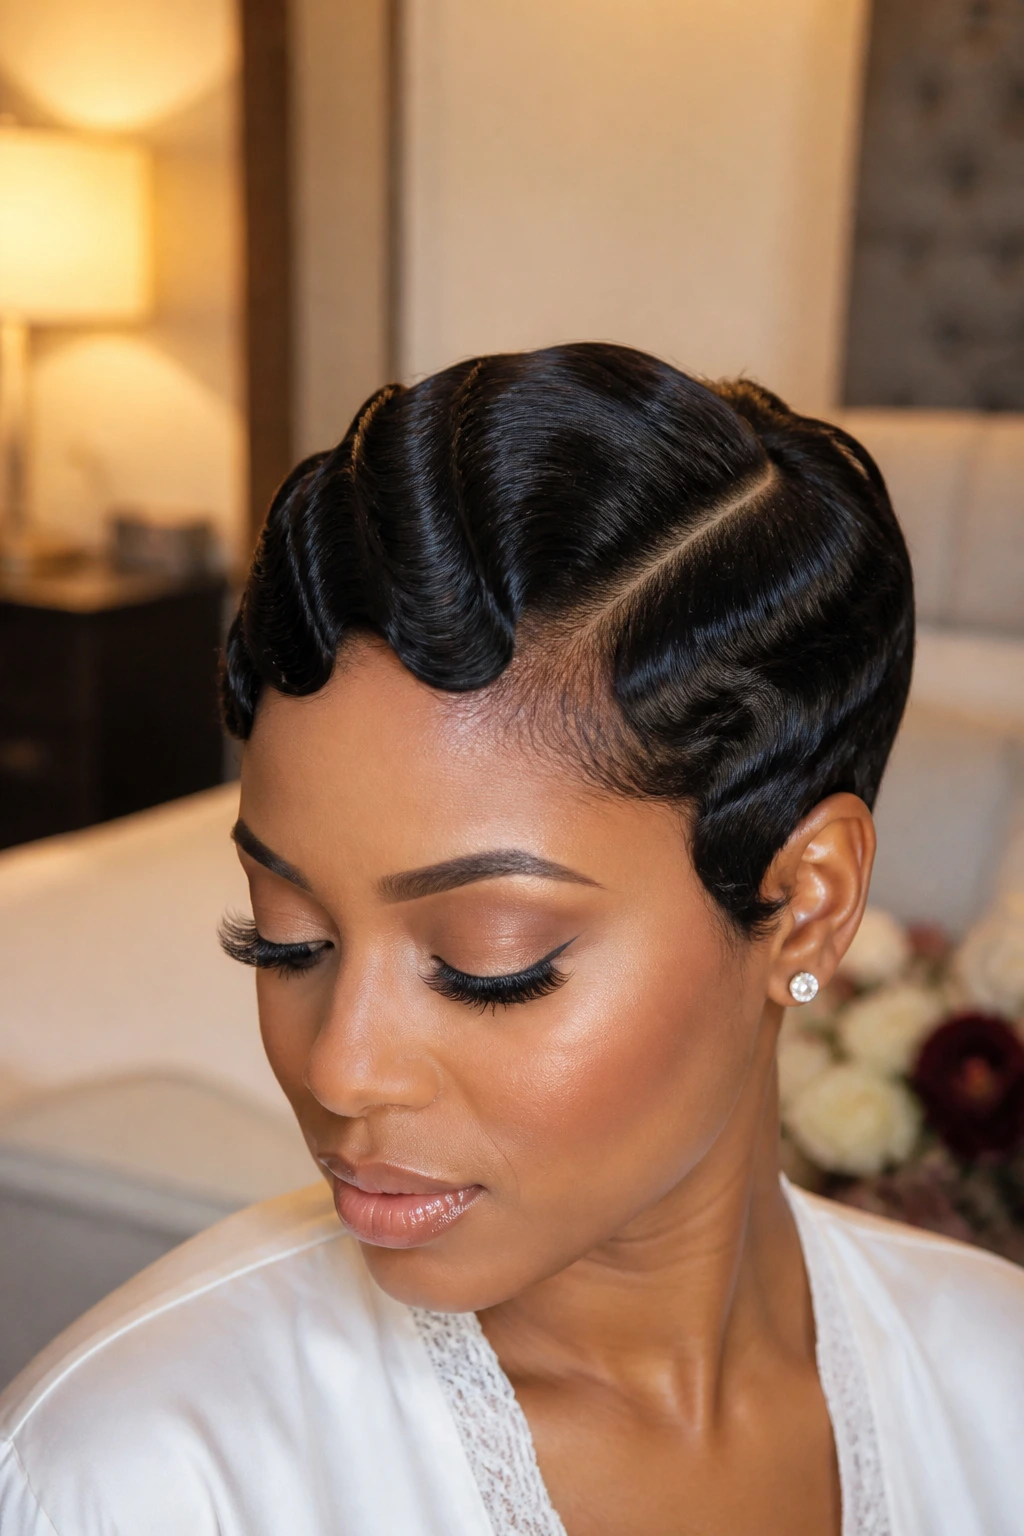
A pixie can still be bridal. In fact, when the waves are set neatly, the short length feels deliberate and chic.
Why It Works: Finger waves add pattern and shine to short hair, which gives the cut more structure than a simple comb-through. The side part adds direction and makes the style feel dressed up.
Key Ingredients:
- 1 short pixie cut
- 1 wave gel or setting lotion, about 2 ounces
- 1 fine-tooth comb
- 4 to 6 clips
- 1 satin scarf
Quick Steps:
- Create a side part and work wave gel through the front section.
- Shape the waves with the comb and clip them in place.
- Set under a hooded dryer or with a scarf until the pattern is dry.
- Brush the rest of the pixie into a smooth direction and finish with shine spray.
Equipment for This Recipe:
- Fine comb
- Duckbill clips
- Hooded dryer or wrap scarf
- Soft brush
How to Serve This Dish: This works beautifully with strong earrings and a gown that doesn’t need hair to do all the work. Keep the veil small or skip it if the waves are the point.
Pro Tips for This Recipe:
- Keep the wave sections small enough to actually curl into place.
- Set the hair fully before you touch the clip marks.
- If the cut is very short, push the wave pattern forward instead of back for a softer frame.
Variations on This Dish:
- Glossed Wave Version: Add a tiny touch of serum after setting.
- Sculpted Side Version: Make the front wave more dramatic on one side.
- Soft Curl Pixie Version: Use a looser wave pattern if you want less rigidity.
Common Mistakes to Avoid with This Dish:
- Applying too much gel and getting flakes once it dries.
- Skipping the setting time, which makes the wave collapse.
- Fighting the cut’s natural direction instead of working with it.
32. Braided Faux-Hawk With a Bridal Finish
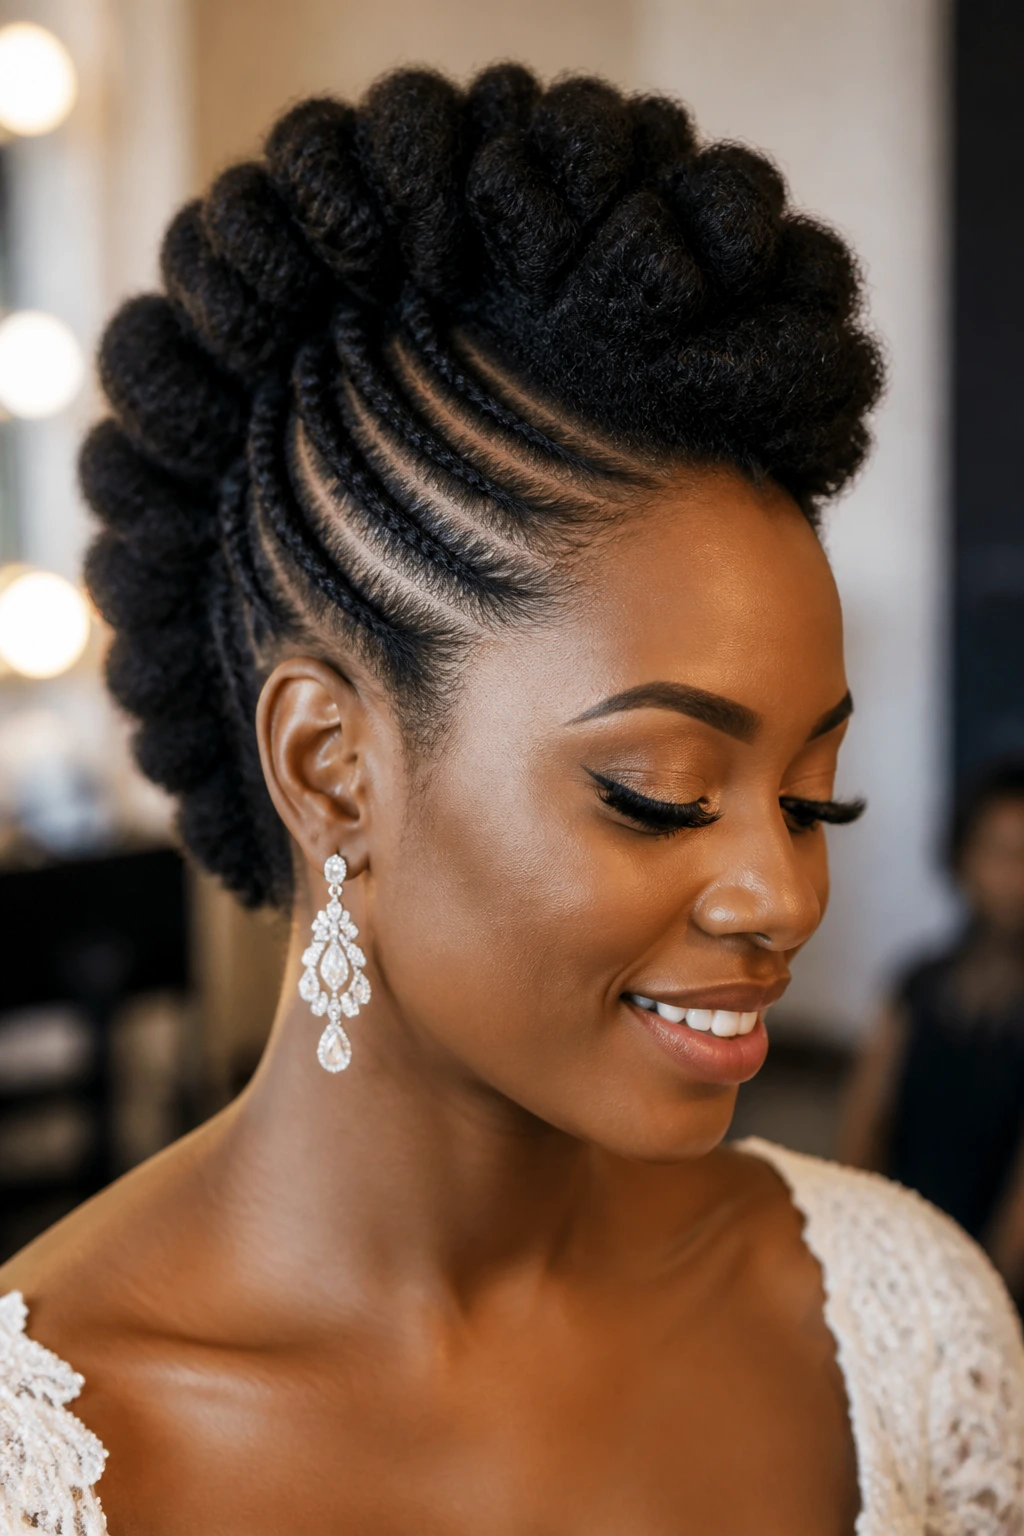
This style has backbone. The sides stay tucked, the center stays alive, and the whole thing gives the head a clean, lifted line.
Why It Works: Braids on the sides build structure, while the center remains full and sculpted. That contrast gives you the drama of a faux-hawk without making it feel costume-like.
Key Ingredients:
- 1 natural base or braided prep
- 1 braiding gel, about 2 ounces
- 12 bobby pins
- 1 pick or curl sponge
- 1 pearl or crystal accent
Quick Steps:
- Braid or smooth the sides tightly toward the center.
- Fluff the center section upward with a pick or fingers.
- Pin the sides under the center so the silhouette stays narrow.
- Add one accent piece near the front or temple.
Equipment for This Recipe:
- Rat-tail comb
- Bobby pins
- Curl sponge or pick
- Satin scarf
How to Serve This Dish: This style loves a dress with structure and a stronger neckline. Keep the earrings simple if the center is tall, because the silhouette already carries a lot of energy.
Pro Tips for This Recipe:
- Keep the sides clean; any bump will show because the style is so exposed.
- Build height in the center with hands first, then secure it.
- Use one accessory, not three, or the shape gets cluttered.
Variations on This Dish:
- Soft Hawk Version: Leave a little texture on the sides.
- Braided Center Version: Add a slim braid down the middle for extra line.
- Cuffed Hawk Version: Place one or two cuffs where the center begins.
Common Mistakes to Avoid with This Dish:
- Overstuffing the center and making the profile look round instead of lifted.
- Forgetting to smooth the sides close enough to the scalp.
- Adding too much shine product, which can make the style read greasy under lights.
33. Soft Flip-End Bob With an Off-Center Part
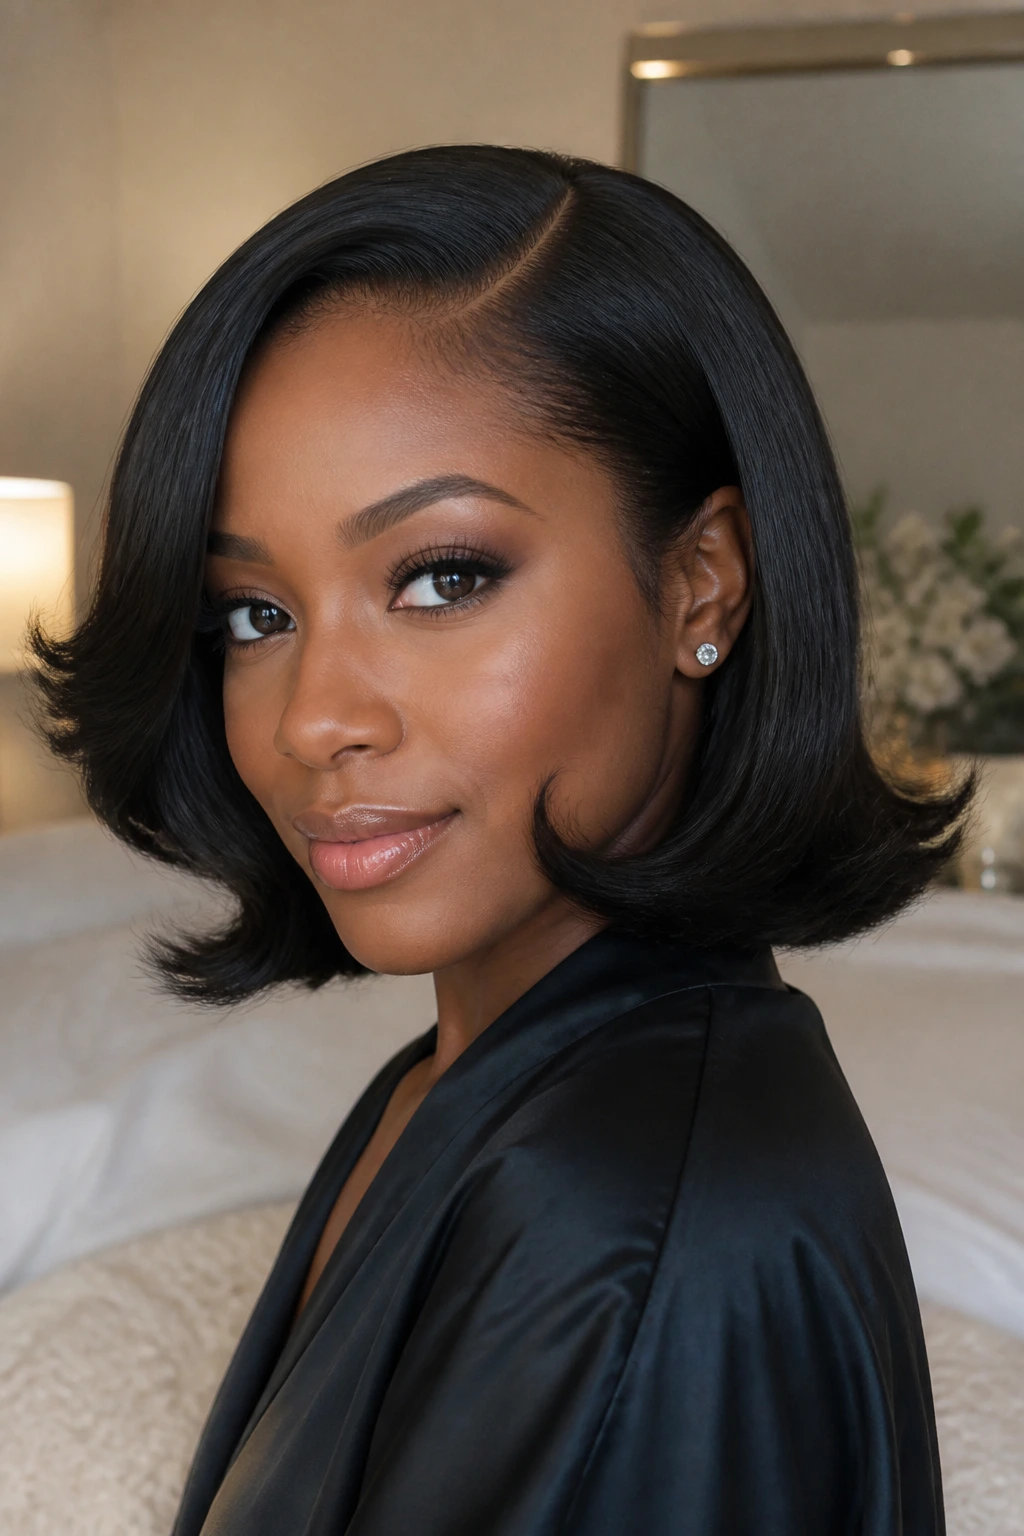
A flip-end bob has a little movement that keeps the cut from feeling static. It’s cleaner than waves, but softer than a blunt press.
Why It Works: The off-center part gives the bob a more relaxed line, and the flipped ends keep the silhouette from looking boxy. It’s a nice middle ground when you want polish without stiffness.
Key Ingredients:
- 1 pressed bob, chin to collarbone length
- 1 heat protectant, 2 to 3 ounces
- 1 round brush or flat iron
- 1 serum, a few drops
- 3 clips
Quick Steps:
- Blow-dry and press the hair smooth in sections.
- Flip the ends under or outward slightly with a brush or iron.
- Part the hair off-center for a softer frame.
- Smooth the finish with a tiny amount of serum.
Equipment for This Recipe:
- Flat iron
- Blow dryer
- Round brush
- Fine comb
How to Serve This Dish: This bob pairs nicely with modern gowns and clean jewelry. If you add a veil, keep it small and high so it doesn’t flatten the flip.
Pro Tips for This Recipe:
- Flip the ends all in the same direction or the bob looks busy.
- Keep the press light and even at the crown.
- Use serum only on the surface and ends, never on the part itself.
Variations on This Dish:
- Under-Curve Version: Flip the ends inward for a more restrained shape.
- Side-Tuck Version: Tuck one side behind the ear with a pin.
- Glossy Center Version: Make the part straight and sharp for more structure.
Common Mistakes to Avoid with This Dish:
- Pressing too many times and losing the bob’s natural swing.
- Choosing a part that sits too far down the middle when the dress needs softness.
- Forgetting to protect the hairline during heat styling.
34. Twisted Crown for Short Natural Hair
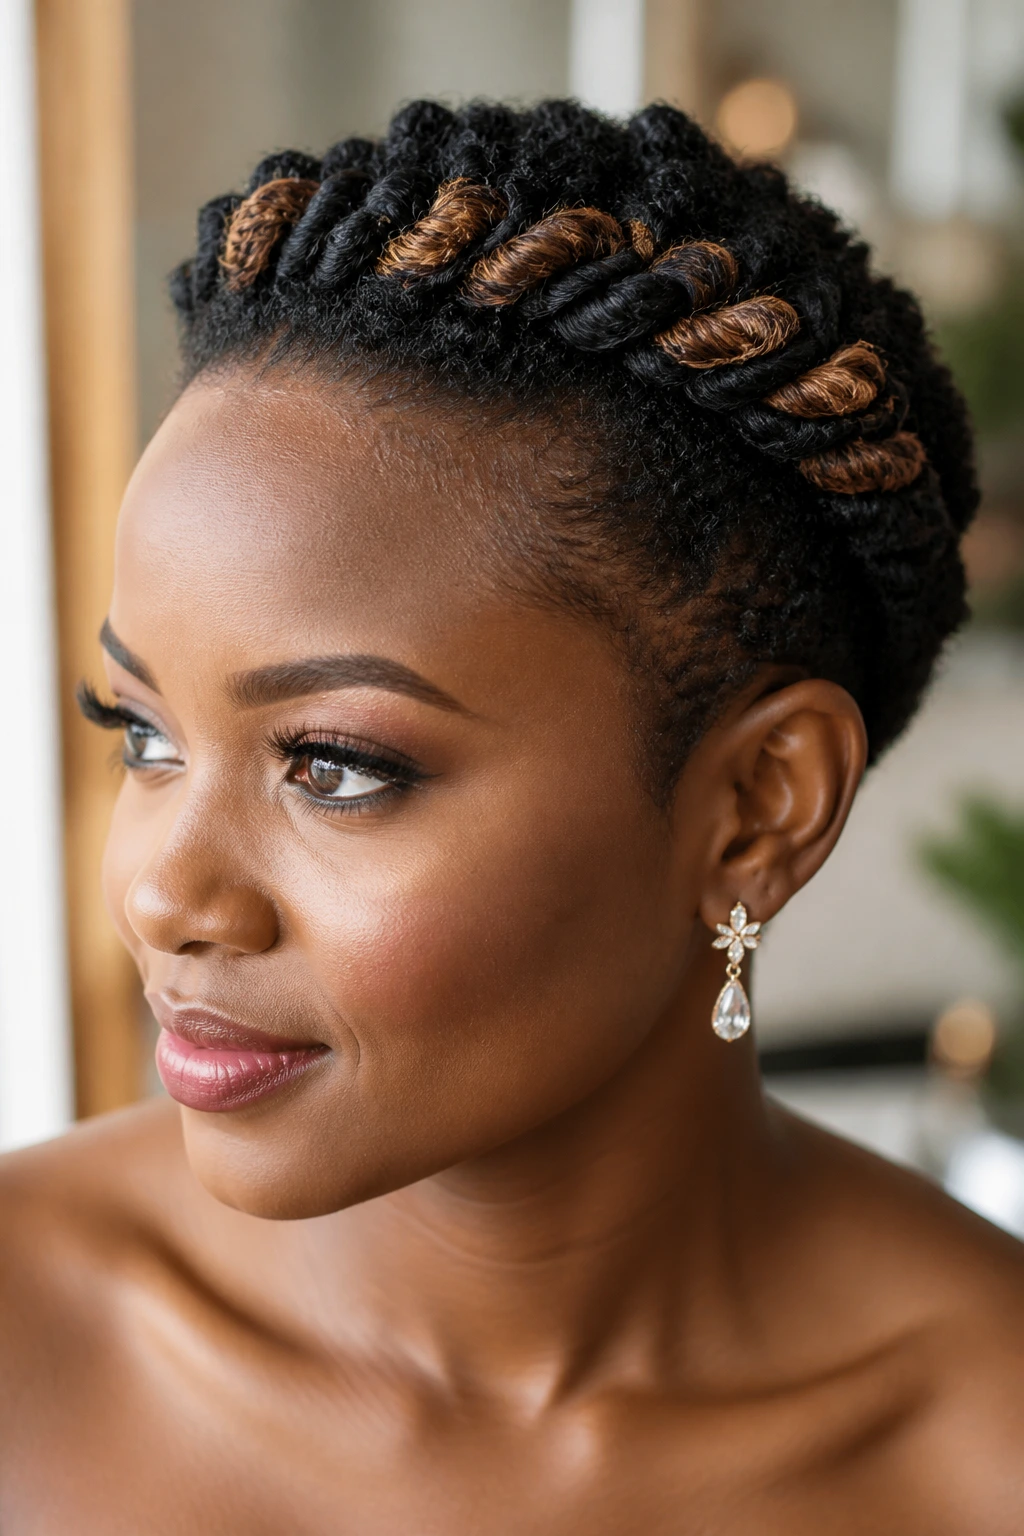
Short hair can absolutely carry bridal drama. A twisted crown gives it shape, keeps the length neat, and puts the focus right where it belongs.
Why It Works: The twists add structure along the hairline and crown, which makes short hair look styled rather than just neat. That framing effect is especially useful if you want to wear earrings or a small comb.
Key Ingredients:
- 1 short natural cut
- 1 twisting cream, about 2 ounces
- 6 to 8 bobby pins
- 1 tail comb
- 1 small floral or pearl pin
Quick Steps:
- Create two or more flat twists along the front and side sections.
- Wrap the twists around the crown and pin them where they cross.
- Smooth the rest of the hair with your hands and a tiny amount of cream.
- Place one pin where the twists meet so the eye lands there.
Equipment for This Recipe:
- Rat-tail comb
- Bobby pins
- Small brush or edge brush
- Satin scarf
How to Serve This Dish: This style is lovely with simple, elegant gowns. If you want a veil, go small and keep it centered so it doesn’t overpower the short shape.
Pro Tips for This Recipe:
- Keep the twists flat to the head so they read as a crown, not random sections.
- Don’t overload the hair with cream; short styles show product fast.
- Pin the twists under each other, not on top of each other, to keep the profile clean.
Variations on This Dish:
- Side Crown Version: Let the crown lean to one side.
- Pinned Bloom Version: Add a floral pin at the temple.
- Sleek Short Version: Smooth the sides lower and keep the top textured.
Common Mistakes to Avoid with This Dish:
- Making the crown too thick for short hair to support.
- Leaving the front sections uneven, which shows immediately on short cuts.
- Forgetting that short hair needs less product, not more.
35. Loc Petal Bun With a Jewel Pin
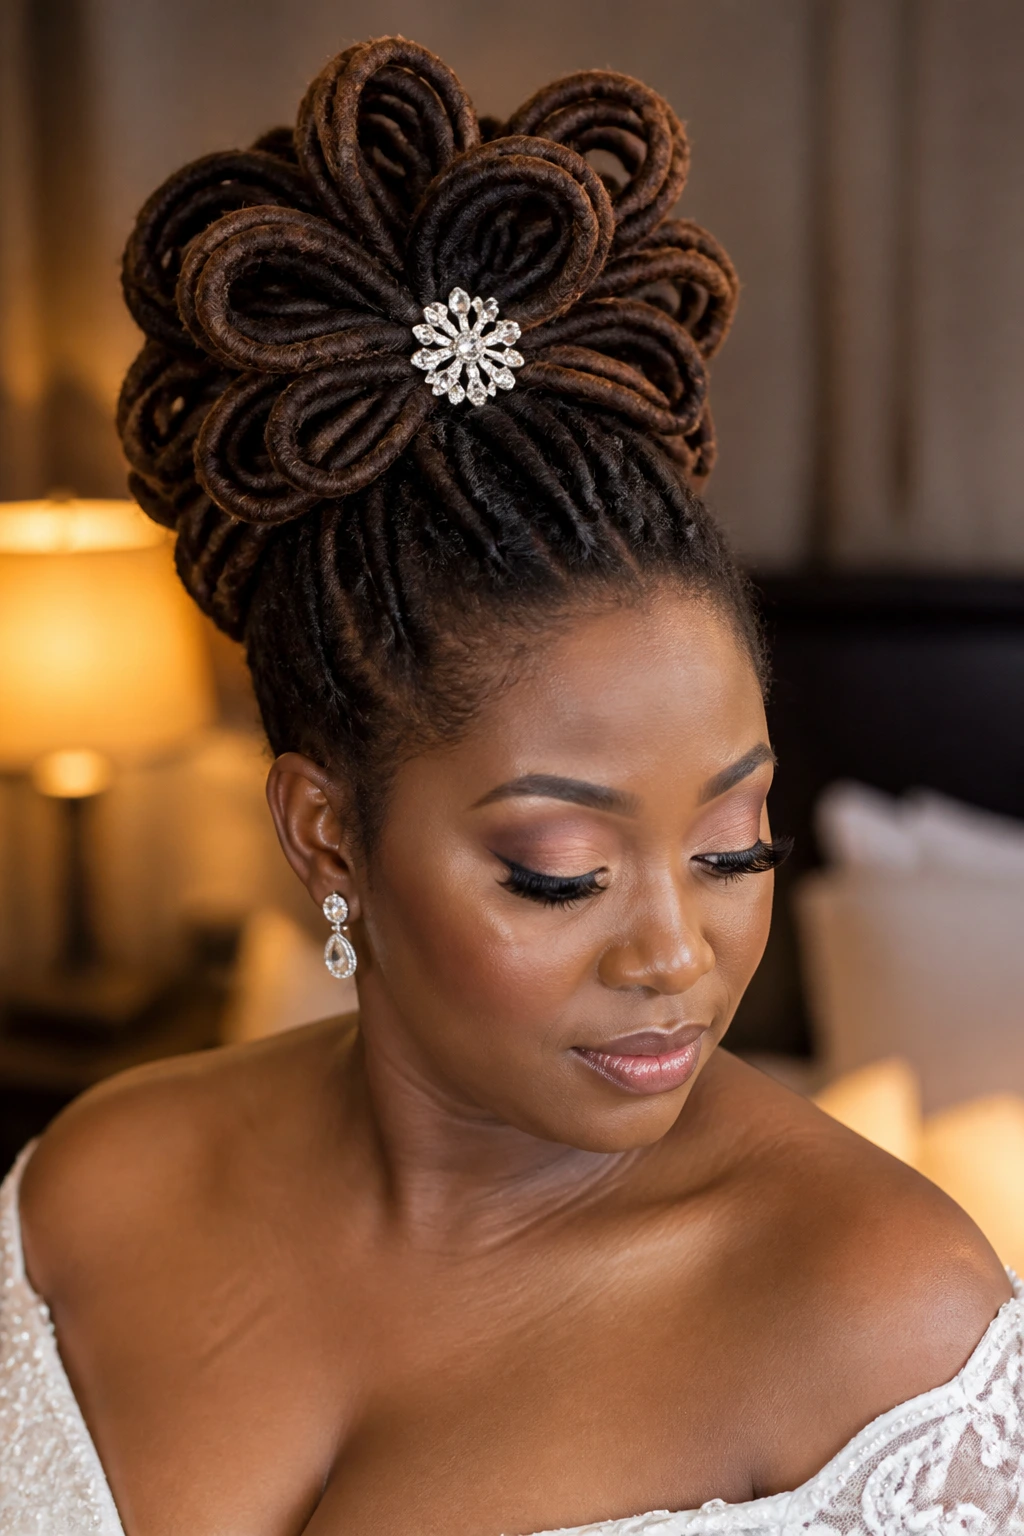
This is the one that looks sculptural from the back and surprisingly soft from the side. Locs arranged into a petal bun create depth, and the jewel pin gives it that bridal spark.
Why It Works: The locs fan outward instead of stacking into one tight coil, which creates a more dimensional shape. A jewel pin lands right in the center where the curves meet, so the eye knows exactly where to look.
Key Ingredients:
- 1 full set of locs, medium to long length
- 10 to 14 bobby pins or loc pins
- 1 light oil, a few drops
- 1 jewel pin or hair fork
- 1 mousse, light use if needed
Quick Steps:
- Gather the locs low at the nape or slightly off-center.
- Arrange them in overlapping loops that fan like petals.
- Pin each loop from the underside so the shape stays open.
- Set the center with the jewel pin and smooth any stray pieces.
Equipment for This Recipe:
- Loc-safe pins
- Hair fork or ornament
- Comb for parting, if you need one
- Satin scarf for overnight hold
How to Serve This Dish: This style looks strong with gowns that have open backs or clean shoulders. It also works well if you want the veil to sit above the bun and let the petal shape show beneath.
Pro Tips for This Recipe:
- Build the bun in wide loops, not one tight knot.
- Pin each loc where it folds, not only at the edge.
- Keep the jewel pin centered if you want the bun to read balanced.
Variations on This Dish:
- Side Petal Version: Shift the bun slightly to one side for a softer profile.
- Pearl Center Version: Swap the jewel pin for a pearl cluster.
- Veil-Base Version: Leave a flatter back point for veil placement.
Common Mistakes to Avoid with This Dish:
- Overpacking the bun so the petal shape disappears.
- Pinning too shallowly, which lets the loops sag.
- Choosing a pin that is too heavy for the loc structure.
Why a Bridal Hairstyle Needs a Real Plan
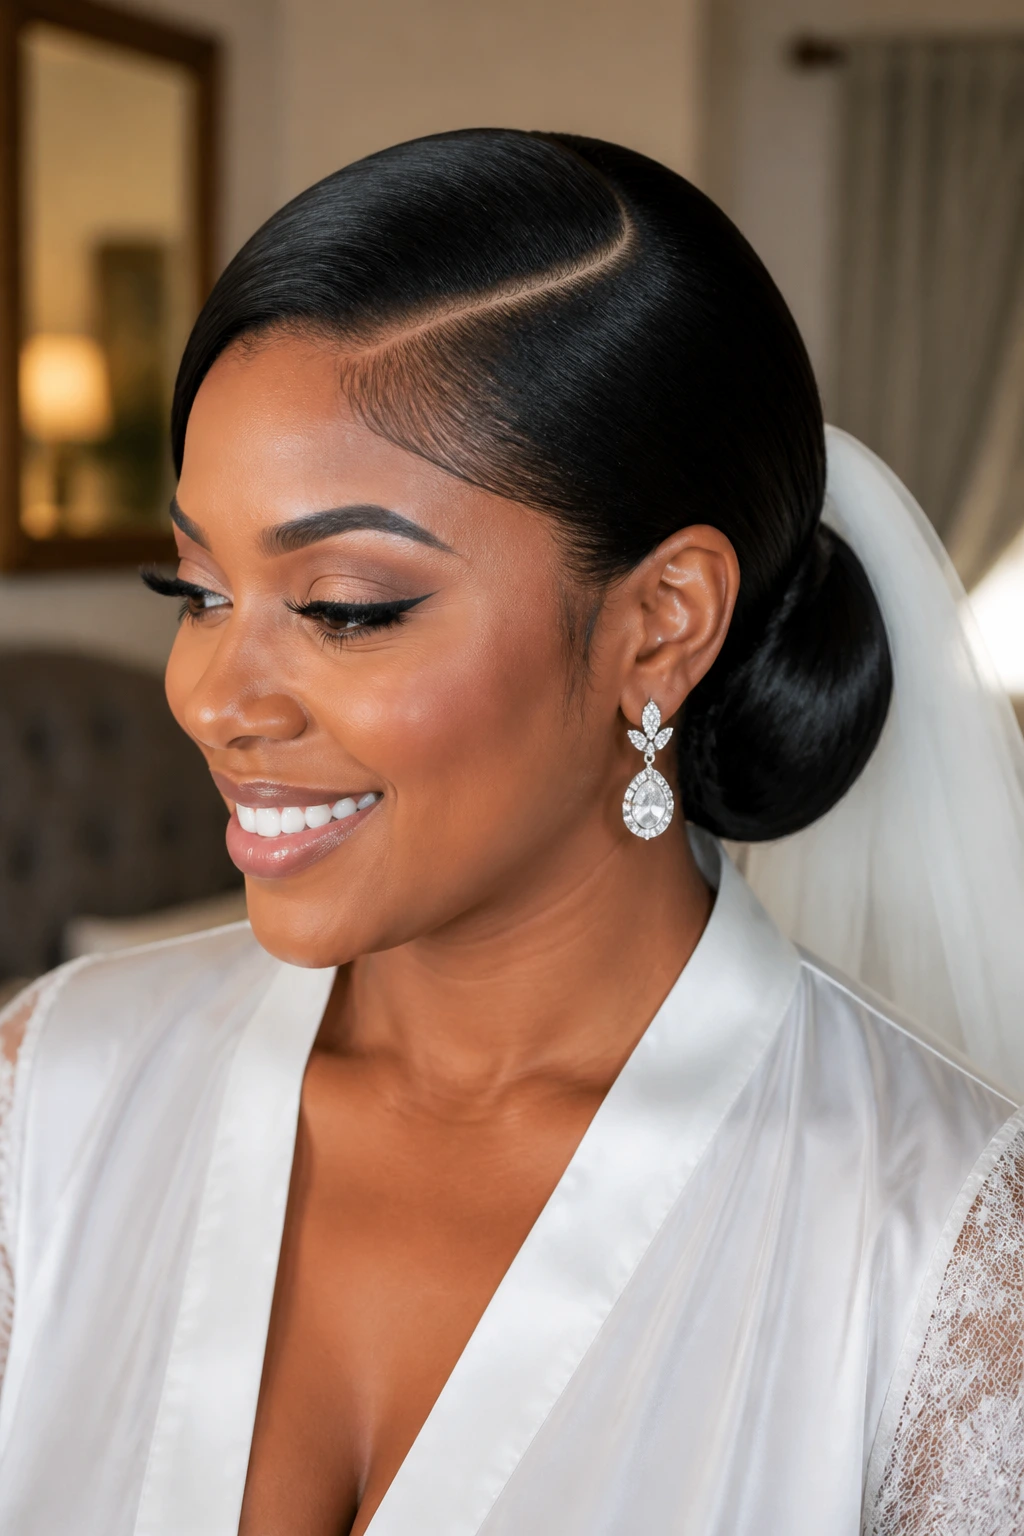
The best-looking wedding hair is usually the hair that has been tested, adjusted, and worn around the house before the wedding day. That sounds less romantic than a last-minute reveal, but it saves everybody a headache. Texture changes with humidity. Pins shift when you laugh. Braids feel different after an hour than they do in the mirror.
Black bridal styles also carry a different set of priorities. You are not just deciding between up or down. You are deciding how much tension your scalp can take, whether your veil has a clean anchor, how your edges will behave under a scarf, and how much movement you want when the photographer asks for one more spin. A style that looks impressive for five minutes can be the wrong style if it pinches at the temples or collapses when you hug people.
What holds up best is usually a style that has at least three things working together: a secure base, a shape that matches your texture, and one finishing point that makes it feel intentional. A bun needs a part or a braid. Waves need a set. Locs need pinning that respects their weight. Even the simplest pressed bob is better with a clean line and a calm finish.
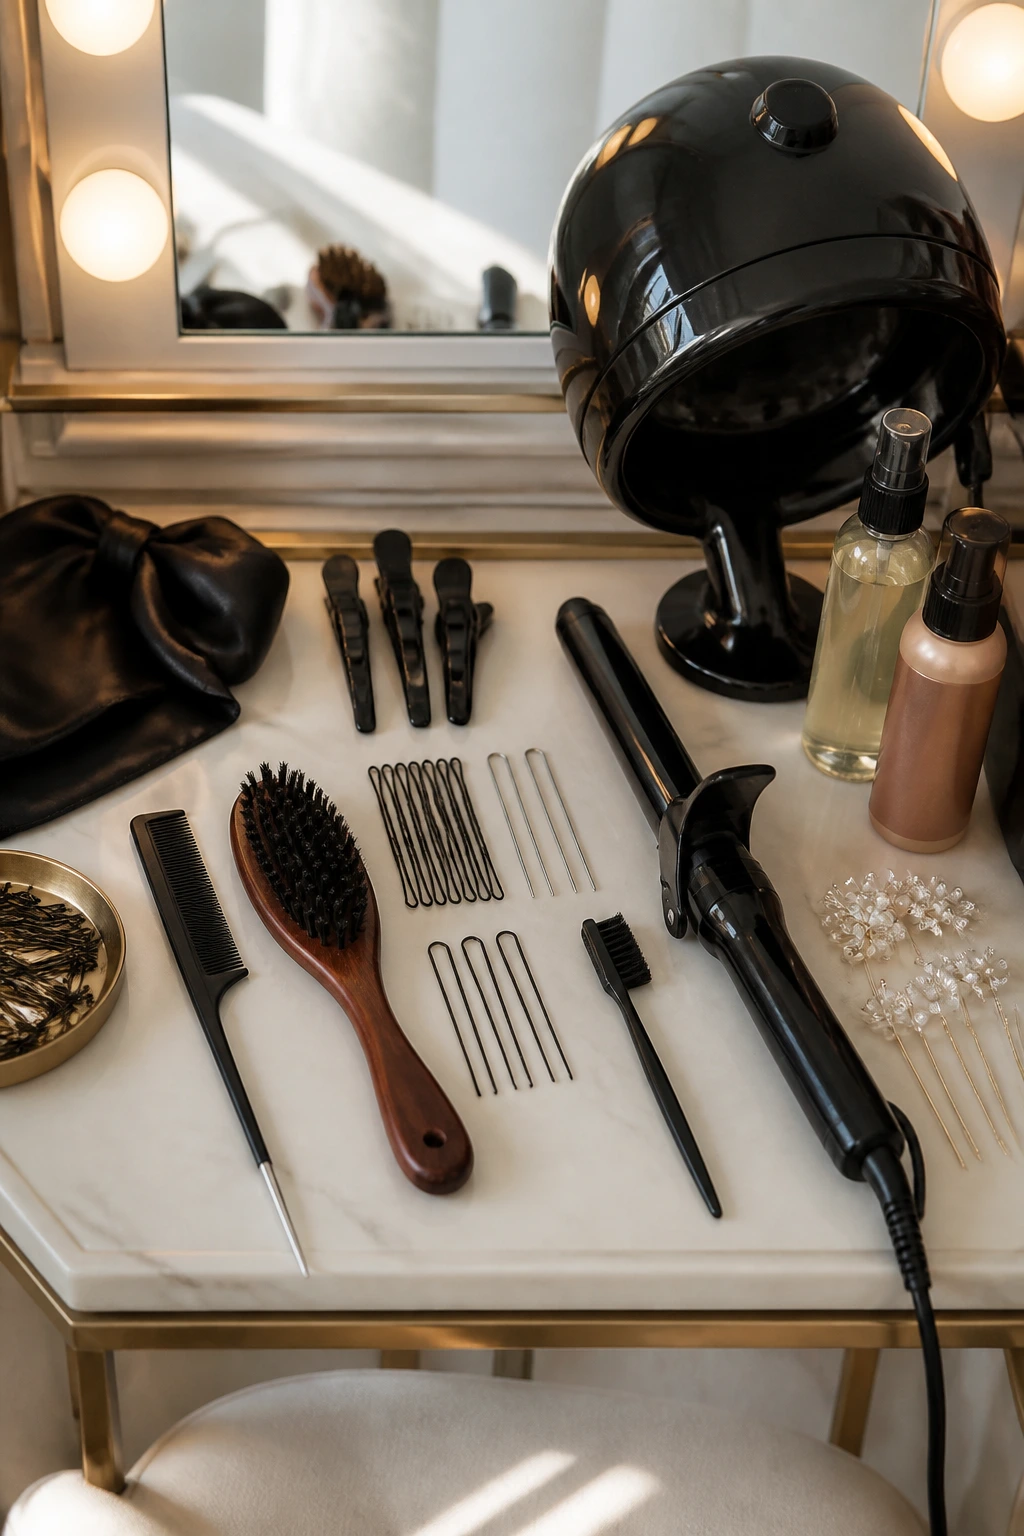
Essential Equipment for These Looks
-
Tail comb: The parting tool that makes a deep side part, crisp crown braid, or clean center line possible.
-
Boar-bristle or soft paddle brush: Useful for smoothing pressed hair, laying edges, and polishing the front without tearing up texture.
-
Bobby pins and U-pins in two sizes: Smaller pins work for detail, while longer pins handle buns, locs, and heavier twist work.
-
Edge brush: Helpful for baby hairs, but also for brushing product into the hairline without overloading it.
-
Satin scarf or bonnet: Lets you set the style, keep edges flat, and protect the finished shape overnight.
-
Sectioning clips: Keep waves, curls, and braid sections from tangling while you work.
-
Curling iron or wand: Best for wave sets, curly extensions, and any style that needs clean movement.
-
Hooded dryer or soft bonnet dryer: Great for finger waves, setting foam, and any style that needs a full dry before you touch it.
-
Mousse or setting foam: Helps curls clump, keeps braids from frizzing, and gives updos a cleaner surface.
-
Heat protectant: Non-negotiable if you’re pressing, waving, or curling hair with heat.
-
Decorative pins, combs, or cuffs: The finish matters, and one well-placed accessory often beats five random ones.
Choosing Hair Products and Accessories With a Bride’s Eye
The smartest shopping move is not buying the flashiest accessory first. It is matching the accessory and product to the shape of the style. A shiny pearl comb looks beautiful in a low bun or crown braid. It can look awkward jammed into a puff that already has too much volume. A metal cuff can brighten braids fast, but if the dress is already beaded, the effect gets noisy in a hurry.
Texture matching matters too. If you are wearing extensions, choose hair with a finish that sits near your own. Super-glossy bundles on top of a soft natural leave-out can make the contrast too obvious in daylight. On the other hand, a silk press can make a curly style look heavy if the wave pattern is too loose. I’d rather see one thoughtful finish than a pile of products trying to rescue the wrong texture choice.
Buy more pins than you think you need. Seriously. A bride’s hairstyle often eats pins in odd places: under the veil comb, around the bun base, behind one ear, under the side sweep. Having 12 pins on hand sounds cautious until you’re standing in front of a mirror with a bun that shifted two inches left and the stylist needs two more to correct it.
And test anything that touches your scalp. That includes gel, edge control, mousse, and even the metal on a clip. If a product flakes on a rehearsal night, it will flake harder once you add heat, sweat, and movement.
How to Pair the Hair With the Dress and Veil
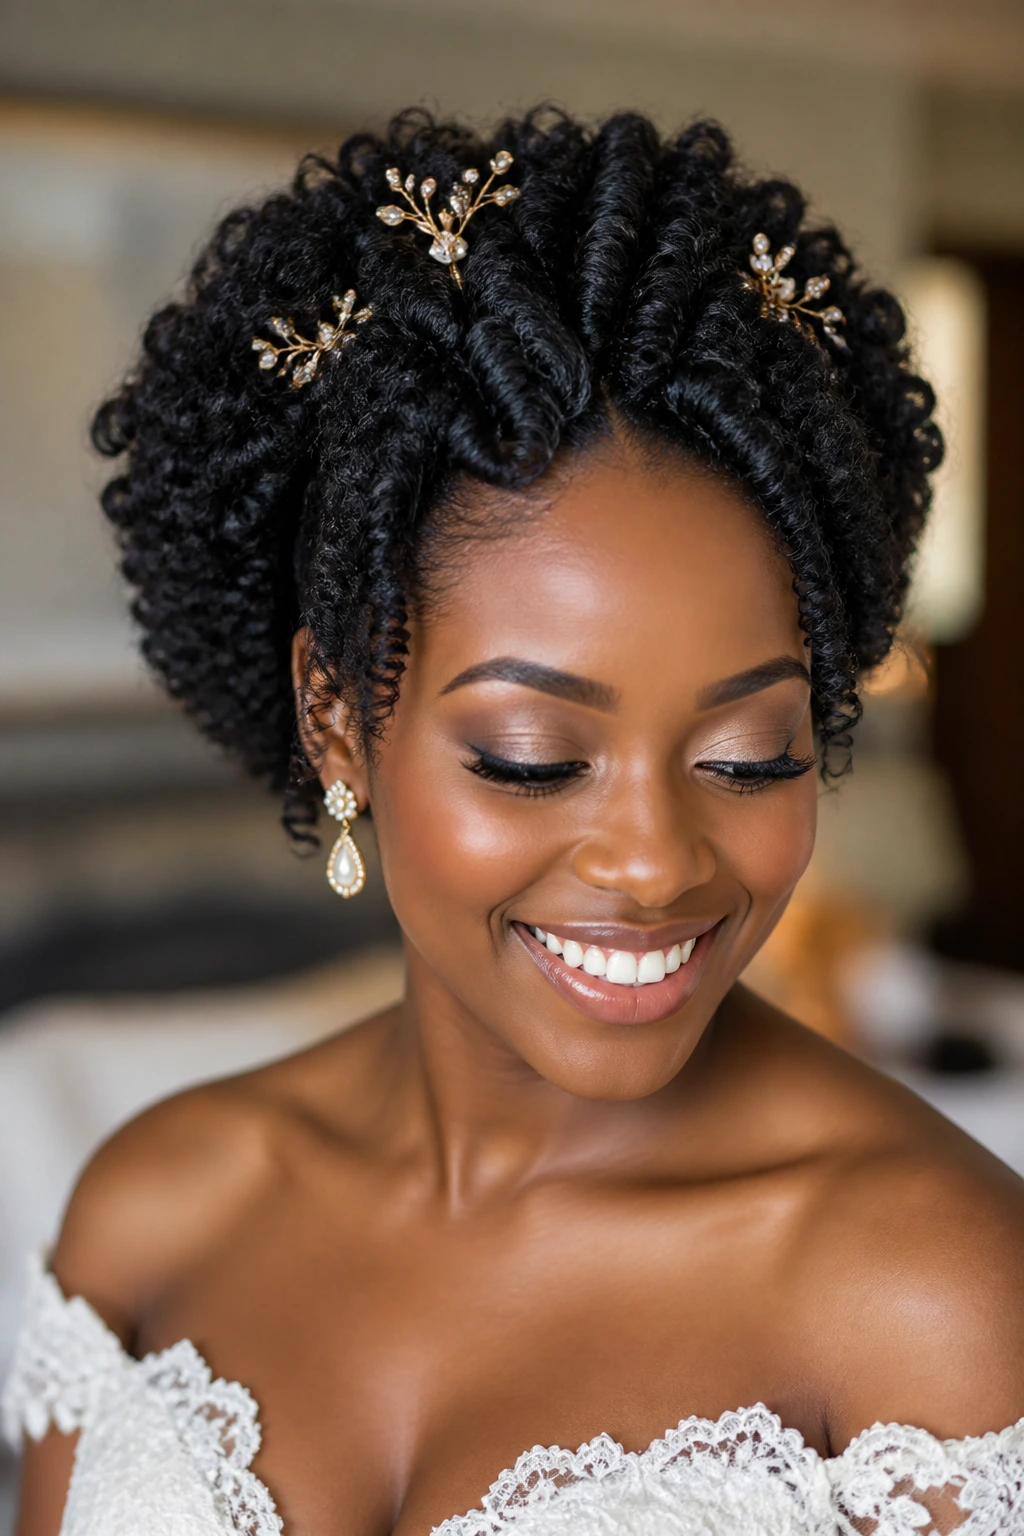
Presentation: Low styles tend to flatter high necklines, while higher styles keep the face open for off-the-shoulder, strapless, or sweetheart gowns. If the dress has heavy work at the back, keep the hair line simple so the eye doesn’t get pulled in three directions.
Accompaniments: Veils, combs, pearl pins, crystal clips, floral accents, and statement earrings all work best when only one or two of them are asking for attention at the same time. A veil and a big comb can live together, but they need space. Give them room.
Portions: Think in terms of scale and balance. Thick braids, locs, and dense coils usually need stronger anchoring and sometimes more support pins; finer hair may need padding or a little filler to keep an updo from looking small. If you want more fullness, add one extra bundle, one extra section of extension, or a light teasing step near the crown instead of dumping on more product.
Beverage Pairing: On the getting-ready side of things, water is the safe hero, mint tea is the steady one, and a little ginger tea can be kind if nerves are sitting in your stomach. Keep drinks covered, though. Nobody wants a coffee ring near the veil.
The Small Touches That Make Bridal Hair Feel Finished
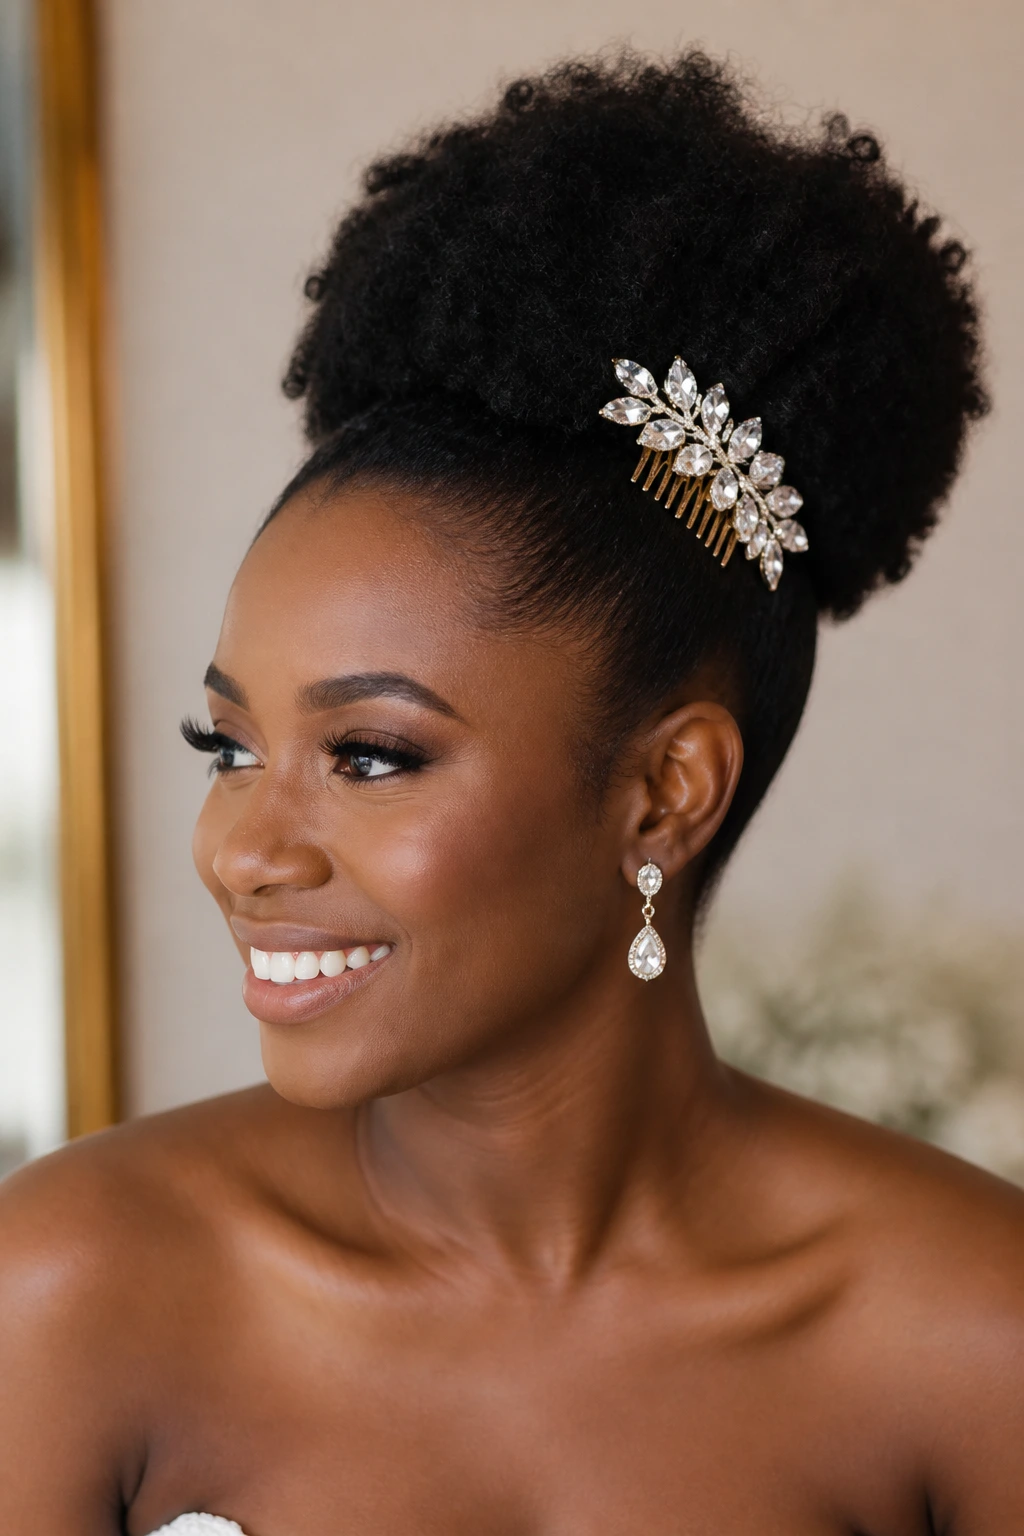
Flavor Enhancement: A tiny bit of shine spray on the surface, not the roots, can wake up a pressed bob, a bun, or a twist set. The rule is light mist, then stop. If you can smell it from across the room, you used too much.
Customization: Pearl pins soften braids and buns. Gold cuffs warm up locs and coils. A single flower pin can turn a natural afro or puff into something more romantic without making it look costume-heavy.
Serving Suggestions: Place the accessory where the shape naturally turns. That might be the side of a braid, the center of a bun, or the point where a wave sweeps over the shoulder. Hair looks more intentional when the ornament follows the structure instead of fighting it.
Make-It-Yours: If you wear your hair natural, choose styles that keep the crown soft and the edges protected. If you’re relaxed or silk-pressed, lean into smoother lines and cleaner parts. If you wear locs or braids, let the texture stay visible; trying to hide it usually weakens the whole look.
Make-Ahead, Wear Time, and Night-Before Care
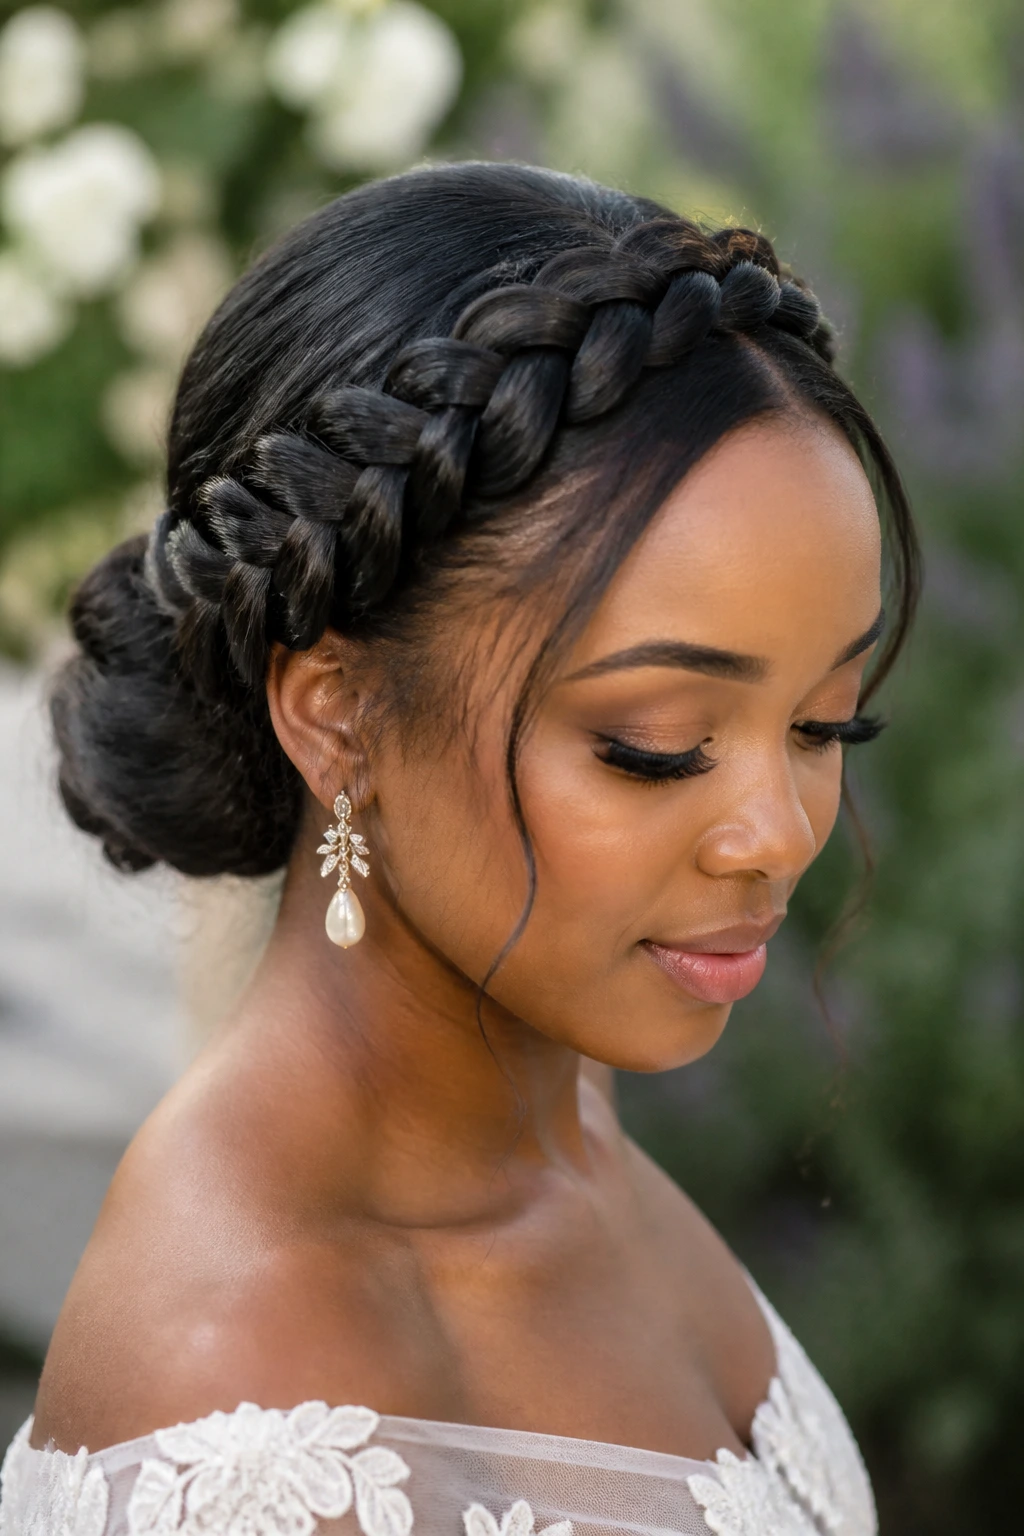
Some bridal styles can be done the day before and still look fresh. Knotless braids, Fulani braids, loc buns, passion twist chignons, and crochet styles usually handle early prep well if they’re wrapped with a satin scarf and protected in a bonnet overnight. Silk presses, loose waves, and finger-wave sets are better when they’re finished close to the ceremony, because humidity and sleep can soften them more than you want.
If the style depends on curl shape, set it the night before and let it cool completely before bed. In the morning, refresh with a tiny mist of water or foam and reshape the front with your fingers. If it’s a pressed style, keep the roots dry, use a satin wrap, and touch up only the bits that actually need heat. A quick pass with a flat iron on one stubborn section is fine. Reworking the whole head again is how you dry it out.
For updos and buns, a rehearsal the night before can help, but the final pinning is often better done the morning of. Hair shifts when you sleep. Pins settle. That’s normal. What you want is a style that can be reset in 10 minutes, not one that collapses the second you stand up. Braids and locs can often hold for several days if you’re careful, while curls and waves usually need more active maintenance.
A satin pillowcase is useful even if you sleep in a scarf. The extra layer helps keep the scarf from rubbing loose. If the wedding starts late and you need to refresh the front, use the smallest amount of product possible. Add product like you’re trying not to be seen adding product.
Variations and Adaptations to Try
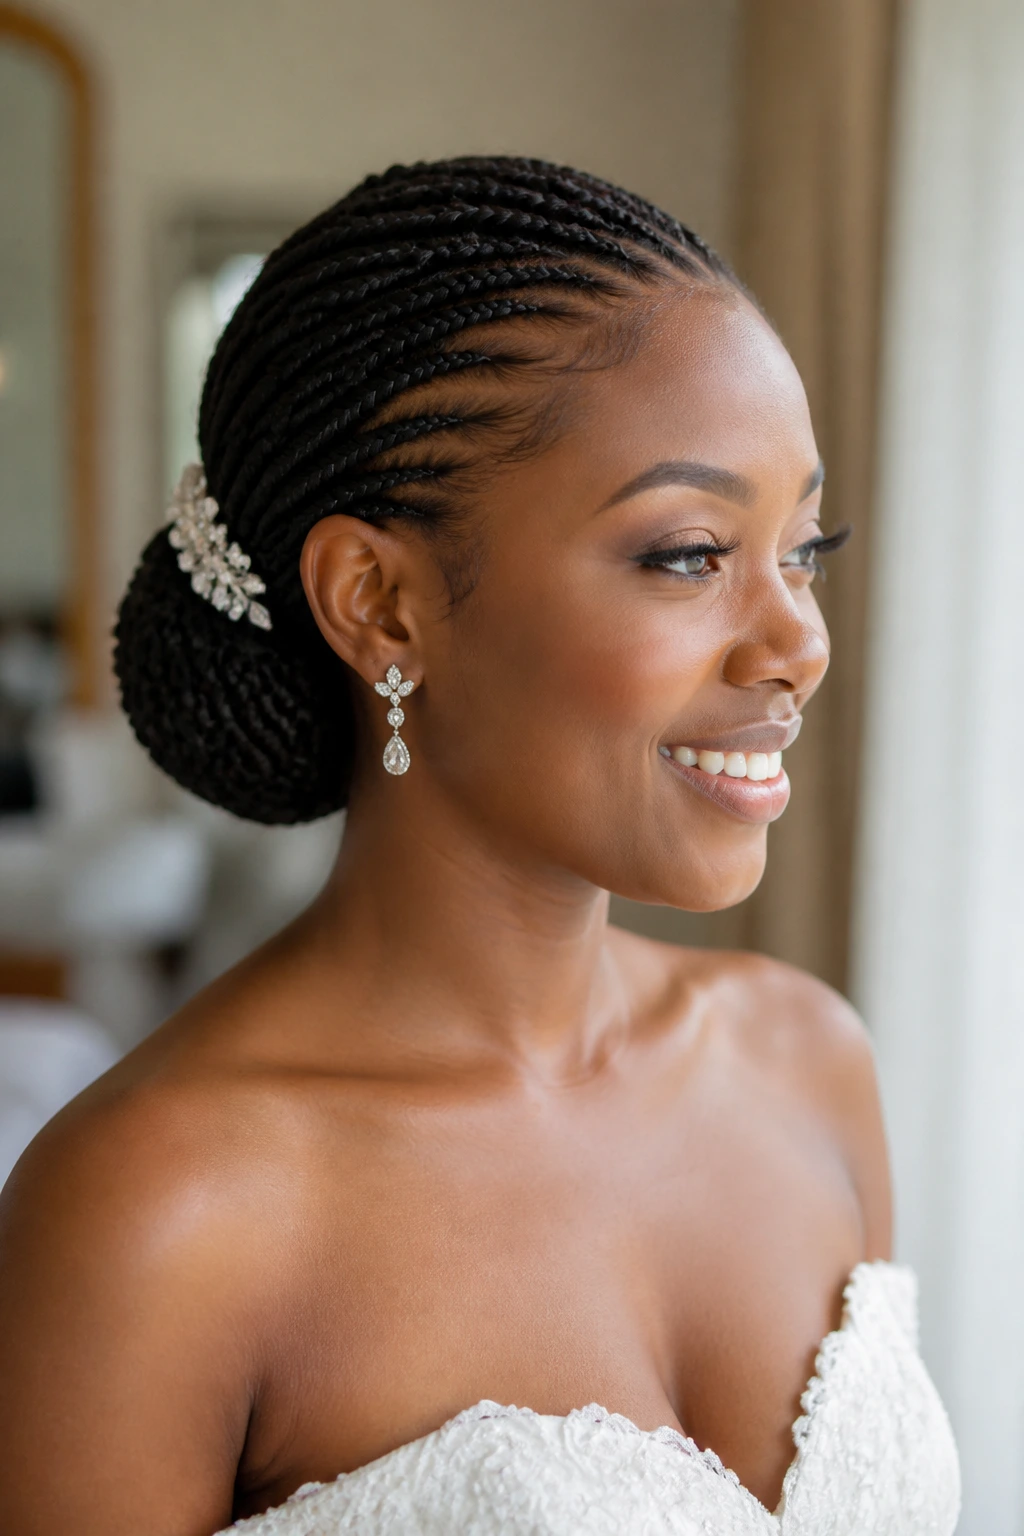
Veil-Friendly Swap: If your first choice sits high and blocks a comb veil, shift the shape lower or leave a cleaner patch at the crown. Small change, big difference.
Protective-Style First: If you want to keep manipulation low, lean toward knotless braids, loc buns, crochet styles, or flat twists. These styles hold their shape while giving your hair a break from daily restyling.
Short-Hair Version: Short cuts do not need more hair; they need better structure. Finger waves, sculpted pixies, crown twists, and tapered frohawks all work well when the finish is neat and the accessory is chosen with the cut in mind.
Natural-Texture Version: Coils, twist-outs, and afros look best when the texture is visible and not overlaid with too much product. Keep the shape rounded or lifted, then choose a single pin or comb that echoes the lines already there.
Extra-Drama Version: If you want more presence, add height at the crown, longer earrings, or one bold accessory. Do not add all three unless the dress is very simple. Hair and accessories should share the stage, not wrestle for it.
Low-Key Finish: For a quieter look, strip the style down to the clean shape alone. A pressed bob, low bun, soft roll, or side sweep can be enough on its own if the parting and edges are clean.
Common Mistakes to Avoid on the Wedding Day
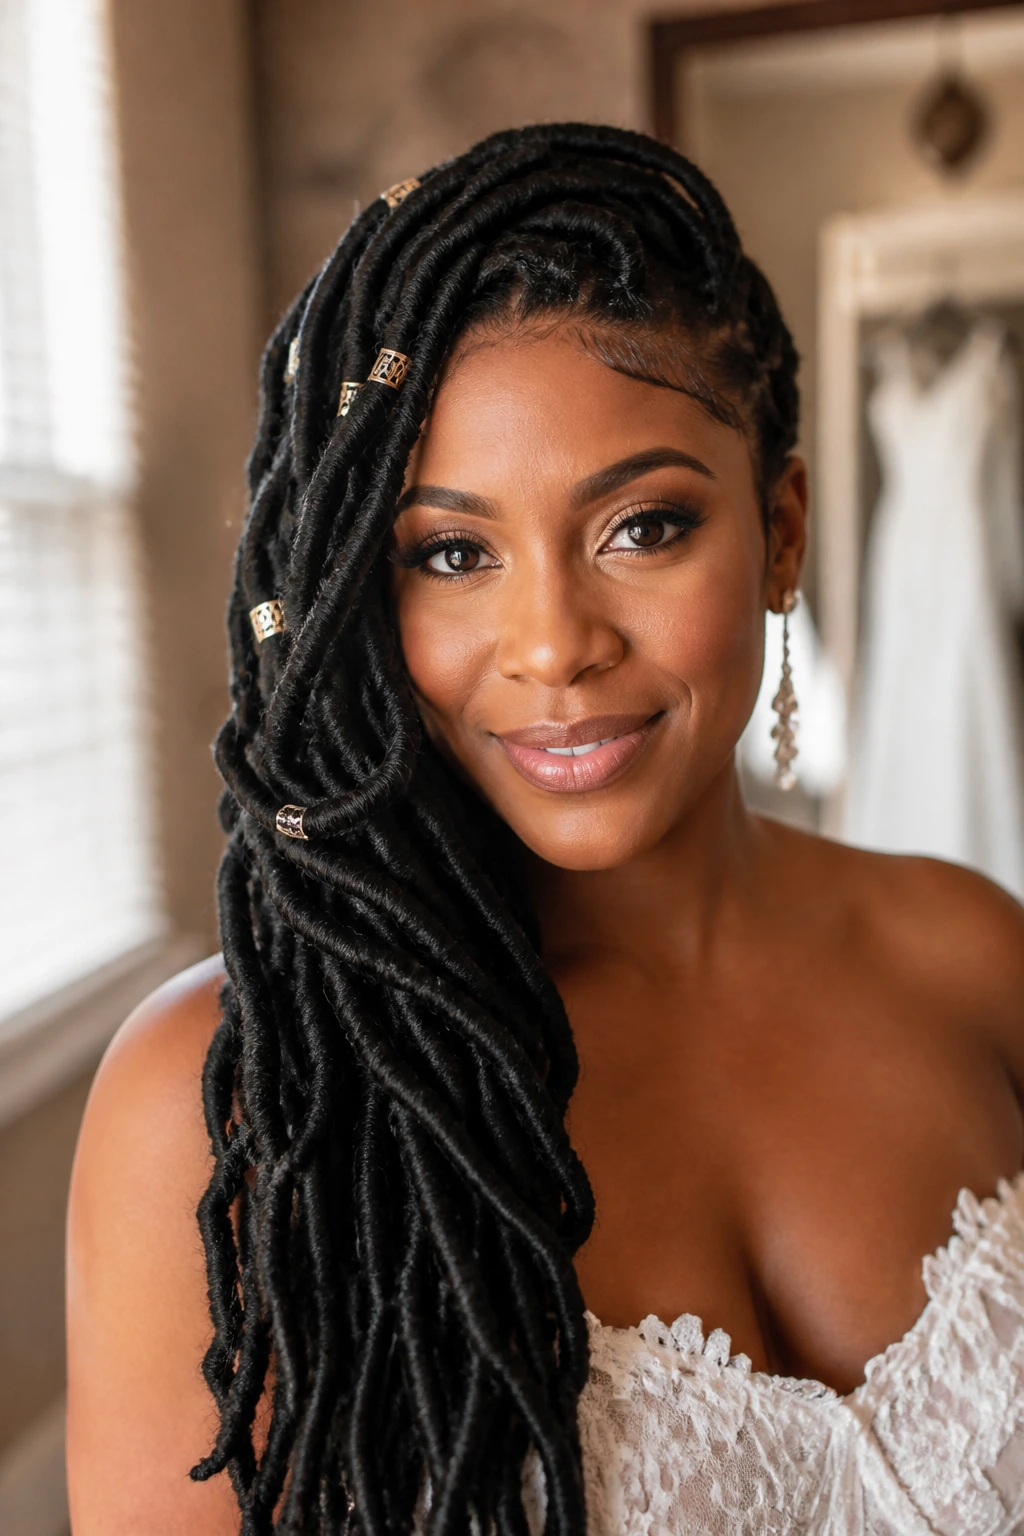
The biggest mistake is a style that pulls too hard at the hairline. Red marks, soreness, and a pounding scalp are not the price of looking polished. If your stylist is tugging so tightly that your eyes water, speak up. The line between secure and painful is thinner than people admit.
Another common problem is accessory overload. A veil, pearl comb, cuffed braids, and a crystal headband can work separately, but all together they start shouting. Pick one main accent and let the shape of the hair do the rest. The cleanest bridal looks usually have one clear focal point.
Skipping a rehearsal is a gamble. If you do not know how the style behaves after an hour, how it sits with the veil, or whether the side sweep really stays in place, the wedding morning becomes the test run. That is not the moment for discovery. It’s the moment for familiarity.
Product buildup causes more problems than most people expect. Too much mousse can dry stiff. Too much gel flakes. Too much serum turns pressed styles limp. The fix is simple: use less product than you think, then add a second light pass only where it is needed.
And do not forget about the back. Brides spend a lot of time looking in the mirror from the front. Photographers do not. A bun that looks neat head-on can still sag at the nape, and a braid that reads clean in the mirror can loosen at the crown. Check the profile and the back before you call it done.
Frequently Asked Questions
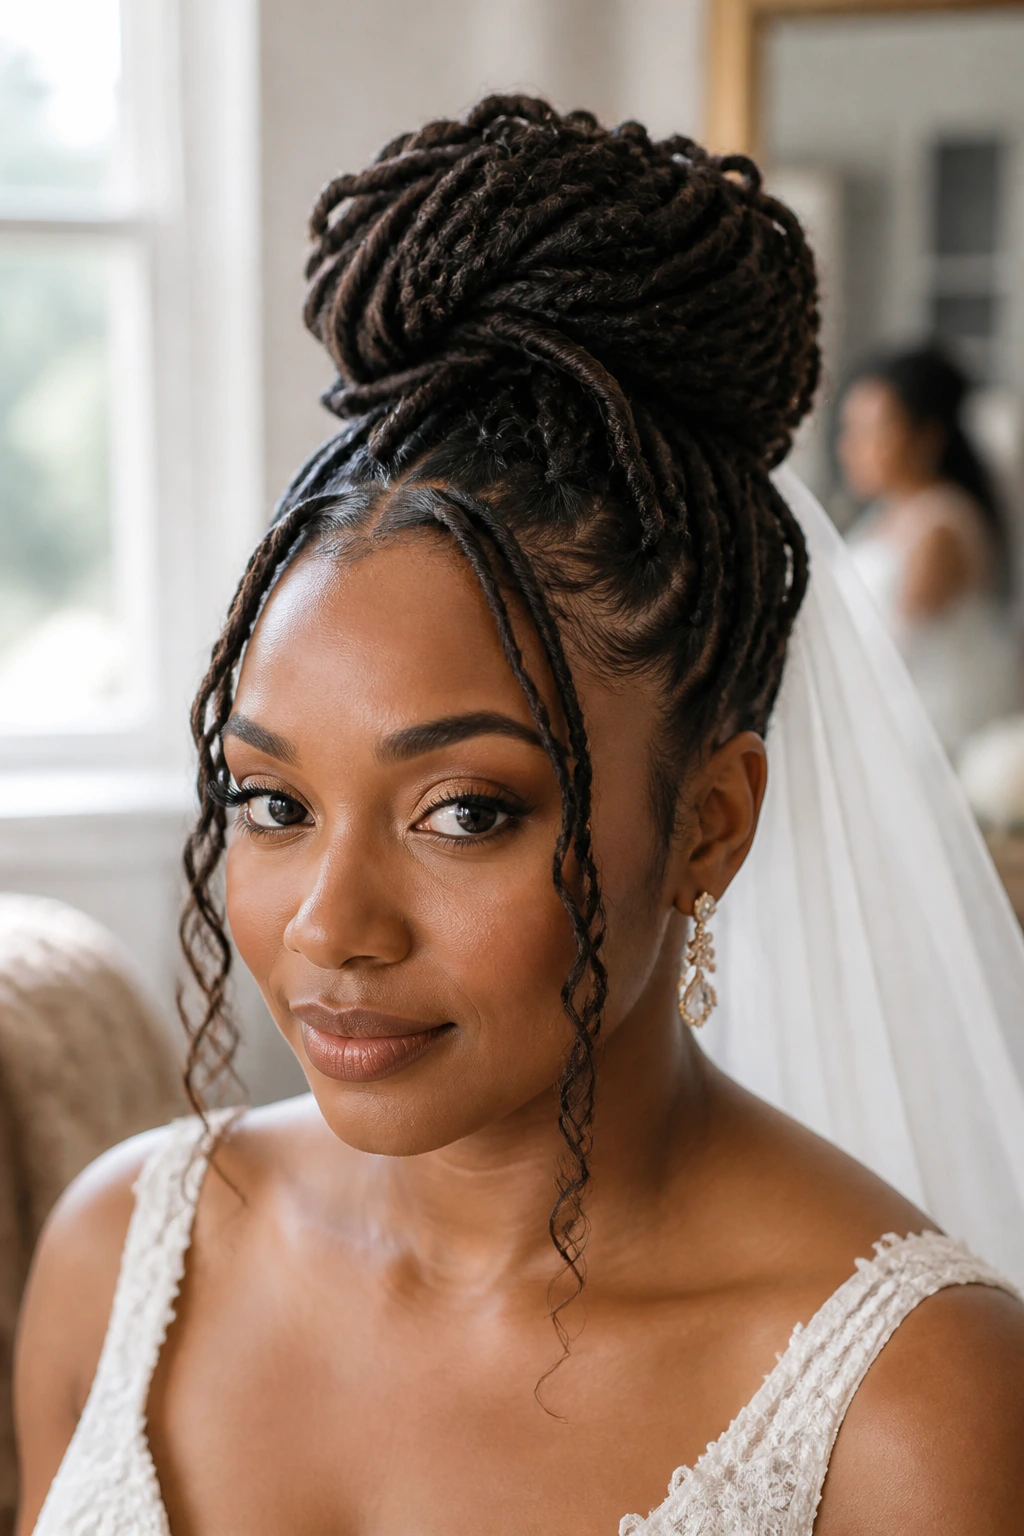
How far ahead should I choose my bridal hairstyle?
Ideally, once the dress and veil are settled enough to know the neckline and weight. That gives you time to test accessories, check tension, and see whether your chosen style behaves well with your hair type.
Can Black brides wear a veil with braids or locs?
Absolutely. The trick is placement. A low bun, crown braid, flat-twist base, or a neat braid pattern gives the comb somewhere to anchor without sliding.
What styles hold best in humidity?
Braided updos, loc buns, twist-based styles, and protective styles usually hold best because they rely on structure more than loose curl pattern. Pressed styles and brushed-out waves can work too, but they need tighter product control and more careful setting.
Should I wash my hair the night before the wedding?
Only if your stylist wants a clean base for a press, curl set, or molded style. For braids, loc styles, and some updos, hair that is prepped a day or two earlier can actually behave better. Freshly washed hair is sometimes too soft for grip.
Can short natural hair still look formal enough for a wedding?
Yes, and often in a very striking way. Finger waves, crown twists, tapered frohawks, and sculpted pixies can look sharper than longer styles when the shape is clean and the accessory is well chosen.
How do I keep my edges from flaking?
Use less edge control, not more. Apply a thin layer, brush it in, and stop once the hairs are laid. If the product flakes during a trial, switch formulas before the wedding day.
What if my curls or waves start falling flat during the reception?
A tiny mist of water or foam can wake the shape back up, but only if the style has some set left in it. If it is a pressed or waved style, a quick touch-up with a small iron on one or two face-framing sections can bring the shape back without redoing everything.
Can I combine a protective style with a bridal finish?
Yes, and that’s often the sweet spot. Knotless braids, crochet styles, locs, and twist updos can look very polished with one clean part, one accessory, and a thoughtful veil placement.
A Bridal Style That Holds Its Shape
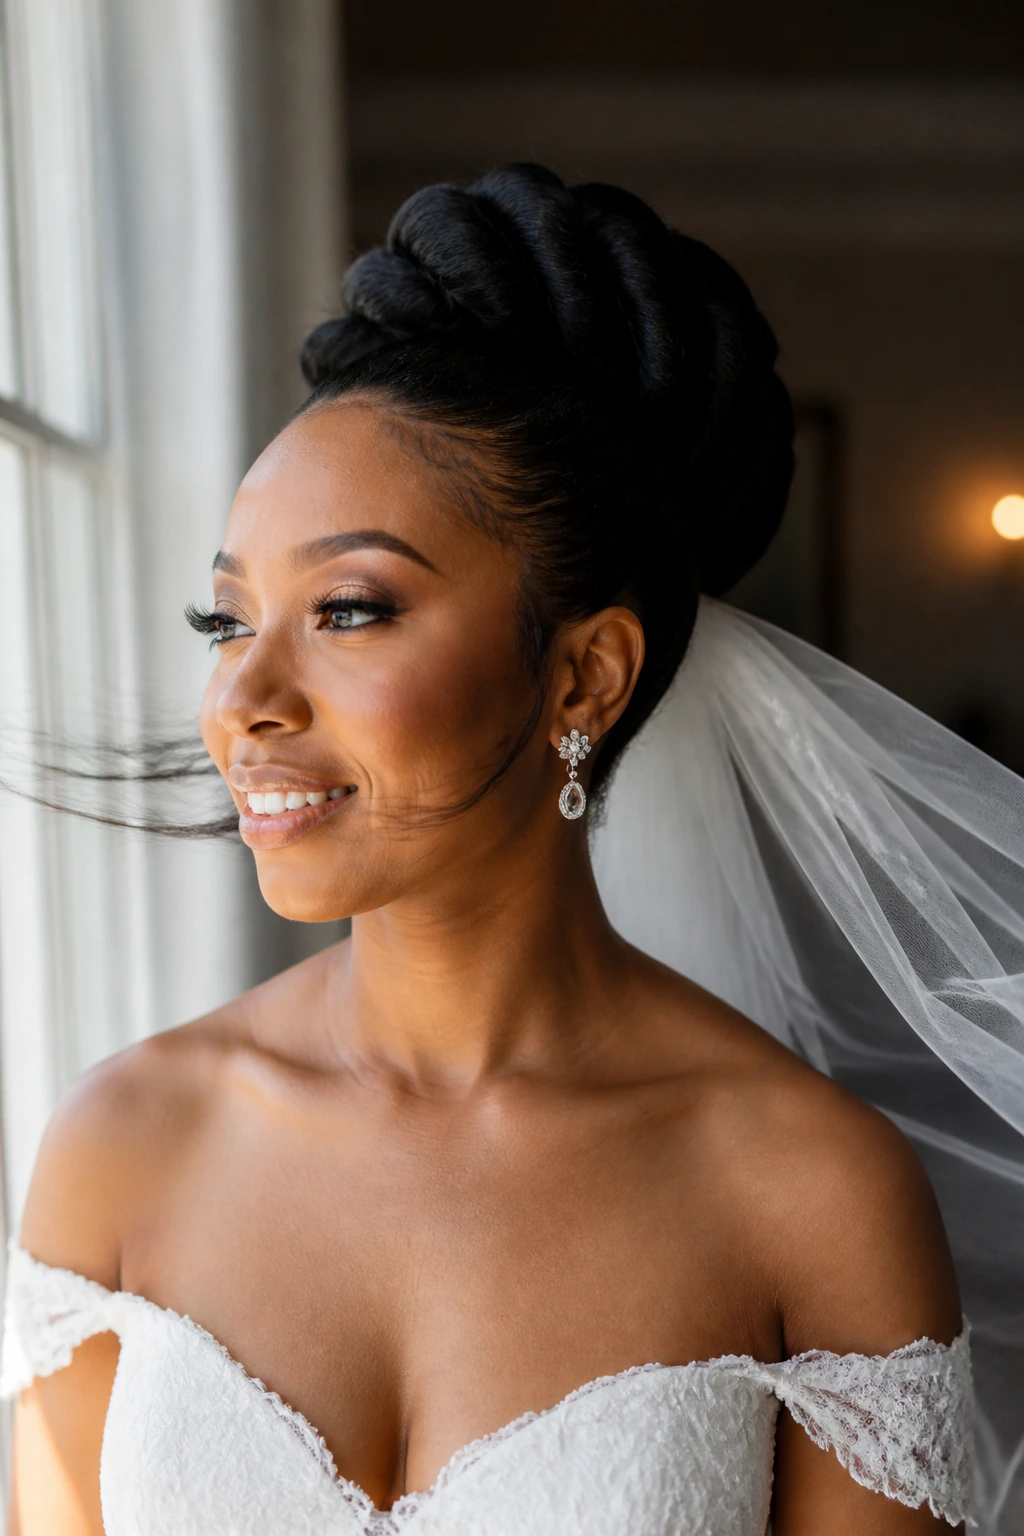
A good wedding hairstyle does more than frame the face. It keeps its nerve. It lets you move, sweat, smile, lean in for photos, and forget about it for long stretches, which is exactly what a bride needs on a day that already asks for enough attention.
What I like about these hairstyle ideas for Black brides is that they respect both form and texture. Some are soft. Some are sculpted. Some lean into braids or locs, while others keep the finish smooth and close. None of them ask you to hide the hair you actually have.
Pick the one that fits your dress, your comfort level, and the kind of day you want to have. If it can survive the veil, the wind, the hugs, and the dance floor, it has earned its place.
