



Long hair looks dreamy in the chair right up until the first bobby pins start slipping and the curls near the nape begin to loosen under their own weight. That is the quiet truth behind wedding hairstyles for brides with long hair: length gives you options, but it also gives gravity more to work with. A style that looks soft and romantic in the mirror has to survive hugs, humidity, flash photography, dinner, and the late-song head tosses on a crowded dance floor.
The good news is that long hair is one of the best canvases for a wedding day. It can hold sculpted waves, build a huge braid, disguise extensions, or anchor a veil without the style feeling flimsy. It can also go the other way—sleek, low, and very clean—with the ends still long enough to read elegantly in back photos. That range is why brides with long hair don’t need one “safe” option. They need a few smart ones.
The styles below lean into different moods: glossy and formal, soft and garden-like, polished and modern, textured and slightly undone. Some are best with thick hair. Some make fine hair look fuller. Some play nicely with a cathedral veil, while others need a comb, a pin, or a flower placed with a little more care. Long hair rewards that kind of attention.
Why These Styles Work on Long Hair
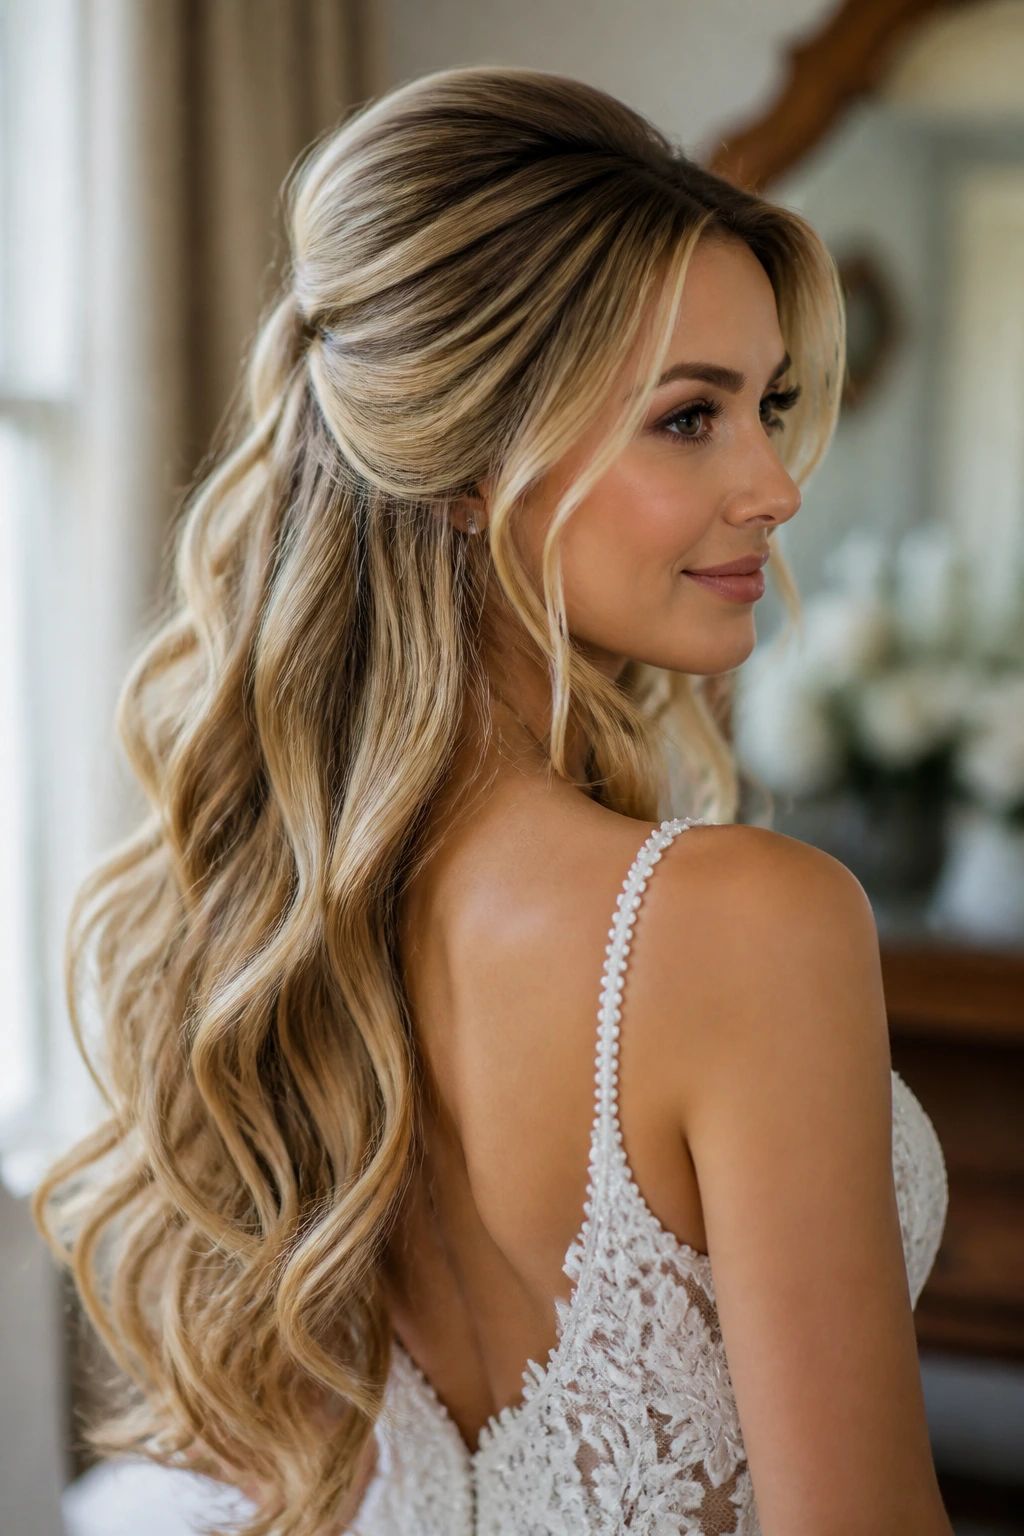
-
Length gives structure: Braids, twists, and buns have more hair to grip, so they hold their shape longer than the same style on shoulder-length hair.
-
Weight changes everything: Long hair can flatten too much at the crown, which is why the best wedding styles build lift in the right place instead of fighting the weight all day.
-
There’s room for detail: A long braid, a wrapped ponytail, or a full wave pattern actually shows from the front, side, and back, which matters in wedding photos.
-
Accessories sit better: Veils, combs, pins, pearls, and flowers have more hair to anchor into, so you can place them with real intention instead of hoping they stay put.
-
You can choose your drama level: Long hair can look plain or grand depending on how you set the crown, smooth the ends, or pull out a few face-framing pieces.
1. Soft Hollywood Waves with a Deep Side Part
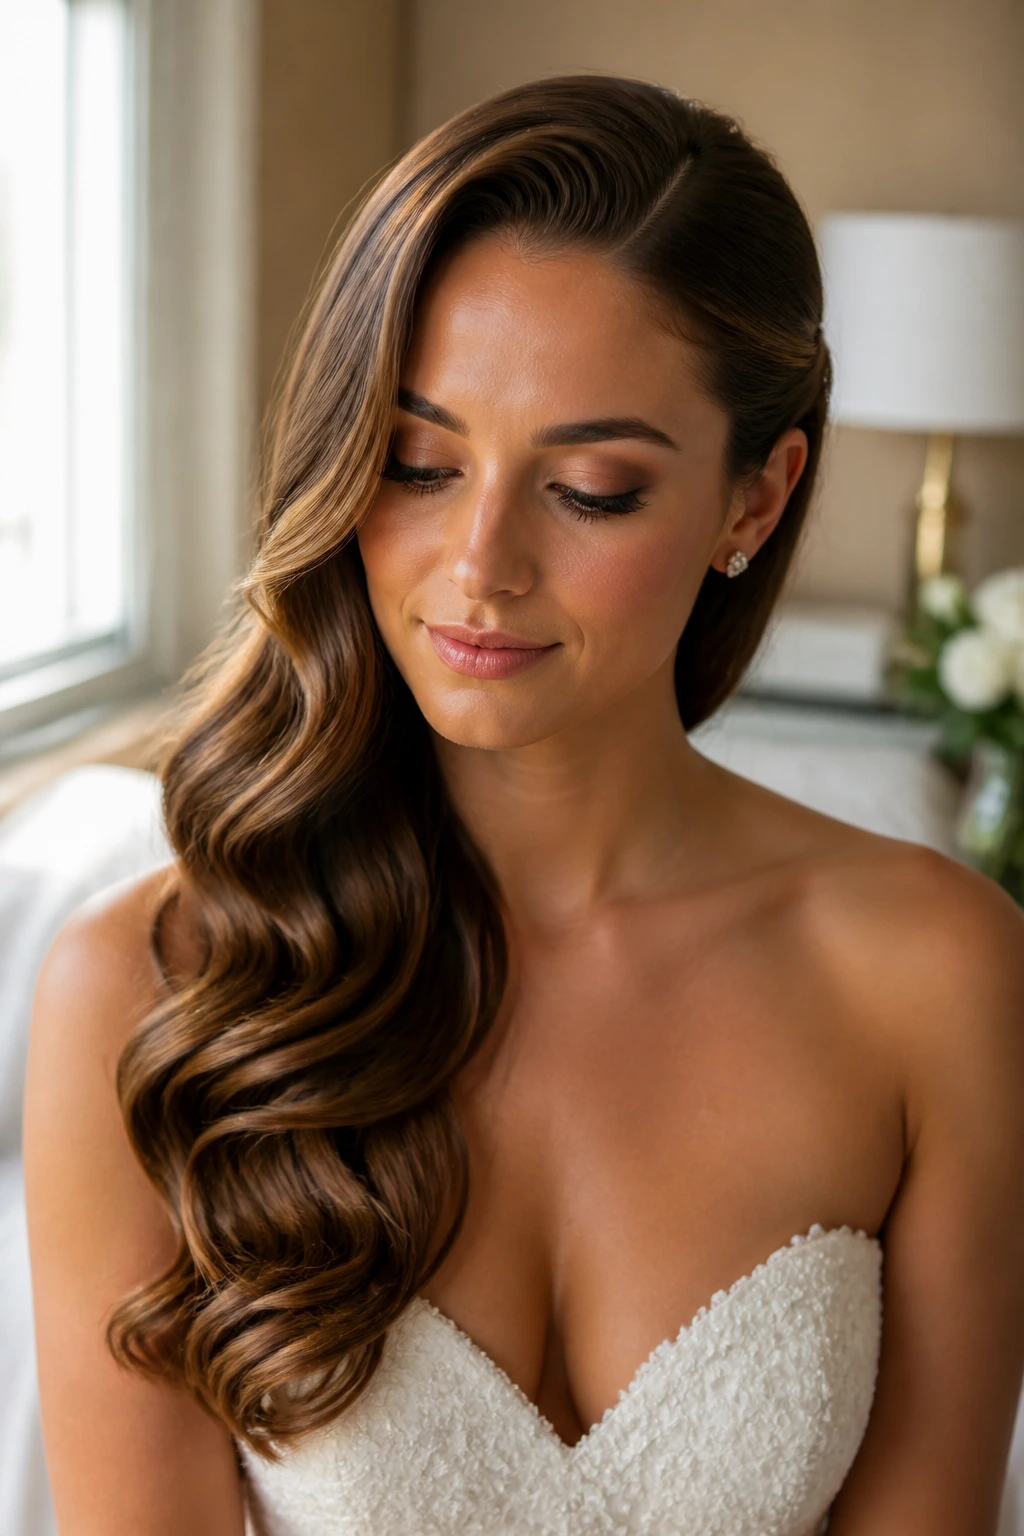
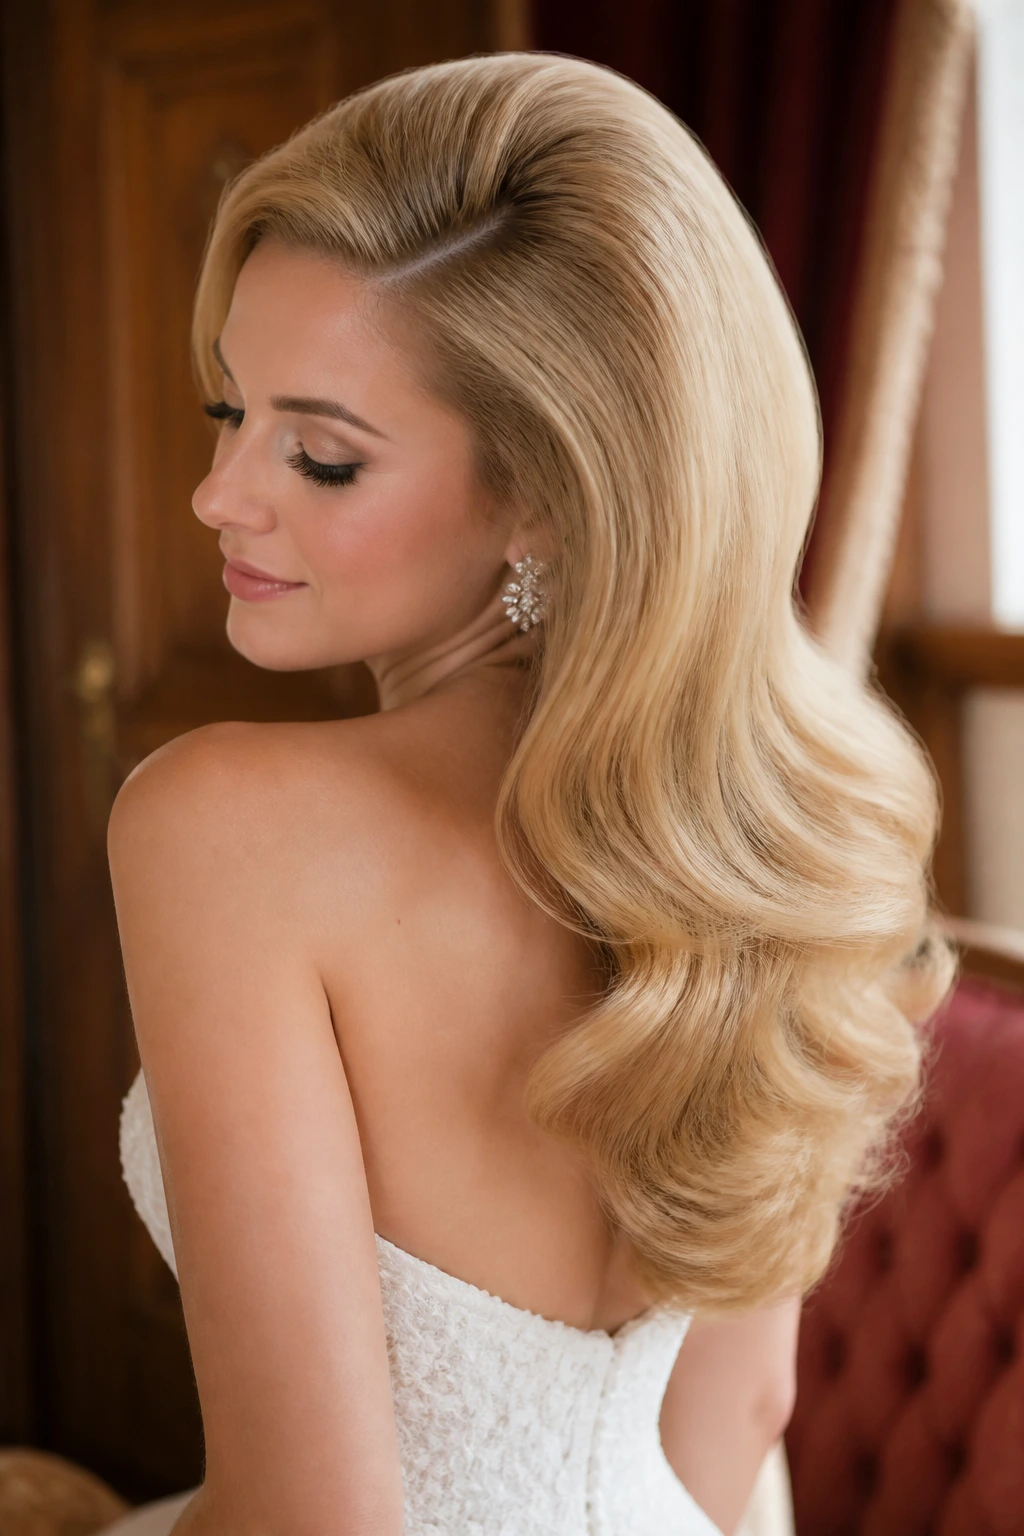
Glossy waves with a deep side part are one of those styles that quietly do a lot of work. The hair looks polished from the front, but the movement through the ends keeps it from feeling stiff or dated. On long hair, the bend has room to breathe, so you get those wide, sculpted curves instead of tiny curls that collapse by the cake-cutting.
Why It Works
The side part gives the whole style a frame, which helps when the dress neckline is simple or the gown is doing the talking. Long hair keeps the wave pattern visible all the way down, and that length helps the style photograph from the back without turning into a blur of curls. It’s formal, but not frozen.
How to Create It
-
Prep damp hair with heat protectant and a smoothing blow-dry cream.
-
Blow-dry with a round brush or paddle brush until the roots are smooth and the ends have shape.
-
Curl 1 to 1½-inch sections away from the face using a 1¼-inch curling iron, then pin each curl flat while it cools.
-
Brush through the curls with a boar-bristle brush or a soft paddle brush to merge them into one wave pattern.
-
Set a deep side part, tuck one side behind the ear if needed, and mist with flexible-hold hairspray.
Best With
- Strapless or off-the-shoulder gowns
- Side-swept earrings
- A veil clipped low on the crown
- Thick hair that can hold a wide wave
Pro Tips
- Keep the roots smooth. Puffy roots make the wave look casual in a way most brides do not want.
- Curl every section in the same direction if you want that old-Hollywood shape, then brush once everything is cool.
- Use a shine spray sparingly. Too much and the top of the hair starts to separate at the part.
Watch Out
Don’t brush the curls while they’re warm. They drop fast and lose the clean wave line that makes the style work in the first place. And if your hair is very layered, leave the shortest pieces slightly straighter near the ends so they don’t kick out like little flagpoles.
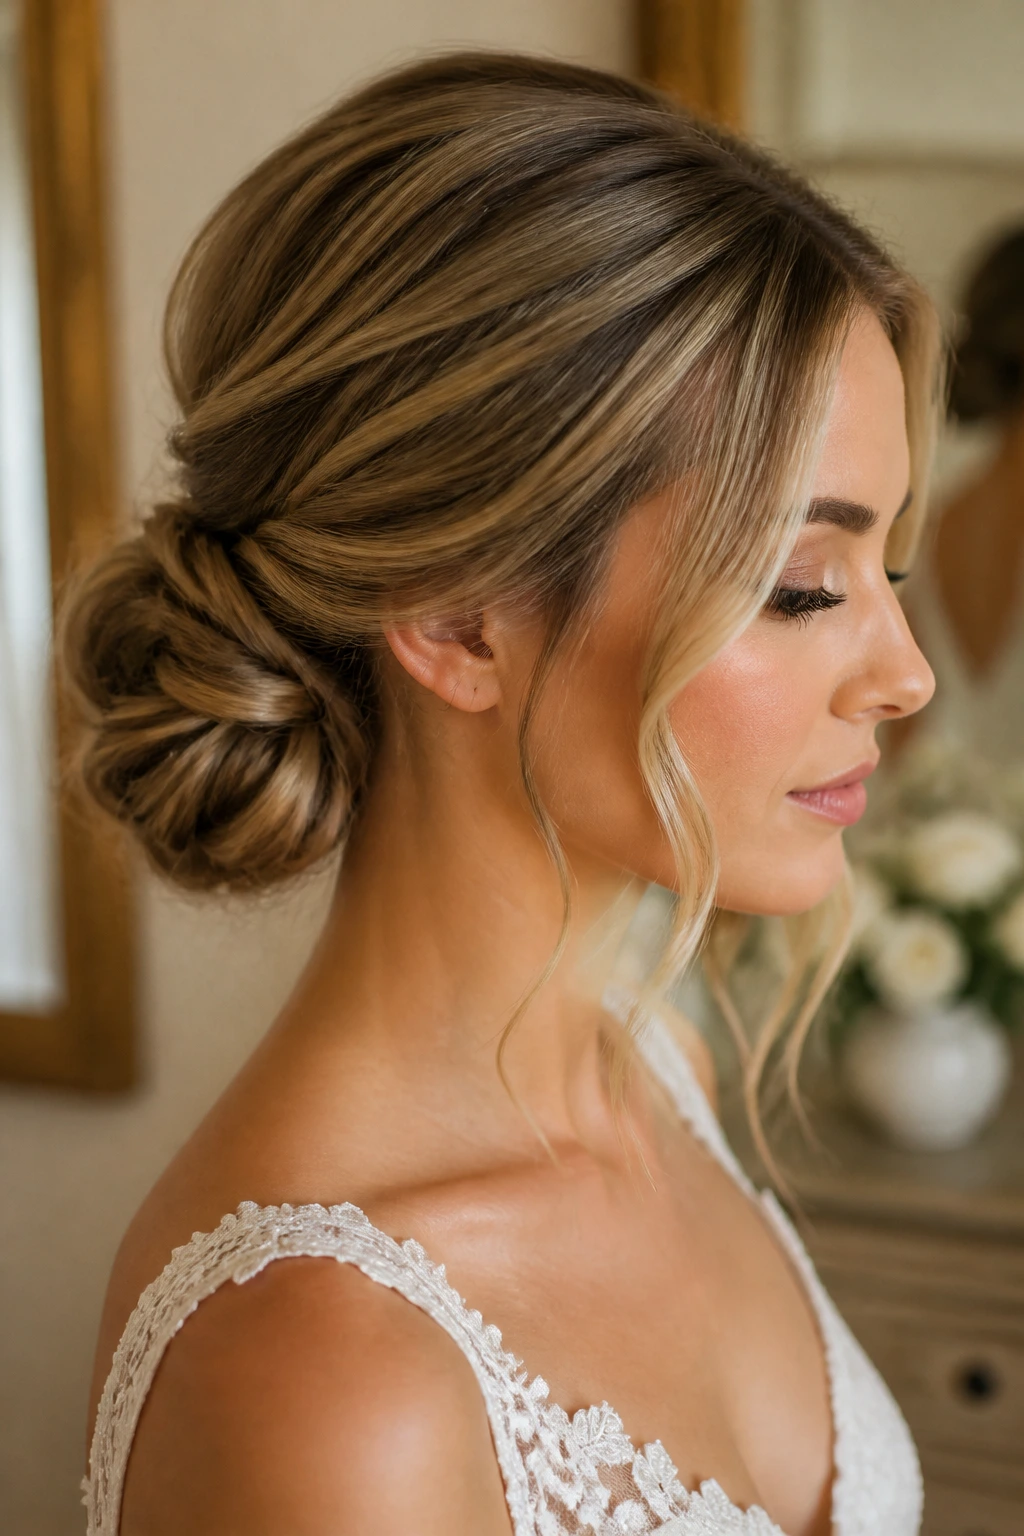
2. Low Chignon With Face-Framing Pieces
A low chignon is the style I reach for when a bride wants her hair off her neck but still wants softness around the face. It is neat without looking severe. And on long hair, there is enough length to build a fuller knot that doesn’t feel skimpy from the side.
Why It Works
The bun sits low enough to clear a veil or a high neckline, while the face-framing pieces keep the front from looking too polished. Long hair makes the chignon feel substantial; you can twist and fold the ends into itself instead of making a tiny knot that disappears in photographs. It also holds pins better because there is more hair to anchor.
How to Create It
-
Part the hair where you want it, then smooth the top with a light serum.
-
Gather the hair at the nape into a low ponytail and secure with a clear elastic.
-
Twist the ponytail into a coil and wrap it into a bun, tucking the ends underneath.
-
Pin the bun with U-pins or French pins, working in from different angles until it feels stable.
-
Pull out two slim face-framing pieces, curl them lightly, and mist the whole style with a medium-hold spray.
Best With
- High-neck gowns
- Lace backs
- Chapel or cathedral veils
- Brides who want to show earrings and collarbones
Pro Tips
- Leave the front pieces a little longer than you think. They should skim the cheekbone, not sit at the jawline like a last-minute fix.
- Backcomb the ponytail lightly before wrapping if the hair is silky and slippery.
- Keep the bun low and slightly broad instead of tiny and tight; it looks more deliberate.
Watch Out
If the bun sits too high, it starts to fight the veil and the neckline. If the face-framing pieces are curled too tightly, they can look like prom hair. A gentle bend is enough.
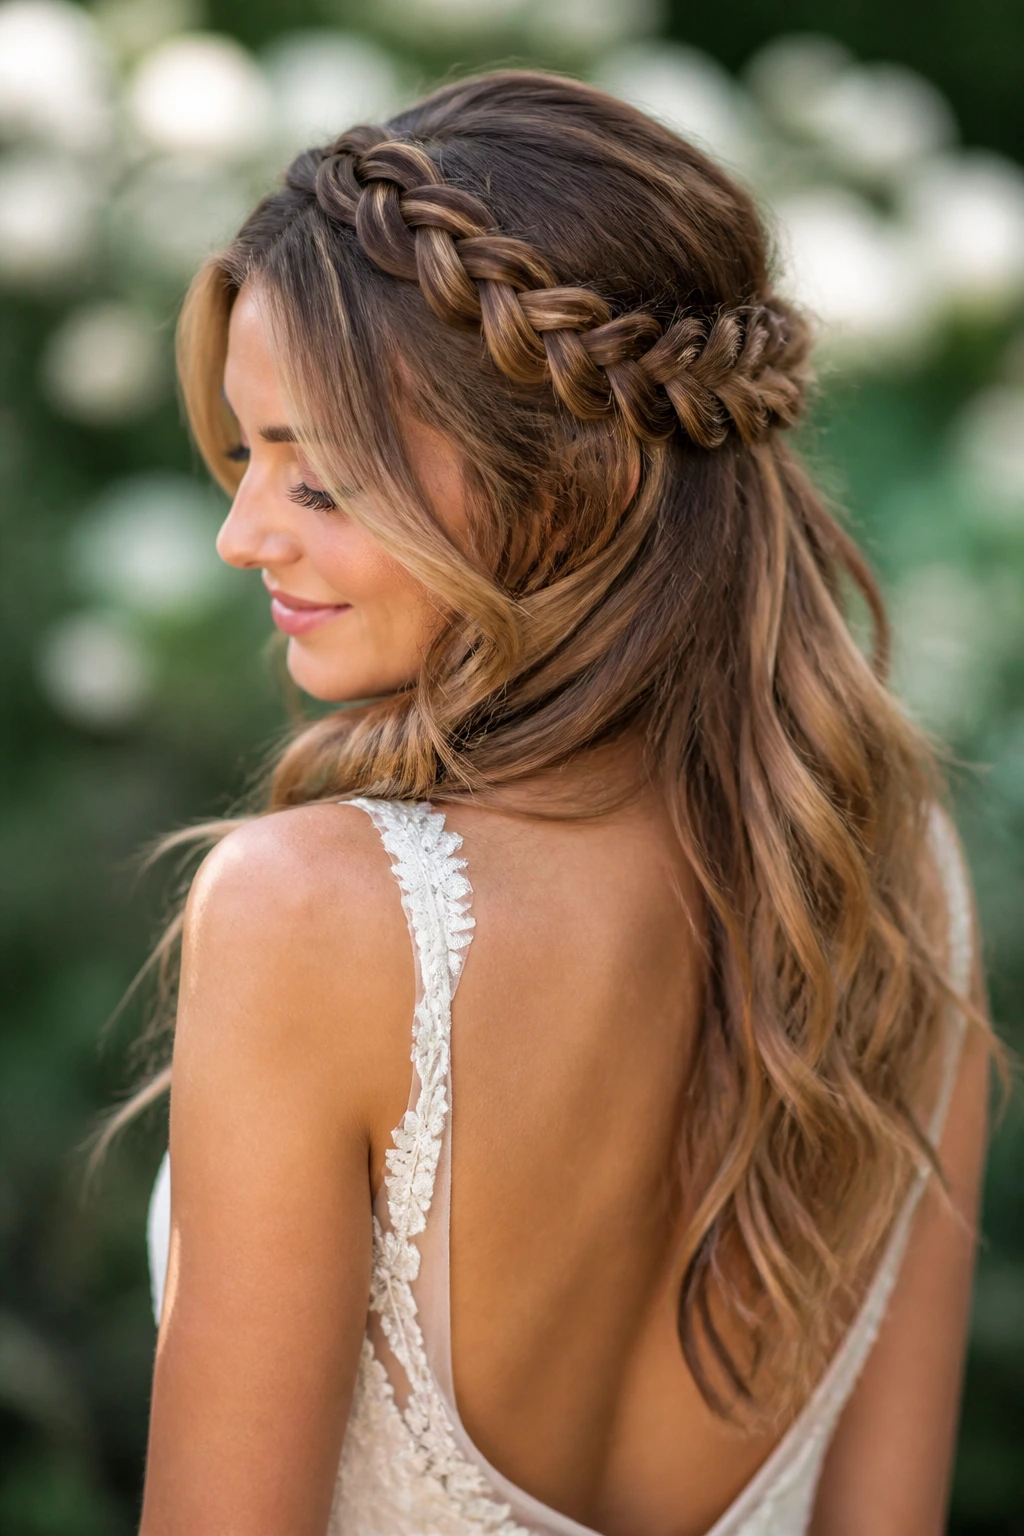
3. Braided Crown Half-Up for an Open Back Dress
This is the style for brides who want to keep the length visible but still need the top half controlled. A braided crown half-up gives shape around the face and shoulders, then lets the rest of the hair fall down the back where it can still do its thing. It’s a smart answer for open-back dresses. The braid becomes the detail.
Why It Works
Long hair can handle the weight of a crown braid without it feeling tiny or flimsy. That braid also gives the veil comb or hairpiece something firmer to sit against than loose waves do. If the dress has a dramatic open back, this keeps the front soft while letting the back of the gown stay visible.
How to Create It
-
Create a clean center part or soft off-center part.
-
Take a section from each side near the temples and braid or twist it back toward the crown.
-
Join the sections at the back of the head and secure them with pins just above the occipital bone.
-
Gently loosen the braid edges with your fingers so the crown looks fuller.
-
Curl the loose hair underneath in large sections and finish with a flexible hairspray.
Best With
- Open-back or illusion-back dresses
- Bohemian or garden weddings
- Fresh flowers tucked near the braid
- Brides who want movement and security at once
Pro Tips
- Loosen the braid after pinning, not before. It holds better that way.
- Add texture spray first if the hair is freshly washed and too slippery.
- Use tiny pins that match the hair color; big dark pins show up in photos and ruin the clean line.
Watch Out
Don’t braid too low. If the braid starts near the ears, the style can drag the face down. Keep the crown section lifted a little higher so it reads intentional, not heavy.
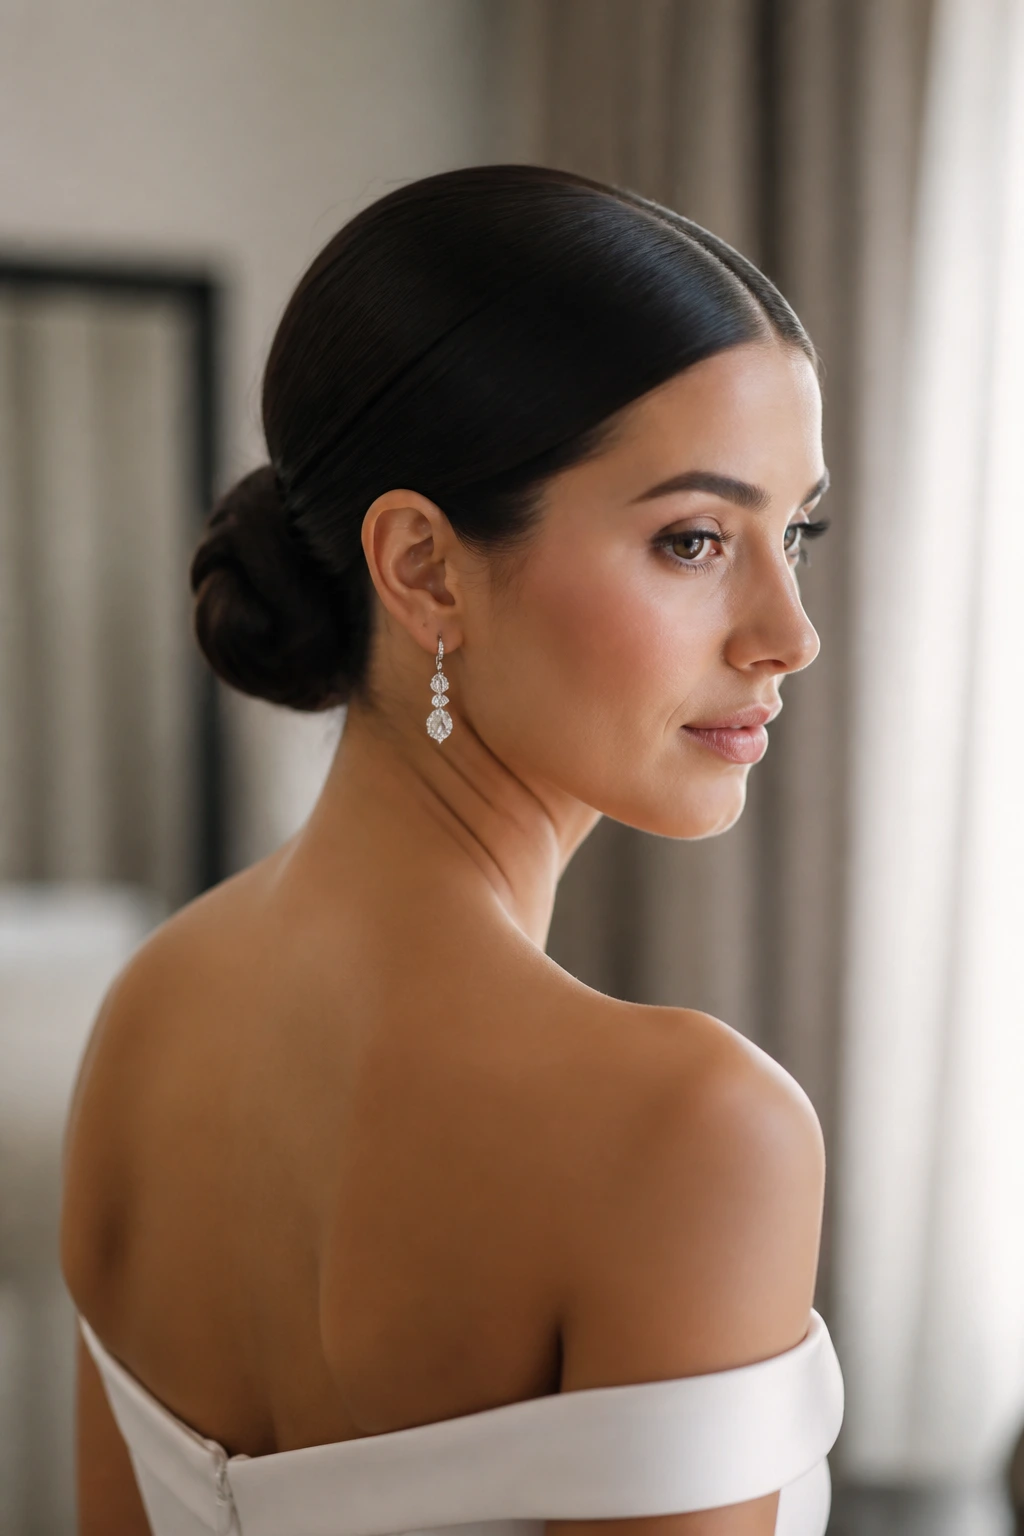
4. Sleek Middle-Part Low Bun
A middle-part low bun is spare, calm, and a little severe in the best way. It is the bride version of a perfectly tailored blazer. Long hair helps here because the bun can be fuller and more sculpted, so it doesn’t look like a tight knot pinned in a hurry.
Why It Works
The clean center part gives the style symmetry, which is useful when the dress has strong lines or a modern silhouette. Long hair lets the bun feel dense and smooth instead of skimpy. It also keeps the neck and shoulders completely open, which is a gift if you want the gown and jewelry to stand out.
How to Create It
-
Blow-dry hair straight with a center part using a smoothing brush.
-
Apply a light serum or cream to the mid-lengths and ends.
-
Gather the hair into a low ponytail at the nape and secure tightly.
-
Twist the ponytail into a bun, tucking the ends under and pinning every loose bit.
-
Finish with a shine spray at the surface only, then smooth any flyaways with a toothbrush or edge brush.
Best With
- Minimalist gowns
- Satin, crepe, or silk dresses
- Statement earrings
- A modern veil with a clean comb
Pro Tips
- Flat iron the part line first if your hair wants to puff up at the roots.
- Do not overload with oil. Too much and the bun starts to split.
- Pin the bun in layers. One ring of pins is rarely enough on long hair.
Watch Out
A low bun like this shows every bump. If the ponytail base is crooked, the whole style reads crooked. Take the time to smooth the crown before you start pinning.
5. Waterfall Braid With Loose Ends
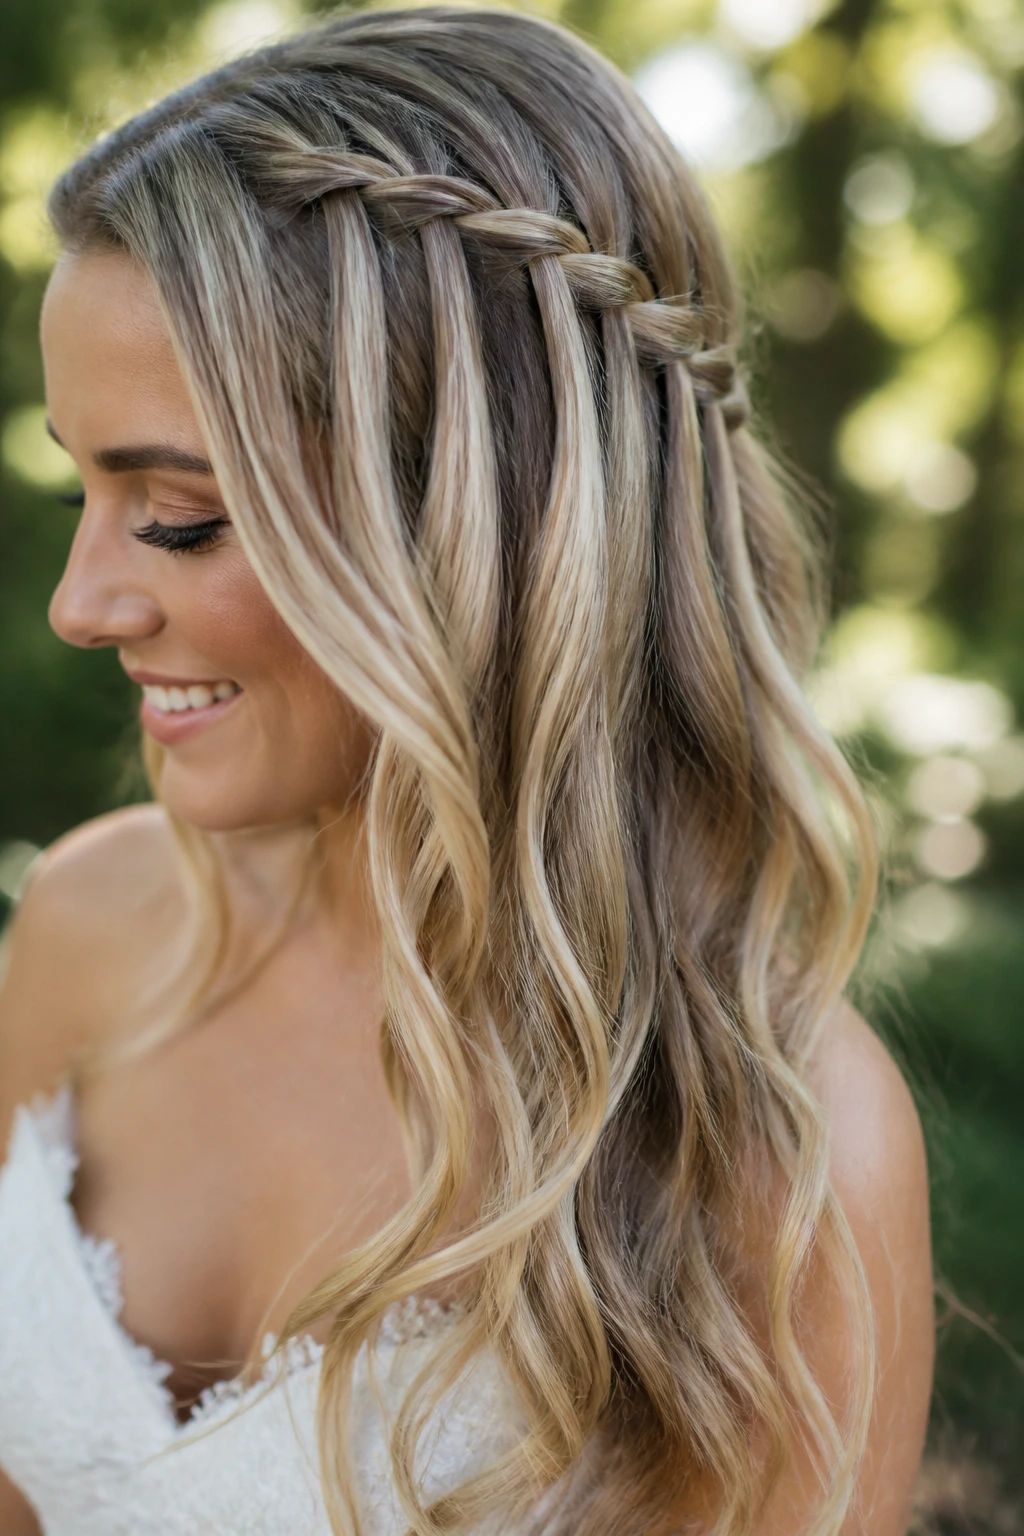
A waterfall braid gives the soft, romantic feeling a lot of brides want without going full loose hair. Pieces drop through the braid like little ribbons, which keeps the style airy. On long hair, the pattern has room to stretch, so the braid becomes visible instead of vanishing into the length.
Why It Works
This style works because it mixes structure and movement. The braided top keeps the hair away from the face, while the rest of the length stays loose and feminine. It’s especially good for long hair with a little wave or bend, because the drops look more polished when the ends aren’t pin-straight.
How to Create It
-
Start with lightly curled or softly waved hair so the braid blends with the rest.
-
Begin a three-strand braid near one temple, dropping the bottom strand and picking up new pieces as you move.
-
Continue the braid along the back of the head or across one side, depending on the look you want.
-
Secure the braid with a hidden pin or clear elastic and curl the loose ends in large sections.
-
Mist with flexible spray and pull a few pieces around the face if the style needs softness.
Best With
- Garden weddings
- Soft lace dresses
- Brides who want half-up hair without a full crown braid
- Hair that holds a loose wave well
Pro Tips
- Practice the braid on second-day hair. Freshly washed hair can slip apart.
- Keep the tension even. One loose section makes the braid look lopsided fast.
- A tiny bit of texture powder at the roots can save the style if the hair is very soft.
Watch Out
Waterfall braids can look messy if the dropped pieces are too thick. Keep them slim, and don’t over-pancake the braid or it loses its clean pattern.
6. Old-Hollywood Blowout With Big, Soft Ends
This is not a casual blowout. The ends are shaped, the roots have lift, and the hair moves in one broad, glossy sweep. If a bride wants her long hair to look expensive in photos, this style earns its keep. It has body without turning into a cloud of curls.
Why It Works
Long hair makes the blowout look luxurious because the shape carries all the way down the back. The style is less about curl and more about controlled bend, which means the hair still looks refined at the ceremony and lively at the reception. It suits brides who want their hair down, but not loose in a way that looks unfinished.
How to Create It
-
Apply heat protectant and a volumizing mousse at the roots.
-
Rough-dry the hair until it is about 80 percent dry.
-
Use a large round brush or blowout brush to lift the crown and smooth the ends under.
-
Once dry, wrap the front sections around a large-barrel curling iron for soft directional bend.
-
Brush lightly, set the shape with a light mist, and tuck one side behind the ear if needed.
Best With
- Long-sleeved or off-the-shoulder gowns
- Veils that come off after the ceremony
- Brides who want a glamorous but not stiff finish
Pro Tips
- Blow-dry the root direction carefully. That is where the style either looks polished or collapses.
- Use the largest barrel you own if your hair is very long; tiny curls look too busy.
- Pin the front sections while they cool to keep them from falling flat by the first toast.
Watch Out
This style can flatten quickly in humidity if you skip the mousse or the right spray. And if the ends are flipped too much, the whole thing starts to look dated instead of soft.
7. Twisted Half-Up with Pearl Pins
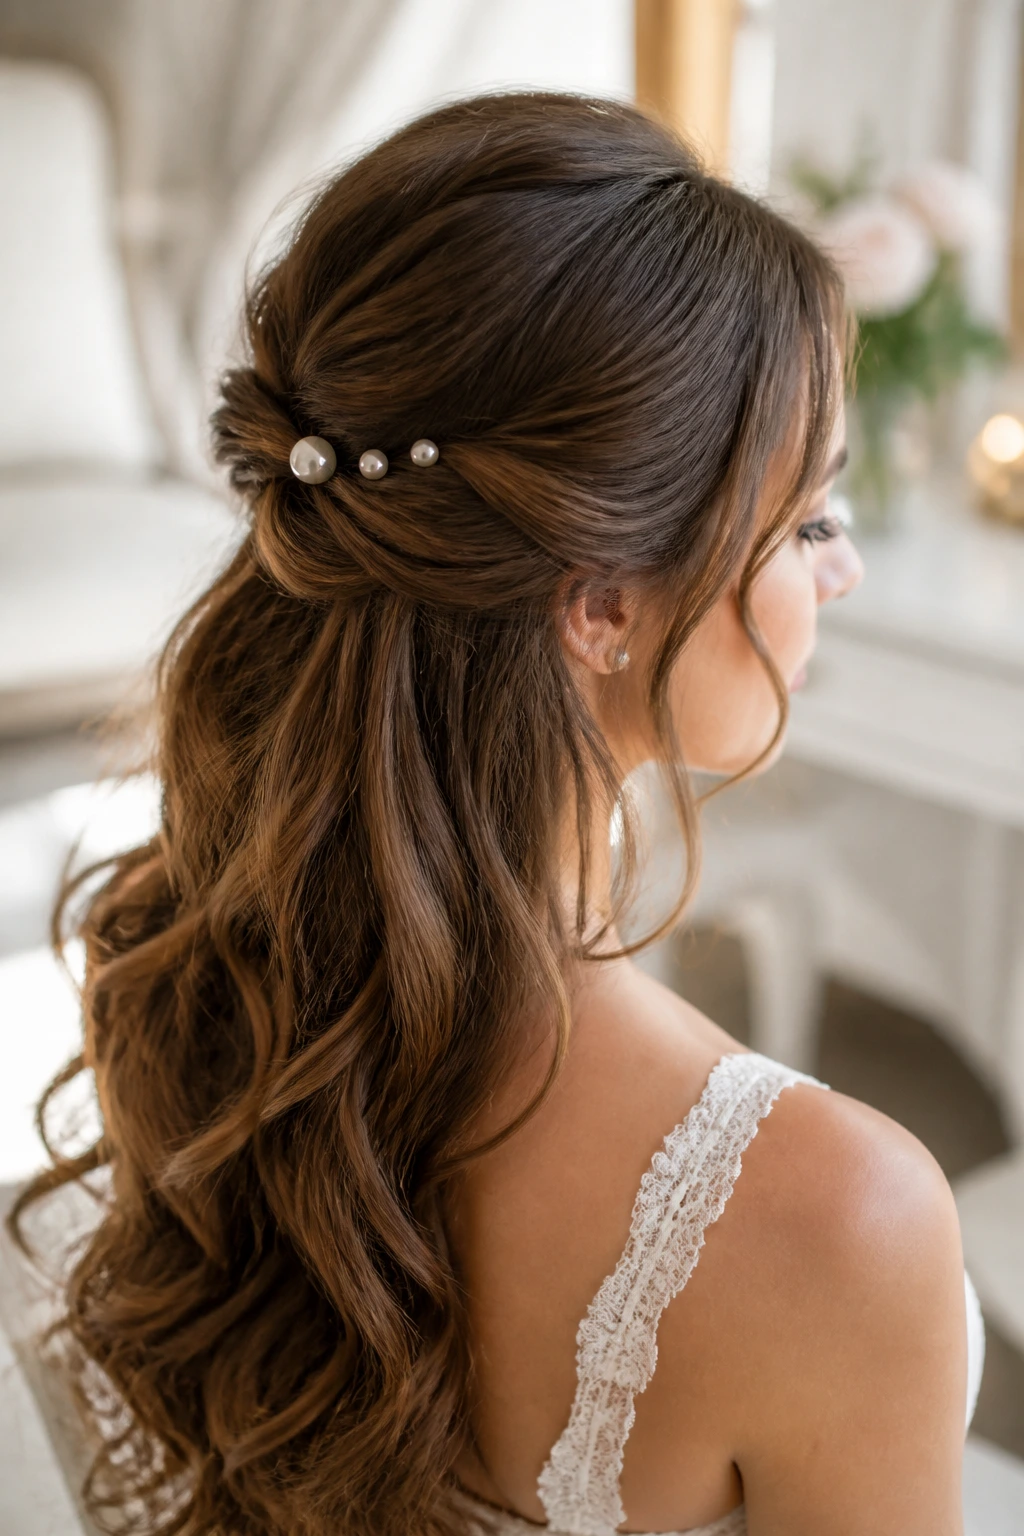
A twisted half-up style is one of my favorites for brides who want something that feels dressed up without looking overbuilt. The pearl pins do a lot of the visual work, so the hair itself can stay soft and slightly airy. Long hair gives the twists enough length to tuck and secure cleanly.
Why It Works
Twists are less fussy than braids and easier to adjust on the fly. They also create a subtle ridge at the back of the head, which gives fine long hair a little lift. Pearl pins catch the eye without needing a giant accessory, and they sit nicely where the twists meet.
How to Create It
-
Curl the hair in loose sections so the ends have movement.
-
Take two sections from each side of the head and twist them backward toward the crown.
-
Pin the twists where they meet, then add pearl pins along the join line or scatter them in a small cluster.
-
Leave the lower half down, brush the curls together, and smooth the top lightly.
-
Finish with a flexible-hold spray and a small amount of shine serum on the ends.
Best With
- Romantic dresses
- Veils that attach below the half-up section
- Brides who like pearls or classic details
- Fine to medium hair that needs a little lift
Pro Tips
- Cross the pins in an X if the twists are slippery.
- Use fewer pearls than you think. One neat cluster often looks better than a crowded row.
- Tuck the twists into the crown slightly higher if you want the half-up shape to show in photos.
Watch Out
Twists can collapse if the hair is too silky and freshly cleaned. Give the roots texture first, or the whole style loosens by lunch.
8. Boho Fishtail Braid Over One Shoulder
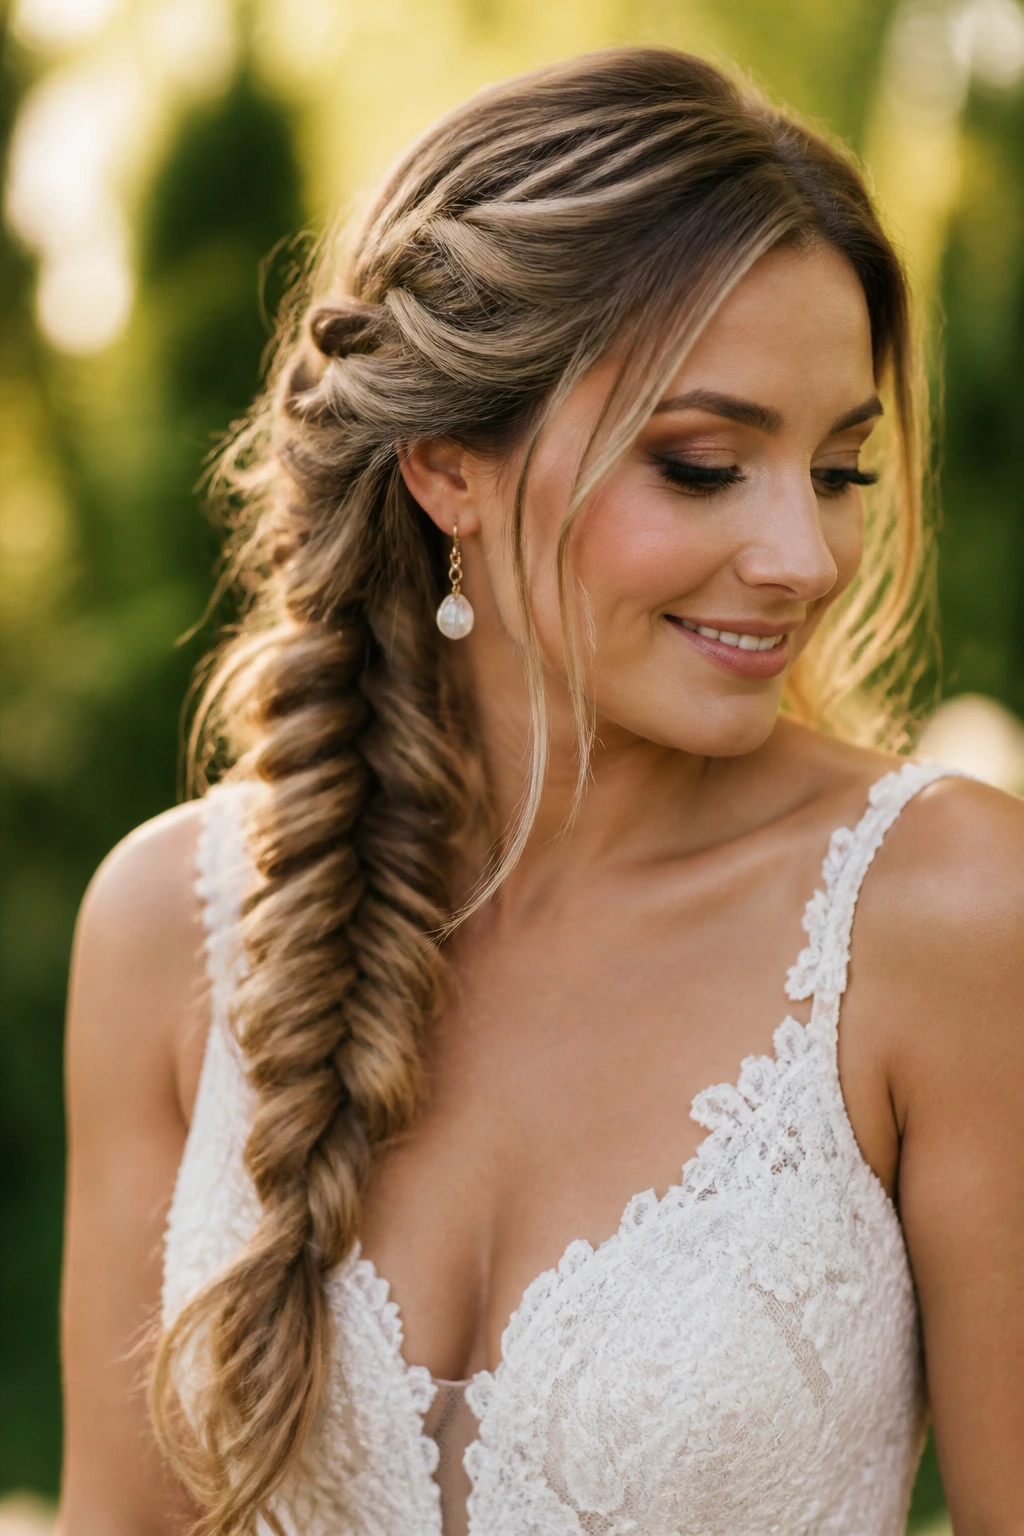
A fishtail braid over one shoulder has a relaxed feel, but it is not weak. In fact, it may be one of the most secure long-hair looks in the whole lineup. The braid shows off thickness and length in a way that feels deliberate, especially when the edges are gently loosened.
Why It Works
The braid keeps long hair controlled while still showing texture and dimension. Over one shoulder, it draws the eye to the collarbone and earring on the visible side, which works beautifully with asymmetrical dresses. It also survives wind better than loose curls. Much better.
How to Create It
-
Smooth the hair and gather it over one shoulder.
-
Divide the ponytail into two sections and begin a fishtail braid by pulling small pieces from the outside of each section into the opposite side.
-
Braid down to the ends and secure with a clear elastic.
-
Gently pull at the sides of the braid to widen it, stopping before the pattern disappears.
-
Wrap a strand around the elastic if you want a cleaner finish.
Best With
- Outdoor ceremonies
- Boho or rustic gowns
- Lace sleeves
- Brides who want their hair to stay put
Pro Tips
- Start the braid lower on the head if you want the shoulder placement to look natural.
- Use dry shampoo or texture spray first if the braid slips.
- Do not over-pancake the braid. It should look full, not fuzzy.
Watch Out
A fishtail braid can look thin at the ends if the hair is layered heavily. If that happens, stop braiding a few inches higher and leave the last bit soft.
9. High Ponytail Wrapped in Hair
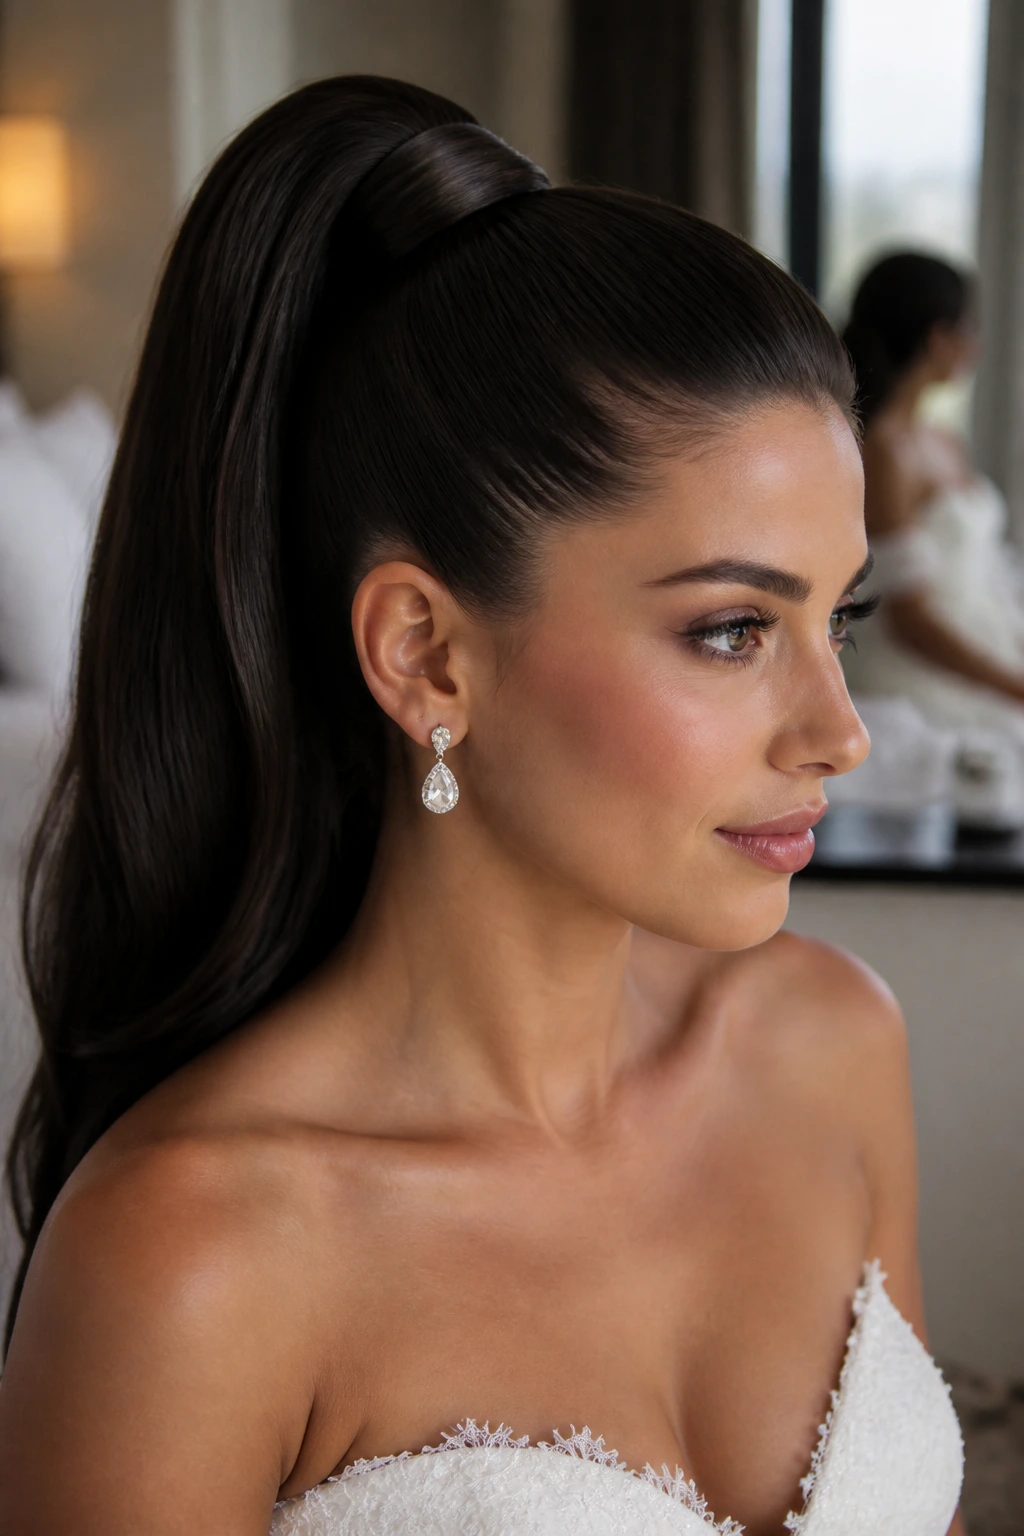
A high bridal ponytail is not shy, and that is exactly why it works. It lifts the face, shows off the neck, and makes long hair look dramatic instead of heavy. Wrapped at the base, it feels intentional rather than gym-adjacent. Big difference.
Why It Works
Long hair gives this ponytail length and movement, so the tail can fall in a glossy sheet or a soft curl pattern. The height creates instant polish, and the clean wrap at the base hides the elastic. It’s a strong choice when the dress is sleek or the bride wants a confident, modern line.
How to Create It
-
Blow-dry the hair smooth and create a slight root lift at the crown.
-
Brush the hair up to the desired height and secure it with a strong elastic.
-
Take a small section from the ponytail, wrap it around the base, and pin the end underneath.
-
Curl the tail in large sections or leave it straight with beveled ends.
-
Lock the style with flexible hairspray and add a little shine at the mid-lengths.
Best With
- Modern gowns
- High necklines
- Oversized earrings
- Brides who want the face lifted in photos
Pro Tips
- Use two elastics if the hair is very thick.
- Smooth the front with a boar-bristle brush before you set the ponytail.
- Wrap the base with a strand that matches the curl pattern so the cover-up looks seamless.
Watch Out
If the ponytail sits too high, it can start to feel cheerleader-ish. Keep the lift at the crown and not at the absolute top of the skull unless the whole look is meant to be very fashion-forward.
10. Braided Low Bun With a Clean Center Part
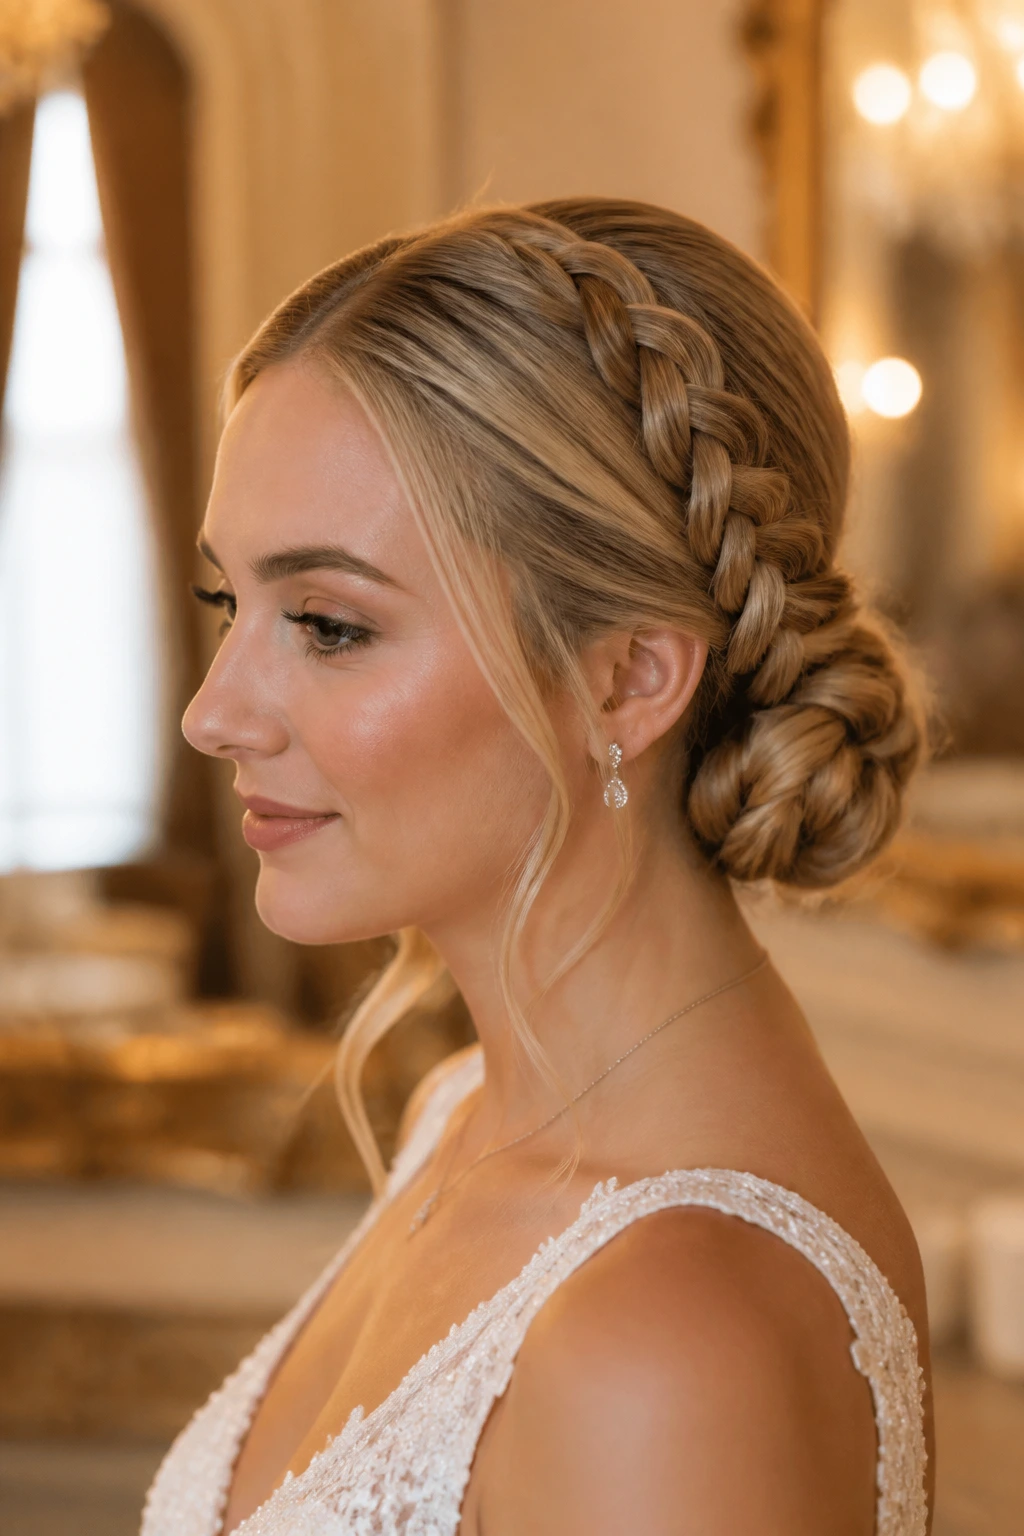
This style sits in a sweet spot between structured and romantic. The center part keeps the front sharp, the braid adds texture, and the low bun keeps everything anchored. It is especially good for long hair because the braid gives the bun more visual interest without needing a giant accessory.
Why It Works
Long hair makes the braid thick enough to show in the bun, which prevents the style from looking flat from the back. The clean part also helps balance heavier hair, especially when the dress is detailed and the bride wants the hairstyle to stay in the background. It does its job quietly.
How to Create It
-
Make a clean middle part and smooth the crown with a flat brush.
-
Gather the hair low and create a single braid down the ponytail.
-
Wrap the braid into a bun, folding the length around the base.
-
Pin all sides with U-pins, especially where the braid crosses itself.
-
Finish with shine spray and smooth any flyaways with a light touch.
Best With
- Formal gowns
- Pearls and classic jewelry
- Longer veils
- Brides with dense, heavy hair
Pro Tips
- Braid the ponytail slightly tighter than you think. It helps the bun feel secure.
- Anchor the bun with pins in different directions. A circle of pins gives more hold than a few straight ones.
- If the hair is layered, leave the shortest layers out of the braid and tuck them at the end.
Watch Out
A loose braid here can make the whole bun unravel in the middle. Tighten the braid at the start, then loosen only the outer edges after the bun is pinned.
11. Side-Swept Waves With One Sparkling Comb
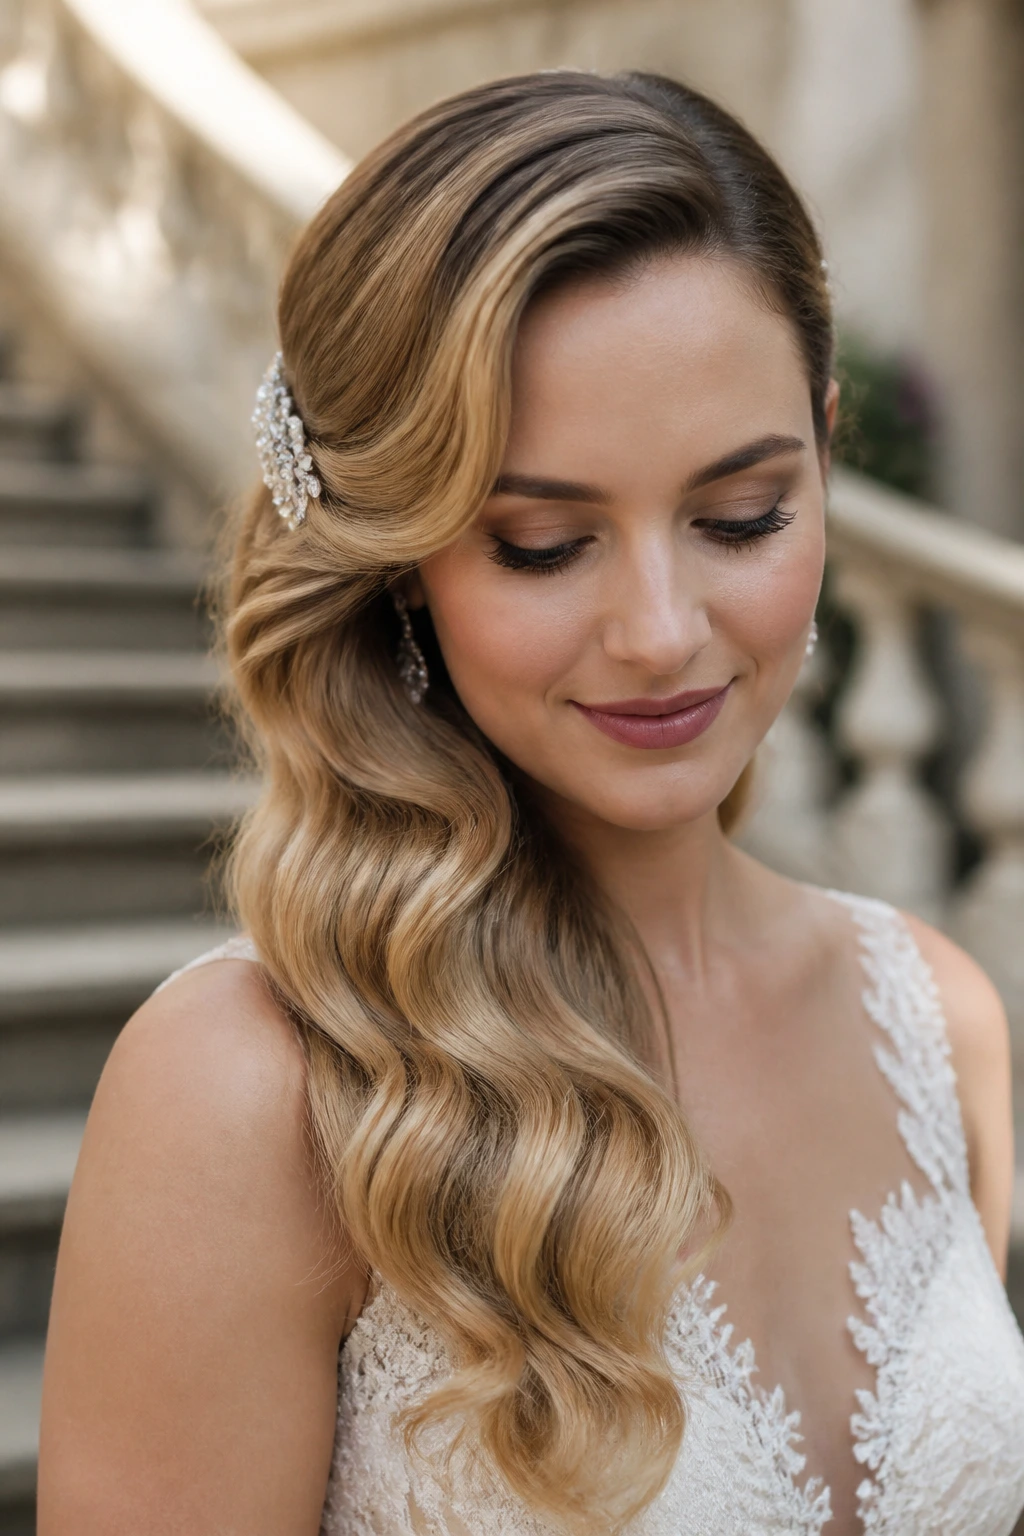
Side-swept waves have a bit of red-carpet attitude. They’re softer than a full updo and more deliberate than hair worn loose. Add one sparkling comb near the sweep, and the style suddenly reads bridal instead of just glamorous.
Why It Works
The sweep lets long hair fall across one shoulder while keeping the front open enough for the face and jewelry. It works especially well if the dress has one-shoulder detailing or an asymmetrical neckline. Long hair gives the wave enough length to cascade in a way that feels finished.
How to Create It
-
Create a side part and curl the hair in large sections away from the face.
-
Brush the waves into one direction so they move over the shoulder.
-
Pin the heavier side behind the ear or just at the temple.
-
Place a sparkling comb at the sweep, where it can catch the hair and hold the shape.
-
Mist lightly and smooth the top with a soft brush.
Best With
- One-shoulder gowns
- Dresses with a draped neckline
- Brides who want one statement accessory
- Long earrings on the exposed side
Pro Tips
- Keep the comb low enough to anchor the sweep. Too high and it becomes decorative only.
- Curl the front pieces away from the face first so the sweep opens properly.
- Use a little extra hold under the visible side where the hair tends to slip.
Watch Out
If the waves are too uniform, the whole thing can look staged. Leave some softness in the mid-lengths so the side sweep still moves.
12. Milkmaid Braid With a Soft, Wedding-Day Finish
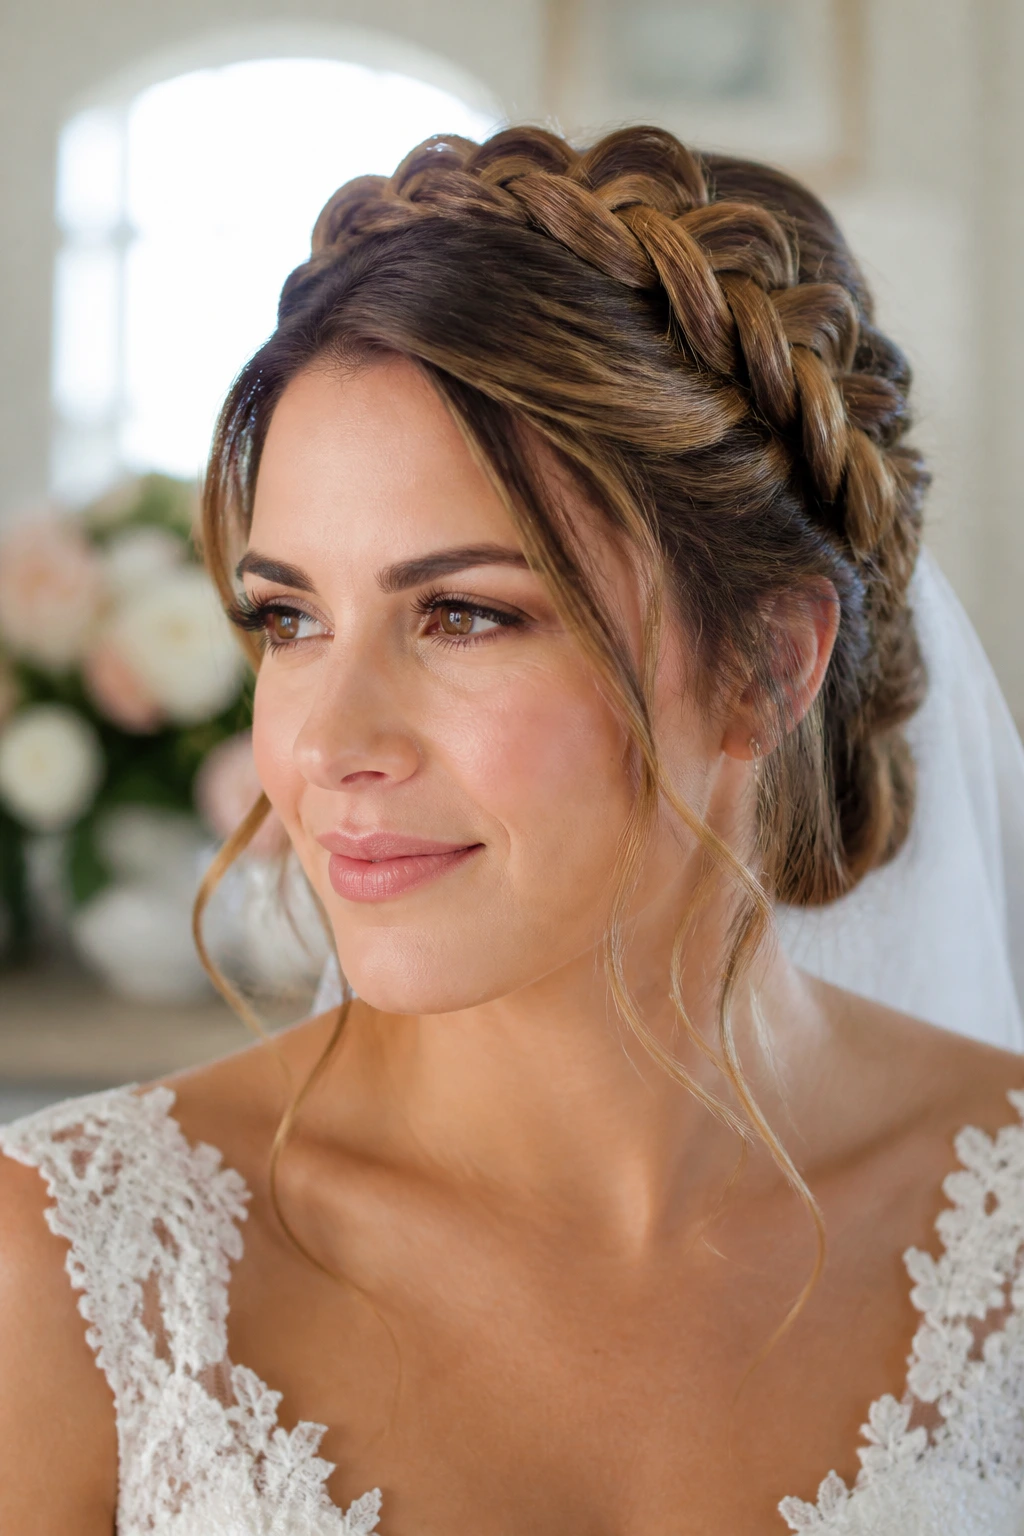
A milkmaid braid can look very sweet, which is either the charm or the problem depending on the bride. The trick is to keep it loose, clean, and a little softer than the childhood version most people picture. Long hair makes the braid thick enough to wrap around the head without looking too tiny.
Why It Works
The style keeps hair completely away from the shoulders and neck, which is useful with high necklines or busy lace. It also gives a lovely frame to the face without requiring a lot of product. On long hair, the braid itself becomes the accessory.
How to Create It
-
Part the hair down the middle and braid each side into a low braid.
-
Pull each braid upward and across the crown, pinning them where they cross.
-
Tuck the ends underneath and secure every hidden point with small pins.
-
Pull a few pieces loose near the temples and curl them gently if the bride wants softness.
-
Finish with a matte-to-satin spray, not anything too glossy.
Best With
- Cottage-style or garden weddings
- High-neck dresses
- Flower crowns or small fresh blooms
- Brides who want all hair off the face
Pro Tips
- Make the braids slightly looser at the outer edge so they don’t look rigid.
- Keep the crown smooth before you pin. A bumpy base ruins the shape.
- This style loves second-day texture. Fresh hair can be too slippery.
Watch Out
A milkmaid braid can look costume-like if it’s braided too tight or placed too low. Keep the wrap high and the lines soft.
13. Loose Low Knot With a Ribbon Tie
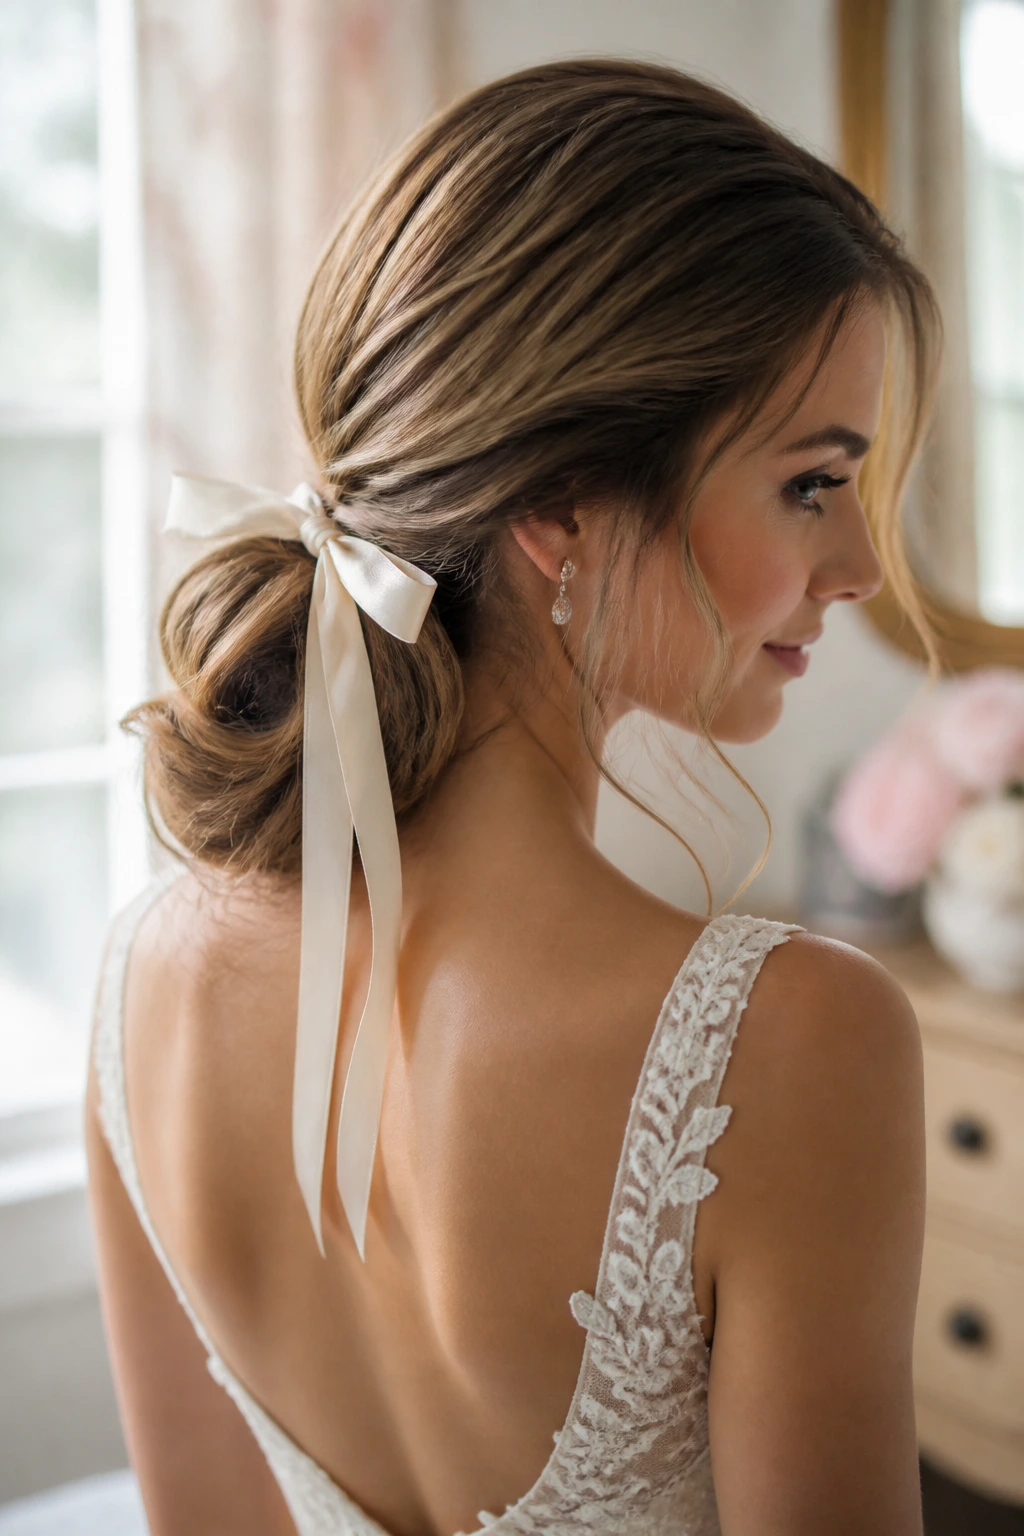
A low knot tied with ribbon has a softness that pins alone can’t always create. It’s a little less formal than a chignon, which is exactly why some brides love it. Long hair gives you enough length to shape the knot cleanly and still leave a ribbon tail that looks intentional.
Why It Works
The knot sits low and relaxed, so it doesn’t fight with the dress. The ribbon introduces texture and a gentle color note—ivory, satin white, blush, even a narrow velvet ribbon if the gown can handle it. Long hair makes the knot look fuller and keeps the silhouette from turning spindly.
How to Create It
-
Gather the hair into a low ponytail and secure it loosely.
-
Twist the ponytail into a knot and pin the center so it holds shape.
-
Thread a ribbon through the base or tie it around the ponytail before knotting.
-
Let the ribbon tails fall naturally, or tuck them beneath the knot for a cleaner line.
-
Leave a few face-framing pieces if the style needs a softer edge.
Best With
- Romantic, simple dresses
- Backyard or smaller weddings
- Brides who like soft details
- Hair with a little natural bend
Pro Tips
- Choose ribbon with enough body. Very thin ribbon can disappear.
- Match the ribbon to the gown, not the bouquet. The dress matters more.
- Pin the knot first, then add the ribbon. Otherwise it can slide around while you’re trying to tie it.
Watch Out
If the knot is too loose, it starts to look unfinished. If it’s too tight, the ribbon loses the point. Keep the texture relaxed, not sloppy.
14. Barrel-Curl Half-Up With a Lifted Crown
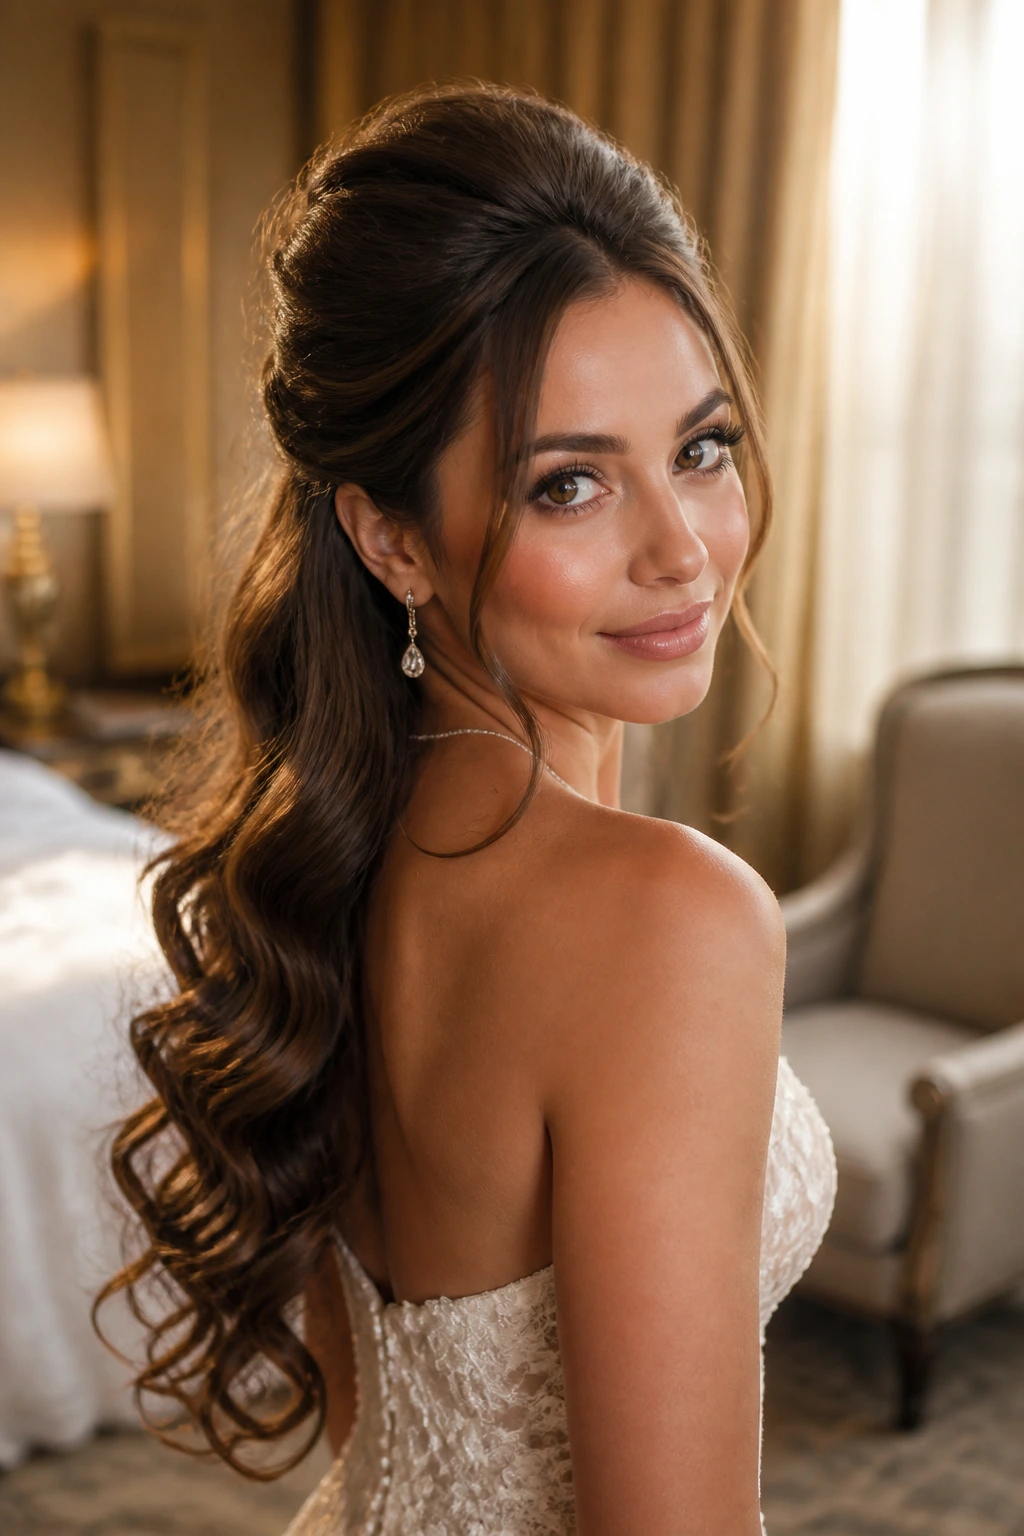
This is the hair version of turning the volume up one clean notch. The crown has lift, the curls are broad, and the lower half still shows off the length. It suits brides who want softness but not a full down style that collapses near the shoulders.
Why It Works
Long hair gives barrel curls enough weight to fall in large pieces instead of turning fluffy. The half-up section holds the crown off the face and gives a place to anchor pins or a comb. It’s especially good when the back of the dress needs to stay visible but you still want a little drama around the head.
How to Create It
-
Curl the hair in large sections with a 1¼- to 1½-inch iron.
-
Lightly tease or clip-lift the crown for height.
-
Take sections from each side and pin them back at the crown, letting the lower hair stay loose.
-
Smooth the top layer over the lift so it looks shaped, not teased.
-
Finish with shine spray on the curls and flexible spray at the crown.
Best With
- Brides who like soft volume
- Strapless or low-back dresses
- Big earrings or hair vines
- Long hair that needs a little structure on top
Pro Tips
- Pin the crown section first, then release the lower curls. It keeps the shape cleaner.
- Do not over-tease. A little lift is enough; a rat’s nest is not the goal.
- Choose curls that are broad and brushed out. Tiny ringlets fight the bridal look here.
Watch Out
If the crown is too flat, the style loses its point. If it’s too high, it starts reading formal in a dated way. The middle path is the good one.
15. Rope-Braid Ponytail That Moves Well
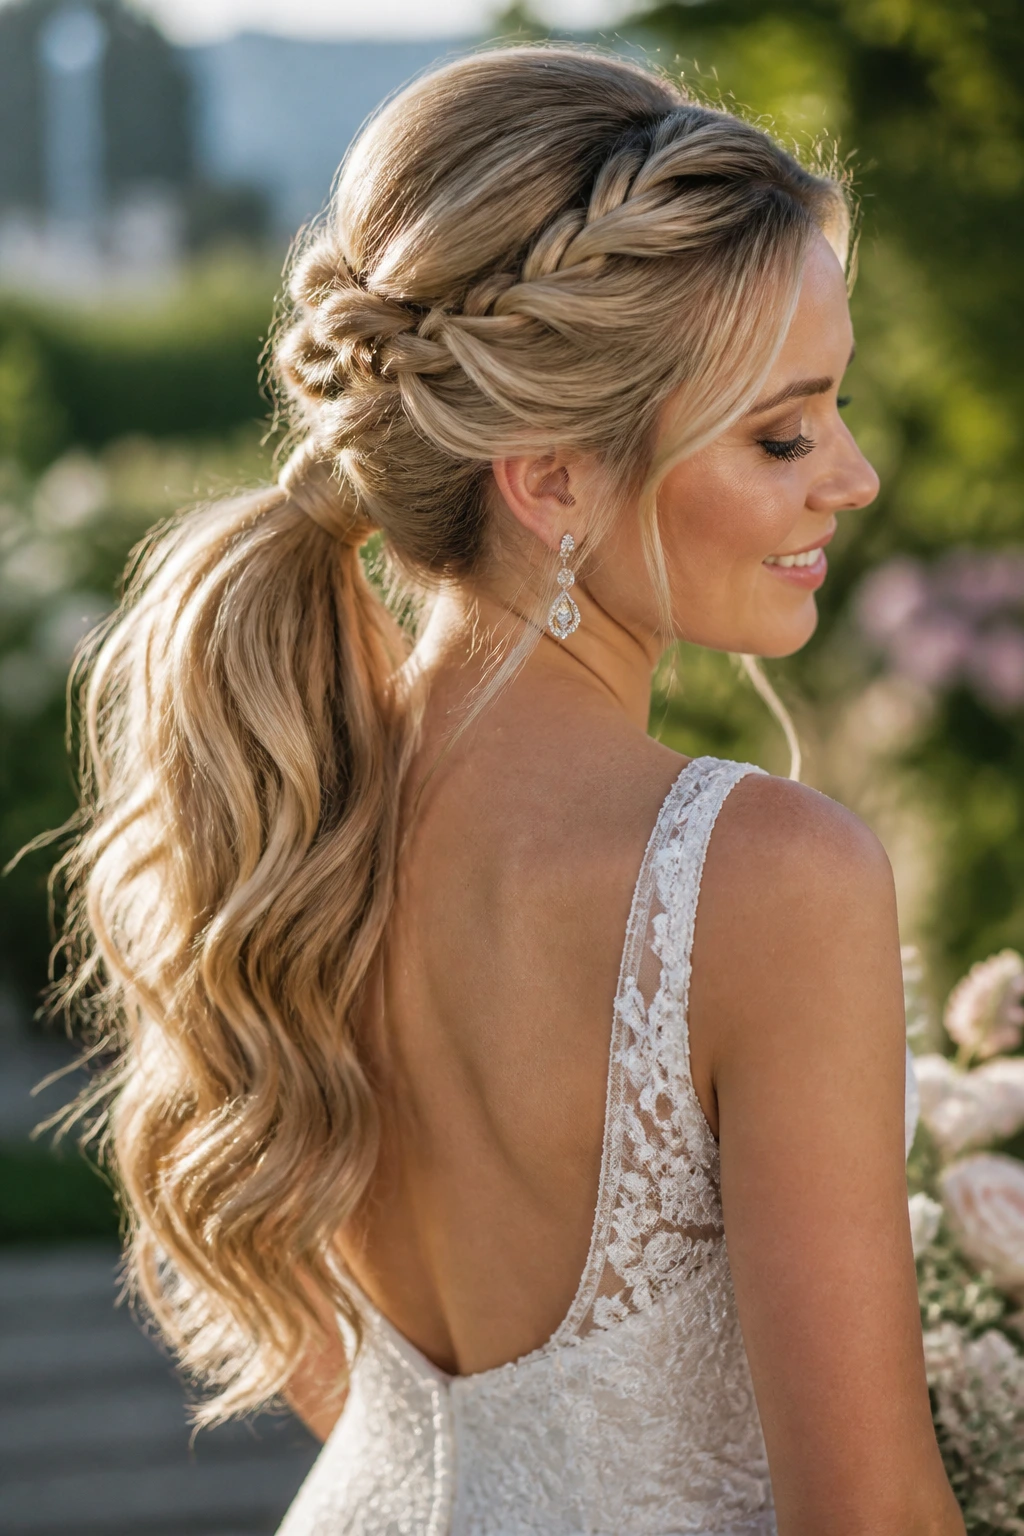
A rope-braid ponytail feels modern without being cold. The twist gives the length a neat pattern, and the ponytail still swings when the bride walks. On long hair, this style has real presence. It doesn’t vanish into the back of the dress.
Why It Works
The rope braid gives control, which matters if the hair is thick or prone to frizz. It also shows off the glossy length in a cleaner way than a standard braid. The wrapped base makes the ponytail look finished from every angle, and that matters because weddings involve a lot of back views.
How to Create It
-
Secure the hair in a low or mid-height ponytail.
-
Split the ponytail into two sections and twist each section clockwise.
-
Twist the two sections around each other counter to the twist direction until the braid forms.
-
Secure the end with a small elastic.
-
Pull gently at the braid edges for fullness and mist with a firm but touchable spray.
Best With
- Sleek gowns
- Brides who want movement
- Long, thick hair
- Minimal jewelry
Pro Tips
- Tighten the twist as you work down the tail. A loose rope braid can unravel.
- Wrap a small strand around the elastic to hide it at the base.
- Keep the surface smooth before braiding. Frizz shows more clearly in this style.
Watch Out
This braid can look thin if the sections are too small. On very long hair, use bigger sections so the final rope reads from a distance.
16. French Twist With Soft Volume at the Crown
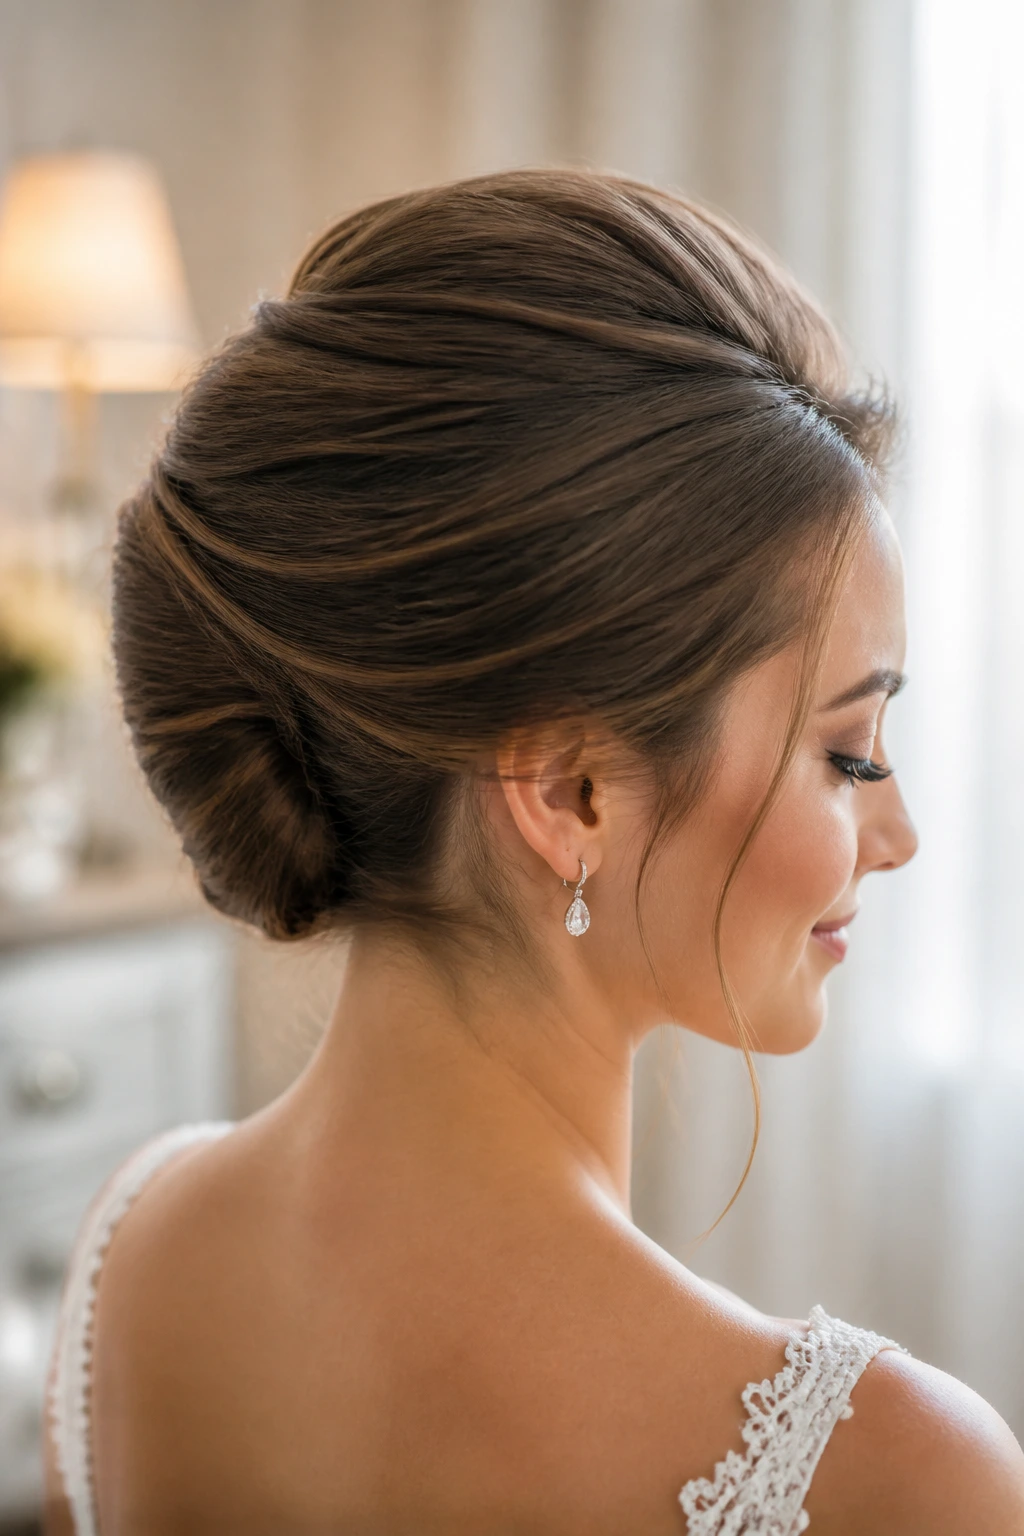
A French twist always has a little old-world confidence. It keeps the hair high and elegant, but the twist itself can be softened so it doesn’t feel severe. Long hair helps because there is more to fold, tuck, and build into the shape.
Why It Works
The vertical line of a French twist lengthens the neck and keeps the back clean. The crown volume gives it lift, which prevents the style from looking flat against the head. It’s an excellent choice when the dress is structured or when the bride wants one of the more formal wedding hairstyles for brides with long hair.
How to Create It
-
Smooth the hair back and gather it slightly off-center or at the nape.
-
Twist the length upward along the back of the head.
-
Tuck the ends into the twist and pin along the seam with French pins.
-
Gently lift the crown before spraying so the top has soft height.
-
Finish with shine spray on the surface and a few hidden pins where the twist feels loose.
Best With
- Formal gowns
- Longer earrings
- Cathedral veils
- Brides who want a clean silhouette
Pro Tips
- The twist should feel snug, not crushed. If it’s too tight, it looks hard.
- Use the hair’s own texture to support the twist. Silky hair needs more pinning than coarse hair.
- Lift the crown after the twist is pinned. That keeps the volume controlled.
Watch Out
If the seam of the twist is visible and messy, the style loses its elegance. Take the time to tuck each fold flat.
17. Floral Half-Up for Garden Ceremonies
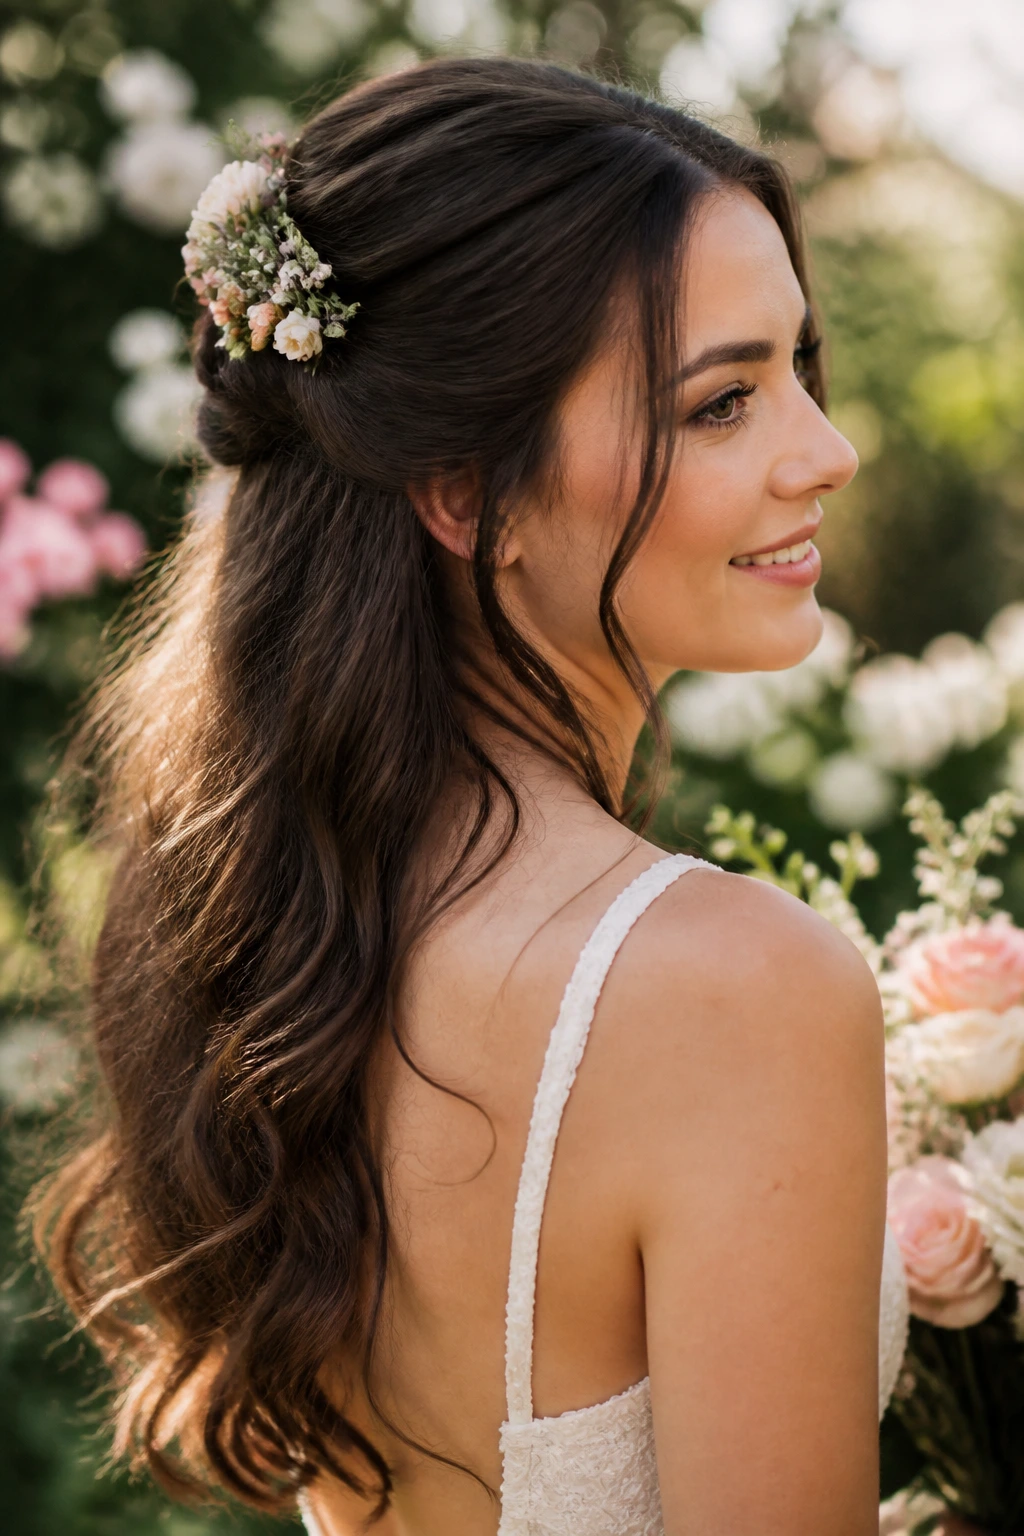
Flowers in the hair can lean precious if the placement is wrong, so the trick is restraint. A floral half-up style uses the flowers as punctuation, not wallpaper. Long hair gives the arrangement a base to rest on, which keeps the flowers from looking like they’re floating in space.
Why It Works
The half-up shape gives the flowers a stable spot near the crown or just above the ears. Long hair also creates enough length below the flowers for the style to still feel bridal after the ceremony starts. If the wedding has a garden, courtyard, or outdoor setting, the whole thing feels anchored to the place.
How to Create It
-
Curl the hair in soft sections and smooth the top lightly.
-
Pull back the front sections into a half-up shape and secure them with pins.
-
Place small blooms, floral pins, or a delicate vine along the pinned section.
-
Keep the flowers clustered rather than spread too far apart.
-
Leave the lower hair loose and brushed through so it balances the detail above.
Best With
- Outdoor ceremonies
- Lightweight veils or no veil
- Lace, chiffon, or soft tulle dresses
- Brides who want a fresh, natural detail
Pro Tips
- Use flowers that can handle warmth and time. Delicate blooms wilt fast.
- Anchor each flower at two points if possible. One pin is a gamble.
- Keep the color palette tight. Two or three tones usually look cleaner than a full rainbow.
Watch Out
Too many flowers can make the style feel busy. A few well-placed blooms beat a crowded crown every time.
18. Sleek Bubble Braid With Satin Finish
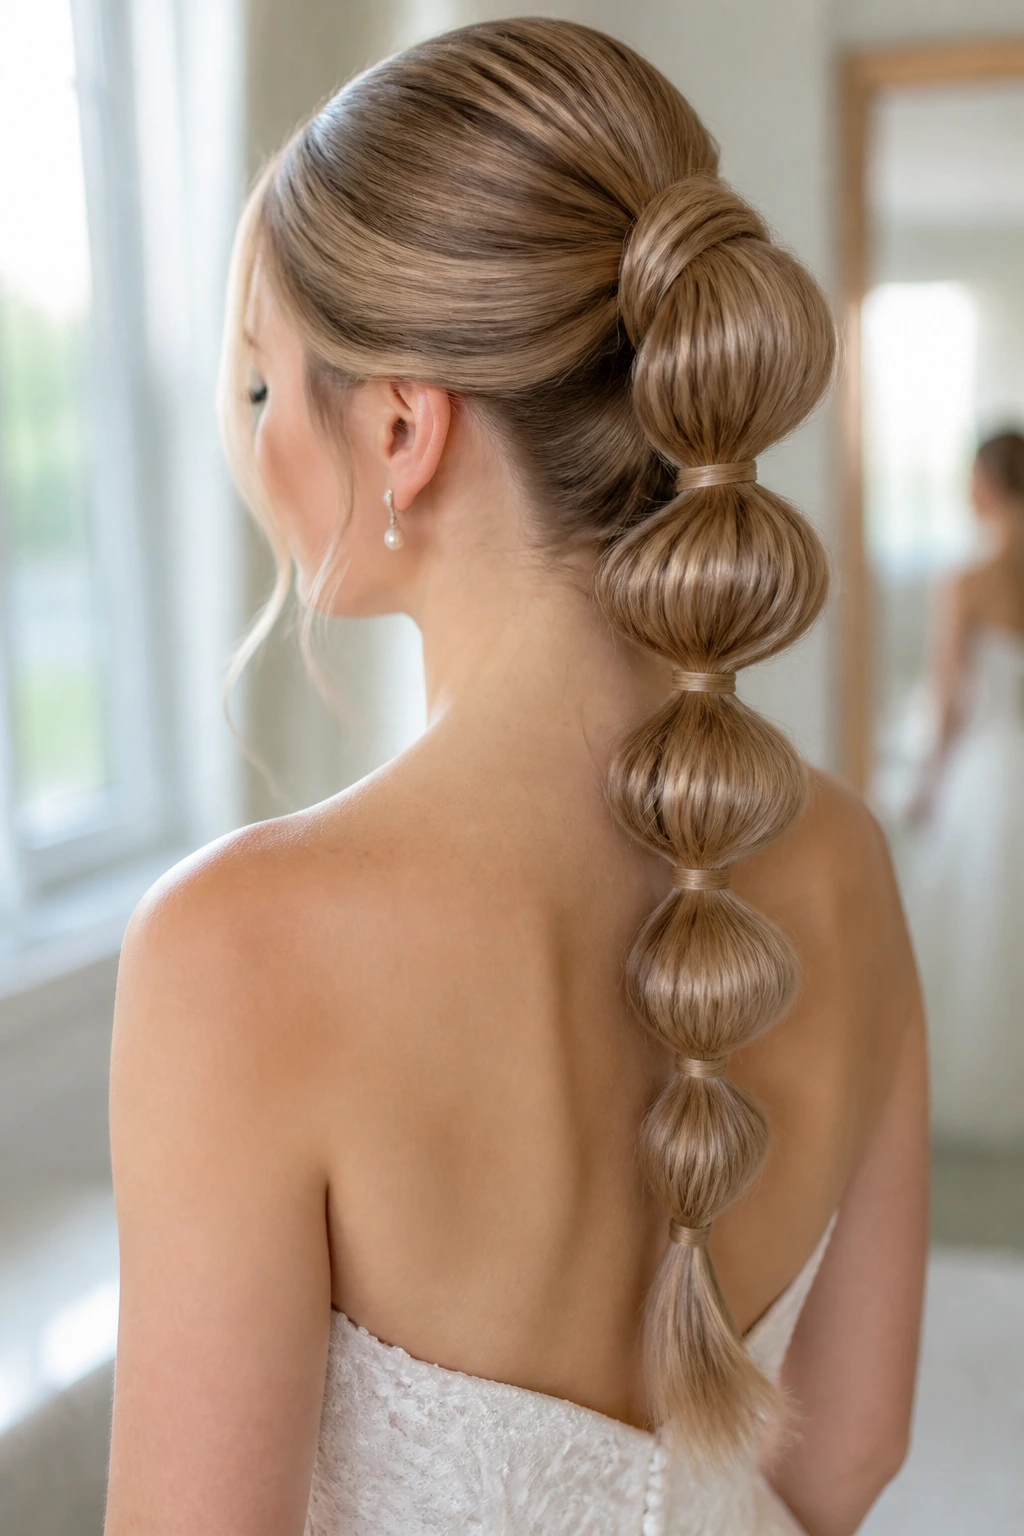
The bubble braid is the youngest-looking style in the group, but in the right setting it feels fresh rather than trendy. Long hair is the whole point here. The bubbles need length to stack cleanly, and the satin finish keeps the braid from reading playful in the wrong way.
Why It Works
This style gives you structure without losing the long line of the hair. It is excellent for thick hair because the bubbles keep the bulk organized. If the dress is modern, architectural, or a bit fashion-forward, the bubble braid fits right in.
How to Create It
-
Pull the hair into a low or mid ponytail and secure with a strong elastic.
-
Add a second elastic a few inches down, then a third and fourth, spacing them evenly.
-
Gently tug each section between elastics to create rounded bubbles.
-
Wrap strands around the elastics if you want a cleaner, more bridal look.
-
Finish with a shine spray and smooth the top tightly against the head.
Best With
- Contemporary gowns
- Thick, very long hair
- Brides who want a style that stays contained
- A minimalist veil or no veil
Pro Tips
- Keep the bubble spacing even. Random gaps make the braid look accidental.
- Smooth the top first with a fine brush so the contrast stays intentional.
- Use clear elastics and hide them with small wraps if you want the style to feel more polished.
Watch Out
If the bubbles are tugged too wide, the braid can look childish. Keep the shape rounded, not puffed out like balloons.
19. Textured Bun With Veil-Friendly Placement
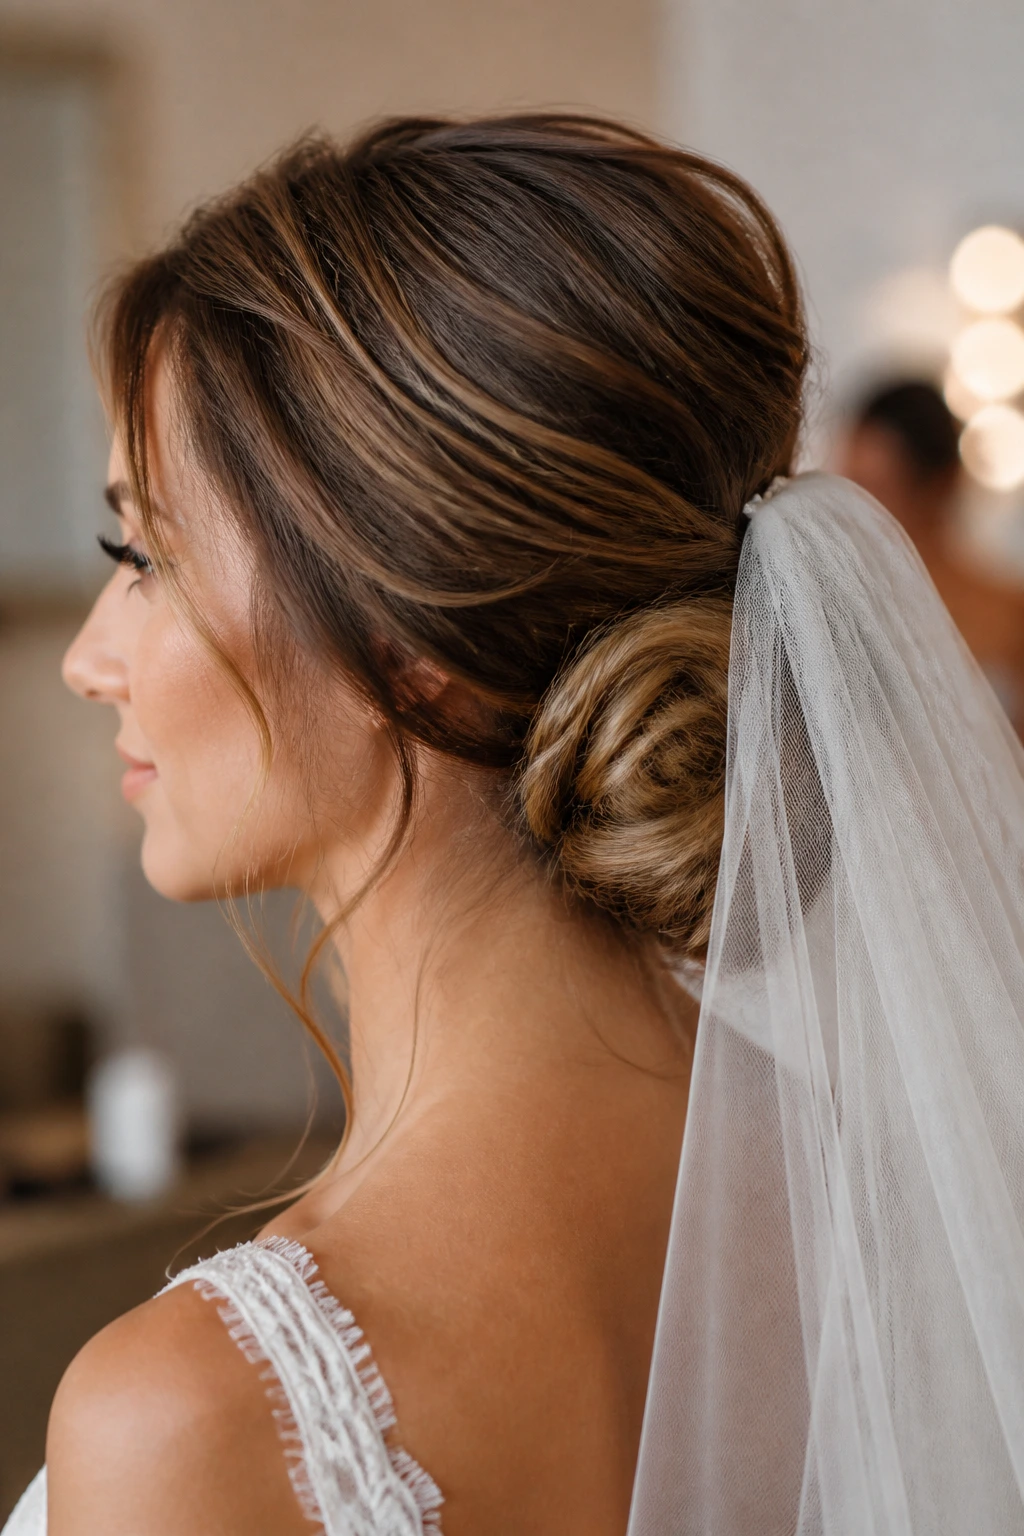
If I had to pick one style that solves a lot of wedding-day problems at once, it would be this. A textured bun sits low enough for a veil, has enough softness to keep the face from looking severe, and gives long hair a place to live without overwhelming the dress. It is practical in the best way.
Why It Works
Long hair gives the bun body and a natural, slightly undone edge that keeps it from looking helmet-like. The texture helps pins disappear into the shape, which matters when the veil comb needs to sit on top or just above the bun. It also survives a long day because the structure is tucked in rather than hanging loose.
How to Create It
-
Curl or wave the hair lightly so the texture has some grip.
-
Gather the hair low at the nape or just below it and twist into a loose bun.
-
Pin the bun in layers, leaving a few soft pieces around the hairline if the bride wants more softness.
-
Place the veil comb above or just underneath the bun, depending on the veil’s weight.
-
Mist with flexible spray and check the style from the back and side before you call it done.
Best With
- Most veil styles
- Brides who want comfort and security
- Dresses with dramatic backs
- Long hair that needs structure without looking stiff
Pro Tips
- Pin the veil after the bun is stable. Reversing that order usually causes a wobble.
- Leave a few controlled wisps near the ears if the face needs softening.
- Use texture first, then smooth the surface where the pins will hide.
Watch Out
Too much texture can make the bun look messy instead of soft. The trick is controlled looseness. Not chaos.
Why Long Hair Changes the Bridal Hairstyle Equation
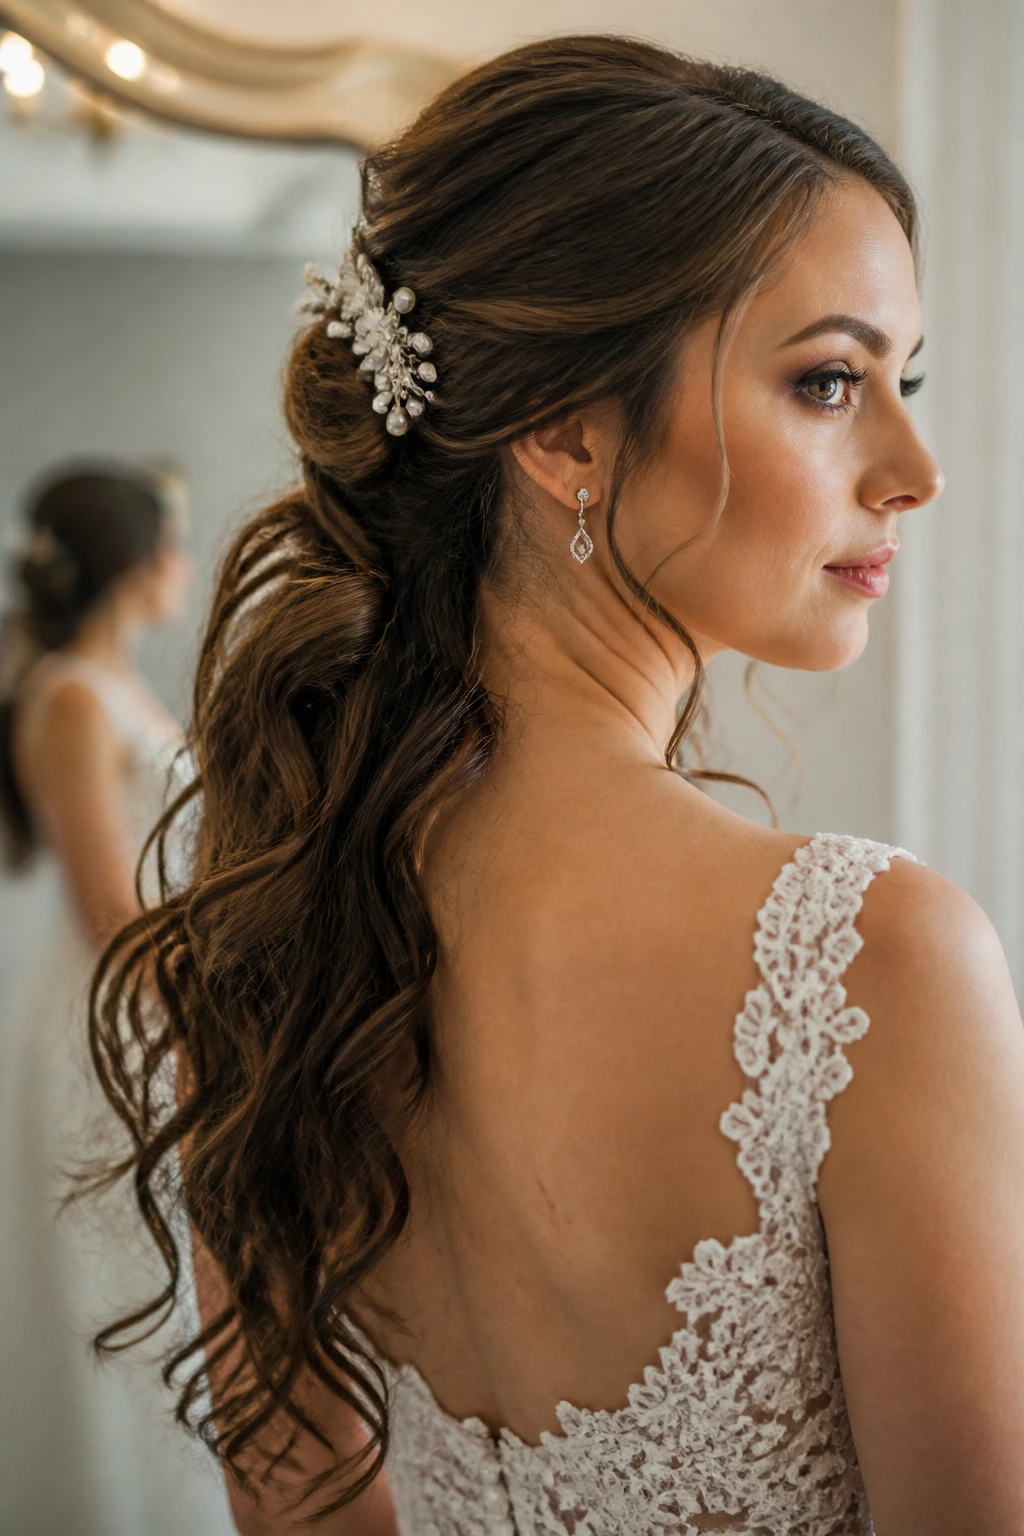
Long hair is generous, but it’s also heavy. That sounds obvious until you watch a curl fall by an inch every ten minutes or see a bun sag because the hair’s own weight keeps pulling it downward. Brides with long hair usually need more structure at the base than brides with shorter hair do, even when the final style looks loose and romantic.
That weight also changes how accessories sit. A veil comb can slide in silky hair unless the stylist gives it a proper anchor point. A floral pin can disappear if it’s placed into a soft, slippery section instead of a dense one. And if the hair is layered, the shortest pieces around the face need to be worked into the style on purpose, not left as an afterthought.
Trial runs matter more here than most people expect. Long hair can look perfect for twenty minutes and then suddenly settle into something else. That’s normal. What you want to know is how it settles—whether the curl opens in a pretty way, whether the braid loosens too much, whether the crown volume collapses when the veil goes on. Those are the details that decide if a style feels dreamy or irritating.
Essential Tools and Products for These Looks
- Heat protectant spray — Use this before any iron or wand; wedding-day heat damage shows up fast in photos.
- 1-inch and 1¼-inch curling irons or wands — These cover most long-hair wave and curl patterns without making the style too tight.
- Large round brush or blow-dry brush — Helpful for sleek roots, volume at the crown, and smooth ends.
- Tail comb — The cleanest tool for crisp parts and sectioning.
- Boar-bristle brush — Best for smoothing waves into a polished finish without shredding them apart.
- Texturizing spray or dry shampoo — Gives grip to buns, braids, and twists, especially on clean hair.
- Flexible-hold hairspray — Holds shape without making the hair crunch at the first embrace.
- Firm-hold hairspray — Useful for sleek buns, ponytails, and humid weather.
- U-pins and French pins — Better than giant regular bobby pins for anchoring buns and French twists.
- Clear elastics — Ideal for half-up styles, ponytails, and braids where the tie should disappear.
- Shine serum or light finishing oil — Use on mid-lengths and ends only; keep it away from the roots.
- Veil comb or hair accessory — Bring the actual piece to the trial. Guessing is how styles get rebuilt on the spot.
- Clip-in extensions, if needed — Not mandatory, but useful for brides who want more length, fullness, or braid size.
The Trial Run That Actually Matters
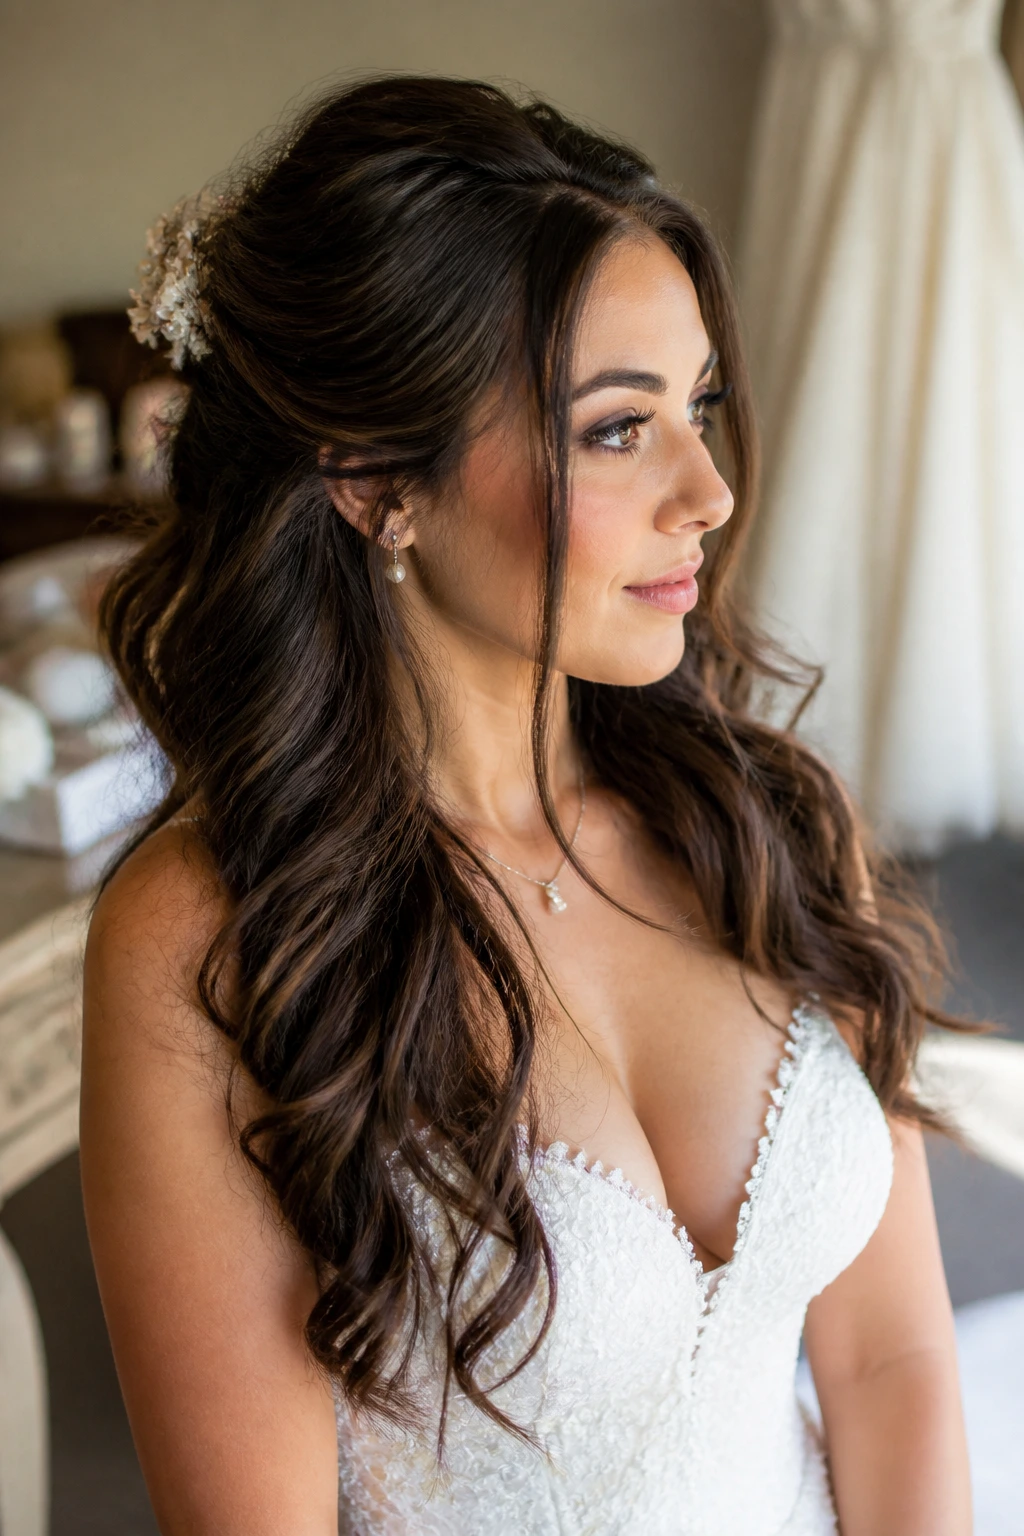
A bridal hair trial is not just about liking the style. It is a test of how the style behaves when the hair cools down, when you move your head, and when you sit under a veil for half an hour. Bring the right accessories, because a hairstyle without the actual comb, pins, or flowers is only half the story.
Wear a top that matches your gown’s neckline, or at least the same shape. A high-neck trial done in a tank top can trick you into thinking the hairstyle feels too heavy or too bare. Take photos from the side, the back, and slightly above. The back view is where long-hair styles either earn their keep or reveal every pin.
Humidity is worth testing too. If your wedding is in a damp location, ask the stylist to use the same products they plan to use on the day and see how the hair reacts after an hour. A style that survives one indoor mirror check and then explodes outdoors is not a style. It’s a risk.
Bring notes. Not just “I like it” or “I don’t.” Write down where the crown flattened, which pieces felt too short, how many pins were needed, and whether the veil comb sat securely. Small details matter here. They change everything.
How to Match the Style to Your Dress, Veil, and Jewelry
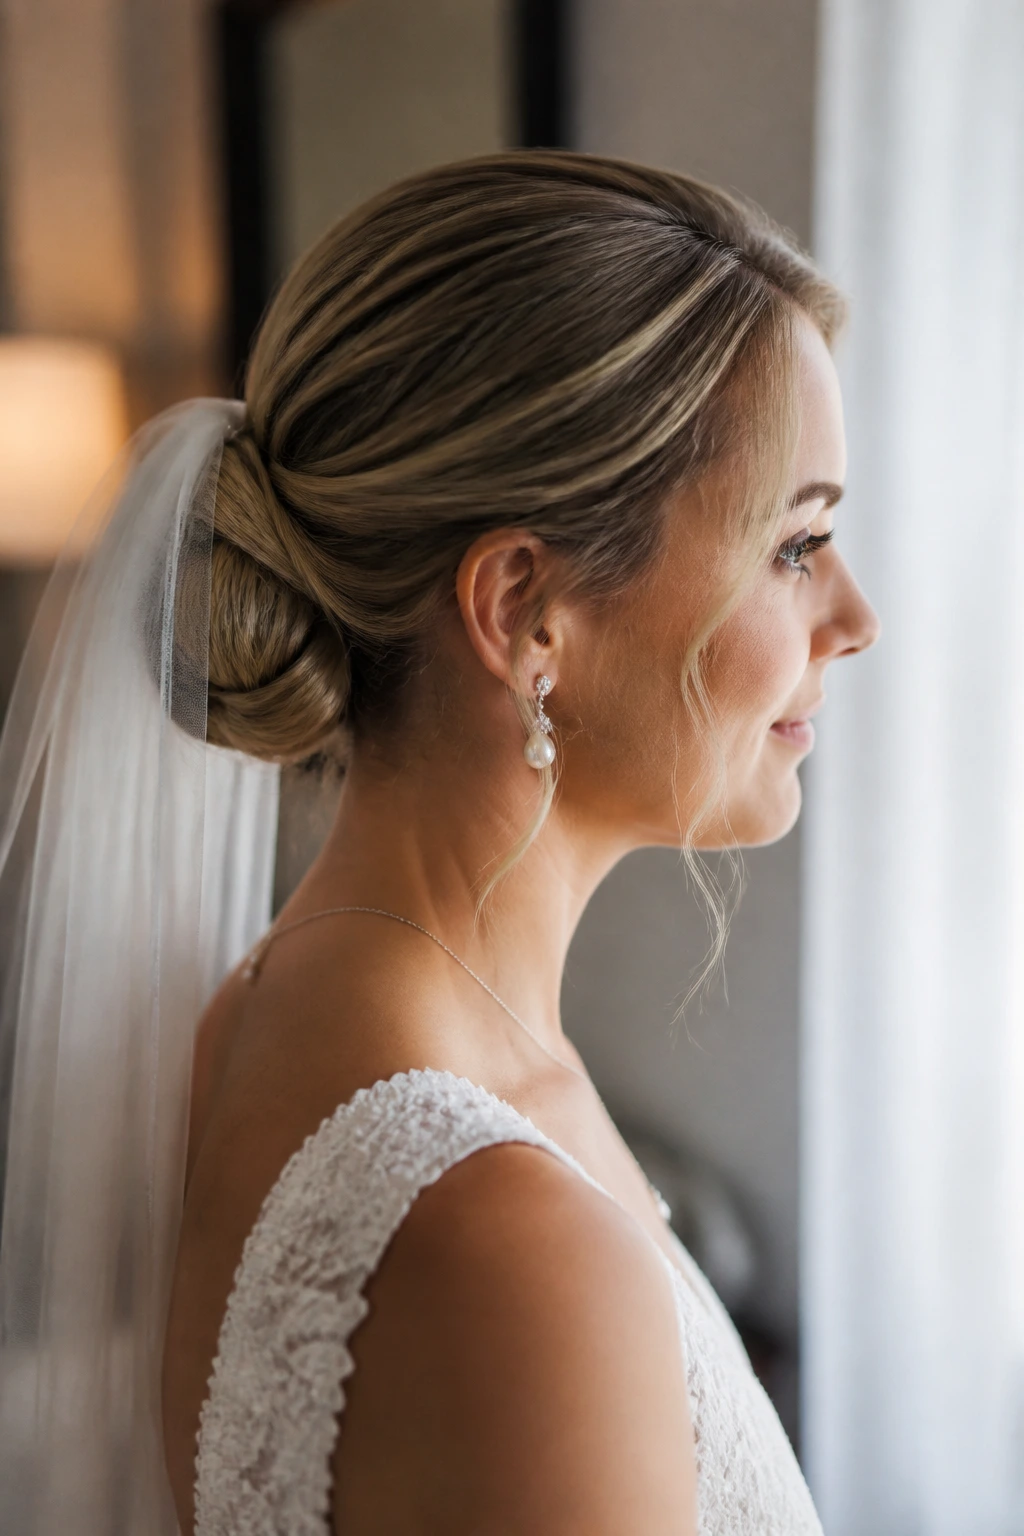
Neckline: High necks and illusion necklines usually call for updos, low buns, or sleek ponytails, because the hair should not crowd the fabric. Open backs and strapless gowns can handle more down hair, more waves, or a half-up style that shows movement from behind. If the dress already has a lot happening near the collarbone, keep the hair cleaner there.
Veil Placement: Heavy veils want an anchor. That usually means a low bun, braided crown, or textured half-up with enough structure at the crown. Lighter veils can sit over waves or a ponytail, but the hair underneath still needs enough grip that the comb doesn’t slide. Always test the veil at the trial, not the morning of.
Jewelry: If the earrings are large, the hair should give them space. Side-swept waves, low buns, and half-up styles usually do that better than a full curtain of curls. If you’re wearing a necklace, a clean bun or ponytail lets the piece stay visible instead of tangling in the hair.
Mood: A satin gown and a sleek bun speak the same language. A garden dress and a floral half-up do too. The style should not feel like it came from another wedding entirely.
Keeping the Style Fresh From First Look to Last Dance
Long hair can hold shape for hours, but only if the first twenty minutes are done well. That means the sections need to cool completely before they’re brushed out, pinned, or shaped into the final look. Rushing that part is why curls fall flat early and buns loosen before dinner.
Pack a tiny touch-up kit. A few U-pins, a travel hairspray, one small comb, and a mini anti-frizz serum are enough for almost everything in this list. If you know your hair tends to shed pins, keep a couple extra in the bridal suite. If the front pieces are likely to drop, ask someone to check them after the ceremony and again before portraits.
The best touch-up is often the smallest one. Smooth the crown, re-pin one side, or refresh the face-framing curl with a finger and a mist of spray. Don’t rebuild the whole style unless it truly needs it. Once you start reworking bridal hair too much, it can get puffy and lose the shape that made it good in the first place.
After the wedding, remove pins slowly and from the bottom up. Hairspray and decorative pins can create tiny tangles if you yank them out. Long hair is easier to preserve than people think, but only if you’re gentle with the undoing.
Extra Polish Without Overcomplicating the Hair
Texture: A little texture spray at the roots can save a braid, a twist, or a low bun that wants to slide. I’d rather see controlled grip than airy fluff on wedding hair.
Hold: Use flexible spray on styles that need movement and firm spray on the sleek ones. Mixing them in the same style often gives the best result: firm at the base, softer on the lengths.
Accessory Choice: One comb, one vine, or one cluster of pins usually looks cleaner than scattering details everywhere. Long hair can already do a lot of the visual work.
Face-Framing: Keep the front pieces intentional. A soft bend at the cheekbone looks finished. A random, uneven strand at the jawline looks like the style broke halfway through the party.
If you wear extensions: Blend them into the mid-lengths, not just the ends. That keeps the length believable and prevents the line where the natural hair stops from showing in curls or braids.
Common Mistakes Brides Make With Long Hair
-
Starting with hair that is too clean: Freshly washed hair can be slippery, which makes braids and buns slide. The fix is simple: wash the day before, not the morning of, unless your stylist wants clean hair for a specific sleek look.
-
Using too much oil or shine serum: A little shine is lovely. Too much makes long hair separate into sections and can flatten the crown. Keep glossy products on the mid-lengths and ends only.
-
Forgetting the weight of the veil: A heavy veil can drag even a solid style down if the anchor point is weak. The fix is to build structure where the veil comb sits, not just where the hair looks pretty.
-
Choosing curls that are too tight: Tiny ringlets shrink fast on long hair and often look more formal than bridal. Big, brushed-out waves age better through the day.
-
Placing accessories too low or too high: A comb that sits awkwardly can throw off the whole balance. Bring the actual accessory to the trial so placement can be tested in the real world.
-
Ignoring the layers: Long layered hair needs face-framing pieces and pin placement planned out. If not, shorter layers pop out in every direction and steal the attention from the style itself.
Variations and Adaptations to Try
For Fine Long Hair: Choose styles that build at the crown—twisted half-ups, low buns with padding, or a blowout with soft lift. Fine hair benefits from texture spray and smaller sections, because big sections can slip apart before the ceremony even starts.
For Thick, Heavy Hair: Go for anchored styles like braided buns, rope braids, or a high ponytail with a wrapped base. Thick hair holds shape well, but it also needs more pins than most brides expect.
For Humid Weather: Sleek buns, rope braids, and textured updos usually beat loose curls. Use anti-humidity spray at the end, not the beginning, and keep the face-framing pieces minimal.
For a Veil-First Look: Pick a low bun, chignon, or textured half-up with a clear anchor point. If the veil is the star for the ceremony, the hair should support it instead of competing.
For a No-Veil Ceremony: You can be looser with waves, waterfall braids, floral accents, or side-swept styles. The back of the hair becomes part of the look, not just a holder for the veil comb.
For Brides Who Want a Second Look Later: Start with a style that can loosen cleanly, like a half-up wave or wrapped ponytail. After the ceremony, a stylist can often remove pins and turn it into softer reception hair without starting over from scratch.
Frequently Asked Questions
How far in advance should I book a bridal hair trial?
Book it once your dress and veil are chosen, or at least once you know the neckline. That gives the stylist enough information to match the shape of the hair to the shape of the gown instead of guessing.
Should long hair be washed the day of the wedding?
Usually, no. Most updos and braided styles hold better on hair that was washed the day before, because it has a little natural grip. The exception is a very sleek style, where your stylist may want cleaner roots.
Can I wear clip-in extensions with these styles?
Yes, and many brides do. Clip-ins work especially well for braids, ponytails, and wave styles that need more fullness, but they should be placed during the trial so the blend looks natural.
What if my hair won’t hold curls?
Then build the style around that fact instead of fighting it. Braids, twists, low buns, and rope styles usually survive better than loose curled looks on hair that drops fast.
Which styles work best with a cathedral veil?
Low chignons, textured buns, braided low buns, and French twists are usually the safest. They create a stable anchor and keep the veil from sliding around during the ceremony.
How do I keep flyaways under control without making the style stiff?
Use a tiny amount of smoothing cream before styling, then finish with a light mist of hairspray and a toothbrush or edge brush for the hairline. Avoid heavy gels unless the style is meant to be sleek from root to end.
Can these styles work on layered hair?
Absolutely, but the layers need a plan. Face-framing pieces, pin placement, and braid tension should all be adjusted so the shortest layers don’t poke out in the wrong spots.
What’s the easiest style to refresh during the reception?
A low bun, ponytail, or half-up wave is easiest to touch up. You can smooth the top, reset one pin, or revive the front pieces without rebuilding the whole head.
The Style That Lasts Beyond the Ceremony
The best wedding hair for long lengths doesn’t just look pretty at one angle for five minutes. It has shape from the front, weight from the back, and enough structure to survive the parts of the day nobody photographs: hugs, wind, tears, and that one dance where the music gets louder than the plan. That is the real test.
Long hair gives you room to make a choice with personality. You can go sleek and spare, soft and romantic, braidy and structured, or full-on Hollywood. The trick is not chasing the most complicated option. It’s picking the one that matches the dress, the veil, and the way you actually want to feel when you look in the mirror.
If you keep one thing in mind, let it be this: the style should support the day, not fight it. When the pins are hidden, the crown is balanced, and the shape still makes sense from the back, you’ve found the right one.
