



A First Communion hairstyle has a narrow brief. It has to look neat in the church aisle, stay put through hugs and handshakes, and still feel soft enough for a child who should look like a child, not a tiny bridesmaid. That balance is where most styles either succeed or fall apart. A bun can be too rigid. A curl can frizz before the opening prayer. A braid can look sweet in the bathroom mirror and then start slipping by the time the family photos begin.
The best first communion updos do three things at once: they keep hair off the face, they sit low enough to work with veils and headbands, and they hold without pulling the scalp tight. That last part matters more than people think. If a style hurts, it shows. A child will touch it, lean away from it, or ask for it to come down halfway through the morning, and none of that helps the day go smoothly.
What works here is not drama. It’s control. Clean lines, secure pins, a little softness around the face, and enough texture that the style doesn’t look shellacked. Some of the best options are very simple on purpose. Others weave in a braid or ribbon so the style feels special without getting fussy. The list below leans into that sweet spot: polished, age-appropriate, and practical enough to survive a long morning on real hair.
Why These Updos Work for a Communion Morning
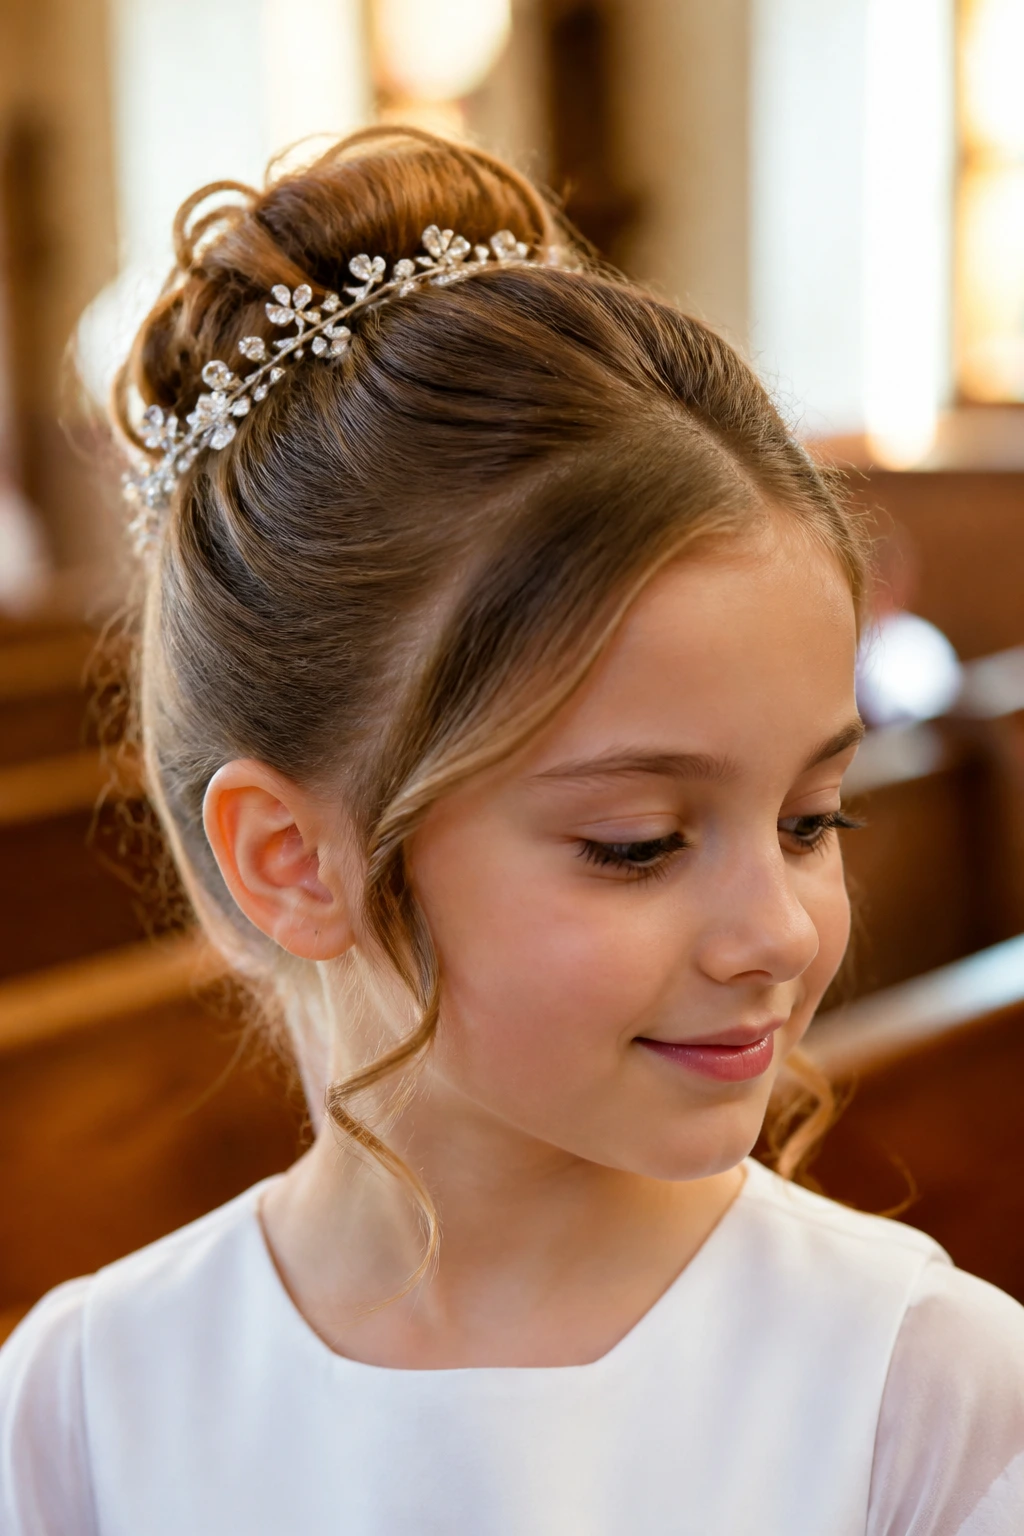
-
They stay low and tidy: Styles that sit at the nape or just above it don’t fight with the collar of a dress, and they’re easier to anchor under a veil comb or headband.
-
They handle movement better: Children turn, bow, hug, and lean in for photos. Braids, twists, and tucked buns move with the head instead of springing apart.
-
They keep the focus on the face: Soft parts, small face-framing pieces, and smooth crowns let the dress and expression do the talking instead of a giant hairstyle.
-
They work on more than one hair type: Fine hair, thick hair, curls, and shoulder-length cuts all have styles in this collection that don’t require a battle with the mirror.
-
They can be dressed up or down: A pearl pin, ribbon, or tiny flower changes the mood fast, which is useful when the dress is already detailed and the hair needs to stay calmer.
-
They are built for real-life wear: A style that looks nice for ten minutes is not enough. These are chosen for the hour-after-hour stretch between getting dressed, church, photos, and whatever comes after.
1. Sleek Low Chignon
A sleek low chignon is the quietest style in the room, and that is exactly why it works so well for First Communion. The shape sits at the nape, so it stays out of the way of collars and veil combs, and the smooth crown gives the whole look a clean, orderly line. It reads polished without looking stiff if you leave the tiniest bit of softness around the ears.
What I like here is the control. You can part the hair in the middle for a tidy, centered look, or sweep it slightly off-center if the child has a natural side part that keeps fighting back. Use a light smoothing cream, gather the hair low, twist it into a flat knot, and pin it in a crisscross pattern. Four to six bobby pins in the child’s hair color usually hold a medium chignon; thick hair may need more.
Where it shines
This style is best when the dress has a high neckline, lace trim, or a narrow back opening that would compete with a big bun. It also handles fine hair well if you add a little texture spray first.
A pearl barrette tucked just above the chignon is enough. No need to crowd it.
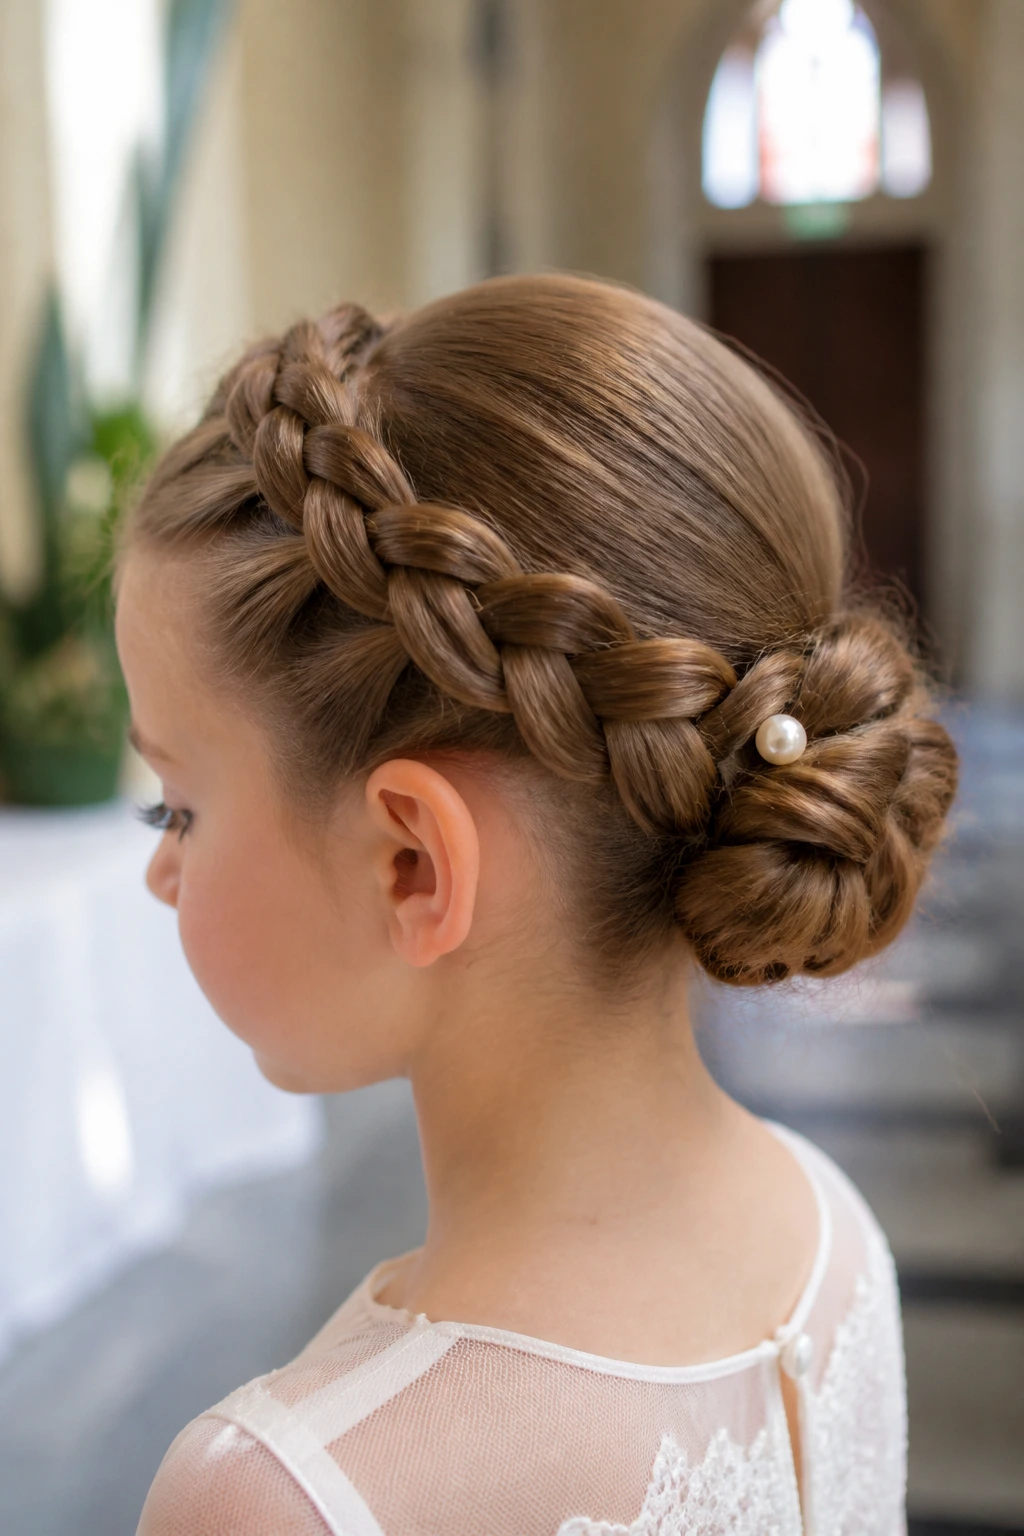
2. Braided Crown Bun
Braids are useful here because they give the hair something to hold on to. A braided crown bun starts with a braid running from one side of the head across the top or around the hairline, then tucks into a small bun at the nape. The result feels a little more detailed than a plain bun, but it still stays modest and neat.
If the child has medium to long hair, this style is a strong choice. The braid keeps flyaways under control near the hairline, which matters if the morning is humid or if the hair tends to puff out around the temples. Pull the braid gently once it’s secured so it looks fuller without getting bulky. That tiny bit of widening makes a big difference in photos.
Best details to add
- A single pearl pin at the tuck point keeps the back from looking too plain.
- Satin ribbon can be woven through the braid if the dress is simple.
- Use a light-hold spray only after the braid is set; spraying too early makes it harder to adjust.
The crown line frames the face in a very calm way. No fuss. No mess.
3. Twisted Halo Knot
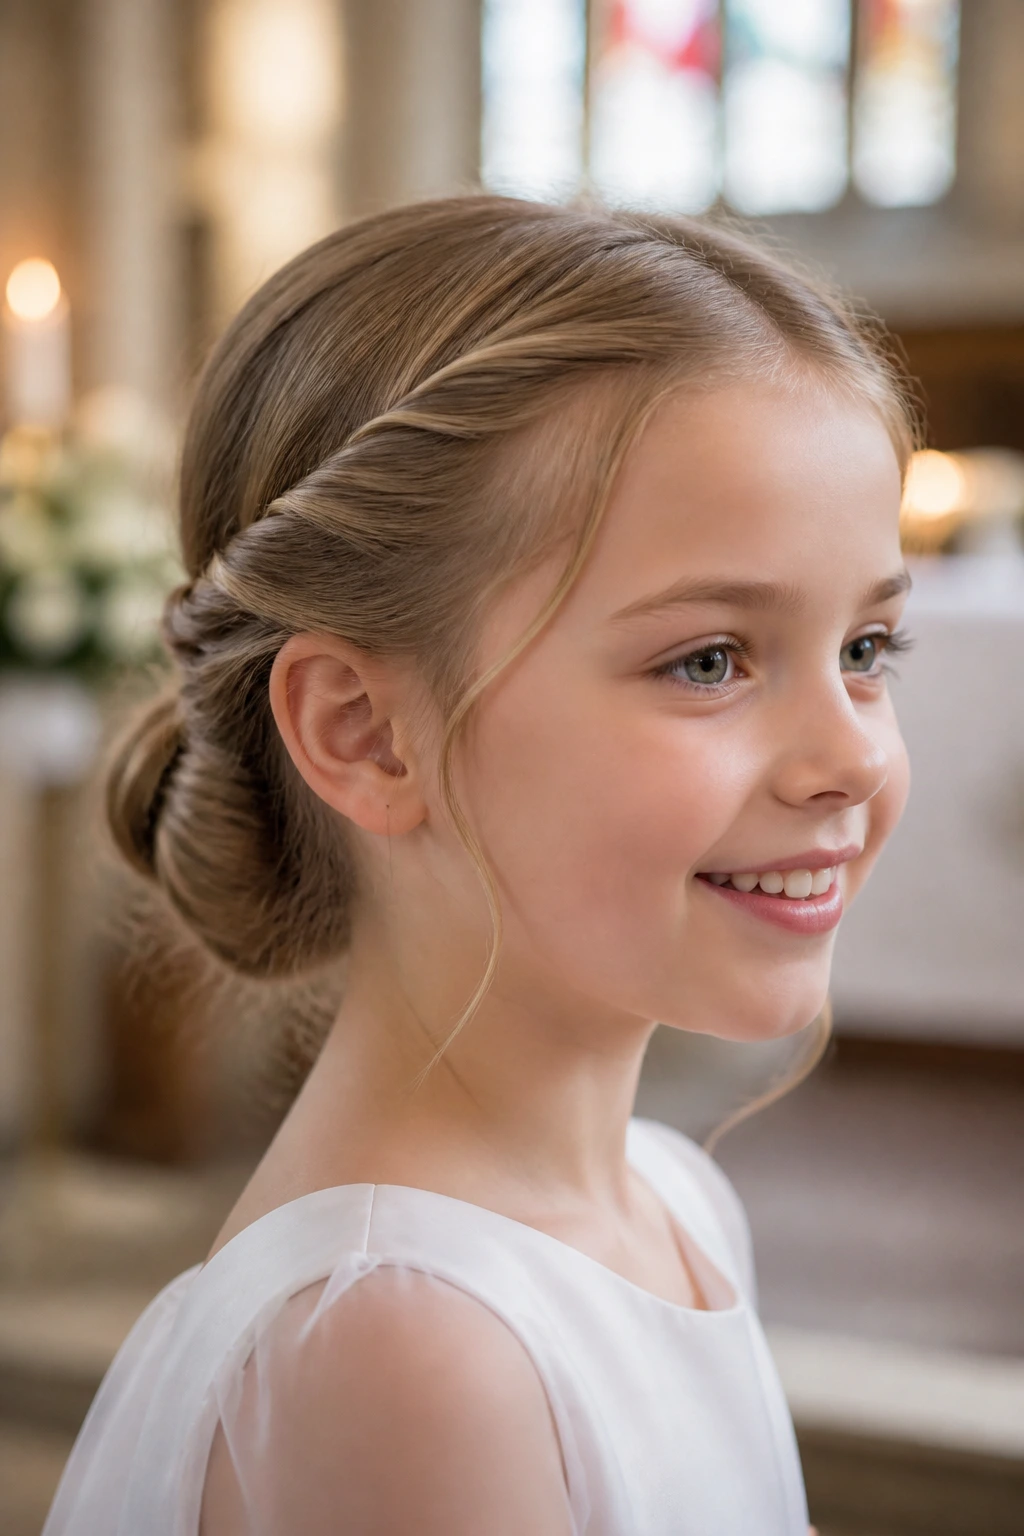
What makes a twisted halo knot useful is the way it softens the front without giving up structure. Two side sections are twisted back from the temples, then gathered into a knot low at the back. Compared with a braid, twists are faster and gentler on hair that tangles when you look at it wrong.
I reach for this one on wavy or layered hair because the texture helps the twists stay put. If the strands are slippery, work a pea-sized amount of styling cream through the mid-lengths before you begin. Don’t overload the roots. That just makes the crown collapse.
The style leaves a soft halo effect around the face, which is lovely with a simple veil or a plain headband. It also keeps small baby hairs from springing loose across the forehead, which, let’s be honest, can make a child look tired in photos even when they’re not.
A twisted halo knot is one of those styles that looks complicated from the outside and is actually pretty manageable once you split the hair into sections and pin as you go.
4. Ballet Bun with a Clean Middle Part
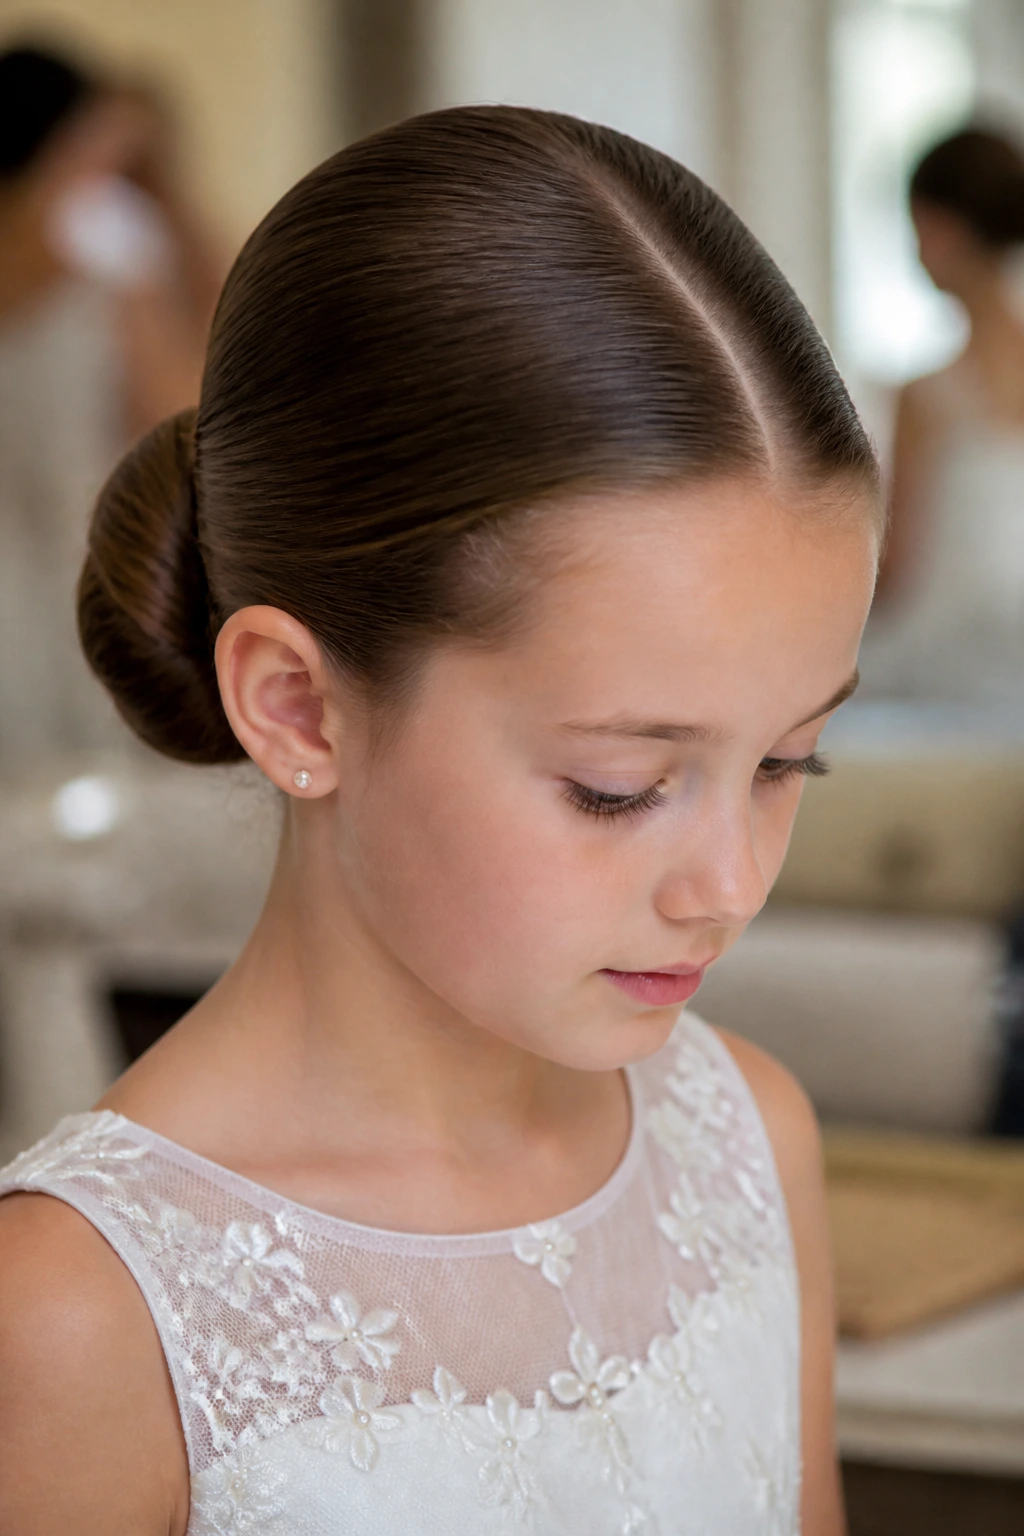
A ballet bun is still popular for a reason. It’s centered, even, and sturdy, and the middle part gives the whole style a formal line without making it fussy. For First Communion, I prefer a softer version with a bun that sits low to mid-low rather than the high, scraped-back look used for dance class. This version feels gentler and less severe.
The key is the crown. Smooth it with a soft bristle brush, not a hard plastic one, so you do not drag the hair too tight. If the hair is fine, a light mist of dry shampoo at the roots gives pins something to grab. If it’s thick, divide the ponytail in two before twisting so the bun stays flatter and doesn’t mushroom out.
A narrow ribbon can wrap the base, but I’d keep it restrained. The clean part and smooth shape already do the work.
This is a good choice for a child who likes hair off the neck and does not want strands falling into her eyes every time she turns toward the aisle.
5. Soft French Twist
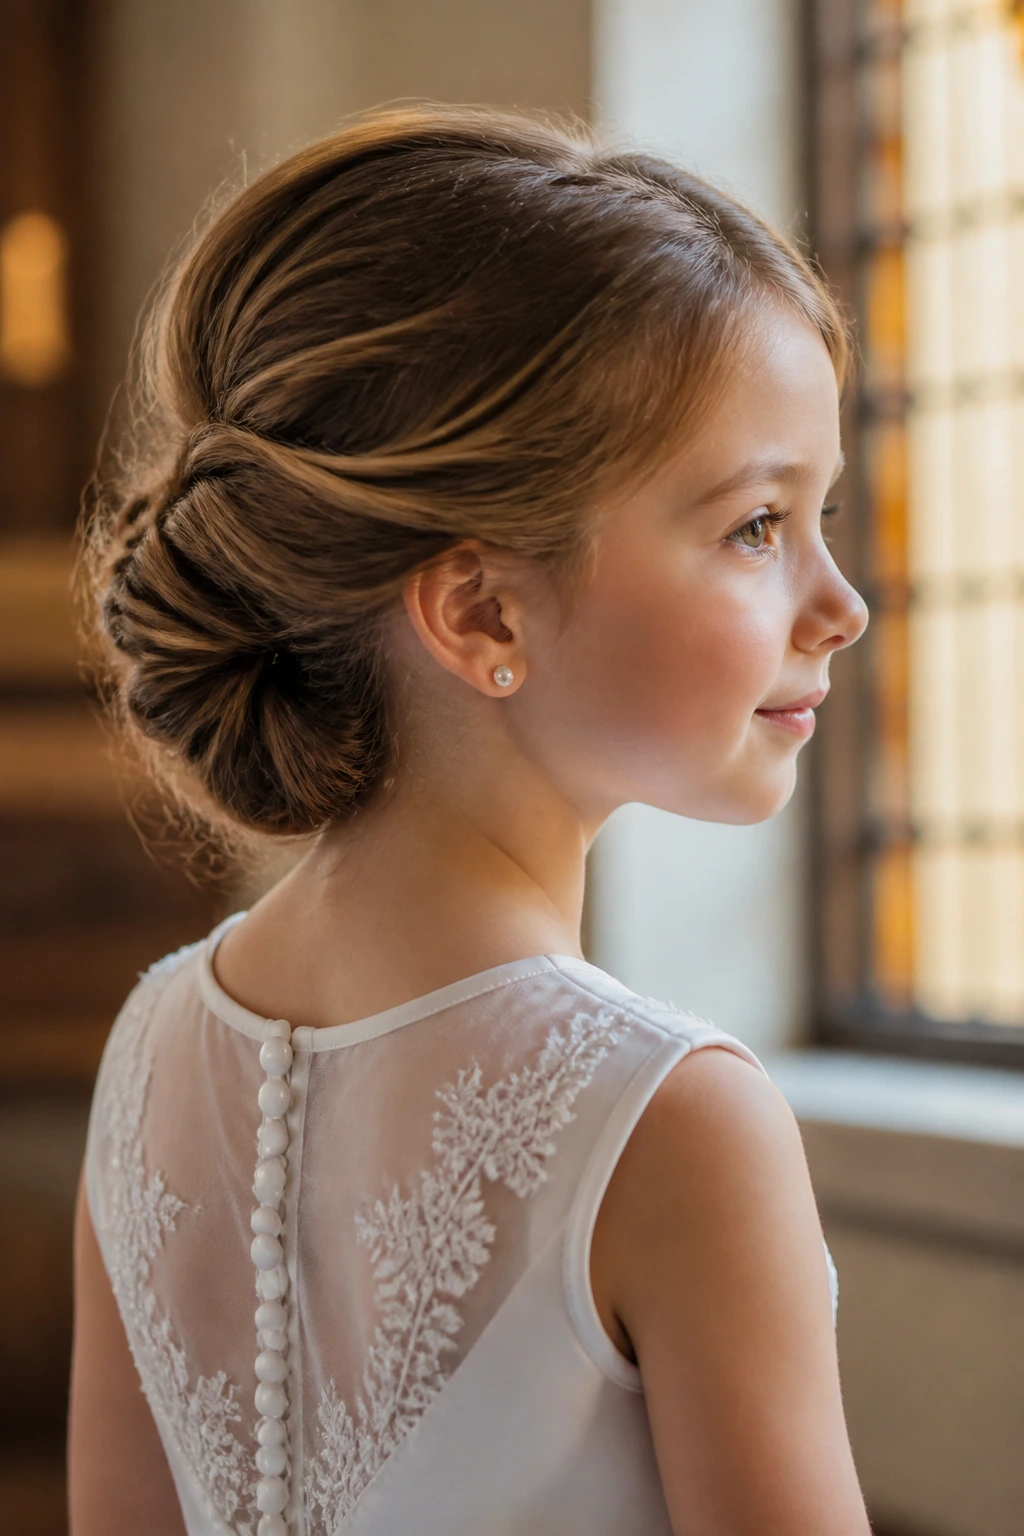
The French twist sounds grown-up, but a softer version works beautifully for a Communion setting. The trick is keeping it low, loose enough to feel gentle, and narrow enough not to overpower the dress. Instead of pulling the hair straight upward into a rigid column, guide it diagonally and pin it into a gentle roll.
This one suits medium to long hair, especially if the hair has some natural body. Very slippery hair needs texture spray first, and very layered hair may need a few extra pins at the center seam. I like using two larger U-pins at the base and then filling in the edges with smaller bobby pins.
It’s a style that can look plain in the best way. Plain here means calm. The shape is clean, the line is elegant, and the back of the dress stays visible.
If you want a small finish, add one tiny flower pin near the tuck. One. Not three. Three starts to feel like a wedding guest.
6. Side-Braided Low Bun
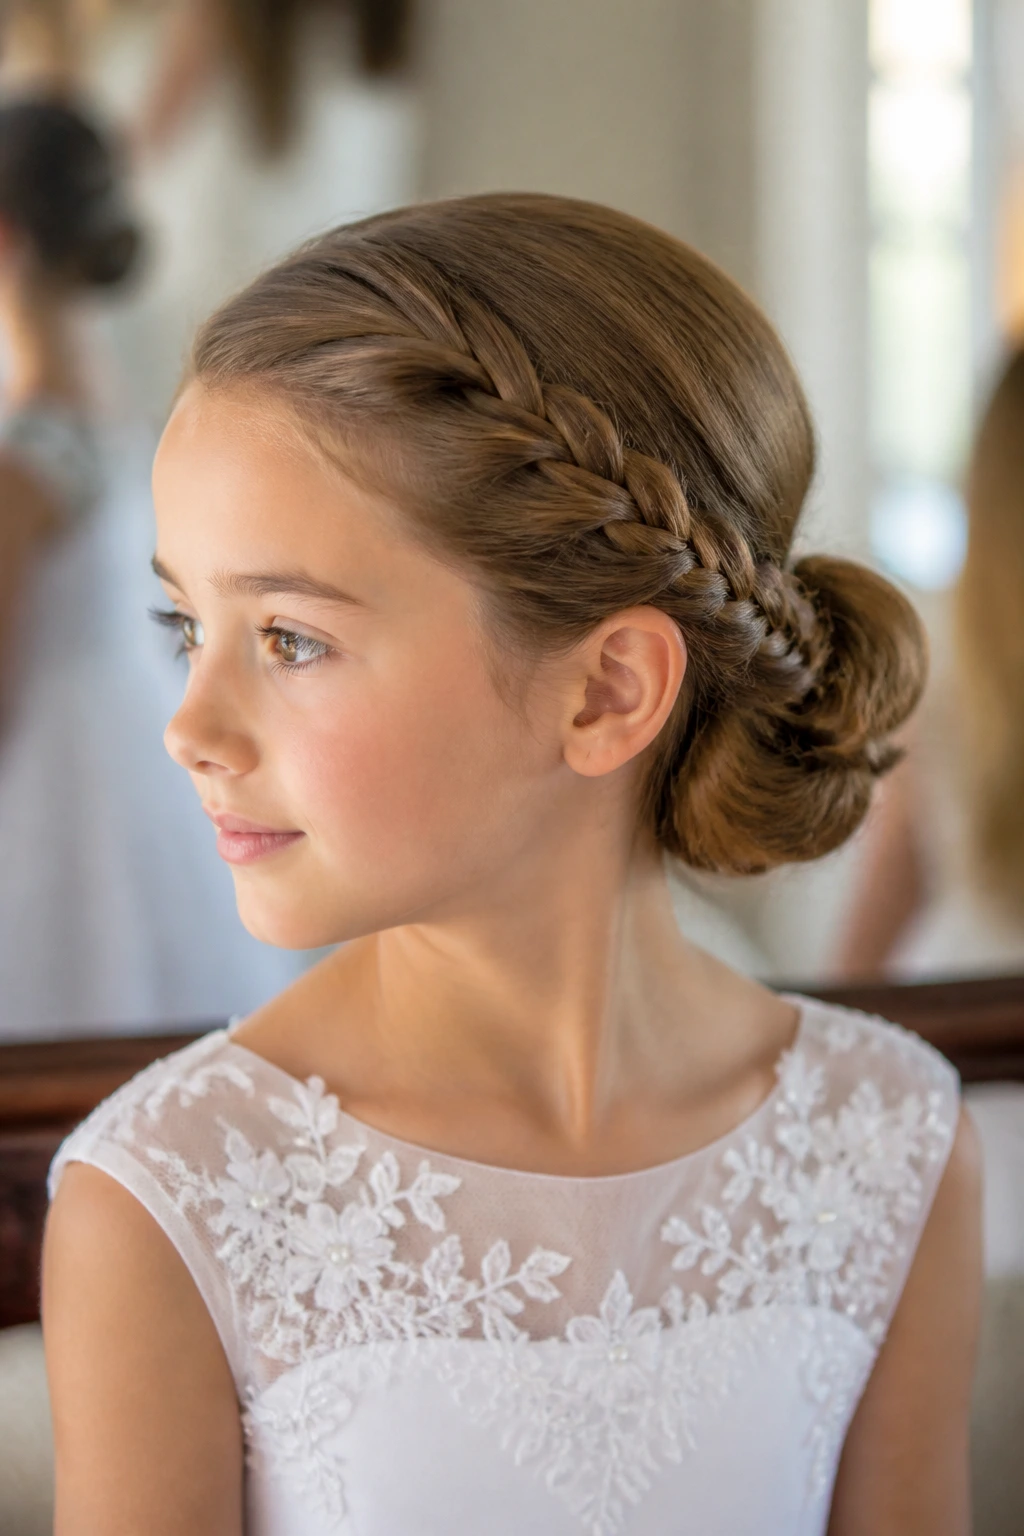
A side-braided low bun gives you a little movement without turning the style into a statement piece. The braid starts near one temple, sweeps across the head, and feeds into a bun set just off-center at the nape. That slight asymmetry keeps the look from feeling too rigid, which matters on a child’s face.
I like this for hair with some wave or bend because the braid and bun both benefit from texture. On very straight hair, the braid can look thin, so I often pull the braid gently once it’s fastened. That widens the plait and makes the whole style read richer.
The off-center bun also helps if a dress back has buttons or a scalloped edge. A centered bun can land right on a detail you want to show off. This one slides a little to the side and leaves the back of the neckline cleaner.
A small satin bow at the base works well, but keep it narrow. Wide bows can start to look like they belong on a gift box.
7. Double Dutch Braid Bun
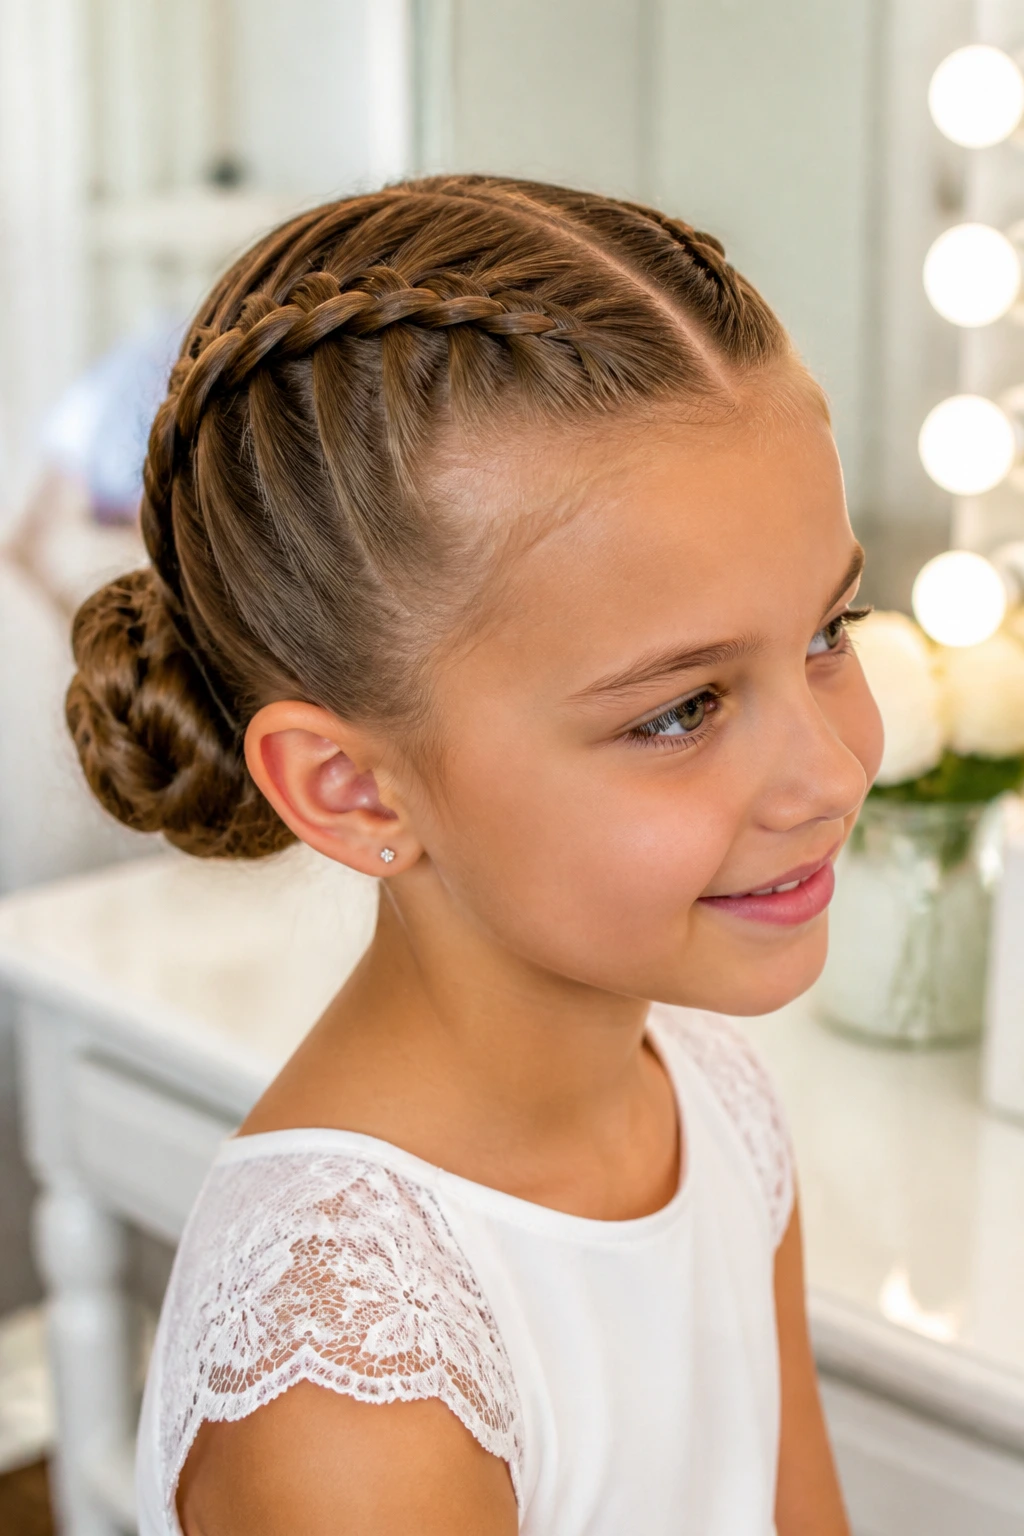
Double Dutch braids are practical in the best possible way. They keep the hair tight to the head, which means fewer loose pieces escaping around the face, and they feed neatly into a bun at the back. For a child who wiggles a lot in the chair, that matters more than how clever the braid pattern looks from the outside.
Because Dutch braids sit raised on the head, they add texture without making the style bulky. If the hair is fine, they give the illusion of thickness. If the hair is thick, they keep the roots flatter and easier to pin. Start with a center part, braid both sides back, and secure them into one bun or two overlapping coils.
A tiny clear elastic at the end of each braid helps keep the finish tidy. Use bobby pins under the bun, not just around it. That anchors the weight better.
This is one of the most secure updos in the group. It is not the softest-looking style on the first pass, but if you gently loosen the braid edges and smooth the hairline, it settles into a very neat, ceremonial shape.
8. Rope-Twist Halo Roll
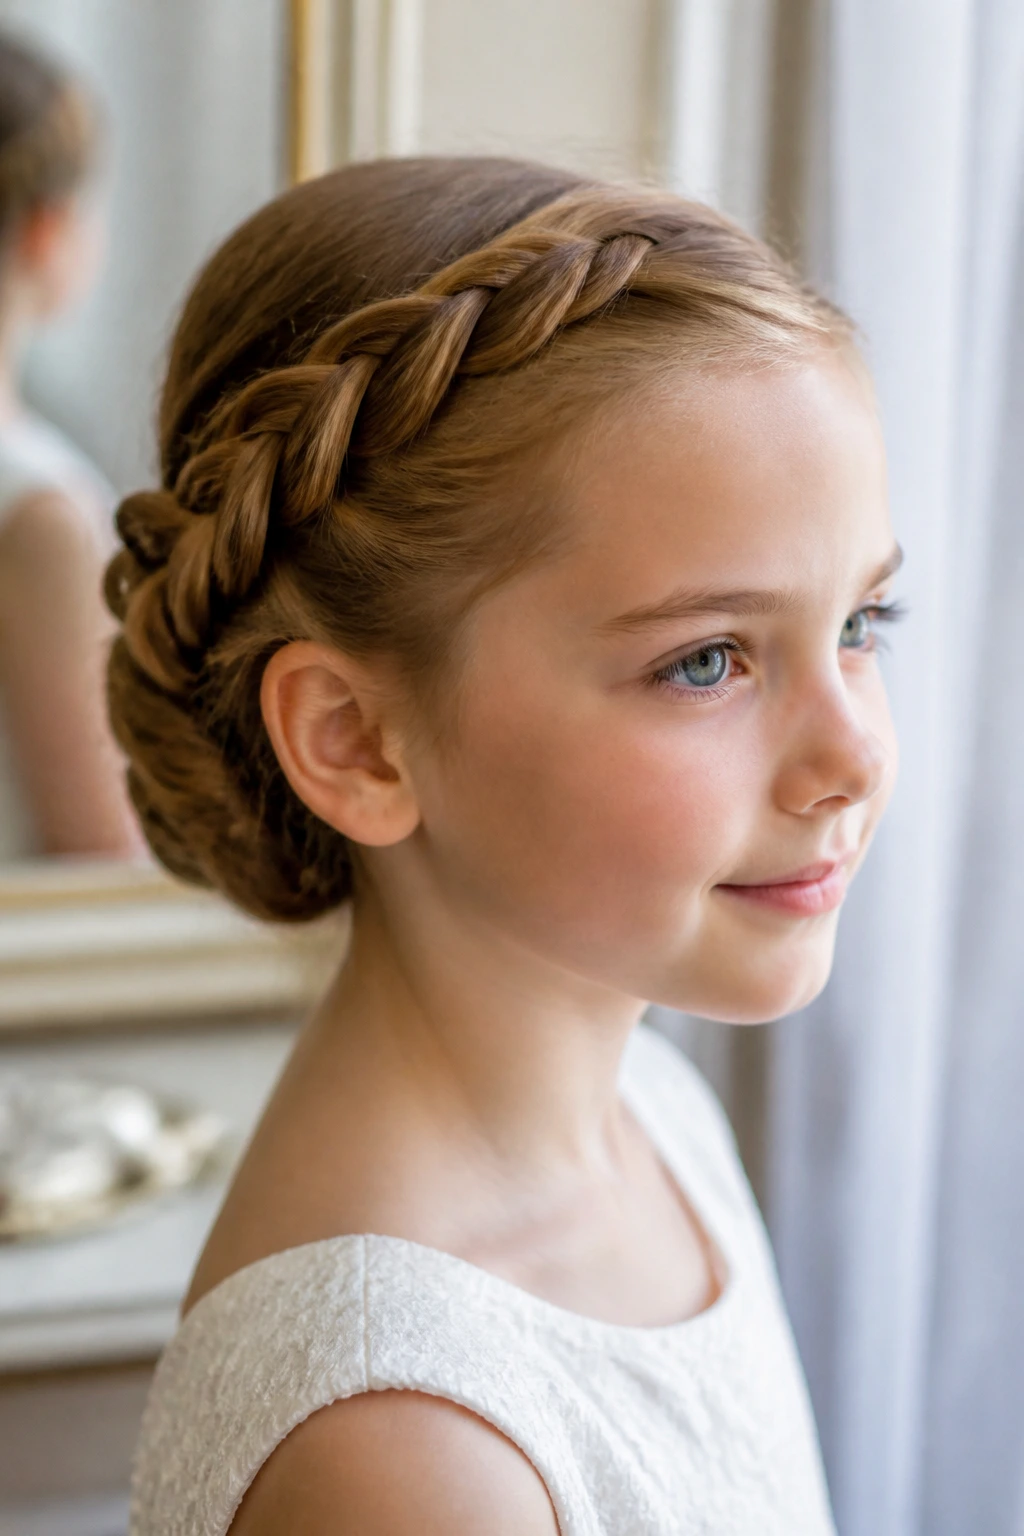
Rope twists are underrated. They look intricate, but all you’re doing is twisting two sections around each other and guiding them toward the back. For a Communion updo, that makes them a smart choice when you want detail without braiding the hair into submission.
The halo part comes from the way the twists trace the sides of the head before rolling into a tucked shape at the nape. It works especially well on hair that slips out of traditional braids. Add a little mousse or a grip spray first, then twist each side tightly enough to hold but not so tight that the child ends up with a headache by noon.
I like this on shoulder-length hair because it gives shorter lengths a way to look finished. Long hair can sometimes make rope twists feel too heavy, so in that case I’d keep the rolls thinner and the bun smaller.
If the dress has simple lines, this hairstyle does a nice job of adding texture near the face without making the crown busy. That balance matters. The hairstyle should frame the moment, not steal it.
9. Ribbon-Tied Knot Bun
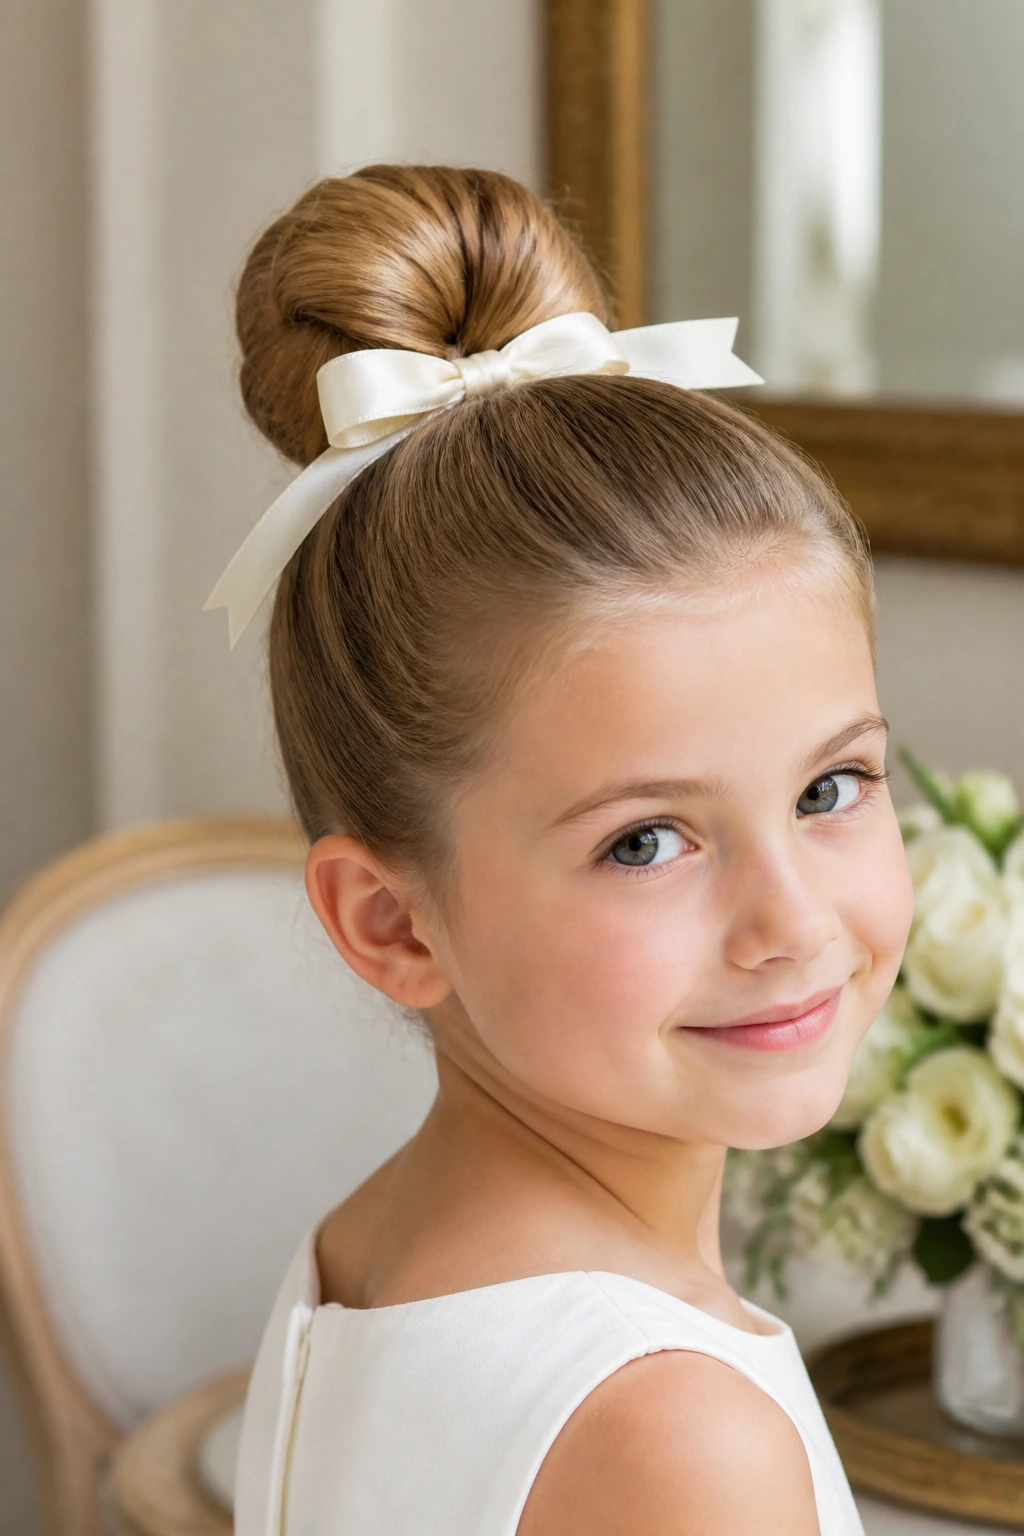
A ribbon-tied knot bun is one of those styles that looks charming because it stays so straightforward. The hair is gathered low, looped or knotted into a compact bun, and tied with a satin ribbon at the base. That ribbon can match the dress sash, echo the flowers in a bouquet, or stay ivory and soft so it doesn’t compete with anything else.
The bun itself should be neat, but not over-sprayed. I’d keep the finish touchable and let the ribbon carry some of the visual weight. If the hair is very fine, a small donut insert or a folded bun maker can help keep the knot from collapsing. If the hair is thick, pin the base first and then tie the ribbon after the shape is secure.
This style works because it feels like a finish, not an event. You see the ribbon, you see the tidy knot, and that’s enough. It’s also one of the easiest styles to adjust if a child changes her mind halfway through the morning and decides she wants the bow moved half an inch to the left. That happens more than adults admit.
10. Curly Low Puff with Pinned Ends
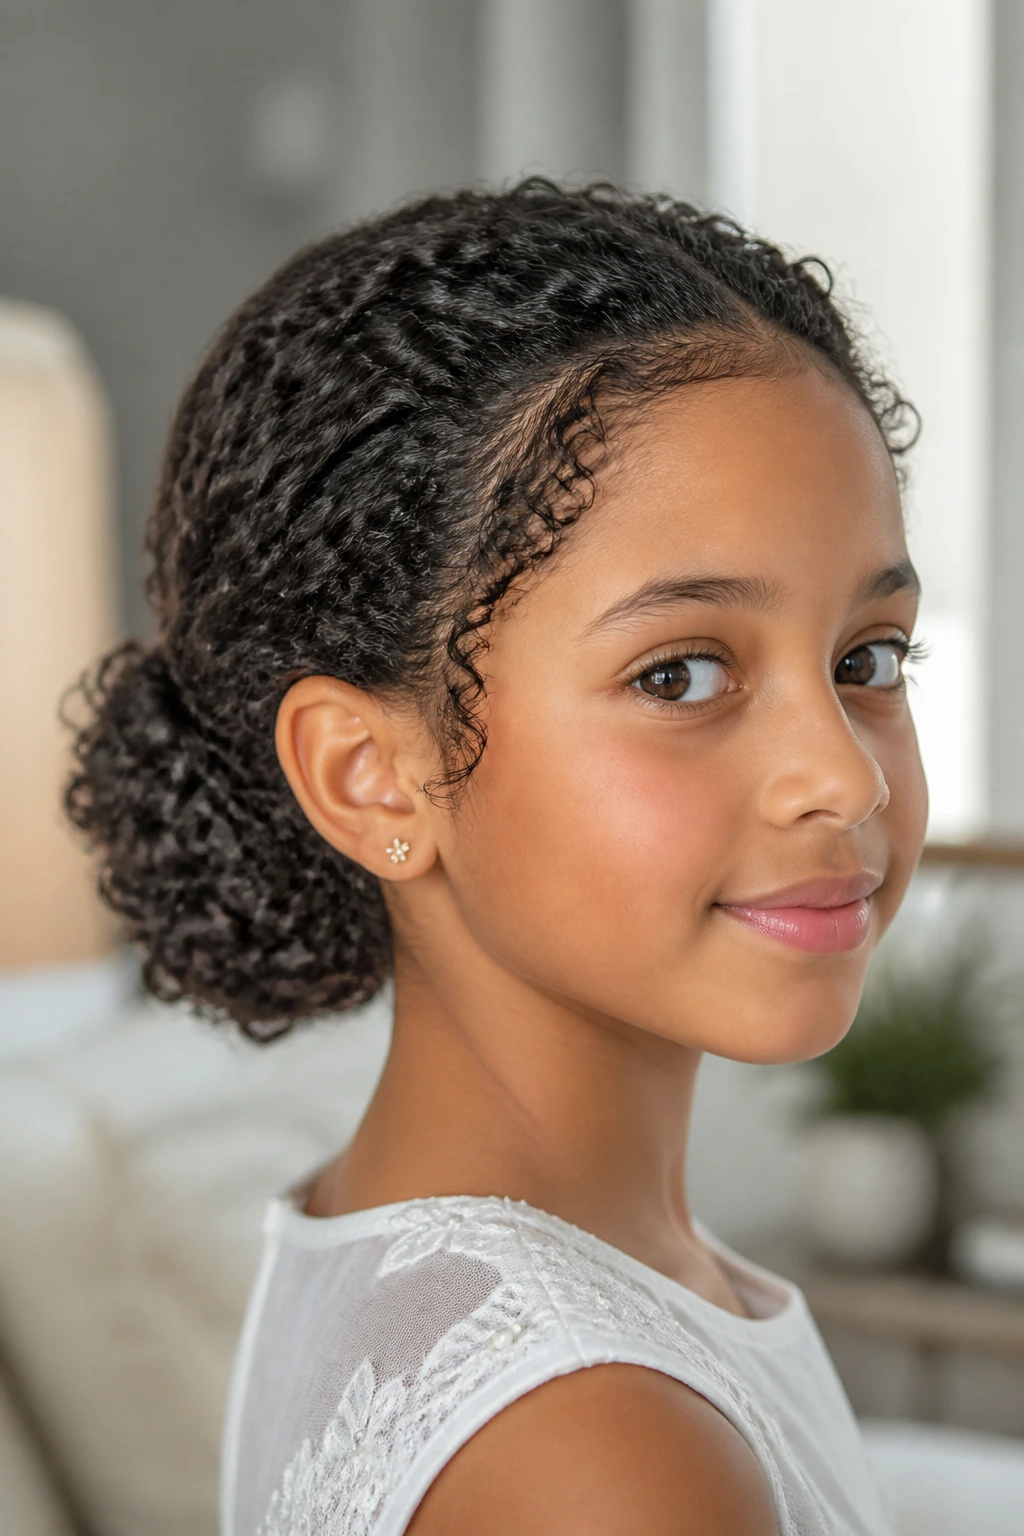
Curly hair should not be flattened just because the occasion is formal. A low puff with pinned ends keeps the curl pattern visible while still getting the hair off the face and neck. For many children, that’s the kinder choice anyway. You work with the texture instead of fighting it into a shape it doesn’t want.
The trick is to gather the curls low, smooth the top section gently, and pin the length under so the curls form a rounded shape at the back. A light curl cream or leave-in conditioner helps define the texture before styling. Don’t brush the curls dry. That’s the fastest route to frizz and an unhappy child.
This style is especially good when the child wears natural curls and the family wants the hair to look polished without looking straightened. Add a small satin clip or one pearl comb, not a full row of decorations. The hair already has presence.
It’s a calm, textured look. And it photographs with a lot more life than a style that has been pressed flat.
11. Tucked-Under Roll
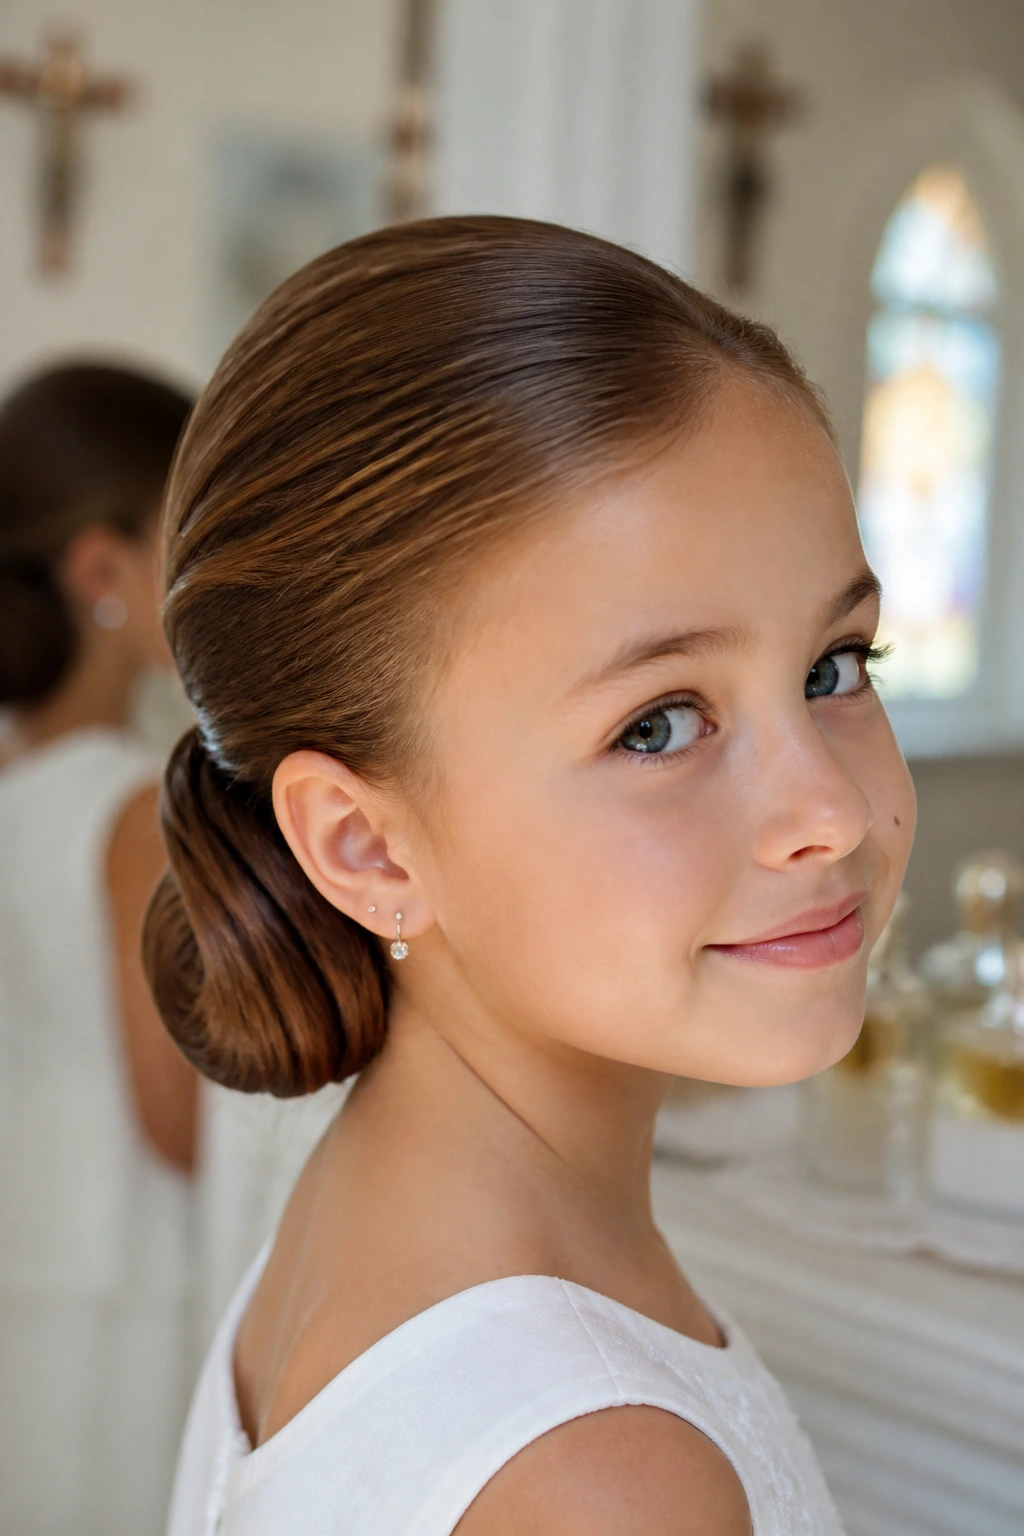
A tucked-under roll is one of those classic shapes that never seems to go out of place. Hair is swept back, rolled inward at the ends, and pinned into a narrow band along the nape. The silhouette stays smooth and low, which makes it easy to wear under a veil or with a dress that has a detailed neckline.
This is a solid option for straight or softly wavy hair that cooperates with pins. If the ends are too slippery, lightly curl them before rolling so they bend under instead of poking out. That tiny extra step saves a lot of frustration later.
I like the tucked-under roll because it looks neat from every angle. There isn’t a bulky base, so the back of the head stays close to the shape of the skull. That sounds unglamorous, but it’s actually flattering. It makes the face look open and the dress line cleaner.
A thin comb tucked above the roll can finish it if the rest of the outfit is simple. Keep it small. This style does not need much help.
12. Polished Low Bun with Face-Framing Pieces
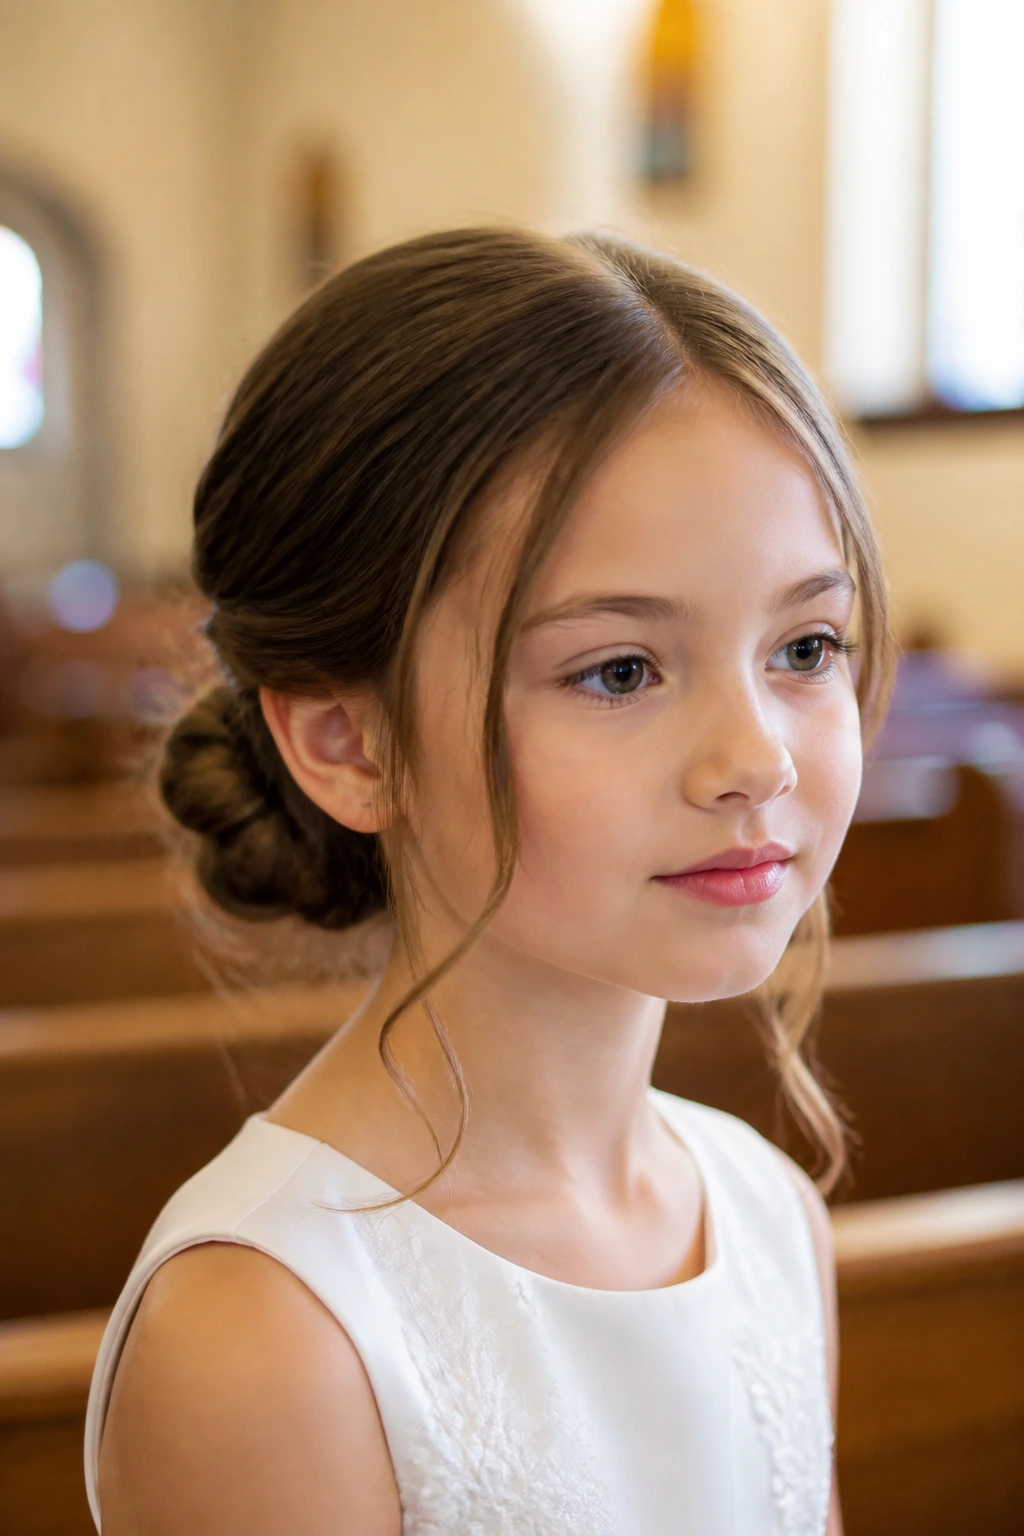
This is the version people reach for when they want softness but still want control. The bun sits low and compact, while one or two fine pieces are left out near the cheeks or temples. Those pieces should be deliberate, not accidental. If they’re too thick, the style starts looking undone. If they’re too thin, they just look missed.
The face-framing pieces work best when they are curled lightly with a 3/4-inch or 1-inch iron and then brushed into a soft bend. A hard curl ring is too formal and too grown-up. What you want is a bend that curves away from the face and settles naturally against the jawline.
This style is especially useful if the dress is very plain and needs a little softness near the face. It also helps if the child has a long face shape or a high forehead, because the loose pieces break up the vertical line. The bun keeps the back tidy. The front stays gentle.
A dab of smoothing cream on the crown keeps flyaways from turning the look messy by photo time.
13. Pearl-Pin Braided Bun
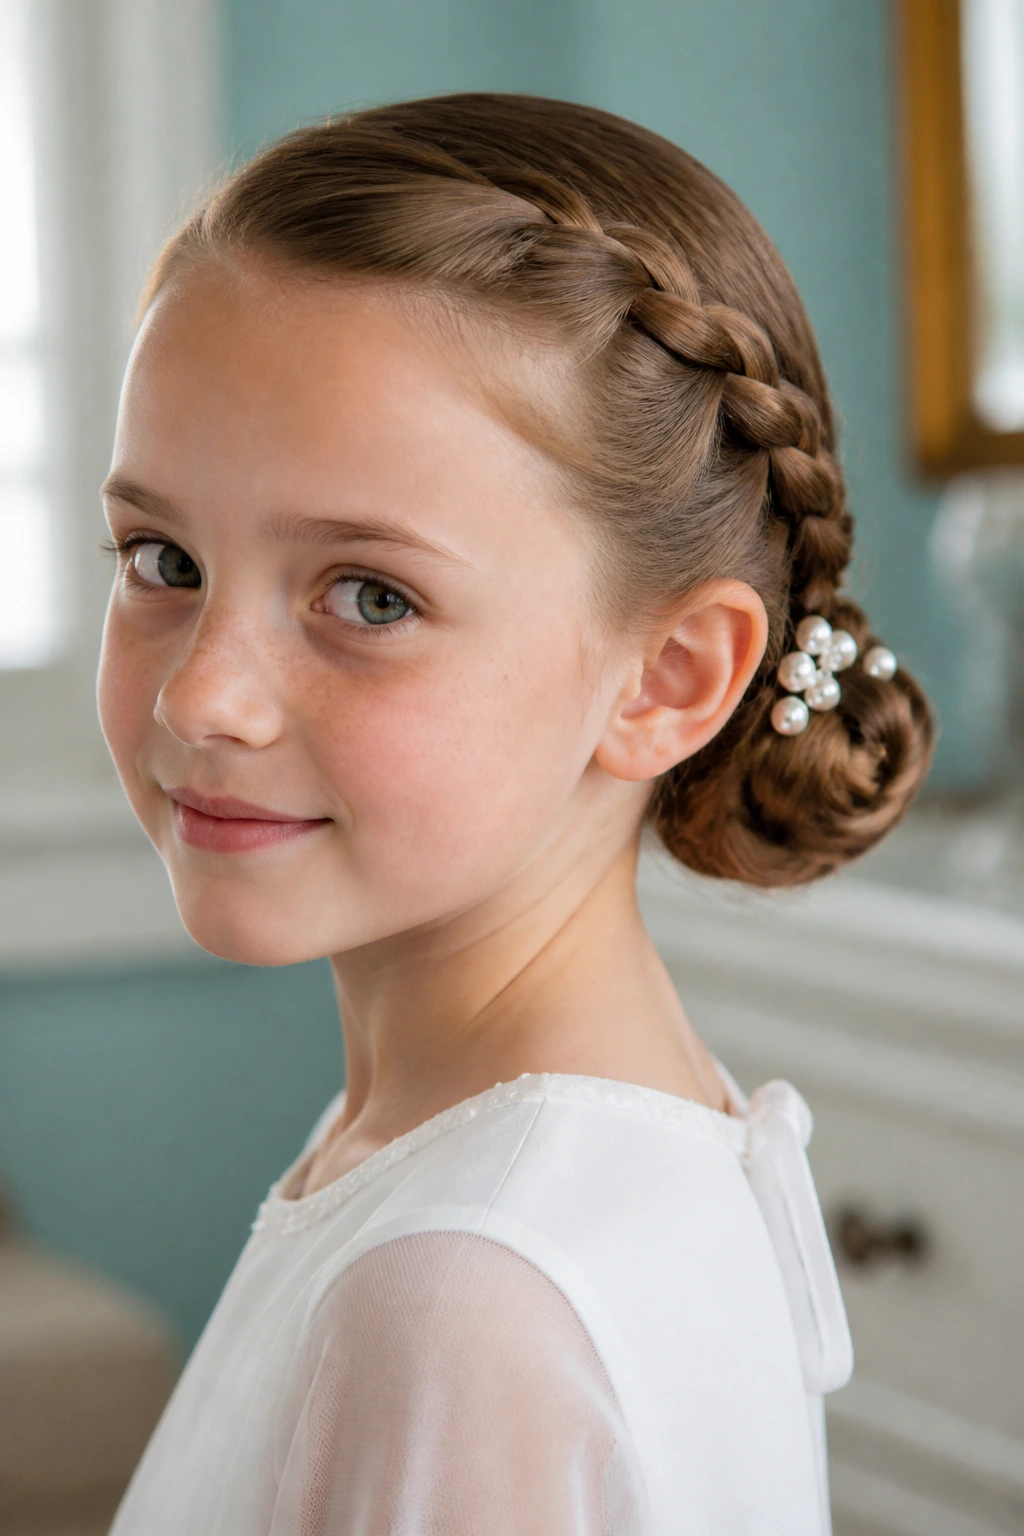
Pearl pins are one of the few accessories that can make a hairstyle feel special without making it busy. A pearl-pin braided bun starts with a braid or two feeding into a low bun, then the pins get tucked at the outer edge of the bun or along the braid seam. The result is refined, but not flashy.
This style works well when the dress already has lace, satin, or beadwork, because the pearl pins echo the texture without competing with it. Keep the braid tight enough to hold its shape, but do not pull it so hard that the scalp looks stretched. A slightly loosened braid gives the bun more body and gives the pearl pins somewhere to sit.
I like this look for medium to long hair because the braid detail keeps the back interesting even if the bun itself is compact. Fine hair can use smaller pearl pins placed closer together; thick hair usually looks best with fewer, larger pins spaced out a bit.
Do not cover the whole bun with pearls. That’s where restraint pays off. One neat cluster is enough.
14. Gibson Tuck with a Soft Twist
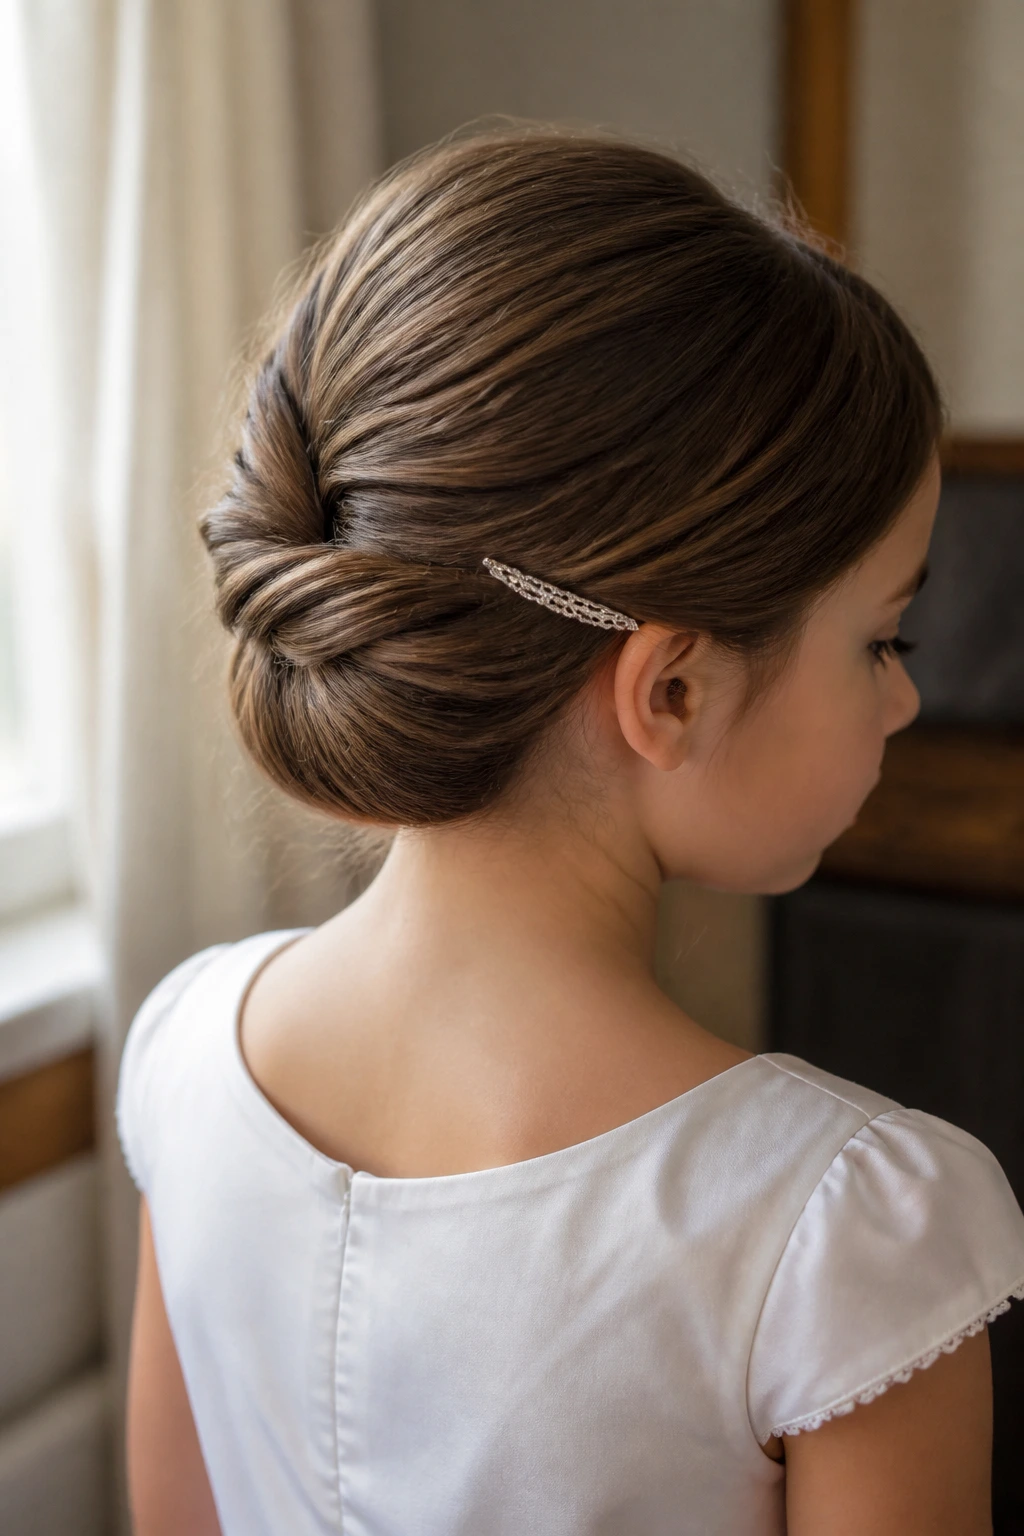
The Gibson tuck has a lovely old-fashioned shape, and that suits a First Communion setting better than a style that looks too grown up. Hair is twisted or rolled up and tucked into itself just above the nape, creating a smooth pocket of hair with a soft curve. When it’s done lightly, it feels almost like a ribbon folded over.
Shoulder-length hair is the sweet spot here. Long hair can do it too, but it needs a stronger pin base so the tuck does not sag. If the hair is layered, a little styling cream and a few hidden pins help the shorter pieces stay inside the roll.
The best thing about this style is its calm outline. There’s no hard edge, no big crown, and no need to pile on accessories. A single narrow barrette or a tiny comb at the side is enough. I’d skip anything heavier.
It’s a good choice when the dress has a lot going on at the top and you need the hair to step back politely.
15. Bubble Braid Bun
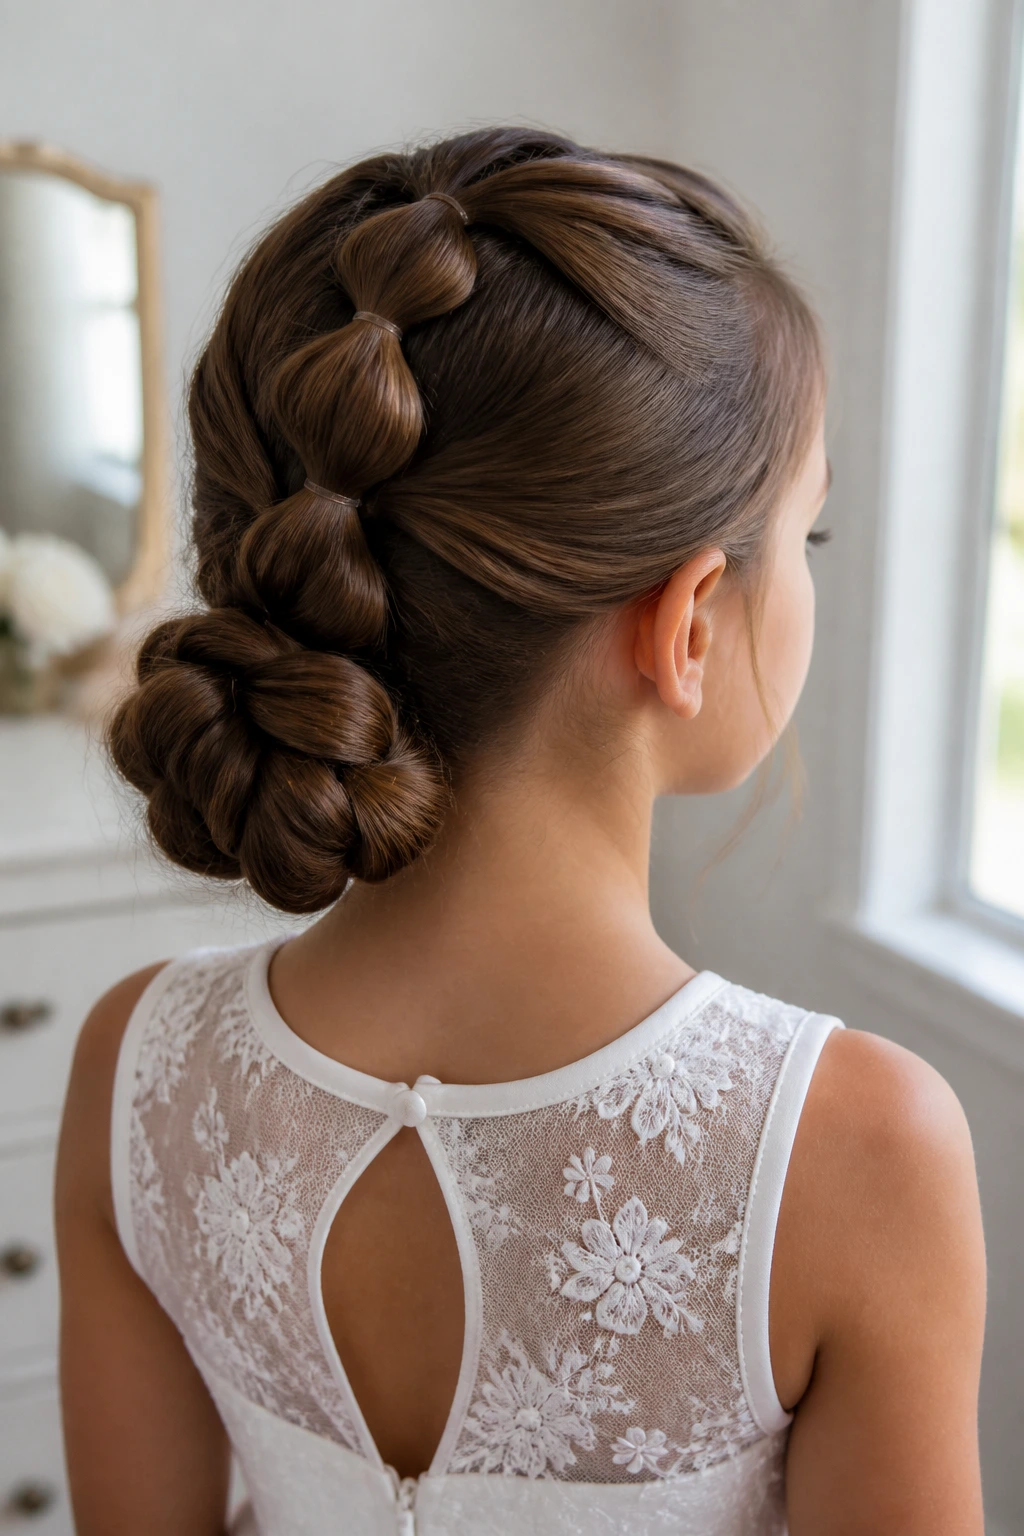
Bubble braids sound playful, and they are, but in the right hands they can still feel polished. For a Communion updo, make a low ponytail, add small elastics every 1 to 1½ inches, puff each section gently, then coil the bubble braid into a bun. The structure keeps the style interesting without making it elaborate.
This works especially well on longer hair because the bubbles create shape even before the bun is formed. Thick hair holds the round sections better, but fine hair can do it too if you mist in a little texture spray first. The key is not to overinflate the bubbles. Small, even sections look cleaner than giant uneven ones.
I like this style when the child wants something a little different but the outfit calls for restraint. The bubble texture shows from the back, yet the final bun still sits low and neat. A satin ribbon tied around the base can soften the whole look.
It’s a nice middle ground. Not plain, not fussy.
16. Deep Side-Part Low Bun
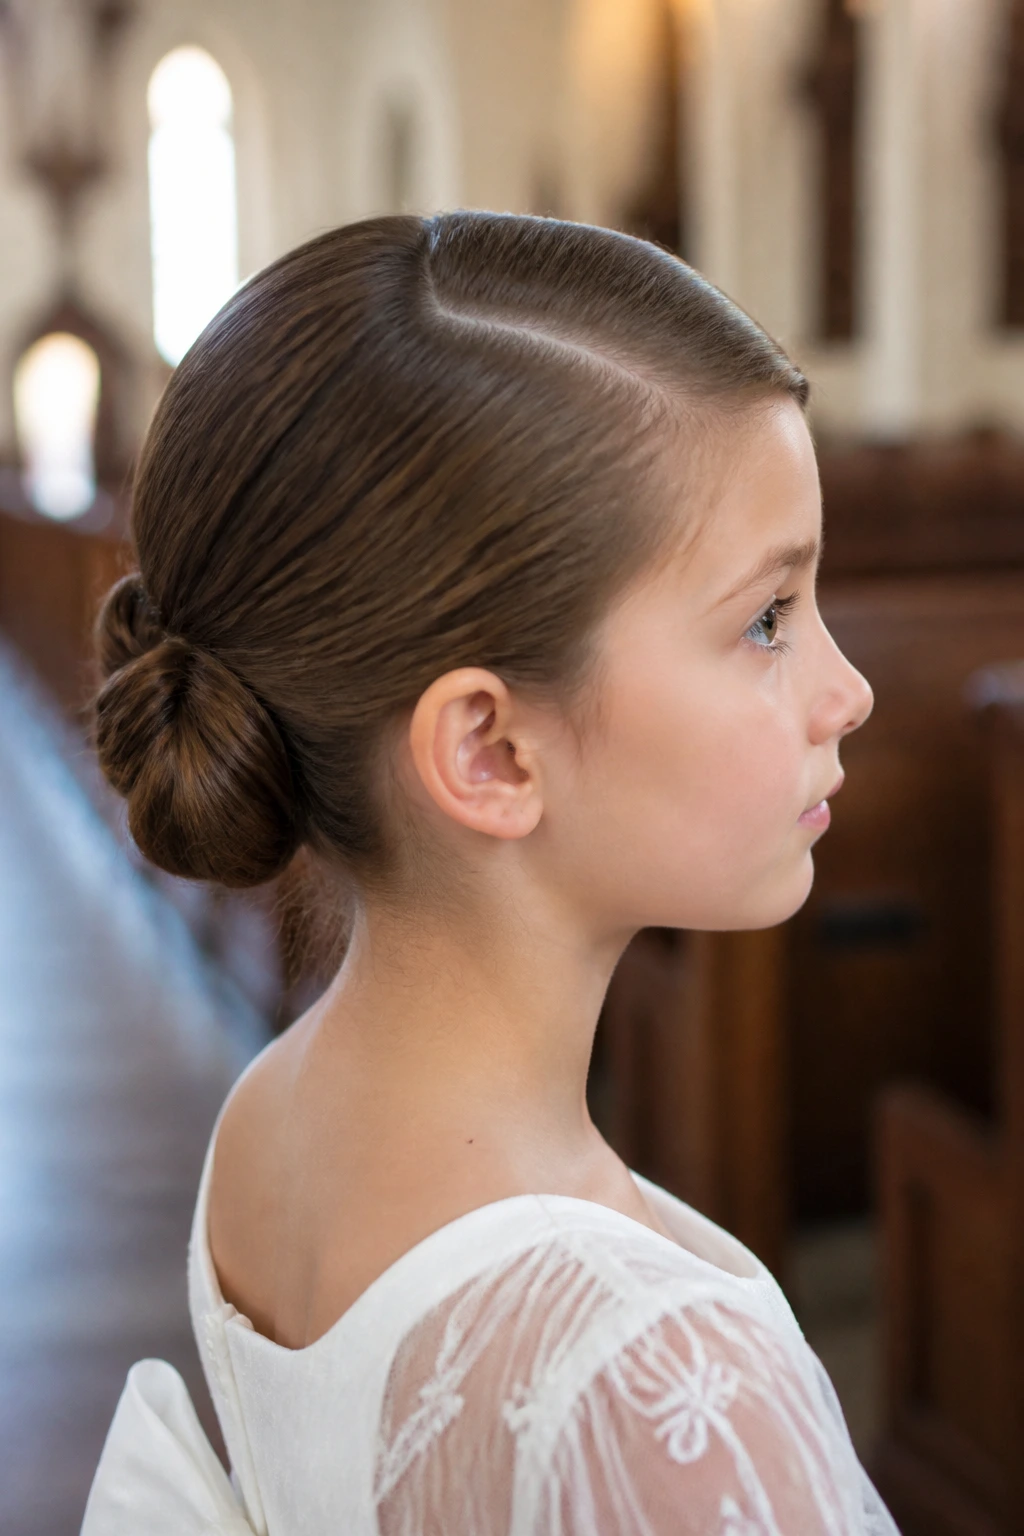
A deep side part gives a Communion updo some shape before the bun even starts. Instead of a centered, symmetrical finish, the hair sweeps from one side, follows the head’s natural curve, and gathers into a low bun at the nape or slightly off to one side. The result feels controlled but not severe.
This style is useful if the child has a side part she already wears often. Fighting the natural fall of the hair usually makes the day harder than it needs to be. A side part lets the hair settle naturally, which can cut the number of pins you need. That matters when you’re working with a sensitive scalp.
It also works well with dresses that have a softer neckline or a one-sided accent, like a flower cluster or lace panel. The bun doesn’t need to mirror the part exactly. In fact, a slight offset can make it look more relaxed.
Keep the crown smooth and the bun compact. The part carries the style. Don’t overbuild the back.
17. Flower-Braid Crown Bun
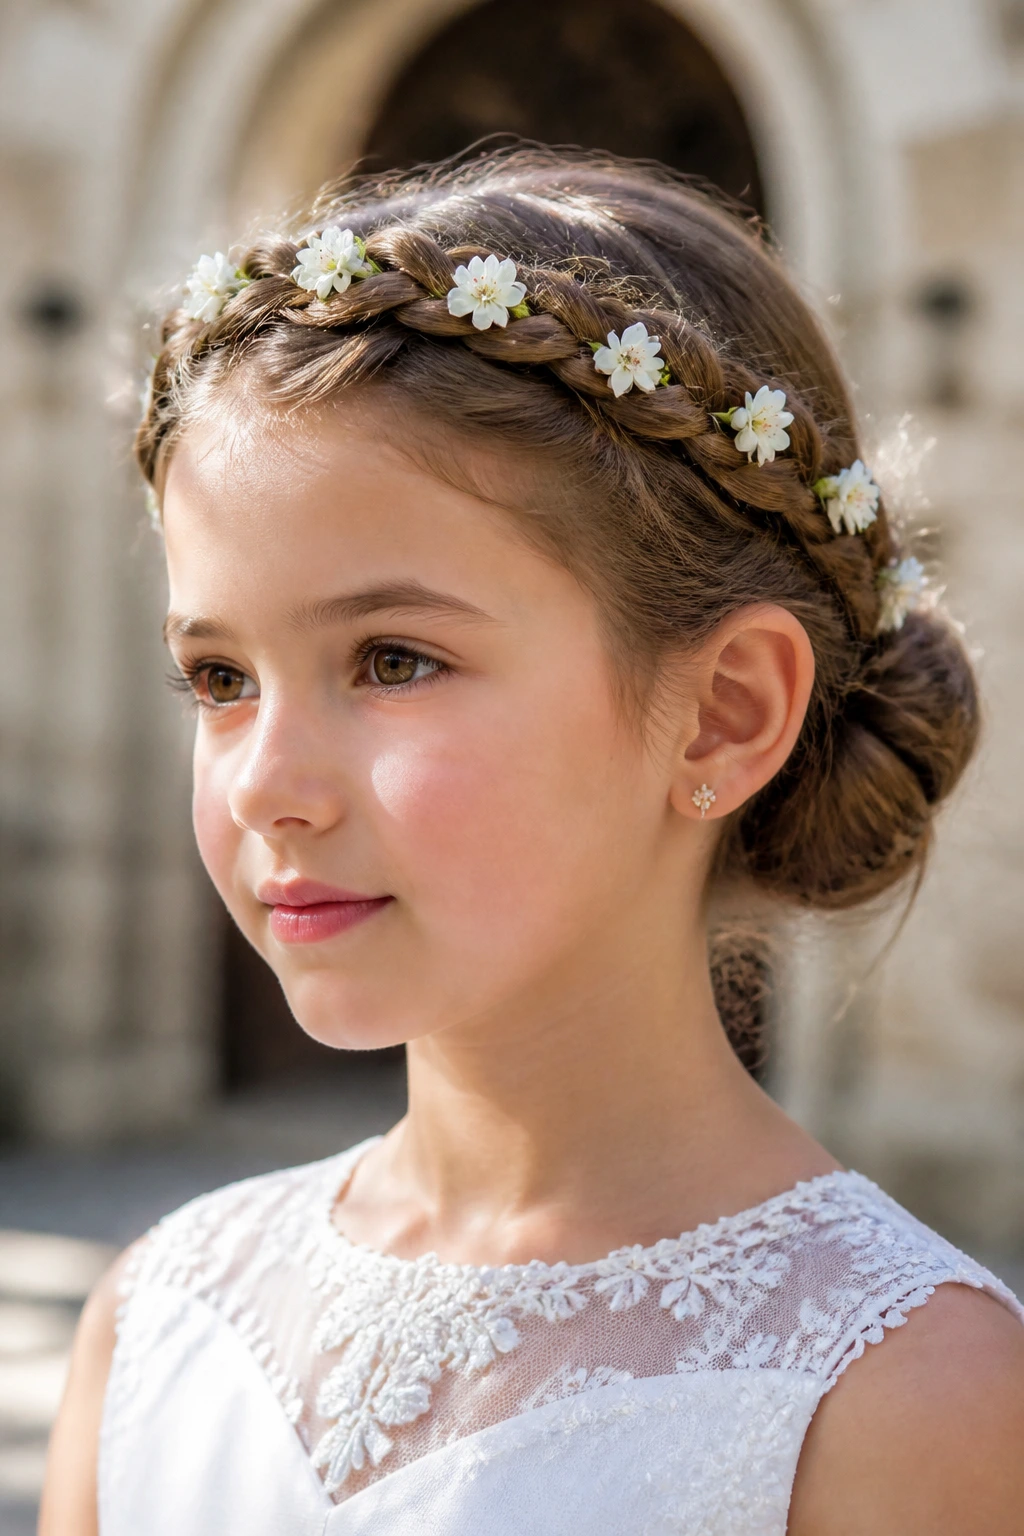
This is the one people picture when they want something tender but not sugary. A flower braid, or a braid that’s shaped and pinned to resemble a small flower or rosette, wraps into a crown-like detail before the hair settles into a bun. It gives just enough decoration to feel ceremonial.
The trick is to keep the “flower” small. A huge braided bloom belongs somewhere else. For First Communion, the braid flower should sit like a soft accent near the side or back of the head, with the rest of the hair controlled into a bun. If the hair is long enough, one braid can be coiled into the flower shape; if it’s medium length, two shorter braids may need to overlap.
This style is especially sweet with dresses that are plain or have simple sleeves. It adds a handcrafted look without relying on a big accessory. I’d keep the rest of the styling clean and use only a few pearl pins near the center if needed.
It’s a quieter version of floral styling. That’s the part I like most.
18. Looped Low Knot
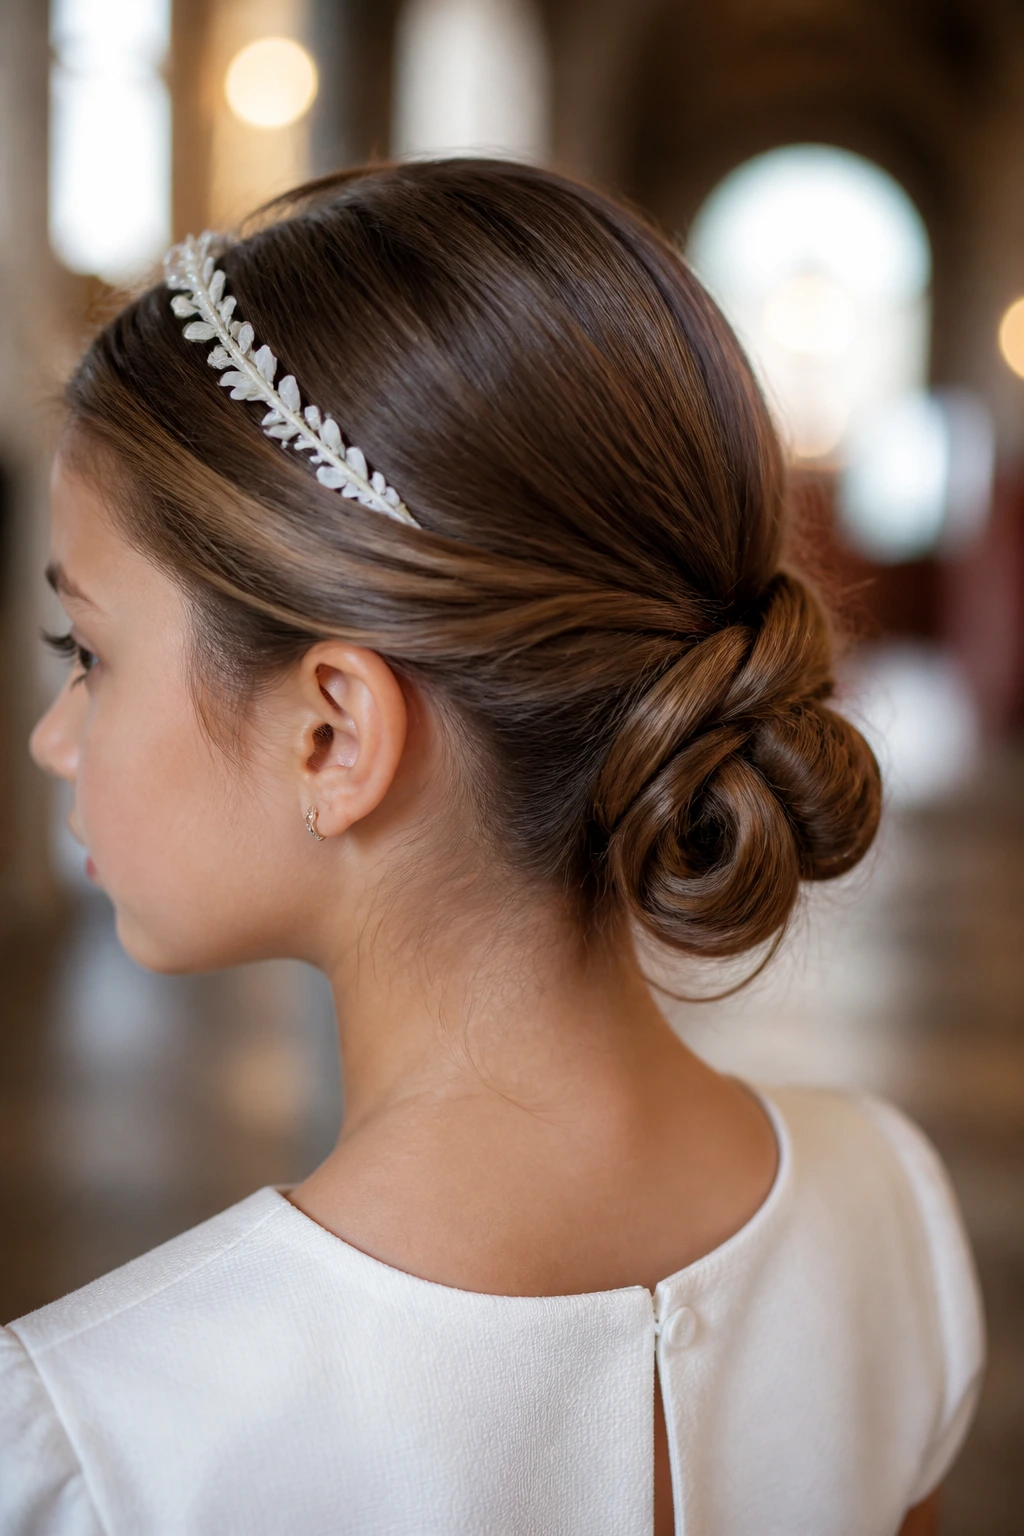
A looped low knot is one of the easiest ways to make hair look finished without making it stiff. The hair is gathered low, folded into a loop, and pinned so the ends stay hidden. The shape looks compact and elegant, but it doesn’t have the hard edges of a tight ballerina bun.
This style is especially friendly for fine hair because the loop creates the illusion of fullness. If you have thicker hair, divide the ponytail into two sections first and loop them separately before pinning them together. That keeps the knot from sitting too heavy at the back of the head.
A looped knot is also forgiving if the child needs the style adjusted after getting dressed. You can loosen or tighten the loop in a few minutes, which is worth its weight in gold on a morning that already has too many moving parts.
Keep the finish smooth at the crown and leave the knot itself slightly soft. A little texture in the loop helps it look intentional rather than overworked.
19. Twisted Ponytail Chignon
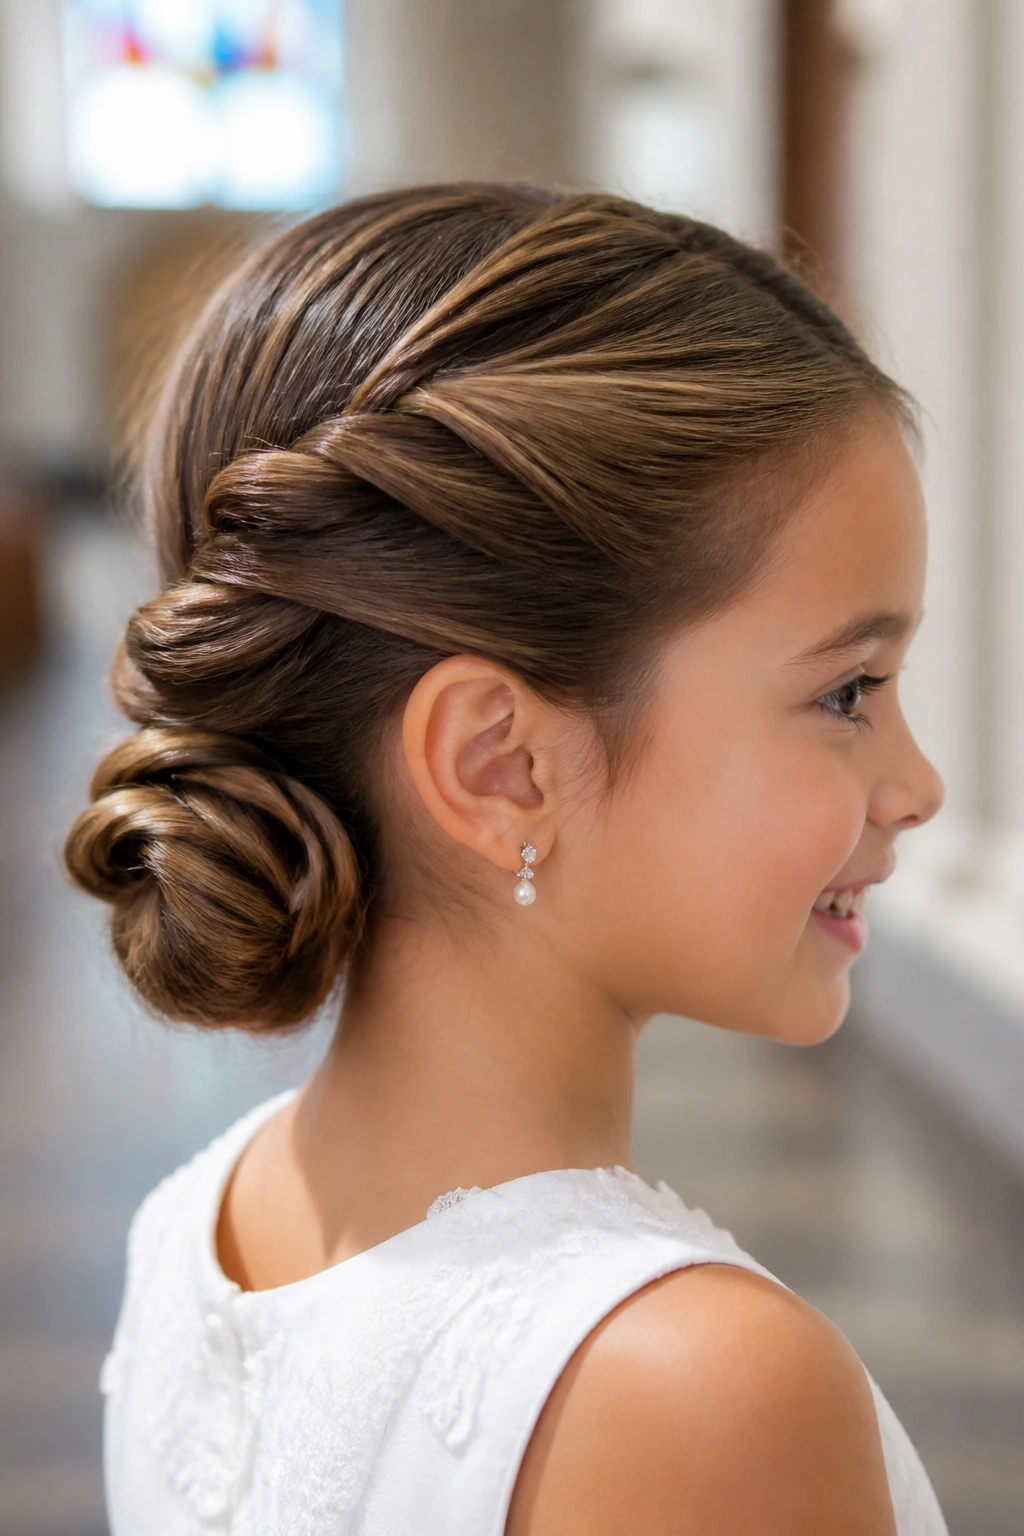
A twisted ponytail chignon is one of the fastest paths to a polished look, and speed matters when a child has zero patience left for styling. Start with a low ponytail, twist the length, then wrap it around the base into a chignon. Pin the edges firmly and tuck the ends underneath so nothing pokes out.
What makes this style useful is its flexibility. Straight hair gets a smooth finish. Wavy hair gets a little movement in the twists. Curly hair can be twisted loosely enough that the texture still reads at the ends. You can also make it tighter if the dress is more formal or looser if the neckline needs a softer line.
I’d use this when the child needs a style that looks organized but doesn’t require a lot of working time. It also tolerates small corrections well. If one side looks heavier, you can shift the wrap a touch before the last pins go in.
It’s not flashy. That’s the point. A solid chignon like this quietly does the job.
20. French Braid Into a Bun
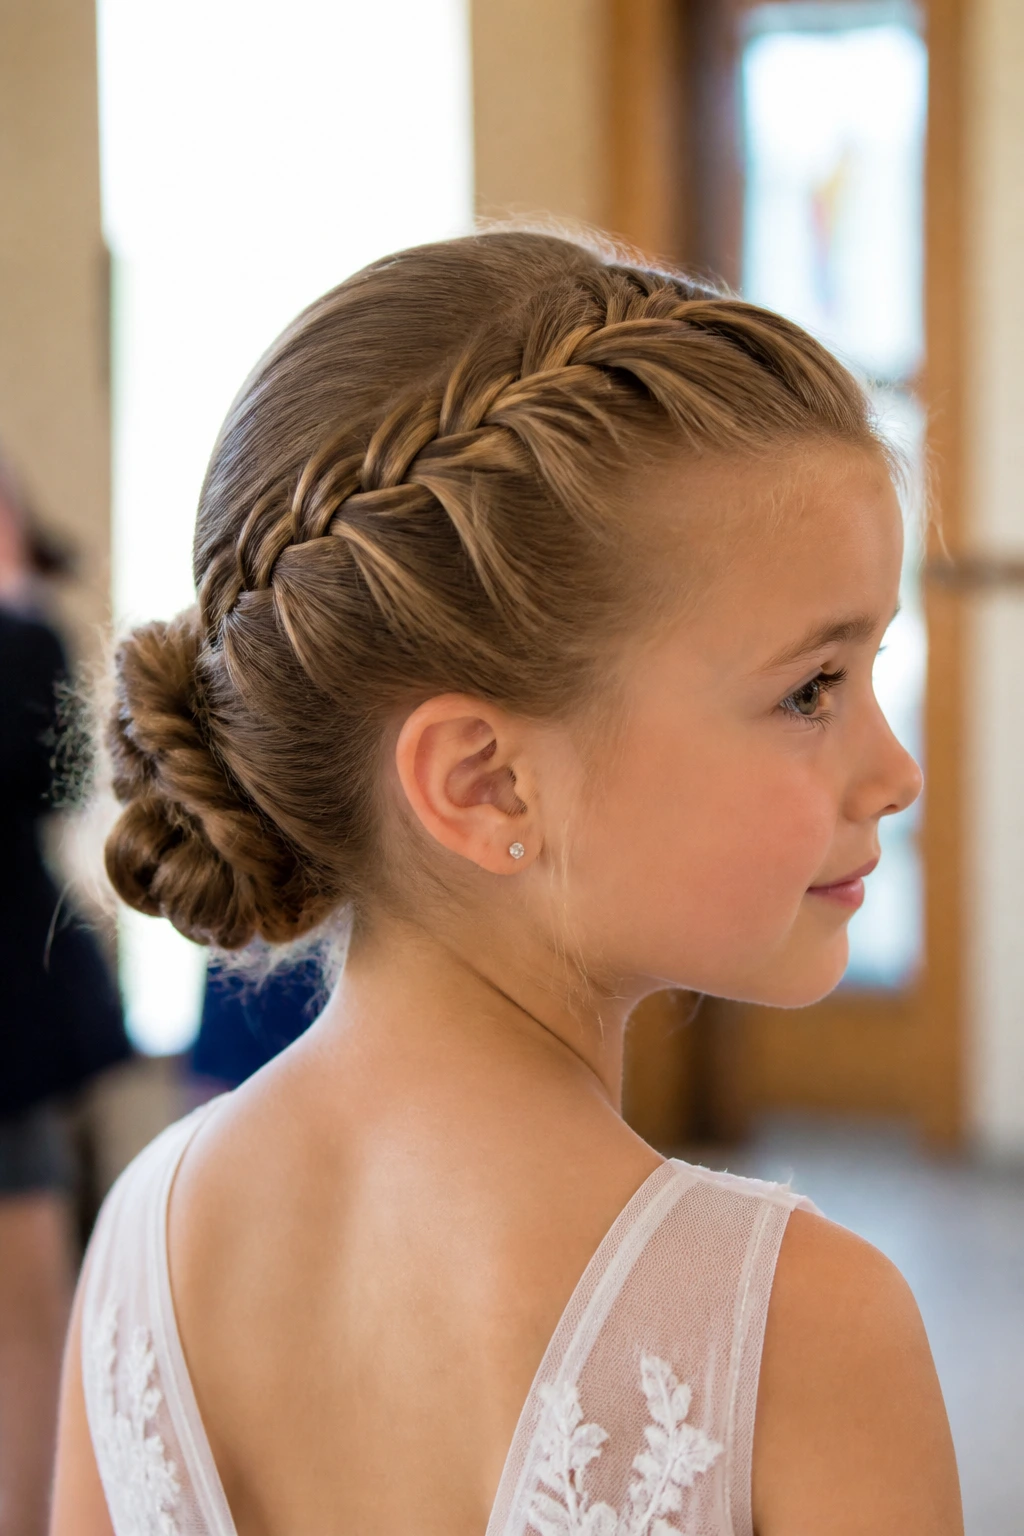
A French braid into a bun is one of the safest bets in the whole group. The braid controls the top section, the bun controls the length, and together they make a style that can survive a long morning without constant checking. It’s especially helpful if the child has layers or flyaways near the crown.
Start the French braid at the front hairline or just behind it, braid toward the nape, then gather the remaining hair into a bun. The braid does not need to be perfect. A slightly soft braid often looks better in photos because it has a little dimension. Pull the braid edges gently once secured so it doesn’t read flat against the head.
This is the style I’d choose for active children or for families who want something classic and dependable. It works with veils, ribbons, and simple headbands. It also looks neat if the child takes off the accessory after the service and keeps the bun alone.
Plain? Yes. Boring? Not at all.
21. Crown Braid With a Hidden Bun
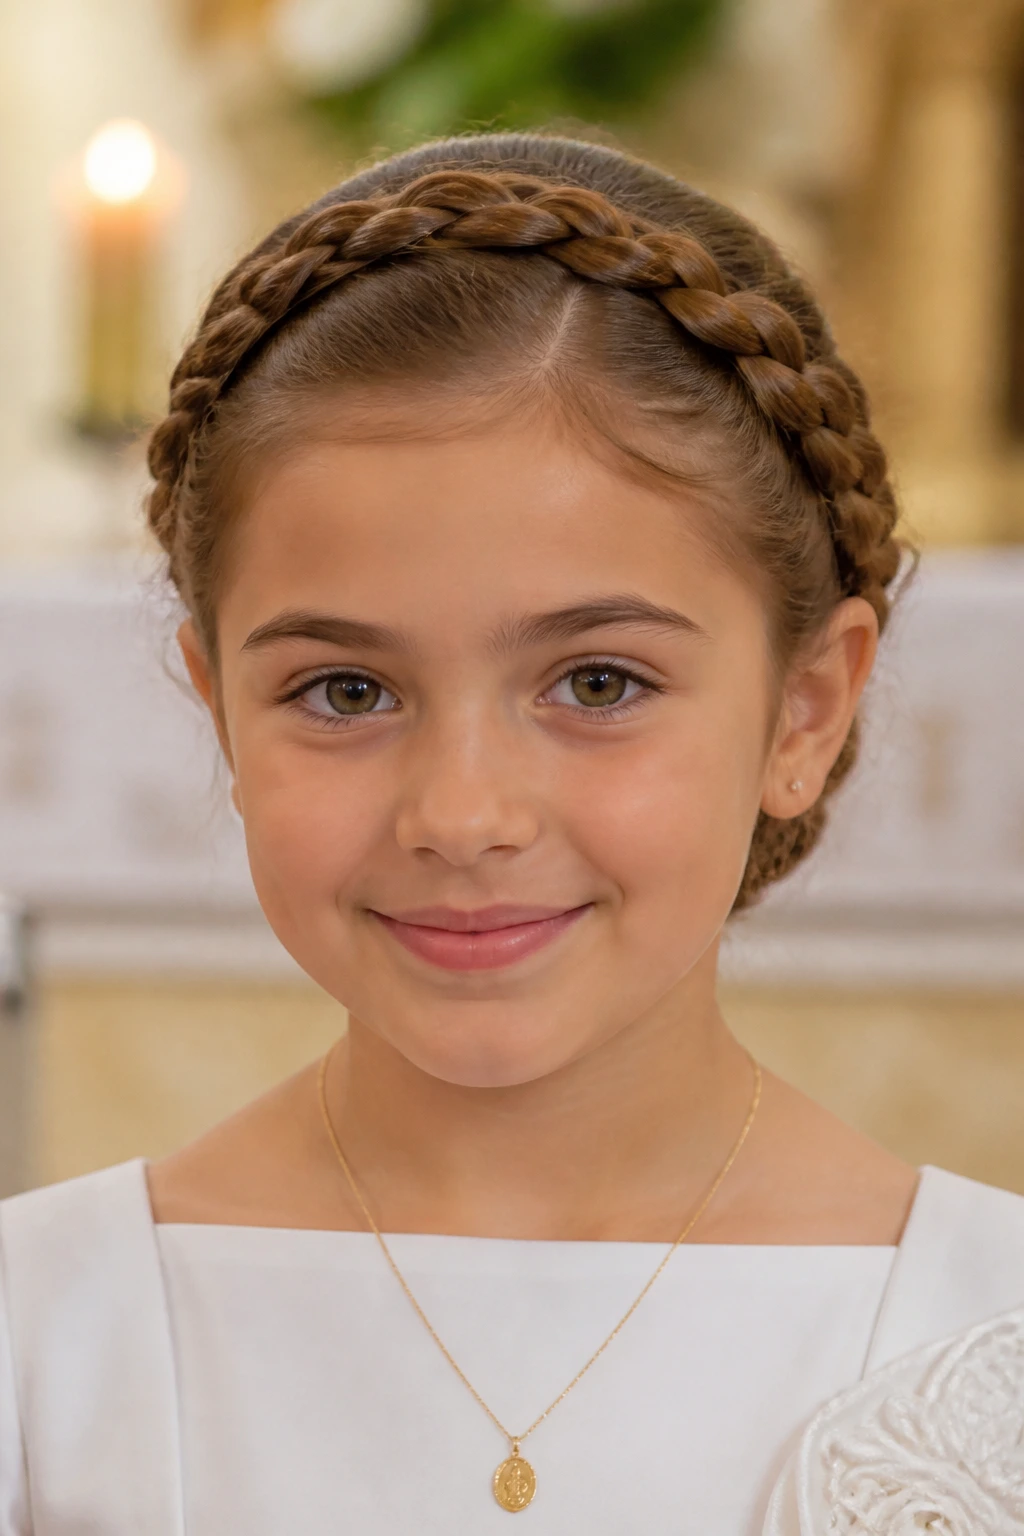
This style has a tidy, almost architectural look, but it still feels child-appropriate when you keep the bun low and small. The crown braid runs around the head, and the hair tucks into a hidden bun at the back. From the front, you mostly see the braid tracing the hairline. From the back, the bun keeps everything secure.
It is a smart choice for medium to long hair because the braid gives structure to the style before the bun is even finished. If the hair is slippery, prep the roots with a little dry shampoo or texturizing spray. That keeps the braid from loosening around the temples.
I like this for dresses with simple necklines and for children who do not want hair touching the cheeks. It creates a very clean frame around the face. The hidden bun also keeps the back of the head uncluttered, which is useful if the dress already has buttons, lace, or a collar detail.
One small flower tucked where the braid ends can finish it. One. Keep the rest of the style quiet.
22. Headband Tuck Updo
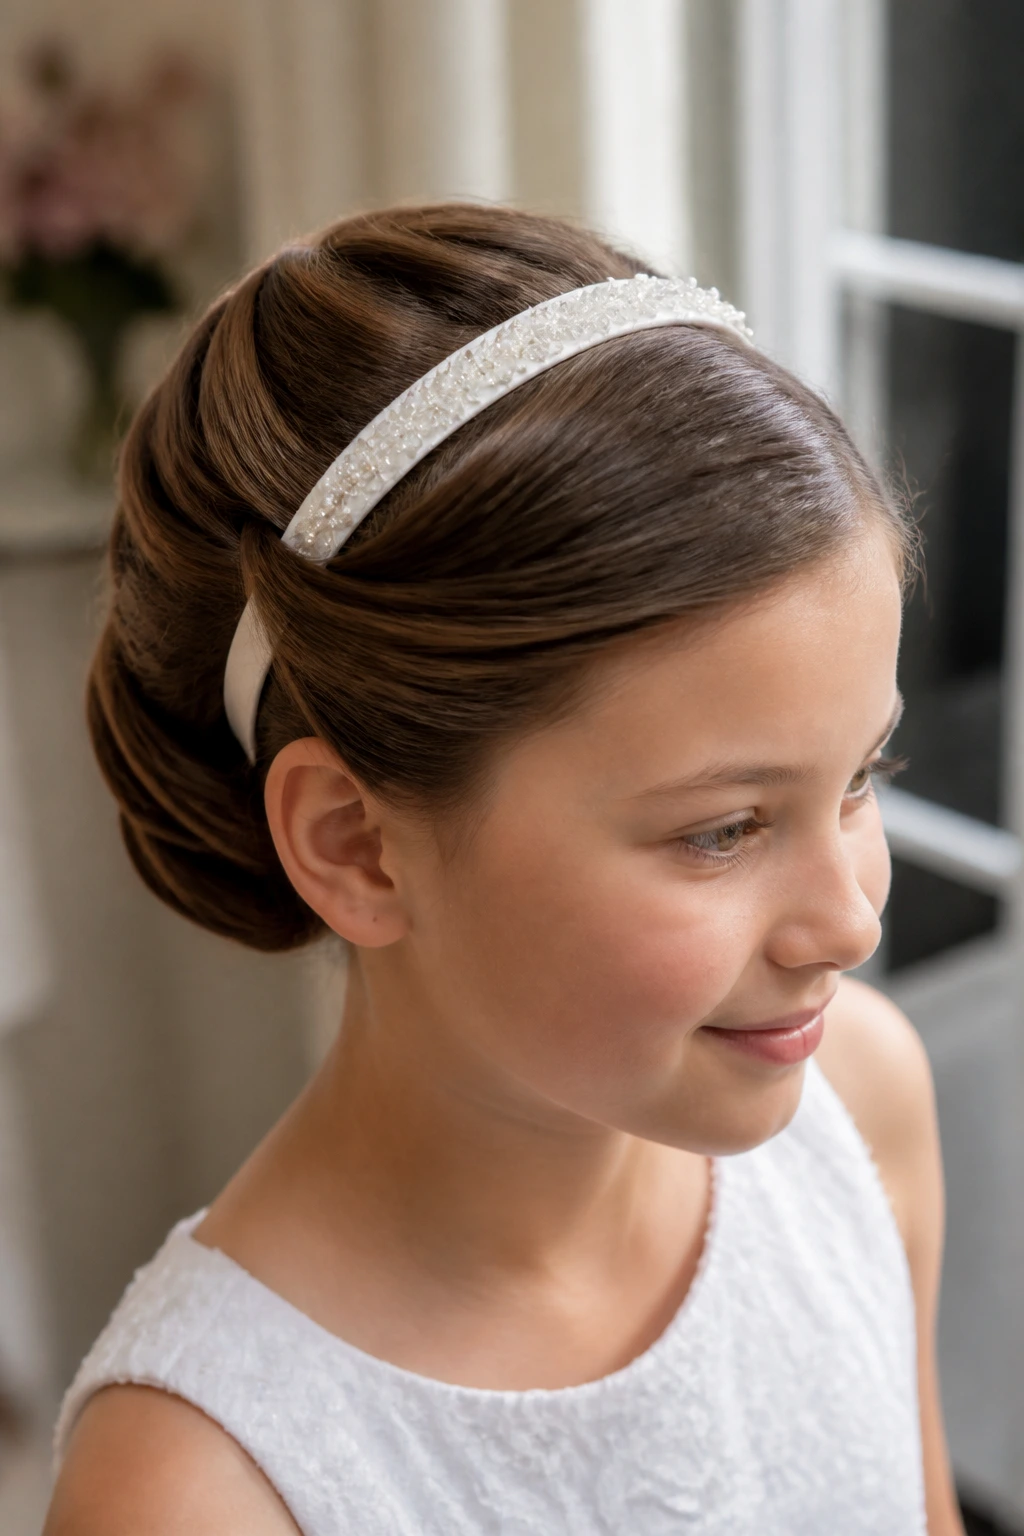
If you need a style that works with shorter hair, this one deserves attention. A headband tuck uses a soft elastic or decorative band to hold the front, then the length gets rolled and tucked back under the band in sections. It works best on shoulder-length hair, but even a bit shorter can cooperate if the layers are not too stubborn.
The trick is choosing a headband that sits snugly but does not pinch. Hard plastic bands can dig in after a while, and children notice that fast. Fabric-covered or padded bands are kinder. After the band is in place, tuck the hair over and under in small sections, pinning the ends as you go so the roll stays close to the head.
This style feels graceful without needing a full bun. It also lets you add a veil clip or a small floral comb near the tuck point if the outfit needs more finish. If the hair is very fine, a little teasing at the crown gives the tuck something to hold.
It is one of the most practical updos for shorter lengths, and that practicality is the reason it belongs here.
23. Satin Bow Bun
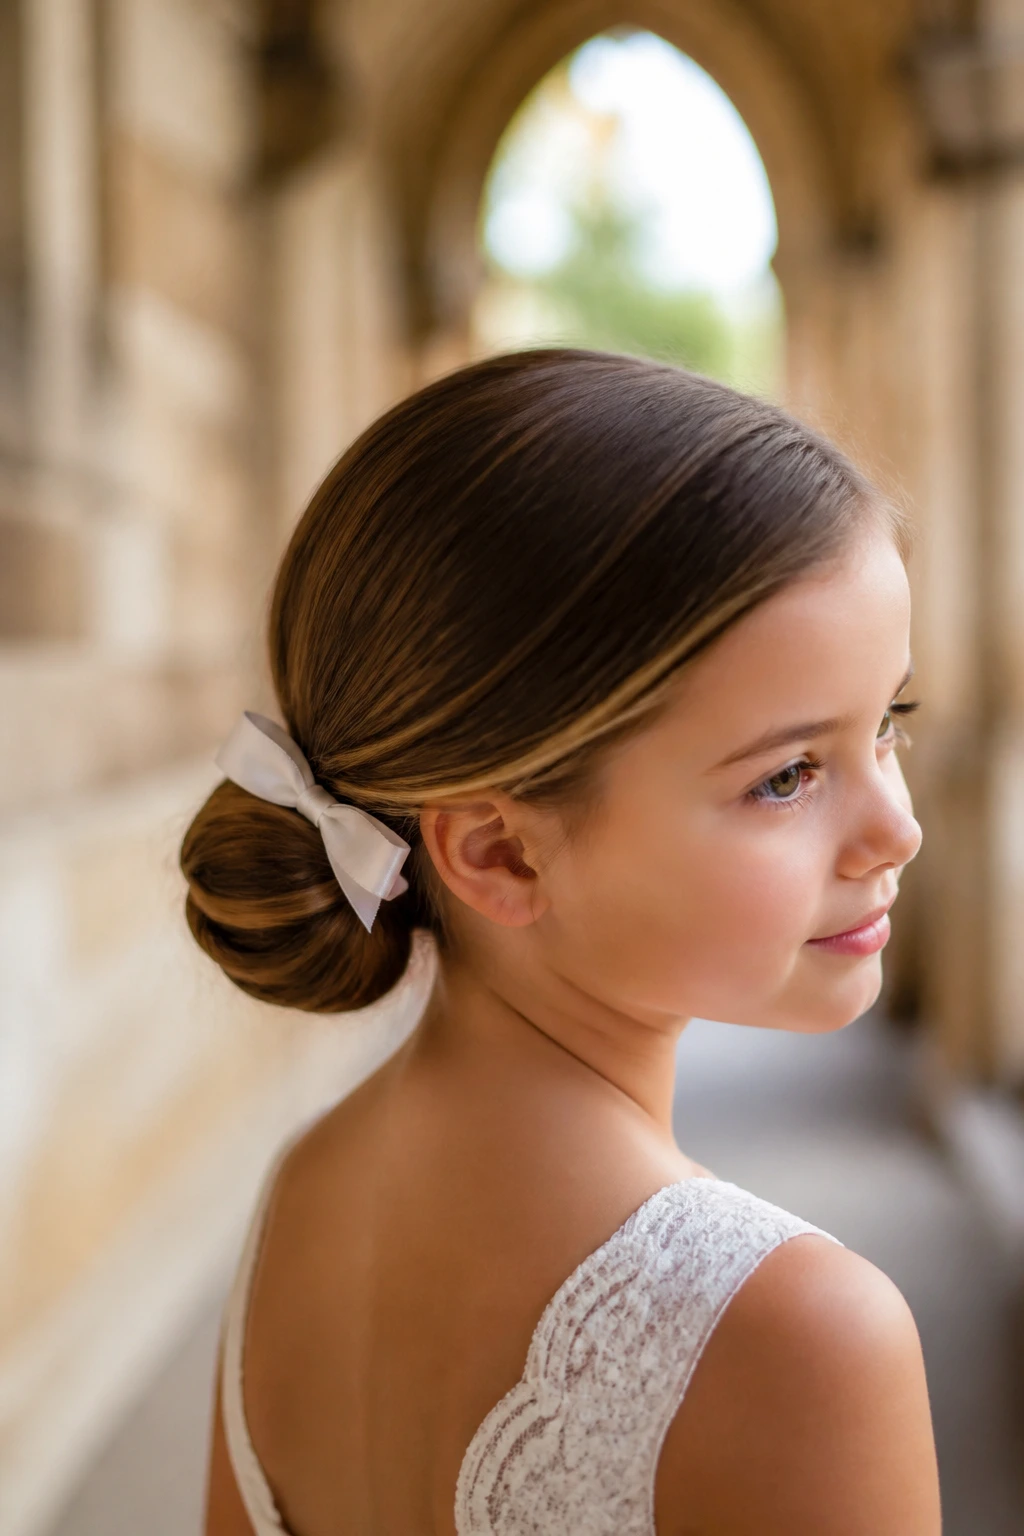
A satin bow bun can tip into sweetness very fast, so the trick is to keep the bun itself clean and use the bow as a small accent rather than the whole story. The bun sits low, either centered or slightly off-center, and the bow is tied around the base or pinned just beneath it.
This style works well when the dress is simple and the family wants one soft detail to echo the occasion. I prefer a narrow ribbon in ivory, blush, or a shade pulled from the dress trim. A huge bow can overwhelm a child’s head and make the hairstyle feel more costume than ceremony.
It’s a good match for straight or lightly wavy hair because the bun shape stays neat. If the hair is curly, smooth only the outer surface and let the bow rest against the natural texture. That keeps the style from looking overworked.
The satin catches light in a gentle way, but more important than that, it gives the bun a finish line. The eye lands there and stops.
24. Sleek Top Bun with a Soft Edge
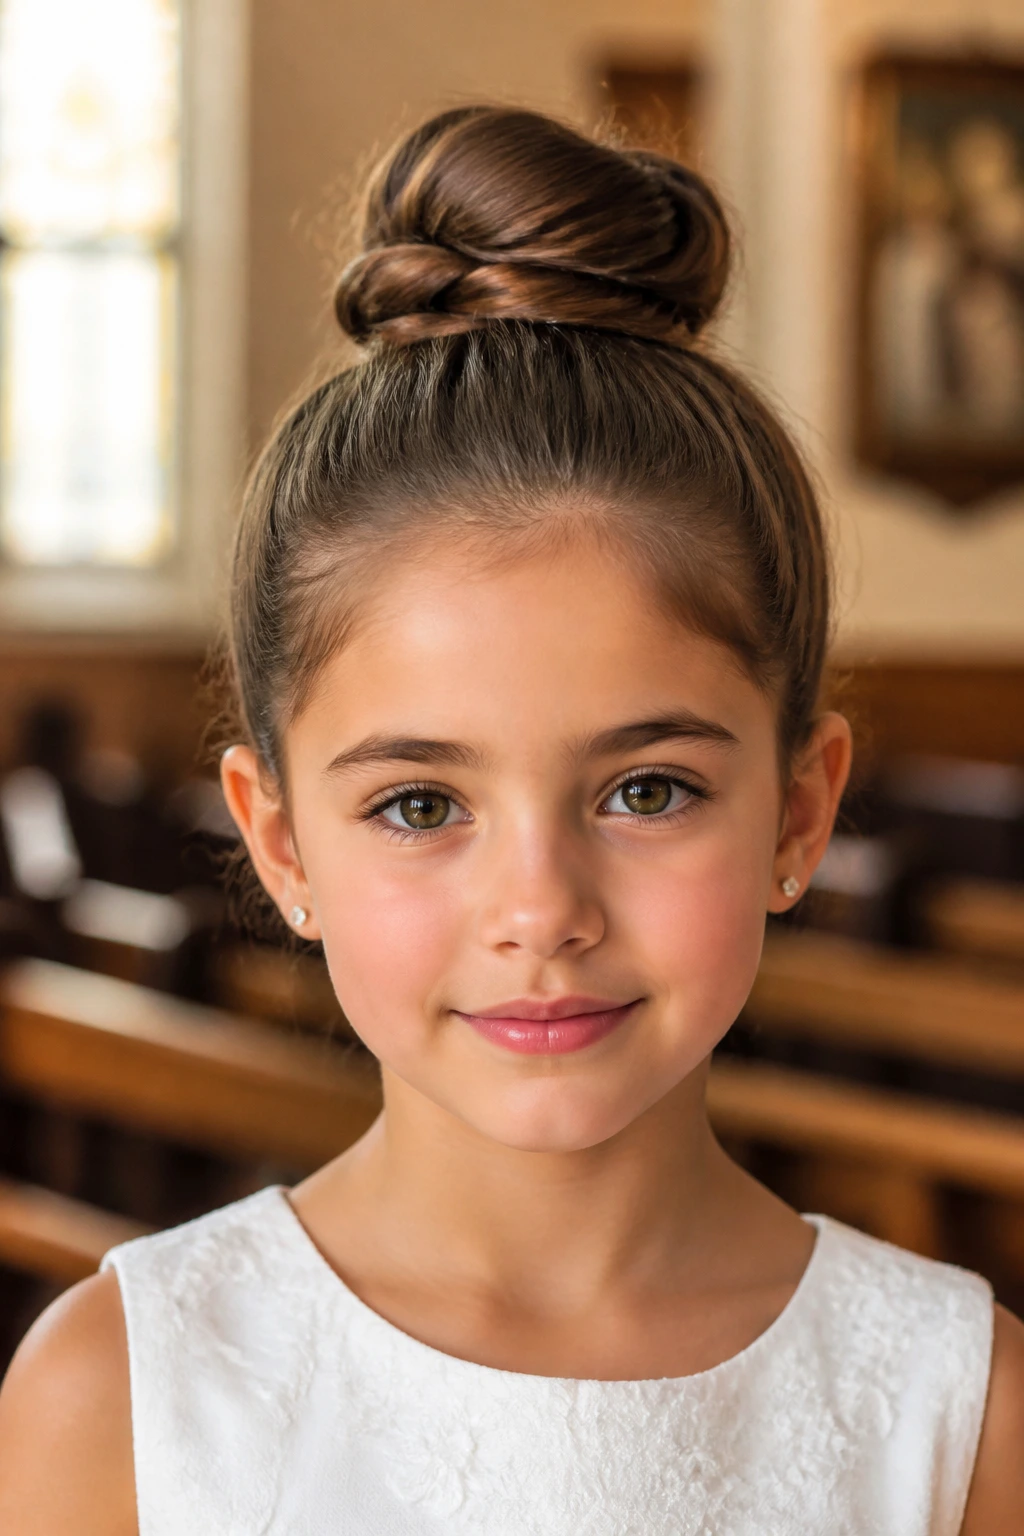
Yes, this one sits a bit higher than the rest, but only slightly. The difference is that the top bun here stays rounded and soft, not tight and severe. If the dress has a wide neckline or open shoulders, a modest top bun can actually balance the shape of the outfit and keep the child from looking swallowed by fabric.
The key is to avoid the hard, polished ballet-class look. Leave a bit of softness around the hairline and keep the bun medium-sized. If the hair is fine, a small bun donut helps the shape stay full. If the hair is thick, twist the ponytail loosely so the bun doesn’t sit like a helmet.
This style can work well for children who like the hair off the neck but don’t want a low bun hitting the collar. It also photographs cleanly from the front, which is useful when the church seating makes back shots less predictable.
I would not over-accessorize it. A tiny pin or a small ribbon at the base is enough. Let the shape do the work.
25. Low Knot with Twisted Sides
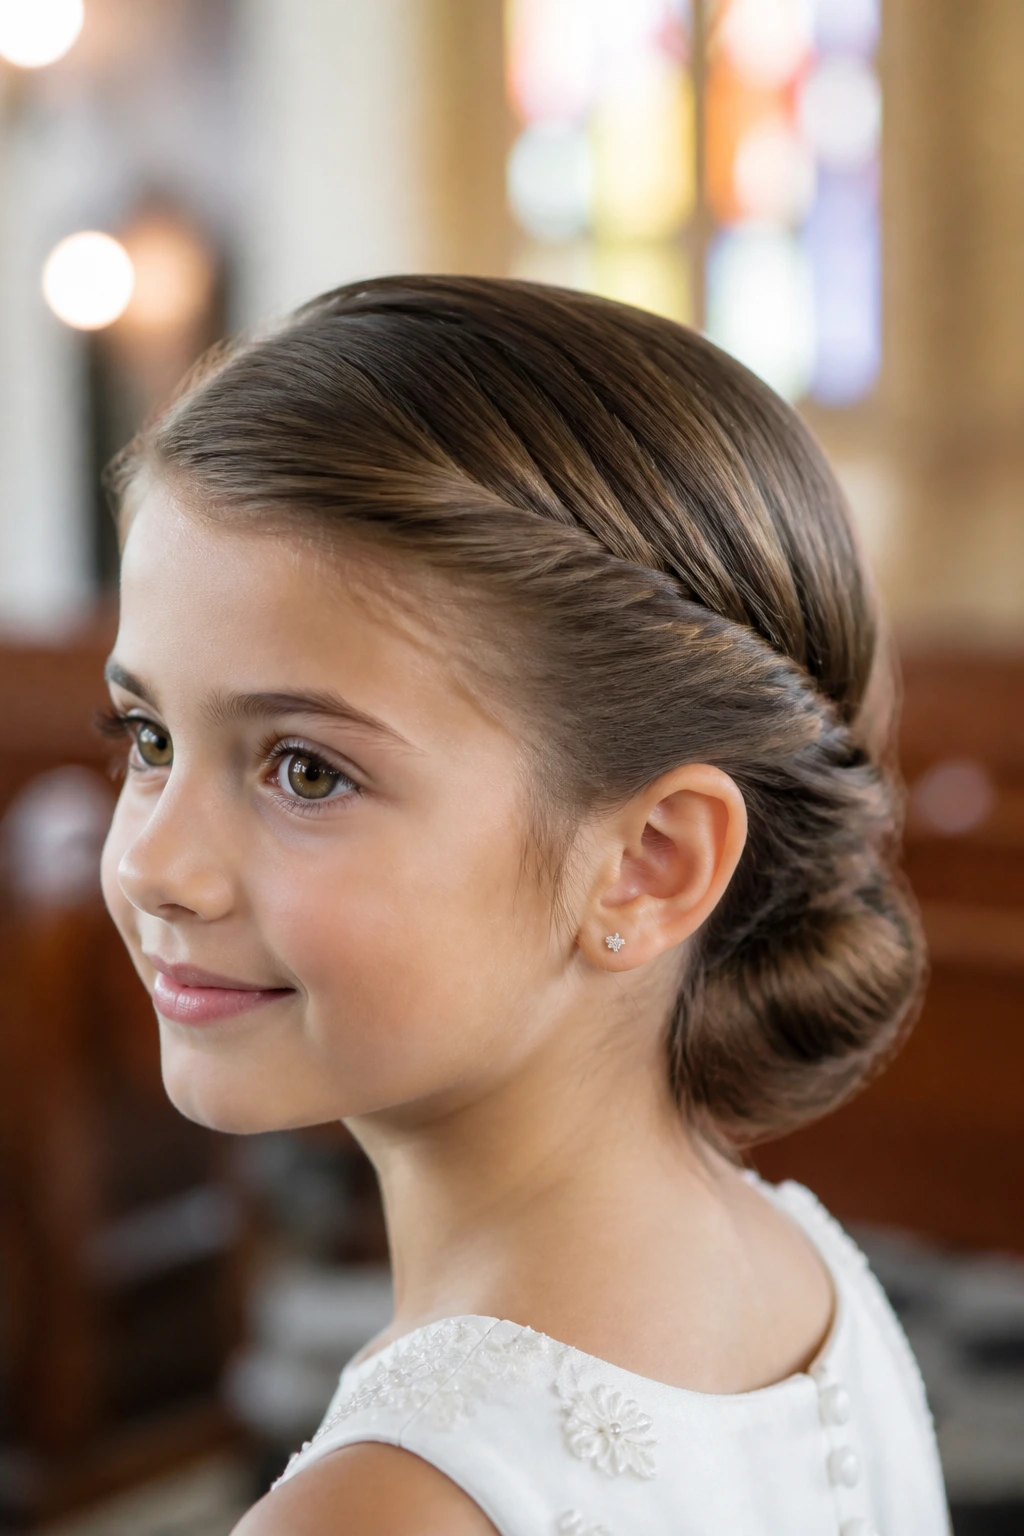
A low knot with twisted sides is a calm style with a little movement built in. Each side is twisted back from the temples, then the sections meet at the nape and fold into a knot. The front stays smooth, but the sides give enough texture to keep the style from feeling flat.
This is a practical choice for hair that has different textures in the same head — smooth at the crown, wavy underneath, and maybe a few shorter layers around the face. Twists handle that better than a braid in some cases because they don’t demand total uniformity. If a section is a little shorter, you can still twist and pin it cleanly.
The knot itself should be small and compact. A low knot that spreads too wide starts competing with the neckline. Keep the edges tucked. Keep the pins hidden.
It’s a good match for lace collars or dresses with soft sleeves because the hairstyle doesn’t add visual noise. The eye goes to the child’s face, then the dress, and only then to the hair. That’s the right order.
26. Braided Updo for Short Hair
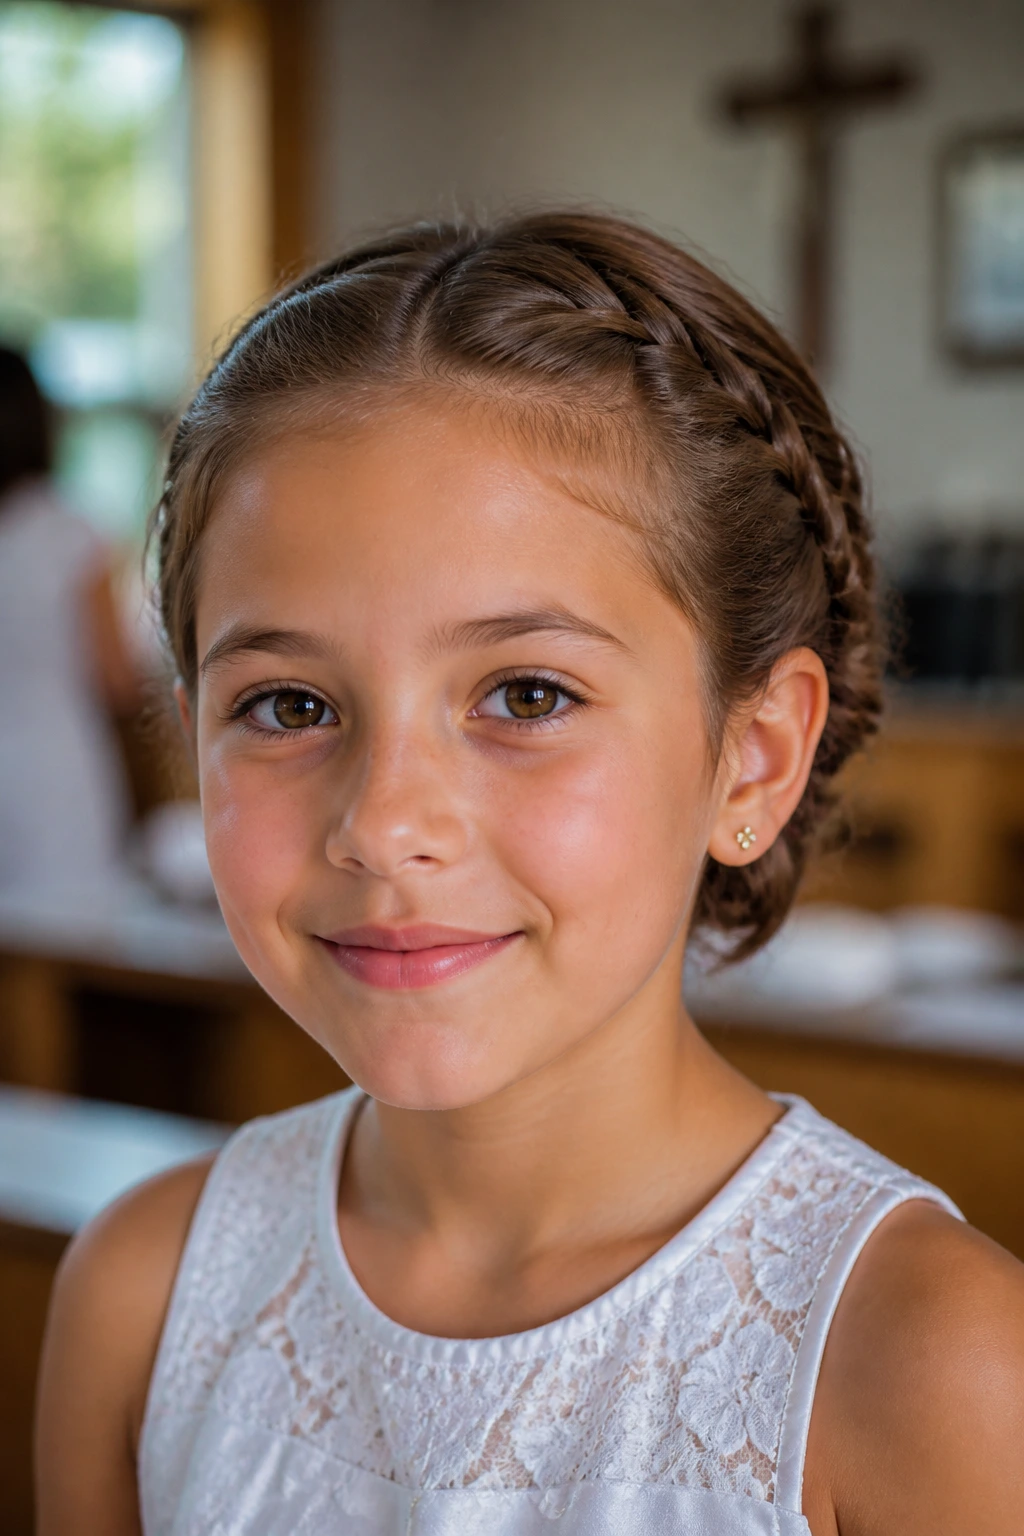
Short hair can be harder, but it’s not a problem if you stop trying to force it into a long-hair shape. A braided updo for short hair usually means one or two tiny braids at the front or sides, pinned into a tucked shape at the back, with the rest of the hair rolled or clipped under. The braid gives the style enough detail to read as intentional.
This is where tiny clear elastics and lots of small bobby pins earn their keep. Section the hair into manageable pieces. A rat-tail comb helps a lot here because the sections need to be neat, not broad and vague. If the hair barely reaches the nape, you can still create the illusion of an updo by pinning it into a low tuck and then placing a braid over the seam.
Short hair styles need a little honesty. Don’t pretend it’s a long bun when it isn’t. Make the shape compact, use accessory placement to finish the look, and leave the silhouette small. A pearl clip or narrow ribbon barrette can do a lot.
Tiny hair, tidy finish. That’s the target.
27. Curly Halo Updo
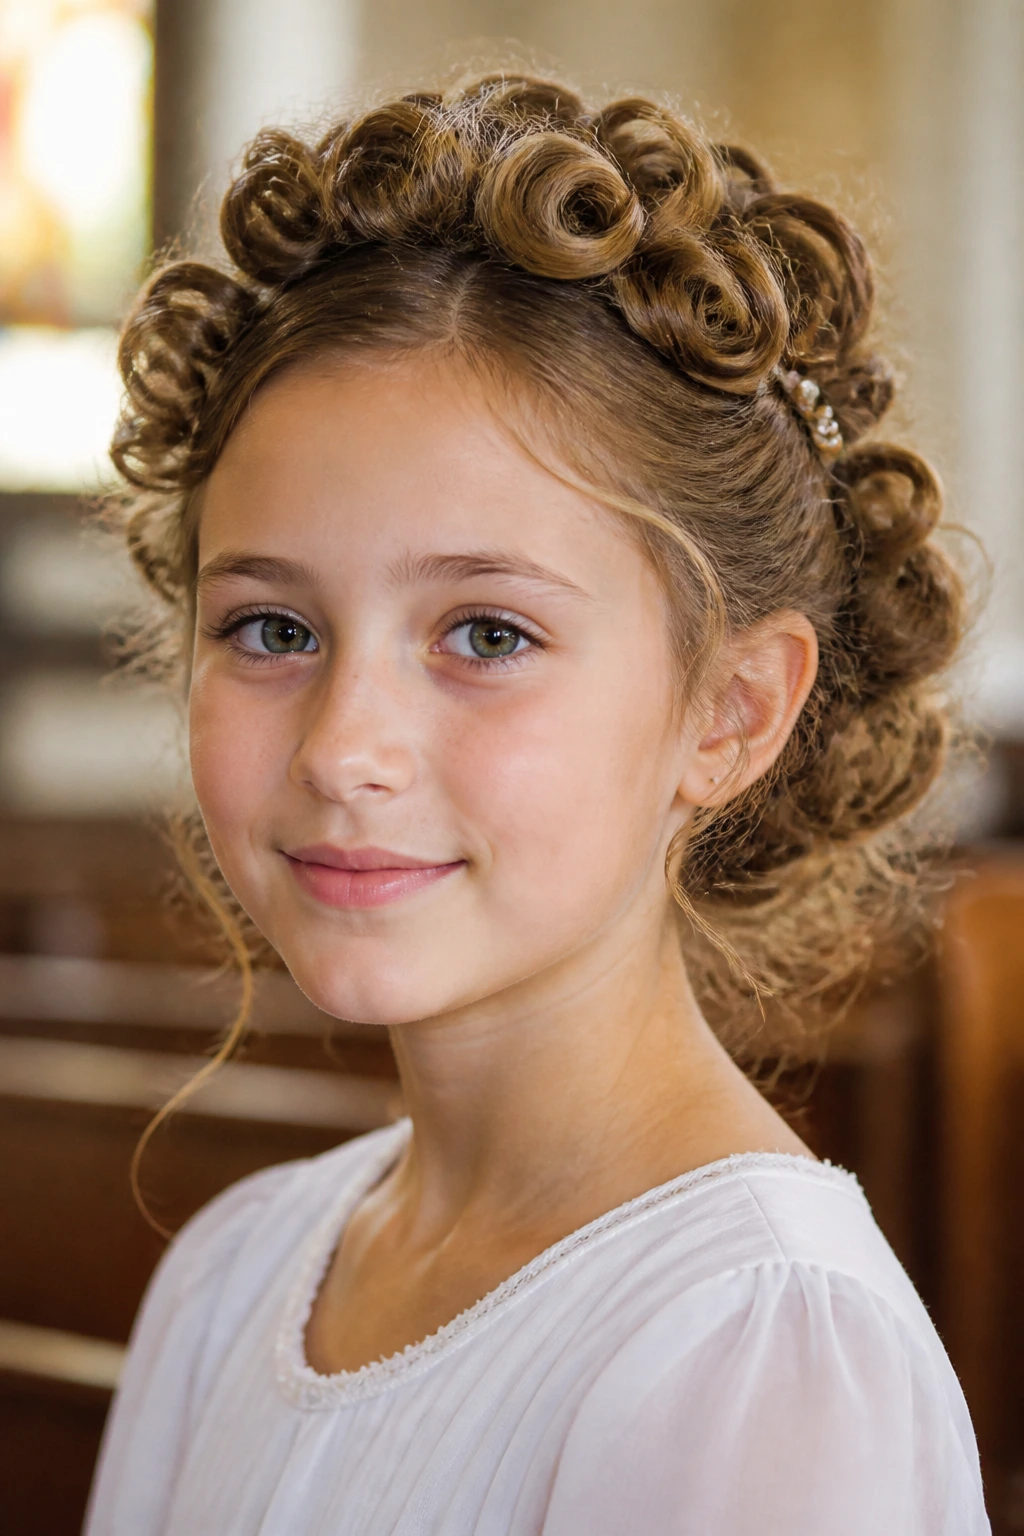
Curly hair does not need to be hidden to look formal. A curly halo updo keeps the curls visible around the crown and then gathers the length into a secure tucked shape at the back. The result has life in it. The texture shows. The style still holds.
The best part is that the halo can be made from the child’s own curls rather than forcing the hair into a strict braid or bun. Use curl cream on damp hair if you can, diffuse it gently, then shape the curls into a halo line with pins or small clips. The back can be pinned low into a soft coil or tucked roll.
I would choose this when the family wants the hair to look like itself, only more finished. That is often the right choice. Straightened curls can look a little too formal for a child’s Communion day, and the halo style avoids that problem.
Keep accessories minimal. A single flower pin or a fine comb near the temple is enough. The curl pattern already brings texture and interest.
28. Woven Low Bun for Thick Hair
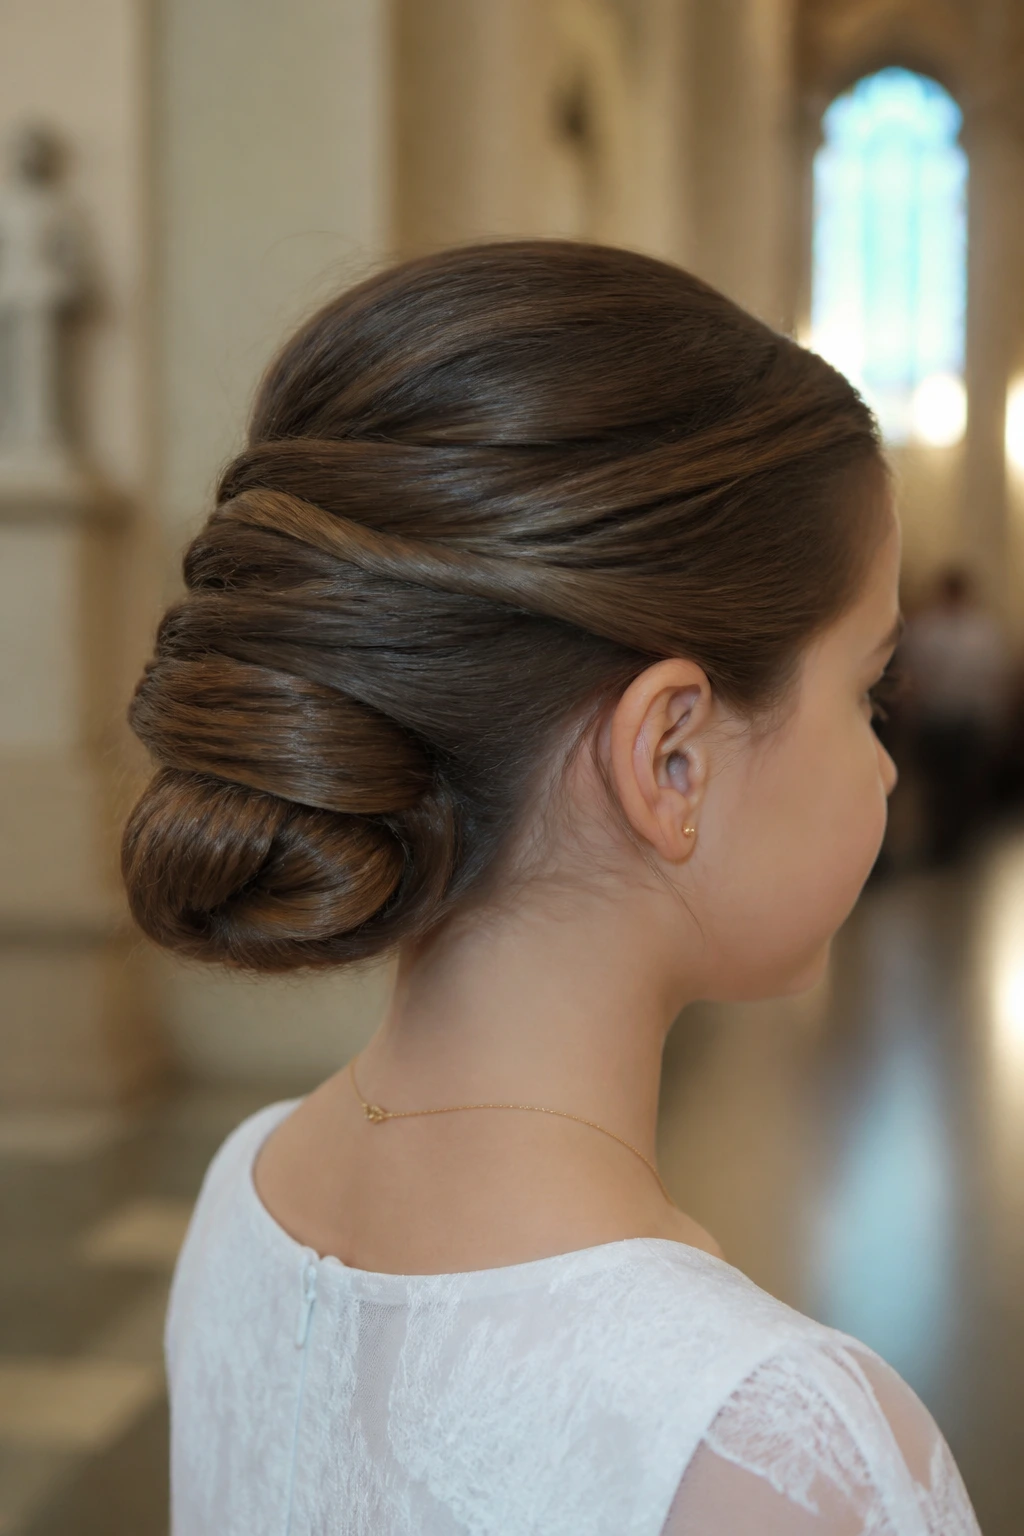
Thick hair can make ordinary buns feel too bulky. A woven low bun handles that by crossing sections over each other instead of wrapping everything into one giant twist. The weave spreads the hair out, so the bun sits flatter and feels more controlled.
This is one of the best styles for dense hair because it reduces the “puffy crown, huge knot” problem that happens when thick hair is shoved into a narrow elastic. Divide the hair into two or three sections, weave or twist them together, then coil the result low at the back. Use U-pins near the center and smaller bobby pins around the edges.
I like this style because it respects the weight of the hair. It does not fight it. That makes the finish look cleaner and usually feels better on the scalp too. A child with thick hair often knows exactly when something is being yanked too hard, and she will tell you with her face.
A smooth side part and a woven bun can look very refined with little extra decoration. The hair itself becomes the detail.
29. Ribbon-Woven Braided Bun
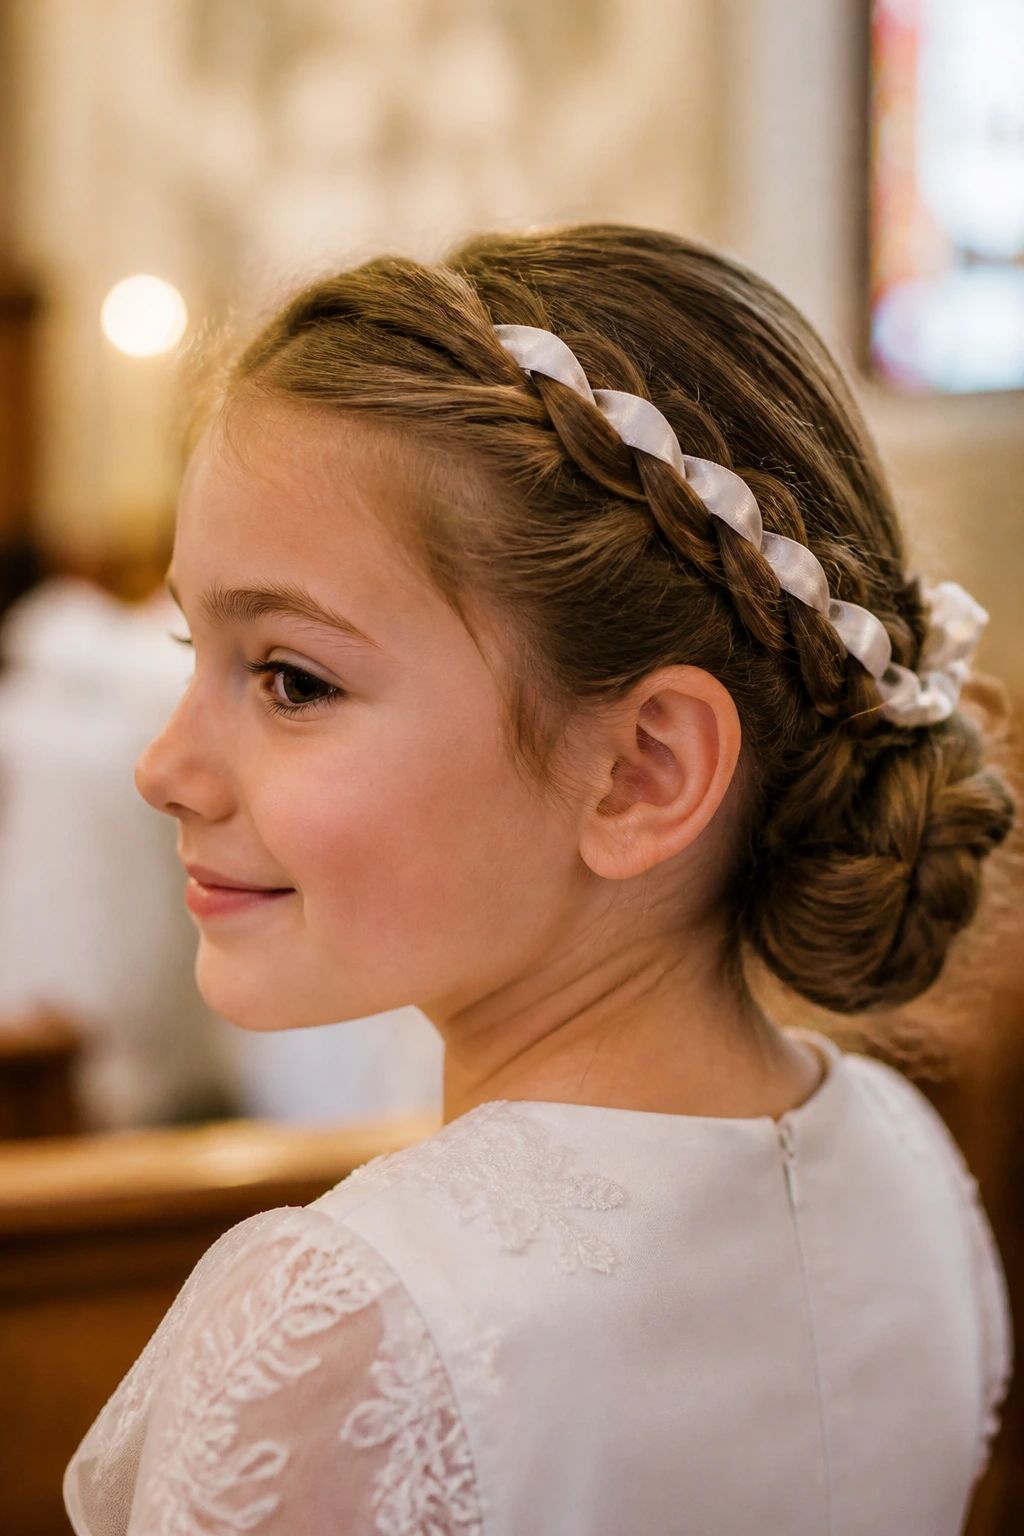
If the dress has a little ribbon trim or a sash, this style can echo it in a controlled way. A ribbon is woven through a braid, and that braid wraps into a low bun. The ribbon does not need to cover the whole head; one length woven through the braid is enough to tie the pieces together visually.
The important part is keeping the ribbon flat. A stiff or wide ribbon can make the braid puff up unevenly, and that gets clumsy fast. Satin or grosgrain works better than anything fuzzy. Thread it through the braid before the bun is formed, then tuck the ends neatly under the bun.
This style works well on longer hair and on hair that holds braids without slipping. If the braid tends to loosen, slightly rough up the hair with dry shampoo before starting. That gives the ribbon something to sit against.
It’s a useful way to link hair and dress without adding a separate accessory. The ribbon becomes part of the structure instead of sitting on top of it.
30. Side-Coiled Bun
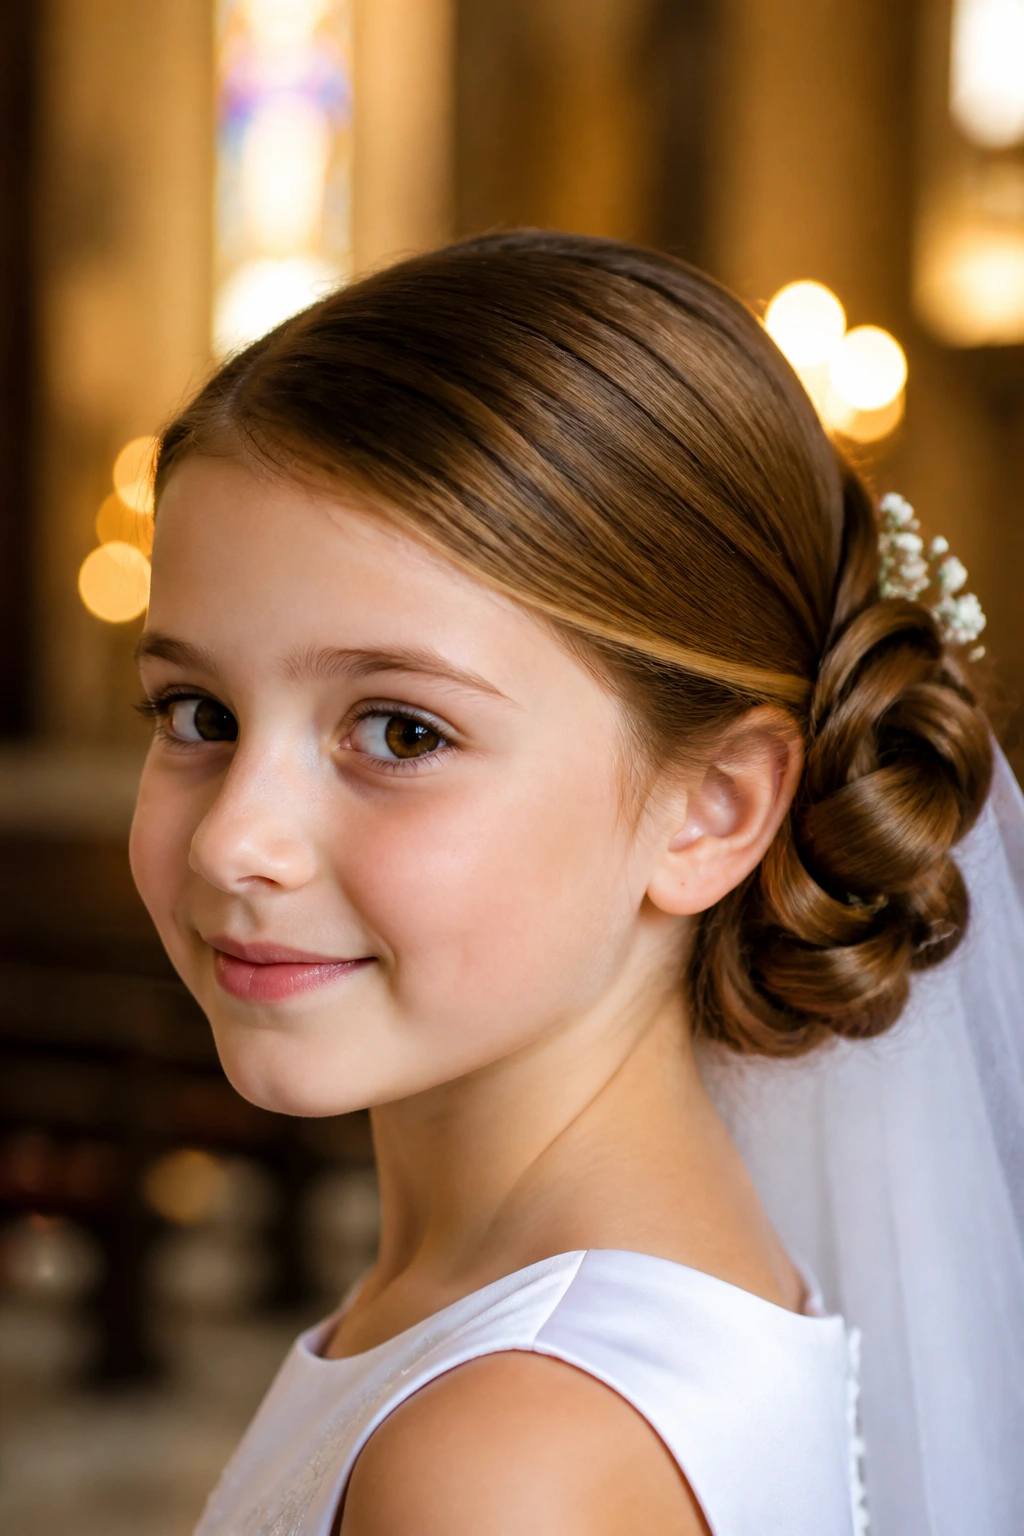
A side-coiled bun sits just off one ear or slightly behind it, which gives the whole style a softer, more relaxed line. It’s still formal enough for the day, but the offset position keeps it from looking too severe. That can be a relief if the dress is very crisp or the child’s face is on the rounder side and benefits from a little asymmetry.
The coil itself should be tight enough to hold but not so tight that it looks like a knot of rope. If the hair is layered, bring the shorter pieces into the coil first and pin them before adding the longer lengths. That keeps the style from fraying at the edges.
This is a good choice when the neckline has a detail on one side, like a flower, bow, or lace panel. The bun won’t clash with it. Instead, it echoes the shape.
I’d keep the front smooth and use a small side part. The shape of the coil becomes the star, and that is enough.
31. Veil-Friendly Loop Bun
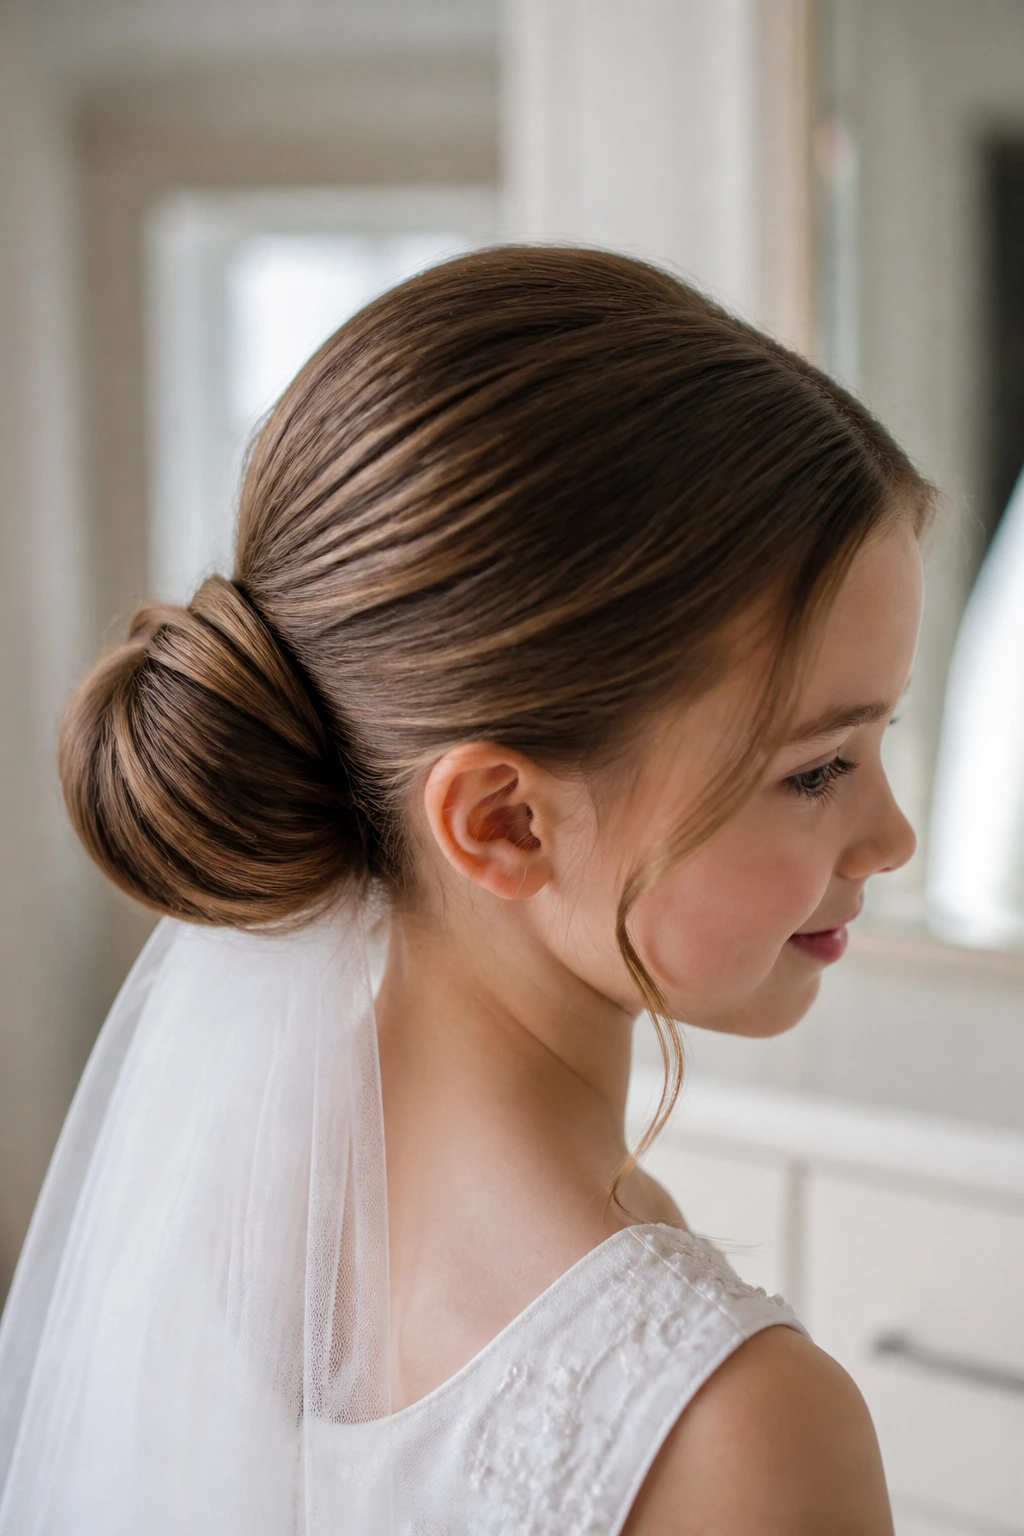
Some hairstyles look nice until you try to add a veil comb, and then they become a mess of pressure points and slipping pins. A veil-friendly loop bun is built with that problem in mind. The bun sits low, the loop is broad enough to support a comb, and the pin placement leaves a clear anchor point for the veil to grip.
This matters if the child will wear the veil for the ceremony and then take it off for photos. You want the hairstyle to still look complete once the comb is removed. A loop bun does that better than a style that only works because the veil is hiding half of it.
I would keep the crown smooth and the loop moderate in size. If the hair is very silky, add a bit of texture powder at the base before pinning. If it’s curly or wavy, keep the loop slightly looser and let the texture do some of the work.
The whole point here is practicality with dignity. No drama. No collapsing combs.
32. Coronet Braid Tucked into Bun
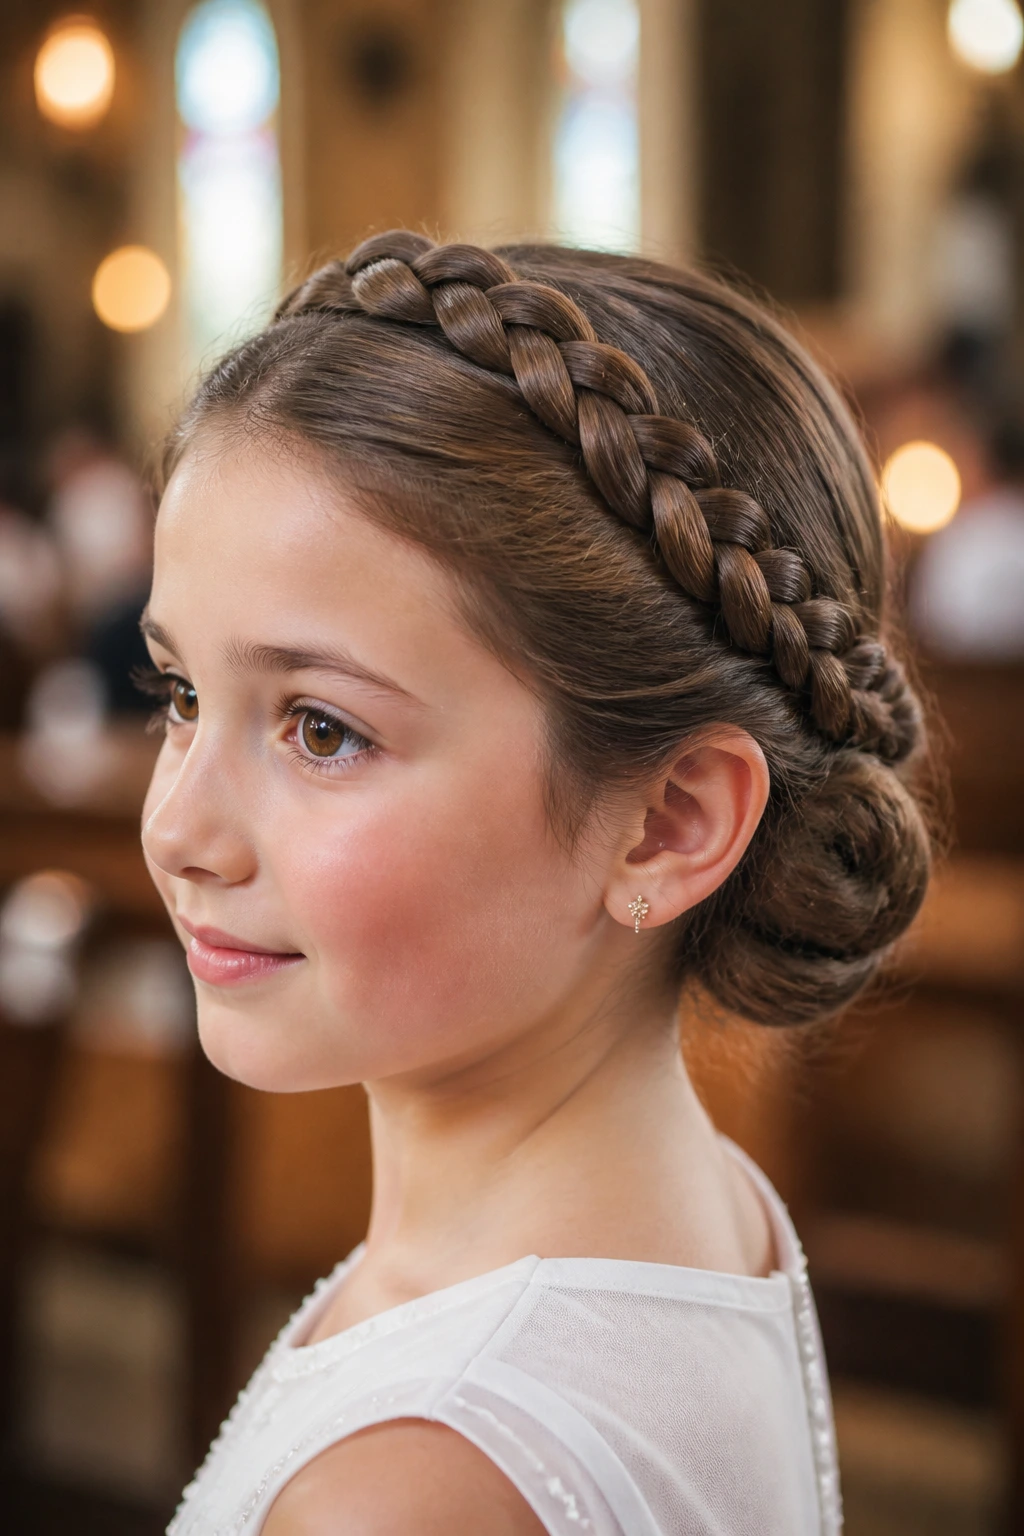
A coronet braid gives the head a gentle frame, and tucking it into a bun keeps the style grounded. The braid circles the crown or follows the hairline partway around before feeding into a low bun. It’s a lovely option when you want something traditional without turning the head into a crown display.
This style is one of the more graceful choices for medium to long hair. It keeps the top clean, gives the sides some structure, and leaves the bun low enough that a dress collar still sits properly. If the child has finer hair, braid the sections a little tighter; if the hair is thick, loosen the braid after pinning so it doesn’t look too heavy.
A coronet braid does not need much decoration. A single pin where the braid tucks into the bun is enough. Anything more starts to crowd the shape.
It’s the kind of updo that looks thoughtful in photos and calm in person. That combination matters.
33. Twin-Twist Bun
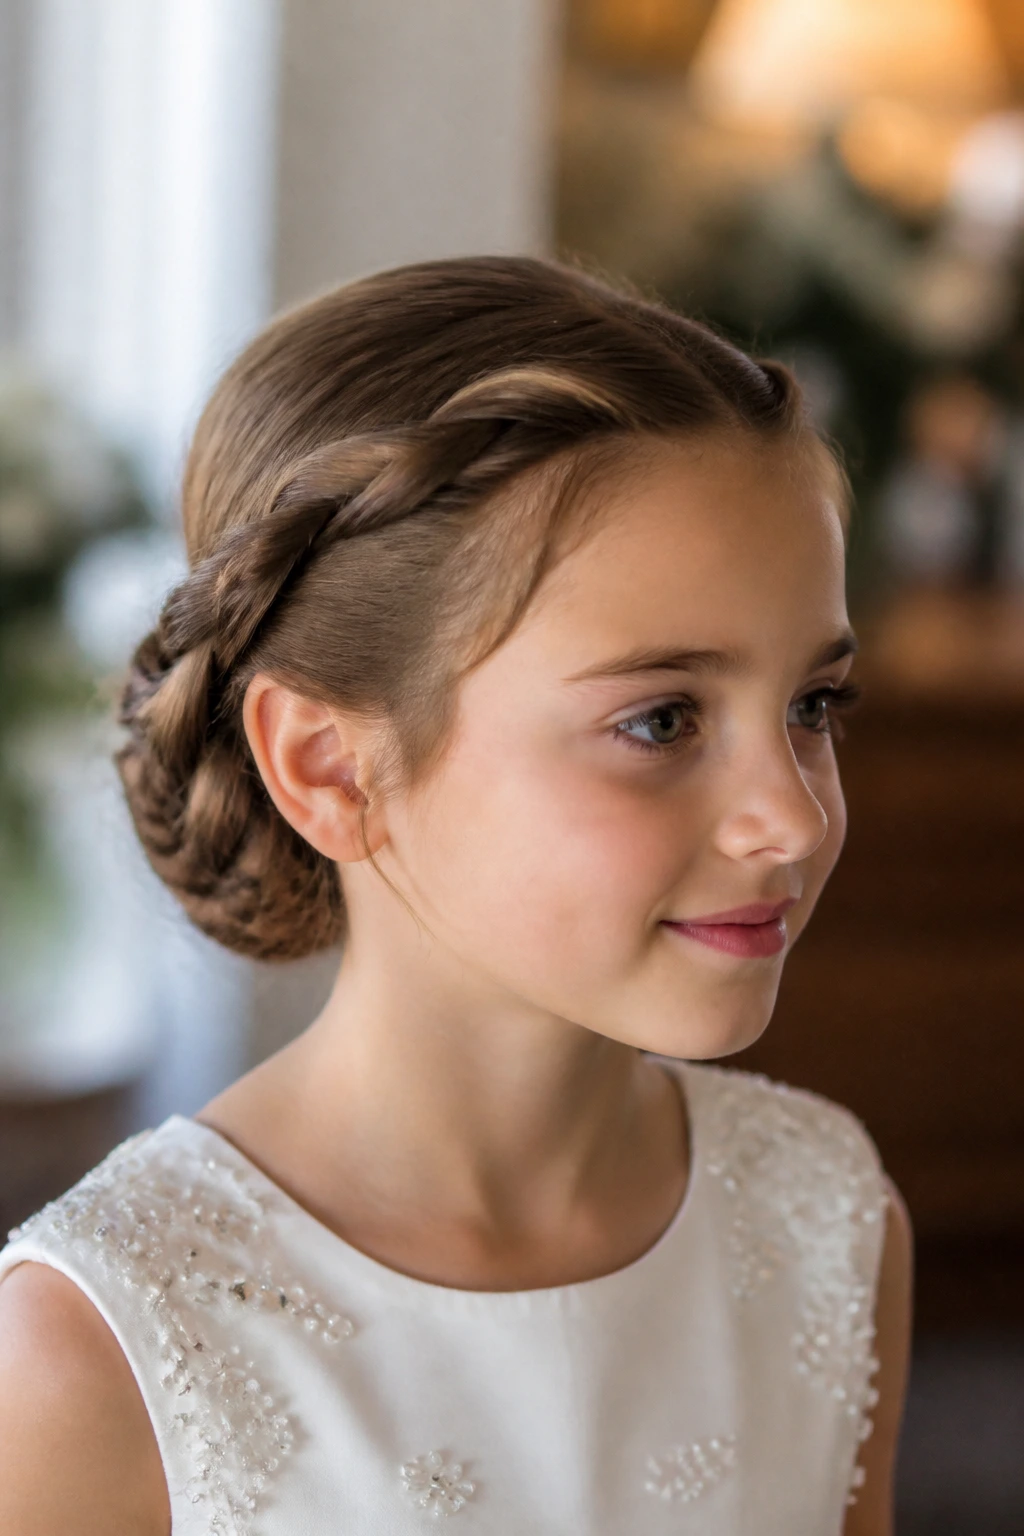
Two twists can do a surprising amount of work. A twin-twist bun starts with the hair divided into two sections, one on each side, and each side gets twisted back before both meet at the nape and coil into one bun. The twists give the front structure, and the bun keeps the length contained.
This style is useful for children whose hair has a mix of textures or for layers that do not want to stay in a braid. Twists are forgiving. They can be adjusted as you go, and they do not demand the same uniform tension as a braid. That makes them easier to manage if you are styling at home and not in a salon chair.
I also like this one because it can be made soft or neat depending on how tightly you twist. Tight twists create a cleaner line. Looser twists give more softness around the face. Either way, the finished bun stays modest and secure.
A pair of tiny pins near the center seam usually does the trick. No need to overbuild it.
34. Petite French Roll
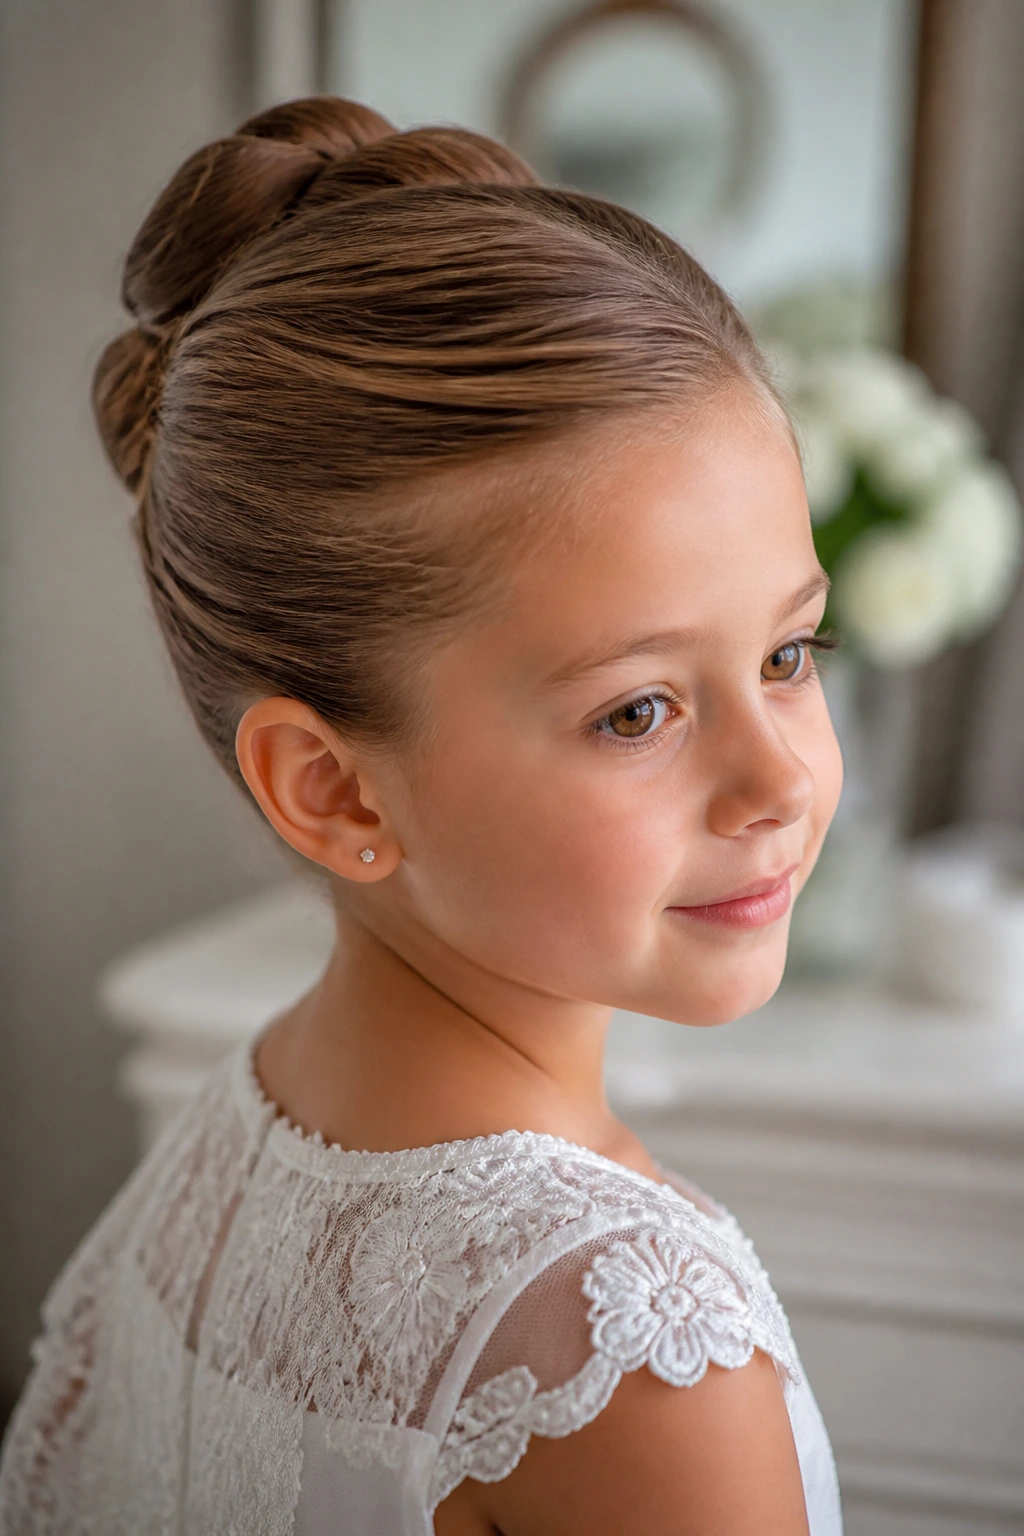
A petite French roll is a slimmer, more child-sized version of the classic roll. Hair is swept back, tucked upward into a narrow vertical shape, and pinned close to the head so the roll does not get too tall. It has a clean, old-school feel that suits a formal morning without making the child look older than she is.
This style works best on fine to medium hair, especially if the length reaches past the shoulders. It is not the easiest style on very layered hair, but a little prep with smoothing cream and a firm brush helps. The roll should feel compact in the hand when you finish. If it starts to balloon outward, pin it flatter.
I like this one when the dress is simple and needs the hair to carry a quiet sense of formality. It also handles headbands and small combs nicely. A tiny accessory at the side of the roll is enough.
Small French roll. Big impact. That’s the whole point.
35. Low Braided Bun with Satin Bow
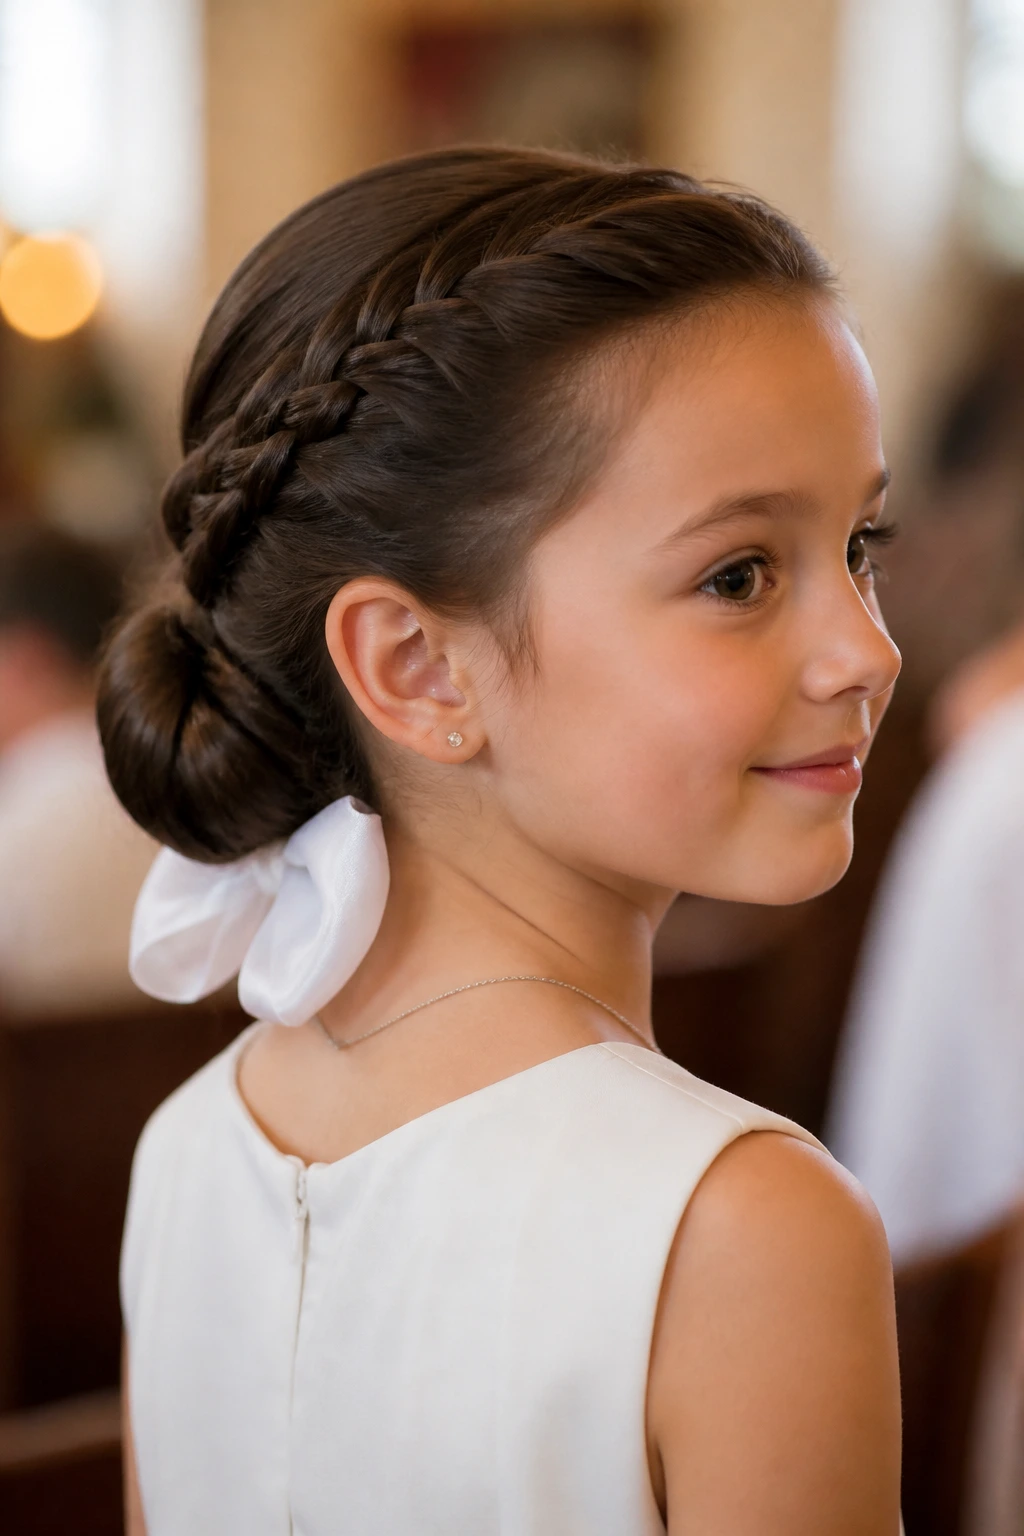
This is probably the most flexible style on the list, and I mean that in the best way. The braid adds structure, the low bun keeps the shape grounded, and the satin bow gives you a clean finish that suits the occasion without getting fussy. If you need one style that can be softened or sharpened depending on the dress, this is a strong final option.
The braid can start as a regular braid, a French braid, or even two smaller braids that feed into one bun. The bow should sit low at the base or under the bun, not on top of it. Keeping it low preserves the shape and stops the bow from dominating the hairstyle.
This style works on most hair lengths past the chin, and it’s especially useful if you want the front tidy and the back still a little interesting. If the dress is ornate, keep the braid simple and the bow narrow. If the dress is plain, you can widen the braid slightly and let the satin be the one soft detail.
It finishes the collection the way a Communion hairstyle should finish: neat, gentle, and ready for a long morning.
How These Styles Hold Their Shape Through the Ceremony
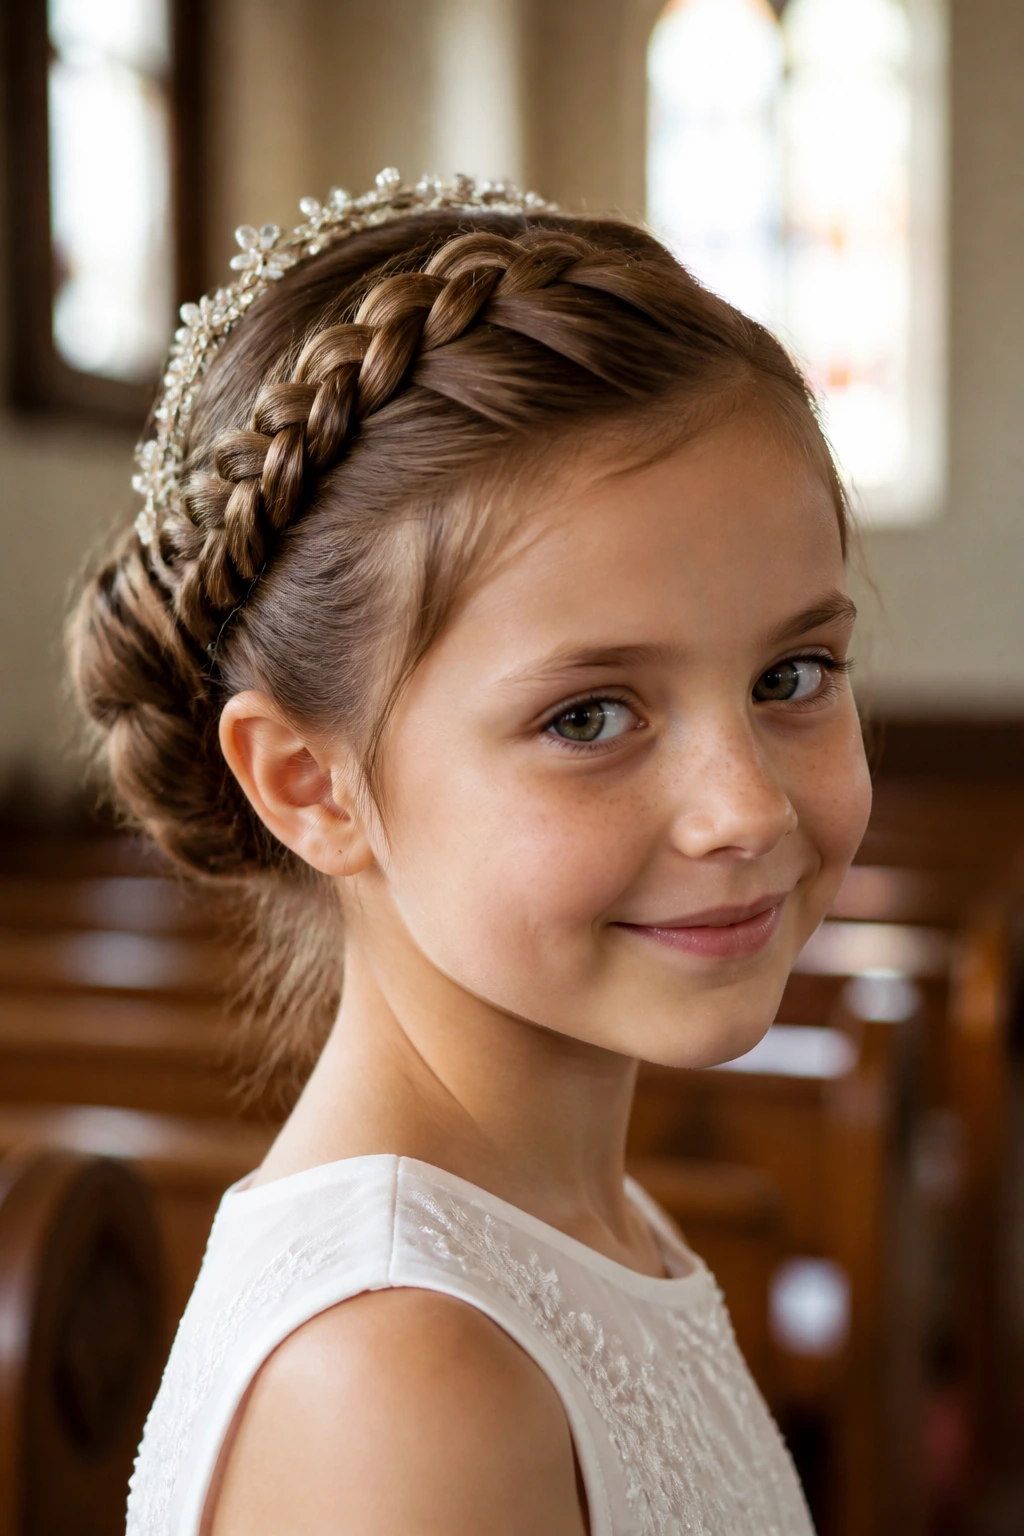
A First Communion updo has to do more than look nice for the first photo. It needs to stay smooth while the child sits, stands, kneels, turns, and gets hugged by three relatives in the same ten minutes. That’s why the best styles here rely on structure before decoration. A braid gives grip. A twist locks hair together. A low bun keeps the weight from sliding downward.
The thing people miss most often is tension. Too loose, and the style breaks apart when the child moves. Too tight, and the hairline starts to puff, the scalp aches, and the child spends the morning touching her head. I aim for secure, not stretched. When you can slide a fingertip under the front hairline without creating gaps, you’re in a good place.
Hair texture matters too. Fine, silky hair usually needs a little dry shampoo or texture spray at the roots before pinning. Thick hair needs stronger anchors and often more pins placed in a crisscross pattern. Curly hair holds better if you shape it while it still has some memory from moisture or leave-in conditioner. None of that is complicated, but it changes the result a lot.
The real test is the bend test. Ask the child to look down, then sit up again. If the bun shifts or the braid loosens right away, add pins before you leave the mirror.
Essential Tools for These Styles
-
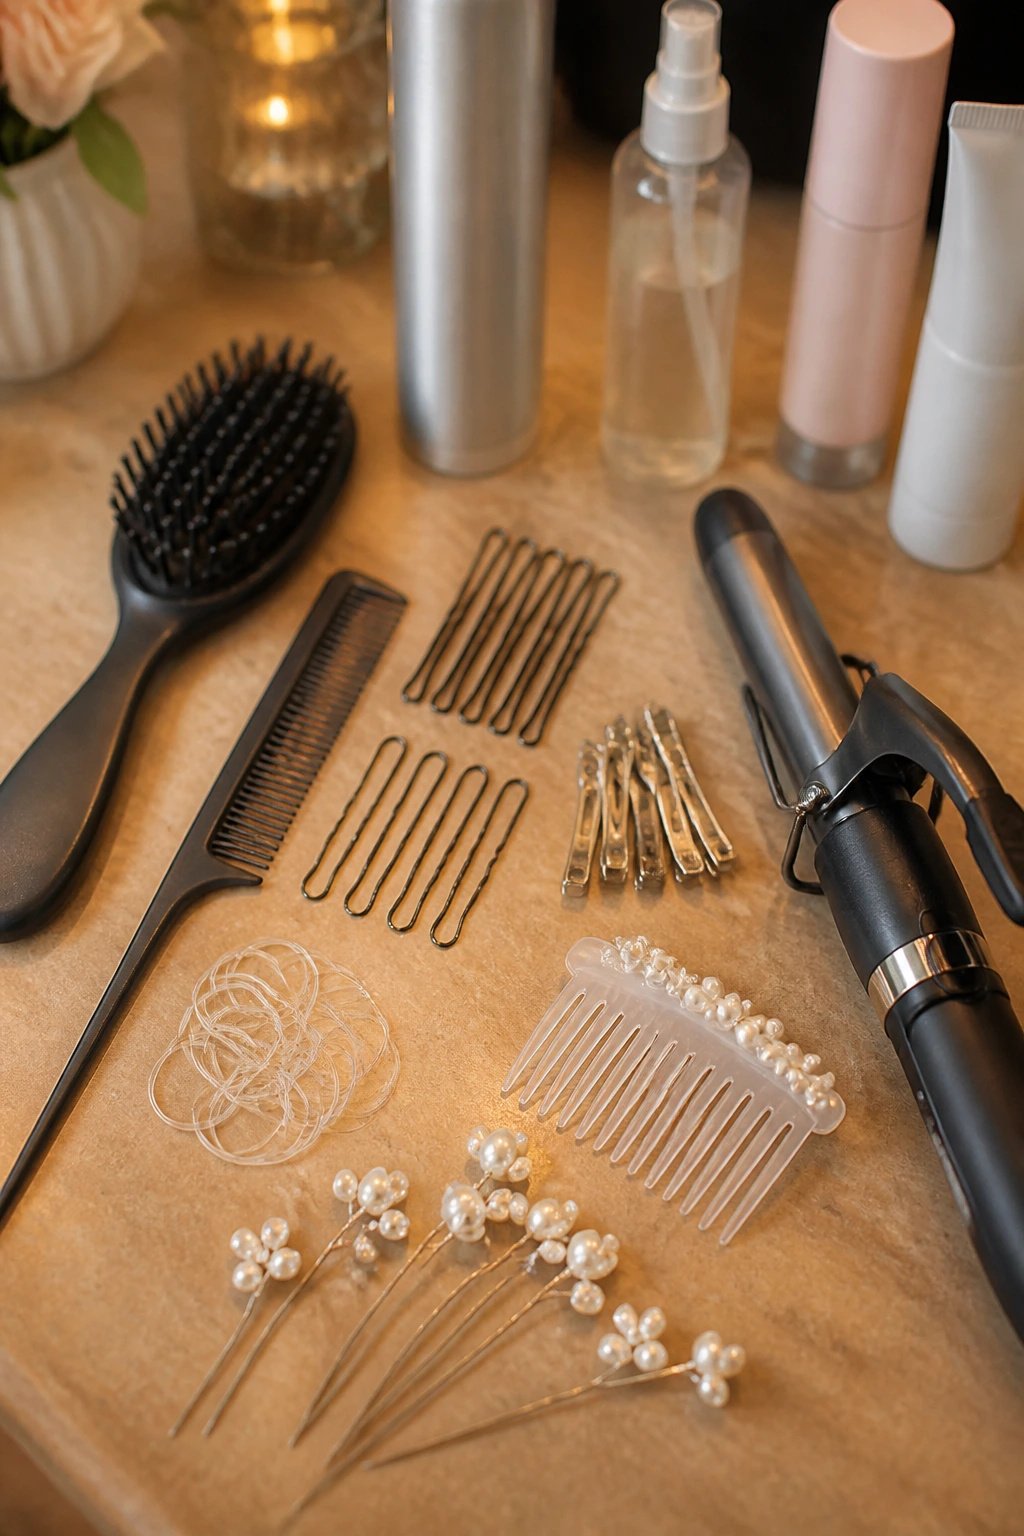
Rat-tail comb: Makes clean parts and small sections, which is half the battle on a morning like this.
-
Soft bristle brush: Smooths the crown without scraping the hair too harshly.
-
Bobby pins in the child’s hair color: They blend in better and are easier to hide around buns and rolls.
-
U-pins: Useful for French rolls, chignons, and tucked buns that need a stronger anchor.
-
Small clear elastics: Best for braids, twists, and bubble sections where a bulky tie would show.
-
Light-hold hairspray: Sets the style without turning the hair into a shell.
-
Texturizing spray or dry shampoo: Helps fine or slippery hair hold pins and braids.
-
Smoothing cream or light gel: Tames the front hairline and keeps flyaways from popping up in photos.
-
1-inch curling iron or wand: Useful for face-framing pieces, ribbons of curl, or adding bend to layered hair.
-
Veil comb or decorative headband: Only if the outfit calls for it; test fit before styling the rest of the hair.
-
Mini hair clips: Great for holding sections while you work, especially on short or layered hair.
-
A few pearl or satin pins: Keep them small; one or two usually does enough.
Prep Work That Makes Styling Easier
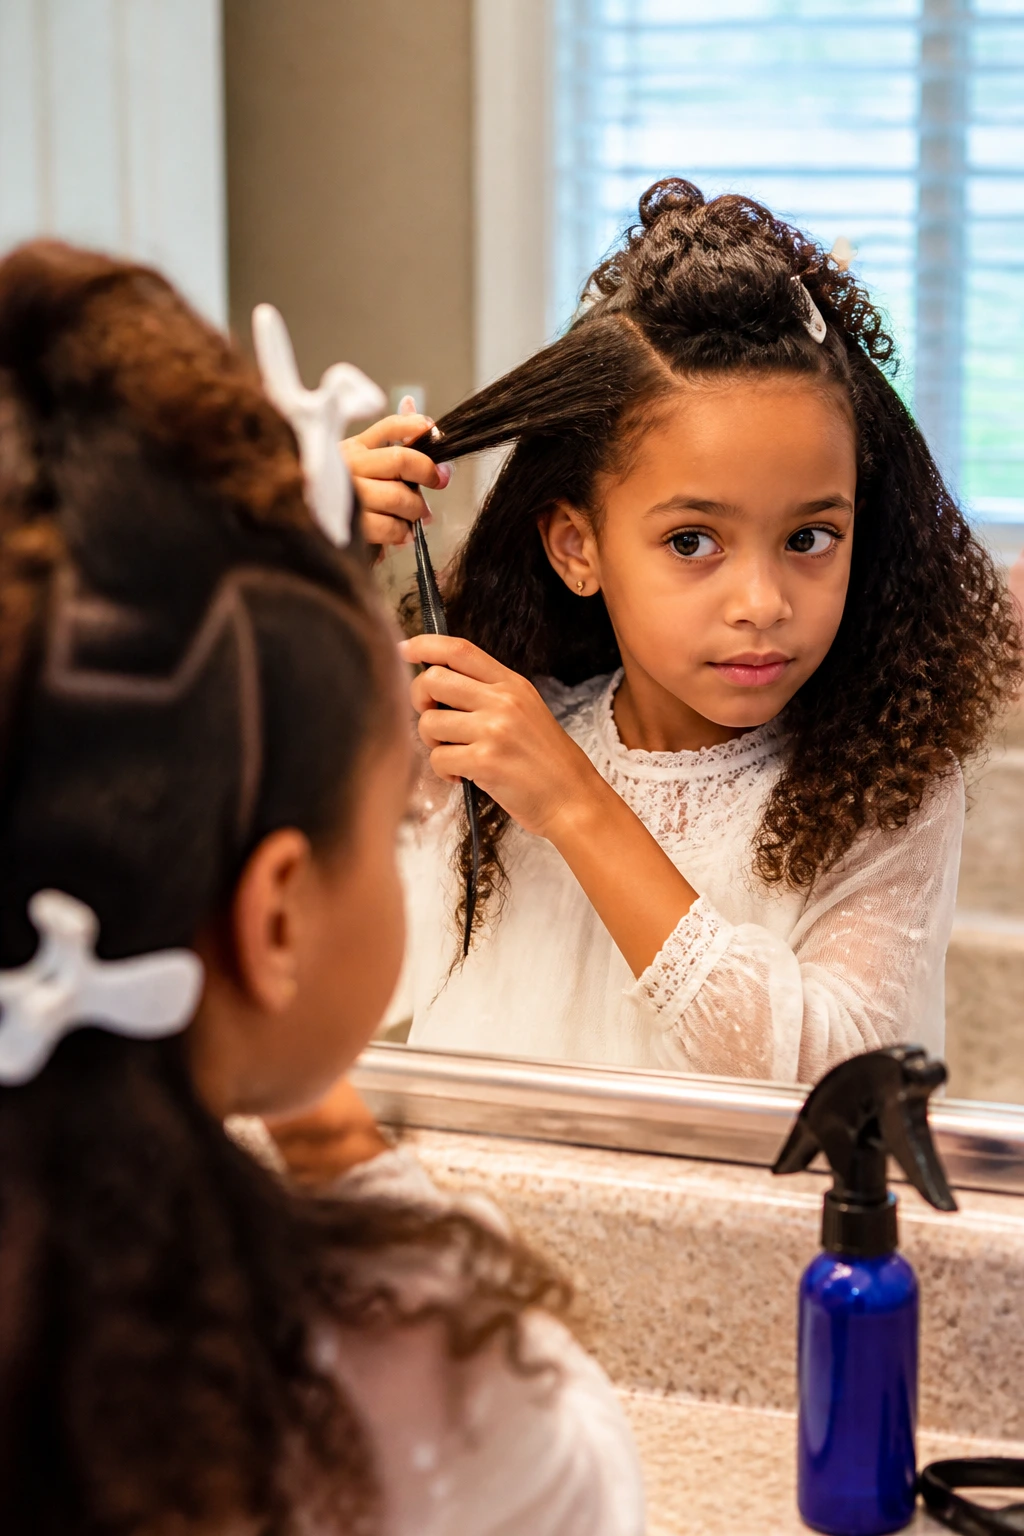
The night before matters more than most people think. Freshly washed hair can be too slippery, especially if it has been blow-dried smooth. On the other hand, hair that is dirty with heavy product can look dull and fight every brush stroke. The sweet spot is usually hair washed the day before or the morning before, then dried fully and left alone until styling.
If the child has fine hair, add a small amount of dry shampoo at the roots the night before or the morning of. Let it sit for a few minutes before brushing through. That gives the hair a little grit. For curly hair, keep the curls hydrated with leave-in conditioner or a curl cream, then shape them gently rather than brushing them out. The curls need memory, not punishment.
Detangle in sections. That sounds obvious, but people skip it and then wonder why the bun looks patchy. A rat-tail comb and a few clips make sectioning much easier. If you’re testing the style at home, do a trial run for ten minutes and make the child wear it while moving around. If pins slip or the crown puffs up, you’ll find out before the big day.
And please do not start with a hot iron on dry tangles. That is how ends fray.
Choosing the Right Updo for Hair Type and Length
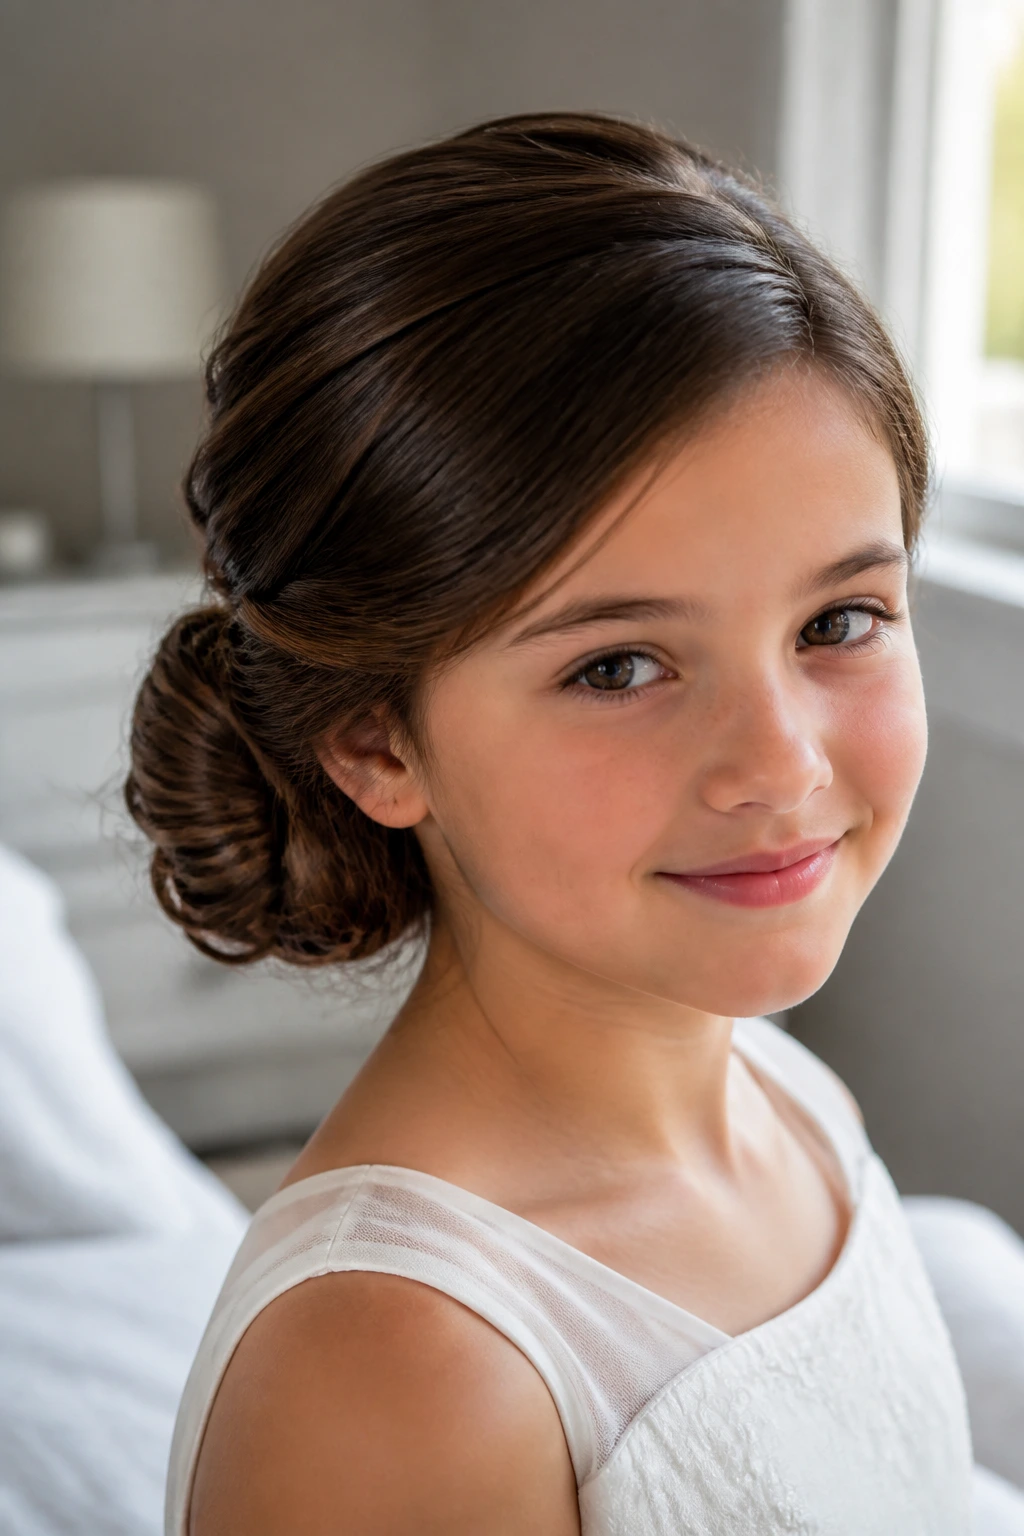
Fine hair wants grip. Thick hair wants spread. Curly hair wants respect. Short hair wants honesty. That’s the simplest way I know to choose.
For fine or silky hair, lean toward braided styles, rope twists, or low knots with a bit of texture spray. Those give the hair something to cling to so the style doesn’t unravel the second the child turns her head. A chignon or loop bun can work too, but only if you build a strong pin base and do not overload the crown with product.
Thick hair behaves differently. It often looks best in woven buns, French braid into bun styles, or low side buns that spread the weight across a wider area. If you try to cram thick hair into a tiny knot, the result can feel bulky and sit too high. Better to use the volume you already have and shape it into something flatter and calmer.
Curly hair should usually stay curly somewhere in the style. A halo updo, low puff, or curly tuck keeps the texture visible and avoids the stiff look that can happen when curls are straightened just for one morning. If you want a smoother top, just smooth the crown. Don’t erase the whole curl pattern.
Shorter hair still has options, but they need smarter pinning and smaller shapes. Tucks, headband rolls, and short braided updos often look better than trying to imitate a long bun.
Matching the Hair to the Dress and Accessories
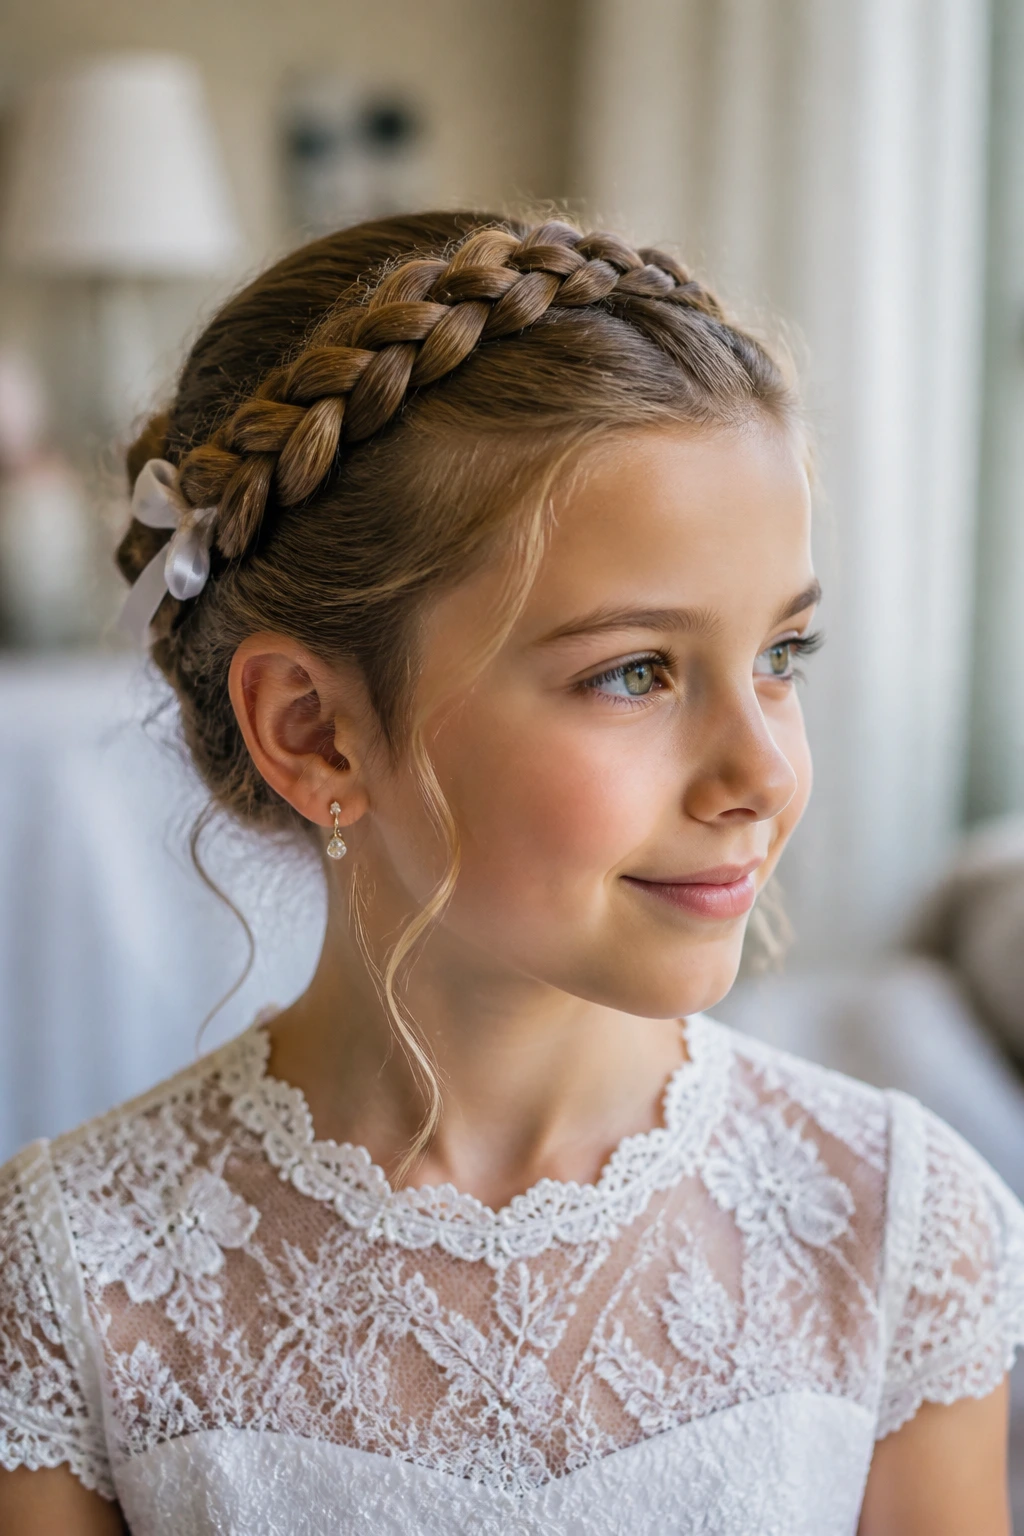
The dress matters. The hair does not get to ignore it.
A high neckline usually wants a low bun, tuck, or chignon so the back stays open and the collar has breathing room. A lace back or button detail also benefits from a style that sits low and narrow. If the dress already has a lot of texture, keep the hair smoother and smaller.
A simpler dress gives you more room to add a braid, ribbon, pearl pin, or flower accent. That’s where the braided crown bun or ribbon-woven braid can really earn its place. The hair becomes the one detail that carries a little ceremony without shouting.
Veils need space to anchor. Put the veil comb over a solid section of hair, not over a loose twist that will collapse later. Headbands are easier, but they still need the crown to lie flat. Test the accessory with the hairstyle before you finish pinning everything down. That saves the annoying moment when a comb sits crooked and you have to open the whole style back up.
If the dress is very ornate, use the hair as a frame. If the dress is plain, let one soft ribbon or pearl pin do the finishing. That balance is where the whole look starts to feel right.
Practical Ways to Keep the Style Comfortable
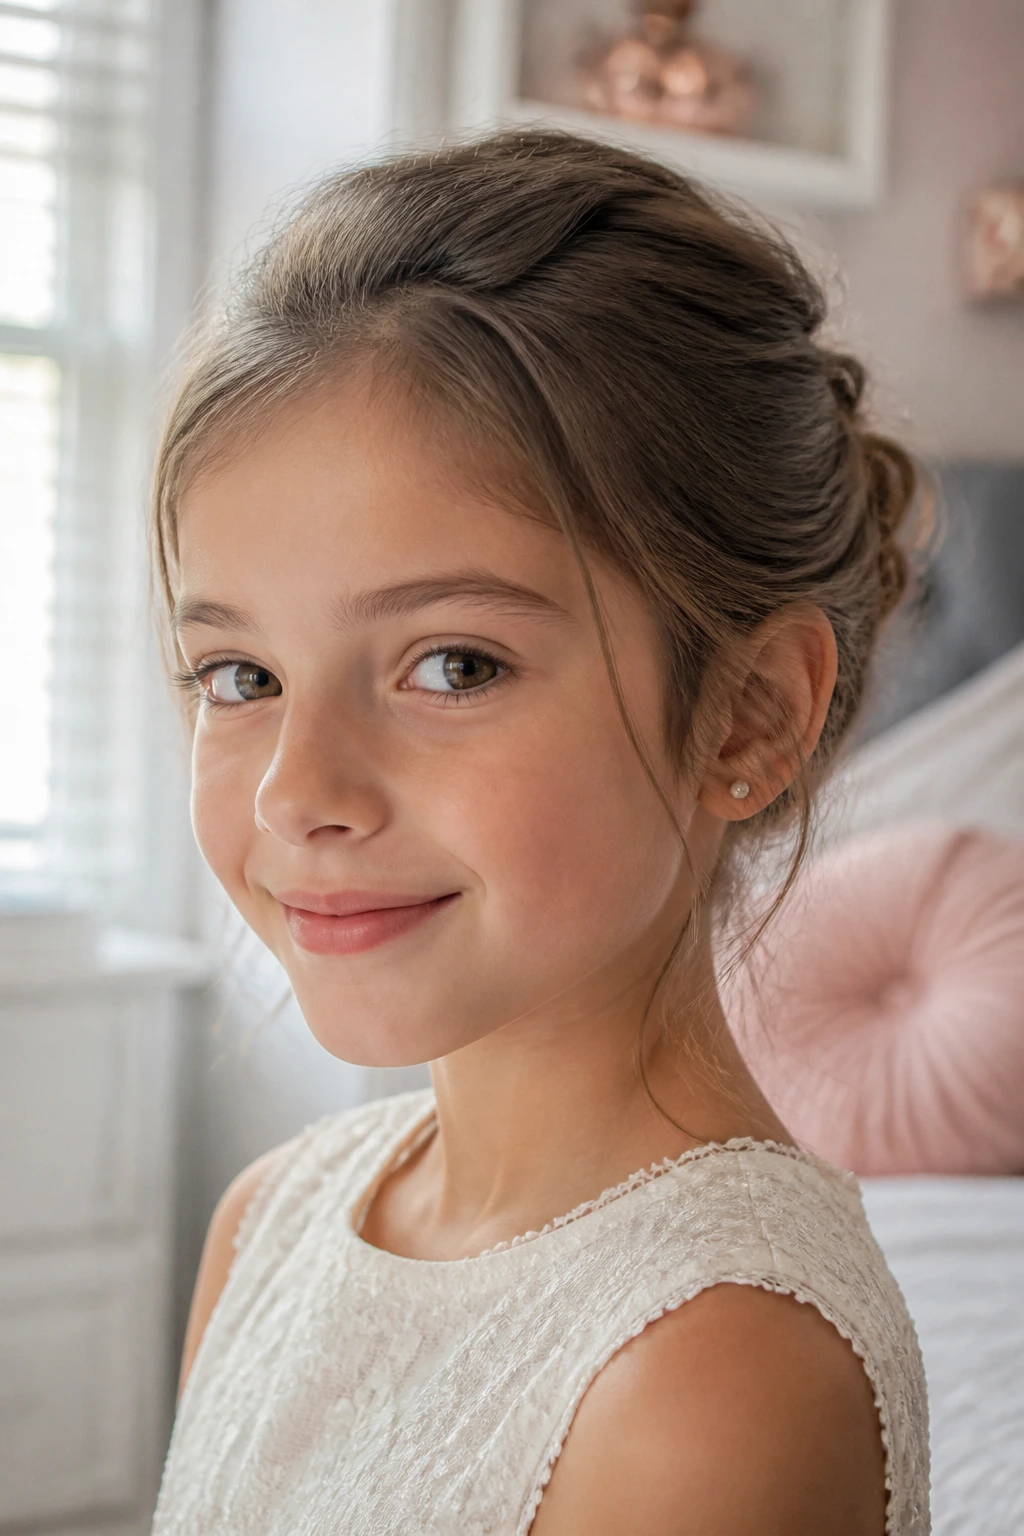
Comfort shows on a child’s face. If the hairstyle is tugging, she’ll look it.
Start by avoiding tight edges around the temples and behind the ears. Those spots hurt first. A style can be secure without being pulled so hard that the skin looks shiny. If you need extra hold, add more pins at the base of the style instead of tightening the whole crown.
Pay attention to accessory weight. Heavy combs and large bows can drag a style down or create sore spots. A light veil or a narrow ribbon usually works better than anything bulky. If you want flowers, go small and place them where they won’t rub when the child turns her head.
Keep a tiny emergency kit nearby: two spare bobby pins, a few clear elastics, a travel spray, and a small brush. That is enough to fix the usual problems without turning the morning into a salon emergency.
And one more thing. Let the child move before you call the style finished. A few steps, a head turn, a hug. If it survives those, it’s probably ready.
Common Mistakes That Make Communion Hair Fall Apart
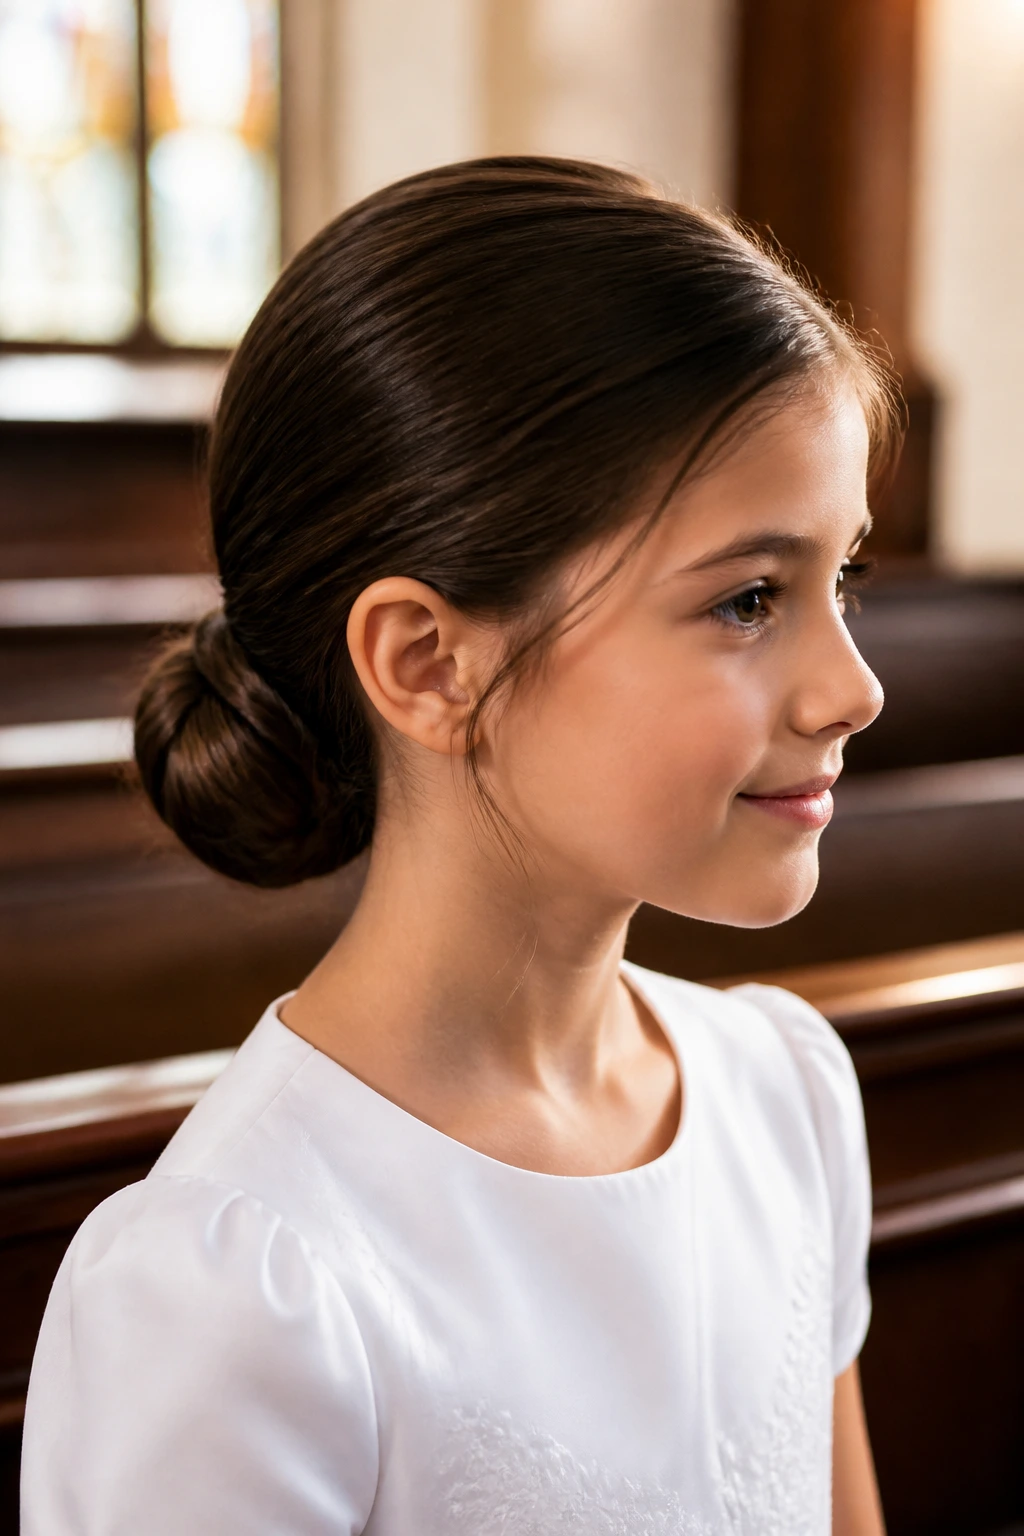
One of the biggest mistakes is washing the hair too clean right before styling. Freshly washed hair can be so slippery that pins slide out and braids lose their shape. The fix is simple: style day-old hair or add a bit of texture spray if the hair has just been washed.
Another problem is making the style too tight. Parents often tighten the crown because they want it to last, but that usually backfires. The child starts touching it, the front puffs up, and the whole look gets stressed. Secure the bun at the base instead of hauling on the roots.
People also overload the hair with accessories. A braid, a bow, pearl pins, and a flower comb all at once can make even a simple style look crowded. Pick one main accent and let the style breathe.
Skipping a trial run is a classic mistake. A style that feels fine in the mirror may collapse after a little walking, and that’s a rough time to find out. A ten-minute rehearsal the day before gives you a chance to pin loose layers, adjust the part, and check whether the veil sits flat.
Last, don’t ignore comfort. If the child says it pinches, listen. Hair that hurts never photographs well.
Gentle Variations to Try
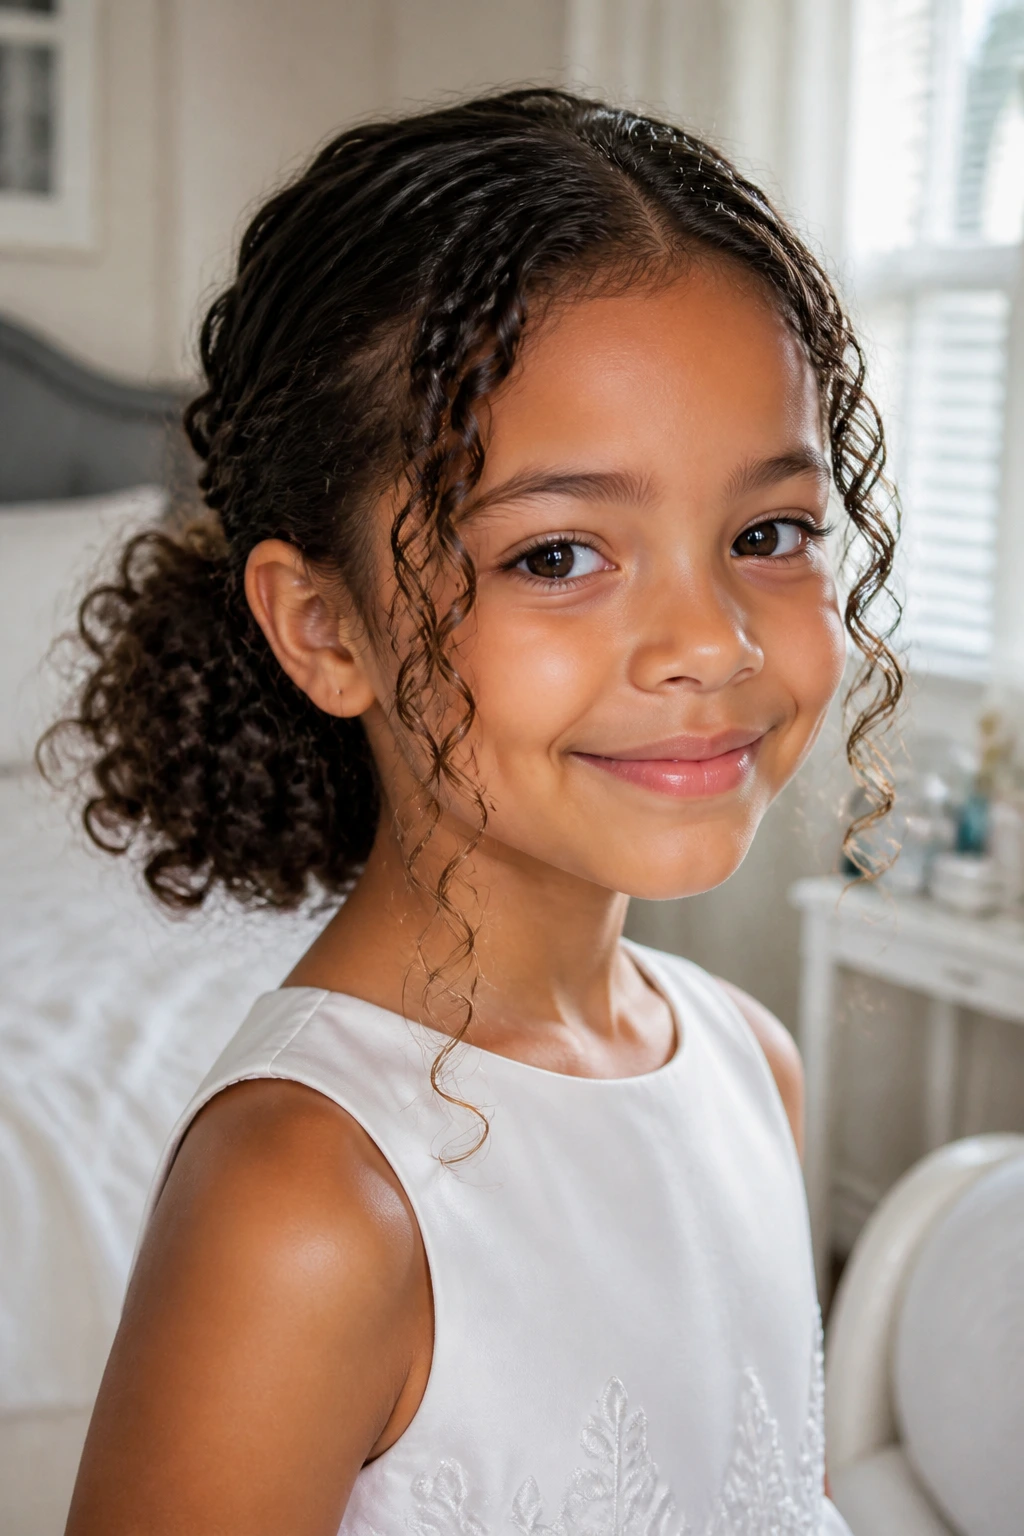
Curly-First Version: Keep natural curls visible in a low puff or halo and pin only the crown flat enough to frame the face. This works well when straightening would feel like too much work or too much heat.
Fine-Hair Grip Version: Add dry shampoo or a light texturizing mist before braiding or twisting, then use more pins than you think you need. Fine hair almost always needs extra anchor points, especially near the nape.
Short-Hair Tuck Version: Swap the bun for a headband tuck, side roll, or small braided crown pinned into a low shape. The goal is a neat outline, not an oversized bun that the length cannot support.
Ribbon Finish Version: Use a narrow satin ribbon at the base of a braid or bun instead of a bigger accessory. It gives the hairstyle a soft finish and ties the look to the dress without adding weight.
Veil-First Version: Place the veil comb before the final pins go in, then build the bun or tuck around that anchor point. This saves time later and keeps the veil from sitting on top of a weak section of hair.
Keeping the Style Fresh Until the Last Photo
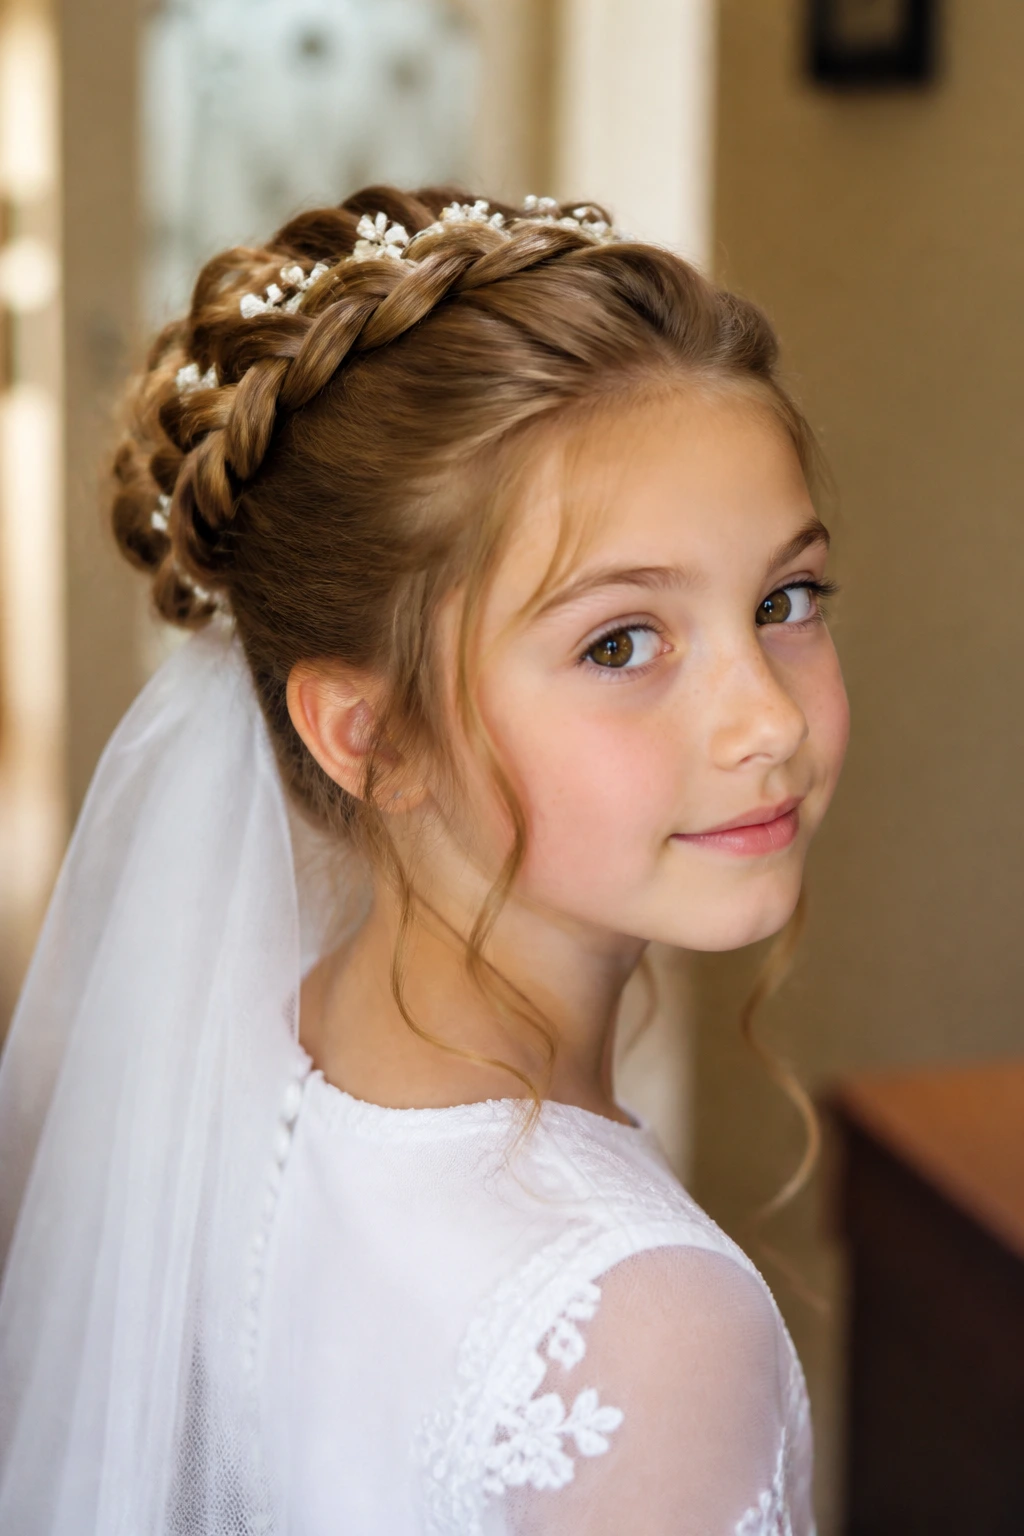
The morning does not end when the hair is done. It ends when the last photo is taken and the accessories come out without half the style falling apart.
Carry a small touch-up kit if the day is long: a few pins, a travel spray, and a small brush. Keep the brush gentle. You are smoothing flyaways, not combing out the style. If the crown starts to puff, press it lightly with your fingers and add one pin near the base rather than spraying the whole head again. Too much spray can make the hair look dusty in bright light.
If a ribbon loosens, retie it low instead of yanking it tight. If a veil shifts, lift it carefully from the comb, reset the anchor, and smooth the section underneath. Most mid-day fixes are small. People tend to make them sound harder than they are.
After the ceremony and photos, remove pins slowly so you do not catch the hair. Brush out braids with your fingers first, then a wide-tooth comb if needed. Wash out product that night, especially if there was a lot of spray or dry shampoo. That keeps the hair from feeling coated the next day.
Frequently Asked Questions
Should the hair be clean or day-old for a Communion updo?
Day-old hair usually holds better because it has a little natural grip. If the hair is freshly washed and feels slippery, dry shampoo or texture spray can help, but a truly squeaky-clean head of hair is harder to pin.
What if my child has very fine hair that won’t stay in place?
Choose styles with braids, twists, or tucked sections instead of one smooth bun. Fine hair usually needs more texture at the roots and more pins placed under the style, not just around the outside.
Can short hair still work for First Communion?
Yes. Headband tucks, small braided crowns, and neat low rolls are all good options for shorter lengths. The style just needs to be compact and honest about the hair you actually have.
How do I keep a veil from sliding off?
Place the comb on a firm section of hair, usually over a braid, twist, or pinned base rather than loose hair. Then secure the veil with a few hidden pins on each side so it does not shift when the child moves.
What’s the best style for curly hair?
A curly low puff, halo updo, or softly pinned tuck usually works best. Those styles keep the texture visible and avoid the stiff look that can happen when curls are pressed straight for a formal event.
How much hairspray should I use?
Less than you think. A light mist from about 10 inches away is usually enough. If the hair starts feeling crunchy before you leave the house, you’ve gone too far.
What if the hairstyle starts falling apart before the photos?
Focus on the base first. Add pins under the bun or tuck, smooth the crown with your hands, and only then fix the decorative pieces. The style almost always slips at the anchor point, not the bow or pin on top.
Can I do the hairstyle the night before?
Some braided or tucked styles can be started the night before, but I would leave final pins and accessories for the morning. Hair tends to shift while sleeping, and a quick morning touch-up usually gives a cleaner result.
A Soft Finish for the Day
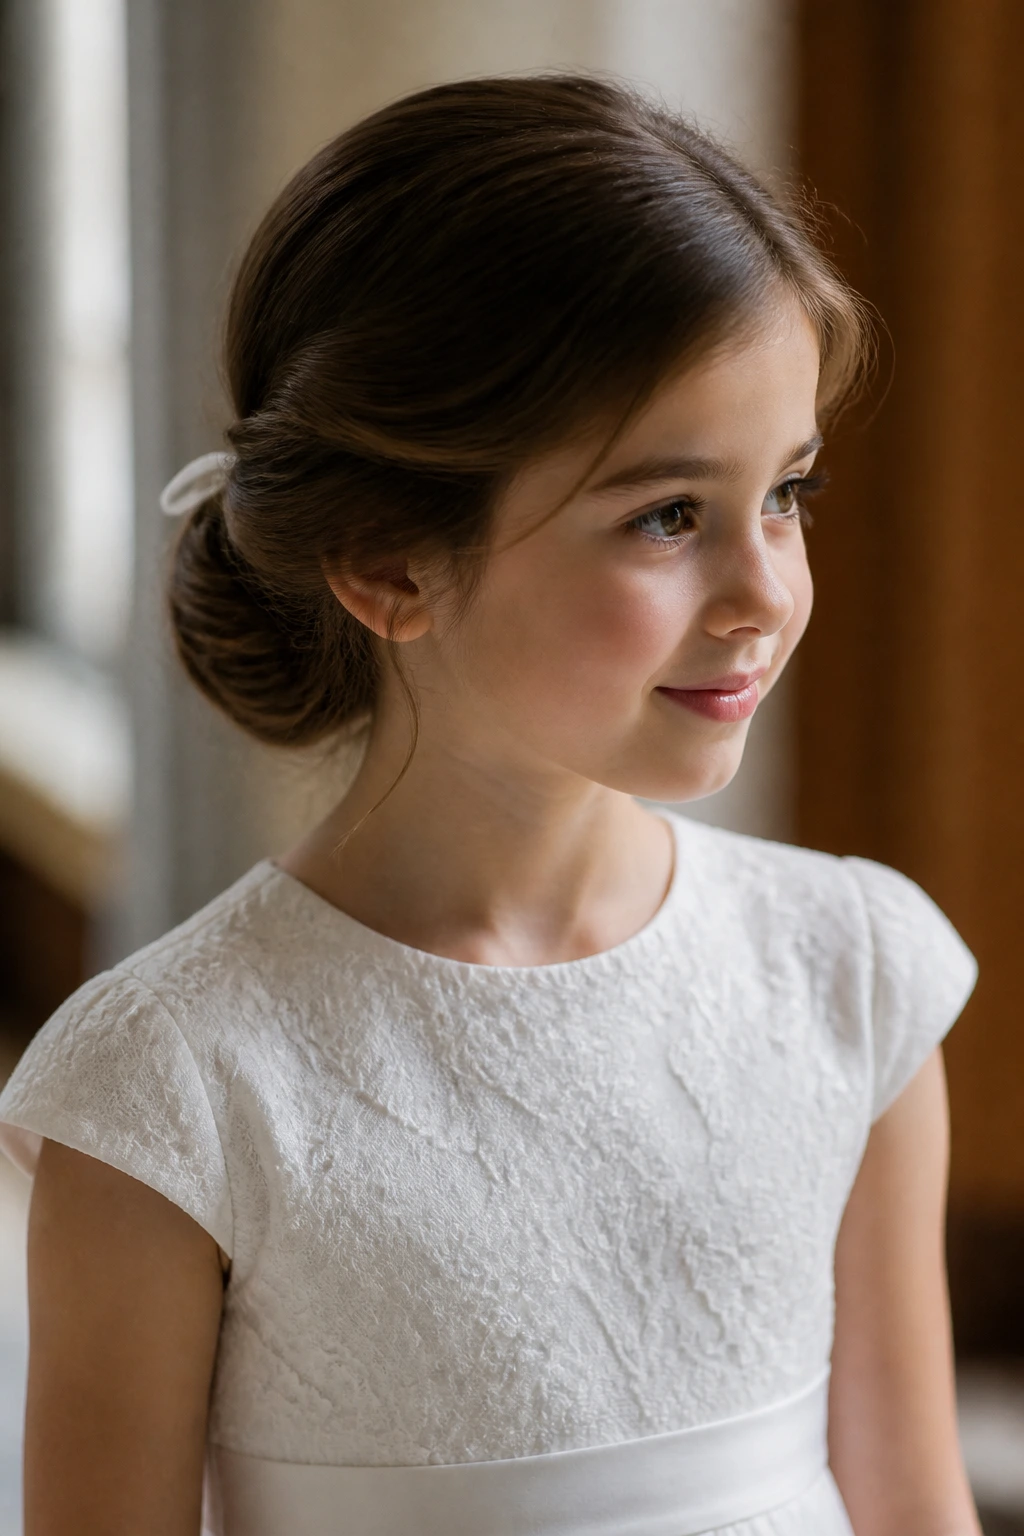
The best first communion updos do not try to steal attention from the dress, the child, or the moment itself. They sit where they should sit. They stay calm. They hold through the walking, the photos, the hugs, and the little bursts of movement that happen even on a very formal morning.
That is why low buns, braids, twists, and tucks keep showing up here. They are steady shapes. They give you room to add a ribbon or pearl pin if you want one, but they do not demand a lot of decoration to feel finished.
Pick the style that fits the hair you actually have, not the one you wish you had. If you do that, the morning gets easier, the photos look more relaxed, and the hairstyle disappears into the day in the best possible way.
