



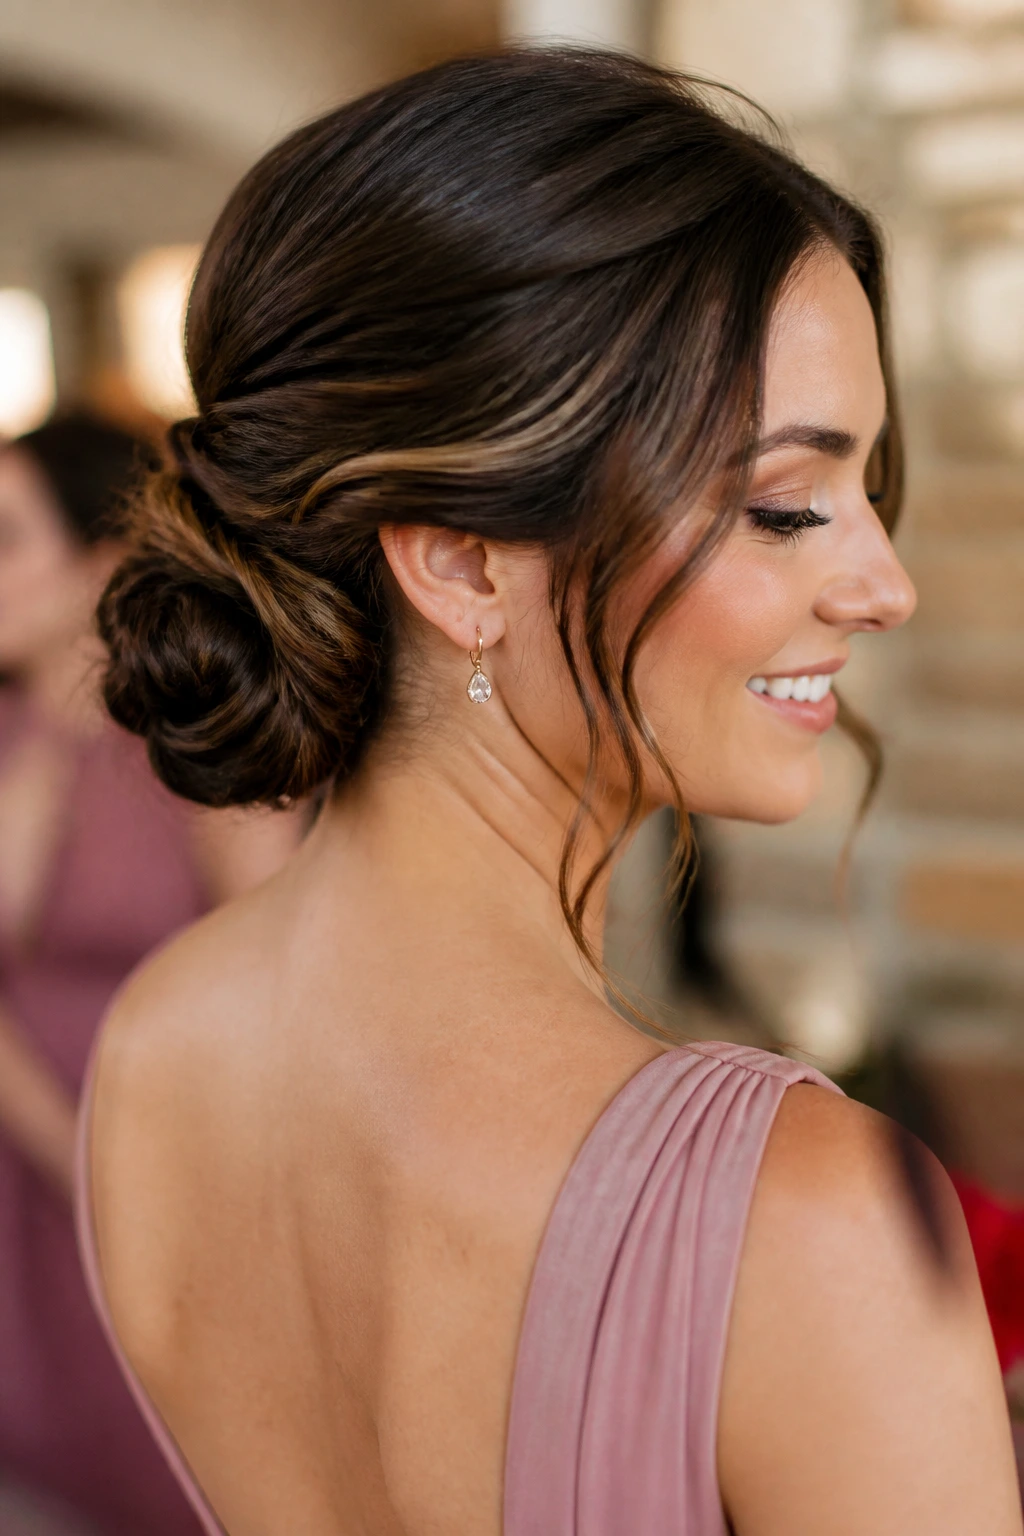
A bridesmaid updo has a harder job than it looks. It has to stay neat through a ceremony, survive a round of group photos, hold up under hugs, and still look decent after a few hours of dancing and a little humidity. Loose curls can be lovely, sure, but bridesmaid updos solve a different problem: they keep the hair off the neck, keep the neckline visible, and give the whole bridal party a finished look that doesn’t fall apart the second someone leans in for a photo.
The best versions are never stiff. That’s the trap people fall into. They think “formal” means lacquered and tight, so they over-smooth the roots, pile on pins, and end up with hair that looks hard from the front and springy from the back. A better bridesmaid updo has shape, not crunch. It sits cleanly at the nape or just above it, gives the face a little breathing room, and uses texture where it matters most: at the base, inside the twist, under the braid, and around the pins.
And there’s the quiet bonus nobody talks about enough: these styles are forgiving when the bridal party has different hair lengths, textures, and density. One person’s hair may be fine and slippery, another’s thick and stubborn, and someone else may have curls that spring in all the wrong places unless you work with them instead of against them. The right updo makes those differences look intentional. That’s the sweet spot.
Why These Bridesmaid Updos Earn Their Keep
-
They hold through a long day: A pinned base at the nape usually lasts longer than soft curls left hanging down, especially once people start hugging and leaning over tables.
-
They suit mixed hair textures: Braids, twists, coils, and tucked rolls give fine hair more grip and let thick or curly hair keep its shape without fighting the hair’s natural movement.
-
They keep necklines visible: Strapless, halter, bateau, and open-back dresses all look cleaner when the hair sits up and away from the shoulders instead of crowding the line of the dress.
-
They photograph well from every angle: A low bun, side twist, or braided crown gives the back of the head some structure, which matters when everyone is lined up in matching dresses.
-
They leave room for accessories: Pearl pins, a slim comb, tiny flowers, or a veil can sit in the style without getting swallowed by it.
-
They can be tailored fast: The same base style can look polished, boho, romantic, or sleek depending on how tight the braid is and how much face-framing hair you leave out.
1. The Polished Low Chignon
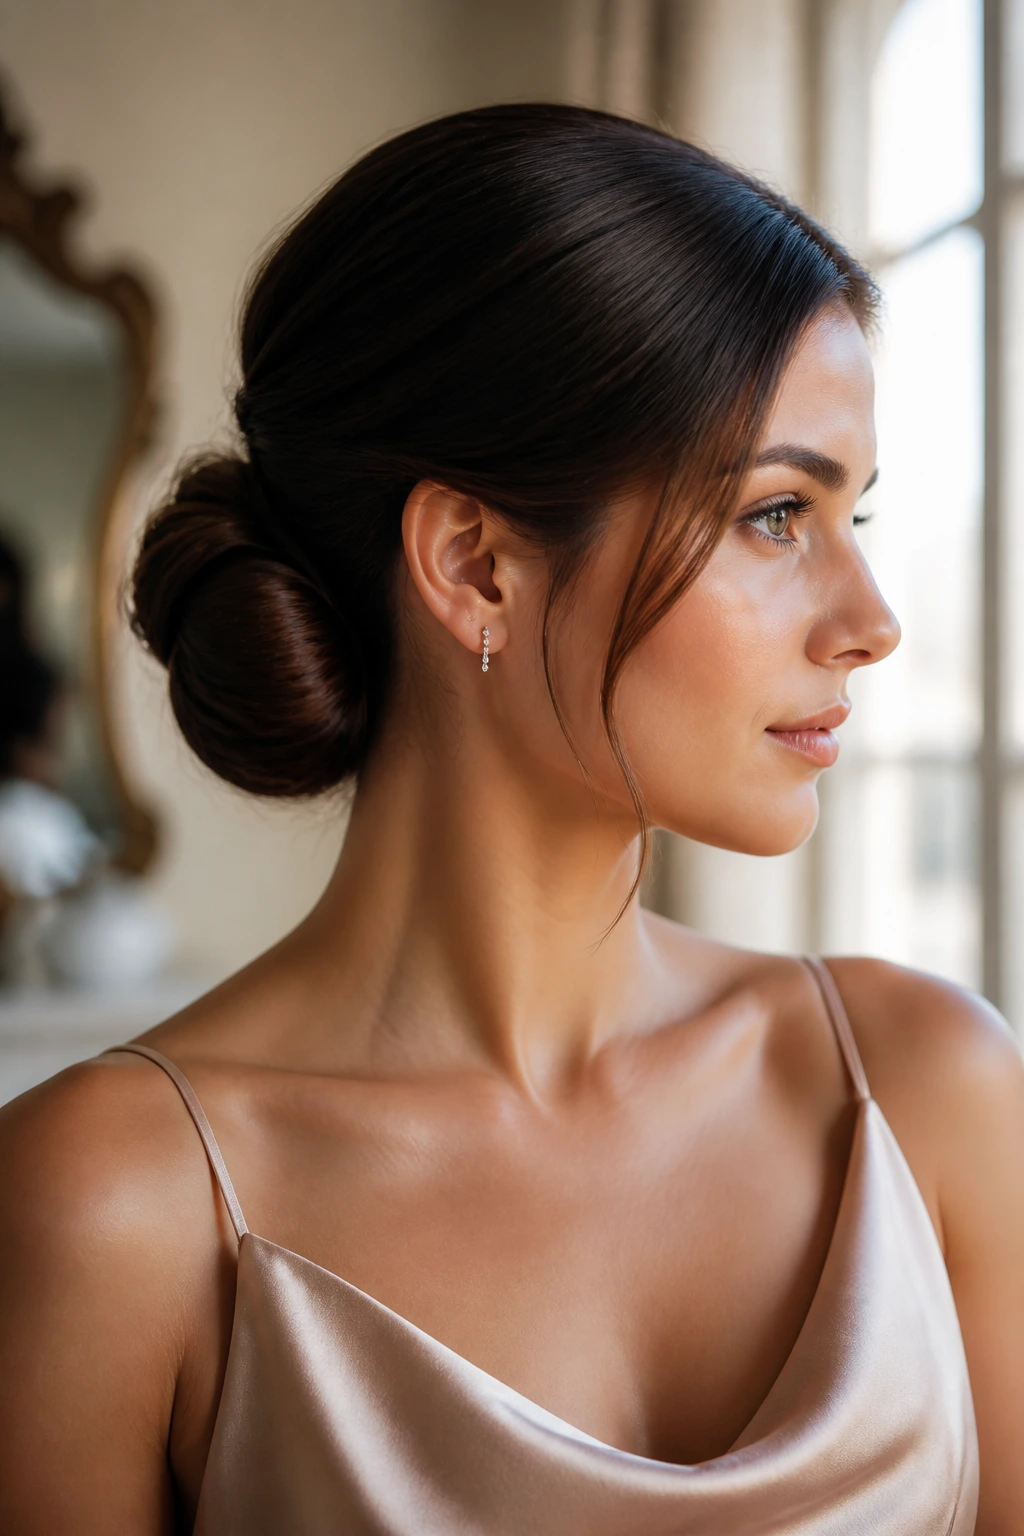
A low chignon is the cleanest answer when the dresses are already doing a lot. Hair is smoothed back, gathered at the nape, and wrapped into a compact knot that sits flat enough to feel elegant but not so tight it looks severe. It works especially well with satin, crepe, or square-neck dresses because the shape is calm and deliberate.
What I like about this version is the control. A little smoothing cream on damp hair, a medium round brush during blow-drying, and a light mist of flexible spray before pinning will give the style enough grip without turning it into a shell. If the hair is slippery, rough up the roots with dry shampoo first. Small thing. Big difference.
Best for: straight or lightly wavy hair, medium to long lengths, and bridal parties that need a uniform style across different textures.
2. Braided Crown Into a Low Bun
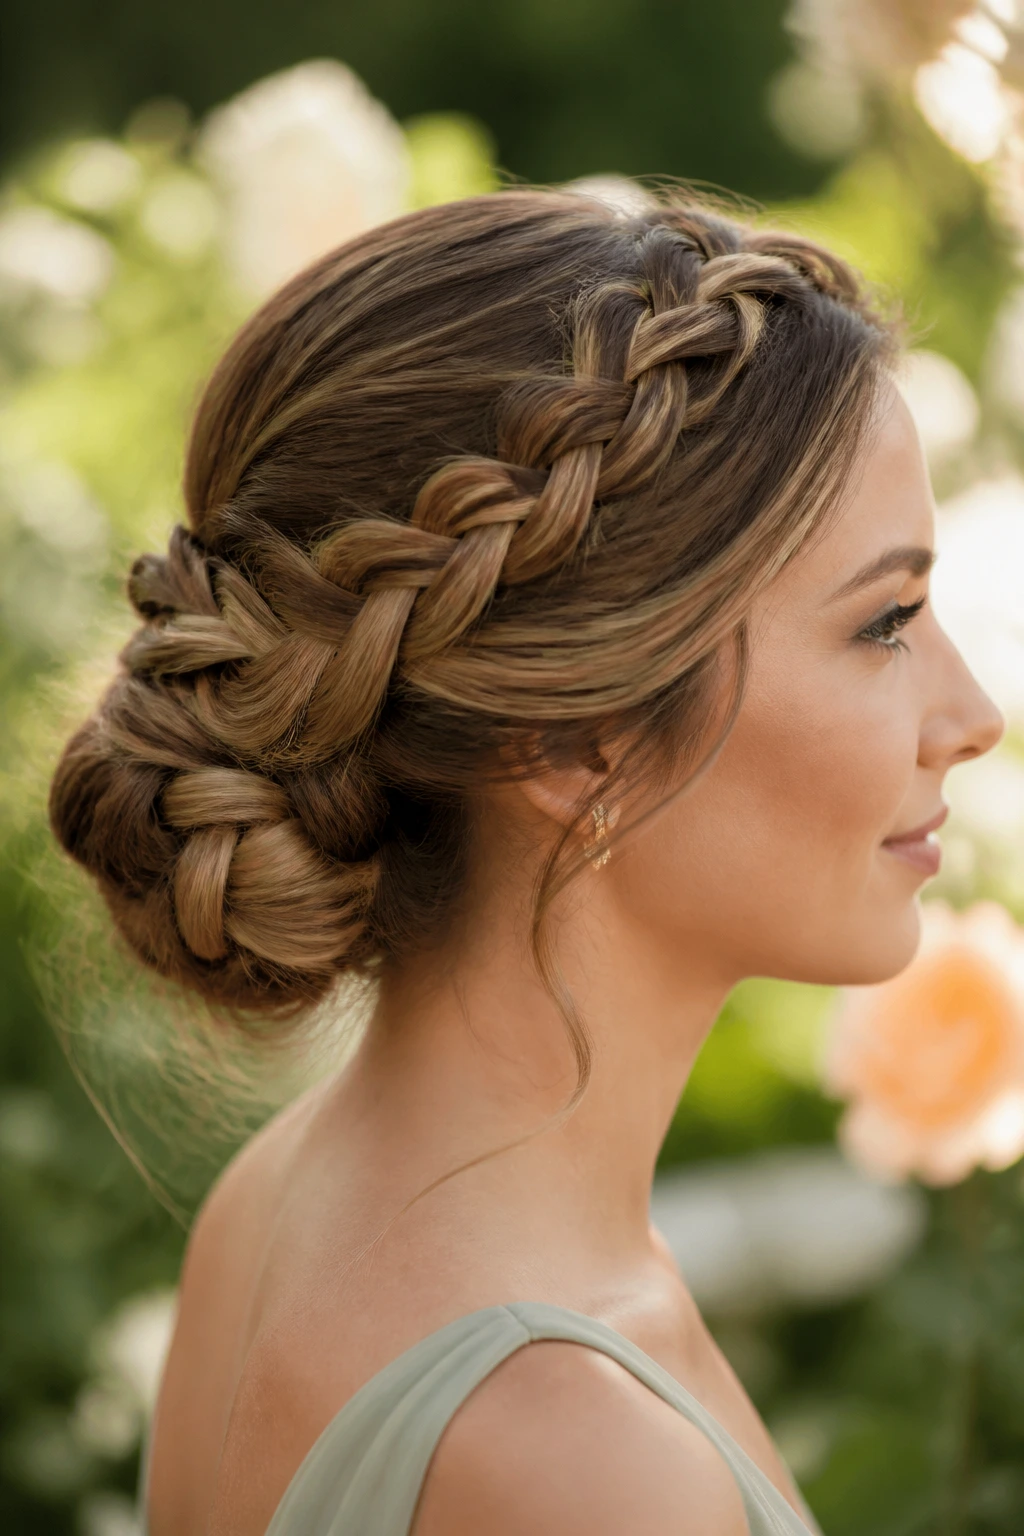
This one has a soft, romantic edge without drifting into fussy territory. A braid starts near one temple or both sides of the head, wraps across the crown, then feeds into a low bun or tucked knot at the back. The braid gives the style some structure, and the bun keeps the whole thing from feeling too loose or festival-y.
The trick is not to make the braid too perfect. A slightly loosened braid has more width, and that width helps the style read from the back in photos. If you pancake the braid, do it gently with your fingertips instead of yanking on every loop. You want fullness, not frizz.
Why it works: the braid acts like a built-in anchor, which means the bun doesn’t need to carry all the weight. That’s useful when hair is fine or layered.
3. The Twisted Nape Knot
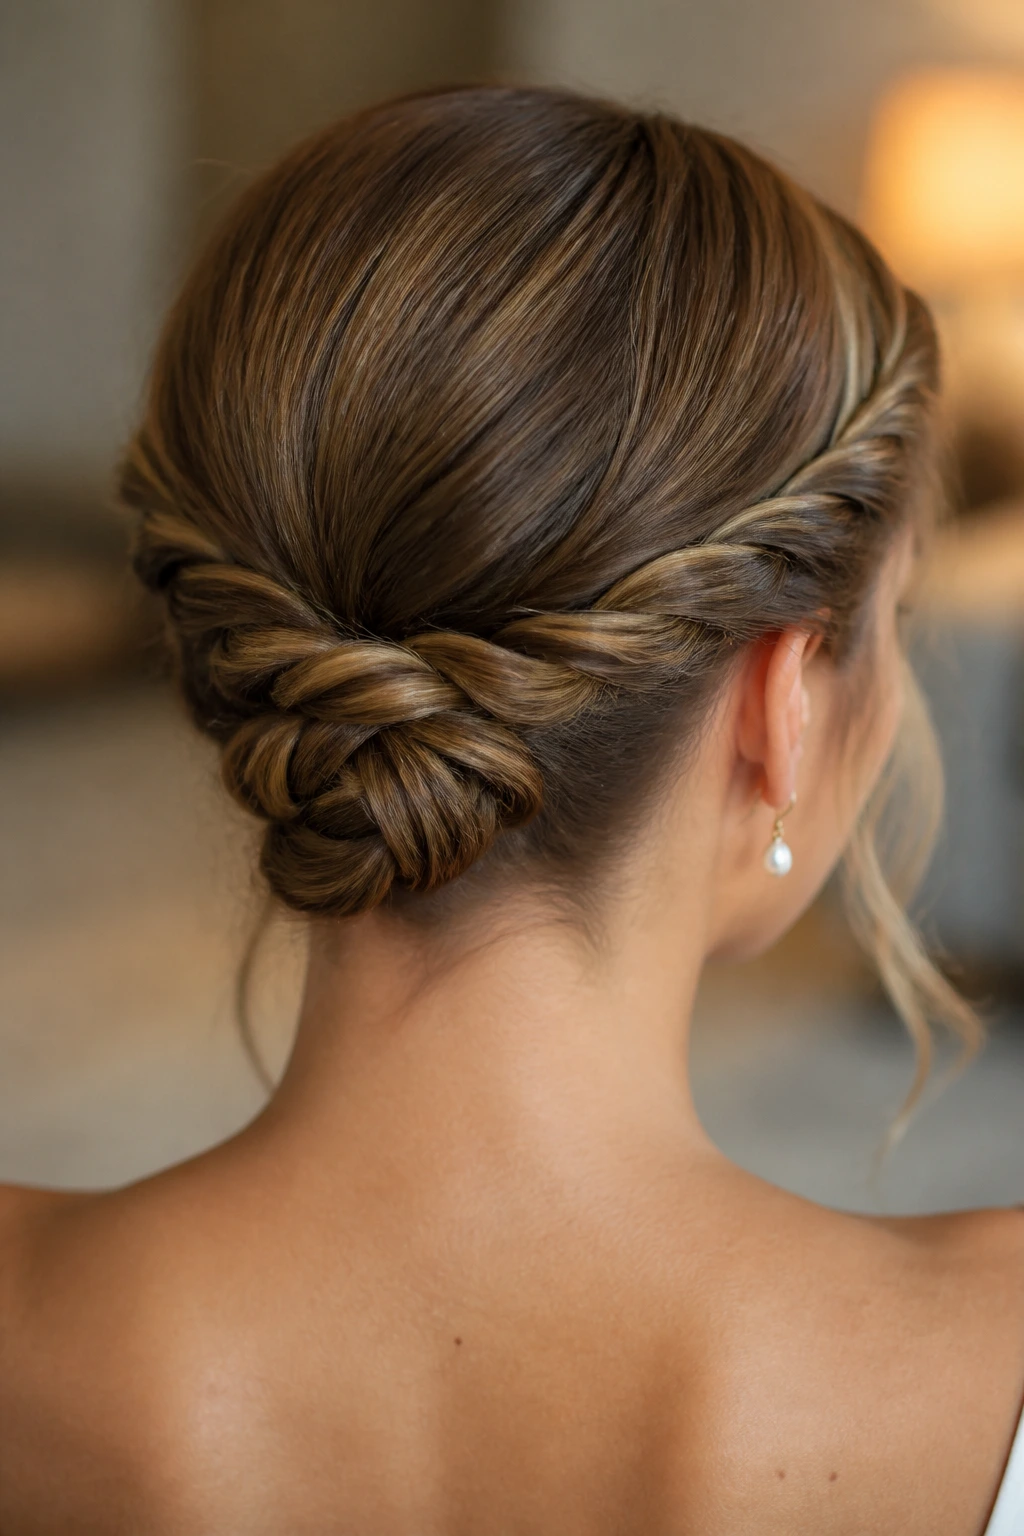
A twisted nape knot is one of those styles that looks harder than it is. Two sections are twisted from either side of the head, then crossed and tucked into a knot low at the neck. From the front, it’s neat and calm. From the back, it has enough shape to feel special.
I’d choose this for bridesmaids with medium-length hair or anyone whose layers are too short for a full bun. Twists handle uneven lengths better than braids because they hide the ends more easily. A few hidden bobby pins in an X pattern will keep the center from slipping.
No heavy teasing here. That would fight the clean line and make the twist look bulky instead of smooth.
4. Side-Swept Low Bun With a Deep Part
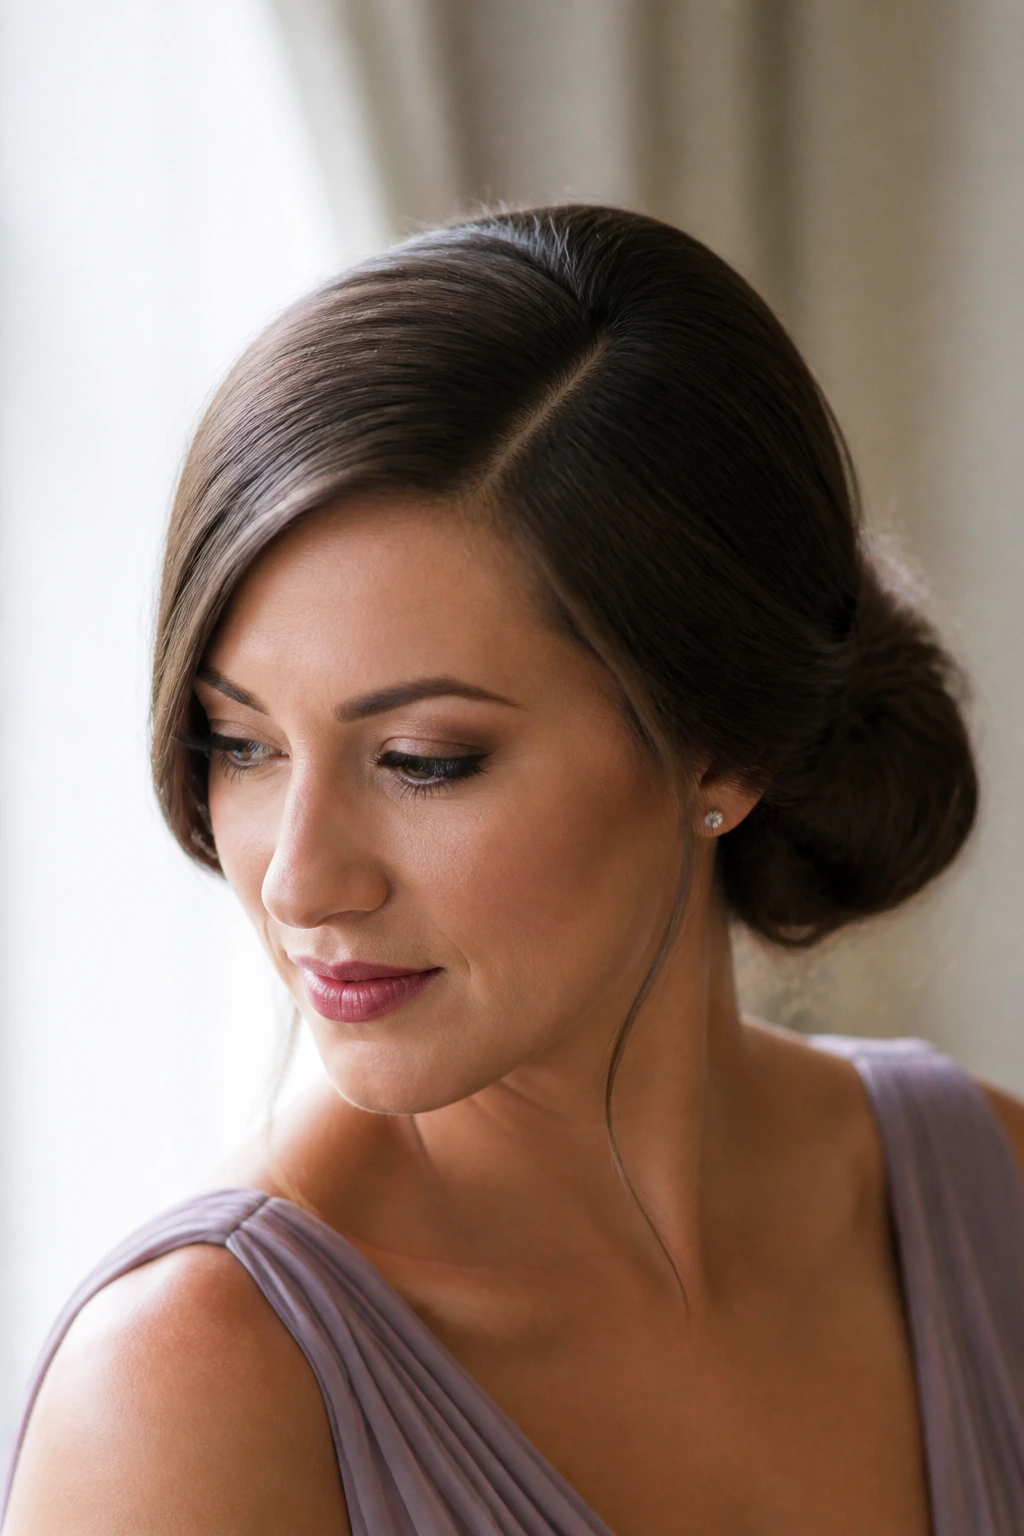
A deep side part gives a low bun a little drama without requiring a dramatic hairstyle. Hair is swept over to one side, pinned at the nape, and shaped into a low bun that sits slightly off-center. It’s the kind of detail people notice only after they’ve looked twice, which is exactly why it works.
This is especially nice for dresses with asymmetrical straps or a neckline that already leans to one side. The style echoes the dress instead of competing with it. If a bridesmaid has a strong jawline or angular features, the side sweep softens everything around the face.
Keep the front smooth, but don’t flatten the crown too hard. A touch of lift at the roots keeps the side part from looking pasted on.
5. Textured Bun With Soft Face-Framing Pieces
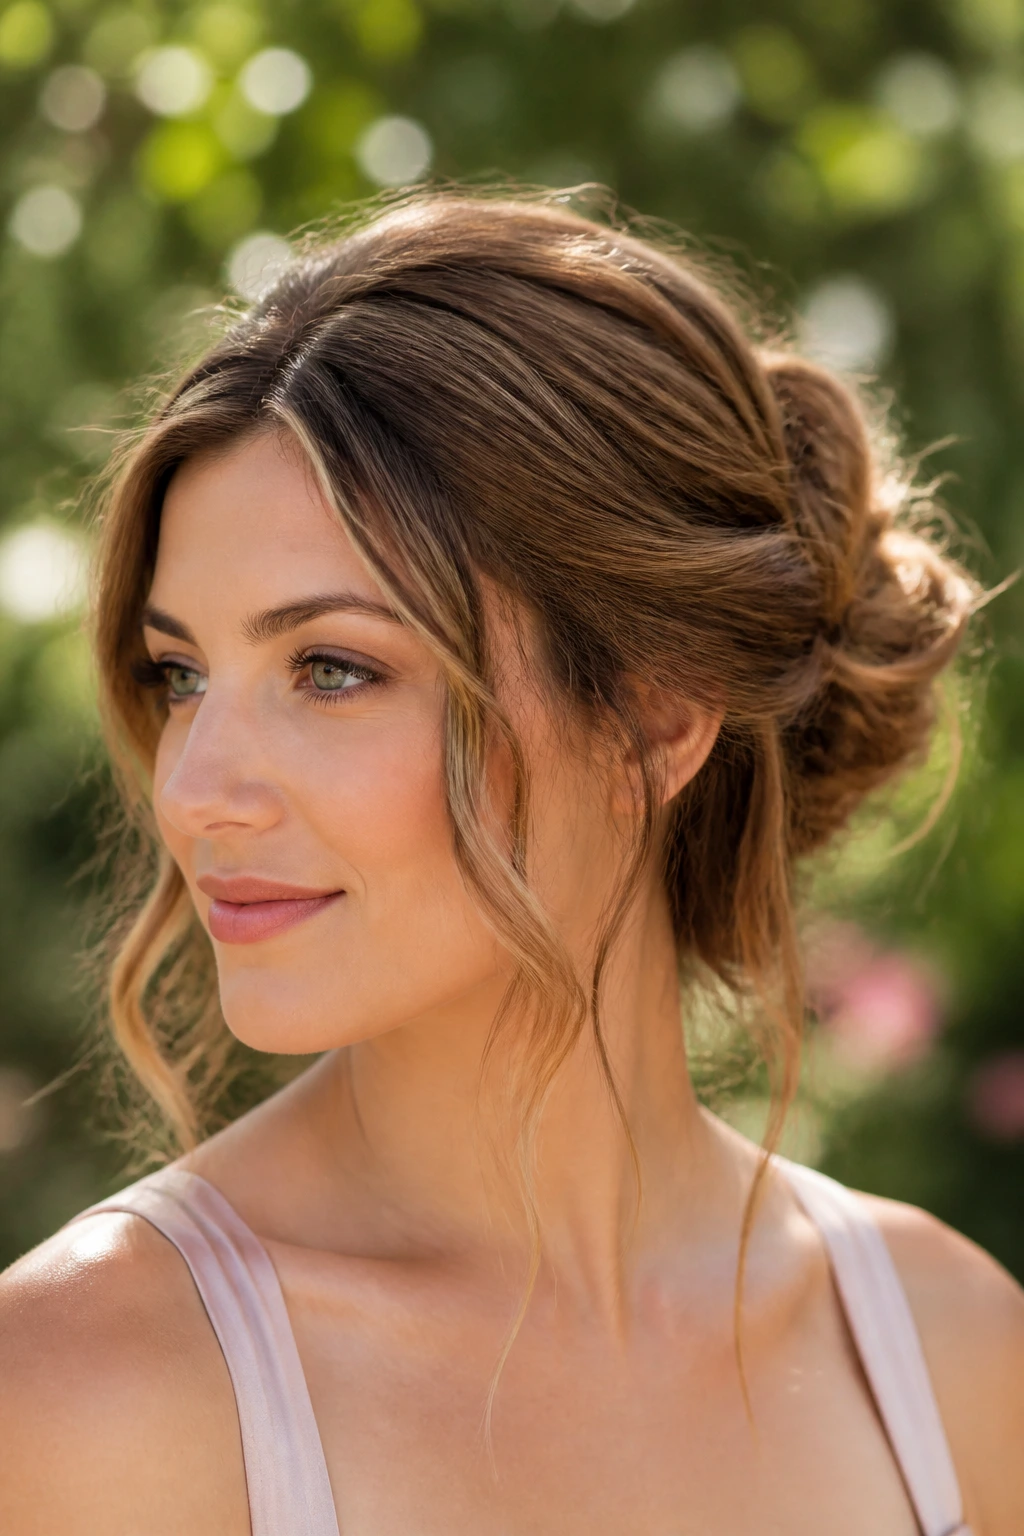
This is the bridesmaid updo I reach for when the vibe is romantic, not rigid. The hair is curled or waved first, then pinned into a loose bun with a few soft pieces left around the face and neck. It should look touched by a person, not assembled by a machine.
The detail that matters most is the balance between texture and control. If the bun is too loose, it slips into mess. If the front pieces are too polished, the style loses its softness. I like to curl the face-framing sections with a 1-inch iron, then brush them lightly so they fall in a smoother S-shape.
Best with: floral dresses, outdoor ceremonies, and any bridal party where the dresses are light, floaty, or heavily detailed.
6. The Soft French Twist
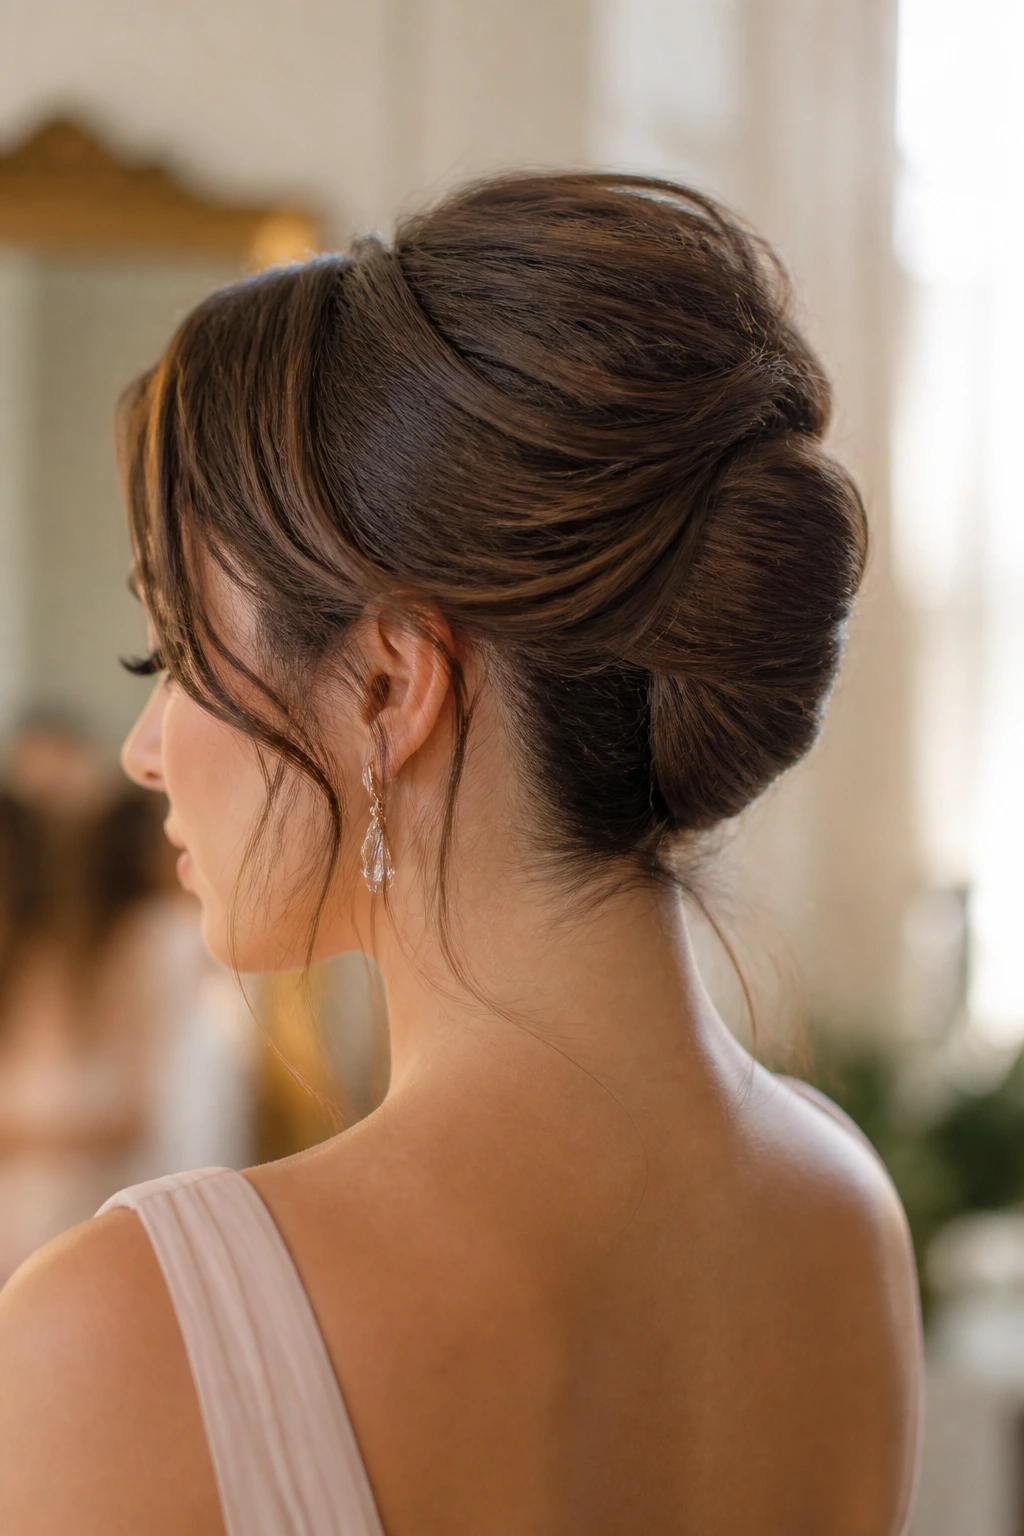
A French twist is one of those styles people think of as old-school, but the softer version feels fresh when the edges are loosened and the finish isn’t glossy to the point of stiffness. Hair is gathered, rolled upward, and tucked vertically against the back of the head. The shape is long, clean, and a little architectural.
I prefer this when the wedding calls for formal without looking severe. It’s especially good with high-neck dresses, cap sleeves, or more tailored silhouettes. A proper French twist also keeps the back of the dress visible, which is a small but very real advantage in photos.
Use a teasing brush only where the twist needs internal body. Too much backcombing shows through and gives the whole thing a cloudy look.
7. The Double-Twist Bun
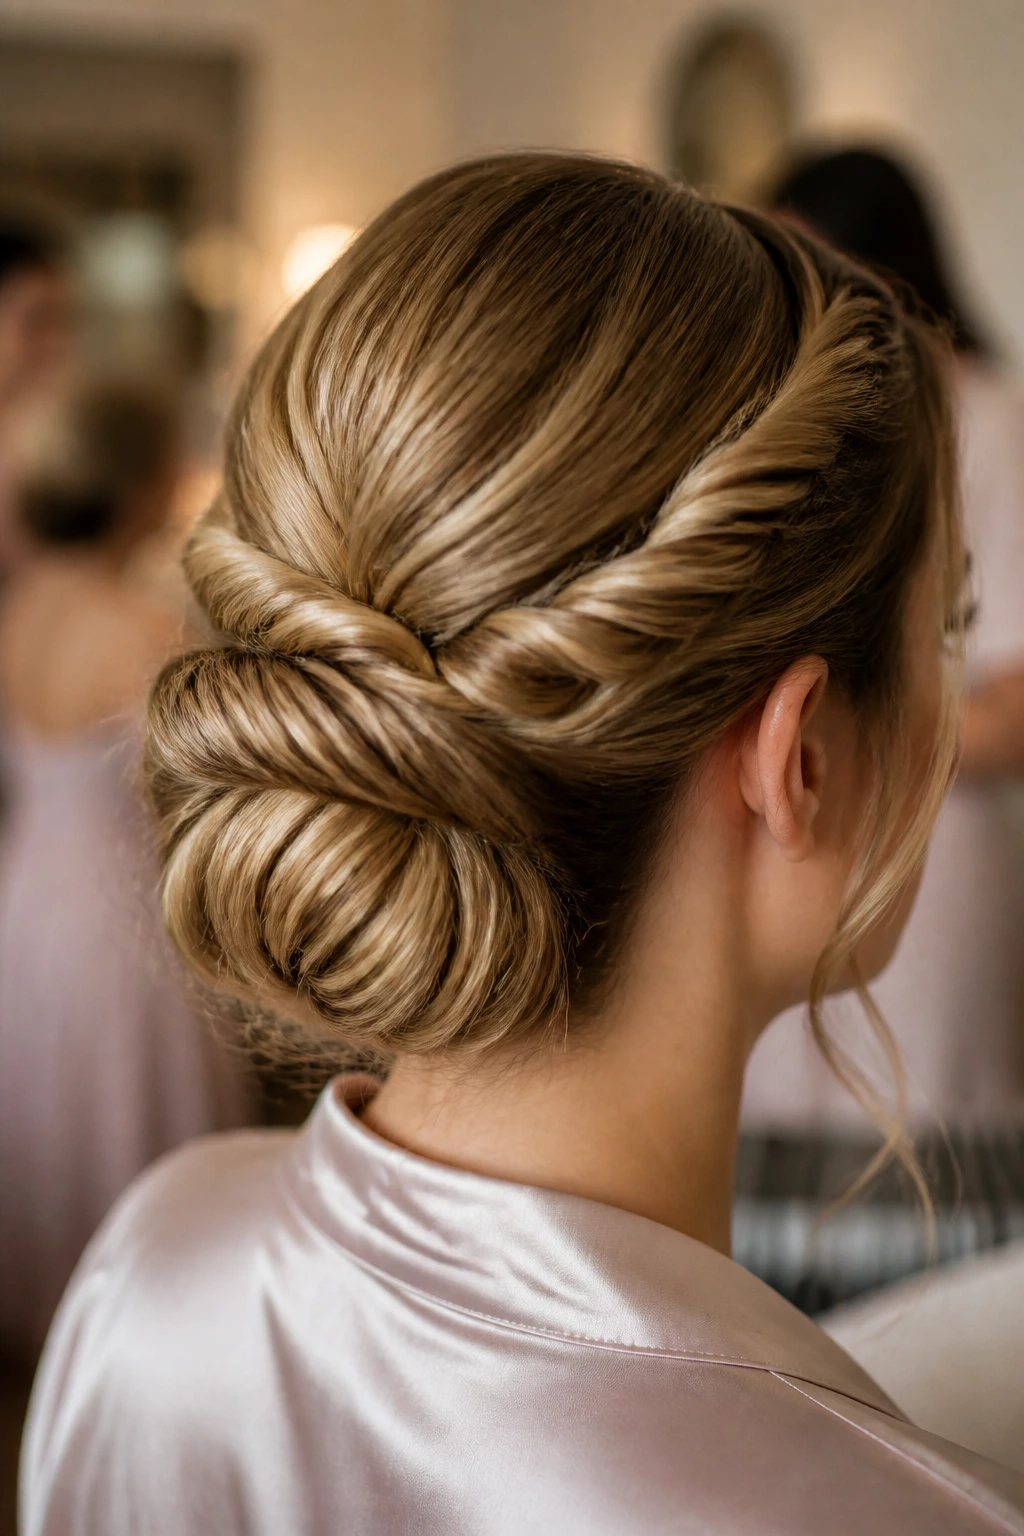
Two rope twists crossed at the back create more body than a single wrapped bun, and that makes this style a lifesaver for fine hair. Each side is twisted inward, then the lengths are crossed and pinned into a compact bun or tucked coil. The finished shape looks fuller than you’d expect from the amount of hair used.
This is one of the better bridesmaid updos for slippery hair because the twists hold onto each other. A little texturizing spray at the mid-lengths before twisting gives the pins something to bite into. If the hair is too soft, the bun can feel hollow. That’s where a tiny bun form or padding helps.
It’s not a style for people who want a lot of movement. It’s for bridesmaids who need clean lines and a solid anchor.
8. Halo Braid Into a Tucked Updo
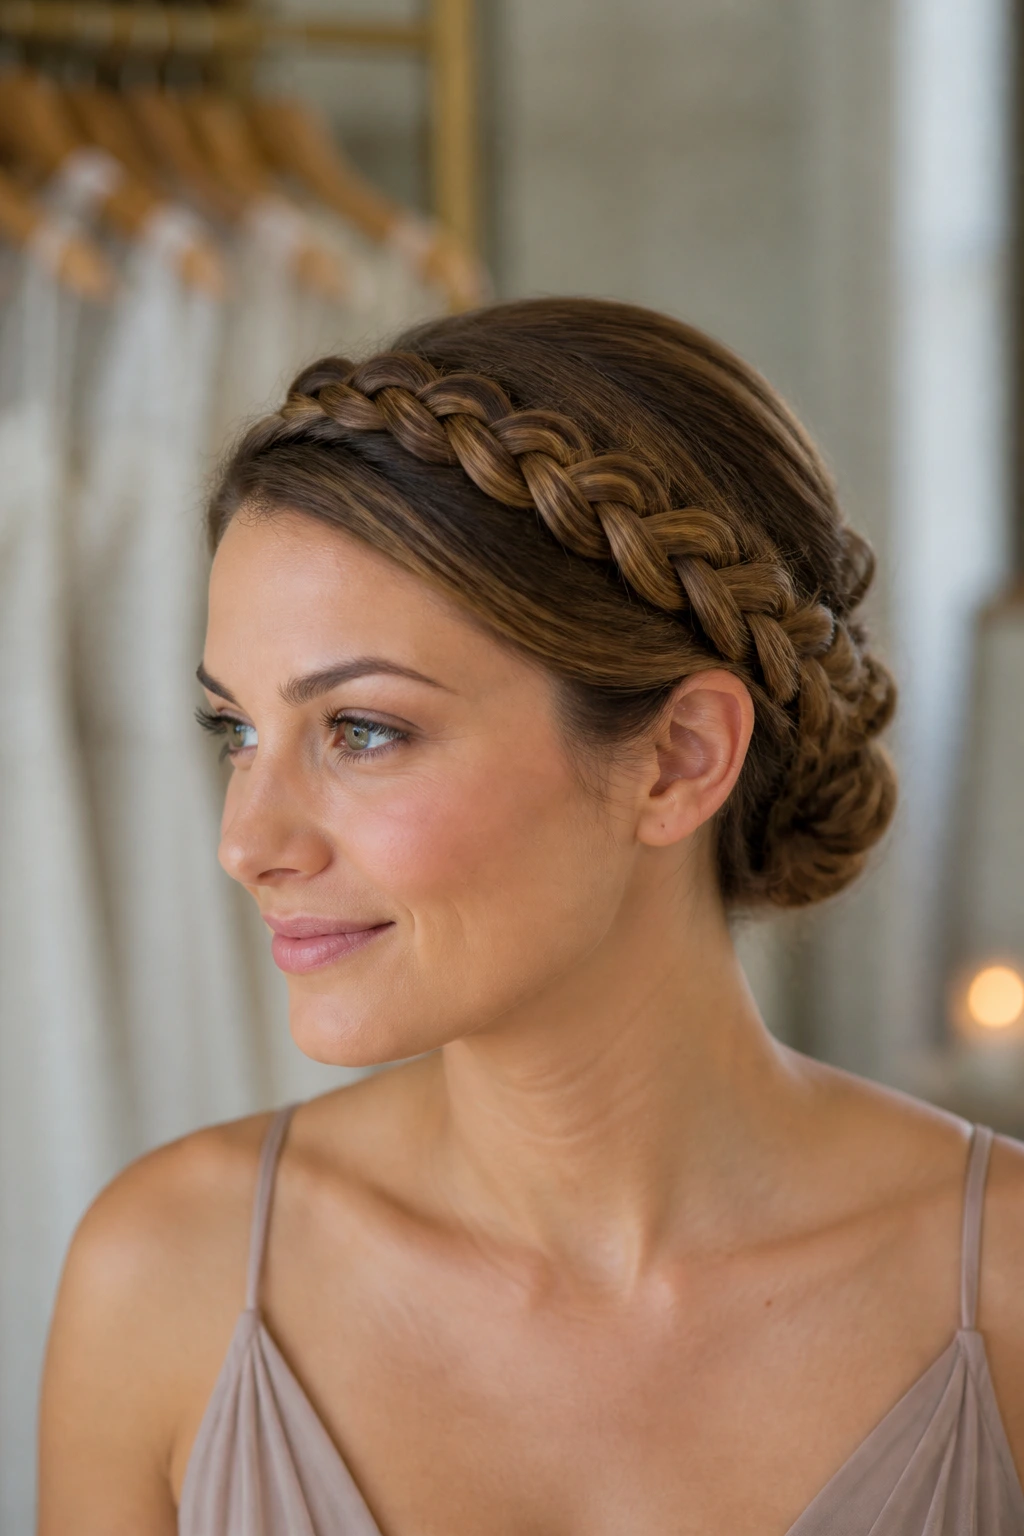
A halo braid can read sweet or polished, depending on how tight you braid it and how low you tuck the ends. The braid wraps around the head like a crown, then disappears into a tucked bun at the back or side. Done right, it frames the face and keeps everything else under control.
The braid should sit close enough to the head that it doesn’t puff out in a weird ridge, but not so tight that it looks pulled. A halo braid on very layered hair needs extra pins every few inches, especially where the braid turns behind the ears. Don’t skip those. They’re the reason the style survives photos.
How to wear it: pair with simpler earrings and a dress that doesn’t already have a lot of neckline detail. The braid is the accessory.
9. Rope-Braid Coil
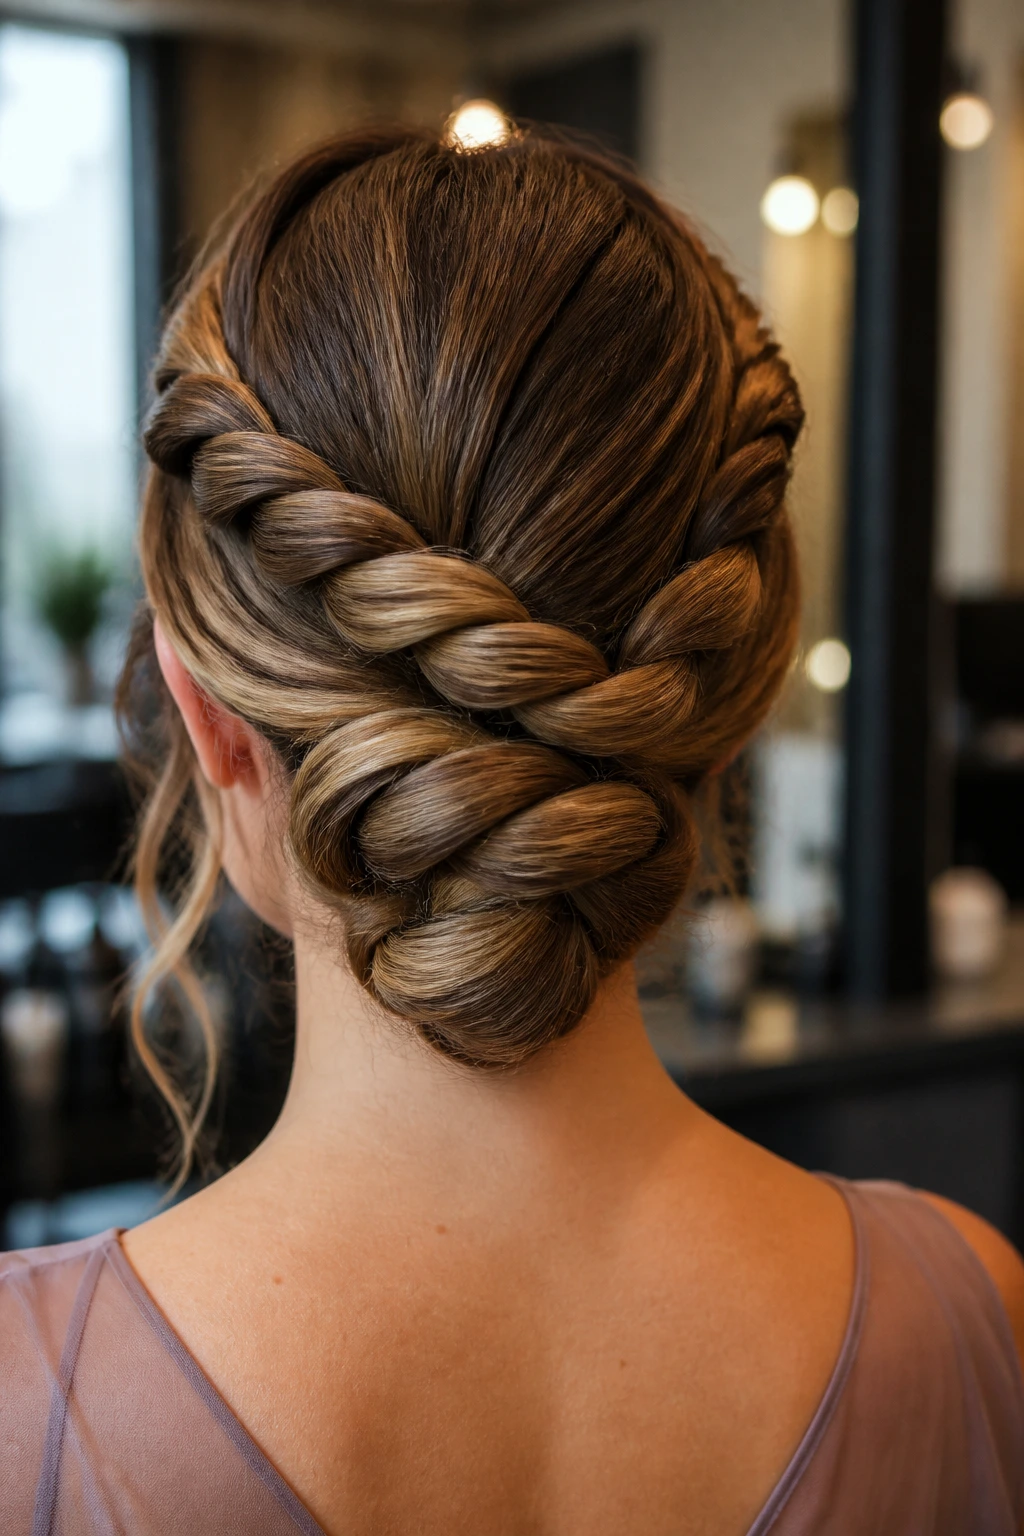
A rope braid is fast, neat, and better than people give it credit for. Two sections are twisted around each other, then wrapped into a coil at the nape or slightly higher. It’s especially useful on thick hair because the twist has enough structure to control volume without flattening the whole head.
The key is direction. Twist both sections the same way before wrapping them in the opposite direction, or the braid will loosen while you pin it. That little detail saves a lot of cursing. Finish with a light mist of spray only on the outer surface so the braid still has movement.
This style has a slightly more modern feel than a classic bun. It reads clean, but not stiff.
10. The Sleek Center-Part Knot
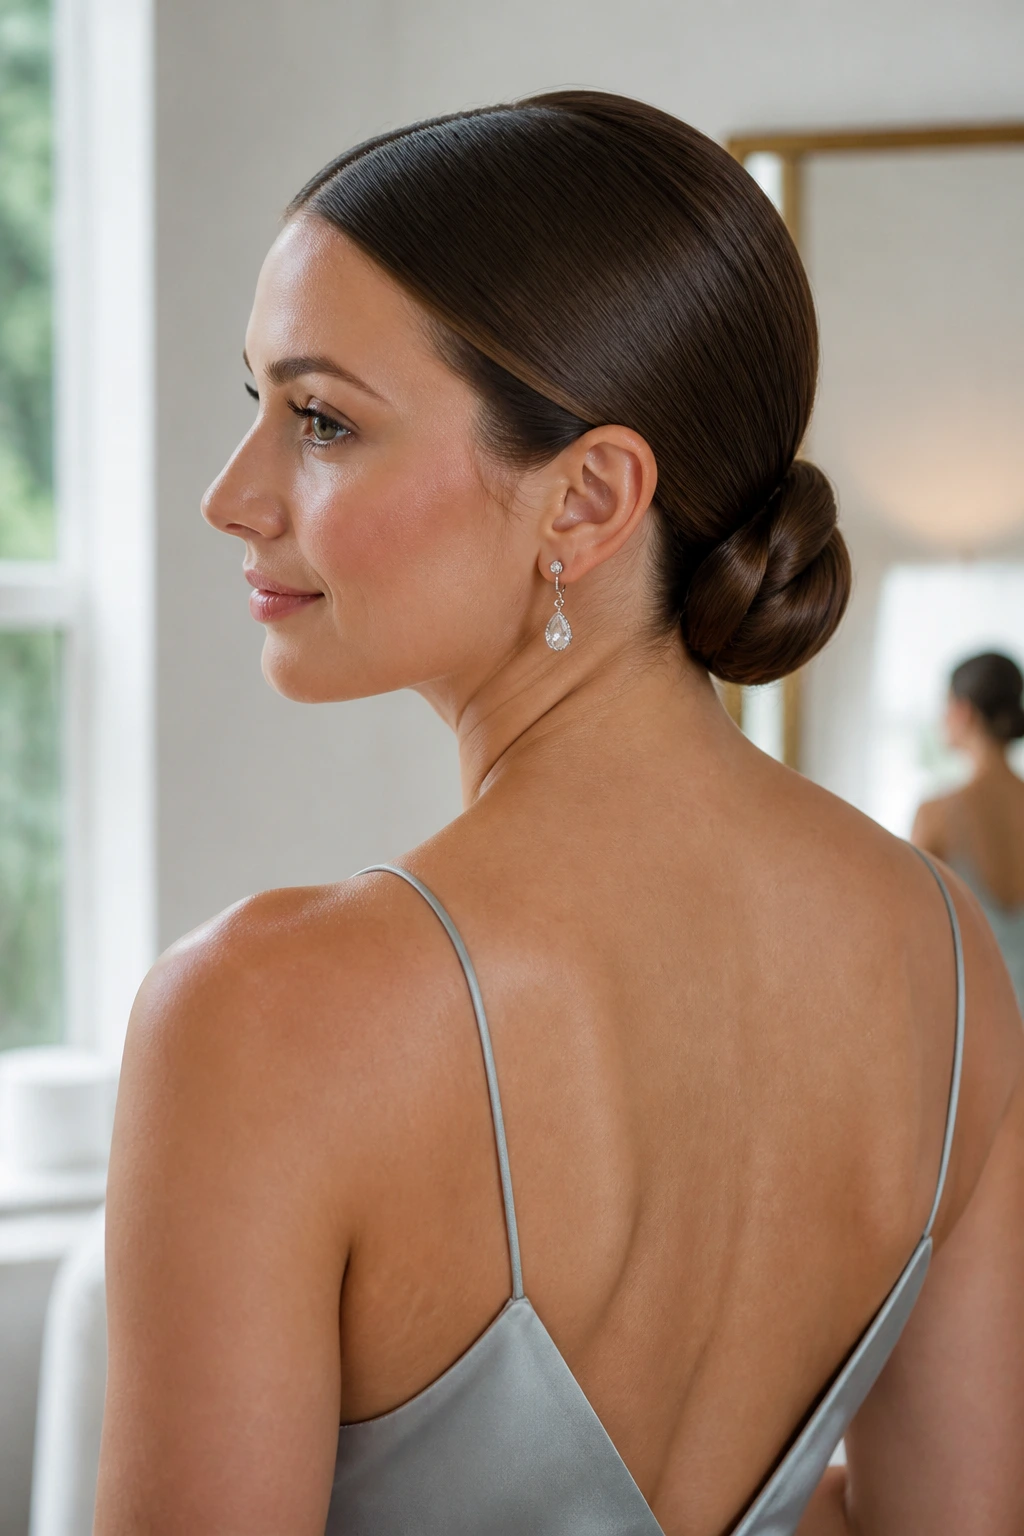
A center part plus a low knot gives you a crisp, modern bridesmaid updo that feels especially good with minimalist dresses. Hair is parted cleanly down the middle, smoothed with a serum or cream, and gathered into a knot that sits low and tight. The result is sharp without being loud.
This one works best when the bridal party wants a uniform look and the dresses already have statement fabric, dramatic sleeves, or strong lines. The style doesn’t fight those details. It gives them room. If hairline flyaways are a problem, use a toothbrush-sized spoolie with a tiny bit of styling gel and press them down gently.
Not every updo needs softness around the face. Sometimes the clean line is the point.
11. The Gibson Tuck
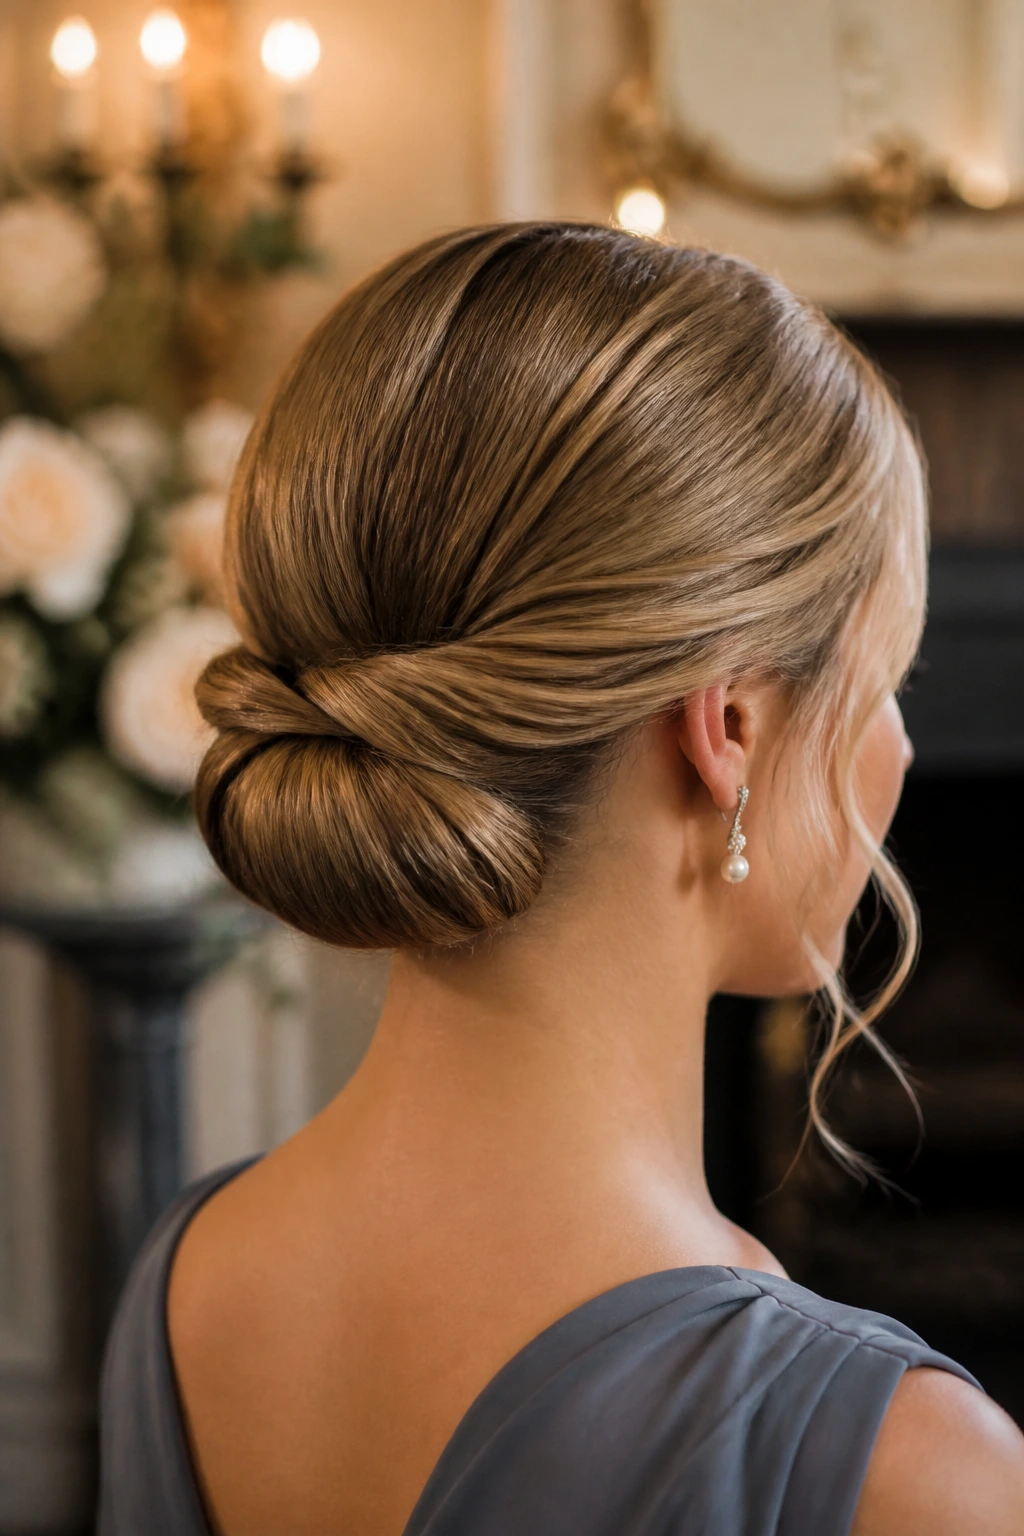
The Gibson tuck has a vintage shape that still feels calm and pretty in photos. Hair is rolled upward and tucked into itself near the nape, creating a soft horizontal fold rather than a round bun. It works especially well for medium-length hair that isn’t quite long enough for a full low chignon.
I like this when the wedding is a little more classic or the dresses have a retro feel. It has a gentle formality that doesn’t look overworked. If the hair is very silky, rough the underside with a bit of dry texture spray first so the roll doesn’t slip.
A slim pearl comb or a single pin cluster looks better here than a heavy accessory. The shape already has enough to say.
12. Bubble Braid Into a Bun
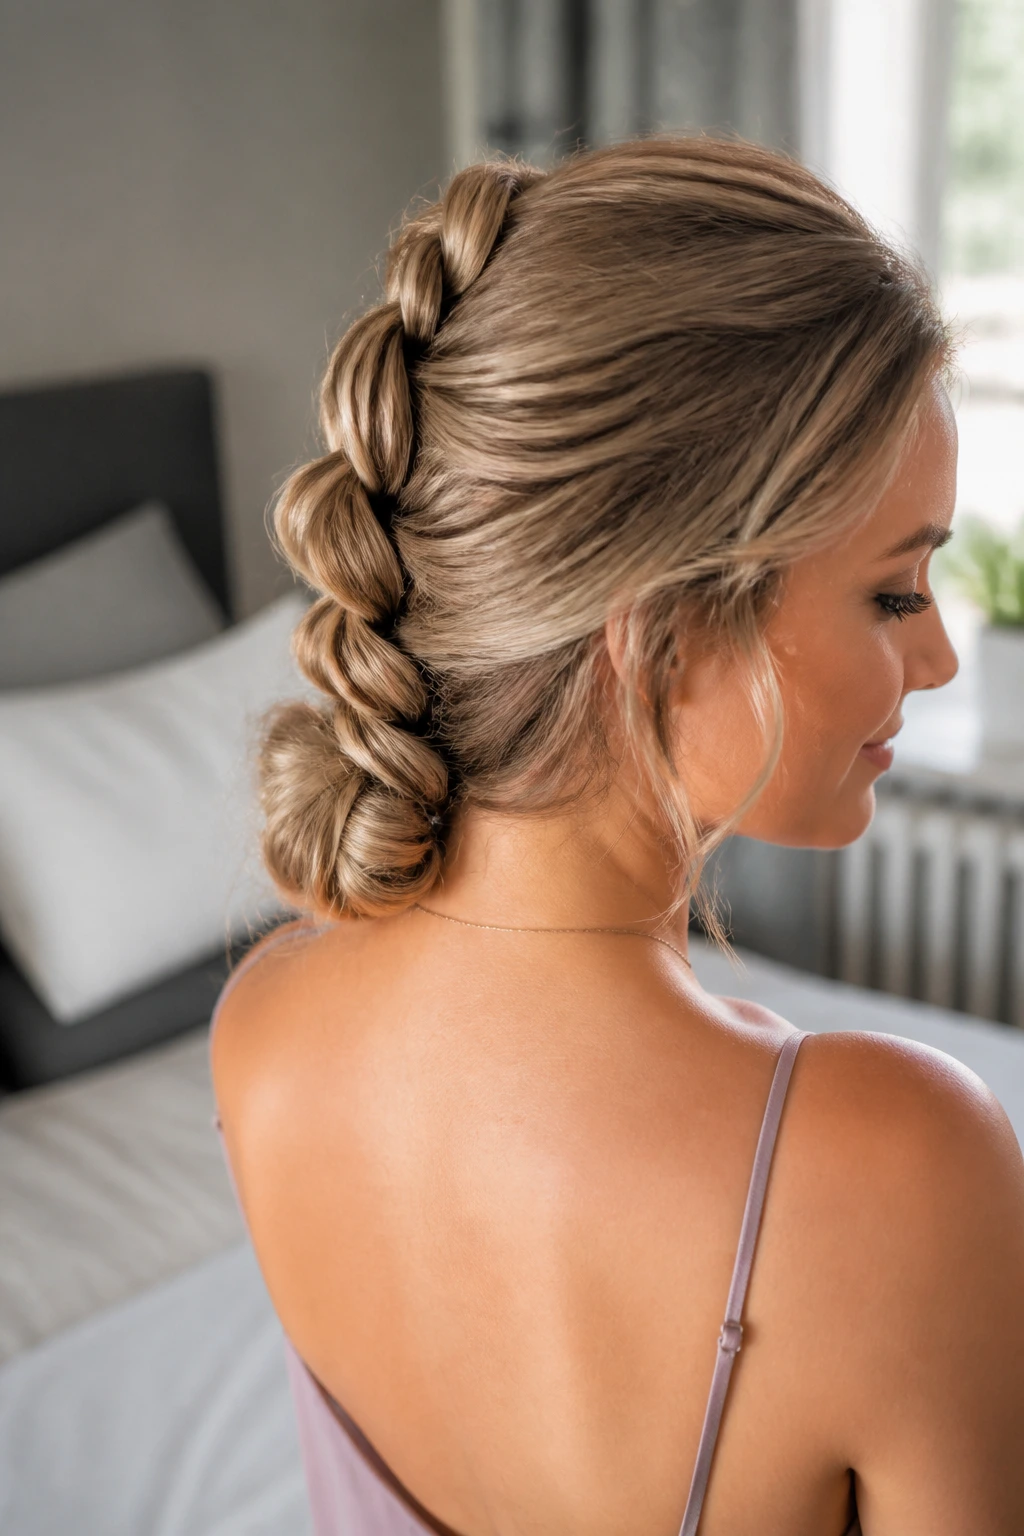
A bubble braid is a smart option when you want something playful but still tidy. The hair is gathered into a ponytail, sectioned with elastics at intervals, then the puffed sections are pinched and shaped into a bun or tucked coil. It gives the eye some movement without leaving loose strands everywhere.
This style shines on long hair and on hair that holds volume easily. Each “bubble” needs a little tug at the sides once the elastics are in place, and you want the bubbles equal enough to look deliberate. Too tiny, and it reads childish. Too large, and the shape falls apart.
I’d use this for a more relaxed wedding where the bridal party can have a little personality without losing cohesion.
13. A Braided Bun With Pearl Pins
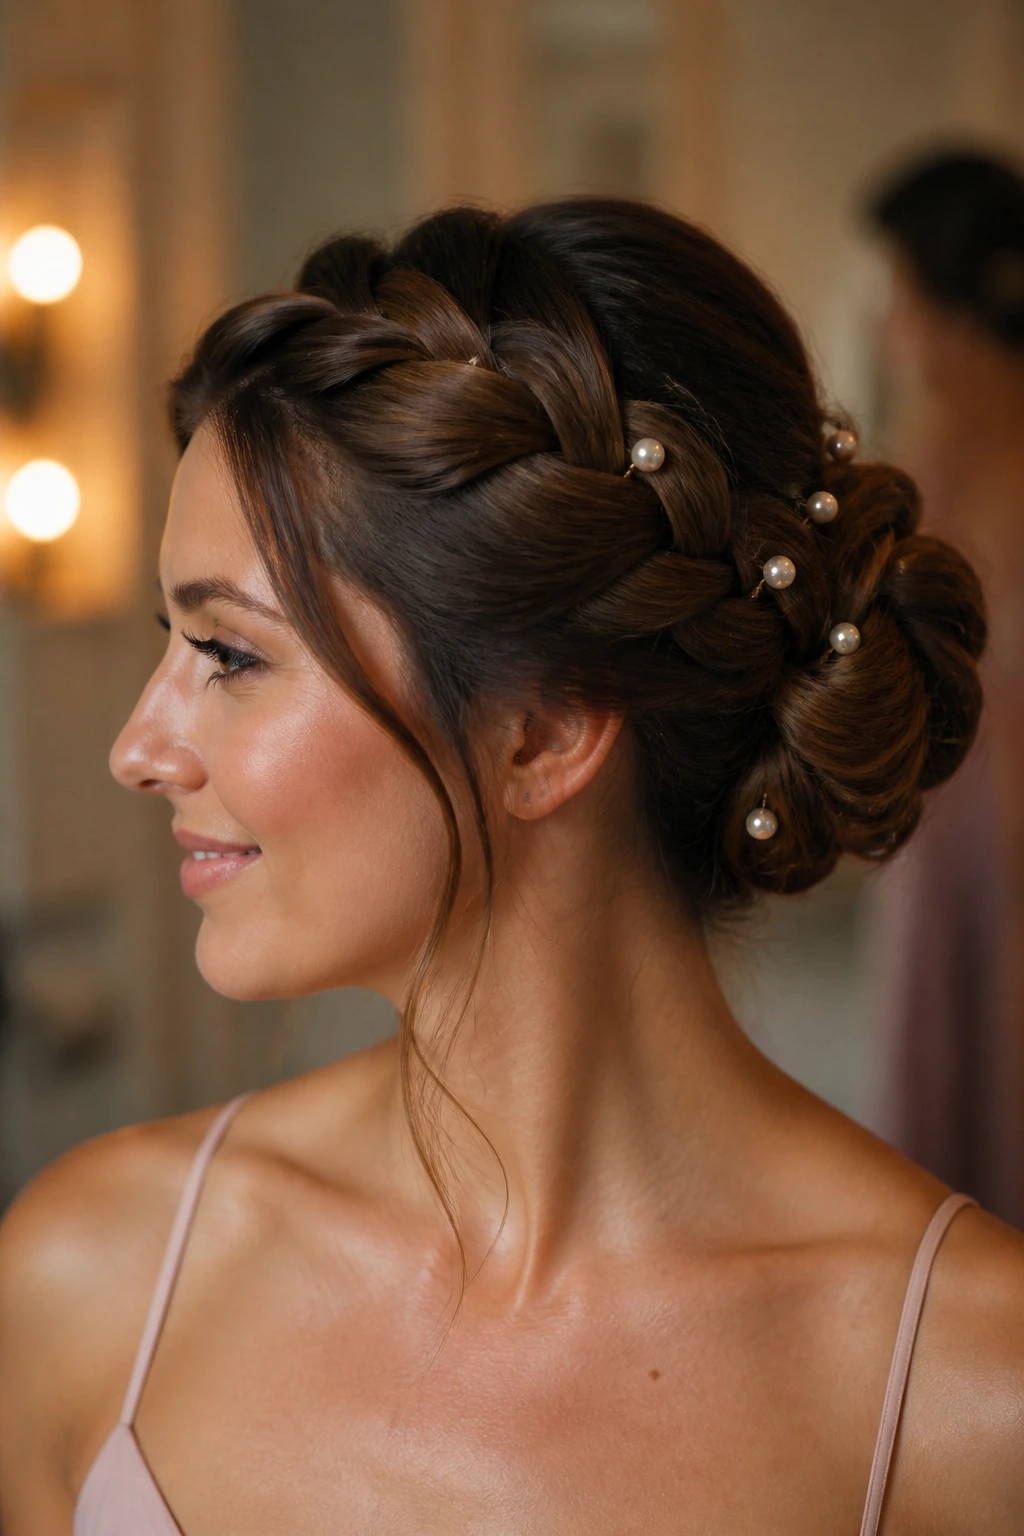
If the dresses are simple and the jewelry is restrained, pearl pins can do a lot of the visual work. Start with a braid — a French braid, Dutch braid, or even a simple three-strand braid — then wrap it into a bun and place pearl pins or small combs where the braid turns. The result feels formal without tipping into heavy ornament.
The braid gives the bun a little grip, which is handy for hair that slips. The pearls should be scattered, not packed in rows. Two or three pieces placed with intention look far better than a pin cluster that swallows the whole style.
Best for: evening weddings, satin dresses, and bridal parties that want one small accessory to tie everyone together.
14. The Faux Bob Tuck
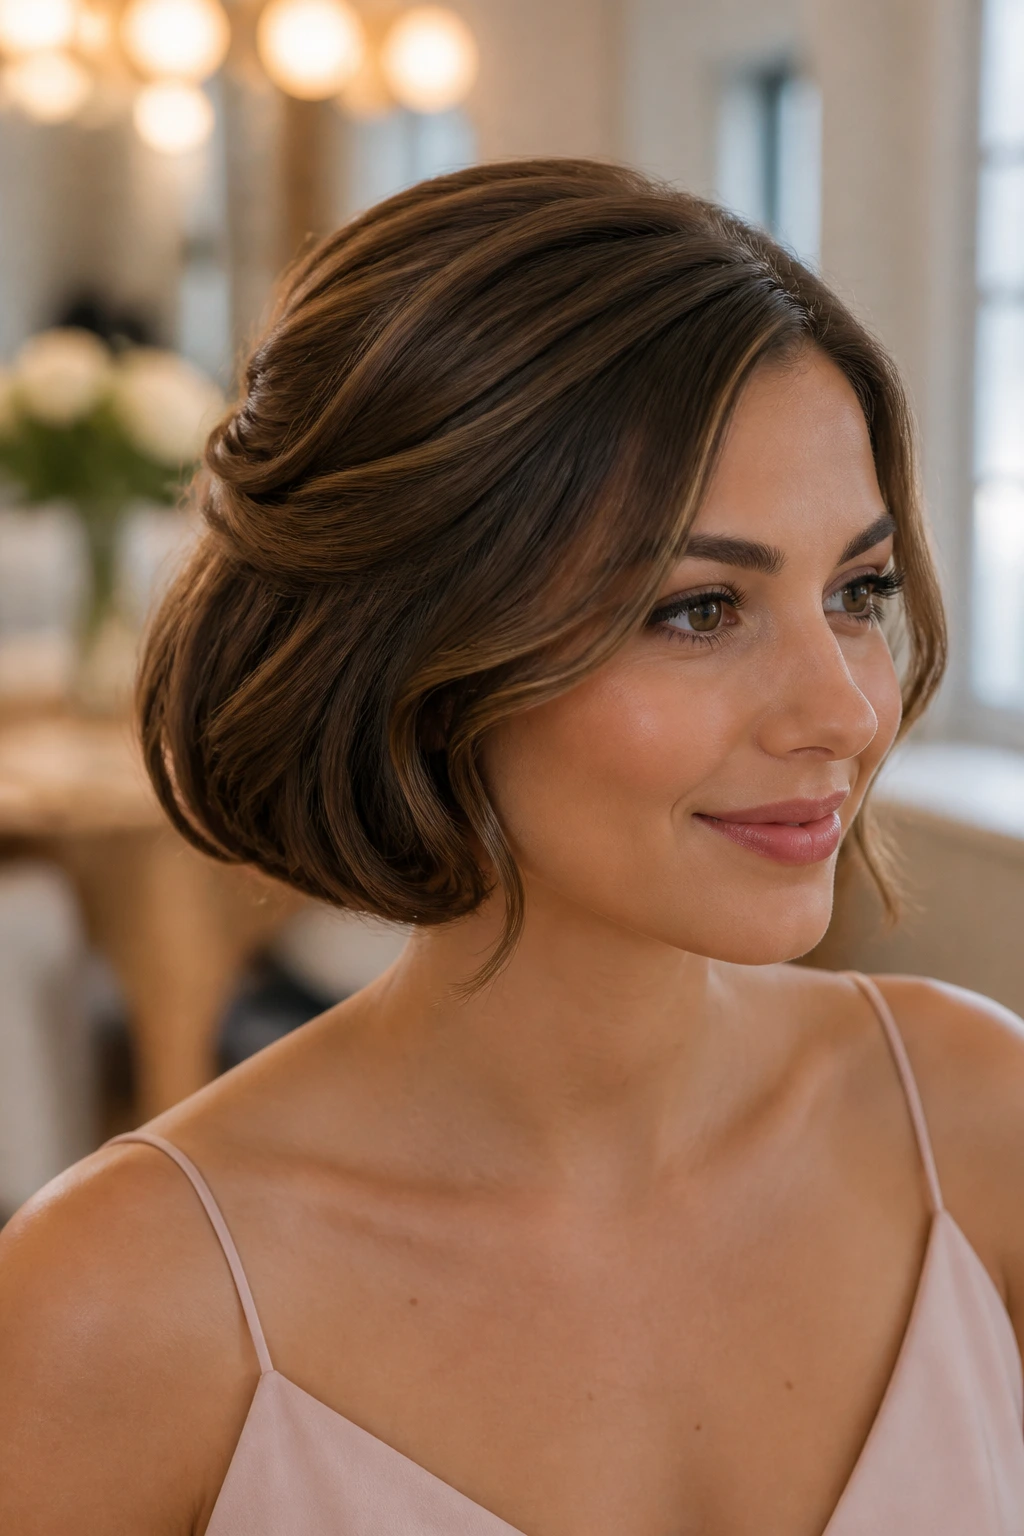
A faux bob is the answer when some bridesmaids have hair that’s too short for a classic bun but still long enough to tuck under. The hair is curled or waved, then pinned under at the neckline to mimic a shorter, sculpted style. It gives the illusion of an updo without forcing the hair into a shape it doesn’t want.
This one is more useful than it gets credit for. Shoulder-length hair can be awkward in formal styling because it sits in the middle — not enough for a bun, too much to leave hanging. The faux bob solves that problem neatly. A few hidden pins along the inside edge keep the tuck from peeking out.
It’s especially good if the bridal party has mixed lengths and you want everyone to look styled without forcing identical shapes.
15. The Wrapped Low Knot
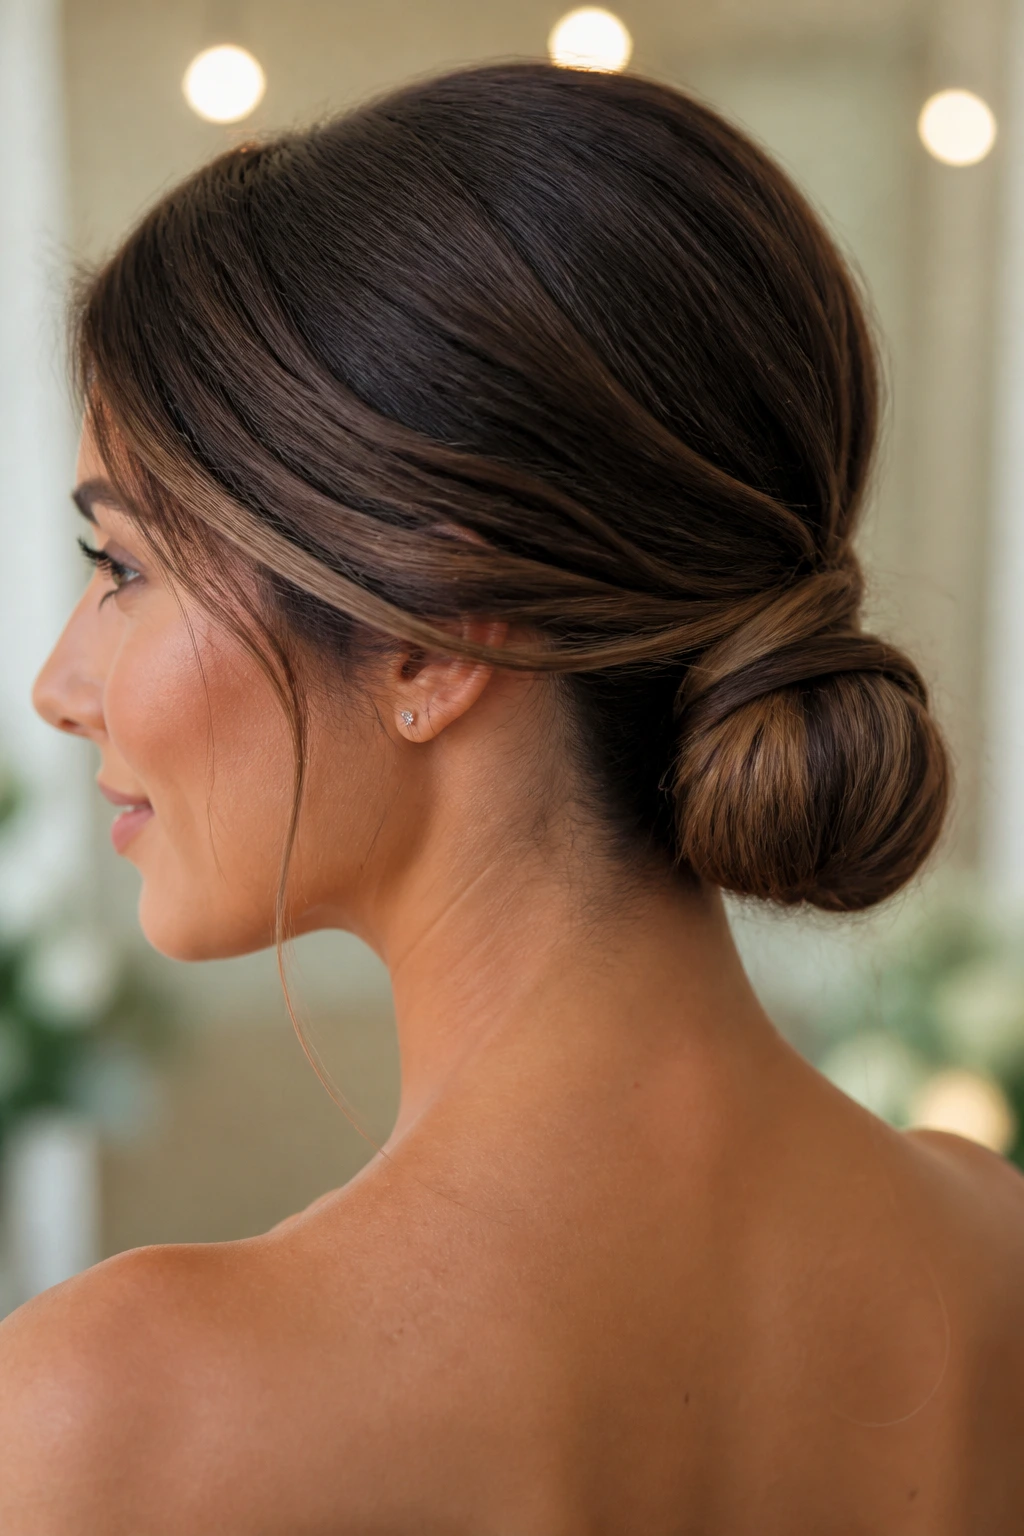
The wrapped low knot is probably the easiest style to make look intentional on a big group. Hair is pulled back, twisted or folded into a knot at the nape, then a section of hair is wrapped around the base to hide the elastic and create a polished finish. It’s neat, compact, and repeatable.
That repeatability matters. A bridal party often needs a style that can be recreated under pressure, and this one gives the stylist a clear shape without demanding perfect hair. Use a small bun form if the hair is fine, or leave a little internal looseness if the hair is thick and wants to bulge.
This is one of my favorites for matching multiple bridesmaids because the same base can be personalized with parting, texture, or a pin.
16. Crowned Low Roll
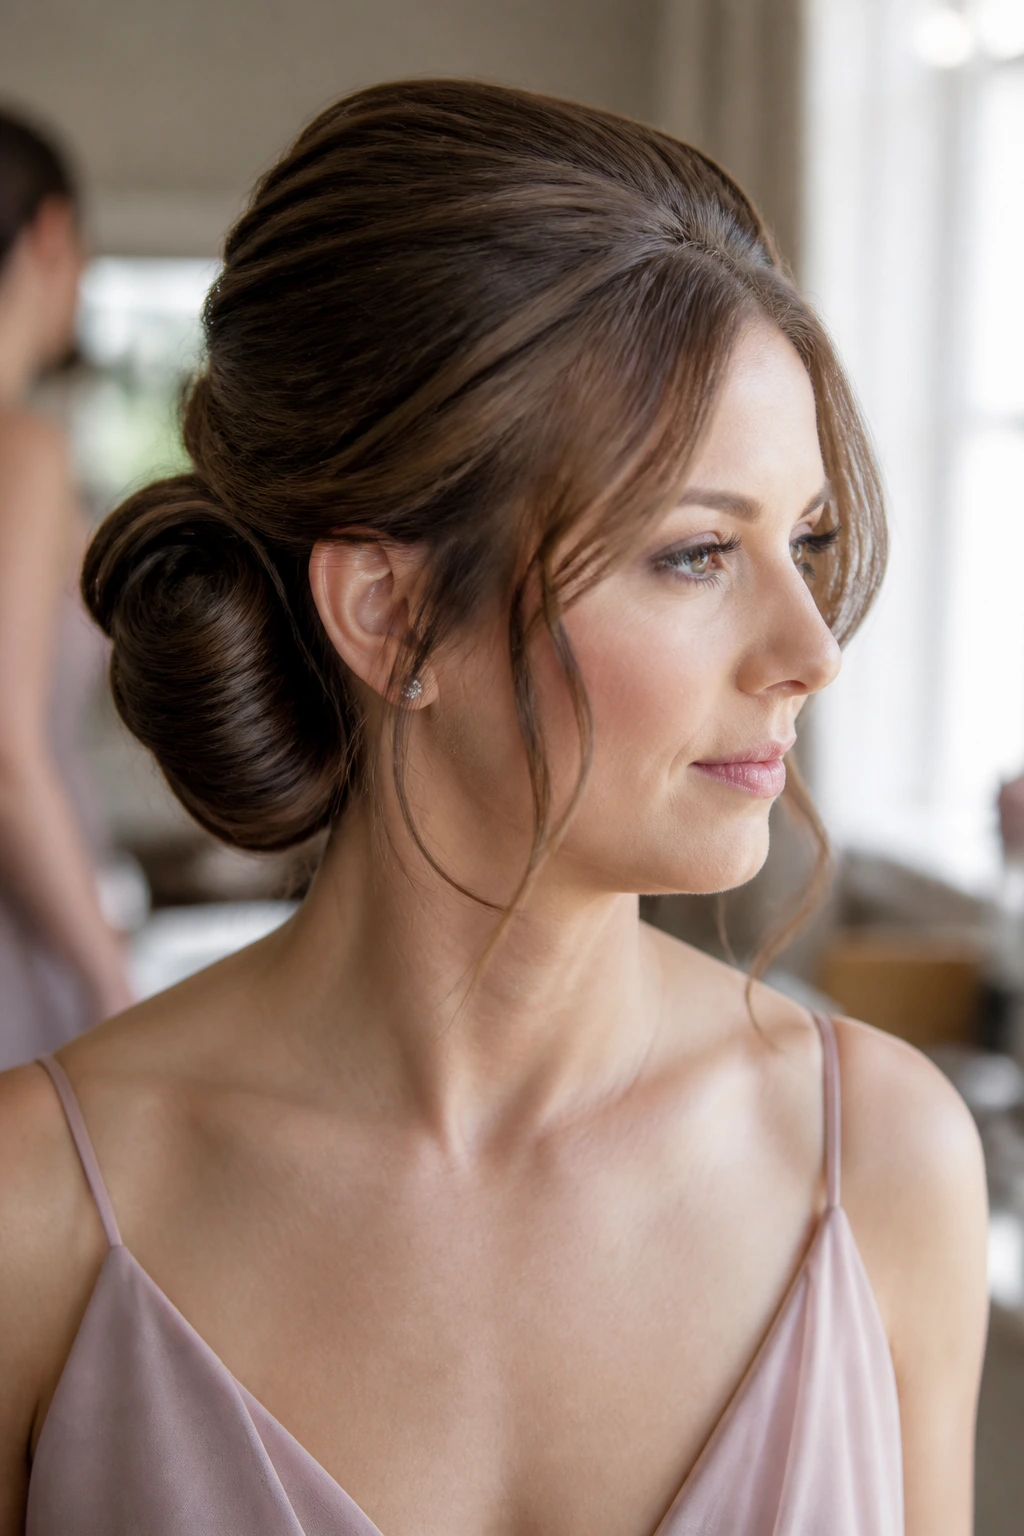
A crowned low roll has a little lift at the top and a smooth roll at the back, which gives it shape without making it feel old-fashioned. The crown gets a bit of volume, then the lengths are rolled downward and pinned into a soft arc. It’s a nice middle ground between sleek and romantic.
The roll works best when the hair has been blown dry with some bend in it. Bone-straight hair can slide unless you prep it with texture spray first. If the bride wants a softer look across the bridal party, this style is easier to dress up or down than a stricter French twist.
It also handles veils cleanly, since the roll sits below the crown area rather than fighting with the comb placement.
17. The Curly Pin-Up Updo
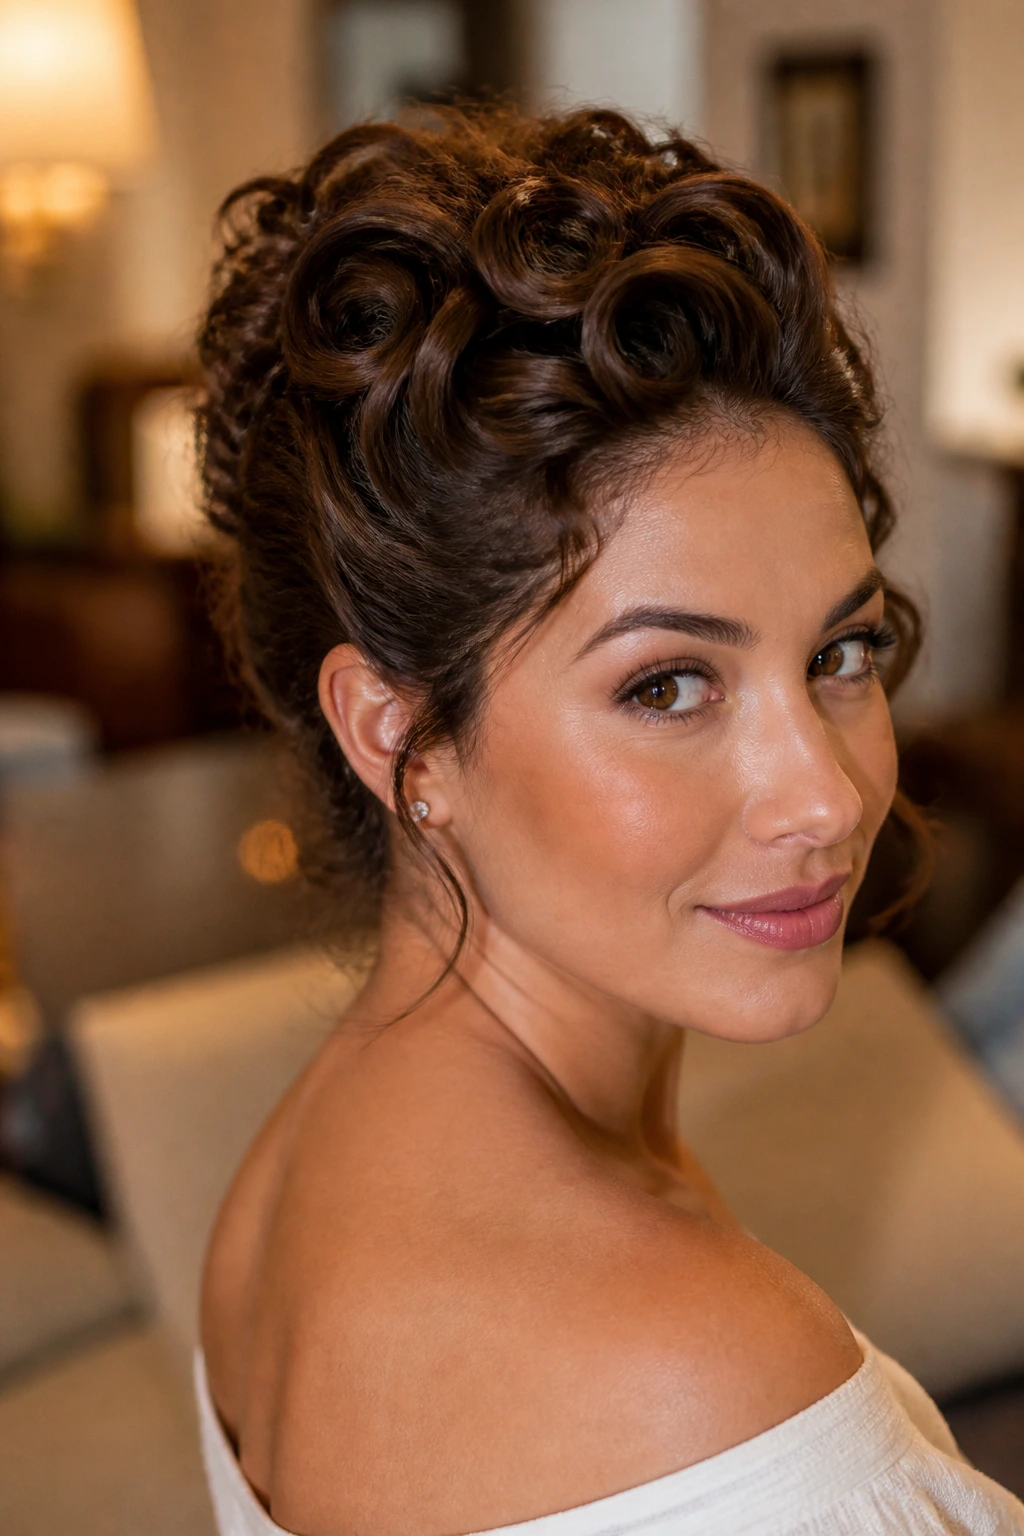
Curly hair should not be bullied into pretending it’s straight. A curly pin-up updo keeps the texture visible, then pins sections upward and inward so the shape stays secure while the curls keep their spring. The result is elegant, but it still looks like the hair belongs to the person wearing it.
The best version starts with defined curls, not brushed-out fluff. Use a curl cream or gel, dry the hair with a diffuser, then pin sections where they naturally want to fold. That makes the style hold longer and keeps the curl pattern from collapsing into one big frizz halo.
This is one of the most flattering bridesmaid updos for textured hair because it works with the pattern instead of flattening it.
18. Knotted Ponytail Updo
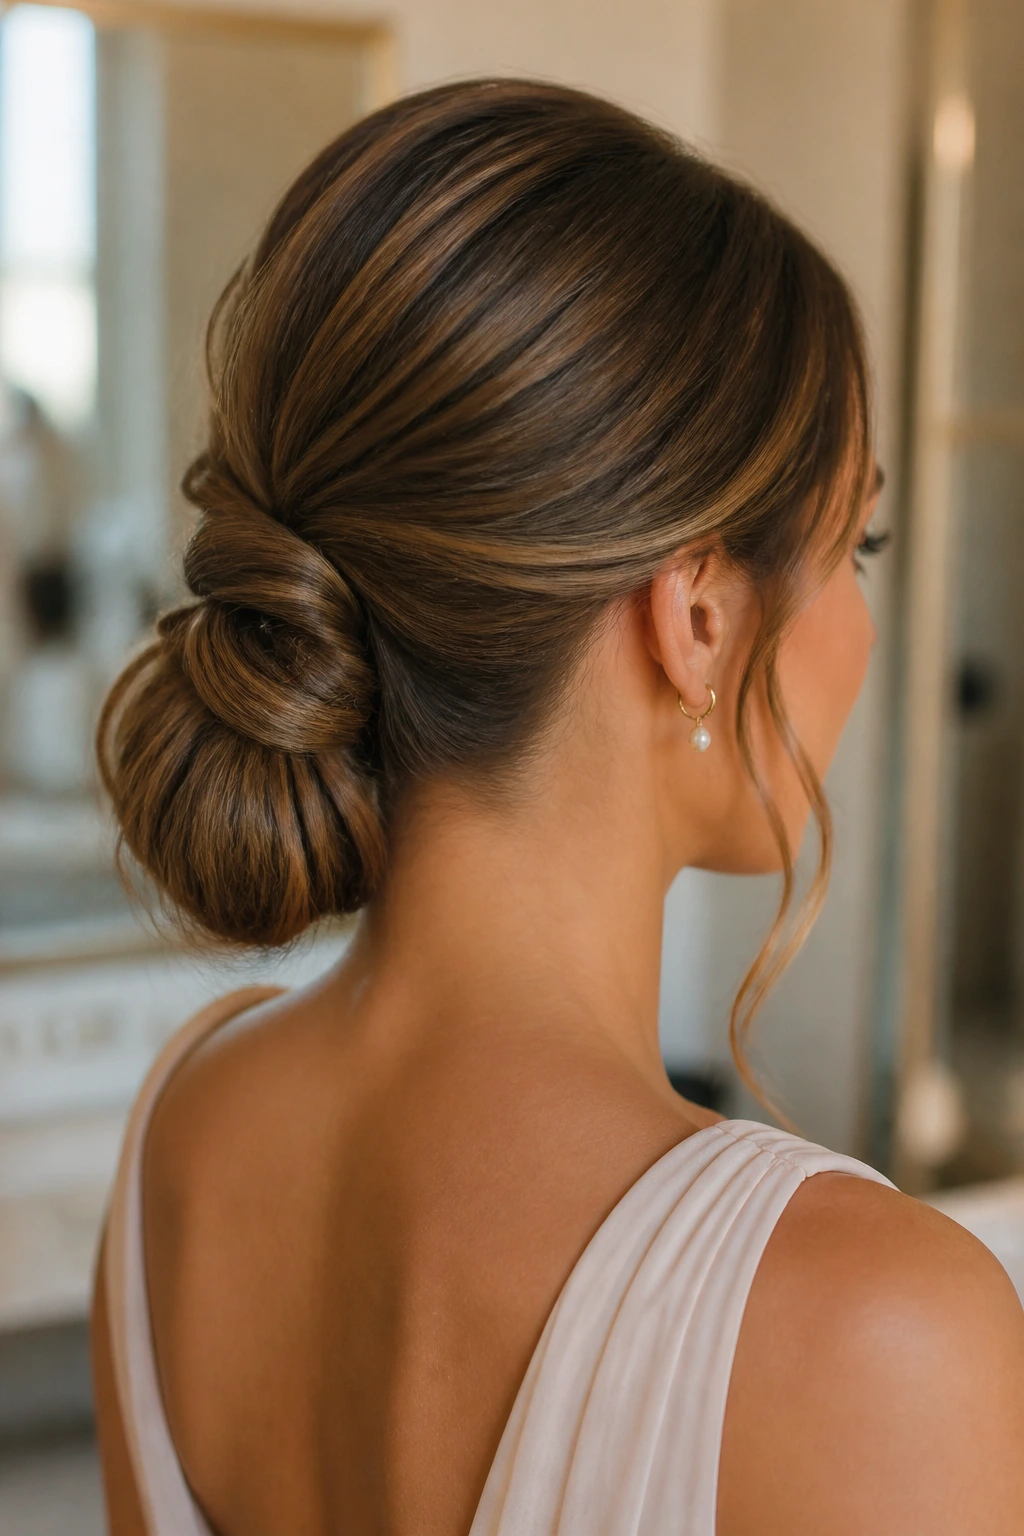
A knotted ponytail updo begins with a low ponytail, then the lengths are knotted, twisted, or looped into a tucked finish that hides the elastic. It sounds simple because it is simple, and that’s part of the appeal. You get structure without the stiffness of a full bun.
I like this for modern dresses or bridal parties that want a cleaner look than loose waves but less formality than a sculpted chignon. It also works on longer hair that tends to get heavy when gathered too high. The knot gives the style some texture, and the base remains compact.
Use a strong elastic at the start and at least four bobby pins to lock the knot. One pin is never enough. Ever.
19. The Basket-Weave Bun
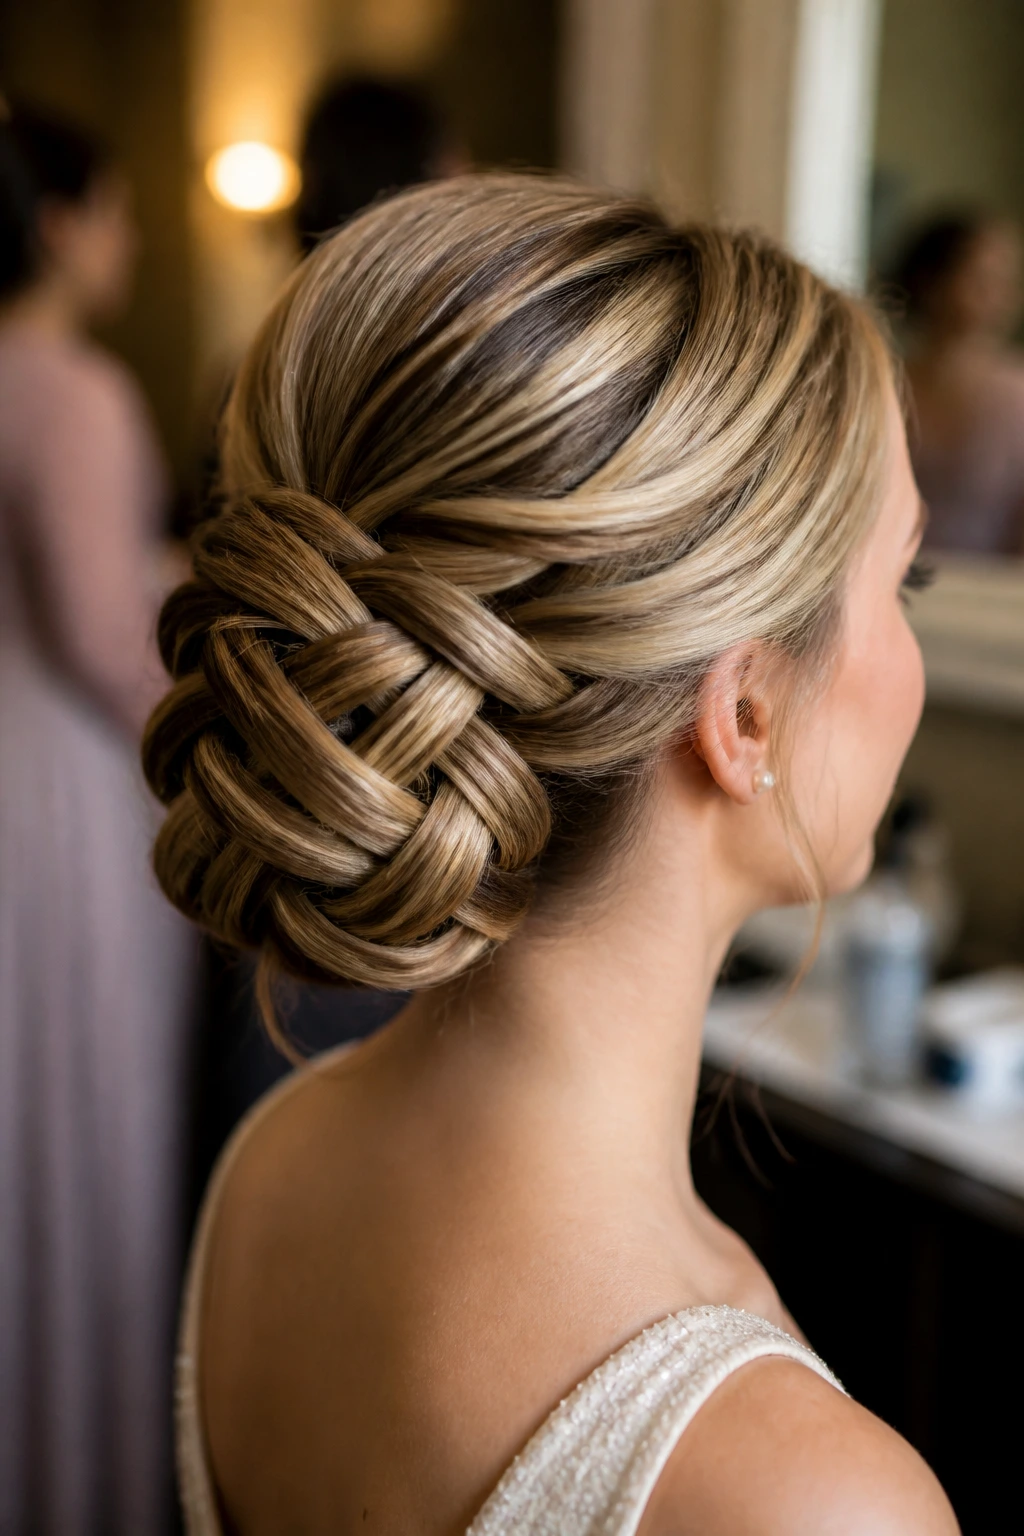
A basket-weave bun has more detail than most bridesmaid updos, and that makes it a good choice when the dresses are simple. Hair is sectioned into panels, crossed over each other, and woven toward the back before being tucked into a bun. The result has a pattern that catches the eye without needing sparkle.
This style takes time, so it’s best for a group with one stylist and a realistic schedule. It works especially well on thick, straight hair because the sections hold their shape. If the hair is too silky, a little dry shampoo at the roots and through the mid-lengths gives the weave something to grip.
The bun should sit low enough that the weave is visible. If it’s too hidden, you lose the whole point.
20. The High Chignon
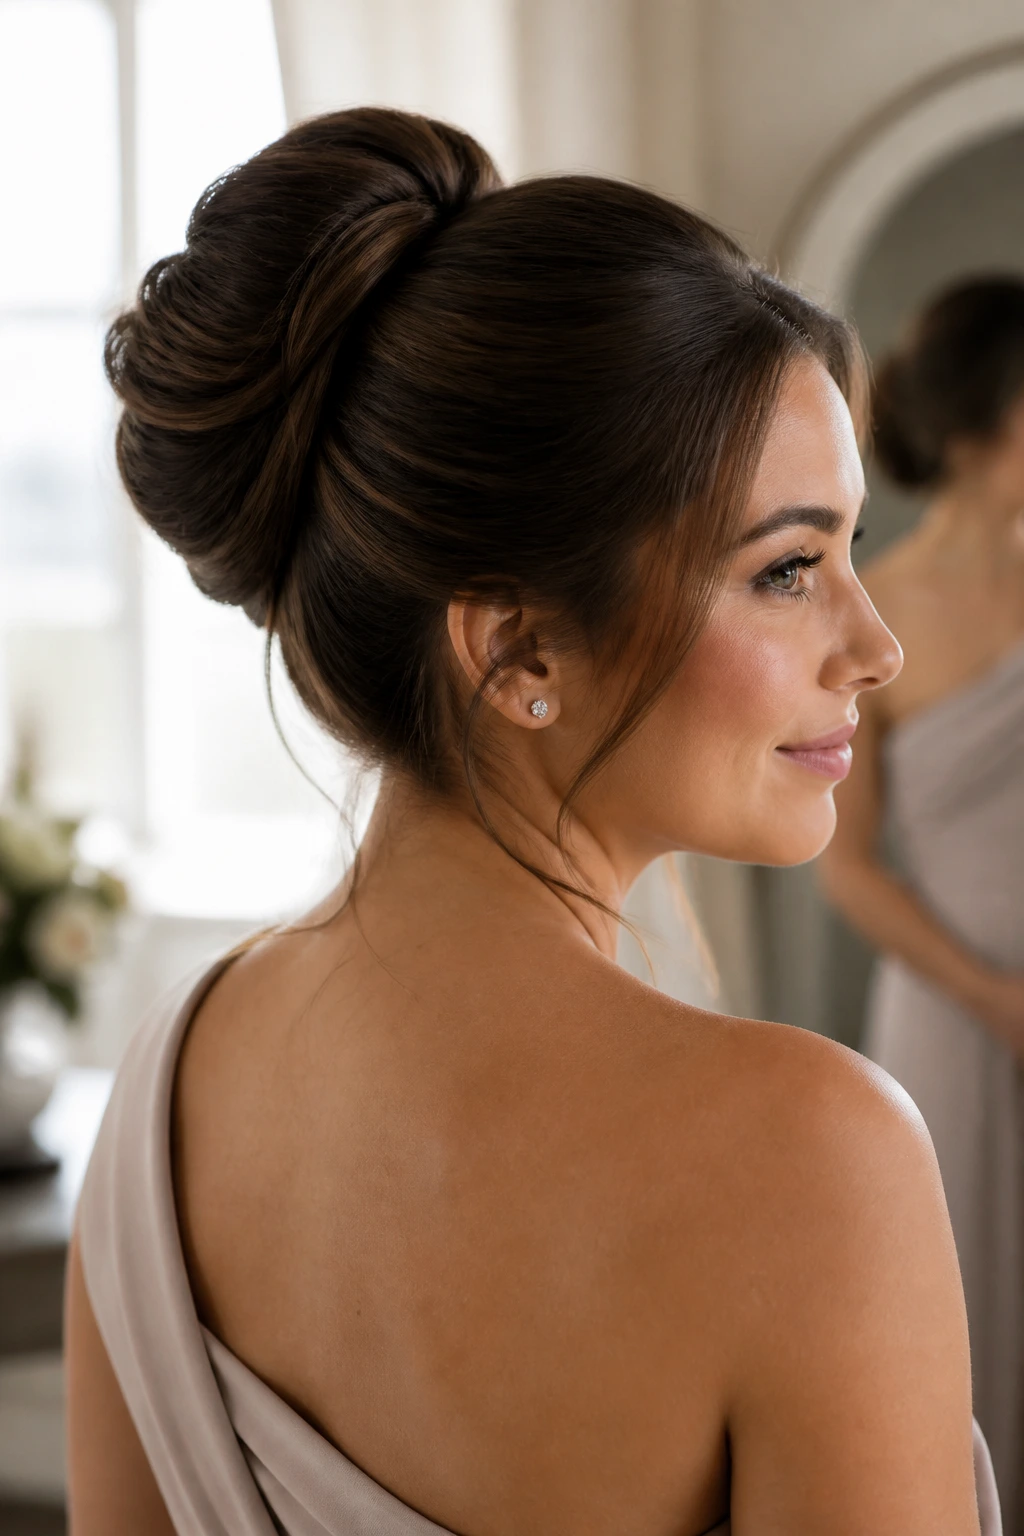
A high chignon sits above the nape but not so high it becomes a topknot. That small shift changes the whole attitude of the style. It feels lifted, a little more formal, and good for dresses with open backs or collars that sit lower around the shoulders.
The shape works best when the hair is wrapped upward in a neat arc rather than shoved into a ball. You want height, not bulk. A few pins angled upward from the base help the style stay where it belongs and keep the chignon from sagging as the day goes on.
This is one of the better choices when you want a uniform style that still looks slightly more dressed up than a low bun.
21. The Messy Ballet Bun
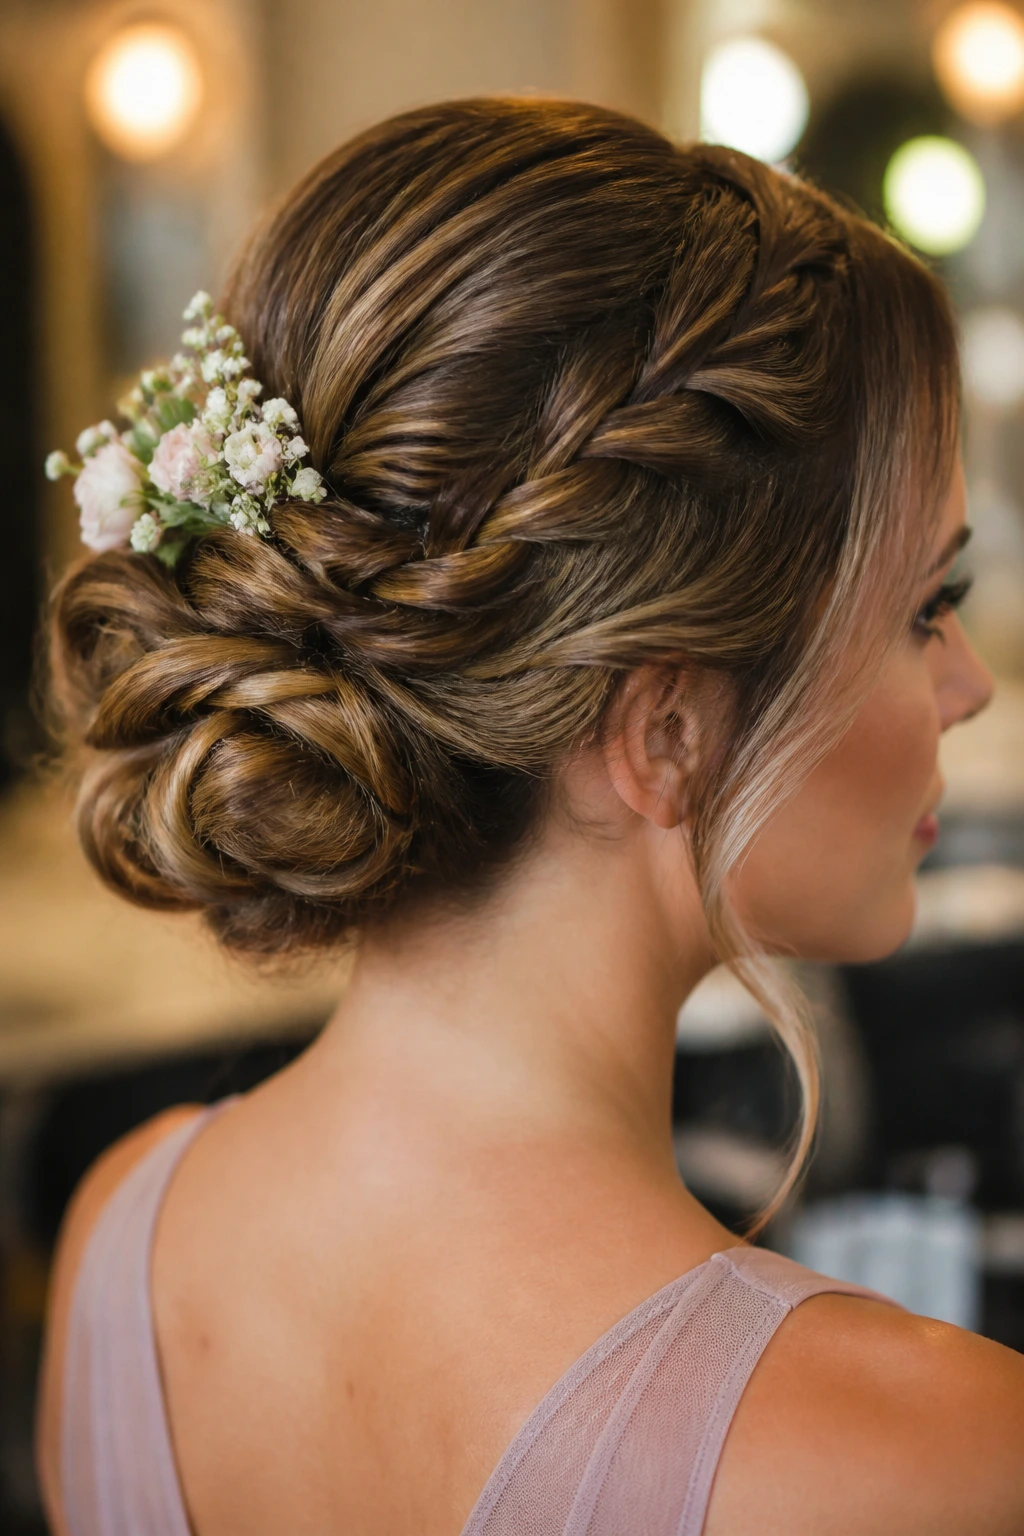
A messy ballet bun can go bad fast if nobody is paying attention to the edges. Done well, though, it gives you softness, lift, and a little movement without looking careless. Hair is gathered high or mid-high, twisted into a bun, and loosened just enough so the shape feels airy.
The line between “soft” and “messy” is thin. Leave too much out, and the style starts to unravel. Keep the perimeter controlled, and let the volume live inside the bun itself. That’s the move. A few tucked strands at the temple can soften the face, but they should be deliberate.
This style suits a bridal party that wants a lighter, more youthful look without losing the updo entirely.
22. Boho Braided Bun
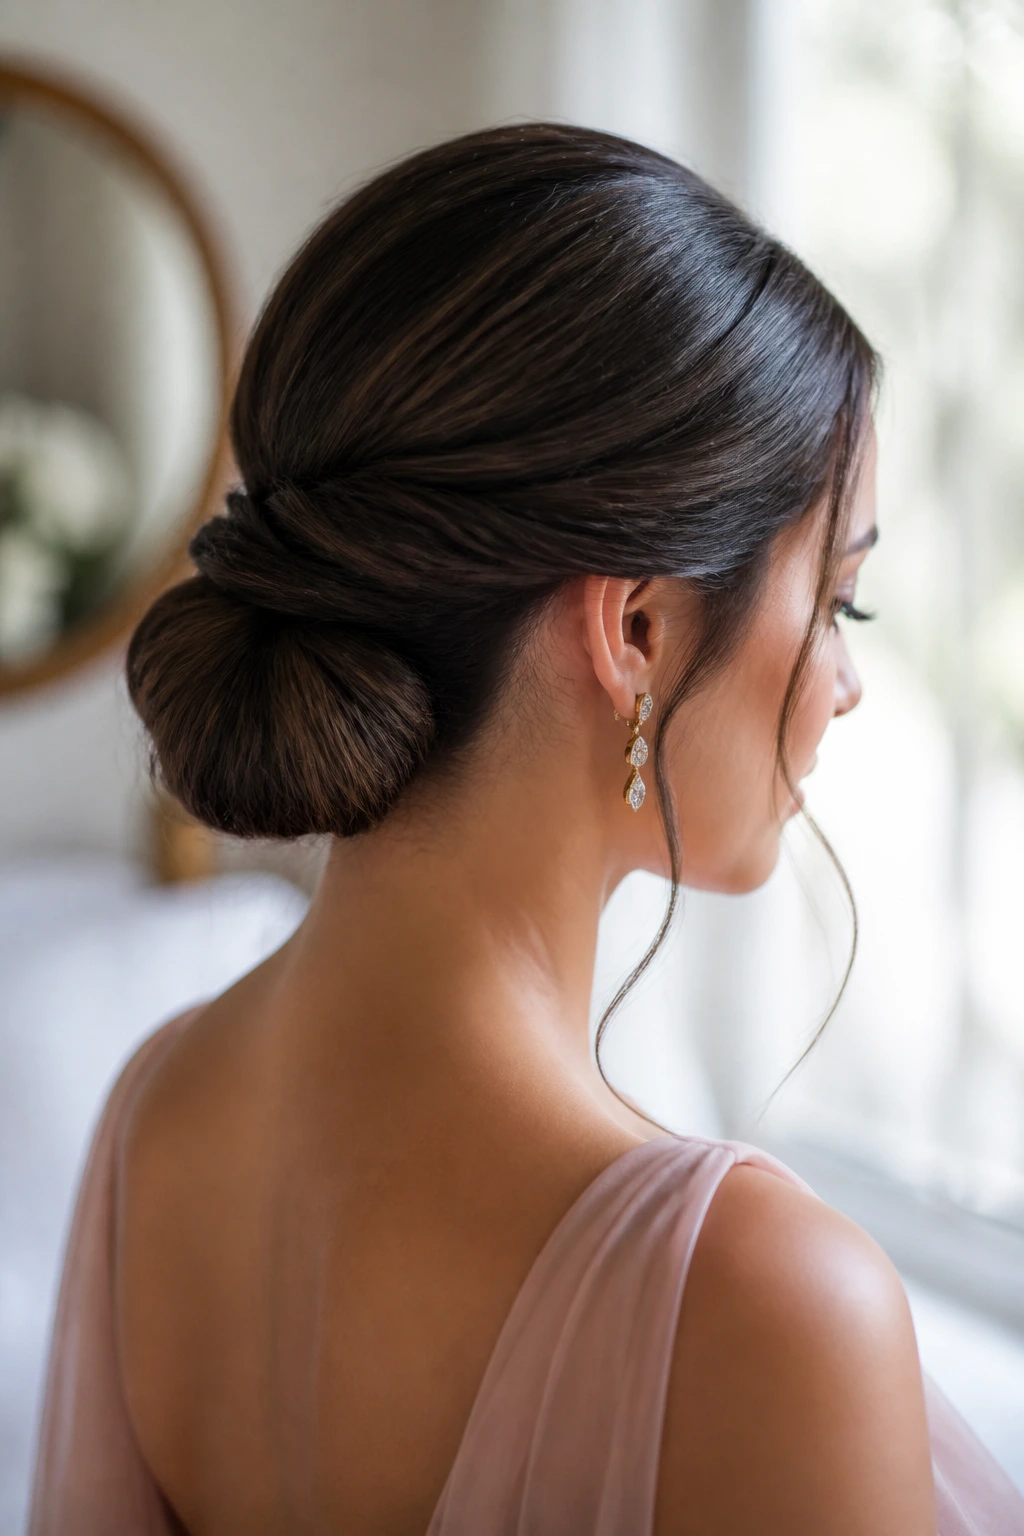
A boho braided bun uses loose braids, soft texture, and just enough imperfection to feel easy. Small braids are threaded into a bun or pinned around one, and the braid pattern can be as subtle or as visible as the wedding calls for. It has a relaxed feel that works especially well outdoors.
This is the style I’d hand to a bride who wants the bridal party to look polished but not too matched. It photographs well with flower accents, vine pins, or a few tiny blooms tucked near the base. The key is to keep the braids soft and the bun compact, or the whole thing can start drifting.
It’s also forgiving if not every bridesmaid has the same length, because the braids can hide little differences in the ends.
23. Sculpted Swirl Bun
A sculpted swirl bun is the sleek, formal cousin in this group. Hair is divided into sections, each section is smoothed and curved into a swirl, and the swirls are pinned into a low or mid-low bun with visible shape. It has a more tailored finish than a loose twist.
This is the bridesmaid updo for black-tie settings, polished dresses, and anyone who wants the back of the head to look as considered as the front. A little shine serum goes a long way here. Too much, and the style turns greasy under reception lights.
I like this version because it gives structure without looking flat. The swirls create depth, and that depth is what keeps the style from disappearing in photos.
24. Waterfall Braid Into a Bun
A waterfall braid brings motion to the style right away. Sections are dropped through the braid as it travels across the head, then the remaining hair is gathered into a bun. The braid acts almost like a visual trail leading into the bun, which makes the whole style feel more intricate than it actually is.
It’s a good fit for bridesmaids with highlighted or dimensional color because the braid shows off the variation in the strands. If the hair is one flat tone, the braid still works, but the texture does more of the talking than the color. Keep the dropped sections controlled so the braid doesn’t turn stringy.
This style has a soft, feminine edge, but it still stays secure when pinned properly at the base.
25. The Low Rolled Bun With Tendrils
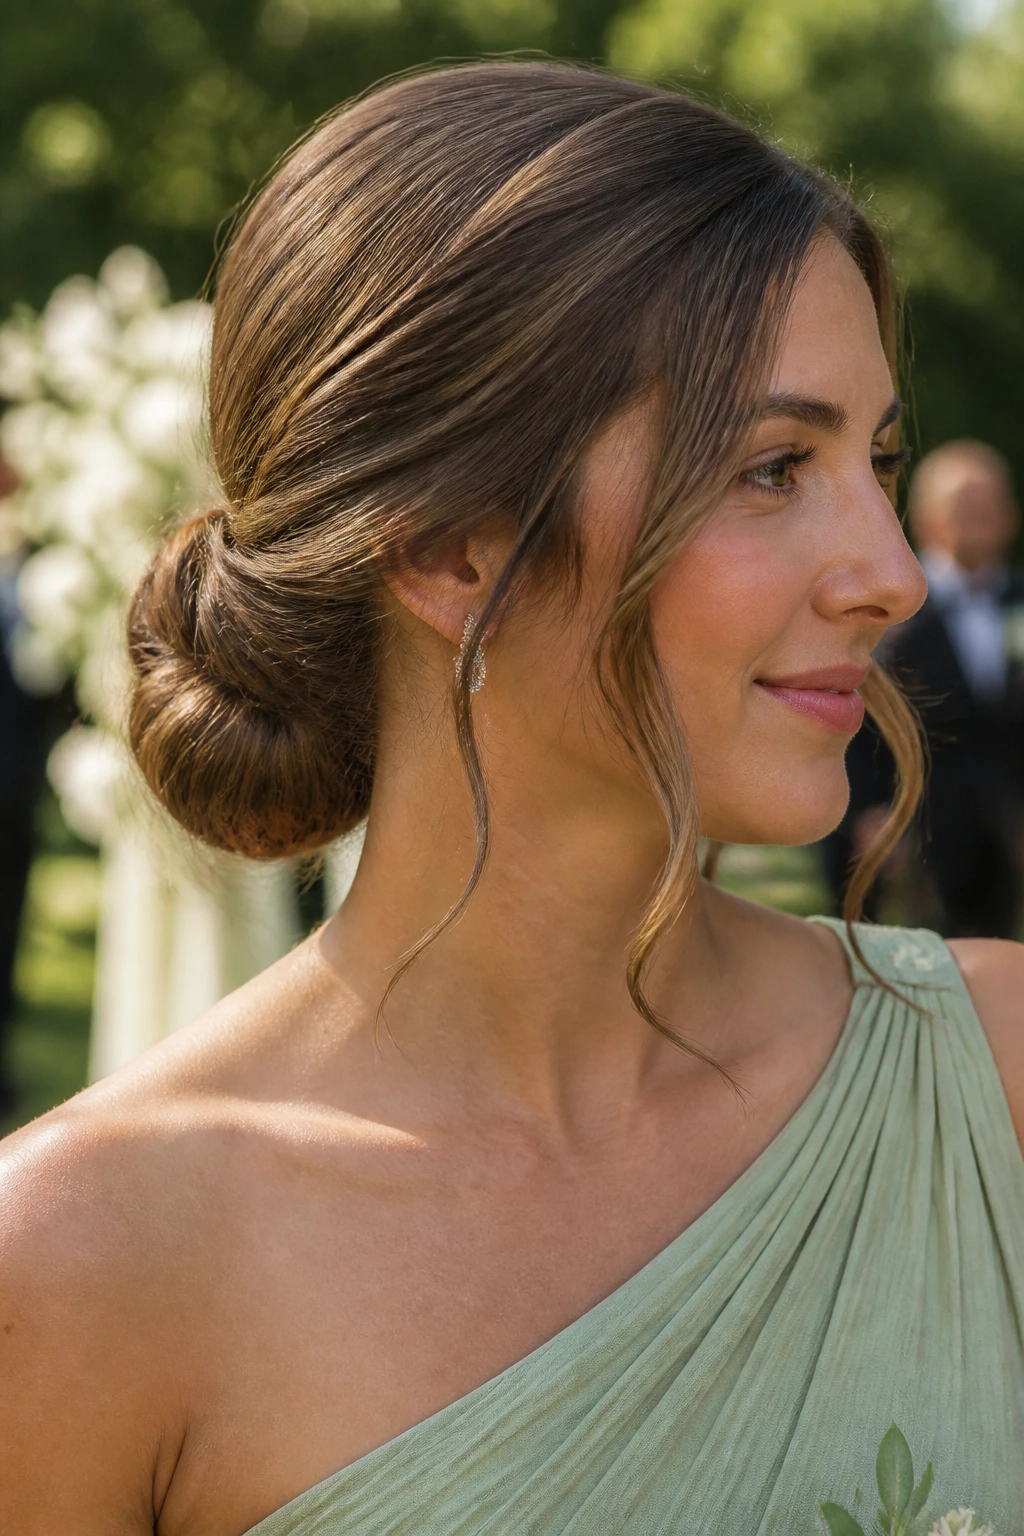
This is the romantic closer, and I mean that in the plainest sense. Hair is rolled low at the nape into a soft bun, then a few thin tendrils are left around the face and ears. The tendrils should be intentional — a whisper, not a mess — and the bun itself should stay rounded and compact enough to survive a full day.
I like this for weddings where the dresses are light, the ceremony is outdoors, or the whole bridal party needs a softer silhouette. It flatters most face shapes because the tendrils can be placed where the face needs a little softness. Curl them lightly, then brush them out so they fall in a gentle wave rather than a corkscrew.
There’s a reason this style keeps showing up. It doesn’t try too hard, and that’s its charm.
Why Bridesmaid Updos Hold Better When the Base Is Built Right
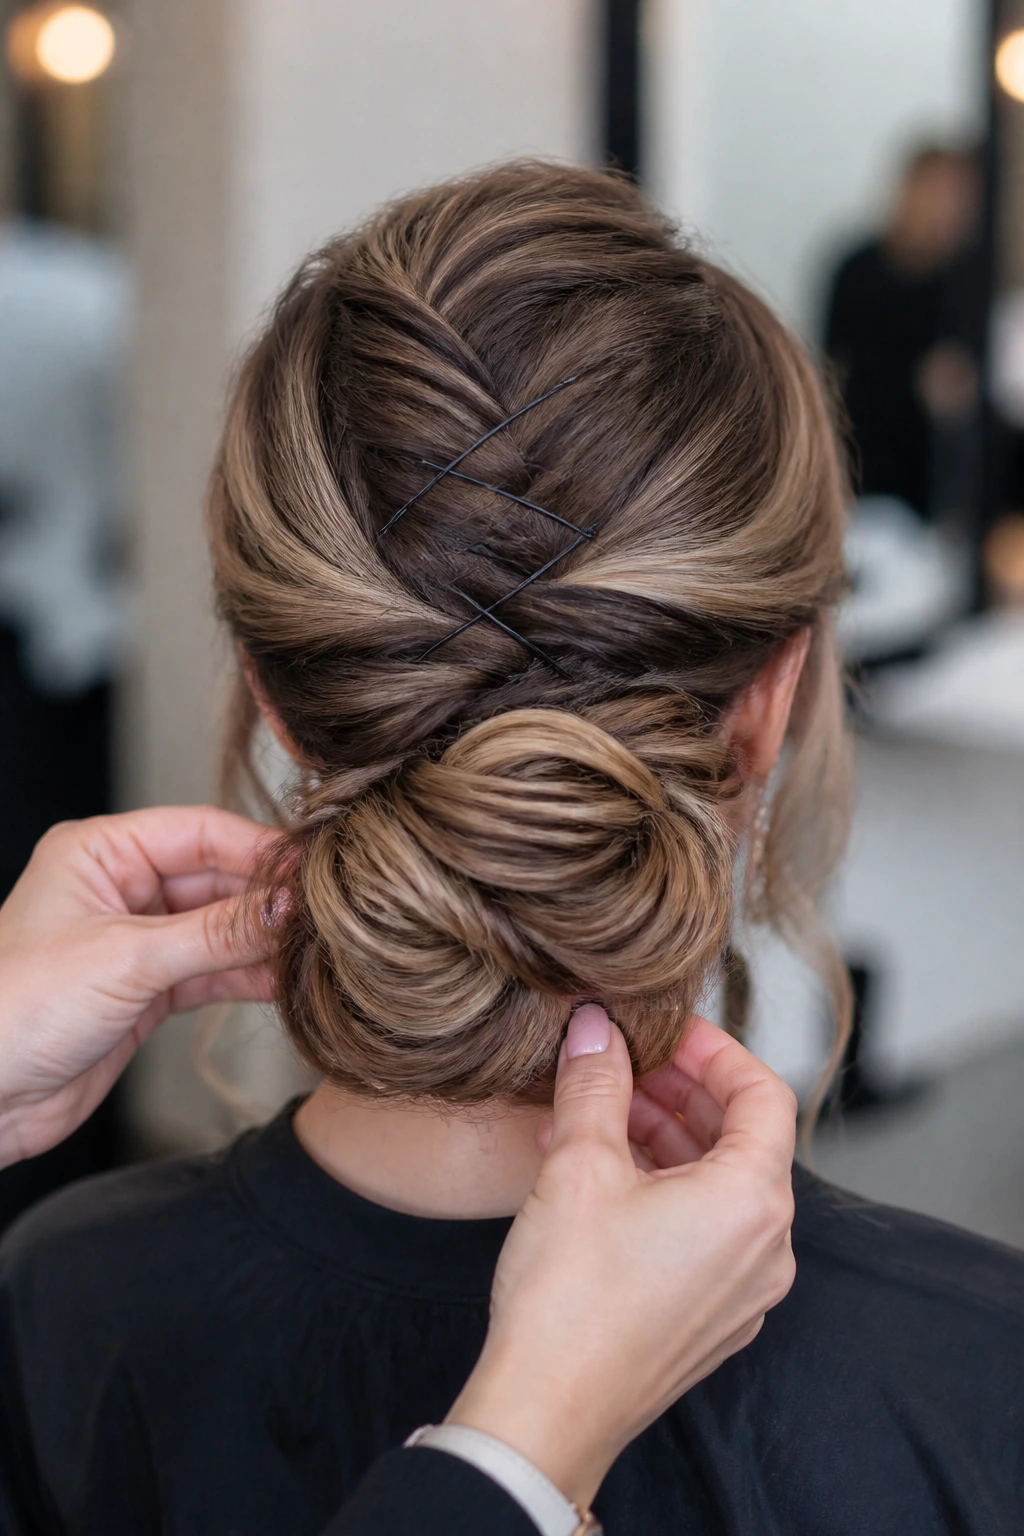
A bridesmaid updo lasts because of what happens under the pretty part. The visible bun, braid, or twist gets the attention, but the real work lives at the base: the texture sprayed into the roots, the crossed bobby pins, the tucked elastic, the little hidden anchors that keep the style from shifting when someone hugs you too hard.
Clean hair can be a problem. Not always, but often enough to matter. Hair that’s freshly washed and silky can slide right out of a style unless you give it grip first. That’s why a lot of stylists prefer hair that was washed the day before, lightly textured, and fully dry before styling begins. A little grit helps. Too much grease helps too, but for the wrong reasons.
The best holding styles use shape and compression together. A braid gives the hair something to hold onto. A twist traps the ends. A bun form gives the center weight. Pins secure the perimeter. When all four of those pieces show up, the updo behaves.
Essential Tools for These Hairstyles
-
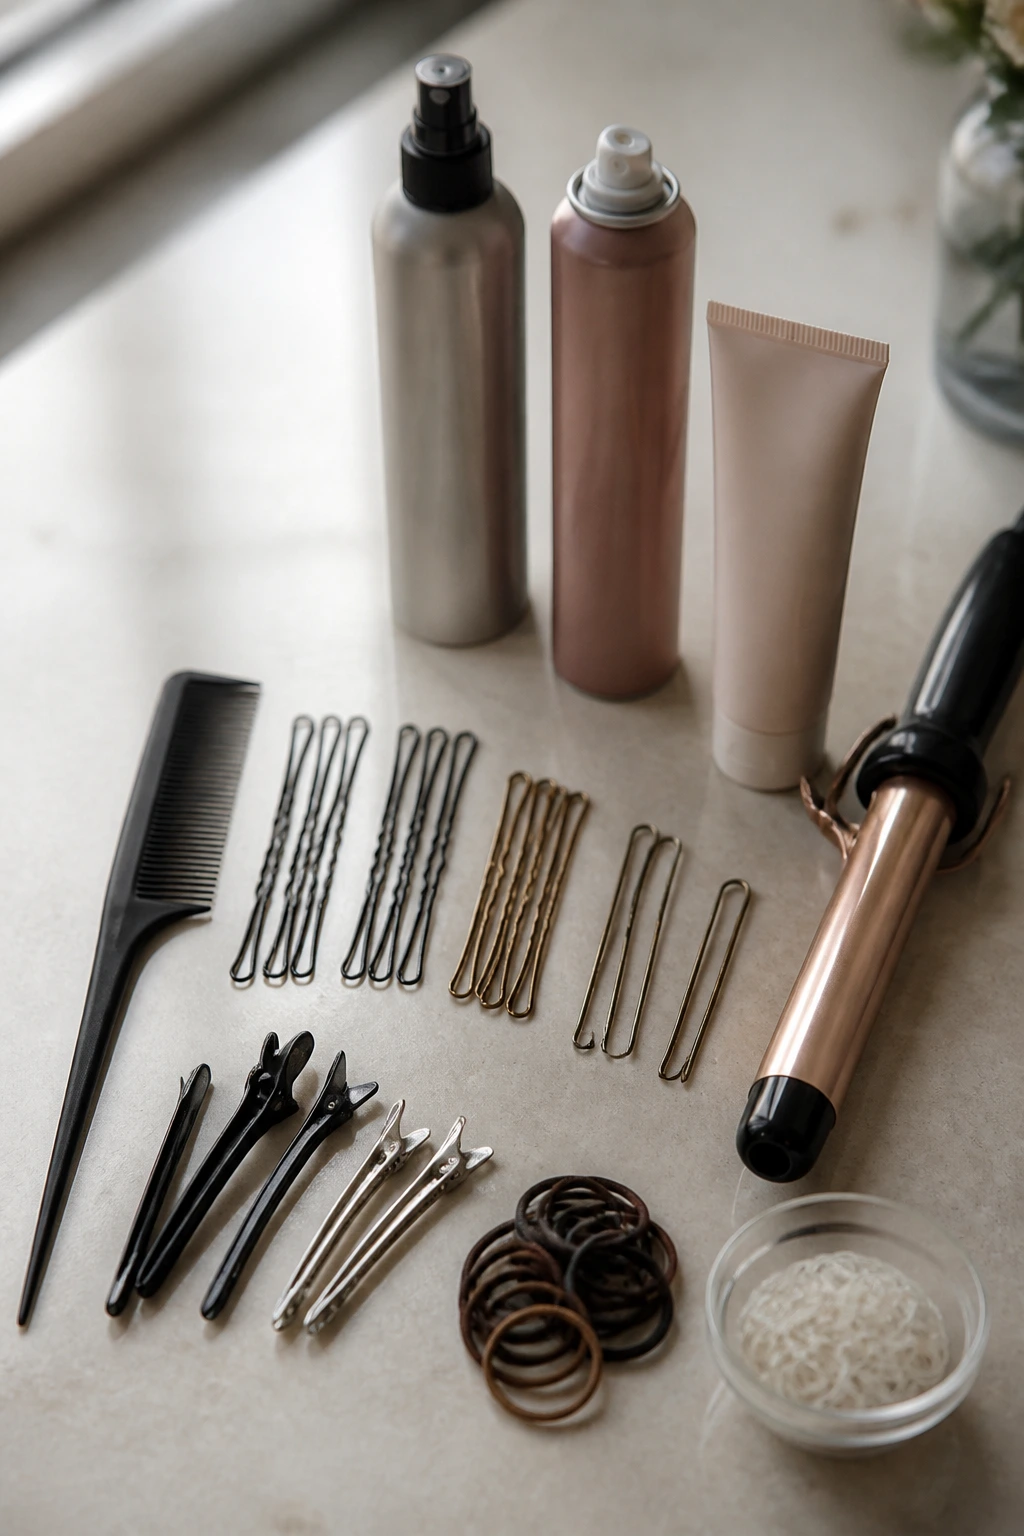
Tail comb: Parting, sectioning, and teasing get much cleaner with a fine-point comb than with fingers alone.
-
Bobby pins in two sizes: Standard and mini pins solve different problems; the smaller ones are better for face-framing pieces and tighter areas.
-
U-pins: These are useful for buns and coils because they hold shape without creating a thick pin cluster.
-
Sectioning clips: They keep one side from collapsing while you braid or twist the other.
-
Texturizing spray: Gives fine or silky hair the grit it needs so pins don’t slide out.
-
Flexible-hold hairspray: Holds the shape without turning the finish rigid or sticky.
-
Smoothing cream or serum: Helps with flyaways and gives polished styles a clean surface.
-
Small elastic bands: Clear or hair-matched elastics are handy for ponytail bases, twists, and bubble sections.
-
Mini curling iron or wand: Useful for softening face-framing pieces or setting curls before pinning.
-
Hair padding or a small bun form: Optional, but handy for fine hair when you need the bun to look fuller without adding bulk.
Smart Hair Prep and Product Picks
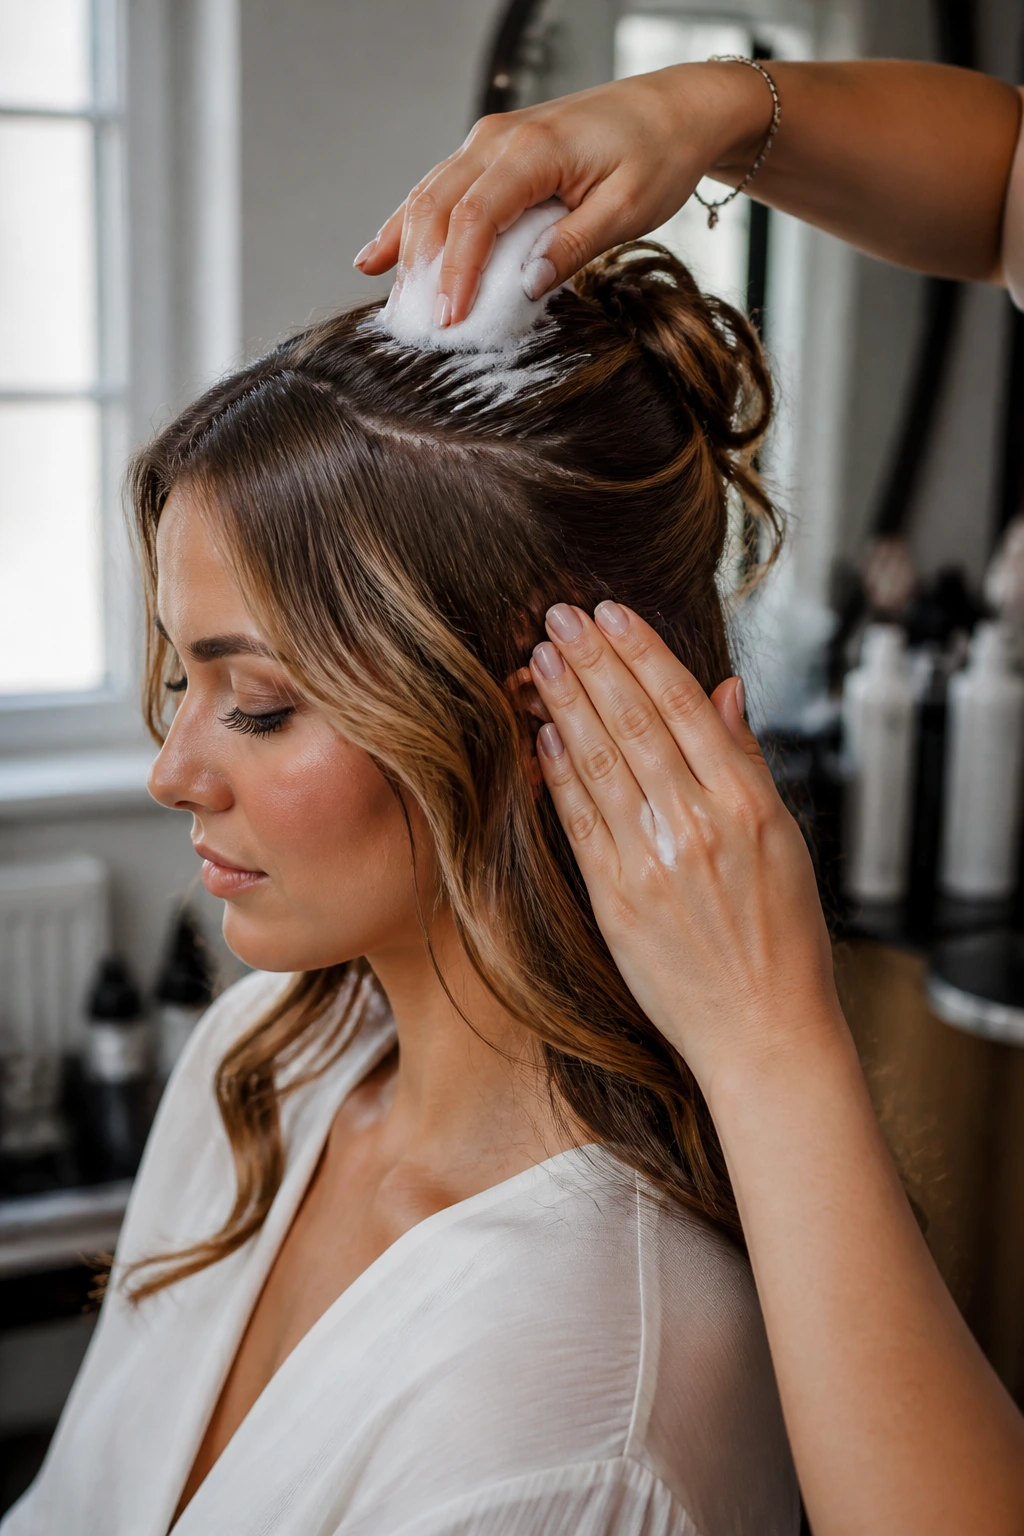
The prep matters more than people want to hear. If the hair is too soft, the pins slip. If it’s too dry, the style frays and the flyaways start standing up like stubborn little antennae. The sweet spot is hair that’s clean enough to move, but not so freshly washed that it behaves like silk ribbon.
For most bridesmaids, washing the hair the day before works better than washing it the morning of. That gives the roots a little texture and keeps the scalp from getting too slippery. If the hair tends to go flat, a light mousse at the roots before blow-drying can help the crown hold its shape. If the hair tends to puff up in humidity, use a smoothing cream on the mid-lengths and ends, then finish with a medium brush.
Product choice should follow hair type. Fine hair usually needs dry shampoo or texture spray before pinning. Thick hair needs sectioning clips and stronger hold at the base. Curly hair often needs curl cream or gel first, then a light mist of spray after the shape is set. And if the bridal party includes a mix of textures, plan the styles around that mix instead of trying to force every head of hair into the same finish.
How to Wear These Styles With Dresses and Accessories
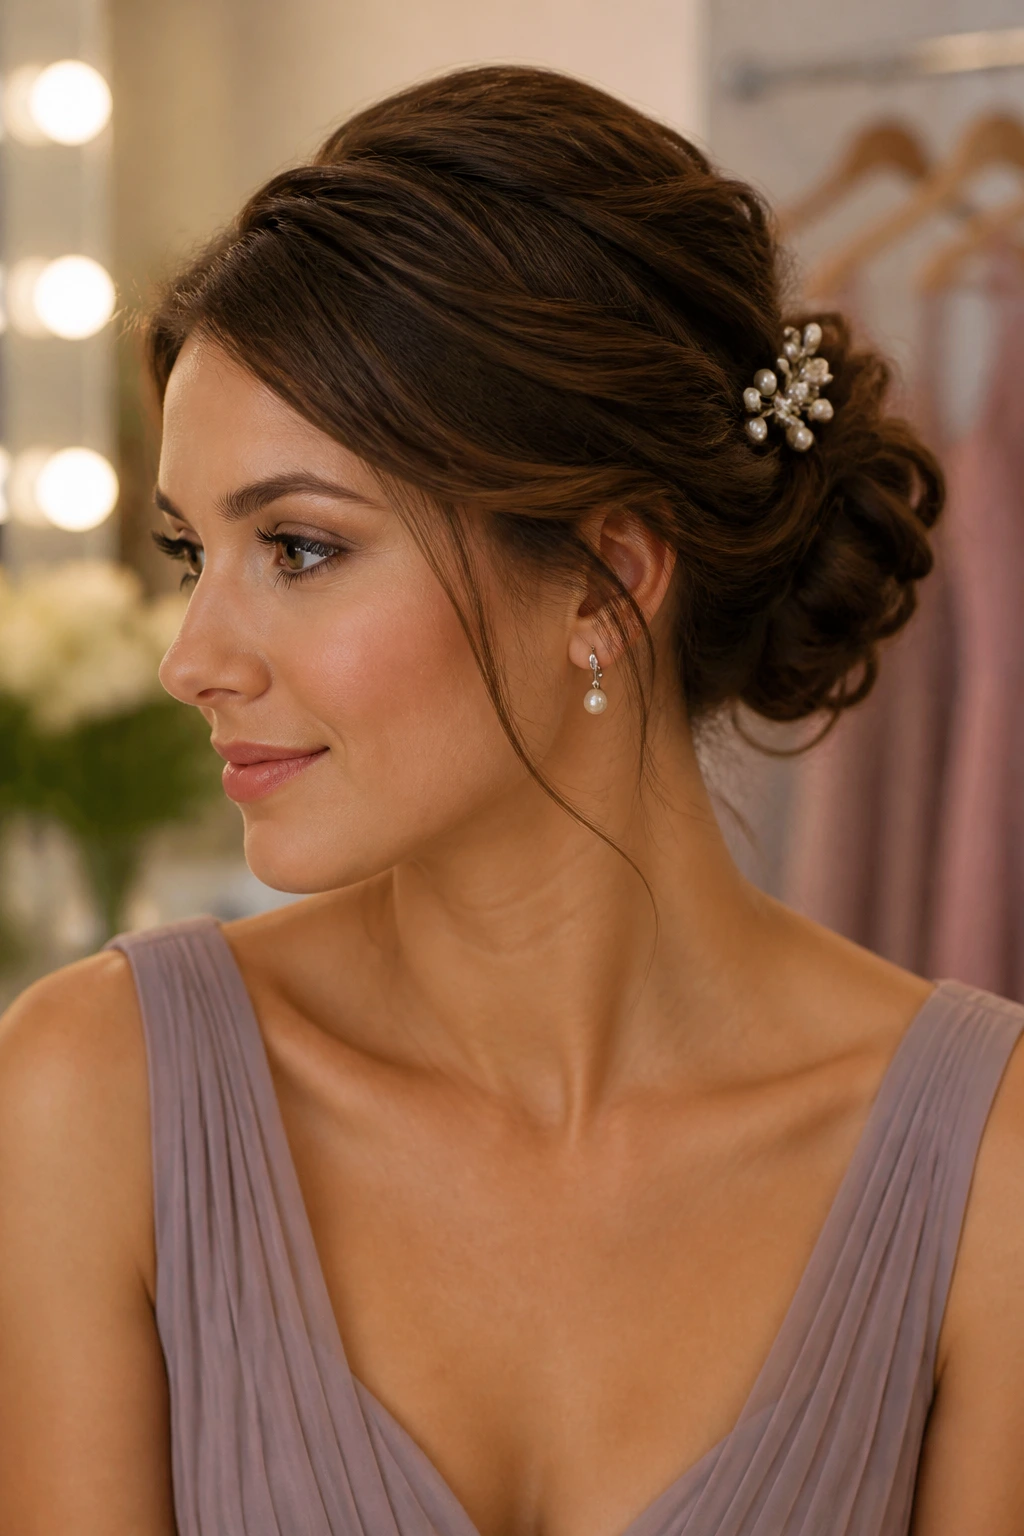
Placement: Low styles sit best with high necklines, halters, and dresses that already have strong shoulder lines. A higher chignon or twisted knot gives open backs and strapless dresses a little more lift, while a side-swept bun can soften asymmetrical dresses.
Accessories: Pearl pins, slim combs, and small floral accents belong in the style, not on top of it. If the hair is already detailed — say, with a braid or weave — keep the accessory small. If the style is sleek, a comb or pin cluster can carry more of the visual weight.
Balance: Big earrings usually work better with clean buns or low knots. If the dress has lace, beads, or a high collar, a simpler updo keeps the whole look from getting noisy. I’d rather see one strong shape than three competing ones.
Comfort: The style should not press into the neck, scrape against the veil comb, or snag on a high collar. If the bridesmaids will wear the look for ten hours or more, make sure the pins aren’t sitting where someone’s sunglasses, earpiece, or veil needs to live later.
Additional Tips and Styling Boosters
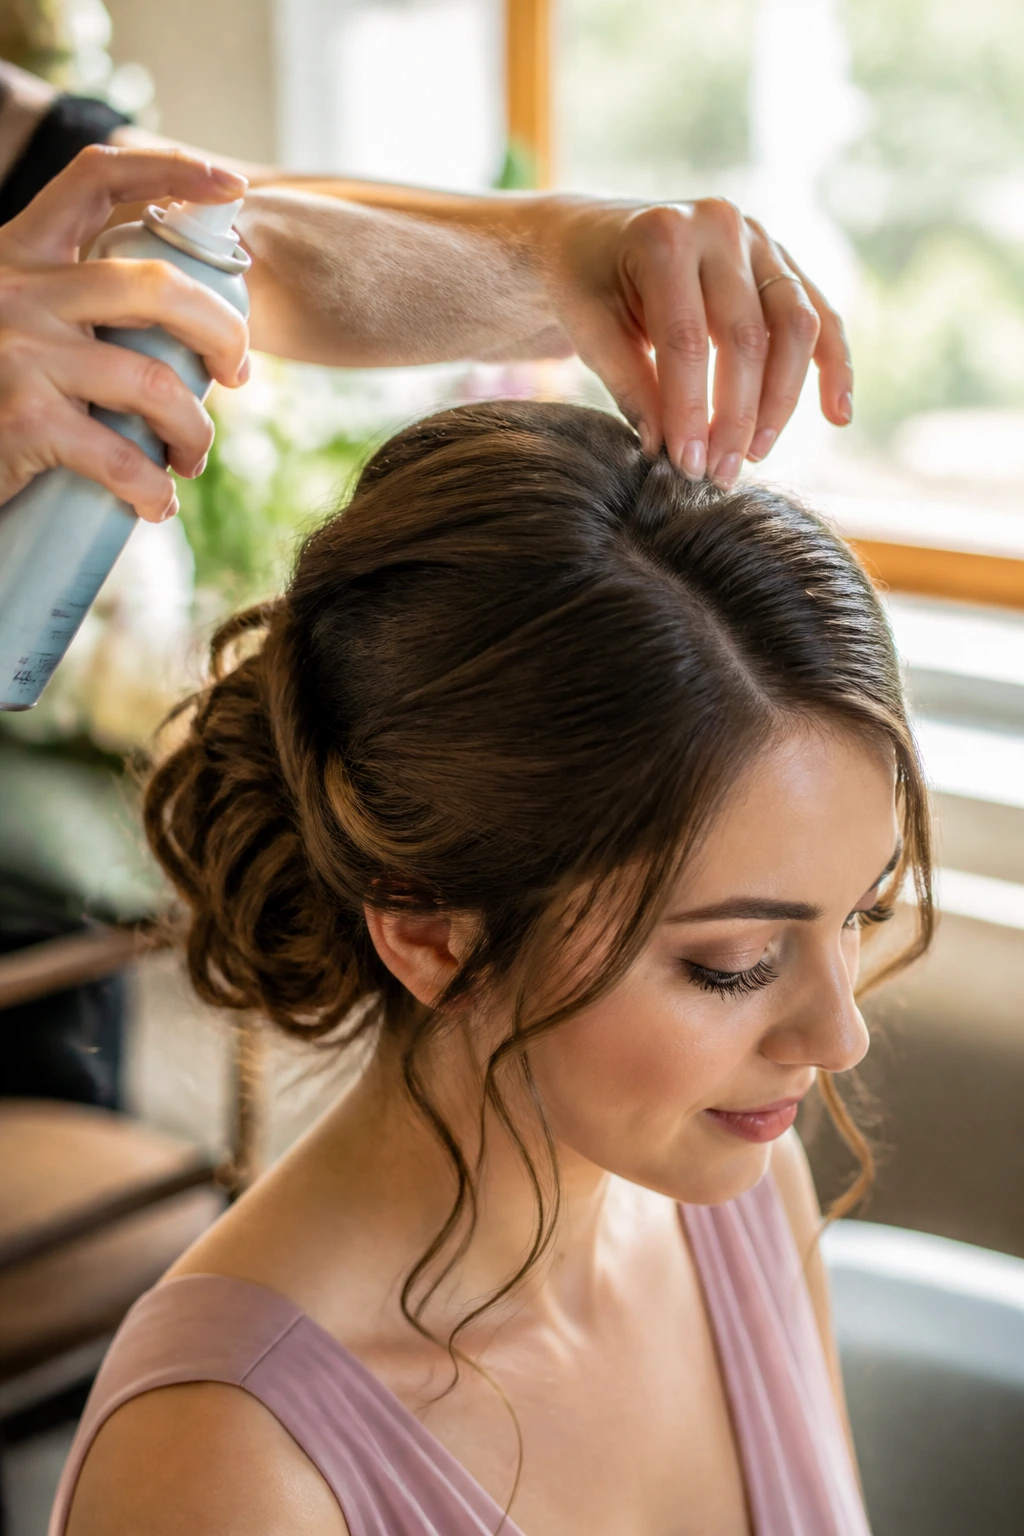
Grip Boost: Sprinkle dry shampoo or texture spray at the roots before you start pinning, especially on fine or freshly blow-dried hair. That little bit of friction makes the style easier to shape and far less likely to slip.
Finish: Flexible-hold spray is the safer choice for bridal party hair. You want movement when someone turns their head, not a helmet. A second light mist at the end works better than one heavy blast halfway through.
Customization: Add a braid to a bun, wrap one section around a knot, or pull a thin face-framing piece from the front if the style needs softness. Those tiny edits help the same basic updo fit different dresses and face shapes.
Make-It-Your-Own: For a cleaner look, smooth the crown and keep accessories minimal. For a softer look, loosen the braid a touch and curl the ends of the face-framing pieces. For a more formal finish, tuck the pins in tight and use a pearl comb or crystal barrette near the base.
Make-Ahead, Touch-Up, and Lasting Power
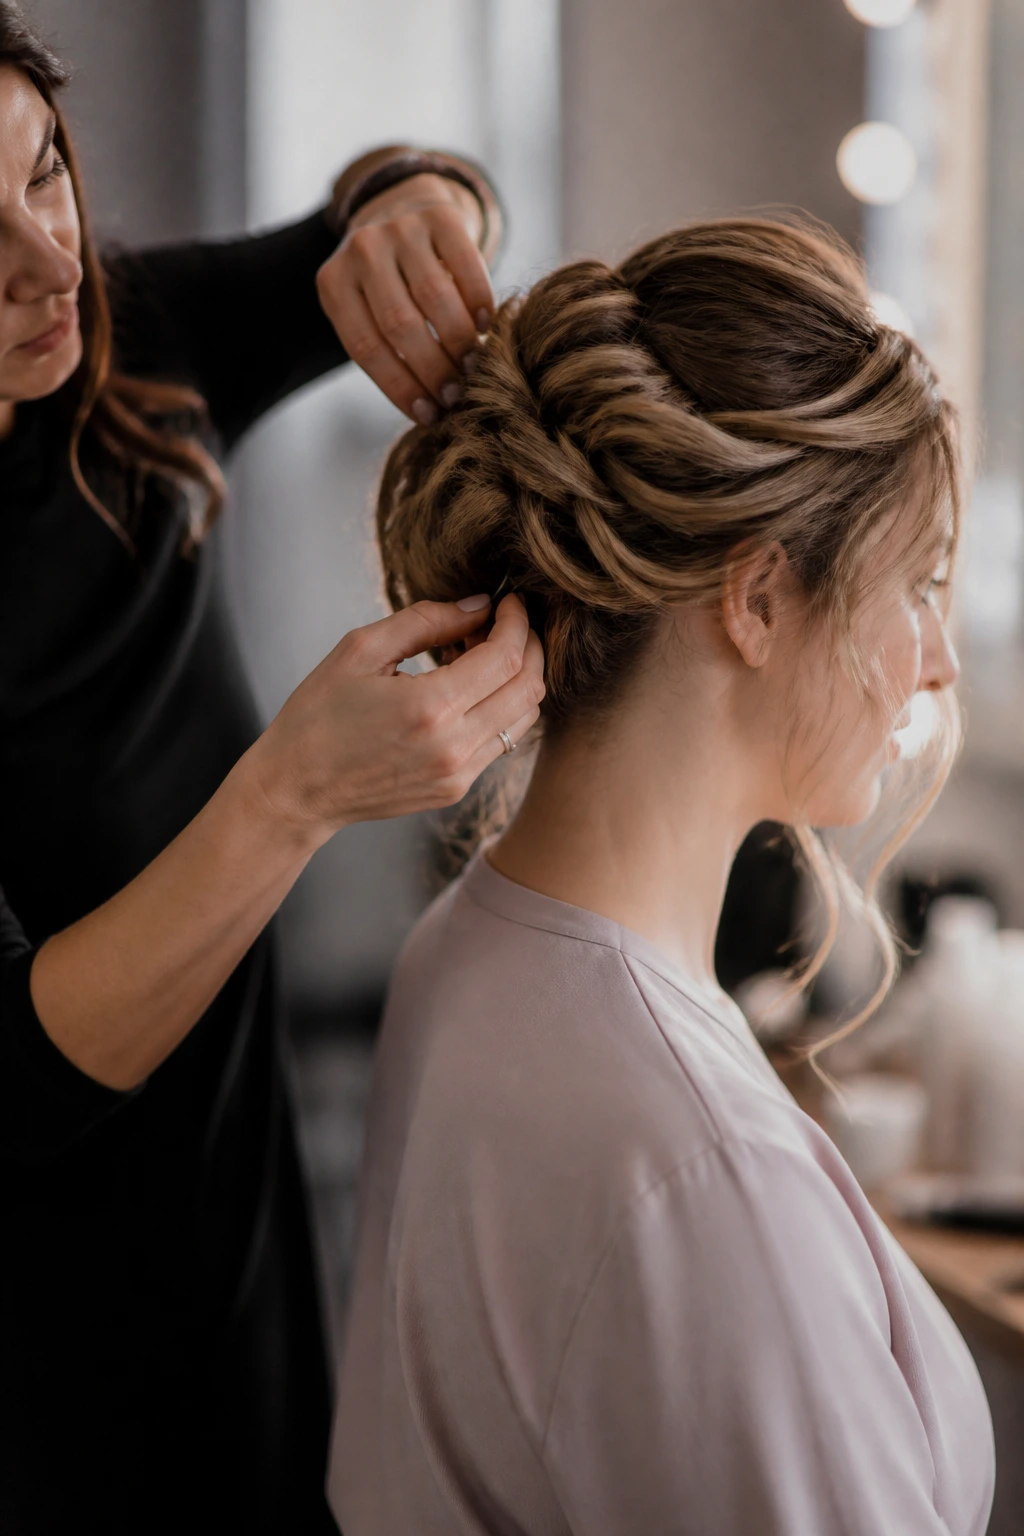
A bridesmaid updo usually looks best when the prep starts the day before, not the day of. Wash the hair the night before if the texture is too silky, or leave it for two days if the roots tend to go flat. Blow-dry it fully. Damp hair is not a shortcut here; it only makes the style collapse sooner.
Some parts can absolutely be done ahead. Curls for a textured bun can be set in the morning and pinned once they’ve cooled. Braids can be prepped a few hours before the ceremony. If a style needs a lot of smoothing, do that close to the finish so the flyaways don’t reappear before the photos.
Pack a tiny touch-up kit. A comb, six to ten bobby pins, a few mini elastics, and a travel-size hairspray can save the day when someone’s twist starts to loosen. If the wedding is outdoors or humid, a small anti-frizz cream is worth the space. For curly styles, a drop of leave-in on your fingers can tame the halo without flattening the curl pattern.
Variations and Adaptations to Try
Fine-Hair Saver: Use a bun form, texture spray, and a double layer of pins. This keeps the style from looking thin and helps the base stay solid through the reception.
Curly-Texture Version: Keep the curls intact and pin only the sections that need control. Straightening textured hair just to get an updo is usually a waste of time and ruins the shape that makes the style interesting.
Short-Length Tuck: For shoulder-length hair, choose a faux bob, Gibson tuck, or low roll. These styles create the look of an updo without forcing too much length into a bun that will fall apart.
Veil-Ready Finish: Place the veil comb below the crown area and keep the bun compact so the veil doesn’t fight the hairstyle. The cleaner the base, the easier the veil sits.
Flower-Forward Style: Add small blooms at the base of a braid or bun, not across the whole head. A little cluster looks polished; too many flowers start to compete with the dress.
Minimalist Satin Finish: Smooth the surface, keep the part precise, and use one strong shape like a chignon or knot. This version fits modern dresses, sharp tailoring, and bridal parties that want less softness and more line.
Common Mistakes to Avoid
-
Starting with hair that’s too clean: Freshly washed hair can be slippery, especially if it’s fine or silky. The fix is simple: prep the hair the day before, or use dry shampoo and texture spray before styling.
-
Using too few pins: One or two pins may hold in the mirror, then fail once people start moving. Cross pins in an X, hide them in the base, and test the style by shaking the head gently before you stop.
-
Making every bridesmaid identical: A style that flatters one person’s hairline or texture may fight another’s. Keep the same overall shape, but adjust the part, braid size, or amount of softness for each head of hair.
-
Overloading the finish with spray: Heavy spray flattens the shape and can make the hair look dusty under bright lights. Use flexible-hold spray in light layers instead.
-
Ignoring the dress neckline: A low, loose bun under a detailed collar can look busy. Match the height and shape of the updo to the dress so both pieces have room.
Frequently Asked Questions About Bridesmaid Updos
How do you keep a bridesmaid updo from falling out?
Grip is the whole game. Start with textured hair, secure the base with an elastic, and pin in layers instead of relying on a single point of support. If the hair is very soft, a light dusting of dry shampoo or texture powder at the roots makes a real difference.
Should bridesmaid hair be washed the day of the wedding?
Usually not, unless the hair is very oily or the stylist specifically wants a clean base for a sleek look. Hair that was washed the day before tends to hold pins and braids better. Fresh hair can slide, especially in humid weather.
Can short hair be put into an updo?
Yes, but the style has to match the length instead of pretending the hair is longer. Faux bobs, tucked rolls, and Gibson tucks work well on shoulder-length hair, while very short hair often looks better in sculpted pin-up styles with intentional texture.
What if the bridesmaids all have different hair textures?
Pick one shape and vary the finish. A low bun can be smooth on one person, braided on another, and twisted on a third while still looking like part of the same group. That keeps the photos coordinated without forcing every head of hair into the same mold.
Do bridesmaid updos work with veils or hair combs?
They do, as long as the accessory has a stable place to sit. Veil combs need a secure anchor, usually just under the crown or above the bun. Heavy combs are easier to support in a low chignon, tucked knot, or braided base.
How long before the ceremony should the style be finished?
Plan for the finish to be done 30 to 60 minutes before photos, with a touch-up right before leaving. That gives the hair time to settle without sitting so long that it starts to wilt or frizz.
What if the hair is very fine and pins keep slipping?
Work in texture first, then use more pins than feels necessary. Cross the pins through the base, not just the surface, and anchor them into a braid or twist whenever possible. A tiny bun form can also give the style something to hold onto.
Can curly hair be styled into a bridesmaid updo without straightening it?
Absolutely, and I’d argue it often looks better that way. Curly pin-up styles, soft tucked buns, and braided crowns let the natural pattern do the heavy lifting. Straightening curly hair just to force a smooth bun usually creates more work than it saves.
The Styles That Hold Their Shape
The best bridesmaid updos are the ones that still look thoughtful after the ceremony, the photos, the speeches, and the fourth time somebody hugs the maid of honor. They don’t have to be the fanciest styles in the room. They just need a solid base, a shape that suits the dress, and enough texture to stay where they’re put.
That’s why the low chignon, the braided bun, the twisted knot, and the soft roll show up so often. They’re not flashy for the sake of it. They’re practical, and they still give the bridal party a clean, finished line. If you choose the style around the hair type, the neckline, and the amount of movement the day will demand, the result will look calm instead of forced.
Pick the shape that fits the dress and the person wearing it. The rest is just pins, patience, and a little spray.
