



A fishtail braid can look elaborate from across the room and almost casual up close, which is exactly why fishtail braid hairstyles keep landing on people’s save lists. The pattern is made from tiny alternating pieces, but the finish can swing from soft and romantic to sharp and clean depending on where you place the braid, how tight you start it, and whether you leave the edges polished or slightly broken up.
What surprises people is how much the setup matters. The braid itself is not complicated. The polish lives in the prep, the section size, and the last two minutes of tugging and pinning. Freshly washed hair can slip like silk. Day-old hair usually grabs better. And if your ends are blunt or frayed, the last inch of the braid will tell on you, so a little smoothing cream can make a bigger difference than a fancy accessory ever will.
You do not need waist-length hair or a wedding to wear one of these. Fishtails work on straight hair, wavy hair, curly hair, layered cuts, blunt ends, and everything in between, provided you choose the version that fits the hair you actually have in your hands. That is the real trick here: not forcing one braid to do every job, but picking the shape that fits the day.
Why These Fishtail Braids Keep Getting Saved
-
They start simple, then look intricate fast: A two-section braid gives you that woven look without needing a lot of hand gymnastics, which makes the result feel fancier than the effort.
-
They work with day-two texture: A little natural oil and a bit of grit help the sections hold, so the braid often behaves better after a wash day passes.
-
They can be neat or messy on purpose: Tight fishtails read polished and clean, while loosened edges and face-framing pieces soften the whole look in a way that feels deliberate, not sloppy.
-
They play well with accessories: Ribbons, scarves, pearl pins, tiny elastics, and even a plain black ribbon can change the mood of the braid without changing the structure.
-
They stretch across hair lengths: Long hair gives you that classic rope-like finish, but shoulder-grazing hair can still manage a smaller, tucked version that looks neat instead of forced.
-
They stay useful beyond one occasion: The same braid can go to school, a dinner out, a photo shoot, or a low-key event if you change the part, the tension, or the finish.
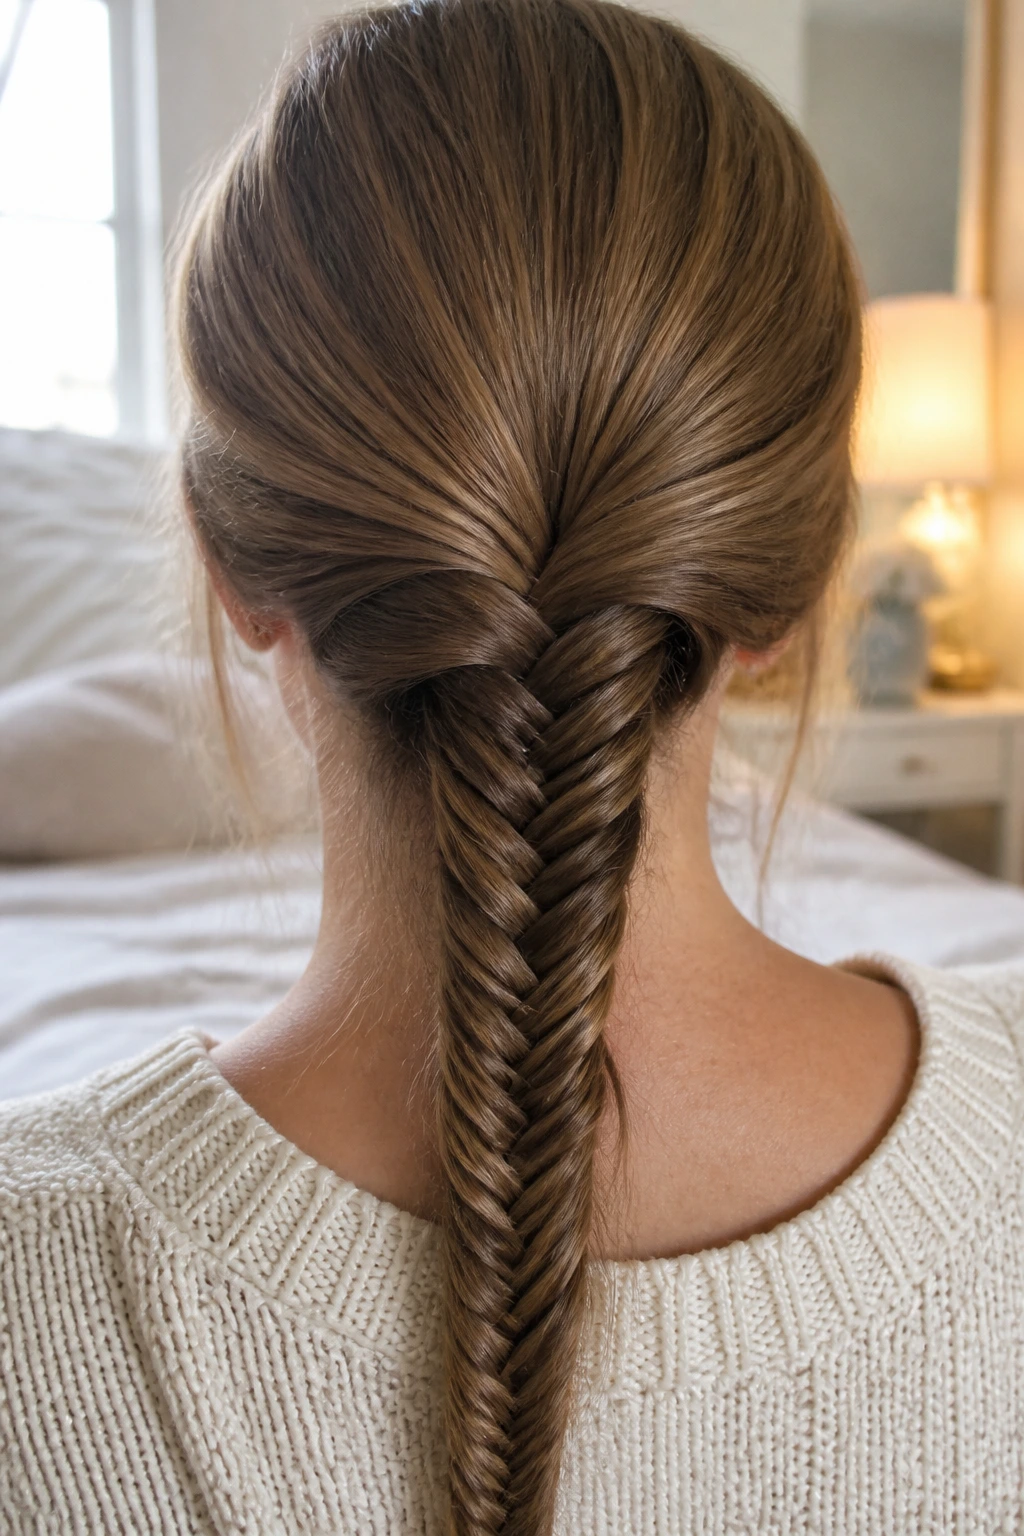
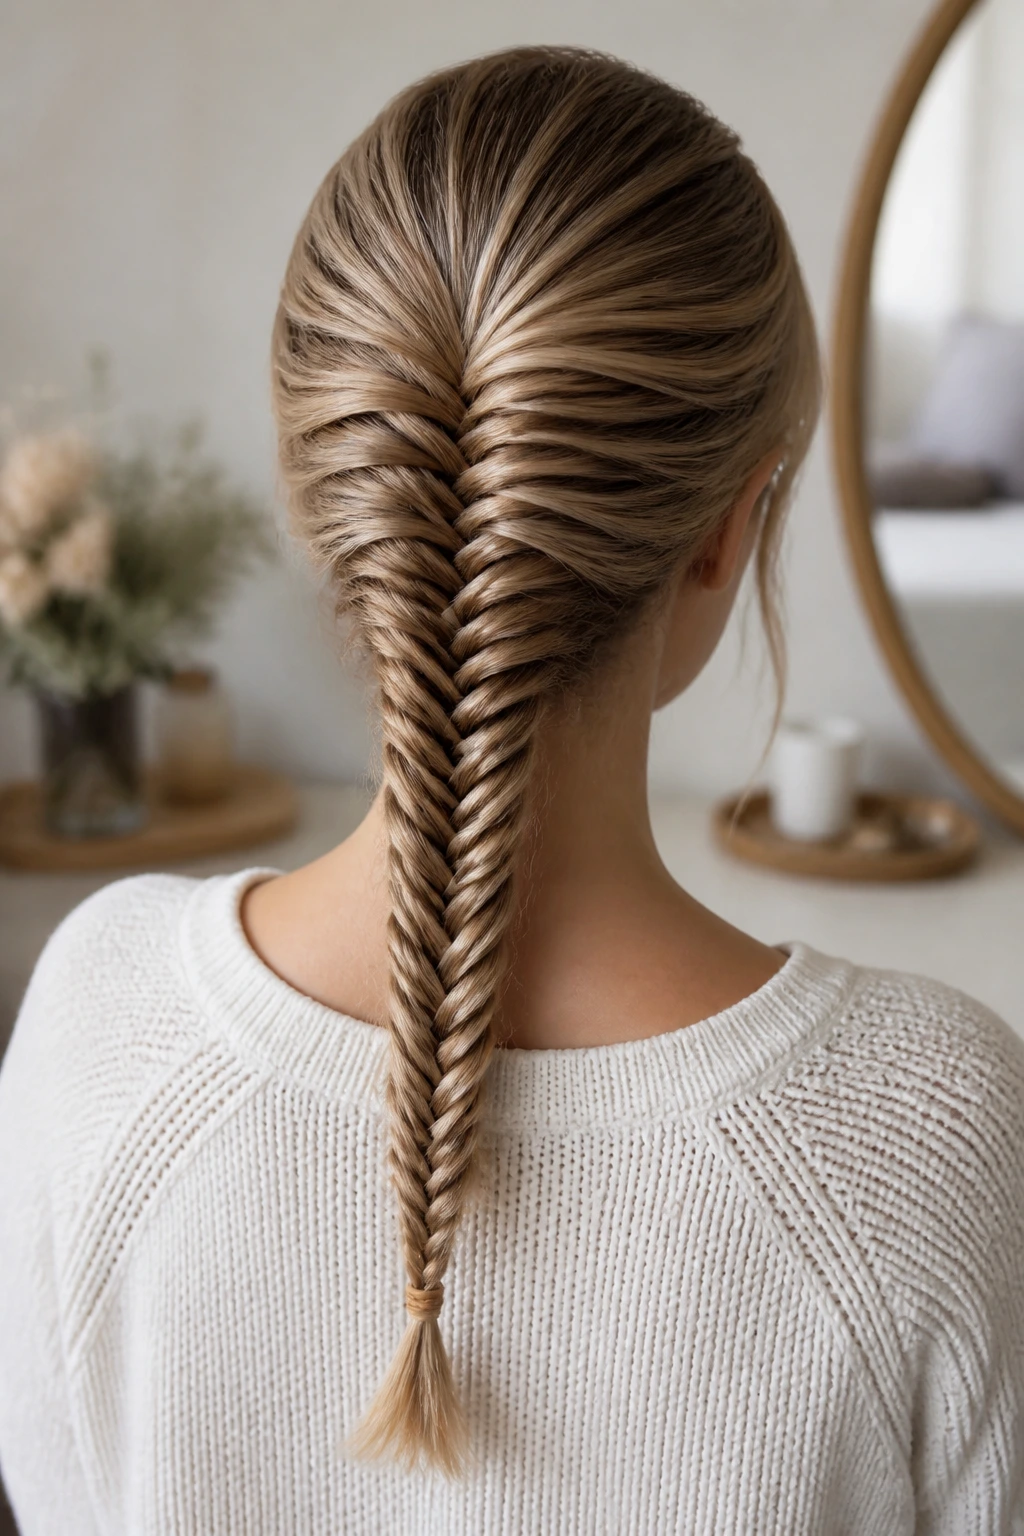
1. Classic Center-Back Fishtail
This is the version people picture first: clean, centered, and balanced down the middle of the back. It works because the braid line stays visible from both sides, which makes the weave read clearly even if your hair is not especially thick. Keep the first few passes snug at the nape, then loosen the finished braid only after the elastic is secure.
2. Loose Side-Swept Fishtail
A side fishtail always feels a little softer than a center-back one. The braid drops over one shoulder, so the weave looks fuller and the face gets a gentler frame. Start just behind the heavier side of your part, not right at the temple, if you want the front to stay open instead of falling in your eyes.
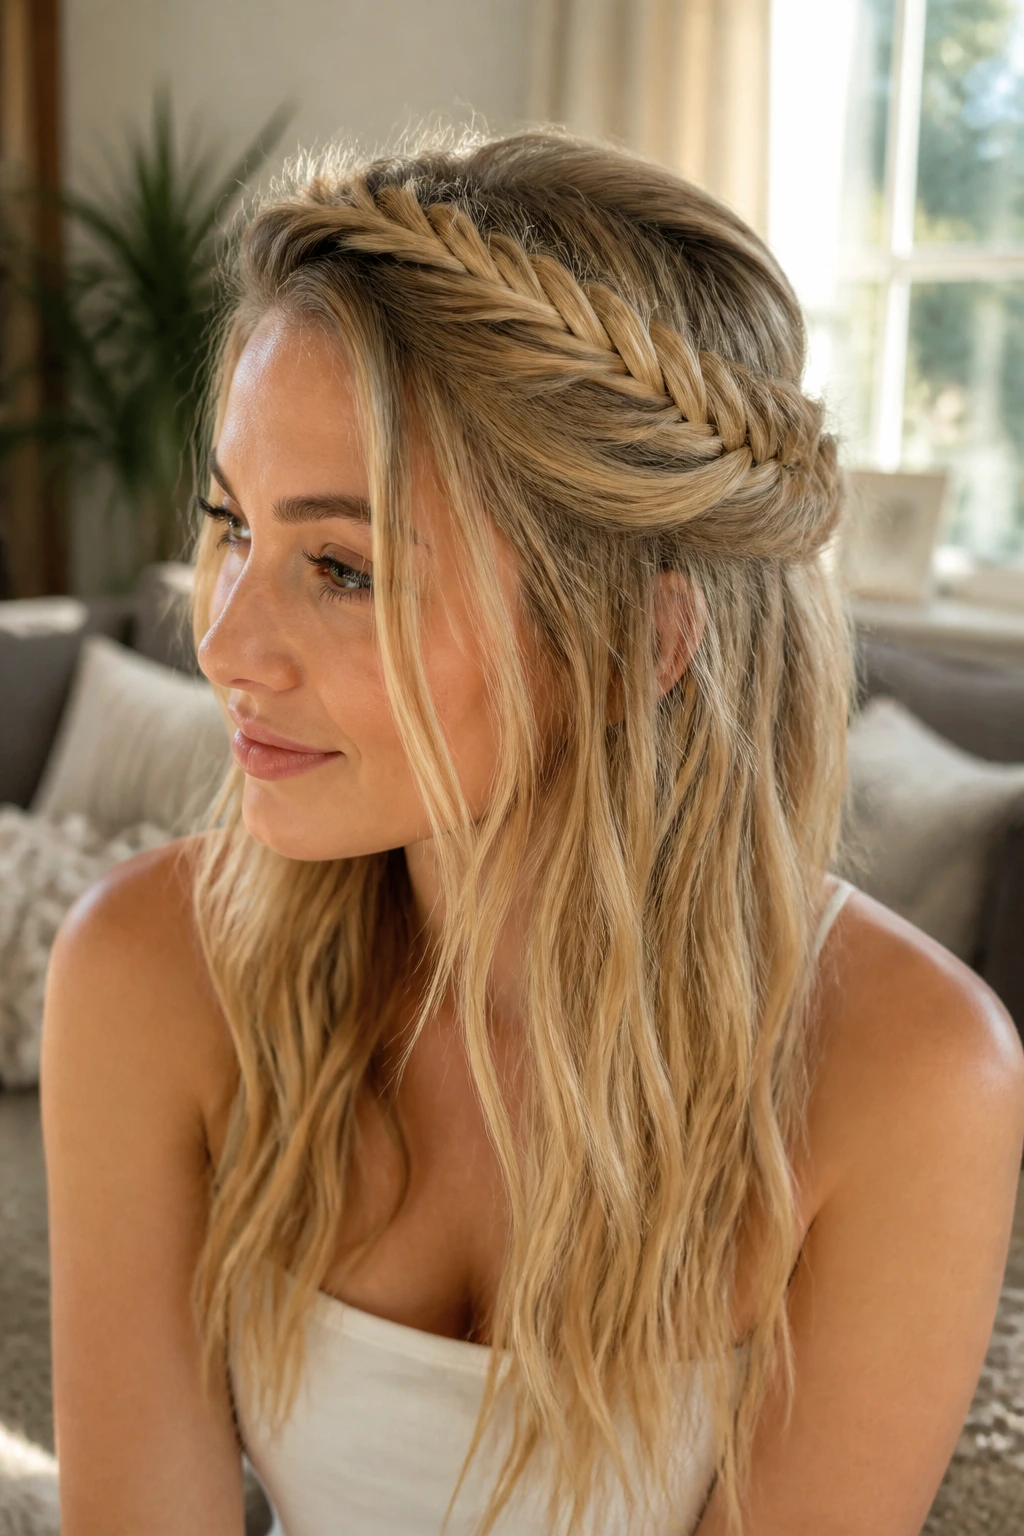
3. Half-Up Crown Fishtail
This one gives you the prettiest part of a braid without taking all your hair away from your face. Braid the top section from one side to the other, then pin it across the back like a narrow crown. It is a good move for layered hair, because the loose lengths below can stay wavy while the top stays controlled.
4. Low Fishtail Ponytail
A low ponytail makes the fishtail look cleaner and less fussy. Tie the hair at the nape first, then braid the tail so the top stays smooth and the braid reads as one long, tidy line. If you want it to look finished, wrap a thin strand around the elastic and pin it underneath.
5. Messy Boho Fishtail
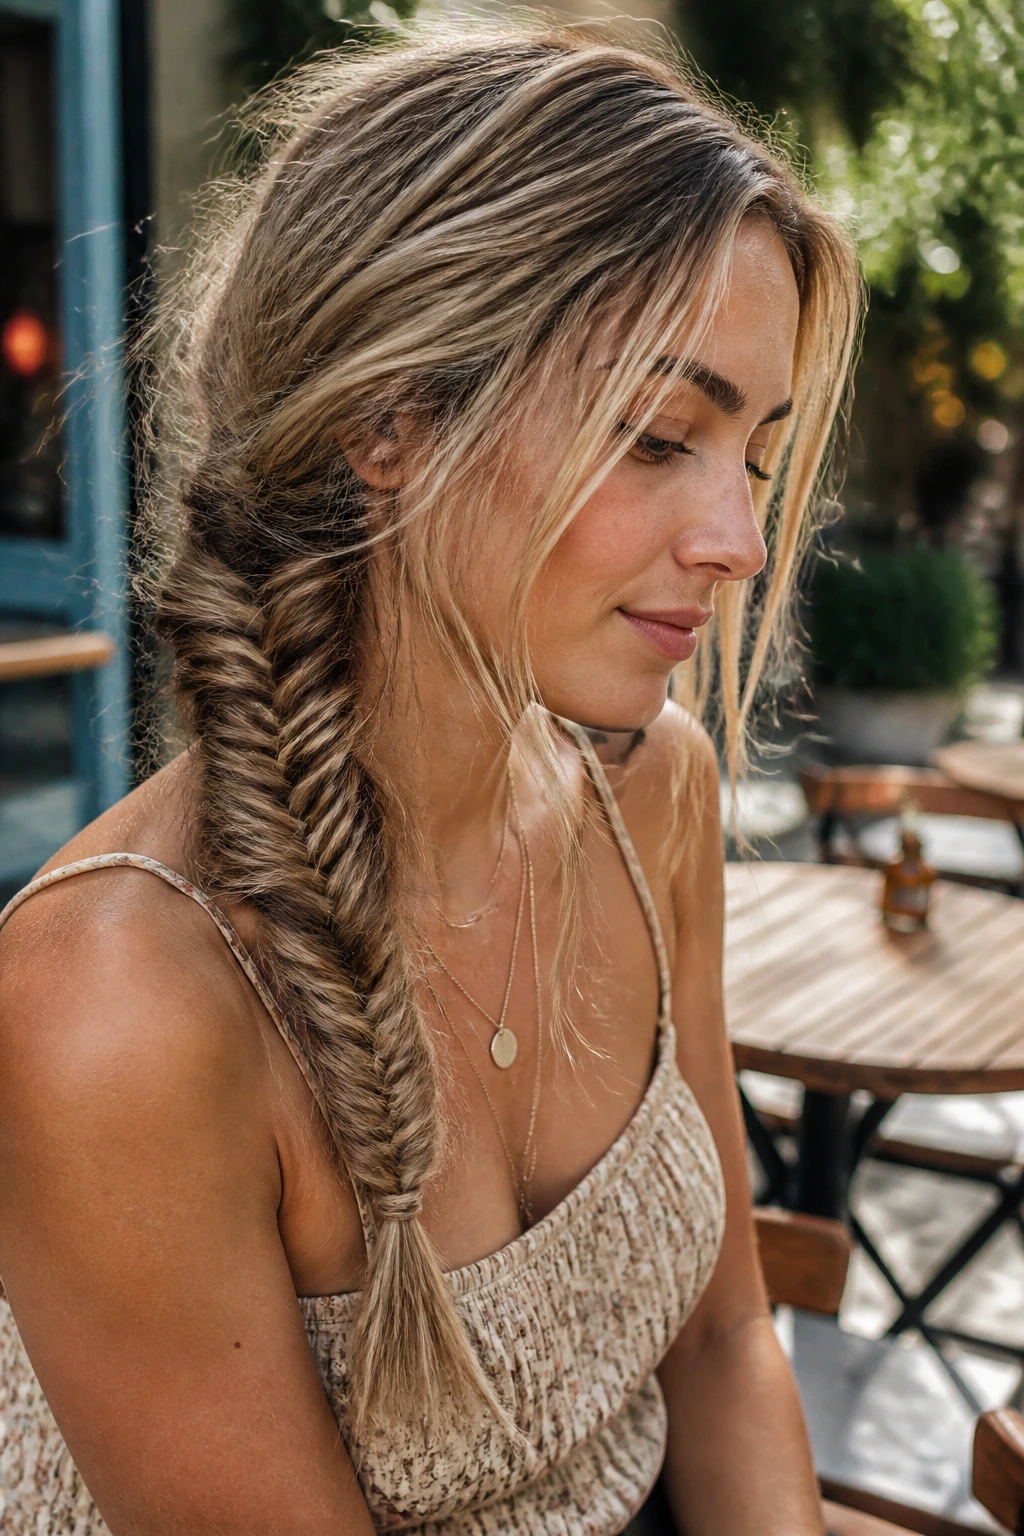
This is the braid that likes a little frizz. Leave the part imperfect, pull two thin face-framing pieces free, and gently tug the braid wider after it is secured. Do not overthink it. The whole point is to keep the shape visible while letting the braid feel soft enough that it does not look locked down.
6. Double Fishtail Pigtails
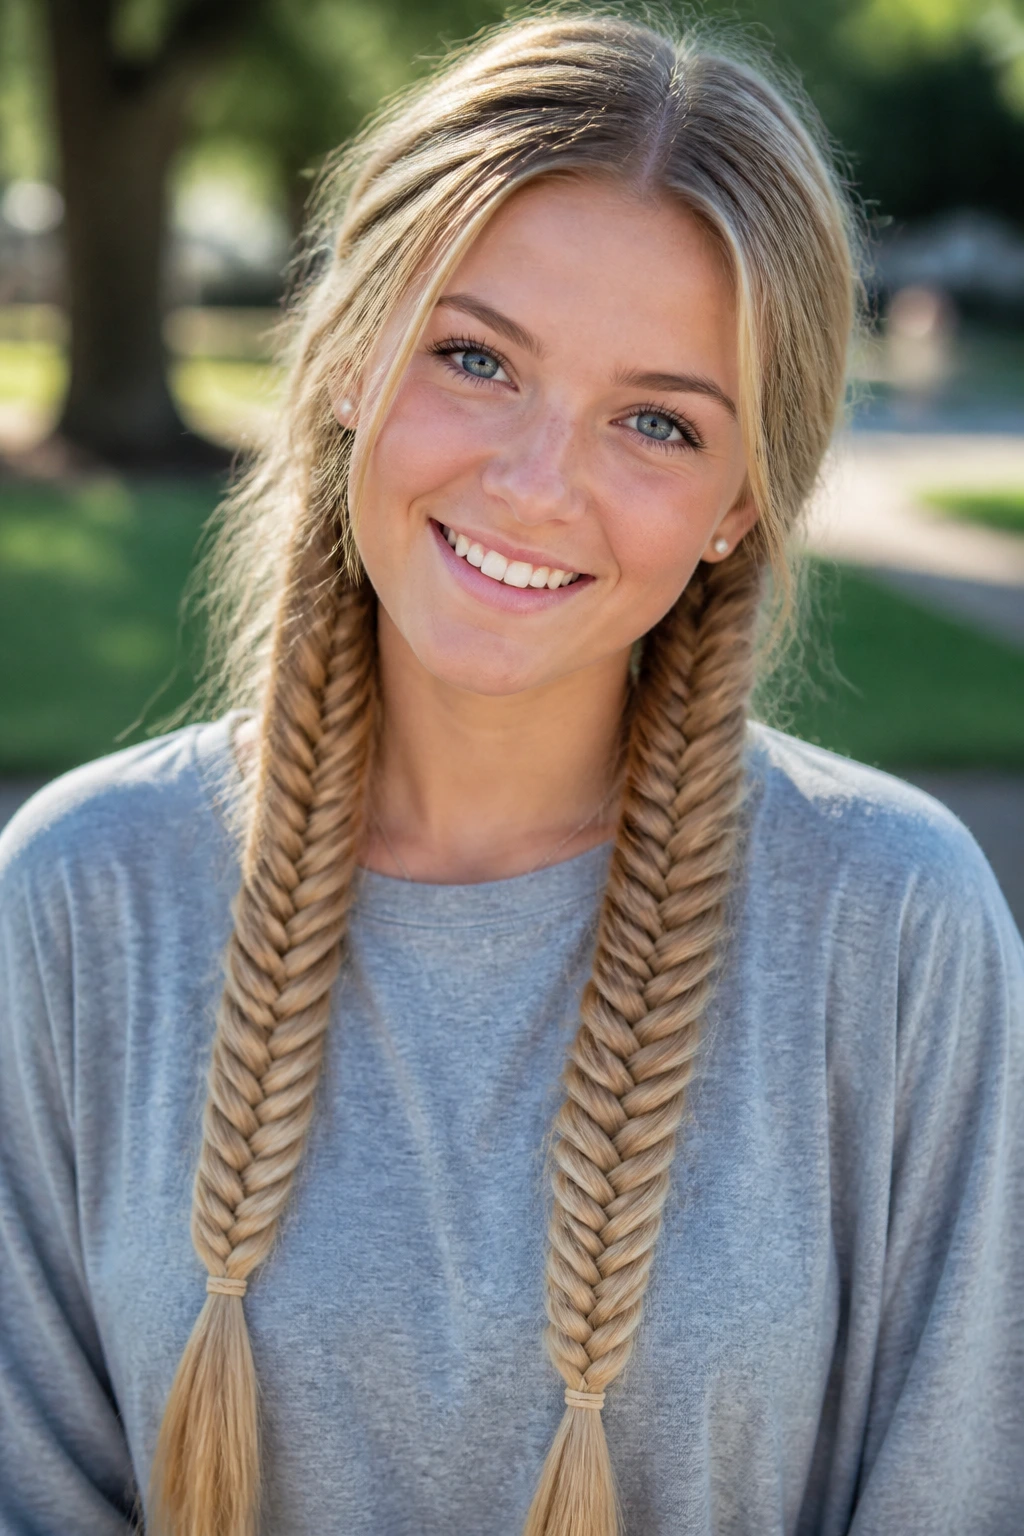
Split the hair into two equal halves and braid each side separately. The result is playful, but not childish if you keep the parts clean and the braids low or mid-height. Tiny clear elastics help here, because bulky ties can make the ends feel too heavy for the style.
7. Milkmaid Fishtail Crown
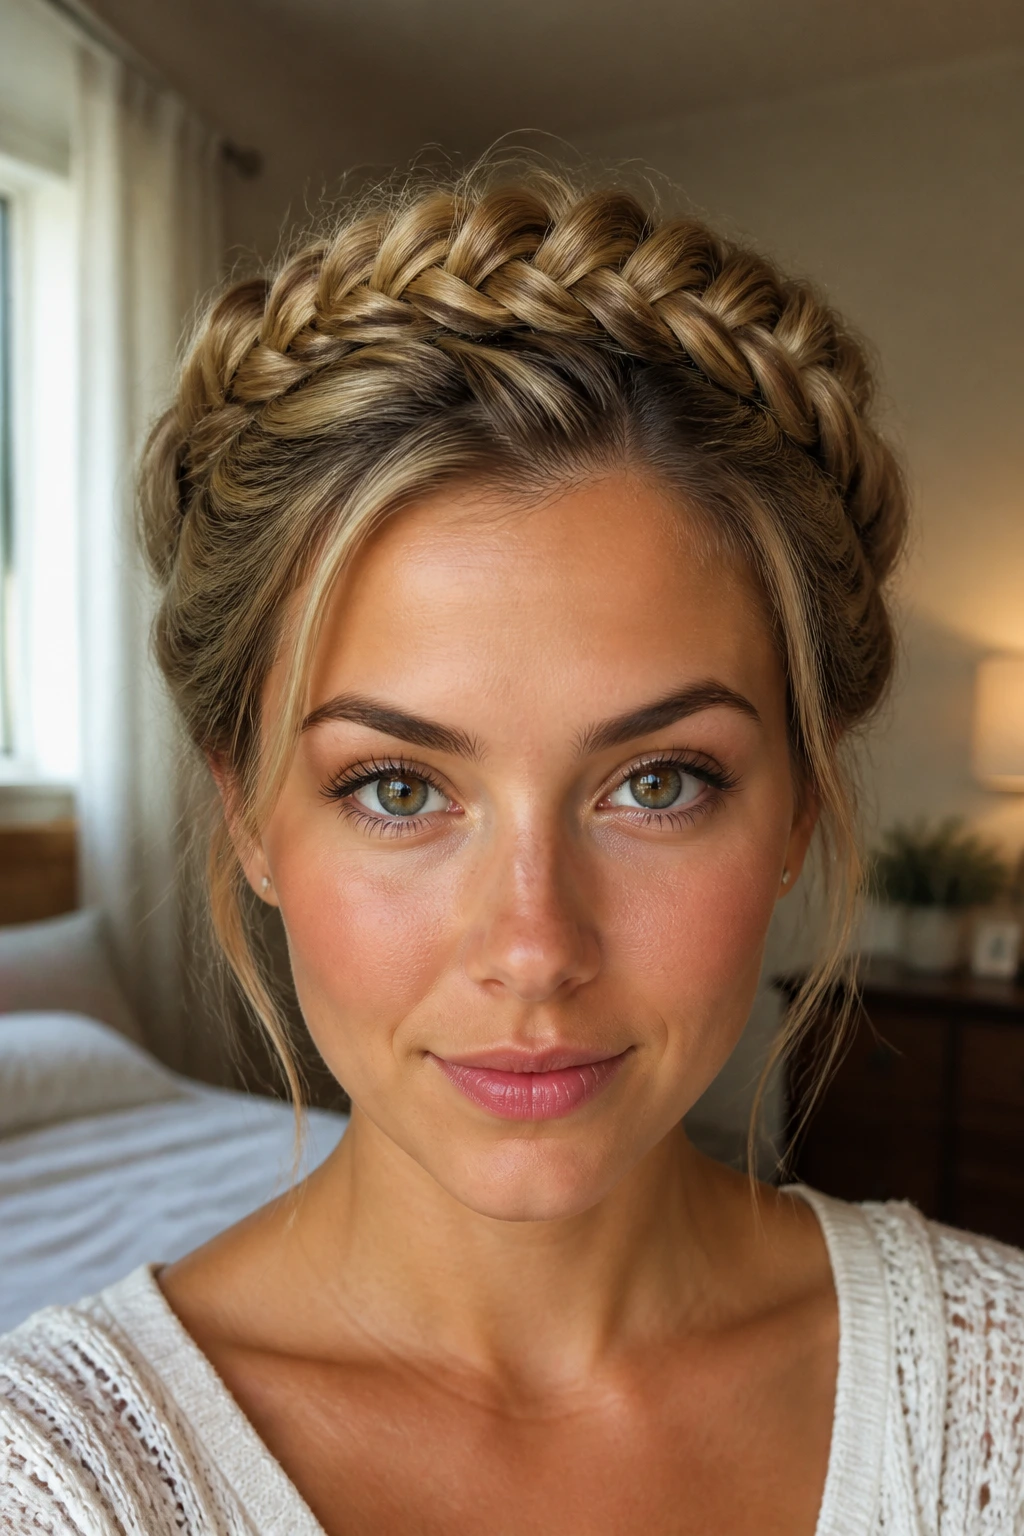
Braid each side, wrap the lengths over the top of the head, and pin them into a crown. The shape sits close to the scalp, so this works best when the sections are tight and the pins disappear into the braid. If your hair is fine, rough up the roots first with dry shampoo so the crown does not slide.
8. Wrapped Fishtail Bun
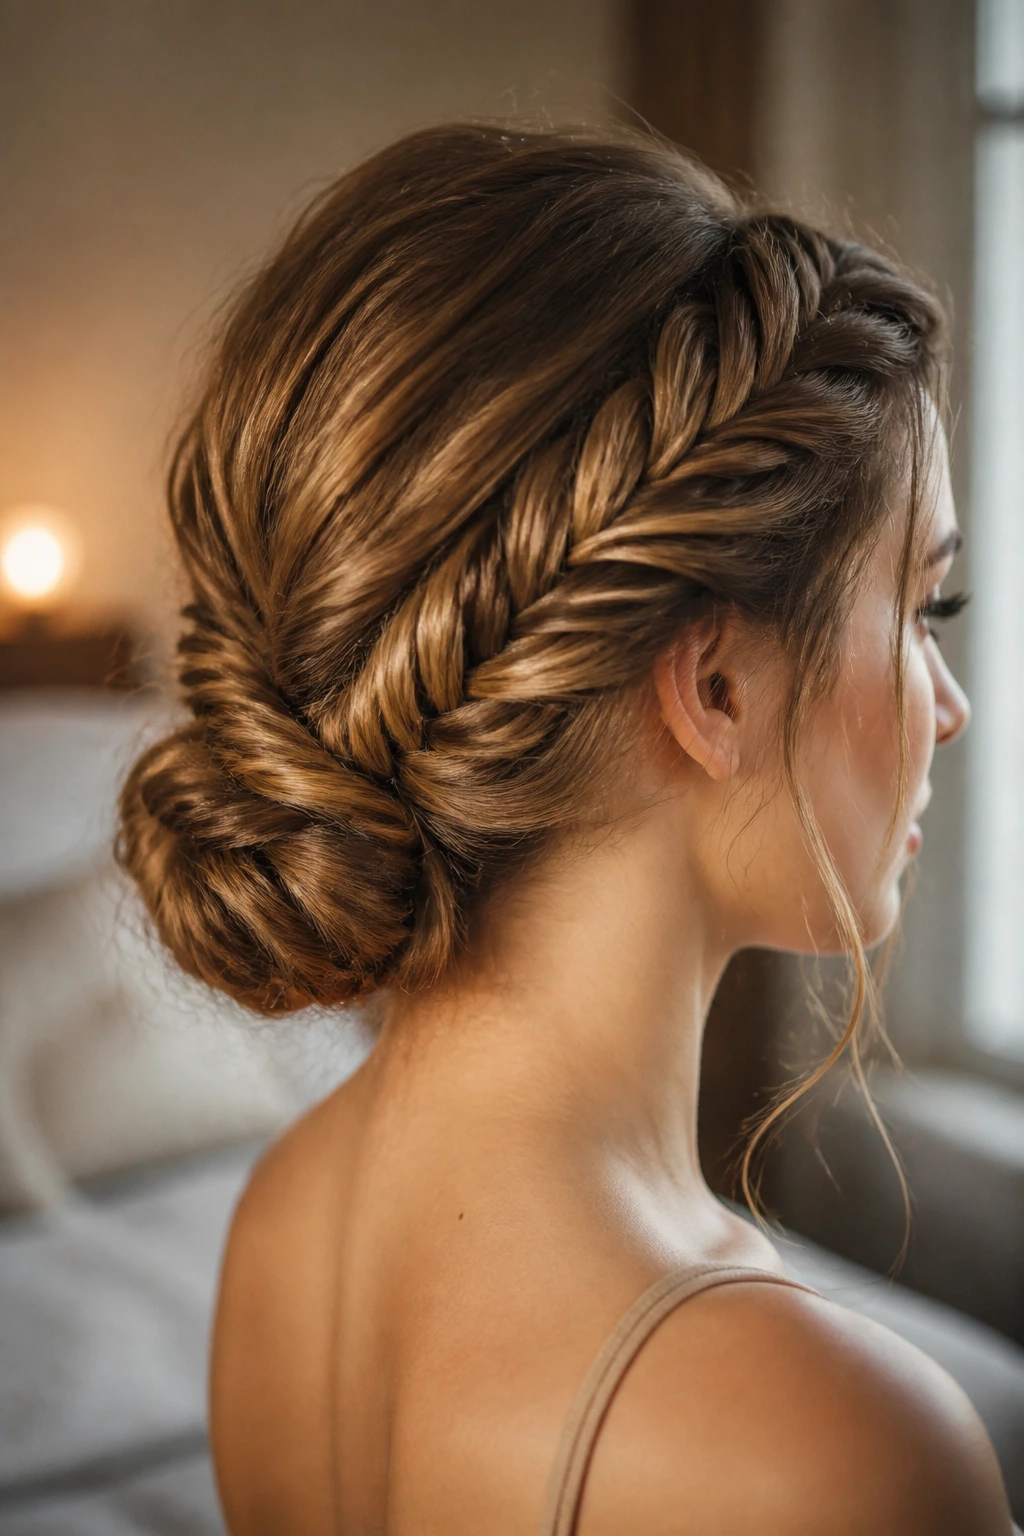
A fishtail bun gives you the texture of a braid and the compact finish of an updo. Braid the hair first, then coil the tail around itself and pin it into a low bun. It is especially nice if the ends are a little uneven, because the bun hides what the braid cannot.
9. Sleek High Fishtail Pony
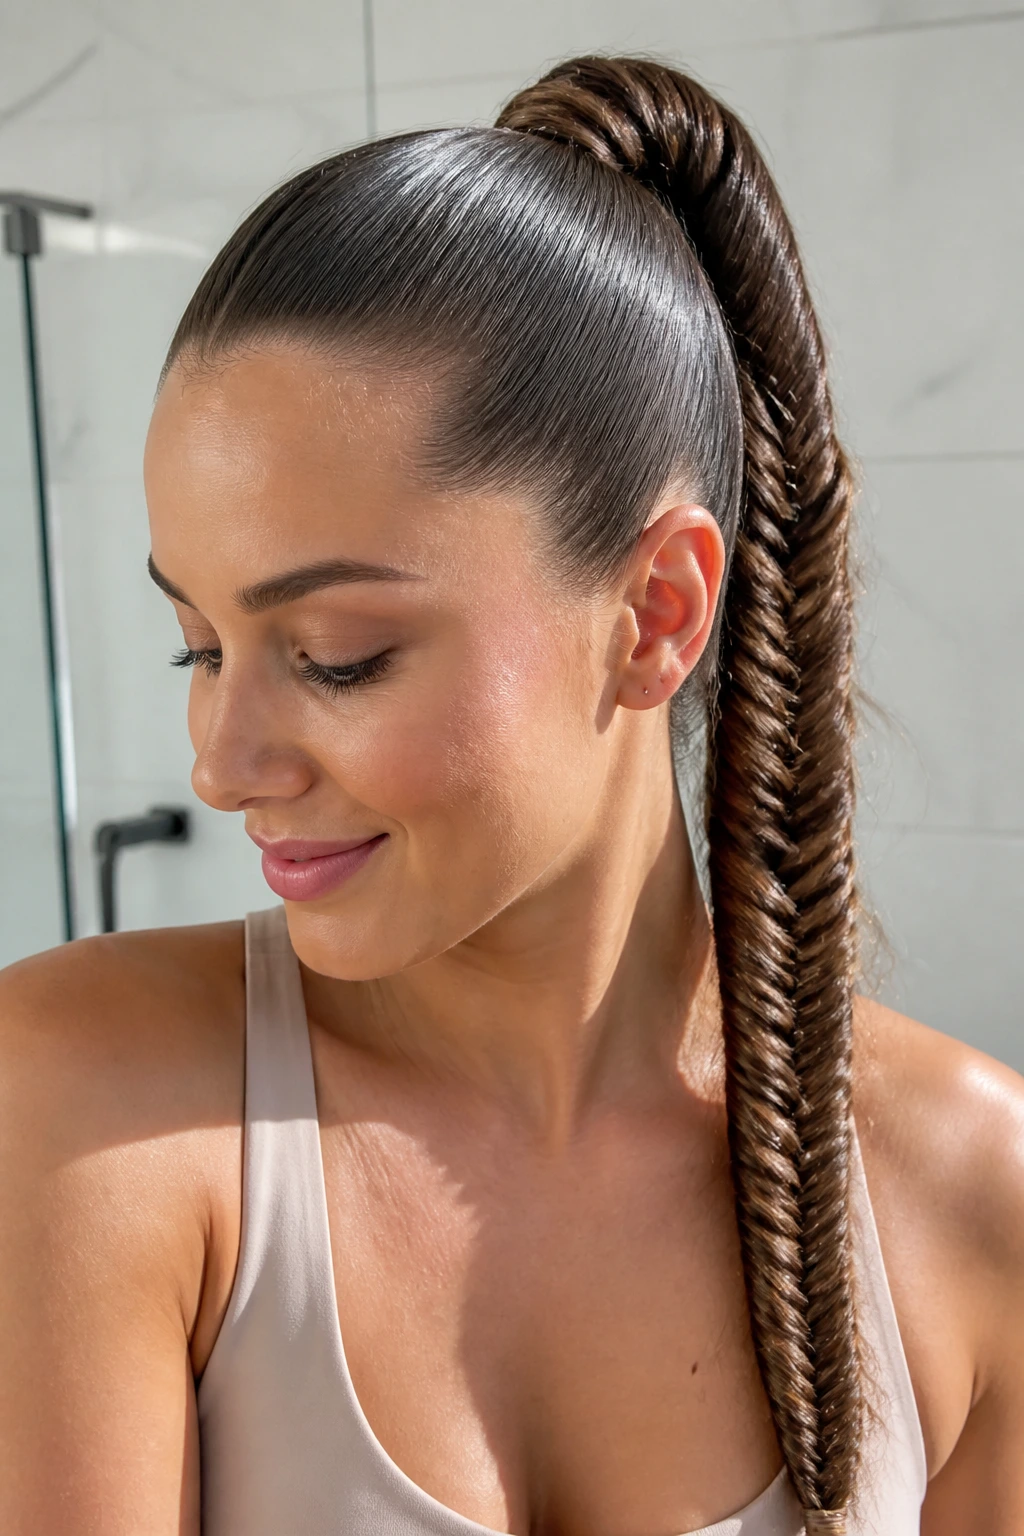
This one is all about contrast: smooth roots, tight base, textured tail. Brush the hair high, secure a ponytail, and keep the crown sleek with a pea-sized amount of gel or smoothing cream. The braid itself can be tighter than the rest of the list, which makes the length look longer than it is.
10. Bubble-Accent Fishtail
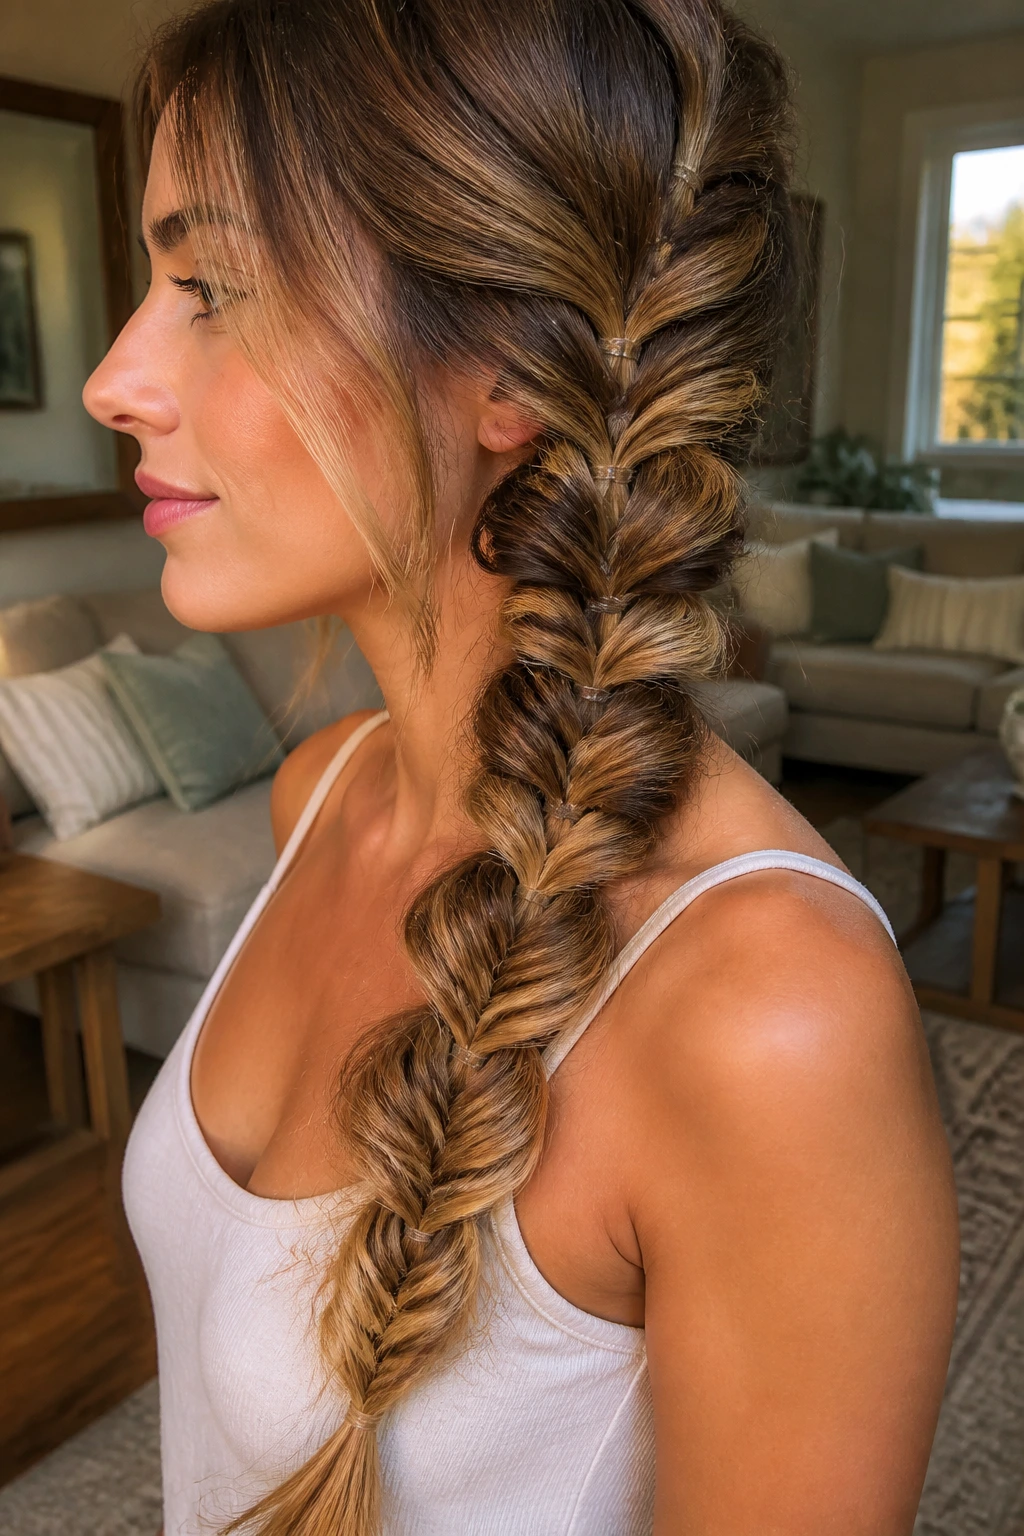
A few tiny elastics can turn a plain fishtail into something with a more playful rhythm. Tie off the braid every couple of inches, then gently puff each section between the ties so the braid looks segmented and airy. This works best on medium to long hair, where the spacing has room to show.
11. French-to-Fishtail Hybrid
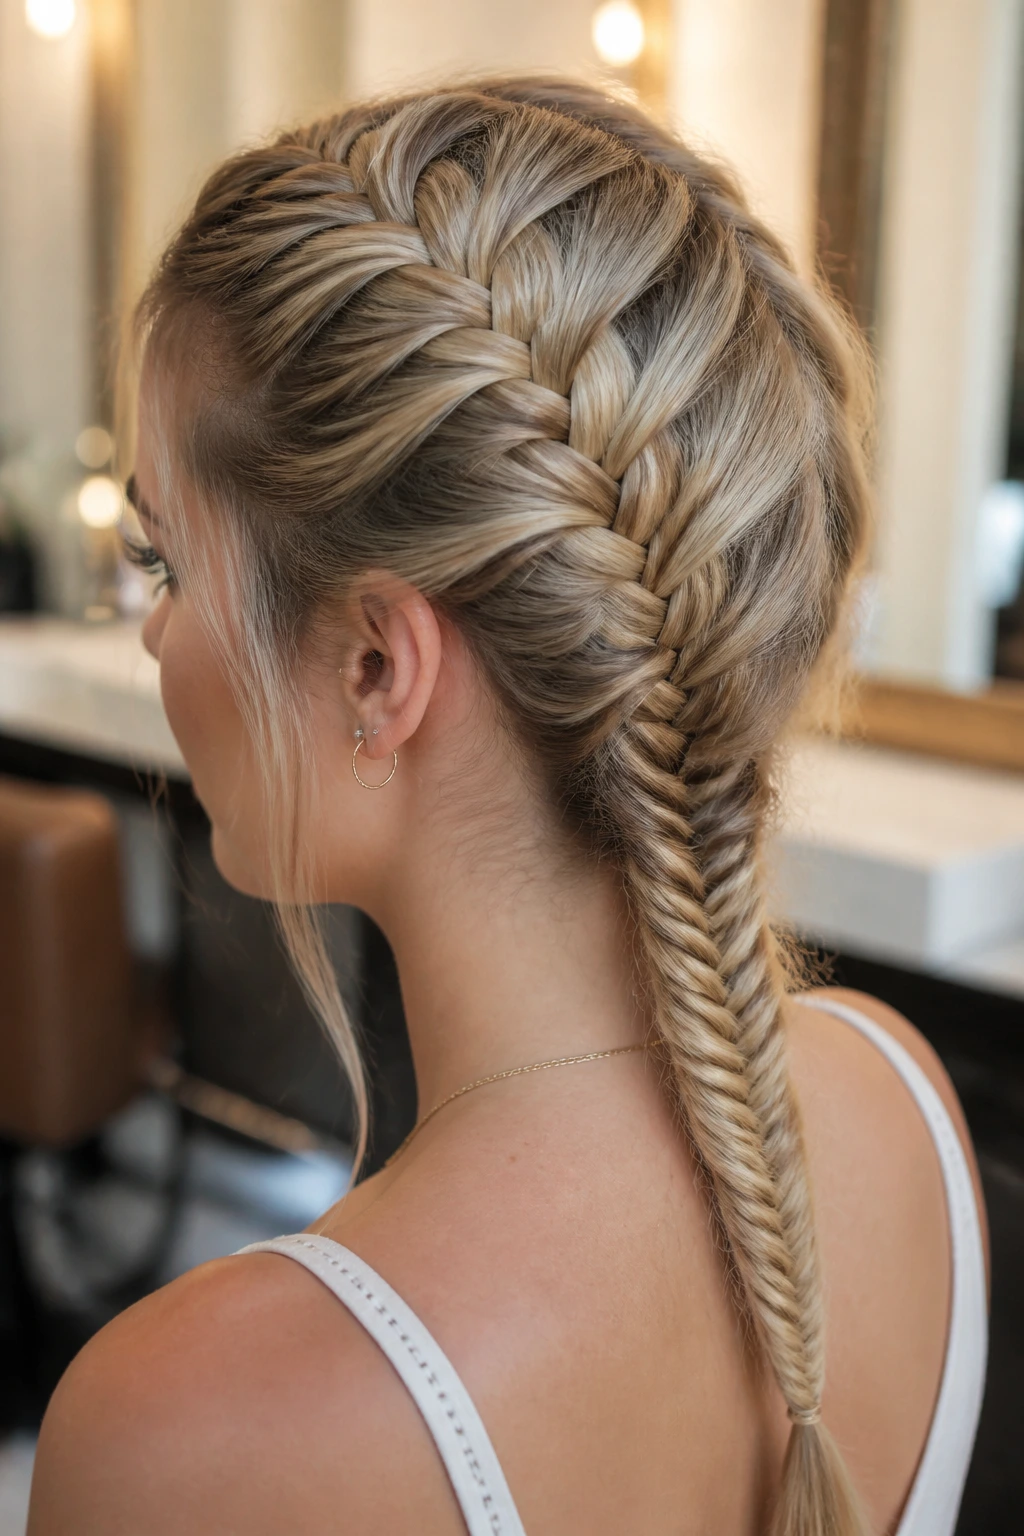
Start with a French braid at the top and switch to fishtail once you reach the back of the head. The hand-off is the whole trick, and it should happen where the braid can hide a small transition — usually just above the nape. This version is useful when you want the front to stay secure but the length to look softer.
12. Pull-Through Faux Fishtail
If your fingers get tangled in real fishtail braiding, the pull-through version is the friendly cousin. It uses small elastics and flipped loops to mimic the same woven look without the same hand pattern. The finish is chunkier and a little more graphic, which is why it photographs so well from the side.
13. Tiny Accent Fishtail
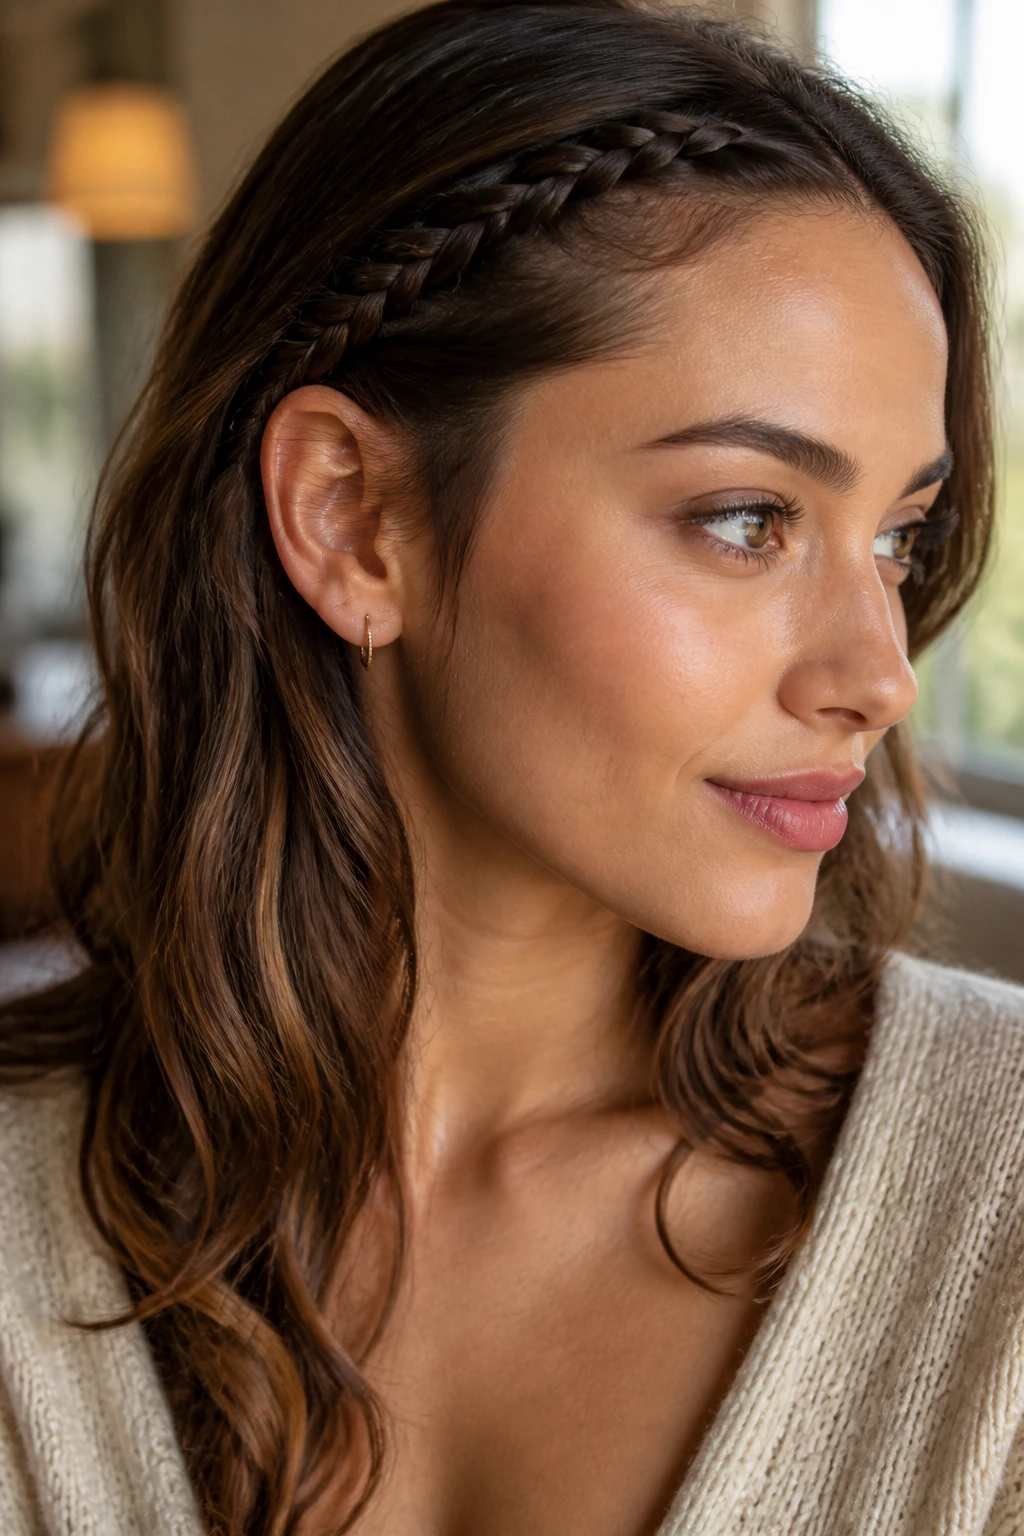
Sometimes the prettiest move is the smallest one. Braid a slim section along the hairline, then tuck it into loose hair or pin it near the ear as a detail instead of a full hairstyle. It works when you want texture without committing to a whole head of braiding.
14. Rope-and-Fishtail Combo
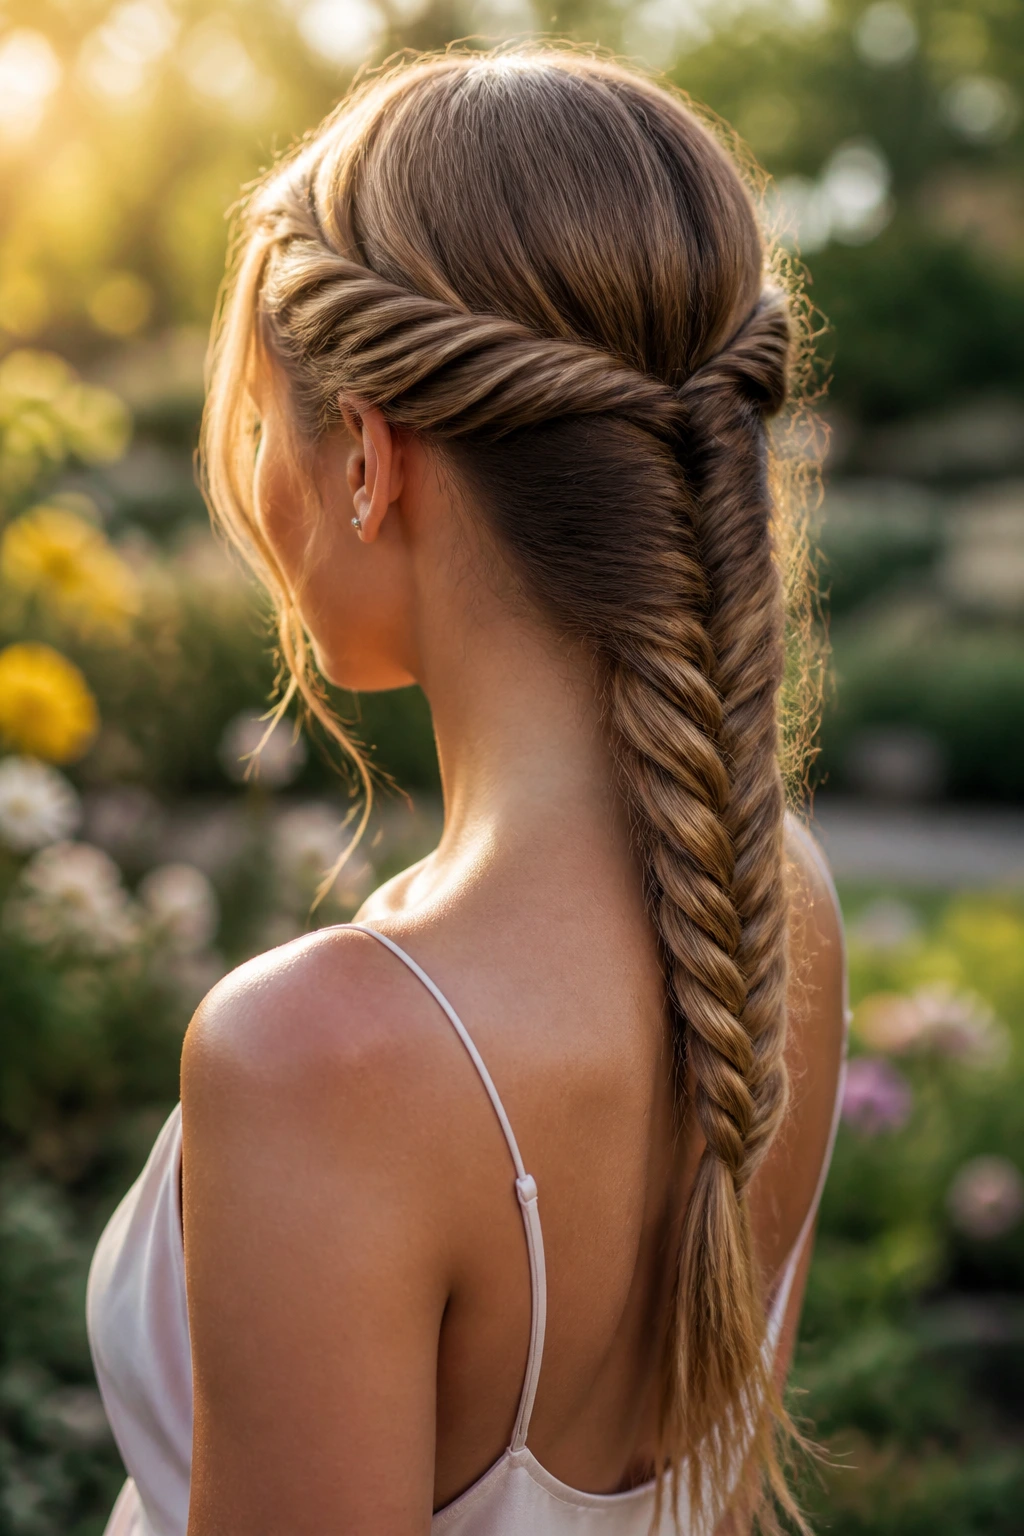
This style starts with a twist and ends with a braid, which gives the top half a smoother look and the tail more texture. Twist the first section away from the face, join the strands at the back, and finish with a fishtail braid. The mix keeps the style from feeling too expected.
15. Fishtail Mohawk Braid
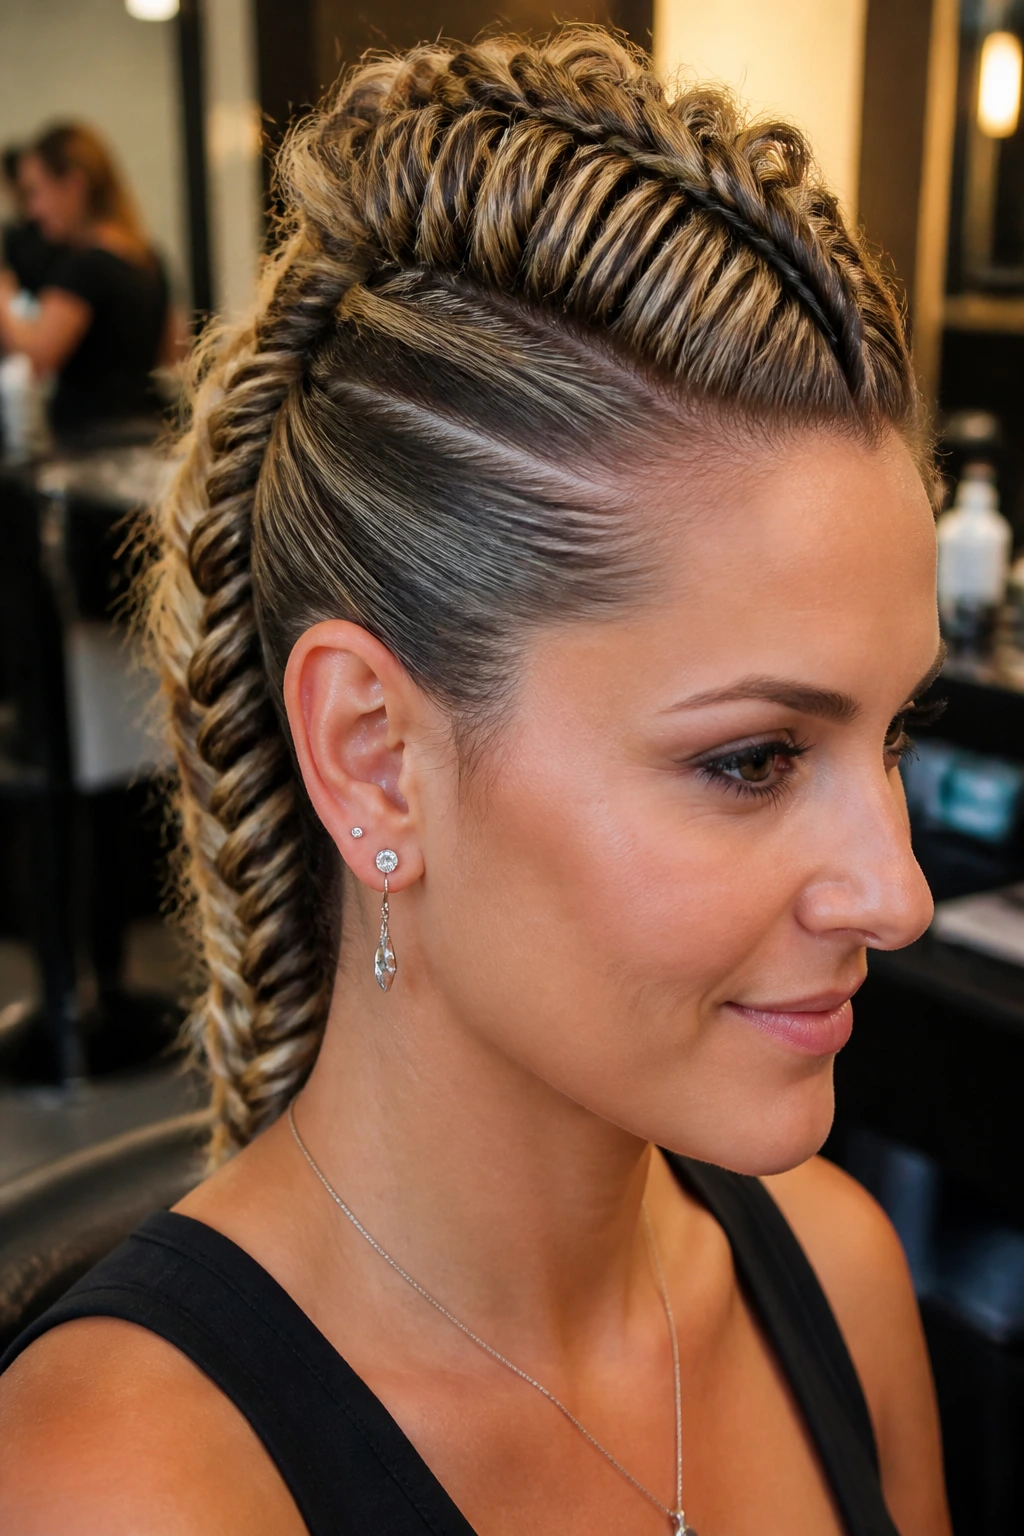
Pull the center section straight back, leave the sides tighter against the head, and braid the middle into a raised fishtail. It has more attitude than the softer versions, and it looks sharp on hair with a bit of natural grip. A little tugging at the edges makes the ridge stand out without turning into a stiff helmet.
16. Loose Face-Frame Fishtail
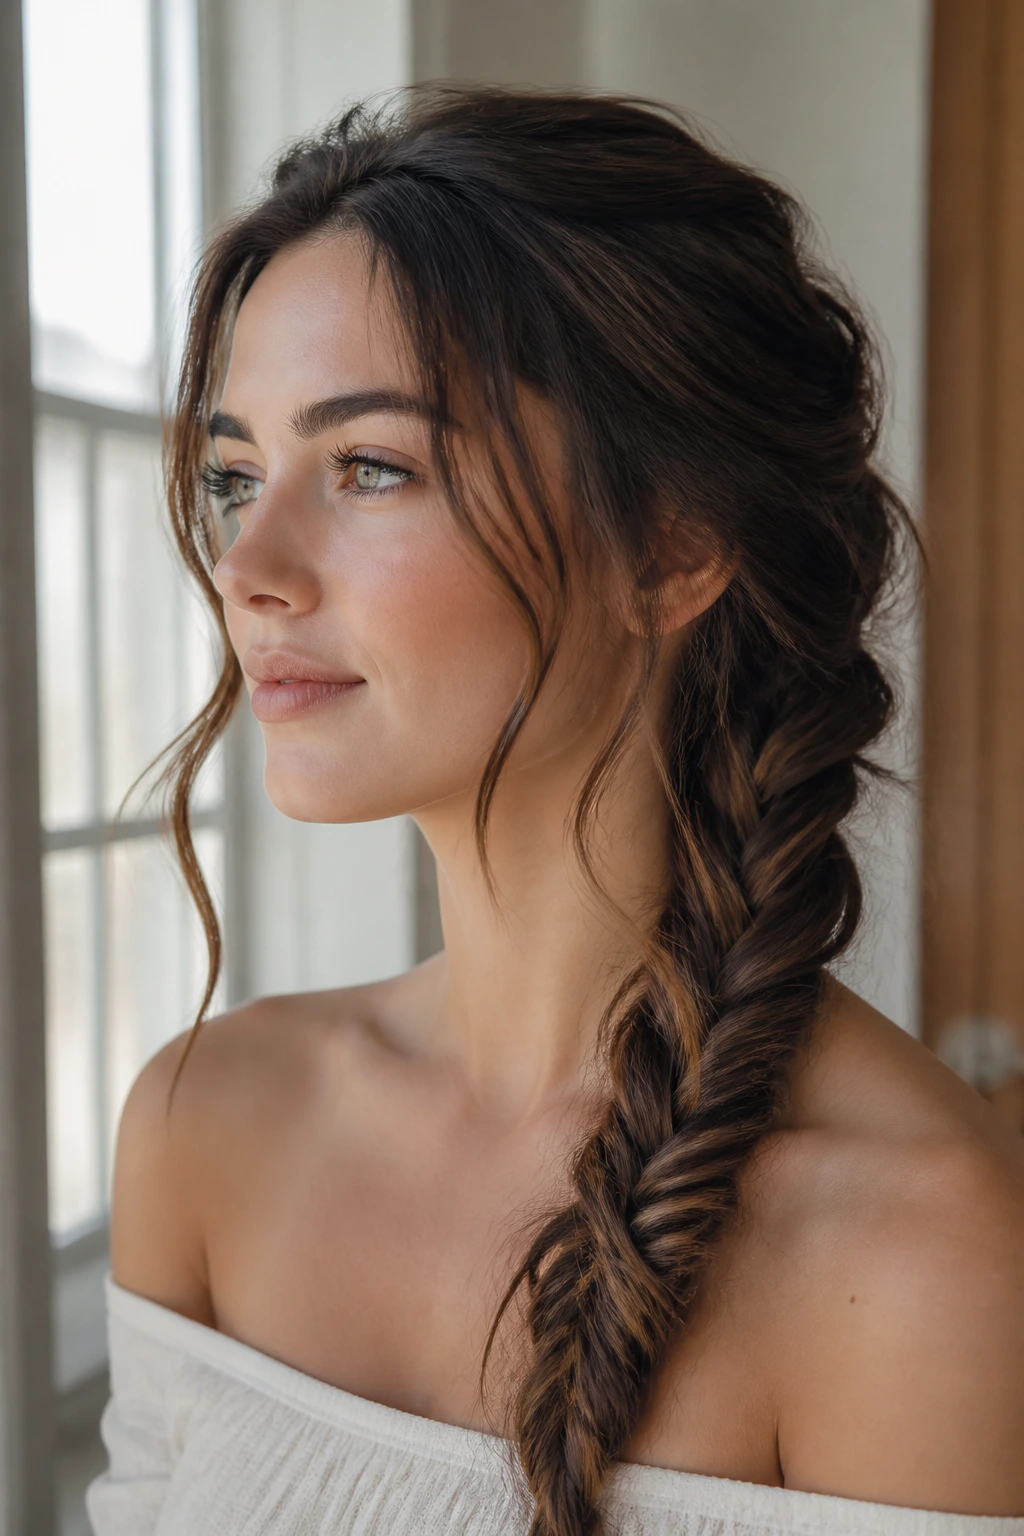
Here, the braid stays neat while the front pieces do the softening. Leave a curved strand on each side of the face, braid the rest loosely, and stop the braid before the ends get too thin and stringy. Curl the loose pieces away from the face if you want the shape to open up a little more.
17. Scarf-Woven Fishtail
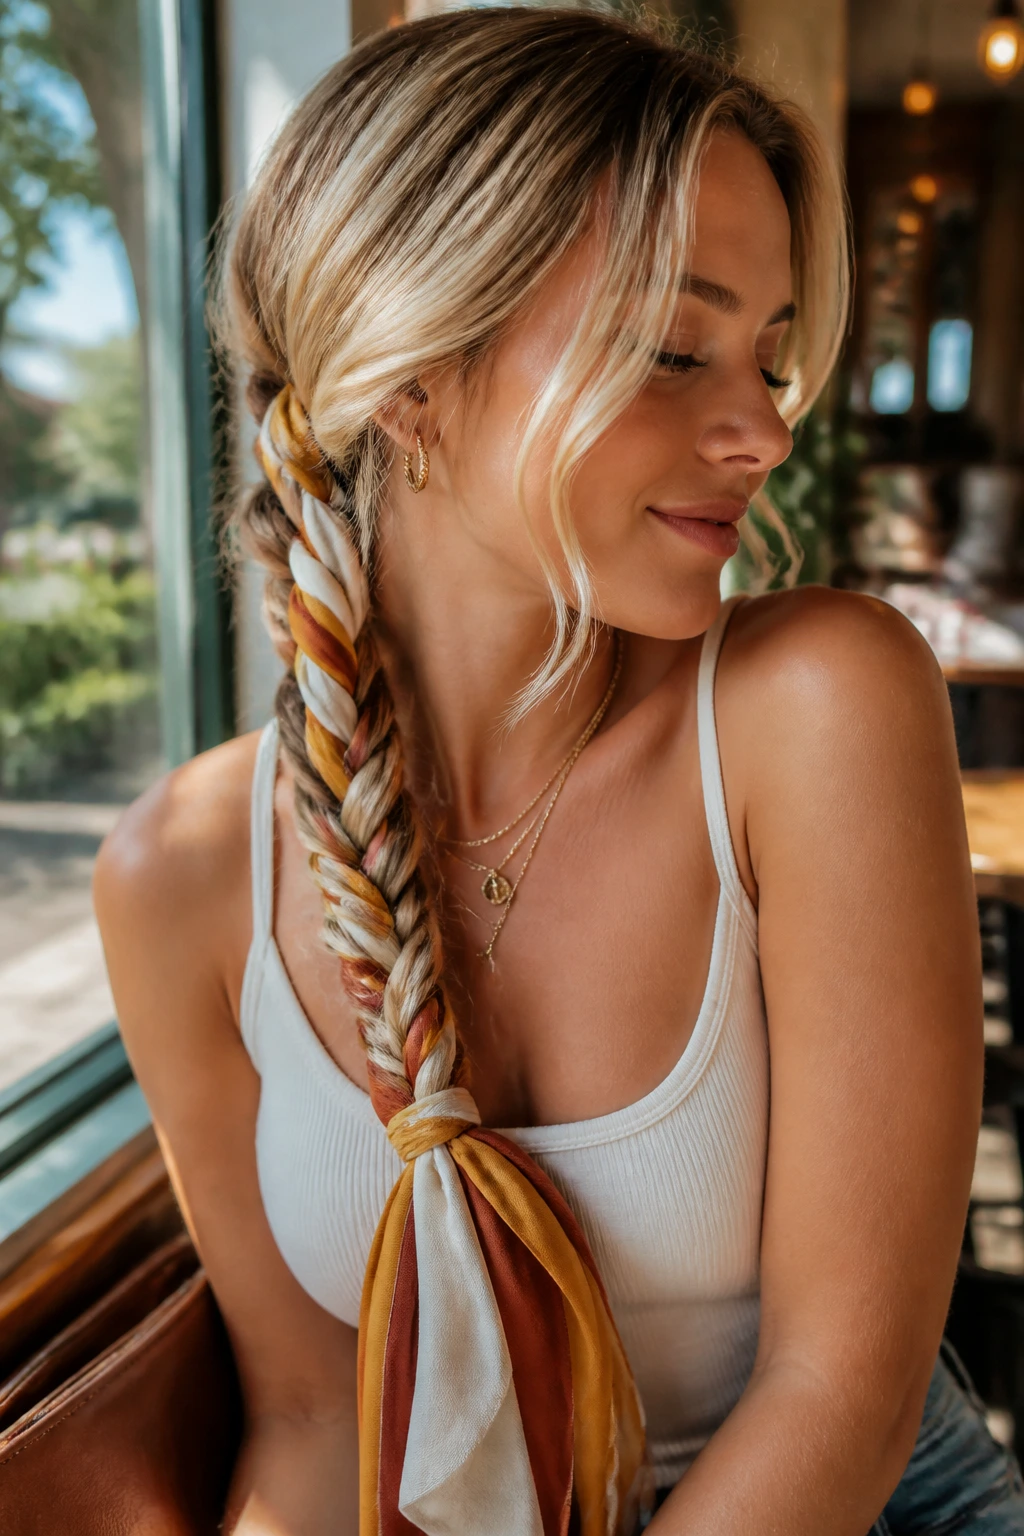
A scarf turns the braid into an accessory, not just a style. Fold it into a narrow strip, pin the center at the base of the braid, and weave it into the sections as you go. The trick is to keep the scarf flat, not twisted, so the color shows as clean bands instead of a knotty mess.
18. Pearl-Studded Fishtail
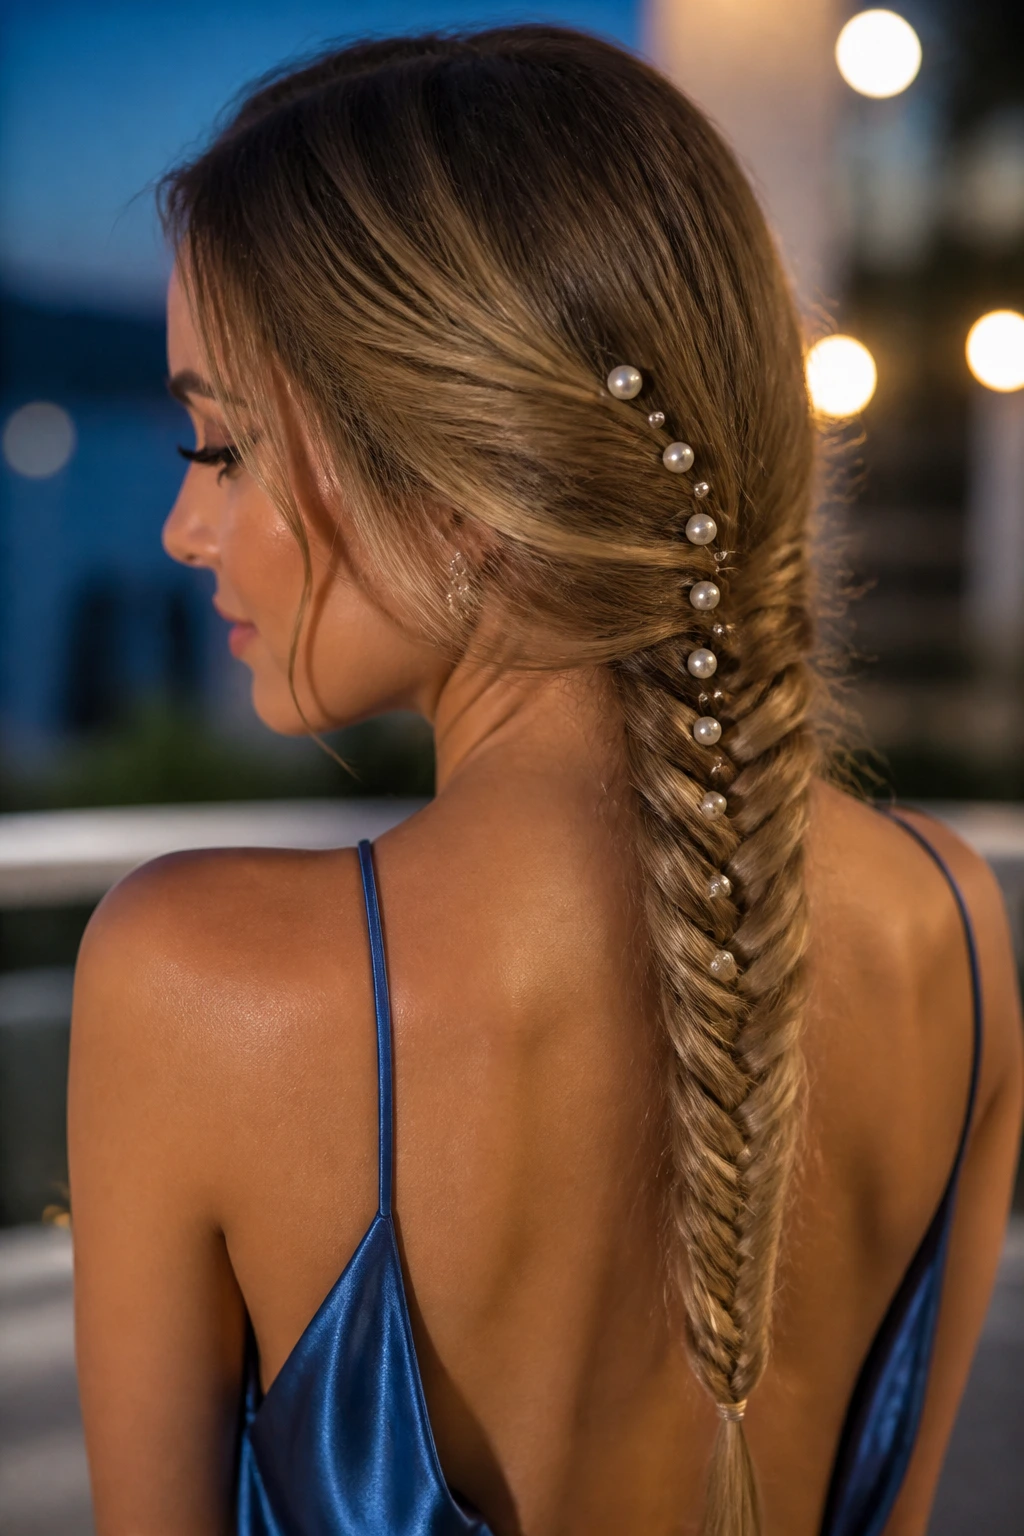
Pearls do best when the braid itself is quiet. Keep the braid smooth, then add pearl pins or small clips along one side so the texture stays the main event. I like this version for dressier events because the braid already has movement, and the pearls just catch the eye at the right points.
19. Curly-End Fishtail
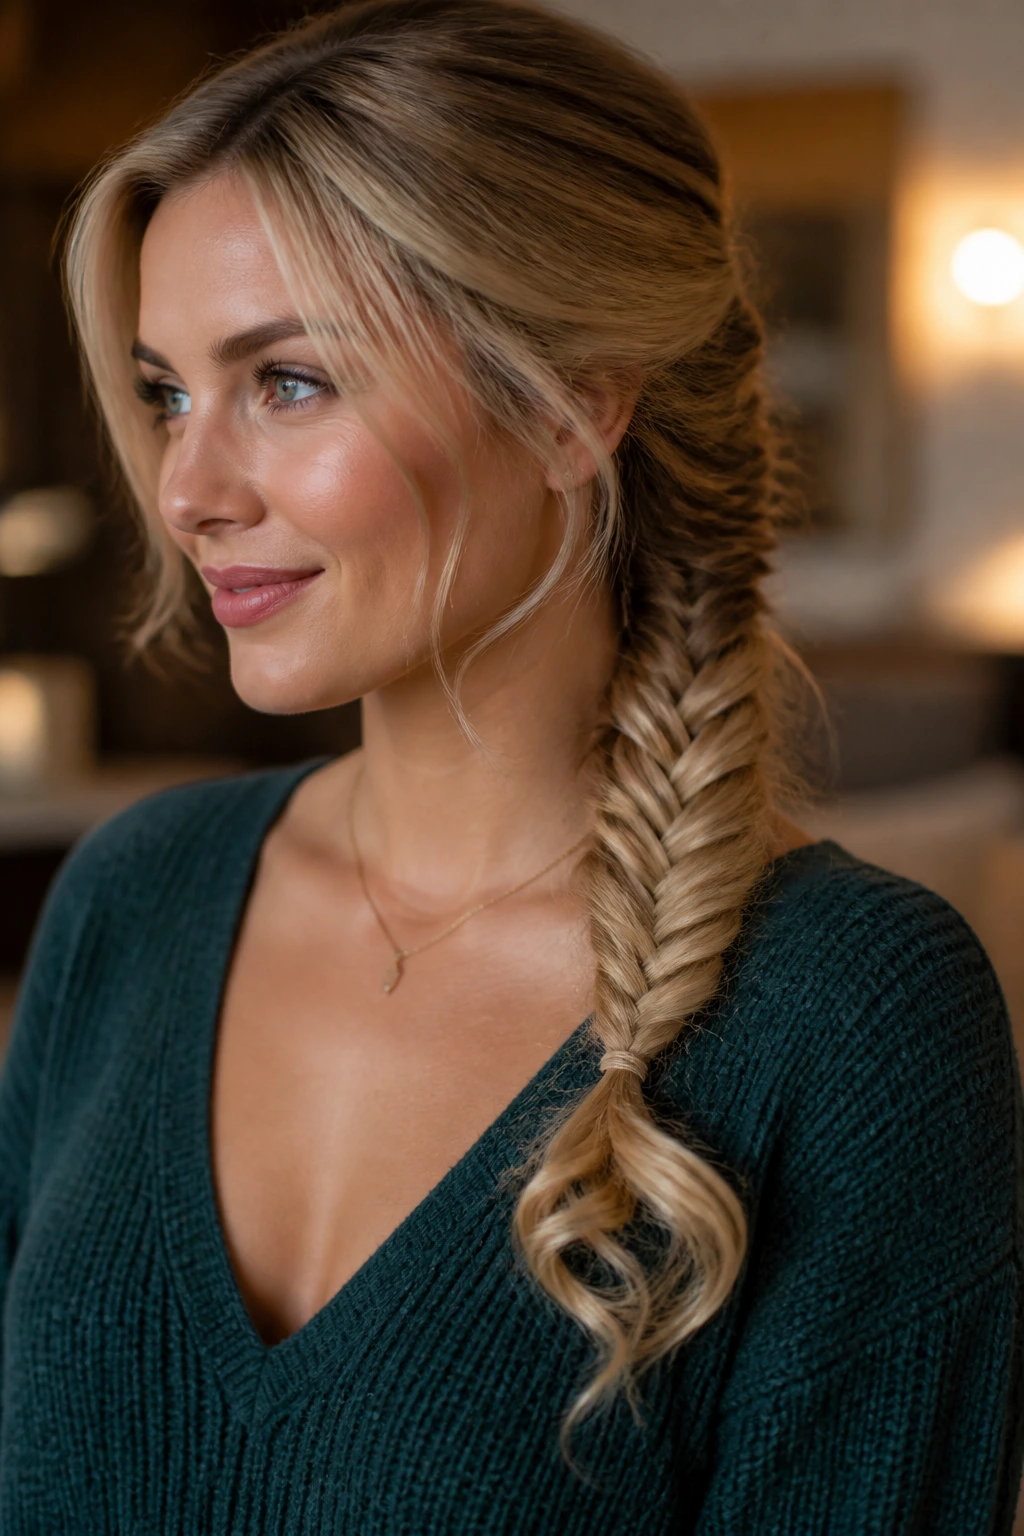
Leave the last few inches out of the braid or finish with a loose curl instead of a tight elastic tail. The soft ends make the braid feel lighter and keep the whole shape from looking heavy at the bottom. This is especially useful on long hair, where a blunt finish can drag the eye downward.
20. Reverse Inside-Out Fishtail
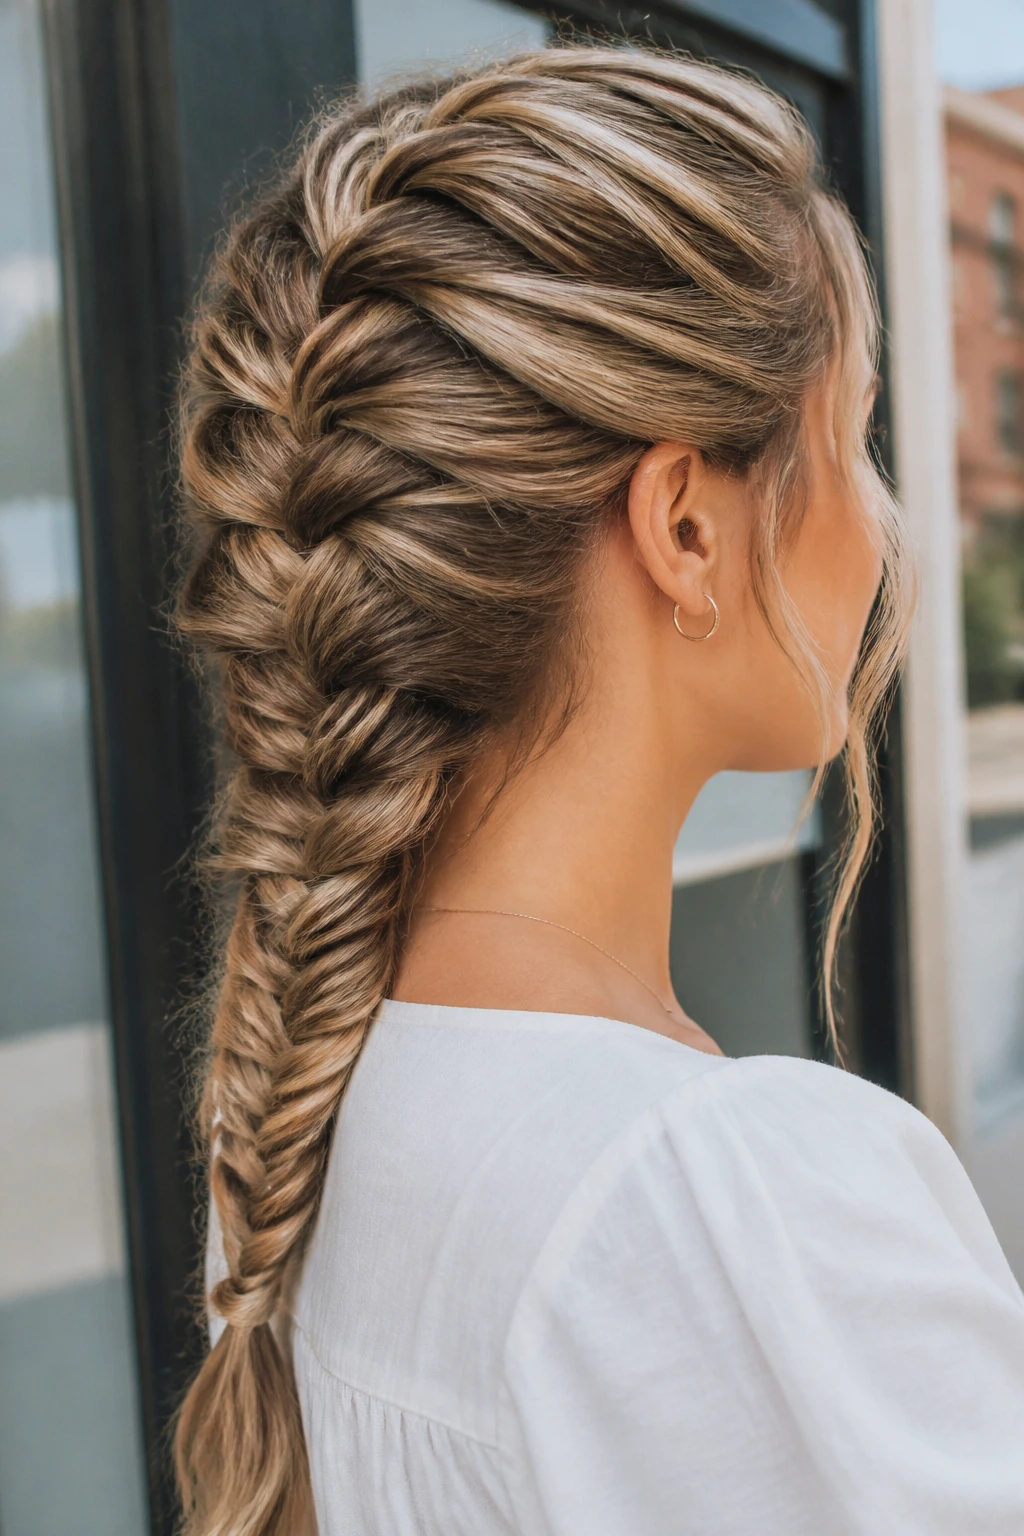
A reverse fishtail pushes the weave outward instead of tucking it inward, so the braid looks raised and full. The result feels a little bolder and a little less expected. If you have thin hair, this is one of the easiest ways to make the braid read thicker without adding extensions.
21. Fishtail into Low Knot
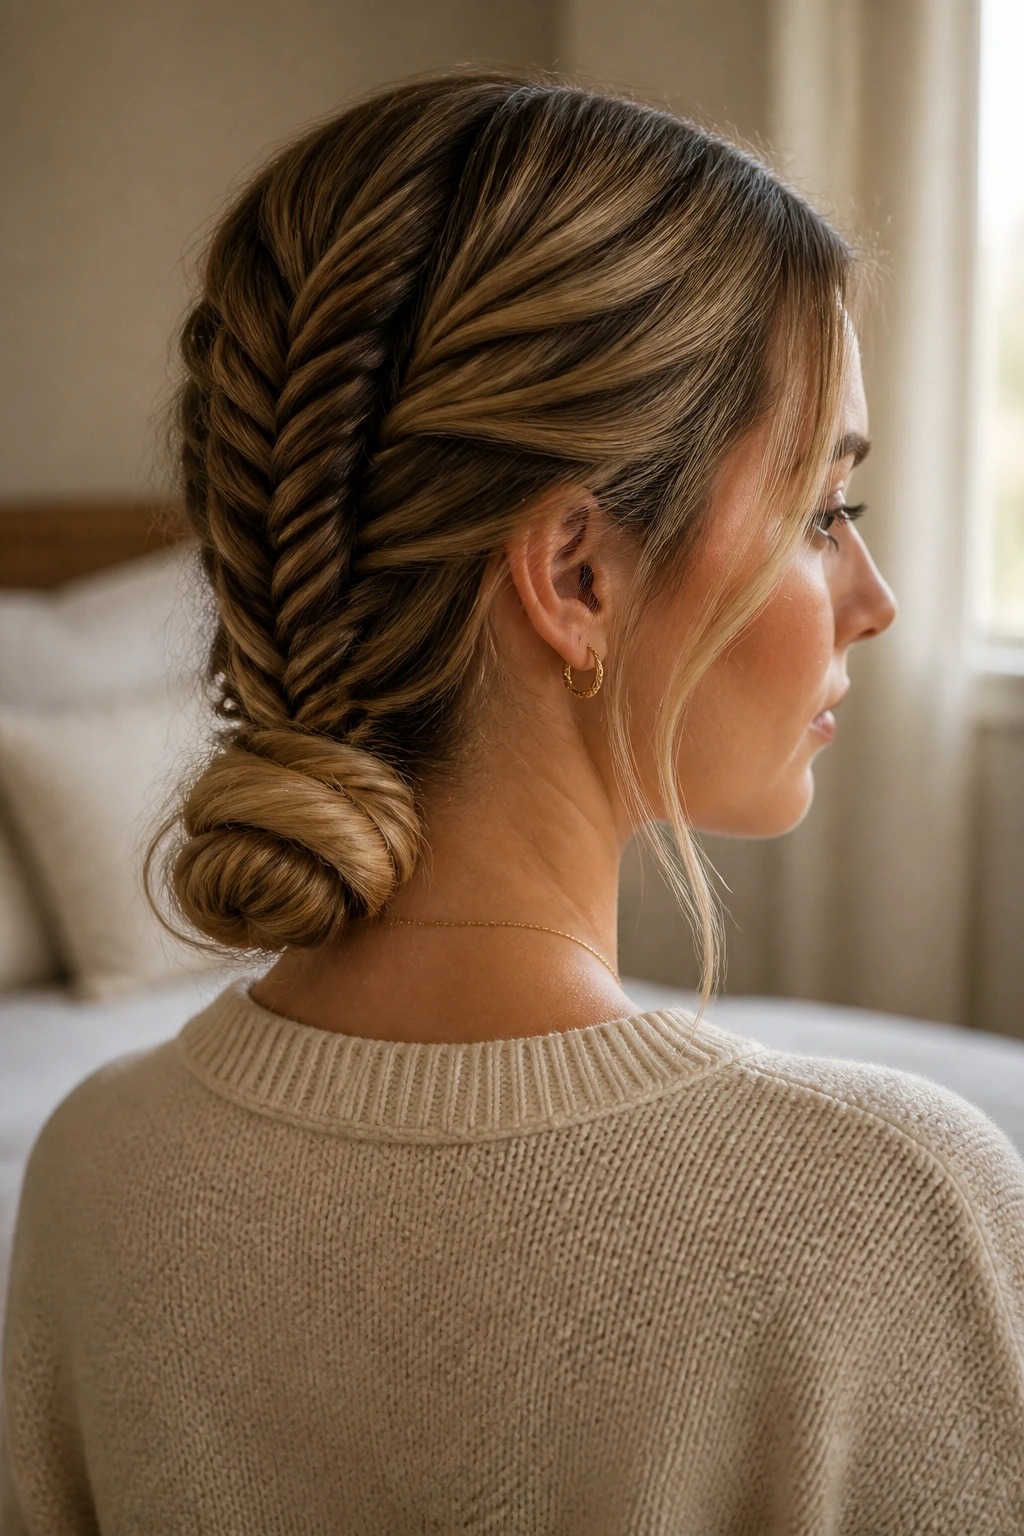
This version starts like a regular braid and then disappears into a knot at the nape. Braid the hair most of the way down, twist the tail once or twice, and pin it flat. It keeps the neckline neat and works well with high collars because the bun sits low enough to stay out of the way.
22. Deep-Part Side Fishtail
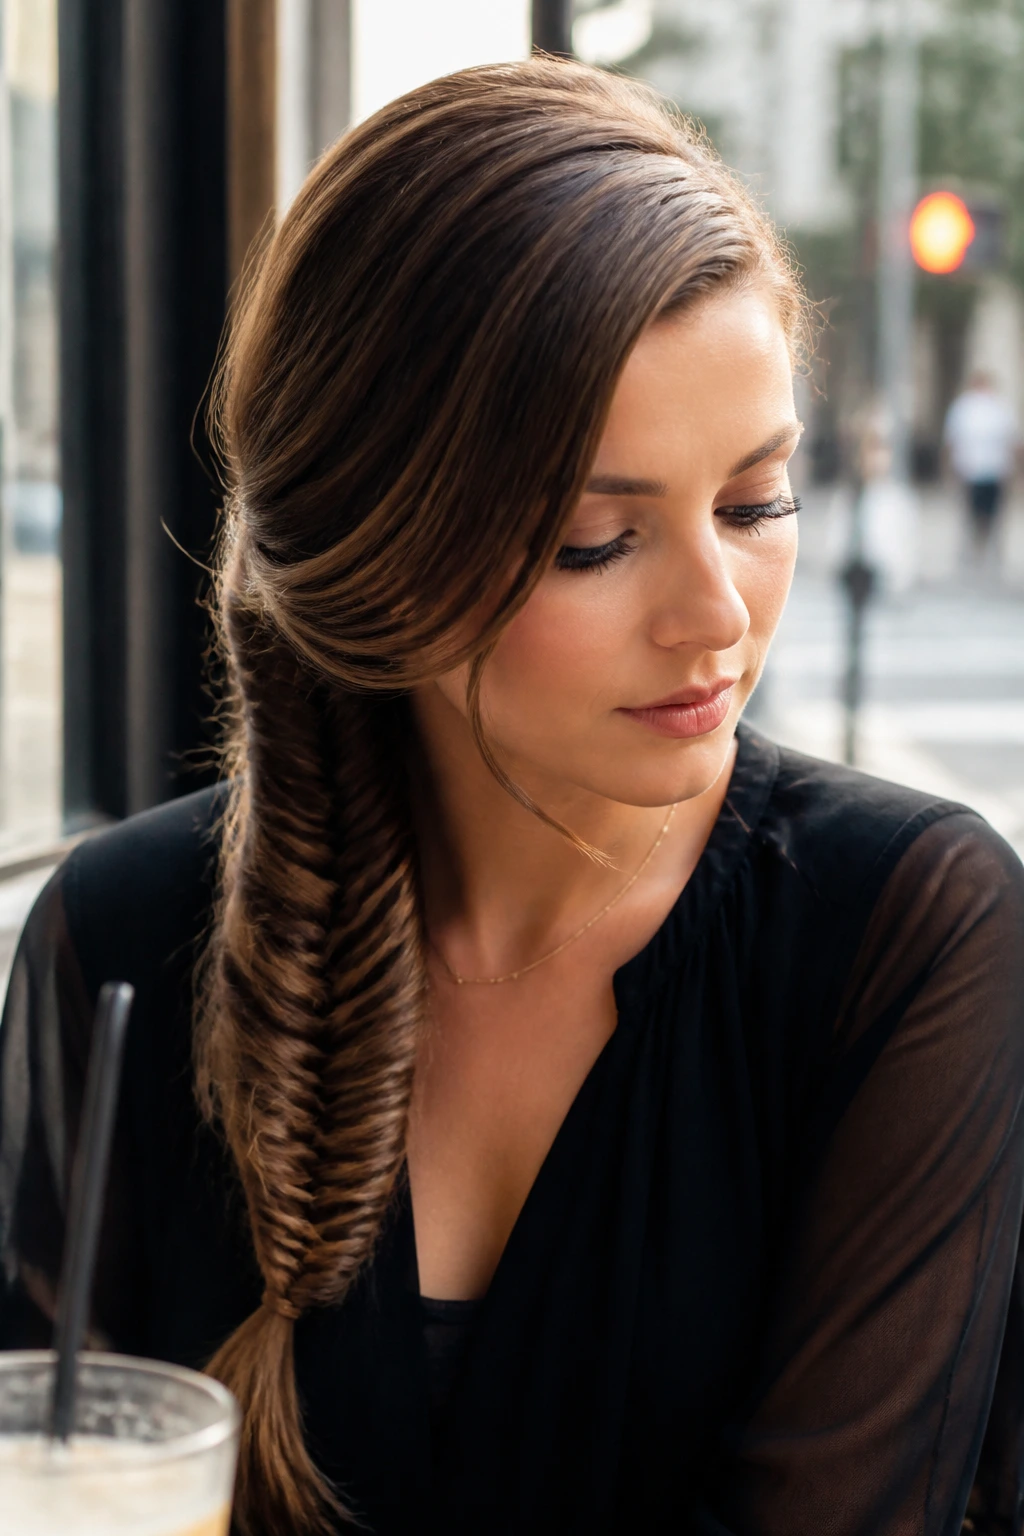
A deep side part gives the braid more drama before the braiding even starts. The heavier side can sweep into the fishtail, while the other side stays sleek and tucked. That asymmetry makes the braid feel more styled and less like something you threw together after a glance in the mirror.
23. Inverted Crown Fishtail
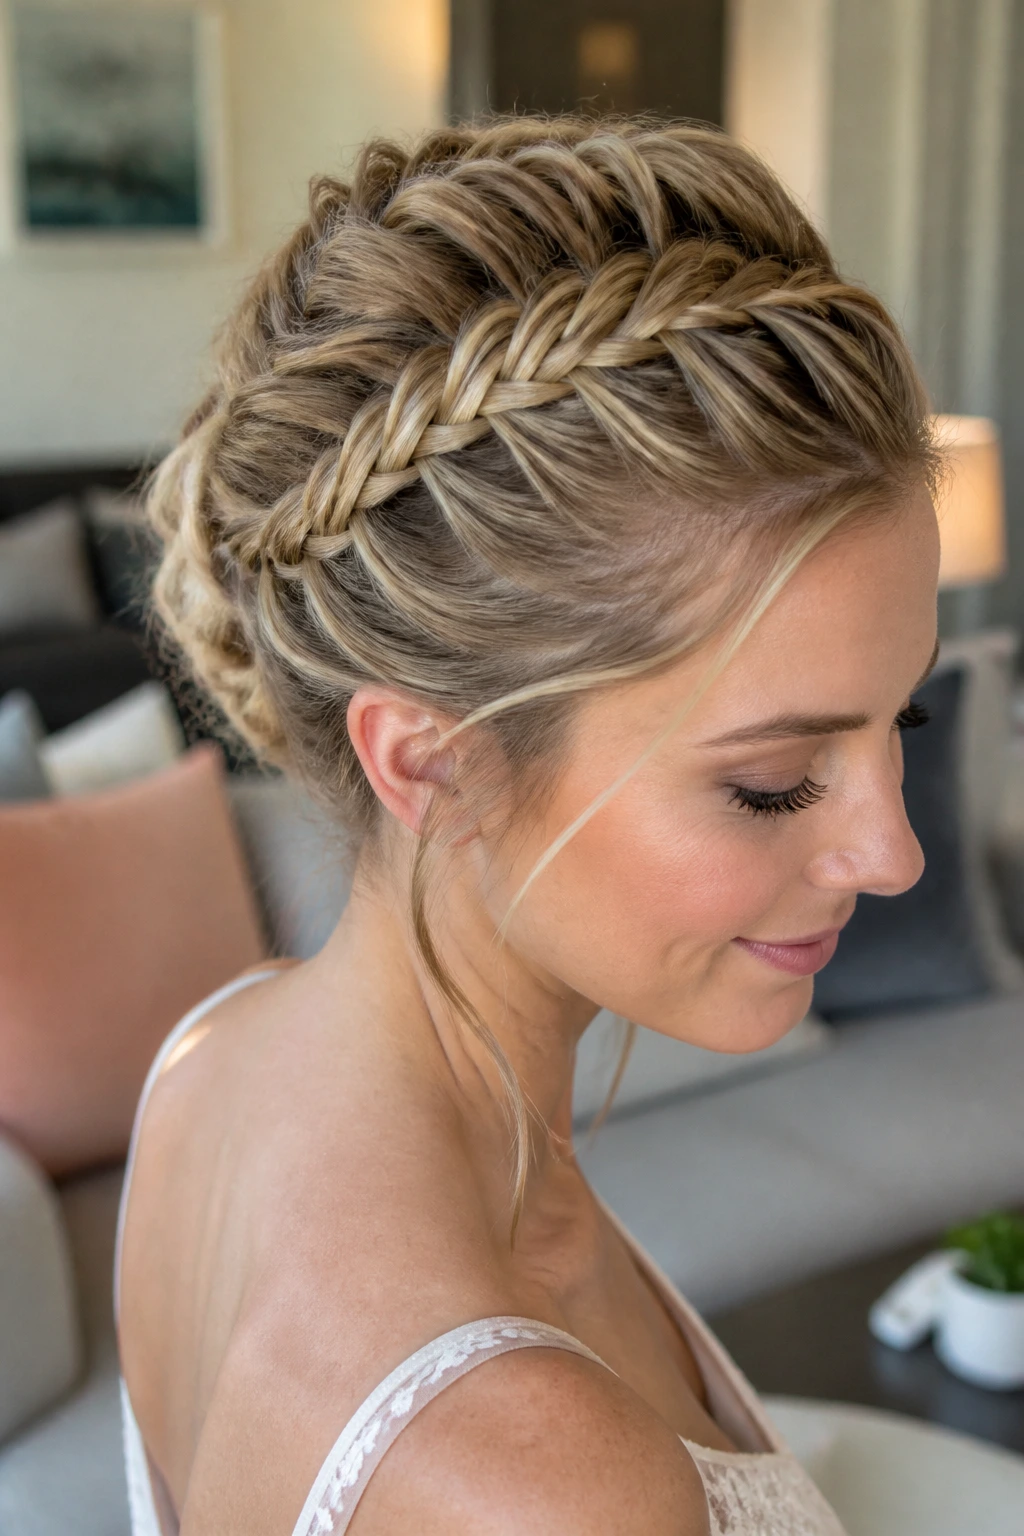
Instead of wrapping the braid like a halo, braid upward along the back and let it arc across the crown in the opposite direction. It is a little more architectural, a little less sweet, and it stays put better if you secure the crossing points with hidden pins. Great choice when you want the front to stay smooth.
24. Dutch-Style Fishtail
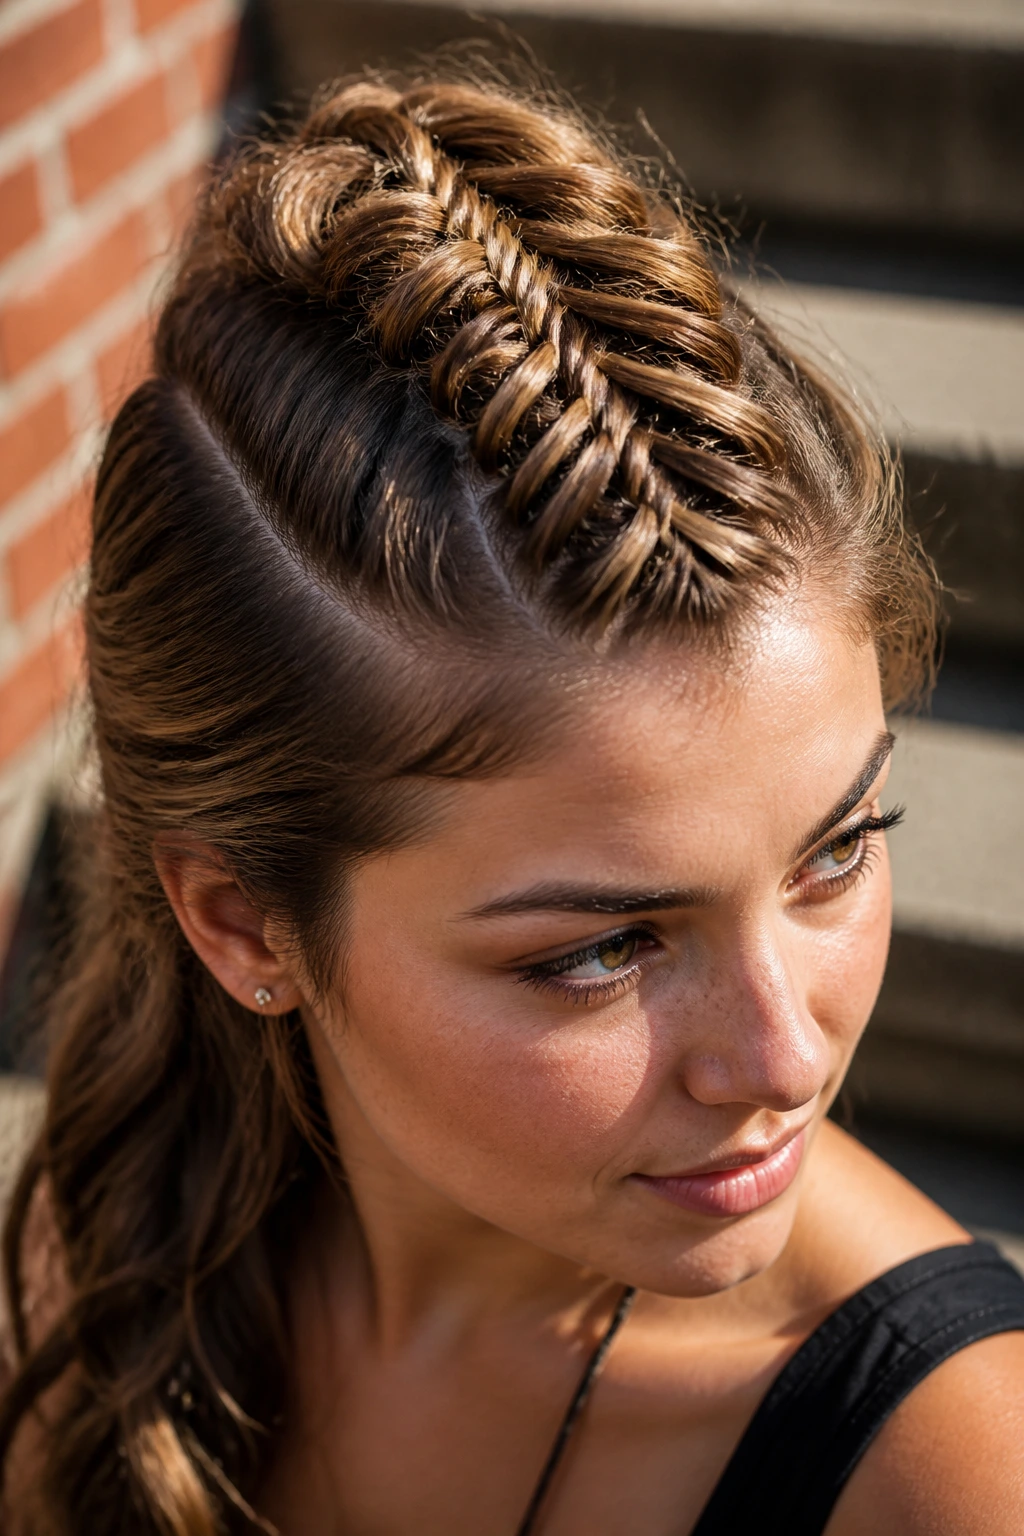
This one lifts the braid off the scalp so the pattern sits on top instead of sinking into the hair. It has more depth than a flat braid, especially when the sections are kept compact at the start. If you like visible texture from the front, this is one of the strongest choices in the whole group.
25. Tucked Fishtail Chignon
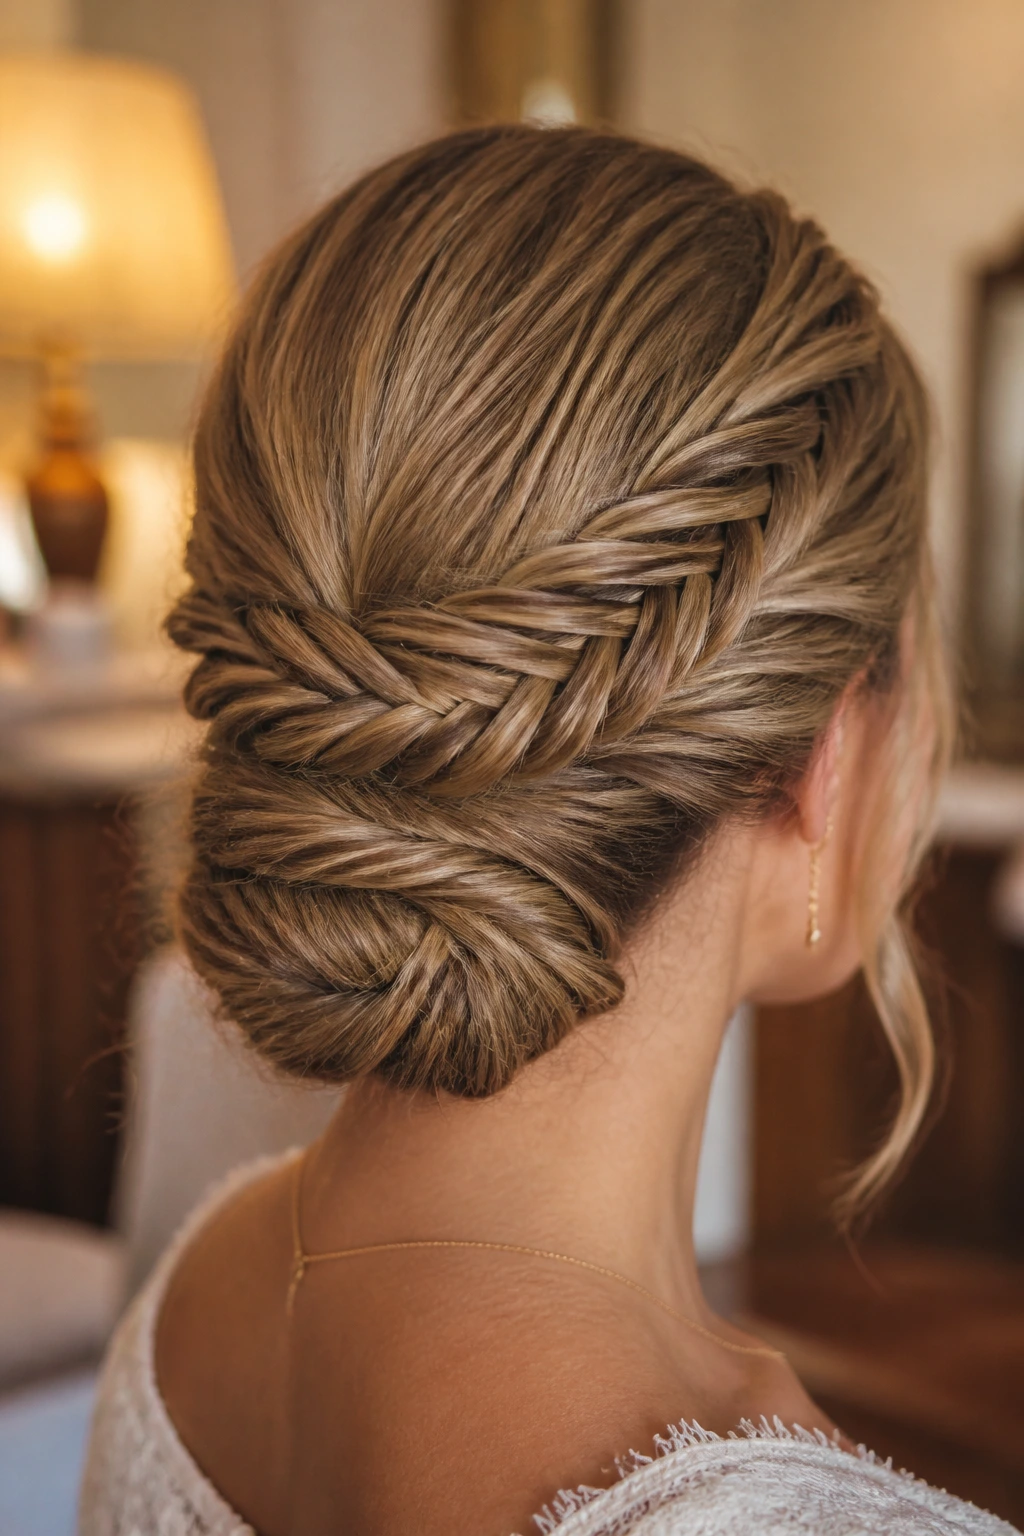
Braid the hair first, coil the length into a chignon, and tuck every loose end underneath. The style feels formal without looking severe, which is a hard balance to get right. Keep the braid slightly loose before you pin it, because a too-tight braid will fight the rounded shape of the chignon.
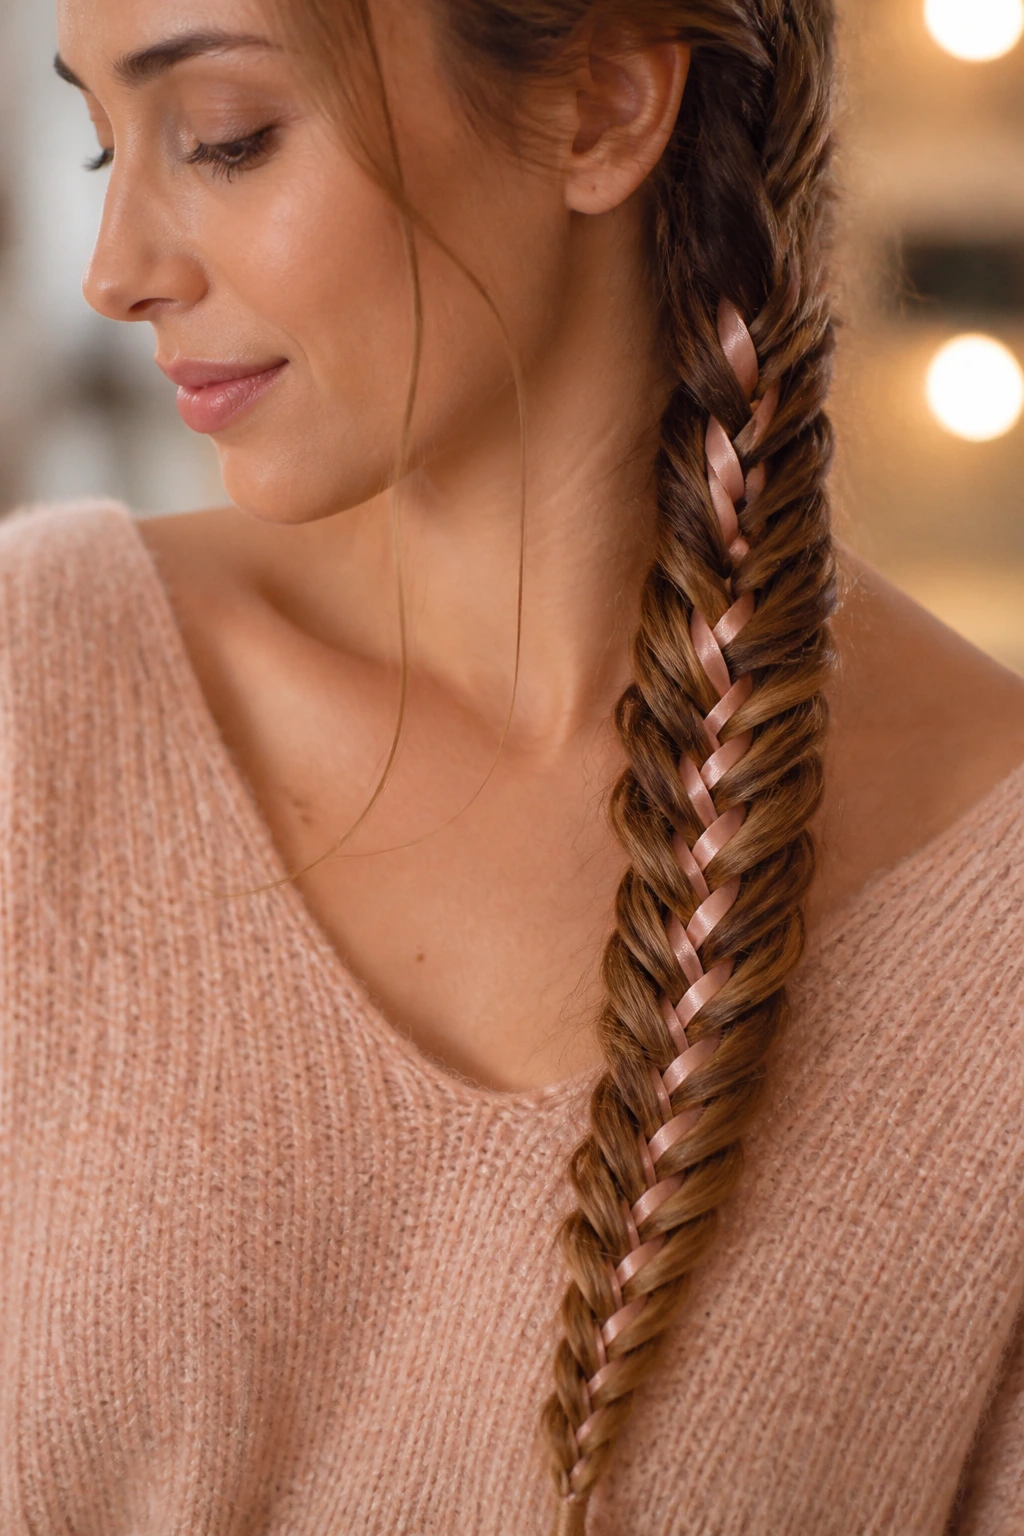
26. Ribbon-Woven Fishtail
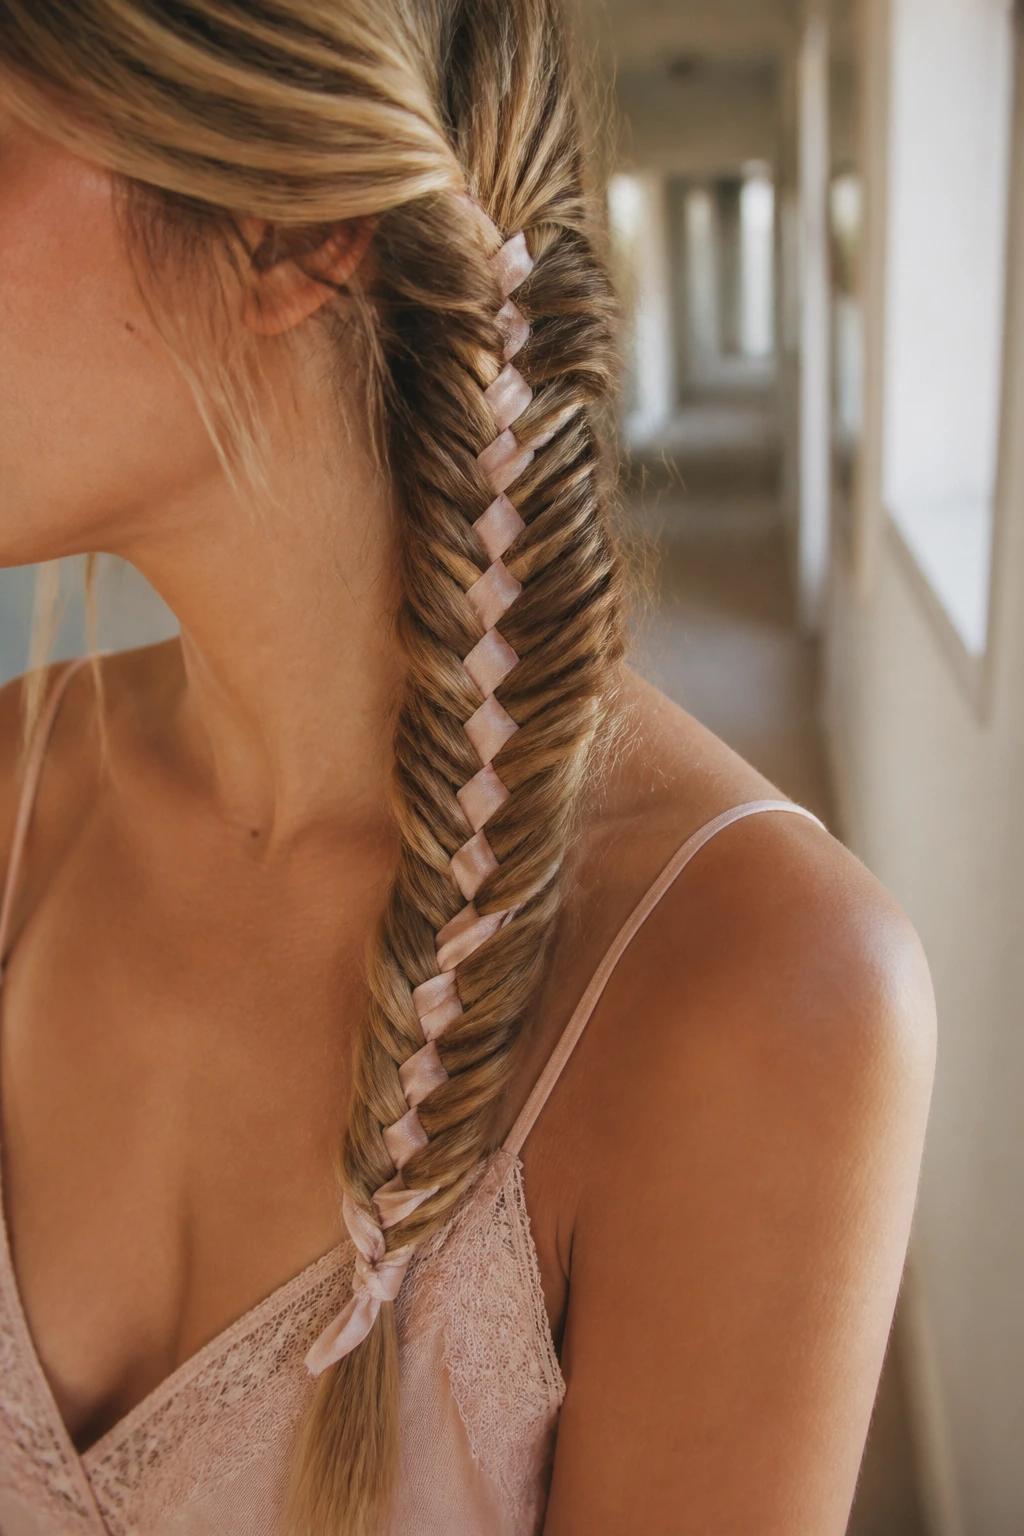
A narrow ribbon changes the braid in one clean move. Thread it in at the top and let it travel with one section through the braid, then keep it flat so it does not bunch. Soft satin works better than stiff ribbon, because it moves with the braid instead of sitting on top of it like decoration.
27. Layered Fishtail for Long Hair
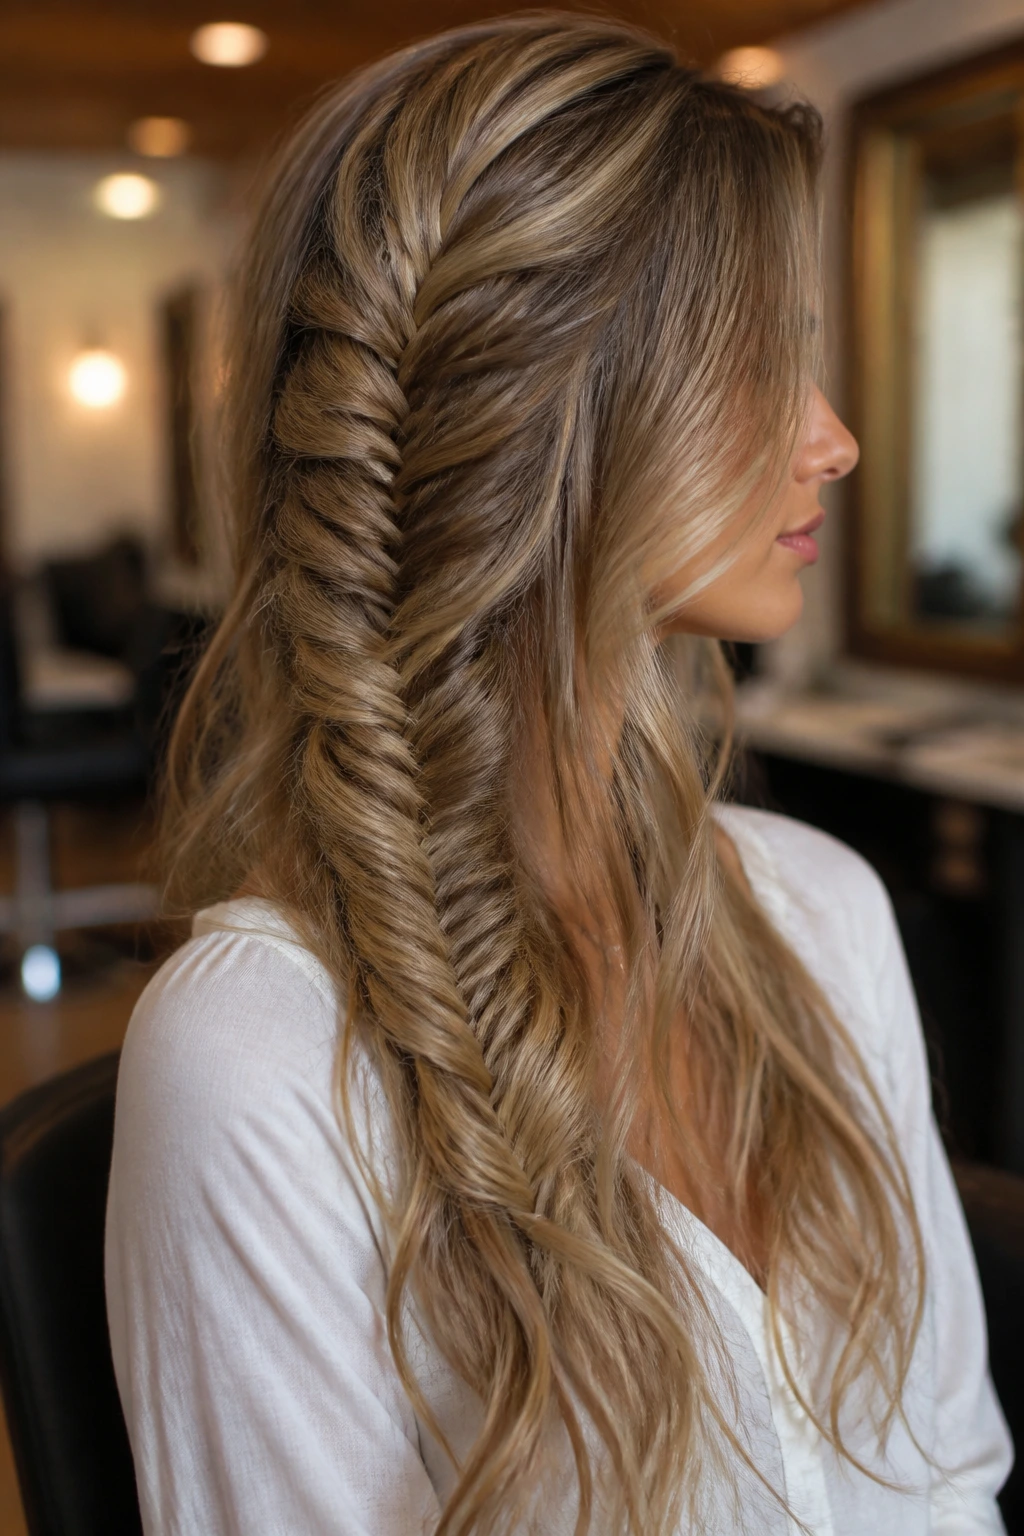
Long layers can make fishtails look airy, but they also love to escape. The fix is to start with slightly tighter tension at the top and keep your sections smaller than you think you need. Once the braid is secure, pull only the outer edges, not the shorter layers at the front.
28. Faux Fishtail for Short Hair
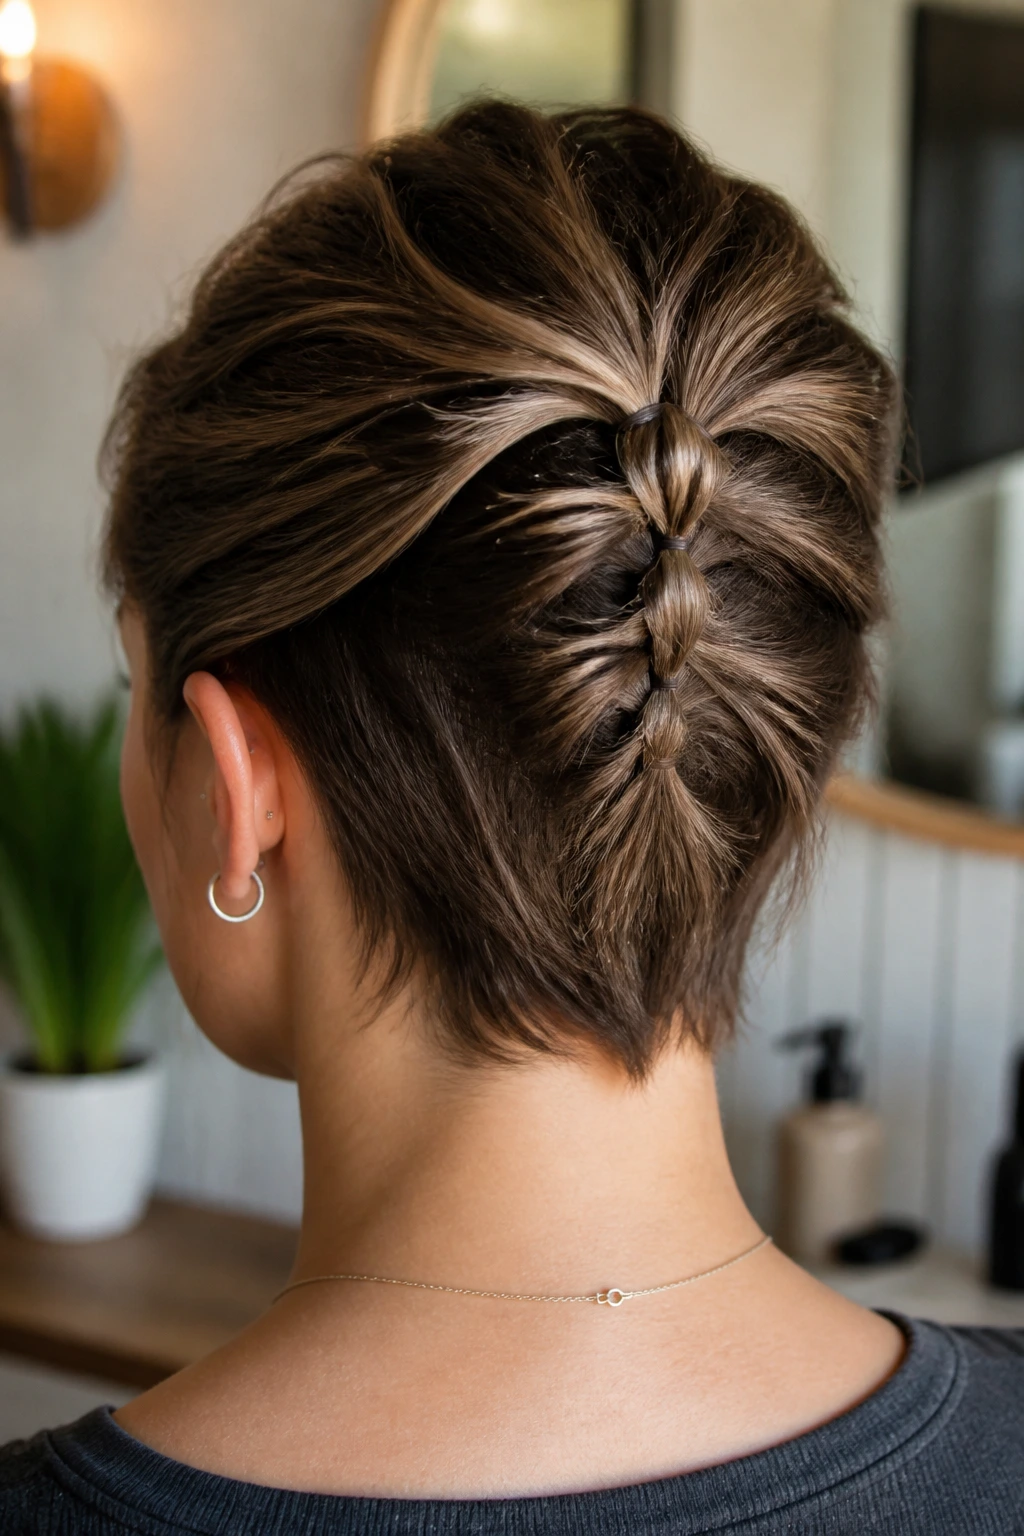
Shorter hair can still get the look if you cheat a little. Build a series of tiny ponytails or mini sections down the back, then pull them together so the braid reads as a compact faux fishtail. It will not have the same long rope effect, but it can still look crisp and intentional.
29. Micro-Braid Front Fishtail
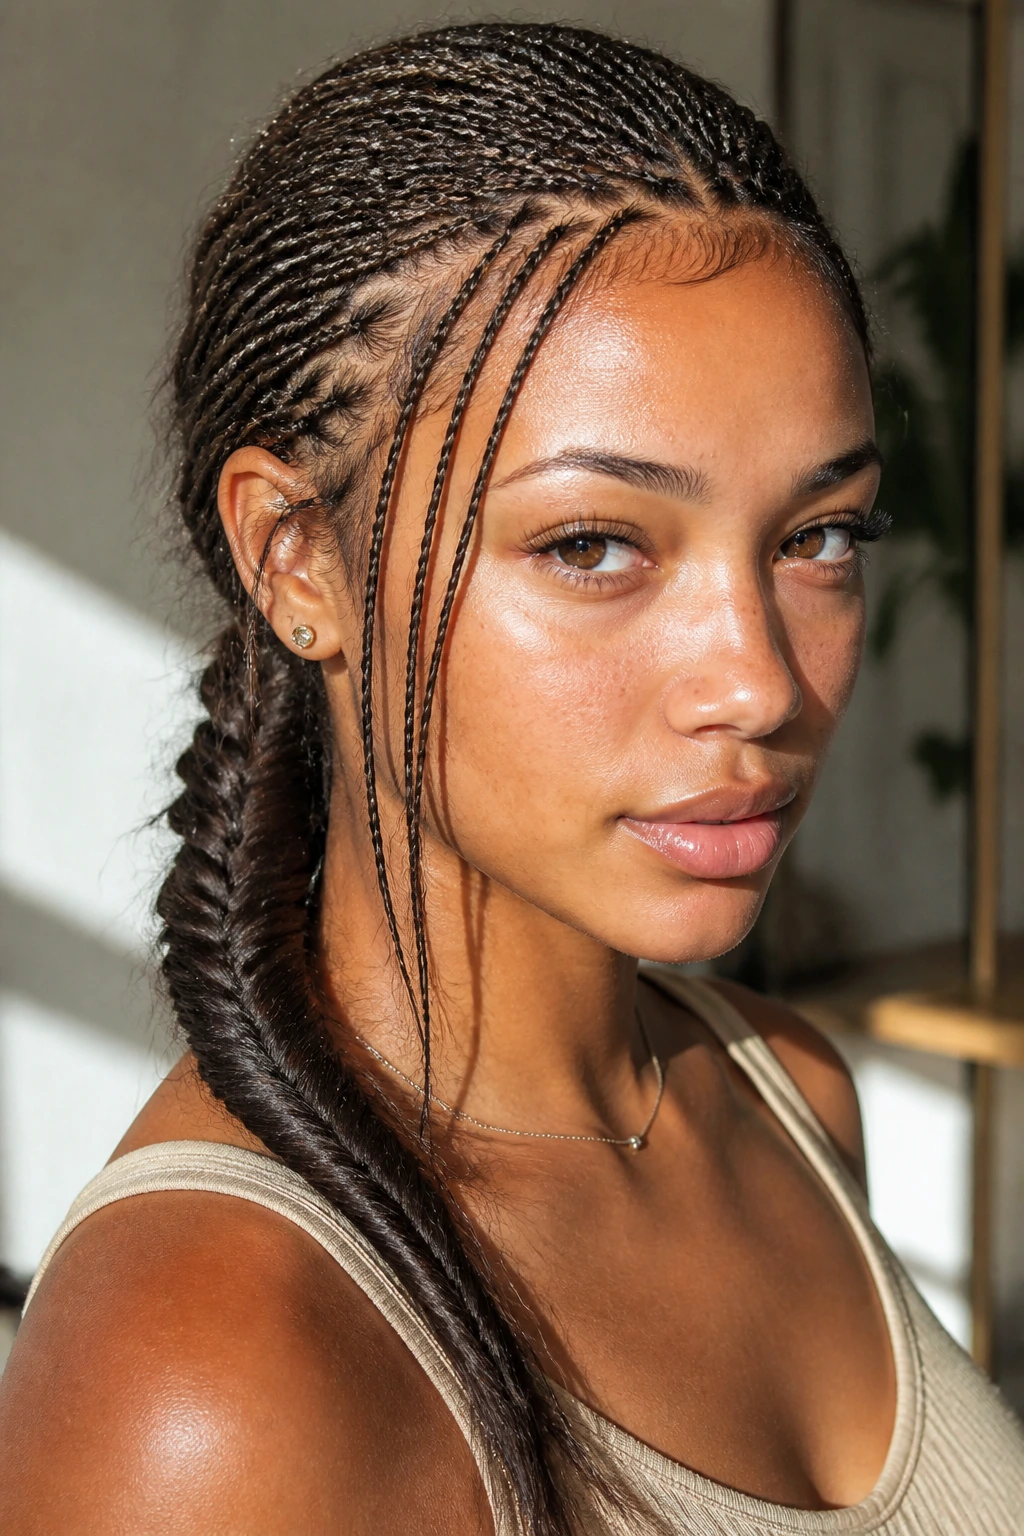
If the front of your hair tends to fall flat, tiny braids along the hairline can give the style some edge. Make a few narrow accent braids first, then gather the rest into a fishtail behind them. The front texture keeps the look from feeling too soft or too polished.
30. Glitter Festival Fishtail
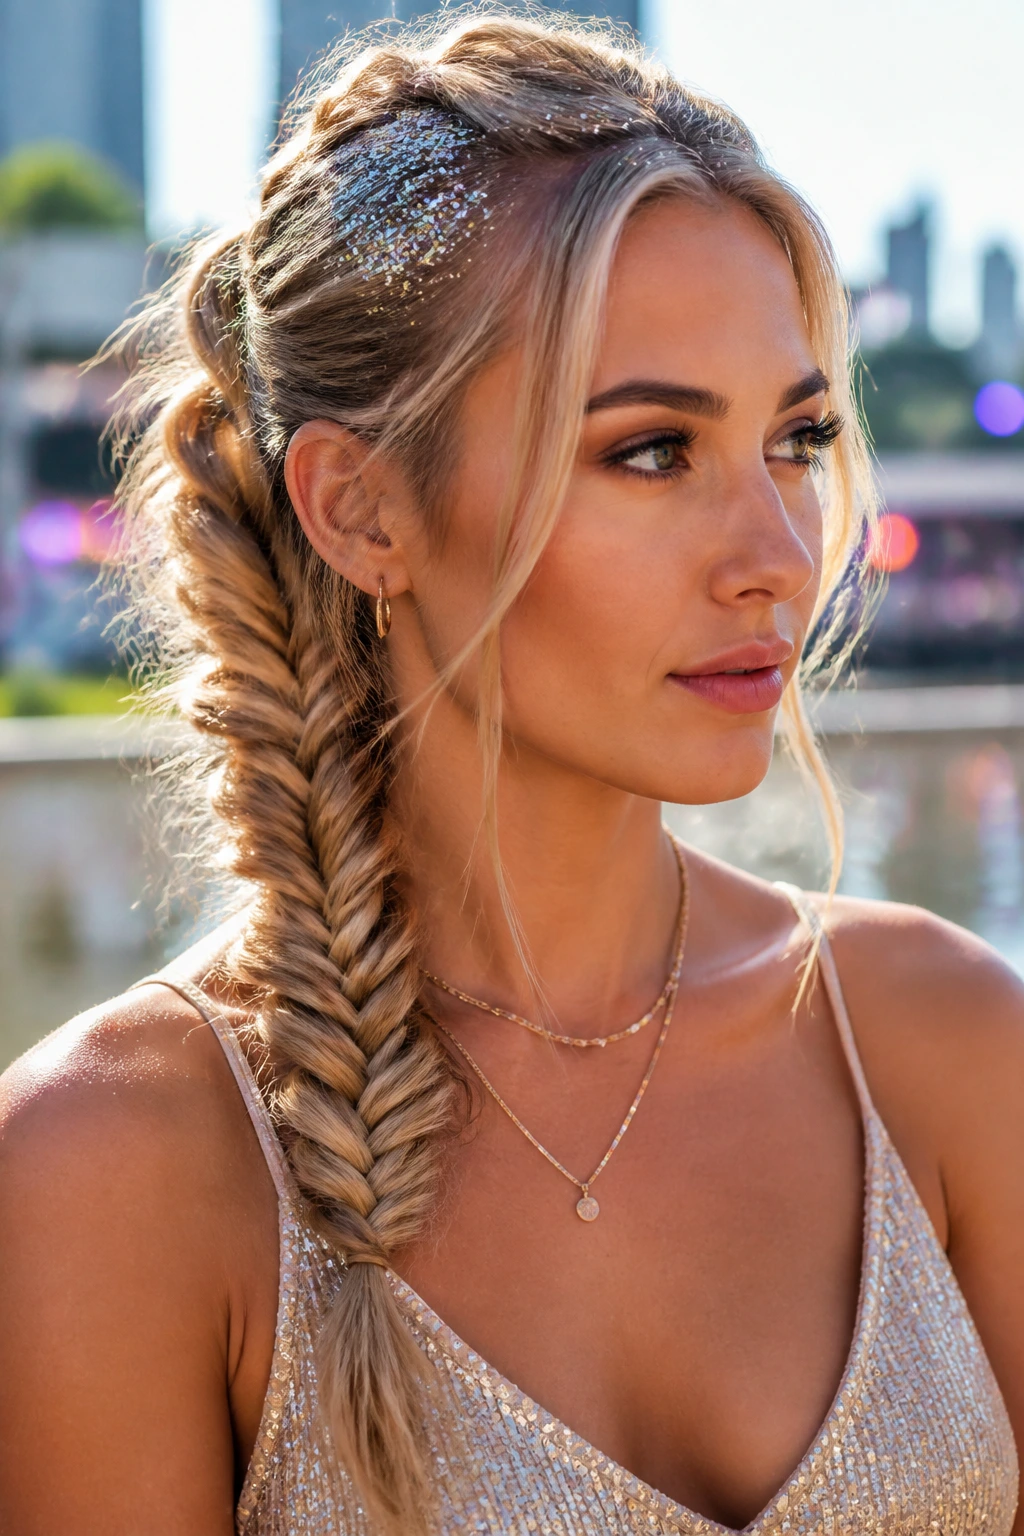
This is the version that leans into sparkle on purpose. Keep the braid loose and textured, then work a small amount of glitter gel or shimmer spray into the outer edges or roots. Use less than you think you need. Too much sparkle turns the braid sticky and distracting fast.
31. Twisted Halo Fishtail
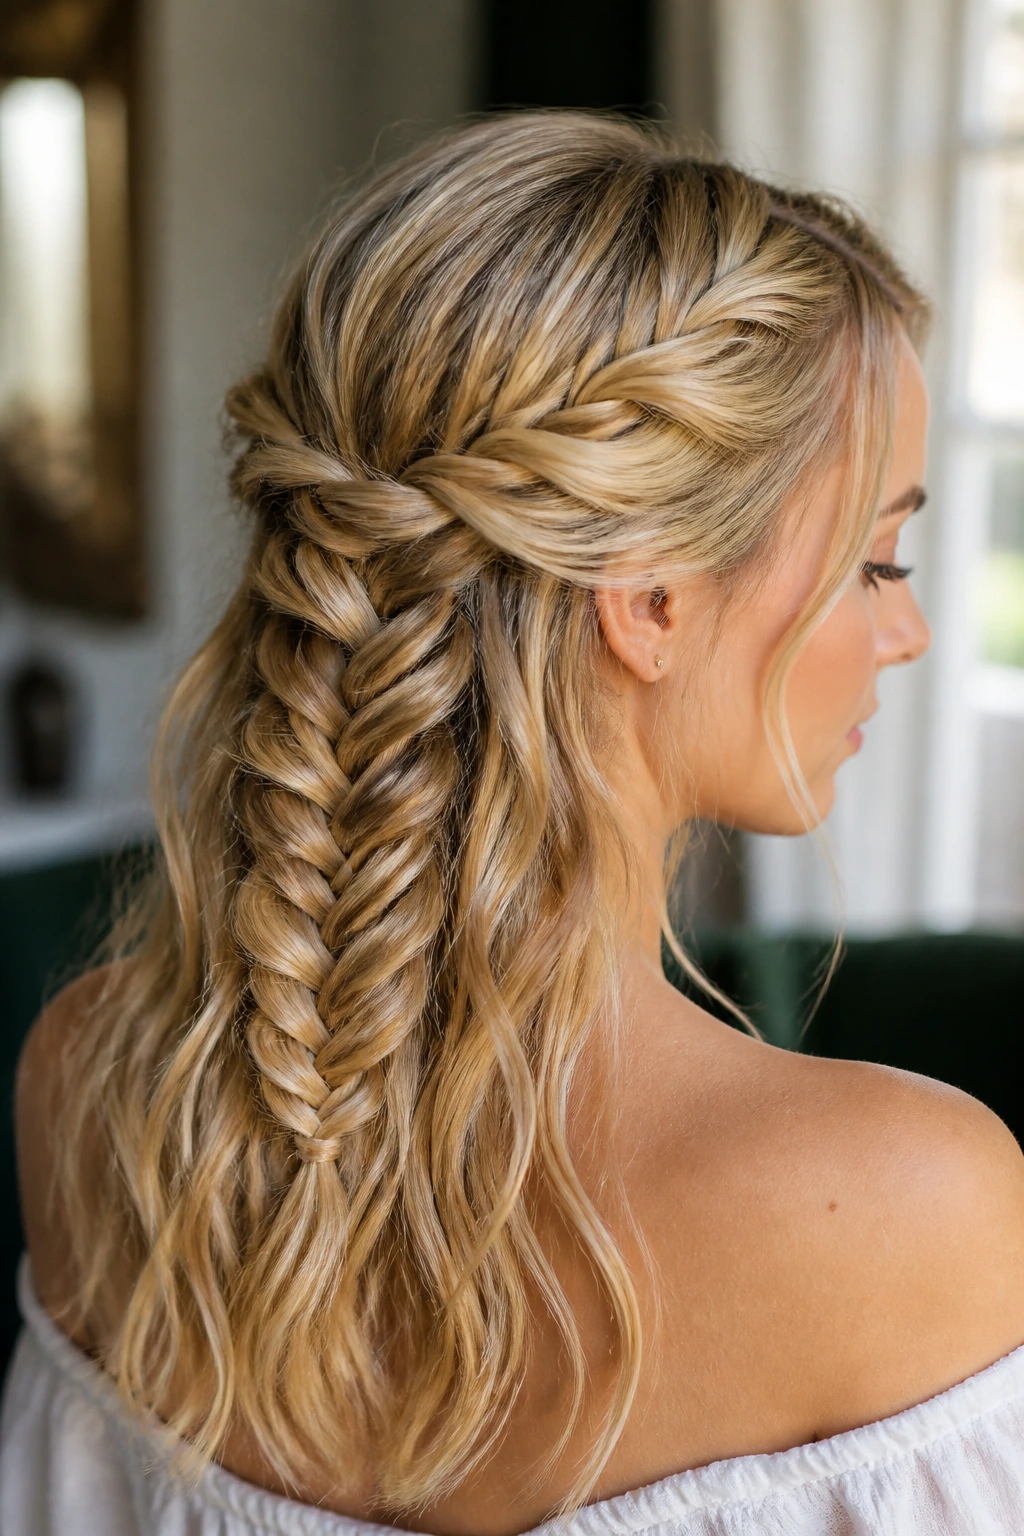
A twisted halo gives you a crown effect without the extra bulk of a full braid around the head. Twist the sides back, anchor them, and let the fishtail sit as the centerpiece in the back. This style flatters hair that has a little wave, because the twists and braid blend more naturally.
32. Waves-First Fishtail
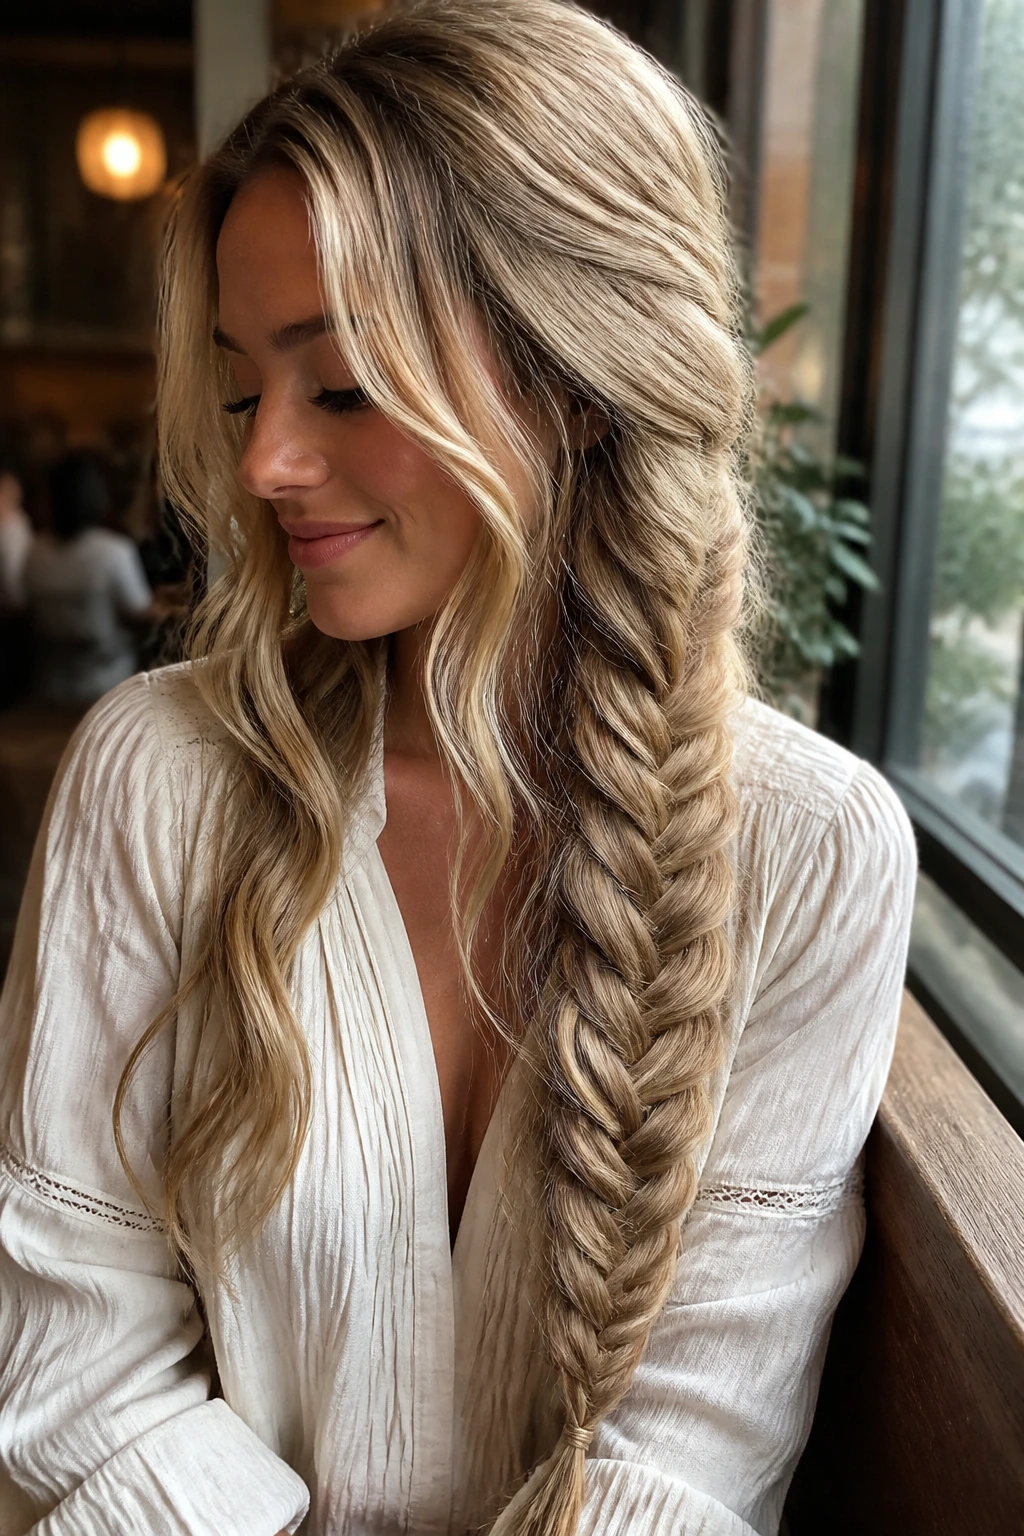
Loose waves under a fishtail make the braid look softer before you even start. Add a few bends with a curling wand, let them cool, then braid without brushing them out completely. The braid catches the waves and creates a thicker, more cloudlike finish.
33. Wet-Look Slick Fishtail
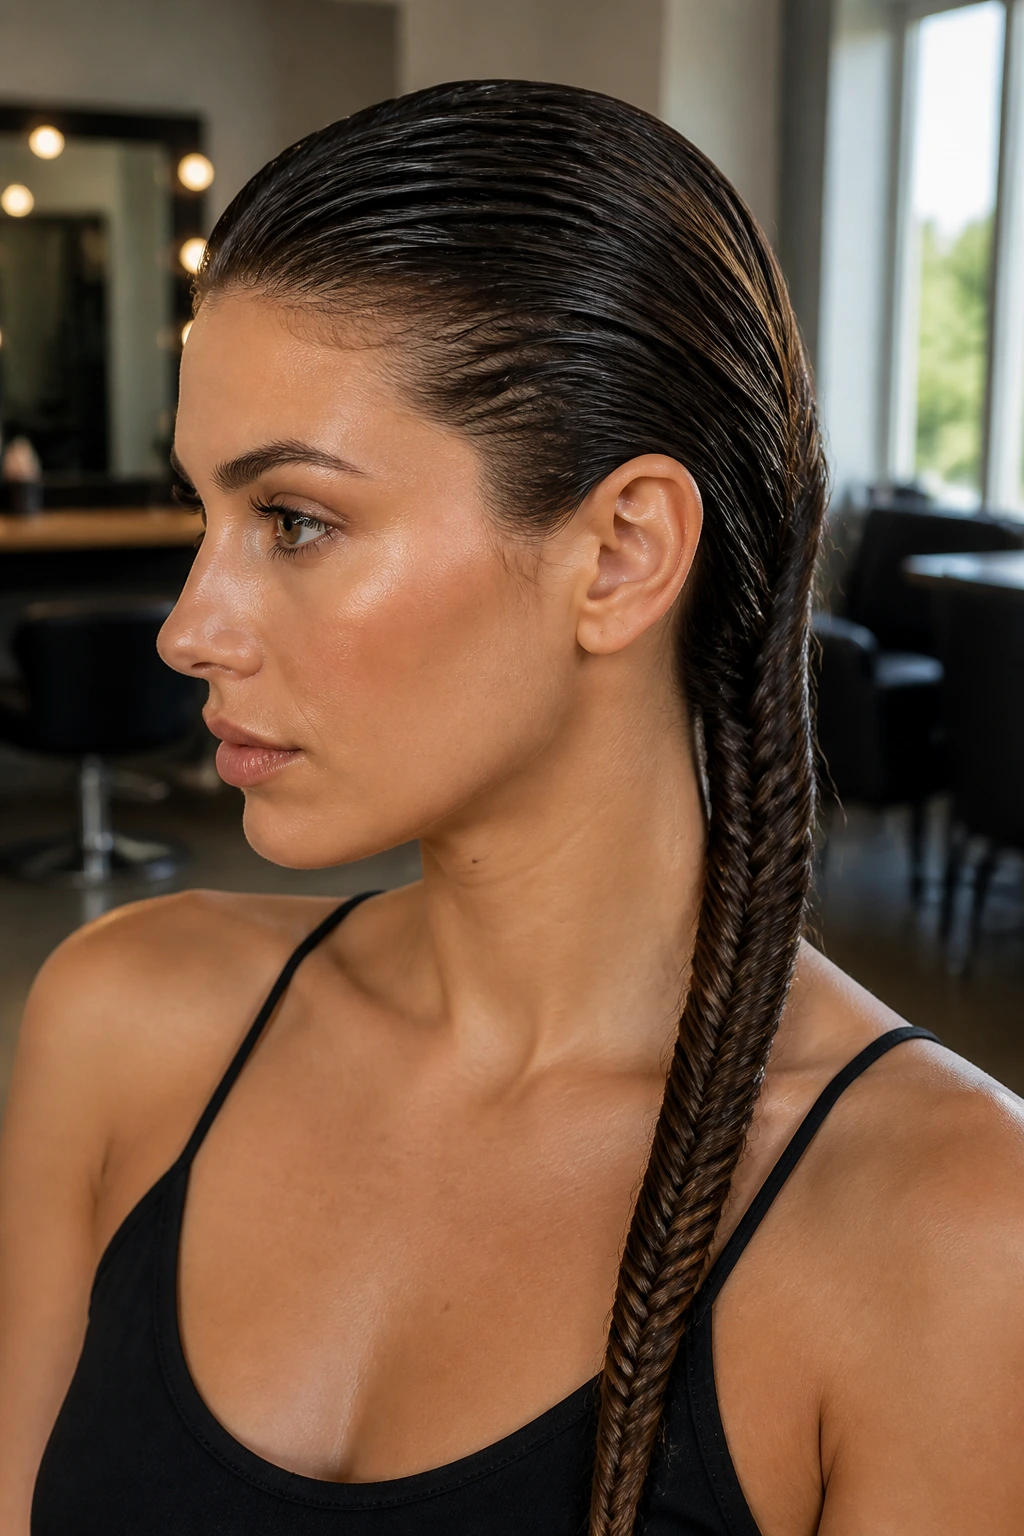
This is the cleanest, sharpest version in the bunch. Apply gel to the roots and smooth the crown tightly before braiding so the braid starts with no fuzz at all. It works best when you want the braid to feel editorial, not romantic, and it needs a strong elastic because the slick base can slide.
34. Braided Pony with Fishtail Tail
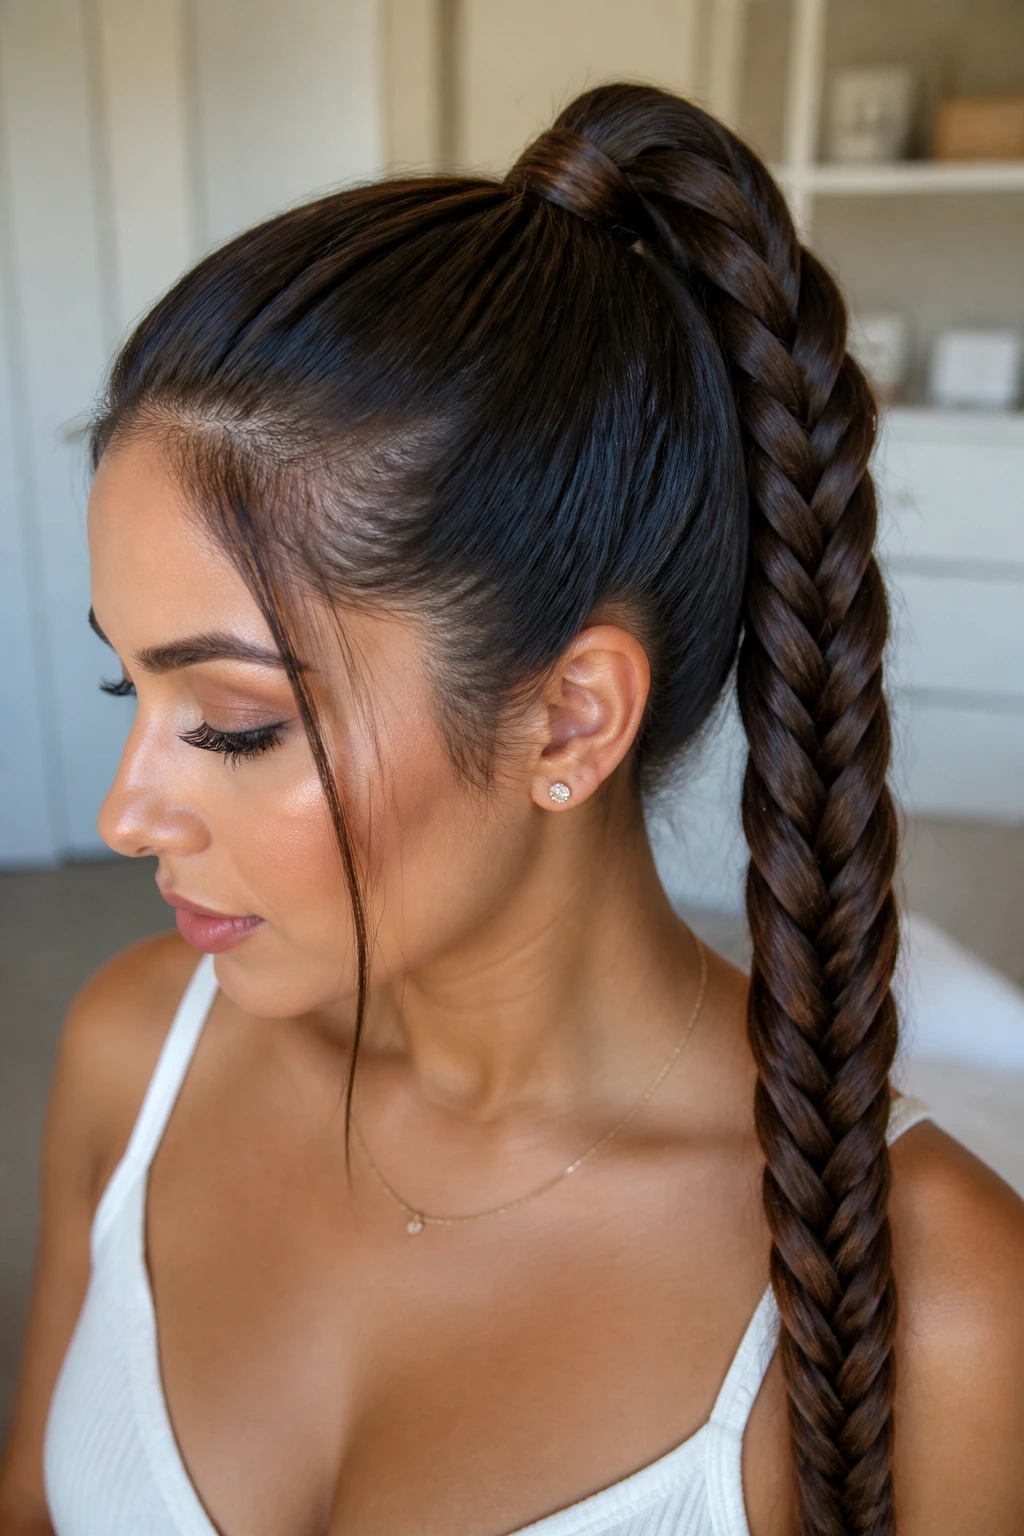
Treat the top like a ponytail and the length like a separate braid story. Pull the hair back, secure it high or low, then fishtail the tail only. The result is easy to wear and gives you the visual drama of a braid without braiding the entire head.
35. Asymmetrical Fishtail Sweep
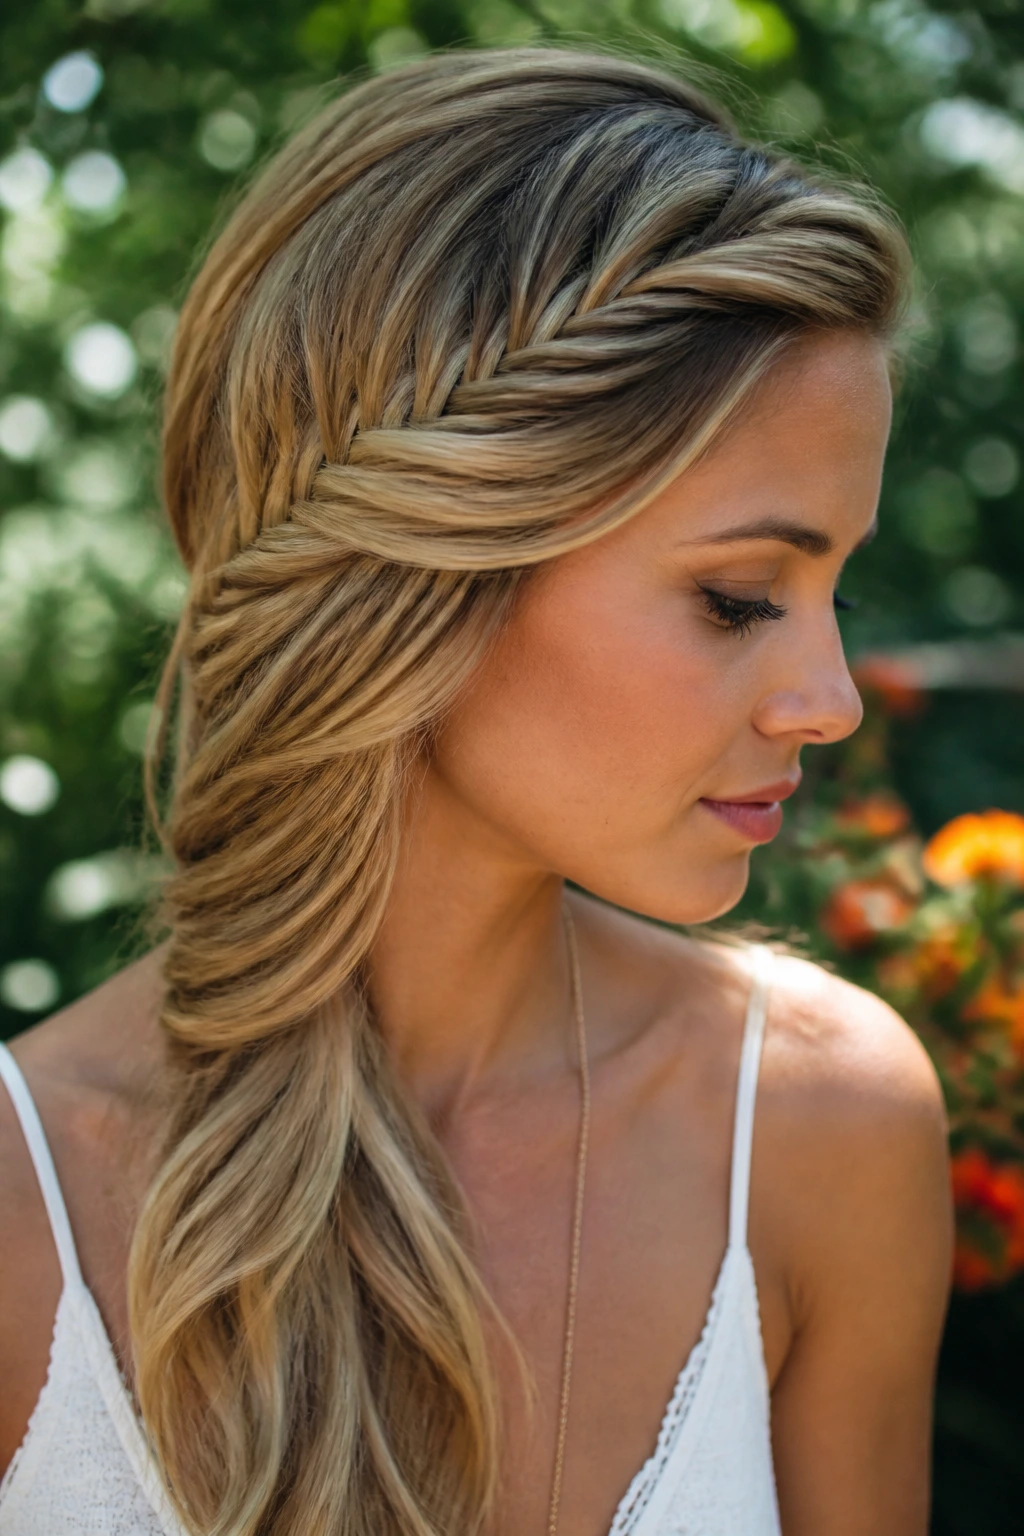
Instead of centering the braid, sweep it across the head and let it fall unevenly over one shoulder. The off-balance shape looks intentional and a little more modern than a straight-down style. It is a nice fix for layered cuts, because the uneven fall helps shorter pieces blend in.
36. Fishtail with Braided Bangs
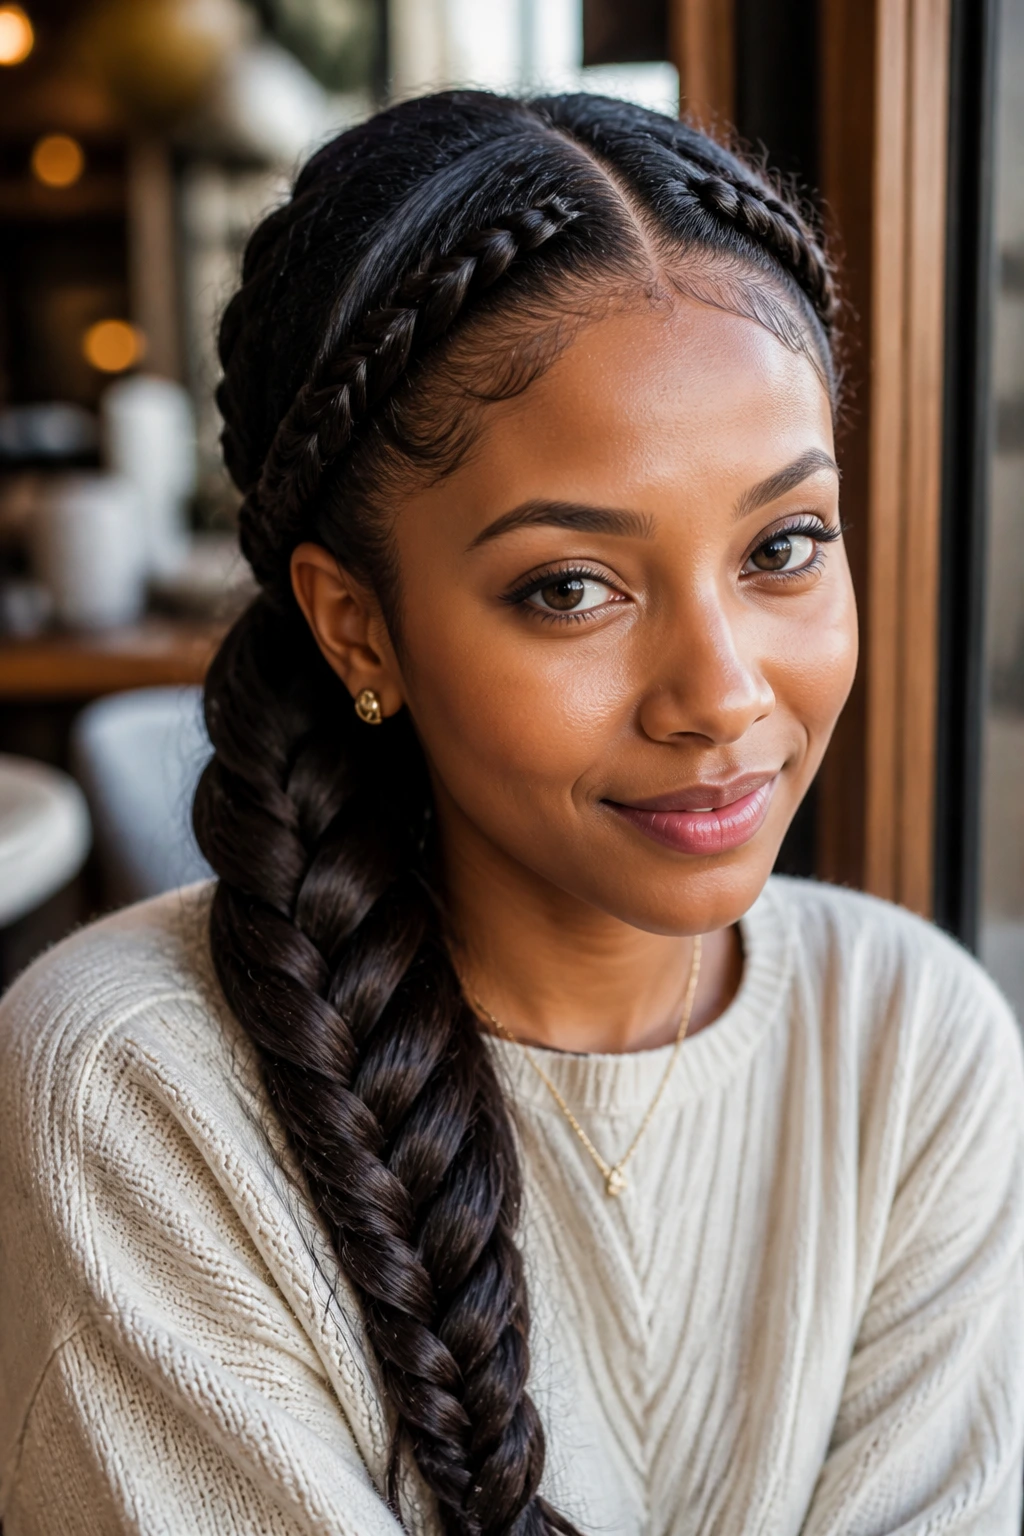
Braided bangs keep the front out of the face and give the whole style a more finished line. Braid the front section along the hairline, pin it back, and let the fishtail take over behind it. This works especially well when your bangs are in that awkward grow-out stage and keep flipping around.
37. Fine-Hair Textured Fishtail
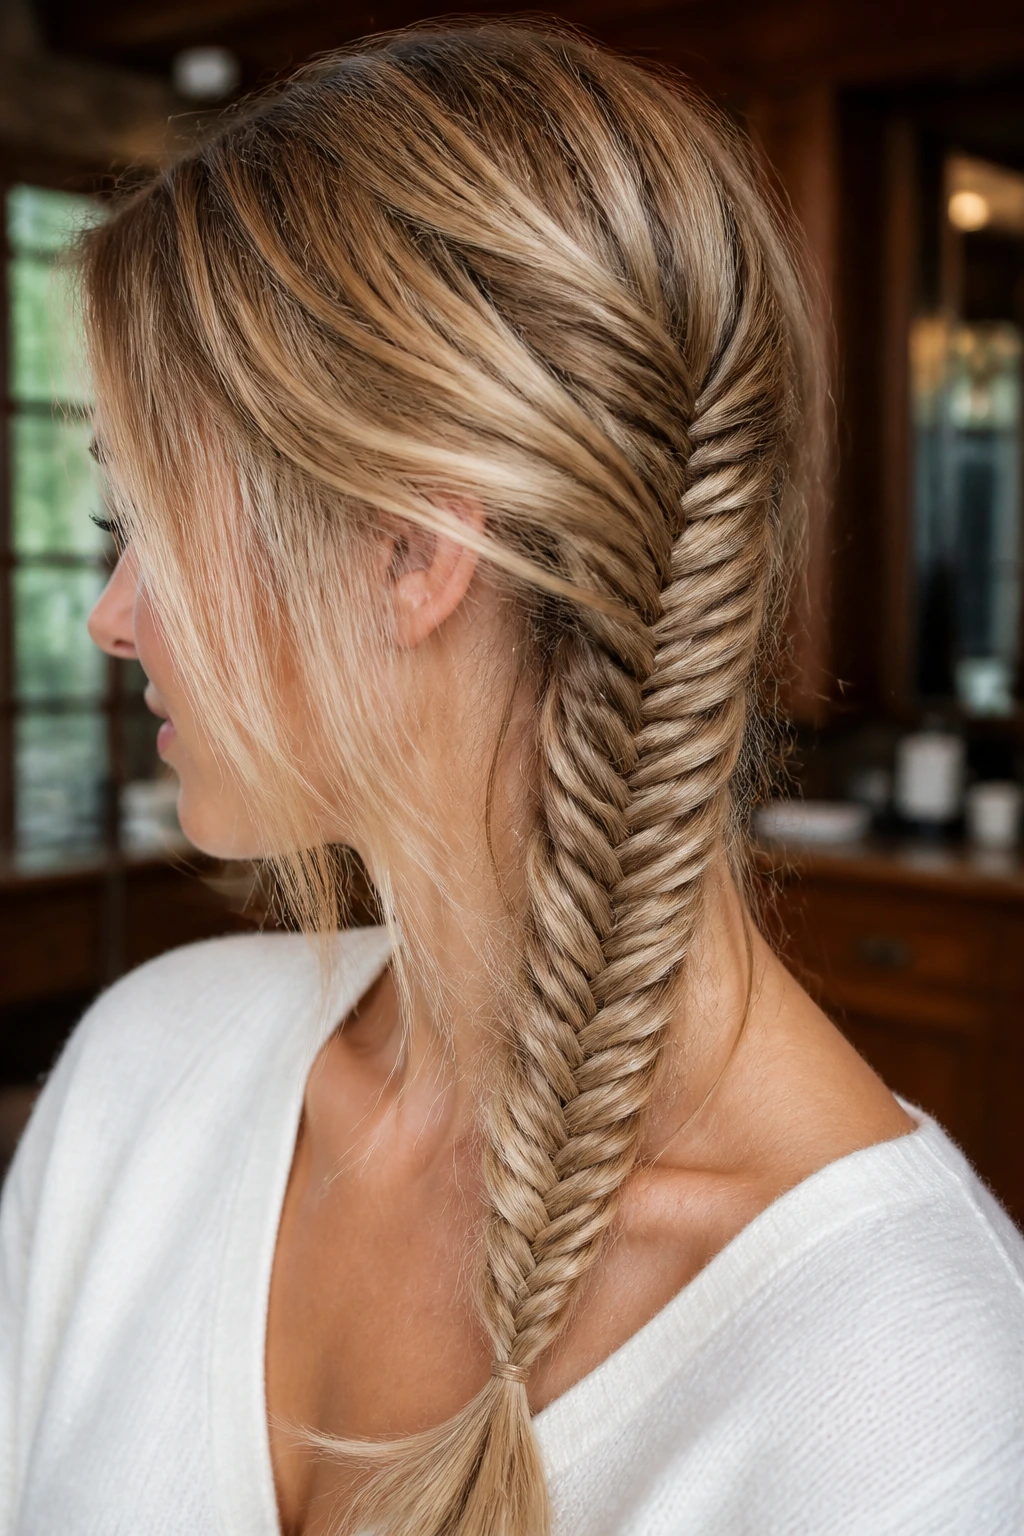
Fine hair needs grip before it needs perfection. Mist the lengths with texturizing spray, braid with smaller sections, and keep the tension steady so the weave does not look thin in the middle. Once it is tied off, gently widen the braid from the outside only; that little stretch can change the whole shape.
38. Thick Pancaked Fishtail
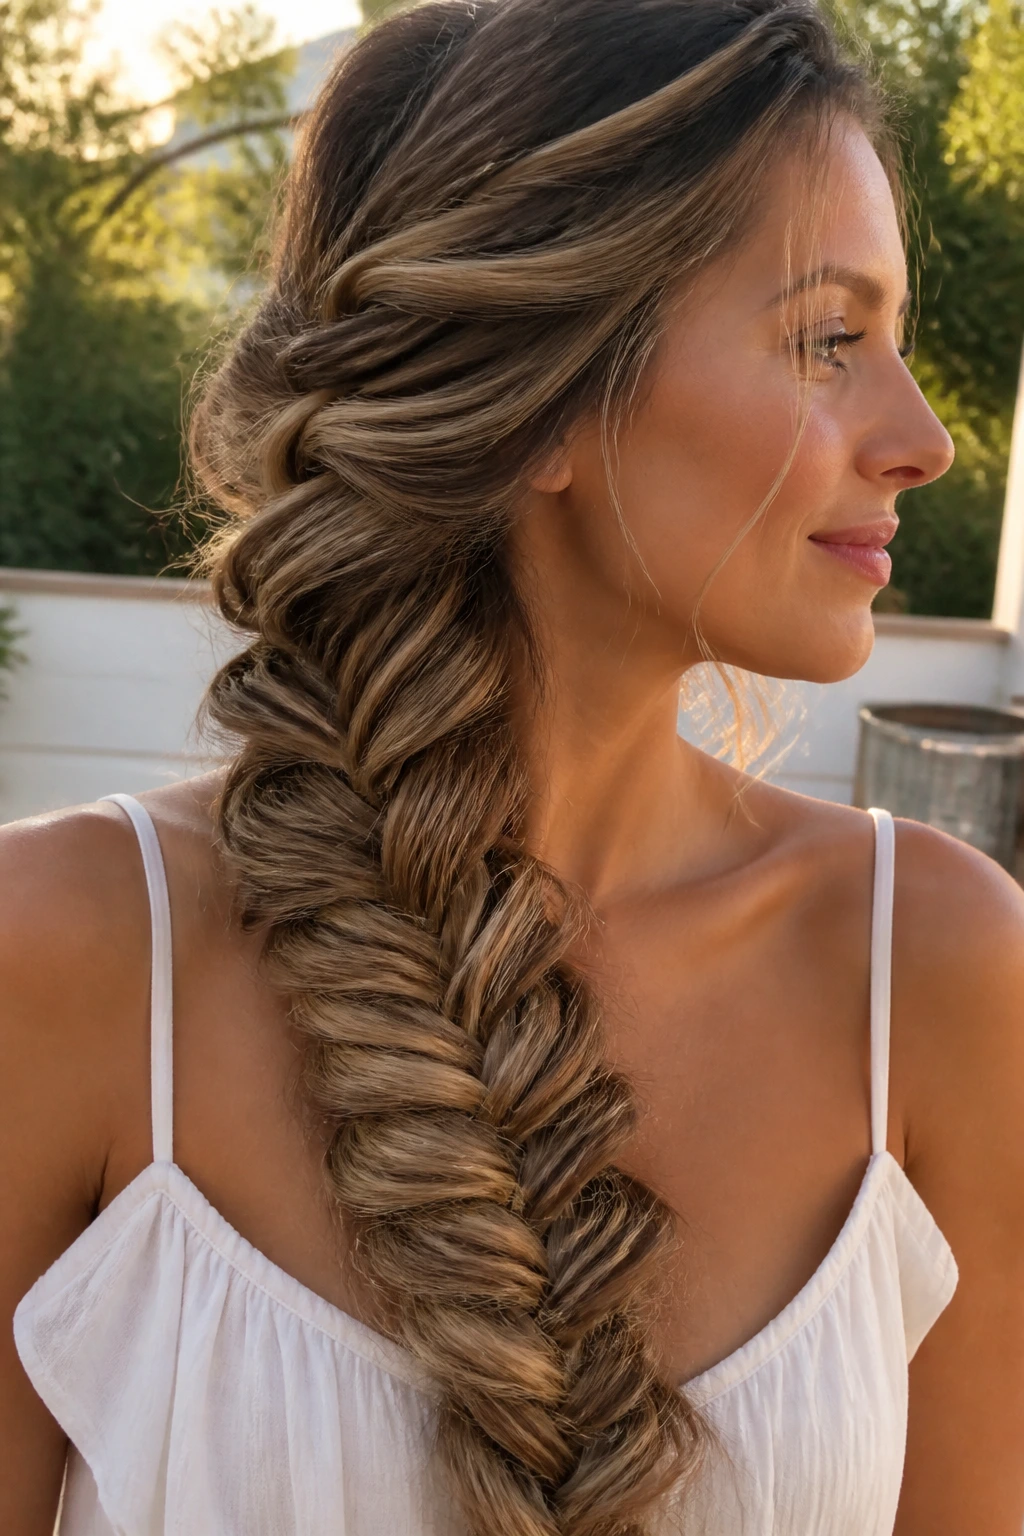
This is the full, airy version with a wide silhouette. Braid loosely, then pancake each edge by pulling the outer loops outward with your fingertips. The braid gets broader, flatter, and more visible, which is useful on thick hair that can handle the extra spread without falling apart.
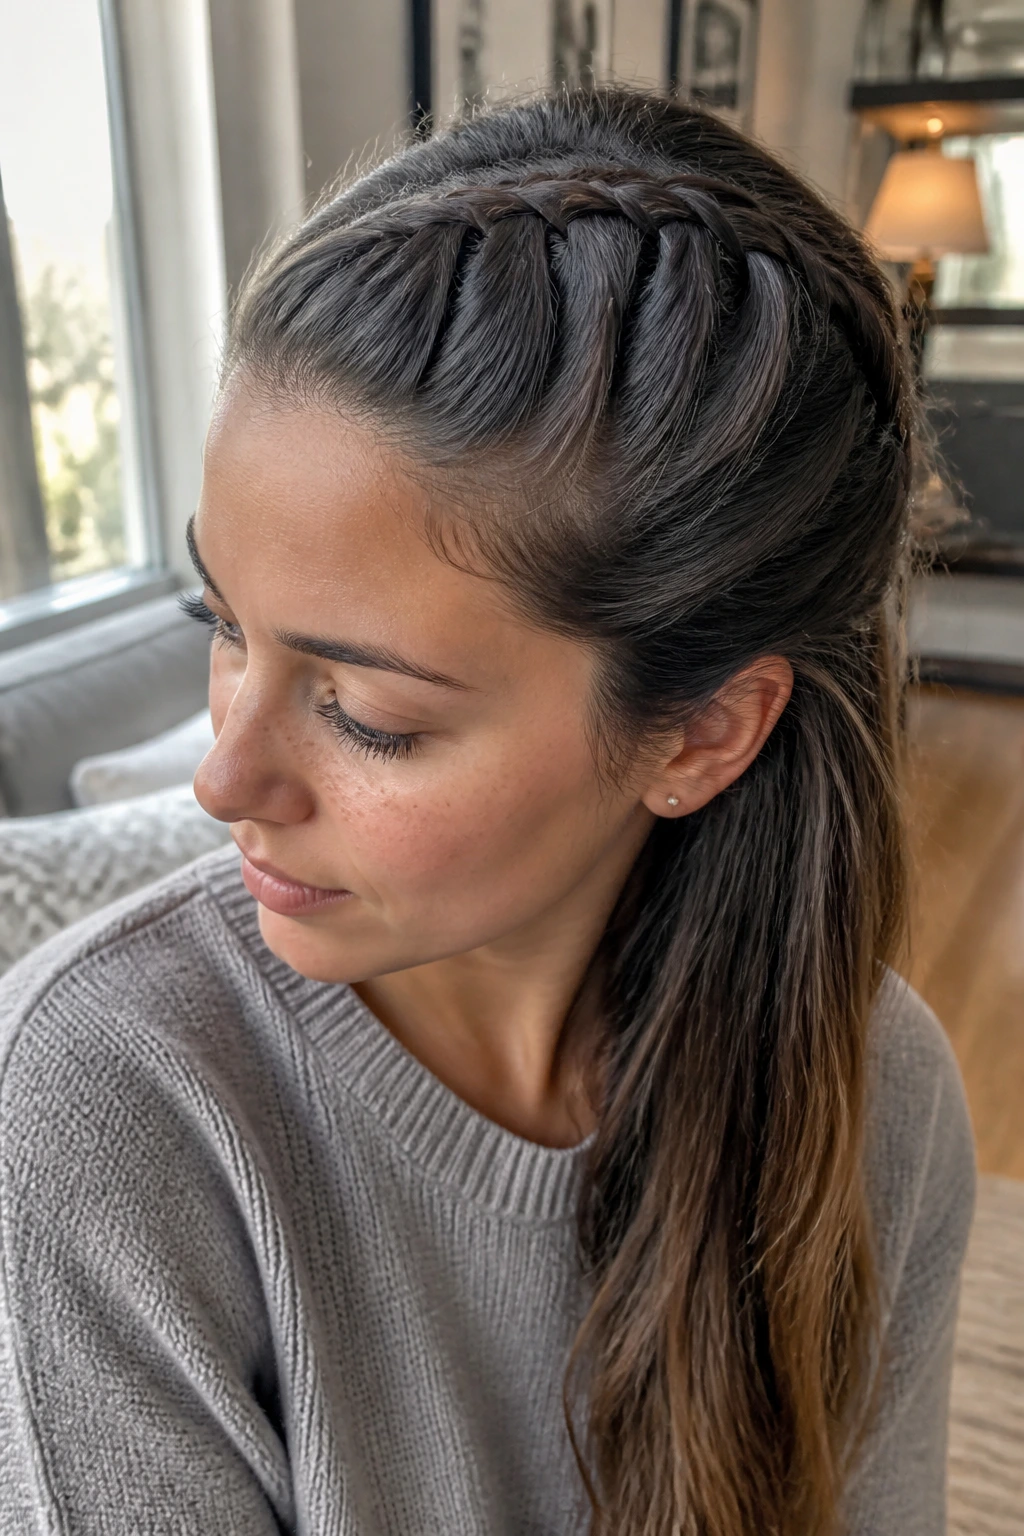
39. Headband-Style Fishtail
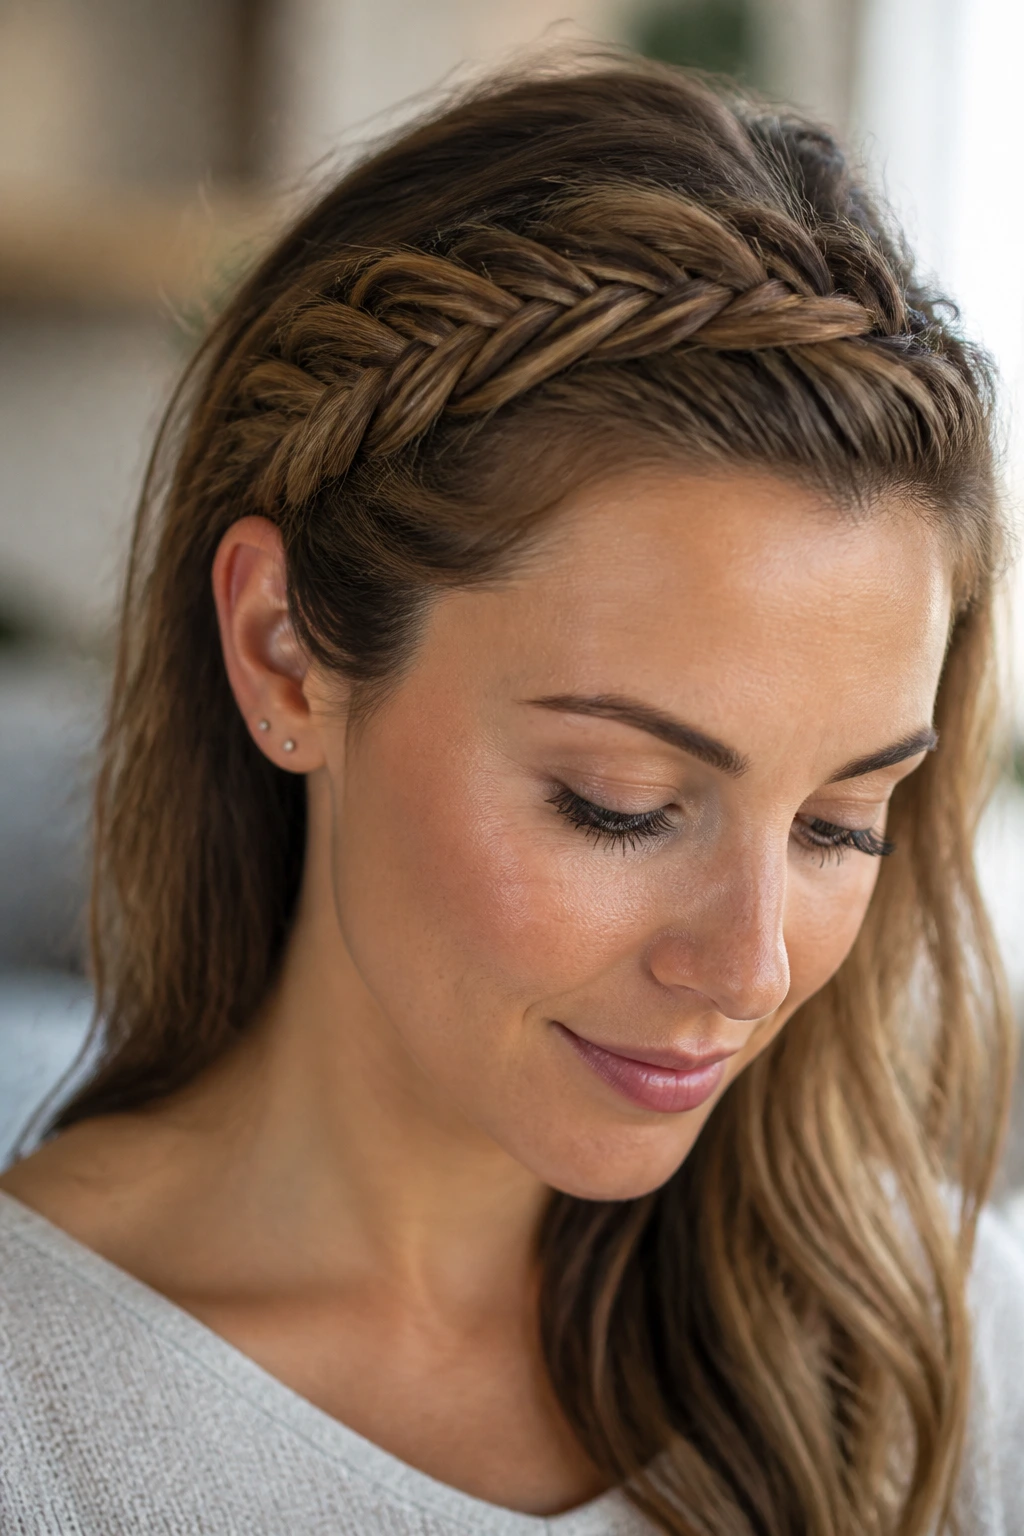
A fishtail can also live across the front of the head like a woven headband. Braid a side section, sweep it over the crown, and pin it behind the opposite ear. The look is tidy and surprisingly practical, especially on days when you want hair off your face but do not want a full updo.
40. Highlight-Showcase Fishtail
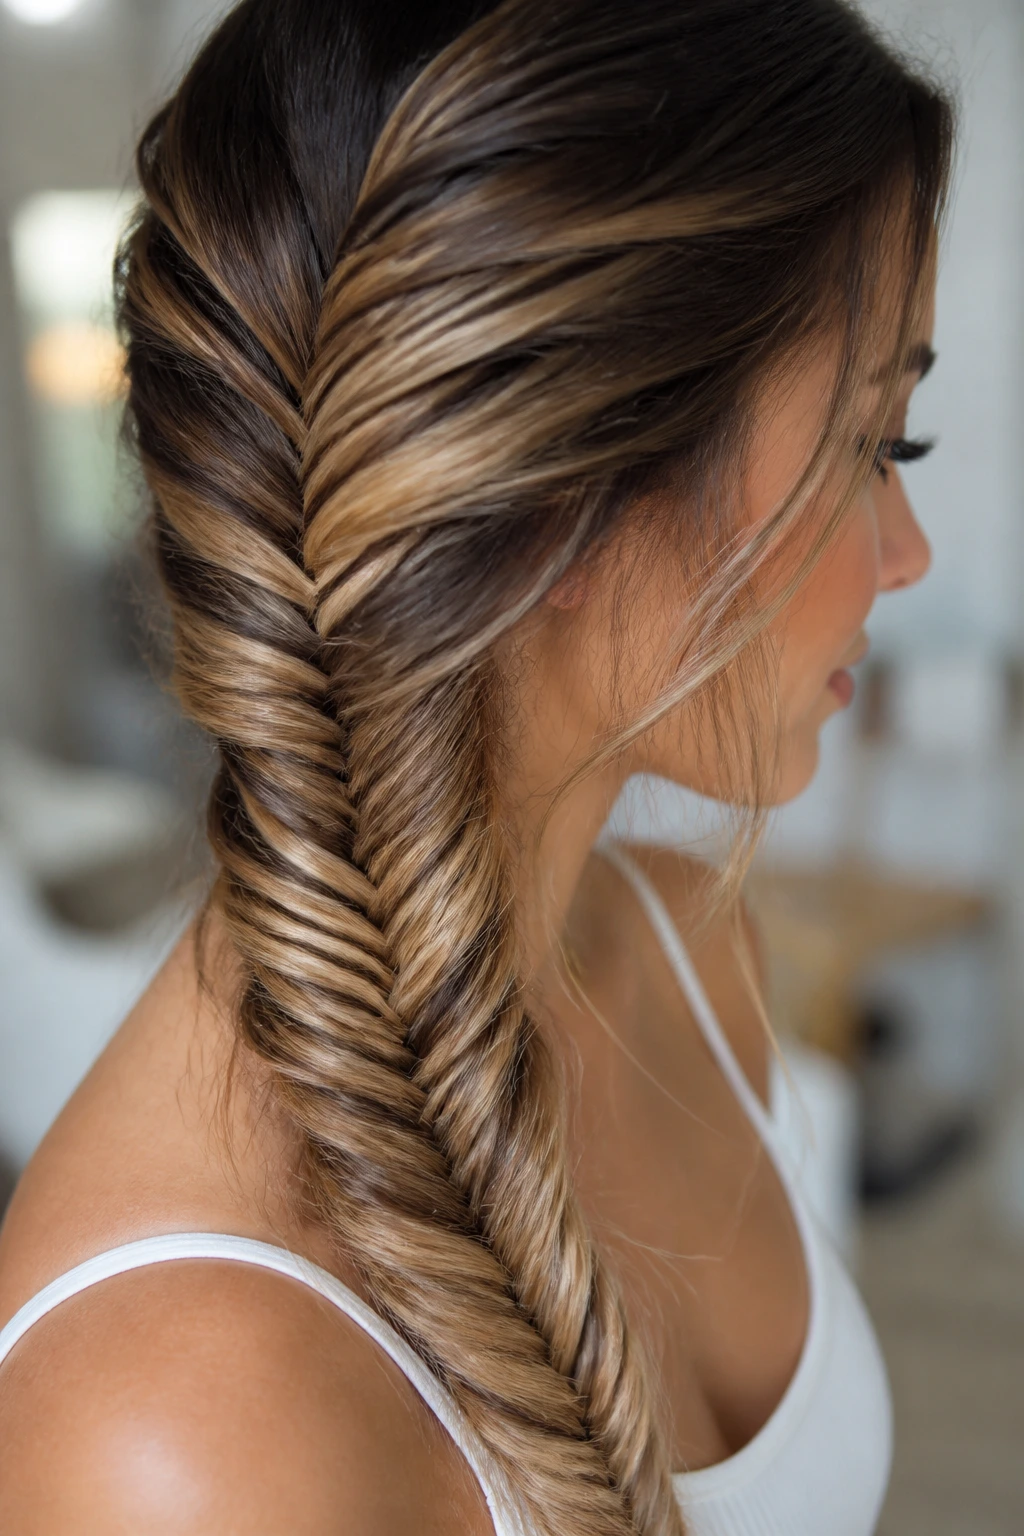
Braids show color shifts better than almost any other style, and this version is built for that. Keep the sections distinct so the lighter pieces and darker pieces alternate through the weave. If you have balayage or subtle highlights, the braid can make the color read as streaks instead of blur.
41. Formal Side Cascade Fishtail
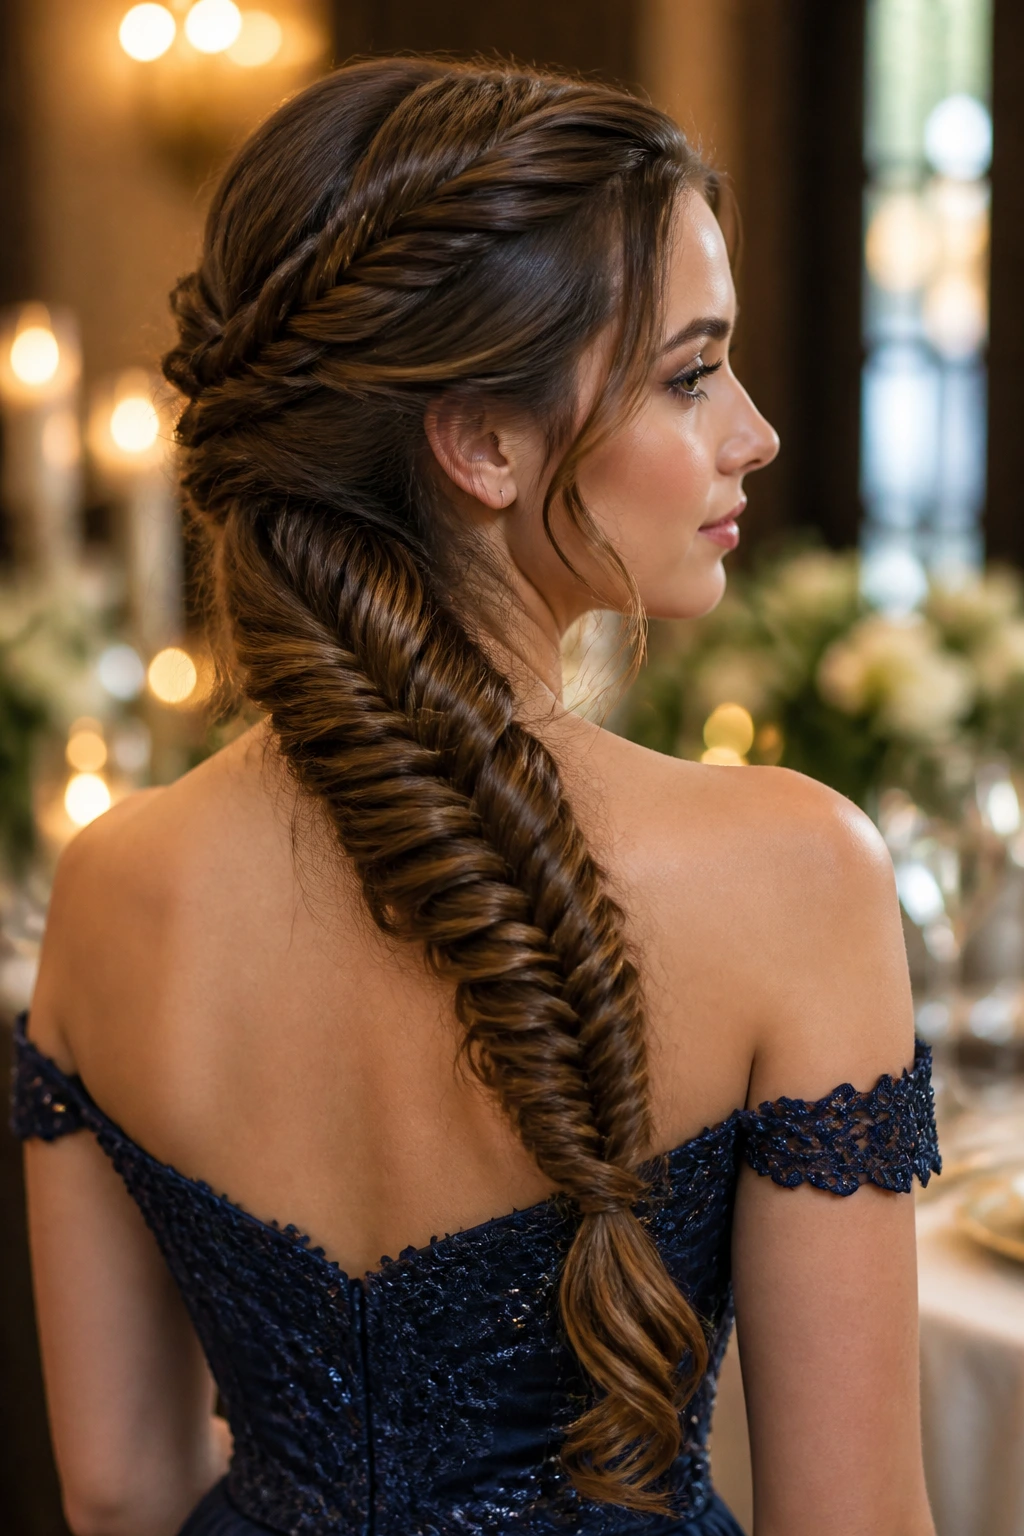
This one is all about sweep and length. Start high on one side, braid diagonally across the back, and let the tail cascade over the shoulder in a long line. A small curl at the end keeps the finish from looking too severe, which matters if you are wearing it with something dressy.
42. Soft Romantic Fishtail Updo
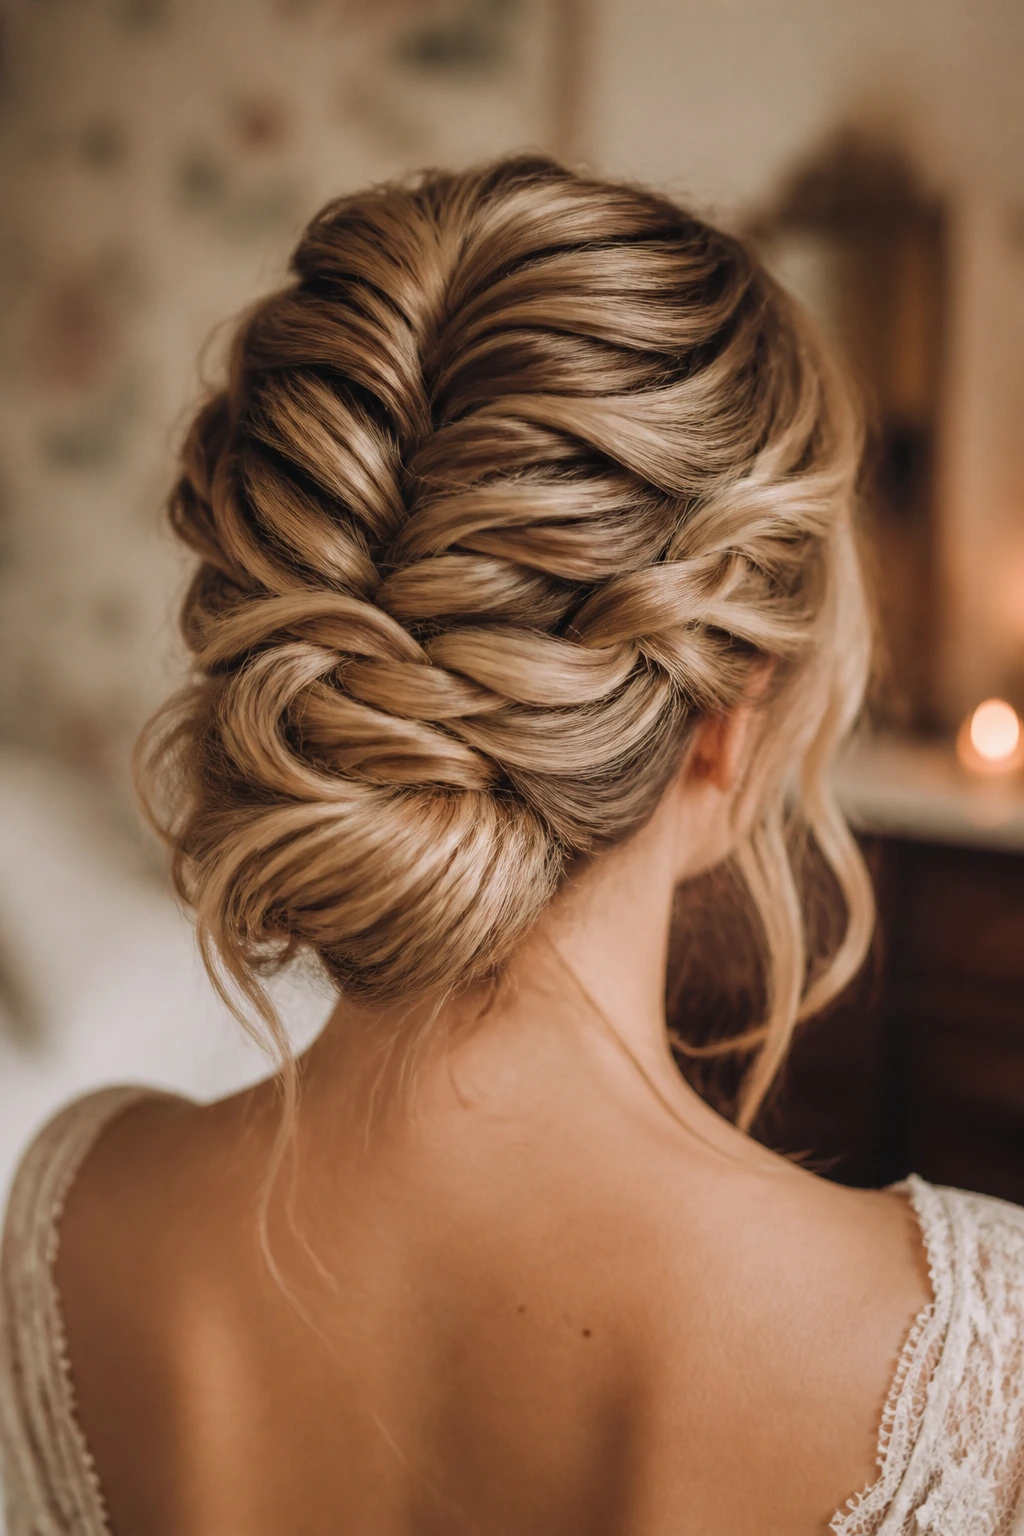
The last style pulls the braid upward and tucks it into a soft, rounded updo that feels less rigid than a standard bun. Leave a few wisps near the temples and at the nape, then pin the braid in loose coils. It is the sort of style that looks complicated from the outside and far more forgiving once you start pinning.
Why Fishtail Braids Hold Their Shape So Well
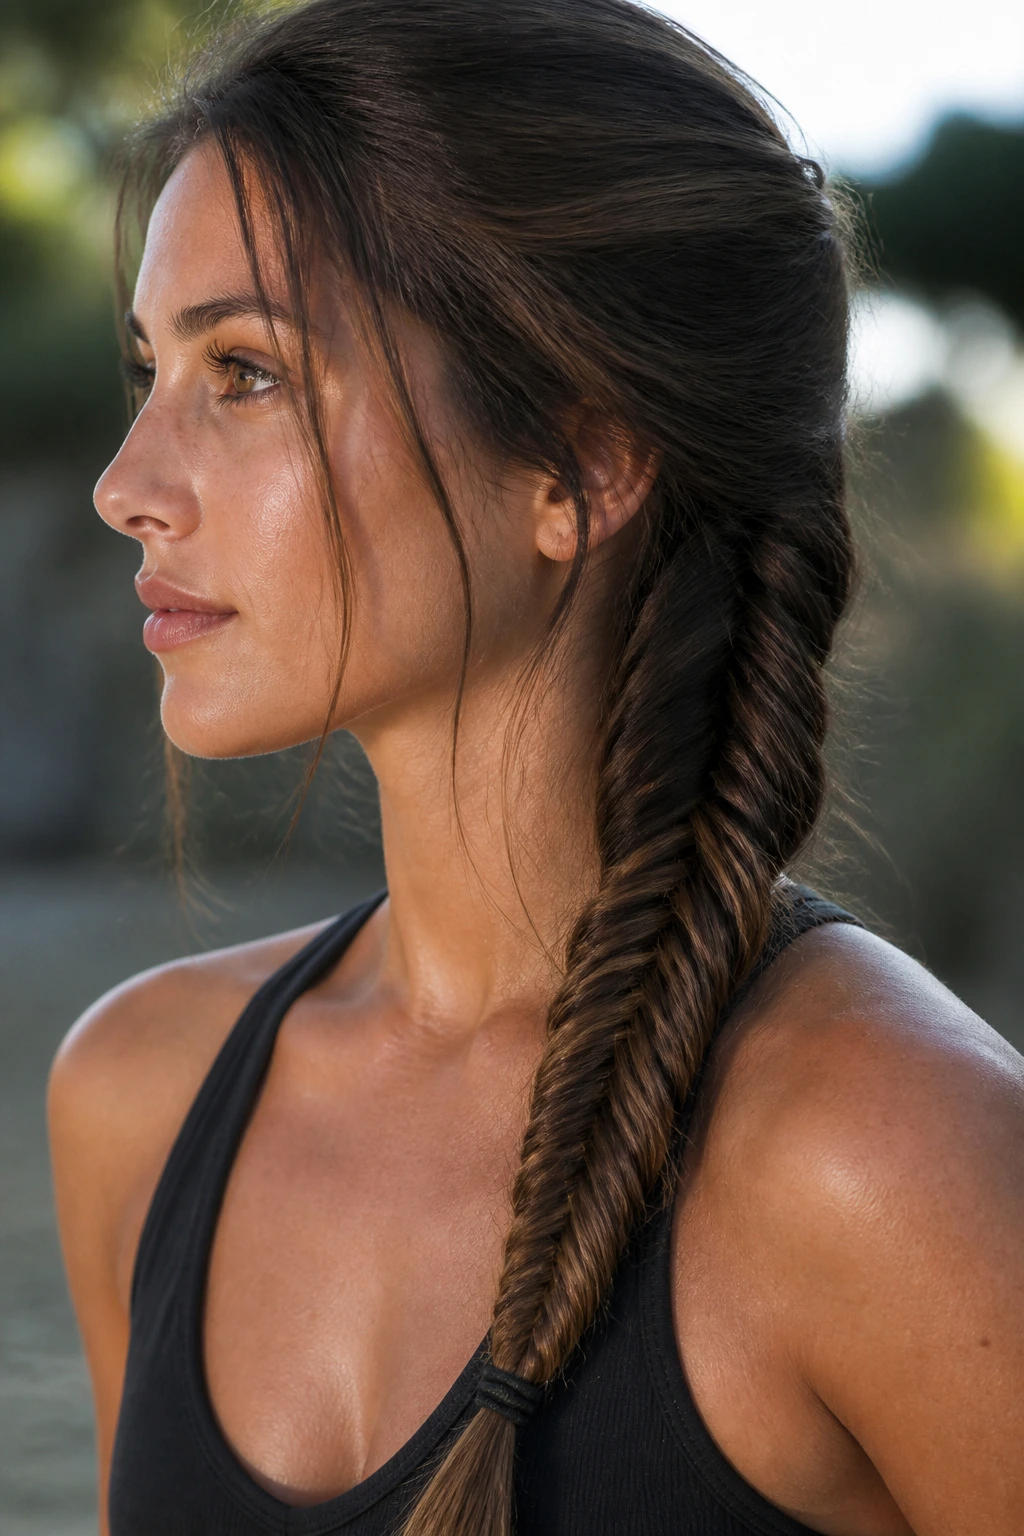
The braid pattern does half the work for you. Because a fishtail uses tiny pieces from the outer edges instead of big, obvious three-strand crossings, the structure ends up packed with little points of friction. That friction is what keeps the braid from looking flat too fast. It is also why the style can be taken from neat to airy with a few careful tugs instead of a full redo.
A second reason these braids behave so well is that they distribute tension evenly. A regular braid can show one loose side more quickly. A fishtail tends to break up that problem because the sections keep feeding into the same center line, so the looseness reads as texture instead of failure. I like that about it. It makes the braid feel less precious.
The only catch is slippery hair. Very clean, very silky hair can slide apart before you finish the last few inches. That is not a reason to skip the style; it is a reason to change the prep. Dry shampoo at the roots, a little texture spray through the lengths, or even braiding after a light wave set can make the whole thing more cooperative.
Essential Tools for Clean Sections and Neat Ends
-
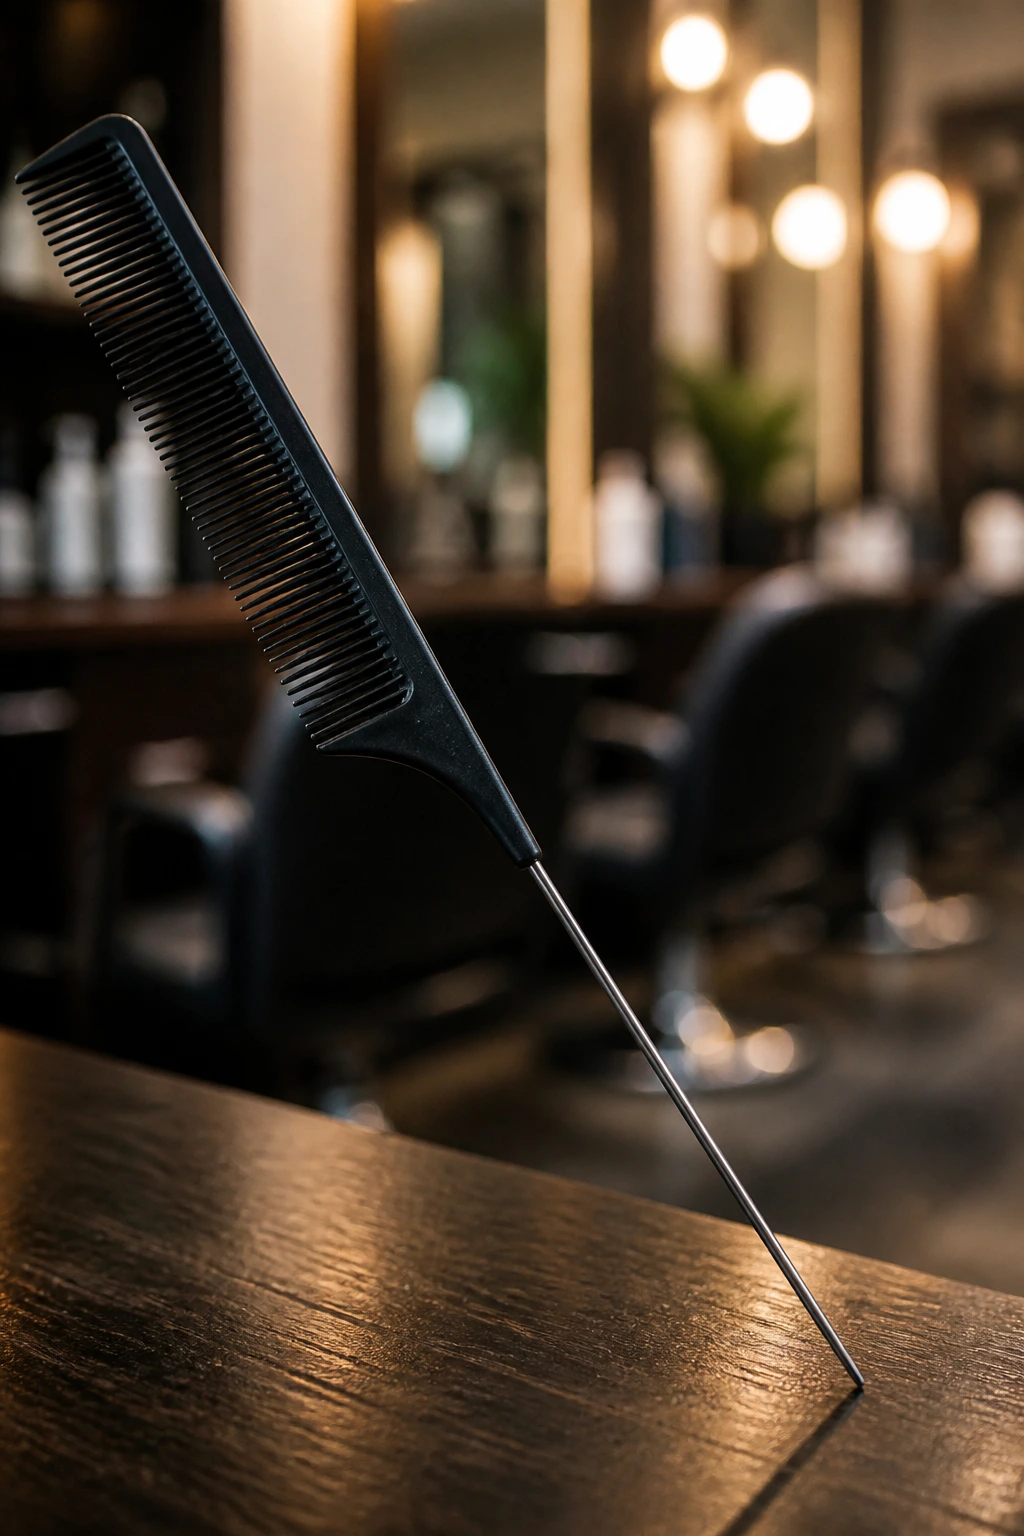
Rat-tail comb: The pointed end gives you clean parts and helps you grab equal bites of hair from each side.
-
Small clear elastics: These are the least distracting way to secure the ends, especially on shorter or finer hair.
-
Paddle brush or smoothing brush: Good for making the crown neat before you start, especially on sleek versions.
-
Texturizing spray: Adds grip to slippery strands and helps the braid stay in place longer.
-
Dry shampoo: Useful on second-day hair or at the roots when you want more hold without more oil.
-
Bobby pins: Pick ones close to your hair color if you are pinning a crown, bun, or side sweep.
-
Edge control or light gel: Best for sleek roots and wet-look styles, but use sparingly so the hair does not get crunchy.
-
Hand mirror or two-way mirror setup: Makes back-of-head braids much easier to check before you leave the house.
Smart Hair Prep and Product Picks
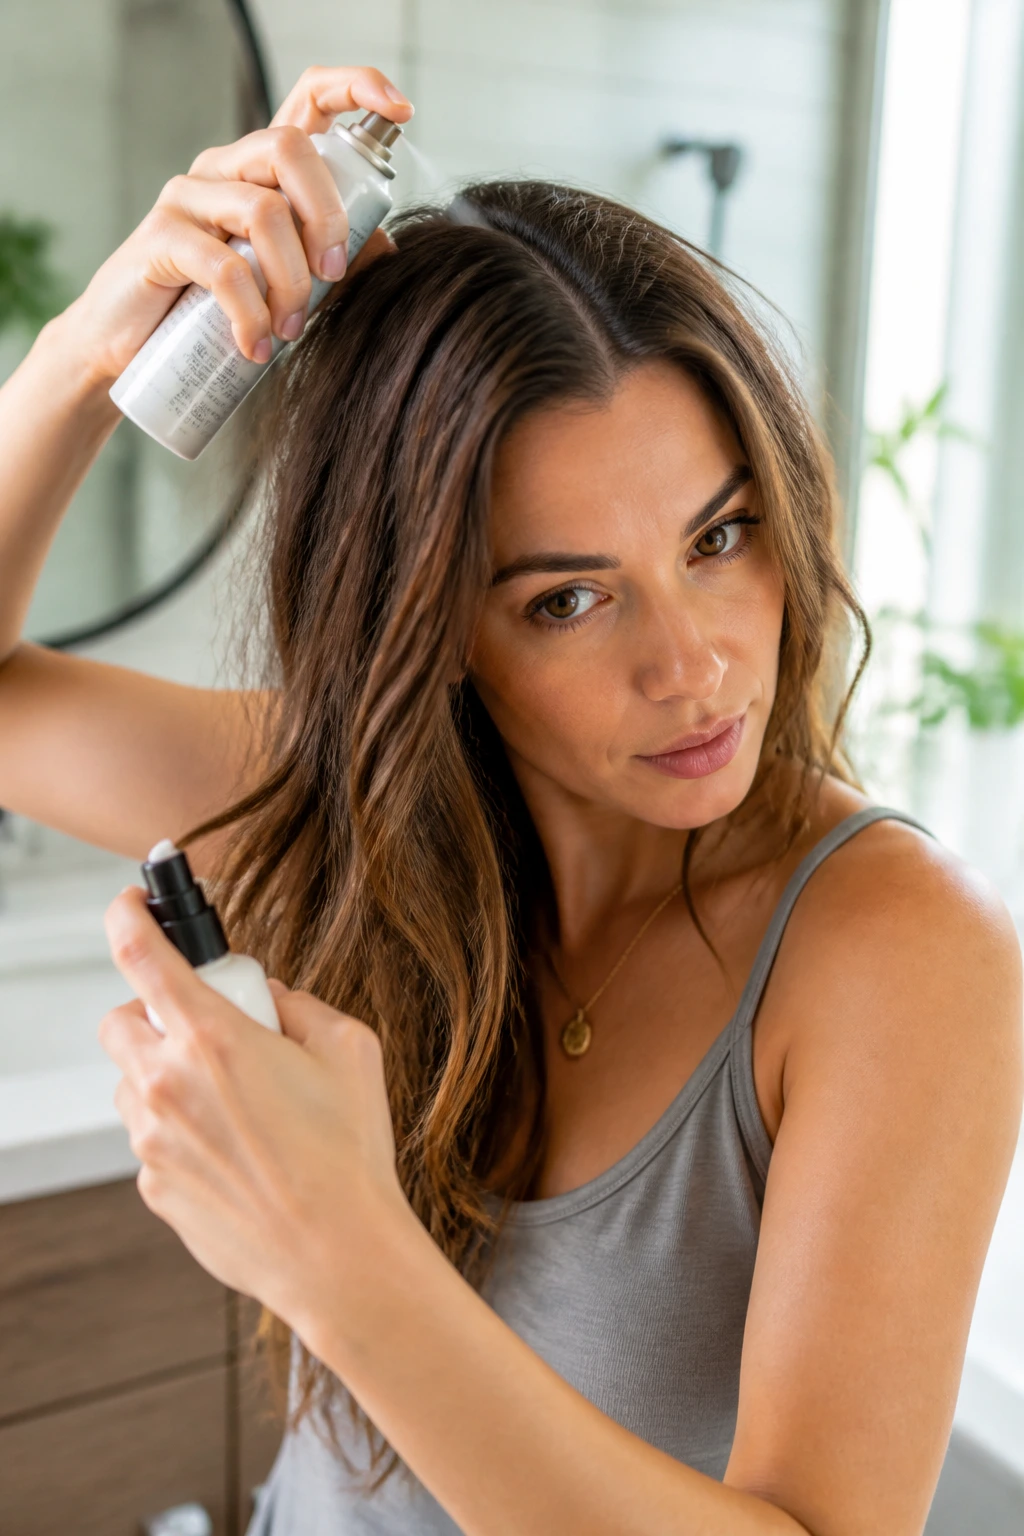
Start with the hair you have, not the hair you wish you had. If your strands are freshly washed and too slick, give them a little grit first. Dry shampoo at the roots, then a light mist of texturizing spray through the lengths, is enough for most people. You do not need to turn your hair into straw; you just need the sections to stop skidding past each other.
For straight or fine hair, a tiny amount of smoothing cream on the ends helps keep the tail from fraying into a stringy little fan. For thick or coarse hair, the better move is usually to keep the roots controlled and let the body of the braid stay a bit rougher. That texture gives the braid shape. Too much product can make the weave heavy and dull.
If you want polish at the crown, use a soft brush and, if needed, a dab of gel on the hairline. If you want softness, brush less and braid more. A braid that is half-finished while you are still trying to perfect the top usually ends up looking overworked. I would rather see a little natural texture than a helmet.
Heat can help, too, but only if you use it for shape, not drama. A few bends from a curling wand give the braid a base that catches and holds better than pin-straight hair. Let the waves cool before braiding, though. Warm hair slips more, and the braid will loosen before it has a chance to set.
How to Wear These Looks
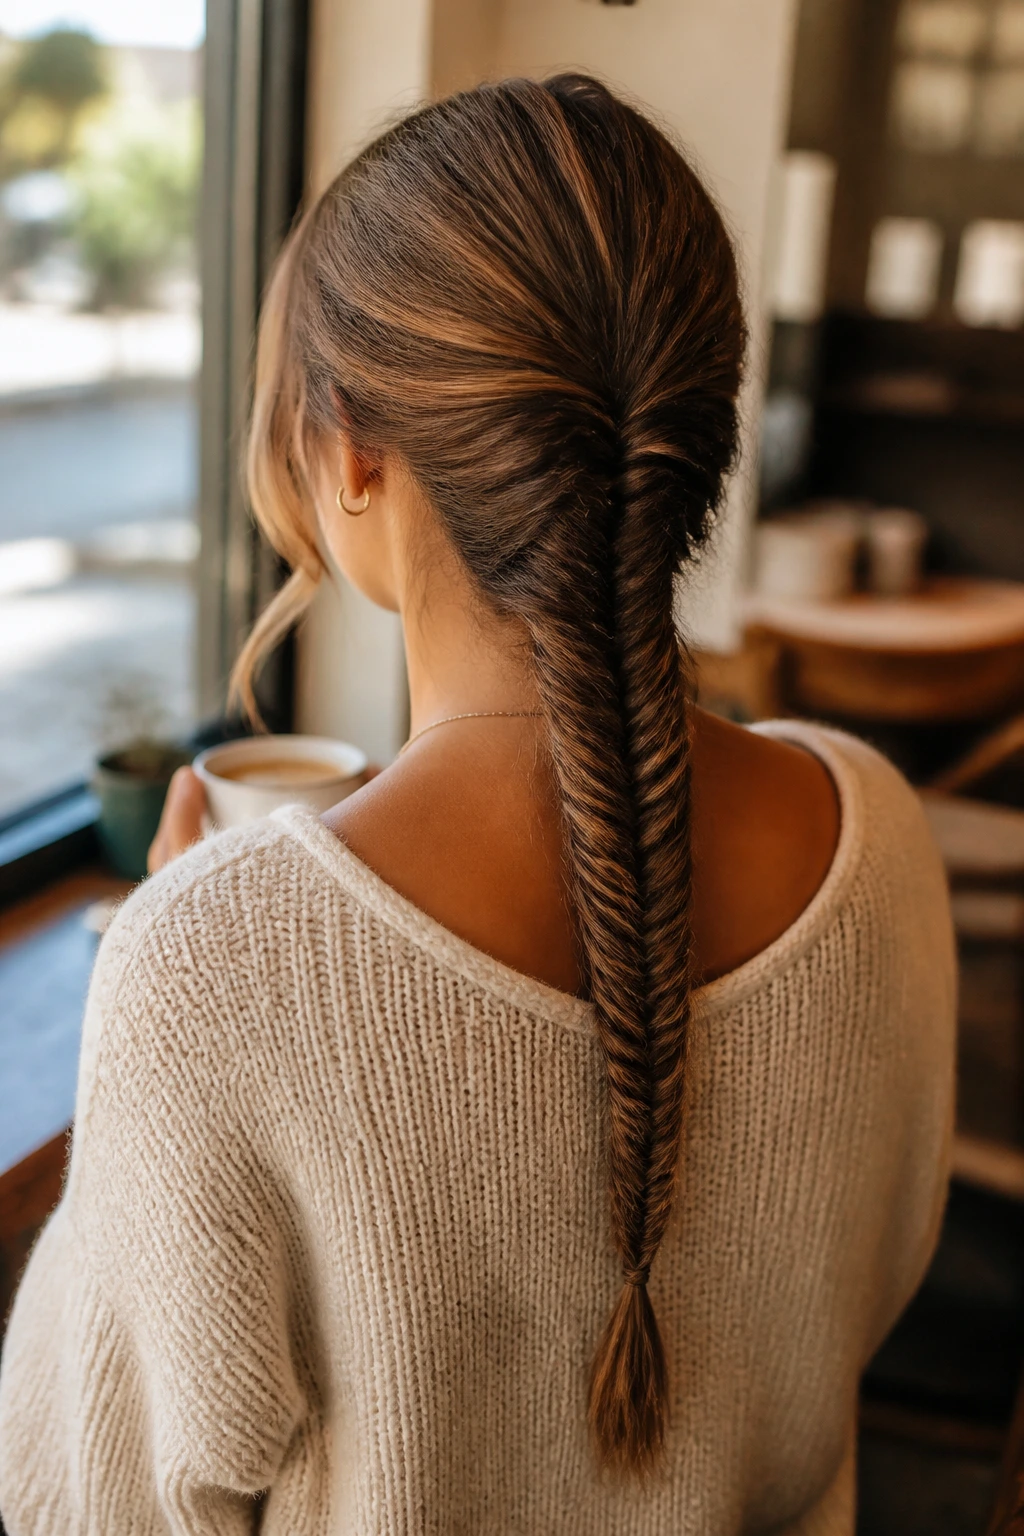
Silhouette: Wear the braid down the center back when you want the weave itself to do the talking, or shift it over one shoulder when you want the face and neckline to stay open. A crown or halo version changes the whole mood, because the braid becomes part of the frame instead of just a tail.
Pair With: Clean braids look sharp with collars, blazers, hoops, and structured tops. Softer versions like the messy boho or loose side sweep work better with knits, open necklines, and smaller earrings that do not compete with the texture.
Length: Waist-length hair can handle chunky sections and loose pancaking. Collarbone-length hair usually needs tighter sections and a smaller braid so the shape stays visible. If your ends are thin, tuck or curl them so the tail does not droop.
Moment: Sleek styles fit workdays, formal dinners, and any event where the hair should look controlled. Messier versions belong on weekends, travel days, outdoor events, and those in-between moments when you want your hair done but not too done.
Additional Styling Tips and Finishers
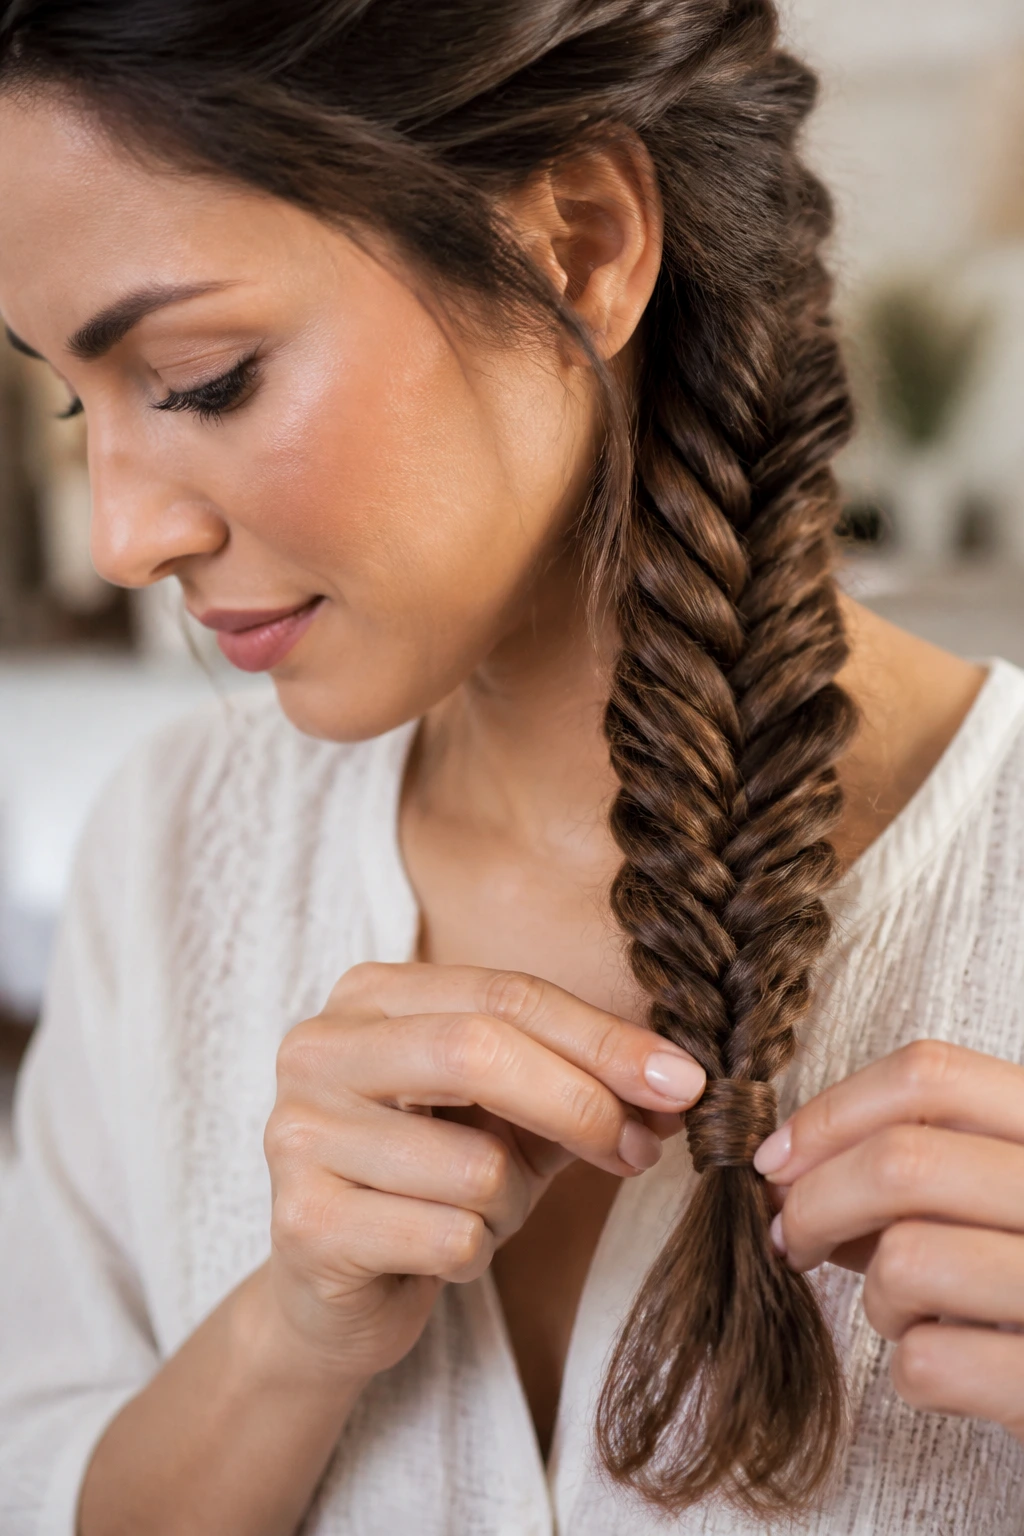
Texture Boost: Pancake the braid only after the elastic is secure. Pulling too early can make the sections uneven, and the braid loses its line fast. Start from the bottom and work upward with small tugs.
Accessory Move: A ribbon, scarf, or narrow velvet tie looks best when it matches the braid’s mood. Satin softens the look. Velvet makes it feel richer. A plain neutral ribbon can be enough if the braid already has a lot of volume.
Face-Frame Fix: Leave the shortest pieces around the temples out on purpose, then bend them with a curling iron or flat iron if they hang too straight. Those pieces are what keep a braid from looking severe on most faces.
Detail Trick: If the braid tail looks too blunt, hide the elastic under a wrapped strand or tuck the end into a pinned coil. That tiny finish changes how expensive the whole style reads, even when the braid took ten minutes.
How to Keep a Fishtail Braid Fresh Overnight and Into the Next Day
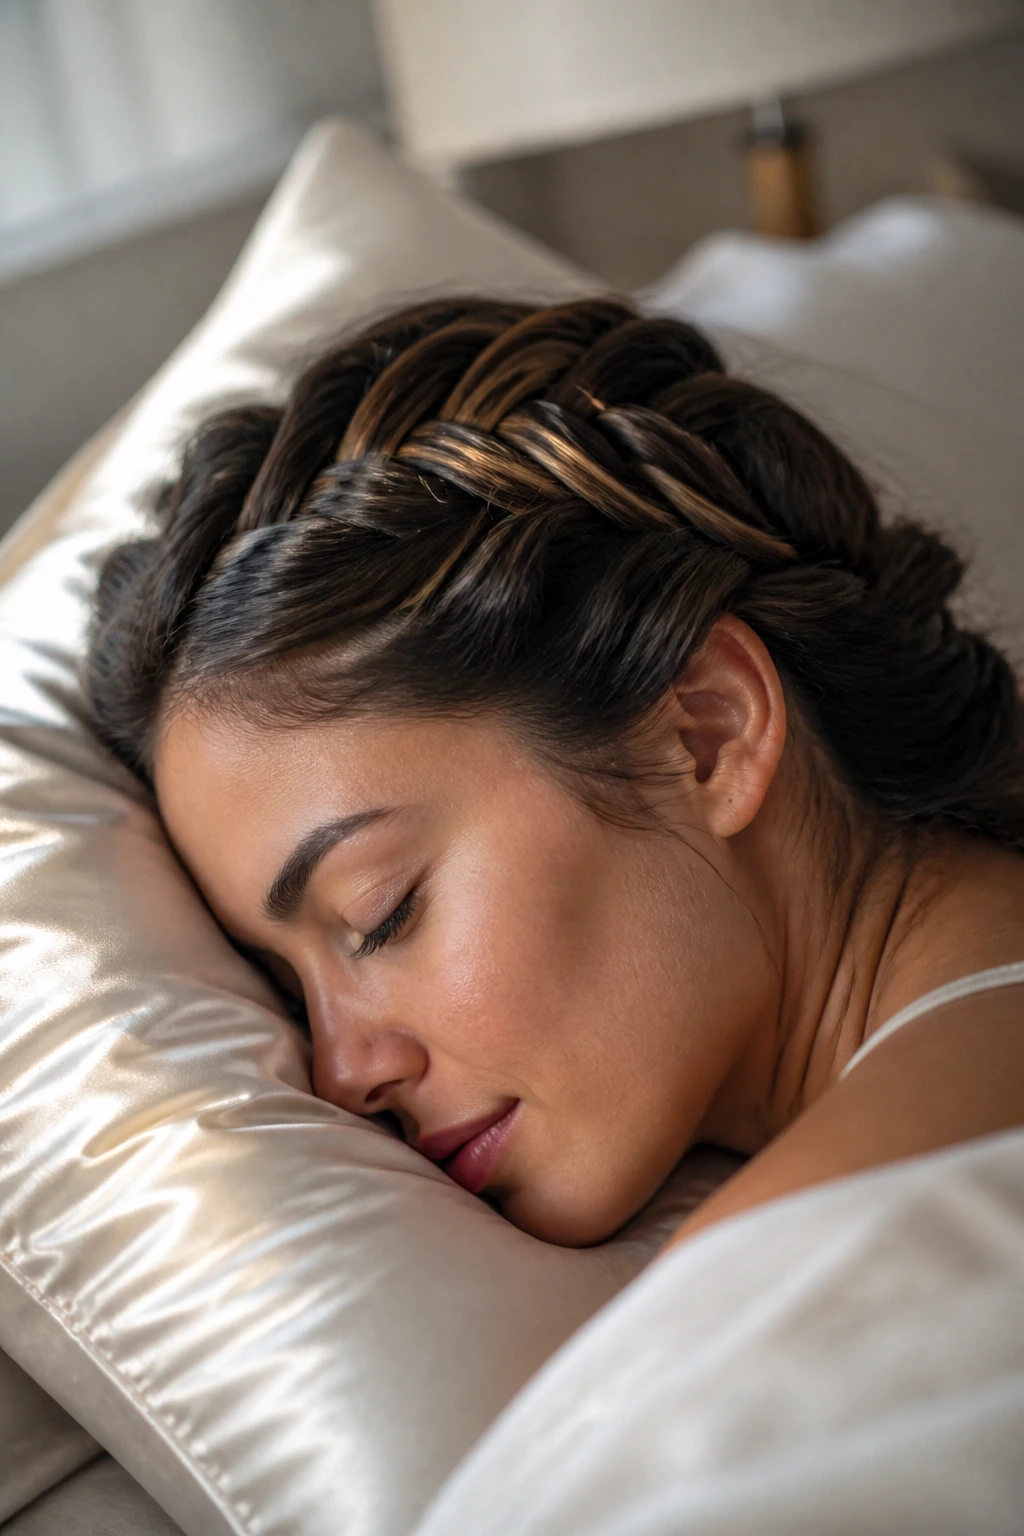
A fishtail usually looks best on day one, but it can stay useful for another day if you treat it gently. Sleep on a silk pillowcase or wrap the braid in a soft scarf before bed so the surface does not rub itself into a fuzz ball. If you pinned a crown or chignon, keep the pins in overnight unless they are poking you.
By the next morning, refresh only what is needed. Mist the braid lightly with water or a leave-in spray if the outer strands look dry, then smooth the roots with your hands instead of brushing through the whole style. Brushing a fishtail after it is set can make the weave lose shape fast, especially on fine hair.
If the braid starts to loosen at the tail, slide in one more elastic rather than trying to rebuild the whole thing. On looser styles, you can also tug a few outer loops back into place and pin any short pieces that have sprung free. A braid that survives the night usually owes it to restraint, not miracle products.
Variations and Adaptations to Try
Curly-Hair Friendly Fishtail: Stretch the curls slightly first, then braid with bigger sections so the pattern is visible without fighting the texture. Leave a few curls around the face for softness.
Fine-Hair Volume Boost: Use dry shampoo, smaller sections, and a gentle pancake at the end. If the braid still looks thin, a tiny clip-in extension in matching color can give the tail more body without changing the feel.
Ribbon-and-Scarf Swap: A narrow ribbon gives a cleaner, dressier line. A scarf makes the braid more relaxed and adds color, which is handy when the outfit is simple and the hair needs one strong detail.
Protective Low Finish: For textured hair that needs less tugging, keep the braid low and pinned close to the nape. The braid stays controlled, and the ends can be tucked away instead of left to fray.
Office-Safe Sleek Version: Flatten the crown with a light gel, keep the part clean, and braid tightly to the shoulder. This version keeps hair out of the face and still looks put together without leaning formal.
Common Mistakes That Ruin Fishtail Braid Hairstyles
Starting with hair that is too clean: Freshly washed hair often slides apart before the braid is finished. If that is what you have, add dry shampoo or texture spray first.
Taking sections that are too big: Giant bites of hair make the braid lose the fishbone pattern and turn into a chunky rope. Smaller, even sections keep the pattern crisp.
Pancaking before the elastic is secure: Pulling the braid wider too early can undo the shape you just built. Tie it off first, then loosen the edges with both hands.
Ignoring the ends: Frayed, blunt, or uneven ends can make even a nice braid look unfinished. Curl, tuck, or wrap the last inch so the finish feels deliberate.
Pulling too hard at the crown: A braid can look soft without the scalp getting yanked. If the base hurts, the tension is too tight, and the style will probably loosen in the wrong places later.
Fishtail Braid FAQs
How long does a fishtail braid take once you get the hang of it?
A simple side or back fishtail can take around 10 to 15 minutes once your hands know the pattern. Add another few minutes if you are smoothing the crown, curling the ends, or weaving in accessories.
Does a fishtail braid work on layered hair?
Yes, but the shorter pieces need a little more control. Start with a firmer braid at the top and stop tugging the outer edges once you get near the shorter layers around the face.
What makes a fishtail braid look fuller?
Smaller sections, a little texture spray, and gentle pancaking usually do the job. If the braid still looks thin, braid a touch looser from the start rather than trying to puff it up later.
Can you do fishtail braids on curly or coily hair?
You can, and the result can be beautiful, but the hair usually needs more prep. Detangle first, add a little moisturizer or styling cream, and choose a lower-tension version so the style does not fight the natural curl pattern.
Why does my fishtail braid keep falling apart?
The usual culprit is slippery hair or uneven section sizes. Add grip at the roots, keep the bites even, and use a small elastic with enough hold for your hair thickness.
Is a fishtail braid better than a three-strand braid for thin hair?
For a fuller-looking finish, often yes. The fishtail’s many tiny crossovers create a denser texture, so thin hair can read as more substantial once the braid is pancaked a little.
Can you sleep in a fishtail braid?
A loose one can be slept in, especially if you want waves the next day. Use a soft tie and avoid pinching the braid too tight at the nape, or you will wake up with an irritated scalp.
How do you stop flyaways without making the braid crunchy?
Use a light mist of smoothing spray or a tiny bit of serum on your palms, then press the surface gently. Heavy gel can make the style stiff fast, so start small and add only if needed.
Braids That Stay Pretty Without Fighting You
The best fishtail braid hairstyles do not look precious. They look calm, controlled, and just a little handmade, which is a far better thing to aim for. Once you stop trying to make every strand behave and start choosing the right version for the hair in front of you, the style gets easier almost immediately.
Pick the braid that fits the moment. Keep a few clear elastics in a drawer, a little dry shampoo on hand, and one or two accessories you actually like wearing. That is enough to make a fishtail braid feel repeatable, not precious — and once it becomes repeatable, it becomes the one you reach for without thinking too hard.
