



Straight hair can be the least forgiving canvas for braids, and that’s exactly why the finished look feels so satisfying when it lands. Every crossing shows. Every part line reads clean. If your hair is fine, silky, freshly washed, or somewhere in that slippery middle ground, a braid can either slide apart before lunch or sit there with that sharp, glossy definition that looks almost drawn on.
The trick is not forcing texture where there isn’t any. It’s giving the hair enough grip to hold the shape, enough tension to keep the braid tidy, and enough softness at the edges so it doesn’t look helmet-stiff. That balance matters more on straight hair than it does on wavy or curly textures, because there’s less natural friction for the strands to catch on.
And that’s the fun part. Straight hair shows off braid structure in a way other textures can’t always do. You see the pattern. You see the seam. You see the work. Once you know which braid suits your length, your layering, and your patience level, the options open up fast.
Why Straight-Hair Braids Deserve a Spot in Your Rotation
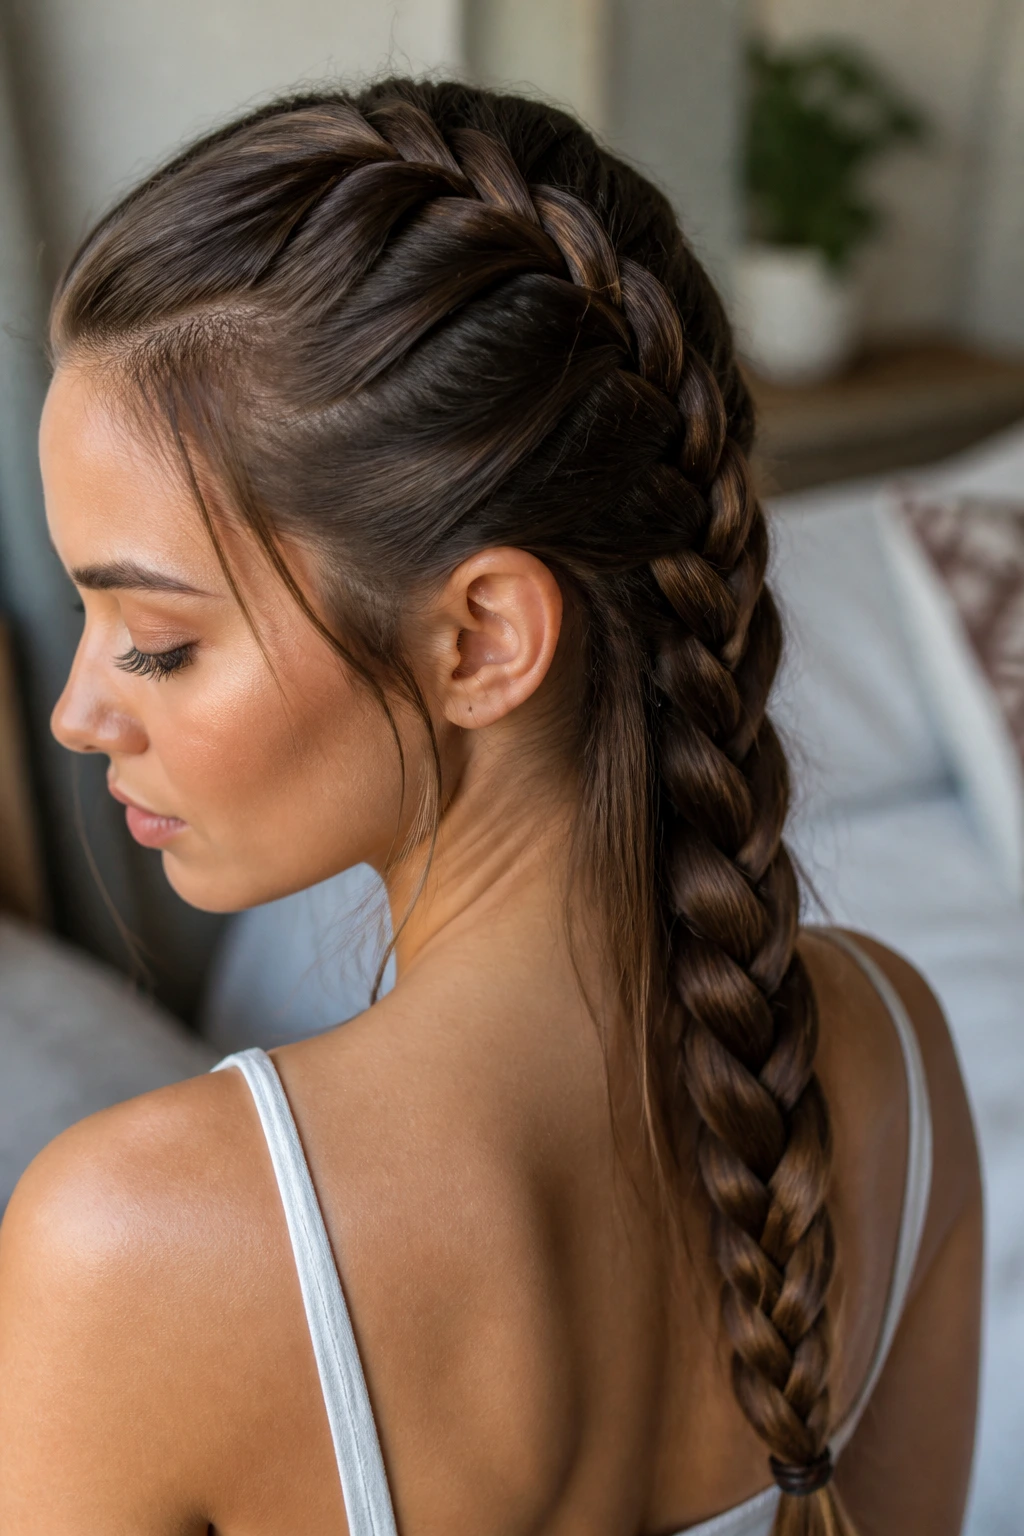
-
Grip changes everything: Straight hair usually needs a little texture spray, dry shampoo, or day-old oil to keep a braid from slipping loose too fast.
-
Clean lines look intentional: The smoother the hair, the sharper the braid pattern looks, especially in French, Dutch, and fishtail styles.
-
They work across hair lengths: A chin-length bob can handle accent braids, while long hair can carry milkmaid crowns, pull-through braids, and heavy side plaits.
-
They solve awkward-day hair: Flat roots, grow-out layers, and mid-length pieces that won’t stay tucked can all be managed with the right braid placement.
-
You can dress them up or down: A tight center braid feels polished; a loose fishtail with a few face pieces left out reads softer and less exact.
-
They buy you time: Once the braid is in place, the rest of the day is mostly about a quick pin or a tiny elastic adjustment, not a full restyle.
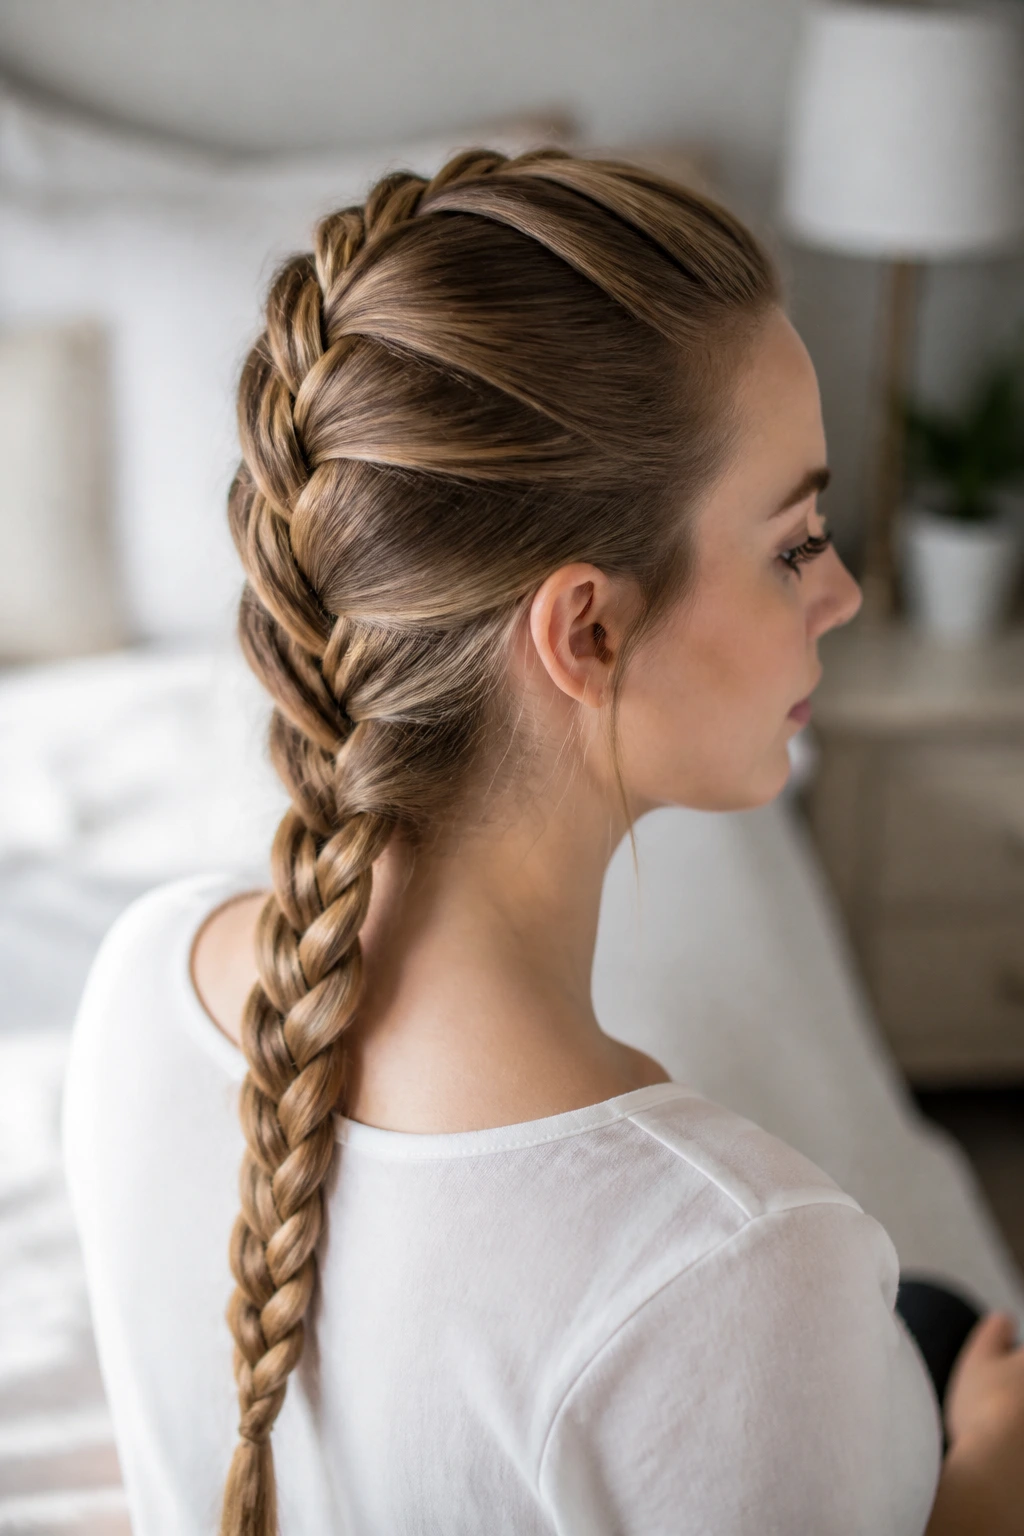
1. Classic French Braid
The classic French braid is the workhorse here, and on straight hair it has one big advantage: the pattern stays visible from the crown all the way down. If the sections are clean and even, the braid looks crisp instead of bulky. That crispness is what makes it so useful on fine or silky hair.
Start high enough that the first few passes sit snug at the scalp. A tiny mist of texturizing spray at the roots helps. Not wet. Not crunchy. Just enough bite so the sections don’t slide apart while you’re crossing them.
Why It Stays Put
A French braid keeps adding hair as it goes, which gives straight hair more anchor points than a simple three-strand braid. That matters when the ends are thin and prone to unraveling. Keep your hands close to the head, and don’t chase perfection on the first try.
Best for: school, work, long days, or anyone who wants the braid to last past the first coffee run.
Quick note: if your layers slip, pinch the outer pieces tighter and braid a little lower through the nape.
2. Split Dutch Pigtails
Dutch pigtails are basically the louder cousin of French braids. Instead of crossing strands over, you cross them under, so the braid sits on top of the hair with more lift and more visible texture. On straight hair, that raised braid line looks especially sharp.
This style is a good fit when the hair is very fine or very flat at the crown. Part it cleanly down the center, then keep the sections tight from the first braid pass. Loose roots make Dutch braids sag fast, and straight hair does not hide that.
The nicest thing about pigtails is that they give symmetry without looking fussy. Two braids, two elastics, done. And if your ends are slipping, a tiny clear elastic at the bottom is worth using even if you hate the look of them.
3. Side Fishtail Sweep
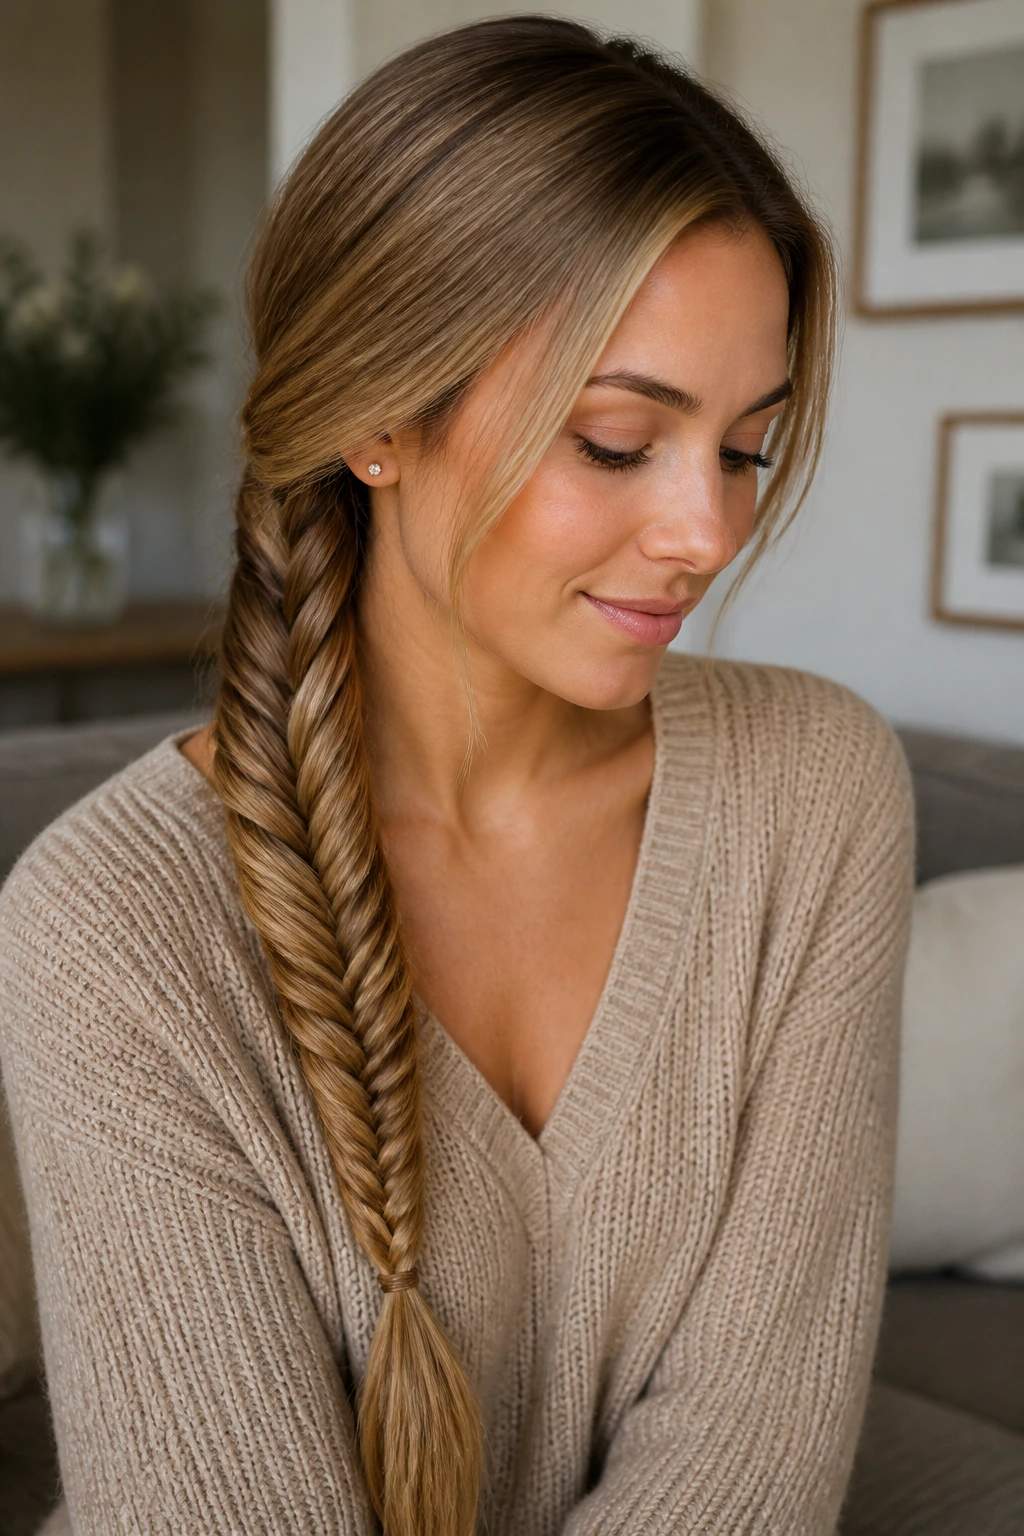
A side fishtail braid can be more forgiving than people think, especially on straight hair where the small crossovers show up like little scales. The smooth surface makes the pattern readable, which is half the appeal.
Pull all the hair over one shoulder and start low, near the collarbone, if you want the braid to feel soft and relaxed. If you want it cleaner, begin tighter at the nape and keep the crossovers small. Either way, a fishtail likes patience more than force.
What Makes It Work
Use your fingertips, not a brush, once the braid starts. Brushing the sections too much makes the outer strands slide apart. A light hold spray at the end helps the fishtail keep that narrow, neatly woven shape instead of puffing out by noon.
4. Milkmaid Crown Braids
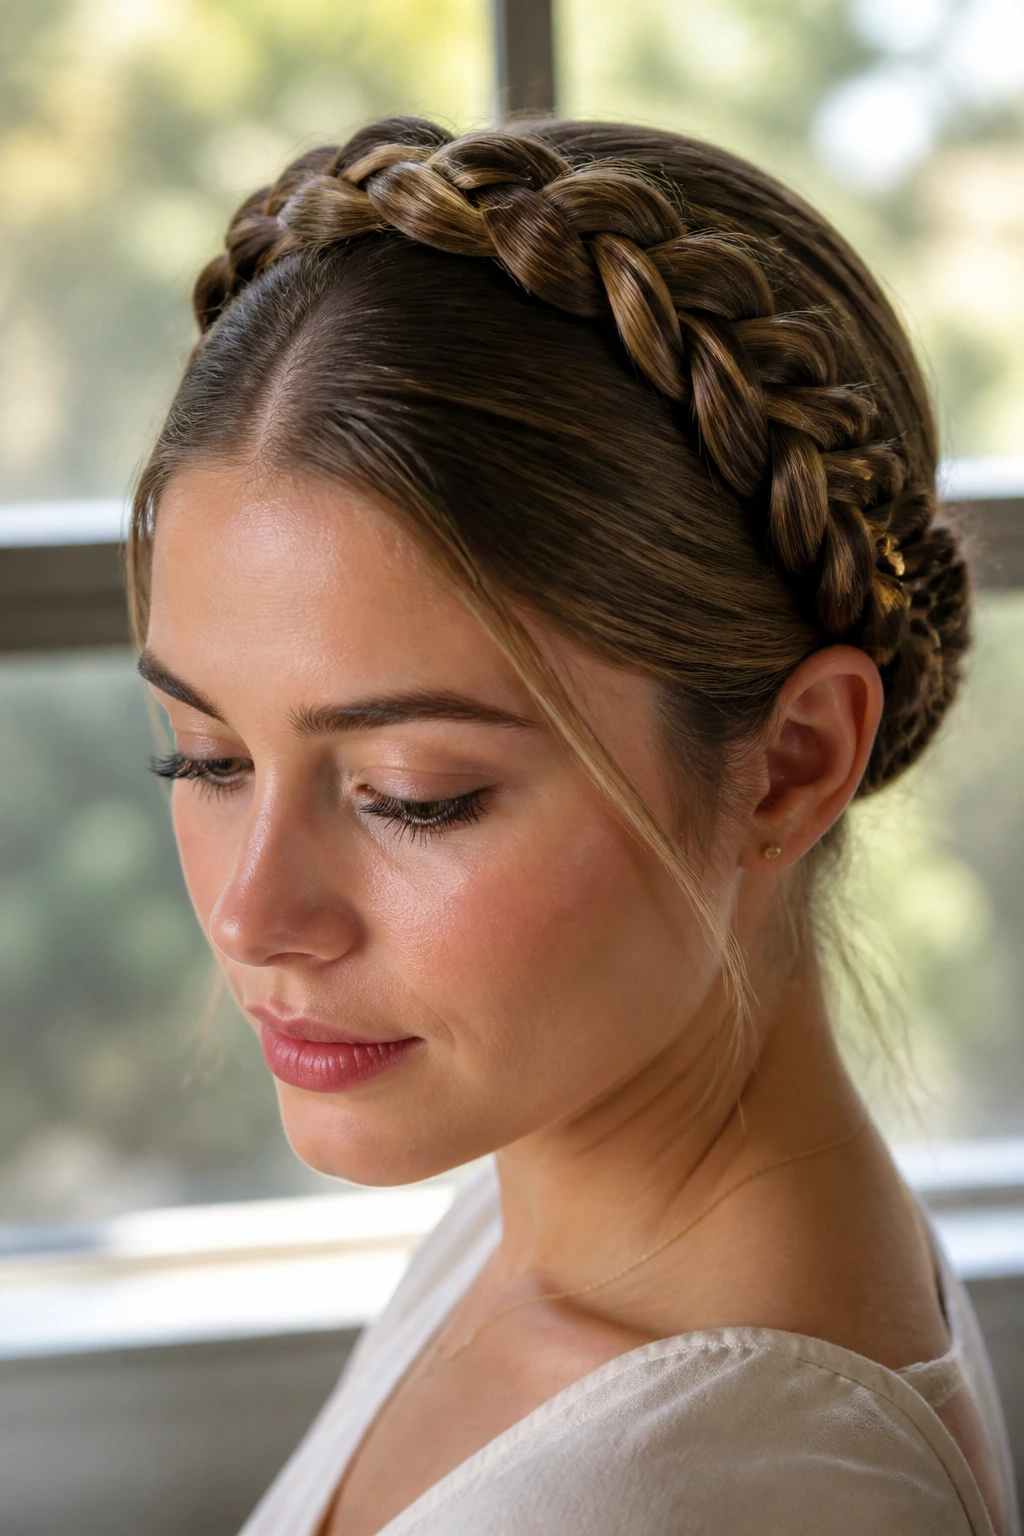
Milkmaid braids sit like a crown, and straight hair does a nice thing here: it keeps the loops smooth instead of fuzzy. You get a clean line around the head, which is exactly why this style reads polished without much decoration.
Make two low braids first, one on each side, then lift them over the top of the head and pin them in place. Use bobby pins that match your hair color if possible, because the hair won’t hide the hardware for you. Straight hair is honest like that.
If your hair is layered, tuck the shorter ends under the braid before pinning. A few hidden pins at the nape keep the crown from shifting. The style looks delicate, but the anchoring should be firm.
5. Waterfall Half-Up
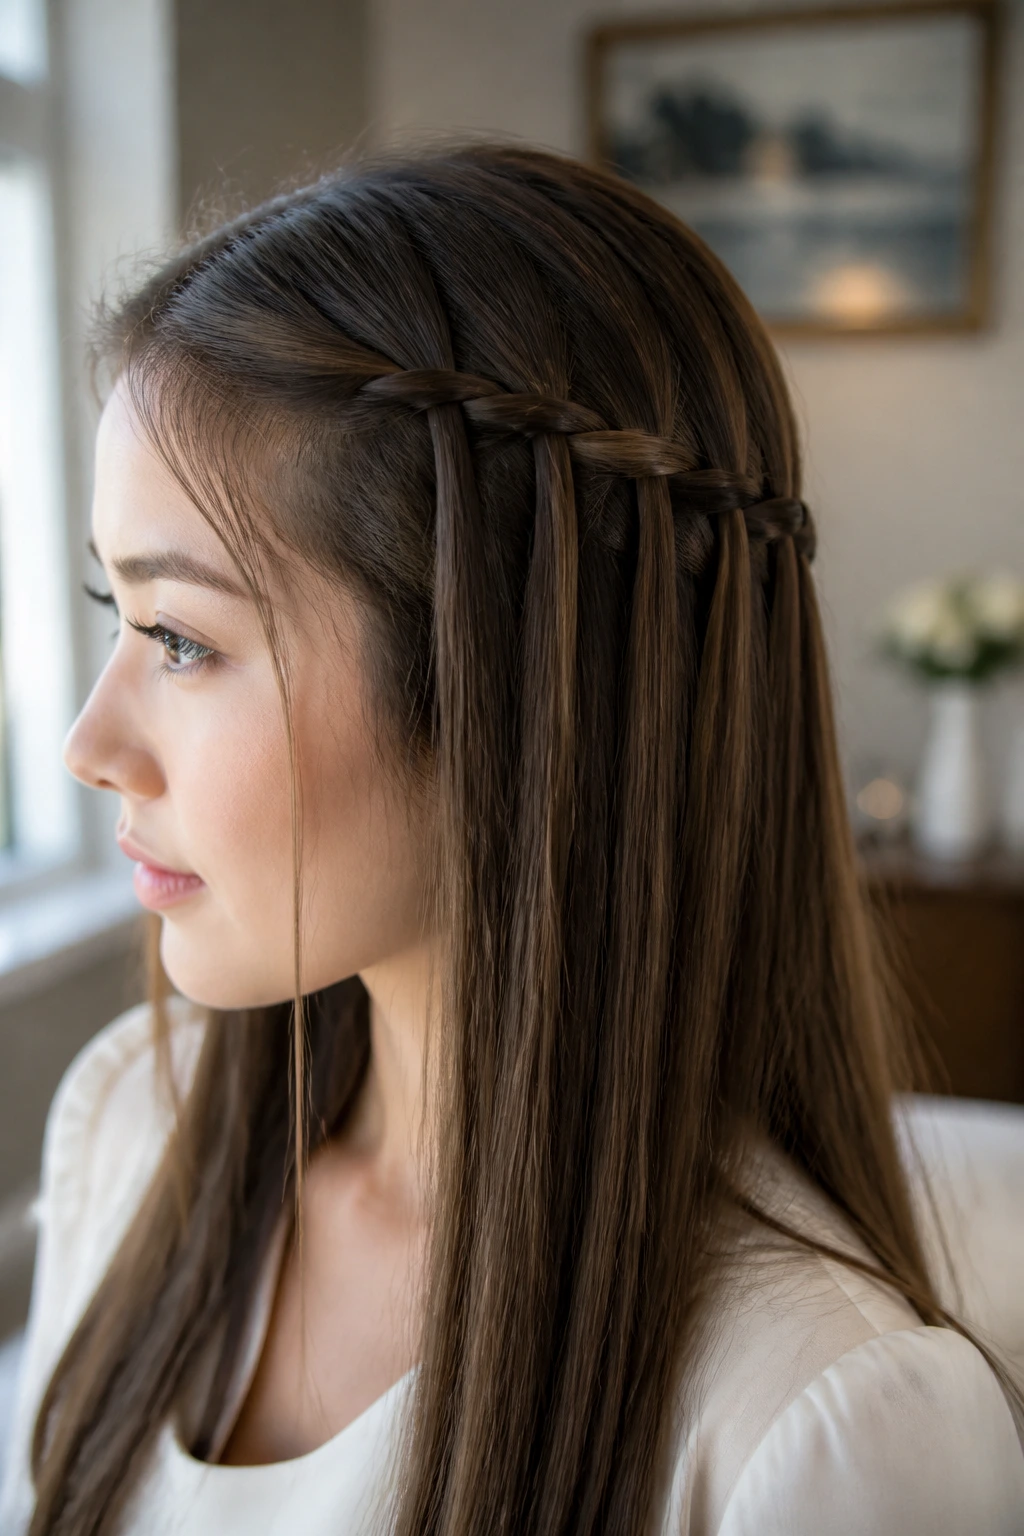
Waterfall braids are one of the few styles that can make straight hair look intentionally airy instead of accidentally flat. The dropped strands hang neatly, which suits hair that naturally falls in clean sheets.
Start with a side section above one temple and braid across the back of the head, releasing the lower strand each time you cross. That falling piece is the whole point. Don’t rush it. If the sections are too large, the braid gets clunky fast.
A waterfall braid works best when the rest of the hair is left sleek, not curled into submission. A soft bend at the ends is enough. Too much curl competes with the braid, and the whole style starts to feel busy.
6. Rope-Twist Ponytail
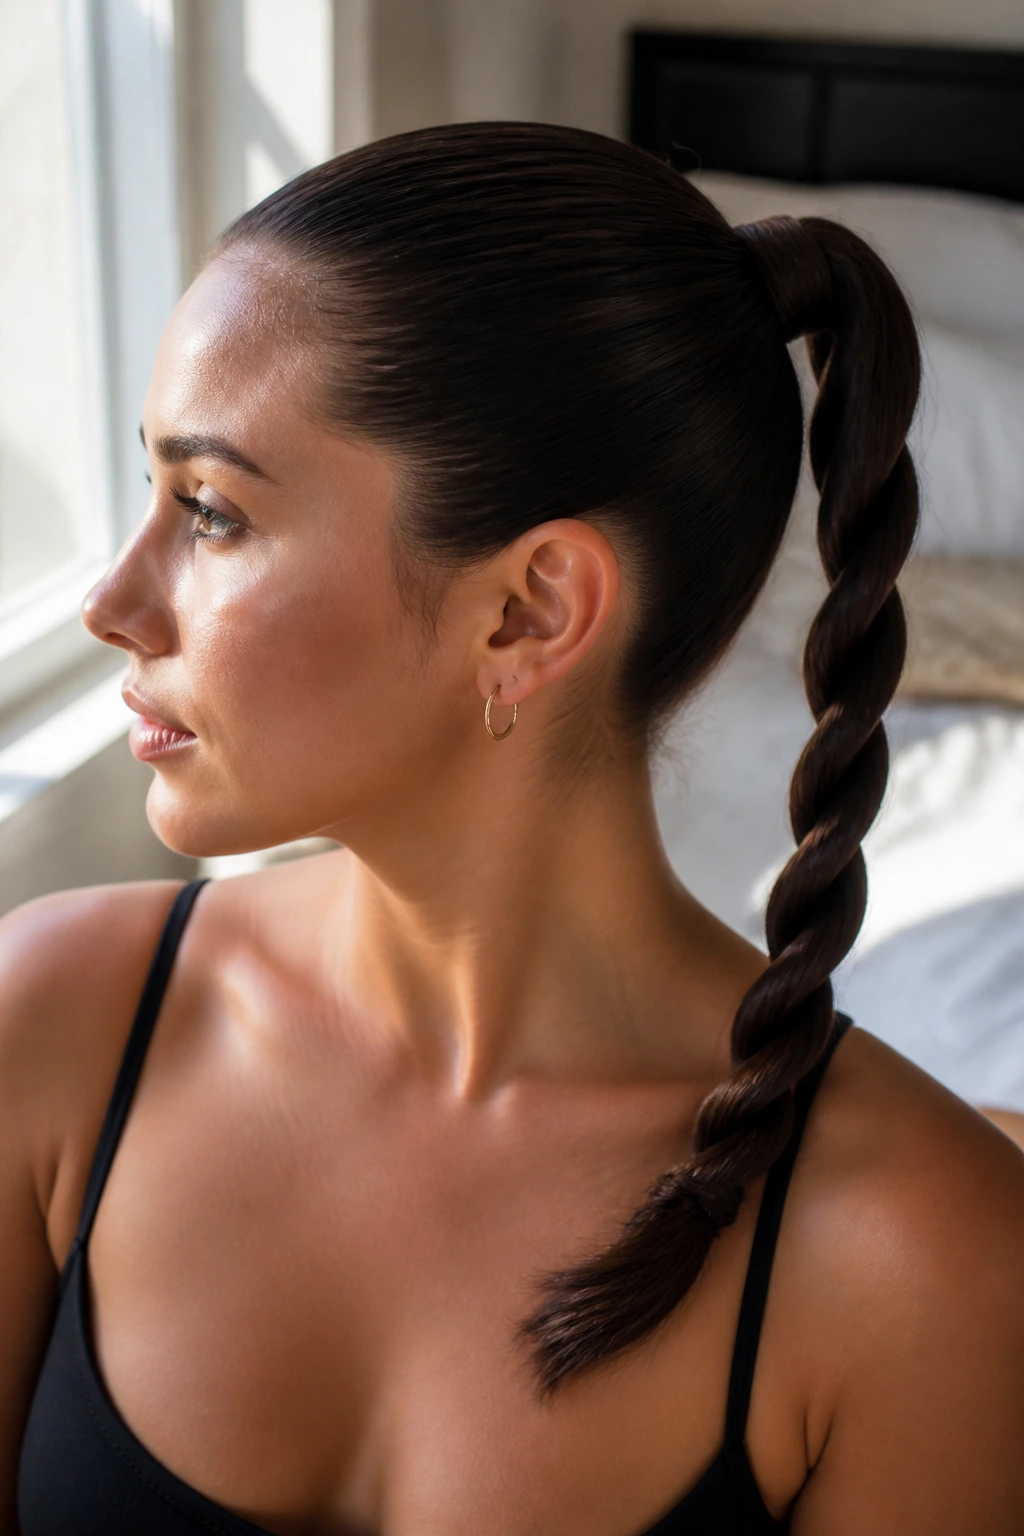
This one is technically a twist, not a braid, but it belongs here because straight hair makes the rope pattern look glossy and neat. It’s also fast, which matters on mornings when your hair is too clean and too flat for anything fancier.
Split the ponytail into two sections, twist each section the same direction, then wrap them around each other in the opposite direction. That opposite-direction step is the part people skip, and then the twist falls open. Secure the end tightly.
A rope ponytail looks best when the crown is sleek and the tail has a little movement. If you want more grip, rough up the ponytail length with a touch of dry shampoo before twisting. Small detail. Big difference.
7. Pull-Through Length Booster
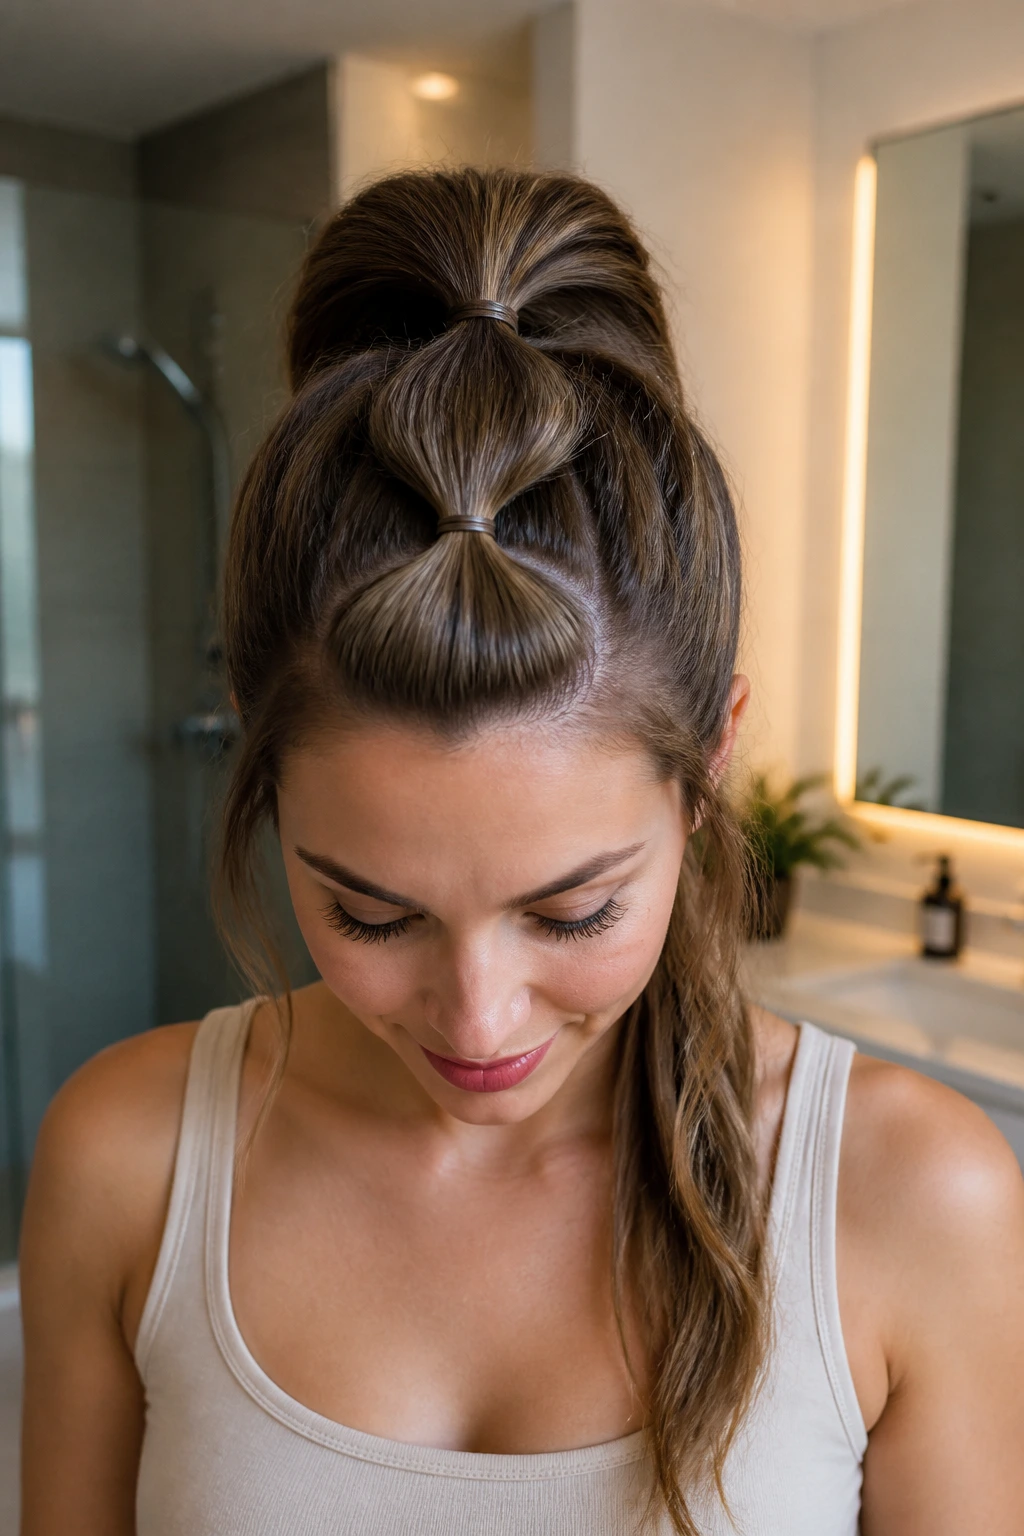
If you want a braid that looks thick on straight hair without needing real thickness, the pull-through braid is the move. It uses a row of ponytails and mini elastics to fake a chunky plait, which is exactly why fine hair does so well with it.
Start by sectioning the hair into two ponytails, one on top of the other. Split the top ponytail, bring the lower one through the gap, and keep stacking sections down the length. Then gently tug the sides of each loop. Not hard. Just enough to puff the braid without exposing every elastic.
A Quiet Advantage
This style holds because the elastics do most of the work. That means even slick straight hair can keep the shape longer than a traditional braid. If you want more fullness, crimp the ponytail lengths first or mist with texture spray before starting.
8. Boxer Braids
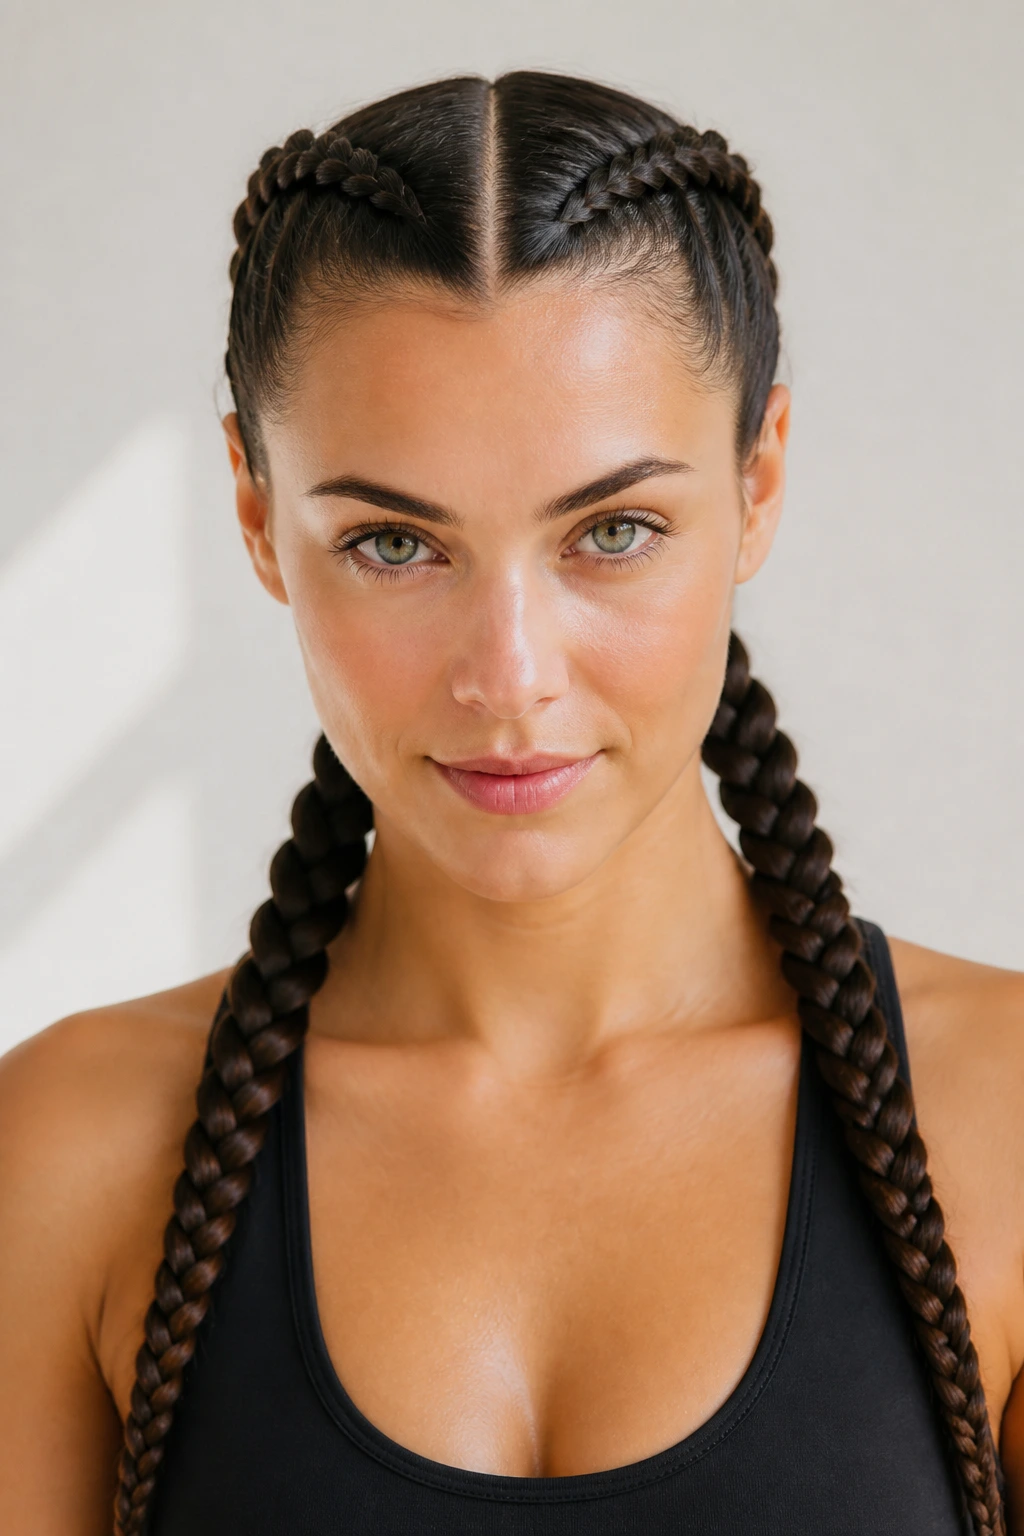
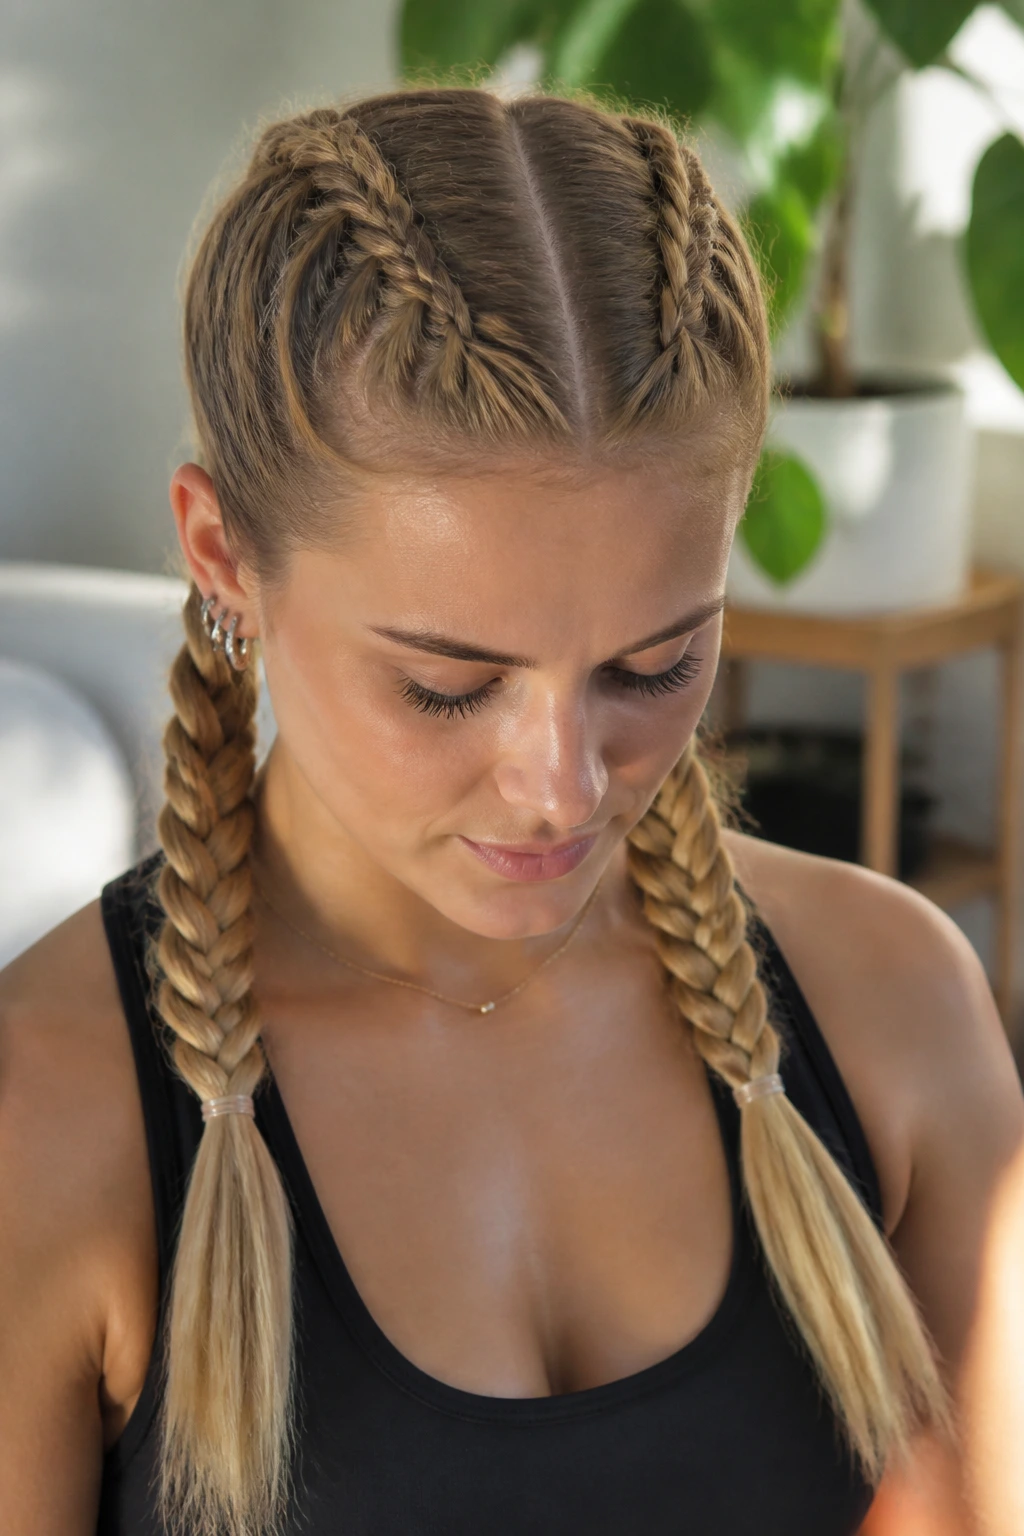
Boxer braids are tight, sporty Dutch braids that sit close to the scalp and stay put better than most styles on straight hair. They’re the braid version of tying your hair down and asking it to behave.
The clean center part matters here. Use the tail of a rat-tail comb and take your time. Uneven parting shows immediately, and straight hair doesn’t offer much forgiveness. Once the parts are set, braid each side snugly all the way to the ends.
These braids are especially useful if your hairline tends to puff up at the temples. The close weave holds that area in place. A small amount of pomade on the first inch of hair can keep little flyaways from escaping like they have somewhere better to be.
9. Loose Side Braid
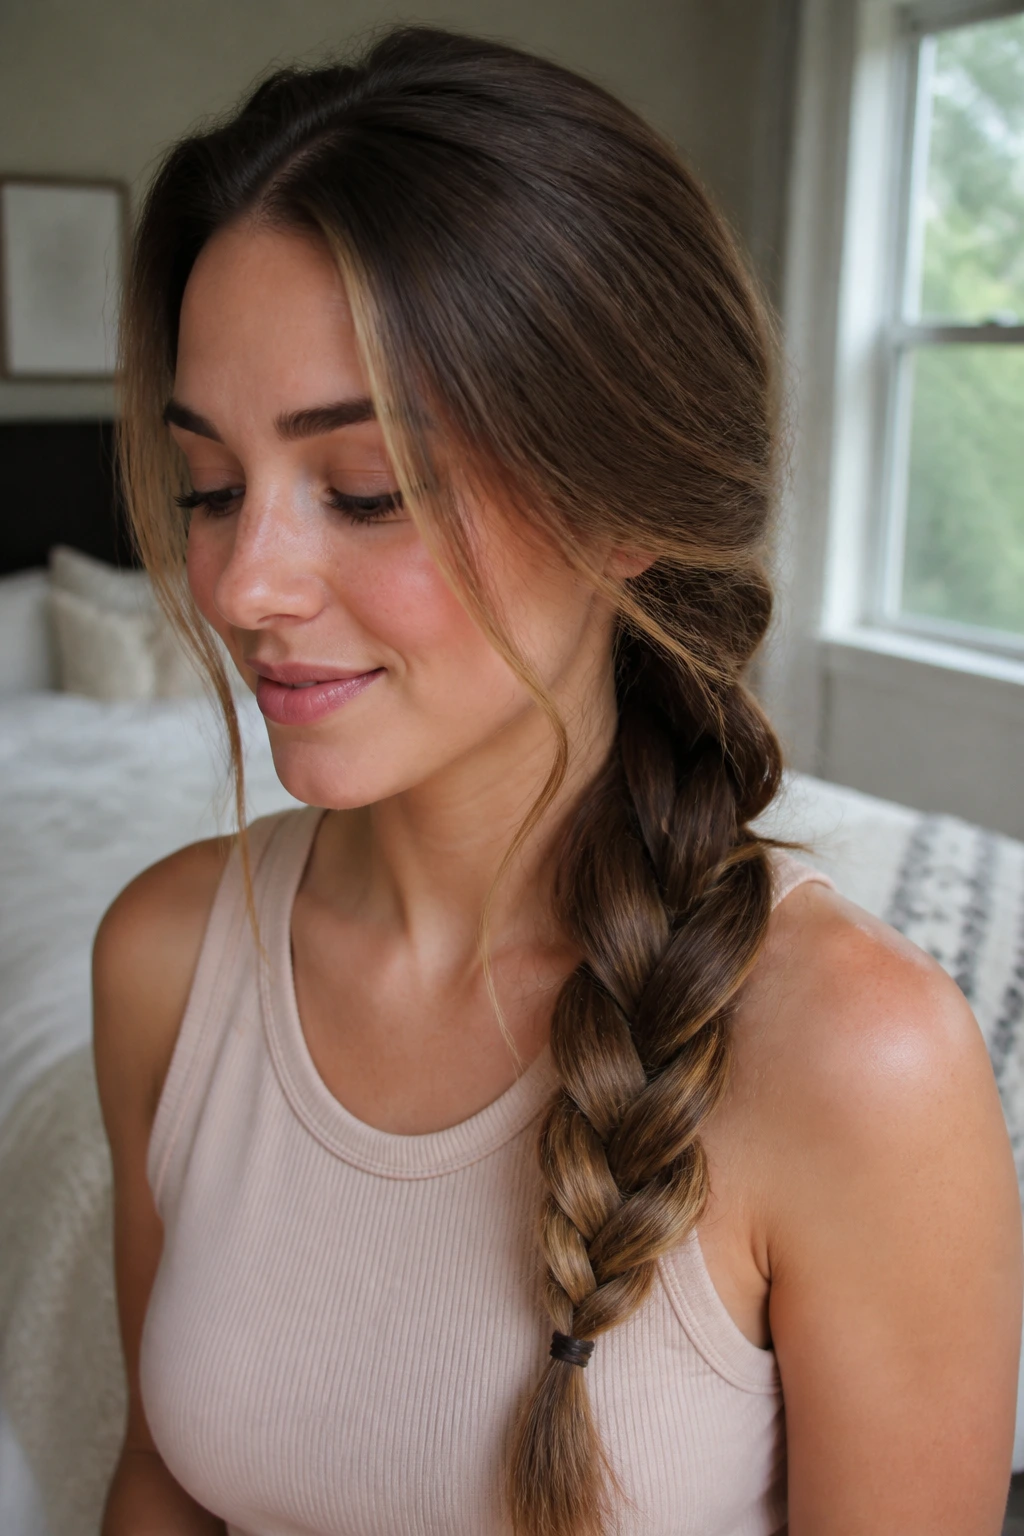
A loose side braid is simple, but on straight hair it has a specific charm: the braid lies flat and tidy while the outer sections stay smooth. It’s the style I reach for when I want hair out of the way without looking like I tried too hard.
Gather the hair to one side at the back of the neck, braid loosely, then pull a few tiny face-framing pieces free if needed. Don’t overthink the looseness. If you go too soft, the braid starts to sag and the whole shape collapses into a ropey mess.
A little mousse at the roots helps this braid hang together longer. So does braiding just below the ear instead of right at the nape, where straight hair tends to slide. Small placement change. Noticeable hold.
10. Low Braided Knot
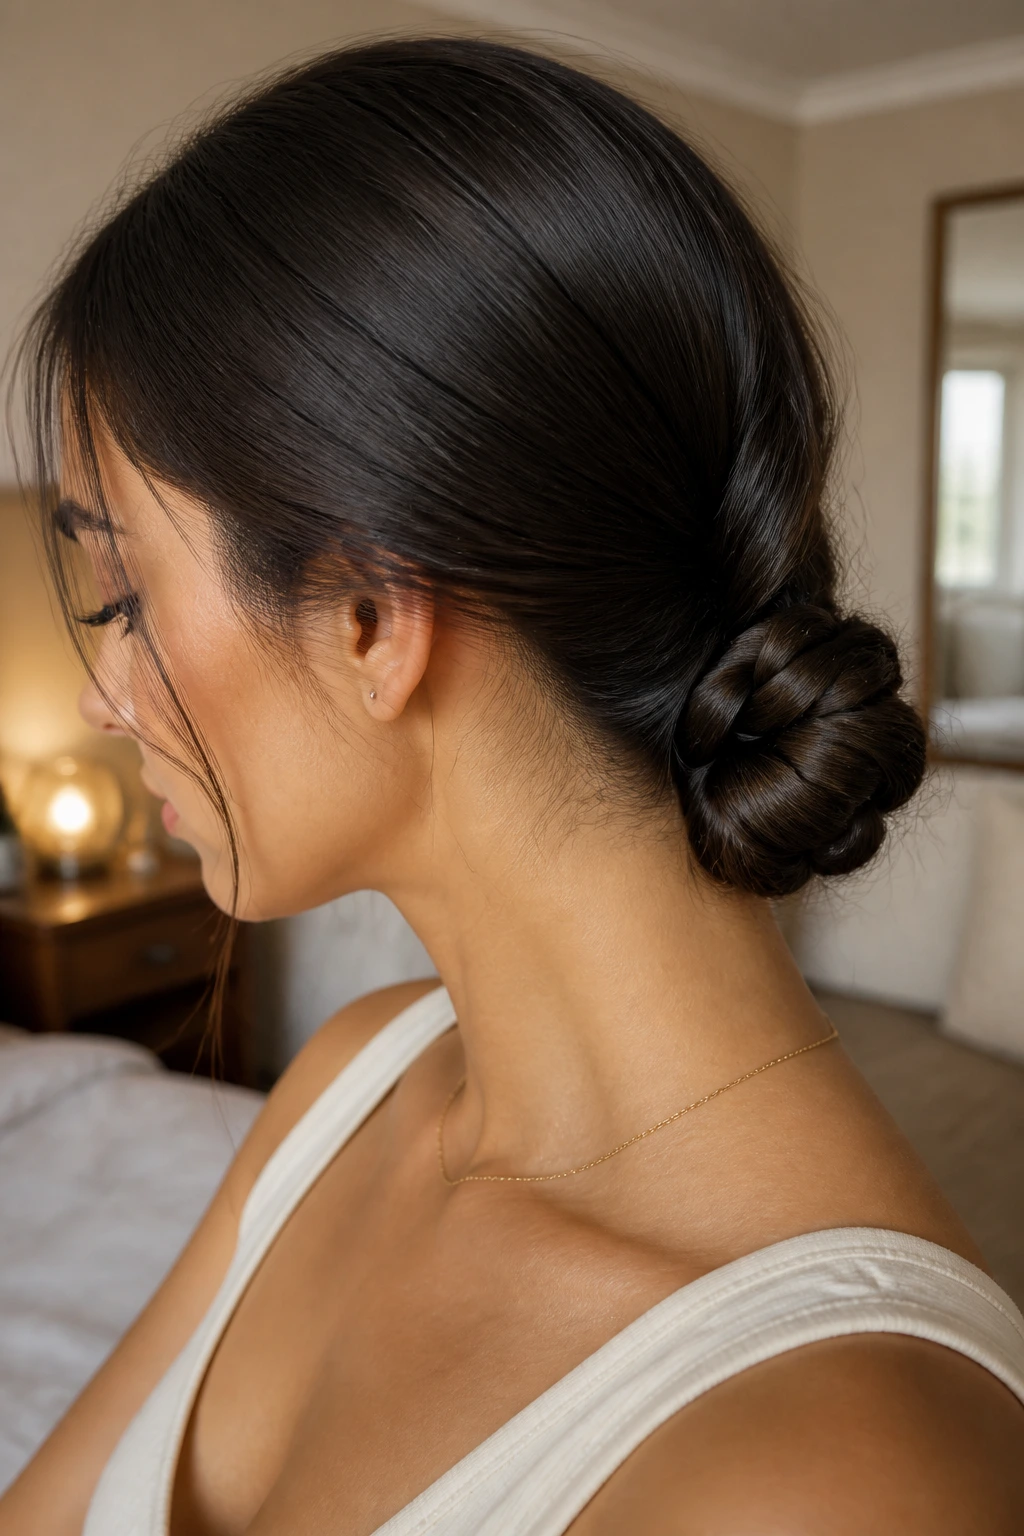
This is one of those styles that looks more deliberate than it actually is. Braid the hair into a low plait, wrap it into a bun or knot at the nape, and pin the base where the braid meets the head. Straight hair gives the knot a smooth surface and a neat outline.
The important thing is not to make the braid too loose before wrapping it. If the plait is airy, the bun gets wispy and can unravel. Keep the braid compact, then tuck the end under the coil and secure it with two or three bobby pins.
It’s a good choice for medium-length straight hair that usually escapes buns. The braid acts like a built-in anchor. That’s the part I like most.
11. Half-Up Accent Braids
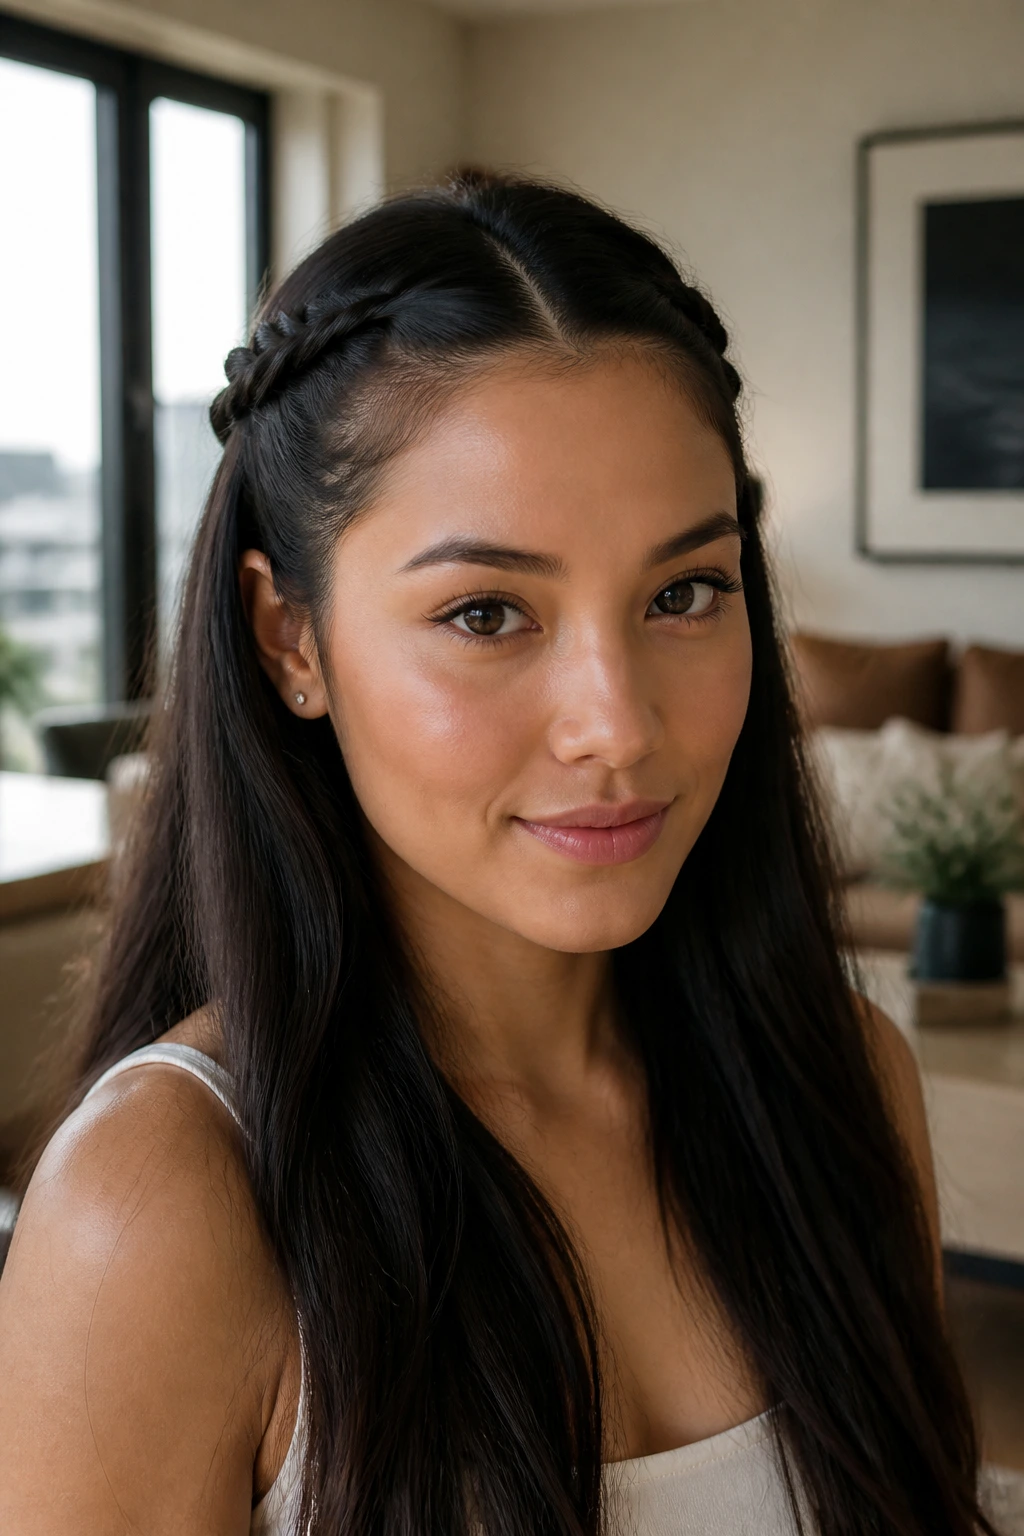
Half-up accent braids are the answer when you want detail but not full head coverage. Take two small sections near the temples, braid them back, and secure them behind the crown. On straight hair, those slim braids read almost like drawn lines.
The trick is scale. If the braids are too thick, they swallow the rest of the hair. Keep them slim enough that the loose lengths still matter. A tiny elastic at the end helps, but you can also pin the braid ends under a small top section if you want a cleaner finish.
This style works especially well with long straight hair that tends to lie flat around the face. The braids create structure without asking the rest of the hair to do much.
12. Four-Strand Flat Braid
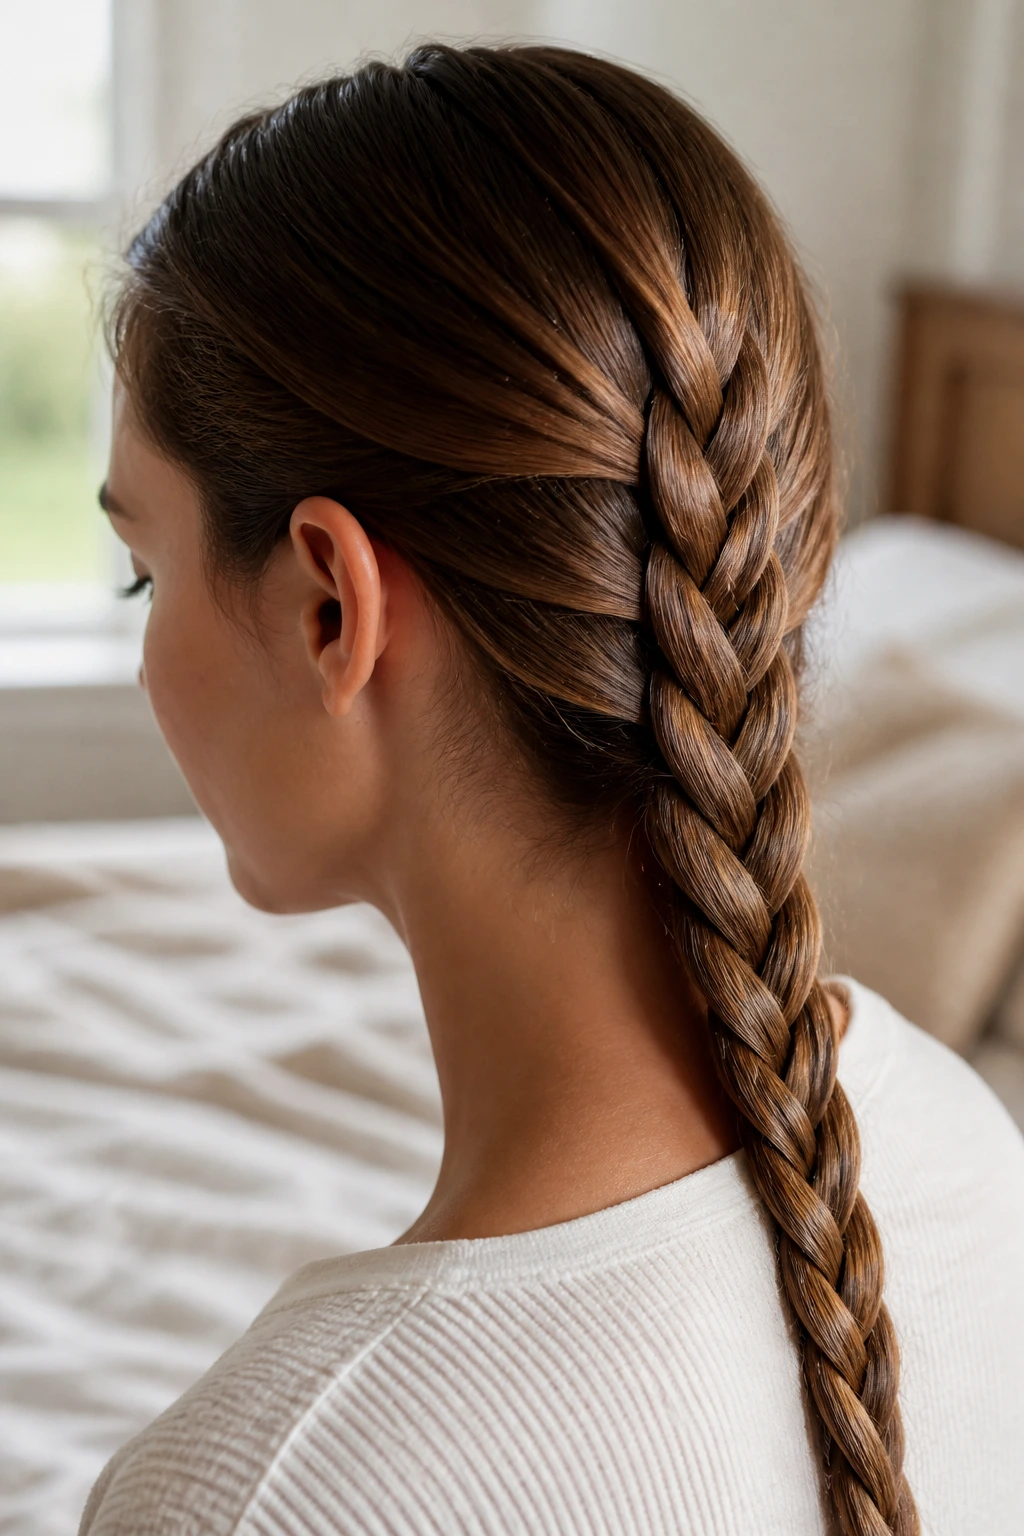
A four-strand braid is where straight hair starts to show off. The pattern is more geometric than a standard braid, and because the hair is smooth, each strand stays readable instead of collapsing into a blur.
You need a little patience and enough length to keep the strands separated. Divide the hair into four equal pieces, then move the outer strands across in a steady pattern. Don’t rush the first foot of braid. Once the rhythm sets in, it gets easier.
Best Use Case
This braid is strongest when the goal is visual detail, not speed. It looks good down the back, over one shoulder, or folded into a low bun. If your hair is layered, use a touch of light cream on the ends only so the shorter pieces don’t fray out of the weave.
13. Infinity Accent Braid
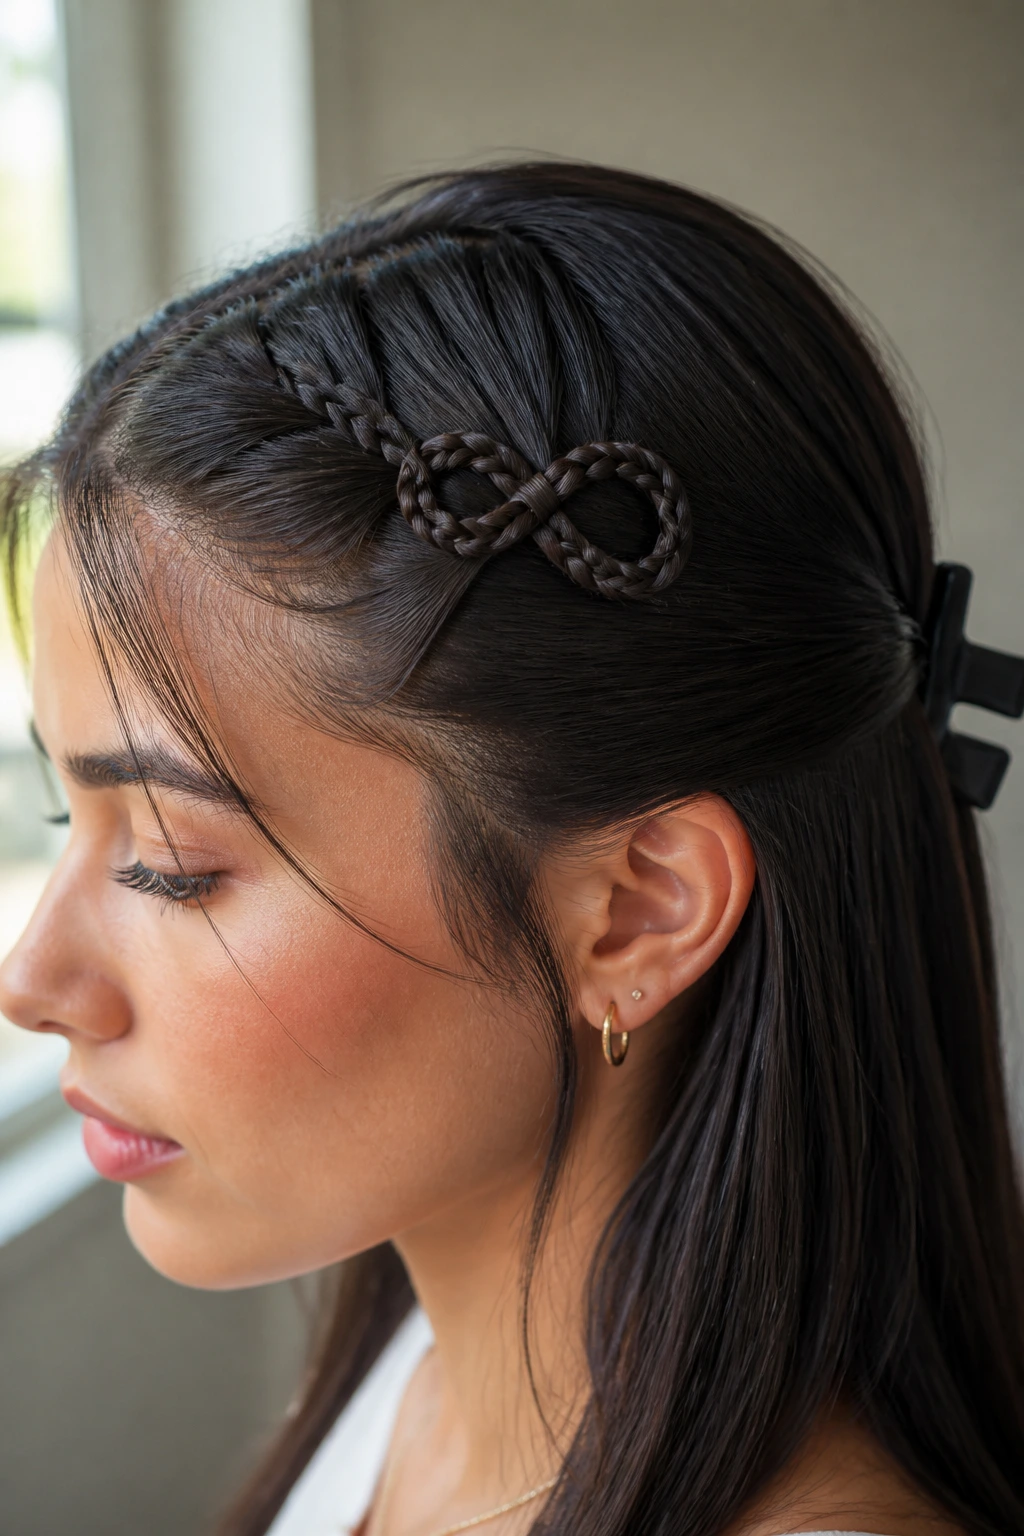
An infinity braid is the kind of detail people stare at because the loop pattern looks fancier than the effort it takes. On straight hair, the repeated figure-eight shape stays visible, which is half the appeal.
Use it as an accent braid along one side rather than trying to make it cover the whole head. A small section near the front or temple is enough. Straight hair holds the sleek loop shape well, but the braid needs control, so clip the rest of the hair away while you work.
If the section feels too slippery, a dry texture spray at the roots will save you some frustration. This braid is not the one to attempt on hair that has just been smoothed with heavy serum.
14. Dutch Braid Into Ponytail
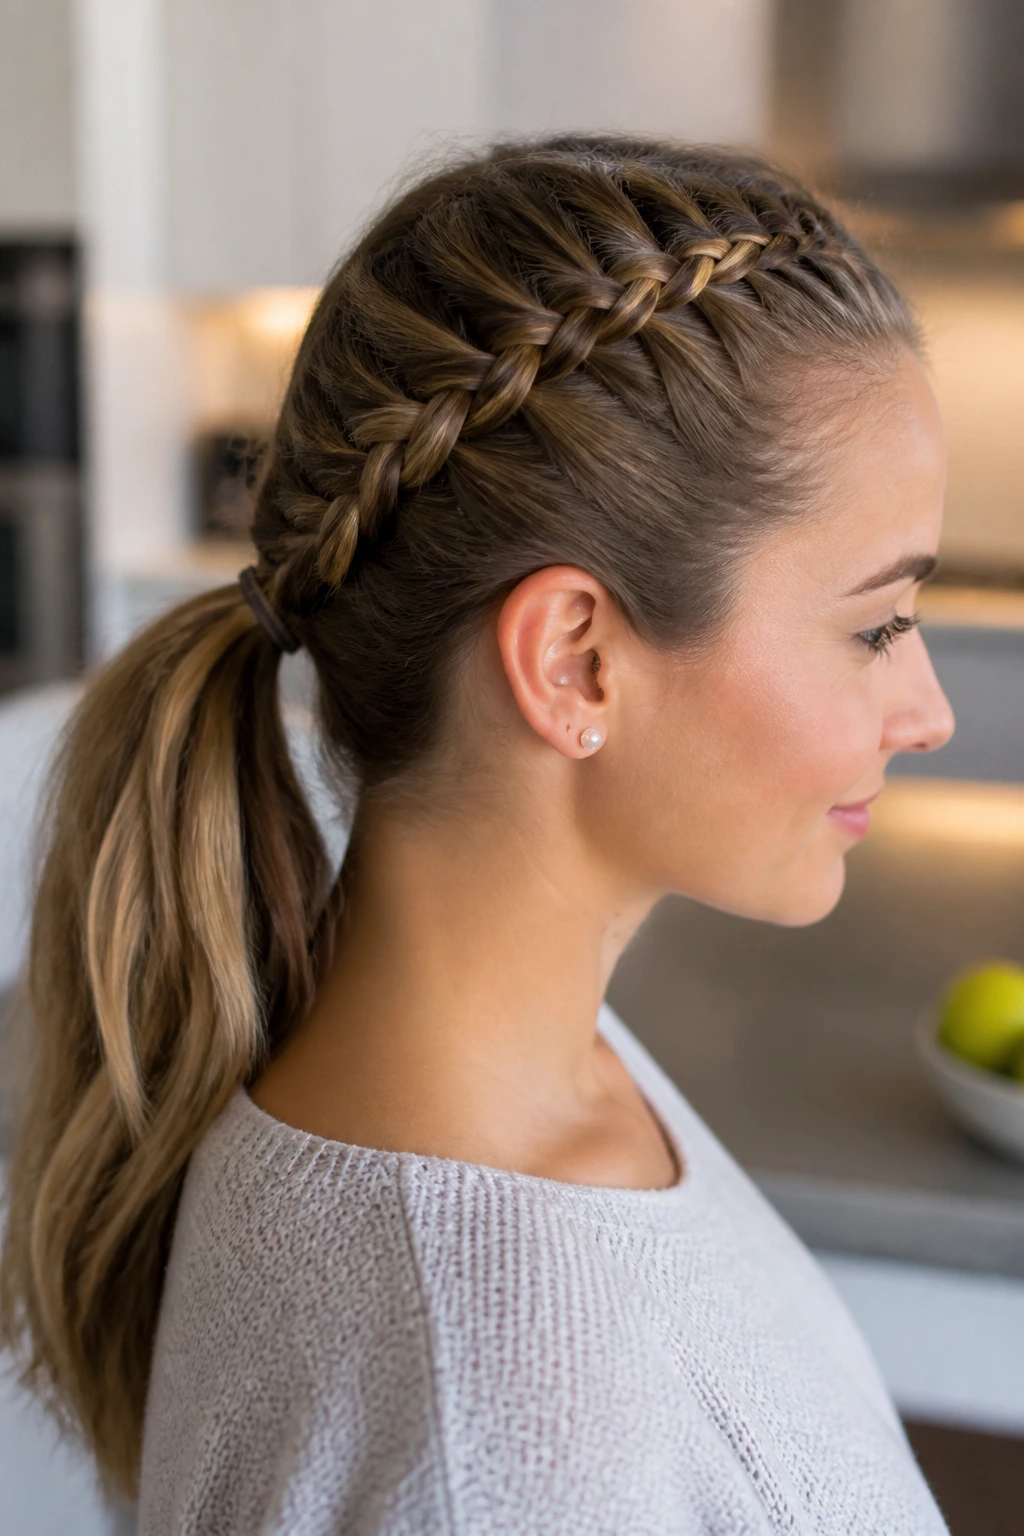
This style gives you the grip of a braid and the swing of a ponytail. Start with a Dutch braid at the hairline and keep braiding down toward the nape, then tie the remaining length into a ponytail. It’s neat at the top and less fussy at the bottom.
Straight hair likes this because the braid prevents the crown from falling flat while the tail keeps the look from getting too rigid. If you want a sharper finish, wrap a tiny section of hair around the elastic and pin it underneath.
The braid should stay snug through the scalp, but the ponytail can be looser. That contrast keeps the style from looking stiff.
15. Halo Braid
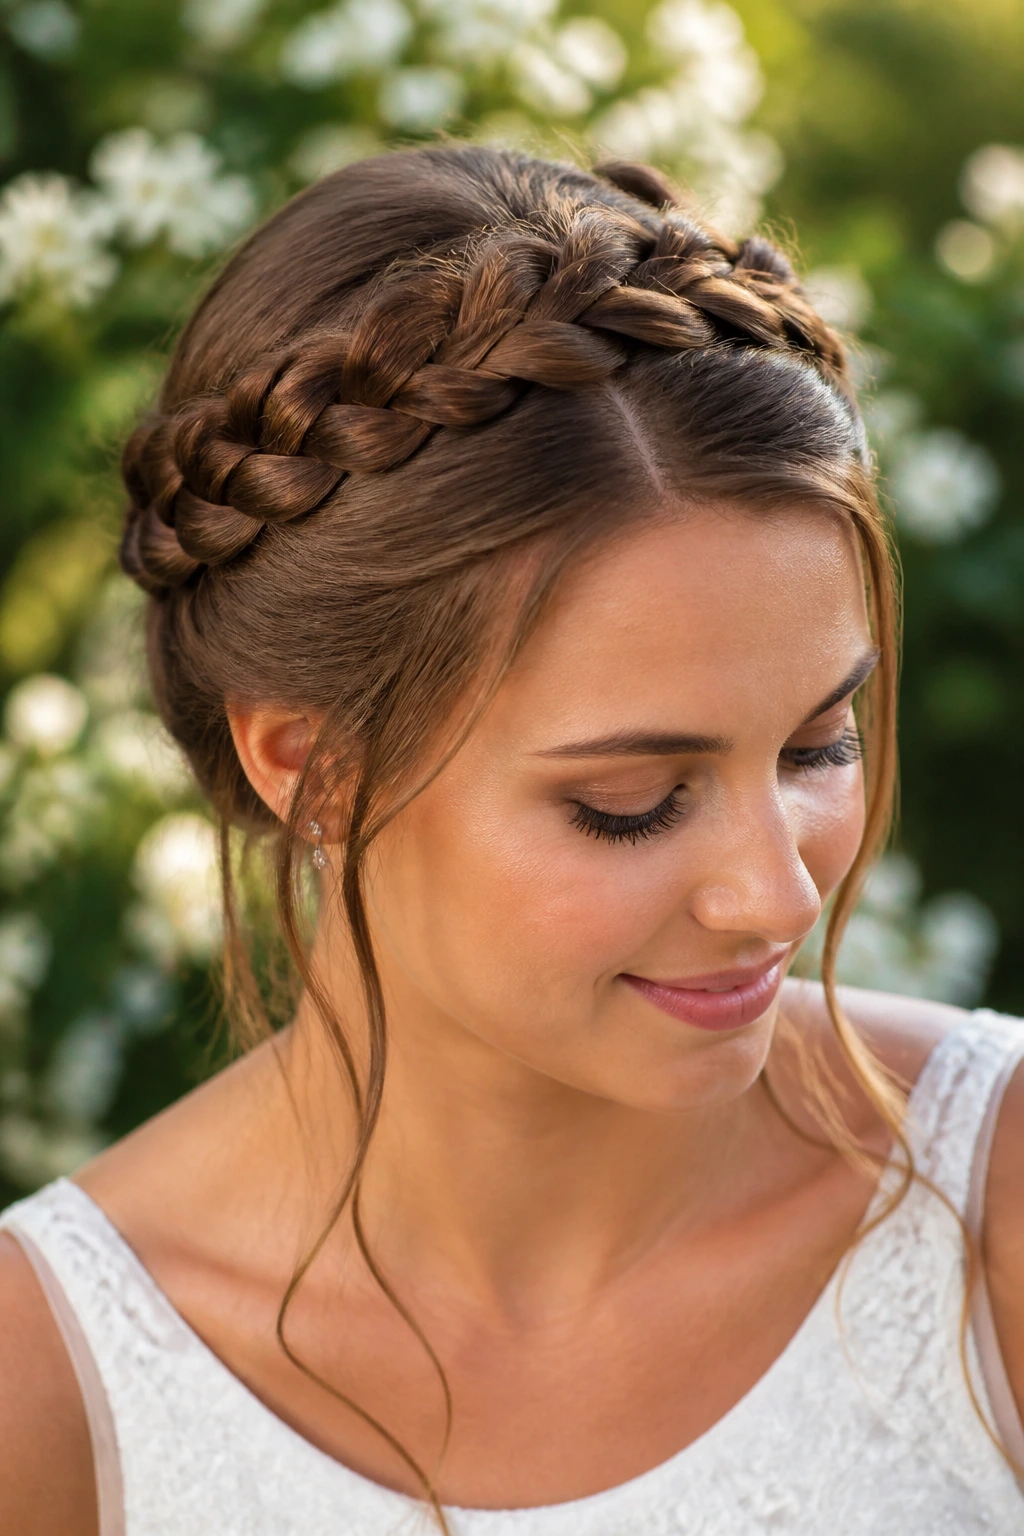
A halo braid circles the head in one continuous loop, and straight hair gives it a cleaner silhouette than you might expect. The braid line stands out against the head shape, which is why this style can look so polished with very little decoration.
You can create it from one long braid wrapped around the crown, or from two braids joined at the back. Either way, pin as you go, not just at the end. Straight hair shifts faster than people think, and a halo that looks fine at the mirror can slip if the anchor points are weak.
A little backcombing under the top layer helps the braid stay in place. Not much. Just enough to give the pins something to bite into.
16. Braided Headband
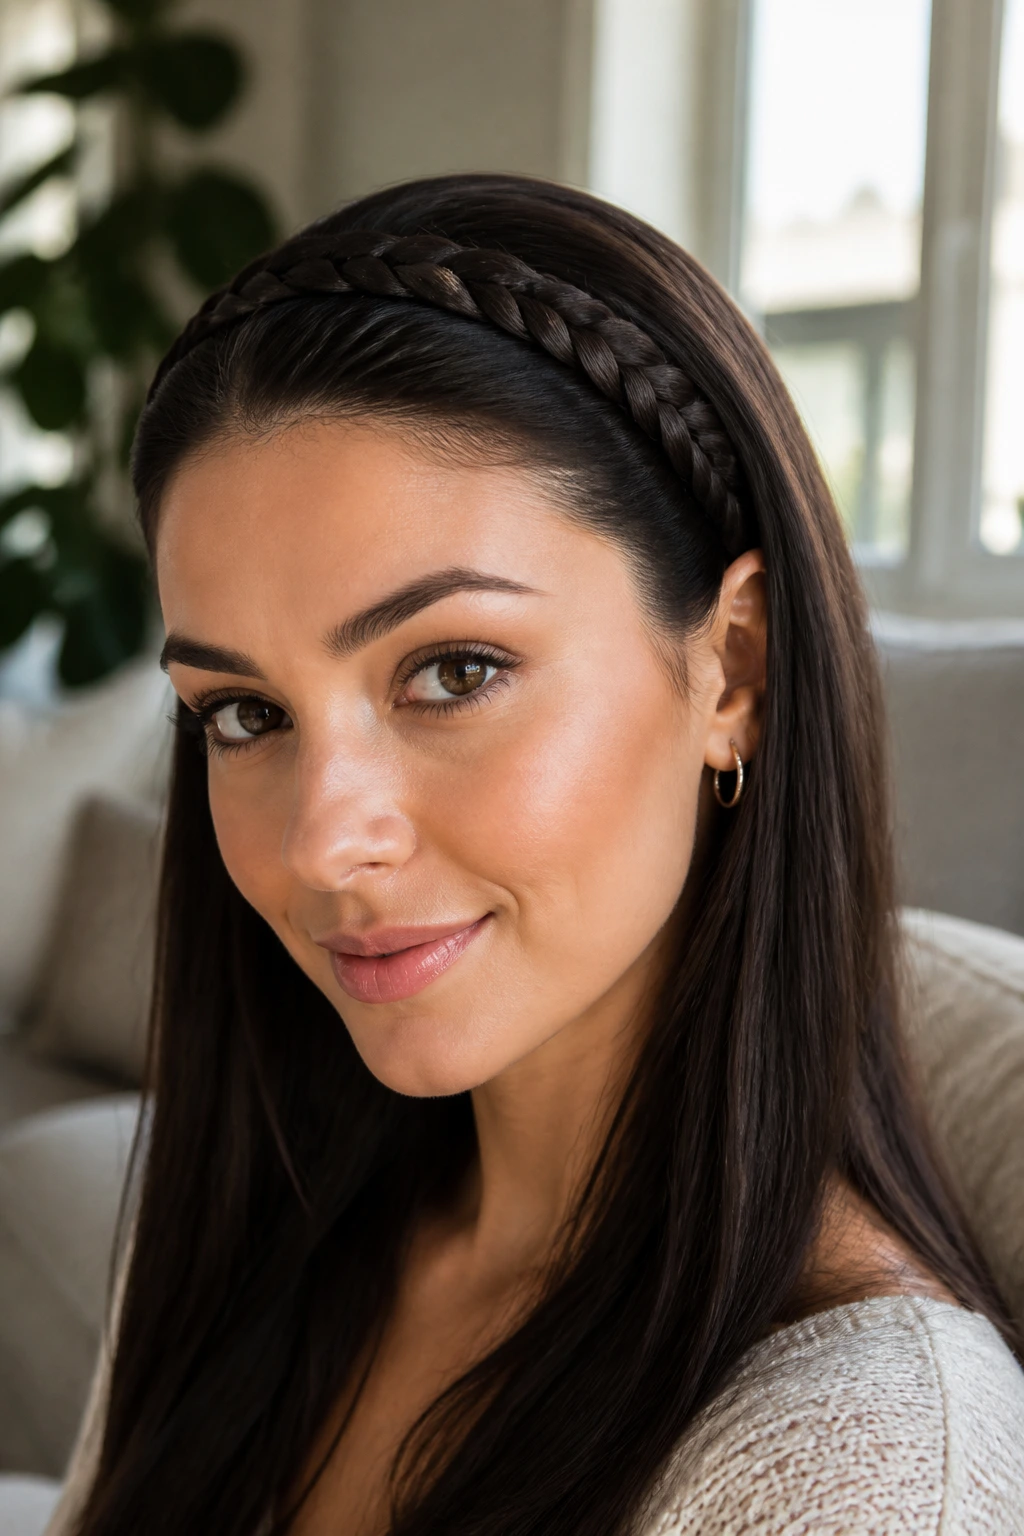
The braided headband is a tidy fix for straight hair that wants to fall into your face. Braid a small section from one temple to the other and pin the ends behind the ears or under nearby hair. It’s a small detail, but it changes the whole front of the style.
This works especially well when the rest of the hair is left down and sleek. The contrast between the loose length and the braided front keeps the look from feeling plain. If your hair is short to medium length, that’s even better, because the braid doesn’t need a ton of length to make sense.
Use a pin on each end, not one. One pin tends to rotate in straight hair.
17. Face-Framing Mini Braids
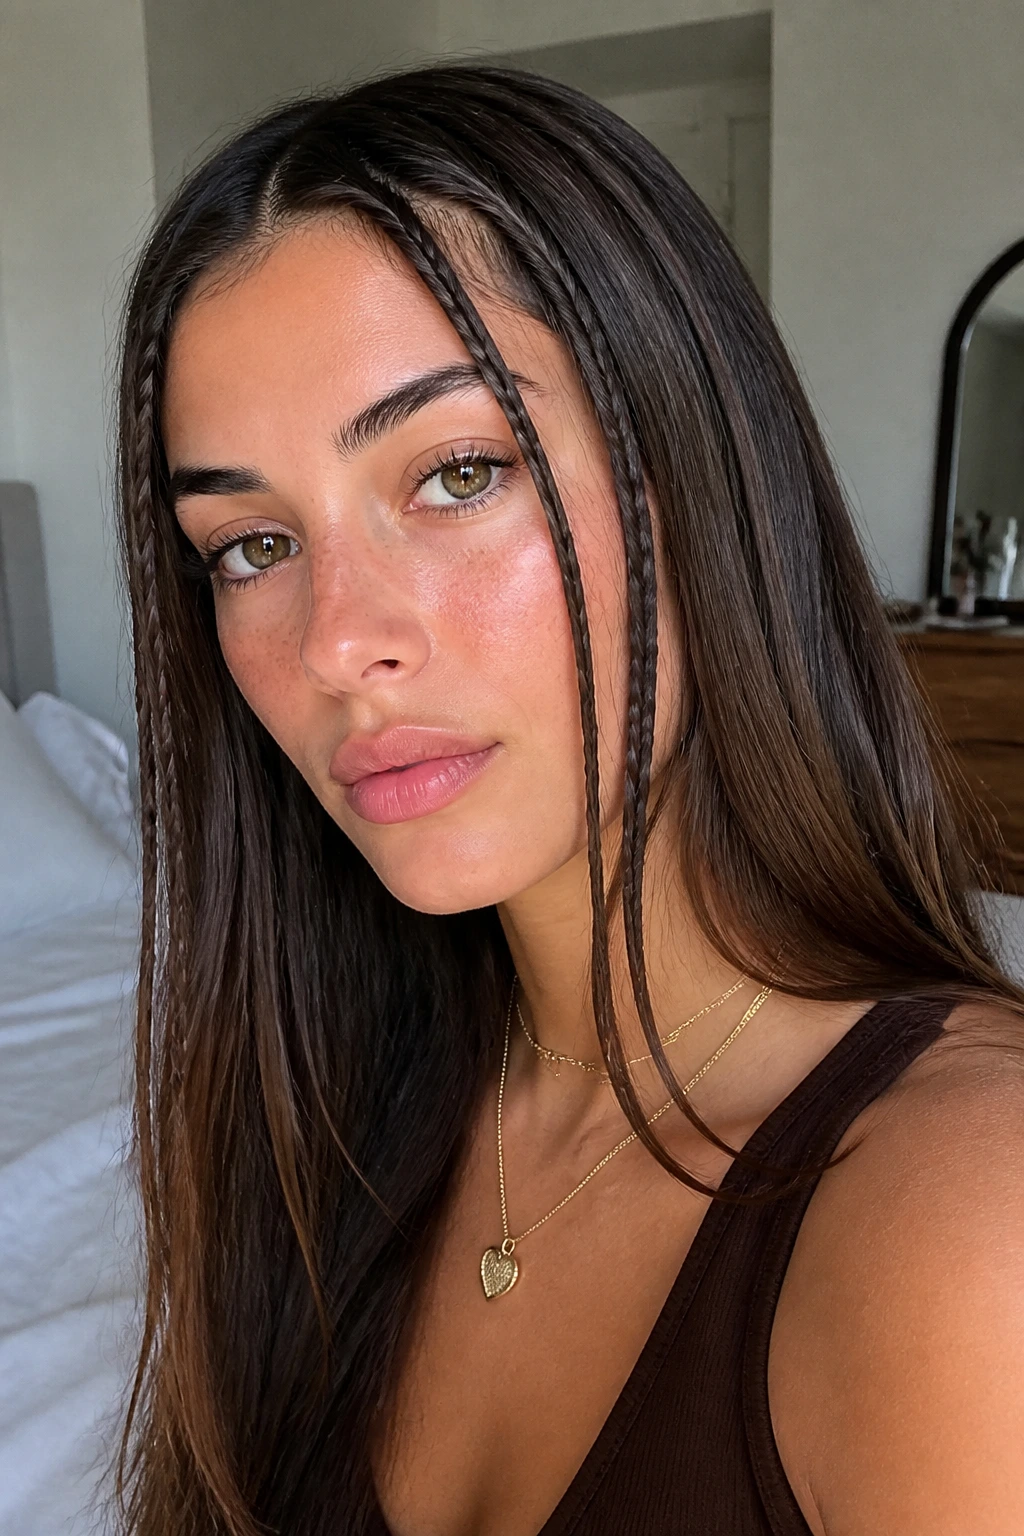
A few mini braids near the face can be enough. That’s the point. On straight hair, tiny braids read almost like texture details built into the haircut, especially if the rest of the hair is left simple and smooth.
Take slim sections at the temples or just behind them, braid each one tightly, and secure the ends with tiny elastics. You can leave them hanging, tuck them behind the ears, or pin them into the back of a half-up style. The braid size should stay small so the face still feels open.
This is a good style for people who want something visible without committing to a full braided look. It takes less time than a crown braid and still makes straight hair look considered.
18. Braid-Wrapped Bubble Ponytail
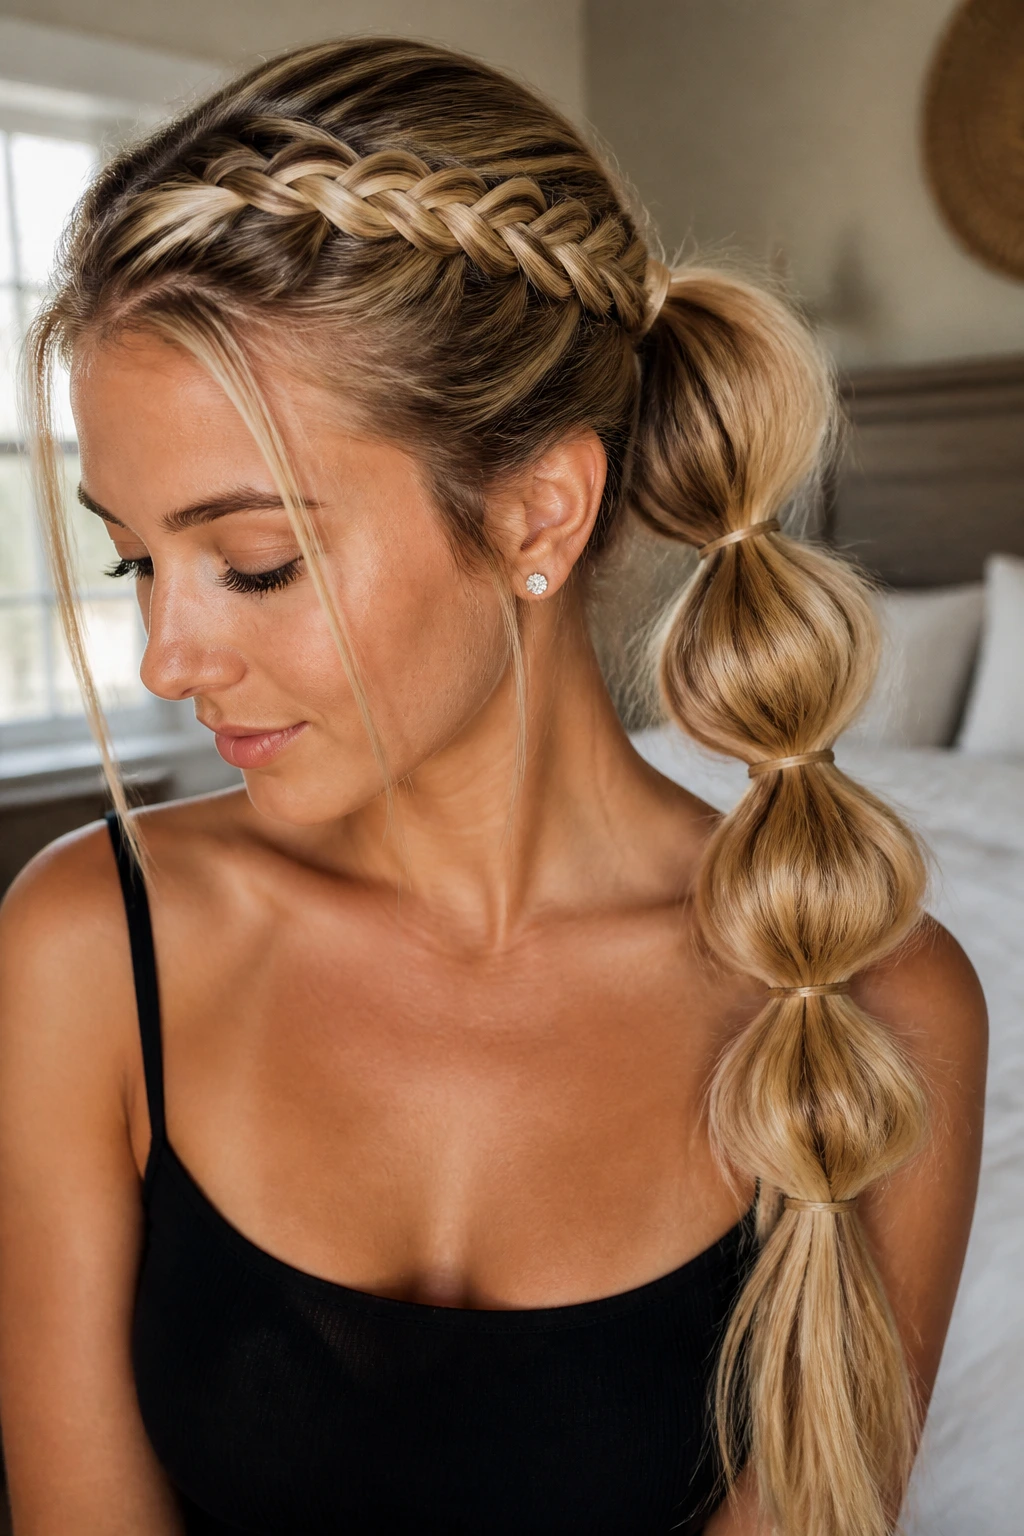
Bubble ponytails can feel a little bare on straight hair unless you give them structure. A small braid at the crown solves that problem fast. Braid a front section first, then feed the rest into a ponytail and add elastics down the length in even intervals.
The bubbles should sit roughly 2 to 3 inches apart, depending on hair length. Once the elastics are in, tug each bubble gently from the sides. That puffing step matters; otherwise the ponytail just looks like a row of tied-off sections.
The braid at the front keeps the style from reading too sporty. It gives the whole ponytail a cleaner top line.
19. Braided Top Knot
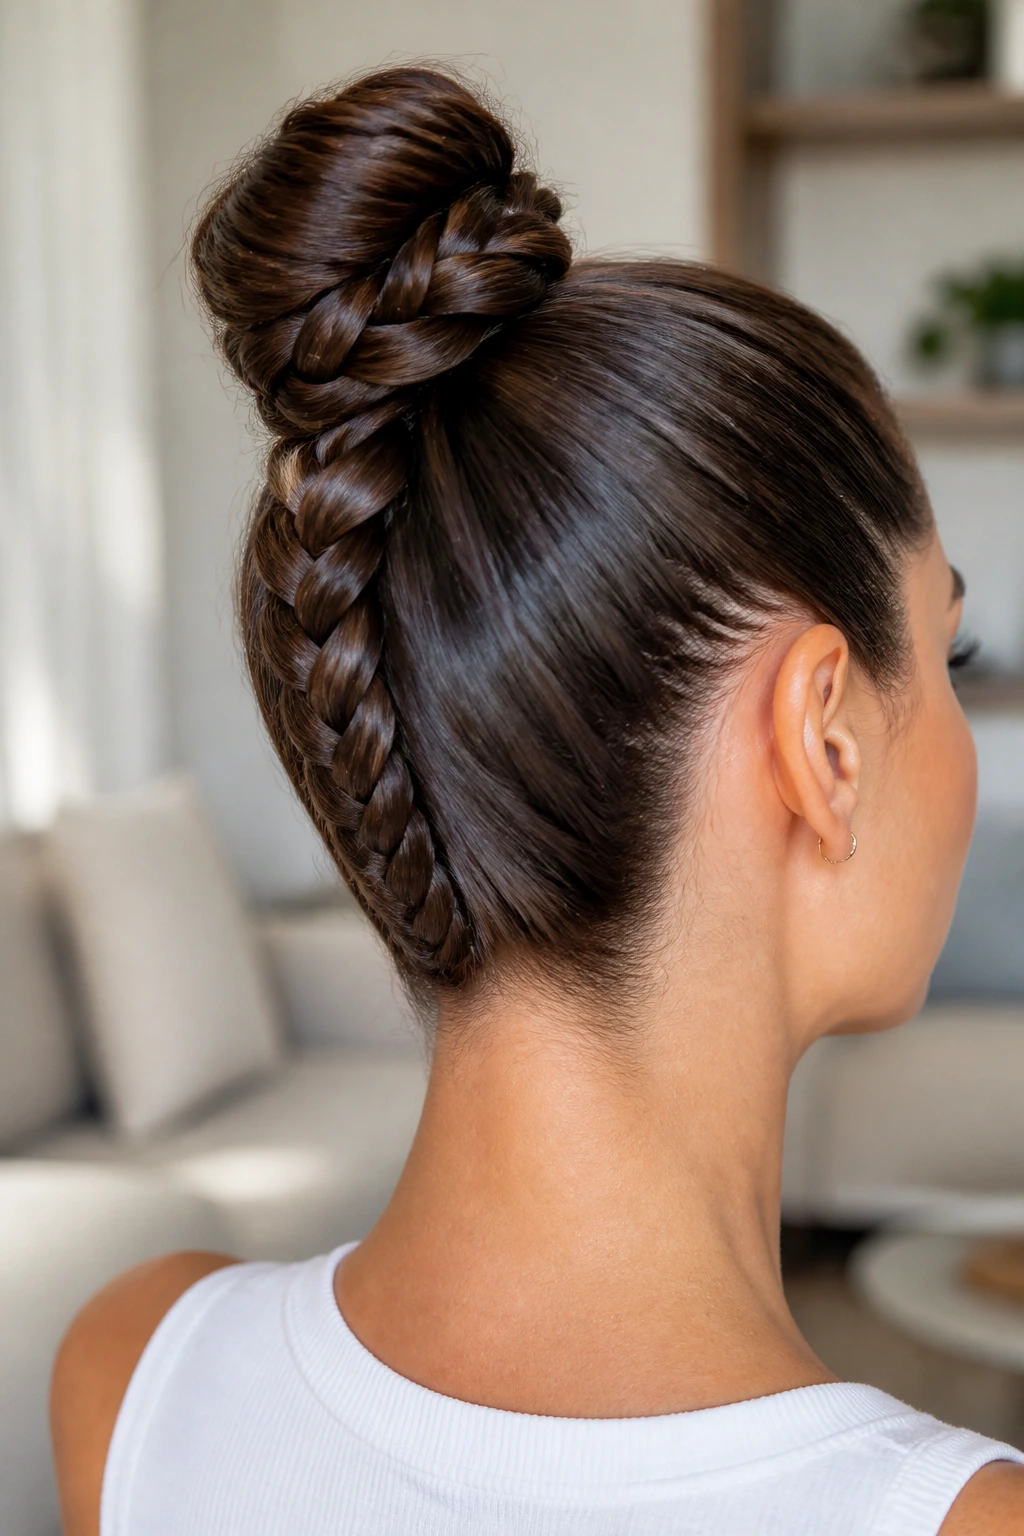
A braided top knot gives straight hair the grip it usually lacks in a simple bun. First make a high ponytail, braid the length, then coil it around the base and pin it down. The braid keeps the knot from slipping apart as easily.
This style works best when the ponytail is set high and tight. If the base is loose, the bun starts to tilt. A few hidden bobby pins placed in an X-shape under the coil help more than one big pin jammed in at an angle.
It’s a strong choice for days when you want the face completely clear. The braid makes the bun look deliberate instead of improvised.
20. Ladder Braid
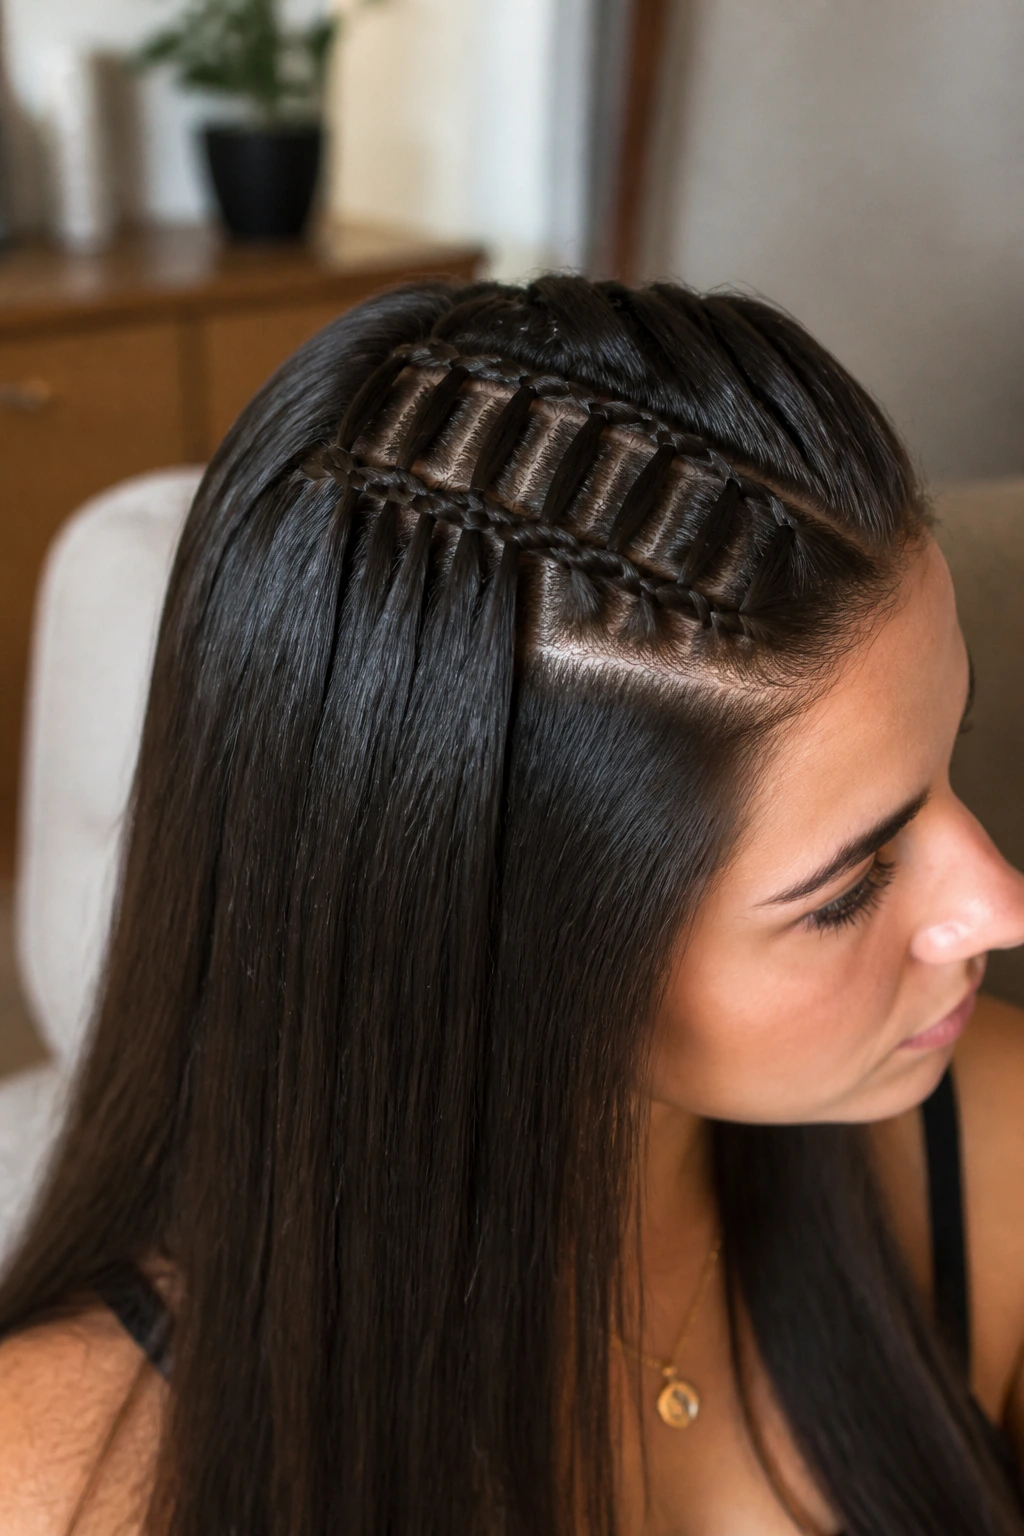
A ladder braid is one of the more detailed looks here, and straight hair is actually useful because the smooth strands show the horizontal “rungs” clearly. It’s a style that looks intricate from a distance and even more interesting up close.
This braid usually works best with long hair and a few section clips. You need control while you build the alternating strands, and straight hair can slide if your hands are moving too fast. A light texture spray before you start gives the sections some bite.
What to Expect
It is not a rushed morning style. It takes patience, especially the first few times. But if you want a braid that looks architectural without needing curls or heavy volume, this is one of the best options.
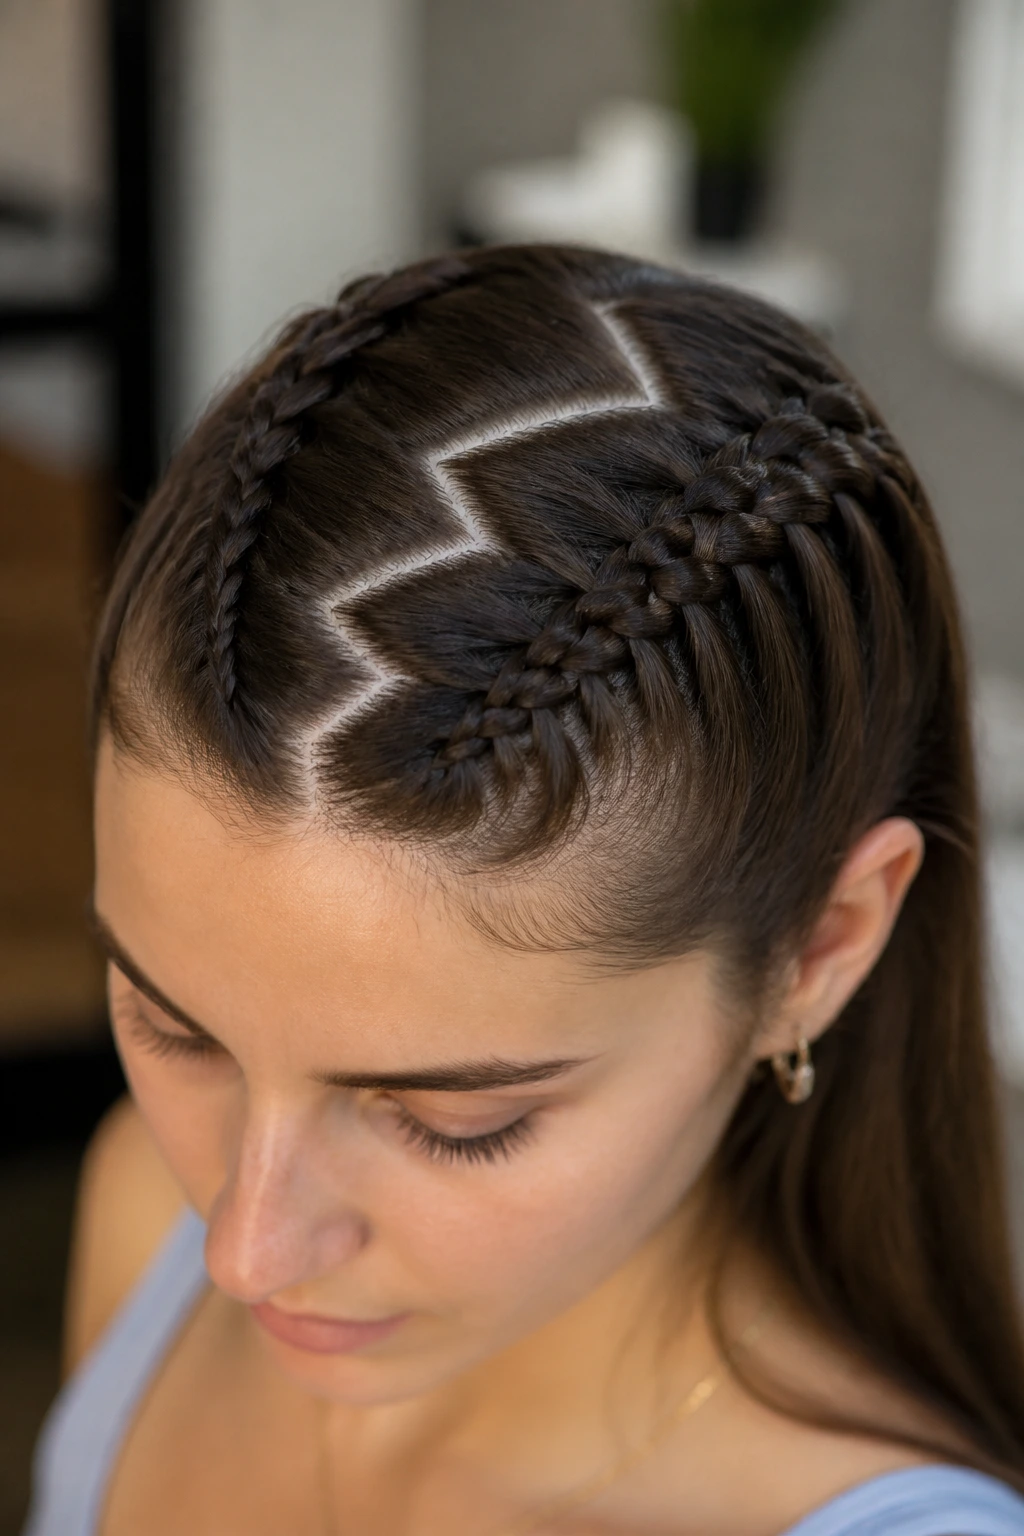
21. Zigzag-Part Twin Braids
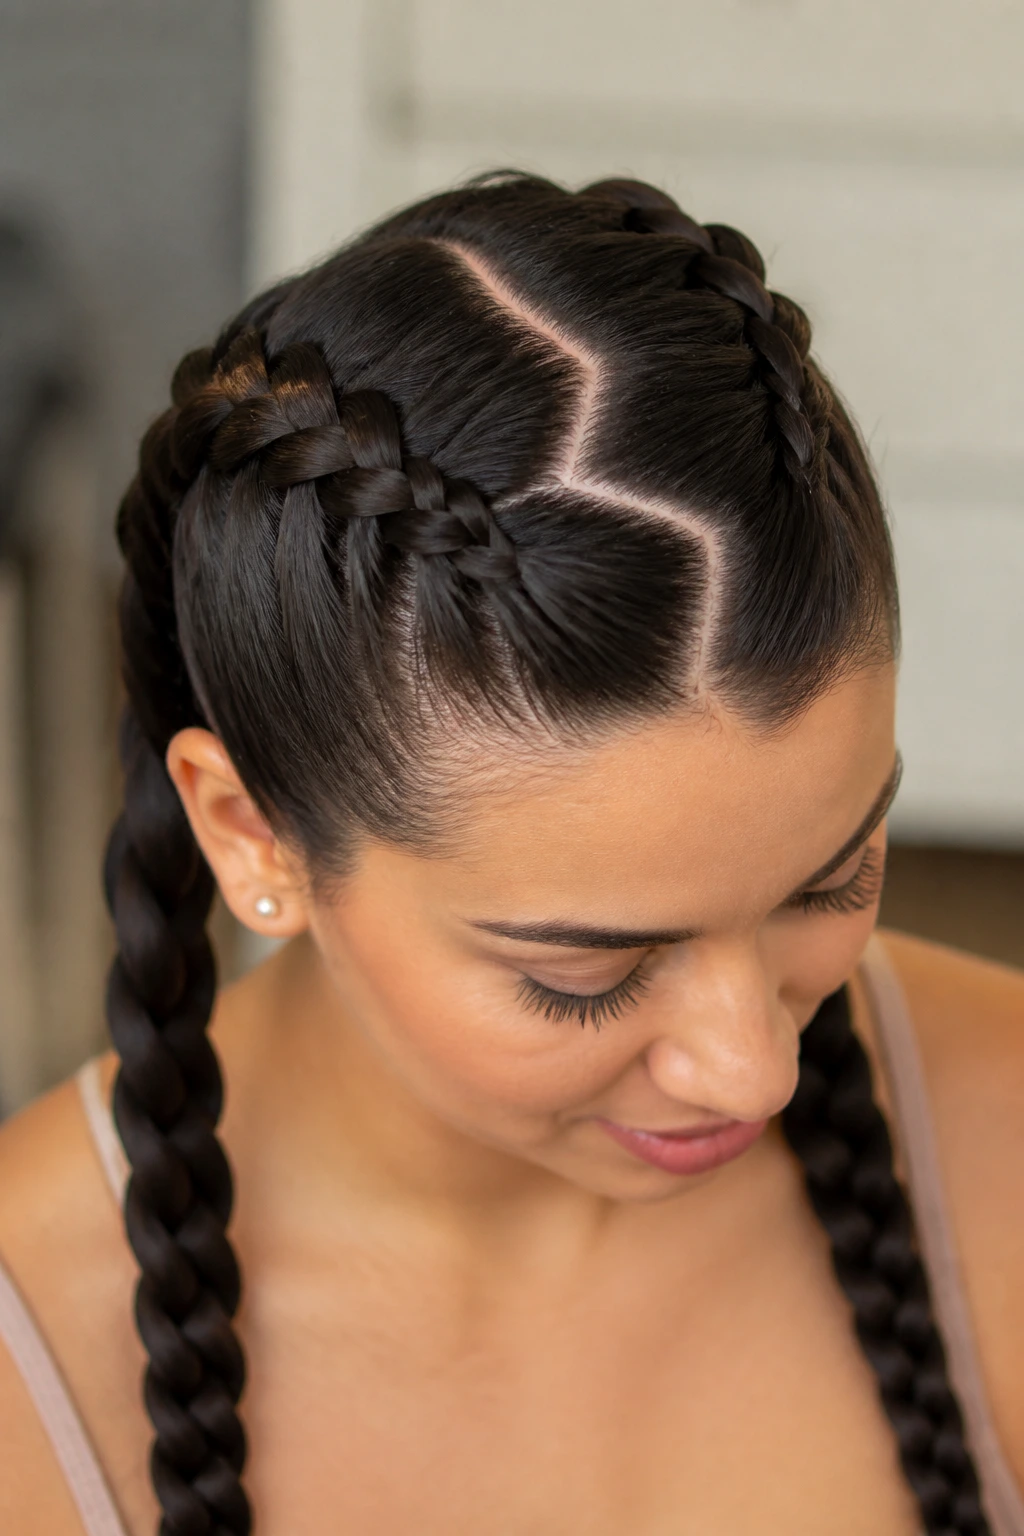
A zigzag part changes the whole mood of twin braids. Straight hair can lean too neat, too school-uniform, if the part is too obvious. A zigzag line softens that and gives the style a little attitude without changing the braid itself.
Use the tail comb to sketch the part cleanly, then braid two low plaits or two Dutch braids from there. The zigzag doesn’t need to be dramatic. Small angles are enough. Too much carving looks messy instead of intentional.
This is a good trick when you want twin braids but don’t want them to feel flat or expected. The part does half the styling work for you.
22. Five-Strand Center Braid
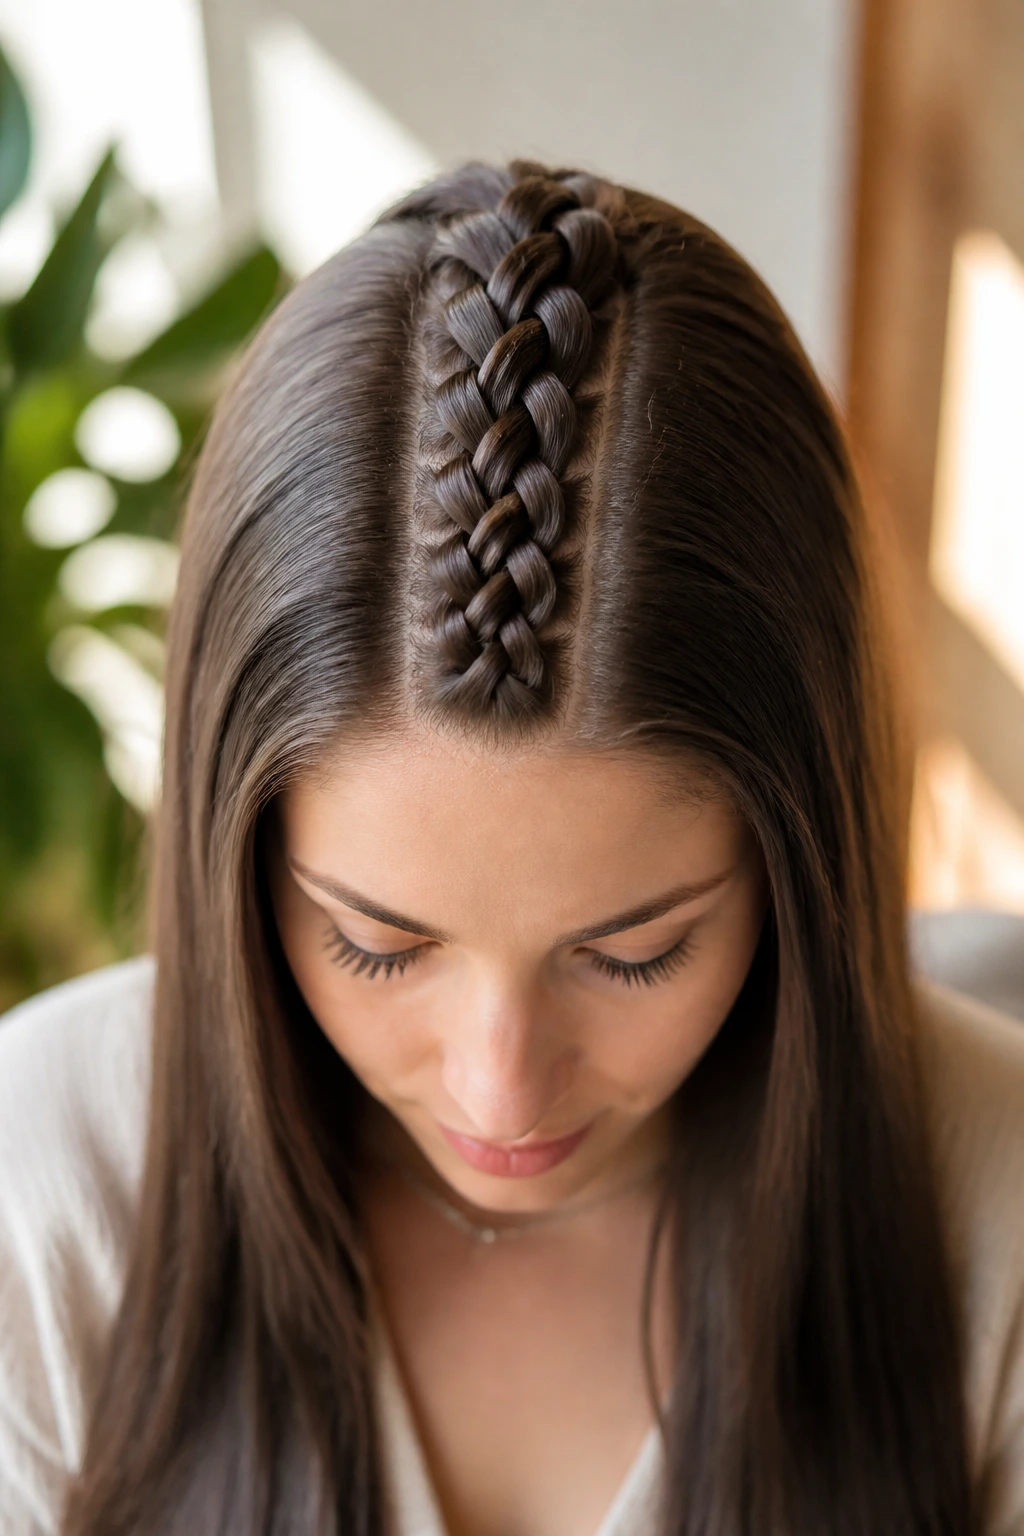
A five-strand braid is a statement piece on straight hair because the pattern stays readable. There’s no frizz to blur the sections, which means the braid shows every move. That’s also why you need to braid steadily and keep the tension even.
It works best on thicker hair or hair with a bit of length, because five strands need room. A tiny bit of smoothing cream on the palms can help keep flyaways down, but don’t overload the hair. Too much slip and the braid loses definition.
If you’ve never done one before, practice on a ribbon or cord first. The hand pattern is easier to understand when you’re not fighting your own hair at the same time.
23. Wrapped Braid Ponytail
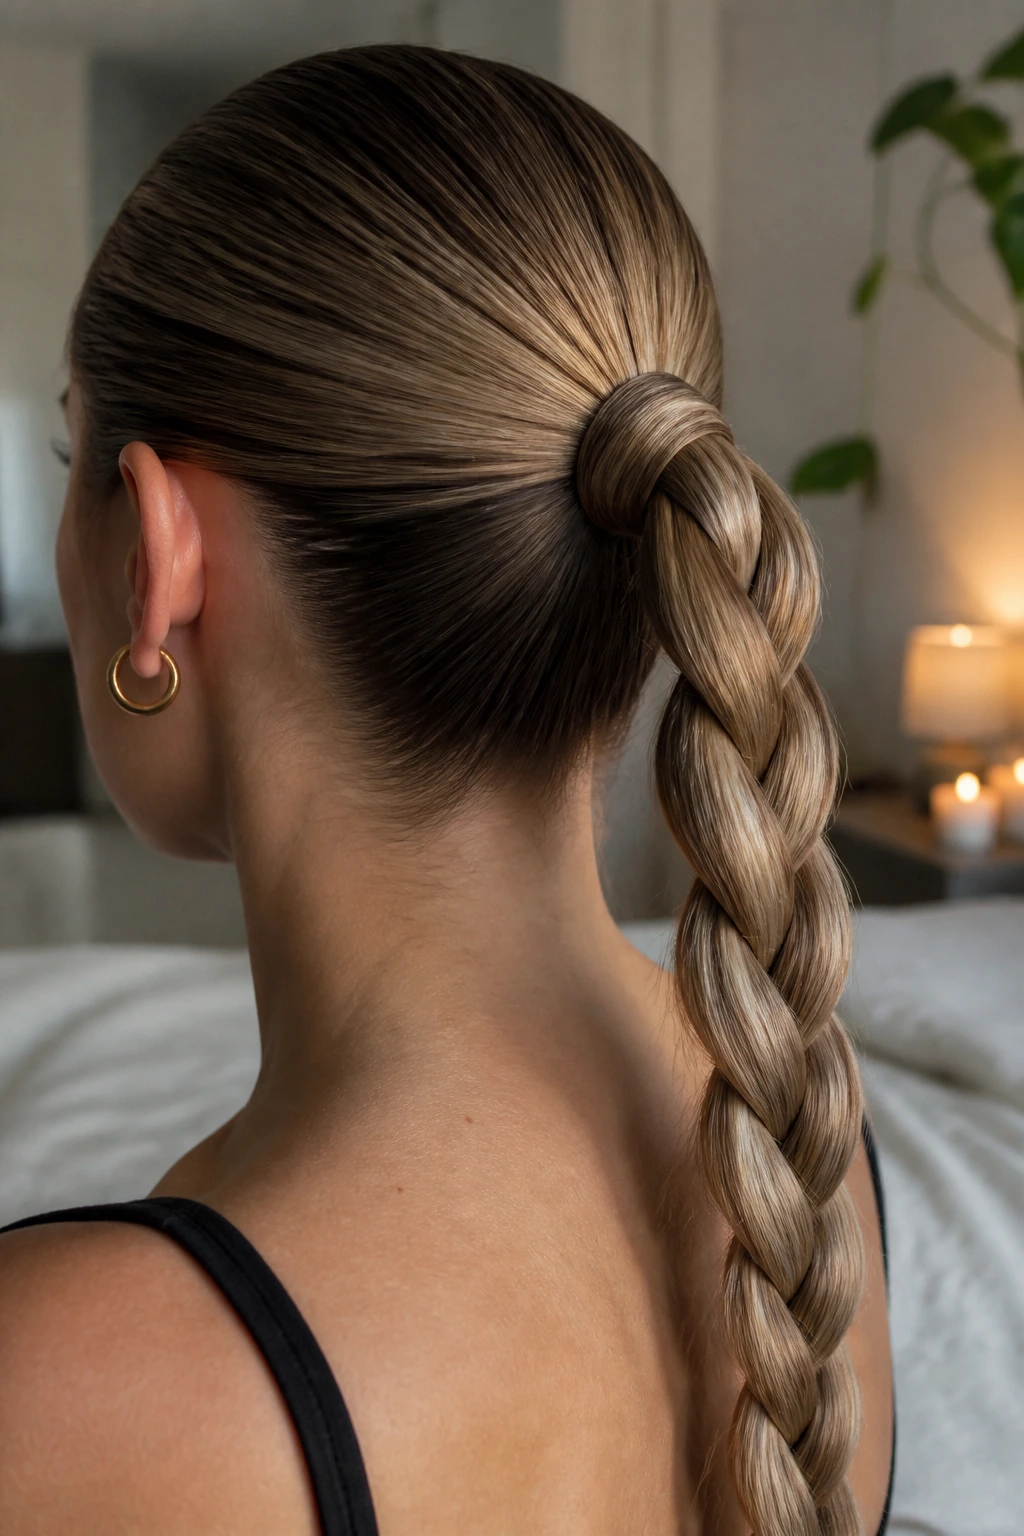
This style starts as a braid and ends looking more finished than a standard ponytail ever does. Make a ponytail, braid the length, and wrap a small piece of hair around the elastic at the base. Straight hair keeps the wrap sleek, which makes the whole ponytail look cleaner.
The ponytail sits best when the crown is brushed smooth and the braid begins just below the crown or at the back of the head. If you want a little lift, tease only the hidden underside of the ponytail before braiding. No need to turn the top into a nest.
It’s a smart option when you want something polished that doesn’t take forty minutes.
24. S-Curve Side Braid
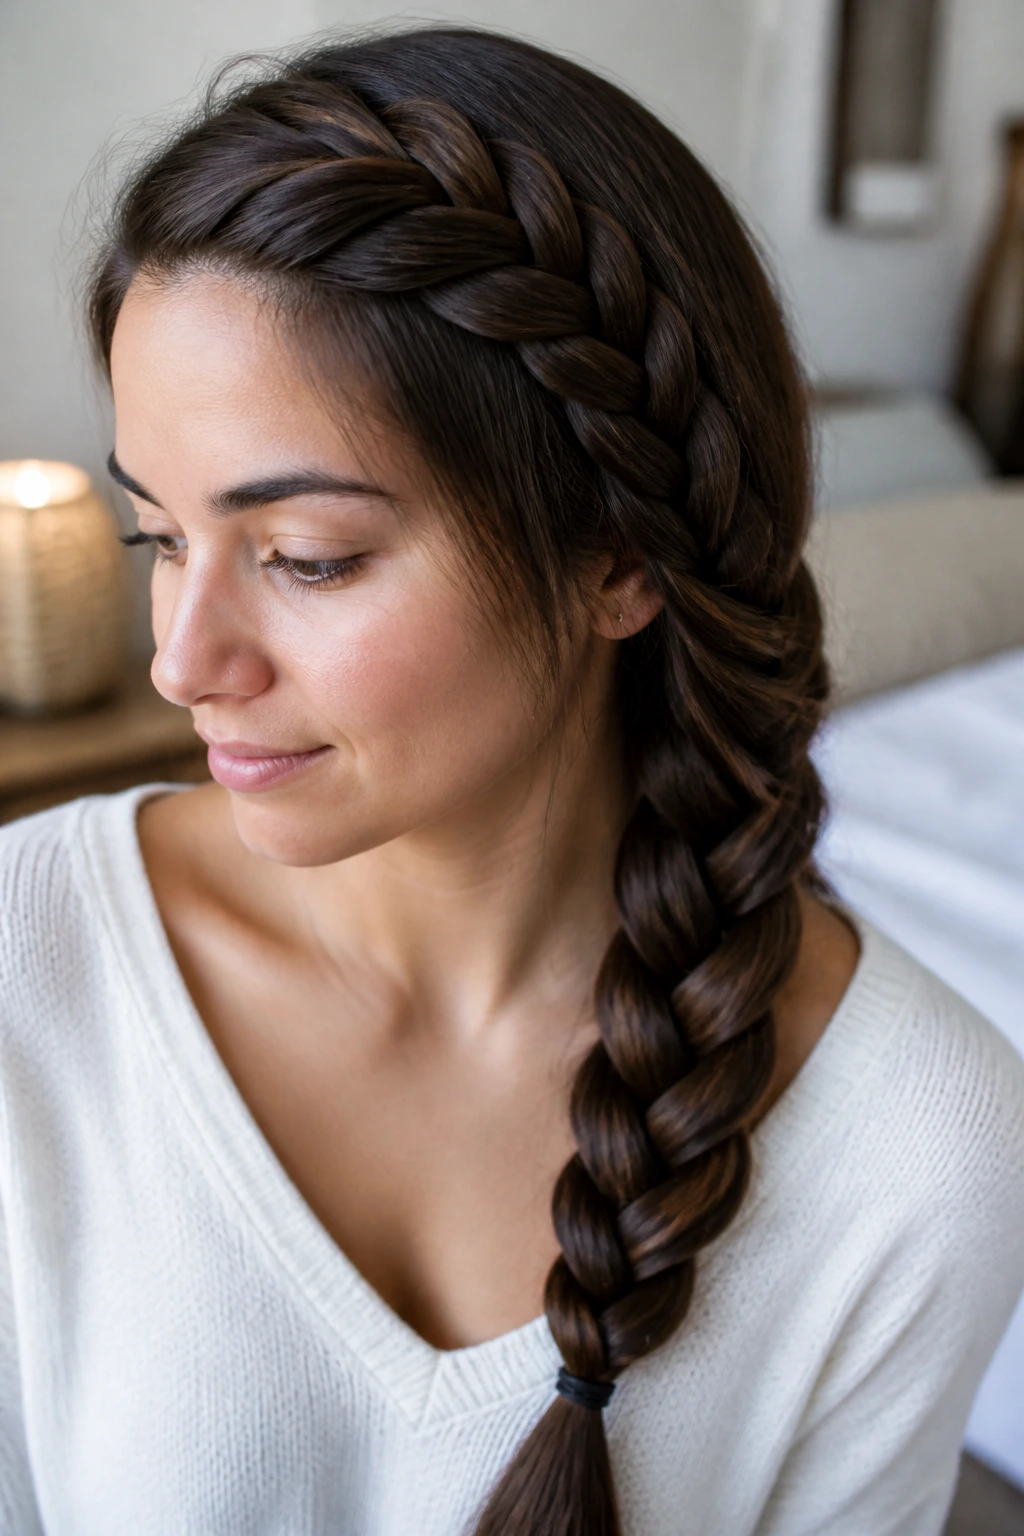
An S-curve braid is a side braid with a little more movement in the parting and placement. Instead of dropping straight down, it starts near the temple, sweeps across the head, and falls over one shoulder. Straight hair makes that curve look neat rather than messy.
This style works best when you guide the braid with your fingers and a few pins as you move across the head. If you let it drift too much, the line gets vague. The goal is a smooth curve, not a zigzag.
I like this one for layered hair because the side placement lets shorter pieces blend in instead of escaping everywhere at the back.
25. Tucked Braided Roll
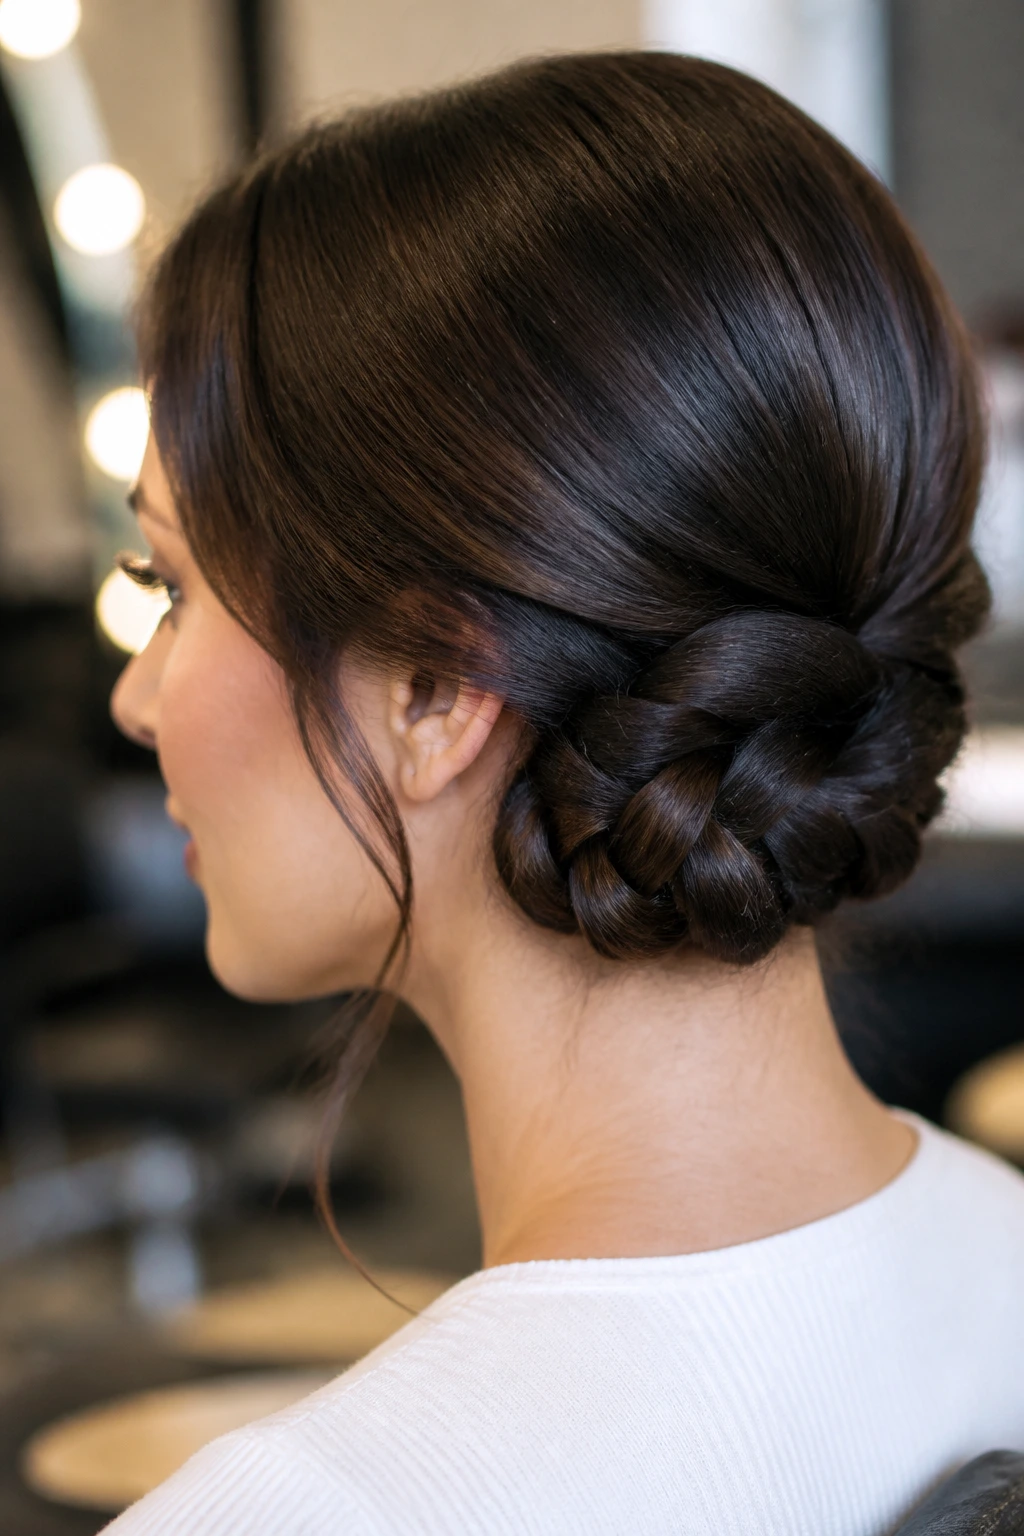
A tucked braided roll is a tidy low style that uses the braid as the shell and the tucked ends as the anchor. Braid the hair low, roll it upward or inward, then tuck the ends underneath and pin them flat. Straight hair benefits from the braid’s texture because the roll grips itself better.
This is a strong option for shoulder-length hair that won’t stay in a standard bun. The braid keeps the ends contained. If the roll feels too slippery, cross two pins through the base in opposite directions.
It’s neat, compact, and a little old-school in the best way.
26. Crisscross Accent Braids
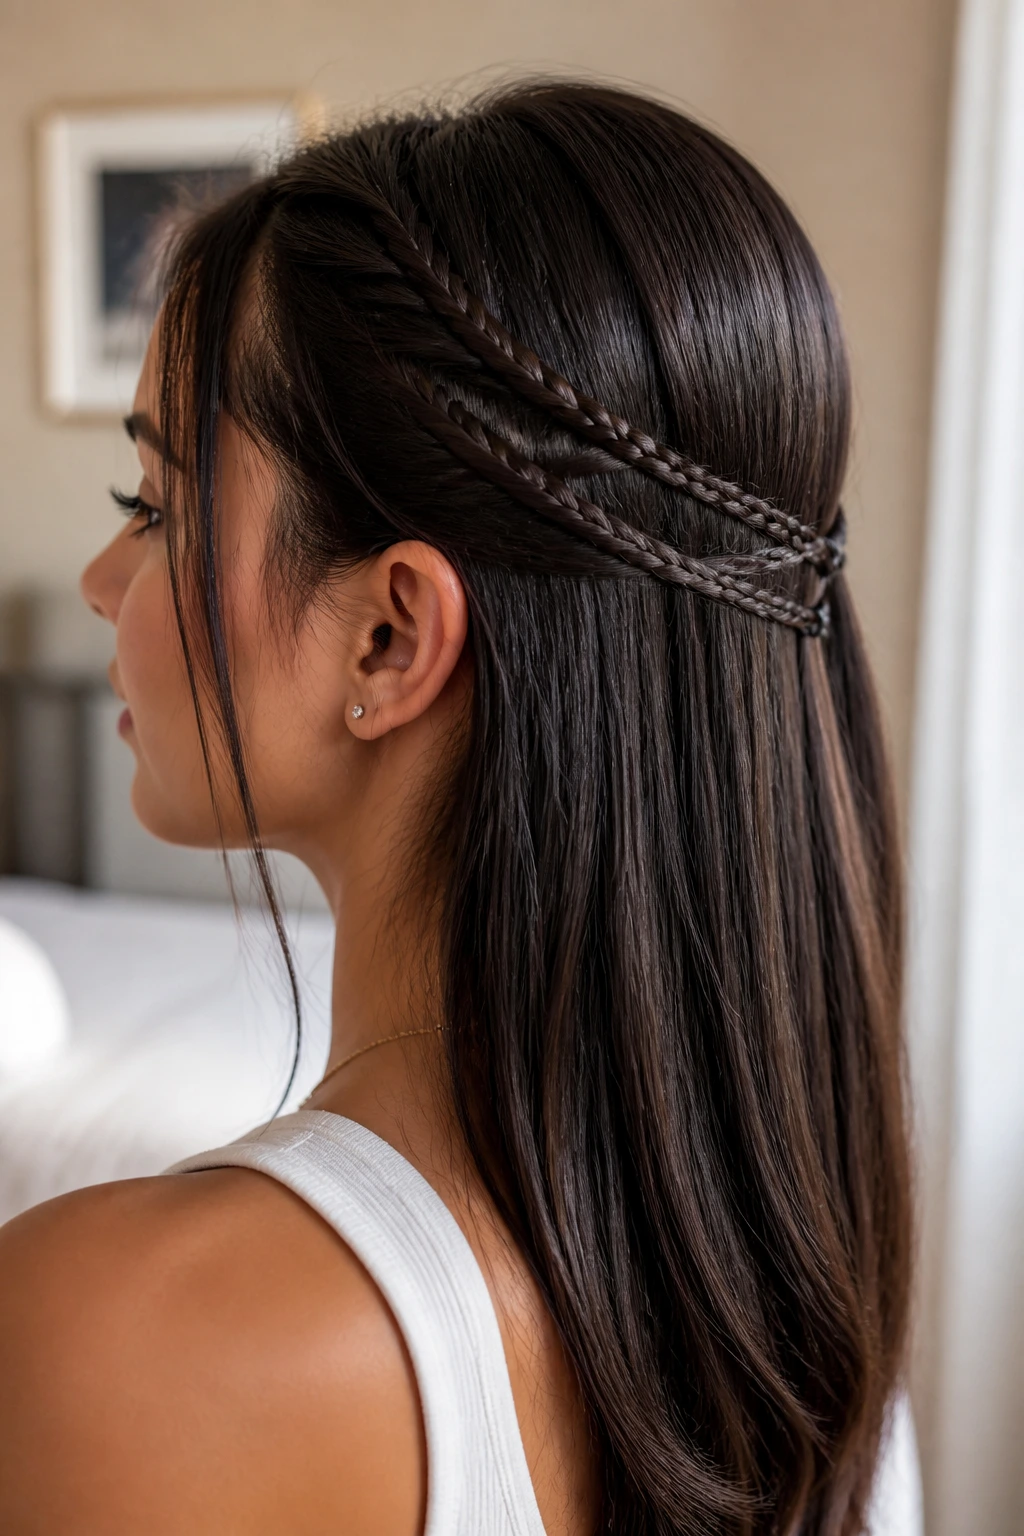
Crisscross accent braids are small braids that cross over each other at the back or side of the head. On straight hair, the lines are easy to see, which makes the style look more intricate than it really is.
Take two or four narrow sections, braid or twist them, then overlap and pin them in place. The crossing points matter more than the braid size. Use small pins and hide them under the overlap so the pattern is what people notice, not the hardware.
This style is useful when you want the back of the hair to feel styled without having to braid the whole length.
27. Sleek Center-Part Twin Braids
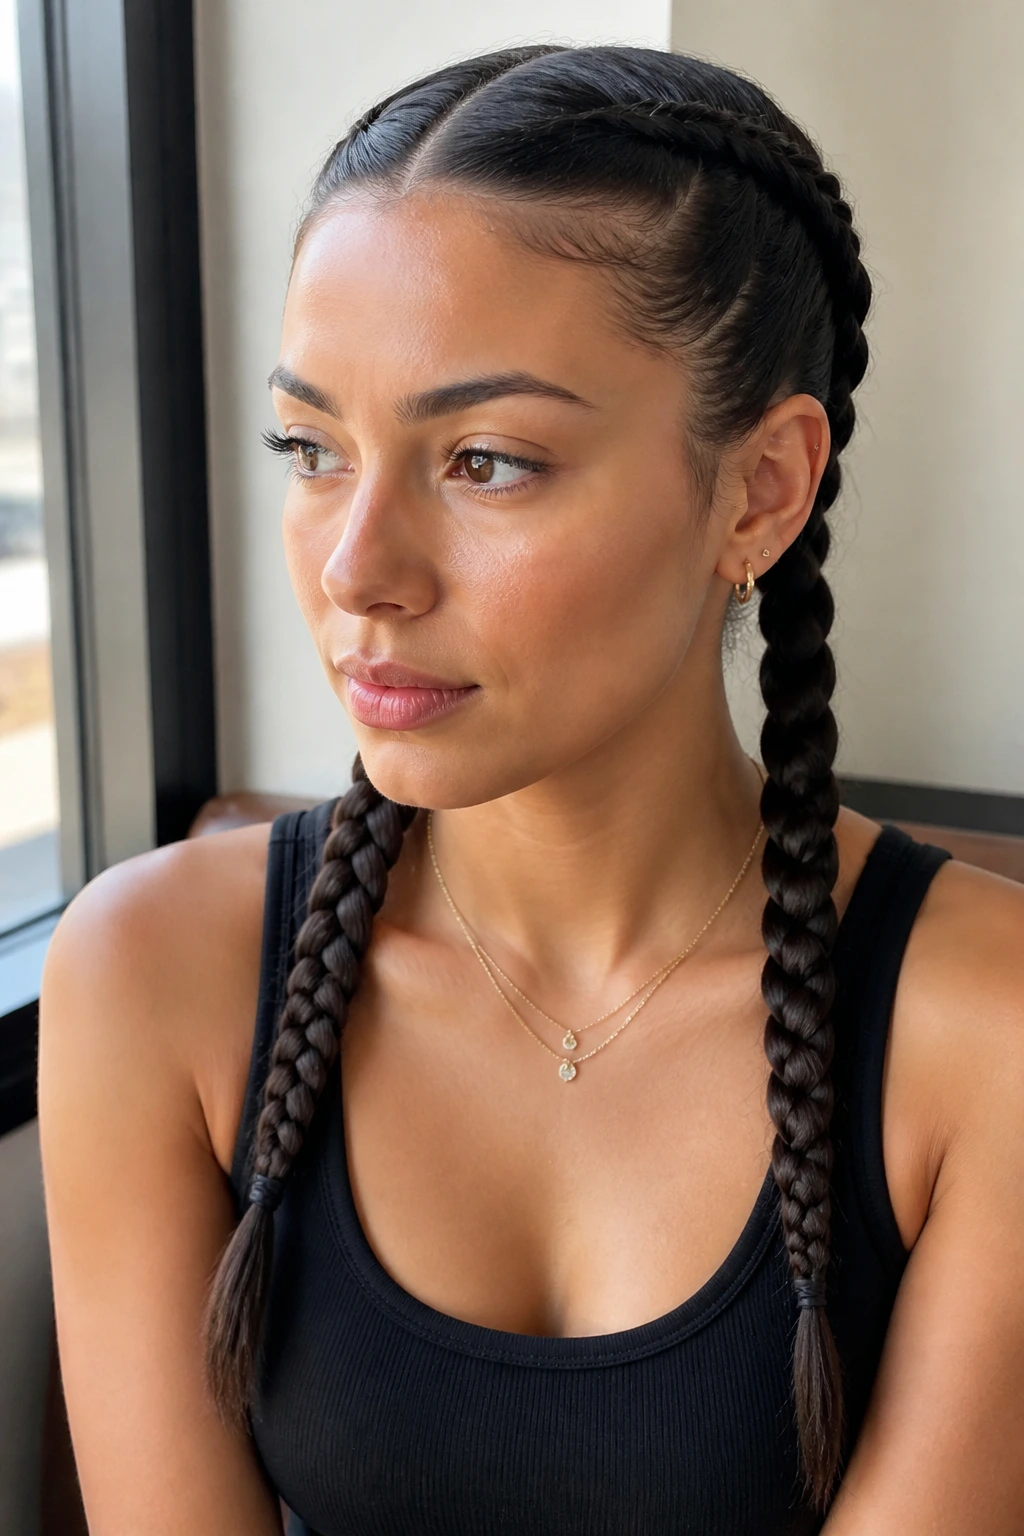
There’s a reason this style keeps showing up: it works. A sharp center part, two straight-down braids, and clean edges create a look that feels controlled without needing extra shape. Straight hair is ideal here because the braid line stays visible from roots to ends.
The part should be precise, and the braids should begin at the same height on both sides. Uneven placement shows fast. That sounds fussy, but it’s what makes the style look crisp instead of accidental.
If your ends are thin, secure them with small elastics and leave the tail a little blunt. Over-fussing the ends can make the whole style look too polished.
28. Messy Fishtail Bun
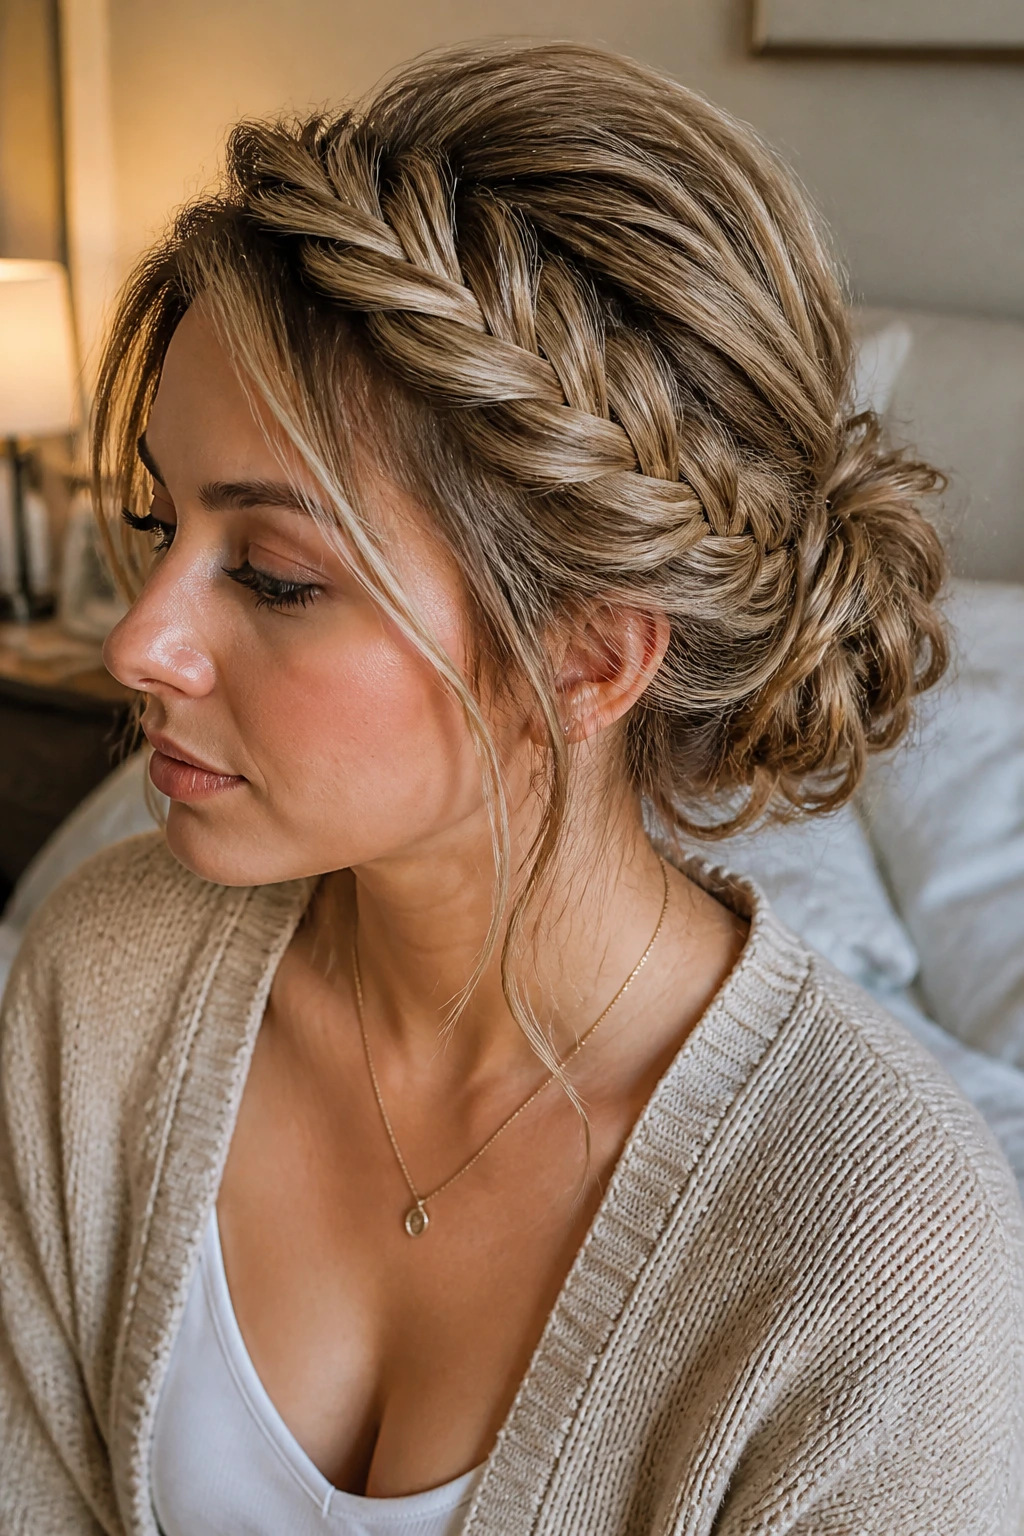
A fishtail bun gives you texture on texture, which is useful when straight hair needs a little life. Make a fishtail braid first, then coil it into a loose bun and pin it so the edges stay soft. The braid pattern still shows, even after it’s tucked.
The best part is that you do not need the bun to be perfectly smooth. In fact, a bit of mess helps. Pull a few side pieces loose and let the braid puff slightly before pinning. That keeps the style from looking too rigid.
Dry shampoo at the roots helps this one hold better, especially if the hair is freshly washed and too slick to behave.
29. Braided Space Buns
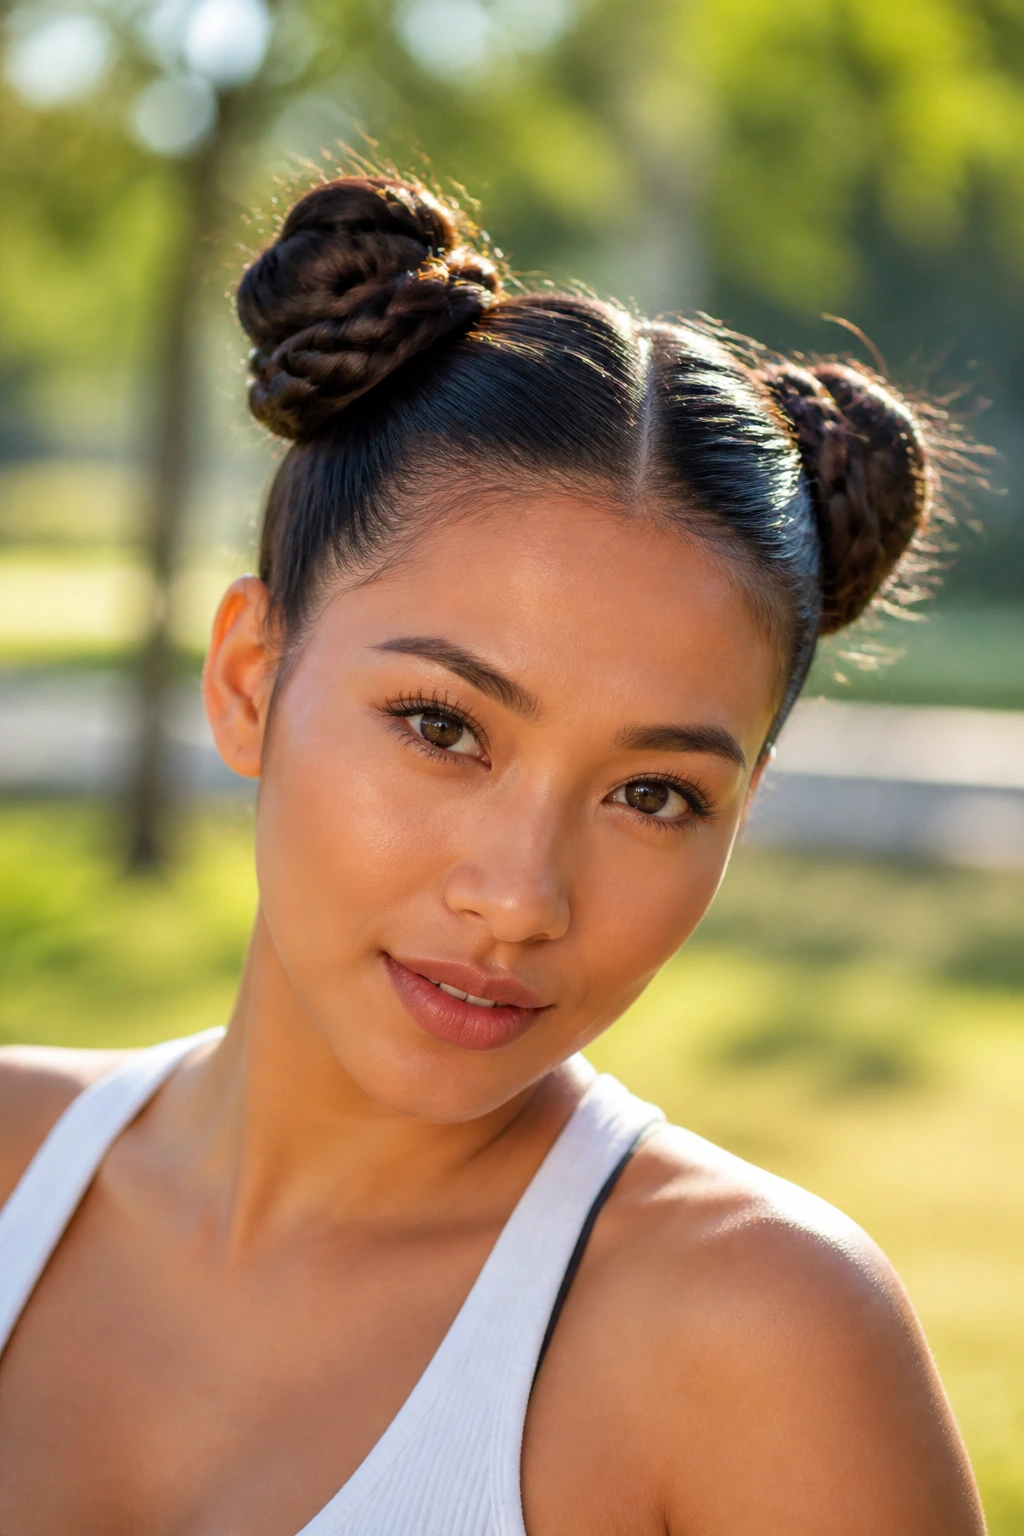
Braided space buns are playful, but they’re also practical if your straight hair tends to fall flat. Divide the hair into two sections, braid each side, then wrap each braid into a bun above the ears. The braid gives the buns more grip than plain twists do.
The placement changes the mood. Higher buns feel louder and more graphic. Lower buns feel softer. Either way, keep the center part clean or the symmetry falls apart quickly.
It’s a good style for short-to-medium straight hair because the braid makes shorter lengths easier to pin into a stable shape.
30. Cornrow-Inspired Back Braids
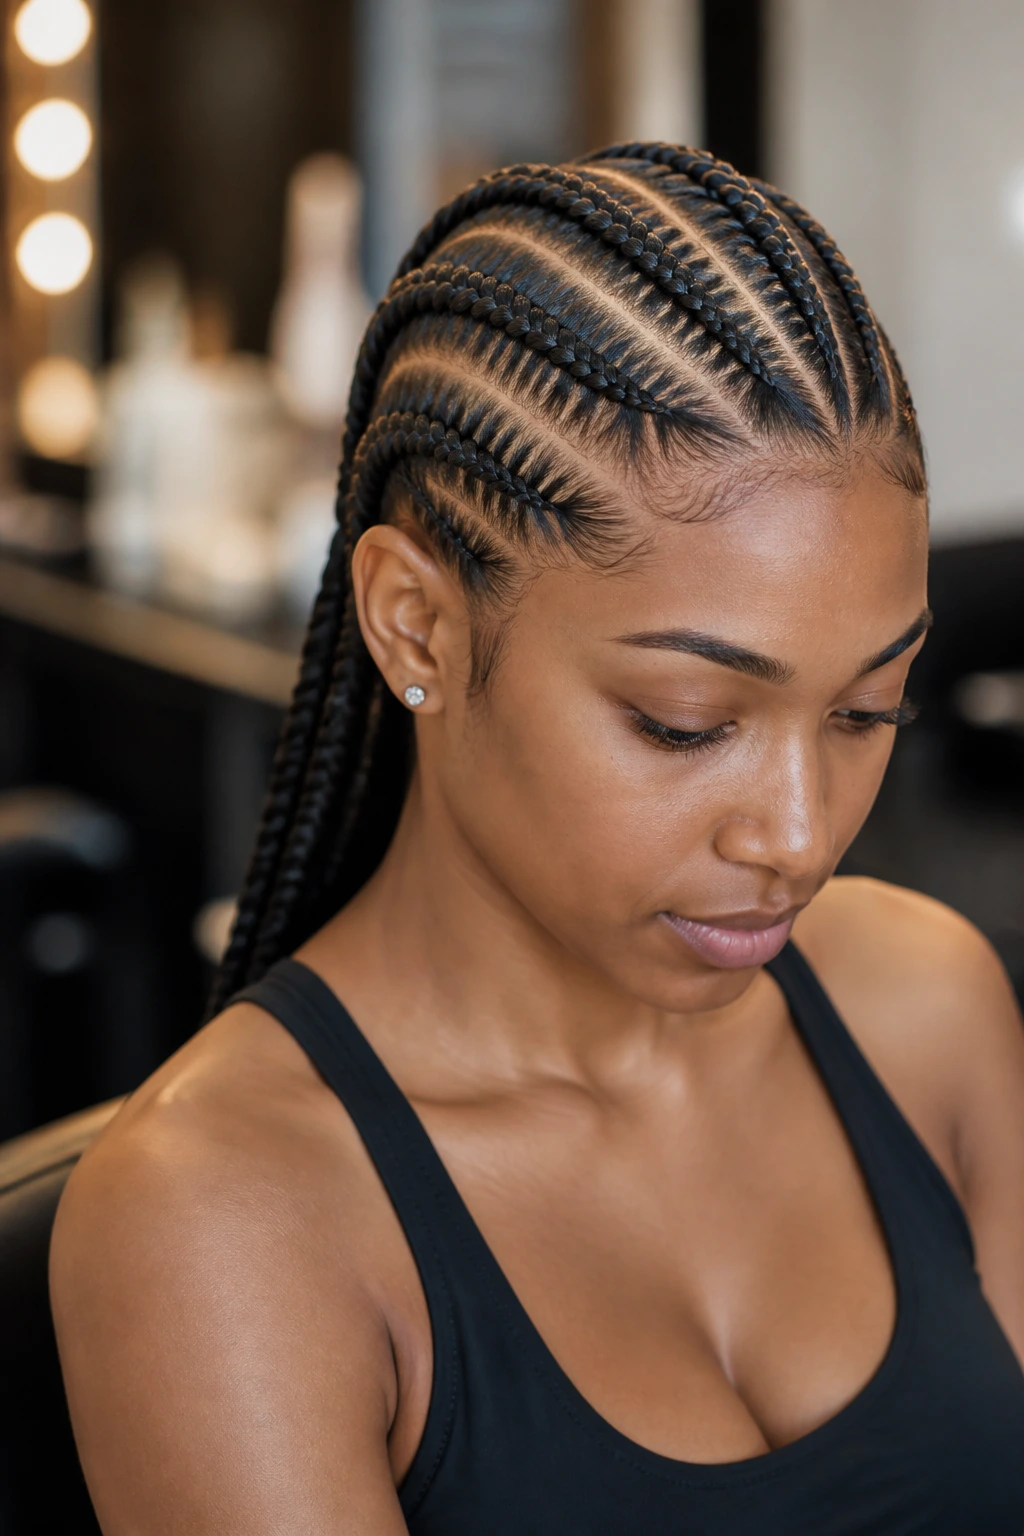
Cornrow-inspired straight-back braids sit close to the scalp and hold well on straight hair when the sections are narrow and the tension is even. They’re not about volume. They’re about clean lines and staying power.
Use a tail comb, small partings, and a little styling cream to keep the scalp line neat. The braids should move straight back in parallel rows, which gives the style a strong, deliberate look. If your hair is very silky, start with a bit of dry shampoo or texture spray at the roots so the strands don’t slide apart while you’re working.
This is one of the best choices when you need a style that stays put through a long day.
31. Mermaid Braid
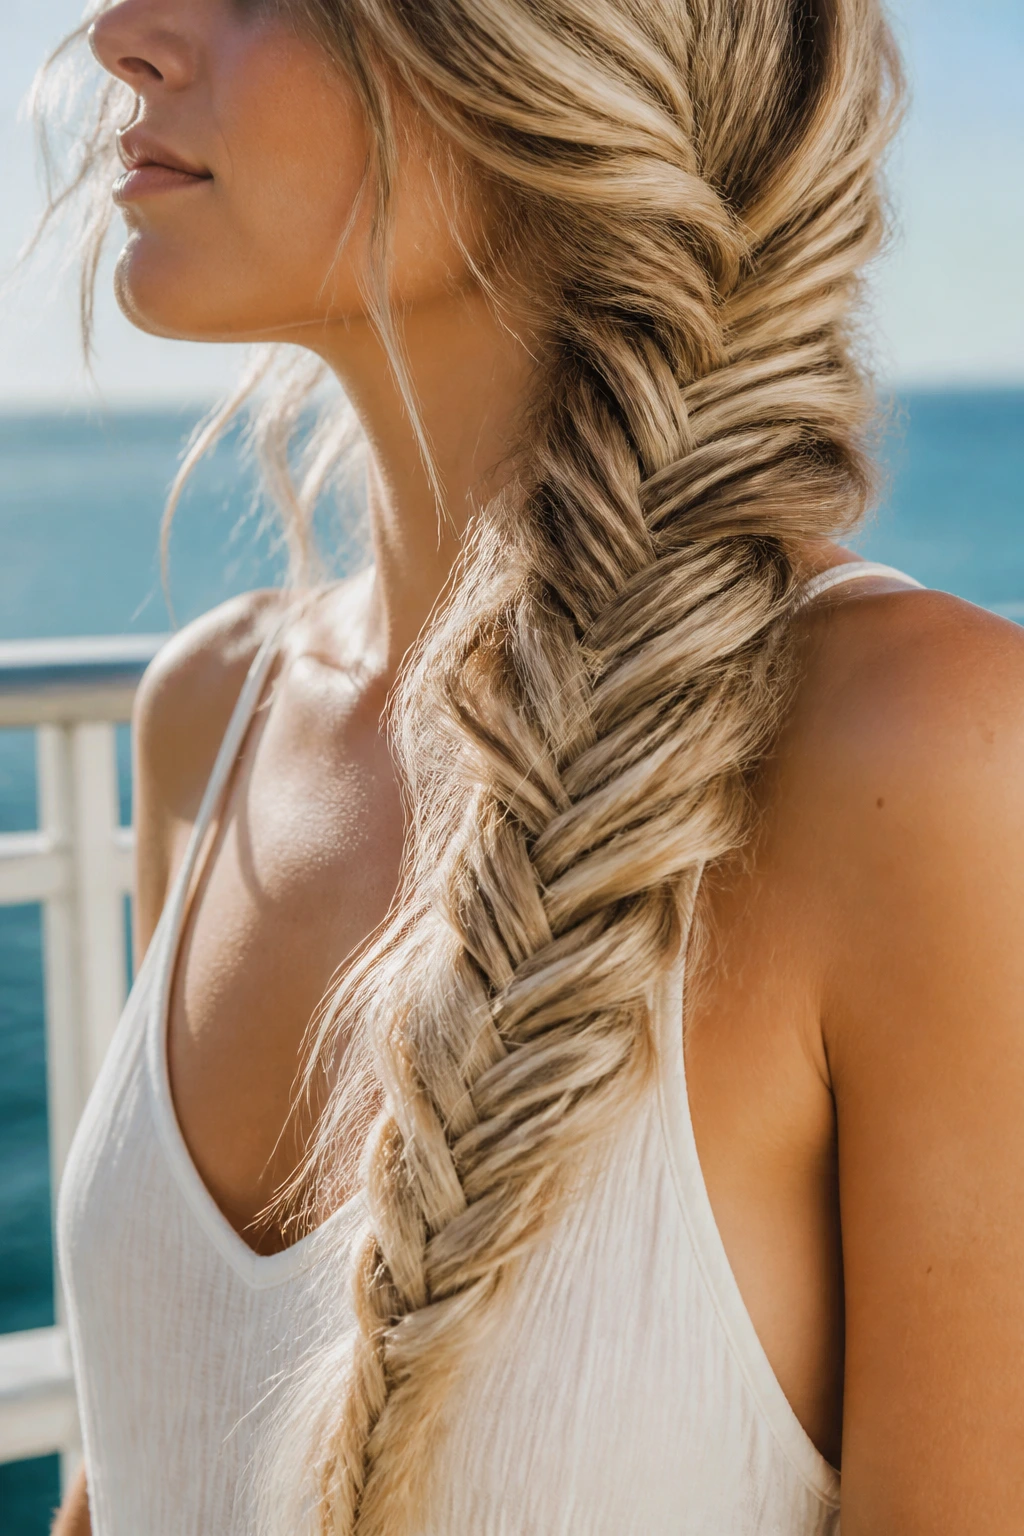
A mermaid braid uses bigger sections and a softer weave, which suits long straight hair that needs shape without looking too tight. The braid should feel broad and slightly loose, almost like it’s draped rather than locked down.
Because straight hair can go limp fast, start with some texture at the roots and a little grip through the lengths. Once the braid is in, gently widen the outer sections with your fingers. Not too much. You still want the pattern to read.
This style shines when the hair is long enough to show off the larger shape. On shorter lengths, it can look unfinished.
32. Accent Braid Into Claw-Clip Twist
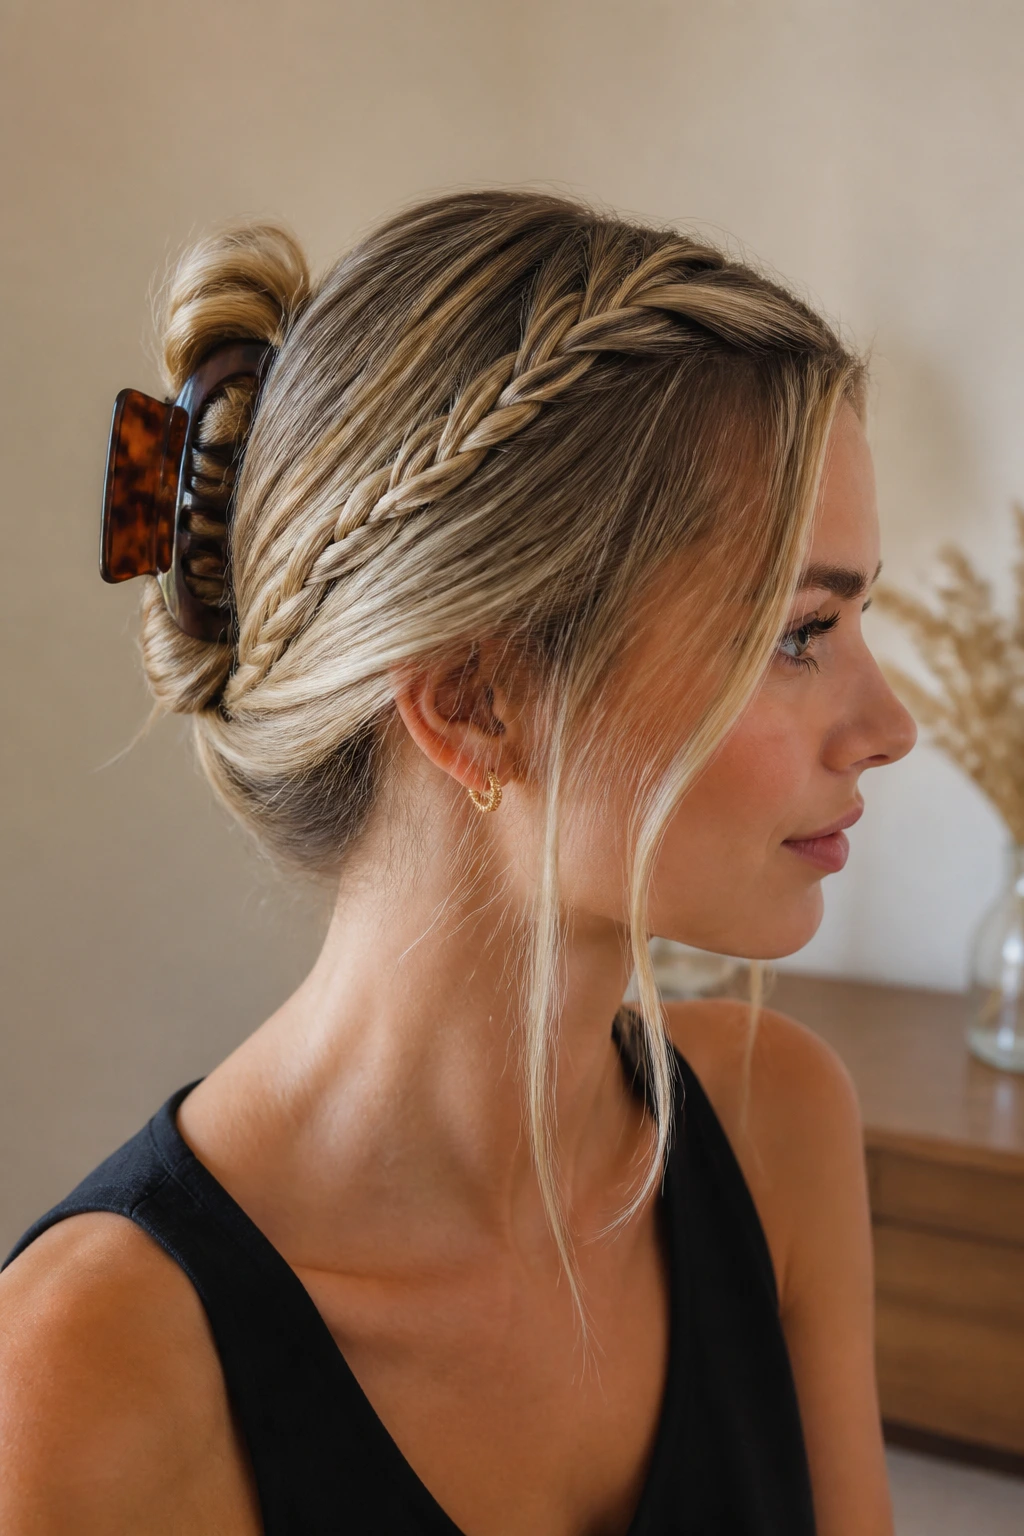
This one is fast, useful, and better than it sounds. Braid a front section or one side section, then gather the rest of the hair into a claw-clip twist. The braid acts like an anchor and keeps the slick straight hair from sliding right out of the clip.
If your hair is very fine, loop the ponytail section once before clipping so the claw has something thicker to grab. A small braid near the face keeps the style from feeling like a last-second fix.
It’s the kind of look that works when you have six minutes and need the front to behave.
33. Ribbon-Woven Braid
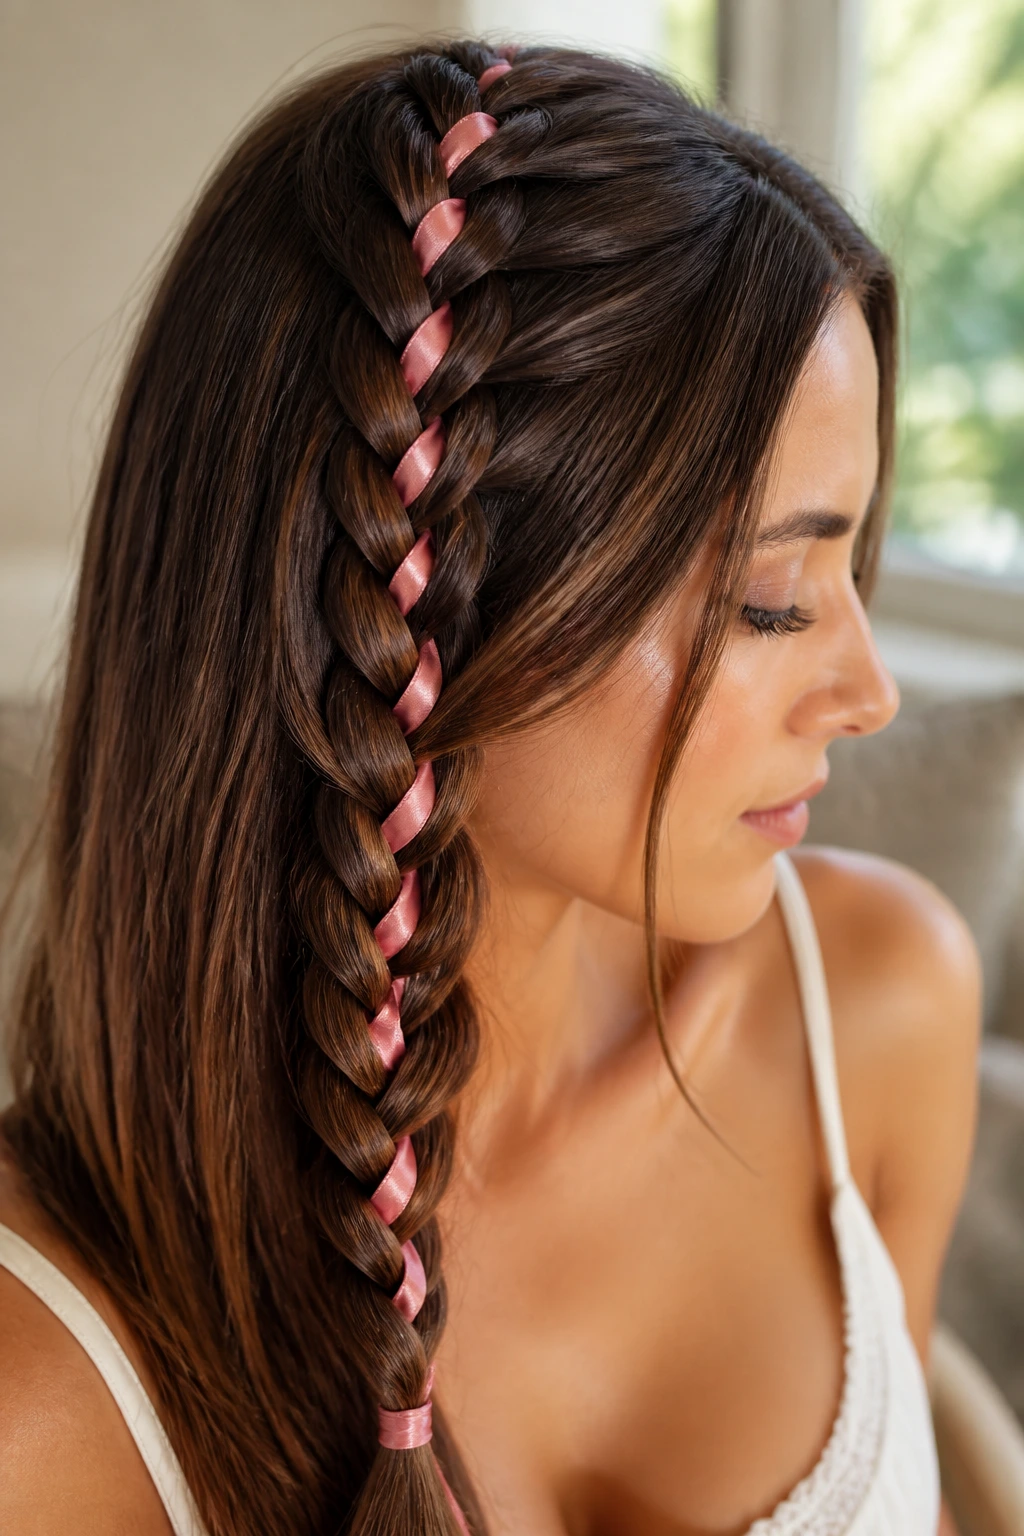
A ribbon-woven braid is one of the easiest ways to make straight hair look more finished without changing the braid structure itself. Thread a narrow ribbon through one strand, then braid it in so the color flashes through the length. Because straight hair lies so smooth, the ribbon sits cleanly instead of disappearing into texture.
Choose a ribbon that’s about 1/4 inch wide. Satin works well, but a matte ribbon holds its shape better if the braid is being worn all day. Tie it securely at the root and keep the weave even so the ribbon doesn’t twist oddly at the back.
It’s a small detail. It changes the whole look.
Why Straight Hair Needs a Little Extra Grip
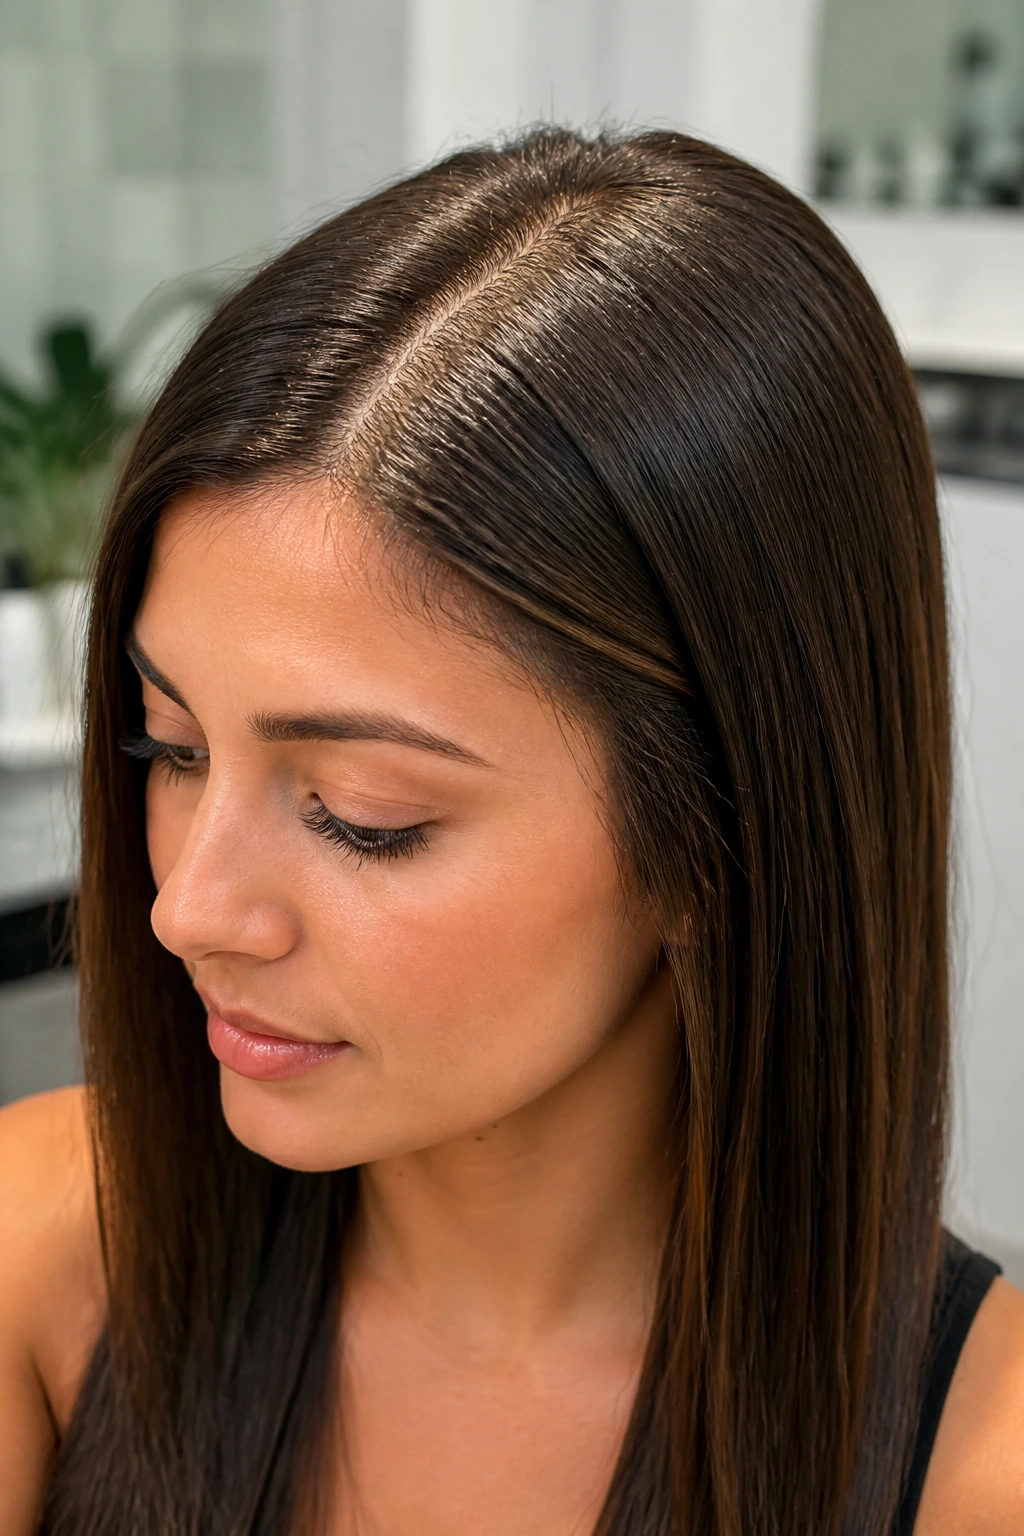
Straight hair has a slick surface. That’s the whole story, and also the whole problem. The cuticle lays flatter, so strands slide against one another instead of catching the way wavy or curly hair does. A braid that would hold for hours on textured hair can loosen faster here, especially if the hair was washed the same day.
That does not mean straight hair is hard to braid. It means prep matters more. A little texture spray at the roots, a small amount of mousse through the mid-lengths, or even a day-old wash can change how the braid behaves in your hands. Too much product is its own mess, though. Heavy cream near the root makes the braid collapse instead of gripping.
Fine hair and layered hair need special attention. Layers poke out. Short face pieces slip. And if the ends are thin, a braid can look neat at the scalp but wispy by the time it reaches the shoulders. I usually work in smaller sections than I think I need, then tighten as I go. That keeps the braid from turning into a loose rope after twenty minutes.
Straight hair also benefits from a cleaner parting and a firmer anchor point. If the root line is fuzzy, the braid reads sloppy. If the root line is sharp, even a simple plait looks deliberate. That is why a rat-tail comb and a few extra bobby pins matter more than people want to admit.
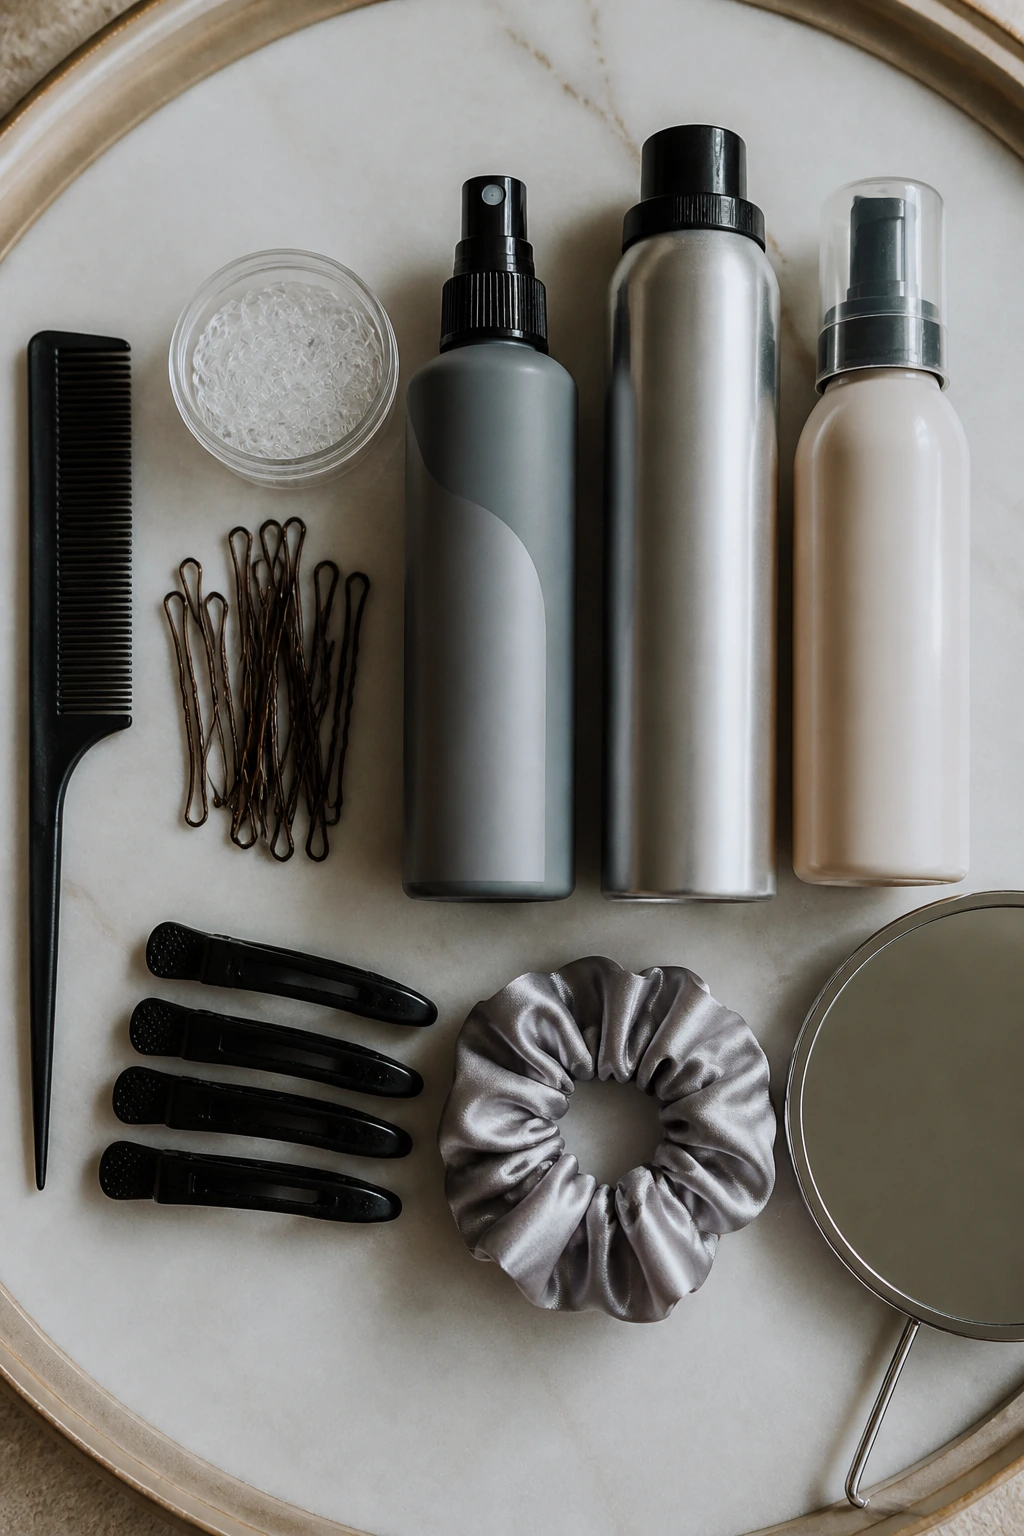
The Tools That Keep Braids from Sliding Apart
-
Rat-tail comb: The pointed end gives you clean parts and tiny section lines, which matter a lot on straight hair.
-
Mini clear elastics: Use these for ends, accent braids, and pull-through sections; they disappear better than bulky ties.
-
Bobby pins in your hair color: Straight hair shows hardware, so matched pins keep the finish cleaner.
-
Texturizing spray: A light mist gives the braid something to grab without making the hair crunchy.
-
Dry shampoo: Best on freshly washed or very fine hair; it adds grip near the roots and softens that slippery feel.
-
Light mousse: Work a small amount through damp hair before blow-drying if you want hold that lasts longer.
-
No-crease clips: These hold sections while you braid without leaving a dent across the crown.
-
Tail spray bottle with water: Useful for taming flyaways or reworking one section without soaking the whole head.
-
Satin scrunchie: Better than a tight elastic for lower ponytail braids and braid-bun styles.
-
Small mirror or phone camera: A second angle helps with nape braids, crown shapes, and anything that wraps around the head.
Product and Prep Choices That Make a Difference
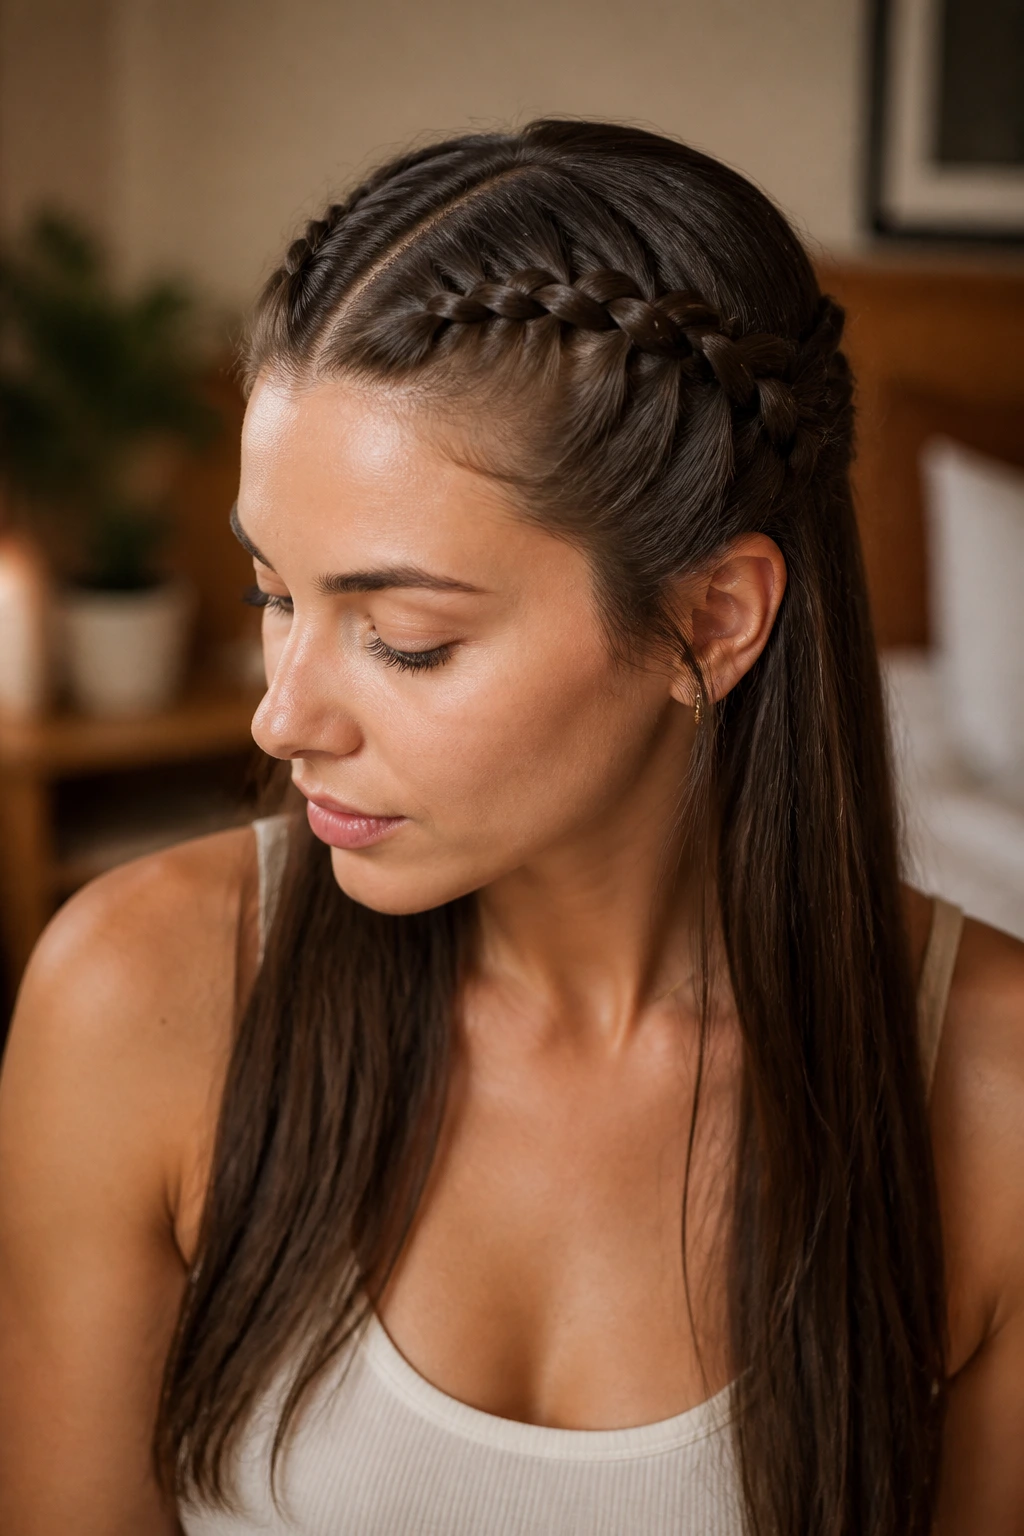
The cleanest braid on straight hair usually starts before the braid starts. If the hair is freshly shampooed and feels squeaky, that’s often too slippery unless you add grip back in with product. A pea-sized amount of mousse through damp hair, then a rough blow-dry with fingers instead of a brush, gives you a base that behaves better.
Dry shampoo is useful even when the hair is not oily. People treat it like a rescue product, but on straight hair it can function as texture in a can. Spray it at the roots, wait thirty seconds, then work it in with fingertips. Don’t pile it on the lengths unless you want a dusty look.
Heavy oils and buttery creams are not your friends close to the scalp. They can make the braid too slick and make sections separate while you’re working. Save shine products for the ends or the final polish. That’s where they belong anyway.
If the hair is very fine, a light styling spray with flexible hold can beat strong gel. Gel can make the hair too stiff to section cleanly. Straight hair needs control, not glue.
How to Keep Braids Neat All Day and Night
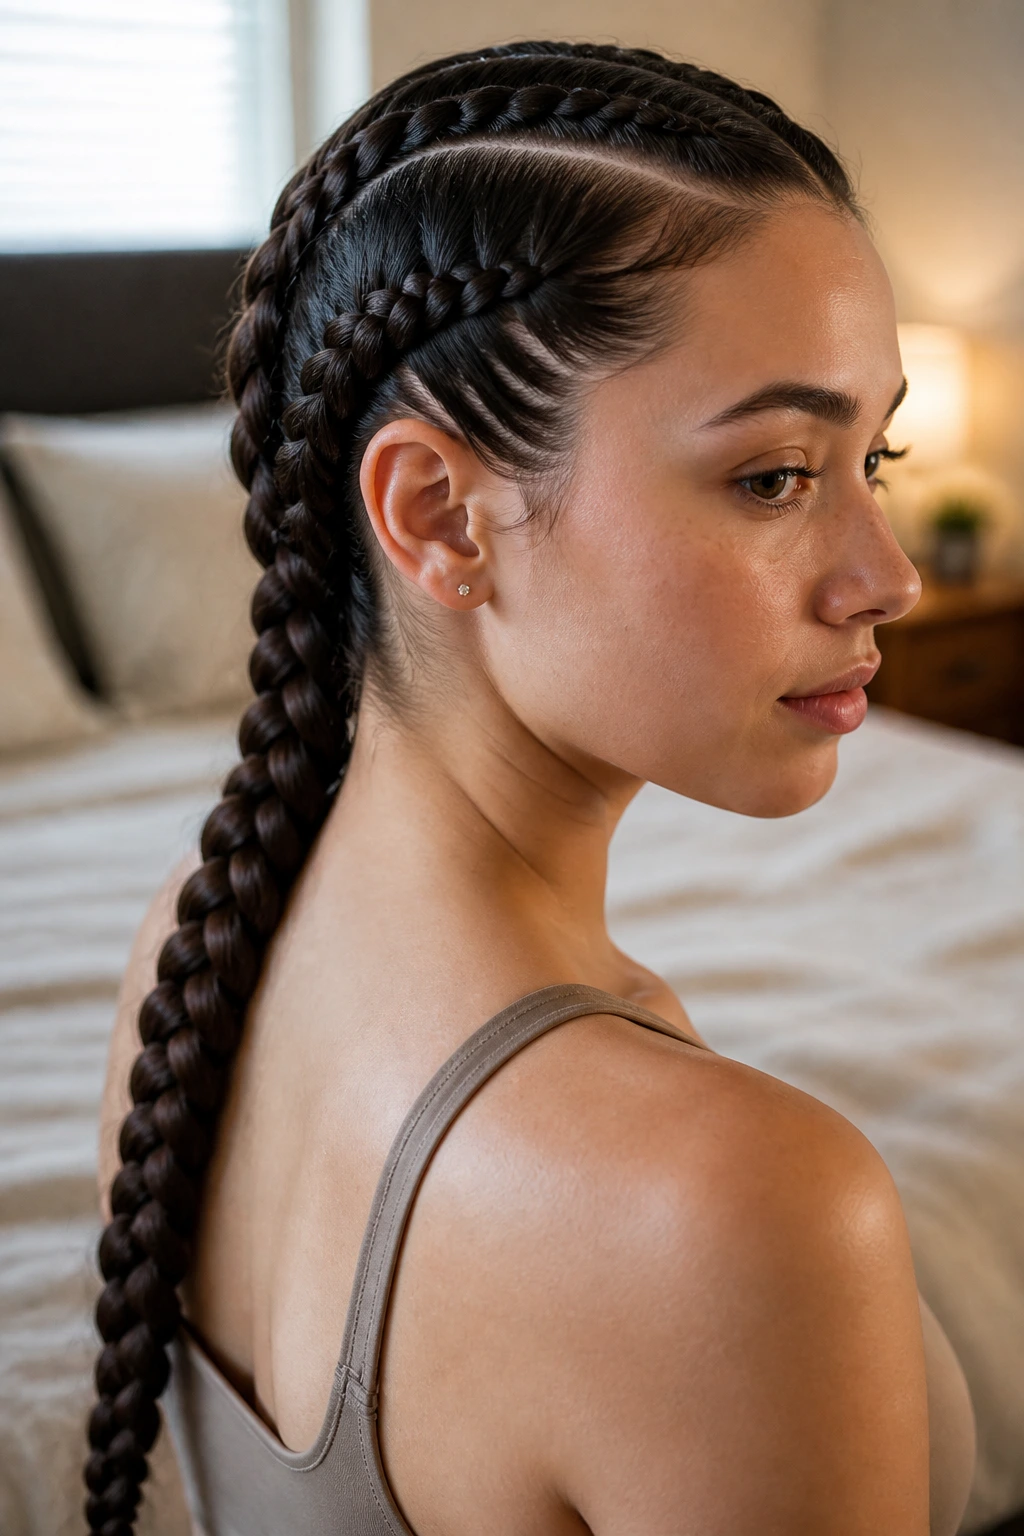
A braid that looks good at 8 a.m. and still holds shape after dinner usually comes down to three things: anchor points, tension, and sleep prep. If the braid starts at the scalp with a firm base, it’s less likely to unravel at the crown. If the tension is even, the braid won’t puff unevenly as the hours pass. And if you sleep on it right, the style can survive the next day too.
For daytime wear, tuck a tiny pin into any spot that starts lifting. Don’t wait until the braid is half undone. Straight hair gives you some warning: the first sign is usually a soft widening at the sides or a loose tail near the nape. Fix that early and you usually save the style.
At night, wrap braids in a satin scarf or sleep on a satin pillowcase. That reduces friction, which matters more on straight hair because the strands are already sliding easily. If the braid is very long, braid the braid loosely once more before bed so the ends don’t whip around and fray.
If you want day-two hair, a small mist of dry shampoo at the roots and a quick finger-fluff through the tail often does more than redoing the whole thing. The braid can look fresher when it’s slightly broken in. Not every style needs to be perfect on day two. Some look better with a little wear.
Small Tweaks That Change the Whole Look
Texture First: If the braid won’t hold, start with product before you start with skill. A light root mist of dry shampoo or texturizing spray changes the way straight hair grips section to section.
Parting Matters: A clean part makes the whole style feel sharper. A zigzag part softens twin braids; a center part makes them feel more formal; a side part relaxes almost everything.
Elastic Discipline: Tiny elastics sound boring, but they keep the braid from loosening at the bottom. If the ends are the part that always falls out, that’s where the fix goes.
Finish Smart: Don’t soak the braid in shine spray. Hit the tail lightly, smooth the flyaways around the hairline, and leave the center of the braid with its natural texture so the pattern stays visible.
Make It Yours: If your hair is ultra-straight and fine, build volume with pull-through or bubble elements. If your hair is thick and heavy, lean into close-to-scalp braids that control the bulk instead of fighting it.
Common Mistakes to Avoid
Braiding fresh-washed hair with no grip: The braid may look neat for an hour and then start slipping. Add texture first, or wait until the hair is a little softer from natural oils.
Taking sections that are too big: On straight hair, oversized sections make the braid bulky at the top and loose at the bottom. Smaller sections usually hold the shape better and read cleaner.
Overloading with smoothing cream: A heavy hand with serum or leave-in product makes the hair slide right out of the braid. Keep slick products on the ends, not the roots.
Skipping the anchor: If the braid starts loose at the crown or nape, it will unravel faster than you want. Tighten the first few passes and secure the base before you relax your grip.
Forgetting the ends: Straight hair often loses shape at the tail first. A small elastic, a wrapped tie, or a tucked finish keeps the braid from turning stringy.
Variations and Alternatives to Try

Soft Weekend Braid: Loosen the braid after it’s secured and pull out a few front pieces. This works when you want movement and don’t need the style to survive a full marathon of errands.
Sleek Event Version: Use mousse at the roots, a fine-tooth comb for the part, and a shine spray only at the very ends. This version suits formal looks where the braid should read crisp and clean.
Workout-Proof Version: Choose Dutch braids, boxer braids, or a low French braid and keep the tension firmer than usual. Straight hair that usually slips will hold better when the braid is close to the scalp.
Short-Hair Adaptation: If the lengths are too short for a full braid, use half-up accent braids, mini front braids, or a braided headband. Those styles give you braid detail without needing a lot of length.
Ribbon or Clip Upgrade: Slide a narrow ribbon through one strand or finish with a decorative clip at the nape. Straight hair takes accessories well because the surface is smooth and the detail stays visible.
How to Protect Braids Overnight and Bring Them Back the Next Day
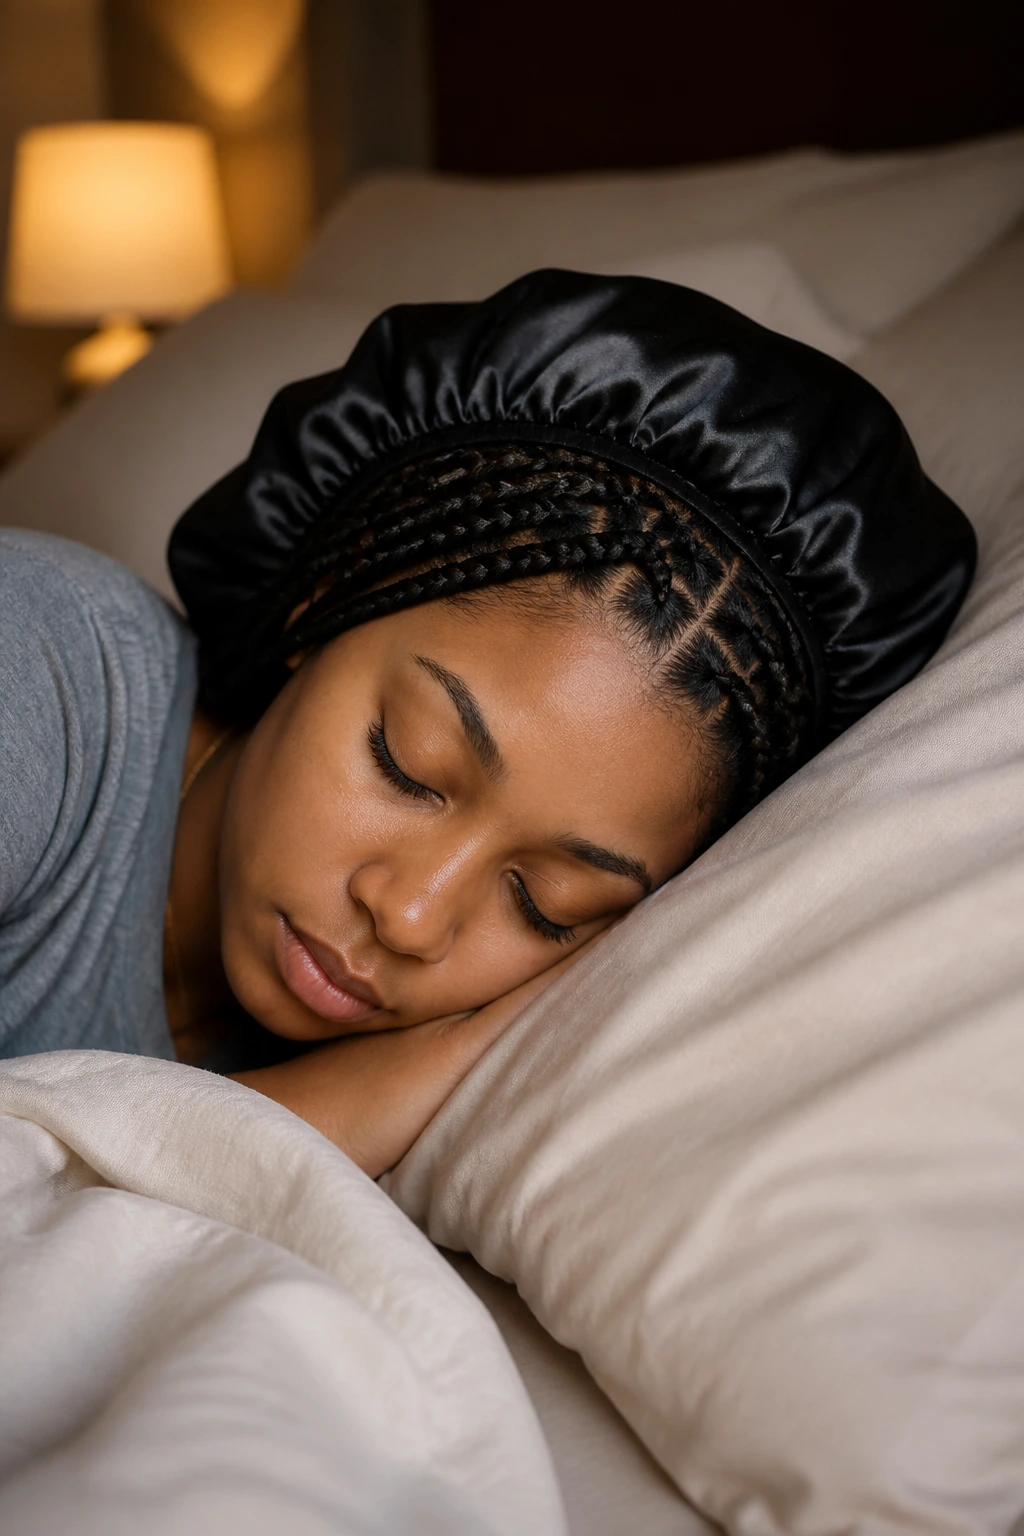
A braid can survive overnight if you treat it like a style worth protecting instead of a throwaway look. Satin is the main thing. A scarf, bonnet, or pillowcase cuts down friction, and friction is what fuzzes the braid apart on straight hair.
If the braid is a long side braid or a low plait, tuck the tail into a loose loop before bed. That keeps the ends from knotting into the pillow. For tighter styles like boxer braids or cornrow-inspired rows, sleep with the braids undisturbed and only smooth the hairline in the morning.
Day-two refreshes are usually small. A spritz of dry shampoo at the roots, a quick re-pin at the nape, and a tiny bit of smoothing cream rubbed between the palms can bring the braid back without rebuilding it. If the braid has gone flat at the crown, loosen the outer loops a touch with your fingers. That’s often enough.
Do not keep re-spraying the whole head. Straight hair gets heavy fast, and too much product can make the braid droop instead of revive.
Frequently Asked Questions
Can straight hair really hold braids well?
Yes, but the hold depends on prep. Straight hair usually needs more texture at the roots and a firmer first few braid passes so the style doesn’t slip apart early.
What’s the best braid for very fine straight hair?
Pull-through braids, Dutch braids, and braided ponytails usually work well because they create the look of thickness and give the hair more anchor points. Tiny accent braids also hold nicely when the hair is too fine for a big plait.
Should I braid clean hair or day-old hair?
Day-old hair usually holds better because a little natural oil adds grip. If you need to braid fresh hair, dry shampoo or texturizing spray helps replace some of that lost friction.
How do I keep layers from popping out?
Work with smaller sections and start the braid a little lower, where the layers are longer. Hidden bobby pins can also catch the shorter pieces before they escape.
What if my braid keeps unraveling at the bottom?
That usually means the tail is too loose or the hair is too slick. Use a small elastic at the end, and if the hair is especially slippery, mist the lengths lightly before you braid.
Are tight braids bad for straight hair?
Tight braids are fine in moderation, but constant pulling at the hairline can cause breakage over time. If the scalp feels sore, loosen the base next time and vary the braid placement.
Can I do these styles on shoulder-length straight hair?
Yes, but the best options are half-up braids, crown accents, mini front braids, Dutch pigtails, and tucked braided rolls. Very long styles like mermaid braids or five-strand braids work better when the hair is a little longer.
How do I hide clear elastics better?
Wrap a tiny strand of hair around the elastic and pin it under the braid, or place the elastic where the braid naturally narrows. Straight hair shows bands more than textured hair does, so this little step matters.
Braids That Hold Their Shape
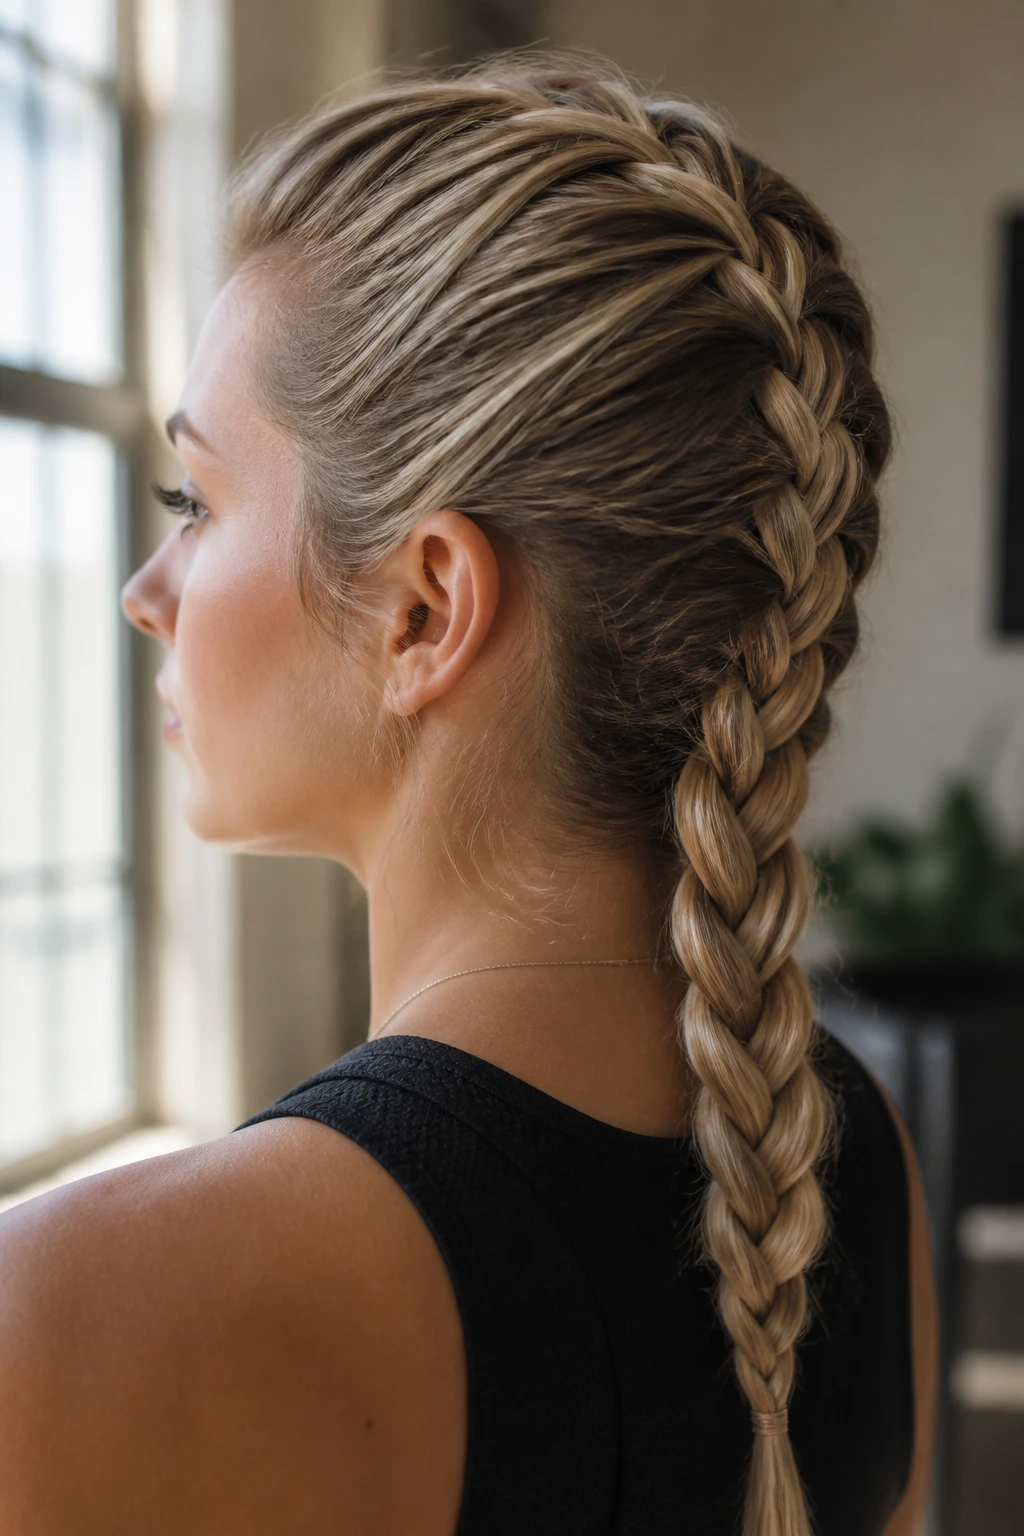
Straight hair doesn’t need to fight the braid. It needs the right braid, the right prep, and a little respect for how slippery those strands can be when they’re freshly washed and too smooth to behave.
The good styles here are the ones that use that smoothness on purpose. They turn it into shine, clean part lines, and sharp patterning instead of letting it become a problem. That’s why a simple French braid can look better on straight hair than a complicated style that isn’t anchored well enough.
Start with the braid that fits your length and your patience. Then adjust the grip, the part, and the finish. Once those pieces click, straight hair stops being the hard case and starts being the cleanest canvas in the room.
