



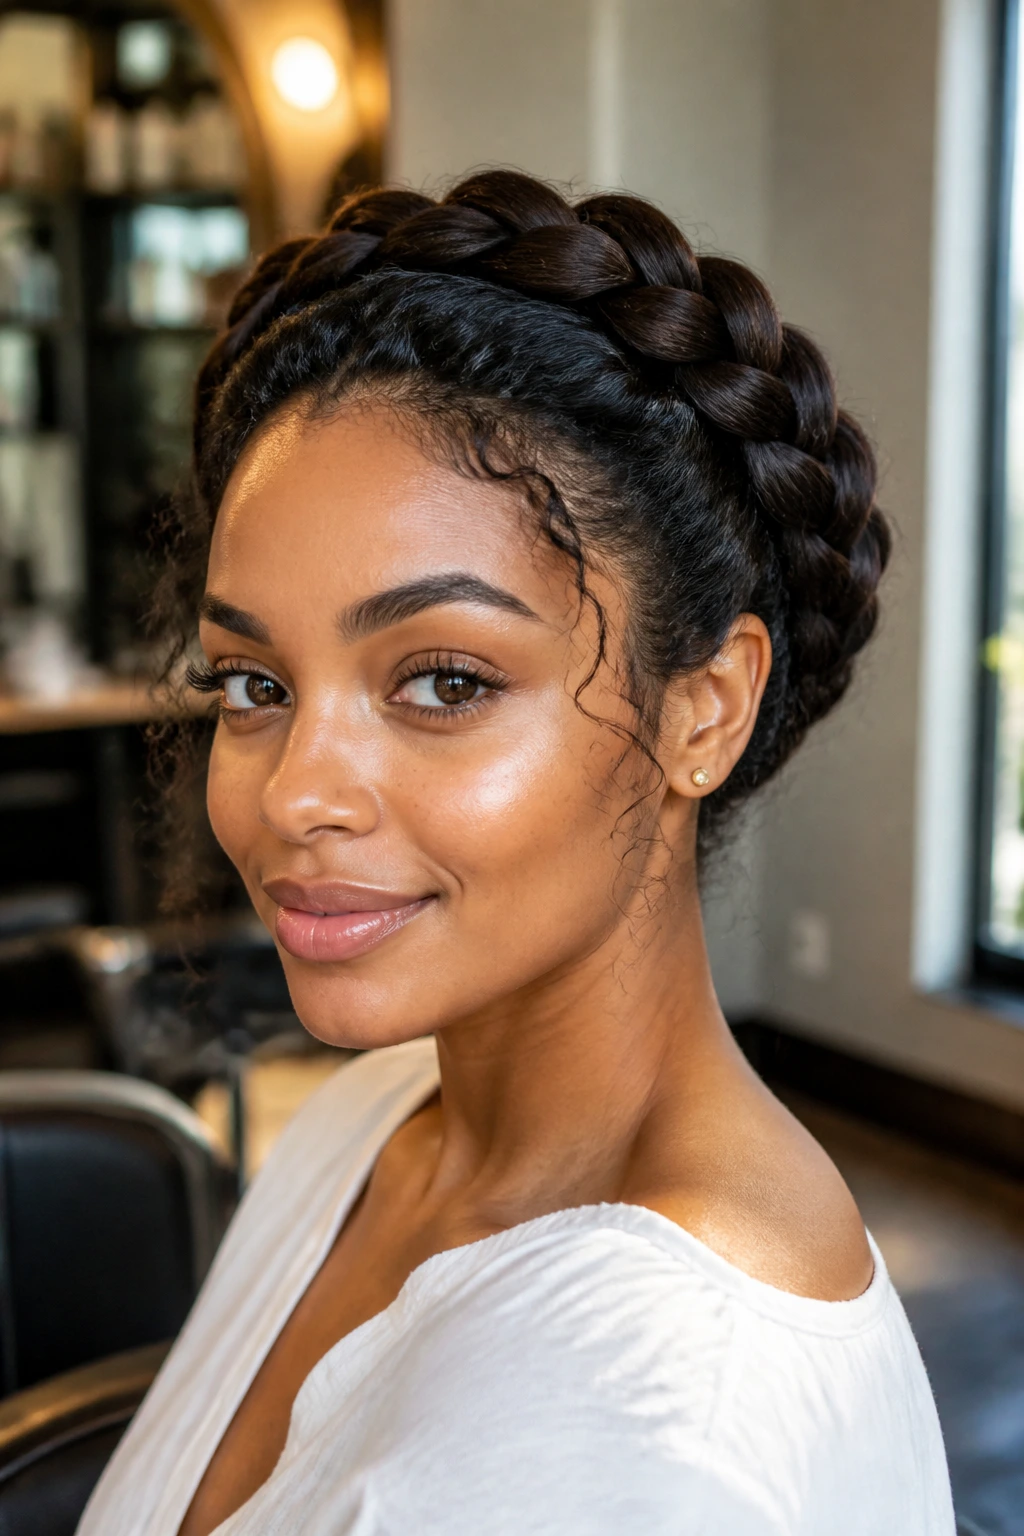
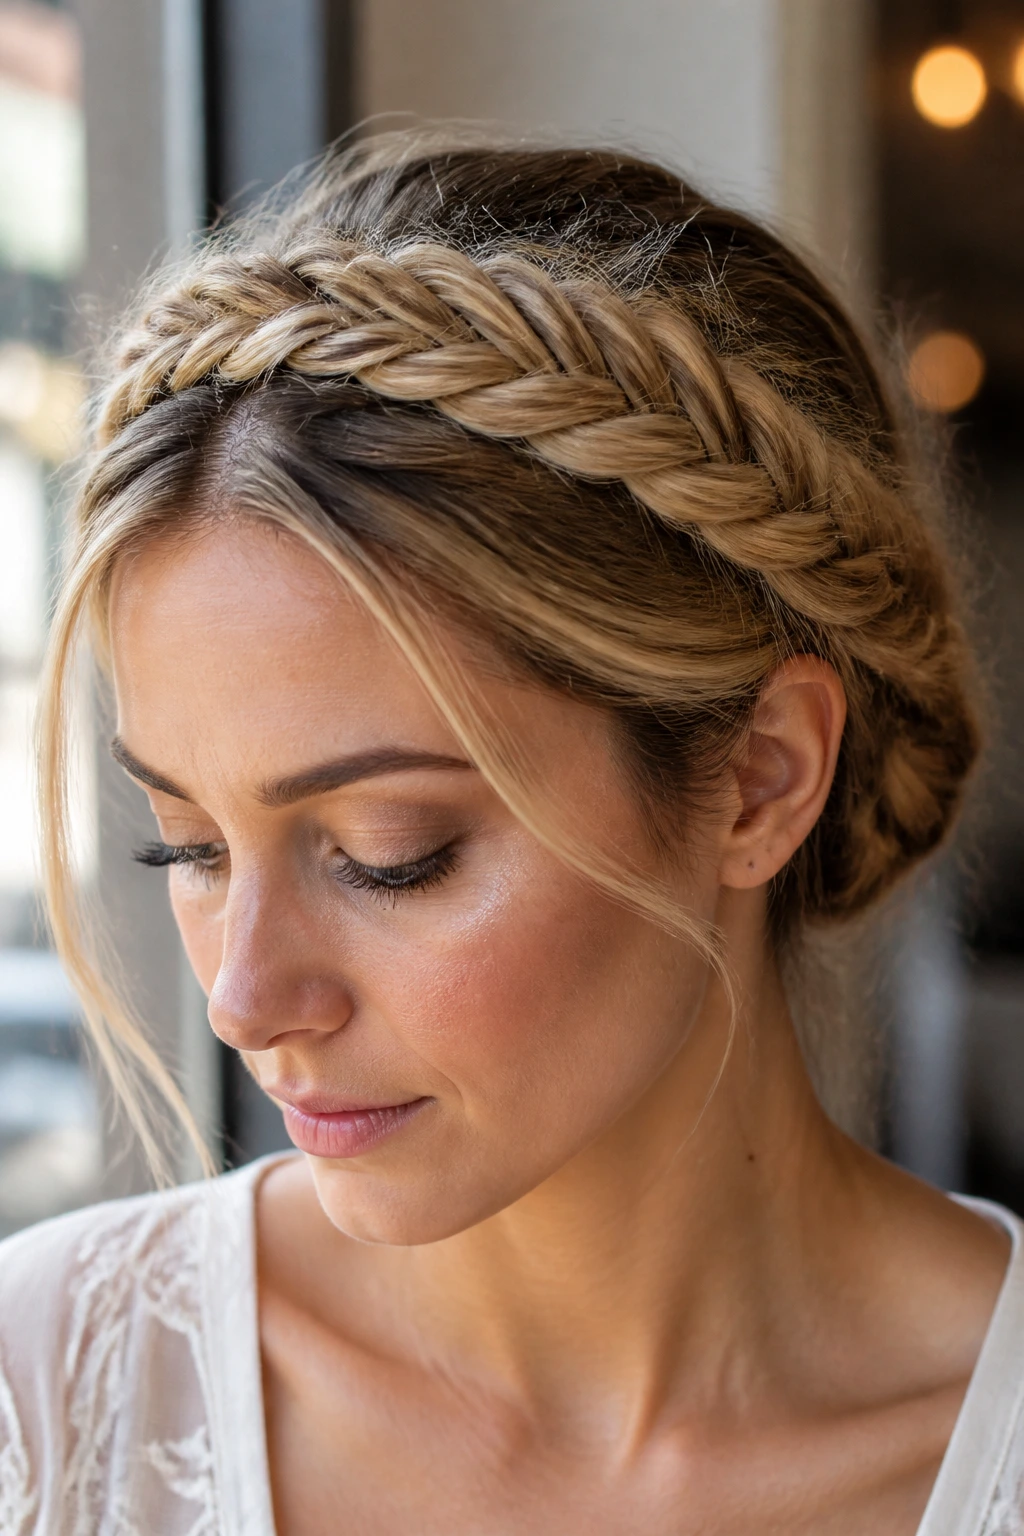
A halo braid can rescue a hair day fast, but the reason it keeps showing up in salons, wedding prep chairs, and hurried bathroom mirrors is not just the shape. It’s the way the braid changes the whole line of the face. A crown braid lifts the eye upward, clears the front, and gives even simple outfits a little structure without making the style feel stiff.
That’s why halo braid hairstyles work across so many hair types and lengths. On fine hair, the braid can look neat and compact. On thick curls, it can feel lush and full, almost architectural. On locs, twists, and braided extensions, the same shape turns into something cleaner and more dramatic, because the texture itself does half the work. The trick is not forcing every head of hair into the same mold. It’s choosing the version that sits naturally on the hair you have.
And there are more versions than people usually think. Some halos sit low and tight like a stitched line. Others are loose, fluffy, and dotted with tendrils. Some are built from Dutch braids, some from rope twists, some from box braids or locs that are tucked and pinned into a crown. The shape stays familiar. The mood changes completely.
Why You’ll Love This Halo Braid Collection
-
Built-In Shape: A halo braid frames the face before you even touch accessories, which is why it can look finished with very little else.
-
Works With Texture: Straight hair, coils, twists, locs, and braids all hold a crown style differently, and that variety is exactly what makes this collection useful.
-
Dressy or Casual: The same braid can read polished with a sleek finish or relaxed with a few loose pieces around the temples.
-
Gentler Than It Looks: When the braid is placed with enough give, it can keep hair off the face without pulling hard at the hairline.
-
Easy to Personalize: A side part, a ribbon, a cuff, or a tucked bun can change the whole tone without rebuilding the style from scratch.
-
Photo-Friendly Without Trying Too Hard: The crown line gives the style shape from every angle, so it holds up in side view, back view, and close-up.
1. The Classic Low Crown Halo Braid
A low crown halo braid is the version I reach for when I want the cleanest line and the least fuss. It sits just above the ears, follows the hairline without crowding it, and gives the whole style a calm, balanced shape. On medium to long hair, it looks neat rather than heavy, which matters more than people think.
The real advantage is the placement. A braid that sits too high can start to look like it’s floating. A lower crown feels anchored. If your hair is fine or slippery, this version also gives you a better chance of hiding pins under the back curve where they’re doing the work but not showing off about it. Keep the front smooth, braid with even tension, and tuck the tail under the back section so the finish stays clean.
Why It Works Best Here
The low crown keeps the braid’s weight distributed around the head instead of stacked at one point. That makes the style easier to wear for several hours, especially if you’re sensitive around the temples.
A light mist of mousse before braiding helps the front sit flat, and a few U-pins at the nape usually do more than a fistful of bobby pins ever will.
2. The Deep Side-Part Halo Braid
A deep side part changes the whole mood of a halo braid. The asymmetry keeps the style from feeling too formal, and it gives one side of the crown a little more lift than the other. That matters if one side of your hair tends to lie flatter or if you like a softer line across the forehead.
This version works especially well when the braid needs a little personality without extra accessories. Start the part near the arch of the eyebrow, not right in the middle, and carry the braid across the crown so it crosses just behind the higher side. The braid should feel deliberate, not tilted by accident. If the parted side starts to puff up, press it down with a small amount of edge control and a soft brush.
If you like face framing, leave one thinner piece out near the heavy side. Tiny detail. Big change.
3. The Dutch Crown Halo
Dutch braids sit on top of the hair instead of sinking into it, and that raised texture gives a halo braid a firmer, more visible edge. If you want the braid itself to be the feature, this is the version that does the job without needing much decoration. It also holds a shape a little better on layered or slippery hair because the braid has more grip.
There’s a practical side too. Dutch braids create a stronger ridge, which means the crown reads clearly from across the room. On thick hair, that ridge can be the difference between “pretty braid” and “why is this style collapsing by lunch?” Keep the sections even, cross the strands under rather than over, and pinch the braid a little flatter once it wraps around the back so it doesn’t stick out like a rope.
This one loves a matte finish. Too much shine can flatten the texture.
4. The Fishtail Halo Braid
Fishtail halos have a finer, woven look that feels almost lacy from a distance. Up close, the braid has a tight, deliberate texture that looks more intricate than it is once your fingers get used to the motion. The shape around the head stays soft, but the braid itself gives you a little more pattern than a standard three-strand crown.
This version is good when you want the braid to feel detailed without going bulky. It works nicely on medium-density hair, and it’s a smart choice if the rest of your outfit is simple. The braid does the visual work for you. Keep the sections small and even, and do not rush the crossing pattern — a fishtail gets messy when one side starts stealing from the other. That’s the whole trick.
If the tail looks thin, pancake the braid gently with your fingertips before pinning it under. The loosened edges make the crown look fuller.
5. The Rope-Twist Halo
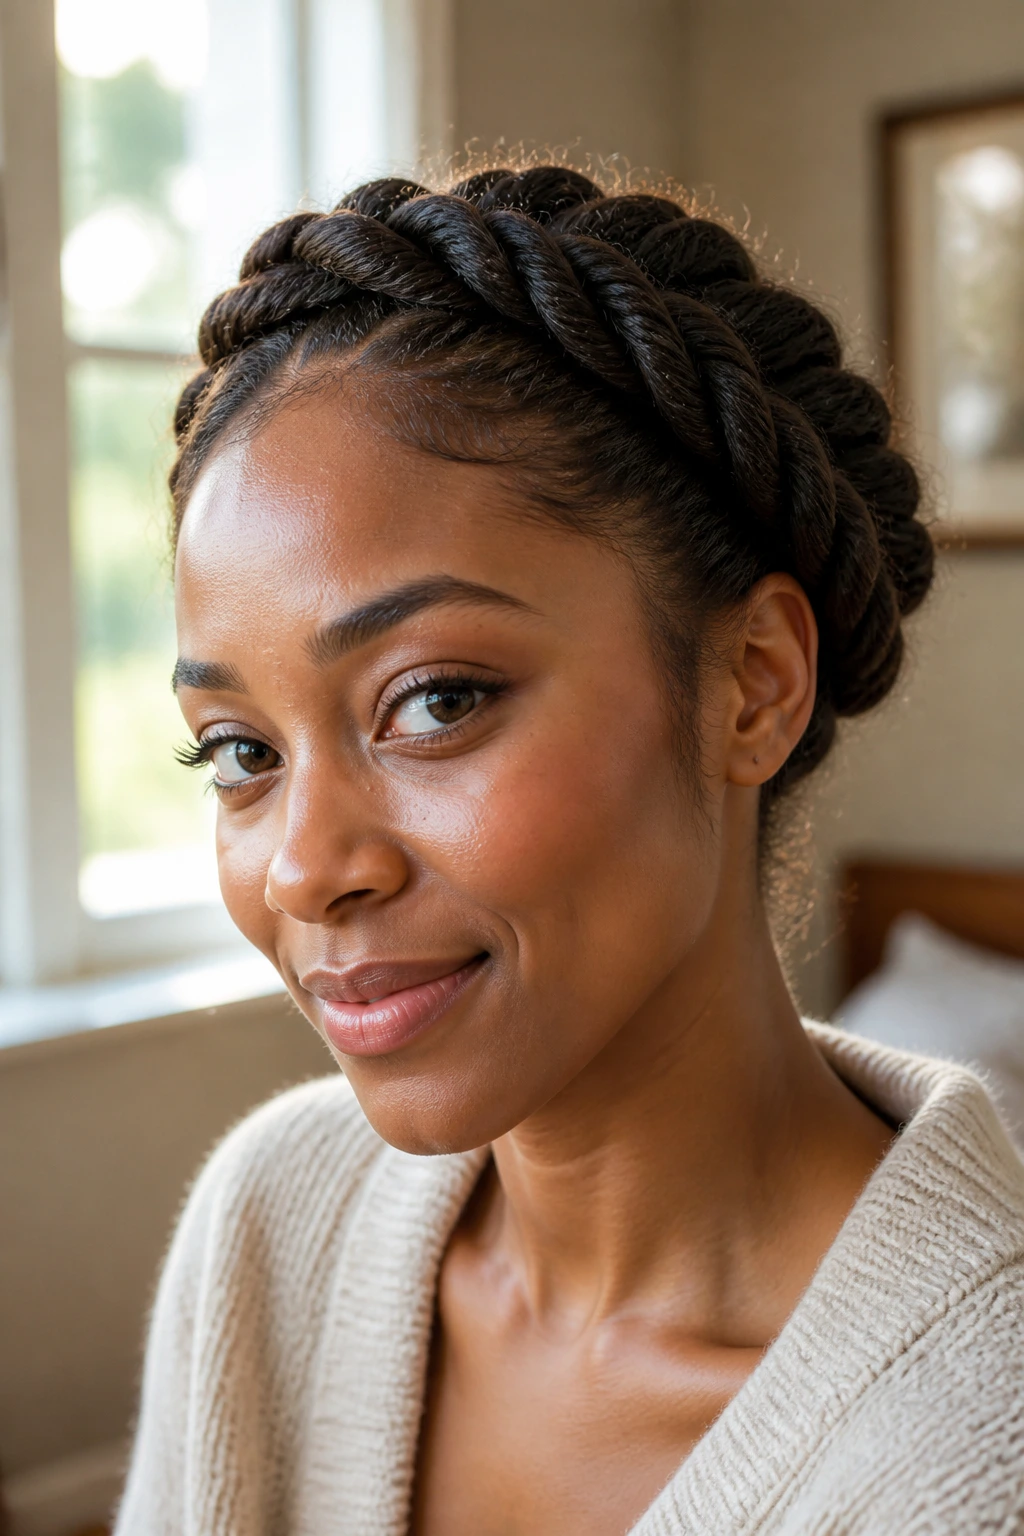
Rope-twist halos are lighter and quicker than braided crowns, and that’s exactly why people keep coming back to them. Two strands twisted over each other create a clean spiral with less hand fatigue than a full braid, which makes this one a smart pick for long hair, locs, twists, or stretched natural hair. It also has a soft sheen when the hair is smooth.
The twist version sits somewhere between polished and relaxed. It does not have the same dense texture as a Dutch braid, so it suits days when you want the shape of a halo without the visual weight. Work with medium sections, twist both strands in the same direction before wrapping them around each other, and pin the halo at the nape and above each ear. If the twist starts to unravel, that usually means the tension was uneven from the start.
A tiny bit of styling cream on the lengths helps the strands stay together. Too much product, though, and the twist loses its clean line.
6. The Milkmaid Halo Braid
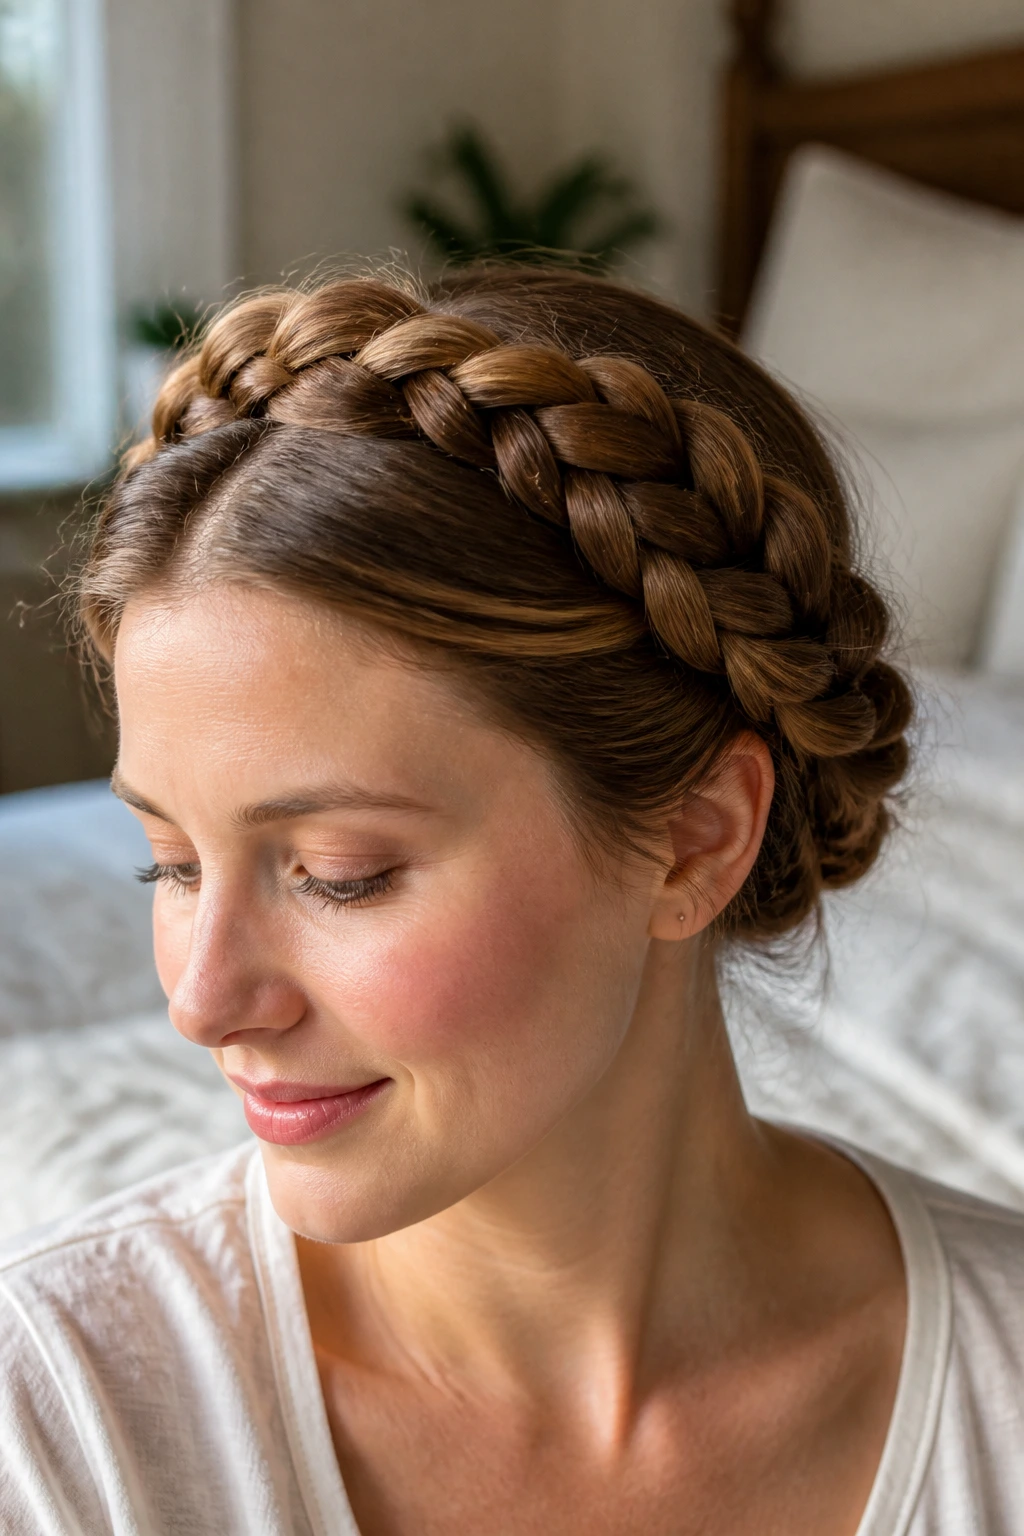
Milkmaid braids are the vintage cousin of the halo style, and they still hold up because the structure is so clear. Two braids cross over the top of the head and tuck in near the opposite ear, creating that wrapped, old-world shape people keep calling soft or romantic when what they really mean is the braid sits beautifully and stays put.
I like this version when the hair is long enough to braid in two equal halves. It’s also a useful fix if one side of the head keeps slipping out of a single crown braid. The doubled structure gives more anchoring points, which matters on layered hair. Keep the braids close enough to the scalp that they follow the head shape, but leave them loose enough that they do not pull the temples tight.
A milkmaid halo looks even better when the ends are tucked fully inside the crossing point. No tails. No fuss.
7. The Tucked-End Crown Braid
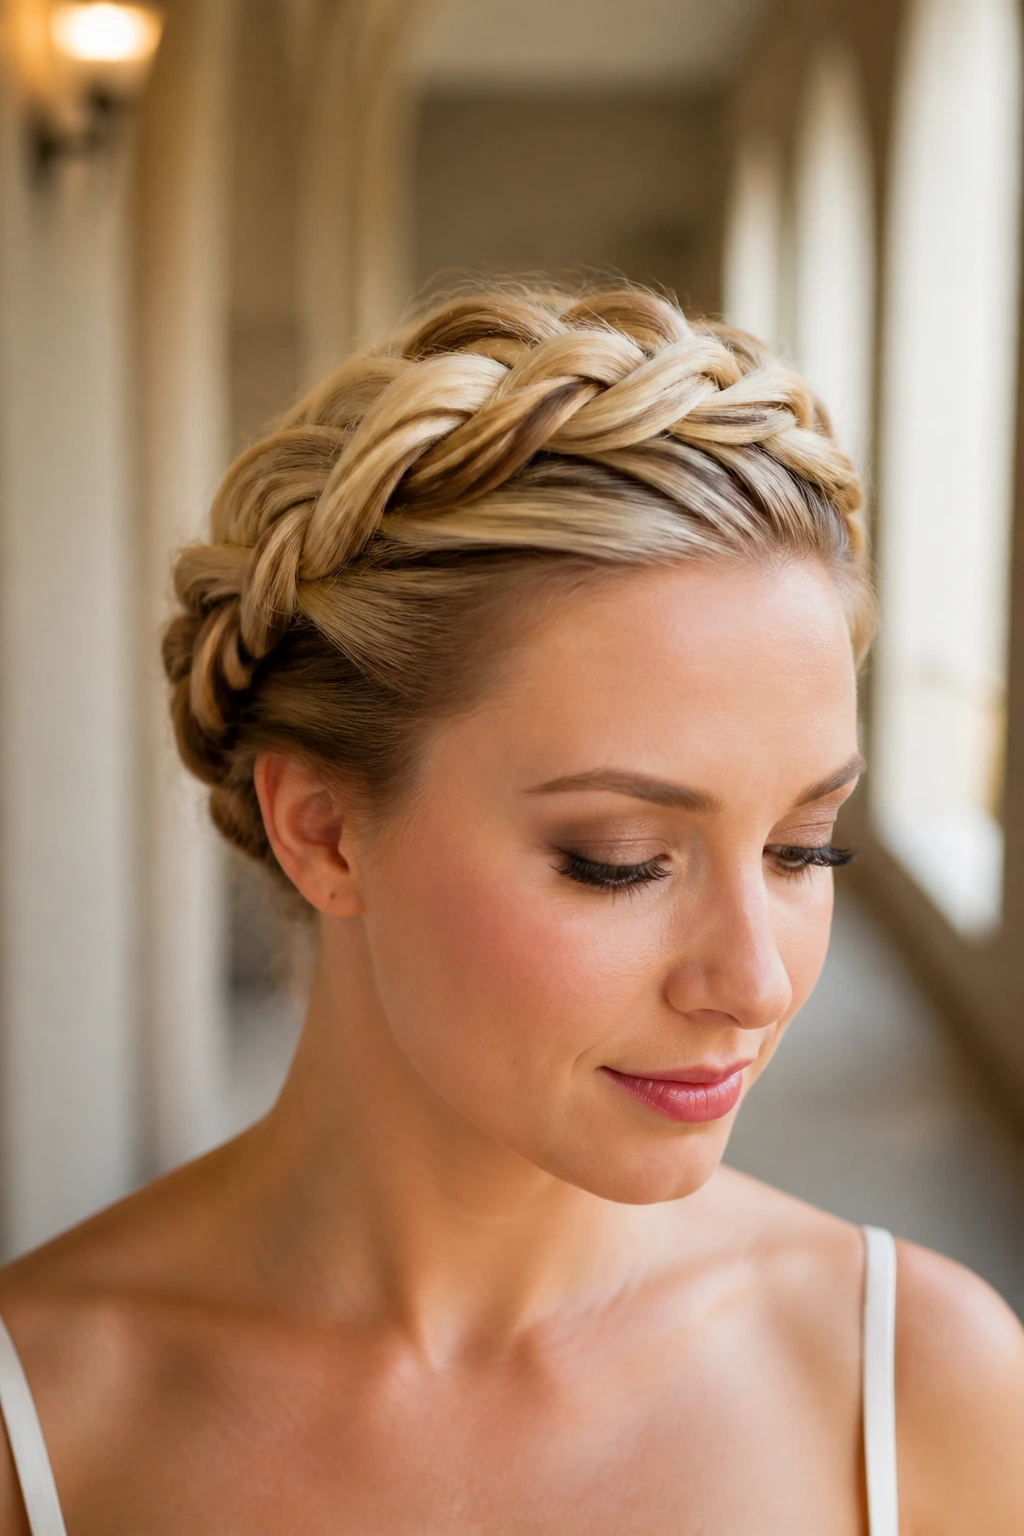
A tucked-end crown braid is the answer when you want the halo line but not the loose tail hanging around the back. The ends disappear into the braid or under pins, so the whole style reads as a clean loop instead of a braid-and-tail combination. That makes it useful for formal events, busy workdays, and any time you want the back of the style to feel finished.
The shape matters here more than the braid type itself. You can build this with Dutch, French, or rope-twist sections, but the last few inches need to be folded inward and hidden. Use U-pins rather than only bobby pins; they grip the tucked section better and keep the end from pushing outward after a few hours. If the tuck looks bulky, flatten the braid slightly before pinning it.
This version has a nice habit of making necklaces and collars look more intentional. The neckline stays open.
8. Halo Braid with Loose Curls
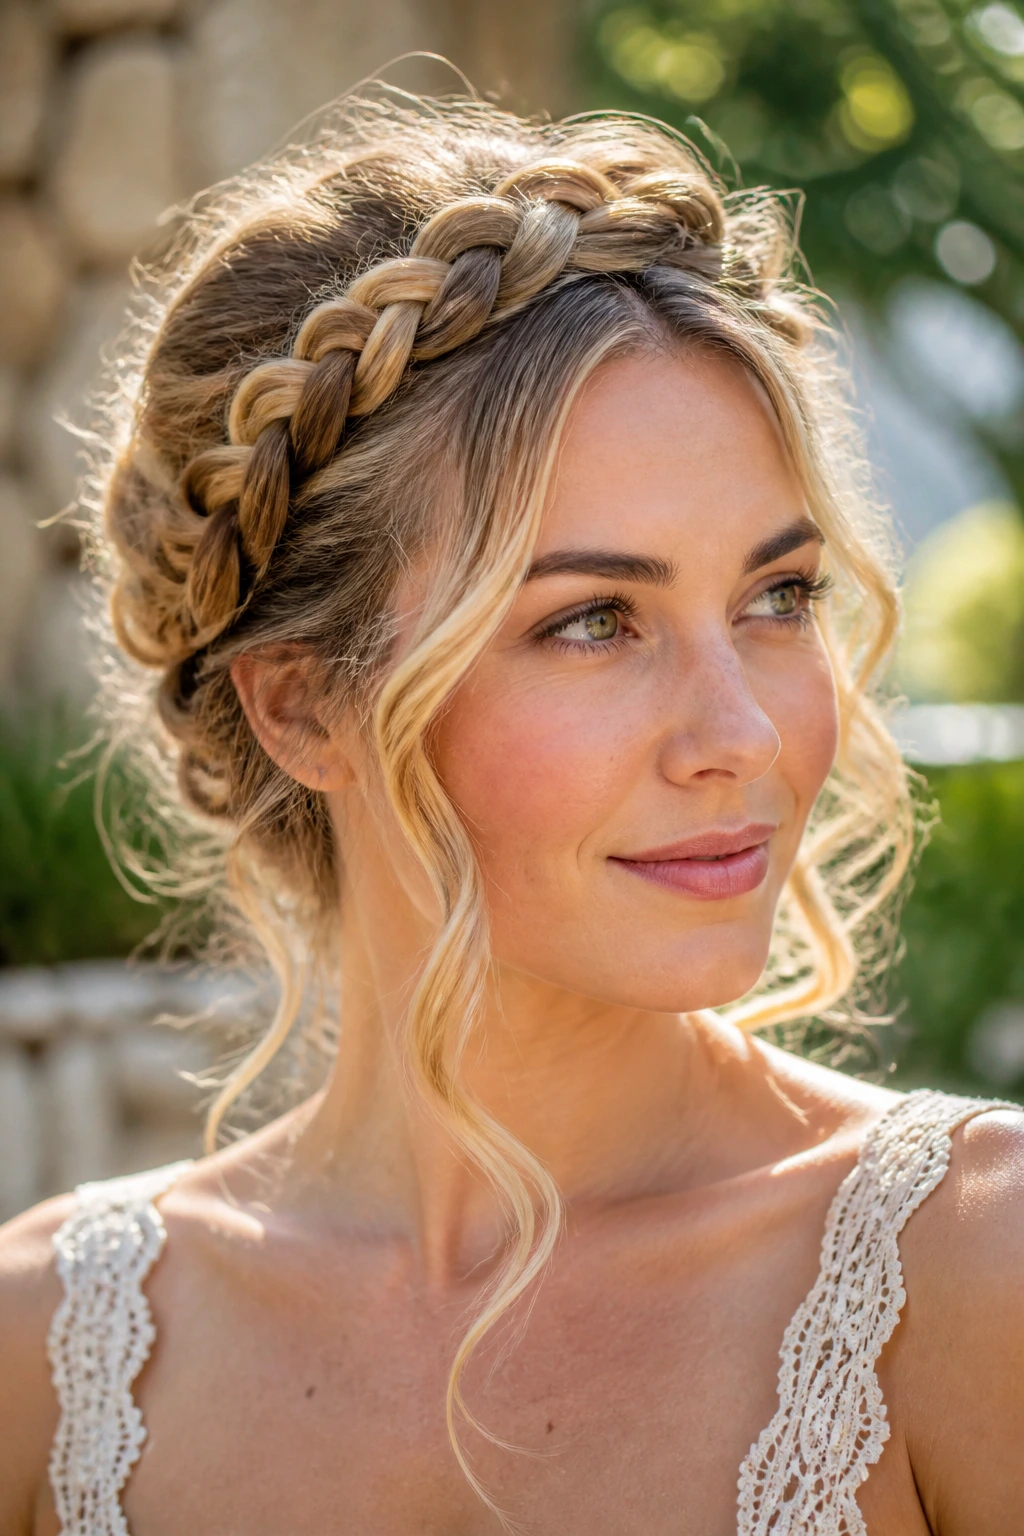
The braid gives the outline; the curls do the softening. That’s the whole appeal of a halo braid with loose curls. The crown keeps the hair off the face, while the ends or the lower sections stay free enough to move, which is useful if you want the style to feel less severe than a full updo.
This works best when the braid is secured high enough to clear the curls but low enough that the shape still reads as a crown. If your hair is naturally curly, leave the ends untouched and let the curl pattern show through. If you’re setting curls with a wand or flexi rods, keep the curl size consistent so the braid doesn’t look like it belongs to one hairstyle and the rest belongs to another. That mismatch is what ruins the balance.
I like this version for soft-dress days and for people who want face framing without giving up volume. It holds a pretty line even when the curls loosen a little.
9. The Halo Braid with Curtain Bangs
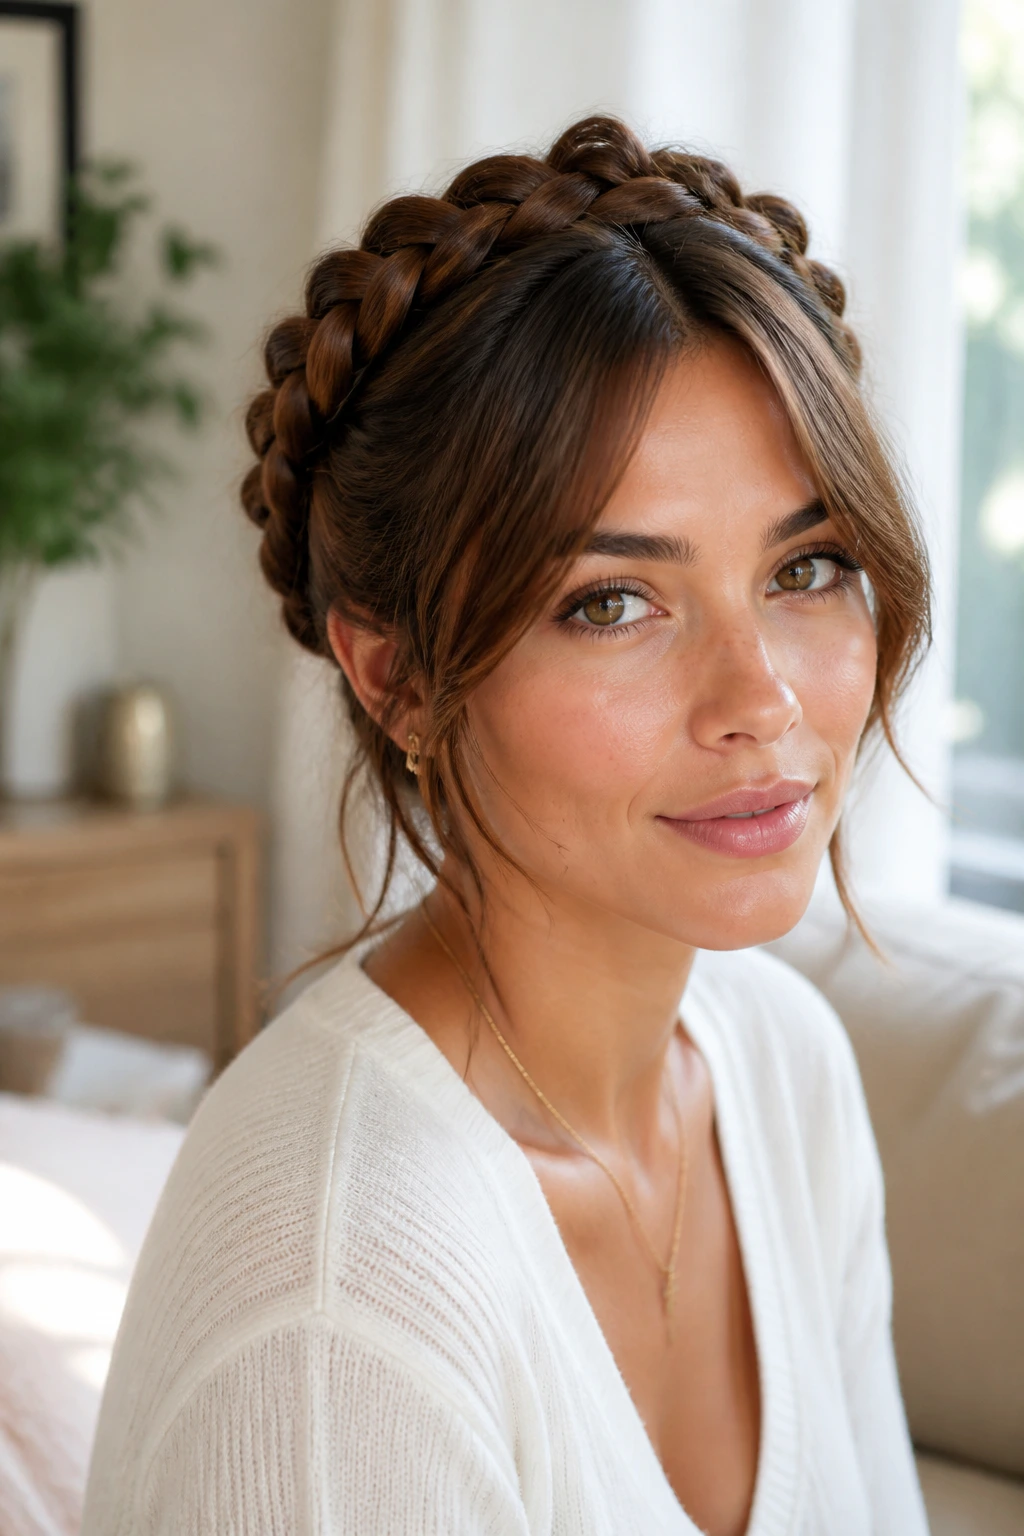
Curtain bangs change the entire face of a halo braid. Instead of pulling every front section backward, this version leaves a middle-split fringe that falls to each side and sits against the cheekbones. The halo still frames the head, but the bangs keep the style from looking too closed off.
There’s a small technical catch here: the bangs need to be shaped before the braid goes in, not after. If they’re too wet or too long, they’ll droop into the eyes and fight the braid. Blow them smooth with a round brush or flat brush, then set the crown braid so it starts just behind the fringe. The contrast between the structured braid and the loose front pieces is what makes the style work.
This one suits people who like softness around the face but still want the braid to feel deliberate. It’s a good compromise. Not fussy. Just smart.
10. The Boho Halo with Face-Framing Tendrils
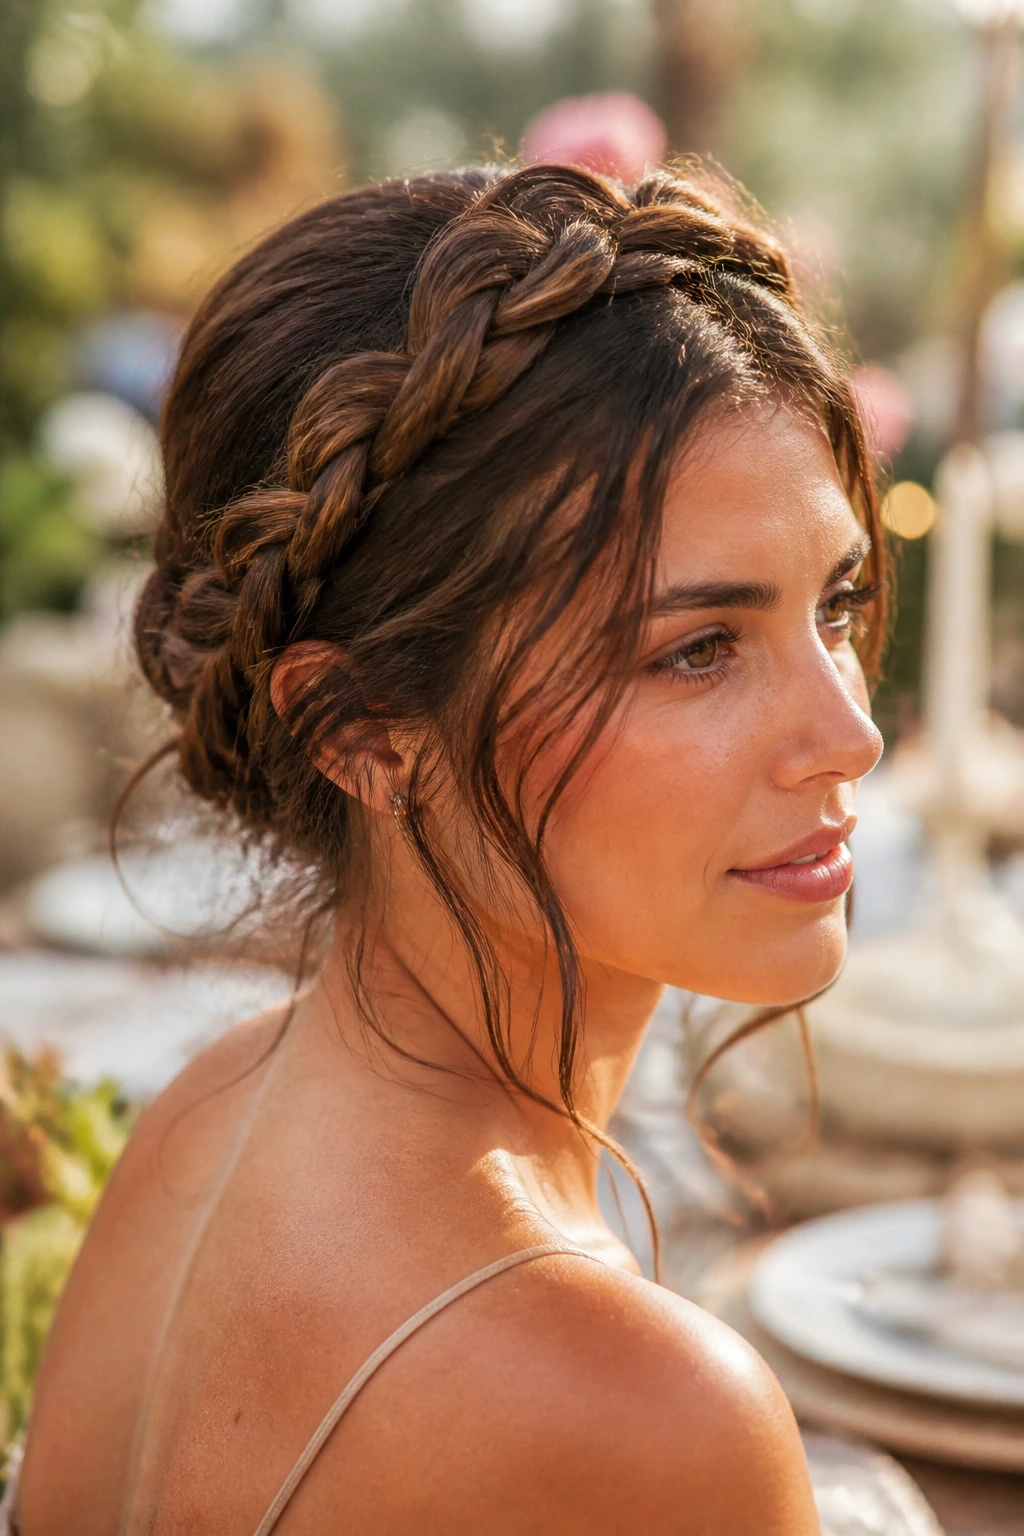
A boho halo braid is basically what happens when you stop trying to make every strand obey. The braid stays in place, but a few slim tendrils are left out around the temples, ears, and sometimes the nape. Those pieces break up the outline and keep the crown from looking too hard or too formal.
The key is restraint. Leave out two or three thin pieces, not a handful. If you pull too much hair forward, the style stops reading as a halo and starts reading as “something came loose.” I prefer soft, deliberate tendrils that are barely waved, because they sit against the braid instead of competing with it. A tiny bit of mousse or curl cream on the loose pieces helps them stay in shape.
This version does well at dinners, weddings, and photo-heavy days when you want movement around the face. It’s the halo braid for people who don’t want the braid to feel too neat.
11. Double Halo Braids
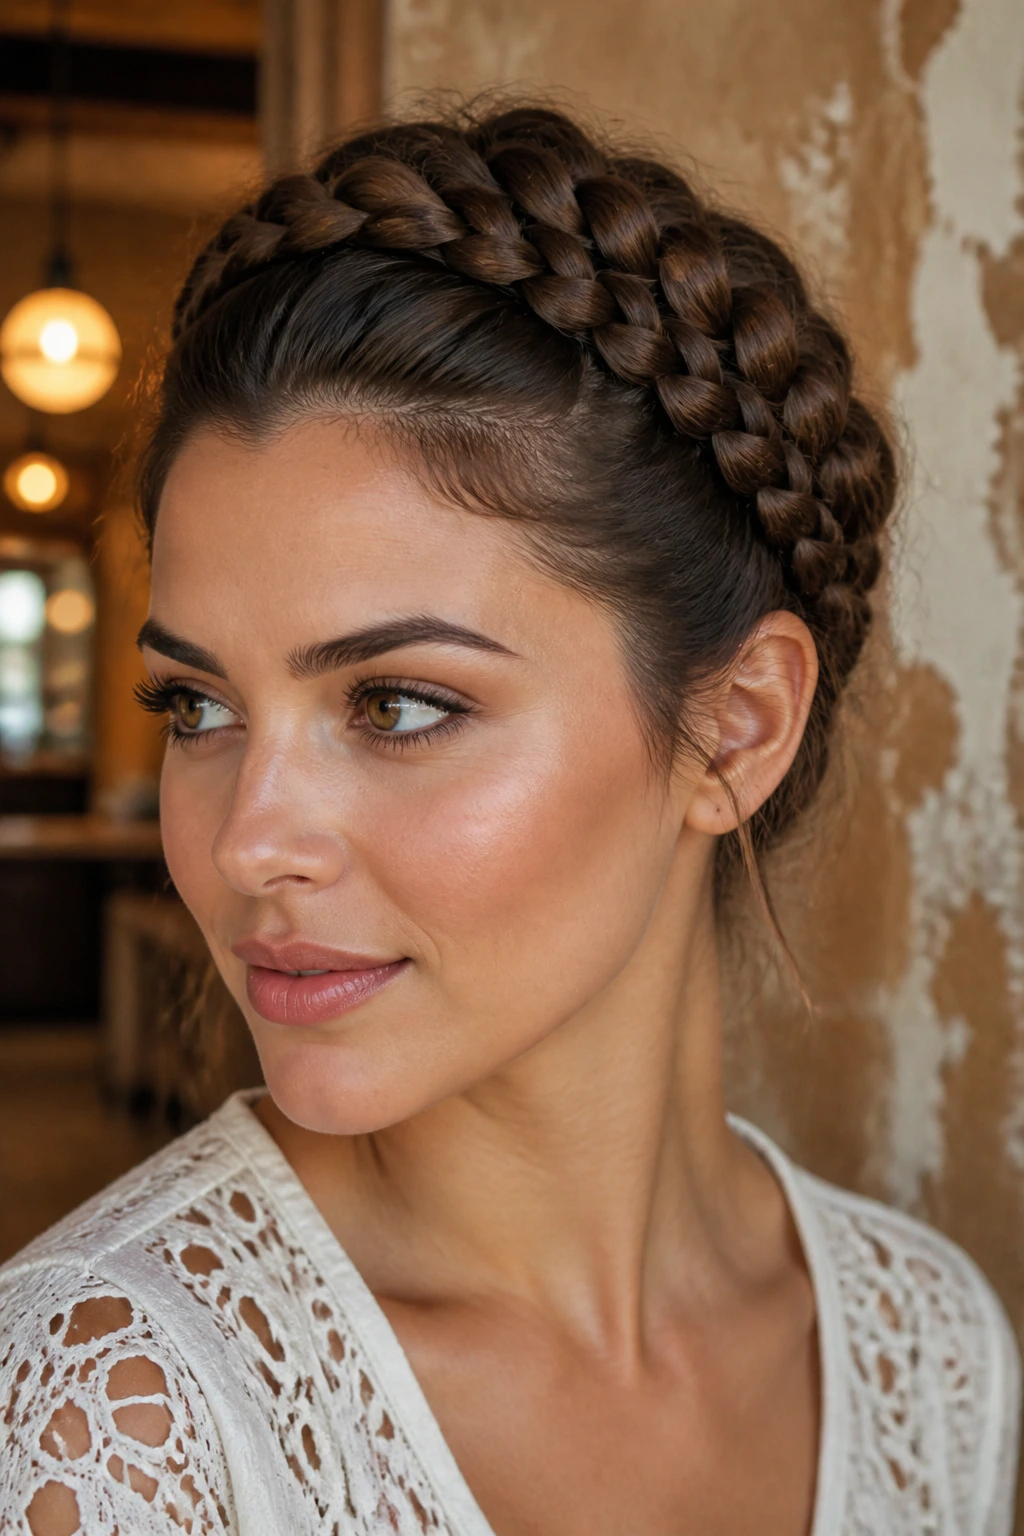
Double halo braids give the style a little more structure, which can be useful if your hair is thick, layered, or stubbornly slippery. Instead of one braid circling the head, two smaller braids stack or cross around the crown, creating a denser frame. The effect is bold, but not loud in a messy way.
What I like about this version is the anchoring. If one braid starts to soften, the second one keeps the outline visible. That makes it a strong choice for longer wear or for hair that needs a bit more holding power. Keep the sections symmetrical unless you want the style to feel intentionally asymmetrical, because one thick braid and one tiny braid can look accidental very fast.
This is the kind of halo that stands up well to pins, cuffs, or small flowers. It already has enough texture to support extras.
12. The Half-Up Halo Braid
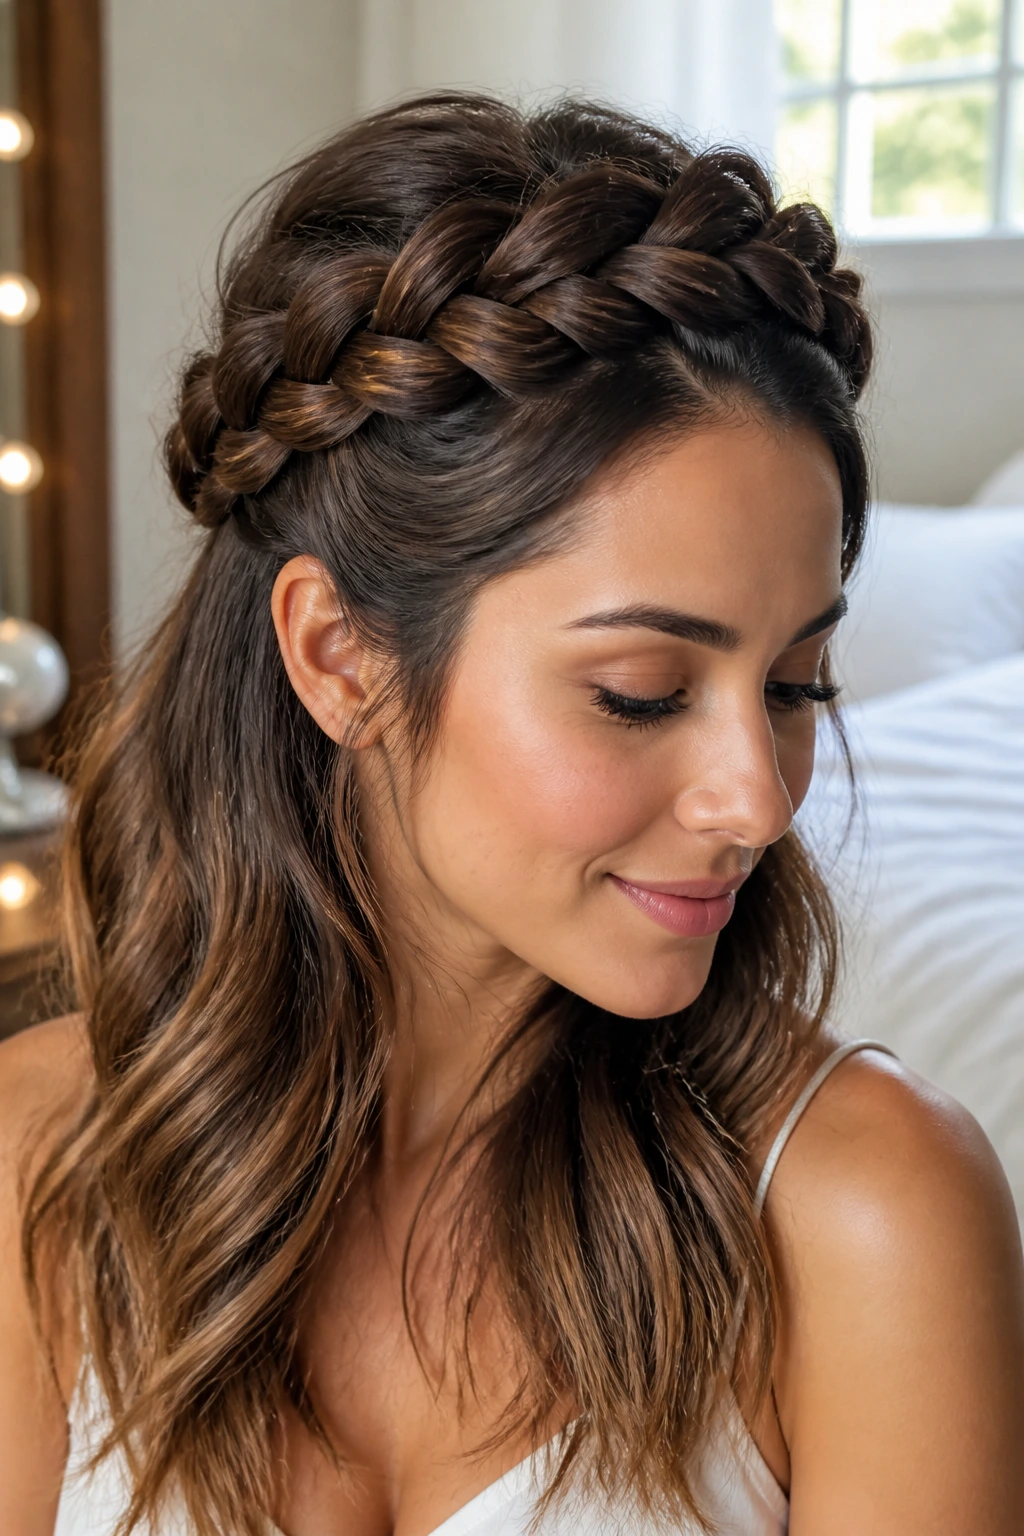
A half-up halo braid is useful when you want the crown shape without committing all your hair to the updo. The top section gets braided around the head, and the lower hair stays free, which keeps the style from feeling too heavy. On long curls, waves, or textured hair, that contrast is what makes it interesting.
The half-up version works because the eye sees the halo first and the loose length second. If your hair has volume, keep the crown braid a little tighter than you would on a full updo, otherwise the top can overwhelm the loose section. A few hidden pins under the braid and a light mist of hairspray or setting foam at the roots usually keep the shape from drifting.
I like this one when the weather is humid but not unbearable. It lets the front behave while the rest of the hair still moves.
13. The Halo Braid Ponytail
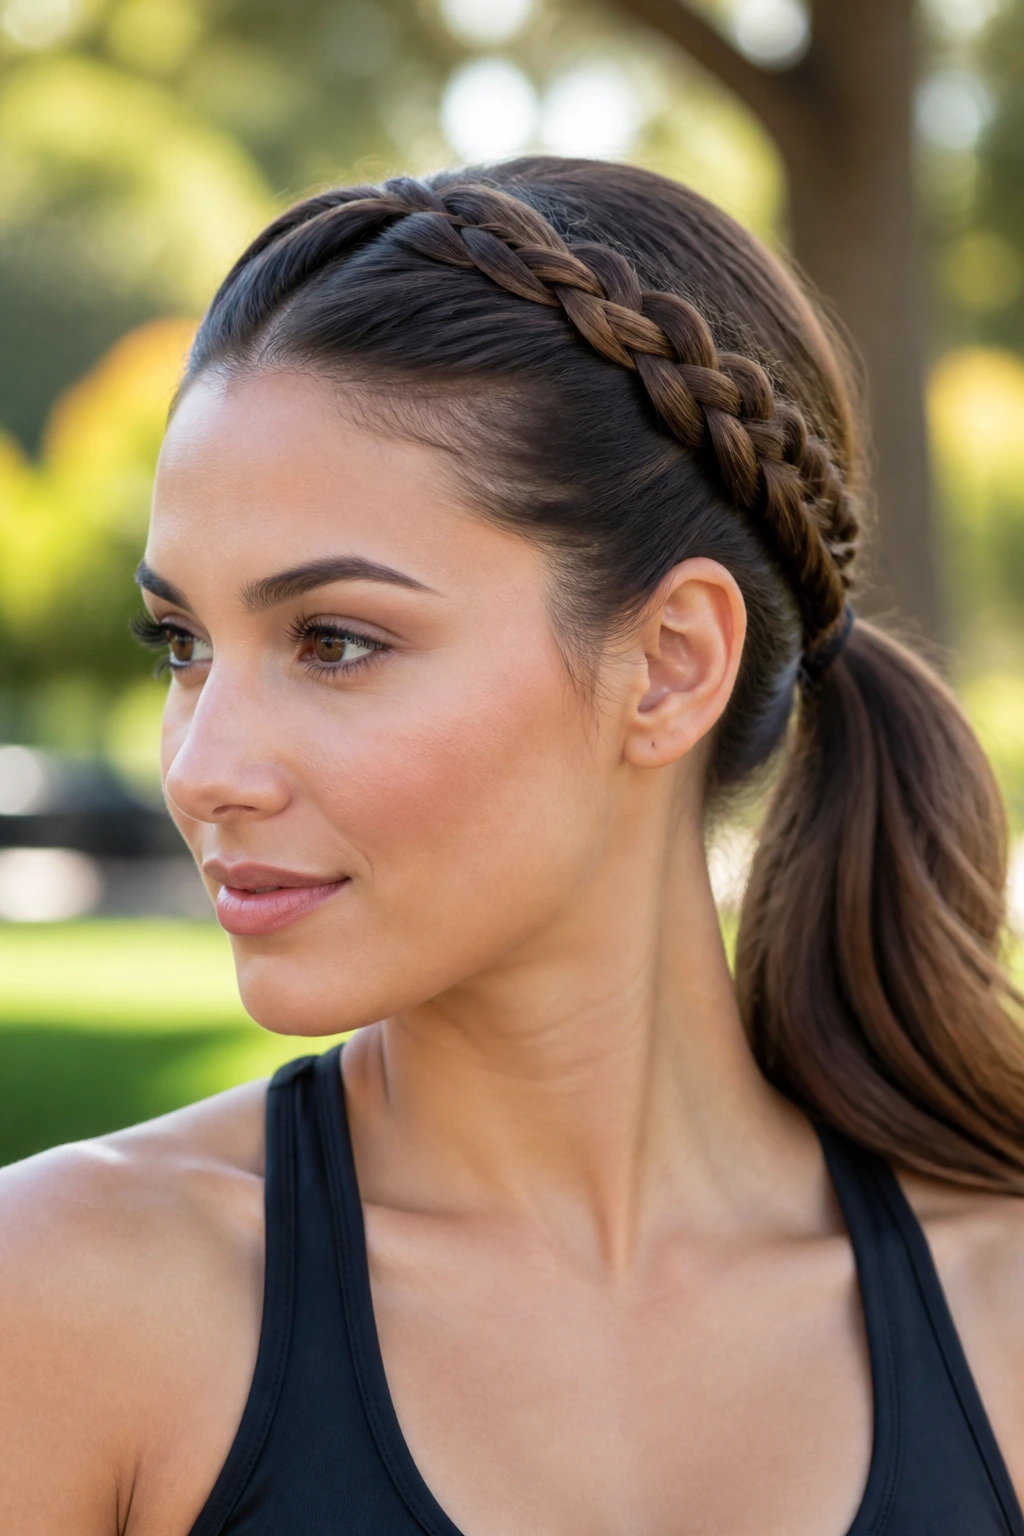
This one bends the rules a little, and that’s why it’s fun. Instead of closing the halo fully, the braid feeds into a ponytail at the back or side, so the crown frames the face while the ends stay gathered and active. It has a cleaner silhouette than a loose half-up style and feels more sporty than a tucked crown.
The ponytail makes the braid easier to wear on layered hair, especially when the lengths are too uneven for a perfect wrap. Build the halo first, secure it with pins, then pull the remaining hair into a low or mid ponytail. Wrap a small piece of hair around the elastic if you want the finish to look more deliberate. A little shine serum on the ponytail lengths keeps the contrast between braid and tail from looking dull.
This is a strong choice for people who like a pulled-together front but do not want all their hair pinned down.
14. The Halo Braid Bun
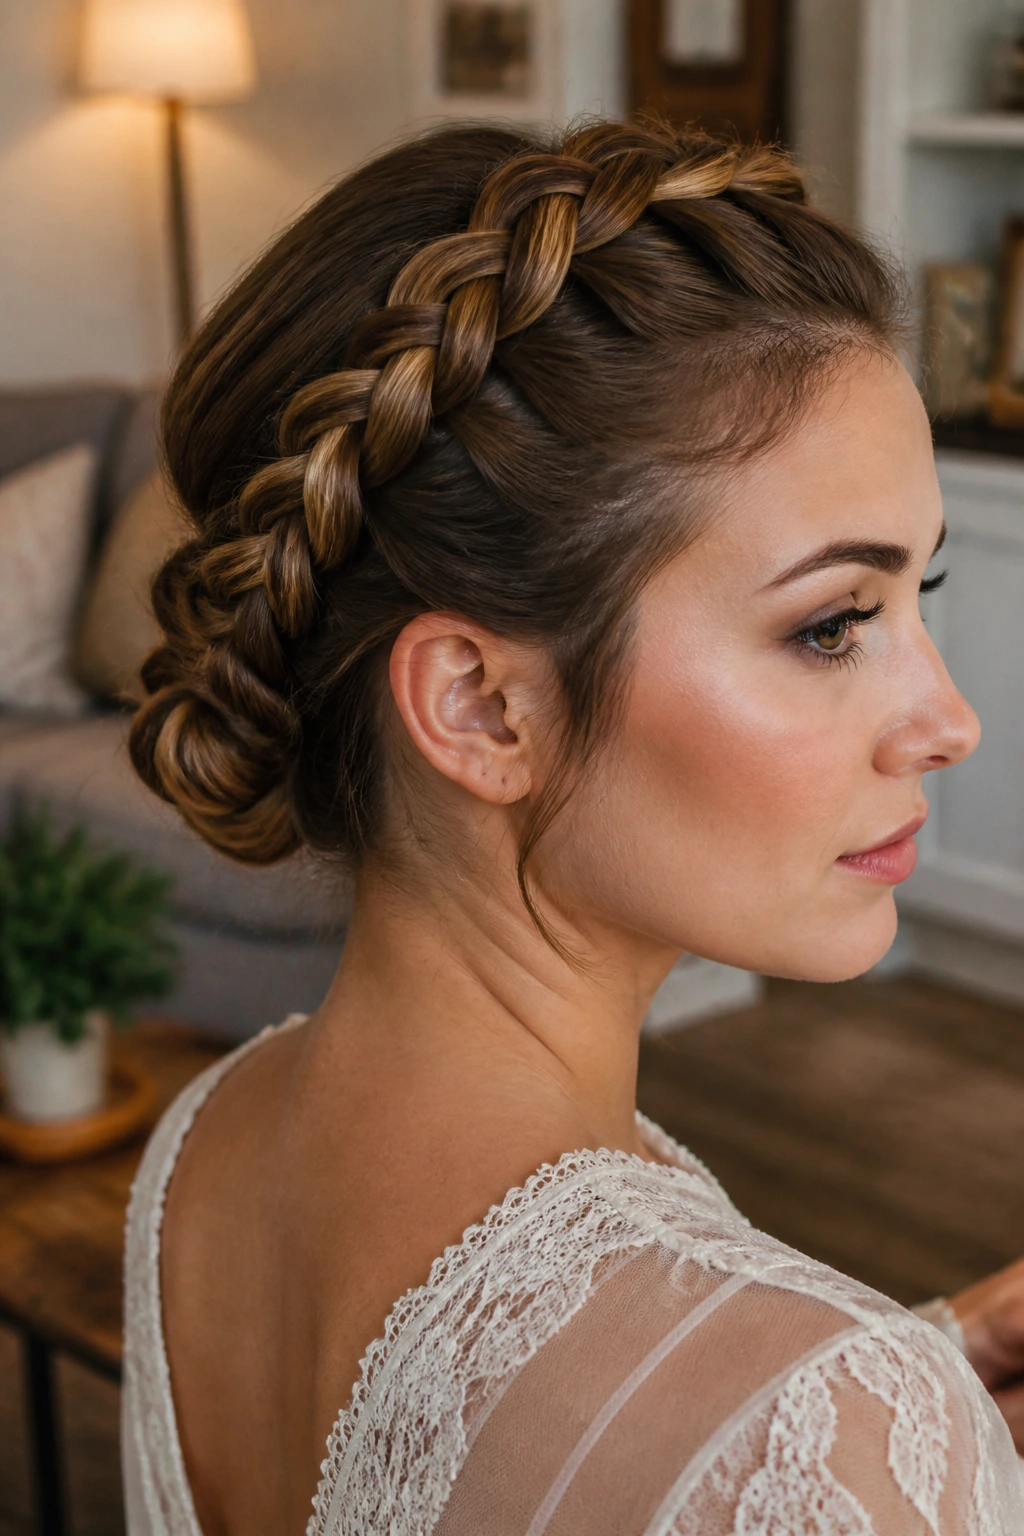
A halo braid bun is what happens when the crown braid and the low bun stop arguing and start working together. The braid wraps the head, then tucks into a bun at the nape or slightly off-center. The result feels compact, tidy, and easier to pin than a full rolled halo.
This version suits thick hair, locs, and extensions particularly well because the bun gives the style a place to end. No awkward dangling tail. No heavy wrap trying to hide itself. Keep the bun low enough that the braid line stays visible from the front, and make the bun small and neat rather than huge. A tight bun can pull the whole style backward, which throws off the balance.
If you want the braid to look a little more dimensional, leave the bun slightly textured instead of slicking it flat to the scalp. That contrast reads well.
15. The Halo Braid for Short Natural Hair
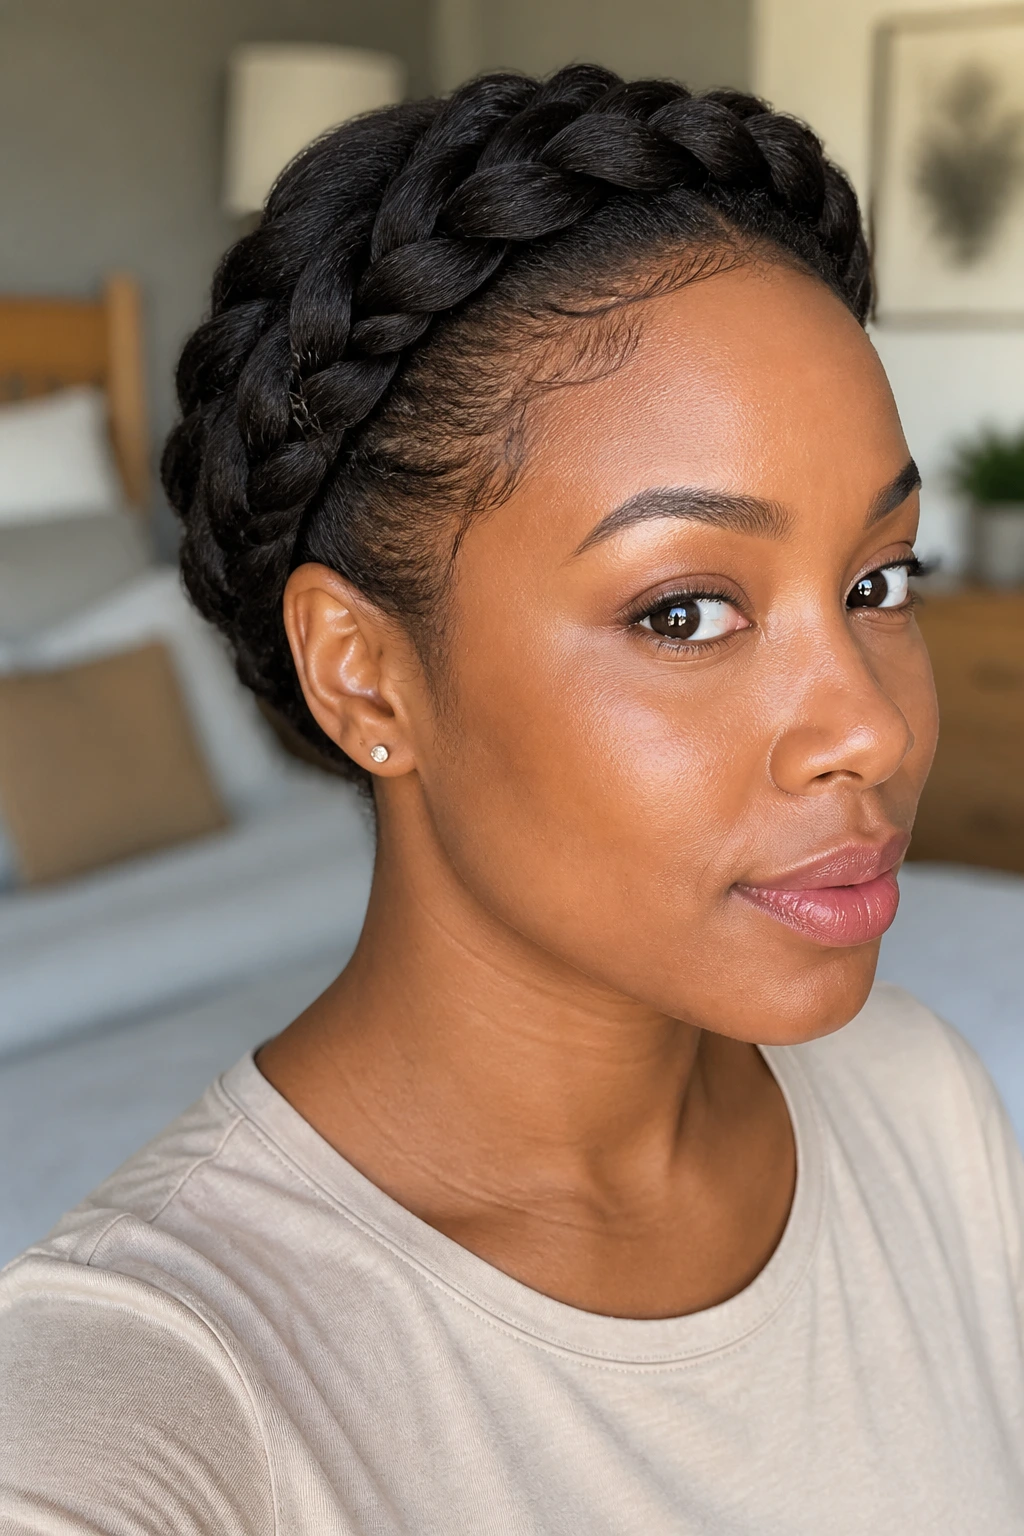
Short natural hair can do a halo braid, but the style needs a different mindset. You’re not trying to build a long, swinging crown. You’re creating a compact frame that works with the length you already have. The braid usually sits closer to the head, with more pinning and less wrapping.
This version looks strongest on stretched hair because the sections are easier to grab cleanly. If your hair is coily and short, use a light leave-in and a small amount of cream for slip, then braid in small segments so the crown doesn’t unravel at the corners. The nape often needs extra pins, and that is normal, not a sign that you did it wrong. Short hair just needs more anchoring.
I like this style because it proves the halo shape is about structure, not length. The crown line still reads, even when the braid is compact.
16. The Halo Braid on Long Box Braids
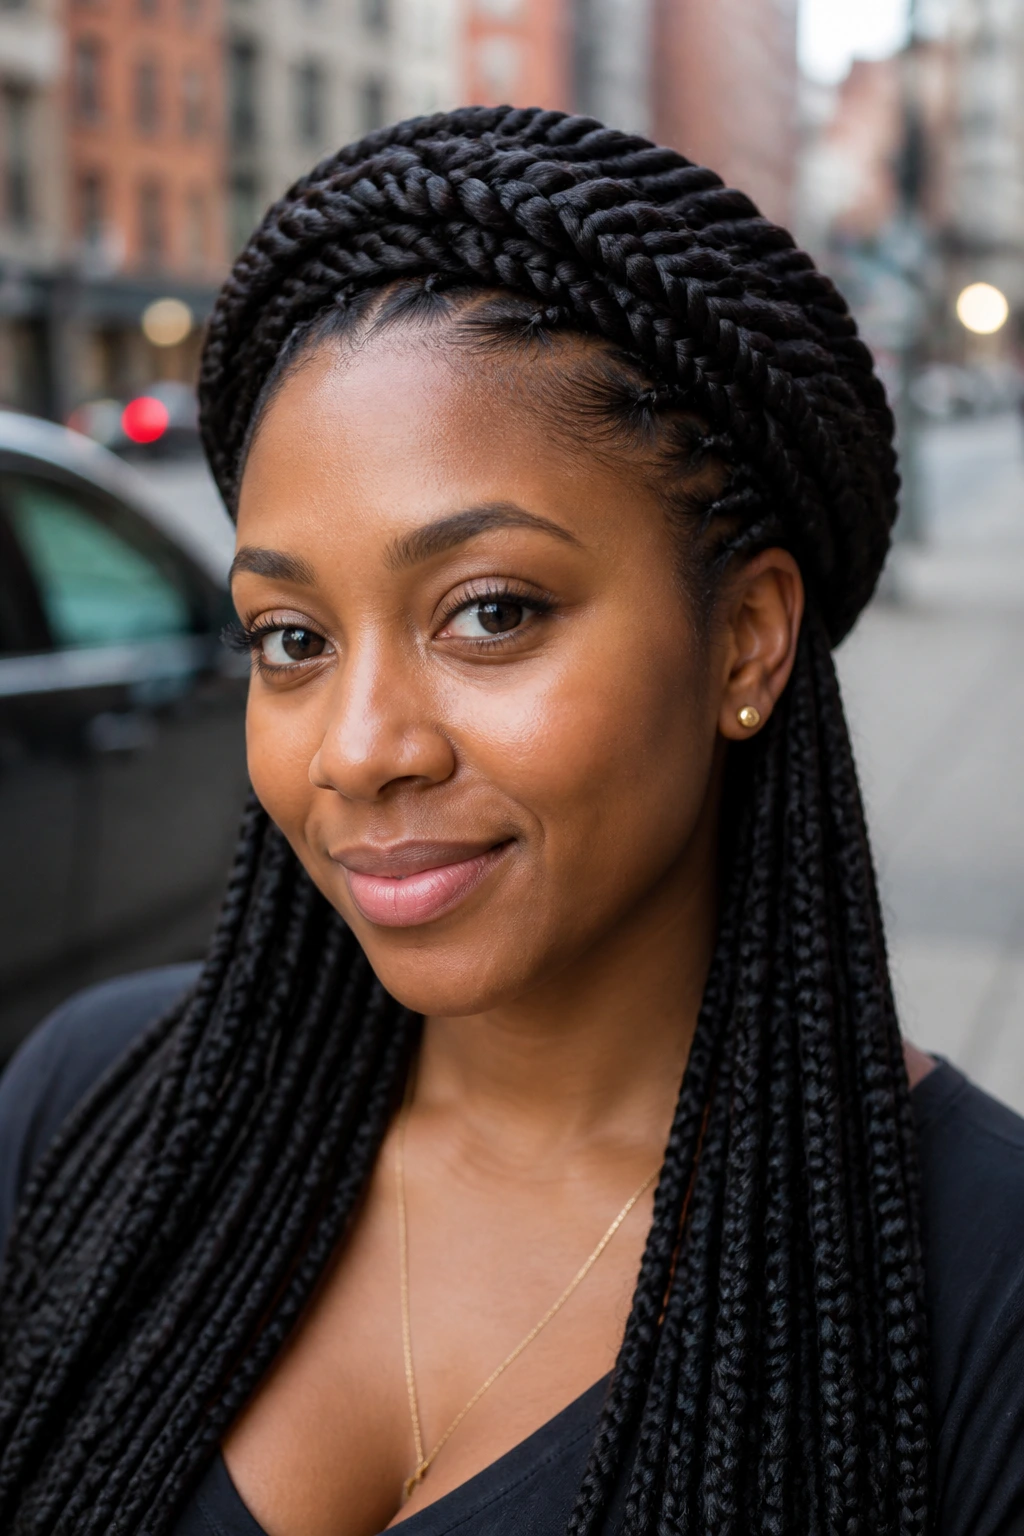
Box braids make a halo braid look full with very little effort, which is why this version is so practical. The braid has built-in thickness, the sections are already separated, and the whole style usually takes shape faster than on loose hair. It also gives you a sturdier crown line because the extensions help hold the arc.
The main thing to watch is weight. Long box braids can pull if you pile too much at the crown, so keep the wrap low and use pins that grip the braid without sliding through the parts. If the ends are heavy, tuck them under the braid or create a low loop at the back rather than forcing them to sit on top. That is where the style gets clumsy.
This is one of those halo braid hairstyles that works hard without asking for much in return. A little smoothing at the hairline, a few pins, and you’re done.
17. The Halo Braid on Locs
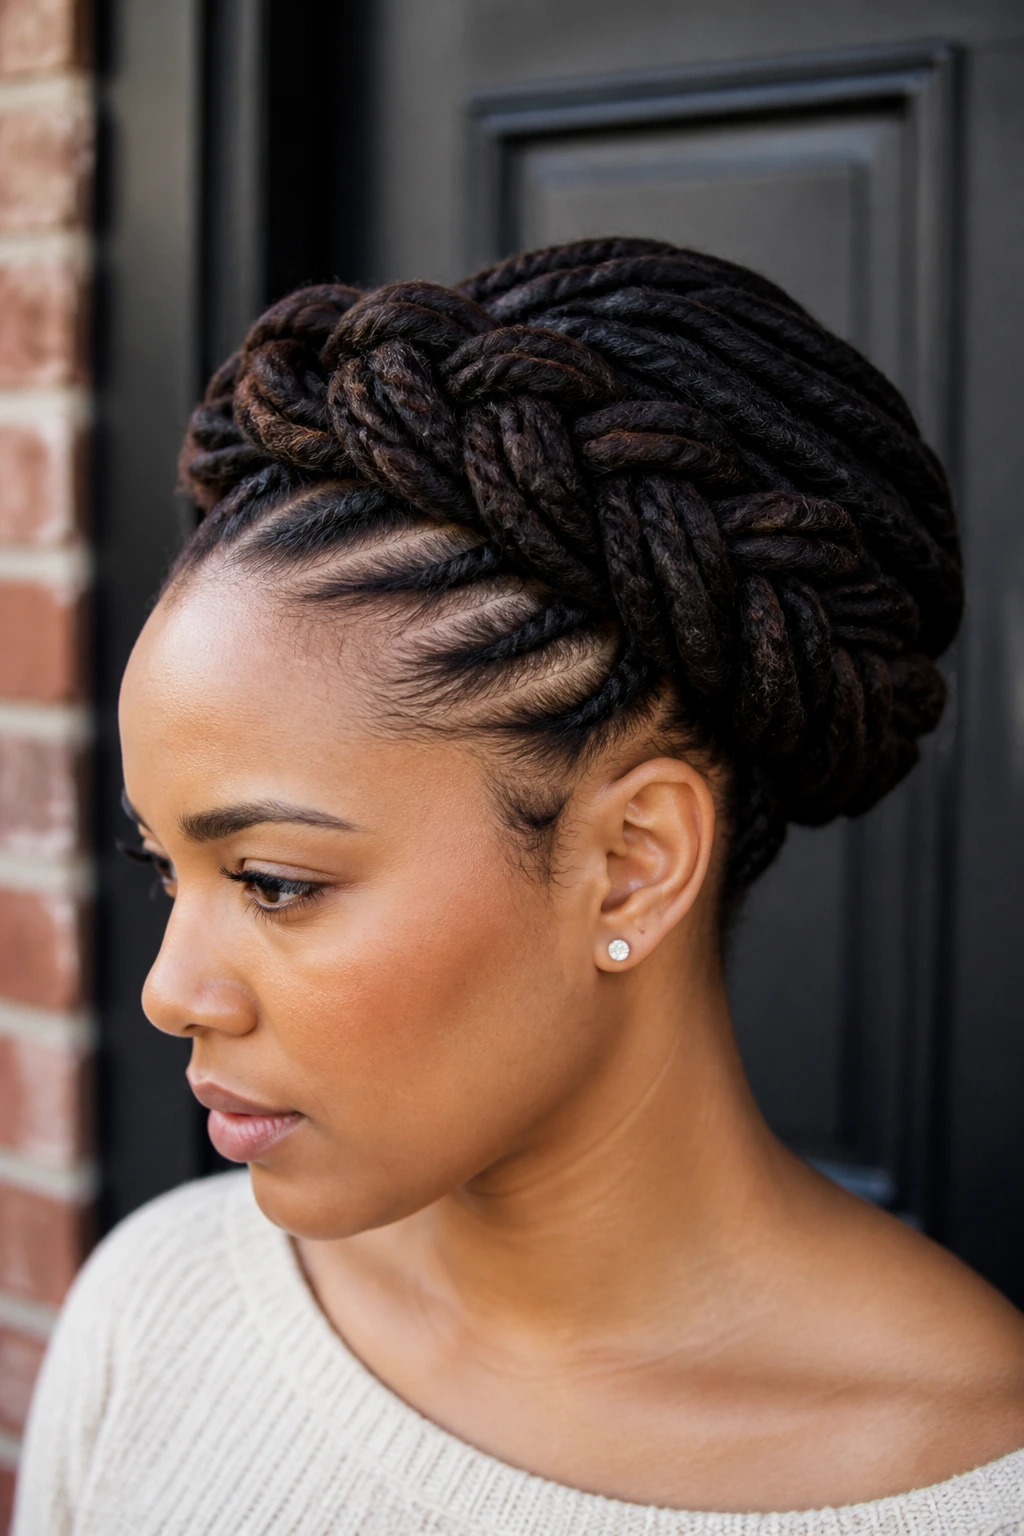
A loc halo braid has a cleaner, more sculptural look than the loose-hair versions, and the texture of the locs does half the styling for you. Because locs already have body, the crown can look rich and defined even with a simple wrap. It’s also easier to keep the style visible from every angle because the locs do not collapse the way soft hair sometimes does.
The trick is weight distribution. Long locs can be heavy, so the braid should be anchored in multiple points around the crown instead of relying on one spot at the nape. Smooth the front, route the locs around the head in an even line, and pin near each curve so the shape stays balanced. If your locs are thick, tuck a few at the back instead of wrapping every single one across the front.
This version looks especially good with a crisp part or a clean edge line. The contrast is sharp.
18. The Halo Braid on Faux Locs
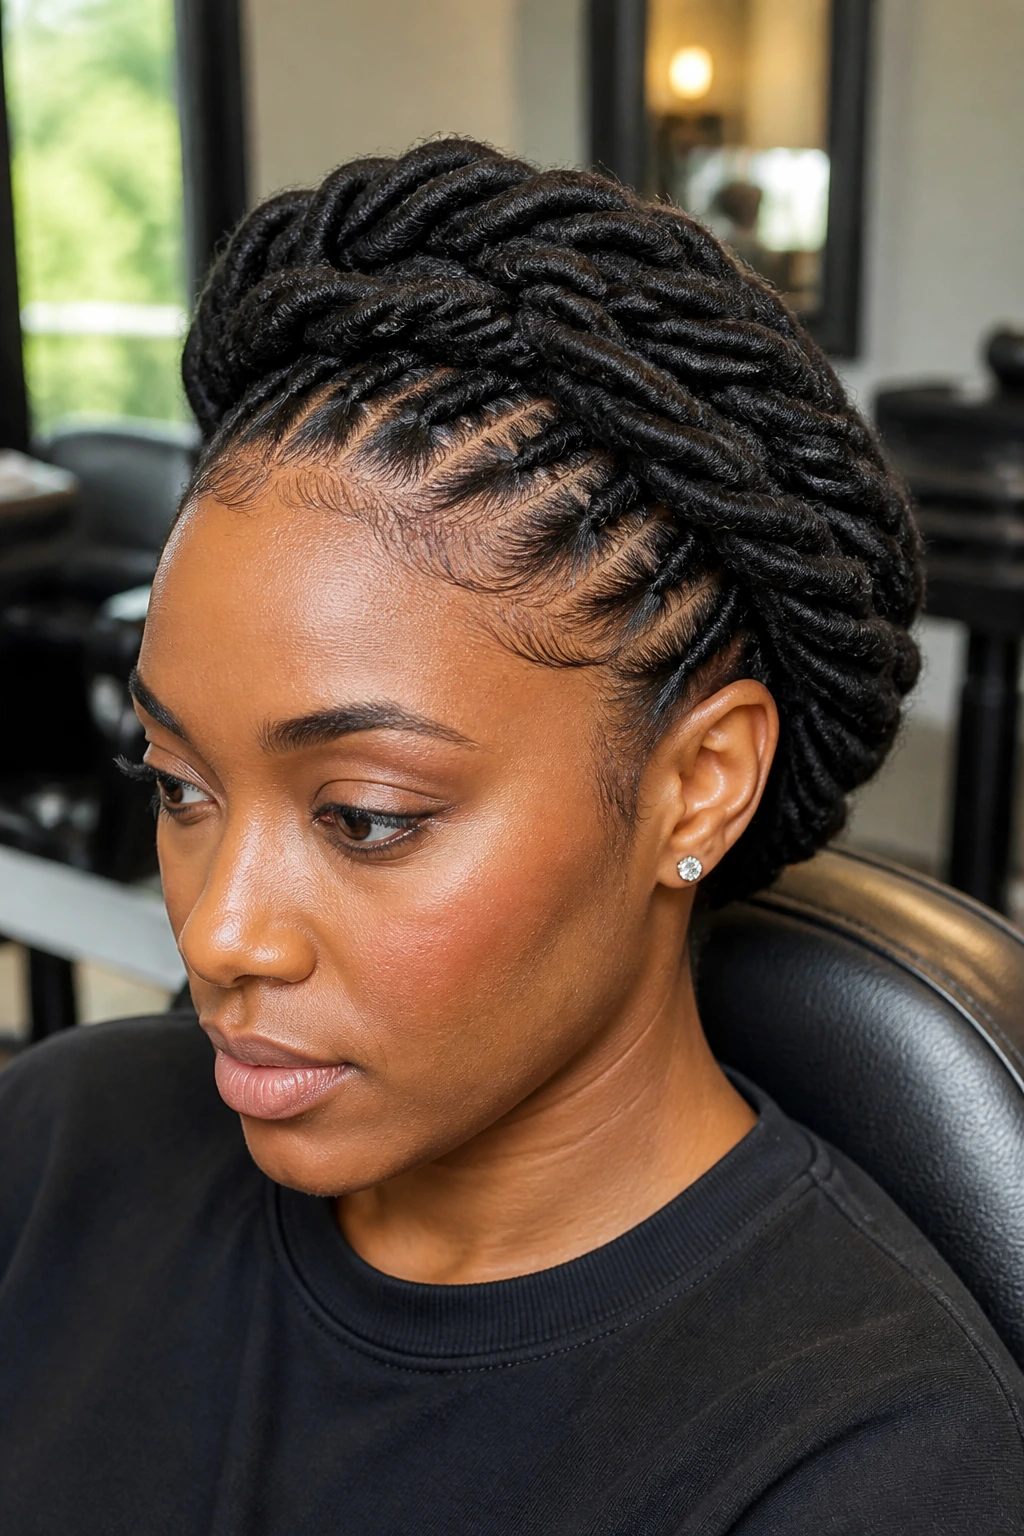
Faux locs bring length and texture, but they also bring bulk. That means the halo braid needs a little more planning than the same style on loose hair. The good news is that once you place the locs in a smooth crown line, the shape looks full, rich, and very finished.
I prefer this version when the hair needs to stay off the neck but still look dramatic. Use larger anchor pins than you would with soft hair, and spread the weight over several pin points so one section does not start sagging. If the locs are long, loop them in a way that keeps the ends hidden under the lower curve of the braid. A messy end can make the whole style look unfinished.
Faux loc halos are strong candidates for accessories. One or two cuffs are enough. More than that and the loc texture starts fighting the extras.
19. The Halo Braid on Senegalese Twists
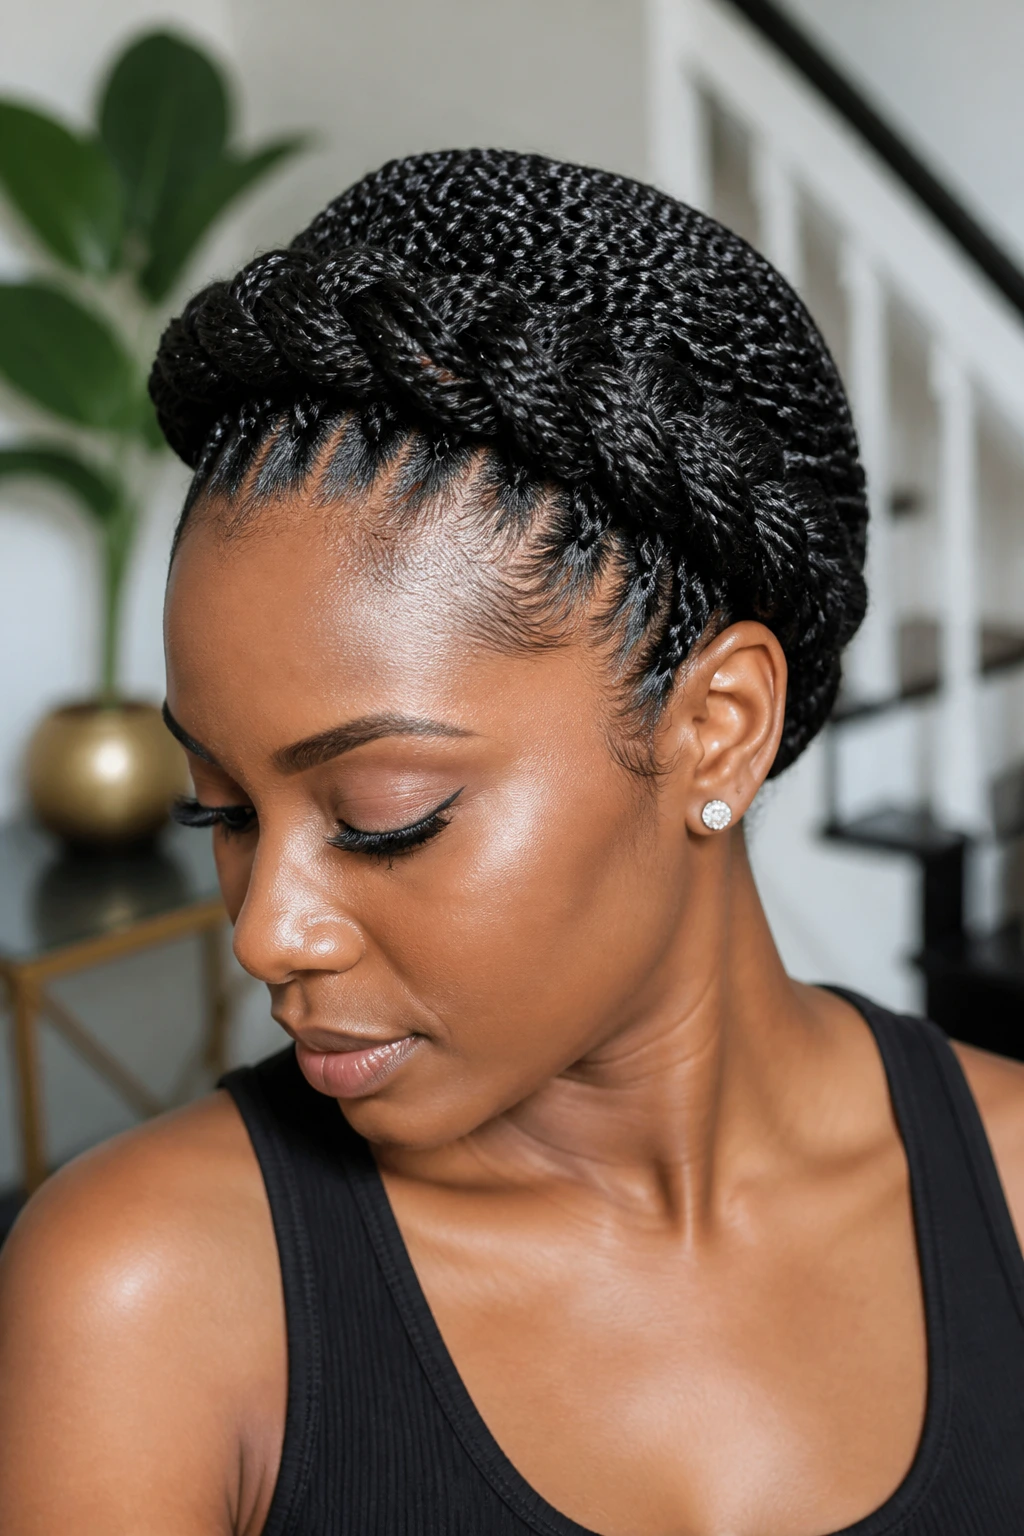
Senegalese twists give a halo braid a sleek, rope-like finish that looks neat from the first wrap. Because the twist is already uniform, the crown tends to sit cleaner than on looser textures, and the braid line stays visible even if the style softens a little during the day. It’s one of the more practical halo options for long-wear styling.
The thing to watch is tension at the temples. Twists can tug if they’re pulled too tightly around the head, so keep the curve soft and let the twist follow the crown instead of hugging it like a wire. Use pins at the crossing points rather than trying to hold the whole shape with one giant clip. That usually fails halfway through the day.
This version is especially good if you want a halo braid that can go from casual to polished with almost no change. The twist texture already does the work.
20. The Halo Braid on Two-Strand Twists
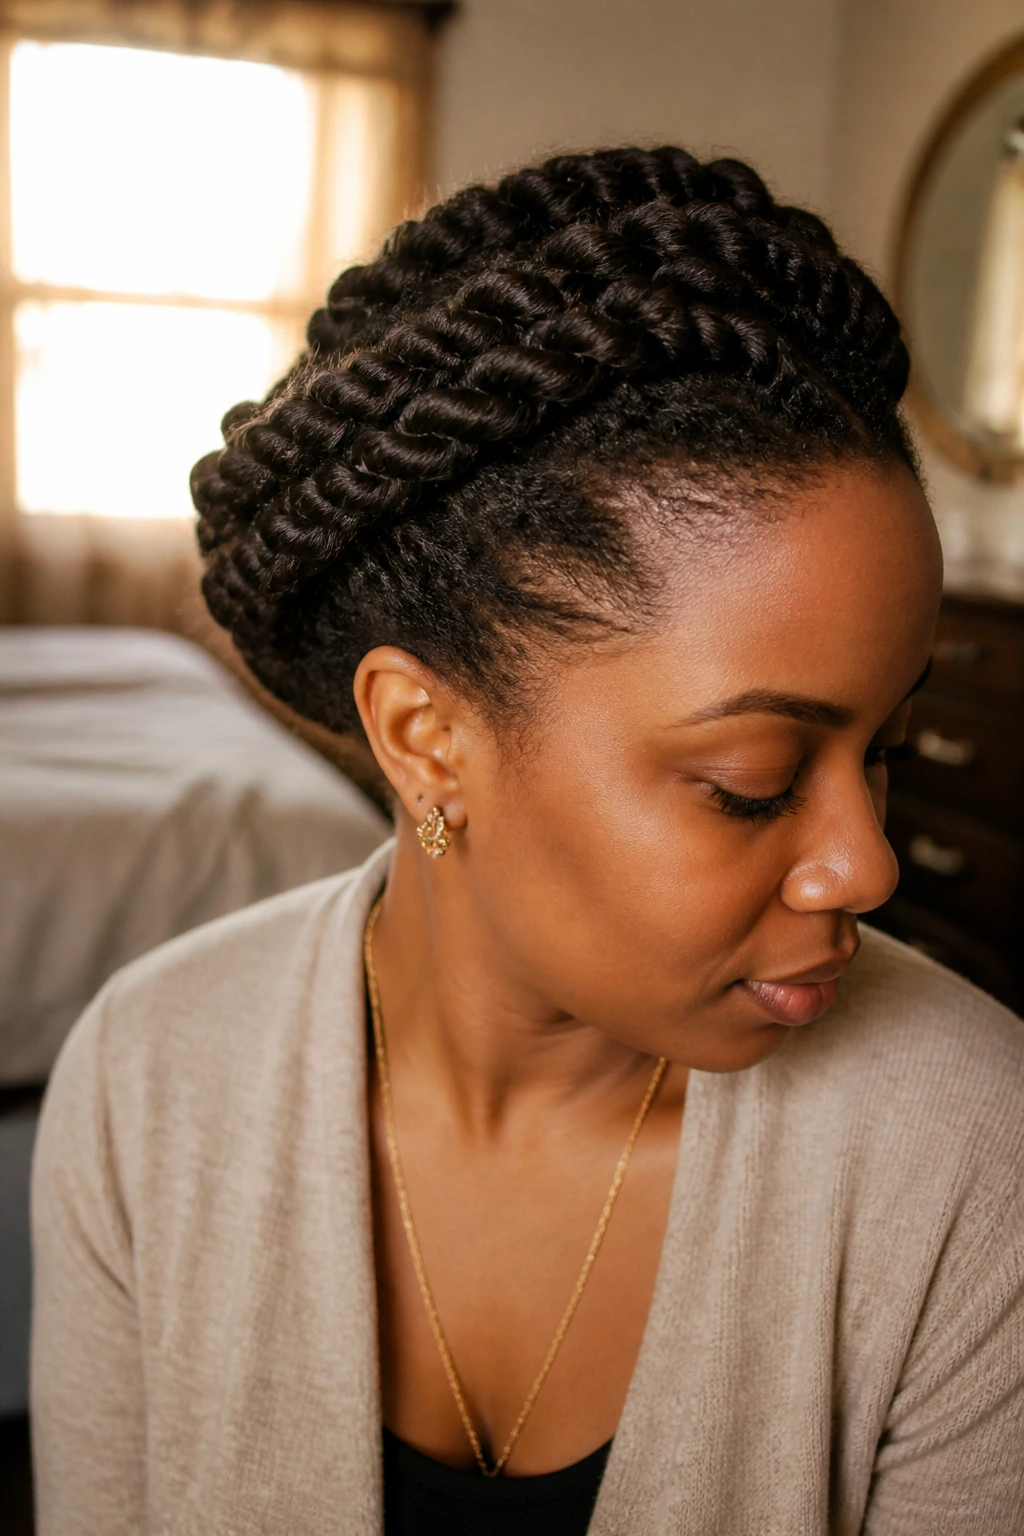
Two-strand twists make the halo feel softer and less carved than a braid built from three sections. That can be a good thing. The style has more movement, a little more looseness, and a more relaxed edge around the face. On coily hair, it also keeps the texture visible instead of flattening it into a braid pattern.
Keep the twists medium-sized so the crown line does not turn bulky. Smaller twists can make the halo look delicate; larger ones create a more rounded, plush shape. If the ends are long, tuck them under or pin them into the nape before they start to unwind. A satin scarf at night helps this version hold its shape better than a cotton pillowcase ever will.
I like this halo for days when you want texture first and polish second. It feels easier than it looks.
21. The Feed-In Halo Braid
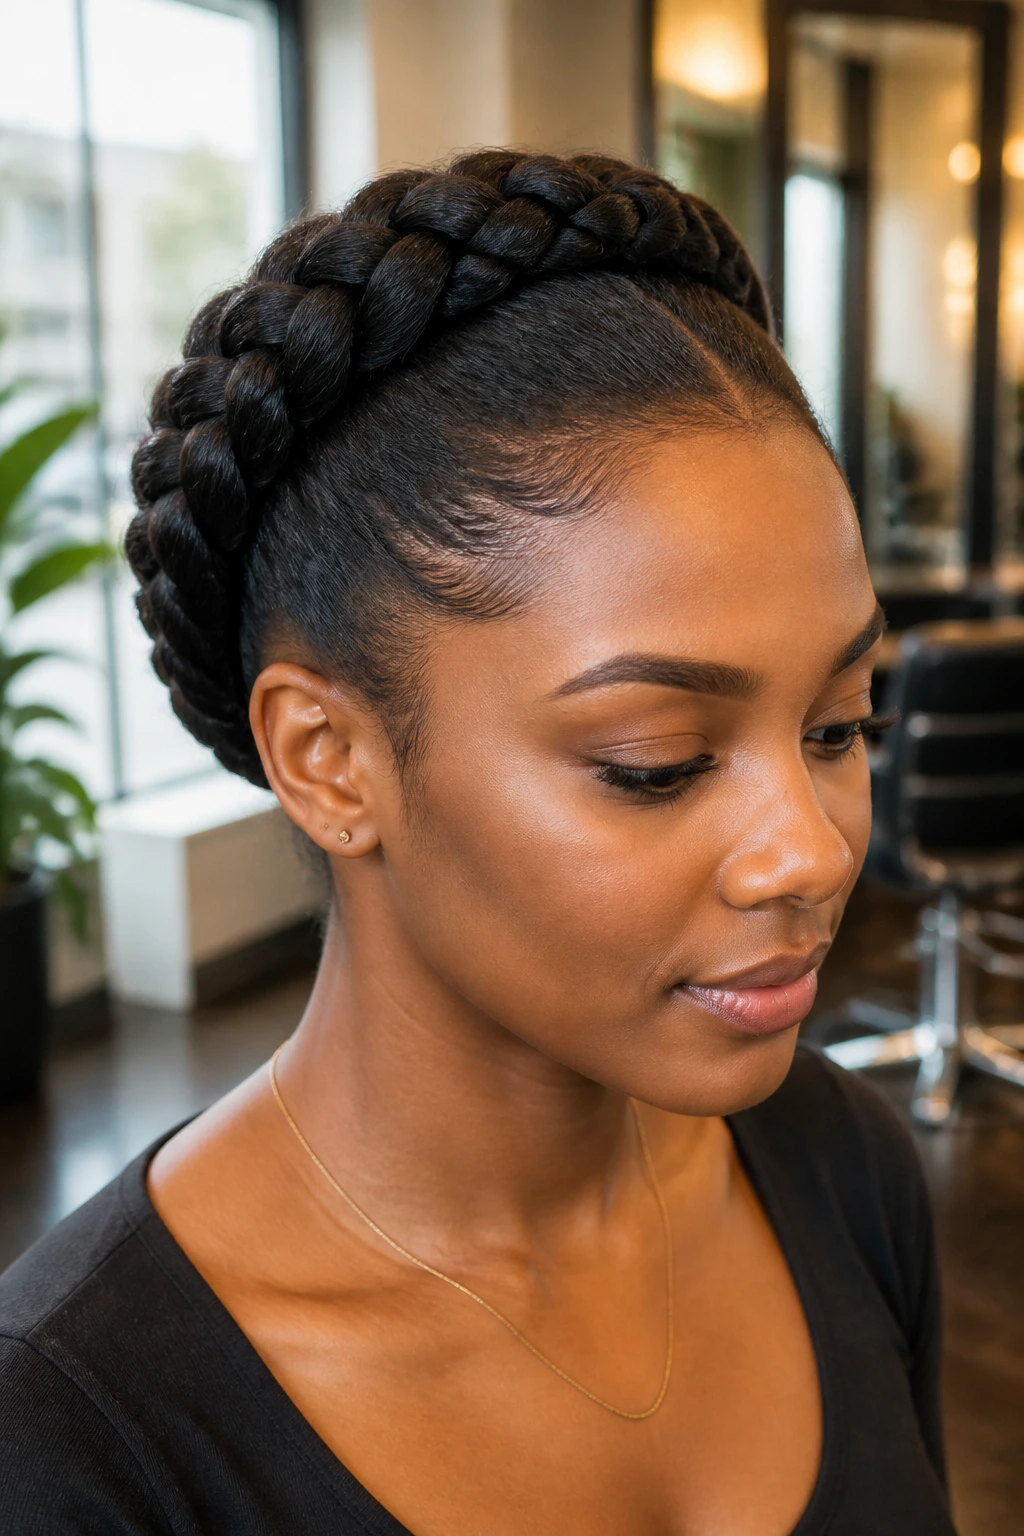
A feed-in halo braid has one major advantage: the braid can look fuller at the front without needing a thick starting section. Hair gets added gradually, which keeps the front from looking bulky or abrupt. That gives the crown a smooth start and a more even line around the head.
This is the version I’d pick if the hairline is delicate or if you want the braid to blend into natural hair more softly. Because the hair is fed in little by little, the transition into the crown looks cleaner than a braid that starts with a big lump of hair. The key is consistency. Add small sections at the same rhythm all the way around so one side does not end up heavier than the other.
Feed-in halos also play nicely with extensions. They let you control fullness without forcing the braid to get thick everywhere at once.
22. The Cornrow-Base Halo Braid
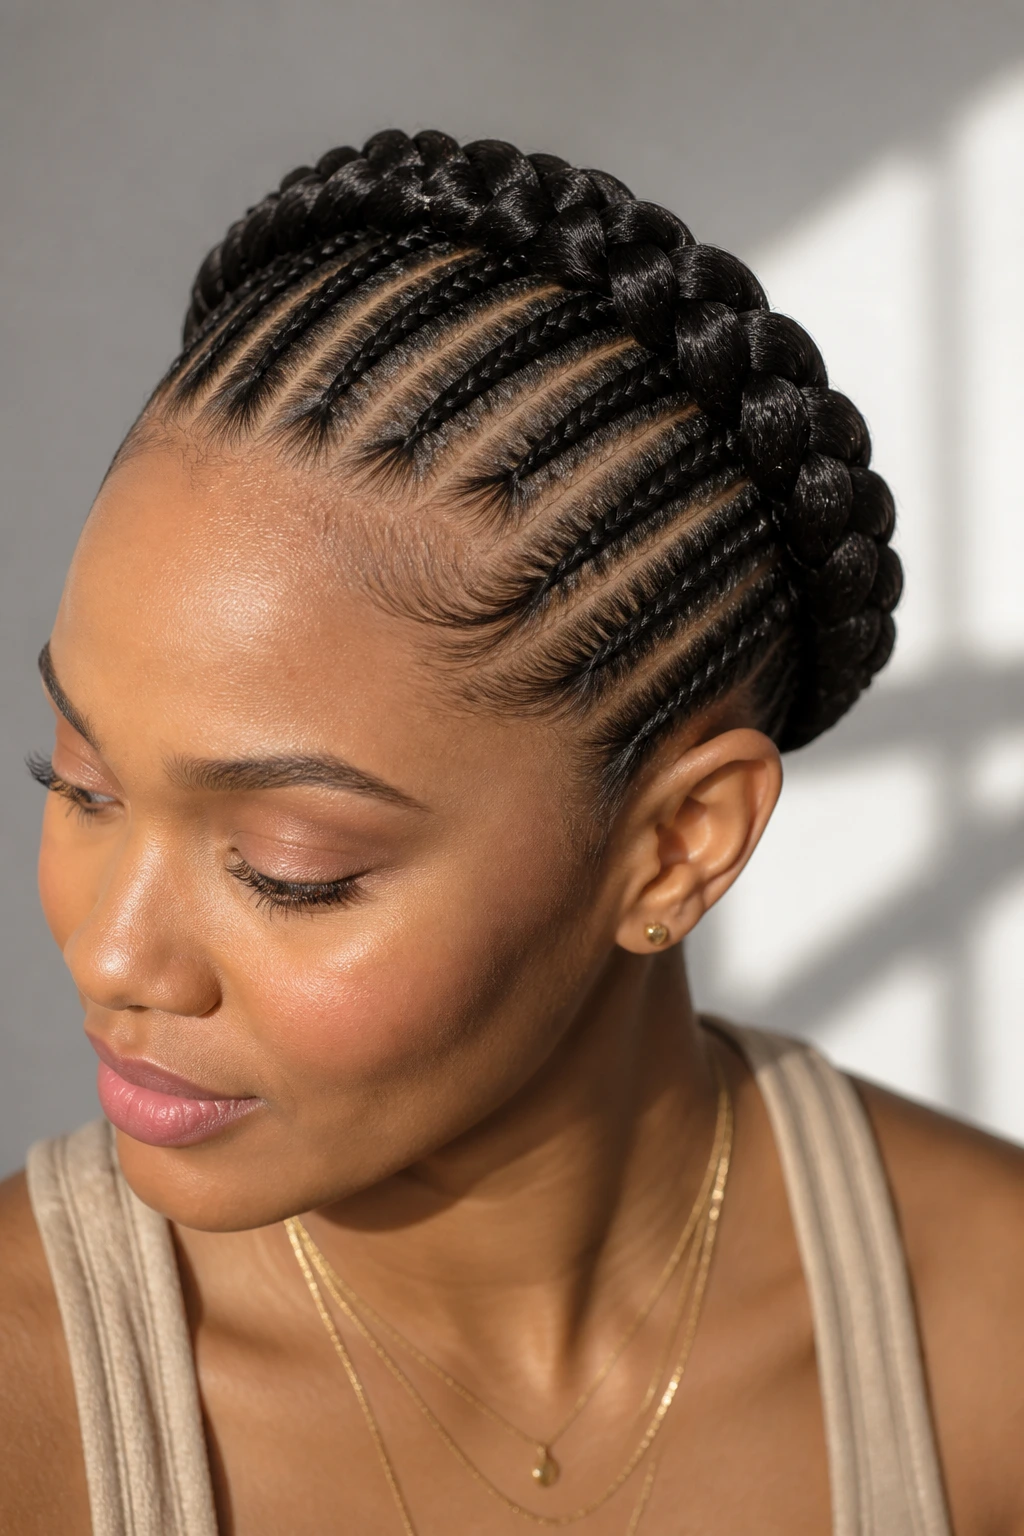
Cornrow bases give the halo a flatter, more secure foundation. Instead of sitting on top of loose hair, the braid follows a mapped path of braided rows before it circles into the crown. That makes the style hold better on slippery textures and gives the front a much cleaner finish.
This version takes a little more time, but the payoff is real. The braid lies closer to the scalp, which keeps the crown from puffing up at the sides. If you have layered hair or a style that tends to separate in the front, cornrow bases keep the shape from wandering. Use a pointed comb to section cleanly and keep the rows even, because uneven rows show fast once the halo wraps over them.
The finish is neat and practical. It’s a good choice when you want the crown to feel locked in rather than loose.
23. The Side-Swept Halo Braid
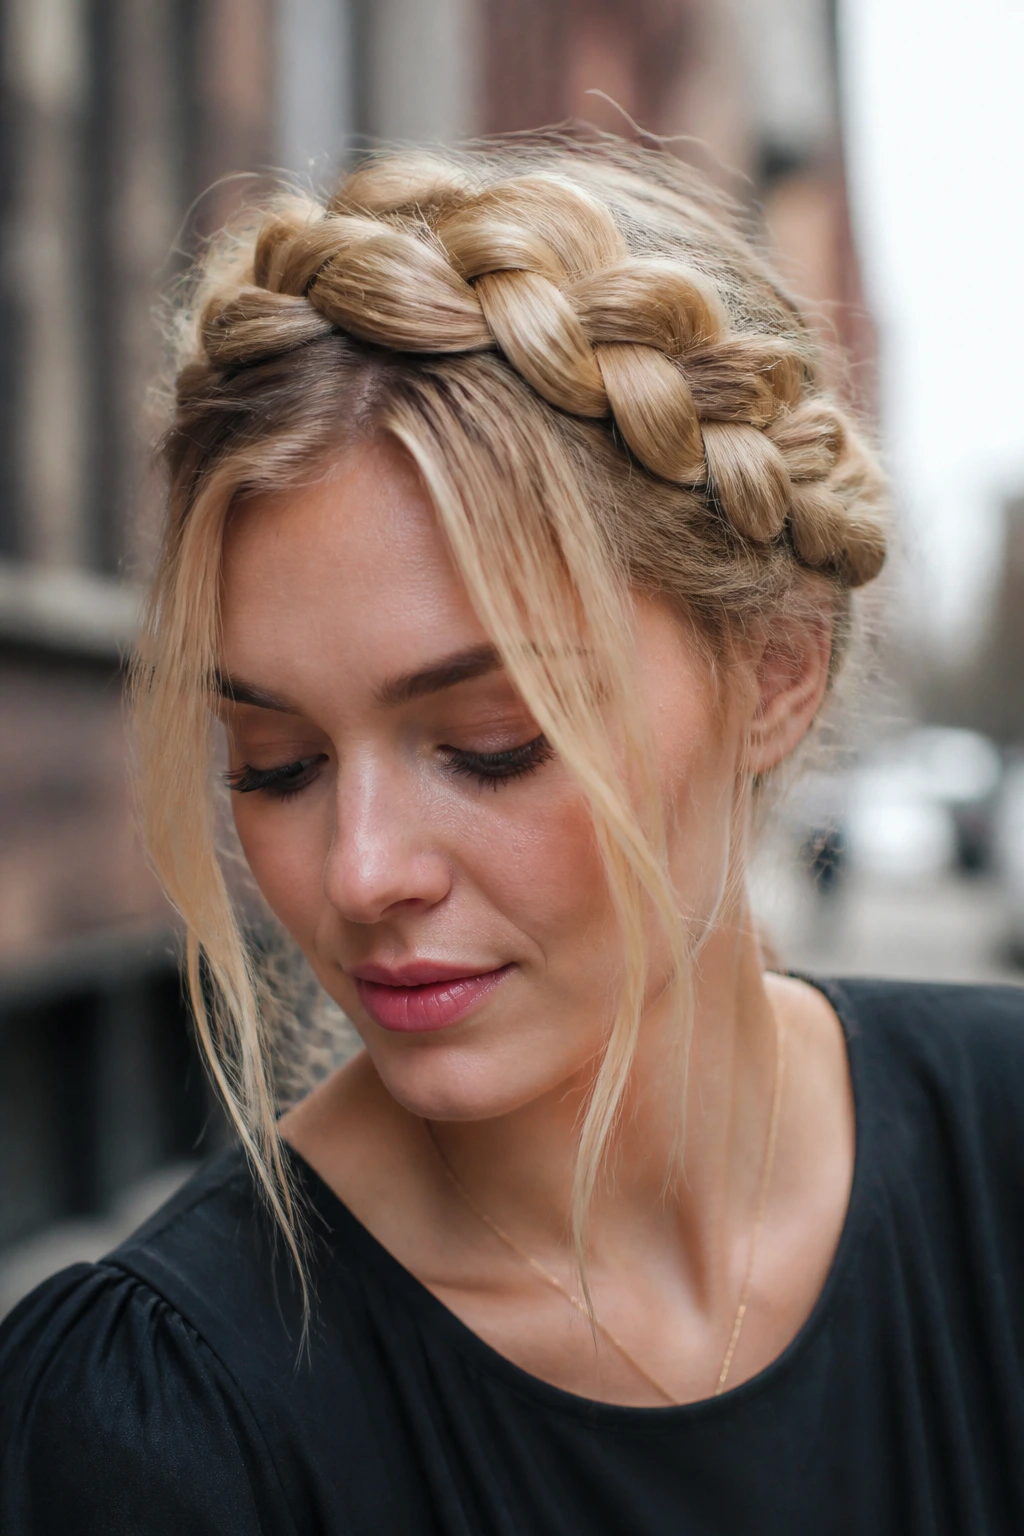
A side-swept halo braid shifts the braid’s visual weight toward one side of the head, which makes the style feel more fluid and less symmetrical. The braid starts on one temple, arcs across the crown, and lands lower near the opposite side. That angle creates motion even when the rest of the hair stays still.
This version is good for faces that benefit from a diagonal line. It breaks up roundness and gives the crown a softer shape. If your hair is dense, keep one side flatter and let the braid puff slightly on the other side; that contrast can be more flattering than a perfectly even wrap. A side-swept halo also plays nicely with statement earrings because it leaves one side of the face more open.
I like it when the braid looks like it was placed with intention, not copied from a diagram. That little tilt matters.
24. The Beaded Halo Braid
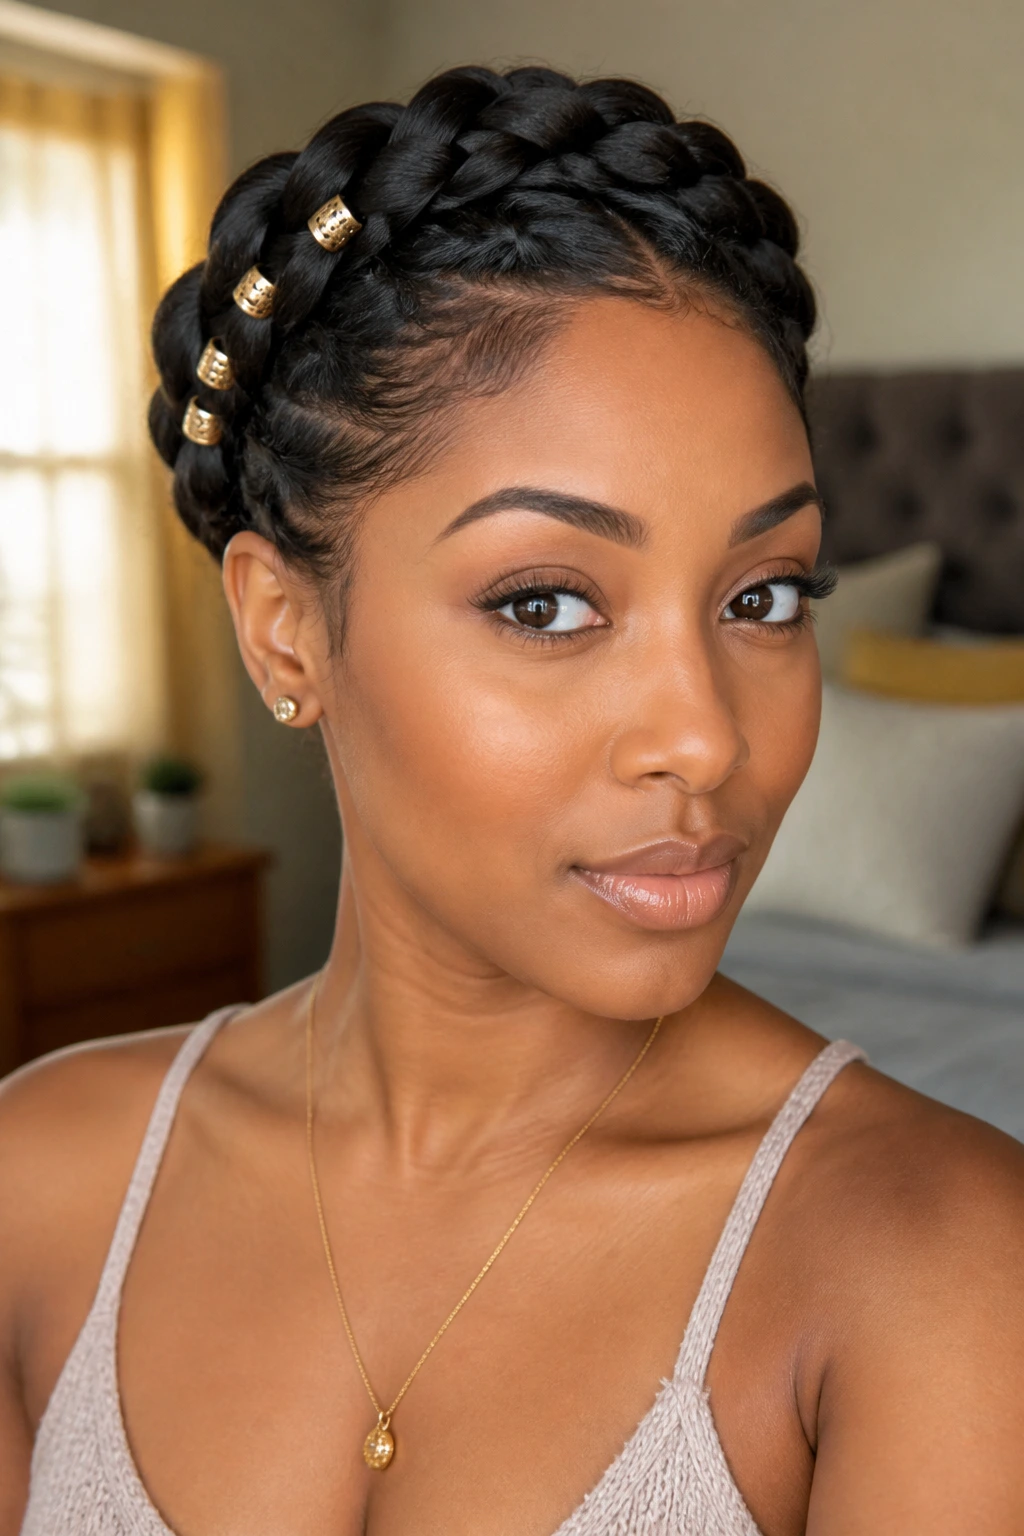
Beads change the sound and weight of the halo braid, which is part of the appeal. They add movement near the ends or along a few sections of the crown, and the style immediately feels more personal. You do not need many. A handful of beads placed on one side or at the tail of the braid is usually enough.
The challenge is balance. Heavy beads can tug at the braid and pull the crown downward, so use lightweight beads or place them on stronger sections where the braid has enough support. I like bead placement near the back or at one side so the front stays clean. If the braid already has a lot of texture, keep the beads simple and the colors limited. Too many bead styles at once can make the crown look noisy.
This version has a nice rhythm to it when you move. You hear it before you see it.
25. The Gold-Cuff Halo Braid
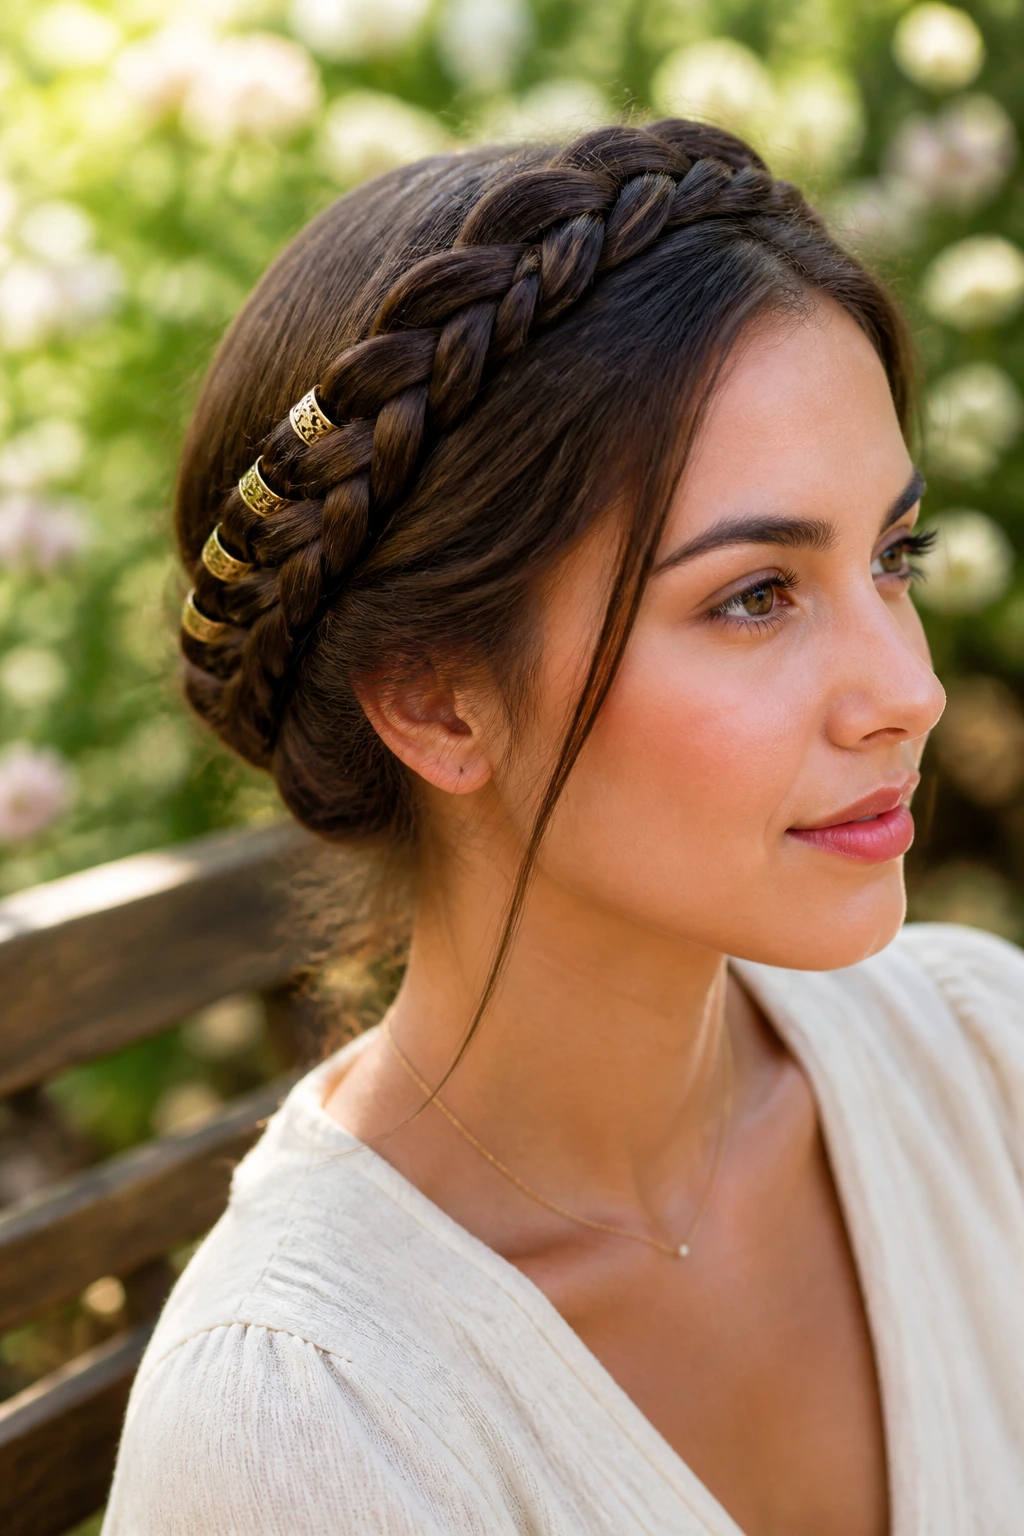
Gold cuffs are the fastest way to dress up a halo braid without changing the braid itself. They catch on the woven line of the hair and give the style a little shine at the exact points where the eye already stops. That means you get more impact from three cuffs than from a scatter of ten.
The braid should be smooth enough that the cuffs do not slide, but not so slick that they wobble every time you turn your head. Place them along one side of the crown or near the back curve if you want a subtle finish. If you use cuffs on both sides, keep the spacing even. Random placement tends to look accidental, and this style does not need that kind of help.
Gold cuffs work especially well on locs, twists, and textured braids because the metallic finish stands out against the hair grain. Clean contrast. No clutter.
26. The Messy Textured Halo Braid
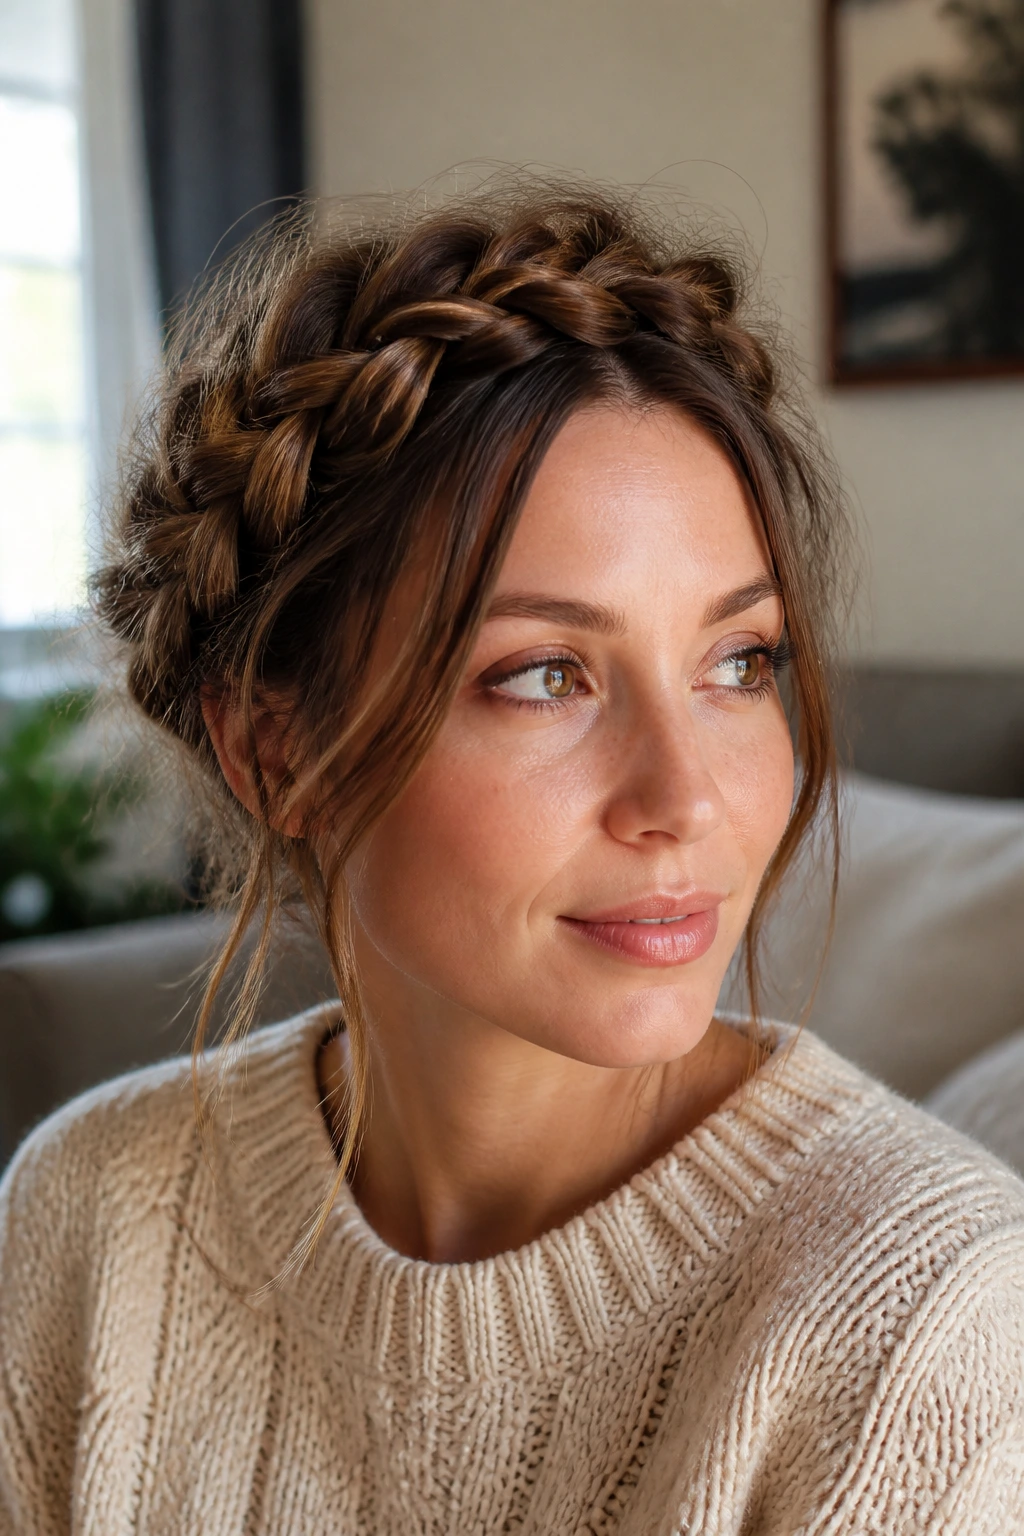
A messy halo braid is not sloppy. That distinction matters. The braid should still have a clear crown line, but the surface can be pulled out a little, the nape can be softer, and a few flyaways can stay where they are instead of being forced into submission. That loose texture gives the braid a lived-in feel.
This version is more forgiving on hair that refuses to stay perfectly smooth. It also lets you cheat in a good way: if the braid line is a little uneven, pancake it gently with your fingers and let the texture hide the imperfections. Use texturizing spray or mousse sparingly at the roots, not the whole length, so the braid keeps movement. Too much product will make the mess look greasy instead of soft.
I like this halo when the goal is shape, not perfection. It reads relaxed without losing the crown.
27. The Sleek Halo Braid with a Low Bun
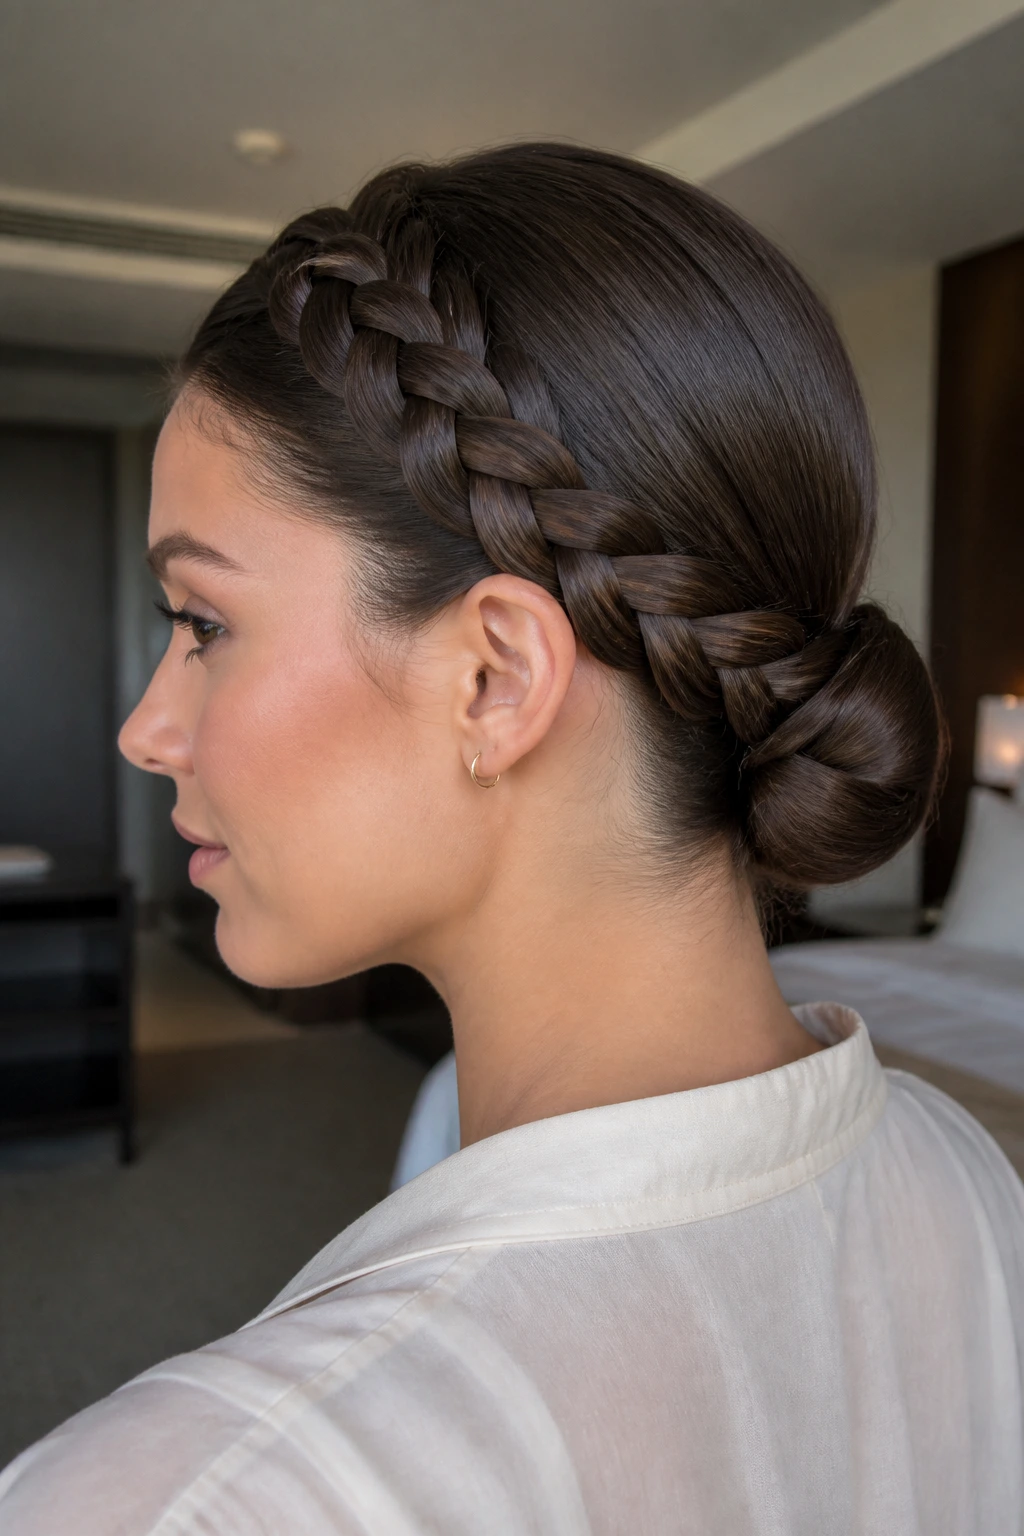
This is the polished cousin of the braided crown. The halo stays smooth and snug, and the remaining hair gets tucked into a low bun at the nape. The result is clean and compact, which is useful when you need the style to stay controlled for several hours.
The sleek finish depends on prep. Brush the hair back while it’s still flexible, set the crown braid with a touch of gel or foam, and keep the bun small enough that it doesn’t pull the entire shape backward. If the bun is too large, it steals attention from the braid. If it’s too tiny, the style can look unfinished. There’s a sweet spot, and it’s usually about the size of a modest fist.
This version suits formal settings, interviews, and days when you want the hair out of the way but still want the crown to do the talking.
28. The Scarf-Tied Halo Braid
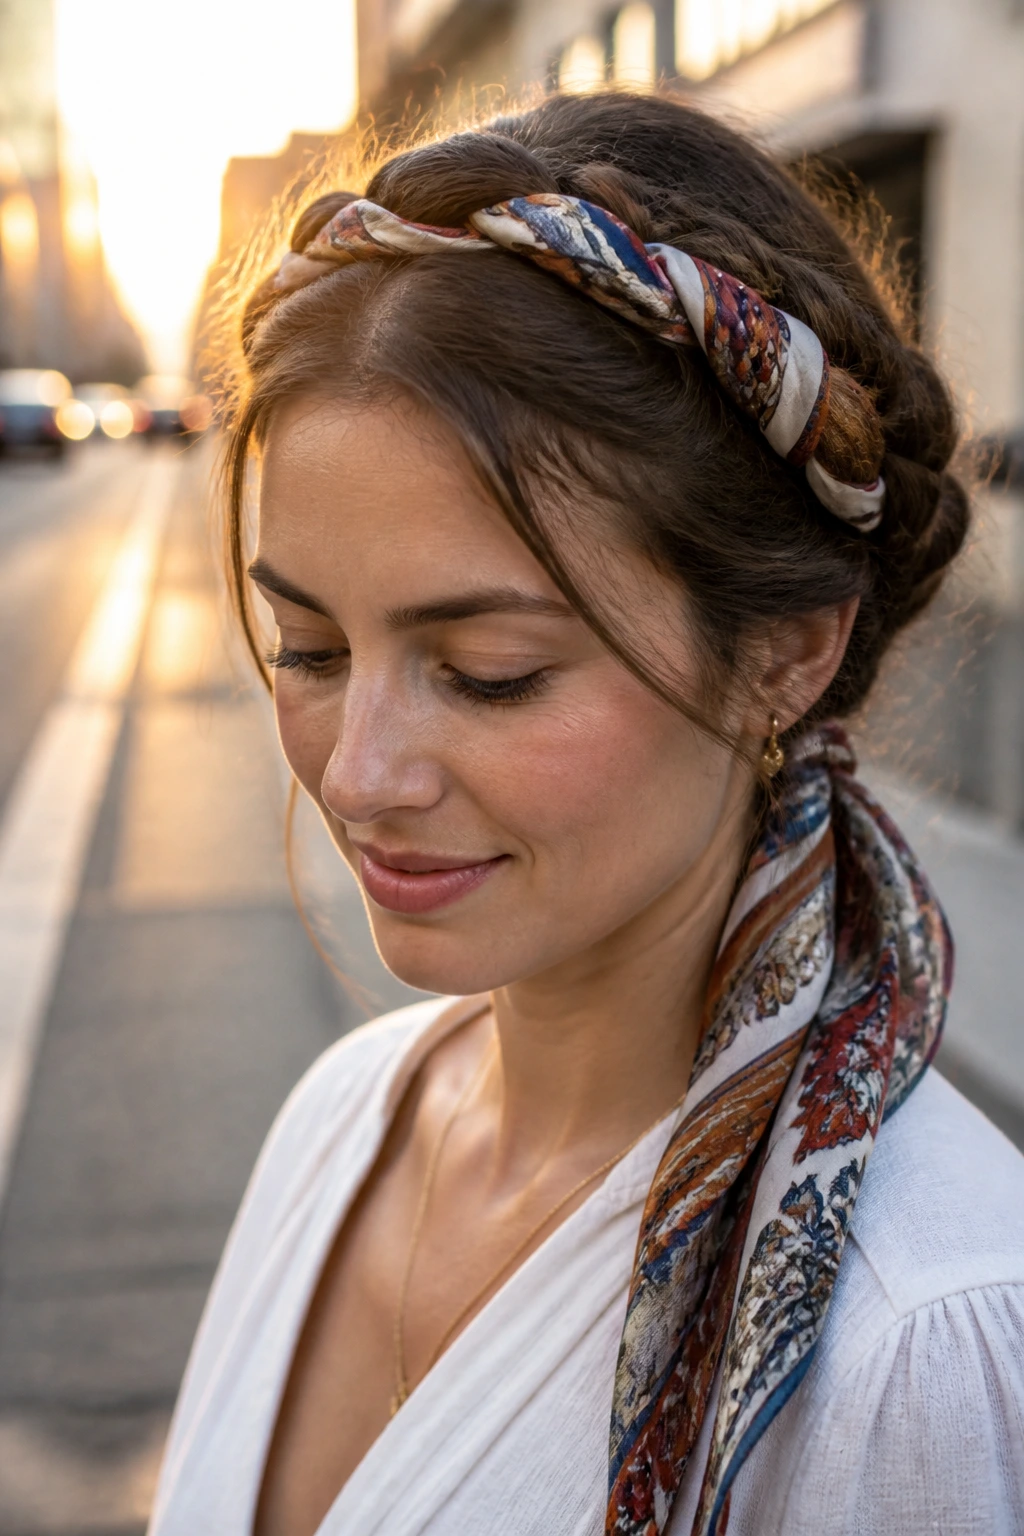
A scarf wrapped through or around a halo braid adds color, texture, and a little movement without rebuilding the whole style. The scarf can run along the braid, wrap near the bun, or tie at one side of the crown. The best part is that the braid and scarf don’t have to match perfectly — a little contrast keeps it interesting.
This version works especially well when the braid itself is simple and you want one thing to stand out. Use a scarf with enough grip that it won’t slide out of smooth hair, and avoid bulky knots at the front because they can change the shape of the crown. A thin silk or satin scarf usually sits better than a thick cotton one. If the scarf is patterned, let the braid stay plain. If the braid has cuffs or beads, keep the scarf quieter.
It’s a small tweak, but it changes the whole read of the style.
29. The Flower-Pin Halo Braid
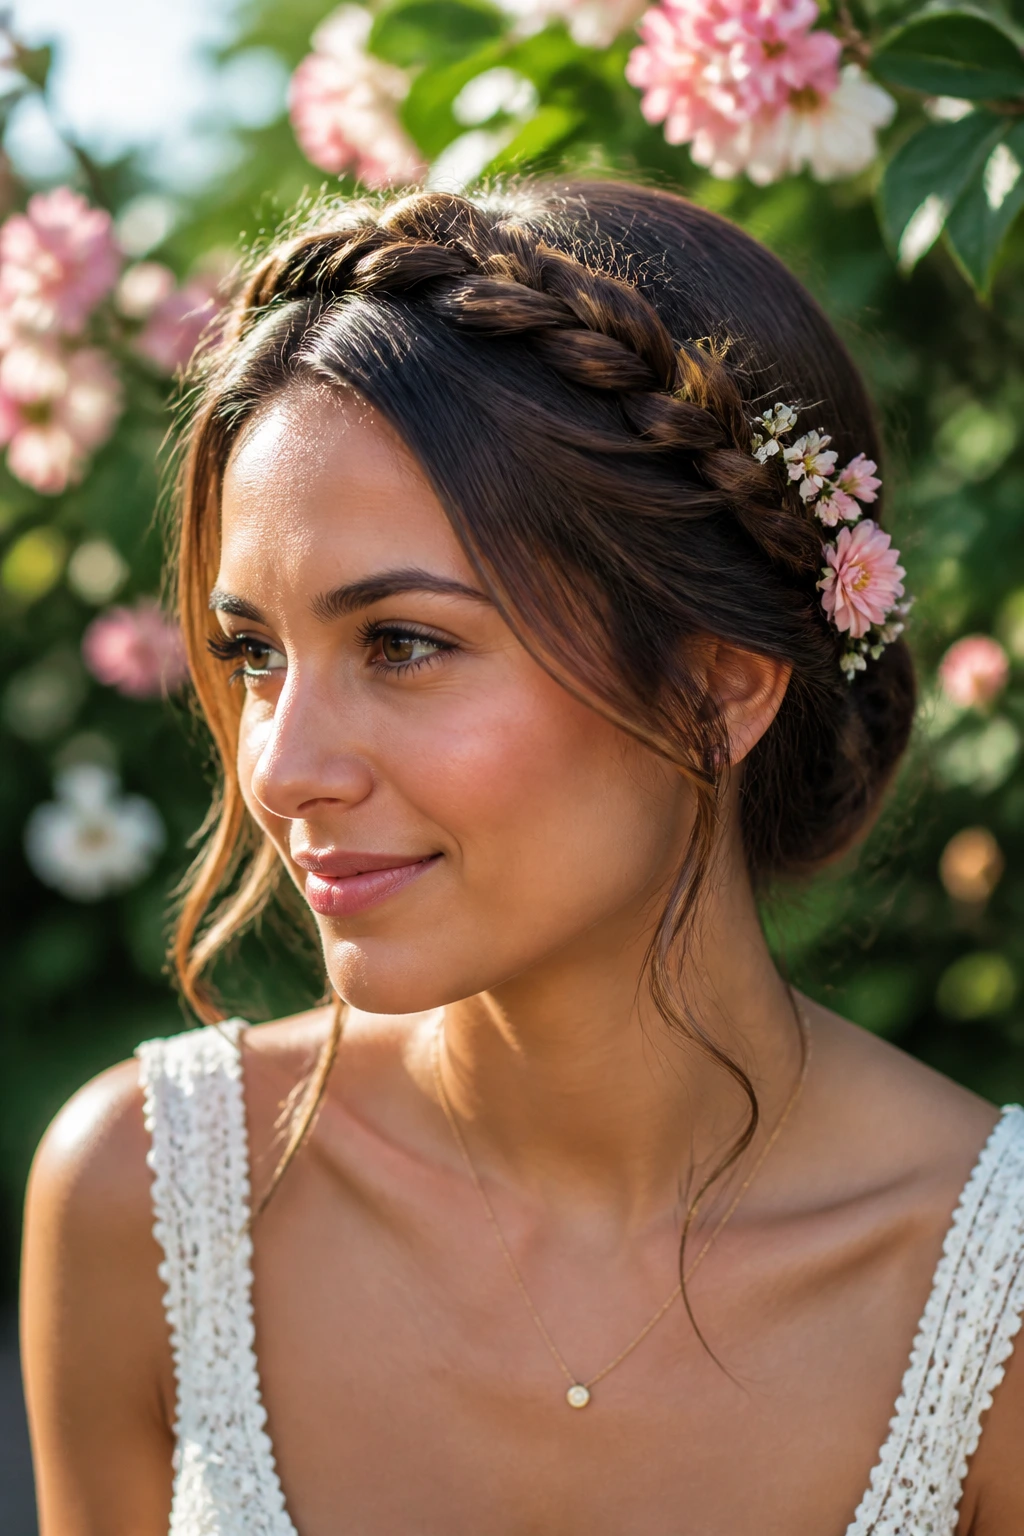
Flower pins are the easiest way to make a halo braid feel softer and more occasion-ready without turning it into a costume. A few placed blooms can sit near the ear, along the back curve, or at one side of the crown where the braid opens up a little. The key is spacing. Too many flowers and the braid disappears.
This works well with a looser halo or a boho version, because the flowers need a little breathing room around them. If the braid is sleek and tight, use smaller pins so the contrast does not feel abrupt. Fresh flowers can look stunning, but artificial clips usually last longer and weigh less, which matters more than people think when the style has to hold for hours.
I like flower pins when the braid already has a soft shape. They add interest without changing the braid’s structure.
30. The Micro-Braid Halo Crown
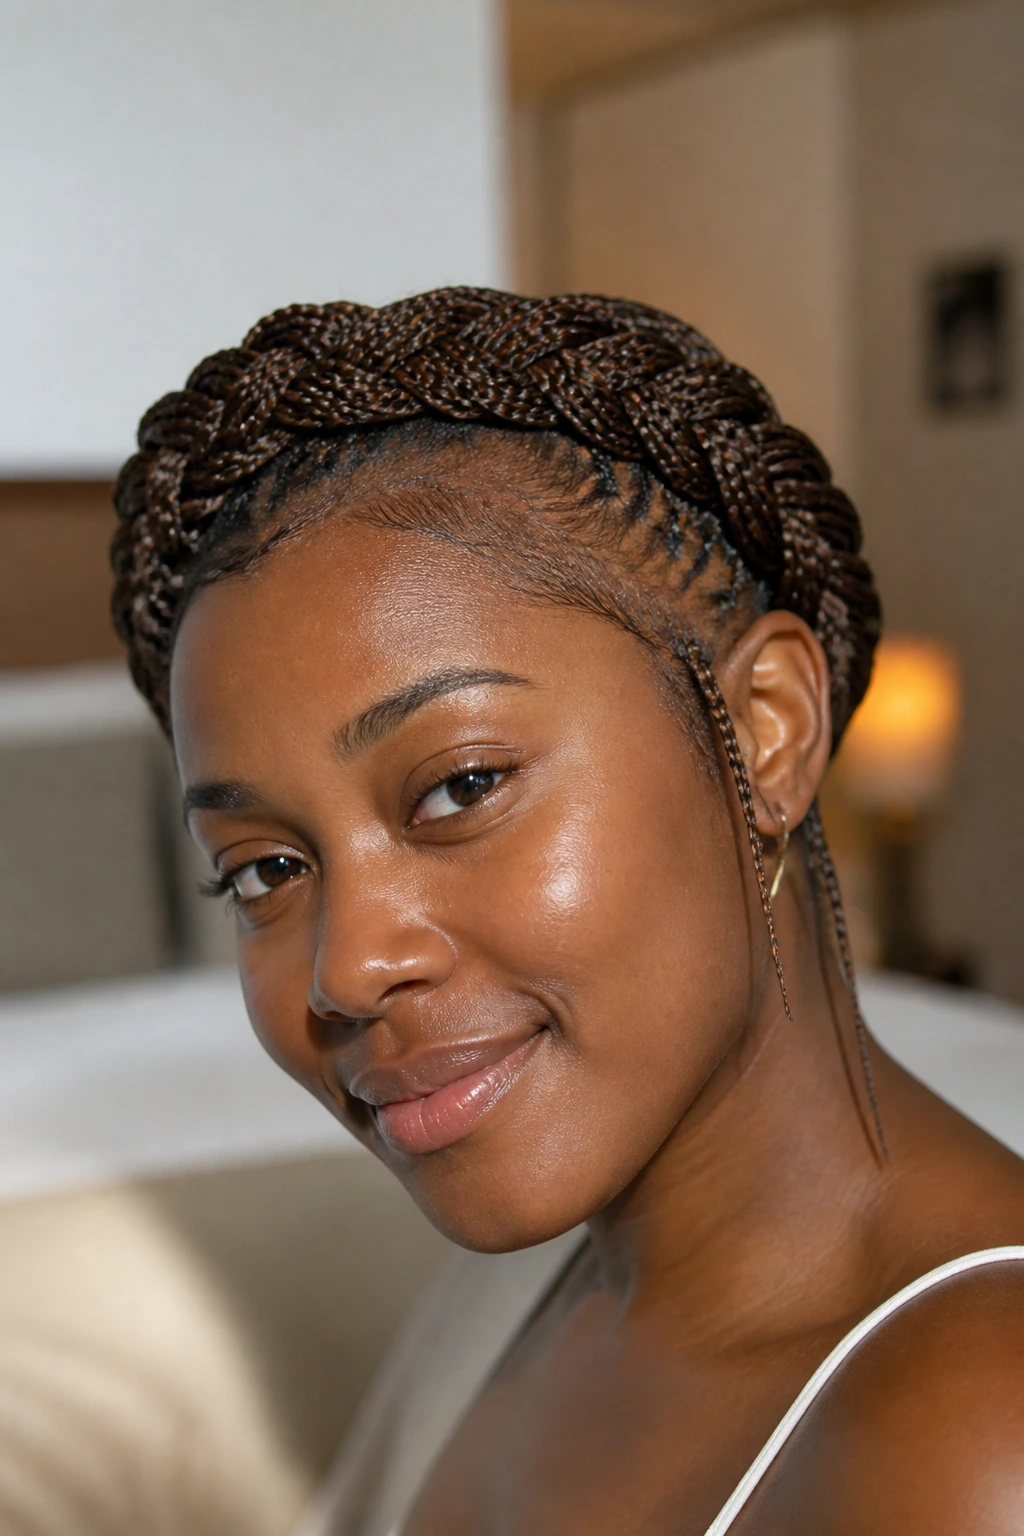
A micro-braid halo crown is delicate, detailed, and a little time-consuming, which is part of why it looks so refined. Smaller braids create a tighter ring around the head and give the style more texture than a single thick braid ever could. The effect is almost woven, especially when the crown circles the head in several narrow strands.
This version is not the one I’d pick if you want speed. It asks for patience and steady sectioning. But once it’s in, it tends to stay visually interesting even when the hair softens. Use tiny clean parts and keep the braid tension even so the crown does not twist. If your hair is dense, micro braids can reduce bulk around the head and make the shape flatter.
The look is subtle from far away and detailed up close. That’s a nice trade.
31. The Halo Braid with an Undercut
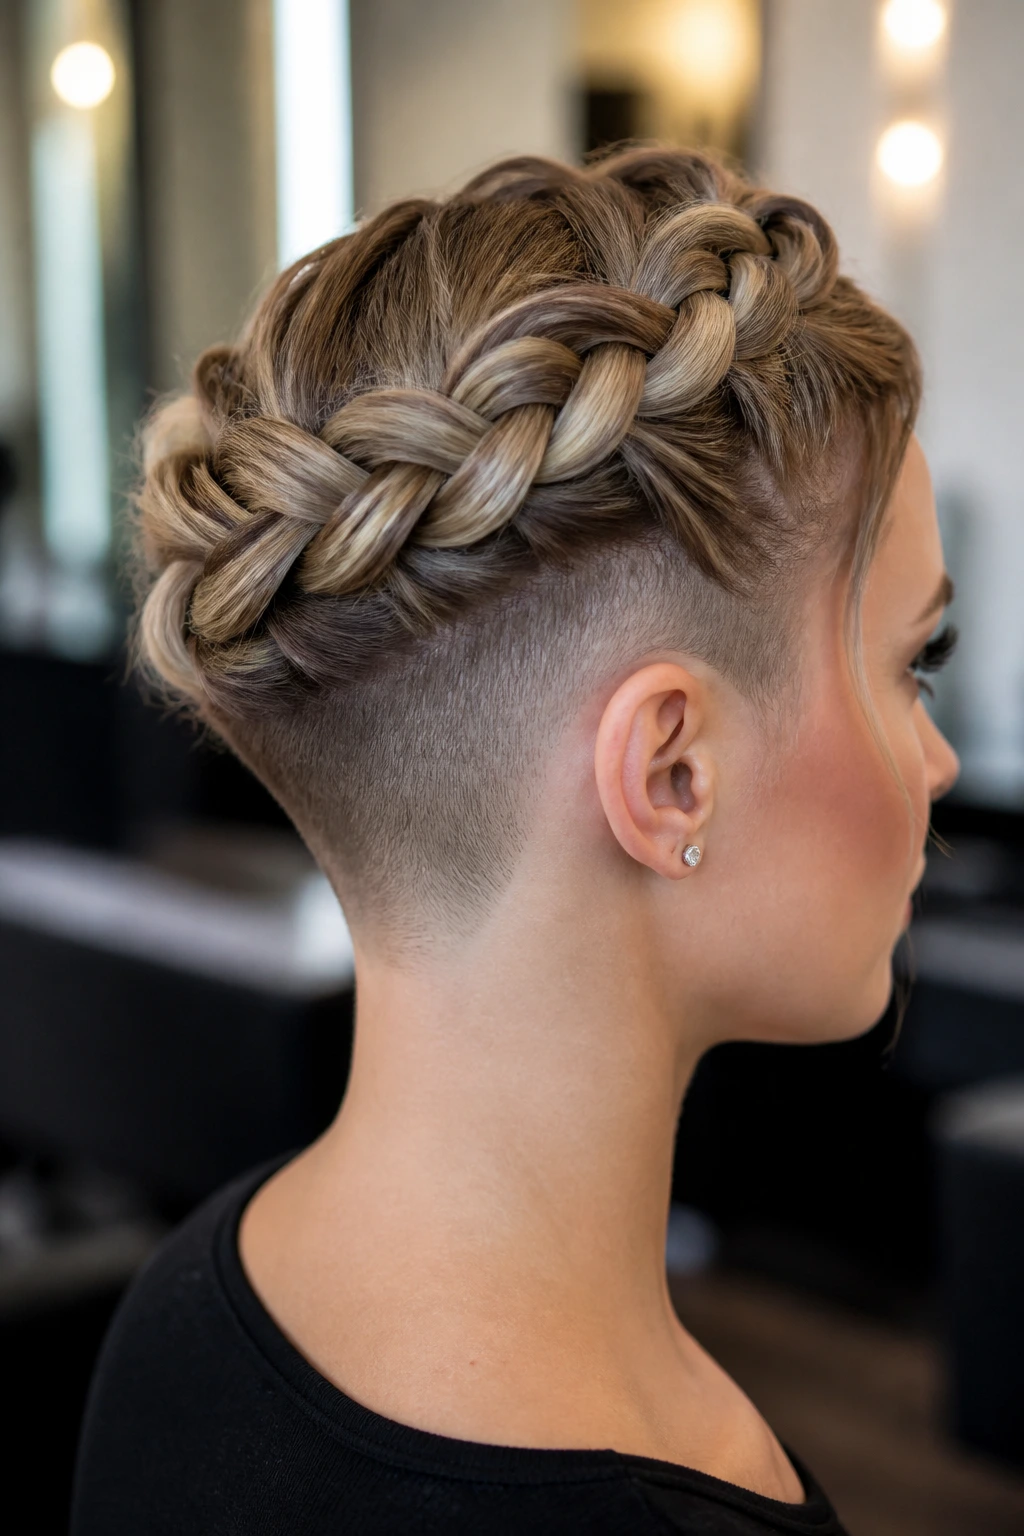
An undercut changes the shape of the halo because it gives the braid a sharp contrast underneath. The crown still sits around the head, but the shaved or closely cropped section removes bulk and exposes more of the braid’s outline. That makes the style look cleaner and a little bolder.
This version works because the braid no longer has to hide all the hair underneath it. The wrap can sit lower and flatter, and the cut itself becomes part of the design. Keep the braid line crisp, because the undercut already brings enough edge. If the braid is too loose, the style can lose the strong graphic look that makes this combo interesting.
It’s a good example of a halo braid adapting to the haircut instead of fighting it. That’s always the smarter move.
32. The Halo Braid with Loose Front Pieces
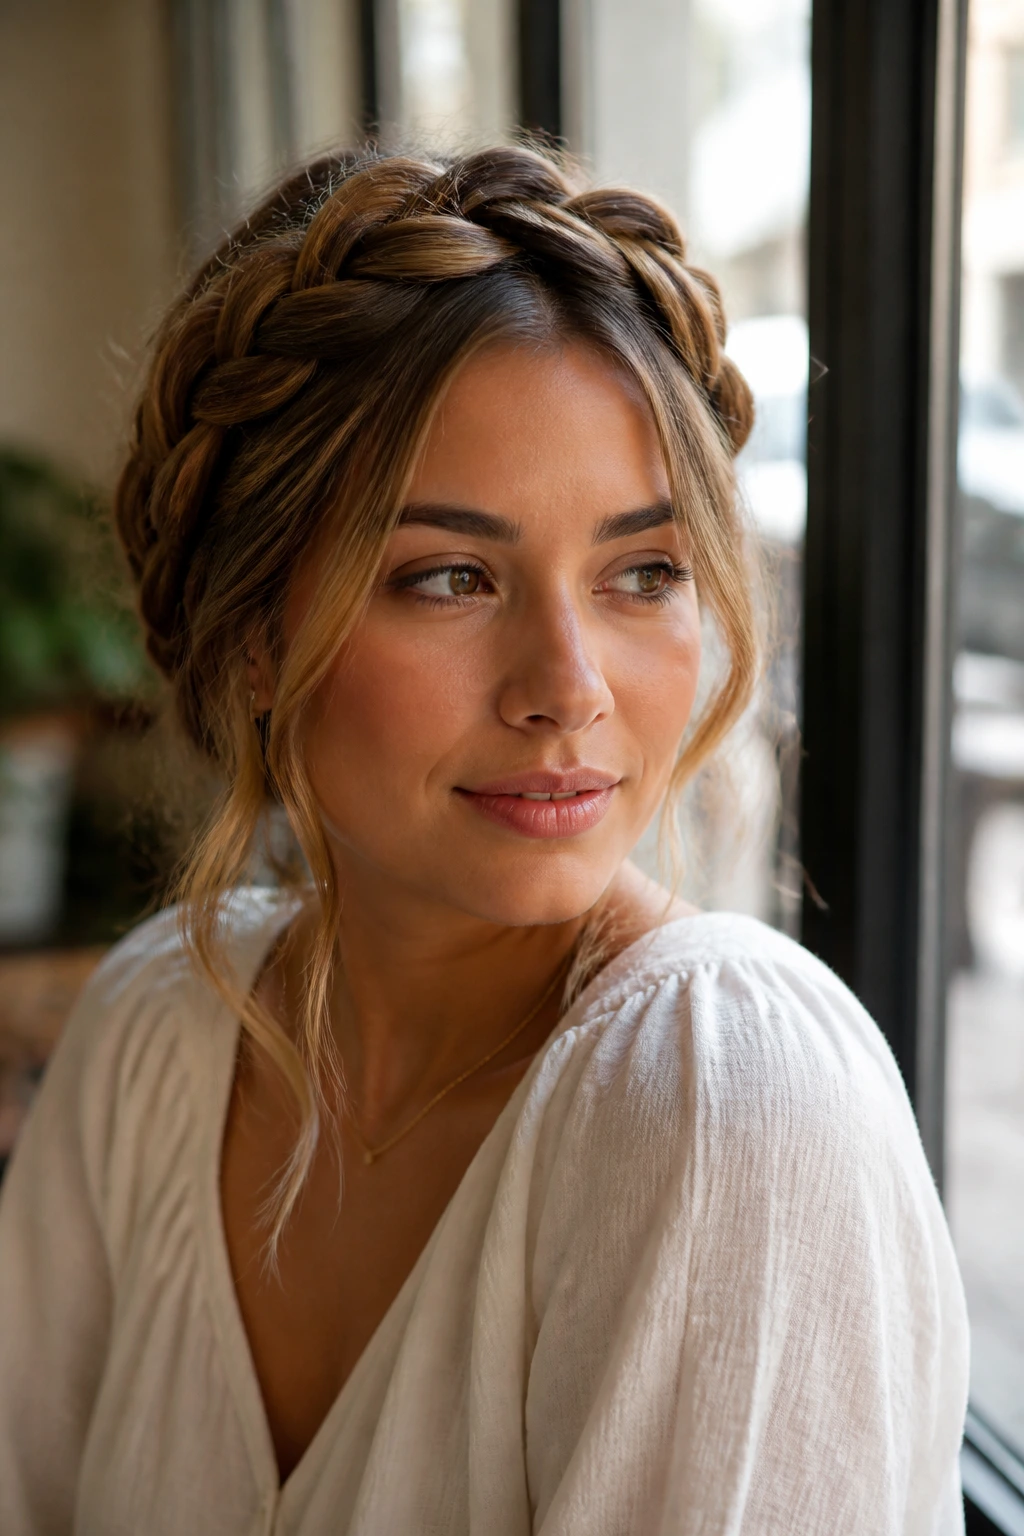
Loose front pieces soften the face and take the edge off a crown braid that might otherwise look too contained. Instead of pulling every strand back, this version leaves a few pieces near the temples or cheekbones free to fall. The braid still frames the head, but the face stays open in a gentler way.
This is a useful version for people who do not like a fully slicked front. It works especially well when the loose pieces are thin and lightly styled, not thick and frizzy. Keep the crown braid tidy so the face-framing bits feel intentional. If those front pieces are too heavy, they can overpower the braid and steal the whole show.
This one has a relaxed feel without giving up the shape that makes halo braids useful in the first place.
33. The Braiding-Hair-Added Halo Braid
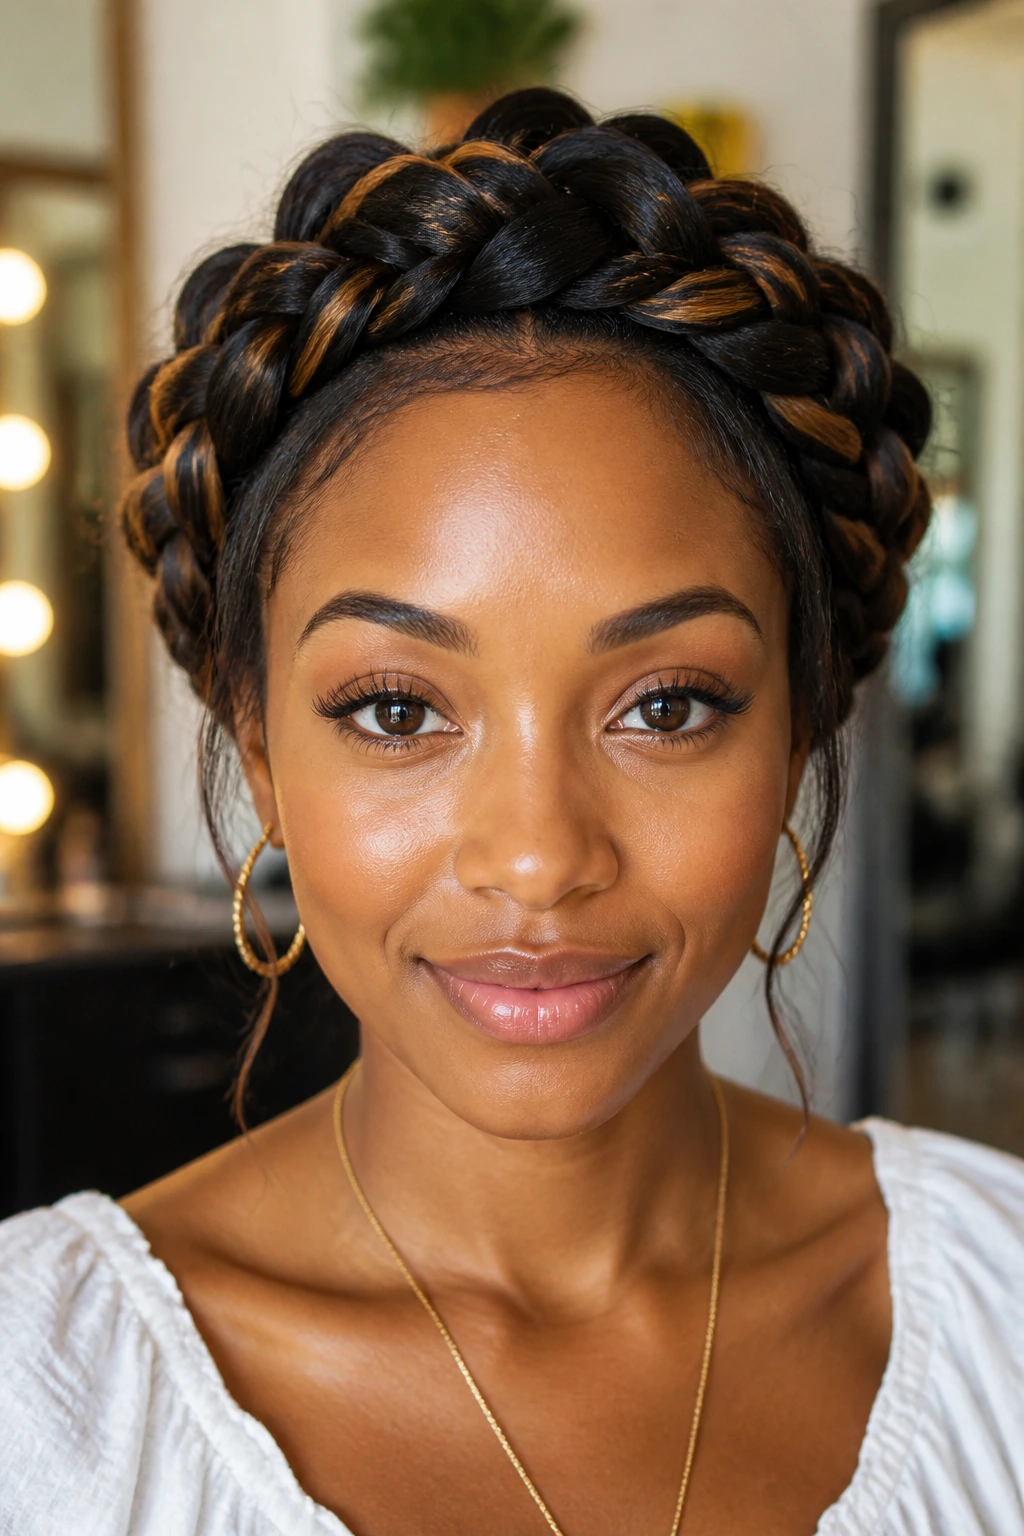
Adding braiding hair to a halo braid gives you fullness fast, and that can solve a lot of problems in one move. Thin natural hair can disappear inside a crown style if the braid is too small, but synthetic or human braiding hair adds volume and helps the halo read clearly from the front and back. The extra length also makes tucking easier.
The important part is matching the added hair to the texture you already have. If the synthetic hair is too shiny or too coarse, the braid will look stitched on. Feather the ends, blend the additions gradually, and keep the added hair balanced on both sides of the crown. You do not need a huge amount. A moderate bundle usually gives enough body without making the halo feel heavy.
This is one of the most useful tricks for fine or short hair. It builds presence where the natural length does not quite get there.
34. The Bridal Halo Braid
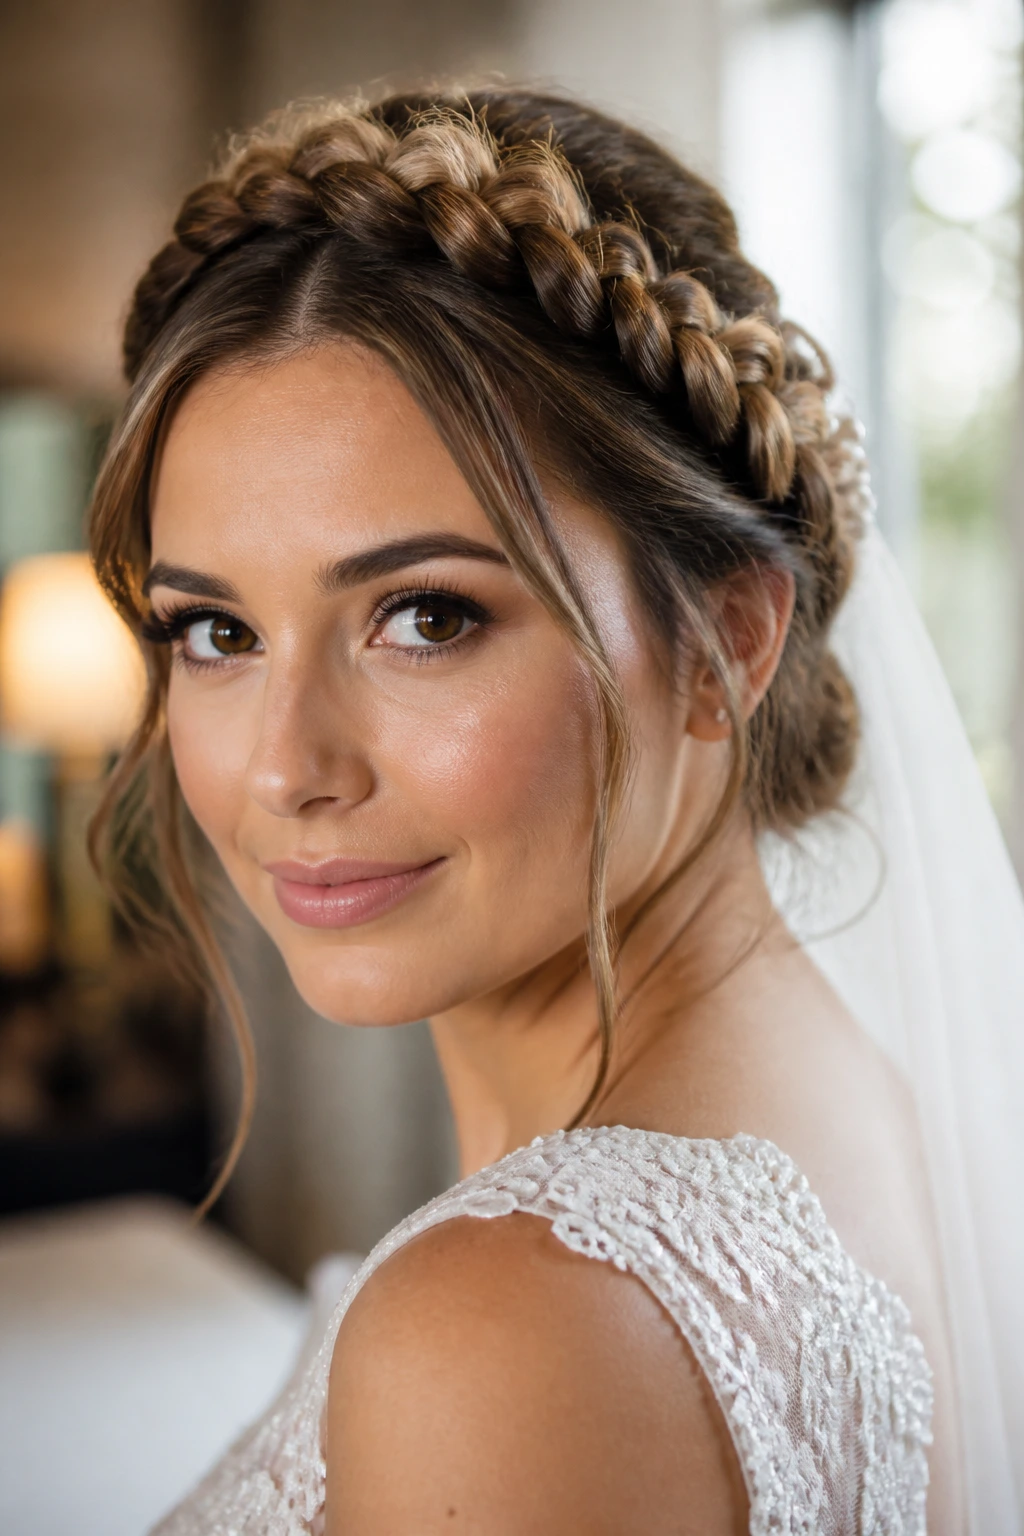
A bridal halo braid is all about control, but not stiffness. The braid needs to hold its shape through photos, hugs, movement, and a long day, yet it should still have a little softness around the hairline. That balance is why brides keep coming back to crown styles. They frame the face and look composed from every angle.
This version usually works best when the braid is polished, pinned carefully, and finished with subtle accessories rather than a pile of them. A few pearls, small pins, or a narrow veil comb are enough. If the braid is too loose, it can puff around the crown and look unfinished under bright light. If it’s too tight, the hairline can start to look strained. The sweet spot is firm but not severe.
A bridal halo is one of those styles where detail matters more than drama. Every pin shows, for better or worse.
35. The Everyday Protective Halo Braid
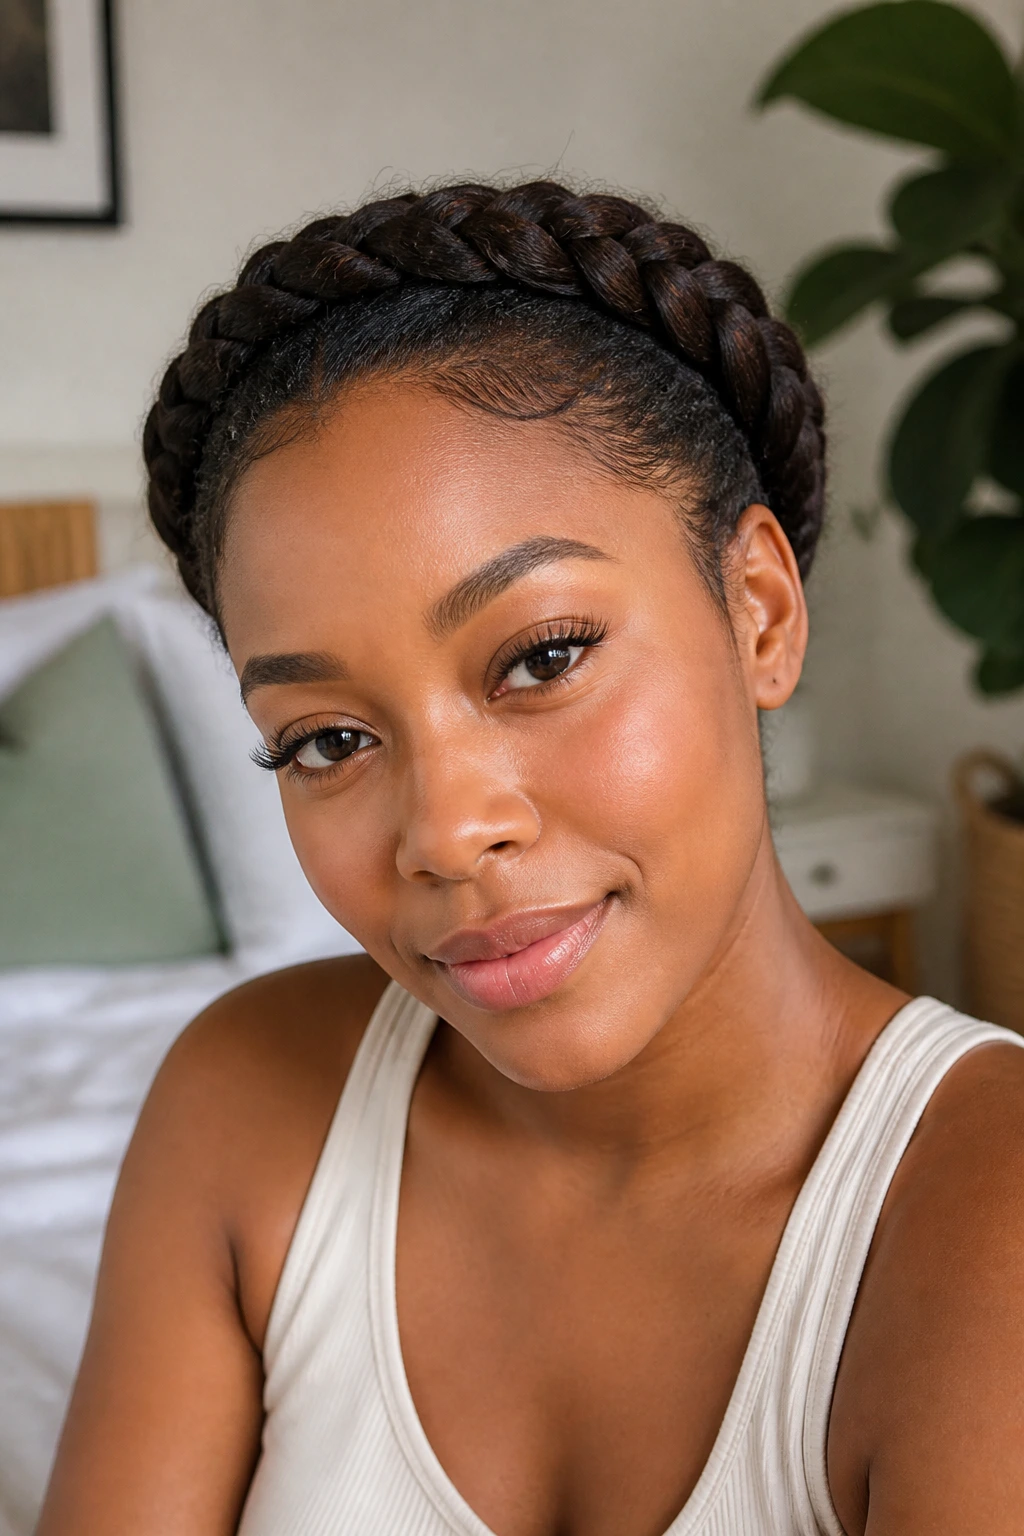
This is the halo braid you keep coming back to because it does the boring, useful job well. It tucks the ends away, keeps the hair off the face, and protects the length without making the style feel overbuilt. On natural hair, twists, or locs, that matters because a style you can actually wear for a few days is worth more than one that looks nice for twenty minutes.
The braid should be secure enough to stay in place, but not so tight that it leaves the crown sore. If you can feel the pins all day, the placement is wrong. Aim for a shape that lies flat enough to sleep in, then refresh the front with a scarf and a small touch of styling foam the next morning. That balance between neatness and comfort is the whole point.
It is not the flashiest halo on the list. It may be the one you wear most.
Why Halo Braids Fit So Many Hair Textures
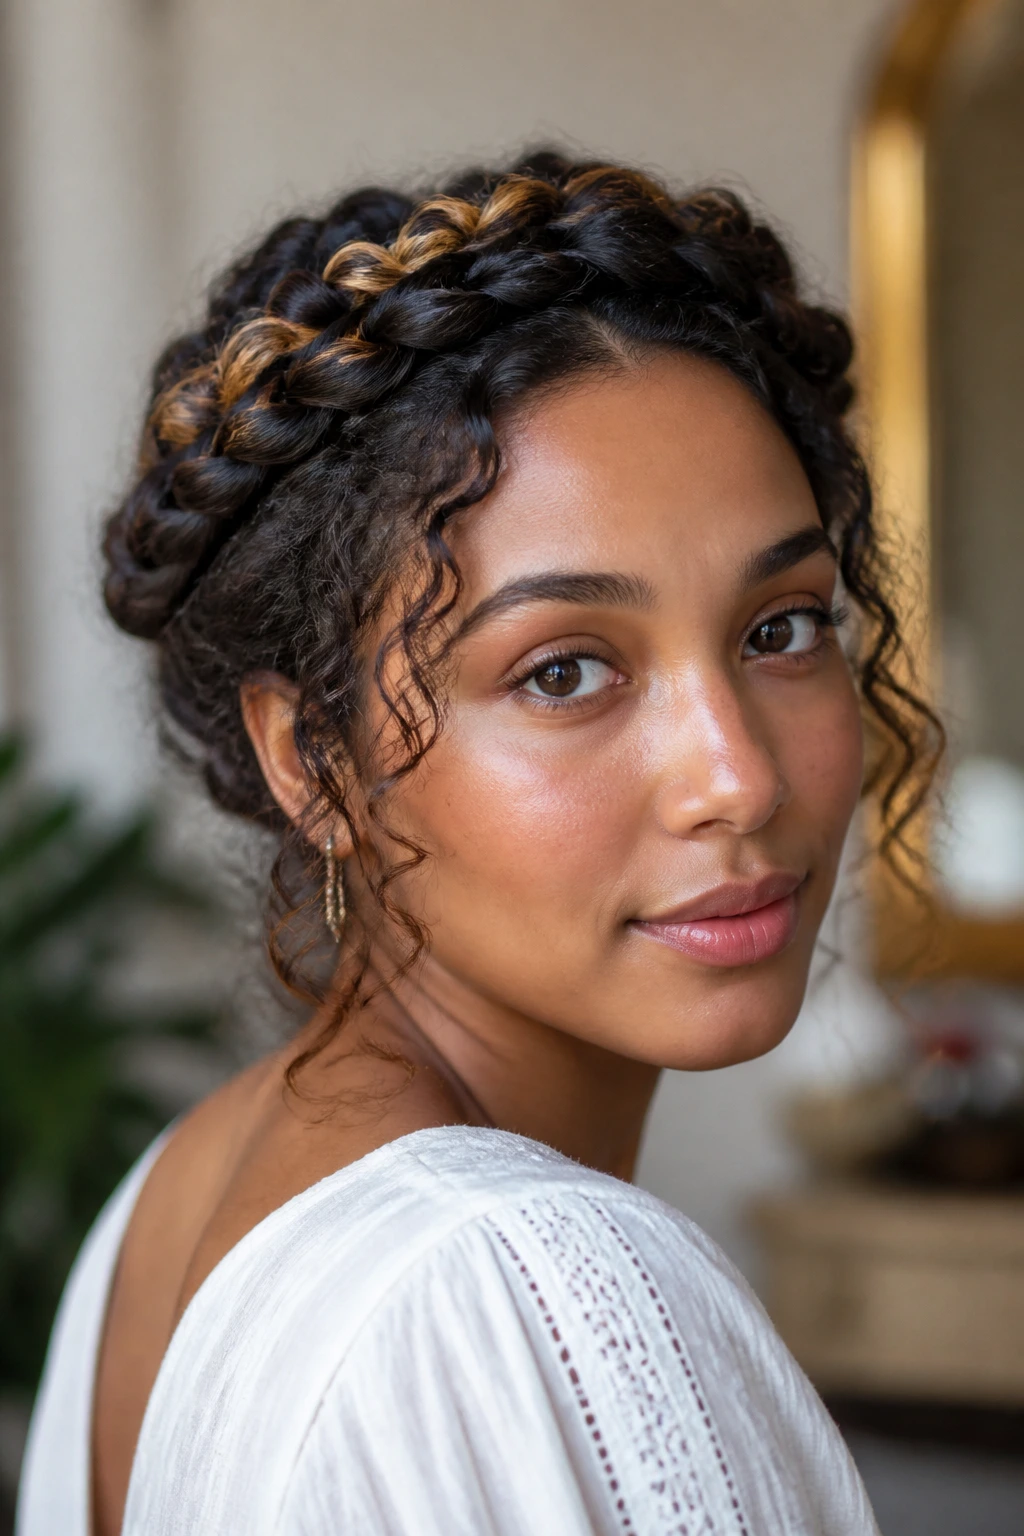
A halo braid works because the shape does the heavy lifting. The braid is not trying to compete with a haircut or a curl pattern; it wraps around them and gives the whole head a clean outline. That is why the same idea can look graceful on fine hair, lush on coils, and especially strong on locs or twists. The crown frame tells the eye where to look.
On Straight or Fine Hair
Straight hair tends to slide, so the trick is grip and placement. A little mousse, a bit of texturizing spray, and a lower wrap usually help the braid hold better than a high crown that keeps lifting off the scalp. Fine hair also benefits from a slightly looser braid because over-tightening makes the sections look smaller than they are.
On Curly or Coily Hair
Curly and coily hair gives the halo braid its best texture. The braid can look full without needing much extra volume, and the natural bend of the hair helps hide pins and section lines. Stretching the hair a bit before braiding usually makes the crown easier to shape, but the style does not need to be bone straight to work.
On Locs, Twists, and Braids
Locs and twists already carry structure, which means the halo can sit like a built-in crown instead of a shape you have to persuade into place. The main job becomes weight control. Once the wrap is even and the pins are hidden, these styles can hold a clear outline with surprisingly little fuss.
Essential Tools for Halo Braids
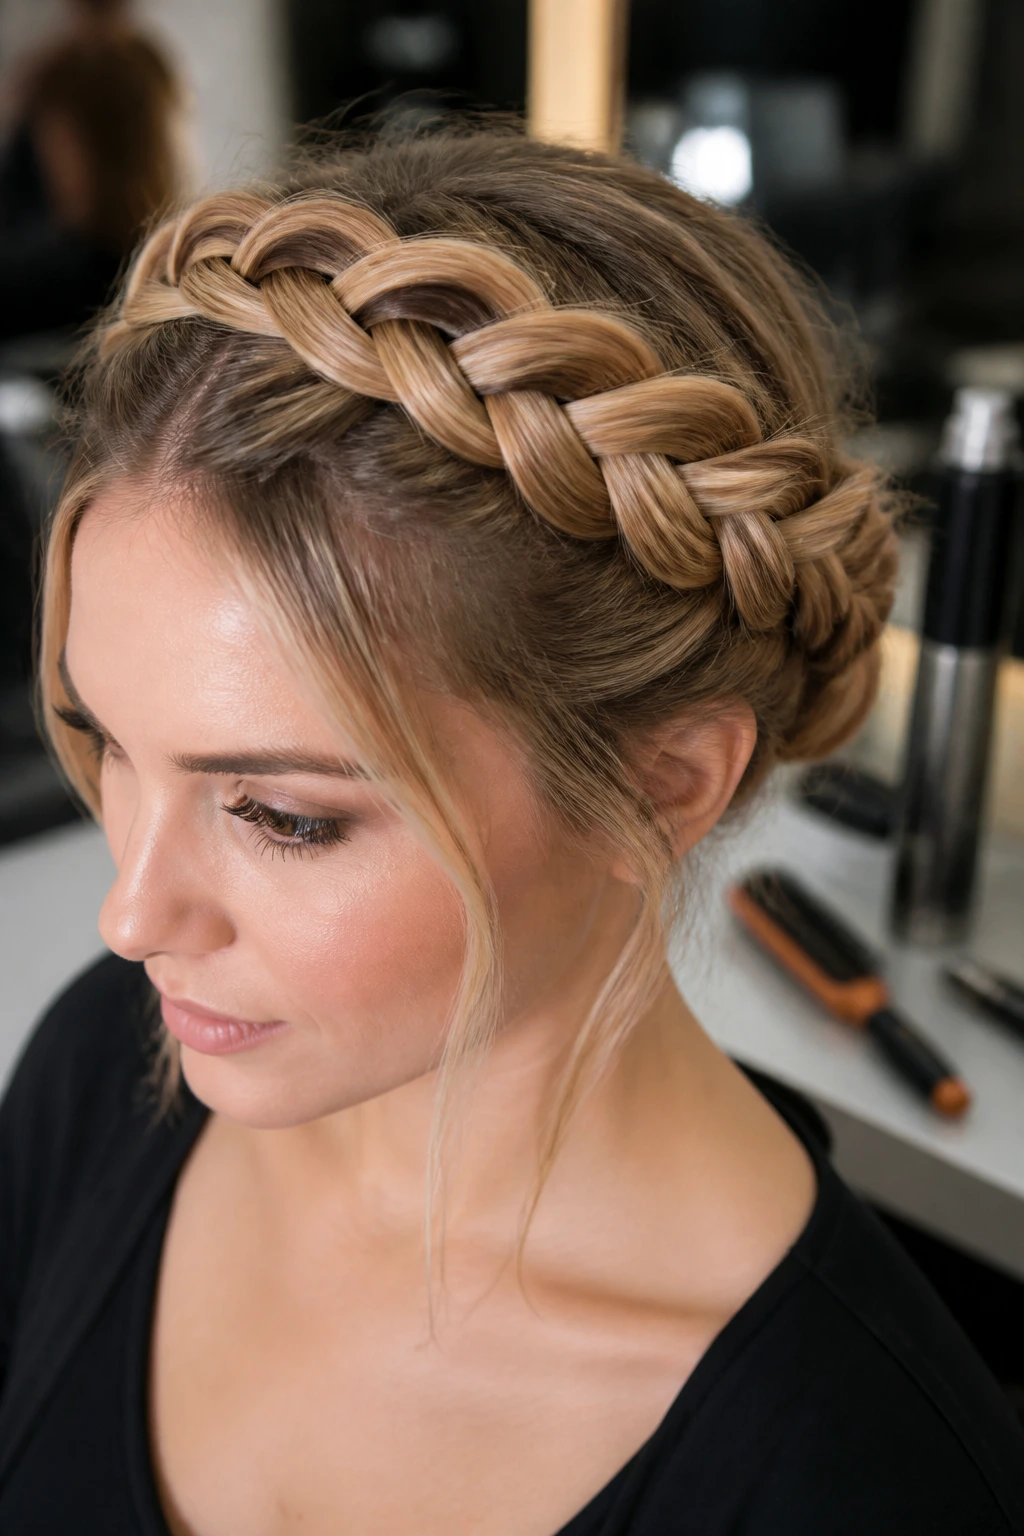
-
Rat-tail comb: The pointed end makes clean parts, especially for side parts and crown sections.
-
Soft detangling brush: This smooths the front without tearing at curls or frizzing the braid base.
-
Sectioning clips: They keep the loose hair out of the way while you braid one side at a time.
-
Bobby pins and U-pins: Use both; bobby pins grip small spots, while U-pins hold tucked ends and heavier wraps better.
-
Clear elastics: Helpful for securing the ends before you hide them under the halo.
-
Mousse or styling foam: Gives loose hair enough control to braid neatly without turning crunchy.
-
Light gel or edge control: Use it only where the hairline needs it; too much can make the style look greasy.
-
Satin scarf or bonnet: This protects the shape overnight and keeps the braid from puffing out.
-
Optional braiding hair: Useful for adding fullness to fine hair or extending short sections into a crown.
-
Small handheld mirror: Handy for checking the back curve where most halos go wrong.
Smart Prep and Product Choices
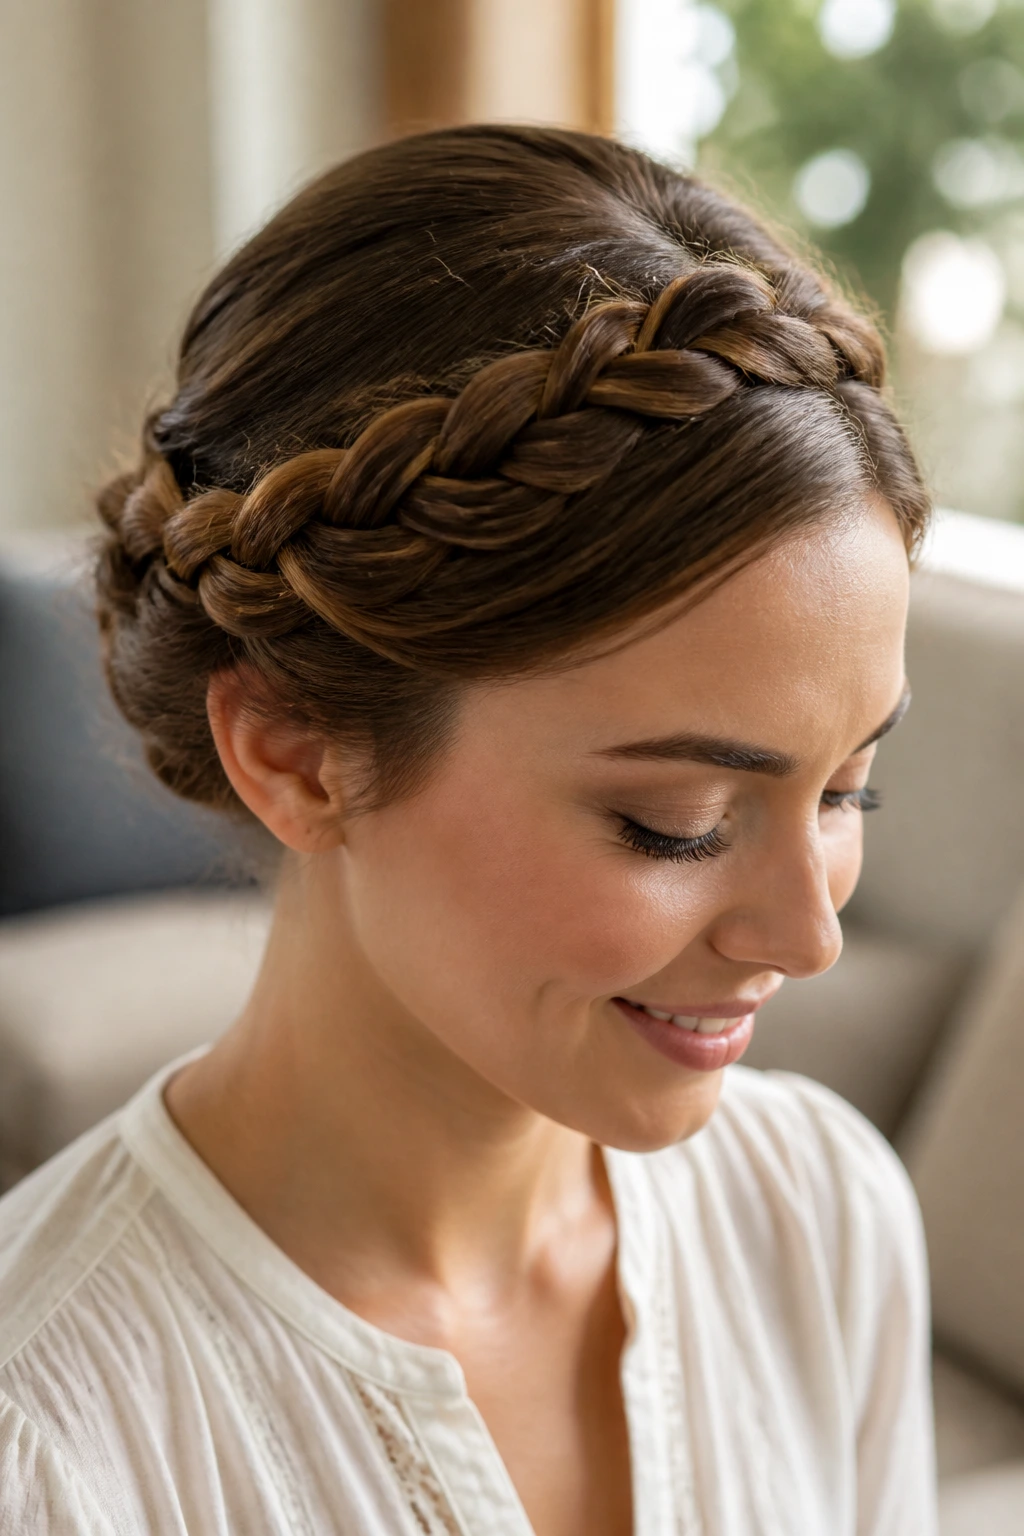
The best halo braids start before the braid starts. If the hair is tangled, oily in the wrong spots, or unevenly stretched, the crown has to fight for its shape. Clean, detangled hair usually behaves better, but “freshly washed” is not automatically the answer. On very soft hair, a day-old base often gives better grip than silky-clean strands that want to slip out of every pin.
Texture matters. If the hair is curly or coily, stretching it a bit with a blow-dryer, banding, or a loose braid-out can make the sections easier to control. For finer hair, a light mousse and a touch of dry texture at the roots can help the braid stay put. Heavy creams can weigh the style down fast, especially around the front.
I’m picky about product at the hairline. A pea-sized amount of edge control is enough in most cases. Smear too much gel around the crown and the style starts to look sticky instead of smooth. If you plan to add extensions or a scarf, keep the base product lighter so the extras do not slide around.
How to Wear These Halo Braid Hairstyles
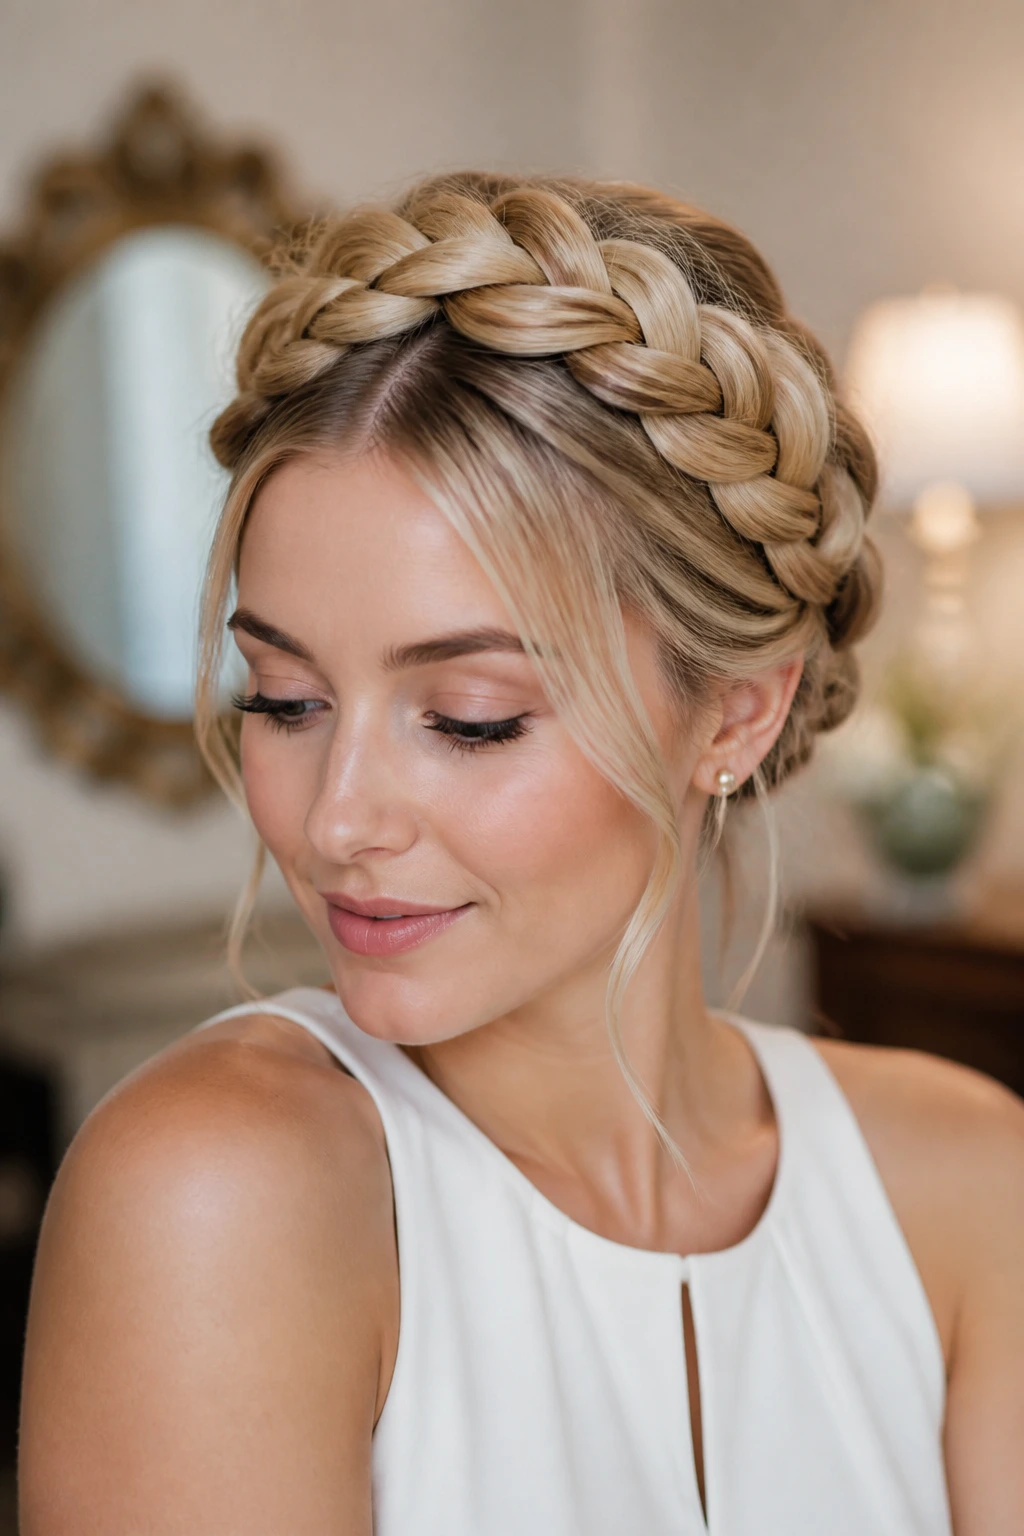
Presentation: Keep the crown line clean and the edges soft, then choose one finishing point — shine, texture, or accessories. A style that tries to do all three usually ends up looking busy.
Accompaniments: Halo braids look strongest with earrings that leave the neckline open, simple collars, or tops with a clear shape at the neck. Big necklaces can crowd the frame. Small hoops, studs, or nothing at all often looks sharper.
Length and Density: Fine or short hair may need braiding hair, extra pins, or a lower wrap to create enough visual weight. Thick hair can usually carry a fuller crown, but it needs more attention at the nape so the style does not jut backward.
Occasion Pairing: Sleek halos suit formal settings, polished work looks, and events where you want the braid to feel neat. Looser, textured, or tendrilled versions fit casual days, weekends, and anything that benefits from a softer line around the face.
Additional Tips and Styling Boosters
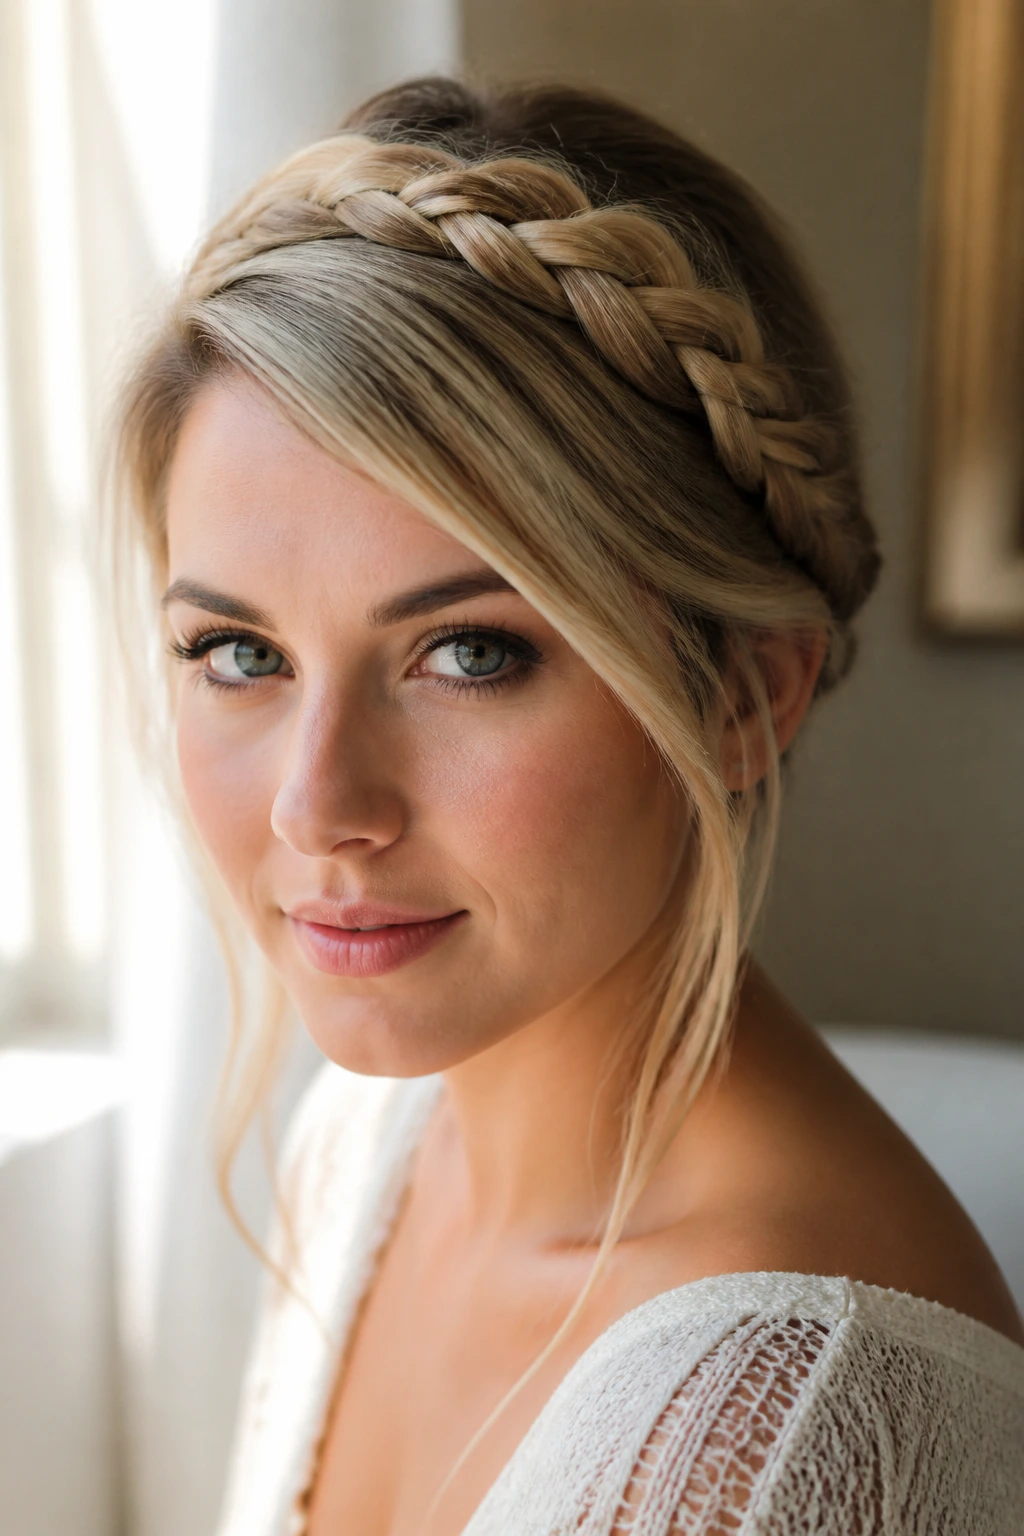
Finish: A light mist of setting foam or flexible hairspray at the crown helps the braid keep its line without turning it stiff. If the style needs shine, apply it after the braid is pinned, not before.
Texture: For a softer halo, tug the outer edges of the braid very gently once it’s secure. That loosens the weave just enough to make the crown look fuller, but stop before the braid starts to open up.
Customization: Thin ribbons, a single scarf, one side of cuffs, or a few scattered beads can change the tone fast. Pick one accent and let it do the talking. Two or three accents are usually enough.
Make-It-Yours: If your hair is very dense, go a little looser and let the braid show its texture. If your hair is fine or straight, tighten the wrap slightly and use pins in the hidden areas so the crown keeps its shape longer.
Overnight Care, Refreshing, and Re-Wrapping
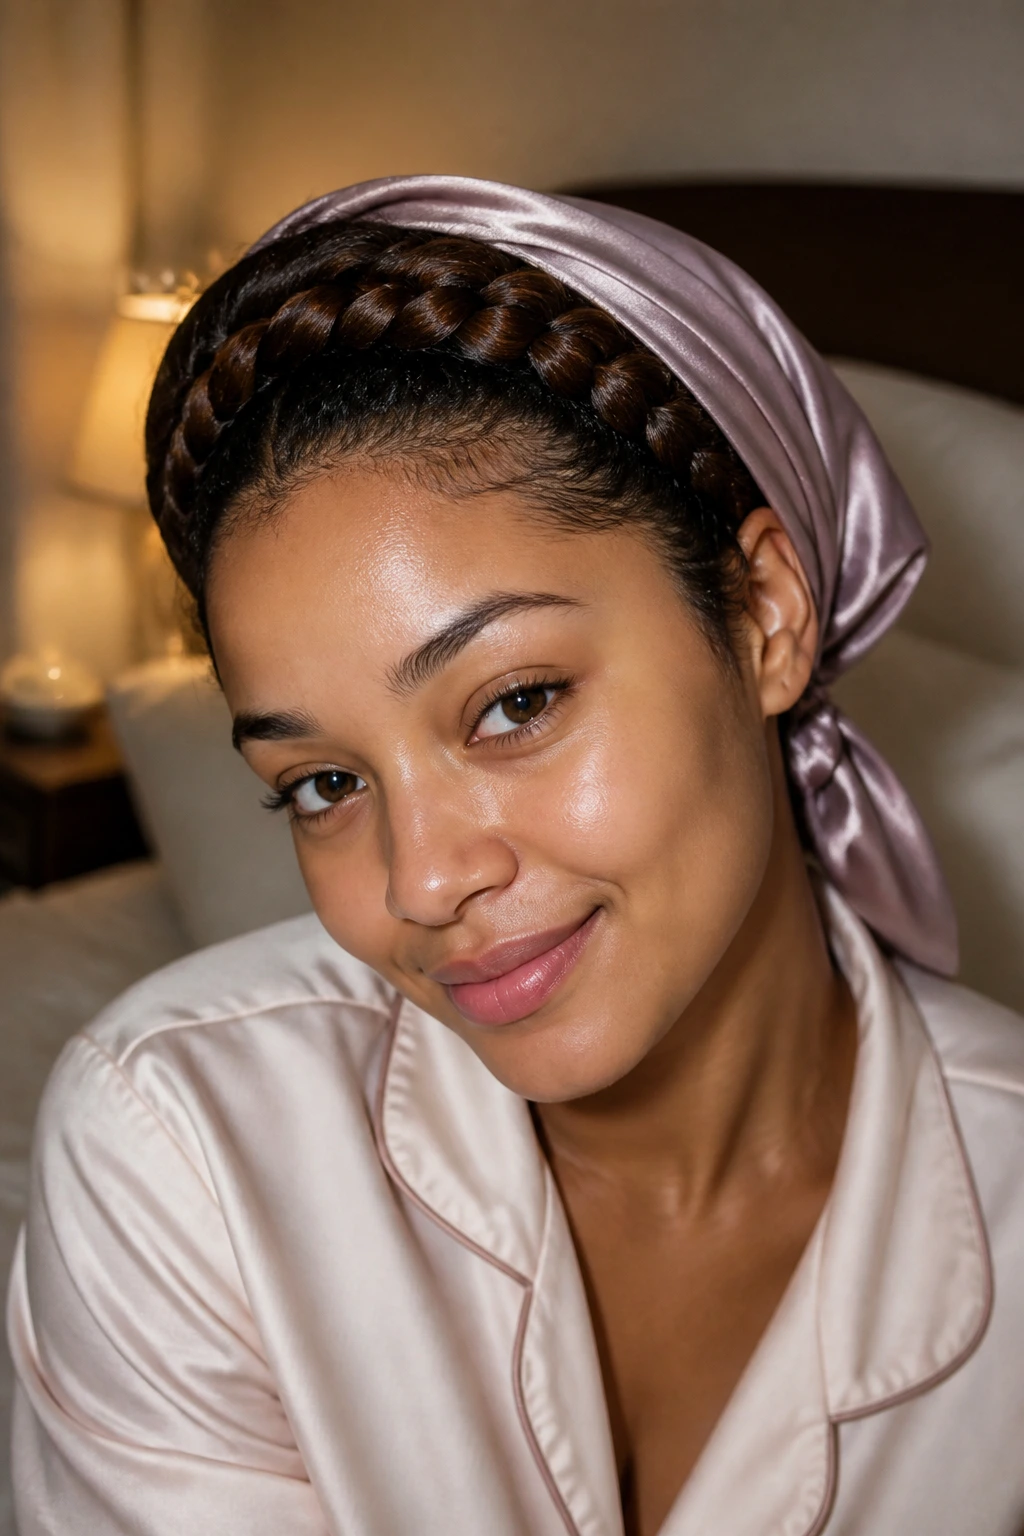
A halo braid usually looks its cleanest on day one, but it can still hold up well for two to four days if you protect it properly. On locs, twists, or braided extensions, the wear window can stretch longer because the texture gives the style more structure. The real secret is not letting the crown get crushed overnight.
Wrap the hair in a satin scarf, but leave enough room that the front does not flatten into a crease. If the braid is bulky at the back, pin the nape lightly before tying the scarf so the weight doesn’t pull it open while you sleep. A satin pillowcase helps too, though I’d still use the scarf if you want the shape to last.
To refresh, smooth the front with a small amount of mousse or a damp brush, then reset any loose pins at the nape. If a side starts to puff, do not rebuild the whole style. Tuck one section back and tighten that curve only. Small fixes beat full restarts every time.
Variations and Adaptations to Try
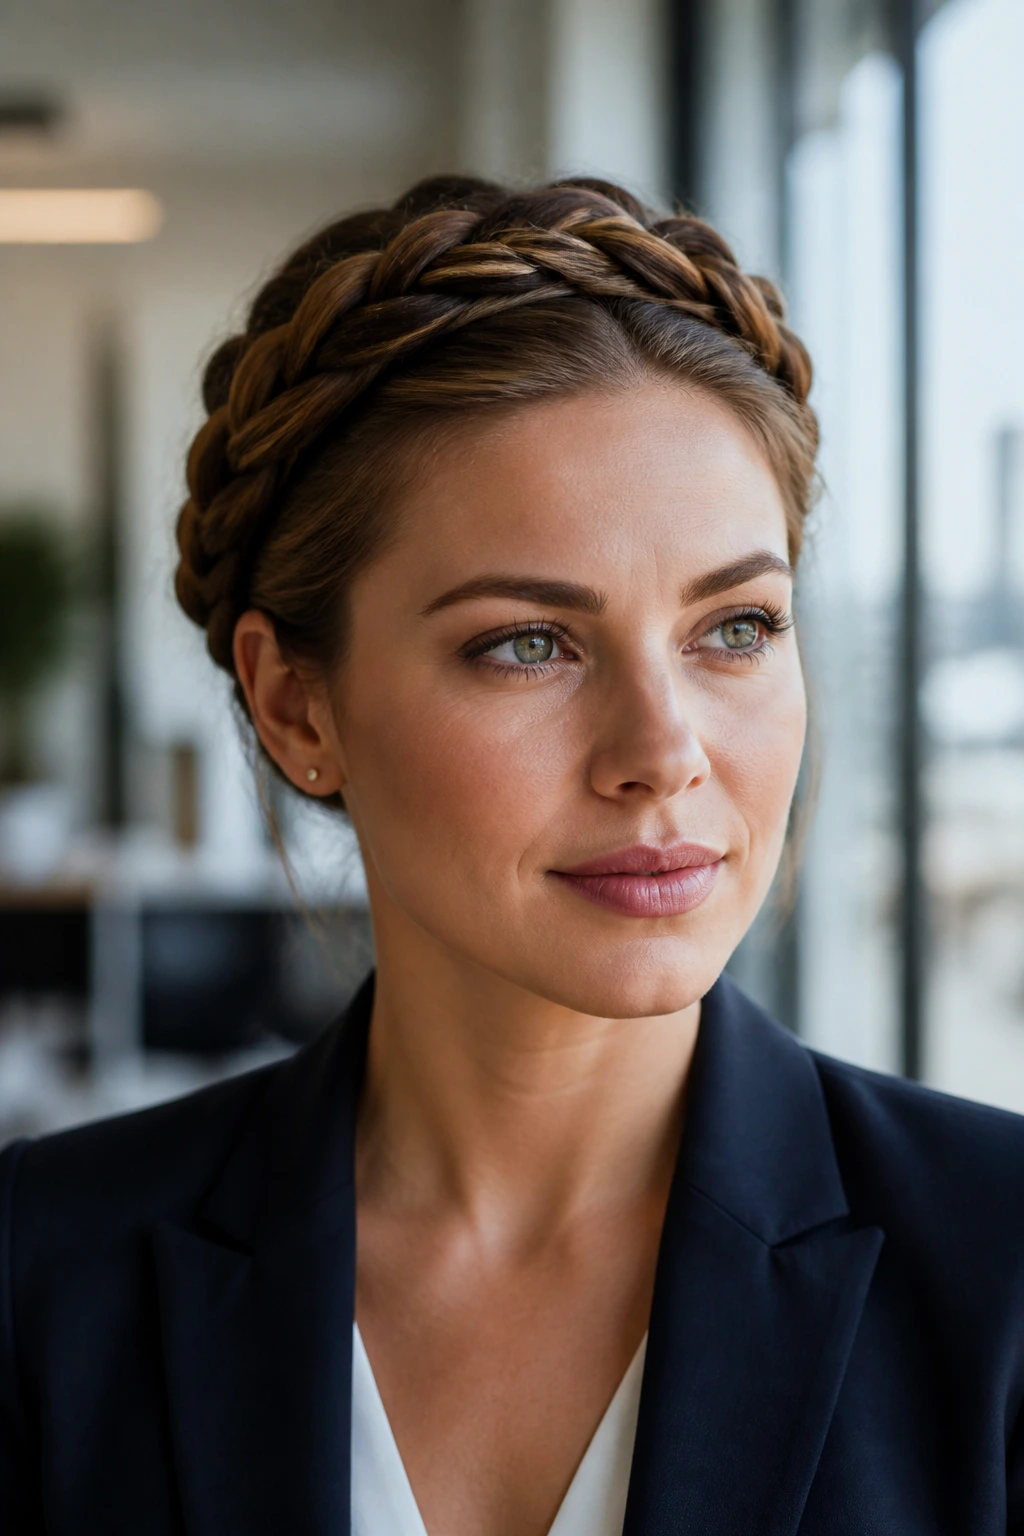
The Sleek Office Halo: Keep the braid low, smooth the front hard, and skip loose tendrils. It gives the crown a clean line that works under a blazer or structured shirt.
The Soft Weekend Halo: Leave two or three thin face-framing pieces out and pancake the braid slightly. The style gets more movement without losing its shape.
The Loc-Friendly Crown: Use wider anchor points and smaller pins so the weight spreads out. This keeps the halo from slipping backward during the day.
The Fullness-Boosted Halo: Add braiding hair only where the crown needs body, usually around the top and one side. That keeps fine hair from disappearing inside the style.
The Event Version: Add one scarf, a few cuffs, or a small cluster of pins near the temple. Stop there. The braid should still be the main shape.
Common Mistakes to Avoid
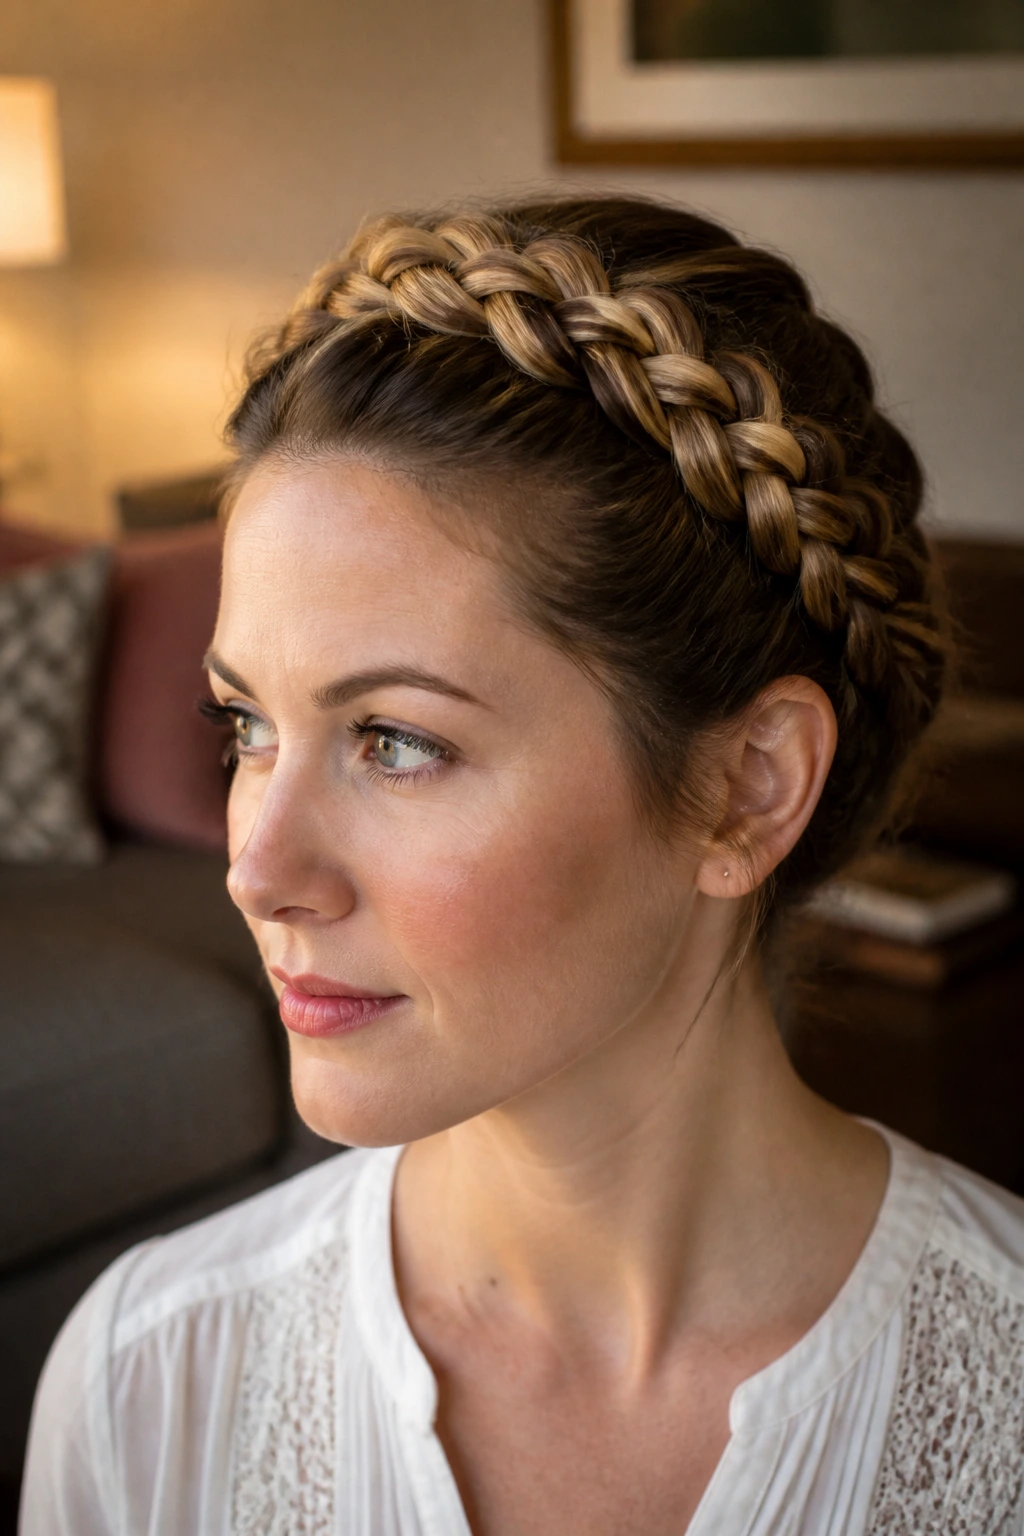
A halo braid fails in predictable ways. The good news is that most of them are easy to fix once you know what they look like.
Pulling the braid too tight at the temples: The hairline starts to ache, and the braid can create a hard ridge instead of a soft crown. Loosen the front section and place the tension farther back.
Using too much product at the roots: The braid turns sticky, the pins slide, and the scalp starts to look shiny in a bad way. Use lighter product and apply it only where the hair actually needs control.
Skipping anchor pins at the nape: The braid looks fine for ten minutes, then the back starts to sag. Secure the tuck with more than one pin and place them in different directions so they lock against each other.
Making both sides uneven without meaning to: One side climbs too high, the other dips too low, and the crown looks crooked. Check the braid in a mirror before you tuck the ends.
Ignoring hair texture at the base: Very smooth hair slips; very fluffy hair puffs. Prep the base for the texture you actually have instead of using the same method on every head.
Frequently Asked Questions
Can halo braid hairstyles work on short hair?
Yes, but the style usually needs more pins and a smaller crown line. Short natural hair can absolutely do it, especially if the hair is stretched first or if you add a little braiding hair for fullness.
How do I keep a halo braid from slipping?
Start with hair that has a bit of grip, then anchor the braid at the nape and around the ears with U-pins or crossed bobby pins. If the base is too silky, add a touch of mousse or texture spray before you braid.
Do halo braids damage the hairline?
They can if they’re pulled too tight. A halo should feel secure, not tight enough to make you notice it every time you blink. If your edges are sore after a few minutes, loosen the front and rebuild the wrap a little farther back.
Can I wear a halo braid on locs or twists?
Absolutely. Locs and twists are some of the easiest bases for this style because they already have body and structure. The main thing to watch is weight at the nape, especially on longer sets.
How long does a halo braid usually stay neat?
On loose hair, two to four days is a fair range if you wrap it at night. On locs, twists, or braided extensions, the style can hold longer because the texture supports the shape better.
What if my braid looks lopsided?
Do not start over right away. Check whether the part is uneven, whether one side has more product, or whether the back pins are pulling the crown off-center. Often one small adjustment at the temple or nape fixes the whole look.
Can I sleep in a halo braid?
Yes. Use a satin scarf or bonnet and keep the nape tucked so it does not flatten awkwardly. If the braid has beads or cuffs, choose a looser wrap so the accessories do not press into the scalp.
Should I add hair for a halo braid?
If your natural hair is fine, short, or layered, adding hair can help the crown read more clearly. Use only enough to create shape; too much extra hair can make the style heavy and harder to pin.
A Crown That Fits Real Life
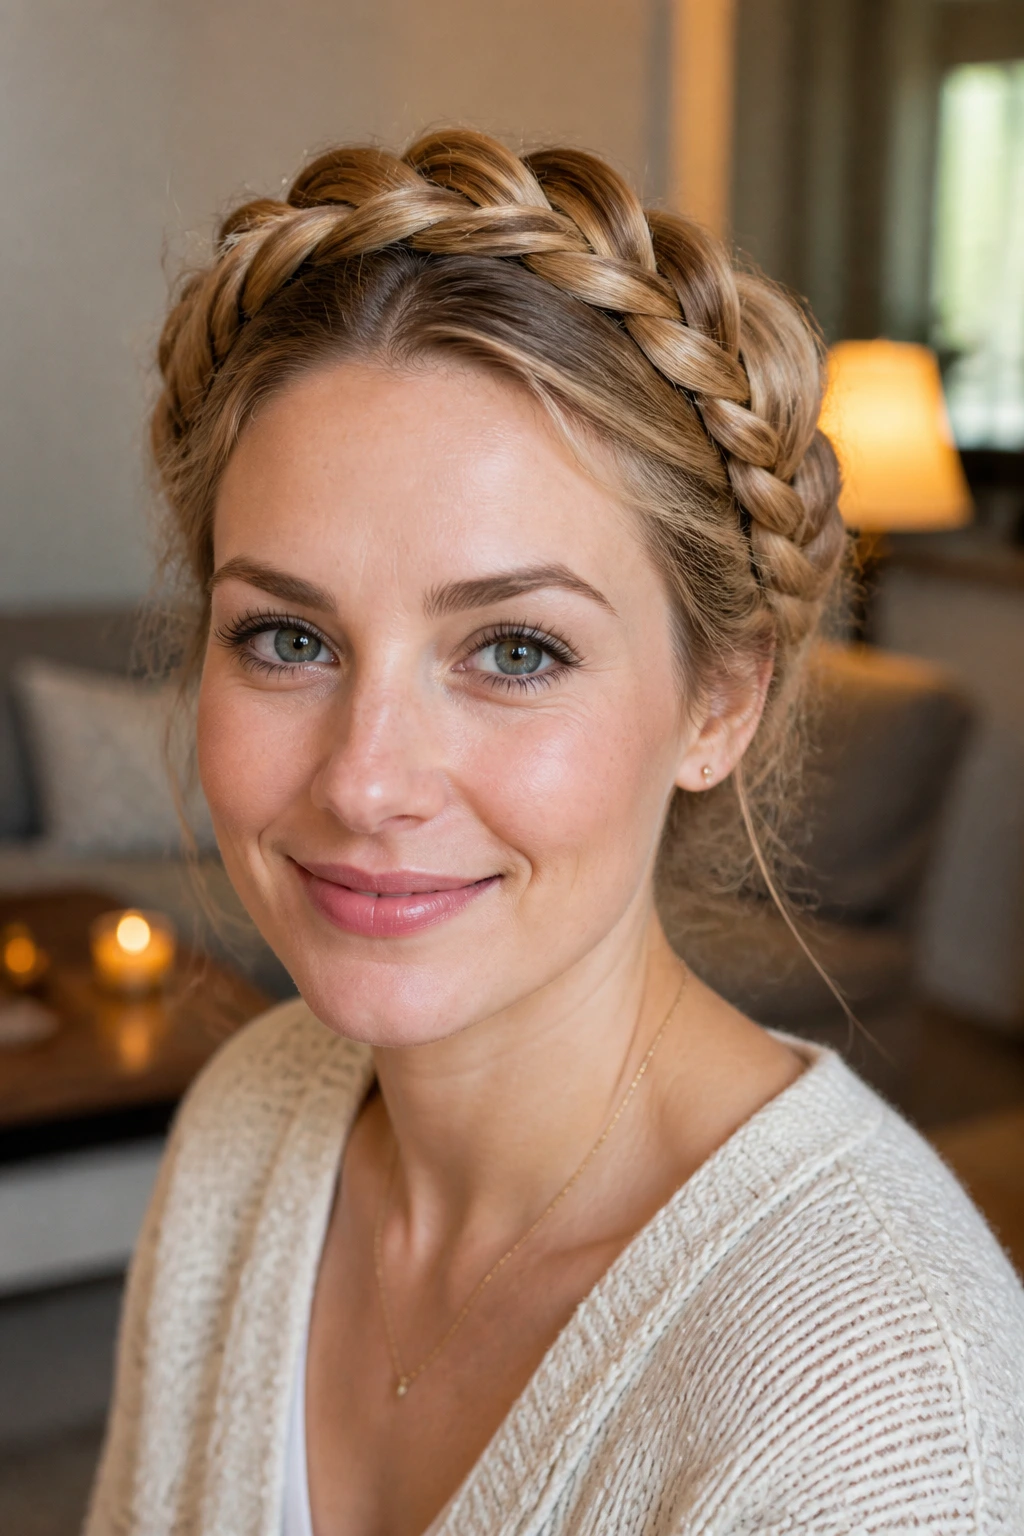
The halo braid keeps coming back because it solves a simple problem: how to make hair look shaped without making it feel overworked. The right version can be neat, soft, bold, or practical, and that range is what makes the style worth keeping in rotation. It is one of those rare braided looks that can be dressed up without losing its usefulness.
Pick the version that matches your hair texture, not the one that looks hardest to the eye. A good halo should sit comfortably, hold its line, and leave you enough room to move through the day without checking it every ten minutes. That’s the real test.
If you build it well, you will keep finding reasons to wear it.
