



A crown braid has a sneaky advantage: it looks like you spent a long time in front of a mirror, but most of the work is really about placement and tension. Sit it too low and it reads like a headband that slipped. Sit it too high and the whole thing starts to look floaty, like it’s hovering instead of sitting on the head.
That’s why crown braid hairstyles keep coming back in so many forms — milkmaid braids, halo braids, braided updos, twist crowns, even loc halos. The bones are the same, but the mood changes fast. Tight and glossy can feel polished. Loose and airy can feel soft in a way that flat hair never will. Add a few face-framing pieces or tuck everything up cleanly, and the same basic shape suddenly works for errands, weddings, photos, or a dinner where you don’t want hair in your lipstick.
The part people miss is this: a good crown braid is less about perfect sections and more about balance. The braid needs enough grip to stay put, enough softness to avoid looking severe, and enough shape around the hairline to feel intentional. Once you start looking at it that way, the options open up fast.
Why These Crown Braids Earn Their Place
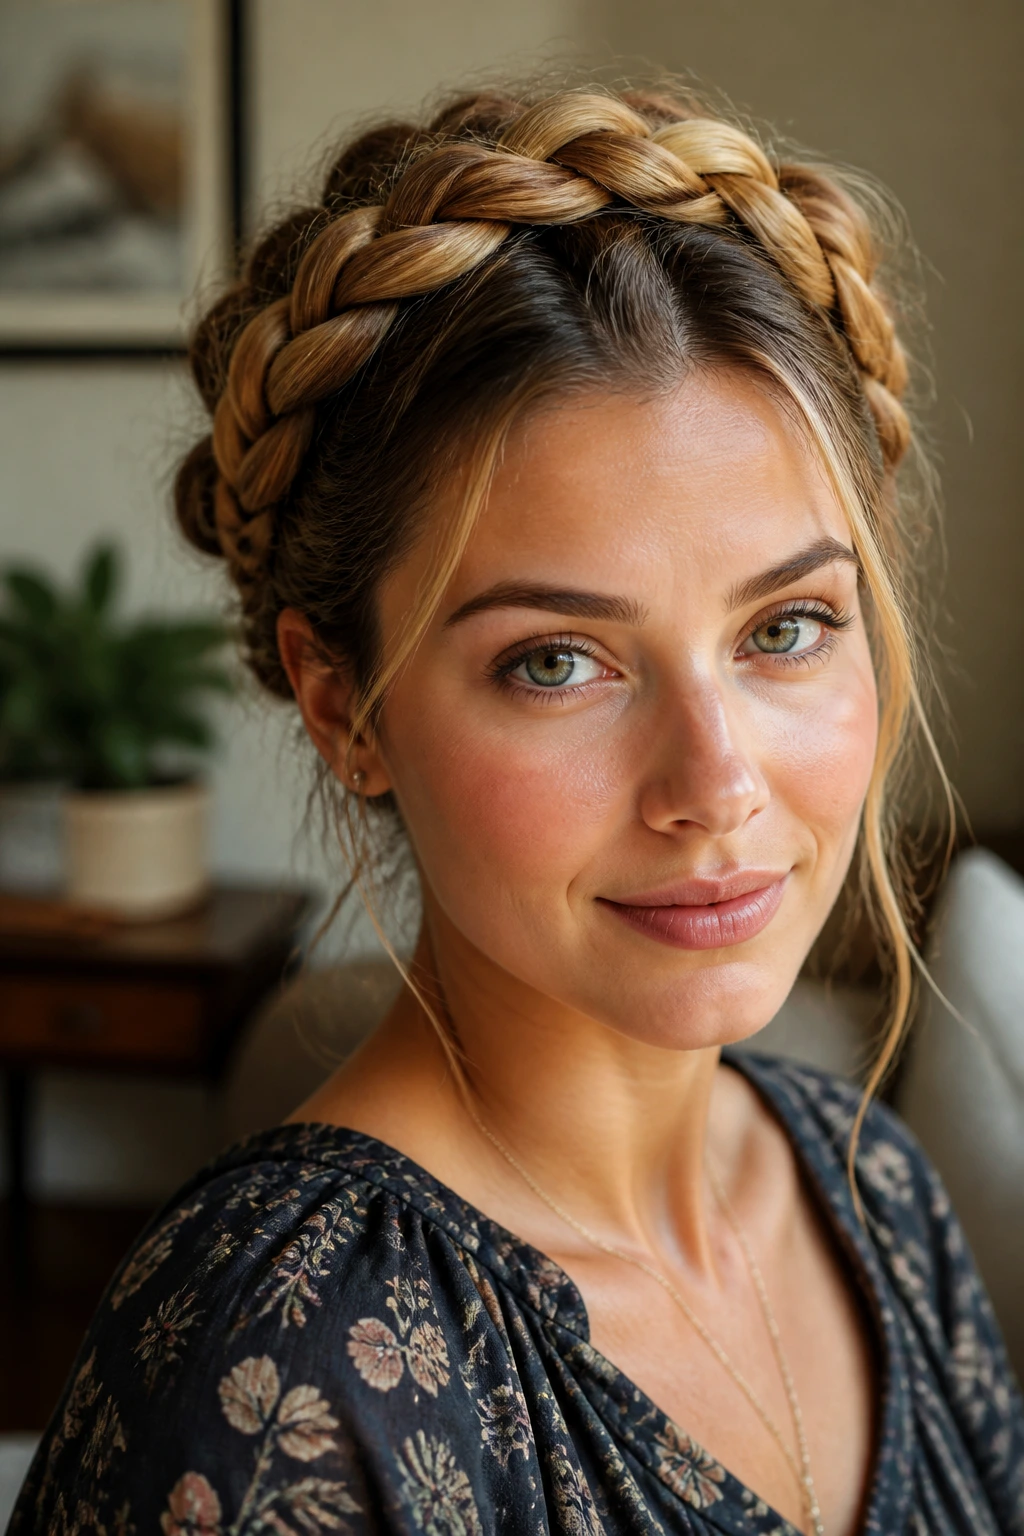
-
They work with the hair you already have: Straight, wavy, curly, coily, loc’d, or braided extensions can all be shaped into a crown-style look with the right base prep and pinning.
-
They solve the “what do I do with this hair?” problem fast: A crown braid gets the hair off the face and off the neck without needing a full blowout or a ton of heat.
-
They can be dressed up or down in minutes: Swap a matte hair pin for pearl pins, or tuck the ends into a bun instead of leaving them loose, and the whole style changes mood.
-
They hold up better than a lot of loose styles: Once the braid is anchored around the head, gravity has a harder time working against it.
-
They are forgiving when the parting isn’t perfect: A tiny zigzag at the hairline or a slightly fuller side usually disappears once the braid is pinned and fluffed.
-
They give you shape around the face: That rim of braid changes the outline of the face in a way that plain hair down just can’t.
1. Classic Milkmaid Crown Braid
This is the version that makes the whole category click. Two braids cross over the top of the head, each tucked and pinned so they form a clean little halo, and the result has that old-school milkmaid shape without feeling costume-y.
I like this one when the hair has enough length to make two even braids but not so much bulk that the braid turns into a helmet. It’s tidy, recognizable, and easy to read from across a room. If you’ve never done a crown braid before, this is the version I’d learn first.
The key is keeping the braids close to the head but not smashed flat. Leave just enough looseness at the outer edges so the crown sits like a real shape, not a strip of rope pressed to the scalp.
2. Soft Boho Halo Braid
Want the braid to look softer and less formal? This is the one. A halo braid that’s gently pulled apart at the loops, with a few wisps left around the temples, has a much looser feel than the tighter milkmaid version.
Why It Works on Wavy Hair
Wavy hair gives this style a little natural bend, which makes the braid look fuller without much teasing. That matters. A braid with some body sits on the head instead of flattening against it, and the loosened edges make the whole thing feel lived-in instead of stiff.
The trick is not to overthink the finish. Pull the braid open just enough to soften the edges, then stop. If you keep tugging, the loops start to look uneven and the crown loses its shape.
This is one of the best crown braid hairstyles for brunch, summer parties, and any day when you want the hair back but not sealed into place.
3. Sleek Dutch Crown Braid
If your hair is slippery, start here. A Dutch crown braid sits with more definition than a flat French braid, because the sections cross under instead of over, which gives the braid a raised edge and more grip along the scalp.
A sleek version works best when you prep the roots with a touch of mousse and blow-dry the hair smooth first. I’d rather see a clean, controlled braid than a messy one fighting to stay in place. The shape matters more than the fluff here.
This style also makes a strong line around the head, which looks sharp with a blazer, a simple dress, or a clean neck line. Keep the braid even. No dramatic pulling apart. The whole point is that tight, deliberate arc.
4. Loose French Crown with Face-Framing Pieces
A braid that leaves two skinny front pieces alone feels less formal the second you look at it. That’s the charm. The crown still gives shape, but the face-framing bits soften the line and stop the style from reading too severe.
This version works especially well when you want the braid to feel a little romantic without tipping into prom-hair territory. The front pieces should be deliberate, though. Too many loose strands and it stops looking styled. I usually leave the first section near each temple out, then curl the ends lightly so they bend away from the face.
It’s a good choice for medium hair density because the braid itself doesn’t need to be huge to carry the look. The face pieces do some of the visual work.
5. Double Crown Braids
One braid can sag. Two can balance each other. That’s the whole appeal of this look, especially if the hair is thick or heavy and you want the style to feel anchored from both sides.
When Two Braids Beat One
Double crown braids are useful when the scalp needs a little more support. Two braids starting from opposite sides distribute the weight better than one long braid wrapped around the head, which means the style often holds its shape longer.
They also give you more control over volume. You can keep one braid tighter and the other slightly fuller if your hair has different textures on each side. That little mismatch is normal. Hair is rarely identical from left to right anyway.
This is a strong pick for people who want a crown effect but don’t want to commit to one long braid weaving all the way around.
6. Braided Crown with a Low Bun
This is the style that solves the “I need my hair off my neck, but I still want some shape” problem. The braid comes around the crown, then the tail is tucked or wrapped into a low bun at the nape.
It looks especially good with thicker hair because the bun gives the style a solid finish. The braid frames the head; the bun grounds it. Without the bun, some crown styles can feel top-heavy. This one doesn’t.
If you’re going somewhere formal but don’t want the stiffness of a full updo, this is a strong middle ground. The bun can be smooth or slightly messy, but I’d keep the braid itself cleaner so the style doesn’t turn into visual noise.
7. Rope-Twist Crown Braid
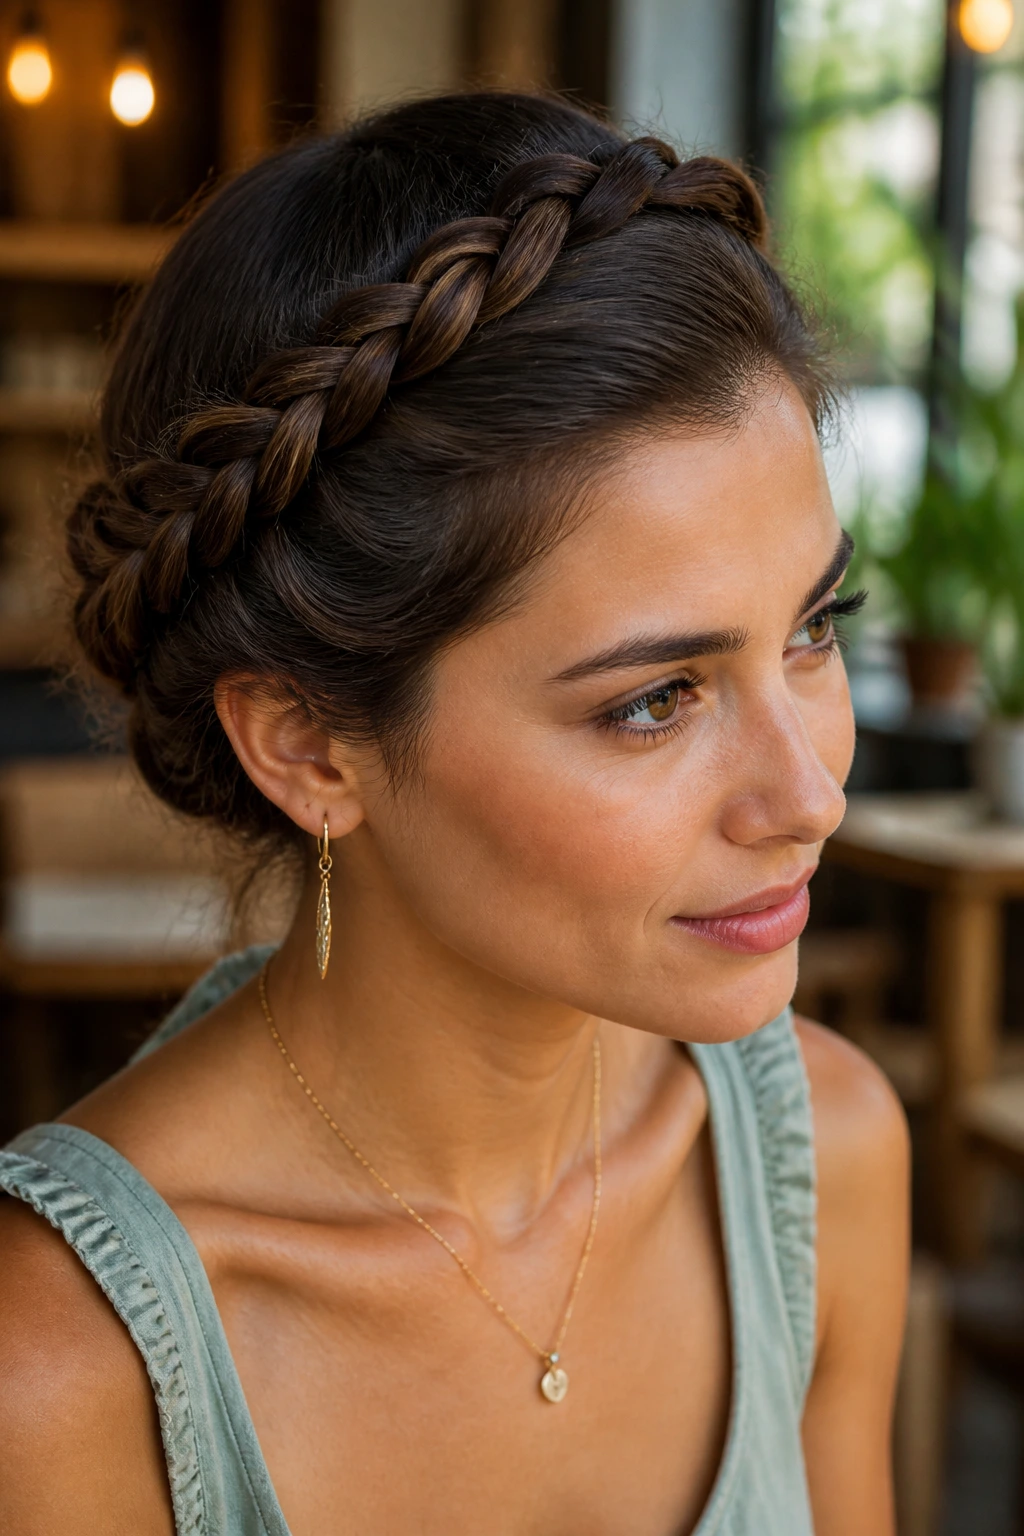
Not every crown needs a classic three-strand braid. A rope-twist crown has a sleeker, slightly more modern feel because the two-strand twist creates a tighter, smoother line.
The surface of a rope twist looks different from a braid right away. Less woven, more spiraled. That makes it a smart option if you want something that sits neatly against the head and moves fast once you get the rhythm.
I like it for hair that frizzes quickly, because the twist can look polished even when the texture around it is a little soft. The finish is clean without being severe, which is a rare balance. No extra fuss.
8. Fishtail Halo Crown
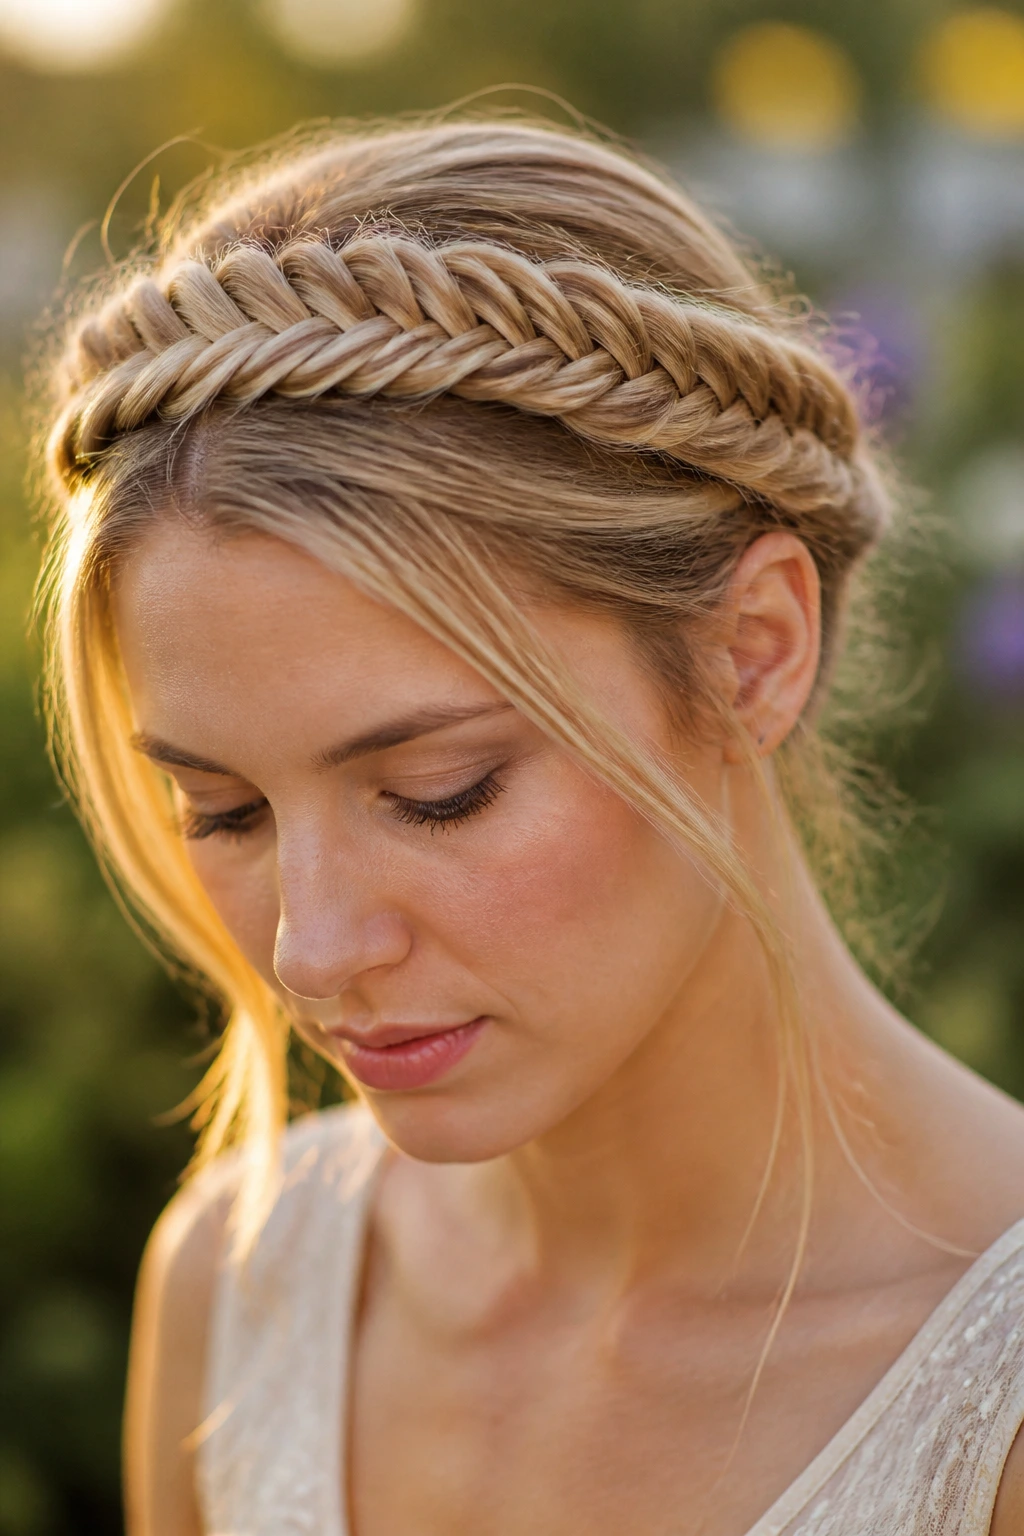
Why does fishtail always look more dressed up? Because the weave is tighter and the pattern has more tiny interruptions in it, which makes the braid read as detailed from every angle.
How to Finish the Ends
Keep the fishtail sections small and consistent, especially near the front where the eye lands first. If the section sizes get messy early, the whole crown looks tangled instead of textured.
The ends are where people usually get lazy. Don’t. Either tuck them under the braid and pin them flat, or leave them as a tiny hidden tail behind the ear if the hair is long enough to disguise it. A dangling fishtail tail can ruin an otherwise clean halo.
This version shines on long hair and on hair that has enough slip to let the sections fall into place without constant finger-fighting.
9. Messy Textured Crown Braid
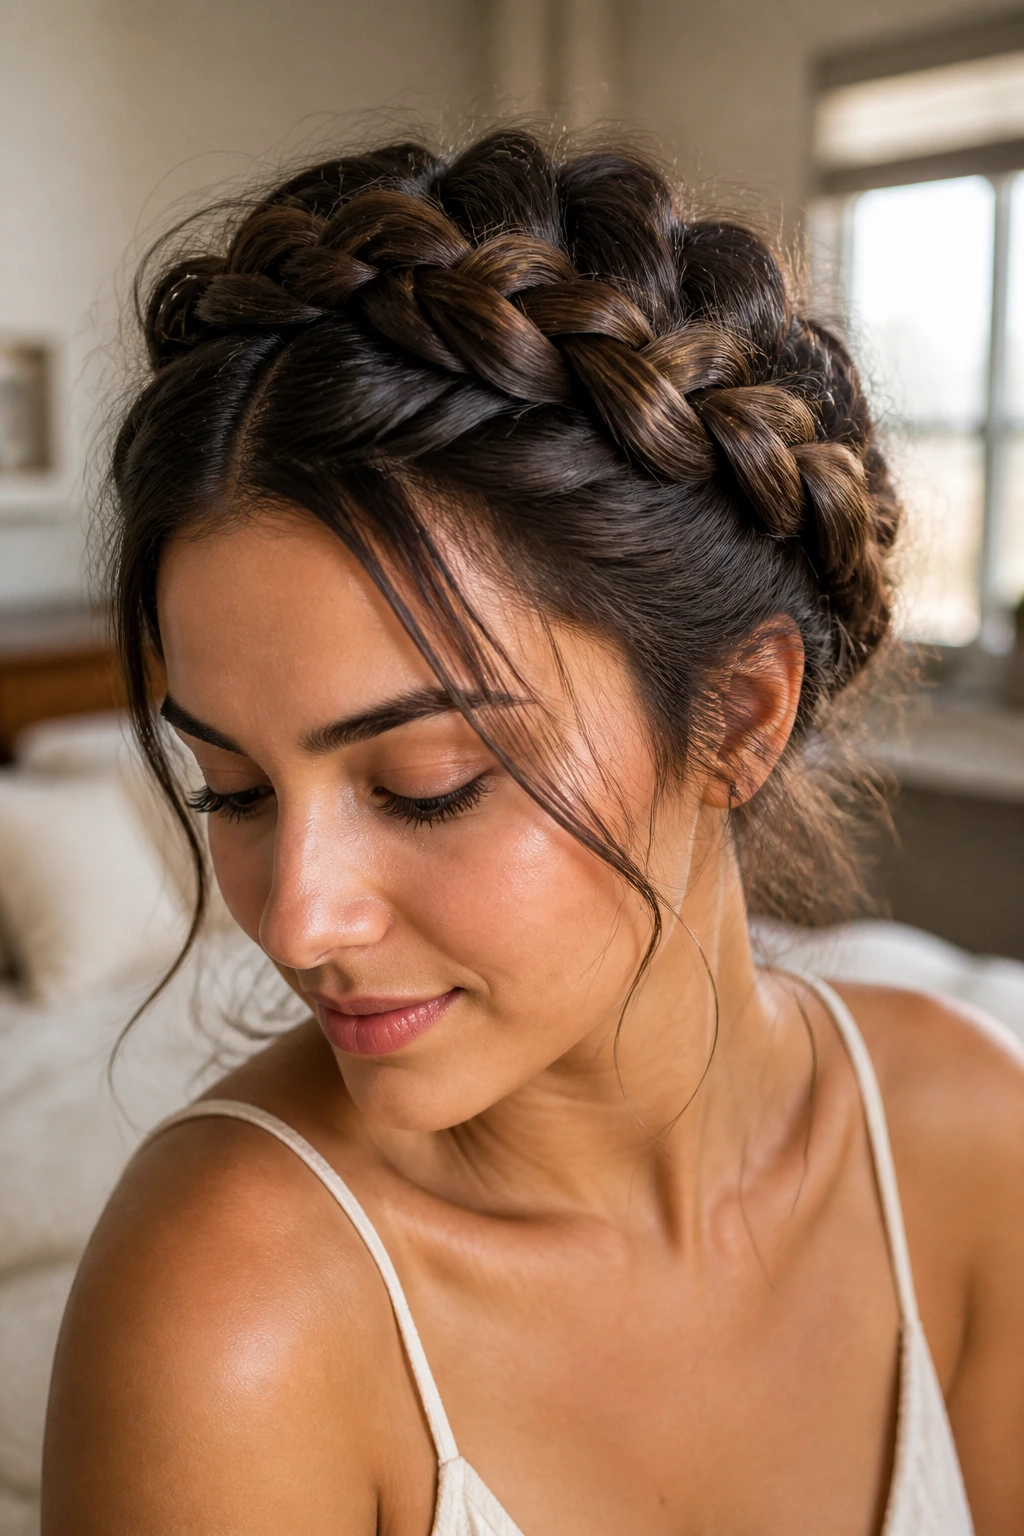
A messy crown braid is not the same thing as a rushed one. That difference matters. The best textured version still has a clean path around the head; it just softens the loops and loosens the surface so it doesn’t look stiff.
Start with texture spray or a little dry shampoo at the roots, then braid with a light hand. Once the braid is pinned, tug the outer edges only where you need a little softness. The crown should look relaxed, not collapsed.
This is the style I reach for when clean, sleek hair feels too formal. It has more personality. And it hides the fact that the braid isn’t identical on both sides, which is useful if your hair density changes from temple to temple.
10. Half-Up Crown Braid
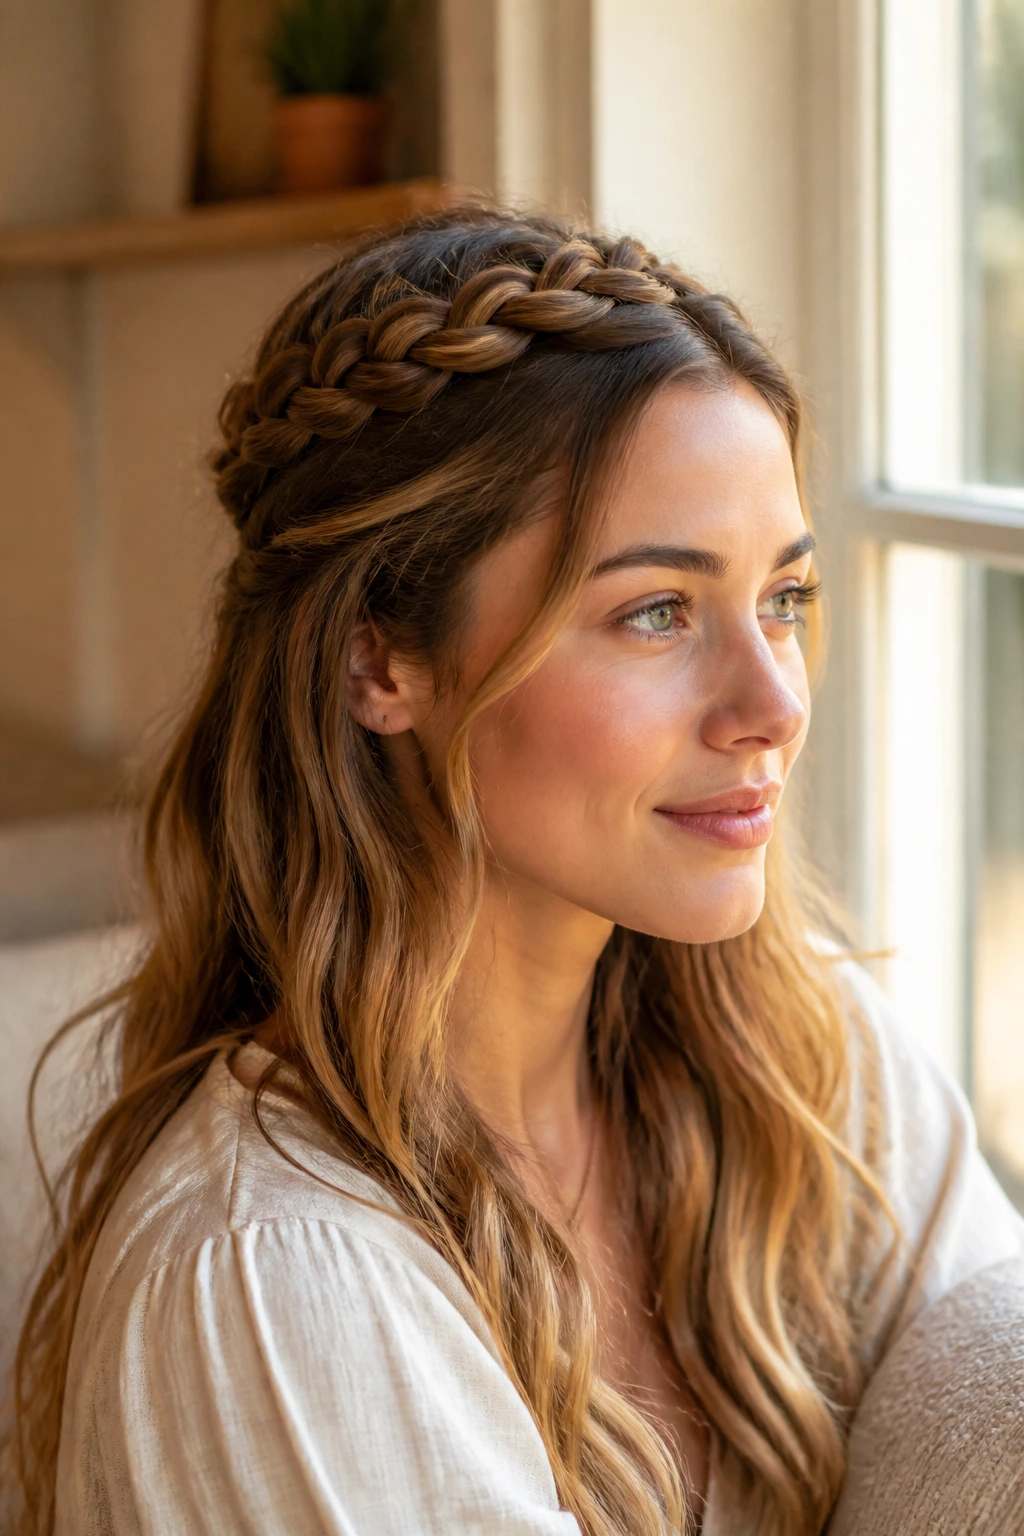
A half-up crown braid keeps the top portion of the hair controlled while the bottom length stays free. That gives you the crown shape without losing the swing of the rest of your hair.
Why the Messy Finish Helps
The half-up version is easier to wear because it doesn’t ask the braid to do all the visual work. The loose length below the braid fills out the style and makes it feel less severe, especially on long hair.
It also gives you a cleaner exit point. Instead of tucking every last strand into pins, you can let the braid stop at the crown and keep the rest loose. Less tension. Less time. Less chance of a pin sliding out halfway through the day.
If you like braids but don’t want a fully pulled-back look, this one hits the sweet spot.
11. Feed-In Crown Braid with a Clean Part
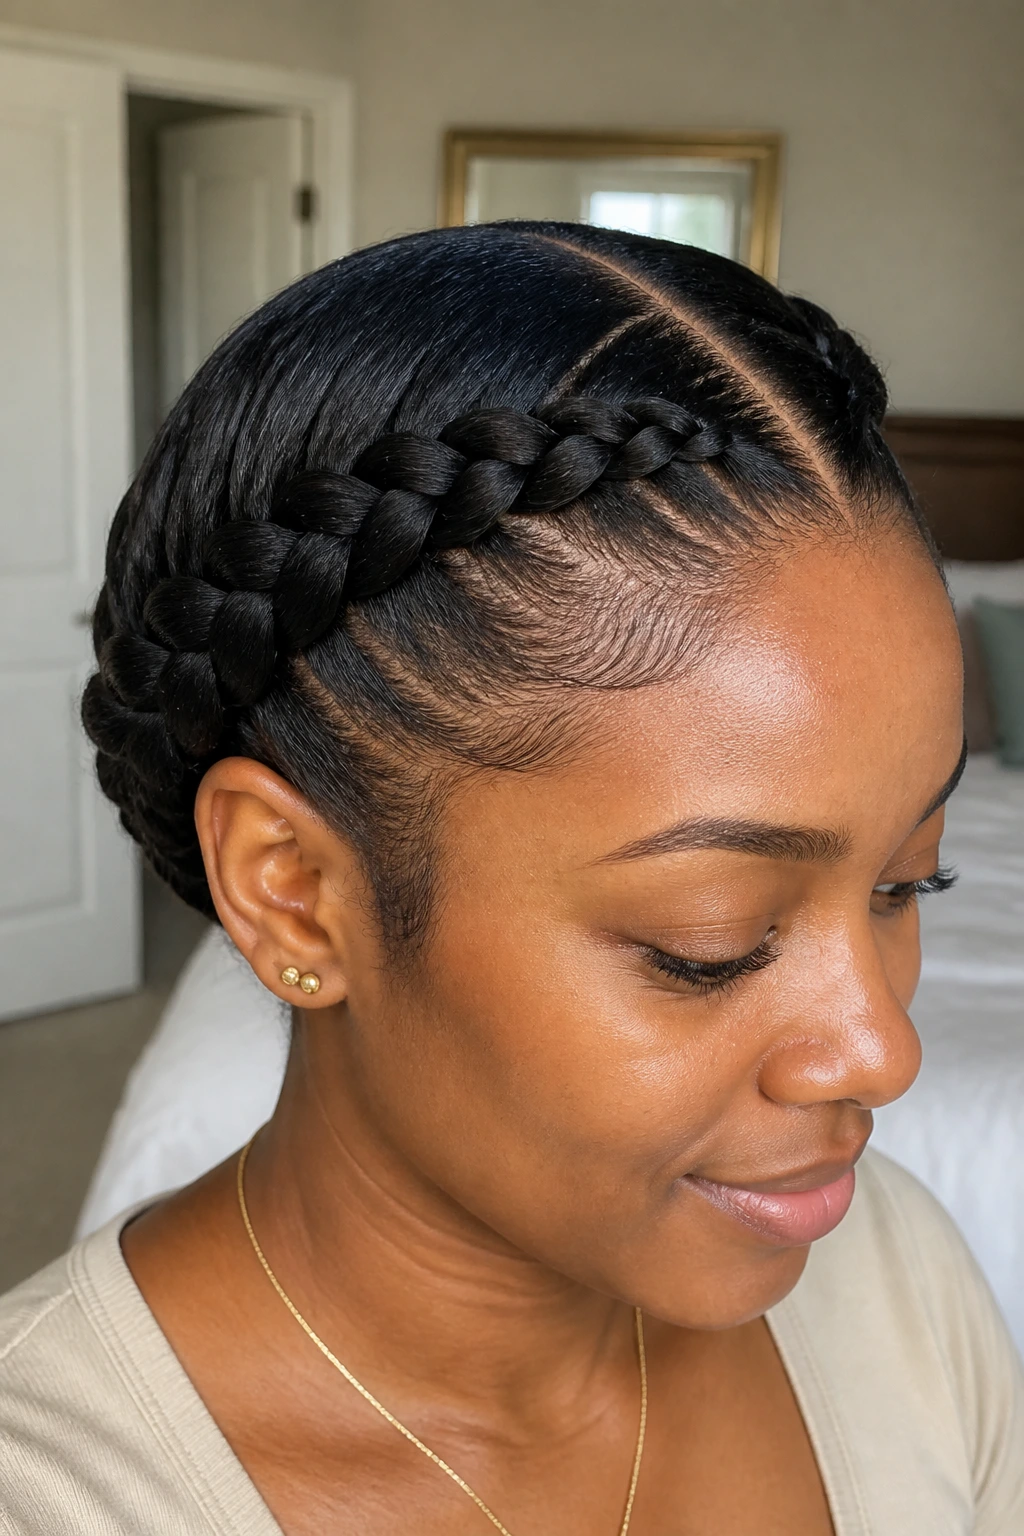
This is the neat one. The braid starts with a crisp part, then picks up sections gradually so it looks like it’s growing out of the scalp with no hard jump in thickness.
Feed-in braids are useful when you want the crown to feel smooth and balanced all the way around. They’re also good for protective styling because the gradual build keeps the edge line looking tidy. If you’re careful with the tension, the finish can stay neat for a long stretch.
I’d use this on hair that needs a little control at the roots. Not flattened. Controlled. There’s a difference, and it shows the second the style settles.
12. Crown Braid with Curly Ends
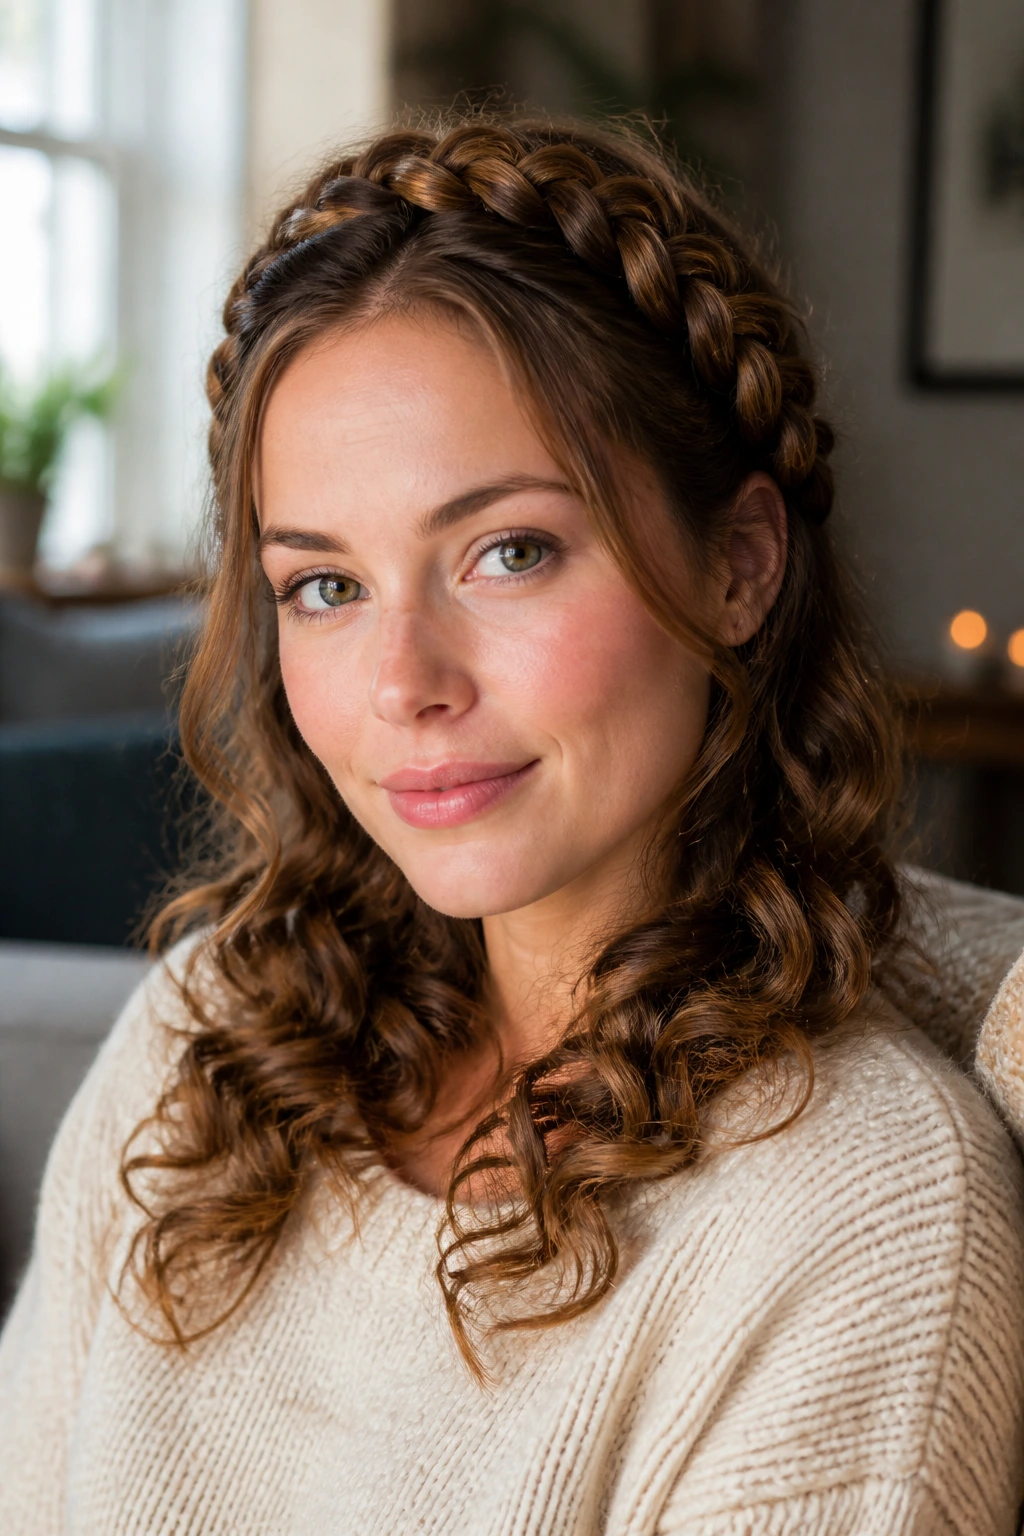
When the braid ends in curls, the whole style gets a softer finish. The crown gives structure, and the loose curly tail adds movement near the shoulders and back.
The texture shift is what makes this one interesting. A braid that stops in a sharp knot can feel a little abrupt. Curls smooth that out. If your hair already has a wave or curl pattern, leave the ends free and define them with a little cream instead of forcing them into a pin-tight tuck.
This version looks best when the curls are glossy but not stiff. You want bend. Not shellacked ringlets.
13. Crown Braid with Bangs
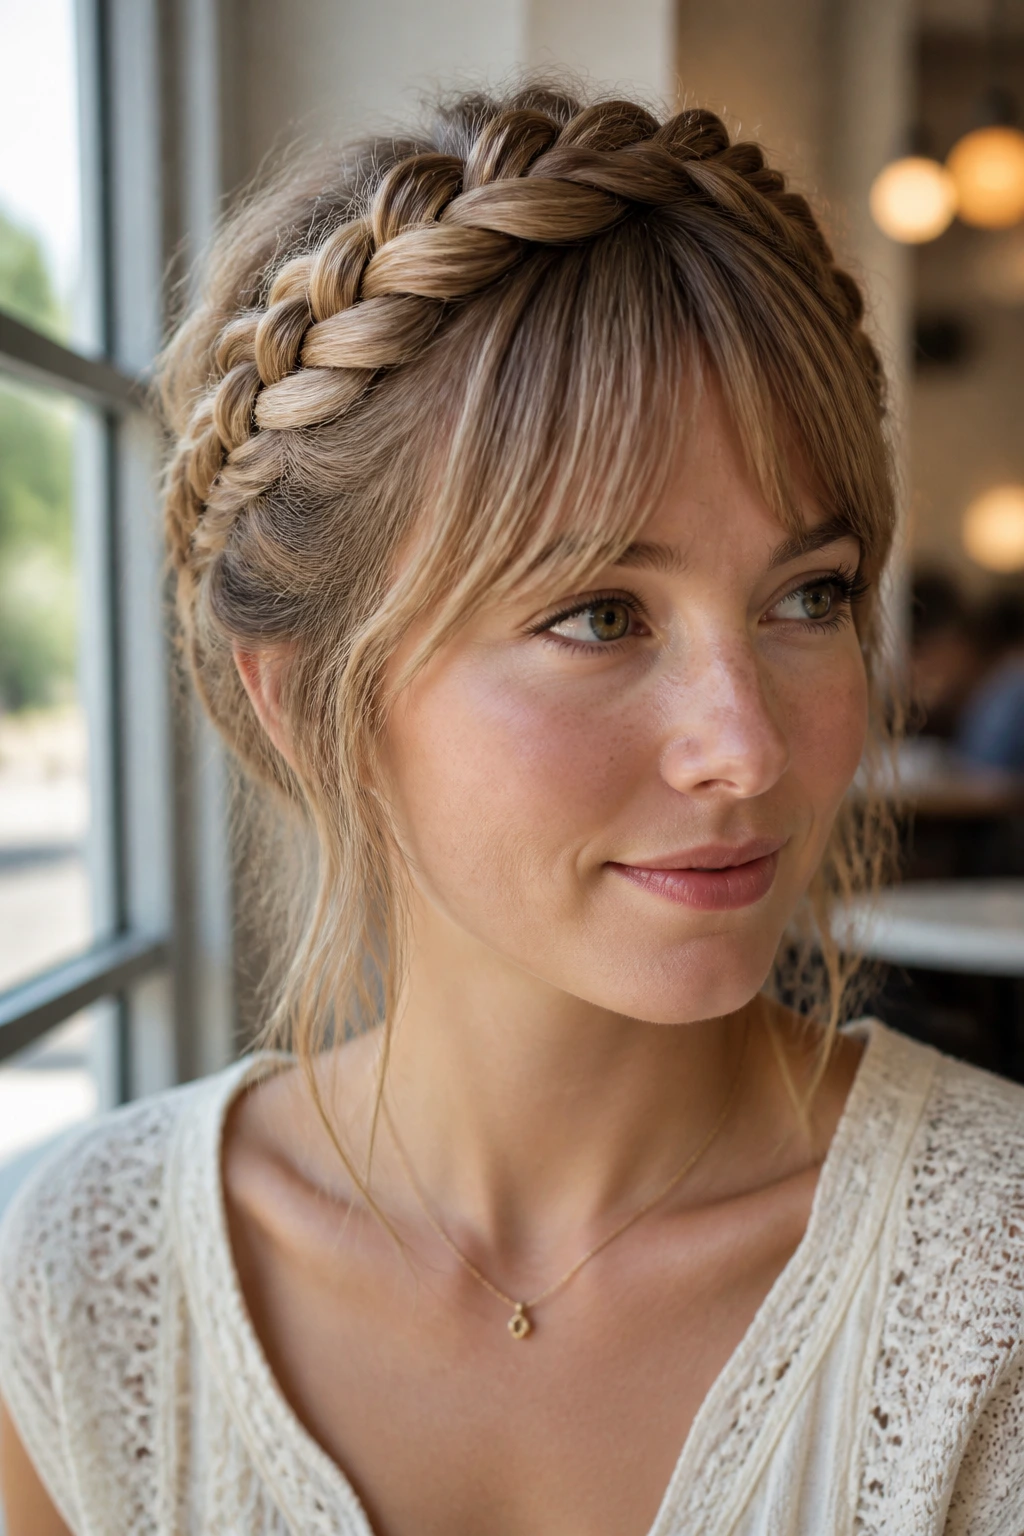
Bangs change the whole mood here. Full bangs, curtain bangs, even a soft fringe can break up the crown shape and keep it from feeling too wrapped-up around the head.
The braid should sit just behind the fringe line so the bangs have room to breathe. If the crown creeps too far forward, the style starts to fight the bangs instead of framing them. That’s when you get puffiness at the hairline and a weird top-heavy shape.
I like this option because it doesn’t ask you to hide the front of the haircut. It works with the cut you already have. That makes it easier to wear.
14. Ribbon-Woven Crown Braid
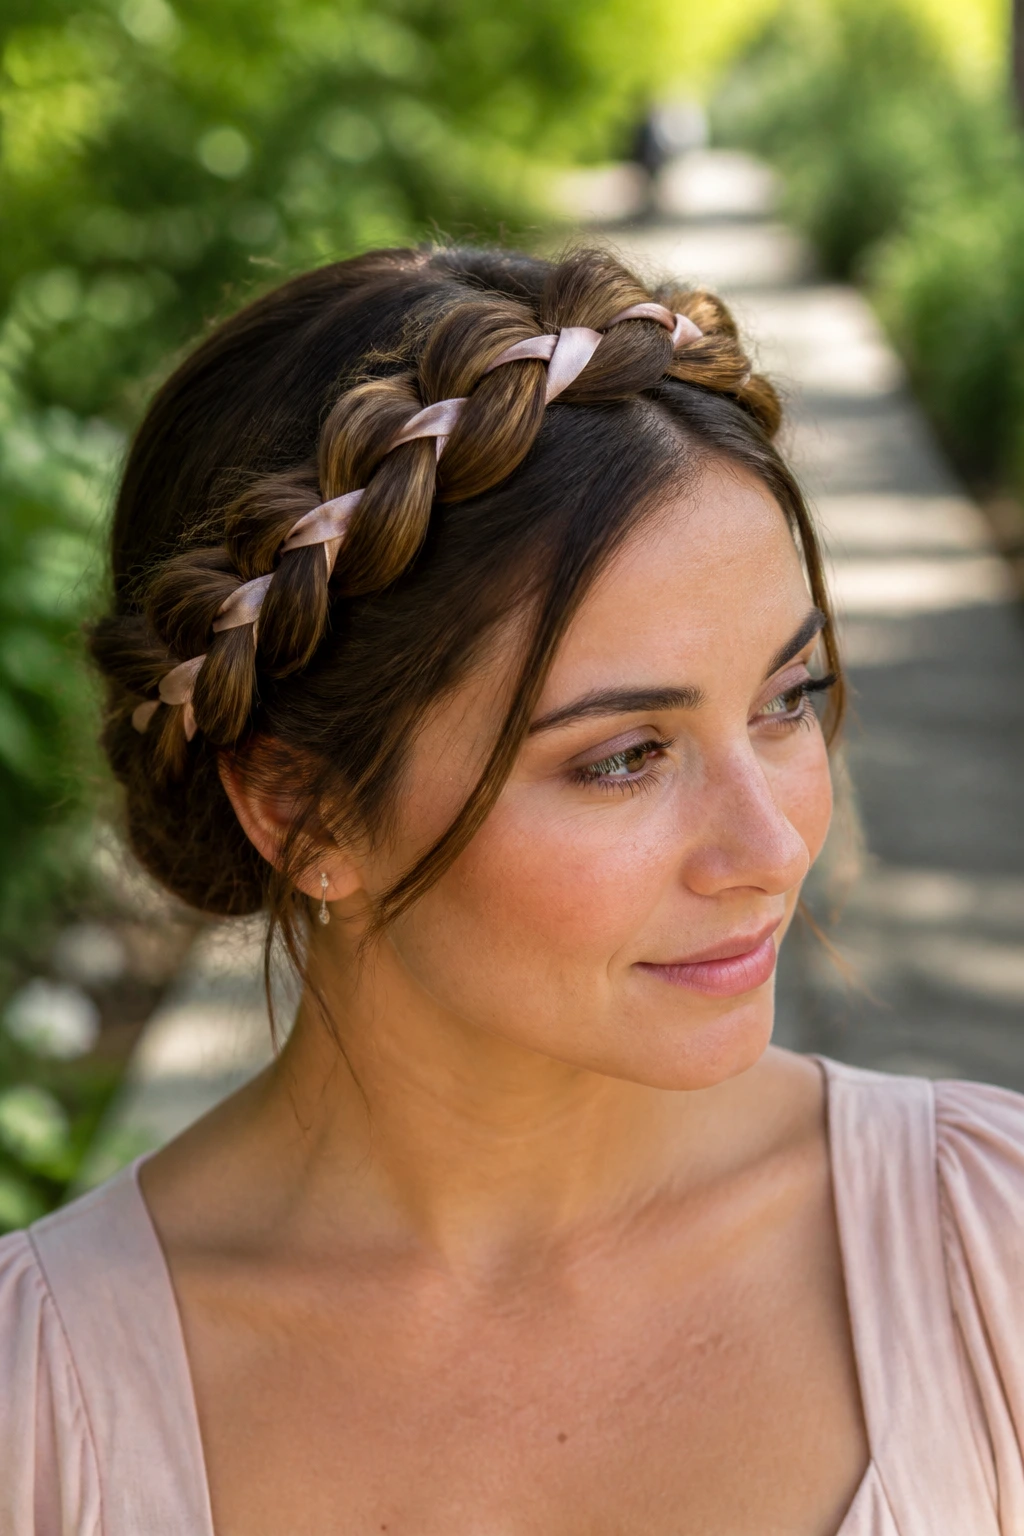
A thin ribbon woven through a crown braid changes the whole read of the style. One inch of satin can do more than another ten minutes of braiding because it catches the eye at each crossing point.
When Ribbon Is Enough
Choose a ribbon that’s narrow enough to sit inside the braid without bulking it up. Too wide, and the braid loses its shape. Satin and velvet both work, but satin slides more easily, so keep the tension a little firmer as you braid.
I’d keep the rest of the look simple. The ribbon is the statement. If you add earrings, a patterned dress, and too much texture everywhere else, the braid disappears into the outfit instead of leading it.
This is a smart choice for birthdays, photos, and any day when you want a small detail to do a lot of work.
15. Side-Part Crown Braid
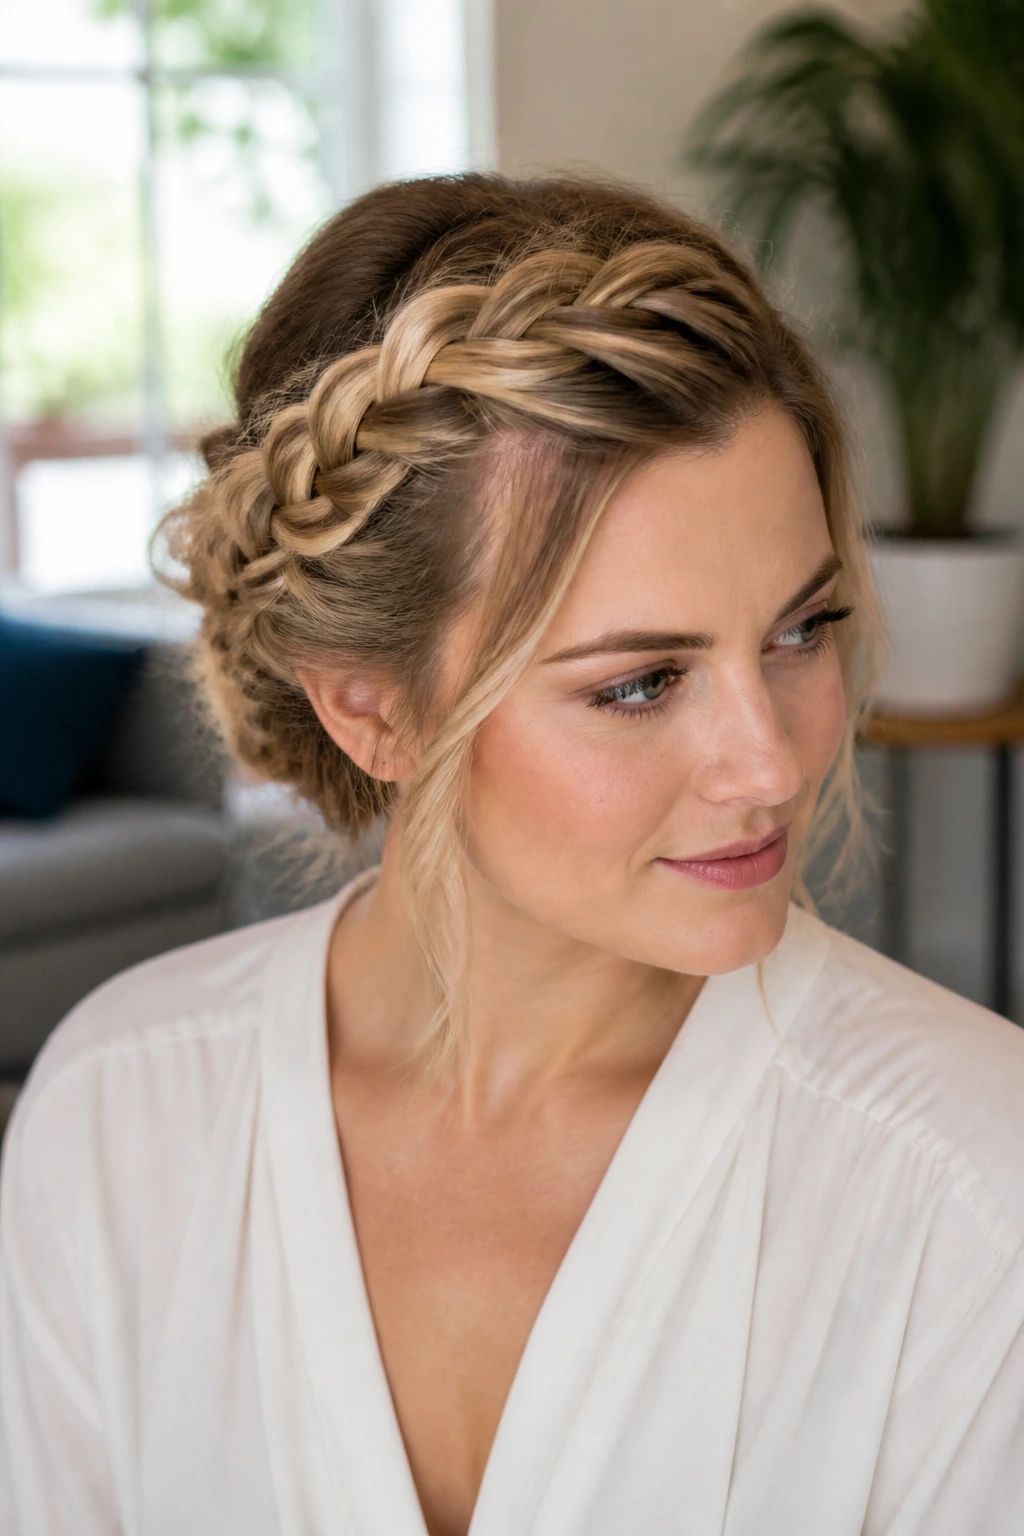
A side part gives the crown braid a different starting angle, and that small shift changes the shape more than people expect. The braid doesn’t sit centered and symmetrical; it sweeps across the head with a little more movement.
This is a nice fix if the middle part feels too rigid on your face. Some people look better with the braid beginning slightly off-center because it breaks up the forehead shape and gives the style a more natural lean.
The part doesn’t need to be dramatic. Even a one-inch shift is enough to make the crown look less uniform. And honestly, that’s often the better choice.
16. Space-Braid Crown Effect
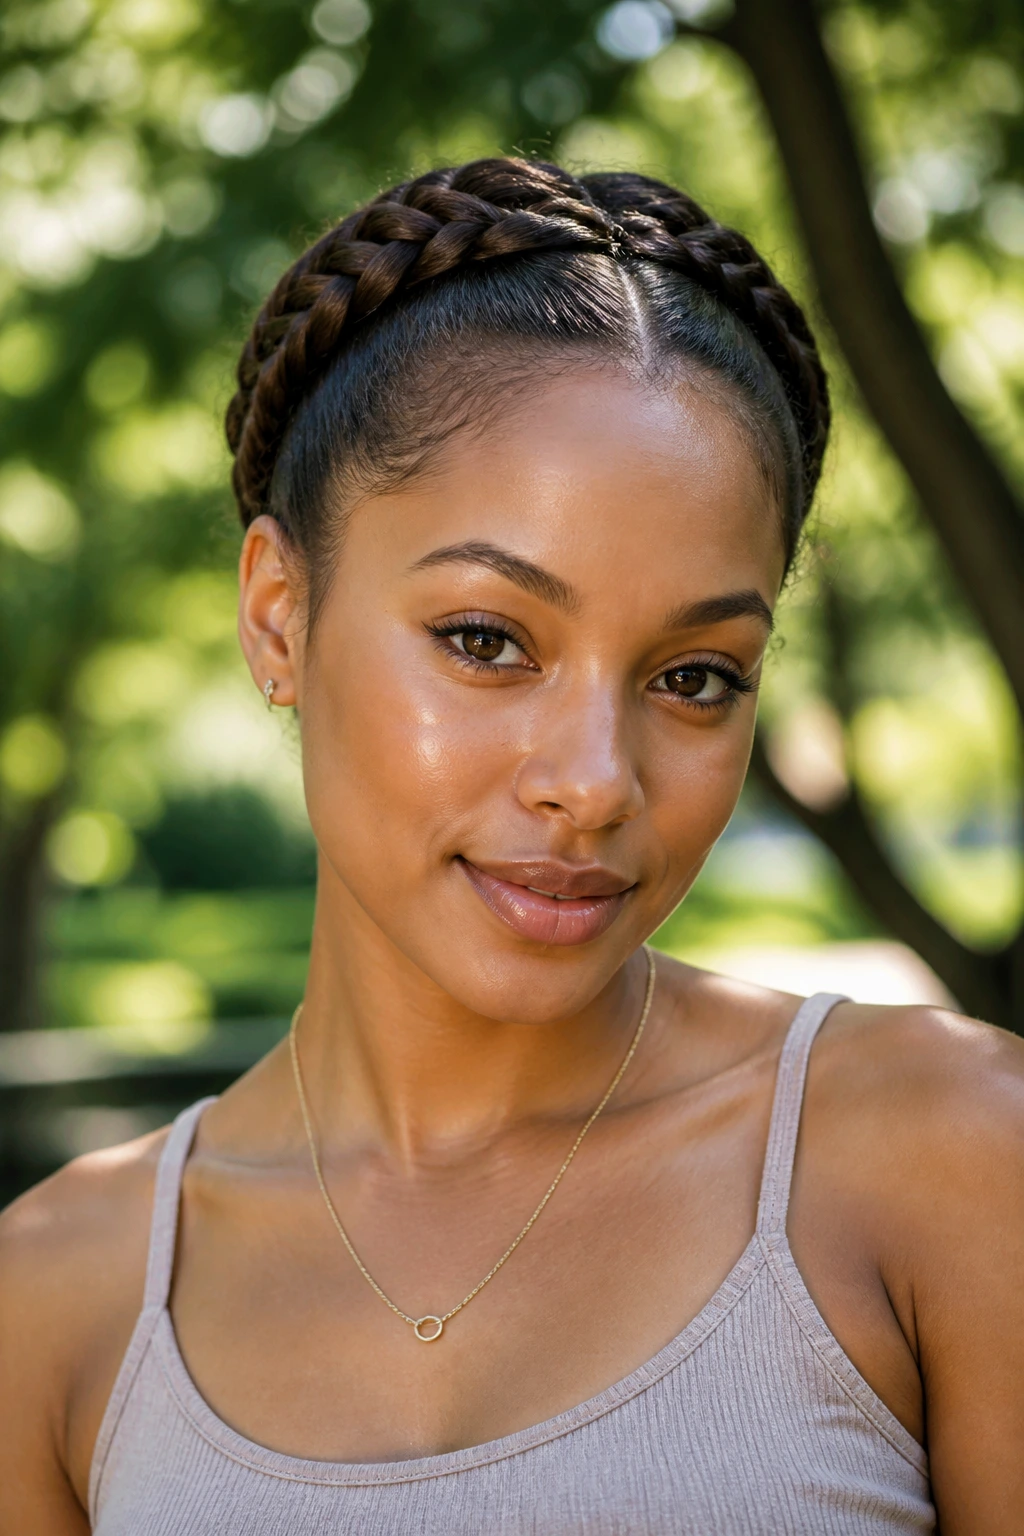
This one borrows from space braids without fully committing to the look. Two braids start high at the temples, then curve back and meet around the crown, creating a rounded frame that feels playful but not childish.
It’s a good pick if you want a little lift at the sides. The visual effect is almost a soft frame around the top of the face. Tighten the base enough to keep the shape crisp, then stop fussing. If you keep pulling, you lose the roundness that makes it work.
This style has a bit more edge than a standard halo braid, which is exactly why some people love it. It reads like a braid with a point of view.
17. Mohawk-Inspired Crown Braid
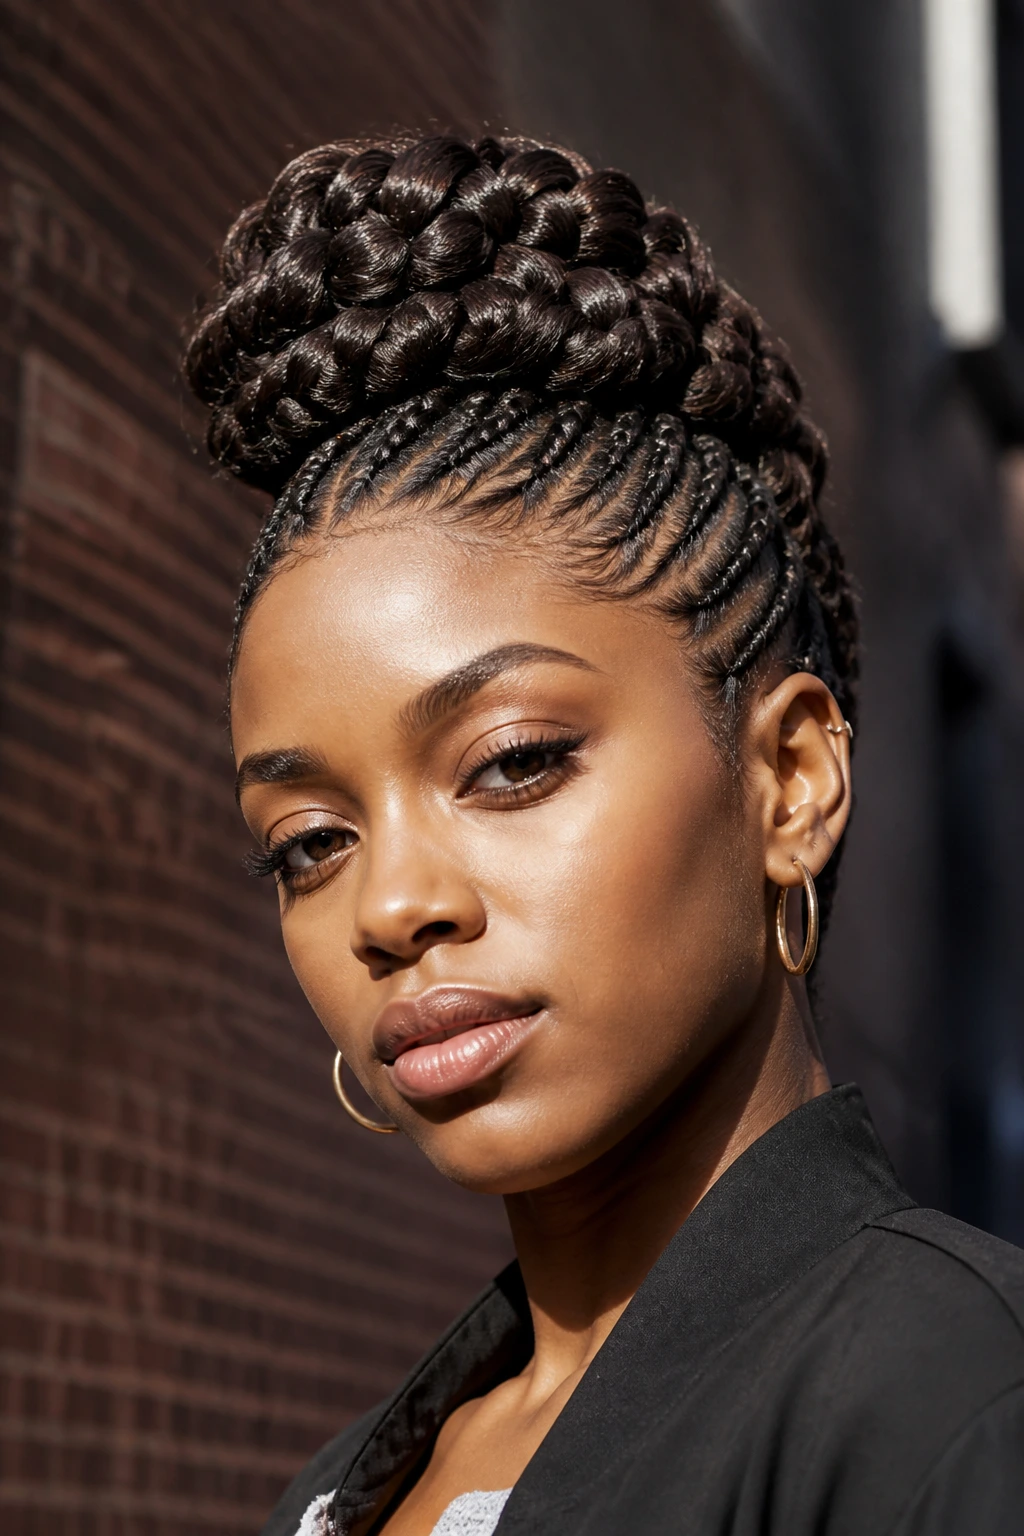
A mohawk-inspired crown braid uses height at the center and a tighter hold at the sides, so the silhouette feels bolder than a soft halo. It’s the opposite of demure.
That contrast is the whole point. The braid lifts the middle, leaving the sides cleaner and the top more dramatic. It works well on thick hair, or on hair with enough texture to support a little shape without collapsing.
I’d reach for this when I want the braid to feel intentional and sharp, not sweet. It’s a little tougher. A little less polished around the edges. Good. That edge is what makes it memorable.
18. Goddess Braid Crown
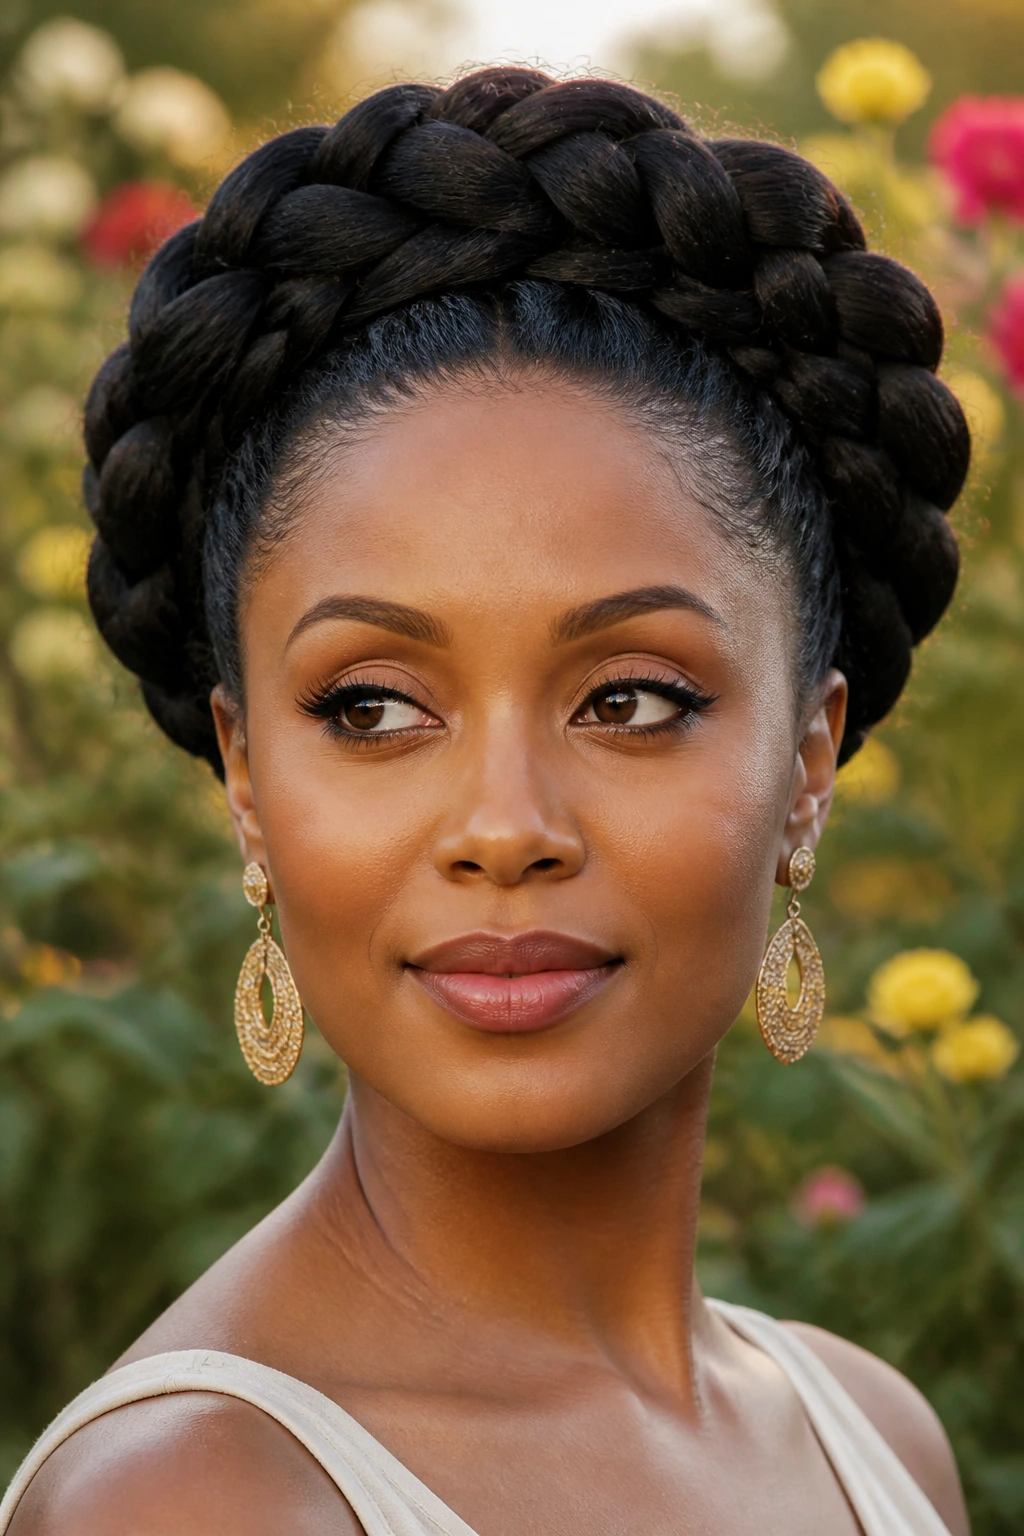
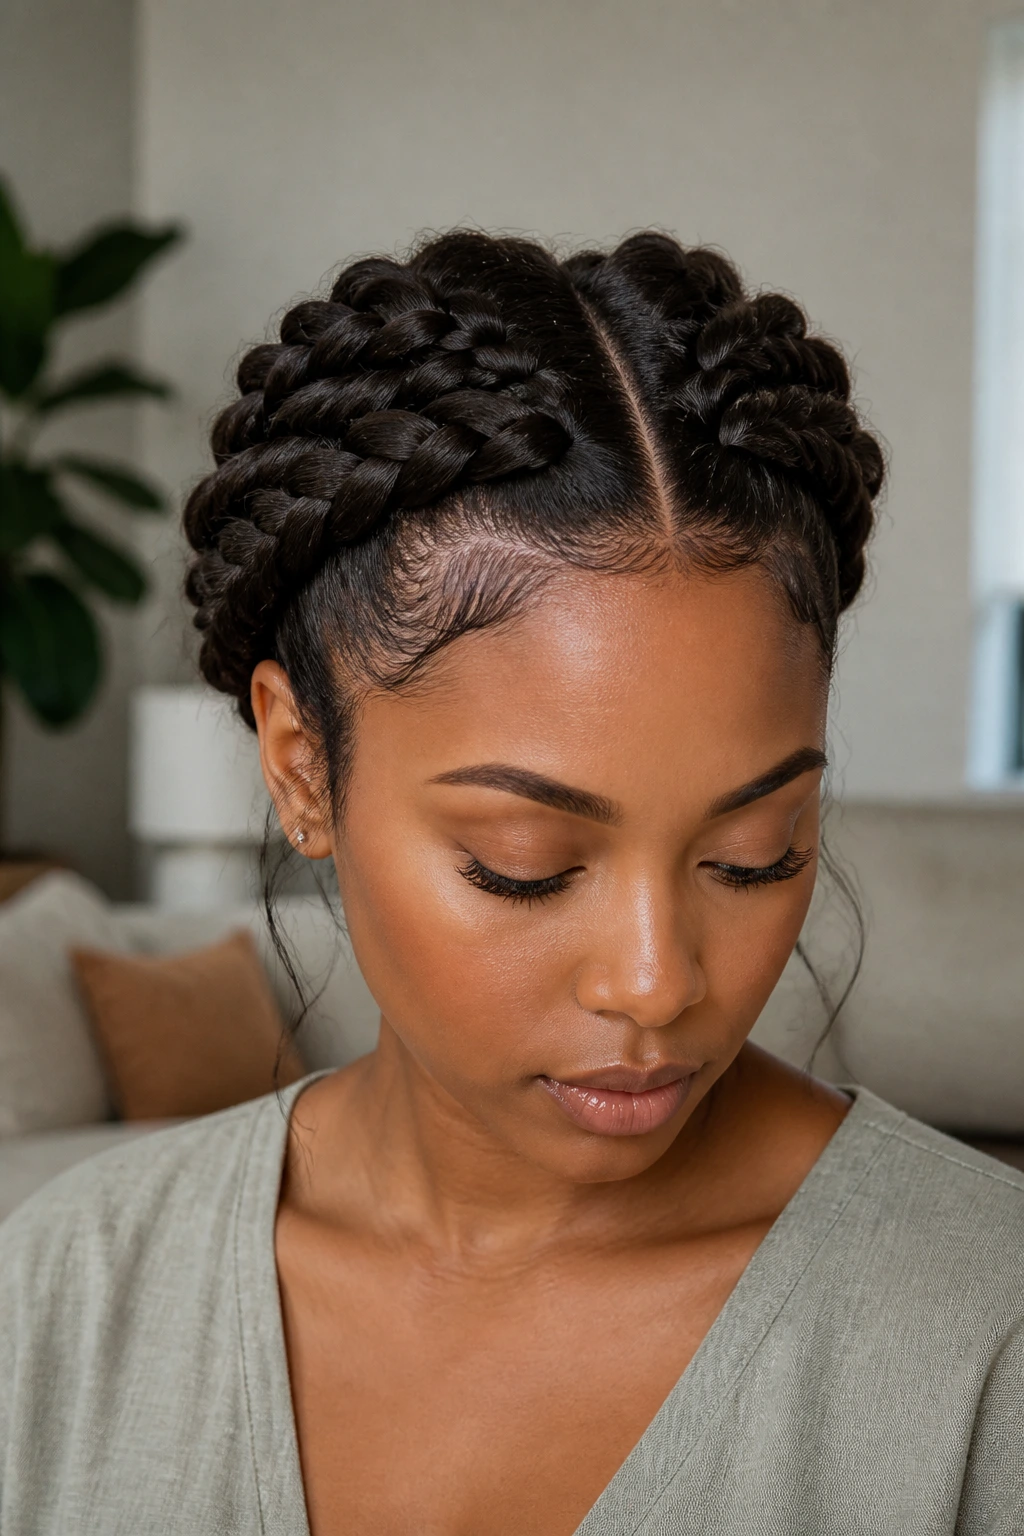
A goddess braid crown leans larger, softer, and more sculpted than a standard crown braid. The sections are fuller, which gives the braid a thicker rope look and a more substantial frame around the head.
The appeal is in the scale. Smaller braids can disappear in dense hair; goddess braids hold their presence. They also photograph with more structure because the size of the braid is visible from the front, the side, and the back.
I like this style when the outfit is simple and the hair needs to carry a little more visual weight. It’s not delicate. That’s the point.
19. Loc Crown Halo
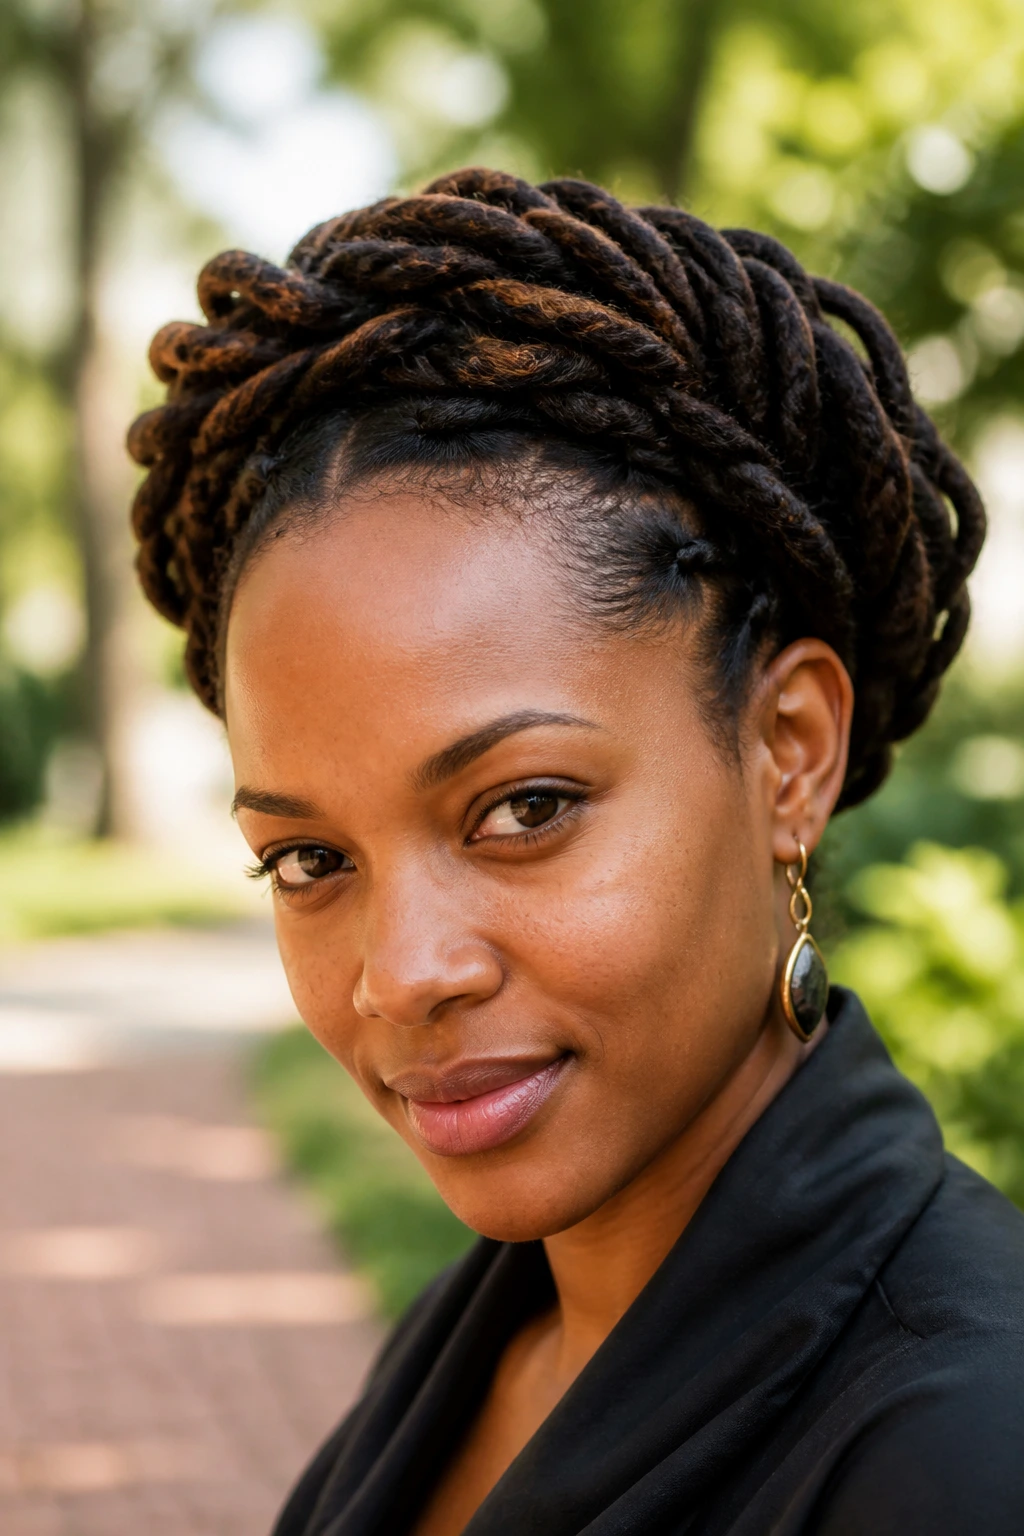
Locs turn a crown style into something with a lot of built-in body. You don’t need to force fullness where it already exists. The halo shape comes from guiding the locs around the head and pinning them with enough support to keep the line clean.
Why Locs Need Less Pinning
Locs already have weight and texture, so over-pinning can make the style feel cramped. Use pins to guide the path, not to clamp every inch down. A few well-placed pins will usually do more than a whole row of tiny ones.
I also like leaving the crown line a touch looser with locs. It keeps the style from feeling too tight against the scalp and gives the shape room to settle naturally. The result looks grounded, not forced.
This is one of the most elegant ways to wear a halo shape without flattening the hair’s own texture.
20. Box-Braid Crown
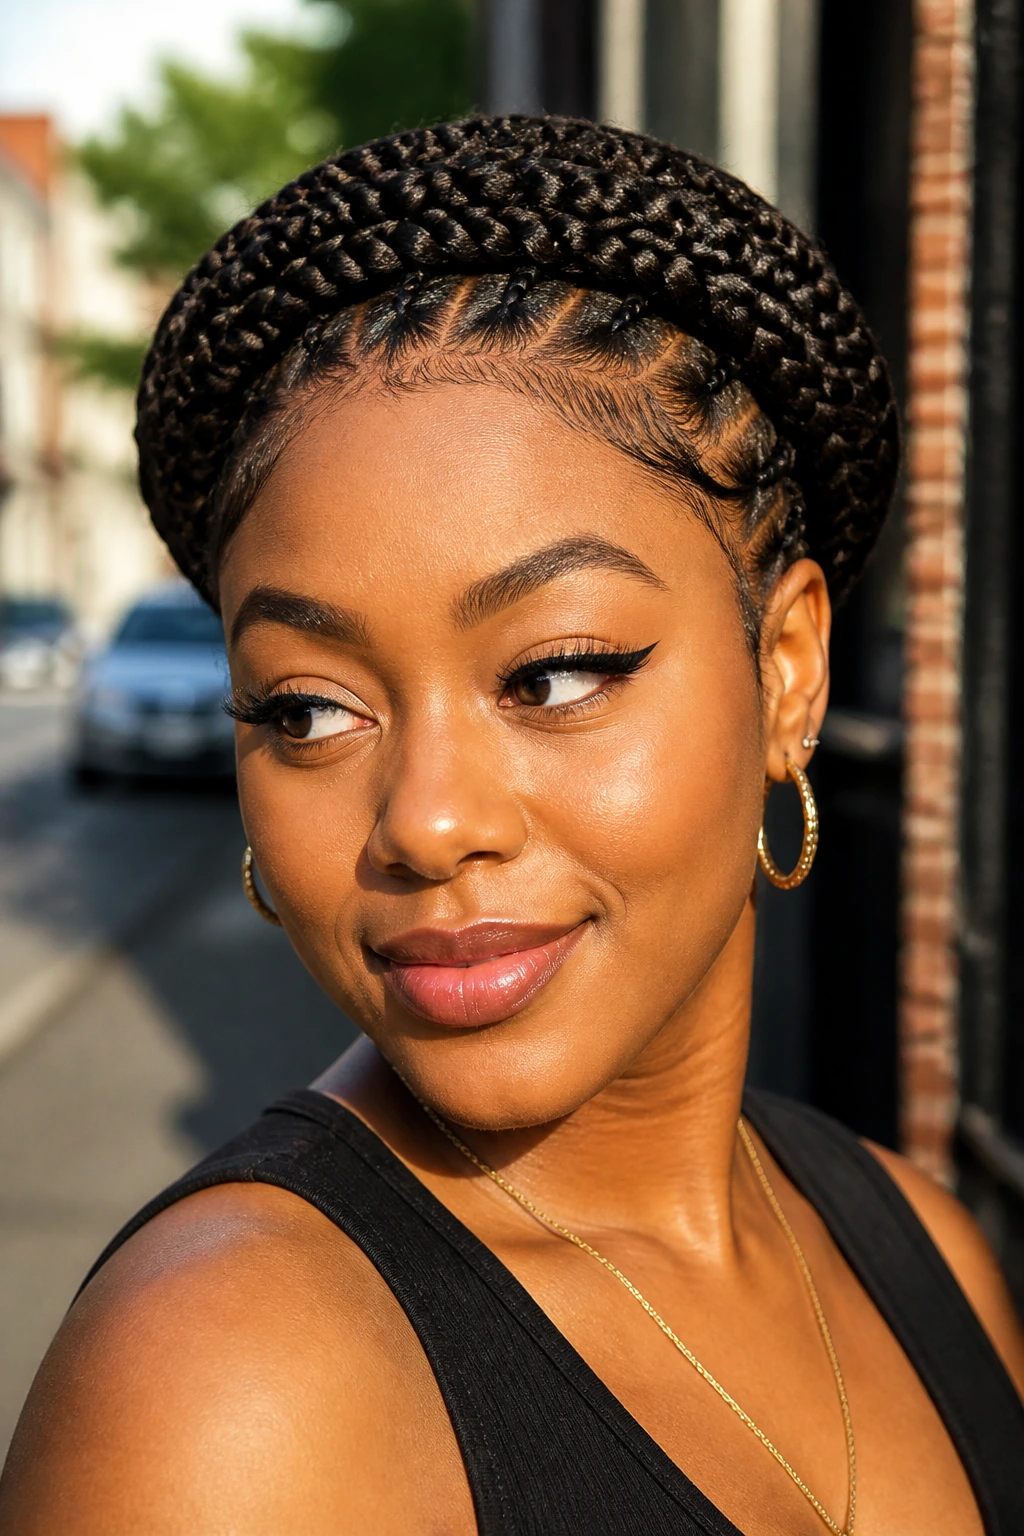
Box braids make crown styles easier in one obvious way: the sections are already there. You’re arranging, not building from scratch. That means the braid can be faster to put up and easier to keep neat.
The size of the box braids matters. Smaller braids give more flexibility and a smoother curve around the head. Larger braids create a chunkier crown with more presence. Neither is wrong. The mood changes, though, and you’ll feel it the second you pin them.
I like this style because it keeps the base protected while still giving you a face frame and a polished shape. That’s a useful combination.
21. Short Hair Faux Crown
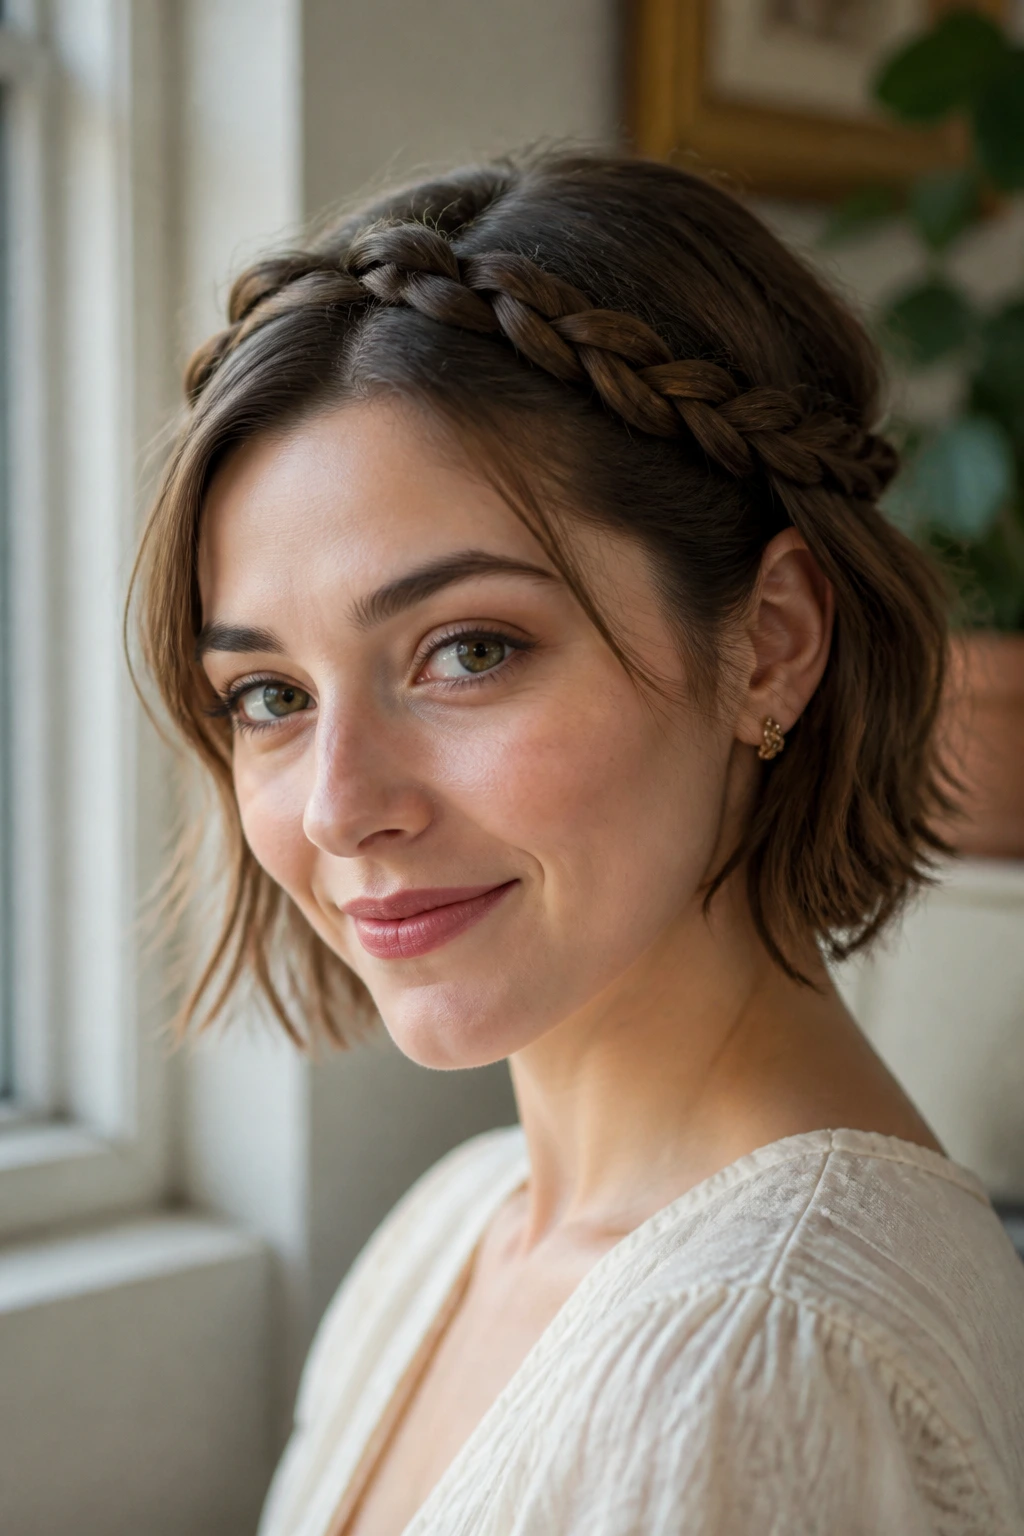
Short hair is not a dead end. It just means you stop pretending you need a full wraparound braid and work with a faux crown instead.
The Faux-Crown Shortcut
Use two small side braids or twists, bring them across the head, and pin them where they meet. On a bob or lob, that can be enough to suggest the crown shape without forcing hair that’s too short to do a full wrap.
The secret is choosing the right amount of hair to grab. Too much, and the braid pops out. Too little, and it won’t read as a crown at all. Keep it small and neat, then anchor the ends well.
This is the style I wish more people tried on shorter cuts. It’s proof that the braid doesn’t need to be long to look finished.
22. Workout-Resistant Tight Crown Braid
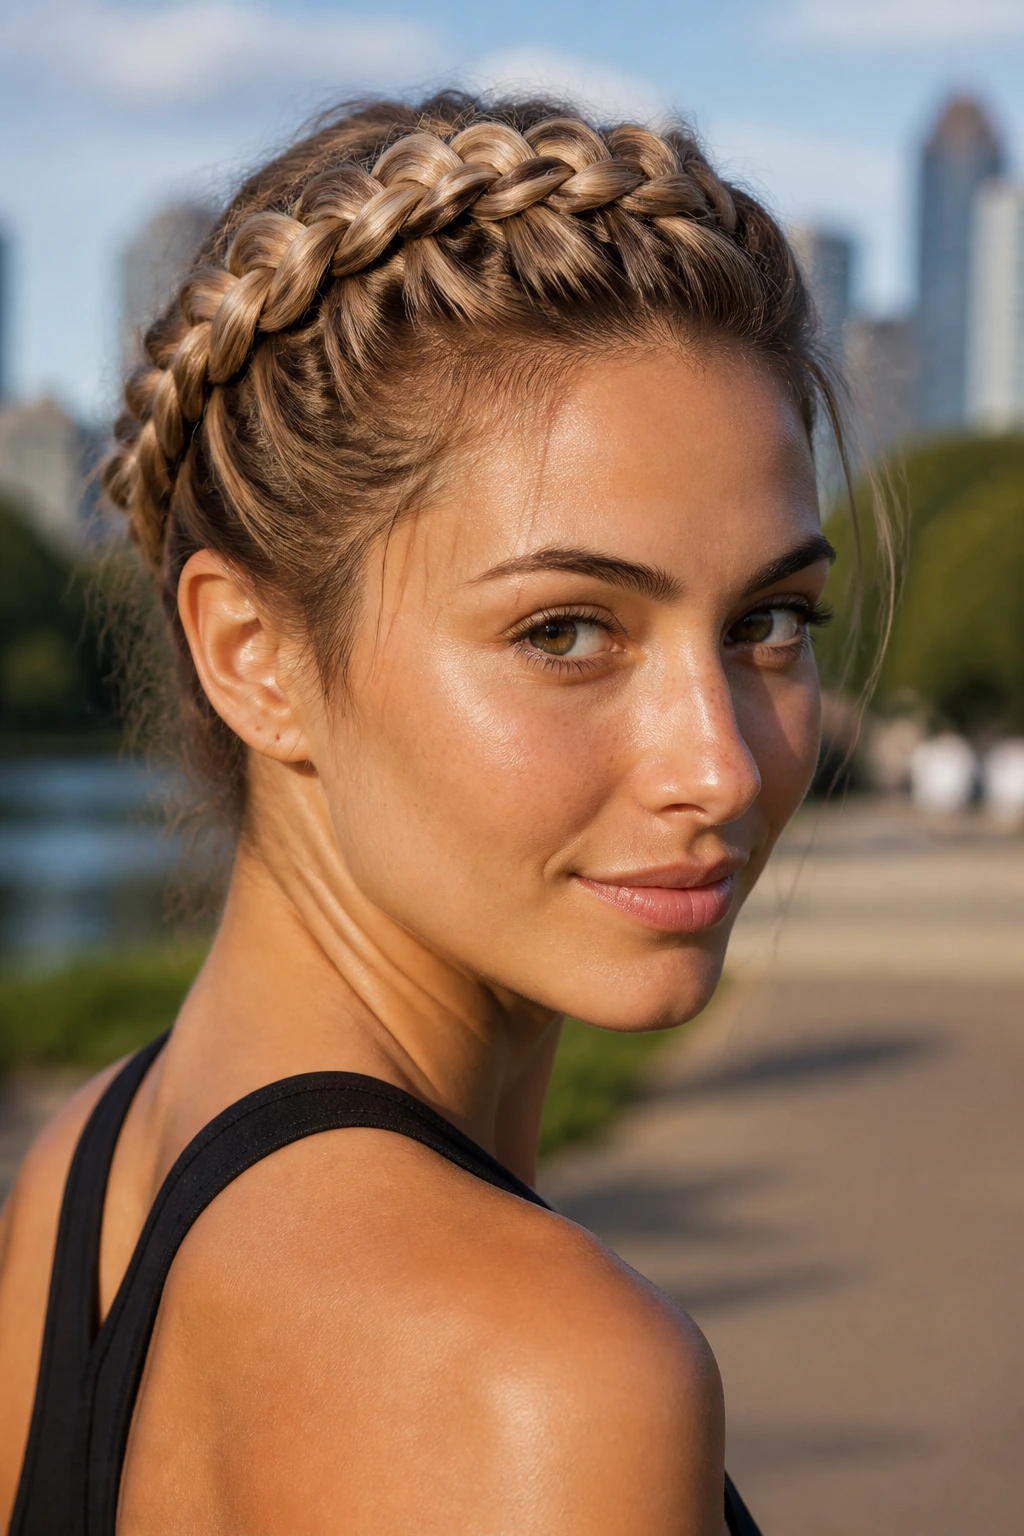
If you want a crown braid that stays put through a long day, go tighter at the roots and cleaner with the pinning. This version isn’t about softness. It’s about staying in place.
The braid should hug the head enough that it doesn’t wobble when you move. That means working with a firm grip, a tighter section size, and pins crossed over the join points rather than shoved in straight. Straight pins slide. Crossed pins hold.
I like this for travel days, outdoor events, or any time you know the style has to survive a little wind. It may not be the loosest looking crown braid, but it does its job.
23. Bridal Floral Crown Braid
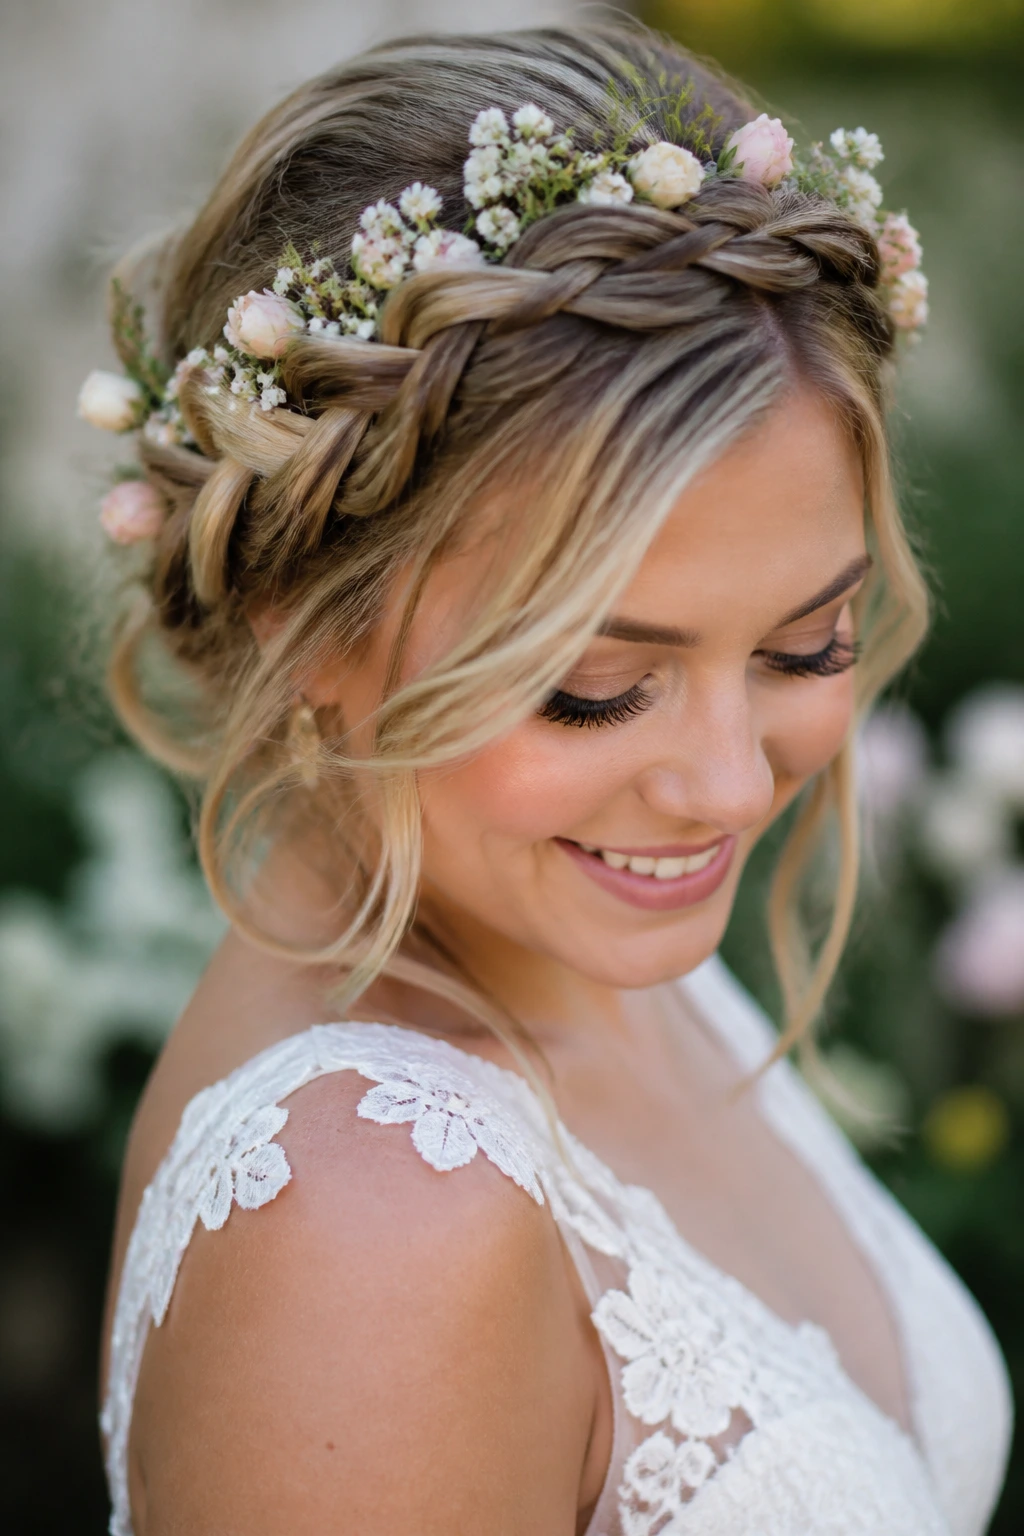
Flowers change everything. Even one small cluster tucked near the braid seam can push the whole style into ceremony territory.
The braid itself should stay smooth enough to carry the extras. If the crown is already frizzy or over-pulled, adding flowers can make it look busy. Keep the braid clean, then place fresh blooms or very small faux flowers where the crown changes direction or where the ends are tucked away.
This is the version that has the most romantic range, but it only works if the braid has a solid base. Otherwise the flowers end up doing the heavy lifting, and that rarely looks as good in person as it does in the mirror.
24. Festival Crown Braid with Beads
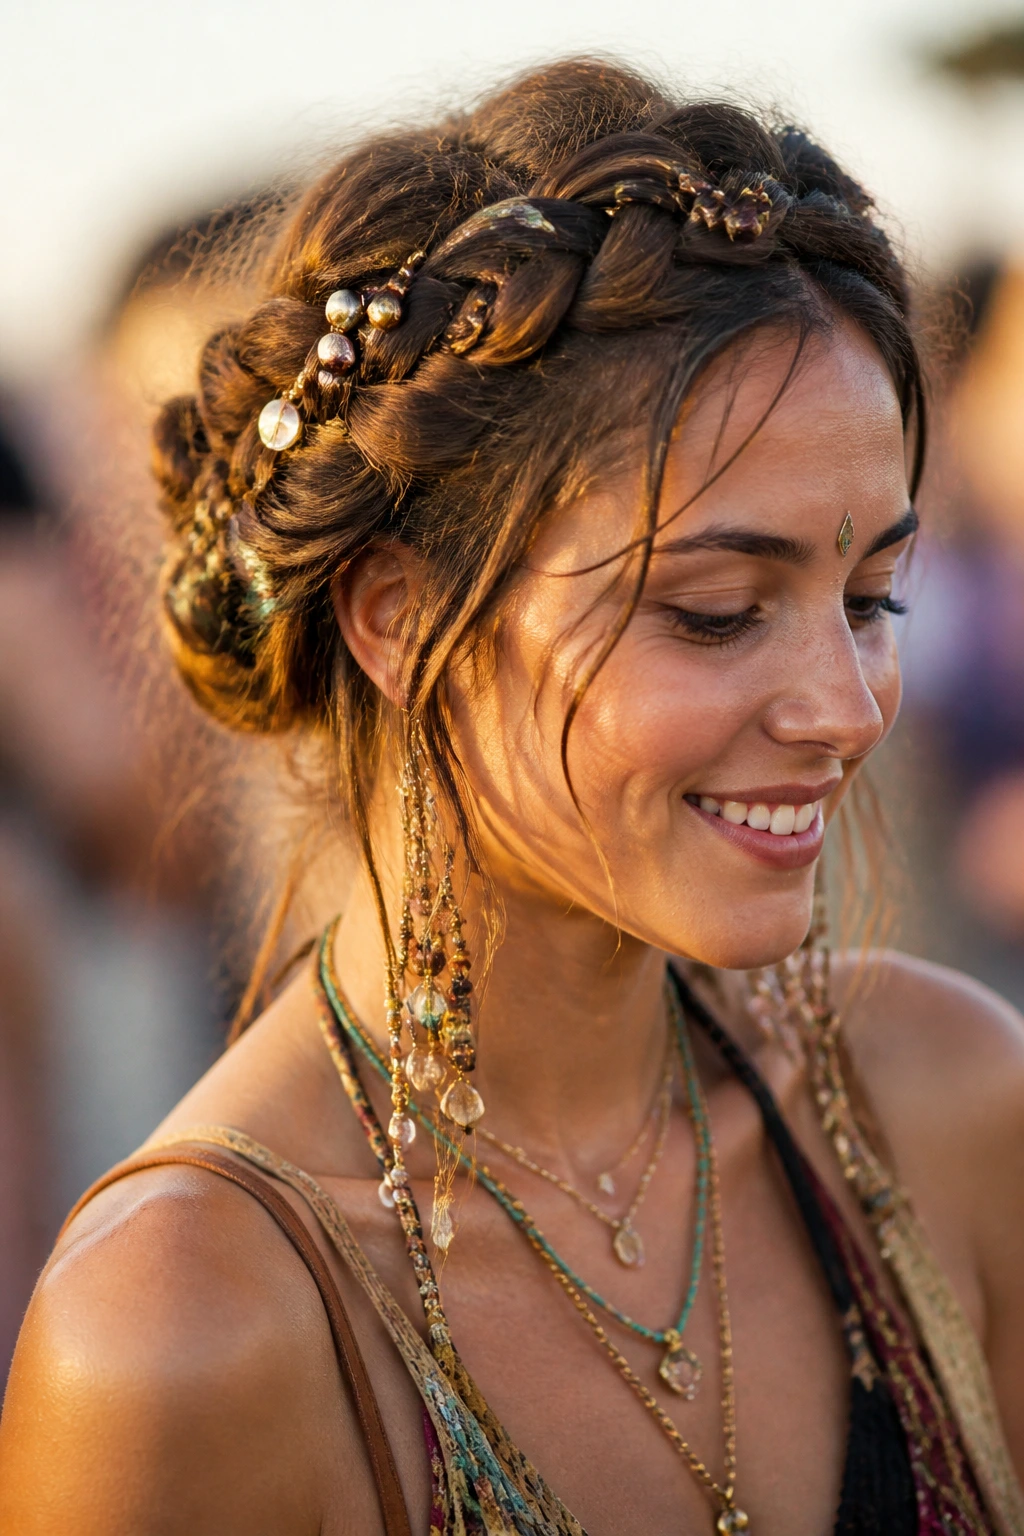
Beads add motion and sound. That sounds small until you see the braid move and notice how the tiny details catch the light as the head turns.
Where the Beads Should Sit
Place the beads toward the ends or at the outer visible sections, not packed all the way into the root area. That keeps the crown from feeling overloaded and makes the decoration read as accent rather than clutter.
I’d keep the braid itself pretty simple if you’re adding beads. A busy braid plus bright accessories can turn messy fast. The cleaner the base, the better the extra pieces look.
This is one of those styles that benefits from a little restraint. One or two good accents beat a dozen random ones.
25. Natural Texture Crown Updo
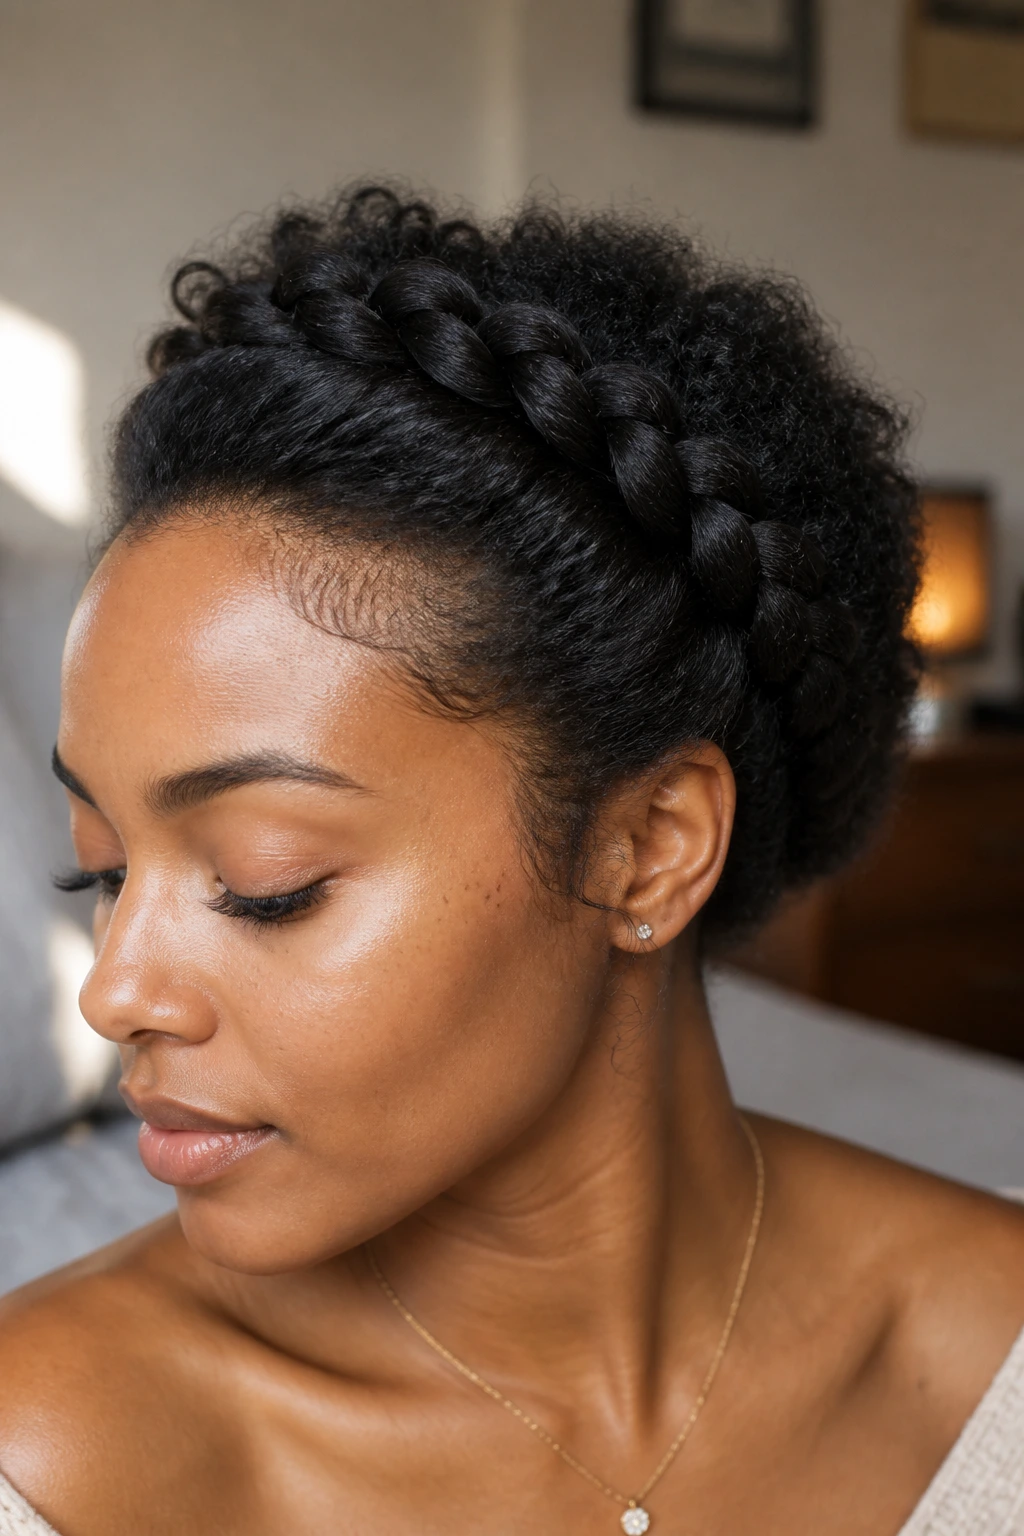
Natural texture changes the whole shape of a crown braid in the best way. The braid doesn’t have to fight every bend and coil to look full, because the texture itself gives it body and lift.
That means this style can lean more sculpted or more freeform depending on how much you smooth the roots and how much you leave alone through the lengths. A little control at the hairline and a softer finish through the crown often works better than trying to make the whole head look identical.
I like this version because it respects the hair it sits on. The braid is there to shape, not erase.
Why Crown Braid Hairstyles Hold Their Shape So Well
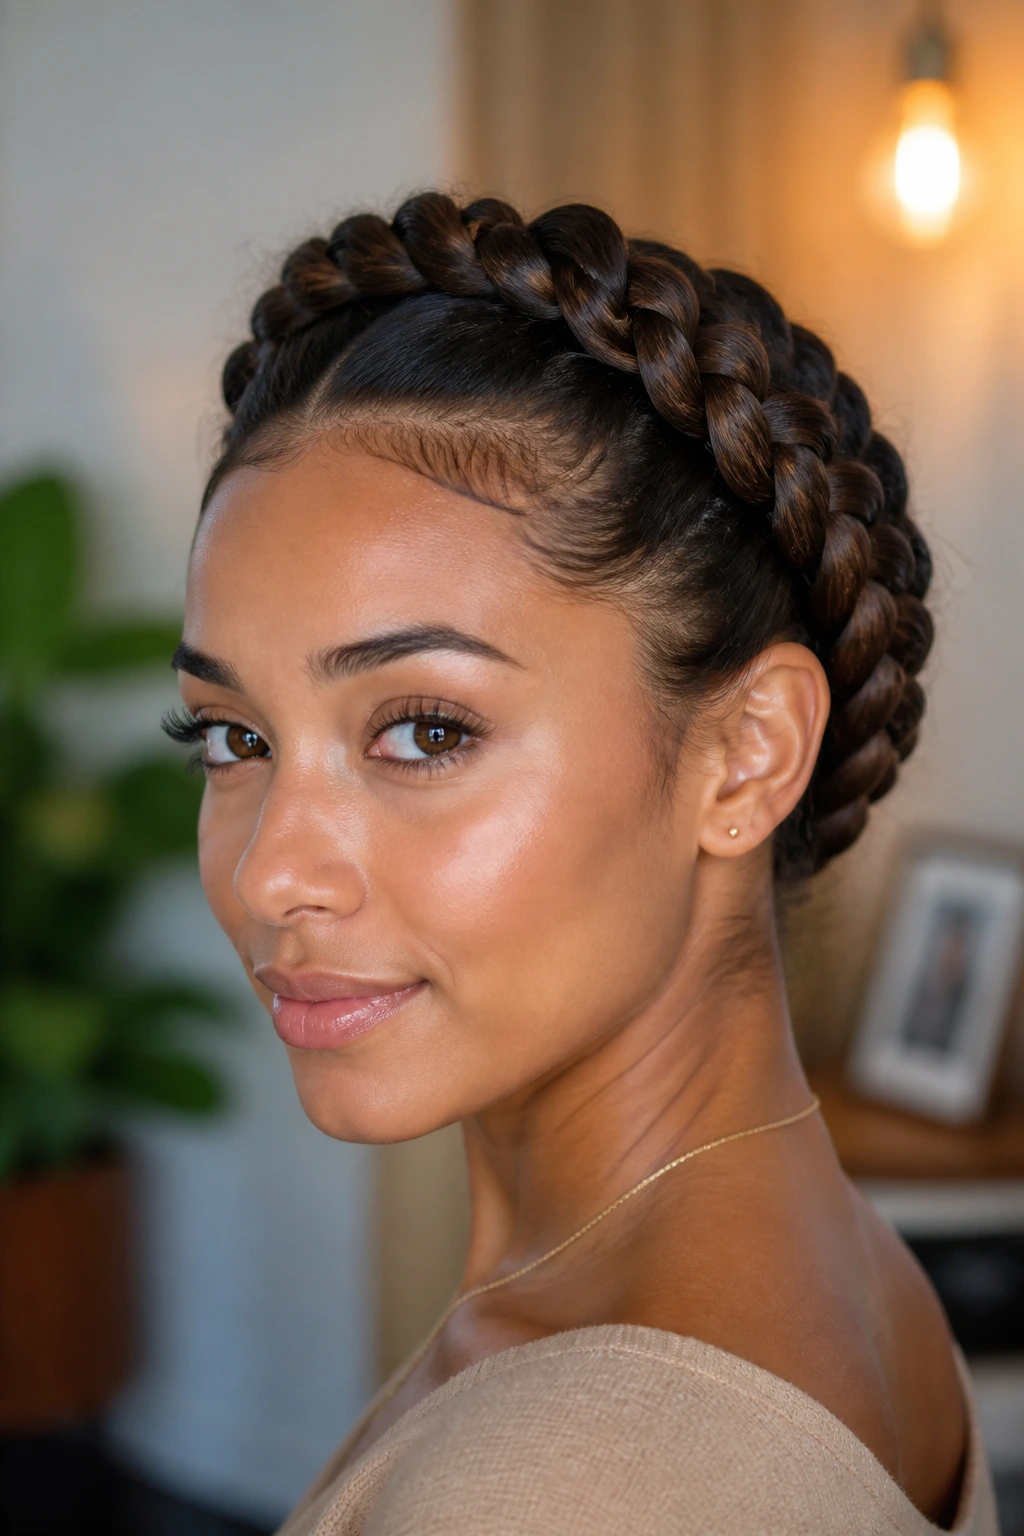
A crown braid has a structural advantage that loose styles don’t. Once the braid is wrapped around the head, it uses the head itself as part of the support system. That’s why a halo braid can stay neat with fewer pins than a big loose twist that hangs from one point.
The other reason is grip. A braid works better when the hair has a little friction, which is why second-day hair or lightly textured hair often holds the style better than freshly washed hair that feels silky and slippery. Clean hair isn’t bad. It just needs help. A little mousse at the roots, a touch of texturizing spray, or a light blow-dry can make a huge difference.
Placement matters too. The braid should follow the curve of the head, not float above it or sink down near the ears. Once that line is right, the style starts to look deliberate almost on its own. That’s the part people underestimate.
Tools That Make Crown Braids Easier
-
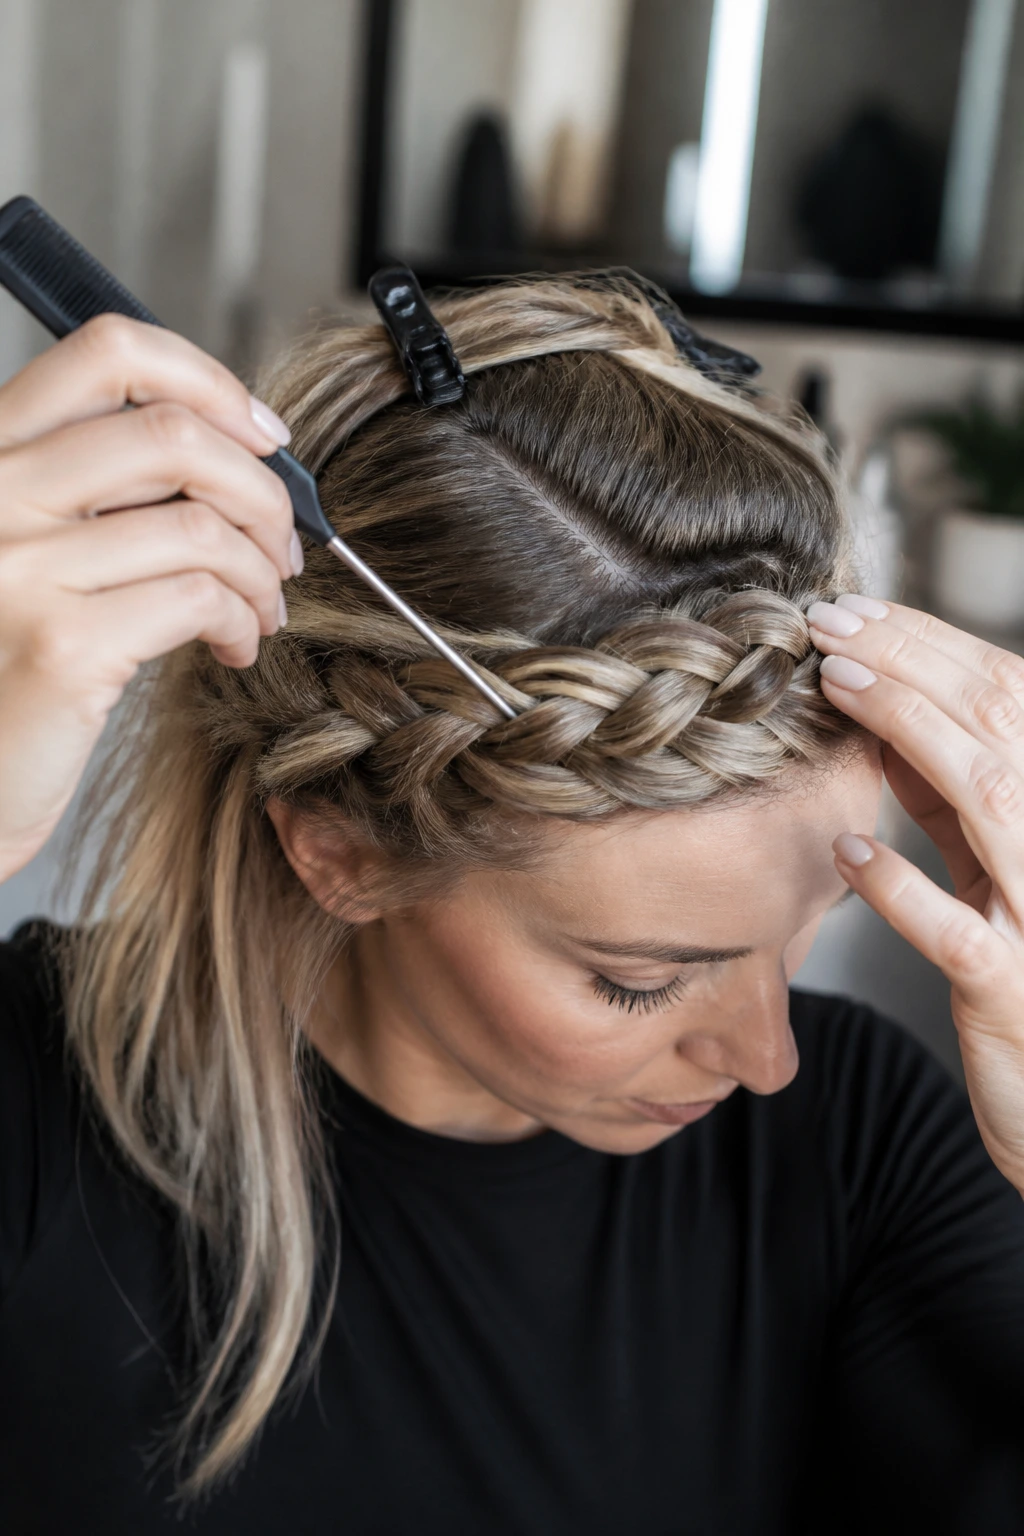
Rat-tail comb: Best for sharp parts and clean sectioning; a blunt comb won’t give you the same control at the temples.
-
Sectioning clips: Useful when you’re braiding one side and need the rest of the hair out of the way. Cheap clips work fine.
-
Small clear elastics: Keep the braid ends secure before pinning, especially if your hair is silky or layered.
-
Bobby pins and U-pins: Bobby pins hold the seams; U-pins are handy when the braid is thick and you don’t want to crush it flat.
-
Texturizing spray or dry shampoo: Gives fine or freshly washed hair some grip so the braid doesn’t slide.
-
Light hold mousse or styling cream: Helps smooth the roots without making them greasy. Use less than you think.
-
Hand mirror or two mirrors: A crown braid has blind spots. You need a back view before you walk out the door.
-
Edge brush or soft toothbrush: Great for smoothing tiny flyaways without spraying the whole head into stiffness.
-
Silk scarf or bonnet: Not for the styling itself, but absolutely useful if you want the braid to survive overnight.
Prep, Section, and Product Choices That Pay Off
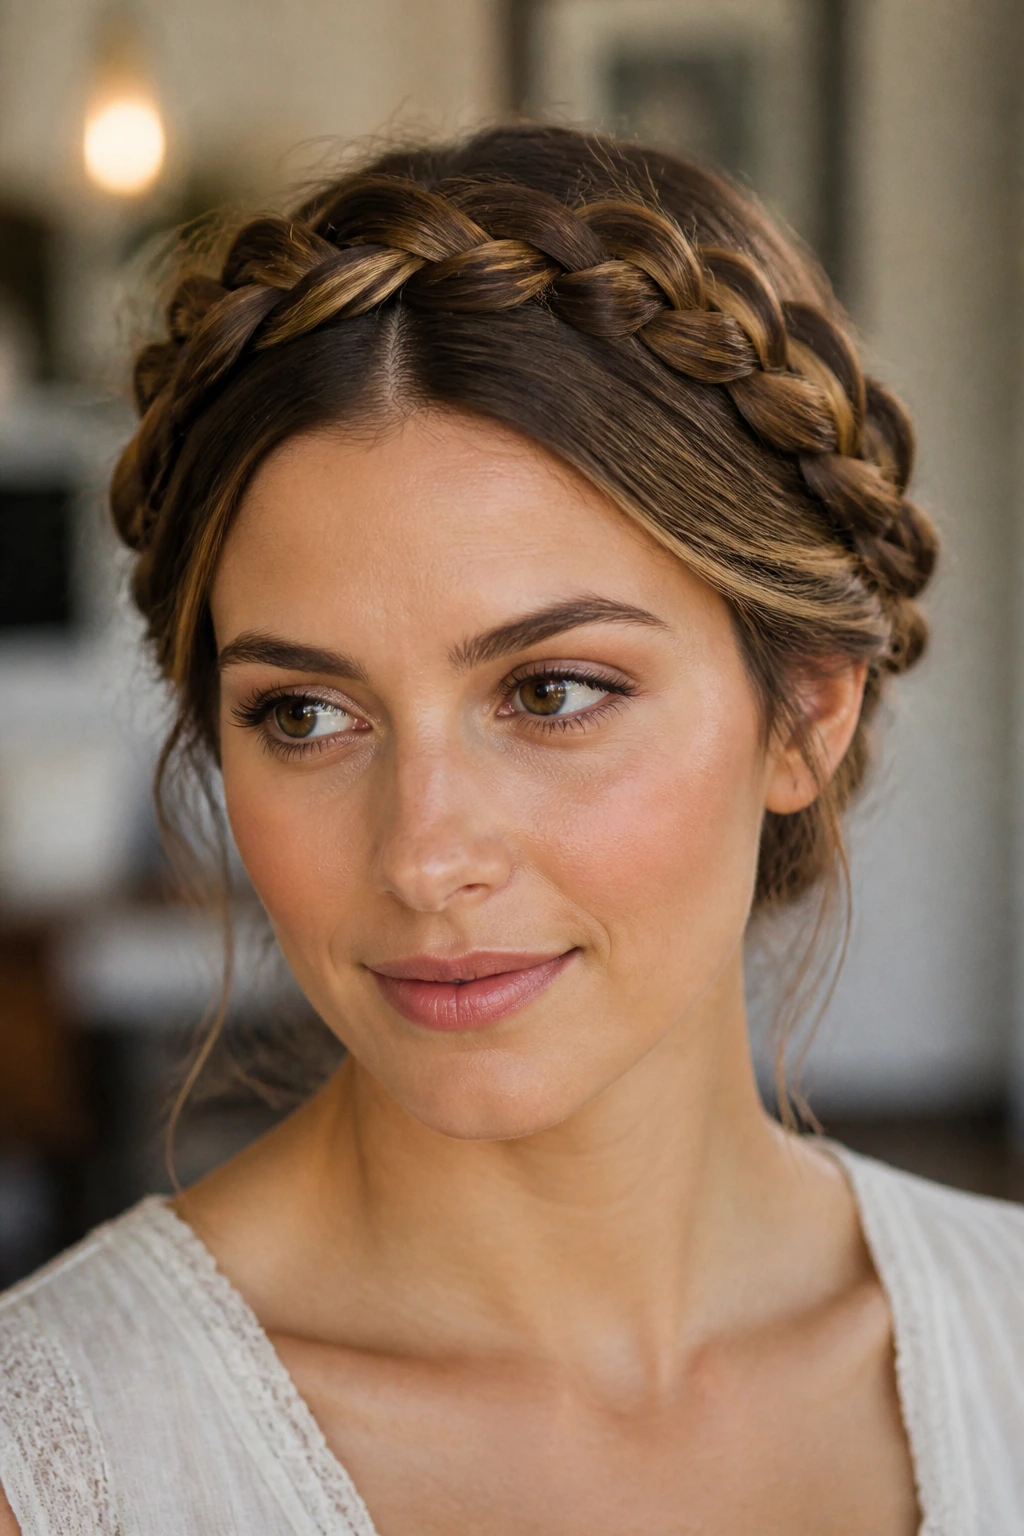
The best crown braids start before the first strand is crossed. If the hair is too clean and too soft, the braid slides. If the hair is tangled, the sections snag and the braid turns lumpy. Neither extreme is fun.
My favorite prep is simple: part the hair cleanly, mist the roots with a light texturizing spray or work in a small amount of mousse, then rough-dry or blow-dry just enough to take the shine off the roots. You do not need a hard helmet of product. That’s where people go wrong. The hair should still move.
Sectioning matters just as much. Crown braid hairstyles look best when the line around the head is even, especially from temple to temple. Use the comb to trace the path first, then clip away the rest. Once the path is mapped, your hands stop guessing.
If the hair is curly or coily and you want a sleeker crown, stretch the roots a little before braiding. If you want the texture visible, skip heavy smoothing and work with the pattern you have. Both approaches are valid. The mistake is trying to force every hair type into the same finish.
How to Wear Crown Braid Hairstyles With the Rest of the Look
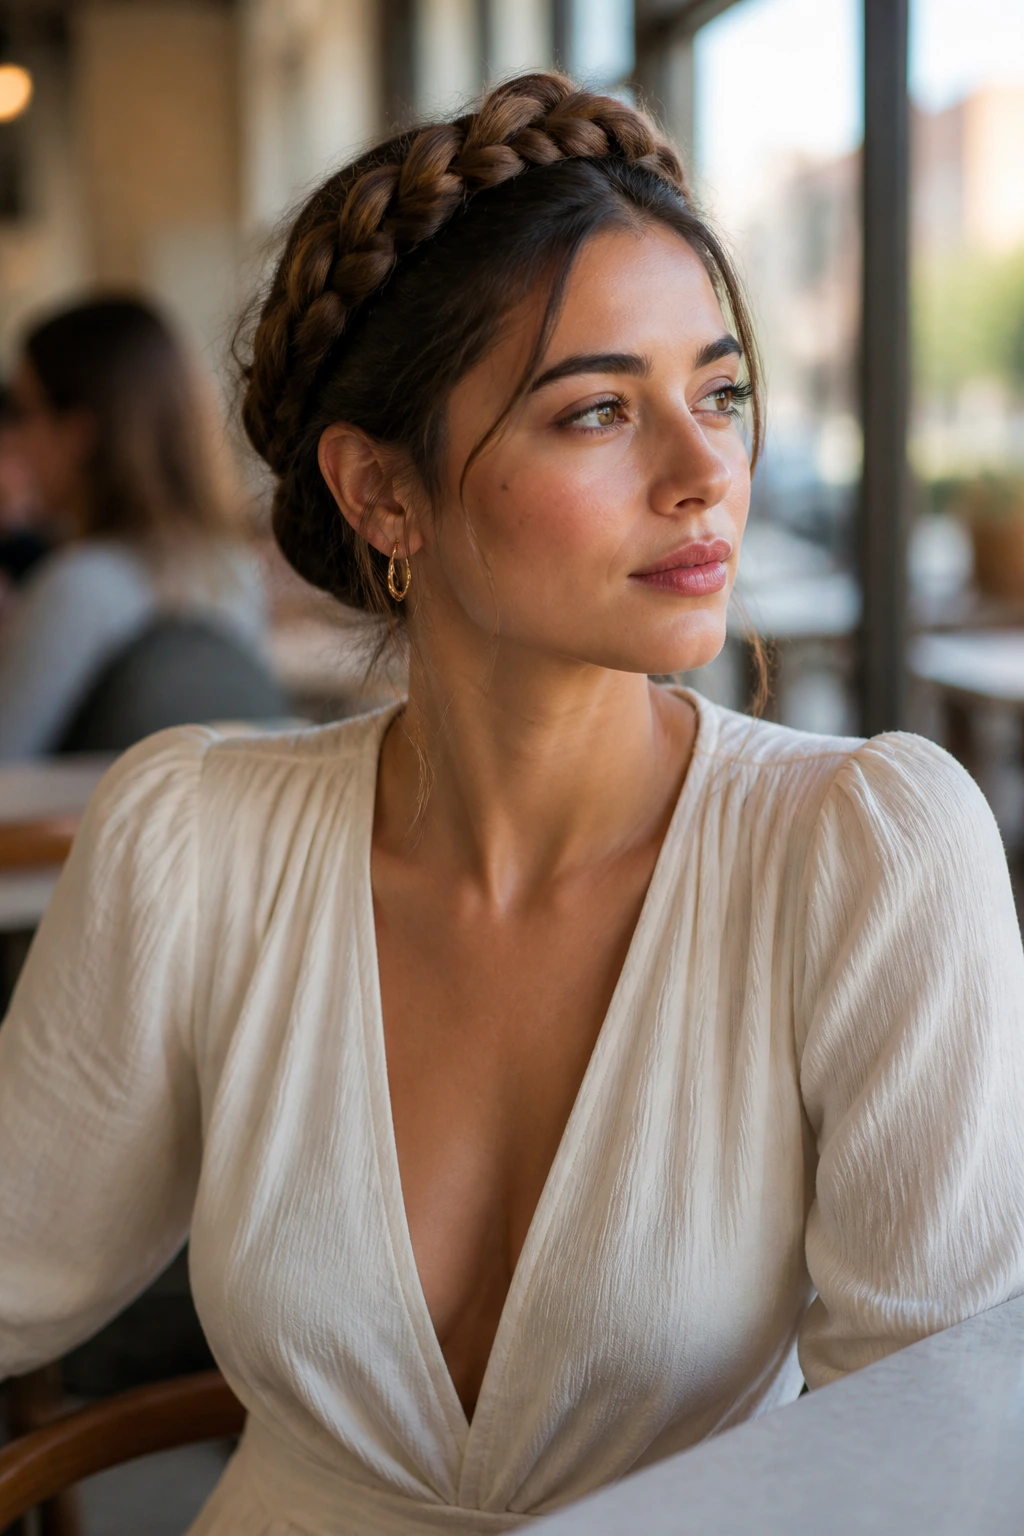
Neckline: A crown braid usually pairs best with open necklines — scoop necks, square necks, boat necks, or a simple collar that doesn’t crowd the braid. A high turtleneck can work, but it needs to be deliberate, because too much fabric near the face starts competing with the braid.
Earrings: Studs, small hoops, and medium drops are easy wins. If the braid is full and textured, giant earrings can tip the look into overload. If the braid is sleek and tight, stronger earrings balance it nicely.
Makeup: A crown braid already gives shape around the face, so you don’t need to pile on every feature. I’d pick one focus point — a bold lip, a soft brown eye, or clean skin with brushed brows — and leave the rest alone.
Outfit mood: The same braid can go soft with a sweater and simple gold hoops or sharp with a blazer and pinned-back sides. That flexibility is the reason people keep coming back to it.
Common Crown-Braid Mistakes and How to Fix Them
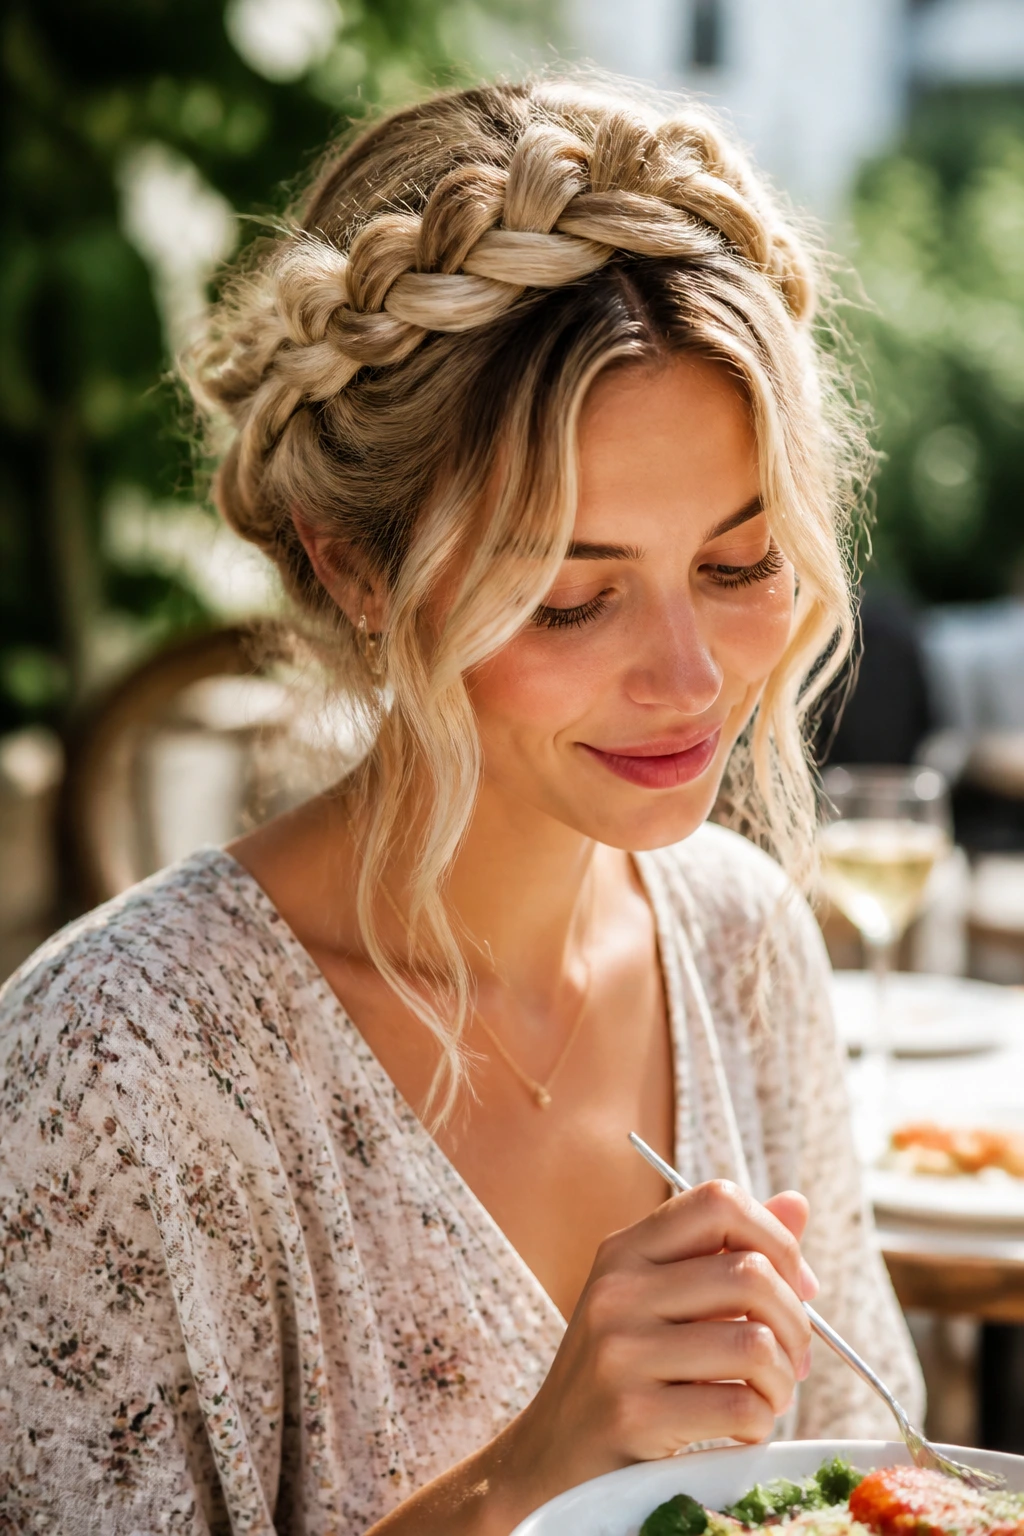
-
Starting the braid too far back: If the braid begins behind the crown, the style loses the halo shape and starts looking like a low wrap. Start closer to the temple line and follow the curve of the head.
-
Pulling sections too hard: Over-tightening makes the braid stiff and can create little bumps where the scalp tugs. Keep the tension firm but not clenched. The braid should sit, not dig in.
-
Using too much oil near the roots: A shiny root line can make the braid slide, especially on straight hair. Use lightweight product at the root and save richer oils for the ends.
-
Skipping the pinning at the seam: If the ends aren’t anchored where the braid meets itself, the whole crown can slowly open up. Cross two pins in an X over the join point and test it with a gentle shake.
-
Making the braid thicker than the hair can support: A huge braid on fine hair can look bulky for a few minutes, then start collapsing. Match braid size to density. That’s the cleaner move.
-
Leaving the finish too perfect: A crown braid that looks sealed and sprayed to death often reads stiff. A few soft edges around the temples or near the ears usually help more than they hurt.
Variations and Alternatives to Try
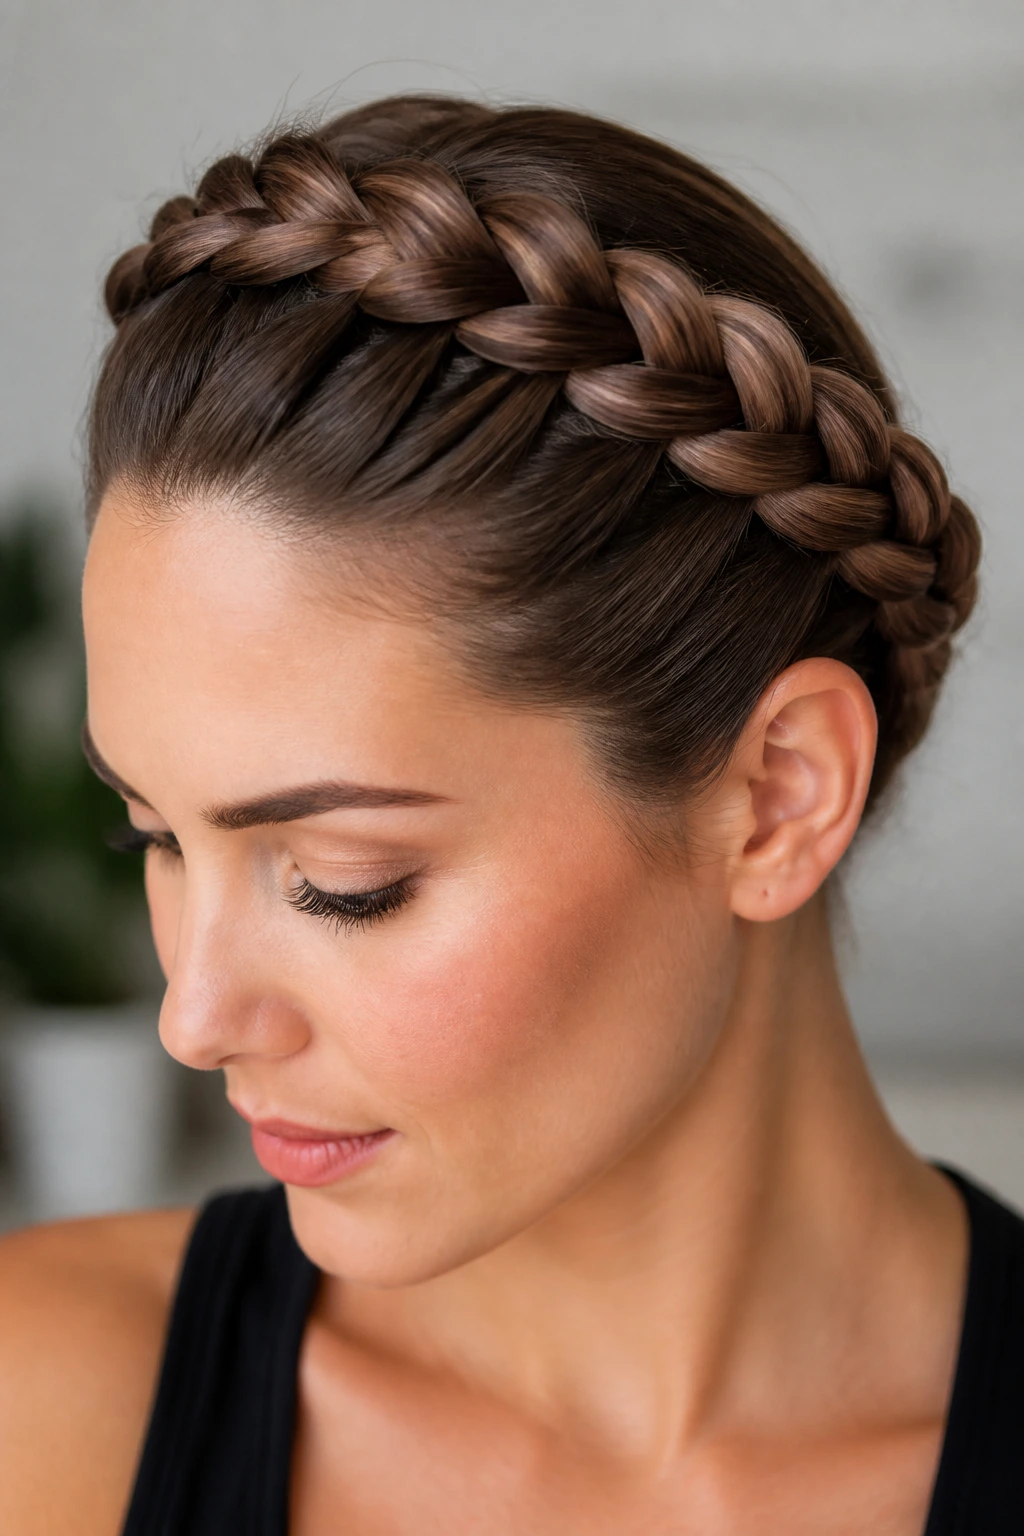
Soft Bridal Halo: Loosen the braid just a touch, pin in a few pearl accents, and leave two tiny face-framing pieces out. This works when you want the crown shape to feel lighter and more formal.
Twist-Crown Shortcut: Swap the braid for two-strand twists. It’s faster, smoother, and kinder to hair that tangles easily. The twist pattern looks neat even when the sections aren’t perfect.
Braided Bun Crown: Finish the crown braid into a low bun at the nape. Good for thicker hair, hot weather, or any moment when you want the braid and the neck both out of the way.
Protective Loc Halo: Wrap locs around the perimeter and pin lightly at the joins. The goal is guidance, not compression, so the style stays secure without flattening the texture.
Short-Hair Faux Crown: Use small side braids or twists and pin them across the top like a headband. It gives the same visual effect when there isn’t enough length for a full wrap.
Tools / Equipment / Resources
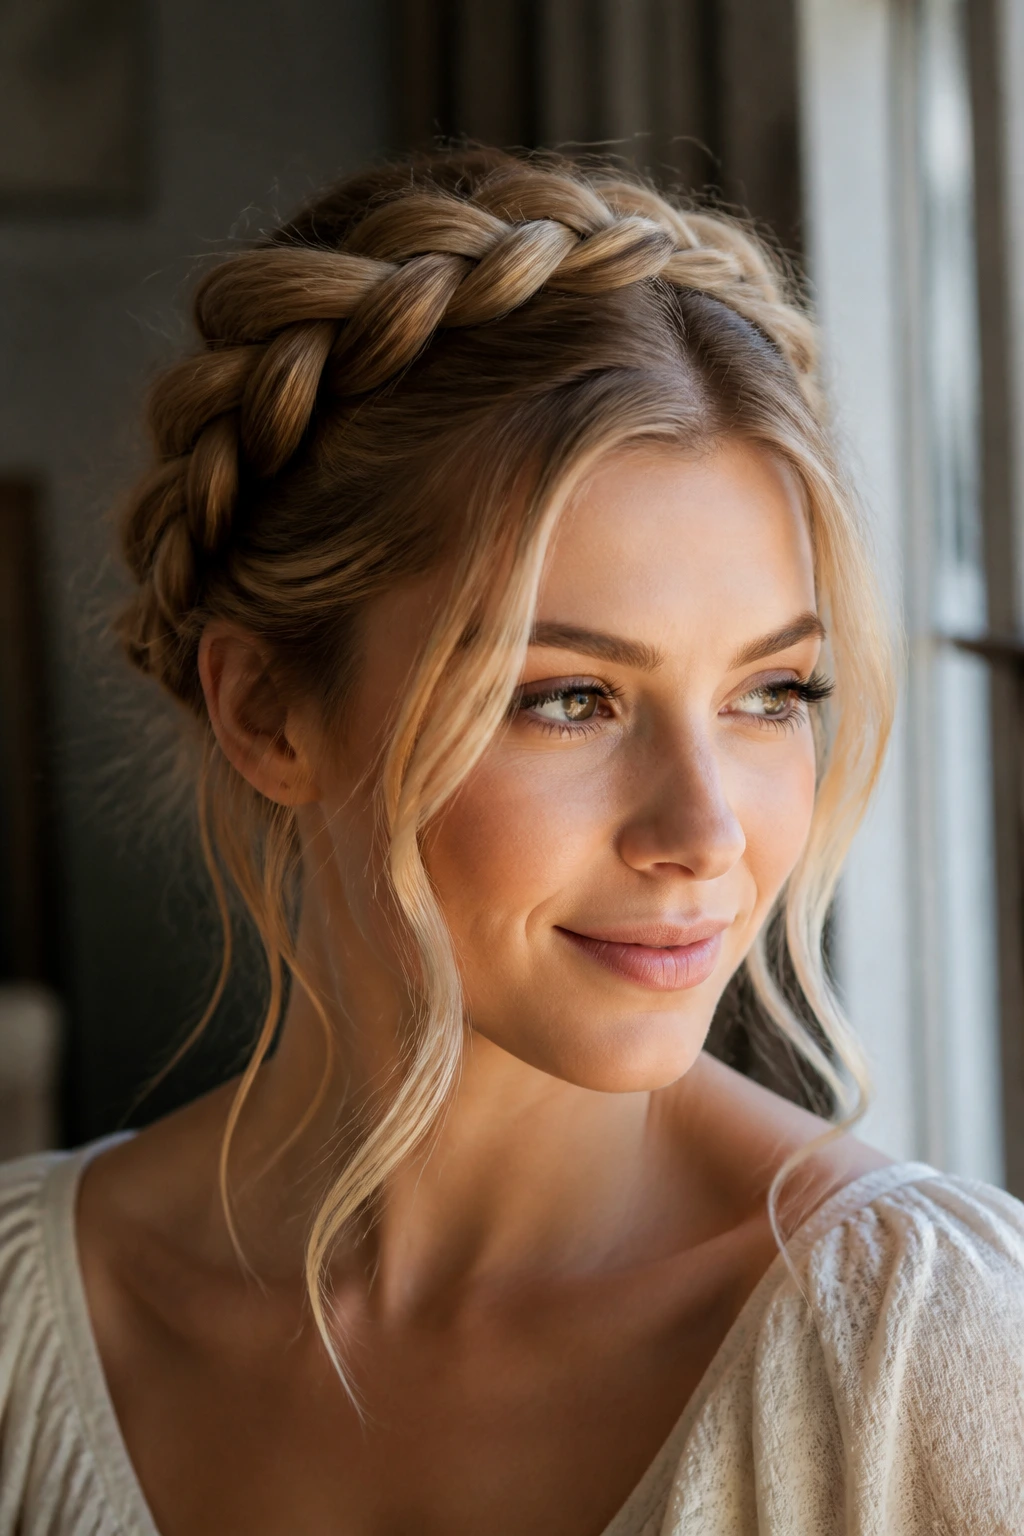
-
Rat-tail comb: Makes clean parts and tidy section lines, which matter more here than in most styles.
-
Sectioning clips: Keep one side out of the way while you braid the other; they save time and reduce tangles.
-
Small elastics: Useful for securing braid ends before tucking, especially on layered or slippery hair.
-
Bobby pins and U-pins: The main holding power for the crown seam and tucked ends. Black pins disappear in dark hair; bronze blends better in lighter hair.
-
Texturizing spray or dry shampoo: Gives fine or clean hair enough bite to stay braided.
-
Light styling cream or mousse: Helps tame flyaways and smooth the roots without heavy buildup.
-
Hand mirror or two mirrors: Needed to check the back curve and the pin placement. Don’t skip this.
-
Edge brush or soft toothbrush: Good for smoothing the hairline without flattening the rest of the style.
-
Silk scarf or bonnet: Helps the braid keep its shape overnight and cuts down on frizz from pillow friction.
How to Keep It Neat Overnight and Through the Next Day
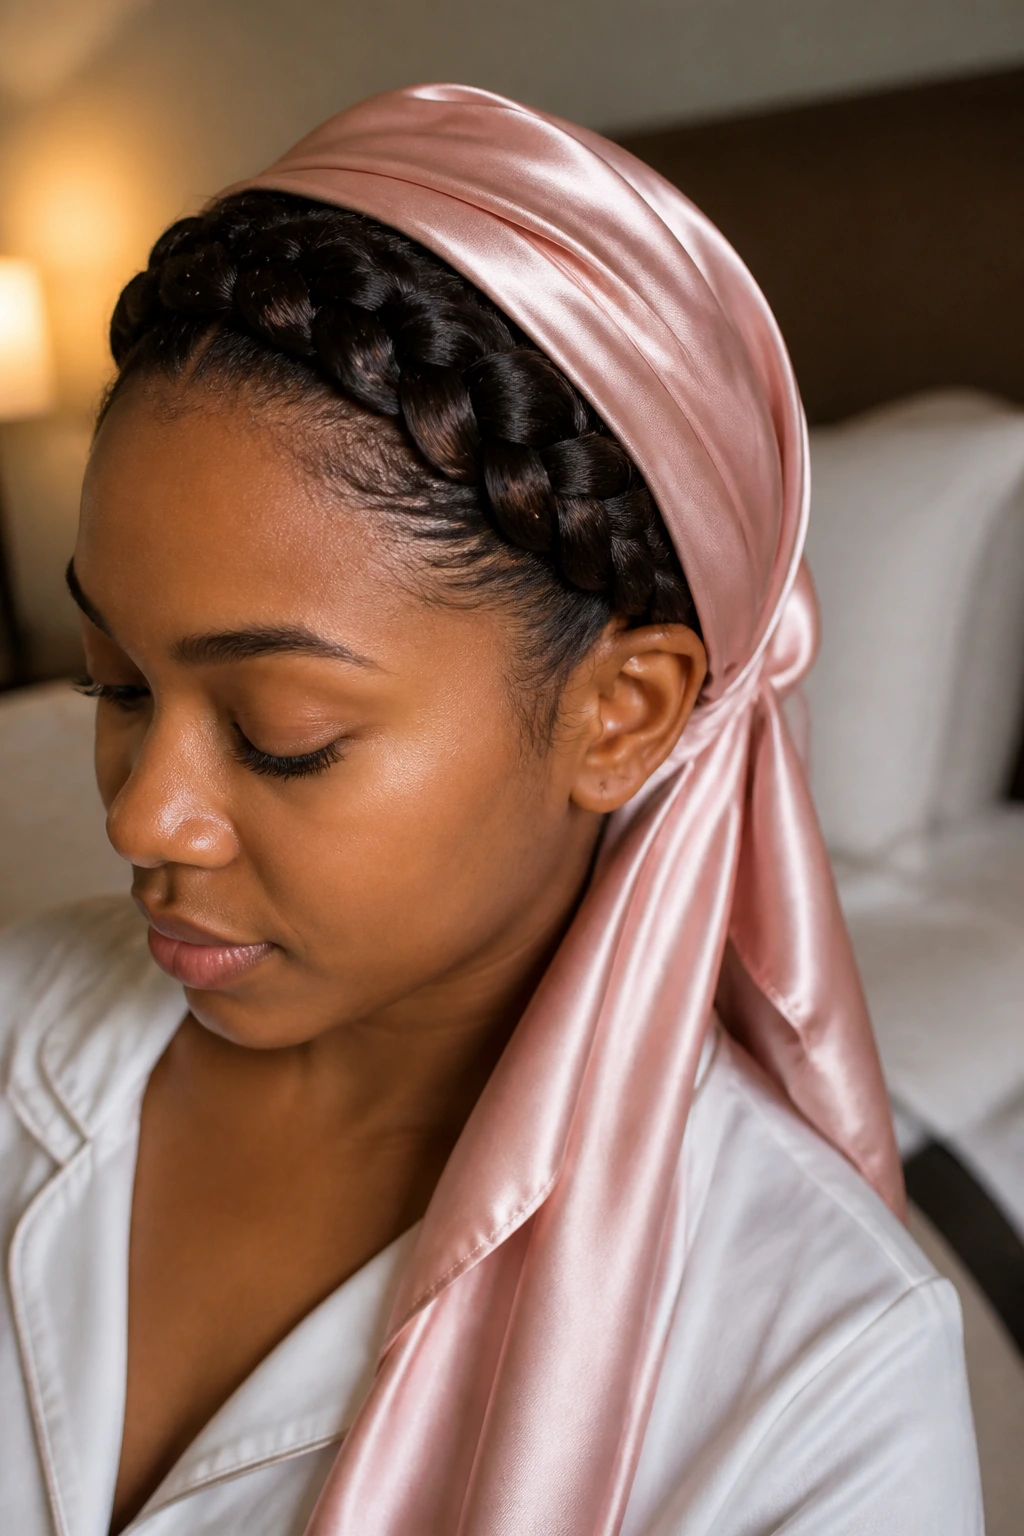
A crown braid usually looks best on day one, but it can hold through the next day if you protect it properly. The biggest enemy is friction. Pillowcases rub the braid loose, especially at the seam where the ends are tucked and pinned.
Wrap the head with a silk scarf or wear a bonnet that actually covers the braid line. Cotton scarves can drag the hair and rough up the surface. If the braid is thick, tuck the ends close to the scalp before you sleep so they don’t poke loose by morning.
For a quick refresh, mist the roots lightly with water or use a tiny bit of leave-in on the palms and smooth only the frizzy spots. Then check the pins around the seam and the temples. That’s usually where the shape starts to drift first. If you feel scalp soreness, take the style out. A crown braid should feel secure, not painful.
Tighter protective versions with braids, twists, locs, or feed-in sections can last longer, but don’t let “longer” turn into “ignored.” If the roots look puffy or the tension feels sharp, it’s time to redo the style. Fresh looks better than stressed hair.
Questions People Ask Before Trying a Crown Braid
How long does hair need to be for a crown braid?
A full wrap usually works best once the hair can make a braid that reaches around part of the head, which often means at least shoulder length. Shorter hair can still work with a faux crown or smaller pinned braids. The issue is not the braid itself; it’s whether the ends can be tucked cleanly.
Does a crown braid work on curly hair?
Yes, and often in a better way than straight hair because the texture gives the braid more body. You may want to stretch the roots a little if you want a neater line, but leaving some texture in the lengths keeps the braid from collapsing.
Is second-day hair better than freshly washed hair?
Usually, yes. Hair with a tiny bit of natural oil grips better and slides less. If your hair is freshly washed, use mousse or texturizing spray so the braid has something to hold onto.
How do I keep the braid from slipping?
Use crossed bobby pins at the seam, not one straight pin shoved in fast. Also, keep the first few sections firm around the temples, since that’s where the braid starts to loosen first when the hair is silky.
Can I add extensions to make it fuller?
You can, especially with feed-in styles, box braids, or braids that need extra length to wrap. Keep the added hair close in color and texture to your own so the join doesn’t show at the crown line.
What if one side of my hair is thicker than the other?
That happens more than people admit. Start with the thicker side slightly tighter or slightly smaller, so the wrap evens out as it crosses the head. You can also let the thinner side overlap a bit more at the seam.
Can short hair fake a crown braid without looking flimsy?
Yes, if you keep the braid small and anchor it well. Use a side braid, a twist, or two tiny braids that meet at the crown. The goal is shape, not size.
How do I stop the hairline from looking messy?
Smooth the front with a small amount of cream or mousse before braiding, then finish with an edge brush and just a whisper of spray. Too much product near the hairline makes the style look wet and stiff.
A Crown Shape Worth Reaching For
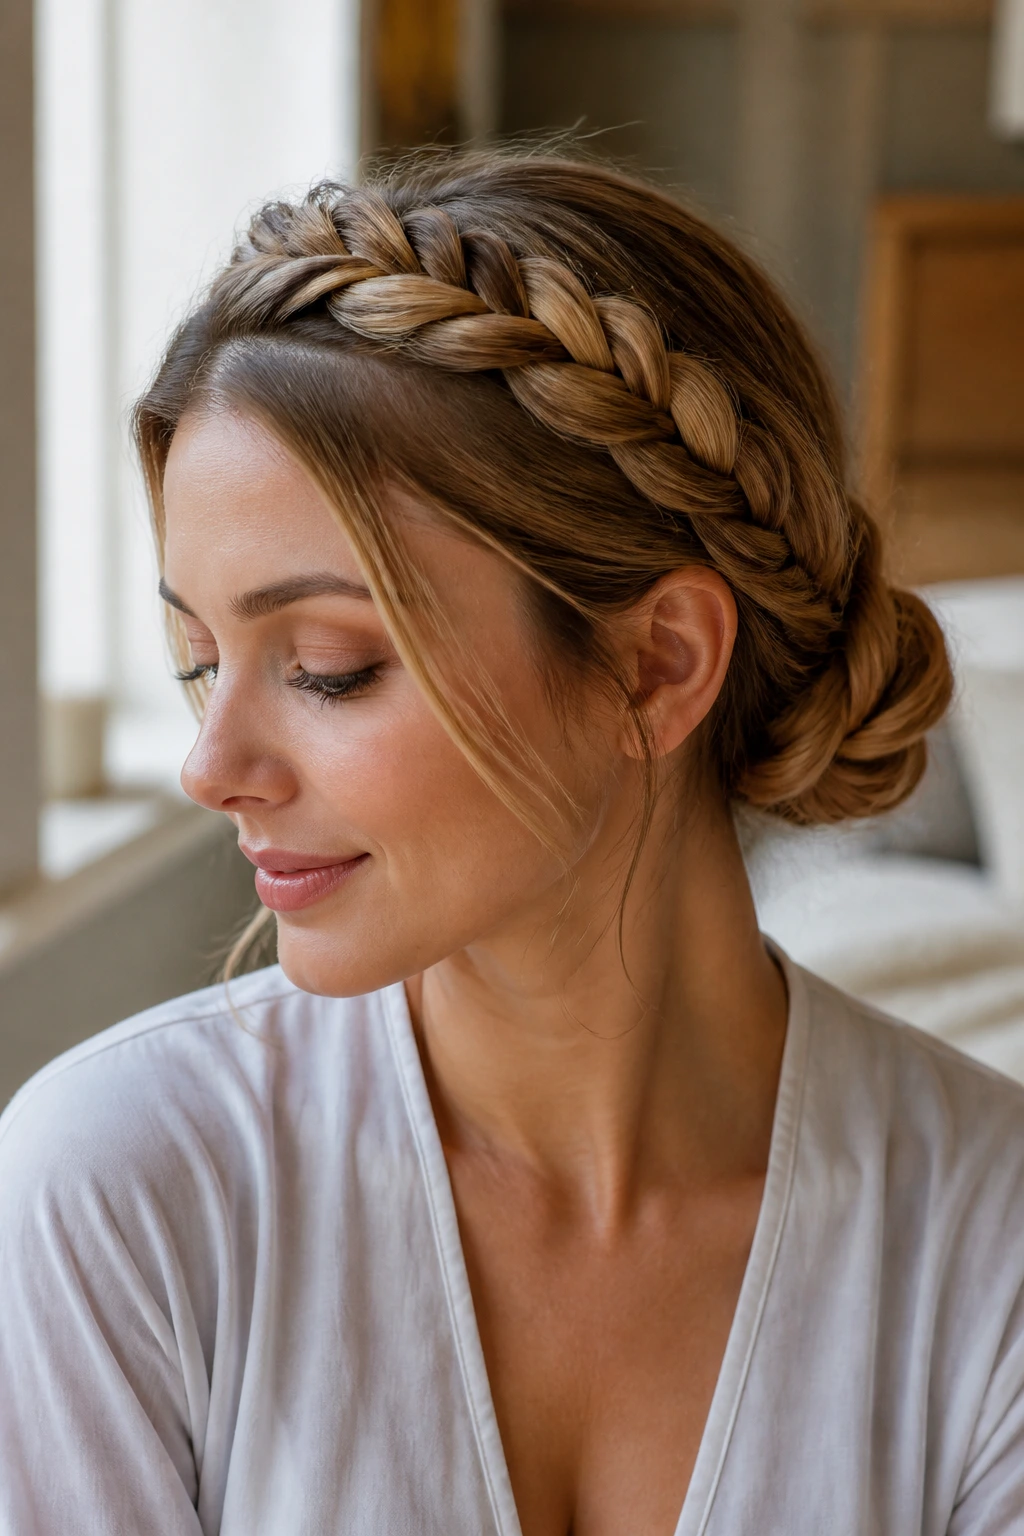
The best crown braid is usually not the most perfect one. It’s the one that follows the head cleanly, sits where it should, and leaves enough softness around the edges to feel human. That’s why this style keeps showing up in so many forms — it’s sturdy, but it doesn’t have to be severe.
If you like a braid that can shift from quiet to dressed-up without changing its whole structure, a crown braid is worth learning well. Start with one version that matches your hair texture and patience level, then move outward from there. The shape stays the same. The mood can change all the way around it.
