



A French braid can look either crisp or fussy, and the difference is usually ten minutes and a comb. The best French braid hairstyles for a soft polished look don’t depend on fancy hands or impossible thickness; they depend on controlled tension, clean parts, and a finish that bends a little instead of locking down like a helmet.
That’s why French braids keep showing up in offices, weddings, school runs, dinner plans, and all the in-between moments where you want hair to stay out of your face without looking rushed. The braid itself is only half the story. The crown, the part, the looseness around the hairline, and the way you end the tail decide whether the style feels soft or severe.
The styles below range from very simple to slightly dressed up, but they all share the same trick: a neat braid line, a little movement around the face, and enough texture at the finish to keep the whole thing from reading stiff. Some are better on fresh hair. Some need a bit of grit. A few are better with earrings, a ribbon, or a pin or two. That’s the good part — once you learn what changes the mood, the rest gets easier.
Why These Braids Feel Soft Instead of Stiff
Softness starts at the scalp, not the end. If the first few crosses of the braid are pulled too tight, the whole style takes on that hard, scraped-back look that never quite relaxes. Leave a little room at the roots and the braid keeps its shape without flattening the top of the head.
The part does more work than people think. A center part gives a clean, balanced feel. A side part breaks up the symmetry and takes the edge off the style in one move. That tiny shift changes the whole read of the braid before you even add a pin.
The finish matters more than perfection. A French braid that’s gently pancaked at the sides, with a few tiny flyaways softened into place, looks lived-in in the best sense. A braid that’s sprayed into a shell can look neat for five seconds and then strangely harsh. I’d rather see a little movement.
Accessories help, but they should not fight the braid. A satin ribbon, a pearl pin, or one simple wrapped elastic can make the style feel intentional. The wrong clip or too many sparkly extras make the braid look like it was dressed by committee.
Texture is the quiet hero. Day-two hair, light mousse, dry shampoo, and a touch of grit at the roots all make a braid easier to shape. Clean hair can work too, but it usually needs a little help.
1. Classic Center French Braid
A center French braid is the style that teaches you what the shape is supposed to do. It sits straight, moves evenly down the back, and gives you that tidy line people notice before they notice the braid itself. When the sections are equal and the crown stays smooth, it has a calm, finished look that works with almost anything from a white tee to a tailored coat.
Why It Stays So Clean
The middle part is doing part of the job here. It keeps the braid from leaning, which means you can focus on the actual hand movement instead of constantly correcting the direction. Keep the first section about 1 inch deep at the hairline, then add in small, even grabs on both sides as you move back. The braid reads polished because the structure is predictable.
I like this one when the rest of the outfit is busy. Prints, chunky collars, statement earrings — the braid gives all of that some breathing room. If you want it softer, pinch the outer edges after you tie off the tail and let the braid widen by a quarter inch or so. Not much. Just enough to lose the tight rope look.
2. Deep Side French Braid
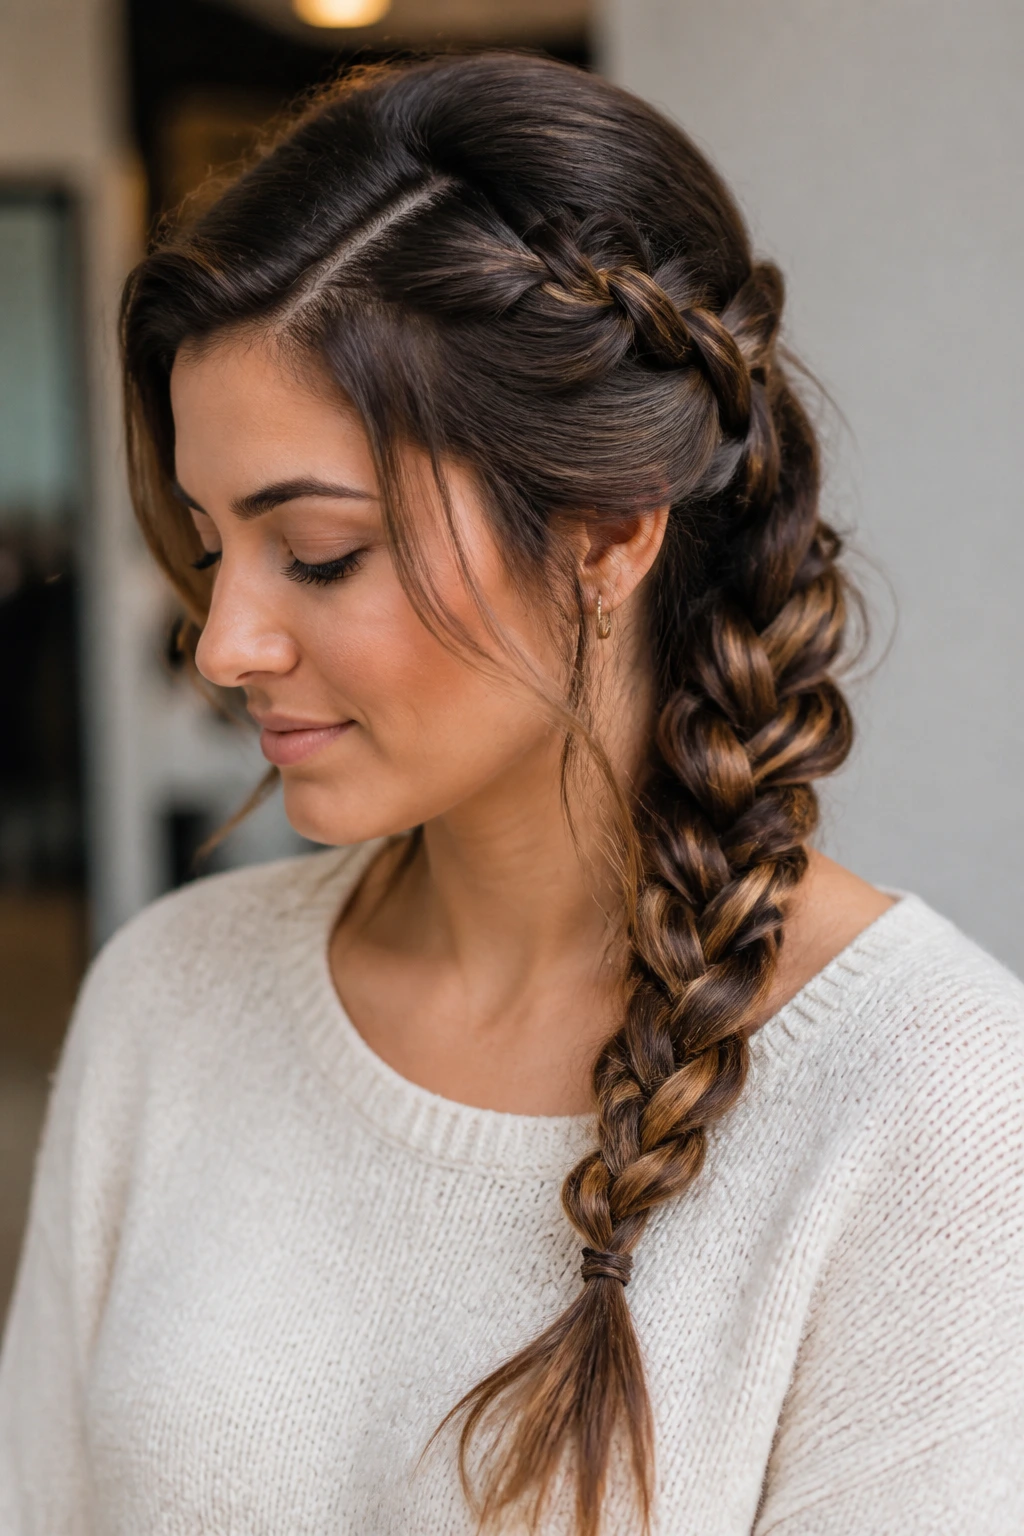
Want the braid to feel softer immediately? Move the part. A deep side French braid shifts the whole mood without changing the technique much at all. The braid drapes over one shoulder, the roots lift a little at the front, and the style ends up feeling a touch more relaxed than the center version.
Where the Softness Comes From
A side part that lands 2 to 3 inches off center gives the crown a little sweep before the braid even starts. That bend makes the style look more fluid, especially if you braid from the heavier side and let the finished length rest over the shoulder opposite the part. The asymmetry does the softening for you.
Quick details that matter:
- Keep the part crisp with the tip of a rat-tail comb.
- Start the braid slightly behind the hairline so the front doesn’t pull flat.
- Finish with a small clear elastic, then wrap a strand of hair around it if you want a cleaner end.
This is one of my favorites for round necklines and soft knits. It plays well with earrings, and it never looks overworked.
3. French Braid Into a Low Ponytail
If you stop the braid at the nape and leave the last 6 to 8 inches loose, you get one of the easiest polished styles in the bunch. The braid gives the front and crown structure, then the ponytail loosens the mood at the bottom. It’s tidy without being severe.
You want the braid to end low enough that the ponytail sits at the base of the neck, not halfway up the head. That placement matters. A ponytail that starts too high can make the whole style feel sporty; a low finish keeps it graceful. Wrap a 2-inch strand around the elastic if you want the base to look deliberate instead of utilitarian.
I reach for this when hair needs to stay controlled through a long day but still move a little. It works especially well on layered hair, because the braid tames the shorter pieces and the tail lets the length breathe.
4. French Braid Into a Low Bun
A braid does not have to stay a braid to keep its shape. Once you braid to the nape, twisting the rest into a low bun gives you the same neat front line with a quieter finish at the back. The result feels elegant in a plain, unfussy way — not stiff, just composed.
The Shape That Makes It Work
Keep the bun low and slightly flat against the head. A puffed bun perched too far out from the scalp can make the style look bulky, especially on fine hair. I like to coil the tail once, then wrap it into a tucked circle and pin it with 4 to 6 bobby pins crossing each other. That cross-pin pattern keeps the bun from slipping without making the back lumpy.
A few loose pieces around the ears help here, but don’t overdo it. You want a soft edge, not a frayed one. This is the braid I’d pick for a dinner out when I don’t want to think about my hair again.
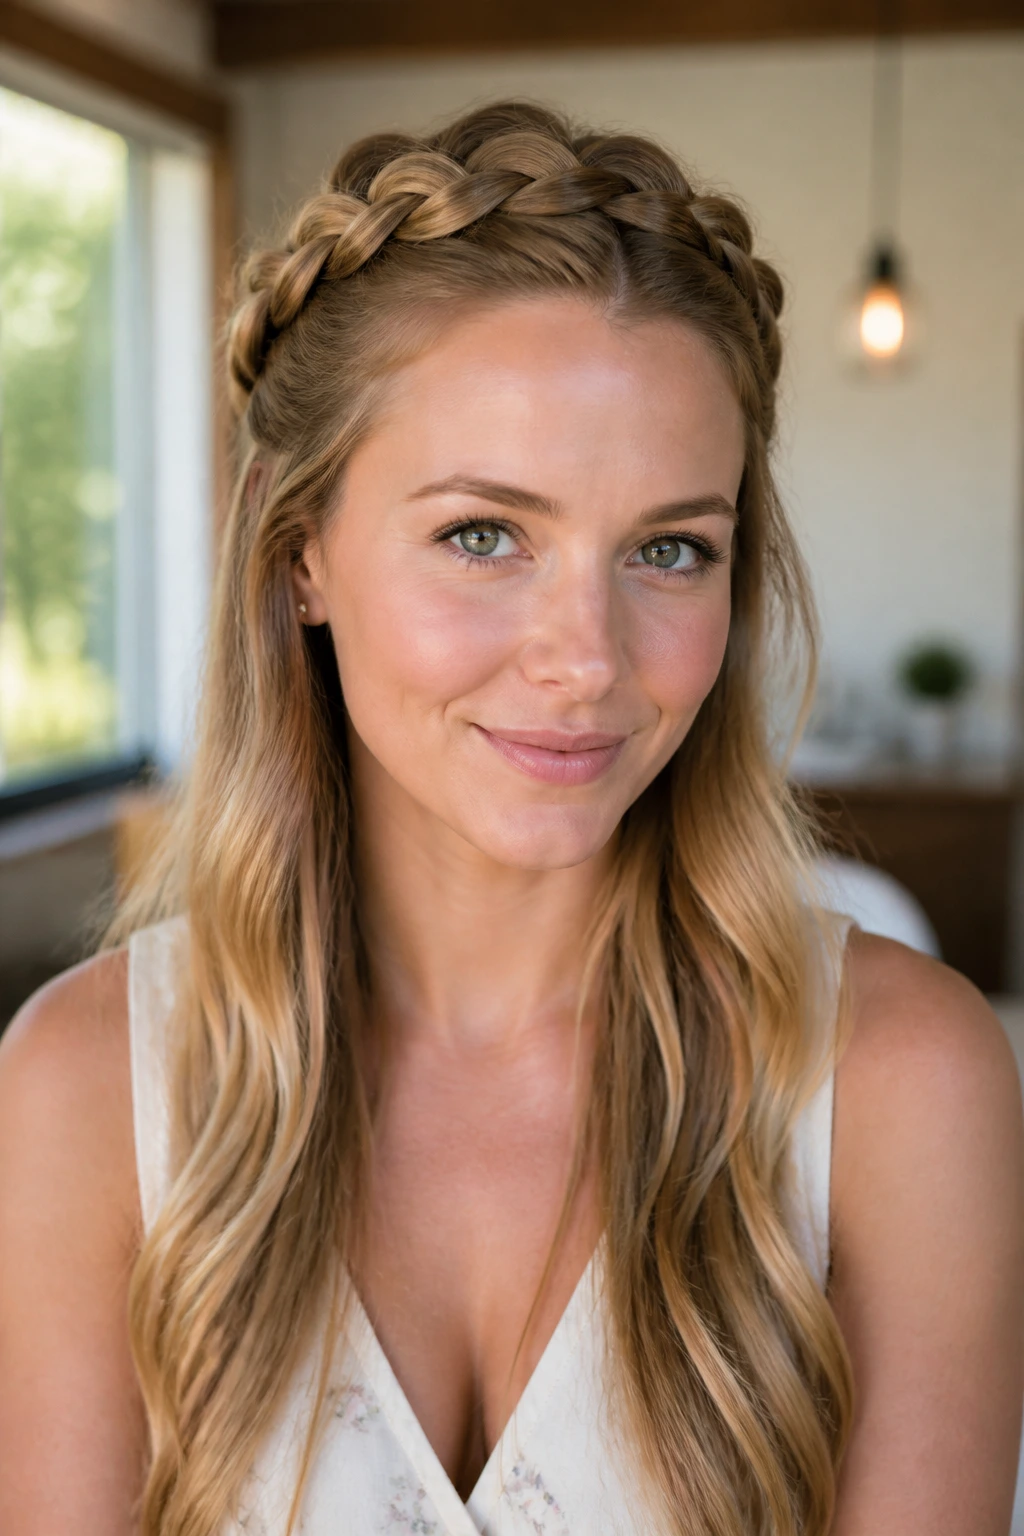
5. Half-Up French Braid Crown
The nice thing about a half-up French braid crown is the way it clears the temples without taking all the hair with it. You get the calm, controlled look of a braid, but the lower lengths still move. On wavy hair, that contrast is especially good; the top stays neat and the bottom keeps its bend.
Start one side near the temple and braid across the back of the head, picking up small pieces as you go. Don’t aim too high. If the braid sits too far up the crown, it begins to look like a tiara that wandered in from a costume drawer. Keep it just above the ears, then clip or pin it at the back.
I like this style when the front needs to stay off the face but the full updo feels like too much. It’s a strong option for long layers, because the braid controls the shorter top pieces while the rest of the hair stays soft.
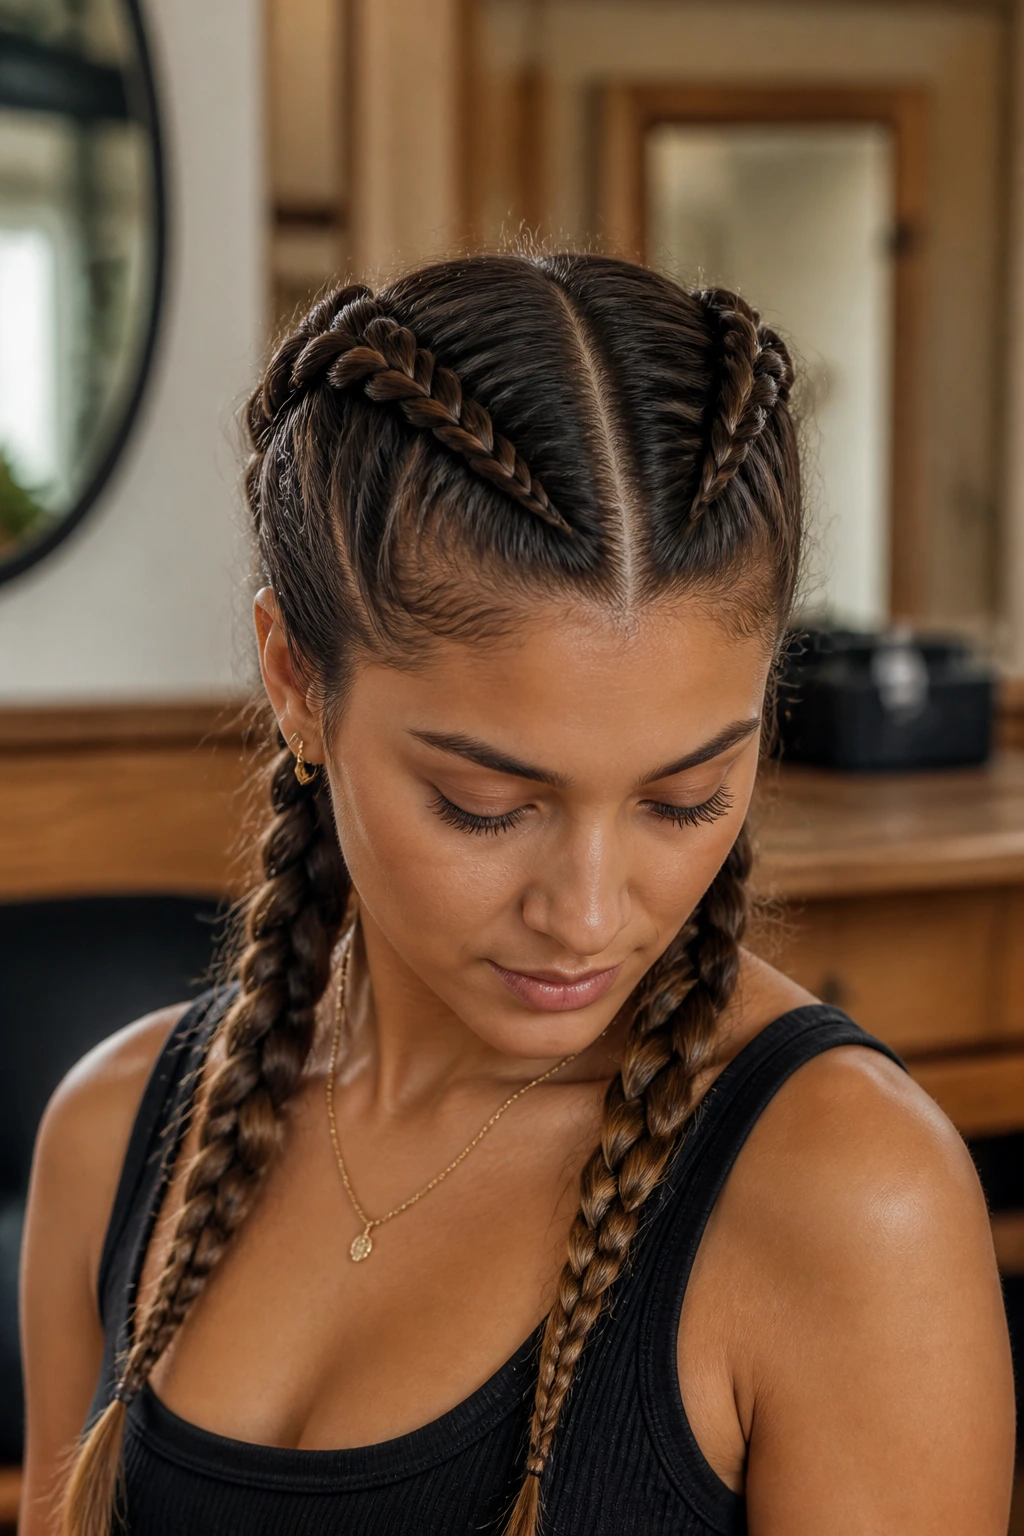
6. Double French Braids
Two French braids can look sporty, but they do not have to. If the part is clean and the braids are kept a little loose through the center of the head, the style reads deliberate and polished instead of gym-only. The key is symmetry. Messy symmetry is still symmetry.
Use the tail of a comb to draw a straight center part from the forehead to the nape. Clip one side out of the way, braid the other side with even tension, then repeat. If you want the finished look softer, stop each braid a few inches before the ends and secure with a small elastic so the loose tails can be waved or curled.
This style works especially well on thicker hair, where one braid can feel too heavy. Two smaller braids distribute the volume better and keep the scalp from getting pulled in one direction.
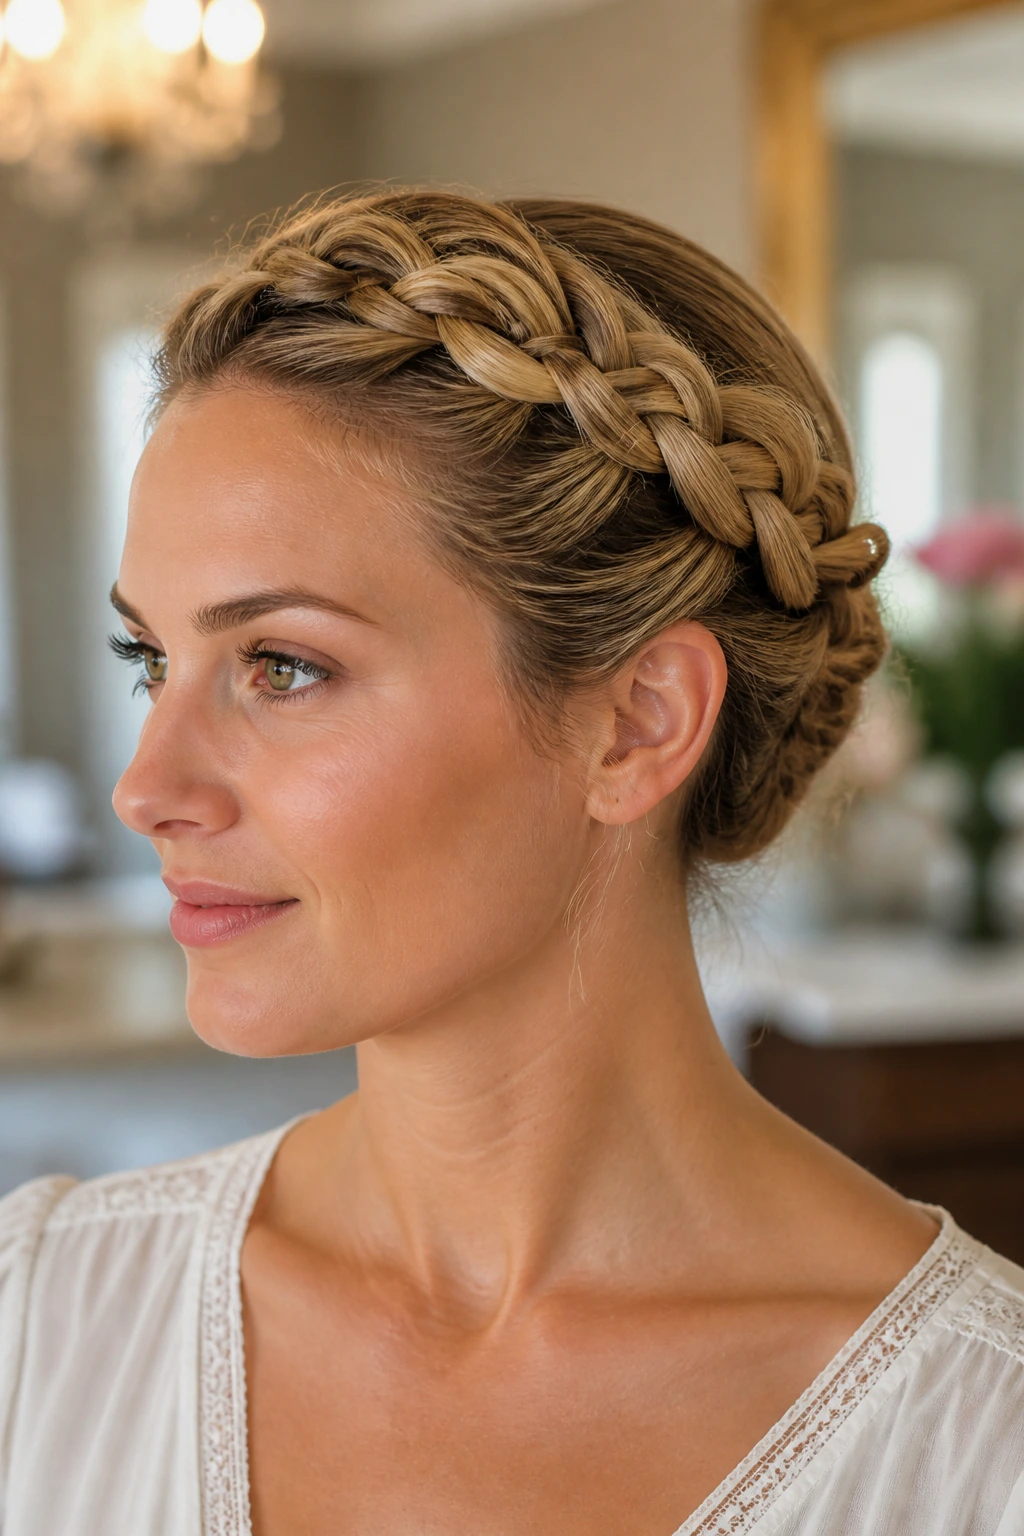
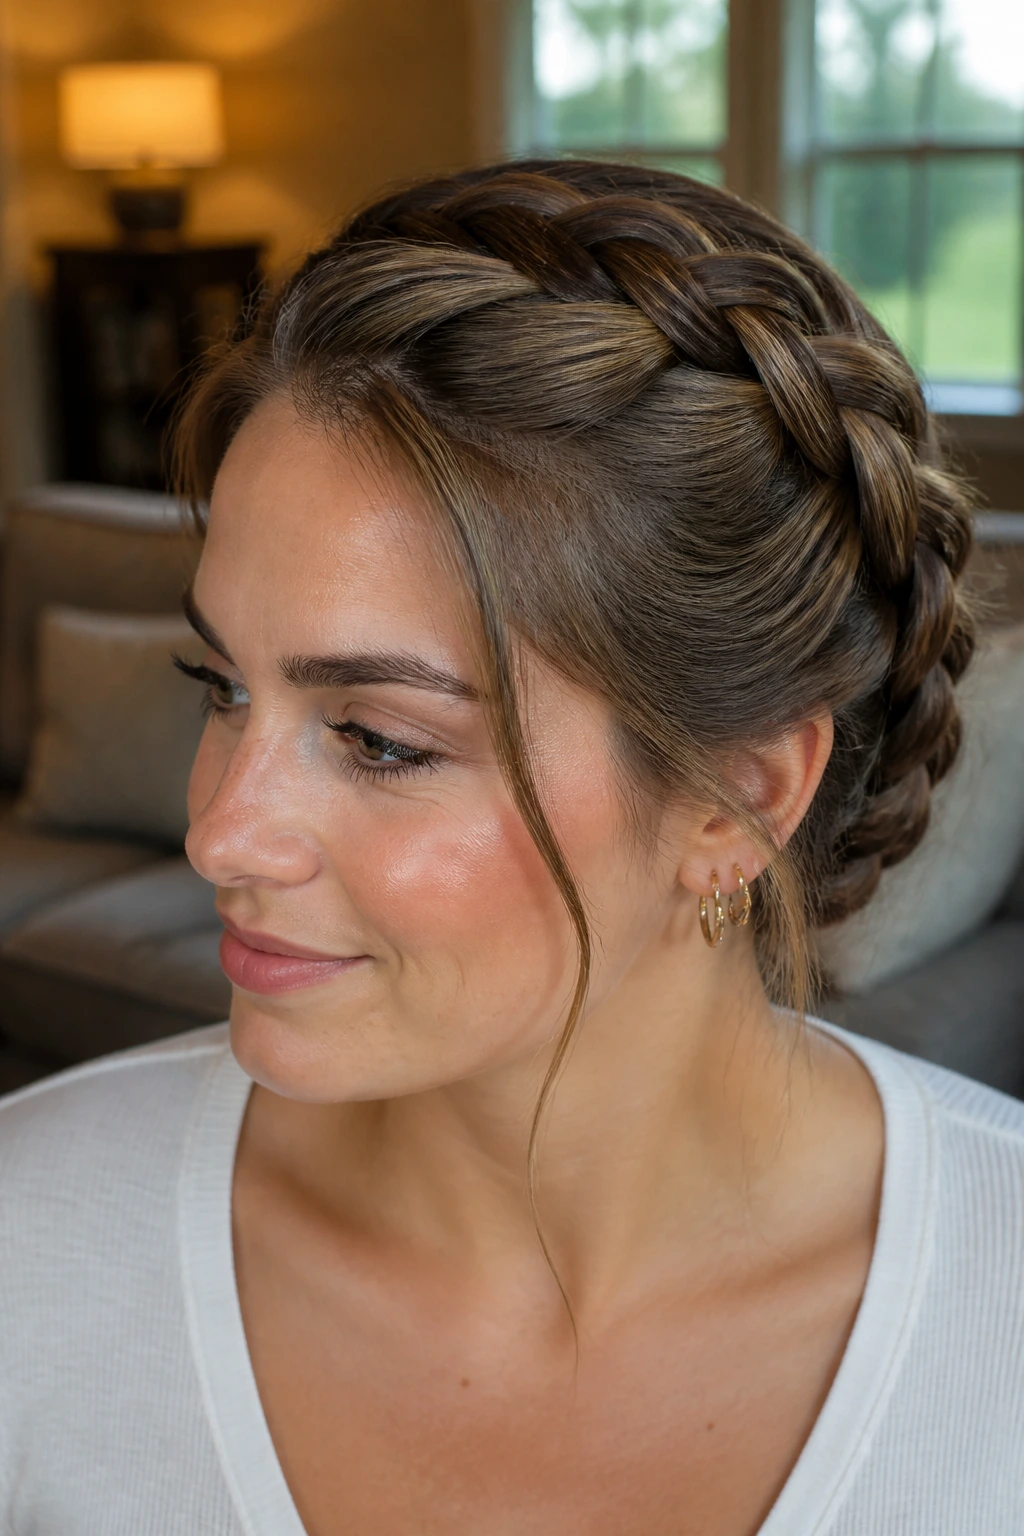
7. Halo French Braid
One braid around the head can replace a handful of pins and still look calmer than a full updo. That’s the appeal of a halo French braid. It circles the hairline, tucks the ends away, and leaves the face open without looking bare.
The Path Around the Head
Start just behind one ear and braid along the perimeter, adding hair as you move around the crown. Keep the braid close to the hairline, not high on the head, or it starts to lose the halo effect and becomes just another crown braid. When you reach the opposite side, pin the ends under the braid with 6 or 7 bobby pins, sliding them in the direction of the braid so they disappear.
This one takes a little more hand control than the center braid, but it pays off. A halo braid is one of the cleanest ways to wear a formal neckline, especially if you want earrings or makeup to stay visible.
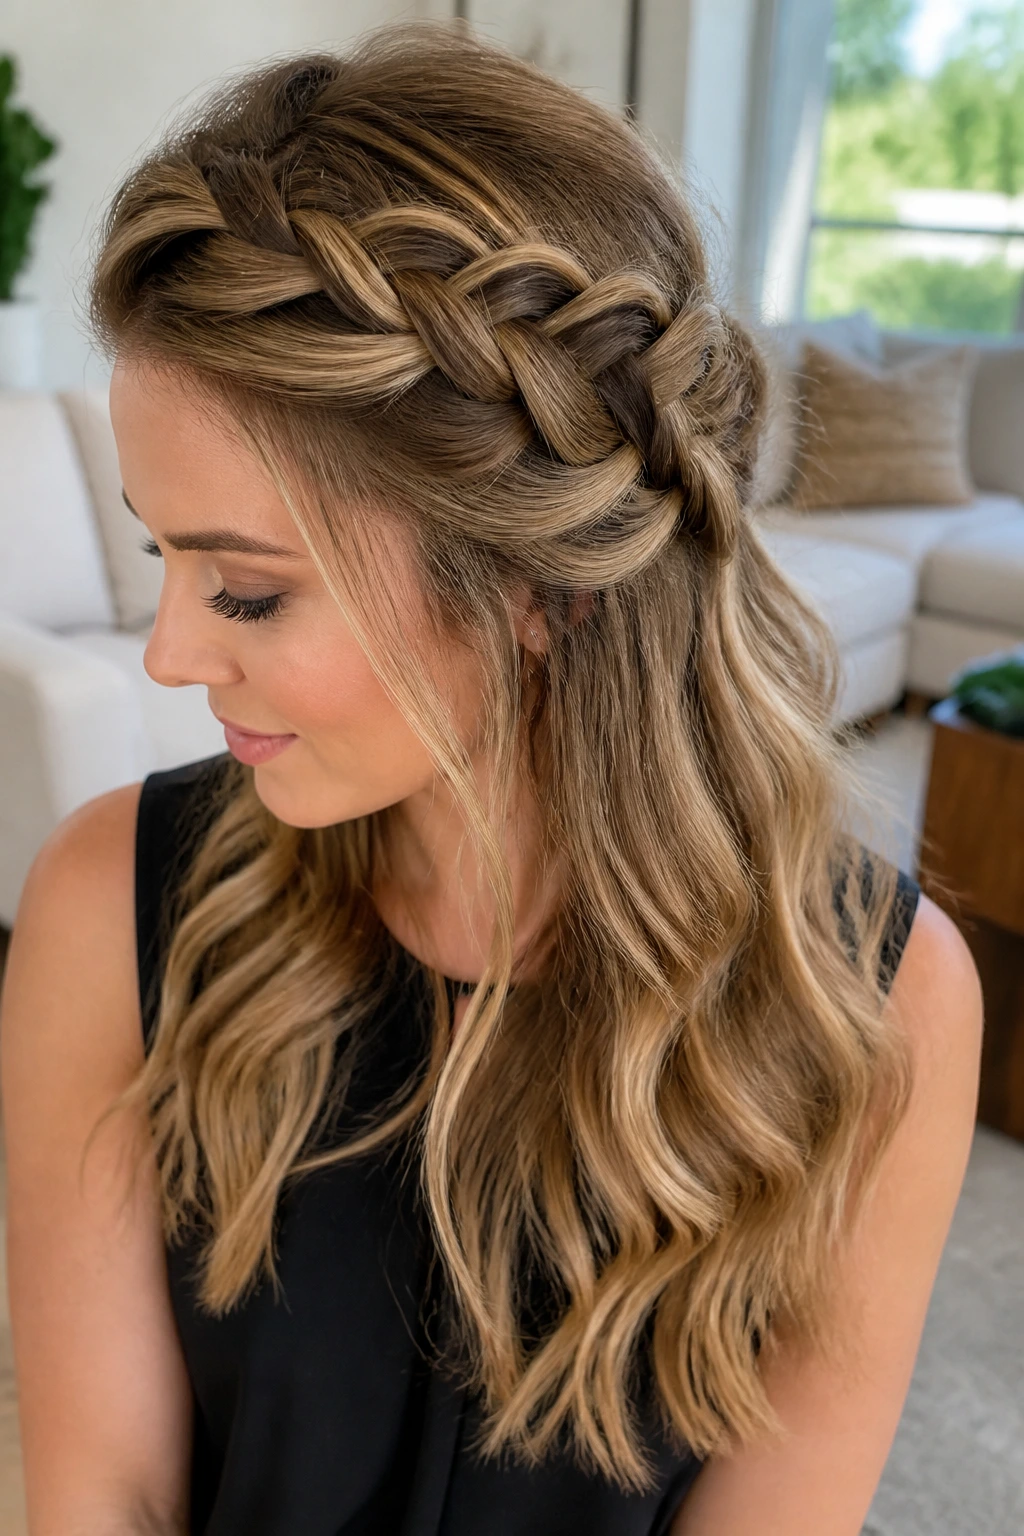
8. French Braid With Loose Waves
I like this one when the braid needs to share the stage. A French braid that takes shape through the crown and then opens into loose waves below the braid line has more movement than a fully braided style, and that movement is what keeps it from looking severe.
Braid only the top section, usually from the hairline to somewhere around the upper back of the head, then stop and let the rest of the hair fall in waves. If your hair is naturally straight, a 1-inch iron through the bottom lengths before braiding keeps the finish from looking flat and stringy. If it’s already wavy, a little mousse at the ends is enough.
The braid gives structure. The waves soften the lower half. That combination is especially good when you want the style to feel dressed up but not formal enough to need pins or a bun.
9. French Braid Pigtails
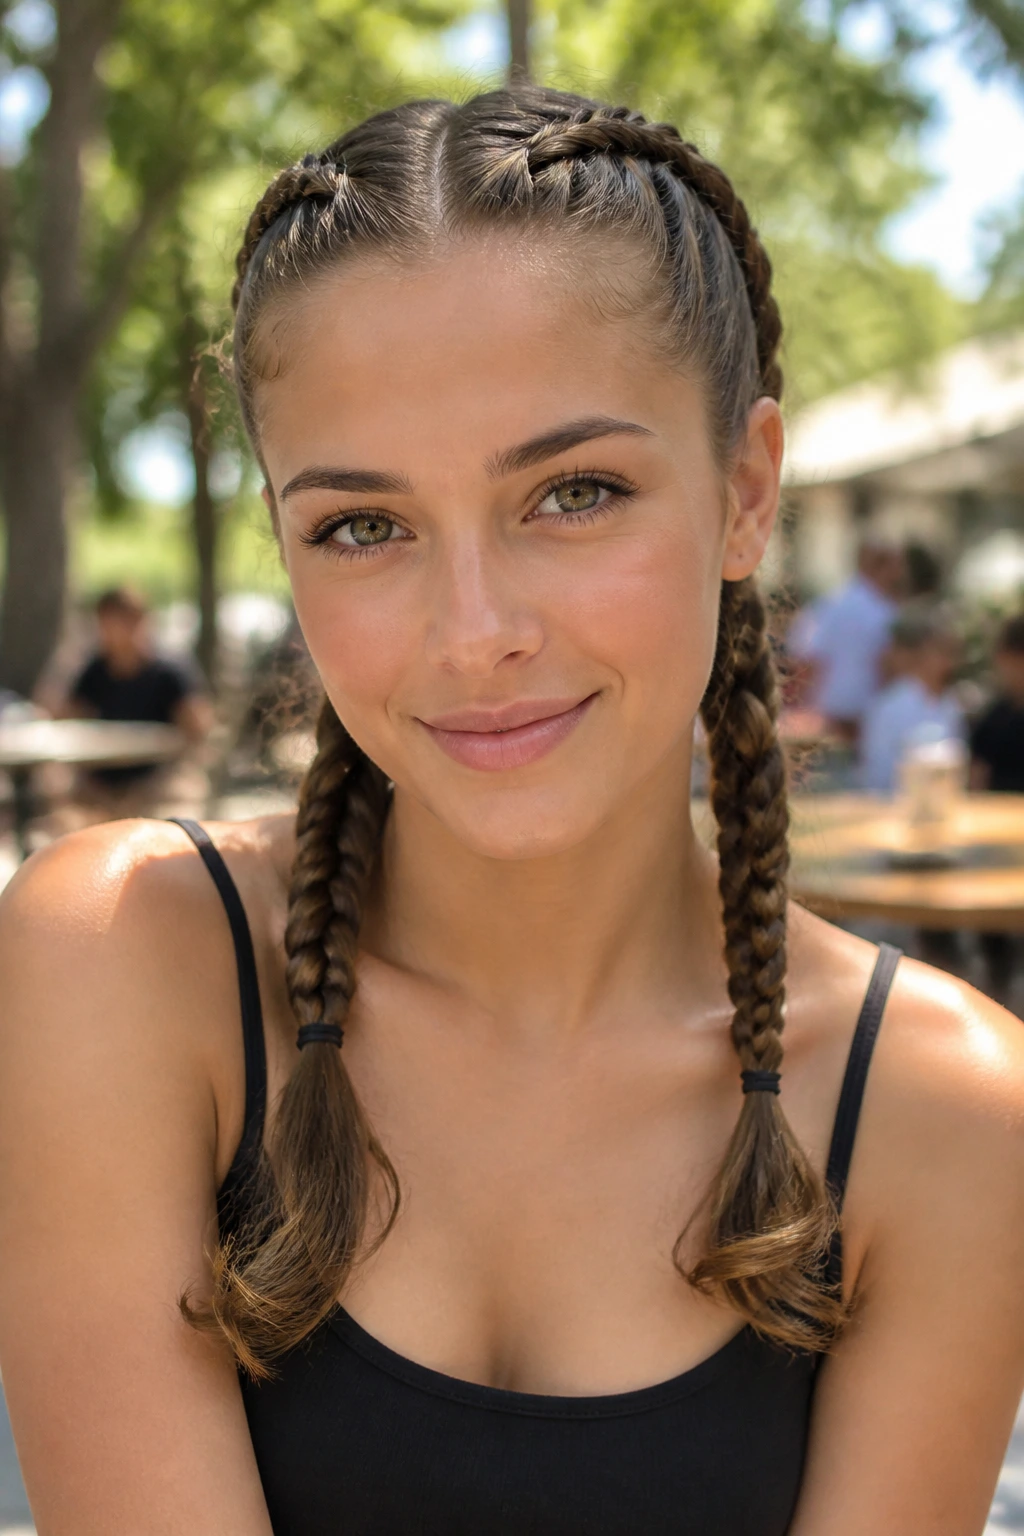
Can pigtails look grown-up? They can if the parts are clean and the braid tension stays even. French braid pigtails are a sharper, softer version of the school-day style because the braid begins at the scalp and keeps the hair controlled from the top down.
The trick is to keep each braid low enough to flatter the face, not so high that they look like little flags. Start each braid just above the temples, work straight down, and secure the ends near the shoulders or a little below. If you leave a small amount of length unbraided and curl the ends, the whole thing feels much less juvenile.
This style works better than people expect for day-two hair. The slight roughness at the roots gives the braid grip, and the two sides help balance out any weird growth pattern in the part.
10. French Braid Headband
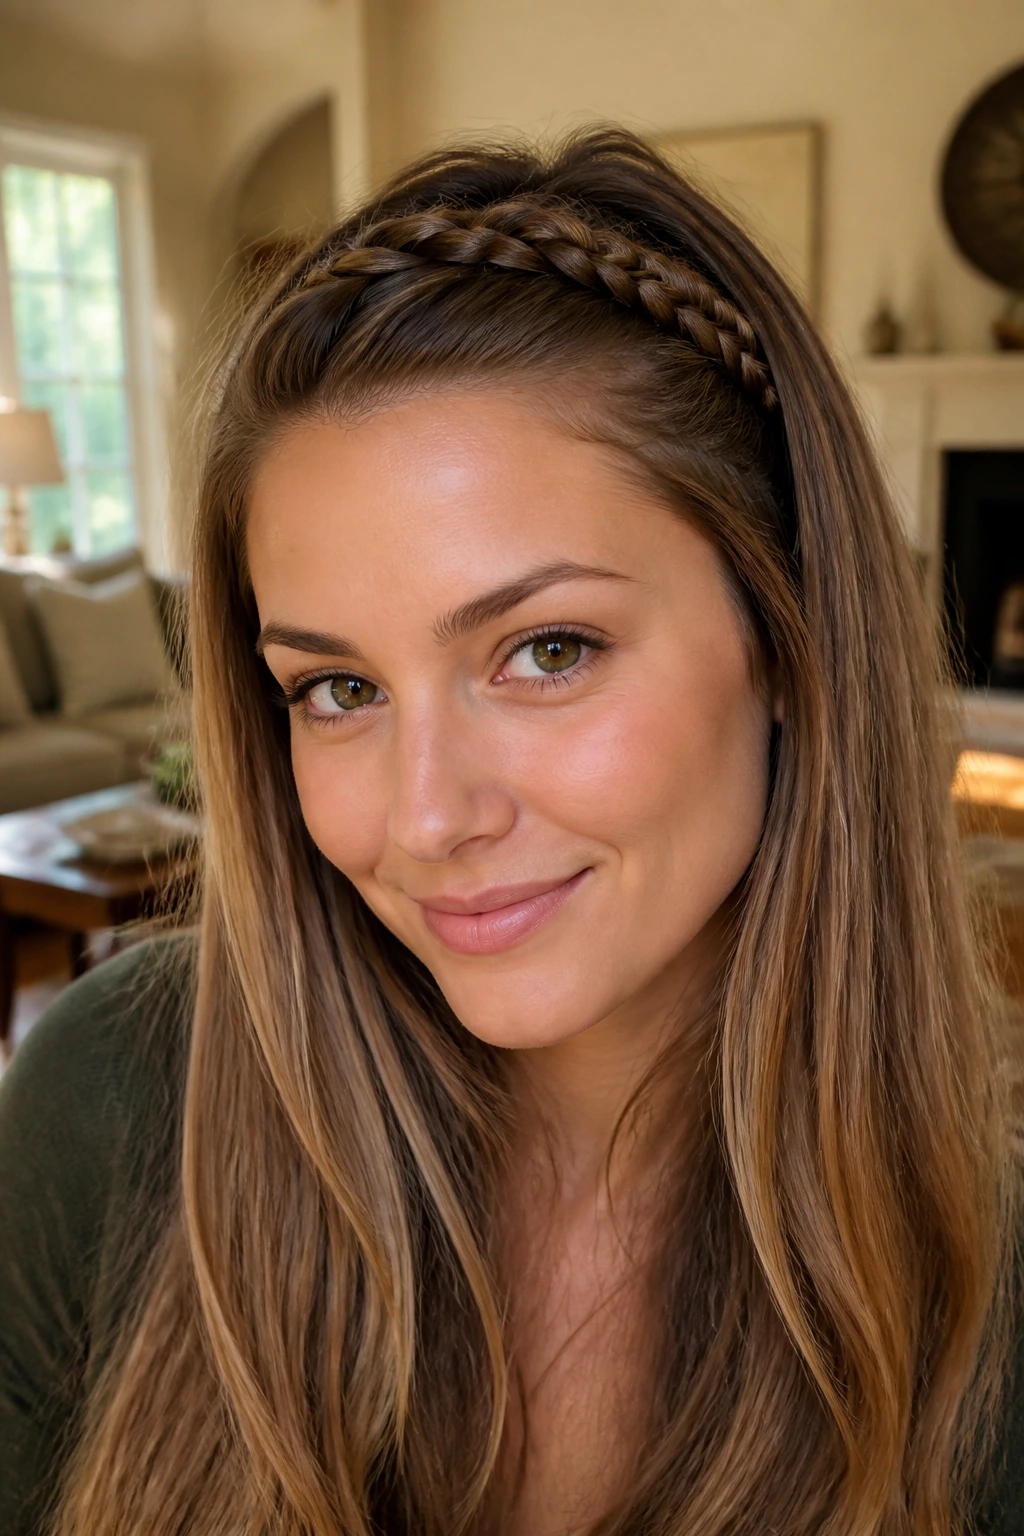
The headband braid is the fastest way to make hair look planned without changing the whole head. It uses a narrow French braid along the front hairline, then tucks the braid behind the ear so it reads like a built-in accessory. The rest of the hair can stay straight, waved, or even clipped back.
Keep the braid narrow. About 1 to 1¼ inches of hair is enough for the front section; any wider and it starts to dominate the face. I pin the braid just behind the ear with two crossed bobby pins so it stays flat. If the pins show, slide them underneath a layer of hair and let the braid hide them.
This one is especially good on medium-length hair, where a full braid can feel heavy. The headband version gives you structure without swallowing the rest of the style.
11. French Braid With Face-Framing Tendrils
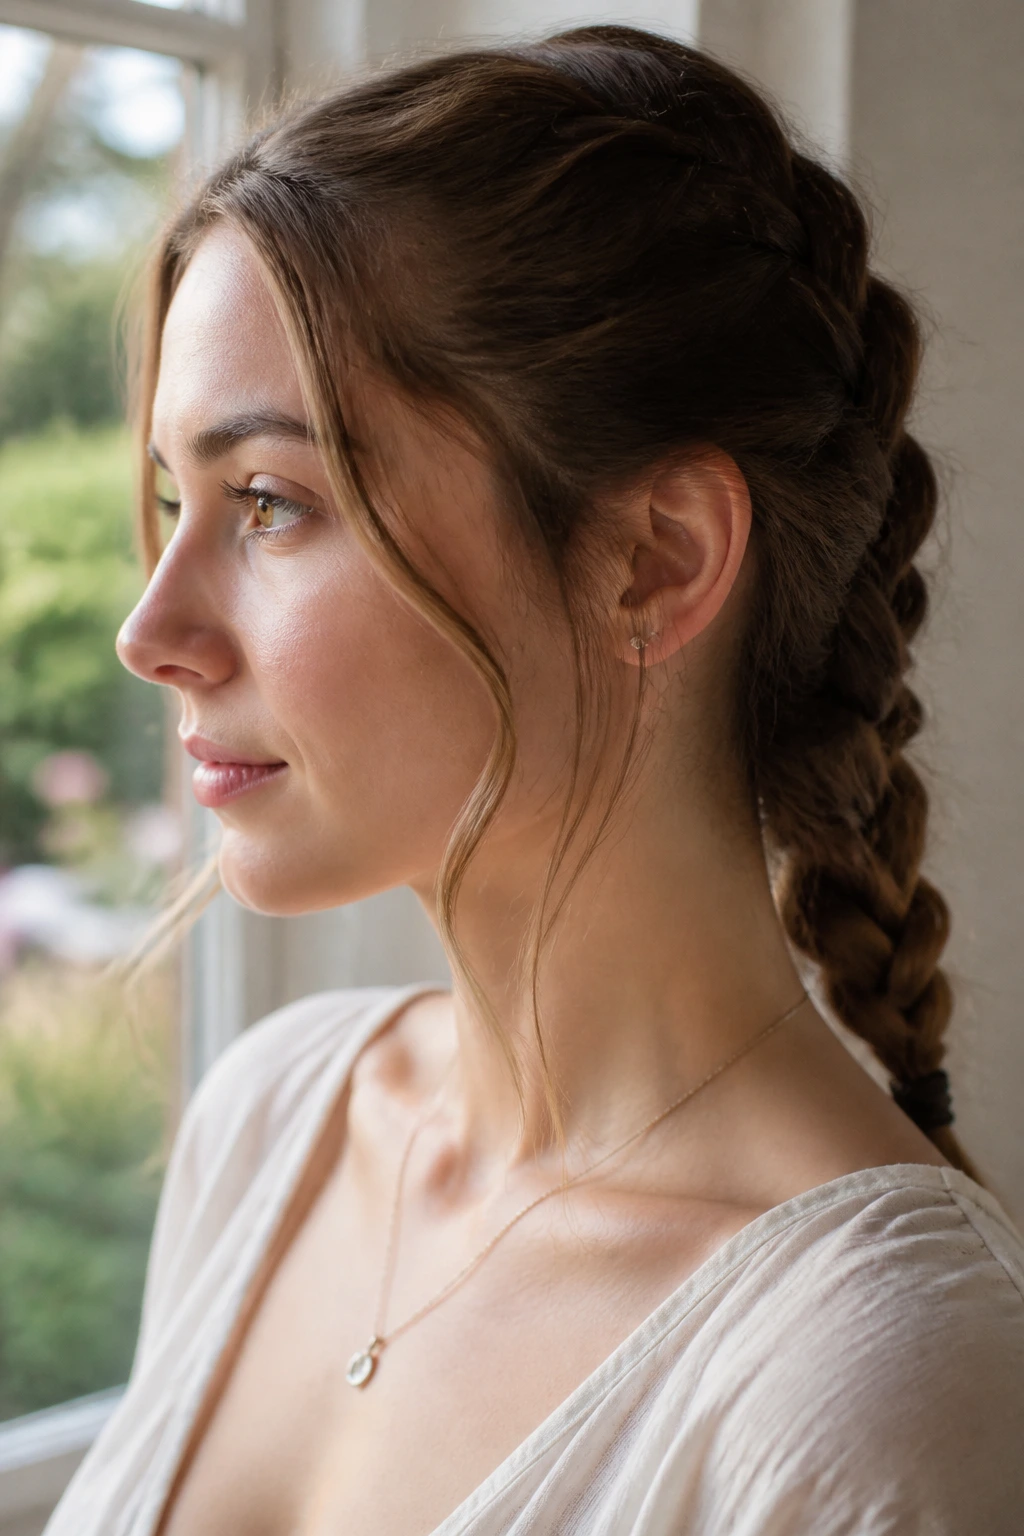
If your jawline reads sharp in photos, leave two thin pieces loose at the temples. That tiny move changes the whole effect of a French braid. The braid still gives you polish, but the tendrils keep the front from feeling pulled back too hard.
I’d keep the face-framing pieces narrow — roughly the width of a pencil, not a marker. Too thick and they start to look like they were forgotten on purpose. Too thin and they disappear. A soft bend with a curling iron or even a finger twist before pinning the braid helps them fall in a relaxed line.
This style is useful when you want the structure of a braid but don’t want to expose every edge of the face. It’s a good middle ground for weddings, interviews, dinners, or any day when you want to look composed rather than severe.
12. French Braid to Fishtail End
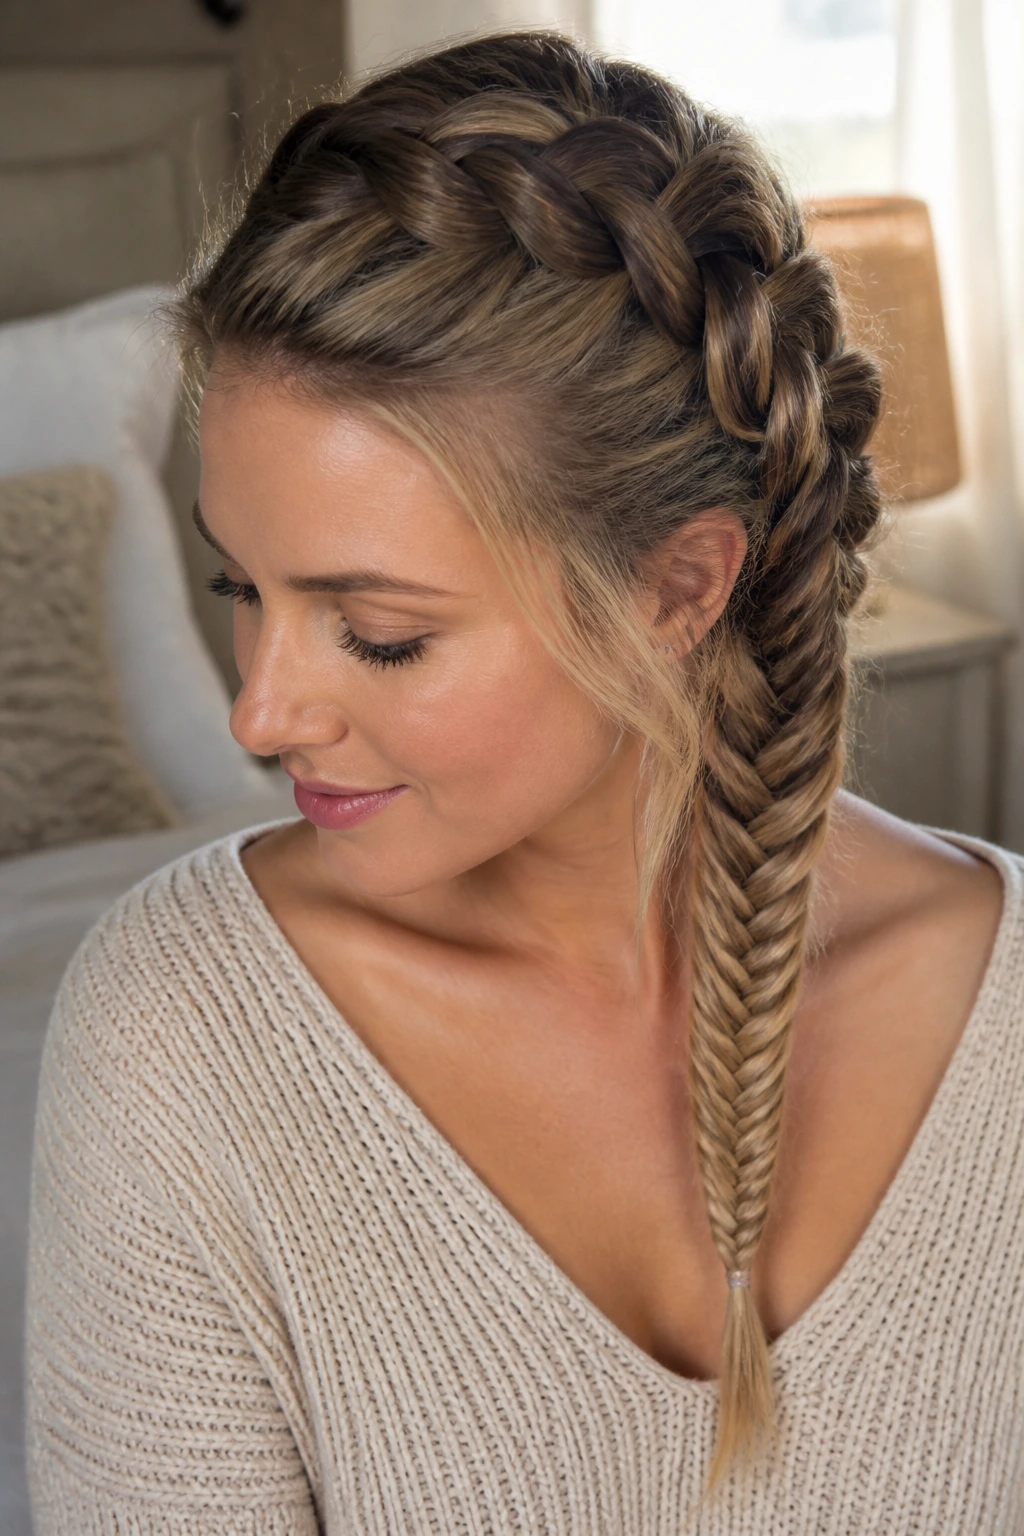
Switching textures at the tail keeps a braid from going flat. A French braid feeding into a fishtail end gives the style a little surprise without making it fussy. The top remains smooth and controlled; the tail gets finer and more detailed as it drops.
The easiest way to do it is to French braid from the hairline to the middle of the back of the head, then split the remaining hair into two sections and fishtail the ends. That change in pattern makes the braid look more deliberate, especially if the tail is left long and clean. A single clear elastic at the end keeps the focus on the texture instead of the tie.
I like this when the outfit is simple and the hair needs a little more interest than a standard tail. It has enough detail to look special, but it still wears like an everyday braid.
13. French Braid Updo
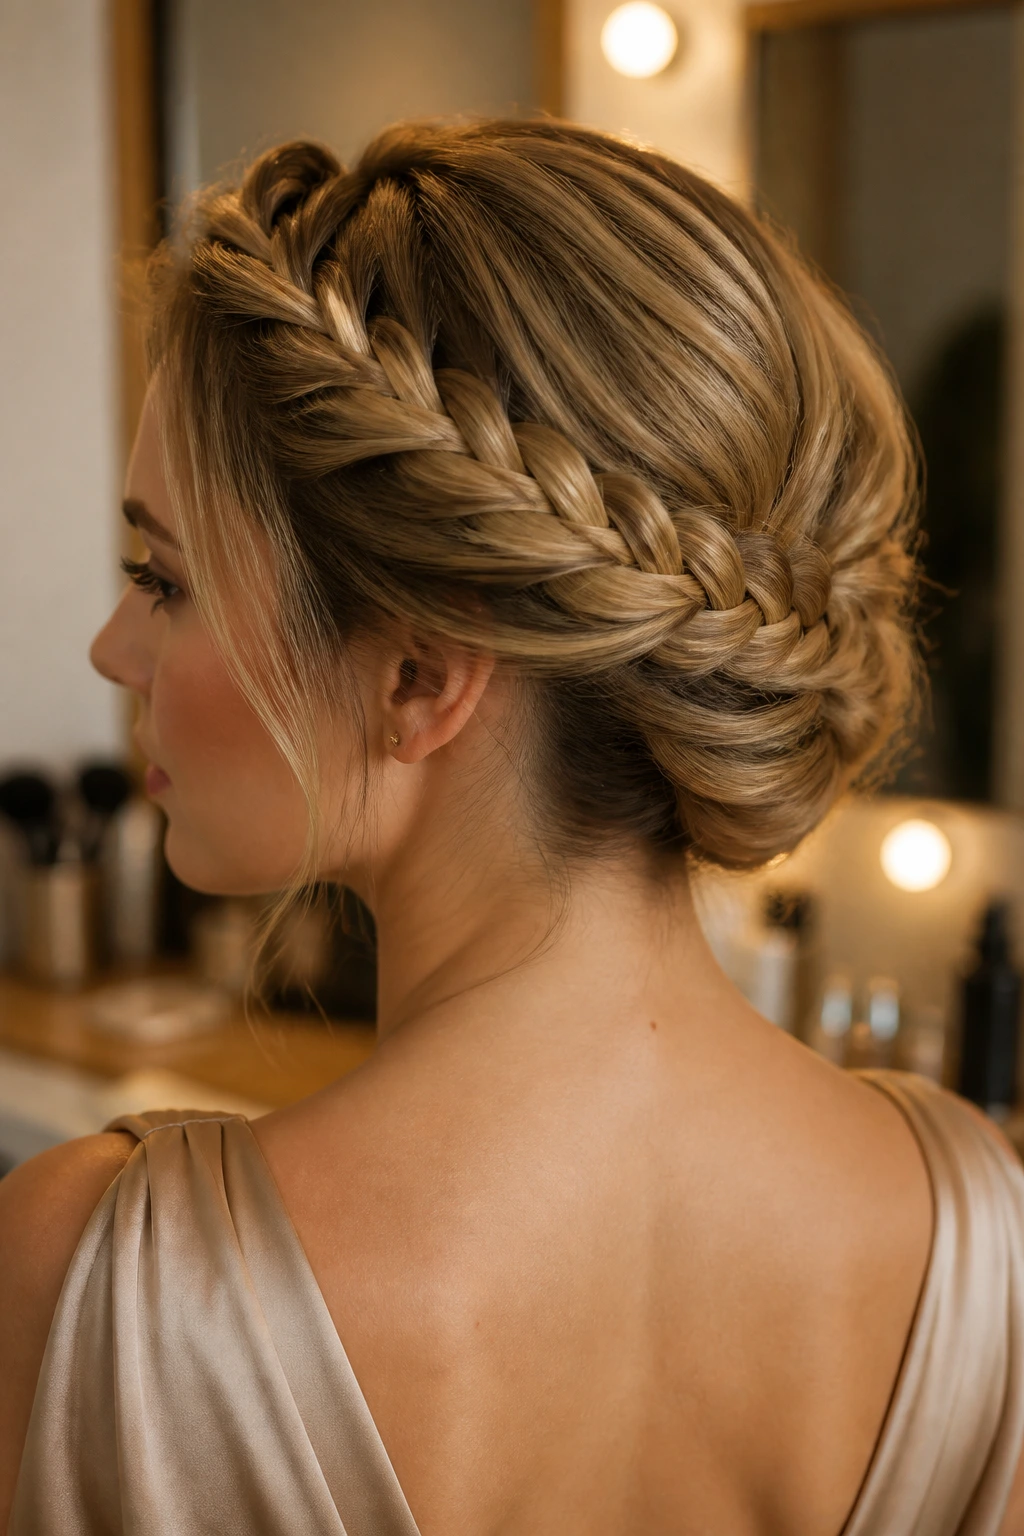
A tucked French braid updo feels neat even before the pins go in. Once the braid reaches the nape, rolling or folding the remaining length upward creates a compact shape that sits close to the head and stays out of the way. The look is tidy, but not severe if you leave the braid slightly loose before pinning.
How the Shape Stays Soft
The secret is not to over-tighten the braid before you tuck it. If the braid is already pulled flat, the updo can look drawn on. Leave a little width in the braid, then curl the tail under and pin it into place with 4 to 6 hidden pins. A soft mist of hairspray on the hands, not directly on the head, keeps flyaways down without freezing the whole thing.
This is one of the better choices for a dressier setting because it keeps the neck clear and still feels human. I’d choose it over a plain bun every time.
14. Wrapped French Braid Ponytail
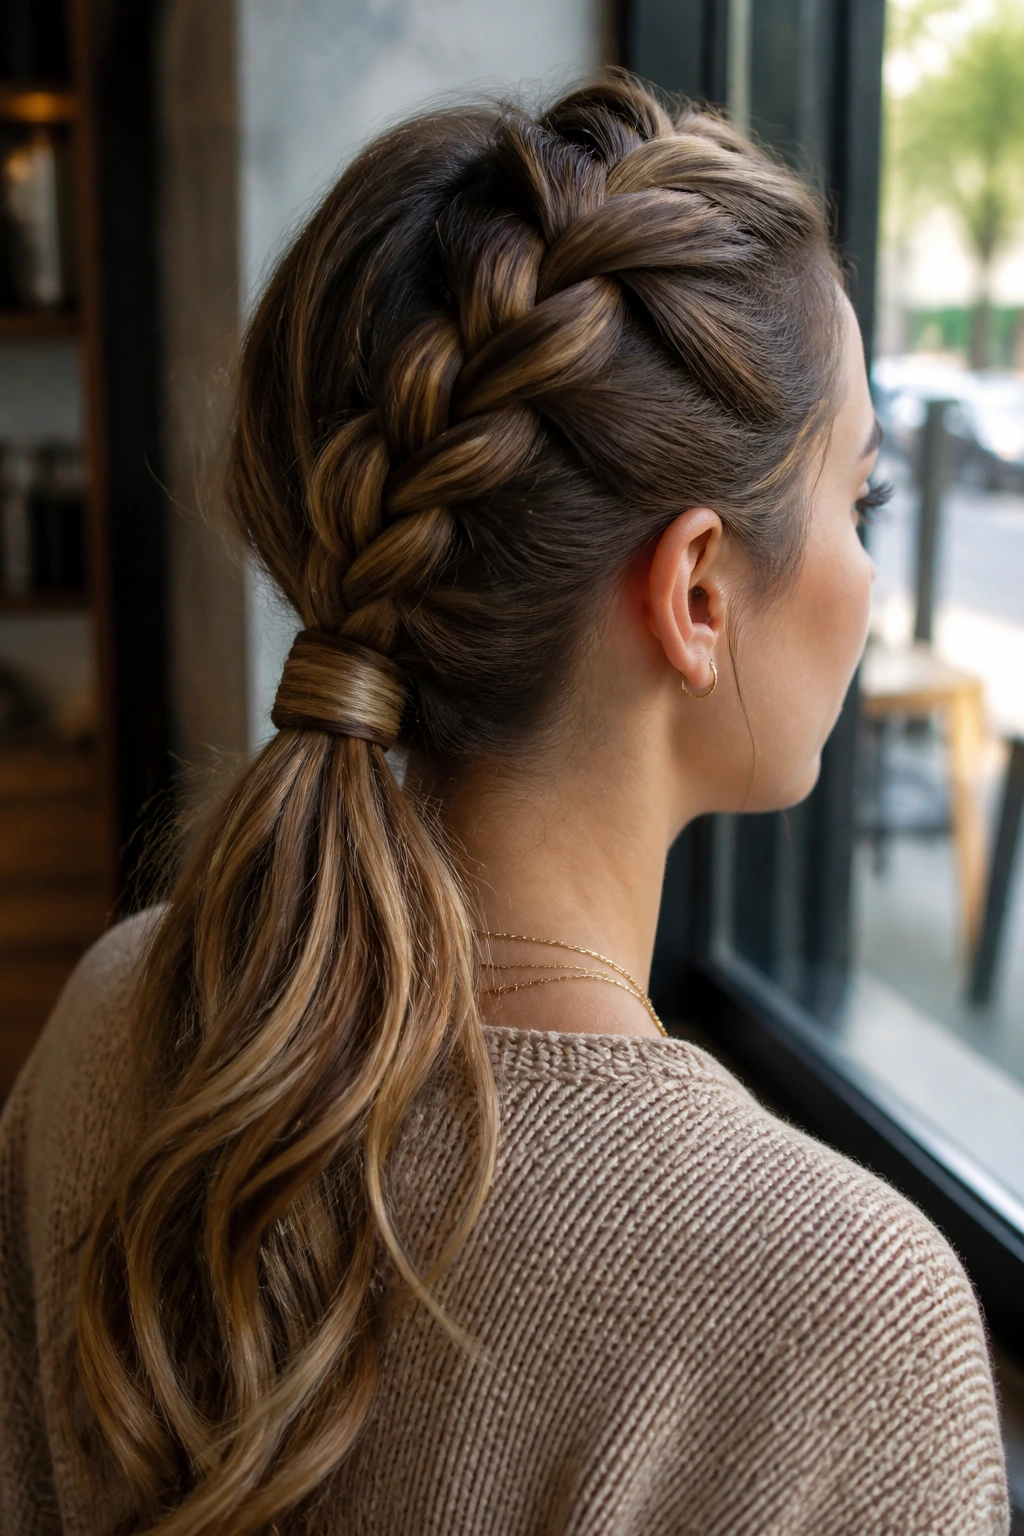
Simple. Clean. A little dressier than a plain ponytail. A wrapped French braid ponytail starts with the braid at the crown and ends in a low or mid ponytail whose base is hidden under a strand of hair. The wrapped base is what makes it feel intentional.
Braid down to the point where you want the ponytail to begin, then gather the rest into a secure elastic. Take a 2-inch piece from underneath, wrap it around the elastic once or twice, and pin the end underneath with a bobby pin. That little wrap changes the whole finish. The eye lands on the braid, not the hardware.
This style is strong on medium to long hair because it keeps the top polished while the tail keeps some swing. It’s one of those looks that works as well with a blazer as it does with a knit sweater.
15. French Braid Bun With Soft Loops
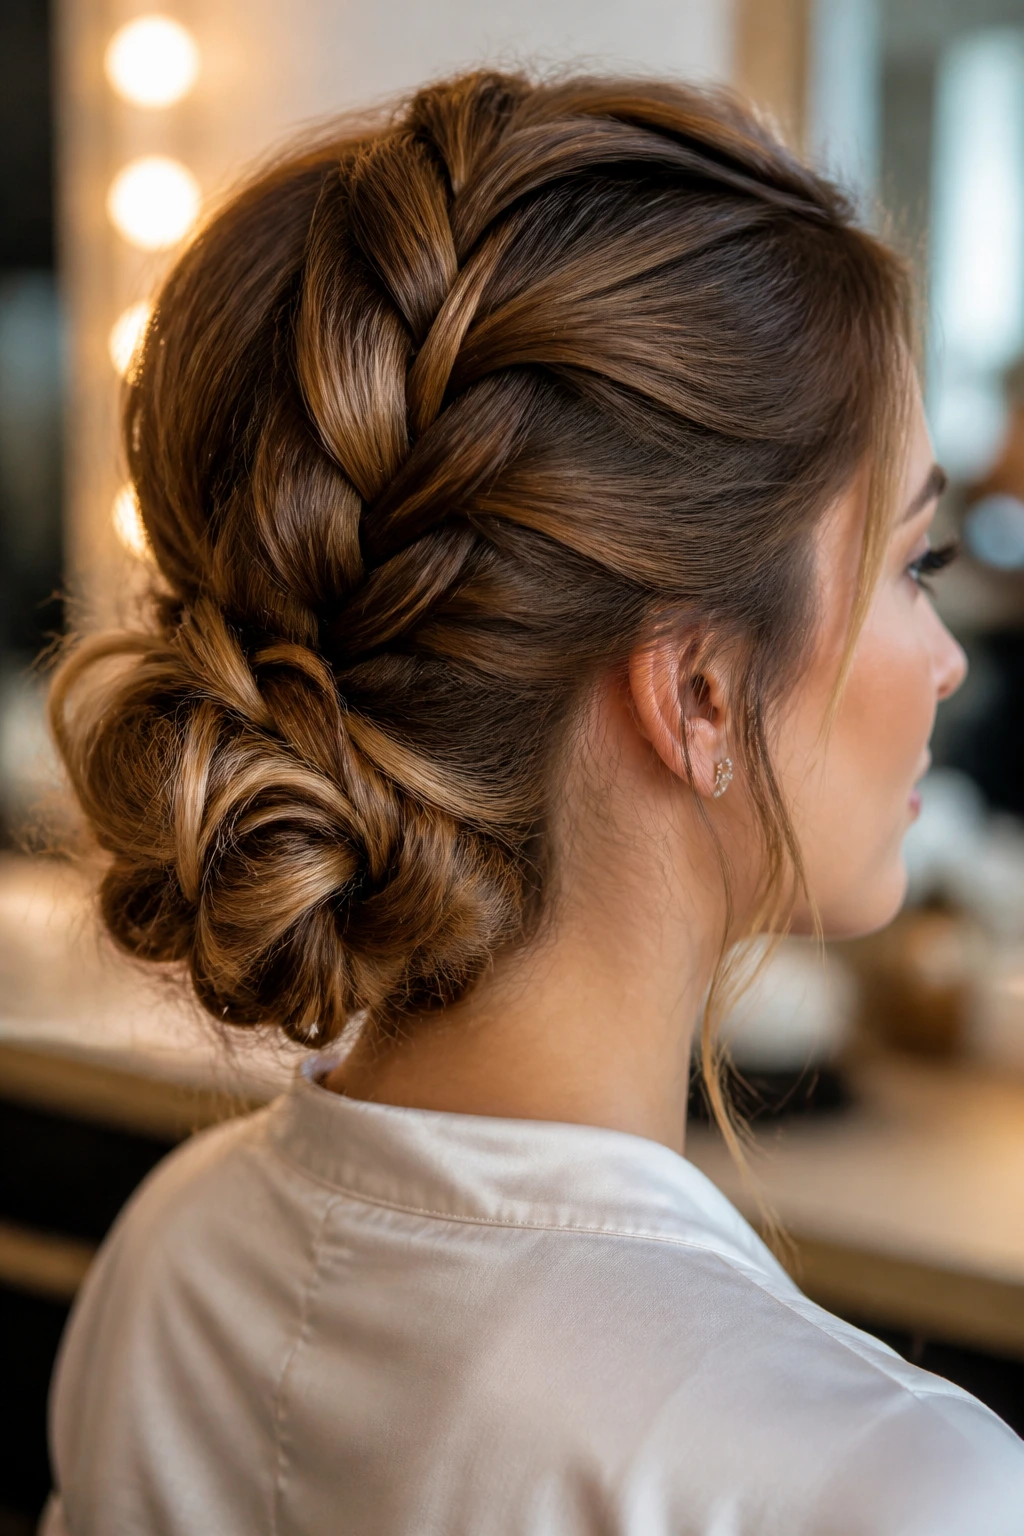
Why do some braided buns look stiff and others look airy? The difference is usually in the loops. A French braid bun with soft loops gives you structure up top and a little lift in the bun itself, which keeps the style from looking too packed down.
Braid to the nape, secure the tail, then wrap the length into a loose bun. Before pinning it fully, gently tug a few sections of the bun outward with your fingertips. Not enough to tear the shape. Just enough to create rounded loops and a little breathing room. Pin the base first, then the outer edges, so the looseness stays controlled.
This is a good move for thick hair, where a tight bun can read heavy fast. The soft loops keep the style from feeling like a knot at the back of the head.
16. French Braid on Curly or Coily Hair
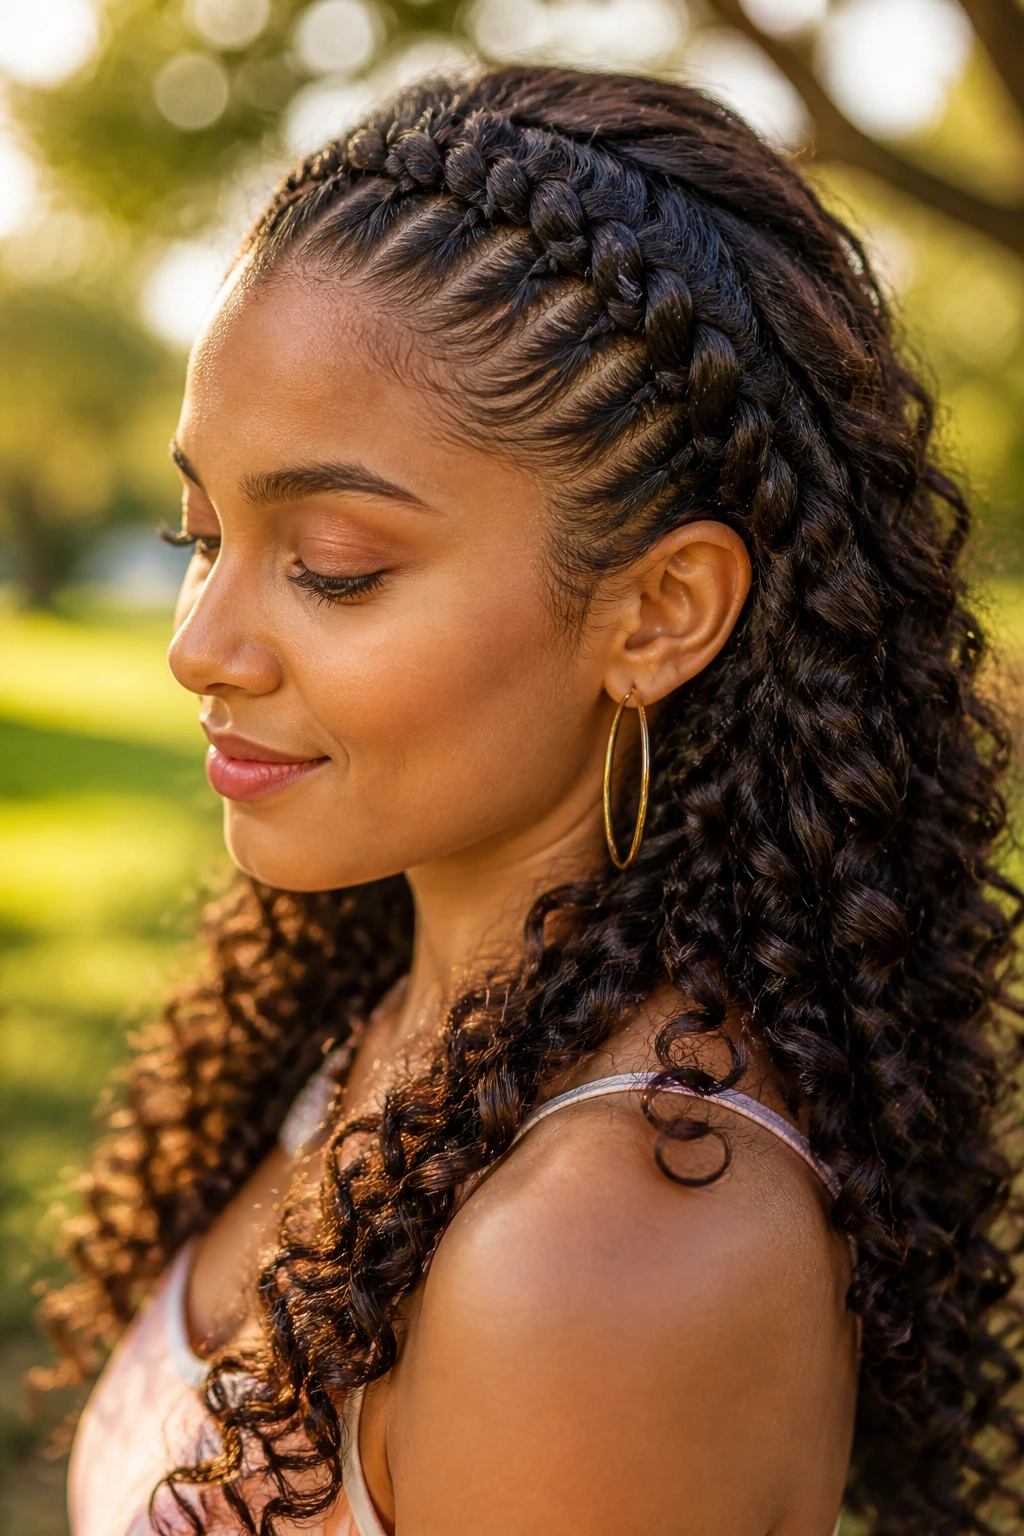
Curly hair gives this style more personality, not less. A French braid on curls or coils can look especially polished because the braid line creates order while the texture keeps the finish alive. The trick is to work with the hair’s shape, not against it.
If the hair is very dense or tight in curl pattern, stretching it first with a blowout, banding, or a twist-out gives the braid a cleaner path. If you want to braid on natural texture, use leave-in conditioner and a light cream for slip, then braid with steady but gentle tension. Don’t yank the roots. Curly hair will fight back, and it will win.
I especially like leaving the ends curly instead of forcing them into a straight tail. That contrast keeps the braid from looking too formal and lets the texture do what it does best.
17. French Braid for Shoulder-Length Hair
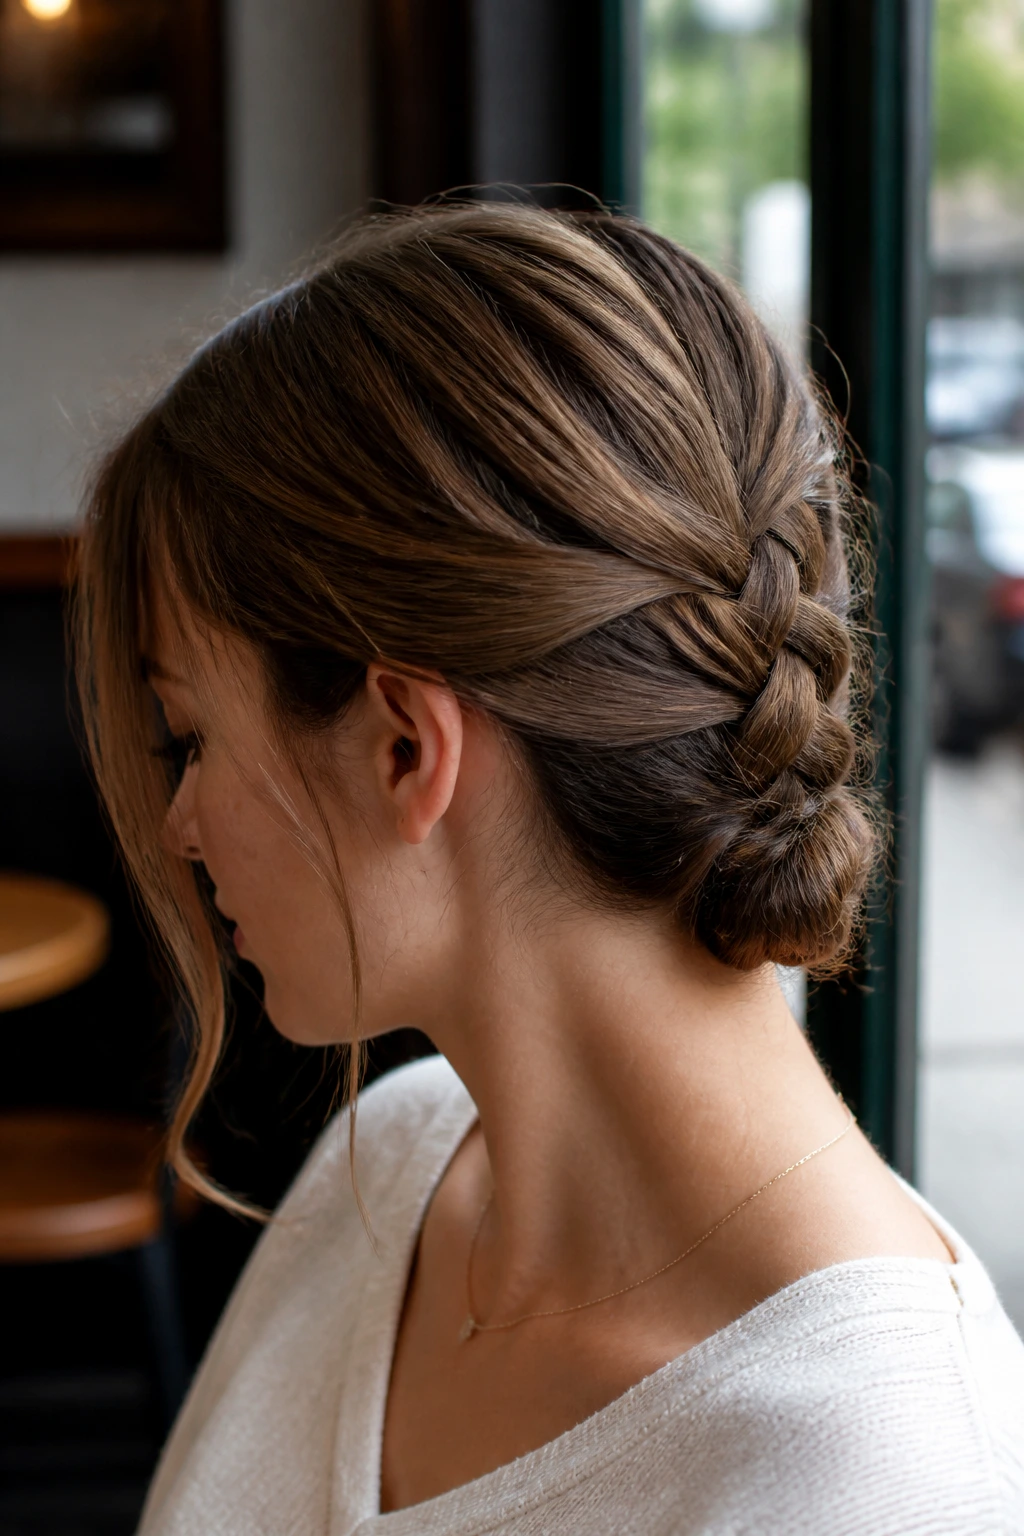
Shoulder-length hair can hold a proper French braid if you start a half-inch lower and use smaller grabs. People often think this length is too short, but that’s usually just a problem of placement. Start too high and the braid runs out of hair before it has shape. Start lower and the proportions make sense.
A smaller braid section also matters here. Keep each grab neat and narrow so the braid doesn’t eat up the available length too quickly. When you get to the nape, you can stop and secure the end with a small elastic, then tuck the tail under with a pin if you want the finish to look cleaner.
This is a nice option for a lob or a layered cut that needs some control at the crown. It keeps the top smooth and avoids the awkward half-finished look shorter braids sometimes get.
18. Ribbon-Woven French Braid
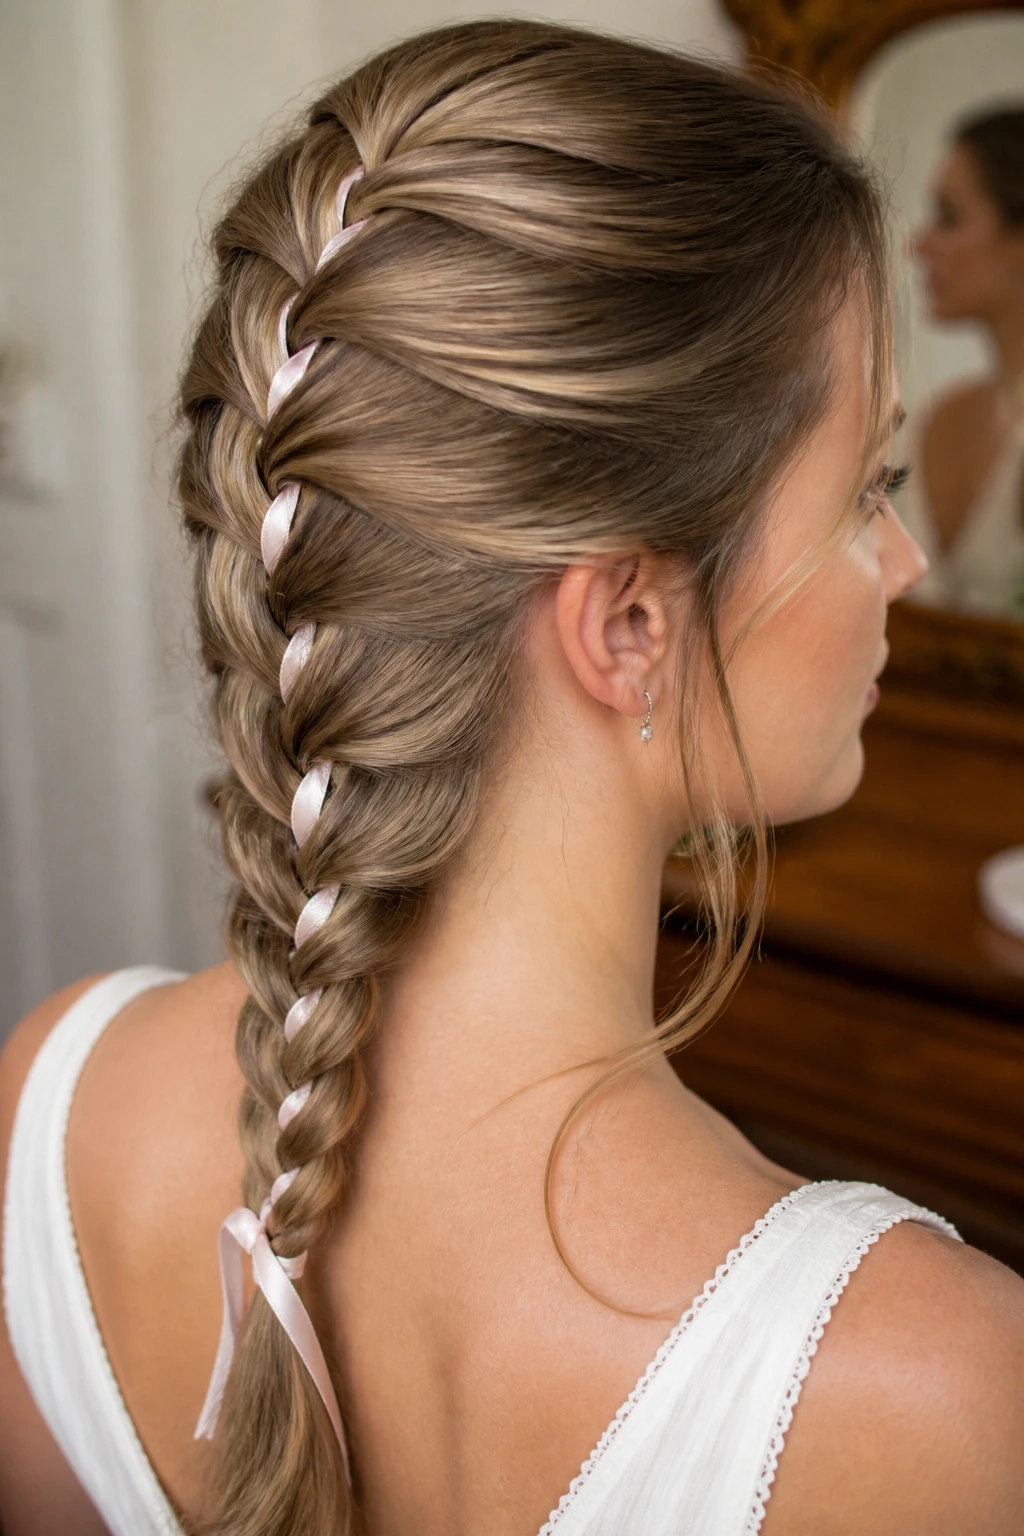
A ribbon does not have to read childish. In the right color and width, it looks sharp. A ribbon-woven French braid gets a softer, dressier finish because the fabric breaks up the hair texture and adds a clean line that sits on top of the braid.
Use a narrow ribbon — about ¼ inch is enough for most hair. Too wide and the ribbon starts to overpower the braid. Tie or anchor the ribbon at the top section, then weave it in as you cross the outer strands. Satin gives a smoother finish, while grosgrain has a little more grip and stays put better.
This is one of the easiest ways to dress up a braid for an event or a dinner without adding a lot of pins. The color choice does most of the work, so keep the rest of the style simple.
19. Pearl-Pinned French Braid
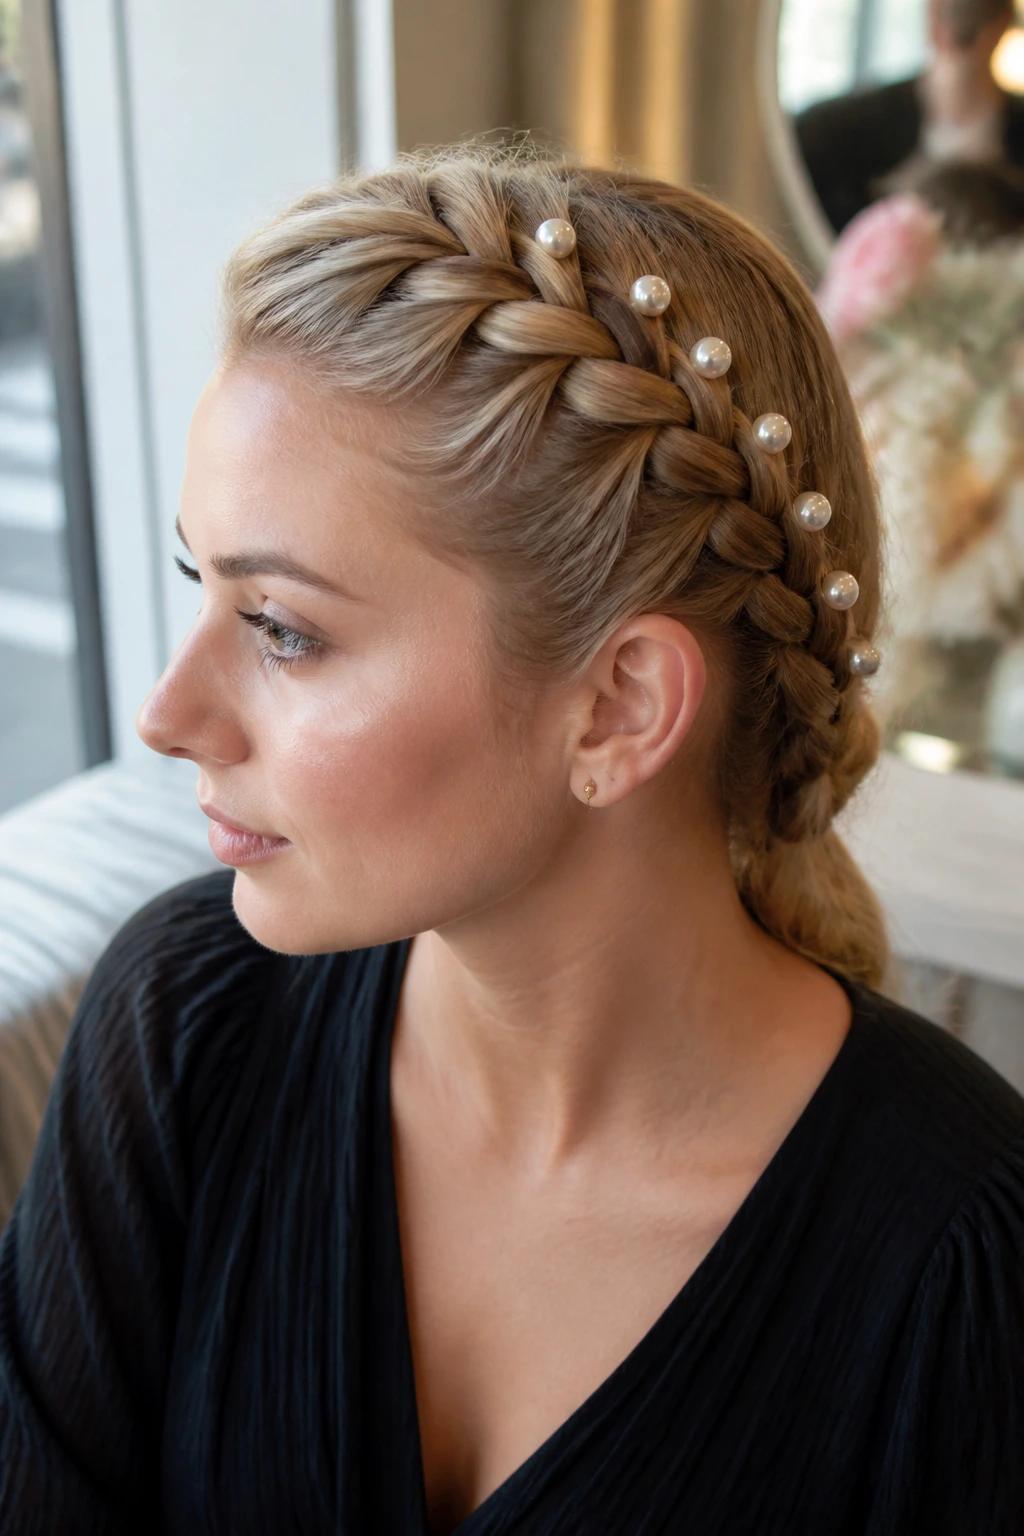
Pearls sit best when the braid itself stays matte and calm. A pearl-pinned French braid looks polished because the braid creates the line and the pins add small points of light without turning the style into a costume piece. The key is restraint.
Place 5 to 7 pearl pins along one side of the braid, not all around it. That asymmetry keeps the look soft. If you place them too evenly, the braid can start to feel over-styled. I like to set them where the braid widens at the crown or where the tail begins, so they catch the eye without interrupting the shape.
This style works especially well with low necklines and simple earrings. The braid does the heavy lifting; the pearls just sharpen the edges a little.
20. Zigzag-Part French Braid
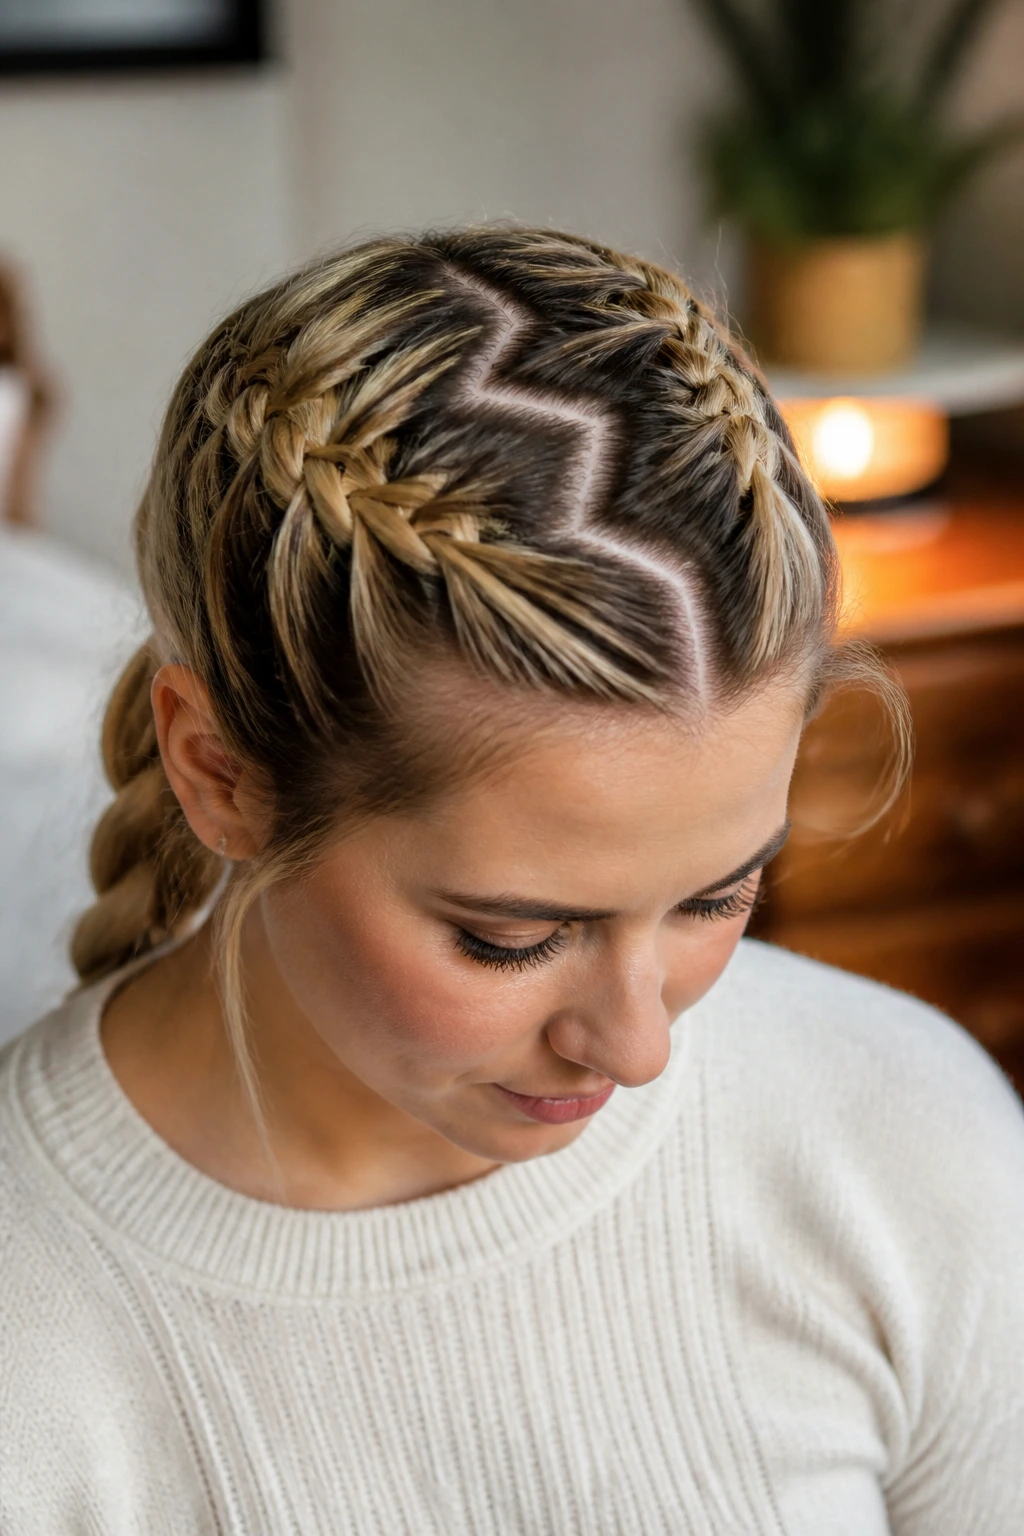
Do you want the braid to feel a little less expected? Change the part. A zigzag part gives a French braid texture before the braiding even begins, which makes the style feel playful without losing polish. It’s one of the best tricks for making a simple braid look custom.
Use the tail of a comb to draw the zigzag in 4 or 5 small angles across the top of the head. Keep the points shallow, not jagged. Once the part is set, braid as usual from the front sections back toward the nape or into a half-up shape. The irregular part adds visual movement, so the braid itself can stay fairly simple.
I like this for second-day hair because the zigzag helps disguise little flat spots. It also looks good when you want the braid to feel a little less strict than a straight middle part.
21. Side-Swept French Braid Chignon
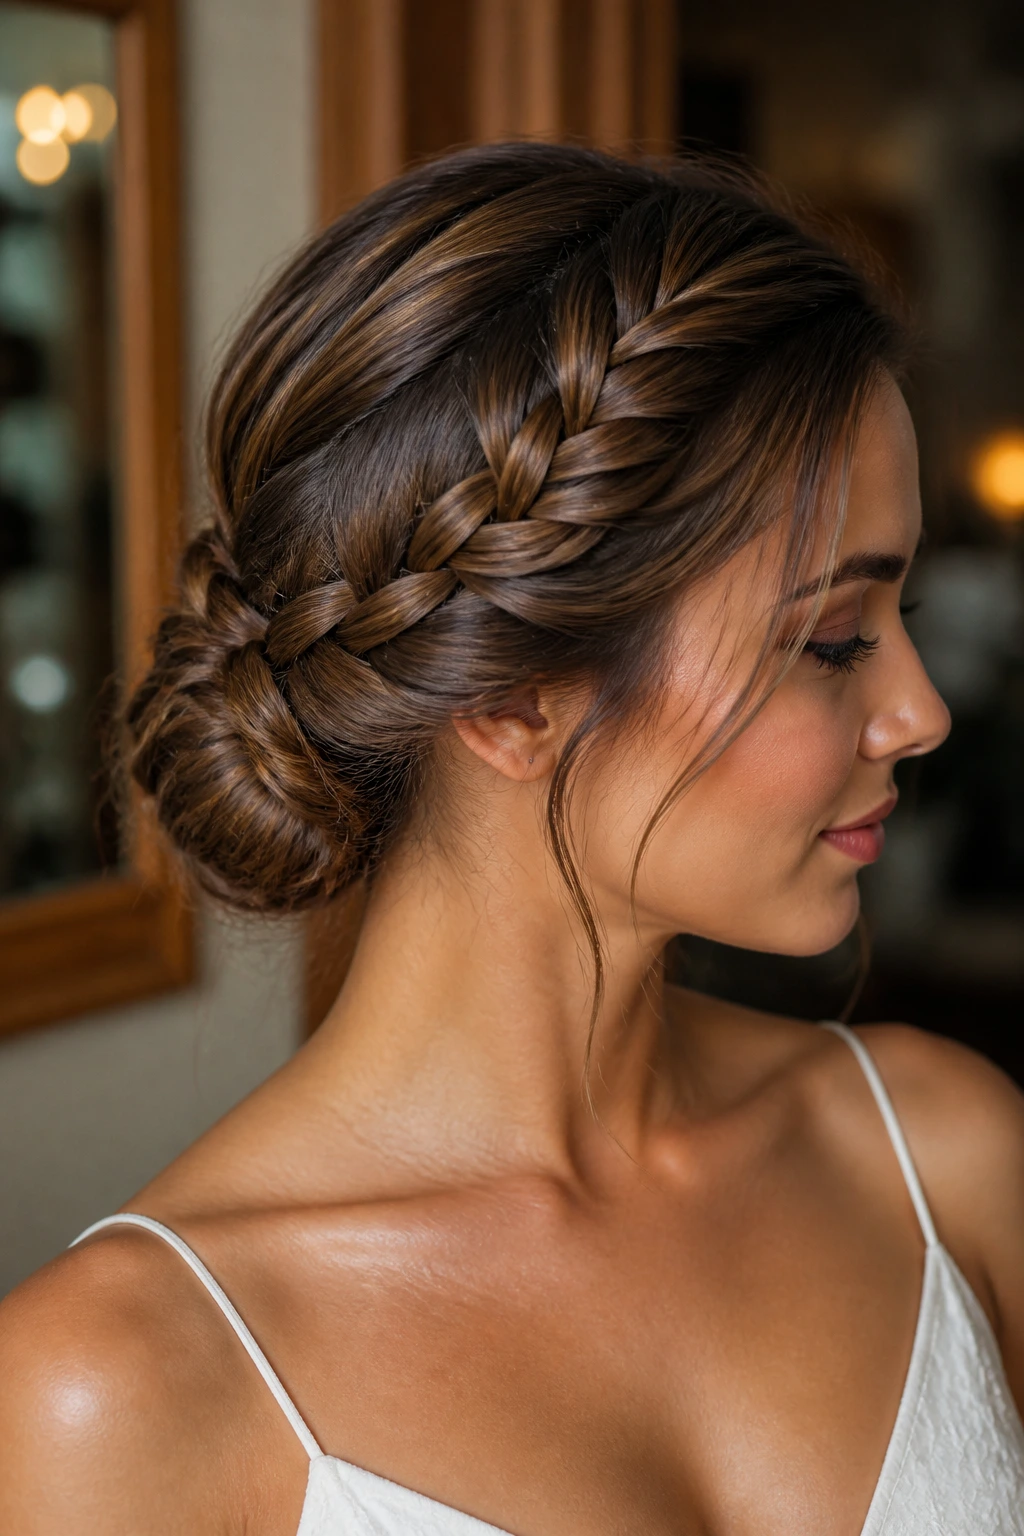
This is the braid I reach for when the outfit is doing most of the talking. A side-swept French braid chignon starts off to one side, moves across the back of the head, and tucks into a low chignon near the opposite nape. It has a quiet elegance to it, though I’d phrase that differently if I were doing this from scratch — it just looks finished.
Keep the braid low and let the sweep across the back stay visible. That curve is what softens the style. Once the braid reaches the nape, fold the tail into a small chignon and pin it flat. A few pins hidden underneath do a better job than one giant pin that pokes out and ruins the line.
This one works well for formal wear, but it’s not fussy if you keep the chignon compact. That balance is the whole point.
22. French Braid Into a Bubble Ponytail
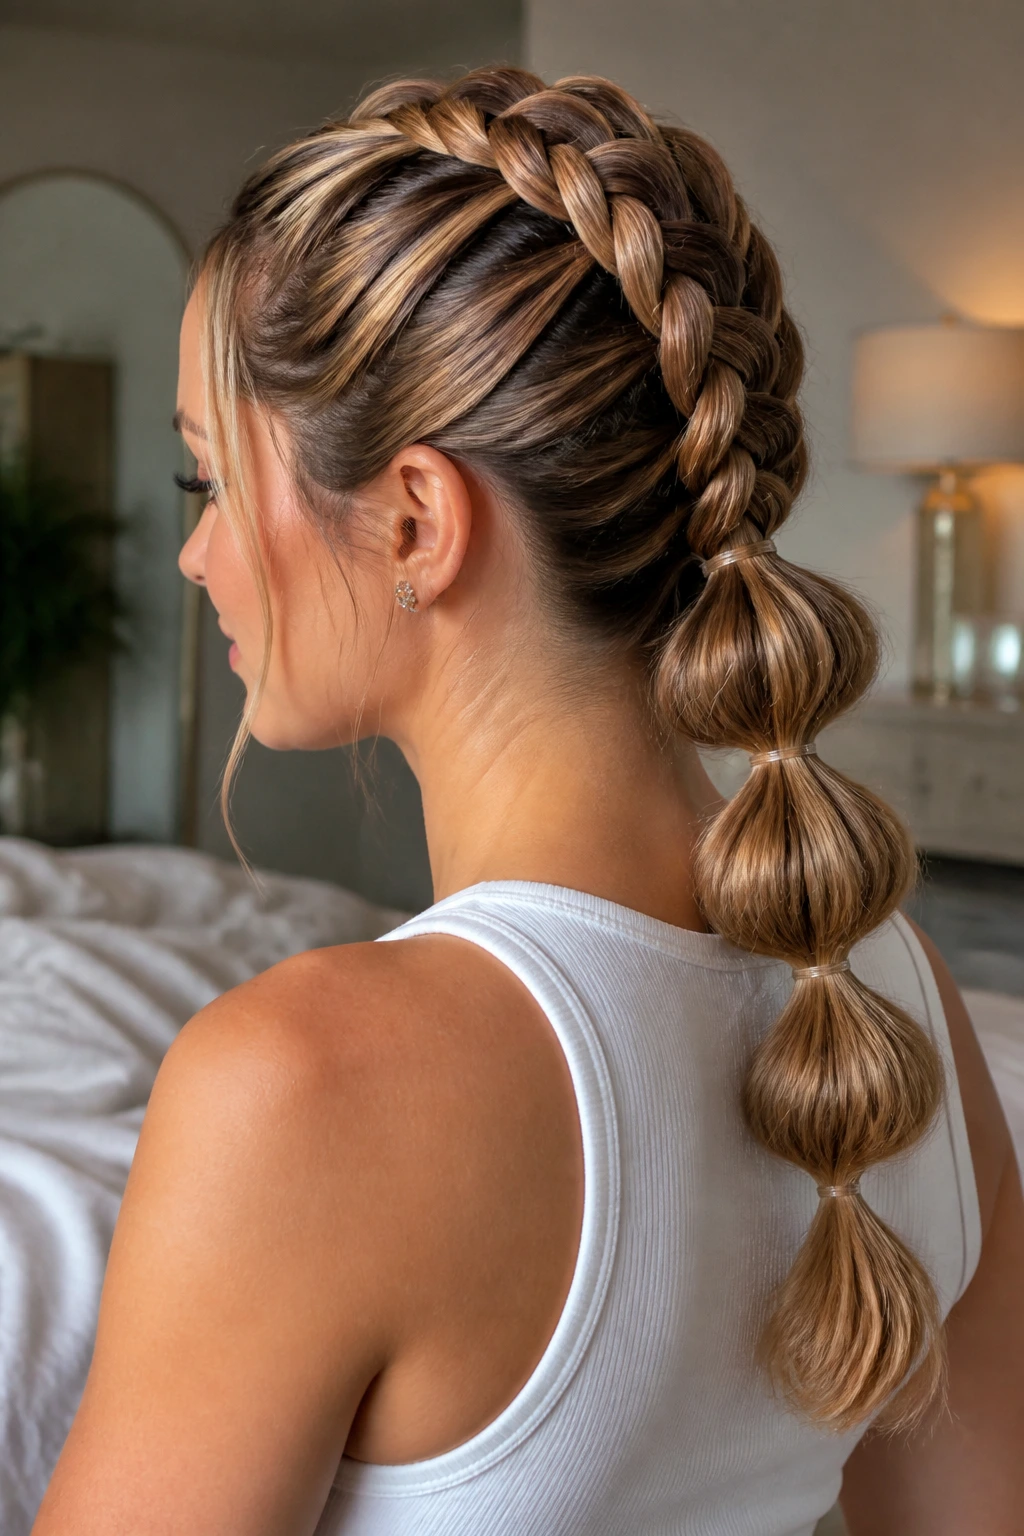
A braid tail and bubble sections play nicer together than you’d think. A French braid into a bubble ponytail gives you a neat top section, then a series of rounded bubbles down the length that keep the style from feeling flat. It has a little personality without asking for much extra skill.
Braid from the hairline to the point where you want the ponytail to begin, then secure the rest into a low or mid ponytail. Add small elastics every 2 to 3 inches down the tail and gently pull each section outward to make the bubbles. The important part is not to yank too hard; the bubbles should look rounded, not exploded.
This style is especially good when you want something polished that still feels modern. It’s also forgiving on layered hair, because the bubbles hide a lot of the unevenness that would show in a plain tail.
What Makes a French Braid Look Intentional
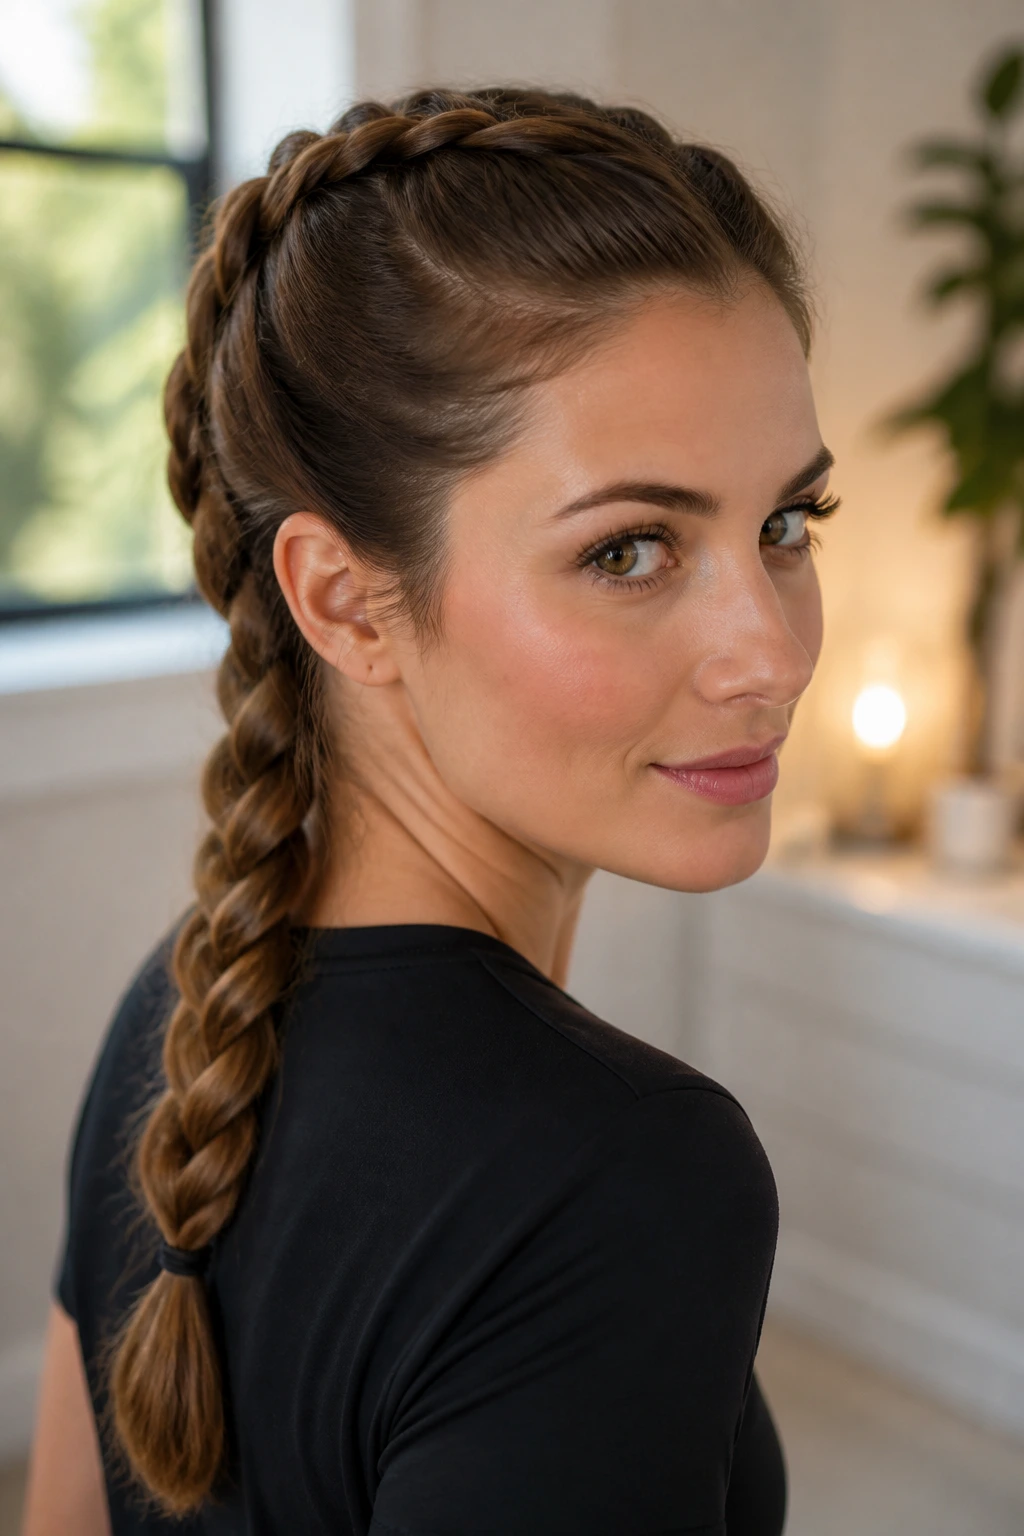
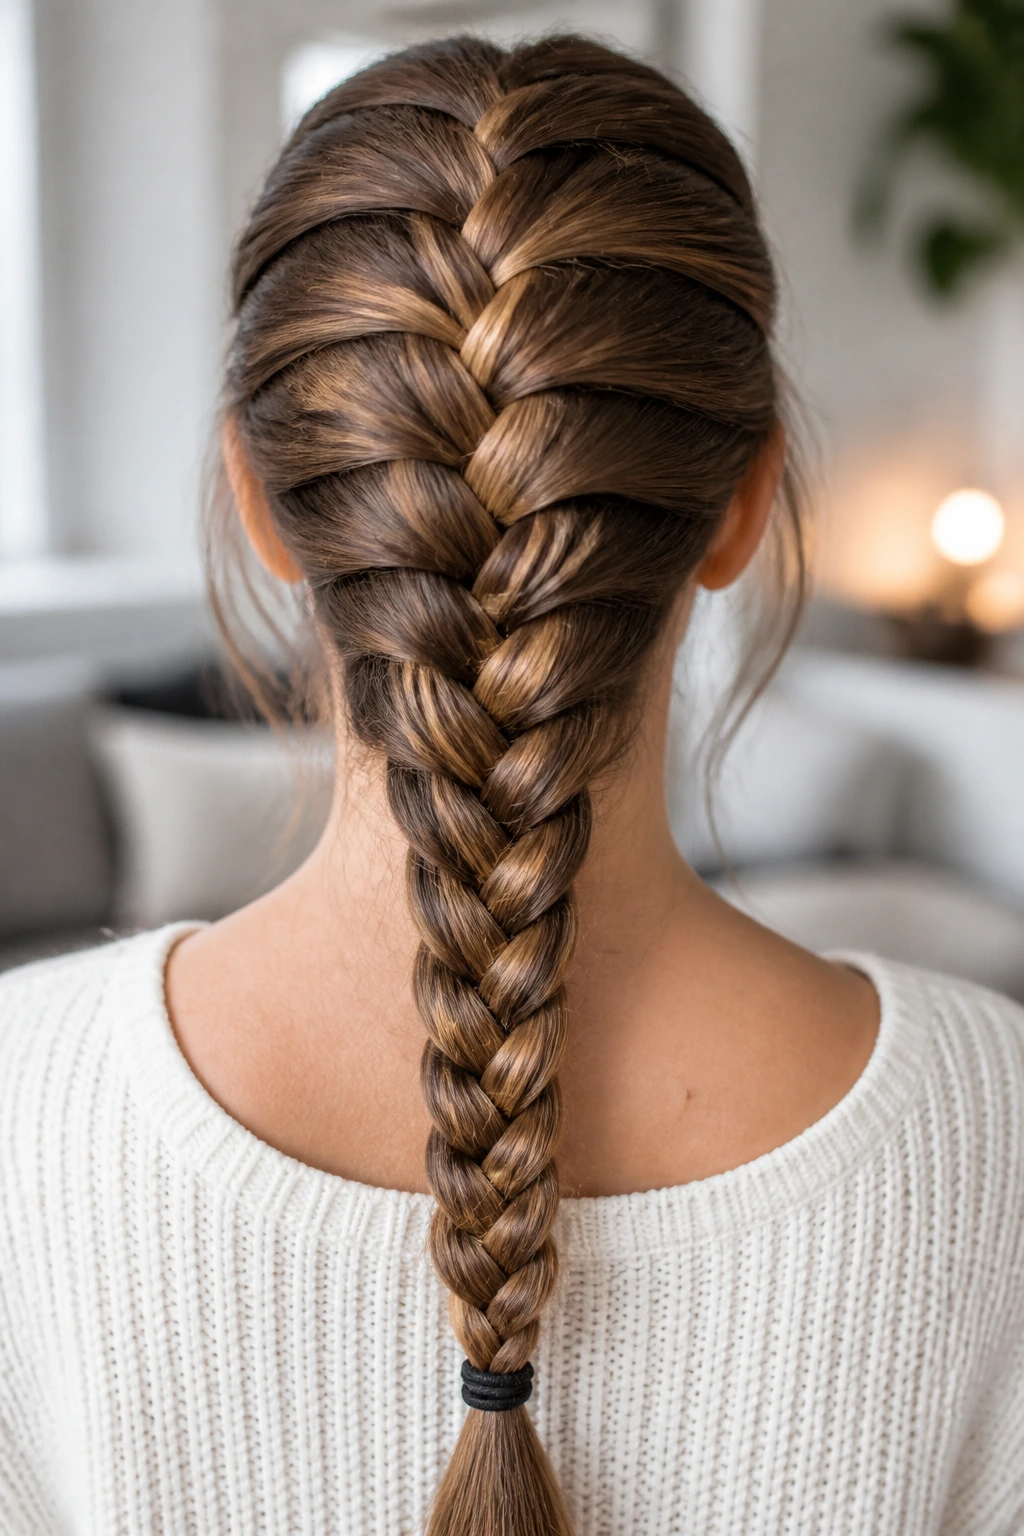
The braid itself is only the middle of the story. The part, the roots, and the finish are what make a French braid hairstyle feel polished rather than accidental. If the crown looks brushed and the braid keeps a clear line all the way down, the style reads deliberate even when it’s slightly loose.
Start with the crown, not the braid
Smooth the top section first. That means brushing the hair in the direction you want it to sit, then adding texture only if the hair is too slippery. A pea-size amount of mousse or a light spray of dry shampoo at the roots can make a huge difference. Clean hair without grip tends to collapse before you get three crossings in.
Let the edges breathe
A braid that’s too tight looks younger and harsher than most people expect. I usually loosen the outer loops by a hair’s breadth — not enough to lose the pattern, just enough to give the braid width. If the hair is fine, that tiny release can keep the braid from looking threadlike. If the hair is thick, it helps the style avoid a bulky, heavy strip down the back.
Finish the tail on purpose
A braid that ends with a random elastic feels half done. A braid that ends in a ponytail, bun, tucked chignon, or wrapped finish looks designed. That’s the part many people skip, and it’s the reason the style misses the mark. The tail is not an afterthought. It’s the punctuation mark.
Tools That Make Braiding Easier
- Rat-tail comb — Use this for clean parts and for picking up 1-inch sections without guessing.
- Paddle brush or boar-bristle brush — Helps smooth the crown before you start, especially on straight hair.
- Sectioning clips — These keep the hair you are not working on out of the way, which matters for side braids and crowns.
- Clear elastics — Best for small, neat ends that won’t distract from the braid line.
- Bobby pins — Use them for buns, crowns, tucked ends, and hidden holds behind the ear.
- U-pins — Handy for larger buns and chignons when you want less visible hardware.
- Light hairspray — A soft-hold spray keeps flyaways down without making the braid stiff.
- Dry shampoo or texturizing spray — Adds grip to clean hair and helps fine strands hold sectioned braids.
- Leave-in conditioner — Useful for curly, coily, or dry hair that needs slip before braiding.
- Small mirror or phone camera — A back view saves you from guessing, especially on halo braids and low buns.
Smart Prep for Better Grip and Less Frizz
Fresh hair is not always the easiest hair. Clean roots can slip, especially if the hair is fine or silky. If your hair is freshly washed, a little dry shampoo at the roots and a light texture spray through the mid-lengths usually gives the braid something to hold onto. You do not need a ton. Too much product makes the braid sticky and dull.
Day-two hair is usually the sweet spot. There’s enough natural oil to stop flyaways from getting wild, but not so much that the braid slides apart. If the crown is flat, flip the hair, mist the roots lightly, and brush it back in the direction you want the braid to sit. That tiny reset can save the whole style.
Curly and coily hair need slip first. A leave-in conditioner, a cream with a little hold, or a twist-out stretched enough to section cleanly makes the braid easier to build. If the hair is tangled, the braid will look lumpy no matter how steady your hands are. Detangle carefully from ends to roots. Slow is faster here.
Fine hair benefits from controlled grit. A little mousse at the root area and a dry texture spray before braiding help the strands hold their place. Keep the sections smaller too. Big chunks on fine hair tend to make the braid puff in the wrong spots and collapse in others.
How to Wear These Braids From Office to Evening
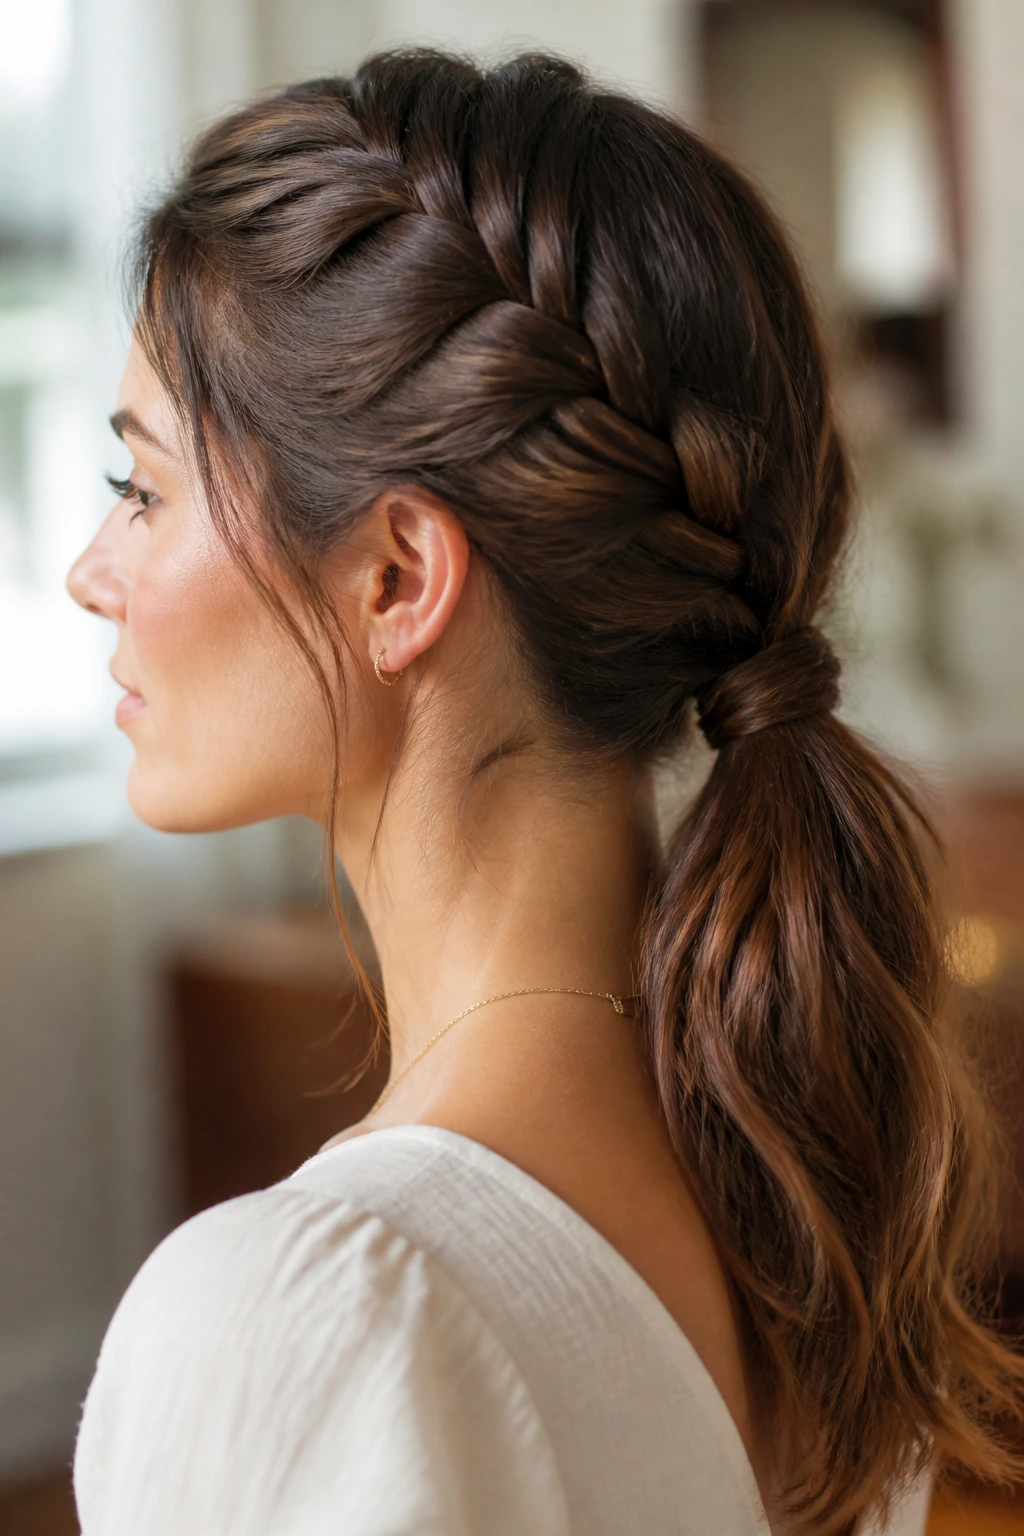
Presentation: Keep the braid line close to the scalp and the finish deliberate. A center braid with a clean tail feels minimal; a halo braid with tucked ends feels dressier; a loose side braid with a few face-framing pieces feels softer and easier to wear on an ordinary day.
Accompaniments: Small hoops, studs, plain collars, knit sweaters, open necklines, and soft makeup all work well with French braid hairstyles. If the braid is ornate — ribbon, pearls, a halo — let the clothes stay simpler. If the braid is plain, the outfit can carry more weight.
Occasion Pairing: A low ponytail braid or wrapped ponytail fits workdays and errands. A chignon, halo, or pearl-pinned braid leans formal. Half-up crowns, face-framing versions, and loose-wave braids sit comfortably in the middle and move from day to night without a reset.
Finish: Use a light hold spray, not a hard shell. A braid should still bend when you touch it. If the top feels crunchy, brush the front lightly with your palms after the spray sets, or it will read more polished-helmet than polished-hair.
Small Changes That Change the Whole Look
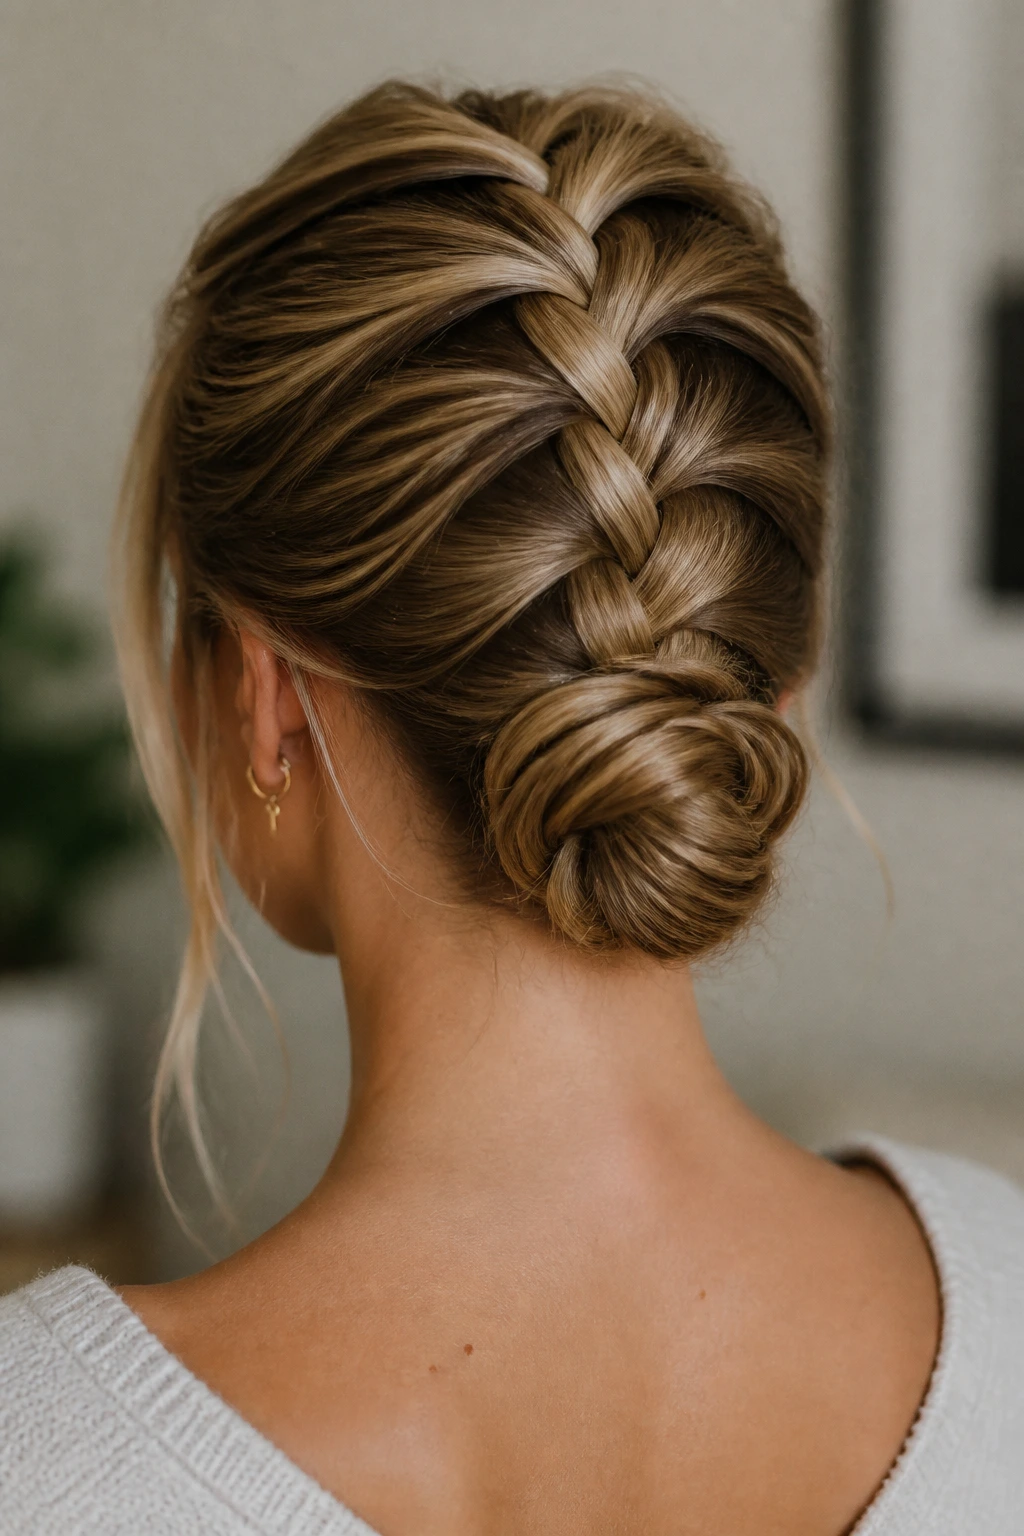
Softness Boost: After the braid is secure, pinch the outer edges of each woven segment gently from the sides. That widening trick gives the braid more body and keeps it from looking too narrow. It’s a small move, but it changes the whole silhouette.
Grip Boost: If your hair slips while you braid, stop and dust the roots with a little dry shampoo or texture powder. Don’t keep fighting slippery hair with more tension. That’s how you get headaches and uneven braid lines.
Customization: A ribbon, pearl pin, or wrapped strand can dress up even the plainest French braid. I tend to like one accent, not three. One is enough. More than that, and the braid starts competing with itself.
Make-It-Yours: Leave the ends straight for a crisp finish, curl them for softness, or tuck them into a bun if you want a more formal shape. On curly hair, keep some texture visible at the tail so the style doesn’t flatten out your natural pattern.
The Mistakes That Make Braids Look Harsh
Pulling too tight at the hairline. This is the fastest way to make the style look stern and feel uncomfortable. If your scalp feels tugged before you reach the crown, loosen and redo that first section. Gentle tension keeps the braid smooth without creating those sharp little ridges at the roots.
Using sections that change size halfway down. The braid starts neat, then suddenly widens or narrows, and the whole line looks off. Keep the grabs consistent. If your hands get tired, pause and reset before the next cross instead of rushing through the last third.
Starting with hair that has no grip. Ultra-slick hair can make the braid slide apart before lunch. Add texture first. Dry shampoo on the roots, a touch of mousse, or braiding on day-two hair usually fixes the problem.
Forgetting the finish. A braid with a random tail or a visible elastic feels incomplete. Tie it off with a clear band, wrap the elastic with hair, or tuck the end into a bun. The end matters. More than people admit.
Over-pulling the loops after it’s done. Pancaking the braid can soften it, but if you tug every section too hard, it frays and leaves holes. Do the loosening after the elastic is secure and stop when the braid has width, not gaps.
Variations and Other Ways to Wear the Look
Ribbon Trail Edit: Swap the plain elastic for a narrow ribbon woven through the braid or tied at the end. Satin feels dressier, while grosgrain holds better on slippery hair. This version works when you want the braid to feel a little more romantic without adding pins.
Bridal Pin Sweep: Add 5 to 7 pearl or crystal pins along one side of a halo braid, low bun, or side chignon. Keep the spacing uneven so it looks collected rather than matching a template. Good for formal events, bad for people who hate fuss.
Easy Workday Version: Use a center braid or low side braid with no accessories and a soft-hold spray at the end. This is the version I’d choose on a busy morning because it needs the least touching during the day. The braid does the job on its own.
Curly-End Version: Braid the top section, then leave the ends curly or wave the tail lightly with a iron. That contrast keeps the style from flattening textured hair and gives the finish a little bounce. It’s the best move when you don’t want the entire look to feel controlled.
Shorter Hair Version: Start the braid lower, use smaller grabs, and plan to tuck or pin the end. Shoulder-length hair can handle a French braid, but it needs a smarter start point. Don’t force the braid too high on the head or you’ll run out of length before the style has shape.
Keeping the Braid Fresh Through the Day
A French braid usually holds its shape better than loose hair, but the front and ends need a little care if you want the style to survive a full day and still look decent the next morning. The first thing to do is leave the braid alone once it’s set. Constant touching makes the front fuzz up and loosens the weave.
For same-day wear, a light mist of hairspray from about 10 to 12 inches away is enough. If you spray too close, you get stiff patches where the braid stops moving. If the style starts to puff at the crown, smooth the area with your fingertips instead of brushing through the whole braid. A brush will drag the pattern apart.
For overnight wear, a silk scarf or bonnet helps more than people expect. If the braid is low, you can also secure the tail loosely into a soft bun or tuck it under the pillow line so it doesn’t snag. In the morning, mist your hands with a little water or leave-in spray and press down the fuzzy spots. Do not soak the braid. A damp restart is enough.
If you want to carry the style for a second day, keep the parts simple: smooth the roots, tighten the elastic if it’s loose, and re-pin the ends if needed. That’s usually enough. The braid won’t look fresh from scratch, but it can still look planned.
Questions People Ask About French Braid Hairstyles
Can I French braid short hair?
Yes, if the hair reaches the point where the braid can add at least a few crossings before it runs out of length. Shoulder-length hair is usually enough for a low braid, side braid, or braided crown, especially if you start a little lower and keep the sections small.
Is French braid better on clean or dirty hair?
Day-two hair usually gives the best grip, but freshly washed hair can work if you add texture at the roots. Fine or silky hair often needs dry shampoo or mousse to keep the braid from sliding. Curly hair may hold better with leave-in conditioner and light cream.
How do I stop the braid from looking too tight?
Keep the first two or three crosses gentle and avoid pulling the hairline flat. After the braid is secured, loosen the outer edges a little instead of yanking from the top. That keeps the crown soft without ruining the structure.
What if my braid keeps slipping apart?
The hair probably needs more grip. Use a texture spray, dry shampoo, or a tiny bit of mousse before you begin, and keep your sections smaller. If the hair is freshly conditioned and silky, wait a bit longer after washing so it loses some slipperiness.
Can I French braid curly or coily hair without blowing it out first?
Yes, but the finish is easier if the hair is stretched or detangled well first. Braiding on natural texture works best when the hair is moisturized and you are not forcing the sections too tightly. Leaving the ends natural usually looks better than trying to fight the curl pattern.
How long should a French braid take?
A simple center braid can take 5 to 10 minutes once your hands know the pattern. A halo braid, crown braid, or braided updo can take 15 to 25 minutes, especially if you’re pinning or tucking the ends. The first try always takes longer. That’s normal.
How do I make the braid look softer around my face?
Leave a few thin tendrils out, move the part slightly off center, or start the braid a little farther back from the hairline. Small changes matter here. A braid that’s neat at the scalp but soft around the temples usually feels the most balanced.
What if one side of my braid looks thicker than the other?
Pause and check the section size before the next cross. If you keep adding slightly larger pieces on one side, the braid will drift and bulk up there. A comb helps, but so does slowing down for the first few inches and setting the pattern cleanly.
Why This Braid Keeps Coming Back
French braid hairstyles keep earning their place because they sit in that rare middle ground: tidy enough to look intentional, soft enough to avoid feeling overdone. That balance is harder to hit than people think. Once you understand where the softness comes from — the part, the tension, the finish — the braid stops feeling like a single style and starts behaving like a whole system.
That’s the part I always come back to. The braid is not just a braid. It’s a way to decide how much structure you want on your head that day, and how much looseness you’re willing to leave in the frame. Get those two pieces right, and even the simplest version looks like you meant it.
