



A mullet haircut for brides can look far more refined than people expect when the layers are softened, the front is controlled, and the back has movement instead of bulk. The trick is not pretending it isn’t a mullet. The trick is shaping it so the cut works with the dress, the veil, and the bride’s own texture.
That matters because wedding hair has a hard job. It has to survive hugs, dancing, flash photography, a little humidity, and the moment when you toss your head back laughing and hope the style still sits where it should. A bridal mullet does that well when the crown has lift and the nape isn’t overworked. It can show off earrings, open the neckline, and still give you enough length to twist, tuck, or pin.
Some brides want soft feathers around the cheekbones. Others want a sharper outline that feels modern without tipping into costume. Fifteen different mullet haircuts for brides can move in very different directions, and that range is the whole point. The cut can be romantic, cool, vintage, polished, or deliberately undone — sometimes all in the same silhouette.
Why These Bridal Mullet Cuts Work Better Than People Expect
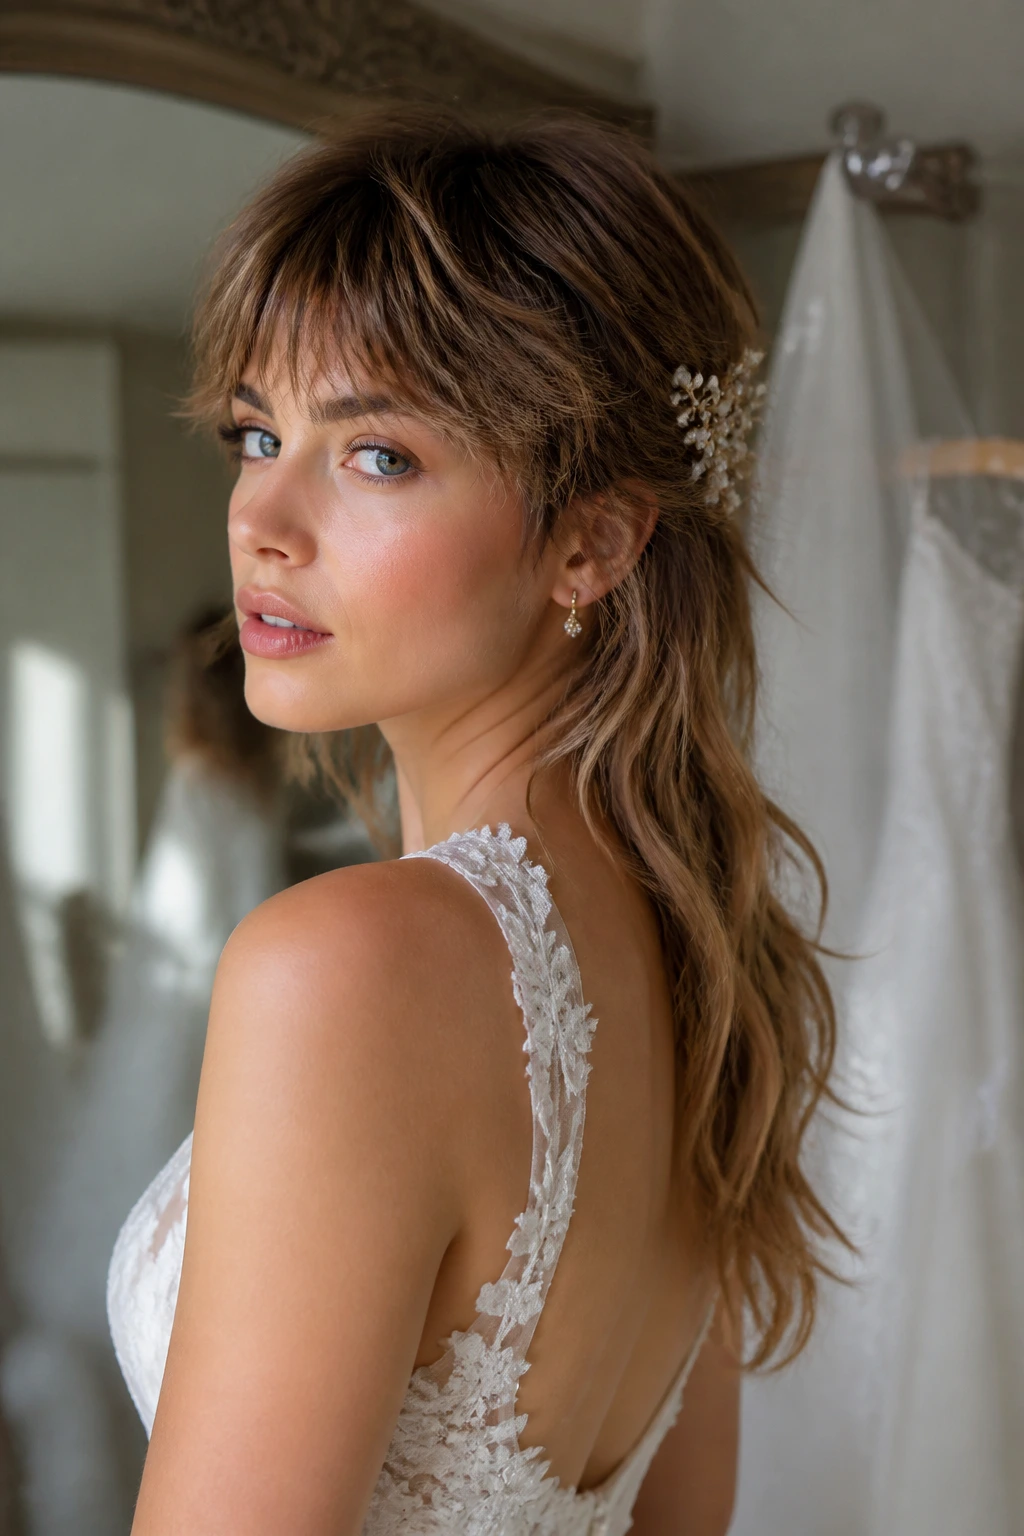
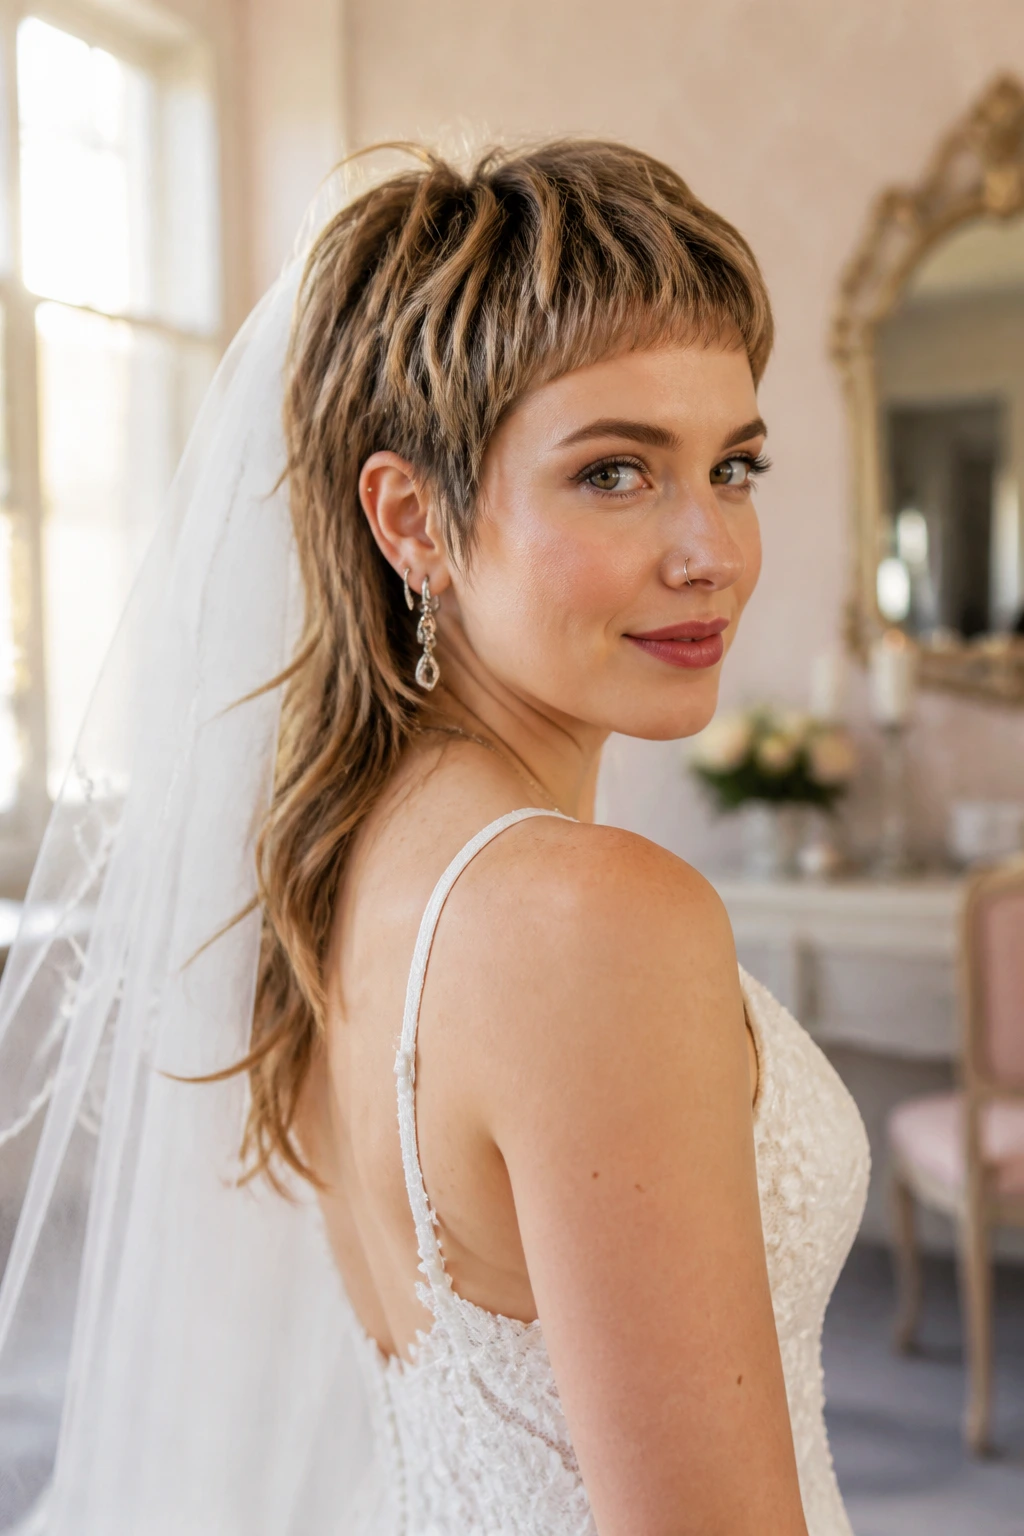
- Neckline control: The shorter front and layered crown keep attention near the face, while the longer back clears room for high necks, pearl straps, and detailed bodices.
- Accessory-friendly structure: A clean crown gives veil combs, pins, and floral clips a solid anchor instead of competing with bulky hair.
- Texture does the heavy lifting: Waves, curls, and bends make the layers look deliberate; straight, flat hair makes the cut look harsher than it needs to.
- Profile shots get more shape: Side angles show the contour through the cheekbones and nape, which is where a good bridal cut earns its keep.
- It can be soft or sharp: You can keep the mullet feathered and romantic, or push it toward a sleeker, fashion-forward line.
- Grow-out isn’t a problem: When the wedding is over, the cut keeps evolving instead of turning into an awkward helmet.
1. Soft Feathered Bridal Mullet
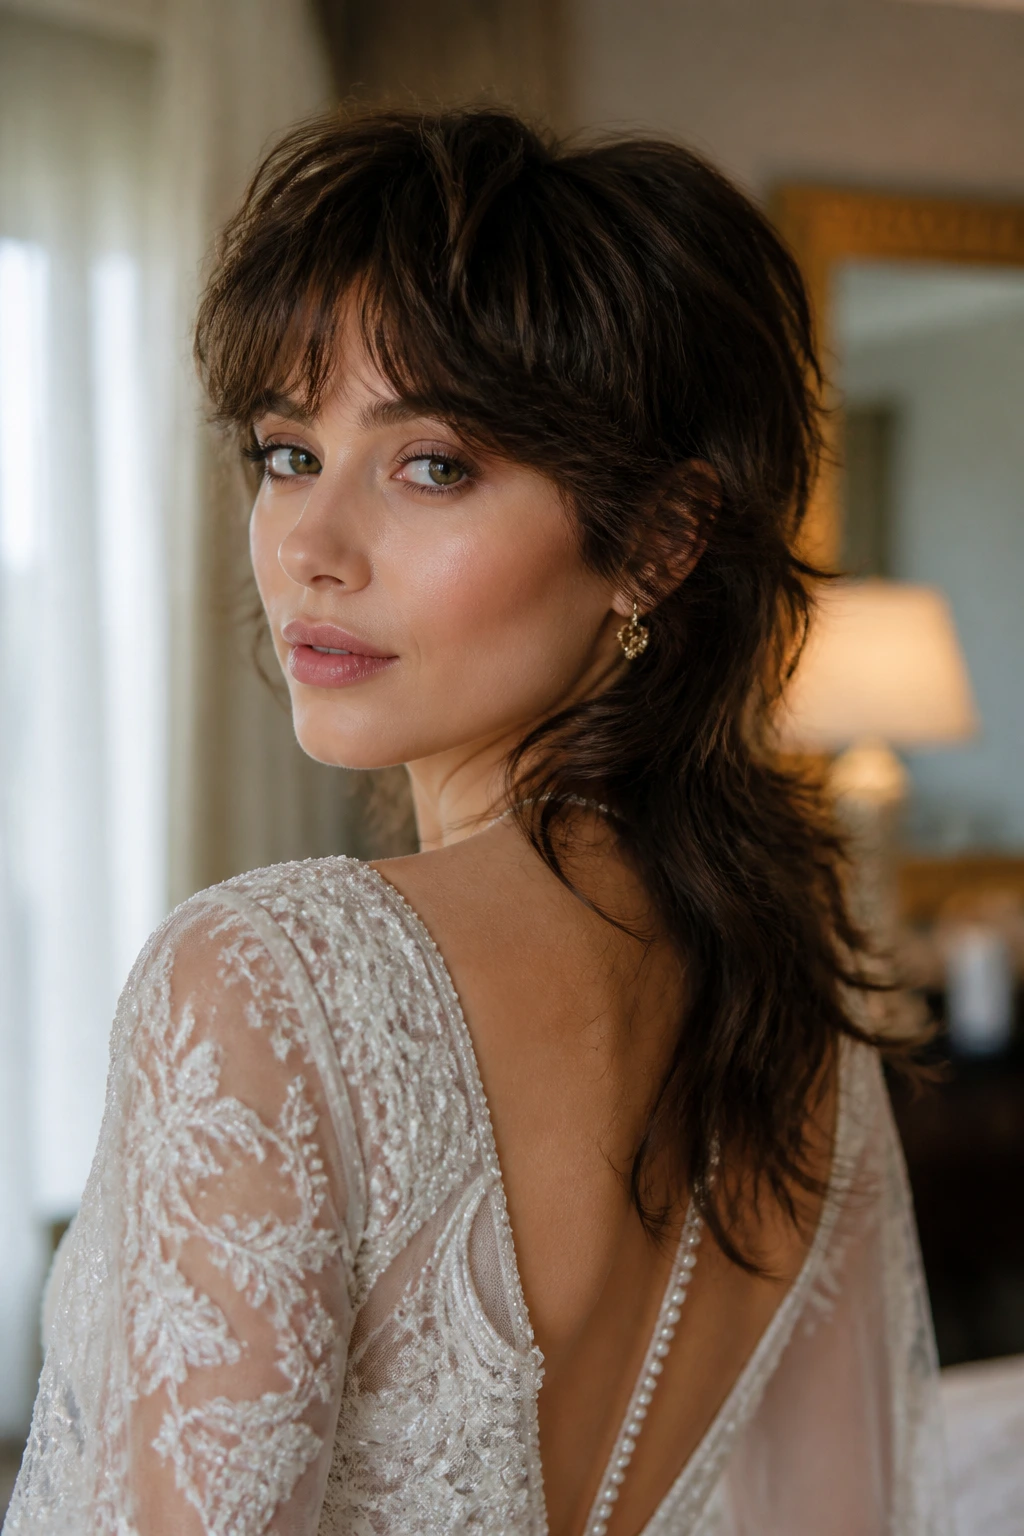
This is the version I’d hand to a bride who wants movement but does not want the haircut to announce itself from across the room. The layers are light around the cheekbones, the crown has a little lift, and the back falls in a soft tail that moves when you turn your head. On lace or silk, it reads as airy rather than rebellious.
Ask for point-cut ends and blended face-framing pieces so the cut doesn’t form a hard shelf at the jaw. The best styling here is a loose bend with a 1.25-inch iron, then a brush-out so the waves loosen into soft ribbons. You want hair that sways, not hair that clings.
Best with dresses that already have texture
If the gown has beading, lace, or ruching, this cut doesn’t fight it. It lets the dress do its thing while the hair keeps a bit of edge. I like it most with sweetheart necklines and sleeves that need a little visual breathing room.
- Light layers around the eyes keep the front from feeling heavy.
- A soft nape helps veil pins hide cleanly.
- Flexible-hold spray keeps the feathered ends touchable.
The result is gentle, but not boring. That’s the sweet spot.
2. Curly Romantic Mullet
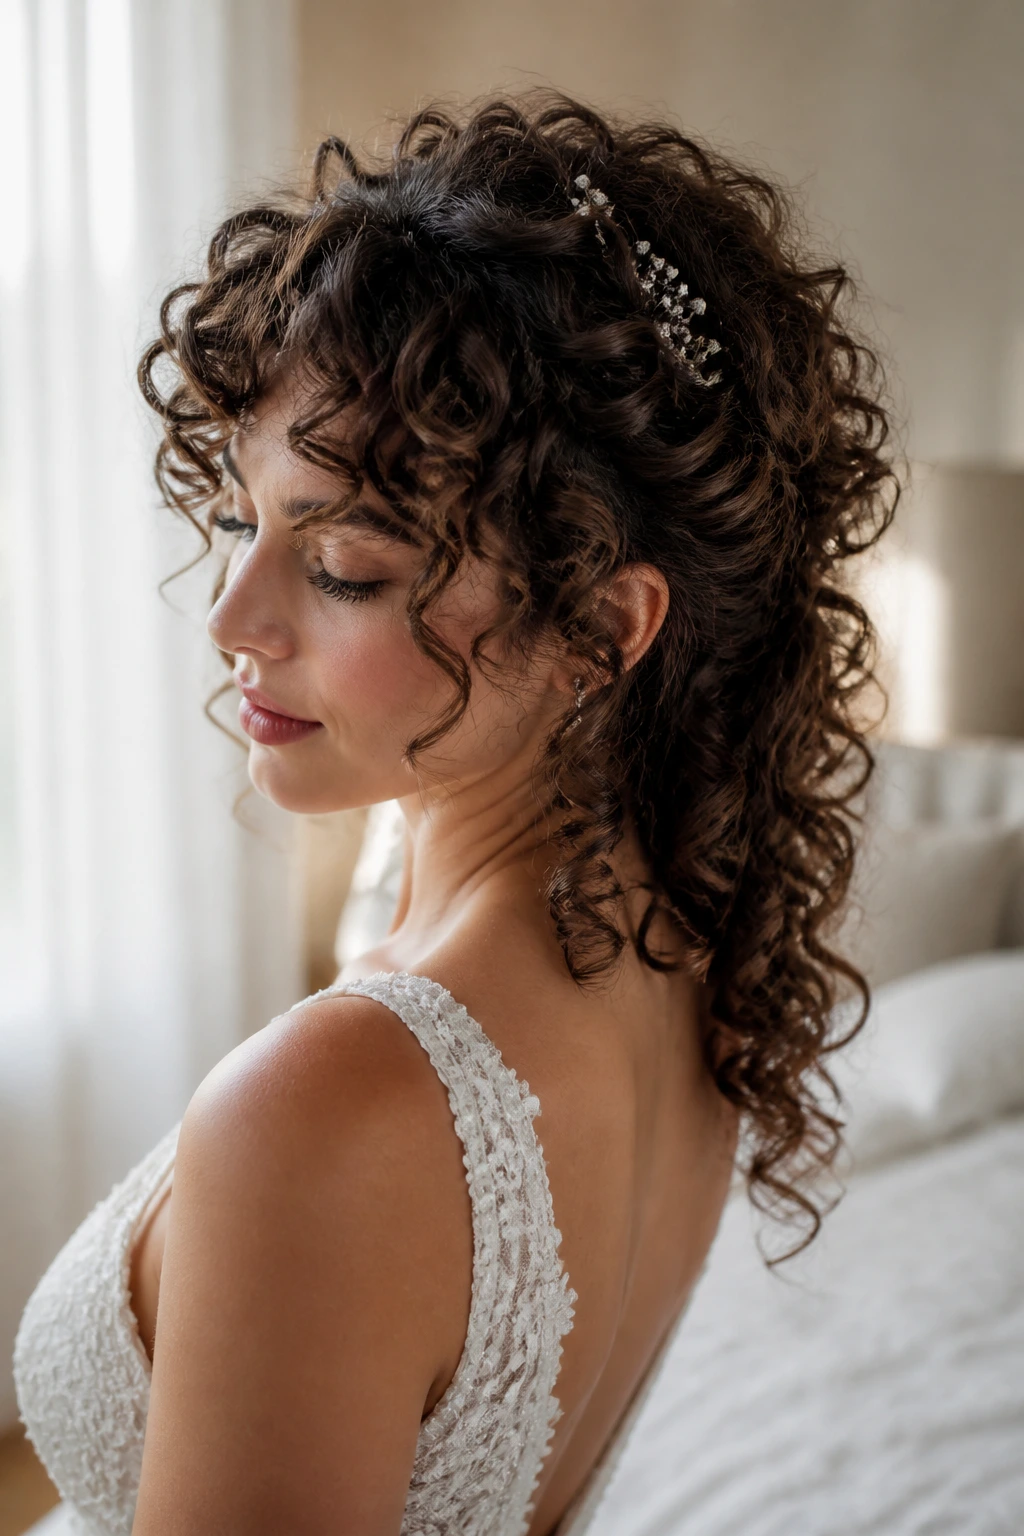
Can a curly mullet read bridal? Absolutely, if the curl pattern is allowed to form its own halo instead of being flattened into submission. The shape works because curls naturally build volume at the crown and soften the transition between short and long sections. You get lift at the top, bounce at the sides, and length where you want it.
This version is especially strong when the stylist cuts dry or dry-curly, because wet curls lie about where they’ll land once they spring up. A good bridal curly mullet has enough length through the back to let the curls stack without puffing out like a triangle. That means thoughtful layering, not just random snips.
How to keep it bridal
Use curl cream sparingly, then diffuse on low until the roots are dry and the curl clumps are set. After that, pin just a few front pieces back with pearl pins or a small comb. Too many accessories and the cut gets busy fast.
This is the one I’d choose for a bride who wants the hair to feel alive in motion. It looks especially good with column dresses, drop earrings, and a neckline that leaves the shoulders open.
3. Sleek Micro Mullet
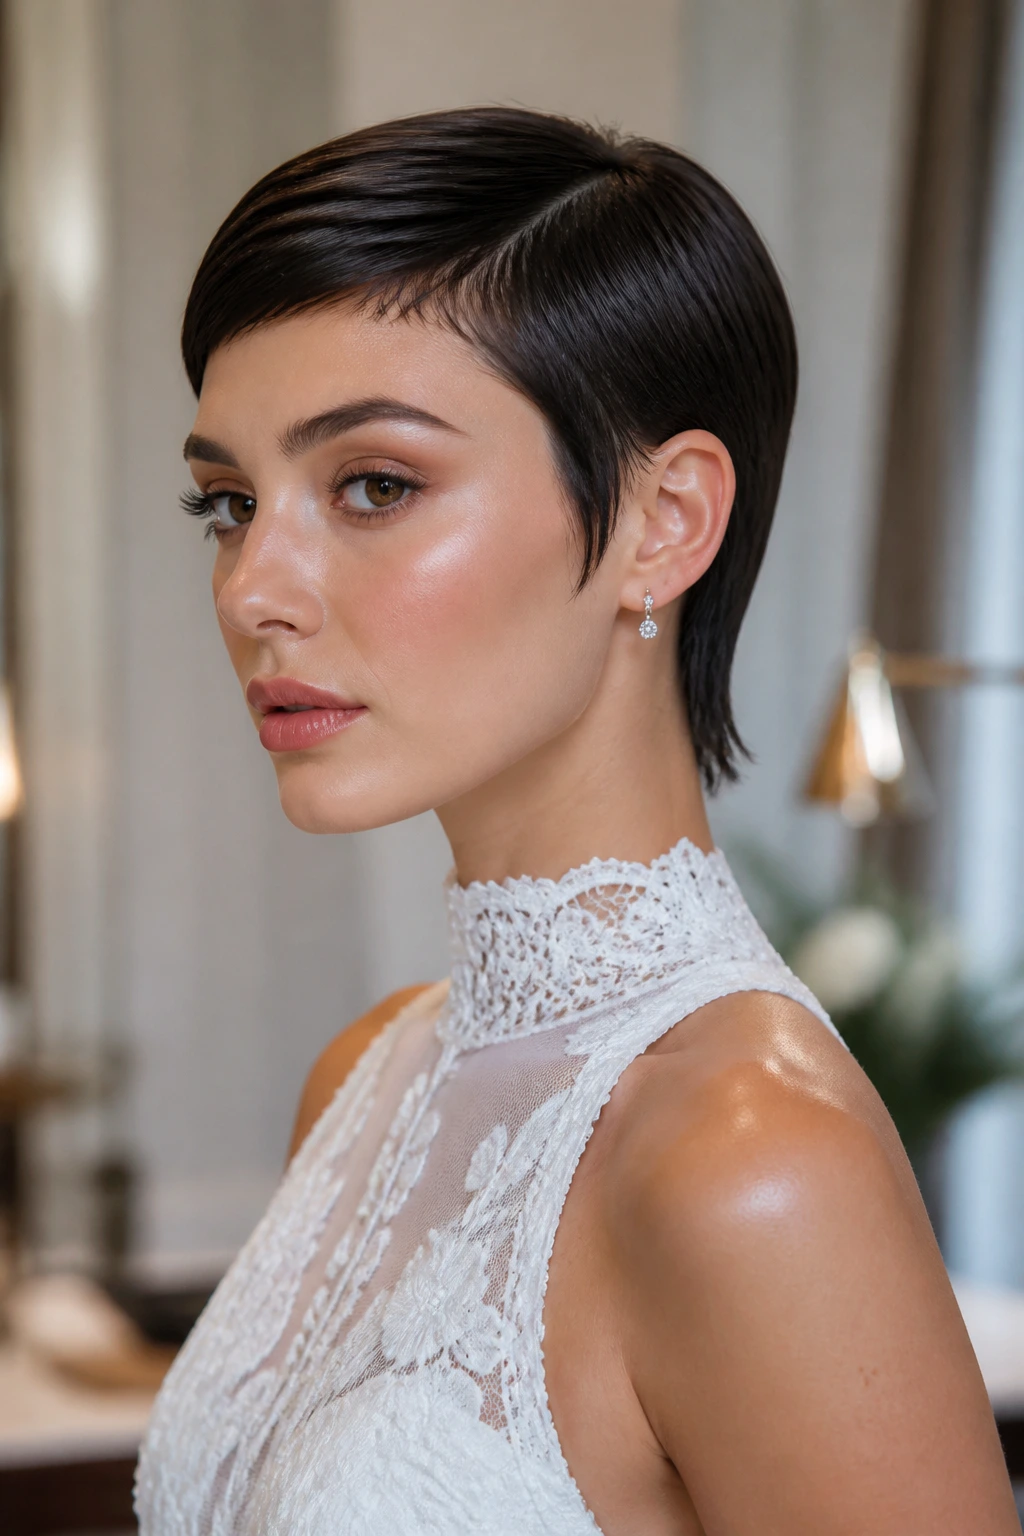
Picture a bride in a clean satin dress, hair tucked close to the head, with a tiny flick of length at the back. That’s the micro mullet. It’s controlled, sharp, and much more polished than people expect when they hear the word mullet.
The magic here is in the contrast. The crown stays smooth, the front layers barely graze the cheekbone, and the back extends just enough to suggest the shape without shouting. It works best when the cut is razor-clean and the finish is glossy, not fluffy. A flat iron set to low or medium heat can create a slight bend at the ends instead of a harsh crease.
This style loves strong jewelry. Hoops, angular drops, even a sculptural ear cuff — all of it makes sense here. Skip heavy volume at the roots. The whole point is that the silhouette stays tight and modern, almost architectural.
For brides who don’t want a lot of hair in the way, this is a smart move. It keeps the profile tidy, and it leaves the neckline open for a high collar, a halter, or a dress with a lot of back detail.
4. Curtain-Bang Mullet with Old-Hollywood Waves
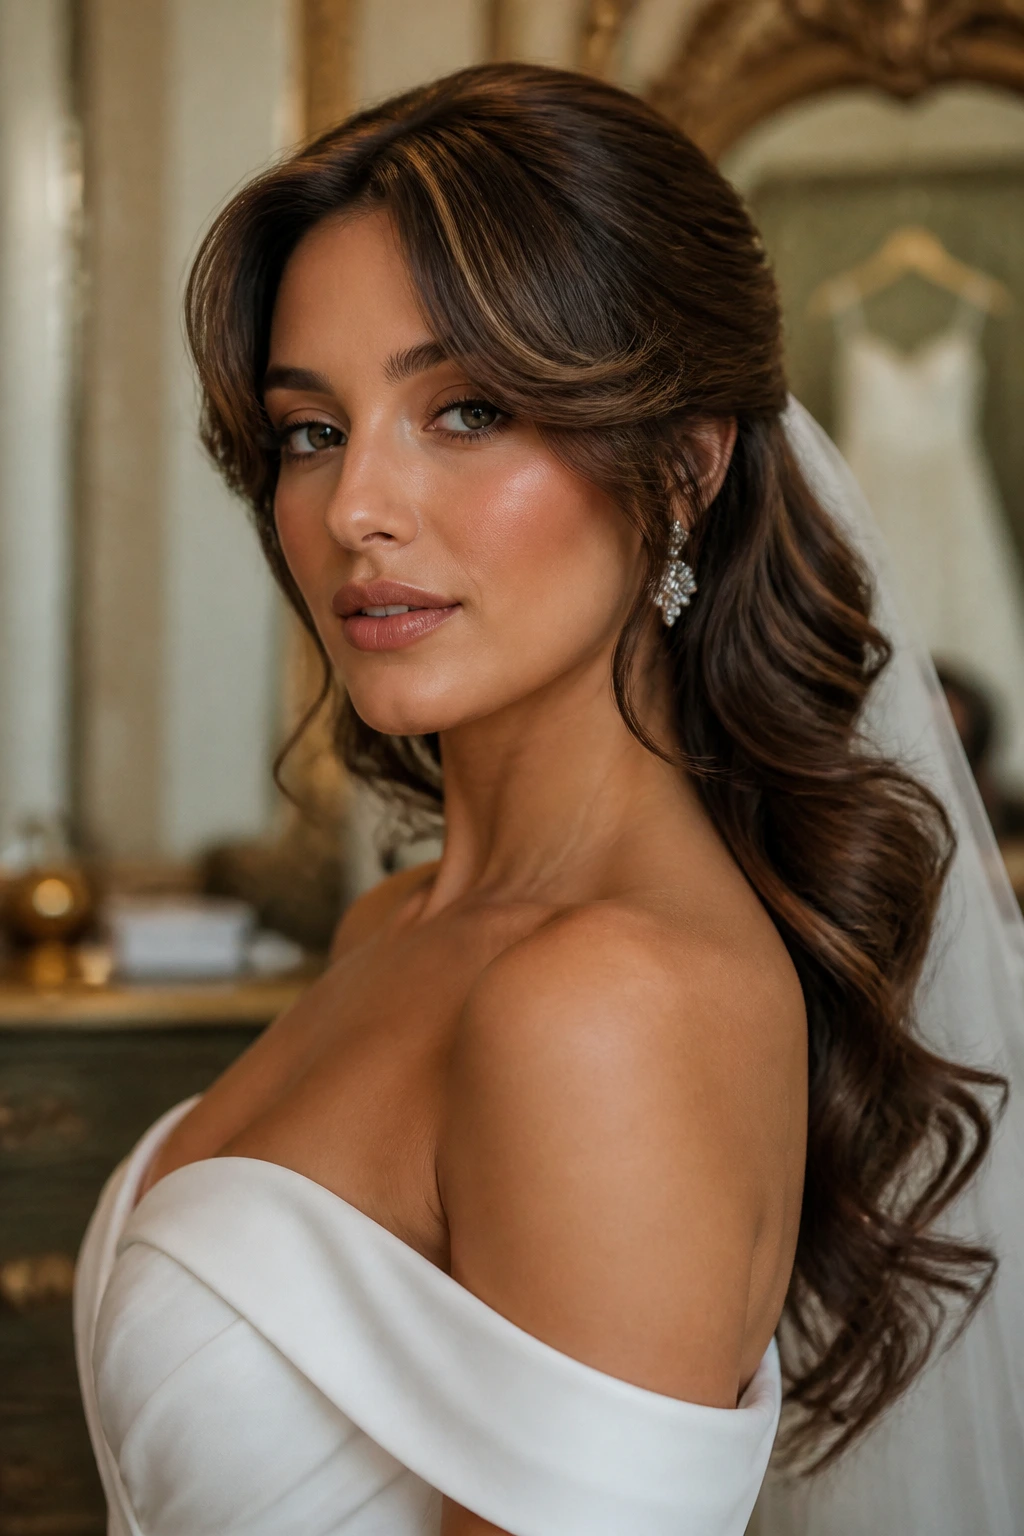
Unlike a classic curtain-bang blowout, this version keeps the back unapologetically long and the overall shape more layered. That’s what gives it bridal polish. The front sweeps away from the center, the bangs open the face, and the lengths through the back carry soft waves that feel slightly cinematic.
It’s a good choice when you want the mullet to act like a framing device rather than the main event. The bangs soften a square jaw, and the waves add weight where the cut needs it. A 1.25-inch iron, rolled away from the face, gives that brushed wave that looks expensive without trying too hard.
What makes it work
- Curtain bangs should sit long enough to tuck behind the ears.
- The wave pattern needs to stay loose, not springy.
- A shine spray at the very end helps the style look finished in photographs.
I like this best with off-the-shoulder gowns and structured bodices. The bangs do the flattering work up front; the back gives the style a little muscle. It’s a strong option when you want glamour without a stiff updo.
5. Braided Crown Bridal Mullet
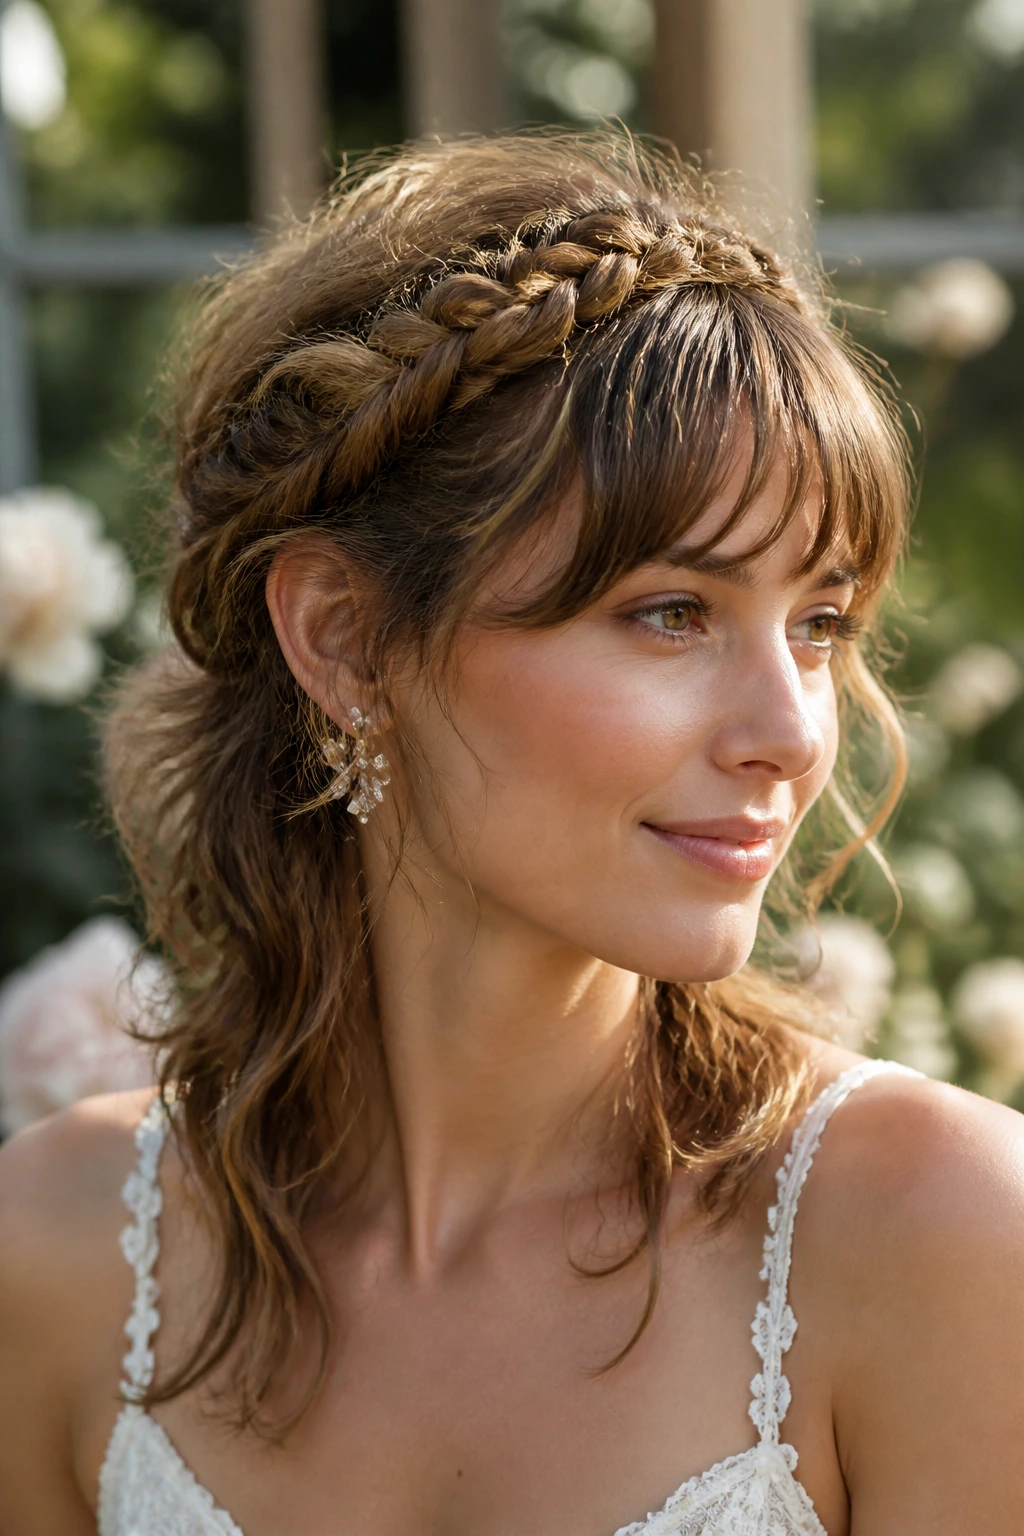
A braid changes the whole mood of a mullet. It pulls the top together, gives the style a woven line across the head, and keeps the front from floating around while you’re trying to get through a ceremony. That little braid — whether it’s a single crown braid or two slim ones meeting at the back — makes the haircut feel intentional in a way loose hair sometimes cannot.
This is especially good for outdoor weddings, because the braid anchors the top while the longer layers move freely below. It also gives you a place to pin in small flowers, baby’s breath, or a narrow vine comb without crowding the rest of the cut.
Use this when the dress feels relaxed but still special. Linen, matte silk, garden florals, and anything with a soft sleeve get along well with it. If the braid is too tight, it can start to look severe. Keep the tension relaxed and leave a few face-framing pieces out.
A braid does not hide the mullet. It frames it. That’s the smarter move.
6. Wolf-Cut Bridal Mullet
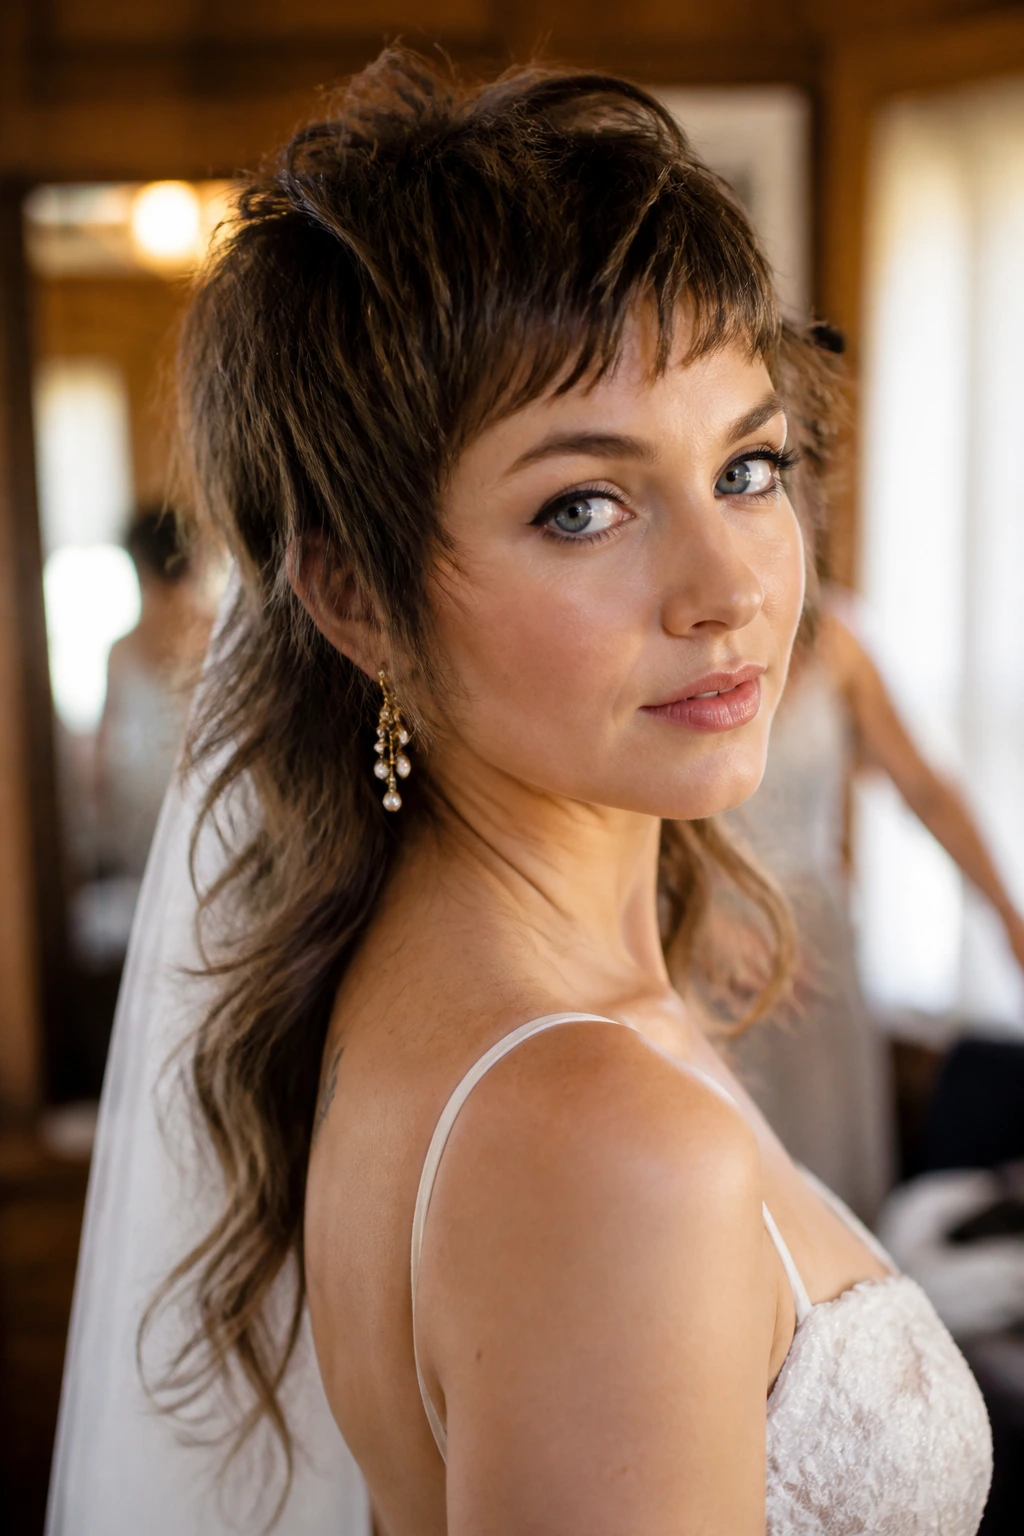
This one has teeth. The wolf-cut bridal mullet leans into the shorter crown, the broken-up layers, and the shaggy lift that makes hair look intentionally lived-in. It’s the version for a bride who wants to look styled, but not polished to the point of stiffness.
The cut should have enough layering to create movement without collapsing into a frizz cloud. A good stylist will preserve length through the back while carving out air around the temples and cheeks. Styling is easy if you respect the texture: mousse on damp hair, diffuse, then rough-dry the roots and pinch a few ends with a light paste.
I’d pair it with minimalist dresses, slip gowns, or anything with a modern neckline. This is not the one I’d choose for a very traditional ball gown unless the gown already has a sharp, fashion-y edge. The cut wants to be seen.
If you like hair that looks a little punk after a long night of dancing, this is the most natural fit in the bunch.
7. Chin-Skimming Front, Long-Back Mullet
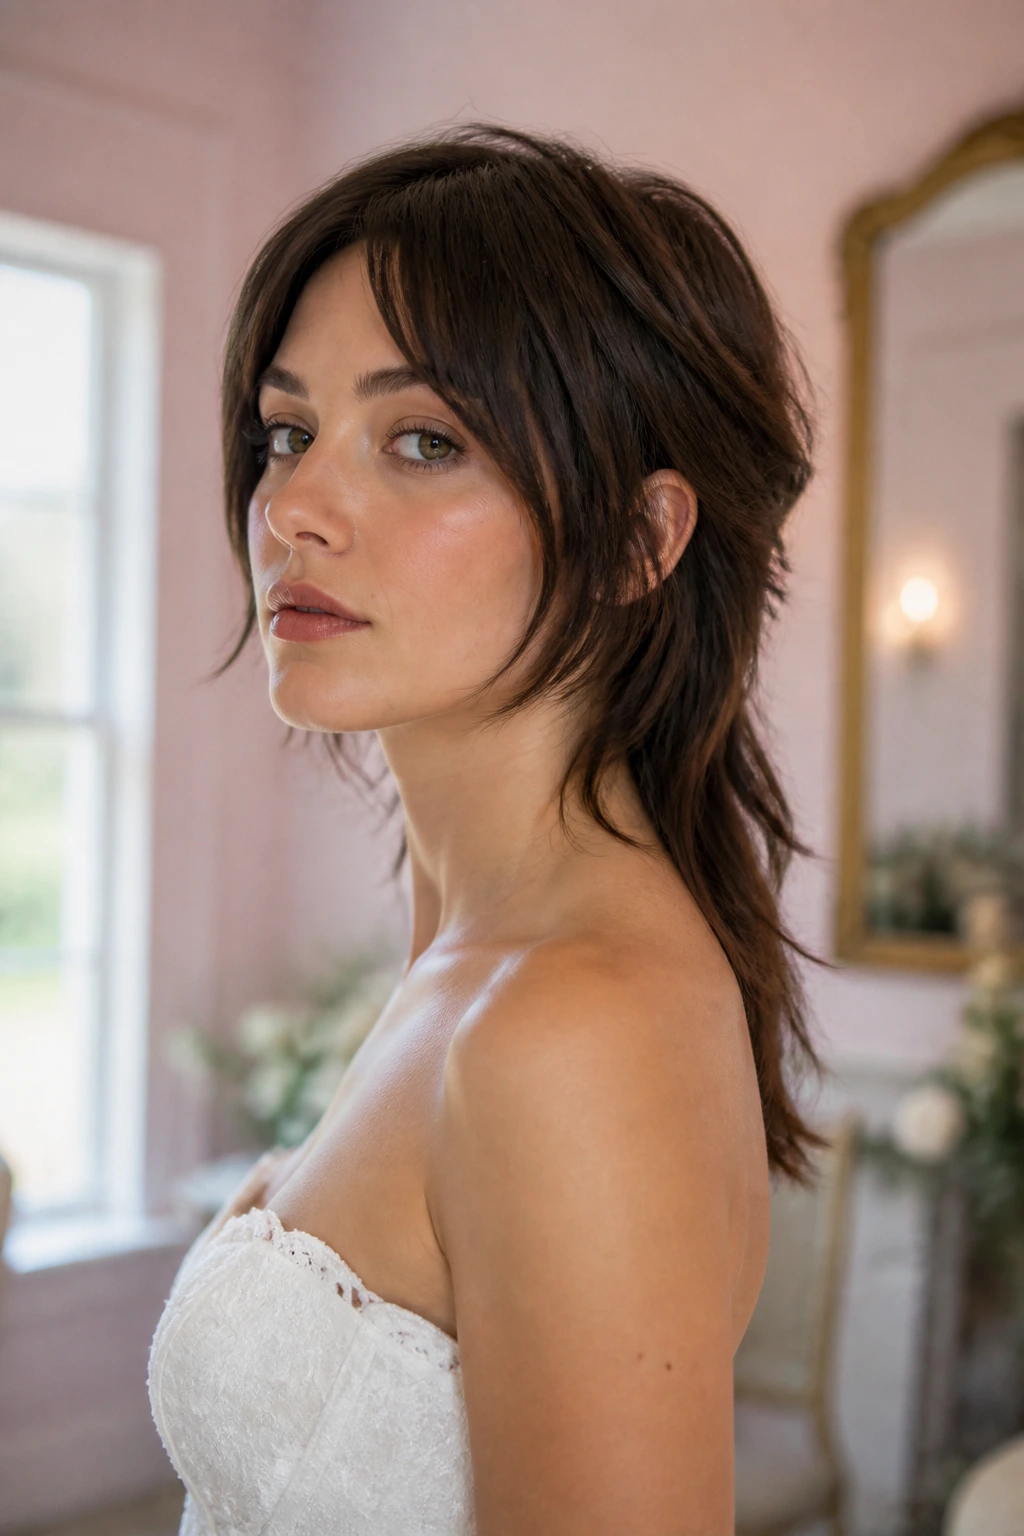
Three inches can change the whole read. If the front pieces stop around the chin, the cut gets stronger around the jawline and feels less like a shag and more like a true bridal mullet with structure. The back stays long enough to move, but the front does the sculpting.
That makes this version a smart choice for strapless dresses and necklines that leave the collarbone open. The chin-length pieces can be tucked behind the ears for the ceremony and pulled loose later, which is useful when you want one cut to carry you through the whole day. It also photographs cleanly from the side, because the front and back have a clear relationship instead of blurring together.
Ask for this from your stylist
- A bluntish perimeter around the chin.
- Soft internal layers through the crown.
- Slight graduation at the nape so the back doesn’t look heavy.
This one is for brides who like a sharper outline but still want softness around the face. It has a little more geometry than the feathered versions, and that can be exactly the right thing.
8. Finger-Wave Mullet
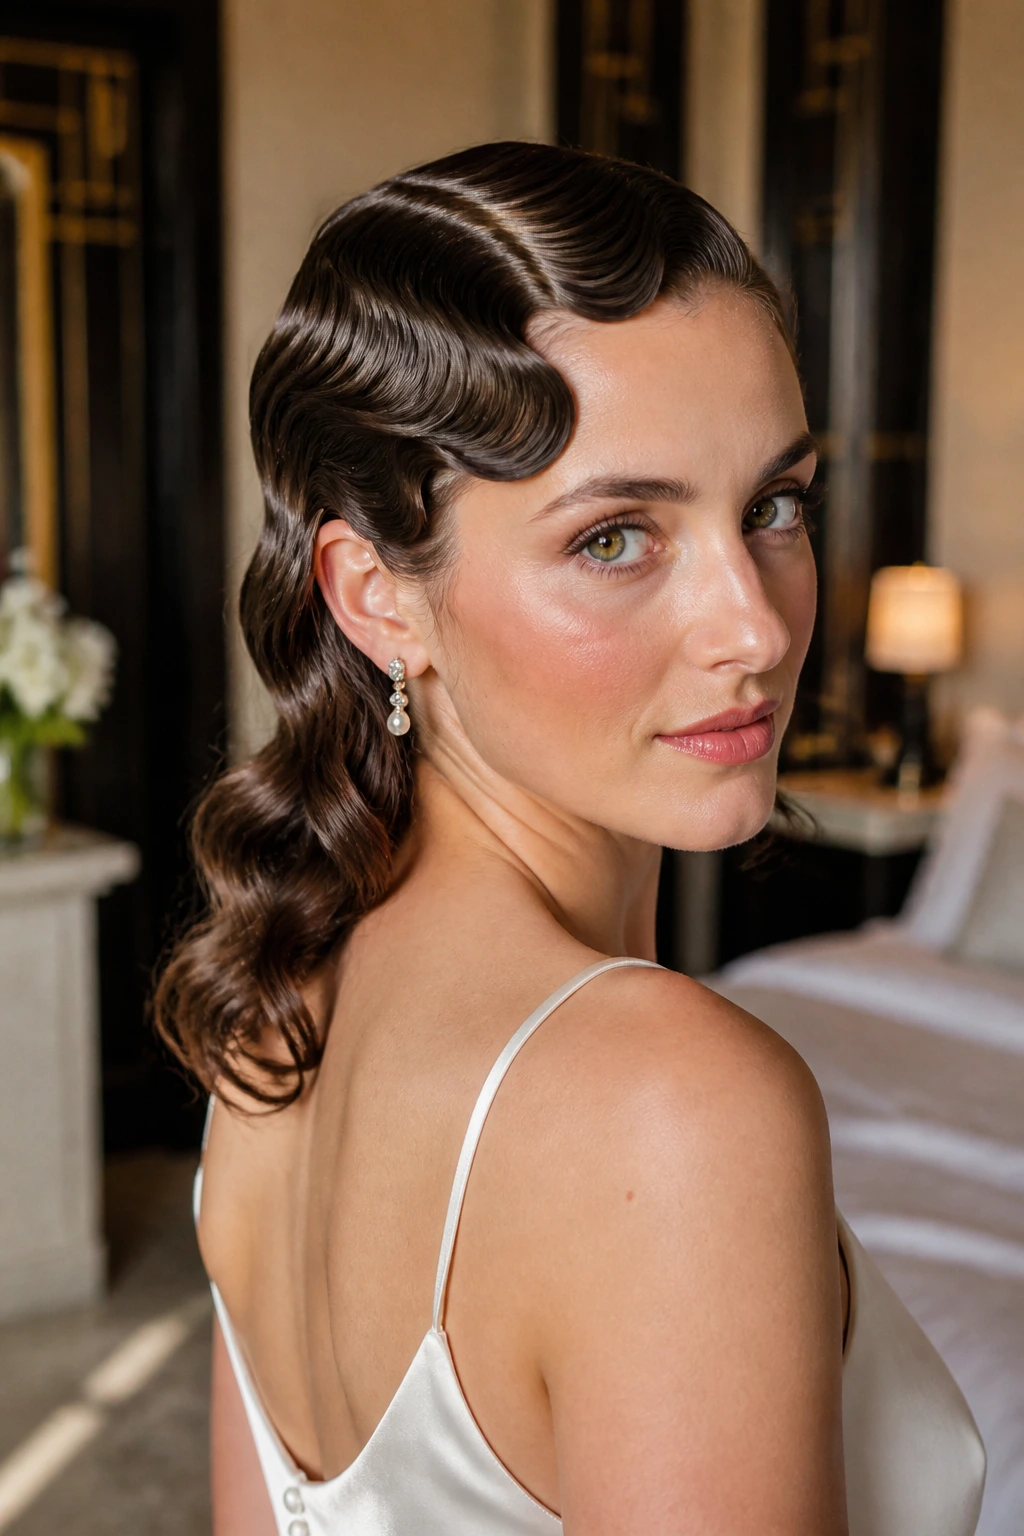
I keep coming back to finger waves because they tame the top while leaving the tail soft. That contrast is what makes this version feel special. The front and crown sit in smooth sculpted ripples, and then the back slips into a longer, looser section that keeps the whole style from looking too formal.
Finger waves also solve one of the annoying problems with wedding hair: flyaways around the temples. Once the wave pattern is set, the front stays put. The style is strongest on shorter to medium lengths, though it can work on longer hair if the top is controlled tightly and the back is left with some movement.
This is a good match for satin gowns, vintage slips, or dresses with a strong Art Deco or 1930s mood. It asks for good pins and a bit of patience. No way around that. But once it’s set, it has a sculpted, glossy look that the camera tends to love.
If you want old glamour without a full updo, this is the cleanest route.
9. Tousled Pixie Mullet
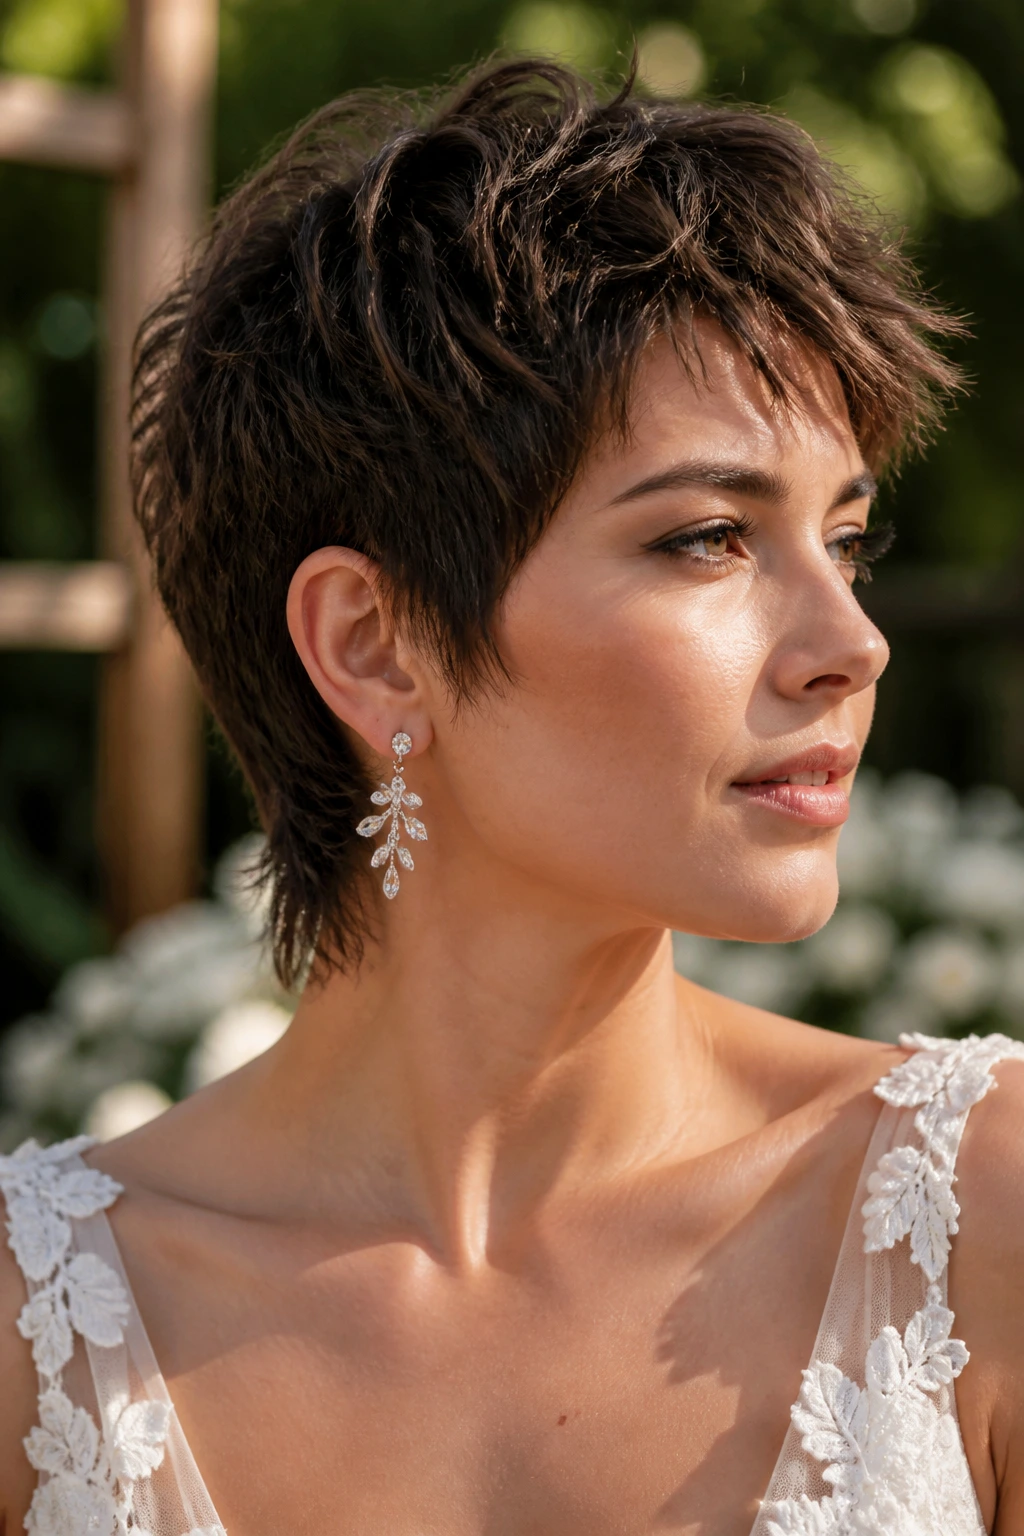
Short hair brides are not locked out of this shape. A pixie mullet keeps the sides lean, leaves a little extra through the nape, and lets the front pieces fall in a textured sweep that feels light and modern. It’s small, yes. Boring, no.
The best part is how little product it needs. A pea-sized amount of styling cream or paste can define the ends without turning the cut greasy. You can finger-style it into place, mist with a flexible spray, and leave a couple of pieces around the forehead slightly uneven so the cut doesn’t look too polished.
This works well when the bride wants earrings to do some of the talking. Studs, small drops, even a single statement earring on one side can look right here. The haircut exposes the neck and jaw, which gives the whole look a clean line.
For brides who hate the feel of heavy hair on the shoulders, this is a relief. Light, quick, and easier to live in than a big pinned style.
10. Boho Textured Mullet
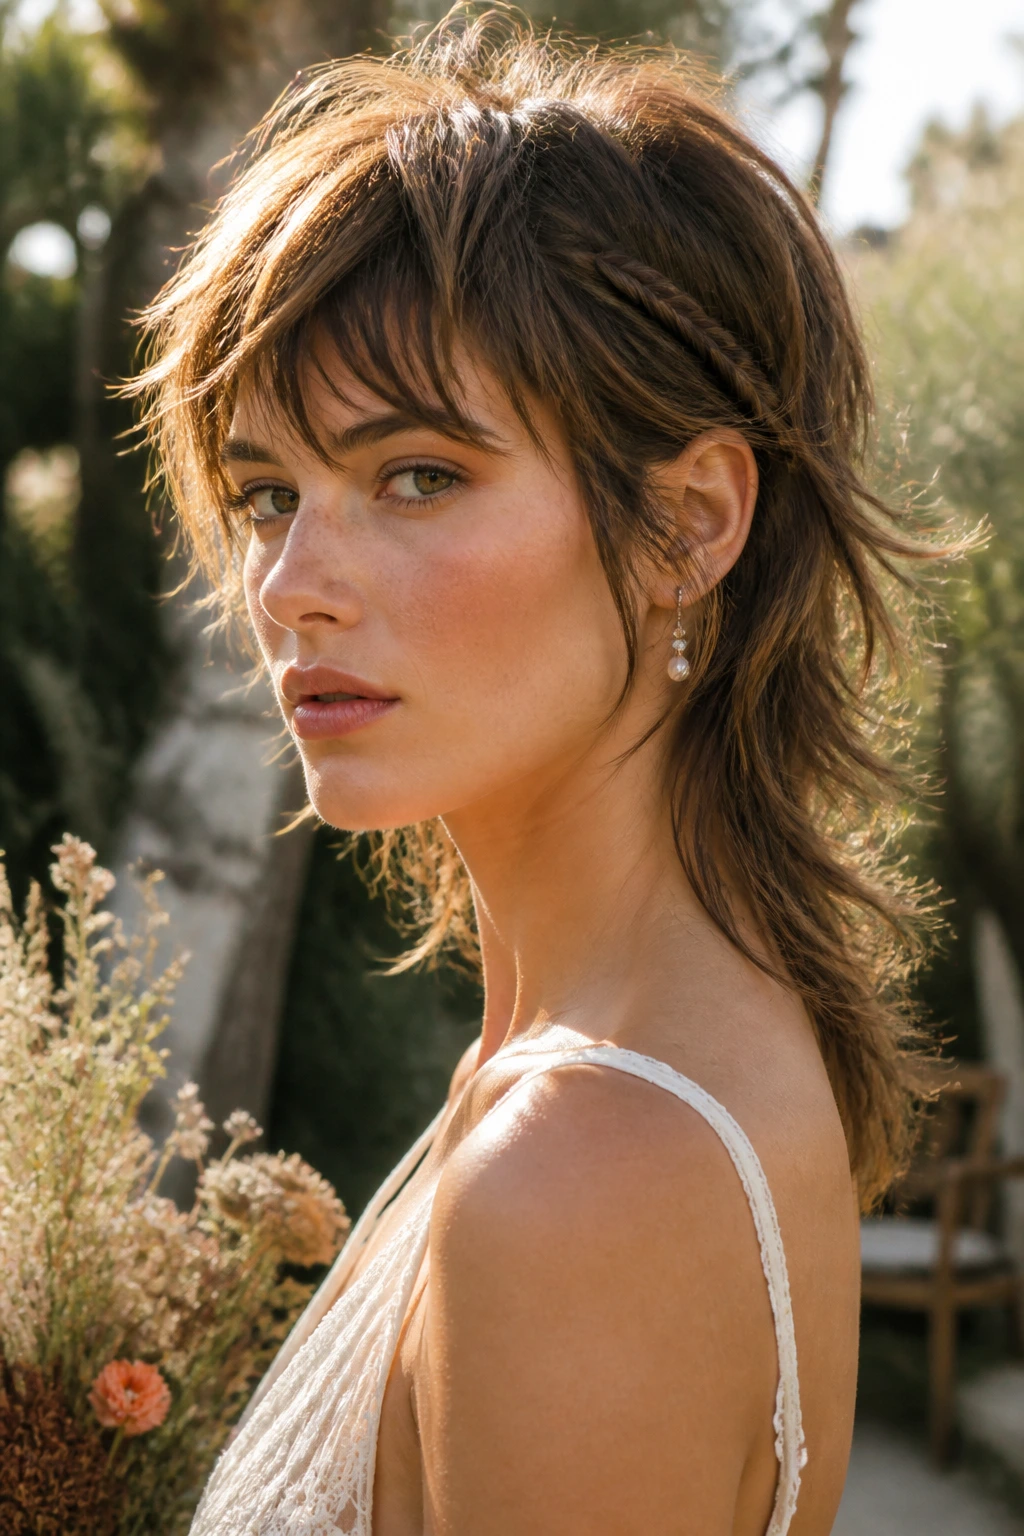
Compared with the wolf cut, this version is softer and more garden-party than downtown. The layers are still there, but they’re brushed into an undone texture that feels relaxed rather than fierce. Think loose bends, a little separation at the ends, and maybe one small braid hidden near the temple.
This is the version that plays nicely with dried flowers, ribbon, or a small crown of greenery. It’s also one of the easiest cuts to wear with natural wave, because the shape doesn’t depend on perfect symmetry. If one side flips differently than the other, the style still makes sense.
What gives it the boho feel
A matte texturizing spray is better than heavy shine here. You want the ends to separate a bit, not cling together. And if the hair is very fine, build the texture from the roots with mousse first so the crown doesn’t collapse by dinner.
This cut suits outdoor weddings, barn settings, and dresses that have a little movement in the skirt. It’s relaxed, but not sloppy — and that distinction matters more than people think.
11. Pearl-Pin Accessorized Mullet
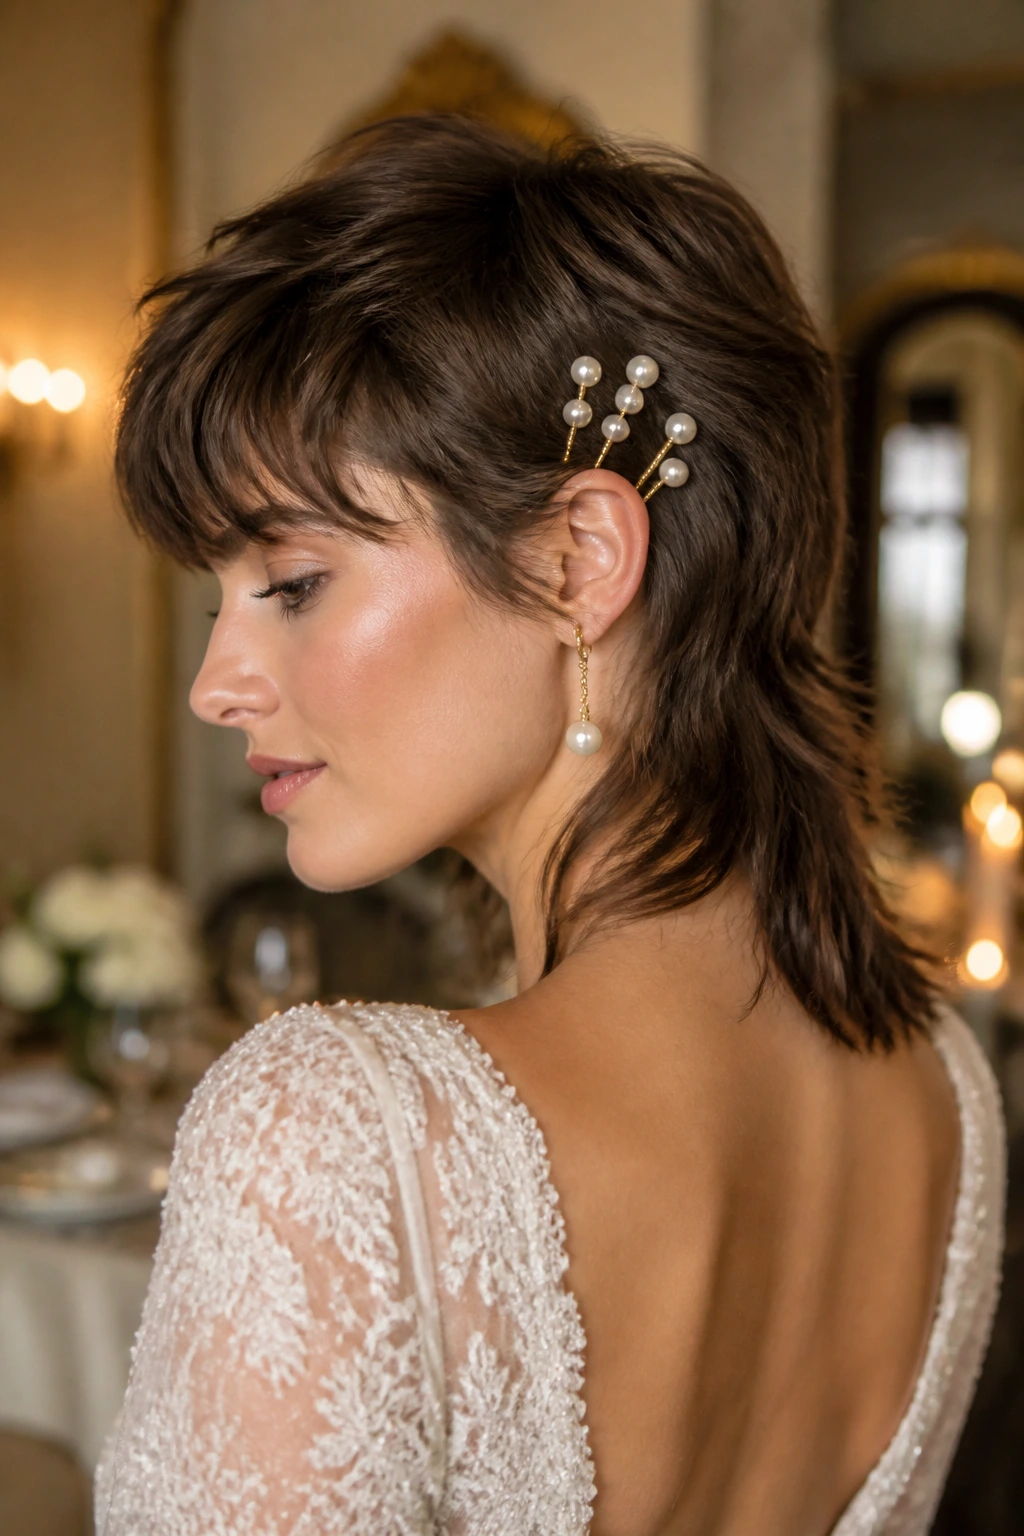
Pearl pins can turn a mullet from cool to ceremonial in one move. They catch the light, yes, but more importantly, they give the cut a visual anchor. Without them, a very clean mullet can feel a little spare. With them, it suddenly looks planned.
The trick is not scattering pearls everywhere. Three to five pins clustered above one ear or tucked into a braid line is usually enough. If you overdo it, the accessory starts fighting the haircut, and the whole thing gets noisy.
This version works on nearly any texture, which is why I like it so much. Straight hair gets a little sparkle; waves get a point of focus; curls get structure. If the dress is plain, the pins can carry more of the visual weight. If the dress is already detailed, keep the pins tiny and let them appear only in side profile.
This is a strong choice for brides who want the mullet to stay the star but still need a ceremonial finish.
12. Veil-Safe Half-Up Mullet
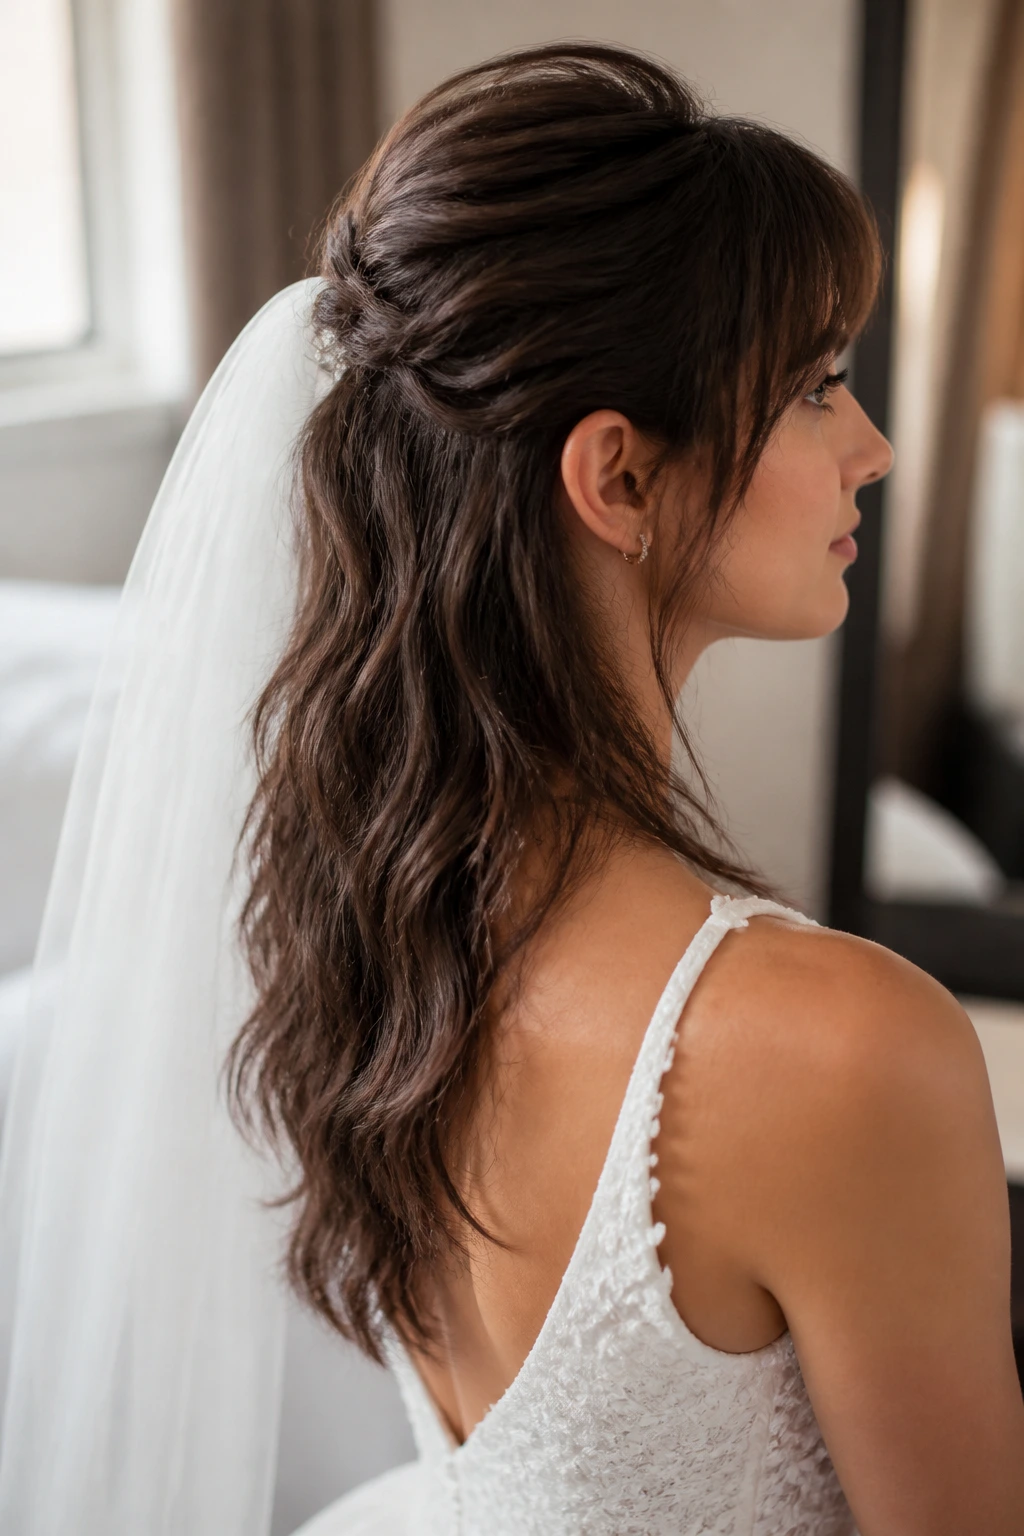
If the veil is non-negotiable, start here. A half-up mullet gives the veil comb something secure to grip, keeps the crown tidy, and still lets the back fall freely enough to show the cut. It’s the most practical option in the bunch, and I mean that as a compliment.
The half-up section should sit at the high point of the head, not too low at the occipital bone, or the veil will droop in a way nobody wants. Braided anchors or small hidden twists can help hold the comb. The rest of the hair can be waved or left with a soft bend, depending on how formal the dress is.
This style is best when you want the veil for the ceremony but don’t want it dictating the entire look. Once the veil comes off, the cut still reads well on its own. That matters. Too many wedding styles collapse when the veil is removed. This one doesn’t.
If you’re planning a long ceremony and a long reception, this is the safe, sensible choice with enough shape to keep it interesting.
13. Blunt Fringe Mullet
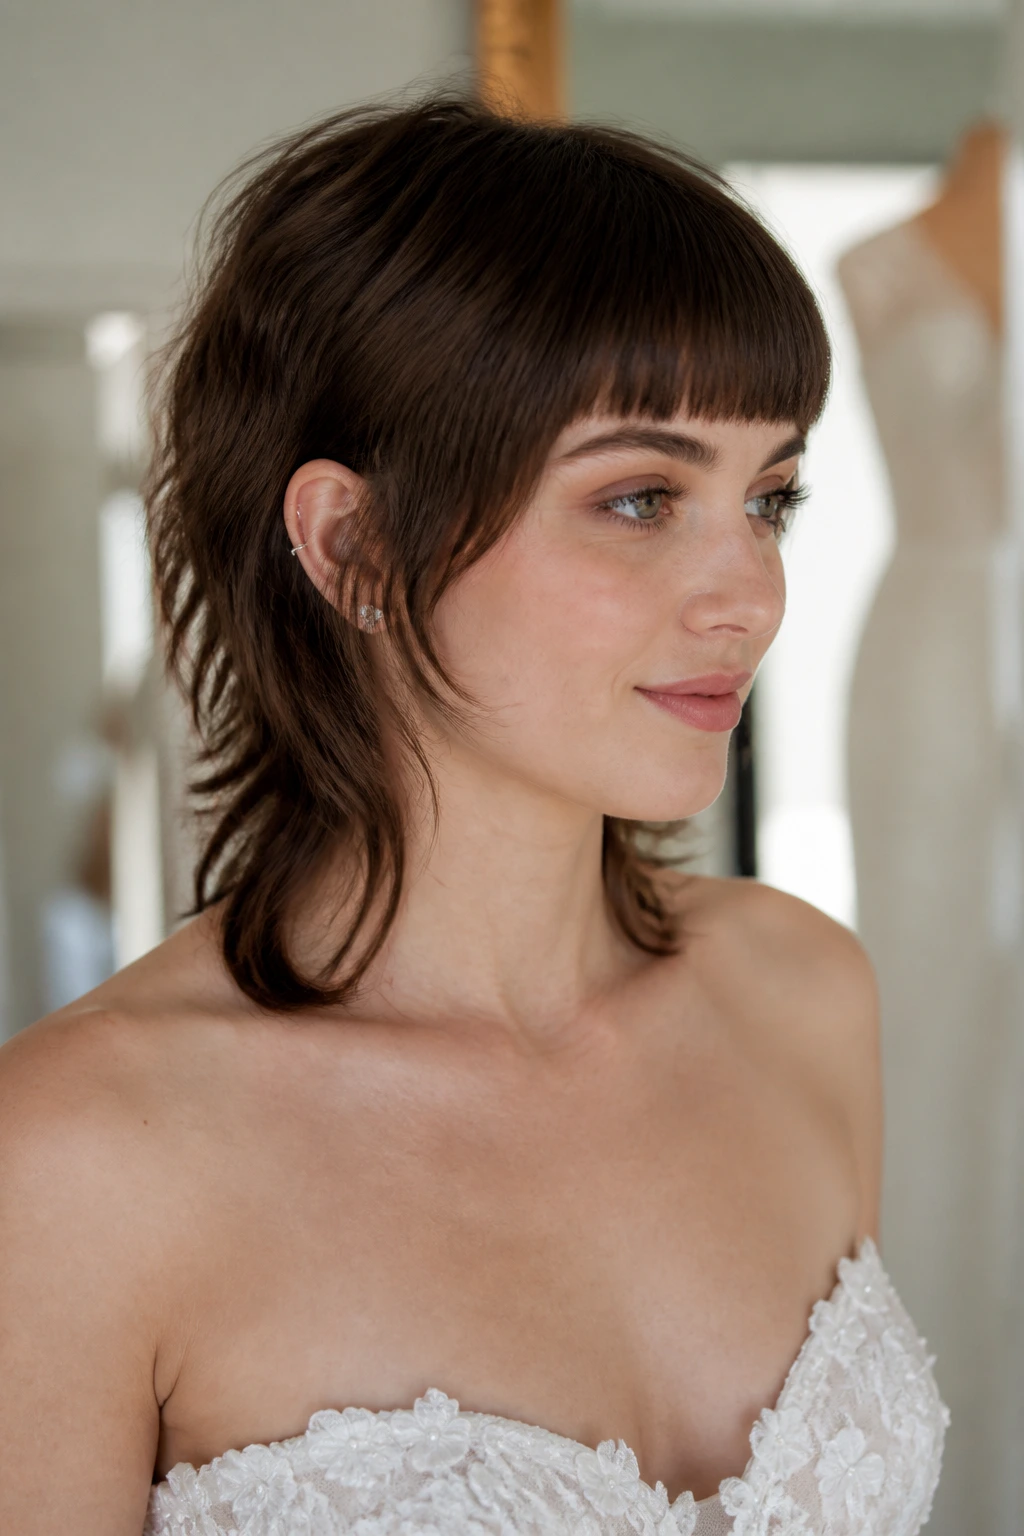
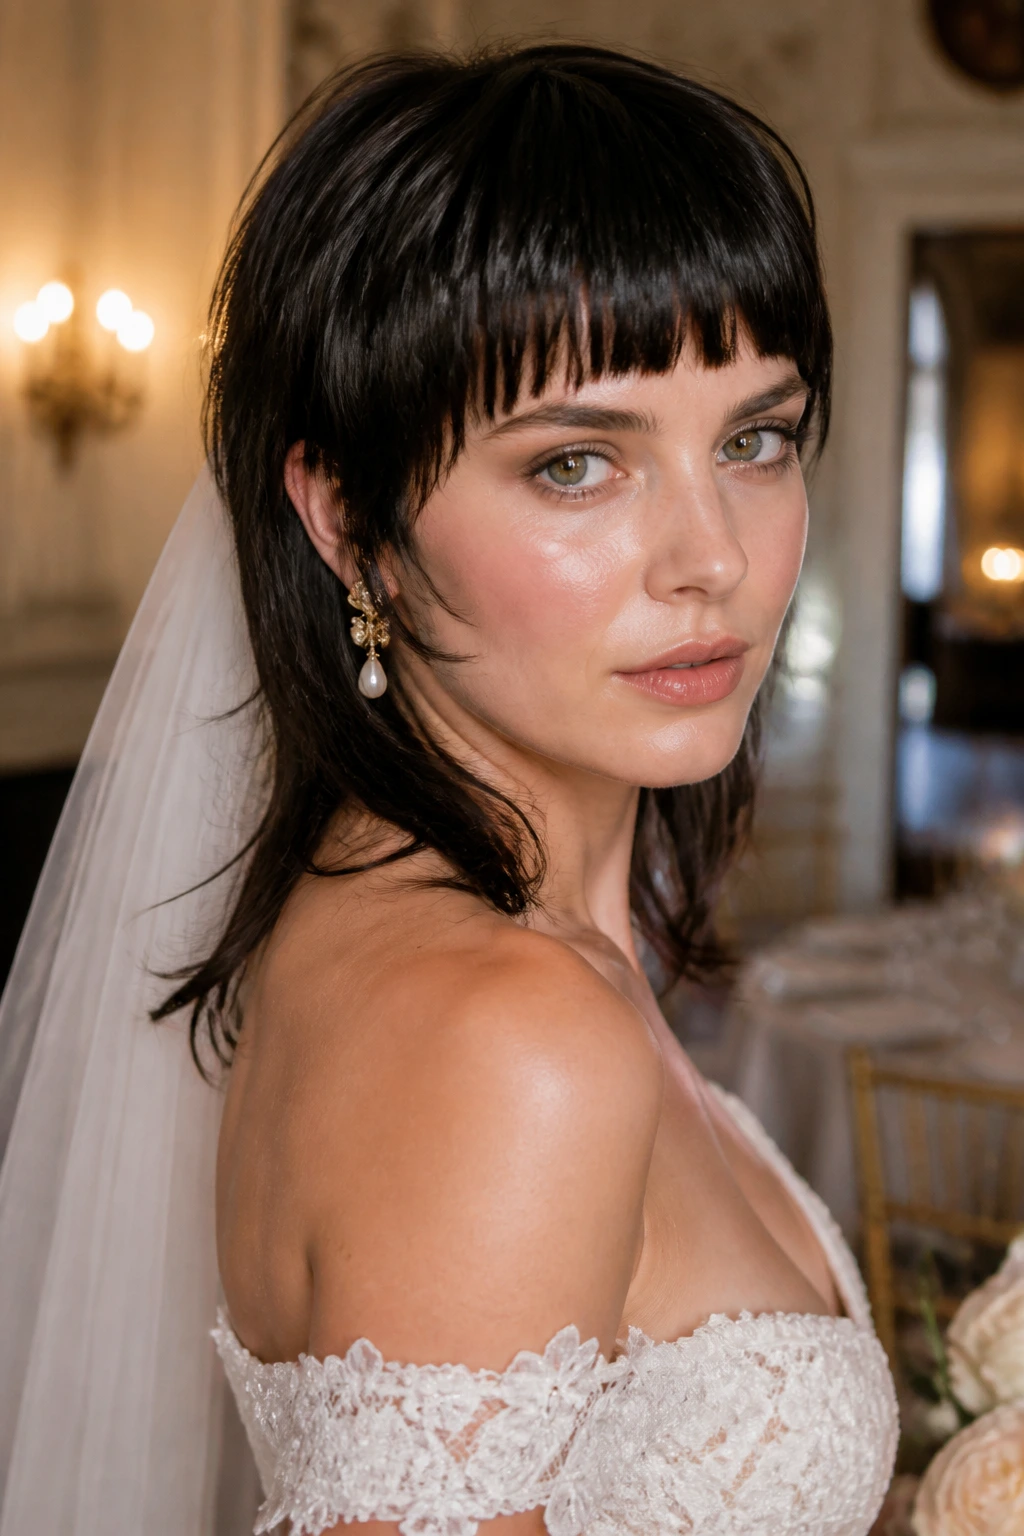
A blunt fringe can calm a mullet down more than a soft fringe can. That straight line across the forehead gives the haircut a clear front edge, which makes the rest of the layers feel deliberate. It’s a strong move, and it changes the face shape in a useful way.
The fringe should sit just above the lashes or skim them, depending on how much eye contact you want the cut to make. Pair it with softer sides so the bangs don’t become the only thing anyone notices. A slight bend through the back keeps the cut from becoming too severe.
I like this for brides with a little attitude in their wardrobe: sharp suits, minimalist dresses, oversized bows, sculptural earrings. It’s not the obvious bridal choice, and that’s the appeal. It gives the face a frame and the outfit a little bite.
If you want your hair to feel memorable without feeling fussy, this one does the job.
14. Long-Layered Low-Drama Mullet
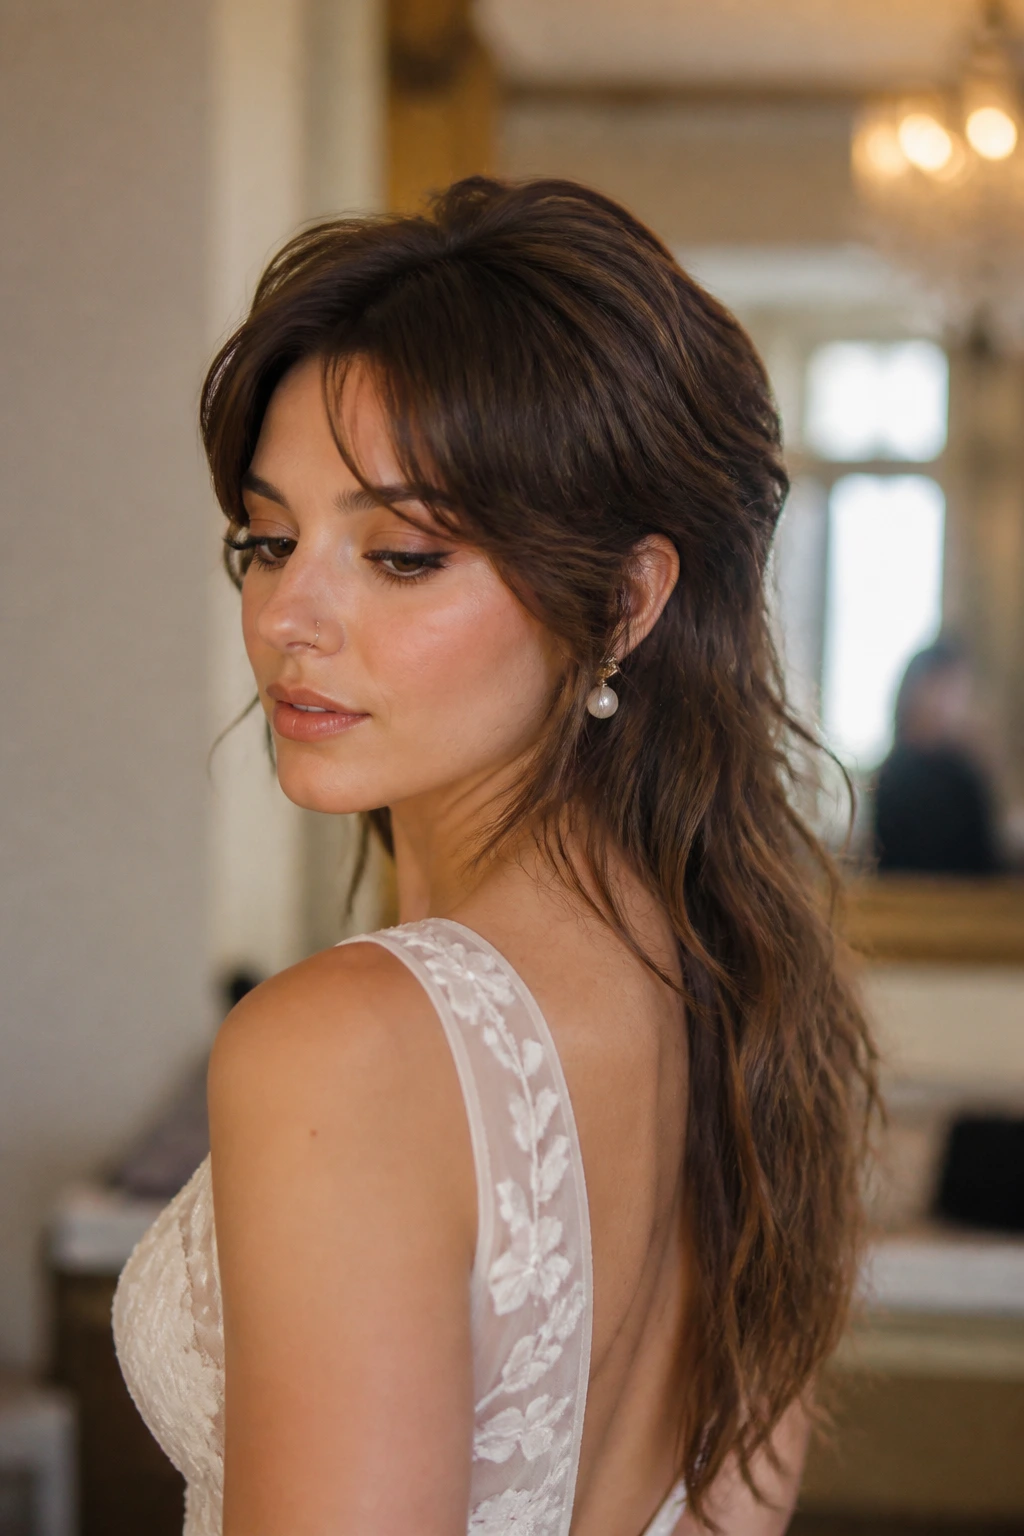
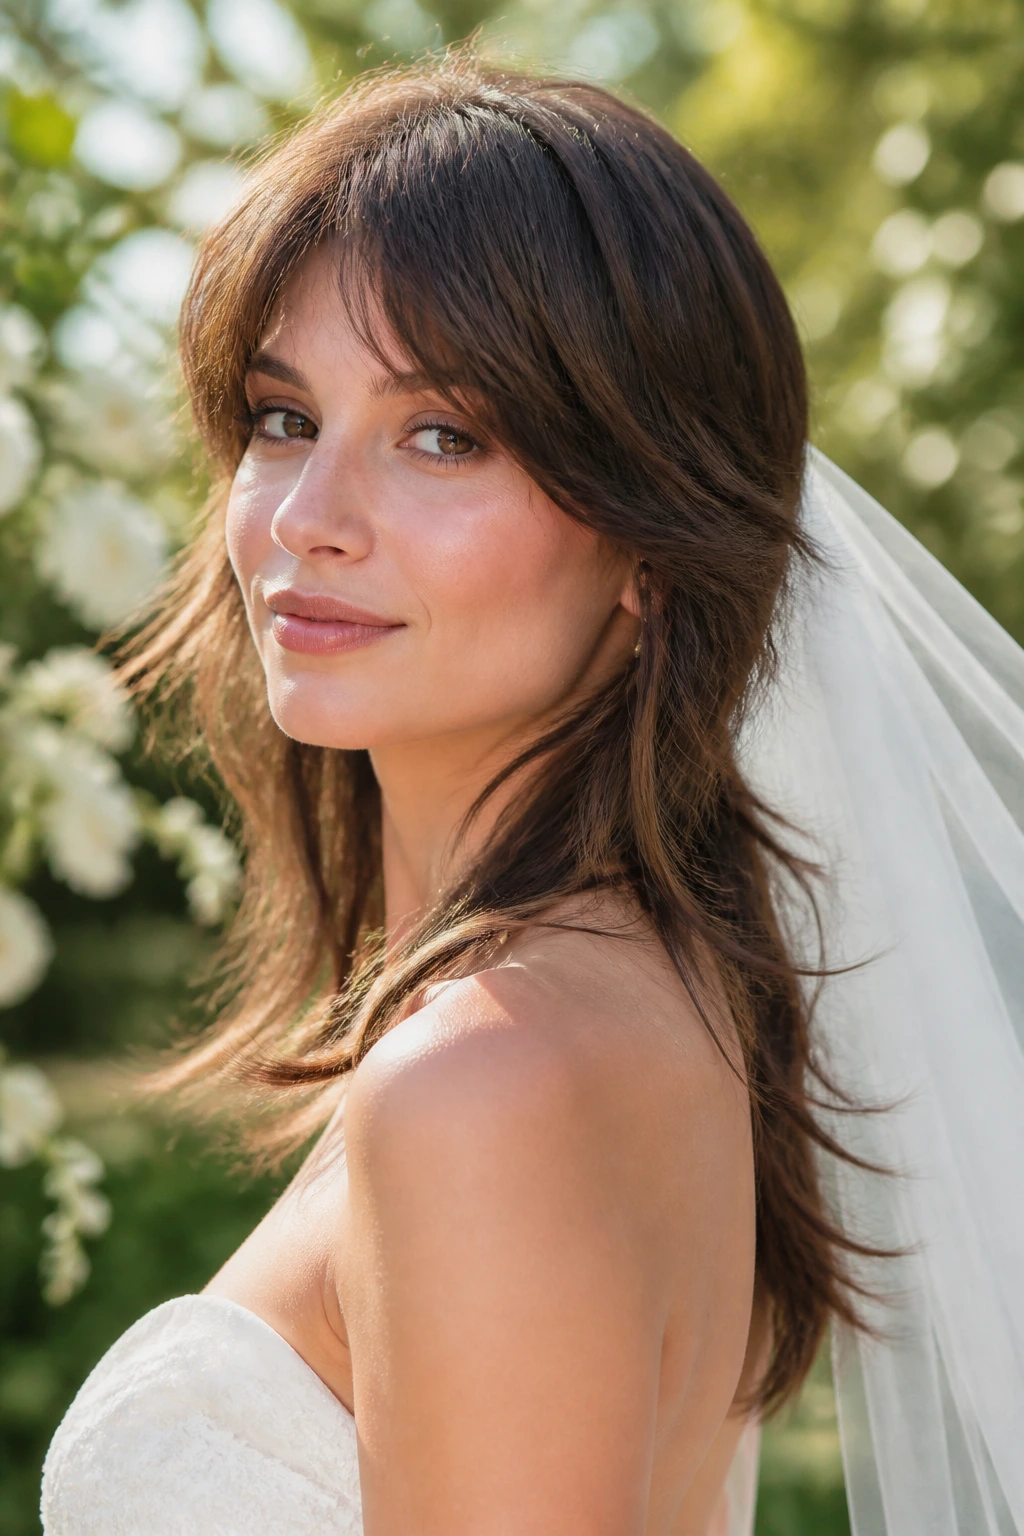
On very long hair, the danger is not length. It’s weight. A long-layered bridal mullet solves that by carving some lift into the crown and by taking bulk out of the lower sections without chopping the hair into something severe. The result still feels long, but the shape has air in it.
This is the least flashy version here, which is exactly why some brides will love it. It works with almost any dress, any veil, and nearly any texture. The front layers can sit just below the cheekbone, and the back can stay well past the shoulders. The whole point is that it reads as elegant first and mullet second.
Best when you want restraint
If your dress already has a lot going on — long sleeves, lace back, ornate trim — this cut stays out of the way. It gives you profile movement without making the hair the headline. Soft waves through the mid-lengths keep the shape from looking flat, and a brushed finish helps the layers blend instead of stepping on each other.
It’s a quiet cut. Not dull. Quiet.
15. Asymmetrical Bridal Mullet
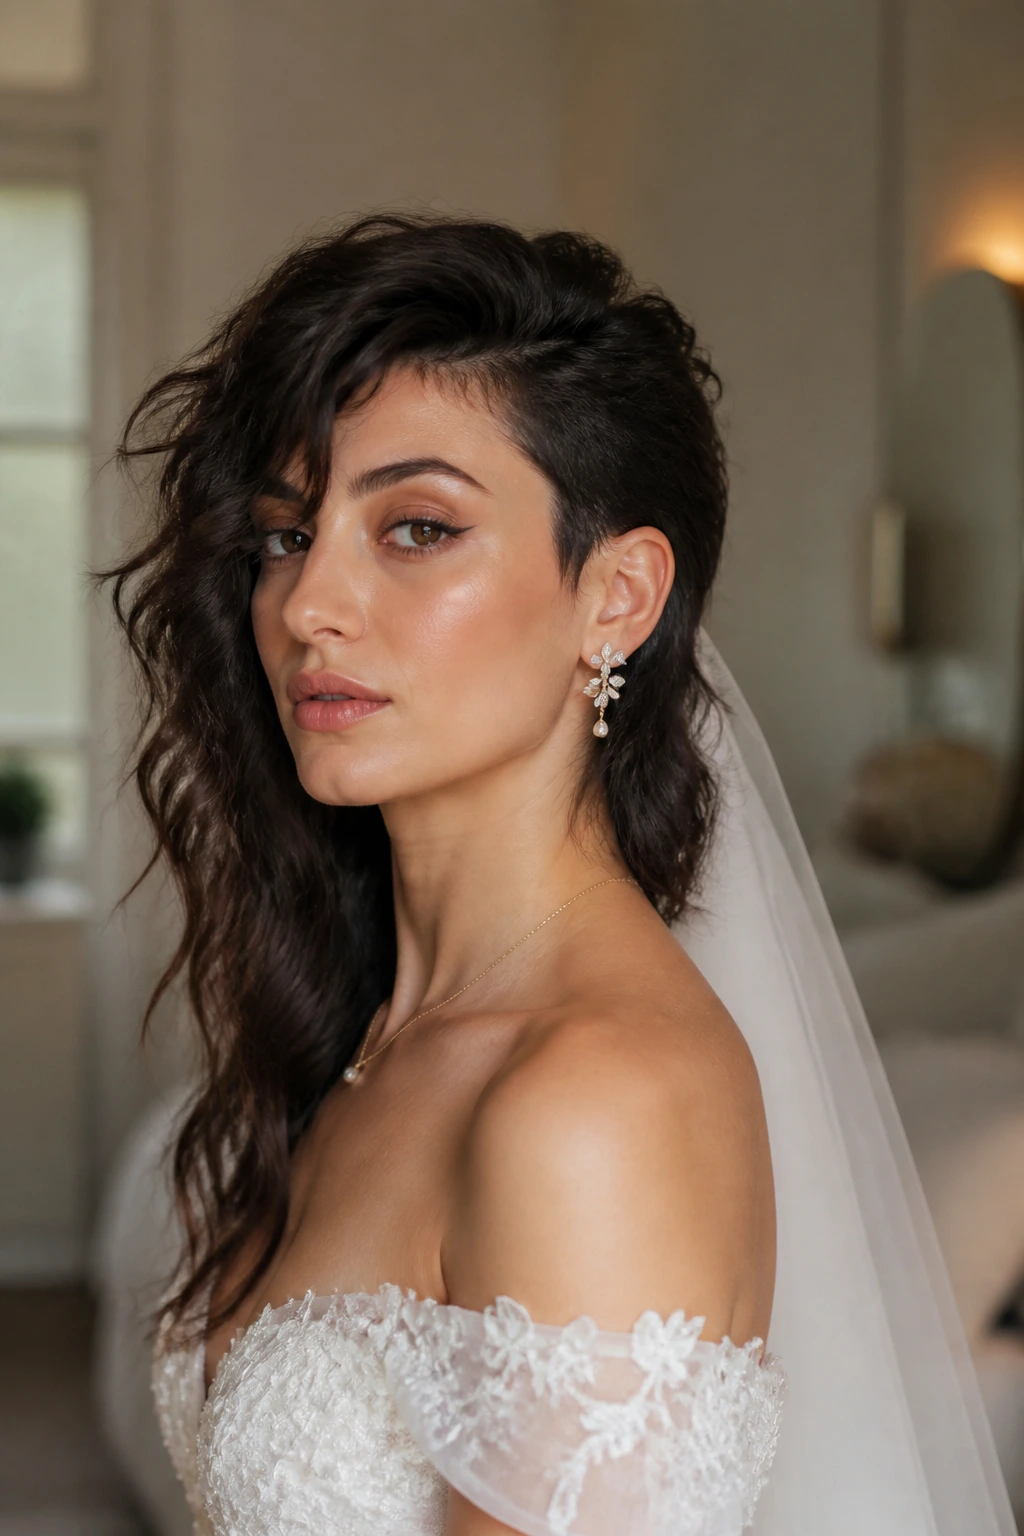
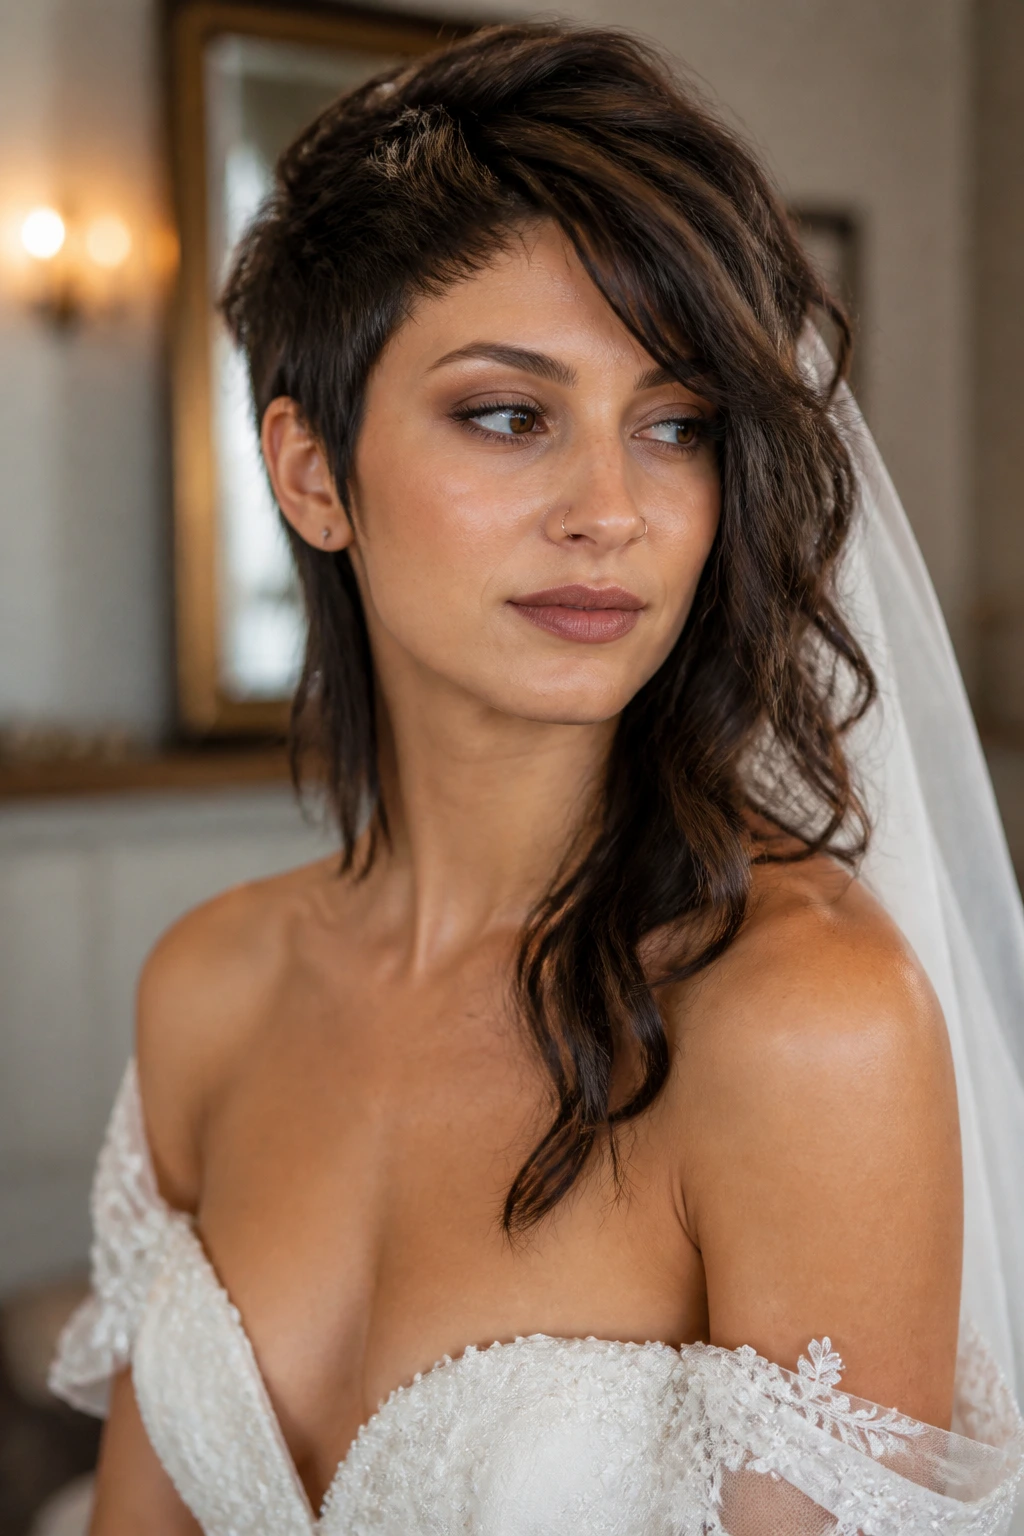
What if you want one side to feel a little sharper? This is the answer. An asymmetrical bridal mullet shifts the balance just enough to create a modern line without turning the whole style into an experiment. One side may tuck a little closer to the cheek, while the other keeps more length or a stronger wave.
The asymmetry is especially flattering with one-shoulder dresses, off-center partings, and bold earrings. It gives the eye somewhere to go. You can keep the texture polished or push it more undone, depending on how much contrast you want. Either way, the cut gets its energy from the imbalance.
This is not a subtle version. That’s the point. It’s for the bride who wants a hairstyle with presence, something that looks designed from every angle instead of just from the front.
If you want the final result to feel editorial but still wearable, this one has the most room to play.
Why the Bridal Mullet Holds Its Shape on a Wedding Day
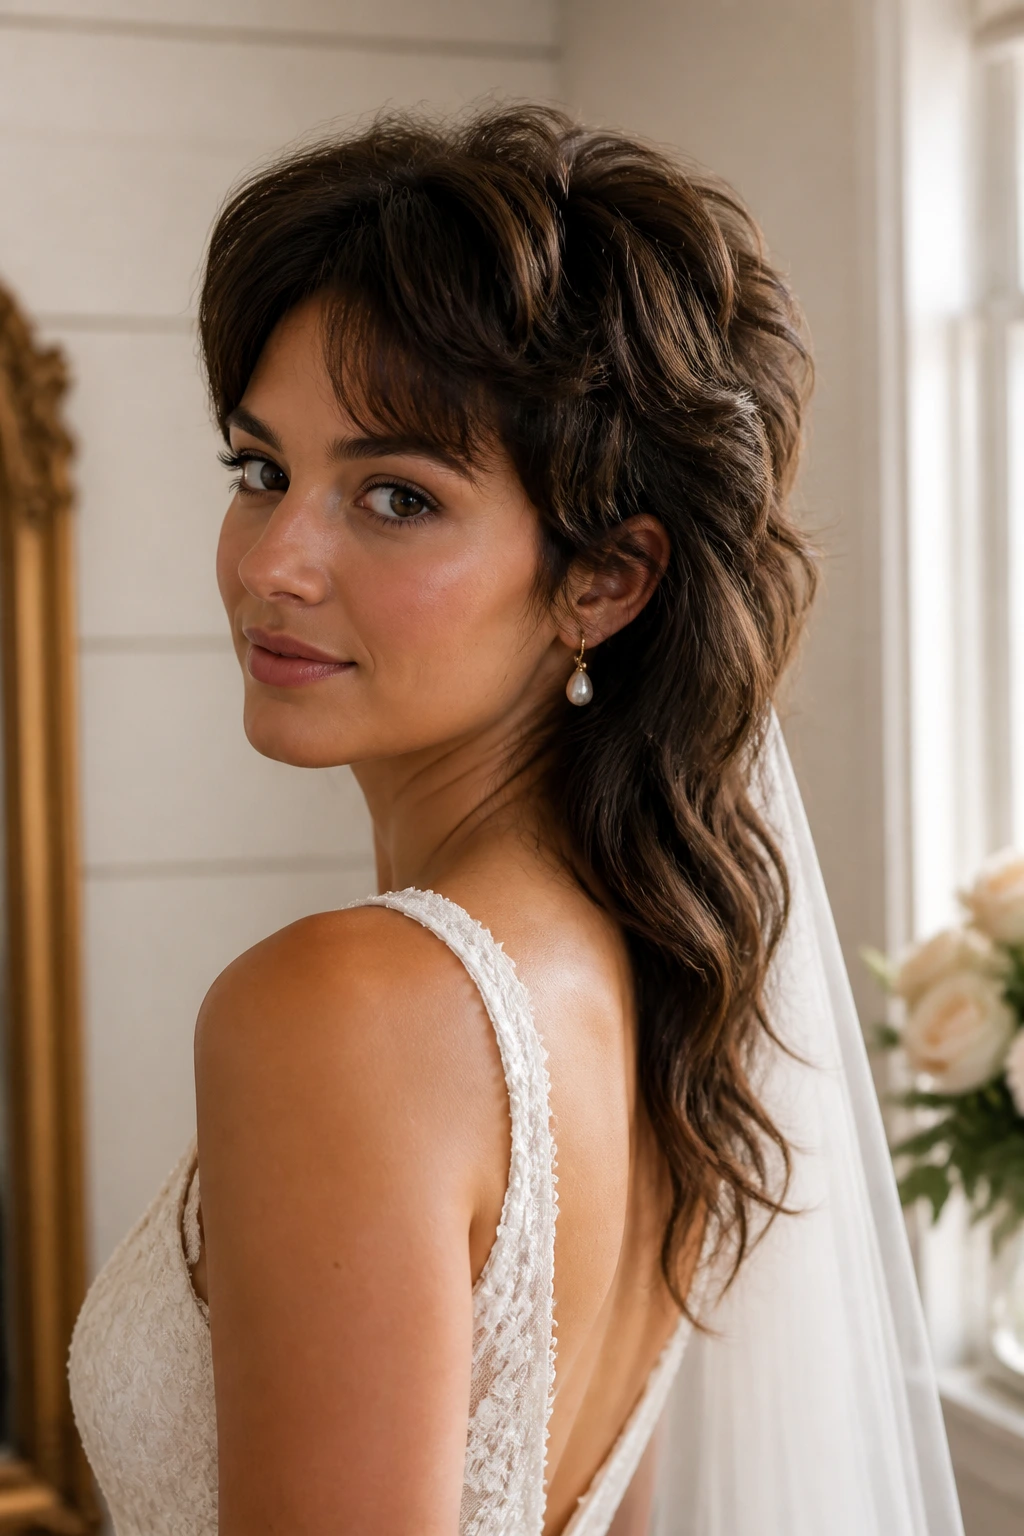
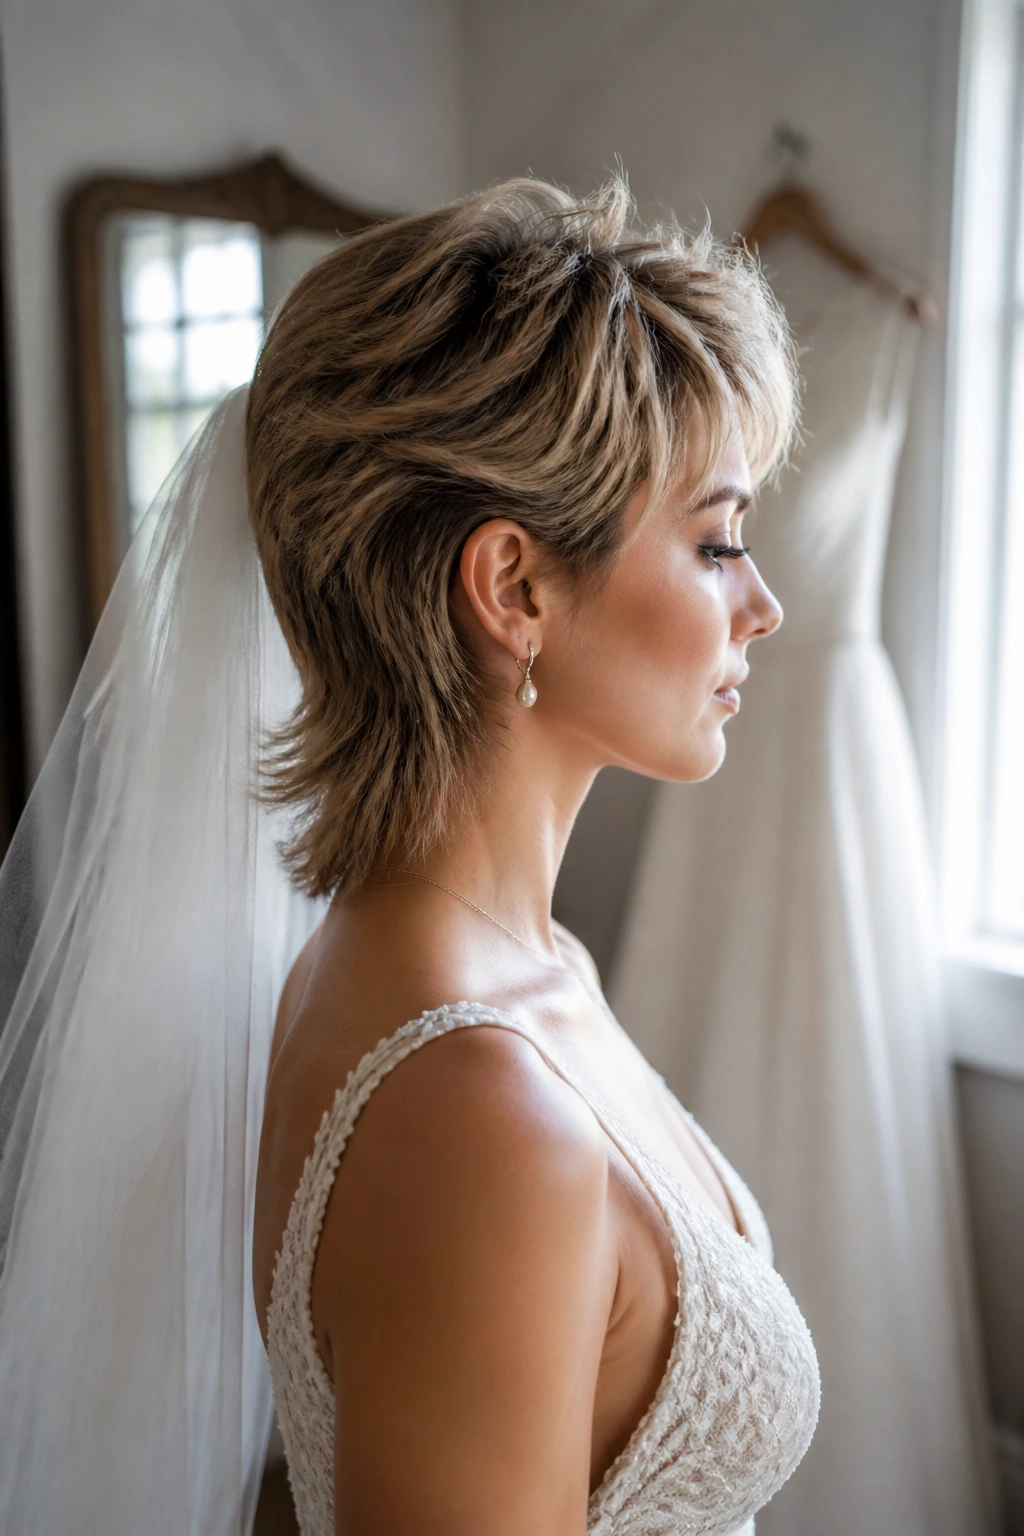
A good bridal mullet works because the shape itself gives you built-in structure. The crown has lift, the sides can be controlled, and the back has enough length to keep moving instead of collapsing into a stiff block. That means the cut can survive hours of wear without needing a dozen hidden pins shoved into one spot.
The profile matters too. Wedding photos are full of three-quarter angles, head turns, and close shots where the side of the hair does more work than the front. A mullet gives the profile something to show — a bend at the cheek, a taper at the nape, a bit of swing through the back. Straight, heavy styles often disappear from the side. This one doesn’t.
What stylists are usually protecting
- The crown needs lift, or the cut reads flat.
- The front pieces need softness, or the face gets swallowed.
- The nape should stay clean enough to work with pins, veils, or collars.
Texture is the deciding factor. A mullet with soft wave or controlled curl feels intentional; one left dry and puffy can look unfinished fast. That’s why a trial run matters. You want to see how the hair behaves with your actual dress, your actual accessories, and your actual setting. Not in theory. In the mirror.
Essential Tools for Bridal Mullet Styling
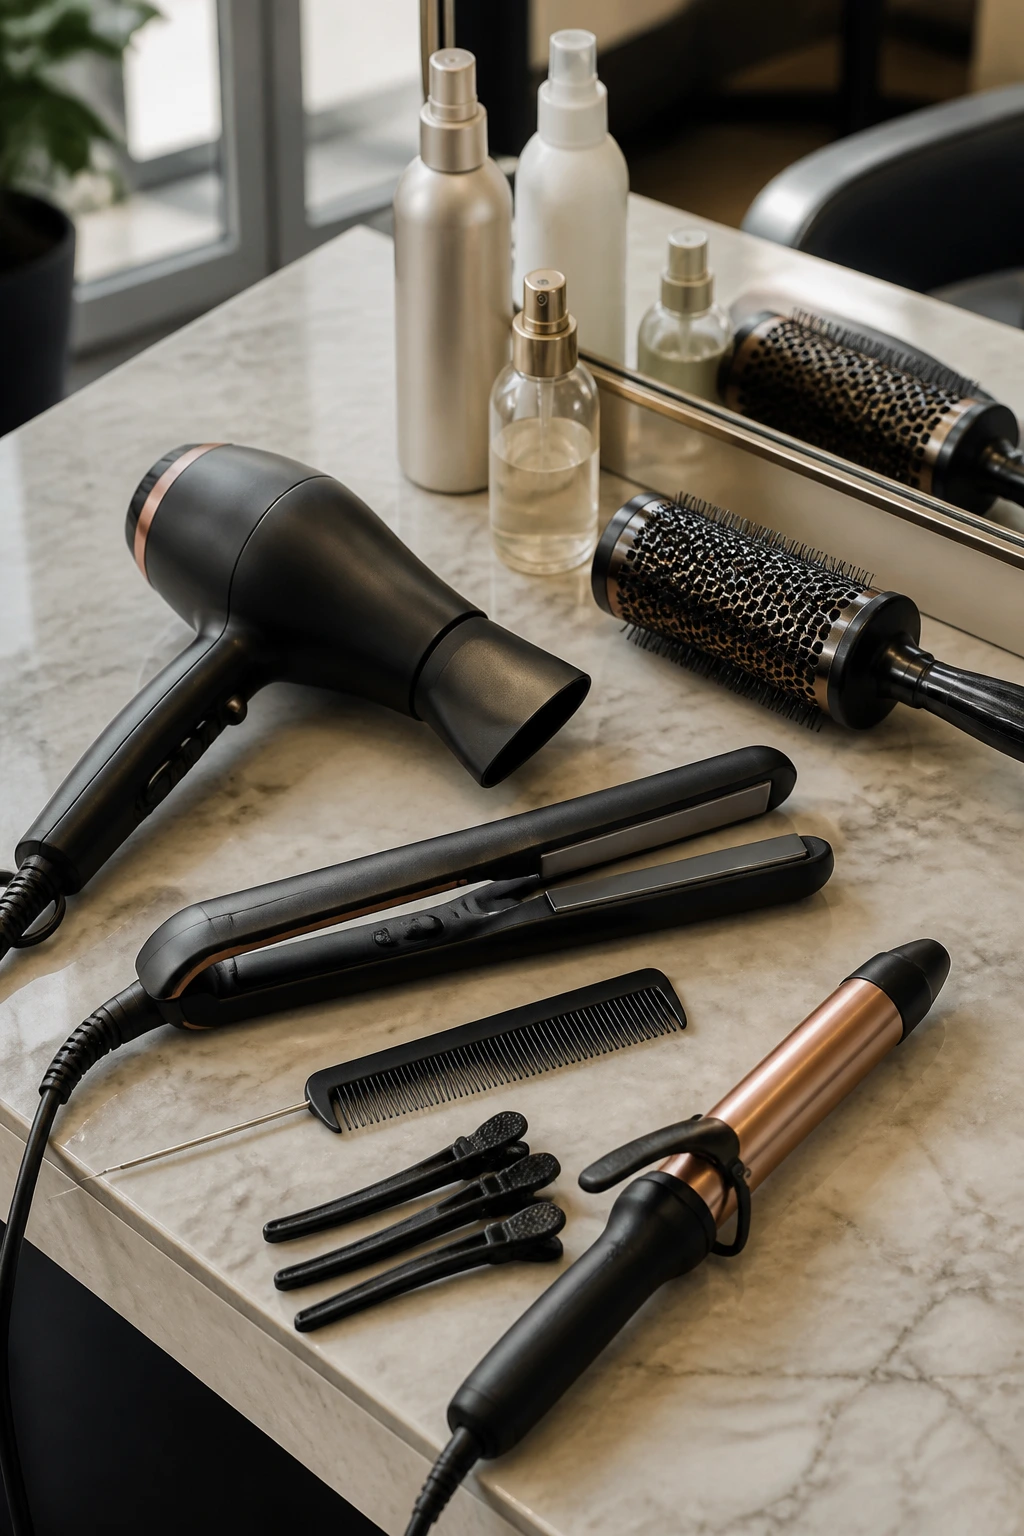
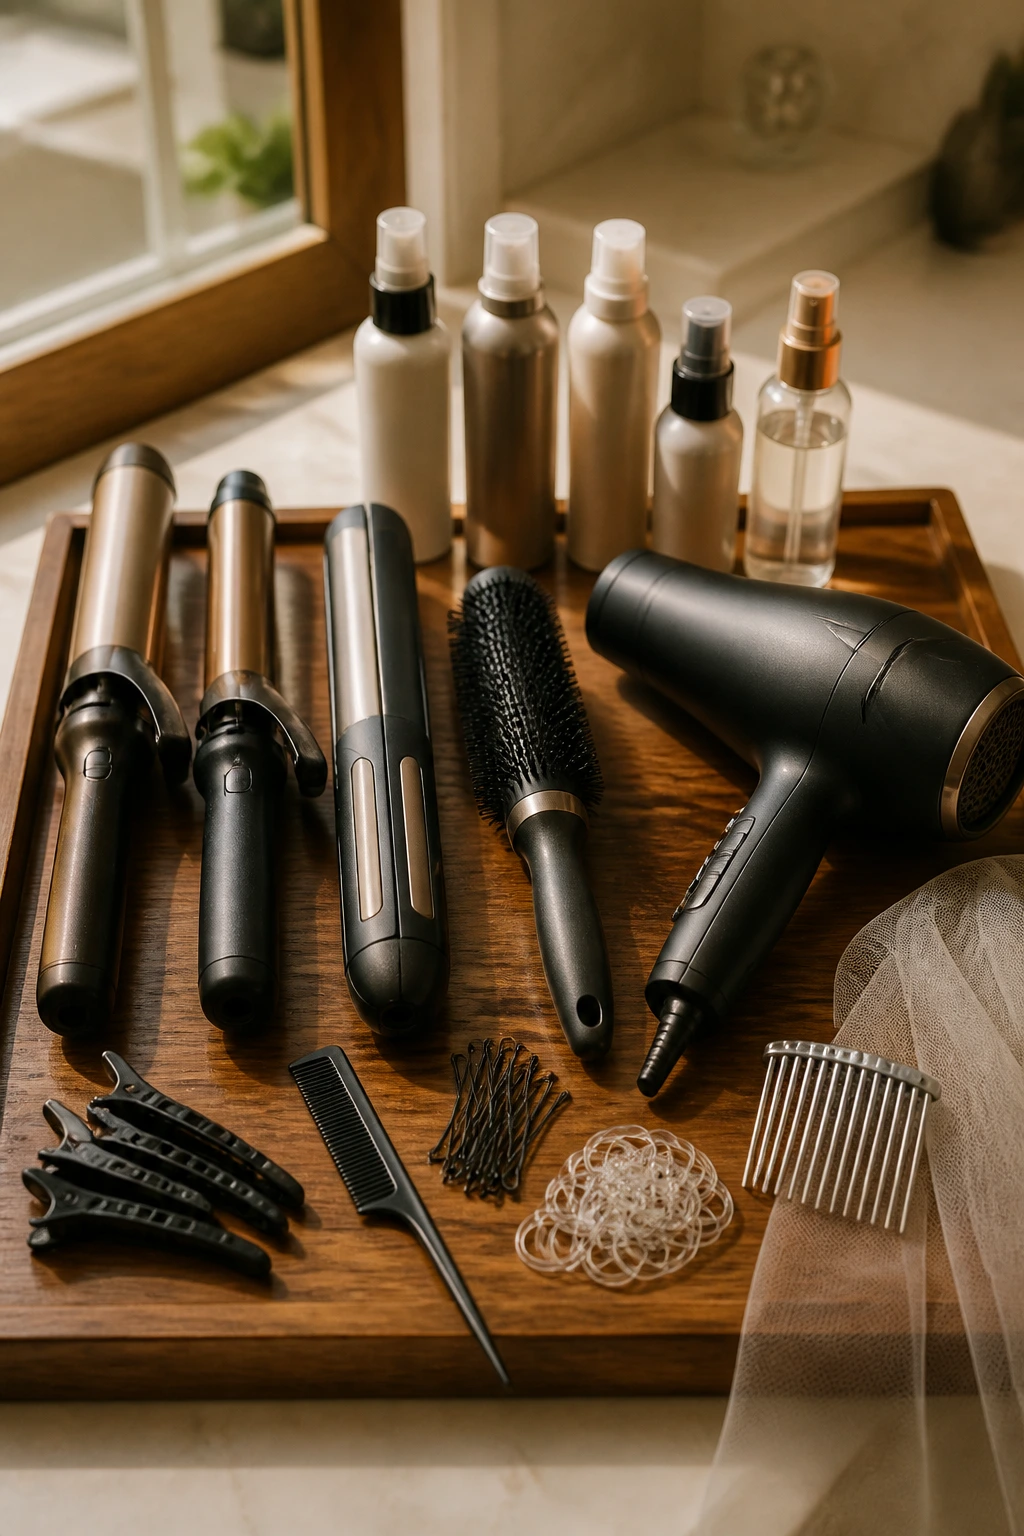
- 1-inch curling iron: Best for tighter bends, short layers, and detail work around the face.
- 1.25-inch curling iron or wand: The workhorse size for soft waves through the back and sides.
- Flat iron with rounded edges: Useful for sleek bends, polished ends, and a smoother finish on blunt fringes.
- Blow dryer with nozzle: Helps direct the crown and keep the roots from puffing out in the wrong direction.
- Round brush, medium barrel: Good for adding lift without turning the ends too fluffy.
- Sectioning clips: Keep the top and back separate while you set the shape.
- Tail comb: Makes clean parts and neat veil placement a lot easier.
- Heat protectant spray: Non-negotiable if you’re using hot tools.
- Flexible-hold hairspray: Holds the style without freezing the layers into a shell.
- Strong-hold hairspray: Use sparingly for the crown, fringe, or veil anchor points.
- Texturizing spray: Helps waves stay separated instead of merging into one heavy curtain.
- Bobby pins in a hair-matched color: Better than black pins showing up like punctuation marks.
- Small clear elastics: Handy for hidden anchors, tiny braids, or half-up sections.
- Veil comb or clip: If you’re wearing one, test it before the big day, not after.
Choosing the Right Cut, Texture, and Styling Products
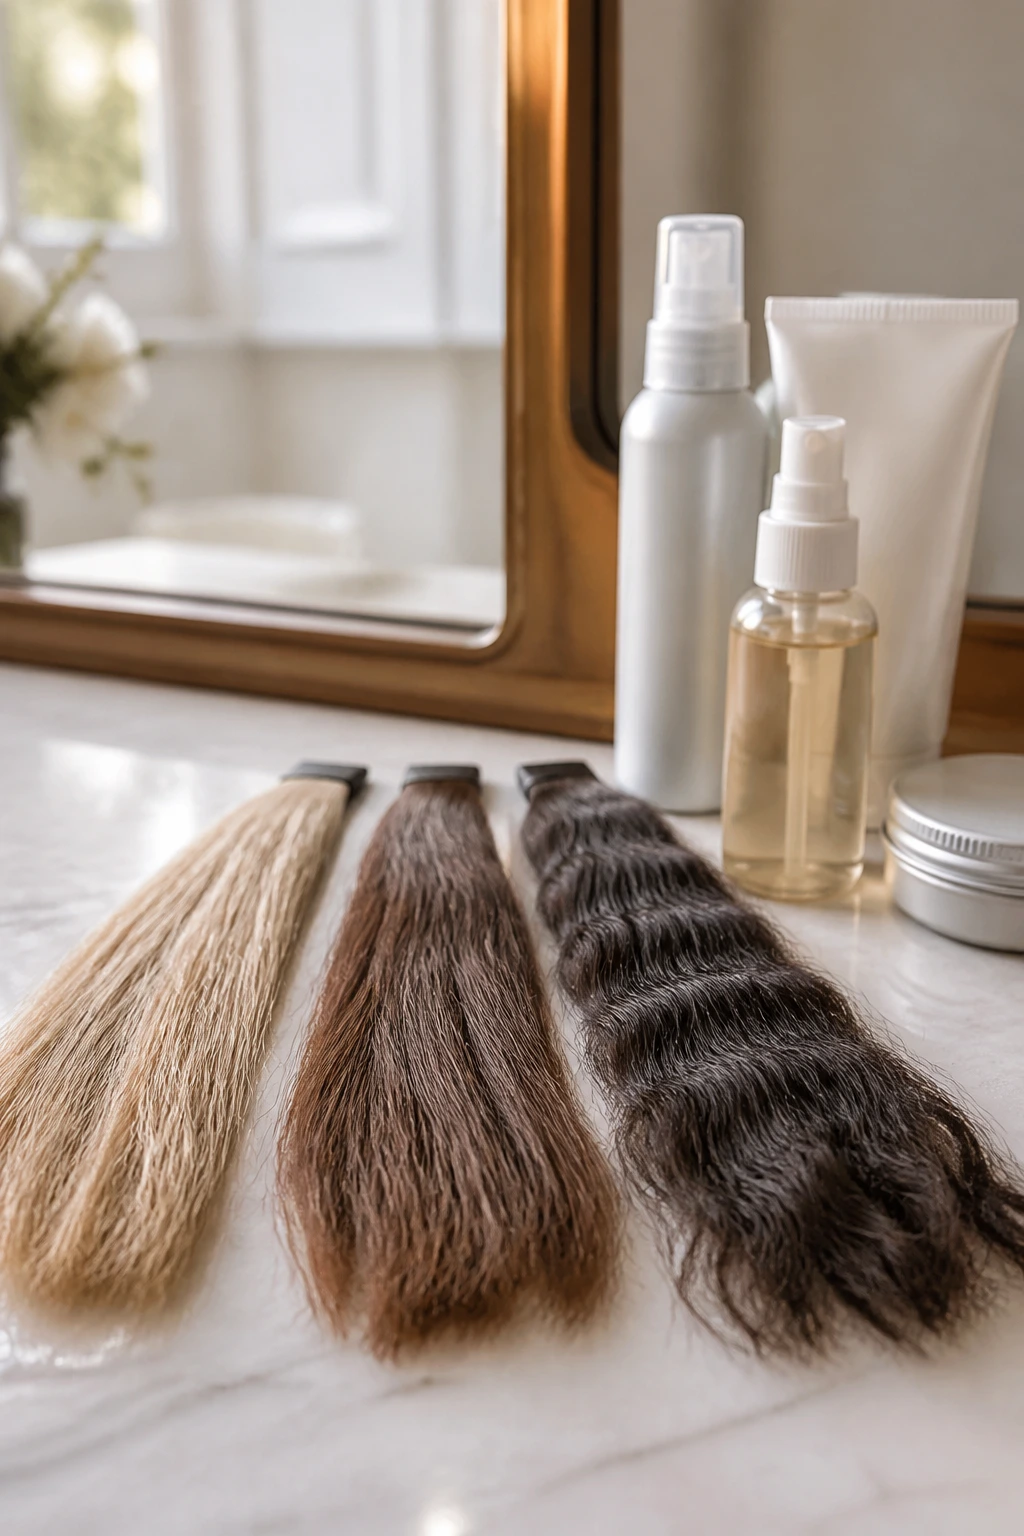
The haircut is only half the story. The other half is what your hair actually does when you stand in daylight and wear it for eight hours. That’s why a bridal mullet should be planned around texture, density, and the dress, not just around a photo on your phone.
If your hair is fine, keep the product stack light. A mousse at the roots, a heat protectant through the mid-lengths, and a dry texturizing spray at the end is usually enough. Heavy creams can flatten the crown and make the front pieces stick to the face. Fine hair needs lift more than it needs softness.
Coarse or curly hair needs the opposite approach. A curl cream or smoothing lotion can control the shape, but don’t pile it on. Too much product weighs down the layers and makes the mullet lose its shape by midday. I’d rather see a little frizz than a collapsed crown. At least the hair still has life.
Bring your stylist a photo of the dress neckline, veil, and earrings. Not just the haircut inspiration. Those details change where the layers should land. A high collar wants a cleaner nape. A strapless bodice can handle more movement around the shoulders. A veil comb needs real estate at the crown, and that can change the cut more than people expect.
How to Wear a Mullet with Veils, Earrings, and Necklines
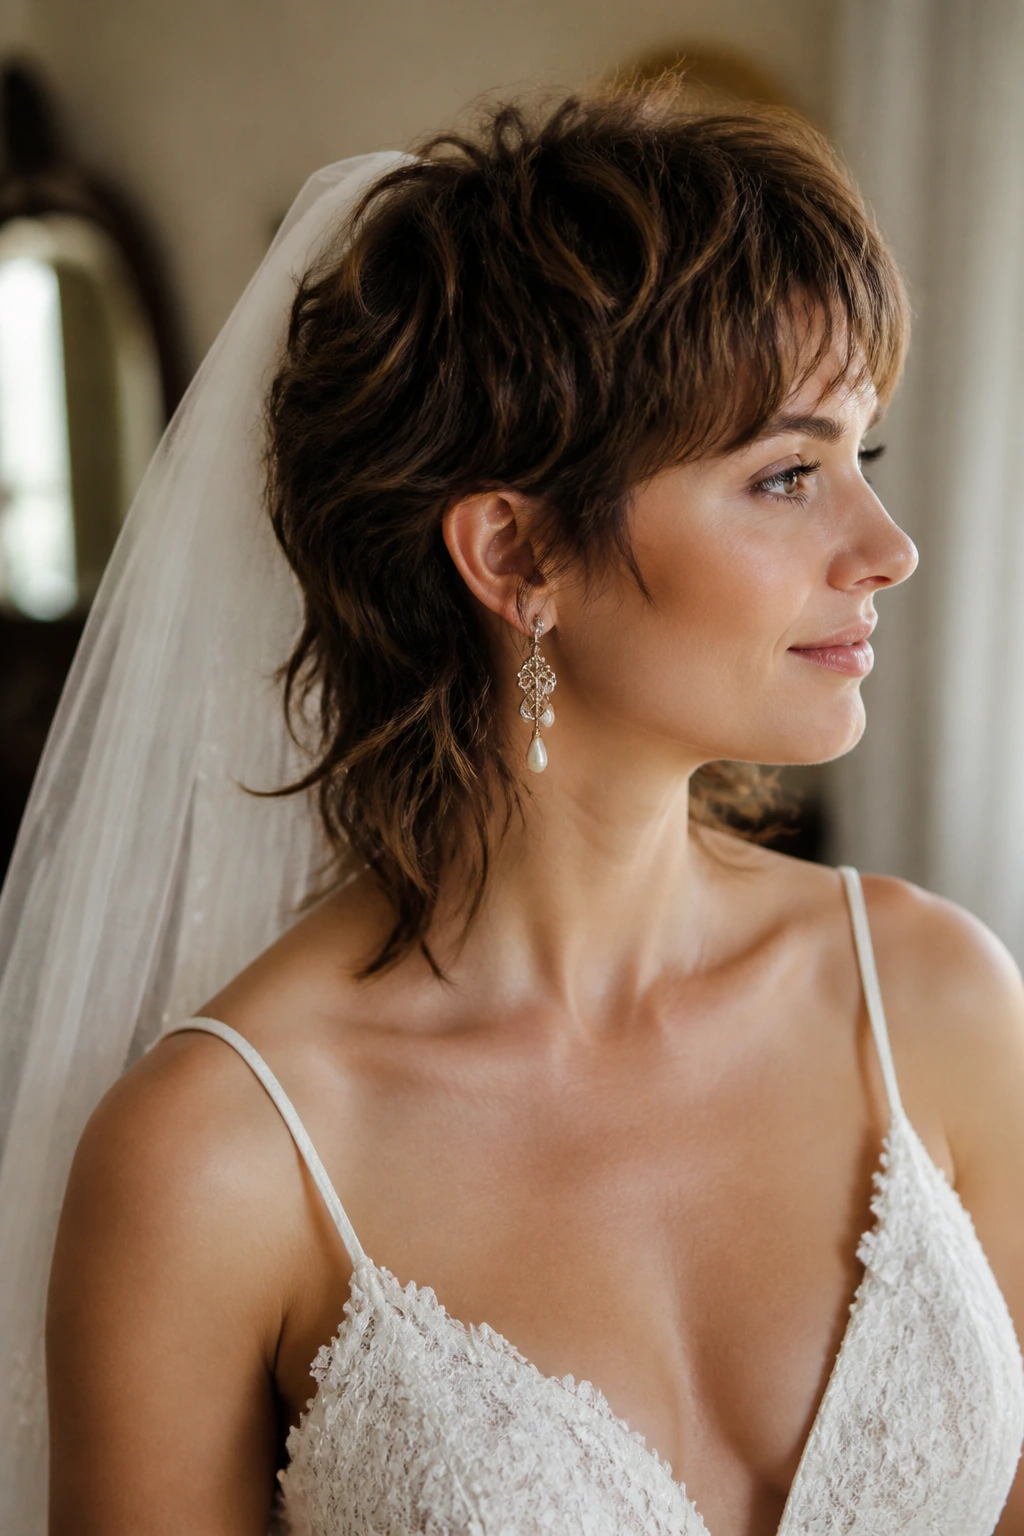
Veil Placement:
Put the veil comb where the crown has enough hair to grip, usually above the occipital bone. If the top is too short, ask for a hidden braid or a tiny anchor twist beneath the surface. That keeps the veil from sliding and saves you from the sad, droopy look that happens when the comb has nothing to hold.
Earrings:
Mullet cuts naturally open up the ears and jawline, so earrings get noticed fast. Long drops work well with softer versions; studs or small sculptural pieces suit the sleek, sharper cuts. If you’re wearing a statement earring, keep the front layers lighter so the hair doesn’t crowd the jewelry.
Necklines:
High necks love a cleaner nape and a narrower back shape. Sweetheart and strapless dresses can handle more volume around the cheeks and shoulders. Halters need the hair to stay off the neck, or the whole look starts to feel busy. Side-swept pieces can soften a square neckline, which is useful if the dress line feels strong.
Photo Angles:
Three-quarter shots are where these cuts shine, so ask your stylist to check the shape from both sides, not just the front. A bride spends a lot of time turning, leaning, and smiling over one shoulder. That side profile matters more than most people realize.
Extra Polish and Personal Touches
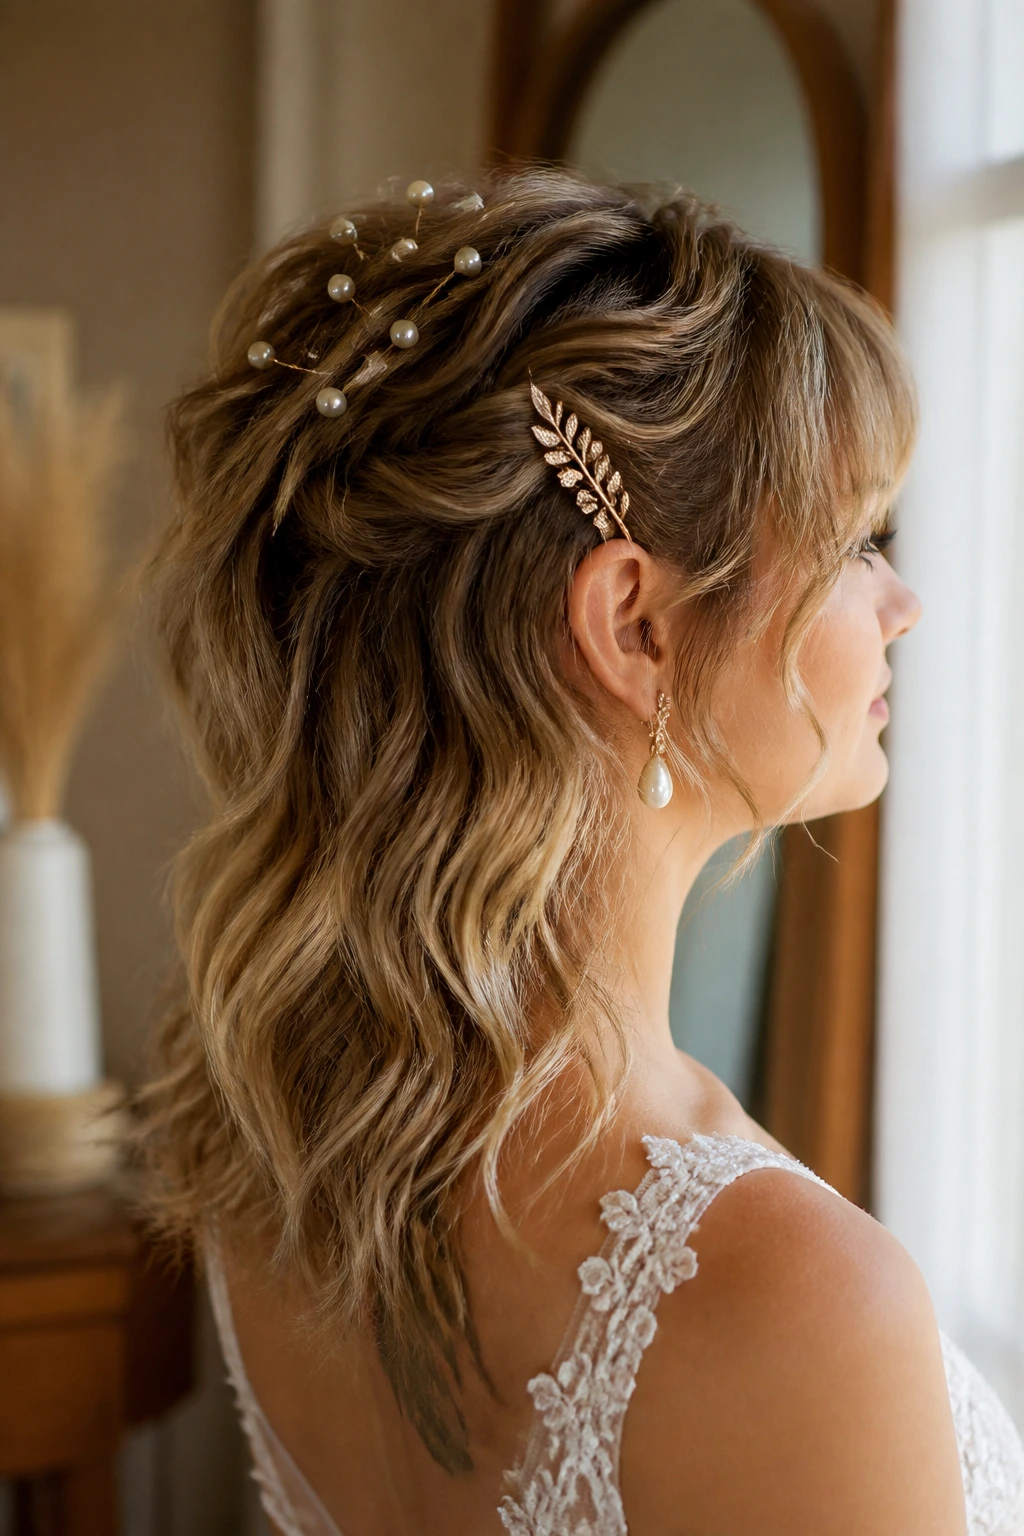
Softness Boost:
If the cut feels too sharp, brush the waves out with a boar bristle brush and mist a tiny bit of shine spray over the mid-lengths. That breaks up hard lines and gives the hair a softer finish around the face.
Hold Strategy:
Pin the crown first, then the veil, then the decorative pieces. If you reverse that order, the hairstyle usually turns into a wrestling match. A little extra spray at the roots is fine. Drenching the ends is not.
Accessory Lift:
Pearl pins, a slim comb, or a tiny vine clip can pull the eye upward and make the mullet feel ceremonial. Keep the accessory close to one side or tucked into the braid line so it supports the cut instead of competing with it.
Make-It-Yours:
For a romantic look, leave two thin pieces around the face and bend them away with a small iron. For a stronger, more fashion-led result, tuck one side behind the ear and keep the other side slightly fuller. Same cut. Different mood.
Trial Runs, Touch-Ups, and Next-Day Care
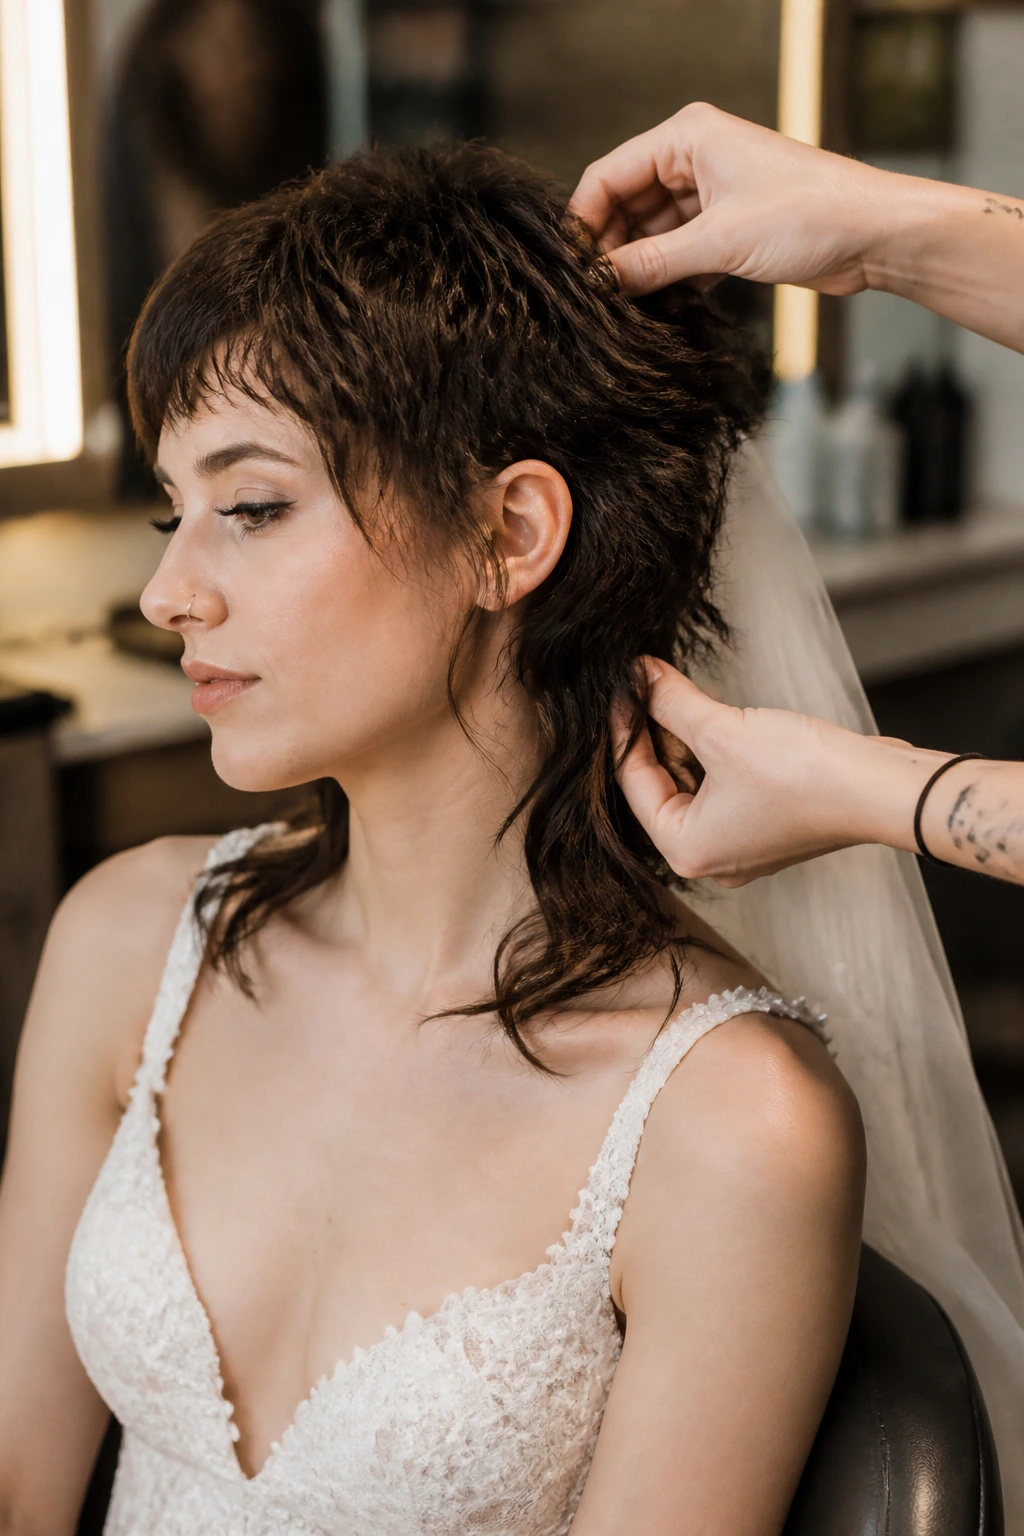
A wedding hairstyle should survive more than fifteen minutes of camera time. Plan on a full trial at least once, and wear the actual neckline, veil clip, or earrings if you can. The shape that looks right in a salon chair can behave differently once you’re standing, sweating a little, and moving all day.
On the day itself, give yourself time for two touch-up windows: one right after dressing, one before photos or the ceremony if there’s a gap. That’s usually enough. You do not need a full restyle every hour. You need a few pins, a comb, and a small bottle of spray.
At night, if the style is still partly intact, sleep with the hair loosely secured and cover it with a silk scarf or bonnet. The next morning, revive the shape with a little water mist and a touch of texturizing spray at the roots. If the cut is heavily waved, a quick pass with a wand on just the front pieces usually brings it back. If the style has gone flat, don’t add piles of product. Start with the crown and work down.
Mistakes That Flatten the Shape
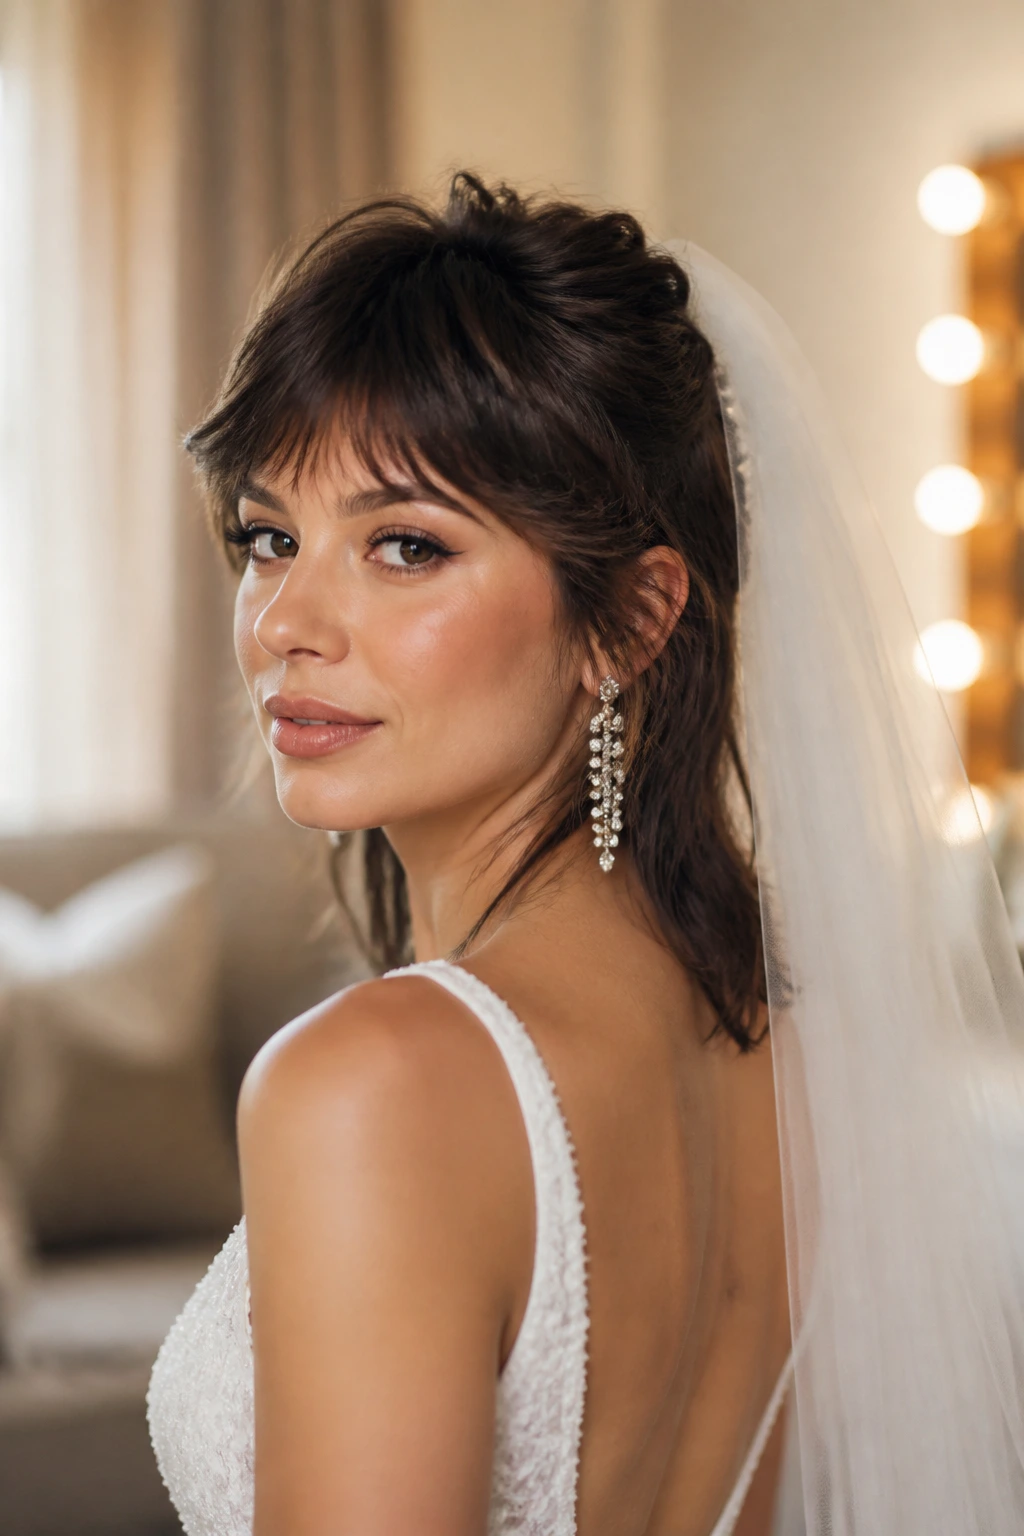
- Making the crown too blunt: If the top is cut into a hard shelf, the style can puff up in the wrong place. Ask for soft blending and internal layering so the crown lifts without looking boxy.
- Using too much cream on fine hair: The layers will separate for all the wrong reasons and the front will collapse by hour three. A light mousse and a dry spray usually work better.
- Forgetting the veil test: A comb that looks fine in the salon can slide on the day if the anchor point is too short. Try the veil with the actual hairstyle before the wedding, not after.
- Letting the back get too heavy: Long hair can drag the whole shape down. Internal removal of bulk helps the back swing instead of hanging like a curtain.
- Ignoring the dress neckline: Hair and dress should talk to each other. If the gown is high and ornate, the cut should stay cleaner; if the gown is simple, you can allow more texture.
- Skipping humidity prep: Smooth styles need heat protectant, flexible spray, and a little anti-frizz support. Otherwise the ends swell up and the silhouette gets muddy.
Questions Brides Ask Before They Say Yes to the Cut
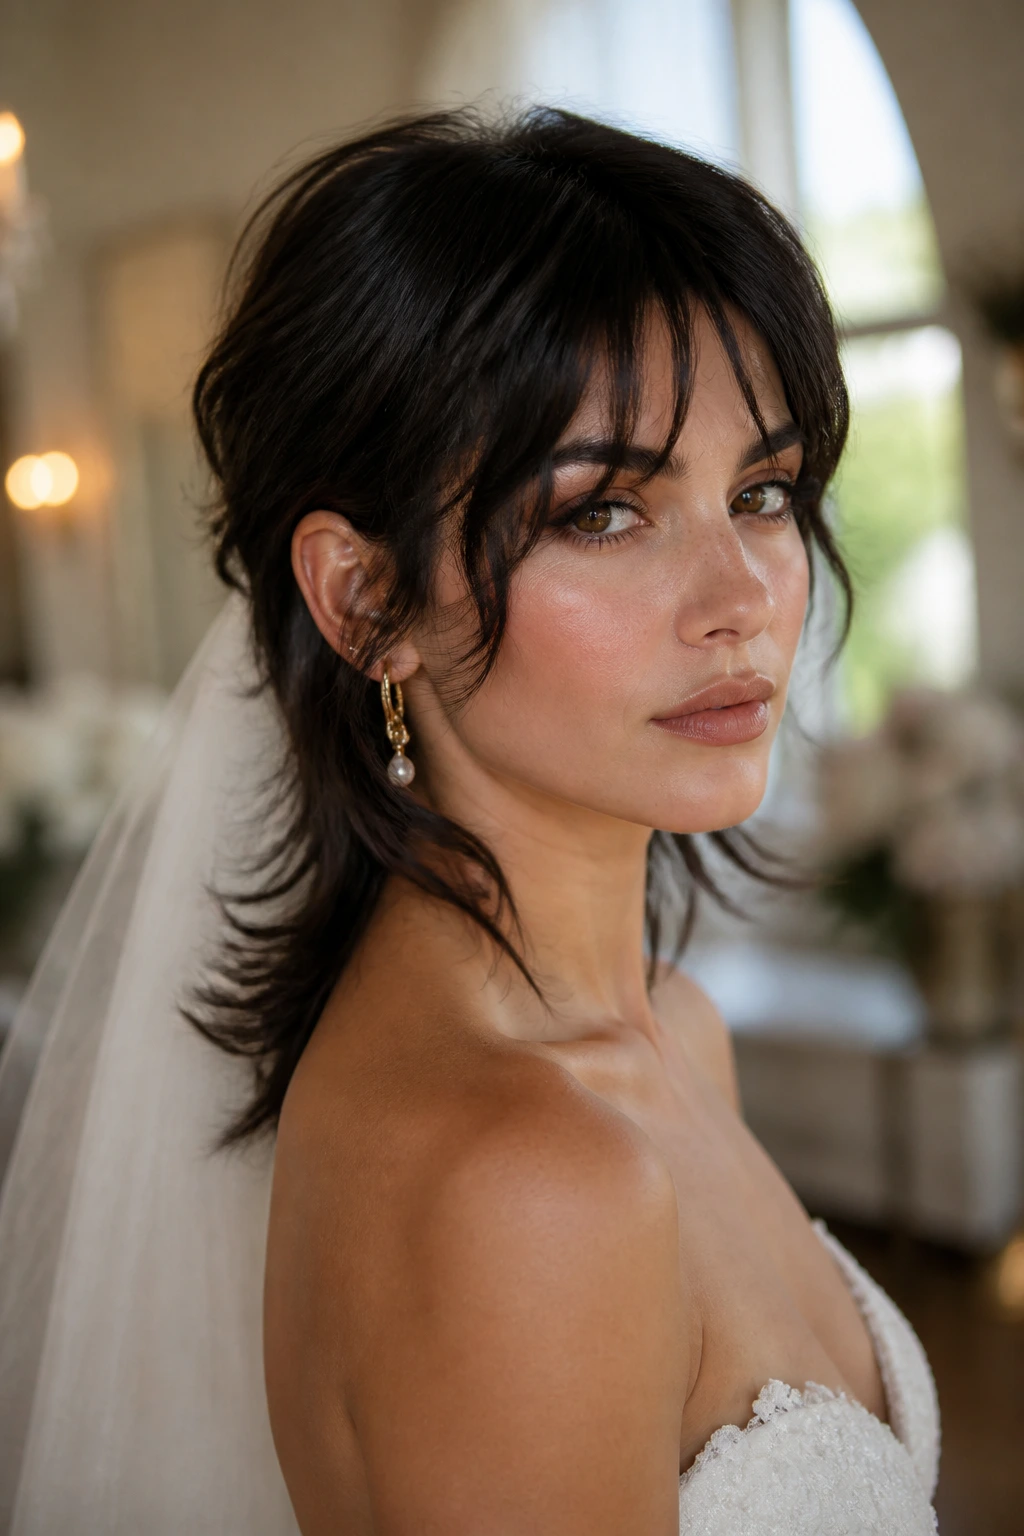
Can a bride really wear a mullet with a veil?
Yes, if the cut has enough crown length to anchor the comb or clip. Half-up styling, hidden braids, and a solid veil test make the difference between secure and sagging.
Does this work on straight hair, or does it need curls?
Straight hair works fine, but it usually needs a bend or texture so the layers don’t lie flat. A soft wave, a brushed-out bend, or a polished tuck gives the shape more life.
What if my hair is thin?
Thin hair can wear a bridal mullet beautifully, but the layers need to stay light. Too much removal of bulk makes the ends wispy in a bad way, so ask for lift at the crown and restraint at the perimeter.
How short can the front be and still feel bridal?
Shorter than people think, as long as the front pieces frame the face instead of stopping abruptly. Chin-length or cheekbone-skimming front sections usually keep enough softness for a wedding setting.
Will this cut look too edgy with a traditional dress?
Not if the styling is clean. Soft waves, pearl pins, a veil, or a brushed finish can pull the cut toward romantic territory fast. The haircut has attitude; the styling decides how loud it gets.
Can I grow it out after the wedding without regret?
Yes. That’s one of the nicer things about this shape. It tends to grow into a shaggy layered cut rather than a weird in-between shape, so the transition is manageable.
Should I cut my hair before or after the final dress fitting?
Before the final fitting, if possible, so the stylist can see the neckline and waistline together. The dress changes how the hair should sit, and that matters more than a lot of brides expect.
The Bridal Cut With Backbone
A wedding hairstyle does not need to disappear into the dress to count as bridal. Sometimes the better move is a cut with shape, movement, and a little nerve. That is what these mullet haircuts for brides do when they’re handled well: they frame the face, open the neckline, and leave enough motion in the hair that the style still feels alive by the end of the night.
The best version is the one that fits the dress, the veil, and the way you actually wear your hair. Soft, curly, sharp, vintage, or barely-there — the shape can move in all those directions without losing itself. That flexibility is the real appeal.
If you’re drawn to a bridal look that feels styled rather than sealed in place, the mullet has more room to play than most people give it credit for, and that makes it worth a serious look.
