



Bridesmaid hair gets trickier the moment the strands are fine. Big curls can go soft before the photographer finishes the group shot. A teased crown can go flat under the weight of one too many pins. And if the style depends on sheer mass, thin hair will tell on you fast.
The fix is not “more hair.” It’s better structure. Bridesmaid hairstyles for thin hair work when they use shape, texture, and smart anchoring points instead of pretending the hair has twice the density it actually has. That means low buns that are built from twists, half-up styles that keep the ends light, braids that create visual width, and accessories that add lift without dragging the whole thing down.
I like these styles because they behave in real life. They hold through getting dressed, hugging relatives, heat from a crowded room, and that awkward hour between ceremony and dinner when everyone starts touching their hair. Thin hair can look airy and expensive when it’s handled with a little discipline. It can also look wispy and tired in ten minutes if you choose the wrong shape.
Why These 17 Bridesmaid Looks Work Better on Thin Hair
-
They create shape where hair usually goes limp: Styles with a tucked nape, a wrapped base, or a braided frame keep the eye focused on structure instead of density.
-
They use the crown on purpose: A small amount of teasing at the roots, done cleanly, gives height without that puffy helmet look that thin hair gets when people panic and over-backcomb.
-
They stay light enough to move: Heavy updos can collapse fine hair. These looks keep the weight centered and the ends controlled, which is why they survive longer.
-
They play nicely with accessories: Pearls, pins, combs, and ribbons do more for thin hair than they do for thick hair, because they can act like anchors instead of decoration.
-
They leave room for a touch-up: If one front piece slips or a wave drops, these styles still read as intentional. That matters more than people admit.
-
They fit bridesmaid duty, not just photos: You need a style that won’t snag on zippers, won’t fight the dress neckline, and won’t become a project after the first toast.
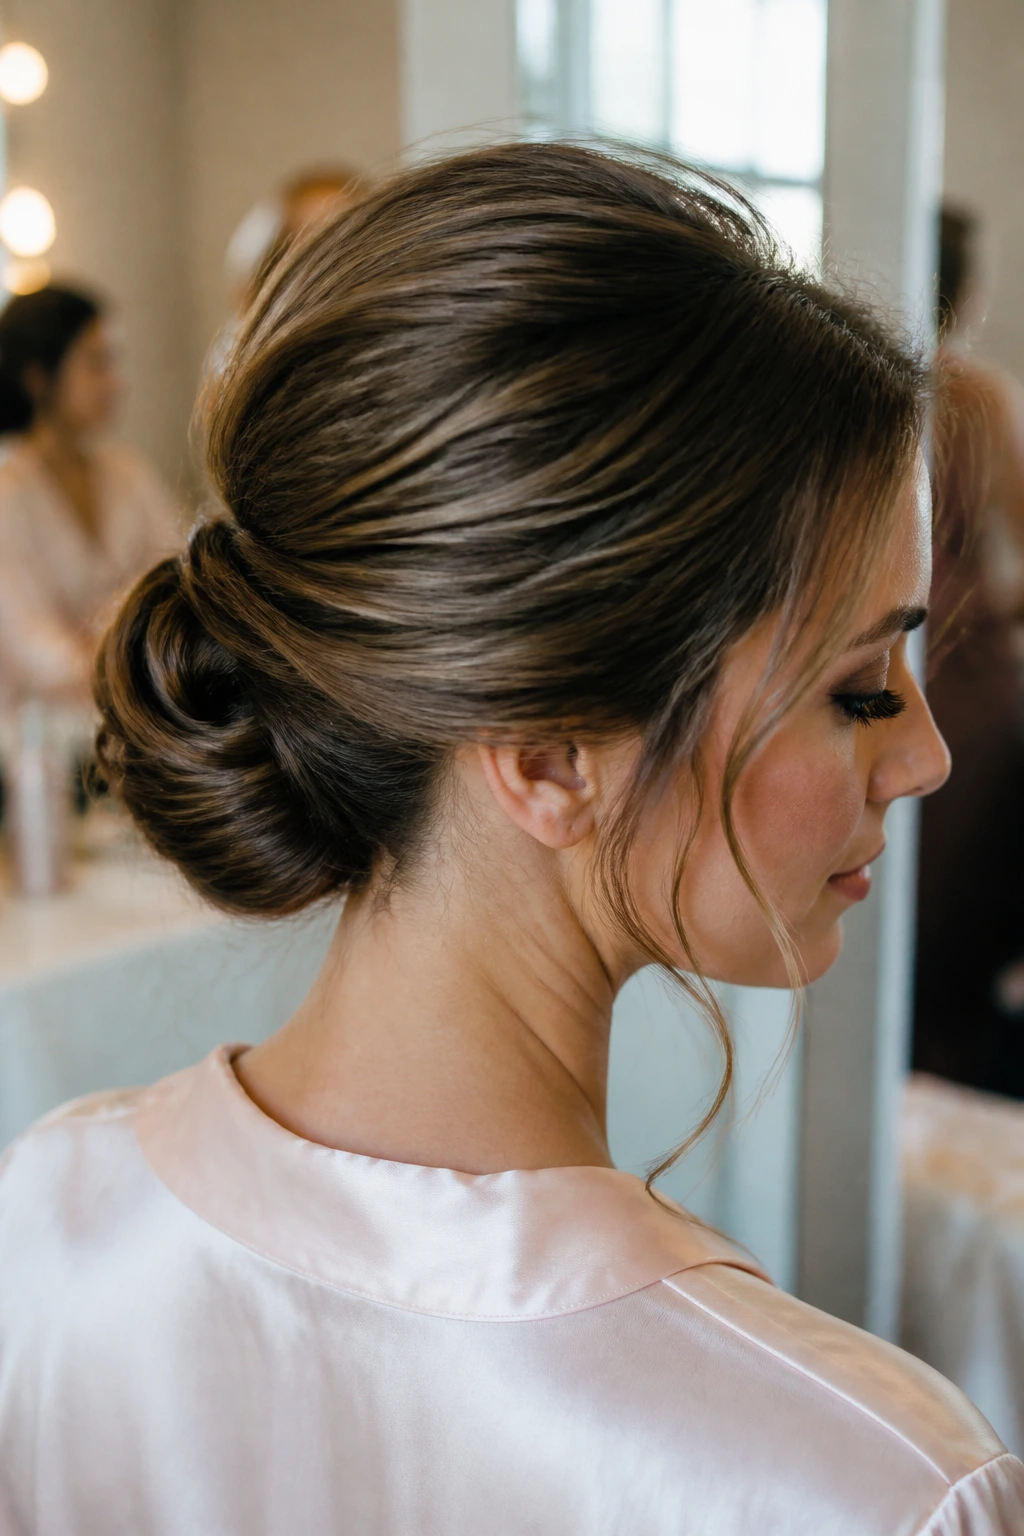
1. Low Twisted Chignon with a Soft Side Part
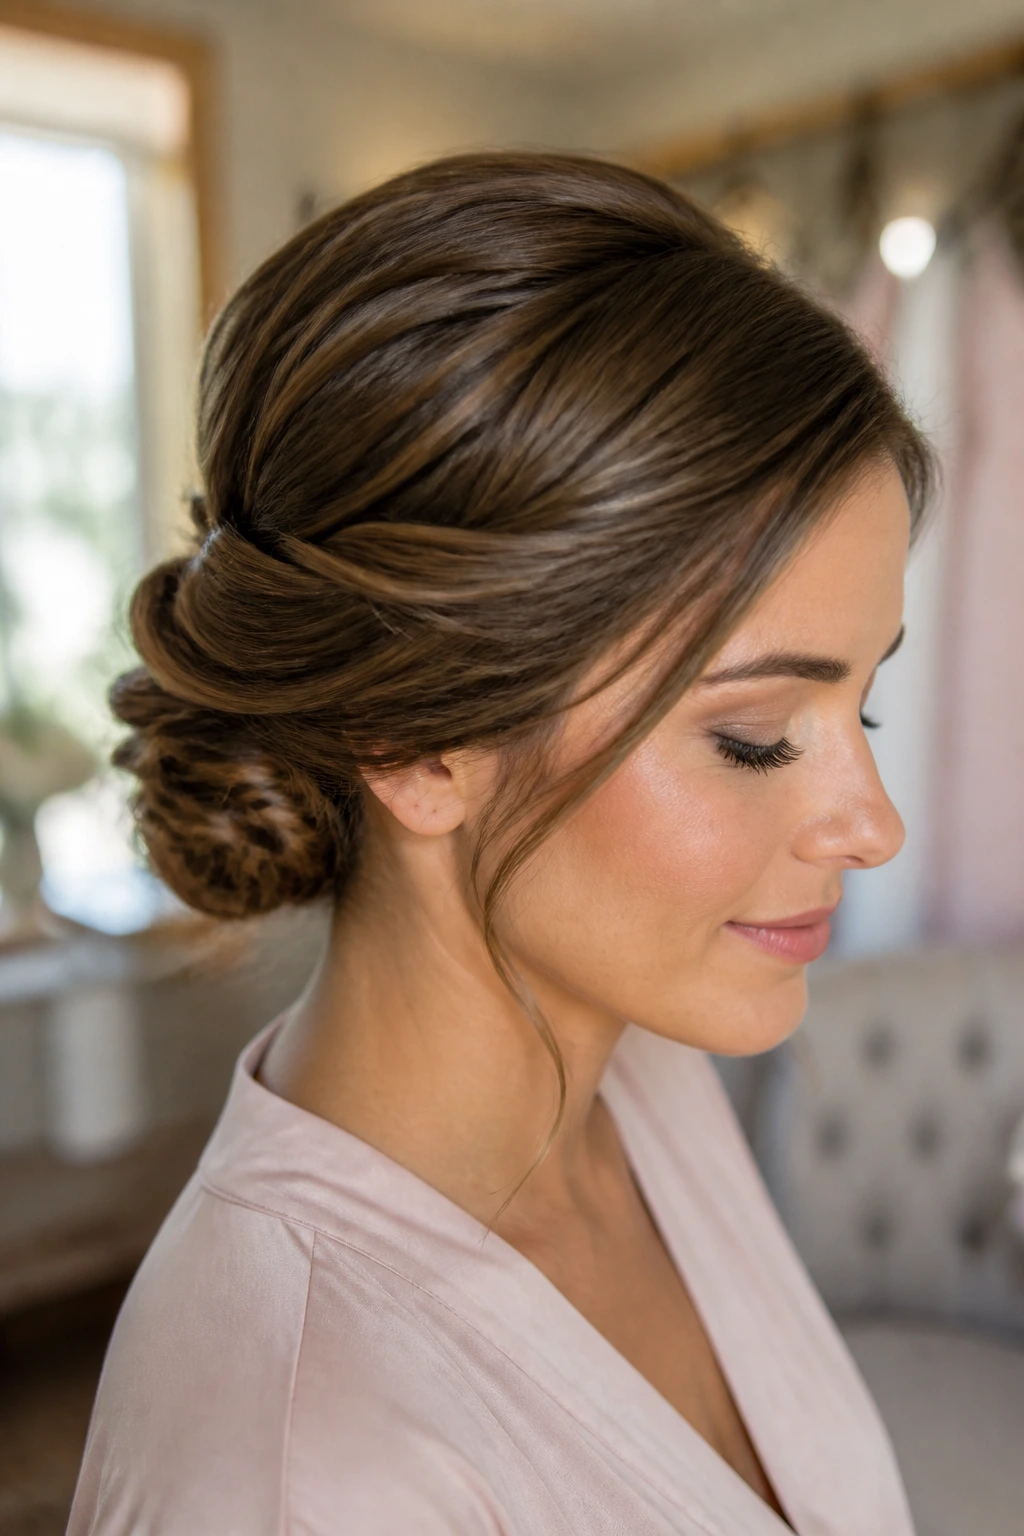
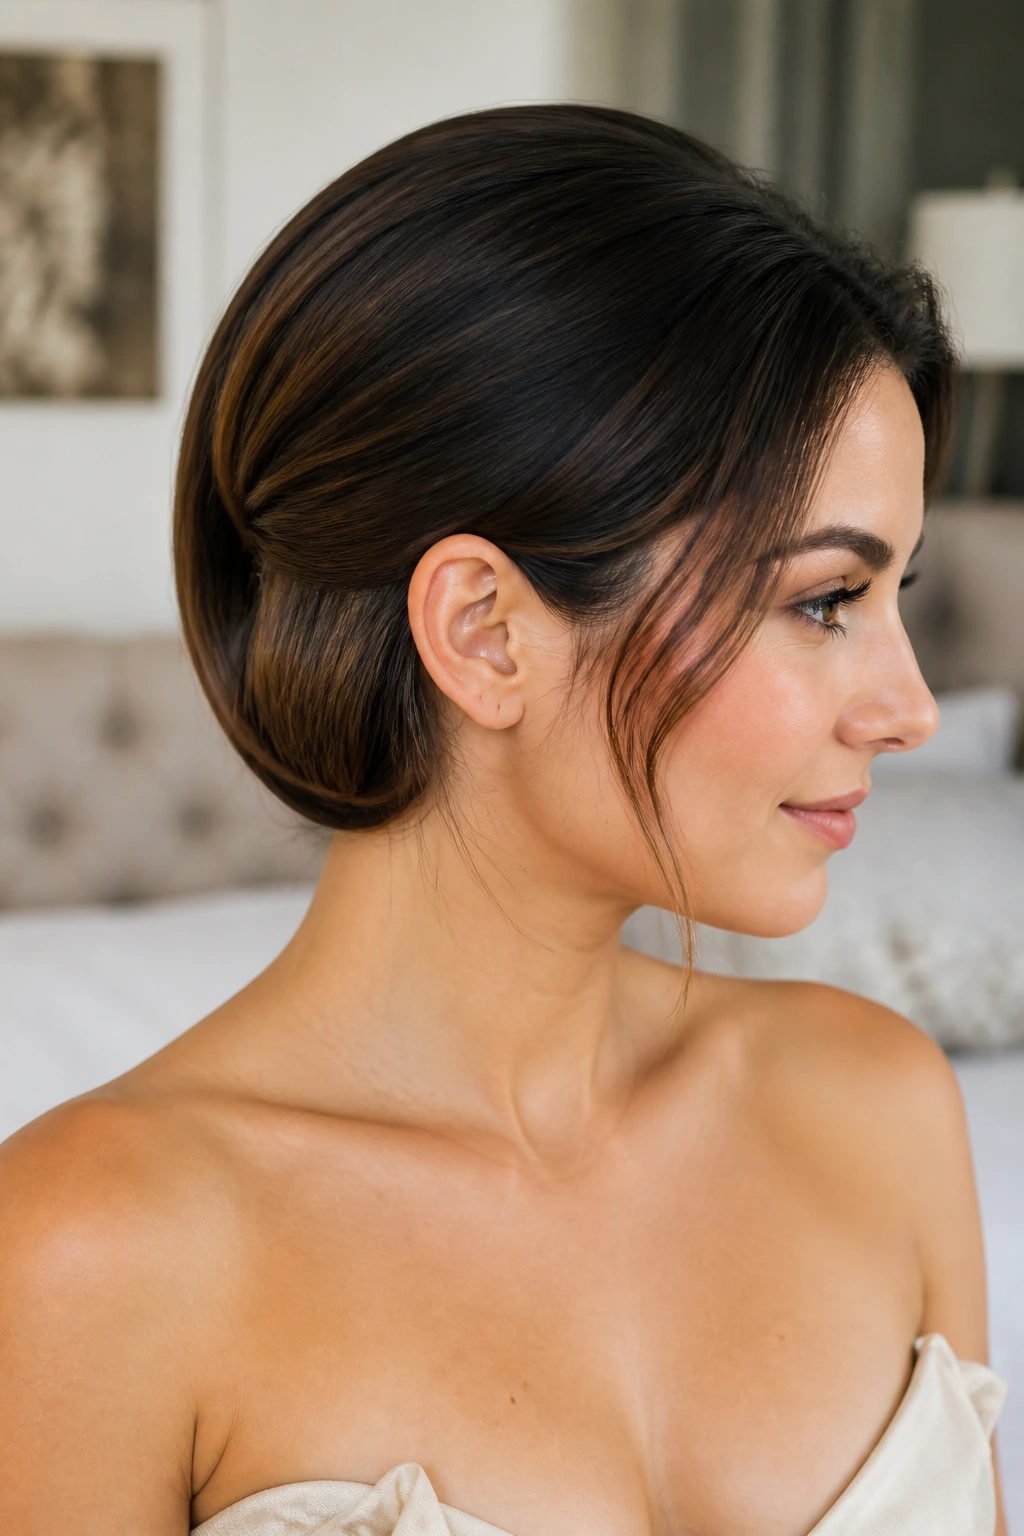
A low twisted chignon is the bridesmaid hairstyle I reach for when thin hair needs to look calm, polished, and a little fuller than it really is. The side part does half the work before the pins even go in; it gives the crown some direction and keeps the whole style from looking like it was pulled straight back and flattened to the skull.
Why It Works
The twists build width at the nape, which is where thin hair usually disappears if you simply gather it into a bun. By splitting the hair into two or three sections and twisting instead of rolling one thick rope, you create texture that reads as volume from the back and the side. A little root lift at the front helps, but the real win is that the chignon sits low and compact, so it doesn’t have to carry too much weight.
What You Need
- 1 can of flexible-hold hairspray
- 1 bottle of texturizing spray
- 8 to 12 bobby pins
- 2 to 4 U-pins
- 1 tail comb
- 1-inch curling iron or wand
- Light shine serum, 1 to 2 drops
Quick Styling Steps
- Mist dry hair with texturizing spray from mid-lengths to ends, then rough-dry with your fingers if the hair feels too clean and slippery.
- Create a deep or soft side part and curl the ends away from the face in 1-inch sections, letting each section cool before touching it.
- Divide the hair at the back into two sections, twist them toward each other, and pin them flat at the nape so the twists sit slightly offset.
- Fold the remaining ends under the twist line and pin them in a loose chignon. Do not compress the bun too tightly; a little air inside the shape makes thin hair look thicker.
- Pull a few face-framing pieces loose, then mist the surface lightly with hairspray.
Pro Tips
- Pin into the scalp, not just the bun. That hidden anchor matters.
- If the hair is very silky, backcomb a 2-inch strip at the crown before you part it.
- A tiny pearl comb above one ear adds polish without stealing the show.
- Keep the bun low enough to sit under a veil if the bride wants one.
Variations
- Braided Chignon: Braid one side before twisting it back. You get more texture at the nape.
- Soft Knot Version: Instead of a full bun, loop the ends into a tucked knot for a lighter finish.
- Ribbon-Threaded Finish: Wrap a narrow satin ribbon around the base for a softer, dressier look.
Common Mistakes to Avoid
- Making the bun too large: Thin hair can’t hide a huge donut shape. It just looks padded.
- Skipping texture spray: Clean hair slips. A little grit gives the pins something to grab.
- Leaving the part undecided: A side part gives this style its shape. A dead-center part can make it fall flat fast.
2. Half-Up Rope Twist with Loose Waves
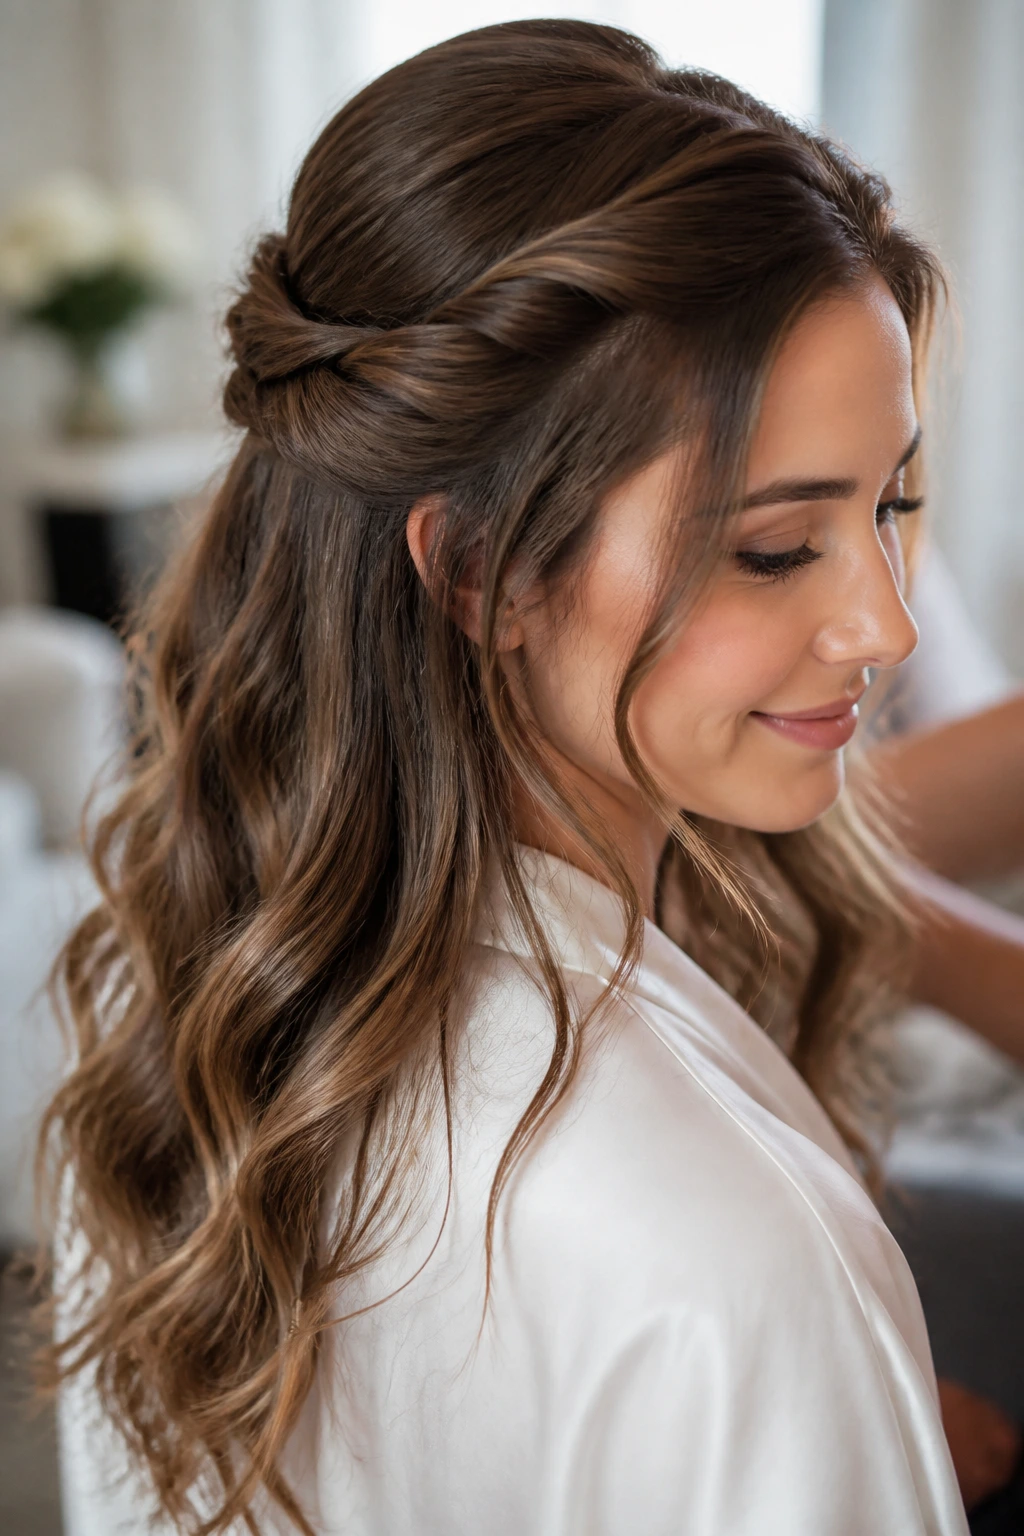
This one has movement without chaos. The top half gets enough structure to stay put, and the bottom half stays soft so the style doesn’t feel heavy or overworked.
Why It Works
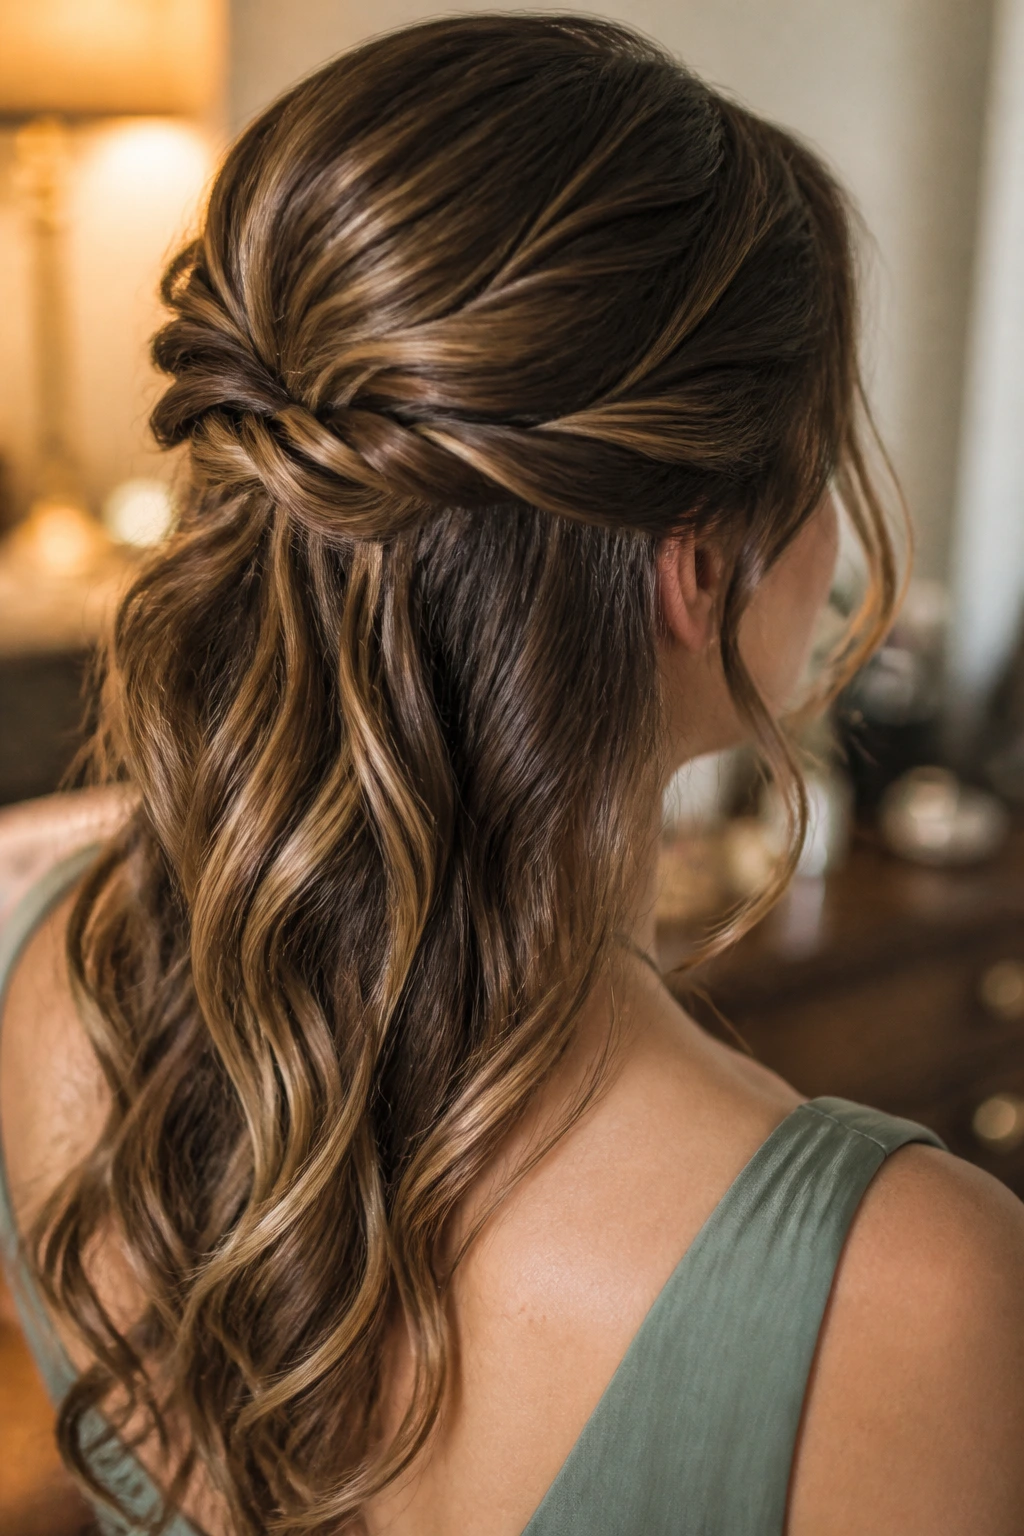
A rope twist is stronger-looking than a simple twist because the crossed strands create a denser visual line. On thin hair, that matters. You’re not trying to fake a lot of hair; you’re using a shape that looks deliberate even when the actual amount of hair is modest. Loose waves below the twist keep the ends from hanging in sad straight strings, which is where fine hair often loses the plot.
What You Need
- 1-inch curling iron
- 2 clear elastics
- 6 to 8 bobby pins
- Texturizing powder or dry shampoo
- Light-hold mousse
- Flexible-hold hairspray
- Tail comb
Quick Styling Steps
- Work a small amount of mousse through damp hair before blow-drying for a little grip at the root.
- Curl the hair in alternating directions, then let it cool completely before combing it out with your fingers.
- Take a section from each temple, twist each section away from the face, then cross them at the back and secure with a clear elastic.
- Twist the tails once more for a second layer of rope texture, then pin them flat against the crown so the join stays hidden.
- Spray lightly and pinch the wave pattern apart with your fingertips. If you brush the curls hard, the style goes stringy in minutes.
How to Wear It This works with off-the-shoulder dresses, square necklines, and anything that needs a little softness around the collarbone. It reads relaxed, but not lazy. That’s the sweet spot.
Variations
- Mini Crown Rope: Bring the twists higher and pin them like a half halo.
- Pearl-Pin Finish: Replace the elastic with two pearl pins crossed at the back.
- Side-Swept Rope: Pull both twists to one side for a softer asymmetrical line.
Common Mistakes to Avoid
- Curling too large a section: Big waves fall fast on fine hair. Smaller sections hold better.
- Using too much serum: Shine product can make the twists slip.
- Leaving the twist loose at the join: Secure the crossing point first, then worry about the tails.
3. Braided Crown into a Tucked Bun
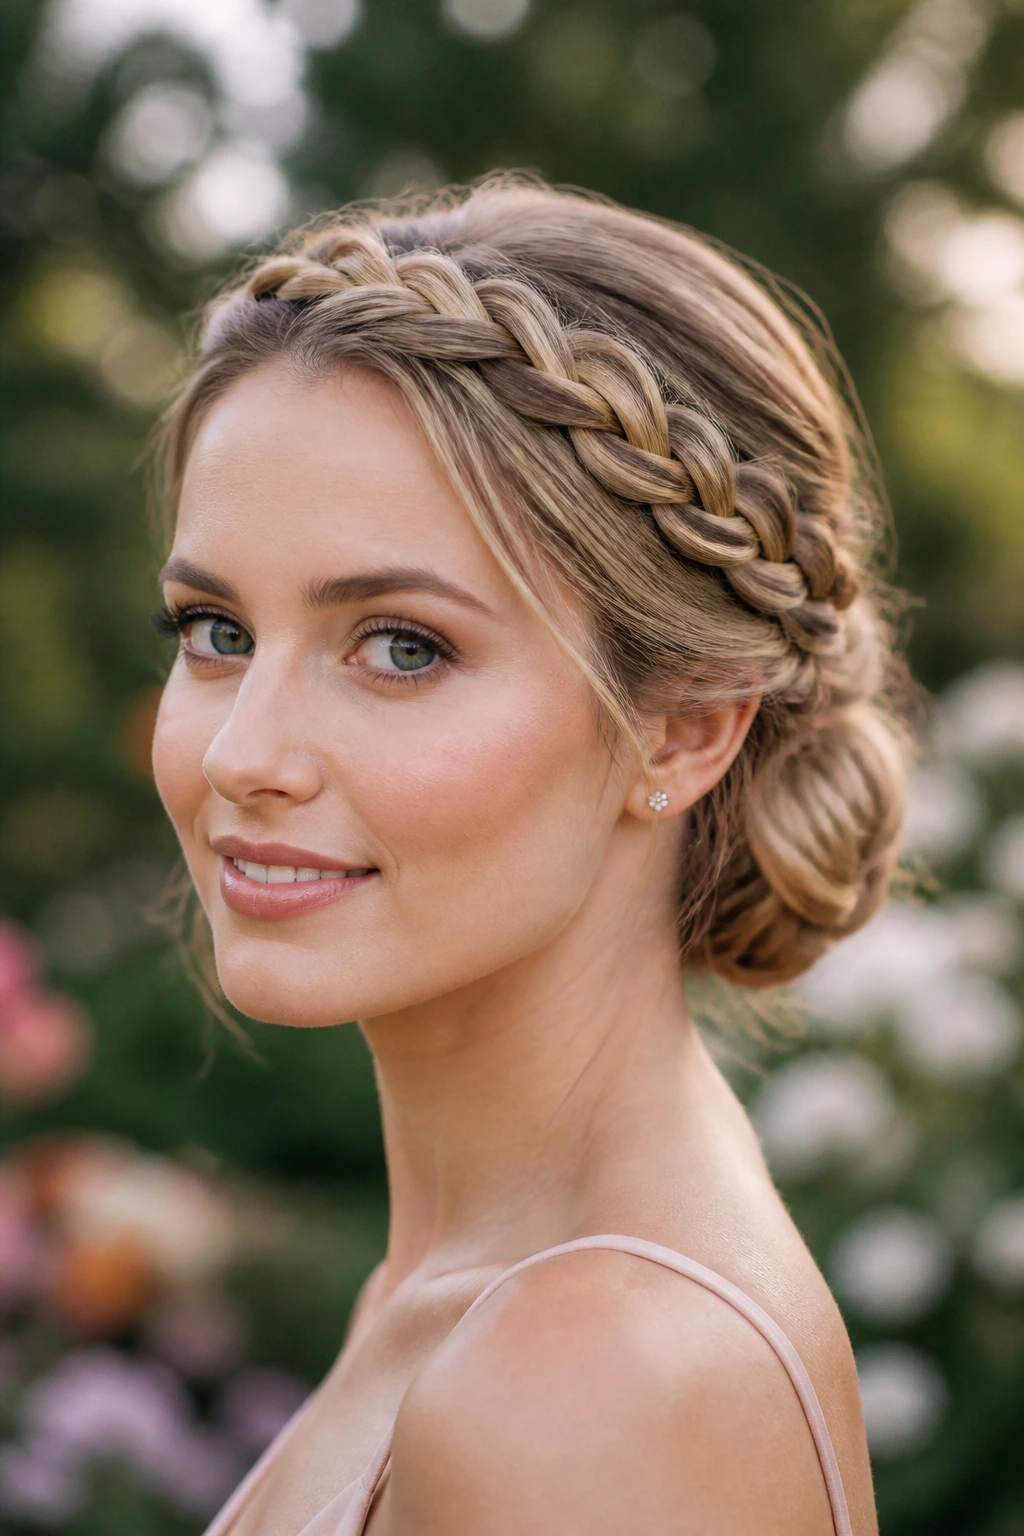
If thin hair needs anything, it’s a visual frame. A braided crown gives you exactly that, and the tucked bun at the back keeps the weight low where it belongs.
Why It Works
Braids do a strange little magic trick on fine hair. They make a modest amount of hair look denser because each strand crosses over the next, building a rope-like line instead of a soft blur. The crown braid also pulls the eye upward, which helps the whole head look more balanced in photos. Once the braid lands at the back, tucking it into a compact bun stops the ends from fraying out and giving away the secret.
What You Need
- Fine-tooth tail comb
- 2 mini elastics
- 10 to 14 bobby pins
- Dry shampoo
- Texture spray
- Small paddle brush
- Optional floral pins or pearl hairpins
Quick Styling Steps
- Prep dry hair with dry shampoo at the roots and texture spray through the mids.
- Part the hair from ear to ear, then braid each front section along the hairline, keeping the braid low and snug.
- Bring the braids to the back and secure them together with a small elastic.
- Twist the remaining hair into a low bun and pin the braid ends inside the bun so they disappear. The braid ends should be buried, not layered on top, or they’ll poke out by dinner.
- Gently tug at the braid edges to widen them a touch, then add decorative pins if you want a softer finish.
Pro Tips
- Braiding dirty-ish hair works better than braiding freshly washed hair. It grips instead of sliding.
- If the crown looks too tight, loosen only the outer loops. Don’t unravel the whole thing.
- A tiny bit of padding under the bun can give the back more presence without looking fake.
Variations
- Single Crown Sweep: Braid only one side and wrap it across the head.
- Halo-to-Knot Hybrid: Let the braid feed into a knot instead of a bun.
- Soft Garden Version: Thread in baby’s breath or tiny silk flowers.
Common Mistakes to Avoid
- Braid tension that’s too loose: Thin hair will show gaps.
- Using heavy accessories: Big clips can drag the crown down.
- Skipping root texture: The style needs friction where the braid begins.
4. Sleek Low Ponytail with Wrapped Base
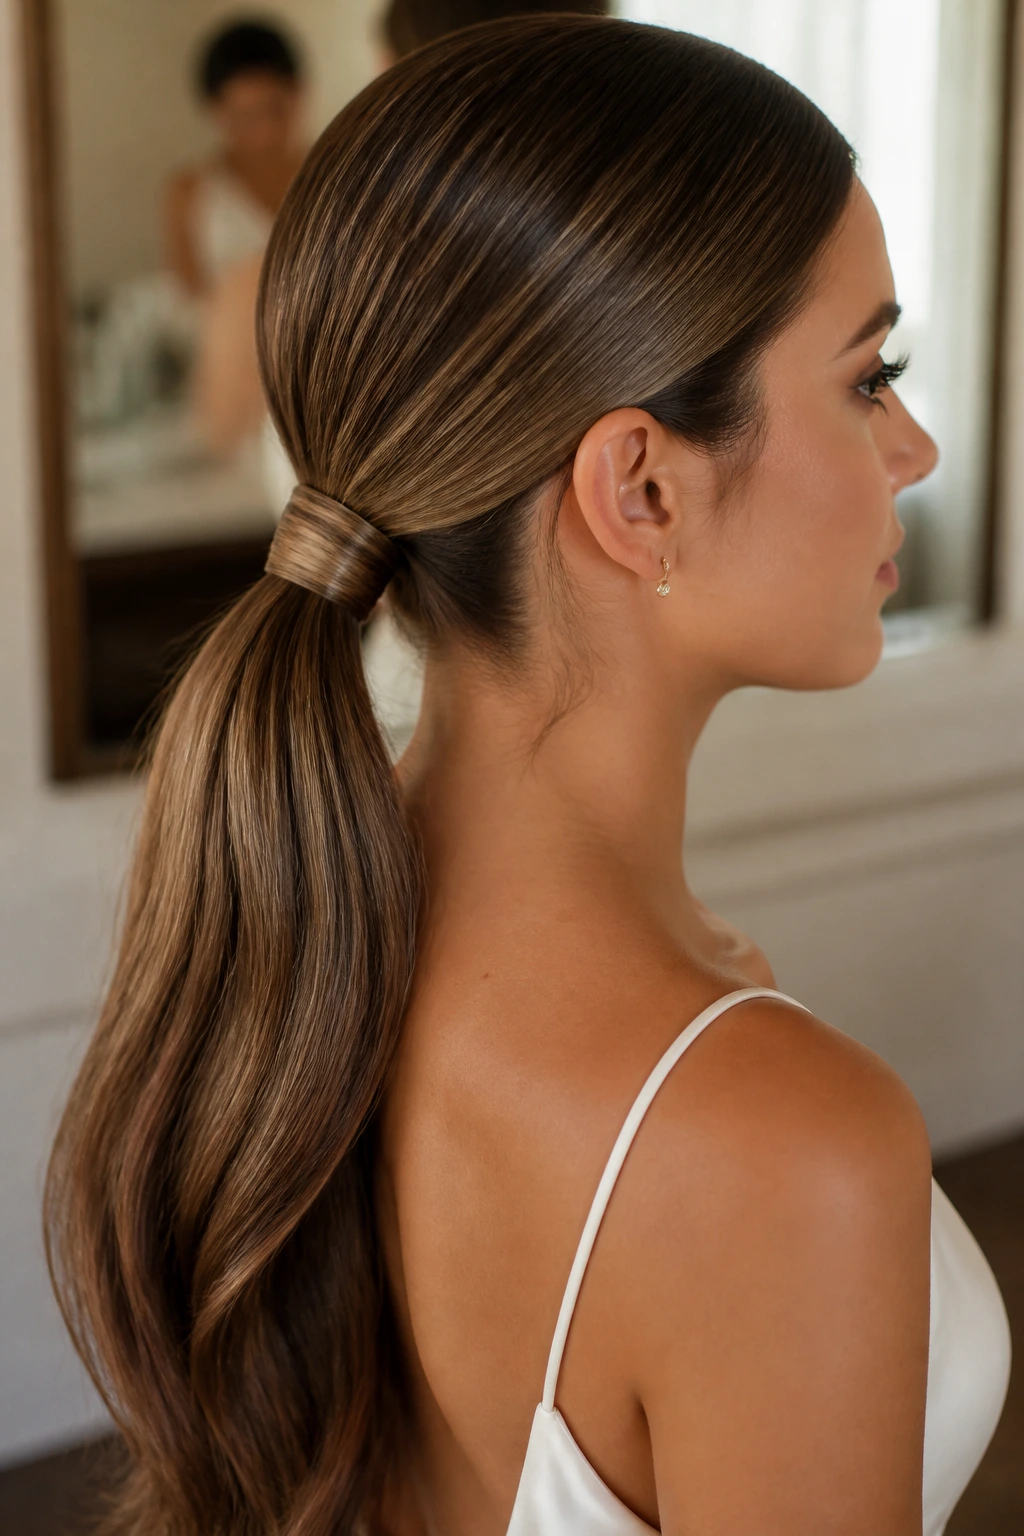
A sleek ponytail sounds almost too simple for bridesmaid duty, which is exactly why I like it. On thin hair, simplicity can be the smartest move, because a clean line often looks fuller than a style that’s been fussed with to death.
Why It Works
The wrapped base hides the elastic and makes the ponytail feel finished, not casual. A slight bend in the lengths keeps the tail from reading as flat or stringy. Thin hair benefits here because the ponytail doesn’t have to pretend to be huge; it only has to look intentional and shiny. Add a little root lift at the crown and the whole style gets a cleaner silhouette.
What You Need
- Smoothing cream, pea-sized amount
- Tail comb
- Elastic that matches the hair color
- 4 to 6 bobby pins
- Flat iron or round brush
- Light hairspray
- One narrow strand of hair for wrapping
Quick Styling Steps
- Smooth a small amount of cream over the surface of dry hair, keeping it away from the roots.
- Use a tail comb to part the hair cleanly, then brush it back to the nape at the desired height.
- Secure with an elastic and tighten once. Do not yank the ponytail into place with a second hard pull; that flattens the crown and causes flyaways.
- Take a thin strand from under the ponytail, wrap it around the elastic, and pin the end underneath.
- Add a soft bend to the tail with a flat iron or large barrel iron, then mist with flexible hairspray.
How to Wear It This one looks sharp with high necklines, structured dresses, and long earrings. It also gives the neck a clean line, which is useful when the bridesmaid dress has a lot going on at the shoulders.
Variations
- Center-Part Version: Go straight down the middle for a modern feel.
- Low Bubble Tail: Add two or three clear elastics down the length for a fuller shape.
- Ribbon Wrap: Cover the elastic with a satin ribbon for a softer finish.
Common Mistakes to Avoid
- Using an elastic that’s too thick: It creates a lump you can’t hide.
- Loading on shine cream: The ponytail turns greasy instead of sleek.
- Forgetting to bend the tail: Poker-straight lengths can look sparse on fine hair.
5. Faux Bob with Hidden Pins
A faux bob is a clever choice when the hair is medium length or longer but not especially full. You tuck the ends under, pin them out of sight, and suddenly the whole shape reads like a polished bob with a little old-Hollywood bite.
Why It Works
Thin hair actually cooperates with this style better than thick hair does, because there’s less bulk to hide under the roll. The illusion comes from clean folding, not volume. You can expose the neckline, show off earrings, and keep the style from falling forward into the face. It’s especially useful when the dress has a detailed back and you don’t want a heavy curtain of hair blocking it.
What You Need
- 1-inch curling iron
- 10 to 15 bobby pins
- Fine-tooth comb
- Texture spray
- Light-hold hairspray
- Optional decorative barrette
Quick Styling Steps
- Curl the full head in medium sections, then let the curls cool completely.
- Brush the surface lightly so the curls loosen into soft waves.
- Pull the hair into a low loose ponytail without securing it, then tuck the ends upward underneath the base to create the bob shape.
- Pin the tucked ends in place from the inside out. The pins should disappear into the fold; if you can see them, the fold is too shallow.
- Smooth the top layer over the tuck and clip one side with a barrette if you want a stronger vintage line.
Pro Tips
- This style works best on hair that’s at least collarbone length.
- If the hair is layered, pin the shortest pieces first so they don’t escape.
- A side part gives the faux bob a more believable shape than a center part.
Variations
- Wave-Set Bob: Make the front pieces more sculpted and glossy.
- Loose Parisian Bob: Leave a few ends peeking out for a softer finish.
- Pinned-Under Side Sweep: Push everything to one side before tucking.
Common Mistakes to Avoid
- Trying to hide too much hair at once: Make the tuck in stages.
- Pinning into slippery curls: Let them cool, or the style slides.
- Using too many decorative clips: One strong piece is enough.
6. Textured French Twist for Fine Hair
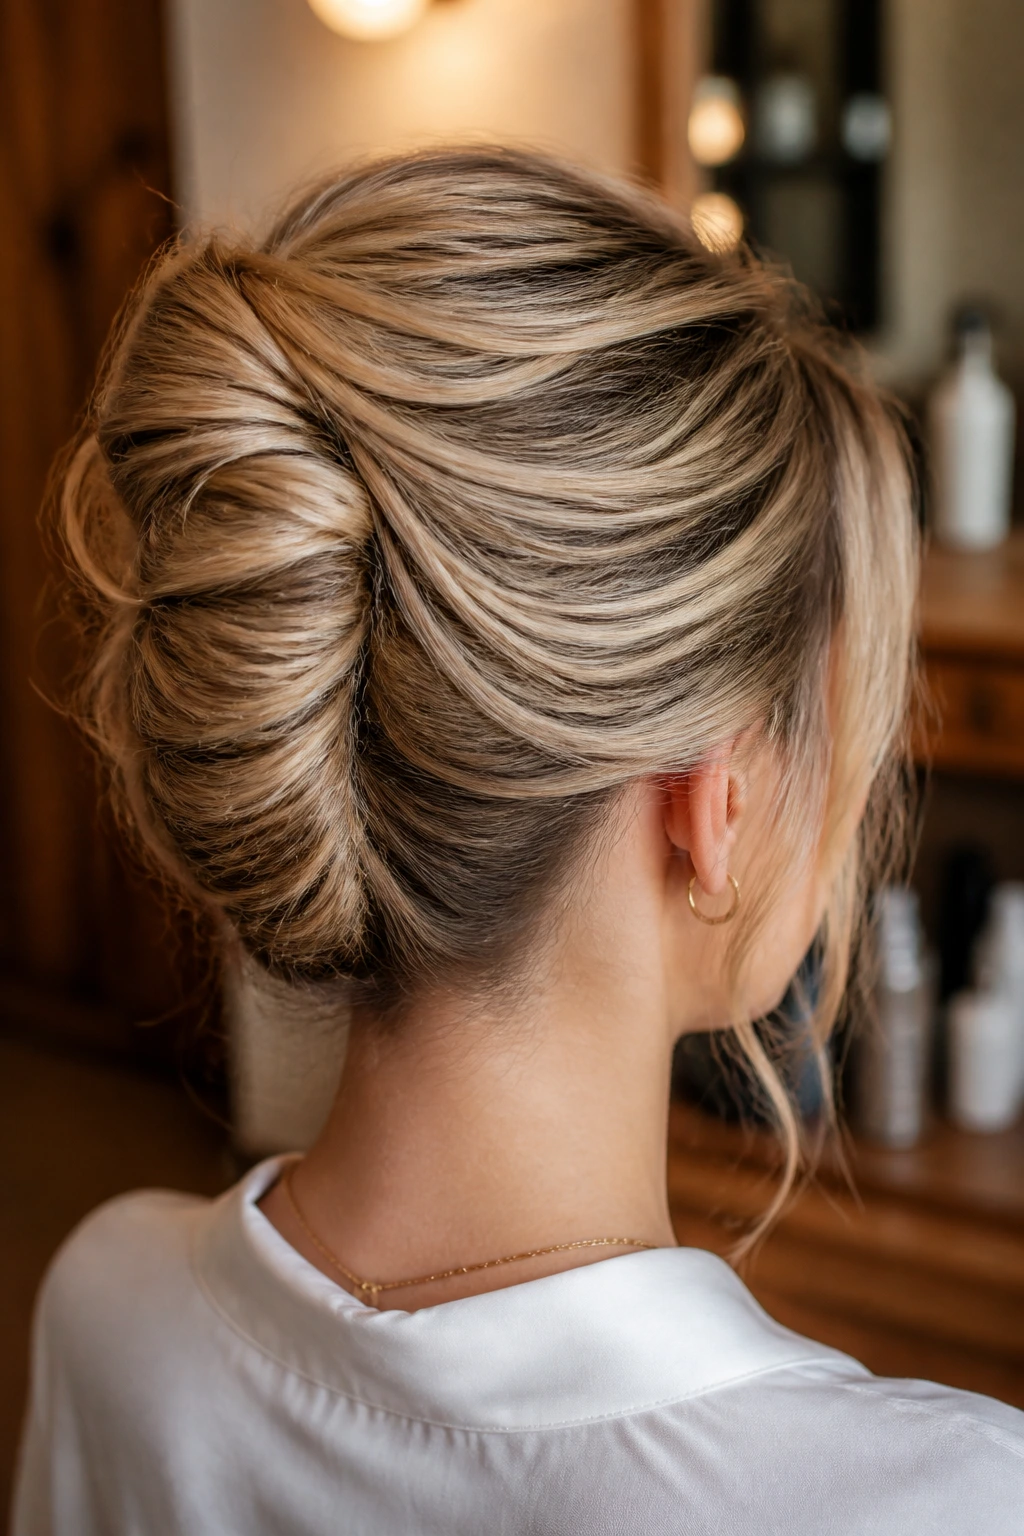
A French twist gets a bad reputation for being stiff, but when it’s done with thin hair, a little texture is exactly what keeps it from looking shellacked. I prefer a looser version with some lift at the crown and a softer seam down the back.
Why It Works
The vertical line of the twist creates height. That’s the whole point. Thin hair often needs a shape that rises instead of spreading outward, and the French twist does that while keeping the nape clean. Texture spray and a bit of teasing give the hair enough bite to hold the fold, and the shape itself hides the fact that the hair isn’t especially thick.
What You Need
- Texturizing spray
- Teasing brush
- 8 to 12 long bobby pins
- 4 to 6 U-pins
- Tail comb
- Strong-hold hairspray
- Optional comb or pin for the seam
Quick Styling Steps
- Spray the roots and mids with texture spray, then lightly backcomb the crown for lift.
- Sweep all the hair to one side at the back and twist upward into a vertical roll.
- Hold the roll flat against the head and pin from the seam inward, working top to bottom.
- Tuck the tail of the hair into the roll and secure it with U-pins. If the twist feels too hard, stop pinning and loosen the outer shell a little; the style should move when you breathe, not crack like cement.
- Finish with hairspray and smooth the side near the face with the palm of your hand, not a brush.
How to Wear It This style loves strapless and bateau necklines. It also plays well with drop earrings, since the neck stays clear and the twist gives the profile some height.
Variations
- Looser Cocktail Twist: Leave the crown softer and less polished.
- Side-Swept Twist: Shift the roll slightly off-center for a modern line.
- Clip-Accented Twist: Add one statement pin near the upper seam.
Common Mistakes to Avoid
- Over-teasing the crown: You want lift, not a tangled nest.
- Pushing all the pins through the same line: Stagger them so the twist holds from multiple points.
- Skipping texture spray: Fine hair needs grip. No grip, no twist.
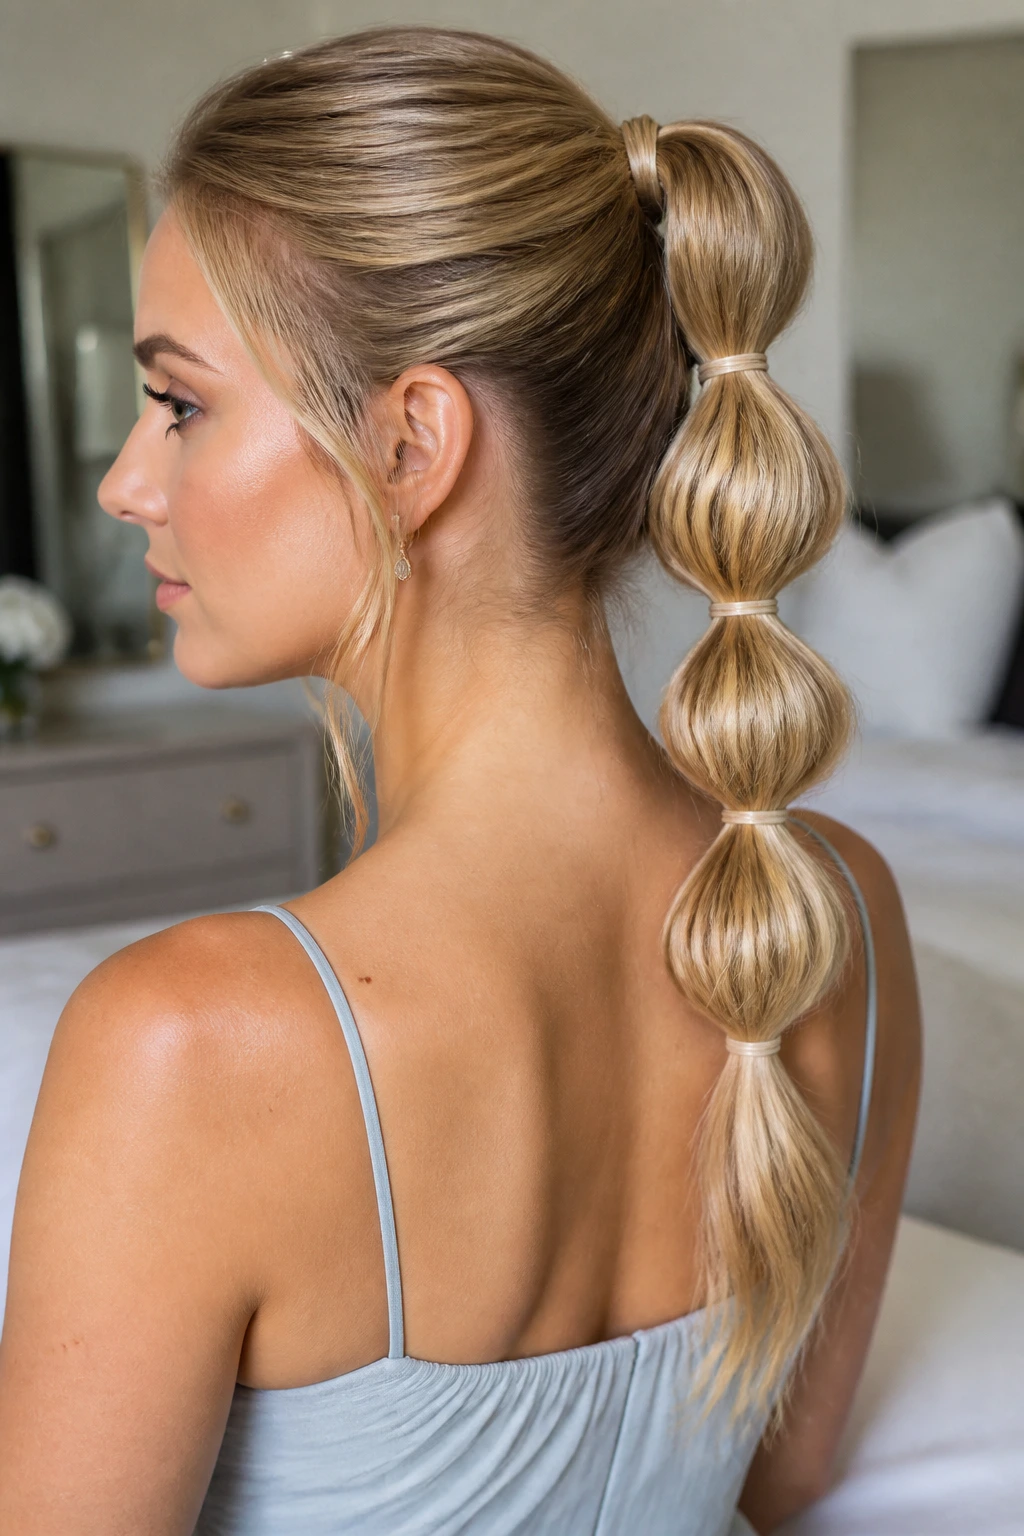
7. Bubble Ponytail with Tiny Elastics
A bubble ponytail is one of the rare styles that makes thin hair look more playful and more substantial at the same time. It creates shape in repeated sections, so the eye sees a fuller line instead of one thin tail.
Why It Works
Each “bubble” acts like a little visual pause. That break in the hair creates the impression of width, especially if the elastics are spaced evenly and the sections are gently pulled outward. Thin hair benefits from repetition because the style doesn’t depend on one giant mass at the base. It depends on the pattern.
What You Need
- 4 to 8 clear elastics
- Small brush
- Texture spray
- 1-inch curling iron, optional
- Light hairspray
- Tiny ribbon or pearl pins, optional
Quick Styling Steps
- Smooth the hair back into a low or mid ponytail and secure it tightly.
- Place another elastic 2 to 3 inches down the length, then gently pull the section between the elastics outward to form a bubble.
- Repeat every 2 to 3 inches down the tail, keeping the spacing even.
- Curl the tail first if you want a softer finish. Straight ends can work, but only if they’re polished; otherwise the bubbles start to look unfinished.
- Tug the bubbles lightly from the sides until each one reads full, then mist with flexible spray.
Pro Tips
- Start with a little texture spray near the roots so the base doesn’t slip.
- Use elastics that match the hair or vanish into the color.
- If the hair is very fine, make smaller bubbles. Big ones collapse fast.
Variations
- Ribbon Bubble Pony: Thread ribbon through the base elastics.
- Half-Up Bubble Tail: Start the bubbles at the crown instead of the nape.
- Braided Bubble Mix: Add one tiny braid before the first elastic for extra detail.
Common Mistakes to Avoid
- Pulling the bubbles too hard: The shape can pancake.
- Spacing them unevenly: The eye notices, and not in a good way.
- Skipping the base anchor: Without it, the whole ponytail shifts.
8. Side-Swept Hollywood Waves with a Deep Part
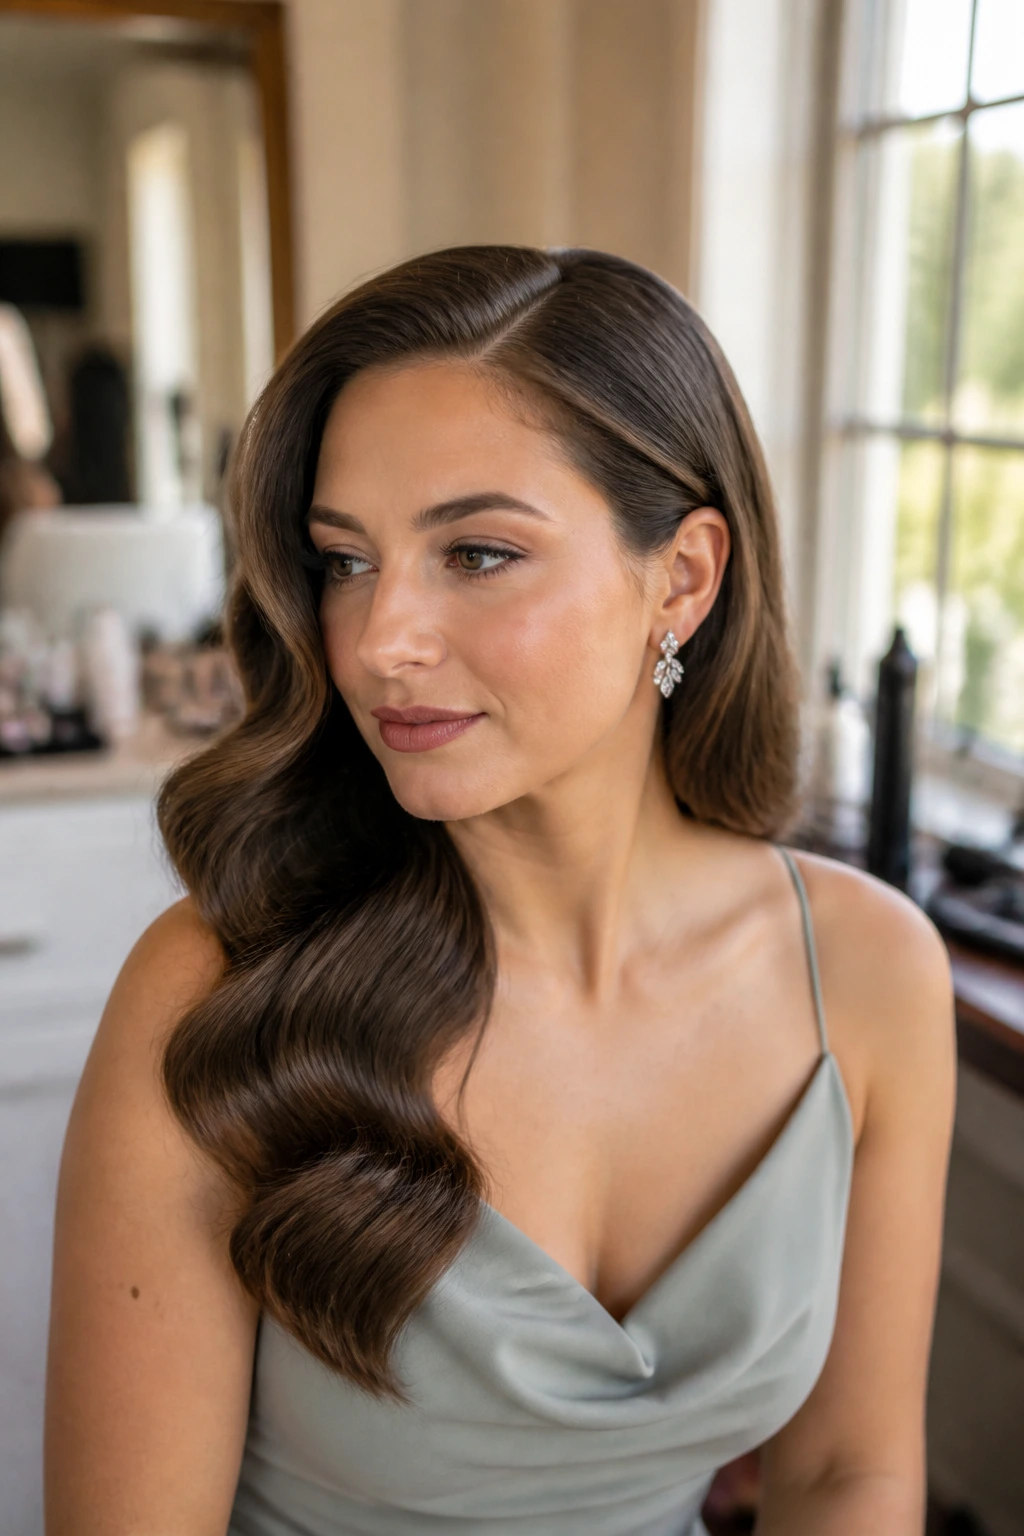
A deep side part changes everything. It gives thin hair an instant sense of drama, and Hollywood waves do the rest by creating a controlled ripple instead of loose, forgettable curls.
Why It Works
Fine hair often looks better when it’s directed, not just curled. The side part creates volume on one side, and the wave pattern makes the hair feel denser because the light keeps hitting the bends. If you pin the heavier side behind the ear or with a small comb, the face stays open and the style feels bridal-party polished instead of everyday soft.
What You Need
- 1-inch curling iron or hot rollers
- Setting clips
- Side part comb
- Light mousse
- Flexible-hold hairspray
- Shine spray, very light
- Decorative comb, optional
Quick Styling Steps
- Apply mousse to damp hair and blow-dry with a round brush for root lift.
- Create a deep side part and curl all sections in the same direction for a uniform wave pattern.
- Clip each curl into place while it cools so the shape sets. Skipping the cooling step is why waves drop early on thin hair.
- Release the curls and brush through them with a soft boar-bristle brush until they become one smooth wave.
- Pin the heavier side near the temple or behind the ear, then mist lightly with spray.
How to Wear It This style is strong with one-shoulder gowns, off-the-shoulder dresses, and dresses with a clean neckline. The sweep frames the face and keeps the rest of the look from feeling empty.
Variations
- Glossy Red-Carpet Version: Use more shine spray and fewer brushed-out ends.
- Soft Side Wave: Leave the wave looser and less sculpted.
- Pinned Back with Gems: Add a jeweled comb on the tucked side.
Common Mistakes to Avoid
- Brushing out the waves too early: Let them set fully first.
- Curling away from the face on both sides: The pattern gets confused.
- Using too much oil: It kills the bend and makes thin hair separate.
9. Knotted Half-Up Halo
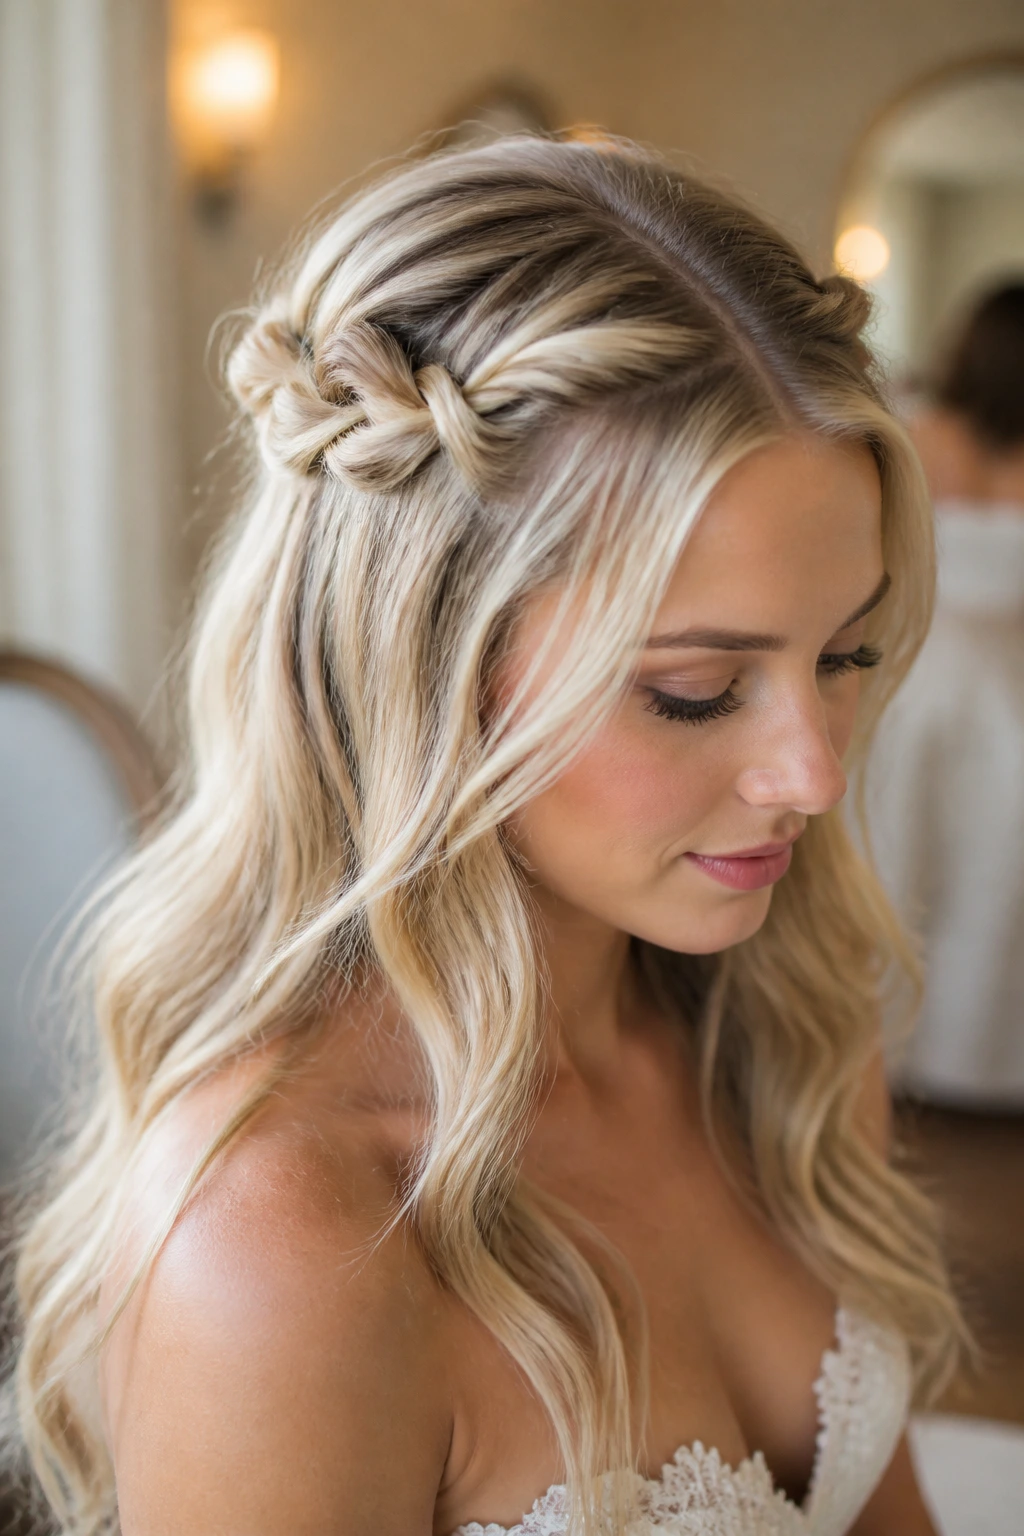
A knotted half-up halo looks more intricate than it is, which is a good thing. Thin hair often doesn’t have enough density for a heavy braid crown, but knots create a similar frame with less bulk.
Why It Works
Two side sections are tied or looped into the back, so the top reads as a soft halo while the length stays loose. That means the style never has to carry the whole head’s weight at once. The knots also make a neat visual line across the crown, and on fine hair, that line is often what people read as fullness.
What You Need
- Tail comb
- 2 mini elastics
- 6 to 10 bobby pins
- Texture spray
- Curling wand or iron
- Flexible hairspray
Quick Styling Steps
- Curl the lower half of the hair in medium sections and let it cool.
- Take one section from each temple and tie them together at the back with a small knot or mini elastic.
- Repeat with another small side section just below the first, stacking the knots if needed.
- Pin the knots flat against the head so they don’t stand out too far. The goal is a soft band, not a row of knots sticking out like handle grips.
- Loosen the top edges slightly and mist with hairspray.
Pro Tips
- Keep the knots small. Large knots on thin hair look awkward fast.
- If the hair slips, rough up the underside with texture spray before tying.
- A tiny flower pin at the center of the back can hide the join.
Variations
- Double-Halo Knot: Add a second row of knots lower down.
- Side Knot Halo: Sweep both knots to one side.
- Braided Knot Halo: Braid each side section before knotting.
Common Mistakes to Avoid
- Pulling the knots too tight: It flattens the crown.
- Leaving the knots visible from the side: Pin them closer to the head.
- Using slick conditioner right before styling: It steals grip.
10. Messy Low Bun with Face-Framing Pieces
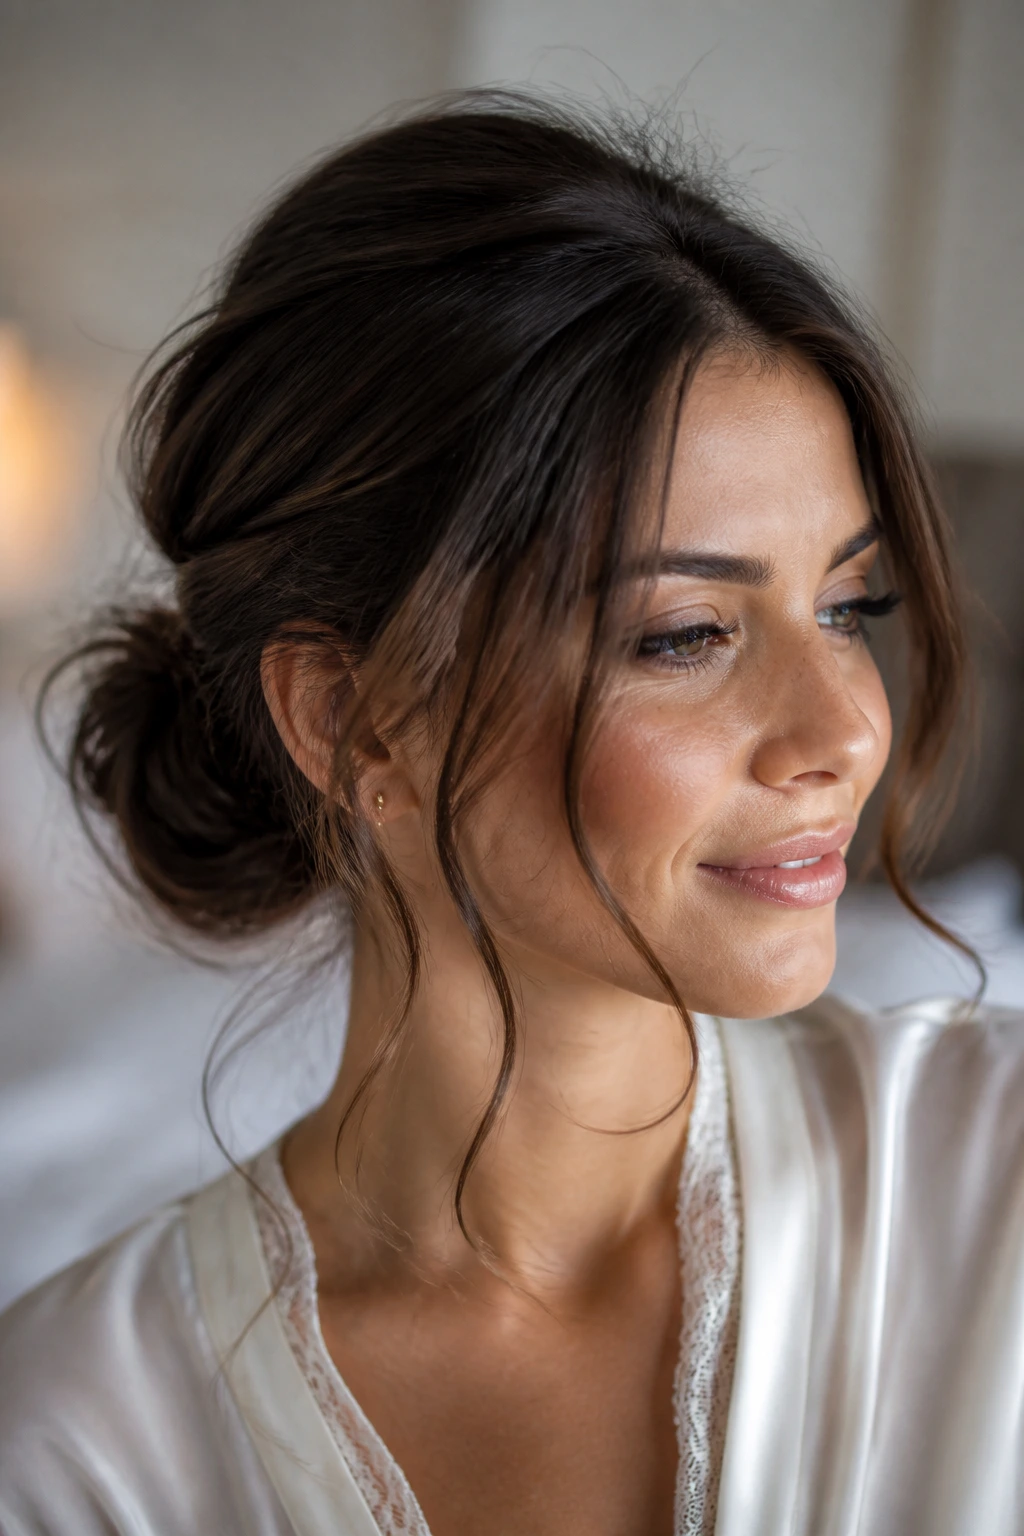
Messy low buns can be tricky on thin hair, because “messy” is often code for “unstyled.” The version worth wearing as a bridesmaid still has a shape. It just doesn’t look like it was built with a ruler.
Why It Works
A low bun keeps the weight near the nape, where thin hair holds best. The soft pieces around the face create the illusion of movement and give the style some softness in photos. If you build the bun from twists and loops instead of one wrapped coil, you get more texture and more visual size without adding actual bulk.
What You Need
- Texture spray
- 1-inch curling iron
- 8 to 12 bobby pins
- 2 U-pins
- Tail comb
- Light hairspray
- Optional thin headband or floral pins
Quick Styling Steps
- Curl the hair loosely and let the curls cool completely.
- Leave out two face-framing pieces, then gather the rest low at the nape.
- Twist the ponytail and loop it into a soft bun, pinning each loop as you go.
- Pull a few strands at the crown and near the bun edges to loosen the shape. Do this slowly. Over-pulling is how a cute bun becomes a frizzy cloud.
- Curl the front pieces away from the face and let them fall softly.
How to Wear It This style works with almost everything, which is why it shows up so much at weddings. It’s friendly with floral dresses, satin, lace, and simple solid-color gowns.
Variations
- Braided Messy Bun: Braid one side before wrapping the bun.
- Soft Parted Bun: Keep a center part instead of pulling everything back.
- Pinned Blossom Bun: Add small flowers near the base.
Common Mistakes to Avoid
- Making the bun too loose at the base: It slips.
- Leaving the face pieces too heavy: They can drag the whole style down.
- Using coarse teasing at the ends: You want lift at the crown, not rough tips.
11. Mini Braids Woven Into Loose Curls
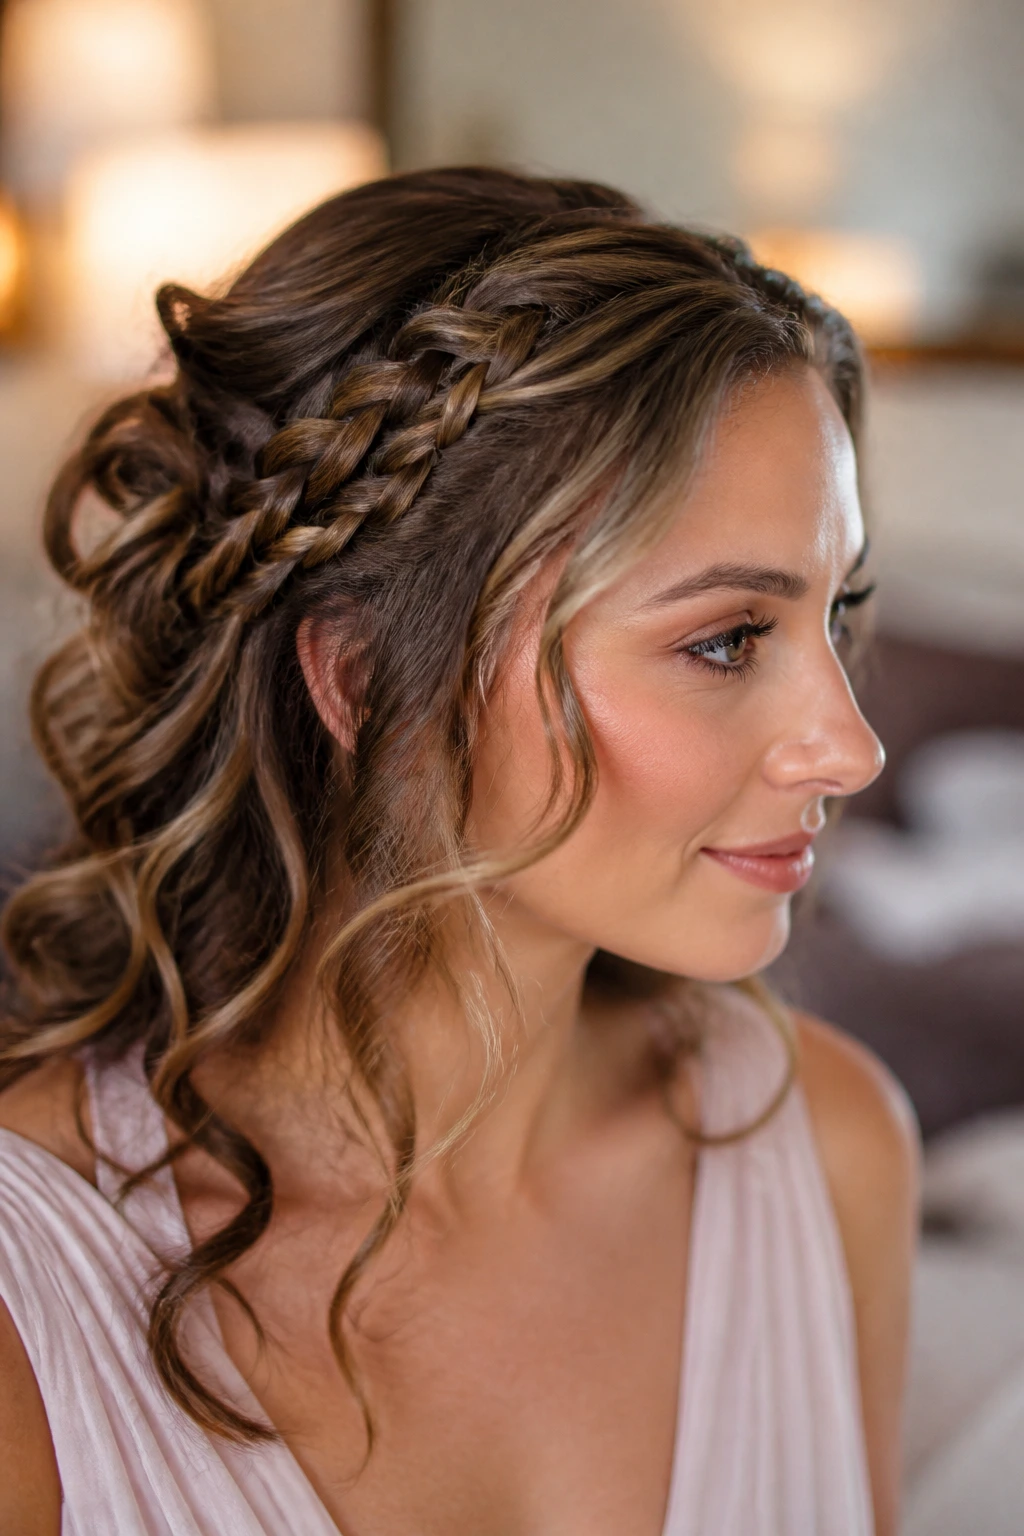
Tiny braids are one of my favorite tricks for bridesmaid hair that needs detail without bulk. They bring texture to thin hair in a way that feels subtle, not childish.
Why It Works
A few slim braids at the temples, behind the ears, or just above the nape break up a large field of loose curls and make the overall style look layered. Thin hair often benefits from detail placement more than from fullness. A braid gives the eye something to follow, which is handy when the length itself is not super dense.
What You Need
- Curling wand
- Small clear elastics
- Texturizing spray
- Small tail comb
- Flexible hairspray
- 4 to 6 decorative pins, optional
Quick Styling Steps
- Curl the hair in 1-inch sections and let it cool.
- Take one or two narrow sections from the front or sides and braid them tightly.
- Secure each braid with a tiny elastic, then weave the braids back into the loose curls.
- Pin the braids where they blend into the style instead of leaving them hanging separately.
- Finger-comb the curls and spray lightly. If you brush this style, the braids lose their crisp line and the whole thing turns soft in a messy way.
Pro Tips
- Put the braids in after the hair has been textured, not before.
- Keep the braids narrow. Wider braids need more hair than thin strands can spare.
- A side placement often looks better than braids on both sides at once.
Variations
- Temple Braid Detail: Just one braid tucked near the ear.
- Braided Half-Crown: Connect the braids across the back.
- Boho Pin Weave: Pin the braid ends under loose curls for a hidden finish.
Common Mistakes to Avoid
- Braiding too much hair: The rest of the style loses body.
- Starting on too-slick hair: The braid unravels.
- Leaving the braid ends obvious: Hide them under the curl pattern.
12. Tucked-In Roll with Pearl Pins
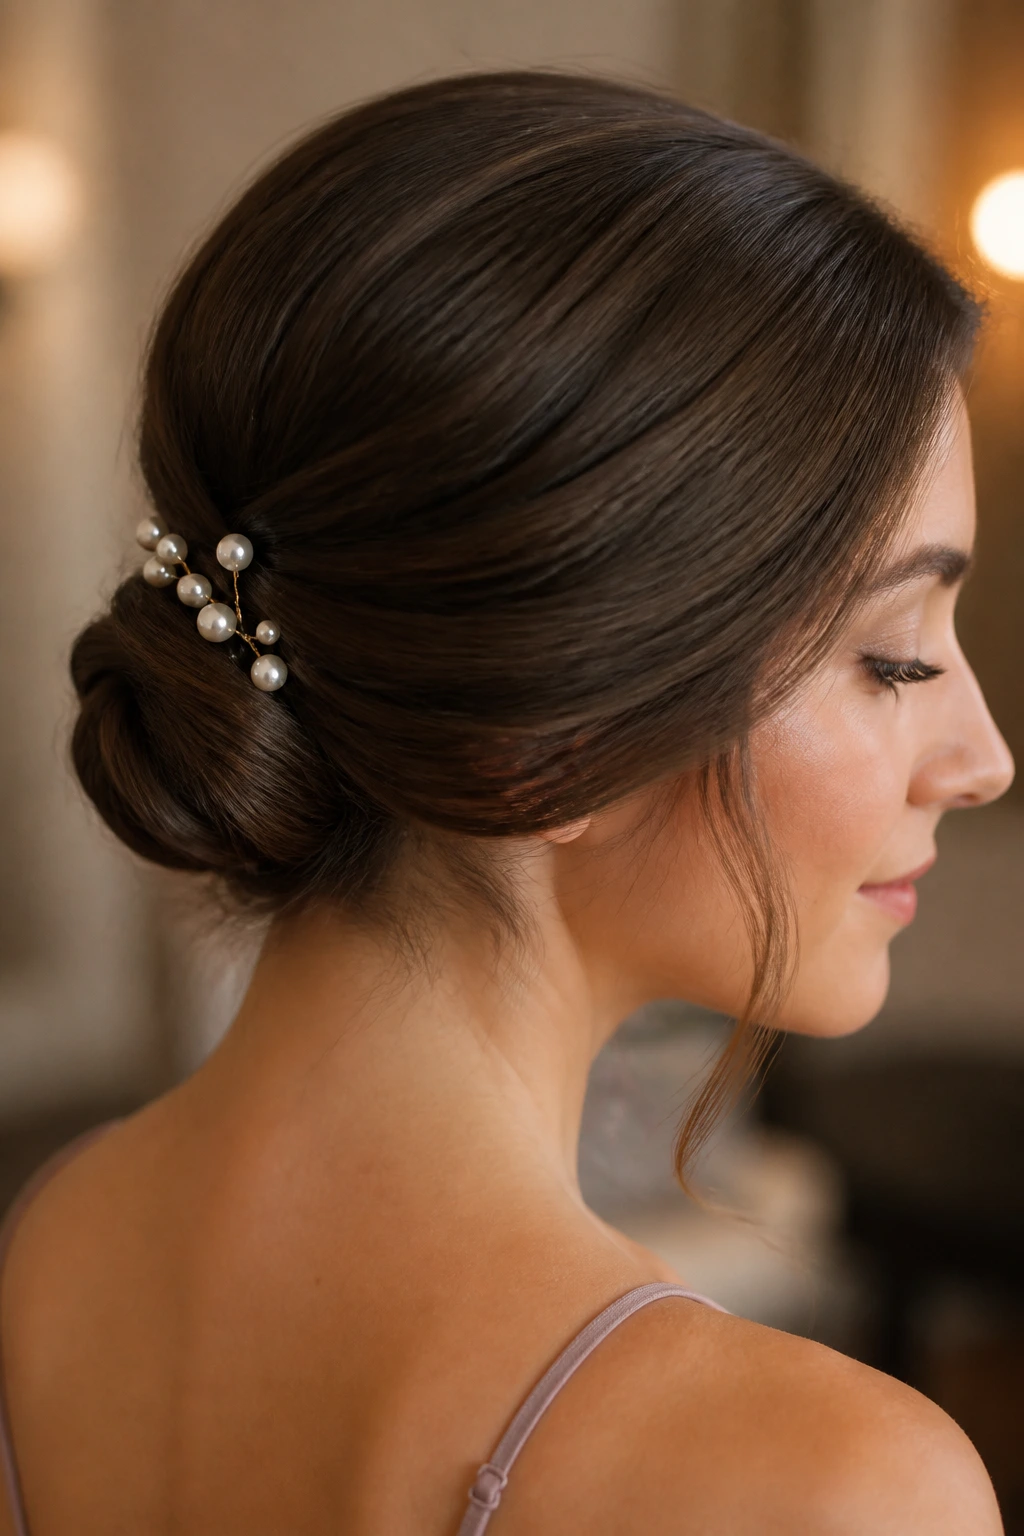
A tucked-in roll has an old-school polish that thin hair handles better than people expect. The trick is in the roll itself: once the ends disappear, the style reads as finished and compact.
Why It Works
Fine hair does not need a lot of mass to make this style work. It needs smooth direction. Rolling the lengths inward creates a clean outer shell, and pearl pins or small jewel pins can turn the seam into the feature instead of something to hide. The result is soft and neat, with enough structure to survive a long reception.
What You Need
- Tail comb
- 8 to 12 bobby pins
- 4 to 8 pearl pins
- Texture spray
- Light hairspray
- Optional padding strip if the hair is very thin
Quick Styling Steps
- Create the desired part and lightly texture the roots.
- Gather the hair low at the back and roll it inward toward the nape, keeping the roll snug but not tight.
- Pin the roll from the inside so the seam stays concealed.
- Place pearl pins along one side or in a small cluster where the roll meets the head. The pins should look placed, not scattered. Thin hair looks cleaner when the decoration has a line or a shape.
- Spray lightly and smooth the crown with the palm of your hand.
How to Wear It This style loves high necks, satin dresses, and minimal jewelry. It also works when the bridal party wants a more refined look that doesn’t compete with the bride.
Variations
- Side Roll: Shift the roll to one side for a softer angle.
- Pearl Chain Roll: Line the seam with a neat chain of pearl pins.
- Braided Roll: Add one braid before rolling for extra texture.
Common Mistakes to Avoid
- Rolling too loosely: It falls apart.
- Putting pins only on the surface: They won’t hold.
- Overdoing the pearls: One row is enough.
13. Braided Mohawk Half-Up
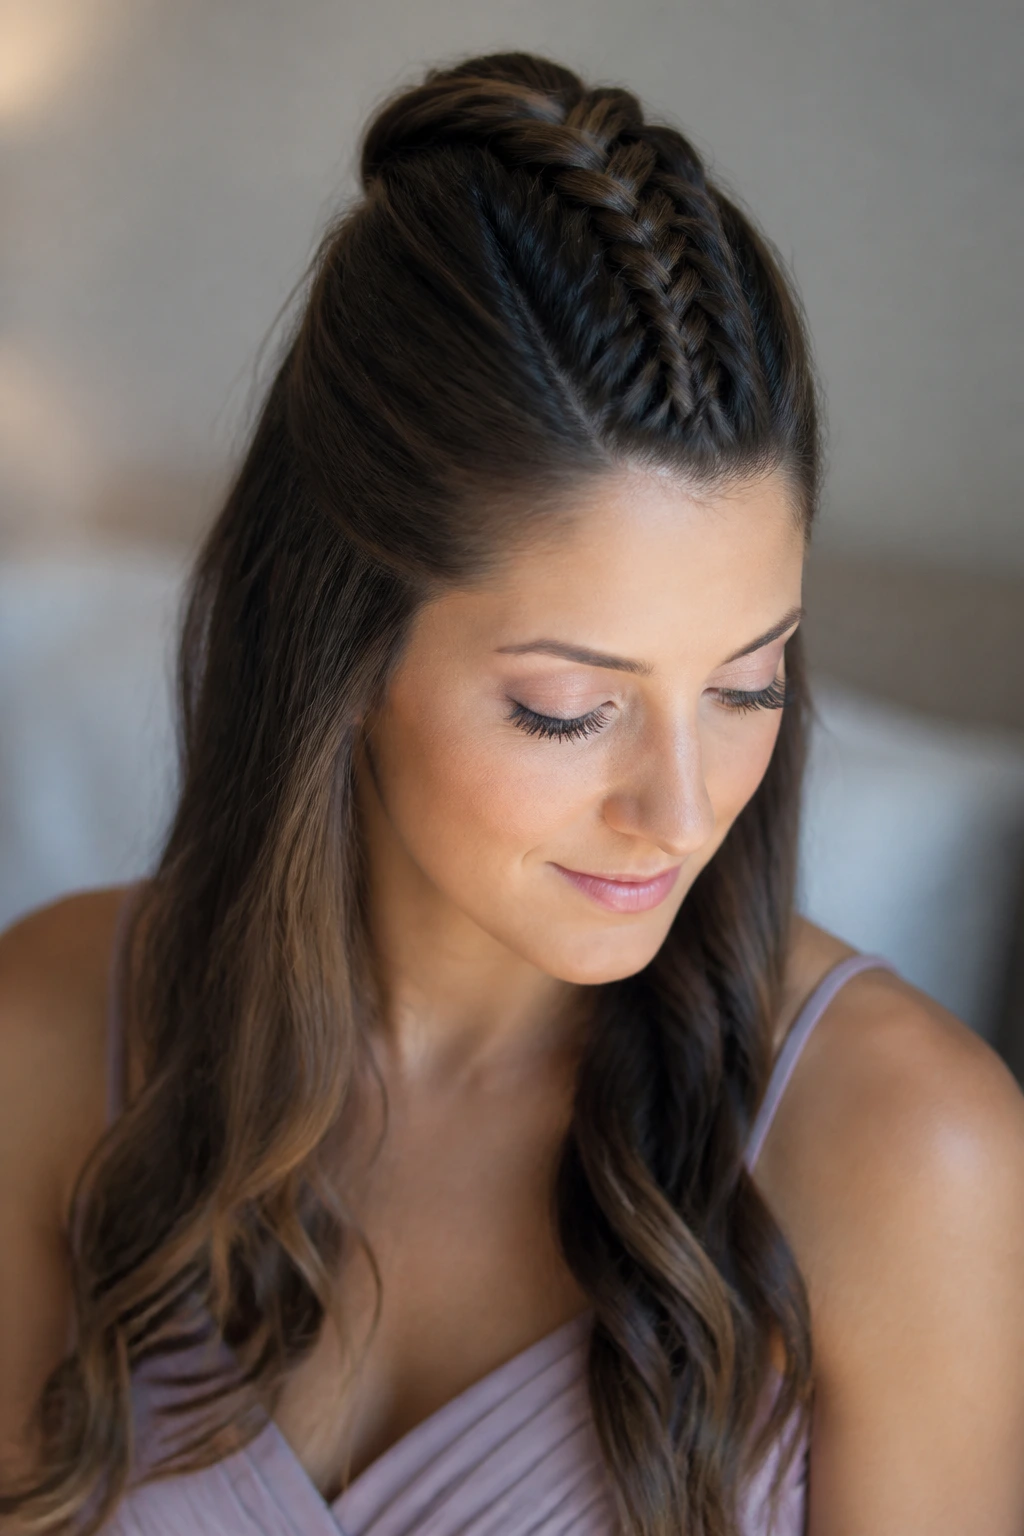
The name sounds bolder than it is. In practice, a braided mohawk half-up is just a center strip of texture that creates height and keeps the sides neat. On thin hair, that strip can be a lifesaver.
Why It Works
By braiding or twisting the middle section from forehead to crown, you build a visible ridge of texture. The sides stay flatter, which is helpful because thin hair often looks best when not everything is fighting for the same amount of volume. A loosened braid along the top makes the hair read fuller than it is, and the loose lengths below keep the style from feeling severe.
What You Need
- Tail comb
- Texture spray
- 1 or 2 small elastics
- 6 to 10 bobby pins
- Curling iron for the lengths
- Flexible hairspray
Quick Styling Steps
- Section off a center strip from the hairline to the crown.
- Braid or Dutch-braid that strip, keeping the braid snug but not tight.
- Pin the braid flat at the back and leave the rest of the hair down in waves.
- Tug the outer edges of the braid lightly to widen it. A wider braid always looks fuller on thin hair, but stop before the loops become loose and fuzzy.
- Spray the top section and smooth the sides back with your fingertips.
Pro Tips
- This style is strongest on hair that has some natural bend.
- If the crown is sparse, tease just under the braid, not all around it.
- A few hidden pins under the braid keep the ridge lifted.
Variations
- Twist-Mohawk: Replace the braid with two rope twists.
- Accent-Braid Mohawk: Add a thin braid on each side.
- Floral Crown Mohawk: Nestle tiny blooms along the braid ridge.
Common Mistakes to Avoid
- Making the braid too tight at the scalp: It can expose the parting.
- Leaving the sides messy: The contrast is what makes the center work.
- Skipping the texture on the lengths: The lower half needs balance.
14. Scandi-Inspired Sleek Knot
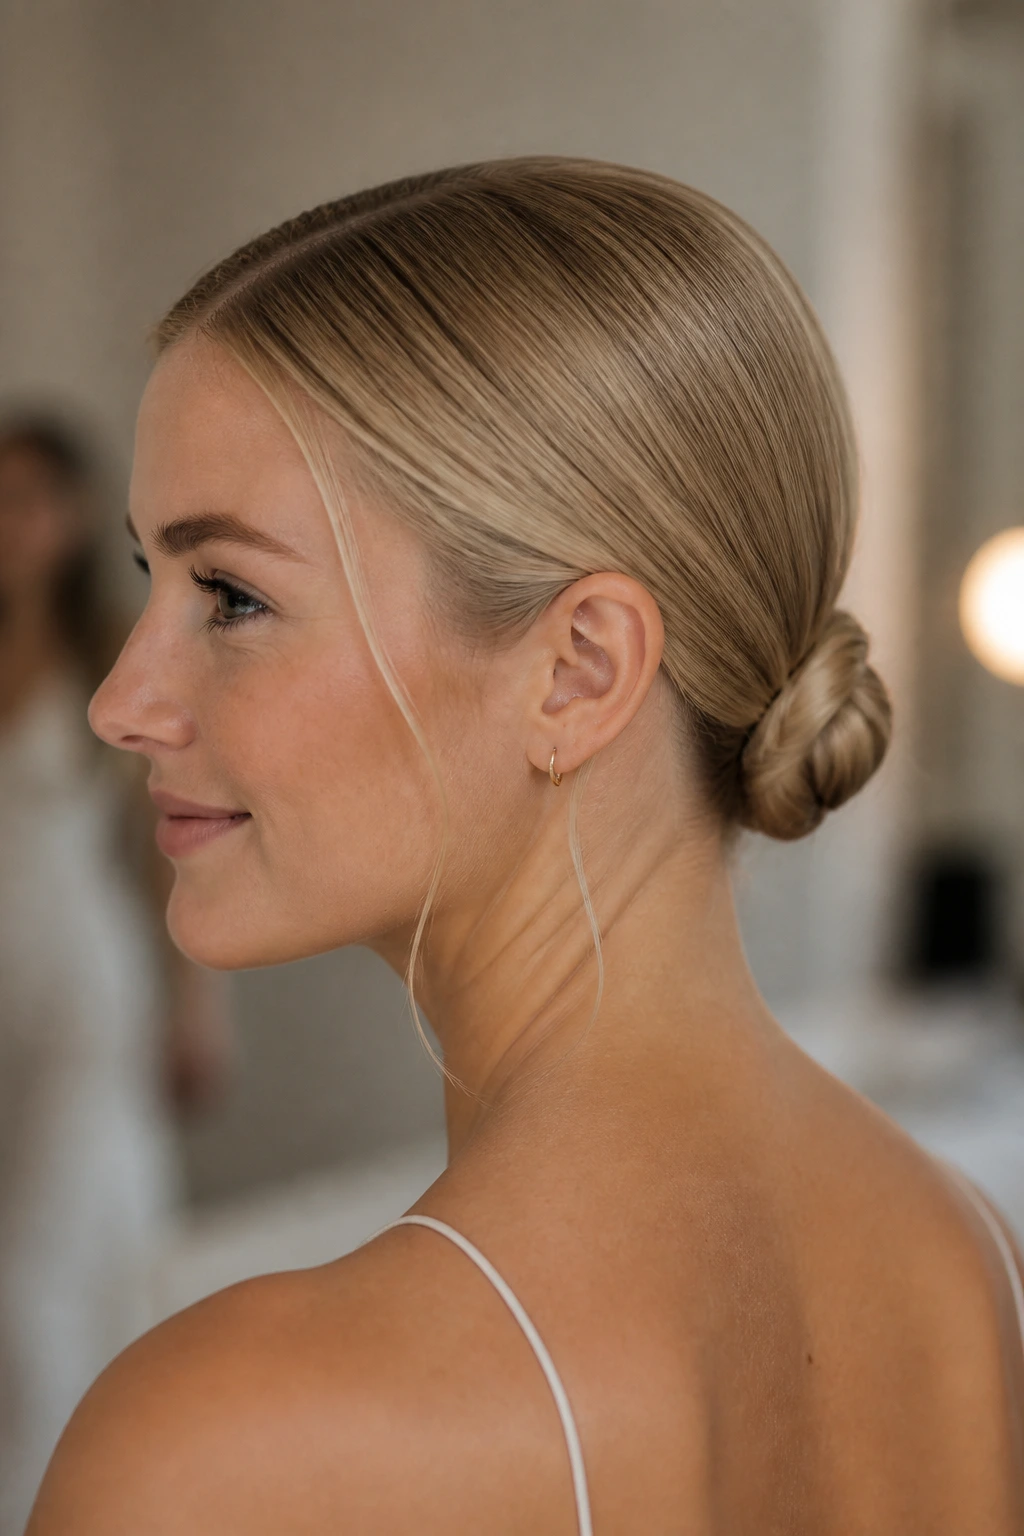
Minimalism can be a gift to thin hair. A Scandi-style knot keeps the lines clean, the part precise, and the finish controlled, which means there’s nowhere for sparse areas to misbehave.
Why It Works
The center part gives the style symmetry. The low knot sits at the nape, so there’s no big mass trying to climb the head and slide away. And because the crown is sleek, the overall look feels intentional even when the hair itself is fine. It’s the opposite of fussy. That’s why it works.
What You Need
- Smoothing cream
- Tail comb
- Fine elastic
- 6 to 10 bobby pins
- Light-hold hairspray
- Shine serum, tiny amount
Quick Styling Steps
- Apply a small amount of smoothing cream to the surface of dry hair.
- Part the hair cleanly down the middle and brush it low at the nape.
- Twist the ponytail into a compact knot and pin it flat.
- Tuck every loose end into the knot so the shape stays smooth. If the knot starts to look bulky, remove one pin and flatten the center before adding the next one.
- Finish with a tiny bit of serum on the outer surface only.
How to Wear It This style suits minimalist dresses, square necklines, and modern bridal parties that want the hair to support the outfit instead of fighting it. It’s also a good choice when earrings are the star.
Variations
- Low Knot with a Deep Part: A softer, more romantic version.
- Wrapped Base Knot: Hide the elastic with one hair wrap.
- Pinned Side Knot: Shift the knot just off-center.
Common Mistakes to Avoid
- Using too much product: Sleek can cross into greasy fast.
- Leaving baby hairs uncontrolled: That’s where the clean line breaks.
- Building the knot too high: It loses the minimalist feel.
15. Soft Voluminous Blowout with Pinned-Back Sides
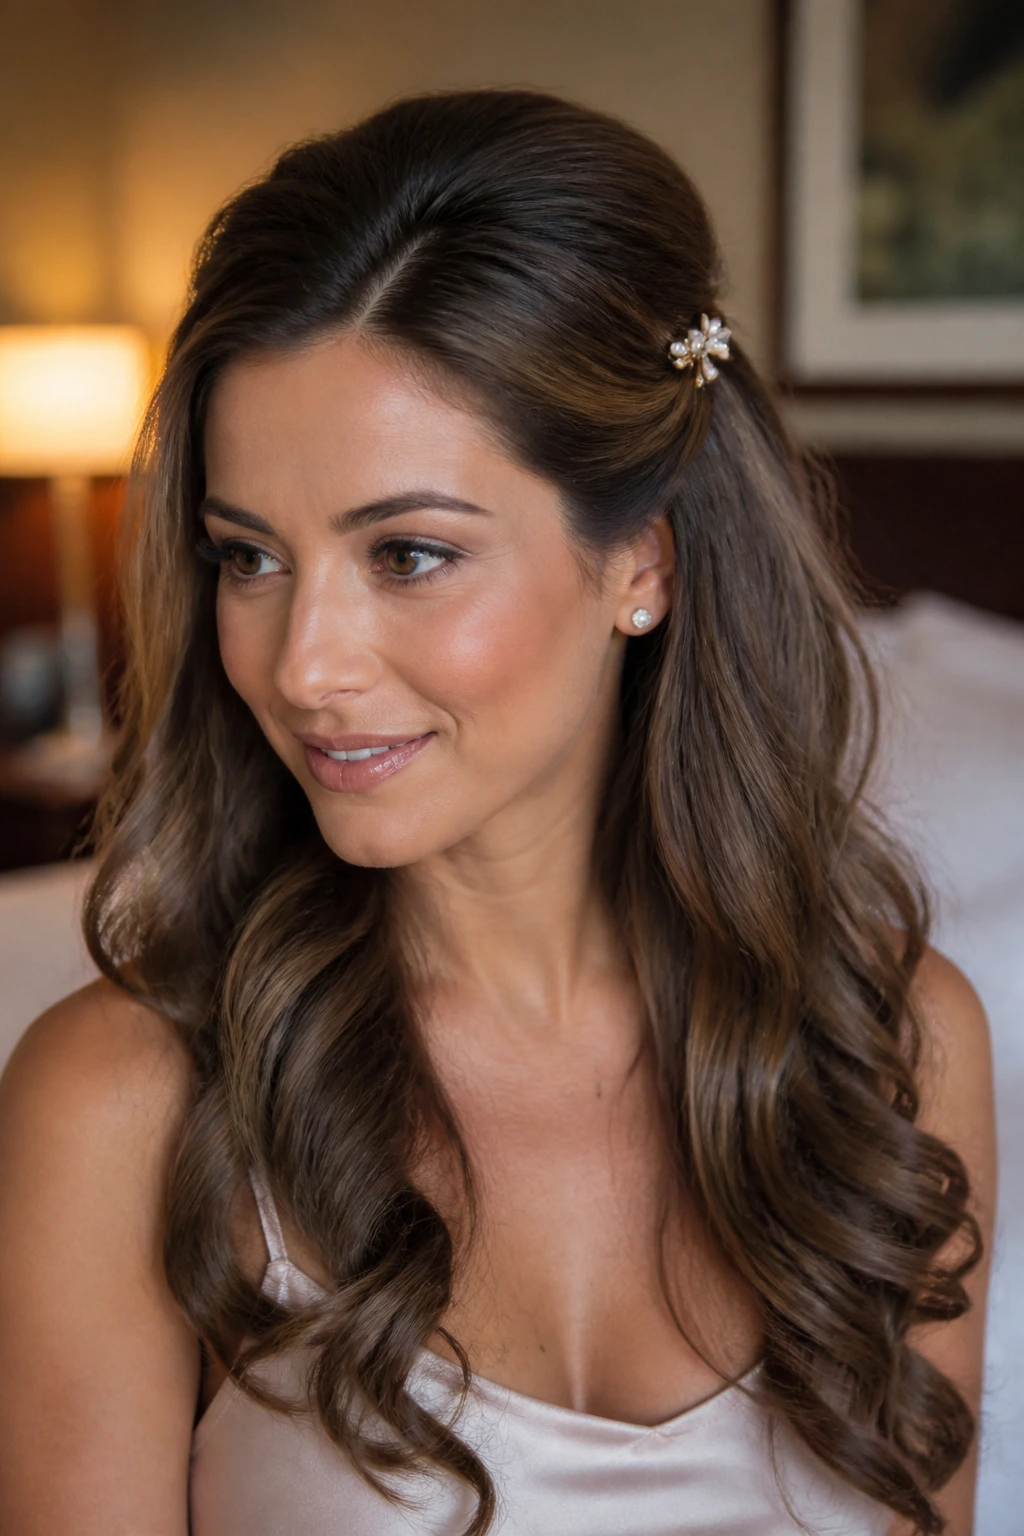
Sometimes the smartest bridesmaid style is not an updo at all. A soft blowout with a little side pinning can give thin hair more movement than a pinned style ever could, as long as the roots are lifted and the ends are shaped.
Why It Works
Thin hair often looks best when it has airy movement rather than forced fullness. A proper blowout builds that movement from the root with a round brush or large rollers, and pinning back the sides opens the face without stealing body from the lengths. The trick is to let the hair look plush, not puffy. There’s a difference, and it matters.
What You Need
- Volumizing mousse
- Large round brush
- Blow dryer with nozzle
- 1.5-inch curling iron or large rollers
- 2 to 4 decorative pins
- Light hairspray
- Dry shampoo, optional at the roots
Quick Styling Steps
- Work mousse into damp hair and blow-dry with lift at the roots.
- Round-brush the ends under or away from the face, depending on the shape you want.
- Add a few loose bends with a curling iron if the hair needs more body.
- Pin one or both sides back just above the ear. Keep the pinned section small; if you pin too much, you kill the whole point of the blowout.
- Spray lightly and separate the ends with your fingers.
Pro Tips
- Blow-dry with the head flipped upside down for the first 30 seconds if the roots are stubborn.
- Let each roller or curl cool completely before brushing it.
- Choose pins with real grip, not just decoration.
Variations
- S-Shape Blowout: Use a soft wave pattern instead of a rounded bend.
- Half-Pinned Blowout: Pin only one side for a side-swept feel.
- Satin Clip Finish: Swap the pins for a small satin bow clip.
Common Mistakes to Avoid
- Blowing the roots smooth: You lose the lift.
- Using heavy finishing cream: It weighs the shape down.
- Touching the hair before it cools: The body disappears.
16. Side Bun with a Braided Band
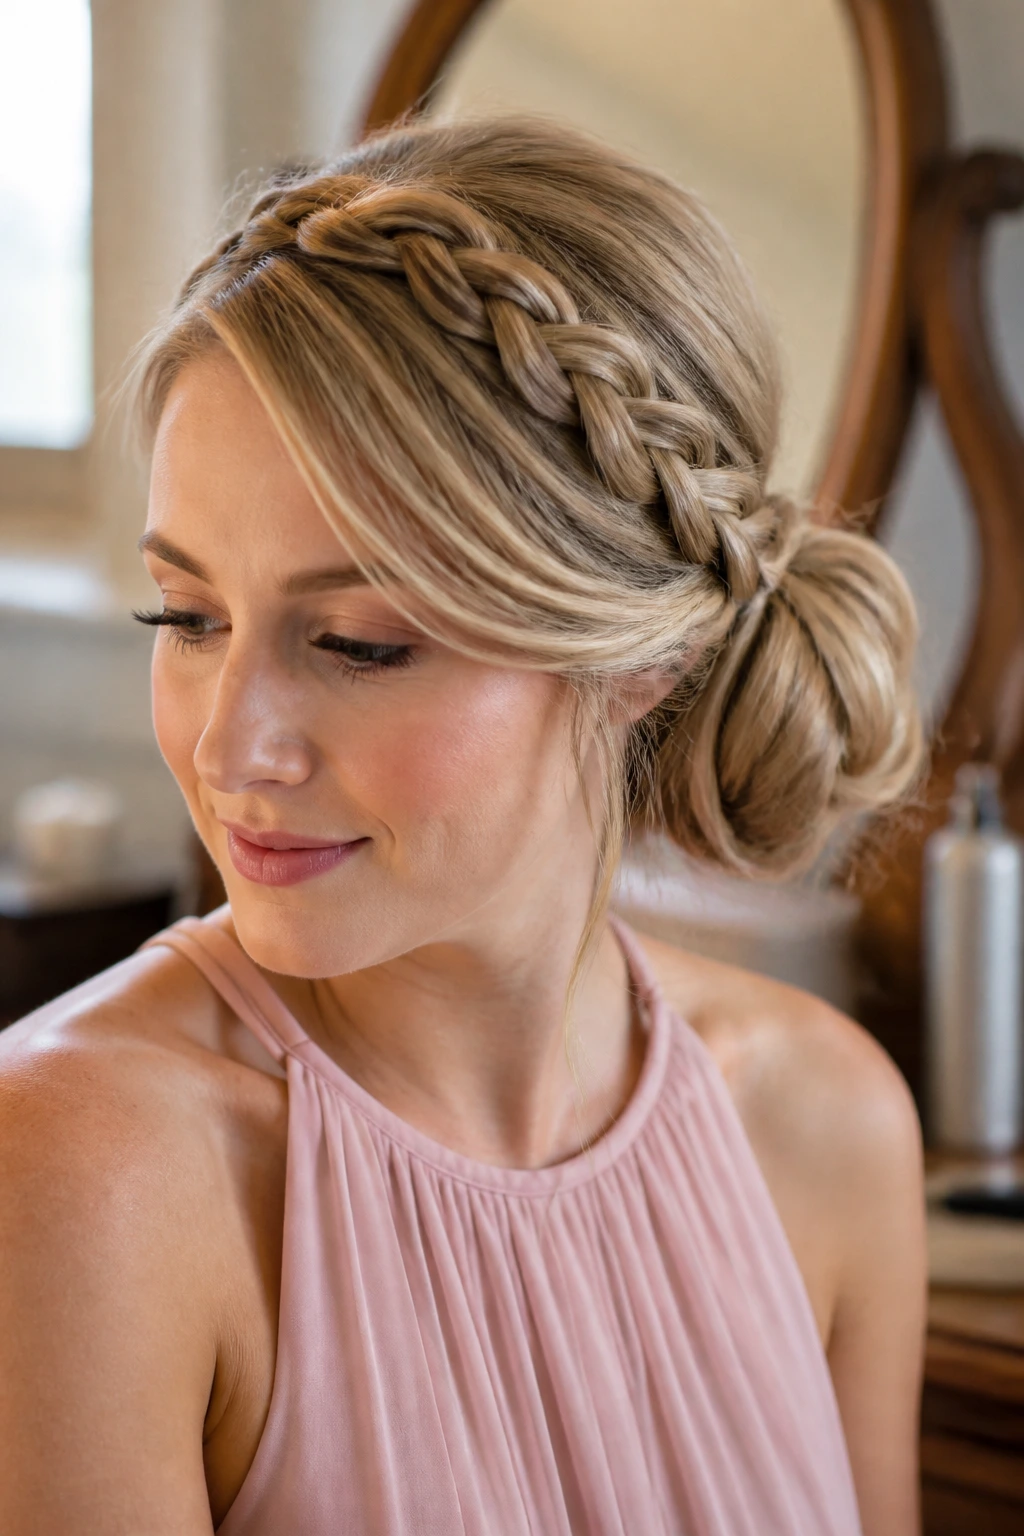
A side bun gives thin hair a little asymmetry, and the braided band acts like a frame around the face and crown. That combination is useful because it creates two points of interest instead of one thin knot at the back.
Why It Works
The side placement shifts the focus away from the center of the head, where fine hair often shows the most scalp. The braid across the front or top adds texture and width. Then the bun itself stays low and controlled, which means the style holds together without needing a ton of mass. It’s one of those looks that can feel formal without looking stiff.
What You Need
- Texturizing spray
- Tail comb
- 8 to 12 bobby pins
- 1 clear elastic
- Curling iron
- Light hairspray
- Optional floral pin
Quick Styling Steps
- Part and texture the hair, then braid a section from one side of the front hairline toward the back.
- Bring the rest of the hair to the opposite side and form a low side ponytail.
- Twist the ponytail into a bun and pin it close to the head.
- Lay the braid over the crown or across the top of the bun, then pin the ends underneath. If the braid sits too far forward, it can crowd the face; keep it just high enough to frame, not cover.
- Curl a few front pieces and mist with hairspray.
How to Wear It It’s especially good with one-shoulder or asymmetrical dresses, because the hair echoes that off-center shape. The side bun also keeps the neckline open for necklaces.
Variations
- Loose Braid Band: A wider, softer braid across the top.
- Twist Band Version: Replace the braid with two twists.
- Side Bun with Pearl Pins: Add pins where the braid meets the bun.
Common Mistakes to Avoid
- Letting the braid get too thick: Thin hair can’t support it.
- Building the bun too far from the head: It looks pasted on.
- Neglecting the crown texture: The braid needs some grip to sit well.
17. Short-Hair Pin Wave with Decorative Clips
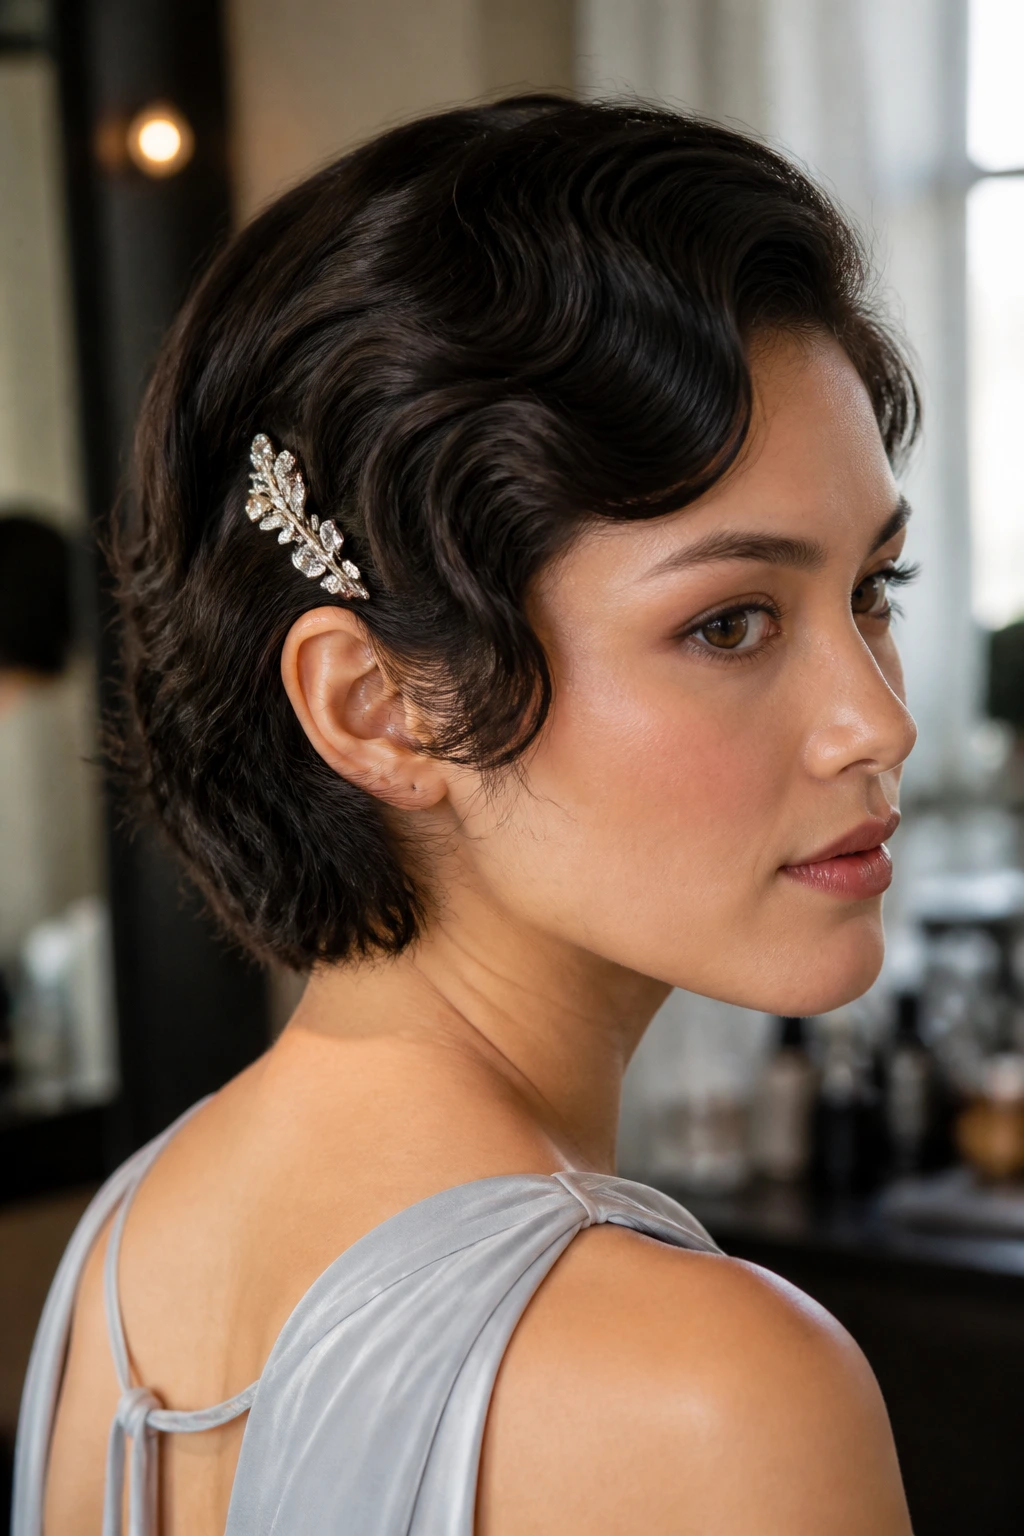
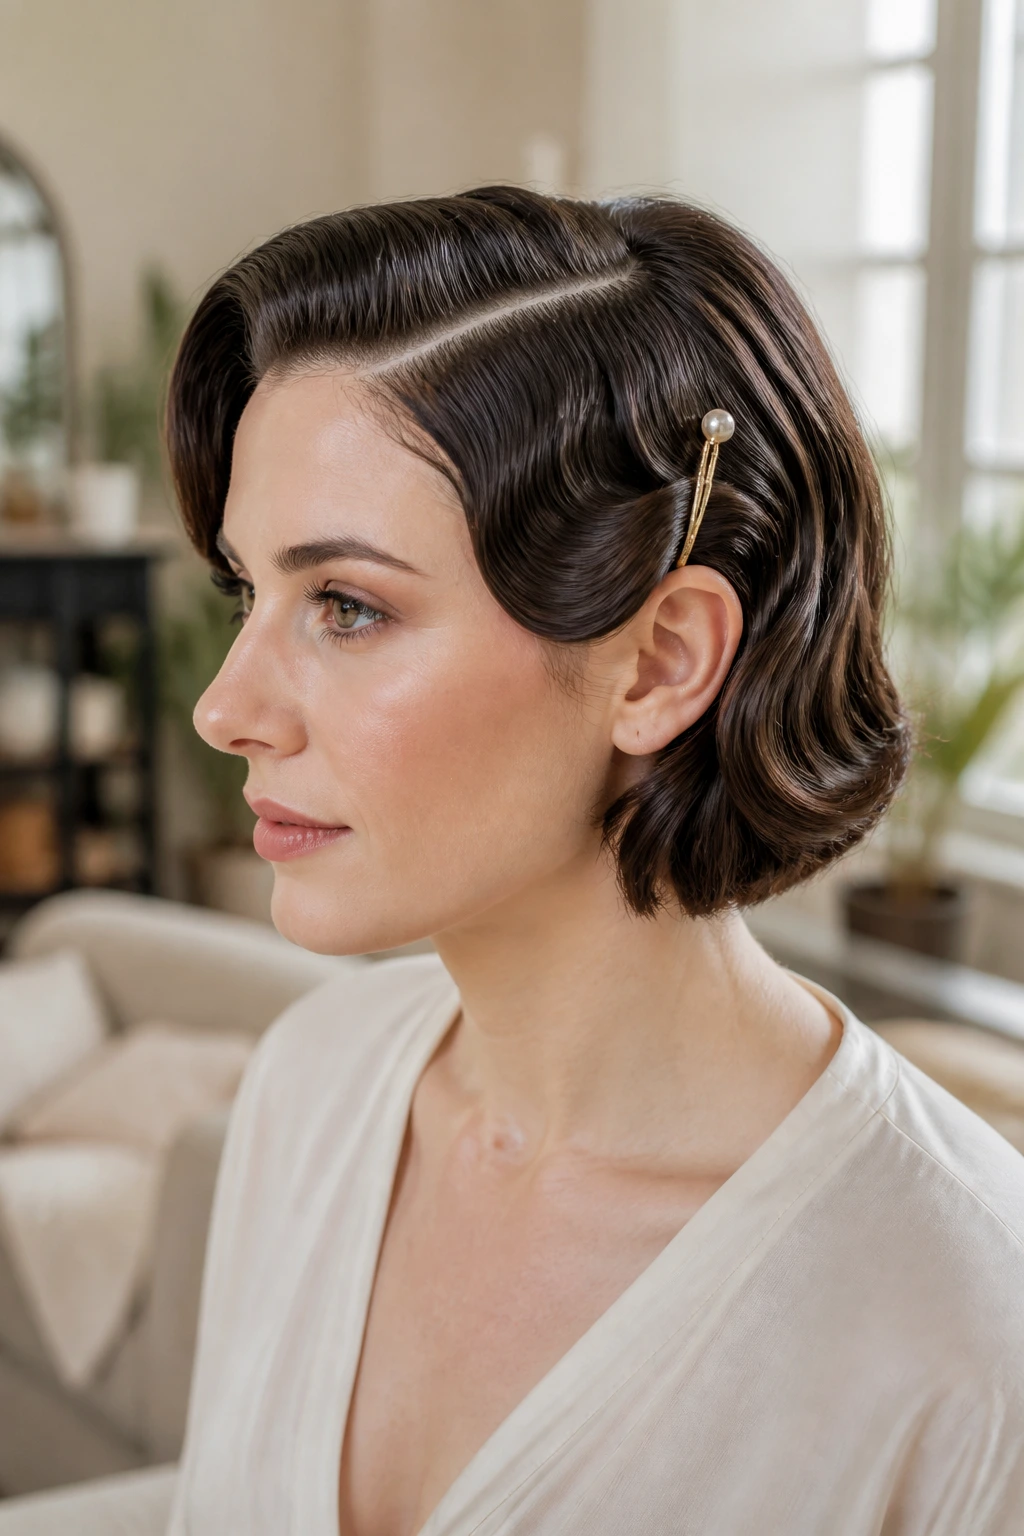
Short hair doesn’t need to be a problem. In fact, chin-length and above-shoulder cuts can look more polished than long hair if the wave pattern is controlled and the accessories are chosen with restraint.
Why It Works
Pin waves and soft bends add movement to short, fine hair without asking it to hold a heavy shape. Decorative clips do some of the visual work, but they should feel like accents, not rescue gear. The style is good because it respects the cut you already have. It doesn’t try to turn a bob into a mermaid wave situation, which is where a lot of people go wrong.
What You Need
- Flat iron or small curling wand
- Setting clips
- Texture spray
- 2 to 4 decorative clips or barrettes
- Light hairspray
- Small comb
- Shine spray, tiny amount
Quick Styling Steps
- Create soft bends with a flat iron or wand, alternating direction only if the cut can handle it.
- Clip the waves as they cool so the shape sets and doesn’t collapse at the sides.
- Smooth the top lightly and add one or two decorative clips above the temple or just behind the ear.
- Mist the finished shape with light hairspray. Do not pile on multiple heavy clips; one well-placed piece usually looks cleaner and keeps the hair from drooping.
- Separate the ends with your fingers if the cut needs a little movement.
Pro Tips
- Choose clips with teeth or a secure clasp, not flimsy decorative shells.
- If the hair is very fine, set a side part before styling.
- A tucked-back side often flatters short lengths more than trying to cover both ears.
Variations
- Deep Side Wave: Stronger Hollywood energy.
- Twig Clip Finish: Small, delicate clips clustered near the temple.
- Sleek Short Set: Smooth the top and keep the wave only at the ends.
Common Mistakes to Avoid
- Using oversized barrettes: They slide or overwhelm the cut.
- Forgetting to set the wave with clips: Short hair needs cooling time.
- Trying to force too much curl: Soft bends look more believable.
How to Build Volume That Doesn’t Collapse Before the Photos
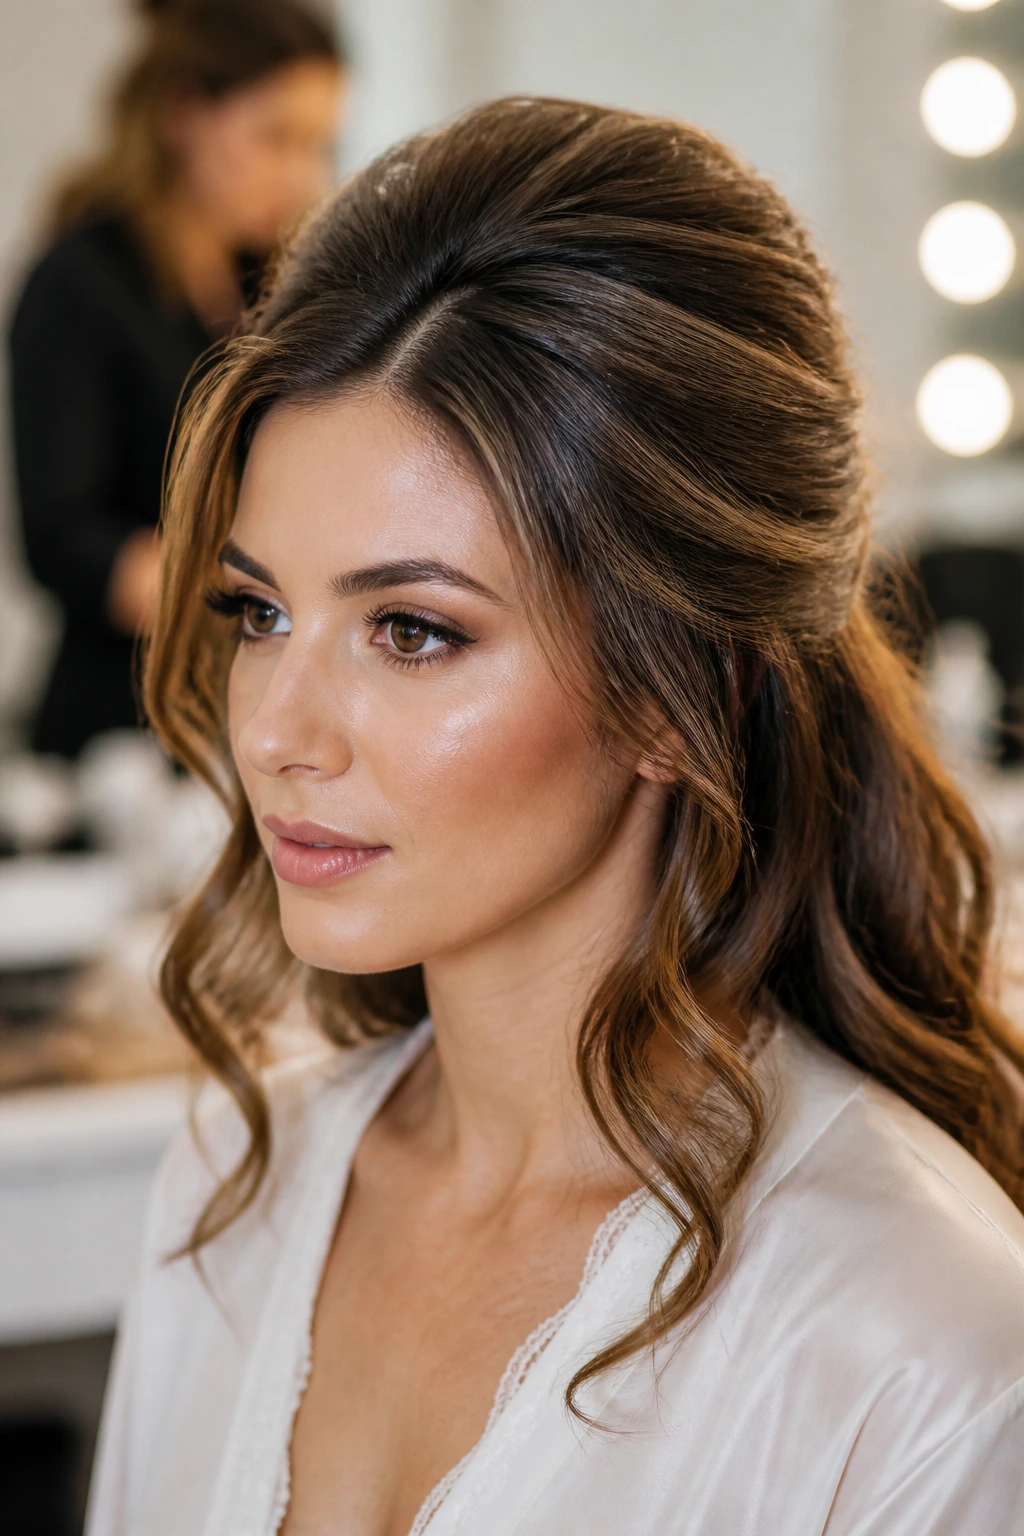
Thin hair usually fails in one of two places: the roots or the finish. The roots fall because they were too clean, too soft, or too flat. The finish goes limp because the hair was brushed into submission after it cooled. Both problems are fixable.
Start with a little grit. Dry shampoo at the roots, even on freshly washed hair, gives the scalp some friction. Mousse on damp hair helps too, but only if you blow-dry with lift. I like to lift sections straight up with a round brush or fingers, then hit the roots with the cool shot for a few seconds so the bend sets before the hair can drop.
The other trick is section size. Small sections hold a wave better than big ones. On fine hair, a 1-inch section often holds better than a 2-inch chunk, even though it takes a little longer. That trade-off is worth it when the style needs to survive a ceremony, photos, dinner, and dancing.
And then there’s restraint. More hairspray is not always the answer. If the hair gets crunchy, it can’t move, and if it can’t move, it breaks shape in weird places. I’d rather use a flexible spray in layers than one heavy blast at the end.
Essential Tools and Products for Bridesmaid Hairstyles on Thin Hair
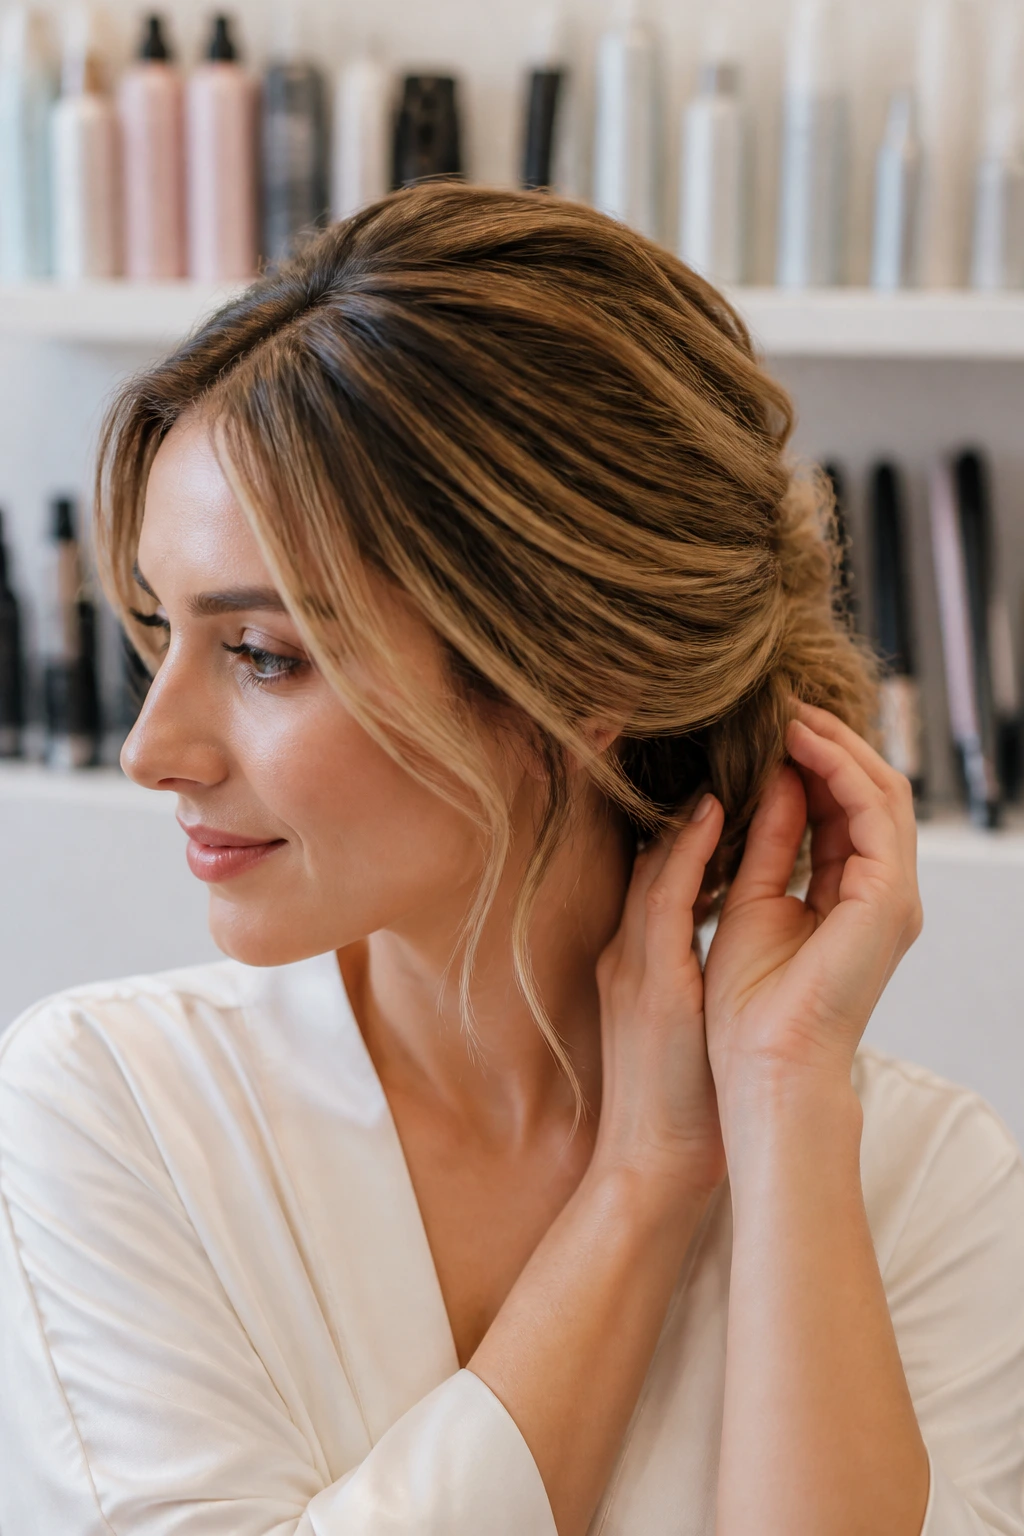
- Tail comb: Clean parts matter on fine hair because messy sections show scalp fast.
- Teasing brush or fine backcombing brush: Useful for the crown and the hidden support under updos.
- 1-inch curling iron or wand: Small enough to give fine hair a bend that lasts.
- Large round brush: Better for lift at the root than a flat paddle brush.
- Bobby pins in two shades: One close to the hair color and one darker, so you can choose the one that disappears best.
- U-pins: Handy for buns and French twists because they hold shape without bulk.
- Mini clear elastics: Great for half-up styles, bubble ponytails, and braids.
- Texturizing spray: Gives thin hair the grip it needs before pinning or braiding.
- Dry shampoo: Adds friction and soaks up slip at the roots.
- Volumizing mousse: Helps the hair keep some body after blow-drying.
- Flexible-hold hairspray: Keeps the style movable instead of stiff.
- Shine serum: Use it sparingly on the ends only, never at the roots.
- Decorative pins or combs: Pearl pins, crystal pins, and small floral clips are ideal when they have decent grip.
- Clip-in padding or extensions, optional: Worth considering if the bridesmaid wants a bit more length or fullness, but only if the color match is exact.
Choosing Accessories That Grip Fine Hair
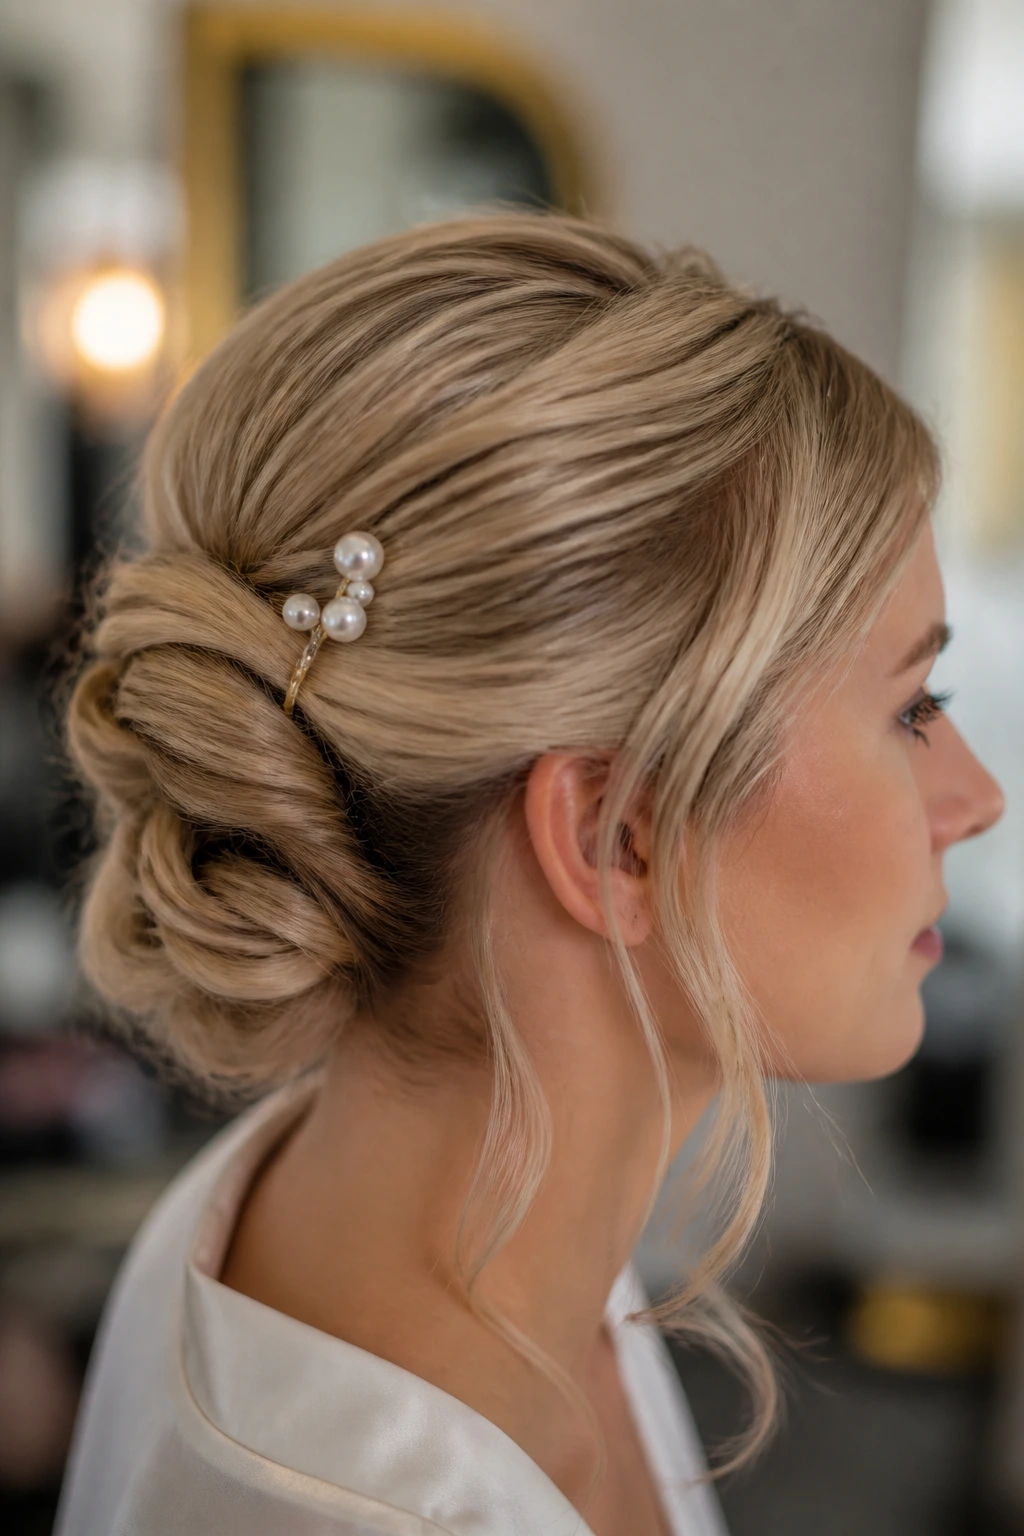
Thin hair is fussy about accessories. Pretty doesn’t help if the comb slides out during cocktail hour. Look for clips and pins with teeth, grip, or a curved base that follows the head shape. Flat, slick decorations look nice in a jewelry tray and fall apart in real hair.
Pearl pins are safer than large barrettes for most of these styles because they distribute the visual weight. A single comb can work too, but it should anchor into a twist, braid, or tucked seam. If the decoration is heavy, place it where the structure is already strongest — near the bun base, the side seam, or the braid join.
Color matters as much as shape. Silver looks sharp against cooler blonde and ash brown hair. Gold can soften warmer brunettes and red tones. Clear plastic tools disappear best in very fine hair, but only if the finish on the plastic isn’t too glossy. Shiny clear elastics can still catch the eye in the wrong light.
One more thing. Test any clip on a small section before the wedding day. Some accessories grab too hard, especially on delicate ends. Better to find out at home than while someone is already in the dress.
Matching the Style to Dresses, Necklines, and Jewelry
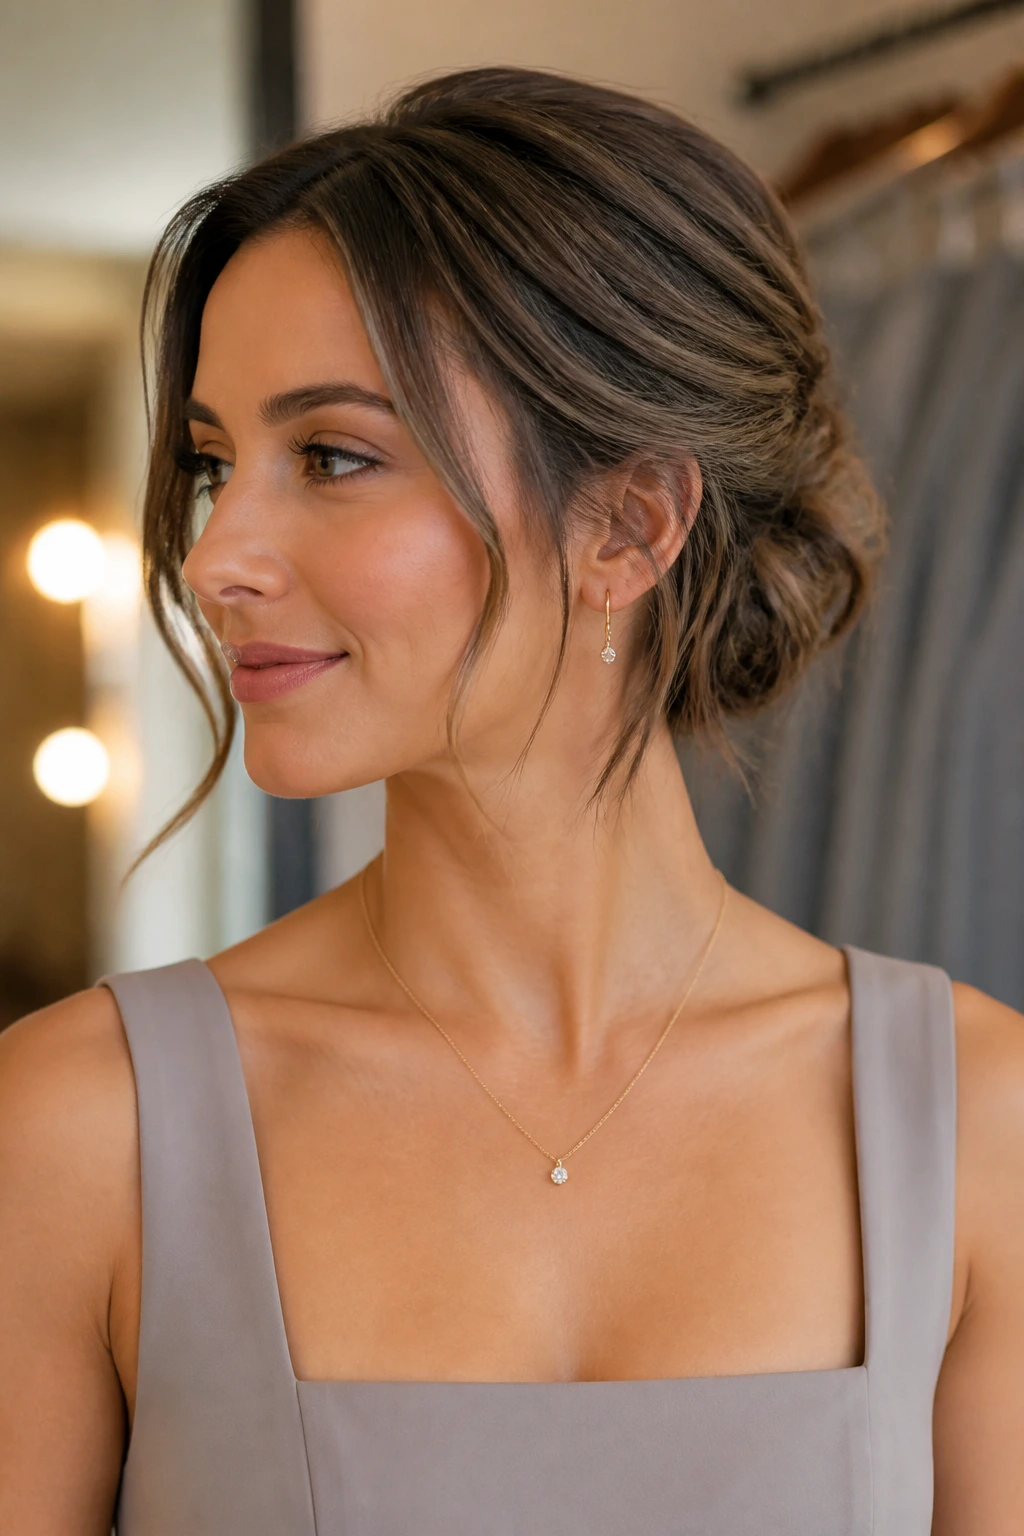
Presentation: Keep the silhouette of the hair in conversation with the dress. A deep side wave works with one-shoulder gowns because both shapes lean the same way, while a low chignon suits high necklines because it leaves the collarbone area clean. If the dress has a detailed back, choose a style that doesn’t bury it under loose hair.
Accompaniments: Long earrings pair best with tucked styles, French twists, sleek knots, and low buns. A shorter necklace can sit well with half-up looks or soft blowouts. Veils and combs need stronger anchors than flowers do, so match them to styles with a solid seam — a twist, a braid, or a rolled nape.
Portions: For very fine hair, less decoration usually reads better. One comb, two pearl pins, or a single ribbon often looks more polished than a crowded cluster of accessories. If several bridesmaids are wearing the same style, change the accessory placement slightly so each one keeps a little individuality.
Beverage Pairing: Water, obviously. And maybe coffee before the trial run, not after. A style that depends on a clean part and a calm hand tends to behave better when you are not rushing through it half-dressed.
Extra Touch-Ups That Keep Bridesmaid Hair Looking Intentional
Flavor Enhancement: A light mist of texture spray at the roots before styling gives the hair more grip than a heavy cloud of hairspray at the end. That one choice changes how long the style lasts.
Customization: If a bridesmaid has a narrow face, add a little width at the temples with soft waves or pulled-out braid edges. If the face is broader, keep the sides sleeker and let the height happen at the crown.
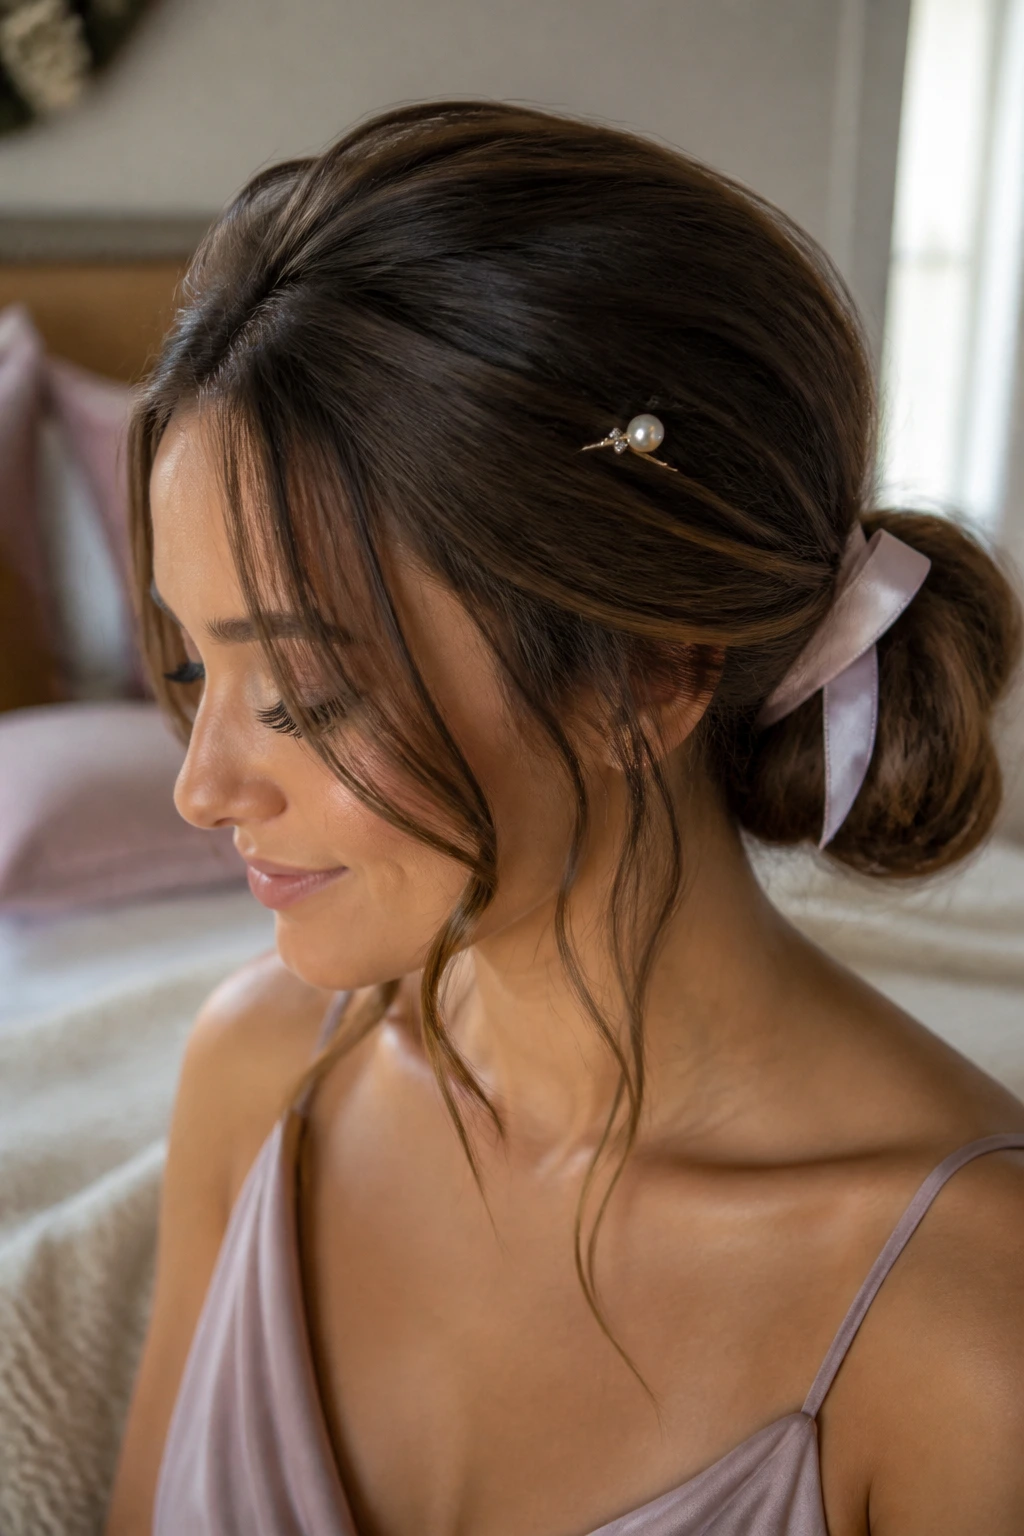
Serving Suggestions: In hair terms, that means finishing touches. A pearl pin at one side, a satin ribbon at the bun base, or one loose curl behind the ear can make the style feel considered instead of generic.
Make-It-Yours: Fine hair can still handle personality. A bridesmaid who hates softness can go sleek and centered. Someone who wants romance can add wispy pieces and floral pins. Someone else can keep it modern with a low knot and one sharp part.
Common Mistakes That Flatten Thin Hair Fast
The first mistake is washing the hair too clean. Freshly washed strands can be slippery and too soft, which sounds nice until pins start sliding. A day-old texture, or at least a little dry shampoo and mousse, gives the style something to hold onto.
The second mistake is over-teasing. A little lift at the crown is useful; a tangled nest at the root is not. If the backcombing looks rough from three feet away, it’s too much. Smooth the top layer back over the teased section and stop there.
The third mistake is using accessories that weigh more than they help. Big clips, thick floral pieces, and oversized combs can pull thin hair down by lunchtime. If the decoration needs its own structural support, it’s probably too heavy.
Another problem is brushing out curls too hard. Fine hair often needs the curls to stay partially defined. If you brush them into soft waves, that’s fine. If you brush them into airy fuzz, you’ve gone too far. Use your fingers first, brush only if the style needs it, and do it gently.
Finally, don’t build the whole look on one single anchor point. One lonely bobby pin at the back is a bad plan. Thin hair needs several small grips spread across the style so the weight is shared.
Variations and Adaptations for Different Hair Lengths and Textures
The Short-Length Edit: If the hair stops at the chin or just below the shoulders, lean on pin waves, tucked rolls, and side-pinned shapes. These styles keep the silhouette tidy without asking the hair to do more than it can.
The Curly-Hair Friendly Version: Fine curls need moisture, but not too much. Use a light cream or mousse, then build the bridesmaid style while the curl pattern still has spring. Braids, low buns, and halo knots work well when the curls are arranged, not stretched.
The Clip-In Boost: For bridesmaids who want more fullness, small clip-in pieces can help, but only if they’re matched carefully and placed low enough to stay hidden. The goal is not to make the hair look twice as thick. It’s to give the style a little extra body where the shape needs it.
The No-Heat Plan: Rollers, pin curls, and overnight braids can give thin hair lift without a curling iron. The finish is softer and usually less polished, but it can still look wedding-ready if the pins and parting are clean.
The Humid-Day Backup: Choose a style with a low center of gravity — low bun, sleek knot, faux bob, or tucked roll. Higher styles can swell or frizz in damp air. Lower ones tend to hold their shape better.
The Minimalist Bridal Party Look: When the dresses are already loud, keep the hair simple. Sleek low pony, smooth knot, or a plain side wave with one clean pin. The hair should support the outfit, not compete with it.
Make-Ahead, Trial Run, and Wedding-Day Timing
A trial run is worth more than people think. Thin hair often behaves differently once the right products are in it, so test the style at least once before the event and wear it for a few hours around the house. Walk, sit, bend over, and move your head around. If a twist slips when you put on a sweater, it will slip again when the dress zipper goes up.
For washing, the sweet spot is usually the day before rather than the morning of. Freshly washed thin hair can be too soft, too clean, and too slippery. If the scalp gets oily fast, wash in the morning and let the roots cool and dry fully before styling, then use dry shampoo as the final prep step.
Plan the style in layers. Heat styling, cooling, setting, and pinning all need time. A good rule is to let curls cool for at least 10 to 15 minutes before brushing them out. If a wave drops while you’re dressing, clip it back up and let the pin rest there for a few minutes while you finish everything else.
Keep a tiny touch-up kit close. Extra bobby pins, a small travel hairspray, one comb, a few clear elastics, and a lipstick-sized dry shampoo can rescue most situations. You do not need a full salon bag. You need the few things that actually fail most often.
Frequently Asked Questions About Bridesmaid Hairstyles for Thin Hair
Which bridesmaid hairstyles make thin hair look fuller fastest?
Low buns built from twists, half-up rope twists, bubble ponytails, and side-swept waves usually create the strongest full-hair illusion. They rely on shape and texture instead of raw volume, which is why they read better on fine strands.
Should thin hair be washed the day of the wedding?
Usually, no. Hair that’s freshly washed can be too slippery and hard to pin. Washing the day before gives the hair a little grip, and that small amount of texture makes braids, twists, and buns hold much better.
Can clip-in extensions help bridesmaids with thin hair?
Yes, if the color match is exact and the pieces are placed carefully. A few well-positioned clip-ins can add body at the crown or length at the ends, but too many pieces can make the style heavy and harder to secure.
Do braids work on fine hair or do they expose too much scalp?
Braids absolutely work, but they need to be small, snug, and placed where they add texture instead of showing every part line. Loosening the outer edges after braiding helps them look fuller without falling apart.
What if the curls fall flat before the reception?
Pin the sections back into the style while they’re still warm if possible, and keep a travel-sized texturizing spray or dry shampoo nearby. Thin hair responds better to a quick re-set than to a full redo halfway through the event.
How many bobby pins does thin hair usually need for an updo?
More than people expect, but not in one pile. A simple low bun might need 6 to 10, while a French twist or braided crown can take 10 to 14 depending on the hair length and slipperiness. Use enough to spread the weight around.
Are sleek styles better than messy styles for thin hair?
Sleek styles can be safer when the hair is very fine because they rely less on loose bulk. That said, a controlled messy style with texture at the root and a tidy base can look just as full if the pieces are placed well.
Can short hair still look bridesmaid-ready?
Absolutely. Pin waves, side clips, tucked edges, and soft bends can look polished on a bob or pixie. Short hair often photographs well because the shape stays visible and doesn’t get swallowed by the outfit.
A Last Pin Before You Leave the Mirror
Thin hair does not need to be hidden on a wedding day. It needs good architecture. A style with a clear base, a little texture, and one smart accessory almost always beats a style that’s been overbuilt in hopes of faking density.
That’s the thread running through all 17 looks here. Choose shape first, volume second, decoration last. If you do that, the hair will still look like itself at the end of the night — only calmer, prettier, and much less likely to surrender before the cake is cut.
