



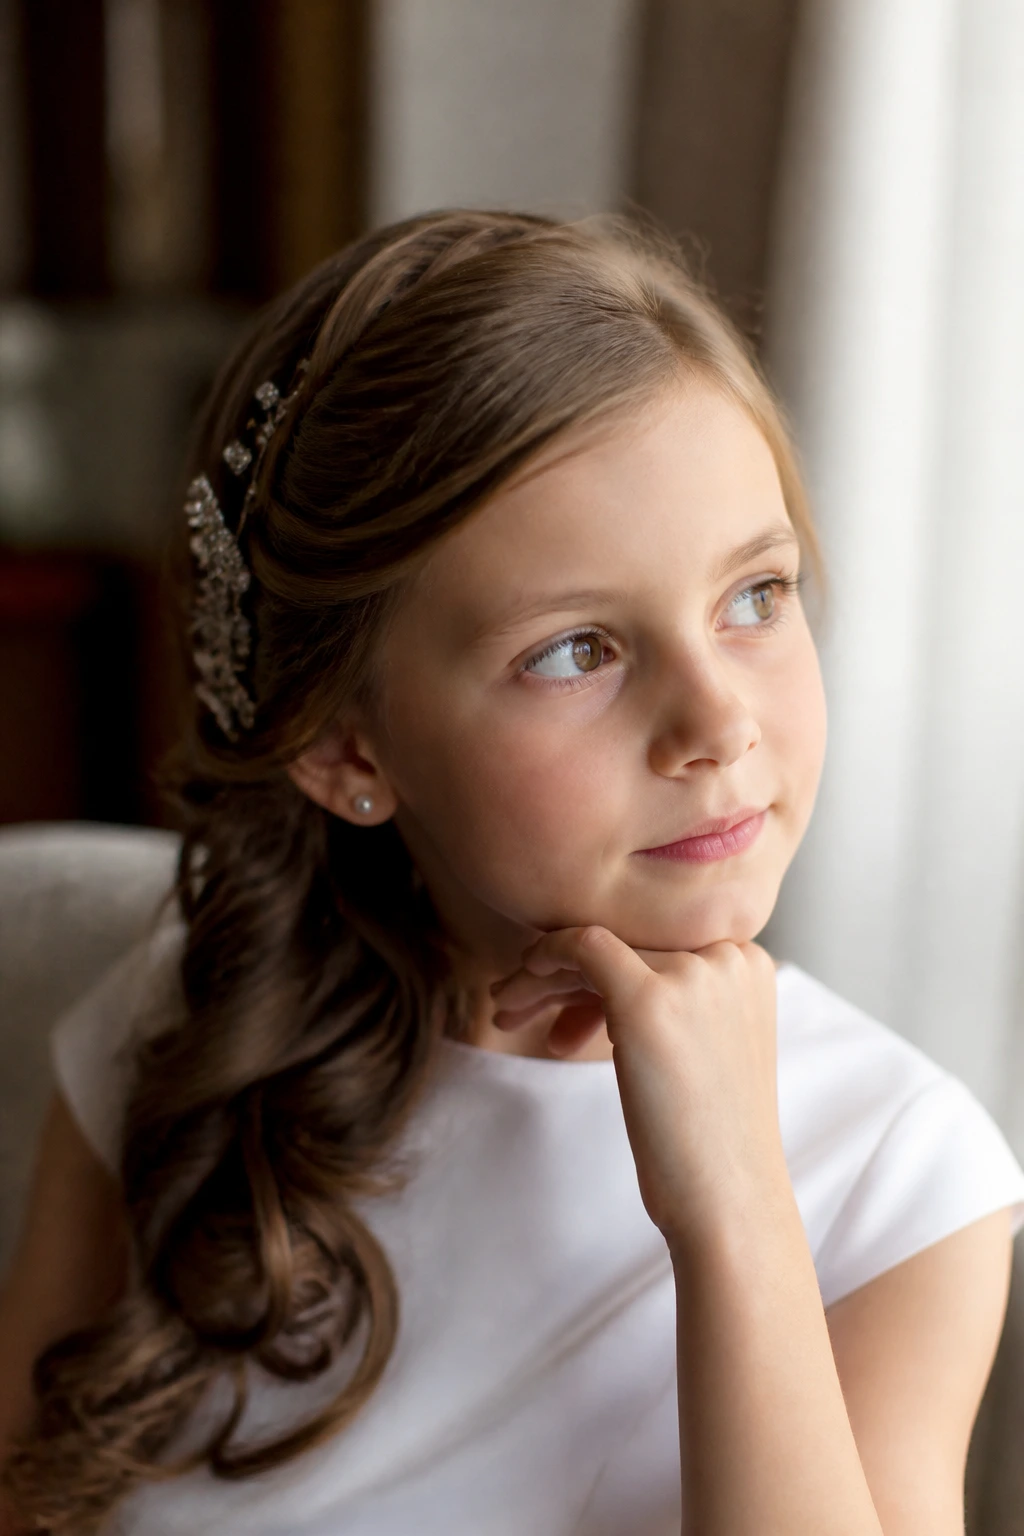
A First Communion morning is not the day for a hairstyle that has to be rescued every ten minutes. The walk into church, the kneeling, the family photos, the ribbon catching on a cardigan sleeve — all of it asks for a style that stays put without looking stiff. First Communion hairstyles work best when they feel gentle, tidy, and a little special, not piled high just to impress the camera.
What I like most about this kind of styling is that the best options usually look simpler than they are. A neat braid anchored low at the nape can read more polished than a fussy updo that starts loosening before the candles are even lit. And because children come in every hair length, texture, and patience level, the right style has to do quiet work in the background.
The sweet spot sits between formal and childlike. A ribbon, a pearl pin, a smooth bun, a soft curl around the cheek — one small detail often does more than three extras. The styles below lean into that balance, with enough structure to survive the service and enough softness to belong on a child who still wants to twirl through the hallway afterward.
Why These First Communion Hairstyles Hold Up So Well
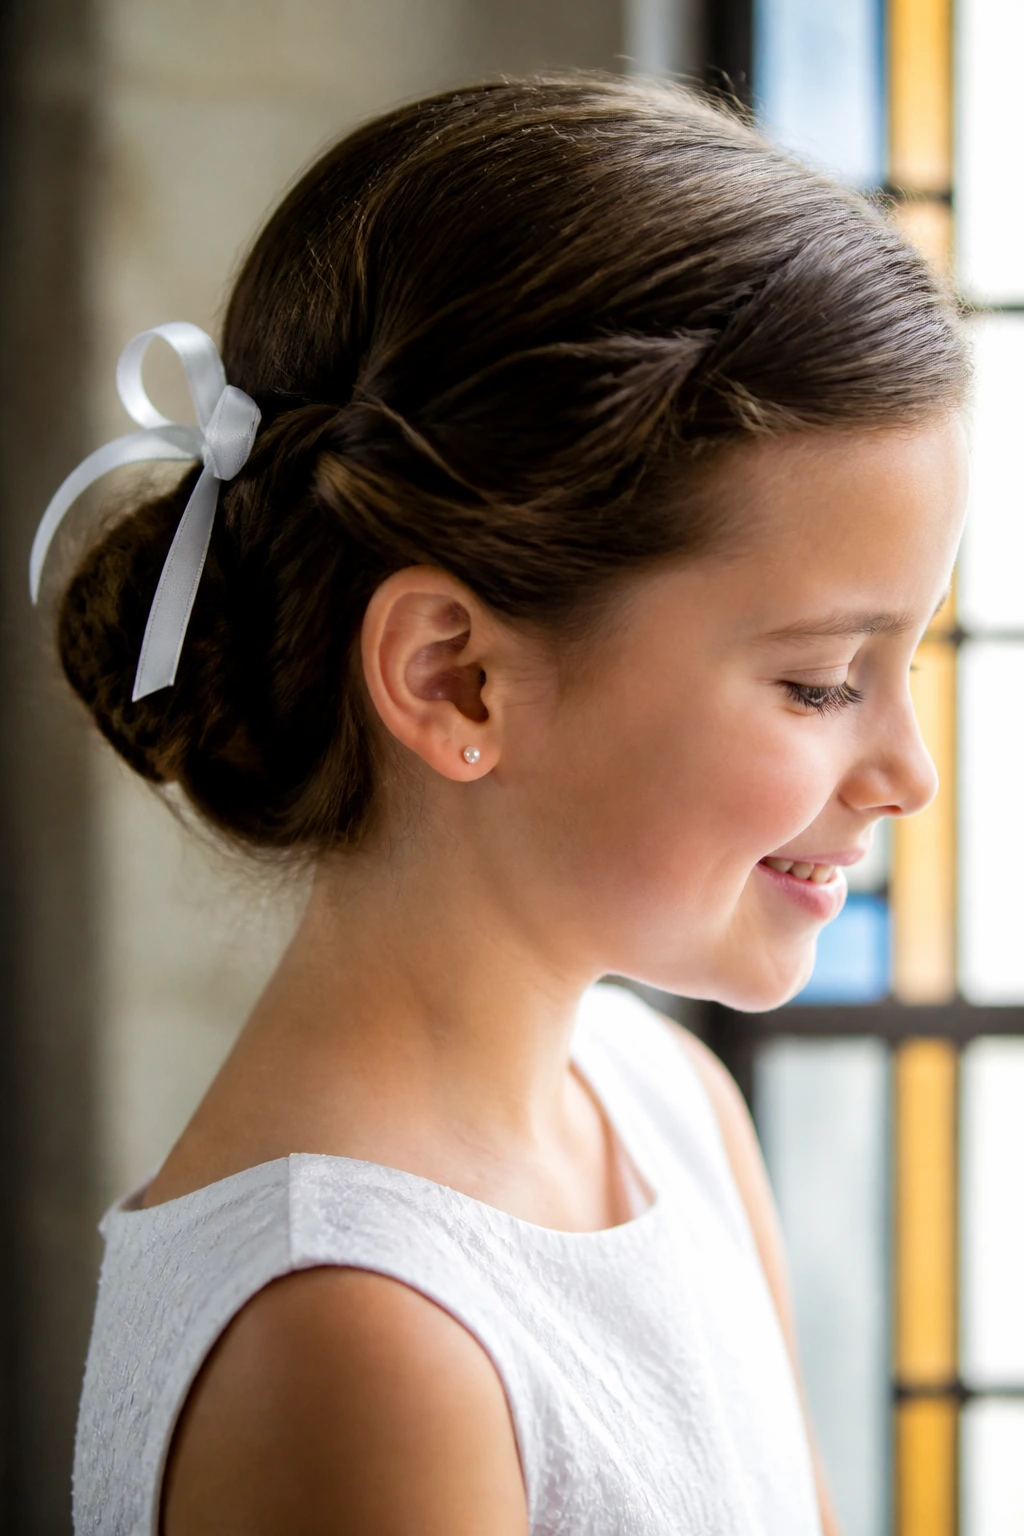
- Low anchor points matter: Styles that sit at the nape or just above it are less likely to shift when a child bows her head, hugs relatives, or leans into a pew back.
- Braids do half the work: A braid gives grip to fine hair and shape to thick hair, which is why it shows up so often in communion styling.
- Softness keeps the look age-appropriate: A smooth bun with a ribbon or a half-up curl set looks special without making the child look overstyled.
- Accessories can do the heavy lifting: A single pearl comb, narrow satin bow, or tiny flower cluster can change a plain base into something that feels ready for the day.
- Photos are kinder to controlled shape: Hair that has a clear line — part, braid, twist, or bun — reads better in family photos than hair that sits loose and shapeless around the face.
- Most of these styles can be adjusted: The same braid can be tighter for fine hair, looser for thick hair, or shifted to one side if a veil comb needs room.
1. Center-Part Low Ballet Bun
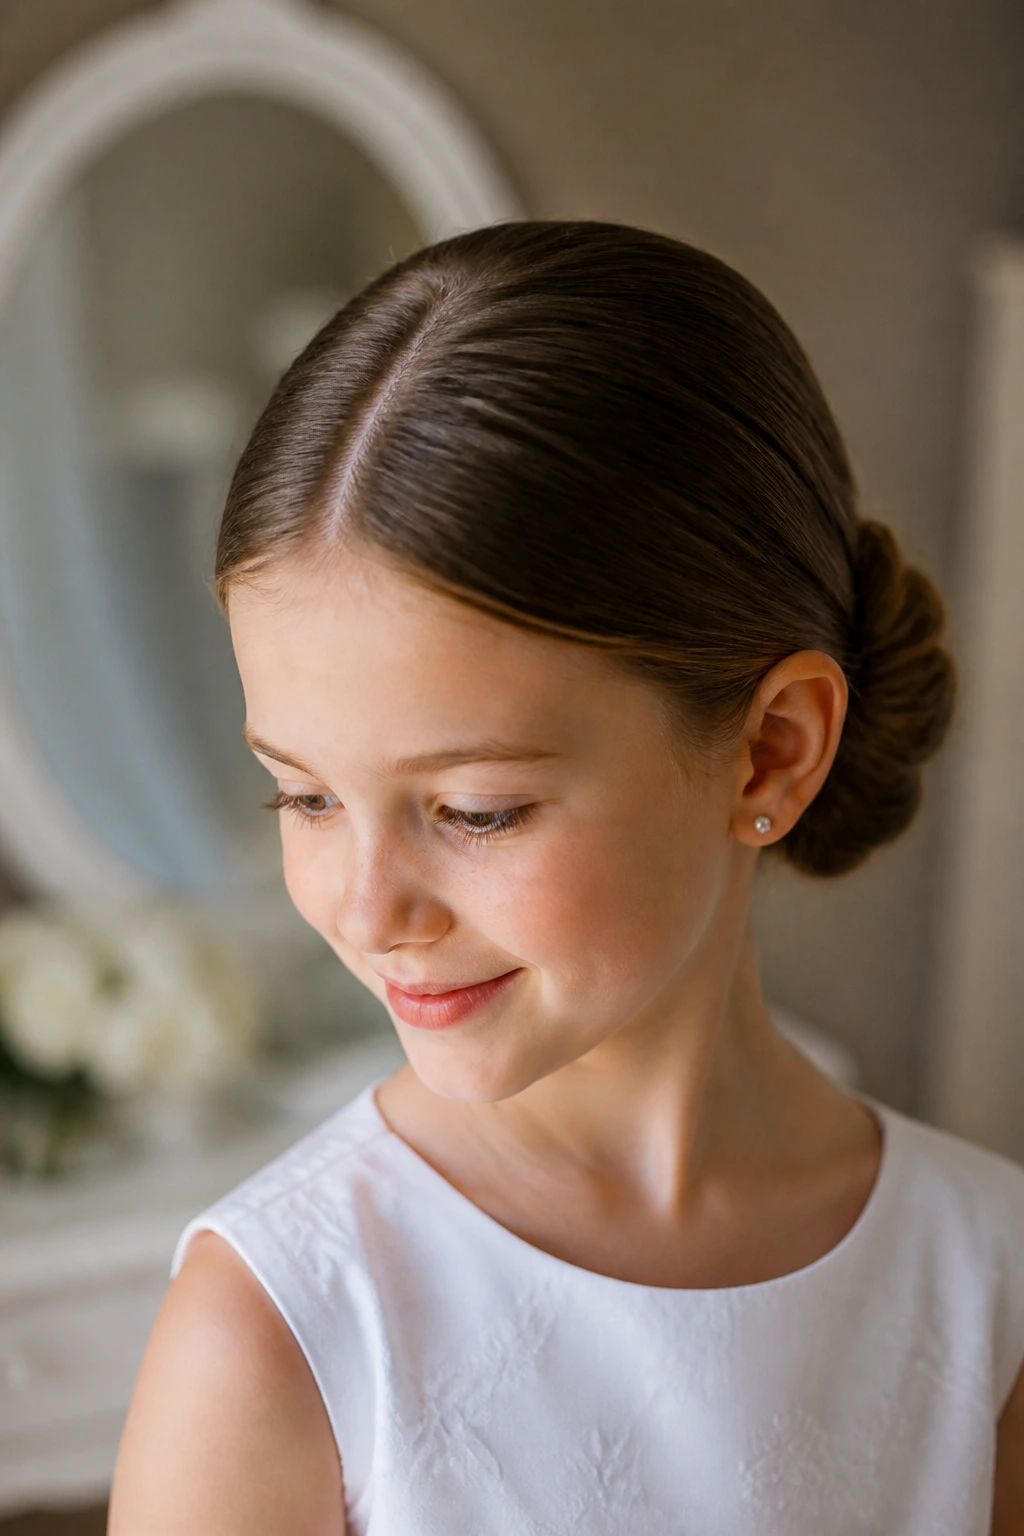
A center part and a low bun is the kind of style that gets out of the way and still looks intentional. The hair sits close to the nape, so there’s no top-heavy shape to wobble around during the service, and the clean part keeps the face open for photos. I like this one when the dress has lace, embroidery, or a high neckline, because the hair doesn’t compete with it.
The bun itself doesn’t need to be huge. In fact, I prefer it small and neat, wrapped once or twice and pinned with 6 to 8 bobby pins that match the hair color. A light mist of hairspray on the brush before smoothing the top helps tame flyaways without making the hair look shellacked.
2. Side-Part Low Chignon With a Smooth Sweep
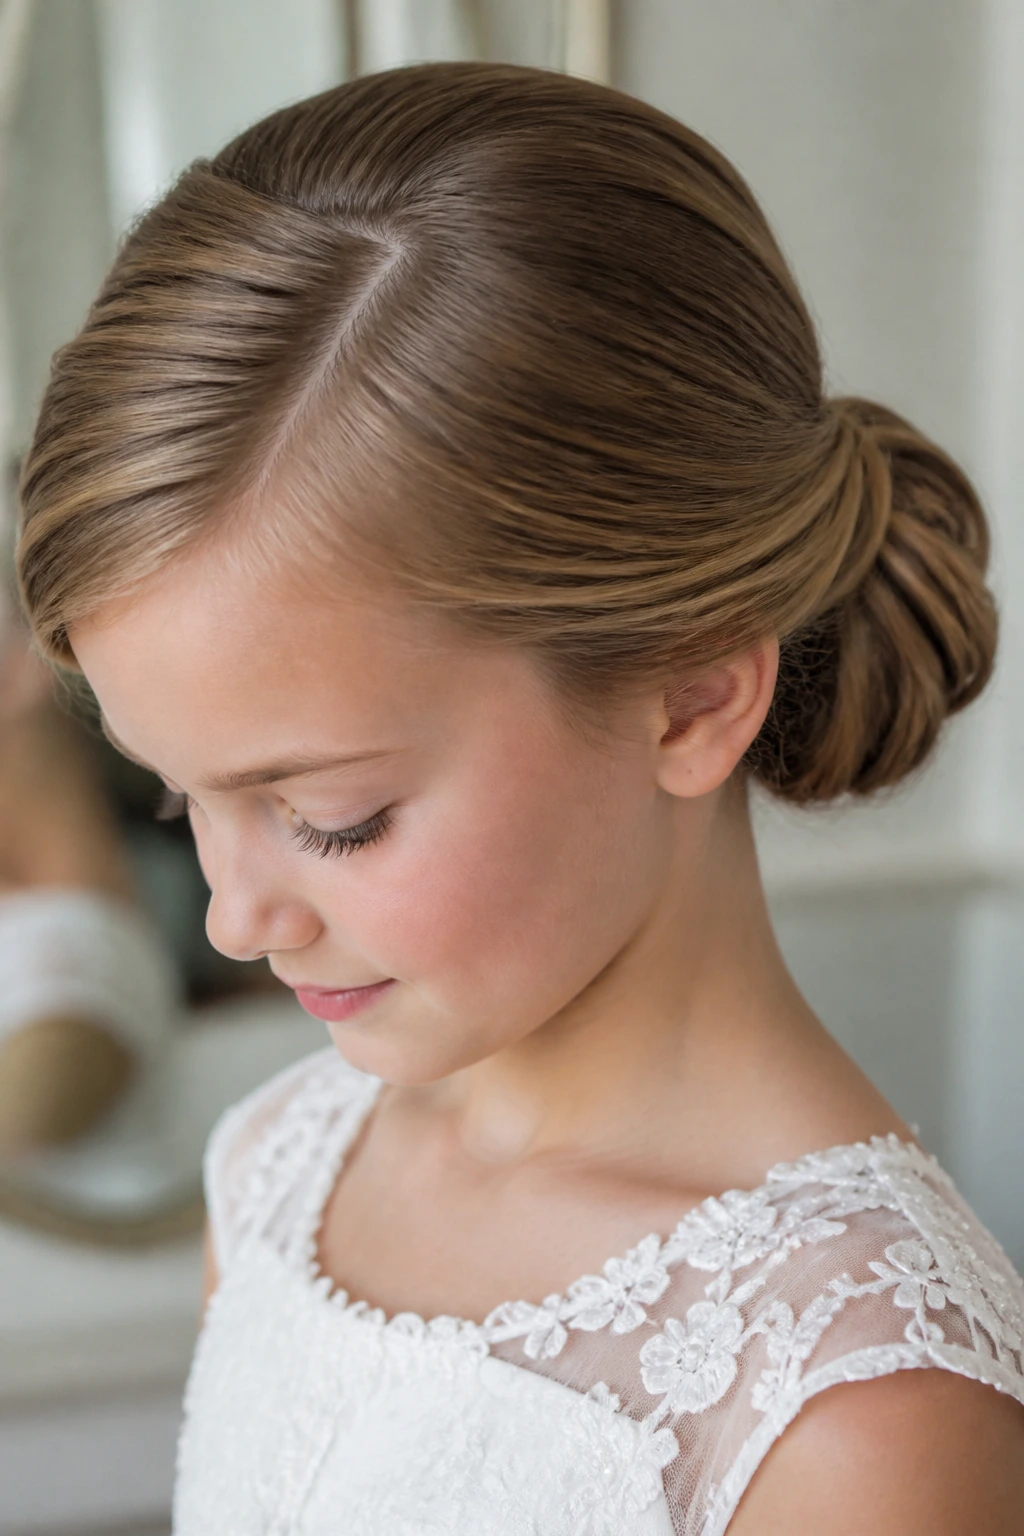
Why does this style work so often? Because the side part adds a little softness before the hair even reaches the bun. The sweep across the forehead gives the style a quieter, more formal line, and the chignon at the nape keeps everything grounded.
This is one of my favorite First Communion hairstyles for children with round or heart-shaped faces, because the side part gently changes the balance without making the style feel fussy. If the hair is straight and slippery, prep the roots with a pea-size bit of mousse and blow-dry it in first. That tiny step makes the pins behave later, which is worth the extra five minutes.
3. Soft Half-Up Twists and Loose Curls
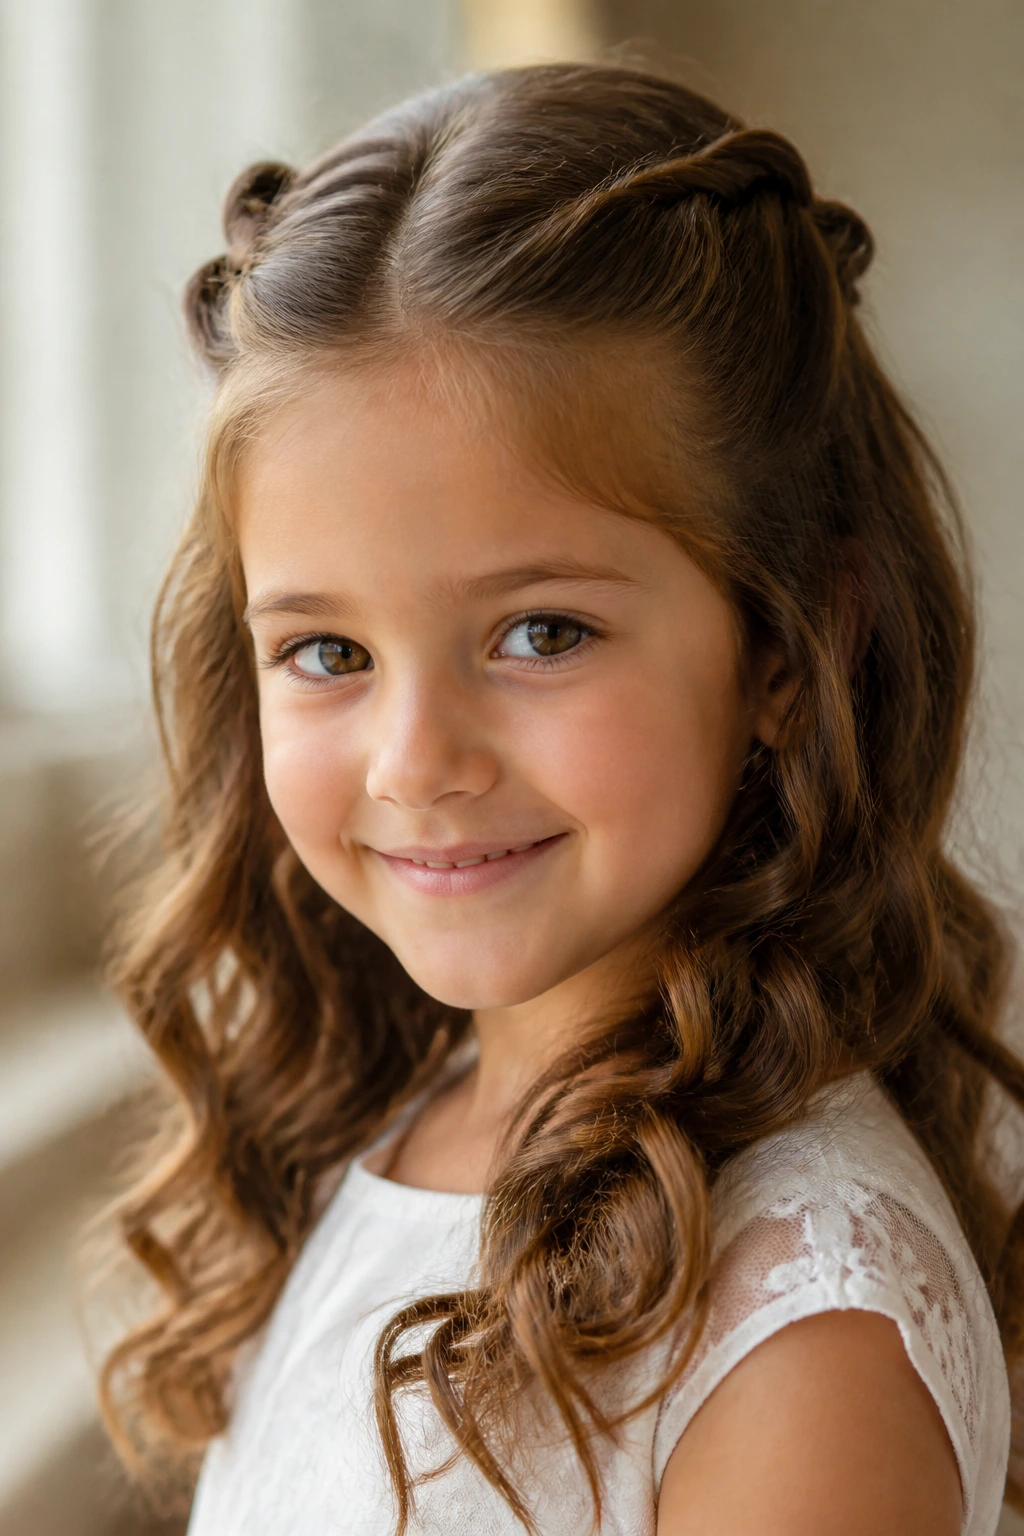
If you want hair down but not loose and wild, this is the place to land. Two small sections are twisted back from the temples and pinned at the crown, leaving the rest in soft curls that fall to the shoulders or past them. It looks sweet in photos, and it gives the face a neat frame without trapping the whole head in pins.
A 1-inch curling iron or wand gives the cleanest bend, especially on medium or long hair. Curl away from the face, let the curls cool, then separate them with fingers instead of a brush. A brush will flatten the shape faster than you think. That’s not the goal here.
4. Ribbon-Woven Crown Braid
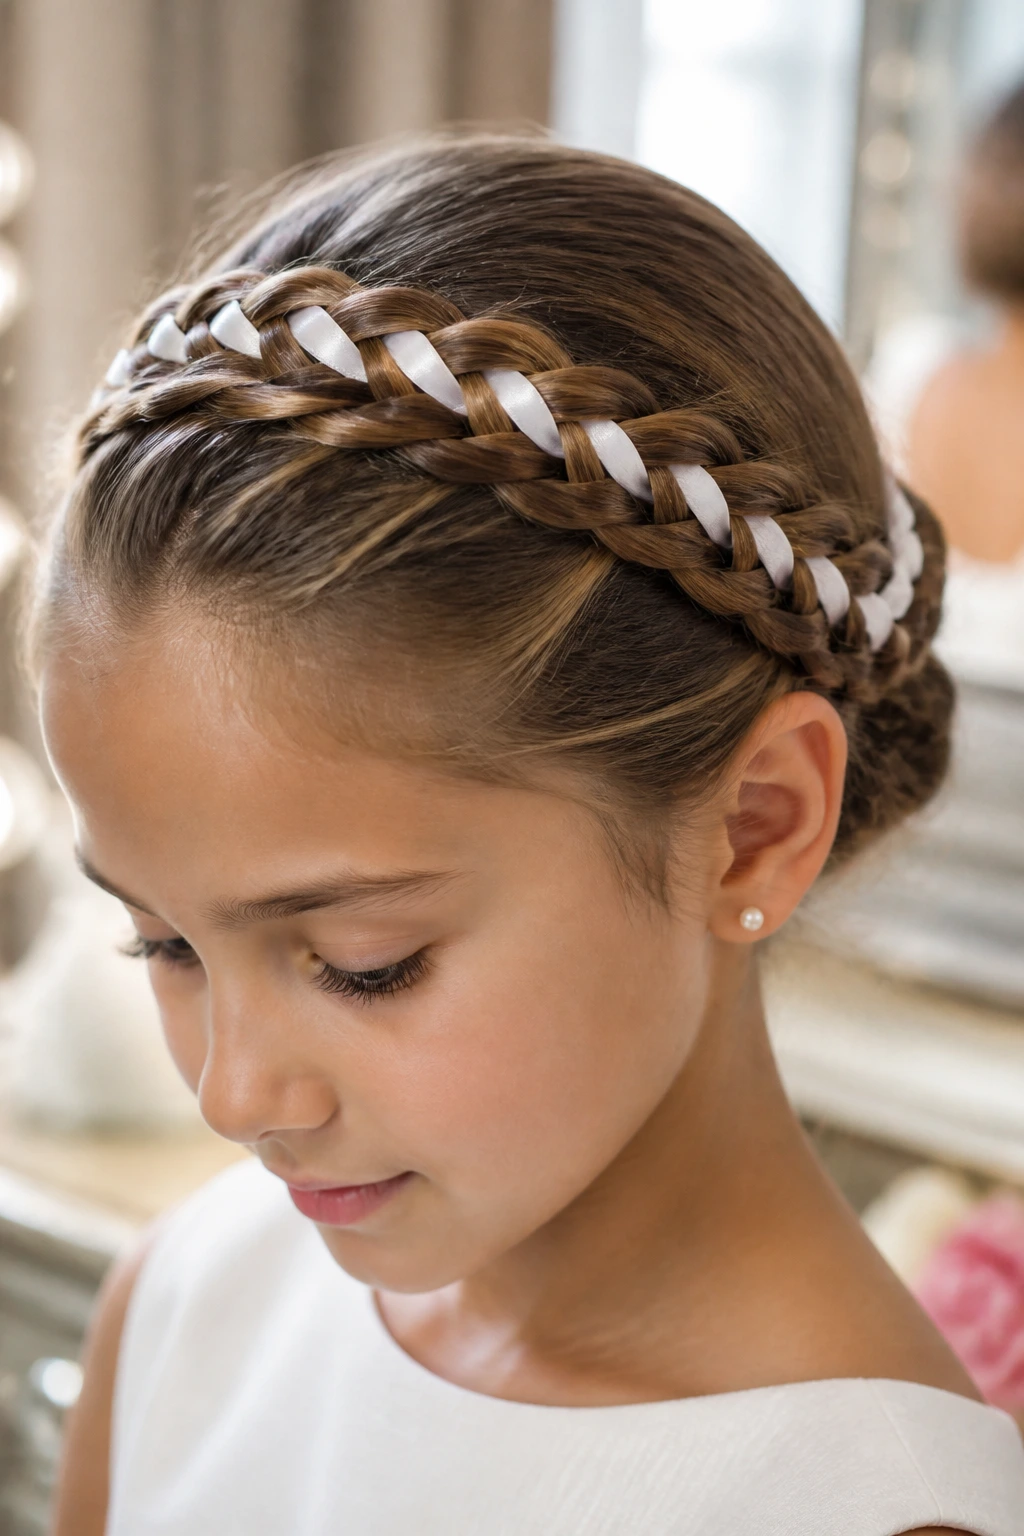
This one has a little ceremony to it. A braid runs along the hairline or just behind it, and a thin satin ribbon threads through the strands so the braid picks up a soft shine as it moves. The ribbon should be narrow — 1/4 inch to 1/2 inch is enough. Wider than that, and it starts to overpower the child’s head.
I especially like this style with a plain dress or a simple veil, because the braid becomes the detail. It also works well on hair that’s a little layered, since the braid can help control shorter pieces near the front. Tie the ribbon at the end with a small knot and tuck the tail under the braid so it doesn’t wag around all morning.
5. Braided Halo That Hugs the Hairline
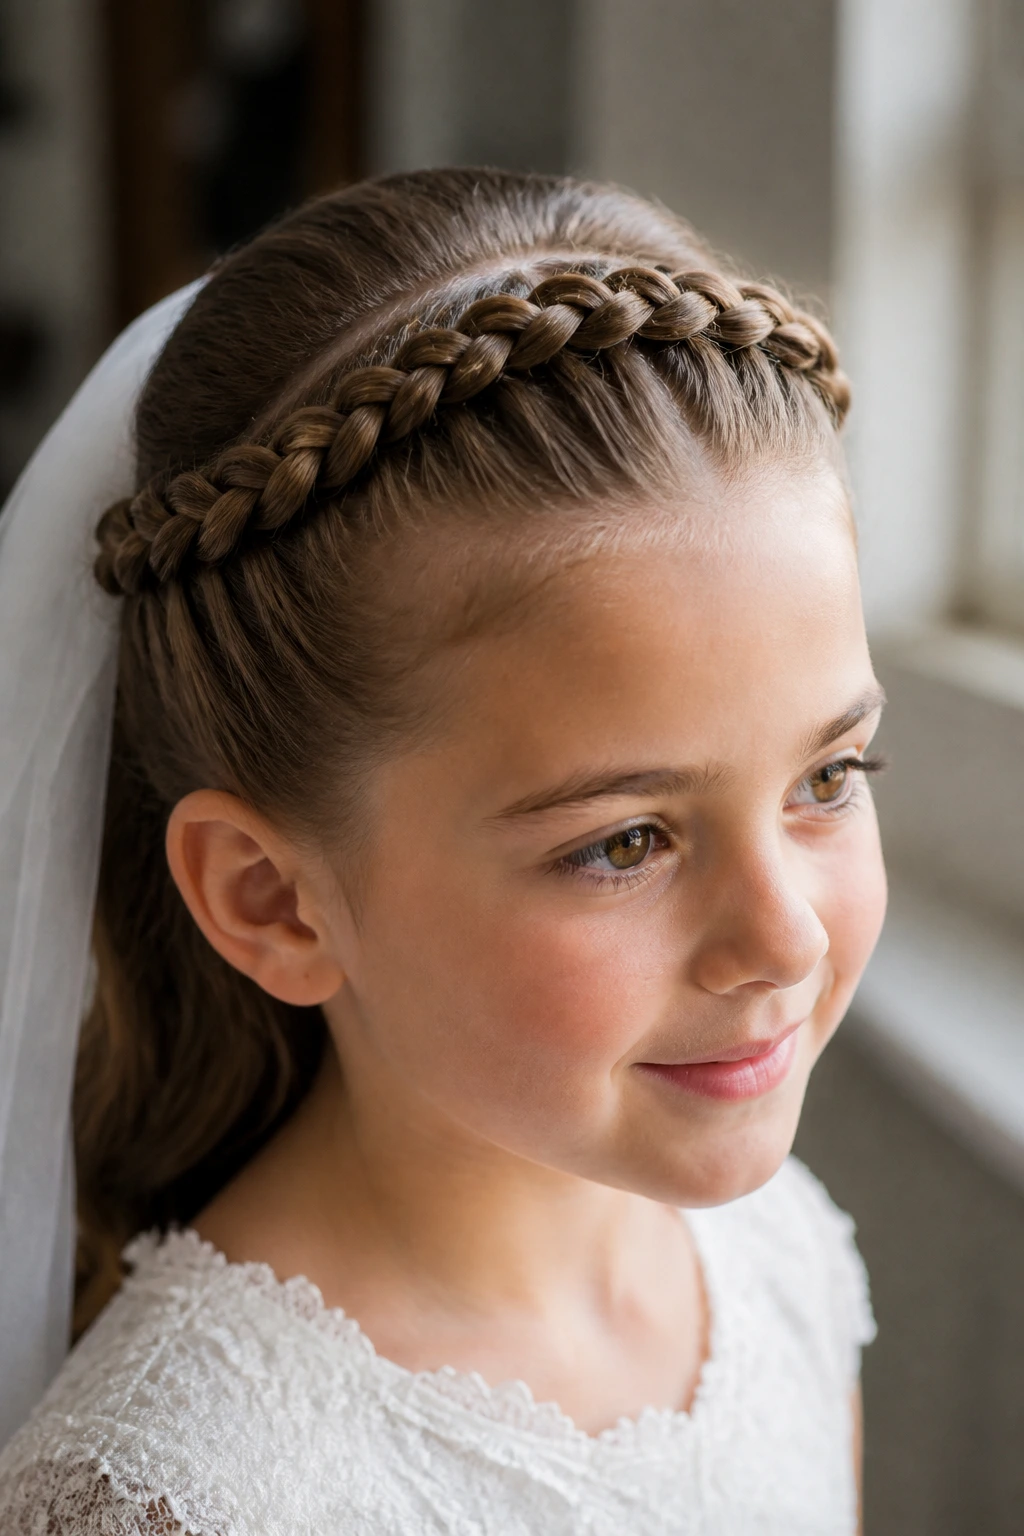
A braided halo is neat in the best way. The braid circles the head like a soft crown, and because it stays close to the hairline, it keeps every loose front piece out of the eyes. That matters more than people think. Communion mornings involve smiles, tears, hugs, and more than one quick dress adjustment.
This style works beautifully when you want a veil comb to sit behind the braid rather than in it. The braid gives a clean surface for pins, and the halo shape looks calm from every angle. If the hair is thick, pull the braid gently after it’s secured to widen it a little. If it’s fine, keep the sections tighter so the braid doesn’t vanish.
6. Waterfall Braid Over Gentle Waves
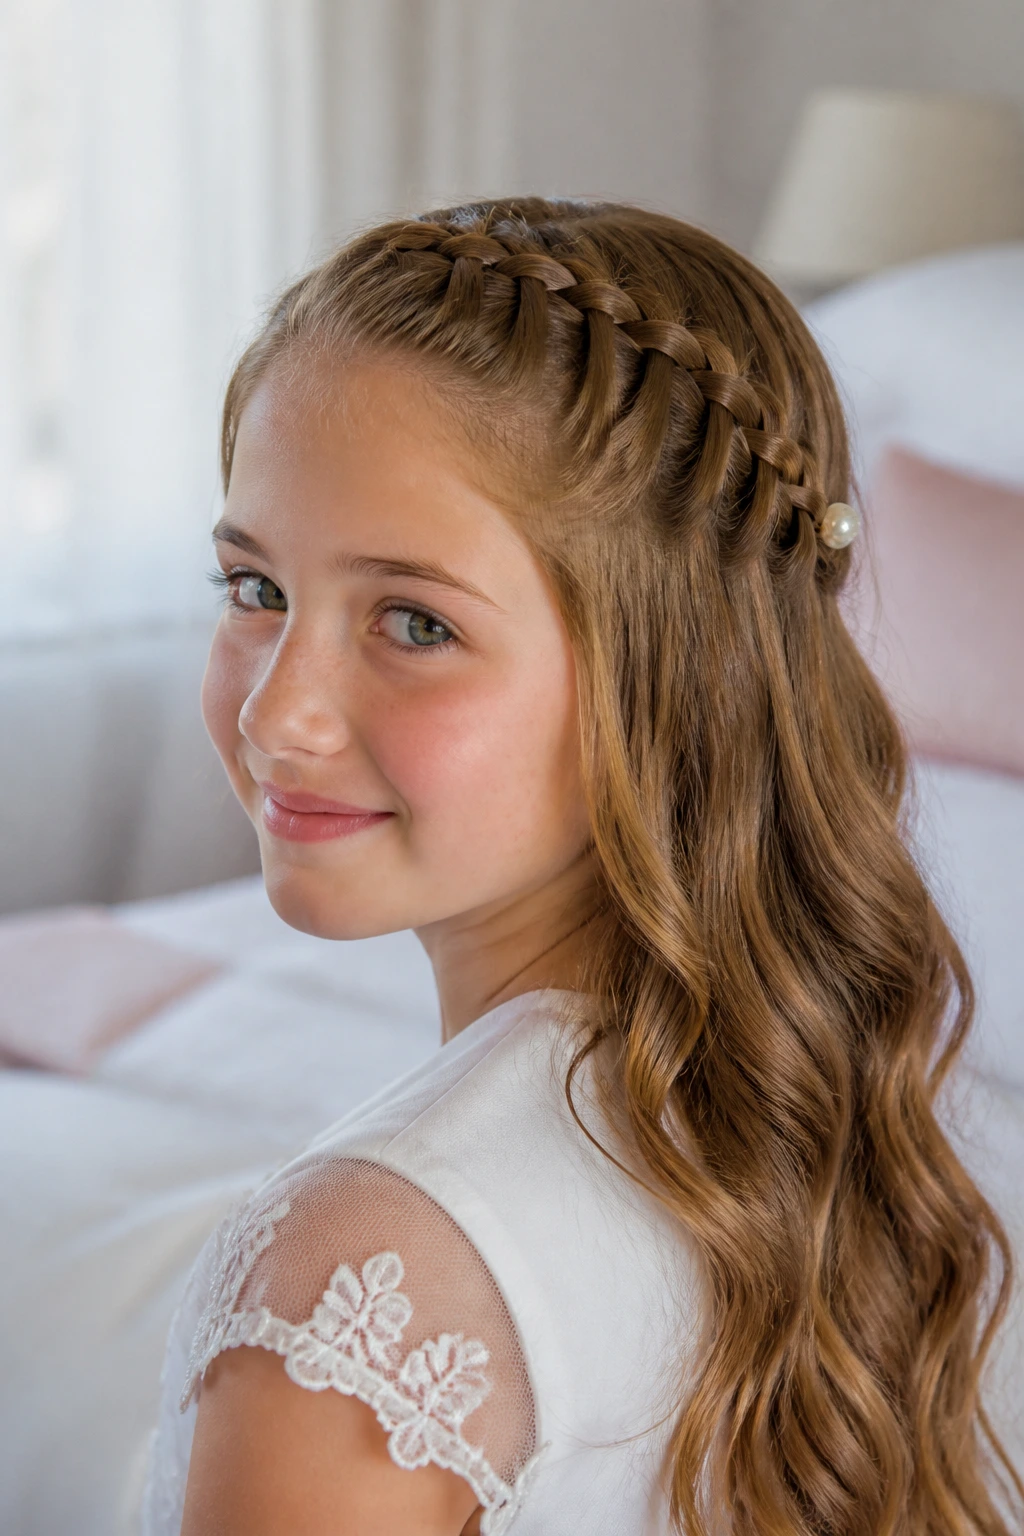
A waterfall braid always looks a bit more intricate than the effort it takes. The top section moves along the crown, dropping strands through the braid so the rest of the hair falls in soft, waved lengths underneath. On a child, that little cascade of hair feels light and airy instead of stiff.
This style is strongest on shoulder-length hair and longer. The braid creates structure; the waves do the softness. I’d keep the waves loose, not spiraled into tight ringlets, because tight curls can look overdone with the braid’s pattern already doing visual work. A small pearl pin at the end of the braid is enough. More than that starts to crowd the shape.
7. Lace Braid Half-Up With Curled Ends
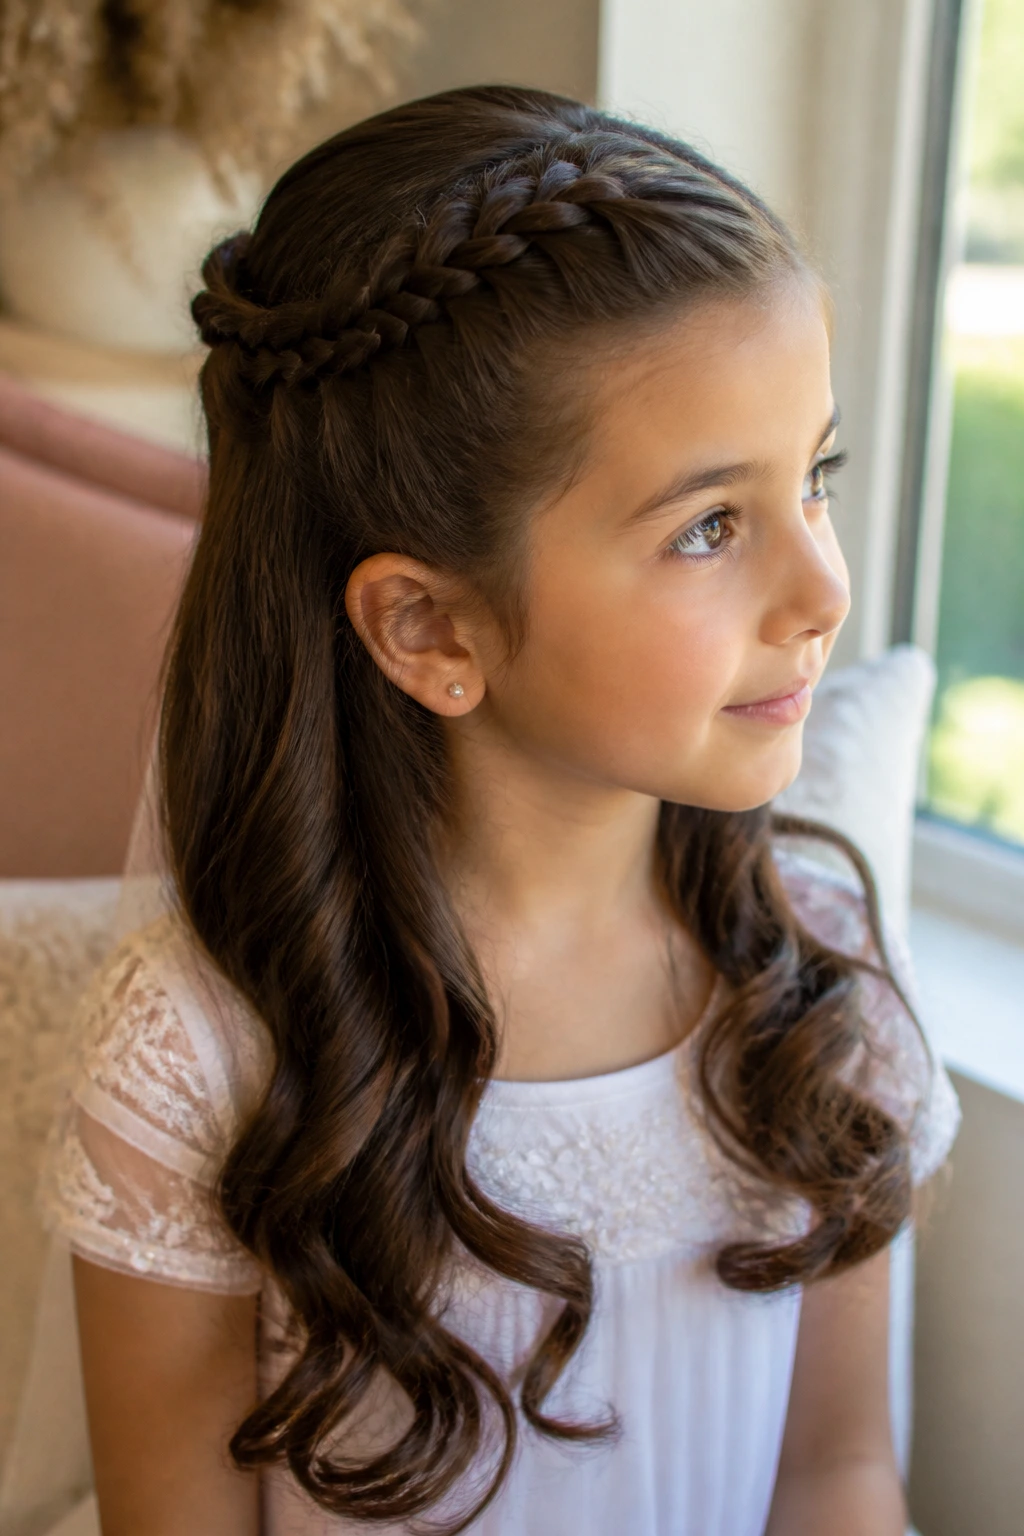
The lace braid is a cousin of the waterfall braid, but it keeps feeding in hair instead of letting sections drop away. That makes the top of the style look tidy and the finished shape feel more anchored. It’s a nice choice if the child tends to touch her hair, because the braid has fewer loose edges to unravel.
I like ending it with curled ends rather than stick-straight lengths. The contrast between the braid and the curl gives the style a little movement. If the ends are very fine, run a soft curl cream through them first so they don’t fray into puff. A little control goes a long way here.
8. Rope-Twist Half-Up With a Satin Bow
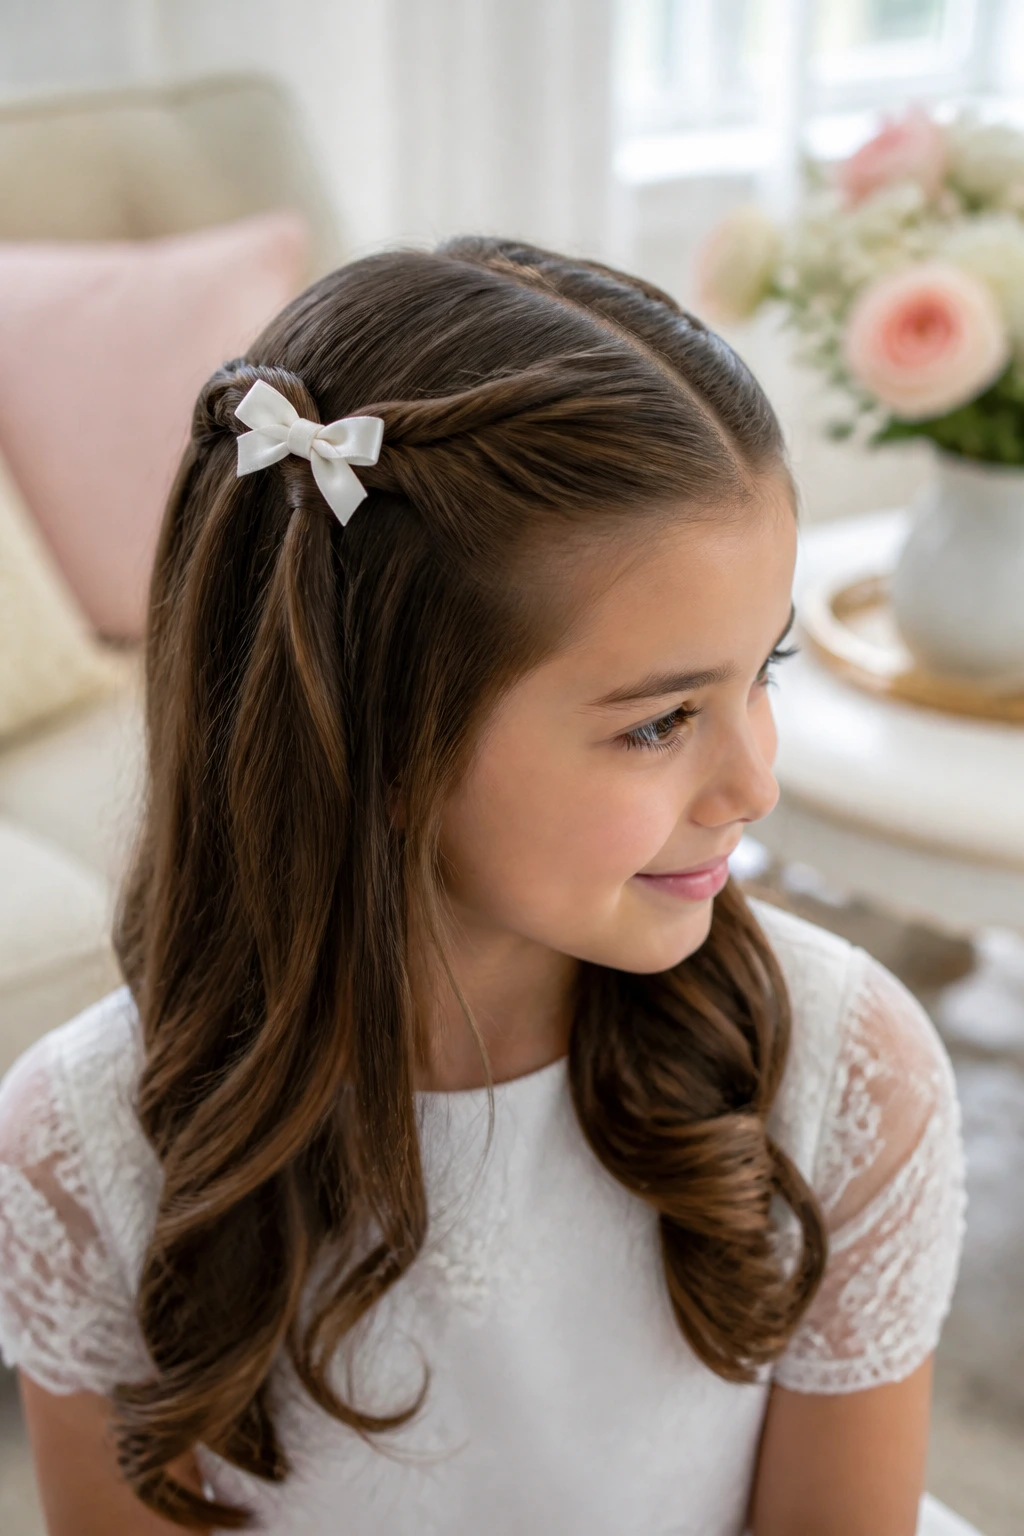
This one is fast, which I appreciate on a morning with shoes, stockings, and a child who suddenly cannot find one earring. Two sections twist back from each side, meet at the crown, and get tied or pinned under a satin bow. The result is neat, light, and easy to repeat if one side comes loose.
It works especially well on fine hair because rope twists hold better than you’d expect once they’re twisted tightly and pinned. Keep the bow small and flat, not oversized. A big bow can tilt the whole head visually and make the style look more costume than communion.
9. French Braid Tucked Into a Low Bun
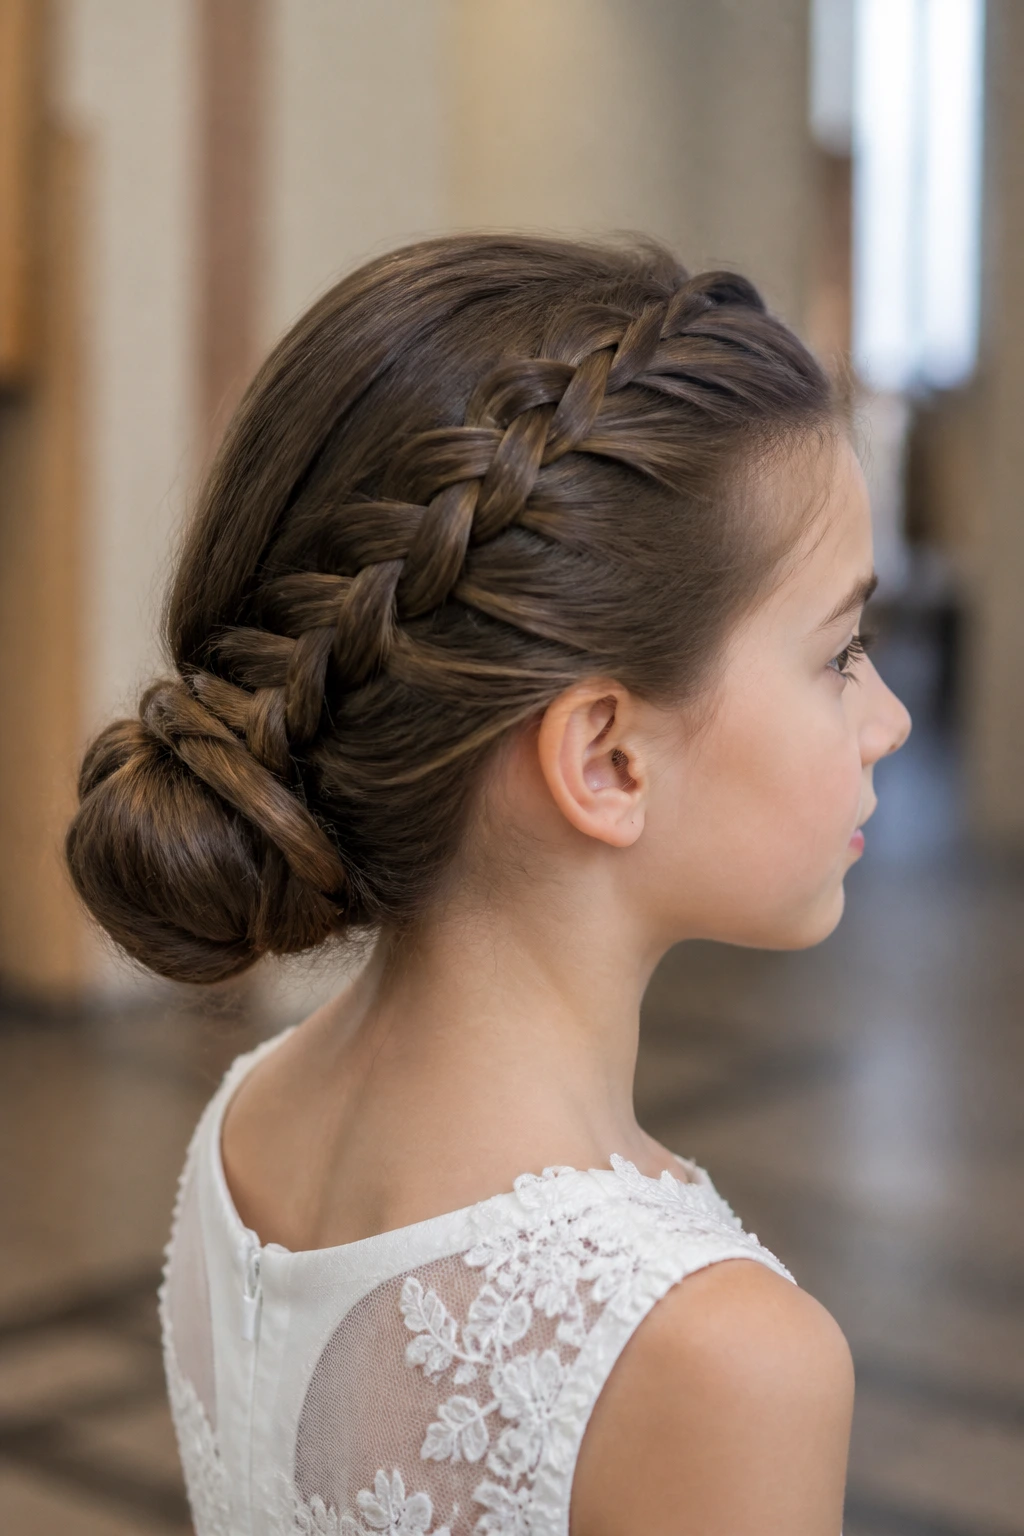
If you want one style that refuses to fall apart, this is the one I reach for. The French braid starts at the crown, collects the hair as it moves down, and then disappears into a low bun at the nape. The braid gives grip, the bun gives weight, and the two together stay put better than almost anything else on this list.
I like this for active kids. They can move, hug, bow, and sit through a long service without the style shifting much. A few hidden U-pins inside the bun help keep the shape round. If the hair is very smooth, mist the braid lightly with texturizing spray before wrapping it into the bun.
10. Bubble Braid Ponytail With Tiny Elastics
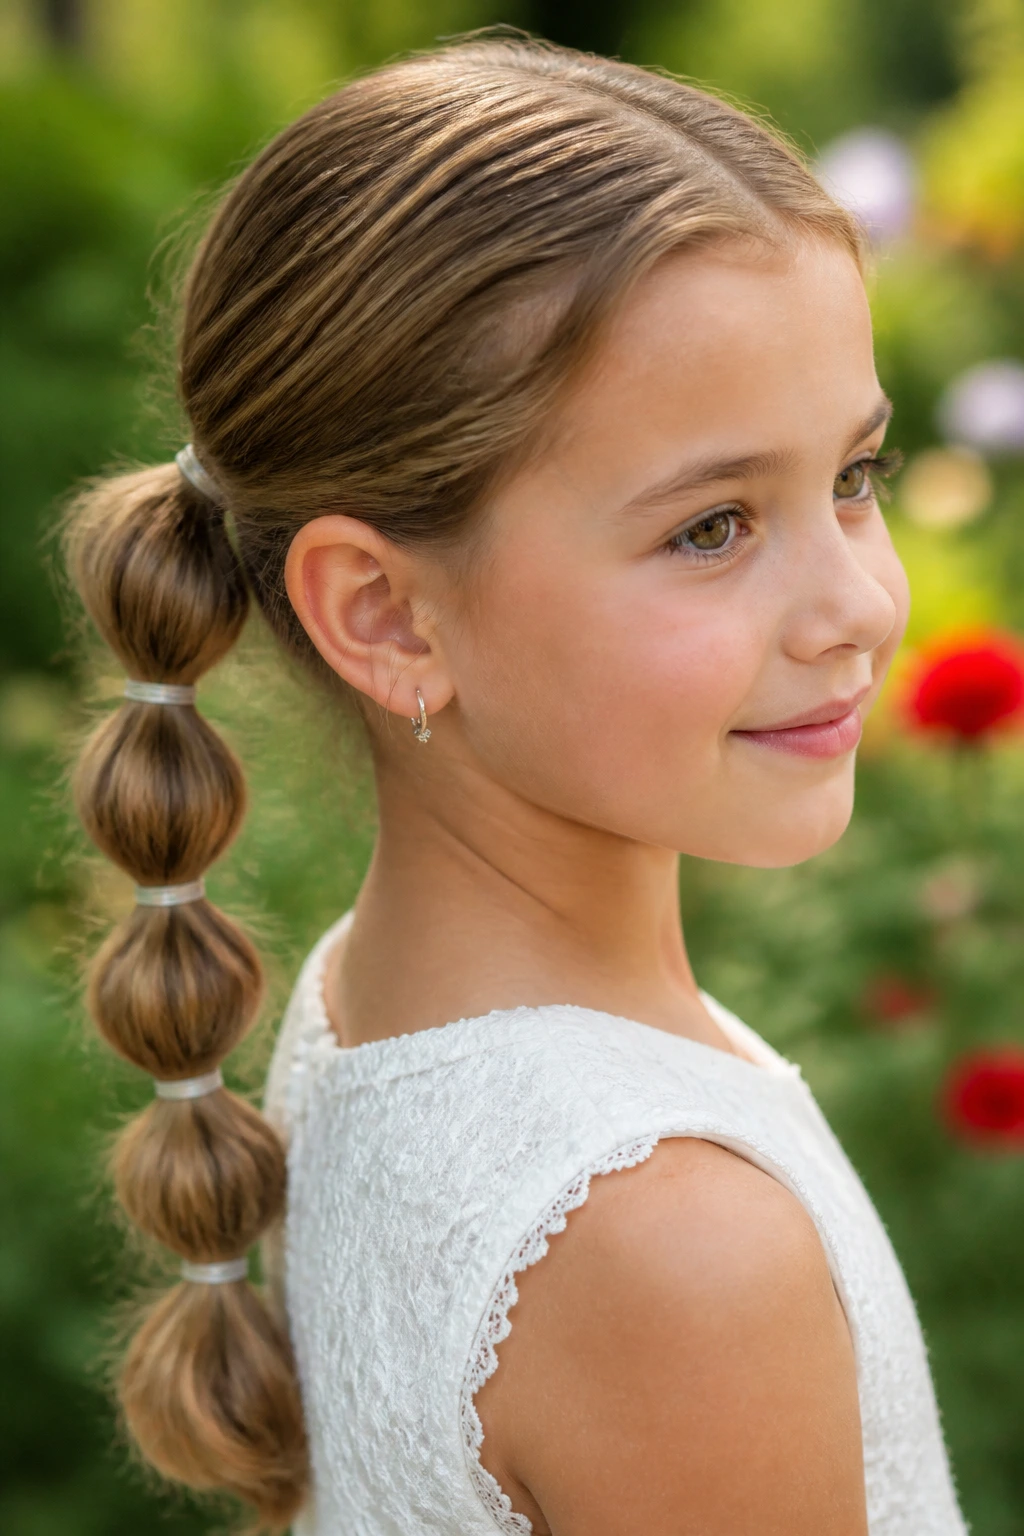
Bubble braids look playful, but this version can be pared down enough for a First Communion. The ponytail sits low or mid-low, and small clear elastics divide it into even sections so each “bubble” puffs softly between the bands. It’s clean, tidy, and a little unexpected.
The trick is to keep the bubbles round but not huge. Gently tug each section after tying it off, then stop before the shape gets cartoonish. I prefer this on medium to long hair that doesn’t want to stay in a braid. A bubble braid solves that problem without asking for perfect strand control.
11. Side Braid Into a Low Ponytail
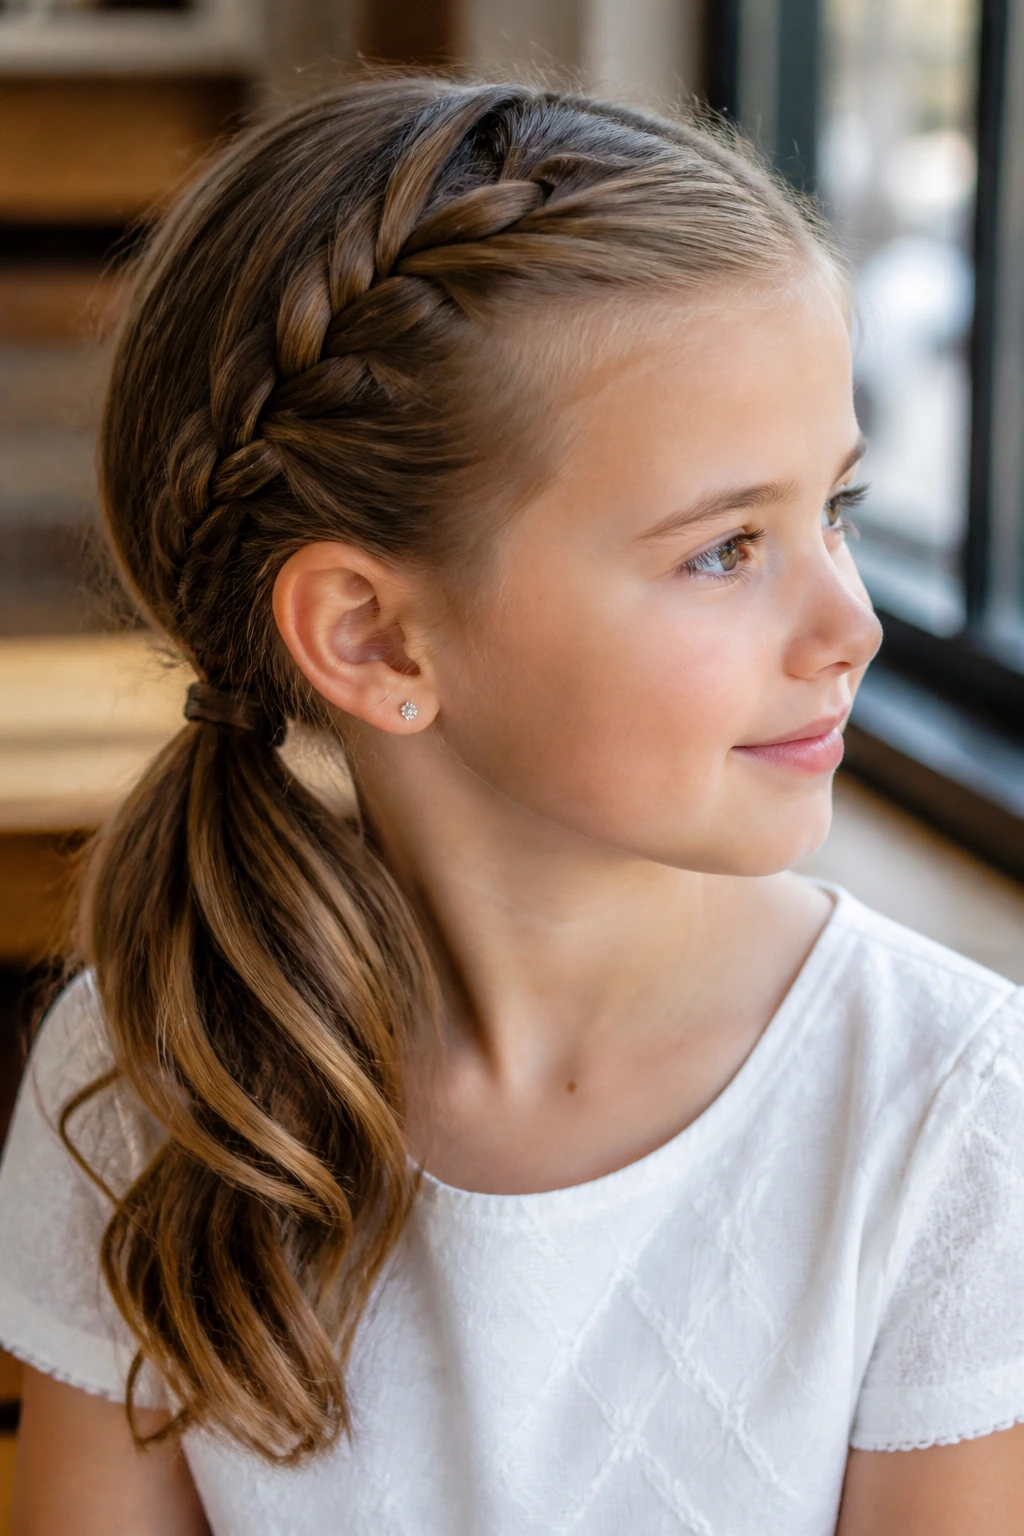
Sometimes a single braid gives just enough detail. Start it near one temple or just behind the ear, then guide it into a low ponytail at the nape. The side placement softens the face, while the low tail keeps the shape modest and easy to handle.
This is one of those styles that looks better than it sounds. The braid acts like a frame, and the ponytail keeps it from feeling too precious. Wrap a small strand of hair around the elastic to hide it, then pin the end underneath. That tiny cover-up matters more than people realize.
12. Two Dutch Braids Coiling Into a Bun
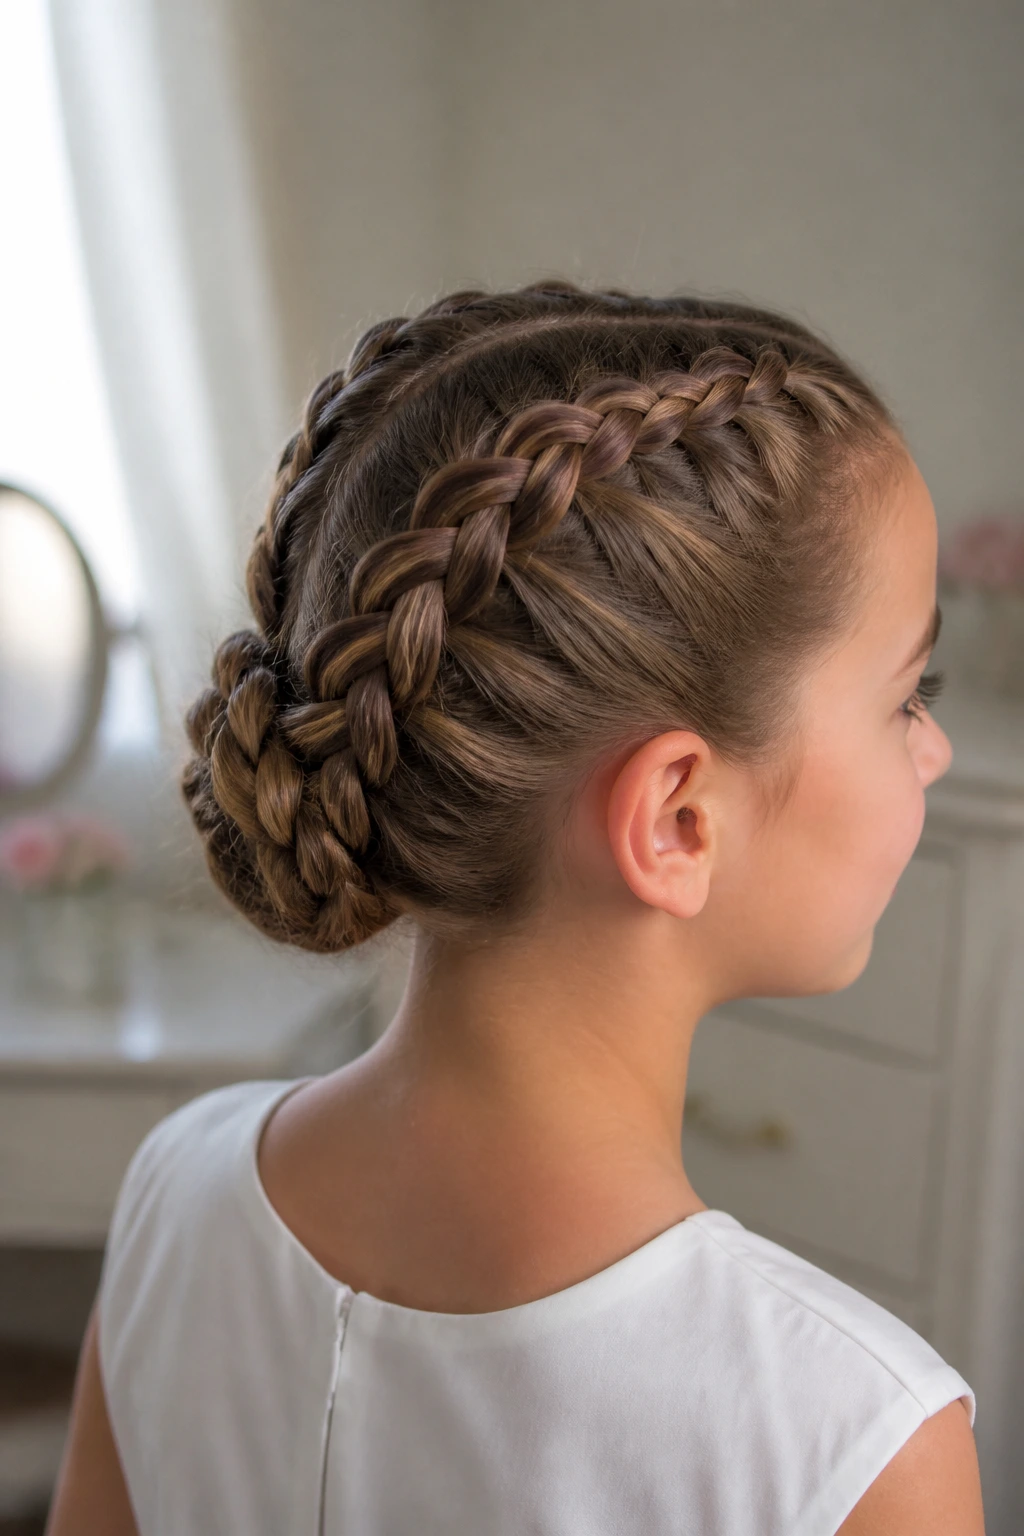
Two Dutch braids bring a little more texture to the crown, and when they coil into a single bun, the style feels secure without looking heavy. The braids sit proud of the head, so they show up nicely in photos, even from the side. That’s useful when there’s a veil comb or clip to place.
This is a smart option for thick hair, because the braids help manage volume before the bun has to deal with it. If the hair is very thick, leave the bun a touch looser so it doesn’t look like a tight ball. The shape should read calm, not compressed.
13. Pinned-Back Bob With a Pearl Clip
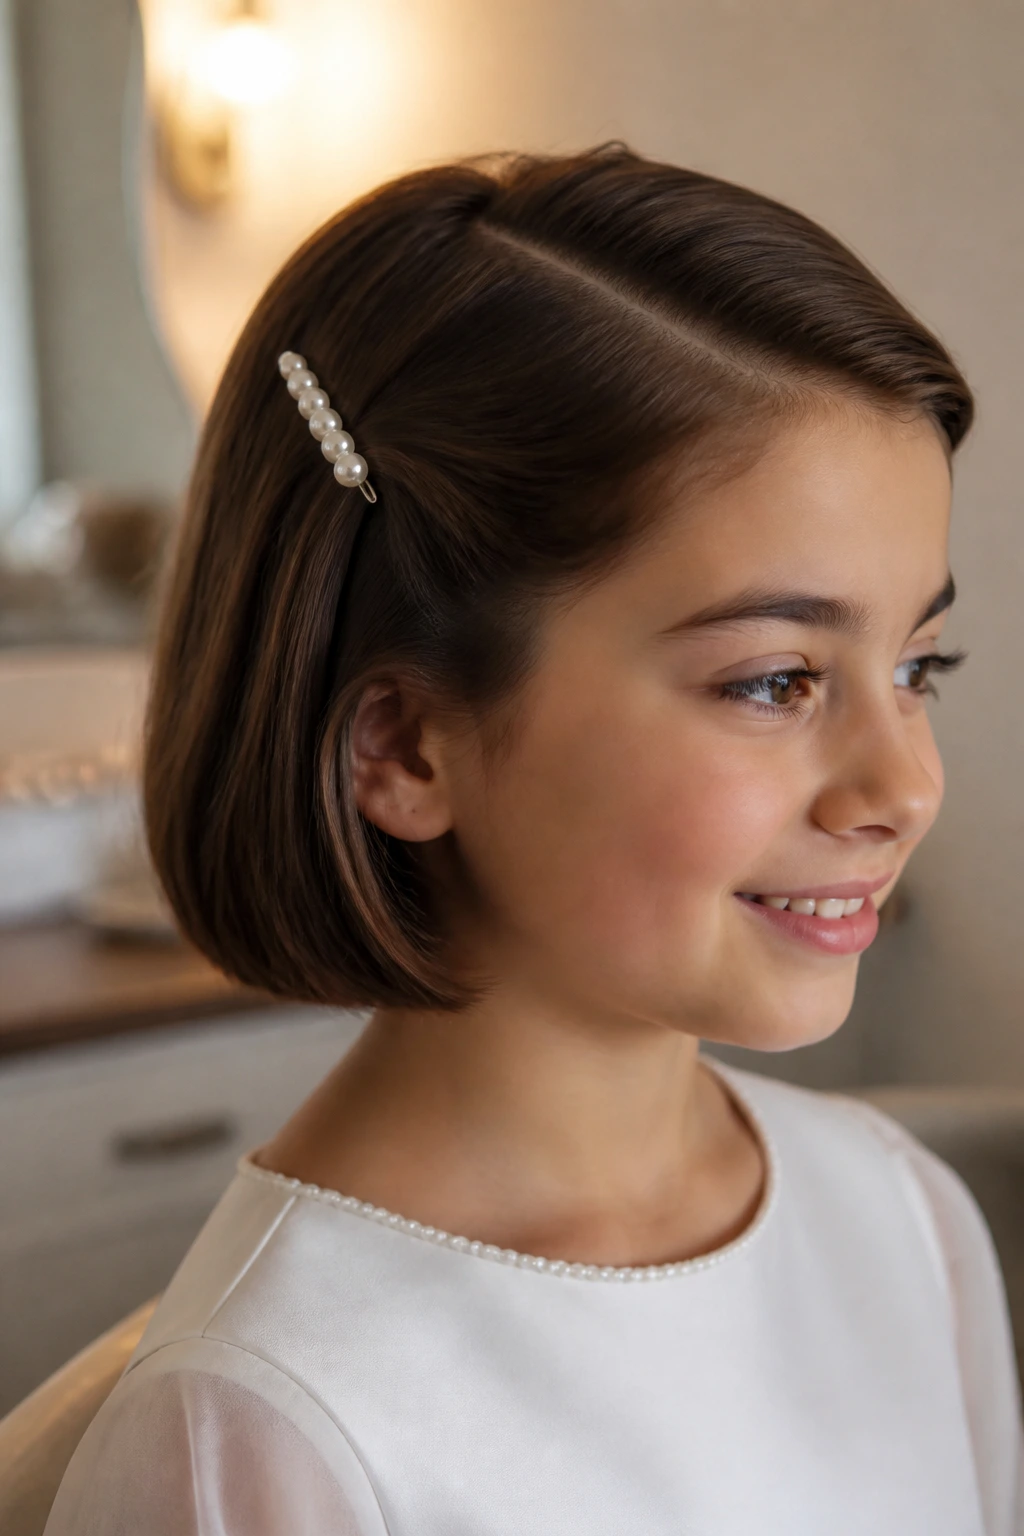
Short hair deserves its own plan. A bob does not need to be forced into a pretend updo, and I’d argue that’s where many people go wrong. A deep side part, a smooth side sweep, and one pearl clip above the temple can look far more polished than overpinned short hair ever will.
Keep the ends tucked under just enough to show the neck line and the dress collar. If the hair flips outward at the bottom, a quick pass with a flat iron or a round brush fixes it. One clip is usually enough. Two starts to feel busy.
14. Headband Tuck for Mid-Length Hair
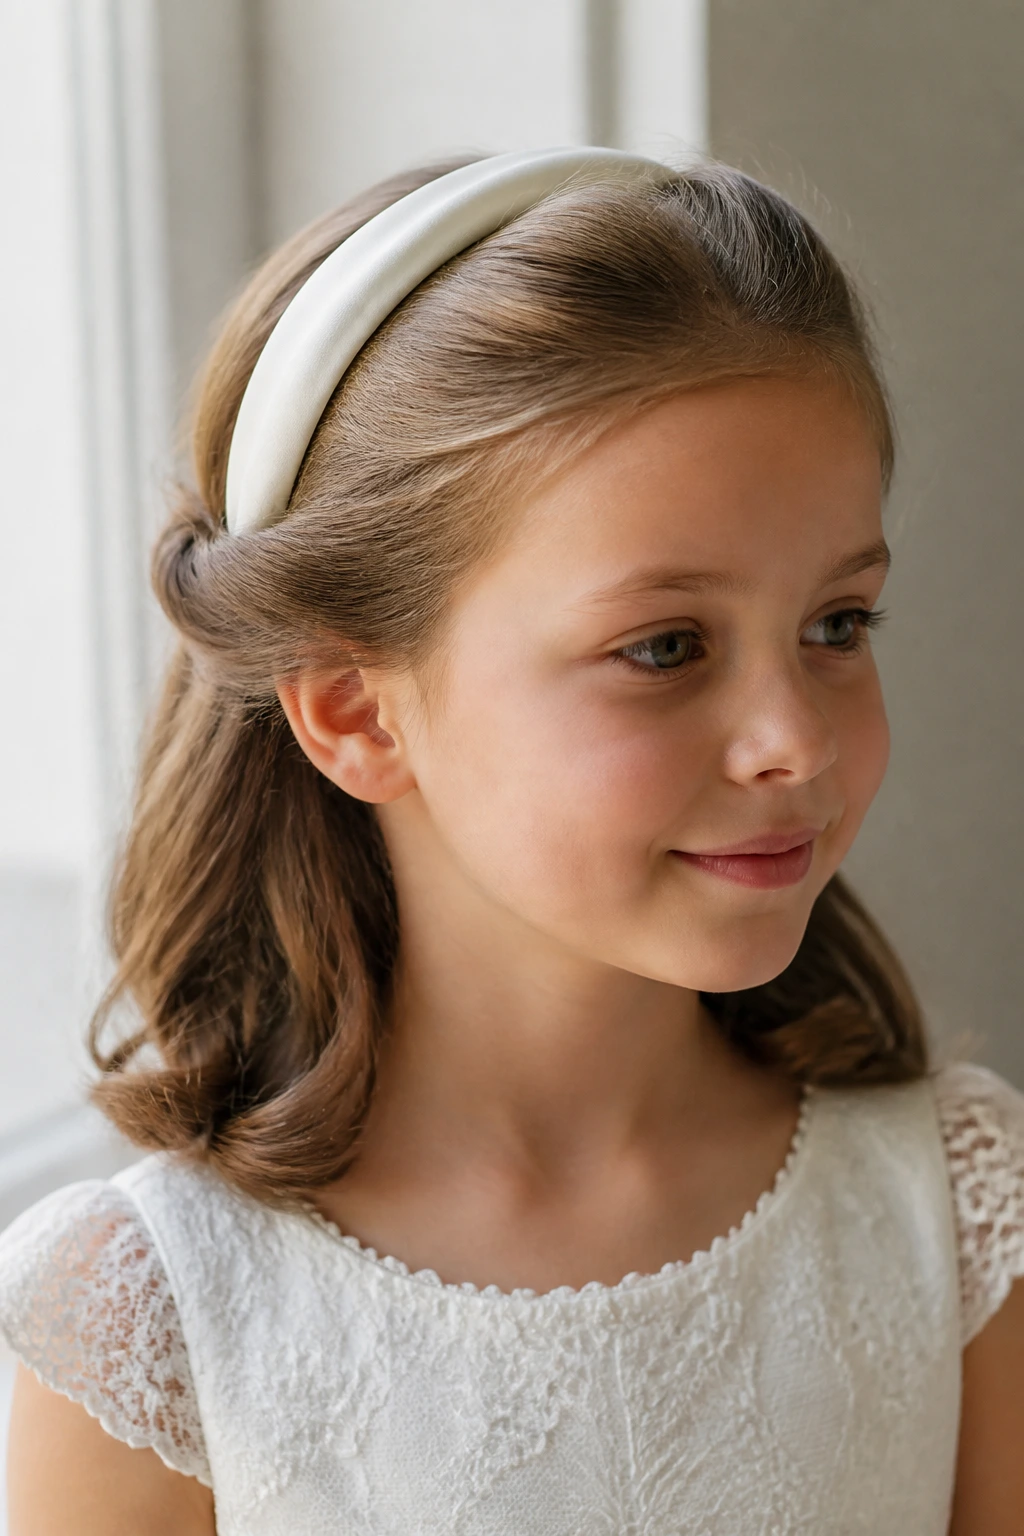
A soft headband tuck is one of those styles that saves the morning. Slide on a padded or satin headband, then tuck the lengths of hair up and under the band so the ends disappear into a smooth roll. The shape sits close to the head and leaves the face open, which makes it very easy to wear with a veil or a small floral comb.
I like this best on hair that reaches the shoulders or just past them. It gives enough length to tuck without creating bulk. If the hair is slippery, a little dry shampoo at the roots adds hold before you start. No, it will not solve everything. But it helps.
15. Ribbon Plait Down the Back
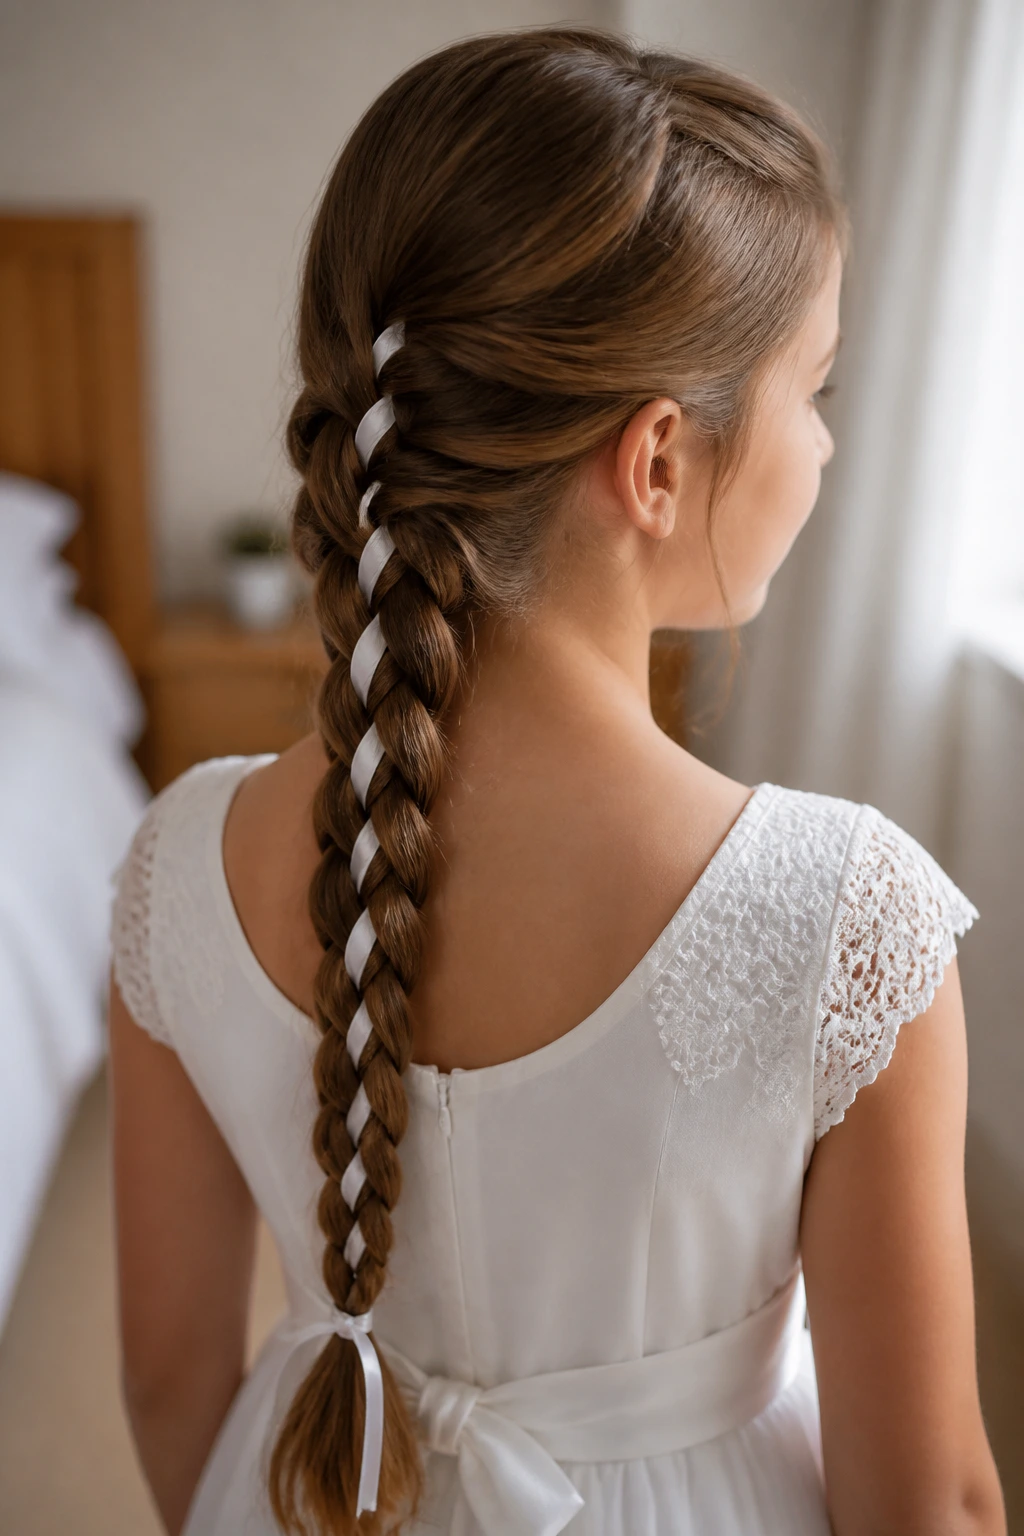
A single plait down the back feels classic in the best sense. Add a narrow ribbon through the braid, and suddenly it has just enough ceremony for the day. The ribbon can match the dress trim, the shoes, or the sash, but I’d keep it to one color so the style stays clean.
This works on long hair that sits well in one place. If the braid is loose, the ribbon can slide. If it’s too tight, the braid turns stiff and loses shape. Aim for the middle. That’s where the style looks polished instead of strained.
16. Pearl-Pin Twists Across the Crown
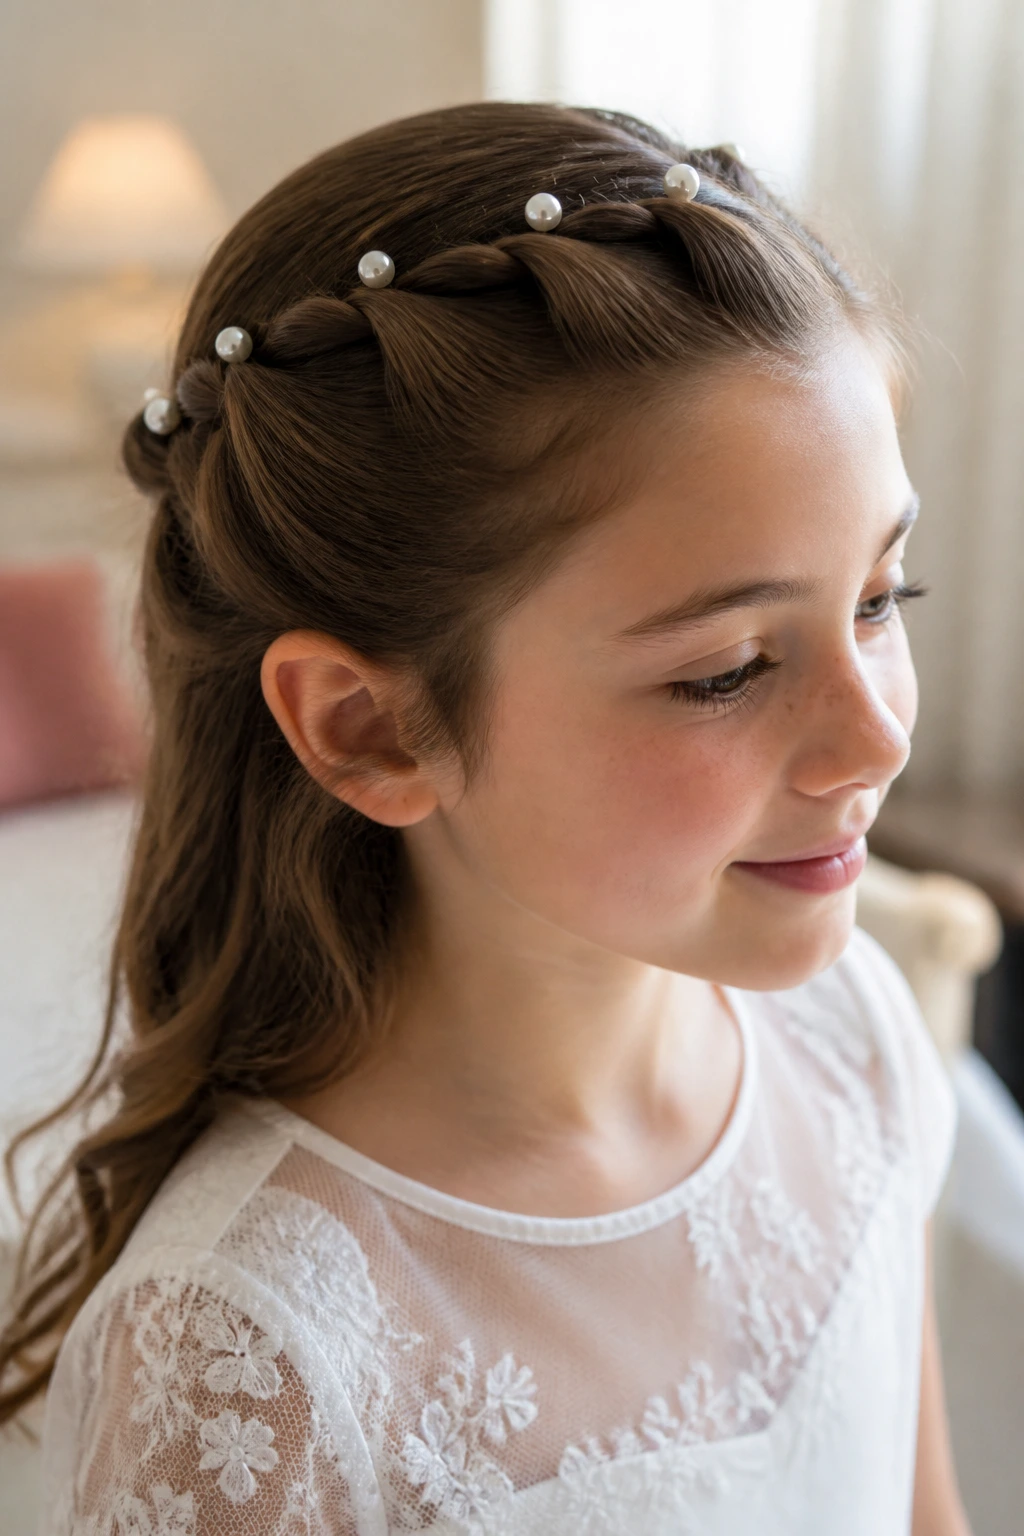
Tiny twists pinned across the crown create a quiet, dotted line of detail that works nicely for children who do not want a full braid or a full updo. Each section is twisted back from the face and secured with a pearl pin, so the style ends up looking soft but deliberate.
The pins should be lightweight. Heavy decorative clips drag fine hair down and leave a visible dent before church is even over. This is one of those styles where less truly reads better. A few pins arranged neatly can carry the whole look.
17. Floral Crown and Soft Waves
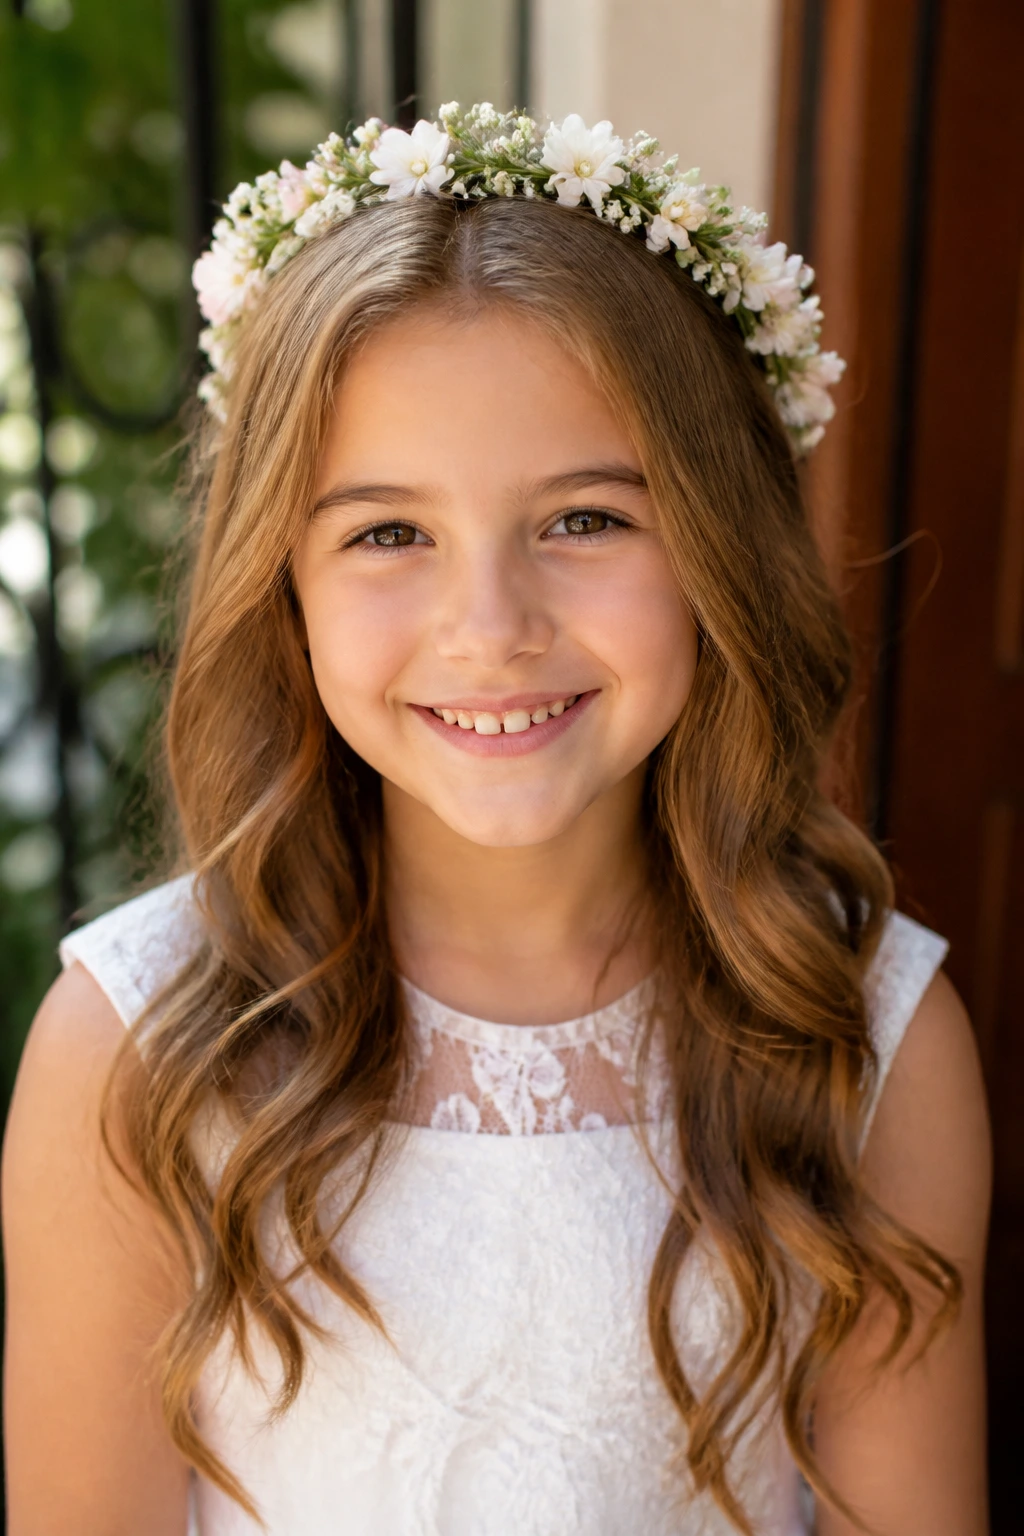
A floral crown changes the mood fast. Keep the flowers small — baby’s breath, tiny roses, or a narrow cluster of greenery — so the crown sits lightly instead of looking like a wreath. Underneath, soft waves keep the hair relaxed and childlike.
I like this when the dress itself is simple. The flowers become the detail, so the hair can stay loose and flowing without feeling plain. Secure the crown with hidden pins at the temples and behind the ears. If the child tends to move a lot, anchor the crown before the final smoothing pass so it doesn’t slide.
18. Low Curly Ponytail With a Wide Bow
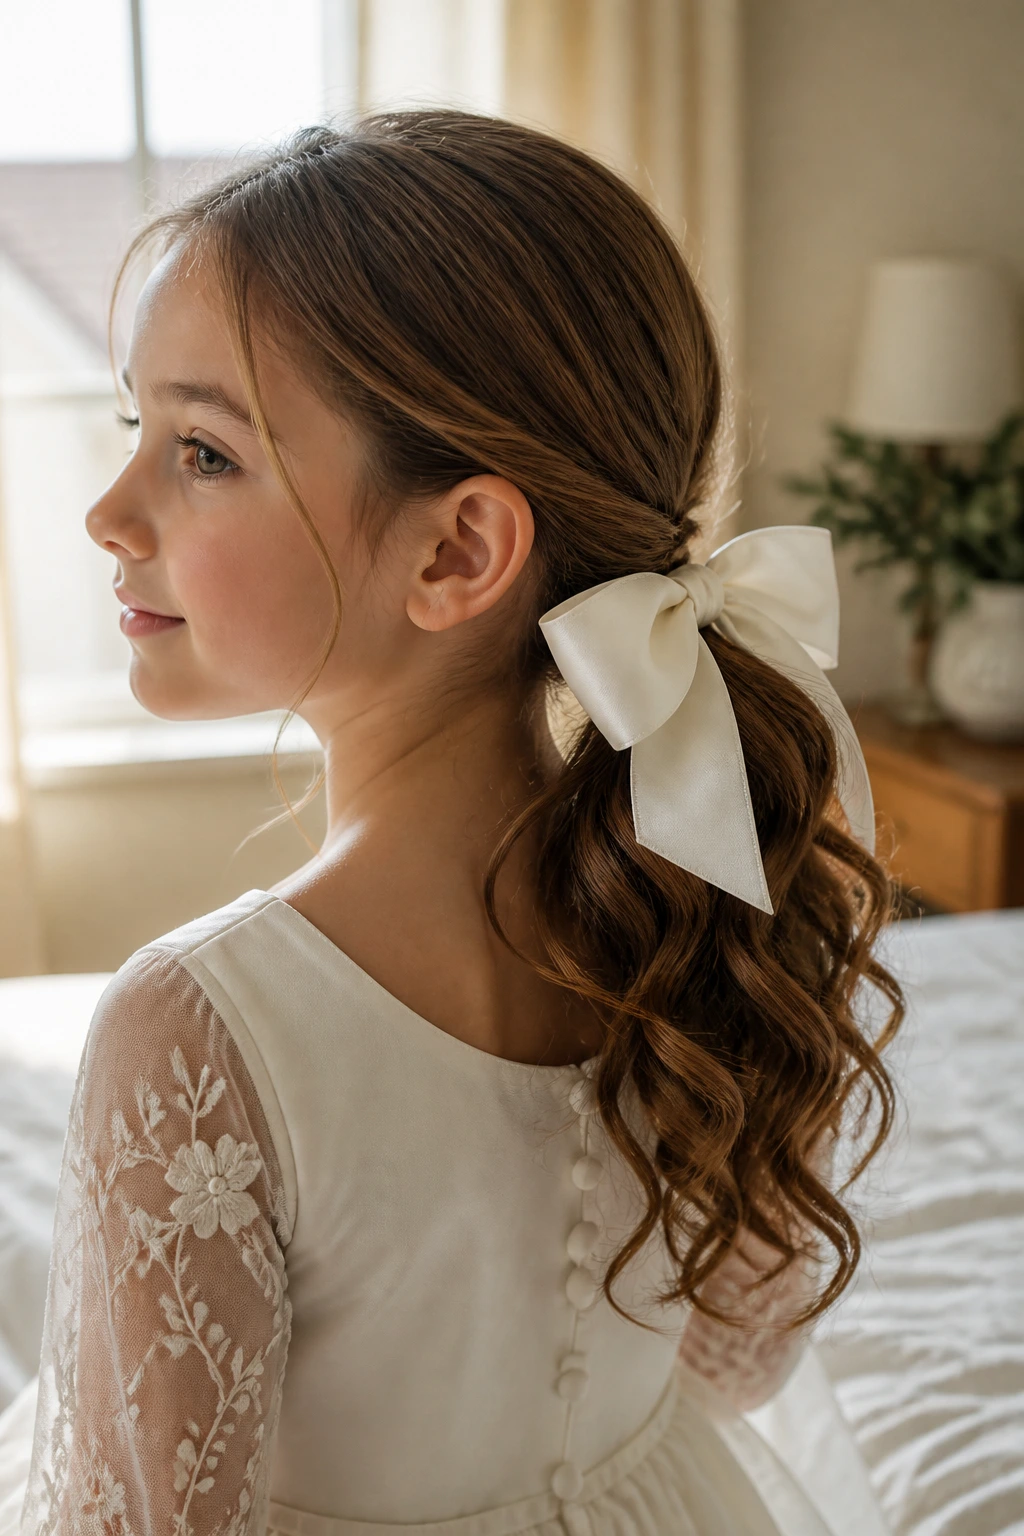
A low ponytail can look formal enough if the texture is right. Curl the tail in loose bends, smooth the top, and tie everything with a wide satin bow at the nape. The result is neat from the front and soft from the back, which is a nice balance for photos.
The bow does more than decorate. It hides the elastic, adds color, and gives the ponytail a finished edge. Keep the curls soft rather than springy. Tight curls can make the tail feel too busy against a dress that already has texture.
19. Mini Accent Braids Over Loose Ringlets
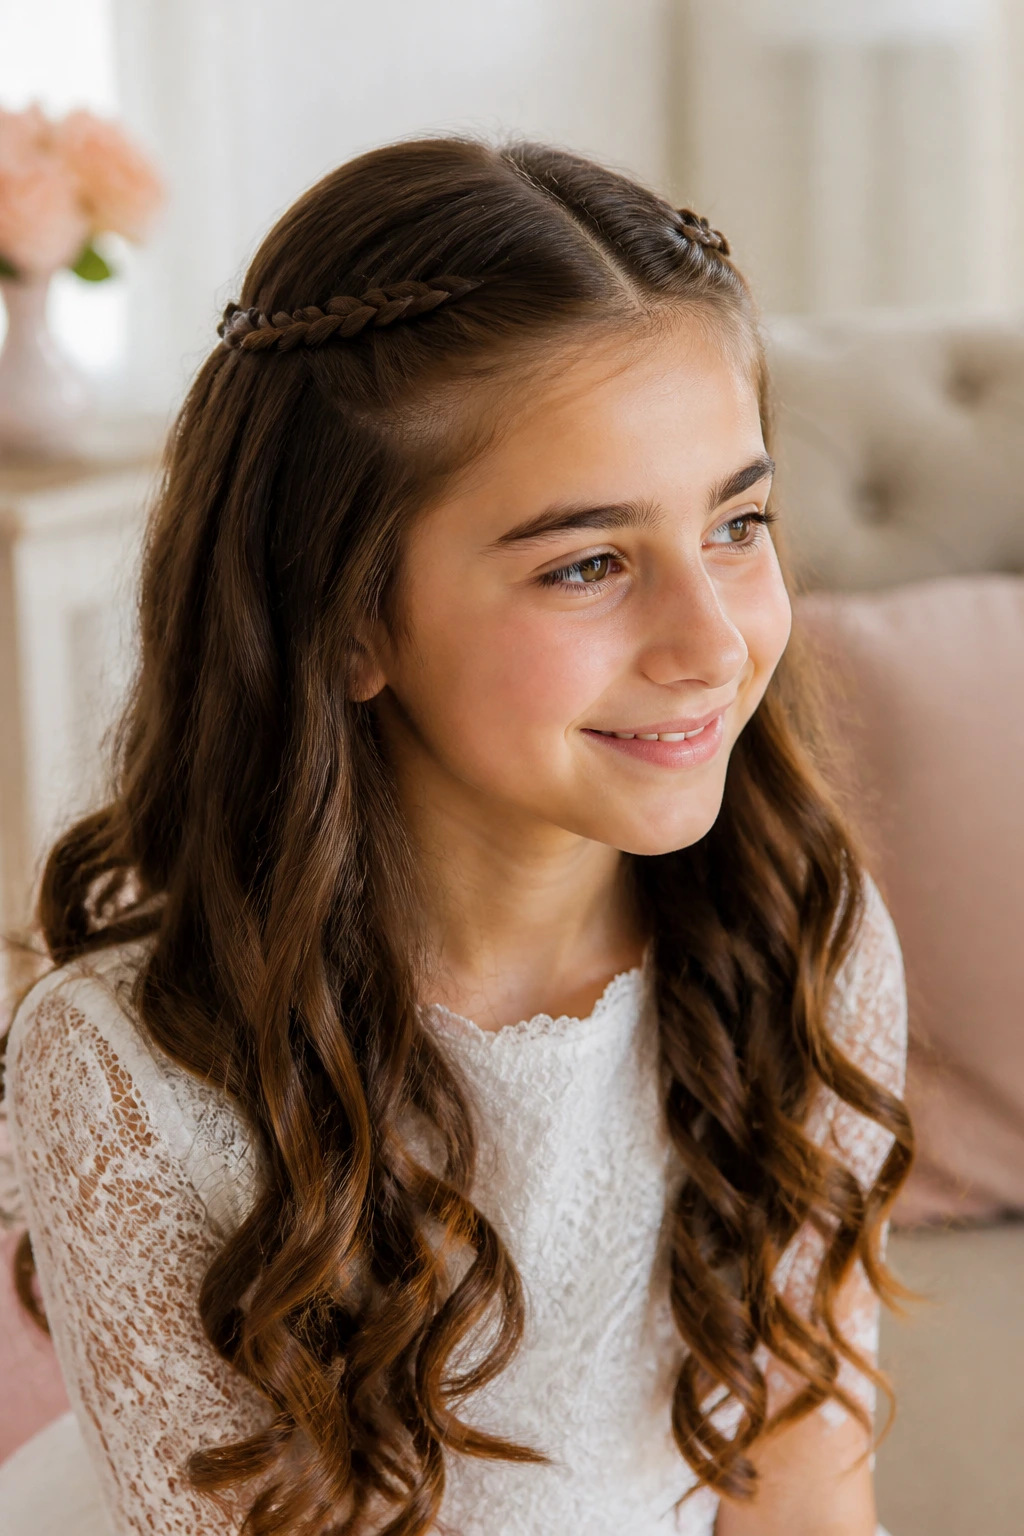
A few small braids placed near the temples or along the part can do a lot of work. They keep the front tidy and give the loose ringlets underneath a place to sit. That contrast — braided top, curled bottom — makes the whole style feel planned without looking overworked.
This one is especially nice for children with naturally curly hair who want to keep some of their texture visible. The accent braids should be thin, almost delicate. If they’re too wide, they steal the show. And the rings of curl underneath should stay soft, not brushed into puff.
20. French Twist for Longer Hair
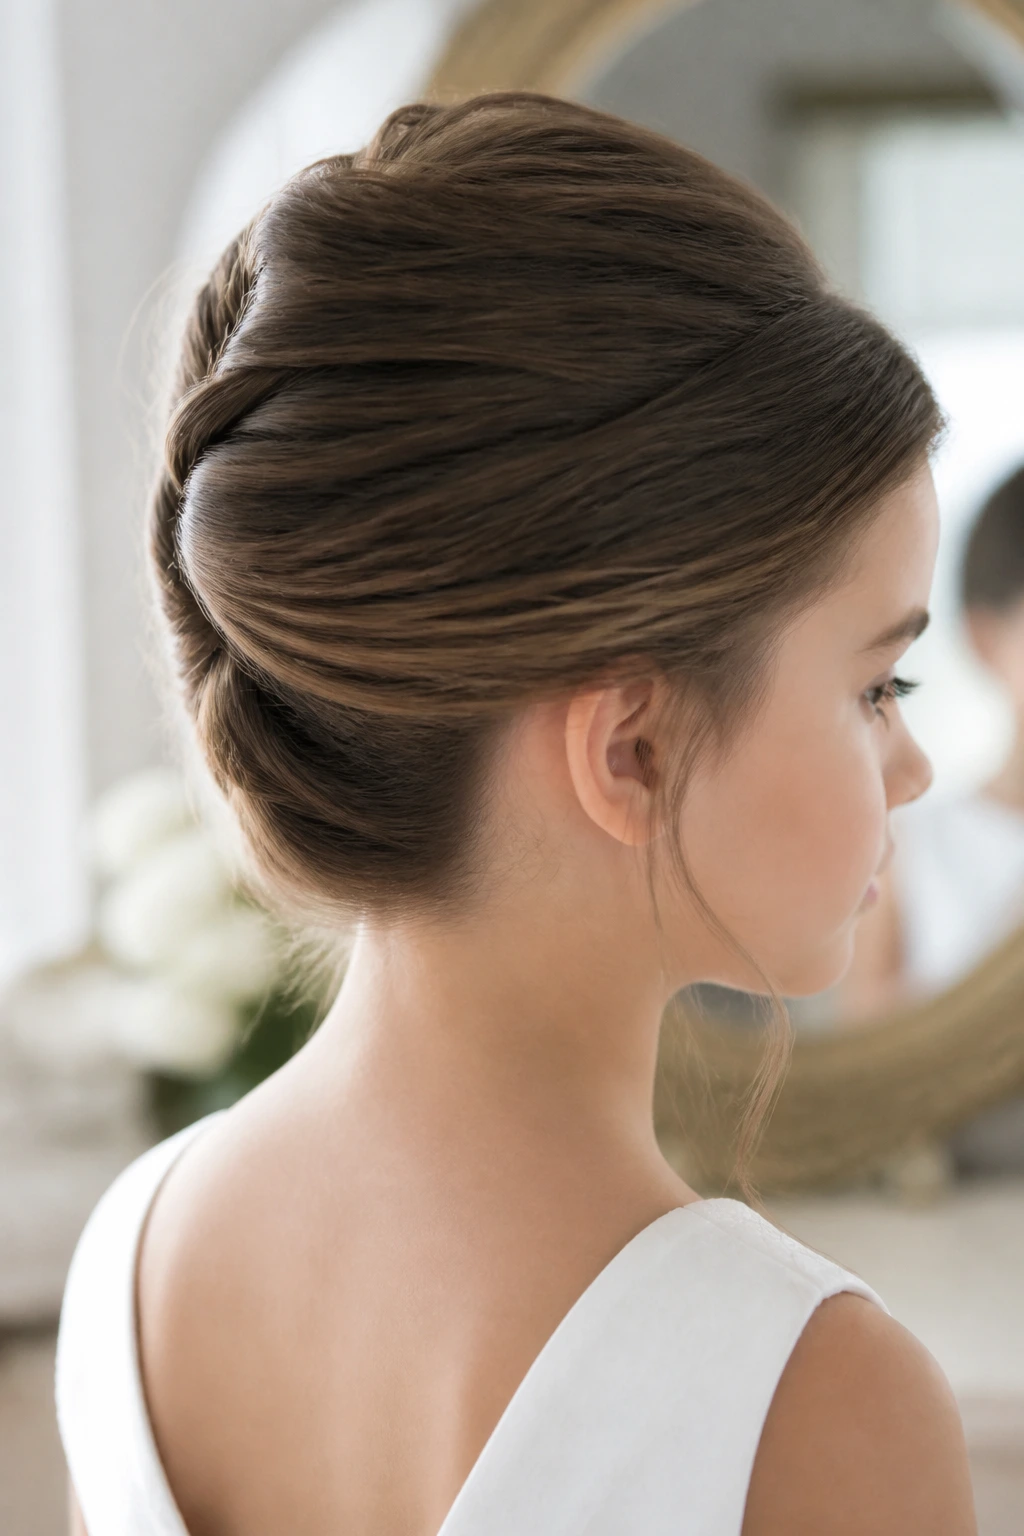
A French twist has a formal line that reads nicely in church, especially when the dress has clean seams or a simple veil. The hair rolls upward and inward along the back of the head, which makes the neck look long and the whole silhouette feel neat. It’s a classic shape, and honestly, it earns its place.
This style needs enough length to fold properly, so it suits longer hair best. The surface should be smooth, but not slick. If it’s too polished, pins slide. A bit of grip at the roots solves that. Use firm pins hidden inside the twist, then finish with a light spray along the outside.
21. Side-Swept Curl Clip-Back
Sometimes the easiest answer is the prettiest one. Sweep the hair to one side, curl the lengths in loose bends, and pin the heavier side back with a barrette or pearl clip. The style keeps the face clear, and the curls still move when the child turns her head.
I like this for children who want hair down but do not want it in the eyes. The asymmetry gives the style a little interest without adding fuss. If the clip is decorative, keep the rest of the hair simpler. Otherwise, the top starts fighting the accessory.
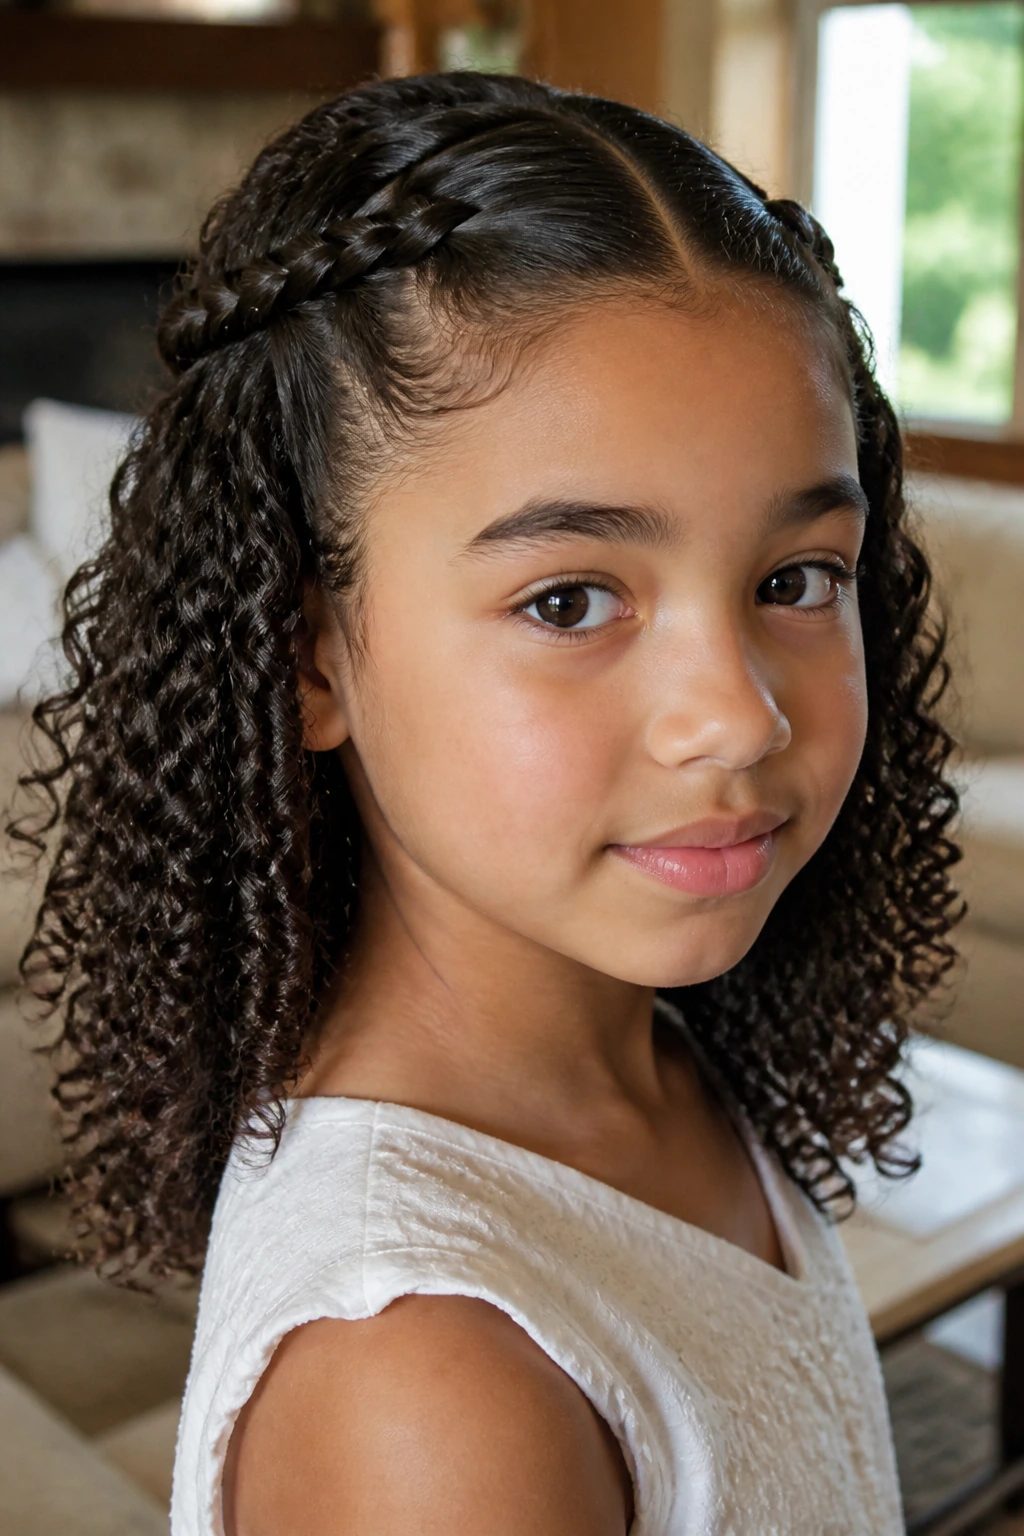
22. Natural Curls with Defined Front Twists
Natural curls should not be buried under a style that ignores them. Two front twists pulled back from the temples can shape the face, while the rest of the curls stay defined and free. A curl cream or lightweight gel helps the pattern stay smooth instead of frizzing out by the second hymn.
This is one of the most honest First Communion hairstyles on the list. It lets the child look like herself, only tidier. Work the product through damp curls with your fingers, not a brush, so the ringlets keep their shape. A small clip or two near the crown is usually enough.
23. Double Braided Pigtail Buns
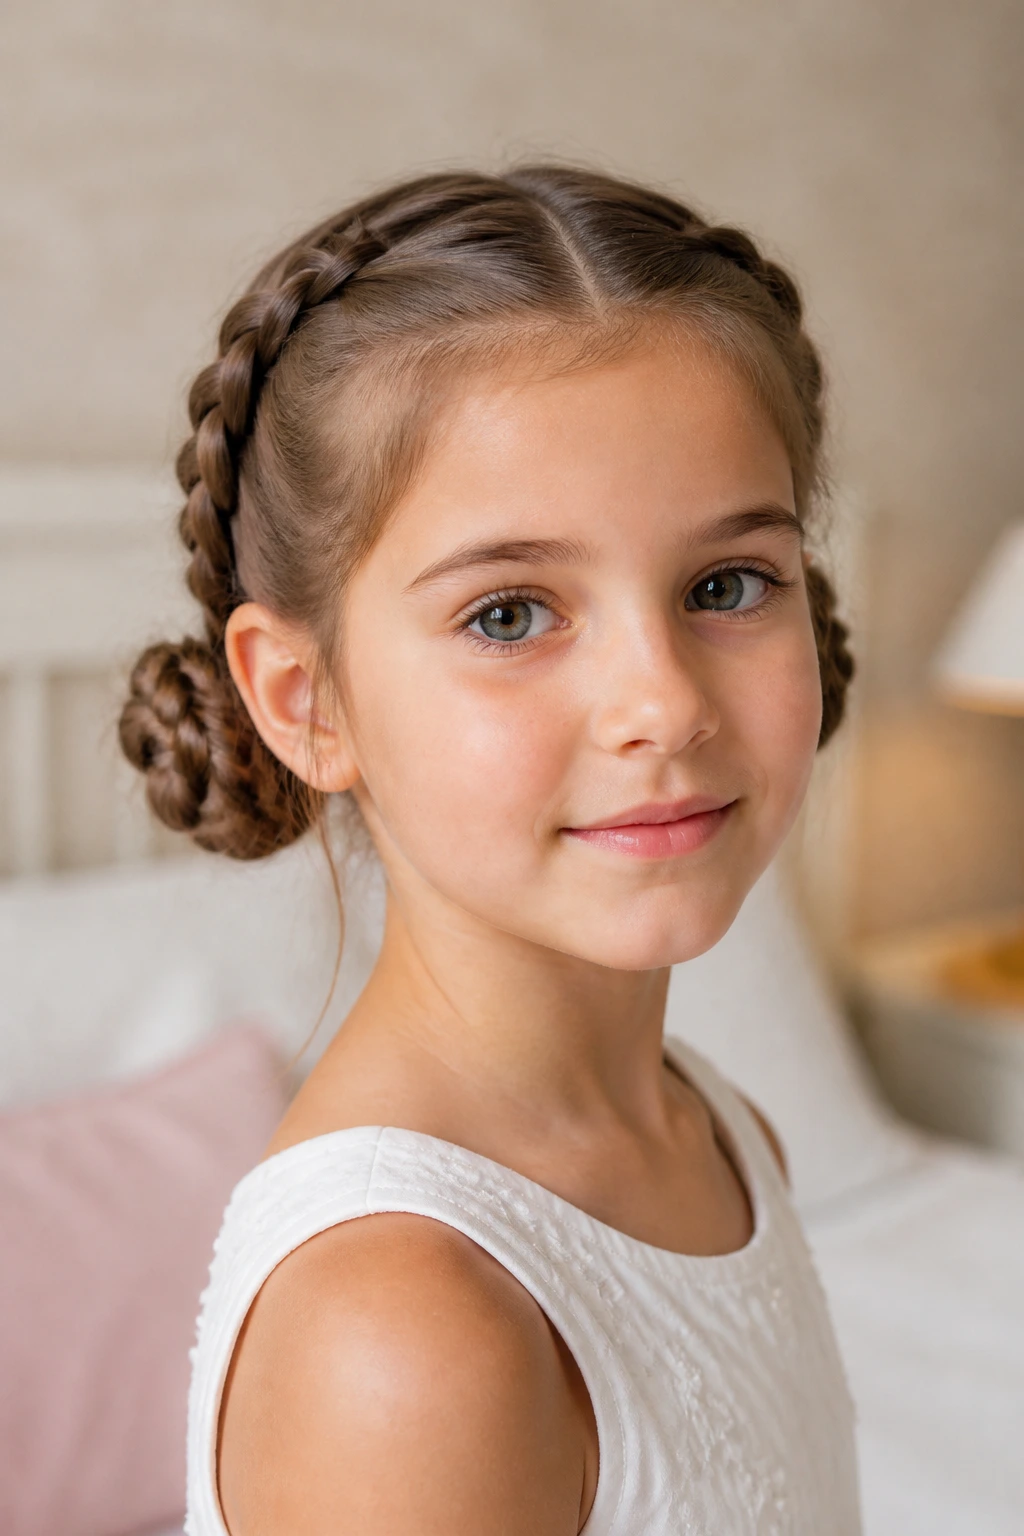
Two braids, two buns, and a whole lot of security. This style keeps hair evenly balanced, which is helpful for children who dislike the feeling of a heavy bun pulling on one side. Each braid feeds into a small bun behind the ear or at the nape, creating a symmetrical shape that looks neat from every angle.
It has a younger, sweeter feel than a single polished chignon. That’s not a drawback. On a child, it looks right. Keep the buns small so they don’t drift into cartoon territory, and use clear elastics to keep the base clean.
24. Low Twisted Knot With Face-Framing Pieces
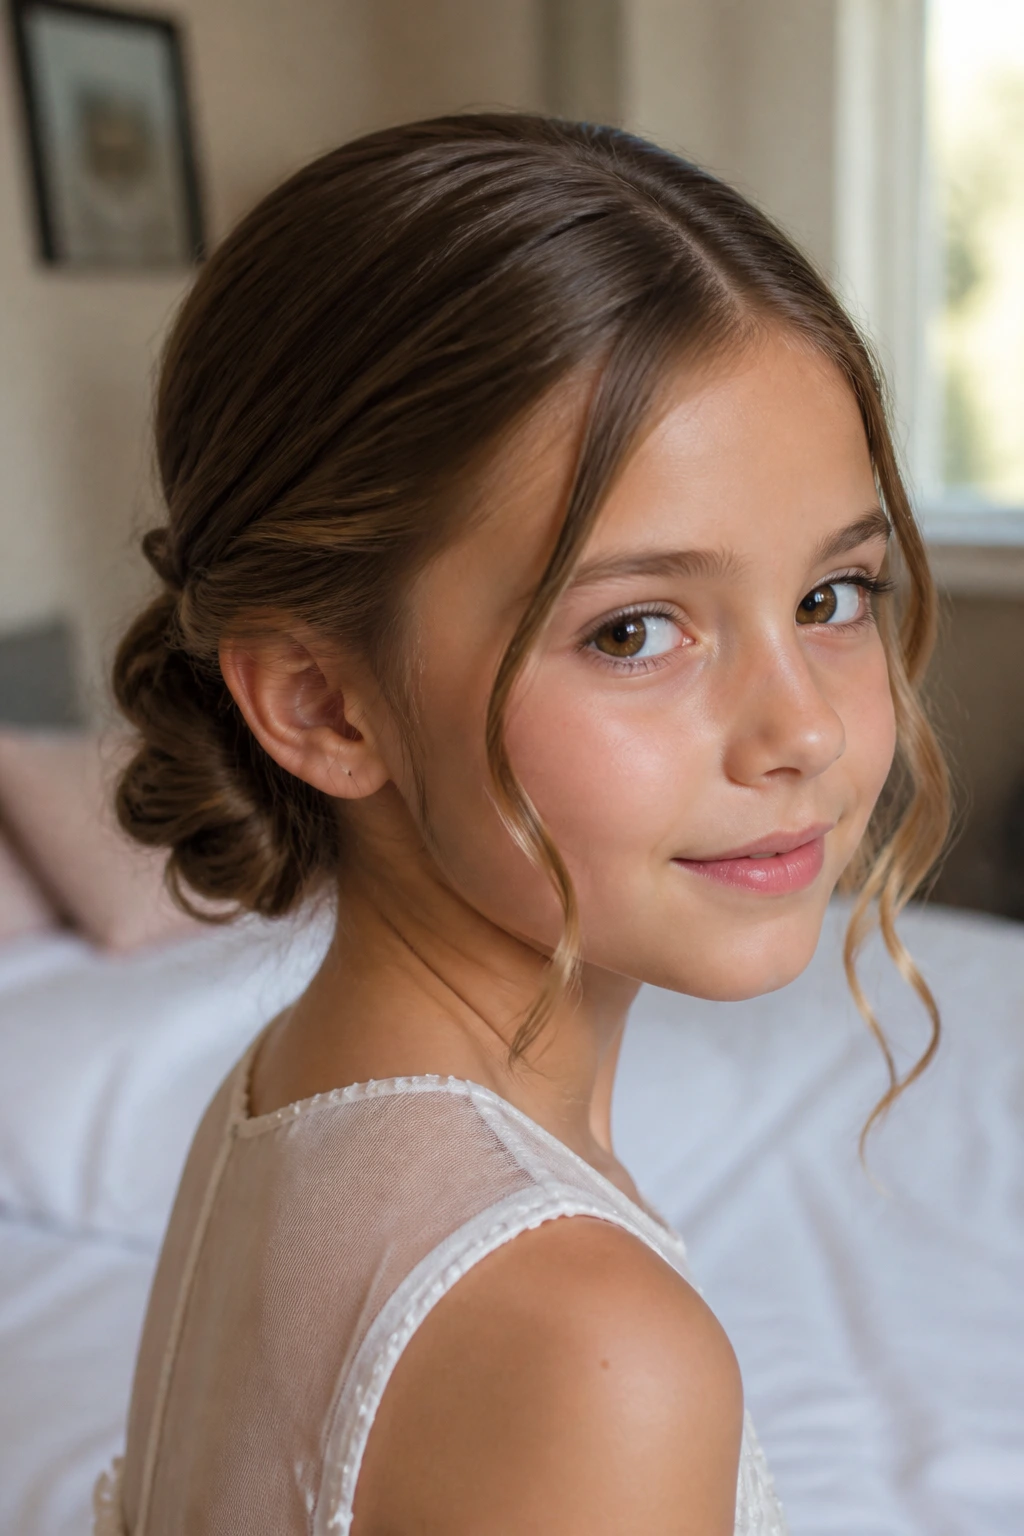
A twisted knot is a lovely middle ground between a bun and a ponytail. The hair is split into sections, twisted, and wrapped into a low knot that sits flat at the back. A few face-framing pieces are left out, curled softly so the style doesn’t feel severe.
I reach for this one when the hair is medium length and a full braid would feel too busy. It’s calm, fast, and easy to adjust if the child changes her mind halfway through. Secure the knot with pins that cross each other rather than sitting parallel. That gives the knot more bite.
25. Lob With One-Side Barrette Sweep
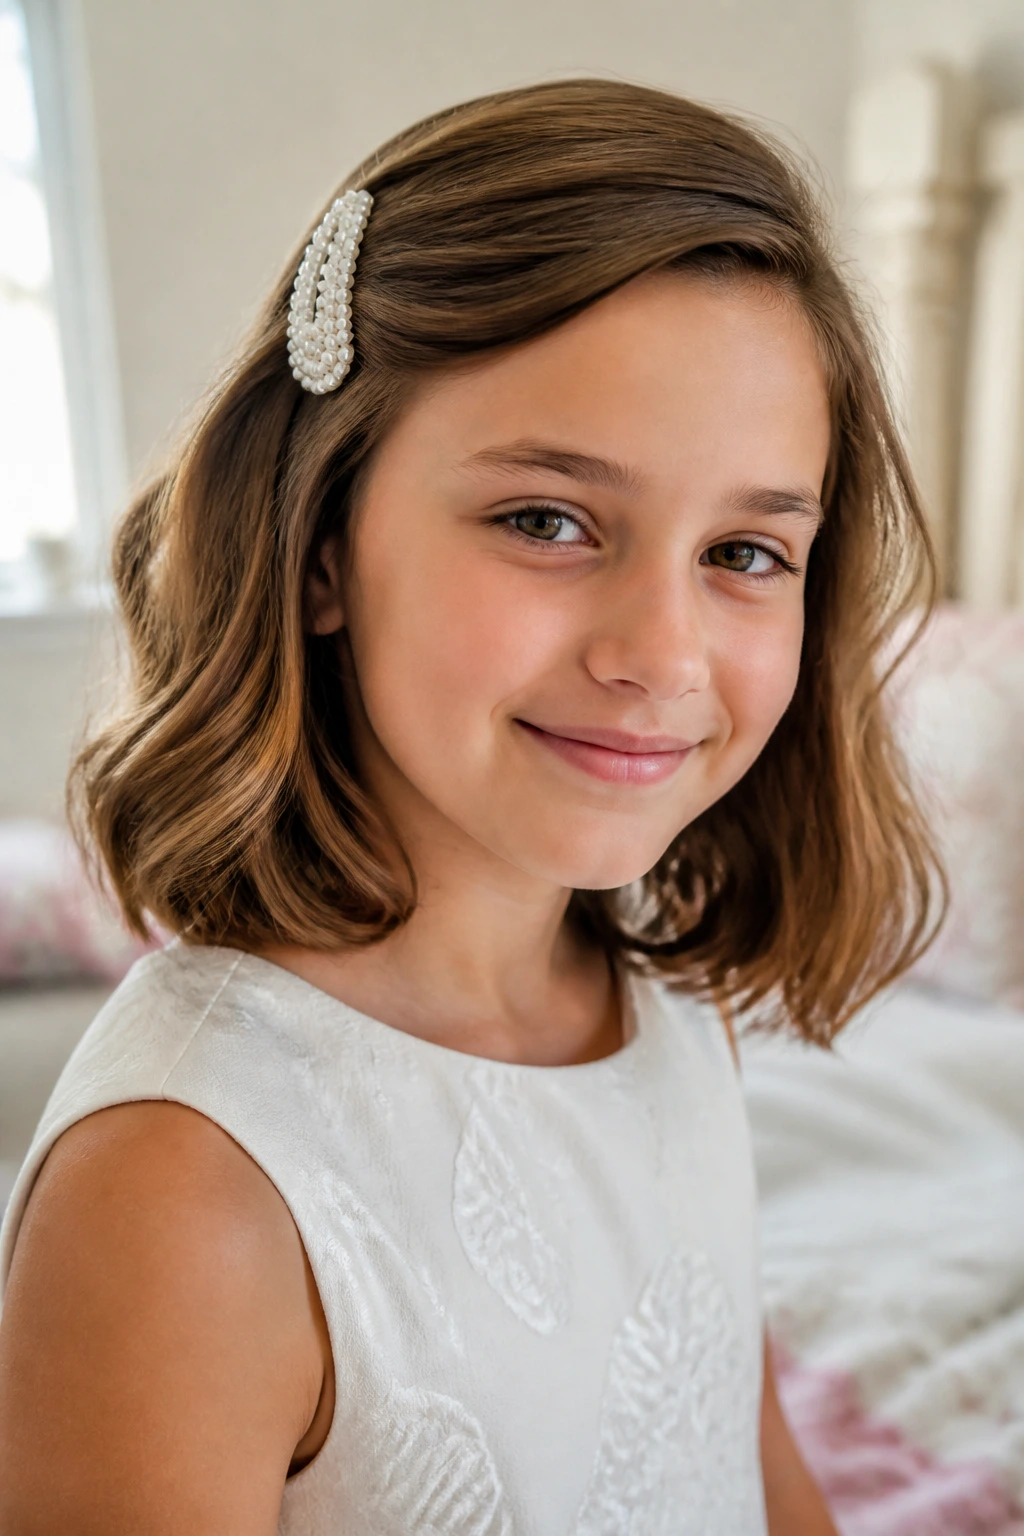
A lob can look polished with almost no effort if the styling is clean. Smooth one side back with a barrette, keep the opposite side soft, and let the hair sit with its natural bend or a light wave. The asymmetry does enough work on its own.
This is a good choice when the child’s haircut does not have much length to play with. There’s no need to force a braid where one will not sit well. A strong barrette — pearl, satin, or brushed metal — can do the same job with less struggle. I’d rather see one clean clip than four frantic pins.
26. Tucked-Under Roll for Shorter Hair
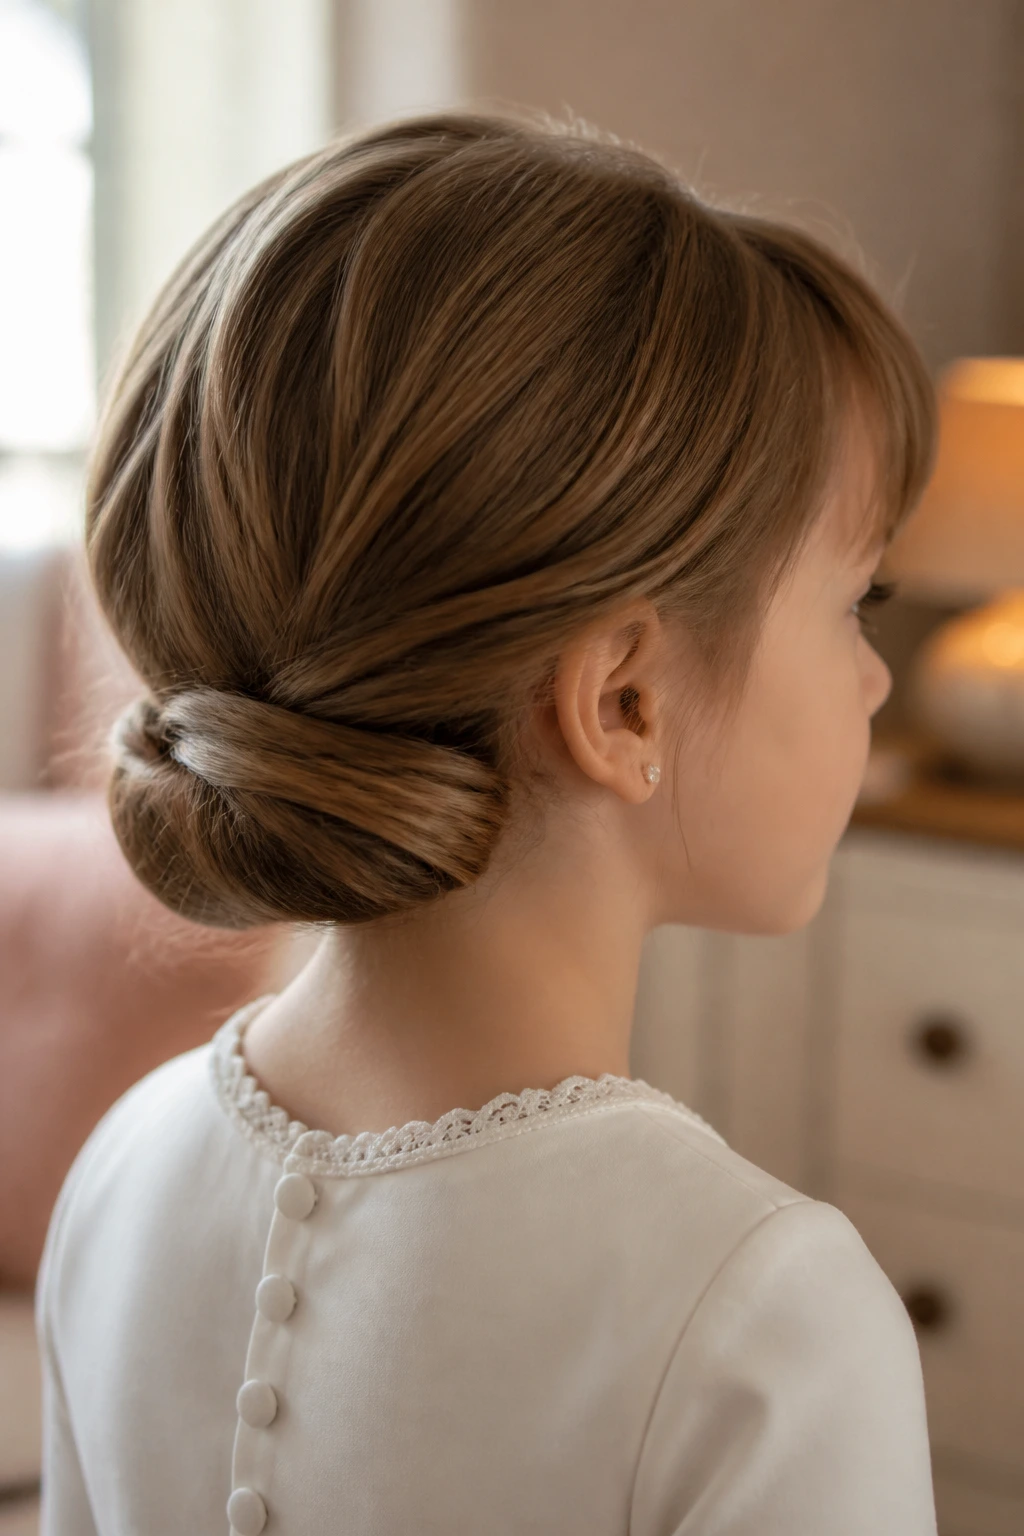
Shorter hair can still look special without pretending to be long. A tucked-under roll gathers the ends inward along the neckline, creating a smooth little fold that follows the shape of the head. It’s tidy, secure, and very good under a veil or headband.
The key is not to make the roll too thick. A thin roll sits flatter and looks more natural on shorter hair. Use a few small pins close together, and finish with a light mist of flexible spray. Flexibility matters here. Hard spray makes short hair pop apart at the edges.
27. Crown Twist With a Veil Anchor
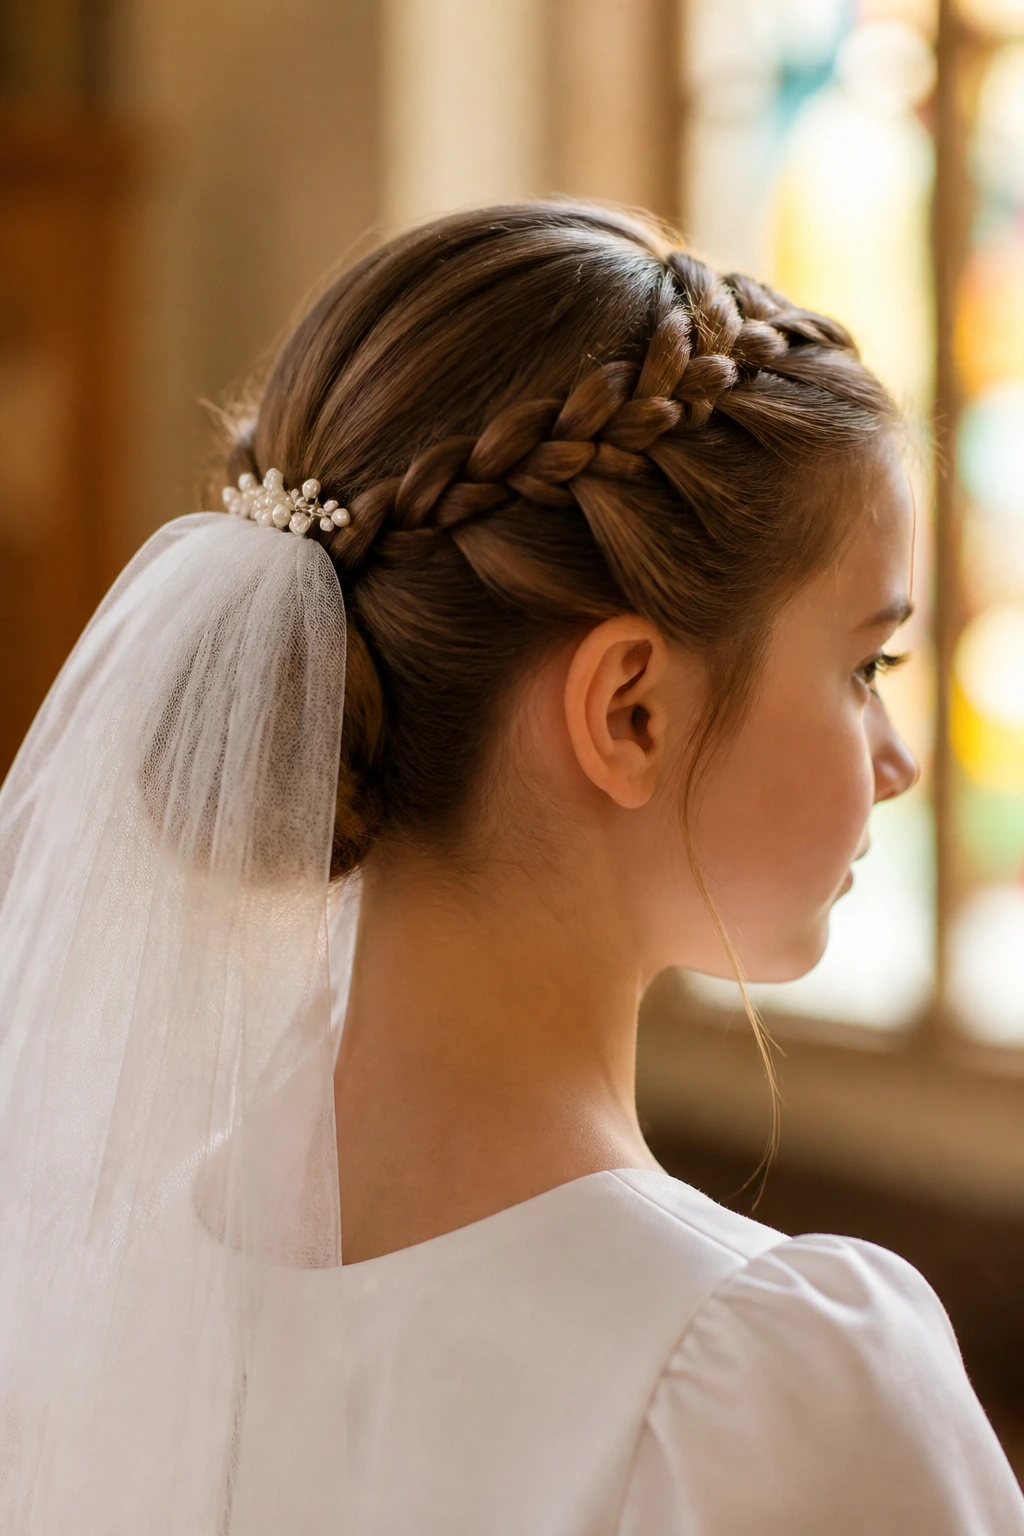
If the veil is part of the plan, this style makes sense immediately. Two twisted sections run along the crown and create a neat base for the veil comb or pin to sit into. The rest of the hair can stay in a low bun, soft curls, or a small knot underneath.
I prefer this when the veil is sheer or lightly edged, because the twist gives it something stable to rest on without adding bulk. Place the comb slightly behind the twist, not directly on top of it, so the veil falls more naturally. Tiny detail. Big difference.
28. Sleek Low Ponytail With a Wrapped Base
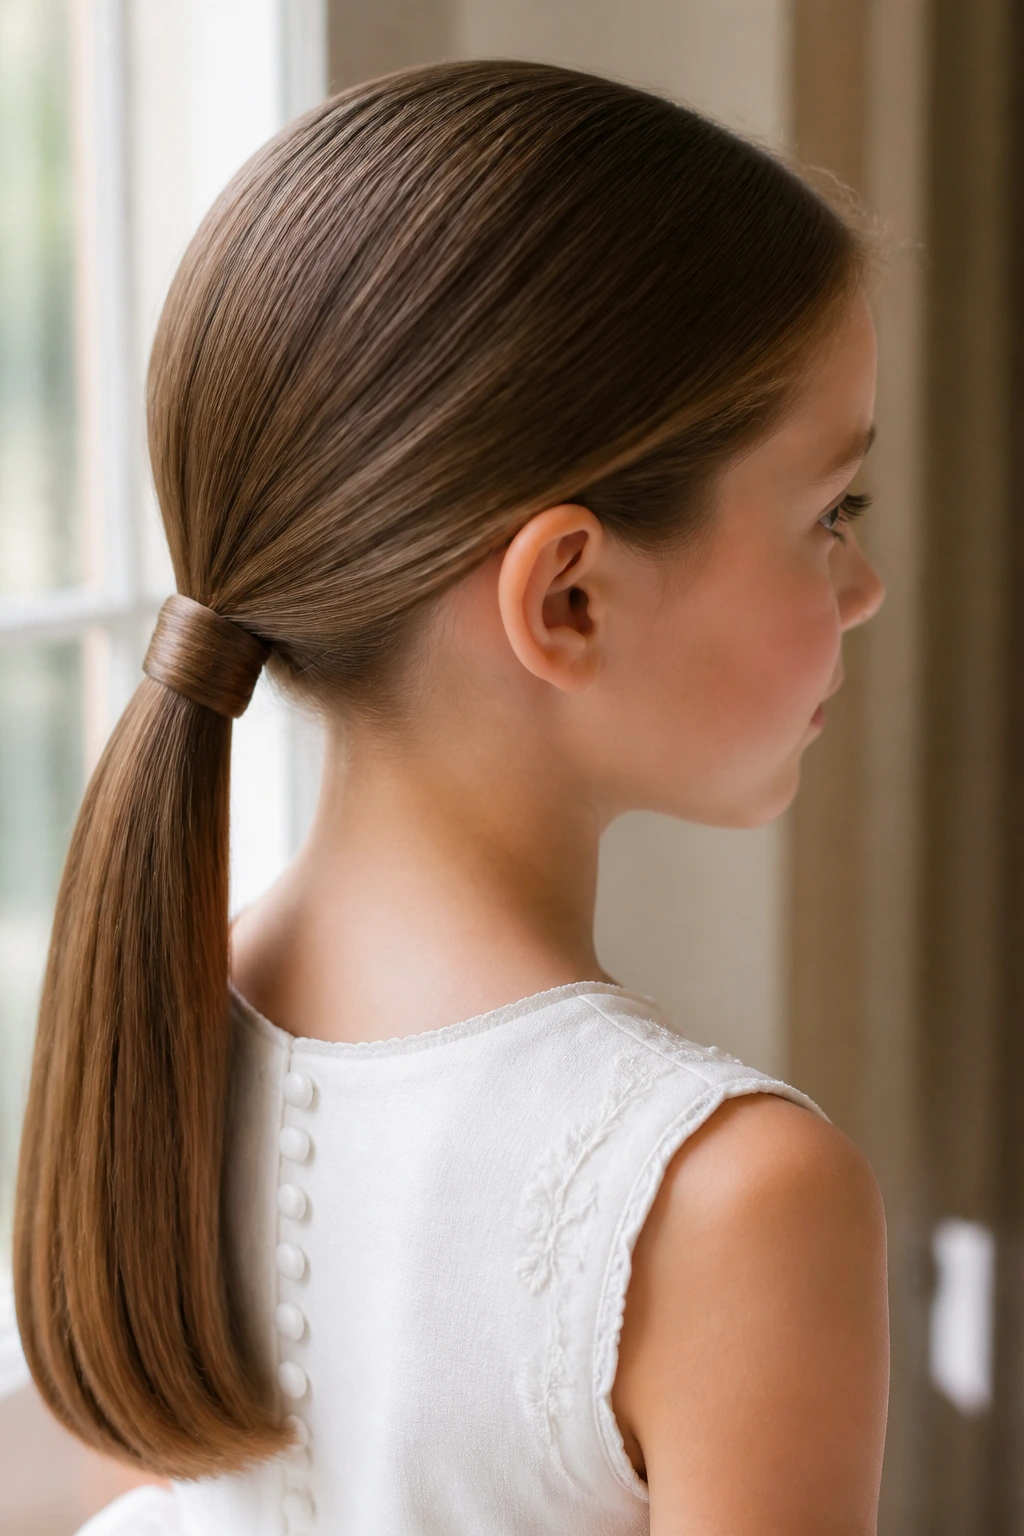
A sleek low ponytail can be surprisingly elegant when the surface is smooth and the base is wrapped with a strand of hair. The wrap hides the elastic and gives the ponytail a more finished, formal line. The shape is simple, calm, and easy to keep neat through the day.
This works especially well for children with straight hair or hair that resists curling. It lets the natural texture stay honest. If the hair is fine, use a touch of mousse at the roots before smoothing, then comb the top with a soft brush. The ponytail should sit flat and clean, not tight enough to pull the hairline.
29. Side Chignon With a Loose Twist
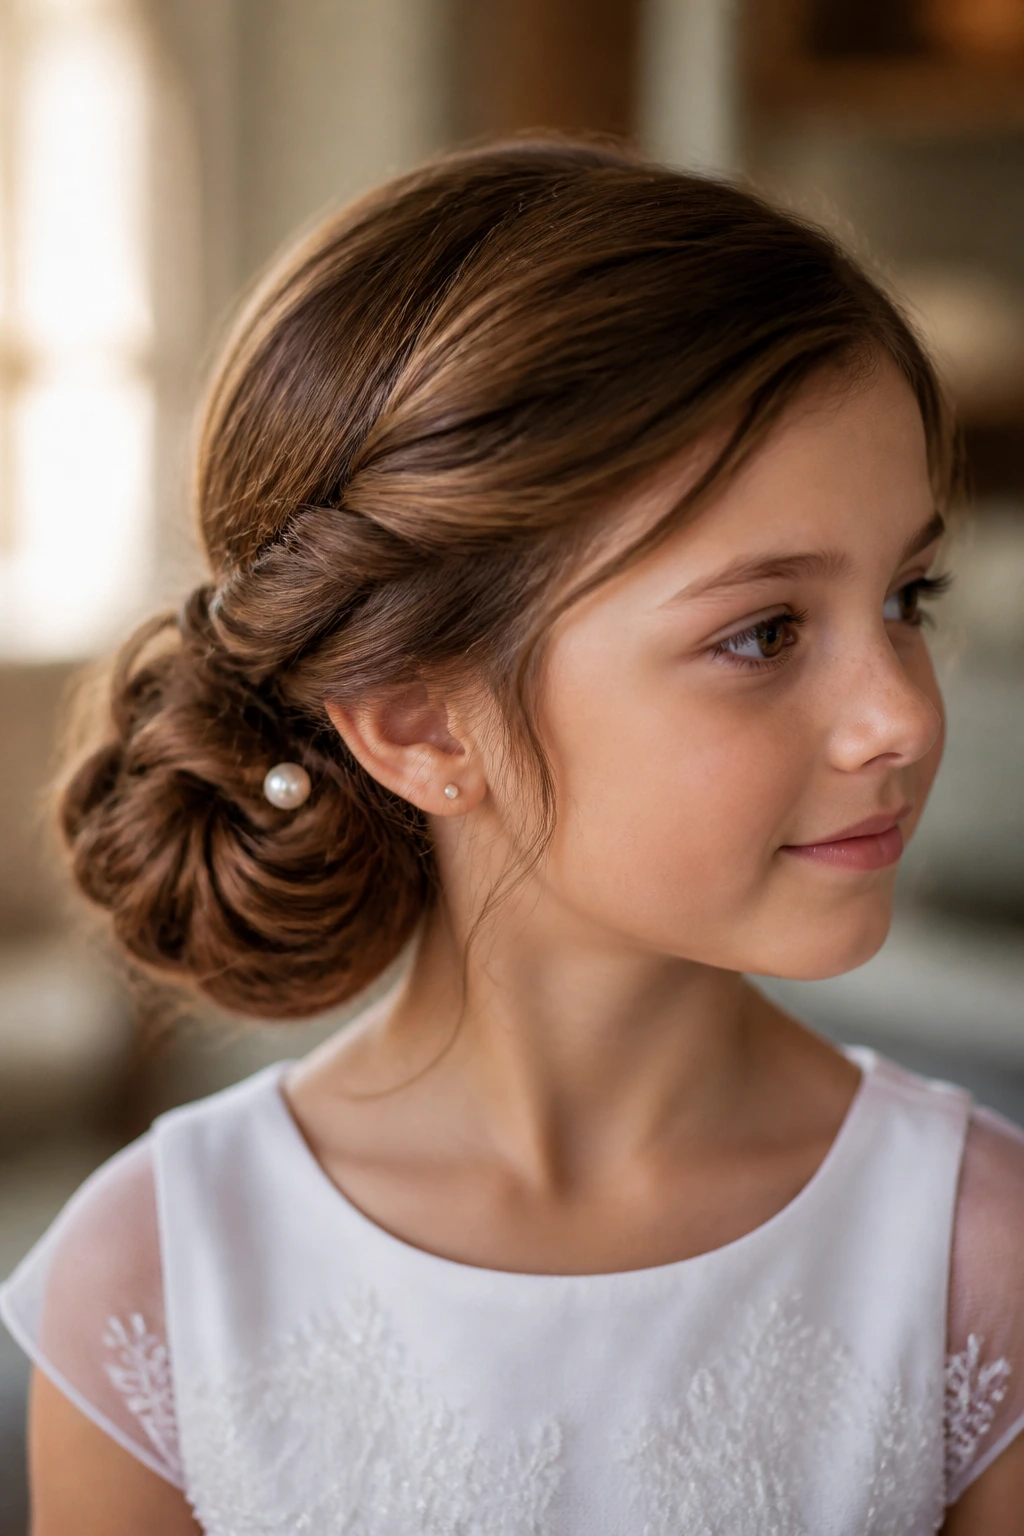
A side chignon feels a little softer than one centered at the nape. The side placement adds shape near the jawline and keeps the back from looking too rigid. A loose twist feeding into the chignon makes it more forgiving if the hair has layers.
I like this on children with fine hair, because the side position can create the sense of fullness without needing a giant bun. One pearl pin near the base is enough. If you add more, the style can start to look crowded. Let the twist do the talking.
30. Half-Up Bow Twist
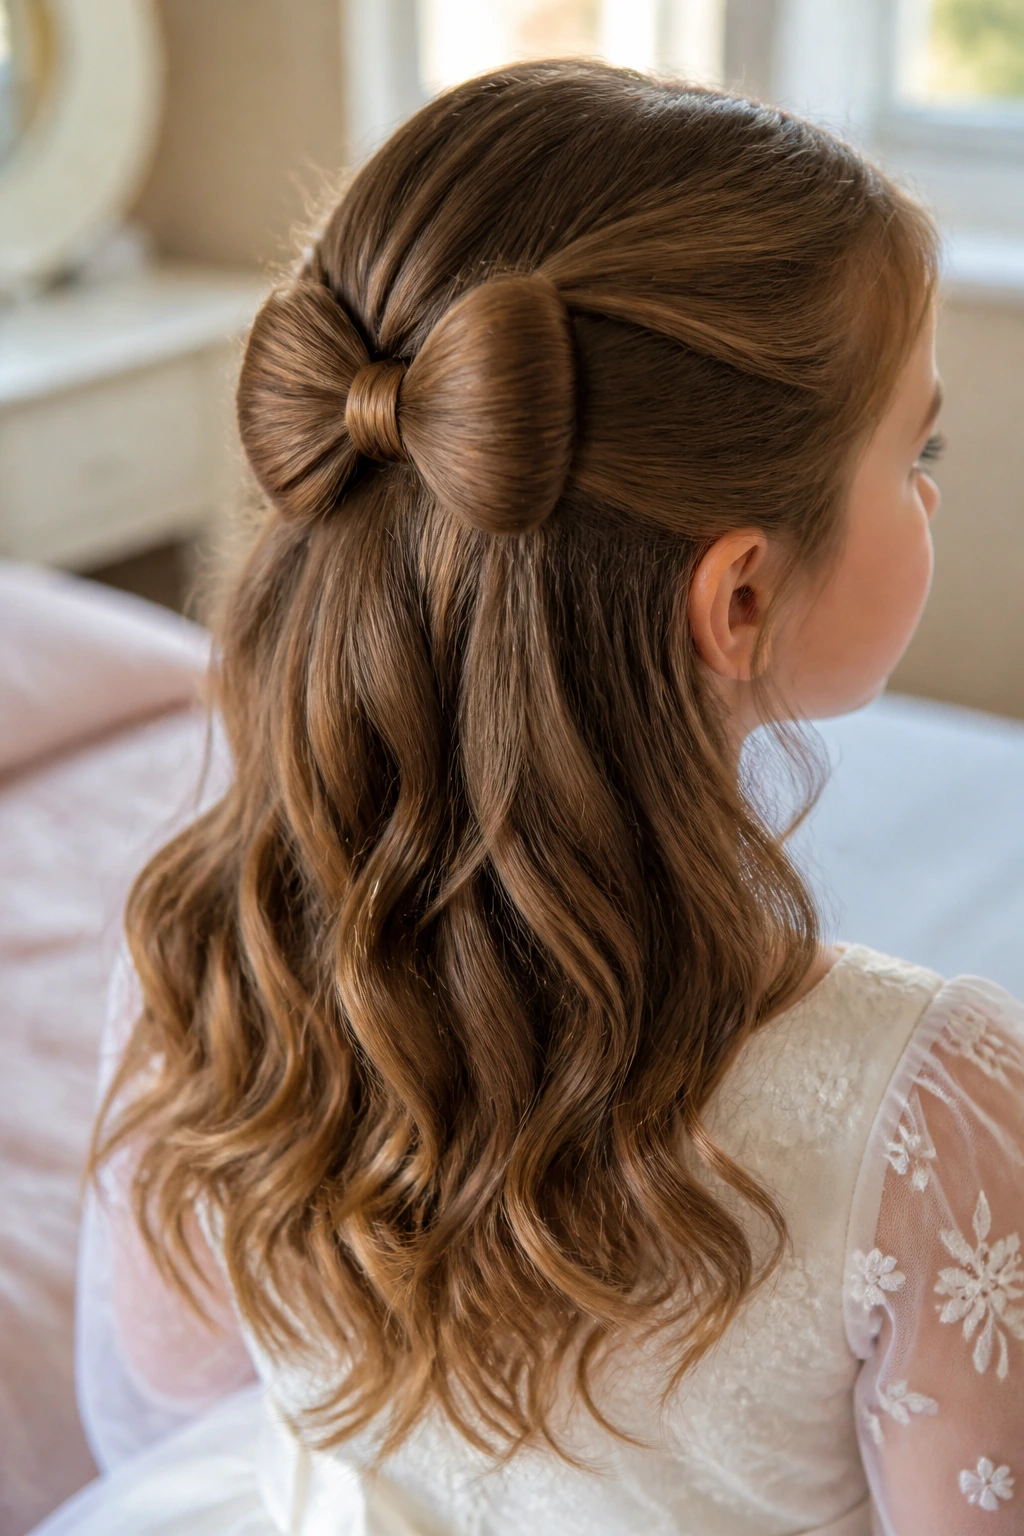
This one gets noticed. Sections of hair are folded and pinned into a bow shape at the back of the head, with the rest left down in soft waves or straight lengths. It sounds delicate, and when it’s done neatly, it looks like a ribbon tied right out of the hair.
The trick is keeping the bow balanced. If one loop is bigger than the other, the whole shape looks lopsided. Use clear pins hidden in the center of the bow, and keep the rest of the hair smooth so the detail has room to stand out. A bow in the hair should feel charming, not theatrical.
31. Braided Top Half-Up for Thick Hair
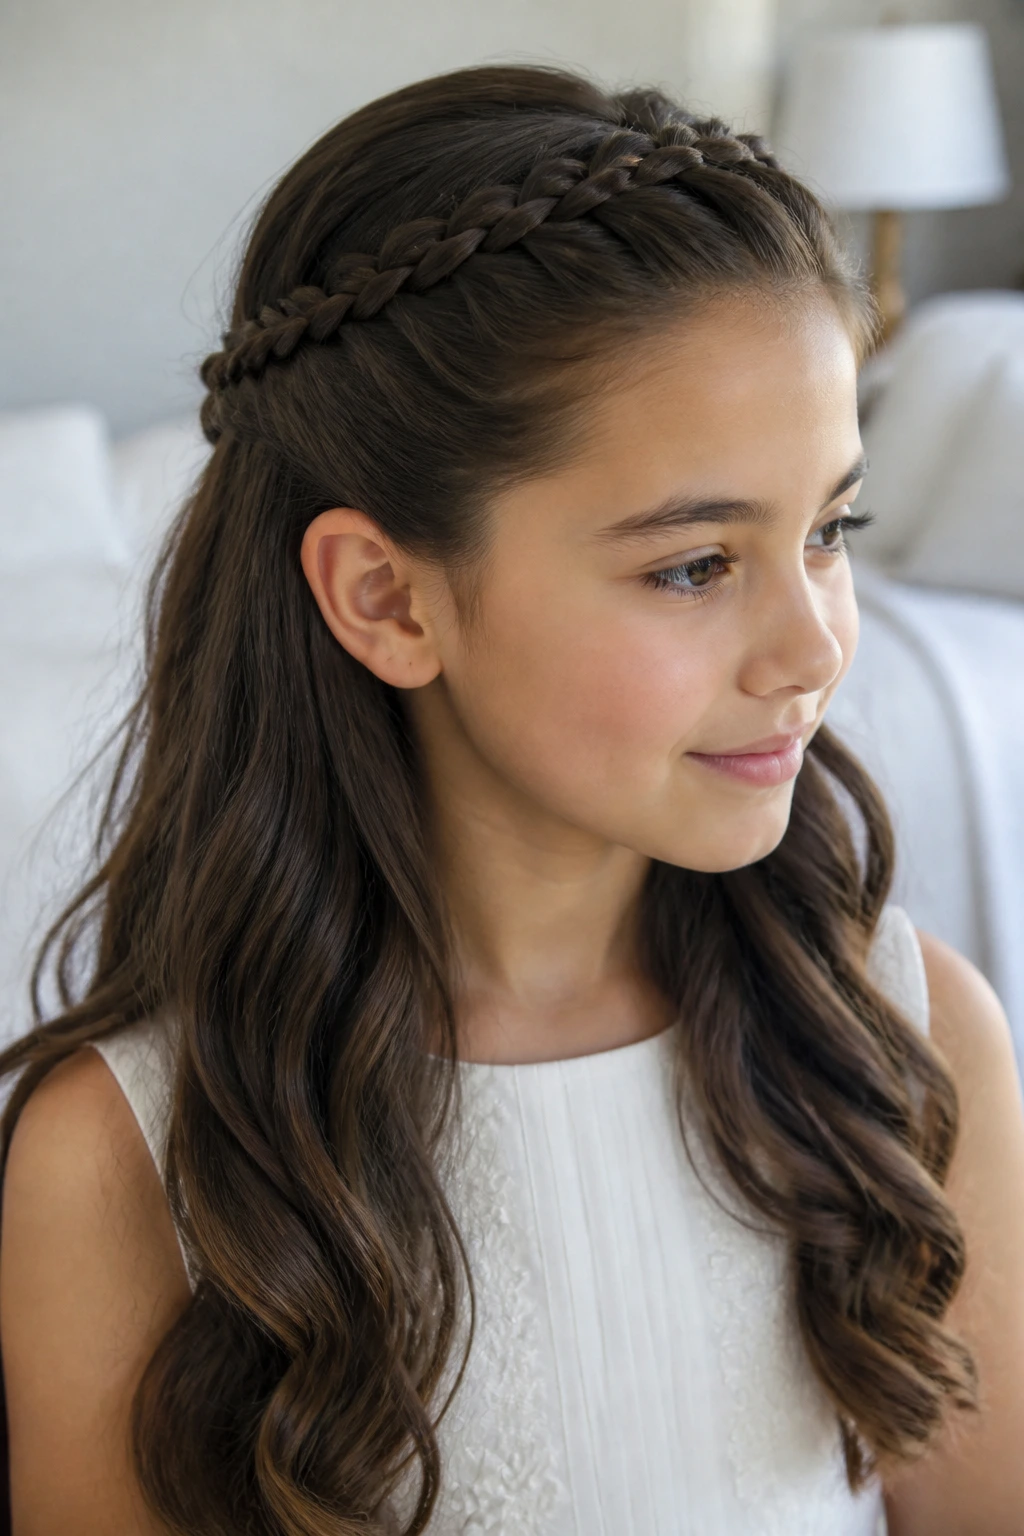
Thick hair often needs a way to calm the crown before the rest is styled. A narrow braid along the top half does that job well, pulling just enough hair back to make the front tidy while leaving length free below. It keeps the hair from ballooning at the roots.
This style is practical, and I mean that as a compliment. It controls volume without flattening it. The bottom can stay straight, waved, or lightly curled, depending on what the hair does best. If the braid feels too tight, loosen only the outer edges. Don’t dismantle the structure.
32. Soft Halo Twist With Open Ends
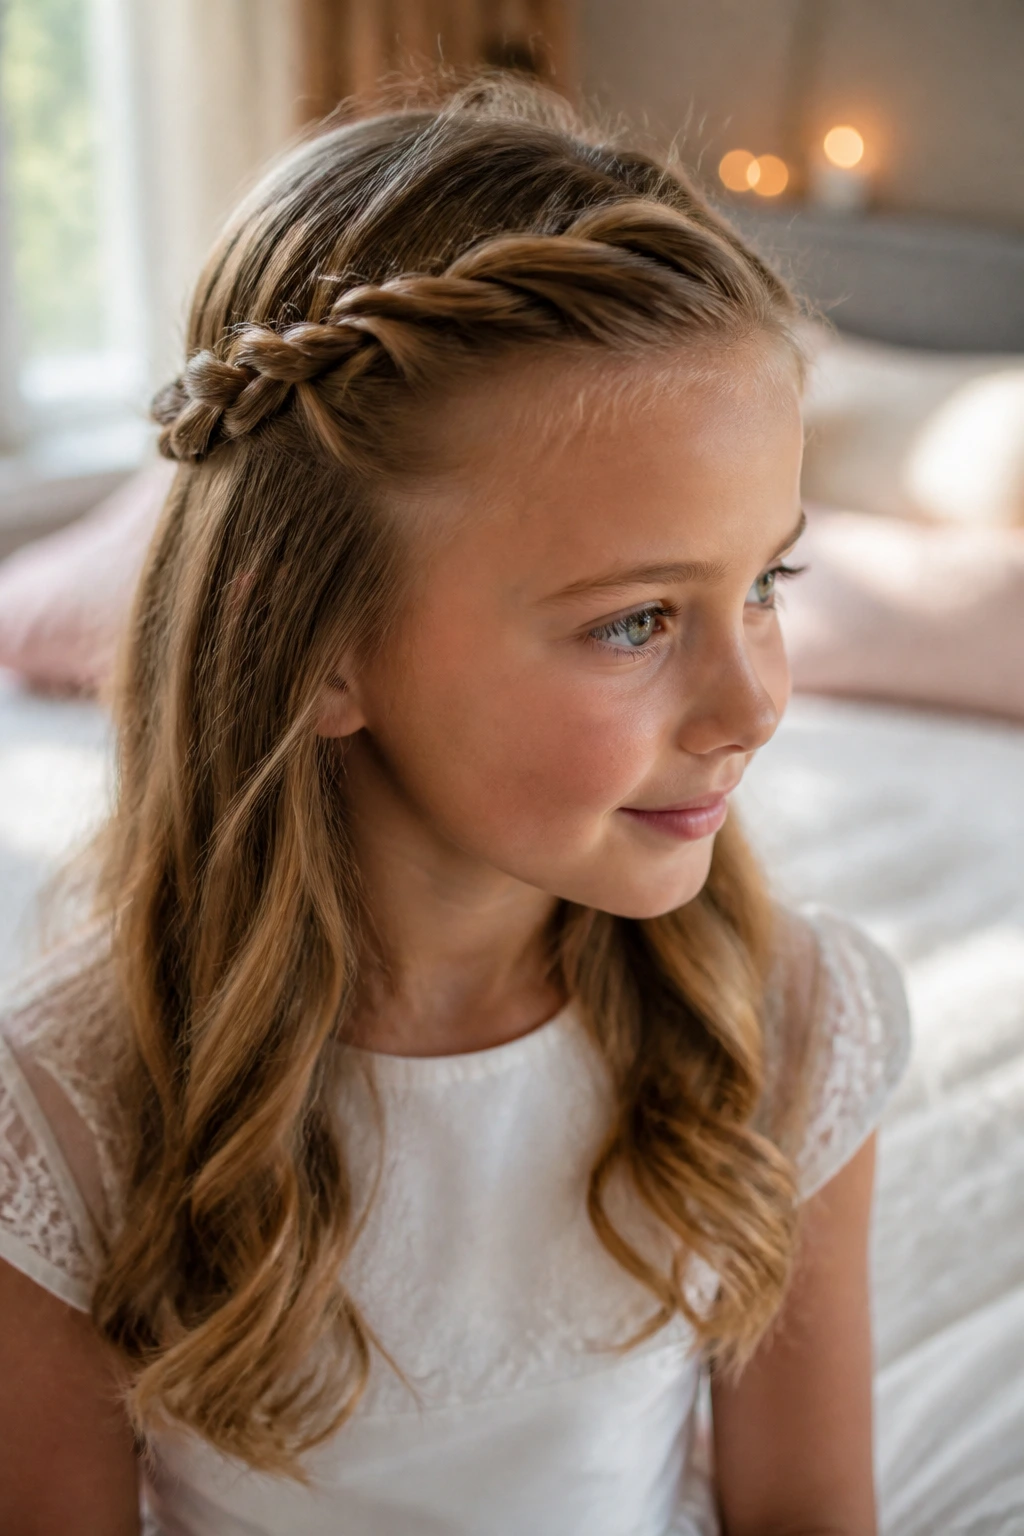
A halo twist gives the same framing effect as a braid crown, but with a slightly softer edge. Two twisted sections run around the head and meet at the back, leaving the lower lengths open instead of pinned up. The result feels light and gentle, which suits the day nicely.
I like this when a child wants hair down but still needs it off the face. It’s also kinder to layers than some braided styles, since the twist can gather uneven lengths without making the crown look jagged. A small comb or tiny floral pin can sit where the twists meet.
33. Curled Half-Up With Pearl Pins
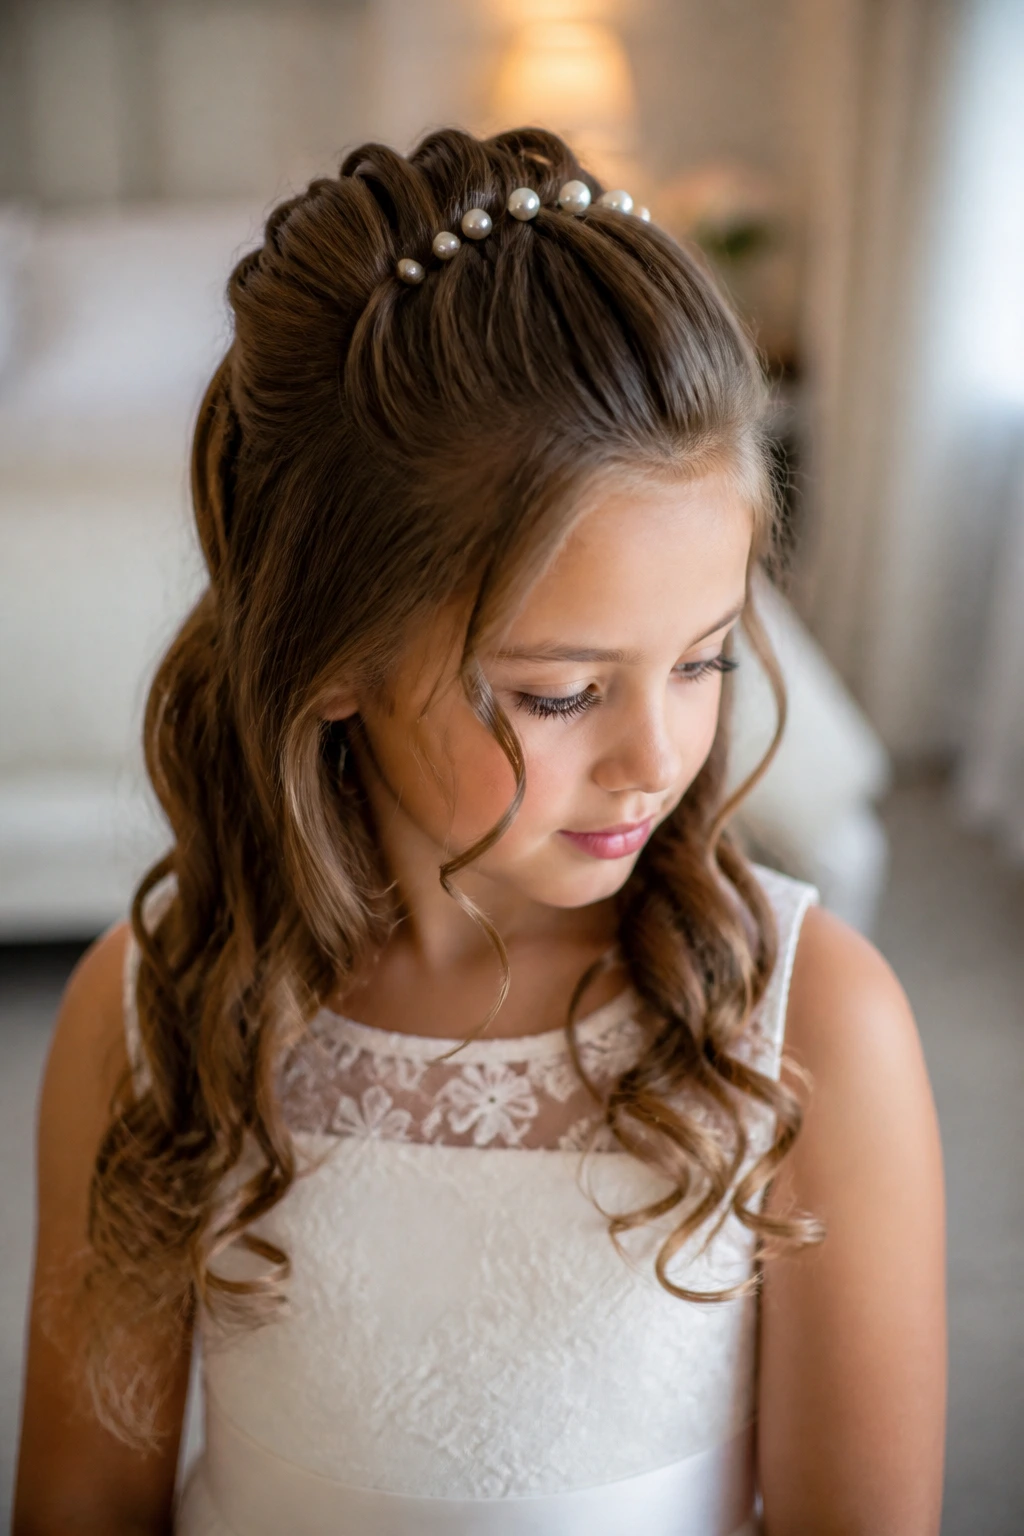
Curls and pearls play well together. Pull back the top half of the hair, let the lower half fall in soft curls, and place a few pearl pins where the pinned section meets the loose length. The style feels calm, and the pearls give it a quiet finish.
This works especially well with dresses that have simple necklines. The hair adds enough detail without taking over the outfit. Keep the pearl pins close together if you want a neat line, or spread them a little if you want the pinned section to look more airy. Either way, skip the oversized pins. They drag the whole look down.
34. Thin Ribbon-Wrapped Ponytail
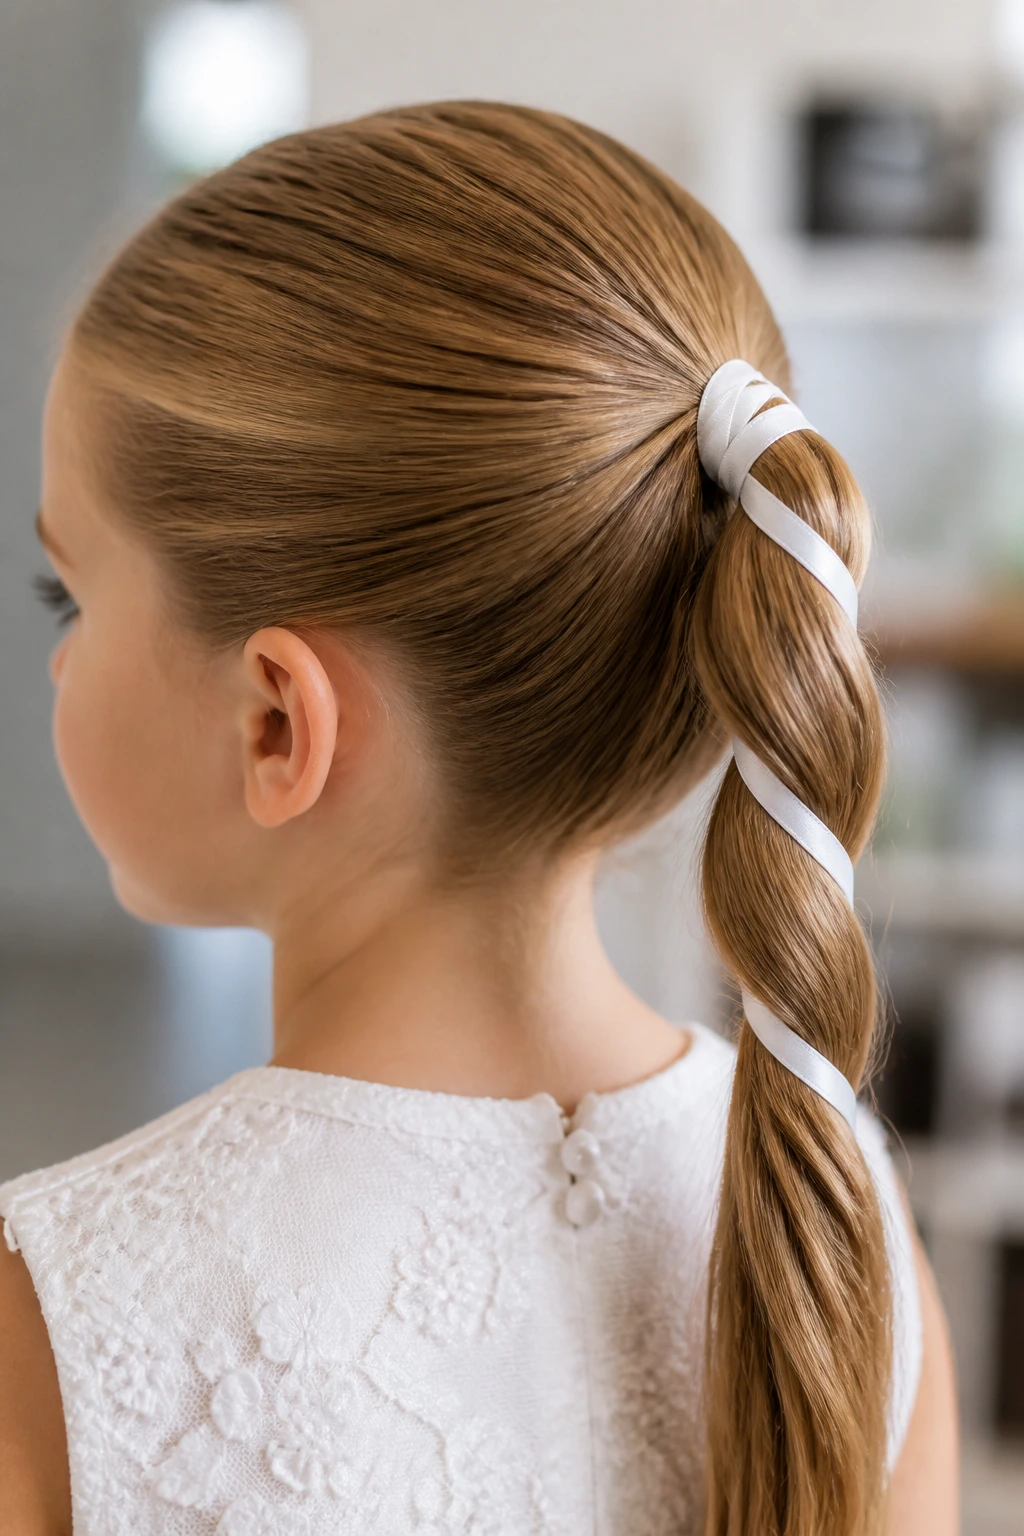
A thin ribbon changes a ponytail fast. Wrap it around the base, then weave it once or twice through the tail itself if the hair is long enough. The ribbon should stay slim and soft so the ponytail still feels like a child’s hairstyle, not a pageant build.
I use this when the dress or socks already have a lot of detail and the hair needs to stay quiet. It’s also a useful choice for fine hair, since the ribbon gives the tail a little more visual weight. Choose a ribbon that lies flat. Shiny ribbon can look plasticky under church lights.
35. Short Hair Side Braid Accent
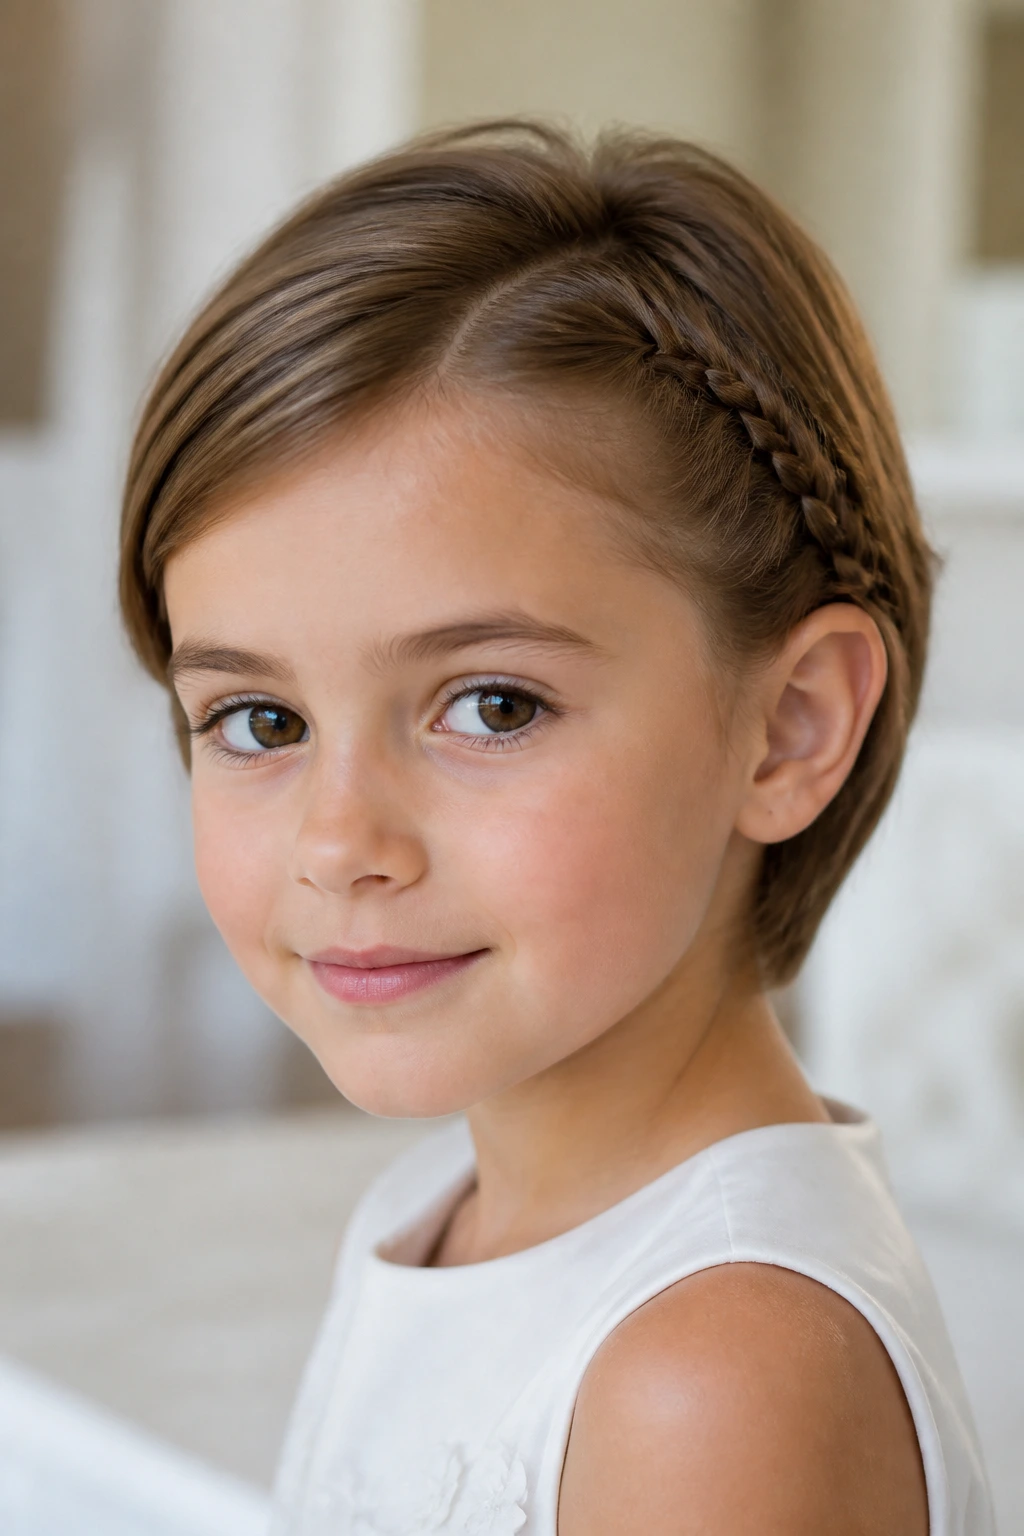
Short hair does not need a giant transformation to feel special. A tiny braid along one side, tucked behind the ear or pinned just above it, gives the cut a point of interest without forcing it into a shape it can’t hold. The rest of the hair can stay smooth or lightly waved.
This is one of those small details that parents often overlook. They should not. On a pixie or short bob, one clean braid accent can be more charming than a dozen clips. Keep the braid narrow and secure it with a pin that disappears into the hair. The goal is detail, not decoration overload.
36. Loose Lob With Face-Framing Twists
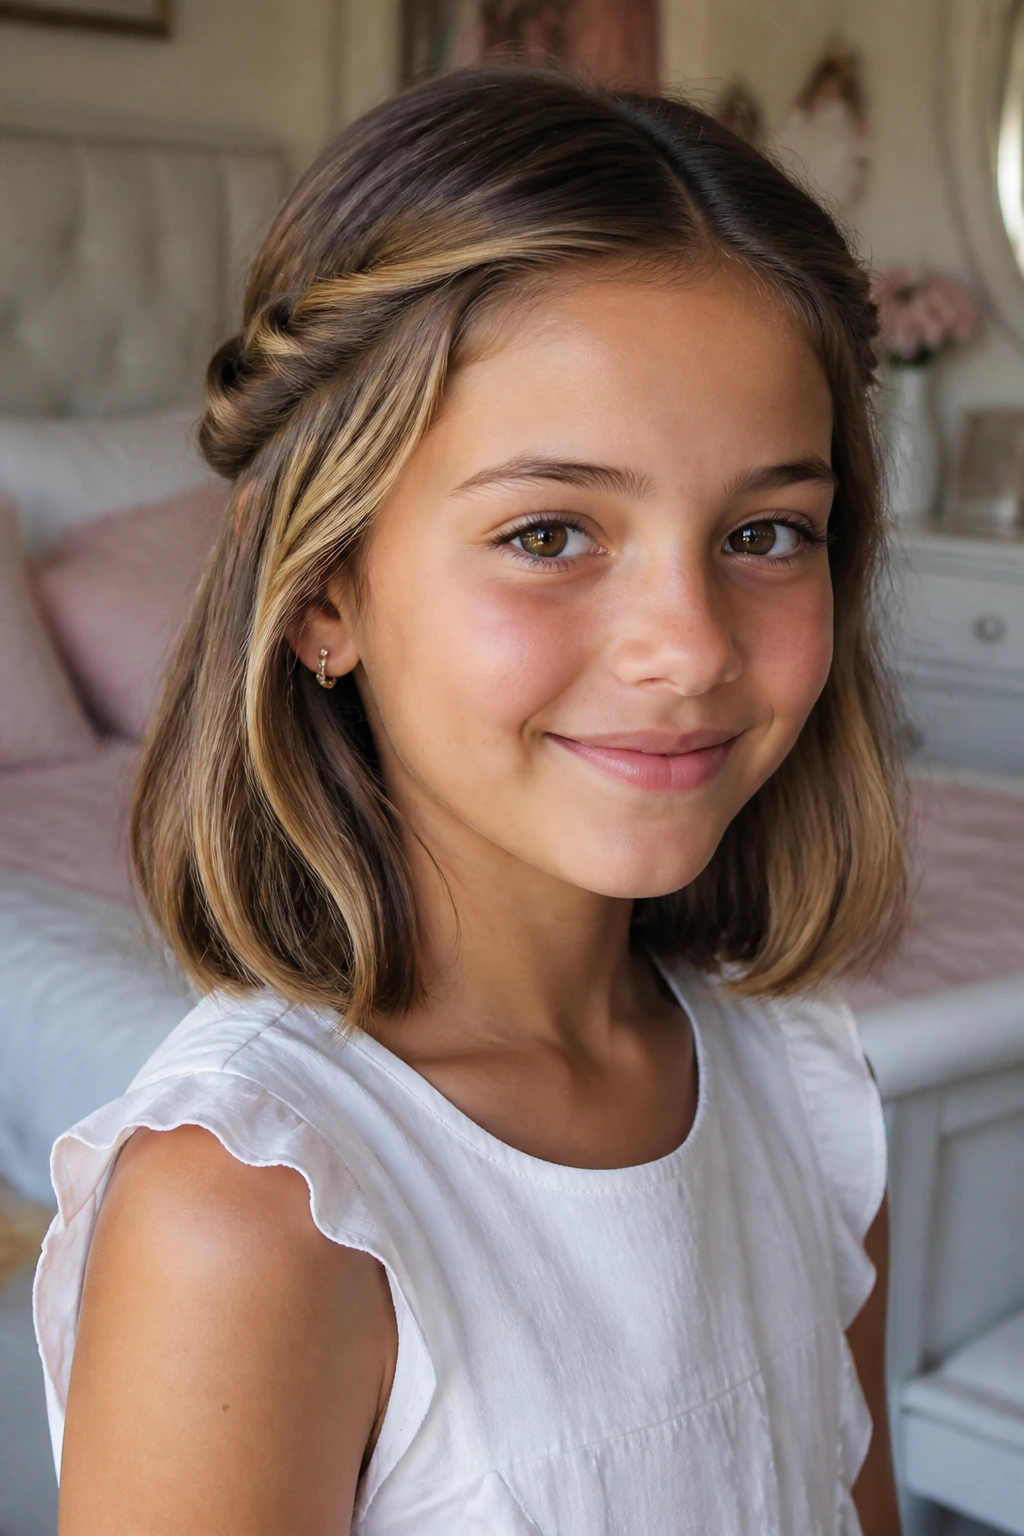
A lob gives you a little more length than a bob, and that means there’s room to add soft twists near the face. Pull back small sections from each temple, twist them once or twice, and pin them behind the ear. Leave the rest loose, lightly bent, and smooth through the ends.
This works because it keeps the shape controlled where the child talks, smiles, and turns her head. The loose length keeps the style youthful. If the hair has a bit of wave already, let it. Straightening every last inch can make the style feel too sharp for the day.
37. Satin Bow Bun With Polished Ends
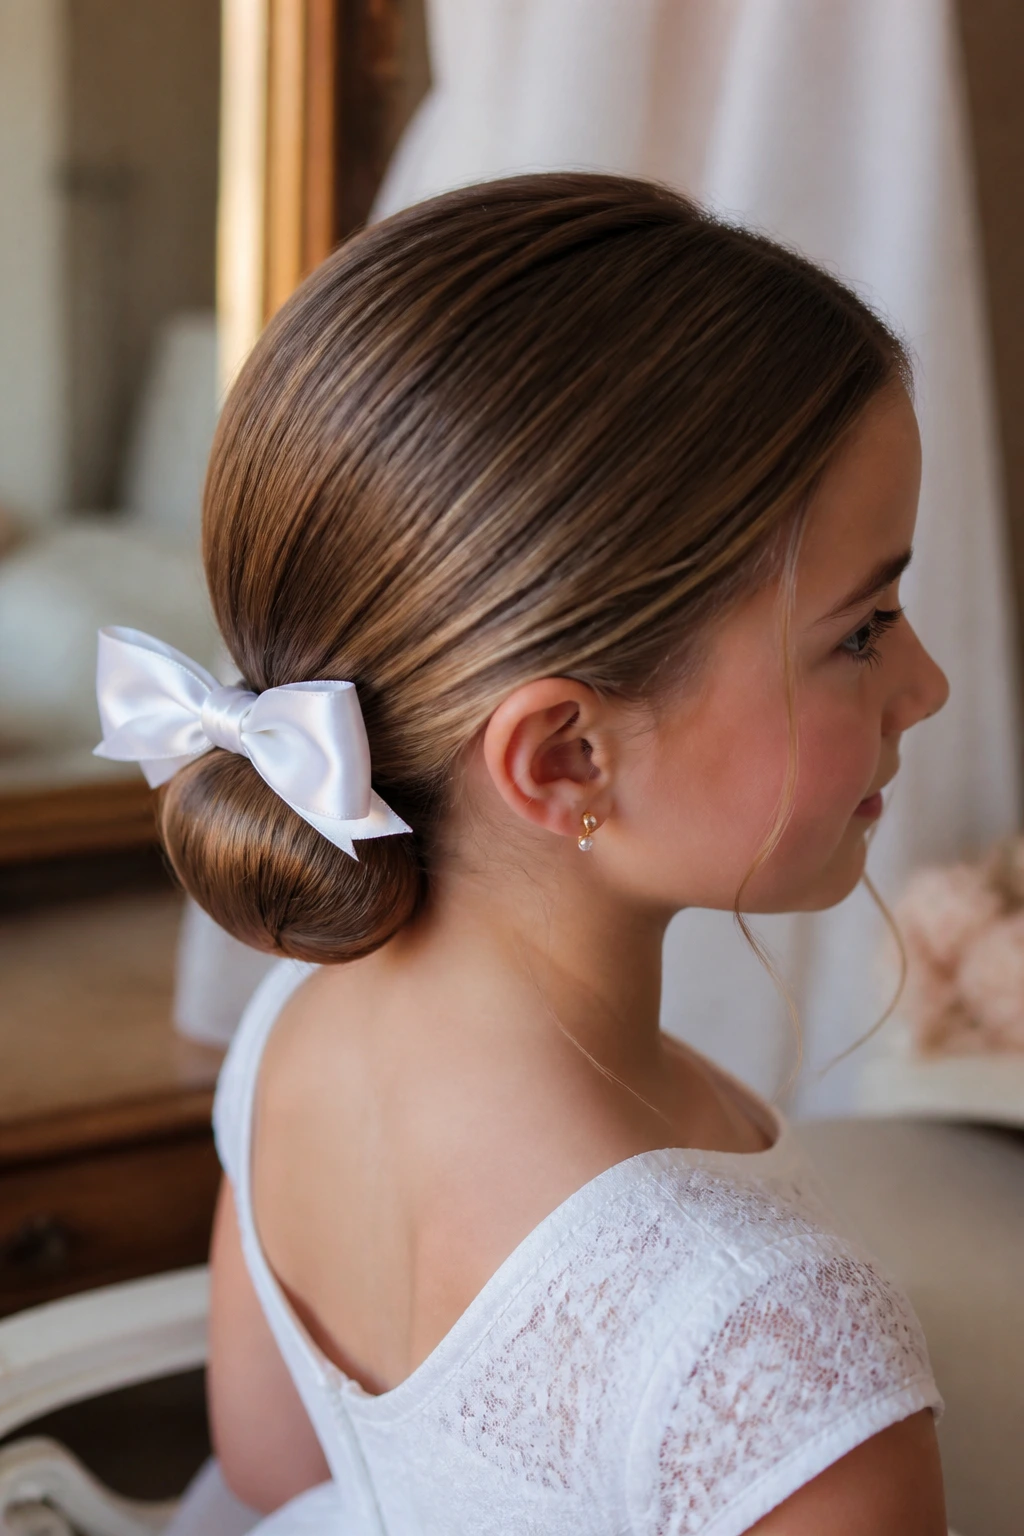
A bun and a bow is a classic combination for a reason. Keep the bun low, smooth the surface so it sits clean, and add a satin bow where the bun meets the nape. If a little hair peeks out at the ends, pin it down instead of leaving it frayed. That’s the difference between tidy and rushed.
This one suits dresses with a simple back line. It doesn’t need extra help. I’d keep the bow medium-sized, not giant, so it feels balanced against the bun. The satin gives a soft finish that photographs well without looking too shiny.
38. Classic Rope-Braid Pony With a Calm Finish
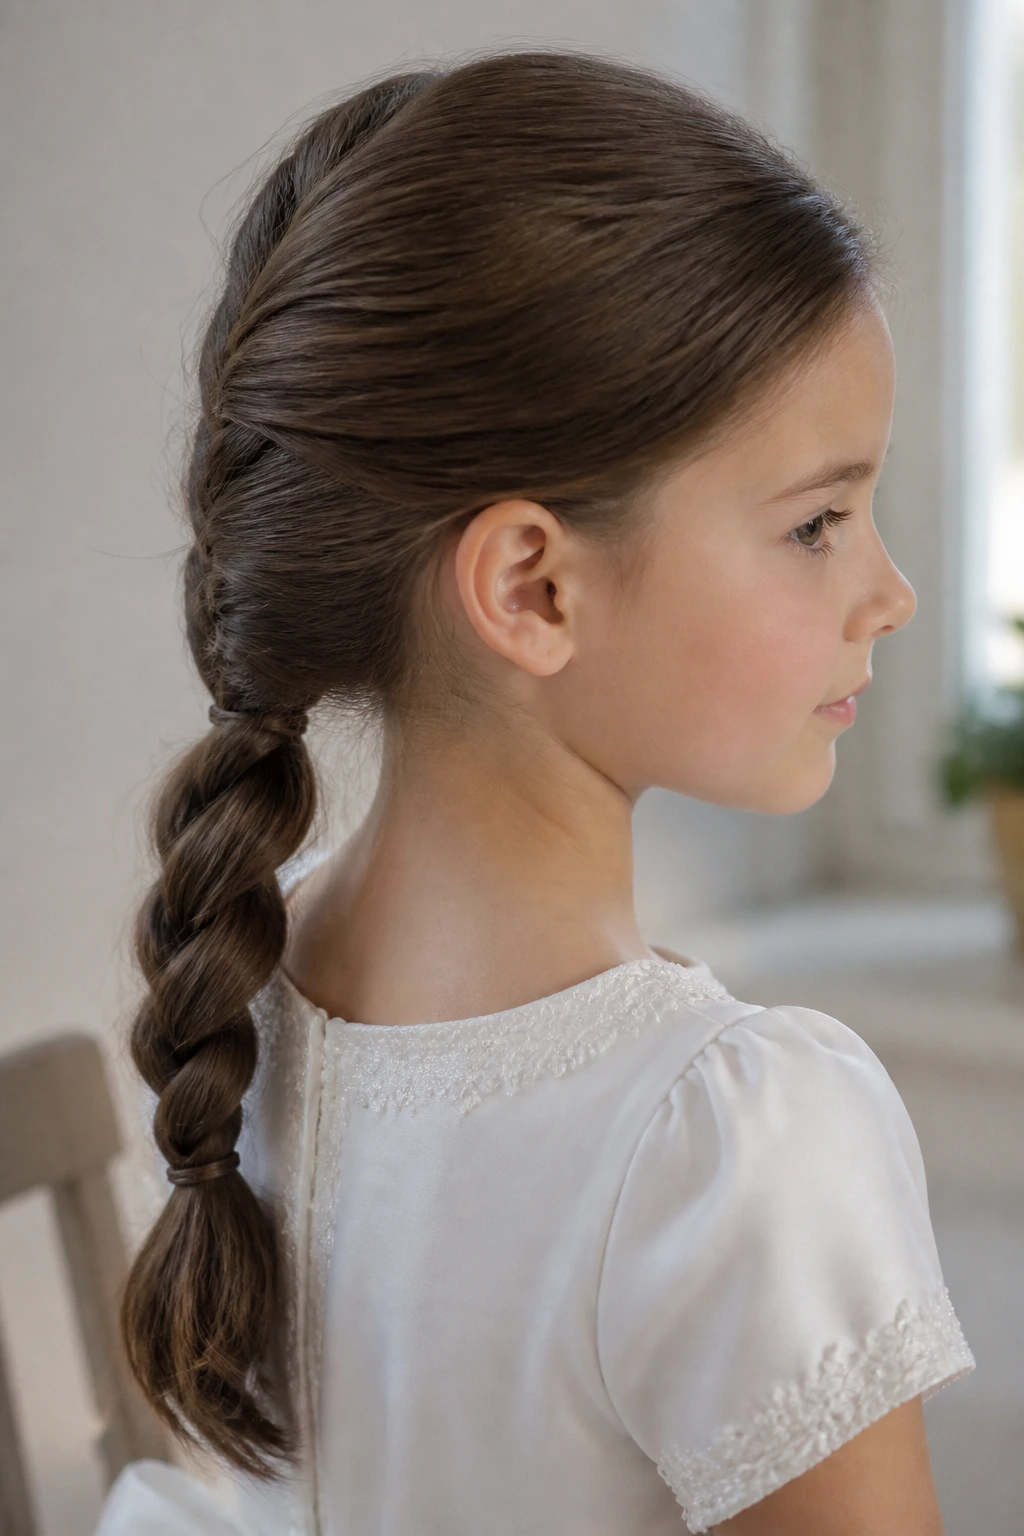
A rope braid ponytail has a nice, orderly feel. Two sections twist around each other from the nape down to the ends, creating a smooth spiral that holds well and looks a little different from the usual braid. It’s tidy, low-fuss, and good on hair that does not stay in place easily.
I like it when the rest of the outfit already has enough detail and the hair should simply behave. A small bow or narrow ribbon at the base works, but it isn’t required. Keep the tension even from top to bottom so the twist doesn’t wobble. Uneven tension shows up fast in this style.
Why This Style Collection Works Beyond the Photos
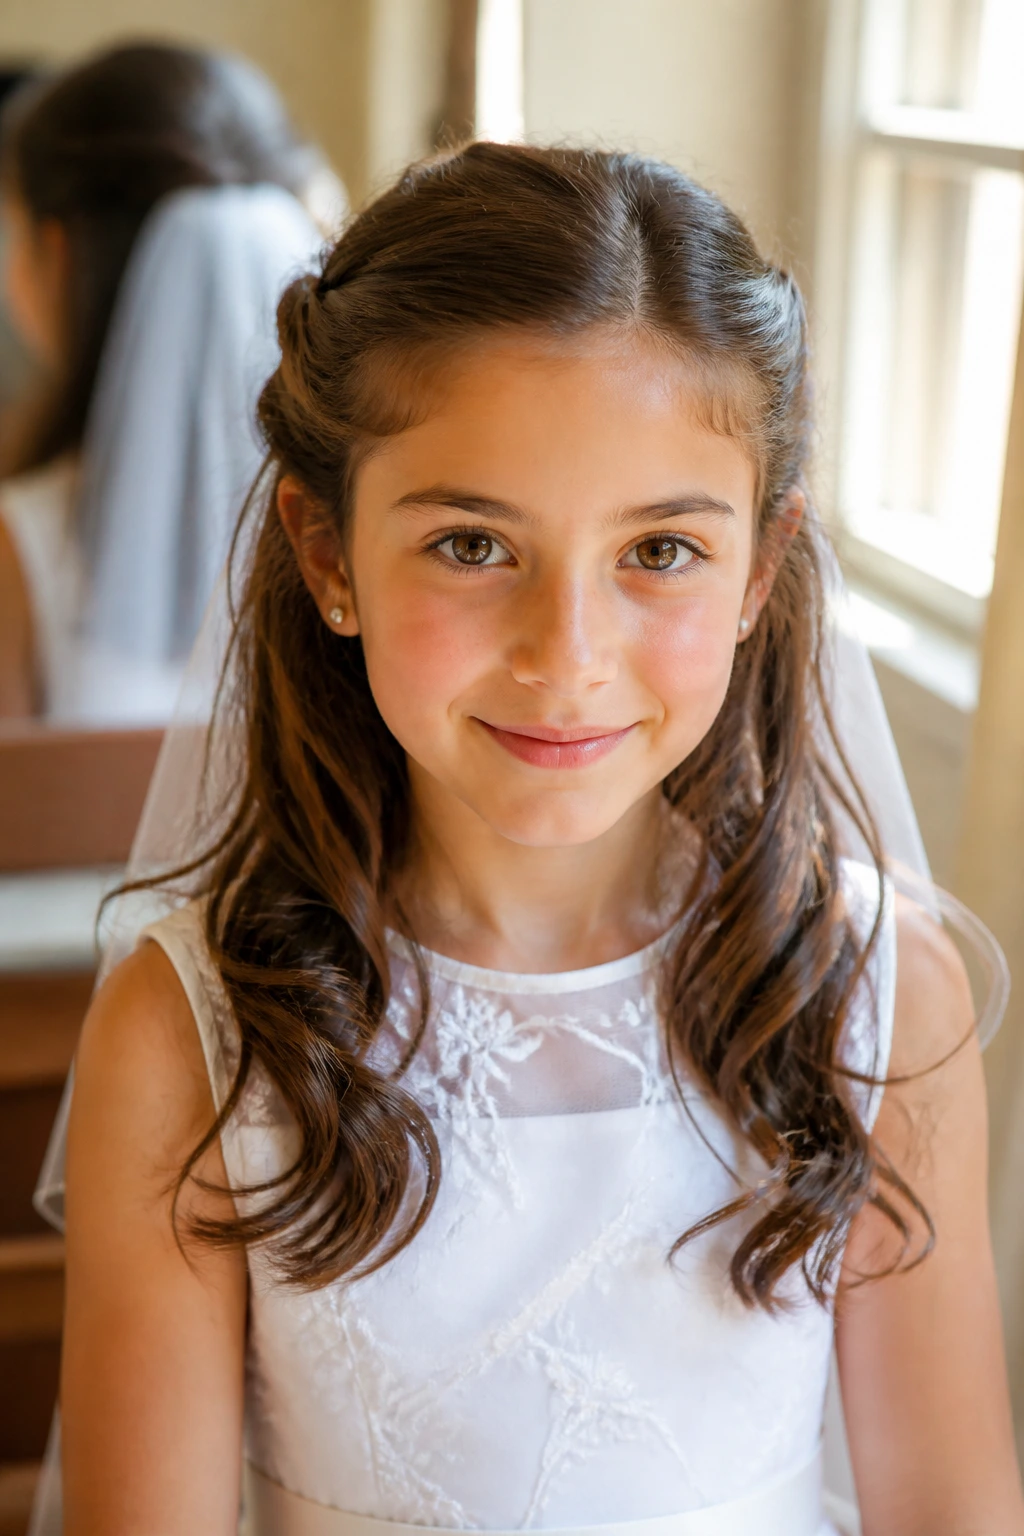
First Communion hair needs a steadier hand than everyday styling, but it doesn’t need to feel precious or stiff. The best looks here keep the hair close where it should be close, then open it up where softness helps the face. That balance matters more than volume, and more than ornament, too.
Low buns, side sweeps, braid crowns, and half-up shapes all behave well under real-life conditions. They sit through the service, stay friendly to veils and clips, and still leave room for a little childlike movement. That last part matters. Hair should not fight the day.
Pins, Sprays, and Ribbons You’ll Actually Use
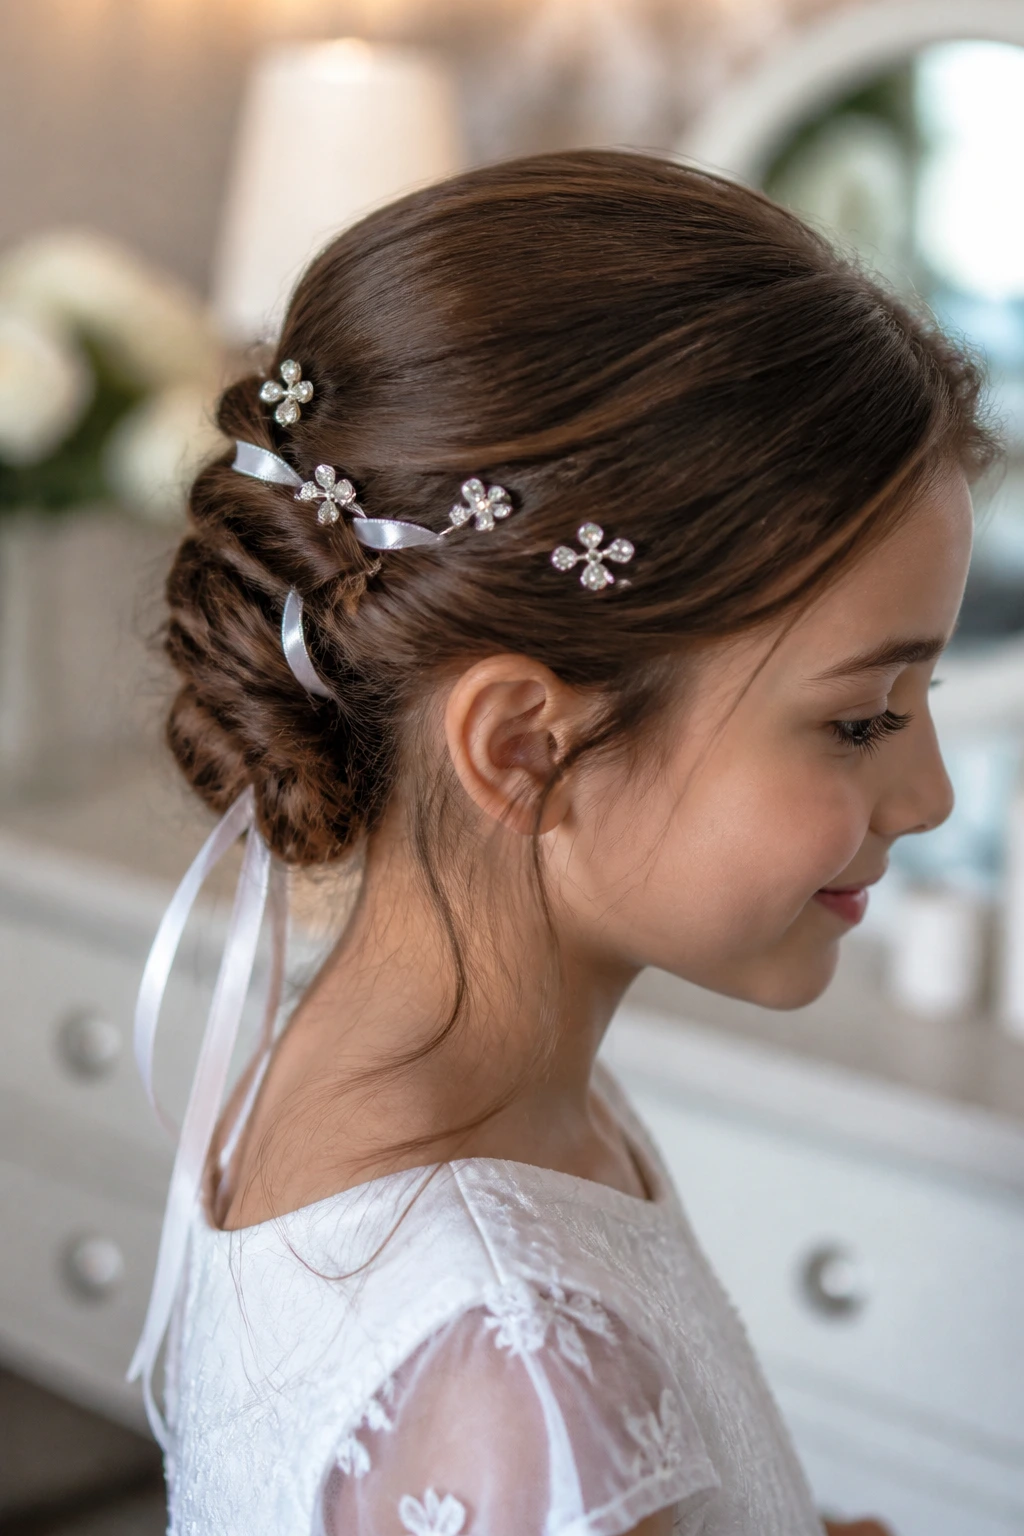
Choosing accessories sounds easy until you’re standing in front of a drawer full of clips that look right in the package and wrong in the hair. The trick is to buy for grip first, then decoration. A bobby pin that matches the hair color and has a strong spring will do more work than a prettier pin that slides out halfway through the procession.
For ribbons, narrower is usually better. A 1/4-inch or 3/8-inch satin ribbon sits neatly on small heads and works with braids, ponytails, and bows without taking over the style. Wider ribbon can be lovely in photos, but it often feels too heavy for a child’s hair. If you want pearls, choose lightweight pins or combs instead of dense clusters. Dense clusters drag.
Products matter too. A flexible-hold hairspray keeps the hair in place without making it crunchy. Lightweight mousse helps fine hair keep shape. Texturizing spray gives braid sections more bite. Heavy oils and thick serums can make the hair too slick, and slick hair is where pins start misbehaving. Not instantly. Just enough to ruin your patience.
How to Finish the Look for Church, Photos, and Lunch
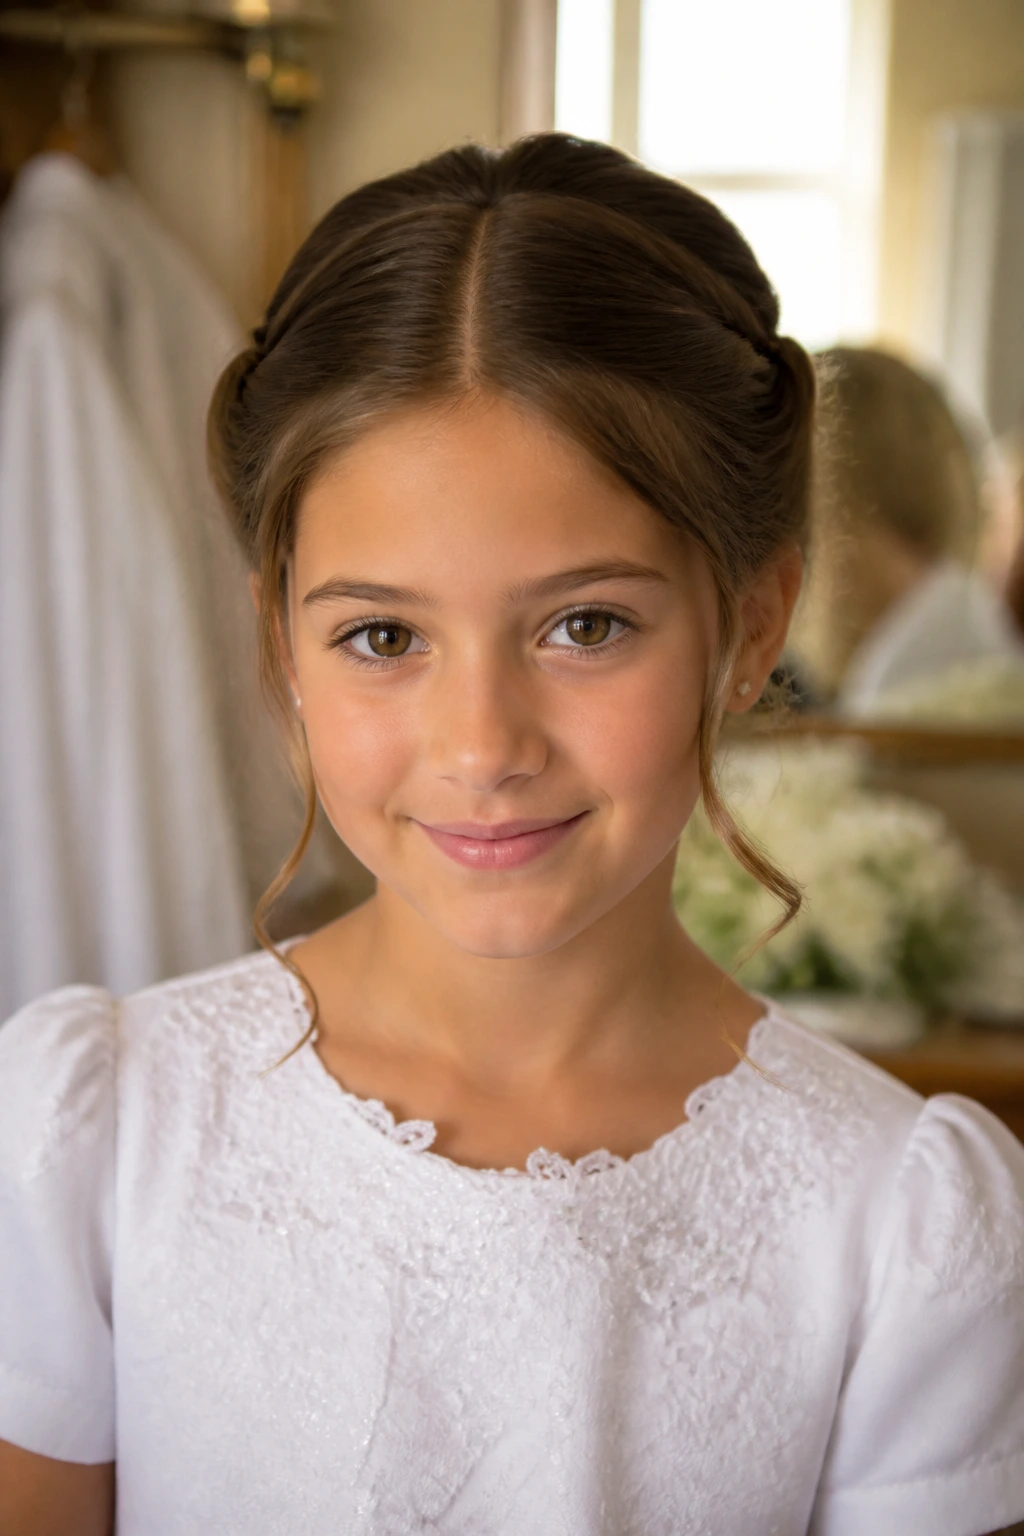
Presentation: Keep the hairline clean, but not pulled back so tightly that the face looks pinched. A soft part, a smooth crown, or one tidy braid line usually reads better than a style with too much height. In photos, the best hair is the hair that frames the face and stays where you put it.
Accompaniments: Think about the dress, veil, cardigan, and shoes as one little group. A pearl comb pairs nicely with lace. A satin bow works with a sash. Small flowers feel right with a simple dress, while a headband can stand in for a veil on a child who wants less fuss.
Portions: For hair, scale the style to the child’s head and hair density. Thin hair needs smaller buns, narrower braids, and fewer accessories. Thick hair can carry wider braids and more structured knots, but even then, keep the accessory size modest. A communion style should sit neatly on the head, not tower over it.
Beverage Pairing: For the meal after church, keep the drink simple. Sparkling water, lemonade, or iced tea works better than anything sticky or dark, especially if the child is still dressed for photos. A white dress and grape juice do not mix.
Small Touches That Make the Style Feel Special
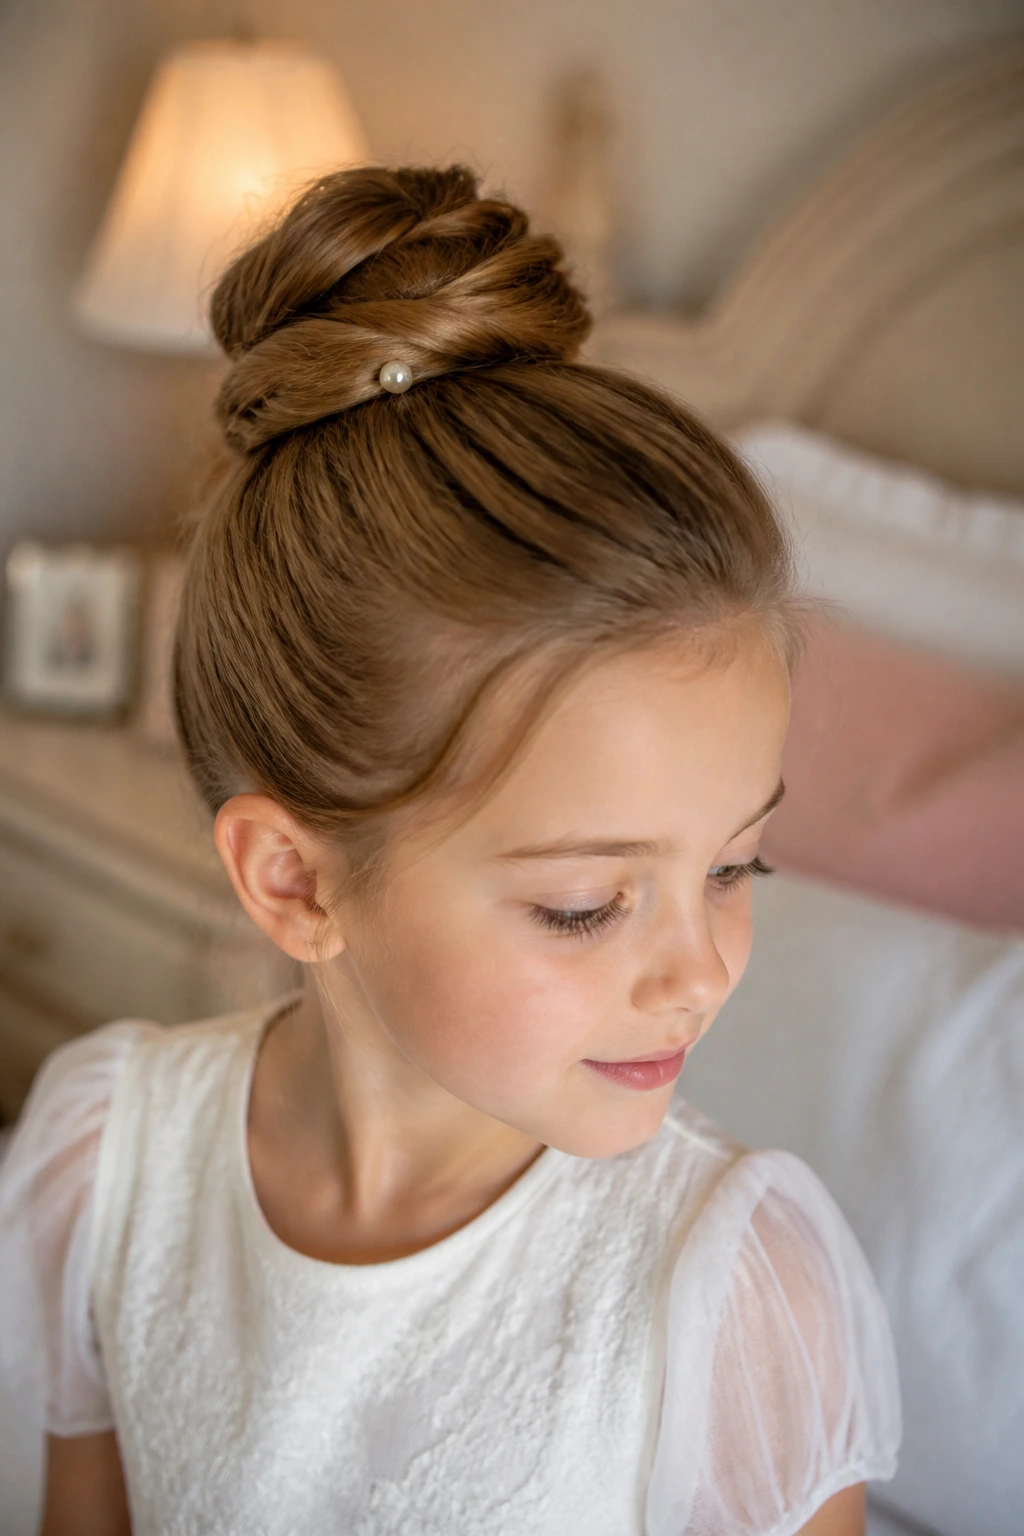
Shine Boost: A pea-size smoothing cream brushed over the top layer can calm frizz and give braids or buns a tidy finish. Use less than you think. Too much makes the hair look greasy by noon.
Customization: Swap ribbon color to match the dress trim, or trade pearls for a tiny satin flower if the outfit leans softer. A child with straight hair can handle a sleek bow, while curly hair often looks best with a lighter clip or comb.
Photo-Day Fix: Bring one extra bobby pin, one small comb, and a travel-size spray in a bag. That tiny kit fixes the one curl that pops up at the wrong angle or the clip that slides after hugging a grandparent.
Make-It-Yours: If the child likes a little sparkle, choose one pin with a clear stone or pearl detail and stop there. If she hates shiny things, stay with matte ribbon and clean braids. The style should feel like hers, not like it was borrowed from a display case.
Night-Before Prep and Morning-Of Touch-Ups
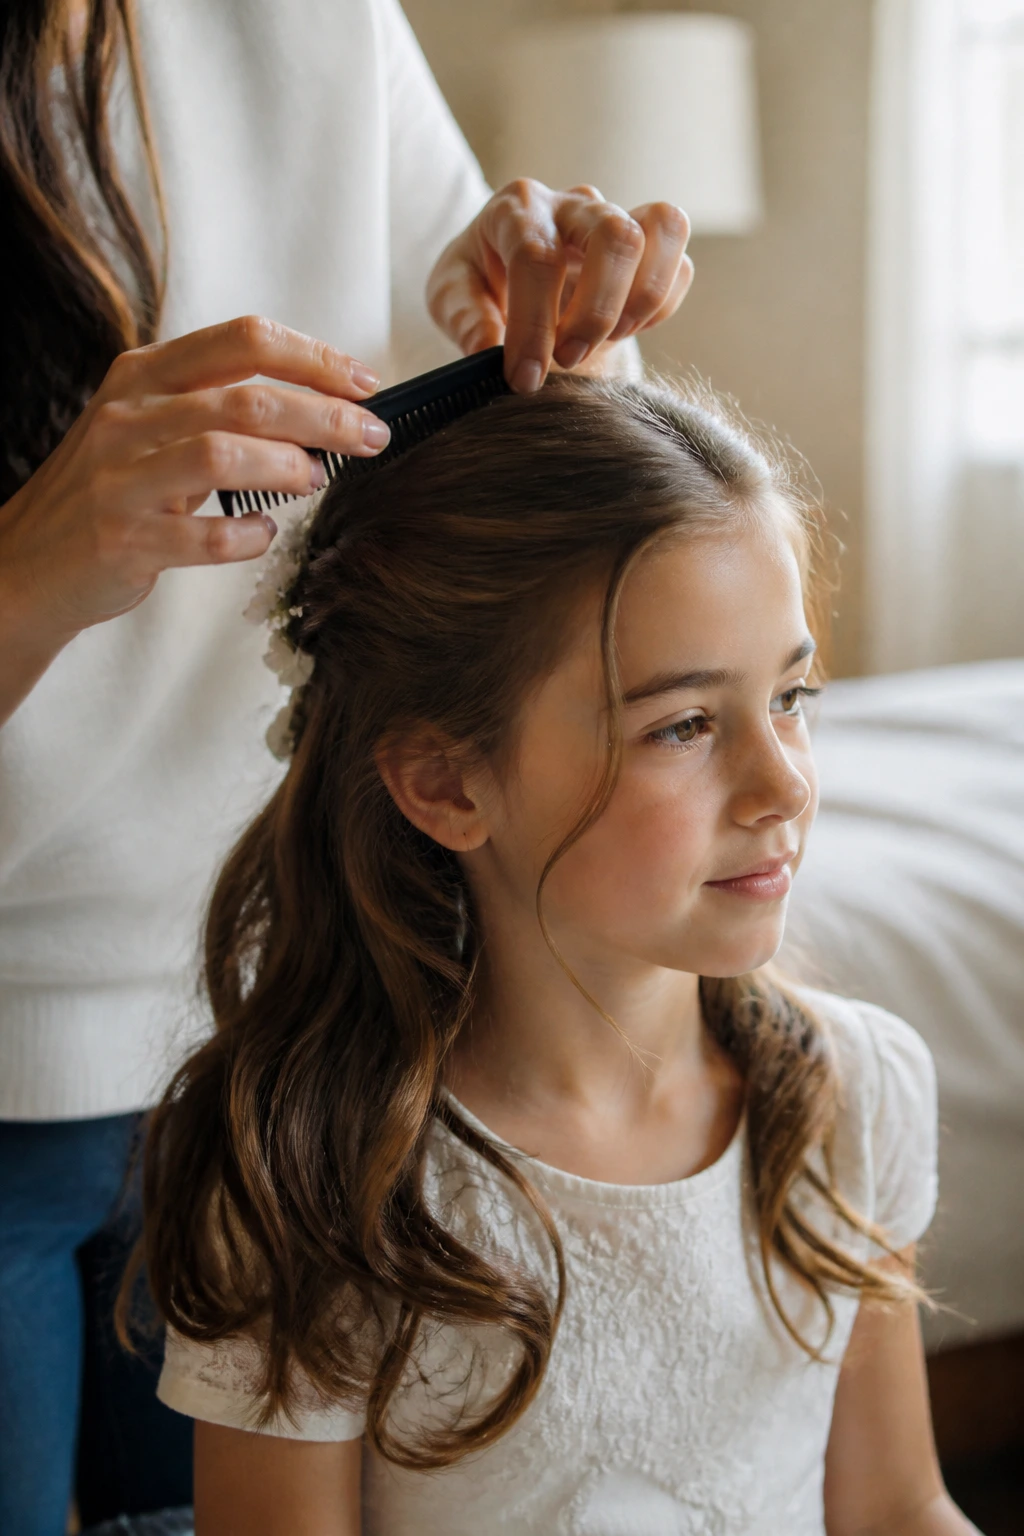
Hair is easier to style when it is not freshly washed and slippery. For most of these looks, washing the night before works better than washing the morning of, especially if the hair is fine or straight. A little natural texture gives the pins something to hold. If the hair must be washed the same day, dry it completely and let it sit for at least 20 to 30 minutes before you start sectioning.
A loose braid or low ponytail overnight can save time on the morning itself. Use a satin pillowcase if you have one; it cuts down on friction and frizz. For curls, wrap them loosely so they don’t flatten into odd bends. For braids and buns, the safest move is to do the shape, leave the final accessory off, and add the ribbon or clip after dressing.
Touch-ups should be small. Smooth the top with a soft brush, reset one pin if needed, and mist lightly. Do not keep rebuilding the style. That is how a clean communion look turns into an anxious one.
Common Mistakes to Avoid
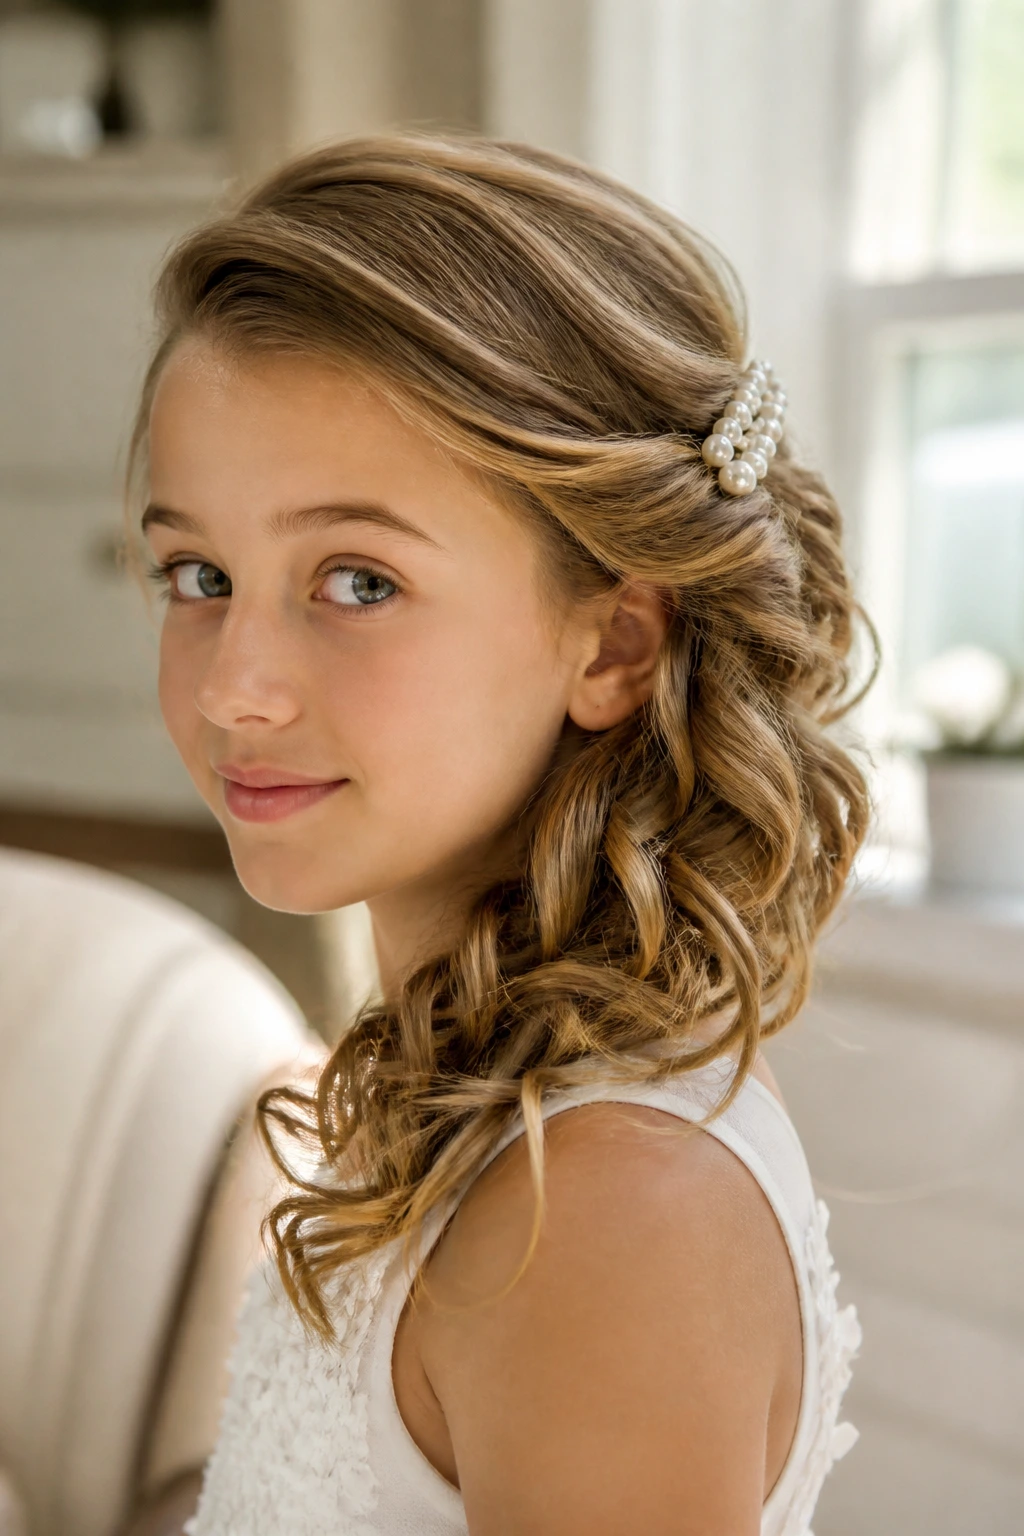
The biggest mistake is styling the hair too tightly. A child’s scalp is smaller and more sensitive than an adult’s, and what feels secure for five minutes can turn into a headache by the time the service ends. Tight styles also leave dents if you need to redo them. Aim for secure, not strained.
Another problem is using accessories that are too heavy. A large clip can slide, tilt, or pull the hair on one side, which is especially annoying in fine hair. Keep the ornament close to the head and light in weight. If it feels like it belongs on a wedding updo, it probably belongs somewhere else.
Freshly washed, silky hair is also a trap. It looks nice for about half an hour, then pins start slipping. A little texture is your friend. Dry shampoo at the roots or a touch of mousse can make the style last longer.
And please do a trial run. Even a fast one. A five-minute test with the braid, bow, or veil tells you more than a week of guessing.
Variations and Adaptations to Try
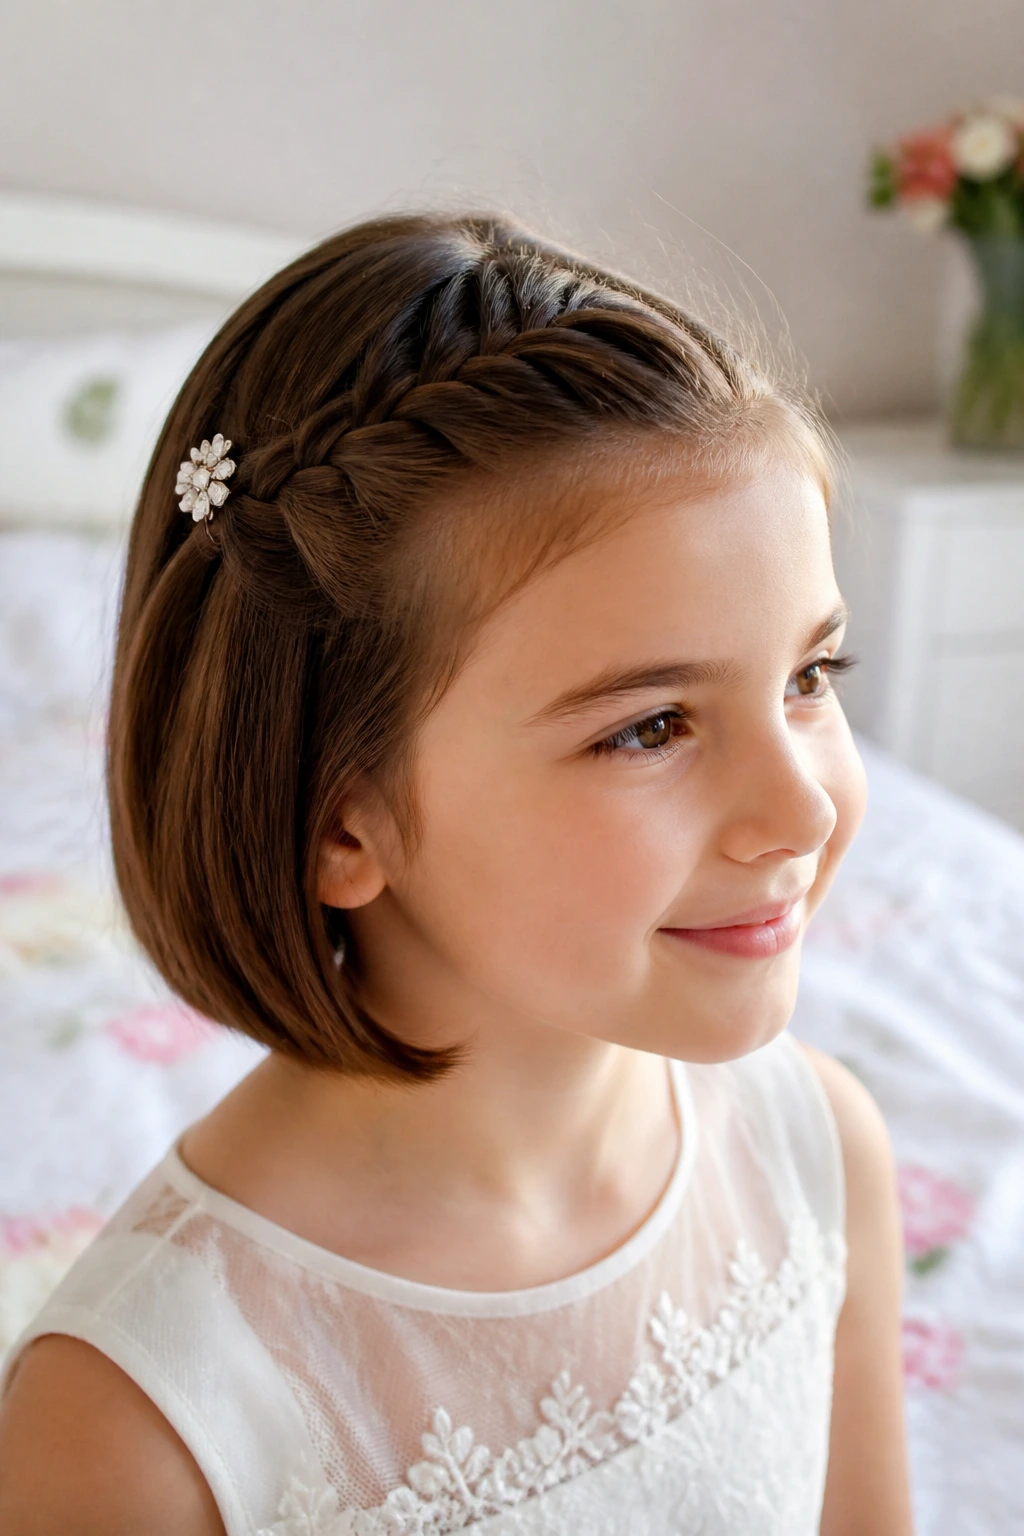
The Short-Hair Fix: If the child has a bob or pixie, lean into clips, side sweeps, and tucked sections instead of trying to force length that isn’t there. A clean barrette, a side braid accent, or a tucked-under roll can look more polished than a pretend updo.
The Curly-Hair Version: Use curl cream, define the texture, and let the curls stay visible. Add front twists, a low half-up shape, or a crown pin so the hair has structure without losing its natural pattern.
The Veil-Friendly Edit: Choose low buns, crown twists, or braid halos when a veil comb needs room to sit. These styles give the comb a steady base and keep the veil from floating awkwardly on top of volume.
The No-Heat Morning: Skip the curling iron and work with braids, twists, and smooth buns. A braid set overnight can create soft waves by morning, and the result often lasts longer than a hot-tool curl anyway.
The Fine-Hair Upgrade: Use texturizing spray, small elastics, and narrow sections. Fine hair looks fuller when the braid sections are not too large and the bun stays compact. Big shapes can swallow the hair; smaller shapes make it look deliberate.
The Busy-Parent Shortcut: Choose one anchor point and one accessory. A low pony with ribbon, a side clip on a bob, or a half-up twist with curls can be done fast and still look dressed for the occasion.
Questions Parents Ask Before the First Pin Goes In
Should the hair be washed the night before or the morning of?
Night-before usually wins. Hair that is a little lived-in holds pins better, especially if it is fine or straight. If the child’s hair tends to get oily quickly, wash it earlier in the day and let it cool and dry fully before styling.
Can a veil work with braids?
Yes, and sometimes braids are the best base for a veil comb. A braid halo, crown twist, or low French braid gives the comb something stable to grip. Just avoid placing the veil over a heavy knot that already takes up the whole crown.
What if my child has very short hair?
Then keep the style honest. A clean side sweep, a tucked-under roll, or one well-placed clip often looks better than forcing pins where they won’t stay. Short hair can be elegant without pretending to be long.
How do I keep flyaways down without making the hair stiff?
Use a soft brush and a flexible-hold spray, not a heavy shell of product. A little smoothing cream at the top and a fine mist over the finished style usually does the job. If the hair still pops up, the problem is often grip, not spray.
Can I curl the hair the day before?
You can, especially if the hair holds curl well. Pin the curls loosely or wrap them in a soft bonnet so they do not flatten into odd bends. In the morning, shake them out with your fingers and add the final accessory last.
What if the child hates bobby pins?
Use fewer of them, but place them more strategically. A braid, a low ponytail, or a ribbon tie can reduce the pin count. Sometimes the trick is to choose a style that needs less pinning instead of fighting for a style that needs more.
How long should the style last?
Long enough for the service, photos, and the meal afterward is the practical goal. Most of these styles will hold well for several hours if the pins are set correctly and the hair has a little texture before you start. Bring one or two spare pins if the day runs long.
What if the hair is slippery and nothing stays in?
Add texture before you pin. Dry shampoo, mousse, or a little texturizing spray can give straight hair enough grip to behave. If it is still too slick, move to braids or a low twist instead of a smooth style that keeps sliding.
A Calm Finish for a Big Morning
The best First Communion hair rarely looks complicated from across the room. It looks calm. Secure. Thoughtful. That is the whole trick, really — choosing a style that lets the child move through the day without tugging at pins or worrying about what the back of her head is doing.
If you keep the shape modest, the accessories light, and the hold steady, almost any of these looks can feel right for the occasion. Pick the one that matches the dress, the hair type, and the child’s tolerance for sitting still, then stop before you start adding extras that don’t earn their place.
