



First communion hairstyles should do one quiet thing well: stay neat from the first photo to the last hug. That sounds simple until you watch a child lean into a pew, turn toward a grandmother with both arms open, then step back into place with a ribbon slightly askew. The best styles survive all of that without looking stiff.
I’ve always thought the sweet spot for communion hair sits between too perfect and too loose. If it takes half a can of spray, a rat’s nest of pins, and a prayer from the stylist, it’s the wrong style. The better choices have a clean shape, a soft front hairline, and a secure anchor point that keeps the whole look from drifting halfway through the morning.
The good news is that polished does not mean grown-up in a harsh way. A low chignon, a braided halo, a smooth bob with a bow, or a tucked natural puff can all look calm, respectful, and pretty without turning a child into a pageant contestant. The trick is picking the style that matches the hair you actually have, the dress you’re pairing it with, and how much fuss the child can stand before she starts touching it.
Why These Styles Feel Polished Instead of Fussy
-
Low anchors stay calmer: Styles that sit at the nape move less when a child turns, hugs relatives, or leans back in the car on the way home.
-
Soft fronts look cleaner than hard spray: A neat part and a smooth hairline read as finished; stiff, shellacked edges usually look older than the dress.
-
Accessories have room to breathe: These looks leave space for a veil comb, pearl pin, ribbon, or barrette without fighting the shape of the hairstyle.
-
Short, curly, and fine hair are all covered: Communion hair should not mean “long and straight only.” A polished bob or a defined natural puff belongs here too.
-
The back matters as much as the front: A style that holds its shape from every angle is the one that still looks tidy when the child bows her head or turns toward the altar.
-
Comfort is part of the finish: If a style pulls at the temples or sits on a scratchy pin, the child will keep reaching for it. That never stays polished for long.
How to Match the Hairstyle to Hair Length, Texture, and the Dress
The dress should get a vote. If the neckline is high, lacy, or decorated near the collar, I lean toward lower shapes: buns, tucked knots, smooth ponytails, and side braids that stay below the fabric line. When the dress is simpler, you have more room to bring the hair up or add a braid across the crown without making the whole outfit feel crowded.
Hair texture matters just as much. Fine, slippery hair usually needs a little grit from dry shampoo or texture spray before you pin it. Thick hair can carry more structure, but it also needs stronger anchoring, which means U-pins, crisscrossed bobby pins, and smaller sections that are easier to control. Curly and coily hair usually looks best when you work with the pattern instead of flattening it into something it never wanted to be.
Then there’s the accessory. A veil comb likes a flat, low anchor. A pearl clip can sit on a twist or half-up section. A ribbon wants a clean line to wrap around, not a crowded knot with six things competing for attention. Pick the accessory first if you already know the outfit, then build the style around it. That order saves a lot of awkward reshaping later.
I also like to think about the child’s patience. A style that takes 15 minutes and stays put is usually better than a style that takes 45 minutes and needs constant repair. Morning peace counts. So does the child’s mood.
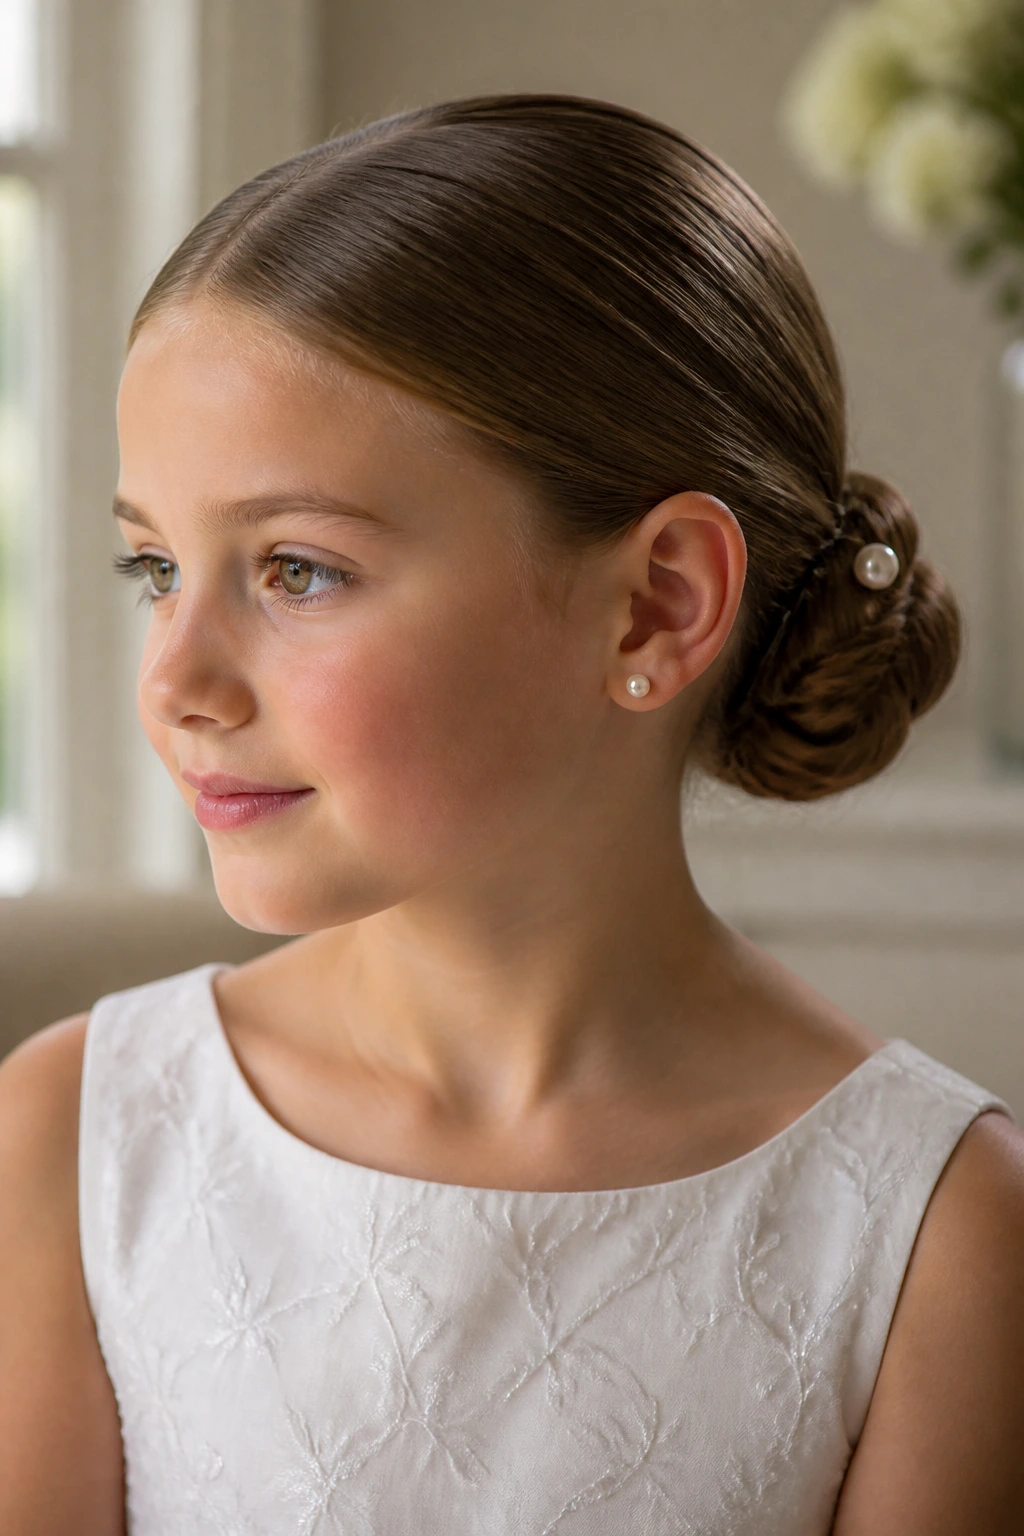
1. Sleek Low Chignon with a Pearl Pin
A low chignon is the quiet workhorse of first communion hairstyles. It sits at the nape, looks neat from the front, and doesn’t start a fight with a lace collar or a small veil. The pearl pin is the part I love most; it gives the bun a finished point without making it look ornate.
Why It Works:
This style keeps the silhouette low and smooth, which means it stays stable during hugs, seatbelt rides, and all the small head turns that happen during the service. It also works well on hair that’s straight, wavy, or lightly curled, because the bun can hide a lot of texture once it’s pinned correctly.
Best on Fine or Straight Hair
- Mist the lengths with a light texture spray before gathering the hair; slippery hair is the enemy here.
- Twist the ponytail into a flat bun, then secure it with 4 to 6 bobby pins that match the hair color.
- Place the pearl pin just off center, not right on top, so the bun keeps its shape.
- Smooth the crown with a dab of cream on the fingertips, not a heavy serum that makes the hair look greasy by noon.
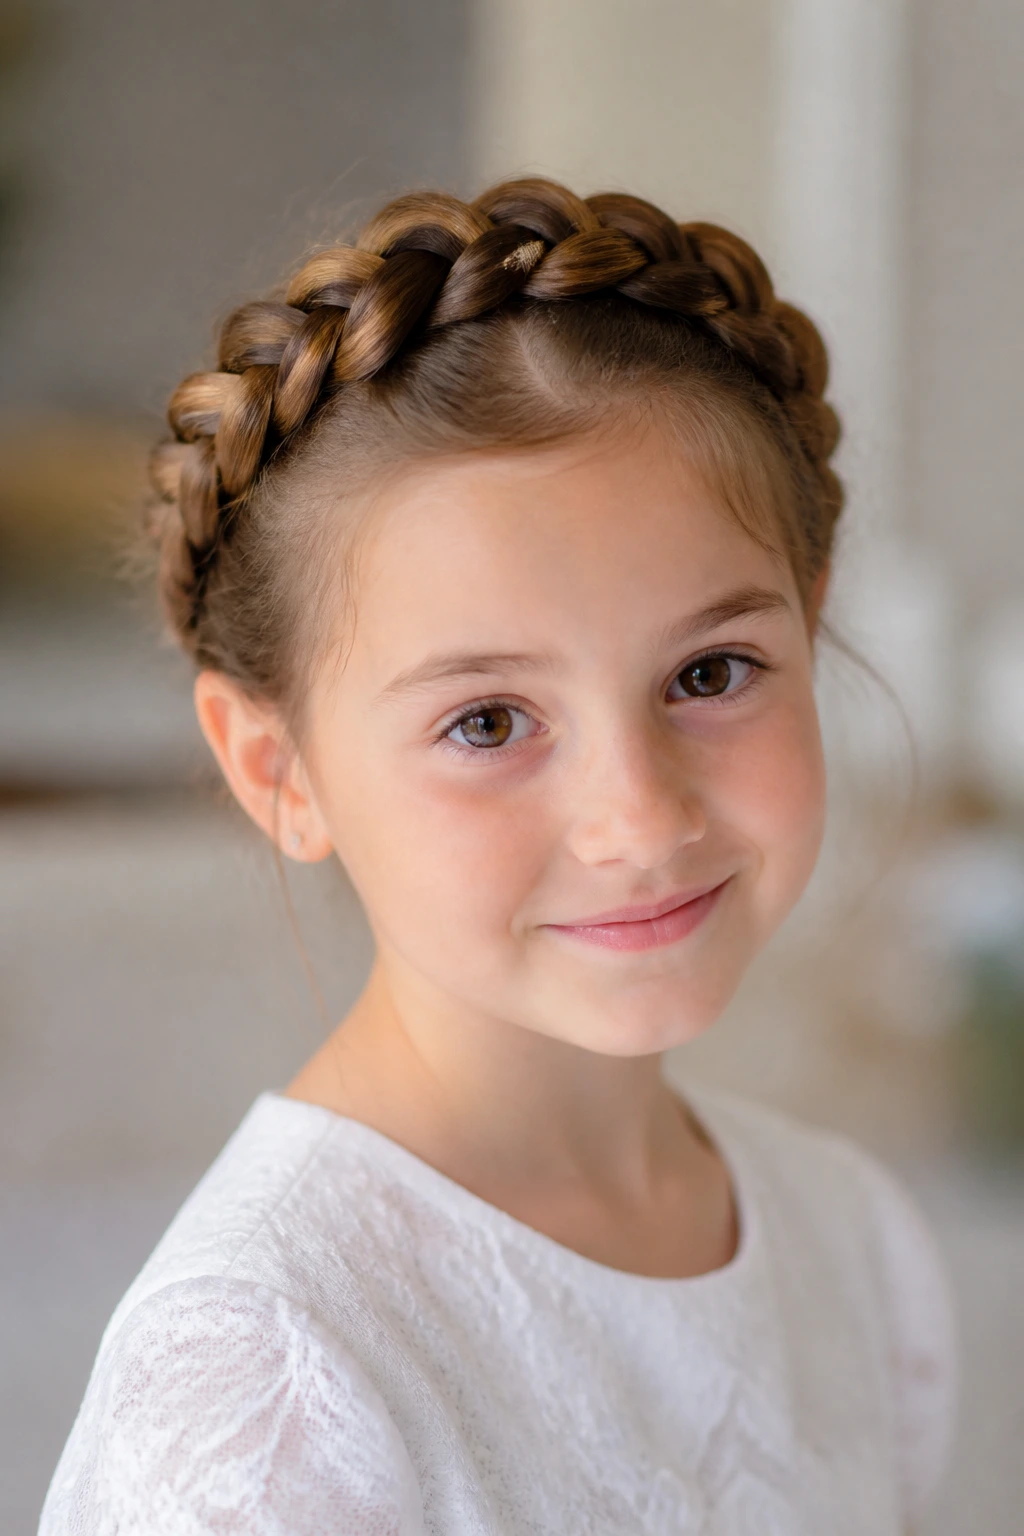
2. Braided Crown Halo
Want something that feels a little more special without getting fussy? A braided crown halo does that job beautifully. It frames the face softly, keeps hair away from the cheeks, and gives the whole look a calm, polished shape that works with simple dresses and more detailed ones.
Why It Works:
The braid itself acts like a built-in border, so the style looks intentional even if the rest of the hair is kept soft. It also gives you a little wiggle room with layering. If the ends are short or the hair is uneven, you can tuck and pin the tail under the braid and no one needs to know.
What to Ask For
- Keep the braid snug enough that it lies flat, but not so tight that it dents the scalp line.
- Start the braid slightly behind the temple so the crown doesn’t feel crowded.
- Leave the back low and smooth rather than puffing the crown up high.
- Tuck any loose ends under the braid and pin them from underneath with two crossed bobby pins.
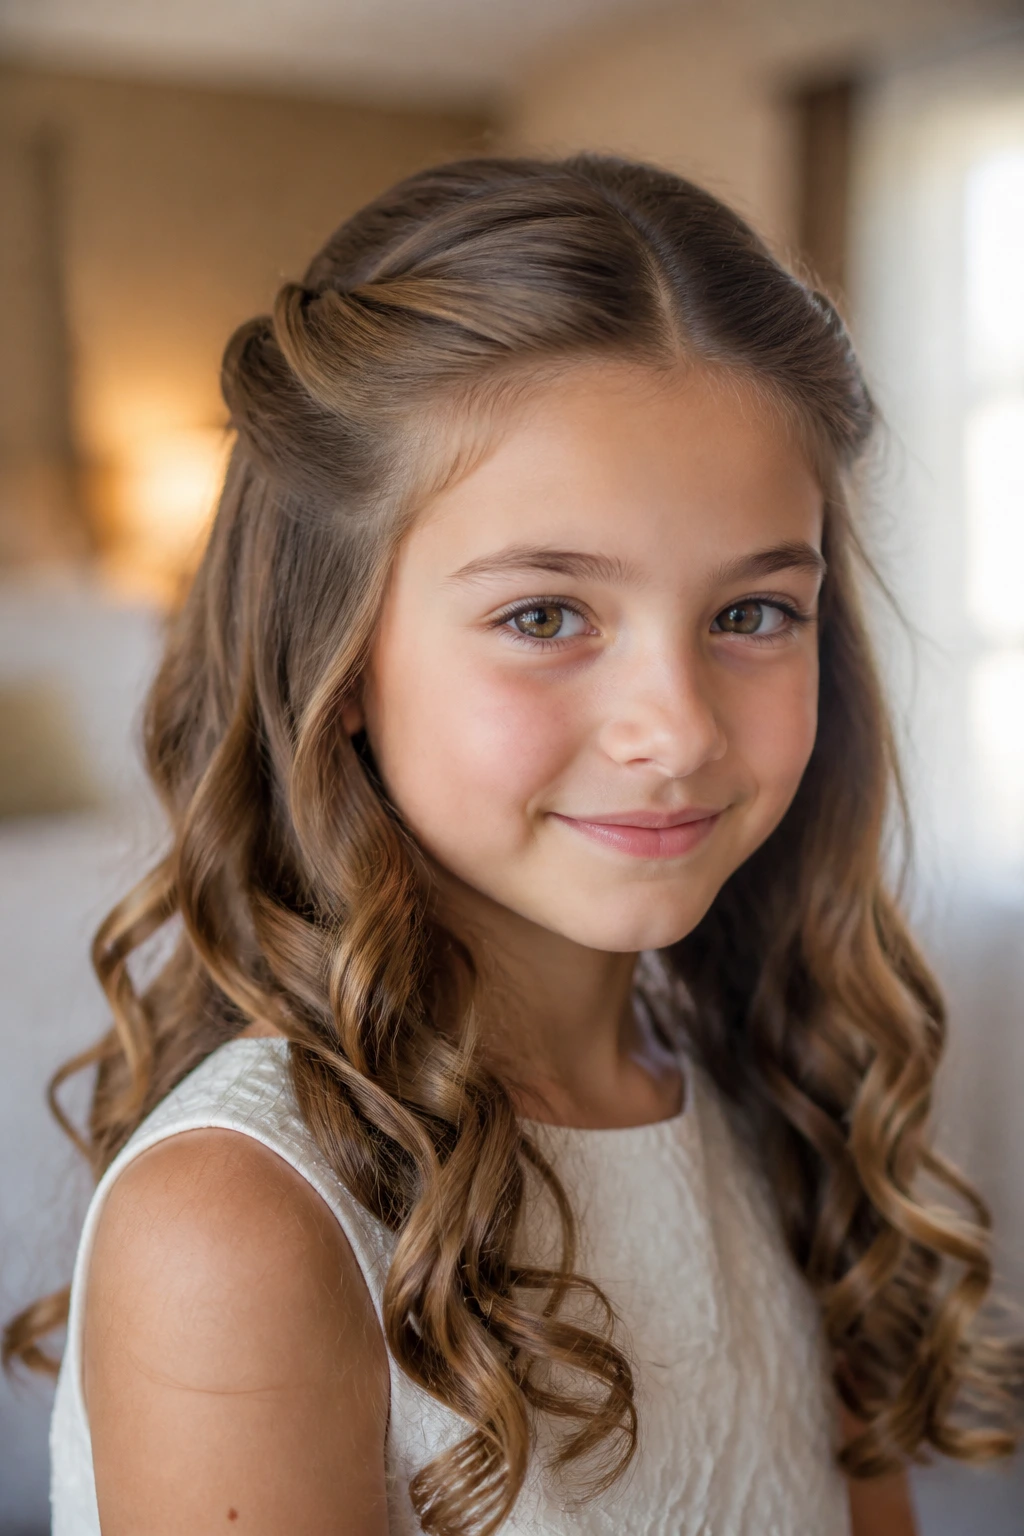
3. Half-Up Twist with Soft Curls
A half-up twist gives you the best part of two styles at once. The front stays off the face, the curls still show, and the overall shape feels gentle rather than stiff. I especially like it for children who don’t want all their hair pinned back but still need something that won’t fall into their eyes during the ceremony.
The trick is to keep the twist neat and the curls soft. Tight ringlets that are brushed out too much can turn puffy fast, while limp waves can look unfinished. If you curl the hair, use a one-inch iron or loose rollers and let the curl cool fully before you touch it. Then twist back the top sections, secure them just above the ears, and let the rest fall naturally.
A small decorative clip works better than a giant bow here. The shape should still feel like a child, not a flower arrangement.
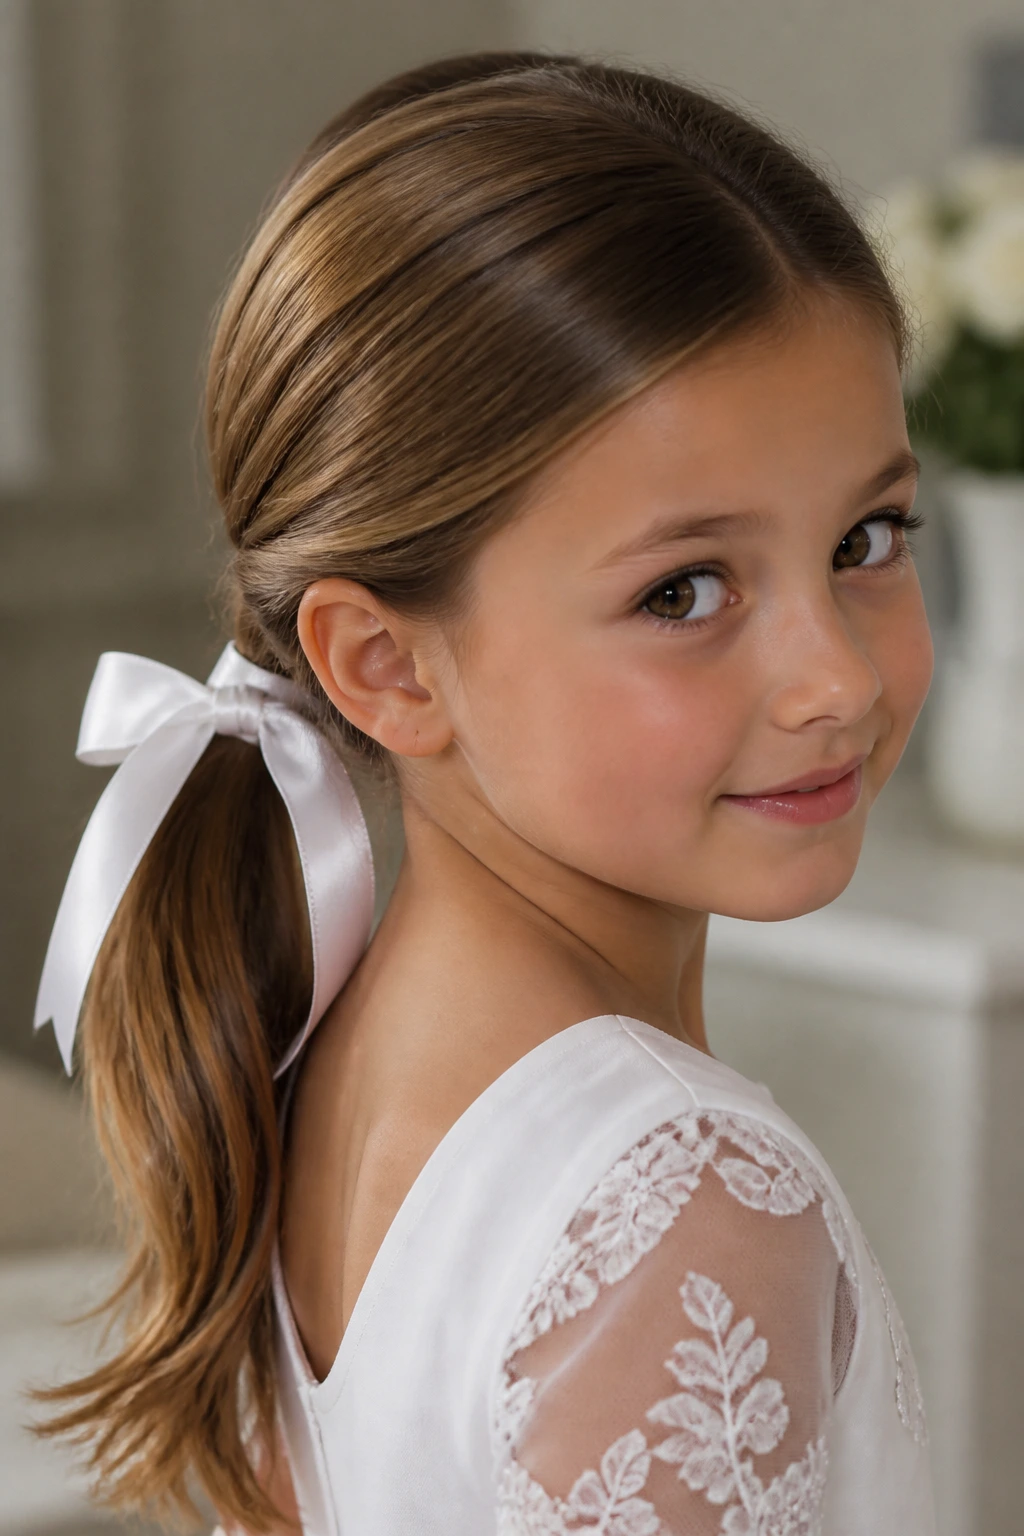
4. Satin Ribbon Low Ponytail
A ribbon-tied ponytail sounds simple, and that’s the point. It’s one of the easiest first communion hairstyles to keep neat, especially when the hair is long enough to gather cleanly but not thick enough to sit nicely in a bun. A satin ribbon softens the look right away.
Why It Works:
The low ponytail keeps everything anchored at the nape, which means the hairstyle doesn’t fight the collar or veil. The ribbon adds polish without adding bulk, and a single wrap around the elastic can hide the practical part of the style.
- Use a smoothing brush before you gather the ponytail so the crown lies flat.
- Tie the ribbon around the elastic, then finish with a bow slightly off center for a softer finish.
- If the hair is very fine, secure the ponytail with two elastics before adding the ribbon.
- A narrow ribbon usually looks tidier than a wide one when the dress already has lace or embroidery.
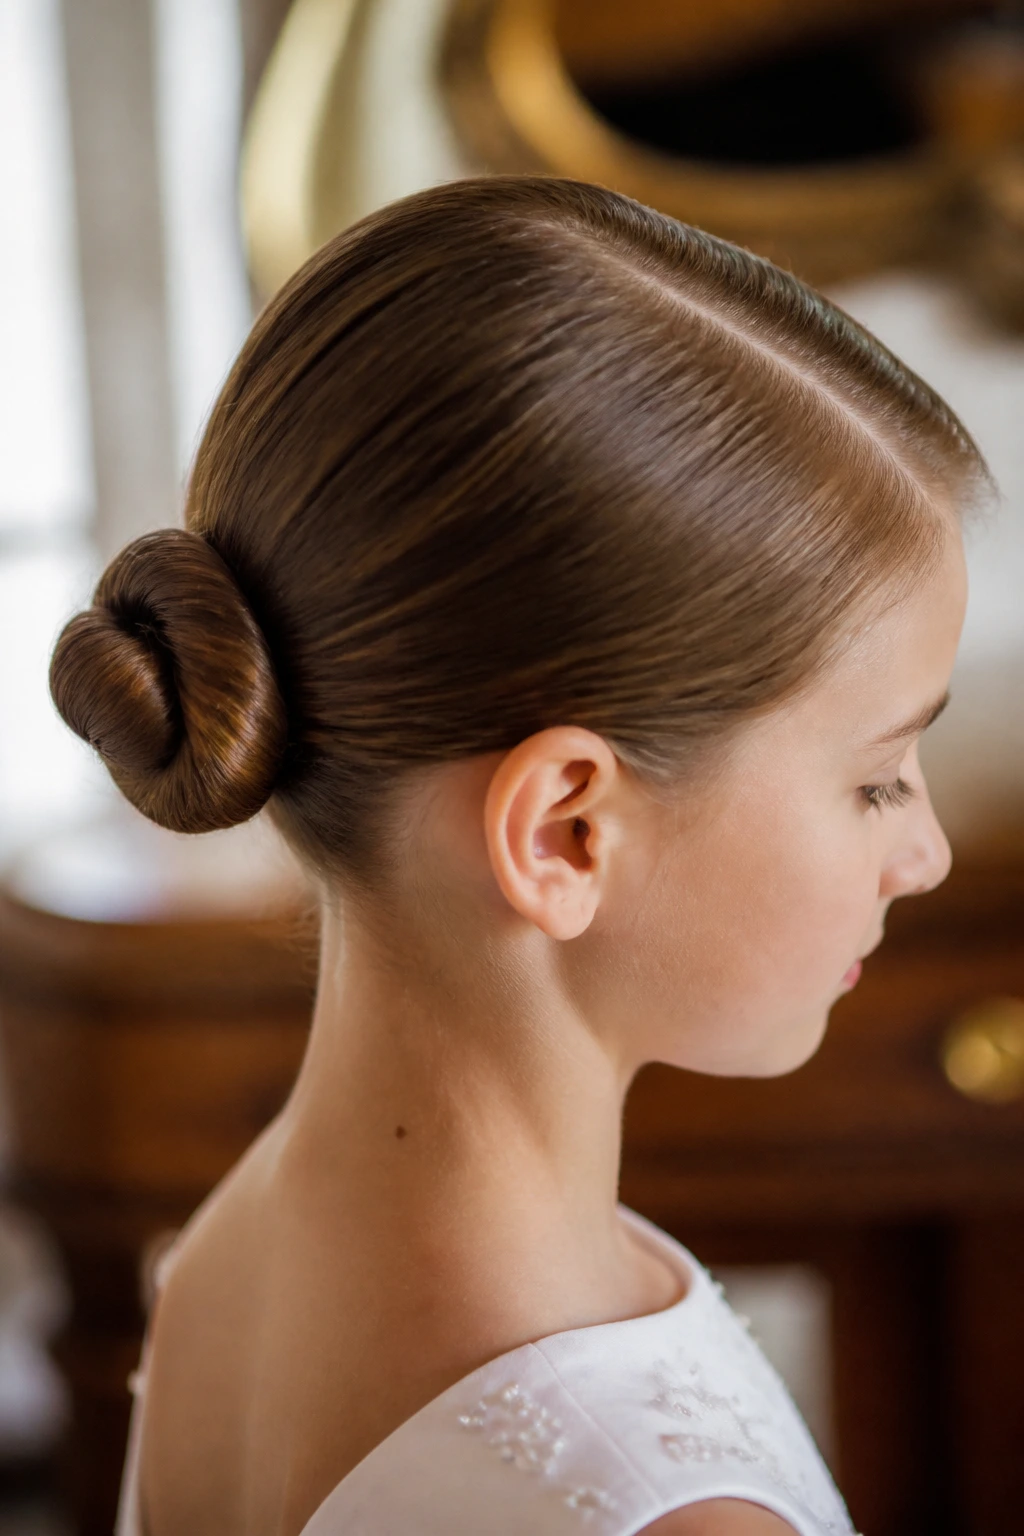
5. Classic Ballet Bun
The classic ballet bun is still around for a reason. It’s balanced, centered, and tidy in a way that reads as careful without being stiff. When the hair is brushed smooth and wrapped close to the head, it creates that clean, modest look a communion outfit often asks for.
This is one of the best options for children who move a lot because the shape sits close to the scalp and doesn’t catch on collars or veil combs. If the hair is fine, a small bun donut can help build the shape, but keep it hidden under the hair. If the hair is thicker, you can skip the donut and just fold the ponytail into itself.
I prefer a slight side part with this style rather than a hard center part. It softens the face and keeps the look from feeling too severe.
6. Side Braid Folded into a Bun
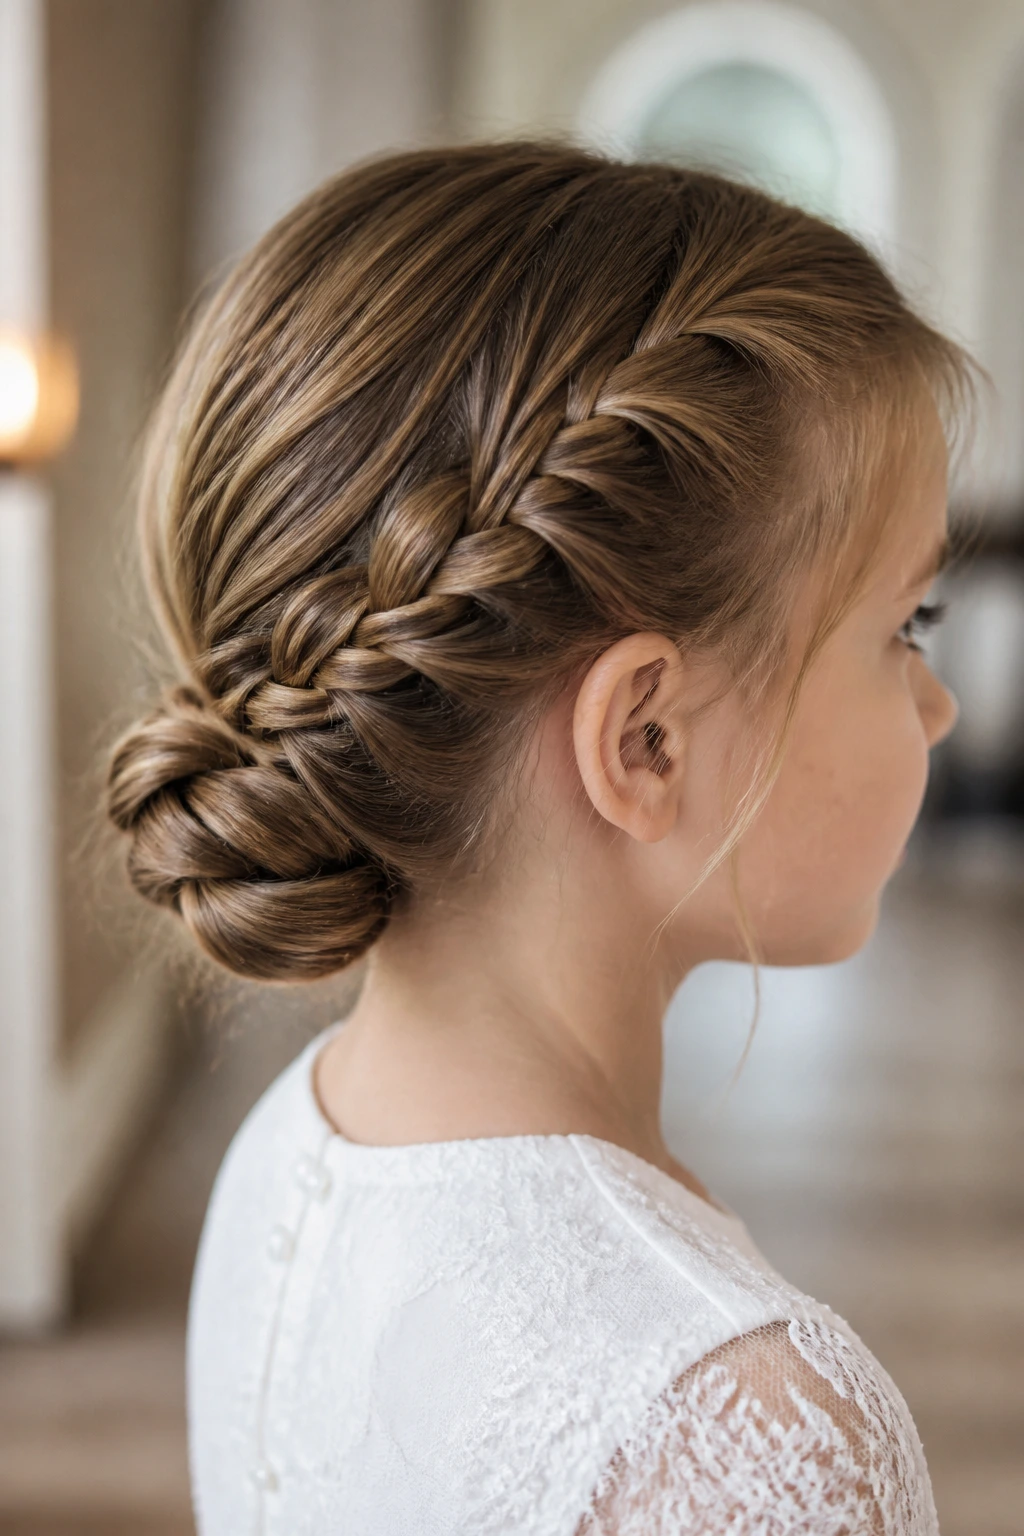
A side braid folded into a bun has a little more personality than a plain bun, but it still behaves well. The braid gives texture on one side, then disappears into a low knot that stays tucked and secure. It’s one of those styles that looks more complicated than it really is.
The real advantage is balance. A braid started over one temple can hide layered ends or a growing-out fringe, and the folded bun at the nape keeps the whole style grounded. If the hair is thick, braid only the top section and leave the lower section smooth; if the hair is medium, braid more of the length before wrapping it.
I like this one with a small pearl comb or a tiny cluster of flowers. Nothing oversized. The braid already does enough visual work.
7. Bubble Ponytail with Clear Elastics
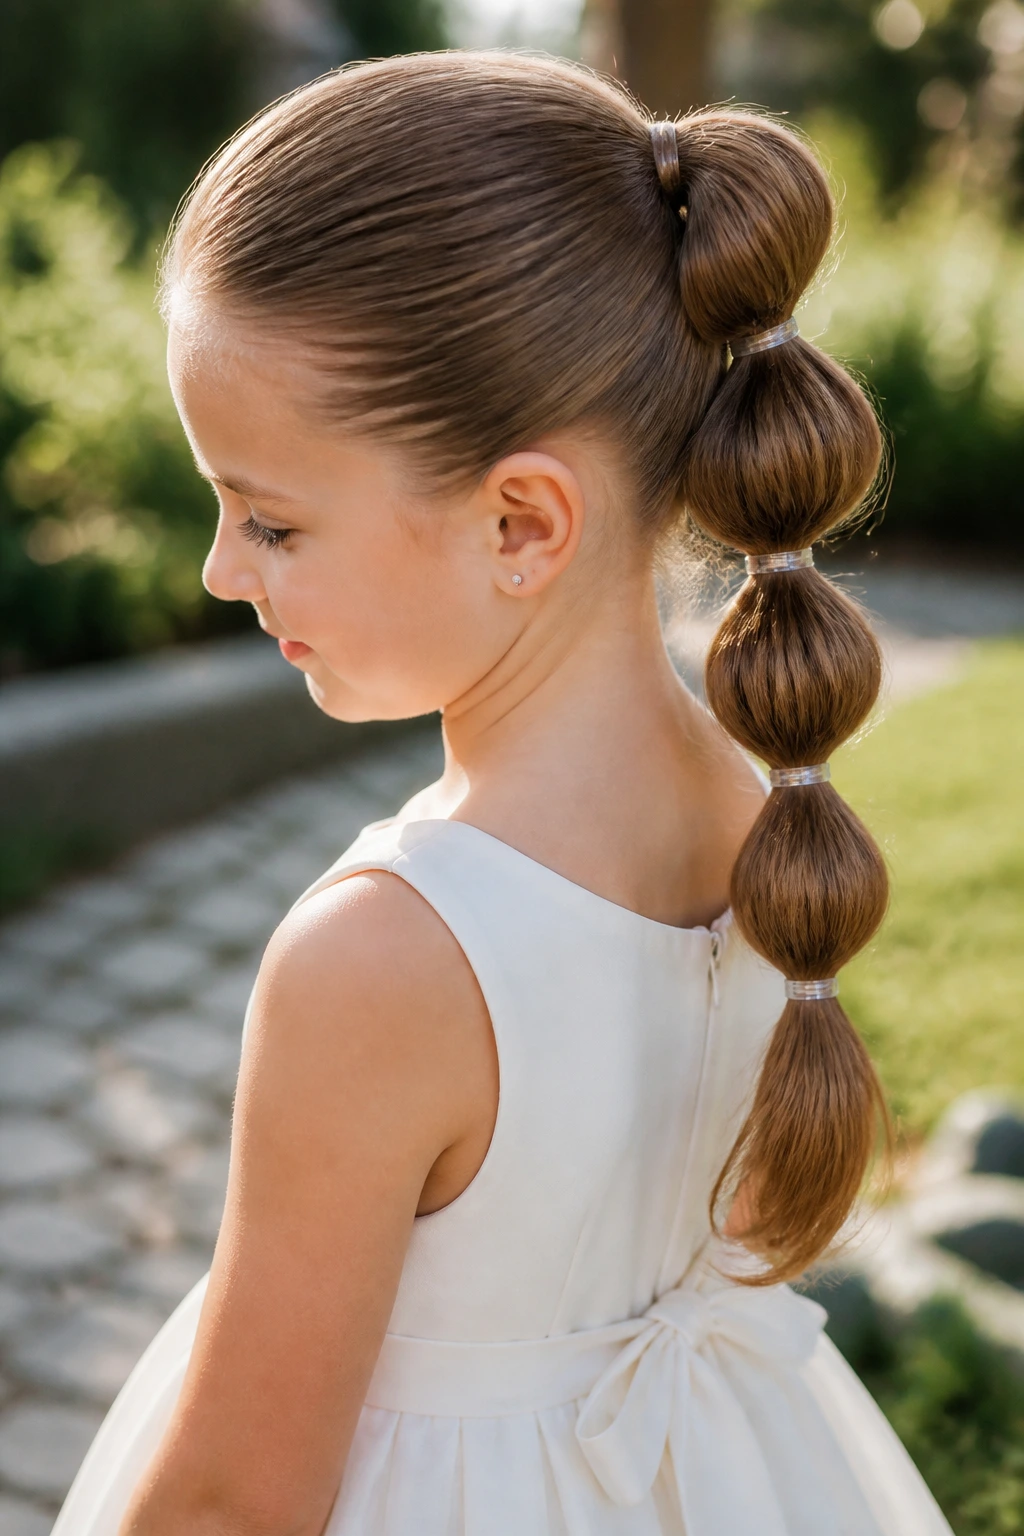
The bubble ponytail is polished in a more playful way. It still looks controlled, but the little rounded sections keep it from feeling severe. On long hair, it can be a nice compromise for a child who wants something pretty but does not want a bun.
Start with a low or mid ponytail and smooth the crown carefully. Then add clear elastics every 2 to 3 inches down the length, gently tugging each section to puff it into a soft bubble. That shape stays tidy longer than loose curls, and the repeated sections keep the hair from tangling on itself.
A little smoothing cream near the crown helps a lot here. Too much, and the bubbles fall flat. Too little, and the flyaways start stealing the show.
8. French Twist with a Smooth Crown
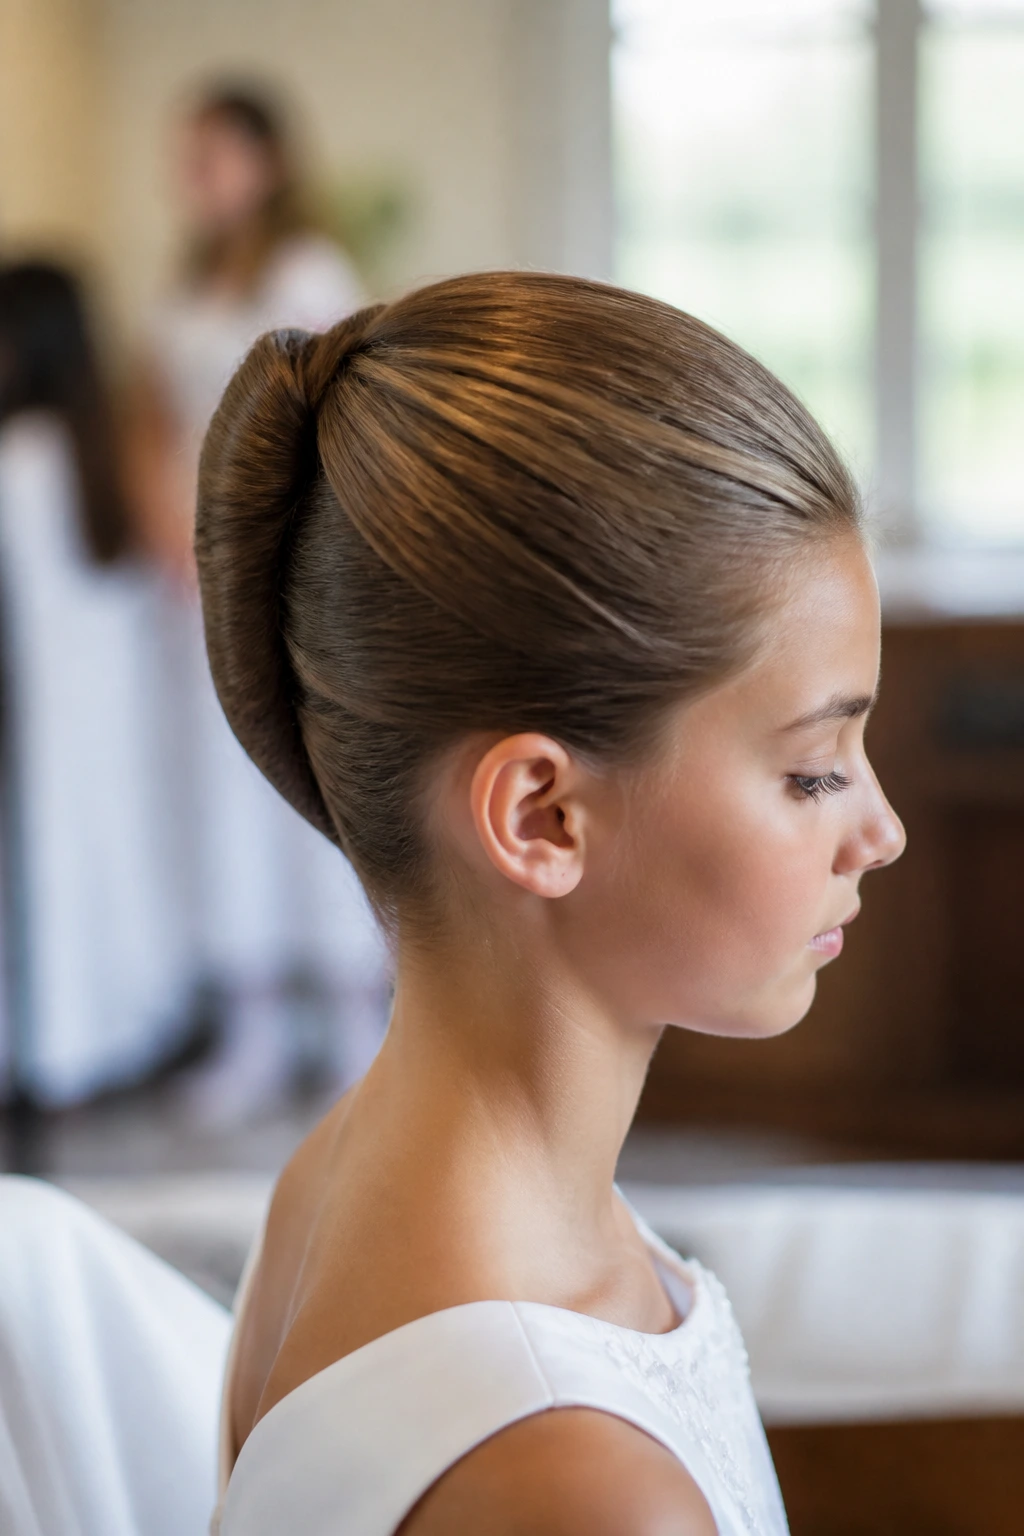
A French twist leans a touch more formal than the other styles here, which is exactly why it works so well for a communion service. It gives the hair a long, elegant line up the back of the head and keeps the profile very clean.
Why It Works:
The twist gathers the hair into a narrow column, so it looks composed from every angle. It also leaves the neckline open, which is useful if the dress has lace, buttons, or a small back detail you don’t want to cover.
If you’re doing this on straight hair, a little grit at the roots helps the twist hold. If the hair is layered, tuck the shorter pieces under with hidden pins before you roll the length upward. A small decorative comb at the base is enough; the style itself already does the heavy lifting.
Best Fit
- Shoulder-length to long hair
- Dresses with open backs or modest necklines
- A child who can sit still for a few minutes while the twist is pinned
9. Double Dutch Braids into a Low Knot
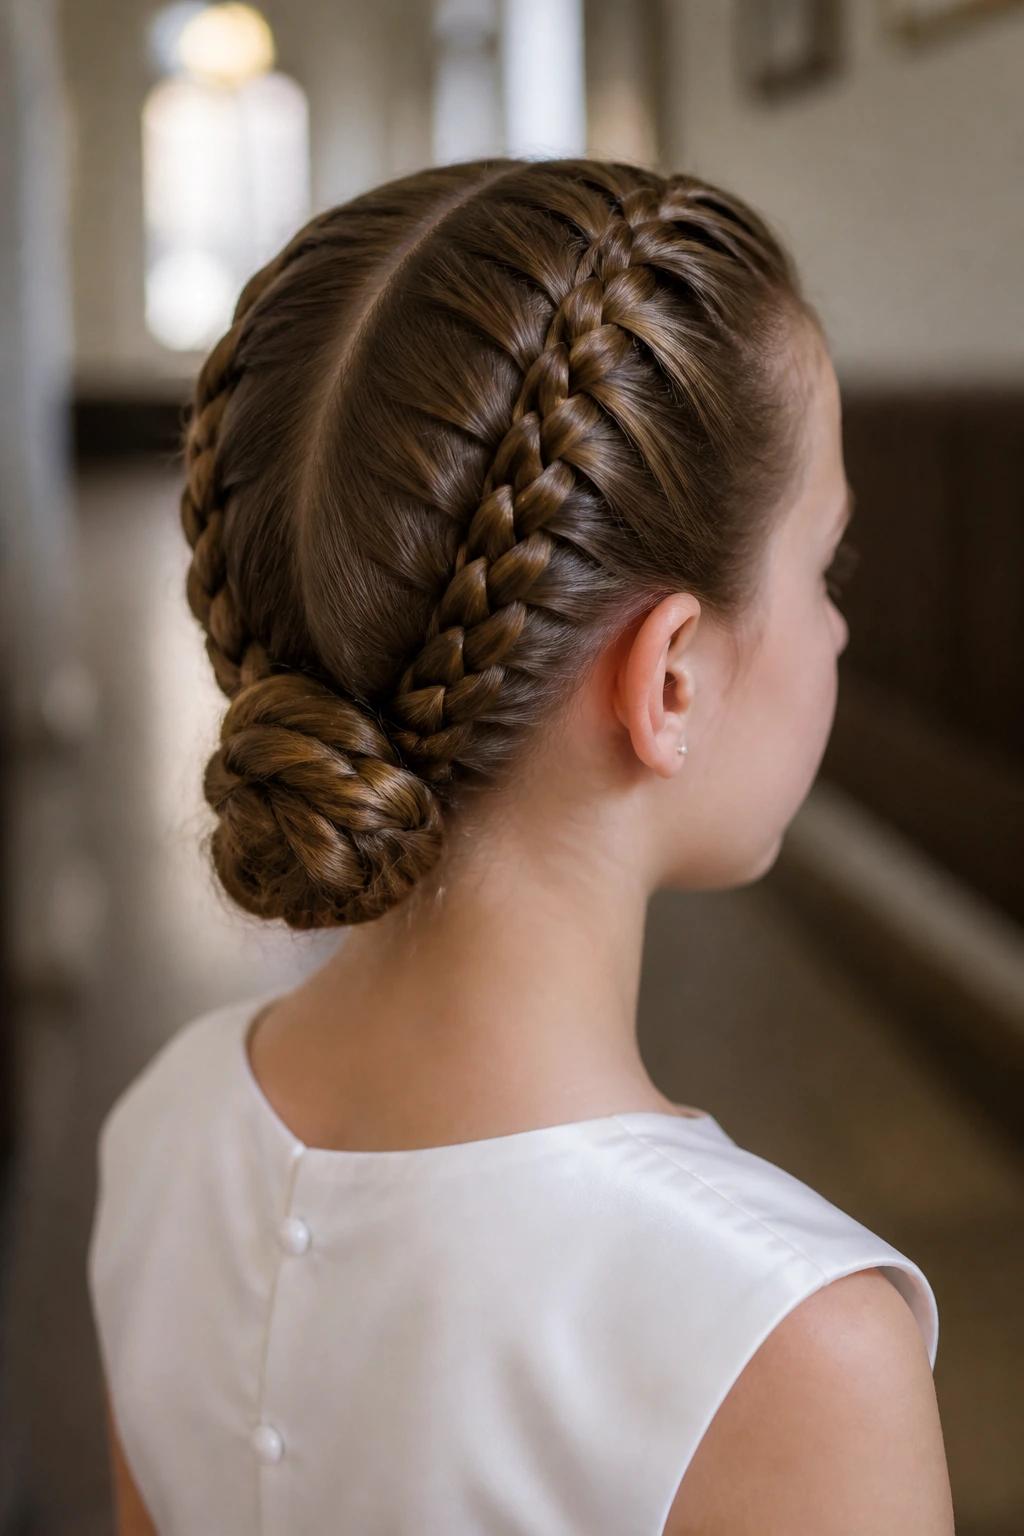
Double Dutch braids create a sharper, more structured look, and I like them for children who need their hair to stay out of the way no matter what. Braiding both sides down toward the nape gives the style a strong frame, then the low knot finishes it cleanly.
This is especially useful if the hair is thick, layered, or slightly textured. Dutch braids grip well, which means the style doesn’t loosen as fast as a soft braid can. Once the braids meet at the back, twist the ends into a compact knot and pin them underneath. The result is neat, secure, and not at all precious.
It’s also one of the better choices if the child will wear a veil. The veil comb can sit just above the knot without bumping into a tall bun.
10. Rolled Bob with a Side Barrette
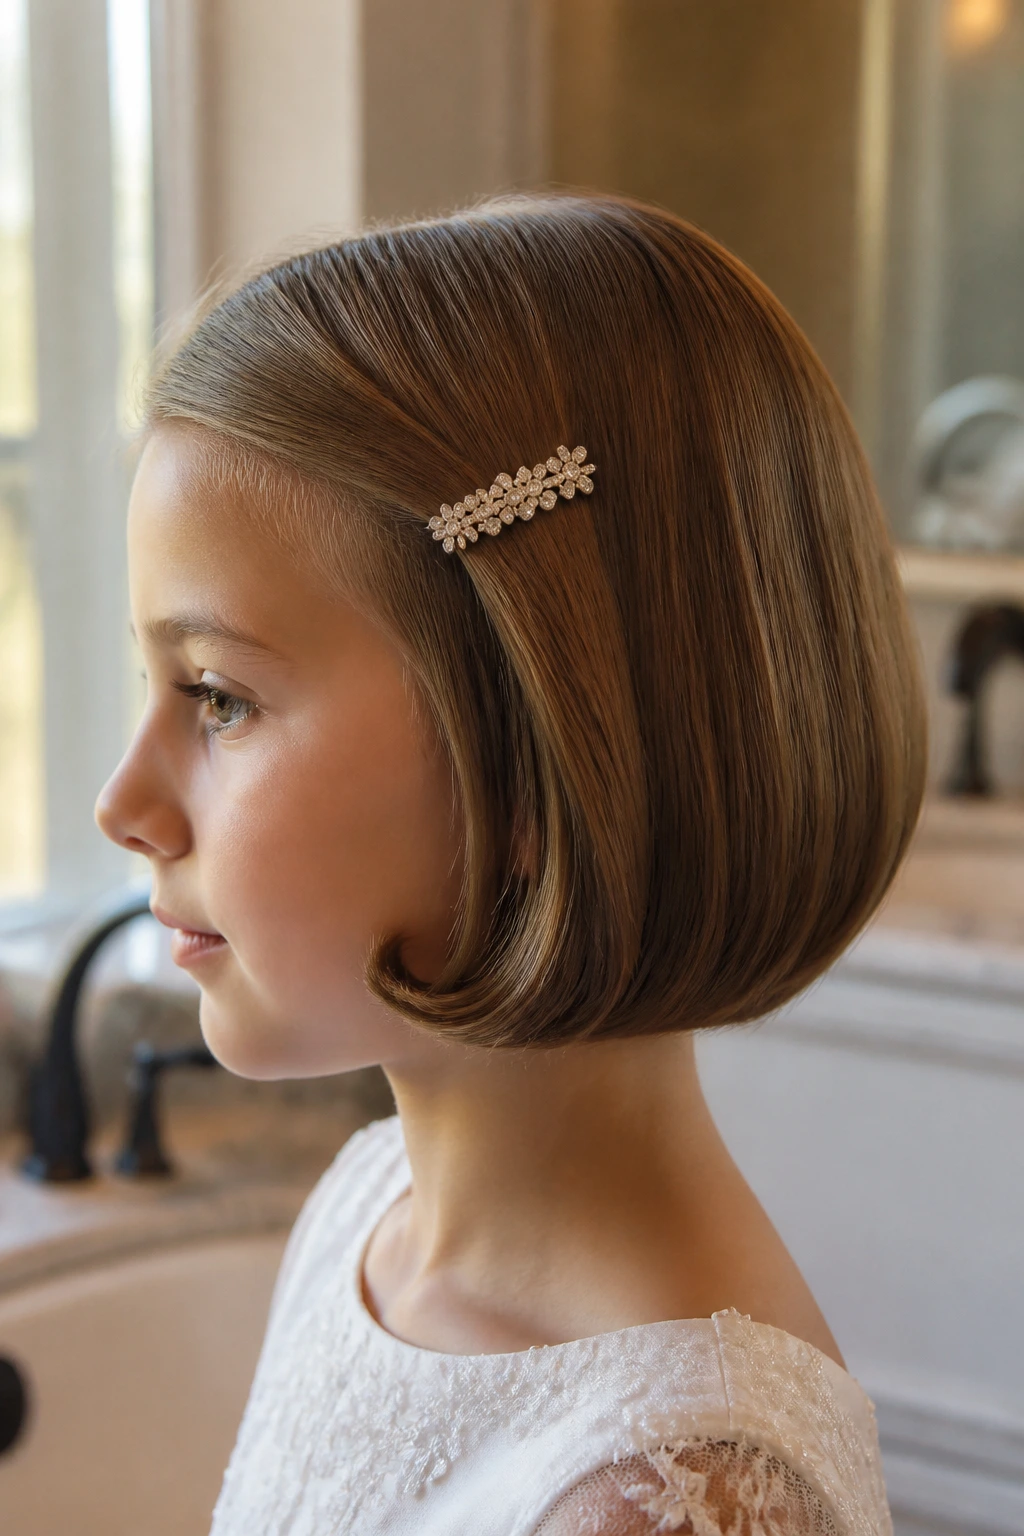
Short hair needs a plan, not an apology. A rolled bob with a side barrette keeps the ends tidy, adds shape, and makes a chin-length or collarbone-length cut look intentional instead of unfinished.
The style works by bending the ends under with a round brush or curling iron, then smoothing the top and pinning one side back. A pearl, satin, or crystal barrette is enough to finish the look. I like this much more than trying to force short hair into a fake bun with too many pins; that usually looks crowded, not polished.
If the bob is blunt, the clean line actually helps. If it has layers, set the ends with a slight inward curve so the shape feels softened around the jaw.
11. Center-Clip Half-Up Curls
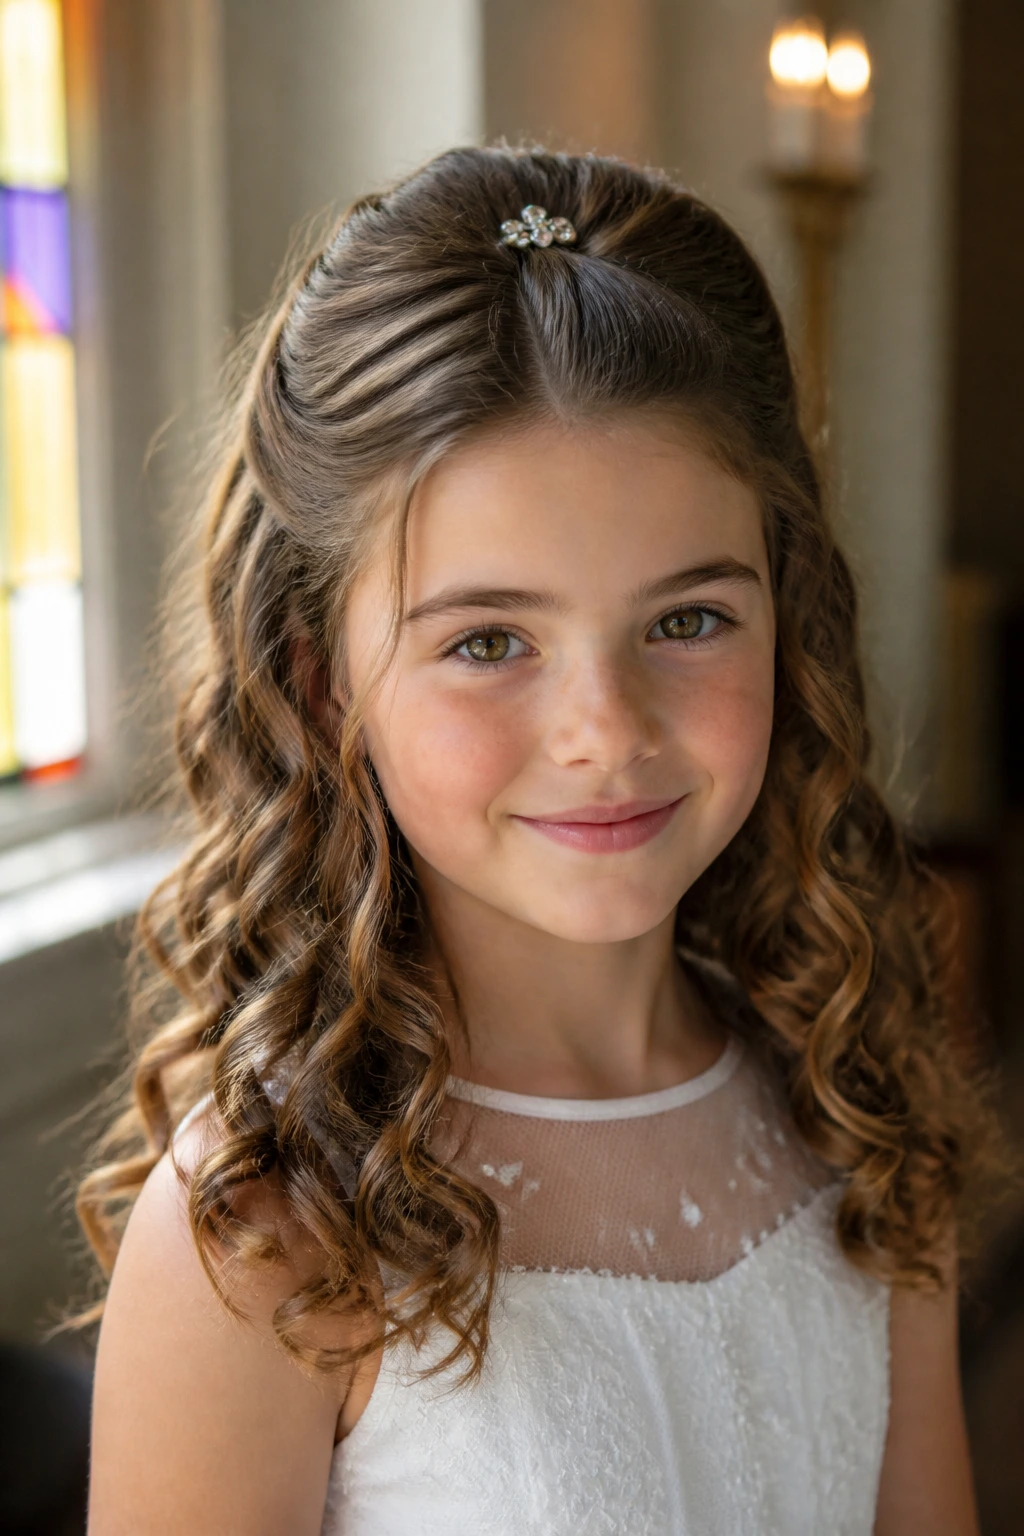
A centered half-up clip is the hairstyle equivalent of good manners. It keeps the front pieces off the face, shows off the curl pattern, and doesn’t ask the hair to be something it isn’t. For communion morning, that’s a win.
Use a center part if the hair naturally falls that way, then bring the top sections back and secure them with a decorative clip near the crown. The key is not to pull the hair too high. Keep it in the middle third of the head so the shape stays young and light. If the curls are tight, leave them defined. If they’re loose, shape them with fingers rather than a brush.
This style is especially kind to children who like to wear their hair down but need a little order around the face. It’s neat without being severe.
12. Veil-Ready Low Knot
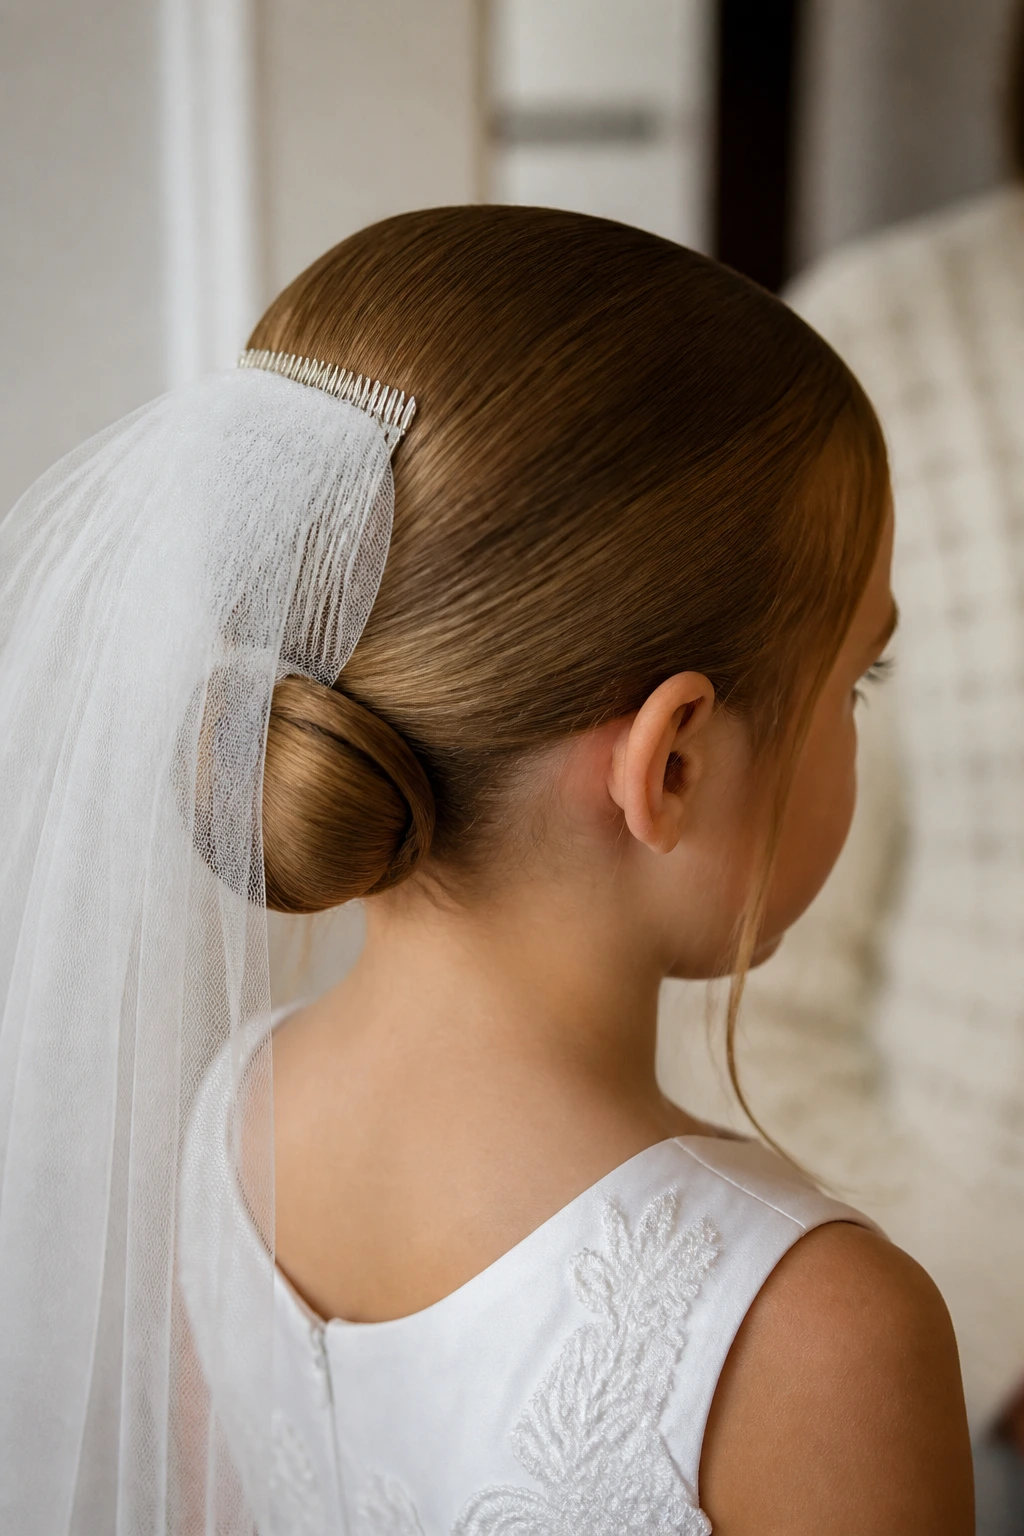
If a veil is part of the outfit, this is the style I reach for first. A veil-ready low knot sits flat enough for the comb to grip, which means you aren’t fighting the accessory all morning. The knot should be low, smooth, and compact, with no bulky section right where the comb wants to land.
The most common mistake with veil hair is placing the bun too high. That creates a bump under the veil, and the veil starts to tilt or slip. Keep the knot just above the nape, pin the hair tightly under itself, and let the comb sit over the smoothest part of the head.
A few crossed pins under the knot will do more for the veil than a dozen decorative clips. Quiet structure is the whole point here.
13. Waterfall Braid with Pinned Ends
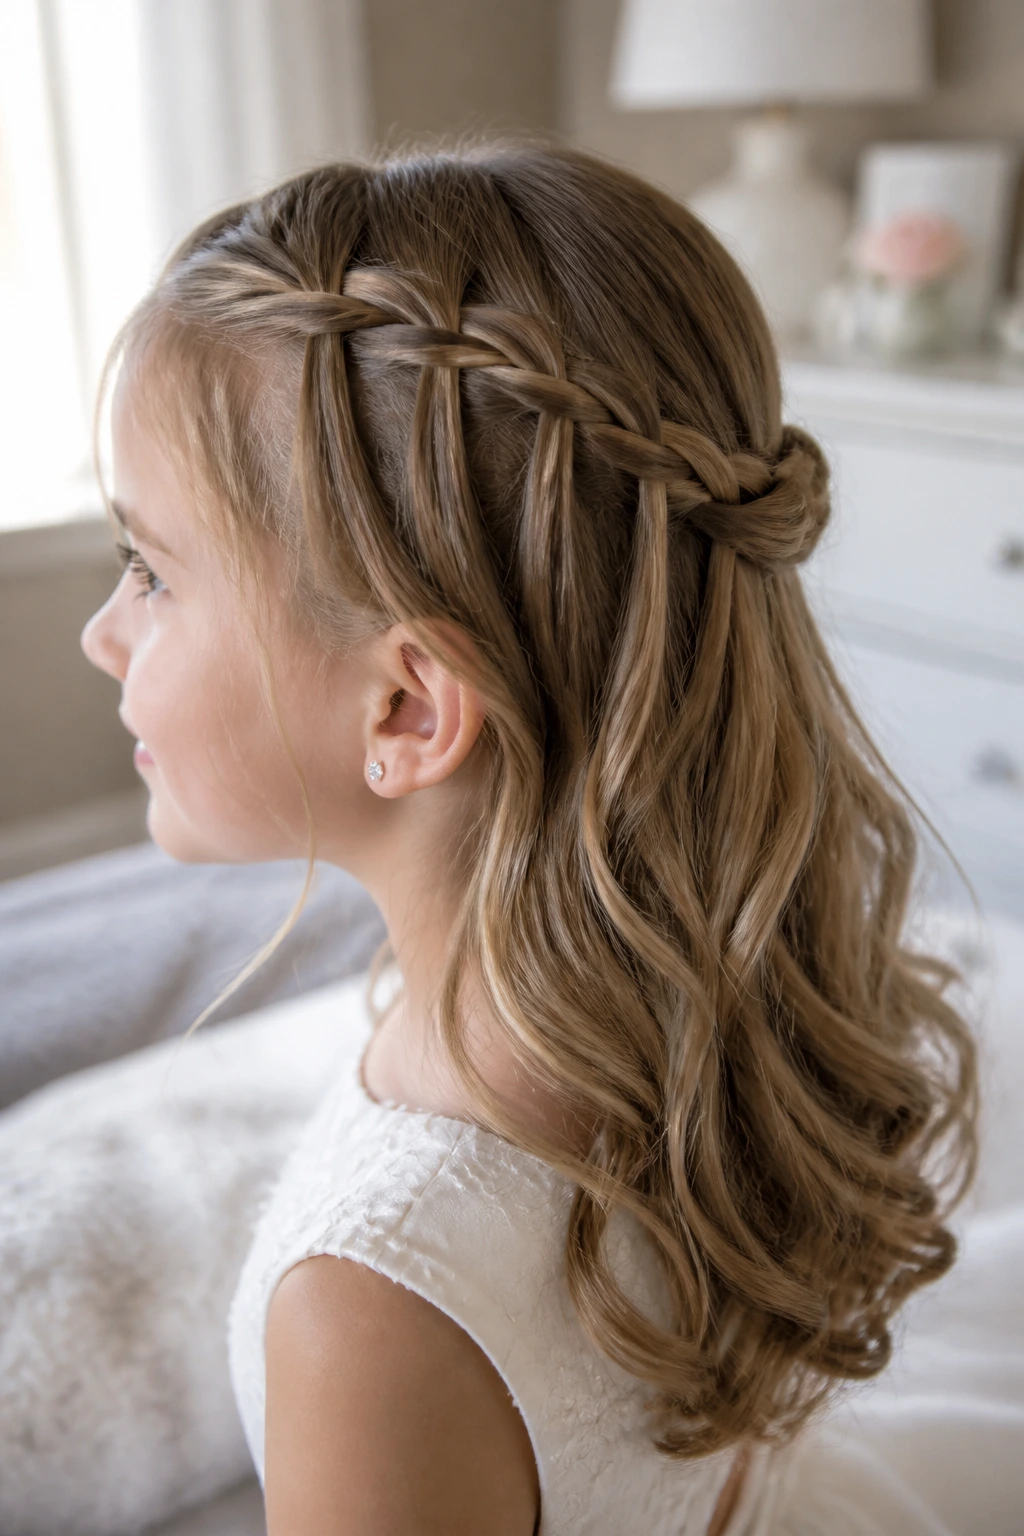
A waterfall braid brings a softer line than a full crown braid, which makes it useful when you want something pretty but not heavy. The braid crosses the top section of the head, then releases strands as it moves, creating that woven look across the side.
Because the style leaves some hair down, it works best when the rest of the hair is softly curled or smoothed into gentle waves. Pin the loose ends underneath at the back so they don’t sag by the end of the ceremony. I like this one on medium to long hair with a simple ribbon or a tiny flower clip tucked near the braid.
It looks delicate. It also needs to be pinned with a firm hand, because the loose structure can slip if the hair is very silky.
14. Rope-Braid Crown with a Bun
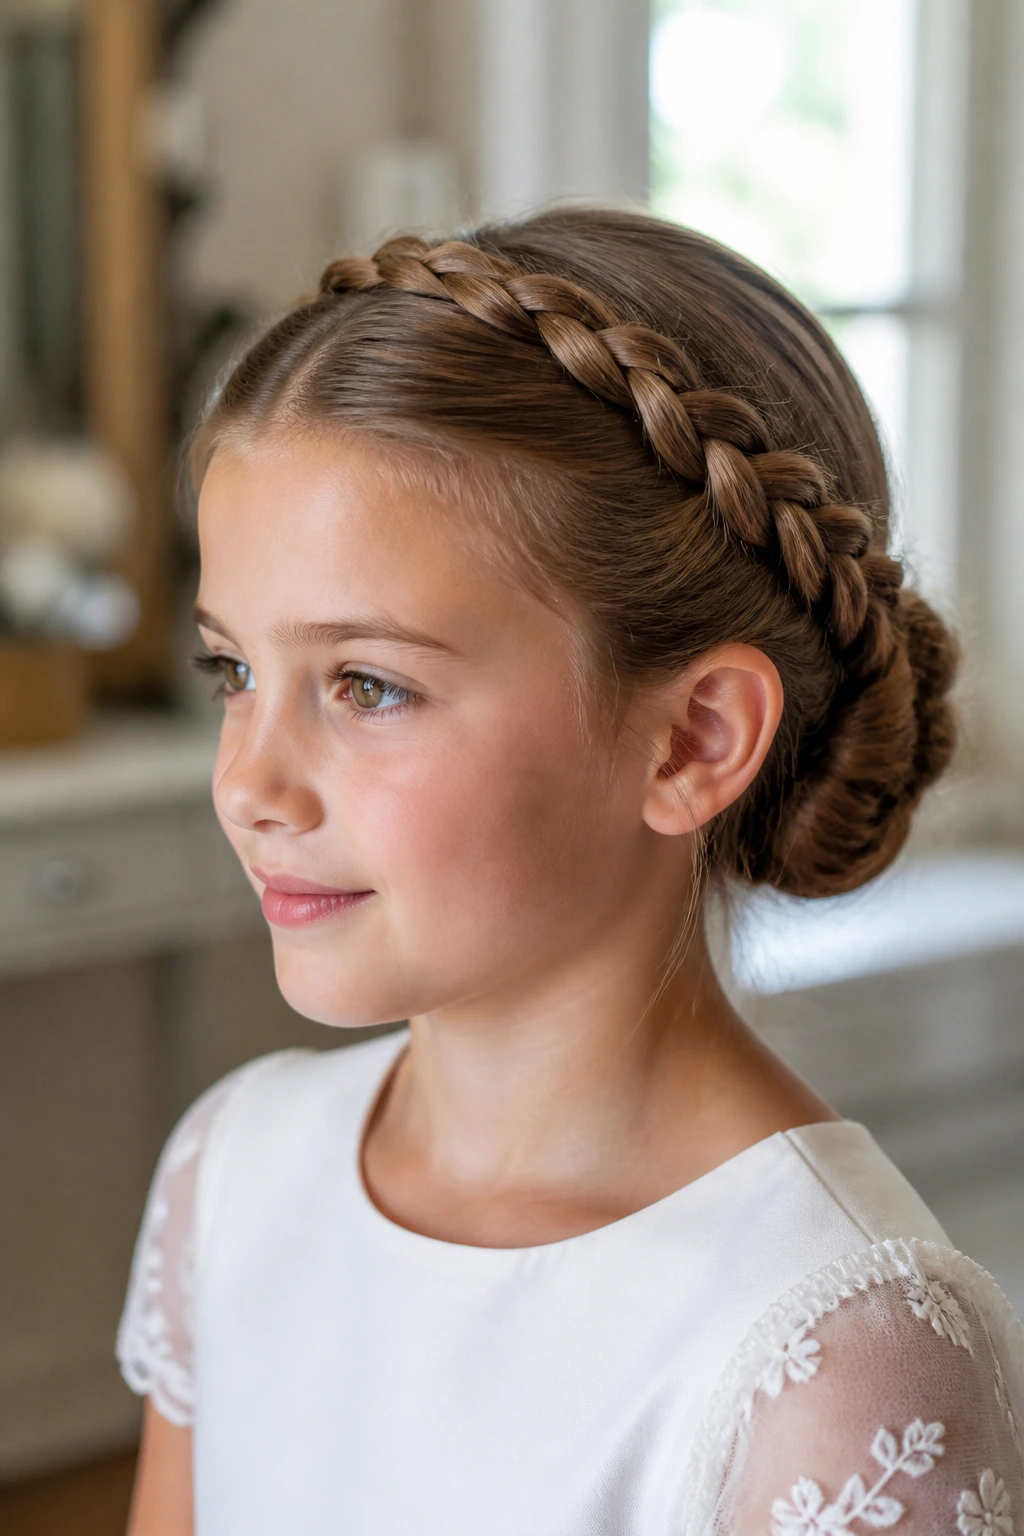
Rope braids are underrated. They’re clean, shiny, and a little less fussy than a regular braid, which is handy when you want a polished look that doesn’t scream “done at a salon at dawn.” Twisting two sections together creates a tidy rope effect that can travel around the crown and finish in a bun.
This style is useful on straight or slightly wavy hair because the twists stay visible. It also handles layers better than some braids do. Once the ropes meet at the back, fold the length into a low bun and pin the center first, then the outer edge. That order keeps the bun from spreading out.
The whole thing has a calm, balanced feel. Not flashy. Just orderly in the right way.
15. Natural Puff with a Clean Side Part
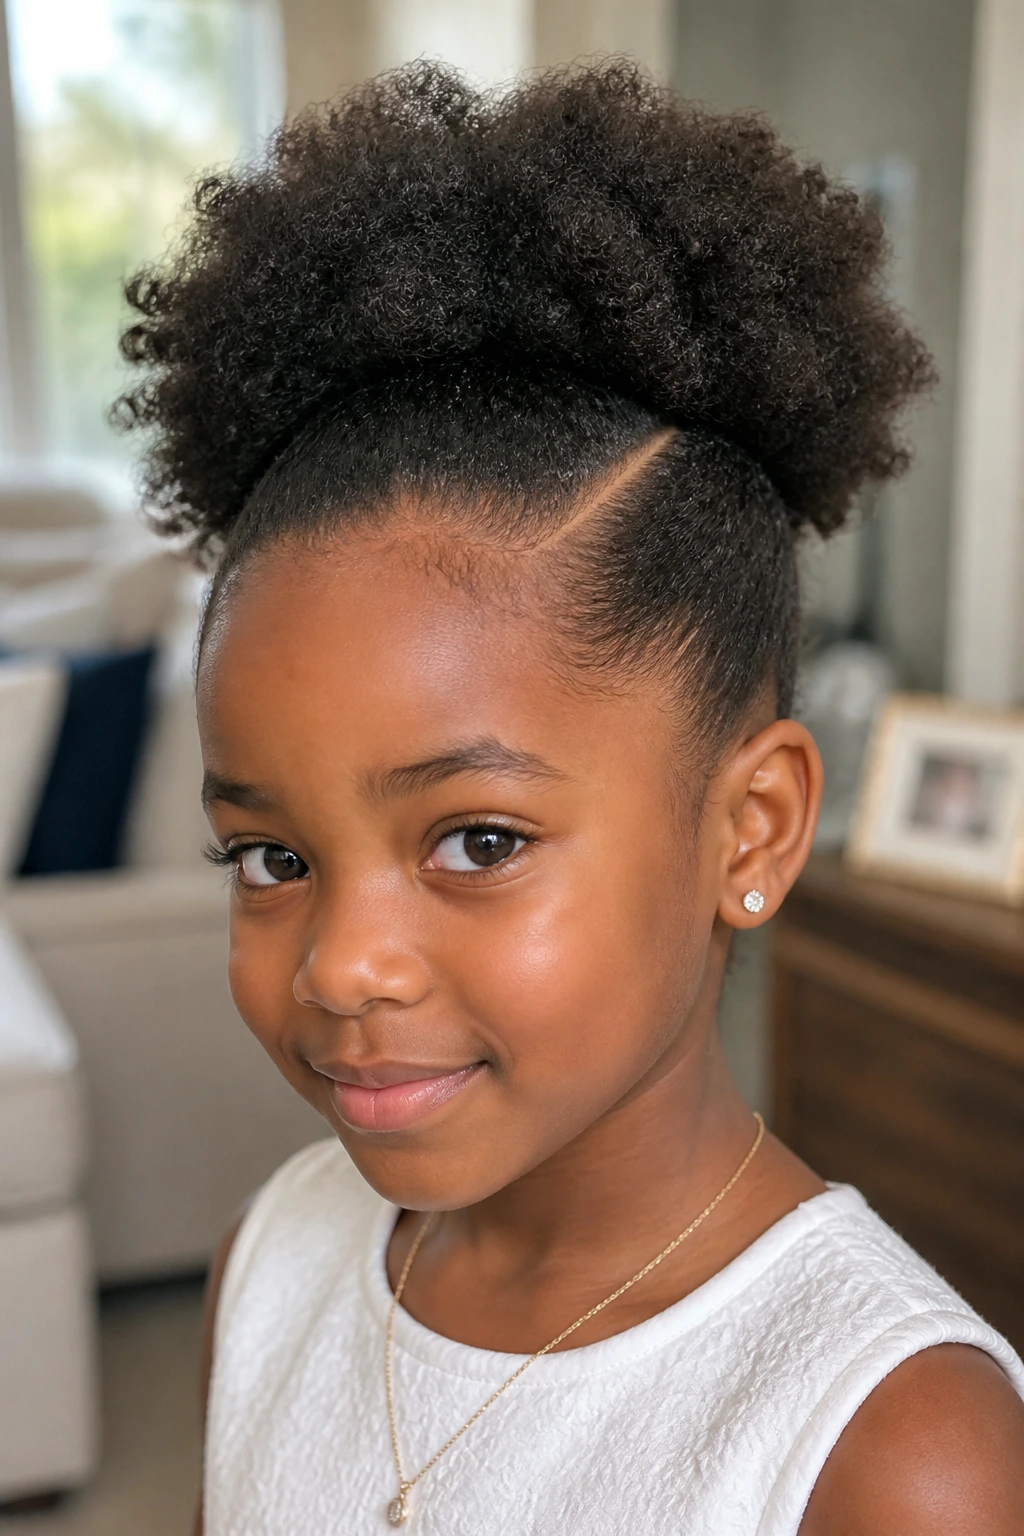
A polished communion look does not have to flatten natural texture. A natural puff with a clean side part can look just as finished as a bun, and honestly, I think it often looks better because it respects the hair’s shape instead of fighting it.
The part should be crisp, the edges should be neat, and the puff should sit centered or slightly low so it feels deliberate. A good leave-in conditioner and a little styling gel near the hairline go a long way. Keep the gel light and smooth it with a soft brush or fingertips; you want control, not a crunchy shell.
A satin ribbon, pearl clip, or slim headband can finish the look without crowding it. The hair itself should still be the star.
16. Twisted Crown with Tucked Ends
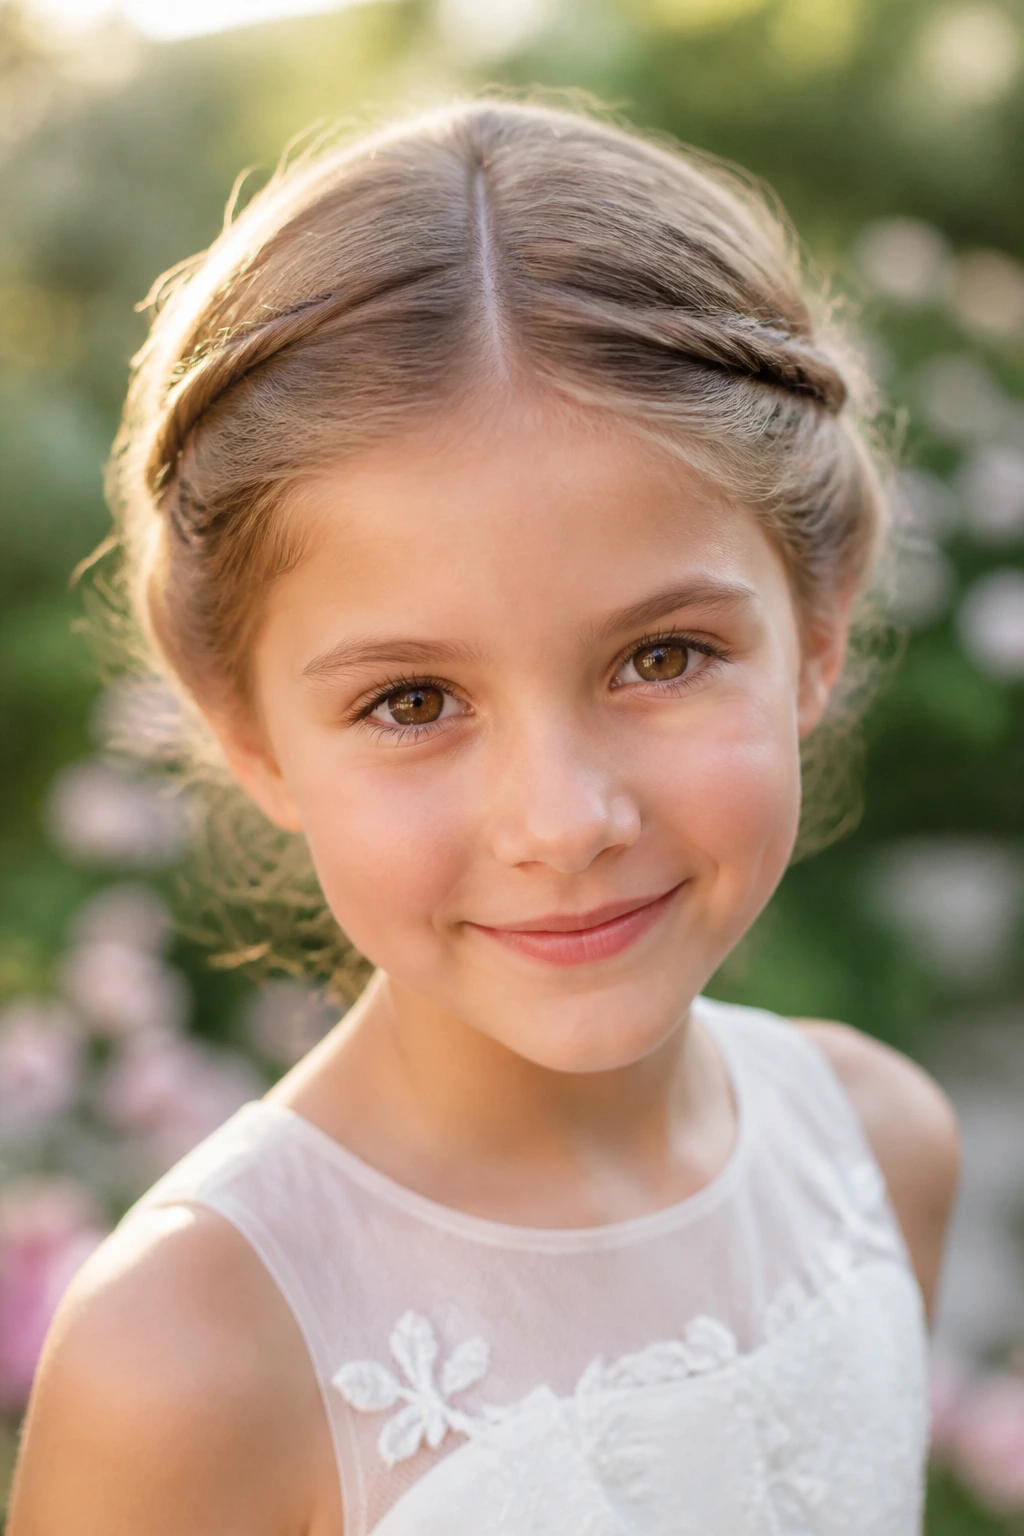
This is the style I pick when I want something soft, graceful, and low-maintenance. Small twists from both temples meet at the back, then the ends disappear under the rest of the hair so the shape stays clean. It has a gentle frame around the face without the weight of a full braid.
The twists work especially well on shoulder-length hair or hair that has a little movement. They also handle fine hair better than a heavy braid can, because the sections stay compact. If the hair is layered, leave the shortest pieces near the front and let the twist hold the longer sections back.
It’s quiet in the best sense. The kind of style you notice because it’s neat, not because it’s loud.
17. Laced Ponytail with Ribbon
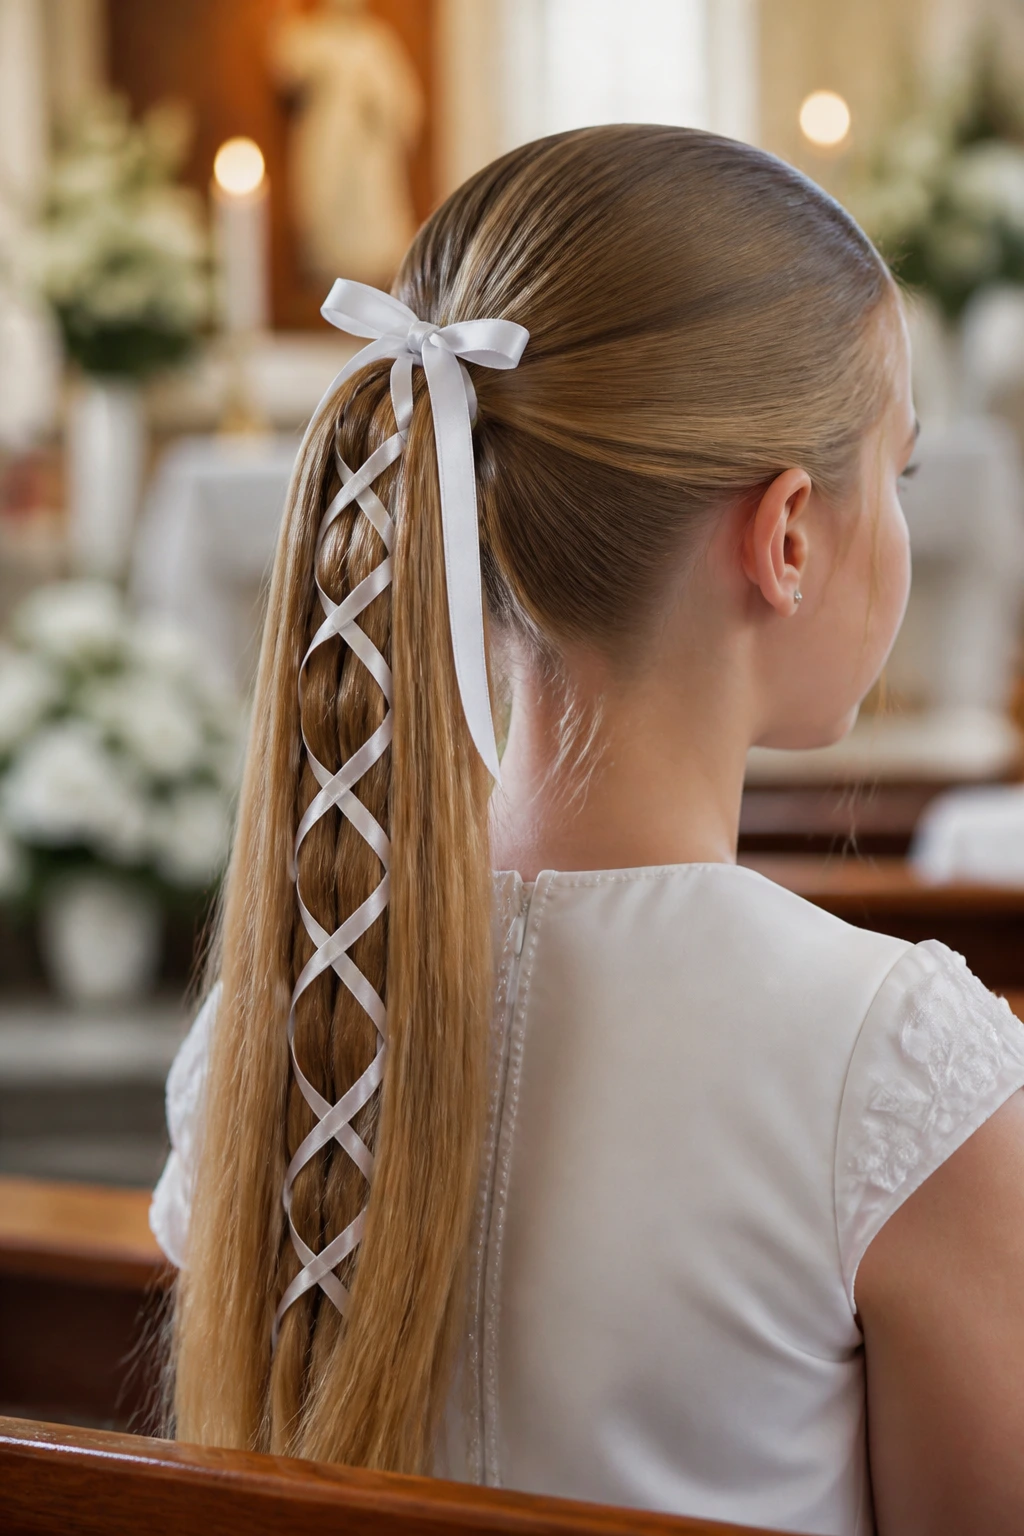
A laced ponytail gives you a touch of decoration without crowding the head with accessories. After the ponytail is secured, thread a narrow ribbon through small gaps in the length or wrap it in a crisscross pattern down the tail. That little detail turns a basic ponytail into something more ceremonial.
I like this style on longer hair that already falls fairly smooth. If the hair is frizz-prone, smooth the surface first and keep the ribbon narrow so it doesn’t fight the shape. The ponytail can sit low for a modest, classic look or slightly higher for a more youthful finish.
A bow at the base is usually enough. If you add too many extras, the ribbon starts to lose its charm.
18. Smooth Bob with a Satin Bow Barrette
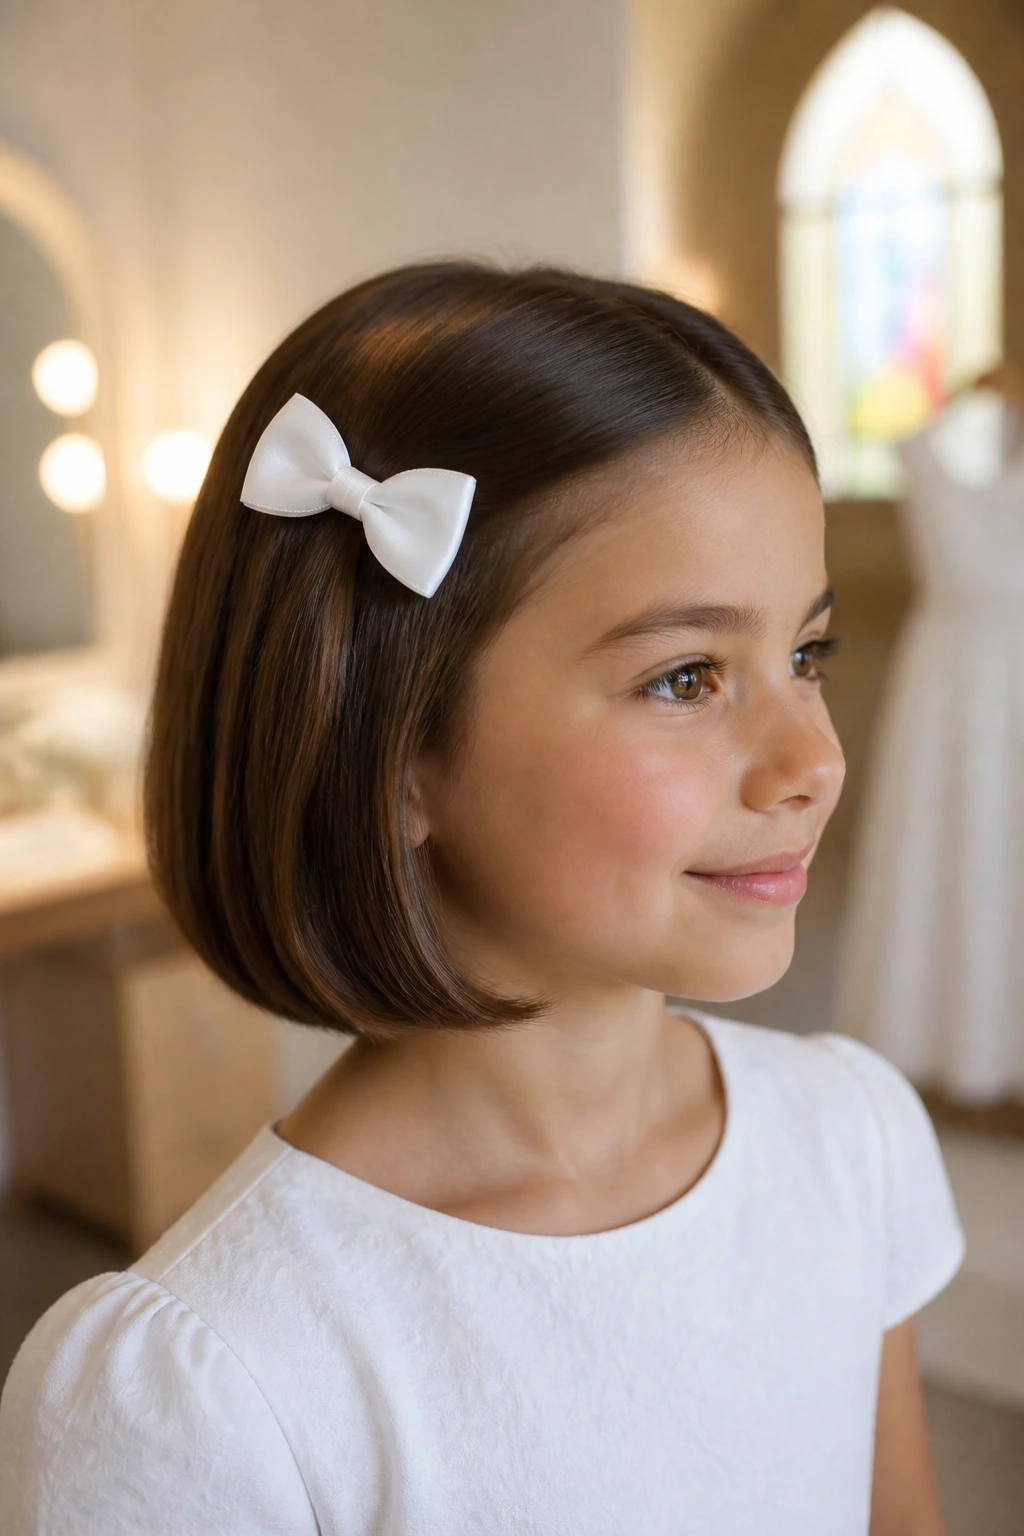
A bob can absolutely be a polished communion hairstyle. A smooth bob with a satin bow barrette keeps the cut crisp, the ends controlled, and the whole look age-appropriate without forcing length that isn’t there.
The secret is the bend. Use a brush or flat iron to curve the ends slightly under, then smooth the top with a light cream or mist of hairspray on a toothbrush for the hairline. Part it on the side or in the center, depending on the cut, and place the bow where it doesn’t cover the face. One barrette is enough. Maybe two if the hair has a stubborn side.
This is a clean, honest style. No fake bun, no overstuffed crown, no wrestling match with short layers. Just neat lines and a tidy finish.
The Tools, Pins, and Products That Make the Job Easier
-
Rat-tail comb: Perfect for clean parts and sectioning the hair without making the lines crooked.
-
Soft brush or boar-bristle brush: Smooths the surface of the hair and helps settle flyaways without roughing up curls.
-
Bobby pins in two sizes: Standard pins handle most styles; smaller pins are better for short pieces and hidden corners near the hairline.
-
U-pins: These are useful for buns and twists because they anchor the shape without making the style look crowded.
-
Clear elastics: Handy for braids, bubble ponytails, and tiny sectioning jobs where a regular elastic would show too much.
-
Light-hold hairspray: Enough to keep the style in place, not so much that the hair feels hard.
-
Smoothing cream or serum: Use a tiny amount on the palms to tame the crown and ends; too much will flatten the style.
-
Dry shampoo or texture spray: A lifesaver for silky hair that refuses to hold pins.
-
Ribbon, pearl pin, or small barrette: Pick one finishing piece and let it do the job. More than one usually starts to look crowded.
-
Curling iron or foam rollers: Useful if you’re building soft curls or waves for a half-up style.
Practical Styling Tips for a Clean Finish
Prep the hair before you start.
Part the hair while it’s dry or just slightly damp, then smooth the front section before you touch the rest. If the crown is already puffy, the whole style gets harder to control later.
Pin the shape, not the surface.
A lot of people place pins where they can see them. Better move: hide the pins inside the twist or bun so they lock the structure, not the outer layer. Cross two bobby pins in an X when you need a stronger hold.
Use the right amount of product.
A pea-sized bit of cream is enough for most children’s hair. Heavy oils and thick pomades can make the hair look greasy under indoor light, and they can also make the style slip faster.
Do a movement test before you leave.
Have the child sit, stand, tilt her head back, turn side to side, and give one gentle hug. If the style survives that, it will probably survive the morning. If a piece shifts, fix it right then instead of hoping it will settle.
A small rescue kit helps, too. Two pins, one tiny brush, and a travel-size spray bottle can save you from a last-minute panic in the church bathroom.
Common Mistakes That Make Communion Hair Look Messy
-
Over-teasing the crown: It can make the hair look bulky and old-fashioned. A little lift is enough; if the top feels spongey, brush it down and start again.
-
Using too much shine serum: The hair may look slick in the mirror, then greasy in daylight. Keep shine products off the roots and use them only on the ends if needed.
-
Placing accessories too high: Veils, bows, and combs sit better when they follow the shape of the hairstyle instead of floating above it. High placement tends to make the head look top-heavy.
-
Skipping a trial run: A style that seems simple can still fail if the child’s hair slips, the part won’t hold, or the accessory pulls the wrong direction. A quick practice a few days ahead saves a lot of scrambling.
-
Pulling the style too tight: It can leave the child uncomfortable and fidgety, which makes the whole look unravel faster. Secure the hair firmly, but don’t yank the hairline raw.
-
Ignoring the hair’s natural texture: Trying to flatten curls into a stiff shell usually creates frizz at the edges by the time the service starts. Work with the texture, then clean up the outline.
Variations and Backup Plans for Short, Curly, or Fine Hair
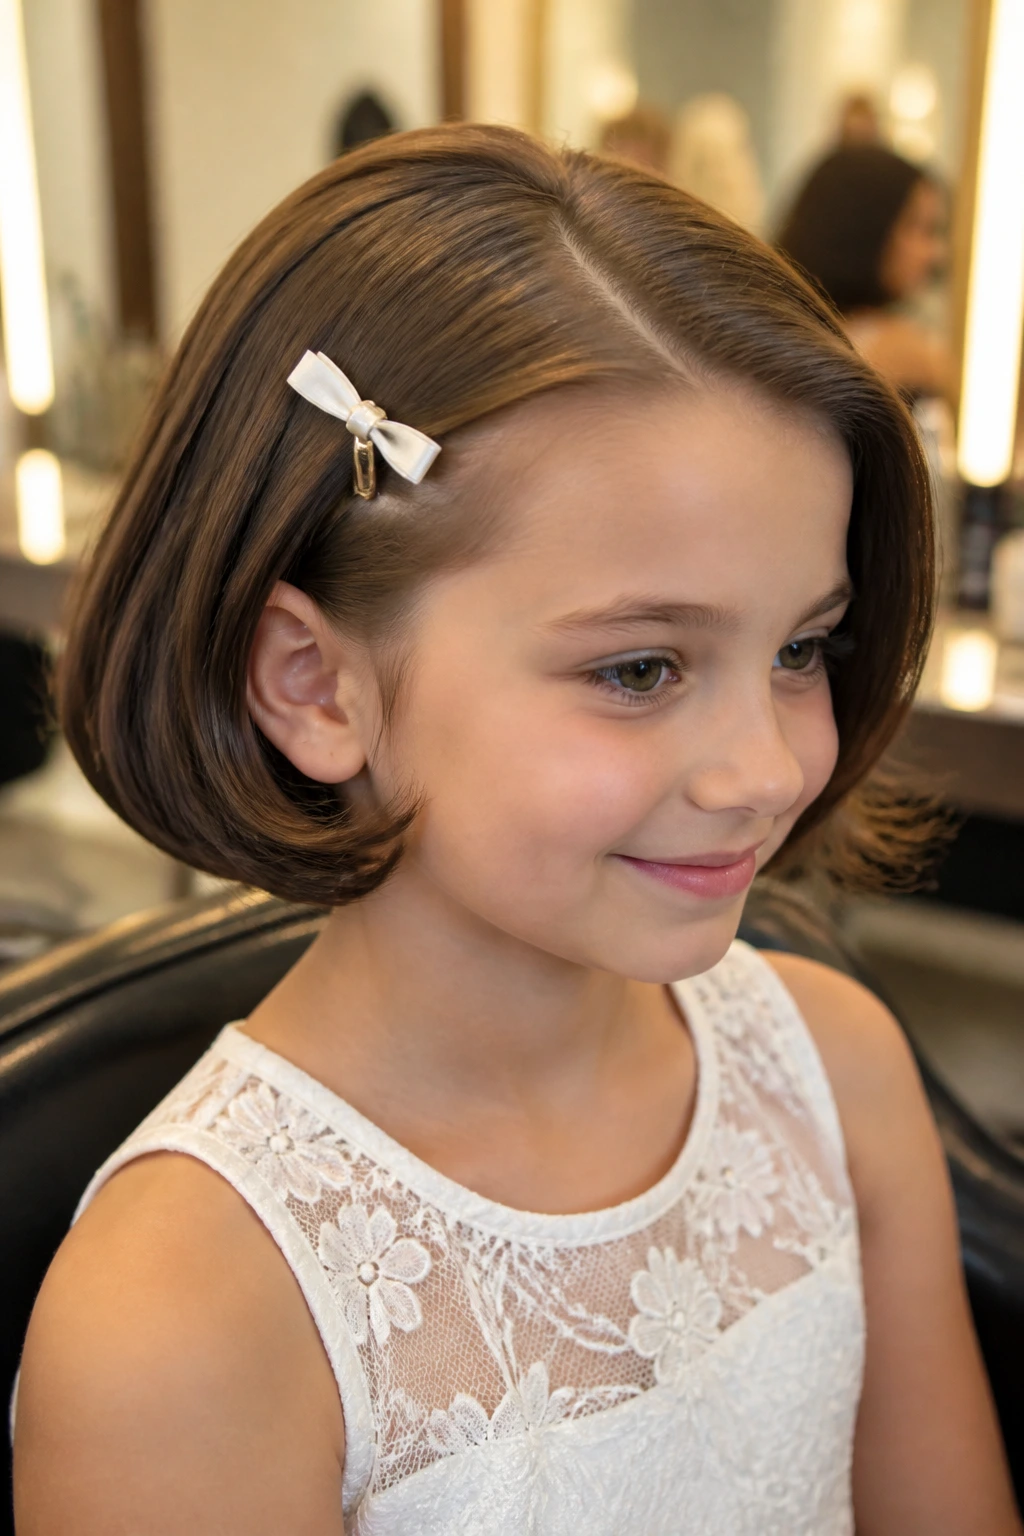
The Short-Bob Ribbon Flip
This version works when the hair stops at the chin or collarbone and a bun is out of reach. Tuck the ends under slightly, create a neat side part, and finish with a ribbon barrette or slim bow. It looks intentional and avoids the “I wish the hair were longer” problem.
The Curl-First Halo
For curly or coily hair, keep the texture defined and use small sections pinned back at the sides instead of trying to smooth everything flat. A halo shape around the crown can frame the face cleanly while letting the curls keep their shape. A pearl clip or satin band works better than a heavy barrette here.
The Fine-Hair Anchor Plan
If the hair slips the moment you touch it, start with dry shampoo or texture spray at the roots, then build a low knot, ponytail, or twist. Fine hair usually needs smaller sections and more hidden pins than people expect. That’s not a flaw; it’s just a different build.
The No-Heat Morning Style
Braids, twists, and ribbon ponytails can all be done without hot tools. That helps when you want to keep the morning calm and avoid the extra shine that heat can leave on very soft hair. This route is especially nice if the child’s hair is already healthy and smooth.
The Veil-and-Bun Backup
If you planned something taller but the veil starts to fight it, switch to a flatter bun or low knot. The accessory will sit better, and the hairstyle will look more composed by the end of the service.
How to Prep, Maintain, and Refresh the Style
A communion hairstyle usually behaves best on hair that’s clean enough to move through, but not so freshly washed that it turns slippery. For many children, washing the night before or the morning of with a light conditioner on the ends works well. If the hair is very fine, second-day hair often holds better than clean, silky hair that has just been blown dry.
Do the main styling 30 to 45 minutes before dressing, not after the child is already in the outfit. That gives you room to fix a part, redo a pin, or smooth a side section without worrying about getting hair product on lace or satin. If you’re using curls, let them cool all the way before pinning or brushing them into place. Warm curls fall faster.
For touch-ups, keep the fix small. Smooth the hairline with damp fingertips, tuck loose ends back into the pin line, and use one or two extra pins if a section starts to shift. Don’t drown the style in hairspray; that usually makes the frizz more noticeable once the hair starts to move.
After the ceremony, remove pins in reverse order and slide them out gently. Brush from the ends upward if the hair was curled or braided. A little detangling spray helps, especially on fine hair that’s been held tight for a few hours.
Questions Parents Ask Before the Service
Should the hair be washed the morning of Communion?
Usually, clean hair is fine, but very silky hair can be hard to pin. If the hair is fine or slippery, washing the night before often gives you a better grip. If the hair is dry or curly, a morning wash with a light leave-in can work better.
What hairstyle works best with a veil?
A low knot, low chignon, or smooth bun is the easiest anchor point for a veil comb. The comb needs a flat surface to grip, so styles that sit high or puffed up tend to slip more.
How do you keep fine hair from falling out of the pins?
Use texture spray or dry shampoo at the roots, then pin smaller sections instead of trying to secure a big bundle at once. Cross two bobby pins in an X when you need extra hold, and match the pins to the hair color if possible.
Can curly hair be worn down for Communion?
Yes, if the curls are defined and the front is kept neat. A half-up twist, side clip, or braided crown can frame the face without flattening the texture. The goal is shape and control, not straightness.
How long before the service should the hairstyle be done?
Most styles are best finished about 30 to 60 minutes before leaving, after the hair has had time to settle but before the child starts getting dressed or moving around a lot. That keeps the shape fresh without giving flyaways too much time to wake up.
What if the hairstyle starts to loosen before photos?
Keep two or three extra pins and a travel brush nearby. Usually the fix is one hidden pin at the weak spot, not a full redo. If a twist loosens, press it back into place and pin at the base, not the top.
Is a trial run worth it?
Absolutely. A five-minute practice reveals whether the part sits right, whether the accessory pulls too hard, and whether the child can tolerate the style without fussing. It also saves time on the actual morning, which is the whole point.
What if my child hates having her hair pulled tight?
Choose a low ponytail, half-up style, or soft braid that uses gentle tension around the hairline. Comfort shows up in the finished look. A child who isn’t tugging at her scalp looks calmer in every photo and every pew.
A Quiet, Finished Look That Lasts
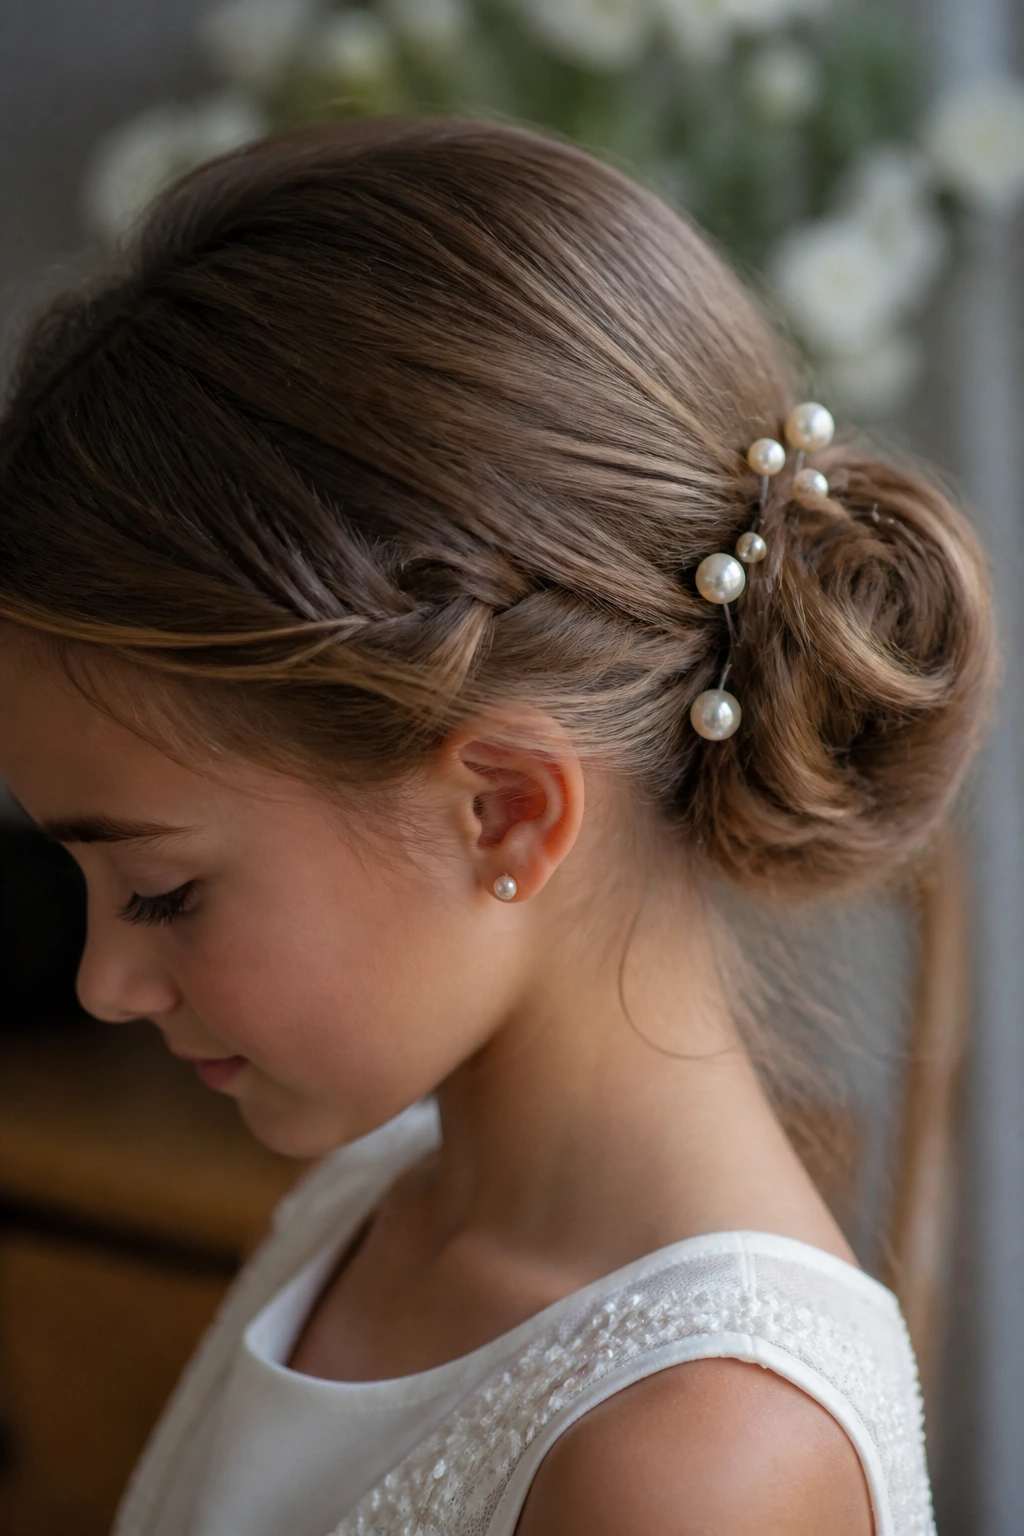
The best first communion hairstyles don’t shout for attention. They sit neatly, stay comfortable, and let the dress and the moment do the talking. That can mean a pearl-pinned chignon, a braided halo, a smooth bob with a bow, or a natural puff with a sharp side part.
Keep the shape low or clean, keep the accessory simple, and keep the child comfortable enough that she stops thinking about her hair after the first few minutes. That’s the real test. When the style disappears into the day and just looks right, you’ve picked well.
