



The best updos for brides with thin hair are built, not just styled. That’s the whole trick. Thin hair usually doesn’t fail because it’s “too short” or “too fine”; it fails when the shape depends on bulk that isn’t there. A heavy spray job can only fake that for so long. By the time the photos start, the crown has gone soft, the bun has shrunk, and the veil comb is hanging on by a prayer.
What works instead is smarter. You want shapes that tuck, fold, braid, and wrap in ways that make small sections do useful work. You want lift where the eye goes first, a stable anchor at the nape, and a little texture so pins can actually grip. A bridal updo for fine strands should look airy in the mirror, but it needs a hidden little skeleton underneath. That’s the part most inspiration photos leave out.
I care about this detail because it changes everything. The right style makes thin hair look intentional, polished, and softly full, instead of trying to pretend it’s thick. And once you know which shapes do that job best, the whole bridal hair conversation gets a lot less stressful.
Why These 19 Bridal Updos Earn Their Keep
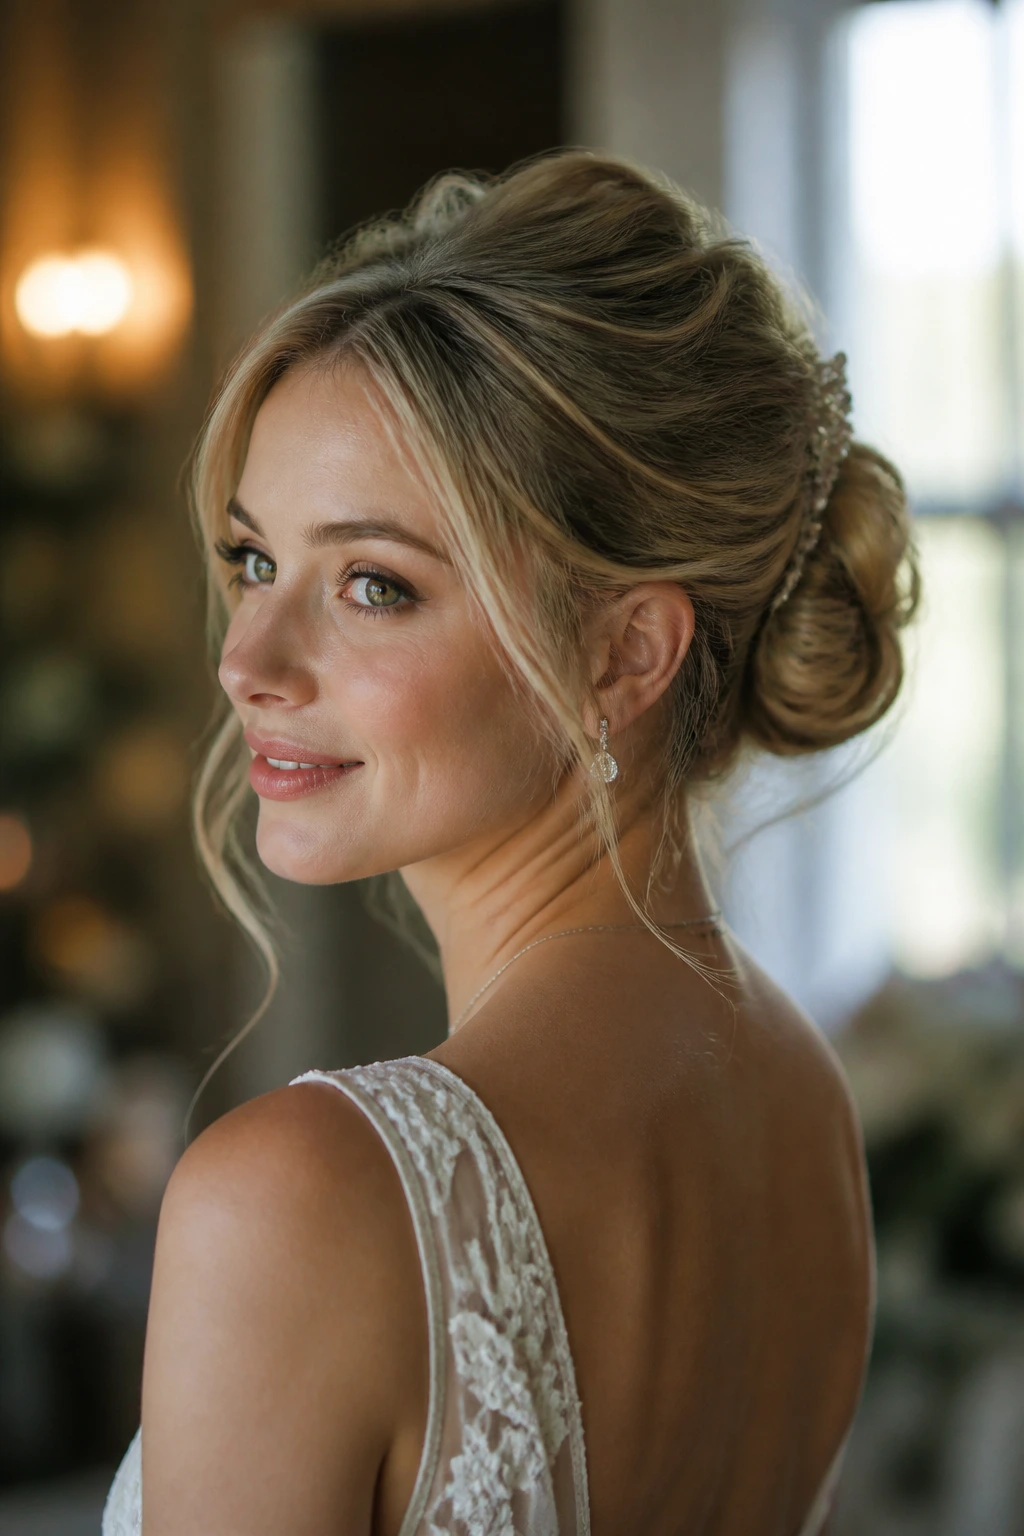
-
They put volume where it matters most: The crown, temple area, and upper back head are where thin hair tends to flatten first, so these styles build lift there instead of wasting effort on the ends.
-
They hide sparse spots without looking padded: Twists, loops, braids, and wrapped sections overlap just enough to cover the scalp line that can show through in straight, sleek styles.
-
They hold accessories better: Low anchors and tucked bases give a veil comb, pearl pin, or floral cluster a real place to sit, which matters more than people think.
-
They look soft in person and on camera: Thin hair can look harsh when it’s pulled tight. These shapes leave a little air around the face and nape, so the style reads bridal instead of severe.
-
They can be done with your actual hair texture: Straight, wavy, fine-curly, shoulder-length, or chin-length hair can all work here with the right prep and a sensible amount of support.
-
They don’t need a mountain of product: The structure does most of the work. Product helps, but it should never be the only thing keeping the style alive.
Why Thin Hair Needs a Different Bridal Strategy
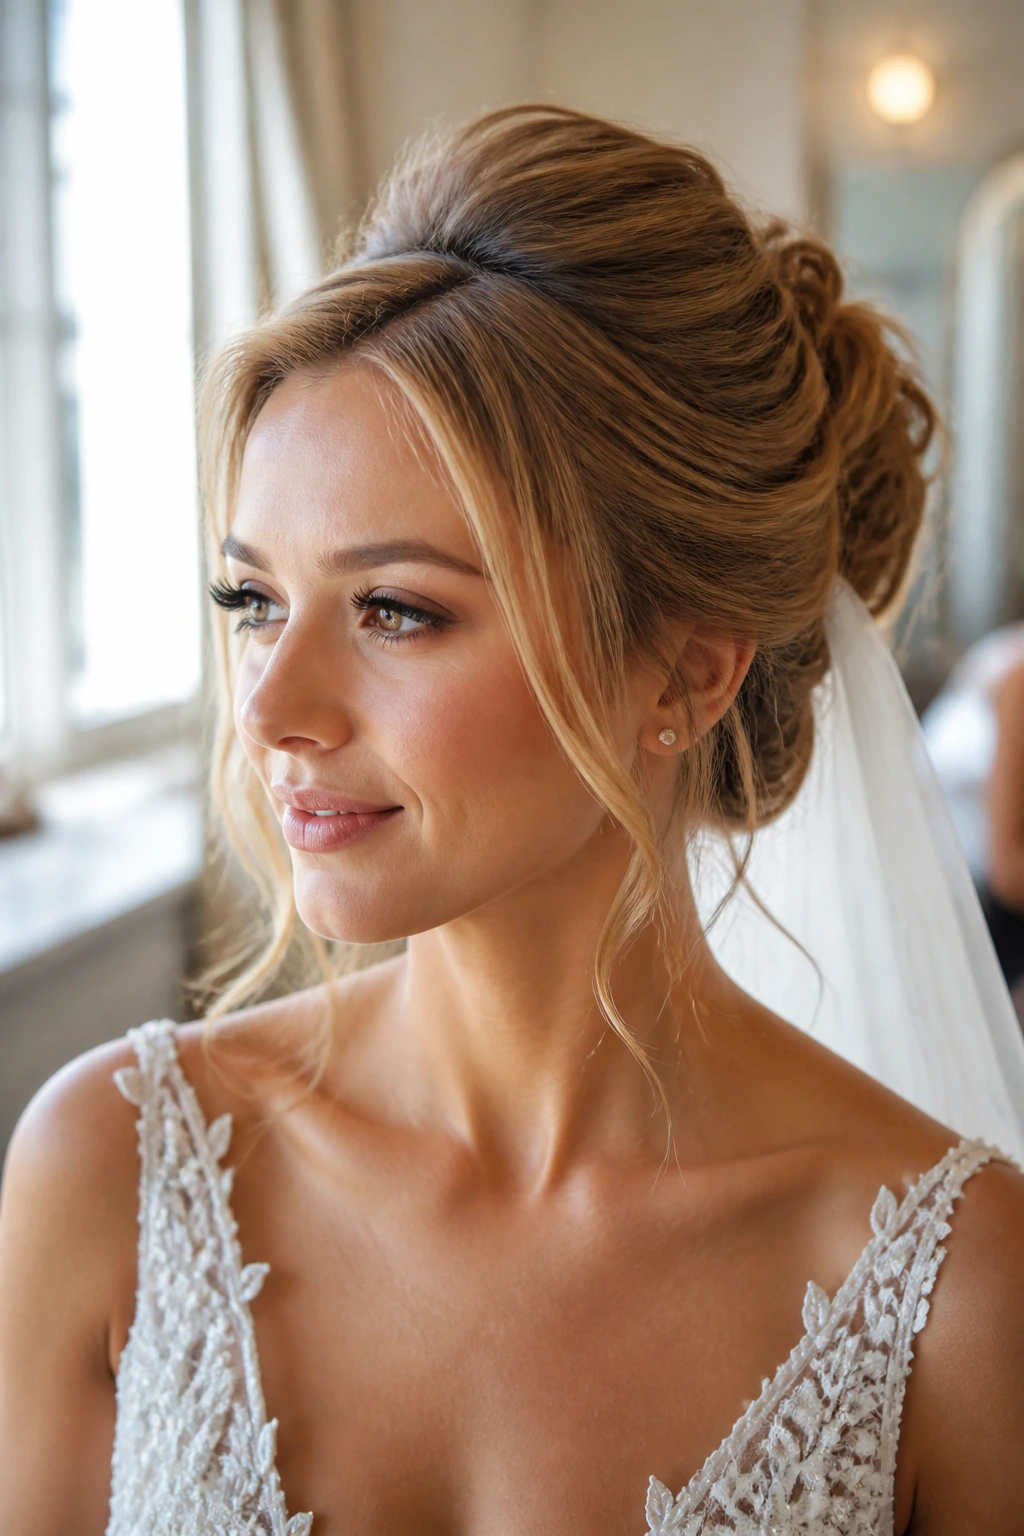
Fine hair and thin hair are not the same thing, and brides get tripped up by that all the time. Fine hair means each strand has a small diameter. Thin hair means there are fewer strands on the head overall. You can have one without the other, and the styling plan changes depending on which one you’re dealing with.
That’s why some updos collapse while others stay put. Hair that’s silky and freshly washed has less friction between strands, so pins slide. Hair with a little texture behaves almost like it has Velcro in it. You are not trying to make the hair rough. You’re trying to give it enough grip that a twist can stay twisted and a bun can keep its shape through a ceremony, portraits, and three rounds of hugging.
Where the volume should go
The smartest bridal styles for thin hair move the bulk upward and backward. A little lift at the crown changes the whole silhouette. A softly padded bun at the nape does more for fullness than any amount of spraying the sides to death. If you pull every strand flat around the hairline, the style will look smaller than it really is.
Why product is only part of the answer
Texture spray, mousse, and dry shampoo are useful, but they are not magic. They create friction and support. They do not create hair. If the shape underneath is weak, the style will still collapse when you add a veil comb or a few hours of movement. I’d take a well-pinned style with moderate product over a crunchy helmet any day.
The quiet advantage of built-in structure
A chignon with a hidden cushion, a braided halo, or a tucked French twist gives thin hair somewhere to live. The hidden support can be a bun donut, a small mesh pad, a clip-in fill piece, or even a few carefully teased sections that are pinned flat once they’re in place. None of that needs to look obvious. In fact, it shouldn’t.
1. Soft Low Chignon With a Hidden Cushion
A soft low chignon is the style I reach for when a bride wants calm, classic shape without drawing attention to every bit of scalp at the nape. The secret is a hidden cushion—a small bun donut, padded mesh, or even a rolled piece of hair padding tucked underneath the wrap. It gives the bun a fuller body before you even start pinning.
Why It Works on Thin Hair
The low placement keeps the style from fighting gravity. That matters. Thin hair does not like to hold height for long unless it’s anchored well, and a low chignon lets the weight sit close to the neckline where it can be controlled. A few soft face-framing pieces keep it from looking too neat.
Tease the crown lightly, not aggressively. You want a little lift, not a rat’s nest. Then wrap the lengths around the cushion in overlapping sections so the bun looks rounded instead of skinny from the side.
A pearl comb or short veil comb sits nicely above this shape, and that is one reason stylists love it. It leaves a clean pocket at the base for accessories. If your dress has a lace back or a low button line, this style does the right amount of showing off and then gets out of the way.
2. Twisted Crown Bun With Face-Framing Pieces
This one gives you a little romance without demanding thick hair. Two twisted sections start near the temples, travel back along the head, and meet at a soft bun or knot at the nape. The twists create the illusion of more hair because they double back on themselves and catch light along the edges.
The front can stay gently parted in the middle or slightly off-center, depending on the face shape and the dress neckline. I like this style because it has movement without chaos. Thin hair can look limp when it’s all one smooth plane. Twisting the sides breaks that up in a good way.
Best detail to ask for
Ask your stylist to pancake the twists a little by pulling the outer edges loose before pinning. Not enough to look messy. Just enough to give the twist some width. That tiny adjustment makes a bigger difference than adding more spray.
If your hair is fine but long, this style can be done without extensions. If your hair is shorter, a small hidden weft at the back helps the bun feel more substantial. Either way, the face-framing pieces should be left soft and curled away from the cheekbones, not dragged straight back.
3. French Twist With a Looser Roll
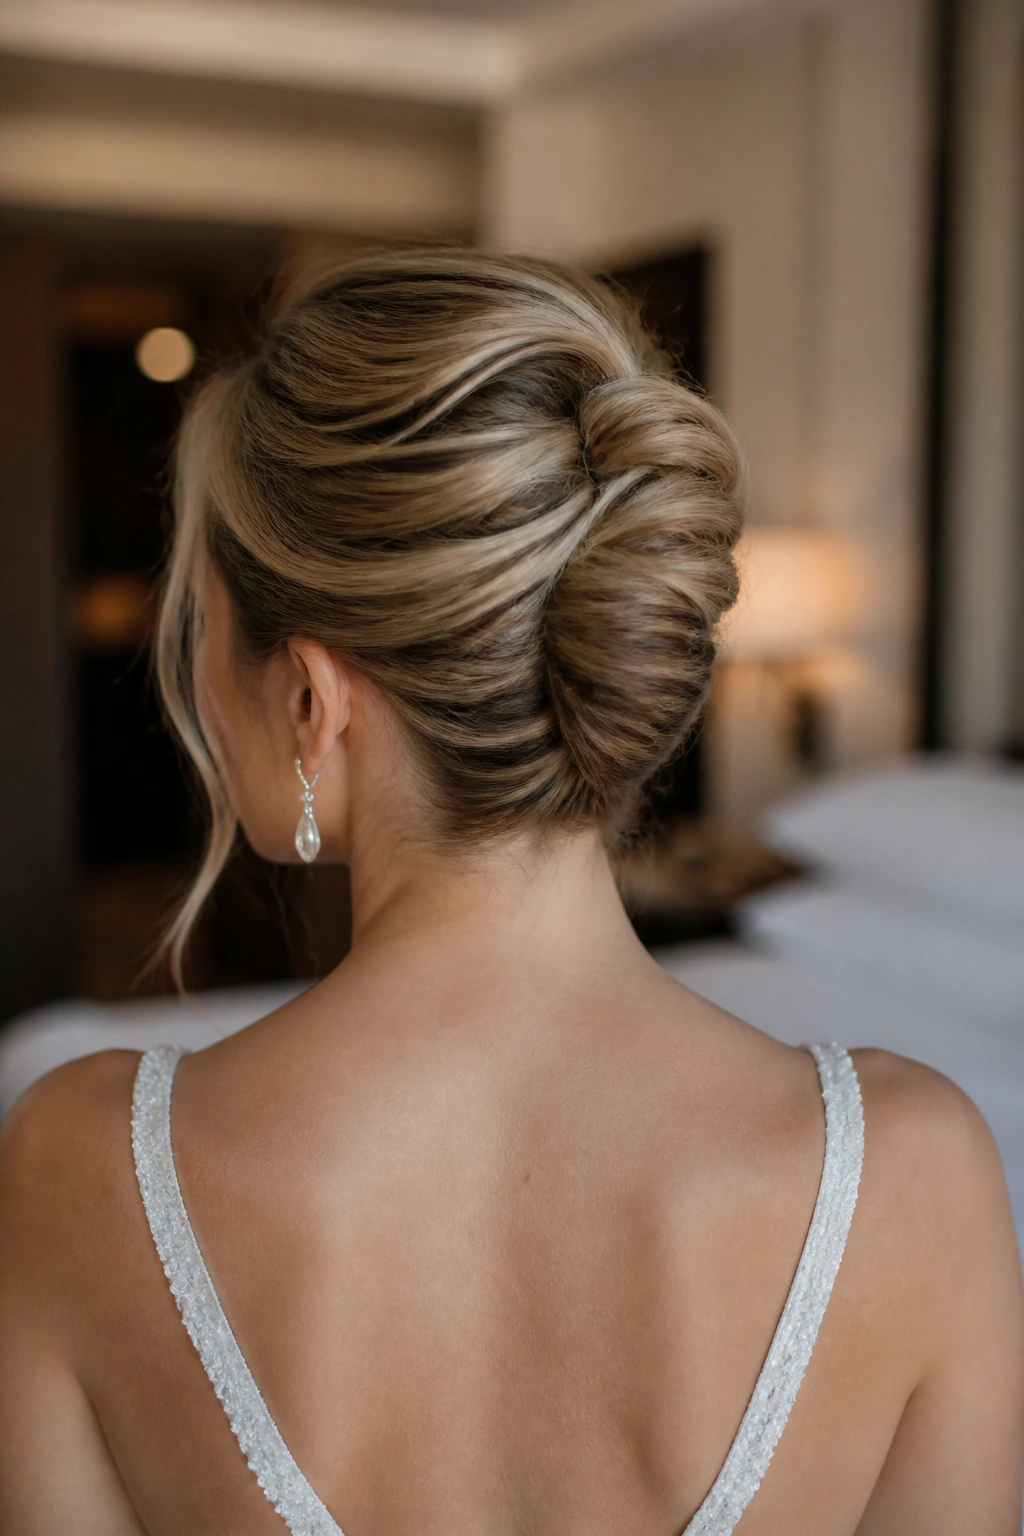
A French twist has a reputation for being strict, but that’s only the severe version. For a bride with thin hair, the looser roll is the one that matters. It creates a clean vertical line in the back, then hides the remaining ends inside a soft fold that feels elegant rather than stiff.
Why I like it for fine strands: the style uses folding instead of bulk. You do not need a massive ponytail to make it work. You need smooth control at the top, a little tease at the crown, and a vertical base that’s pinned properly along the seam.
How to anchor it
Start with texture spray through dry hair. Not the kind that leaves grit everywhere—just enough to make the strands stop slipping. Twist the hair upward, tuck the ends, and pin along the fold with long bobby pins or U-pins that match your hair color. Insert them in opposite directions so they lock.
A French twist also gives you a very clean place for a comb, side pin, or narrow veil attachment. If your dress is high-necked or has dramatic sleeves, this shape lets the clothes stay in charge while the hair behaves.
4. Braided Halo Updo With a Low Nest
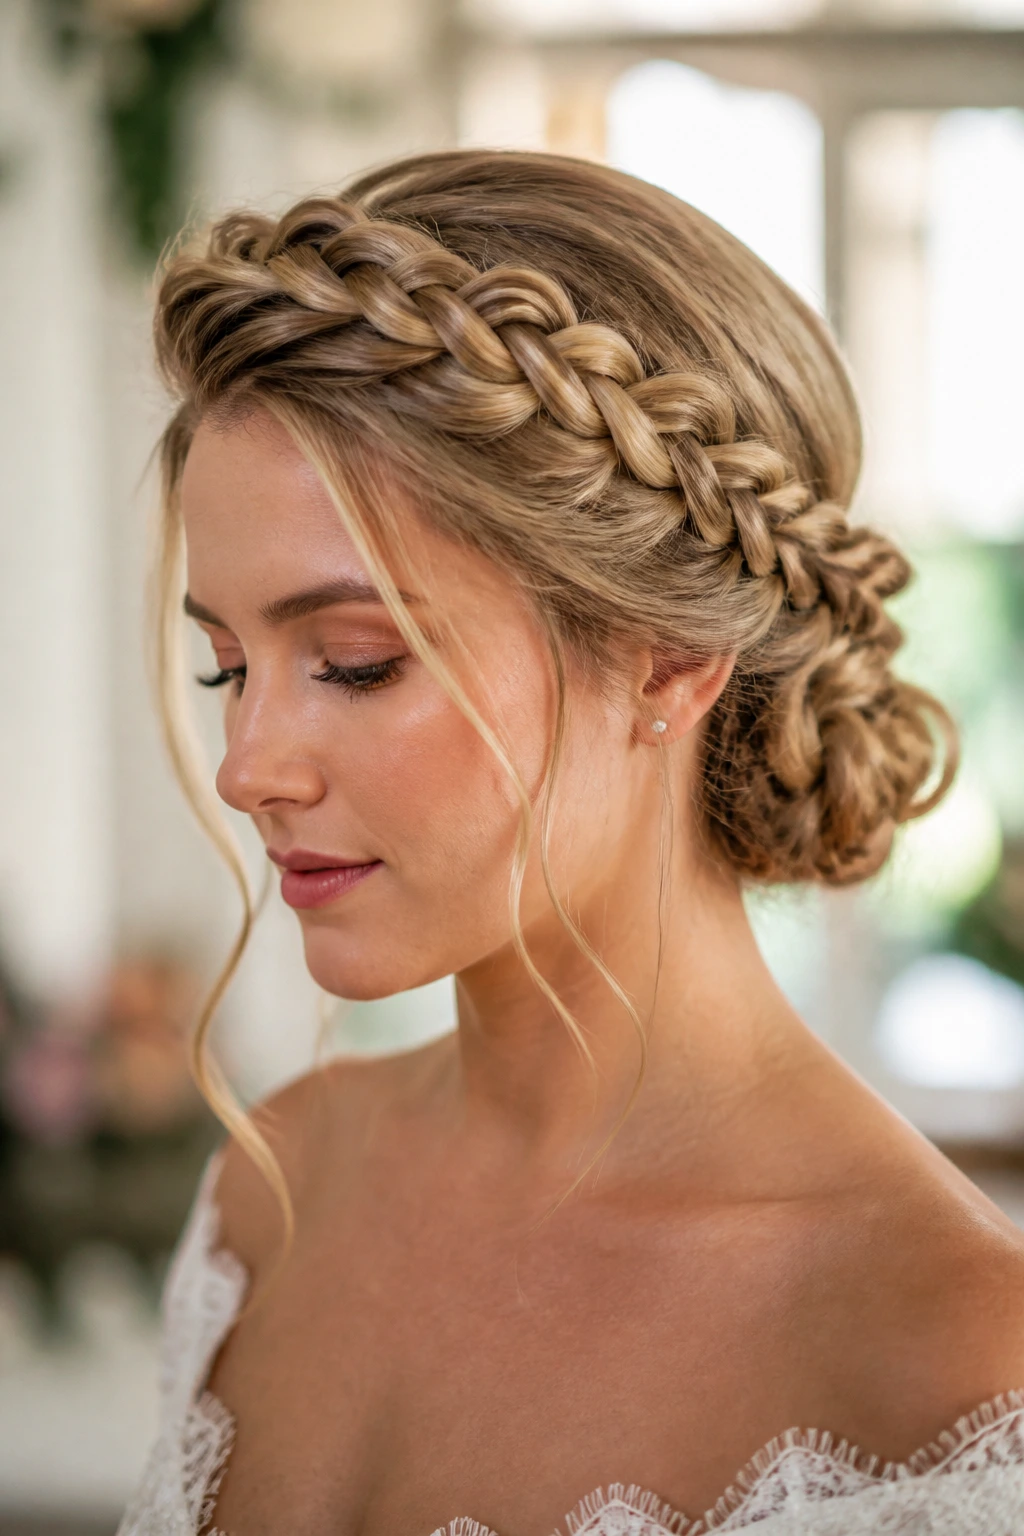
A braided halo is one of those styles that looks more complicated than it is. That works in your favor. Two braids, or even a single braid wrapped around the head, create a visible ring of texture that makes the hair seem fuller because the braid itself has thickness.
The back can end in a small nest-like bun or tucked coil. That little low finish is where thin hair gets a break. You’re not asking the braid to carry all the weight. You’re giving it a resting place.
What makes it bridal instead of boho
Keep the braid clean at the base, then soften the edges gently. You want the halo to look intentional, not frayed. A few pinned curls near the temples help if the dress calls for softness. If you’re wearing a veil, place the comb underneath the braid’s back seam so it doesn’t fight the shape.
A braided halo is especially kind to hair that has different densities in different areas. A sparse side section? Braid it. A thin crown? Pull that section into the braid path so it disappears into the pattern. That’s the beauty of this style. It hides unevenness by turning it into design.
5. Gibson Tuck With Crown Lift
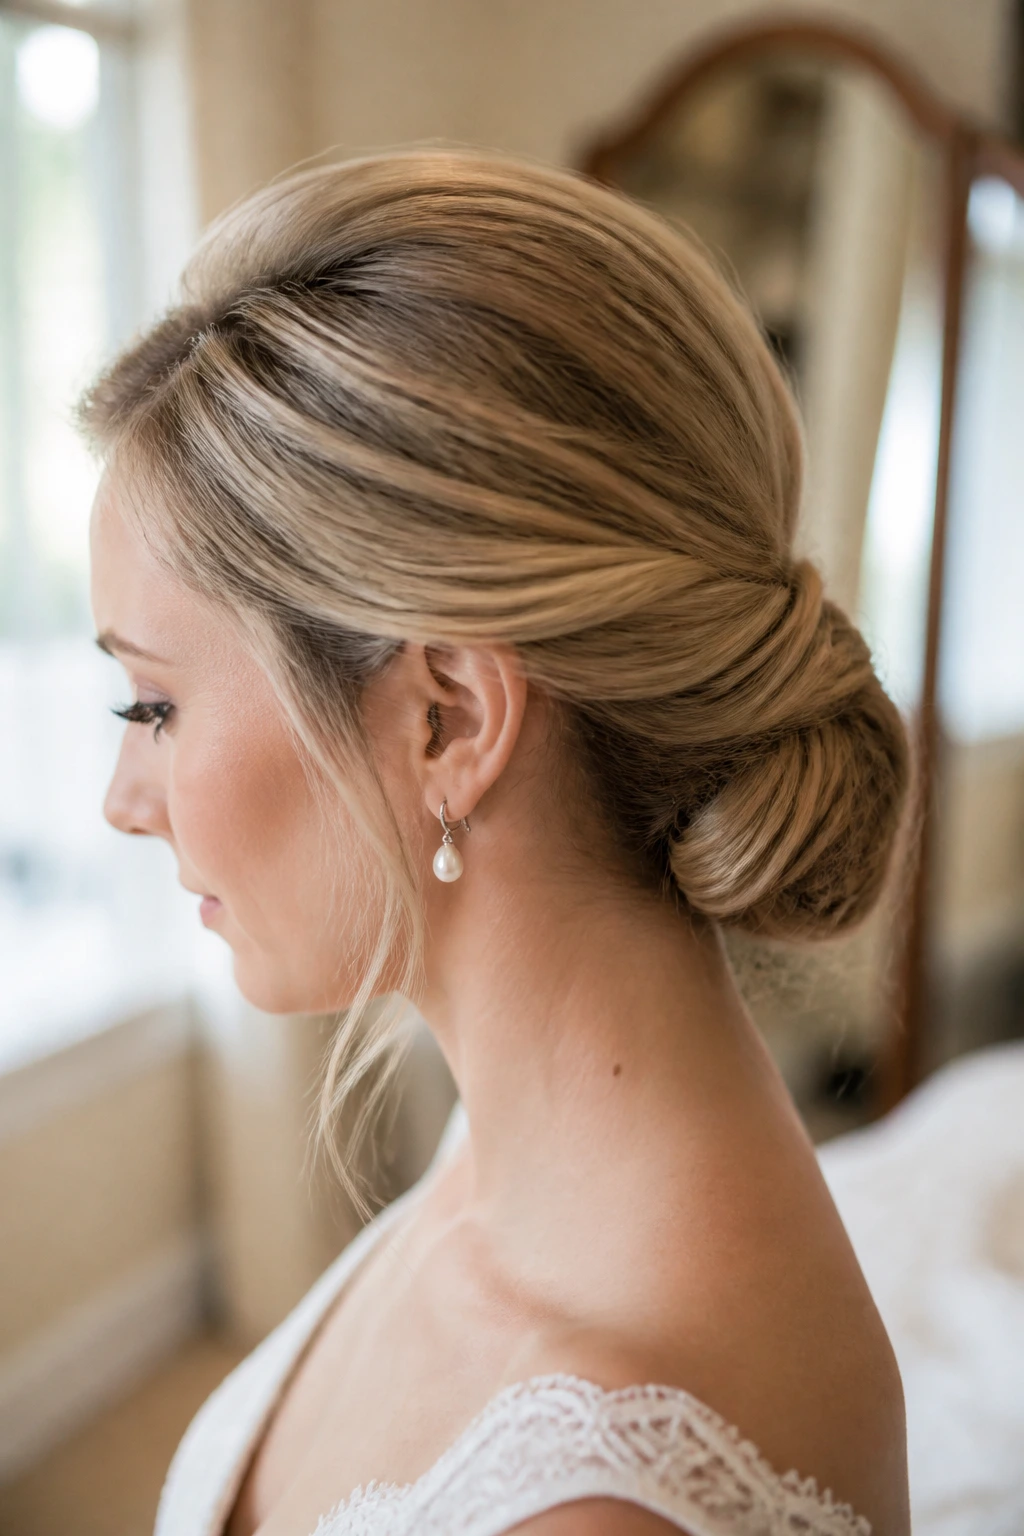
The Gibson tuck is almost unfairly good for thin hair. The style folds the hair upward and tucks the ends into a pocket just above the nape, which means you can create a lot of shape without needing a large pile of hair. It has a vintage softness that reads bridal immediately.
A little height at the crown is the whole game here. Use a light tease or a small cushion under the upper section, then smooth the top layer over it. The hair should feel supported, not puffed. Thin hair does not need a giant lift to look full; it needs a believable one.
One detail that matters
The tuck has to sit snugly, but not tight. If the fold is too stretched, the style collapses. If it’s too tight, the sides get pulled thin and the scalp starts to show. The sweet spot is a pocket that holds the ends without spreading the hairline.
This style is a quiet hero for brides who want something soft, classic, and not over-styled. It also loves veils. The comb can sit just above the tuck, and the shape underneath stays intact because the hair is folded into itself rather than hanging from one elastic.
6. Textured Top-Knot With a Wrapped Base
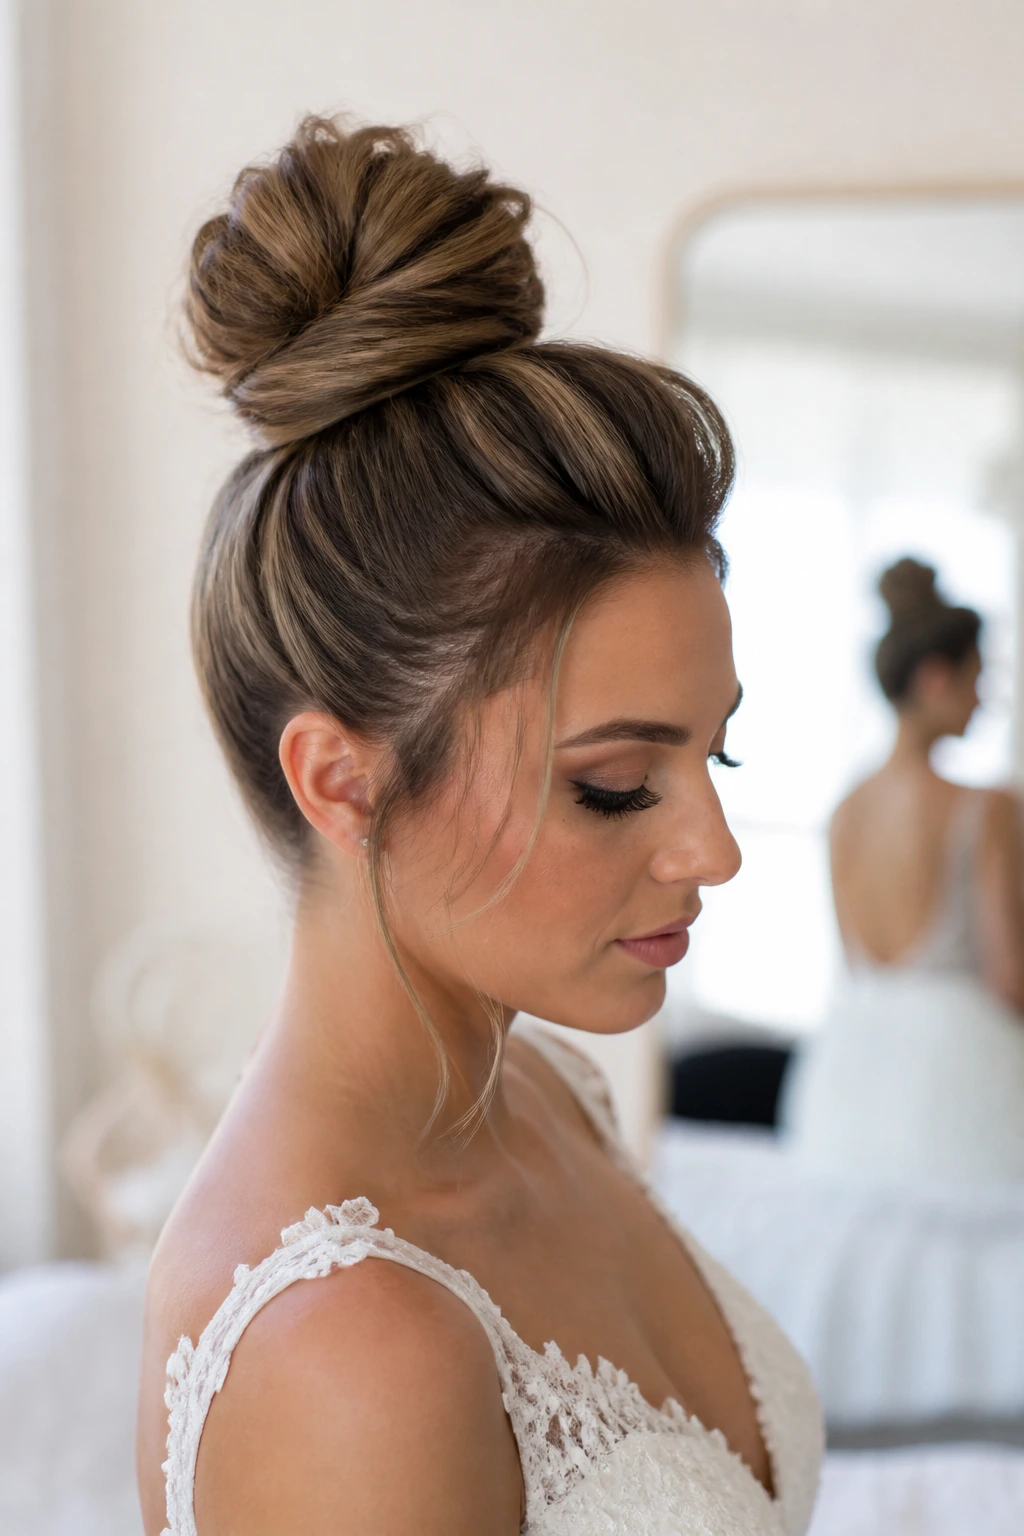
A top-knot for a wedding sounds casual until you build it properly. Then it becomes a very polished little tower of texture. For thin hair, the trick is to keep the knot compact, wrap the base with a separate section of hair, and leave the top slightly airy so it doesn’t look like a work gym bun.
This style works best when the crown gets a bit of root lift first. Blow-dry with mousse or a root spray, then add a touch of backcombing where the knot will sit. Not all over. Just enough to give the base something to cling to.
I like this for modern dresses, square necklines, and brides who want the hair up but not severe. It can look minimalist in a clean gown or a little relaxed in a textured one. If your hair is especially fine, a small bun filler inside the knot will keep the bun from shrinking too much after twenty minutes.
7. Rolled Low Bun With a Donut Insert
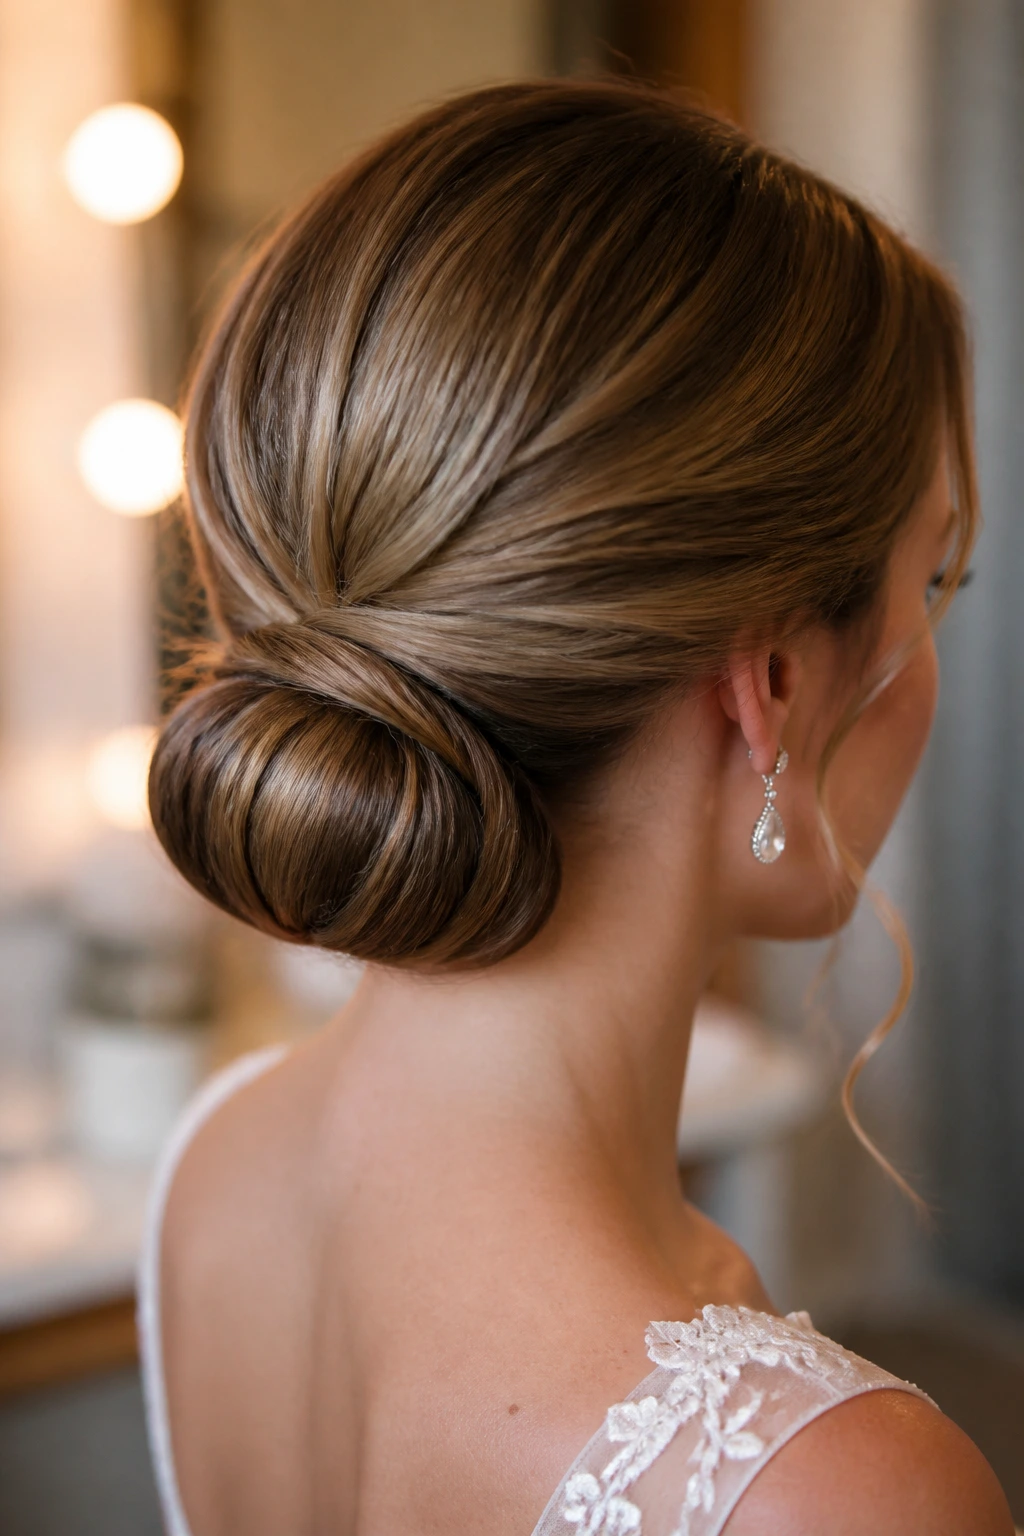
If you want a bun that looks fuller than it is without looking fake, this is the one. A small donut insert gives the hair structure, and the roll around it creates a thicker silhouette instantly. The style sits low, usually at the center or slightly off to one side, and that makes it feel bridal rather than sporty.
The best part is how forgiving it is. Thin hair often has trouble filling a bun evenly, which leaves weak spots at the edges. The insert solves that. You wrap sections around the donut, pin as you go, and finish by smoothing the outer layer so the padding disappears.
When to use this one
Pick it if your gown has a strong back detail and you need the hair to stay out of the way. Pick it if your veil comb needs a stable anchor. Pick it if your hair is shoulder-length but not especially dense. It is one of the most practical updos in the whole group.
A tiny note: don’t choose a donut that is too big. A giant filler on fine hair looks like a prop. A modest one gives you shape without drama, and that is the right move here.
8. Side-Swept Knot With a Deep Part
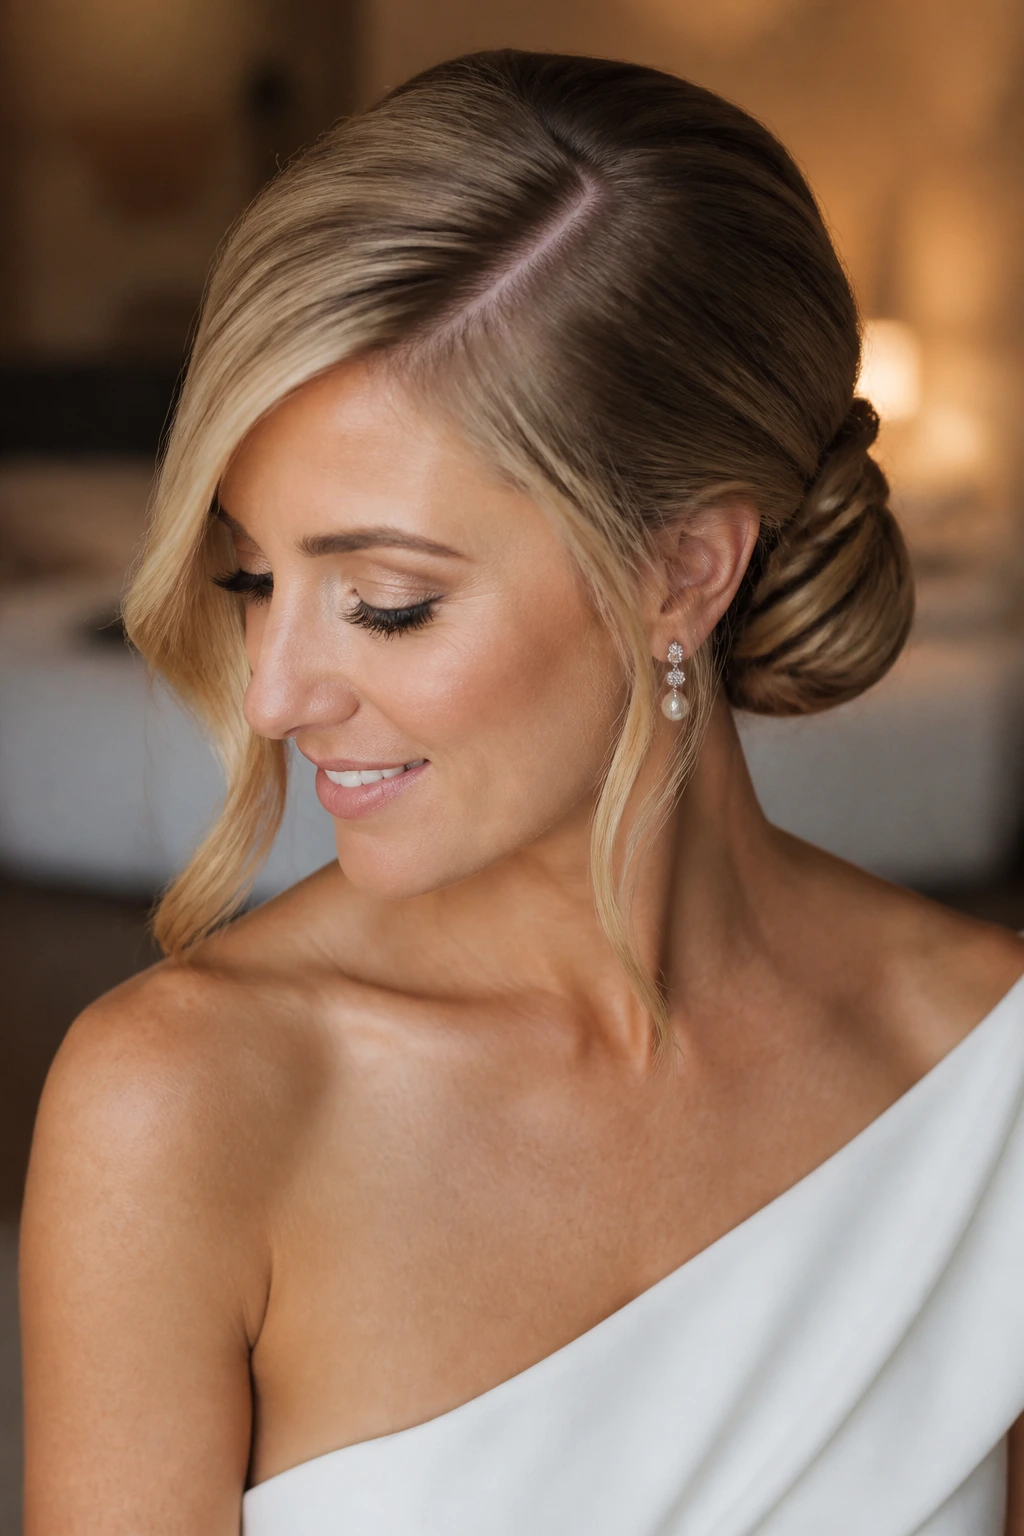
A deep side part changes the whole mood of thin hair. It creates weight on one side and lift on the other, which gives you instant asymmetry and a little visual richness before you’ve even pinned the knot. The low side-swept finish keeps the style soft near the neck.
This is a good answer when straight-down center parts make the scalp feel exposed. A side part can hide a flatter temple area and make the front look fuller because the hair is crossing diagonally instead of falling in one line. That diagonal shape is your friend.
Put the knot low and just behind the ear on the heavier side. Leave a sweep of hair over the front hairline, then tuck the other side a little more tightly. The contrast is what makes it interesting. Thin hair sometimes needs contrast more than volume.
Statement earrings sit beautifully with this one. The hair frames one side of the face and leaves the other side open, which gives the jewelry a place to breathe. If your dress has one-shoulder detailing, this is a particularly smart pick.
9. Double-Twist Bun for Shorter Fine Hair
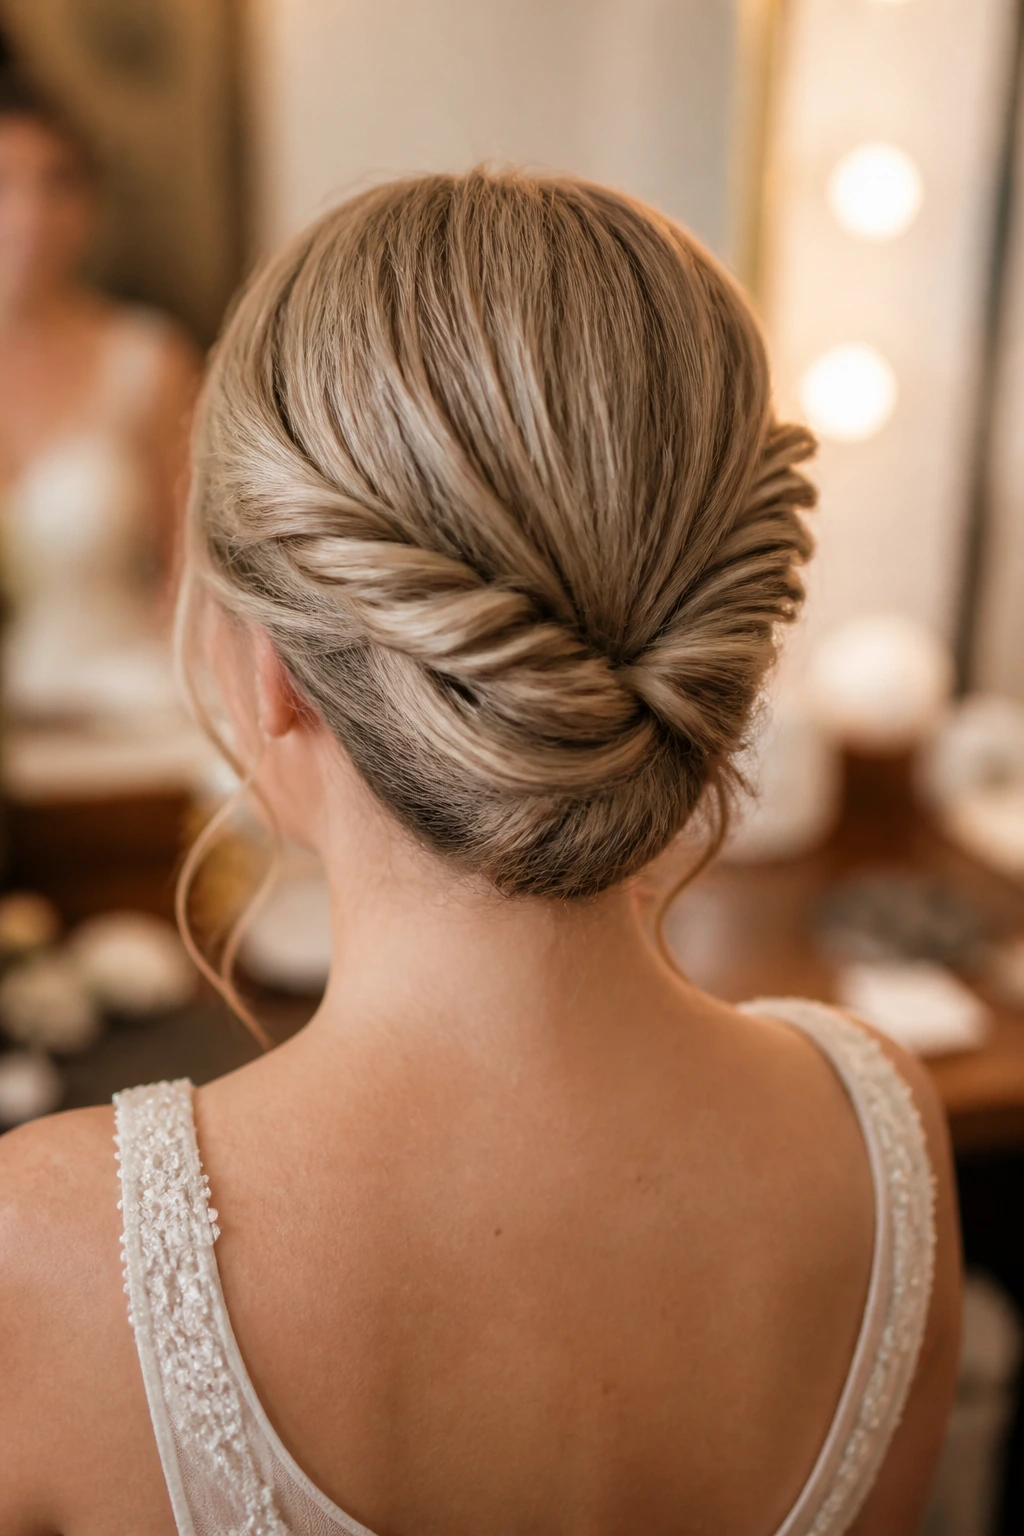
Shorter thin hair can still do a proper updo, but it needs a shape that builds from small sections. The double-twist bun is exactly that. Two or four twisted panels from the sides are pinned into a low bun or knot, and the overlaps create a fuller-looking back without requiring a lot of length.
This one is especially nice for shoulder-length hair that feels too short for a full chignon but too long to leave down. The twists hide the transition points, which is where shorter fine hair usually gives itself away. If the ends are a little uneven, no problem. They disappear into the center of the bun.
How to make it hold
Use tiny clear elastics or a couple of discreet bobby pins to secure each twist before building the bun. That way the style has multiple anchors. Thin hair does better with more anchor points and less tension at each one.
You can soften the top with a light tease at the crown, but keep the sides smooth enough that the twists stay readable. The look should feel delicate, not empty. A few pearl pins placed where the twists cross can make the shape look deliberate and polished.
10. Infinity Twist Bridal Updo
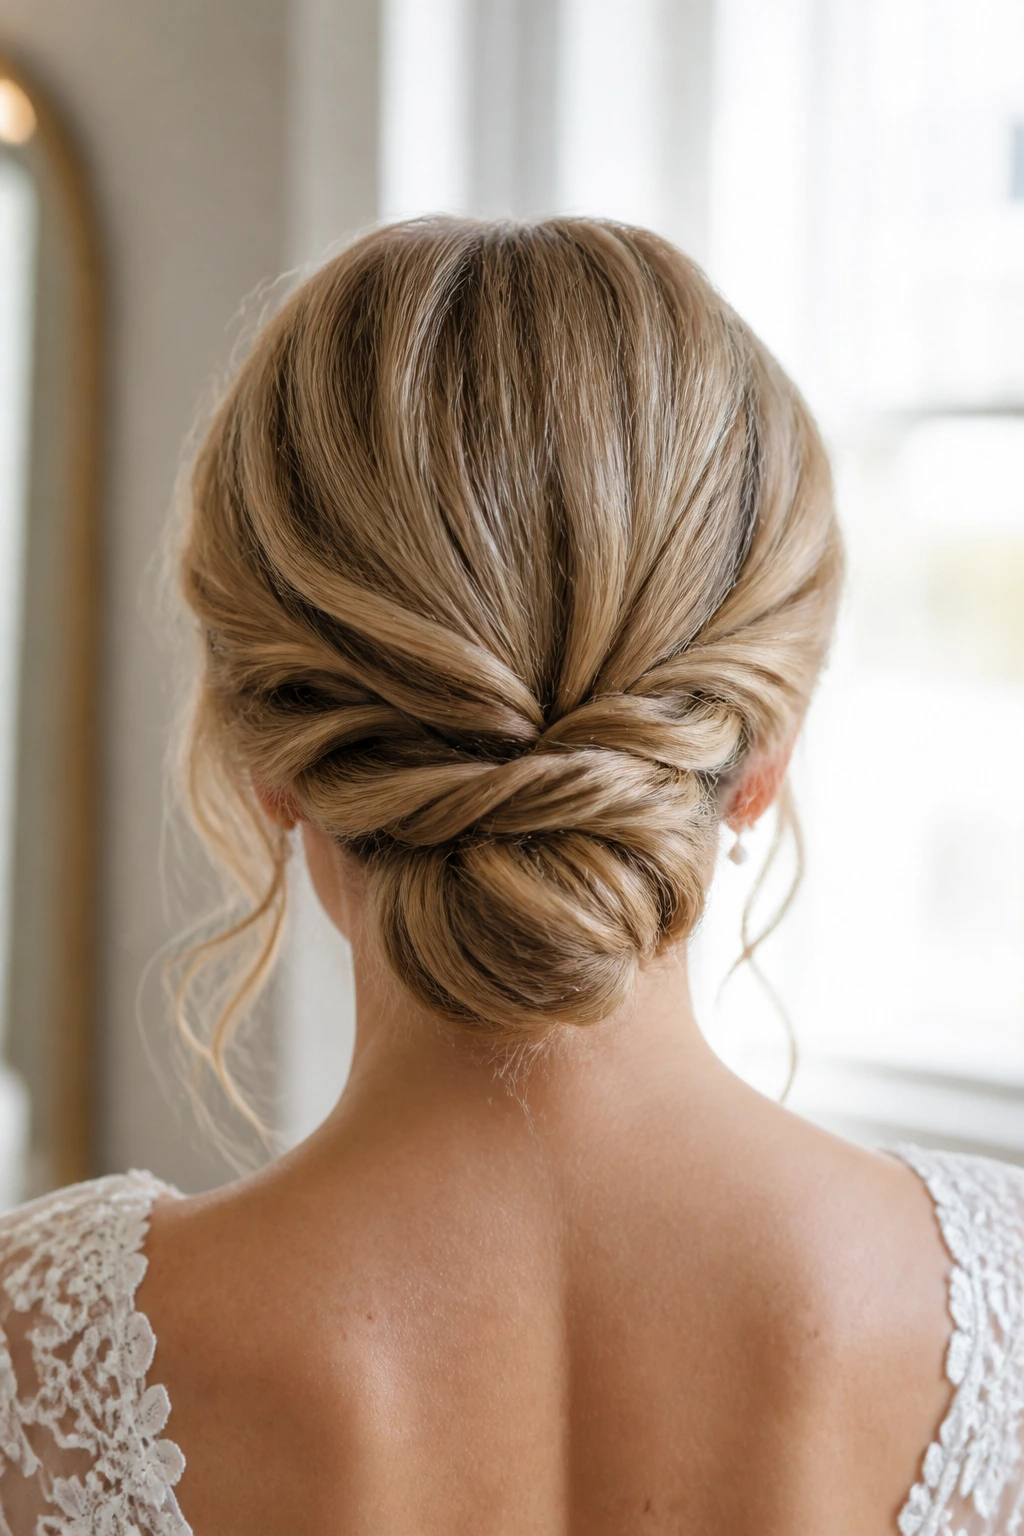
The infinity twist looks intricate, which is good news for brides with thin hair because you can get a lot of visual detail out of not much actual hair. Two sections loop over and under each other in a figure-eight pattern, then tuck into a low finish. The shape creates movement without needing a dense braid.
It is one of the smartest choices if you want something a little less common than a bun or chignon. The looping pattern breaks up thin areas, and the repeated crossing of hair gives the back some texture that reads richer on camera.
I’d call this one medium difficulty. It’s not hard once you understand the path of the sections, but it does need a steady hand. If the hair is very slippery, prep with dry texture spray and let it sit for a few minutes before you start pinning. That pause matters more than people think.
A good infinity twist looks best when the finish is soft and slightly loose, not pulled into a perfect knot. The charm is in the curved lines. Let the ends hide cleanly, then leave the top a little airy so the style has room to breathe.
11. Mini Braided Bun Cluster
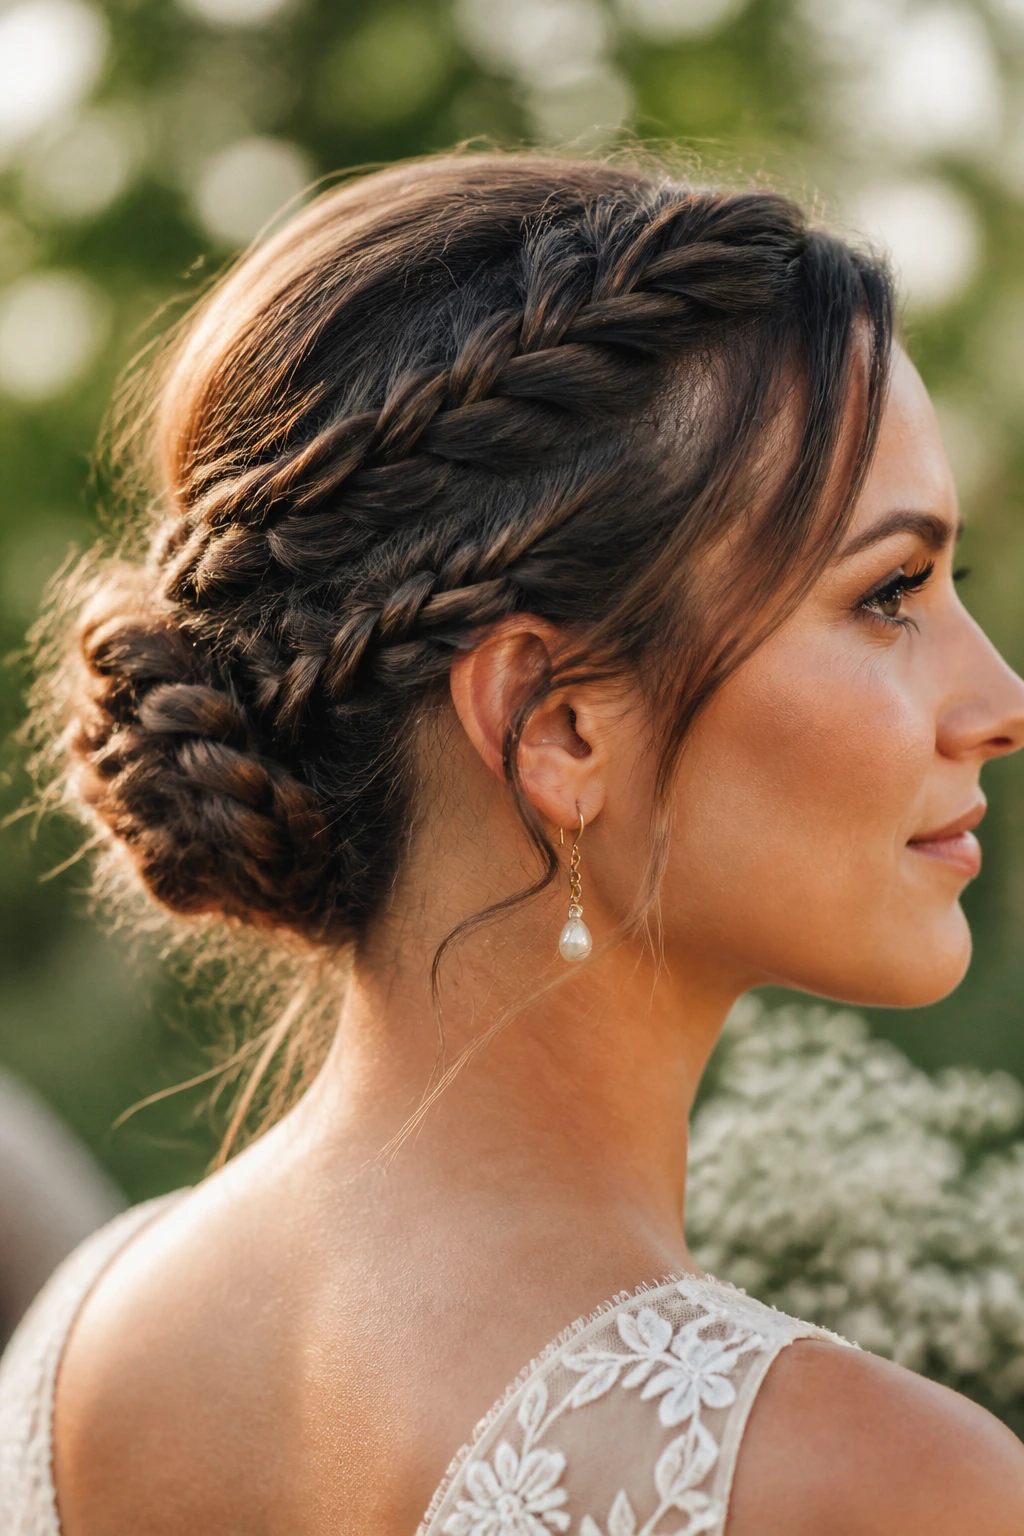
A mini braided bun cluster is exactly what it sounds like: a few small braids gathered together into one rounded finish. For thin hair, that’s useful because tiny braids create the impression of many more strands. They also add grip, which helps the bun stay stable.
This style works when the hair is too fine to make a single big braid look full. Instead of one thick braid that turns skinny halfway through, you make three or four slimmer braids and build them together. The result has texture from every angle. It’s a clever little cheat.
Best use case
This is a smart choice for boho-leaning weddings, outdoor ceremonies, or dresses with a softer silhouette. It can be embellished with tiny flowers, but I’d keep the floral pieces light. Heavy blooms can pull fine hair down fast.
If your hair is fine and layered, ask for the shortest layers to be tucked into the base first. That keeps them from poking out and makes the bun cluster feel tidy. It does not need to be perfect. It needs to look intentional and secure.
12. Sleek Low Bun With a Deep Side Part
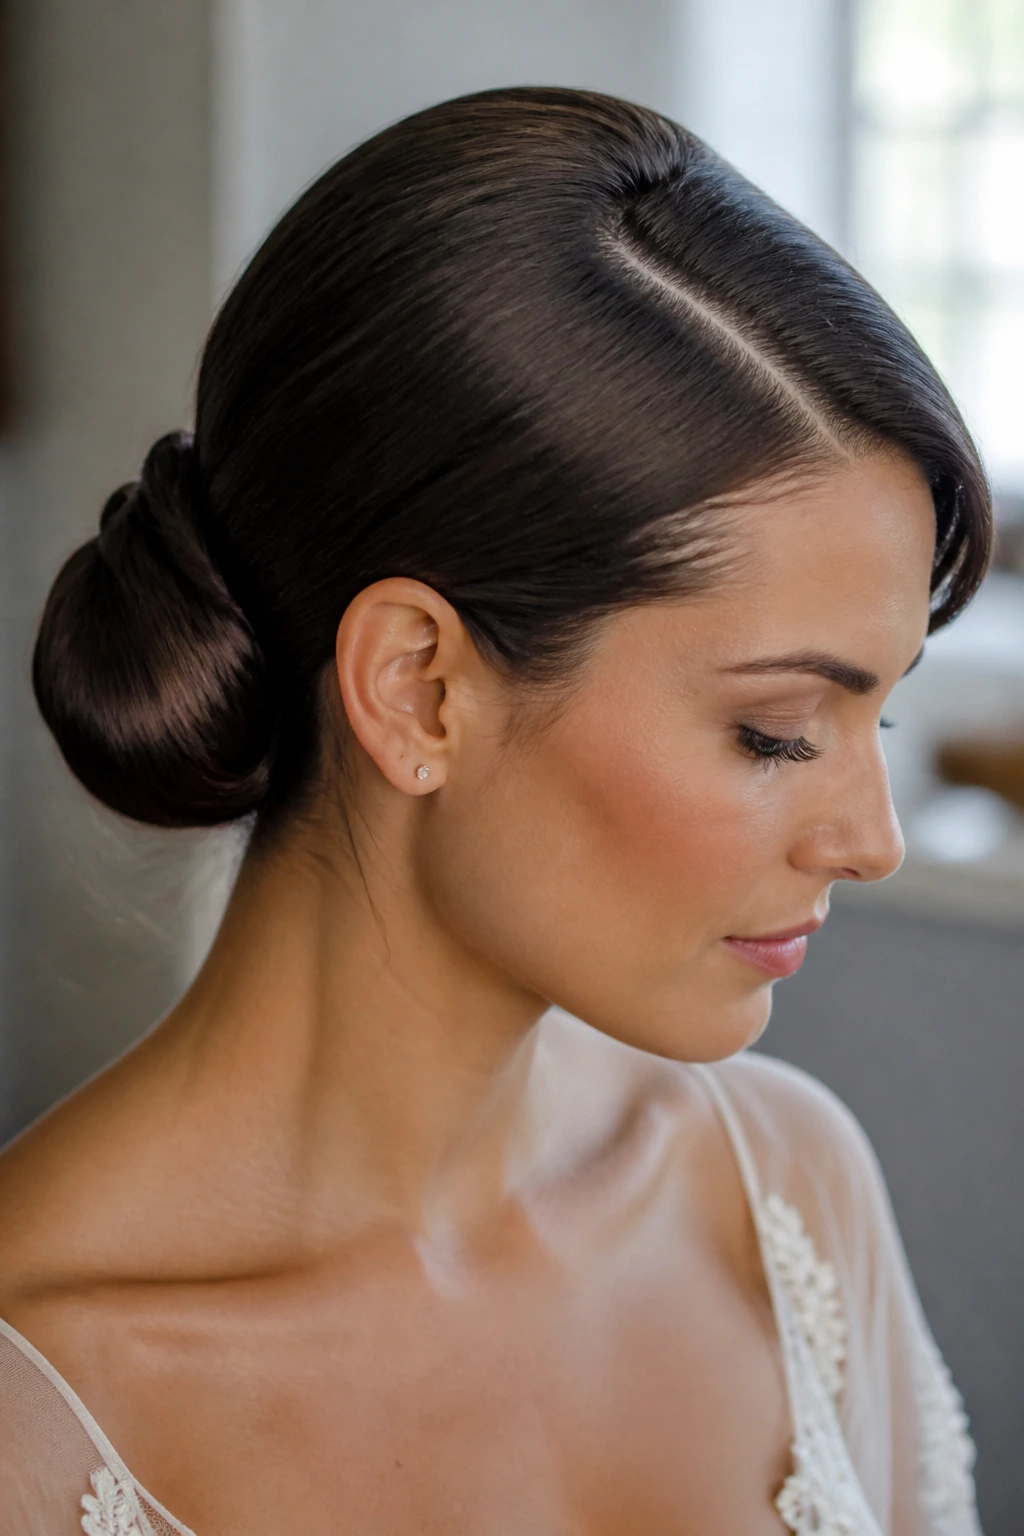
Sleek buns can be risky for thin hair because every flaw shows, but when the part is deep and the bun is low, the style turns elegant instead of bare. The side part gives the front some shape, and the low bun keeps the silhouette compact enough that the hair does not have to pretend to be thicker than it is.
The key is controlled smoothness, not flatness. Use a lightweight cream or smoothing lotion sparingly through the top layer, then comb the hair into the part and pin the bun at the nape. If the hair is too slick, it will slide; if it’s too dry, it will frizz. You want the middle ground.
This style shines with dramatic earrings and clean dress lines. It also photographs well from the side because the bun sits low enough to show the neck. If you’re worried the look will feel too severe, leave a tiny bit of softness around the ears or a narrow wave at the front.
One thing I’d avoid here: too much shine serum. On thin hair, it can make the head look smaller and the bun look thinner. Use less than you think.
13. Bubble Ponytail Chignon
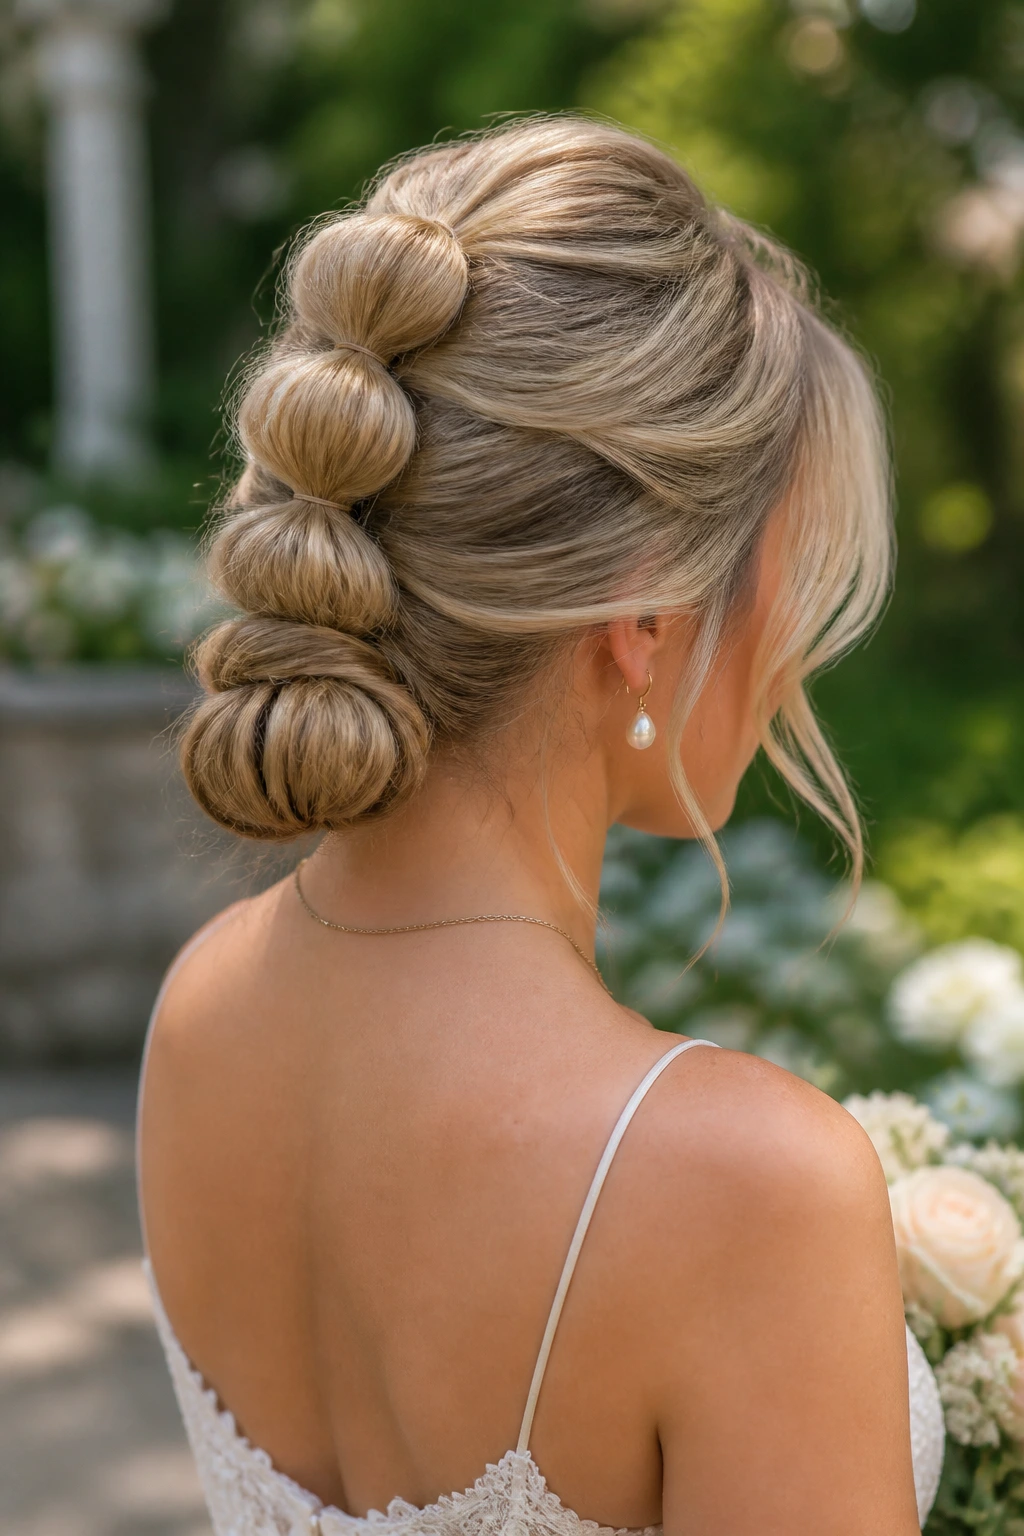
A bubble ponytail chignon gives fine hair more visual mass before it becomes a bun. You tie the ponytail in small intervals with clear elastics, then gently puff each section so it looks rounder. After that, the tail is wrapped into a chignon or tucked coil at the nape.
This is one of my favorite tricks for brides whose hair looks limp in one long line. The bubbles create built-in texture, and that texture carries into the final bun. A standard ponytail can expose how little hair is there. A bubble ponytail hides that by turning the length into shape.
Keep the elastics spaced evenly, maybe every 1 to 1.5 inches, depending on length. Then pinch each section softly from the sides to widen it. Do not pull it so hard that the bubbles go thin again. The goal is soft volume, not a cartoon shape.
It works especially well with medium-length fine hair because the bubble sections add interest before the final wrap. If your wedding look needs a playful but still polished edge, this style gives you that without asking the hair to do too much.
14. Wrapped Ponytail Into a Bridal Knot
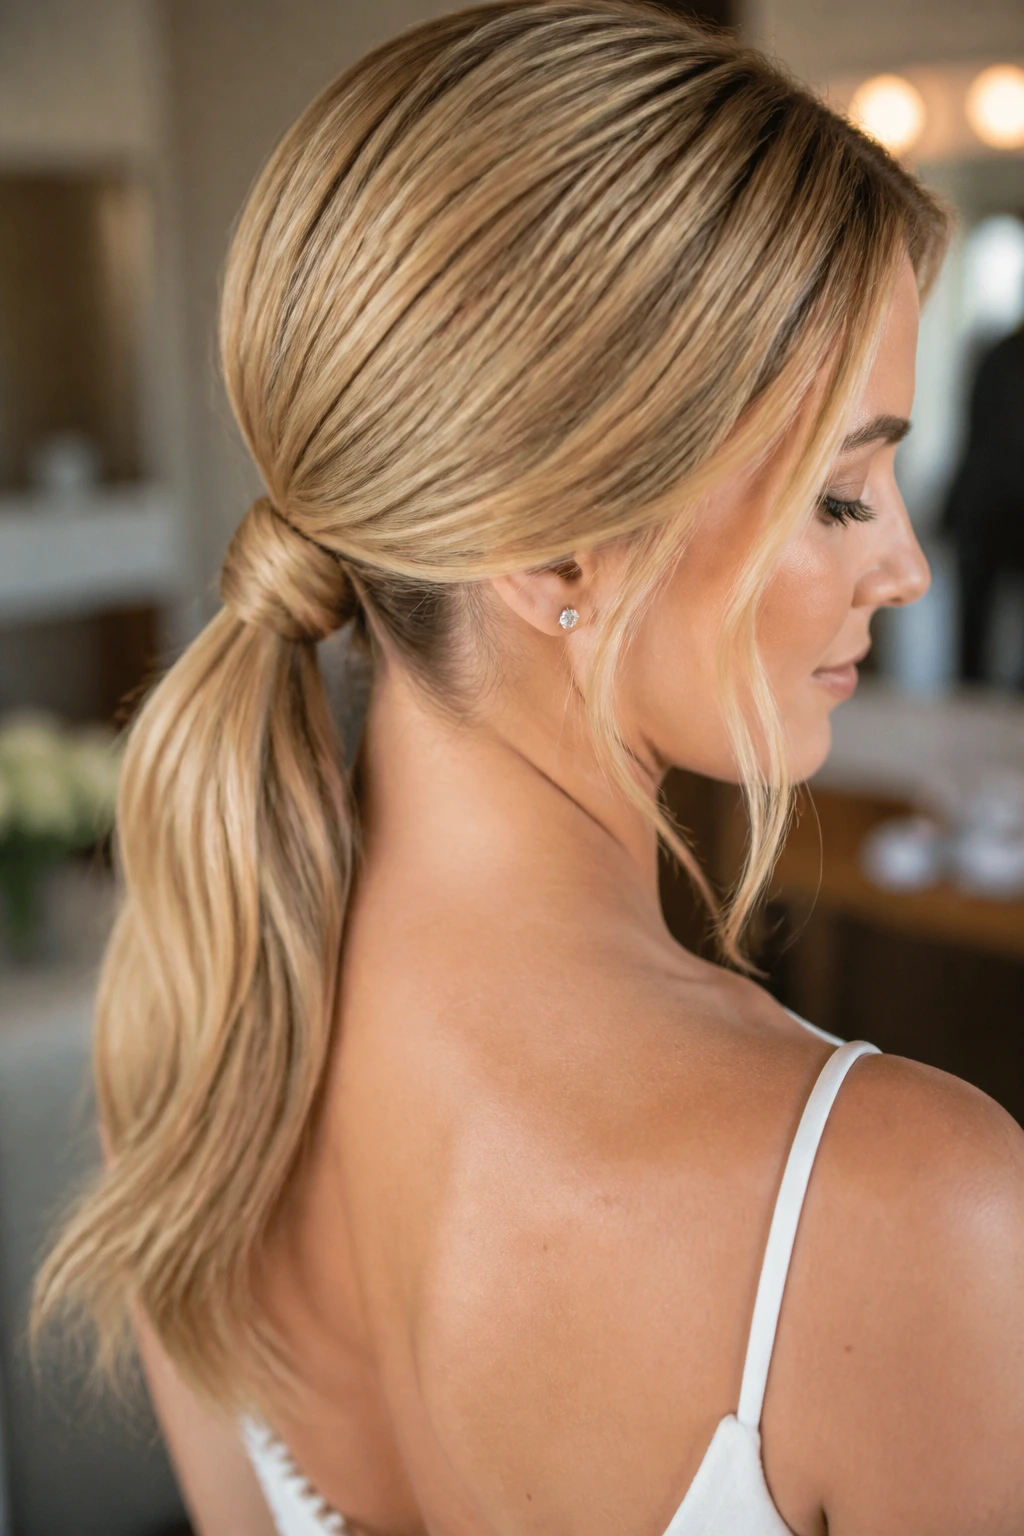
A wrapped ponytail into a knot is one of those styles that sounds plain until you see it done well. Then it looks sleek, controlled, and surprisingly rich. The ponytail is pulled low or mid-low, wrapped with a small section of hair, and tucked into a knot or coil that sits right at the nape.
The advantage for thin hair is simple: a ponytail gives you a strong base. Once that base is in place, you can build a knot around it with far more security than you’d get from loose hair alone. The wrap hides the elastic and makes the finish look more expensive than a basic ponytail would.
Small but useful detail
If the hair is very fine, make the ponytail slightly textured before wrapping. A tiny bit of backcombing at the tail base gives the knot more body. Then pin the wrapped section from underneath so the shape stays tight.
This style loves a long earring and a clean neckline. It also works if you need the hair to survive a long day without looking too fluffy by the end. There’s a reason stylists keep coming back to ponytail-based updos. They stay put.
15. Fluffy Faux-Hawk Updo
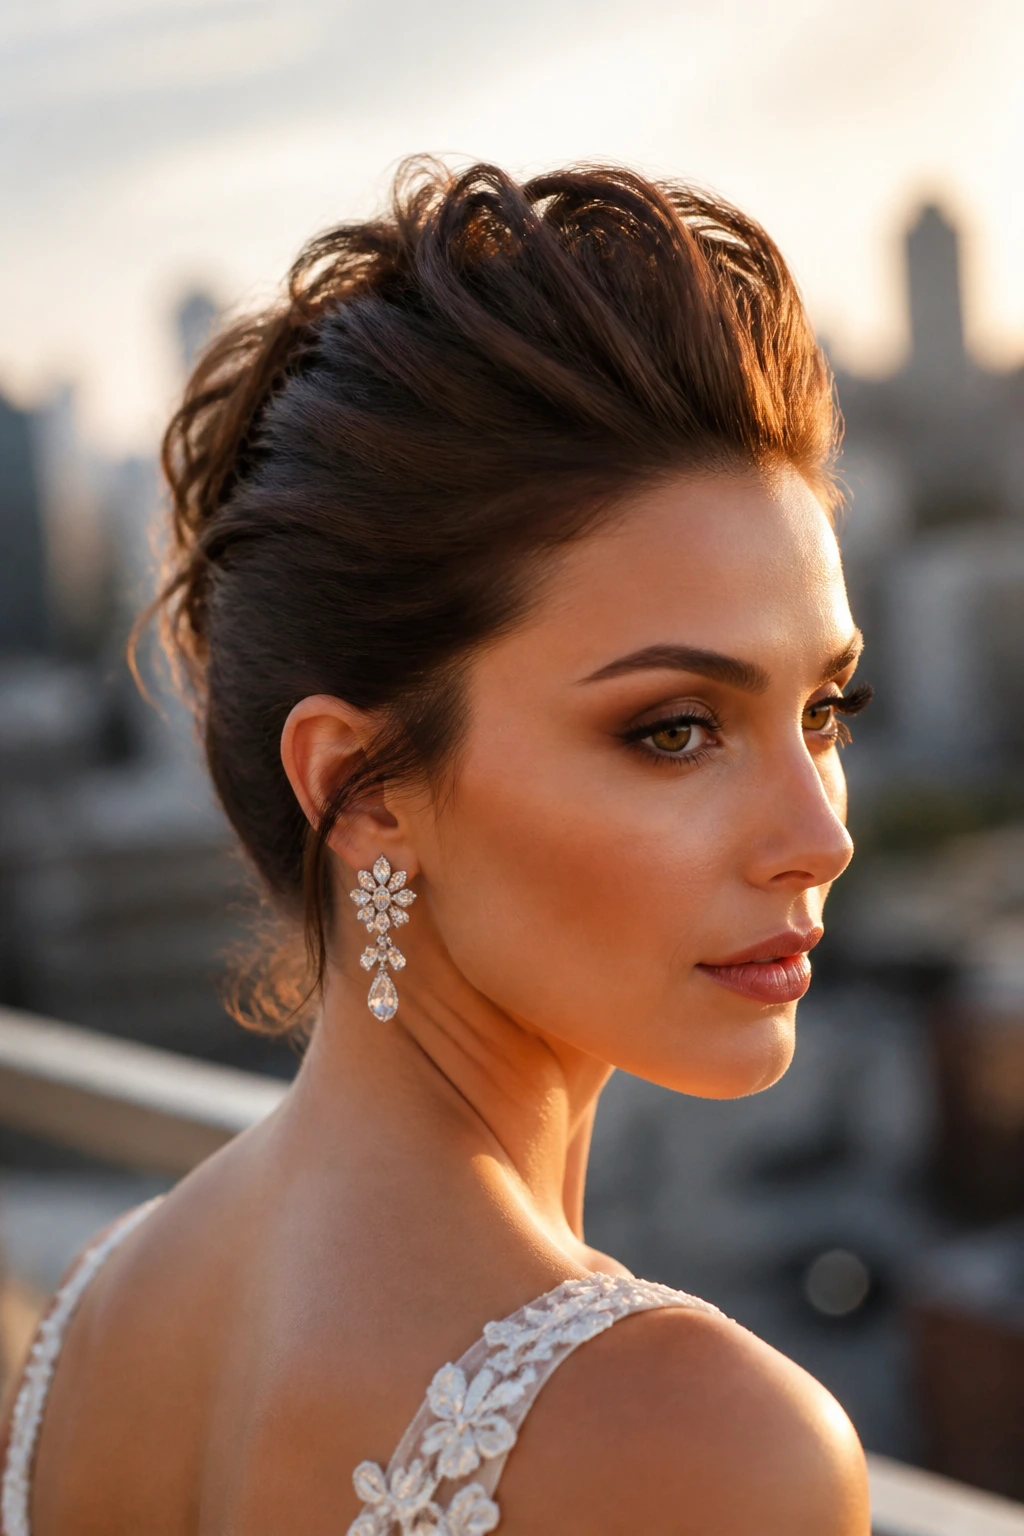
A faux-hawk sounds bold because it is. The good news is that thin hair can handle it if the center ridge is built carefully and the sides are pinned flat enough to create contrast. The result is a lifted, modern bridal style that gives the illusion of more hair because the eye tracks the central height.
This is the style I’d choose for a bride who hates looking too prim. It has edge. It also gives you more room to fake thickness because the shape itself is dramatic. You can use small cushions, hidden pinning, or a bit of clip-in support along the center if needed.
How to keep it from looking too spiky
The center should be soft, not stiff. Pull the ridge upward in a few rounded sections, then pin each section securely before teasing the top edge lightly. The sides should be smooth but not plastered down. If they’re too flat, the whole style starts looking harsh.
A faux-hawk updo pairs well with modern gowns, deep necklines, and strong makeup. It does not need a lot of extra decoration. A few metallic pins or a narrow comb are enough. The shape is the statement.
16. Pinned-Curl Vintage Updo
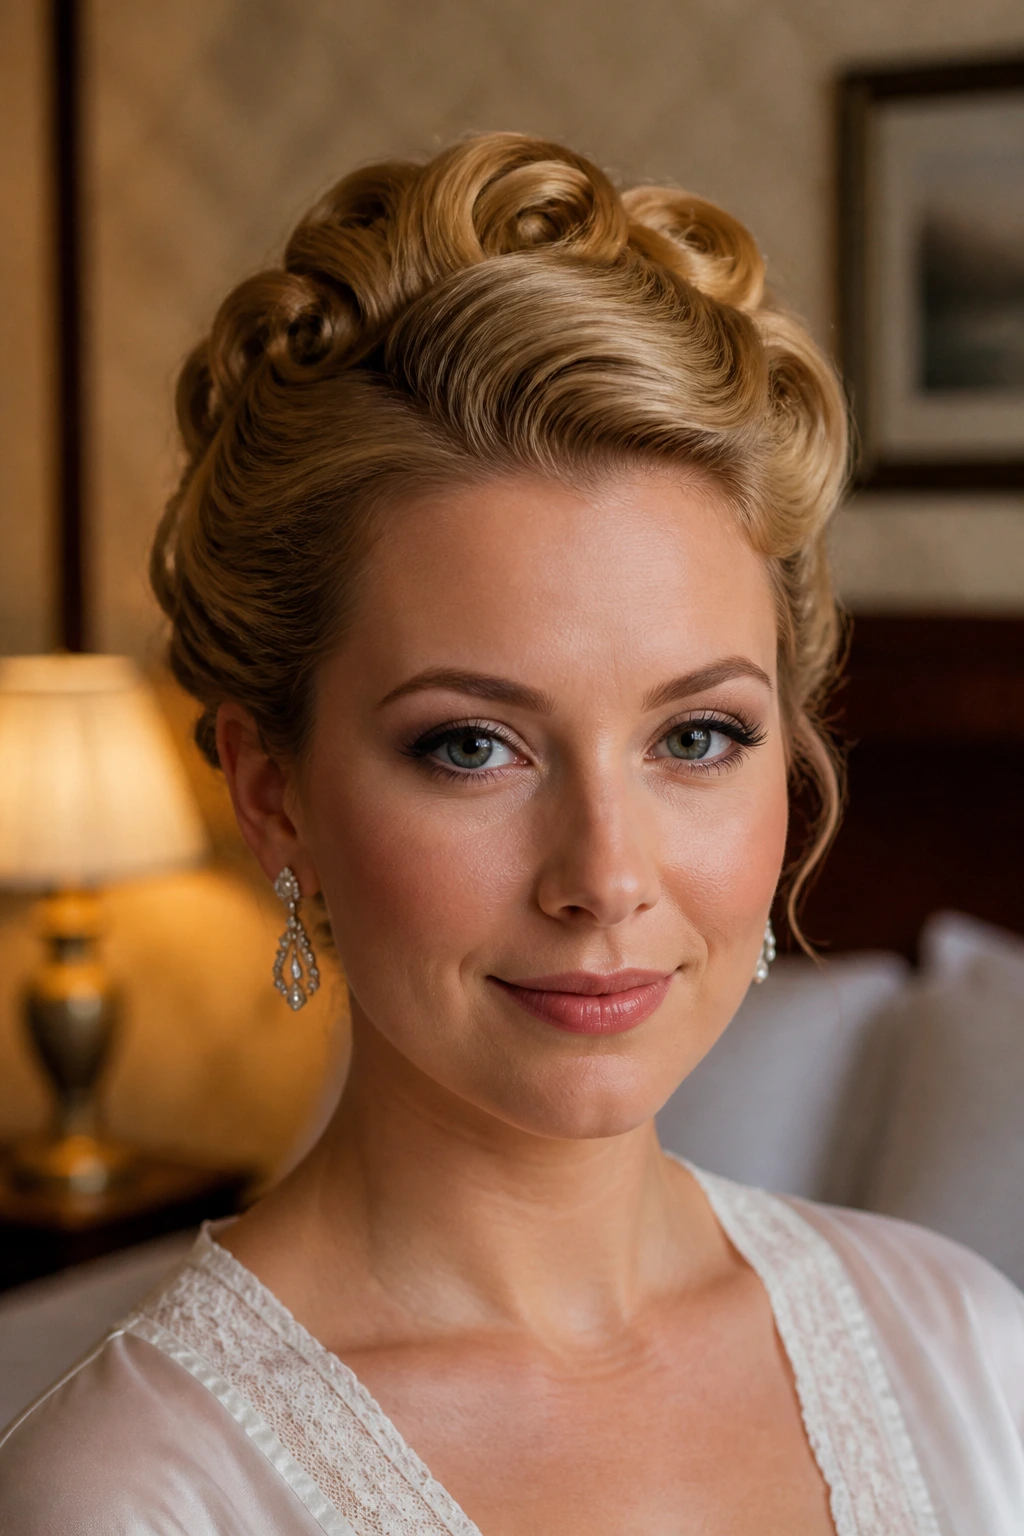
Pinned curls are a gift to thin hair because each curl acts like a tiny padded unit. Instead of asking one big bun to carry the whole look, you build the updo from several curled sections that are pinned into waves and rolls. It has an old-Hollywood feel without needing thick hair.
The trick is setting the curls with enough shape that they stay round. If they’re too loose, they’ll flatten. If they’re too tight, the whole style can look hard. Medium barrel curls or hot roller sets are useful here because they create a curl with enough body to pin.
I love this for brides who want softness around the face and a little glam in the back. The pinned curls can be arranged asymmetrically or in a more centered cluster, depending on the dress and the veil. Thin hair looks richer when it’s broken into smaller sculpted pieces like this.
A comb of crystal pins or pearl accents can sit right where the curls overlap. That’s the nice part. The style gives the accessories a place to rest instead of floating on top.
17. Half-Up to Full-Up Transition Bun
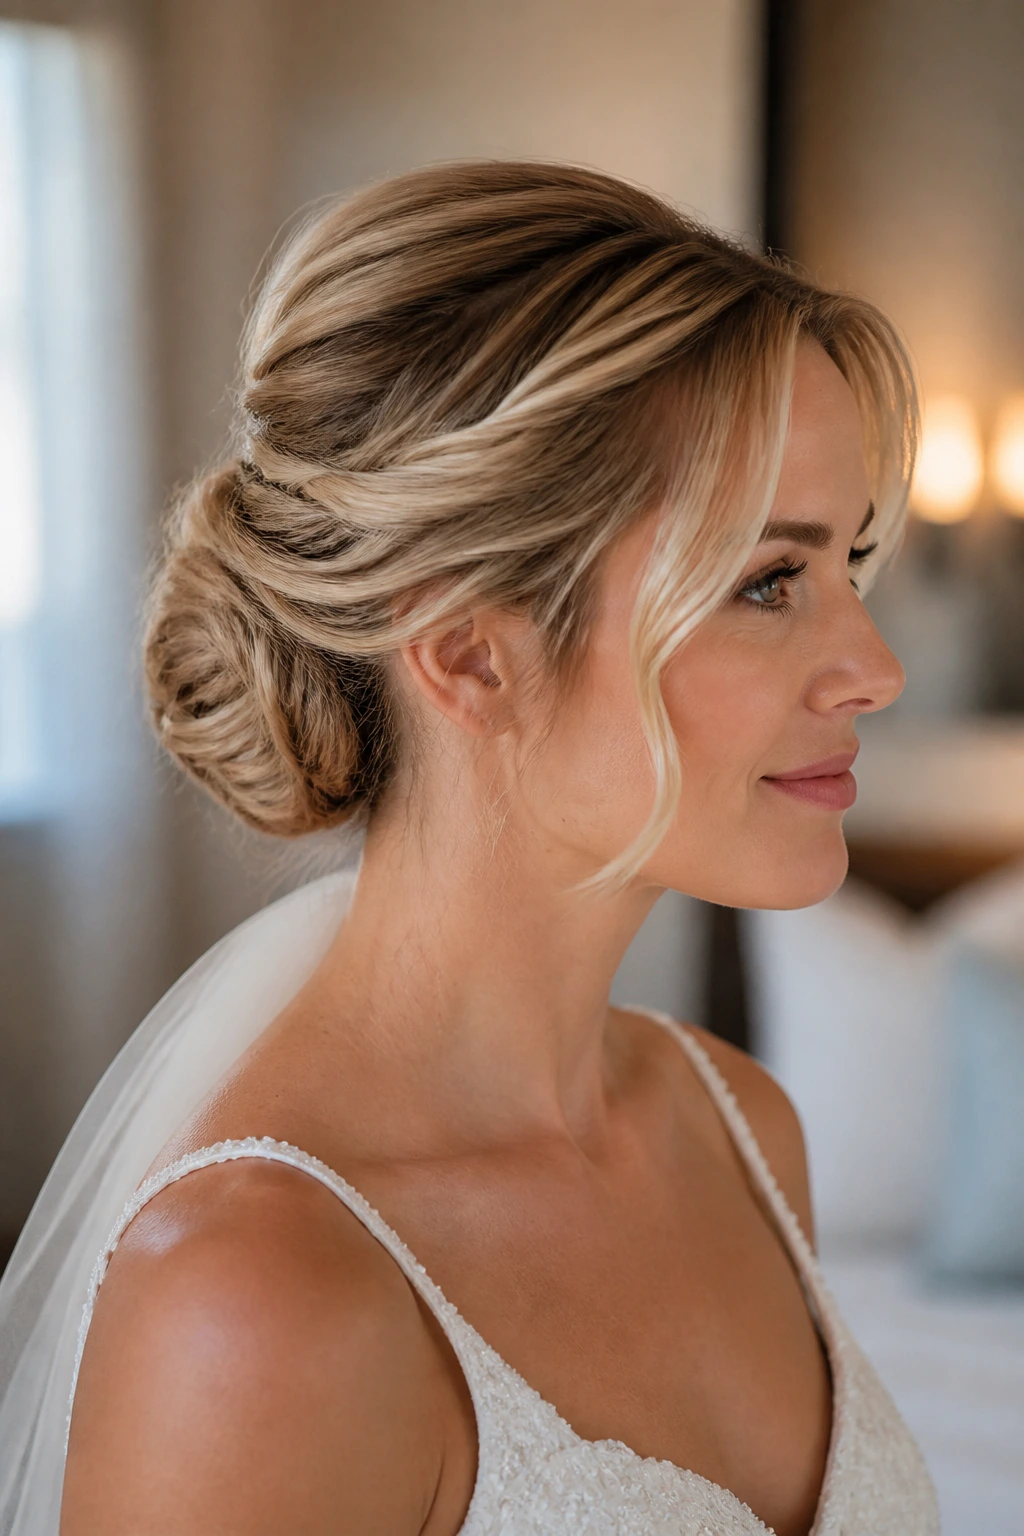
Some brides love the feeling of hair up but don’t want to look fully pulled back. The half-up to full-up transition bun solves that. You start with the top half gathered and secured, then fold or tuck the lower section into a soft bun or coil at the back.
This style is useful for thin hair because it builds in stages. You’re not asking one section to do everything. The half-up top creates lift, while the lower tuck adds bulk and gives the style a broader shape. It’s a nice compromise when you want softness around the face.
Who this suits
Brides with shoulder-length hair often love this one because it feels fuller than a strict bun but more secure than wearing the hair down. It also handles veil placement well, especially if the veil sits below the top section and above the bun.
Leave some movement at the sides. That is what keeps the style from reading flat. A gentle wave or bend through the loose pieces around the temples can make the whole thing feel less rigid. Thin hair looks better with a little air in it anyway.
18. Floral Anchor Bun With Hidden Pins
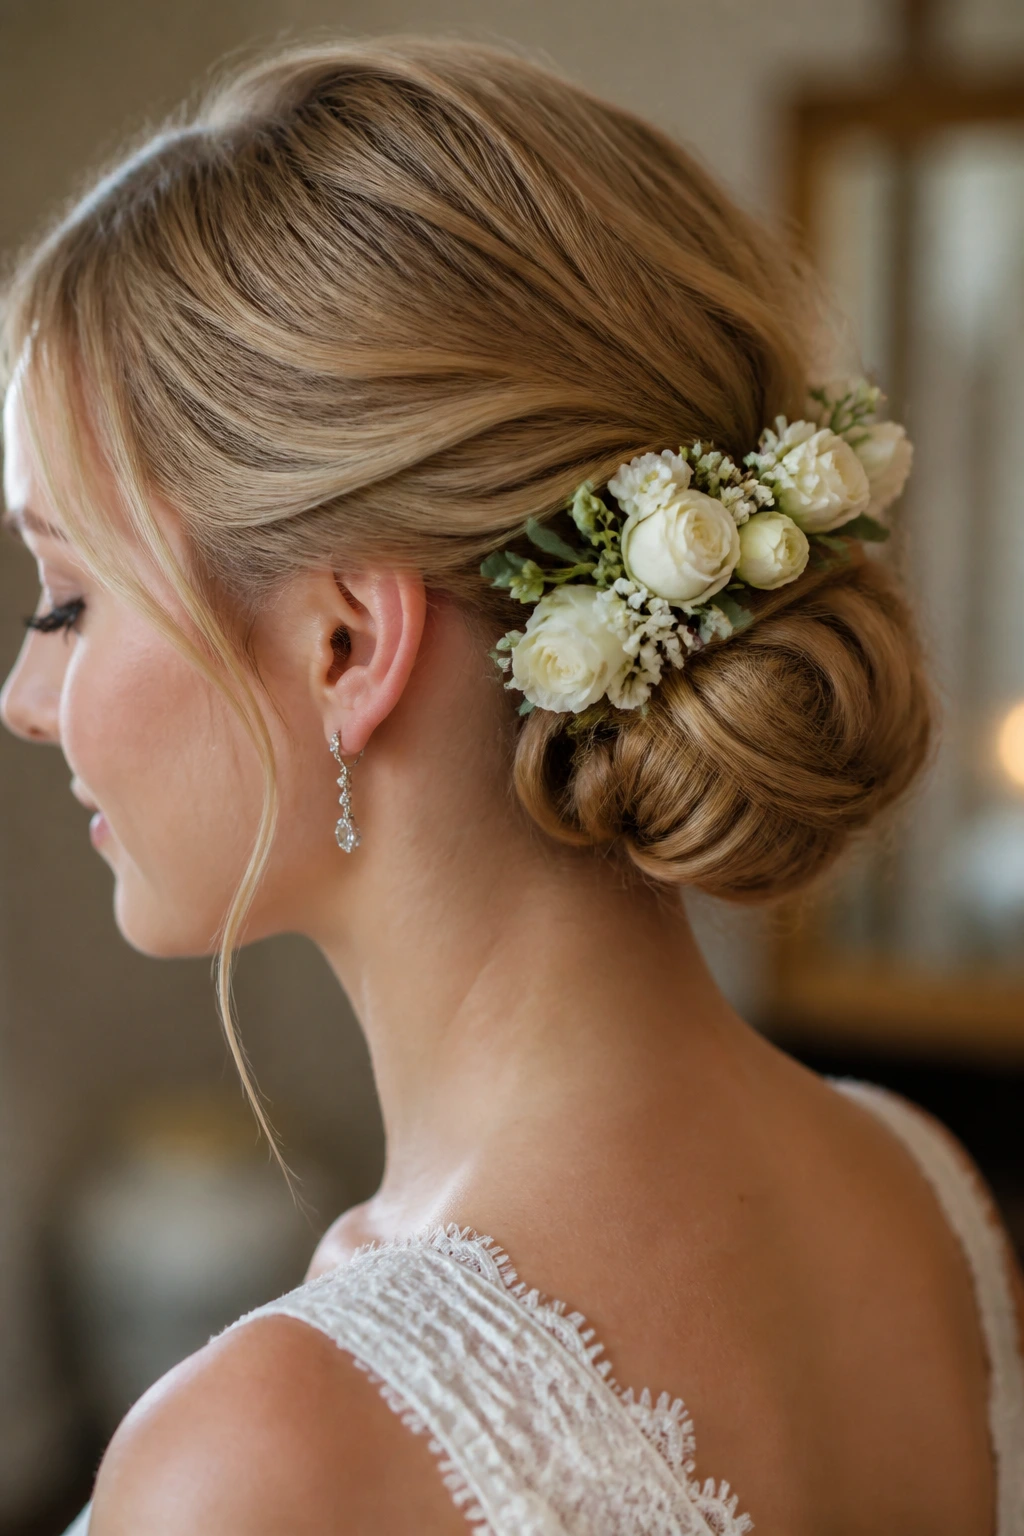
A floral anchor bun is built for brides who want flowers in the hair, not flowers sitting on top of hair that can’t hold them. The bun itself needs a sturdy base first. Then the blooms are wired or pinned into the shape, usually in a small cluster on one side or tucked just above the nape.
For thin hair, the important part is the anchor. Big blossoms can drag the style down if there isn’t enough support. I’d use lightweight flowers—spray roses, small orchids, waxflower, or tiny buds—rather than heavy stems. Short stems and extra pins are your friends here.
A low bun works best because it gives the flowers a natural landing spot. The texture of the bun helps the pins grip, and the floral pieces can be tucked into the overlaps instead of perched on the surface. That matters a lot when the hair is fine and the event lasts all day.
Keep the rest of the style understated. If the flowers are doing the visual work, the bun should stay calm and secure. Thin hair rarely benefits from too many competing details.
19. Soft Knot-and-Tuck Updo With Veil Space
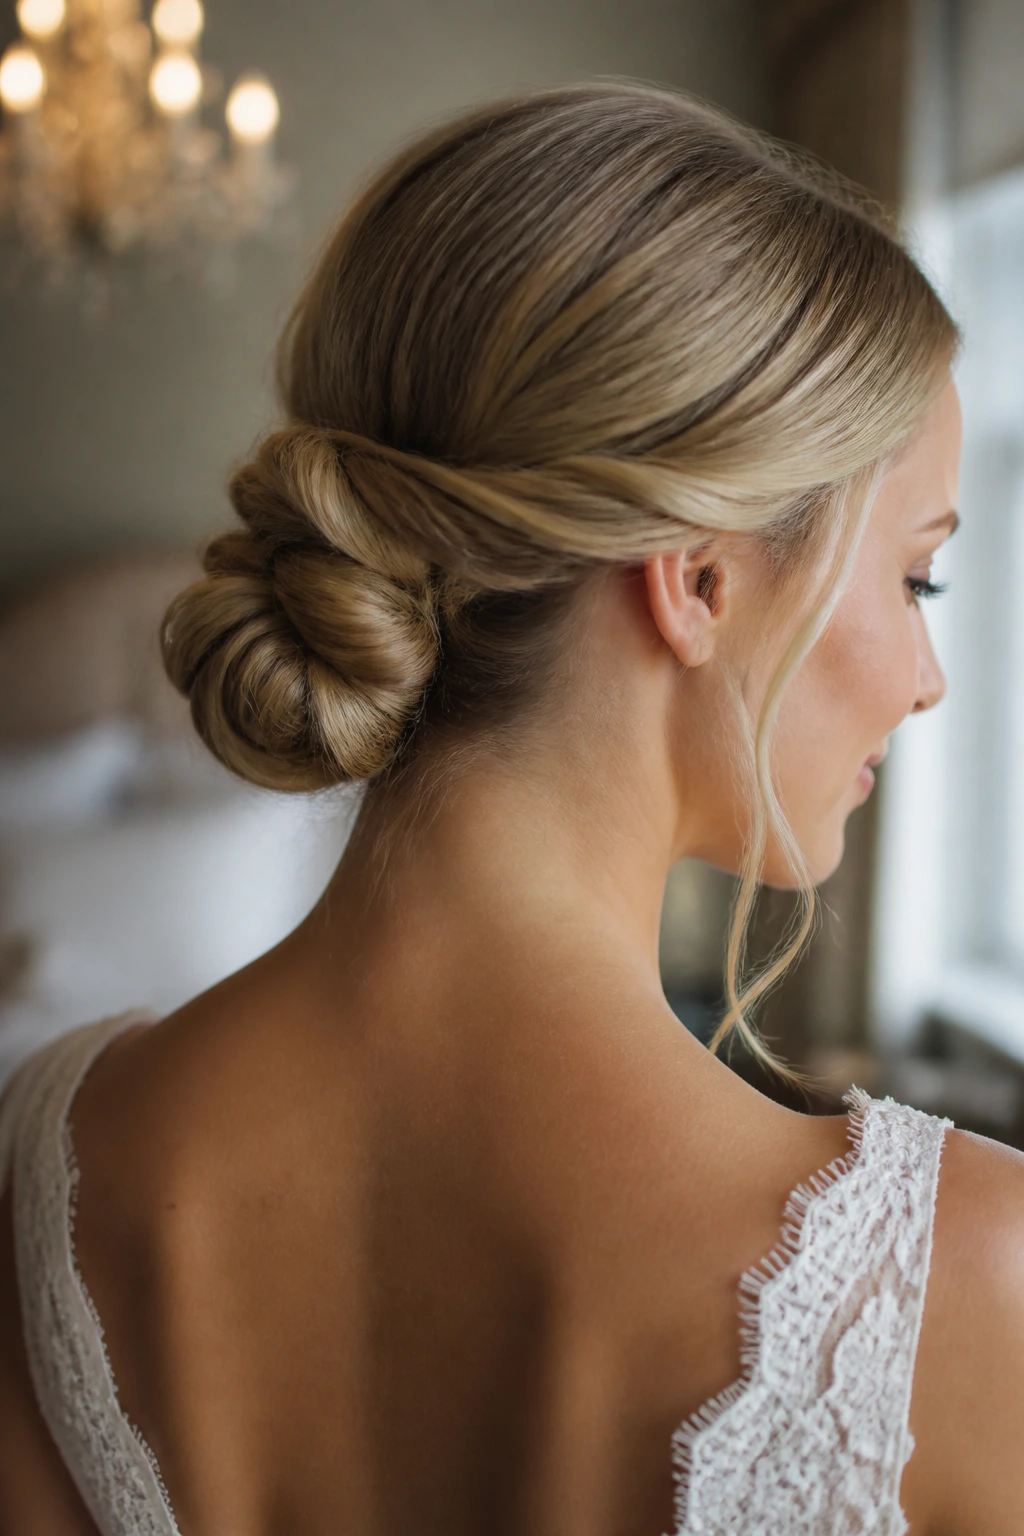
A knot-and-tuck updo is one of the most useful bridal shapes for thin hair because it creates a clean silhouette without demanding a lot of thickness. Hair is gathered low, twisted into a knot, then the remaining ends are tucked around it and pinned in overlapping sections. The result is soft, rounded, and easy to veil.
What I like most here is the space it leaves. The center of the back stays open enough for a veil comb, but the surrounding hair gives the comb something stable to bite into. That means less wobble and fewer emergencies right before the ceremony.
This style is also forgiving if your hair is a little uneven in length. Tucked ends vanish neatly, and shorter layers can be hidden into the knot with a few extra pins. It’s not flashy. It doesn’t need to be. The shape is enough.
If you want one style that balances ease, softness, and good veil placement, this is probably it. It’s the kind of updo that looks neat in person and still has enough texture to survive a close-up.
The Bridal Hair Tools That Actually Matter
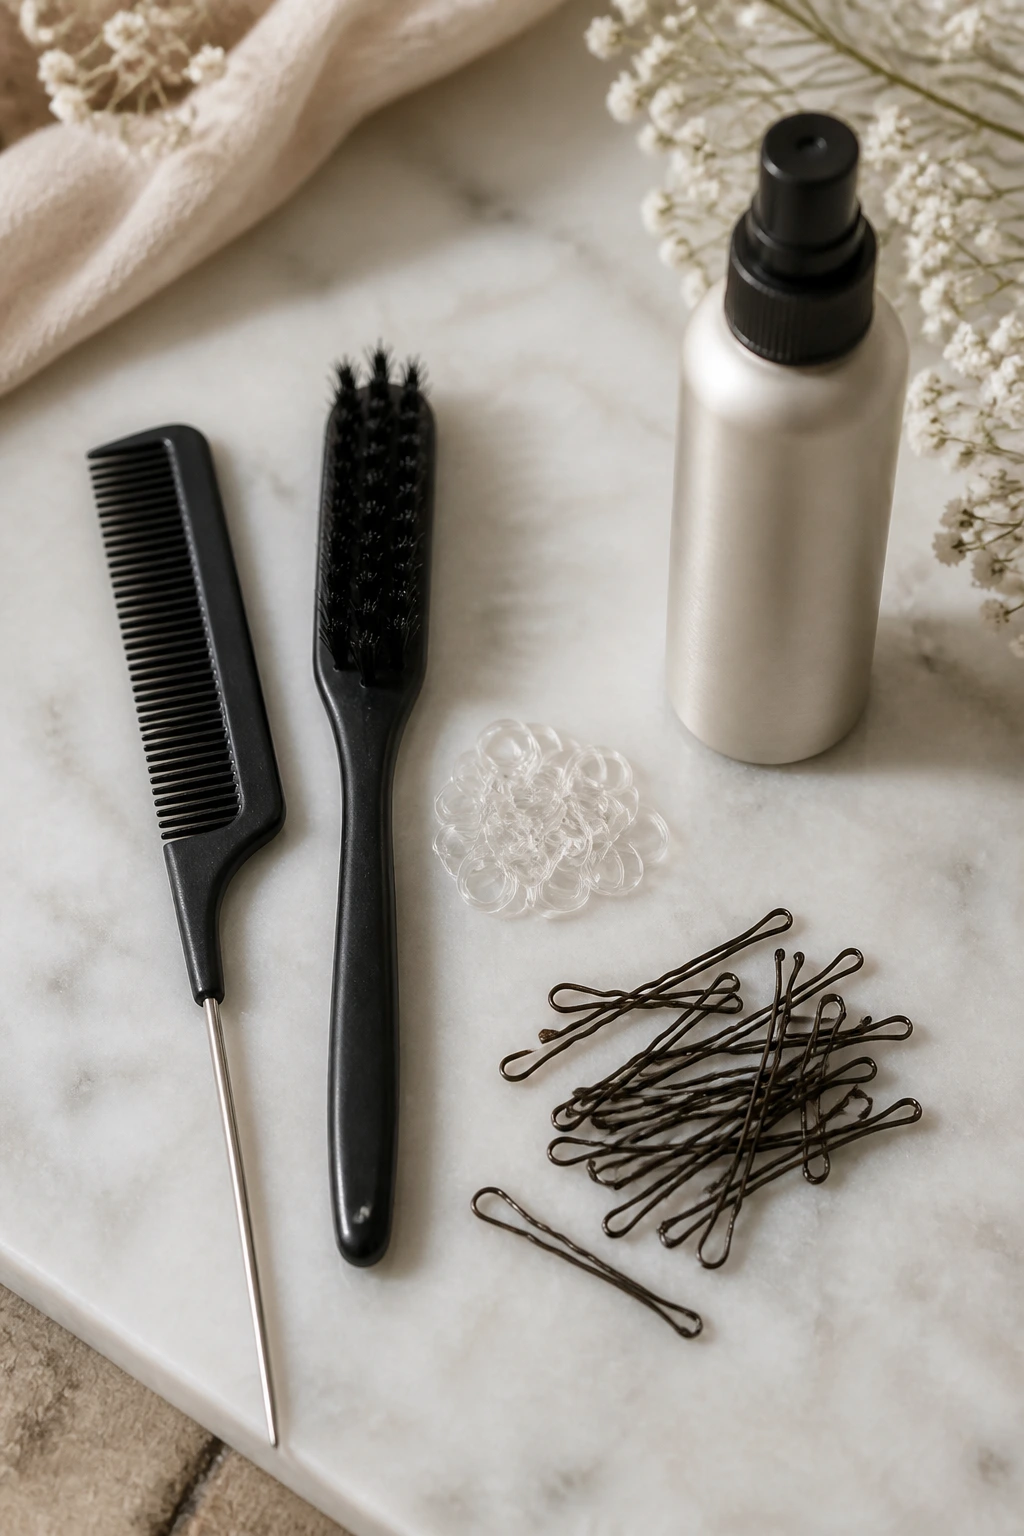
You do not need a drawer full of gadgets. You need the right few things, and they need to be the kind that grip fine hair instead of skating over it.
- Tail comb: Use it to make clean parts and lift small sections at the crown without ruining the surface.
- Teasing brush or fine-tooth backcomber: Handy for adding root lift where the style needs hidden support.
- Volumizing mousse: A light mousse at the roots helps thin hair hold shape once it’s blow-dried.
- Texturizing spray: This adds friction so pins don’t slide. Use it before pinning, not after the style is already built.
- Small clear elastics: Essential for bubble sections, mini braids, or holding a twist before you pin it.
- Bobby pins in two shades: One shade for the hair, one close to the hair’s highlight or lowlight tone. Matte pins usually grip better than shiny ones.
- U-pins: These are better than bobby pins for some buns and folds because they lock larger sections without leaving a harsh dent.
- Hair donut or padded bun insert: Useful when you want a fuller chignon without layering in too much fake hair.
- Clip-in filler or one small weft: A good option if the hair is truly sparse and you want more substance around the back.
- Strong-hold hairspray: Use a flexible-to-strong formula so the finish stays touchable but controlled.
- Hot rollers or a 1-inch curling iron: Helpful for soft bends, crown lift, and the kind of curl that pins well.
- Hair net: Not glamorous, but useful under certain buns when you need extra control.
Smart Prep and Hairpiece Choices for Fine Hair
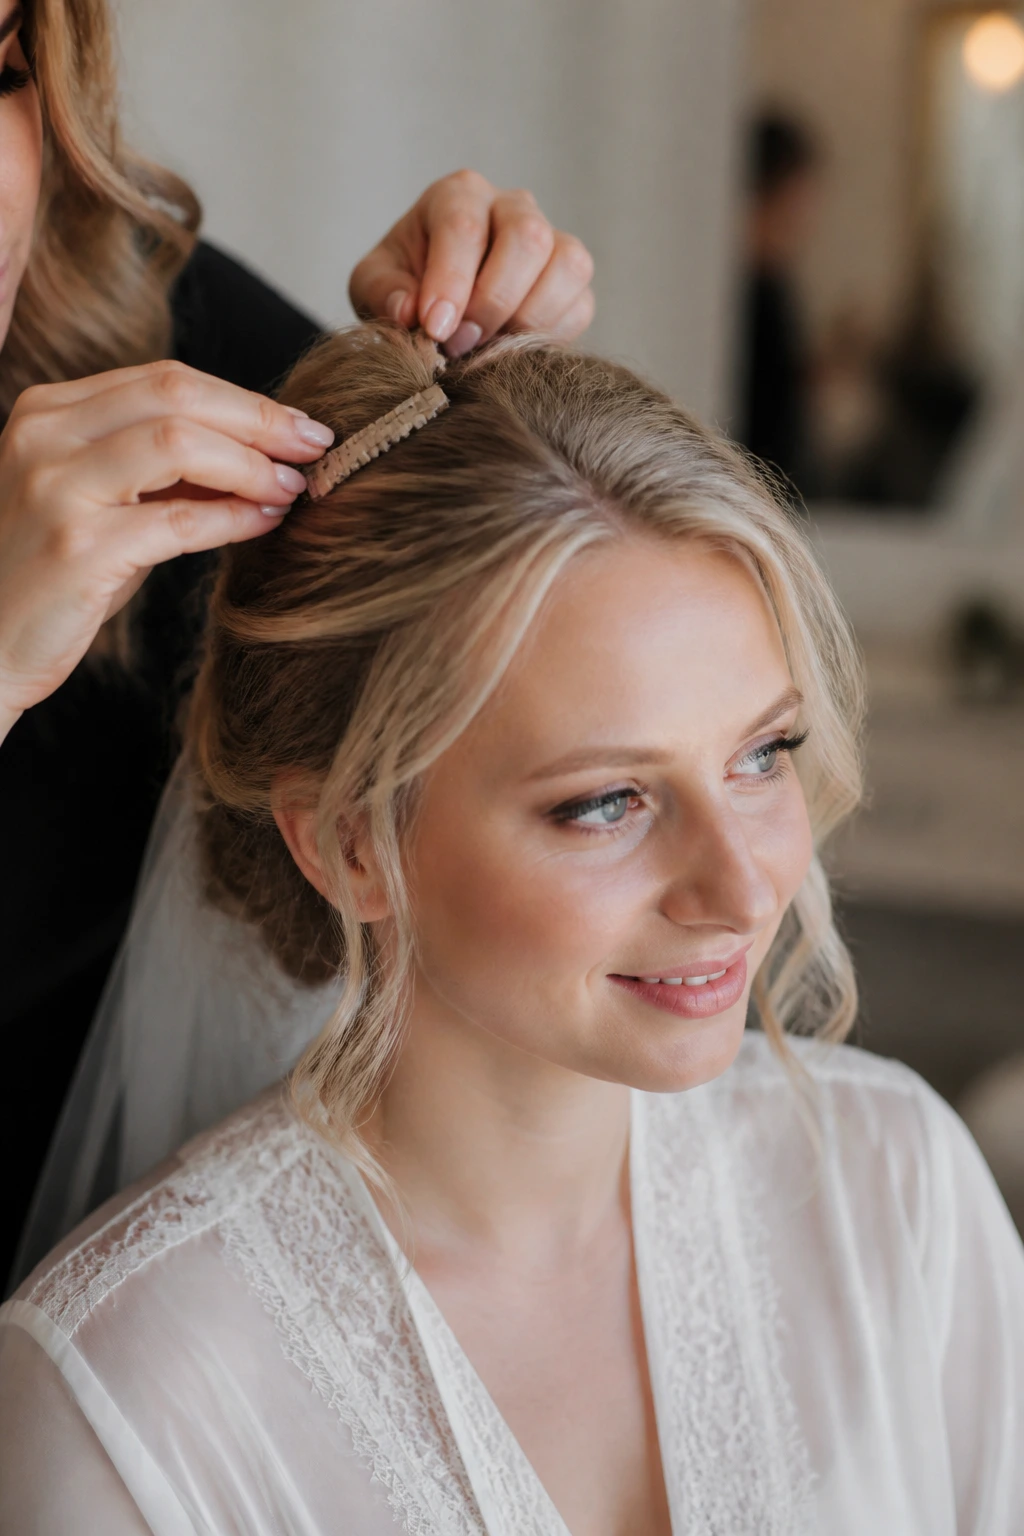
The day before the wedding matters more than the morning-of panic spray. Thin hair usually behaves better when it’s washed the day before, lightly conditioned from mid-length to ends, and dried with some root lift. Freshly washed hair can be too soft and slippery. It looks clean. It does not always hold.
If you’re buying clip-in hairpieces, pay attention to density and texture, not just color. A human-hair piece usually blends more naturally because you can heat-style it to match your own finish. Synthetic pieces can work in some cases, but many of them look too shiny under daylight or refuse to blend with a soft wave pattern. That contrast gets obvious in photos.
A lot of brides also overbuy hair. Don’t. One modest weft or a small filler piece is often enough for thin hair. Four bulky pieces can make the style feel heavy and obvious. You want support, not a helmet.
For accessories, pick combs and pins with teeth or loops that can actually grab hair. If the accessory is smooth on the underside, it will slide unless the base is padded and pinned first. Fresh flowers should be lightweight and short-stemmed. Heavy blooms drag fine hair down, and I’ve seen a pretty arrangement go flat in under an hour.
How to Wear These Updos With a Veil, Jewelry, and Neckline
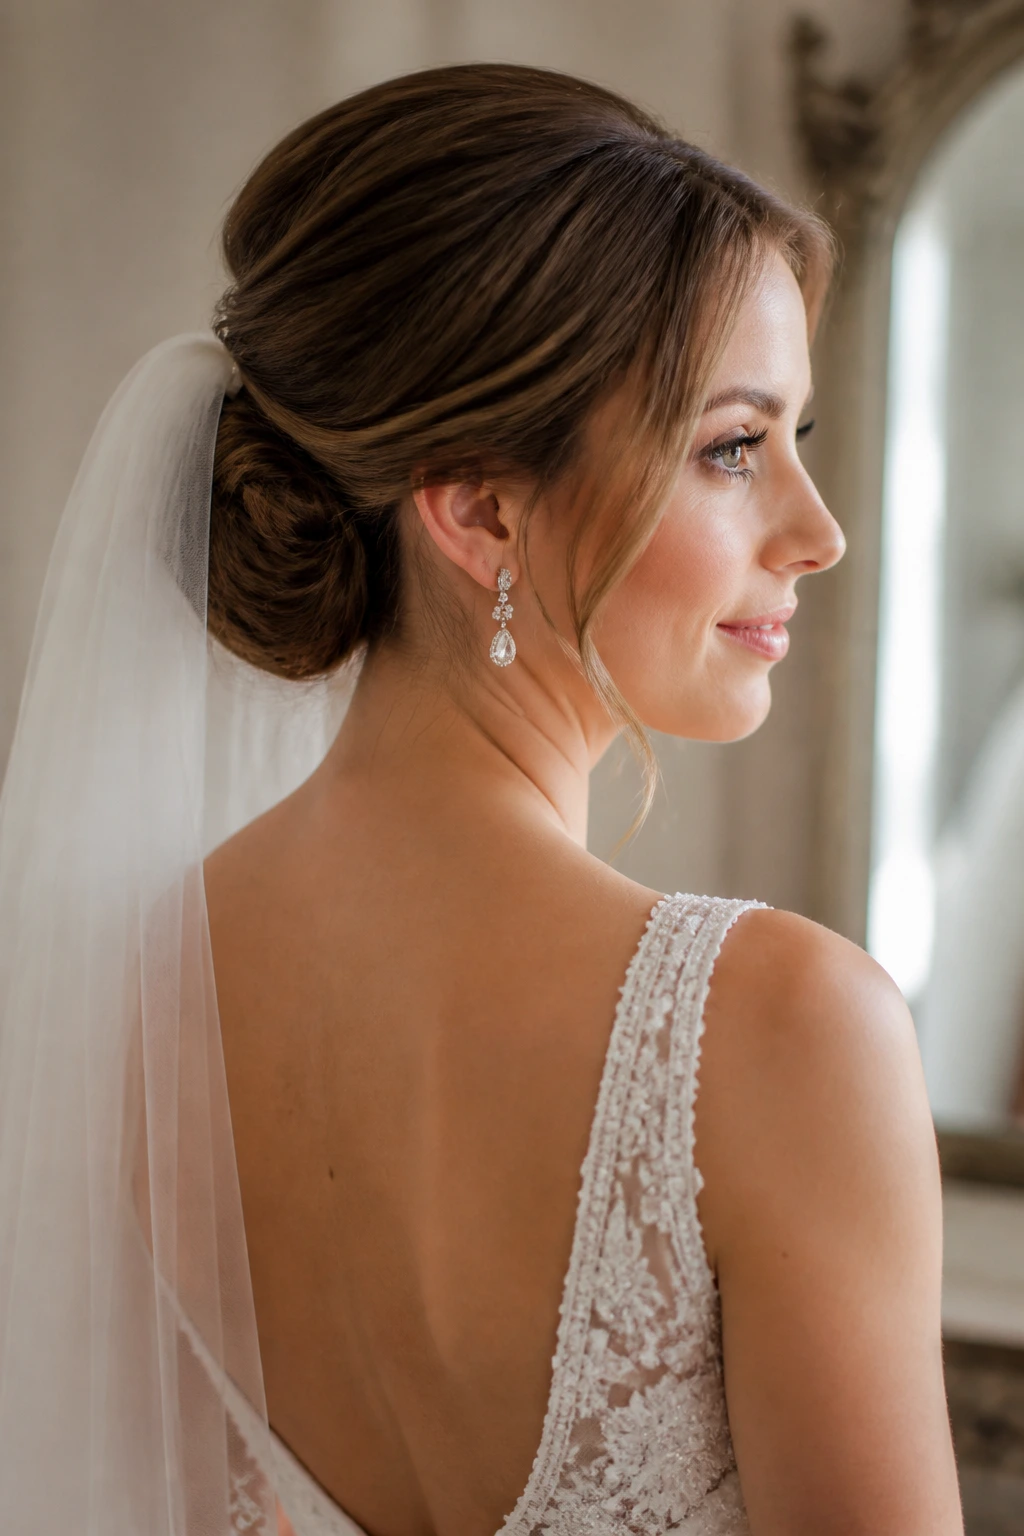
Placement matters more than ornament. If your dress has a low back, put the main visual weight low at the nape so the hairstyle doesn’t compete with the gown. If the dress is high-necked or has beading around the collar, a softer bun or twist keeps the neckline from feeling crowded.
Veil: A comb placed above a padded bun or tucked into a braided seam stays put better than one stuck into loose, airy hair. If the veil is cathedral length, keep the base low and sturdy. If it’s a blusher, make sure the front sections are soft enough that lifting the veil won’t wreck the shape.
Earrings: Big earrings work with sleeker buns and side parts. Smaller pins or studs can pair with fuller textures, floral accents, or braided halos. If both the hair and jewelry are shouting, one of them needs to calm down.
Neckline: Strapless and off-the-shoulder dresses can handle more crown lift. A high neckline usually looks better with a lower, softer knot or French twist. And if you’re wearing a dramatic cape, let the hair stay clean and contained. The outfit already has a lot to say.
Photo finish: Check the style from the side and from above. A bridal updo that looks good only from the front is half-finished. The back has to read clean, full, and anchored.
Small Tweaks That Change the Whole Result
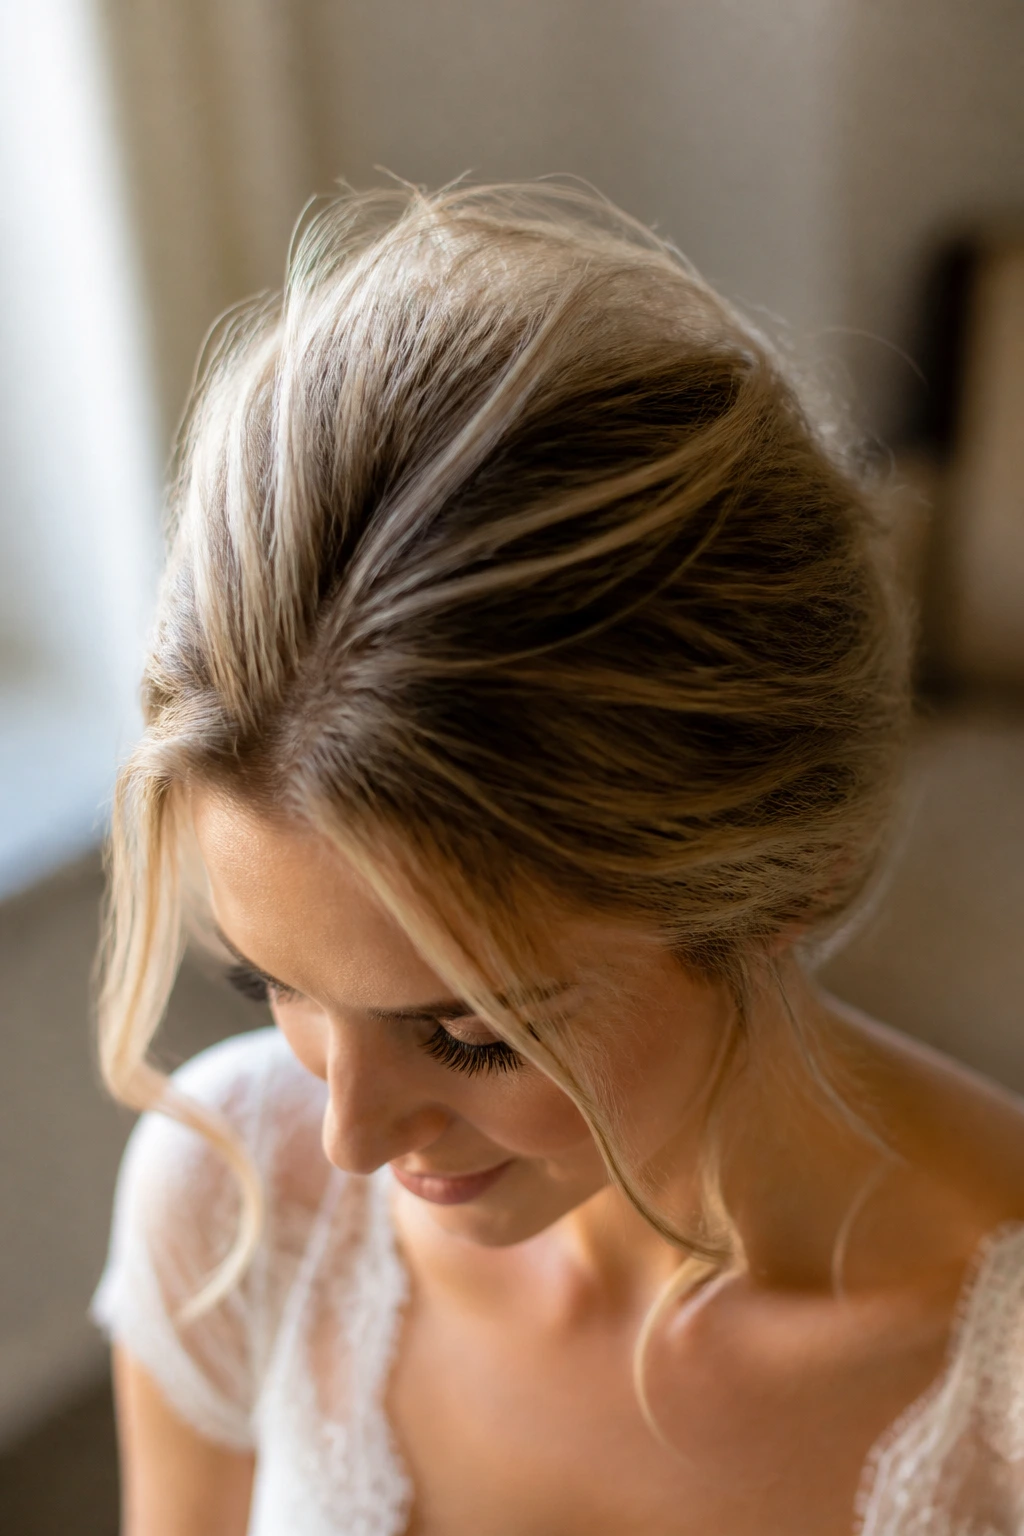
Root Lift: Work mousse through damp roots, then blow-dry with the head tipped slightly forward. That gives fine hair a little memory before the pins ever go in. A cool shot from the dryer helps lock the lift without making it crispy.
Texture Before Shape: Dry texture spray or a light dusting of volumizing powder can make slippery hair behave. Use it in layers. One spray, a minute to settle, then another if needed. Dumping half the bottle into the hair just makes it dull and dusty.
Shape Control: Leave the front softer than your instinct says. Thin hair looks thinner when every strand is scraped back. A little looseness at the temples and a bit of bend near the ears makes the whole style feel fuller.
Accessory Balance: If the hair is modest, the accessories should be too. A narrow comb, a few pearl pins, or one floral cluster tends to read better than a huge piece that overpowers the shape.
Make-It-Yours: If your hair is straight, build more texture before styling. If it’s wavy, preserve some of the wave and don’t brush it flat. If it’s curly, pin the curls in their natural direction instead of forcing them into a shape they fight.
Mistakes That Flatten Fine Bridal Hair
-
Starting with hair that’s too clean: Squeaky-clean hair can be slippery and hard to pin. Day-old hair, or hair prepped with a bit of product, usually holds shape better.
-
Pulling the front too tight: A flat crown and tight temples make thin hair look thinner. Leave a little lift and softness so the style has width.
-
Using too much shine serum or oil: Gloss can look nice in theory, but on fine hair it often makes pins slide and strips away texture. Use the tiniest amount, if any, and keep it away from the roots.
-
Choosing an oversized accessory: A giant comb or heavy floral piece can drag the style down and expose the base. Match the accessory to the density of the hair, not to the size of the dress.
-
Skipping a full veil trial: A veil changes the balance of the style. If you do not test it, you may find the comb sits awkwardly or crushes the crown.
-
Building too much height too fast: Thin hair can look artificial when the crown is teased into a mountain. Build lift in small layers and pin each layer before moving on.
Variations and Alternatives to Try
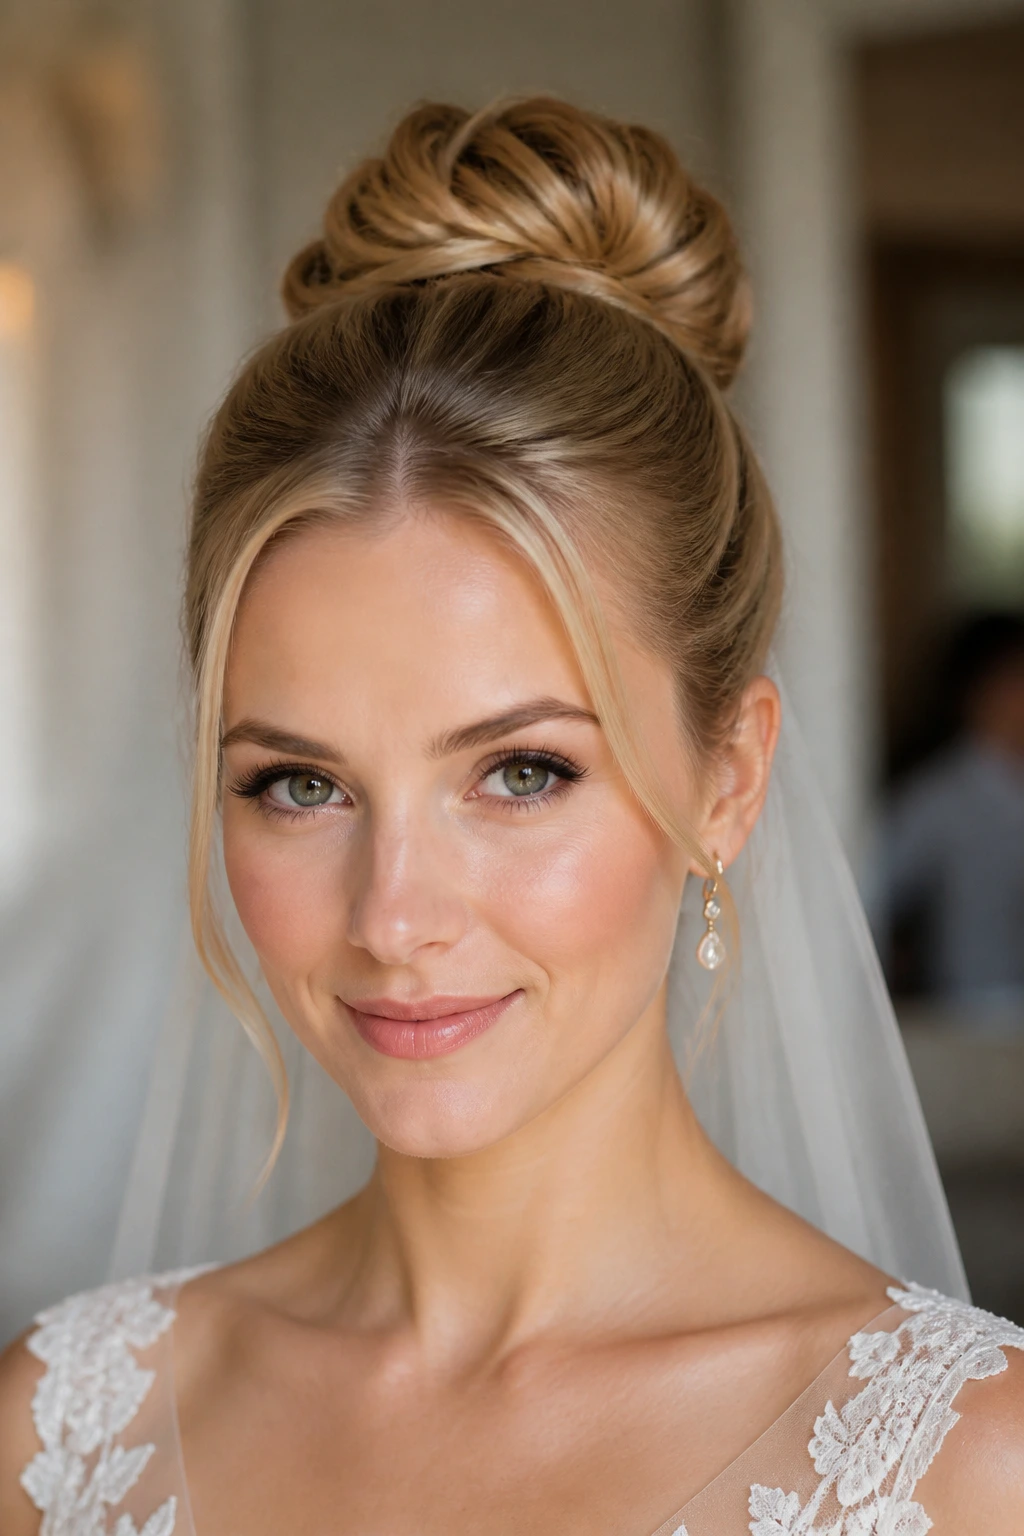
The No-Extensions Version: Keep the same shape, but use padding and better sectioning instead of adding hair. This works best when the goal is clean structure rather than obvious fullness. It’s the least fussy path if your natural hair already has enough length.
The One-Weft Boost: Add a single clip-in weft or filler at the back to give the bun more substance. This is often the sweet spot for brides with truly sparse hair because it adds body without becoming obvious. Keep the piece low and blended.
The Short-Hair Rescue Version: Use mini twists, tucked ends, and small pinned curls instead of trying to force a big bun. Shorter hair can look gorgeous in a bridal updo when the shape is compact and intentional. A lot of the charm comes from the detail, not the size.
The Curly Texture Version: Leave some of the natural wave or curl pattern visible and build the updo around it. This creates fullness without fighting the hair’s own shape. It also tends to look softer and more lived-in, which suits a lot of dresses.
The Sleek Modern Version: Go for a deep side part, a low knot, and minimal volume at the crown. This works when the dress is sharp and clean-lined. The key is precision—every pin should disappear, and every line should look deliberate.
Keeping the Style Full From First Look to Last Dance
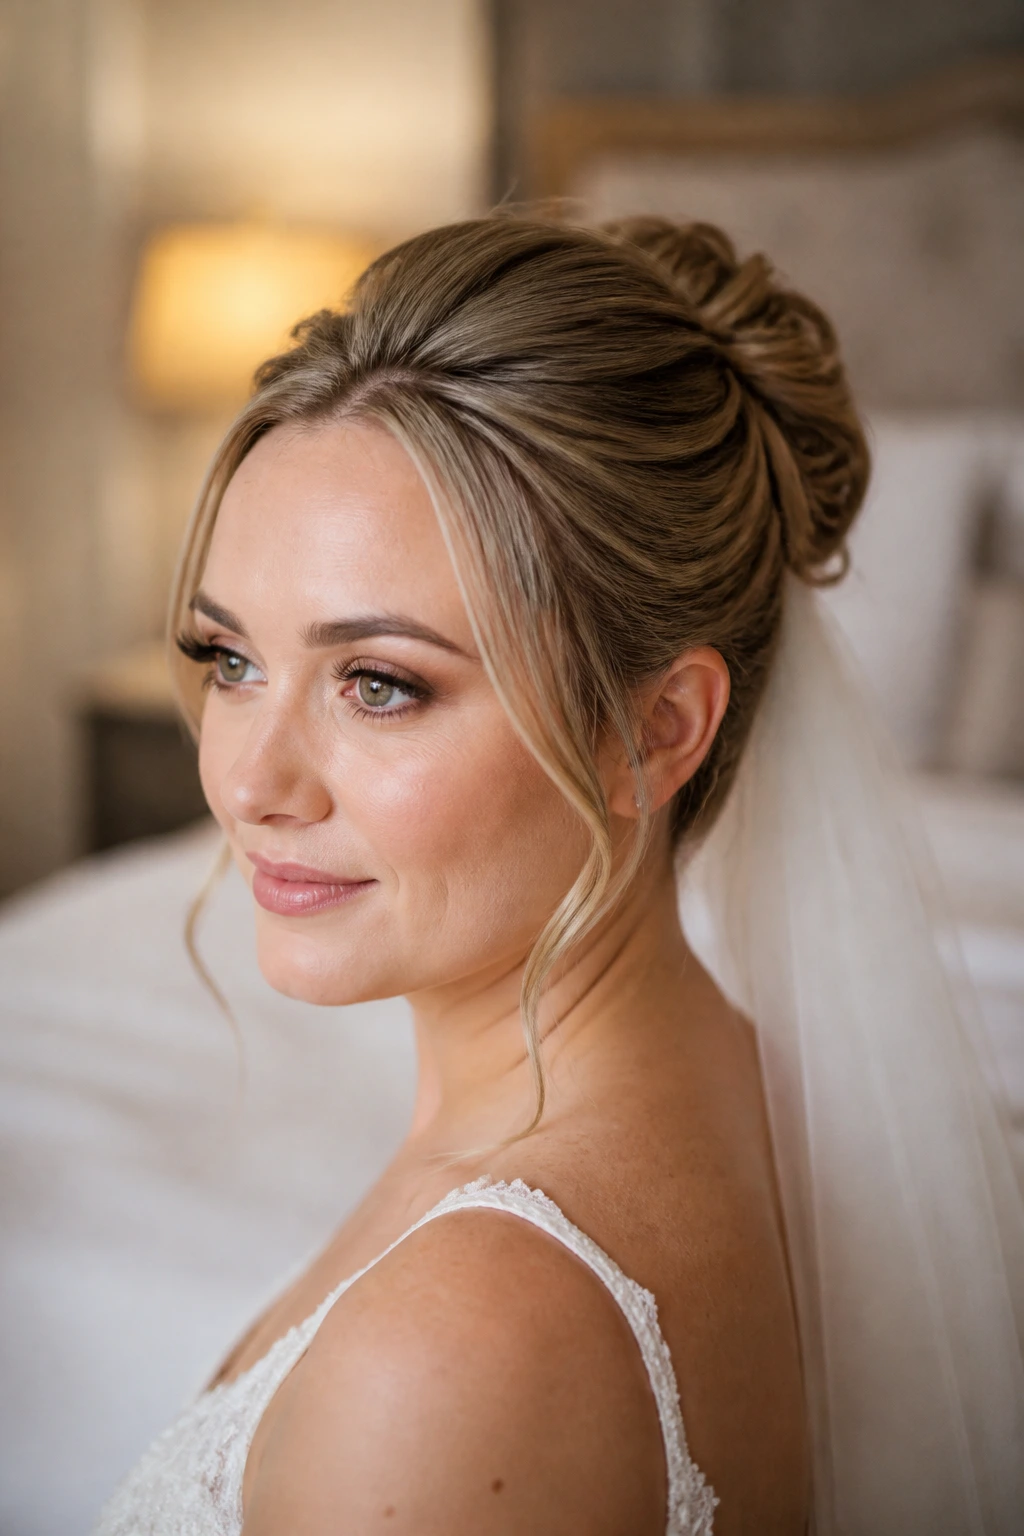
A bridal updo for thin hair usually holds best when the prep starts the night before. Wash and dry the hair, keep it light on the conditioner, and avoid piling on silky leave-ins that make the strands slippery. If you’re doing a trial, use the same products you plan to use on the actual day. Different spray, different result. Sometimes dramatically different.
A properly anchored style should stay presentable for roughly 8 to 12 hours without a full rebuild, though the front pieces may soften before the bun does. That’s normal. The first places to loosen are usually the temples and crown, not the base. Pack a tiny touch-up kit: a handful of pins, one travel hairspray, a small comb, and a clear elastic or two.
If you expect humidity, heat, or outdoor photos, ask for a slightly firmer base than you think you want. Fine hair softens fast in warm air. Also, let the hair set for a few minutes before adding a veil. Rushing the veil onto a still-moving style can flatten the lift you worked to build.
After the event, remove pins one at a time and brush gently from the ends upward. If product build-up is heavy, a clarifying wash the next day is kinder than scrubbing at the scalp for ten minutes. Hair that’s been teased and pinned all day needs a quiet reset.
Bridal Hair Questions Brides Ask Most
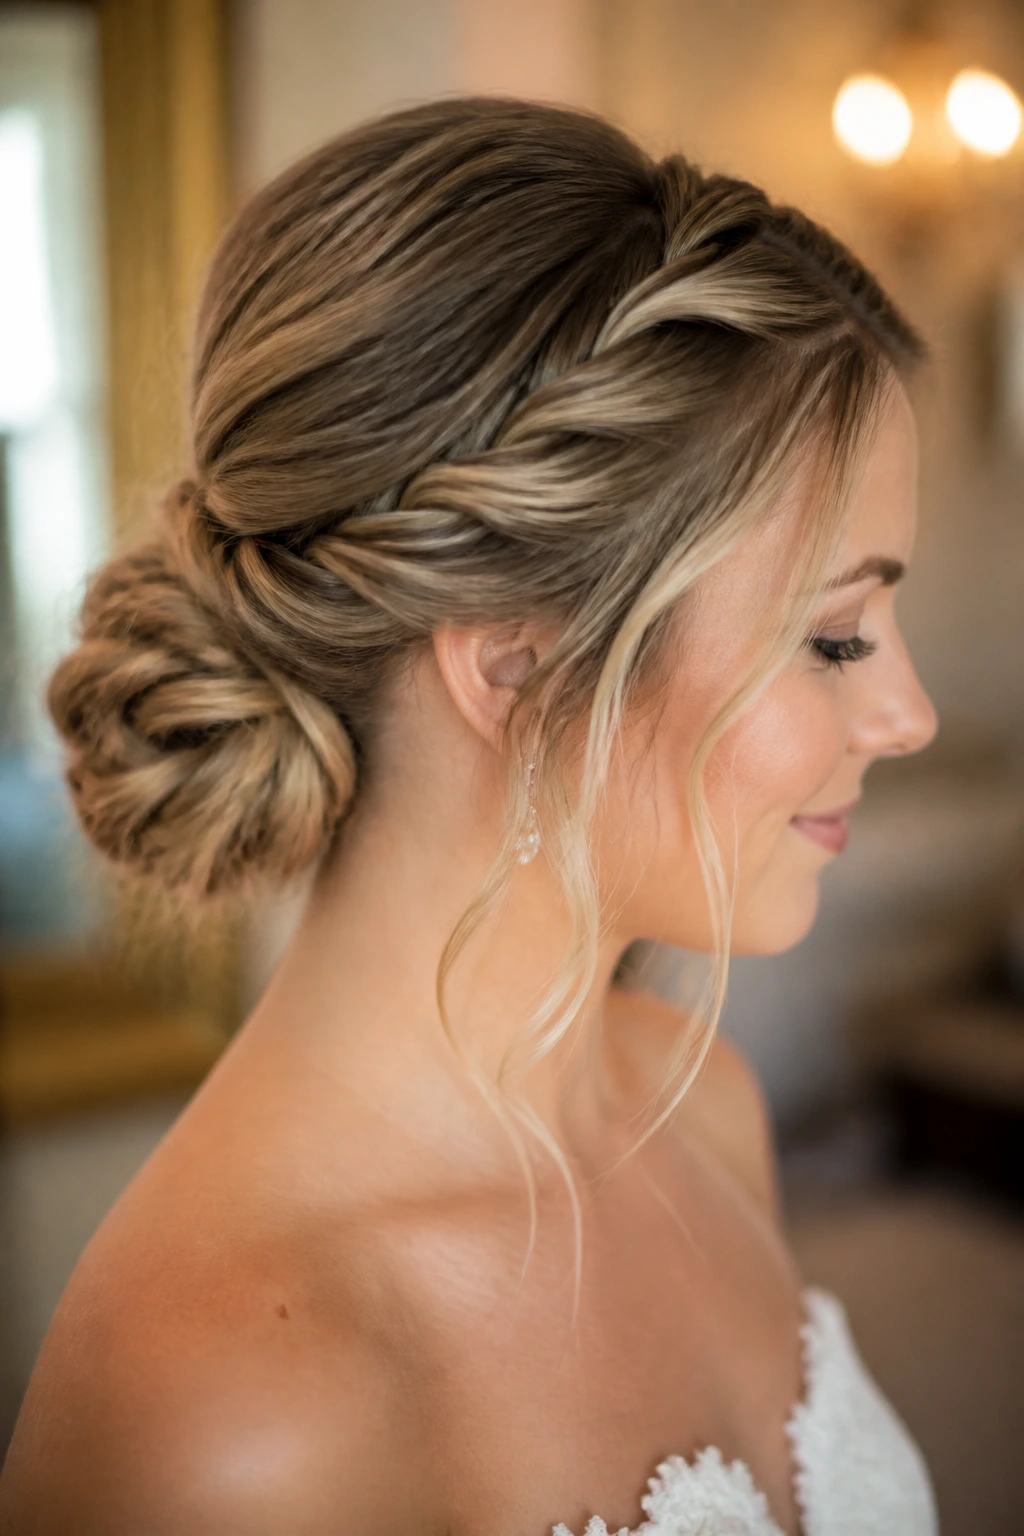
Can thin hair hold an updo without extensions?
Yes, if the style is low, well-pinned, and built with texture or padding in the right places. A soft chignon, Gibson tuck, or knot-and-tuck updo can work beautifully on natural hair alone. The real question is whether you want extra fullness or just a stable shape.
Is second-day hair better for a bridal updo?
Usually, yes. Second-day hair tends to have more grip, which helps pins stay in place. If your hair gets oily quickly, a little dry shampoo at the roots can mimic that same texture without making the style stiff.
What kind of extension works best for thin hair?
A small human-hair clip-in piece or one subtle weft usually blends best. Keep the color matched to the mid-lengths and ends, not just the roots. Huge extension sets can feel too heavy and may show through if the hair is very fine.
How do I stop bobby pins from slipping out?
Cross them over each other, anchor them into textured sections, and insert them against the direction of the twist or bun. Matte pins grip better than shiny ones. If they still slide, the hair is probably too clean or too smooth.
Will a veil ruin the updo?
Not if it’s placed over a stable base and the comb is anchored into a padded or braided section. The problem is usually not the veil itself. It’s the way the comb is attached to hair that has no grip.
Can these styles work on shoulder-length hair?
Yes, and some of them work especially well there. The double-twist bun, Gibson tuck, and half-up to full-up transition bun are all useful for that length. Very short layers may need to be tucked with extra pins, but that’s normal.
How much teasing is too much?
If the section turns fuzzy, stiff, or hard to smooth over, you’ve gone too far. Thin hair usually only needs a little lift at the crown and a little fullness at the bun base. More than that can make the style look dry and fragile.
What if the style starts to fall during the reception?
Pin the loosening section back into the nearest anchored point rather than adding pins randomly. A quick mist of hairspray on a comb or your fingers can tame flyaways without soaking the whole head. The back of the style usually needs the least touch-up; the front softens first.
A Bridal Shape That Still Breathes
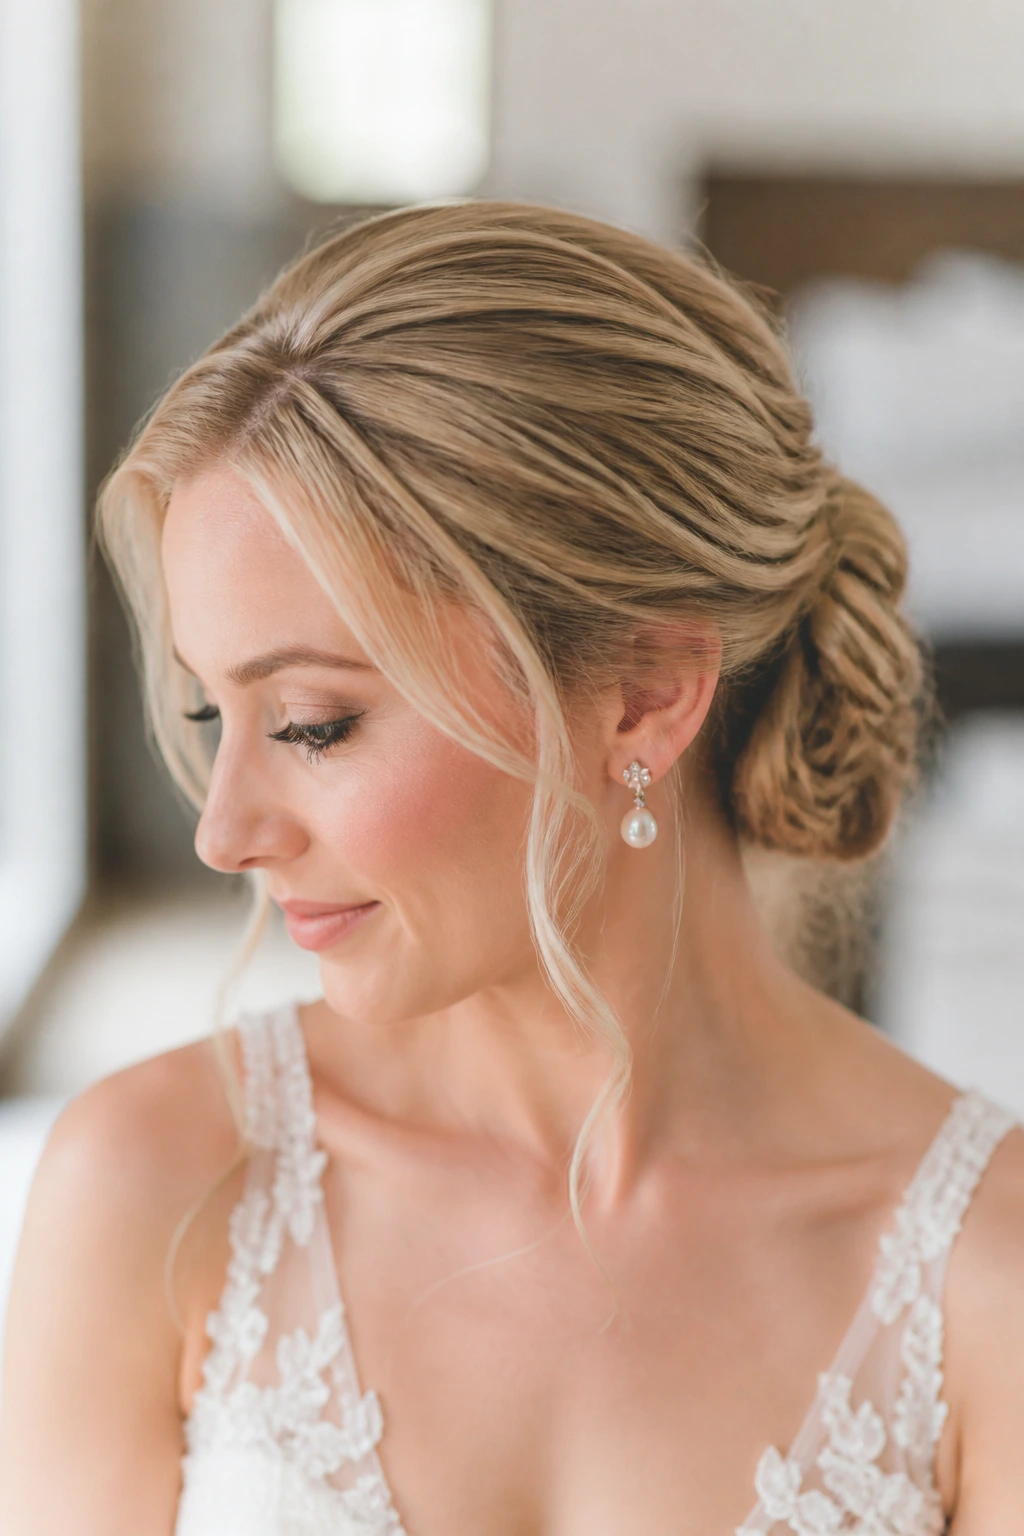
Thin hair has its own strengths. It can hold a soft line, show detail cleanly, and sit close to the head without looking bulky. That’s why the best bridal updos for fine strands aren’t the ones that pretend to be dense. They’re the ones that use shape, placement, and a little hidden support to create something graceful and steady.
Pick the style that matches your dress, your veil, and the way your hair actually behaves when it’s pinned. Not the way you hope it behaves. Do one trial with the real products, the real accessories, and the real pressure of a long day. That single run will tell you more than a folder full of inspiration photos.
And if you’re torn between two looks, choose the one that leaves the nape and crown looking calm. Thin hair loves calm.
