



Soft beachy texture has a funny way of looking casual and fussy at the same time. A few inches too much curl and it starts reading like prom hair. Too little bend and the whole style flattens out before lunch. The sweet spot sits right between those two: a loose, broken wave that moves when you turn your head and still looks touchable when you run your fingers through it.
That’s why wavy hairstyles stay in rotation. They can make fine hair look fuller, take weight out of thick hair, and give a blunt bob enough movement to stop feeling boxy. The cut matters. So does the section size. And yes, the tool matters too — a 1-inch iron, a rounded flat iron, or even two loose braids overnight all land in very different places.
The best part is that beachy texture doesn’t belong to one hair length or one type of person. Long layers, a collarbone lob, curtain bangs, a shag, a bob, a claw-clip half-up, a low ponytail, even a short crop — each one can carry that soft wave in a different way. Some look sun-dried and easy. Some look polished enough for dinner without losing that loose bend around the face. The good versions all share the same trick: they look intentional without looking stiff.
Why These Waves Earn Their Keep
-
They move instead of sitting there: Soft waves keep the hair from looking carved into place, which is the main reason the style feels lighter than a tight curl set.
-
They work with the cut you already have: A lob, shag, long layers, or a short bob changes how the wave falls, so you can make the style feel tailored instead of copied.
-
They’re forgiving on day two: A little dry shampoo at the roots and a quick re-bend around the front pieces can wake the whole style up fast.
-
They give you heat and no-heat options: You can get the same loose texture from braids, twists, a diffuser, or a wand, depending on how much time and heat you want to use.
-
They look different with tiny changes: A side part, a tucked-behind-ear side, or a few straighter ends can make the same wave read casual, polished, or slightly undone.
1. Long Layers with Soft S-Waves
Long layers give beachy waves room to breathe. Without them, long hair can turn heavy at the ends and the wave just collapses into a curtain. With a little internal shape, the bend starts to show up around the cheekbones and keeps traveling down instead of getting trapped at the bottom.
I like this look with a 1-inch curling wand or a rounded flat iron, because the goal is not a tight spiral. Wrap medium sections away from the face, leave the last inch or so a touch straighter, then let everything cool before you touch it. Once the hair is cool, rough it up with your fingers, not a brush, so the wave stays soft instead of turning into one big puff.
This is the version I’d point people toward if they want hair that looks like it has movement even when it’s down all day. It’s especially good for medium to thick hair that needs some weight removed. Long one-length hair can handle waves, sure, but layers make the shape look far less forced.
2. Collarbone Lob with Bent Ends
A collarbone lob is one of the easiest cuts to make beachy texture look modern. The length sits right where the hair bends naturally at the shoulders, which means the style gets a little help even before you pick up a tool. That’s why a lob rarely needs a lot of styling to read as finished.
For this version, bend the mid-lengths and let the ends stay a little straighter. That tiny detail matters. If every inch of the hair is curled, the lob starts to look smaller and more rounded than it should. If the last inch stays loose, the whole shape feels sharper and less overworked.
This cut is especially kind to finer hair. The perimeter gives the illusion of density, while the loose wave keeps it from looking stiff. It’s one of those styles that can look casual with a T-shirt and still hold up with a blazer. Not flashy. Just smart.
3. Curtain Bangs and Face-Framing Waves
Curtain bangs do a lot of the heavy lifting here, which is probably why people keep coming back to them. They soften the front of the hairline, split the attention around the eyes, and make the rest of the wave feel more relaxed. If the bangs are cut well, you barely need to do much to the rest of the style.
The trick is to give the front pieces a little more intention than the back. Blow-dry the bangs with a round brush or twist them loose as they dry, then bend the first section on each side away from the face. The sections around the cheekbones should be the most visible; the ones farther back can be softer and less defined.
This is one of my favorite shapes for someone who wants soft beachy texture without a wall of hair around the face. The bangs break up the line of the style in a good way. They also make the hair look styled even when the rest is basically air-dried and finger-tousled. That’s a useful little cheat.
4. Deep Side-Part Waves
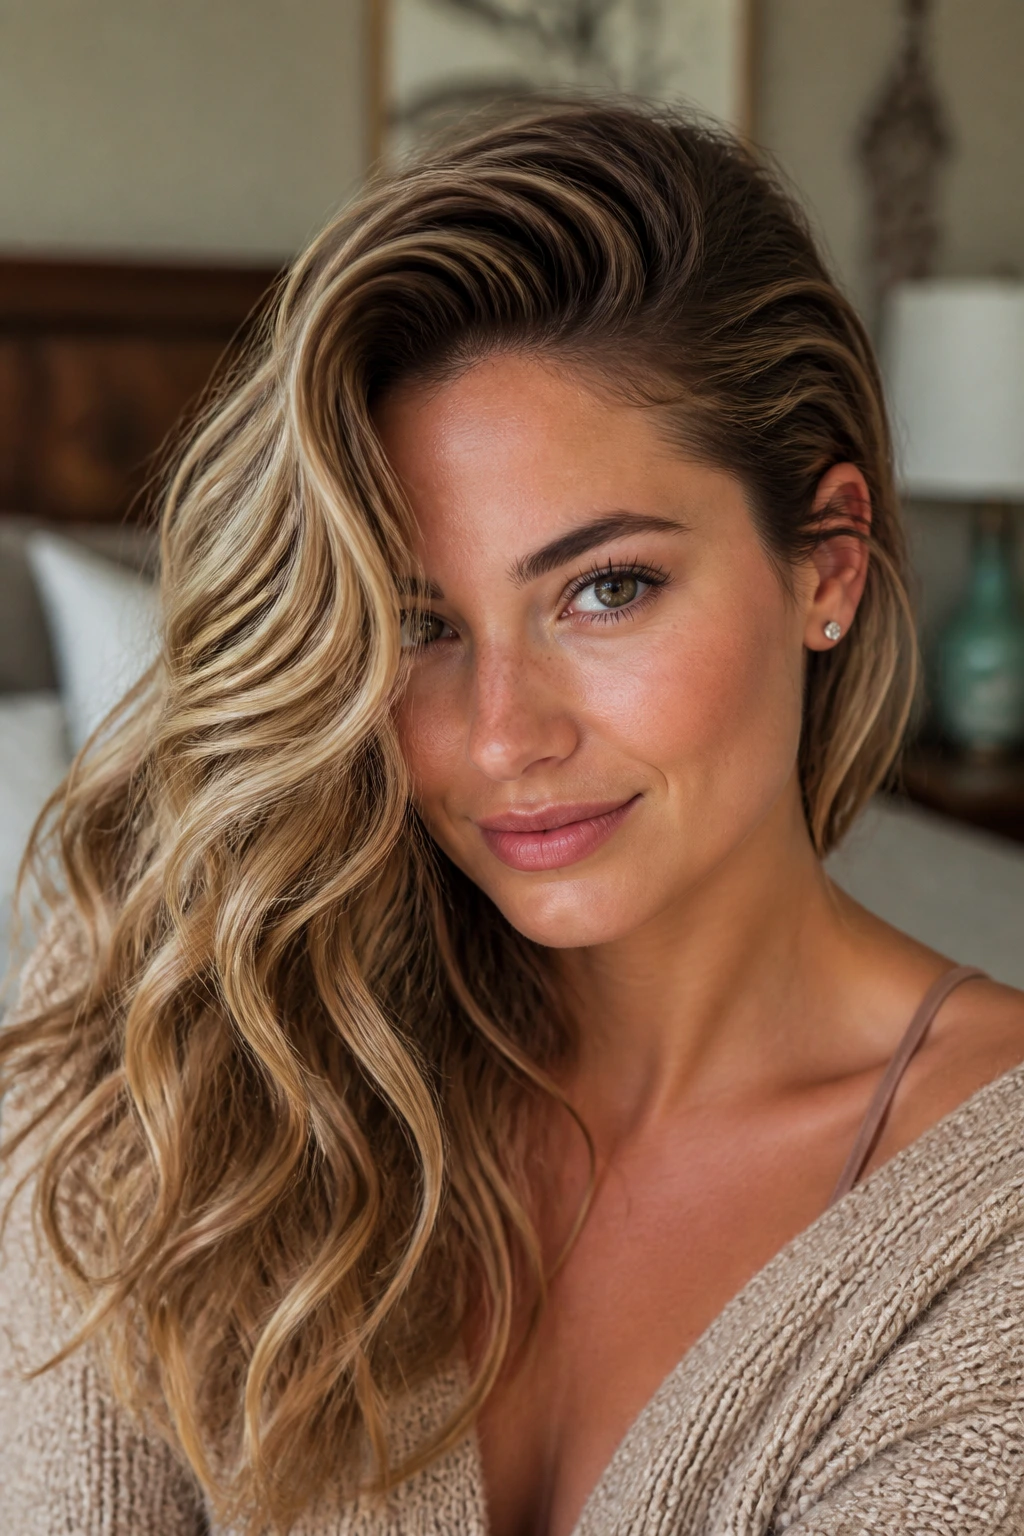
Why does a side part make waves feel richer? Because it changes where the weight lives. A deep side part pushes the hair up at the root on one side and drops it into a smoother sweep on the other, which gives the whole style more shape before the wave even starts.
I’d use this on hair that tends to sit flat at the crown or on anyone who wants a little more drama without going full glam. Curl or bend the hair away from the part, then tuck the heavier side behind one ear after the wave cools. That small move opens the face and stops the look from feeling too symmetrical, which is often what makes loose waves feel plain.
This version works well with a soft, brushed-out finish. If you want the hair to look airy, keep the product light and let the part do the work. If you want it to feel a bit dressier, add one clean tuck and a subtle shine spray. The rest can stay quiet.
5. Half-Up Claw Clip Waves
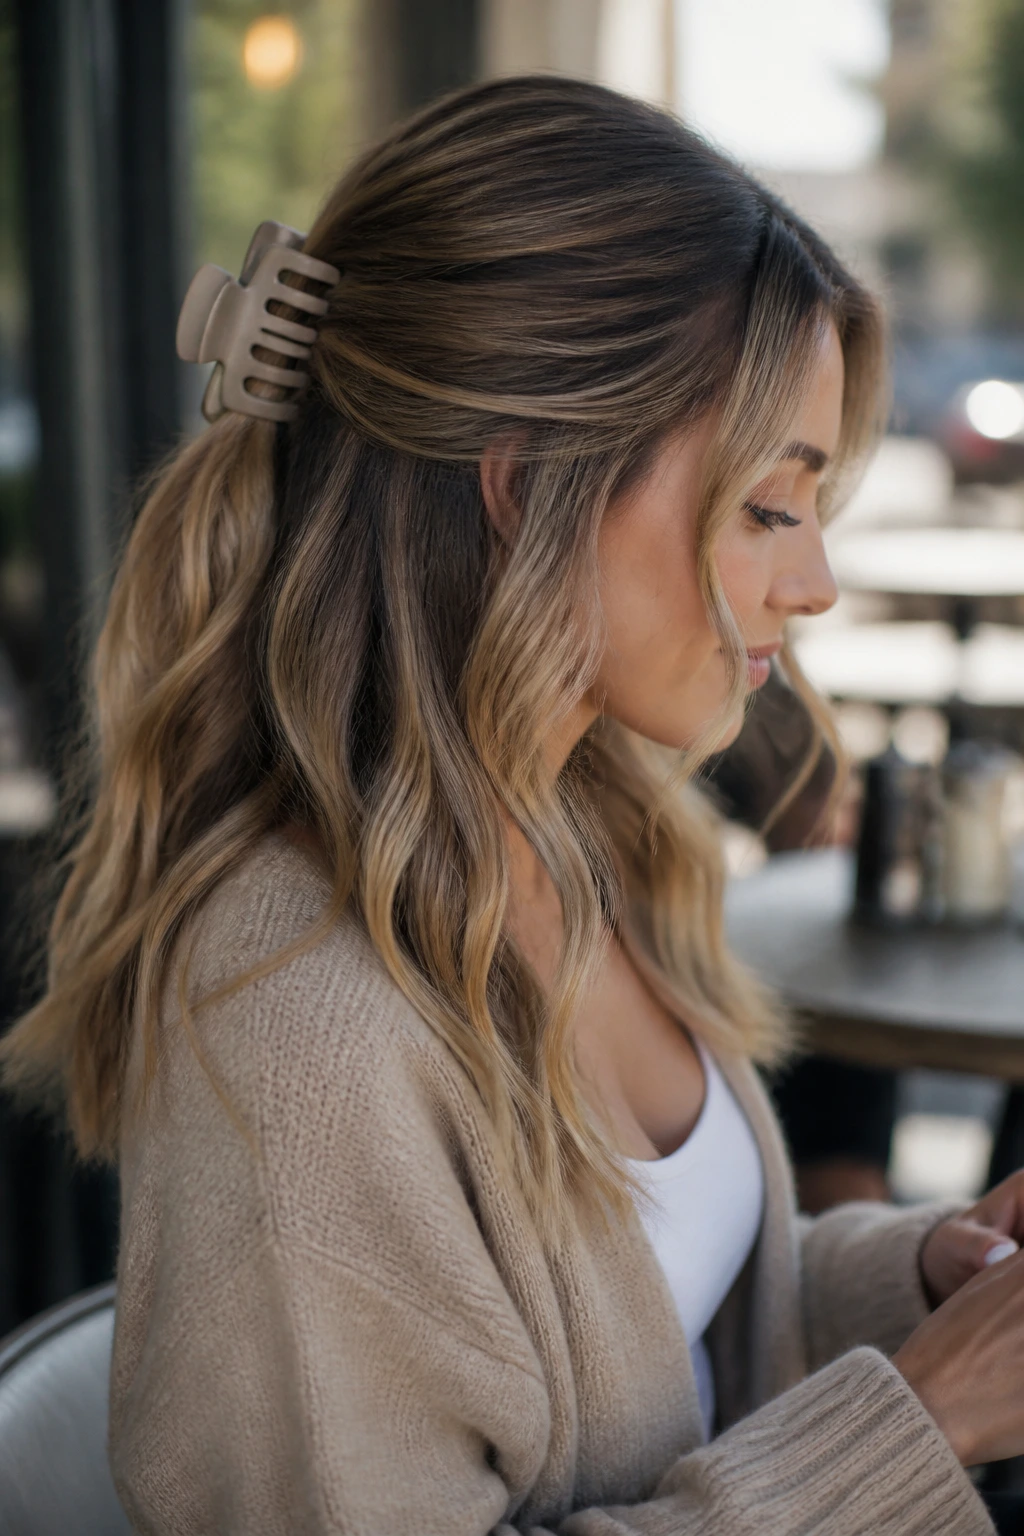
A half-up claw clip makes beachy waves look lived-in in the best way. You get lift at the crown, movement through the ends, and enough looseness around the face that the style never feels pinned down. It’s also one of the easiest ways to stretch a blowout or a wave pattern into a second day.
The important part is not pulling the top section too tight. Leave a little softness at the temples and crown so the shape doesn’t turn severe. A matte claw clip gives the whole thing a more casual feel, while a polished clip makes the same style look slightly neater. Either way, keep a few front pieces out if you want the waves to read soft instead of clipped-back.
This one is especially useful for medium to long hair that needs a break from being worn fully down. It clears the face, shows off texture through the ends, and still feels feminine without being precious. One twist. One clip. Done.
6. Tousled Bob with Piecey Texture
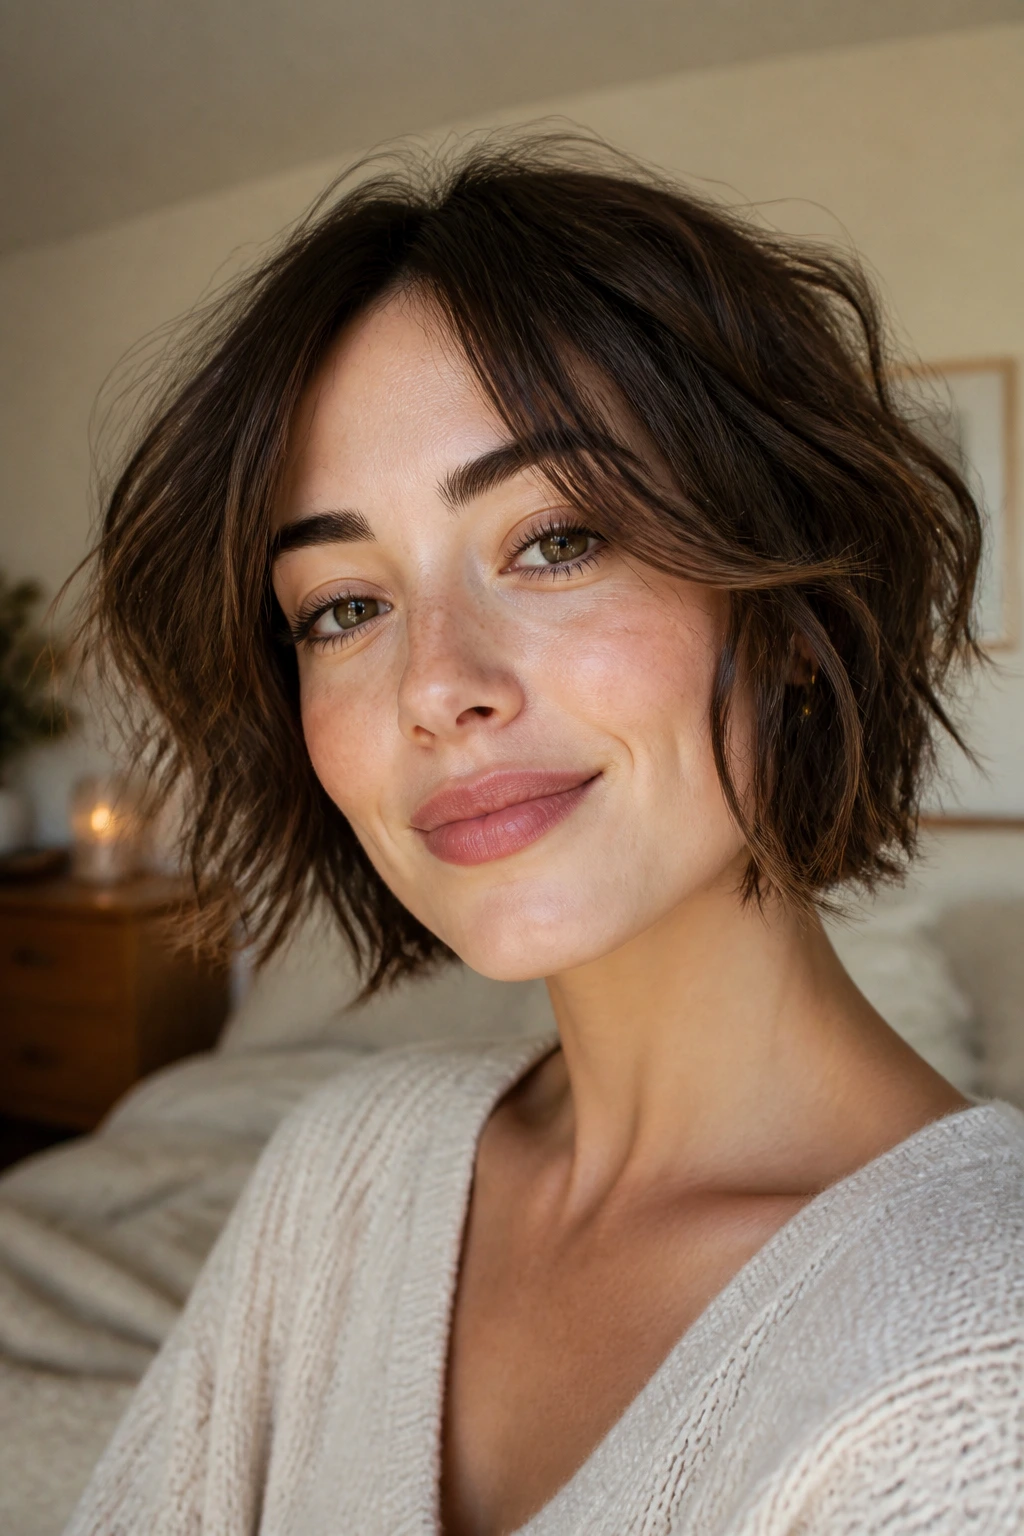
Bobs need a lighter hand than long hair. If you put the same size wave into a chin-length cut that you’d use on a long layer cut, the bob can end up looking too round or too bouncy. The better version has a few loose bends, some straighter spaces between them, and slightly piecey ends.
A small iron or a flat iron with rounded edges works well here because the sections are short and the wave should stay loose. Alternate the direction of the bend, leave the bottom quarter-inch softer, and finish with a tiny bit of texturizing spray just through the mid-lengths. That last step helps separate the wave without making the bob crunchy.
This is a strong choice for straight bobs that need some movement or for finer hair that benefits from a little grit. It also reads younger and a touch more relaxed than a super-sleek bob. Clean line, messy texture. Nice contrast.
7. Feathered Shag Waves
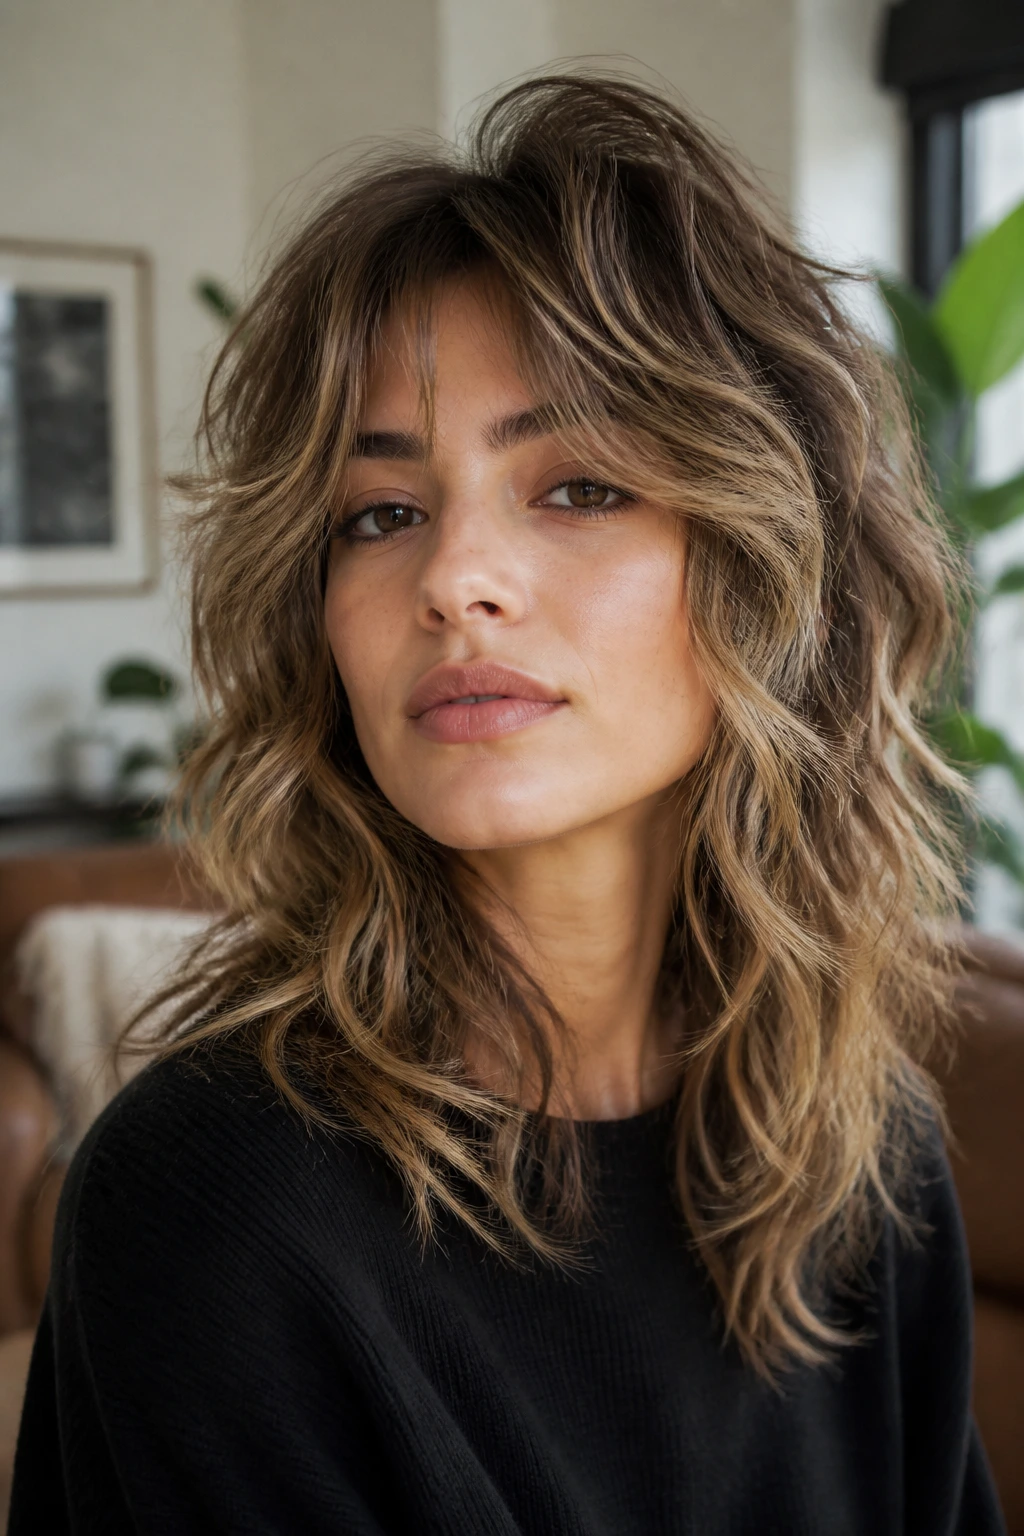
A shag and soft wave already speak the same language, which is why this cut works so well. The layers are built to move, the front pieces are usually lighter, and the overall shape doesn’t need a lot of help to look interesting. If anything, the mistake people make here is trying to smooth the shag too much.
Why the Shag Loves Texture
The crown wants lift, the ends want separation, and the whole cut looks better when the wave isn’t identical from root to tip. That means mousse or foam is often more useful than a heavy cream. Work it through damp hair, scrunch lightly, then either diffuse on low or let the hair air-dry and break it apart once it’s set.
How to Keep It Soft
Don’t over-brush. Seriously. A shag starts to lose shape the second every layer gets combed into one flat sheet. I’d use fingers, a wide-tooth comb, or a quick shake at the roots, then stop.
This is one of the few styles where a little mess is the point. Just keep the mess controlled.
8. Brushed-Out Glam Waves
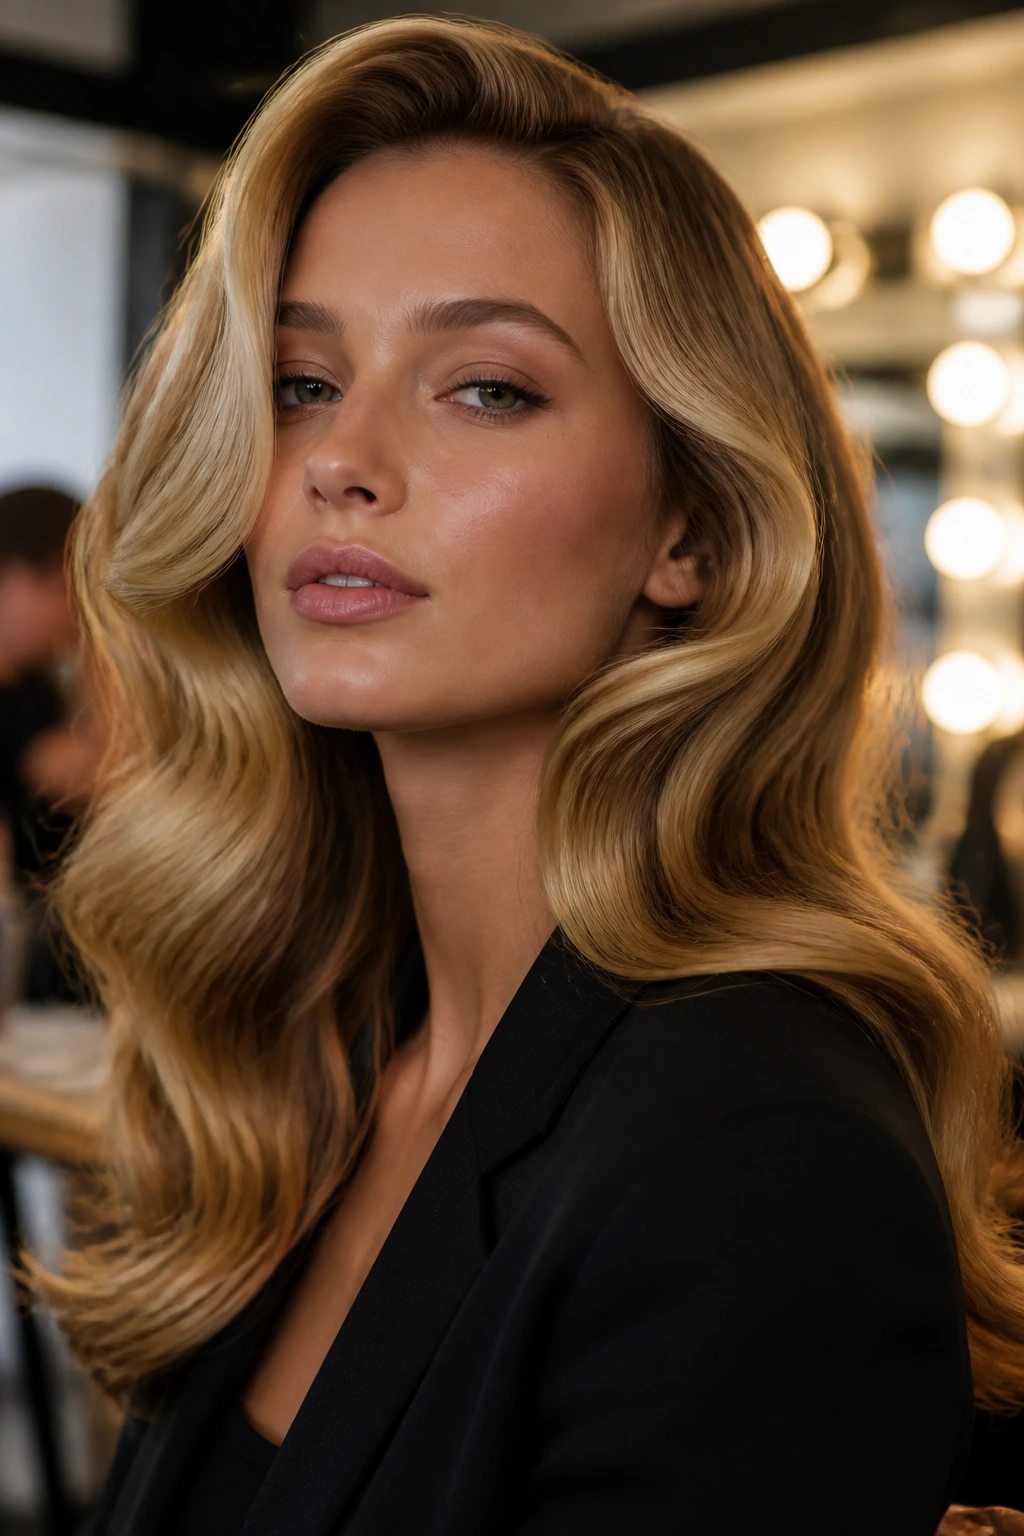
Beachy hair does not have to look casual. When the waves are brushed out after they cool, they turn into softer ribbons that still have movement but feel cleaner and more dressed up. This is the version I’d reach for when the outfit has structure — a sharp collar, a blazer, a silk neckline.
Curl medium sections in the same direction on each side of the face, let them cool fully, then brush through gently from the ends upward. The brush merges the individual curls into one soft wave pattern. A drop of shine serum on the ends helps keep the surface smooth, but don’t drown the roots in oil or the style will go limp in a hurry.
This look is especially good on medium to long hair with enough density to hold a brushed-out shape. It can feel almost old Hollywood, but looser. Less polished helmet, more soft ribbon. That balance is the whole point.
9. Braided Overnight Waves
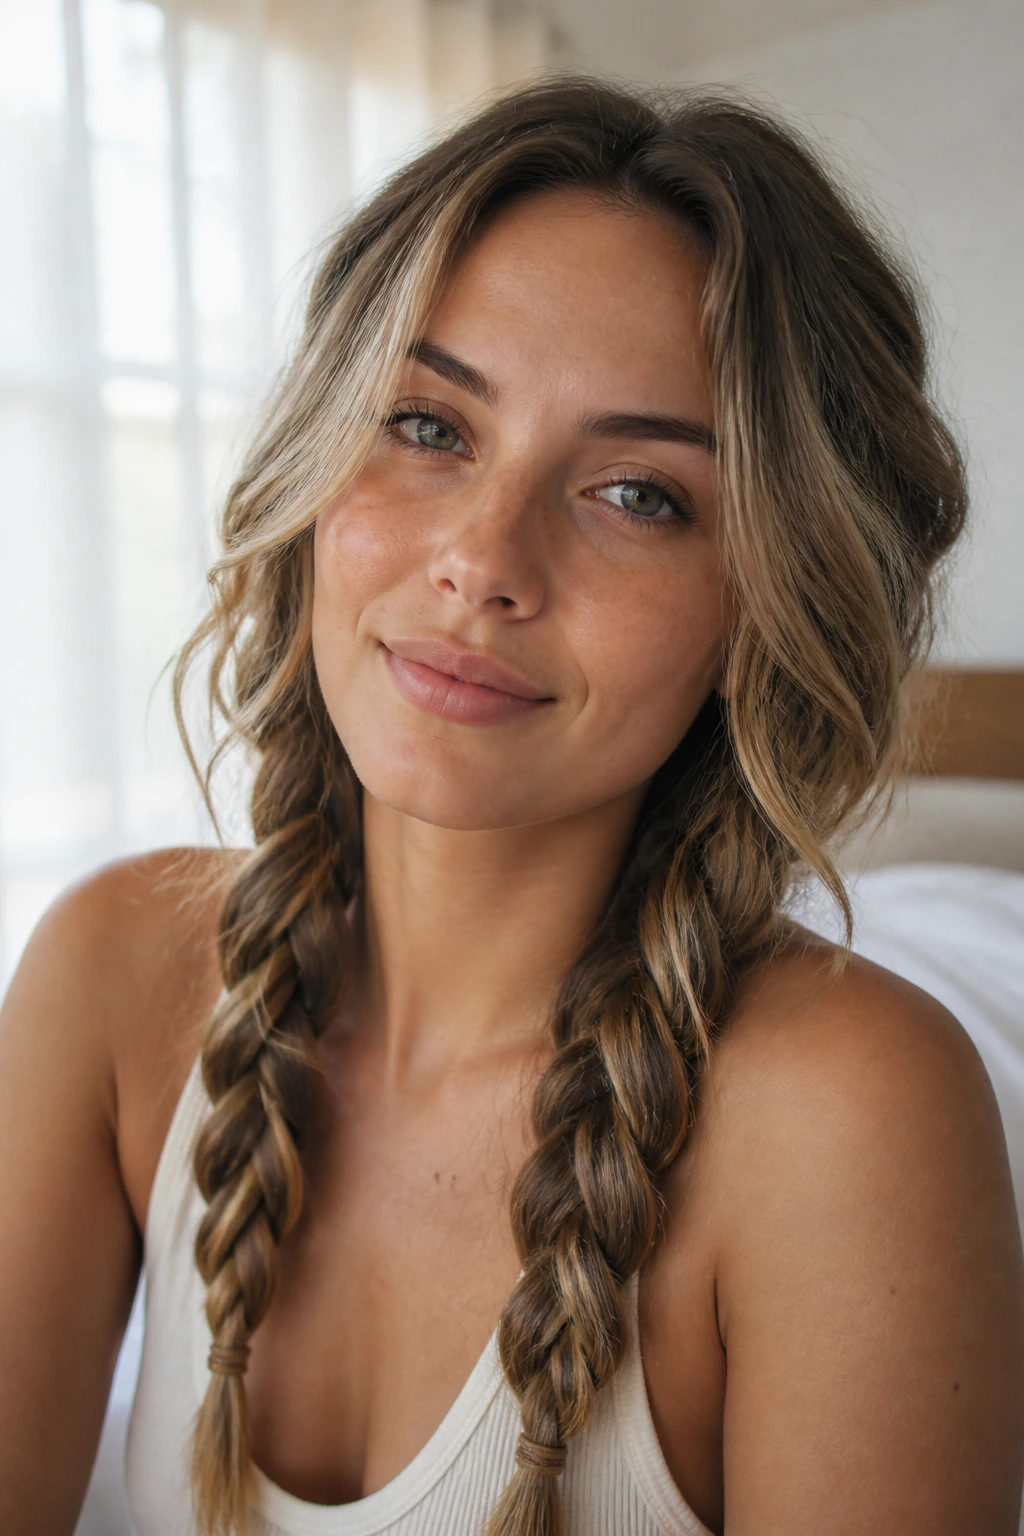
Braids are the old reliable no-heat move, and they still earn their spot because they make a softer wave than a lot of people expect. Two loose braids give broad, gentle bends. Four smaller braids give a bit more texture. Either way, the hair wakes up with a wave that feels broken in rather than carved.
The hair needs to be dry by the time you take the braids out. Damp roots mean saggy bends and a weird crimp near the scalp, which is a look nobody asked for. If your hair is very straight, add a tiny bit of leave-in to the mids before braiding, not a heavy cream. Heavy product can make the wave fall out faster.
This is a good choice when you want shape without heat or when you need to save time in the morning. It’s not the most precise wave pattern, and that’s part of the charm. The finish tends to look softer and a little more casual than wand curls, which makes it easy to wear.
10. Diffused Natural Waves
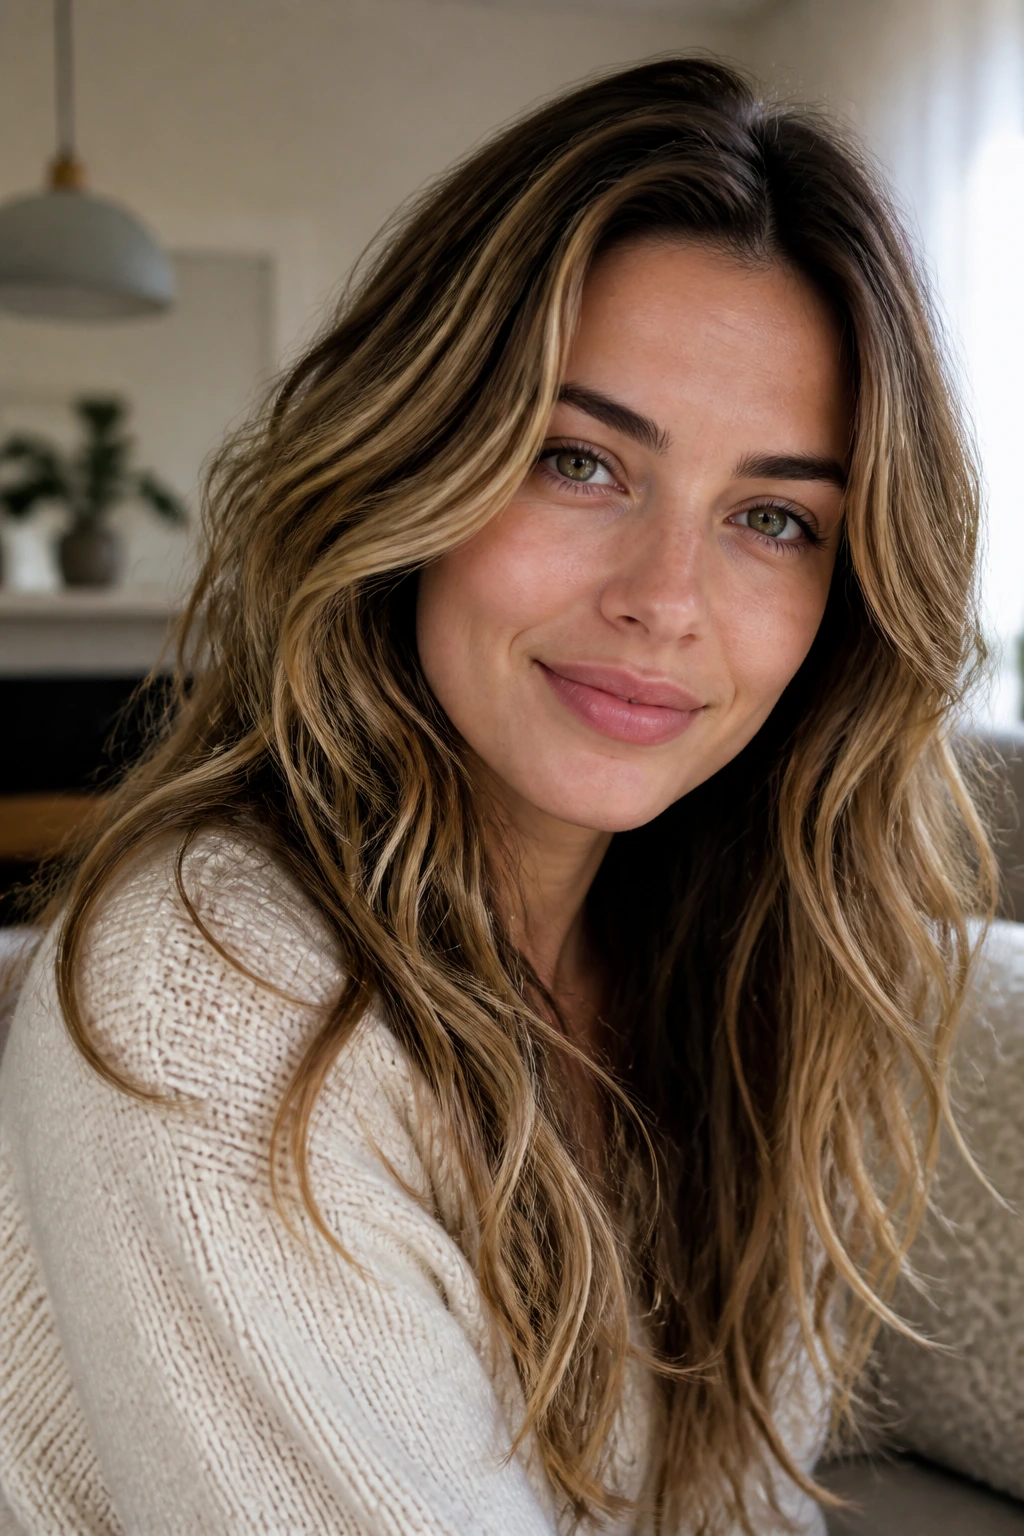
If your hair already has a bend to it, stop fighting it. Natural waves usually look best when they’re coaxed, not forced into uniform curls. A diffuser helps by lifting the pattern without blasting it apart, and that makes a huge difference in how the texture settles.
The Shape You’re Trying to Keep
Scrunch in a light foam or leave-in on damp hair, then cup sections in the diffuser on low heat. Keep the airflow gentle and stop when the hair is about 80 percent dry. That last bit of air-drying matters because it helps the pattern settle without getting frizzy from too much handling.
What Not to Do
Don’t rake the hair over and over while it dries. That’s how you get puff instead of wave. A quick squeeze is enough. Once the hair is set, separate only the bigger clumps with your fingers.
This version is for people who want to work with what they have rather than rebuild the whole head from scratch. Usually, that’s the smarter move anyway.
11. Mermaid-Length Waves
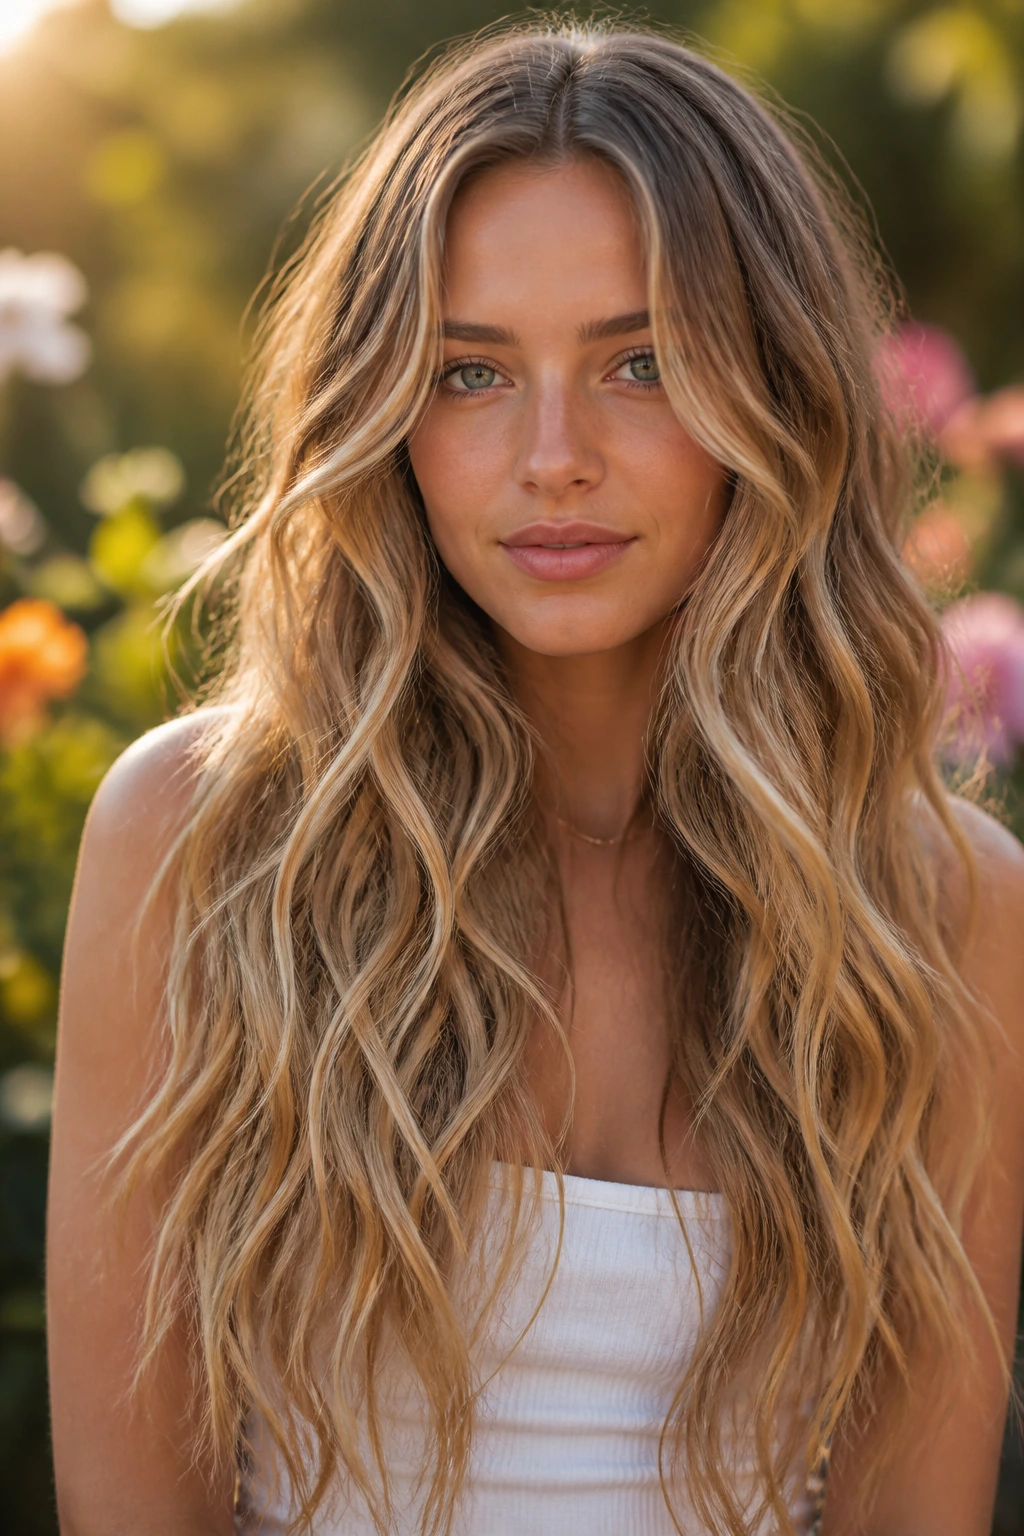
Long hair can be stunning with soft waves, but only if the layers are managed well. Without shape, mermaid-length hair tends to hang in one heavy curtain, and the wave gets lost before it reaches the bottom. Blended layers fix that by taking weight out of the mids and letting the bends show up in more than one place.
Use larger sections and a slightly longer hold on the iron or wand so the pattern reads from top to bottom. I also like to keep the ends a little softer than the rest. That helps the hair fall in long, touchable ribbons instead of little springy curls that fight the length.
This is the style that benefits the most from patience. Let it cool. Let it settle. Then decide whether it needs a quick finger-comb or a brush-out. Rushing this one usually makes the lower half puff out before the top has even finished setting.
12. Low Ponytail with Wavy Crown
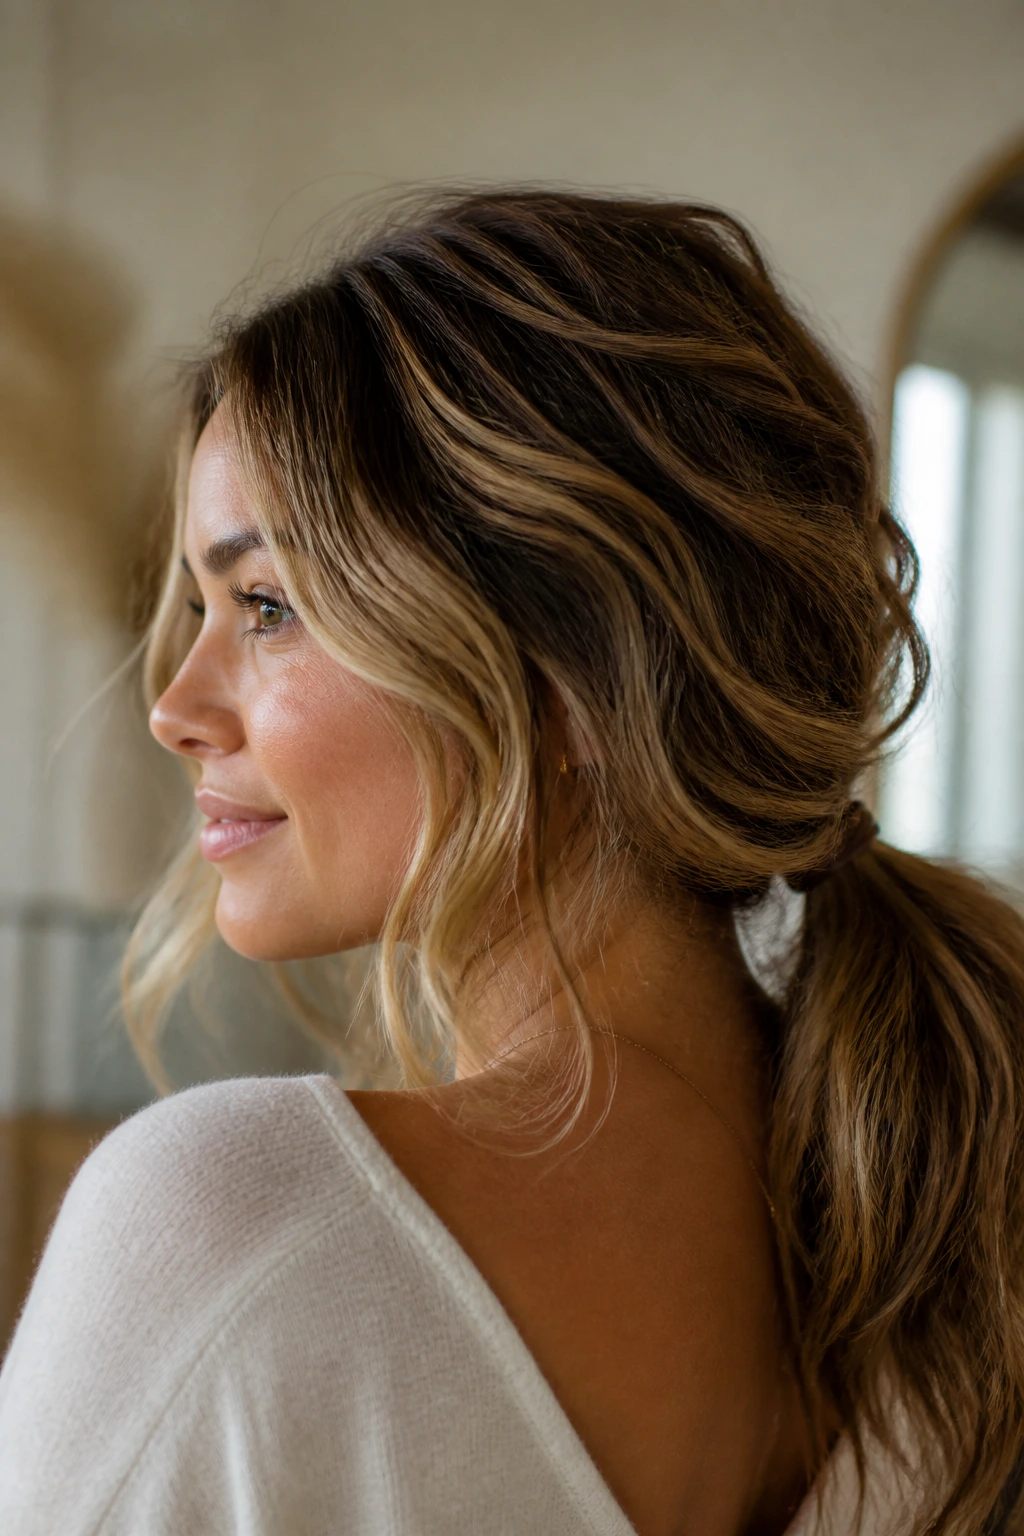
A low ponytail can still show off soft beachy texture if you leave the crown loose and the lengths wavy. The trick is to keep the ponytail low enough that the wave pattern in the top layers doesn’t get yanked flat. If you pull too tight, the whole style loses the softness that made it worth doing.
I like this when the hair is a little greasy at the roots or when the weather is doing the most. Add a bit of lift at the crown, gather the hair at the nape, and leave a few front pieces loose. If you want it cleaner, wrap a small strand around the elastic. If you want it more casual, skip that and let the clip or tie show.
The ends are what keep this from looking like a standard ponytail. Wavy lengths spill over the back and make the style feel finished even though it takes almost no time. Good trade.
13. No-Heat Twist Waves
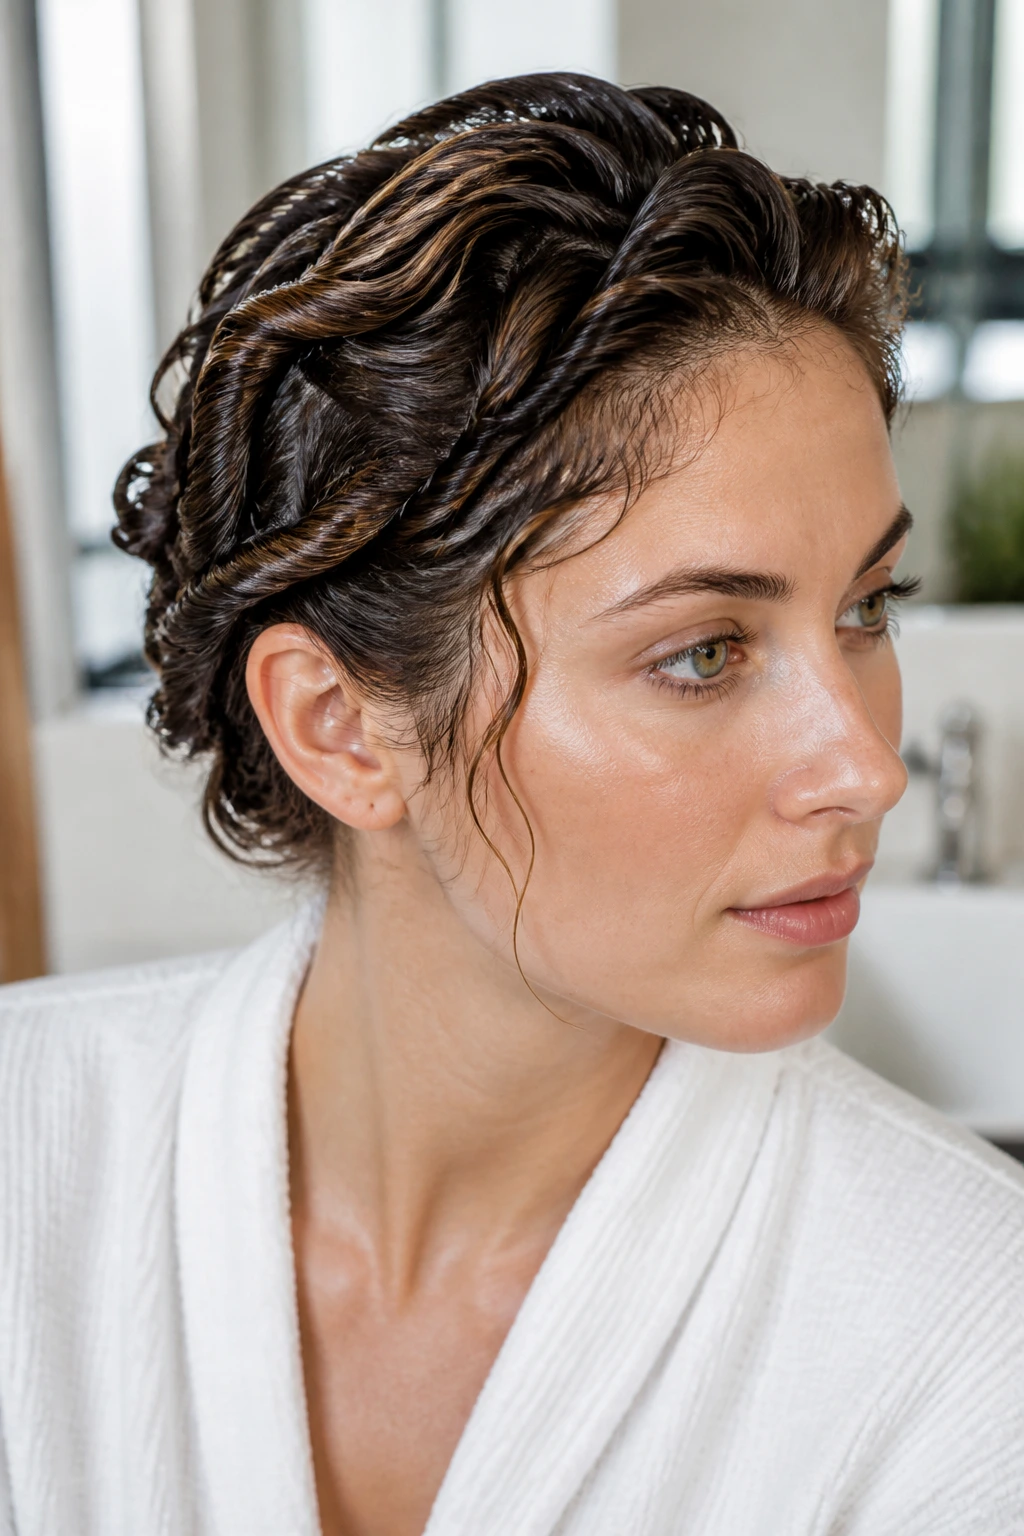
Twists make a softer wave than braids because they create a looser bend with less of a patterned crimp. That’s useful if you want the hair to look like it dried into texture rather than being pressed into shape. The result is gentler, especially around the face.
Section damp hair into two to six parts, twist each one away from the face, and secure the ends flat against the head. The hair has to dry all the way through before you take the twists out, or the wave will collapse and turn fuzzy. A little leave-in on the mids helps, but skip anything heavy at the roots.
This is one of the best low-effort ways to get beachy waves without a hot tool. It also suits people who want less uniform texture. The wave comes out a little irregular, which is exactly why it looks easy.
14. Wolf Cut with Soft Ends
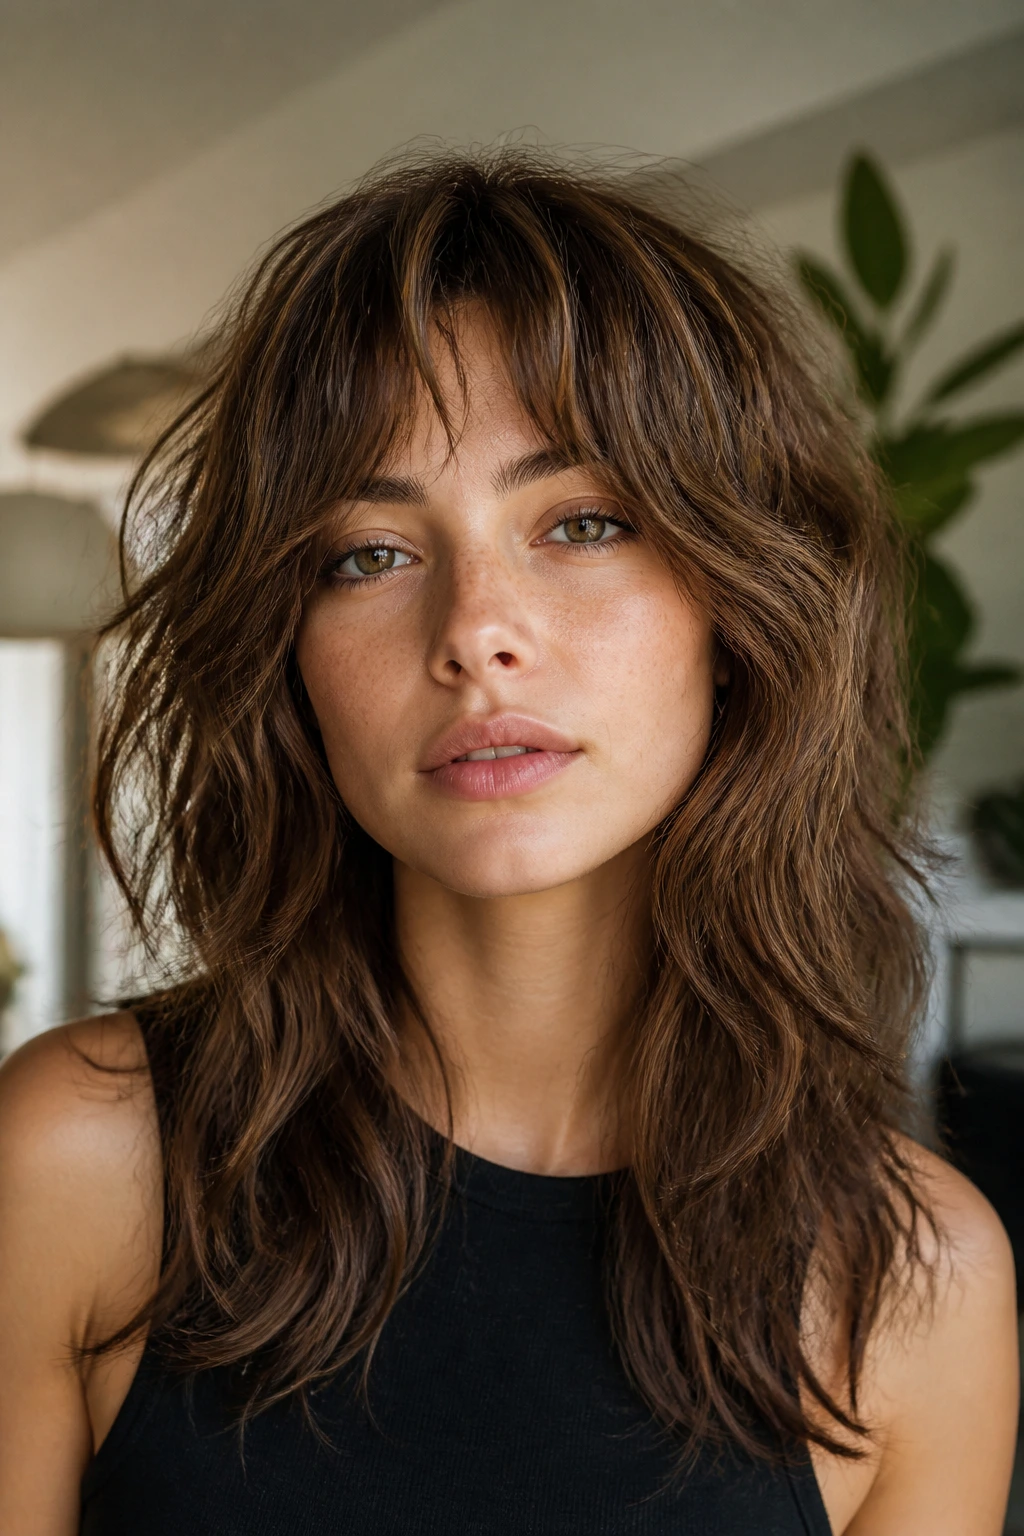
The wolf cut can go hard on texture if you let it. Sharp separation, heavy volume at the crown, and strong ends can make the whole thing feel more punk than soft beachy. The softer version keeps the crown airy but rounds off the ends so the wave feels broken in, not jagged.
Softening the Edges
Use a medium section size and bend the hair loosely instead of creating tight definition on every layer. A little mousse at the roots gives lift, while a light spray through the ends helps separate the pieces. You want movement, not stiffness.
Why It Works
The wolf cut already has shape built in. That means you can spend less time styling and more time refining the front pieces and crown. If you’re the type who likes a bit of edge but still wants softness around the face, this one lands in a nice middle ground.
It’s a strong cut for people who hate flat hair but do not want something polished every day.
15. Fine Hair Waves with Root Lift
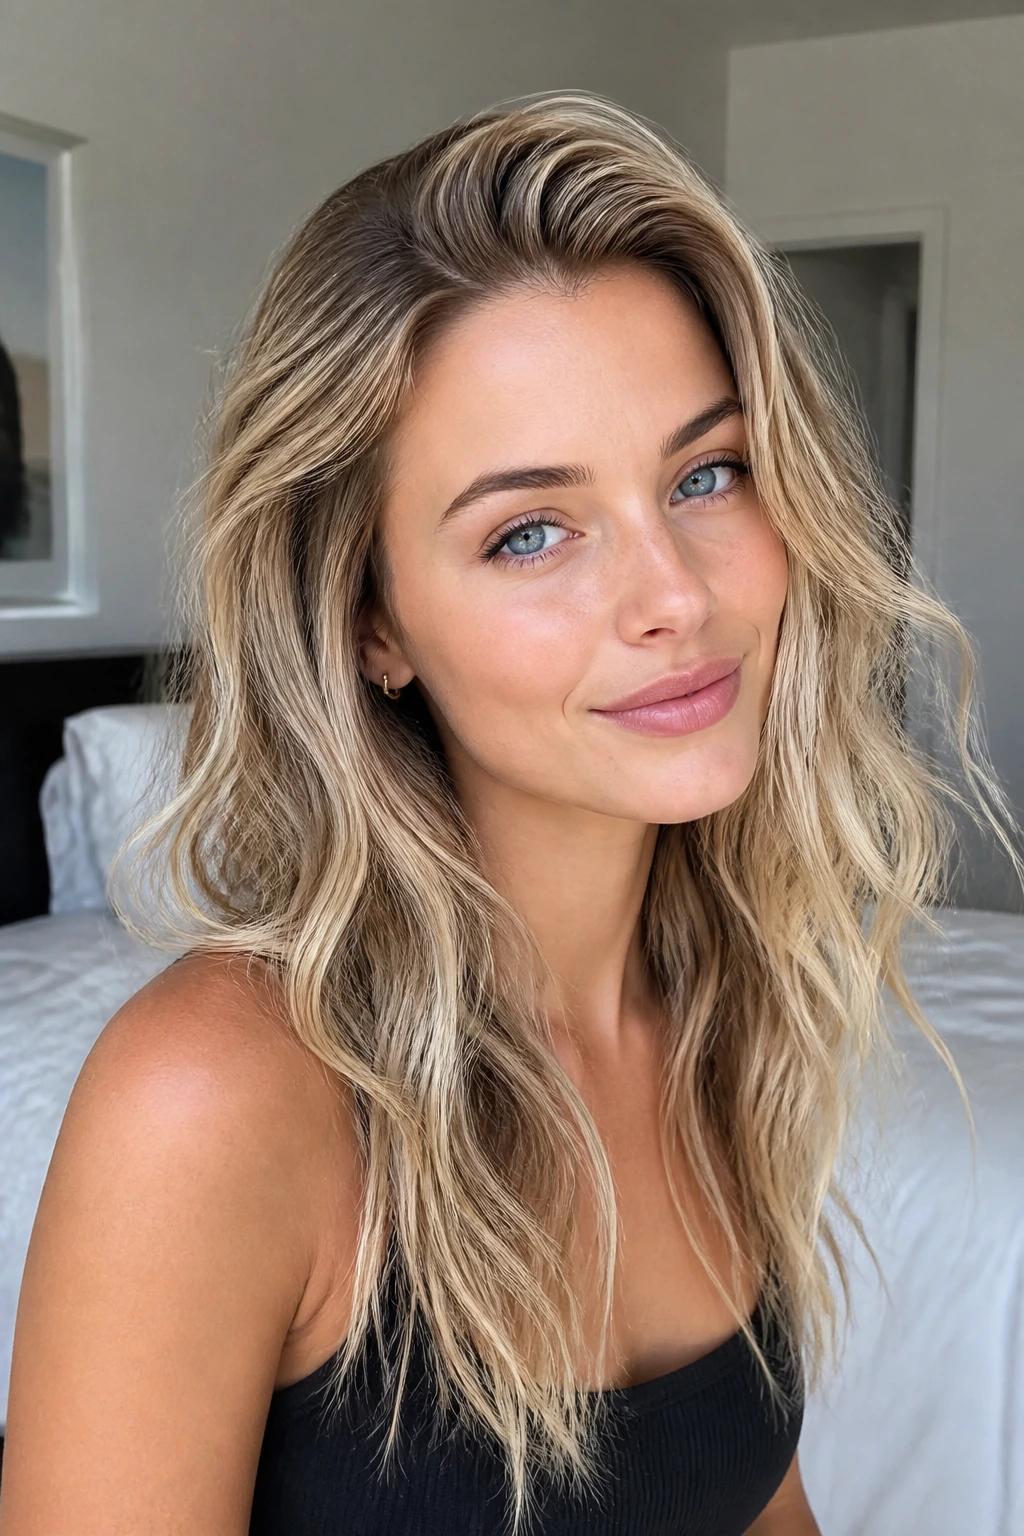
Fine hair needs structure before it needs curl. Otherwise the wave sinks under its own weight and the roots go limp before the style even gets out the door. That’s why root lift matters more here than fancy curling patterns.
A mousse or light foam at the roots gives the hair something to hold on to, and small clips at the crown while the hair cools can make a surprising difference. Use smaller sections near the top, but don’t overload the mids with product. A little texture spray at the lower half is enough to keep the wave visible without dragging everything down.
If your hair is fine, I’d rather see a few well-placed bends than a whole head of soft fluff. You can always add a touch more texture later. Taking product away is a lot harder.
16. Thick Hair Waves with Weightless Movement
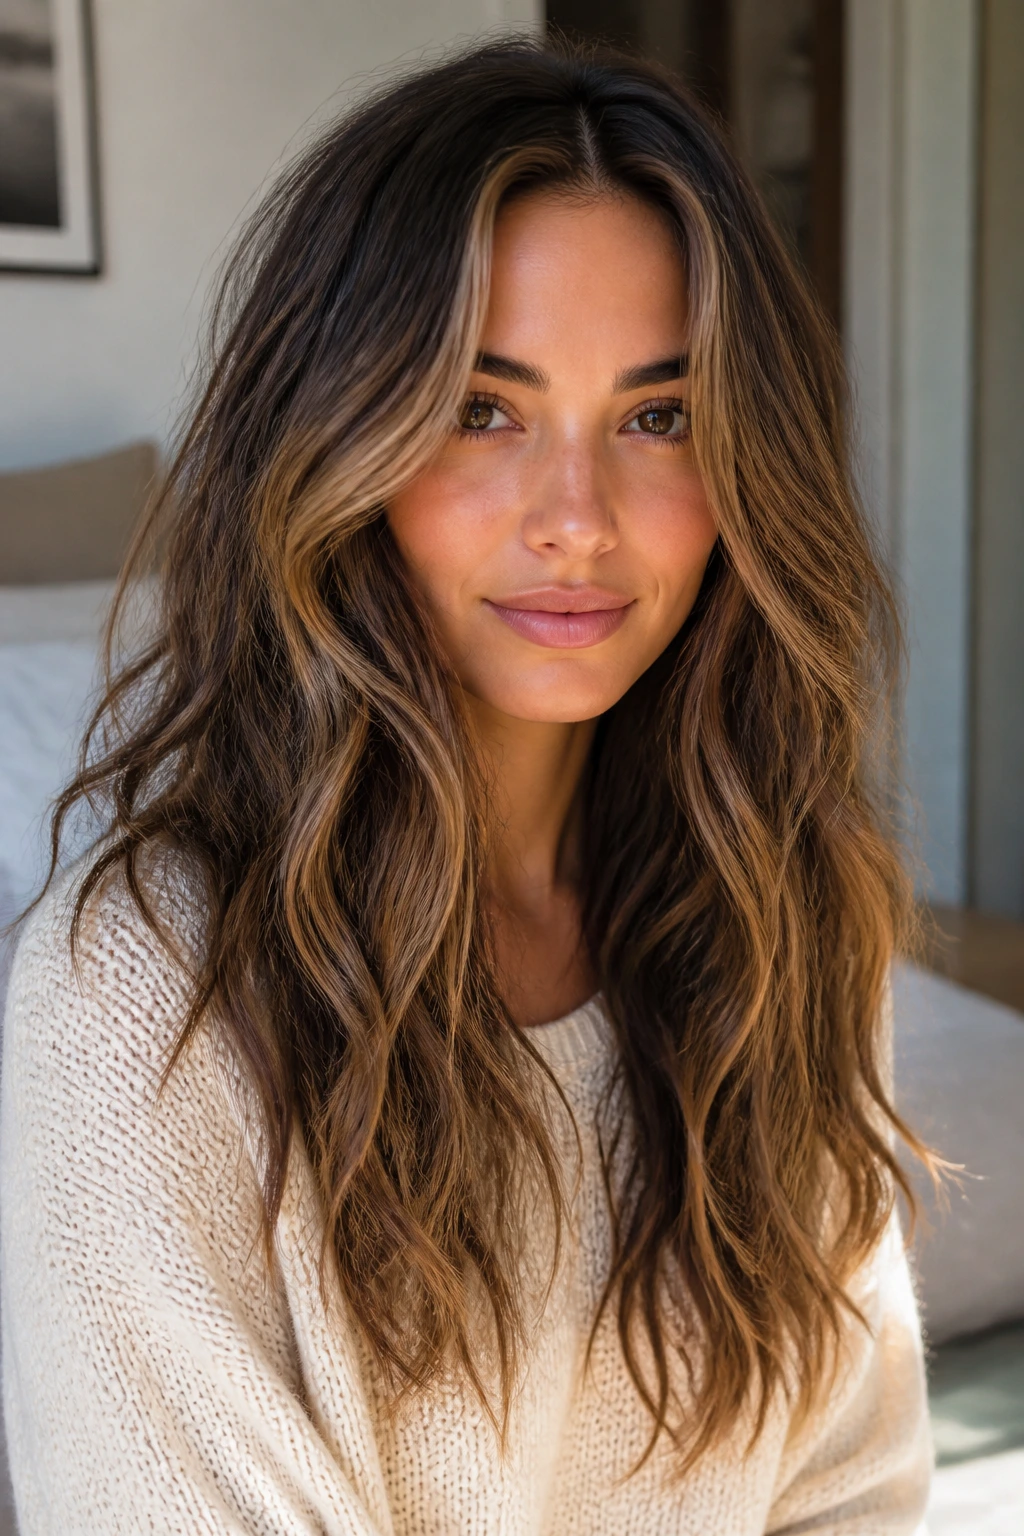
Thick hair can take a wave, but it can also swallow one. That’s why this version needs fewer sections, a little more planning, and a focus on weight control. If the hair is too bulky, the wave disappears into the body of the style.
The cut matters here. Hidden layers or internal shaping help the hair fall better without turning the top layer choppy. When styling, use larger sections than you would on fine hair, and keep the product light at the roots. A smoothing cream through the mids can help the wave glide instead of puffing out, but too much will make the style collapse into heaviness.
This is the hair type where people often overdo the curling and end up with too much volume in the wrong places. Soft beachy texture on thick hair should still move. It should not sit like a sculpture.
17. Short Crop Waves with Piecey Finish
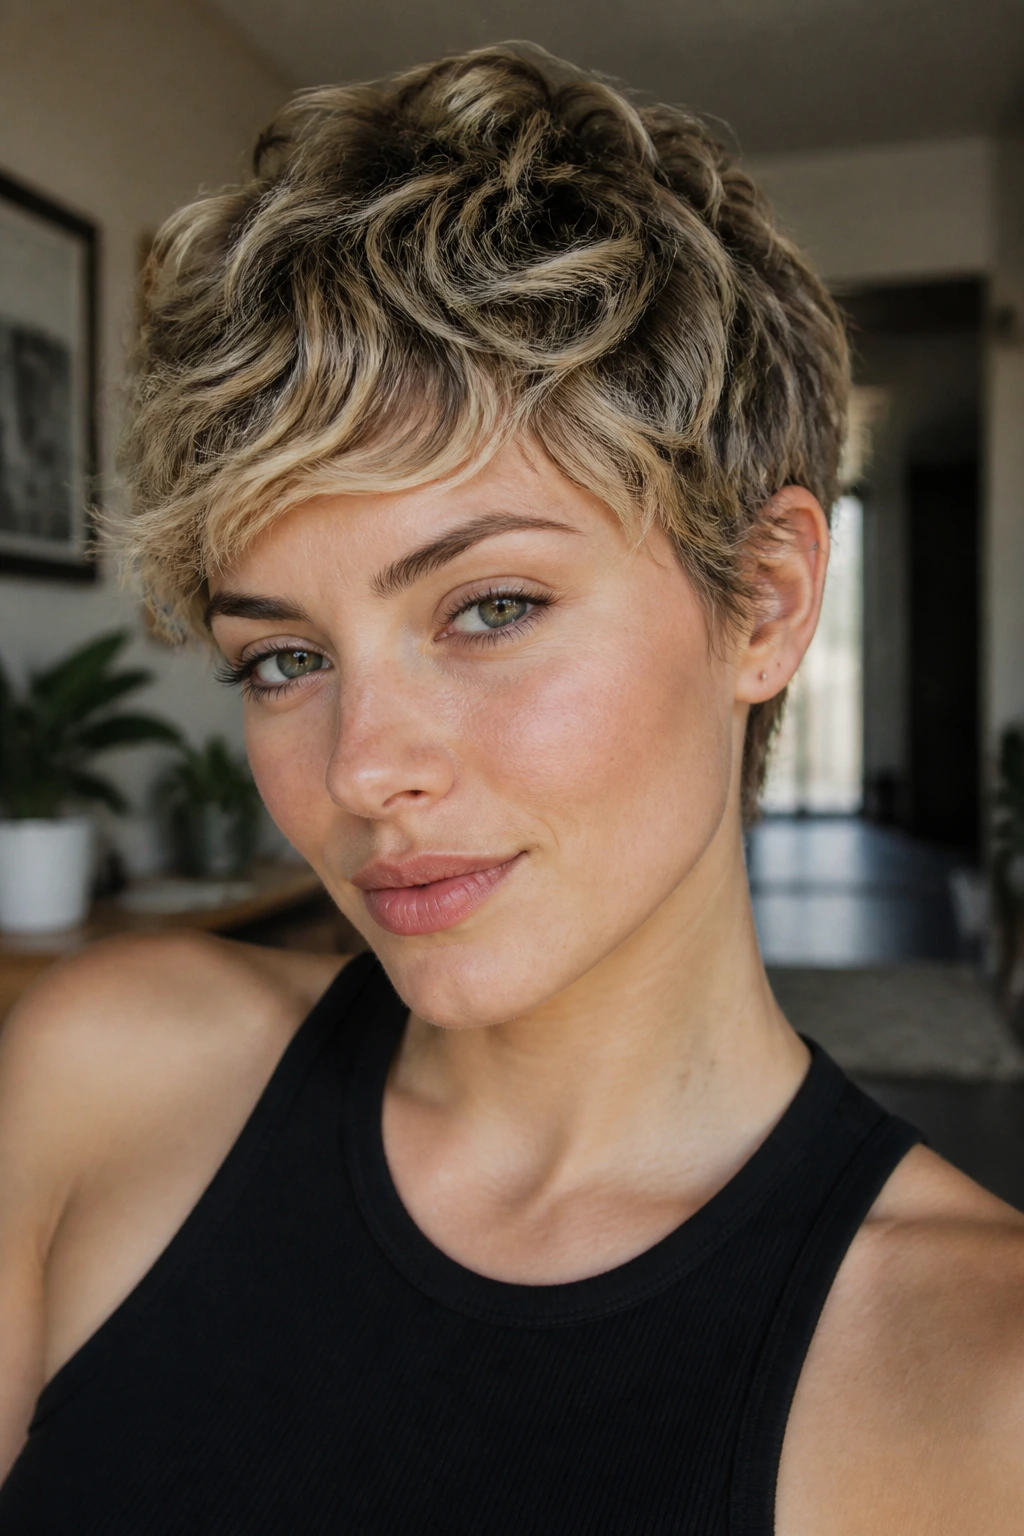
Short hair still has room for beachy texture, it just needs a different scale. On a pixie, bixie, or short crop, the wave shows up mostly through the top layers and front pieces. That means small movements matter more than big curls.
Use fingers, a mini iron, or a flat iron with rounded edges to create tiny bends in the fringe and crown. Then separate the ends with a dab of light wax or pomade on your fingertips. The goal is piecey, not wet. A little separation makes the style look intentional; too much and it turns greasy fast.
This is a good reminder that beachy waves are not only for long hair. On short cuts, they can make the shape feel softer and less sharp around the ears and neckline. Small head, small wave, same idea.
18. Glossy Soft Waves for Dressier Nights
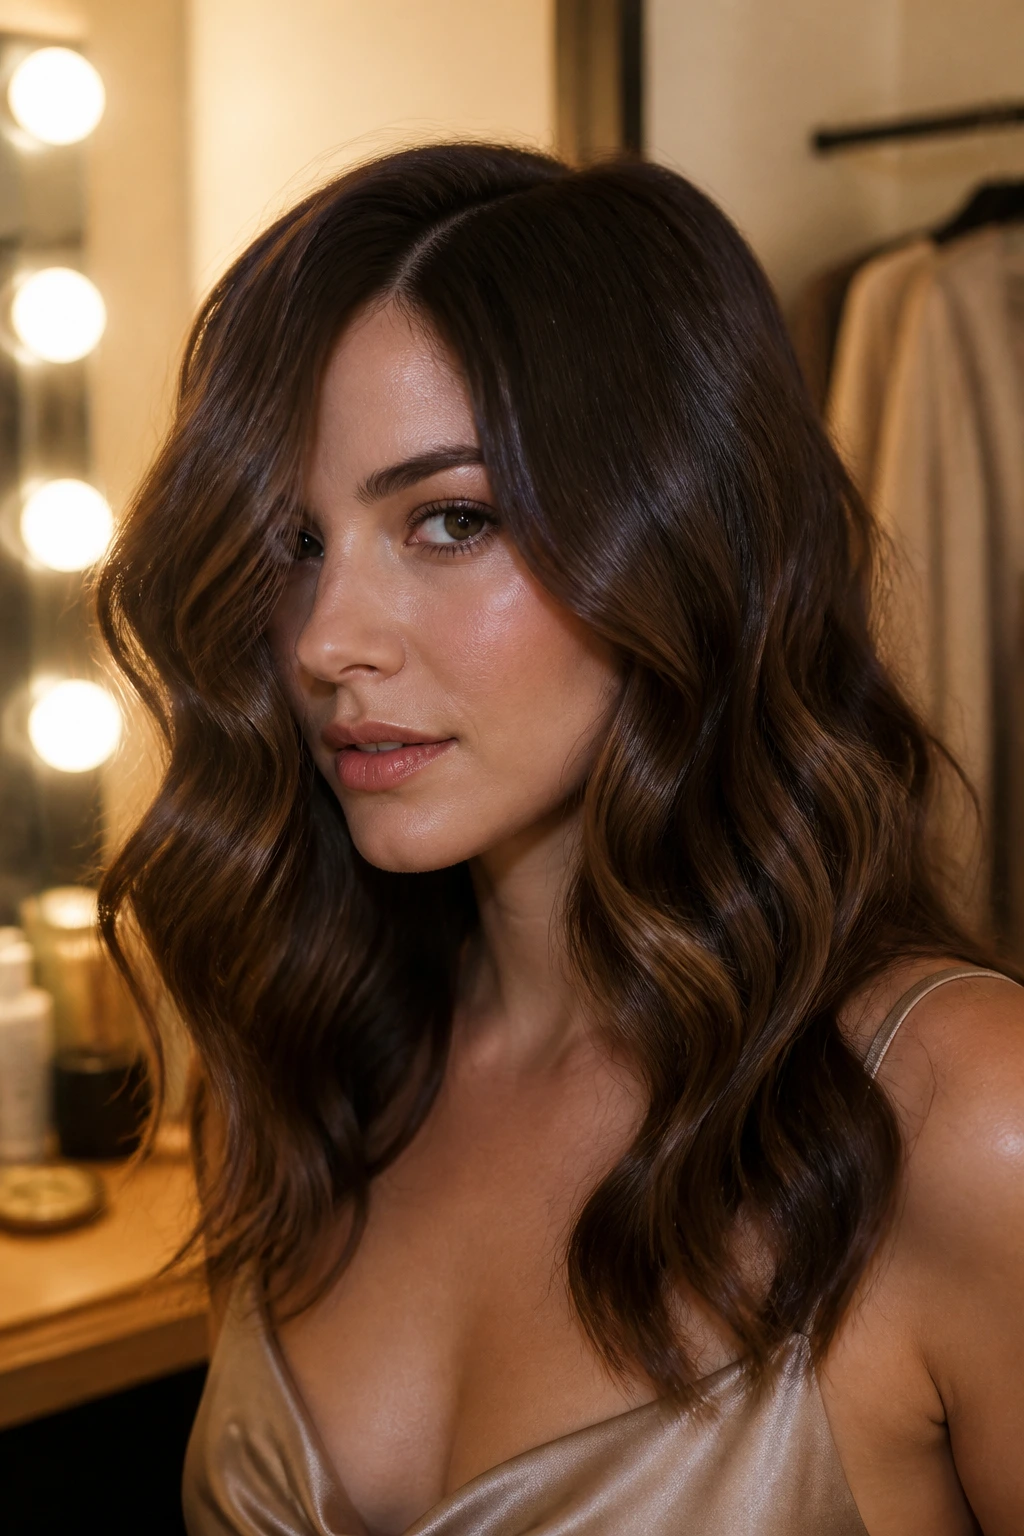
Sometimes the wave should look softer and a little cleaner, not matte and piecey. Glossy soft waves do exactly that. The bend stays loose, but the surface has more shine and the clumps stay more defined, which makes the style read dressier without turning into a formal curl set.
Curl away from the face, let the hair cool, then brush it just enough to merge the pieces without erasing the shape. Finish with a light serum only on the ends and a whisper of shine spray through the mids if the hair tends to look dull. The shine should catch the light in a quiet way, not sit on top like grease.
This version is what I’d choose when the outfit already has enough texture. Satin top, structured dress, sharp collar — all of them benefit from a wave that looks smoother and a little more deliberate. It’s still soft. Just less surfy, more finished.
What Gives Soft Beachy Texture Its Airy Finish
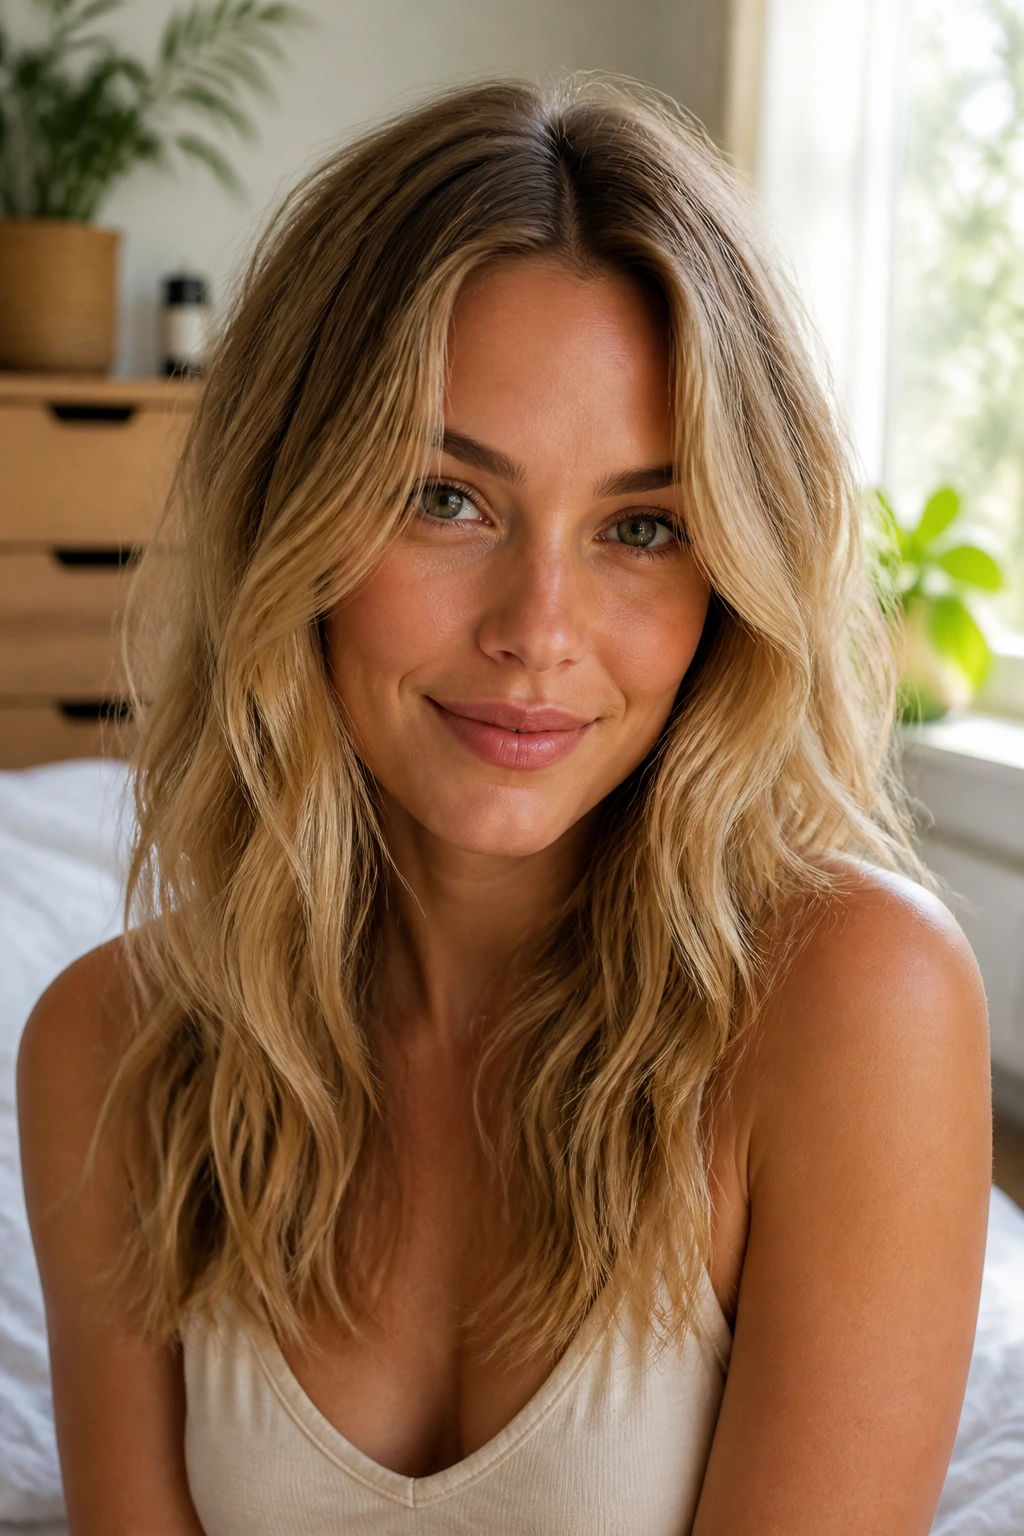
The difference between a beachy wave and a regular curl is mostly in the shape. Waves bend. Curls loop. That sounds like a tiny distinction until you see it on real hair, where the loop can suddenly make the whole style feel tighter and more formal than you wanted. A soft wave has straighter space, looser ends, and less repetition.
The cut underneath matters almost as much as the styling tool. Long layers, invisible layers, feathering around the face, and even a blunt bob all change how the wave settles. A blunt cut makes the shape feel heavier and more graphic. Layers let the hair move. Neither is wrong, but they give you very different results.
Products should support the shape, not build it from scratch. Mousse gives lift. Texture spray gives separation. Heat protectant keeps the ends from fraying. A tiny bit of cream smooths the mids. That’s about the right amount of drama for most soft waves. If the hair feels coated, you used too much.
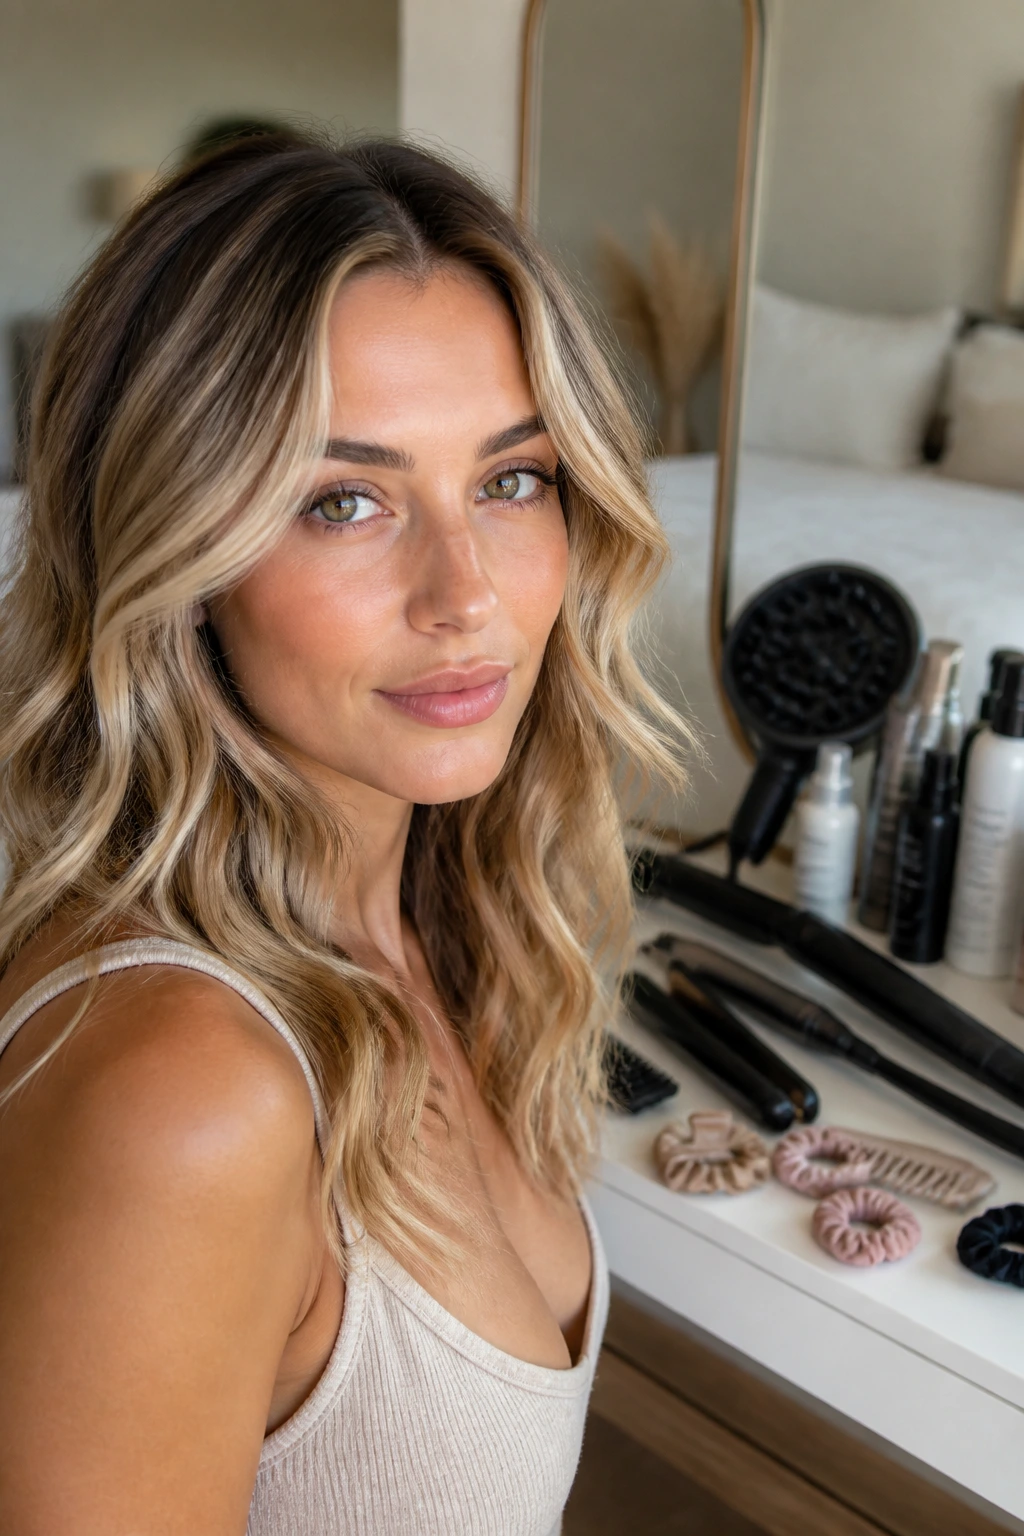
Essential Tools for These Hairstyles
-
1-inch curling wand or iron: The most flexible size for soft, loose bends on medium to long hair.
-
Flat iron with rounded edges: Good for S-waves, lob bends, and shorter cuts that need less wrap and more movement.
-
Blow dryer with diffuser: Helps natural waves dry with shape instead of puffing out into frizz.
-
Heat protectant spray: Keep this on the shelf even for low-temperature styling; it helps the ends stay smoother over time.
-
Light mousse or styling foam: Useful on fine hair, natural waves, and any style that needs root support.
-
Texturizing spray or dry texture spray: Adds separation after the wave is set; a little goes a long way.
-
Wide-tooth comb: Better than a brush for breaking up waves without flattening them.
-
Sectioning clips: Makes the styling process easier, especially on thick hair or long layers.
-
Silk scrunchies or a soft claw clip: Handy for overnight braids, twists, and half-up styles that shouldn’t leave dents.
Smart Cut and Product Choices for Better Waves
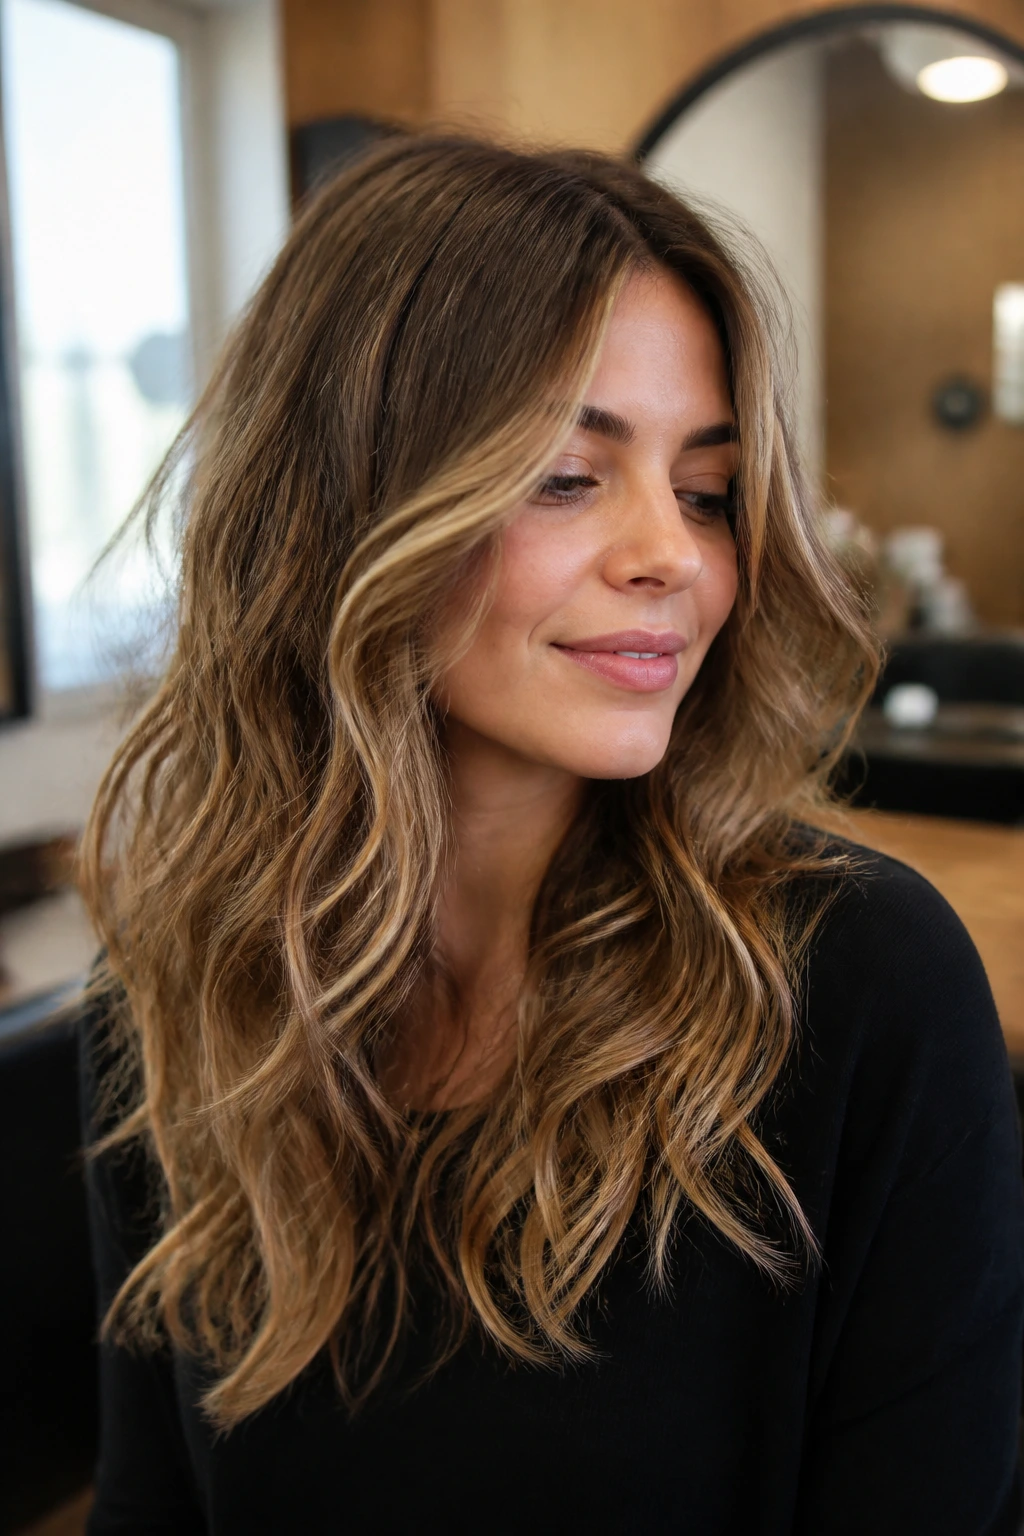
The haircut decides whether the wave falls softly or fights you the whole way. If your hair is all one length and it tends to feel heavy, ask for long layers or invisible layers around the mids and face. You do not need a choppy haircut to get movement. You need shape in the right places. That’s a much smaller request, and usually a better one.
Fine hair likes products that add body without leaving slip behind. Think mousse, foam, a light texture spray, and maybe a touch of dry shampoo at the roots on day two. Heavy creams and thick oils can weigh it down fast. Thick or coarse hair is the opposite story. It usually needs a little smoothing in the mids and a smart cut that removes bulk under the top layer so the wave doesn’t puff out like a triangle.
Porosity matters more than a lot of people think. Hair that drinks product fast can go frizzy if it’s under-prepped, while lower-porosity hair may need less product and more patience with drying time. If your waves swell in humidity, use less product at the roots and keep the finish lighter. If the hair is stubbornly straight, work in smaller sections and let every bend cool before you touch it.
How to Wear These Waves
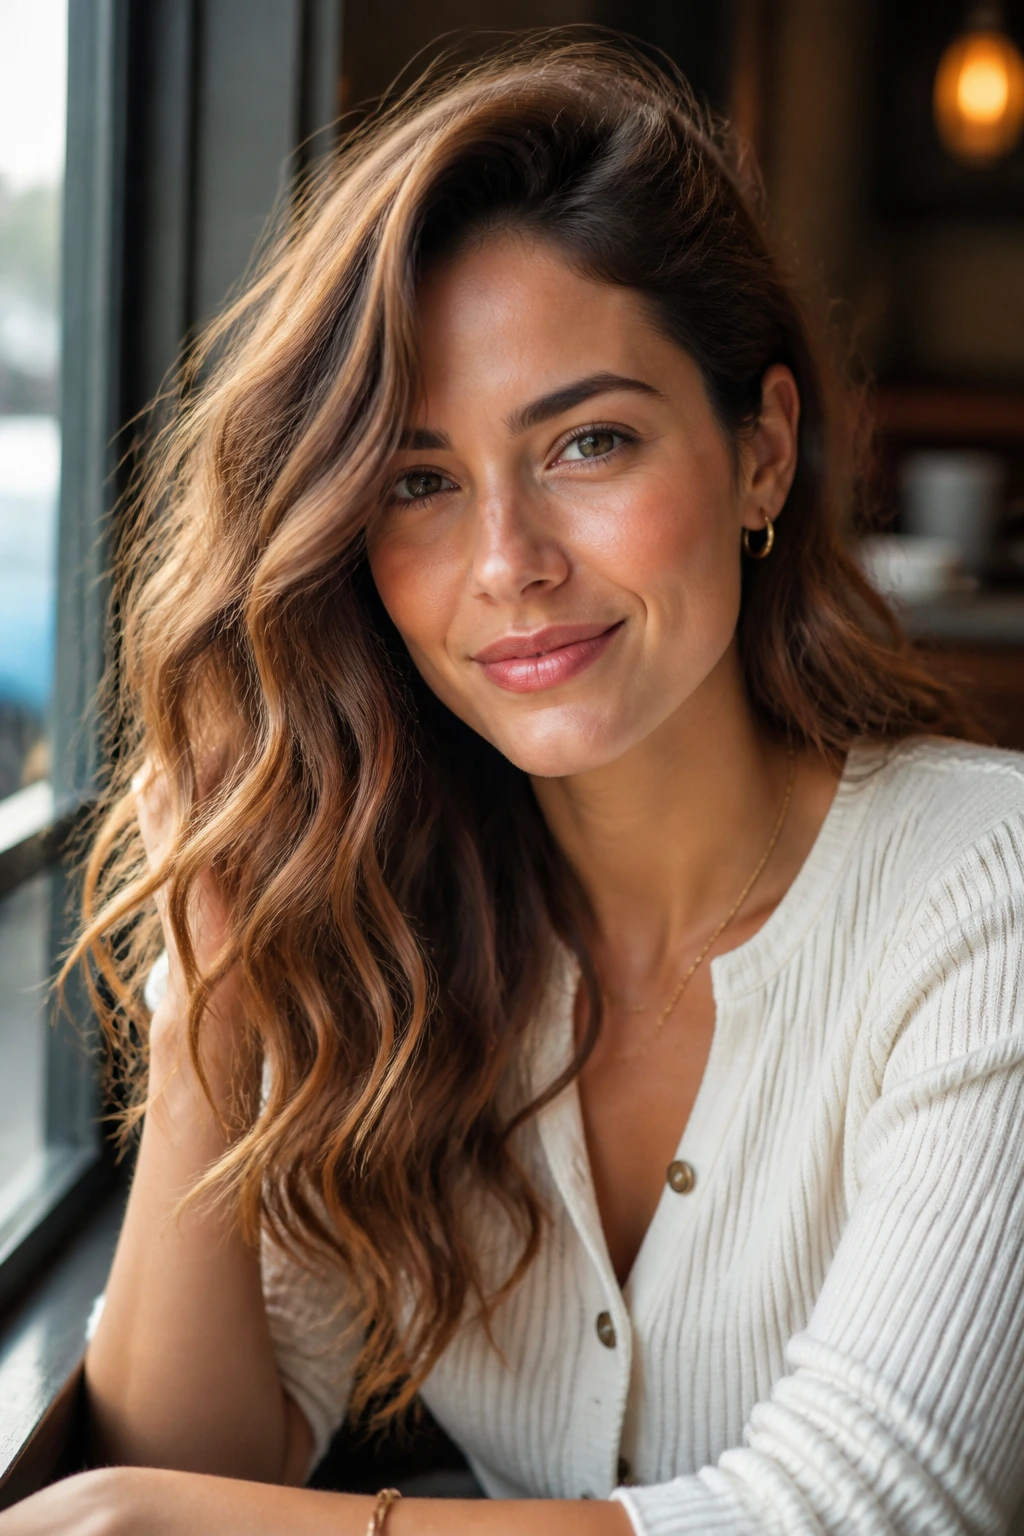
Presentation: Keep the crown soft and the bends loose so the hair reads touchable instead of set in place. A few pieces tucked behind one ear can make the whole style look cleaner without changing the wave pattern.
Accompaniments: Curtain bangs, hoop earrings, a sharp neckline, or a relaxed collar all change the tone of the same wave. A center part makes the look calm and modern; a deep side part adds lift and a little more shape around the cheekbones.
Wear Time: Heat-set waves usually hold best for one to three days, depending on density and how much you brush them out. No-heat braid and twist waves tend to start softer and loosen faster, which is fine if you want a more relaxed finish.
Occasions: Loose lob waves and claw-clip styles work for everyday wear, while brushed-out or glossy versions fit better with dressier outfits. The hair does not need to match the occasion perfectly. It just needs to feel like it belongs with the rest of the clothes.
Extra Texture Tricks and Personal Tweaks
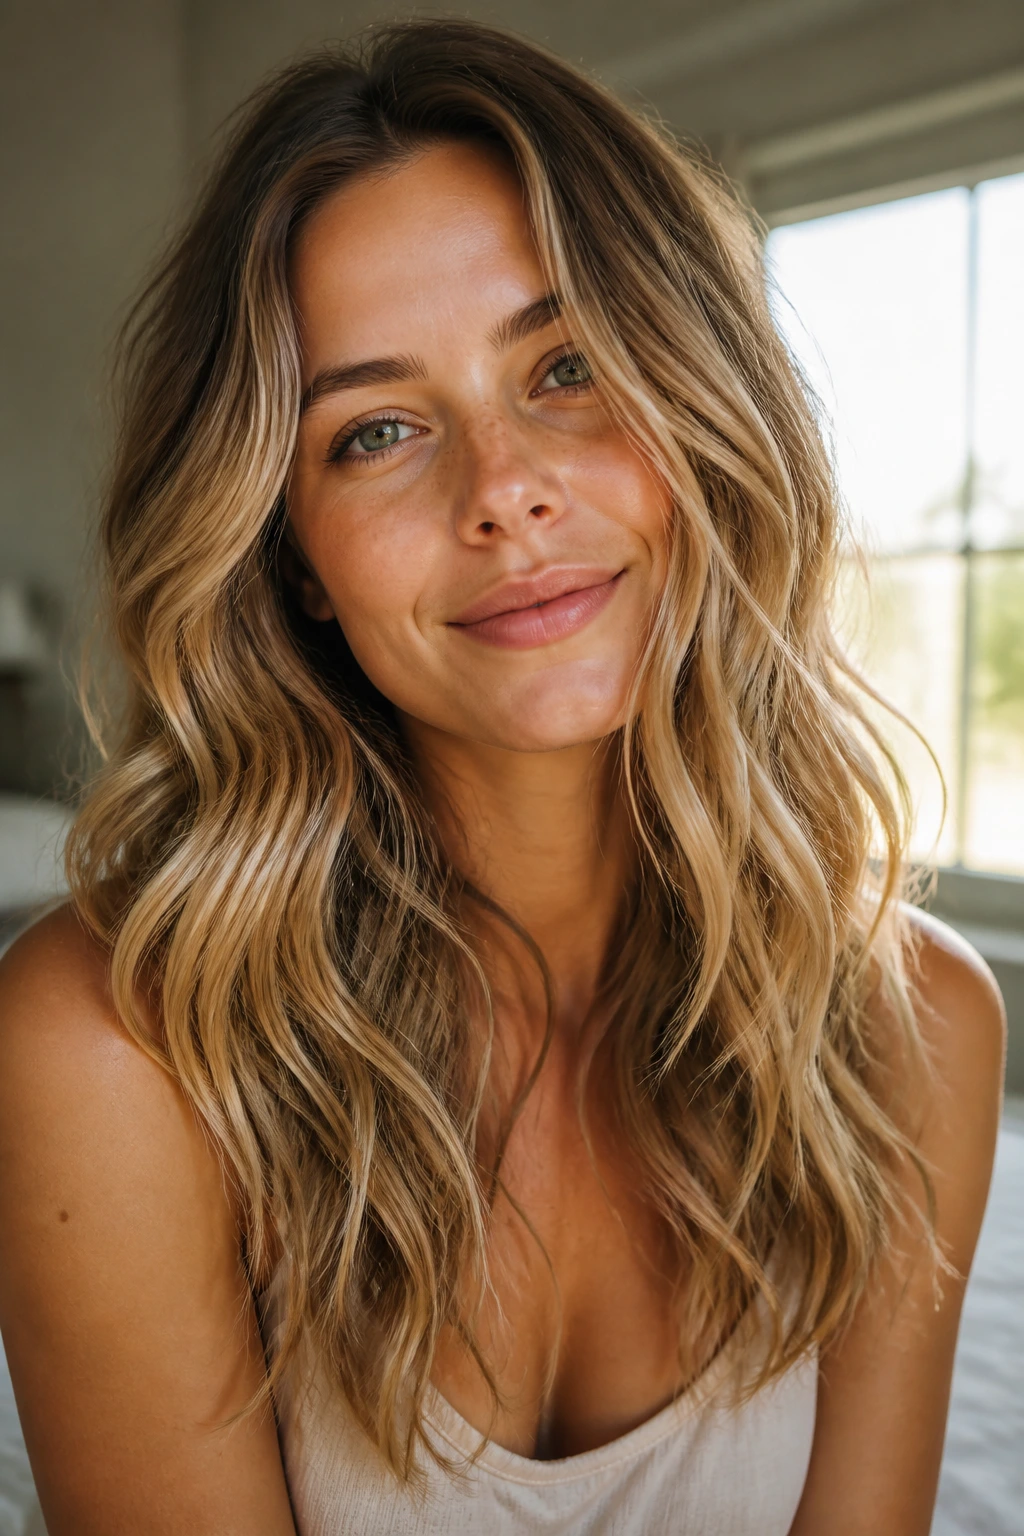
Texture Boost: A pea-sized amount of cream worked through the mids before styling helps the hair bend more cleanly and keeps the ends from splitting into frizz. Use less than you think you need. More product rarely gives you more wave.
Customization: Switch the part before you change the whole style. A center part softens a shag or lob, while a deep side part makes the same hair feel fuller at the crown. That tiny change has more payoff than people expect.
Serving Suggestions: A single tucked side, a slim clip near the temple, or one face-framing pin can make loose waves look intentional without crowding the style. I’m not a fan of over-accessorizing this look. One good detail beats five small ones.
Make-It-Yours: Fine hair usually wants mousse and root lift. Thick hair wants smaller amounts of cream and fewer sections. Naturally wavy hair often looks best when you stop styling before every piece matches. That bit of imperfection is what keeps the finish soft.
Named Variations and Alternate Approaches
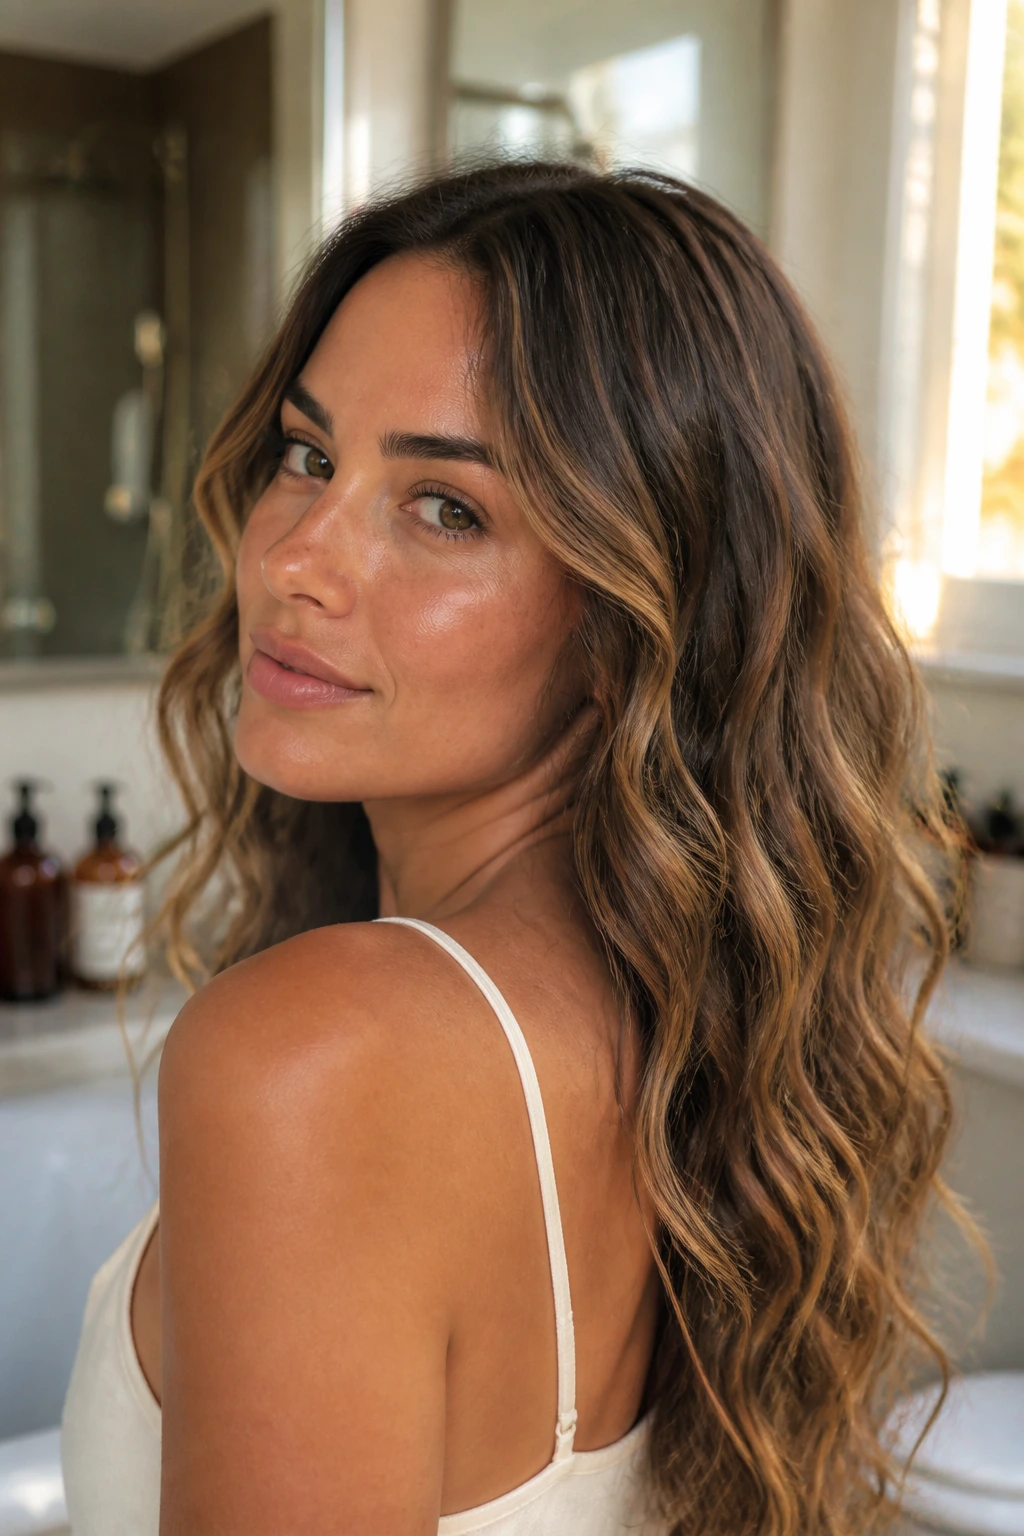
Humidity-Soft Waves: Use a slightly tighter bend and a lighter finish spray if your hair puffs up the second it leaves the bathroom. The shape should stay loose, but the outer layer needs enough control to survive damp air.
Blowout-to-Wave Hybrid: Smooth the roots with a round brush, then add waves only through the mids and ends. This version feels cleaner than a full head of bends and works well when you want movement without a lot of texture at the crown.
No-Heat Sleep Waves: Two loose braids or a couple of flat twists before bed give you softer texture with almost no effort. The result is usually gentler than hot-tool waves and a little less exact, which is a fair trade.
Short-Hair Ripple: On a bob or bixie, focus on tiny bends near the front and crown instead of trying to curl the whole head. The style reads beachy because of the movement, not because every piece looks the same.
Brushed-Out Evening Waves: Curl, cool, brush, then finish with a light sheen spray. The hair keeps the same soft bend but loses the casual, piecey look and starts reading more dressed up.
How to Keep Soft Waves Fresh Between Washes
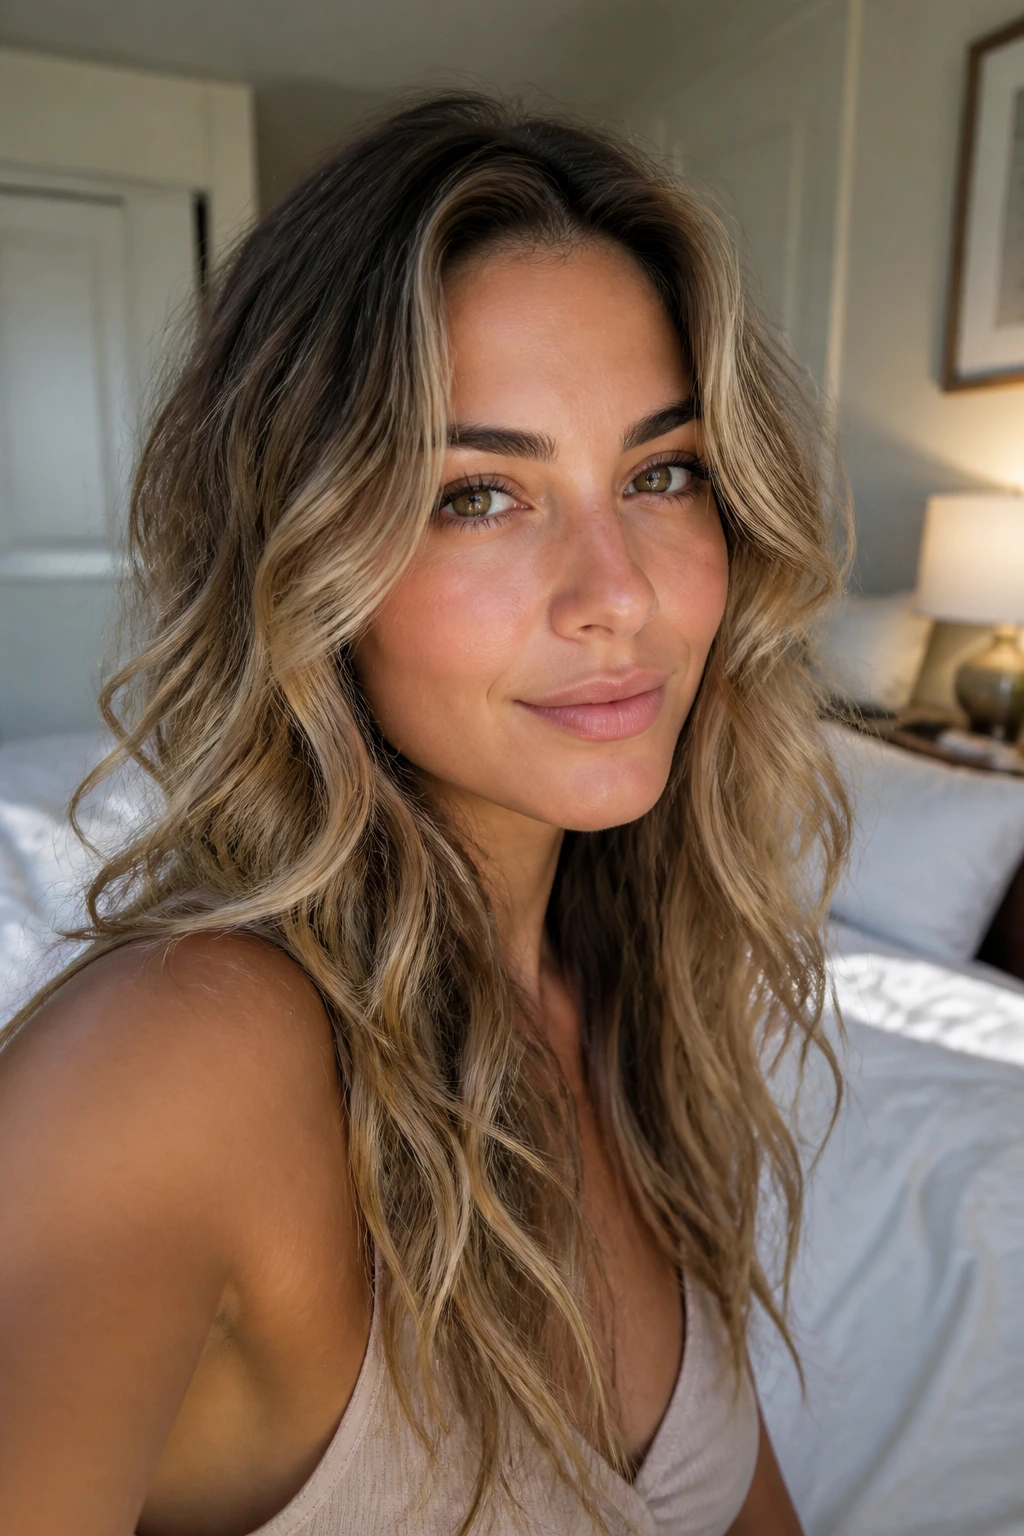
Soft waves age better than a lot of styles, but only if you treat them like they need a little maintenance. Sleep on a silk pillowcase if you can, or at least pull the hair into a loose pineapple or low, soft tie so the bends do not get crushed flat. A hard elastic is a bad idea here. It leaves dents that are awkward to hide.
On day two, work dry shampoo into the roots and shake it through with your fingers. If the front pieces have gone limp, re-bend only the face-framing sections with a hot tool and leave the rest alone. That small touch-up usually gives the whole style enough life to survive another day without a full restyle.
Most heat-set waves hold best for one to three days. Braids and twists tend to soften faster. If the ends go fuzzy, don’t reach for more oil first. That usually makes the mids heavy and the roots flatter. A tiny mist of water, a quick scrunch, and a fresh pinch of texture spray are usually the better fix.
Common Mistakes to Avoid
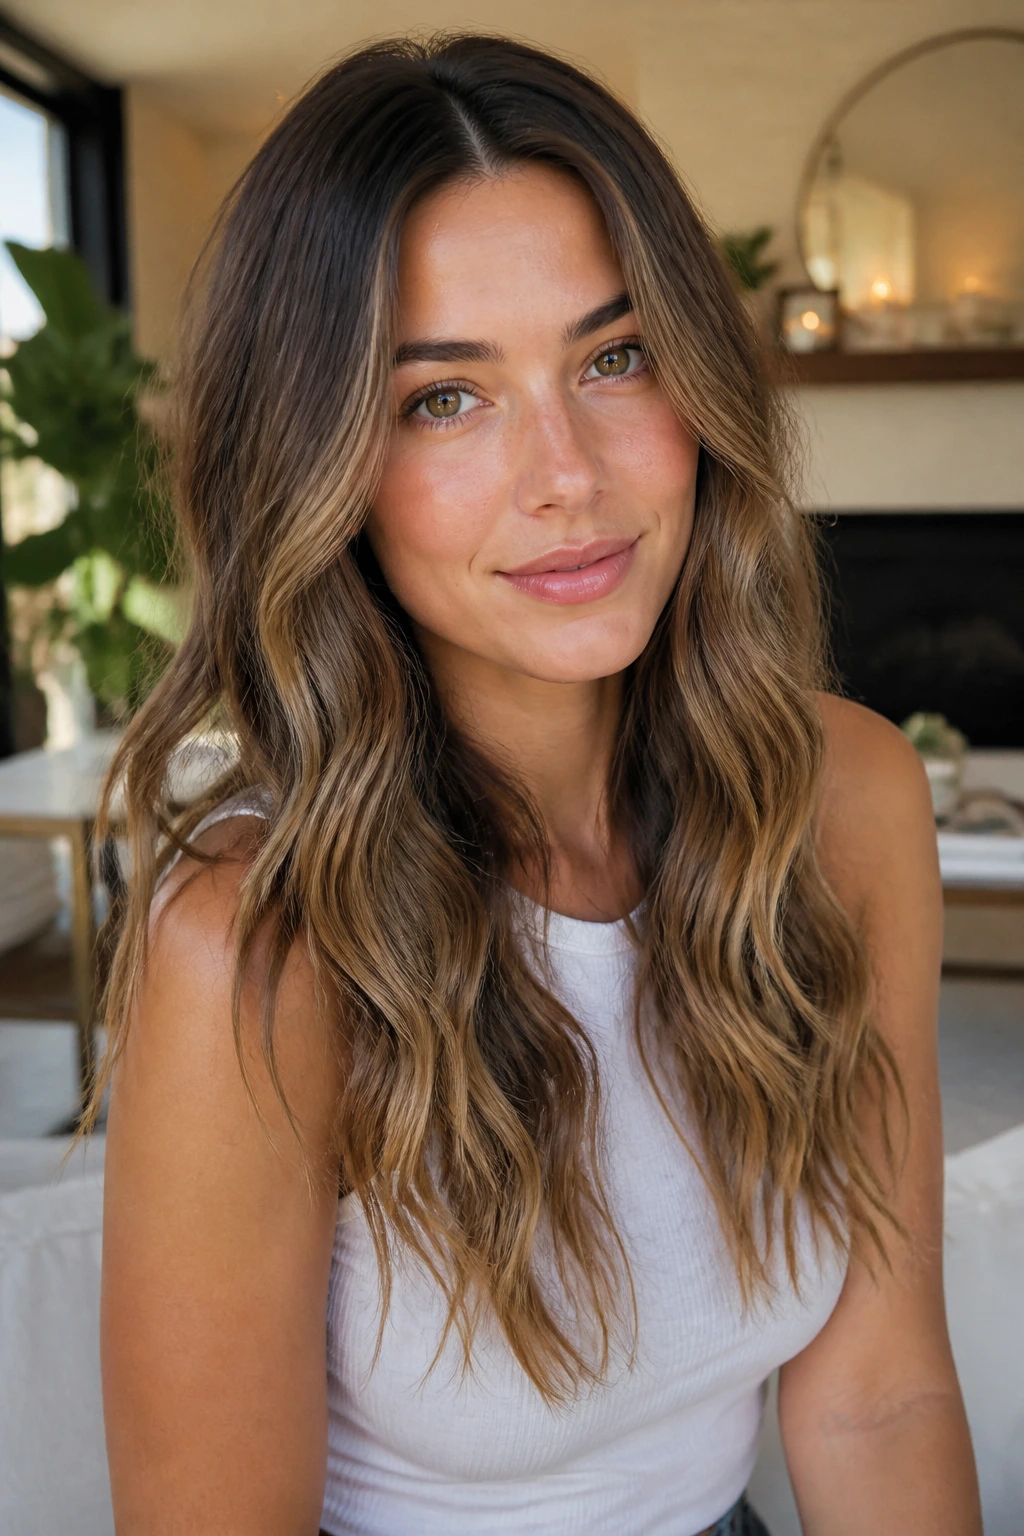
-
Curling every section the same direction: The hair can look too neat and ringlet-like. Alternate directions and leave a few face-framing pieces looser so the wave has some break in it.
-
Using too much product at the roots: The hair goes flat and sticky instead of airy. Keep cream and oil on the mids and ends, then build lift with mousse or dry shampoo near the crown.
-
Brushing before the hair cools: Warm waves collapse fast and lose their shape. Let each section cool fully before you touch it, pin it, or brush it out.
-
Making sections too wide: Huge sections heat unevenly and fall out early. Use smaller slices on fine hair and medium ones on thicker hair so the wave actually sets.
-
Skipping the cut: One-length hair can hold a wave, but it often looks heavier and less soft. Long layers, face-framing shape, or hidden debulking usually make the texture easier to wear.
-
Turning the heat too high: The ends get fried and the wave starts to look dry instead of soft. Use the lowest setting that actually bends your hair, and lower it again if your hair is colored or fragile.
Frequently Asked Questions
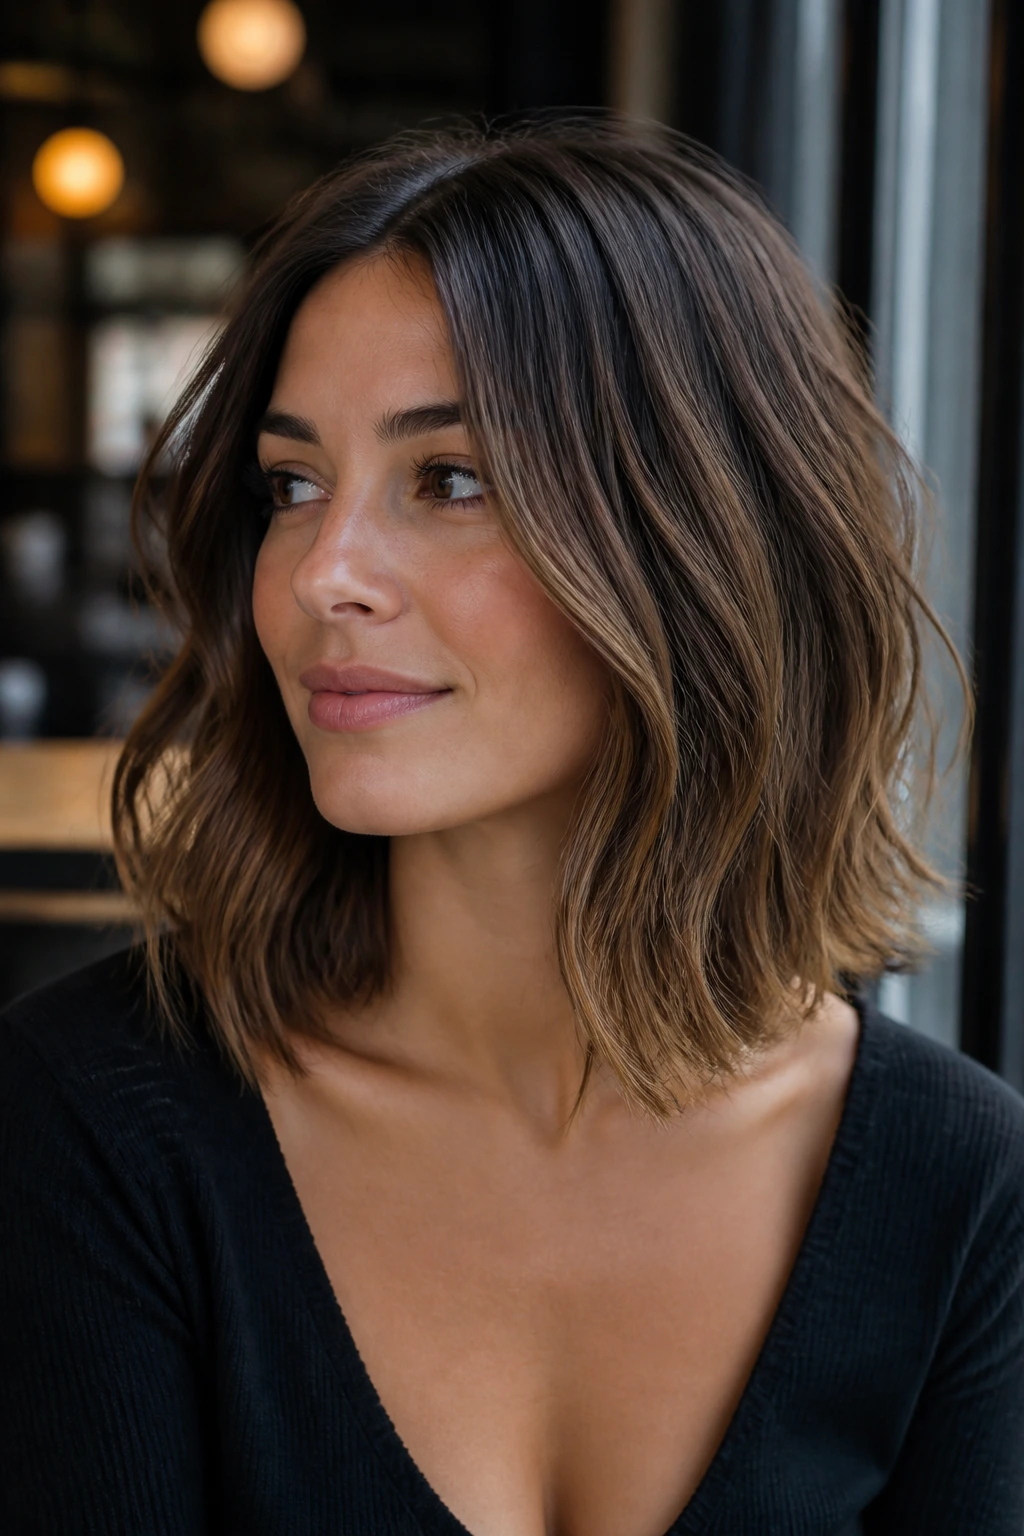
What hair length works best for soft beachy waves?
Long layers, collarbone lobs, and shoulder-length shags tend to give the easiest results because the wave has room to move. Shorter cuts can still work, but the texture needs to be smaller and more piecey so the shape doesn’t get lost.
Can fine hair pull off beachy texture without falling flat?
Yes, but the product choice matters. Fine hair usually does better with mousse at the roots, small sectioning, and a light texture spray at the end rather than creams or heavy oils that drag the style down.
Should the ends be curled too?
Not always. Leaving the last inch straighter can make the style look softer and more modern, especially on lobs and long layers. If you curl every inch, the result can drift toward a tighter curl pattern instead of loose waves.
What if my waves fall out fast?
Start by using smaller sections and letting each one cool before you touch it. A clip at the root while the curl sets can help a lot, and a little extra support from mousse or texturizing spray usually lasts longer than trying to use more heat.
Is a curling wand better than a flat iron for this look?
A wand is easier for loose, consistent bends. A flat iron gives more control on shorter hair, on S-waves, and on styles where you want the ends a bit straighter. Both work; the shape you want decides which tool makes more sense.
Can naturally wavy hair just air-dry into these styles?
Often, yes. Natural waves usually look best when they’re encouraged with a light foam or leave-in and dried with minimal touching. If the pattern is uneven, a diffuser or a few quick bends around the front can smooth things out.
How do I keep waves from looking too curly?
Use larger sections, leave the ends slightly softer, and brush or finger-comb only after the hair cools. The moment the whole head looks too uniform, the beachy feel starts to disappear.
Do layers help or hurt this style?
Usually, they help. Long layers and soft face-framing pieces let the wave move instead of hanging like one heavy sheet. The only catch is that the cut should be balanced; too many choppy layers can make the texture look frayed.
Soft Waves That Actually Wear Well
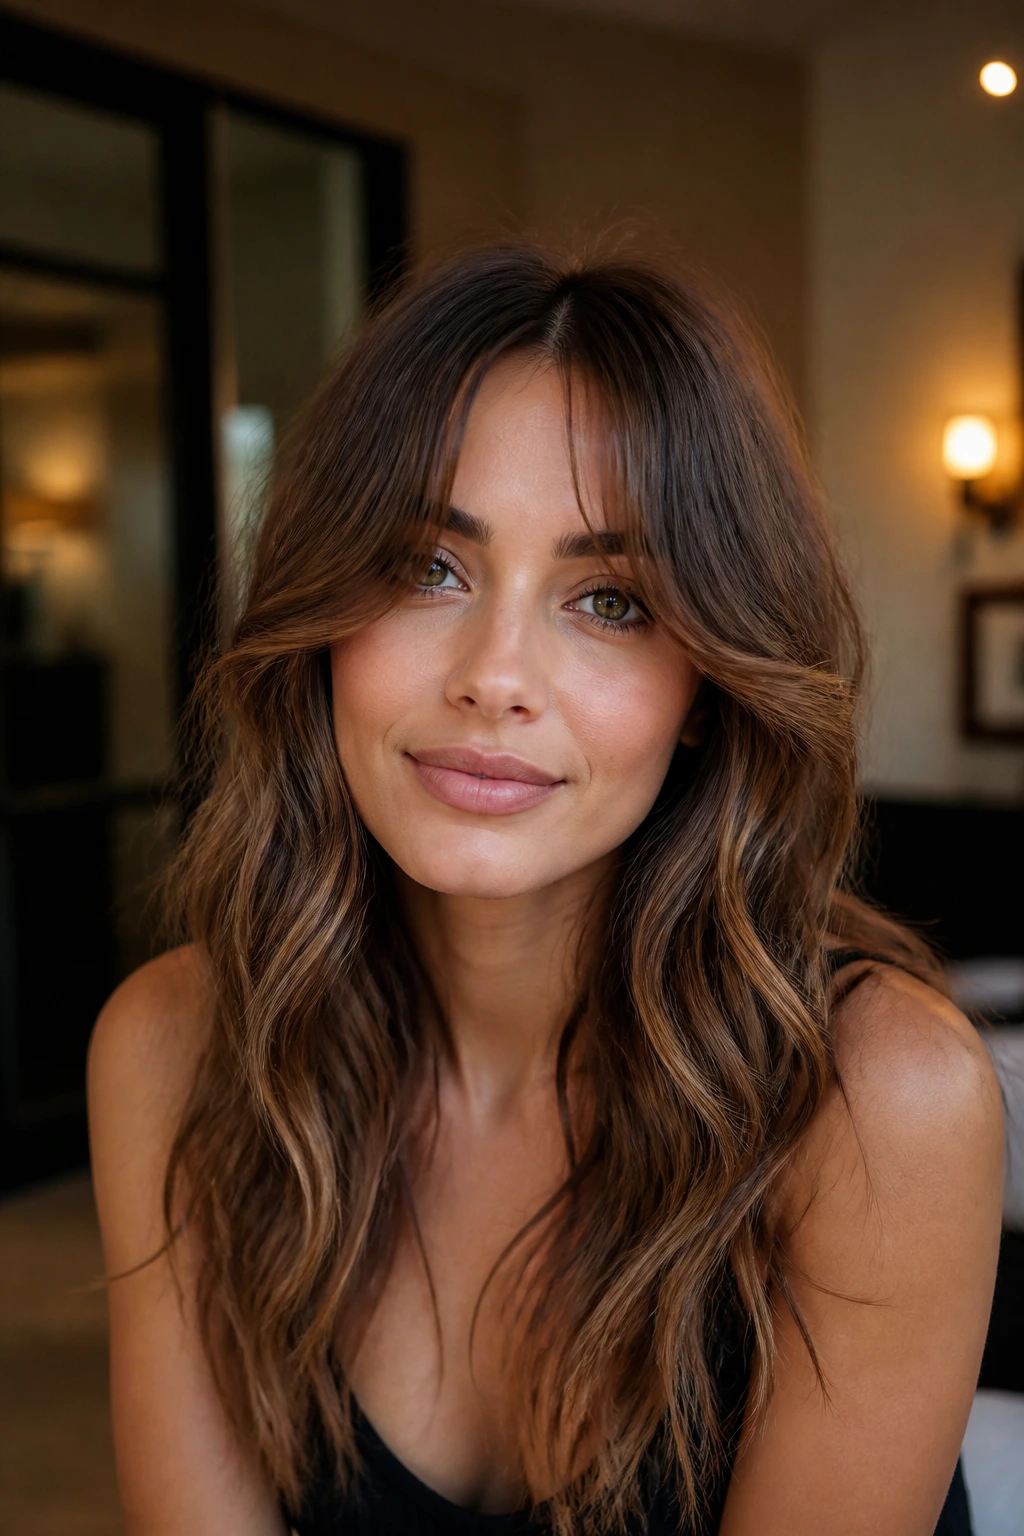
The best wavy hairstyles are the ones that still look like hair after they’ve been lived in a little. That means the cut supports the wave, the tool shapes it without overworking it, and the finish stays soft enough to move. If any one of those pieces goes missing, the style starts to look styled instead of easy.
Pick one shape that matches your haircut, then keep the rest simple. A loose bend around the face, a little lift at the crown, and ends that still feel touchable will carry you a long way. That’s the part people remember anyway — not the exact tool, just the way the wave falls and settles as you move.
