



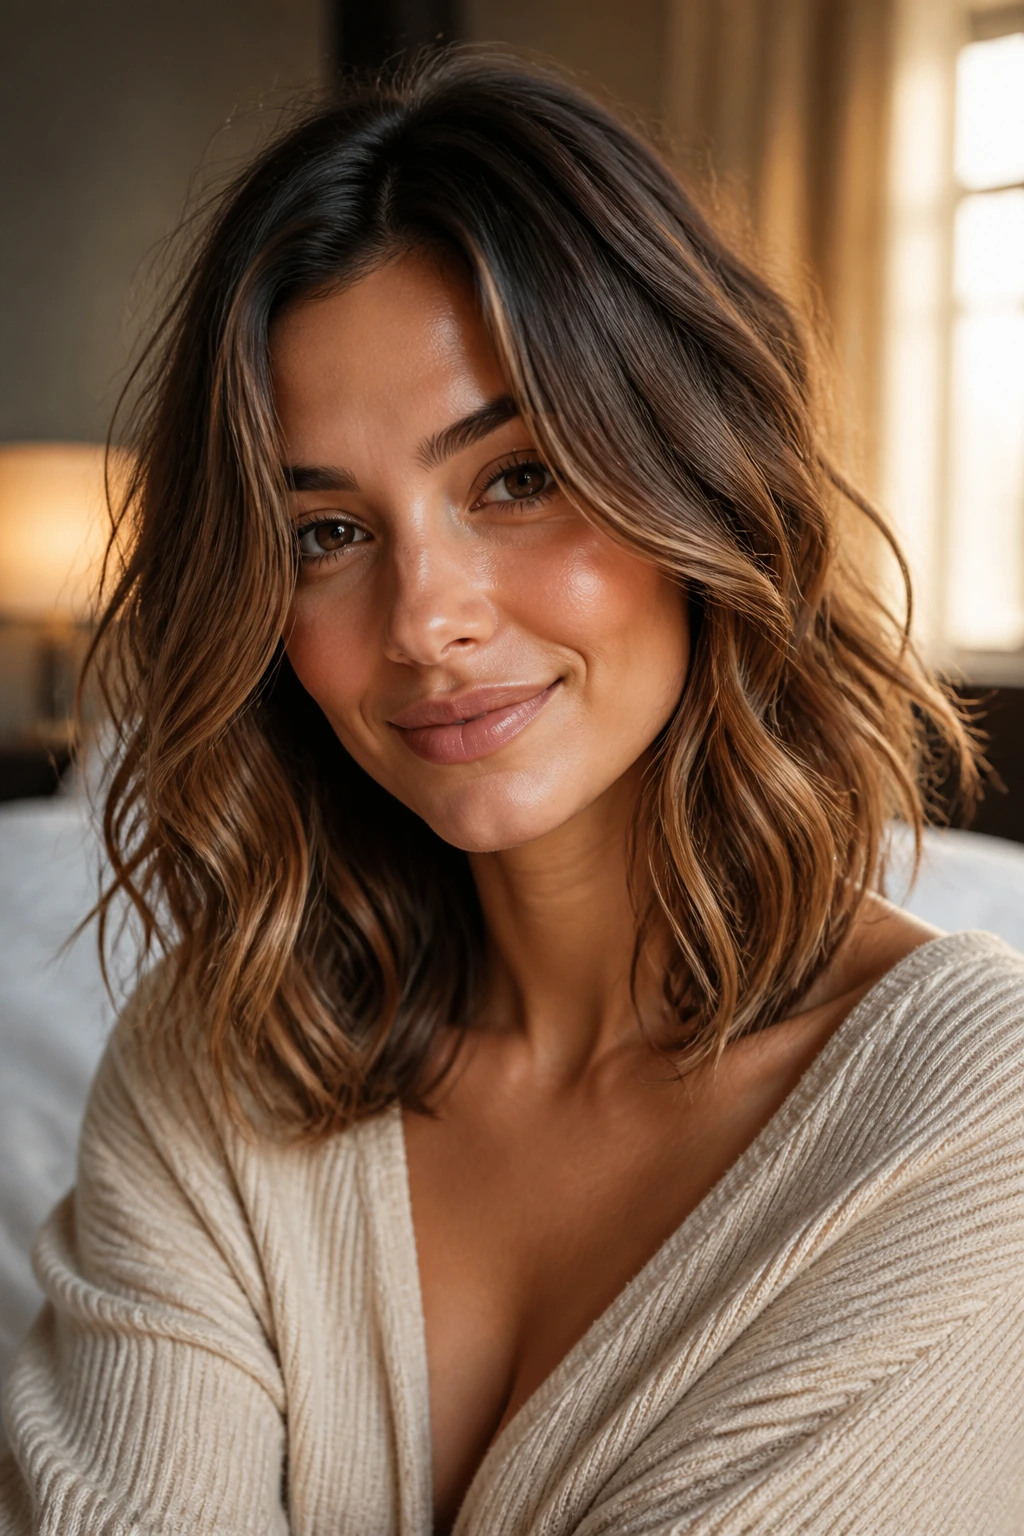
Shoulder length wavy hairstyles sit in that rare spot where hair still moves, still catches a breeze, and still has enough weight to look intentional instead of floaty. The length brushes the collarbone, the bend sits around the cheekbones, and the ends don’t drag the whole shape into the floor by lunchtime. That balance is the reason this cut keeps showing up in salons, on sidewalks, and in those mirror selfies people take when their hair finally behaves.
There’s also a reason people keep asking for waves at this length instead of going longer. Shoulder-length hair gives you enough room for texture to show, but not so much that every curl has to fight gravity. The wave pattern reads clearly. The shape holds up after a few hours. And when the front pieces fall a little crooked, which they often do, it tends to look lived-in rather than wrong.
I’m fond of this length for one blunt reason: it’s forgiving. A one-inch curling wand, a flat iron bend, a bit of air-drying, or a rough blow-dry with mousse can all land in the same soft territory. You do not need theatrical curls. You need movement, a little separation, and ends that still look like hair—not straw, not spaghetti, not a helmet. The styles below lean into that sweet spot from a bunch of different angles, and a few of them are far easier to wear than they look.
Why These Shoulder-Length Waves Keep Working
-
The weight lands in the right place: Hair cut to the shoulders keeps enough mass to smooth out frizz, but not so much that waves collapse into a limp curtain by midafternoon.
-
The face gets the benefit first: With this length, the bend usually sits near the jaw, cheekbone, or collarbone, which means the wave frame is visible even when the rest of your outfit is plain.
-
The styling window is short: A 1-inch wand, a flat iron, or even a diffuser can shape shoulder-length hair fast because you’re not wrestling with endless sections.
-
The grow-out is kinder: A blunt line can stay neat for a long time, and layered versions keep moving as they grow out instead of turning heavy and triangular.
-
It works with a messy finish: This is one of the few lengths where a slight mismatch in texture—soft roots, piecey mids, a bendier front section—can look better than a perfectly even curl pattern.
-
It takes accessories well: Clips, barrettes, headbands, and tucked sections all land cleanly at this length because there isn’t too much hair to pin down.
That’s the charm of it. Shoulder-length waves do not need to be precious. They need shape, a little air, and enough texture to keep the ends from sitting flat against the shoulders.
1. Center-Part Waves That Skim the Cheekbones
A clean center part and a soft bend through the mid-lengths can make shoulder-length hair look calm in the best way. The wave starts near the cheekbone, slips past the jaw, and settles right on the collarbone, where it gets that easy movement people spend half an hour trying to fake.
Why It Works
This style works because the center part keeps both sides even, which makes the soft texture read as deliberate instead of accidental. If you wrap 1-inch sections away from the face and leave the last inch out, the ends stay relaxed and the whole cut keeps its swing.
It’s especially good on oval and heart-shaped faces, but I also like it on round faces when the front pieces are kept a touch longer. The wave shouldn’t start too high. Let the root stay a little flat, then build the bend through the middle of the hair.
- Best tool: a 1-inch curling wand
- Best product: lightweight heat protectant with a little slip
- Timing cue: let each curl cool fully before touching it
- Best finish: finger-comb, then mist once with flexible hairspray
Pro tip: clip the front pieces forward while they cool. That tiny detail keeps the cheekbone bend from falling out before you leave the bathroom.
2. Deep Side-Part Waves for Instant Lift
A deep side part changes the whole mood of shoulder-length waves. The hair suddenly has a little drama at the crown, and the wave pattern looks denser because one side gets a touch more height before it drops into the bend.
The part does a lot of work here. More than people expect. If your hair is fine or tends to lie flat at the roots, this style gives you the illusion of fullness without needing a ton of product. A small amount of mousse at the roots, a rough dry, and a side sweep around the temple are enough to make the shape feel bigger.
Keep the wave soft. You want a loose bend, not a stiff curl that fights the side part. I usually like a 1.25-inch curling iron for this one because it makes a broader wave, then I brush it out once the hair is cool. That softens the line just enough.
The result lands somewhere between easy and dressed up. Good place to live.
3. Curtain Bang Waves That Melt into the Cut
Why do curtain bangs and shoulder-length waves click so well? Because both shapes want to move away from the face, then fall back in. That makes the transition between fringe and length look smooth instead of chopped up.
The trick is in the direction. Blow-dry the bangs with a round brush or a medium roller, pulling each side away from the center and slightly up at the roots. Then let the rest of the hair take a looser wave pattern so the front doesn’t feel too polished compared with the body.
How to Wear It
Keep the curtain pieces grazing the cheekbone, not buried in the eyes. If they’re cut too short, the wave ends up looking busy. If they’re too long, they stop acting like bangs and start acting like random face-framing pieces. There’s a narrow sweet spot here, and it’s worth protecting.
This style is one of the most flattering options for shoulder-length wavy hairstyles because it softens the forehead and keeps the cut from feeling boxy. You get movement near the eyes, movement through the mid-lengths, and enough texture at the ends to keep it from going flat.
4. Invisible-Layer Waves with Soft Movement
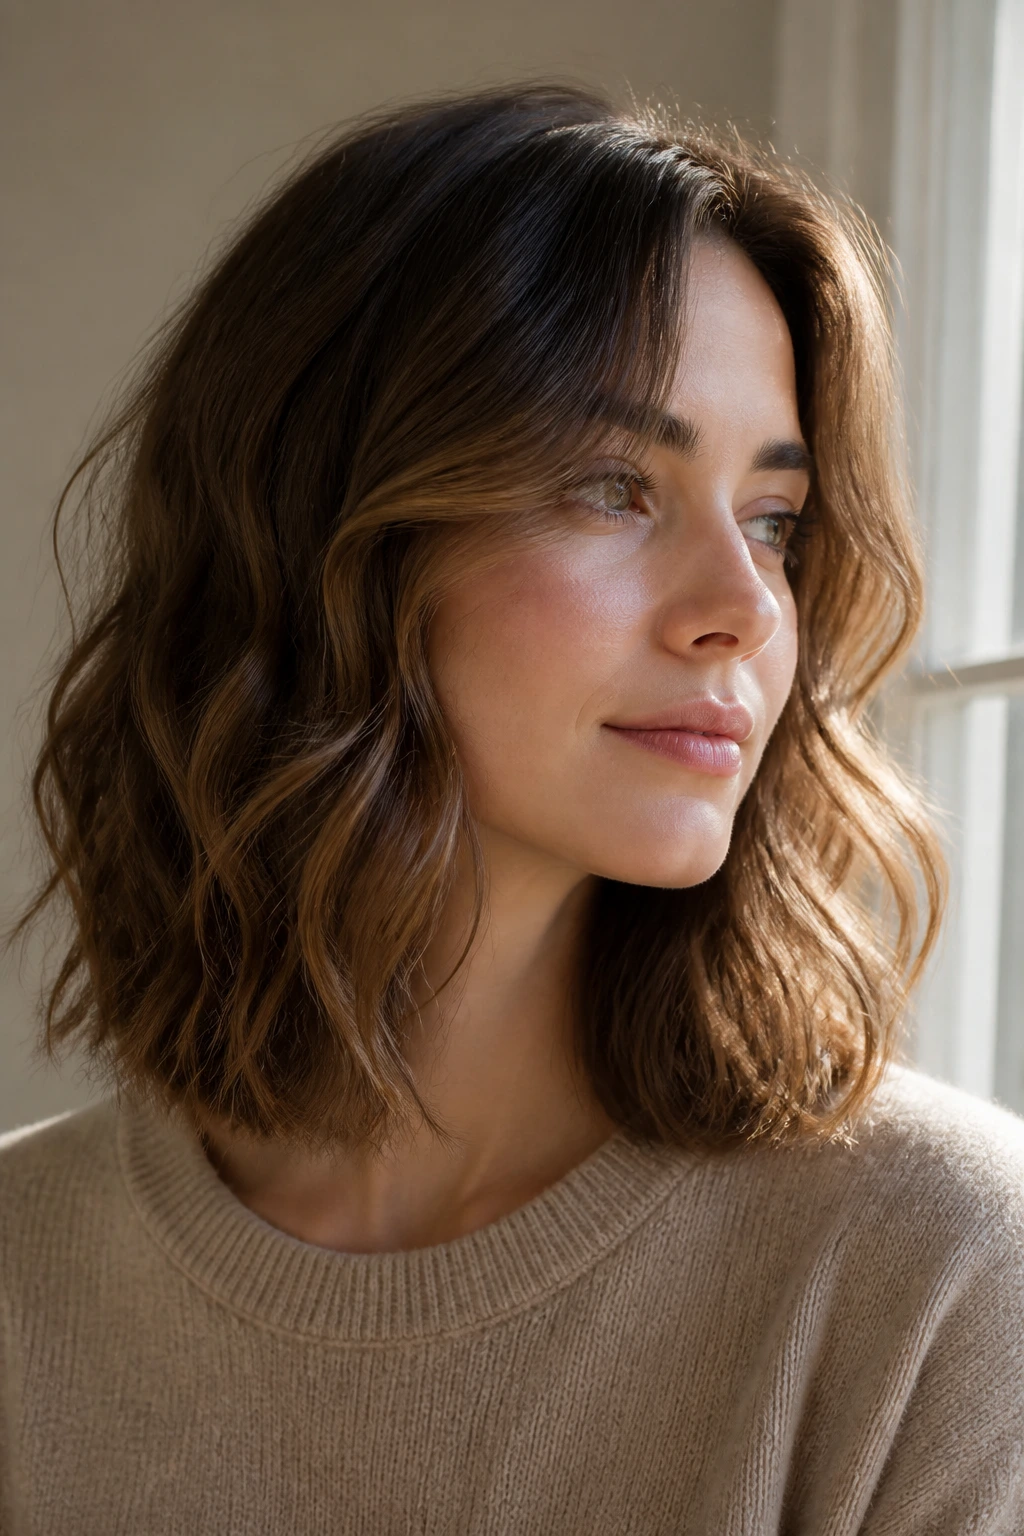
If you want soft texture without obvious choppy ends, invisible layers are the quiet answer. The cut keeps a mostly clean outline from the front, but the interior has enough shorter pieces to let the hair bend and swing.
That matters at shoulder length because the line can turn bulky fast. A blunt edge plus heavy density can make waves look like they’re sitting on a shelf. Invisible layers fix that without turning the cut into a shag. The shape just moves better.
I like this on thick hair that needs subtraction more than addition. The wave pattern stays smooth, but the middle of the hair does not feel packed. A medium-barrel wand and a light texture spray are enough to show the cut’s movement.
Key Details to Ask For
- Internal layers, not a chopped perimeter
- Soft face-framing pieces that blend into the sides
- Length that still touches the shoulders, not above them
- Ends kept blunt enough to look healthy
The best version of this style looks like the hair grew that way. No drama. No obvious steps. Just a cut that knows where to stop.
5. Brushed-Out S-Waves with a Smooth Finish
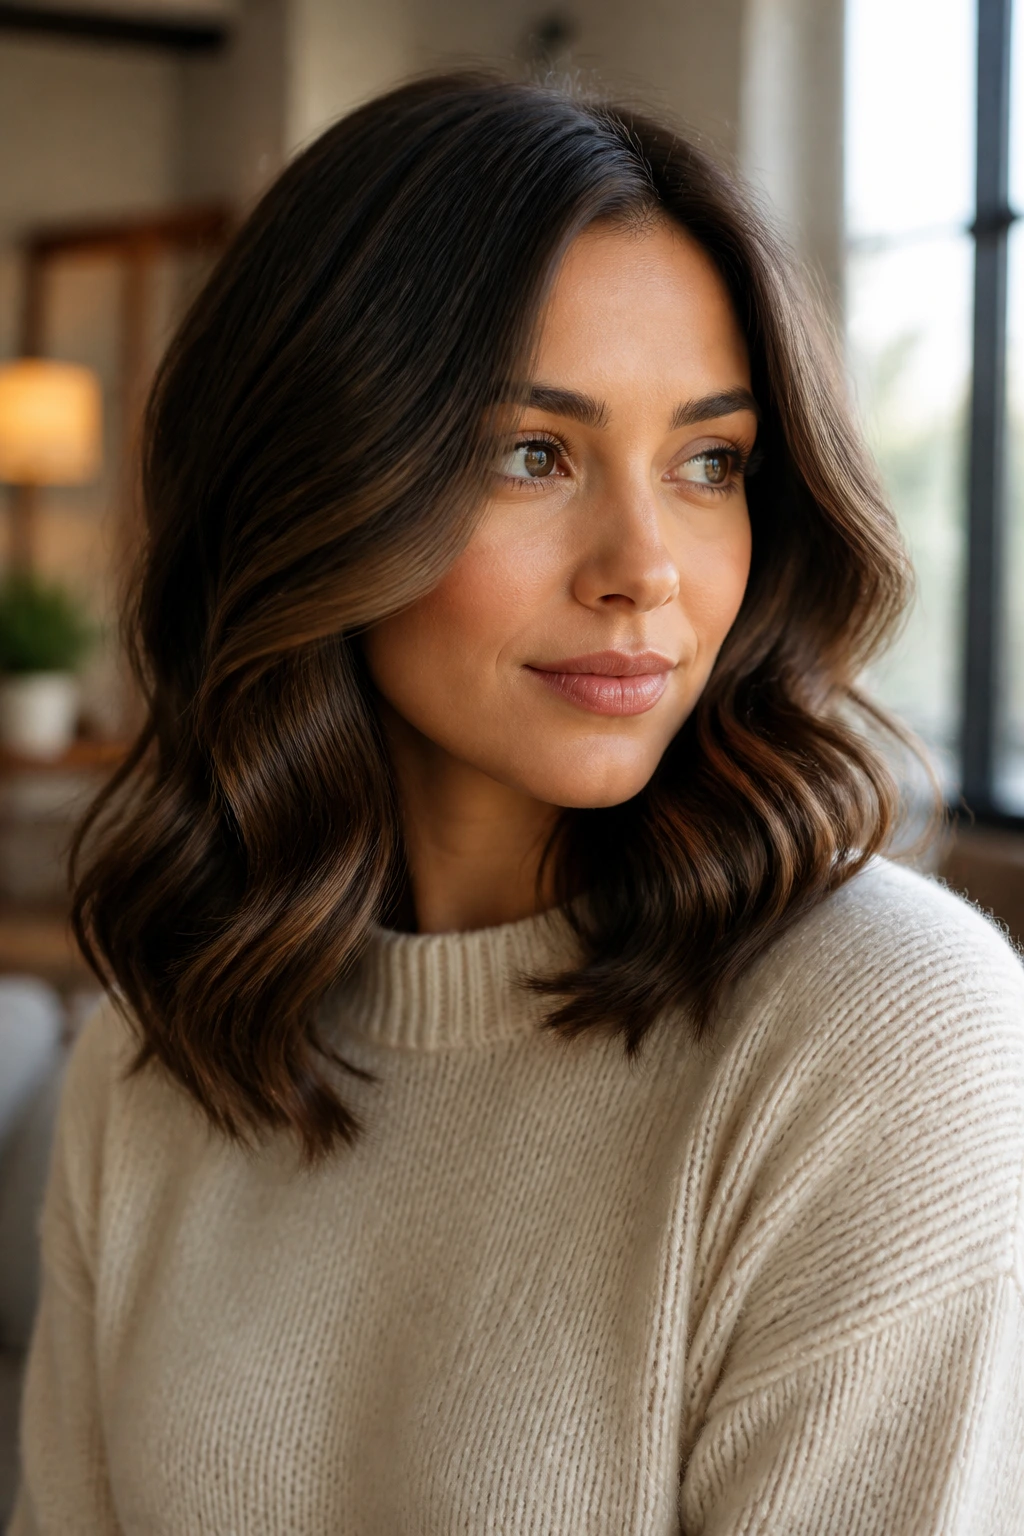
Brushed-out S-waves have a different feel than beachy bends. They look smoother, more controlled, and a little more old-school without drifting into formal hair. The wave pattern is still there, but it reads like a line instead of a curl.
Start with a 1.25-inch iron or wand, wrap medium sections, and alternate the direction as you move around the head. Once the hair cools, brush it gently with a paddle brush or a wide boar-bristle brush. That one step breaks the curl into a softer, ribbon-like shape.
What I like here is the finish. It doesn’t shout. It just sits there with a polished bend and a little shine. If your hair gets frizzy when you brush it dry, mist the brush lightly with a leave-in spray before you go through the lengths.
A final veil of lightweight serum on the ends keeps the shape from turning fuzzy. Use less than you think. A half-pump is usually enough.
6. Shaggy Waves with Air Around the Crown

A shaggy shoulder-length wave is all about space. Not volume for the sake of volume. Space. The crown lifts, the lengths piece out, and the overall shape feels light even if the hair itself is thick.
This is the style I’d point to if someone says they want texture but hates anything that sits too neat. The layers do the heavy lifting here. A shaggy cut around the shoulders lets the waves separate naturally, so the style looks good even when the front has gone a little off-center.
It’s especially useful if your hair gets bulky when it dries. A little mousse at the roots, a diffuser, and a rough bend through the front pieces are enough. You do not need every section curled. In fact, that usually makes this look too neat.
Best for
- Wavy or slightly curly hair that wants shape
- Thick hair that needs air between the layers
- People who like a tousled finish rather than a polished one
Give the ends a pinch of texturizing spray and leave the rest alone. That restraint is the whole point.
7. Blunt Shoulder Cut with Loose Texture
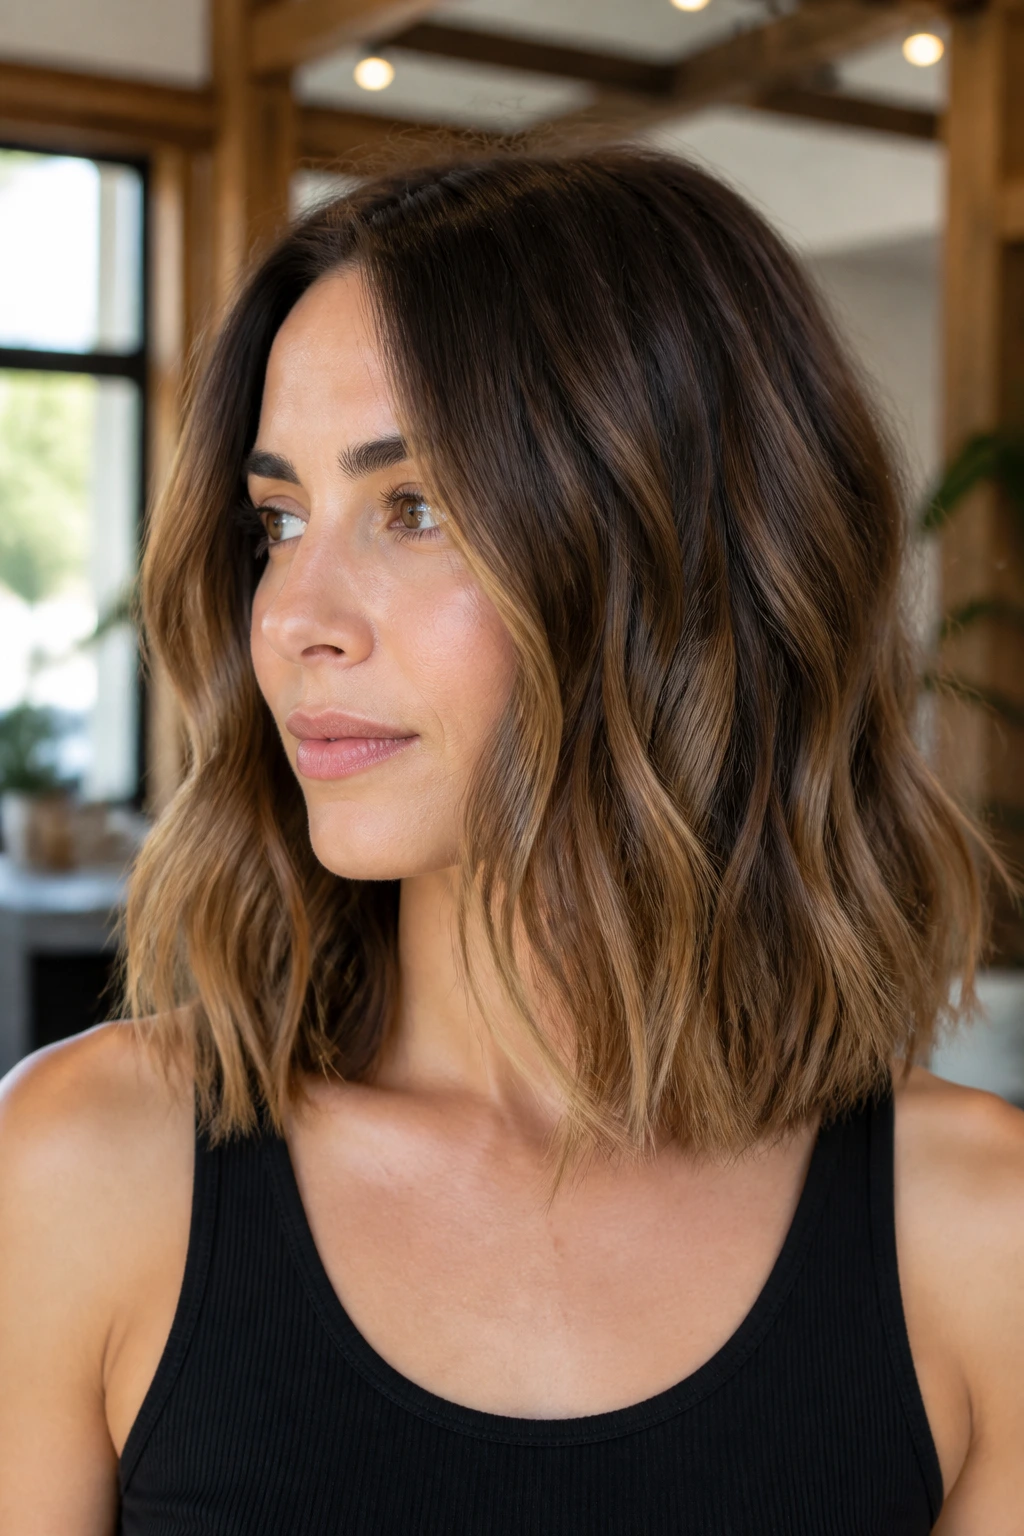
A blunt shoulder cut is the opposite of fussy. The edge is clean, the line is solid, and the wave lives mostly in the middle and front sections. That contrast is the appeal: a strong silhouette with soft movement running through it.
On fine hair, this cut can look fuller than a heavily layered one because the perimeter holds weight. On straight hair, it keeps the length from feeling scraggly. On naturally wavy hair, it gives the bend a neat boundary so the texture doesn’t spread out into a triangle.
Use a flat iron or wand to create a loose bend, not a full curl. A slight turn of the wrist at the mid-lengths is enough. Then rake the hair apart with your fingers once it cools so the line stays soft around the shoulders.
The cut itself does most of the work here. The styling just wakes it up.
8. Money-Piece Waves That Brighten the Front
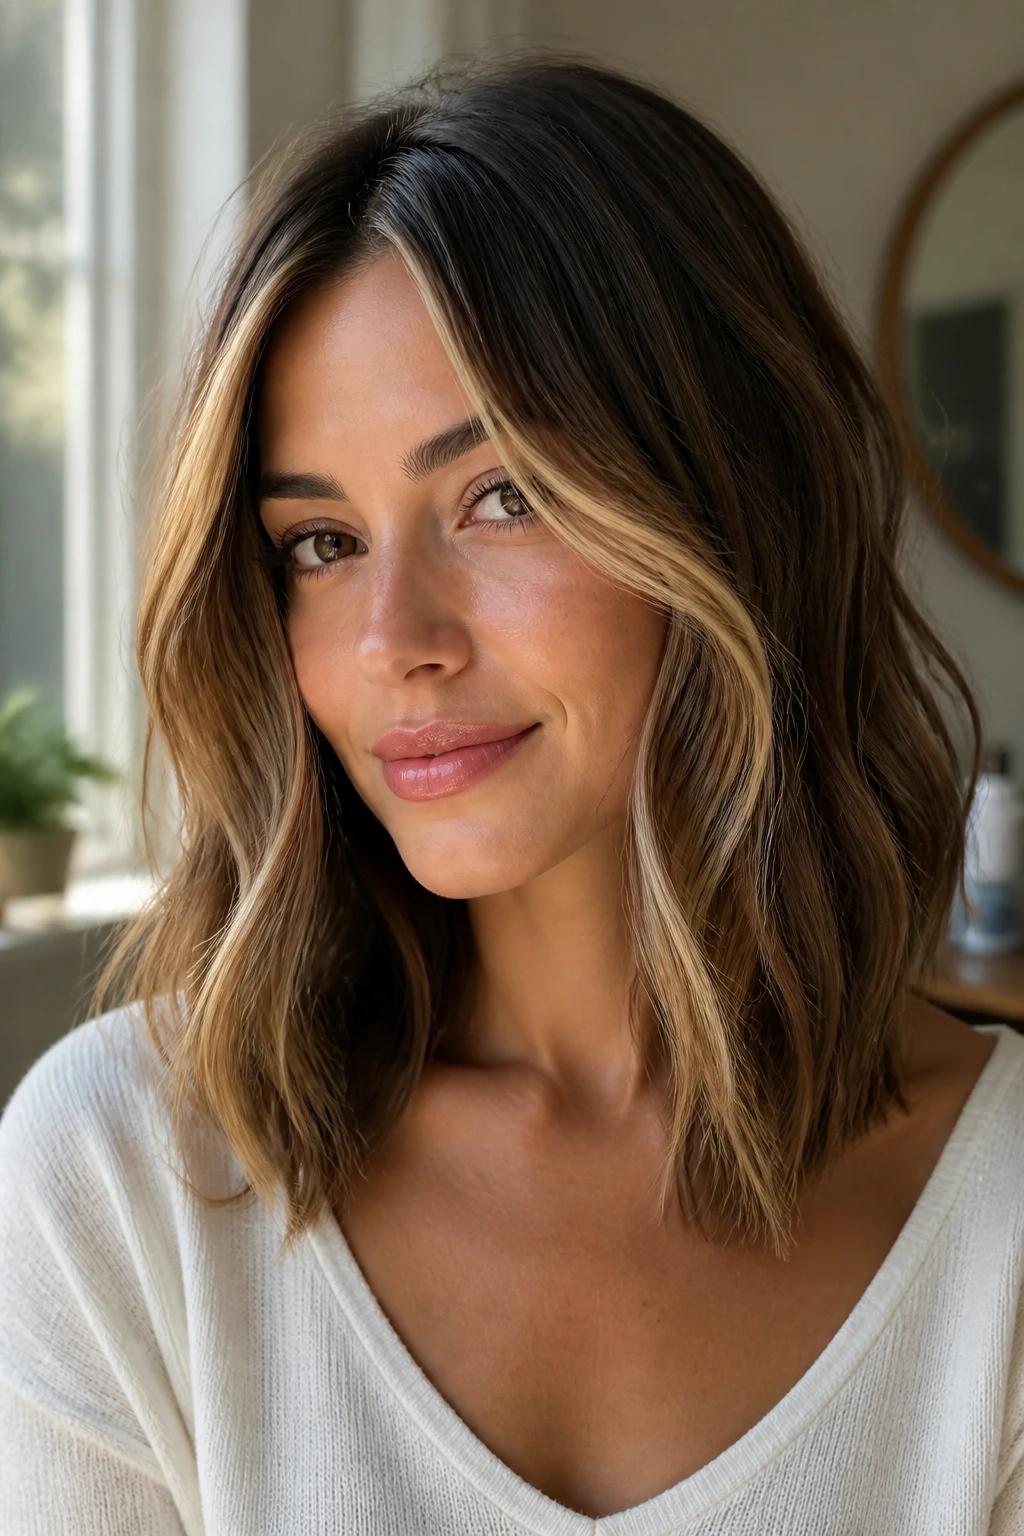
A brighter front section changes how shoulder-length waves read in the mirror. The face picks up light first, and the wave pattern near the front becomes the thing people notice before they even clock the rest of the cut.
If you wear money-piece highlights, keep the front bend softer and a bit more polished than the back. That contrast gives the lighter pieces something to show off. I like wrapping the front pieces away from the face and letting the back stay slightly more relaxed.
What Makes It Pop
The wave should guide the eye, not fight the color. A stiff curl around a bright blonde streak can look overdone fast. A loose bend, on the other hand, lets the color sit in the curve and catch the edge of the light near the cheek.
This is one of those styles that looks expensive without requiring a complicated haircut. It’s the color placement, the part, and the bend working together. Keep the ends soft. That matters more than people think.
9. Old-Hollywood Waves with a Side Sweep
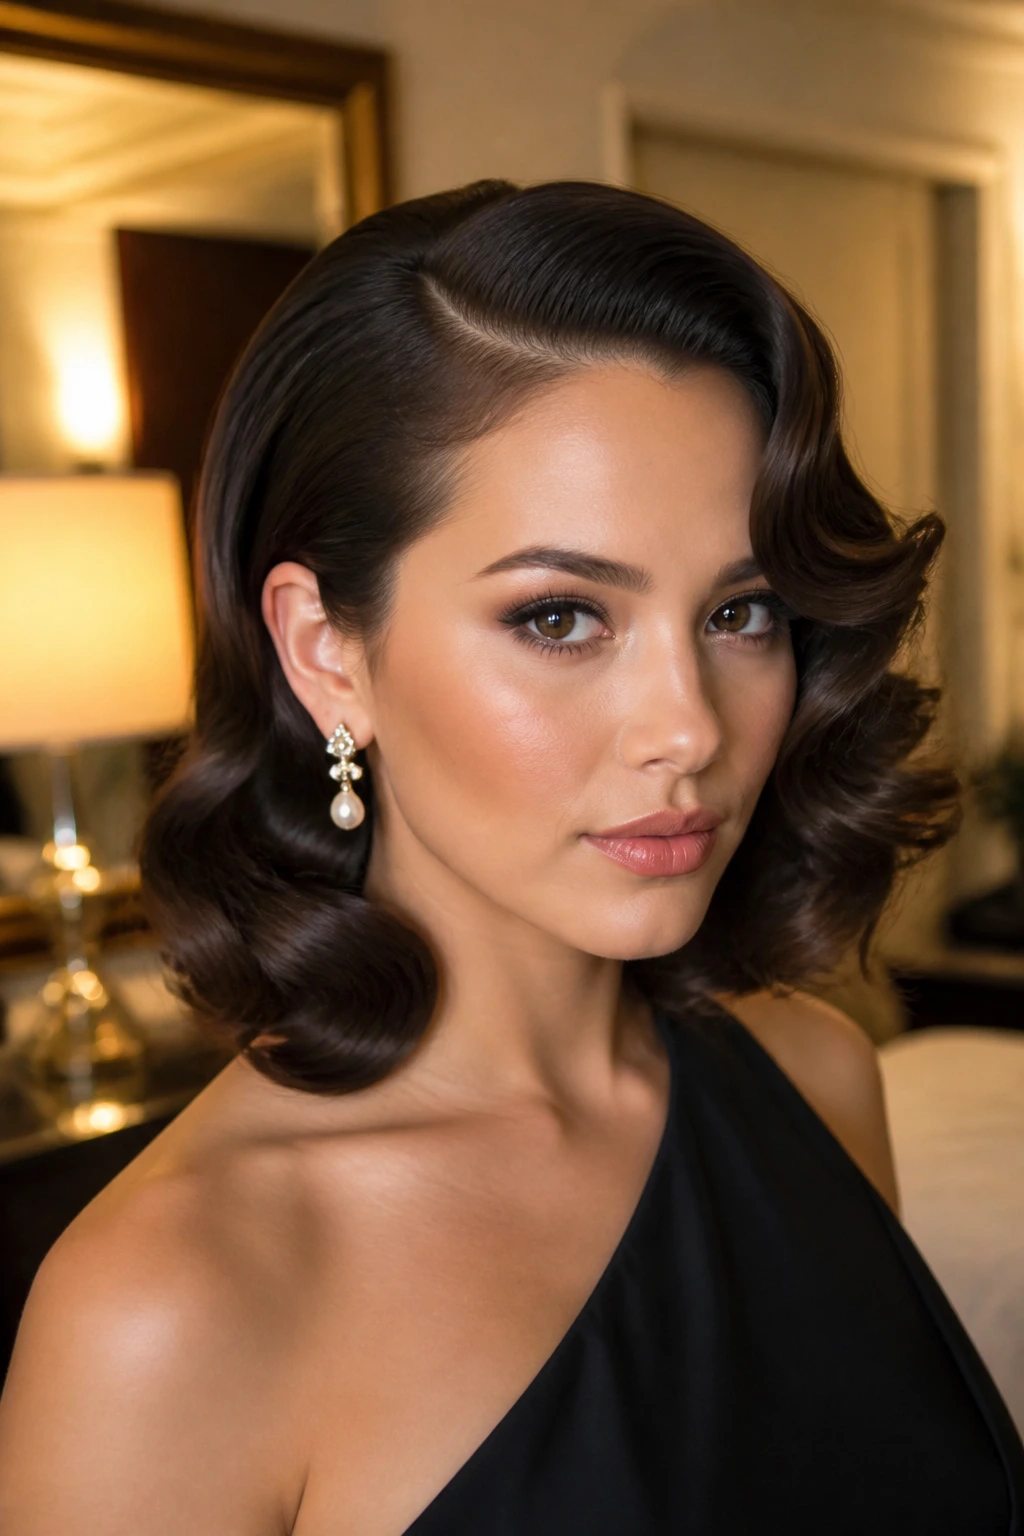
Old-Hollywood waves at shoulder length are all about direction. One side gets swept back, the other falls into a clean curve, and the whole style feels smoother than a standard beach wave.
The best version of this look uses larger sections, a larger barrel, and a lot of patience while the curls cool. Pin each curl up after wrapping it. That lets the shape set without collapsing under its own heat. Then brush the waves gently until they form those broad, glossy bends.
This style suits a dinner, a wedding, a gallery opening, or any event where you want hair that looks finished. It is not the fastest option. It’s worth the time when you want shoulder-length waves to read as polished instead of casual.
A side sweep at the front keeps the style from feeling too fixed. Without that, it can look stiff. With it, the whole shape breathes.
10. Razor-Cut Waves with Piecey Ends
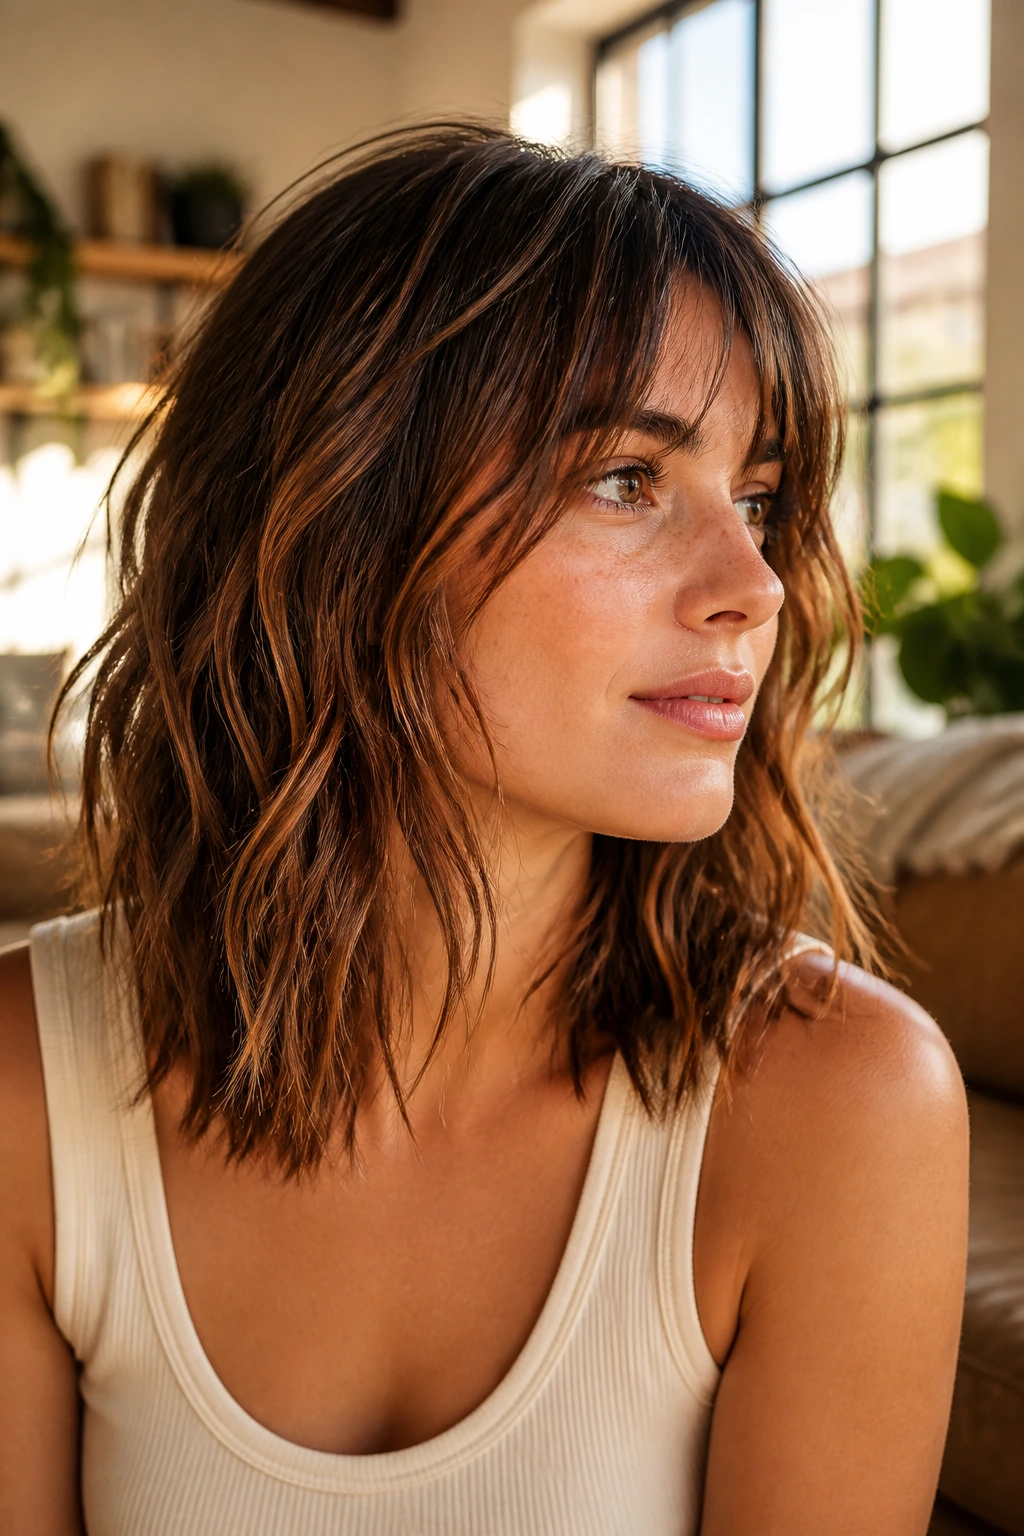
Razor-cut waves have edge. Not attitude. Edge. The ends are softer and more separated, which makes the wave pattern look lighter and a little more modern than a classic layered cut.
This style works best when the hair is not over-brushed. If you smooth it too much, you lose the point. Use a texturizing mousse or a light salt spray on damp hair, then dry it with your fingers or a diffuser. After that, use a wand on random sections to create bends rather than perfect curls.
The piecey ends are the selling point. They make the hair move in small shifts instead of one heavy swing. If you like hair that looks a little undone even when it’s styled, this is your lane.
A warning, though: razor cuts need a good hand. Too much thinning can make the ends fray. Keep the texture soft, not shredded.
11. Half-Up Twist with Loose Lower Waves
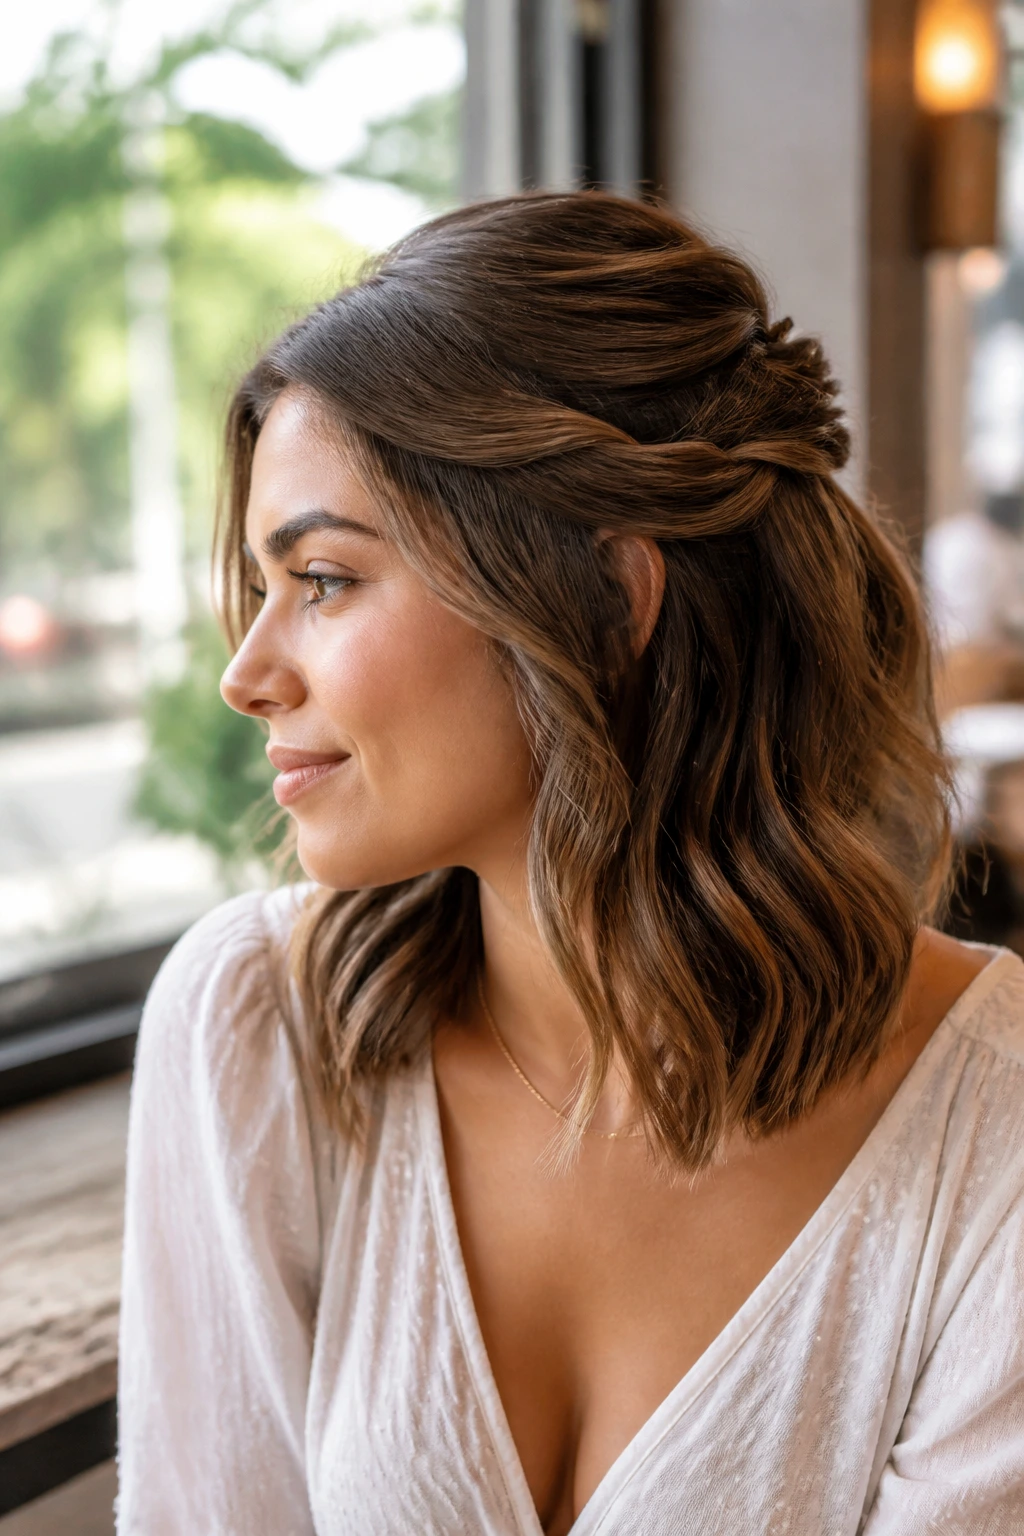
Half-up styles can flatten shoulder-length hair if you pull them too tight. The better version leaves the lower half loose and keeps the twist or clip high enough to show the wave pattern underneath.
I like this on day-two hair, when the roots have a little bend and the ends need a reset. Gather the temples and crown, twist them back, and secure with a small clip or pin. Let the lower waves fall in soft sections around the shoulders.
The appeal is practical. You get hair off the face, a little lift at the crown, and enough movement left below to keep the style from feeling pinned down. It also works with curly or wavy textures that get frizzier near the front.
If you’re dressing it up, curl two front pieces away from the face before pinning the top half. That tiny step makes the whole style look intentional.
12. Tucked-Behind-the-Ear Waves with a Clean Neckline
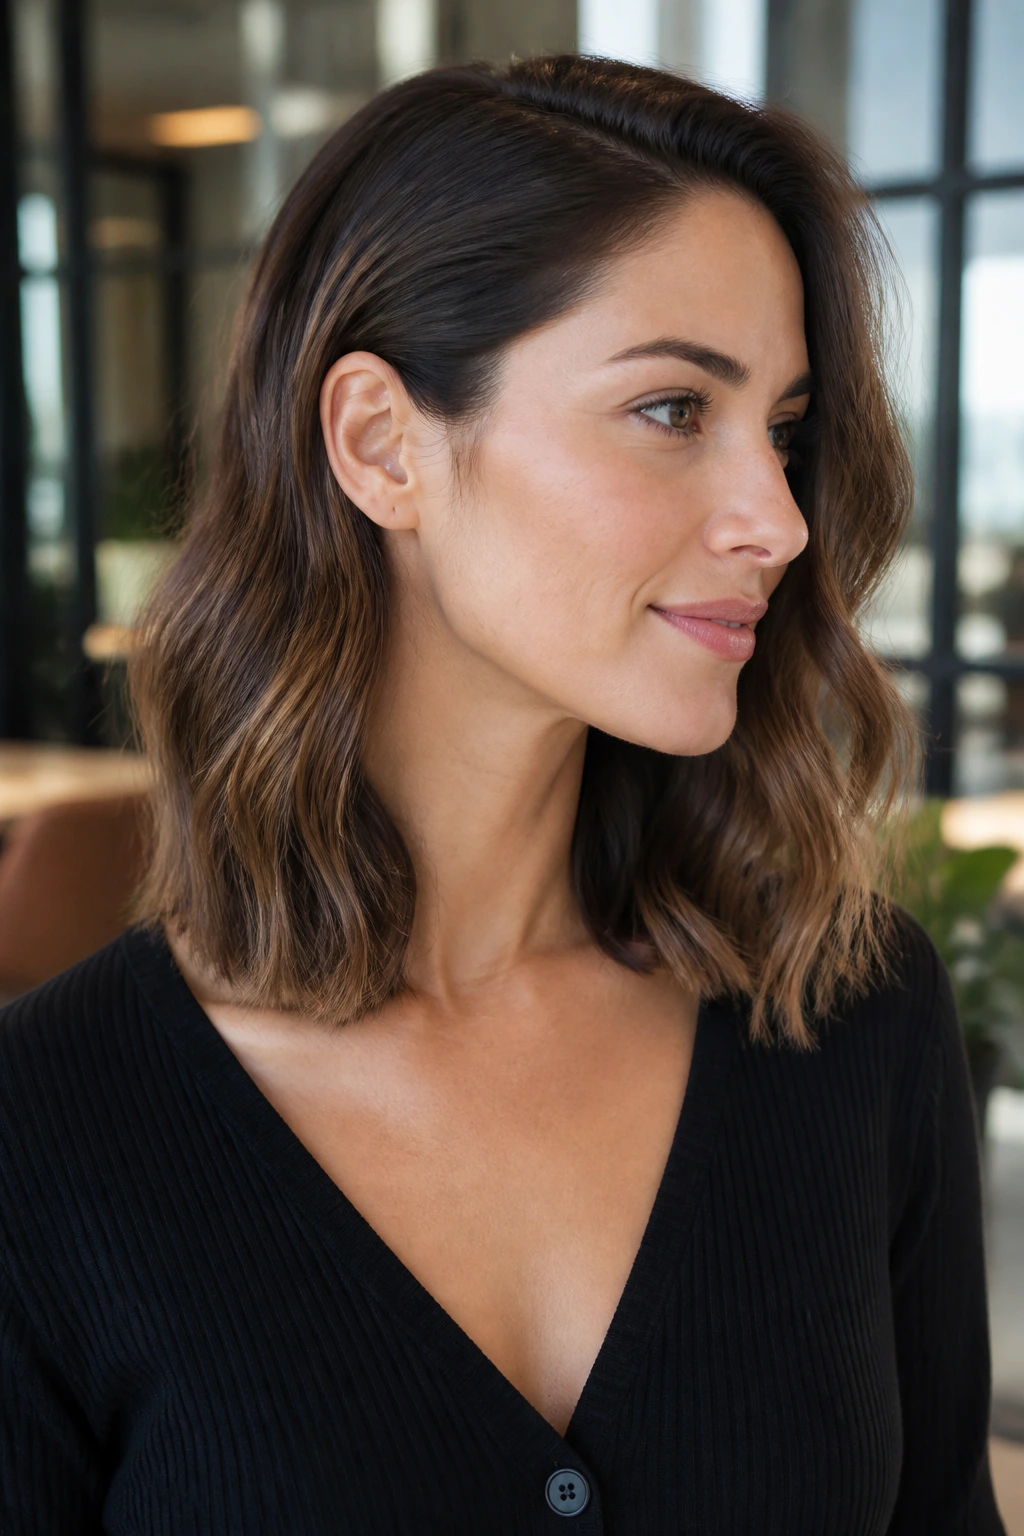
This is one of my favorite understated shoulder-length wavy hairstyles because it solves a real problem: too much hair around the face. Tucking one side behind the ear opens the neckline, shows off earrings, and lets the wave do its work without taking over the whole head.
The cut should still have softness at the front. You don’t want the tuck to expose a blunt, stiff edge. Keep the bend loose around the cheek and jaw, then tuck the flatter side behind the ear and let the opposite side hang a little fuller.
What Makes It Different
Unlike a full blowout, this look doesn’t need the whole head to be perfectly uniform. The tucked side can be smoother. The loose side can carry more movement. That unevenness is part of the charm.
It’s also good for people who wear glasses or statement earrings. The space around the ear helps. The hair looks tidy, but not severe.
13. Retro Flipped Ends for a Playful Curve
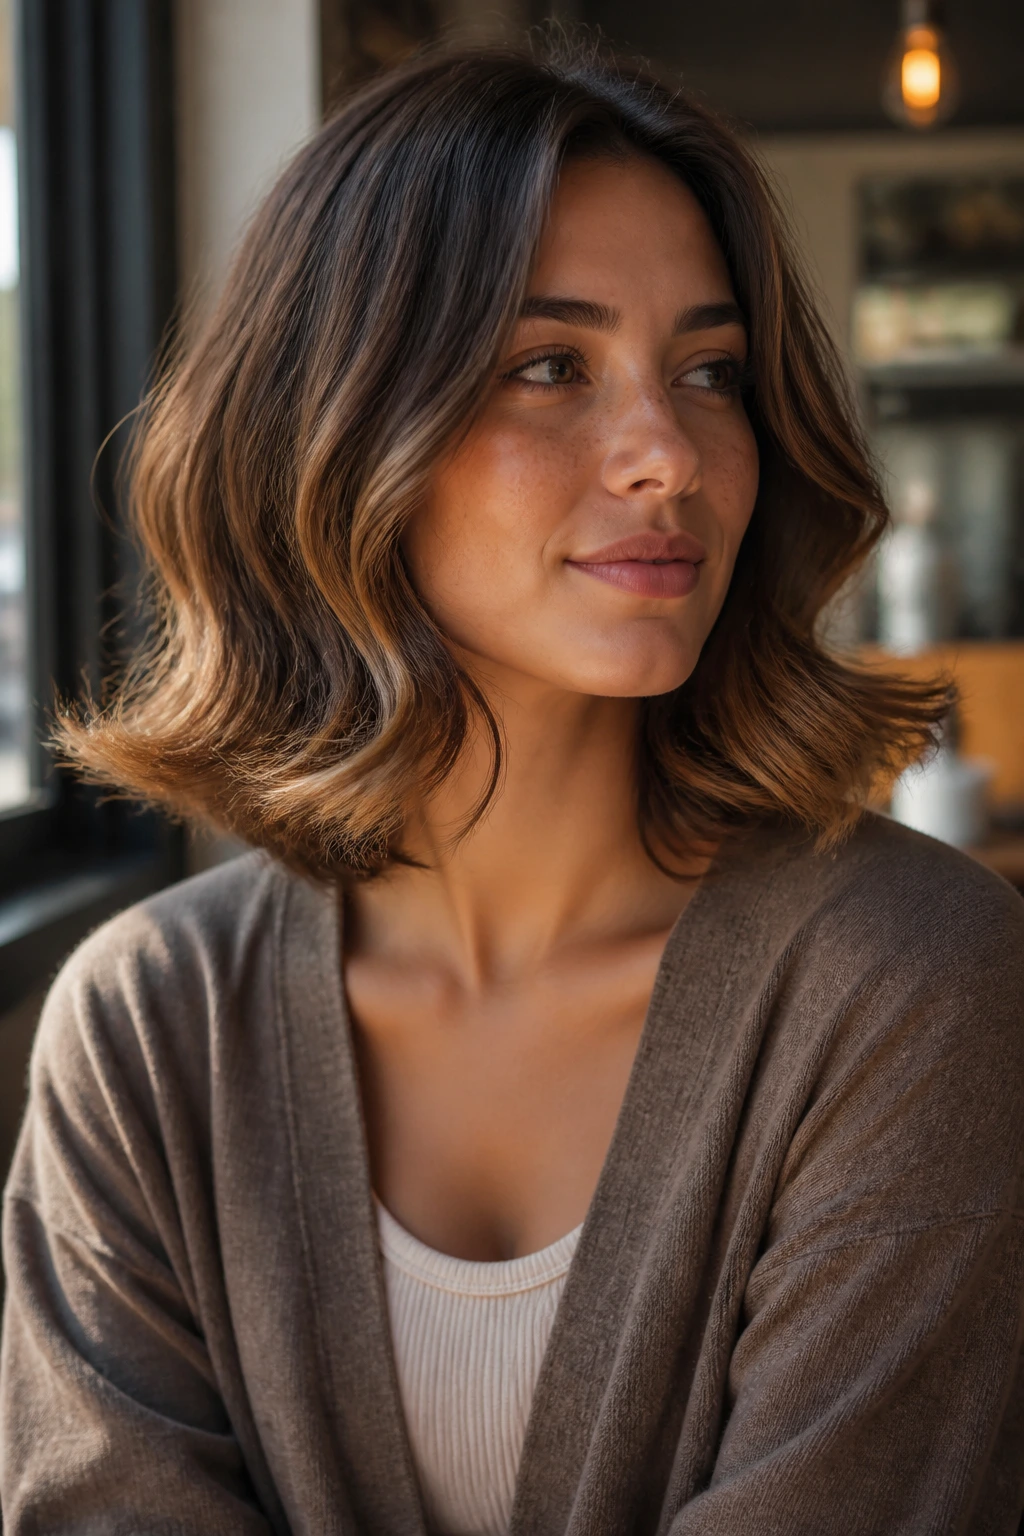
Flipped ends bring a little lift to a shoulder-length wave without turning it into a curl set. The hair turns outward just at the bottom, which makes the cut feel lively and slightly retro in a way that’s more fun than precious.
Use a flat iron or blow-dry brush to turn the last 1 to 2 inches of hair away from the neck. Keep the rest of the wave soft. If you flip every inch of the hair, the style gets too much volume and loses the easy texture that makes shoulder-length cuts shine.
The good version of this look feels almost cheeky. The ends bounce. The mid-lengths still hold a bend. And the overall shape makes plain knitwear and high necklines look better because the line of the hair doesn’t disappear into the clothes.
Best tools for the flip
- Flat iron with rounded edges
- Small round brush
- Heat protectant that leaves no heavy residue
- Light-hold spray at the end
A small flip is enough. Don’t overdo it.
14. Air-Dried Natural Waves with Creamy Texture
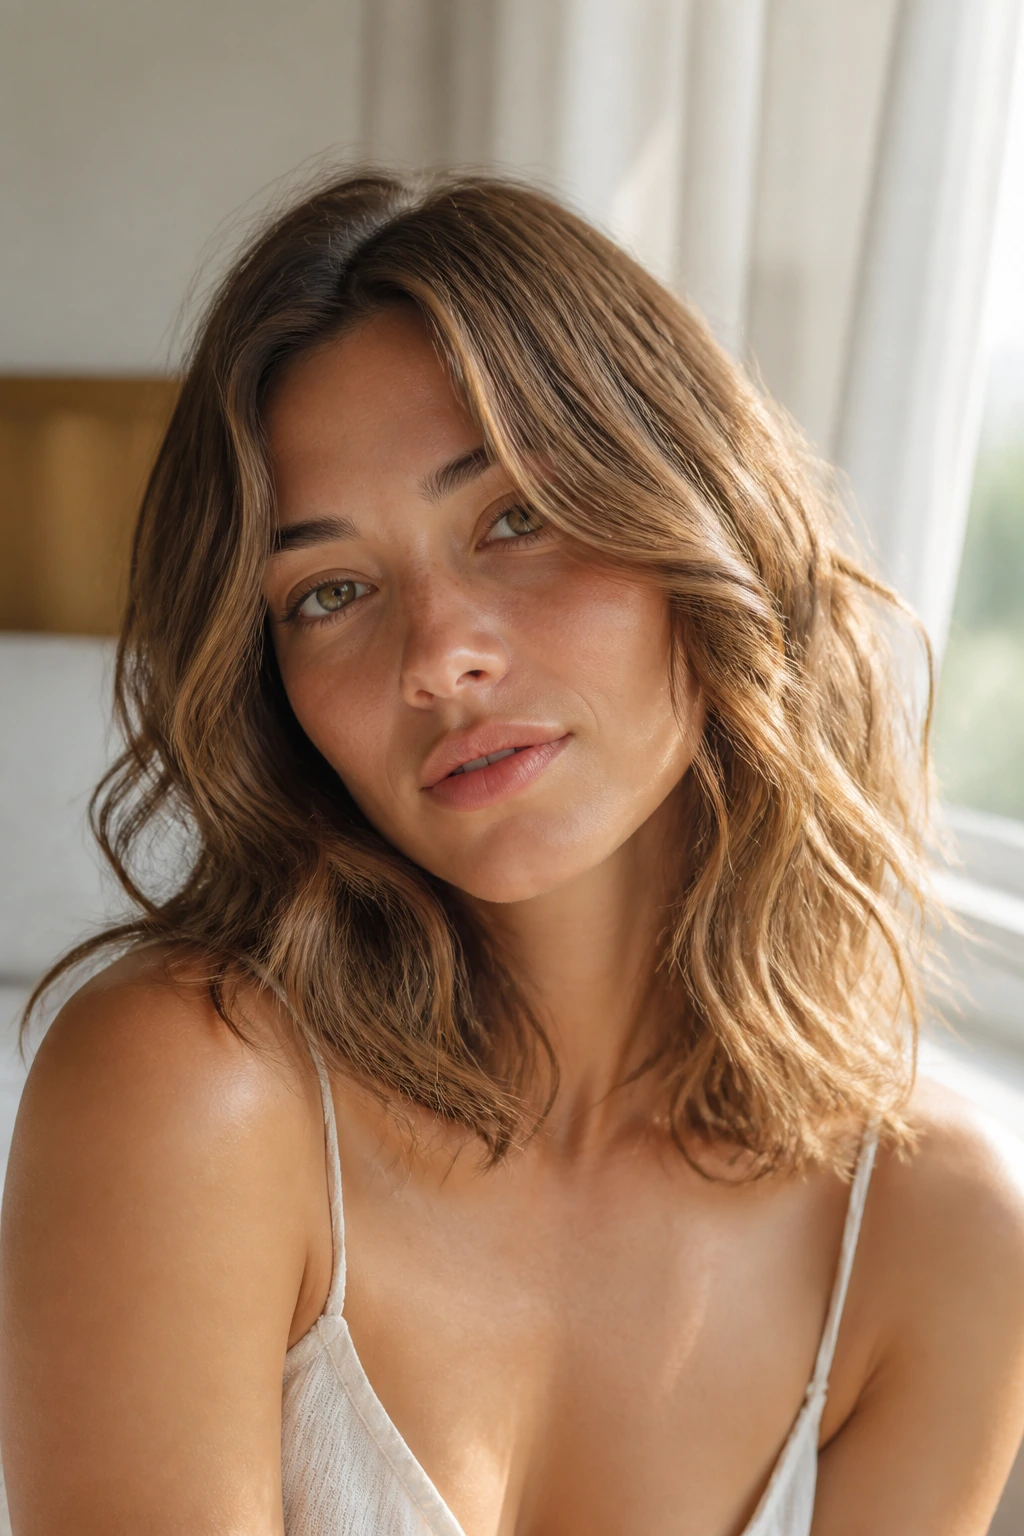
Air-dried waves have a softer edge than heat-set styles. The hair keeps more of its own pattern, which makes the finish look less “done” and more like your actual texture got a good night’s sleep.
Start with a curl cream or light leave-in on damp hair, then scrunch the lengths and leave the roots alone as much as possible. If your hair dries flat at the crown, clip the roots up for the first half hour. That helps keep the lift from collapsing as the hair dries.
This is the style I recommend to people who hate the feel of too much product. A little cream at the ends, maybe a small dab of gel near the front, and then hands off. When the hair is fully dry, break the cast if there is one. Soft waves need movement, not crunch.
The finish can look a little irregular. Good. That’s the point. The hair should still look like hair.
15. Root-Lift Waves That Keep the Crown Open
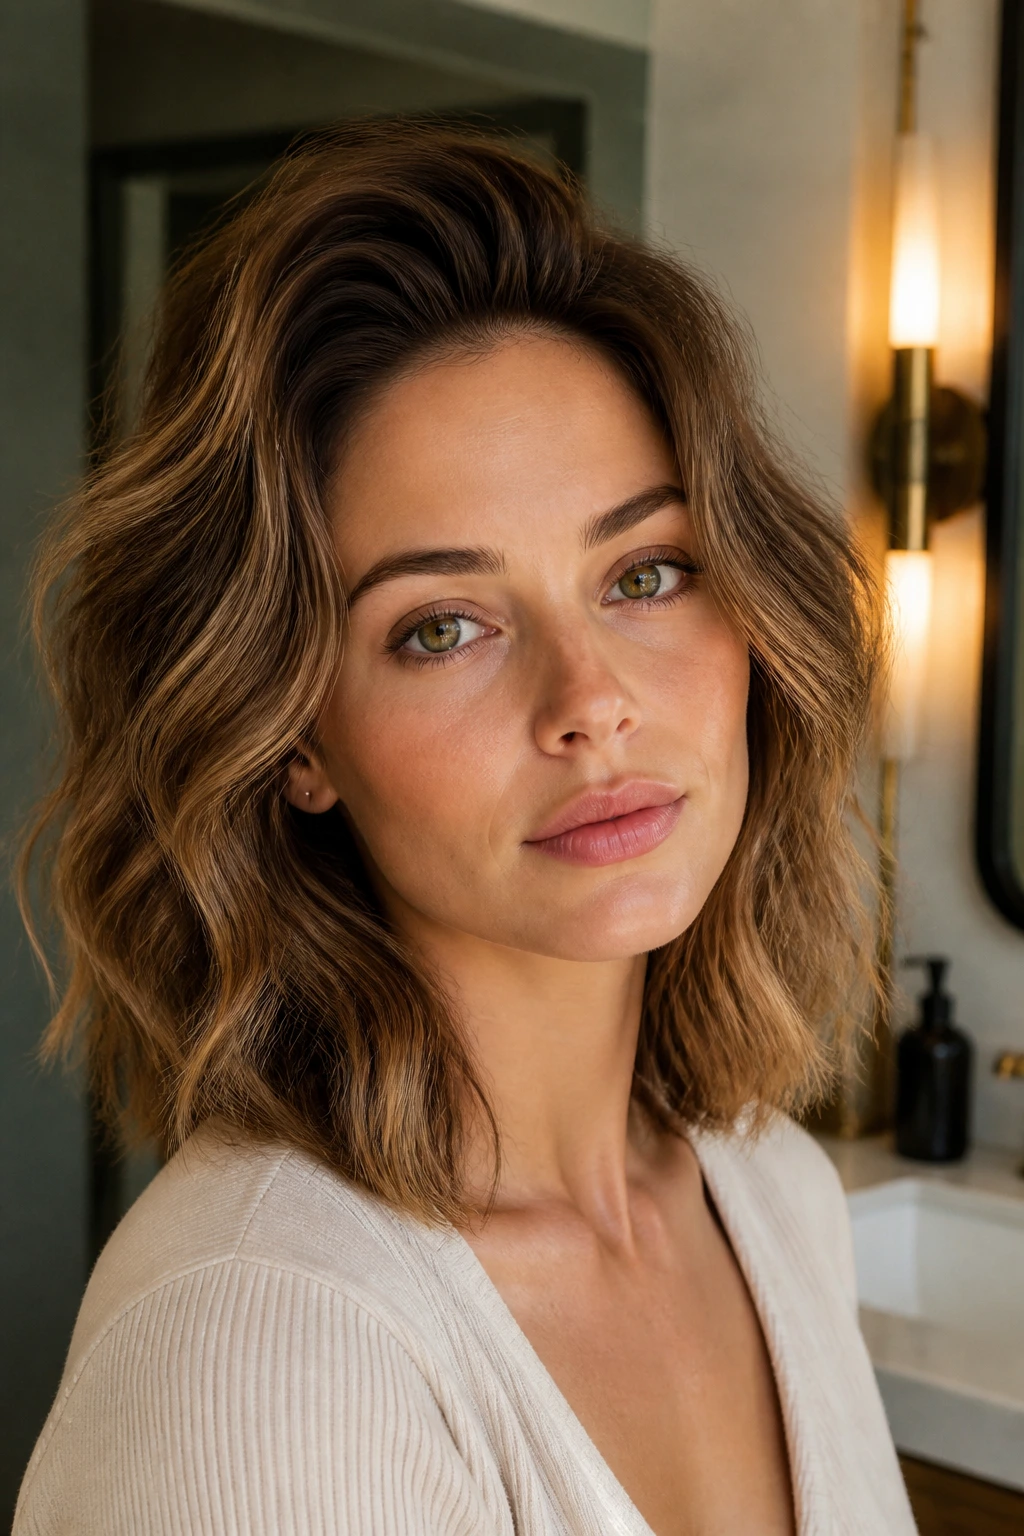
A lot of shoulder-length waves fail because the roots go flat before the ends have a chance to matter. Root-lift styling fixes that. The crown stays open, the top has a little air, and the wave pattern reads from the top down instead of just the mid-lengths out.
Mousse at the roots is the obvious move, but placement matters. Put it where the hair naturally collapses—usually at the top of the crown and just behind the temples. Then rough-dry with your fingers or a vent brush until the roots are dry enough to hold shape.
Why It Works
This style keeps the silhouette from turning into a triangle. When the crown has lift, the shoulders do not take over the whole look. That matters with shoulder-length cuts because the end line sits right where the body of the hair meets the body of the clothes.
If your hair is fine, use a root clip while the hair cools. If it’s thick, lift the top with a round brush and stop before you over-smooth the wave. You want buoyancy, not helmet hair.
16. Wet-Style Sculpted Waves with a Glossy Finish
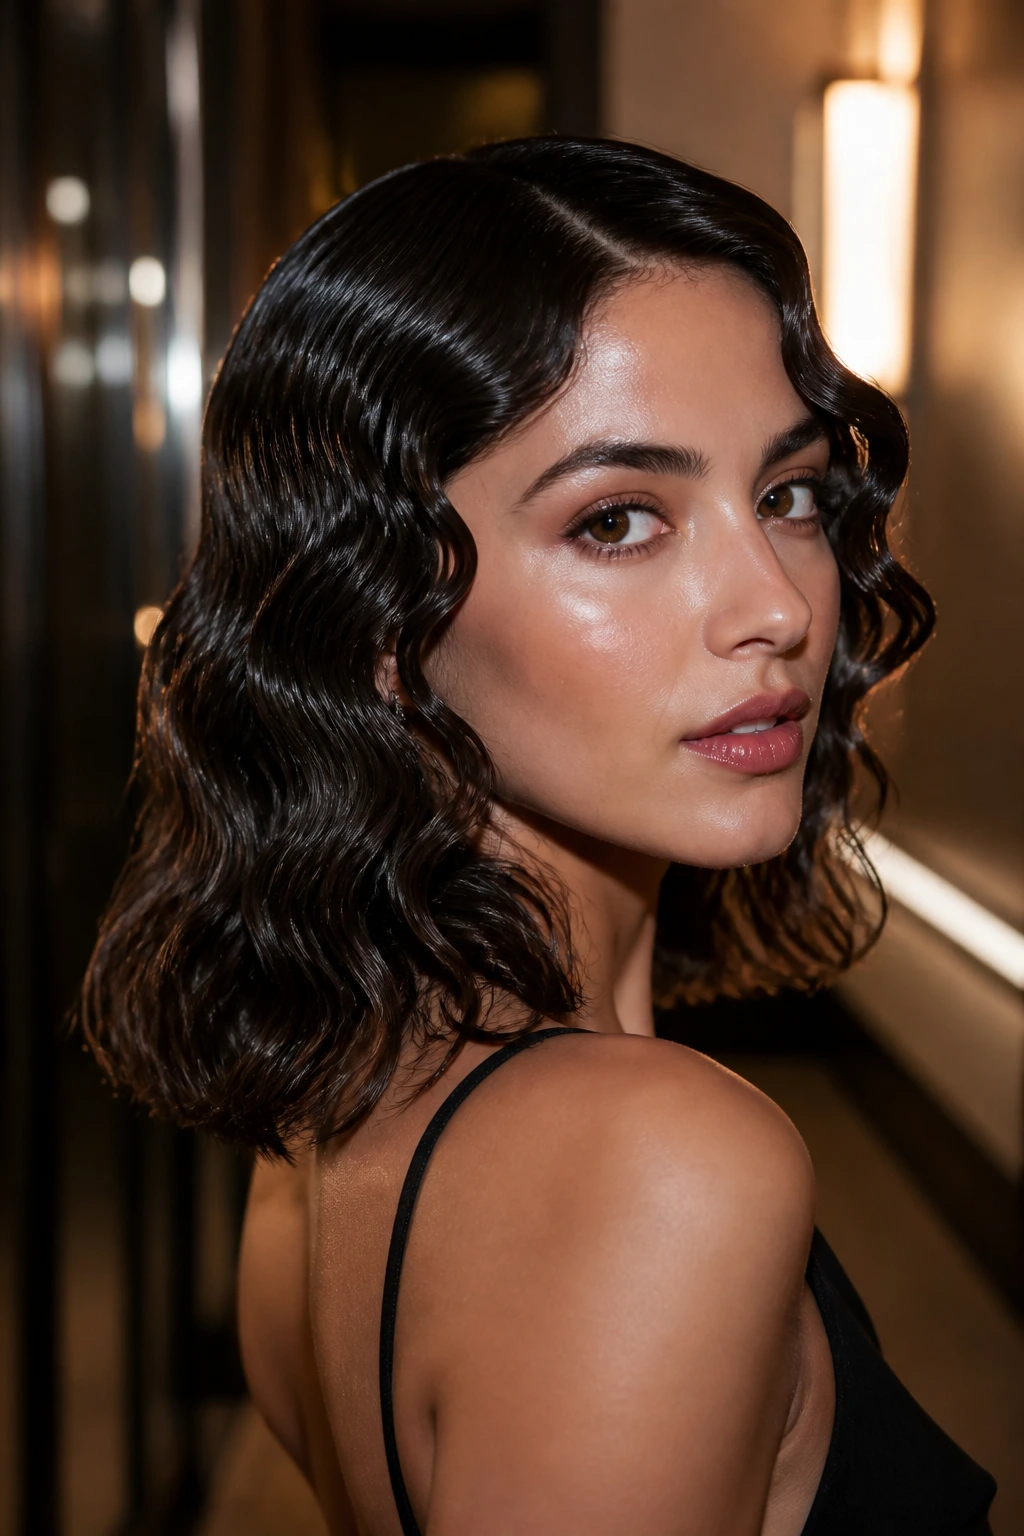
Wet-style waves are not subtle. They are sleek, defined, and a little dramatic. On shoulder-length hair, that can be a very good thing because the length keeps the style from looking like a wet mop. The shape stays contained.
Work gel through damp hair, then comb it into place with a wide-tooth comb or fingers. Create a clean part, define a few front pieces, and let the rest fall into soft bends. The trick is restraint. You want shine and structure, not crunch all the way down the shaft.
Would I wear this every day? No. But on a night out or in humid weather, it solves a problem fast. It also looks sharp with strong eyeliner, gold earrings, or a simple black outfit.
Leave the ends slightly softer than the top. That keeps the style from going too hard.
17. Claw-Clip Waves for Off-Duty Days
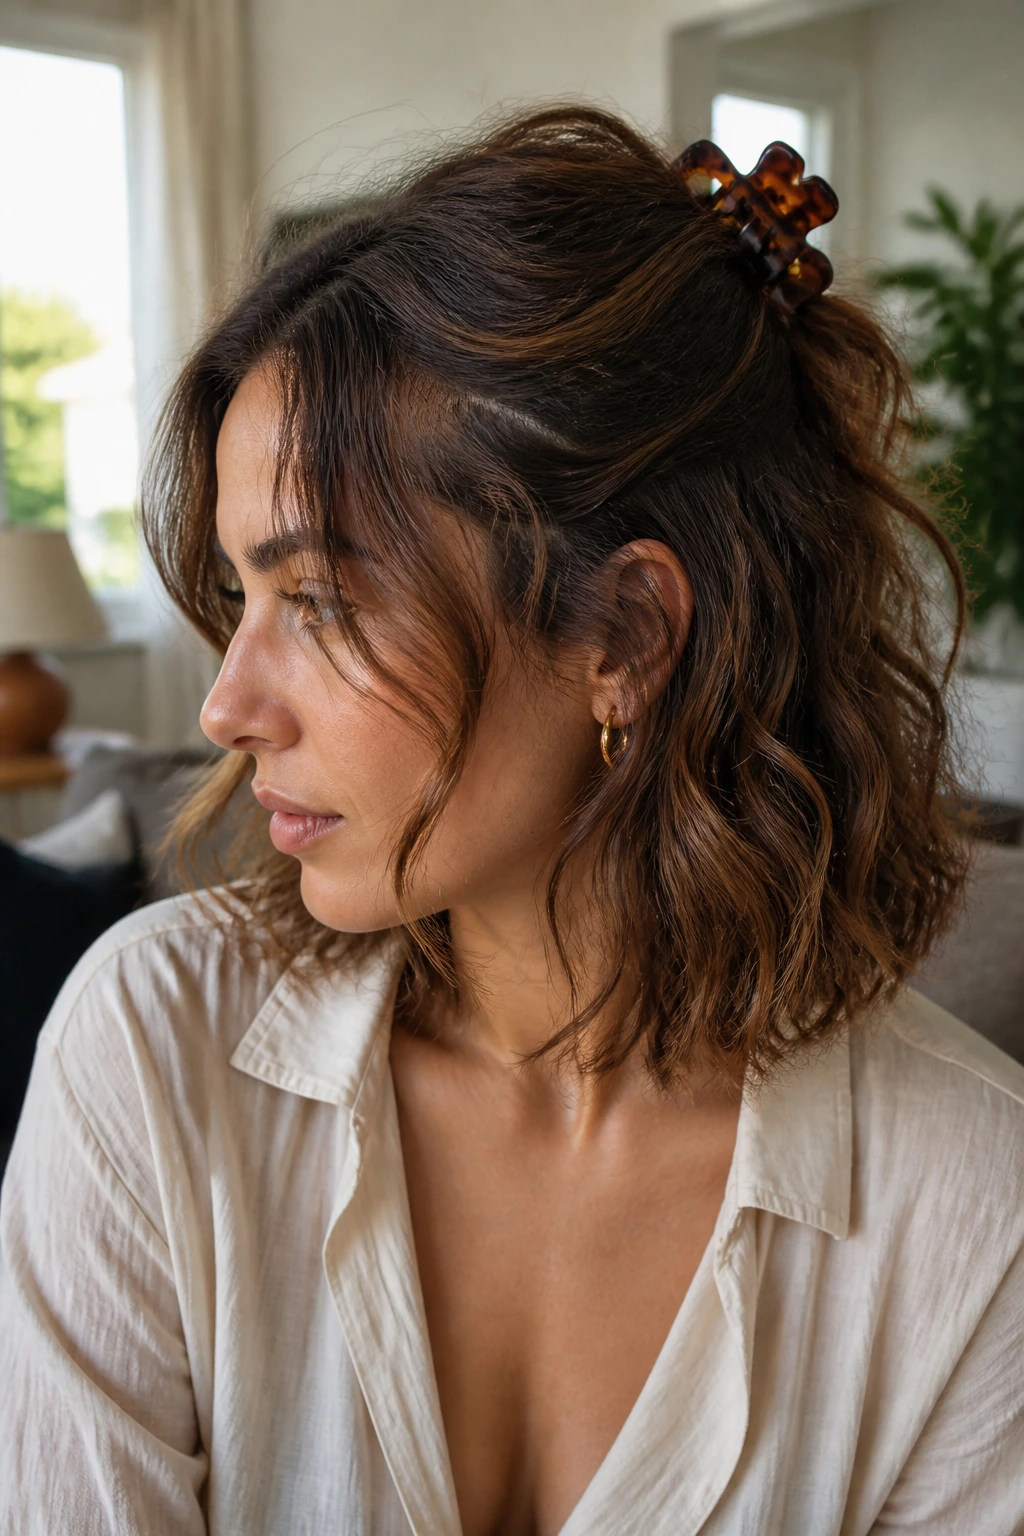
Claw-clip waves are what happens when you decide your hair should work with you instead of against you. The top gets gathered back loosely, the length stays wavy, and the shoulders still show enough movement to make the cut look styled.
This works best with second-day texture. The wave pattern already has a little memory, and the clip adds shape at the crown without crushing the lengths. Use a medium claw clip, not one that has to fight the amount of hair you have. If the clip is too small, the whole look falls apart by lunch.
I like this look because it feels casual without turning sloppy. A few loose face pieces, a little frizz at the ends, and a soft lift at the back all help. That loose imperfection is the appeal.
If you want it neater, twist the top half before clipping. If you want it softer, leave the twist loose and let the ends spill out.
18. Micro-Layer Waves for Extra Movement
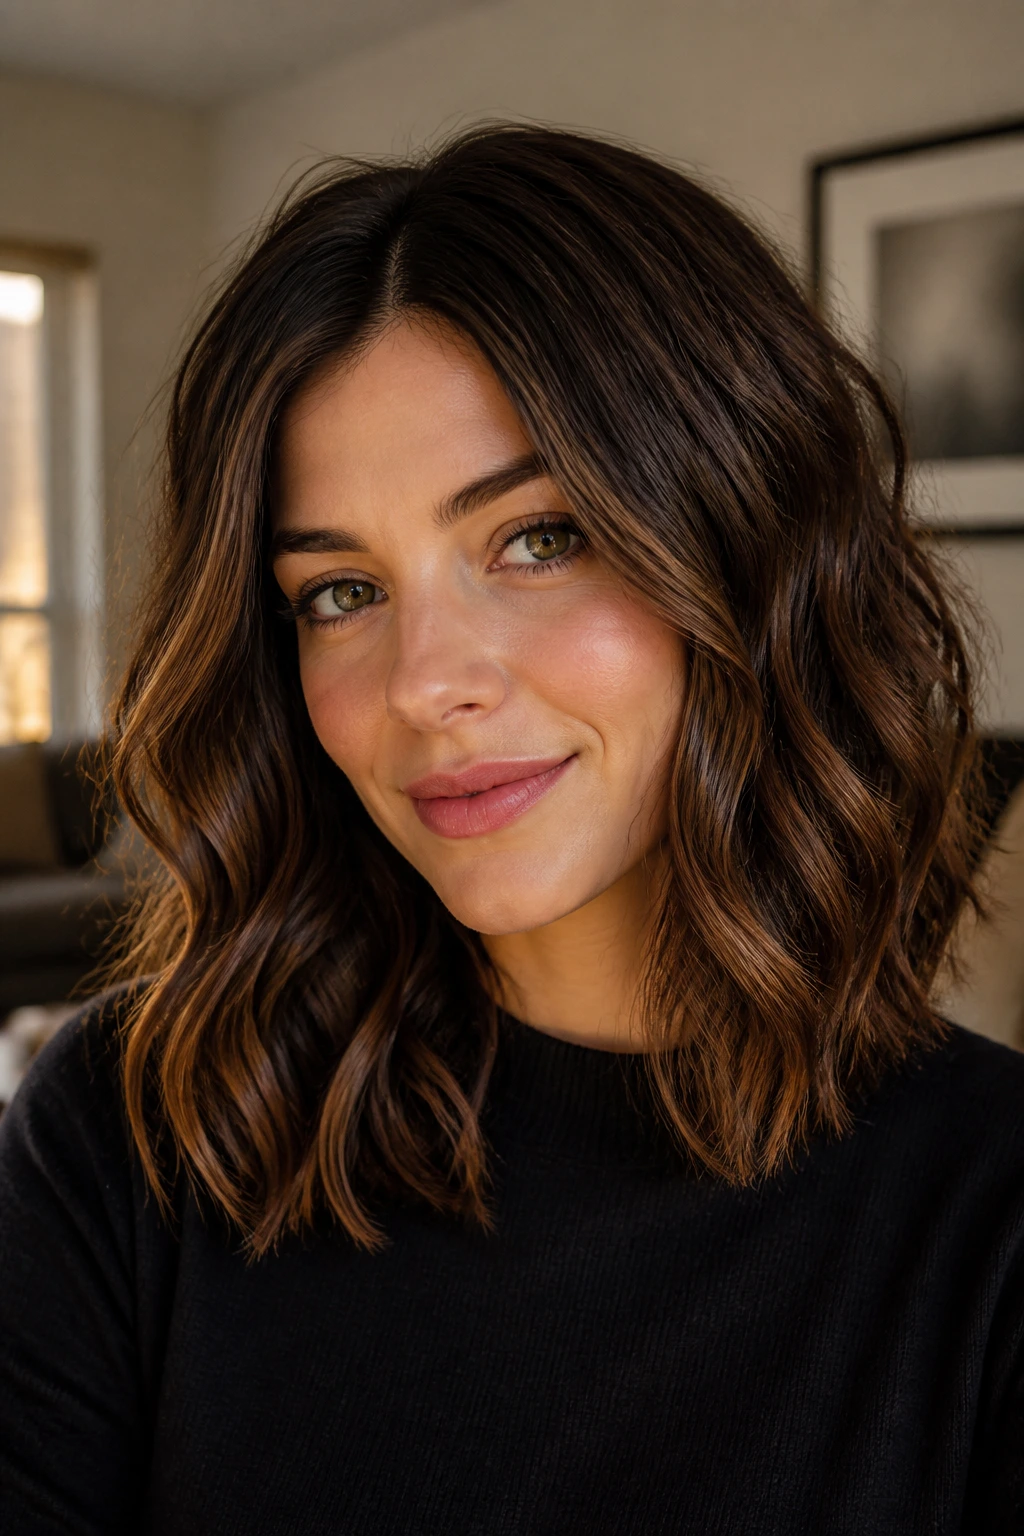
Micro-layers are tiny, careful layers that keep shoulder-length waves from lying like one flat sheet. They do not scream for attention. They just stop the silhouette from feeling heavy.
This is a smart choice for dense hair that needs a little internal movement but doesn’t want a shag. The wave still looks soft, but the layers break up the mass enough that the ends don’t puff out in one solid line.
Best for
- Thick or medium-thick hair
- Hair that flips outward at the ends
- People who want shape without obvious shag layers
Use a medium barrel and alternate the curl direction in small sections. That keeps the layers from bunching together. A light mist of texturizing spray is enough; too much will make the shorter pieces stick up.
The beauty of micro-layers is that they show up in motion, not in a still photo. Walk a little. The hair changes.
19. Event-Ready Glam Waves with a Soft Bend
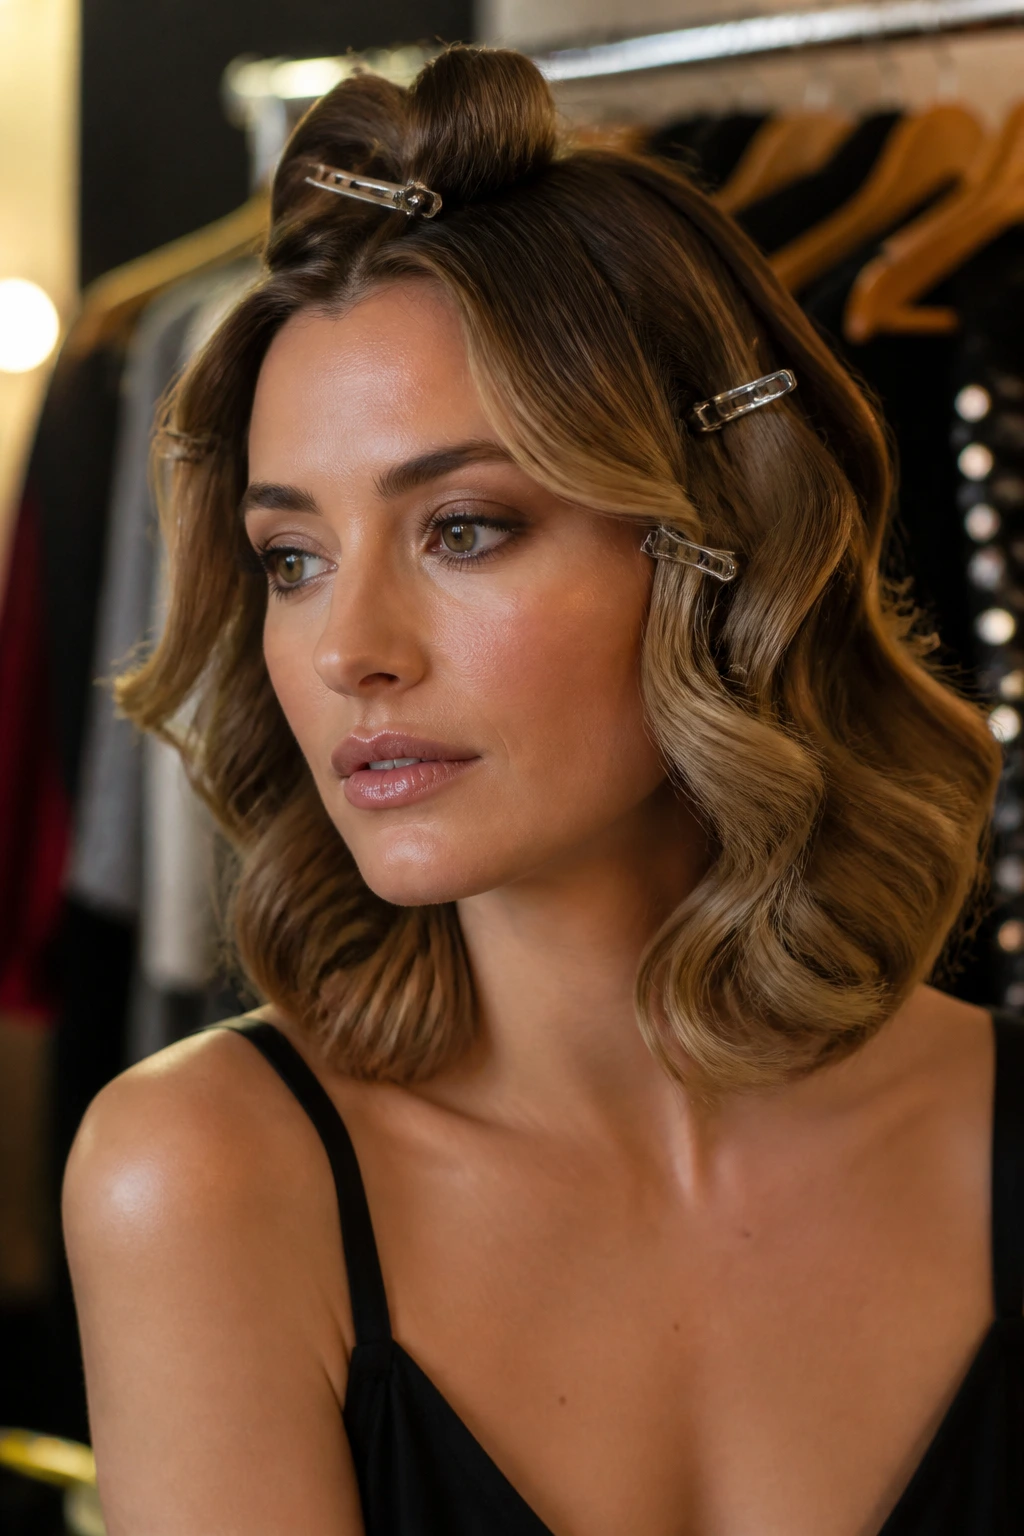
This is the polished sibling of the old-Hollywood wave. The shape is a little looser, the shine is a touch softer, and the bend feels modern instead of costume-like.
I’d style this with a large-barrel wand, smooth sections, and a very light brush-out at the end. The wave should sit in broad arcs from temple to shoulder. If you want the style to last, pin each curl until it cools. That one habit makes a bigger difference than most styling products.
The finish matters here. A drop of serum on the ends, a light spray over the surface, and a clean part can make shoulder-length hair look dressed up fast. It’s a good match for strapless tops, tailored jackets, or anything with a neckline worth showing.
Do not over-brush it. This look wants flow, not a complete collapse into fluff.
20. Beachy Waves with Separated Ends
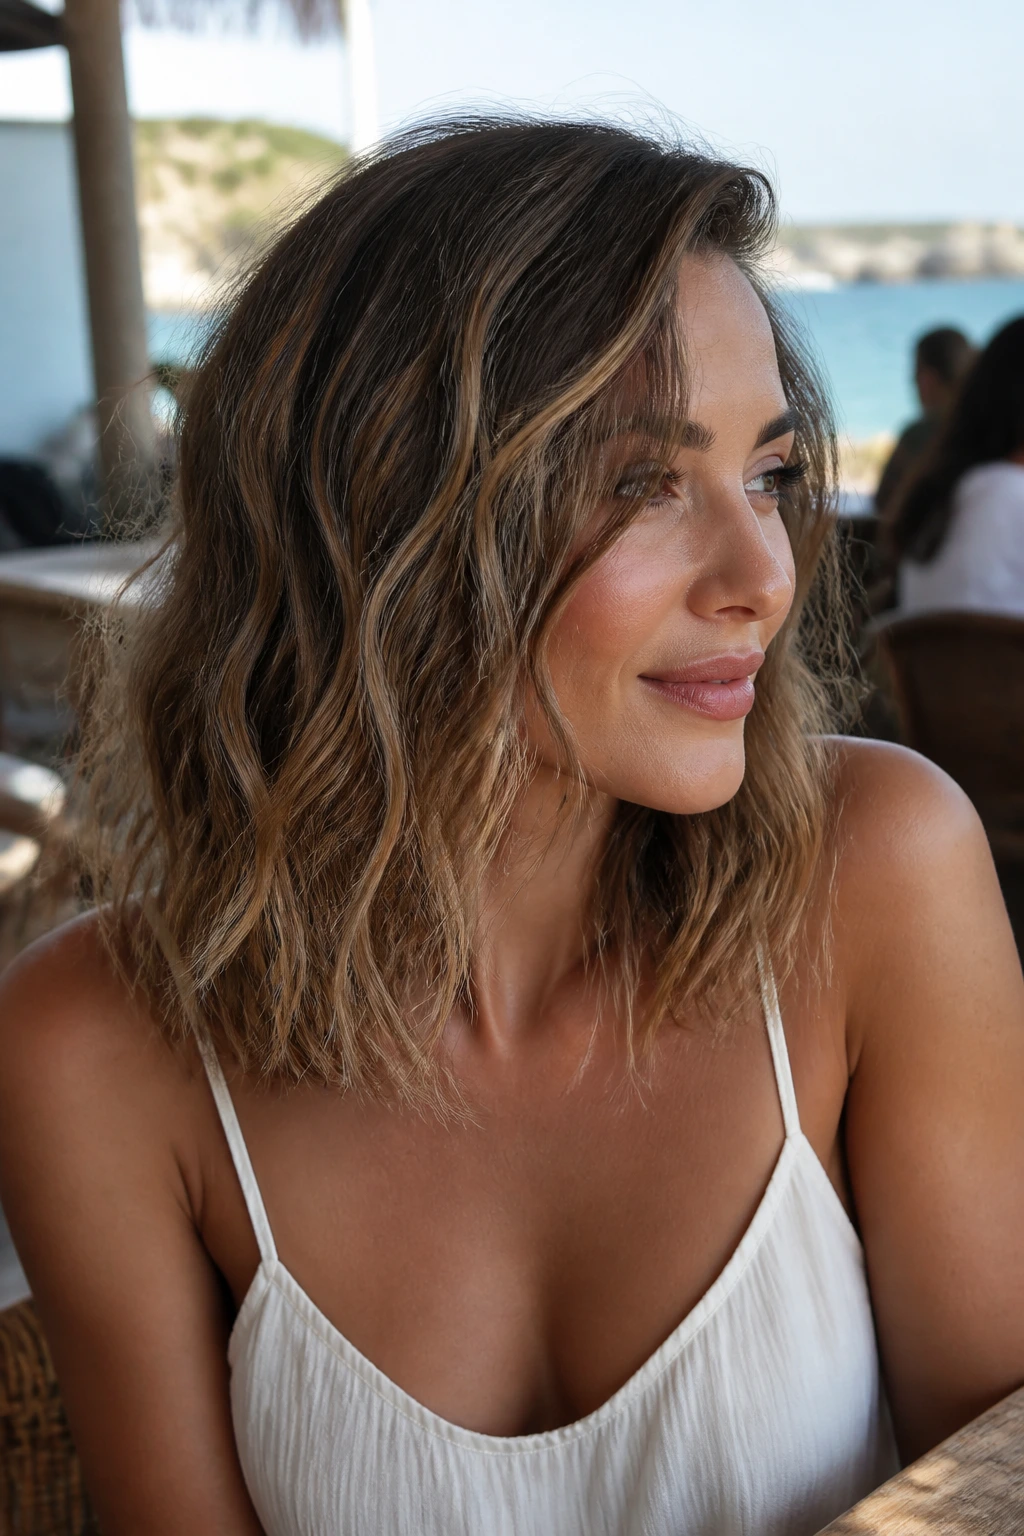
Beachy shoulder-length waves can go wrong fast if they get too uniform. The better version keeps some pieces wider, some thinner, and the ends separated just enough to show texture instead of sameness.
Start by misting a salt or texturizing spray through damp hair, then rough dry. Wrap random sections around a wand, leaving the ends out on some pieces and fully wrapping others. The mismatch gives the style a natural finish. Hair in the real world never bends in one clean pattern anyway.
I like this style because it’s forgiving on both fresh and second-day hair. A little extra wave at the front, a little separation through the ends, and the shoulders carry the rest. If the hair starts to frizz, don’t drown it in more product. Pinch a small amount of cream between your palms and smooth only the outer layer.
The result should look soft, touchable, and a little imperfect. That’s the whole point.
Why Shoulder-Length Waves Hold Their Shape Better Than Longer Hair
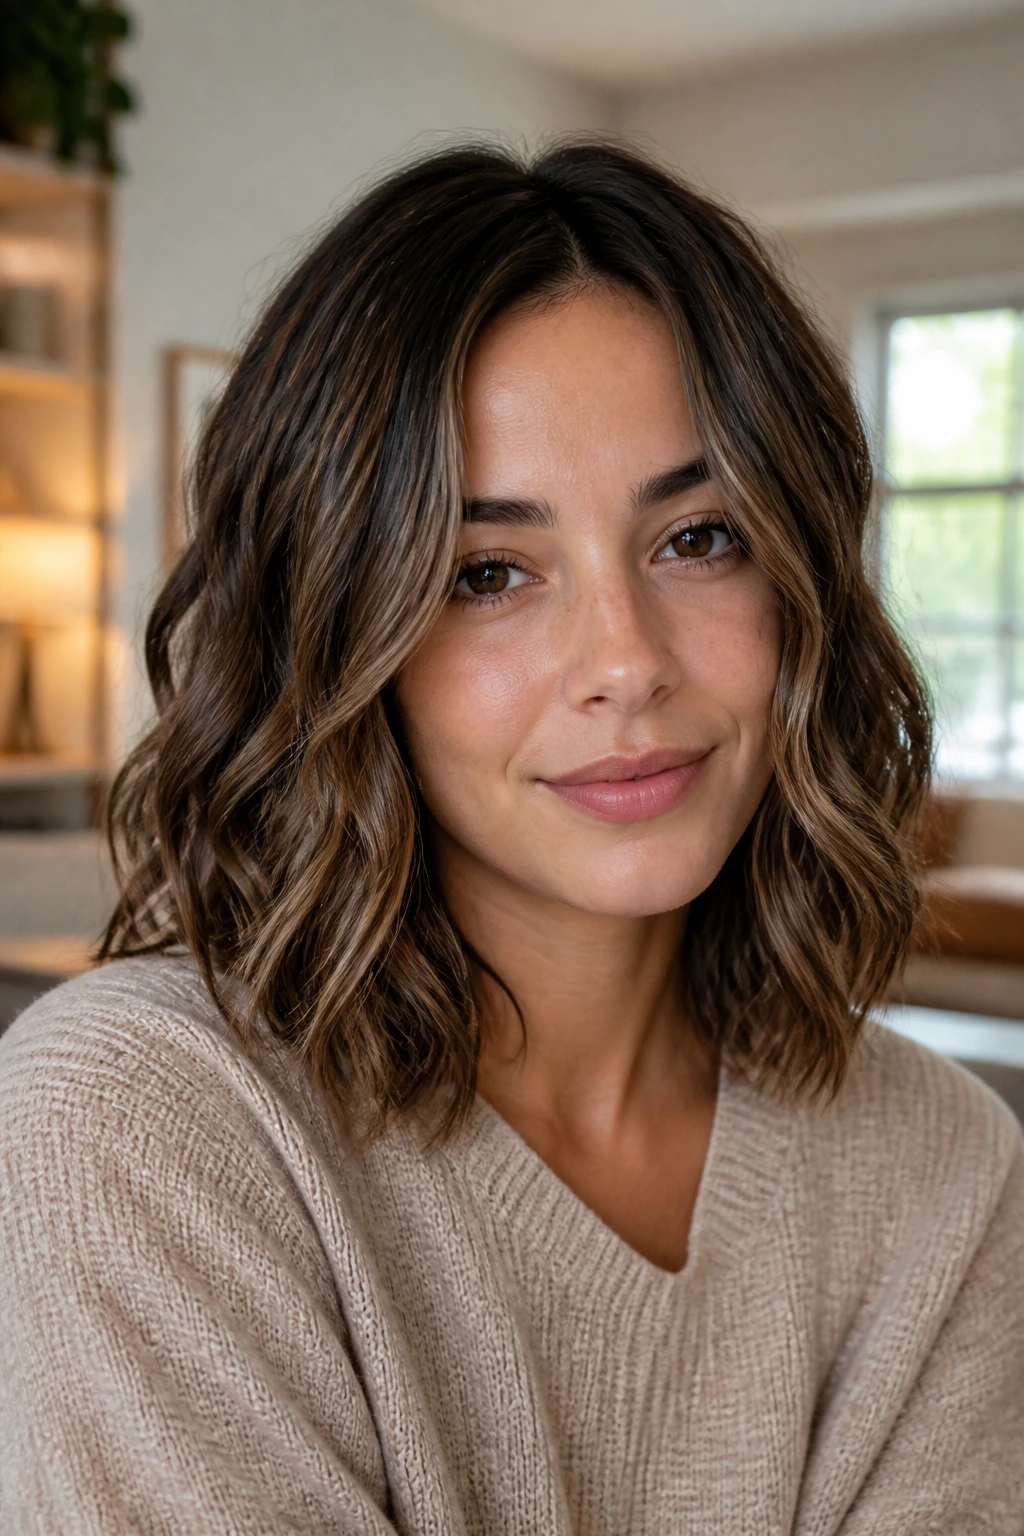
The cut does more of the work than people think. At shoulder length, hair still has enough length for a wave to show, but the weight is short enough that the bend doesn’t stretch itself out overnight. That means a wave set with a 1-inch wand can still look like a wave six hours later instead of turning into a faint ripple.
There’s also a practical reason this length flatters texture. The hair sits near the collarbone and jaw, so the movement is visible from the front without needing extra volume at the ends. If the hair goes much longer, the wave has to carry more weight. If it gets much shorter, the shape can turn bulky fast. Shoulder length lives in the middle, and the middle is where texture behaves.
I like this length on people who want options. You can smooth it, bend it, clip it back, flip the ends, or leave it air-dried and messy. The cut still makes sense. That flexibility is rare.
Tools That Make Shoulder-Length Wavy Hairstyles Easier to Style
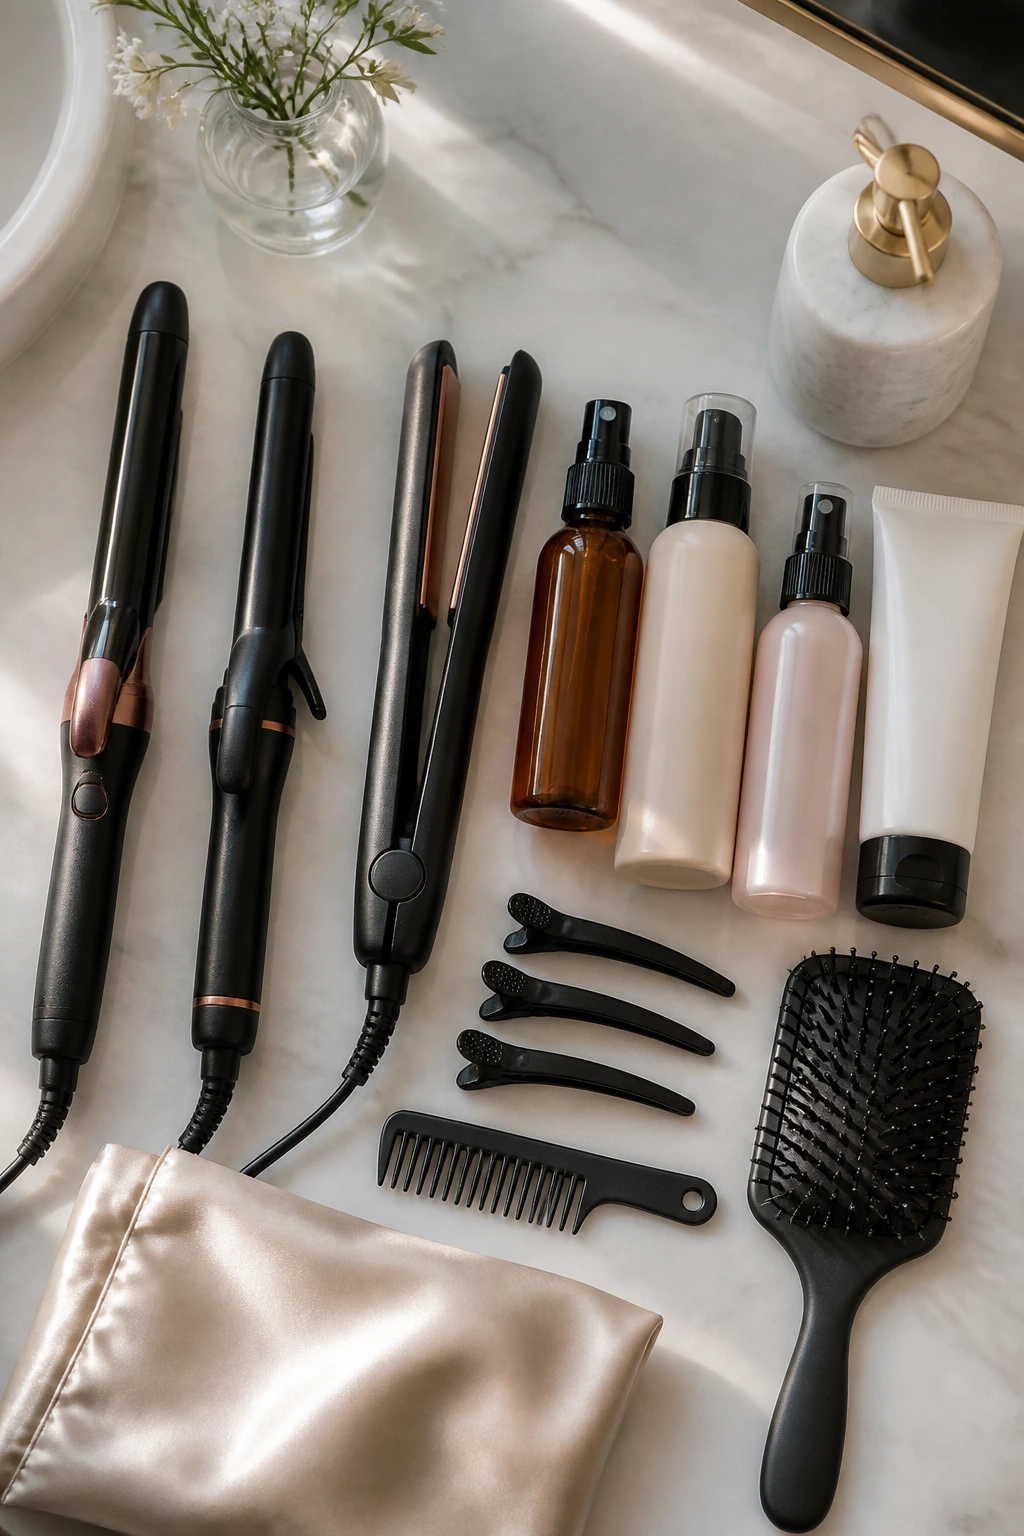
- 1-inch curling wand: Best for softer, more defined bends that still look natural on shorter lengths.
- 1.25-inch curling iron: Good for broader, brushed-out waves and anything that leans polished.
- Flat iron with rounded edges: Useful for S-waves, flipped ends, and a less curled finish.
- Heat protectant spray: Non-negotiable if you use heat; choose a lightweight formula so the hair does not feel coated.
- Volumizing mousse: Helps the roots hold lift without needing a ton of backcombing.
- Texturizing spray: Gives separation through the mids and ends; a little goes a long way.
- Curl cream or leave-in conditioner: Handy for air-dried waves and rough-dry textures.
- Duckbill clips or sectioning clips: Keep the top layers out of the way while you set the rest.
- Wide-tooth comb and paddle brush: The first preserves wave shape; the second helps soften a curl into an S-wave.
- Silk pillowcase or bonnet: Helps keep the wave pattern from getting crushed while you sleep.
If you only buy three things, buy the heat protectant, a medium-barrel tool, and a good texture spray. The rest help. Those three shape the result.
How to Ask for the Cut and Keep the Texture Soft
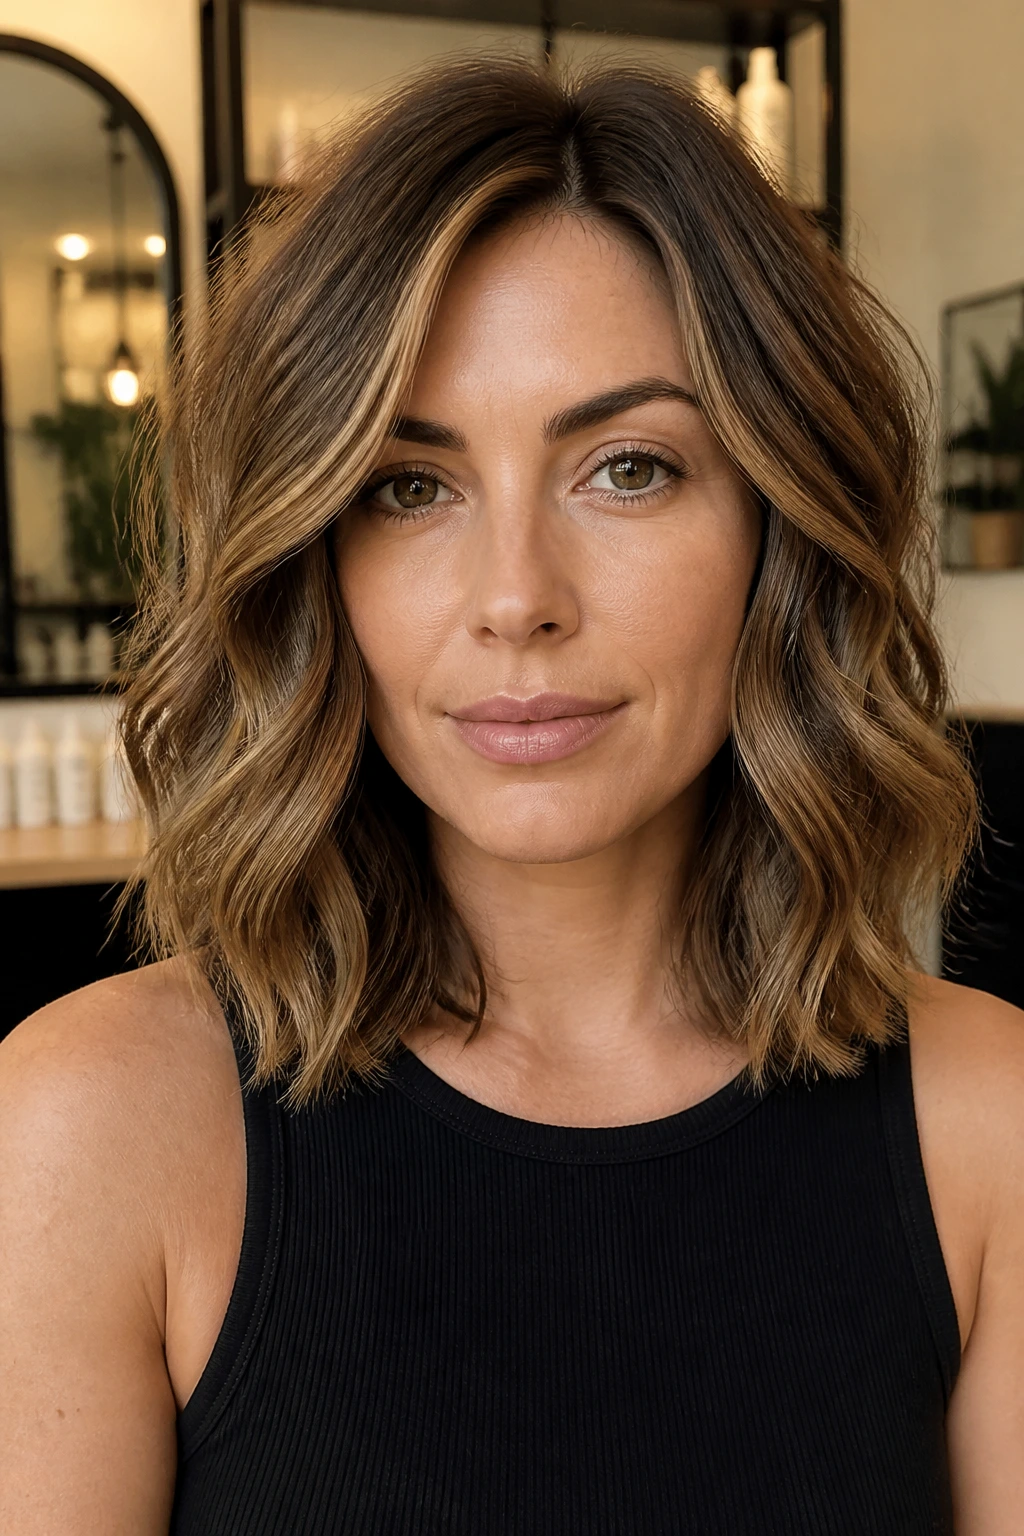
The easiest way to get this look right at the salon is to talk in terms of movement, not just length. Tell the stylist you want the hair to sit around the shoulders, keep enough weight to lie down, and still bend softly at the mid-lengths. That usually points them toward either invisible layers, a blunt perimeter with subtle internal shaping, or a shaggier finish depending on your hair density.
Bring up the ends. Seriously. If the ends are too blunt on thick hair, the wave can puff out. If the ends are too thinned on fine hair, the style can look wispy and weak. The right amount of texture depends on how the hair behaves when it dries, not just on what looks nice in the chair.
At home, the order of products matters. Heat protectant goes first on dry hair. Mousse or curl foam goes on damp roots if you want lift. Creams go on the mid-lengths and ends. If you dump everything together, the hair tends to feel coated and the wave loses clarity. Small amounts. Separated steps. Much better result.
Common Mistakes That Make Waves Puffy, Flat, or Frizzy
-
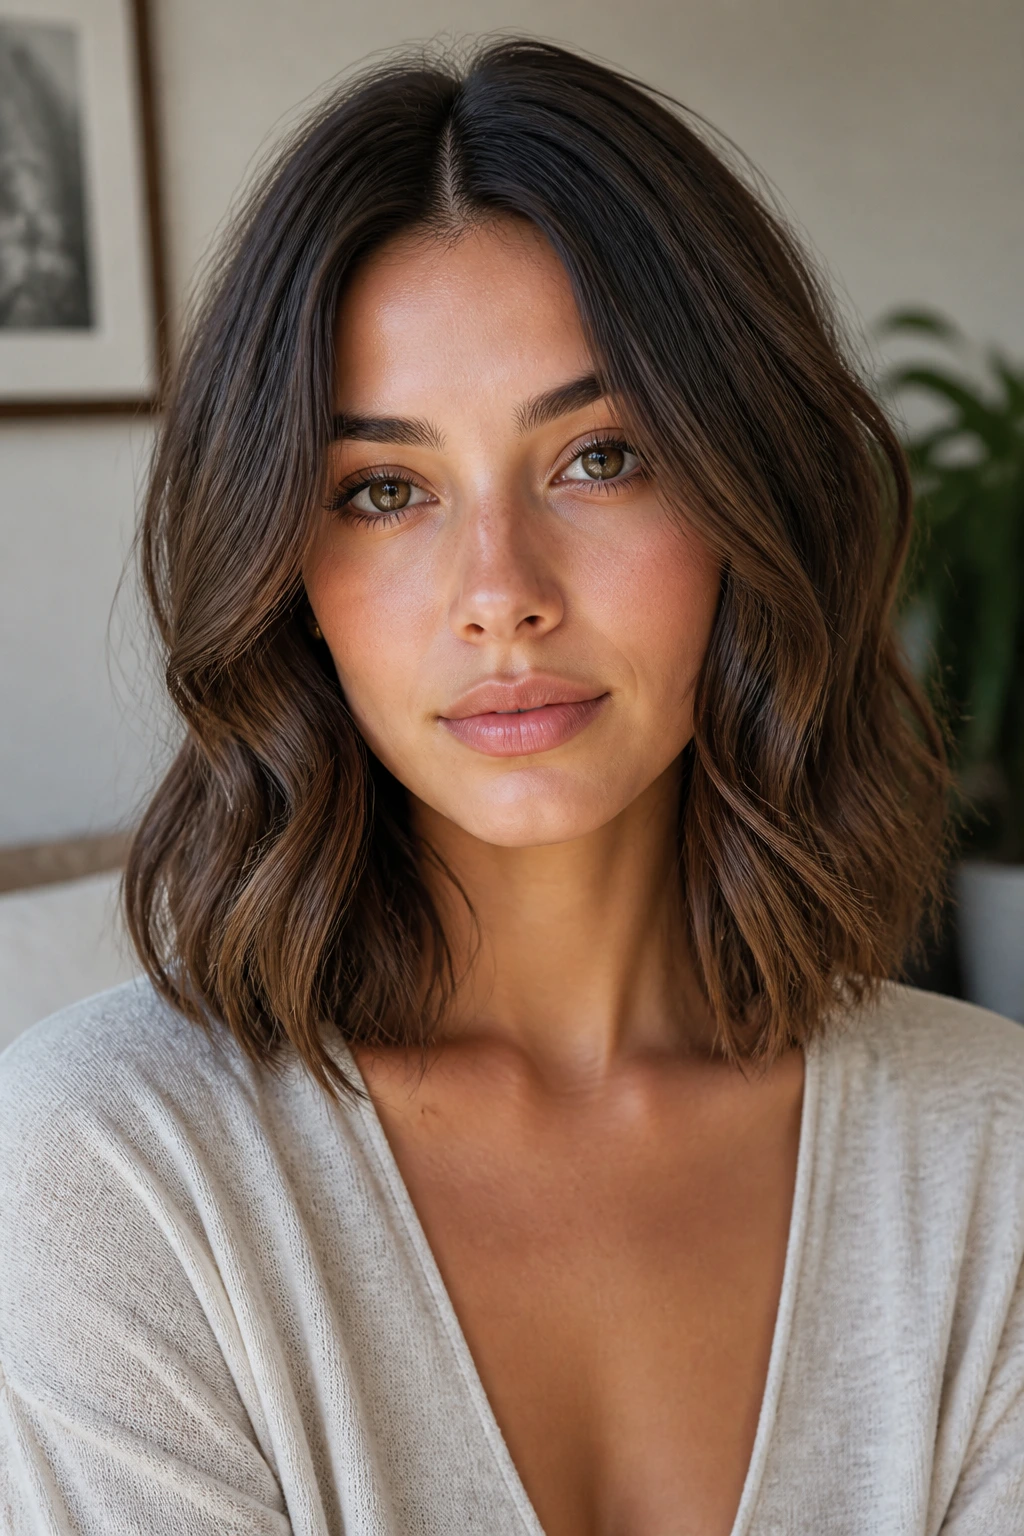
Wrapping every section the same way: If every strand curls in one direction, the style can turn into a uniform barrel instead of soft movement. Alternate directions, then brush lightly where needed.
-
Using too much serum or cream: The hair starts to look separated in a greasy way, especially around the ends. Start with a pea-sized amount and add only if the hair still feels rough.
-
Letting curls cool in your hand instead of on clips: Warm curls collapse fast. Pinning them up gives the shape time to set before gravity gets involved.
-
Styling on hair that isn’t fully dry: Even a little dampness under a hot tool can make the bend weak and fuzzy. Dry the section completely before you curl or flat-iron it.
-
Skipping root work: If the roots stay flat, the style can sag into the shoulders and lose shape. Lift the crown with mousse, clips, or a round brush.
-
Cutting too many short layers into a wavy shoulder-length cut: The hair can puff out around the sides, especially in humidity. Ask for controlled layering, not a shredded finish, unless that is the look you want.
Most bad wave days come from trying to do too much. The fix is usually the opposite: fewer products, fewer passes, more patience while the hair cools.
Variations for Fine Hair, Thick Hair, and Natural Texture
-
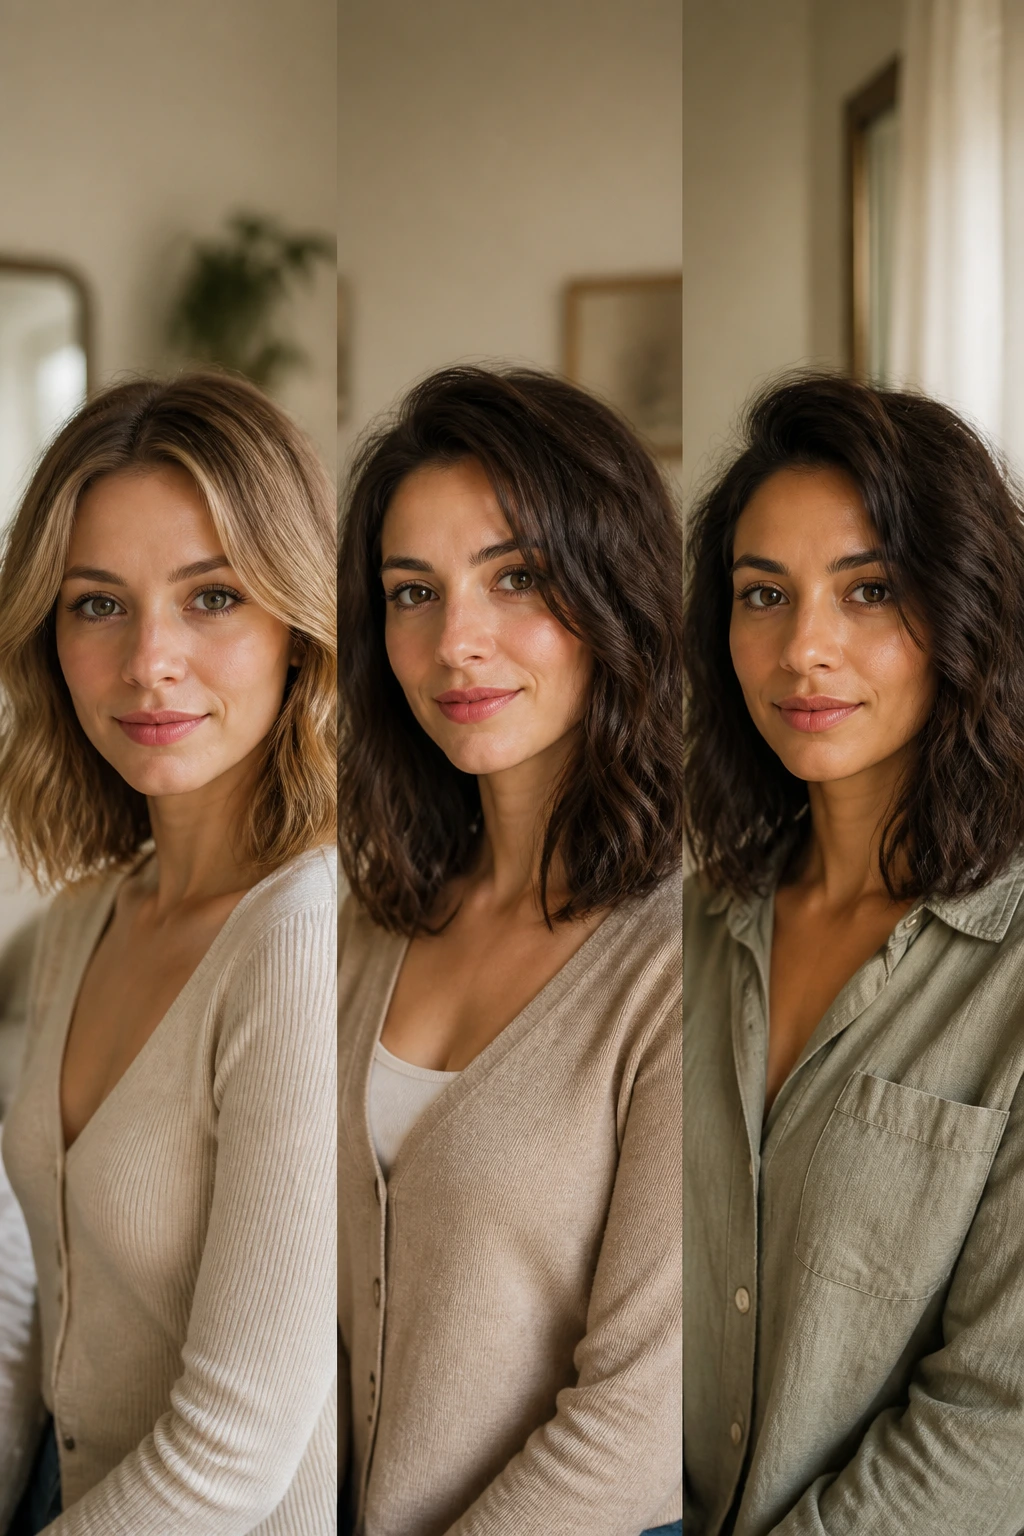
Fine Hair Float: Keep layers minimal, use a lightweight mousse at the roots, and style with a 1.25-inch wand so the wave looks broader and fuller. Fine hair needs body more than it needs definition.
-
Thick Hair Control Cut: Add invisible layers or micro-layers and keep the perimeter blunt enough to hold the shape. Thick hair usually looks better with movement inside the cut, not just at the tips.
-
Natural Wave Wake-Up: If your hair already bends on its own, skip the full curling routine and use a diffuser with curl cream. Then touch only the front pieces with heat so the finish stays soft.
-
Heatless Bend: Sleep in loose braids, rope twists, or a silk ribbon wrap, then separate the waves in the morning with a little leave-in spray. This suits people who want texture without hot tools.
-
Glossy Evening Sweep: Use a larger barrel, a side part, and a shine spray for an event-ready version that looks smoother and more deliberate. Keep the ends soft so it does not veer into formal pageant hair.
-
Humidity Shield: Work a small amount of anti-frizz cream through the ends, then finish with flexible hairspray instead of texture spray. That combo keeps the shape cleaner when the air gets sticky.
These variations are less about trend and more about control. Choose the one that matches your hair’s habits, not the one that looks best in a still image.
Keeping Shoulder-Length Waves Fresh Between Wash Days
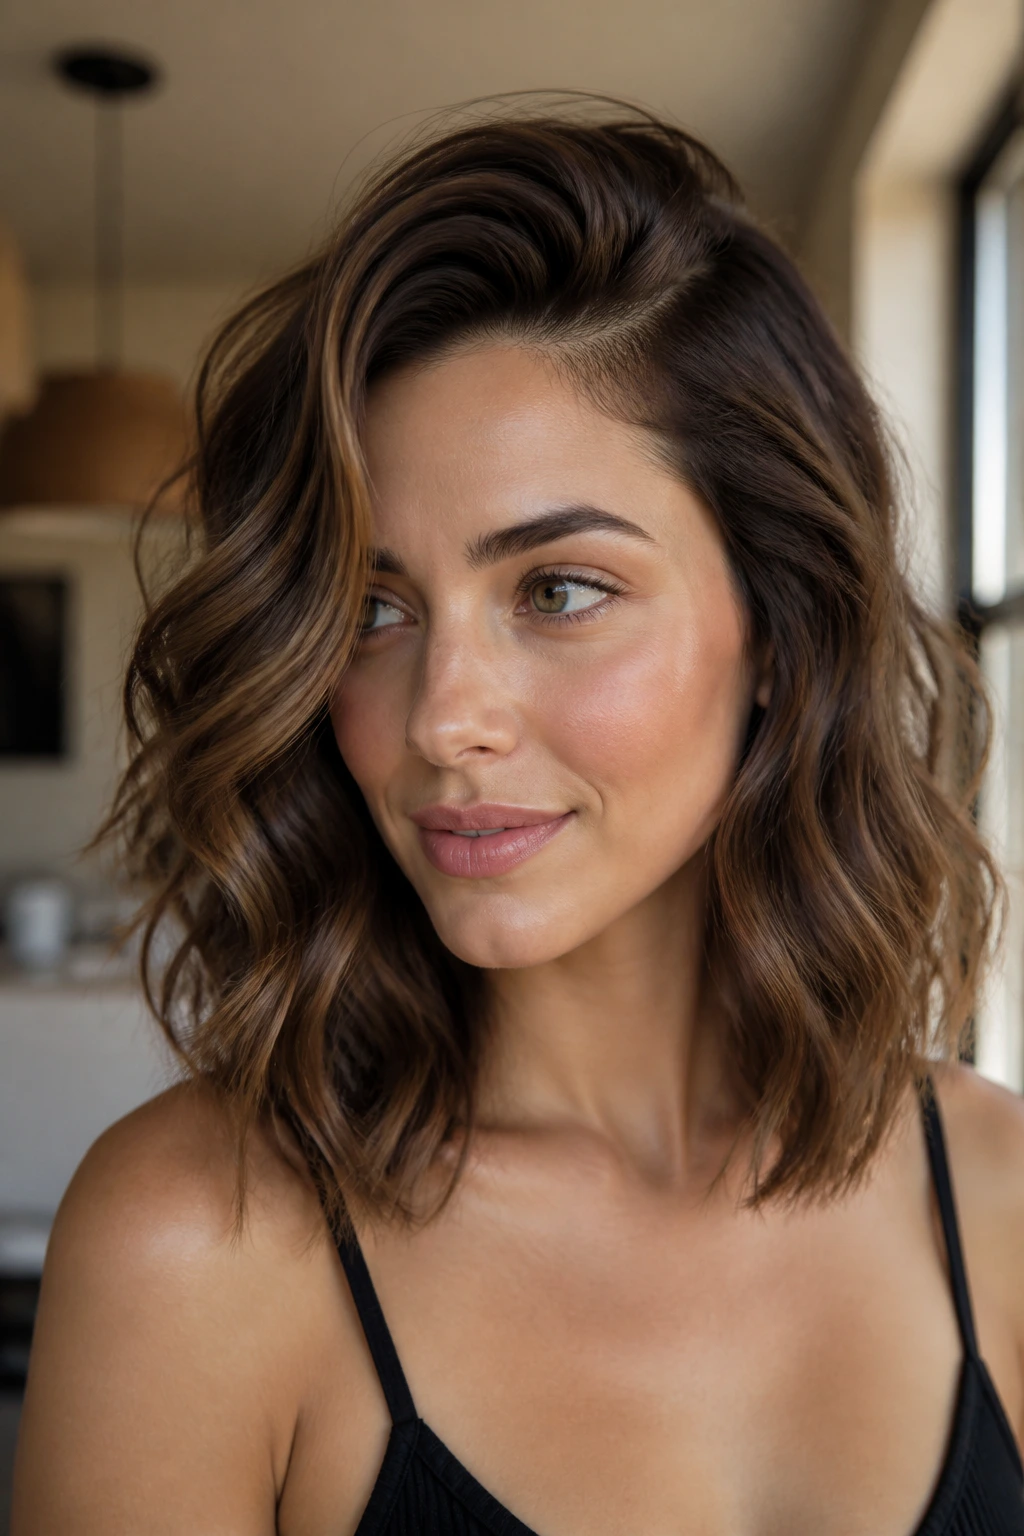
Shoulder-length waves often look better on day two than on day one, as long as they are not crushed overnight. A silk pillowcase helps. So does clipping the top section loosely at the crown or sleeping in a very loose pineapple if your texture is more wavy-curly than straight-wavy. The point is to keep the bend from getting flattened into the side of your face.
Morning refresh is usually quick. Mist the lengths lightly with water or a leave-in spray, scrunch where the waves have gone limp, and touch the front pieces with a wand for 10 to 15 seconds each if needed. Do not re-curl the whole head unless you enjoy spending your life in front of the mirror.
Dry shampoo helps, but only at the roots. If you spray it through the mids and ends, the texture can turn dusty. Massage the roots with your fingertips, then stop. If the ends feel dry, use one drop of serum and nothing more.
Trims matter too. At shoulder length, the ends sit where coats, scarves, and shirt collars rub against them. Dust them every 6 to 8 weeks if your hair grows fast or frays easily. That keeps the wave line soft instead of ragged.
Common Questions About Shoulder-Length Wavy Hairstyles
Will shoulder-length waves make thin hair look thicker?
Usually, yes—if the cut keeps some weight at the ends and the roots get a bit of lift. Fine hair looks fuller when the wave is broad rather than tightly curled, so a 1.25-inch iron or a brushed-out finish tends to work better than small ringlets.
Do shoulder-length waves work on very thick hair?
They do, but the cut needs internal shaping or the silhouette can go wide. Thick hair often looks best with invisible layers, micro-layers, or a blunt perimeter paired with controlled texture at the top.
Should I get layers if my hair is naturally wavy?
A little shape helps, but too many layers can make the wave puff out and lose its line. Ask for soft internal layers or face-framing movement first, then see how the hair behaves once it’s dry.
How do I keep the ends from flipping out too much?
Use smaller sections near the shoulders and stop curling the last inch if you want a softer finish. A smoothing cream on the ends before styling can also keep them from kicking outward.
Can I air-dry shoulder-length waves and still have a nice shape?
Yes, especially if your texture already has some bend. Use curl cream or leave-in on damp hair, scrunch, and clip the roots while they dry so the crown does not flatten.
What part looks best with shoulder-length wavy hair?
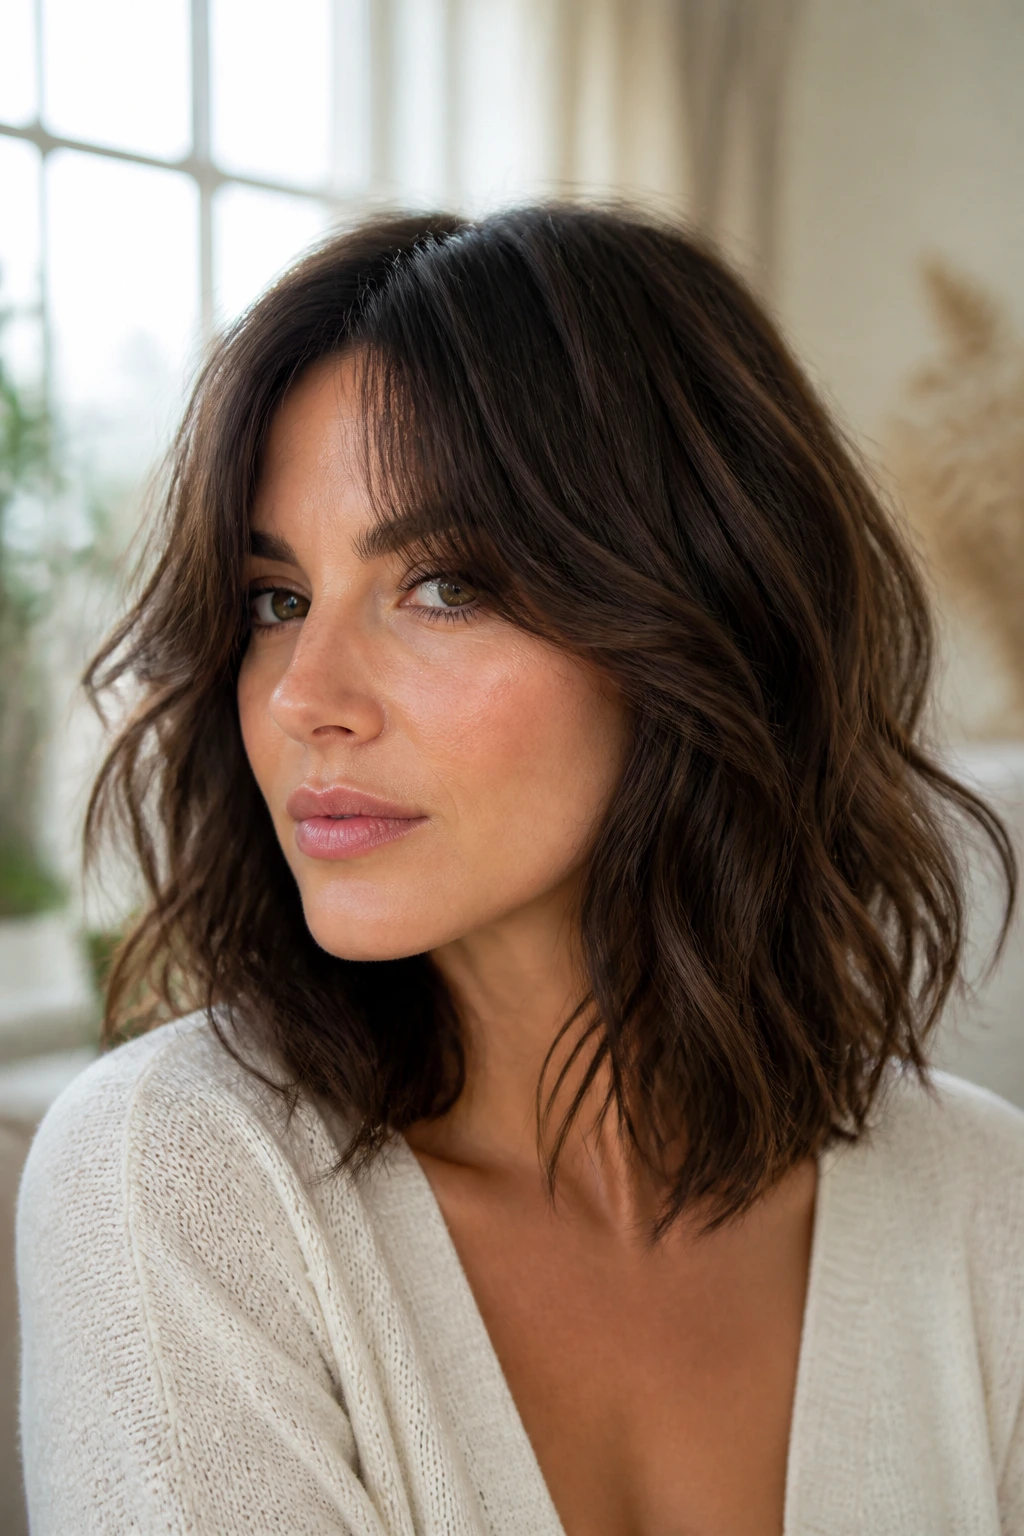
A center part gives a clean, soft frame. A deep side part adds lift and can help fine hair. Curtain bangs often sit somewhere in the middle and blend into either parting pattern.
How often should I heat-style this length?
As little as your routine allows. The hair sits near the shoulders and gets rubbed by clothing, so heat damage shows up fast at the ends. A couple of full heat-styling days a week is usually enough if you refresh with texture spray or air-dry the rest of the time.
The Collarbone Sweet Spot
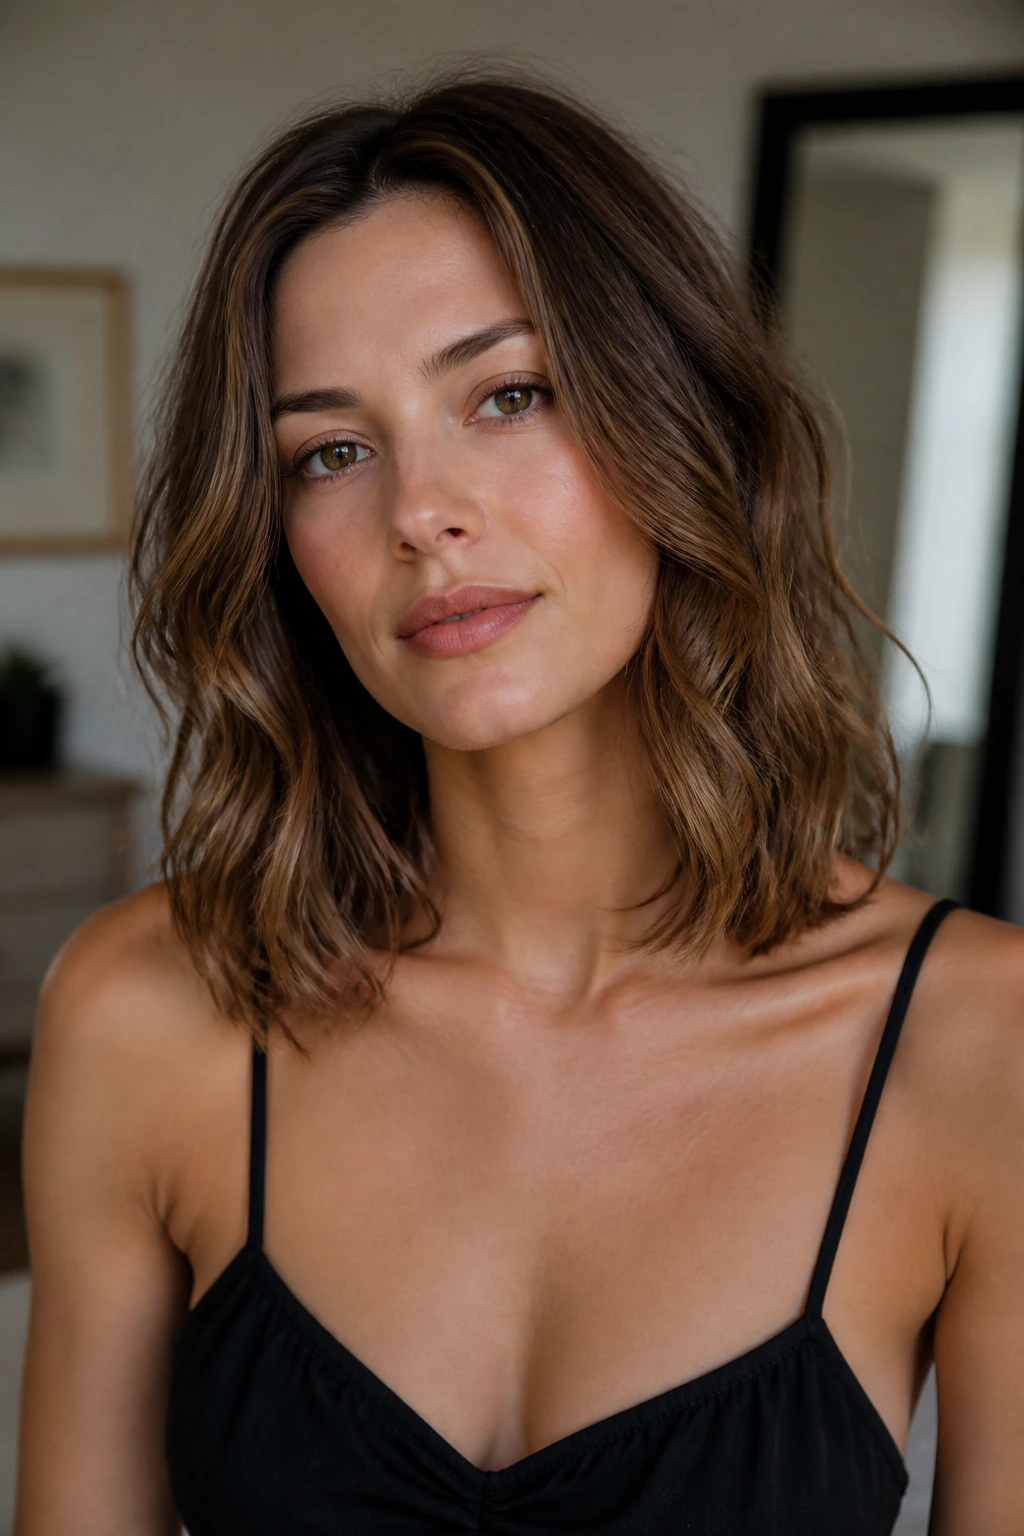
Shoulder-length wavy hairstyles work because they give texture somewhere to land. The wave has room to breathe, the ends stay visible, and the shape doesn’t depend on a heroic amount of styling to look finished. That’s the real magic here. Not volume for its own sake. Not curls that scream for attention. Just hair that moves in a way that looks easy because the cut was thought through.
If you’re choosing between a longer cut that drops flat and a shorter one that starts getting fussy, this is the length I’d keep coming back to. It’s the one that forgives a rushed morning, a humid afternoon, and the occasional bad hair day without looking careless.
Pick the version that suits your hair’s temperament, not the one that sounds fanciest on paper. The right shoulder-length wave has a way of making that choice obvious once it’s on your head.
