



Medium length hair is the sweet spot where waves finally make sense. The hair has enough weight to fall in a clean bend, but not so much that every curl gets dragged straight by lunch. If you’ve ever watched your roots stay flat while the ends puff out like they’re trying to leave the party early, you already know why wavy hairstyles for medium length hair deserve their own playbook.
The shape matters more than people think. Collarbone cuts, shoulder-grazing lobs, and layered medium hair all handle bends differently, and the difference shows up fast: one style gives you soft movement, another gives you polished gloss, and another turns second-day hair into the best hair day of the week. Small shifts — where the part sits, how wide the sections are, whether the ends stay straight — change the whole look.
That’s what makes medium-length waves so fun. You can go easy and airy, dress them up, pin them back, braid them, tuck them, or leave them loose and a little messy. The good versions look deliberate without looking stiff. The bad versions? Too much product, too-tight curls, or waves that start too close to the scalp and flatten into a helmet by afternoon. Let’s get into the looks that actually hold up.
Why This Collection Feels So Wearable
- Built for shoulder-grazing cuts: Medium length hair has enough length to show movement, but not so much that waves disappear under their own weight.
- Easy to bend into different moods: The same lob can read casual with a salt spray finish or polished with a deep side part and brushed-out waves.
- Friendly to second-day hair: A little dry shampoo at the roots and a few face-framing touch-ups can revive most of these styles in under ten minutes.
- Works with straight, wavy, and curly textures: You’re not fighting one hair type here; you’re shaping what’s already there.
- Loves accessories: Clips, barrettes, headbands, hoops, and scarves all sit nicely on medium lengths without swallowing the style.
- Less weight, more hold: Compared with long hair, medium hair usually keeps a bend longer because it doesn’t drag the wave down as fast.
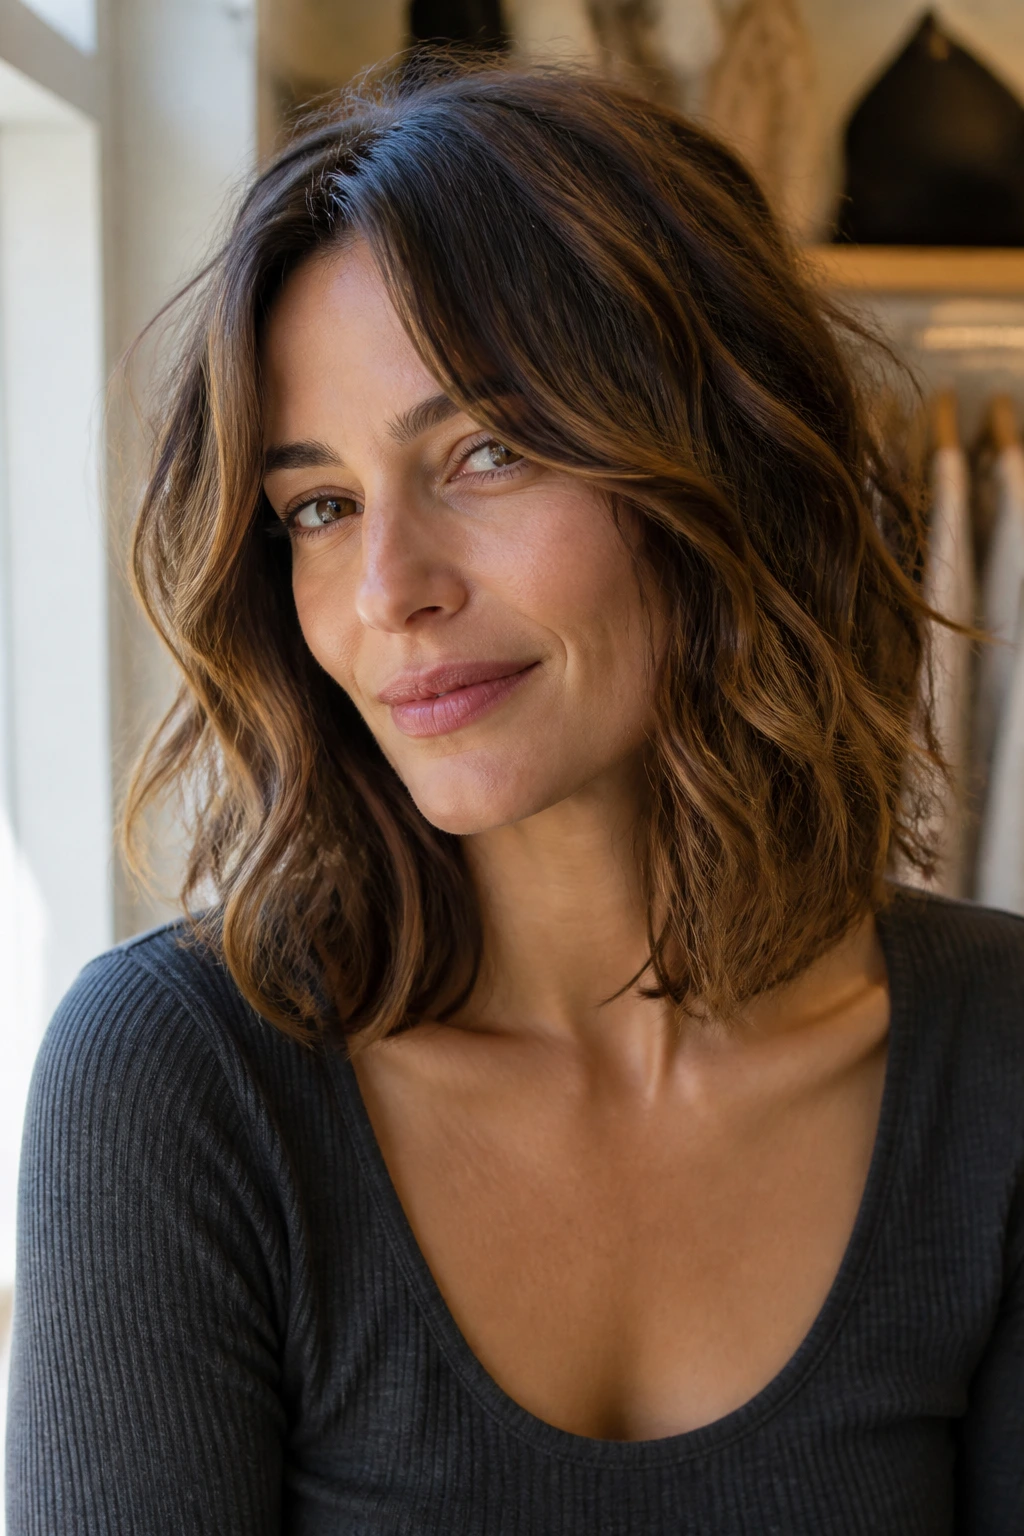
1. Center-Parted Soft S-Waves
A clean center part and loose S-waves are the quiet overachievers of medium-length styling. The look sits right between polished and relaxed, and it’s one of the few wave patterns that doesn’t fight a collarbone cut. The bend lands around the cheekbones, then loosens toward the ends, which keeps the shape soft instead of springy.
Why It Flatters Medium Hair So Well
Medium hair has enough length for the wave to open up, but not so much that it collapses into a heavy curl. That’s why a 1.25-inch curling iron or wand works better here than a tiny barrel. Wrap 1-inch sections away from the face, leave the last inch out, then brush everything out once it cools.
If your hair is fine, add mousse at the roots before drying. If it’s thicker, skip the mousse at the crown and go with a light heat protectant plus a flexible hairspray at the end.
- Best on oval, heart, and square faces
- Looks especially good on a blunt lob
- Keep the roots calm and the bend mid-length
- Brush with a boar-bristle brush for a smoother finish
One good bend beats ten tight curls.
2. Deep Side-Part Glam Waves
A deep side part changes the whole mood fast. The hair suddenly has lift at one side, the front falls in a sweep across the forehead, and medium length takes on that old-school gloss that looks better when the waves are brushed together instead of left separate. It’s a strong look without being fussy.
The trick is to set the part while the hair is still damp or freshly blown dry, then clip the heavier front section aside while you curl the rest. Use a 1.5-inch iron if your hair holds a curl well; if not, a 1.25-inch barrel is safer. Let the curls cool completely before combing them into one smooth wave.
A little shine serum on the ends helps. Too much near the roots will flatten the lift you just built, and that’s a waste of time.
3. Collarbone Lob with Loose Ends
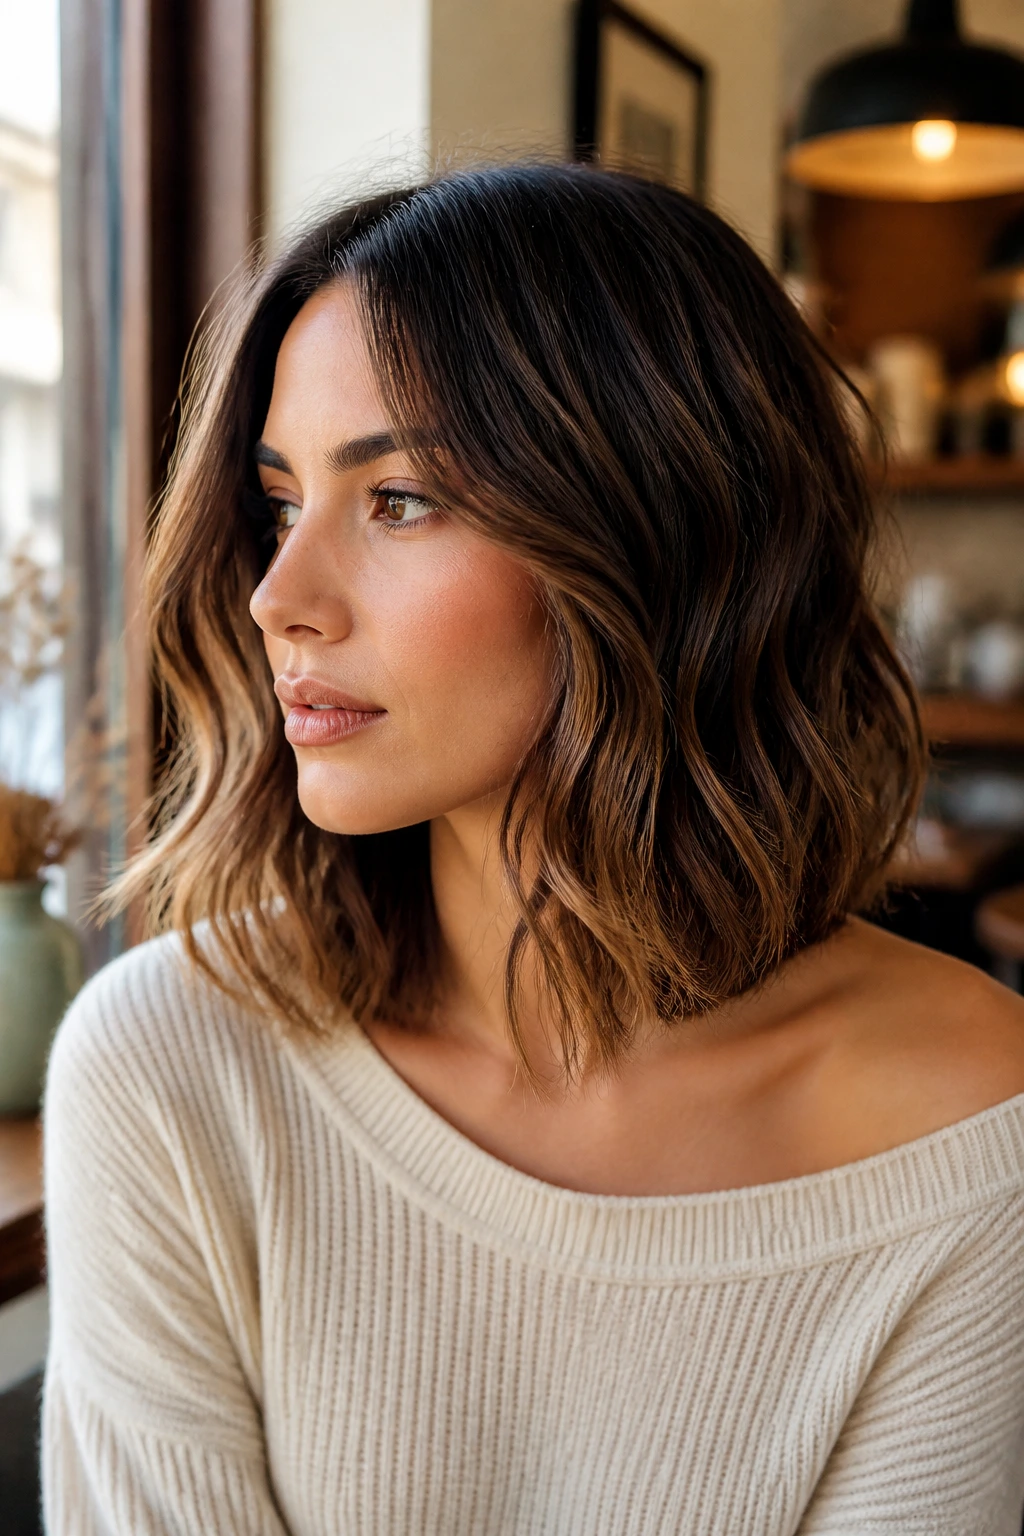
This is the answer to the blunt lob that keeps flipping out in random directions. Instead of curling every inch, you bend only the middle lengths and leave the ends straighter, which gives the cut a cleaner line. The result looks intentional, not overdone.
If you’ve got thick hair, this style is gold because it removes bulk without turning the whole head into a curl cloud. Work in horizontal sections, wrap the mid-lengths around a wand, then stop before the last inch and a half. The ends should still move, but they shouldn’t curl back on themselves.
A flat iron can also do the job if you prefer a softer, straighter finish. The bend should be gentle enough that you can still see the outline of the cut.
4. Half-Up Twist with Tousled Waves
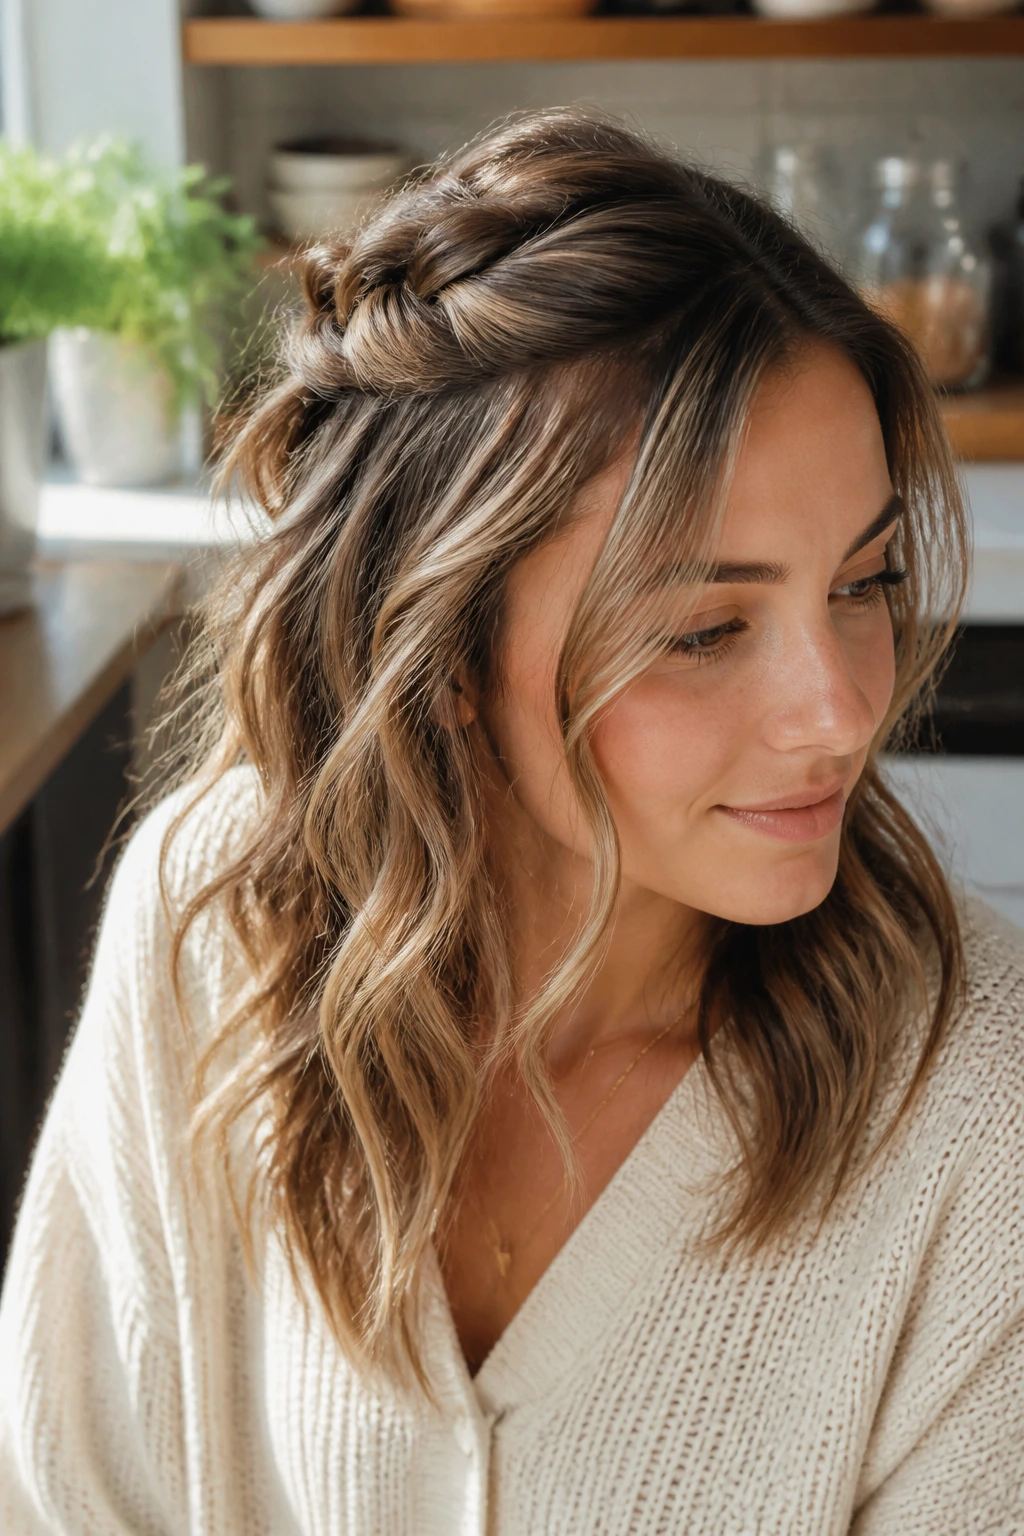
Want your hair out of your face without losing the wave pattern? The half-up twist is the cleanest answer. Pull back each temple section, twist it once or twice, and pin it at the back of the crown. The lower half stays loose, which means the style still shows off the bend through the lengths.
This one works especially well on day-two waves because the hair already has a little grit. A touch of texturizing spray at the sides helps the twist hold, and you don’t need a ton of bobby pins — two on each side usually does it. If your hair is finer, backcomb the pinned section lightly before securing it.
The look lands in that middle space between casual and dressed up. Good for brunch. Good for a dinner. Good for the days when your hair is cooperating enough to deserve a small reward.
Best Features to Keep in Mind
- The twist should sit just above ear level, not at the top of the head
- Leave two front pieces out if you want a softer line
- Pin the twist flat against the scalp so it doesn’t puff
- Use a mist of flexible hold, not crunchy lacquer
5. Claw Clip Stack with Face-Framing Pieces
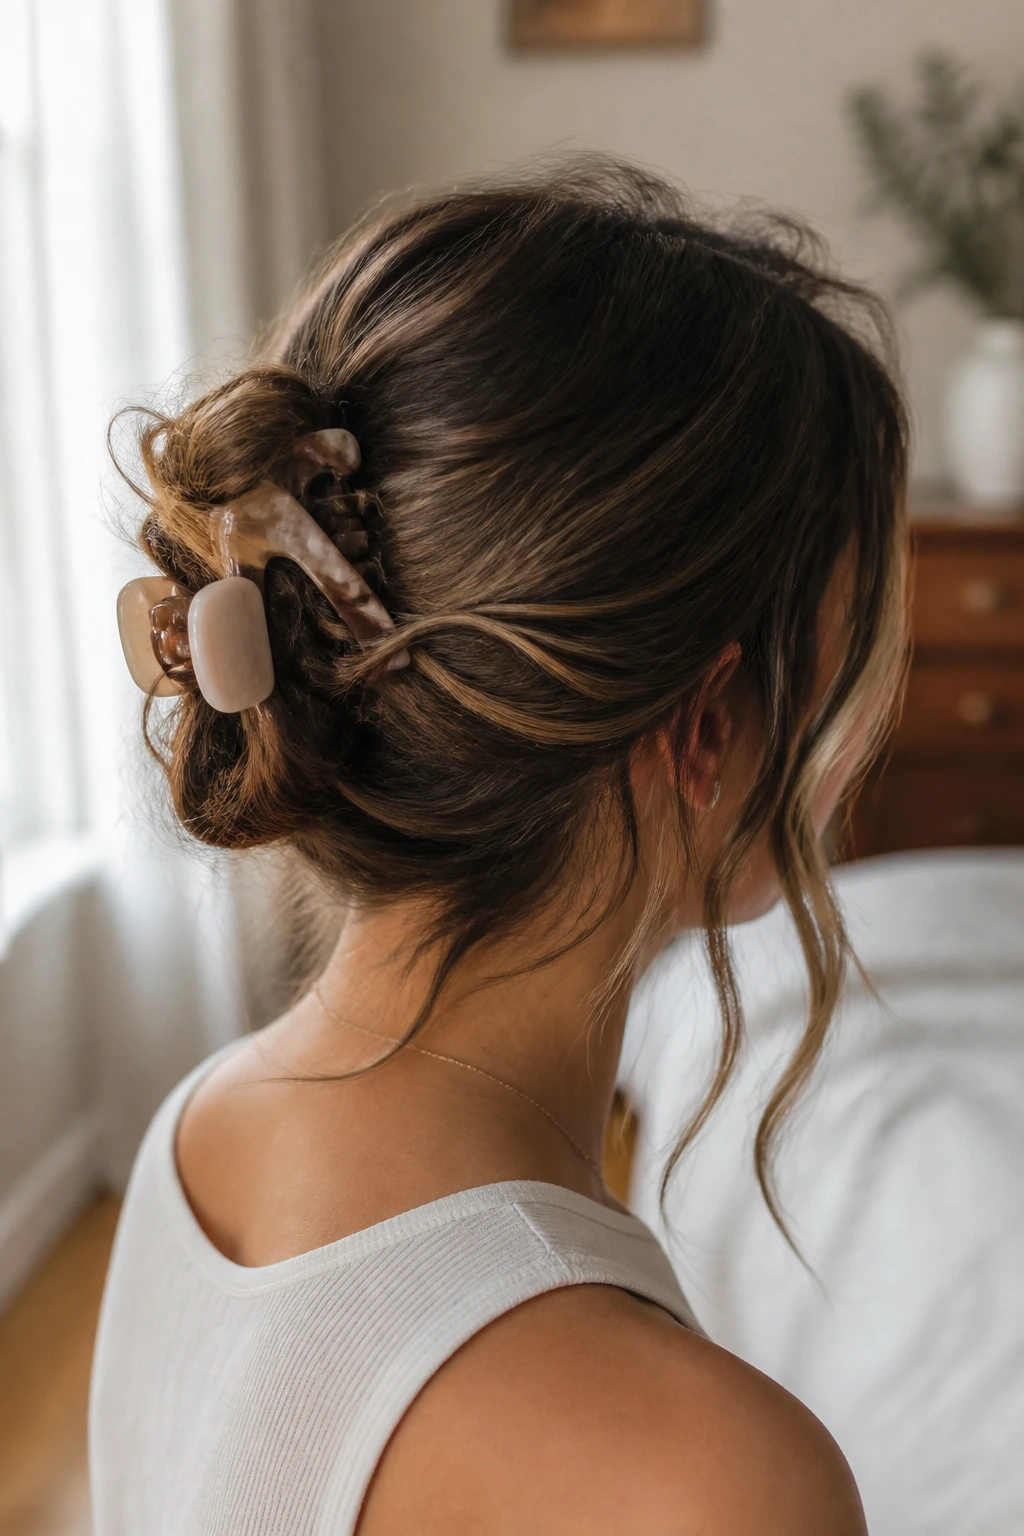
The claw clip earns its keep on medium-length hair because it gathers just enough hair to look styled, not scraped back. Stack the clip at the back of the head, let the ends roll over the top, and leave a pair of face-framing pieces out. Those front strands matter. Without them, the style can look too severe.
This works best when the hair has some bend already. If the waves are flat, re-bend the front pieces with a curling iron for 30 seconds each and let them cool before clipping back. A medium-sized clip is usually better than an oversized one; too much plastic and the style starts feeling clumsy.
I like this for thick hair that wants to escape every pin you own. The clip gives structure, and the loose pieces keep it from looking like a gym hairstyle.
6. Textured Shag Waves
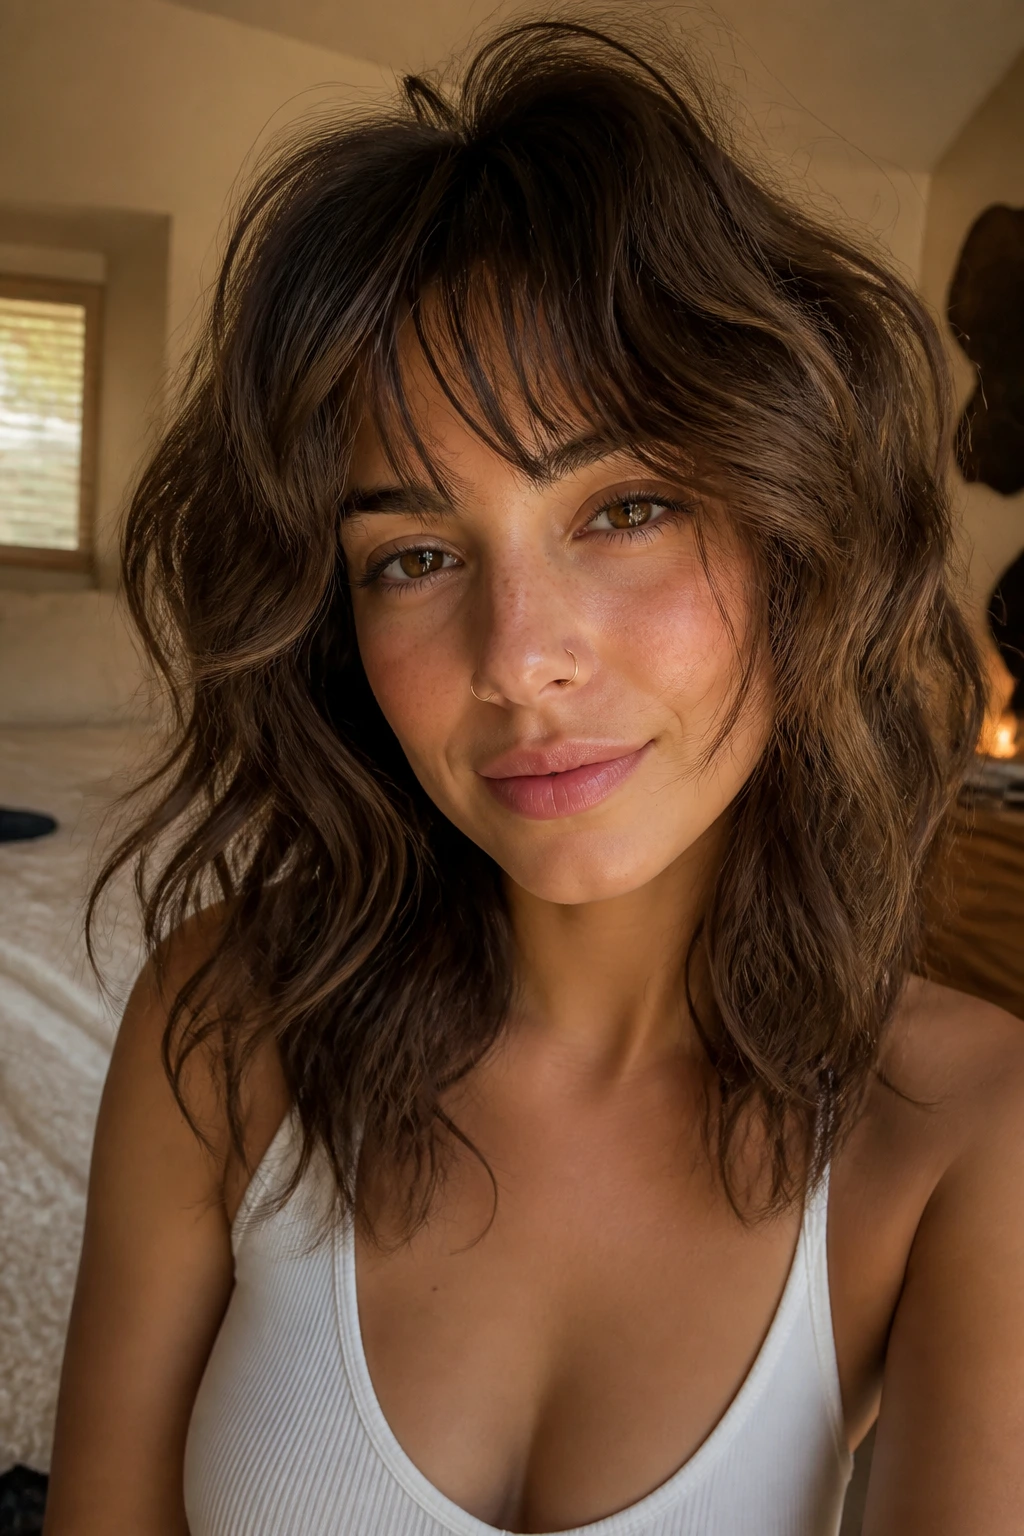
A shag cut practically begs for waves. The layers do half the work, so you don’t need a perfect curl pattern — you need piecey movement and a little roughness at the ends. Medium length shag waves look especially good when the crown has lift and the fringe has a softer bend.
Diffuser? Yes. Brush? Not much. Work mousse through damp hair, scrunch in a lightweight cream, then diffuse on low heat until the hair is about 80 percent dry. After that, stop touching it. Let the pieces separate on their own, then finish with a small amount of texture spray.
This is one of those styles that looks better with a little imperfection. If every strand behaves, the shag loses its edge.
7. Curtain Bang Waves
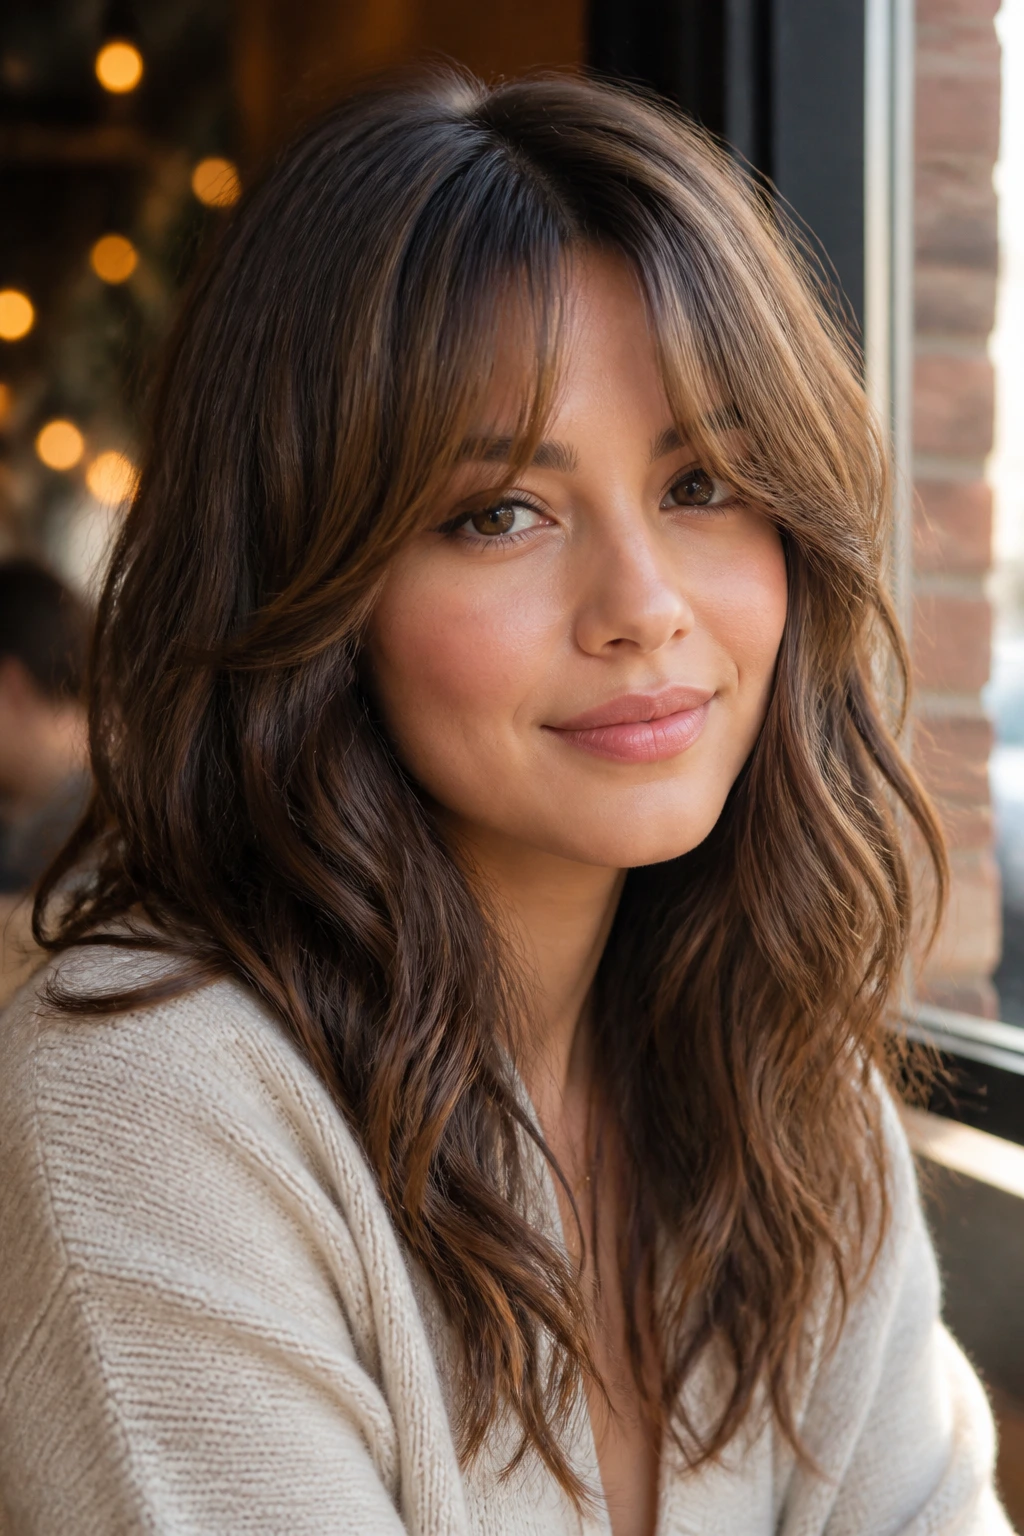
Curtain bangs change the shape of medium waves in a big way. They pull the eye inward, soften the forehead, and make even a simple wave pattern look more layered. The danger is overcurling the bangs, which turns them into a loop instead of a sweep.
The trick is to blow-dry the bangs away from the face with a round brush, then tap the ends with a flat iron or wand just enough to bend them back. Keep the rest of the hair loose and airy. The goal is a soft frame, not a full head of ringlets.
If your hair is wavy already, this style is almost cheating. The bangs and lengths work together, and you don’t need much else except a light hold spray.
8. Flat-Iron Bends
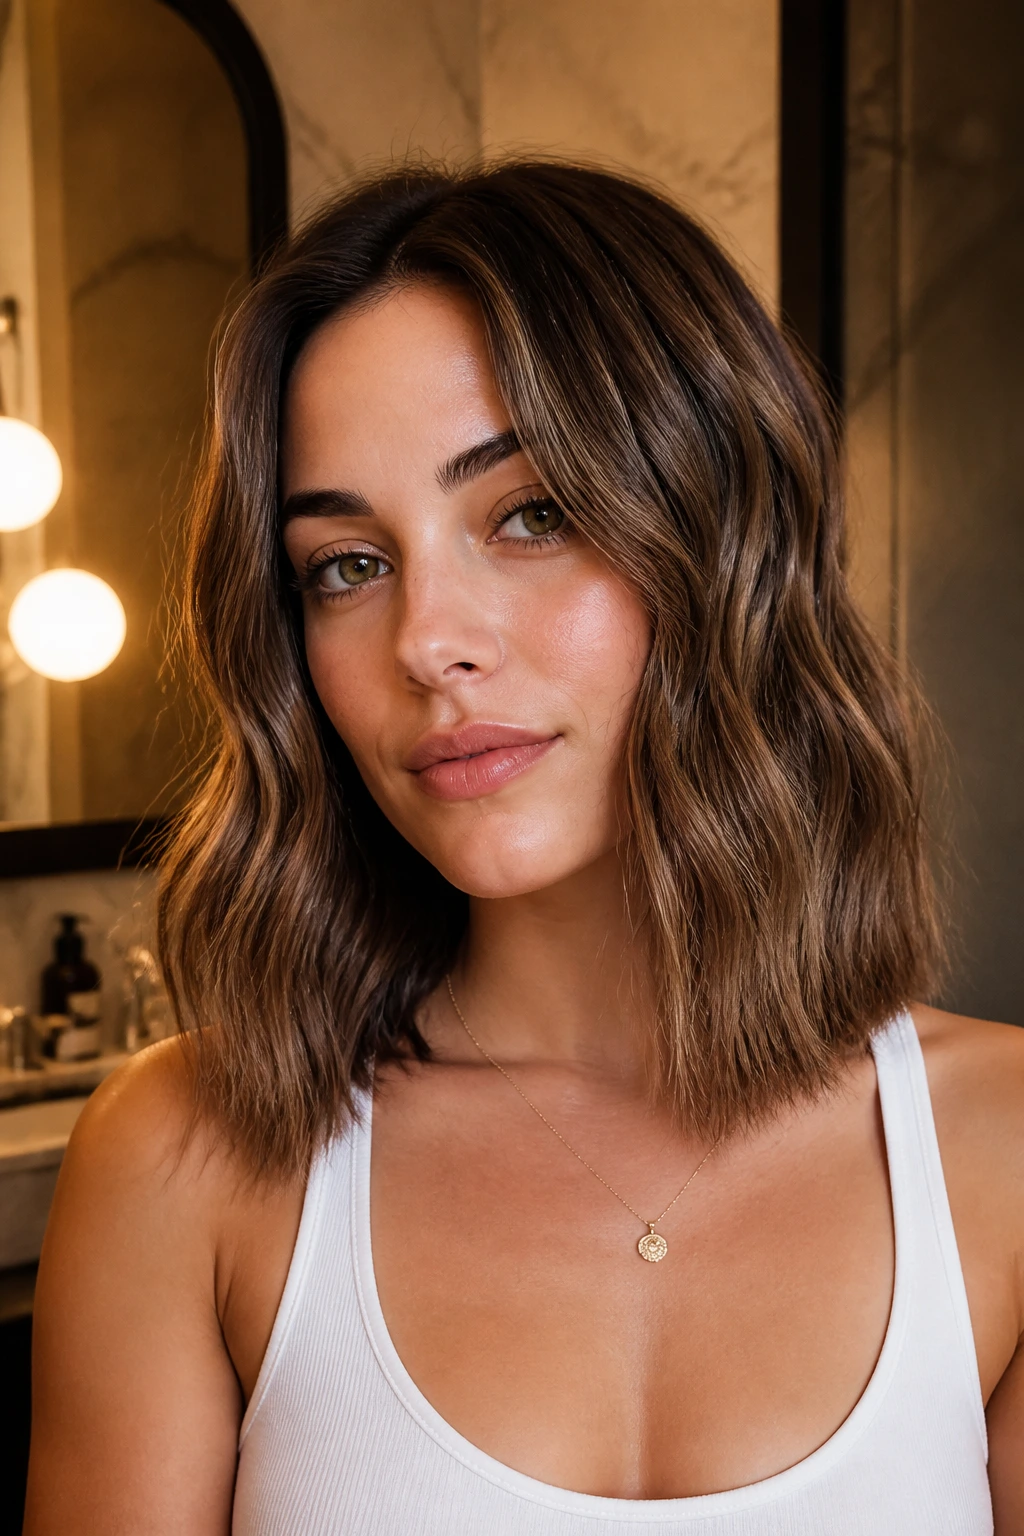
If curling irons make your arms tired, flat-iron bends are your friend. They create a looser, more modern wave that sits nicely on medium-length hair because the bends aren’t too tight. You clamp a 1-inch section, rotate the iron a quarter turn, slide a few inches, rotate again, and keep going down the strand.
The pattern should feel slightly irregular. That’s the point. Perfectly even bends can look stiff, especially on medium hair, which already has enough shape on its own. The last inch can stay straighter so the ends don’t look puffy.
Use a heat protectant every time. Flat irons get hot fast, and repeated passes do more damage than people expect.
Quick Notes
- Best for straight or slightly wavy hair
- Use medium heat first; raise it only if the bend falls immediately
- Keep sections narrow for cleaner waves
- Let the hair cool in your hand before brushing it out
9. Barrel Wand Waves
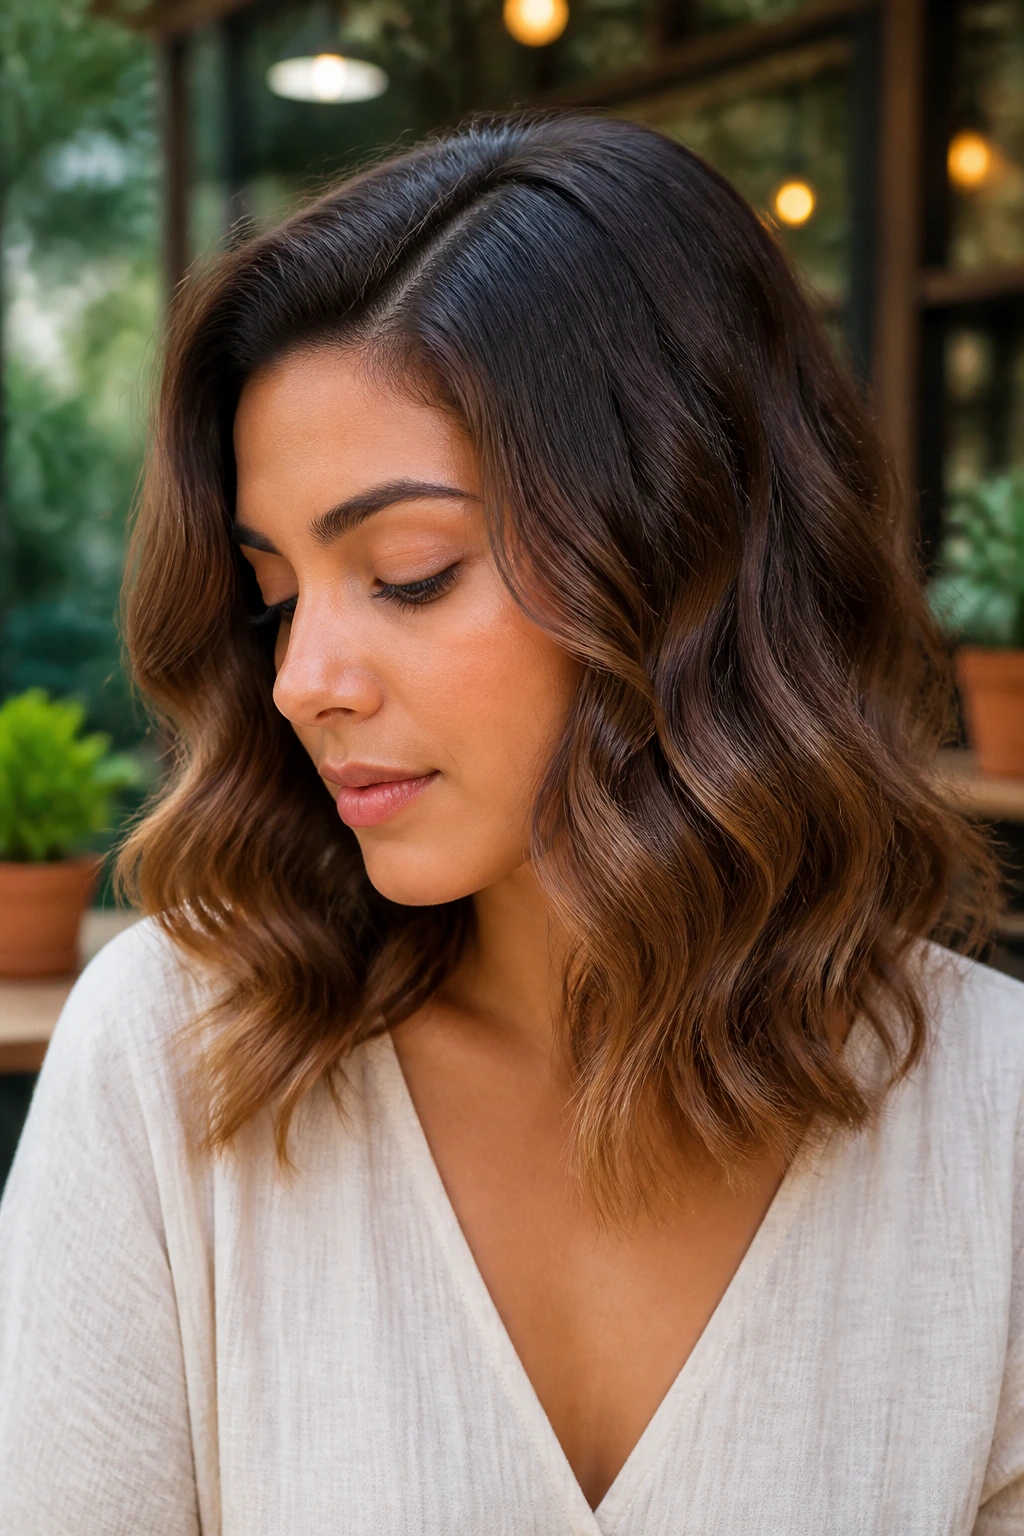
A barrel wand gives medium hair that smooth, even wave pattern that sits between beachy and polished. The finish looks especially good when the sections are wrapped away from the face, then brushed gently after cooling. If the waves are too tight at first, don’t panic. They relax fast once they lose heat.
A 1.25-inch wand is the safest size for most medium cuts. A 1.5-inch wand gives a softer bend if your hair holds shape well. Hold each section for about 8 to 10 seconds, then release it into your palm for a second before letting it drop. That cooling pause matters.
This style is one of the easiest ways to make a lob look expensive without a lot of effort. Not fancy. Just clean, controlled movement.
10. Beach Waves with Salt Spray
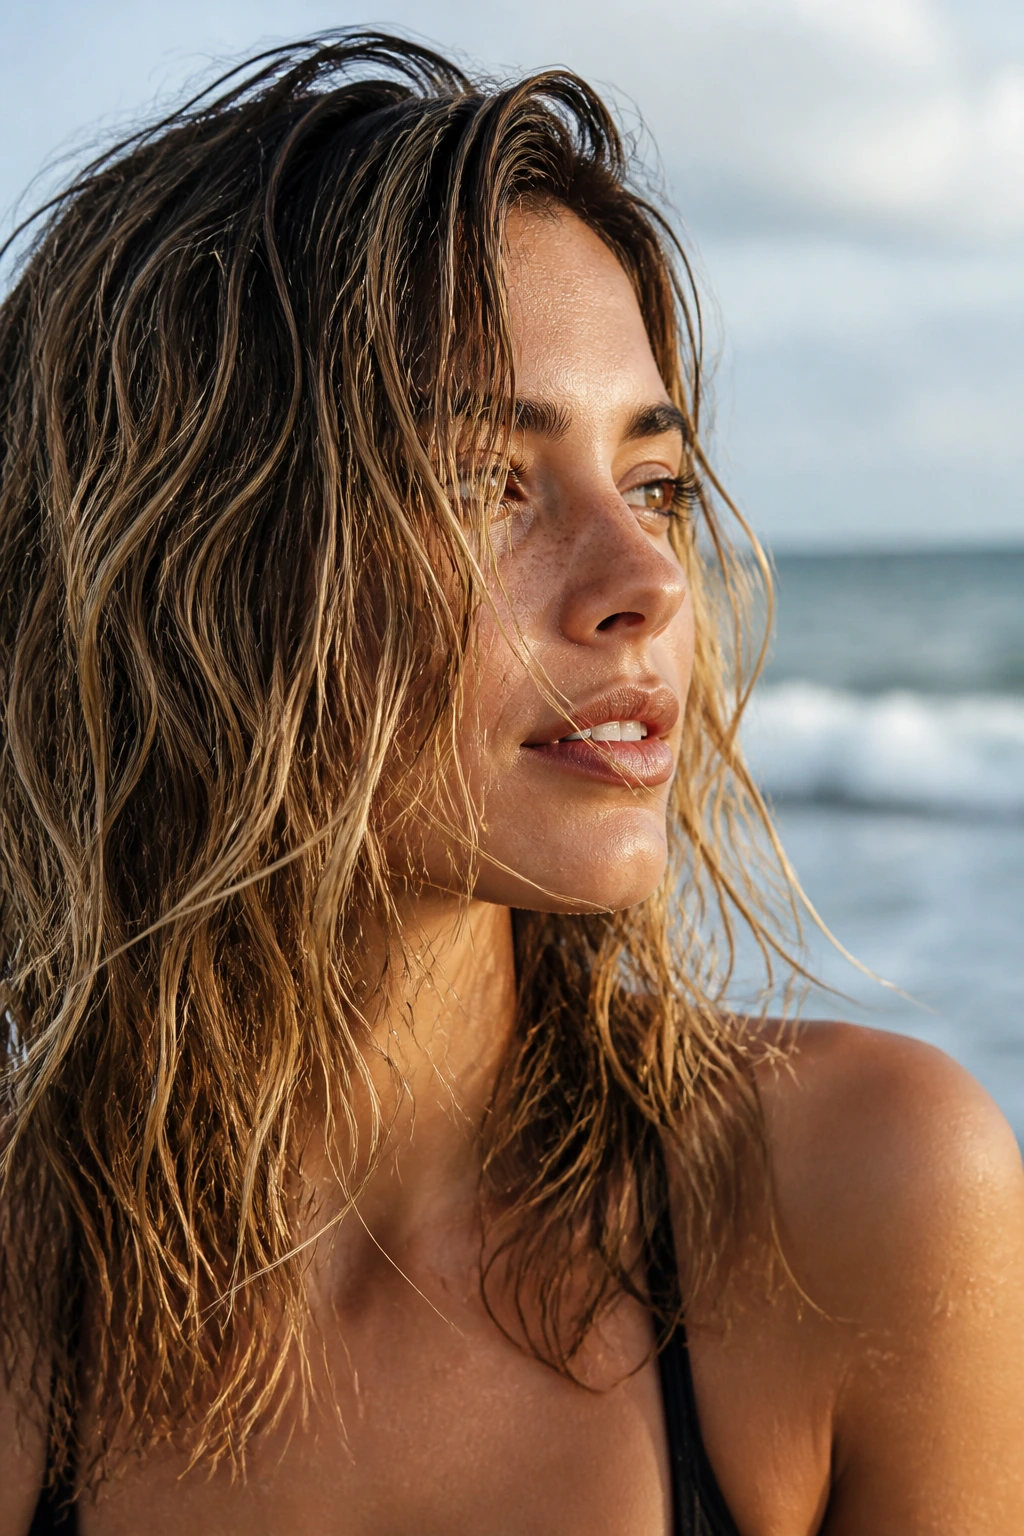
Beach waves only work when they look a little undone. That means you want texture first, shine second. Start with damp hair, mist salt spray through the mid-lengths and ends, then scrunch with your hands until the pattern starts to form. If your hair is stick-straight, a diffuser helps. If it’s already wavy, you may not need heat at all.
The catch is dryness. Salt spray can rough up the cuticle fast, so pair it with a leave-in conditioner or a lightweight cream underneath. Medium hair tends to hold this style well because the length isn’t heavy enough to pull the texture flat right away.
I’d use this on days when you want movement more than polish. It has a little grit. That’s the charm.
11. Tucked-Behind-Ear Waves
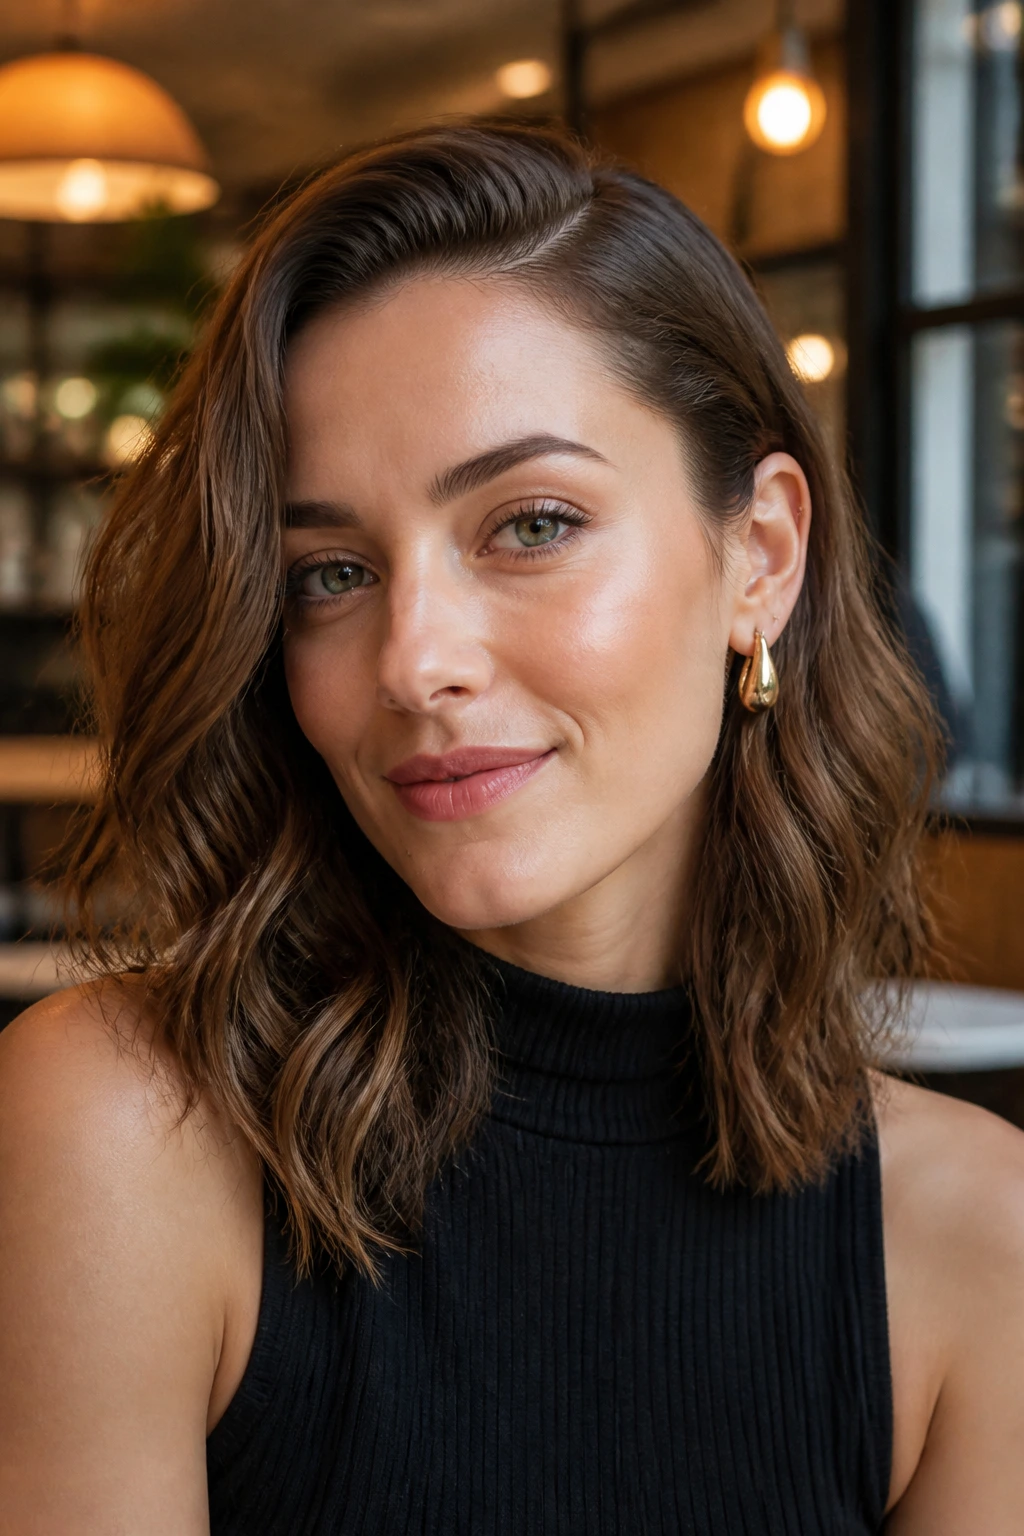
One tucked side and one loose side gives medium waves a sharp little line. The front gets smoother, the exposed ear invites an earring, and the rest of the hair falls in a soft curtain. It’s one of the easiest ways to turn a basic wave pattern into something that looks thought through.
Flat hair at the tucked side ruins the effect, so smooth the top with a tiny bit of cream or serum before tucking. Don’t flatten the entire head. Just calm the front section so it sits close to the skull and lets the wave down below do the talking.
This works especially well on lobs that stop at the collarbone. The hair has enough length to tuck without popping loose every five minutes.
12. Braided Crown Half-Up
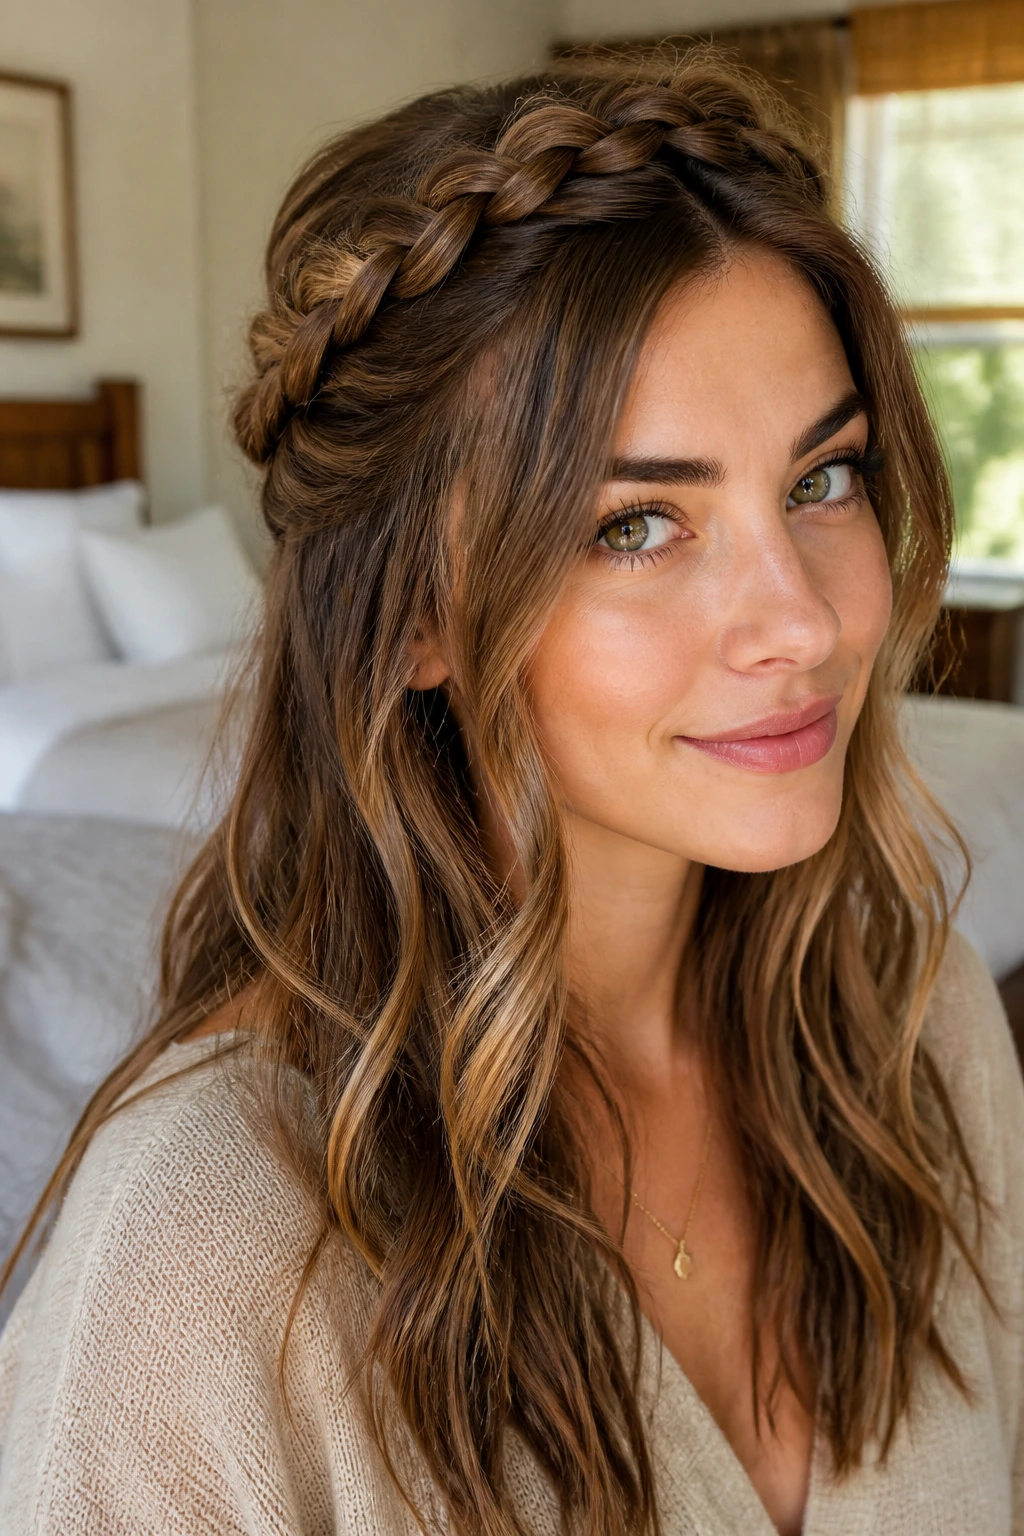
A braided crown half-up gives medium waves a bit of structure without stealing the whole show. Braid a section from one temple to the other, pin it across the back, and let the remaining waves fall loose. It’s a good move when you want the style to feel a little more finished than a twist, but not as formal as a full updo.
The braid should stay loose. Tight braids can flatten the top and make the hair look smaller than it is. Pancake the braid gently by pulling at the edges once it’s pinned, especially if your hair is fine and needs a little bulk.
This version works nicely on layered cuts because the braid and waves create two separate textures. That contrast is what makes it interesting.
Style Notes
- Use small clear elastics if your hair slips
- Pin the braid under the wave line so the bobby pins disappear
- Keep the part neat if you want a cleaner finish
- Let a few front pieces fall out for softness
13. Low Ponytail with Loose Wave Wrap
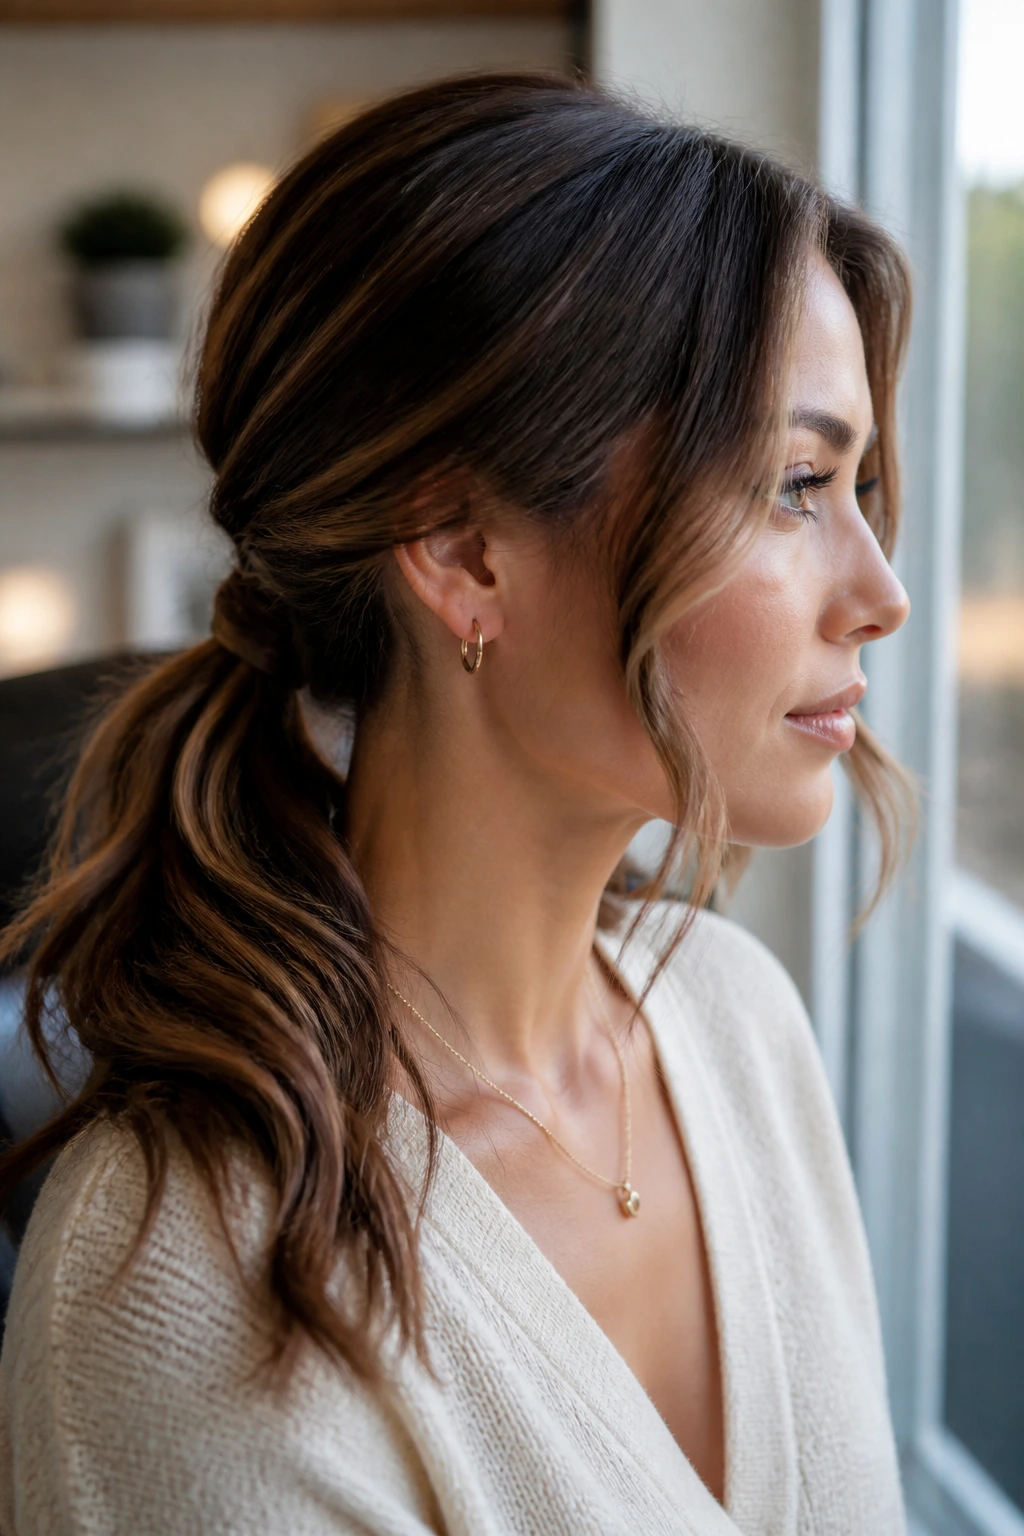
A low ponytail can still count as a wave style when the front and tail both keep their bend. Pull the hair to the nape, secure it loosely, then wrap a small strand around the elastic to hide it. Leave the crown slightly lifted and the lengths softly waved.
This style is useful because medium-length hair can make a low pony look tidy without turning into a severe knot at the base. If the ponytail feels too thin, tug the crown gently to loosen it and add width. A few bent face-framing pieces keep the style from looking too strict.
Good for work. Good for travel. Good for mornings when you want to look awake before you’ve had coffee.
14. Messy Top Knot with Stray Waves
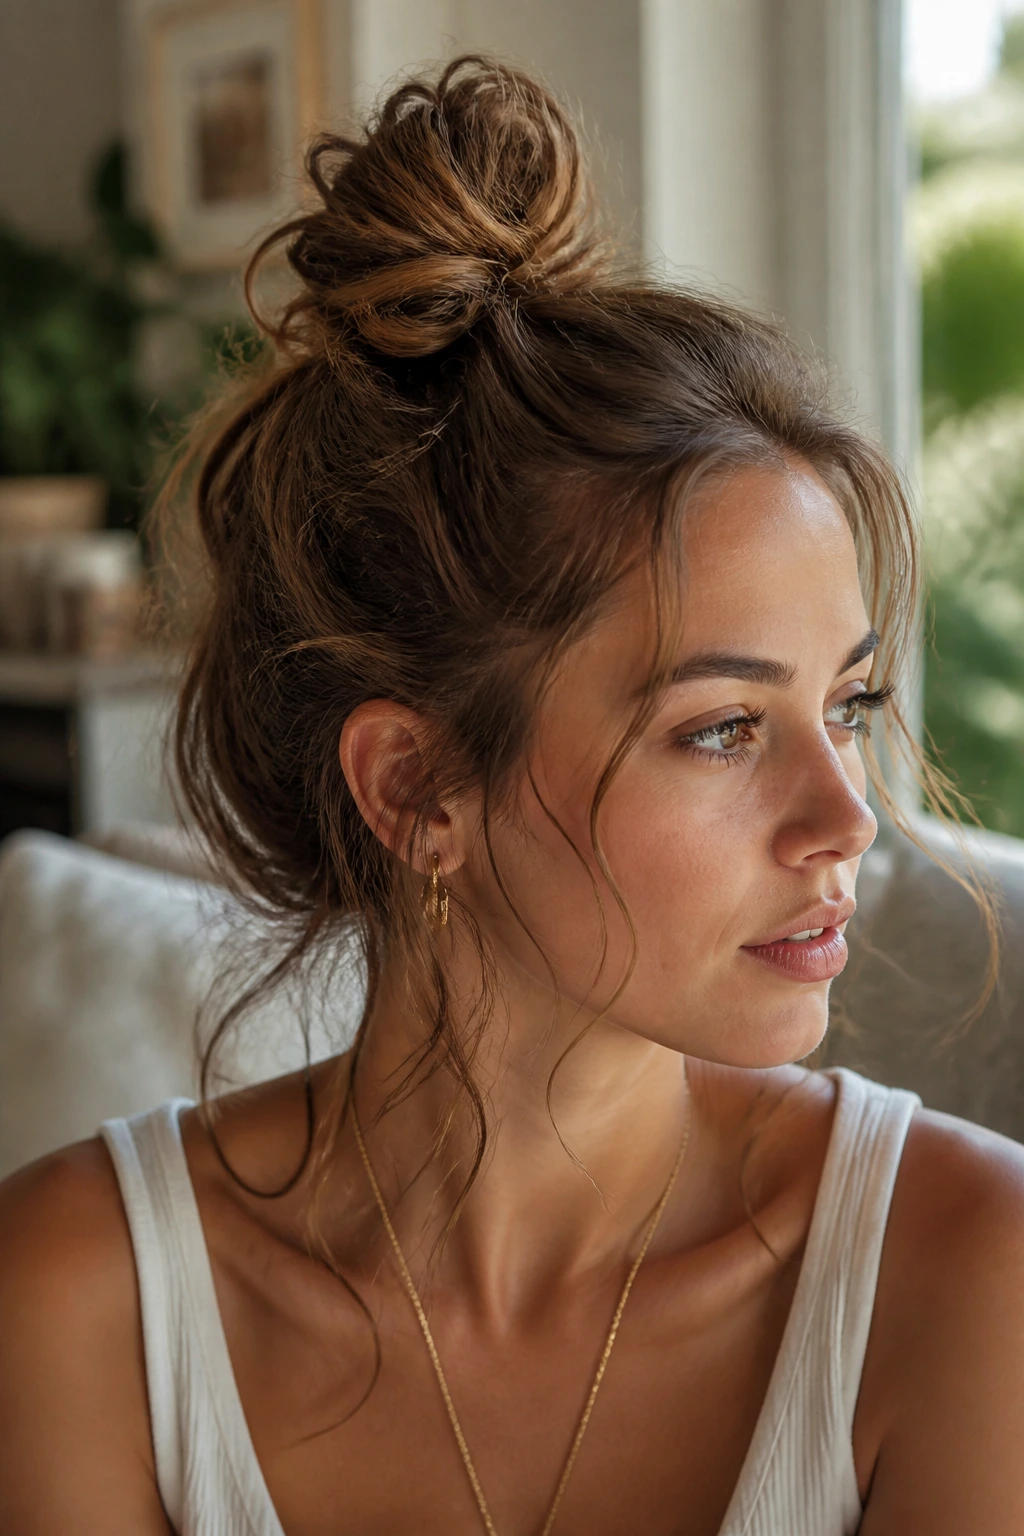
A top knot on medium hair works best when it doesn’t try too hard. Twist the top half or all of the hair into a loose knot, pin it lightly, and leave the rest of the wave pattern visible around the face and nape. The stray pieces matter here. They keep the style soft.
If you try to smooth every strand into the bun, medium length can get awkward fast — the bun gets tiny, and the leftover lengths start poking out in strange places. Let it be imperfect. A few loose bends around the temples and neck are what make it look intentional.
This is a solid style for humid days or late afternoons when your waves have already done their best and need a second job.
15. Waterfall Braid and Waves
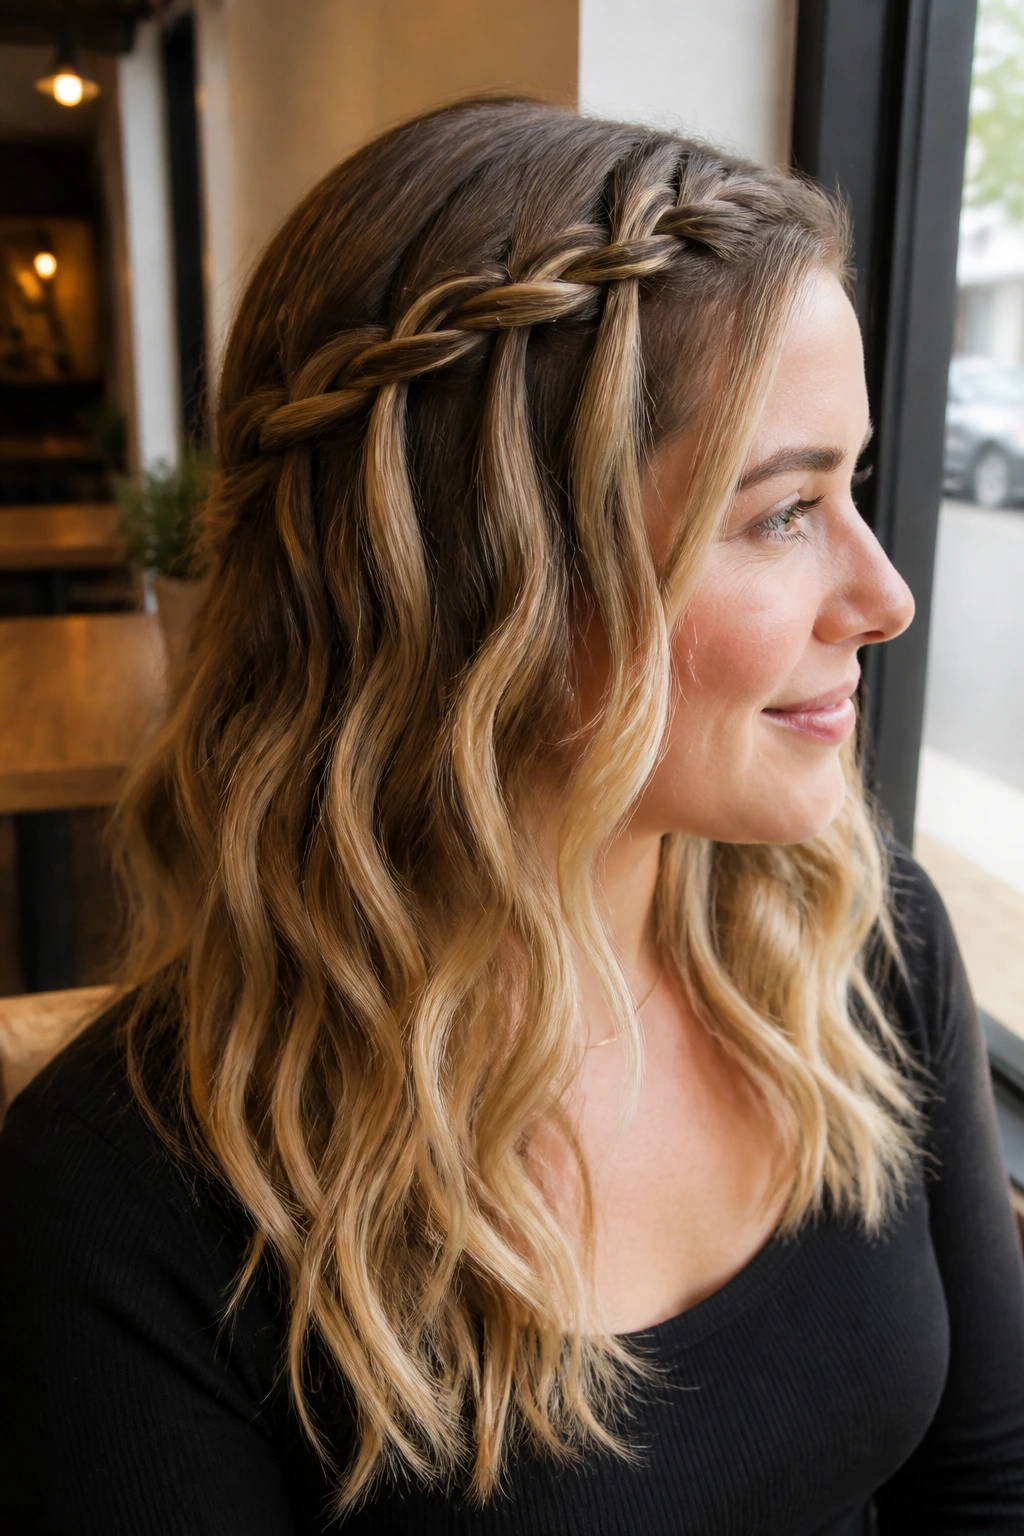
A waterfall braid is one of the prettiest ways to show off medium-length waves because it lets the length stay visible while the braid adds movement across the top. The braid works best when it sits just above the ear and travels along one side, not too high on the head. That keeps it grounded.
The loose strands that drop through the braid should stay soft, not curled tight. If they’re too springy, the braid gets lost in the texture. Use a little smoothing cream on your fingers before weaving so the strands glide and hold their shape.
This look is a good fit for layered hair, where the braid can catch different lengths and create that soft, cascading line without much effort.
16. Retro Flip-End Waves
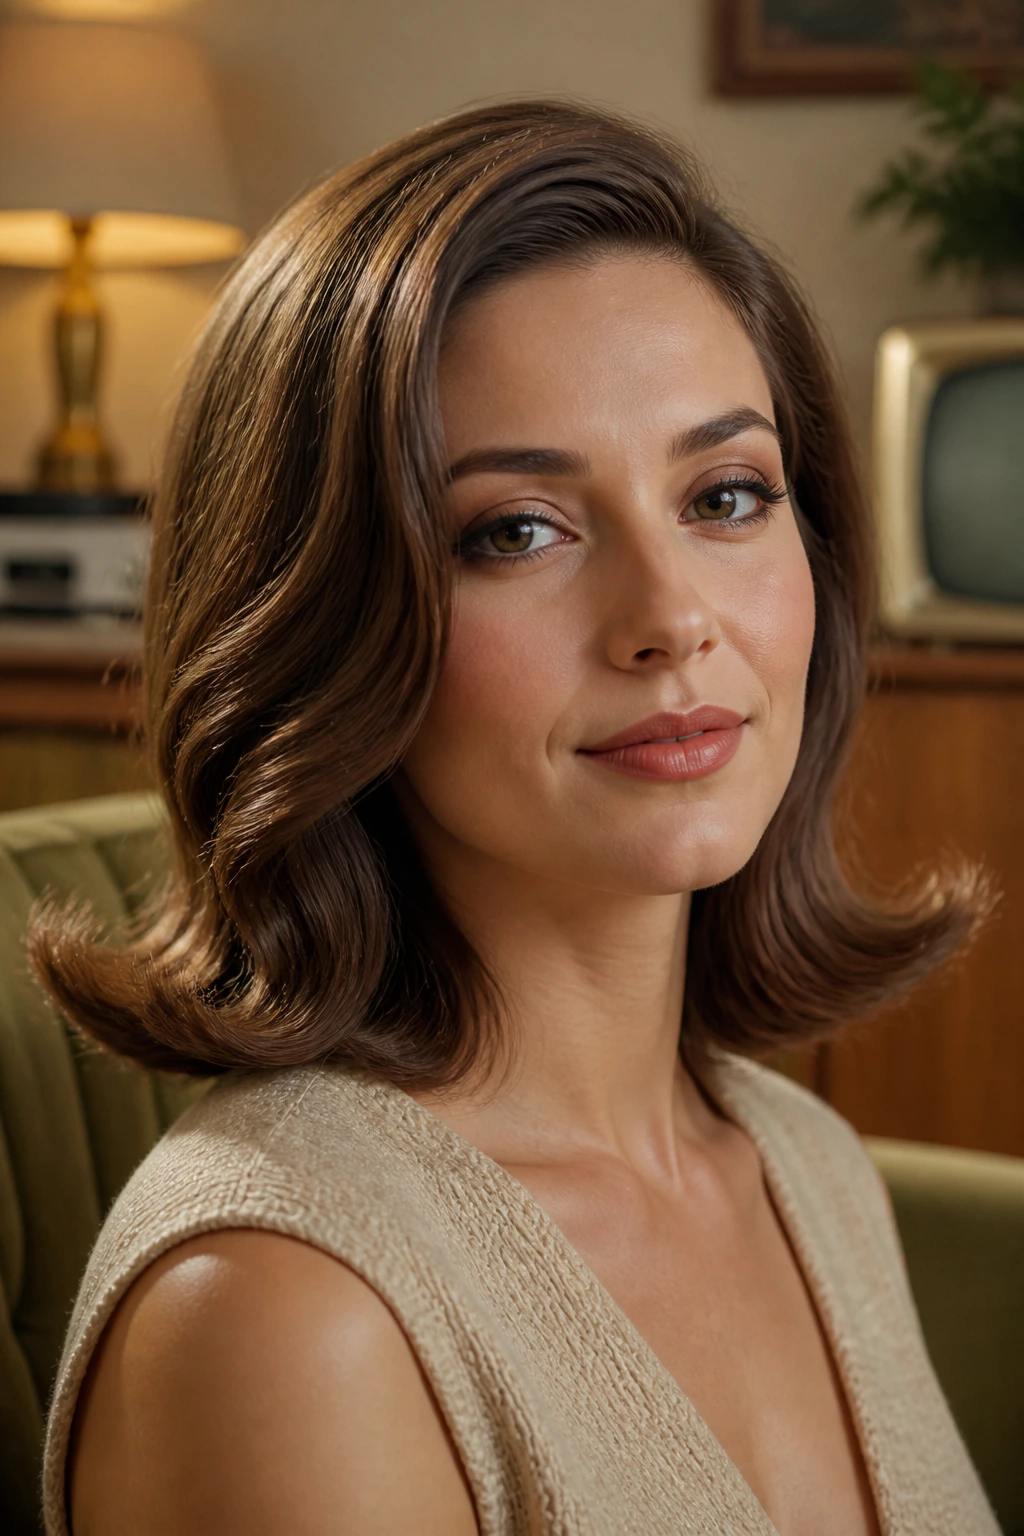
Flip-end waves bring a little old-fashioned shape back into medium hair. Instead of bending everything under, you curl the ends outward so they turn away from the neck and shoulders. The mid-lengths stay smooth, which makes the style look sharper than a full curl.
A round brush blowout works well, but a large-barrel iron can do the same thing if you clamp only the bottom third of each section. The finish should feel bouncy, not curly. Think shoulder-skimming movement rather than full-on vintage set.
This style looks especially good with a blunt collarbone cut because the flipped ends give the line a playful edge. It’s a small change, but it changes everything.
Quick Shape Checklist
- Keep the crown smooth
- Flip the last 1.5 to 2 inches outward
- Brush lightly so the ends keep their curve
- Finish with a flexible spray, not a stiff shell
17. Pin-Curled Defined Waves
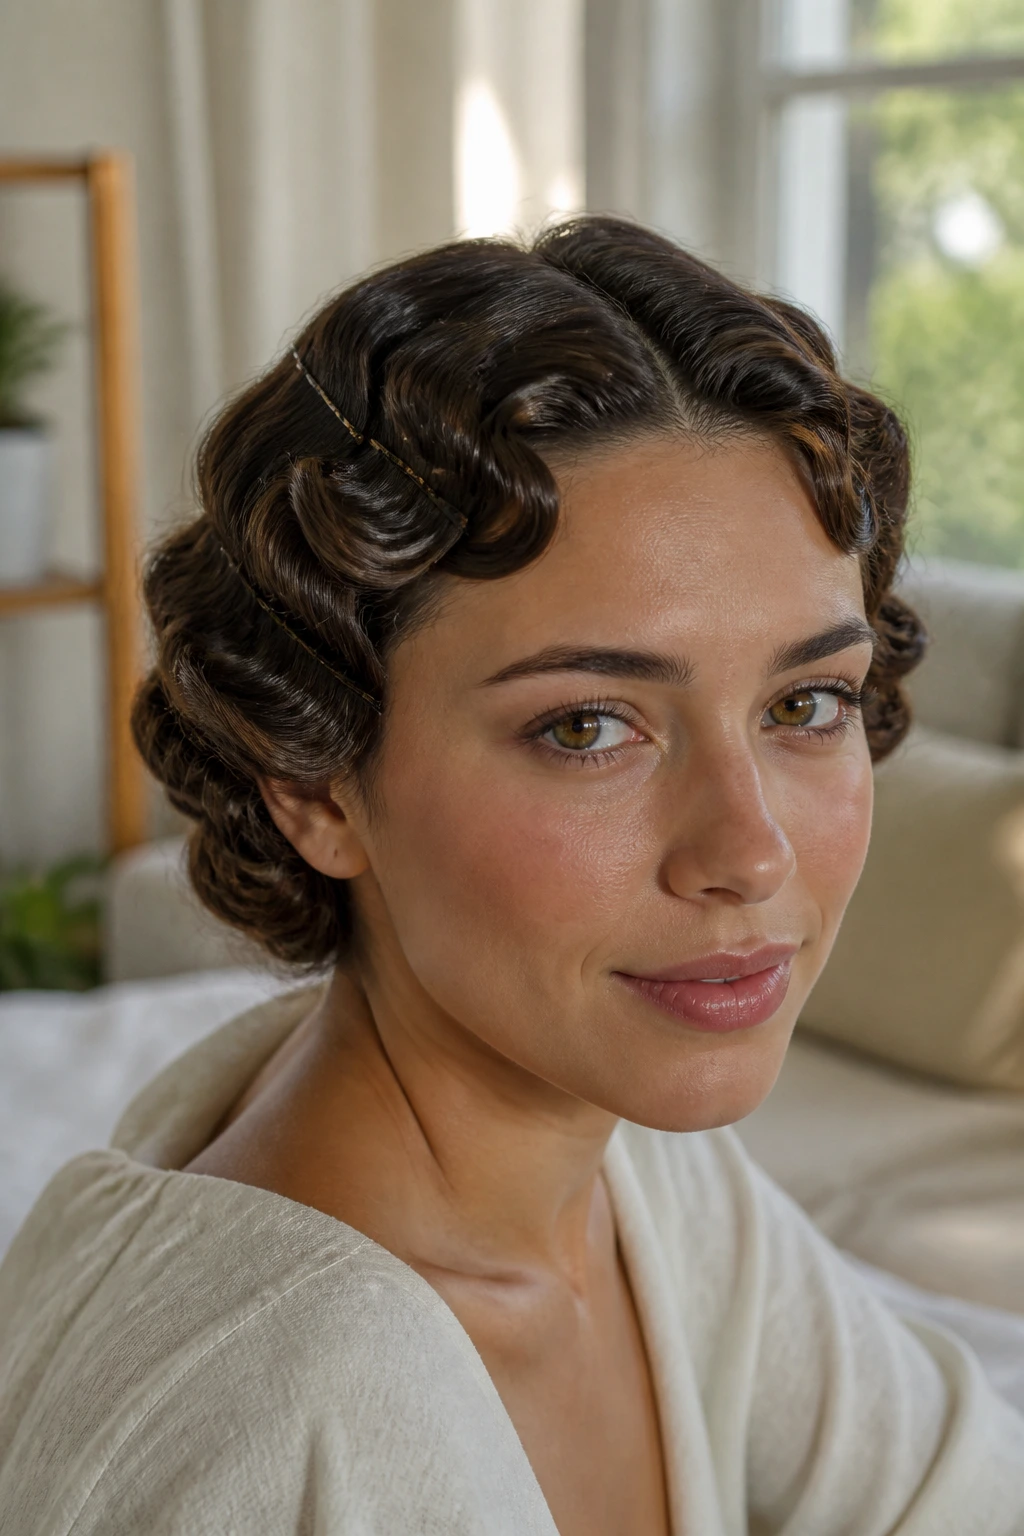
Pin curls are the patience option. They take more time, but medium hair holds them nicely because the length isn’t too heavy. Wrap small sections into curls, clip each one flat against the head, and let them cool all the way before taking the pins out. That cooling time is not optional. Warm hair collapses fast.
The result is a soft, defined wave with a bit more shape than beach waves and less stiffness than a formal curl set. It’s useful for events, photos, or any day when you want the pattern to stay put.
Brush only if you want a looser finish. Otherwise, separate with your fingers and leave the curl pieces intact. The shine usually looks better that way.
18. Wet-Look Sculpted Waves
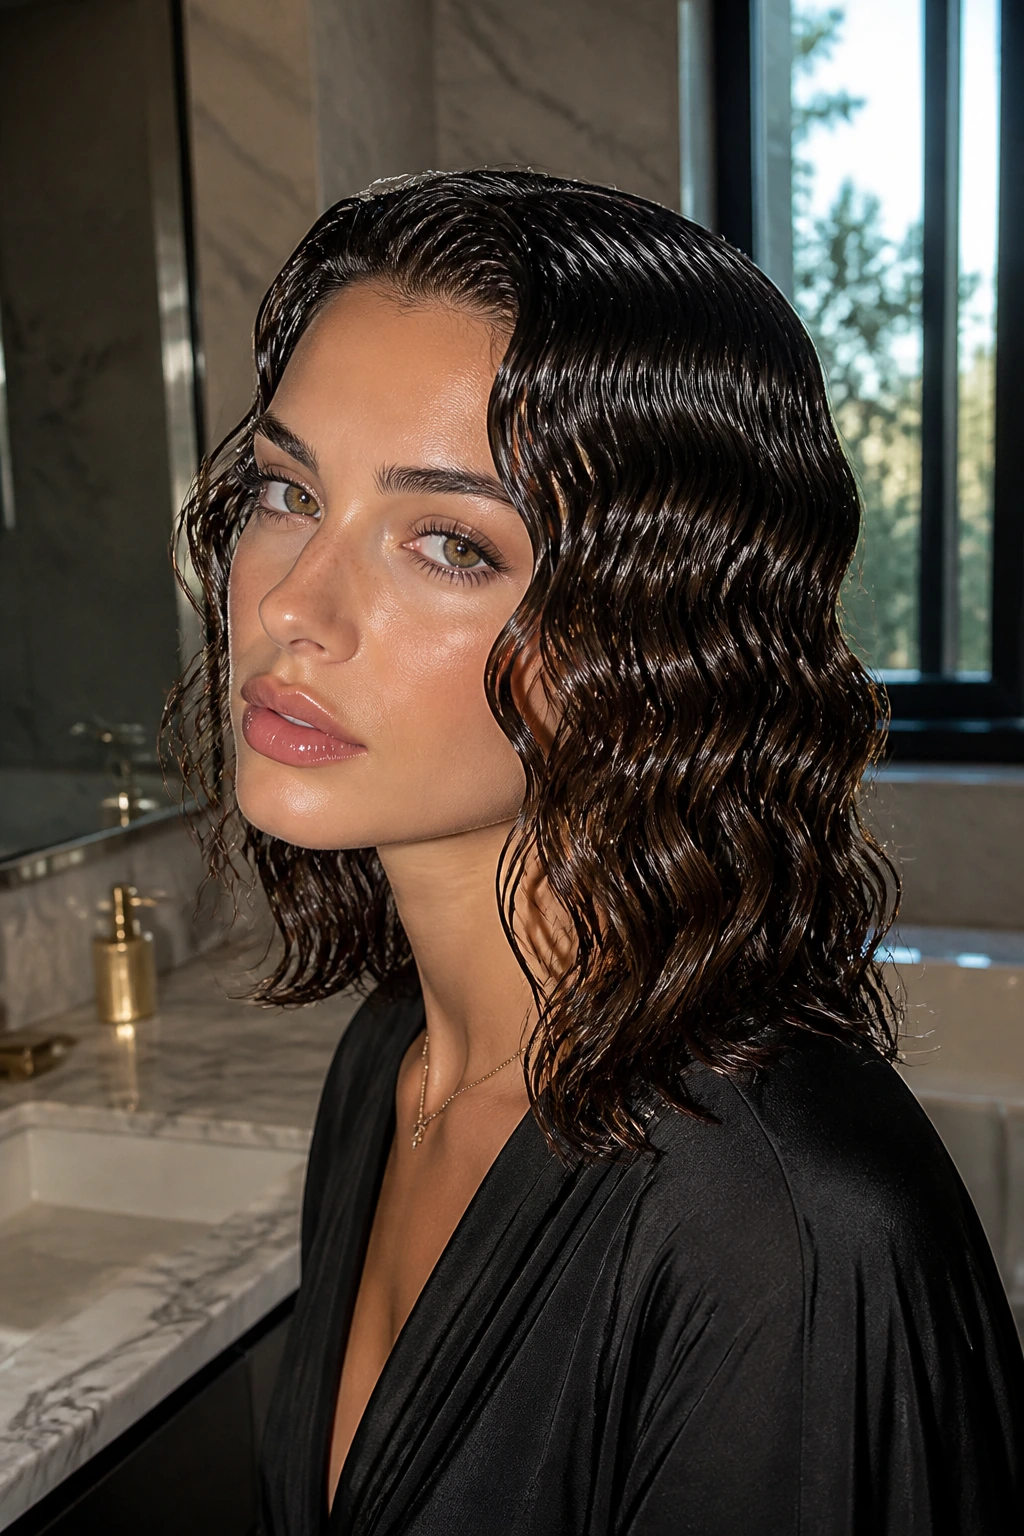
Wet-look waves are sharper than most people expect. They need gel, patience, and a hairline that’s smooth enough to let the style read as sleek instead of greasy. On medium hair, the shape works because there’s enough length to form S-curves without the weight of long hair pulling them out.
Apply gel to damp hair, comb it through, and pinch sections into loose waves with your fingers. A fine-tooth comb helps define the front, especially along the part and temples. The ends can stay a little looser so the whole look doesn’t stiffen up like plastic.
This is the style you pick when you want the hair to feel deliberate from root to tip. It’s not soft. It’s sharp.
19. Air-Dried Scrunched Waves
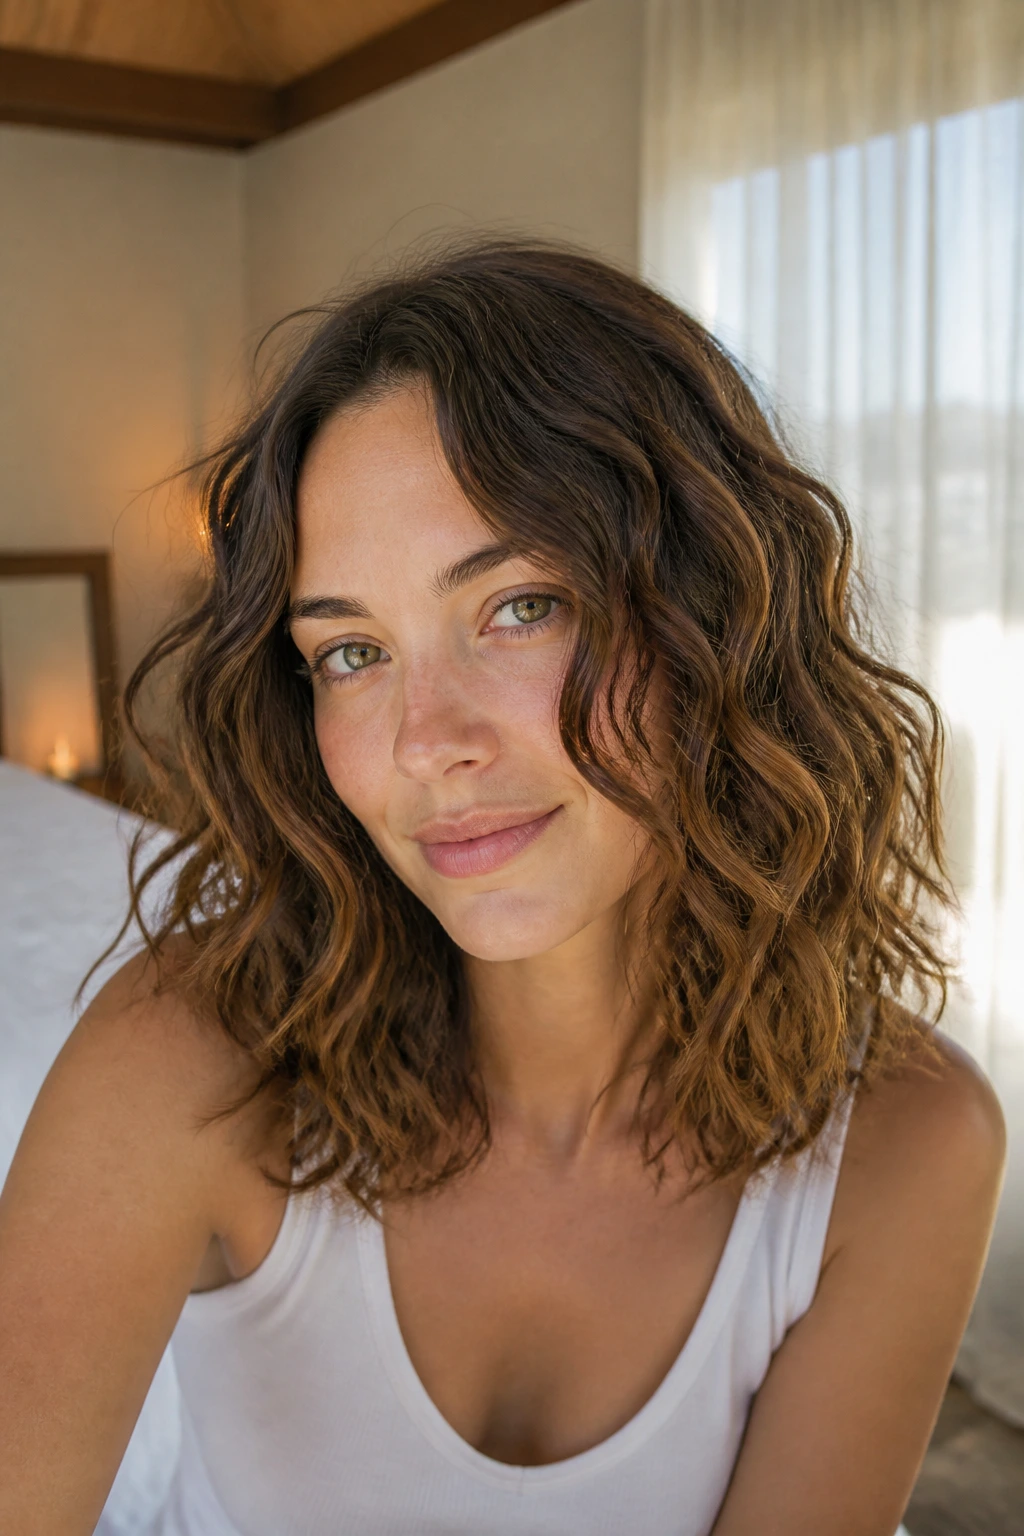
Air-dried scrunched waves are the easiest way to work with natural texture on medium hair. Start with leave-in conditioner, then add a light mousse or curl cream through damp lengths. Scrunch from the ends upward, let the hair dry without constant touching, and break up any crunchy spots only once the hair is dry.
The trick is resisting the urge to keep adjusting it. Air-dried waves get puffier when they’re handled too much. If your roots flatten, clip them up for a bit while the hair dries, then remove the clips once the crown has some lift.
This is one of the most practical looks on the list because it lets the hair do half the work. Good hair day, low effort.
20. Side-Swept One-Shoulder Waves
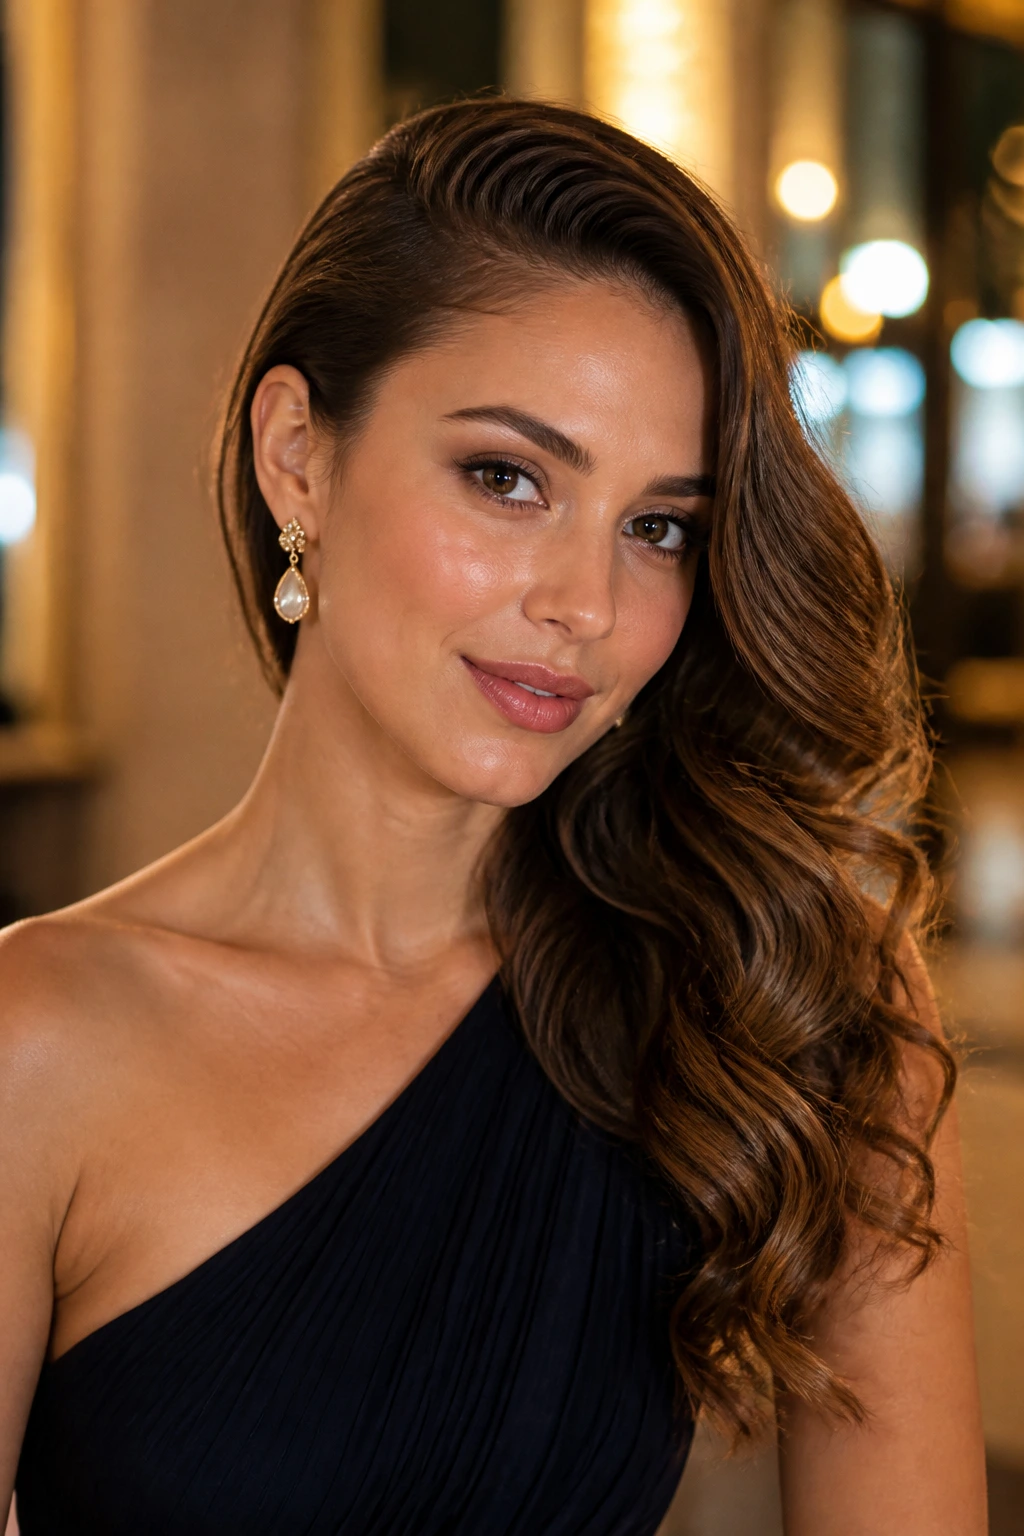
Pulling all the hair over one shoulder changes medium waves from ordinary to intentionally dramatic. The line across the collarbone becomes part of the style, and the waves stack over one side instead of falling evenly on both. It’s especially nice if you’re wearing a dress or top with a clean neckline.
Use a smoothing serum near the roots on the tucked side so the hair lies flat. Then bring the heavier side forward and let the waves drop in layers. A hidden bobby pin behind the neck can keep the sweep from sliding back.
The look feels polished without needing much product. If the wave pattern is soft and the part is clean, the whole thing reads as elegant with very little effort.
21. Face-Framing Highlight Waves
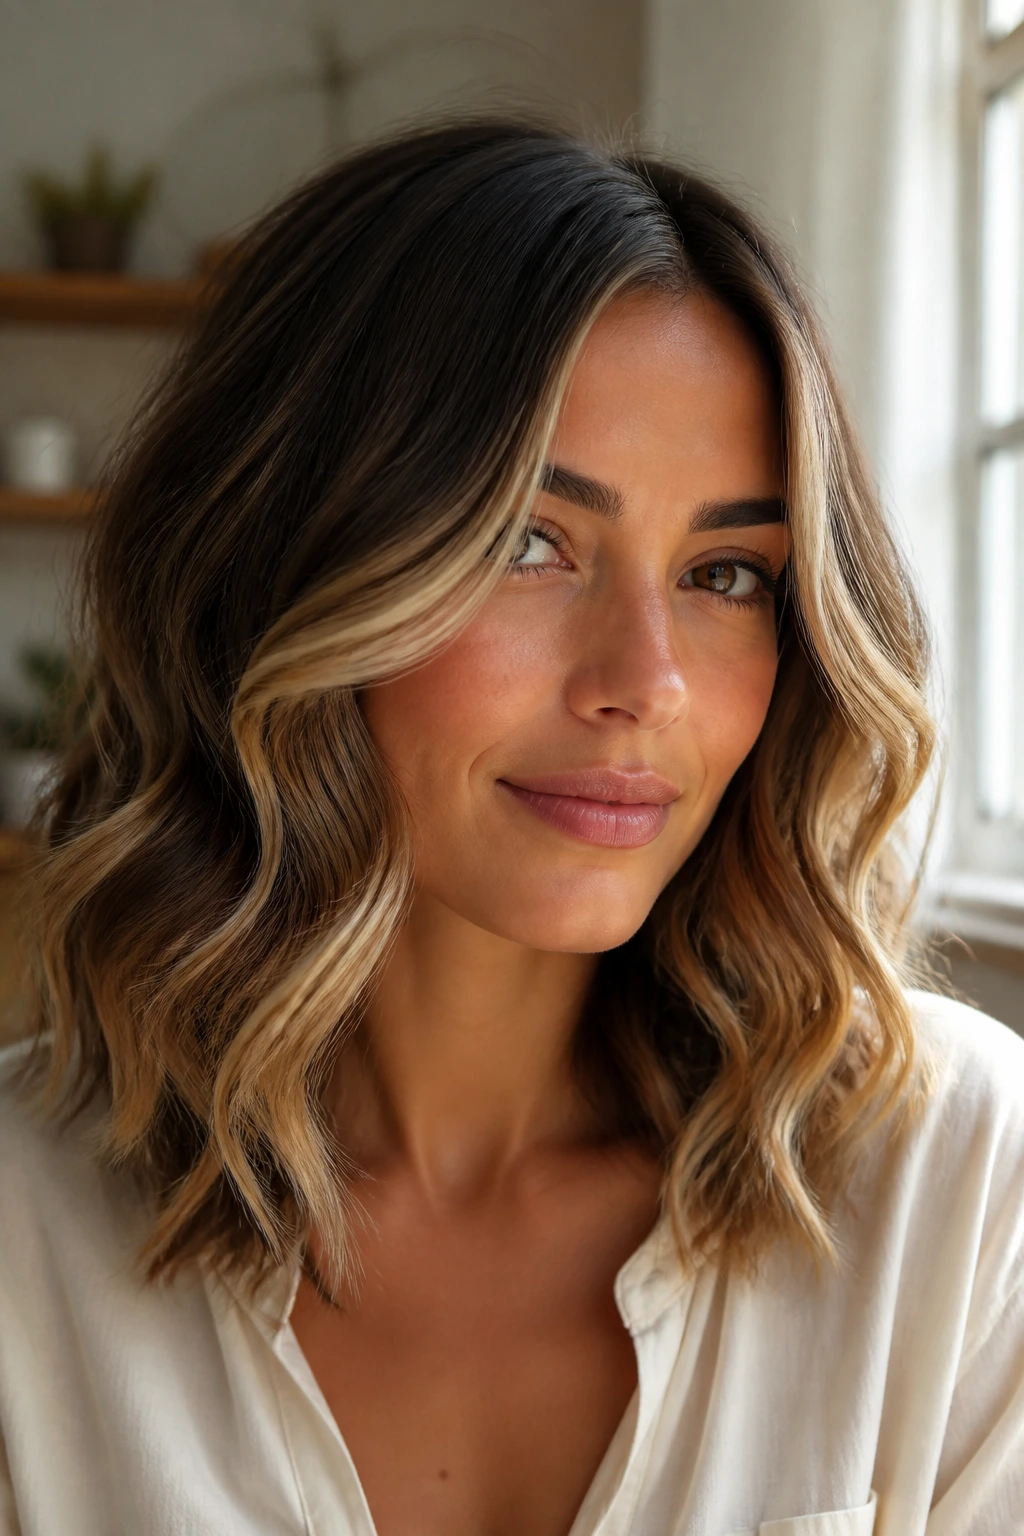
If your hair has highlights, this is the style that makes them work for you. Face-framing waves put the lighter pieces right where the eye goes first — around the cheekbones, jaw, and front of the shoulders. Medium hair is a nice length for this because the highlighted sections don’t vanish into the rest of the hair.
Curl the front pieces away from the face, then soften the rest into looser bends. Don’t make every section match. The contrast helps the color stand out. A touch of gloss spray on the mids can make the lighter pieces catch the light without turning the roots greasy.
This is one of those styles that looks more expensive when the color placement is good. Haircut matters. Color placement matters too.
22. Loose Hollywood Side Waves
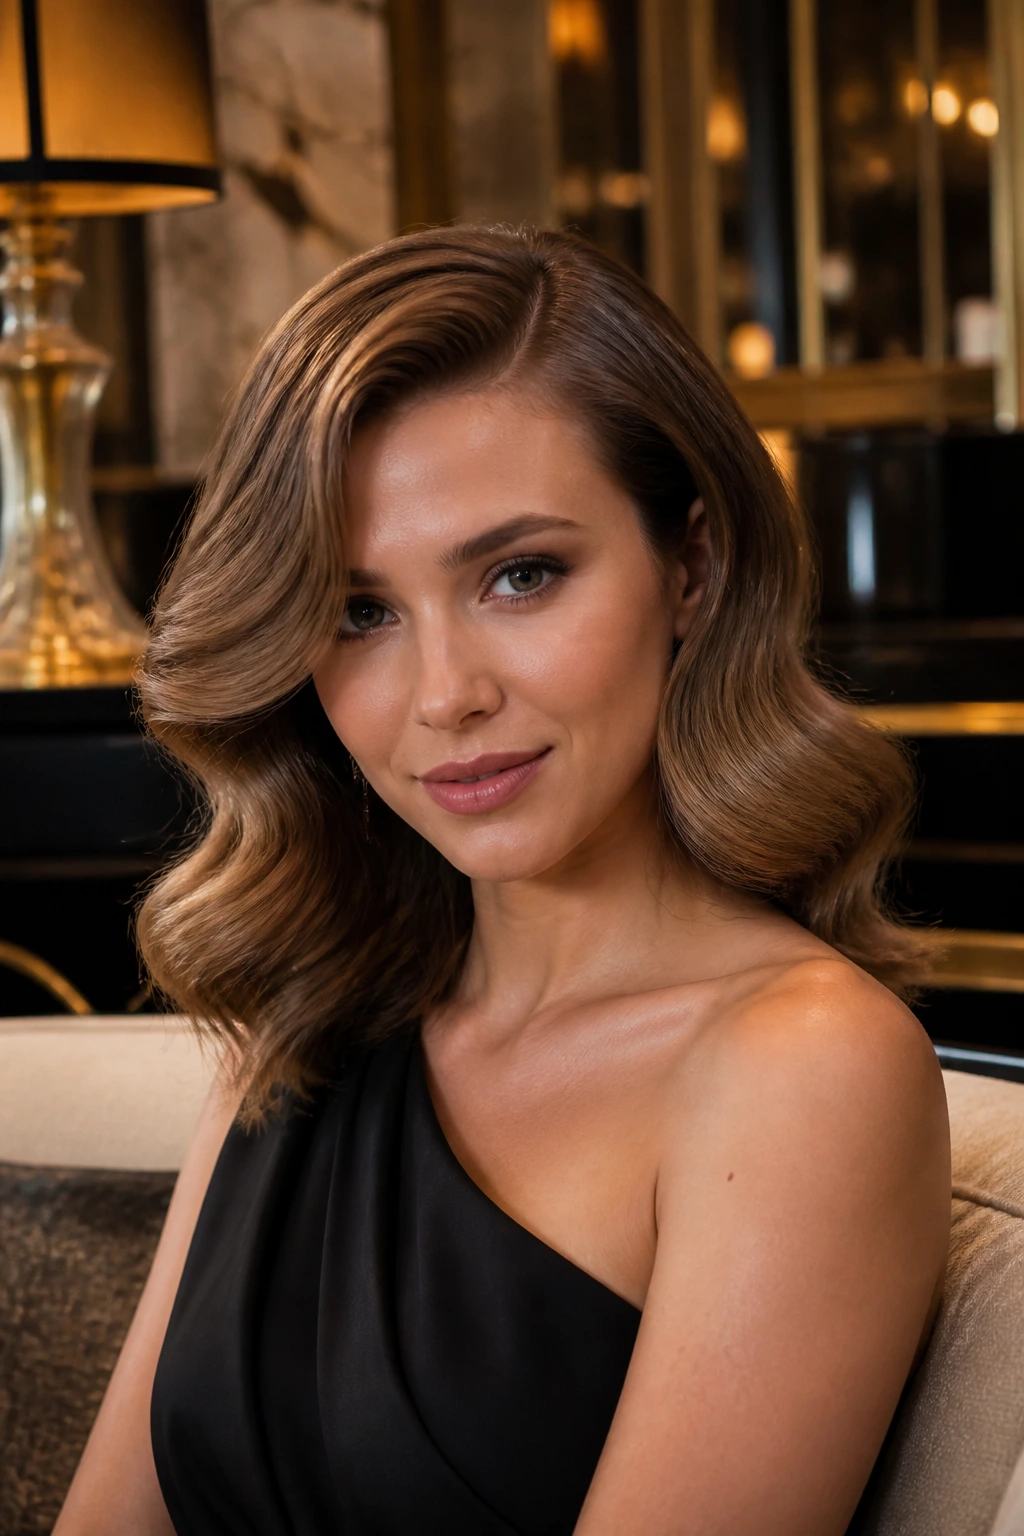
Hollywood waves on medium hair should stay soft, not stiff. The side part creates that sweep across the forehead, and the brushed-out wave pattern makes the whole shape feel smooth and glossy. Medium length is actually a sweet spot here because the hair is long enough to show the fold of the wave, but short enough to stay lifted.
Use clips while the curls cool so the shape sets in a smooth curve. Then brush them together with a wide paddle brush until the separate curls melt into one continuous wave. A small amount of shine serum on the ends finishes the job.
This is the most formal look on the list, and it has a bit of drama to it. Not loud. Just clean and controlled.
23. Half-Bun Wave Halo
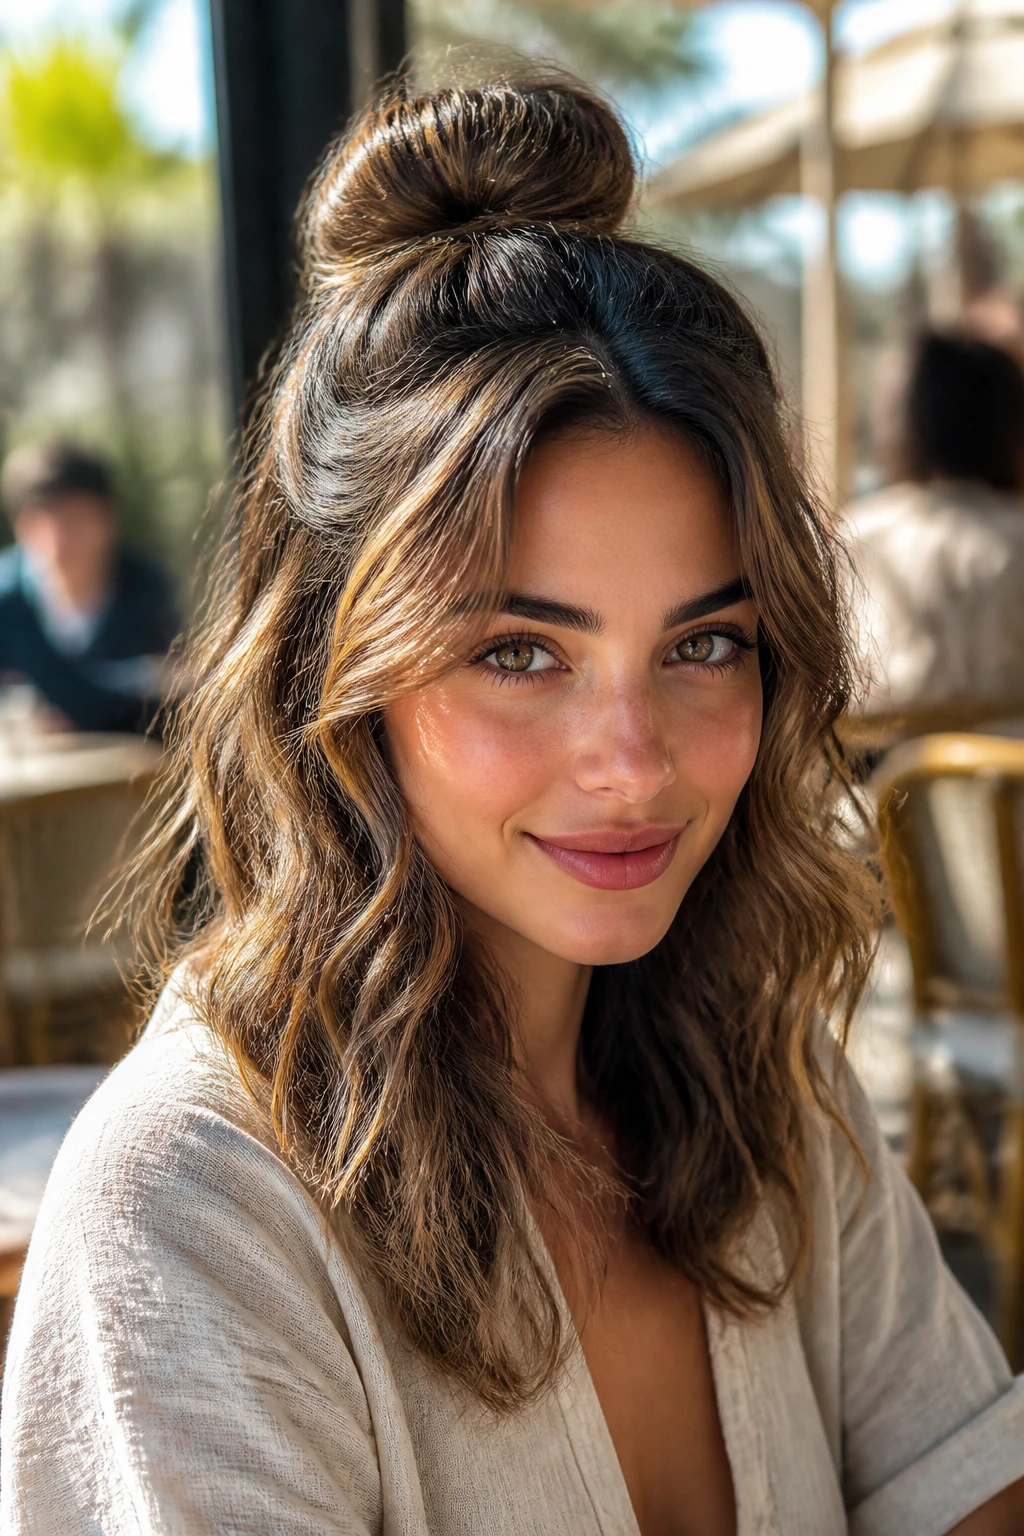
The half-bun wave halo is the easy answer when you want hair off your face but still want the wave pattern to show. Pull the top half into a small bun or knot, then leave the rest loose around the shoulders. The loose bottom half keeps the style light, while the bun gives it some height.
This works well when the waves are a little messy. In fact, that helps. The contrast between the tidy top and the loose ends makes medium hair look fuller. If your crown is flat, loosen the bun a touch or tug the top for more lift.
It’s a casual style that still looks planned. Handy when you want something fast that doesn’t feel lazy.
24. Rope-Braid Accent Waves
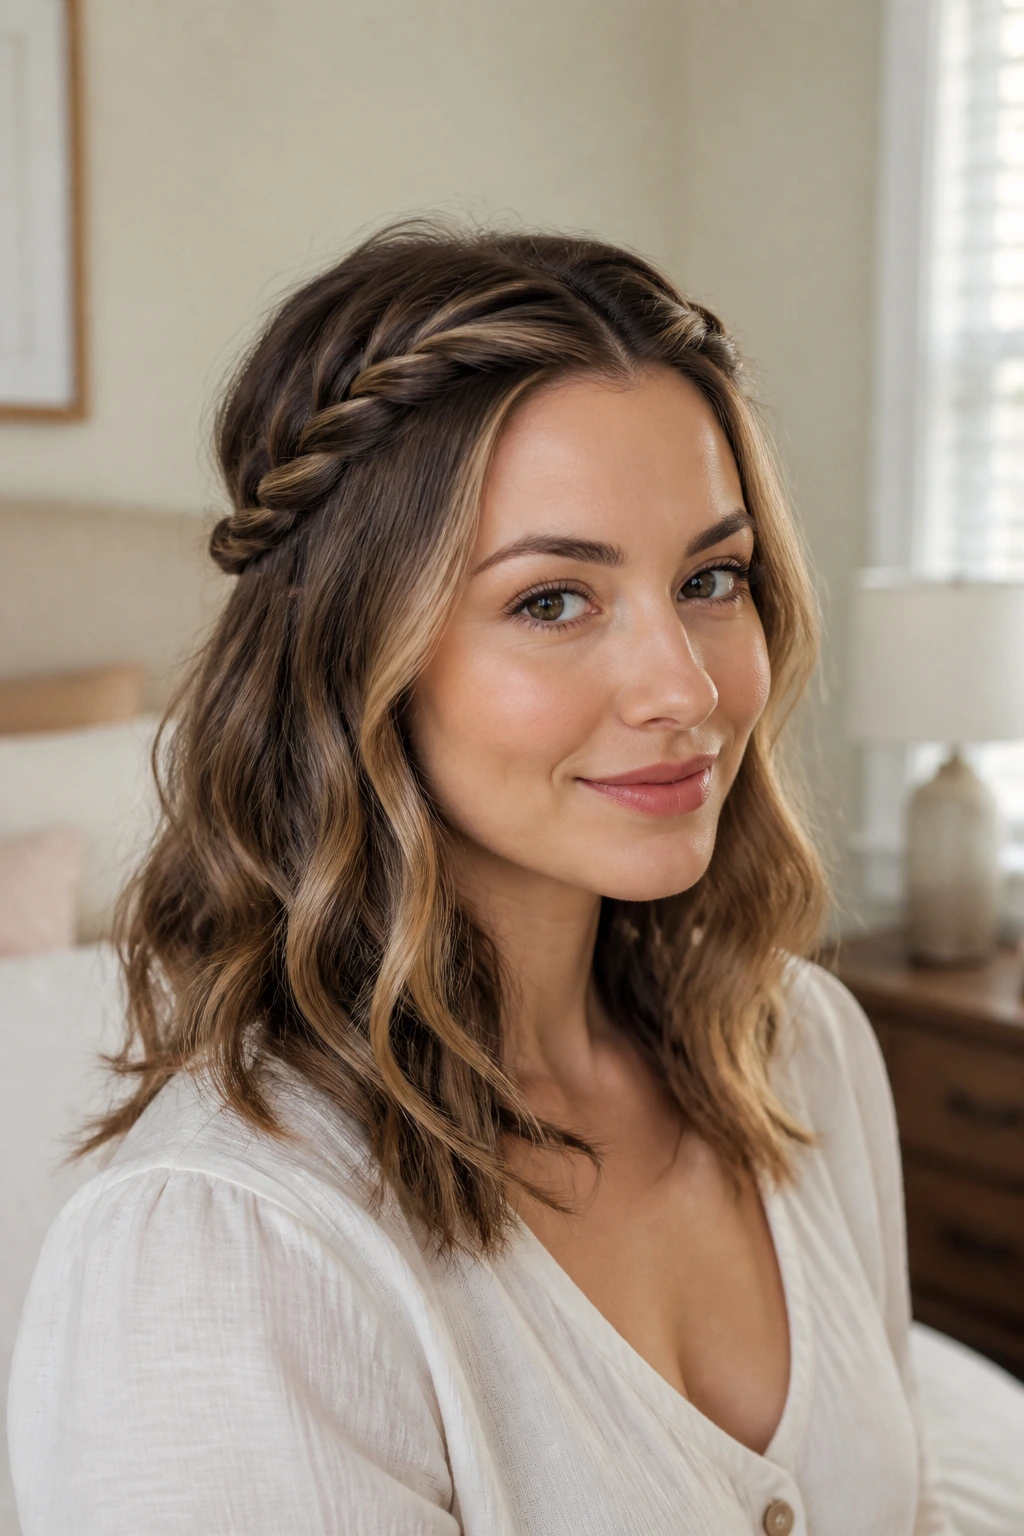
Rope braids add just enough detail to medium waves without taking over the whole head. Twist two small front sections into rope braids, pin them back, and leave the rest of the hair loose and waved. The twist gives the style a little shape near the face, which is useful when the rest of the hair is more relaxed.
This style works well with layered cuts because the braid catches different lengths and the loose pieces fall in a soft frame. It also survives movement better than a plain pin-back, which is why I like it for days when you’re actually doing things.
A dab of texturizing spray at the roots helps the braid stay where you put it. No drama. Just structure.
25. Soft Layered Waves with Crown Volume
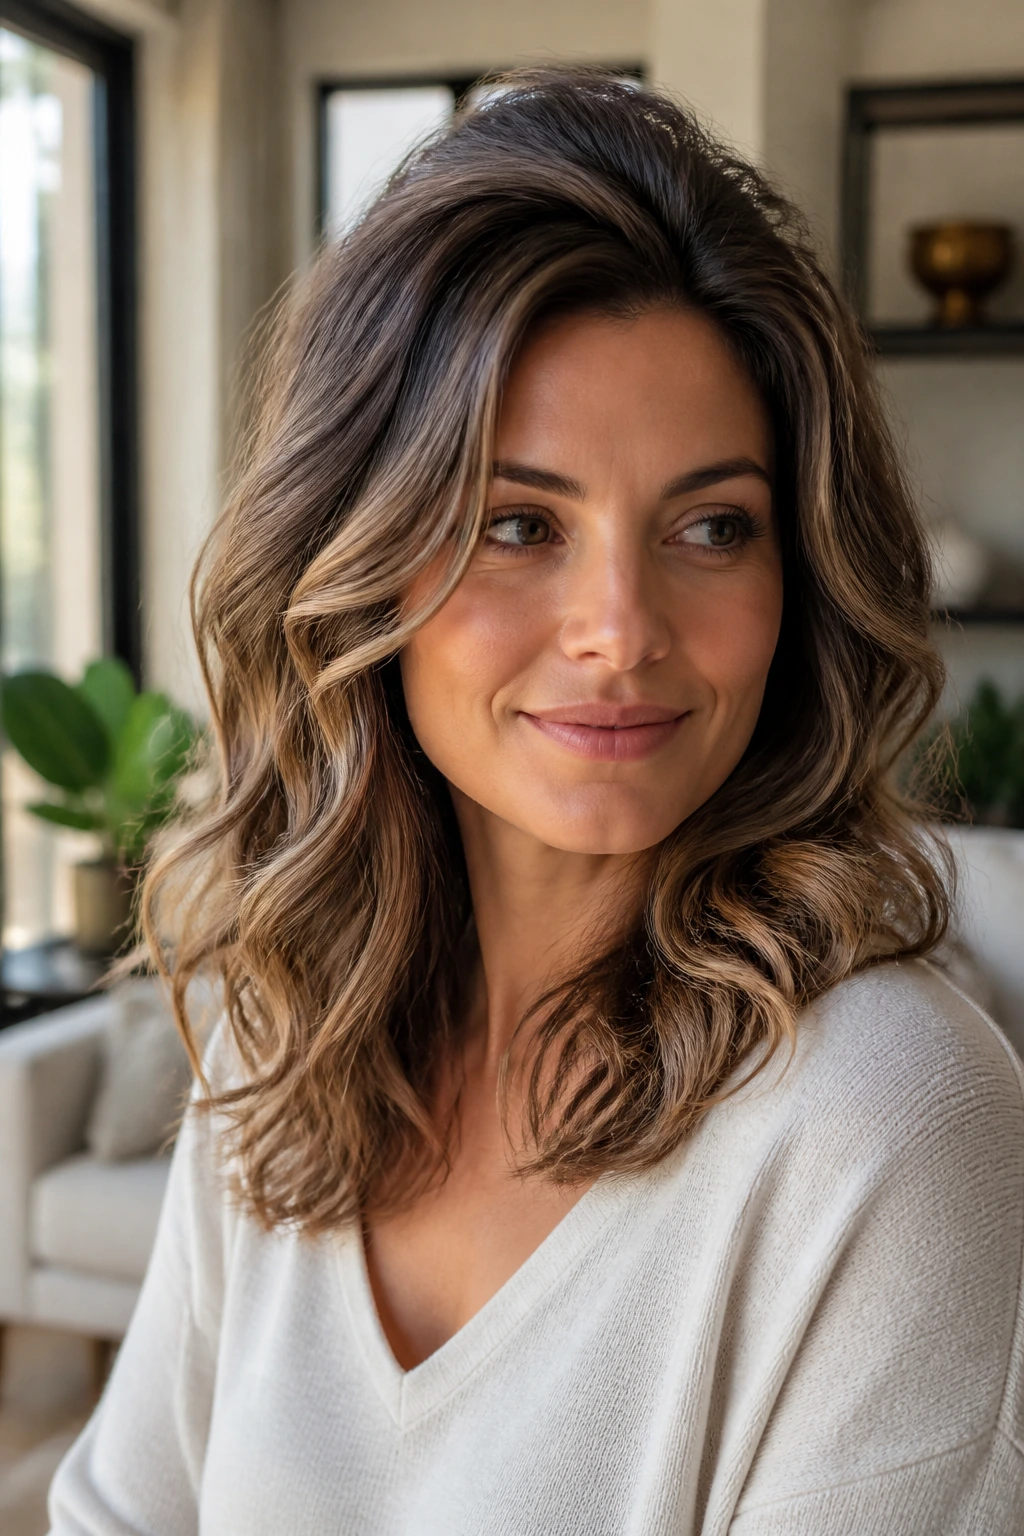
Layers make medium waves look fuller, but only if the crown keeps some lift. Blow-dry the roots with a round brush or clip them up while drying, then wave the lengths with a medium barrel. If the crown falls flat, the whole style loses shape and starts looking heavy.
The layers should move in different directions only in the lower half. Up top, keep the root area smooth enough to show the cut. A little root-lifting mousse can help if your hair tends to collapse by midday.
This is one of the most forgiving looks for medium hair because it gives the style room to breathe. The layers do the work. You just keep them from getting crushed.
26. Headband Waves
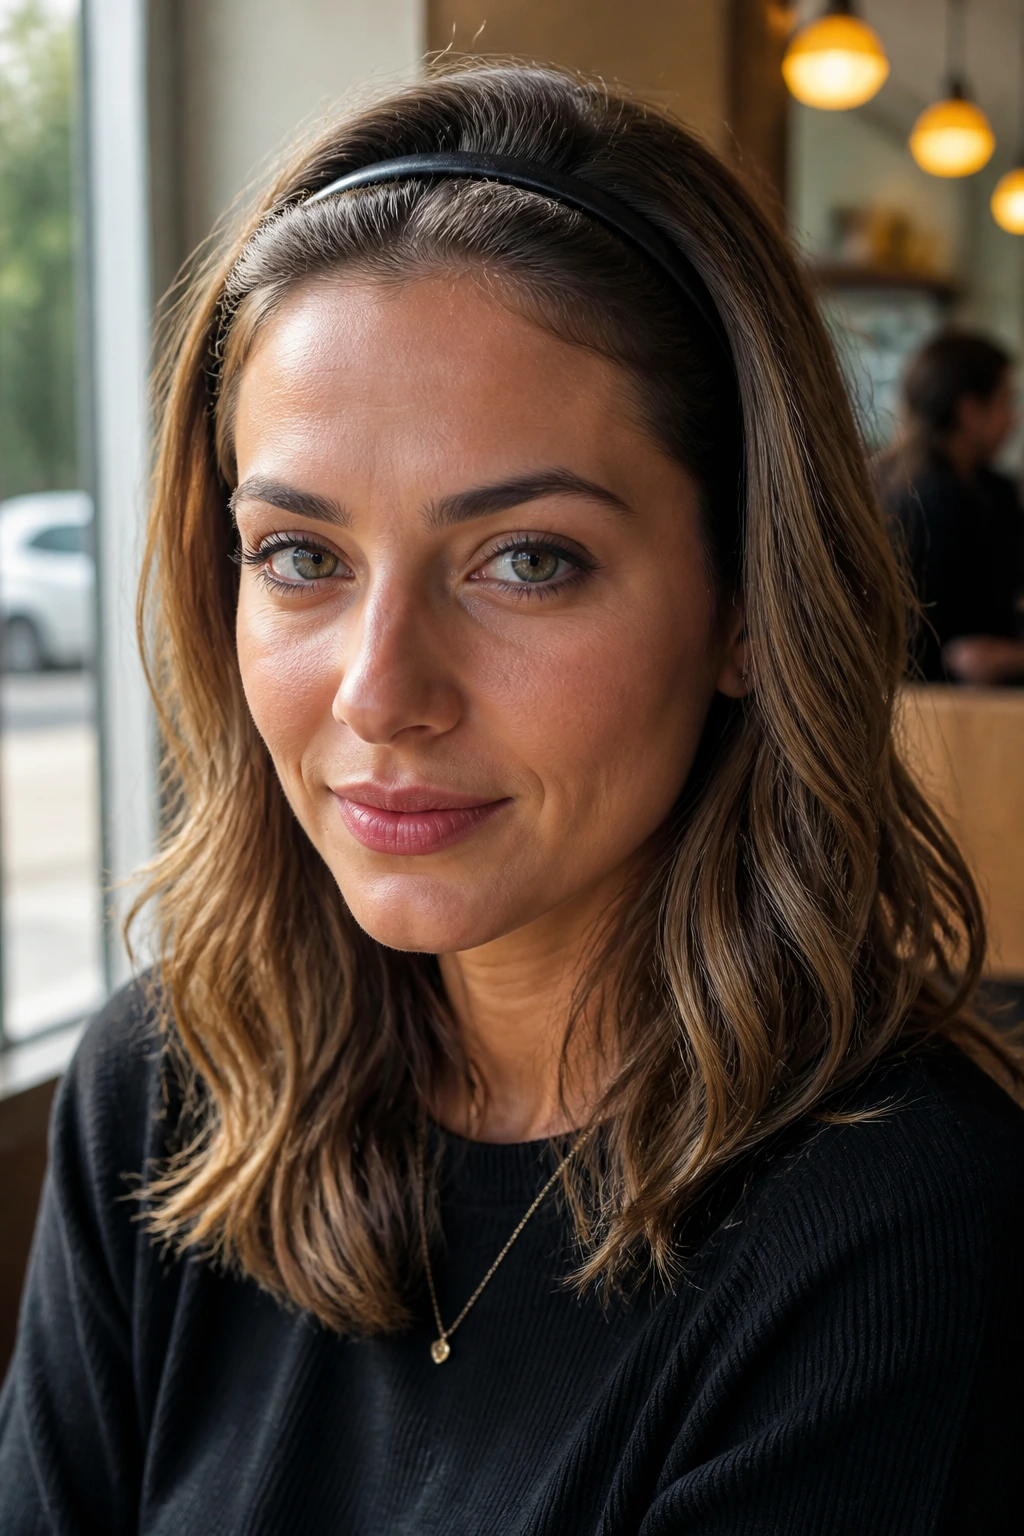
A headband can do more than hold hair back. On medium waves, it gives the front section a clean frame and lets the rest of the hair spill around it in soft bends. If the headband is padded, it can add a little height too, which is useful for flatter hair.
The key is placing the band after the waves are already shaped. If you put it on first, the hair can get stuck in awkward lines. Push the front pieces gently back, then let a few bends fall loose around the ears so the style doesn’t look pinned down.
This is a smart choice for day-two hair or windy weather. The accessory earns its place by doing real work.
27. Sleek Crown, Wavy Ends
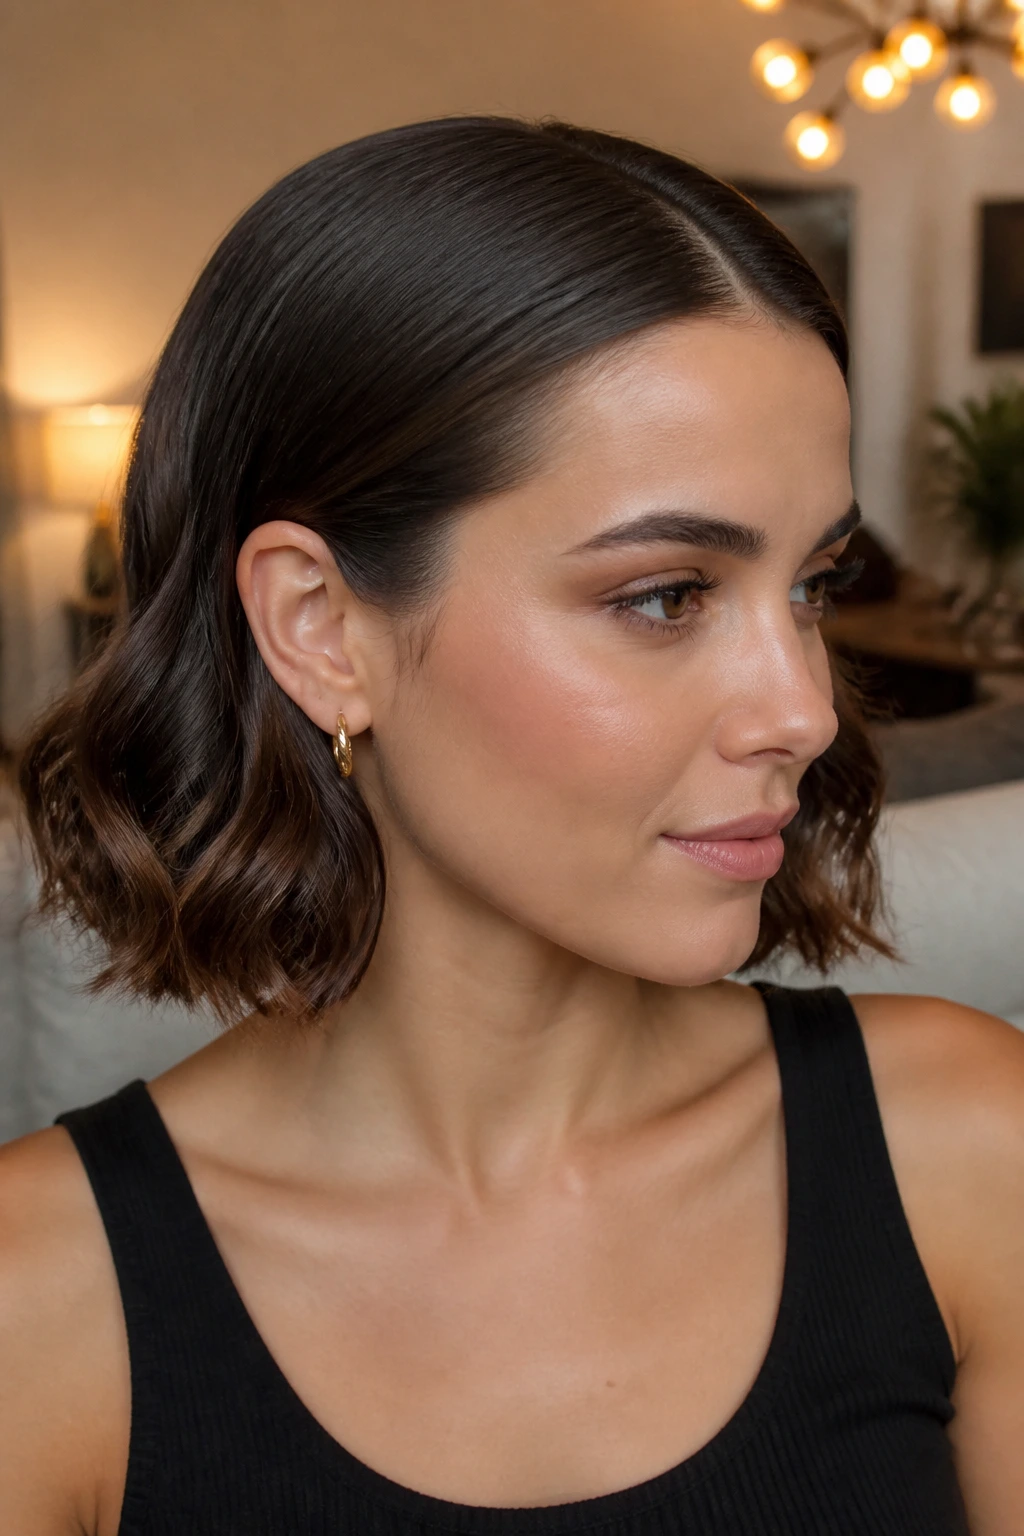
A smooth crown with wavy ends is a sharp contrast style, and medium hair handles it well because the length below the ears is still light enough to move. Blow-dry the top section flat with a brush, then start the wave pattern around the cheekbone or jawline. That split keeps the style clean at the top and soft at the bottom.
This look is especially good when you want your hair to frame the face but not crowd it. The polished roots make the waves feel intentional, and the transition point between smooth and textured should sit low enough that it doesn’t look chopped off.
One small mistake ruins this look fast: too much oil at the crown. Keep shine products on the ends only.
28. Boho Braid-Tucked Waves
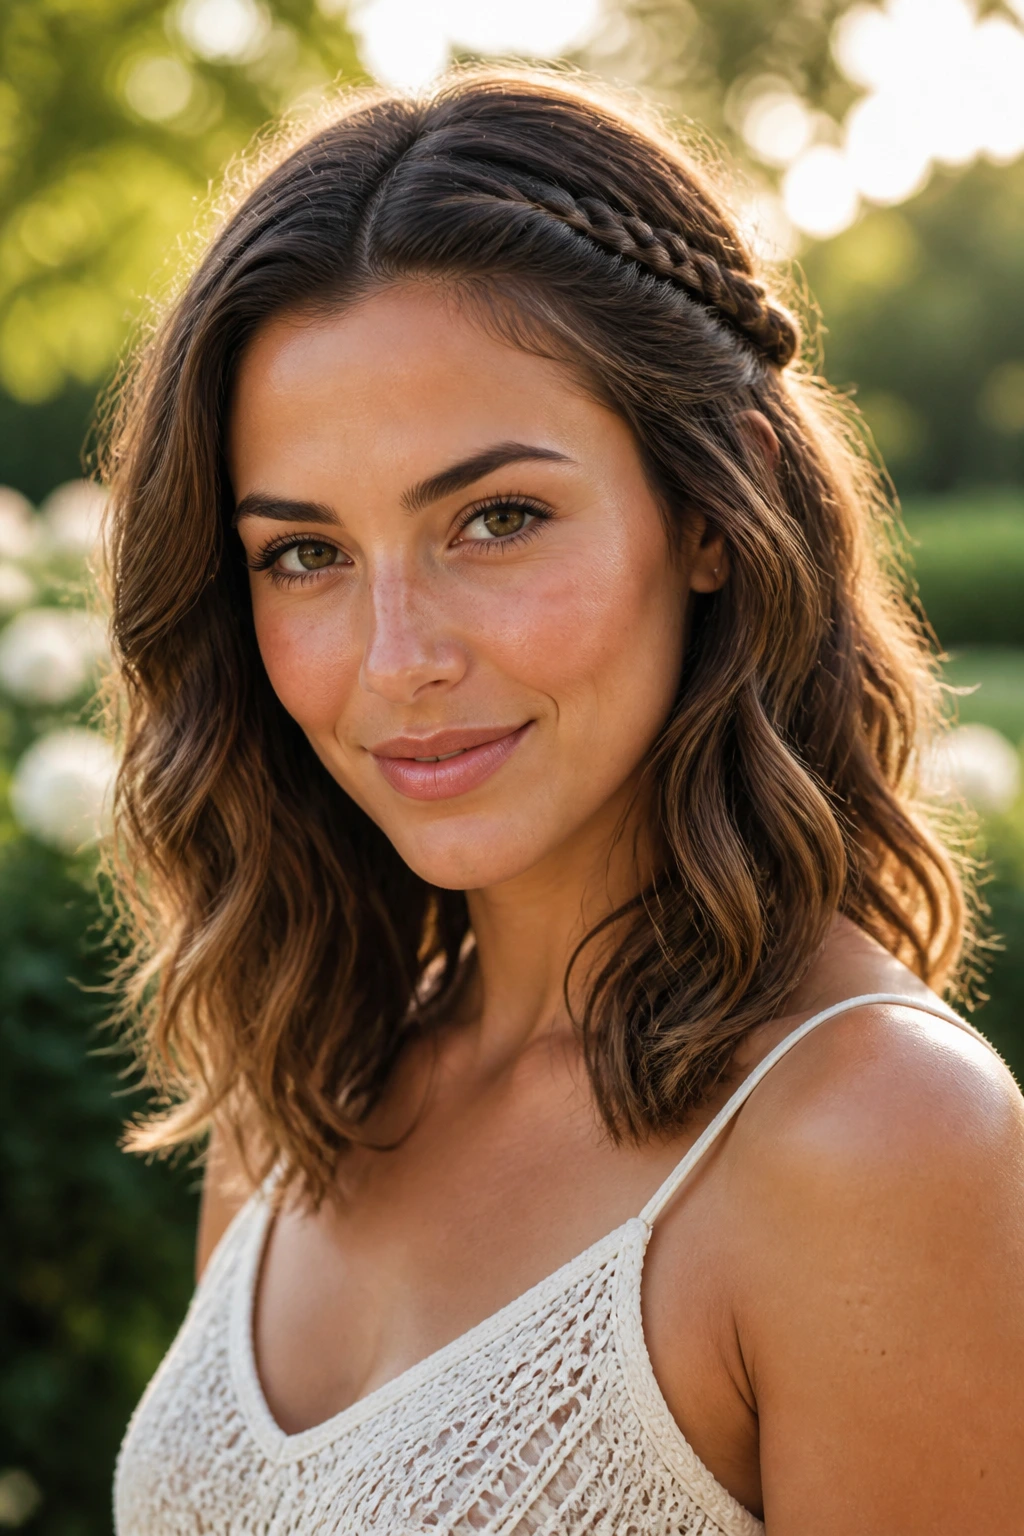
Boho braid-tucked waves are relaxed, but they still need shape. Add one or two tiny braids near the temples, tuck them back, and let the rest of the waves fall loose over the shoulders. The little braids create a soft frame without turning the whole head into a braid style.
This works well with medium-length layers because the hair has enough movement to keep the braids from looking heavy. It’s also a good fix for pieces that won’t stay out of your face. Tuck them, pin them, move on.
The style lands somewhere between casual and dressed up, which is exactly why it keeps showing up in real life instead of just in photos.
Why Medium Length Hair Holds Waves So Well
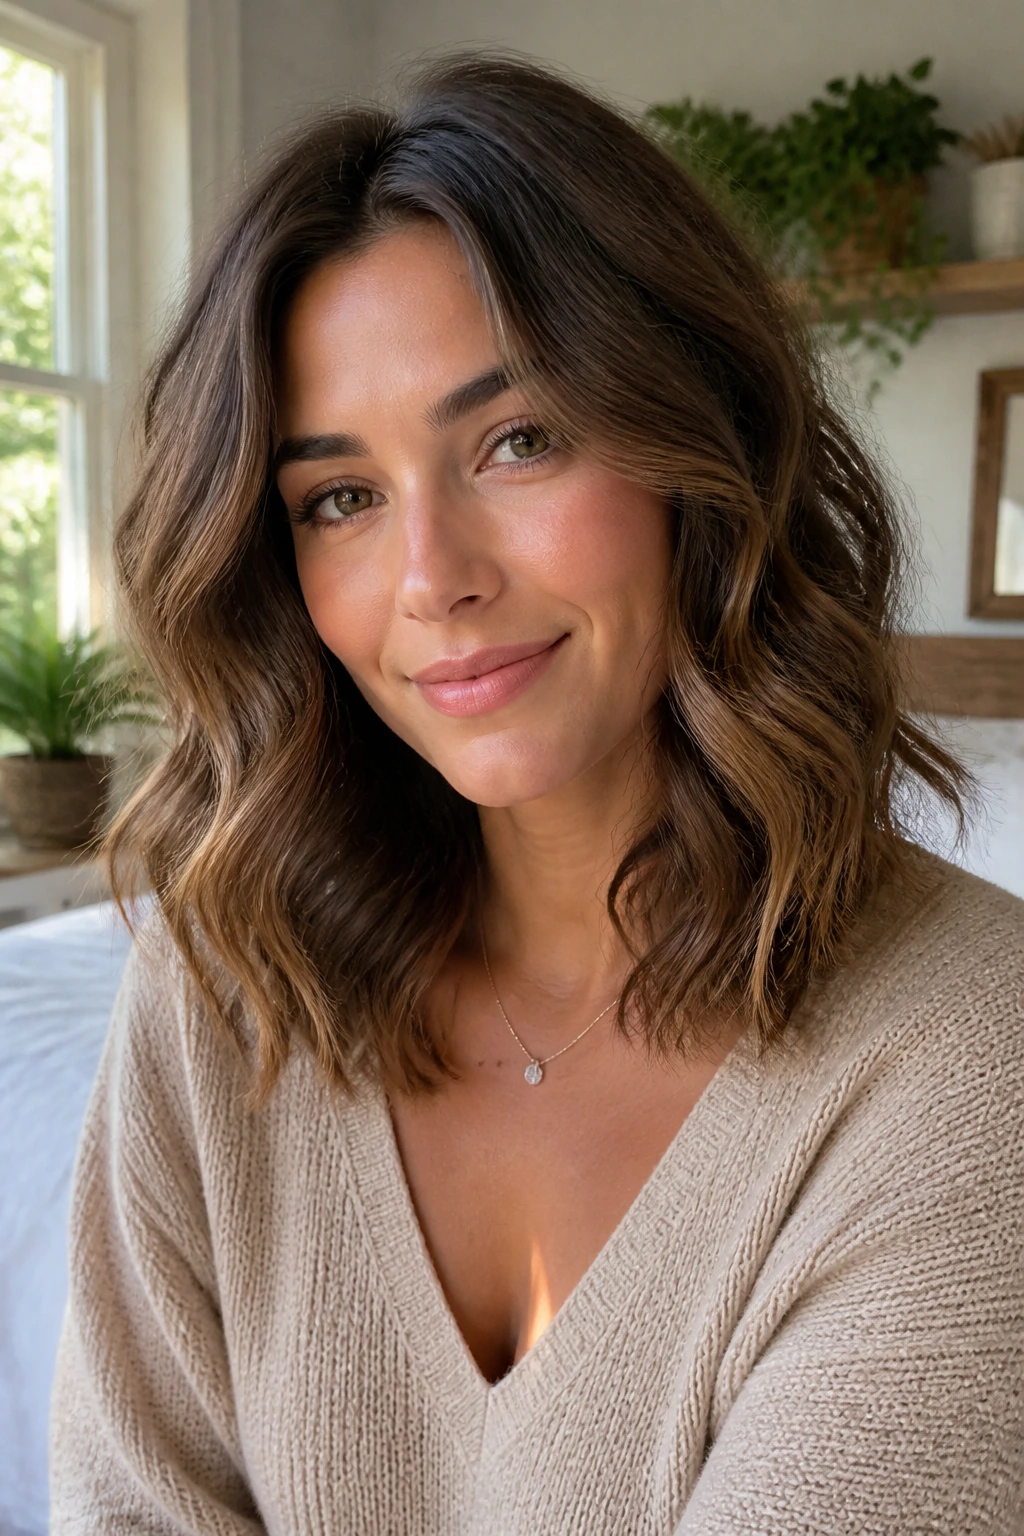
Medium hair has a built-in advantage: the bend can form without getting dragged down by extra length. Long hair often needs more product, more heat, or more setting time just to keep the curl from drooping. Short hair, on the other hand, can kick out too fast and lose that soft wave shape before it settles.
Shoulder-length and collarbone cuts sit in the middle. They give waves room to move, but the hair still has enough density to hold the curve. That’s why so many of the most flattering styles here start the bend below the cheekbone or jawline instead of right at the roots. The shape reads cleaner that way.
Layers matter too. A blunt medium cut gives you heavier, smoother waves. A layered cut gives you lift, separation, and a little more air around the face. Neither one is better in a vacuum. They just do different jobs, and that’s useful when you’re deciding whether you want a sleek finish or a piecey one.
Essential Equipment for These Styles
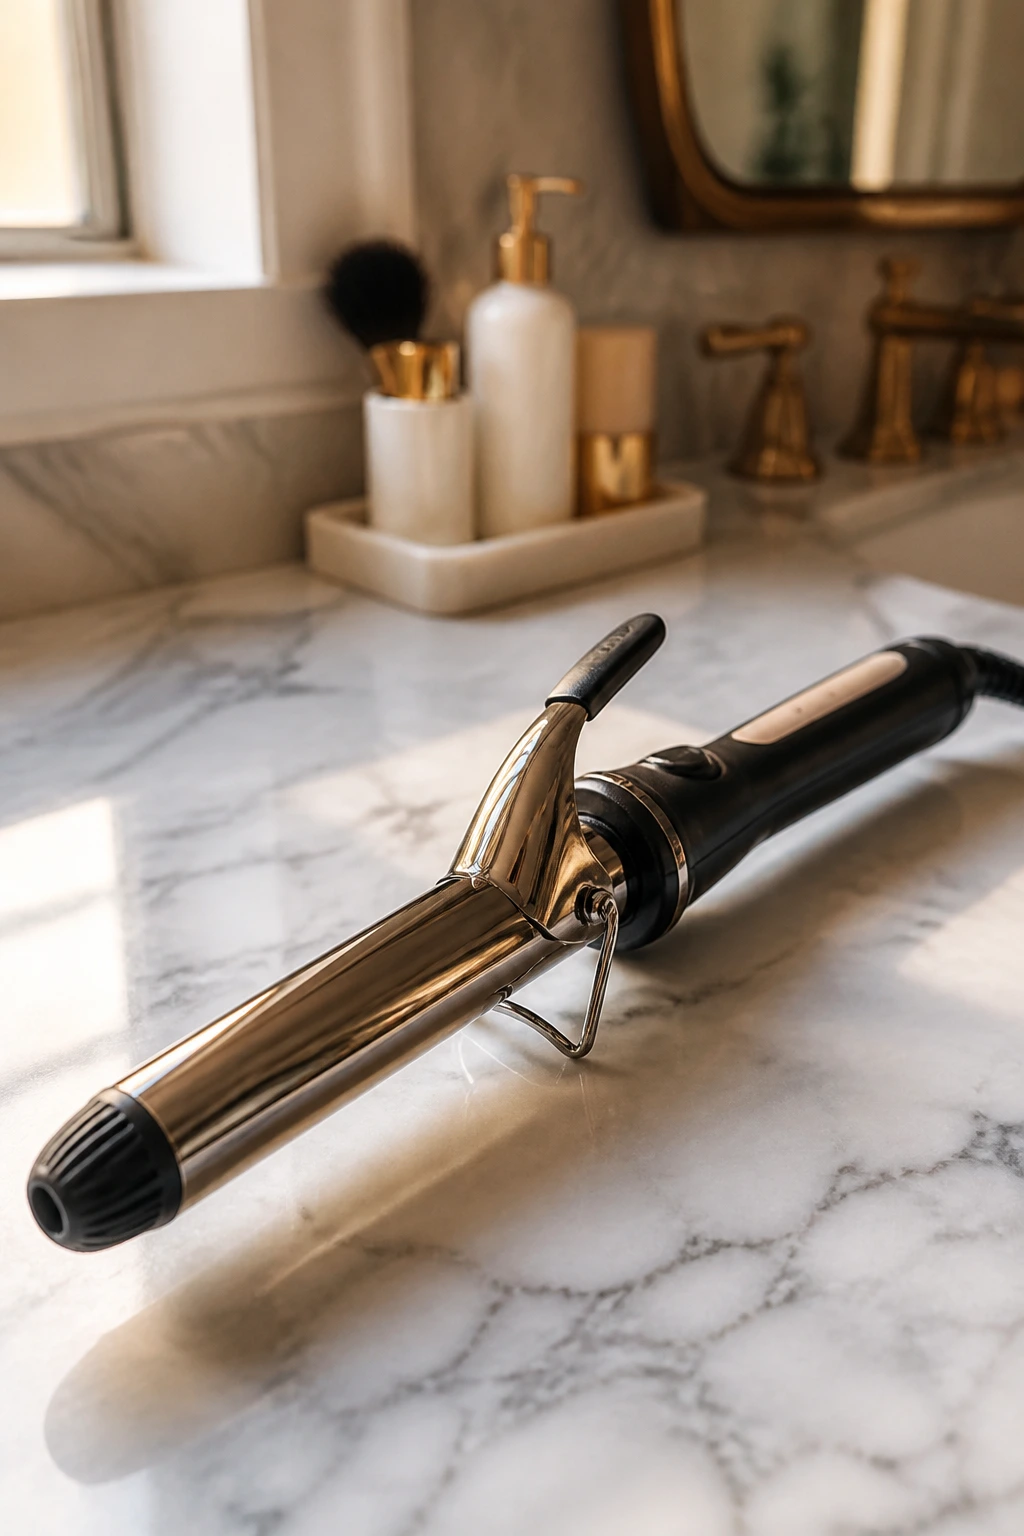
- 1-inch curling iron: Best for tighter bends, pin curls, and face-framing pieces that need more shape.
- 1.25-inch curling wand: The most flexible size for loose S-waves and brushed-out texture on medium hair.
- Flat iron: Good for soft bends, flipped ends, and a smoother wave pattern when you don’t want a round curl.
- Heat protectant spray: Non-negotiable before hot tools; it helps reduce roughness and breakage.
- Volumizing mousse: Useful at the roots for fine hair that collapses fast.
- Texturizing spray: Adds grit and a bit of lift on dry hair, especially for braids, twists, and claw-clip styles.
- Lightweight serum or oil: Best on ends only, where a little shine smooths frizz without flattening the crown.
- Duckbill clips or sectioning clips: Make it easier to set curls and pin cooling sections out of the way.
- Wide-tooth comb and paddle brush: One for soft separation, one for brushing out waves cleanly.
- Silk scrunchies and bobby pins: Handy for half-up styles, low ponies, buns, and day-two refreshes.
- Diffuser attachment: Helpful if your natural wave needs lift without blasting it into frizz.
Smart Product and Tool Picks for Wavy Medium Hair
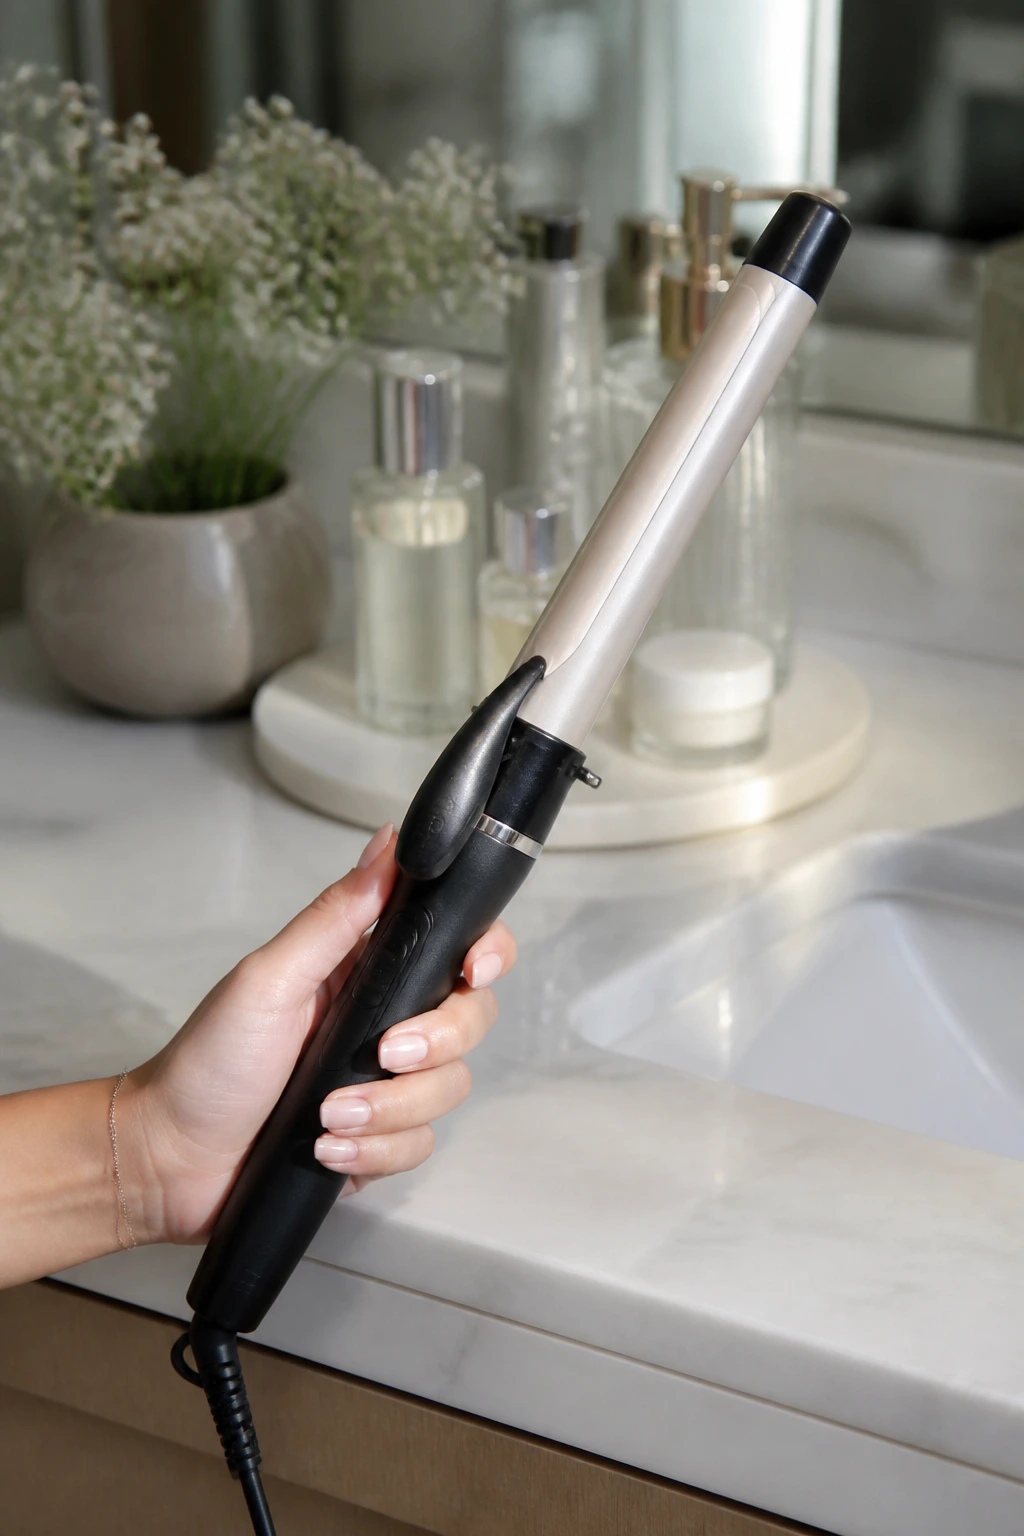
Pick products by weight, not by hype. Medium-length hair can get dragged down fast by heavy creams, sticky oils, and thick finishing balms that belong on coarser, longer hair. A light mousse at the roots, a flexible cream through the mids, and a small amount of serum at the ends usually do more than a drawer full of fancy jars.
Heat tools need the same kind of restraint. A 1.25-inch wand gives the most forgiving wave for this hair length because it creates shape without turning the ends into tight corkscrews. If your hair is very dense, a 1.5-inch barrel can soften the bend. If it’s fine or slips flat fast, a smaller barrel with a cool-down pinning step usually lasts longer.
Heat protectant should go on every time, and not as a mist in the air that barely lands on the hair. Spray it section by section, comb it through, then style. That small extra step is worth it. Hair gets rough at the cuticle when heat is repeated on the same spot, and medium hair shows that dryness fast because the ends sit right near the shoulders where friction hits all day.
How to Wear These Waves With Different Outfits
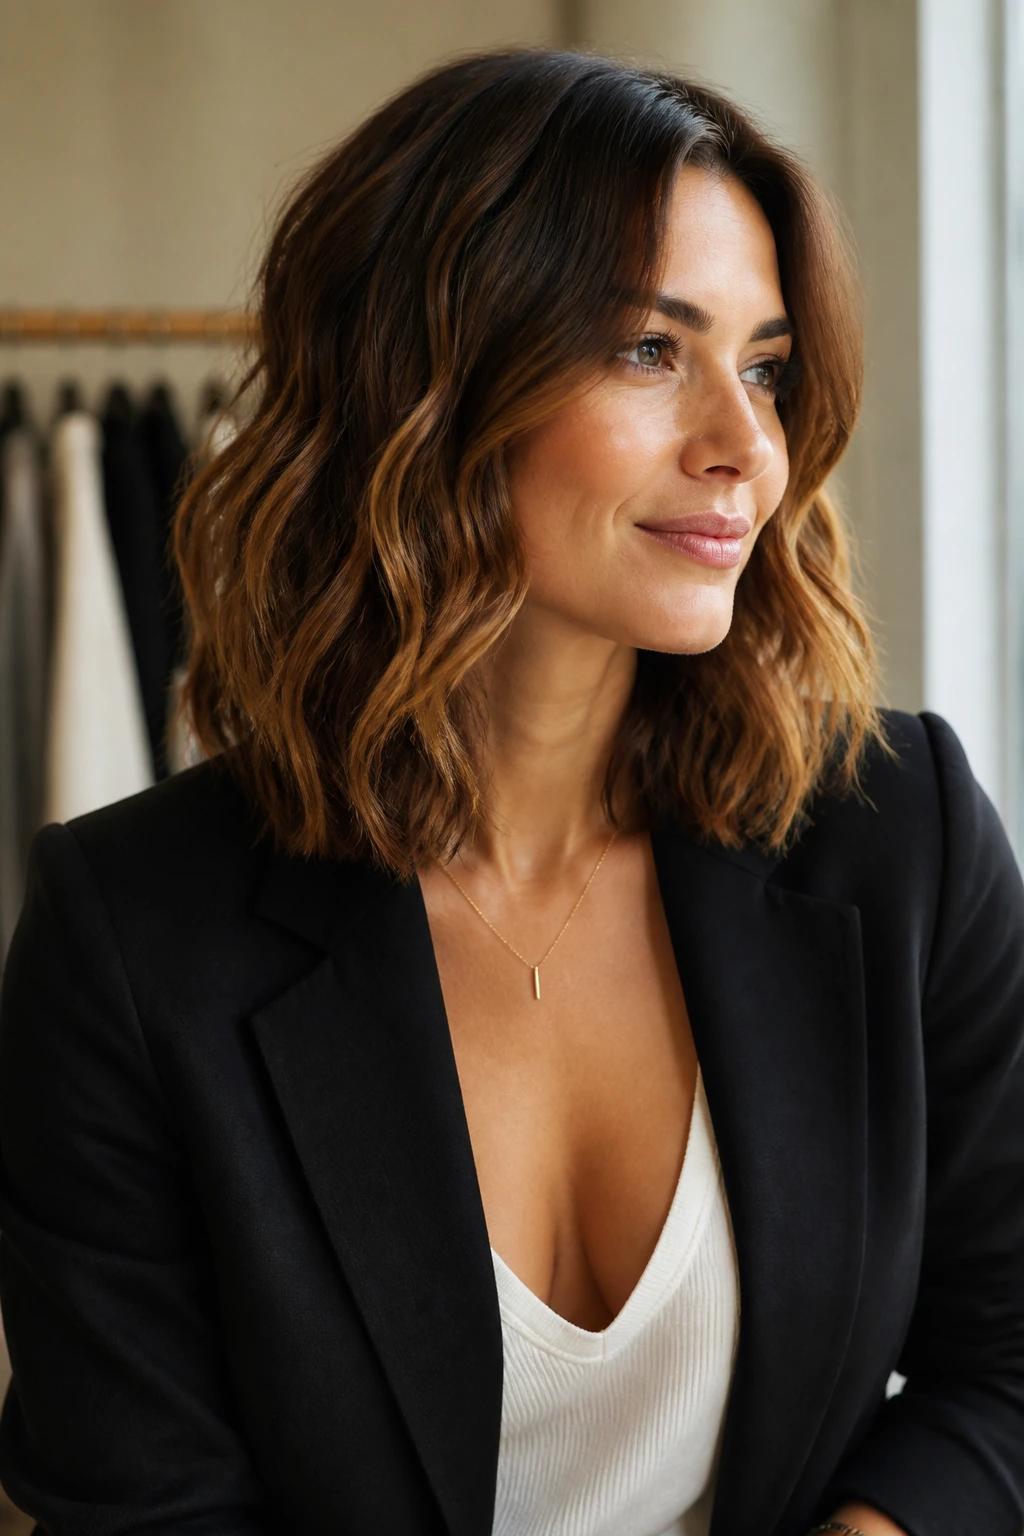
Presentation: Keep the wave pattern matched to the neckline. A deep side part looks strong with a blazer or open collar, while center-parted waves sit nicely with crew necks and simple dresses because the hair falls evenly on both sides.
Accessories: Medium waves love small-to-medium accessories. Think hoop earrings, slim headbands, claw clips, barrettes, silk scarves, and one good pin instead of a pile of them. Too much hardware starts competing with the hair.
Balance: If the outfit is busy, keep the hair softer and brush the waves out a little more. If the clothes are plain, let the texture do more of the work — tighter bends, more lift at the crown, or a side sweep that shows off the shape.
Density and length: Fine hair usually looks better with styles that keep the top smooth and the wave concentrated through the mids and ends. Thick hair can handle braids, clips, twists, and bigger bends because it has enough body to hold them.
Additional Styling Tweaks and Finishers
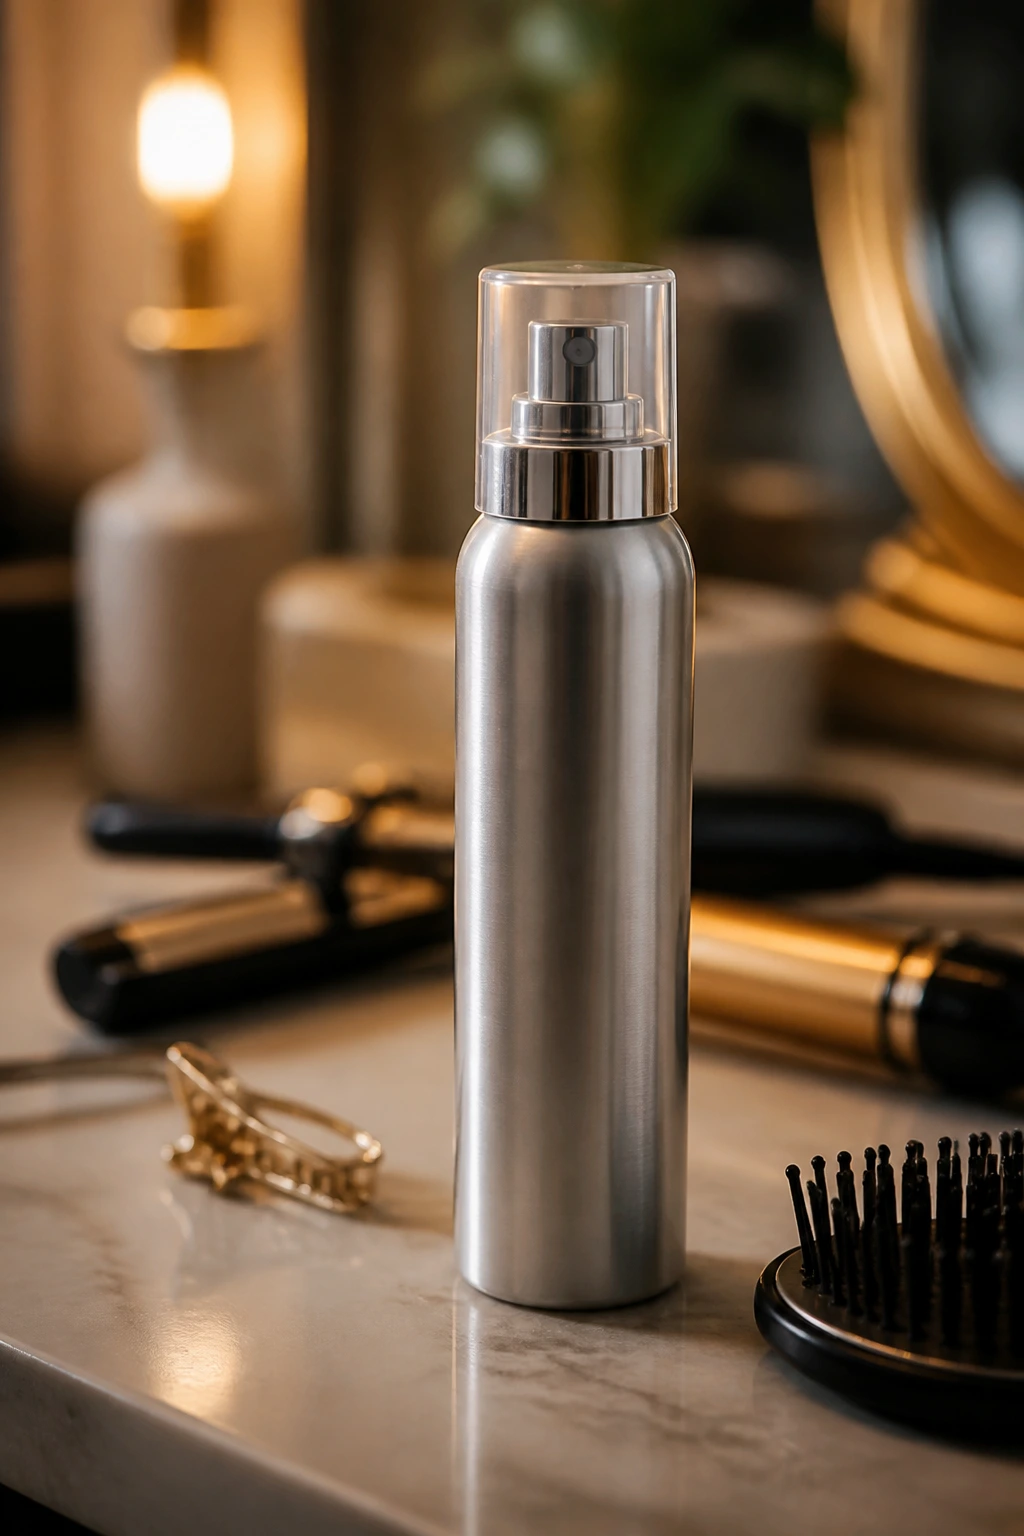
Texture Boost: A dry texturizing spray at the mid-lengths can wake up soft waves that flattened overnight. Spray from about 8 inches away, let it sit for 10 seconds, then scrunch with your hands so it doesn’t land in one sticky patch.
Humidity Defense: If your hair frizzes at the first sign of damp air, use a light anti-humidity spray or a drop of serum only on the outside layer and the ends. Don’t coat the crown. That’s how medium hair turns limp.
Fast Refresh: For day-two hair, mist the front pieces with water, twist them around your finger, and hit them with a dryer for 15 to 20 seconds. That’s often enough to bring back the shape without restyling the whole head.
Make-It-Yours: Fine hair likes mousse and root clips. Thick hair likes a stronger hold spray and fewer product layers. Naturally wavy hair usually needs less heat and more coaxing; straighter hair usually needs a bit more barrel time and a longer cool-down.
How to Keep Waves Going for More Than One Day
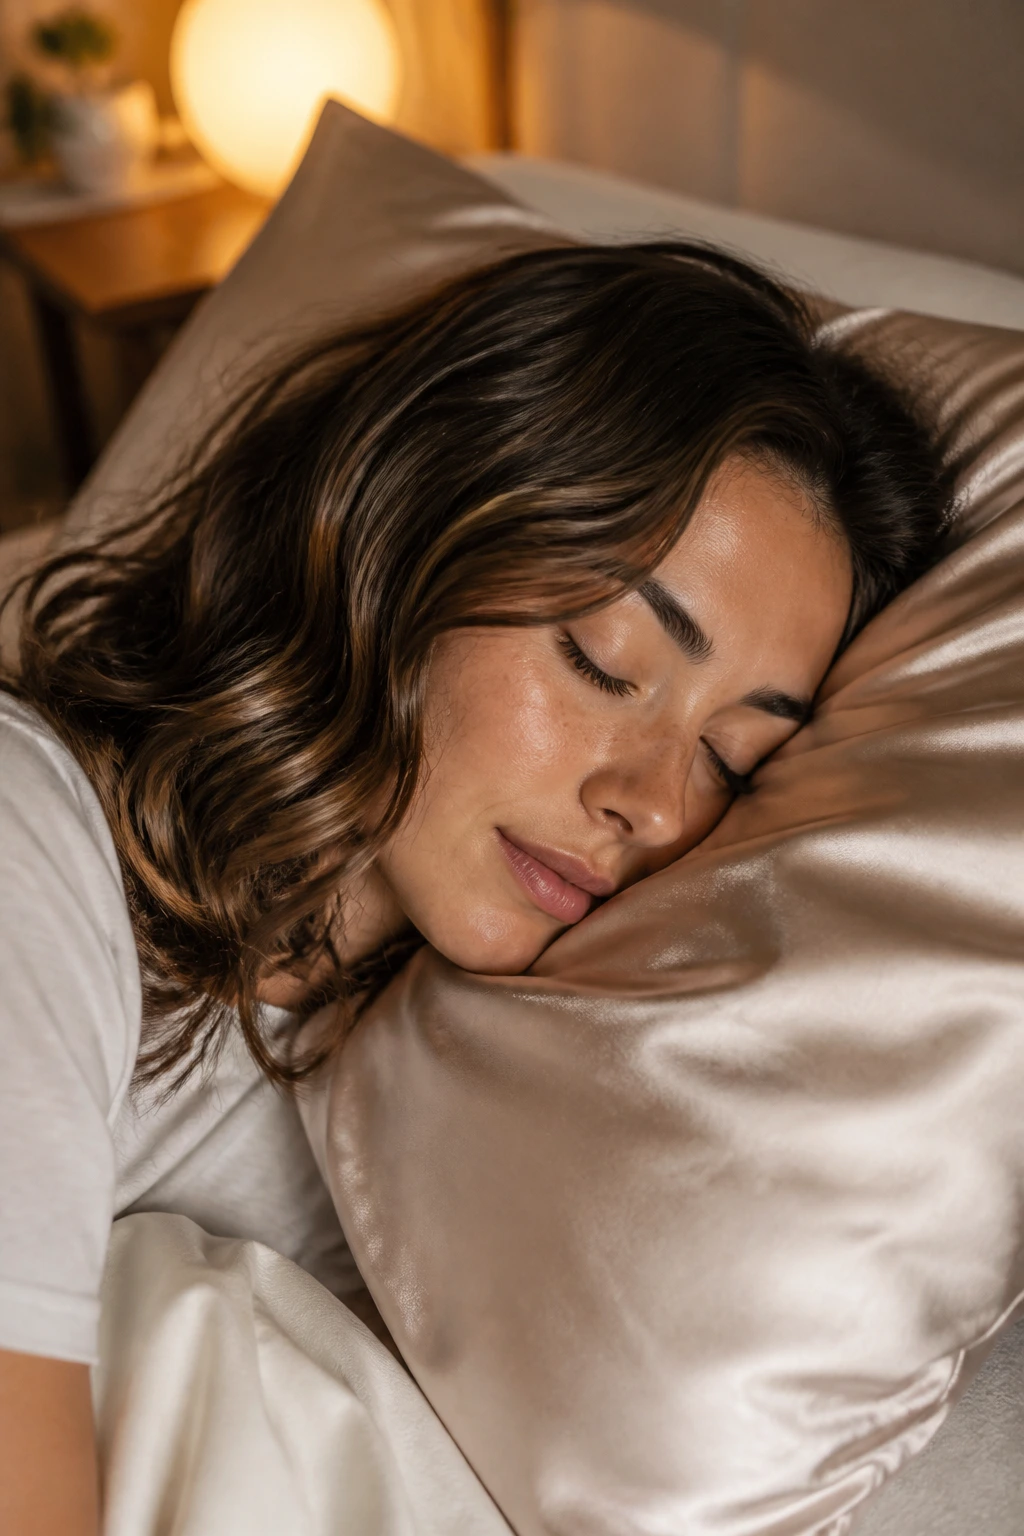
Most heat-styled medium waves hold best for about one to two days if you sleep on them properly. A silk pillowcase helps cut friction, but the bigger move is how you arrange the hair before bed. Loose twists or a soft pineapple clip at the crown keep the wave pattern from getting crushed flat while you sleep. Tight elastics are a bad idea. They leave dents and make the hair look bent in all the wrong places.
If the waves fall overnight, don’t start over from scratch. Mist the hair lightly with water, warm the front sections with a curling iron for a few seconds each, and let the rest of the style stay a little imperfect. That small refresh usually works better than re-curling the entire head, which can make medium hair look overworked and dry.
For natural waves, the maintenance is different. A little leave-in conditioner on the ends, a bit of scrunching, and a quick dry-shampoo lift at the roots can carry the shape through day two and sometimes day three if the weather isn’t cruel. Beyond that, the hair usually needs a wash or a proper re-set. Hair that’s been heavily sprayed, braided, or pinned should also get a scalp cleanse sooner — product build-up shows on medium hair faster than people think.
Variations and Adaptations to Try
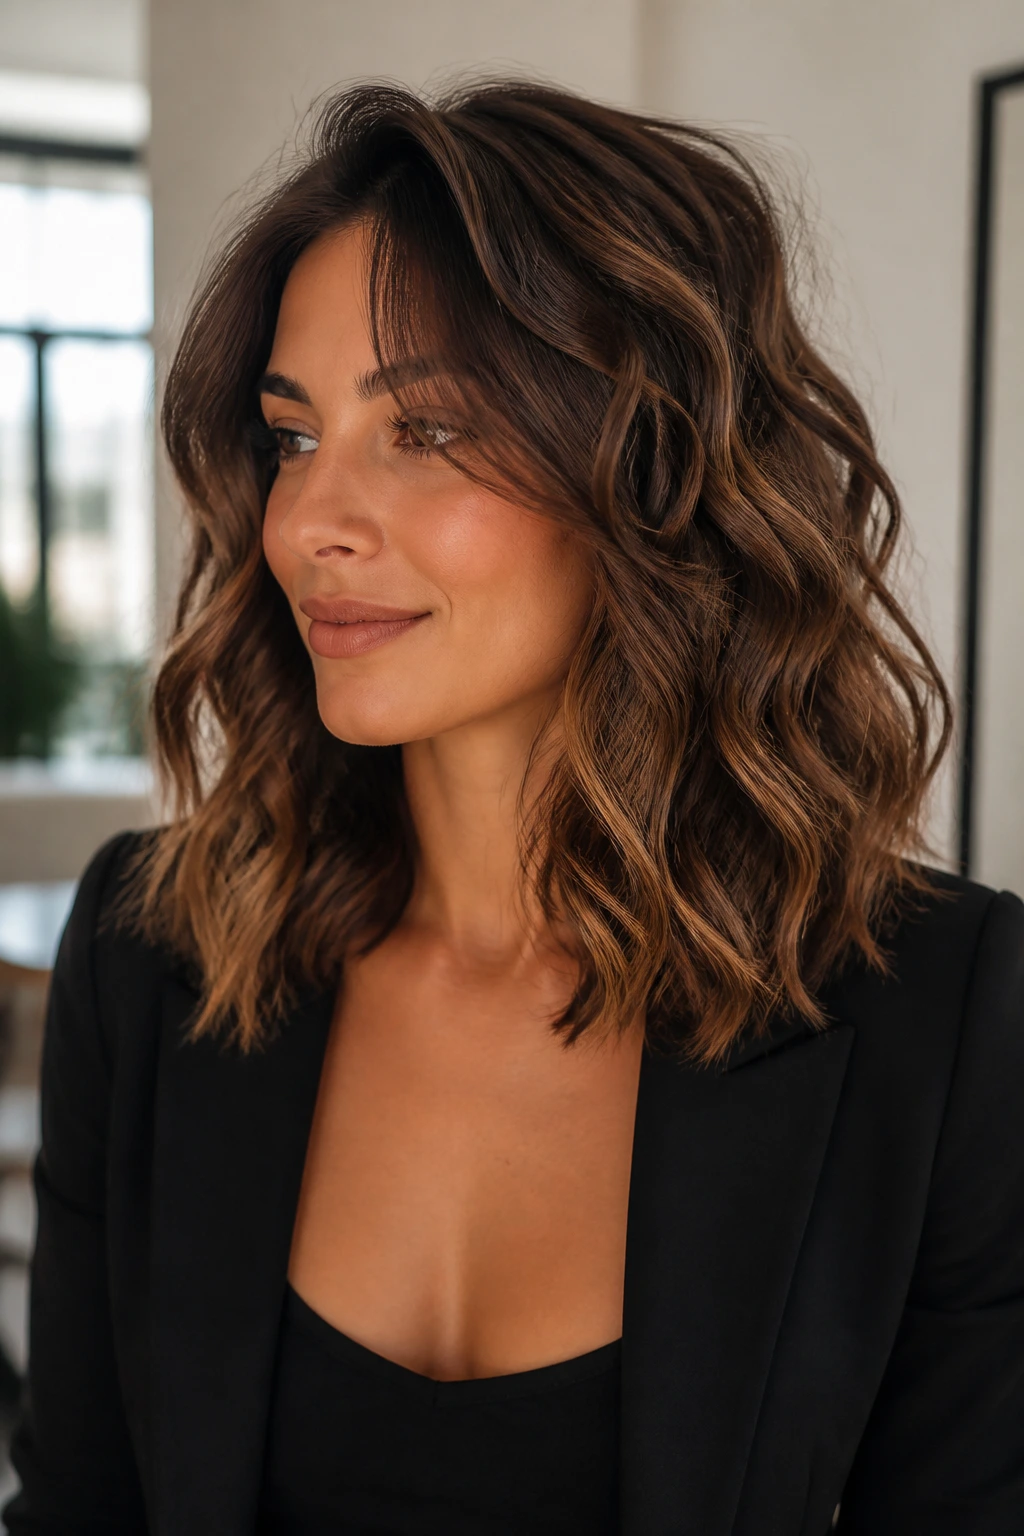
Fine-Hair Lift Waves: Start with mousse at the roots and wave only the lower two-thirds of the hair. The top stays airy, which keeps the style from collapsing before lunch.
Thick-Hair Softener Waves: Use bigger sections, a 1.5-inch barrel, and a smoothing cream before styling. This cuts down bulk and stops the ends from ballooning out.
Heatless Overnight Waves: Braid damp hair into two loose braids or wrap it around a soft rod set. Let it dry fully before taking it down, or the wave pattern will fall apart fast.
Humidity-Ready Gloss Waves: Keep the texture smoother, then finish with a light anti-frizz serum and a flexible spray. This version holds shape better when the air feels damp and sticky.
Event-Ready Side Sweep: Deep side part, brushed-out waves, and one tucked side with a statement earring. It’s a clean move for weddings, dinners, or any night that needs a little more polish.
Common Mistakes That Flatten Medium Waves
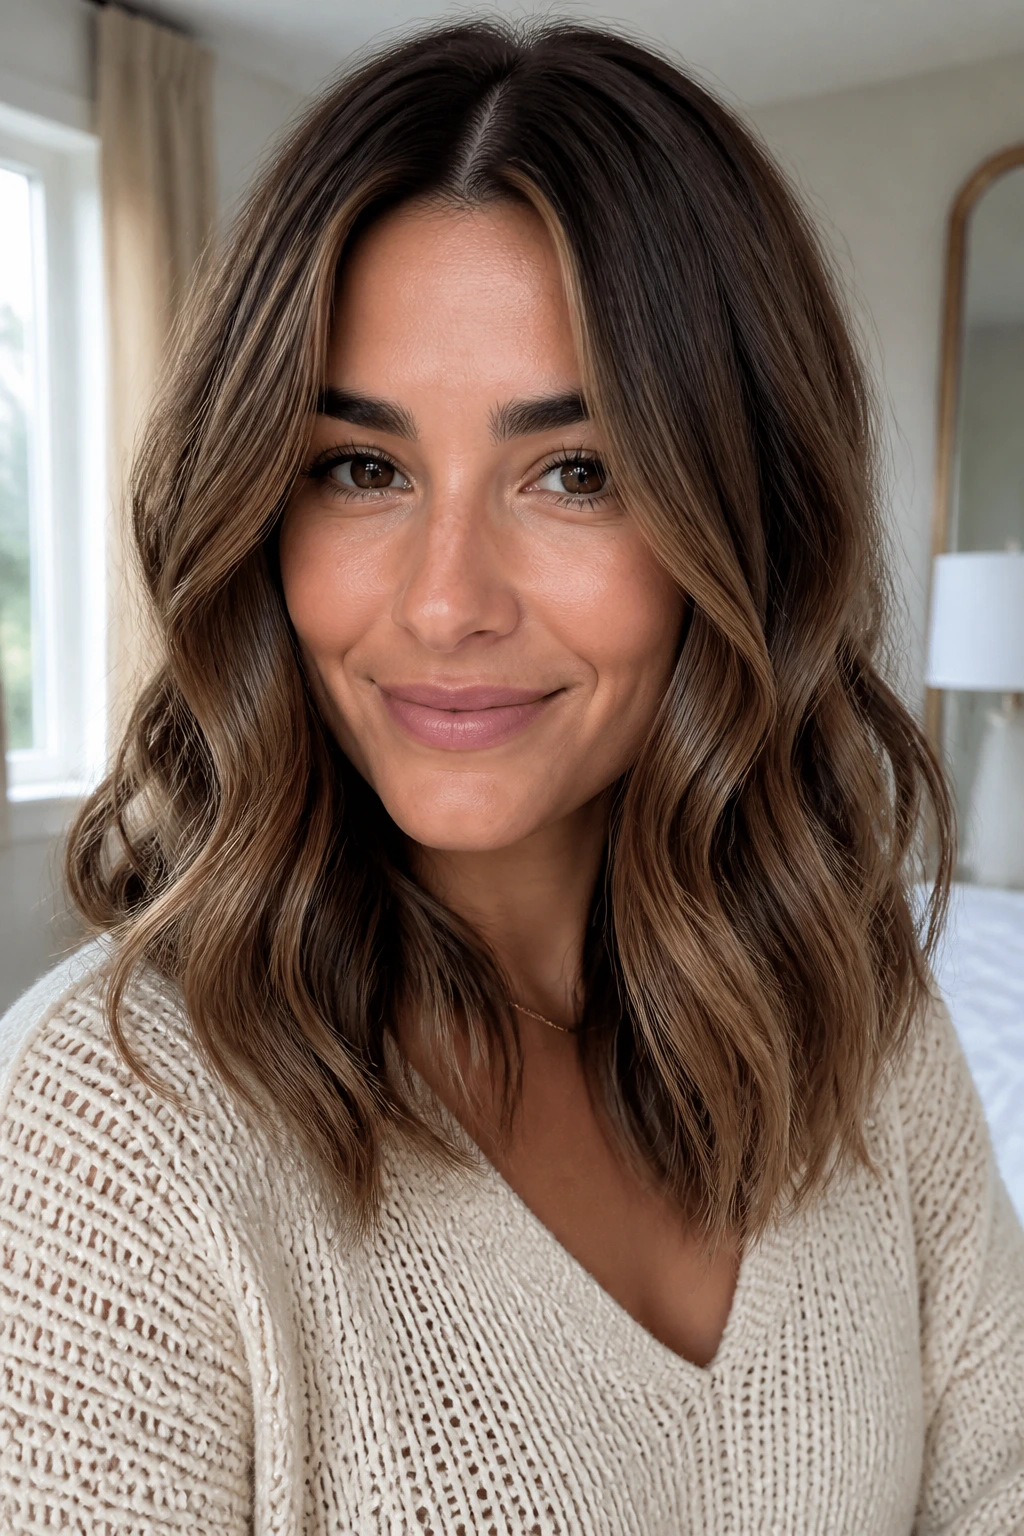
The first mistake is curling every section the same way. When every bend turns in one direction, medium hair can start looking like a tube instead of a wave. Alternate directions as you move around the head, then brush the curls together only after they cool.
Another one: starting the curl too high at the root. That usually makes the crown puff up while the ends stay too straight, which is a strange trade. Begin around cheekbone or jaw height unless you’re going for a very full shape.
Product overload is a big one too. Medium hair does not need a scoop of cream, an oil, a serum, and a finishing balm all at once. Use one smoothing product at the ends, not four layers that weigh the cut down.
And then there’s the brushing problem. Brushing warm waves too early can flatten them before they set. Wait until the hair is fully cool, then use a soft brush or your fingers depending on how loose you want the finish.
Questions People Ask About Wavy Medium Hair
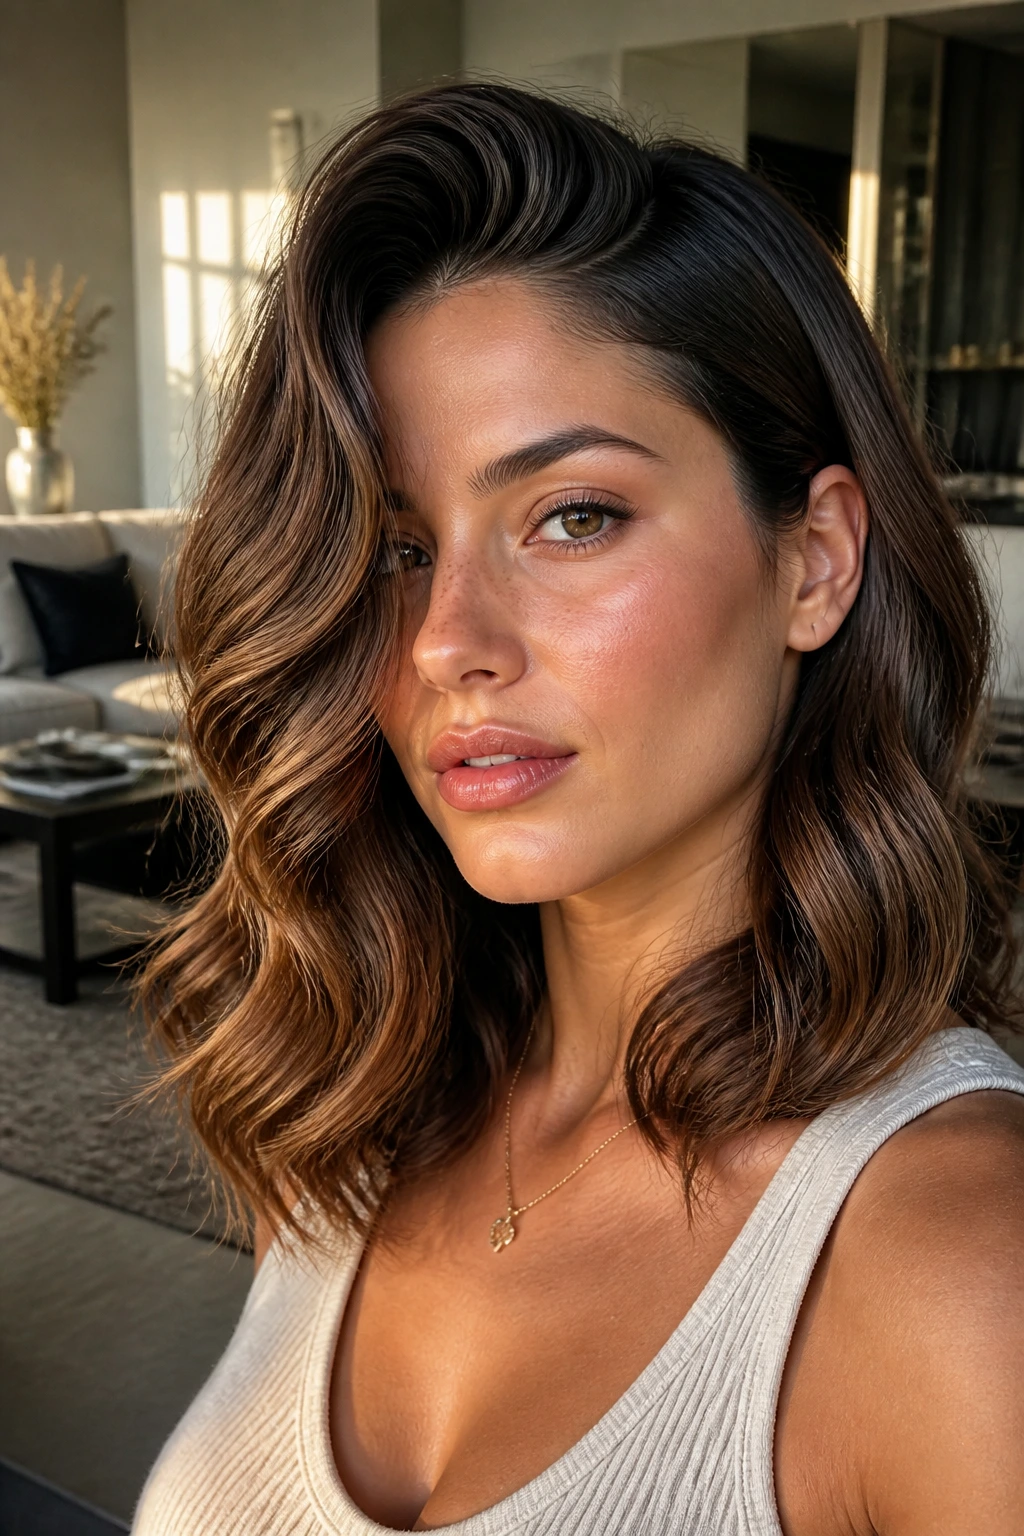
What counts as medium length hair?
Usually hair that lands between the chin and just past the shoulders. A collarbone cut is the classic middle point because it gives enough length for waves but stays easy to shape.
Do layers or blunt ends work better for waves?
Layers give more movement and a softer, airier finish. Blunt ends make the wave line look fuller and cleaner. Neither one wins every time; the cut should match the finish you want.
Can I do these styles on naturally wavy hair?
Yes, and some of them work better on natural wave than on straight hair. Air-dried scrunched waves, claw clip styles, and half-up twists usually look especially good without much heat.
Why do my waves fall flat so fast?
Usually it’s too much product, not enough cool-down time, or sections that are too wide. Medium hair needs the wave to set before you brush it out.
Is a curling iron or wand better?
A wand gives softer, more relaxed bends. A curling iron with a clamp can add more control, especially around the face. I’d use both depending on the look.
How do I keep medium waves from looking puffy at the bottom?
Leave the last inch or so straighter, and don’t overuse texture spray on the ends. That little bit of restraint keeps the shape cleaner.
Can I wear waves on day-two hair without restyling everything?
Absolutely. Refresh the front pieces, add dry shampoo at the roots, and leave the rest alone unless a section has gone completely flat.
What if my hair is thick and heavy?
Use larger sections, work with a slightly higher heat setting, and don’t load on oils. Thick medium hair usually needs less product than it seems.
Soft Ends, Good Days
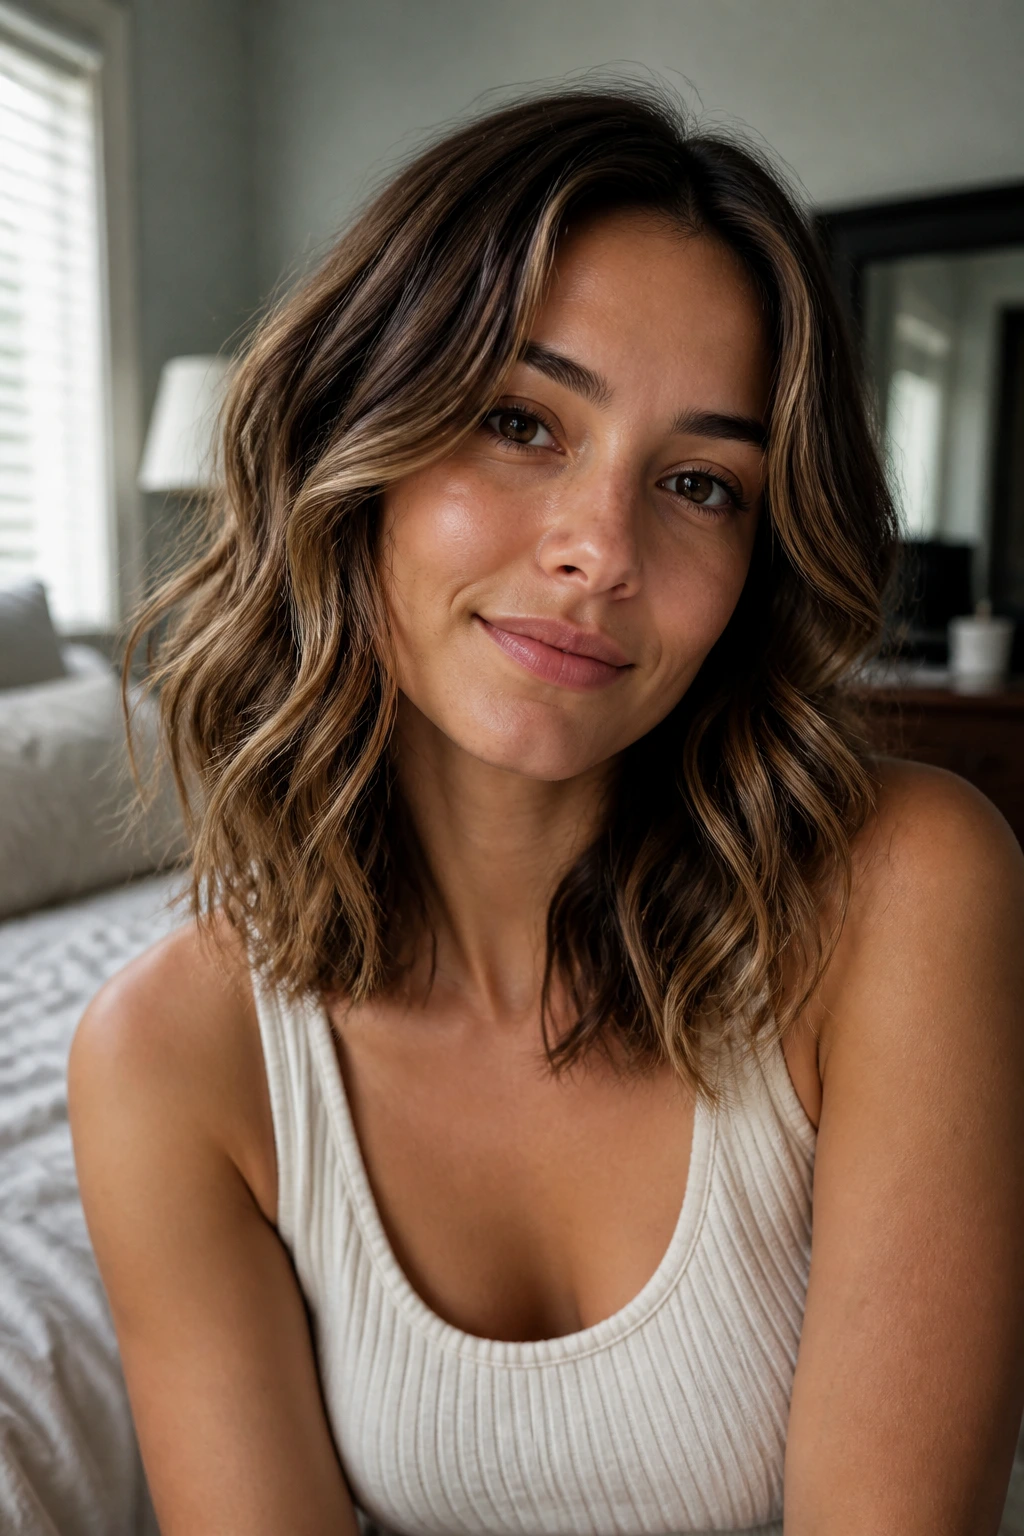
Medium-length waves work because they sit in a useful middle ground. The hair is long enough to move, short enough to hold shape, and flexible enough to take a half-up twist one day and a brushed-out glam wave the next. That’s a rare combination, and it’s why these looks keep coming back into rotation instead of disappearing after one wash day.
The best part is how little you have to change to get a different result. A deeper part, a larger barrel, a tucked ear, a clipped crown, a braid near the temple — small moves, big payoff. Keep the ends from getting overloaded, let the crown stay light, and the style usually behaves.
Pick one look that fits your cut and your routine, then make it your own from there. Medium hair likes a bit of experimentation, and once you learn where your waves want to sit, the whole thing gets easier fast.
