



Bun hairstyles for short hair have one job: turn a few stubborn inches into something that looks deliberate. And that is where most people get stuck. They try to force a bob into a long-hair knot, the ends poke out, the pins slide, and the mirror starts acting smug.
Short hair does not hate buns. It just asks for a different kind of bun. A chin-length bob wants a tighter nape knot, a layered lob wants hidden anchors, and a curly crop often looks better when you stop trying to smooth every strand into obedience. The best short-hair bun styles don’t fight the haircut. They use the haircut’s natural texture, weight, and layers to their advantage.
That is the part people miss. The magic is not in having more hair. It’s in building a shape that fits the hair you have — compact, secure, and a little bit strategic. Once you know which bun to reach for, the whole thing gets easier. Not effortless. Easier. There’s a difference.
Why Short Hair Bun Styles Need a Different Playbook
Short hair bends the rules, which is good news if you stop expecting symmetry. A bob or lob gives you less length to wrap, but it also gives you less weight dragging the style down. That means a well-pinned short bun can sit higher, tighter, and cleaner than a long one that slumps by noon.
Texture matters more than volume here. Freshly washed, squeaky-clean hair is slippery, and slippery hair is a bun’s enemy. A little day-old grit, a mist of texturizing spray, or even a light dusting of dry shampoo at the roots changes the whole equation.
Layer placement is the real puzzle. Short layers around the face and neck tend to escape first, so the best styles either tuck those ends into the bun or make them part of the finish. Chasing every little piece into submission usually creates more fuss than polish.
Pins do more work than product. Hairspray helps at the end, but the shape lives or dies on where the bobby pins sit. Cross them. Hide them. Push them into a small section of scalp-supported hair instead of into loose fluff.
The smaller the bun, the smarter the build. A compact knot often looks more elegant on short hair than a bloated one that tries too hard. Tiny can be chic. Tiny can also stay put.
1. The Micro Low Bun at the Nape
A micro low bun is the short-hair style that finally admits the obvious: you do not need a grapefruit-sized knot to look finished. On a chin-length bob, this sits right at the nape, tight and neat, with just enough surface texture to keep it from reading severe. I like it because it feels honest. Small, tidy, and unfussy.
Why it works
The bun stays close to the scalp, so gravity has less leverage. That matters more than people think. When the weight is low and compact, the style can survive a workday without sagging into a sad little rope.
- Gather hair with your fingers, not a brush, if you want a little lift at the crown.
- Twist the lengths inward until they fold into a plum-sized coil.
- Secure the base with a small elastic, then cross two bobby pins over the seam.
- Tuck the shortest ends underneath with one U-pin if needed.
Best use: this is the one I’d pick for a bob that barely reaches the neck. It looks clean with a blazer, a turtleneck, or a plain T-shirt, which is a nice range for something so small.
2. The Half-Up Mini Bun with Loose Ends
This is the style for the day your hair refuses to behave as a full bun. You take the top half, twist it into a tiny knot, and let the lower layers fall straight, waved, or curled underneath. The whole look feels lighter because it doesn’t pretend your haircut has extra length it doesn’t have.
The half-up mini bun also flatters layered cuts. The shorter pieces at the back can stay down where they belong, and the top section does the job of looking intentional. It reads relaxed, but not sloppy. That balance is harder to get than people expect.
I reach for this when the front of my hair looks fine but the nape pieces are too short to gather cleanly. It solves the problem without making a speech about it. A small elastic, two pins, done.
3. The Twisted Nape Bun
What if one gathered ponytail keeps falling apart? Split the job in half. The twisted nape bun uses two side sections that are twisted toward the center, then tucked into a compact knot at the base of the neck. It is one of the best ways to hide short layers because the twists do the camouflaging for you.
How to build the twist
Start with a center or slight-off-center part if you want a polished look. Take a section from each temple, twist it back toward the nape, and pin the twists together where they meet. Then gather the remaining hair, fold it inward, and secure the tiny bun with pins that cross at the base.
The trick is tension. Too loose, and the twists unravel. Too tight, and you expose every shorter layer around the hairline. Aim for firm, not strained. If you have fine hair, a touch of dry texture spray on the mid-lengths makes this style hold much longer.
4. The Messy Pin-Loop Bun
Second-day waves and a messy pin-loop bun get along just fine. In fact, that little bit of friction in the hair is what makes this style work. Instead of coiling every strand into a perfect knot, you loop the hair once, pin the loop, and leave the ends to disappear into the base with a few discreet pins.
This one has a looser, lived-in shape. Not sloppy. Lived-in. That difference matters. The best versions still have a clear center and a defined nape, but the surface has stray pieces and soft bends that stop it from looking too rigid.
Key details that matter
- Use a small elastic or a clear band to make a low ponytail first.
- Pull the ponytail only halfway through on the last wrap to create the loop.
- Leave a few short ends visible on purpose if your layers are fighting back.
- Pin the loop from both sides so it doesn’t sag into a lopsided knot.
A quick mist of flexible-hold hairspray helps, but don’t drown it. The style should move a little when you turn your head.
5. The Braided Crown Bun
A braided crown bun gives short hair more grip than a plain bun ever could. Tiny braids along the hairline create texture, and texture is what makes short hair cooperate. I like this style because it makes the bun look more elaborate than it actually is.
The crown part does the heavy lifting visually. You can braid just the front two sections and bring them into a small nape bun, or braid from the temples back and let the braids feed into the knot. On a lob, that tiny extra structure keeps shorter face-framing pieces from slipping out by lunchtime.
If your hair is very smooth, braid tightly and pin the braid ends flat against the head before shaping the bun. If your hair is wavy, a looser braid gives a softer finish. Either way, the braid acts like a little road map for the eye. It tells people the style is on purpose.
6. The Sleek Wet-Look Chignon
A sleek wet-look chignon is the short-hair answer to a formal bun that doesn’t need fake volume to look expensive. Gel at the roots, comb the hair flat, and keep the bun low and narrow. The shine is the point. The shape should look smooth enough that you can see the comb lines at the crown if you look closely.
This style is a favorite of mine for fine hair because slicking the hair down removes the puffiness that can make a short bun look unfinished. It also works well if your bob is blunt. A blunt edge makes the chignon look sharp instead of fuzzy.
Use a fine-tooth comb, not just your fingers, and set the part before you add product. Once the hair starts to dry, stop touching it. Every extra pass with the comb can create ridges that show up later in photos and under bright lights.
7. The Side-Swept Bun
A side-swept bun is one of those styles that quietly fixes asymmetry. If your cut is a little longer on one side, or your layers fall heavier on one temple, this bun uses that imbalance instead of trying to flatten it. The bun sits just behind one ear or slightly below it, with the front section swept across the forehead or tucked into a deep side part.
Best for
This style shines on bobs that hit the jaw or on lobs with a strong side part. It also flatters short hair that needs a little softness around the face. The off-center placement makes the head shape look a touch longer, which I like more than the stiff, centered version.
A side-swept bun does not need to be huge to read well. A small knot with a clean sweep across the front usually looks better than a bulky one sitting too far back. Keep the bun compact and let the sweep do the visual work.
8. The Faux French Roll Bun
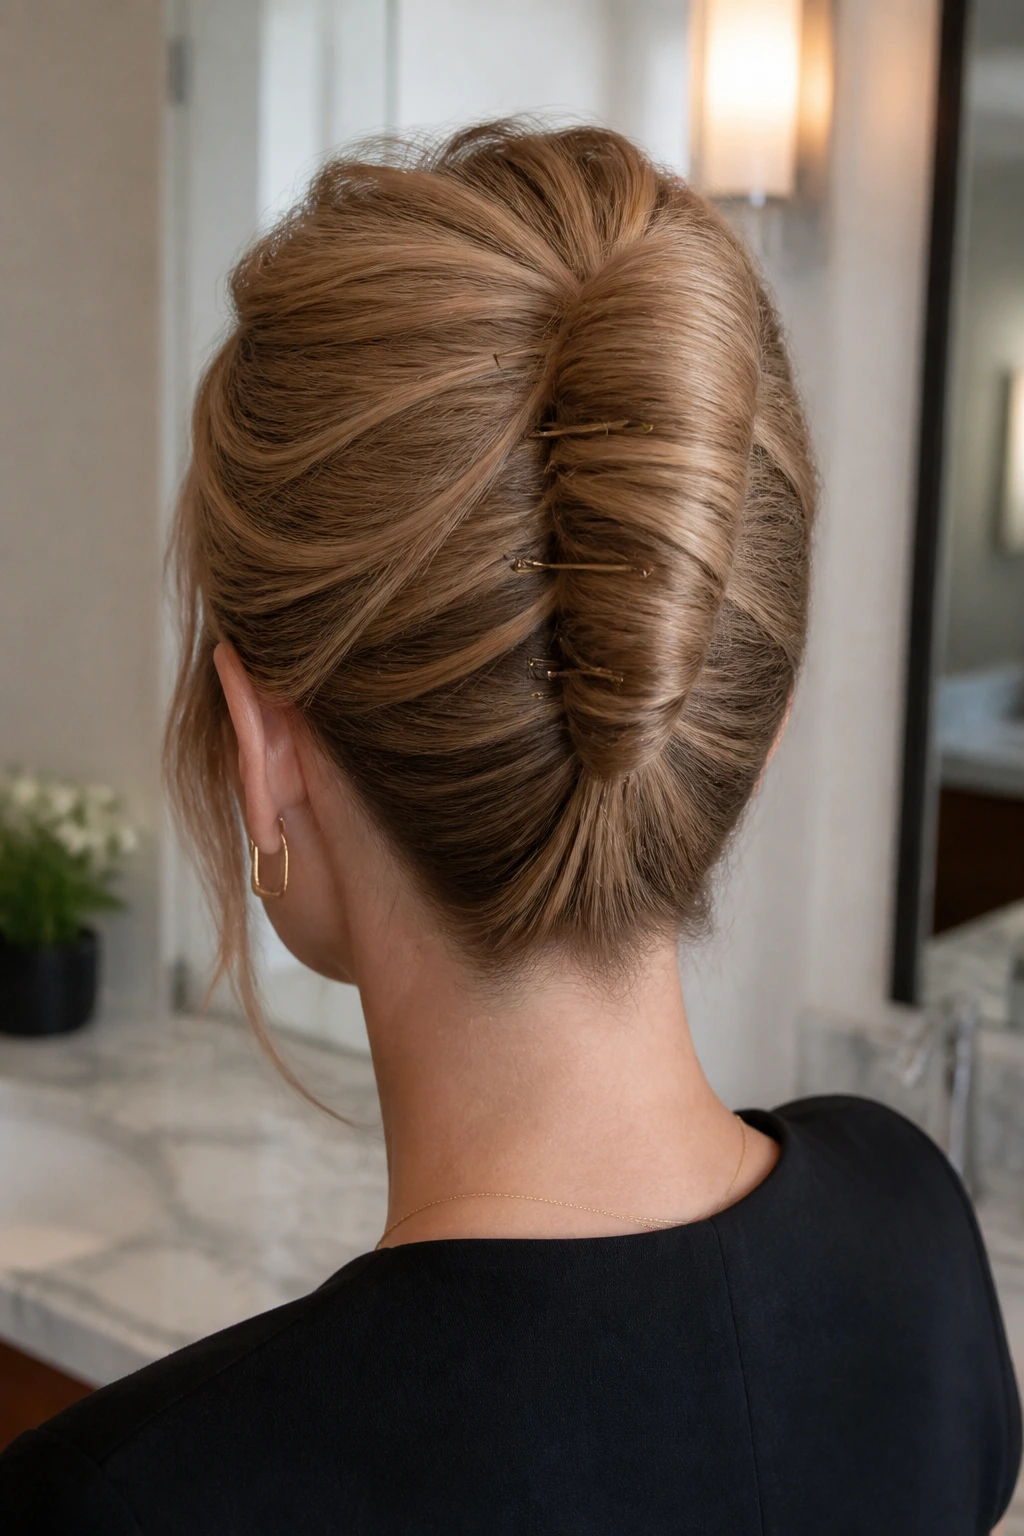
This is the best lie a short haircut can tell. The faux French roll bun borrows the vertical line of a classic French roll, then cheats the back into a tucked mini bun. It’s sleek, narrow, and very good at making chin-length hair look more structured than it really is.
The shape depends on rolling the hair inward along the back of the head, almost like you’re folding a soft envelope. You secure the roll with pins running horizontally across the seam, then tuck the ends into the interior. Shorter hair often behaves better here than longer hair because there’s less mass trying to spring out.
If you want this style to last, prep the hair with a light styling cream at the mids and a stronger hold product near the nape. That gives the roll some slip on top and some grip underneath. Strange little detail. Matters a lot.
9. The Space-Bun Pair
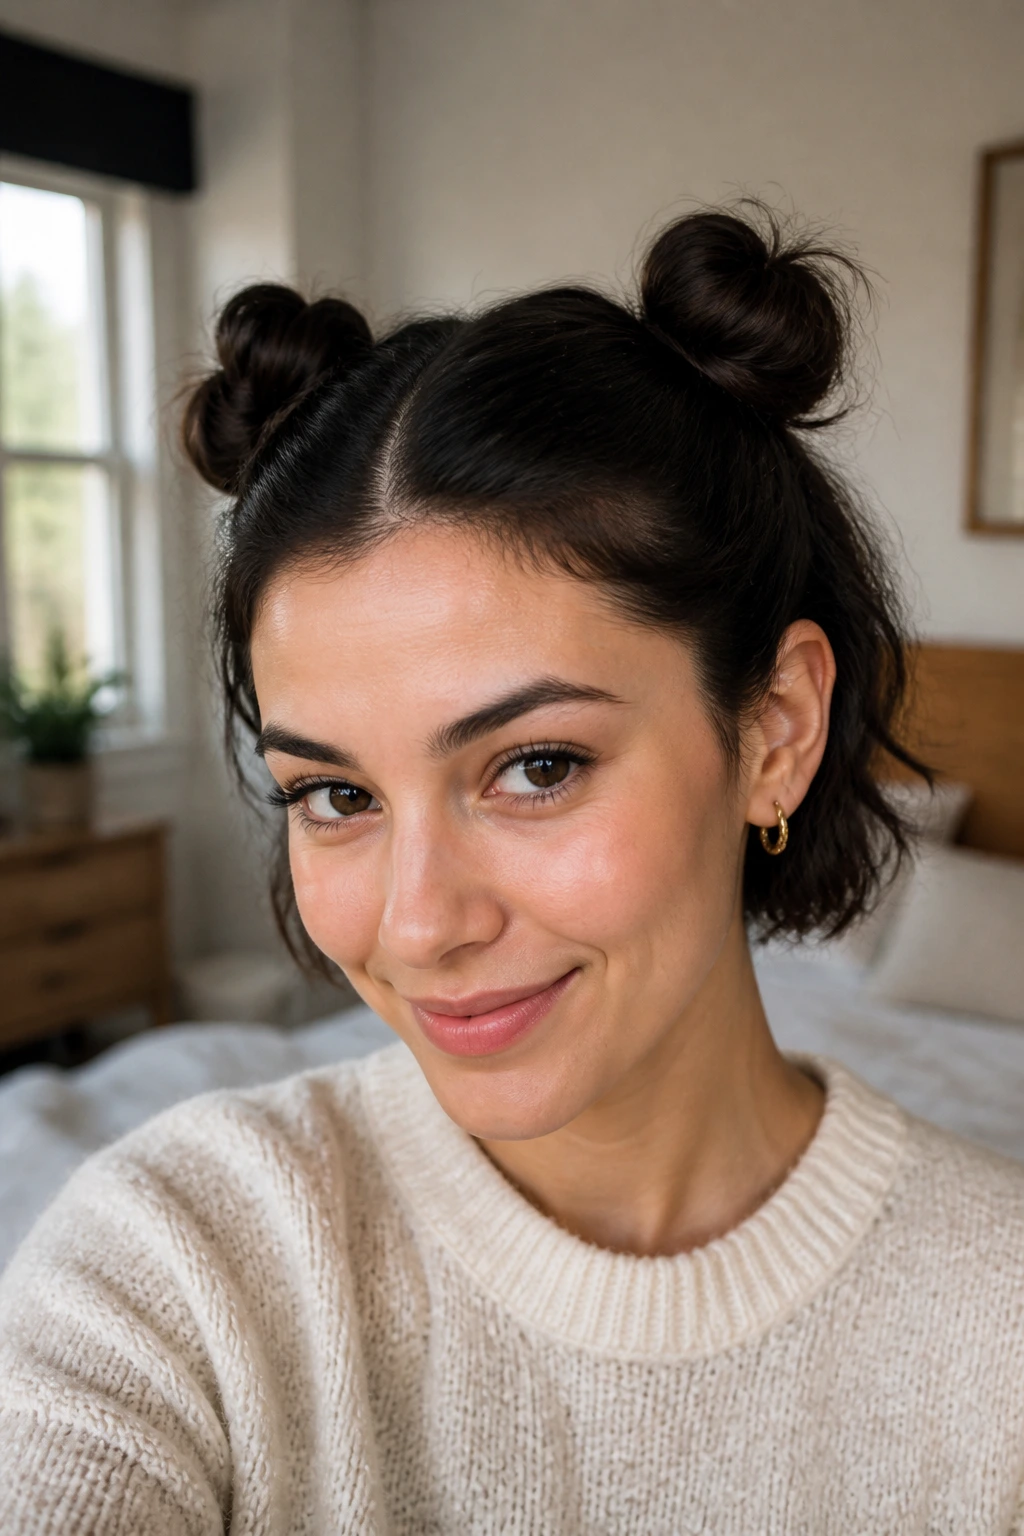
Two small buns can be easier than one big one on short hair, and that surprises people. The space-bun pair splits the length into two manageable sections, so each bun only has to hold part of the hair’s weight. You get a playful shape without asking a bob to do a long-haired trick.
This style works best when the buns sit a little higher than the ears but not so high that they turn cartoonish. Think clean, compact, and balanced. If the hair is layered, leave a few shorter pieces around the temples to soften the edges. It keeps the style from looking too rigid.
I like this for wavy or curly short hair because the texture fills the buns naturally. Straight hair can do it too, but it usually needs texture spray first. Without that, the buns can look thin and overly neat in a way that isn’t flattering.
10. The Claw-Clip Faux Bun
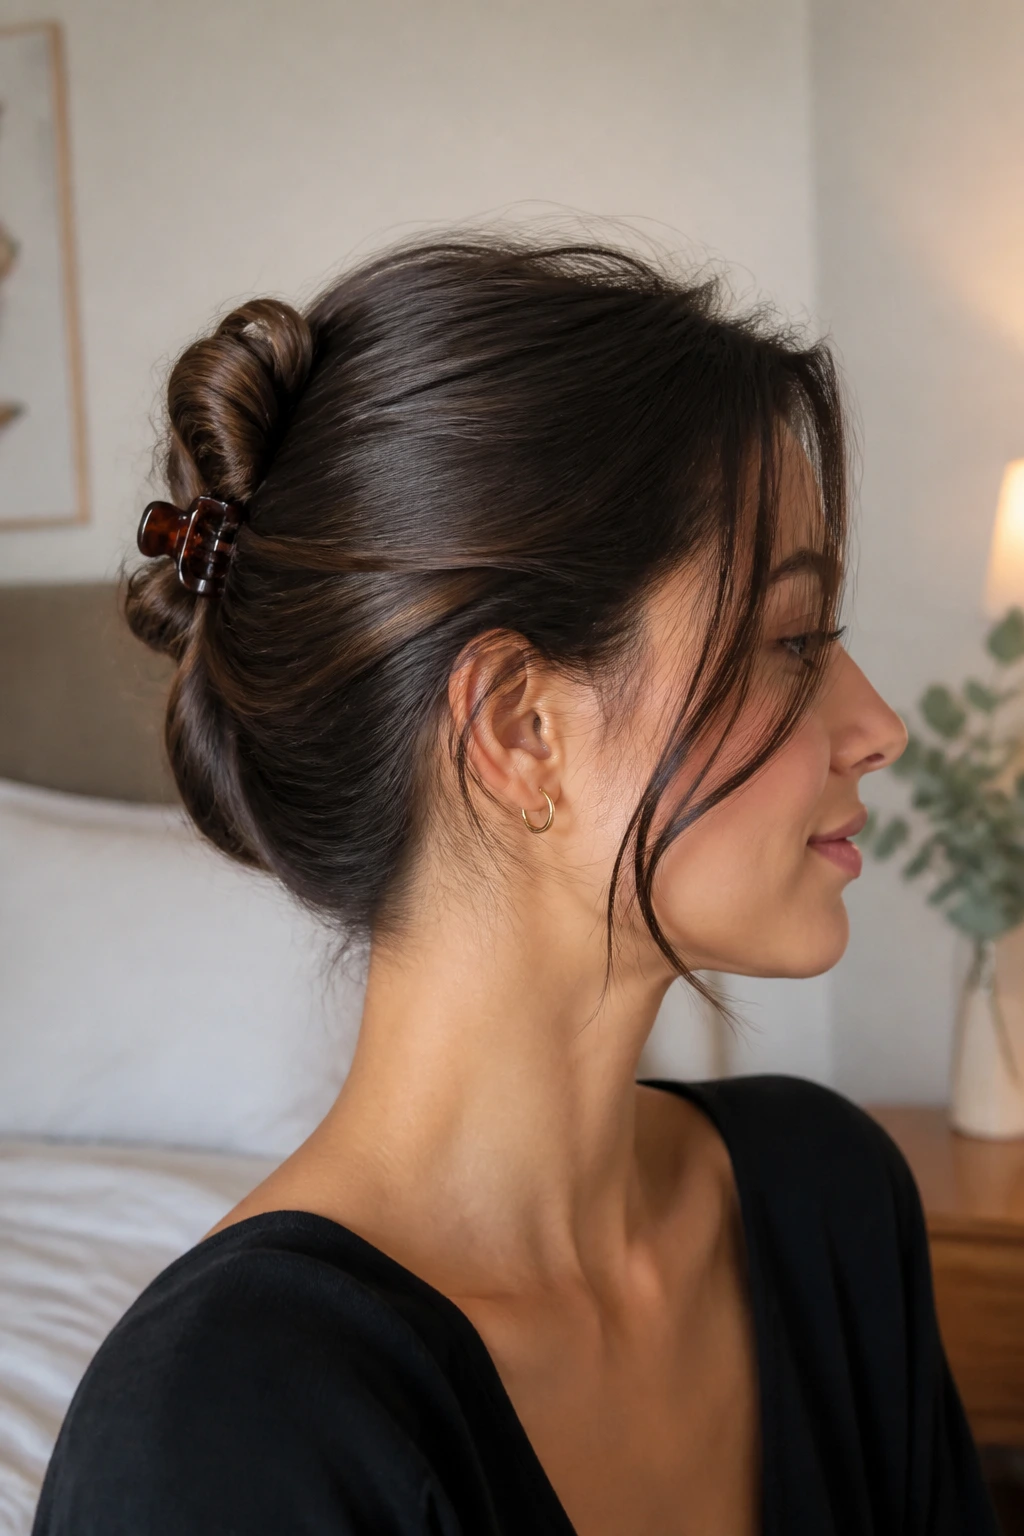
Three minutes. Maybe four. That’s the claw-clip faux bun’s whole personality.
You twist the hair upward, fold the length once or twice, and catch it with a small claw clip that grips the twist at the center. Short hair often looks better with a petite clip than a giant one. Big clips can swallow the style and make the back look clumsy, while a smaller clip keeps the shape compact.
This is not the style for perfect symmetry. It’s the style for moving hair off the neck without a full production. A few pieces may stick out, and that’s fine if the clip is secure. In fact, a little looseness can make the whole thing look more deliberate.
11. The Donut-Padded Bun
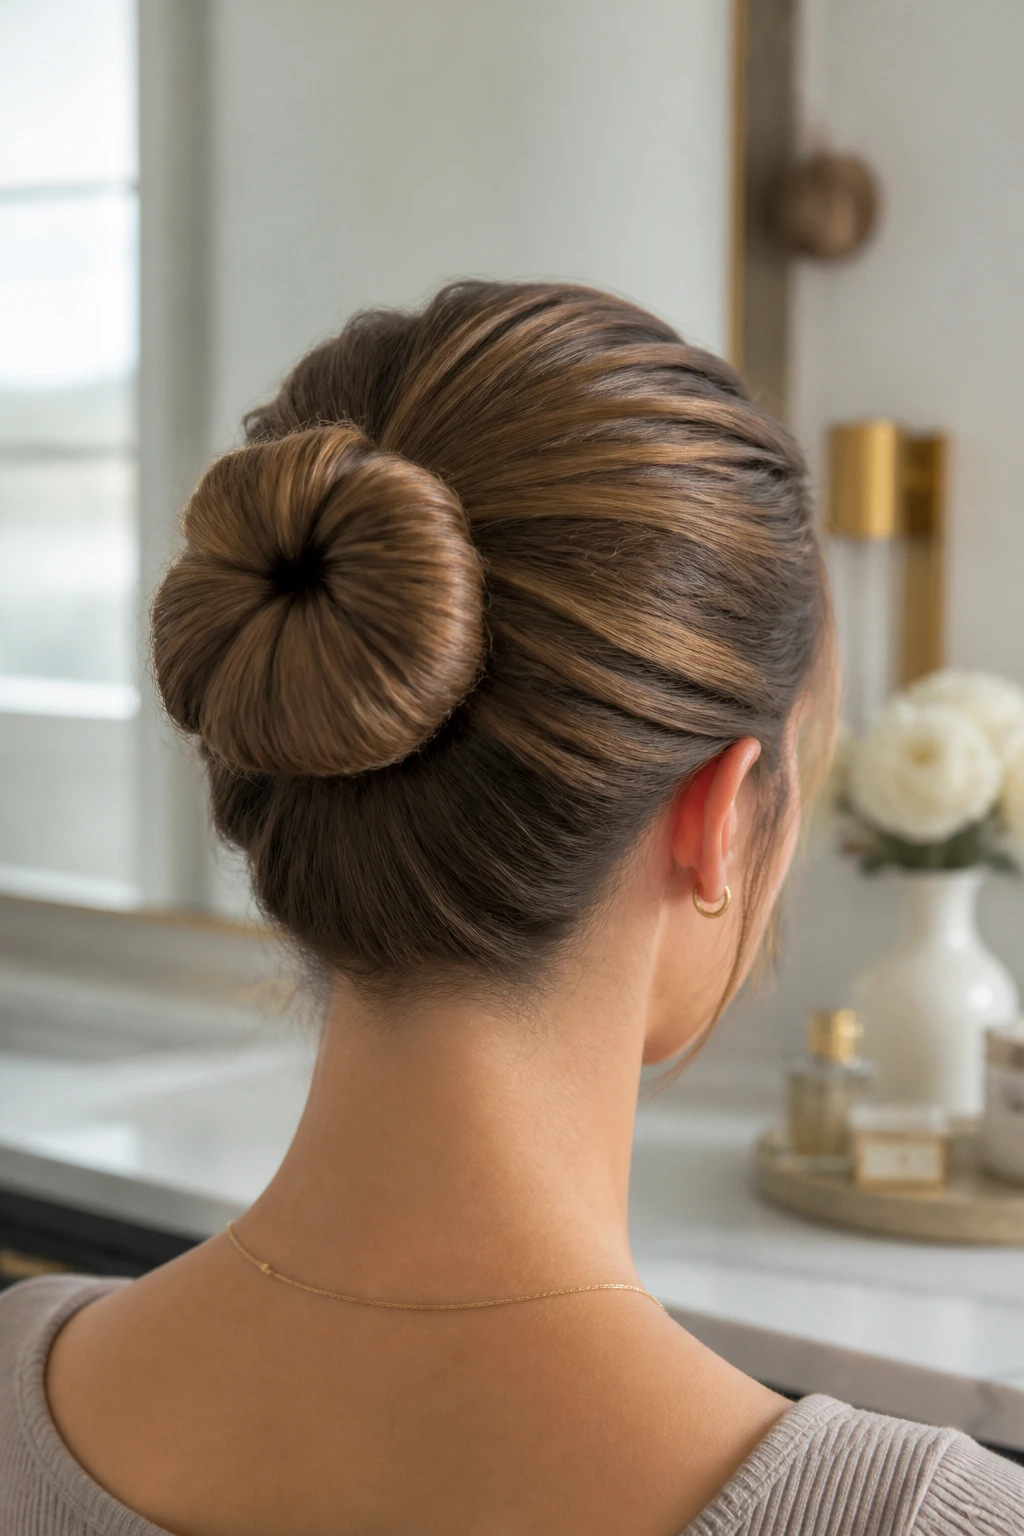
A bun donut is not cheating. It’s structure.
Short hair often needs a little padding to create a shape that reads as a bun instead of a tucked nub. A small donut, a rolled foam ring, or even a thin makeshift cushion under the hair gives the style the roundness it can’t always make on its own. The key is scale. Use a small donut, not a giant one, or the padding will show through.
This style is useful when you want height and fullness for an event but your hair stops short of wrapping cleanly around itself. Pull the hair over the padding in sections, pin as you go, and smooth the surface only at the end. If you smooth too early, the bun can go flat before it’s even finished.
It’s a little more work than the micro bun, sure. But the shape is worth it.
12. The Rope-Twist Bun
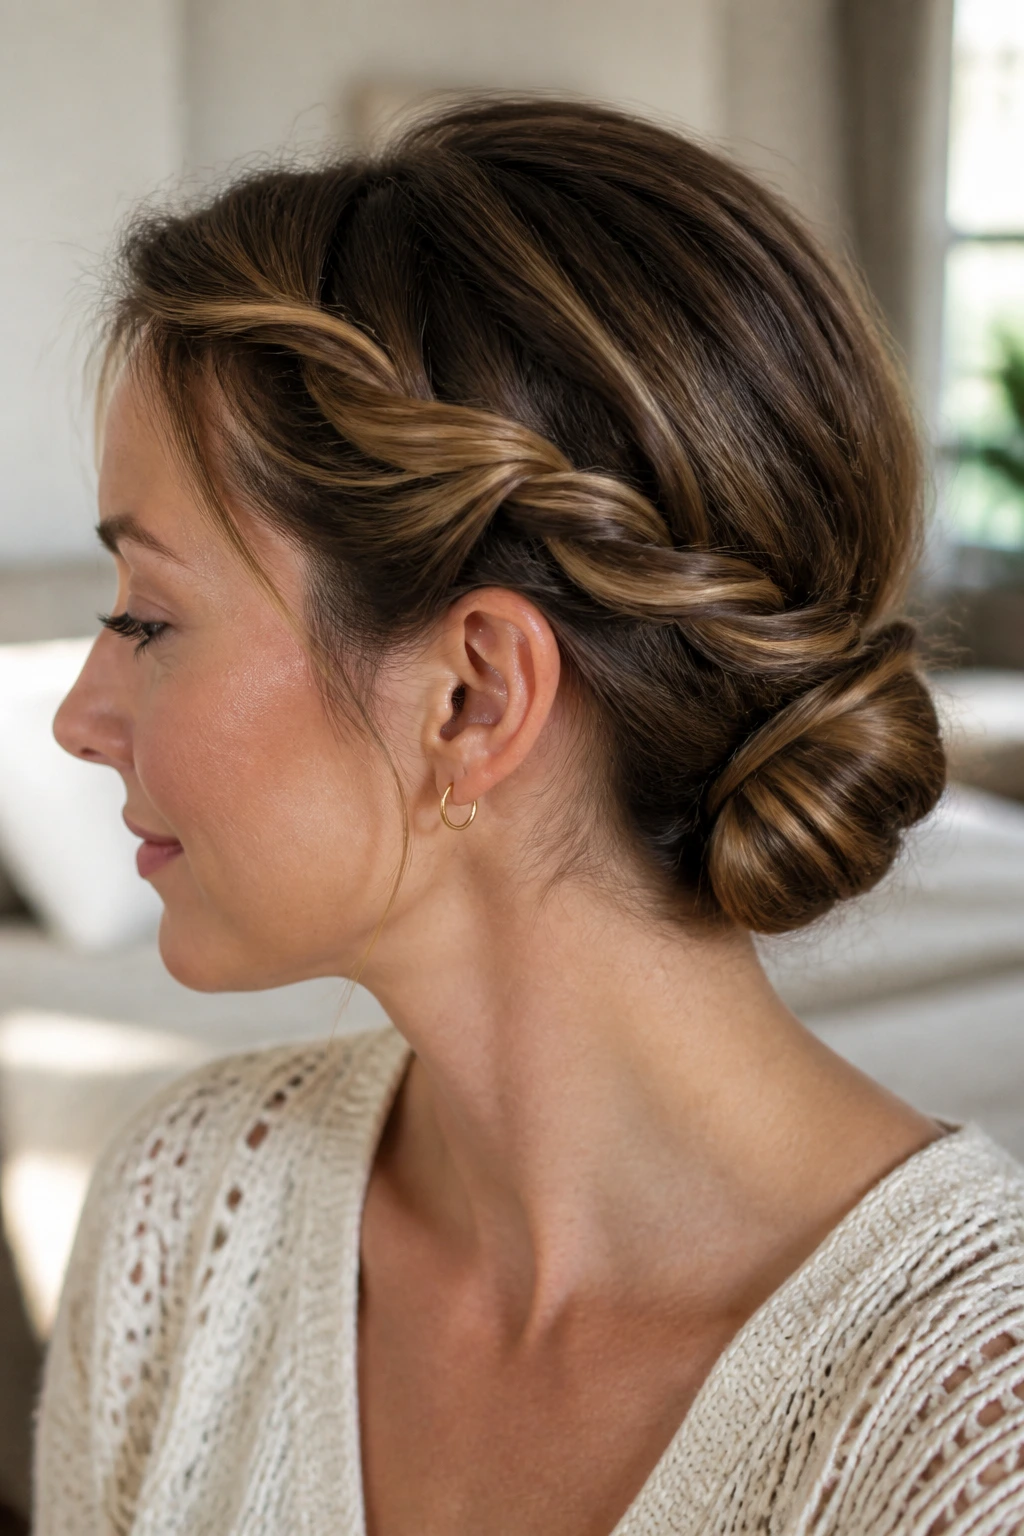
Compared with a loose three-strand braid, a rope twist gives short hair a tighter, more contained line. You split the hair into two sections, twist each one in the same direction, then twist them around each other in the opposite direction. That ropey shape wraps into a neat bun with less fuzz at the edges.
What makes it different
Rope twists compact the hair without flattening all the texture out of it. That makes them useful on hair that slips when it’s too smooth, but also looks bulky when it’s too teased. The twist gives the bun a little tension, and tension is what keeps short hair from exploding outward.
This style looks especially good if you want a low knot that feels a bit more polished than a messy bun. Use a light serum on the ends, not the roots, or the twist can slide apart before you finish pinning.
13. The Loop-and-Tuck Bun
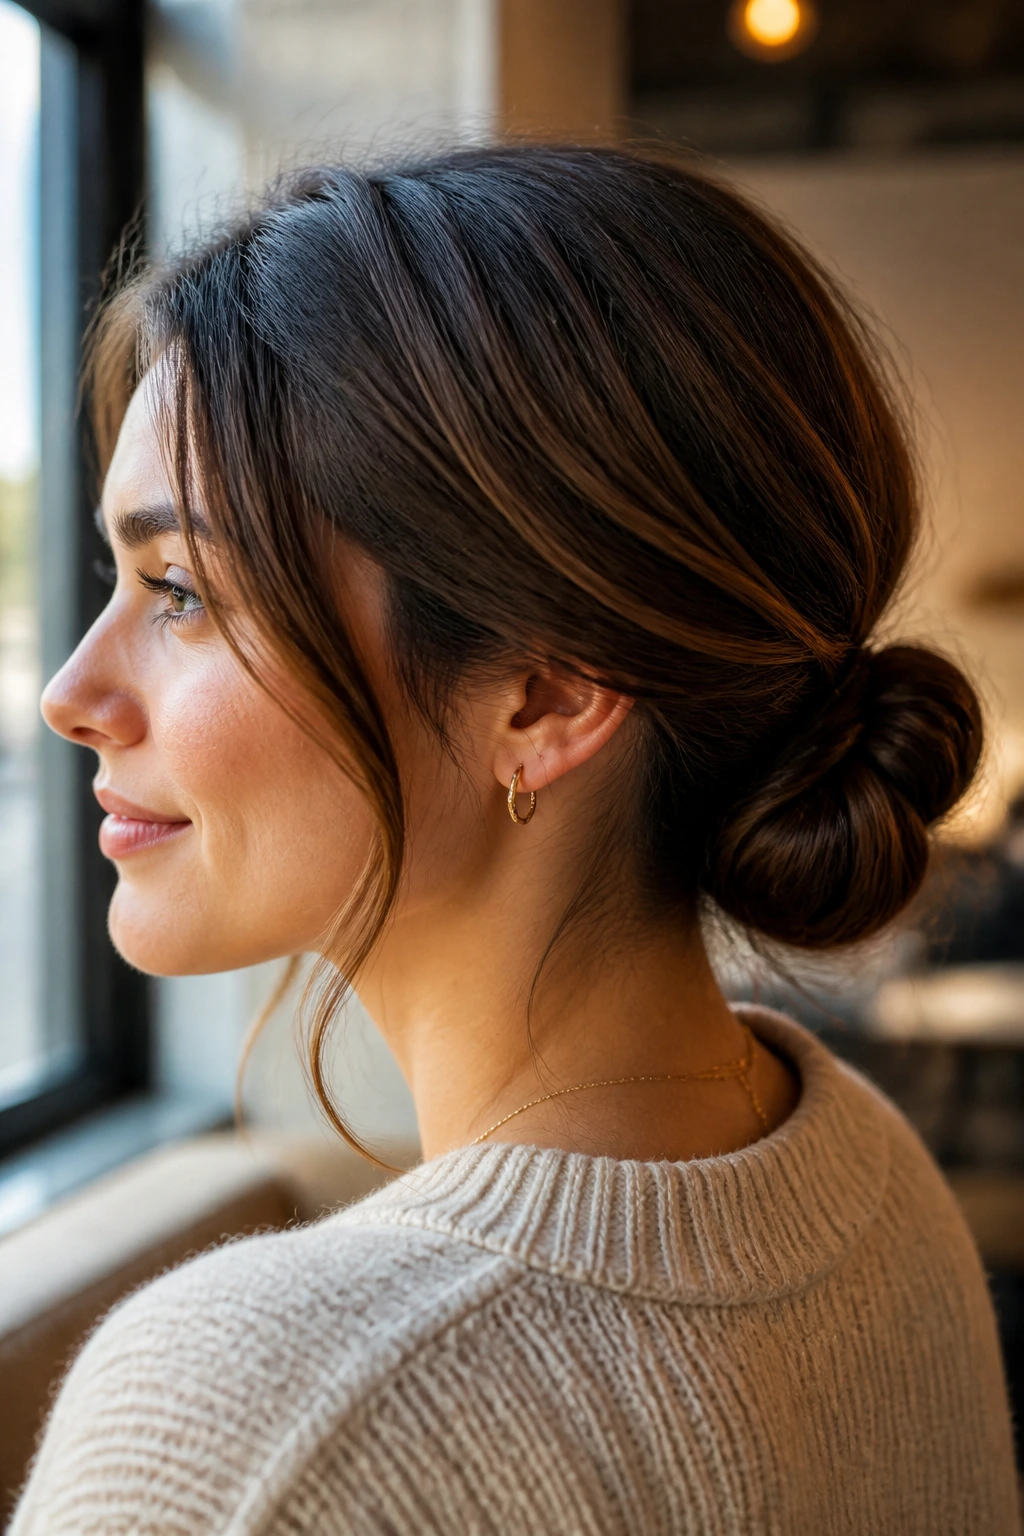
The loop-and-tuck bun is the cleanest shortcut on this list. You gather the hair into a low ponytail, pull it partway through the elastic on the final wrap, then tuck the remaining ends into the loop and pin them flat underneath. That’s it. No drama.
It works because the loop creates a pocket for the ends to hide in. Short layers have fewer places to escape, and the result often looks neater than a more complicated bun that’s trying too hard. I especially like this on lobs that are just shy of full bun territory. The loop gives the style a finished edge even when the lengths are a little awkward.
If you want more shape, tug the loop outward slightly before pinning. If you want a sleeker finish, keep the loop tighter and flatter against the neck. Same method. Different mood.
14. The Curly Puff Bun
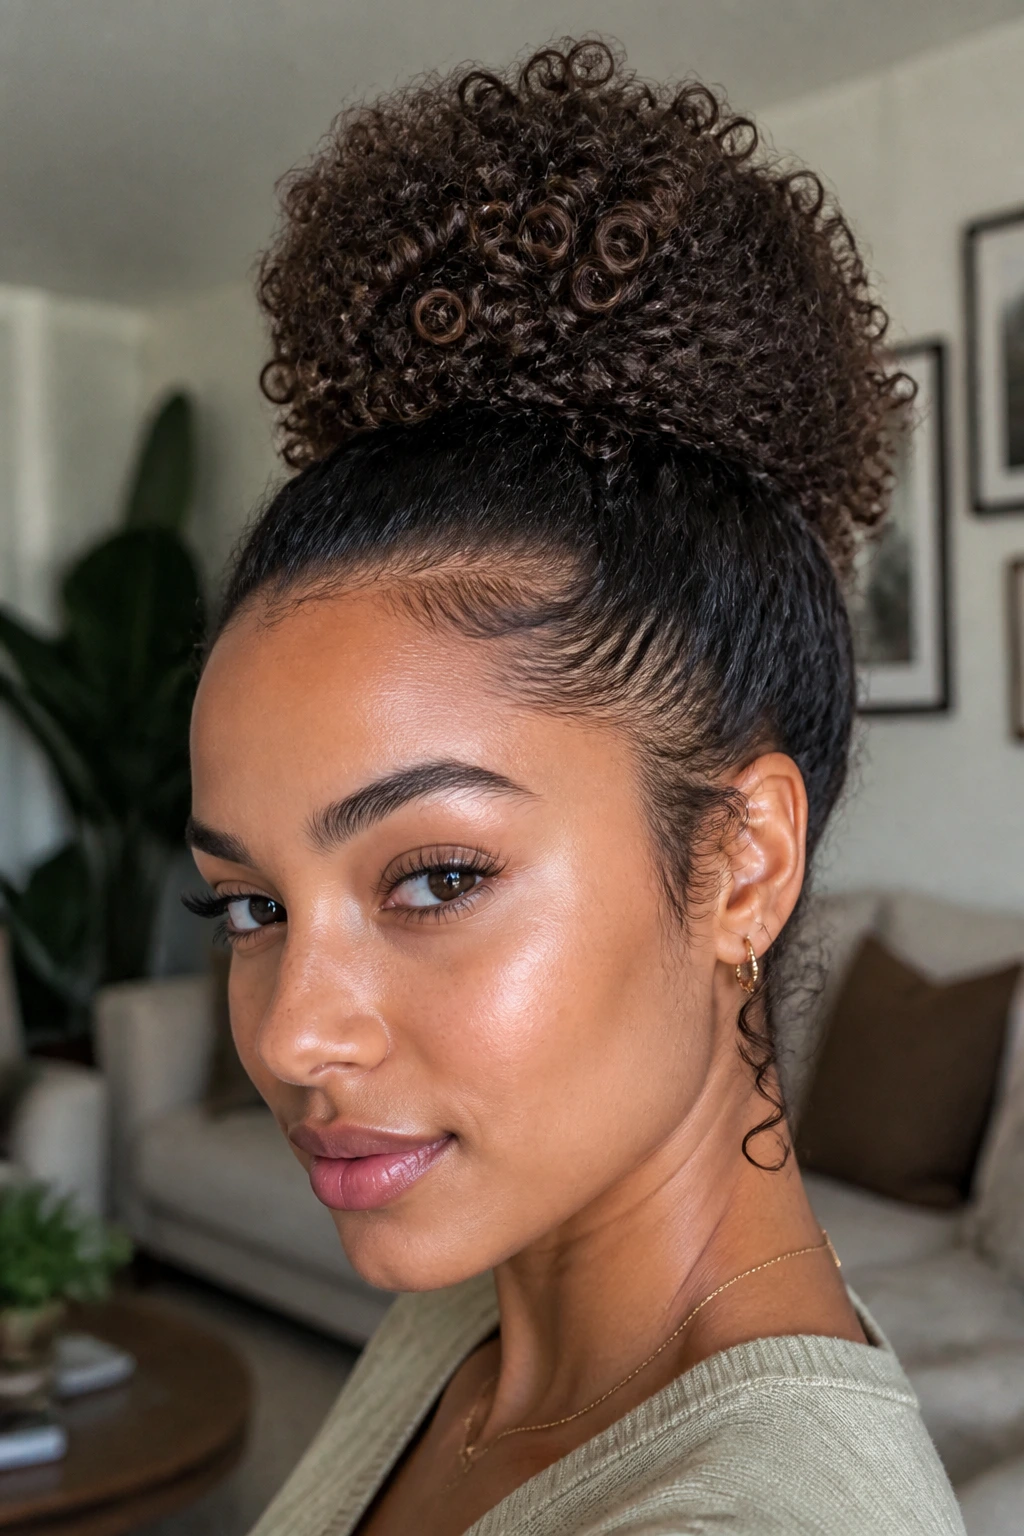
Curly hair brings its own architecture, and the curly puff bun respects that. Instead of brushing the curls into a smooth knot, you gather them gently and let their natural spring create the bun’s body. The result is round, textured, and much less likely to collapse than a style that forces curls into straight-hair behavior.
The best version starts with curls that have been refreshed, not crushed. Use a bit of water or leave-in on the outer layer if the curl pattern needs waking up, then gather the hair low or mid-height and secure it with a soft elastic. Pin the ends where they want to sit rather than fighting them into a shape they won’t hold.
For short curly hair, this is one of the easiest wins. The texture fills space that straight hair has to fake. That’s not a compromise. It’s an advantage.
15. The Knotted Bun
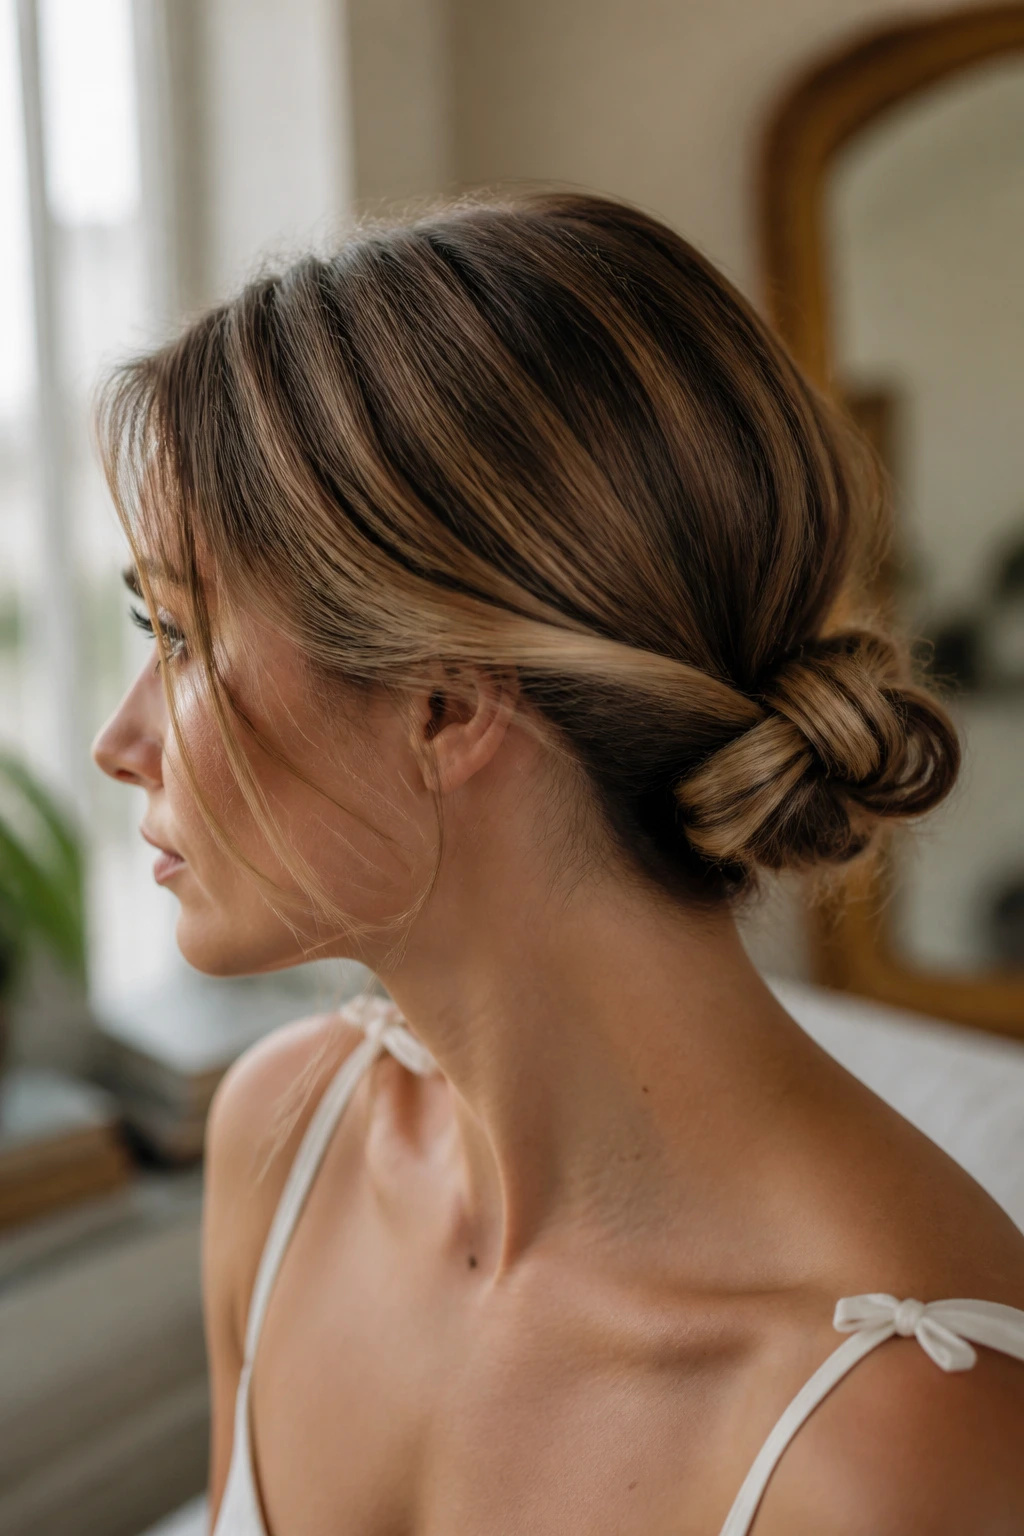
If you can tie a knot, you can make this bun.
The knotted bun starts with two sections that cross over each other once, almost like the beginning of a shoelace knot. The ends are then tucked and pinned into the base. On short hair, that crossing motion gives the bun a built-in hold, which means you need fewer pins than you might expect.
How to wear it
This style lands somewhere between casual and polished. It’s good for layered hair because the knot itself hides shorter pieces, and it’s good for fine hair because the overlap creates a bit of thickness at the center. Keep the knot low and fairly tight if you want it to read tidy; loosen it slightly if you want a softer finish.
One small warning: don’t pull the sections so hard that the knot sits too high on the back of the head. The shape gets awkward fast. Low and centered is the safer move.
16. The Double-Loop Bun
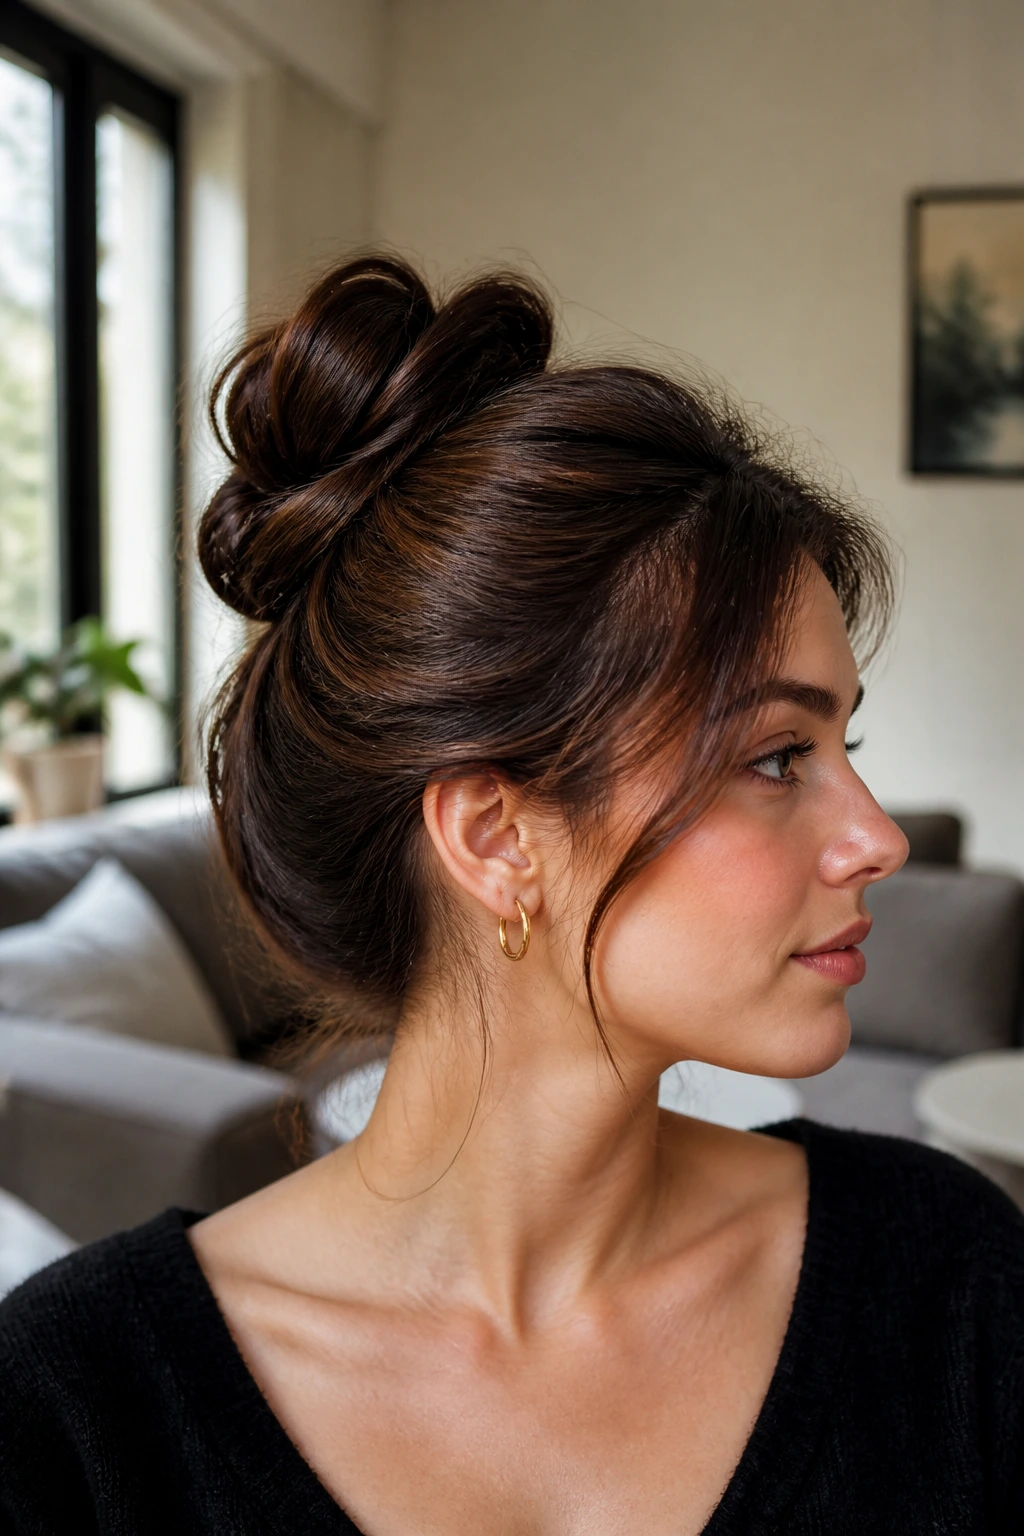
The double-loop bun is a neat answer for hair that’s too short for a single thick coil. You create one loop, secure it, then fold another small section over or under it so the bun appears fuller from the back. It looks sculpted, almost like the hair folded itself into two tidy layers.
This style is one of the better options for fine hair because the loops create the illusion of volume without requiring a lot of actual bulk. The trick is not to stretch each loop too far. If the loops get too wide, the bun starts to flatten and expose the pins.
Keep the center anchored with a clear elastic and use bobby pins only where the loops need support. A little shine spray at the end helps the folds read cleanly, especially if the hair is naturally matte.
17. The Braided Side Bun
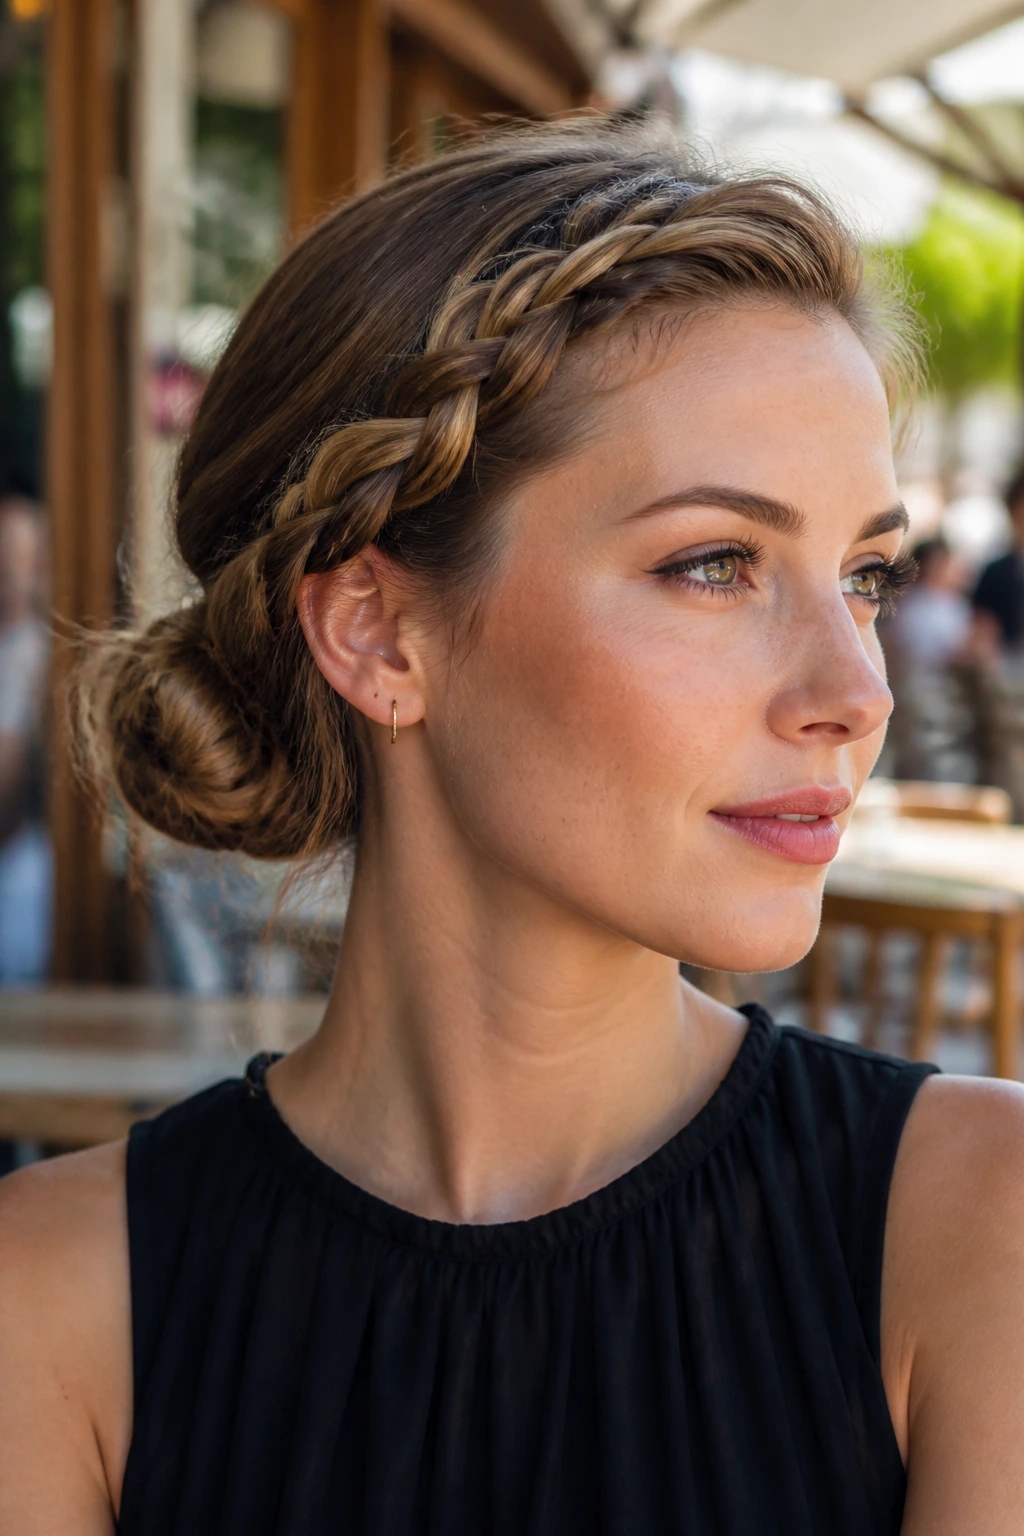
A side braid leading into a bun does two jobs at once: it controls the front and feeds the bun with extra grip. That makes it useful for short hair that has trouble staying smooth around the temple or nape. The braid acts like a handle, and the bun benefits from the extra structure.
I like this version for shoulder-length cuts with layers because the braid helps corral the shorter top pieces. Bring the braid down toward one ear, then gather the ends into a small side bun. Keep the bun low enough that the braid and the knot feel connected, not like separate hairstyles sharing a head.
If you’re styling for something a little dressier, braid tightly and keep the bun polished. If you want a softer look, pancake the braid slightly before pinning it into place.
18. The Face-Framing Loose Bun
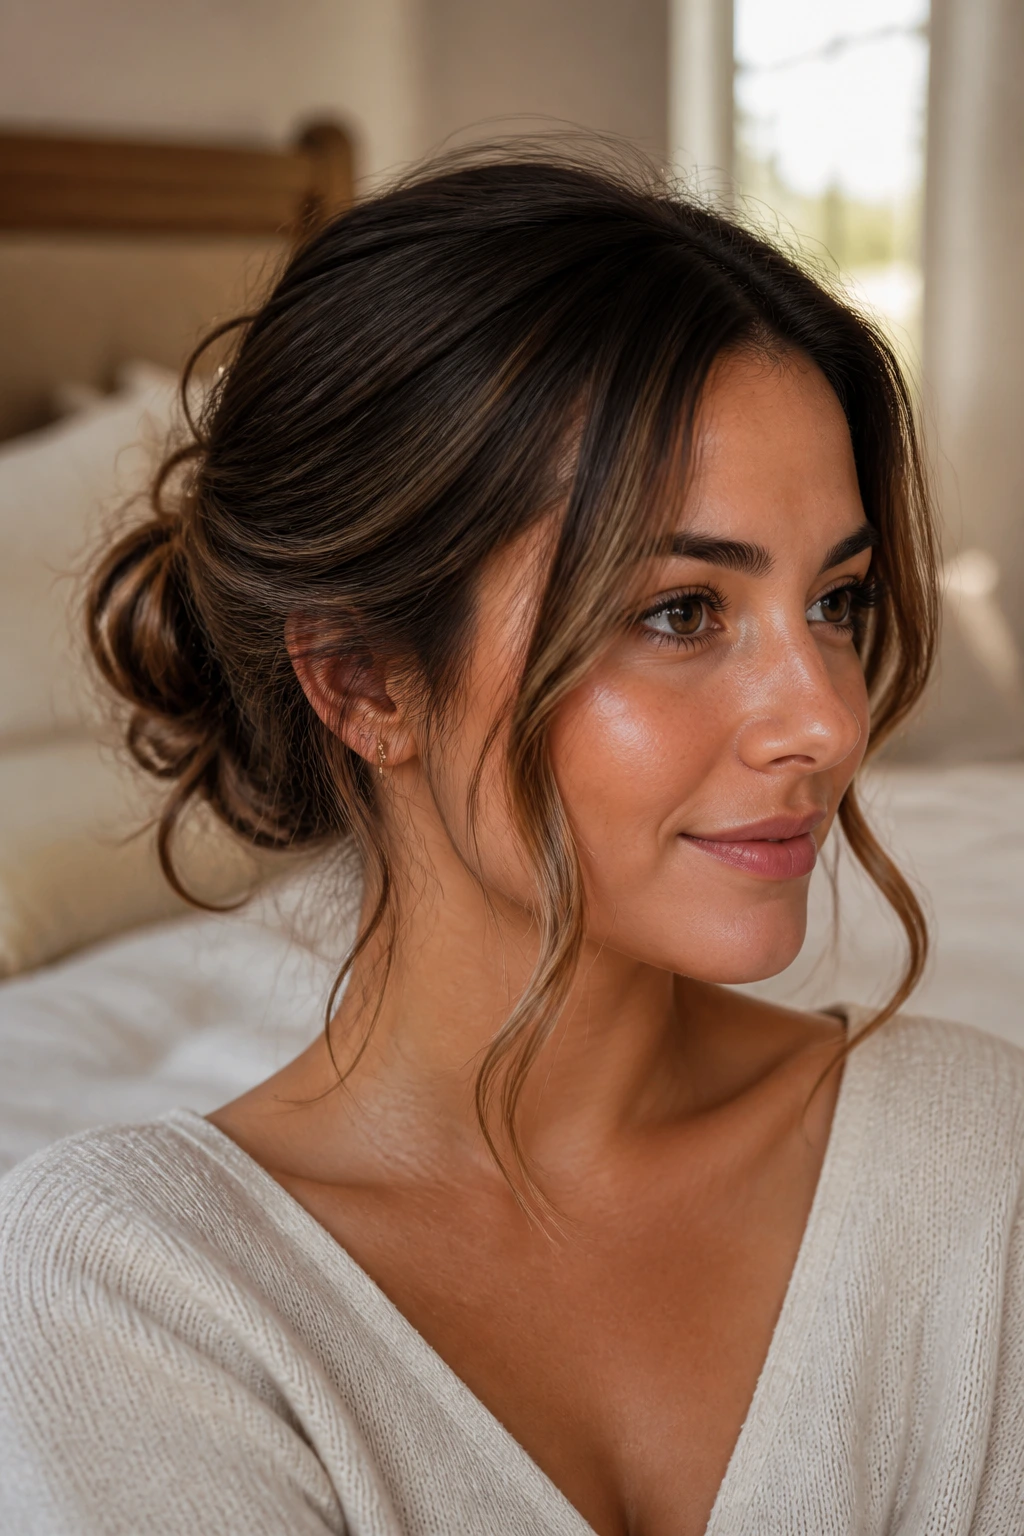
Not every short-hair bun should erase the haircut. Sometimes the best move is to keep the front loose and let the bun sit quietly at the back. This version leaves two or three face-framing pieces out on purpose, which softens the shape and keeps the style from feeling severe.
The loose bun works well on short hair because the free front pieces balance the smaller size of the knot. If every strand were pinned back, the style could start to look too tight around the head. A few tendrils at the temples change that immediately.
I prefer this on hair with some wave or bend, since the loose pieces fall more naturally that way. If your hair is straight, a quick wrap around a curling iron for just the front sections keeps the look from falling flat. Nothing fussy. Just enough.
19. The Clip-In Wrapped Bun
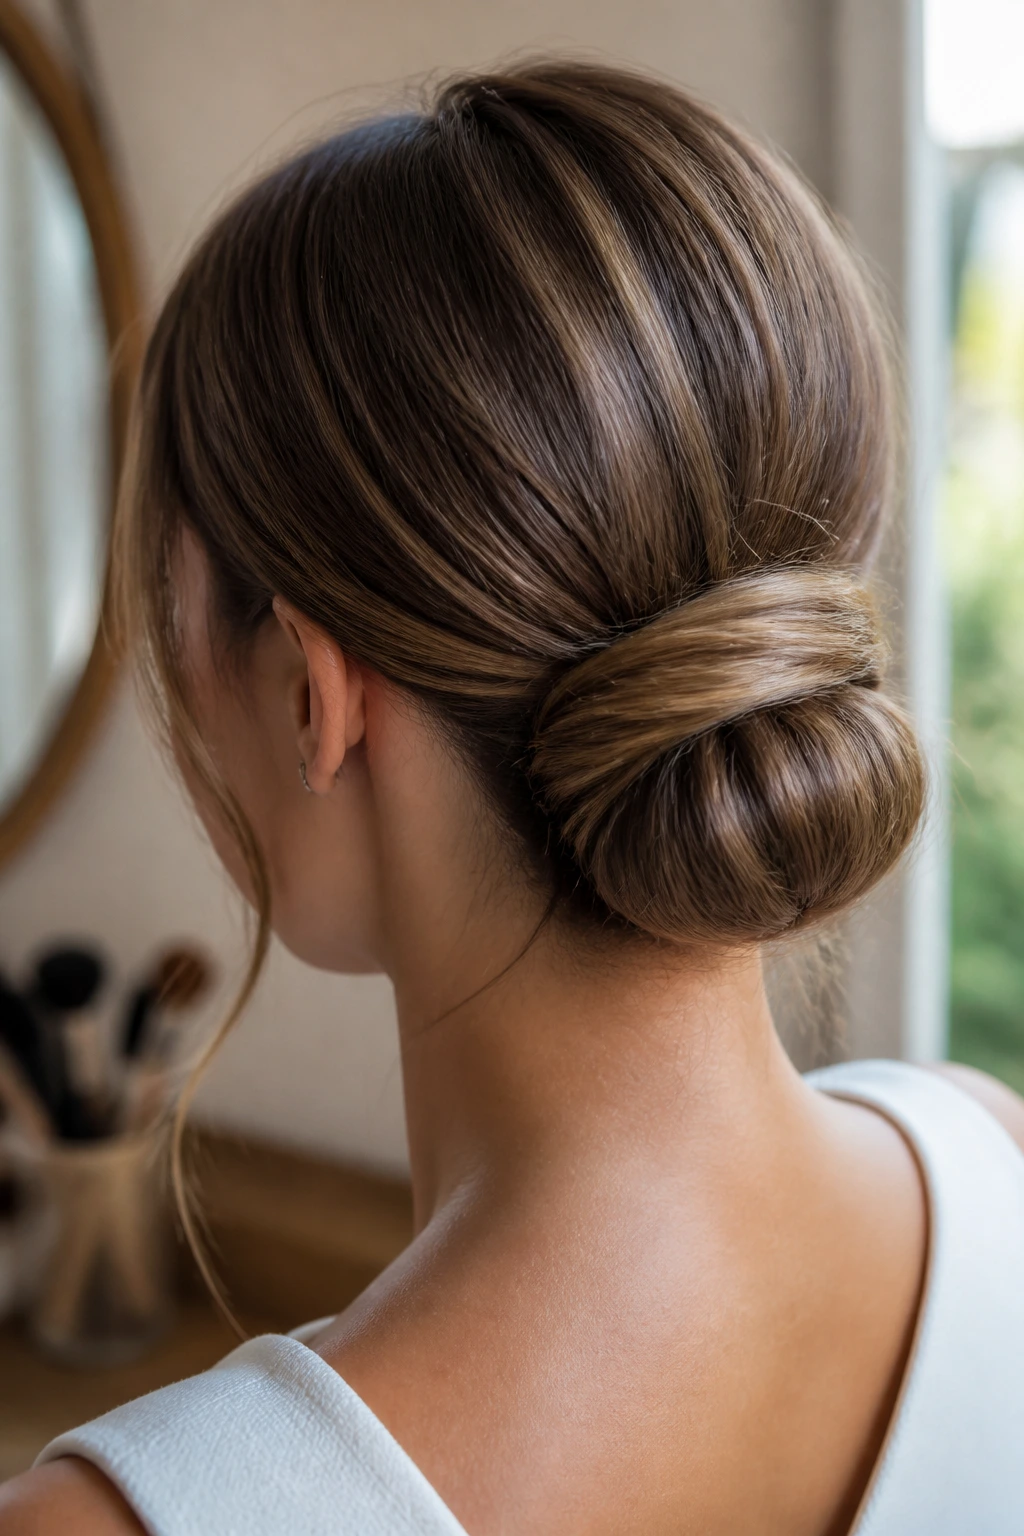
This is the one style on the list that admits a little help can go a long way. A clip-in wrapped bun uses a small extension piece, a ponytail wrap, or a bun wrap to give short hair the length needed for a fuller finish. You’re not building a whole new head of hair. You’re giving your bun enough material to look finished.
The best part is that the wrap hides the join. Once the short hair is pinned into a low base, the added piece can circle the bun and cover the ends that would otherwise poke out. It’s a smart option for weddings, photos, or any moment when a compact bun needs to look a little richer.
If you use clip-ins, match the texture as closely as you can. Straight on straight is easy. Wavy on straight can work too, but the contrast is more obvious if the shine levels are off. A tiny mist of hairspray on both layers helps everything blend.
Why Short Hair Buns Hold Better Than You’d Think
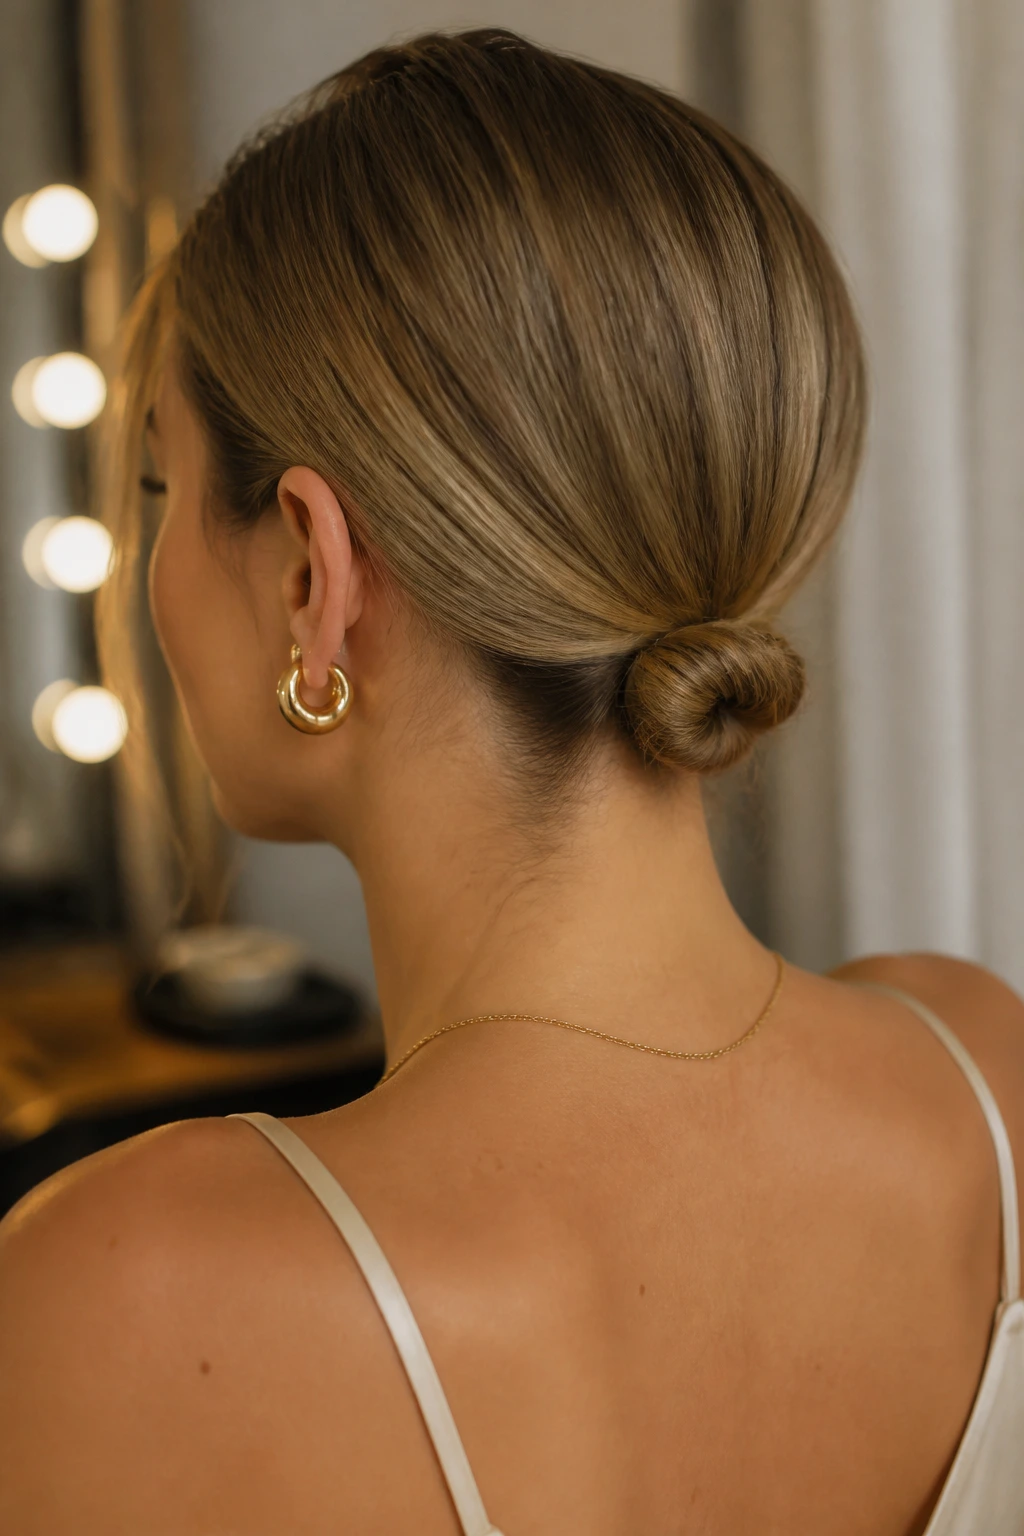
A short bun holds best when you stop measuring it against long hair. That sounds obvious, but people keep forgetting it. Long hair hangs from the bun and drags it down; short hair has less of that pull, so once the base is secure, the style can sit in place for hours without much drama.
The main job is to create anchors. A low elastic at the nape, a few crossed bobby pins, and a section of hair tucked back over the seam usually matter more than the amount of hairspray you spray over the top. If the base is solid, the style survives. If the base is loose, you can coat the whole thing in spray and it will still wobble.
Short layers are the nuisance, not the length. They pop out around the hairline, near the ears, and right above the nape. That’s why so many of these styles either braid the front, twist the sides, or leave a few face-framing bits out on purpose. You’re not hiding the haircut. You’re steering it.
And that is the part I like most. Short hair buns look strongest when they look planned, not forced.
Essential Tools for Bun Hairstyles on Short Hair
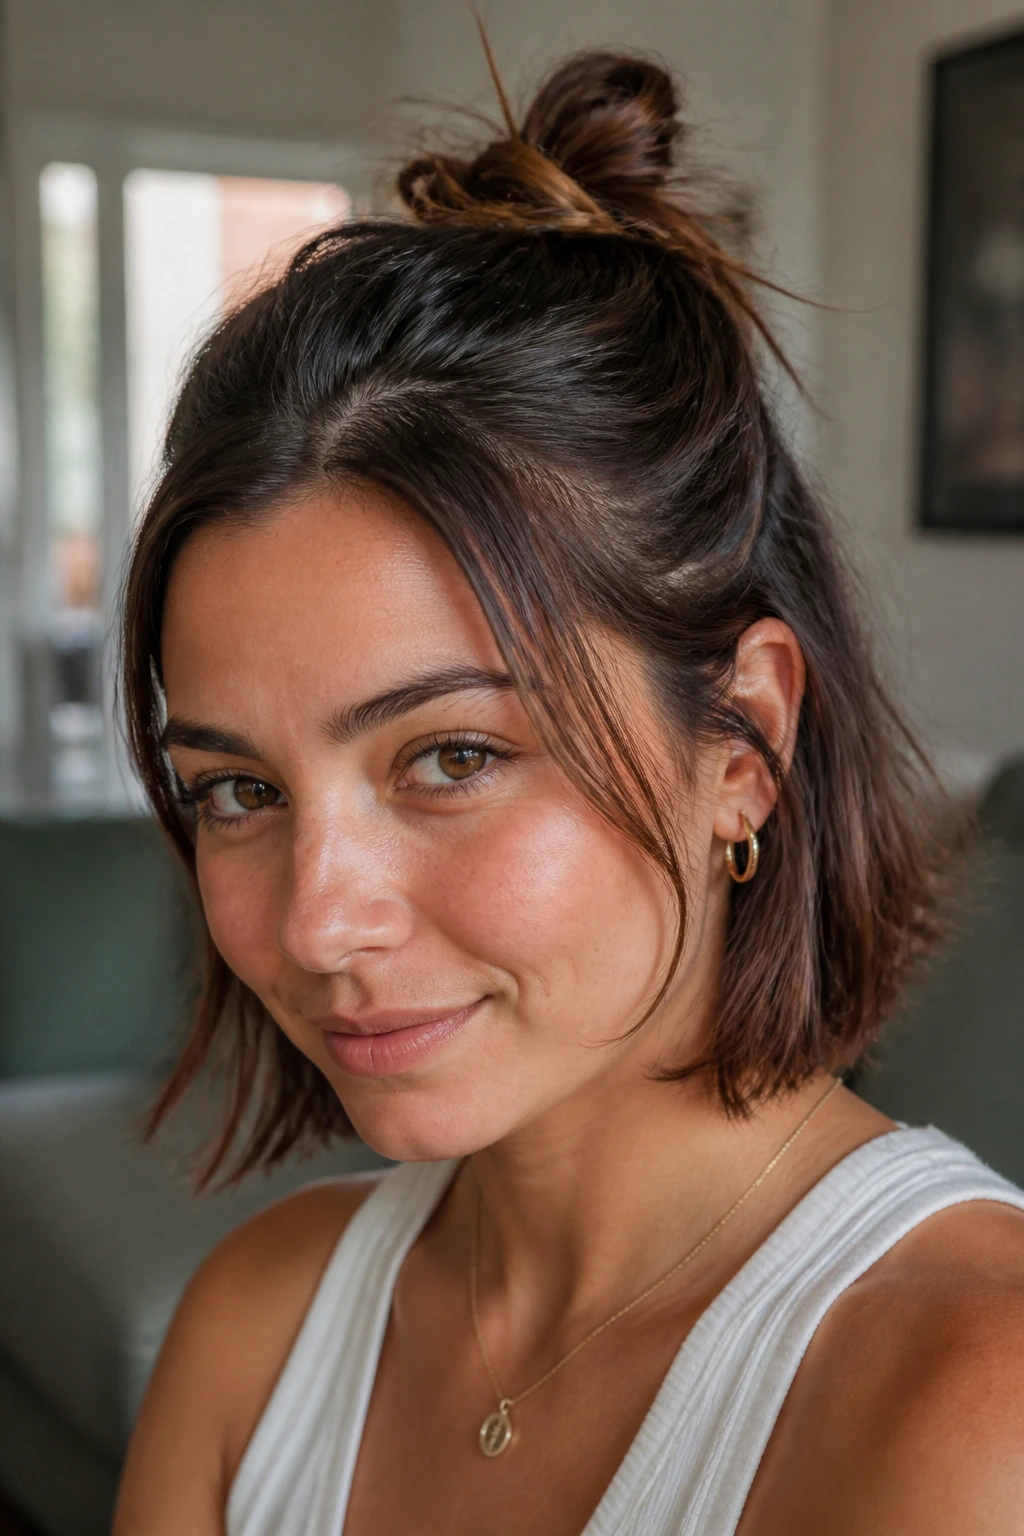
- Bobby pins in two sizes: Small pins grip around short layers and temples; larger pins help pin the core of the bun flat against the scalp.
- U-pins: These are useful for tucked buns and rolled styles because they support shape without crushing volume.
- Mini clear elastics: Better than bulky bands for half-up, loop-and-tuck, and twisted styles.
- Texturizing spray: Gives slippery hair some grit so the bun has something to hold onto.
- Dry shampoo: Handy on clean roots and especially good if the hair looks too soft to cooperate.
- Fine-tooth comb: Best for sleek chignons, French rolls, and side parts that need a crisp line.
- Detangling brush or boar bristle brush: Smooths the surface before you pin without wrecking the sectioning.
- Strong-hold hairspray: Use it at the end, after the shape is built, not before.
- Small claw clip: Great for fast faux buns and twisted nape styles.
- Bun donut or foam padding: Optional, but useful when short hair needs a little bulk for a fuller finish.
- Hand mirror or phone camera: The back of a short bun can fool you in the mirror; check the shape before you leave.
Smart Prep Before You Twist, Pin, or Tuck
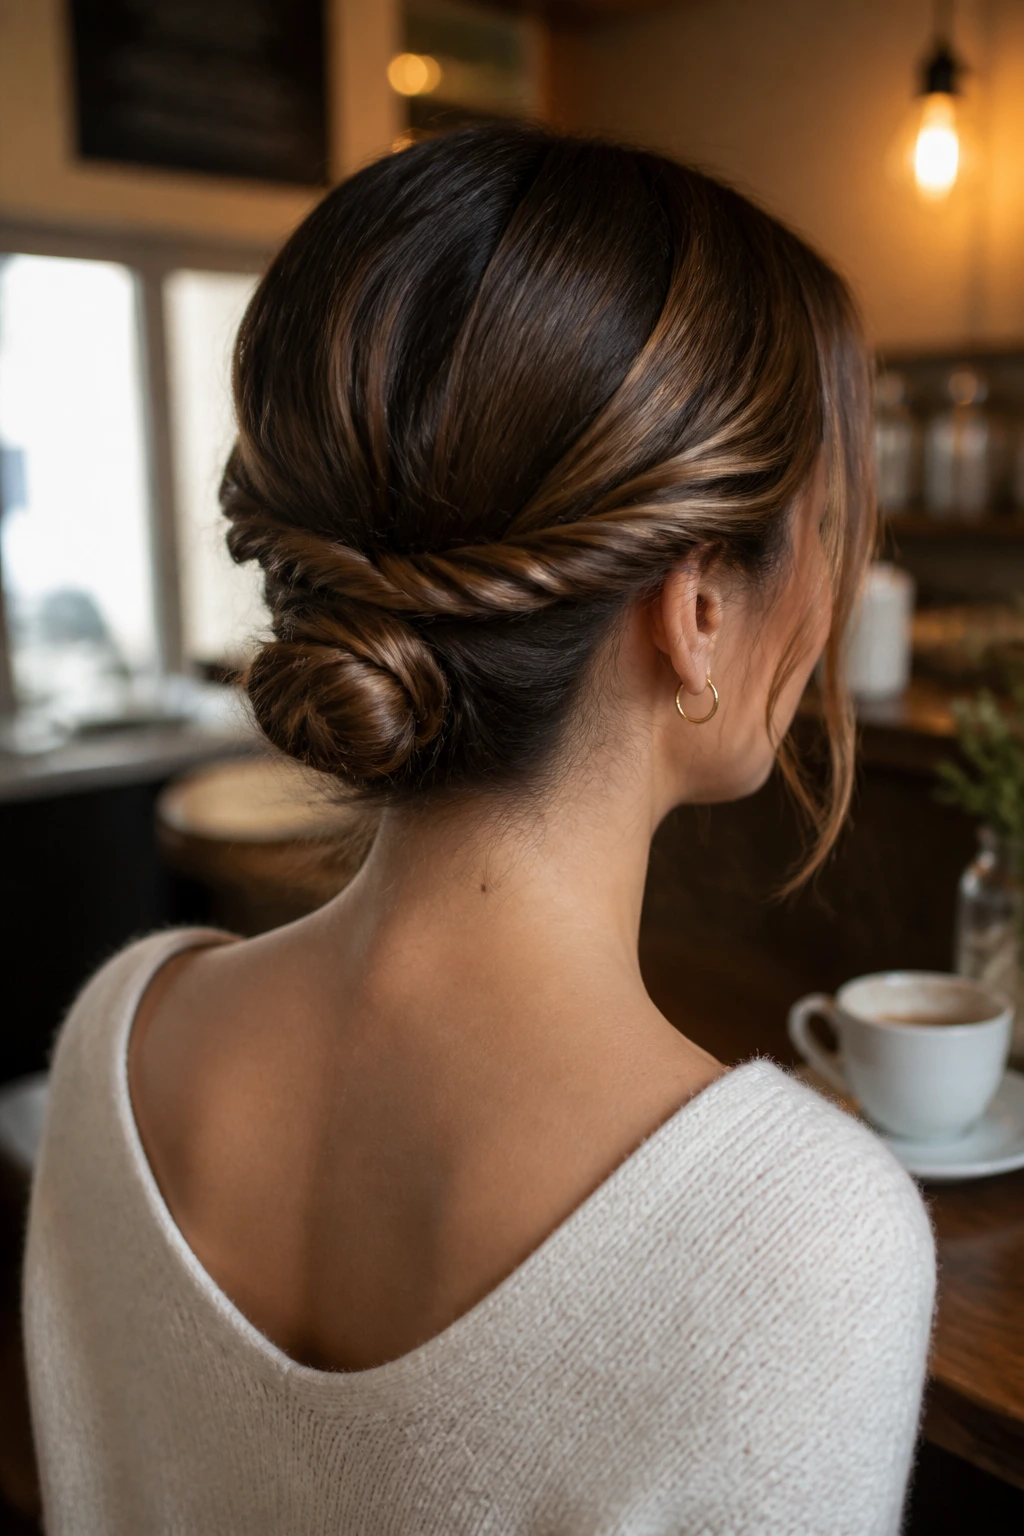
Day-old hair usually wins. Freshly washed hair can work, but it tends to slide around like it has somewhere better to be. If you’re starting clean, rough-dry the roots first and add a little texture spray once the hair is fully dry. That tiny bit of grit changes everything.
For sleek buns, use a small amount of smoothing cream on the mid-lengths and ends only. Too much near the roots makes the base too soft to hold. For messy or pinned buns, skip the smoothing cream and lean into texture instead. You want the hair to remember it has shape.
Sectioning helps more than people expect. A short haircut can look chaotic if you try to gather it all at once. Split off the front pieces, then work the back into the bun first. Once the core is secure, you can decide what to do with the face-framing bits. Leave them out, braid them in, or pin them across the top — but make that choice on purpose.
One practical trick: if your hair gets flyaway-prone, mist your hands with a little hairspray and smooth the surface with your palms instead of spraying directly. It keeps the finish cleaner and avoids that stiff, dusty look that cheap spray can leave behind.
How to Choose the Right Bun for Your Haircut
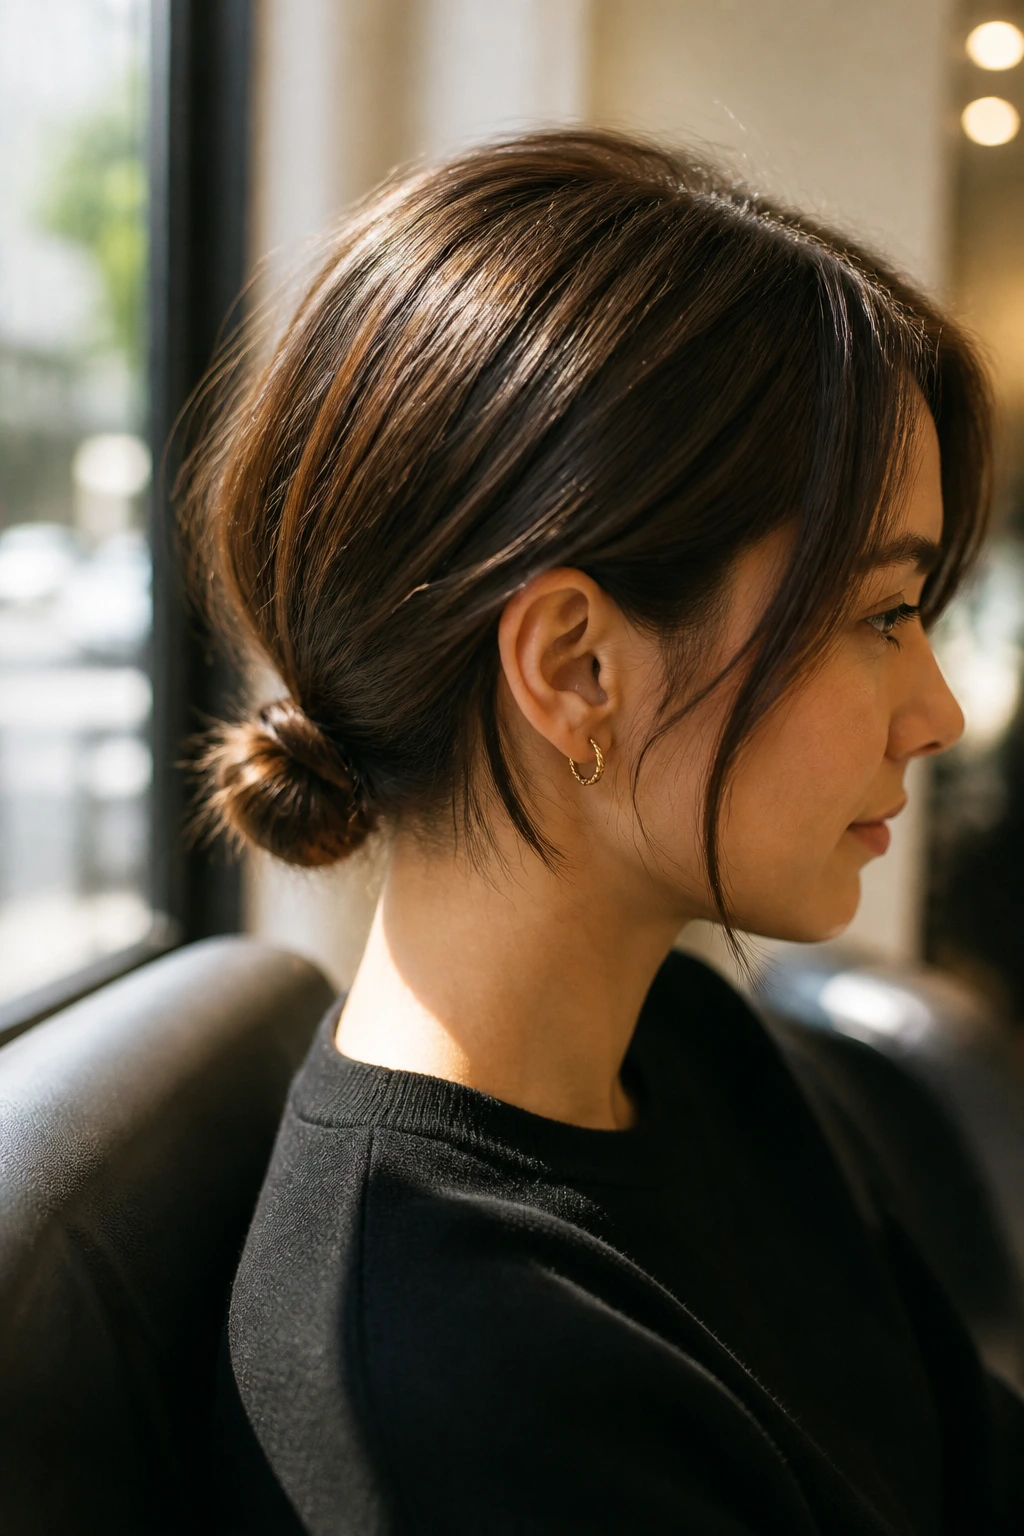
A chin-length bob and a layered lob do not want the same bun. That’s the first split to make in your head.
Chin-length cuts
Reach for the micro low bun, the loop-and-tuck bun, or the faux French roll. These styles keep the length close to the scalp and avoid asking for more wrapping room than the haircut has. Shorter ends tuck more cleanly when the bun stays low.
Lobs and layered crops
Twisted nape buns, braided side buns, and half-up mini buns usually behave best here. The extra length gives you more options, but the layers still need help. Anything that creates structure at the sides is useful.
Curly and wavy hair
The curly puff bun, messy pin-loop bun, and knotted bun make the most sense. They respect the hair’s natural bend instead of flattening it. If you brush curls too hard, the bun can turn fuzzy in a hurry.
Fine or slippery hair
Sleek chignons, rope-twist buns, and donut-padded buns hold shape well. Fine hair needs grip, not volume only. Texture spray, root powder, and a smaller bun size help more than piling on hairspray.
Thick hair
Use styles that divide the load: space buns, braids into a bun, or a loop-and-tuck that keeps the mass under control. Thick short hair can make a bun feel heavy if you try to gather everything into one tight knot.
Small Adjustments That Change the Finish
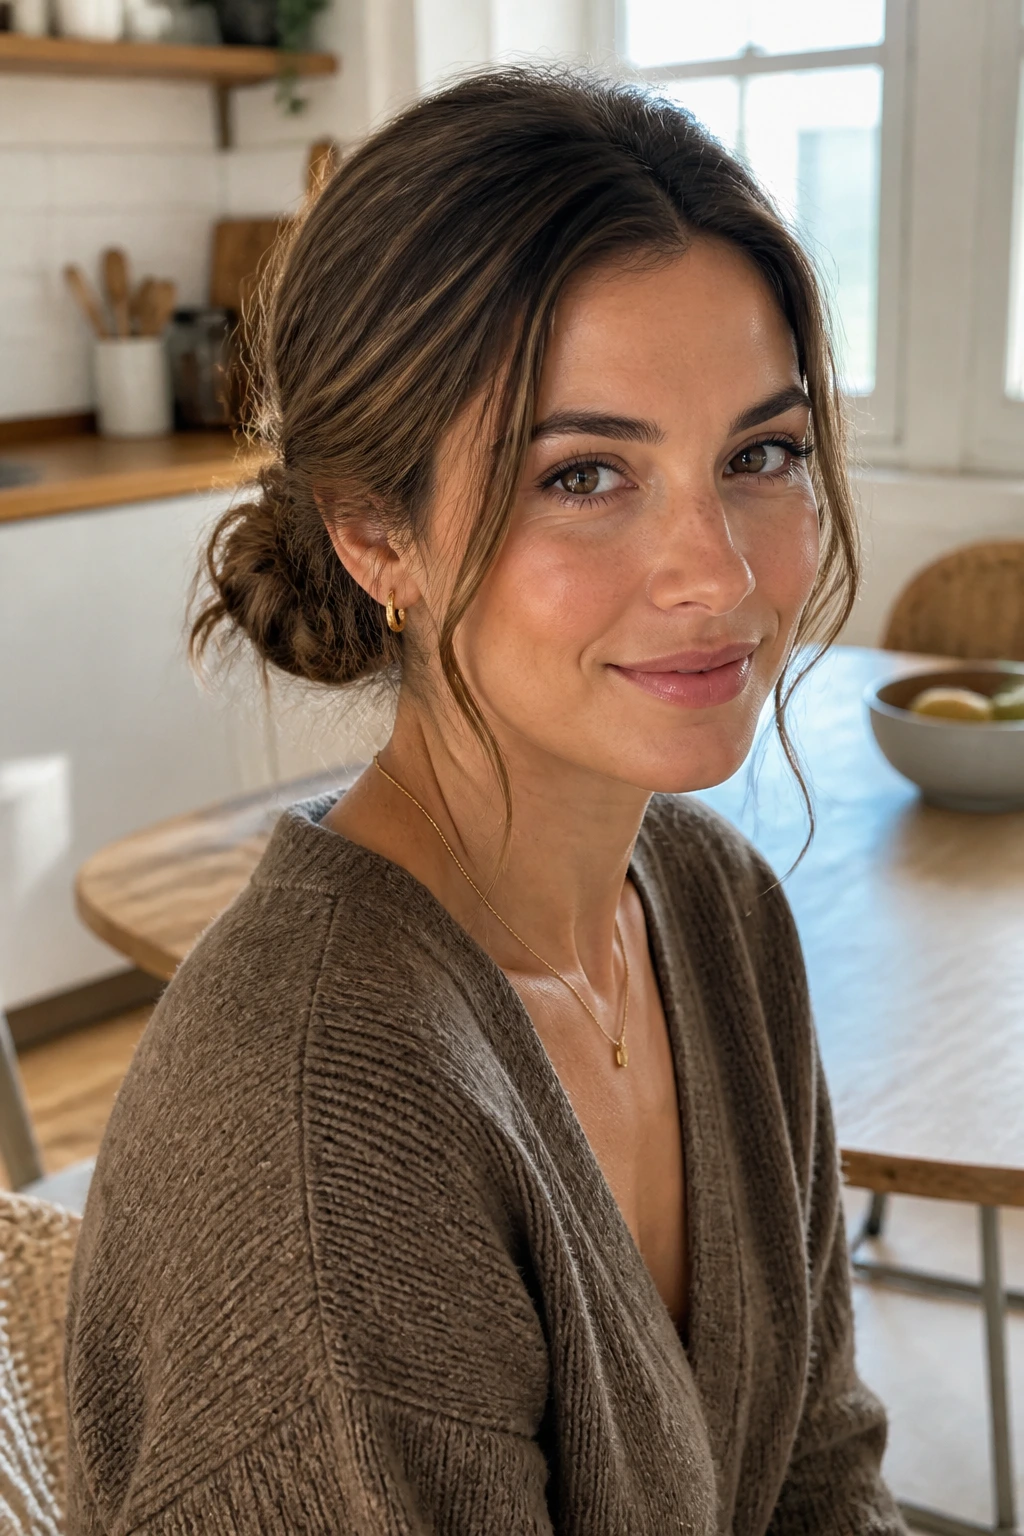
Texture first: If the hair is too silky, mist the roots with dry shampoo and wait 30 seconds before touching the section again. That tiny pause lets the product set instead of turning slick.
Anchor before shape: A tiny elastic at the base gives you a control point. Once that’s in place, the bun becomes much easier to fold, twist, or loop.
Pin the base, not the fluff: Push bobby pins into the denser part of the bun and angle them toward the scalp. Pins sitting only in loose outer strands slide out fast.
Leave one thing imperfect on purpose: Maybe it’s a side tendril, maybe it’s a tucked end that peeks out. A short-hair bun looks more natural when one small detail is soft instead of sealed shut.
Use less product than you think: Heavy spray makes short hair crunchy before it’s even set. Build the shape first, spray second, touch it last. That order matters.
Common Mistakes That Make Short Hair Buns Slip
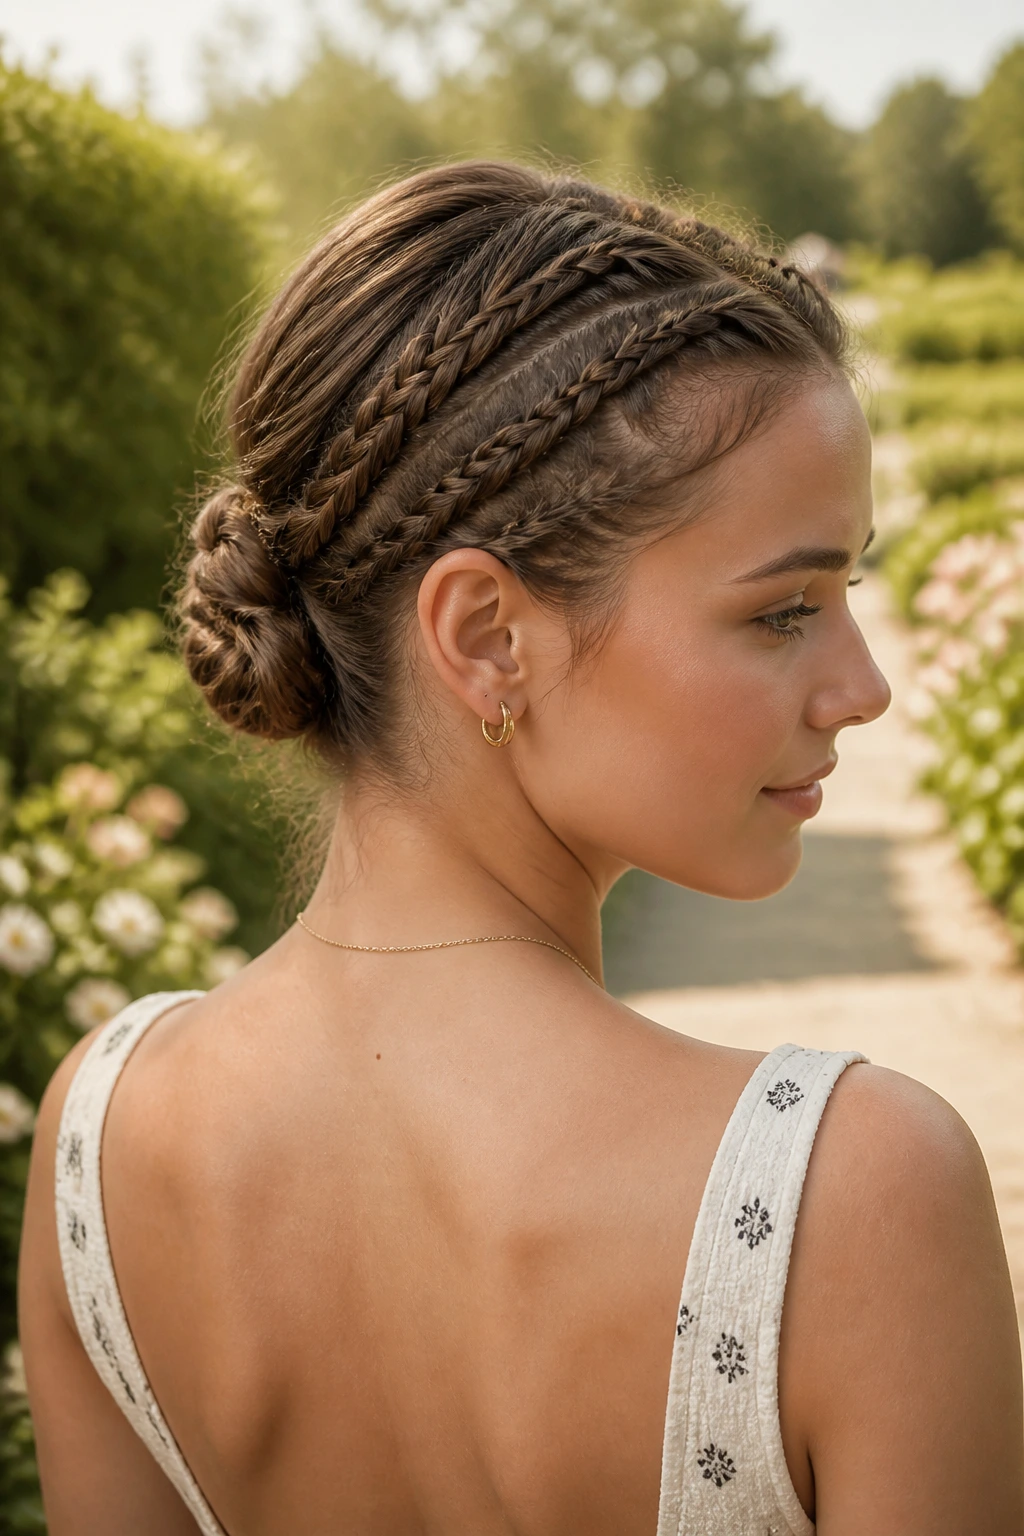
- Using hair that’s too clean and too soft. The bun looks smooth for five minutes, then the sections start sliding out. Fix it by adding dry shampoo or texture spray before you gather the hair.
- Trying to force every layer into the bun. Short face-framing pieces often pop free because they were never meant to go in. Either braid them in, twist them back, or leave them out with intention.
- Placing the bun too high for the length you have. A high bun on a short cut can expose the ends and make the style unstable. Move it lower, closer to the nape, and the hold usually improves.
- Relying on one elastic and calling it done. An elastic starts the shape; pins finish it. Without the pins, the style can droop the moment you move your head.
- Spraying before the shape is built. Hairspray on unpinned hair just freezes the chaos in place. Build first, spray after, and use only enough to set the surface.
- Pulling too hard on the top. Over-tightening creates bumps and scalp tension, and it can make short layers separate from the bun instead of joining it. Firm is enough.
Variations and Adaptations to Try
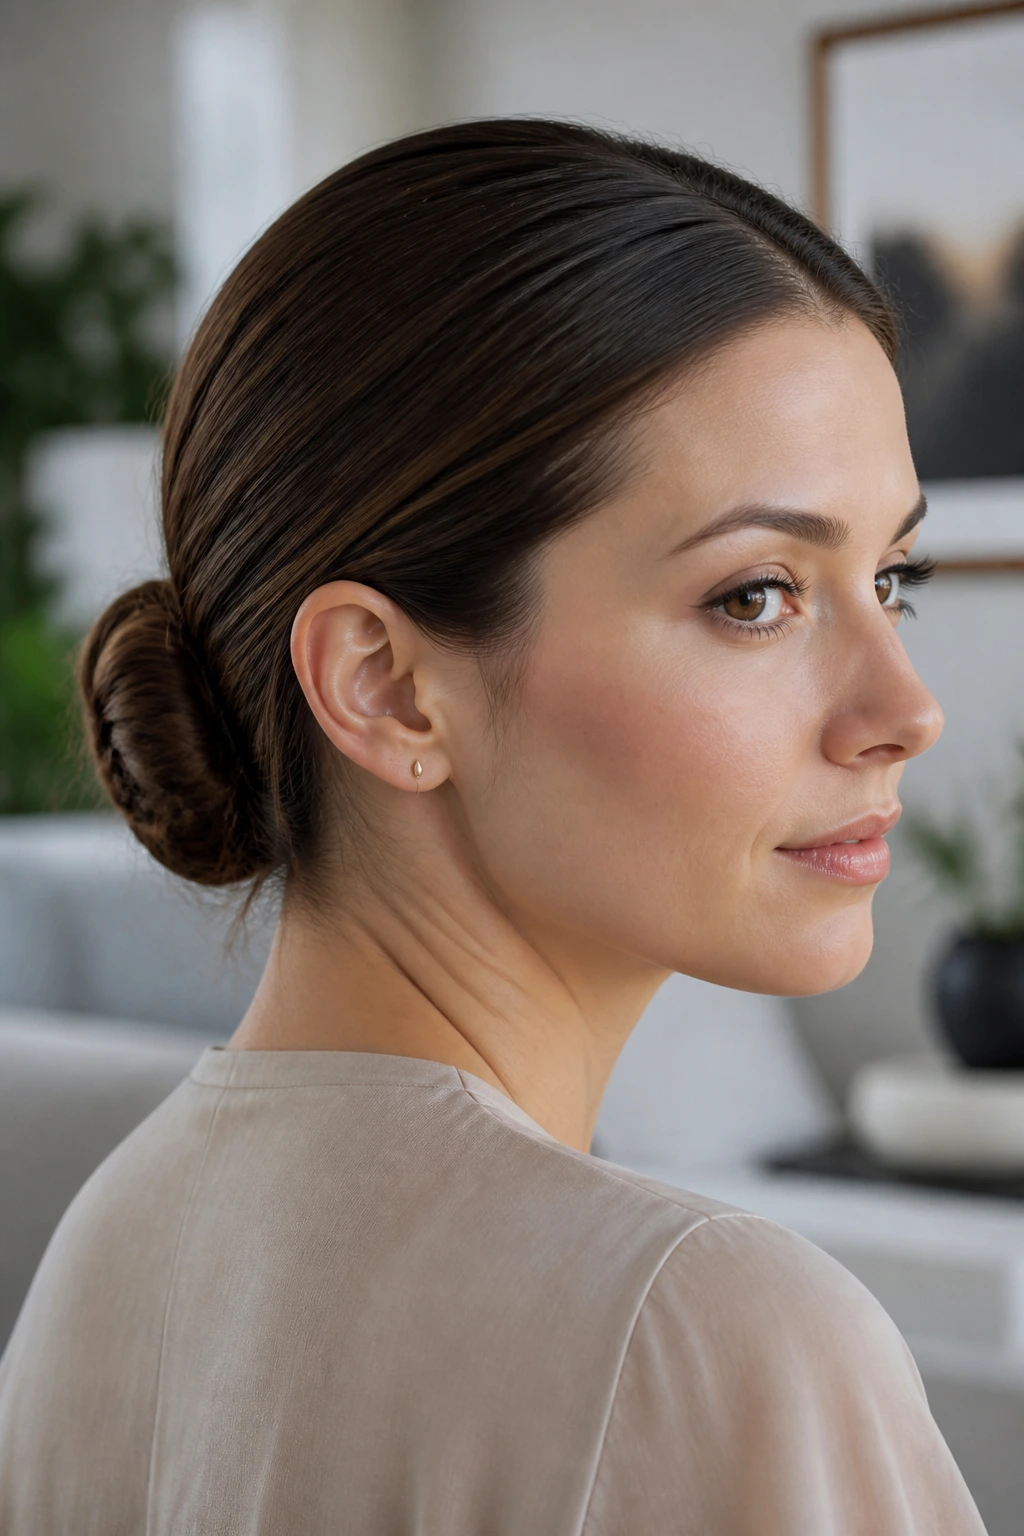
The Fine-Hair Grip Bun: Add texturizing spray from roots to mid-lengths, then backcomb only the underside of the crown before pinning. This gives the bun a little extra body without making the top look teased.
The Curly-Set Bun: Keep the curls in clumps, use a soft elastic, and pin around the curl pattern instead of flattening it. This keeps the bun rounded and stops frizz from taking over.
The Sleek Office Bun: Smooth the hair with a fine comb and a small amount of gel, then set the bun low and centered. It’s clean enough for a dress code, but still works on a bob that would never support a big knot.
The Fullness-Fake Bun: Use a small donut, a bun shaper, or a clip-in wrap to build volume. This is the easiest path when you want a more formal shape but your ends stop short of the ring.
The Heat-Free Soft Bun: Let the hair air-dry in loose bends overnight, then twist it into a low bun the next morning. The natural bends make the style look softer, and you skip the flatness that straight-dried hair sometimes has.
Keeping the Shape Fresh Through the Day and Overnight
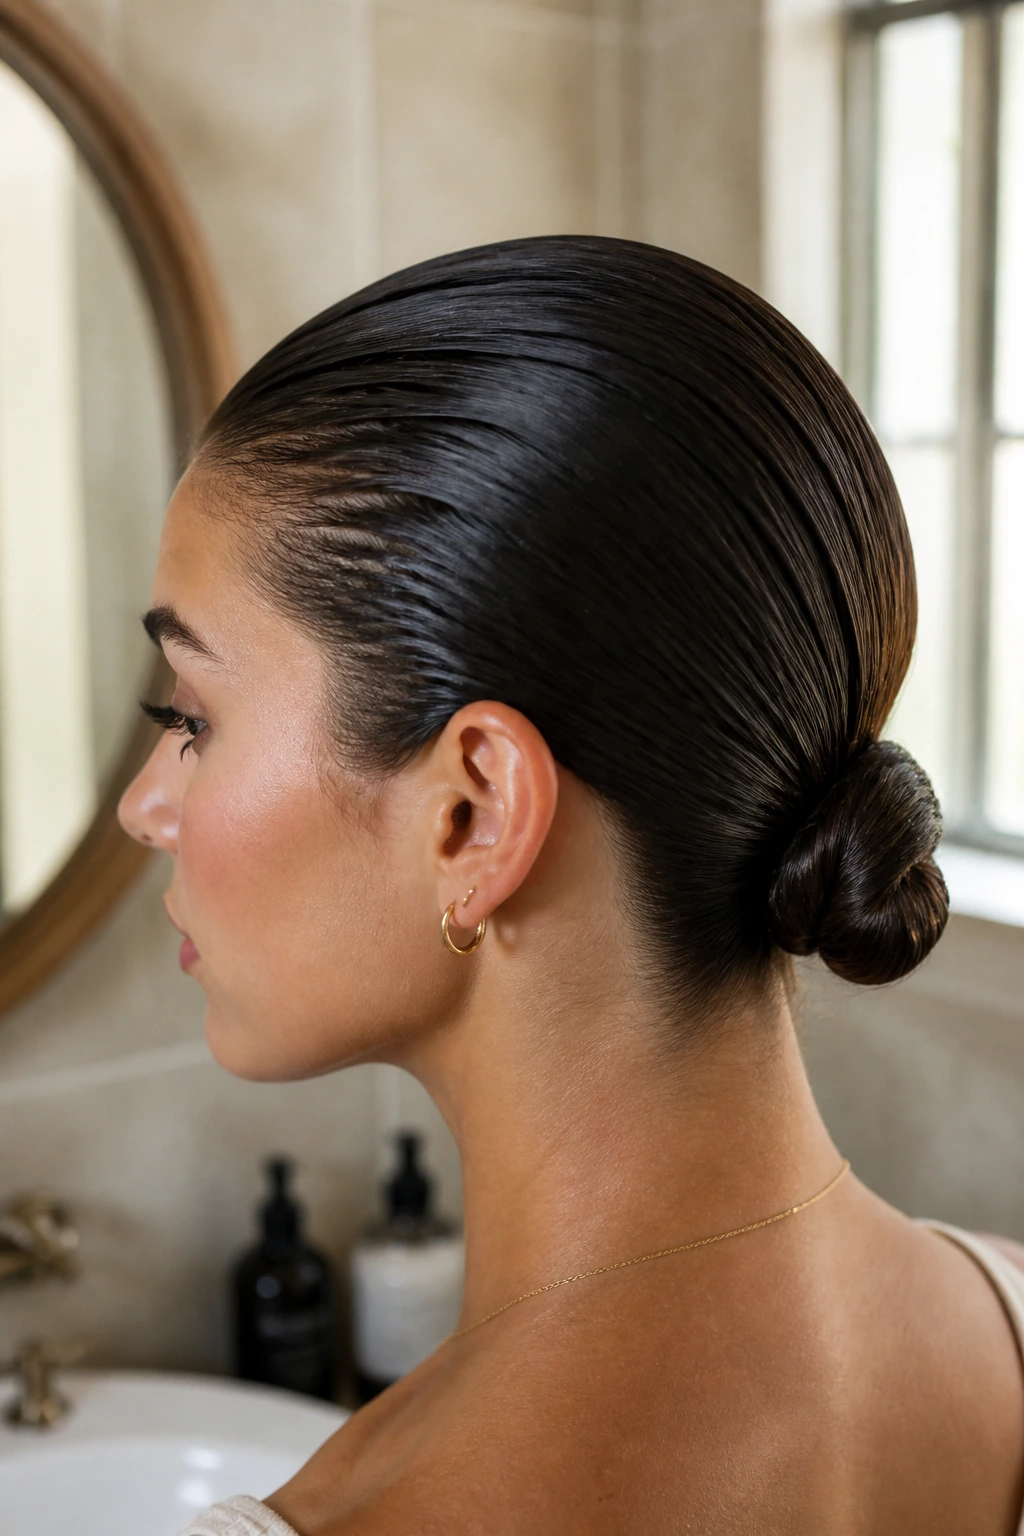
A short bun usually holds better than people expect, but the weakest point is almost always the front and the nape. If you need the style to last all day, check the pins after a few hours, especially if you’re moving between heat, humidity, and indoor air conditioning. That combination loosens even a good bun.
For overnight wear, loosen anything that feels tight before bed. A silk or satin pillowcase helps reduce friction, and a loose scarf over the hairline keeps shorter pieces from frizzing up. If you sleep in a micro bun or loop-and-tuck style, keep the pins in place but release any tugging tension at the temples.
The next morning, don’t brush it all out and start over unless you have to. A light mist of water on the face-framing pieces, a little dry shampoo at the roots, and one or two pin adjustments often restore the shape faster than a full remake. If the bun has flattened, lift it gently at the crown with your fingertips and re-pin the base lower down.
Short hair buns are rarely a one-and-done sculpture. They’re more like a shape you keep nudging back into place. That’s normal.
Frequently Asked Questions
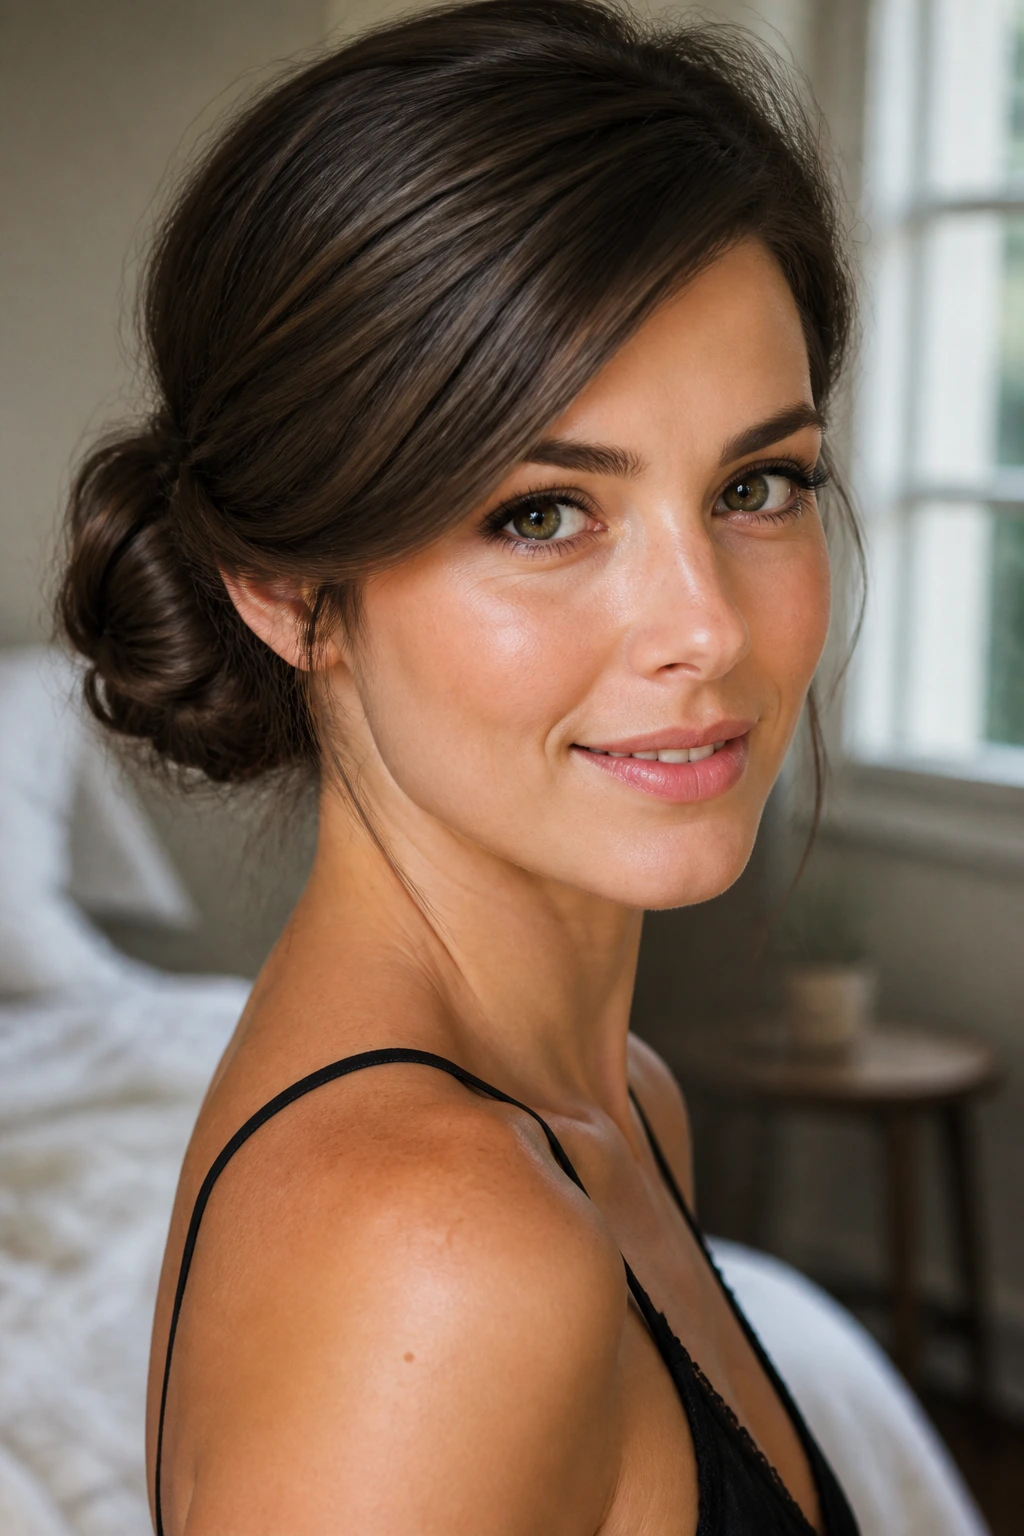
How short can hair be and still make a bun?
Chin-length hair can usually make a micro bun, a loop-and-tuck, or a pinned low knot if the layers aren’t too choppy. Very short crops can still do mini twists or tiny faux buns with a clip, but the style will be more tucked than wrapped.
What’s the best bun for layered short hair?
The twisted nape bun, messy pin-loop bun, and braided side bun handle layers well because they give the short pieces a place to hide. Layers behave better when they’re folded into structure instead of smoothed into a flat surface.
Can I do these styles on freshly washed hair?
You can, but you’ll usually need dry shampoo, texture spray, or a little root lift first. Freshly washed hair is soft and slippery, which makes pins work harder than they should.
Do bobby pins or U-pins hold better on short hair?
They do different jobs. Bobby pins grip the base and hold the shape flat, while U-pins support fuller or rolled buns without squeezing them down. I’d keep both in the drawer.
How do I hide ends that keep sticking out?
Tuck them under the bun’s base and pin them into a denser section of hair, not just the outer shell. If the ends are too short to hide, let a few pieces stay visible and make it look intentional instead of wrestling them into a losing battle.
Which bun styles are best for fine hair?
The sleek chignon, donut-padded bun, and rope-twist bun usually give fine hair the most structure. They rely on shape and tension rather than raw volume, which helps the style stay put.
Can curly hair do these bun styles without becoming frizzy?
Yes, and the curly puff bun is the easiest win. Keep the curls clumped, use a soft elastic, and avoid brushing them out before pinning. Frizz usually shows up when curls are stretched too hard.
How do I make a short-hair bun look fuller?
Use a tiny bun donut, split the hair into two loops, or add a small wrapped extension piece. A little padding goes a long way, but oversized padding will show through and make the bun look like it’s wearing a helmet.
A Little Hair, A Lot of Possibility
Short hair doesn’t limit bun styling nearly as much as people assume. It just changes the recipe, so to speak — less wrapping, more pinning, more texture, more intention. Once you stop chasing the long-hair version of a bun, the shorter versions start looking cleaner, sharper, and more interesting.
The styles that last are the ones that respect the cut you already have. A tiny nape knot, a side-swept twist, a braided crown, or a soft loop-and-tuck can all look more refined than a bun that’s been overworked into collapse. Small can be strong. Small can be polished. Small can also be the thing that saves a rushed morning.
If your hair sits in that awkward in-between space, try one style with texture, one with structure, and one with a little softness around the face. The best short-hair bun is rarely the fanciest one. It’s the one that stays put and still looks like your haircut, only better.
