



Elegant chignon hairstyles have a habit of looking more complicated than they are. Pull the hair low, tuck the ends, smooth the edges, and suddenly the whole face looks more open and the neckline more deliberate.
The difference between a stiff bun and a good chignon is rarely the bun itself. It’s the part, the tension, the way the hair is folded, and whether the finish respects the hair’s natural movement instead of fighting it. A center part can sharpen the look, a side sweep can soften it, and a few crossed pins can make the whole thing stay put longer than people expect.
That range is what makes chignons worth learning. A low knot for a black dress, a braided version for a veil, a loose tucked roll for dinner, a polished wrap for work—same family, different mood. A few millimeters of placement change everything, and the styles below show just how far that small shift can go.
Why These Chignons Earn Their Place
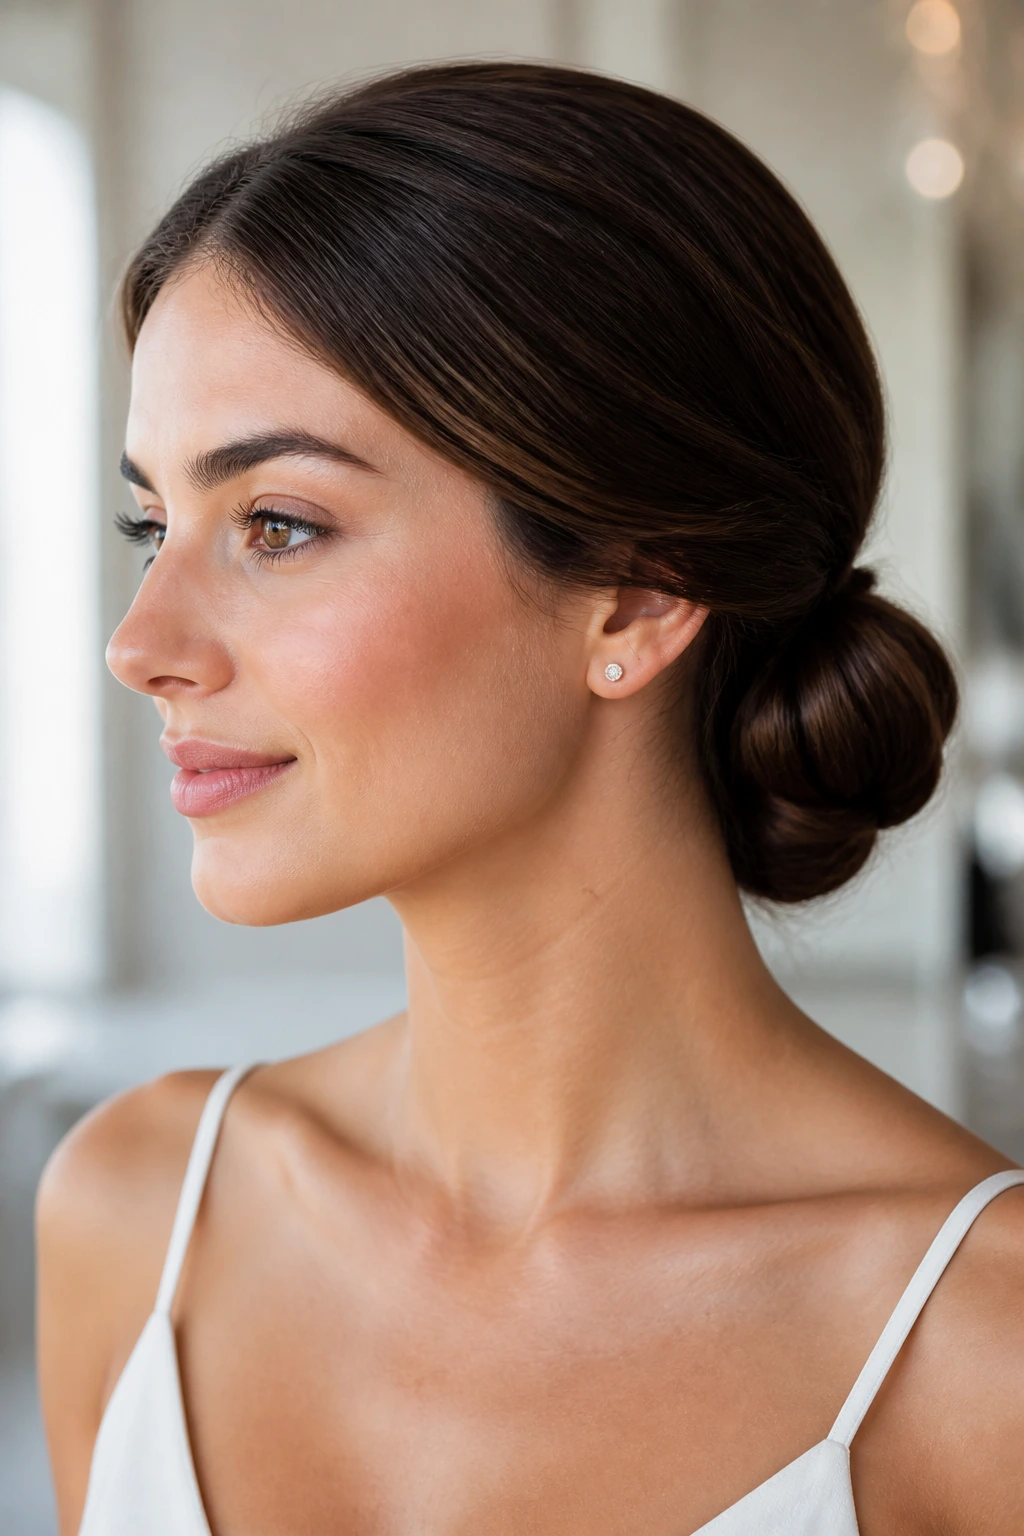
- Clean neckline: A chignon pulls the hair off the shoulders and leaves room for collars, earrings, and a stronger face shape.
- Shape control: Small changes in parting, height, and finish turn the same basic bun into something sharp, soft, romantic, or formal.
- Pin-friendly structure: The low placement gives bobby pins and U-pins a solid anchor, which matters if you want the style to survive a long day.
- Works with real hair: Fine hair, thick hair, curls, and layers can all be folded into a chignon with the right prep and pinning order.
- Accessory-ready: Pearls, combs, flowers, and veils sit better on a chignon than on a loose bun that keeps shifting around.
- Easy to scale up or down: The same outline can look quiet for the office or dressed up enough for a formal event.
1. Classic Low Chignon
A classic low chignon sits right at the nape and keeps the whole shape clean. It’s the version people picture first, and for good reason: the hairline stays calm, the face stays open, and the finished knot feels settled rather than busy.
Keep the surface smooth but not shellacked. A light mist of spray before the final pins gives the hair enough grip to stay put, and four to six bobby pins hidden under the coil are usually enough for shoulder-length to long hair.
2. Sleek Center-Part Chignon
A center part changes the mood instantly. With the hair drawn straight back from a crisp middle line, the chignon feels sharper and more deliberate, almost architectural. A drop of gel at the part and temples keeps the finish clean, especially if your hair has a halo of baby flyaways.
This version looks best with sharp collars, tailored jackets, or earrings that need room to show. If your face is long or narrow, leave a little softness at the temples so the style does not go severe.
3. Side-Swept Chignon
An off-center part softens the whole shape before the bun even starts. One side gets a longer sweep, the other side tucks in more neatly, and that uneven balance gives the chignon a quiet kind of movement.
The trick is to keep the sweep intentional. Let the front section follow the line of the cheekbone, then anchor the knot low enough that the shape doesn’t drift toward a side bun by accident.
4. Twisted Knot Chignon
Twists make a chignon look hand-shaped rather than simply pinned. Instead of folding the hair into one round mass, you twist two or three sections and cross them over each other, which gives the bun subtle ridges and a cleaner hold.
This is a good choice for layered hair because the twists catch shorter pieces better than a plain wrap does. If the hair feels slippery, mist the lengths with texture spray first; otherwise, the twists can unravel while you’re pinning.
5. Braided Crown Chignon
A braided crown chignon starts with braid work near the hairline or along one side, then feeds that braid into a low knot. The braid does two jobs at once: it adds surface detail and gives the rest of the style something to grip onto.
Use this one when the hair is too smooth for a plain chignon or when you want the front of the style to feel more finished. Keep the braid snug, though. If it gets too chunky, the bun starts looking crowded instead of elegant.
6. Softly Messy Chignon
Messy works only when the looseness is controlled. Pull a few strands from the crown, leave two face-framing pieces where they actually flatter the face, and keep the base of the bun anchored so the whole shape still reads as a chignon.
A matte texture spray helps here more than shine serum ever will. The style should look lived-in, not unfinished, and that line is thinner than most people think.
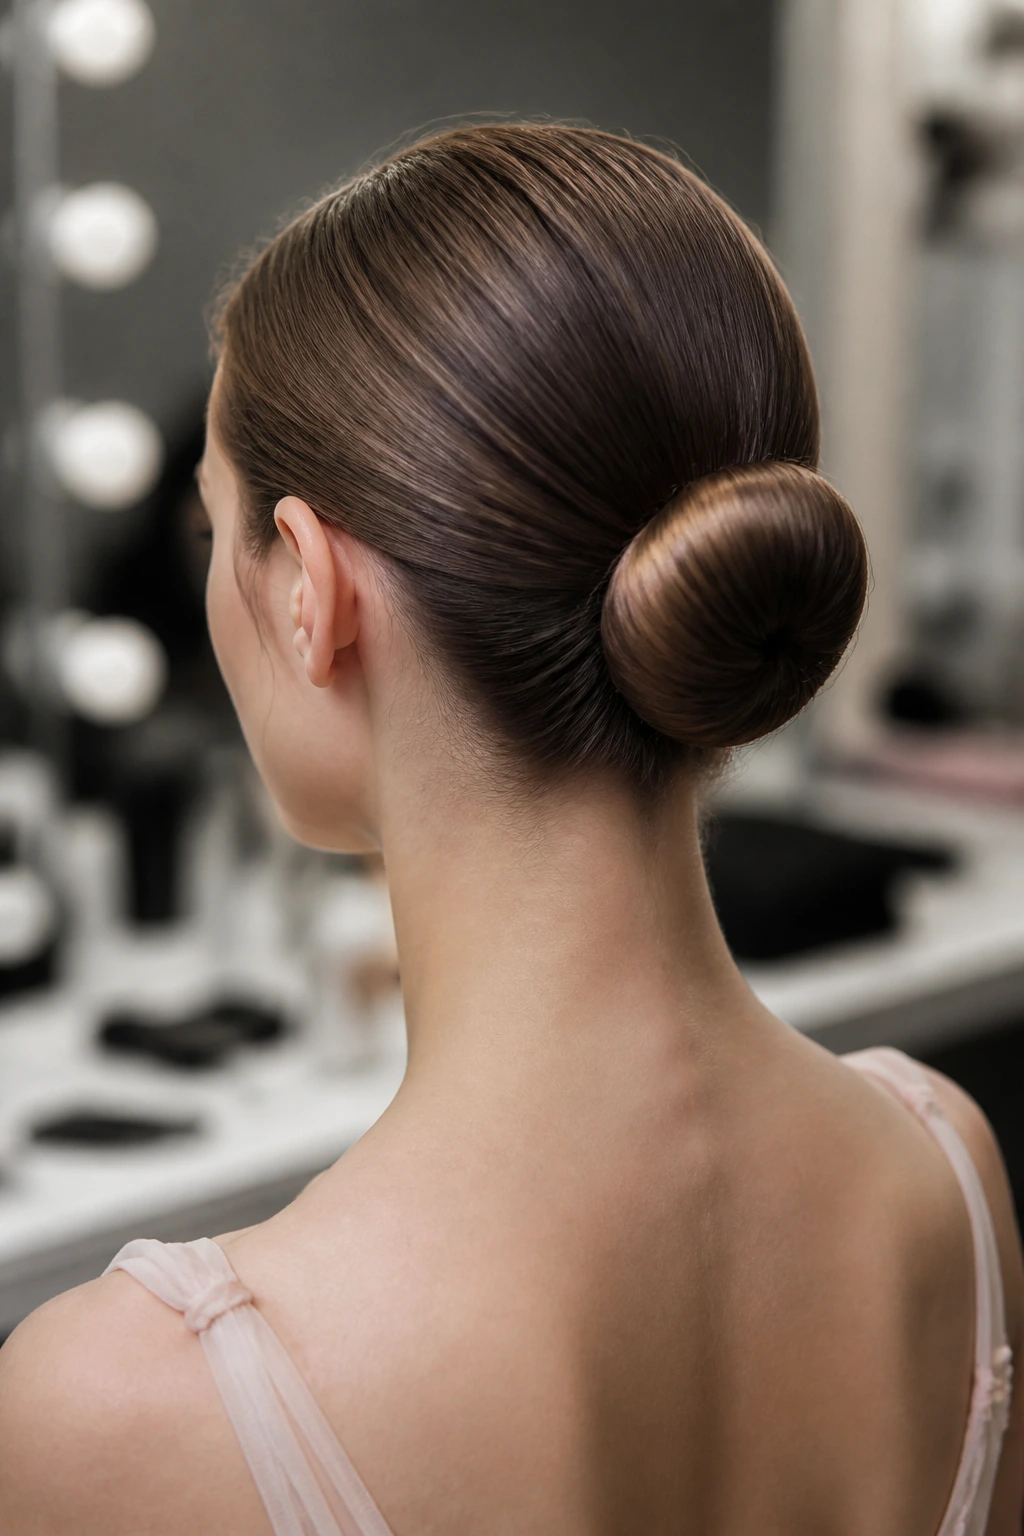
7. Ballet-Pretty Chignon
This version has a neat, centered shape that feels disciplined in the best way. A bun form or a tightly wrapped coil can create that compact, round silhouette, and the nape stays clean so the whole style reads almost sculpted.
It suits dresses with simple necklines, because the chignon already brings enough structure. If you want the look to feel less severe, leave one tiny piece near the ear soft instead of slicking every strand into place.
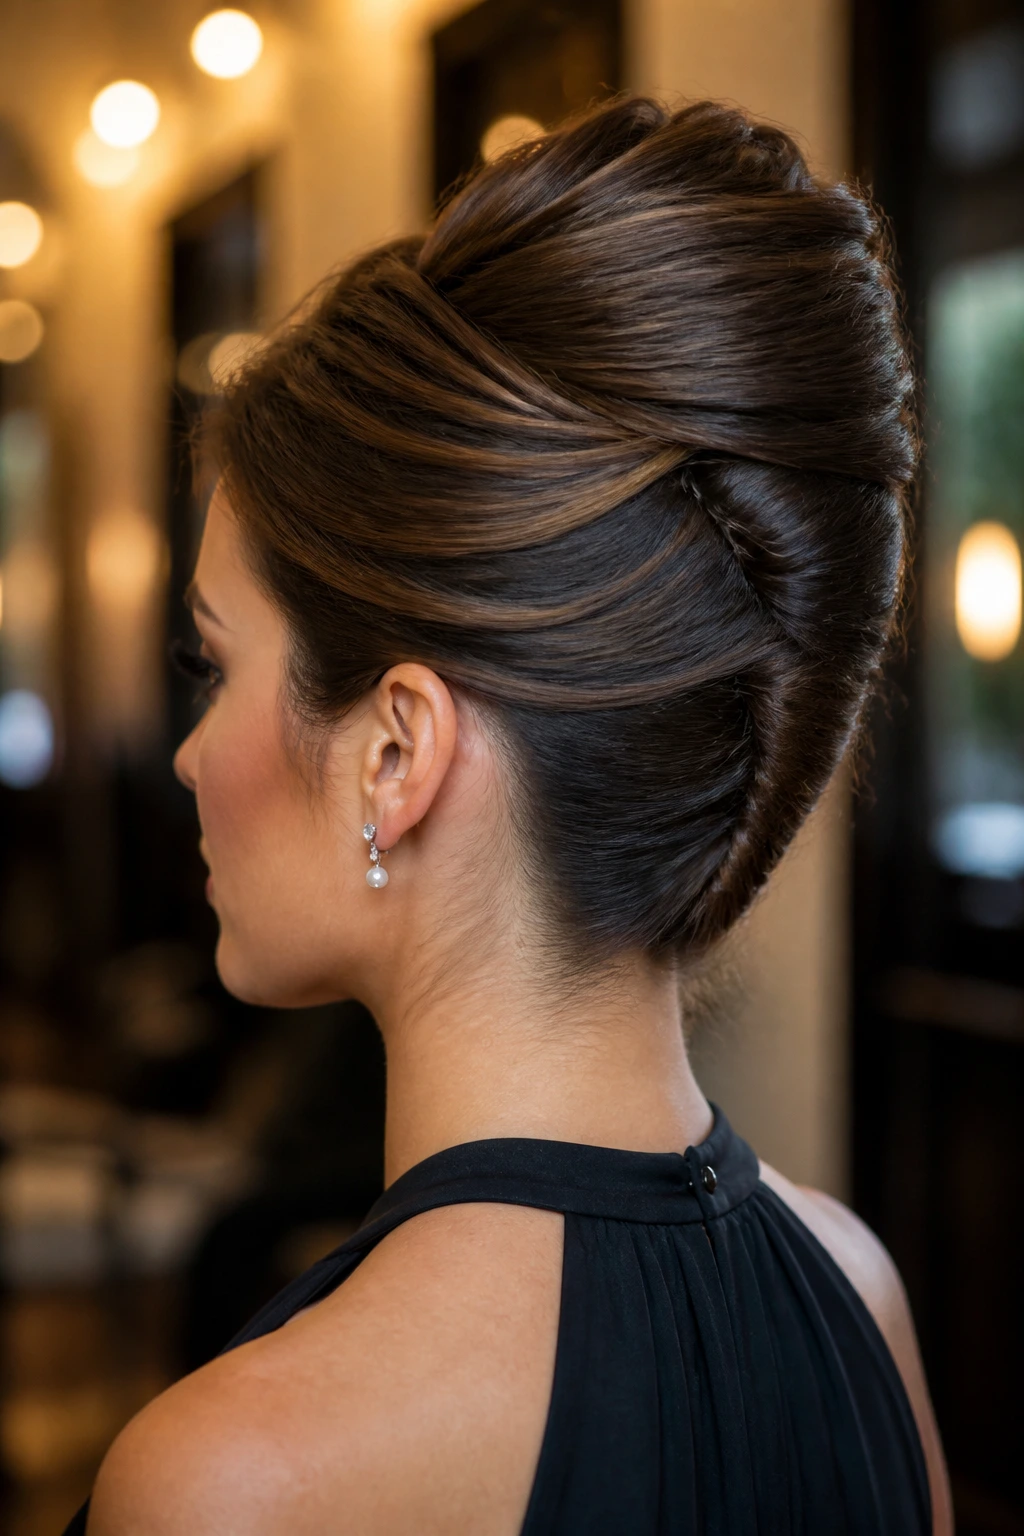
8. French Roll Chignon
A French roll chignon climbs upward rather than sitting in a round knot. The hair is swept back and rolled vertically, which creates a long, narrow shape that looks more formal than a low bun and a bit more tailored than a loose twist.
This style likes strong pins and a careful hand. If the roll opens at the seam, tuck a U-pin through the ridge and angle it downward into the base; that usually holds better than forcing more product into the hair.
9. Volume-Lift Chignon
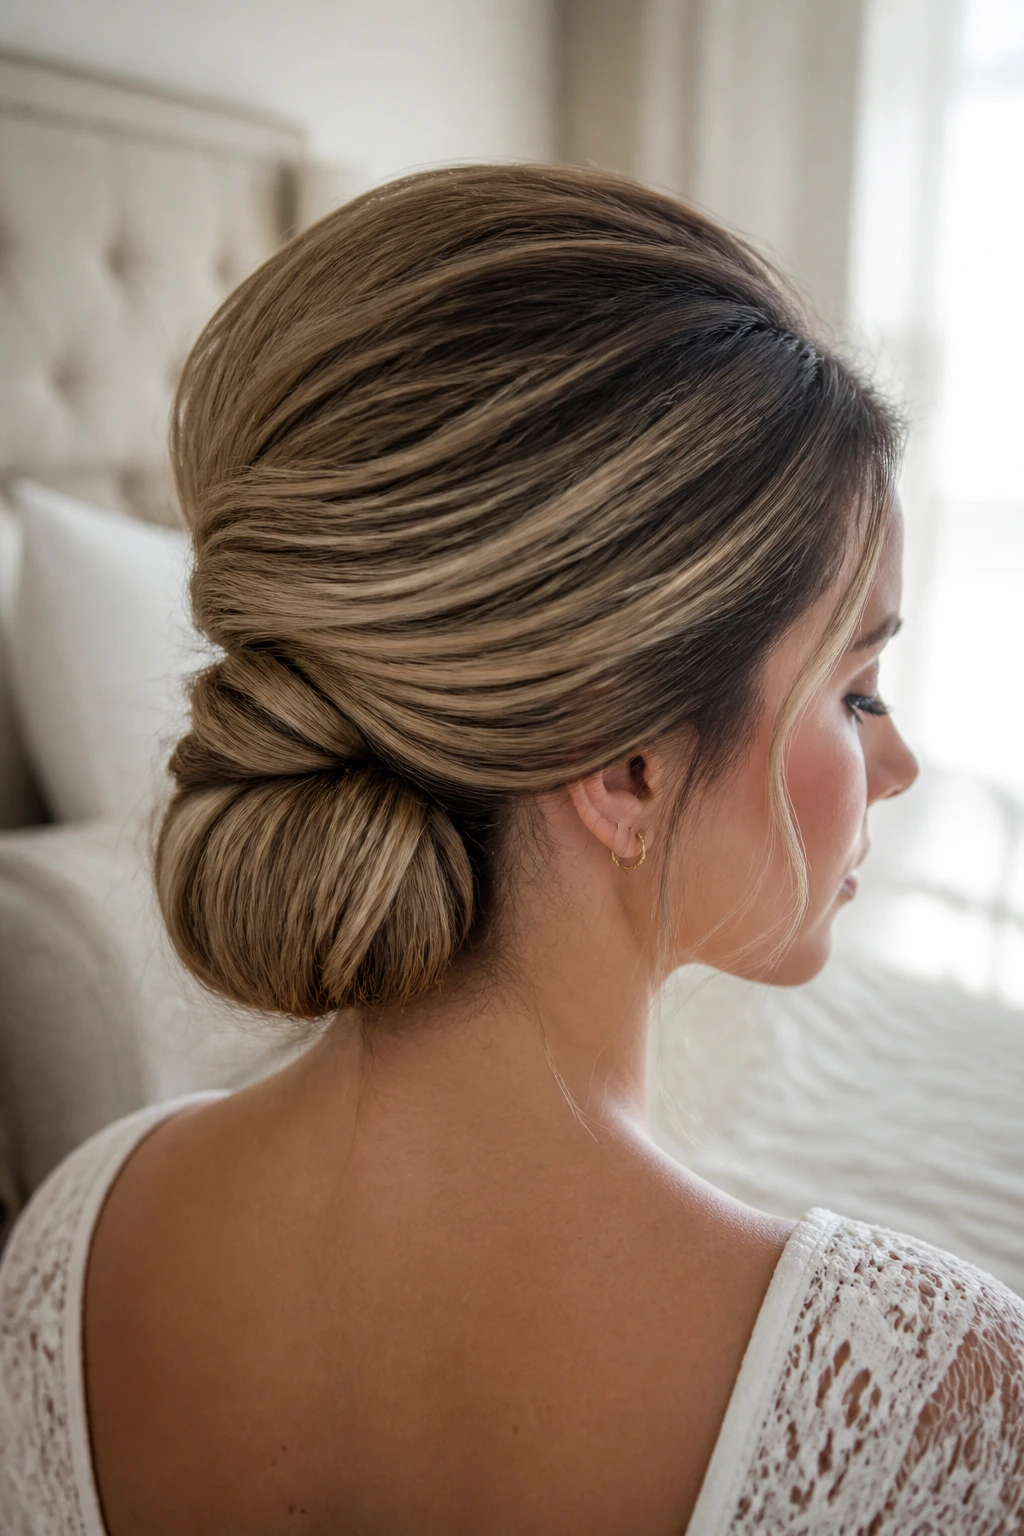
A little lift at the crown changes the whole profile. With a touch of backcombing or a lifting spray near the roots, the chignon sits low while the head shape looks fuller on top, which is useful if you want the face to appear a bit longer.
The best version keeps the crown airy, not poofy. Tease only the upper section that needs support, then smooth the outer layer over it so the volume shows from the silhouette instead of from obvious texture.
10. Double-Twist Chignon
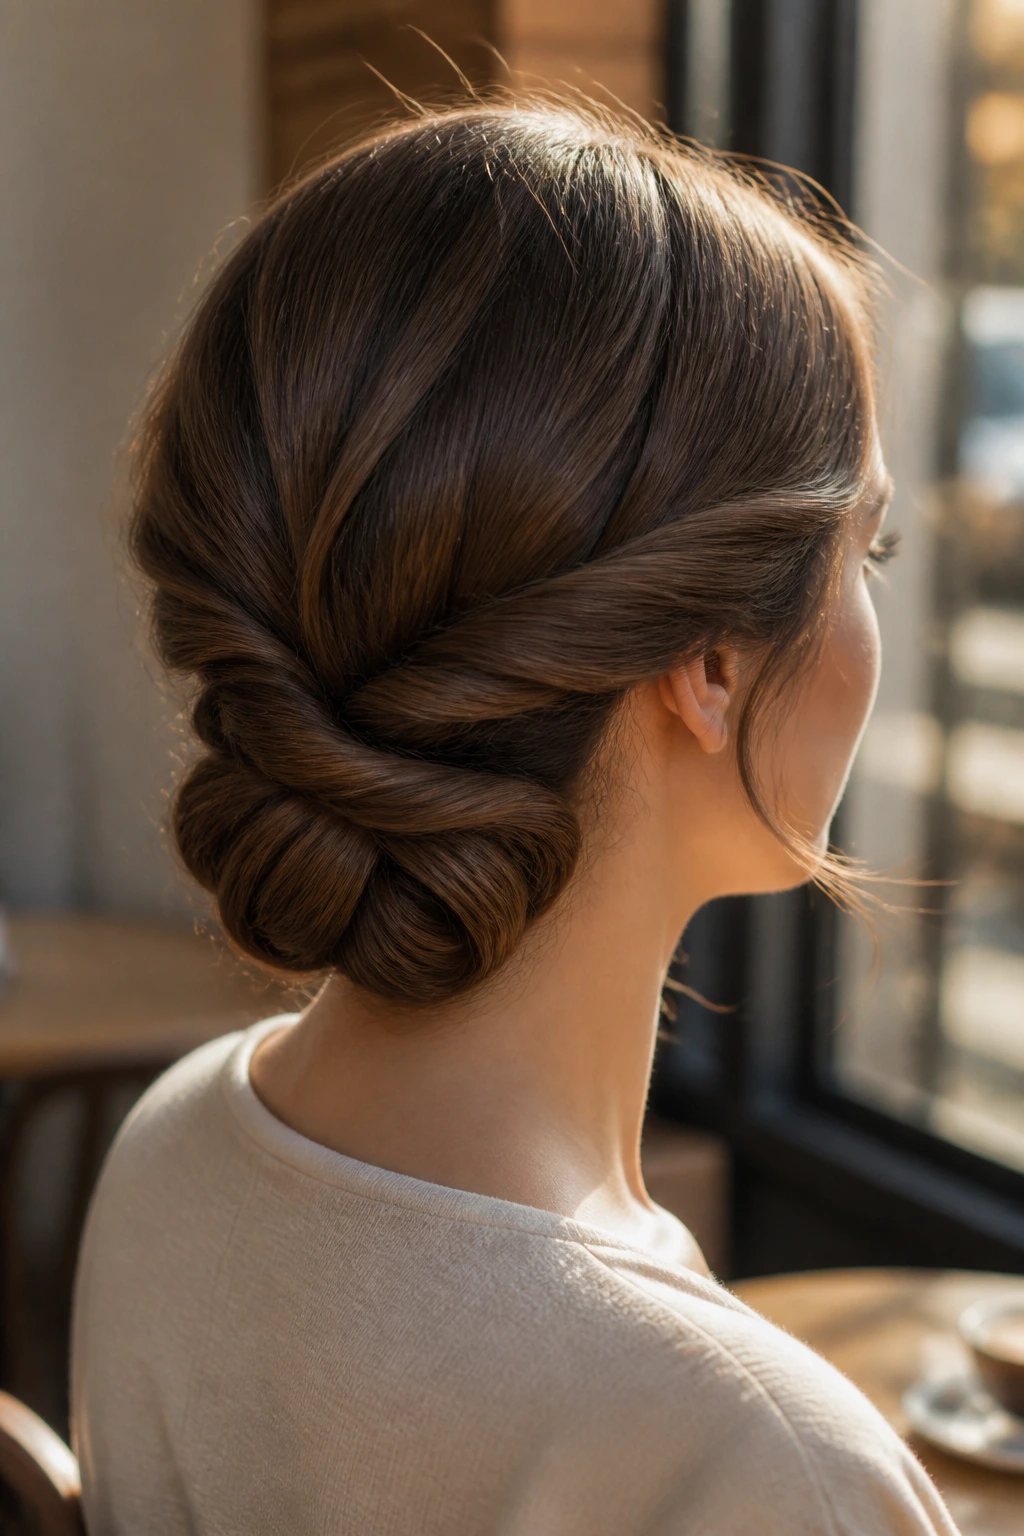
Two twists can solve a flat-looking bun fast. Draw one twist from each side of the head toward the center, cross them at the nape, and tuck the ends under the fold so the chignon feels layered without getting bulky.
This style works especially well on medium hair, where a single twist can look too thin and a full bun can feel too heavy. The crossing point is the important part—pin there first, then build the rest of the knot around it.
11. Pearl-Pinned Chignon
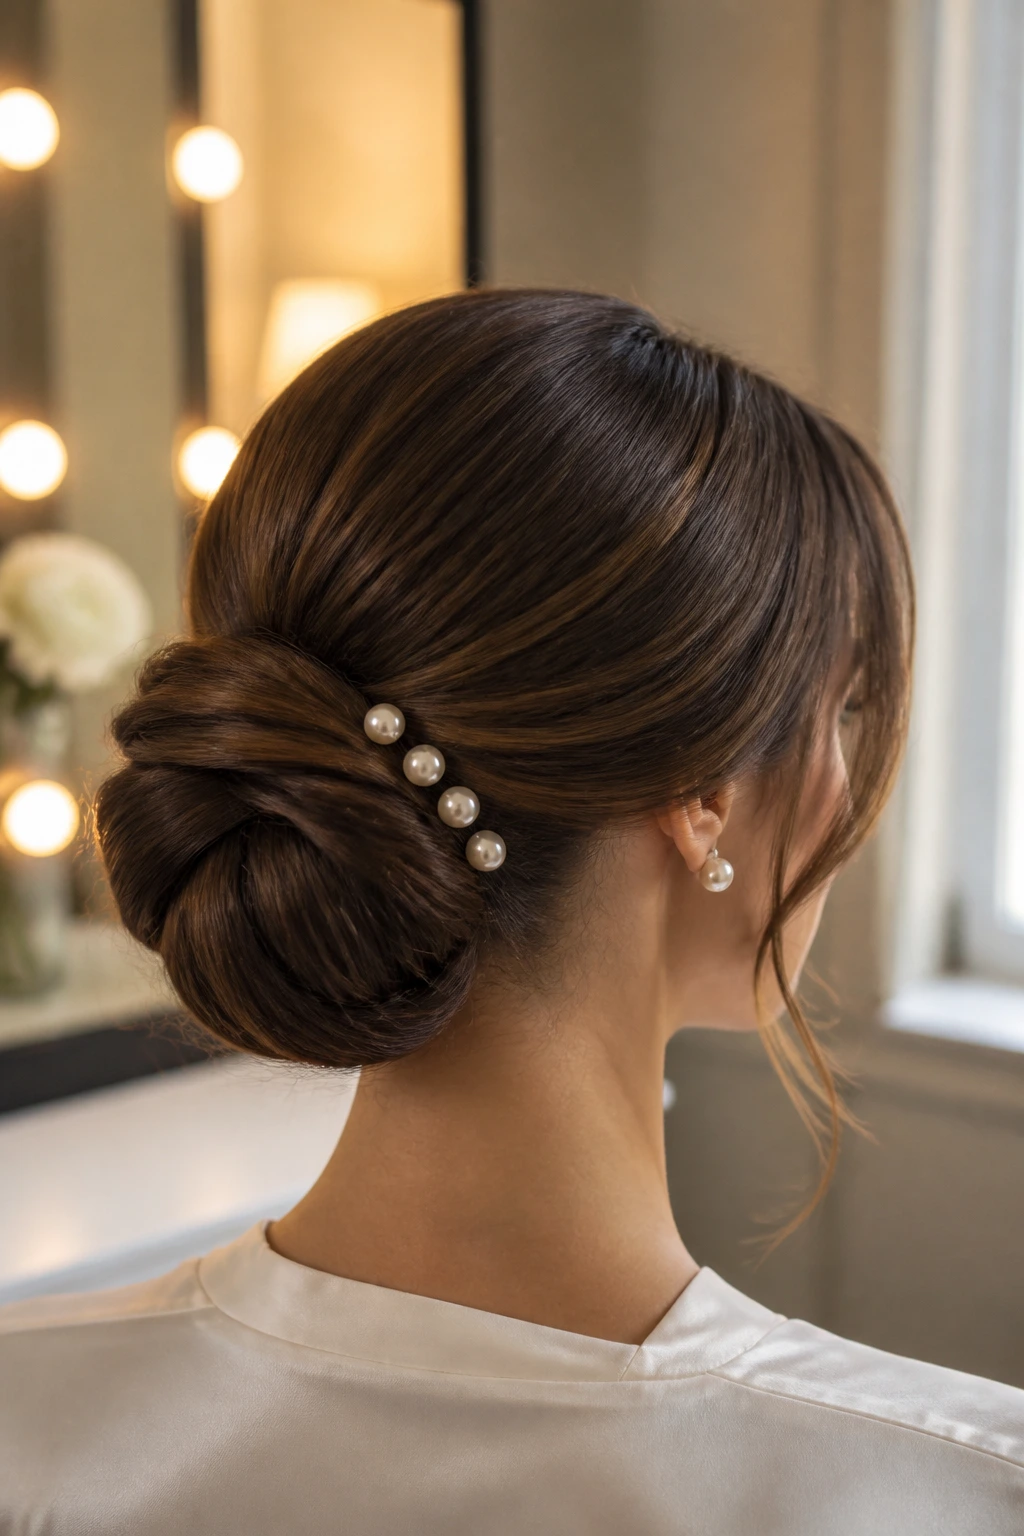
Pearl pins make a chignon look finished without asking the style to become decorative from head to toe. A few pins placed along the seam of the bun catch the eye in a gentle way, especially when the rest of the hair stays smooth and simple.
Do not scatter the pearls everywhere. Three or four placed near one side of the knot usually looks better than a full cluster, because the shape of the bun still gets to be the main event.
12. Wrapped-Section Chignon
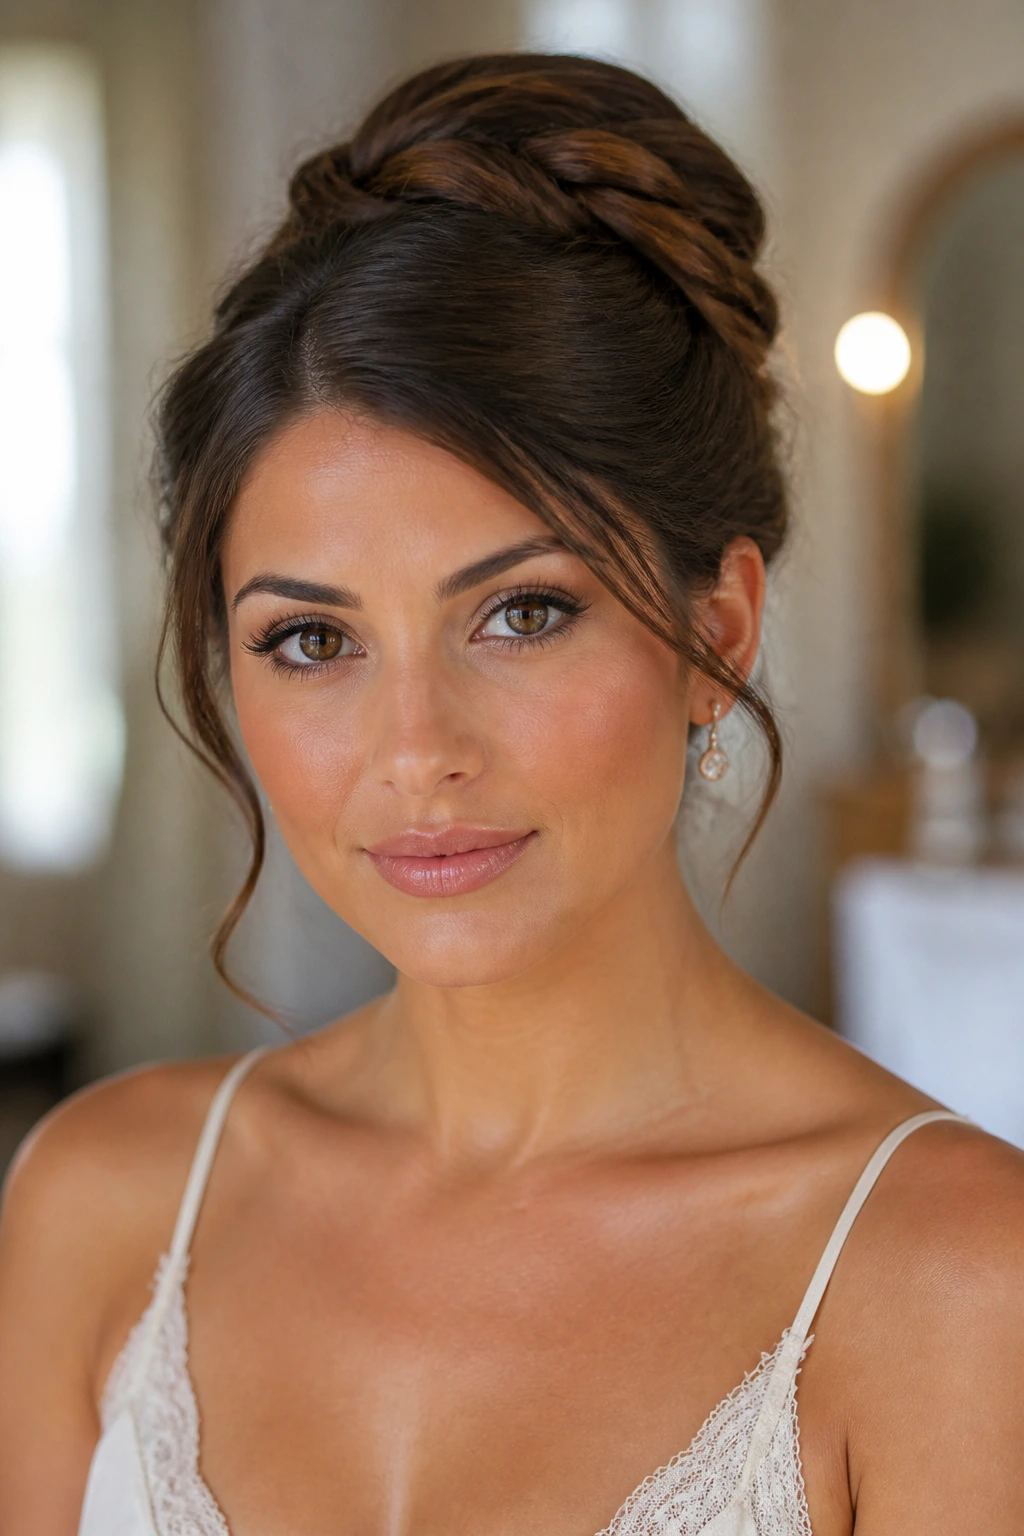
A wrapped-section chignon shows the layers on purpose. Instead of hiding every strand in one smooth coil, you wrap sections around each other so the bun has visible bands and a subtle bit of dimension.
It’s a smart choice if you want the style to look polished but not stiff. The wrapping should be snug enough that the shape holds, yet relaxed enough that the edges of each section stay visible.
13. Gibson Tuck Chignon
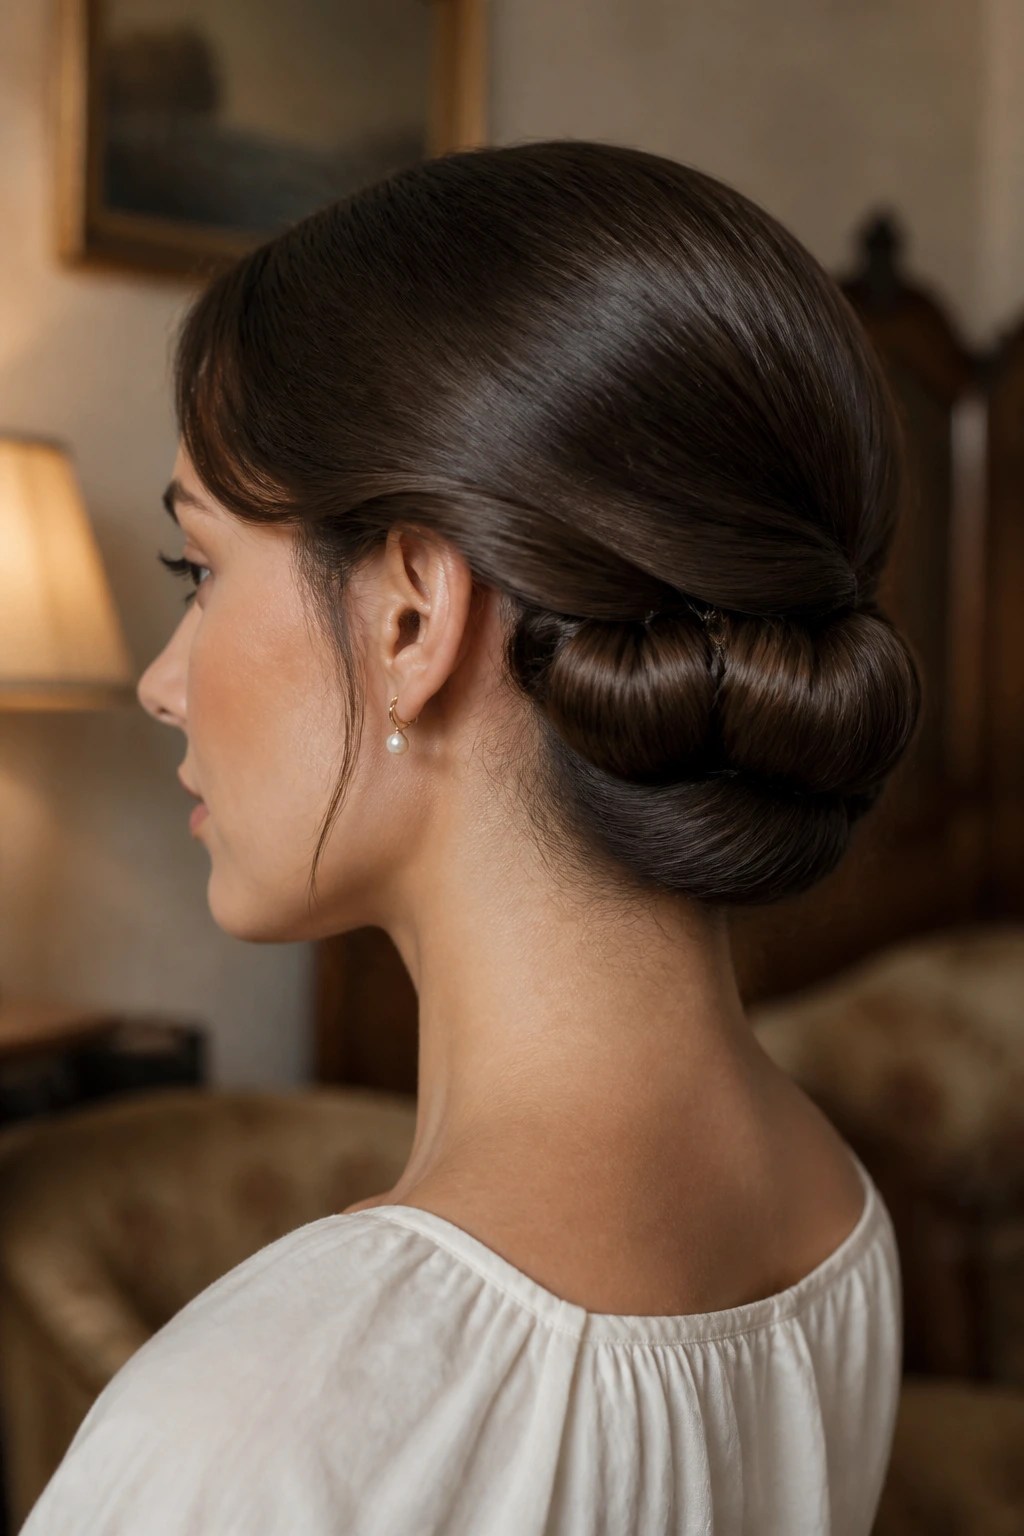
The Gibson tuck sits somewhere between vintage and modern, and that’s exactly why it still works. The hair folds upward and under itself at the nape, creating a tucked roll that feels soft, tidy, and a little old-fashioned without turning costume-like.
Medium-length hair takes to this shape well. If your hair is long, keep the fold tight; if it’s shorter, use a couple of hidden pins at the center to make the tuck look fuller than it really is.
14. Braided Low Bun Chignon
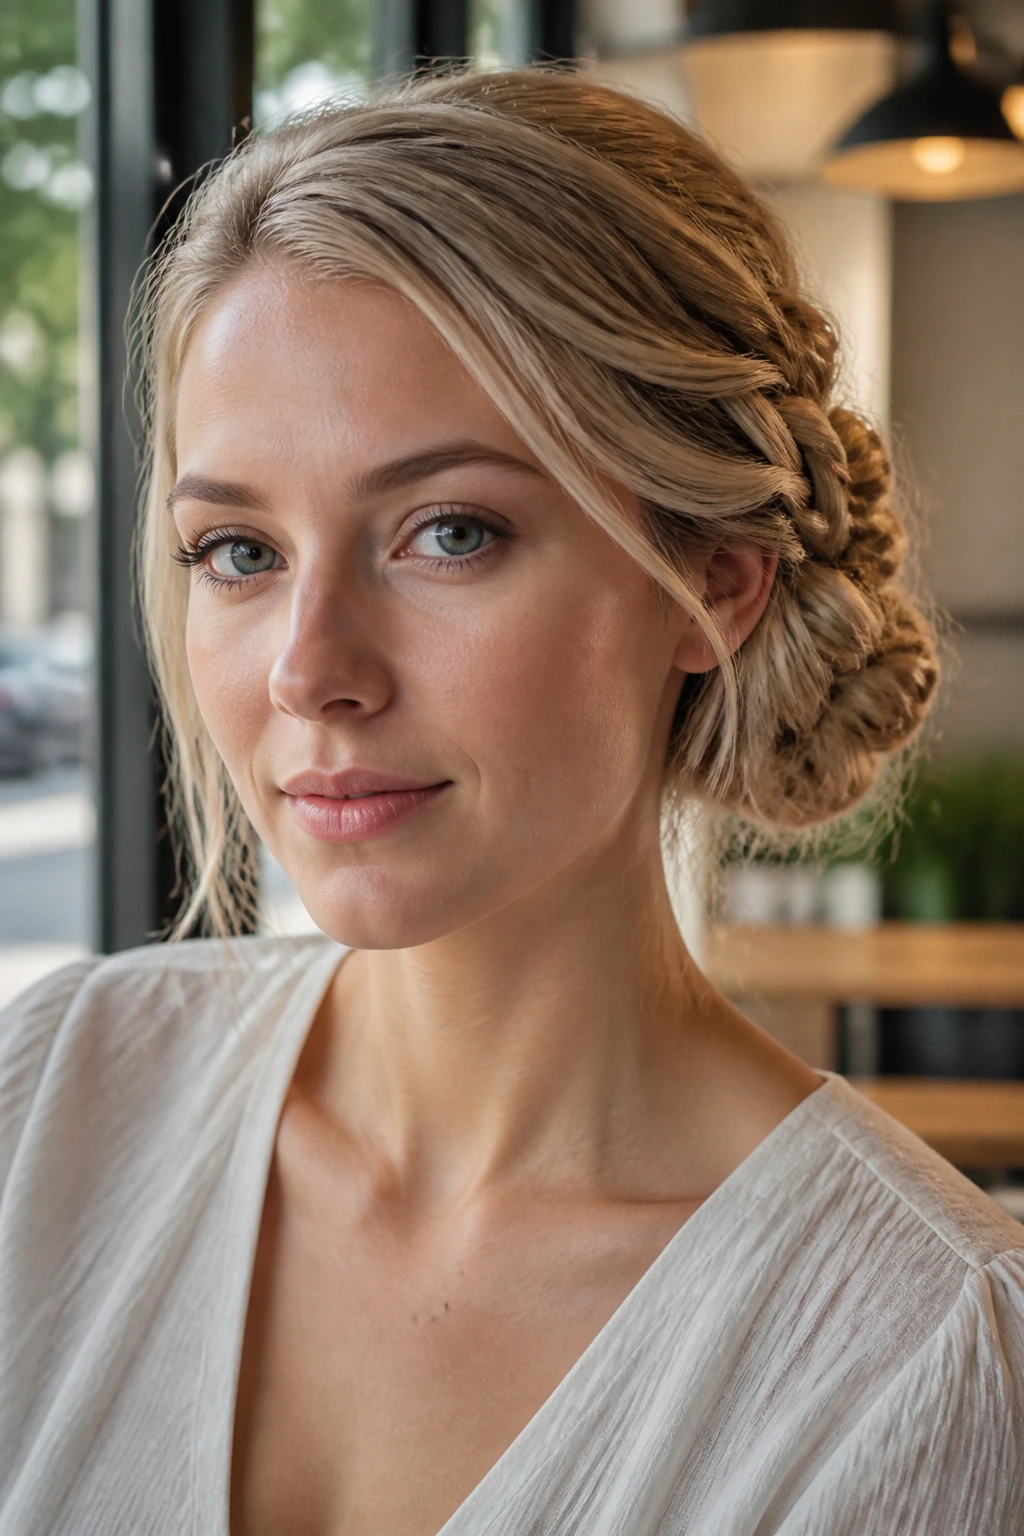
A braid gives the bun more grip from the start. Once the hair is braided, it coils into a low chignon with less slipping and a bit more texture across the surface, which is useful if your hair is layered or very straight.
This is one of the easiest ways to make a plain bun look intentional. The braid doesn’t need to be complicated—a single three-strand braid is enough if you want the final knot to look fuller.
15. High Chignon
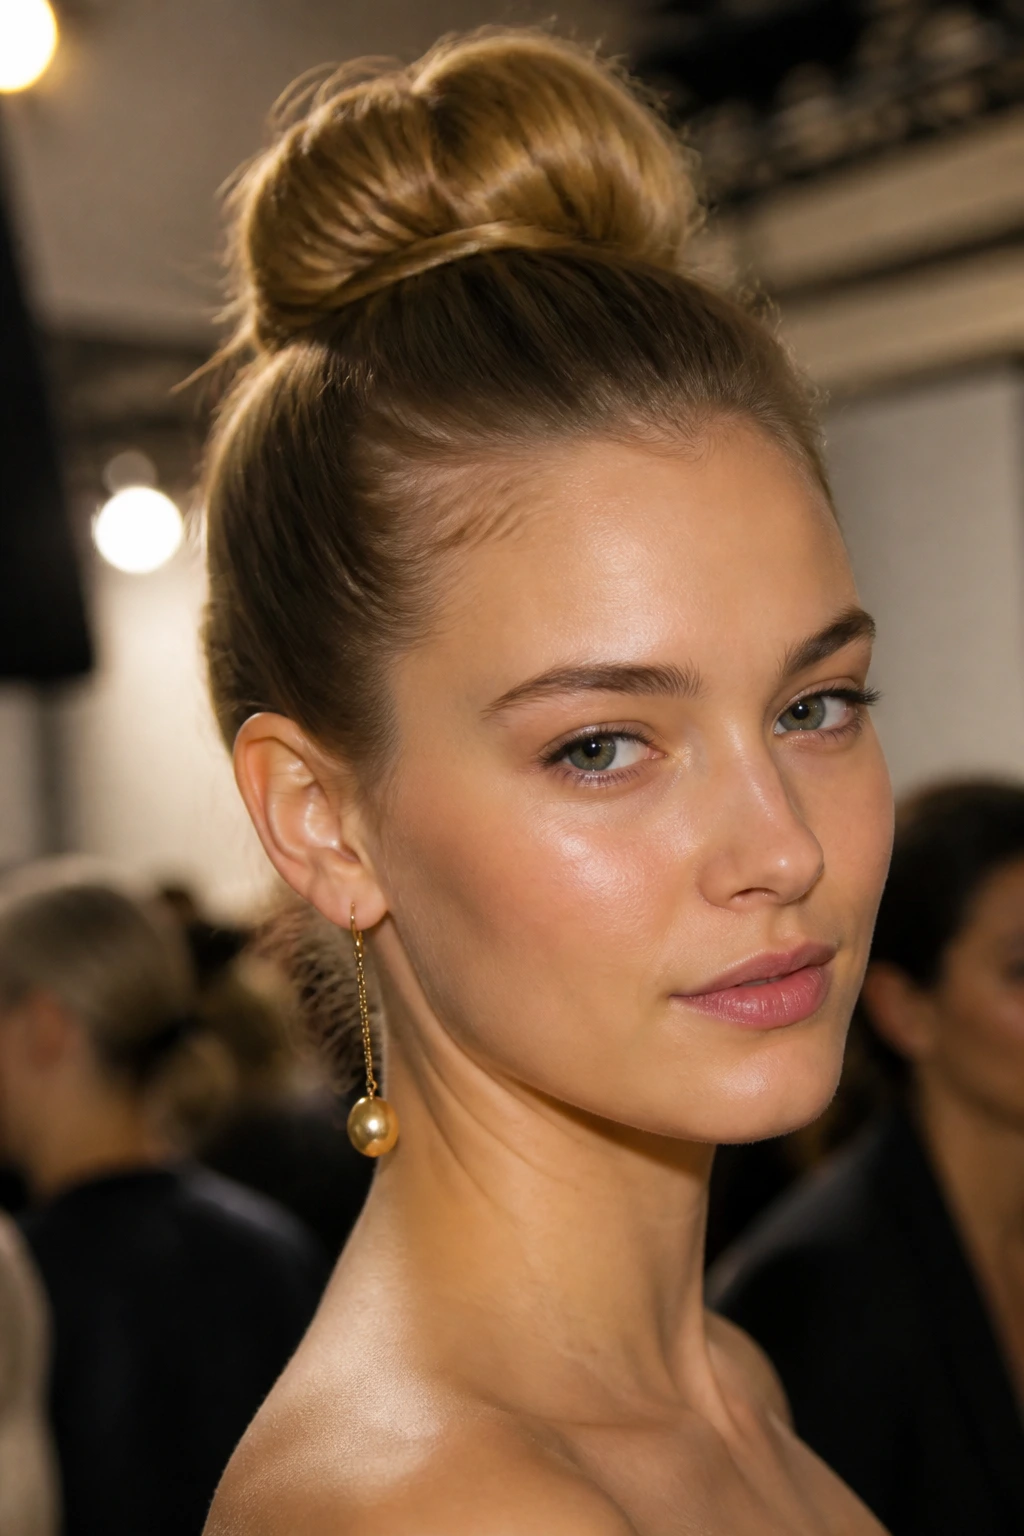
A high chignon shifts the focus upward and changes the line of the neck right away. It sits above the nape, often closer to the occipital ridge, so the style feels taller and a little more dramatic than a low knot.
Use it when the outfit can handle some lift. Open necklines, bare shoulders, and cleaner earrings tend to suit it best, because the bun itself already adds enough height.
16. Nape-Hugging Chignon
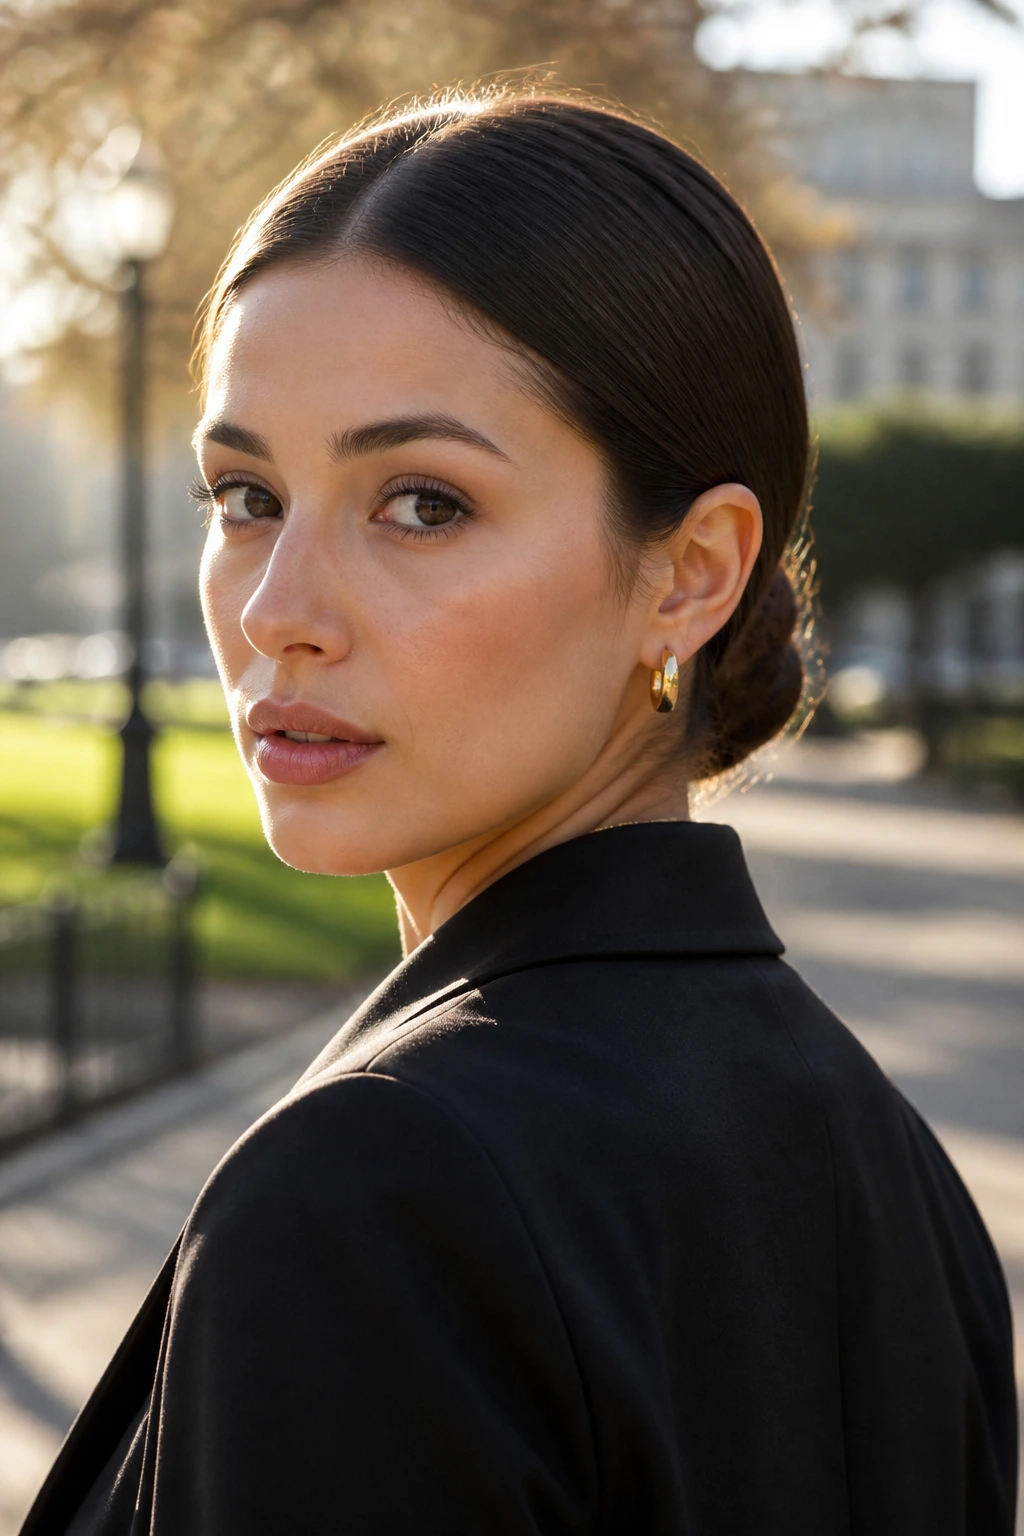
The nape-hugging chignon keeps everything low, flat, and calm. It barely rises off the collar line, which gives the style a quiet finish and makes it easy to wear under jackets, shawls, or high necks.
This version is a favorite when the rest of the look already has structure. The lower profile also tends to hold better on windy days, because there’s less hair trying to lift away from the head.
17. Rolled Chignon
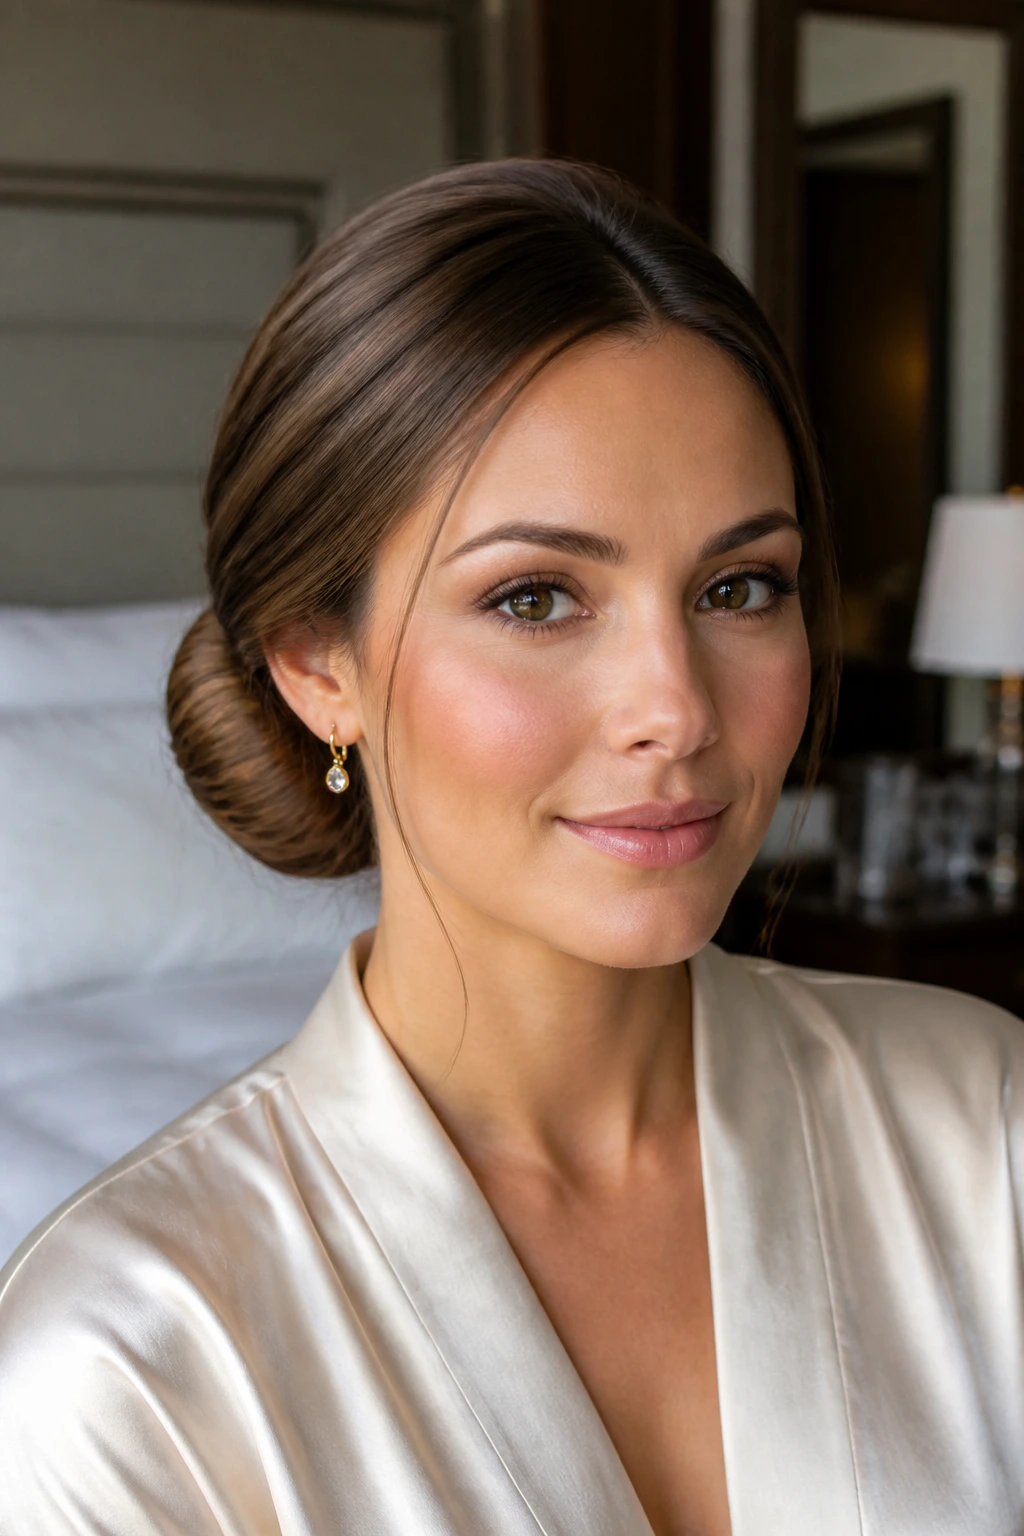
A rolled chignon has a smoother, more continuous shape than a knot. The hair is guided inward as if it’s folding into itself, which hides the ends and leaves the outside surface looking soft and deliberate.
Keep the roll tight at the seam and pin along the hidden edge, not the visible surface. That keeps the shape round without stacking too many pins where they’ll show.
18. Wave-Framed Chignon
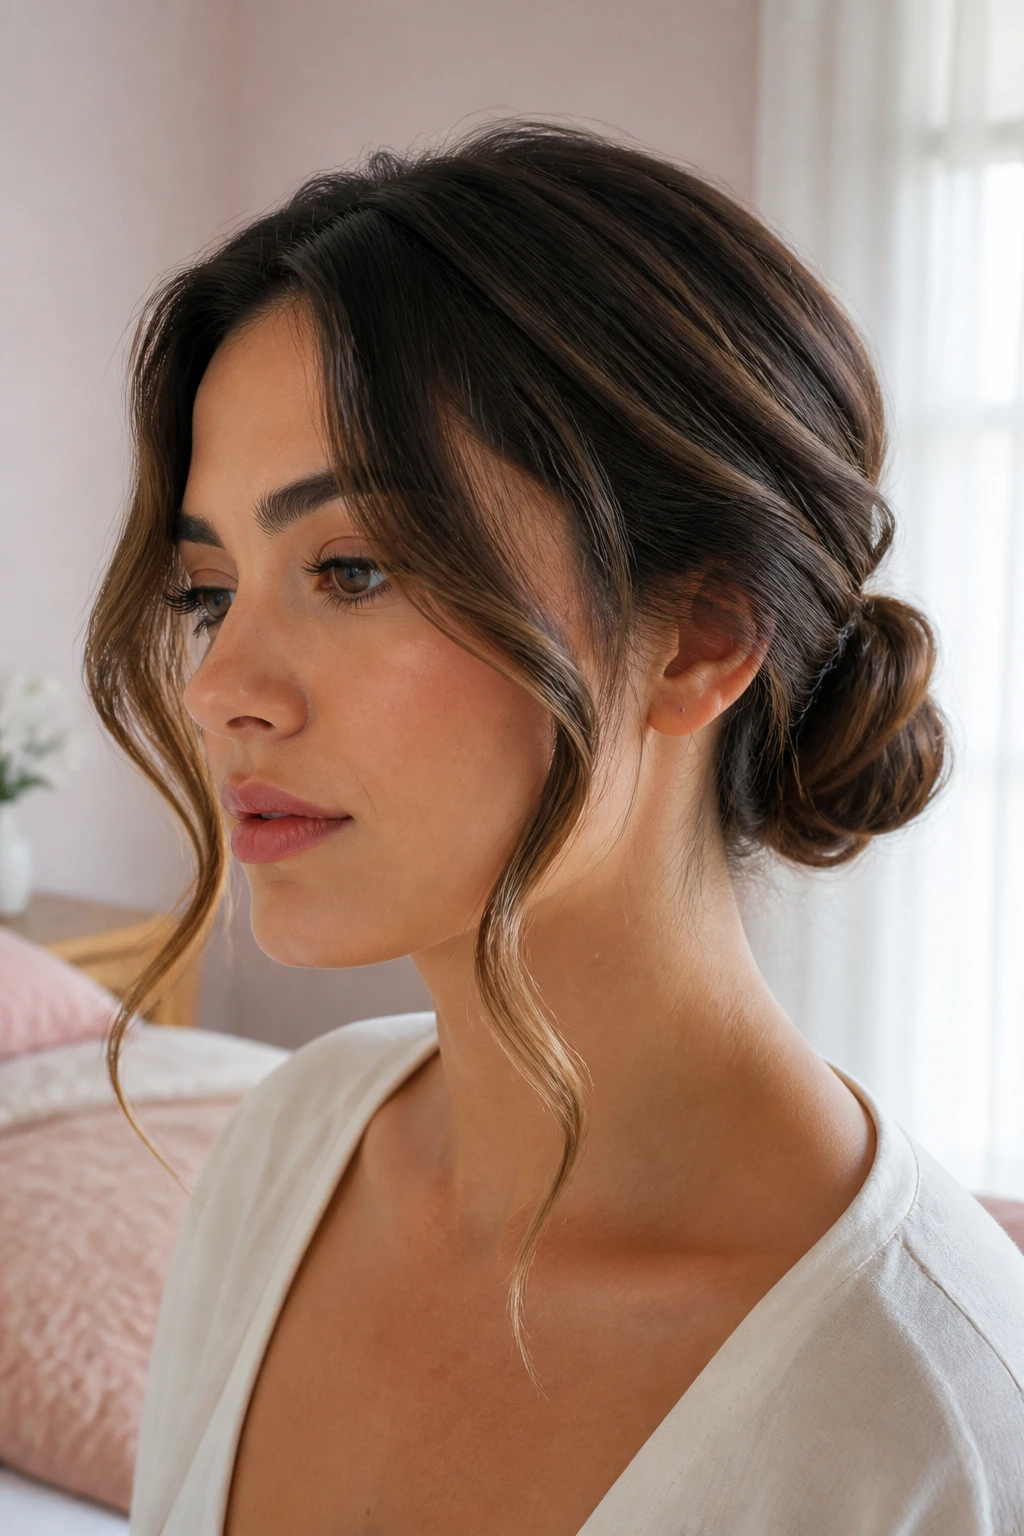
Loose waves around the face change the whole mood of the style. The chignon can stay low and neat, but the front pieces soften the cheekbones and keep the look from feeling too formal for daytime wear or a romantic evening outfit.
The key is restraint. Two waves are enough. Five starts to look overdone, and the chignon loses the clean shape that makes it work in the first place.
19. Floral Chignon
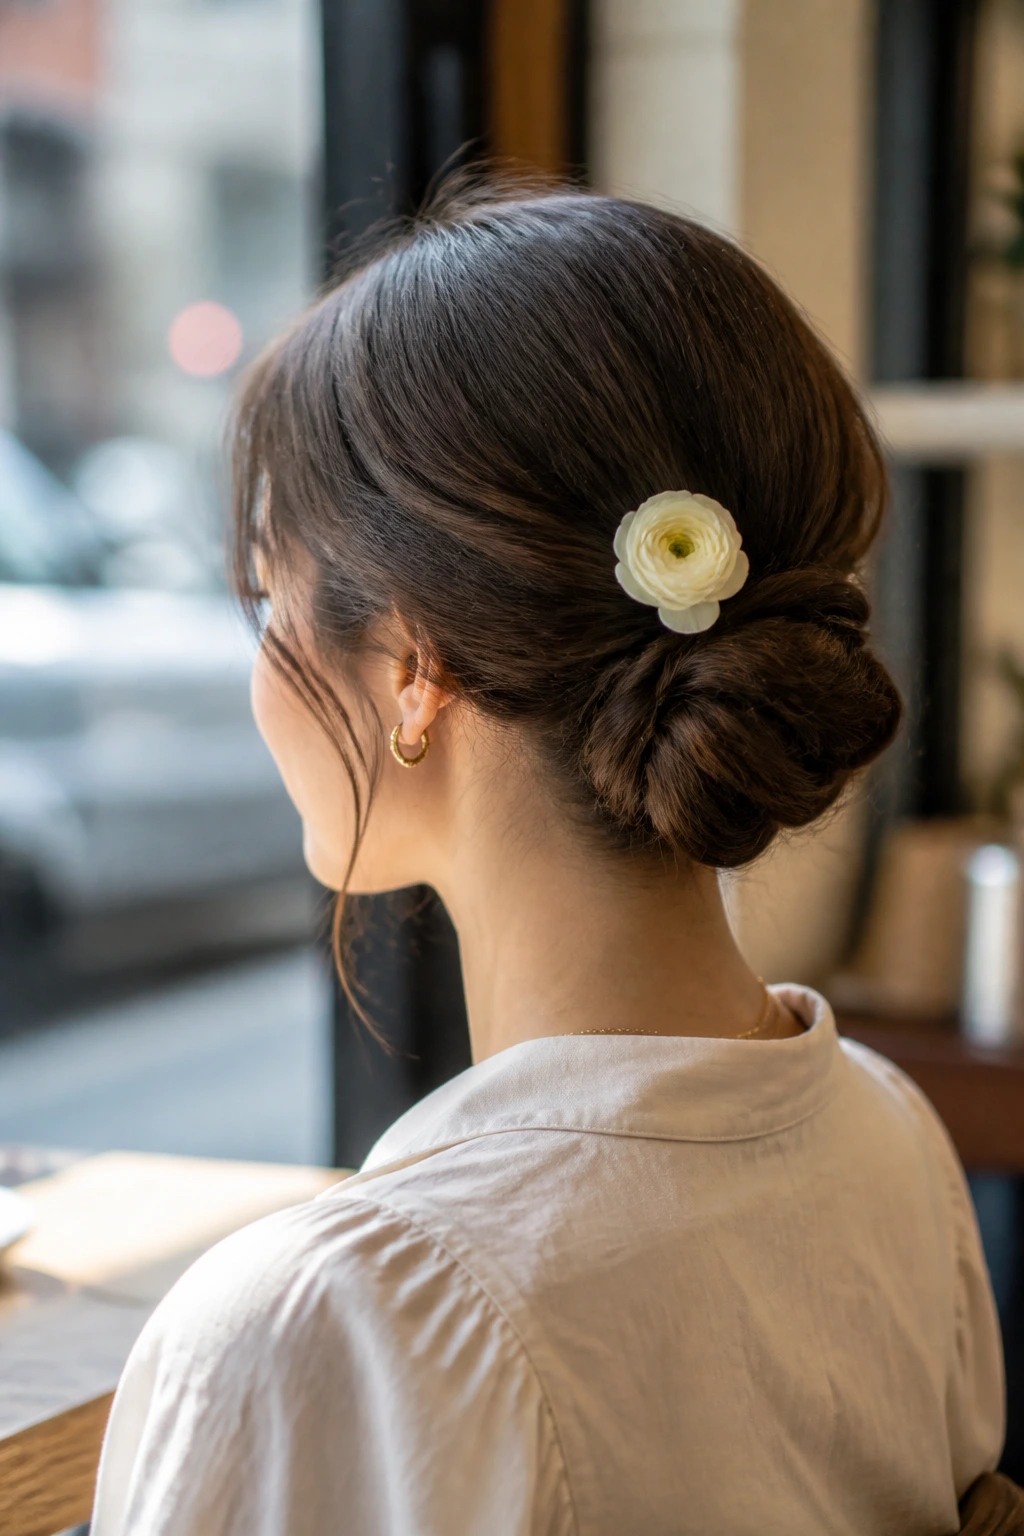
A floral chignon works best when the bun itself stays simple. One fresh bloom, a tiny sprig, or a silk flower tucked near the side of the knot gives the style a focal point without burying the shape under decoration.
Place the flower where the eye naturally lands first, usually just above the seam or slightly off center. If the bun is too loose, the flower can make the style feel heavy, so keep the base tight before adding anything extra.
20. Rope-Braid Chignon
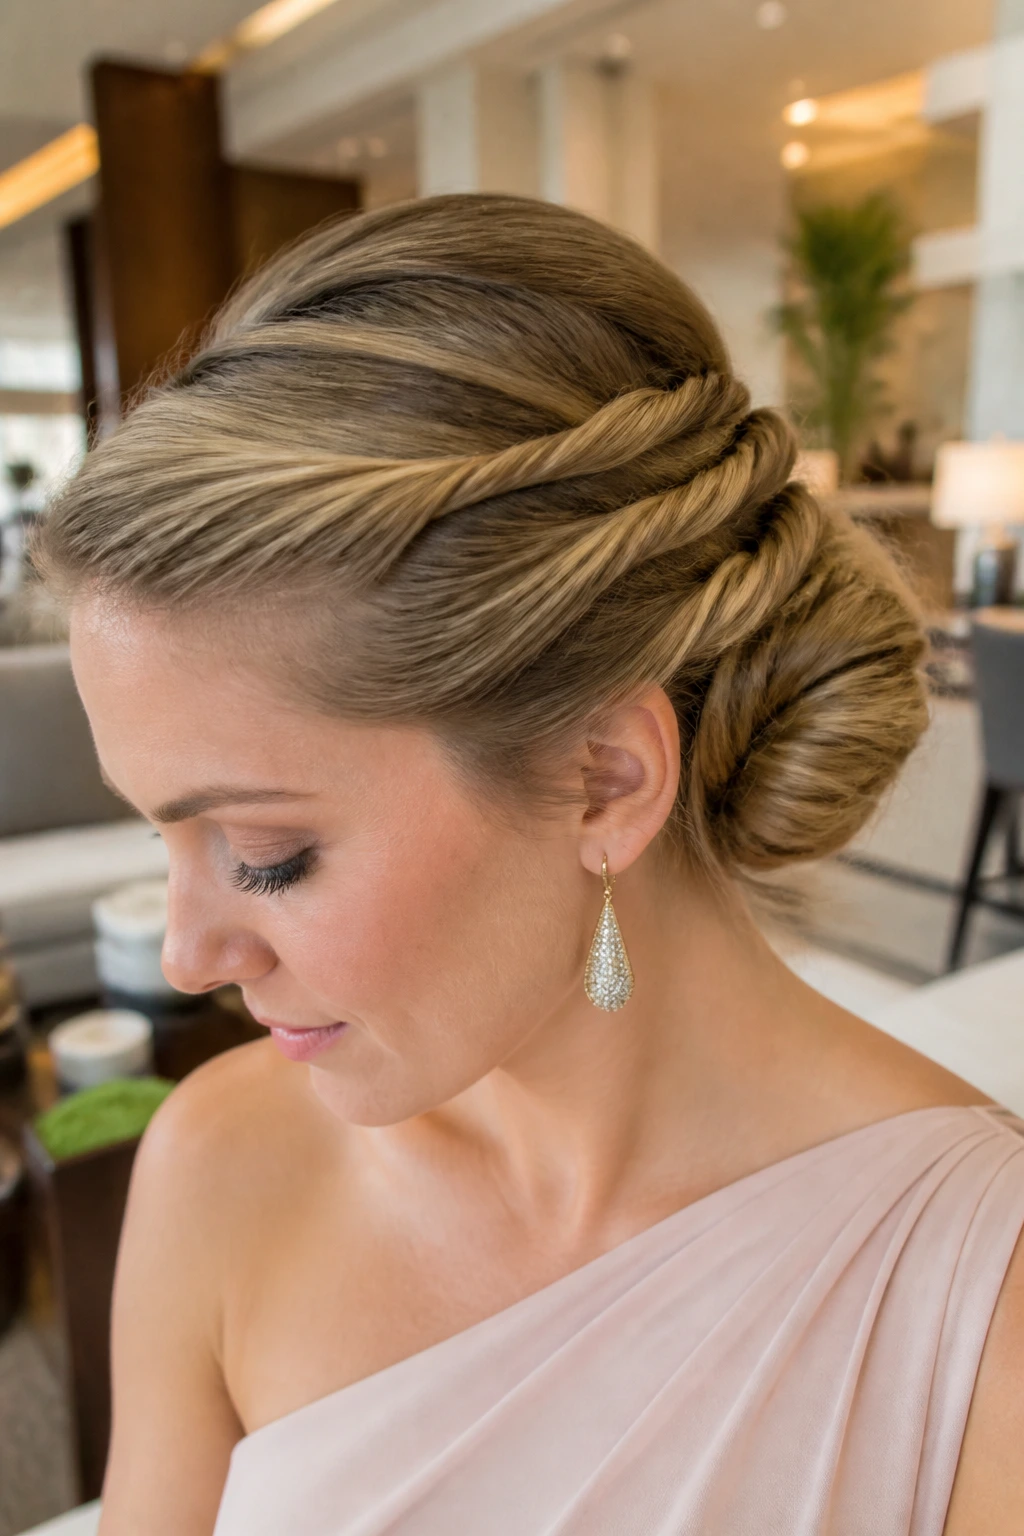
Rope braids bring a tighter, more defined texture than a regular braid. The twisted strands feed into the chignon with a slight ridge, which gives the style a cleaner pattern and a little more hold.
This version is especially useful for hair that slips out of pins easily. Rope braids grip each other well, so the finished bun tends to stay neat even if the day gets long.
21. Deep Side-Part Chignon
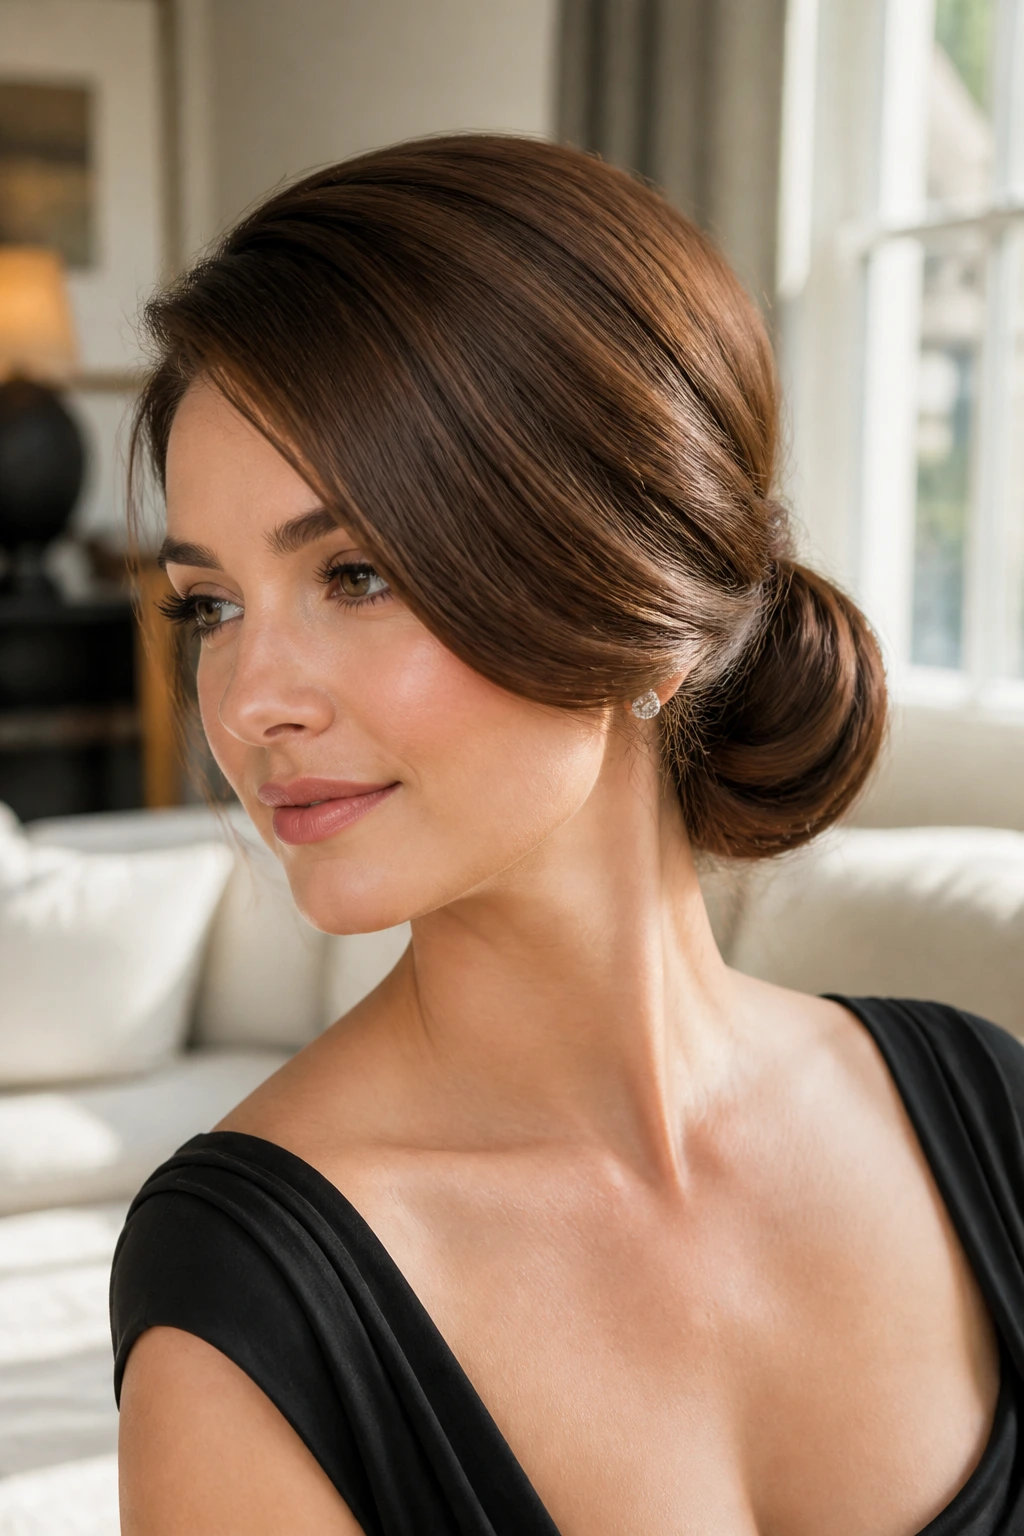
A deep side part can change the entire face balance before the bun even happens. The heavier sweep across the forehead makes the chignon feel more asymmetrical and a little softer, which works well if you want the style to avoid looking too strict.
Pair it with earrings that can handle some movement. A deep side part already draws the eye to one side, so the rest of the look should stay calm and uncluttered.
22. Minimalist Sleek Chignon
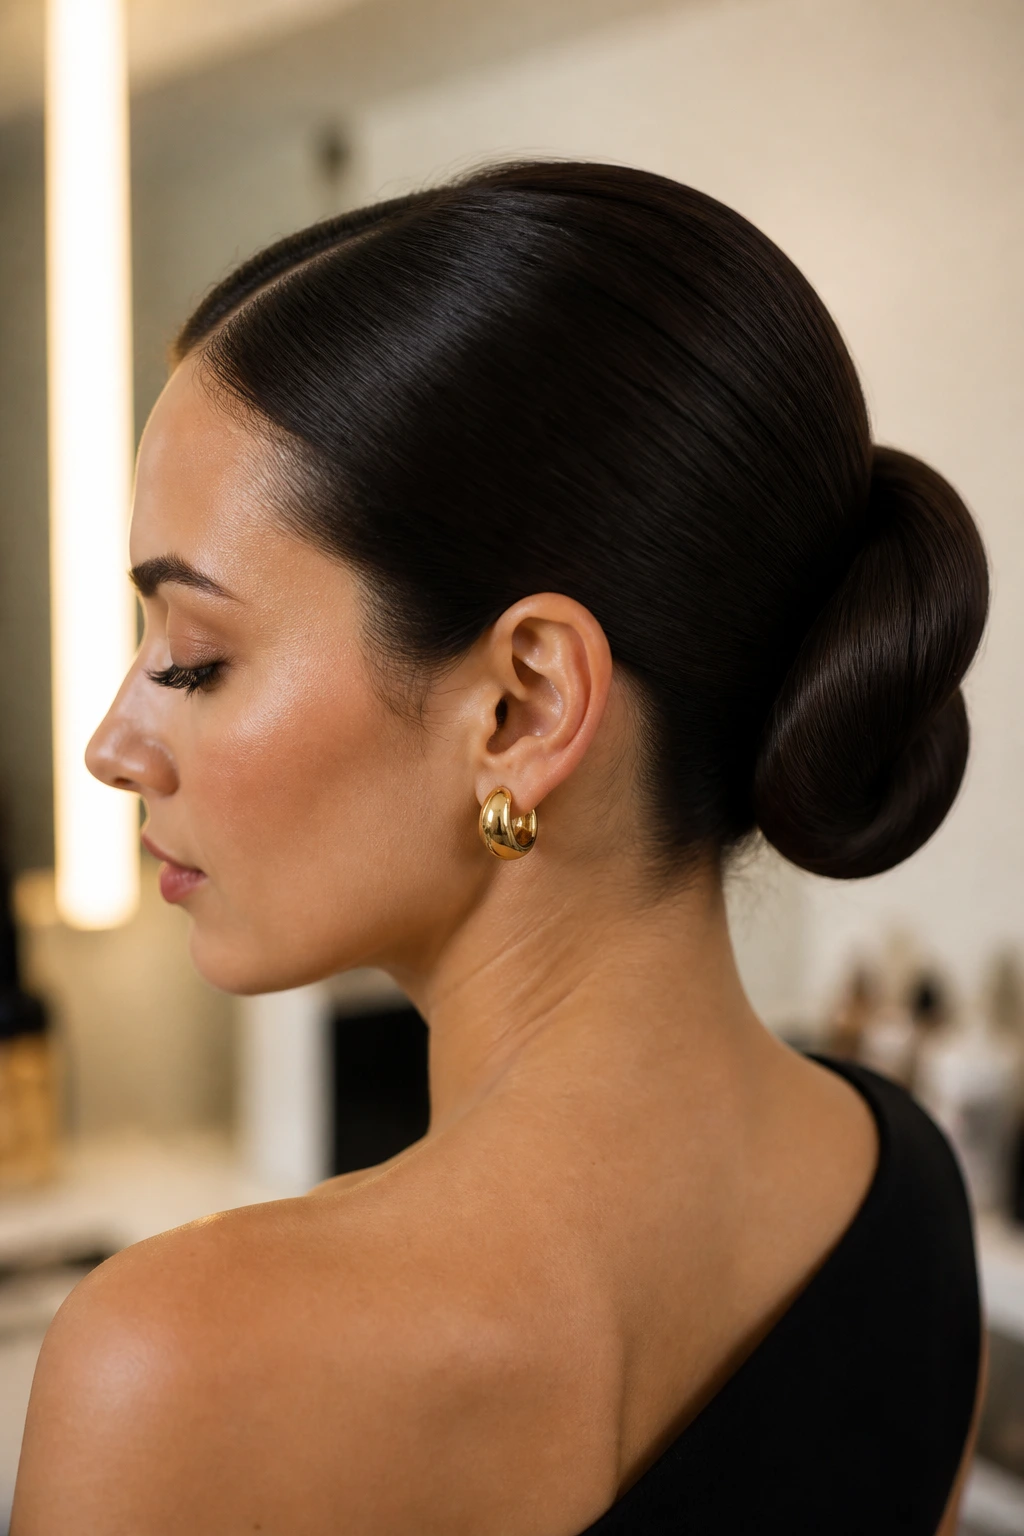
Minimalism here means the finish has to be immaculate. No wisps, no rough ends, no hidden clutter around the nape—just a smooth surface, a precise part, and a tight coil that sits exactly where it should.
This is the version for people who like clean lines more than decoration. A tiny amount of smoothing cream on the outer surface and a toothbrush-sized edge brush can make the difference between polished and flat.
23. Textured Matte Chignon
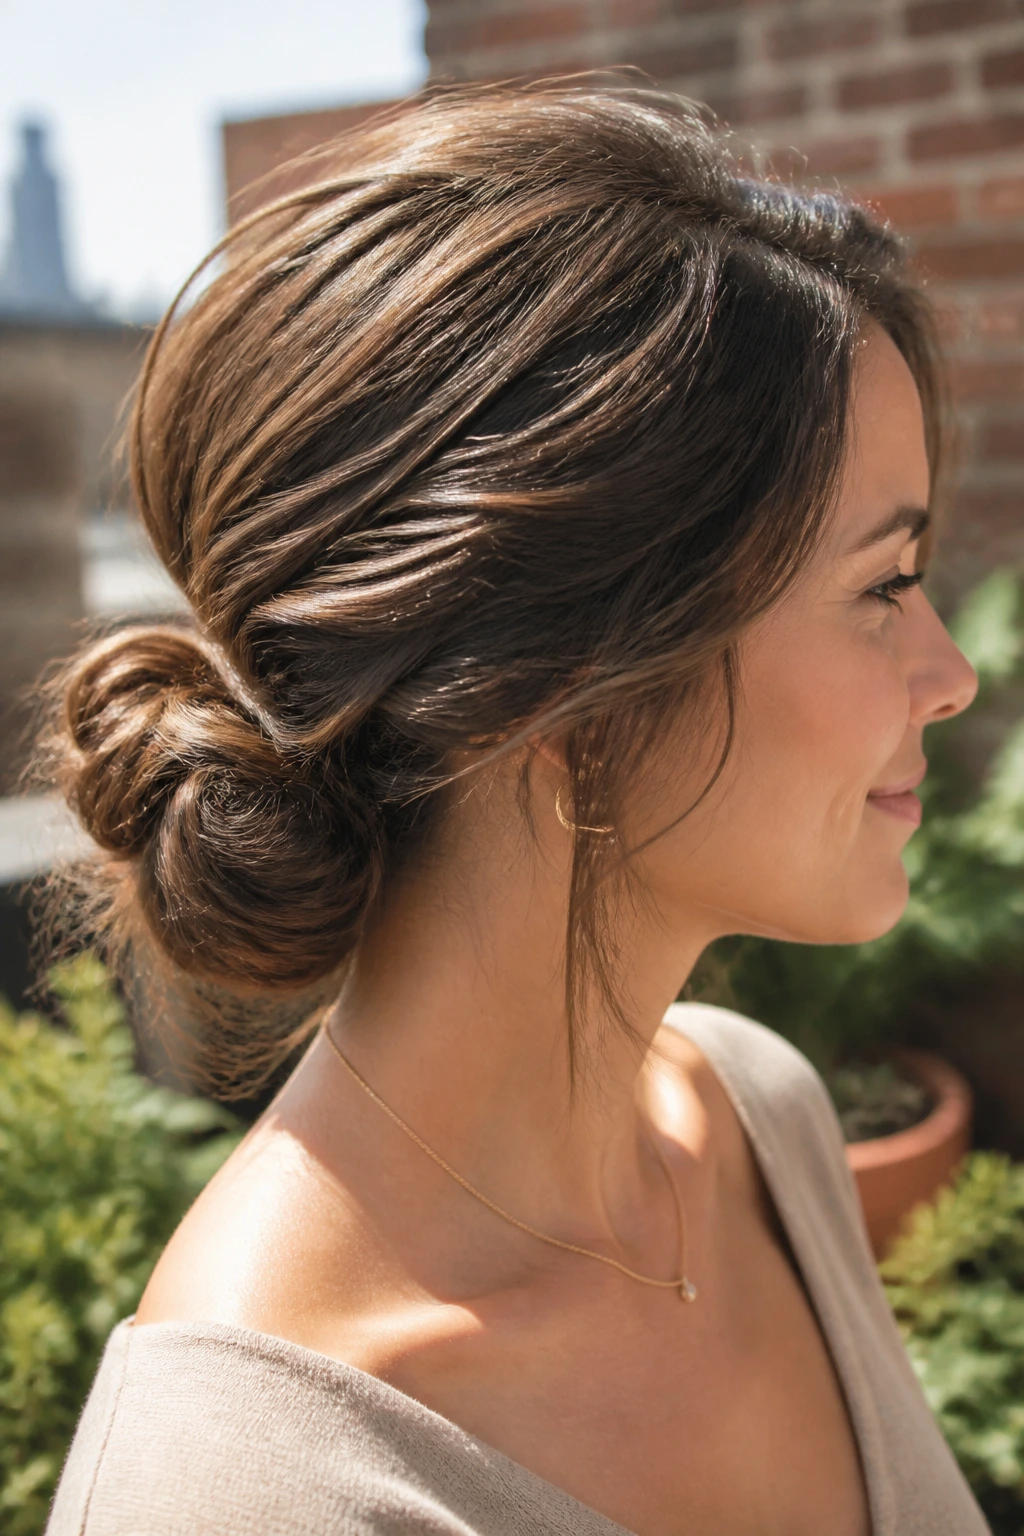
The matte version feels softer because the hair isn’t trying to shine its way through the room. A little roughness in the lengths, a piecey finish around the bun, and a few controlled flyaways make the style look relaxed without losing its shape.
This chignon likes dry shampoo or texture spray more than serum. If the hair is too glossy, the pieces slide together and the whole bun starts looking heavy.
24. Padded Chignon
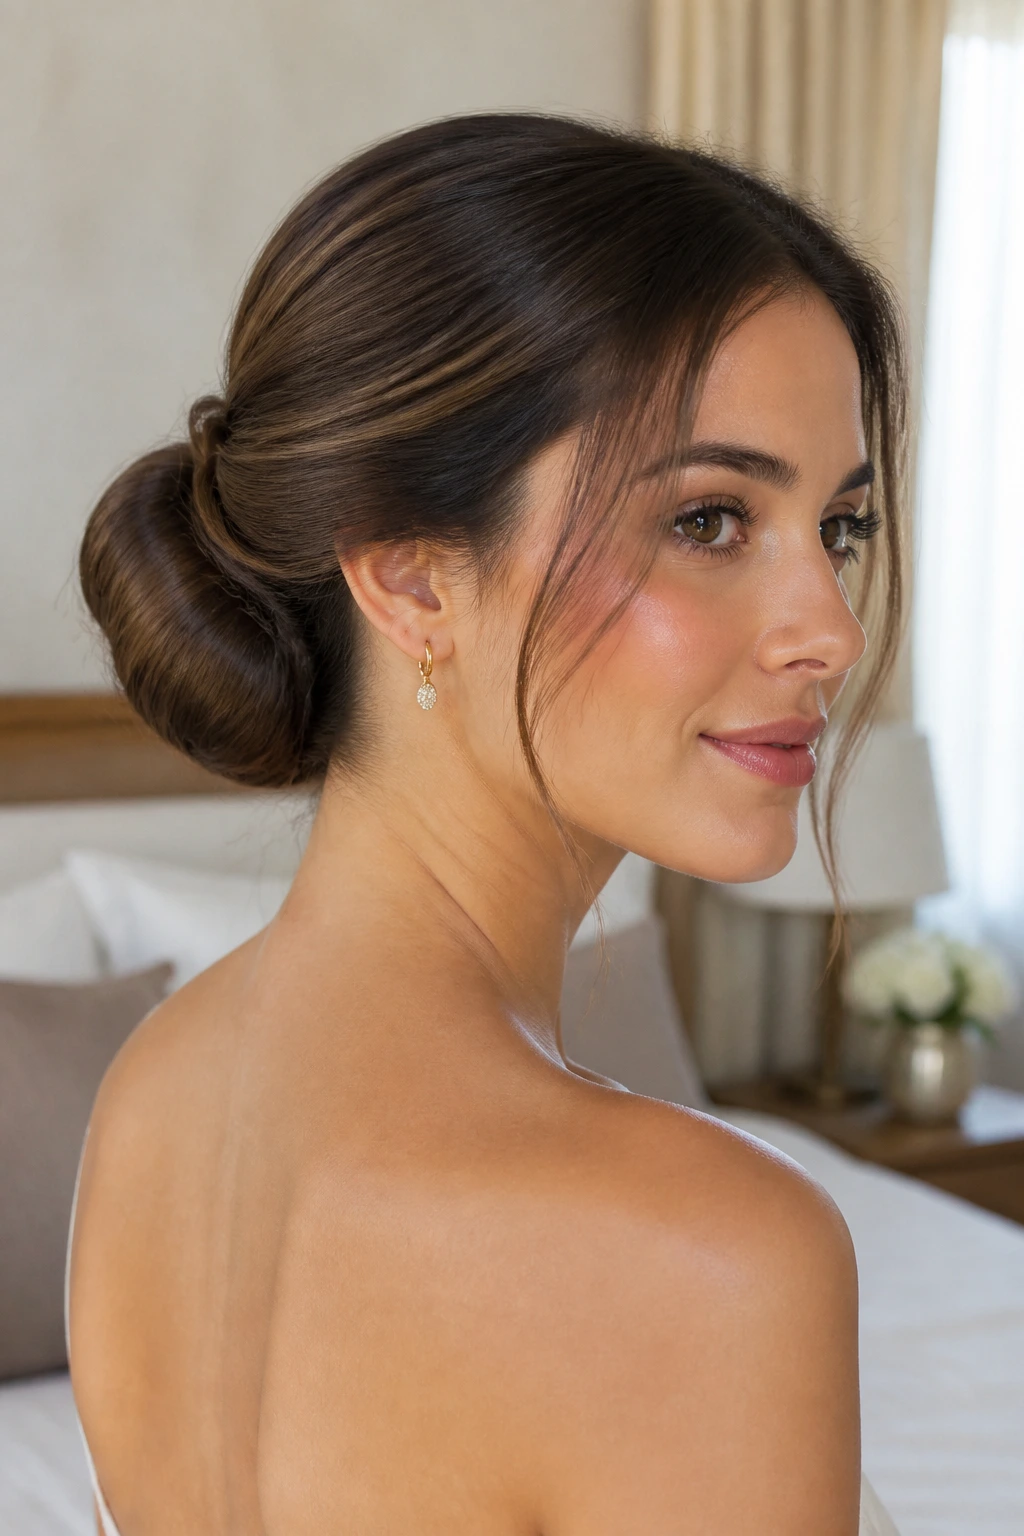
Padding changes the silhouette fast. A small bun form or hidden cushion can make fine hair look fuller and give the chignon a rounded shape that sits more confidently at the back of the head.
The trick is to hide the padding completely. If it shows through the hair, the style turns awkward; if it disappears under the fold, the bun looks naturally rich and balanced.
25. Infinity-Twist Chignon
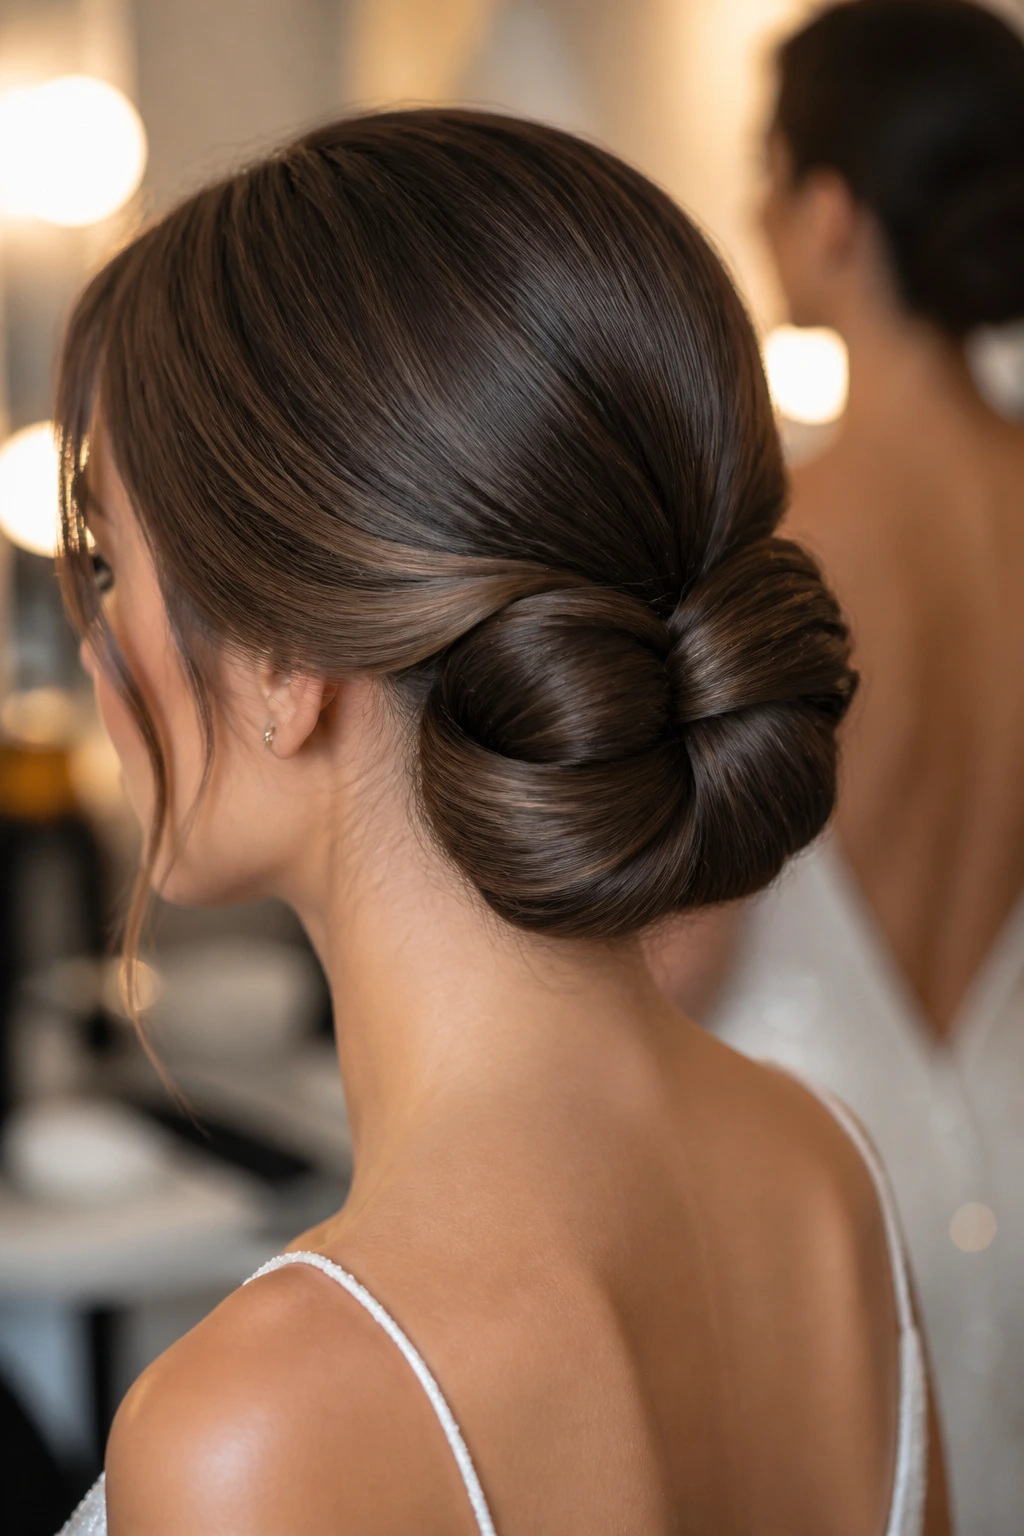
The infinity twist is the most sculptural of the group. The sections loop over and under each other in a figure-eight pattern, which creates a shape that feels deliberate from every angle instead of only from the front.
It suits events where the back of the hair will be seen—think open-backed dresses or photos taken from behind. Keep the loops even, because uneven twists are noticeable here in a way they aren’t in simpler buns.
26. Vintage-Inspired Chignon
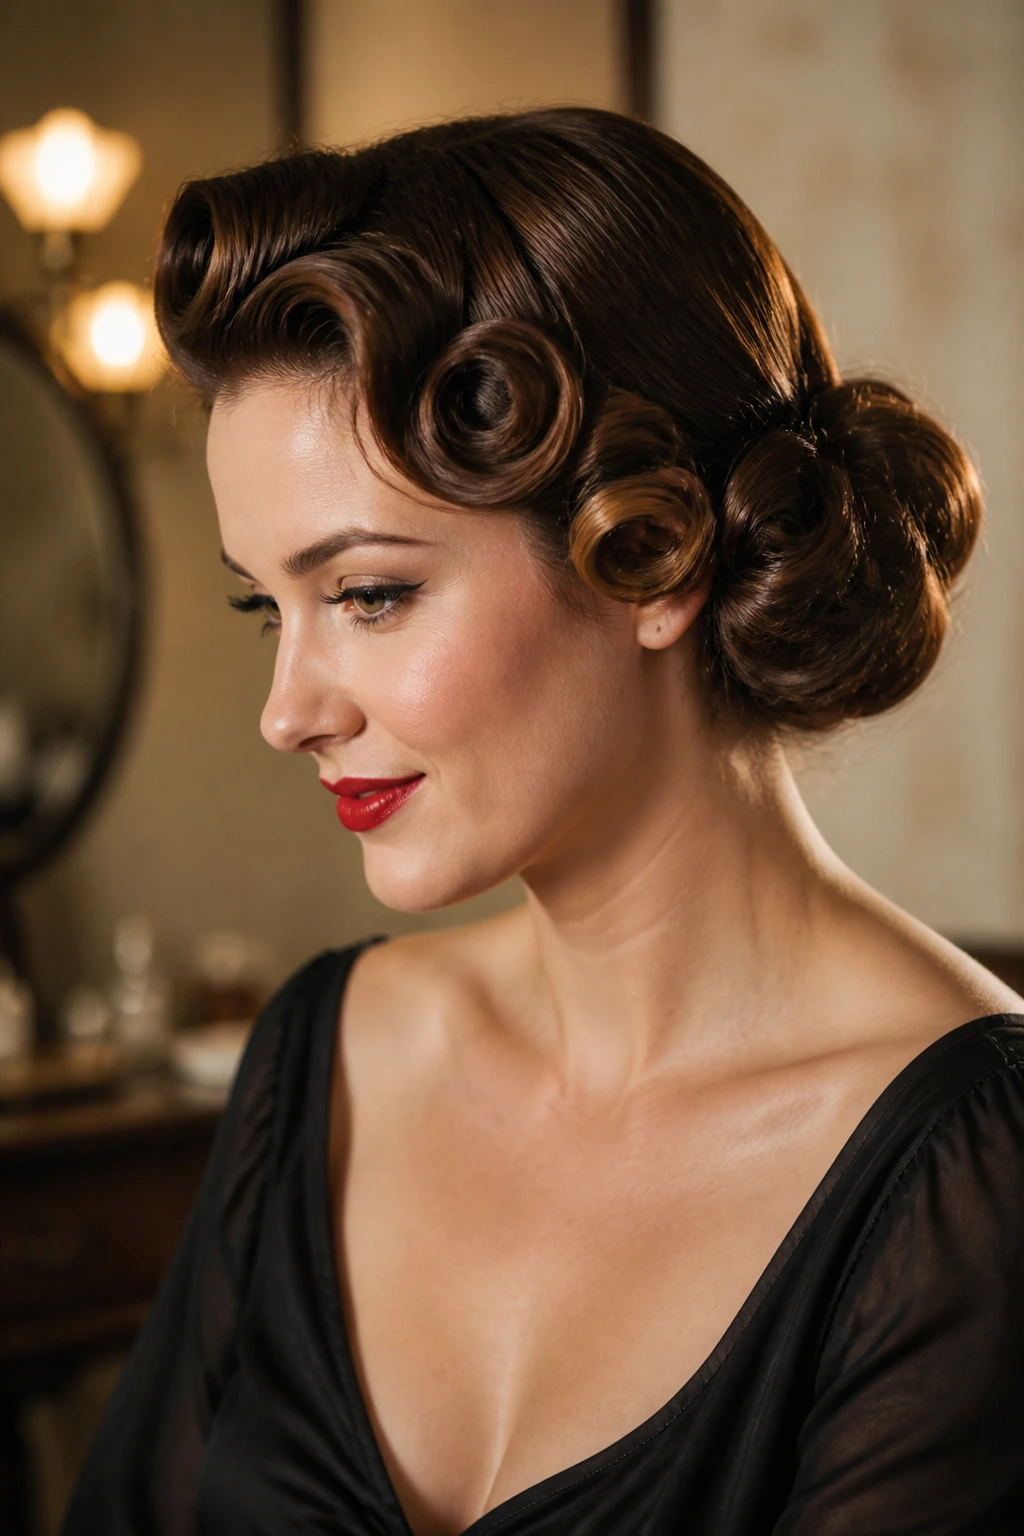
A vintage-inspired chignon usually borrows from pin curls, smooth rolls, and a glossy finish. The result feels a little old Hollywood, but only if the shape stays clean and the volume is placed with care rather than piled on.
This style asks for patience with the pins. Tuck each roll in place before moving to the next one, and stop adding product once the hair has that soft shine—too much, and the whole thing starts looking wet.
27. Thick-Hair Chignon
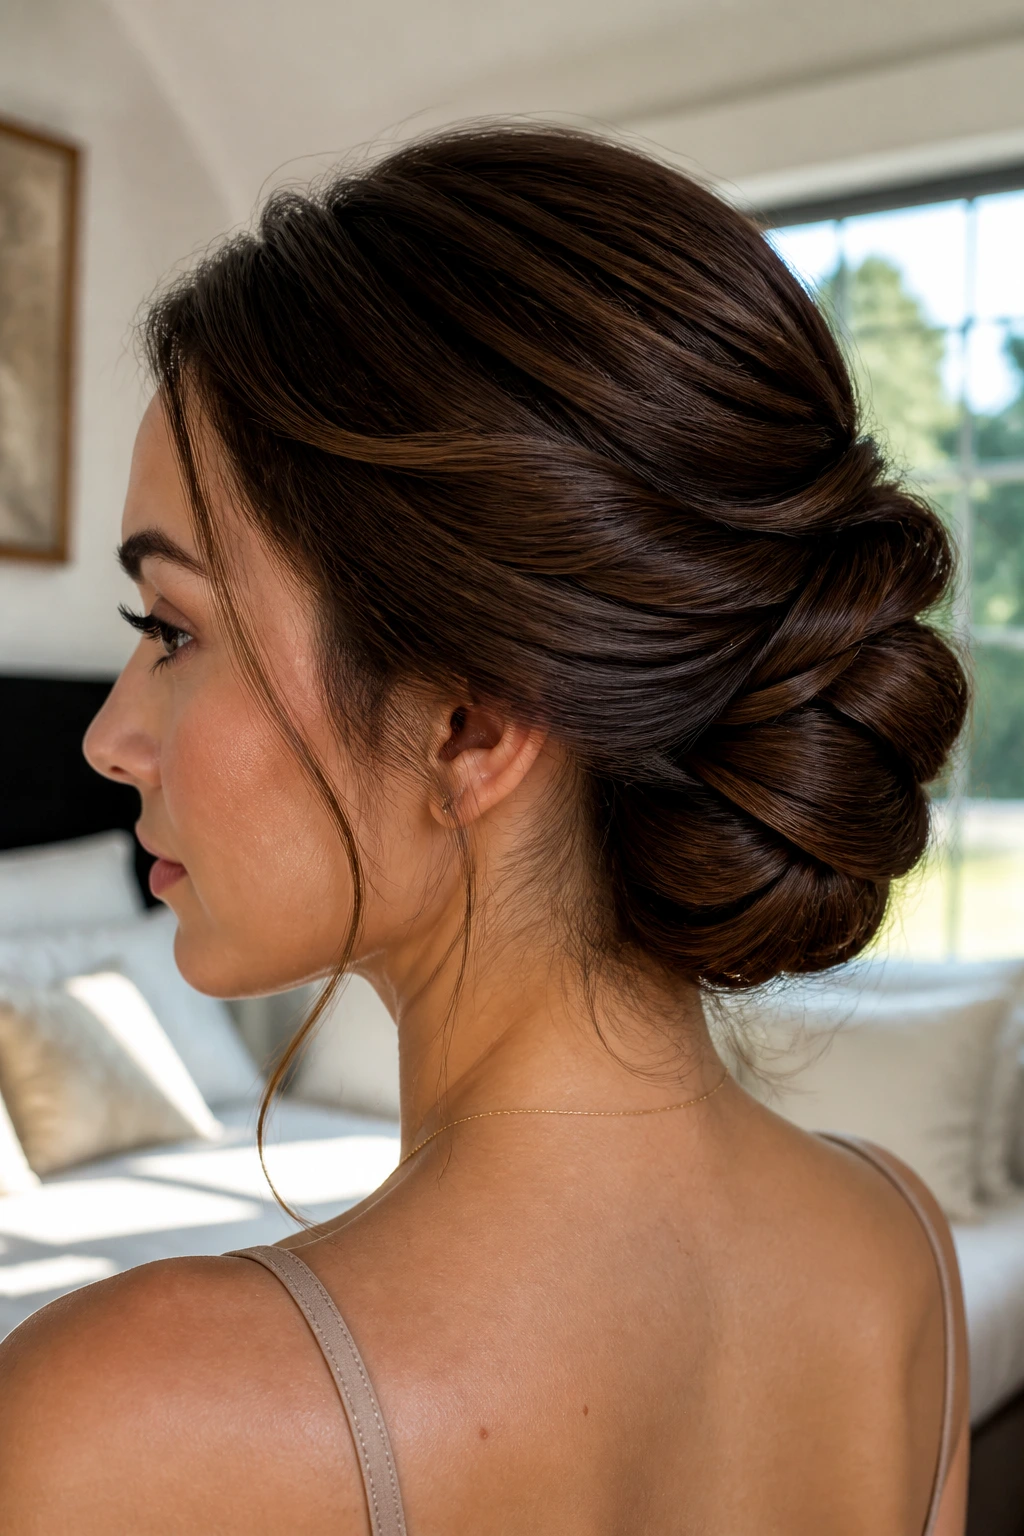
Thick hair needs a chignon that respects weight. Split the hair into smaller sections, twist each one before pinning, and never try to cram every strand into one giant elastic, because that usually creates a lopsided lump by the end of the day.
The best thick-hair chignons feel anchored in layers. A strong base at the nape and crossed pins hidden under the folds keep the shape from slowly sinking, which thick hair likes to do if it’s left to its own devices.
28. Fine-Hair Chignon
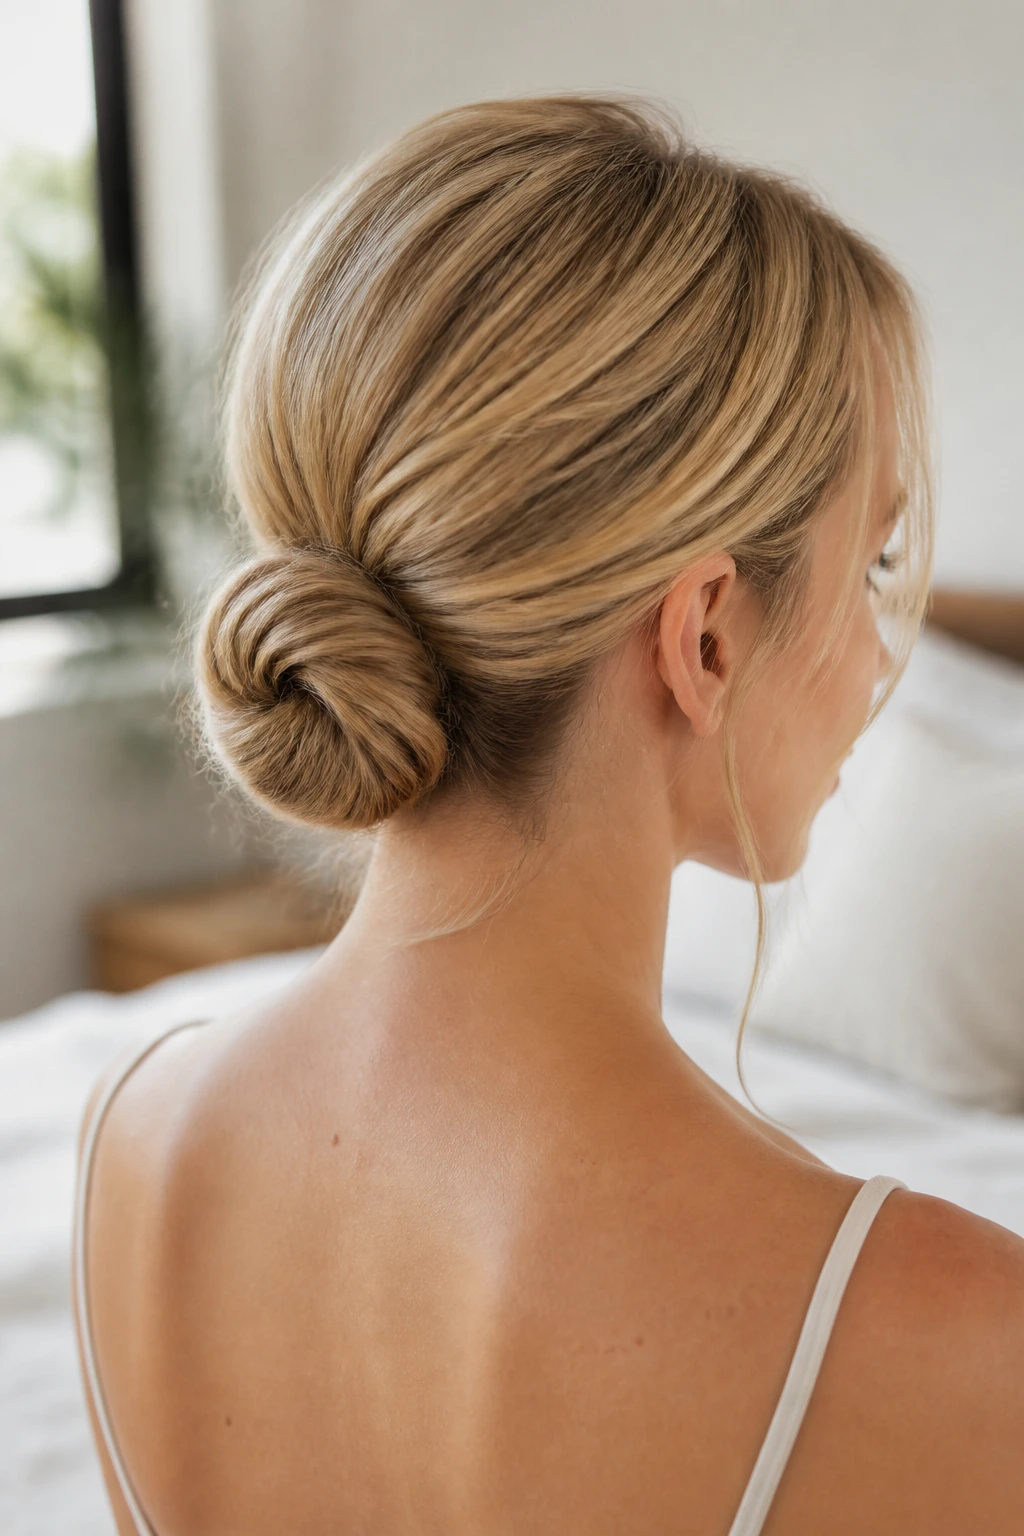
Fine hair needs the opposite treatment: more grip, less slickness, and a shape that reads fuller than the actual amount of hair suggests. Dry shampoo at the roots, a bit of texture spray through the lengths, and a small padded center can do a lot of heavy lifting.
Keep the bun modest in size. If the chignon gets too wide, fine hair starts to look stretched thin around it, and the style loses the tidy line that makes it work.
29. Short-to-Medium Chignon
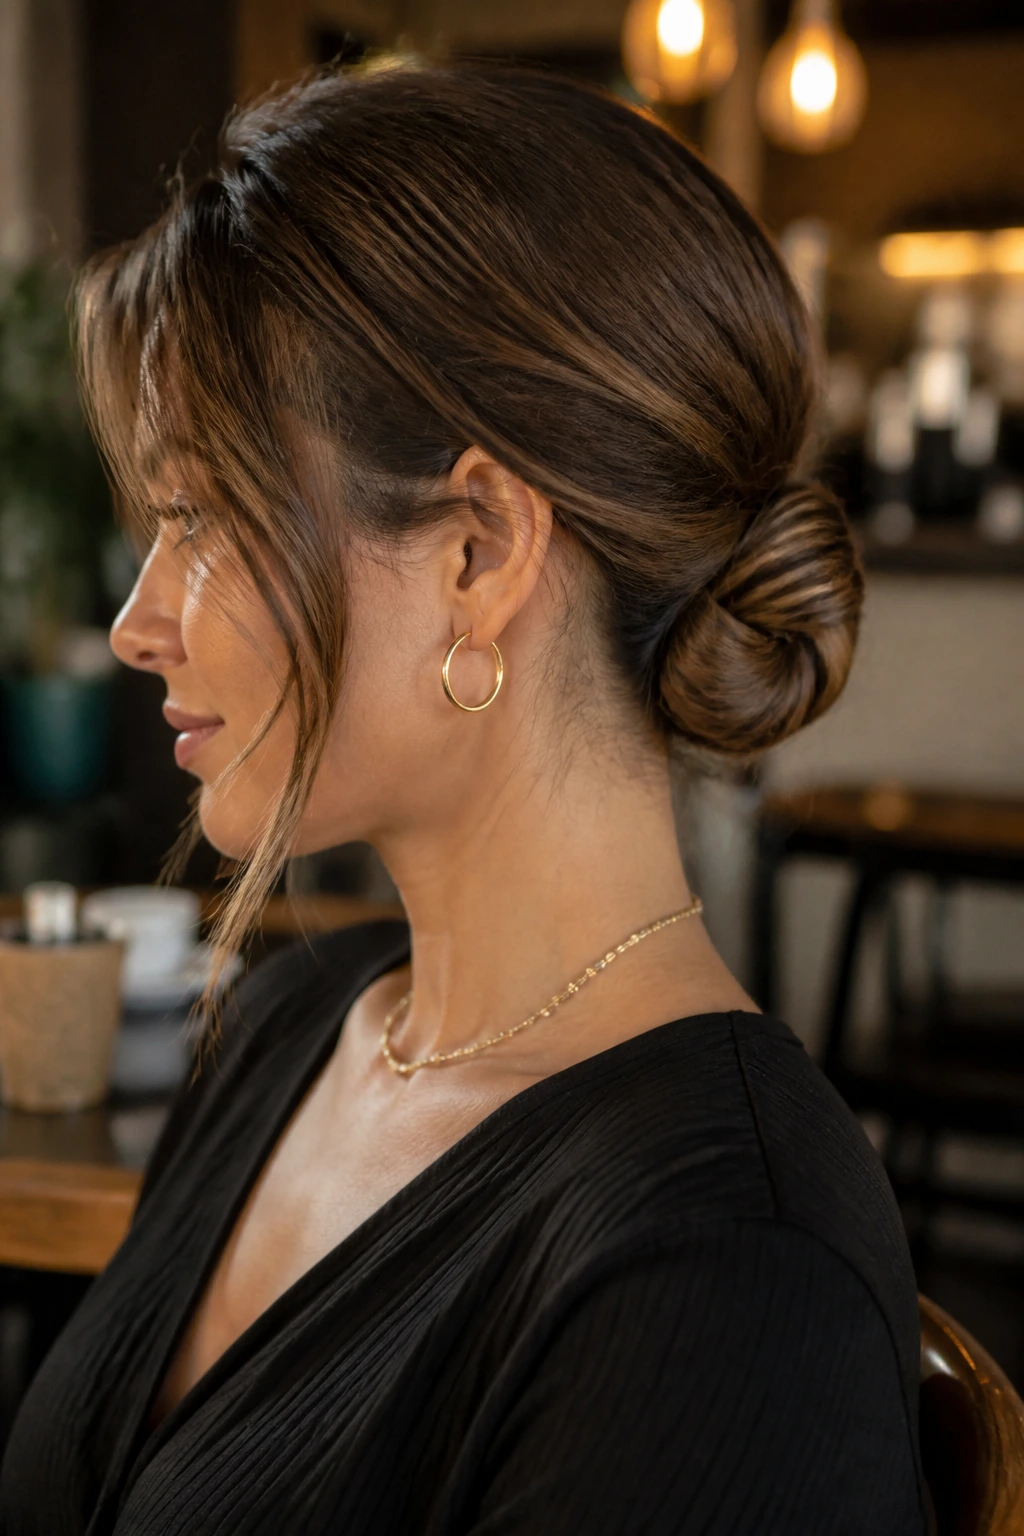
Short-to-medium hair can still make a chignon if the tuck stays small and deliberate. A few tight twists at the nape, hidden pins, and maybe a tiny filler piece can create the shape without pretending the hair is longer than it is.
This version looks best when the ends are folded inward instead of hanging free. The goal isn’t to force a big bun out of short hair; it’s to make a compact, elegant knot that feels believable.
30. Braided Side Chignon
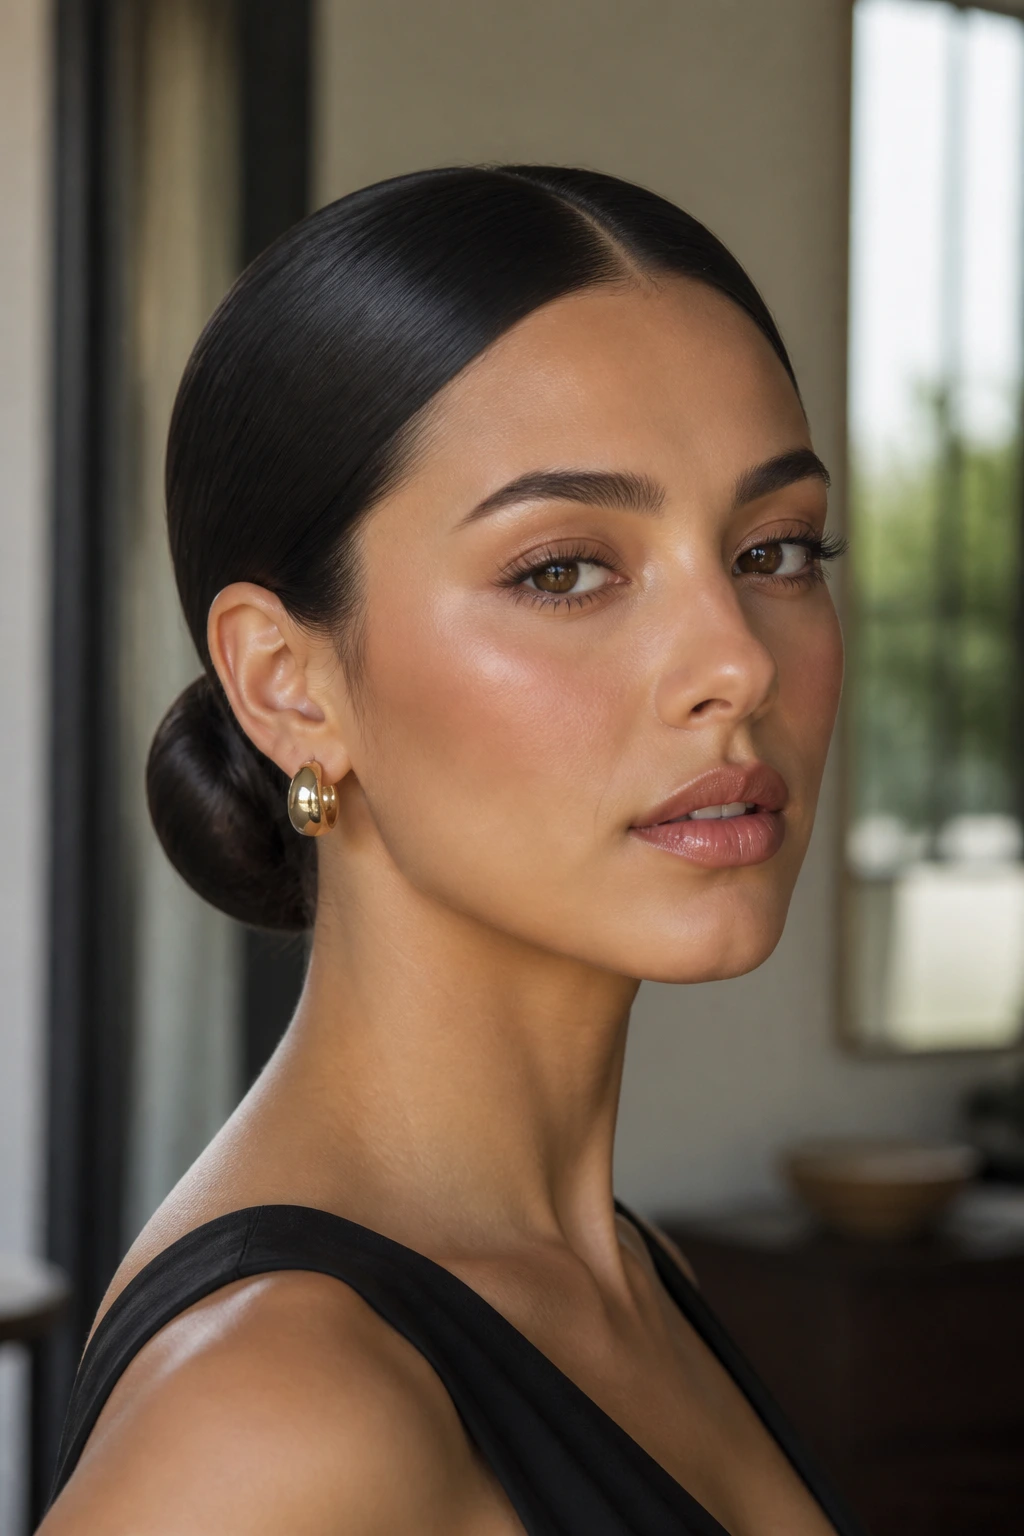
A braided side chignon shifts the knot slightly off center, which gives the whole style a little motion. The braid sweeps toward one side before it tucks into the bun, so the final shape feels softer than a center-set knot and more anchored than a loose side bun.
It’s a nice match for asymmetrical necklines or gowns with one shoulder detail. Keep the braid close to the head so the shape stays refined instead of turning into a heavy side plait.
31. Accessorized Tucked Chignon
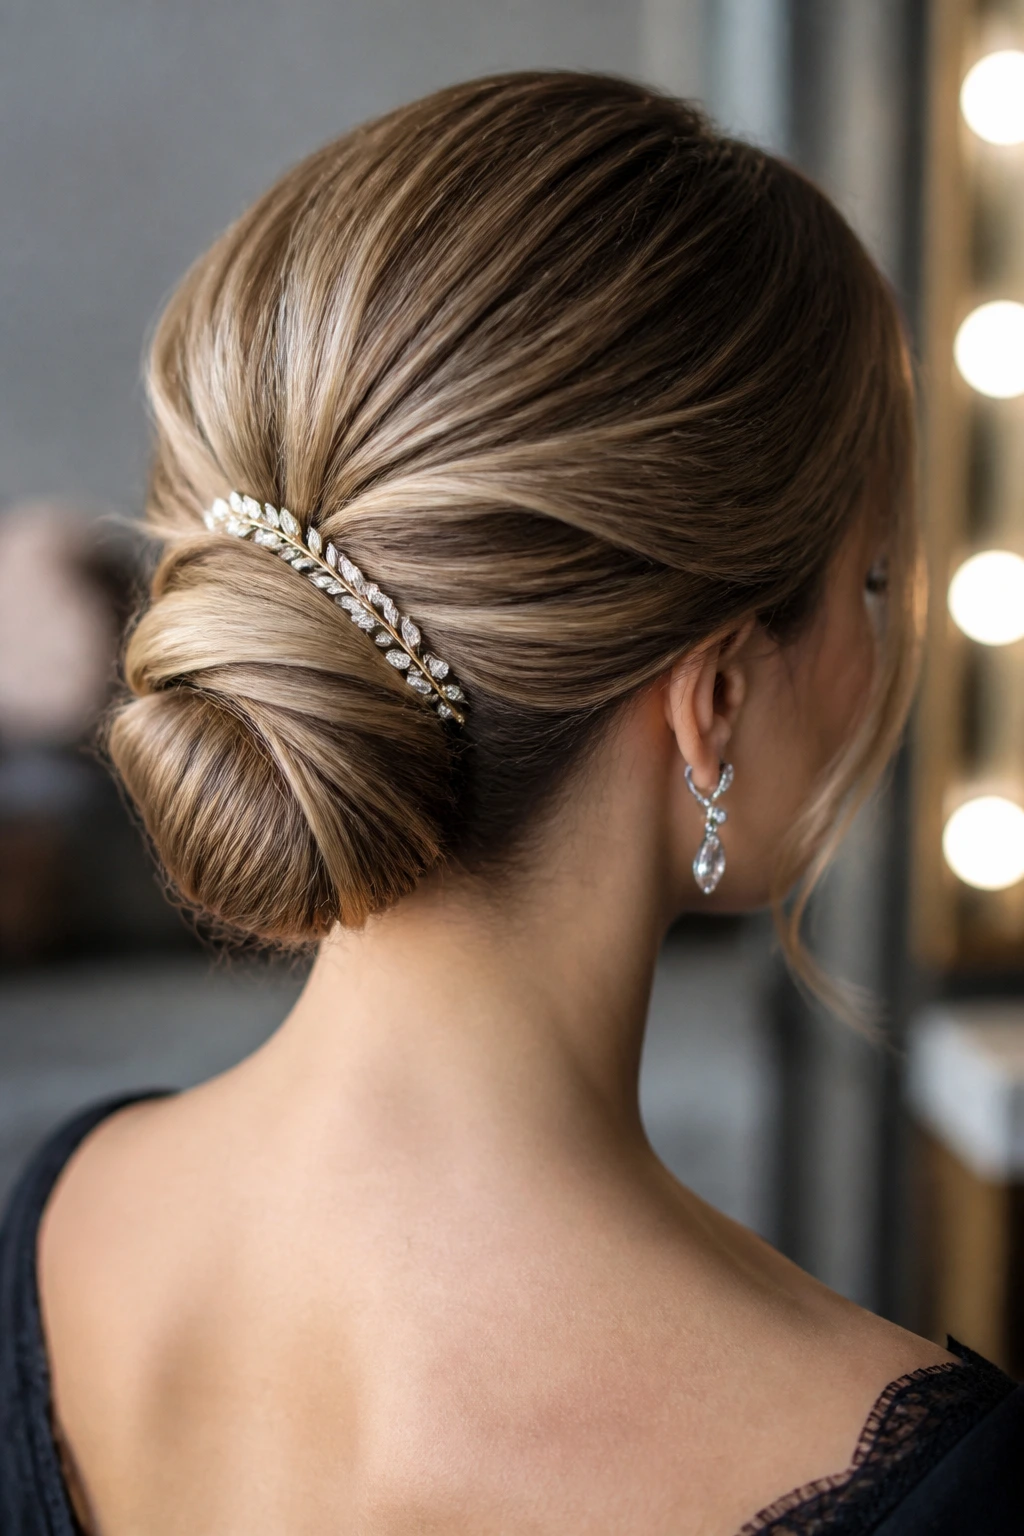
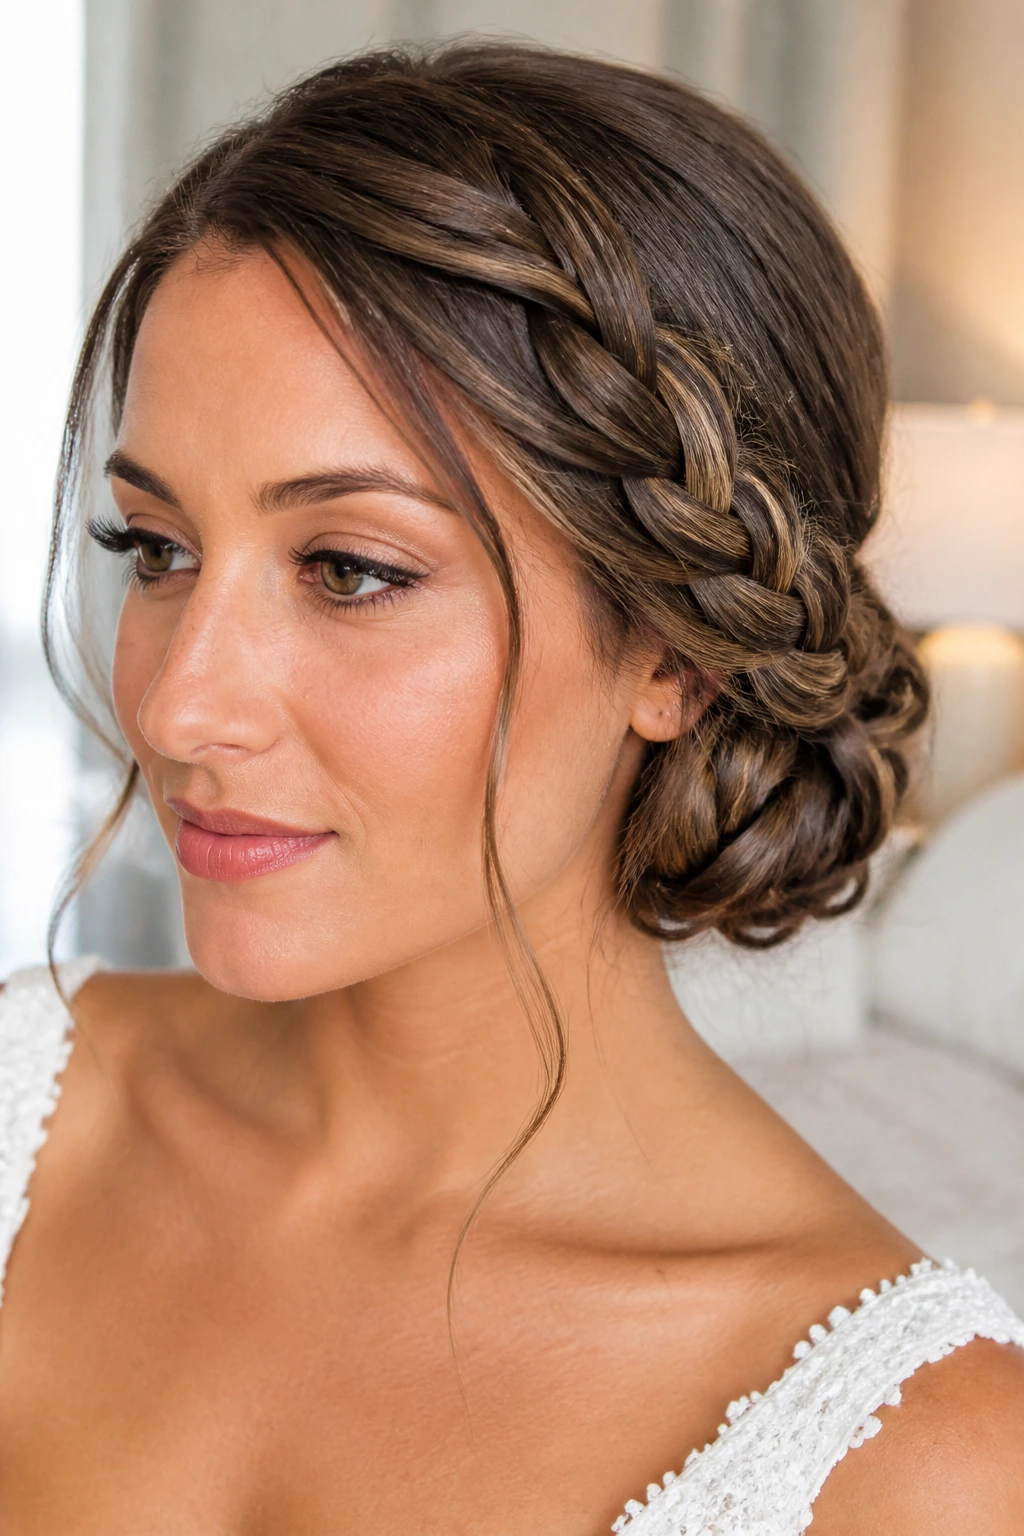
Accessories should feel like punctuation, not decoration pasted on top. A slim comb, a metal hairpin, or a barrette can help secure the tuck and make the chignon look finished, especially when the hair itself is kept simple.
Place the accessory where it reinforces the shape. If the clip sits too high or too far from the seam, it can make the bun look accidental; when it sits on the fold, it looks chosen.
32. Looped Romantic Chignon
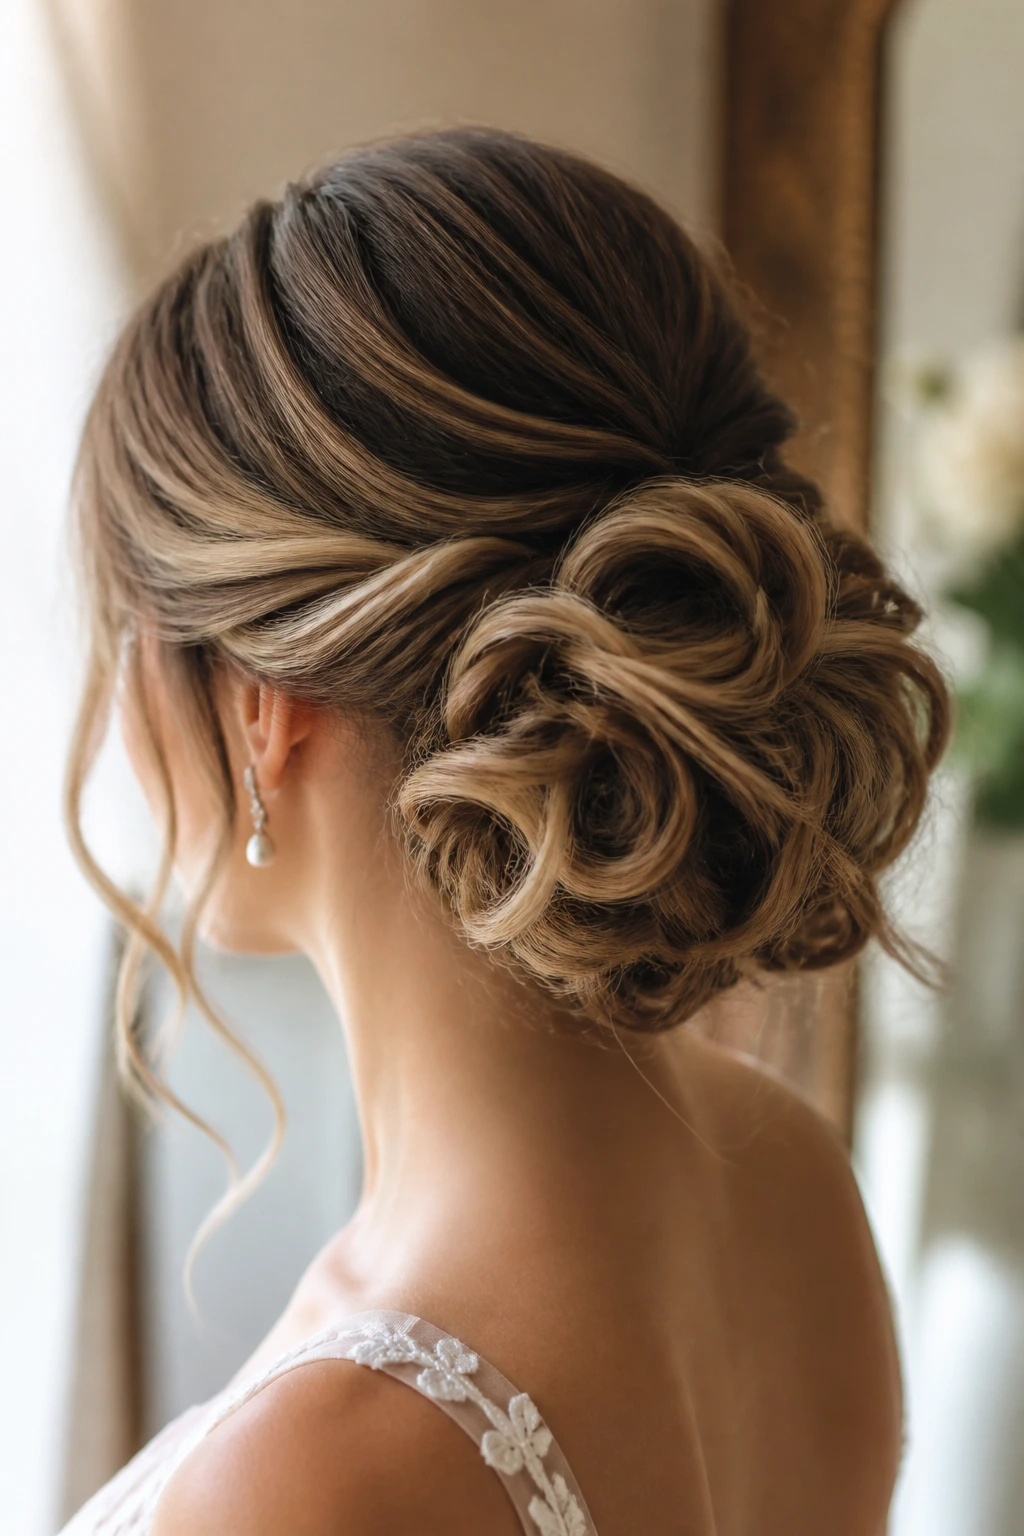
Loops make a chignon feel softer without turning it messy. Instead of one tight knot, the hair folds into rounded shapes that stay visible, which gives the style a romantic outline and a little more movement at the back.
This version works well when you want the bun to look airy. The loops should be full enough to show but not so loose that they start collapsing into one another.
33. Veil-Ready Chignon
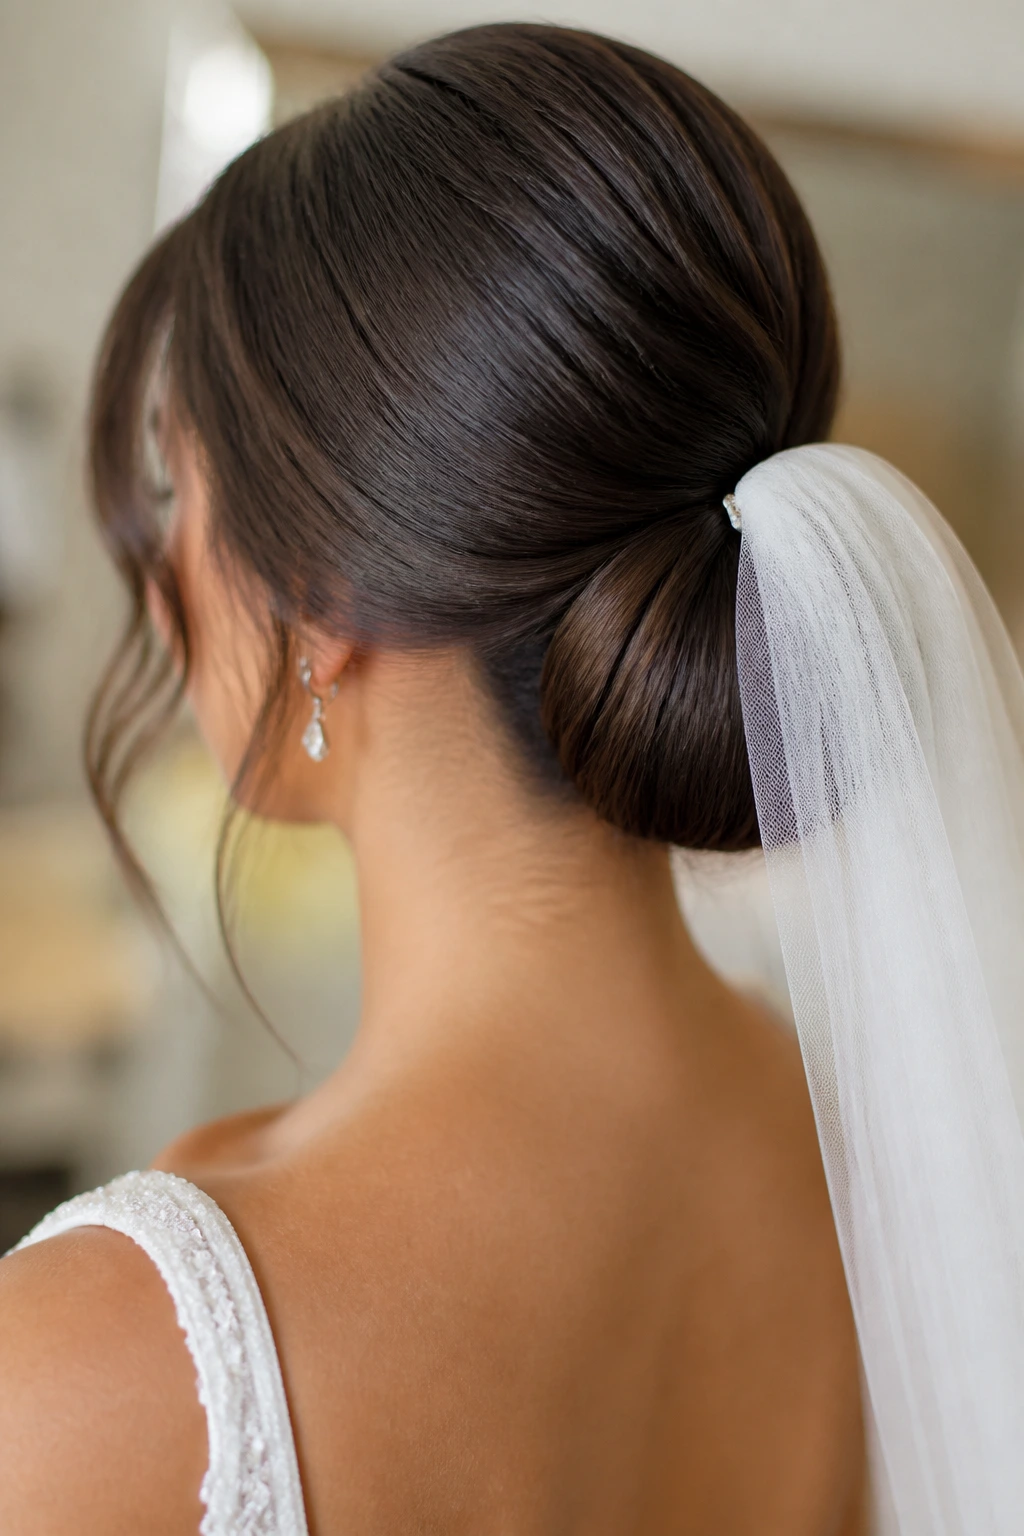
A veil needs a stable chignon more than a dramatic one. The bun should have a firm center and a smooth outer surface so the veil comb can anchor without slipping, tilting, or snagging on stray pieces.
Keep the shape compact and the pins hidden. If the chignon is too loose, the veil pulls on it as soon as it’s clipped in, and that’s when the whole style starts to drift.
34. Office-Ready Chignon
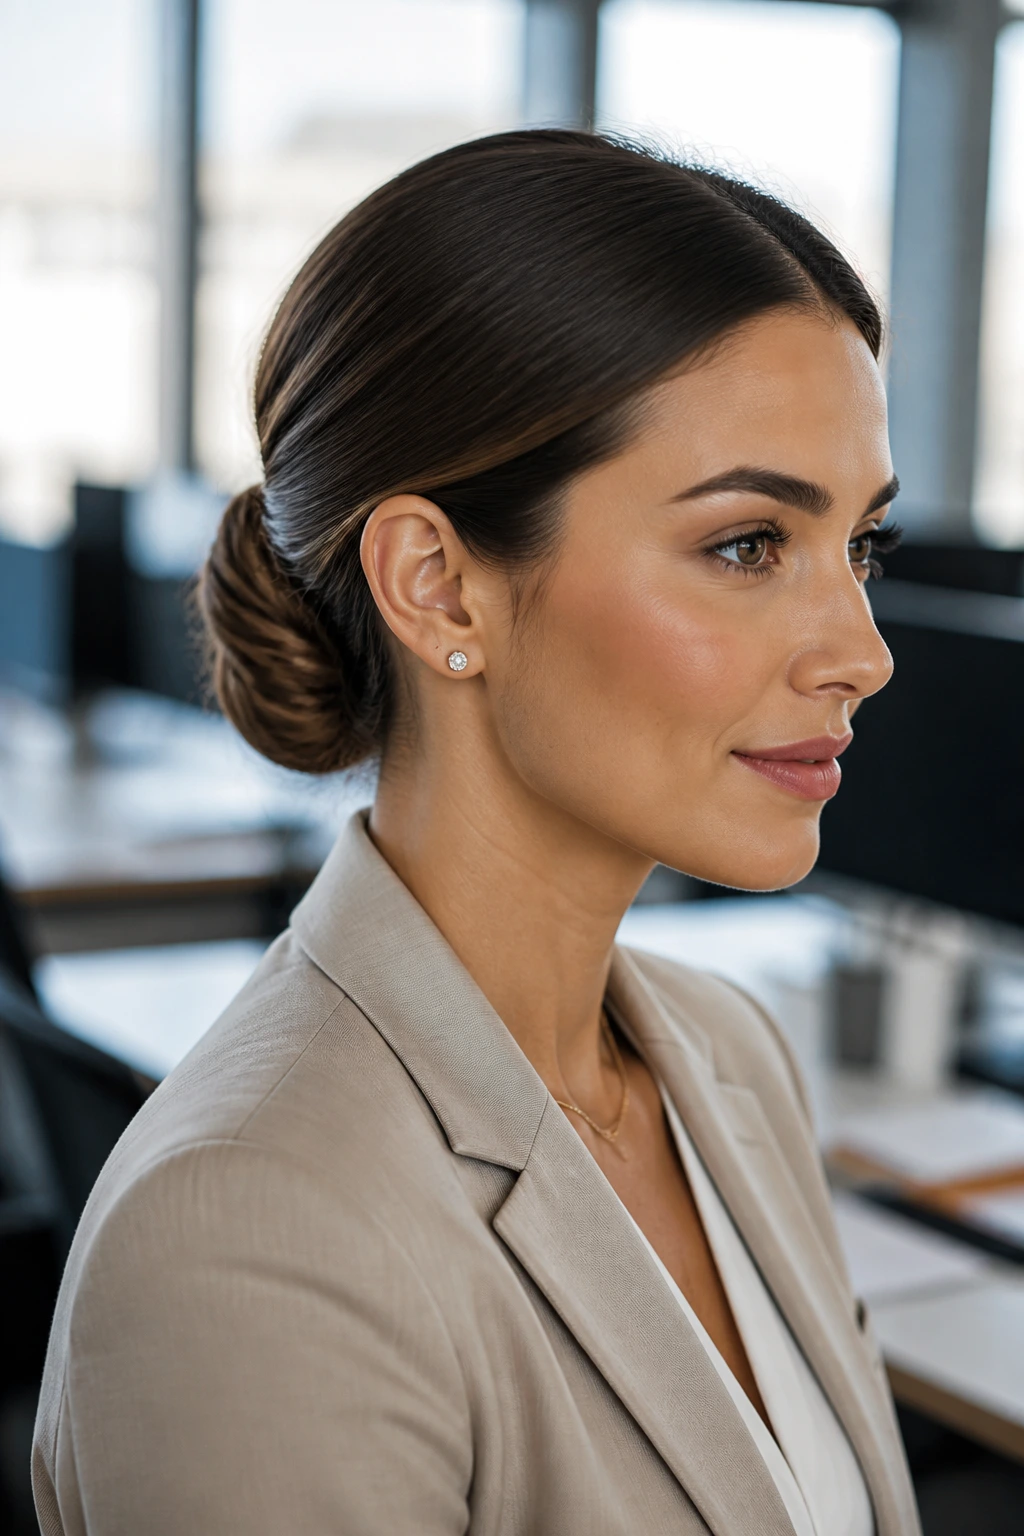
An office-ready chignon has to survive a desk chair, a coat collar, and a few hours of being ignored. The best version is neat, low, and secure, with enough polish that it looks thought through but not so much shine that it feels formal.
This is the chignon for days when you want your hair out of the way and still want to look put together in a meeting. A clean part, tight base, and one final pass with a smoothing brush usually do the job.
35. High-Shine Event Chignon
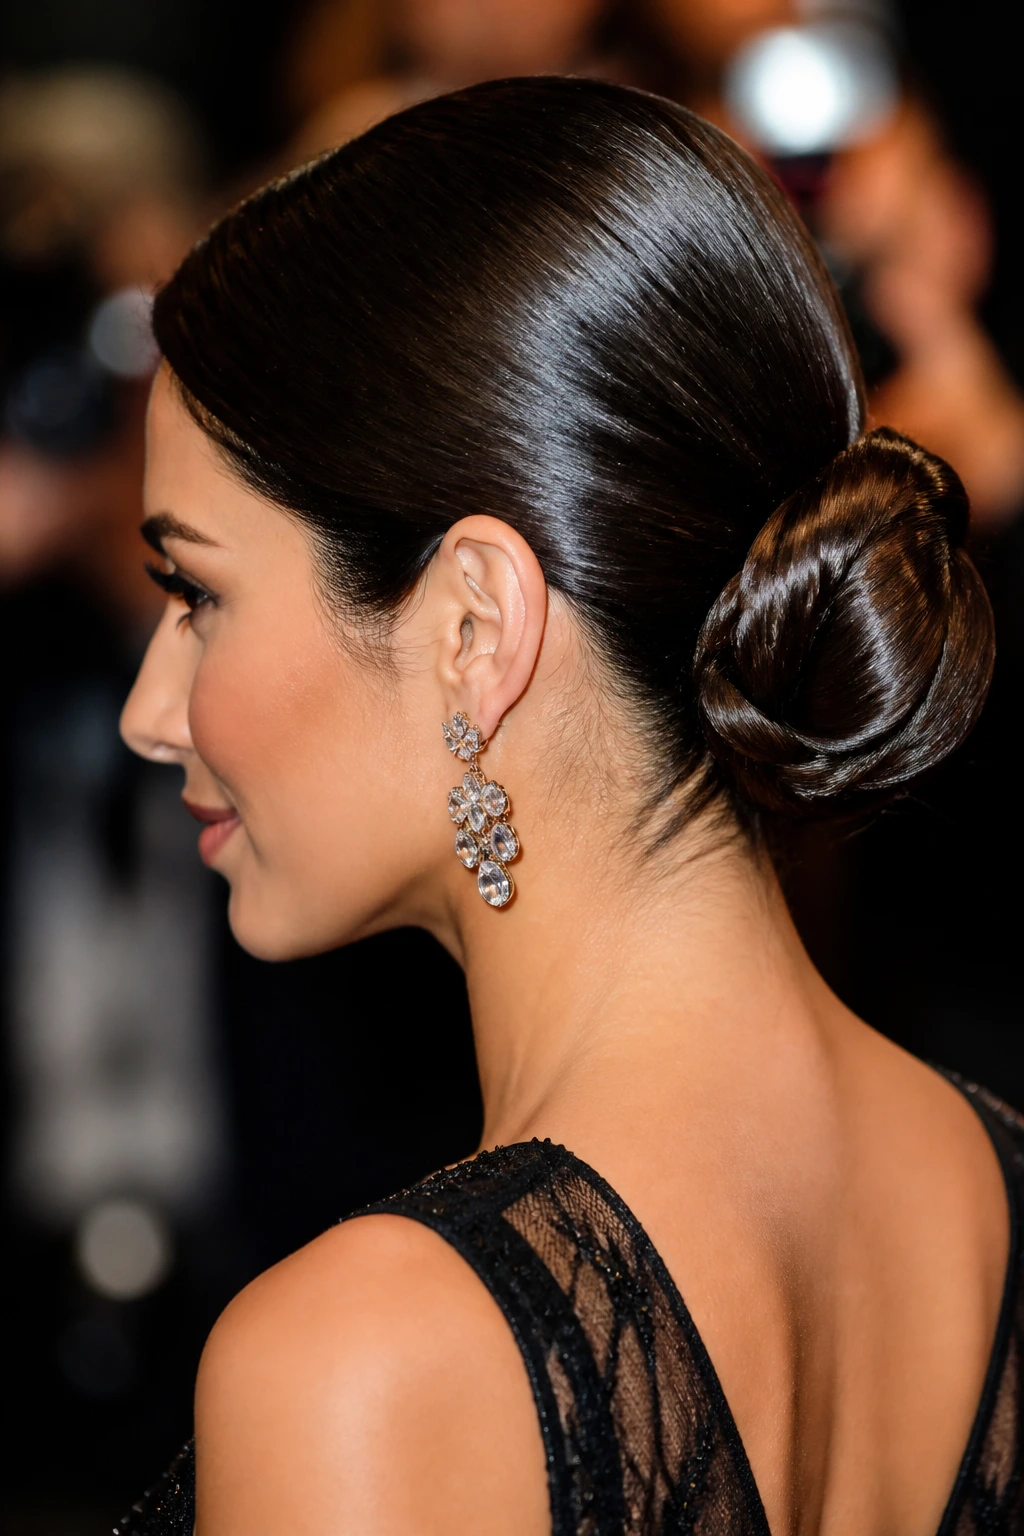
Shine changes how formal a chignon reads. When the outer surface is sleek and reflective, the bun feels dressed up even if the shape itself is simple, which is why this version works for evening events and photos.
Use gloss spray sparingly. Too much makes the hair look greasy under light, while a thin layer just on the top surface gives the style that polished sheen people notice right away.
36. Swirled Chignon
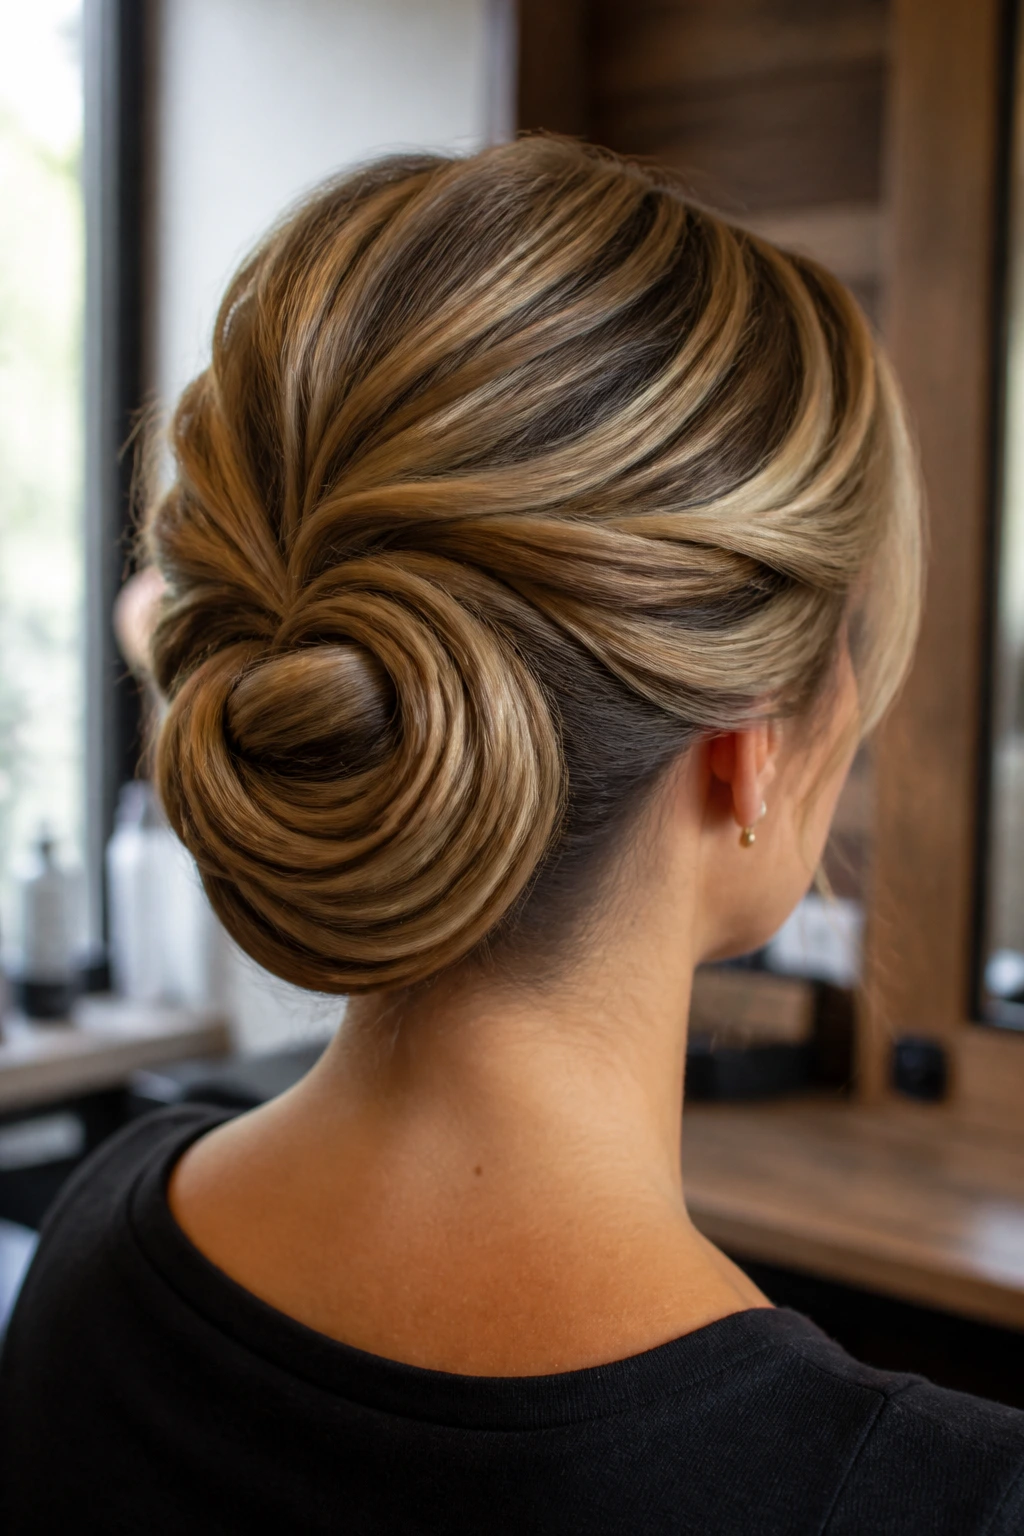
Swirls give the bun a hand-shaped look that feels a little more considered than a plain coil. The hair is guided in visible arcs around the center, which creates a subtle pattern across the back of the head.
This is a good middle ground between sleek and ornate. If you want the chignon to look interesting from behind without adding braids or flowers, swirls do that work quietly.
37. Curly-Hair Chignon
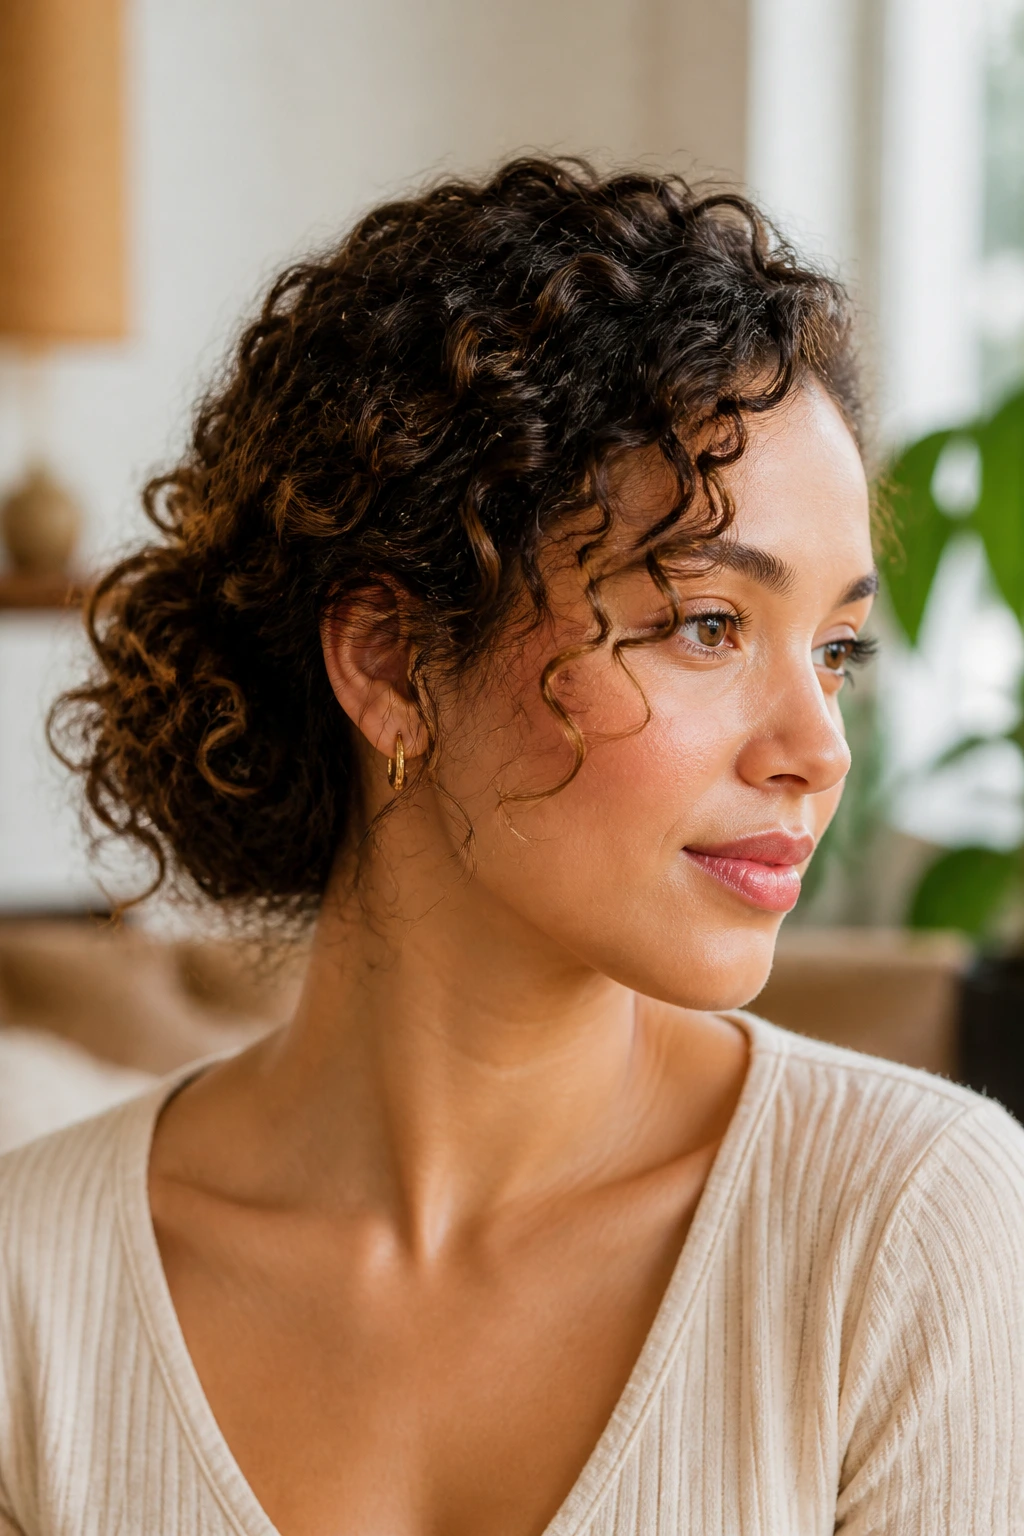
Curly hair deserves a chignon that keeps some of its texture visible. Instead of flattening every curl, gather the hair in sections, pin the curl clusters where they naturally want to sit, and let the shape breathe a little.
The result is softer and less forced than a straightened bun. A light cream or gel on the edges helps define the hairline, but the curls themselves should still look like curls, not like they’ve been erased.
38. Sculpted Editorial Chignon
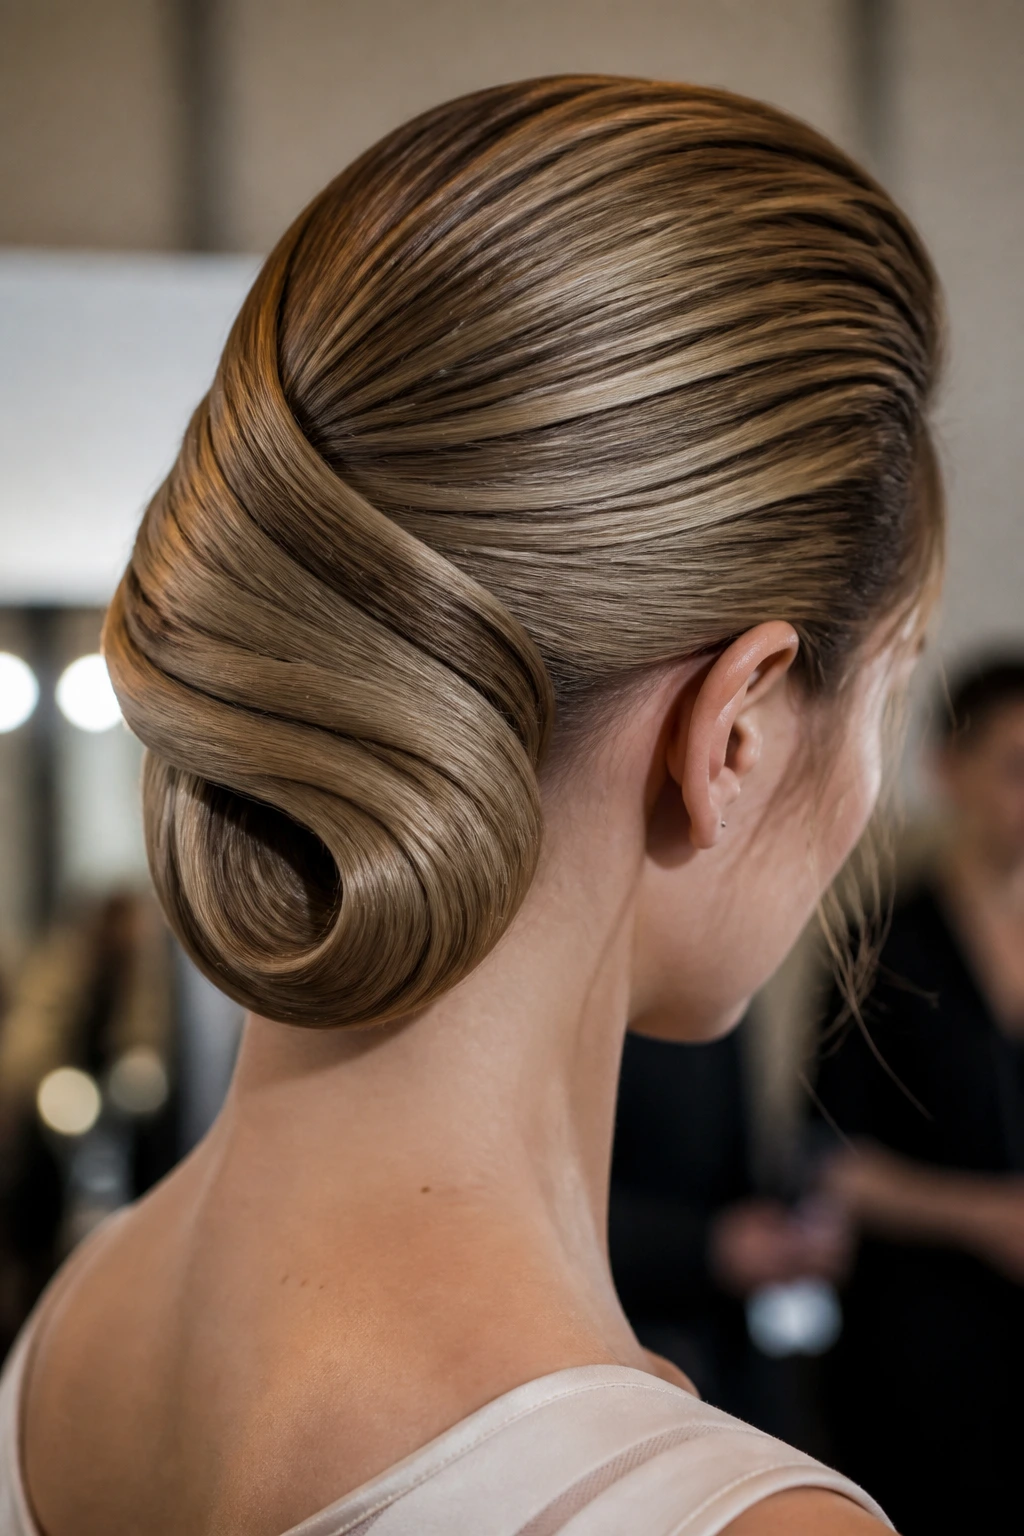
The sculpted version is all about precision. Every fold has a reason, every pin is hidden, and the final shape looks intentional from every angle, which is why it has that clean, editorial feel without needing extra decoration.
This style rewards patience more than product. Build the shape slowly, smooth the outside once, and stop touching it. The longer you fuss, the more likely the chignon is to lose the crisp line that makes it stand out.
Why Chignon Hairstyles Read as Elegant Right Away
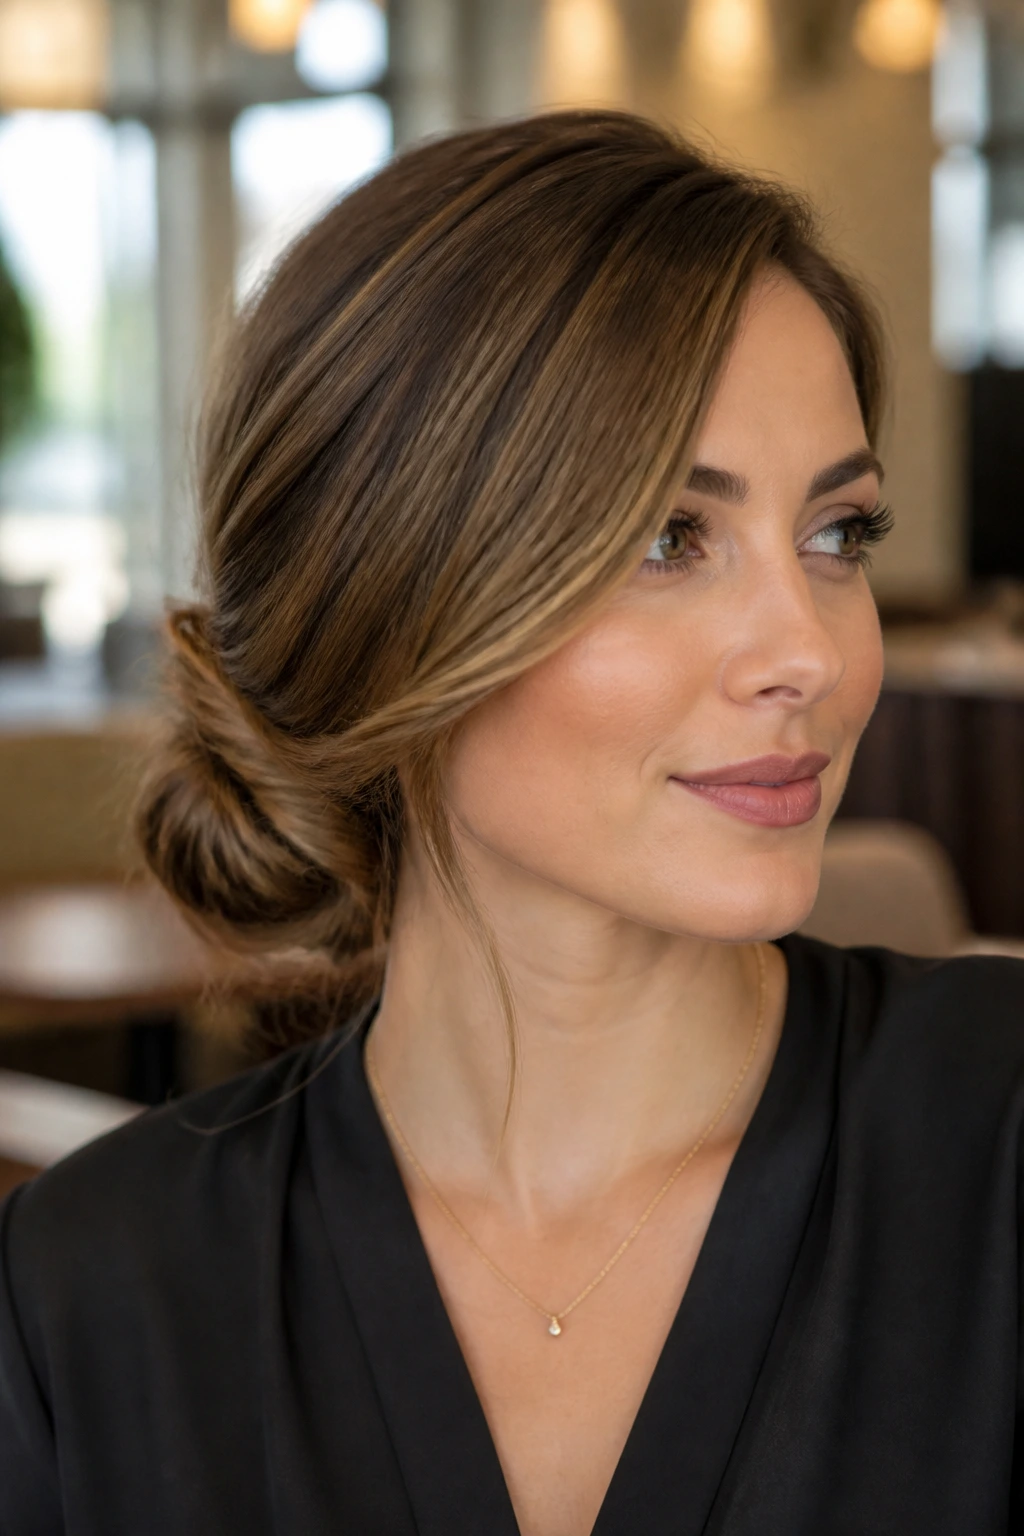
The reason chignon hairstyles feel polished so fast is simple: they clear space. Once the hair moves off the shoulders and sits low at the back of the head, the face, neck, and outfit start to do more of the visual work.
The best chignons also keep their logic easy to read. A neat roll, a braid feeding into a knot, or a tucked coil gives the eye one clear path to follow. Confusion is what makes an updo look overworked. Clean lines calm it down.
There’s a small practical side here too. Low placement keeps the weight centered, which is why a chignon tends to feel more secure than a loose pinned twist at the sides. If the base is stable, everything above it looks better.
The Pins, Brushes, and Sprays That Make the Shape Easier
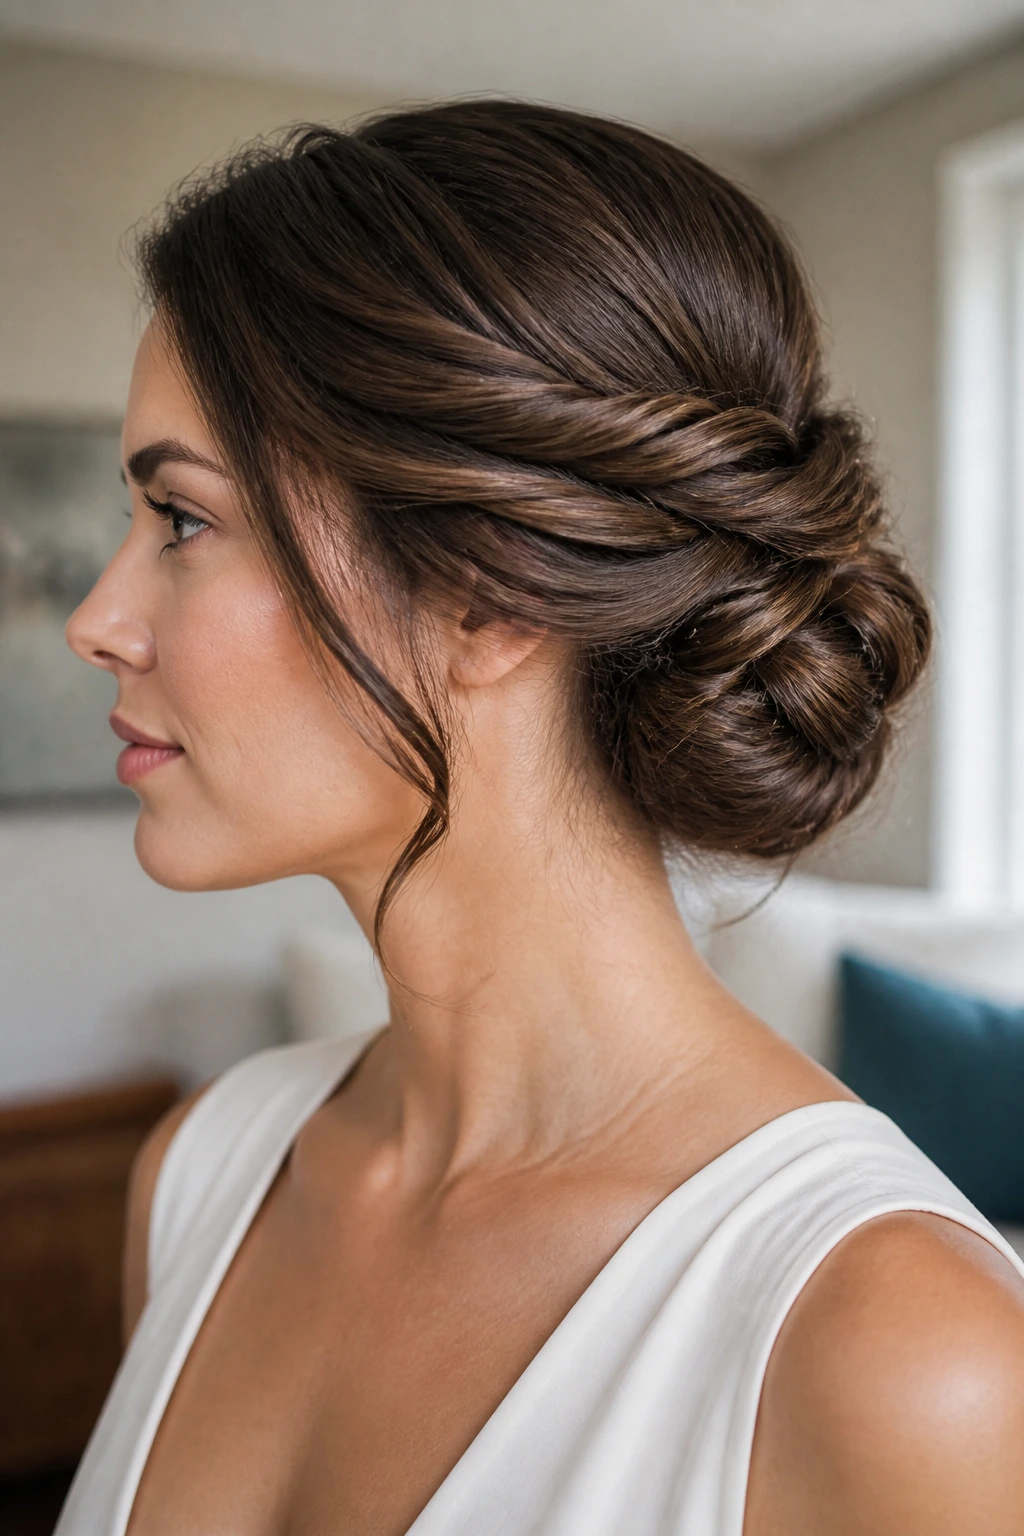
- Rat-tail comb: Clean parting starts here. The tail gives you a straight line at the center or a soft sweep where you want the front to sit.
- Boar-bristle brush: This smooths the surface without leaving the crown puffy. It’s especially useful before a sleek chignon.
- Mini clear elastics: These are useful for anchoring small sections before you twist or braid them into the bun.
- Bobby pins with a matte finish: Shiny pins slide more easily. Matte ones grip better and tend to disappear in the hair.
- U-pins: These work well for thick hair or fuller buns because they hold the shape without squeezing it flat.
- Texture spray or dry shampoo: Clean hair needs grip. A little texture keeps the strands from slipping apart.
- Light smoothing cream or gel: Use this at the part and hairline, not all over the head, or the bun can start to look heavy.
- Bun form or padding: Helpful for fine hair or for styles that need a fuller silhouette.
- Fine mist hairspray: A light mist at the end locks the shape without freezing the hair into place.
How to Prep Hair So a Chignon Holds Cleanly
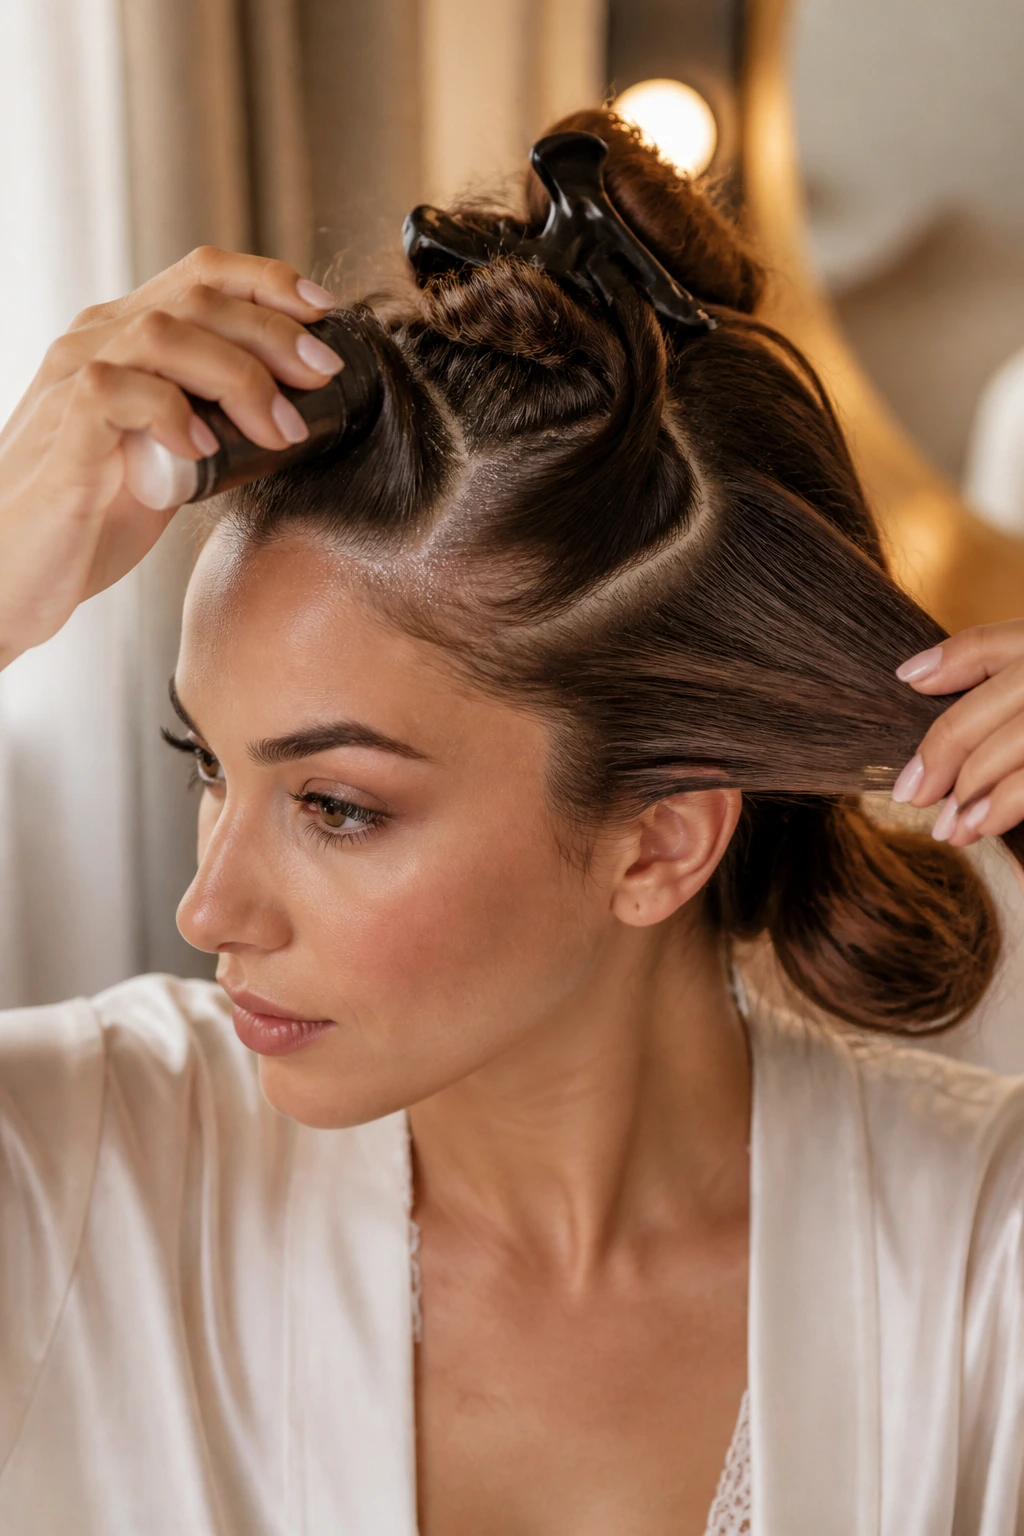
Freshly washed hair can be slippery. Day-old hair usually has more bite, which is why so many chignons seem easier to build on hair that isn’t squeaky clean. If you do start with fresh hair, a little dry shampoo at the roots changes the feel fast.
Clean roots versus day-old grip
Hair that has been washed and blown dry is smooth, sometimes too smooth. That’s useful for sleek styles, but it can make twists slide apart while you’re working. A small amount of powder or spray at the roots gives the strands something to catch on.
Where to add product
Put smoothing cream where the hair meets the face and texture spray through the lengths. That keeps the hairline neat without turning the bun itself greasy. If the hair is curly or frizzy, work in product from mid-length to ends and leave the root area lighter.
Section before you pin
Split the hair into clear parts before you start twisting. One section for each side, one section at the crown, and one for the back gives you better control than trying to hold everything at once. The whole style goes faster when the pieces are organized first.
How to Match the Chignon to Your Face, Collar, and Earrings
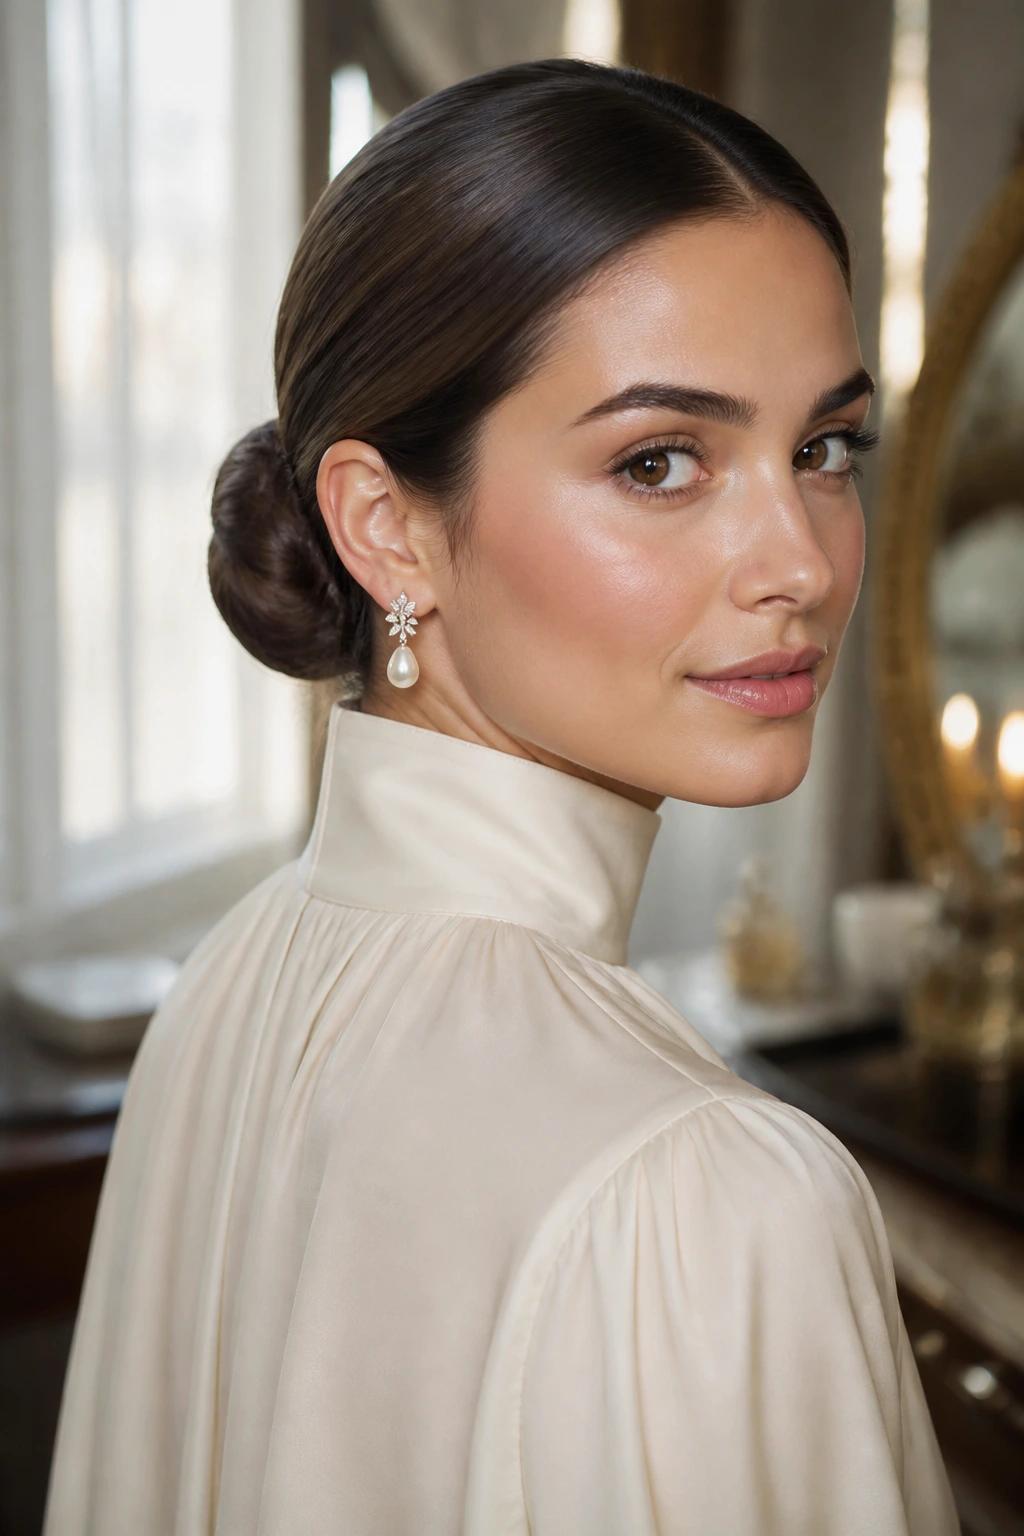
Neckline matters more than people think. A high collar or buttoned blouse usually looks best with a low, compact chignon because the two shapes don’t compete. Bare shoulders, on the other hand, can handle more height or a looser finish.
Earrings change the equation too. Big drop earrings need breathing room, so a quieter bun works better. If the earrings are small or close to the ear, a pearl pin, floral detail, or a little wave at the front can carry more of the visual weight.
Face shape is where placement earns its keep. A little height at the crown lengthens a round face. A side sweep softens a square jaw. A centered, balanced chignon suits someone who wants a calm, even line rather than a strong asymmetry.
Small Tweaks That Change the Whole Look
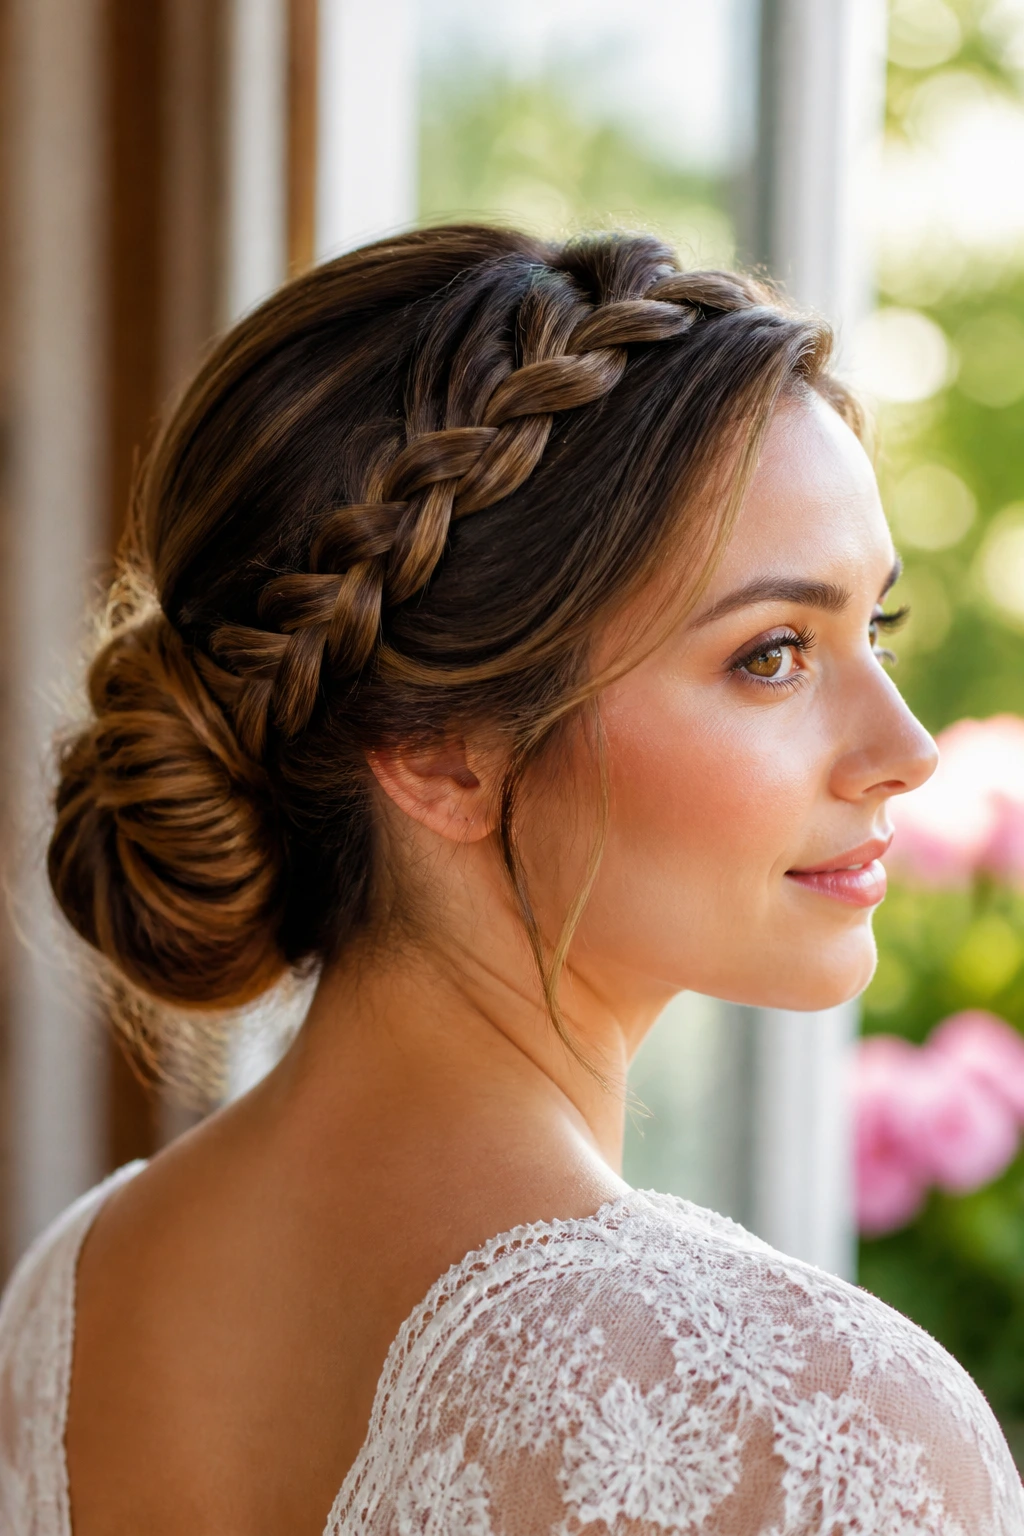
Texture: A matte finish makes the style look softer, while a smooth finish makes it feel sharper. Texture spray adds grip, but use it before pinning, not after.
Height: Moving the chignon up an inch changes the whole mood. Low reads quiet; higher reads more dressed up and a little more dramatic.
Face Framing: One or two loose pieces near the cheeks are enough. More than that, and the shape starts losing the clean line that makes a chignon work.
Accessory Placement: Put combs, pins, or flowers where the bun already has structure. If the accessory floats away from the fold, it looks disconnected.
Make-It-Yours: Fine hair usually needs padding or texture spray. Thick hair needs sectioning and stronger pins. Curly hair usually looks best when some curl pattern stays visible instead of being smoothed out completely.
Common Chignon Mistakes and the Fix for Each One
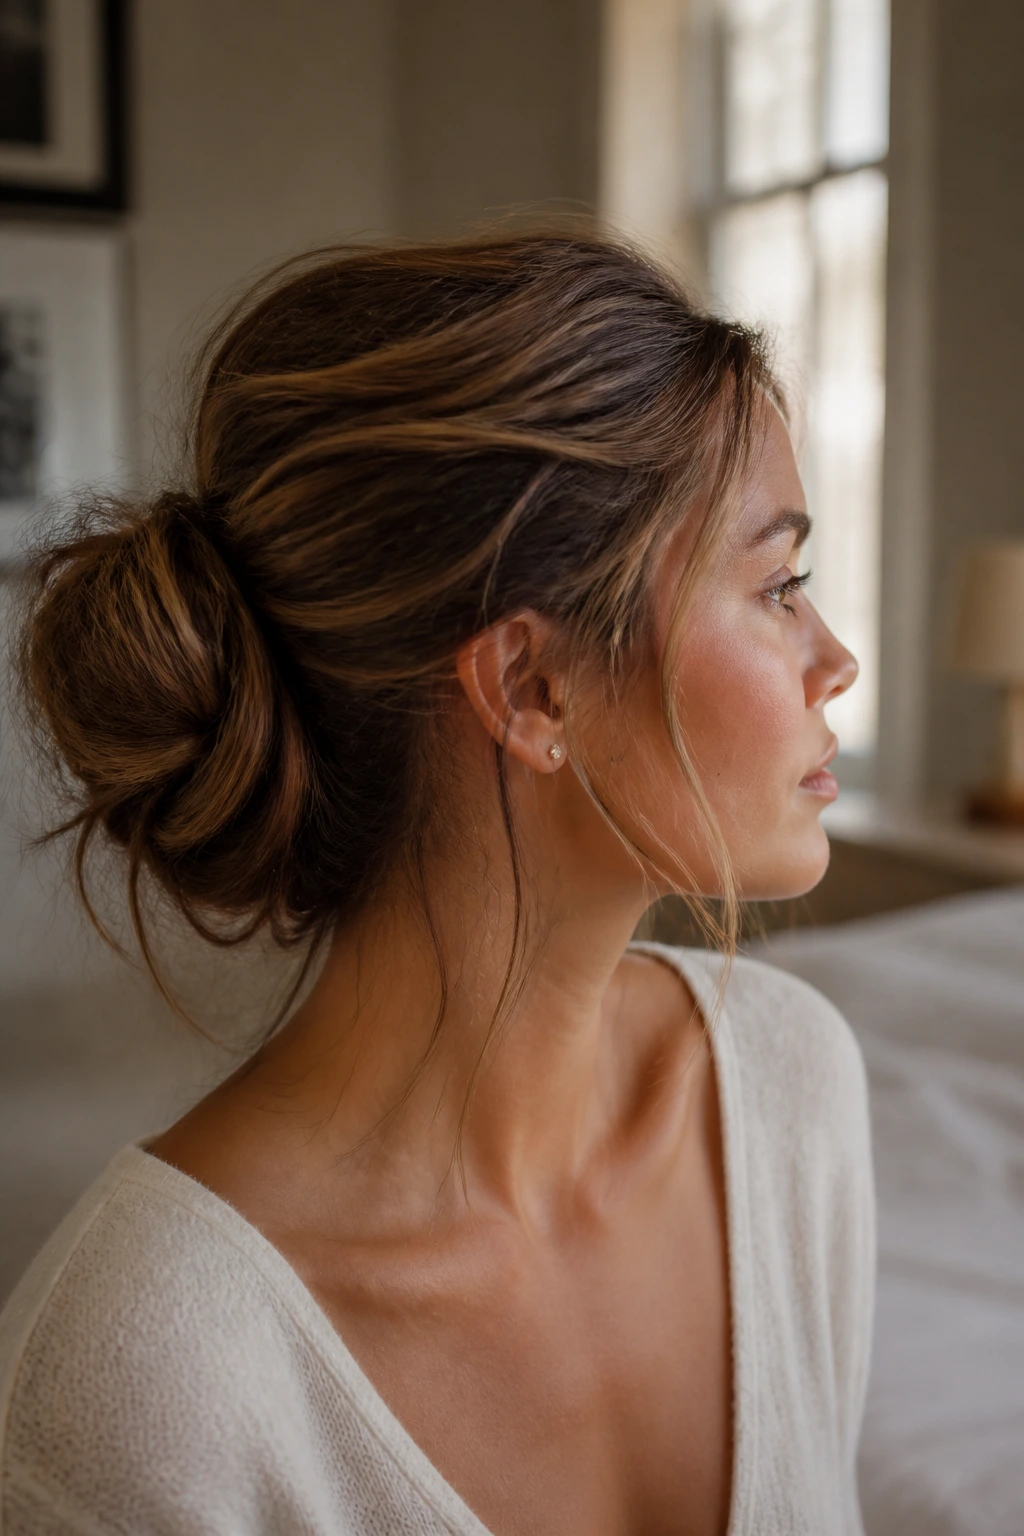
- Starting with hair that’s too slippery: The bun looks fine for ten minutes, then starts sliding. Add dry shampoo or texture spray before you twist, especially if the hair was freshly washed.
- Using too many pins in one spot: The bun feels crowded and still won’t hold. Spread the pins around the seam and cross them in different directions so they support the shape together.
- Making the bun too big for the hair density: The style looks bulky from one angle and thin from another. Build in smaller sections instead of trying to stretch one huge coil across the back of the head.
- Smoothing every strand flat: The chignon can start to look hard and lifeless. Leave a little softness at the hairline or part so the style has shape.
- Adding decoration before the base is secure: Flowers, combs, and pearl pins all shift if the chignon underneath is weak. Lock the structure first, then add the extra piece.
- Using heavy serum on the crown: The hair loses grip and starts to separate. Keep shine products on the outside surface only.
Chignon Variations for Fine, Thick, Curly, and Short Hair
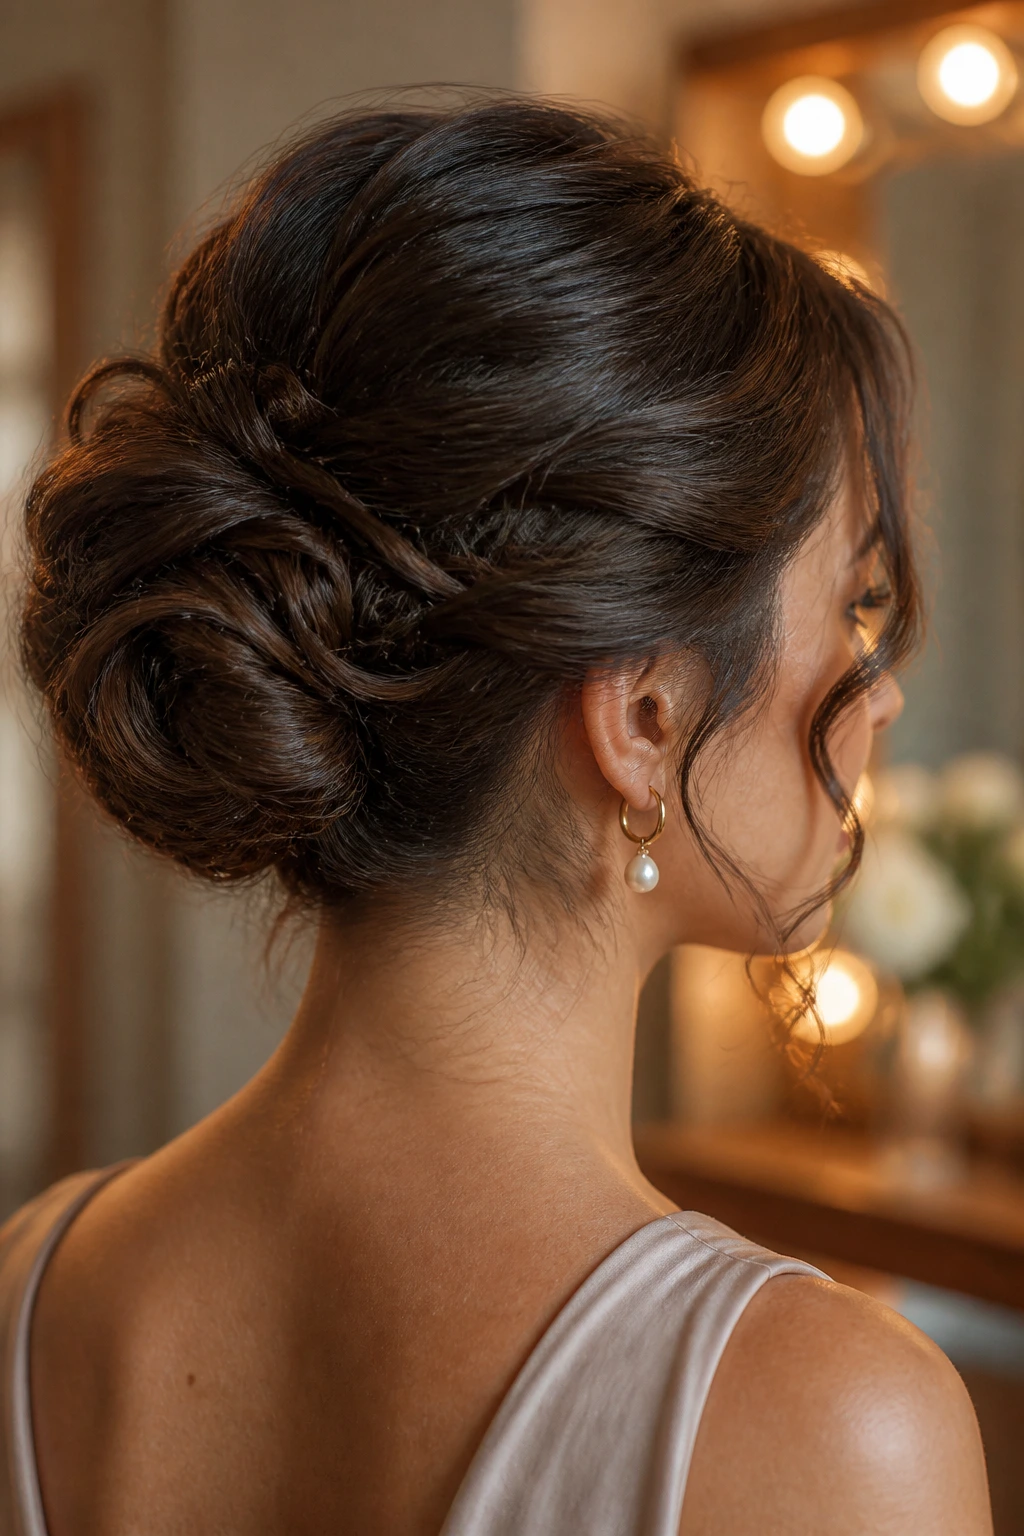
Fine-Hair Lift: Build a small padded center and use texture spray at the roots. A compact chignon looks fuller than a wide one, and it stays neater through the day.
Thick-Hair Anchor: Section the hair before pinning and let each twist support the next one. Thick hair looks best when the bun is anchored in layers instead of forced into one tight knot.
Curl-Respecting Tuck: Keep the curl pattern visible and pin the curls where they naturally sit. This keeps the shape from looking flattened or overworked.
Mini Chignon for Short Hair: Use tight twists at the nape and hide the ends under the fold. If the length is too short for a full bun, the smaller shape will still read as a chignon and not as a failed updo.
Bridal Smooth Base: Start sleek, then add one detail—pearls, a veil, or a soft wave near the front. When the base is clean, the extra piece looks intentional instead of crowded.
How to Keep a Chignon Fresh for the Next Day
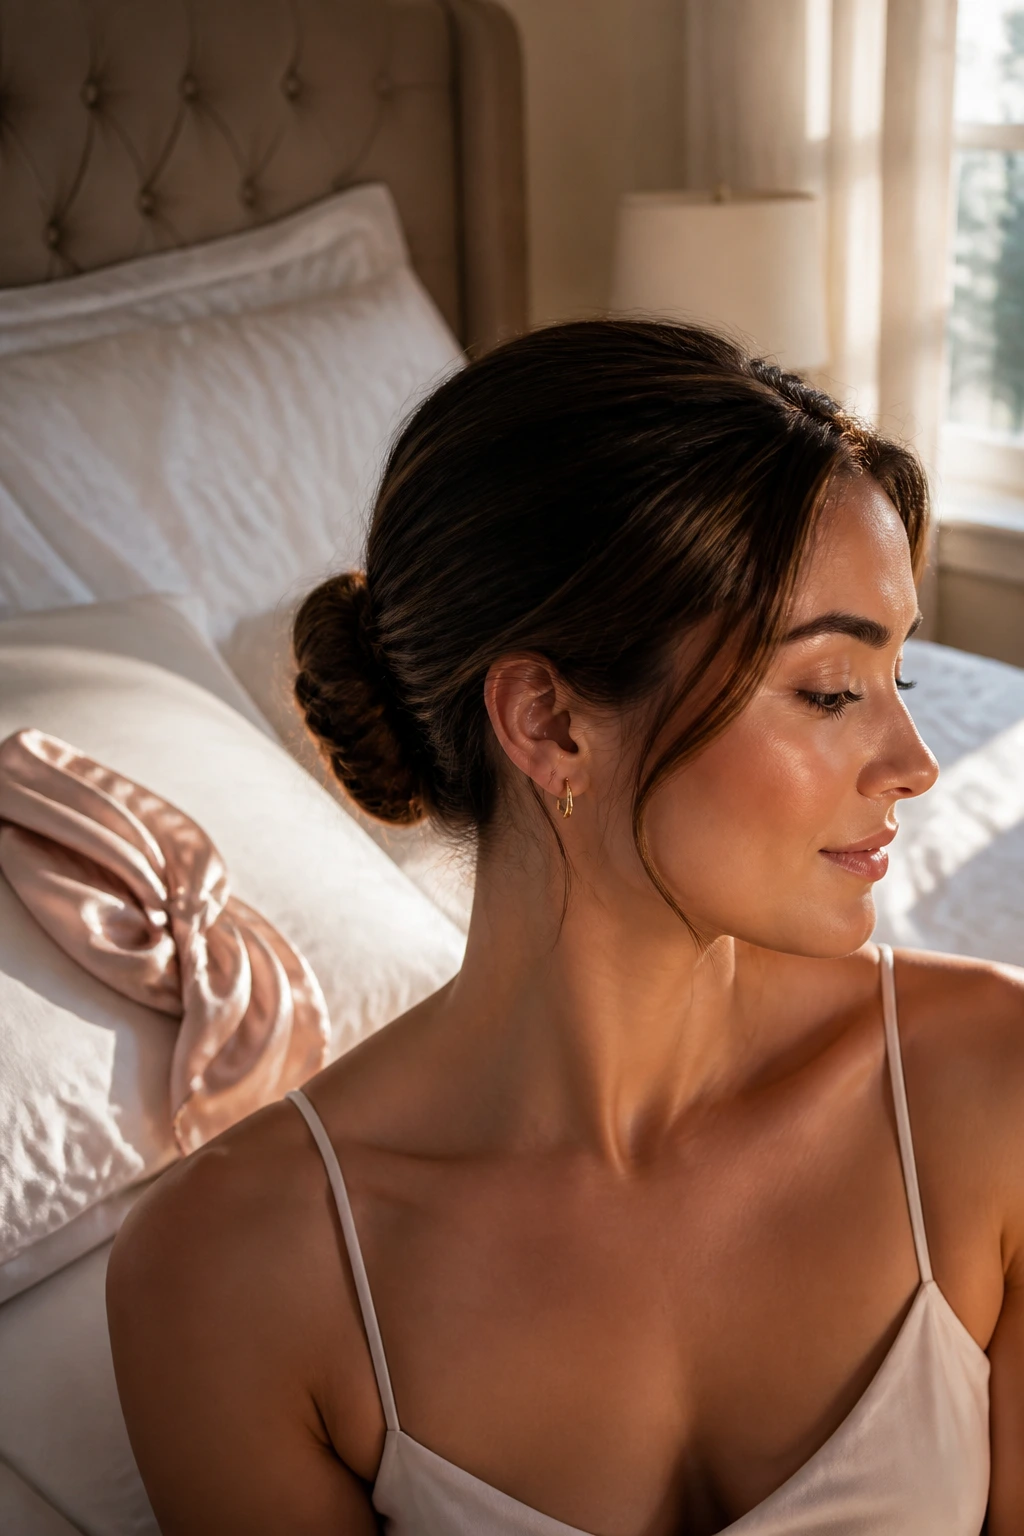
If you need a chignon to survive overnight, the safest move is to protect the shape rather than rebuild it from scratch. A silk scarf or pillowcase helps, because rough cotton tends to catch the flyaways and flatten the bun in odd places.
The next morning, check the part first. A tail comb and a tiny mist of water or spray usually reset the surface fast, and one or two pins can bring the bun back into line if the fold has loosened. Don’t drench it; a dampened edge is enough.
For event wear, keep a couple of spare pins and a travel-size spray nearby. Chignons usually fail at the edges before they fail in the center, so a quick pin near the seam is often all they need.
Chignon Questions People Ask Before They Pin
Can you make a chignon with short hair?
Yes, if the hair reaches the nape or just below it. A mini tucked chignon with hidden pins often looks cleaner than trying to force a full bun from hair that’s too short.
Is a chignon the same as a bun?
Not exactly. A chignon is usually a low bun or knot at the nape, and the styling tends to be more polished and deliberate than a casual bun.
What if my hair slips out of pins?
Use texture spray or dry shampoo before you start, then cross your pins over the hidden seam. Matte pins grip better than slippery ones, and U-pins can help if the hair is thick.
Can curly hair be put into a chignon without straightening it?
Absolutely. In fact, curls often look better when some texture stays visible. Pin the curls in sections and shape the bun around their natural movement instead of flattening everything down.
How many pins does a chignon usually need?
A simple low chignon may only need four to six bobby pins, while thicker hair or a more sculpted style can use more. The right number is the number that keeps the shape stable without making the bun feel stuffed.
What’s the easiest version for beginners?
The classic low chignon or a braided low bun is usually the easiest place to start. Both give the hair structure before the final tuck, which makes pinning far less fussy.
How do you make a chignon look softer?
Loosen the hairline a little, add one or two face-framing pieces, and keep the bun surface gently textured. Softness comes from restraint, not from pulling half the style apart.
A Last Word on Chignons
A good chignon does one useful thing very well: it makes hair look calm without making the whole face disappear. That’s why the style keeps showing up in such different forms—sleek, braided, tucked, waved, pearl-pinned, or barely there at the nape.
Pick the version that fits the hair you actually have and the neckline you’re wearing, not the imaginary perfect version in your head. The best chignons are practical first, pretty second, and steady enough that you stop thinking about them once they’re pinned.
