



Short hair has a way of exposing every trick in a bun. The elastic shows, the ends pop out, and the shape goes from “casual knot” to “why is this fighting me?” in about thirty seconds. That’s not a failure of your hair. It’s a sign you need a smaller, smarter shape.
The best messy buns for short hair lean into folds, tucks, and a little controlled chaos instead of trying to wrap a huge coil around nothing. A jaw-length bob can hold a tiny topknot with more personality than a long, polished bun, and a collarbone lob can fake more volume than most people expect if you give the roots some grit. Dry shampoo, texture spray, and a few well-placed pins do more heavy lifting here than any elaborate styling routine.
And that’s the part people miss. Short hair doesn’t need to be “fixed” before it can go up. It needs a different map. Once you stop chasing a long-hair silhouette, the whole thing gets easier, faster, and a lot less annoying.
Why Short Hair Makes the Messy Bun Better, Not Harder
-
Short layers give you built-in texture: those little pieces that refuse to stay tucked are the same pieces that make the bun look soft instead of helmet-like.
-
You need less hair than you think: a bun built from half your length often looks fuller than a stretched-out wrap that’s trying too hard to be big.
-
Pins matter more than size: four good bobby pins placed in an X pattern will beat one giant elastic every time, especially on slippery hair.
-
Day-two hair is your friend: a little oil at the roots plus dry shampoo on the crown gives the bun something to grip, which is half the battle.
-
Asymmetry hides the seams: off-center placement, a side twist, or one tucked piece at the nape can make short hair look deliberate instead of improvised.
-
Accessories carry the look: a claw clip, a ribbon, or a single decorative pin can make a tiny bun feel finished without forcing it to be bigger than it is.
Why Short Hair Needs a Different Bun Game
Short hair fails in standard bun tutorials for one simple reason: those tutorials assume you can keep wrapping and wrapping until the ends disappear. With a bob or lob, that extra wrap often doesn’t exist. The result is the little mushroom nub so many people complain about — too tight at the base, too small at the crown, and somehow still falling apart.
The trick is to think in folds. A short-hair bun usually works because the hair is bent, pinned, and folded back on itself, not because it’s bundled into a giant coil. That shift matters. You get more hold when the style is built close to the scalp and anchored where the hair naturally wants to sit.
Texture is the other big piece. Silky, freshly washed hair slides. A bit of roughness from dry shampoo, mousse, or even an air-dried bend gives the bun teeth. That doesn’t mean the style has to look messy in a bad way. It just means the shape can breathe a little.
The sweet spot for length
Chin-length hair and collarbone-length hair behave differently. Chin-length cuts usually need smaller buns, half-up shapes, or twist-and-pin tricks. Lobs can usually handle a lower knot, a braided tuck, or a looser wrap at the nape. Keep that in mind while you browse the styles below, because the right bun for short hair is the one that matches your actual length, not the one in a video made for waist-length hair.
1. The Pebble Topknot
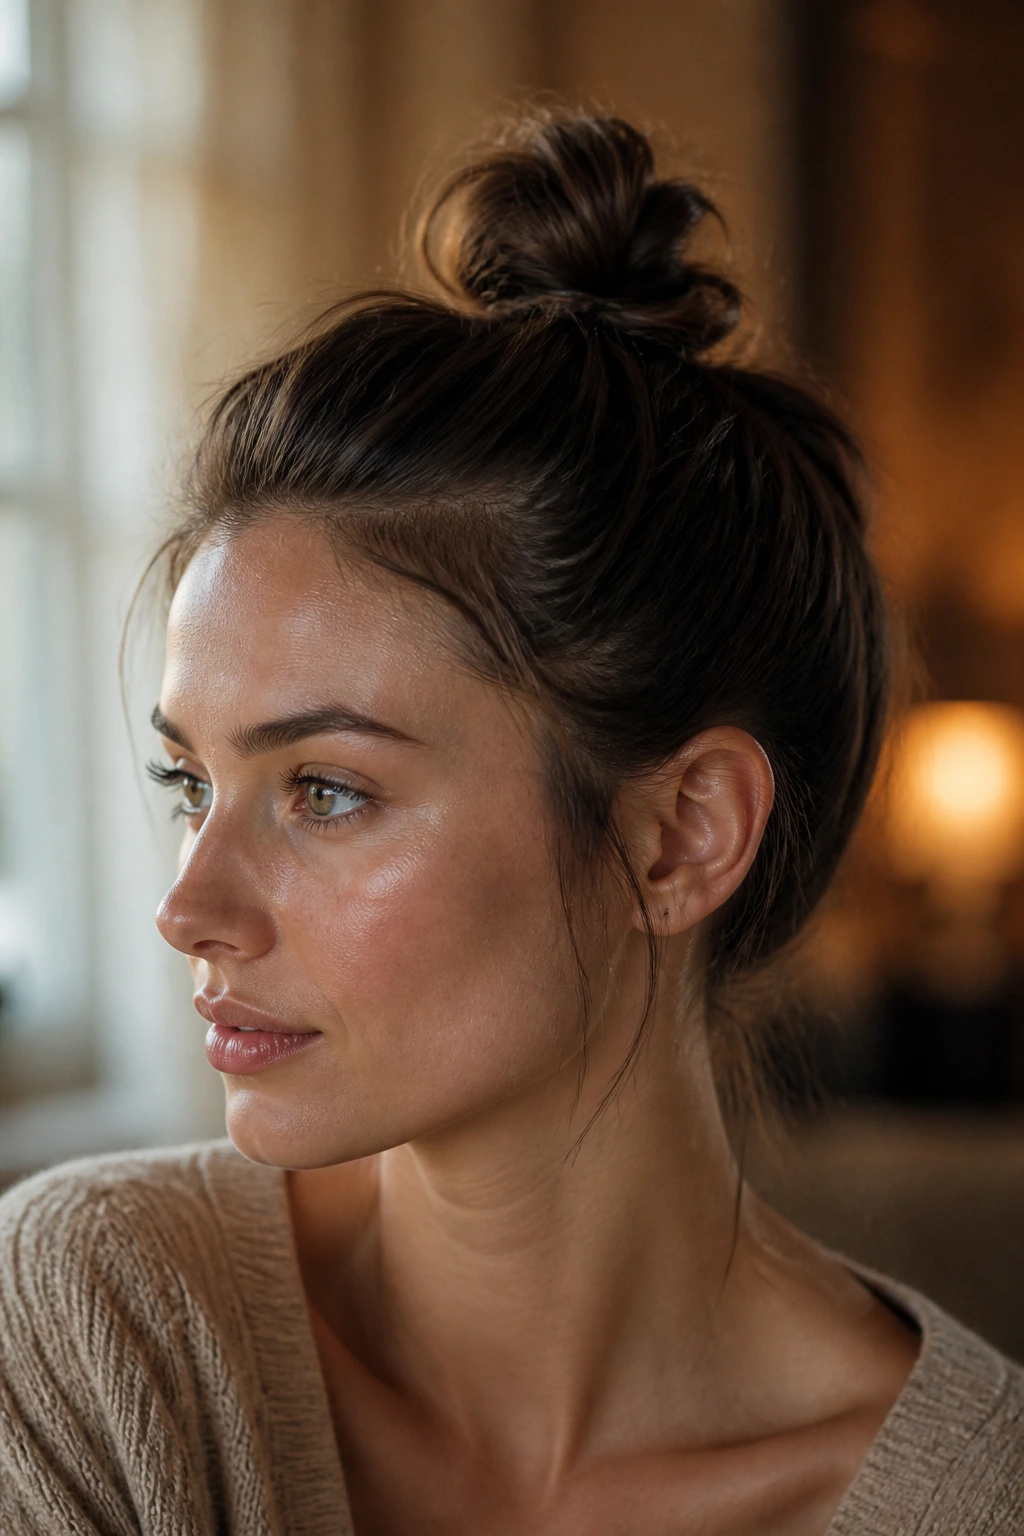
A pebble topknot is tiny on purpose. It sits high, usually just above the crown, and looks like a compact little knot with soft pieces escaping around the hairline. On short hair, that’s a feature, not a flaw.
Why it works
The height gives you the illusion of more length because the eye reads upward volume first. If your hair is only brushing your jaw or neck, this style keeps the ends close to the scalp instead of trying to fight them into a long wrap. Use a small elastic, twist the pony into itself once, and pin the loose tail flat against the base.
Quick shape notes
- Best for jaw-length bobs and short lobs
- Usually needs 4 to 6 bobby pins
- Looks better with dry shampoo or texture spray than with silky clean hair
Tip: Pull out two thin face-framing pieces and leave them alone. Once you keep touching them, the whole thing gets fussy.
2. The Low Twist Bun
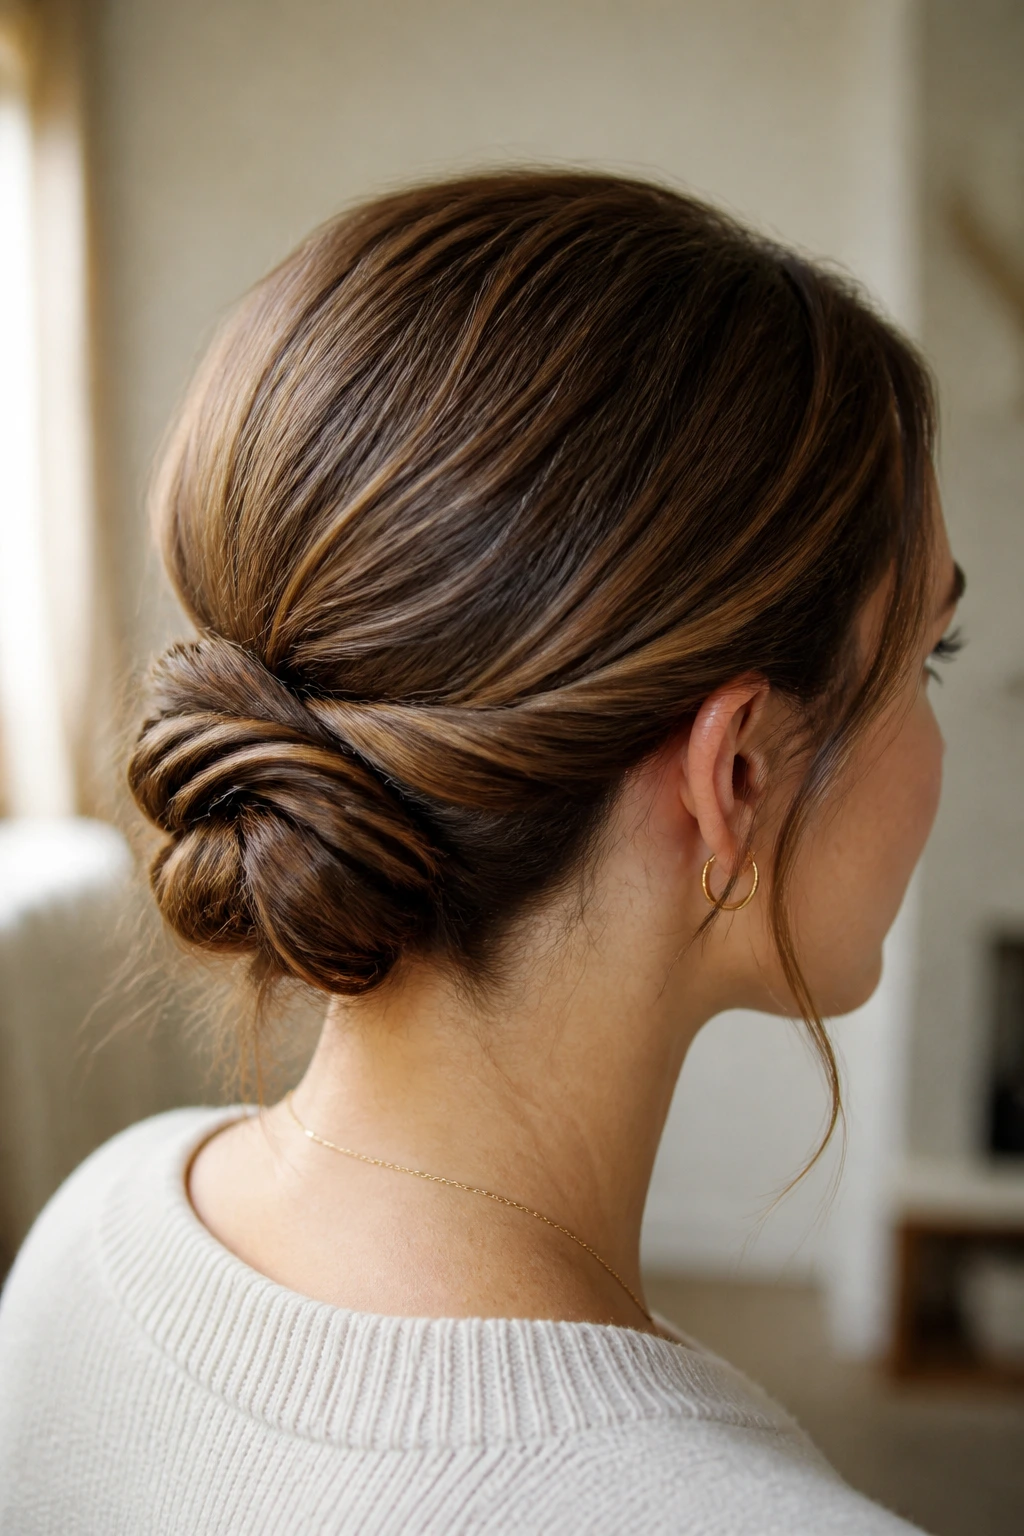
The low twist bun is the quiet one in the group, and I mean that in the best way. It sits at the nape, where short layers are easiest to hide, and the shape looks more intentional than a rushed topknot.
A low bun like this does not need much hair to look full. Twist the gathered hair into two rope-like halves, coil them into a small circle, and pin them low and tight against the head. The nape hides the seam, which is why this version is so forgiving on shorter cuts.
If your hair tends to spring loose at the sides, tuck the shorter pieces under the twist before pinning. That tiny move changes everything. You’ll get a bun that stays put without looking overbuilt.
3. The Half-Up Cloud Bun
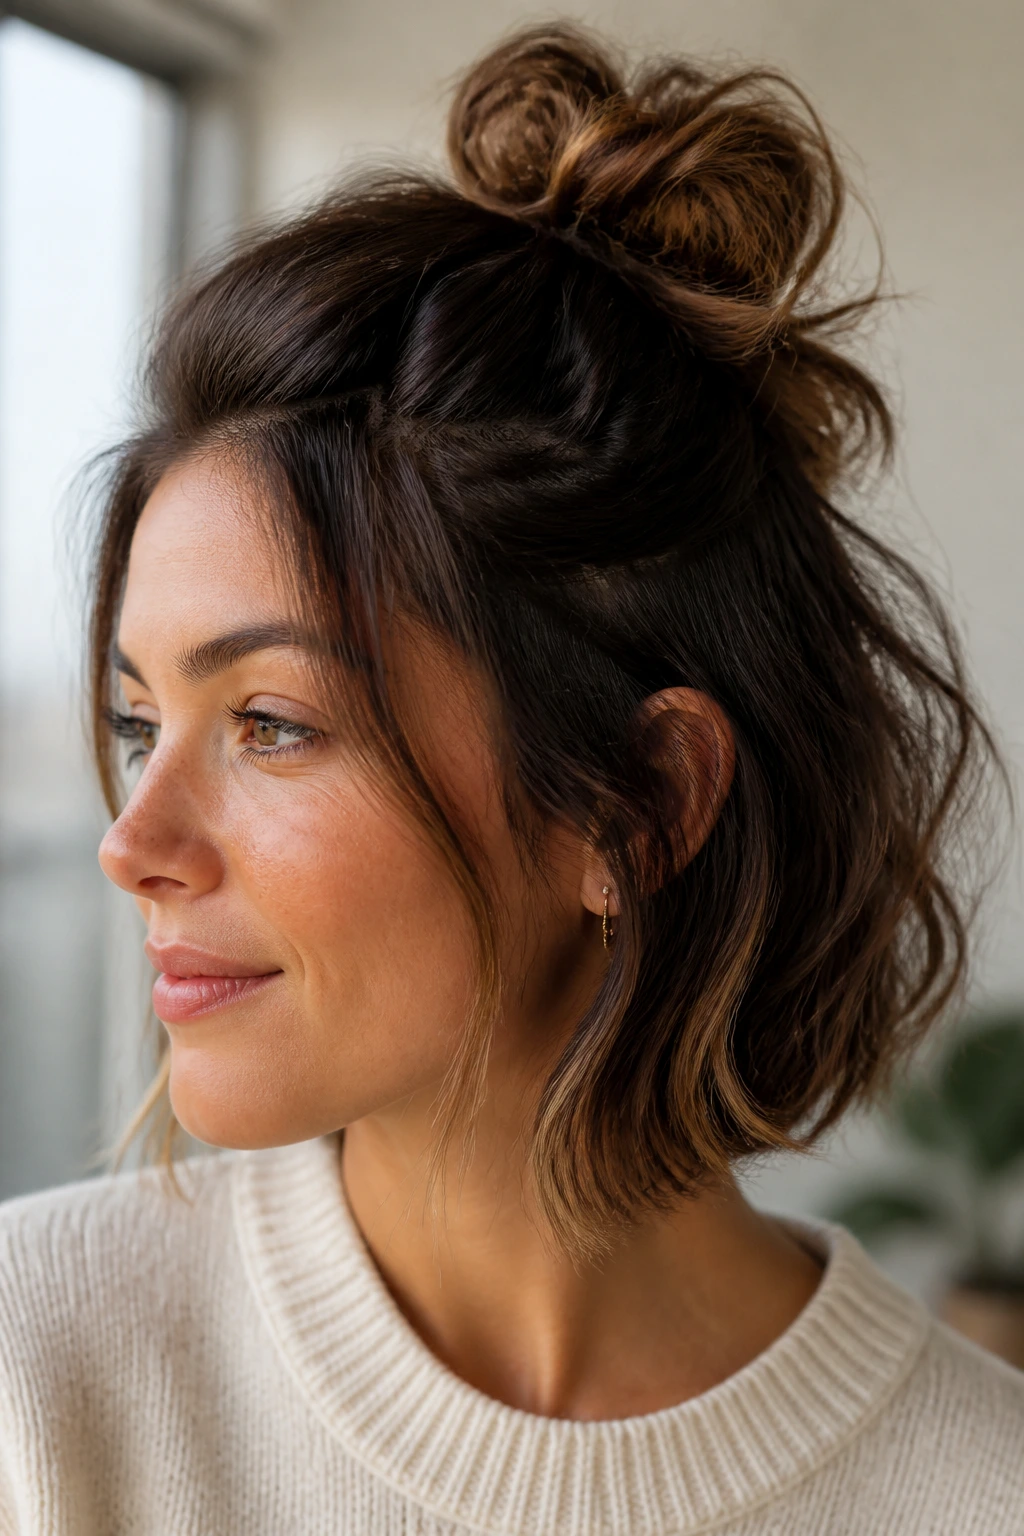
Why does the half-up version work so well on short hair? Because you’re only asking the top section to do the job. That means less weight, less slipping, and a shape that still leaves you with hair down around the shoulders.
The “cloud” part comes from the crown. Lift that section slightly before you tie it back, then twist it into a loose little bun and pinch the top to fan it wider. The lower half stays out, which gives the whole style a softer line and makes your bun look fuller than it really is.
How to shape it
- Gather from temple to temple, not from the full head
- Tease the crown lightly if your hair is fine
- Keep the bun loose enough that the ends don’t poke straight up like antennae
The style looks best when the bottom hair has a little bend. Straight, flat ends can make the top bun look disconnected. A quick wave with a flat iron or some natural texture helps the two sections feel like they belong together.
4. The Claw-Clip Pocket Bun
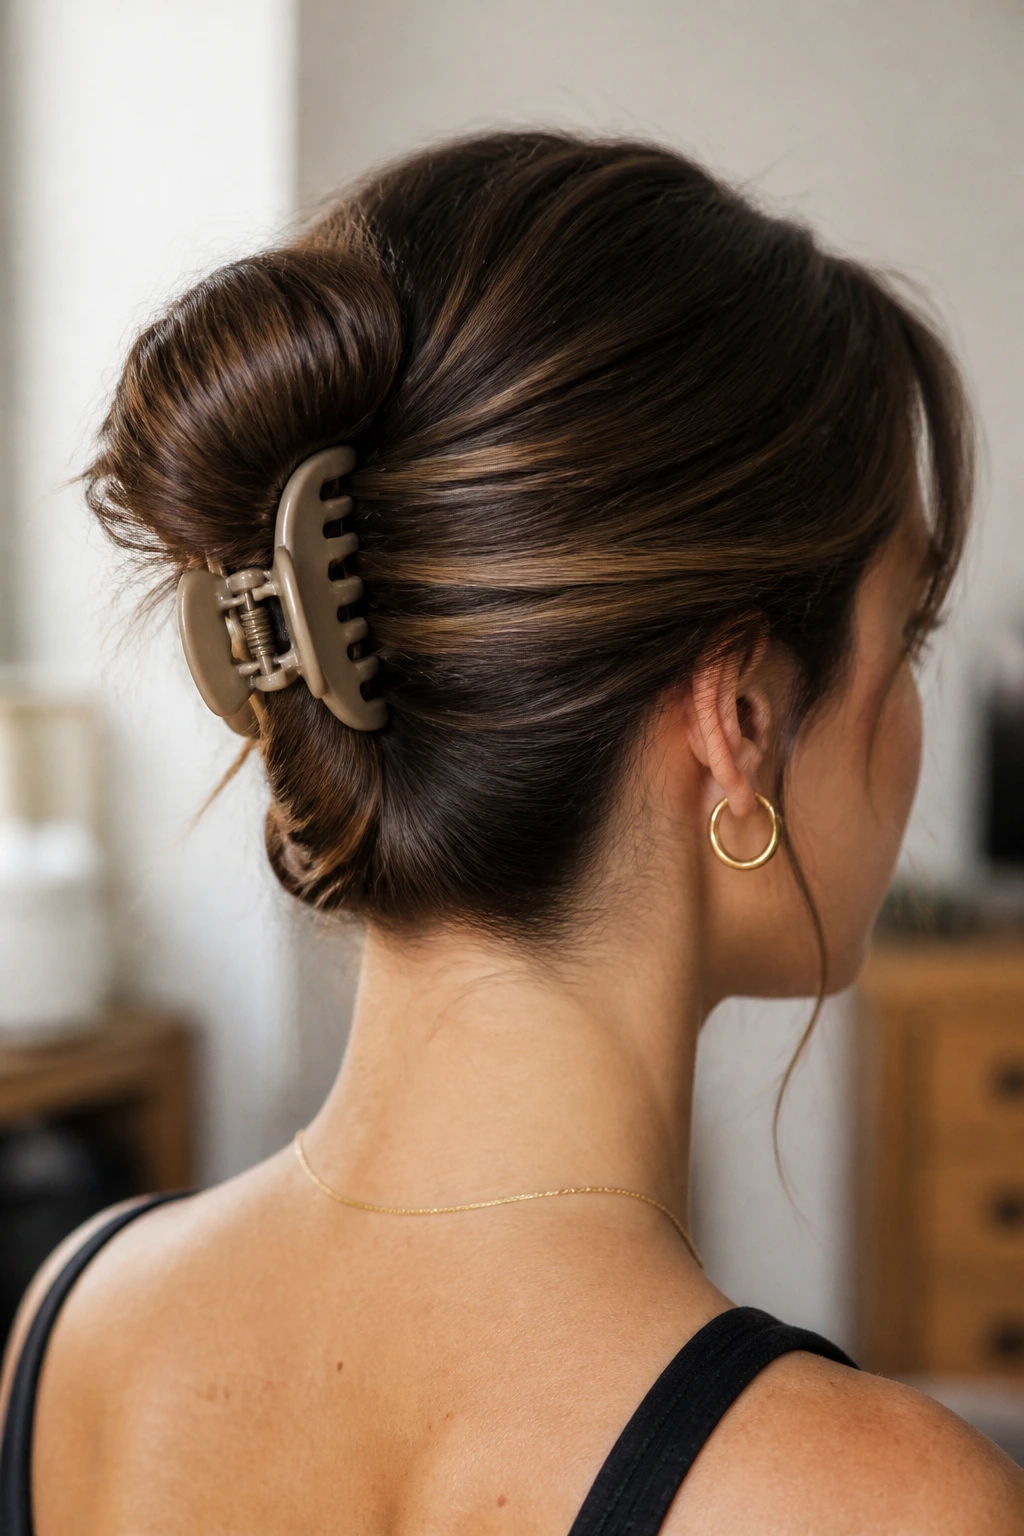
A claw clip bun is one of the easiest short-hair updos around, but the trick is treating the clip like a pocket, not a clamp. Twist the hair up from the nape, fold the ends inward, and let the clip catch the base while the tucked ends sit inside the fold.
This version is especially good when you don’t want to fight with pins. It works best with medium-sized clips that have enough space for the fold but not so much space that the hair slides around inside. If the clip is too big, it turns into a loose hinge. If it’s too small, it will pop open by lunchtime.
Use a little texture spray first, then twist the hair until it starts to coil on itself. The ends should disappear into the pocket. If a few pieces fall free, leave them. That’s part of the shape.
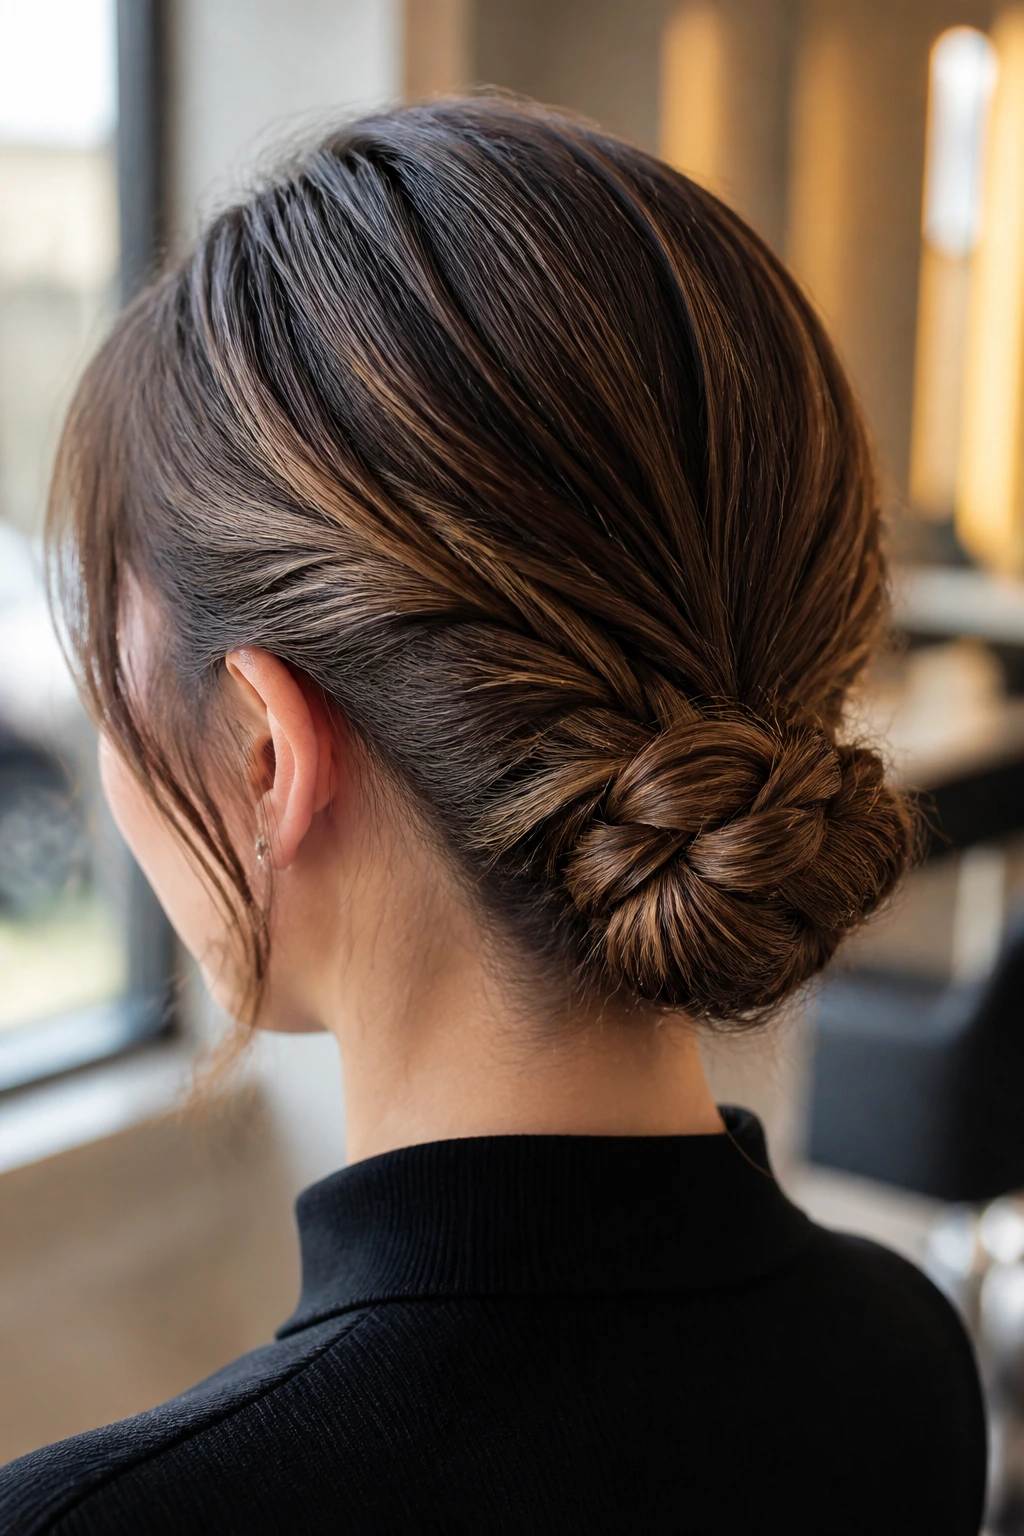
5. The Braided Mini Chignon
A braided mini chignon is one of those styles that looks more complicated than it is. The braid gives short hair a spine, and the chignon gives it a place to land. Together, they make a bun that behaves.
Start with a low pony, braid the tail, then fold the braid upward and around itself into a tiny chignon at the nape. If your hair is layered, braid a little tighter than you think you need to so the shorter pieces stay inside the plait. A light pancaking of the braid — just tugging the edges slightly — can make the final bun look wider and less pinched.
This one is especially useful for people whose short layers always escape from plain buns. The braid traps them before they get a chance to do that. The result is neat enough for work, but still soft enough to count as messy.
6. The Side-Swept Bun
A side-swept bun is better than a centered bun when your hair is too short to behave. The off-center placement hides uneven ends, makes the style look relaxed, and gives you room to let one side fall softly around the face.
That asymmetry is doing real work. Short hair often has one side that cooperates and one side that refuses to tuck. Put the bun just behind one ear or slightly below it, and you suddenly have a shape that looks stylish instead of lopsided.
Best way to wear it
- Pair it with a deep side part
- Leave one temple piece longer than the other
- Use a single decorative pin on the heavier side if the bun feels too plain
I like this version for dinner, date night, or any outfit with a neckline that needs a little clearing. It looks especially good with hoops and a collarbone-baring top. The side placement does the flattering work for you.
7. The Twin Mini Buns
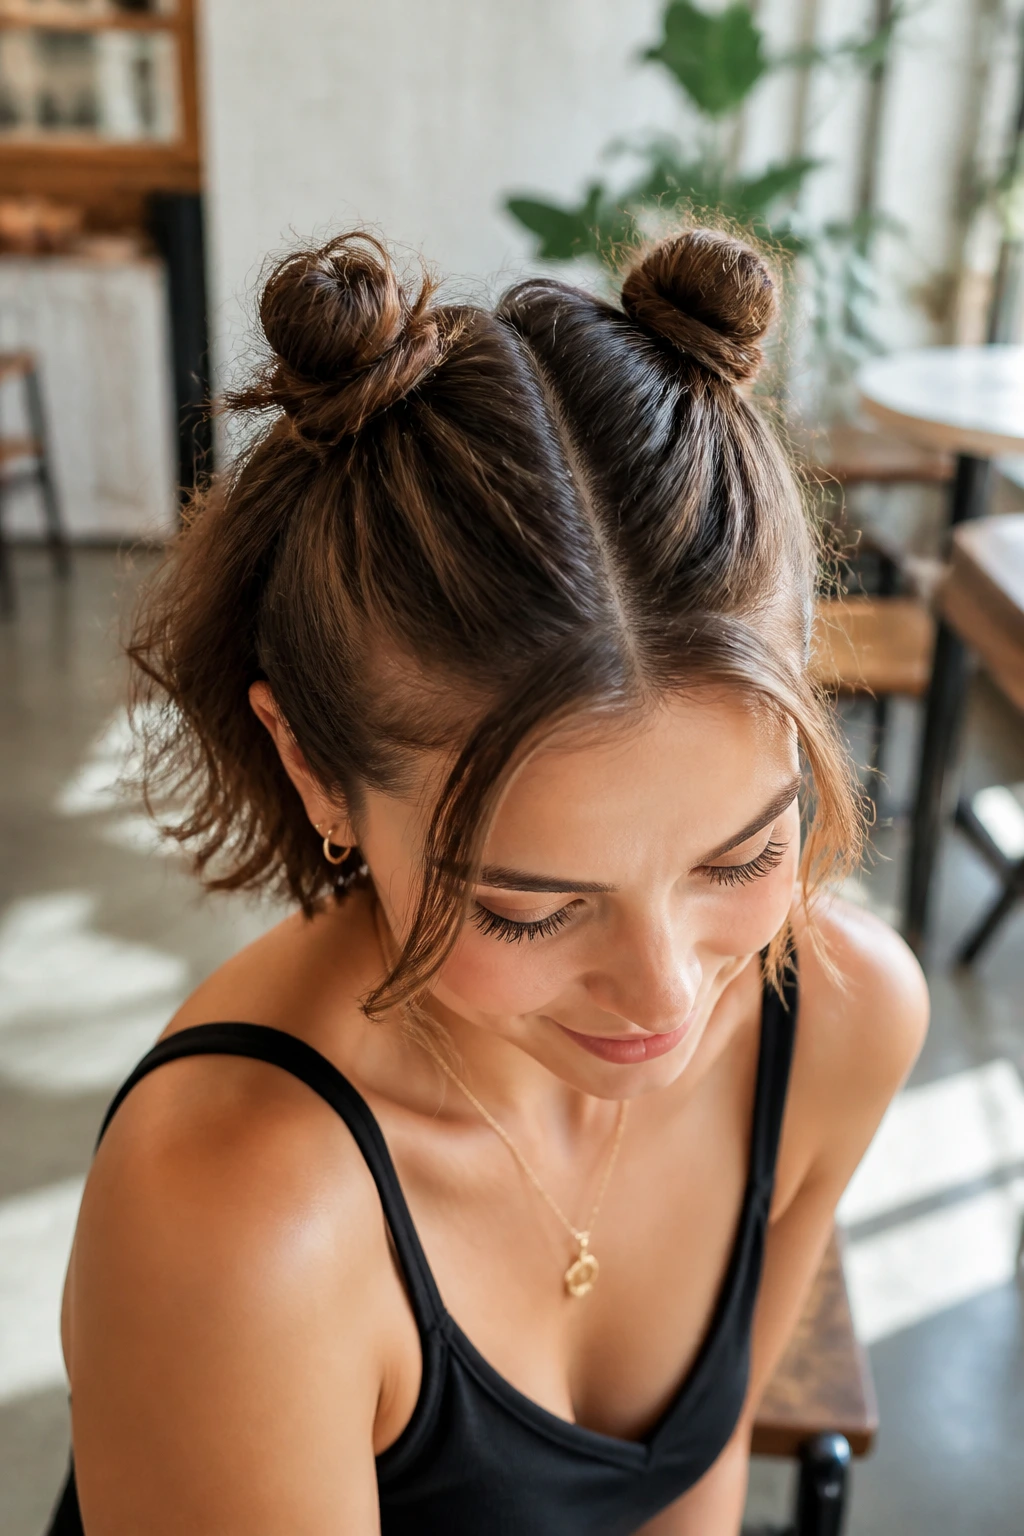
Two tiny buns can be easier than one big one when your hair is short. Divide the hair down the middle, make two small ponies, and twist each one into a knot or coil close to the scalp. The whole look reads playful and slightly undone, which is exactly the point.
This style solves the “not enough length” problem by splitting the load. Each bun needs less hair, less wrapping, and less pinning. That makes it a smart option for chin-length cuts or fine hair that collapses under its own weight.
The buns can sit high like little nubs at the crown, or lower near the nape for a quieter version. Either way, don’t chase symmetry too hard. A tiny difference in height makes the style look human.
8. The Faux-Volume Scrunch Bun
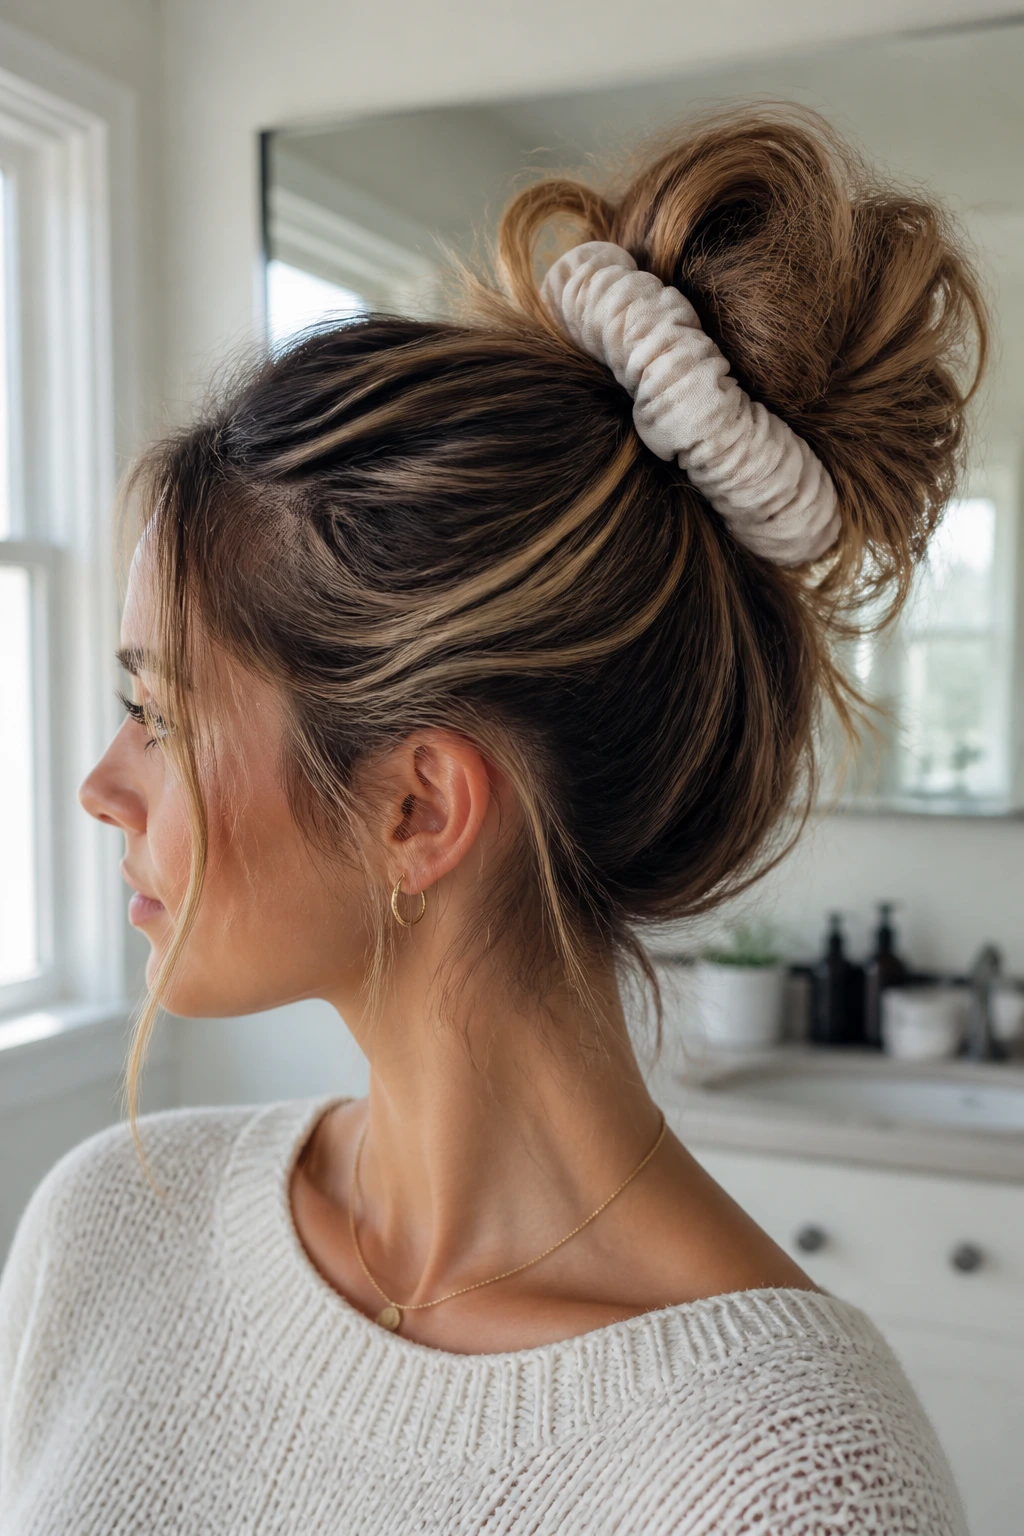
If your hair is fine, this is the bun that cheats in your favor. A large scrunchie gives the illusion of bulk, and the elastic base fills space that your hair simply doesn’t have.
Wrap the hair around the scrunchie once, maybe twice if your length allows, and stop before the bun gets tight. Then tug the outer edge of the hair slightly so the shape puffs out instead of collapsing inward. The scrunchie does half the styling, which is why this one works so well on short, slippery strands.
This is also one of the few short-hair buns that looks better with a chunky accessory. Velvet, satin, or matte cotton all add a little body. Keep the rest of the look simple and let the scrunchie do the talking.
9. The Curly Pineapple Bun
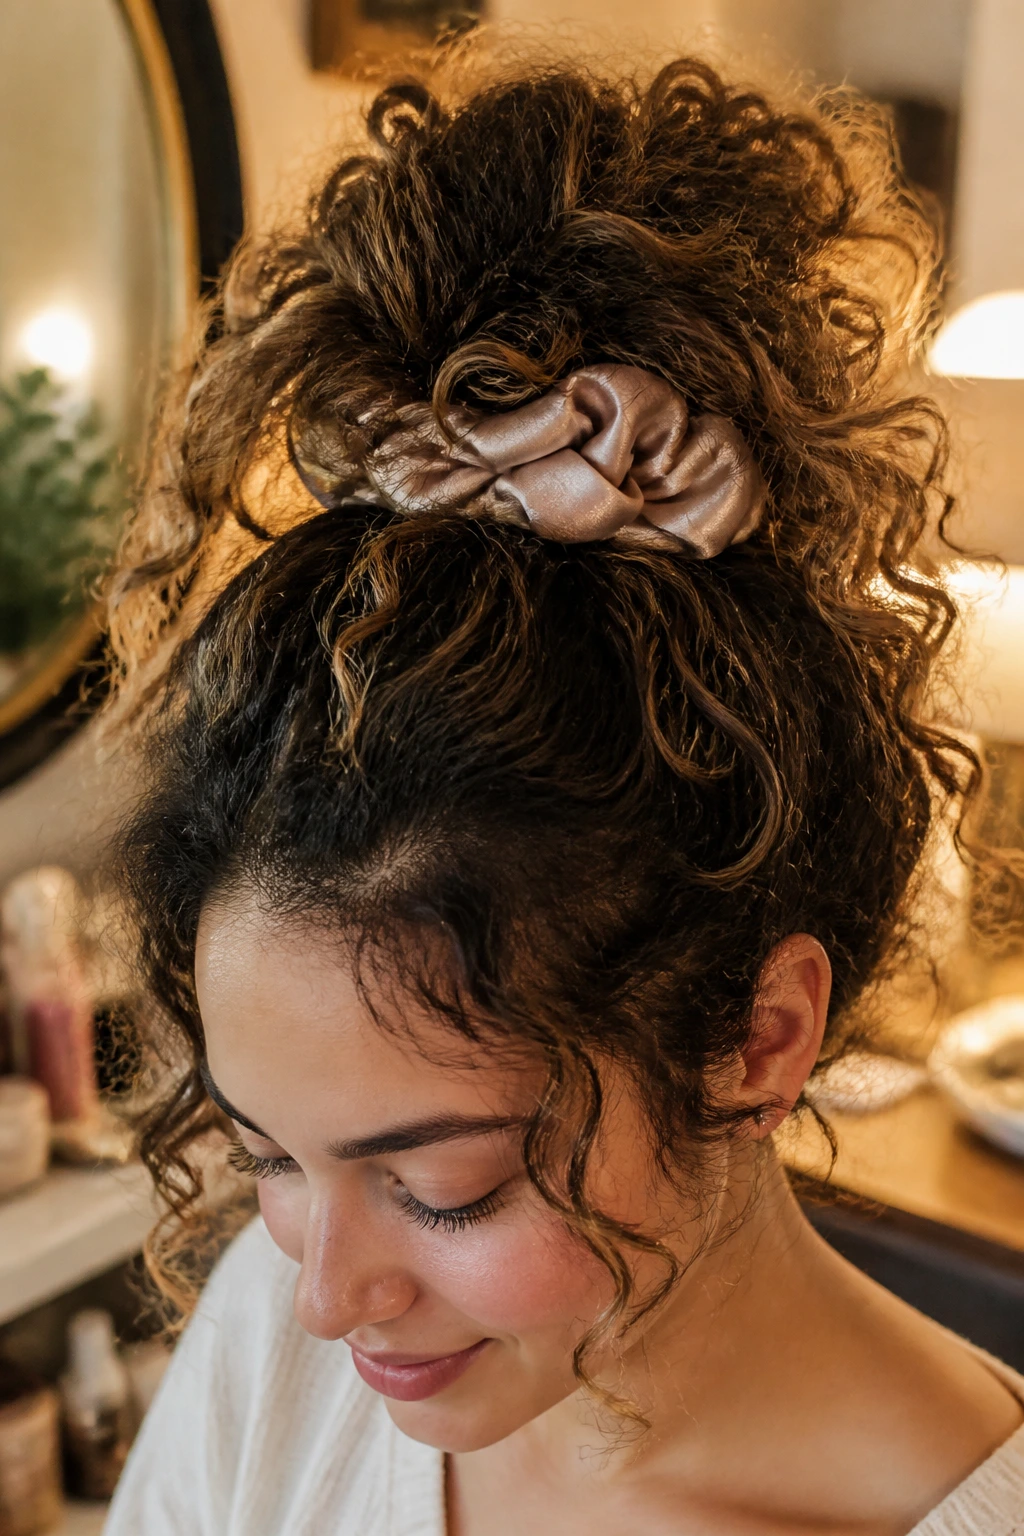
Curly hair gets its own rules. A pineapple bun keeps the curl pattern from getting crushed and turns the natural spring of the hair into the shape itself. The result is high, loose, and full of movement.
Instead of brushing the curls smooth, gather them gently with your fingers and secure them high on the head. Let the ends spill out a little. That spill is what makes this look good. A silk scrunchie helps because it grips without flattening the curl.
This style is especially good for second-day curls. The bun absorbs whatever shape the curls already have, so you’re not forcing them into a structure they don’t want. That’s why it looks easy — because it is, once you stop fighting the texture.
10. The French-Pin Coil
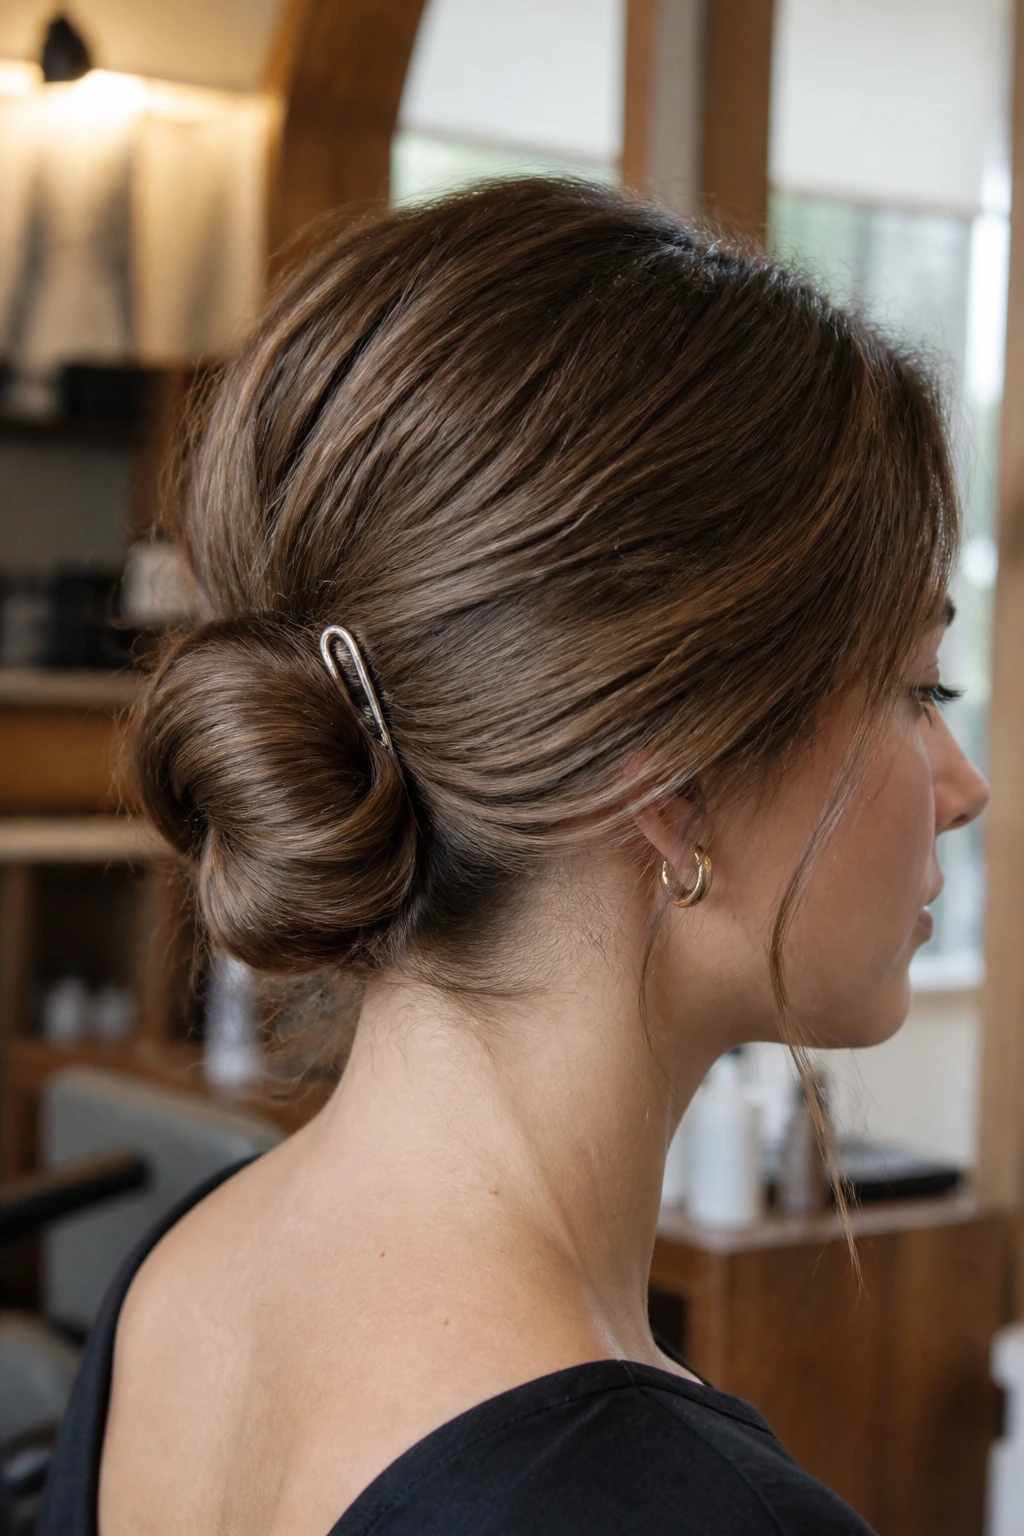
A French-pin coil brings a little structure without making the bun feel stiff. Twist the hair into a low coil, then slide the pin through the base to lock it in place. The hair is held by tension, not by a dozen tiny pins.
This is a nice choice when you want the bun to look slightly elevated but not too polished. The pin itself does the visual work, so the bun can stay small and a little loose. If your hair is smooth, add texture spray first; otherwise the pin can slide.
There’s a small learning curve here. The first attempt may wobble. That’s normal. Once you find the angle that catches both the coil and the scalp, it stays put better than you’d expect.
11. The Crown-Twist Bun
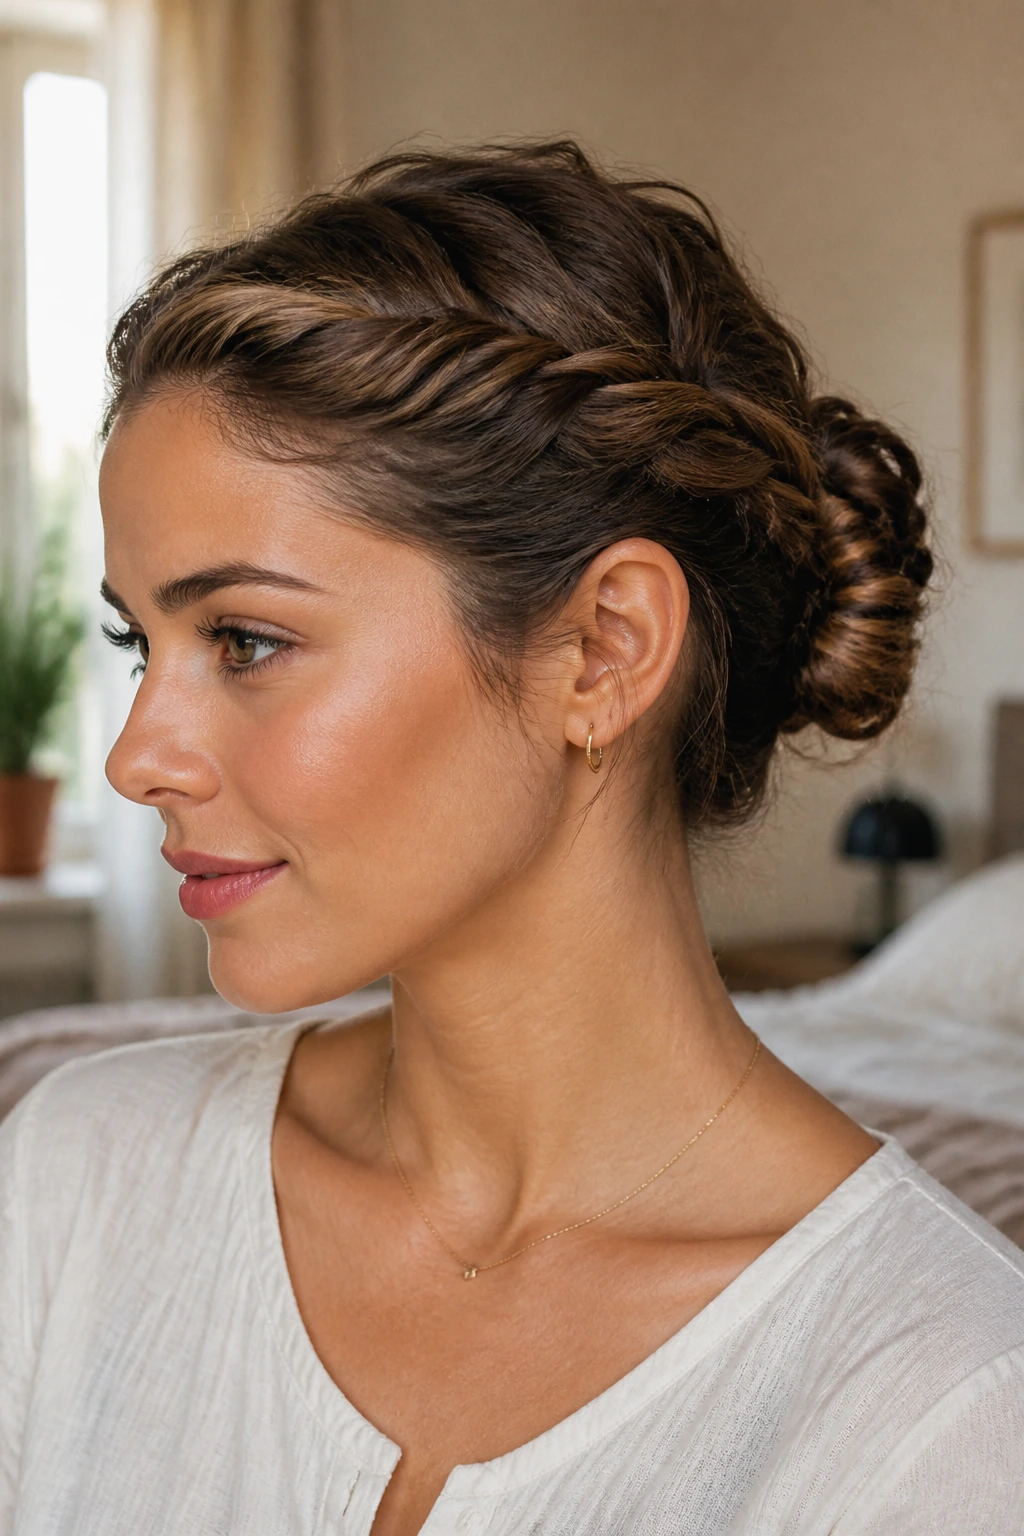
The crown-twist bun starts with two side sections swept back from the temples. Those sections are twisted toward the center and anchored into a compact bun or knot at the back of the head. It gives short hair a little crown shape without demanding much length.
What I like here is how it controls layers. Side twists catch the pieces that usually escape, and the center bun sits low enough to look grounded. If your hair is layered around the face, this style keeps the front soft while the back does the heavier lifting.
Use a rat-tail comb to part the side sections cleanly. Then twist with a little tension, not a lot. Too much pulling will make the bun feel tight and expose the shorter hairs you were trying to hide.
12. The Knotted Pony Bun
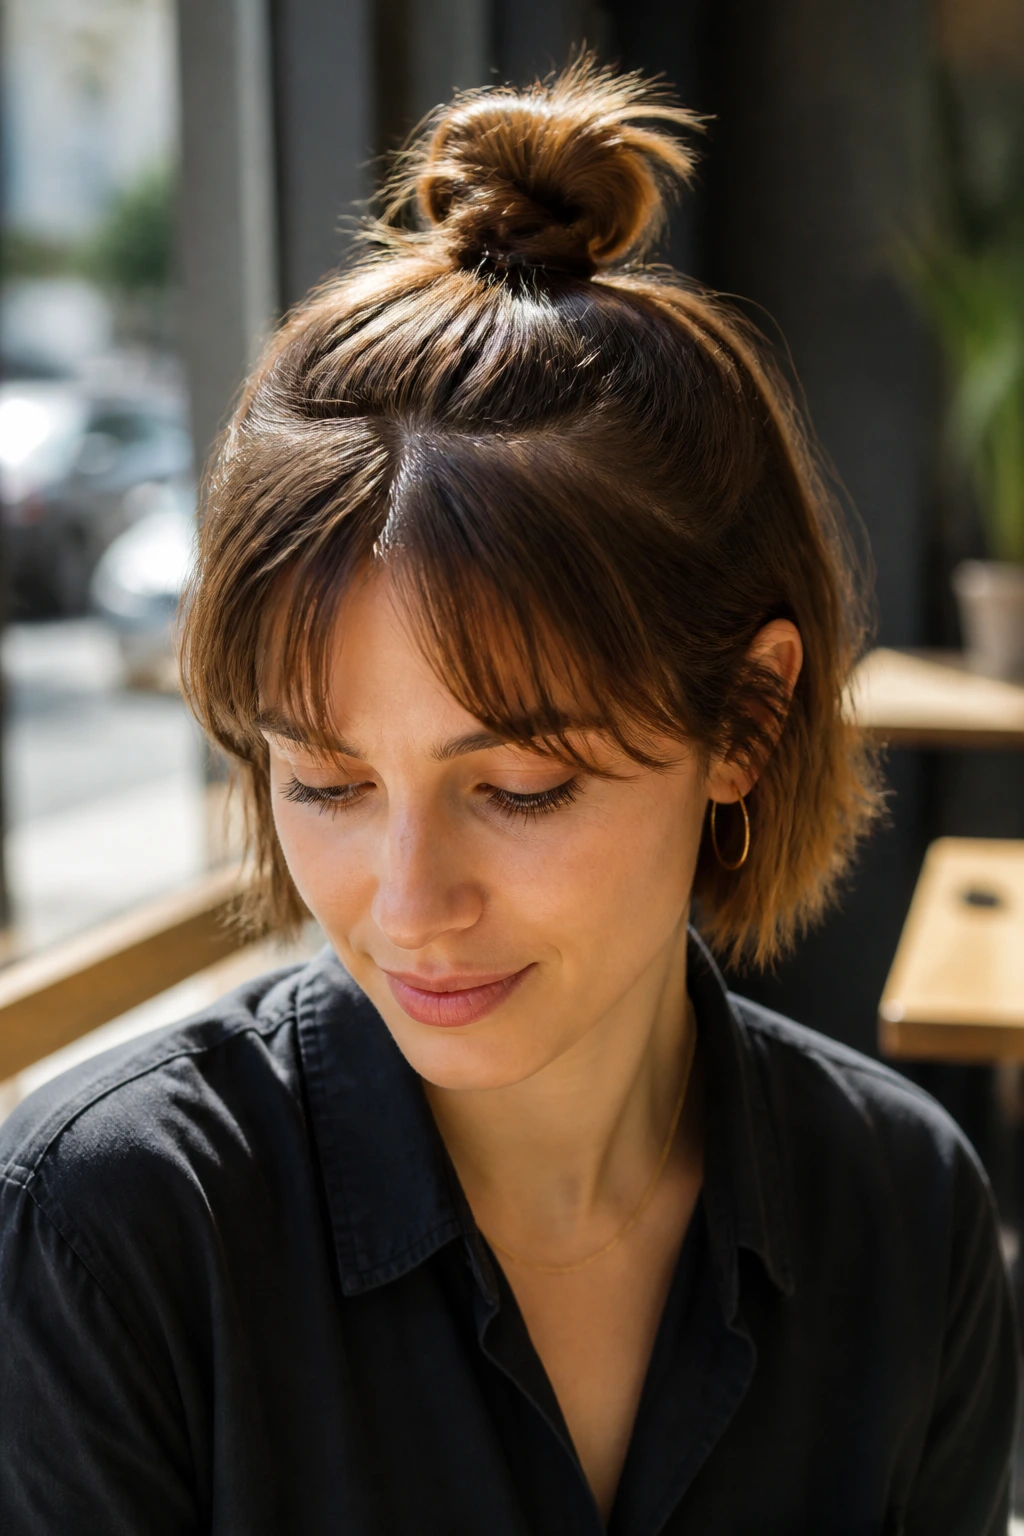
A knotted pony bun looks clever in the best way. You make a short ponytail, split it in half, tie the halves into a simple knot, and then tuck or pin the loose ends into a bun shape.
The knot gives the style structure right away. On short hair, that matters because you often don’t have enough tail to build a full loop. The knot also creates a nice lump of texture at the base, which keeps the bun from looking flat.
This one works especially well if your hair is a bit rough or layered. The knot disguises uneven length. If the ends are too short to tie cleanly, slide them under the knot and pin them flat instead. No one will know the difference.
13. The Lob-Length Chignon
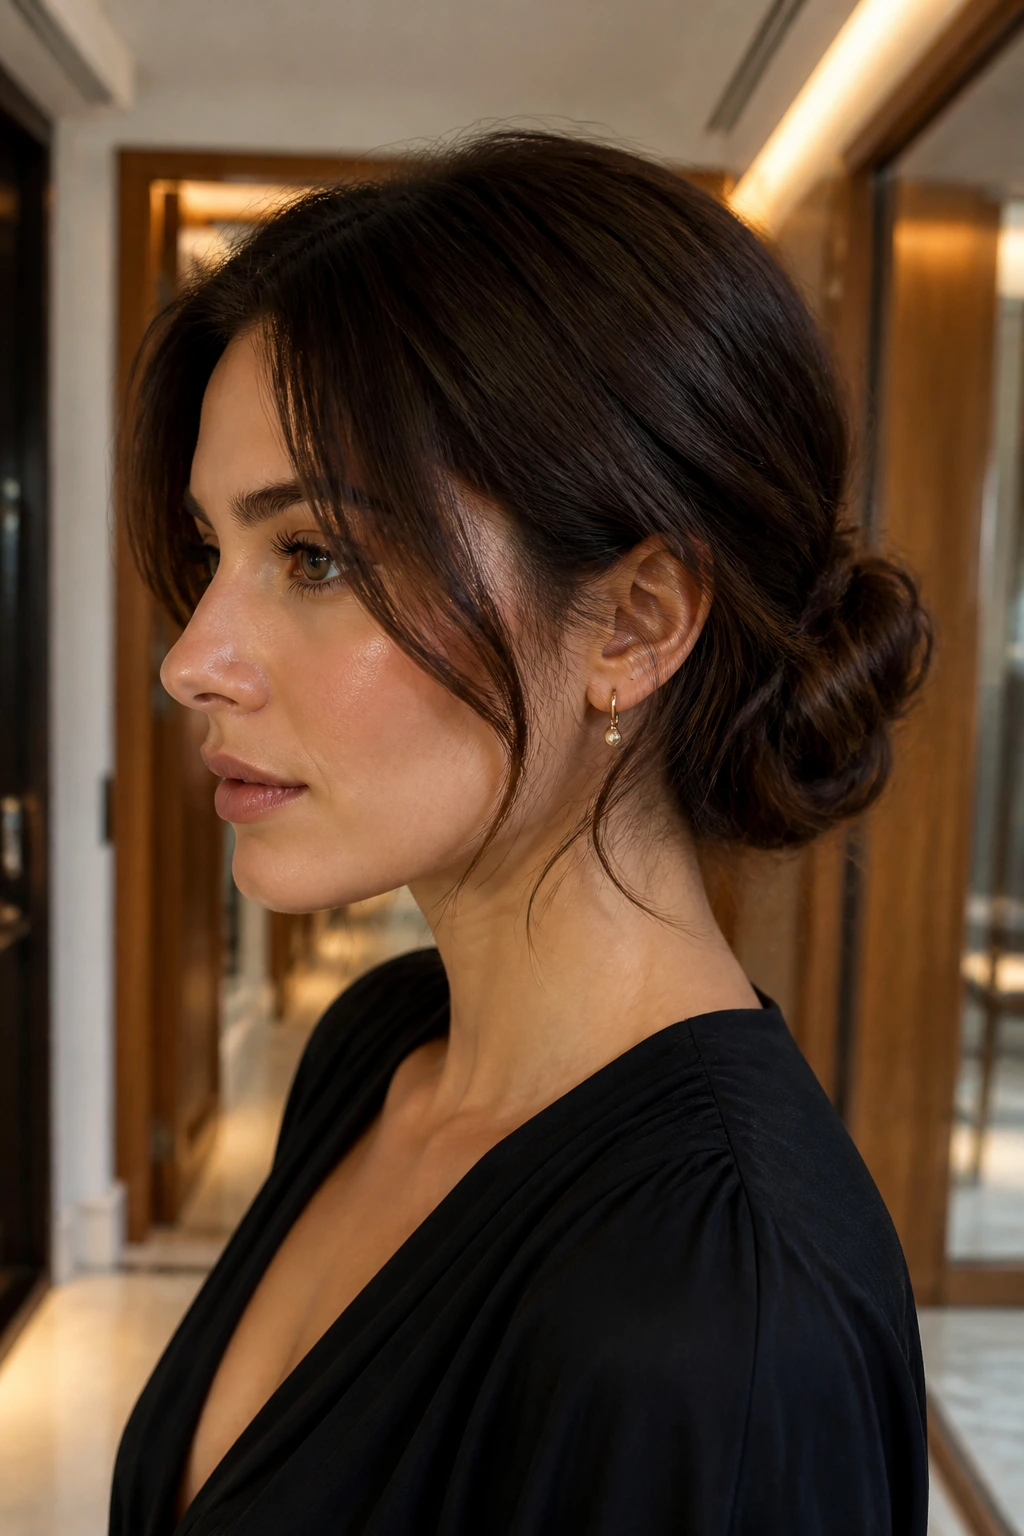
A lob-length chignon is one of the prettiest ways to wear short hair up, and it’s easiest when the cut brushes the collarbone. The extra length at the nape gives you enough hair to coil, but not so much that the bun gets heavy.
Start low, keep the shape soft, and tuck the ends under rather than wrapping them endlessly around the base. The chignon should sit like a small rolled nest, not a giant knot. A tiny bit of height at the crown keeps it from looking too serious.
This is the one I’d reach for when the outfit is doing the loud work and the hair needs to stay calm. It sits close to the head, clears the neck, and doesn’t get in the way of earrings or collars.
14. The Flip-and-Tuck Bun
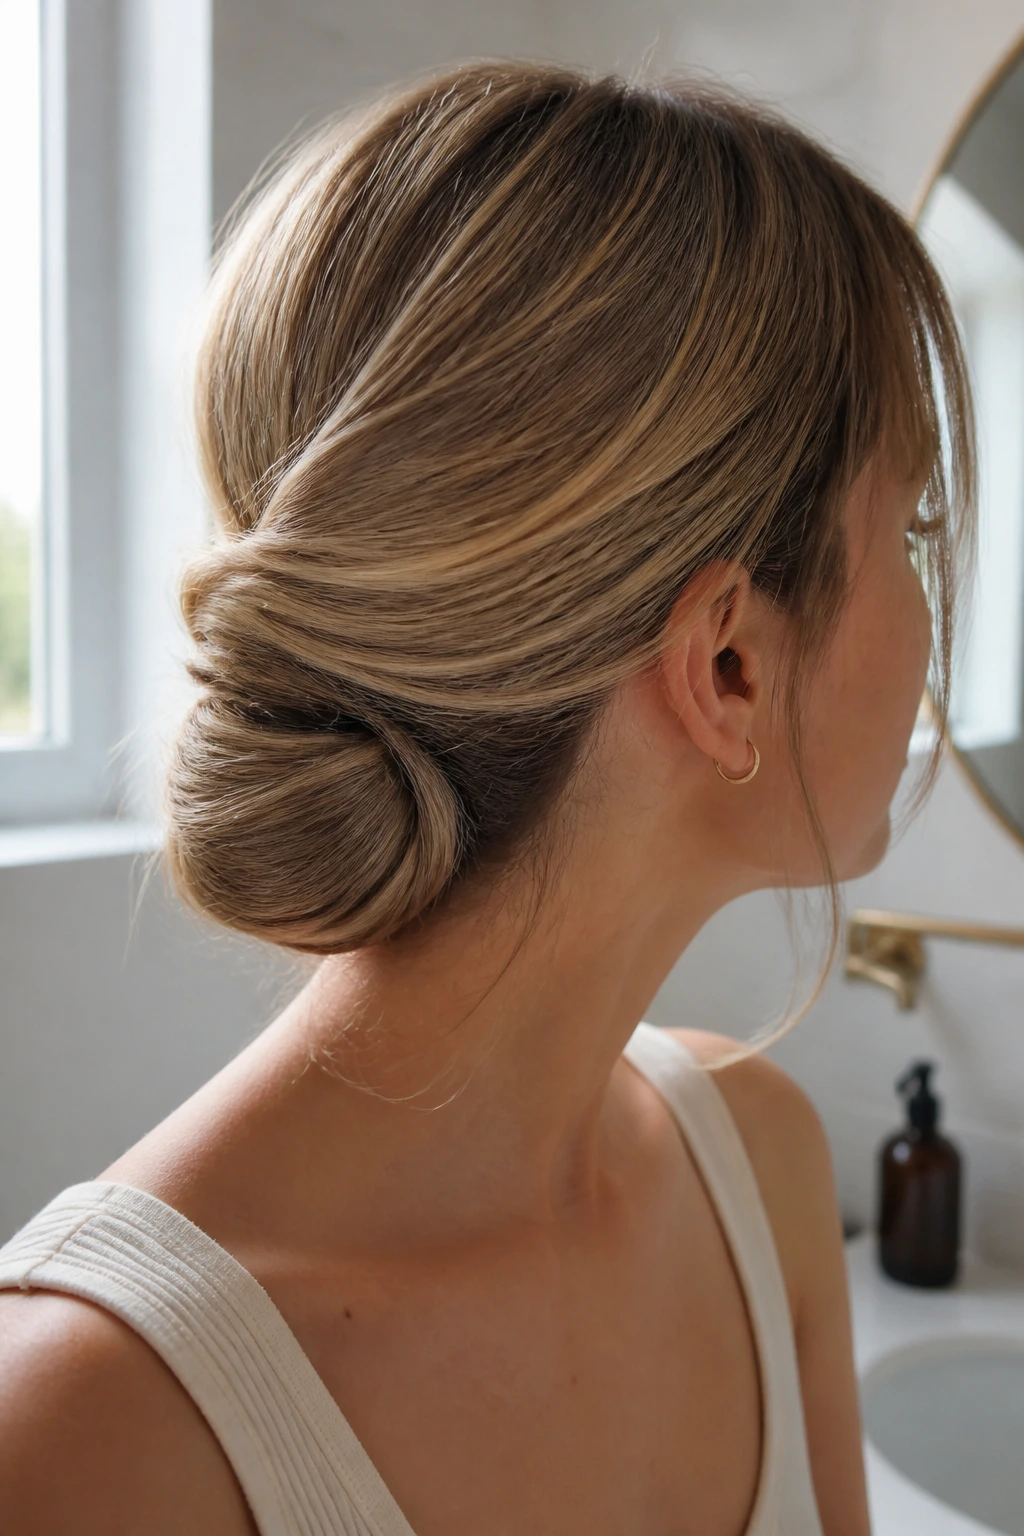
The flip-and-tuck bun is basically a shortcut with good manners. Tie the hair into a low pony, create a small gap above the elastic, and flip the ends through once before tucking them under the base. Short hair loves this because it doesn’t ask for much length.
The shape ends up looking soft and slightly folded, which is exactly what you want from a messy bun. If the ends are too short to flip completely, roll them inward with your fingers and pin them where they land. You are building shape, not obeying a rule.
This style works well when your hair is freshly brushed and a little too slippery for a classic twist. The flip creates tension fast, and the tuck hides the awkward bits. Easy. Quick. Done.
15. The Scrunchie Puff Bun
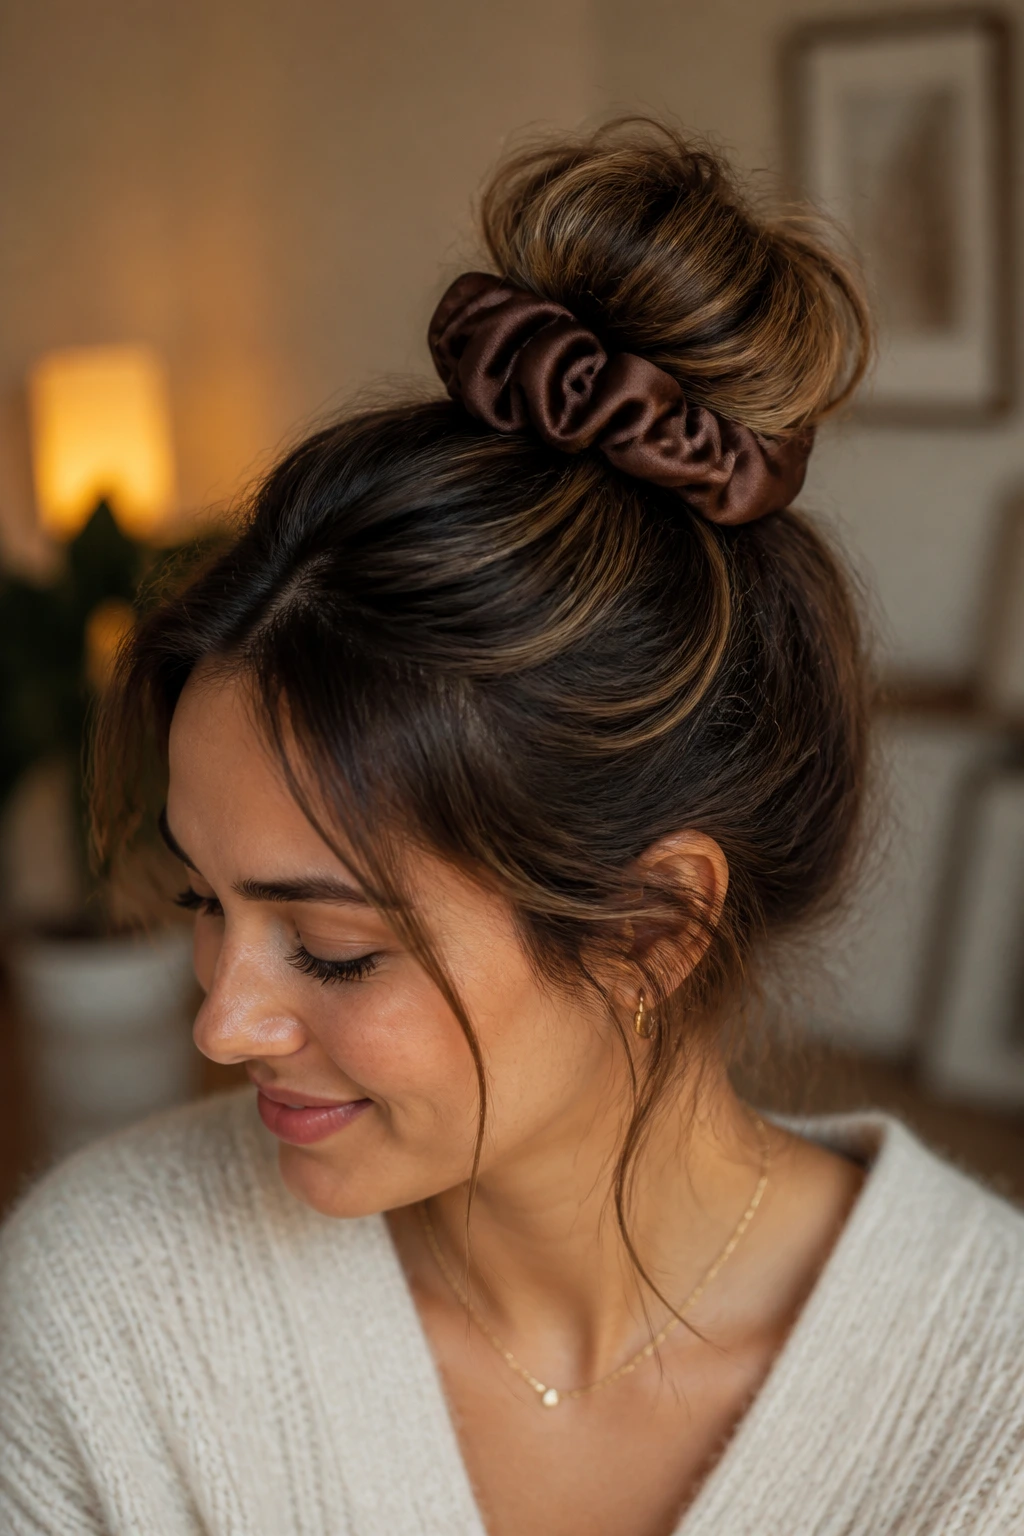
A scrunchie puff bun gets a lot of mileage out of one oversized accessory. The bun sits around the scrunchie instead of trying to wrap all the hair around itself, which makes it a good fit for short, fine, or uneven cuts.
Choose a thick scrunchie — fabric or velvet works well — and gather the hair loosely at the back or crown. Wrap the hair once, maybe twice, then stop before the shape gets small and tight. The point is a soft puff with enough body to look full from the front.
If your hair is very short at the nape, let the ends peek out a little. That’s part of the charm here. A bun like this should look slightly relaxed, like you put it up with one hand and meant it.
16. The Fringe-Friendly Bun
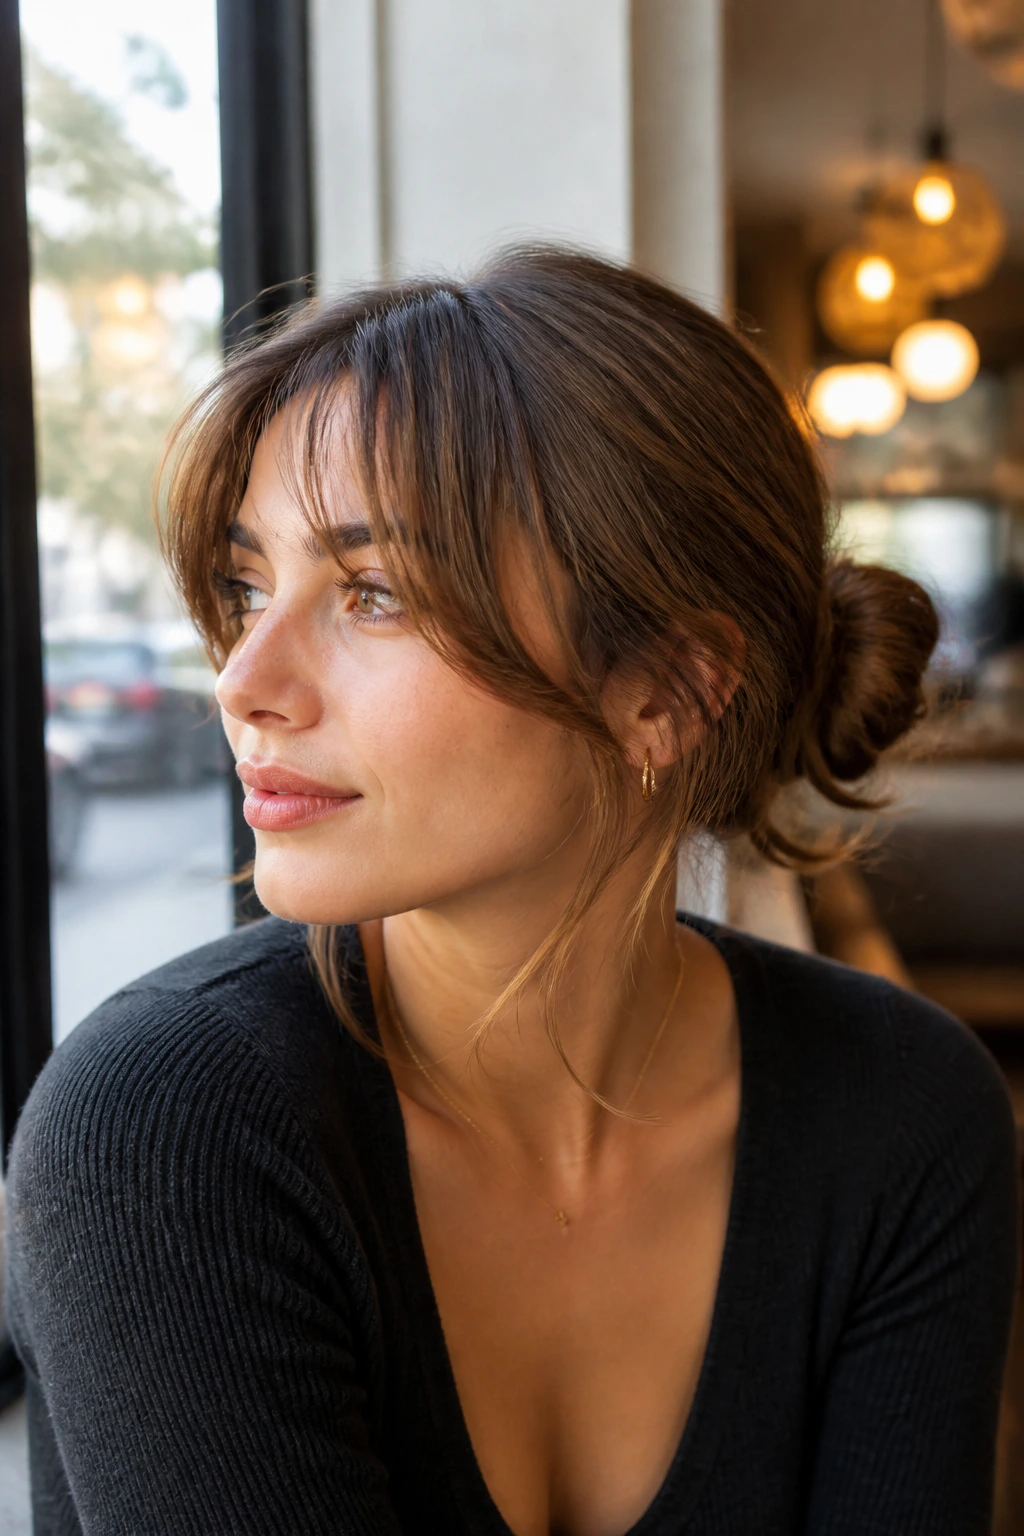
Bangs change everything. A fringe-friendly bun leaves the bangs, curtain pieces, or shorter front layers out of the bun on purpose, which keeps the style from pulling too hard on the front of the head.
The bun itself can be low, mid, or slightly off-center, but the front needs room to breathe. Curtain bangs look especially good with a low messy knot because the hair around the face softens the shape. If your bangs are blunt, keep the bun looser so the contrast doesn’t feel too severe.
A little styling cream on the fringe can help, but don’t overdo it. Bangs that are too polished next to a messy bun can feel disconnected. Softness should travel from front to back.
17. The Rope-Twist Bun
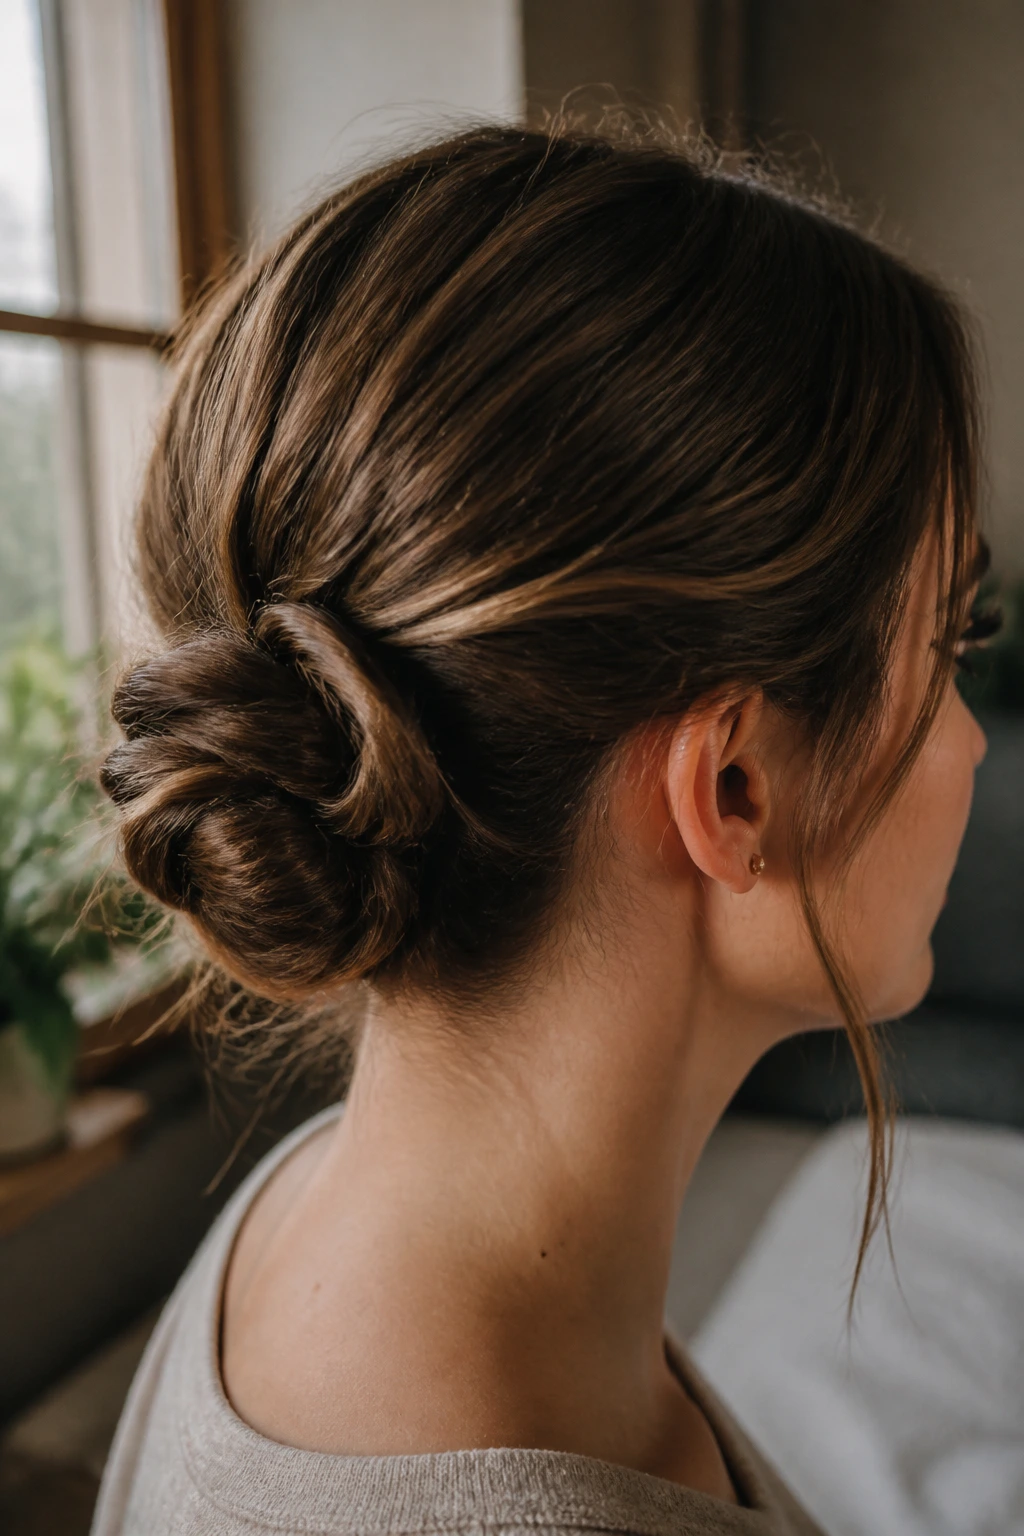
A rope-twist bun holds well on short hair because the twist itself adds grip. Split the hair into two sections, twist each section in the same direction, then wrap them around each other to create a rope before coiling the result into a bun.
The rope texture is useful on hair that slips out of plain knots. It makes the whole shape feel tighter without needing a hard, sprayed finish. That’s a good trade if your hair is straight or very smooth.
This style likes a middle or slight side part. It also takes bobby pins well because the rope gives the pins something to catch. If the bun seems too small, tug the outer twist slightly to widen it. Little move. Big difference.
18. The Low Wisp Knot
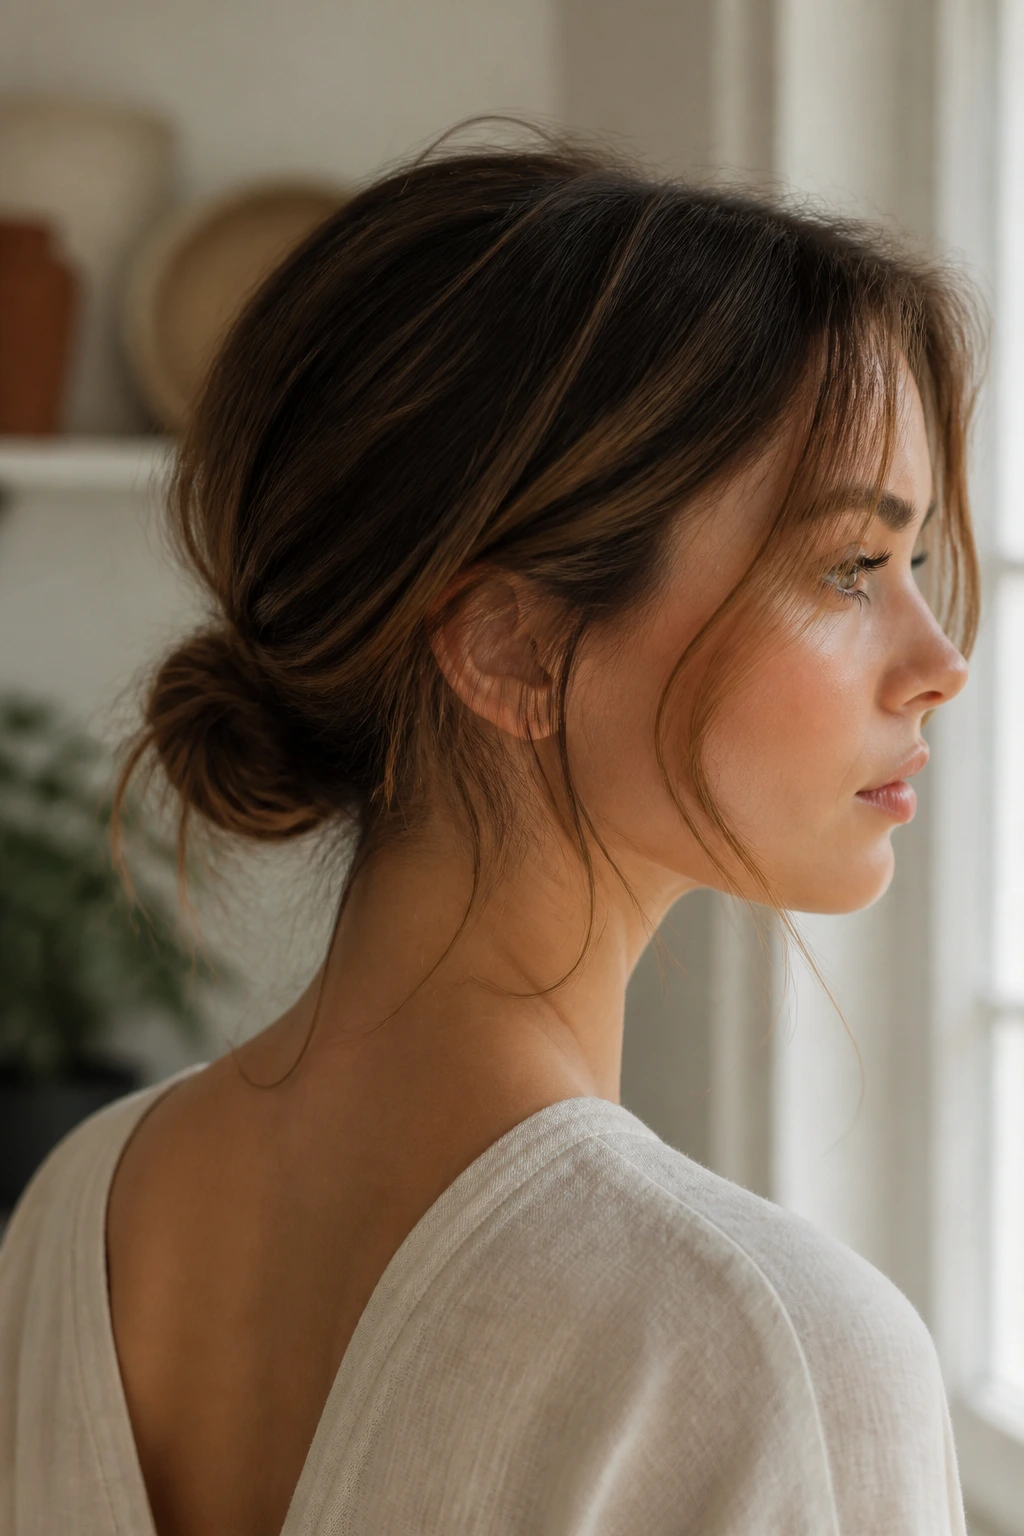
A low wisp knot is not trying to hide that your hair is short. It leans into it. The bun is small, the edges stay soft, and the wisps at the nape and temples are part of the design rather than an accident.
This is the bun for days when you want softness more than control. It sits low enough to be calm, but loose enough that a few ends can escape without ruining the shape. On a bob or lob, that can look prettier than a stricter bun.
Use light-hold spray only. Heavy product makes wisps look stiff, and that kills the effect. The whole point is a barely-there knot that still looks finished.
19. The Accessory-First Bun
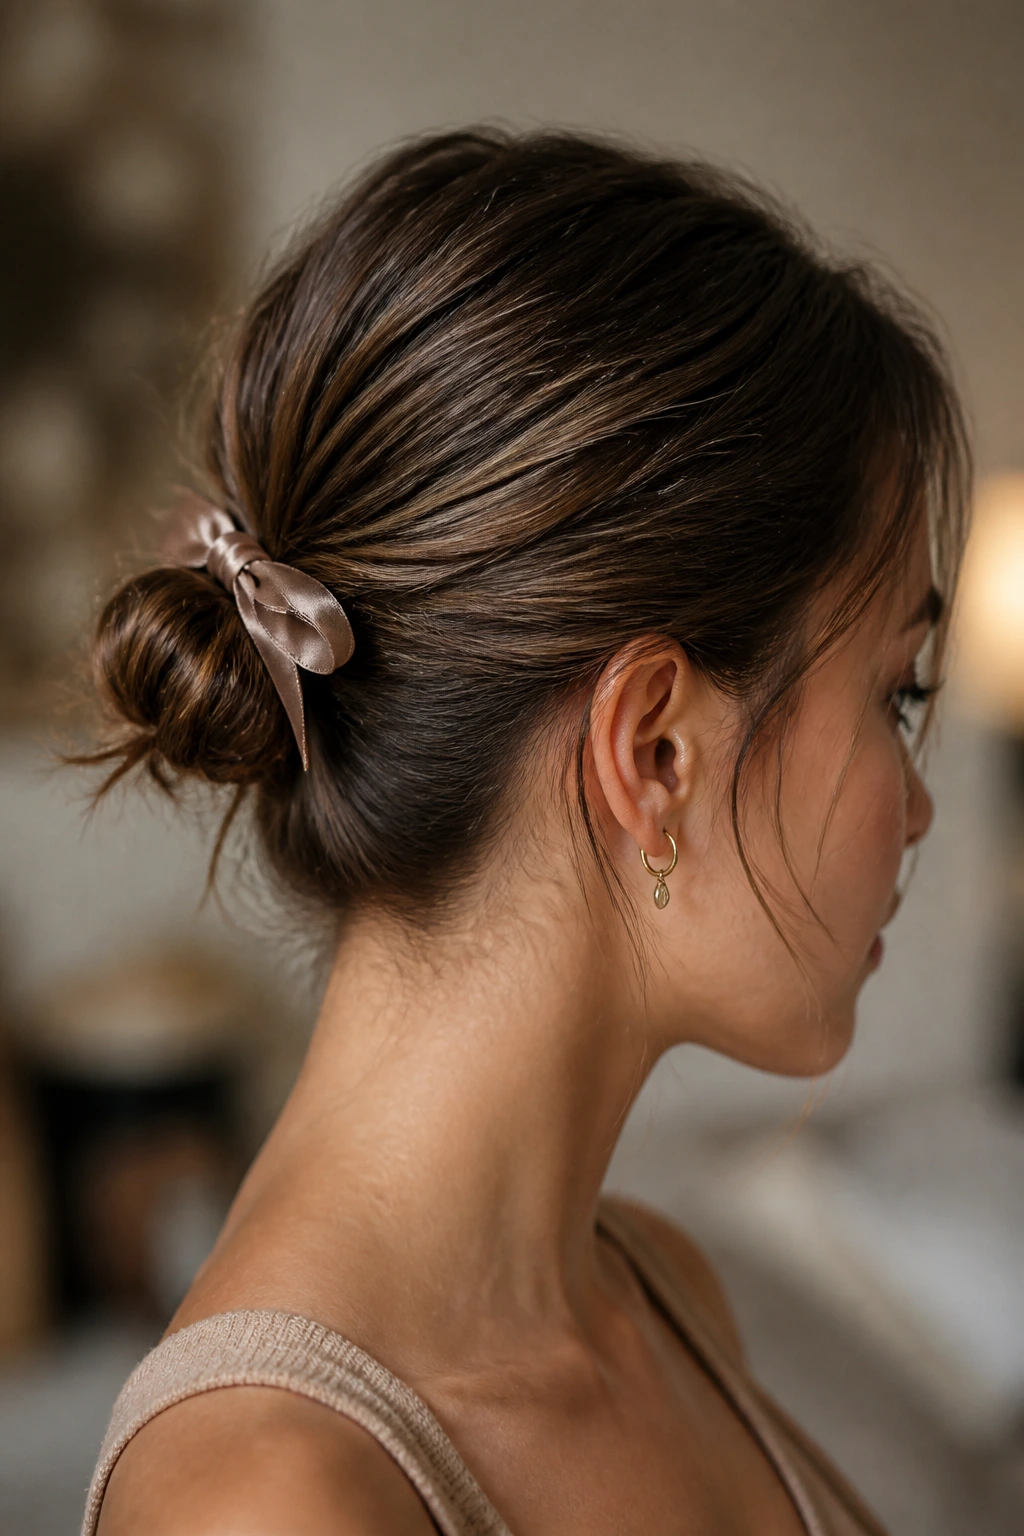
Sometimes the accessory is the real hairstyle. A barrette, ribbon, scarf, or decorative pin can hold a tiny messy bun in place while making the whole thing feel intentional. That’s a good move when your hair is borderline too short for a bigger bun.
Make the bun small and secure first, then add the accessory where it can hide the joining point. A ribbon tied around a low bun, or a slim scarf wound through a twist, can cover the exact places where short layers like to escape. That makes the style look polished without needing more hair.
I like this version for days when the outfit feels plain. The accessory does the visual lifting, and the bun gets to stay small and simple. No overthinking required.
20. The Damp-Hair Sculpted Bun
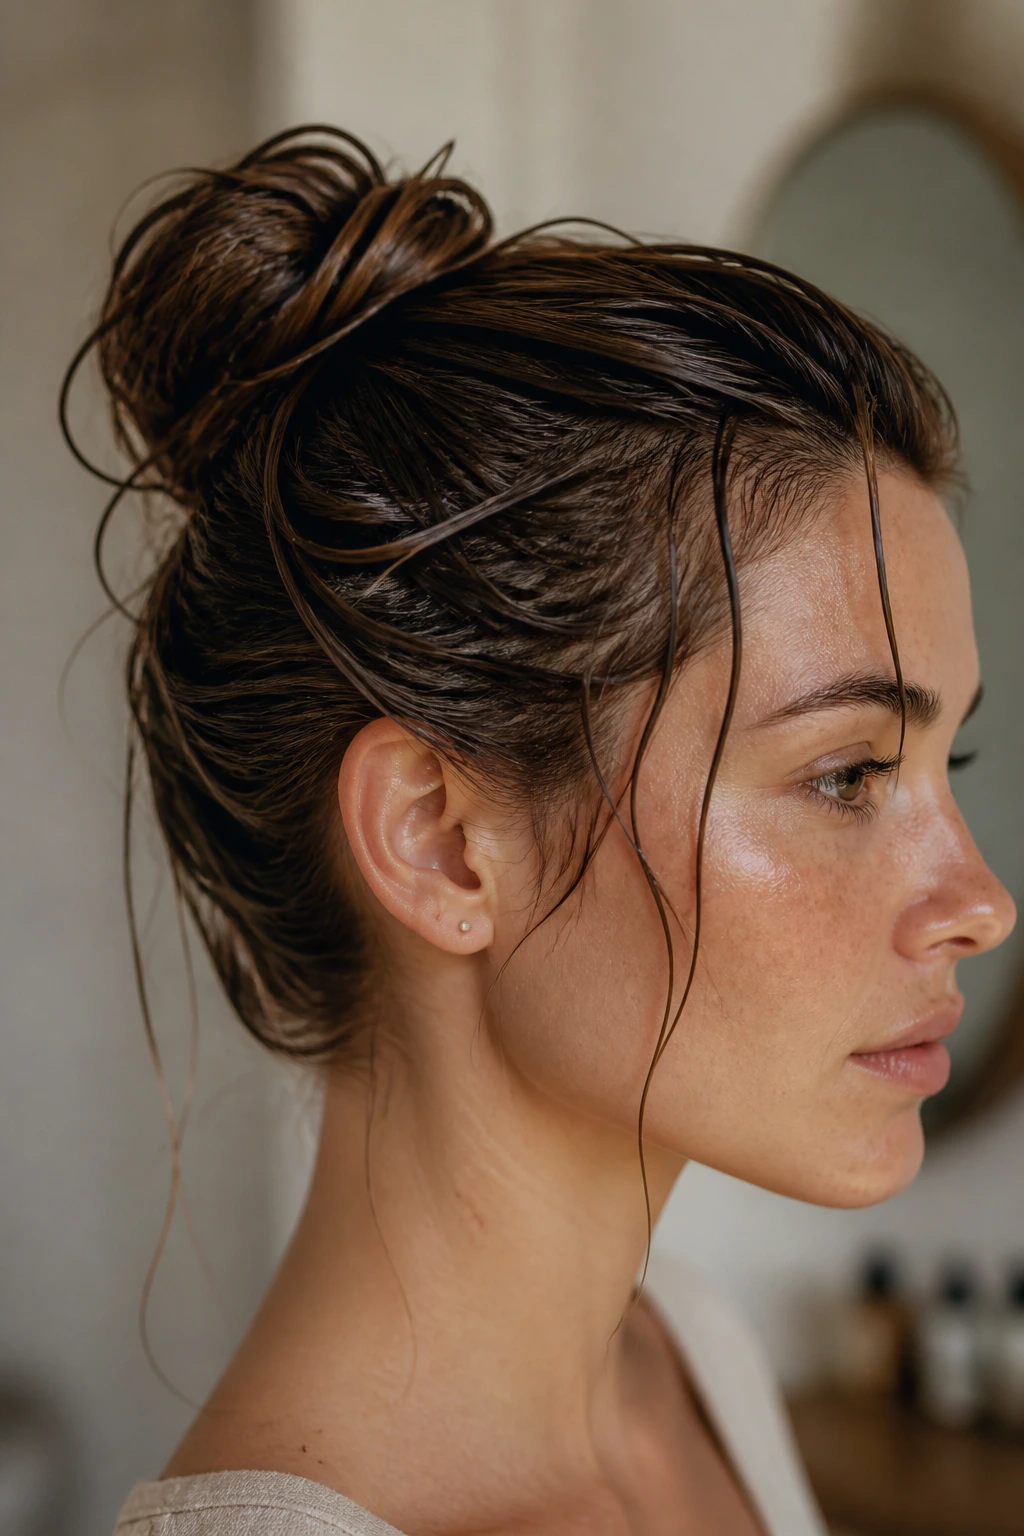
Damp hair can be your secret weapon if you want shape to stay put. Not dripping wet — that’s a different problem — but damp enough that the hair remembers the position it dries in.
Work a small amount of mousse or leave-in through the mid-lengths, then gather the hair into the bun shape you want while it’s still flexible. As it dries, the hair will set in place with less need for extra pins. This is especially helpful if your short hair refuses to hold a bend once it’s fully dry.
The finish is softer than a slick bun and cleaner than a fully messy one. If your hair is very curly, test this approach carefully, because damp styling can push the curl pattern in odd directions if you rush it.
21. The Overnight Heatless Bun
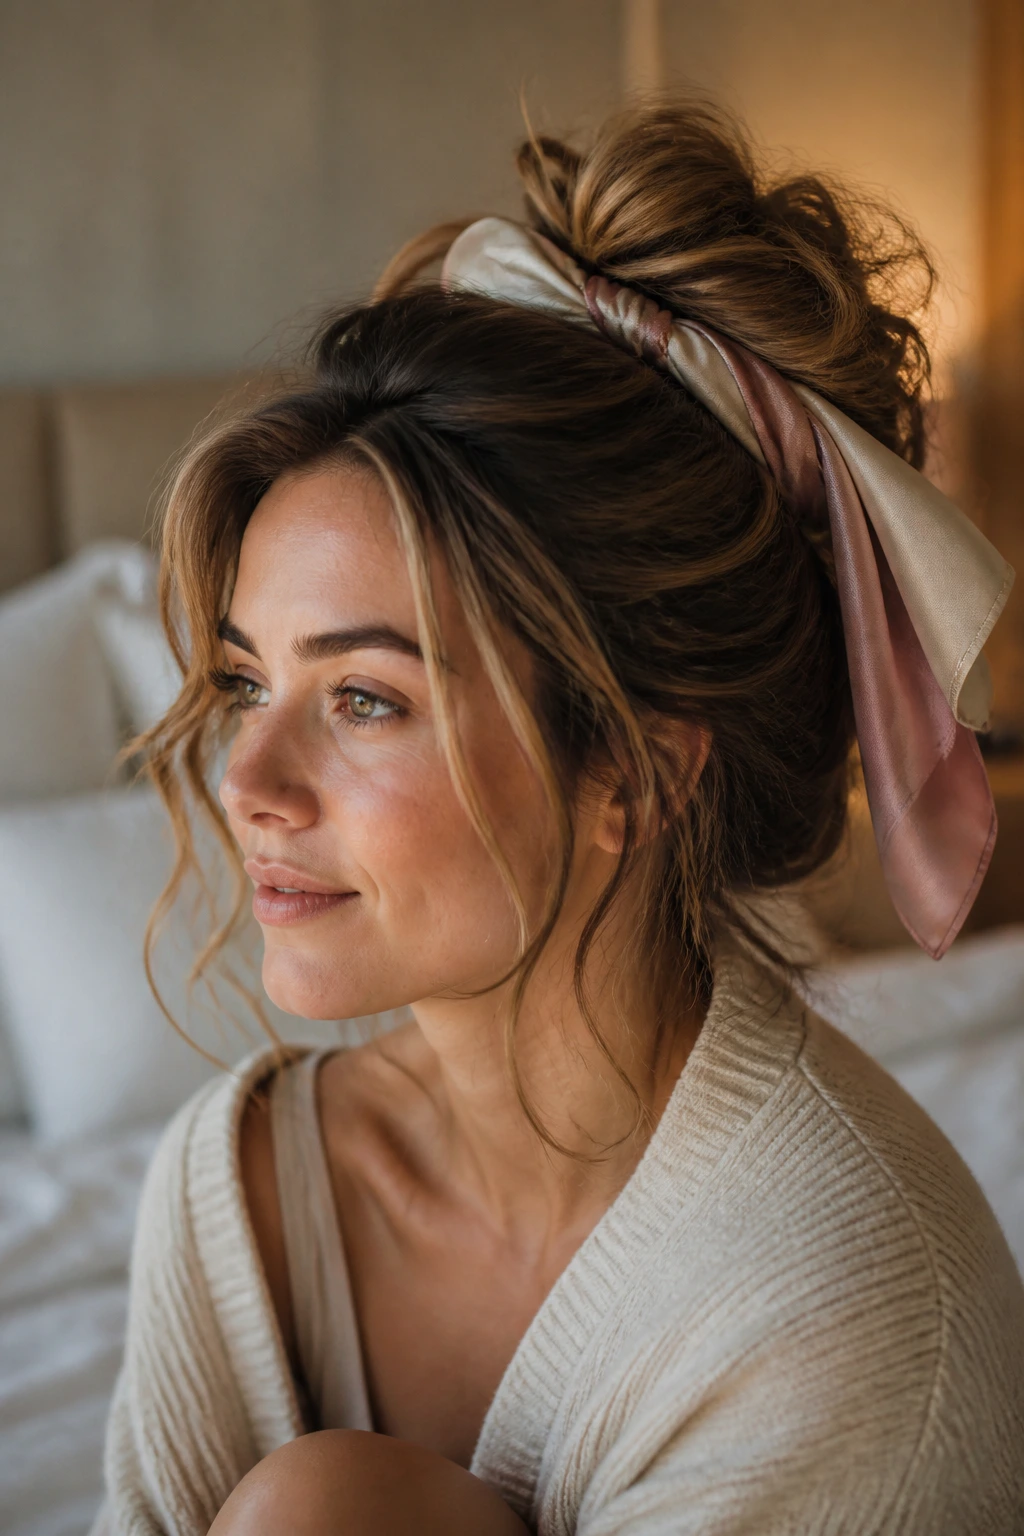
A heatless bun is one of those styles that earns its keep the next morning. Twist or loosely knot the hair before bed, secure it in a way that won’t dig in, and let the shape set while you sleep. In the morning, the bun itself becomes the style.
The point isn’t to wake up with a perfect updo. It’s to give the hair a little bend and memory so the final bun has texture and movement. A silk scarf or pillowcase helps keep the shape from frizzing out overnight.
This works especially well if your hair has trouble holding volume. The next day, you can release the twist slightly, pin it back into place, and get a fuller result with less effort than starting from scratch.
22. The Pin-Ring Bun
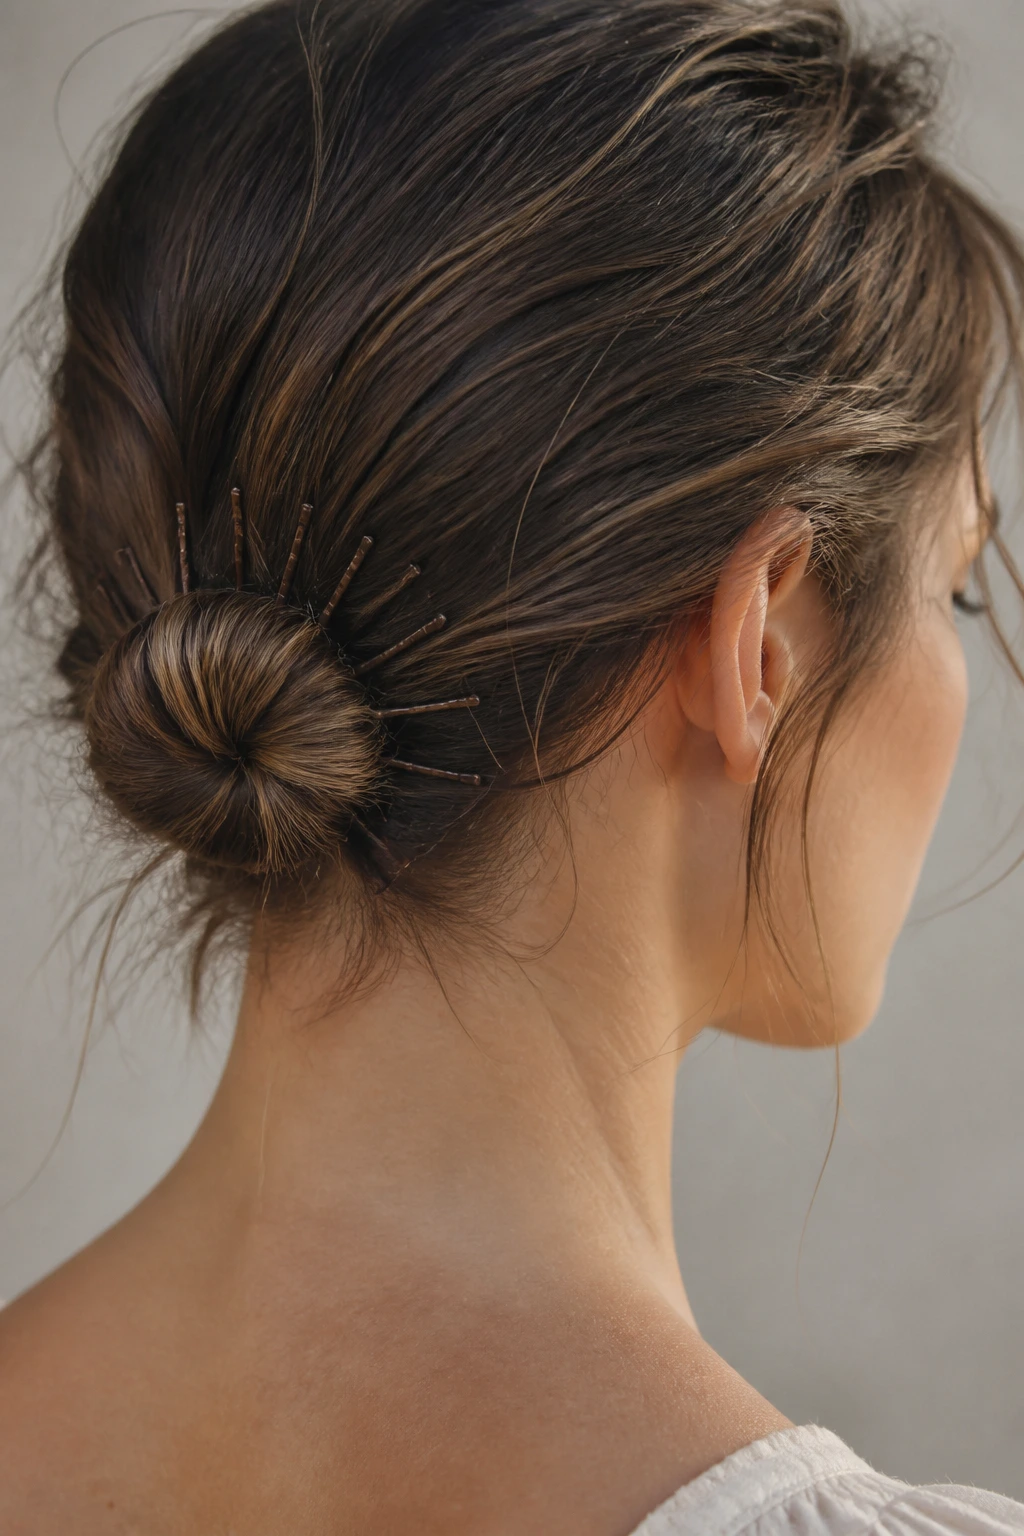
A pin-ring bun is built from the outside in. Instead of relying on one elastic to do all the work, you shape a small bun and then arrange bobby or U-pins in a loose circle around it so the pins become part of the structure.
This style is a lifesaver for very short hair at the nape. The ring of pins holds stray ends flat and lets the bun stay compact without collapsing. It also makes the bun look more textured because the pins create tiny seams and shadows.
Use pins that match your hair color as closely as you can. The whole trick here is blending. When the pins disappear, the shape looks far more deliberate.
23. The Split-Section Bun
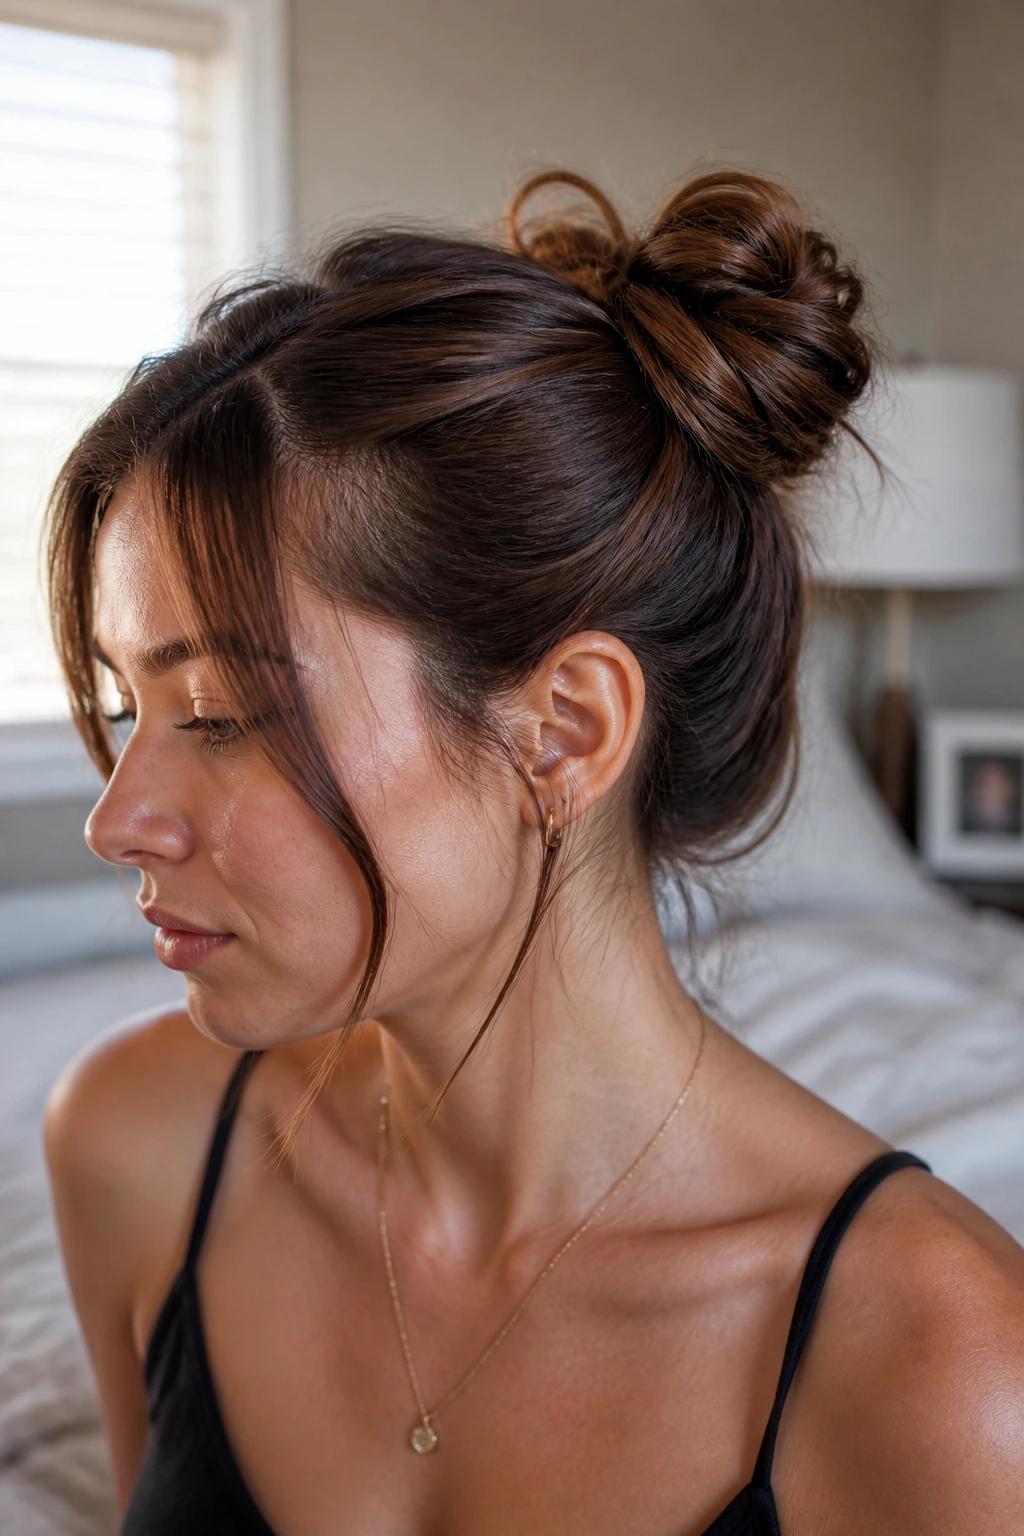
Split-section buns are useful when one mass of hair feels impossible. Divide the hair into two or three smaller sections, twist each section on its own, then combine the twists into a bun or knot.
That smaller-section approach is kinder to short layers. Each piece has less distance to travel, so the ends are less likely to pop free. The final bun also ends up with visible texture, which is exactly what messy hair styling should look like.
If your hair is thick, this method is especially good because it spreads the bulk out. If your hair is fine, it creates the illusion of thickness without a giant teased crown. Either way, the bun gets better texture than a one-step gather.
24. The Curly Halo Knot
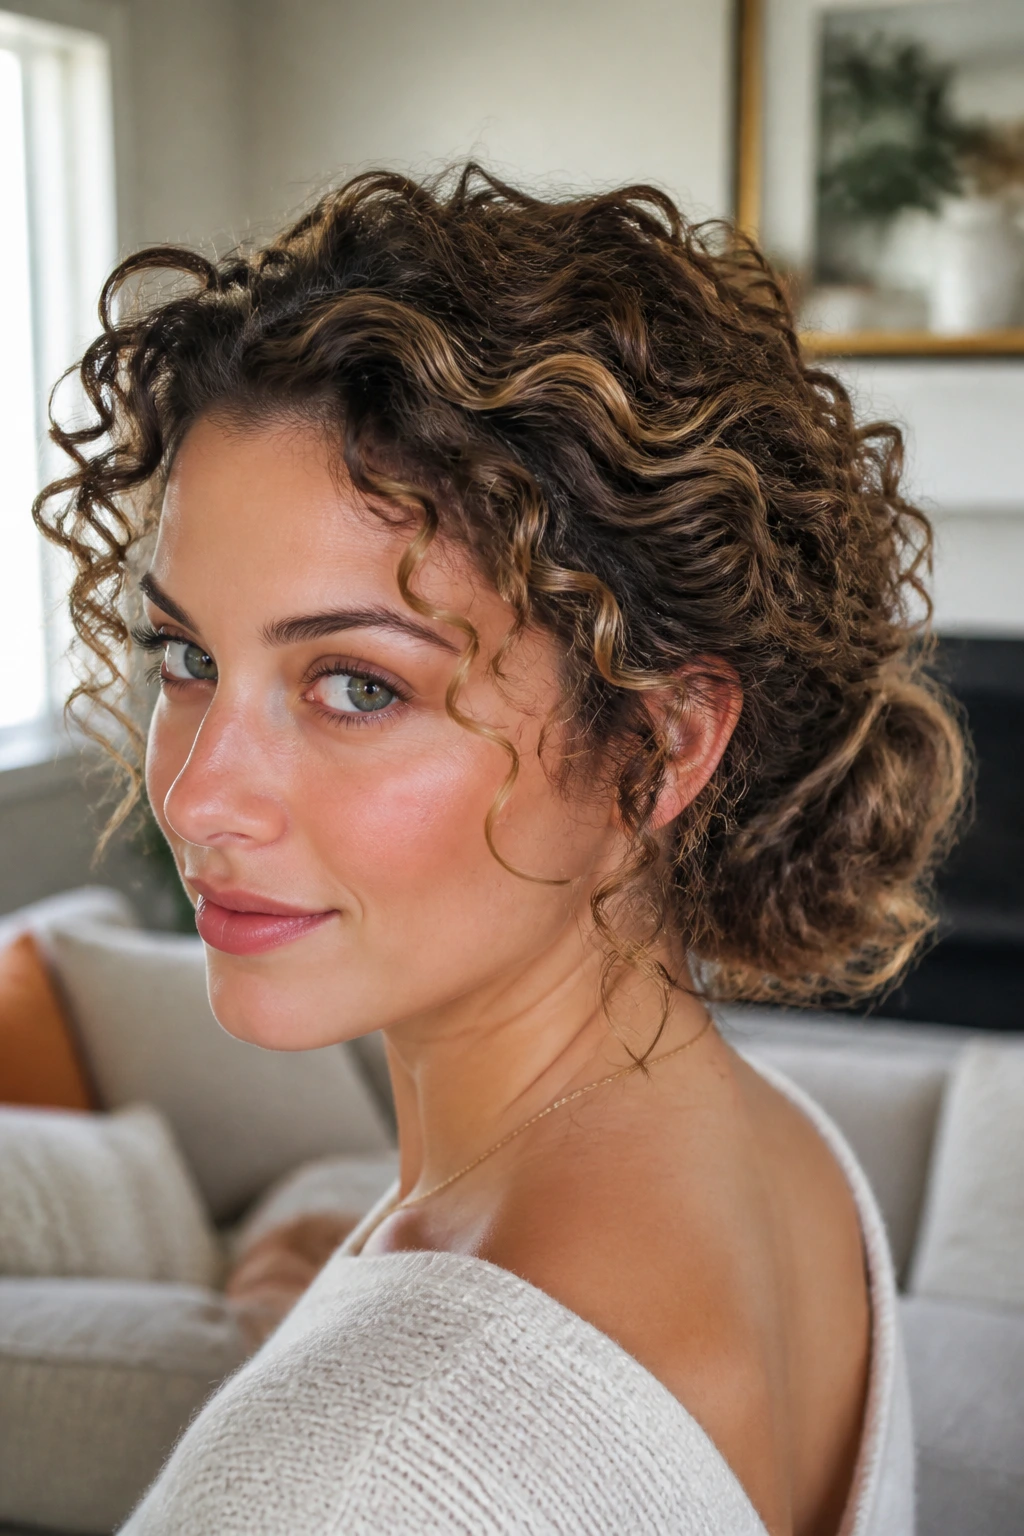
The curly halo knot leaves some curl volume around the crown and temples while the bun stays low and tucked. It’s a nice way to make natural texture feel like the whole point of the style instead of something you need to control away.
Gather the back into a small knot, but don’t drag the front too tightly. Let the halo of curls sit softly around the face and upper head. That contrast makes the bun look fuller than it is and keeps short curly pieces from getting overworked.
This is one of the most forgiving short-hair bun styles for textured hair. Curly ends don’t need to vanish. They just need a home.
25. The Fanned-Out Bun
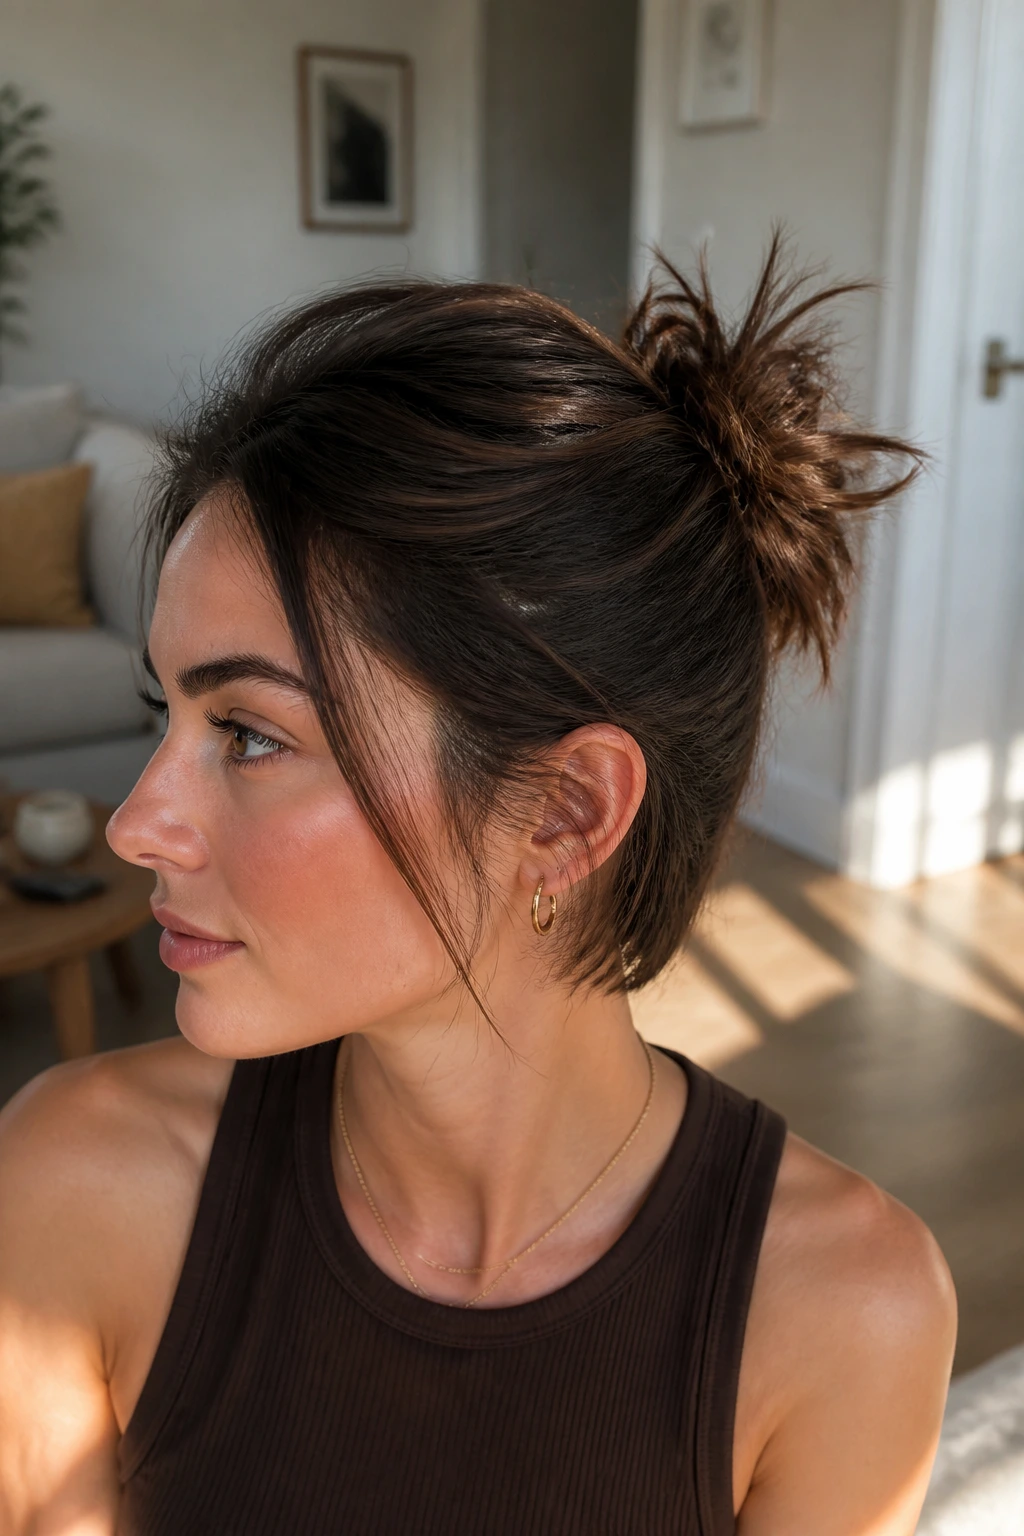
A fanned-out bun turns the ends into decoration. Instead of forcing the hair into one smooth wrap, gather a small base bun and fan the loose ends around it in little sections, pinning each piece where it lands.
That fan shape gives short hair more surface area, which makes the bun feel bigger. It’s especially useful when the cut has blunt ends or layers that are too short to coil all the way around. The shape stays soft, but it doesn’t disappear.
This style looks best when the ends have a little bend. If they’re stick-straight, the fan can look choppy. A quick wave or even the bend from a previous day helps.
26. The Mini Gibson Tuck
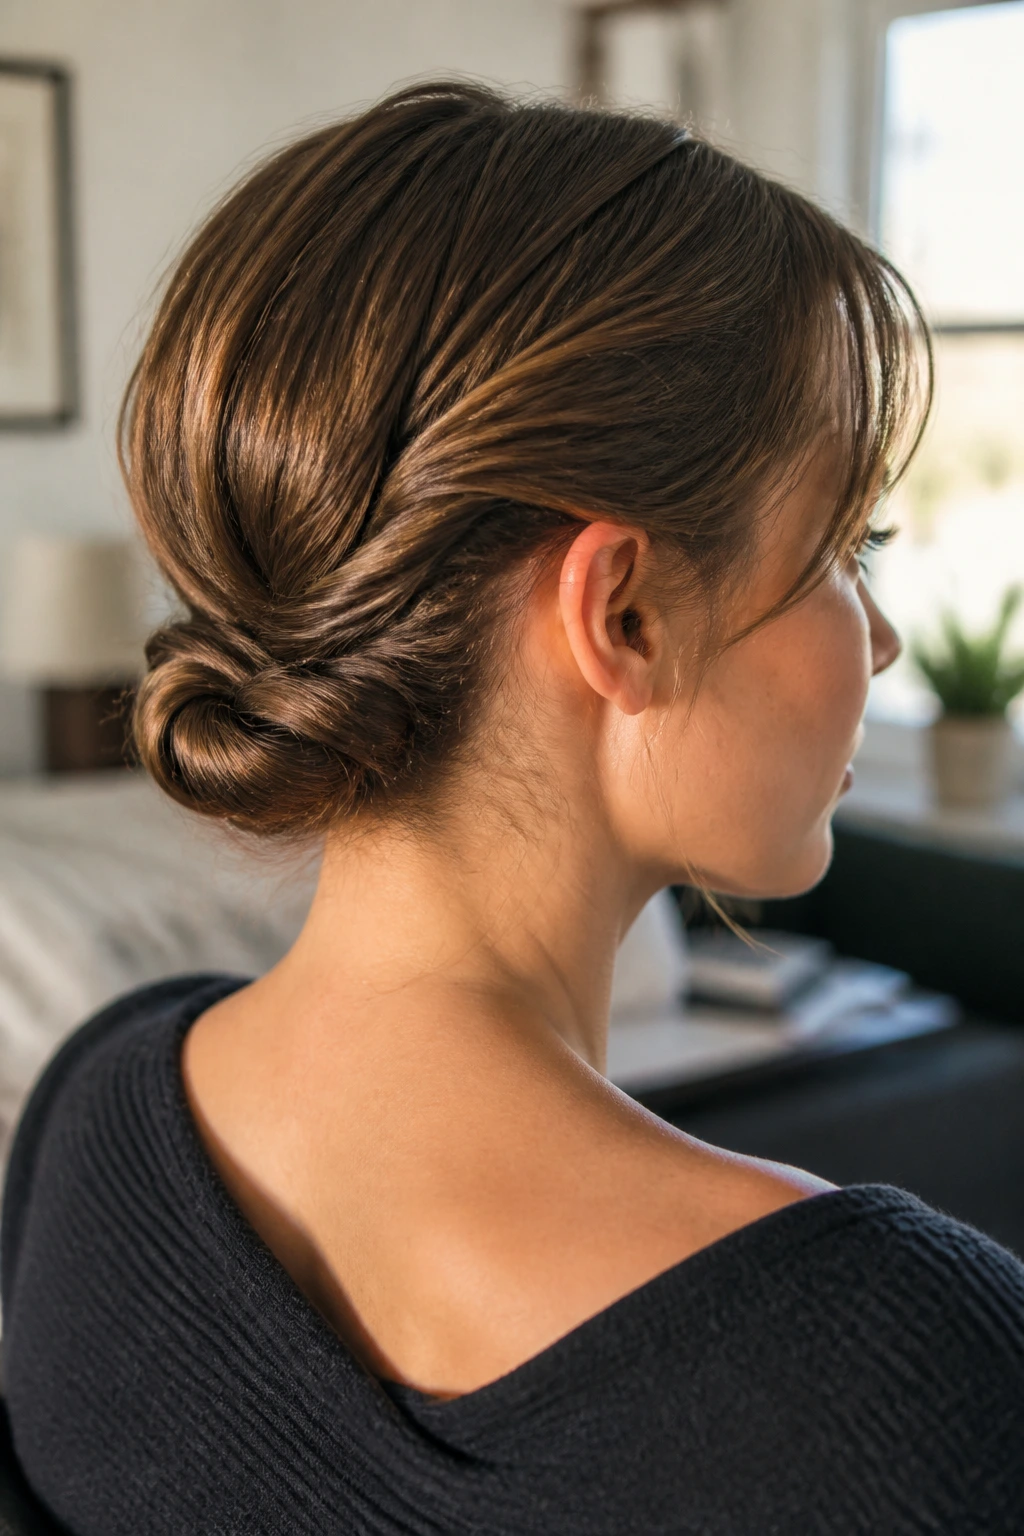
The mini Gibson tuck has a vintage shape, but it works on short hair because it asks for folding, not wrapping. Roll the ends upward and inward at the nape, then tuck them under themselves until a compact bump forms.
What makes this one good is the clean line along the neck. It hides shorter pieces neatly and gives the bun a little structure without making it feel stiff. On a lob, the tuck can sit low and elegant; on a bob, it becomes a tiny rolled knot.
A couple of pins at the tuck line are usually enough. If the roll looks too neat, pull one side loose by a few millimeters. That tiny rough edge is what keeps it in the messy-bun family.
27. The Errand-Run Bun
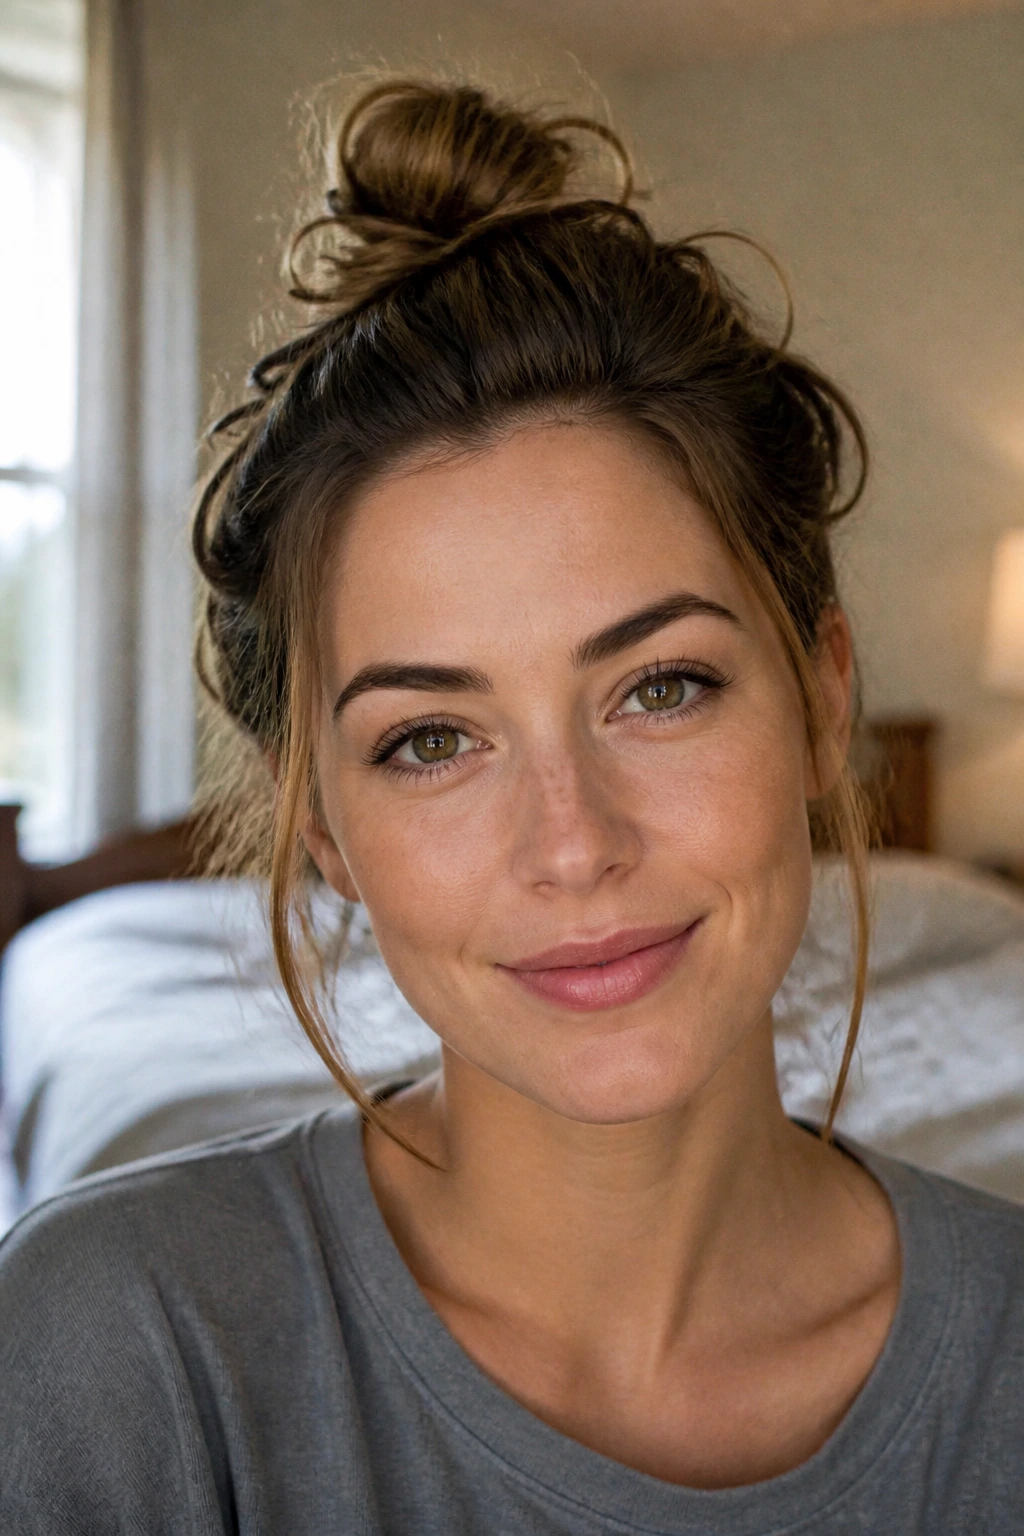
This is the bun you make when you’re late, the mirror is smudged, and you still need hair off your face. One elastic, a few pins, and a small bit of dry shampoo are enough. The errand-run bun doesn’t pretend to be refined.
Gather the hair wherever it wants to sit, twist once, and pin the loose bits flat. Keep the shape slightly uneven. A little disorder is what makes this version work. If you try to make it perfect, it starts looking like you tried to make it perfect.
The best part is that it’s honest. On short hair, that honesty often looks better than over-styling. No one needs a tiny, overworked knot when a relaxed one gets the job done.
28. The Polished Messy Event Bun
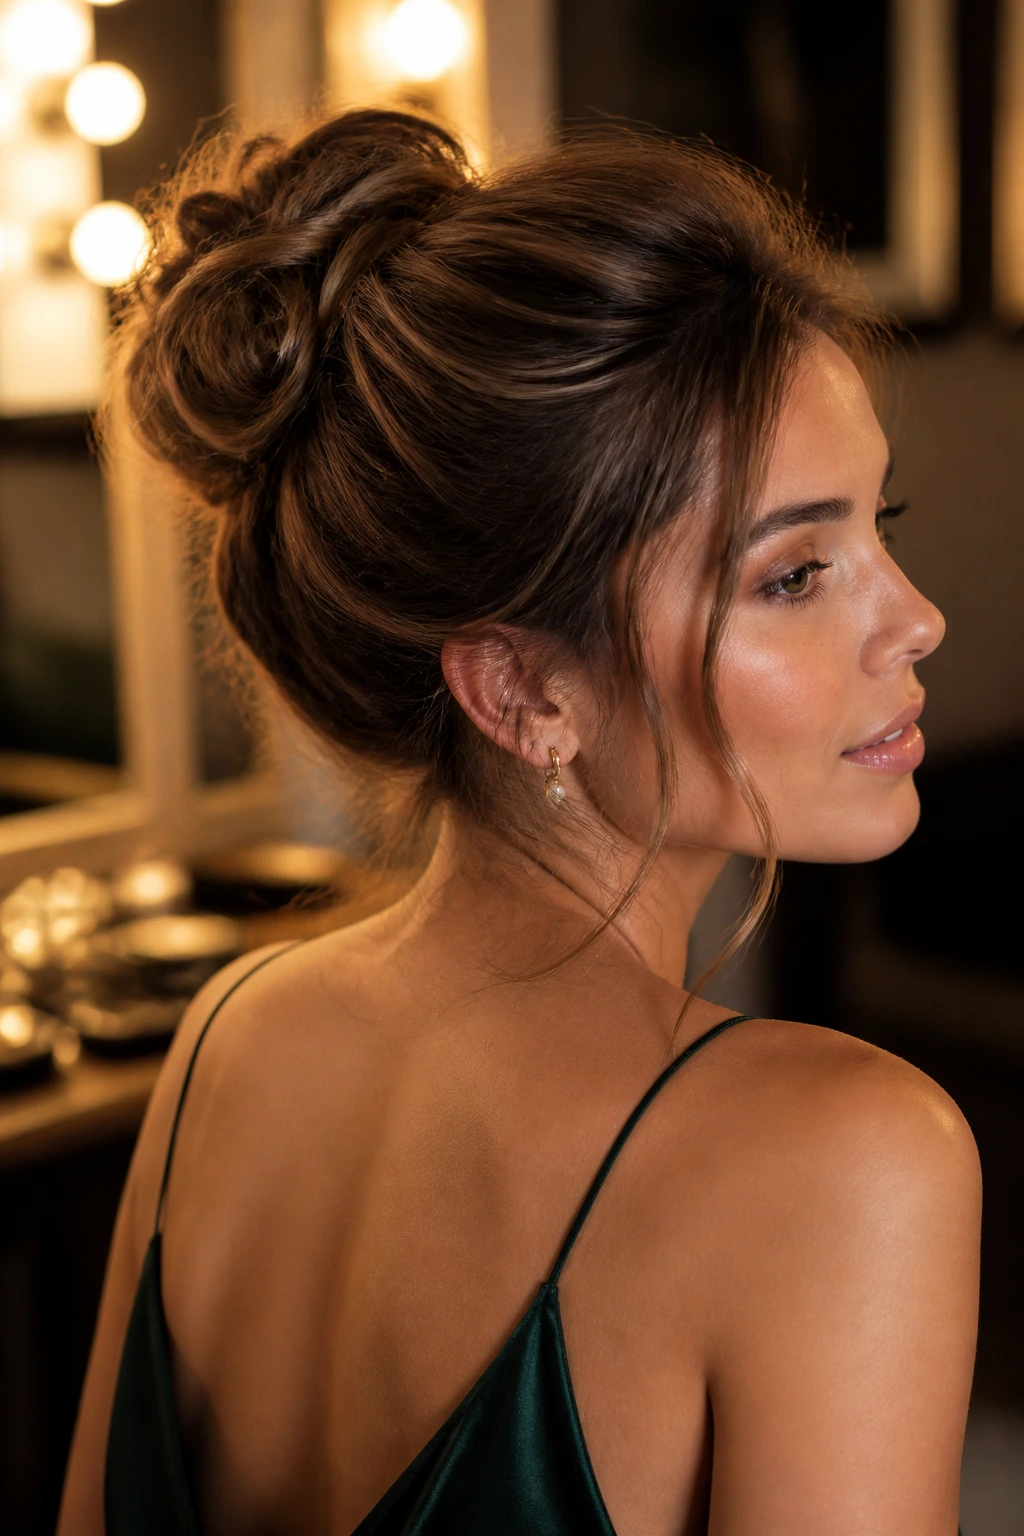
This version keeps the mess, but tidies the edges. Smooth the crown, leave soft face pieces, and create a bun that’s compact enough for an event but still loose enough to feel lived in.
A tail comb helps here. So does a little shine spray on the top layer, not on the bun itself. The shine makes the front look deliberate while the bun stays airy and soft. I’d use this for dinner, a wedding, or any setting where you want the hair to look finished without turning stiff.
The key is restraint. Don’t over-tease the crown. Don’t bury the bun in product. You want the shape to read as styled, not armored.
29. The Braided Crown Micro-Bun
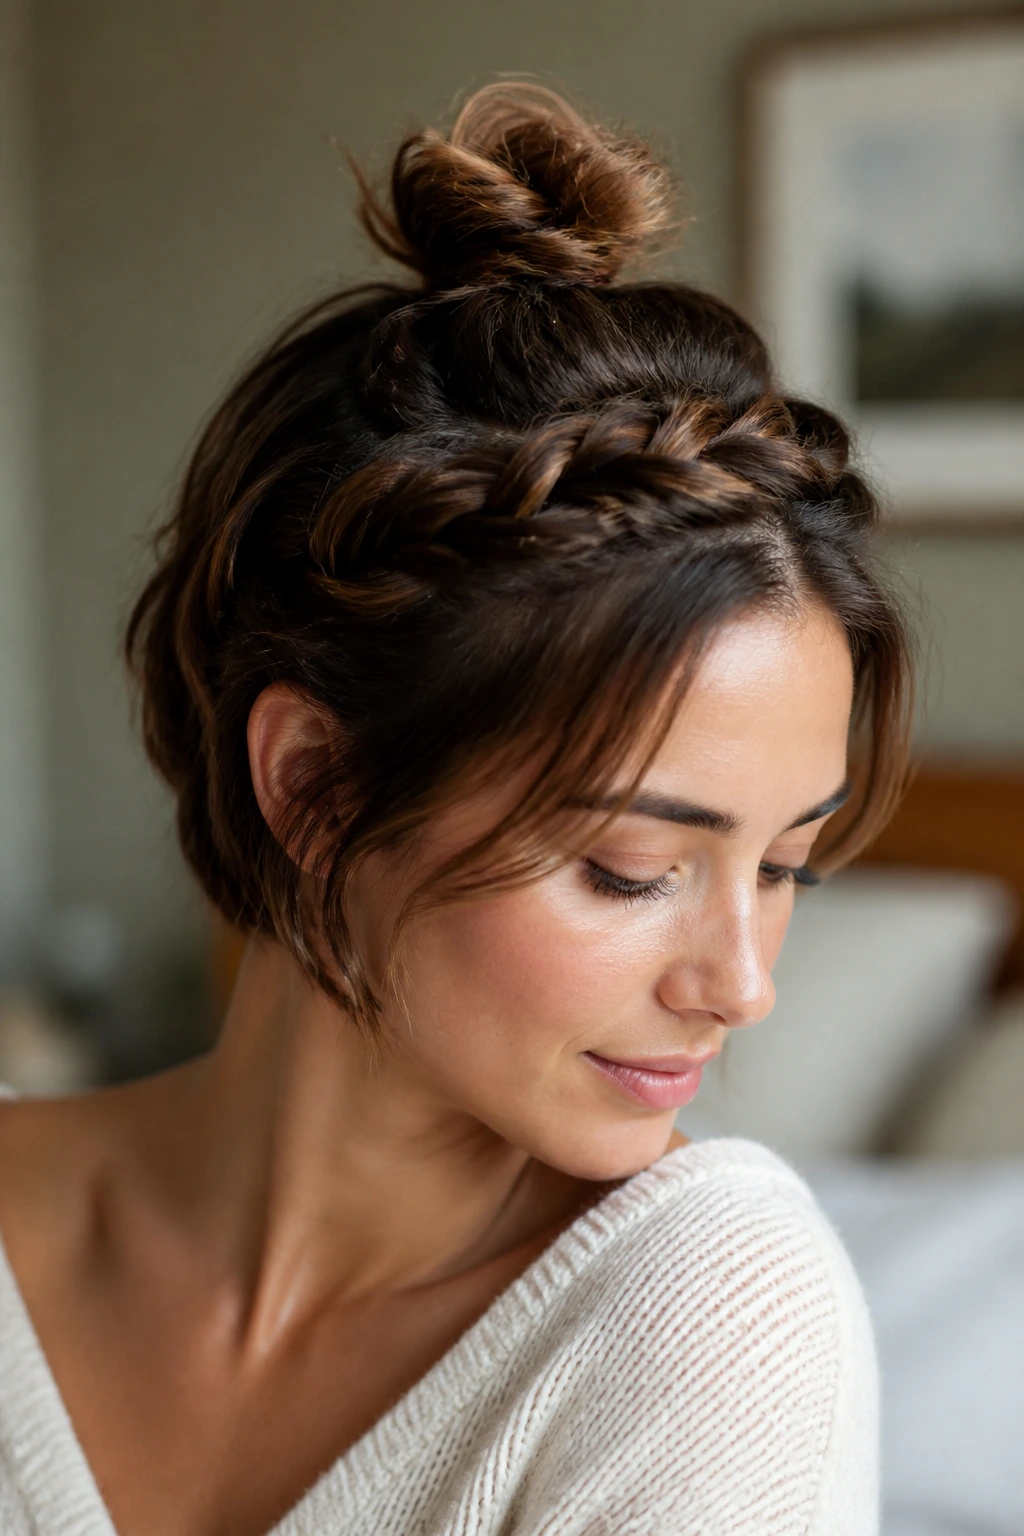
A braided crown micro-bun gives short hair some ceremony. Braid a small section from one side of the crown toward the back, then fold the rest into a tiny bun at the center or off to the side.
The braid acts like a decorative frame, which is handy when the bun itself has to stay small. That frame draws the eye upward and makes the whole style feel fuller. It’s a good option if your hair is too short for a big braid but long enough for a small one.
This style also photographs well from the side, because the braid gives you a visible line while the bun stays tucked in. Keep the braid loose enough to look soft. A rigid crown braid with a tiny bun can feel too formal for the word “messy.”
30. The Day-Old Hair Rescue Bun
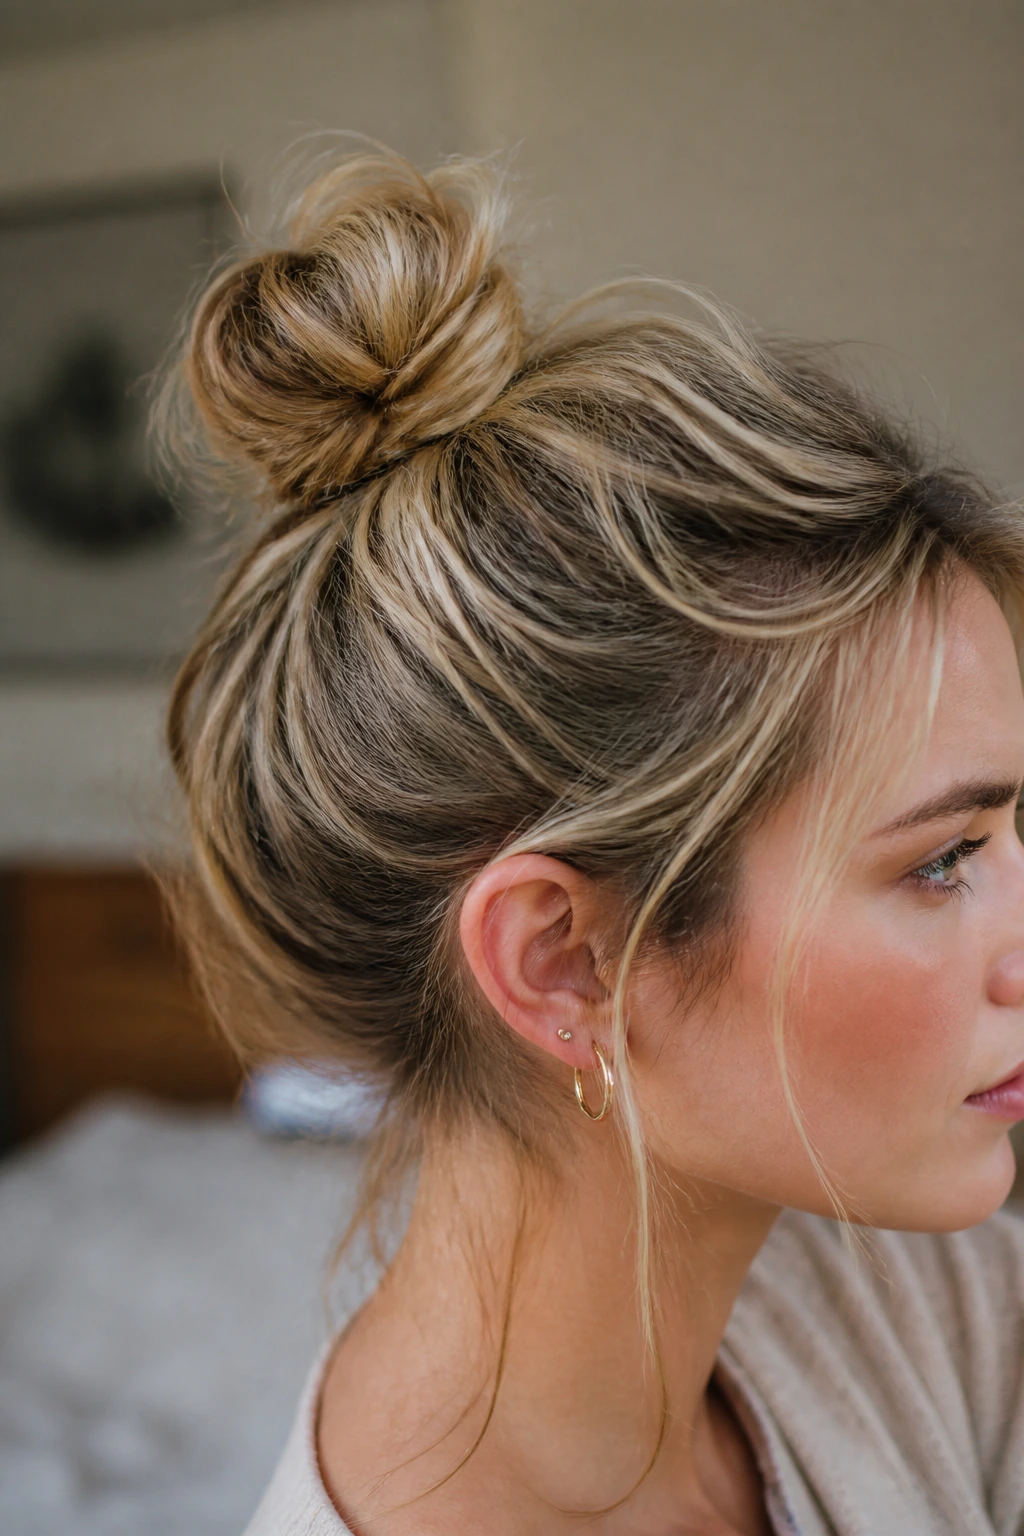
Day-old hair is often the best hair for a short bun, and this style leans all the way into that fact. It’s the rescue version: the one you make when the hair is not clean, not fresh, and not in the mood to cooperate.
Use dry shampoo at the roots, scrunch a little texture through the mids, and build a small bun wherever the hair is willing to sit. Pin the obvious bits, leave the soft bits, and stop before you overwork it. Freshly washed hair can do this too, but it usually needs a little grit first.
This style works because it doesn’t ask for perfection from the start. Short hair often behaves better once it has been lived in for a day. The bun simply gives that texture somewhere to go.
How to Make Short-Hair Buns Hold Without Feeling Stiff
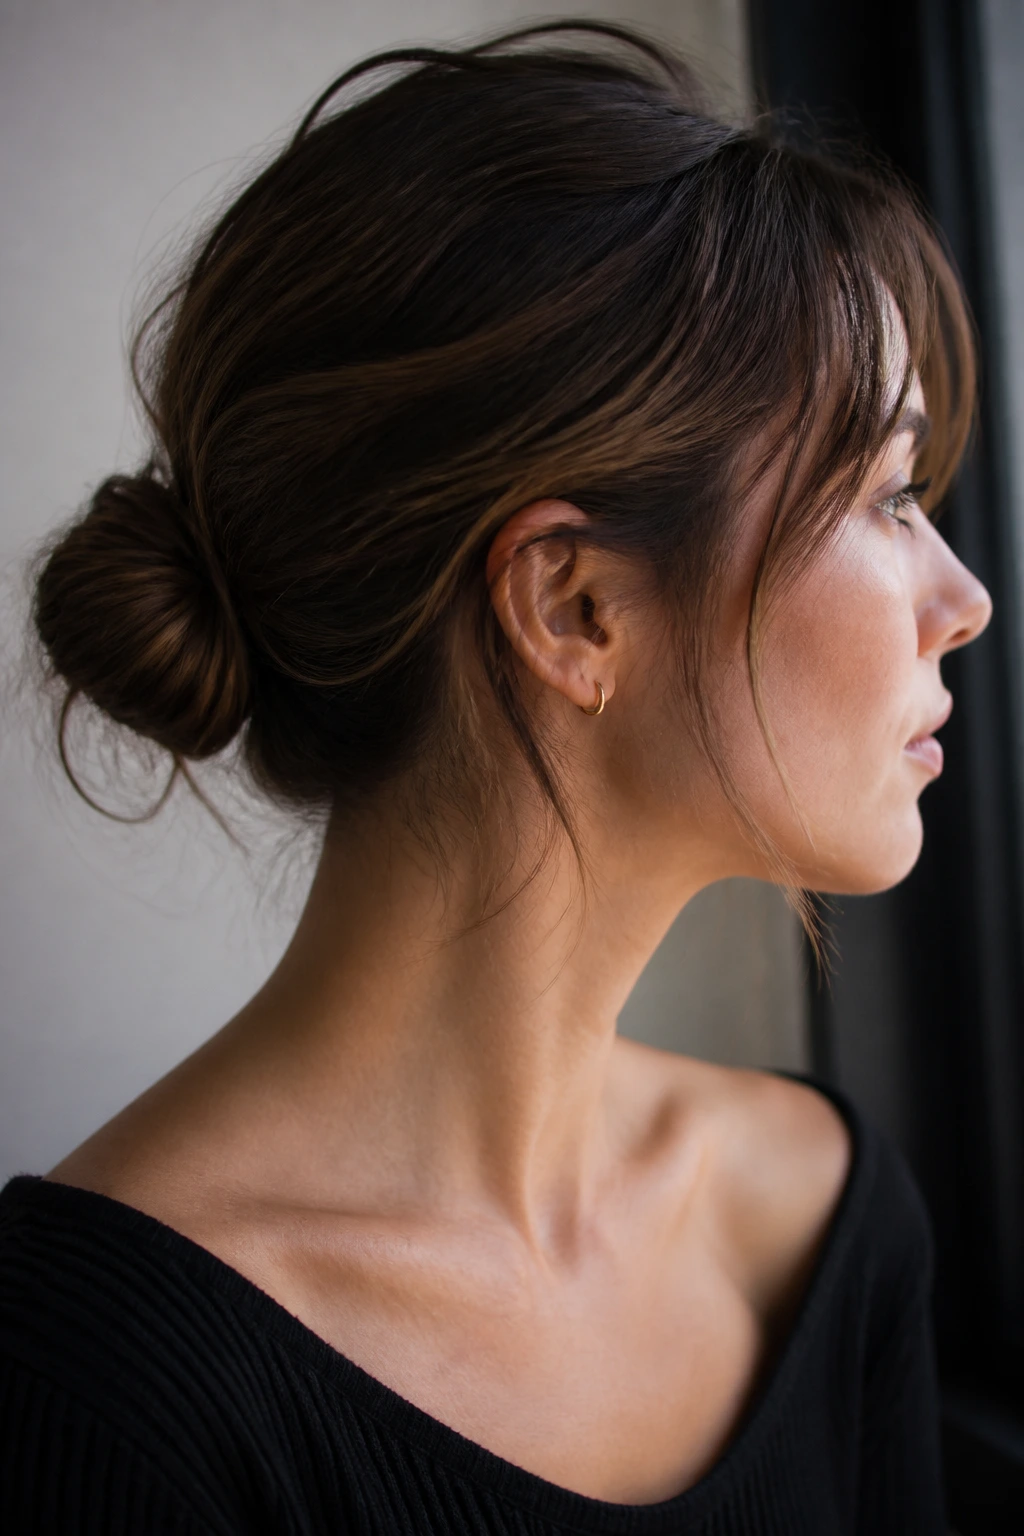
Short hair holds best when the base has grip, the middle has tension, and the finish stays a little loose. That sounds fussy, but it’s actually simple in practice. A few passes of dry shampoo at the roots, a small elastic, and crossed bobby pins do more than a heavy cloud of spray.
Grip at the roots: If your hair is freshly washed, rough-dry it with your fingers and add texture spray before you start. Even five minutes of air time can make a difference. Silky hair needs friction or it slides.
Tension in the middle: Pull the bun snug enough that the shape stays together, then stop. If you yank too hard, the style gets small and the short pieces pop out anyway. A controlled, slightly loose knot lasts longer than a tight one.
Softness at the edges: Tug the bun a little after pinning so it spreads out. Then leave the face pieces alone. The fastest way to ruin a short bun is to keep fiddling until every line is crisp.
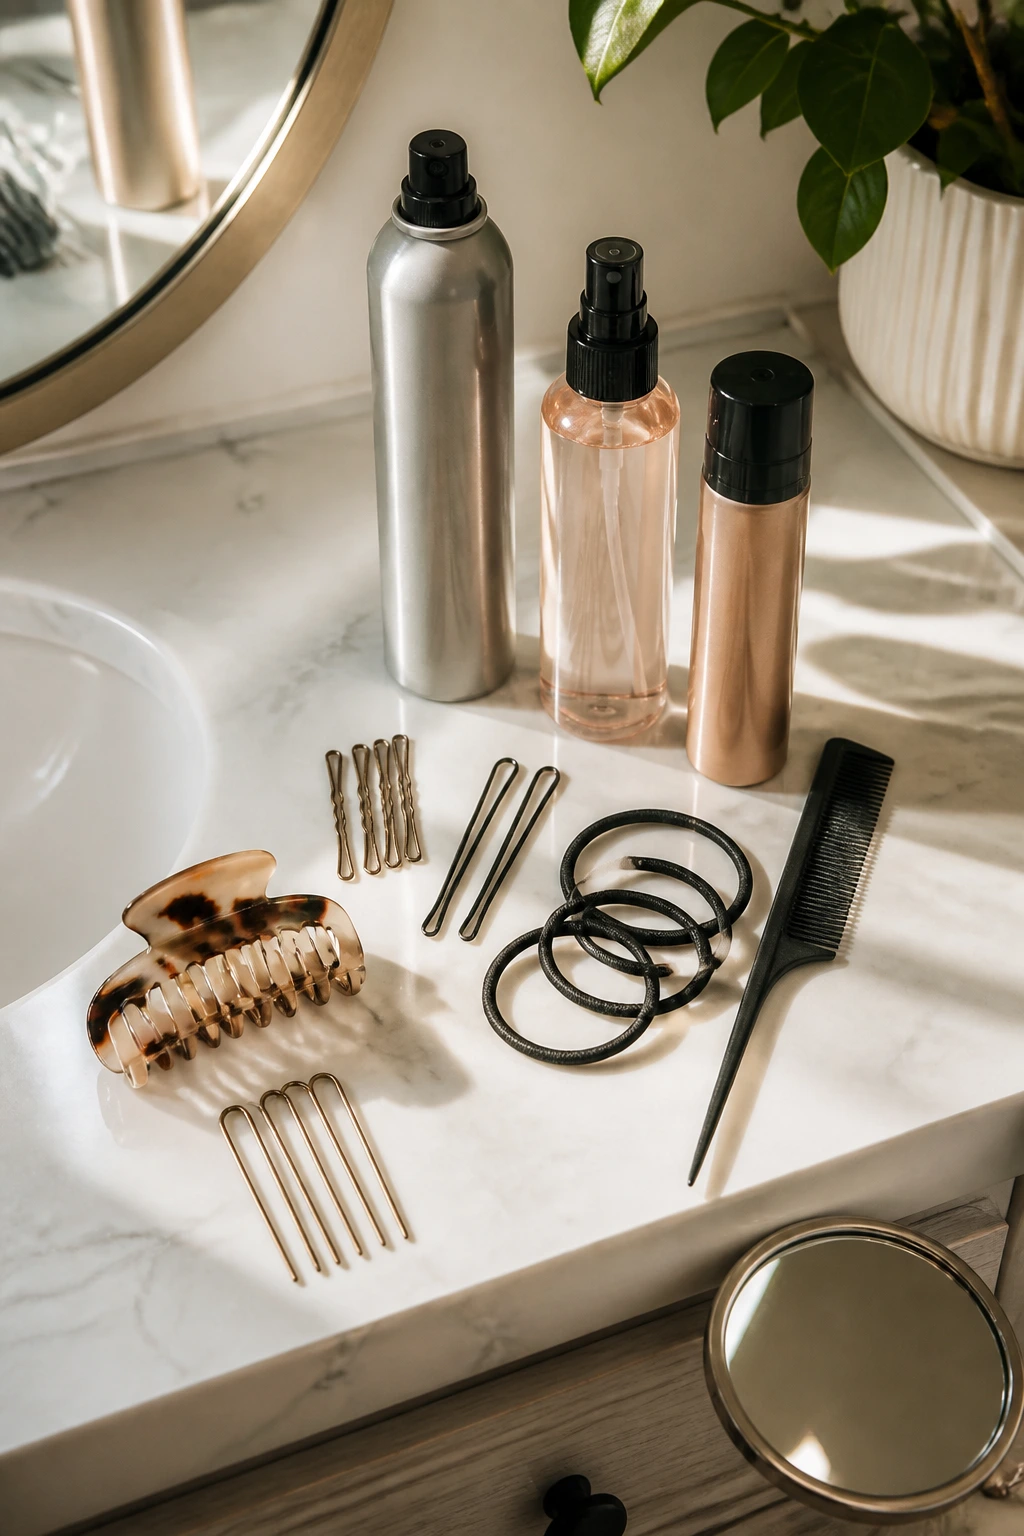
Essential Tools for Messy Buns on Short Hair
-
Bobby pins in two sizes: short pins for face-framing pieces, longer pins for the base of the bun.
-
Snag-free elastics: thin, strong elastics hold the first pony or knot without adding bulk.
-
Dry shampoo: gives clean hair the gritty feel it needs so the bun doesn’t slide.
-
Texture spray: adds bend and touchable hold, especially on straight or fine hair.
-
Tail comb: useful for parts, crown lifting, and smoothing the top without flattening everything.
-
Medium-hold hairspray: keeps flyaways under control after the shape is set.
-
Claw clip: handy for the pocket-bun and quick twist styles.
-
U-pins: better than regular pins for some low buns because they catch and hold without screaming “I’m pinned.”
-
Small mirror: check the back. Short buns often look fine from the front and lopsided from behind.
Smart Prep: Texture, Grip, and Parting
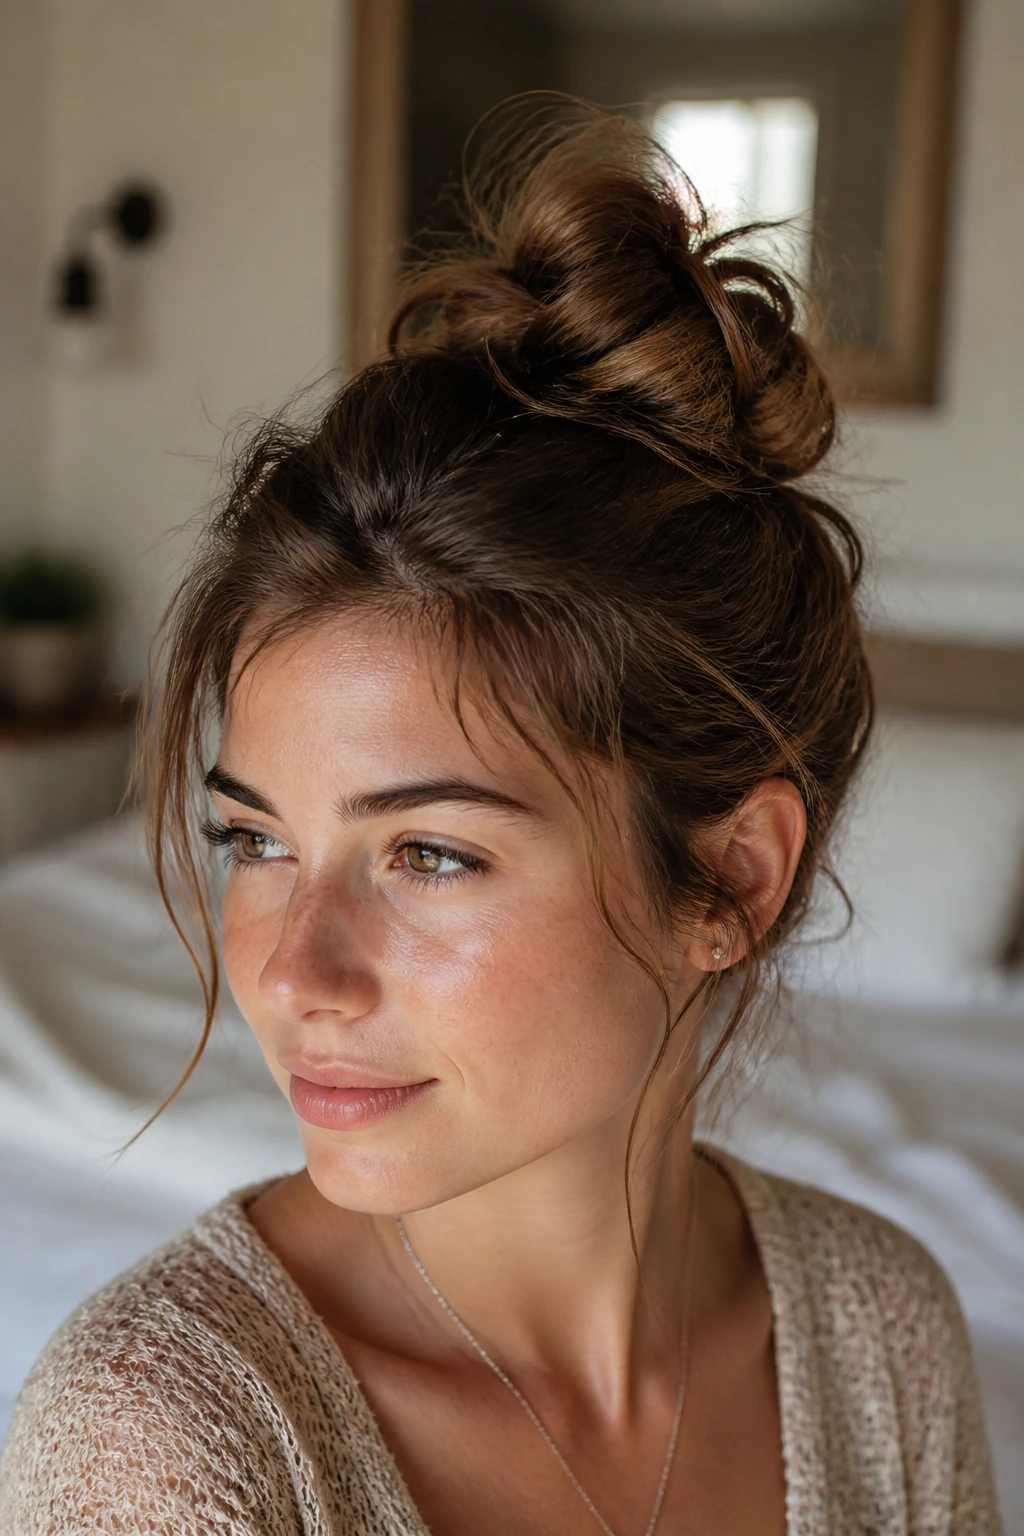
Short-hair buns almost always look better on hair that is not squeaky clean. That doesn’t mean greasy. It means lightly lived-in, with enough texture for the strands to catch on one another. If your roots are too soft, a little dry shampoo at the crown gives the bun something to bite into.
Parting matters more than people expect. A center part makes some buns look sharper and more modern; a side part softens the shape and hides uneven layers. If your hair is very short at the temples, a side part can help because it gives those short pieces a place to land instead of forcing them straight back.
Heat helps too, but only when it’s gentle. A bend from a blow dryer, a quick wave, or even twisting damp hair while it dries can make the final bun stay. Straight, slippery hair is beautiful, but it’s a pain for most messy updos. A little roughness is your friend.
How to Wear These Styles With the Rest of Your Look
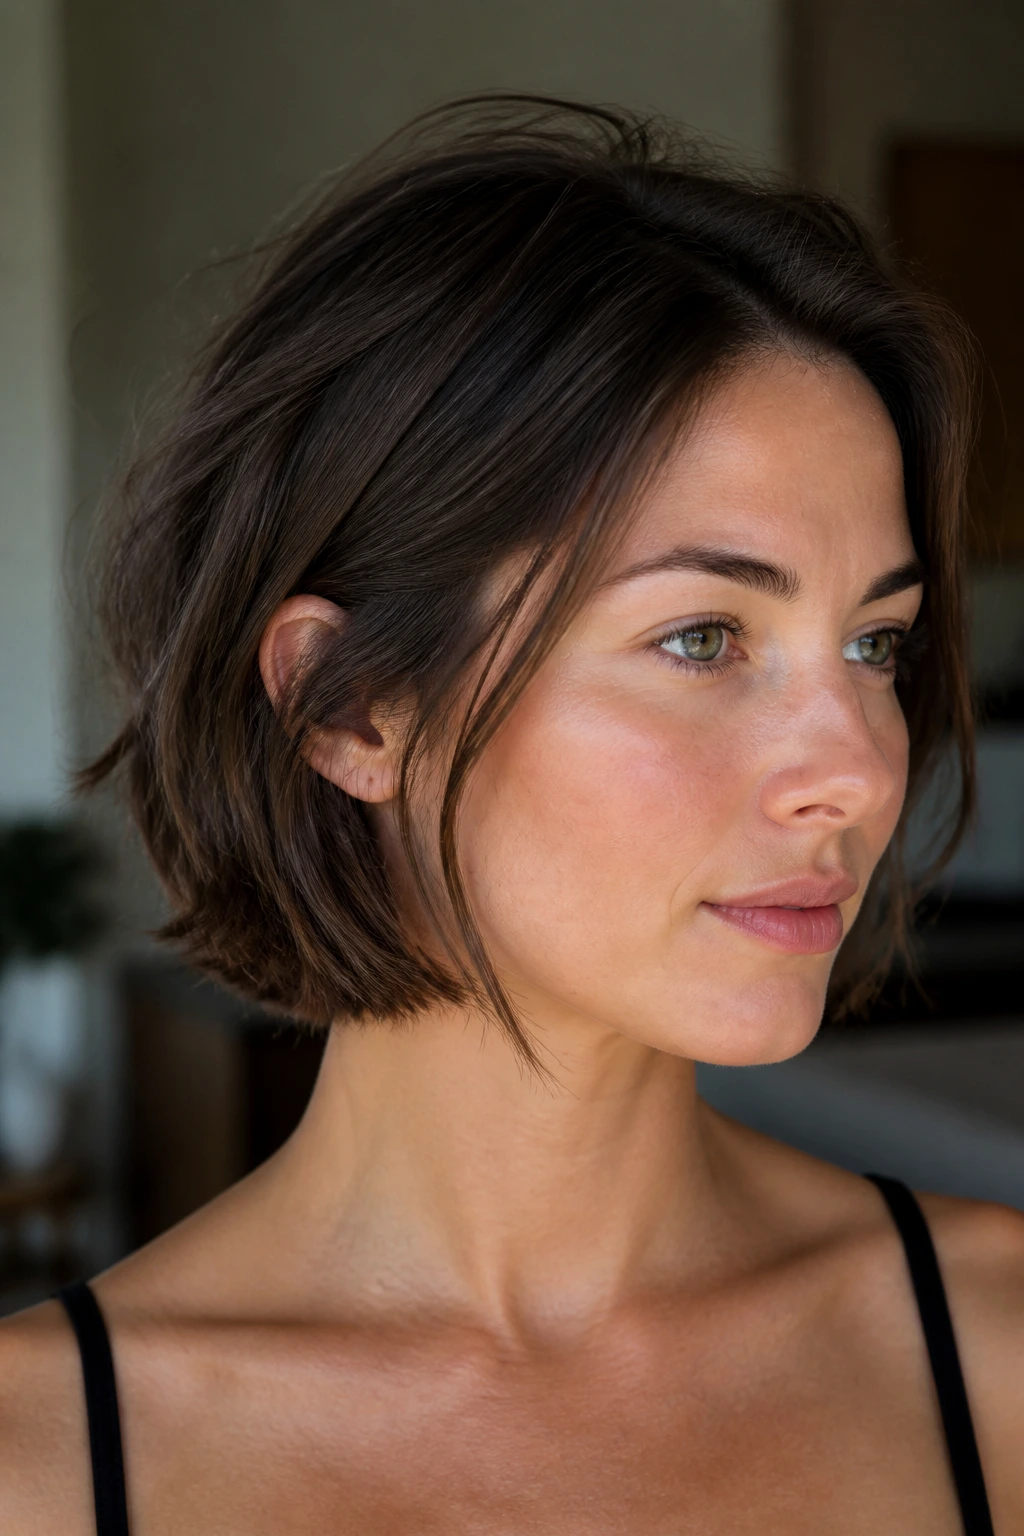
Placement: High buns open the neck and make short hair feel playful. Low buns are calmer and sit well with sharp collars, crew necks, and anything that needs a little polish. Side buns land somewhere in the middle and are the easiest way to hide uneven lengths.
Face-framing: If your face is round or you want a softer line, leave a couple of thin pieces out near the temples. If your hair is layered, those pieces may escape on their own. Let them. They usually make the style better.
Texture: Matte texture looks relaxed and casual. A hint of shine on the crown makes the bun feel cleaner and more intentional. Mix the two carefully: matte on the bun, a little shine on the top layer. That contrast works.
Balance: Chunky earrings pair well with low buns because they keep the face from feeling crowded. High buns can handle a simpler earring or no earring at all. The hair already has enough personality up there.
Additional Tips and Finishers
Grip Booster: Dust a tiny bit of texture powder at the roots before you pin anything. It gives fine hair more bite than another round of hairspray, and it keeps the bun from sagging after an hour.
Volume Trick: Pull the bun outward gently with your fingertips after pinning, then tap the crown lightly with a comb. You’re not teasing it into a bird’s nest; you’re giving it shape.
Pinning Trick: Cross two bobby pins over the base of the bun in an X. That one move keeps the bun from sliding loose during the day, especially on short, layered cuts.
Accessory Move: A narrow ribbon, a small claw clip, or a single metal barrette can hide the boring part of the bun and make the style look finished. Use one accent, not five. Too many accessories start doing the work of the hairstyle.
Common Mistakes That Make Short-Hair Buns Slip
-
Starting with hair that’s too clean: silky, fresh-washed hair has no grip. Fix it with dry shampoo, texture spray, or a rough blow-dry before you gather anything.
-
Trying to build a big bun from too little length: if the bun keeps exploding, it may be too ambitious for the cut. Shrink the shape, move it lower, or switch to a half-up version.
-
Using one elastic and hoping for the best: one elastic rarely holds the whole job on short hair. Add pins where the bun meets the scalp so the style has a second anchor.
-
Pinning only the outer surface: if the pins never reach the base, the bun loosens fast. Slide pins into the hidden underside where the tension actually lives.
-
Overloading with product: too much oil, cream, or shine spray makes short hair slide out of itself. A little texture goes farther than a greasy finish.
-
Pulling too hard on the crown: that can flatten the top and make the bun look smaller, not bigger. Lift gently and stop before the whole head goes tight.
Variations and Adaptations to Try
Fine-Hair Grip Fix: Start with dry shampoo at the roots, then build a smaller bun and pin it closer to the scalp. Fine hair usually looks better with a compact shape than with a stretched one, because the shape reads fuller when it’s tight at the base and soft on top.
Thick-Hair Control Plan: Split the hair into sections before twisting so the bun doesn’t feel like a lump. Thick hair often needs two elastics or a few extra U-pins to keep the weight from dragging the style down.
Curly-Hair Friendly Version: Skip the brush and use your fingers. Let the curl pattern stay visible around the bun instead of trying to flatten it, and choose a looser knot at the crown or nape.
Bang-and-Fringe Version: Leave curtain bangs, blunt bangs, or shorter front layers out on purpose. A bun with fringe looks more balanced when the front has room to move and doesn’t get shoved back into the elastic.
Dress-Up Finish: Swap the plain elastic for a velvet scrunchie, satin ribbon, or a slim metal pin. The bun can stay messy; the accessory does the formal work.
Make-Ahead, Refreshing, and Next-Day Fixes
Short-hair buns are usually best styled close to when you’ll wear them, but the prep can happen earlier. If you know your hair gets slippery, add dry shampoo the night before and let it sit. That gives the powder time to absorb oil and dull the slickness a little.
A loose overnight twist can help, too. Wrap the hair softly, secure it with a silk scrunchie, and sleep on a satin pillowcase if you have one. The goal is texture, not a finished style. In the morning, you’ll have enough bend to build the bun faster.
To refresh a bun that has loosened during the day, mist the outer layer lightly with water or a leave-in spray, then re-pin the loose spots. Don’t drench it. Wet hair collapses the shape faster than dry hair does. If the bun has gone flat, pinch the crown and add one extra pin at the base rather than rebuilding the whole thing.
Frequently Asked Questions
Can you really do a messy bun with chin-length hair?
Yes, but the style usually needs to stay small and low or move into a half-up shape. Chin-length cuts rarely have enough length for a full wrap, so look for styles that fold, twist, or tuck instead of looping several times.
What’s the best hair length for these buns?
Lob-length hair is the easiest because it can usually do both low buns and half-up versions. Shorter cuts can still work, but they do better with compact knots, pin-ring shapes, or half-up buns that use less hair.
Should short hair be clean or dirty before styling?
A little lived-in texture is better than squeaky-clean hair. Day-one hair can work if you add dry shampoo or texture spray, but day-two hair usually gives you more grip and less slipping.
How many bobby pins do I need?
Most short buns need between 4 and 8 pins, depending on thickness and length. Fine hair usually needs fewer, but slippery hair may need more crossed pins to keep the base from moving.
Why does my bun keep falling apart at the sides?
That usually means the bun is too big for the amount of hair you have, or the base isn’t anchored close enough to the scalp. Shrink the shape, lower the placement, and pin the hidden underside first.
Can curly hair do these styles without losing its texture?
Absolutely. Curly hair often looks better in short buns because the curls fill space naturally. Use your fingers, not a brush, and let a few curls stay free around the face or nape.
What if my layers keep slipping out?
Use smaller sections and pin the layers as you go instead of hoping they’ll stay in the final twist. A light wax stick or a touch of texture spray on the shortest pieces can help them grip the rest of the hair.
Is a claw clip better than pins for short hair?
Sometimes, yes. A claw clip works well when the hair is thick enough to fill the clip pocket, but pins usually give more control for very short or layered cuts. If your clip keeps sliding, the bun is probably too small for that clip size.
The Short-Hair Bun Advantage
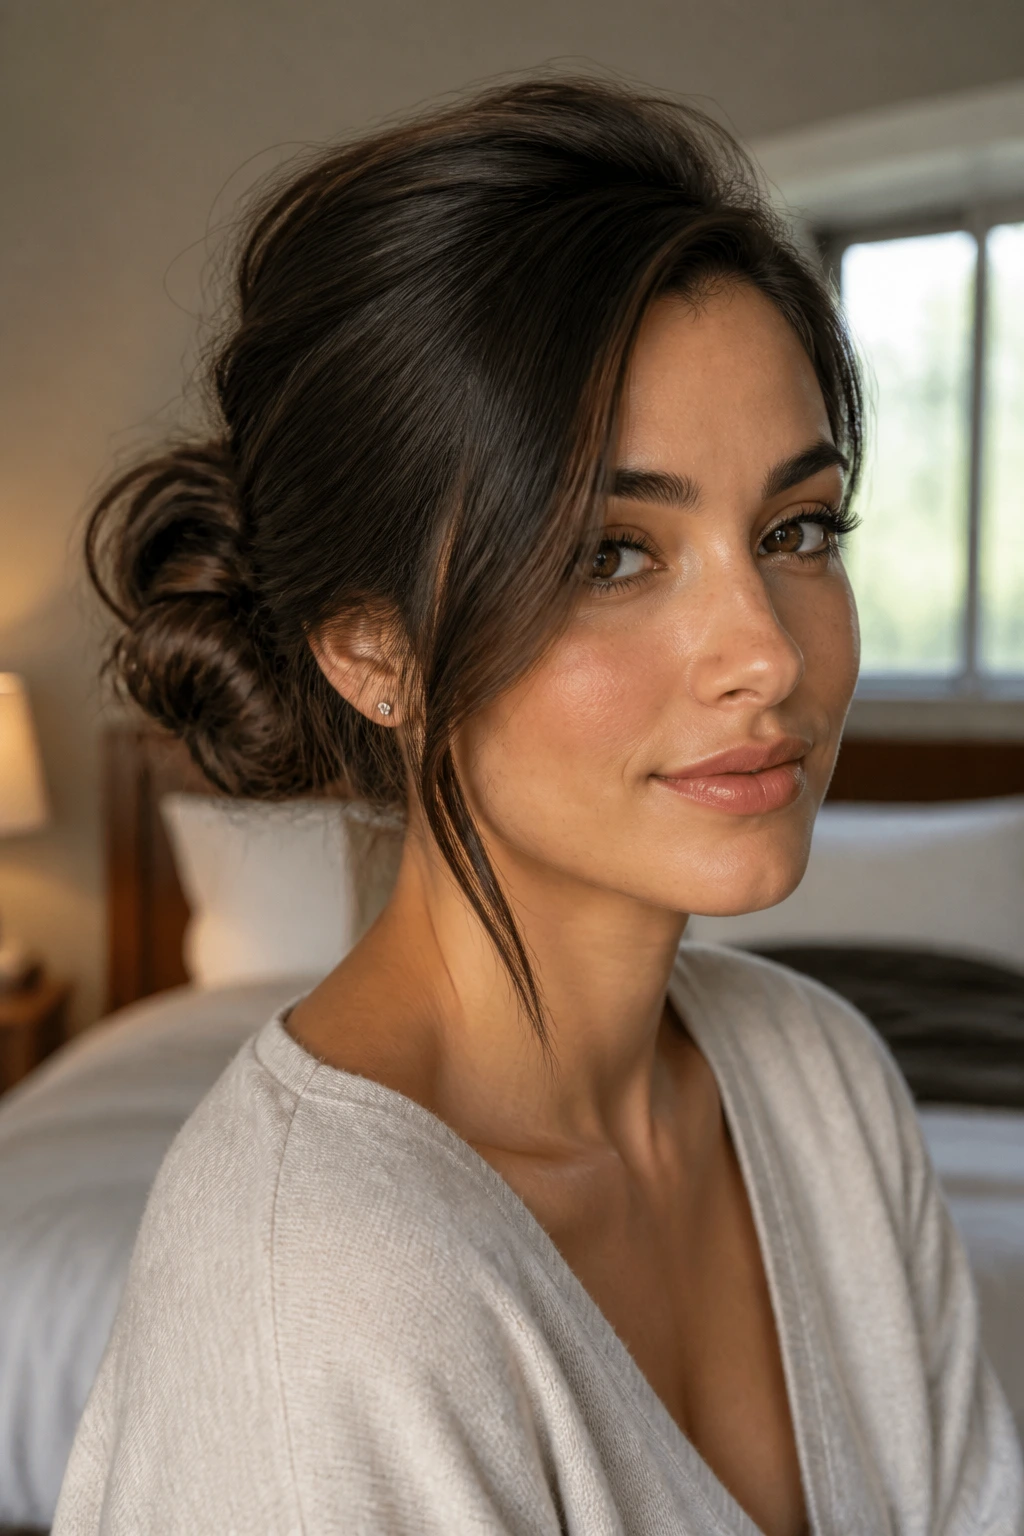
Short hair has its own kind of charm when it goes up. It doesn’t need to imitate a long bun to look good, and the styles that work best here prove that point over and over. A little asymmetry, a little texture, and a few smart pins can turn the shortest layers into something that feels easy instead of forced.
That’s why these messy buns for short hair are worth keeping around. They respect the cut you actually have. And once you get used to that smaller, smarter shape, you stop fighting your hair and start using it.
