



A high bun can look like a rushed fix, or it can look like a decision. The difference lives in the details: where the part lands, how flat the sides lie, whether the crown has a little lift before the hair disappears into the knot, and how clean the base looks from the back when you turn your head. These sleek high bun styles for women are all about that line between polished and fussy. Miss it, and the bun feels heavy. Hit it, and the whole face looks sharper.
The good ones are not all built the same way. Some start with a dead-center part and a tight coil. Some need a side sweep, a braid, or a hair net. Some work best on second-day hair because there’s enough grit in the strands for the pins to hold. Others want a tiny bit of shine cream and a very calm hand with the brush. No part of this has to be complicated, but it does have to be deliberate.
And that is the real appeal of a sleek high bun: it’s one of those styles that can go to work, a dinner, a wedding, or a gym bag emergency without changing its basic bones. The bun sits high, the hair stays controlled, and the finish can lean glossy, severe, soft, or sculpted depending on what you do at the hairline. Small moves. Big difference.
Why These Sleek High Bun Styles Stand Out
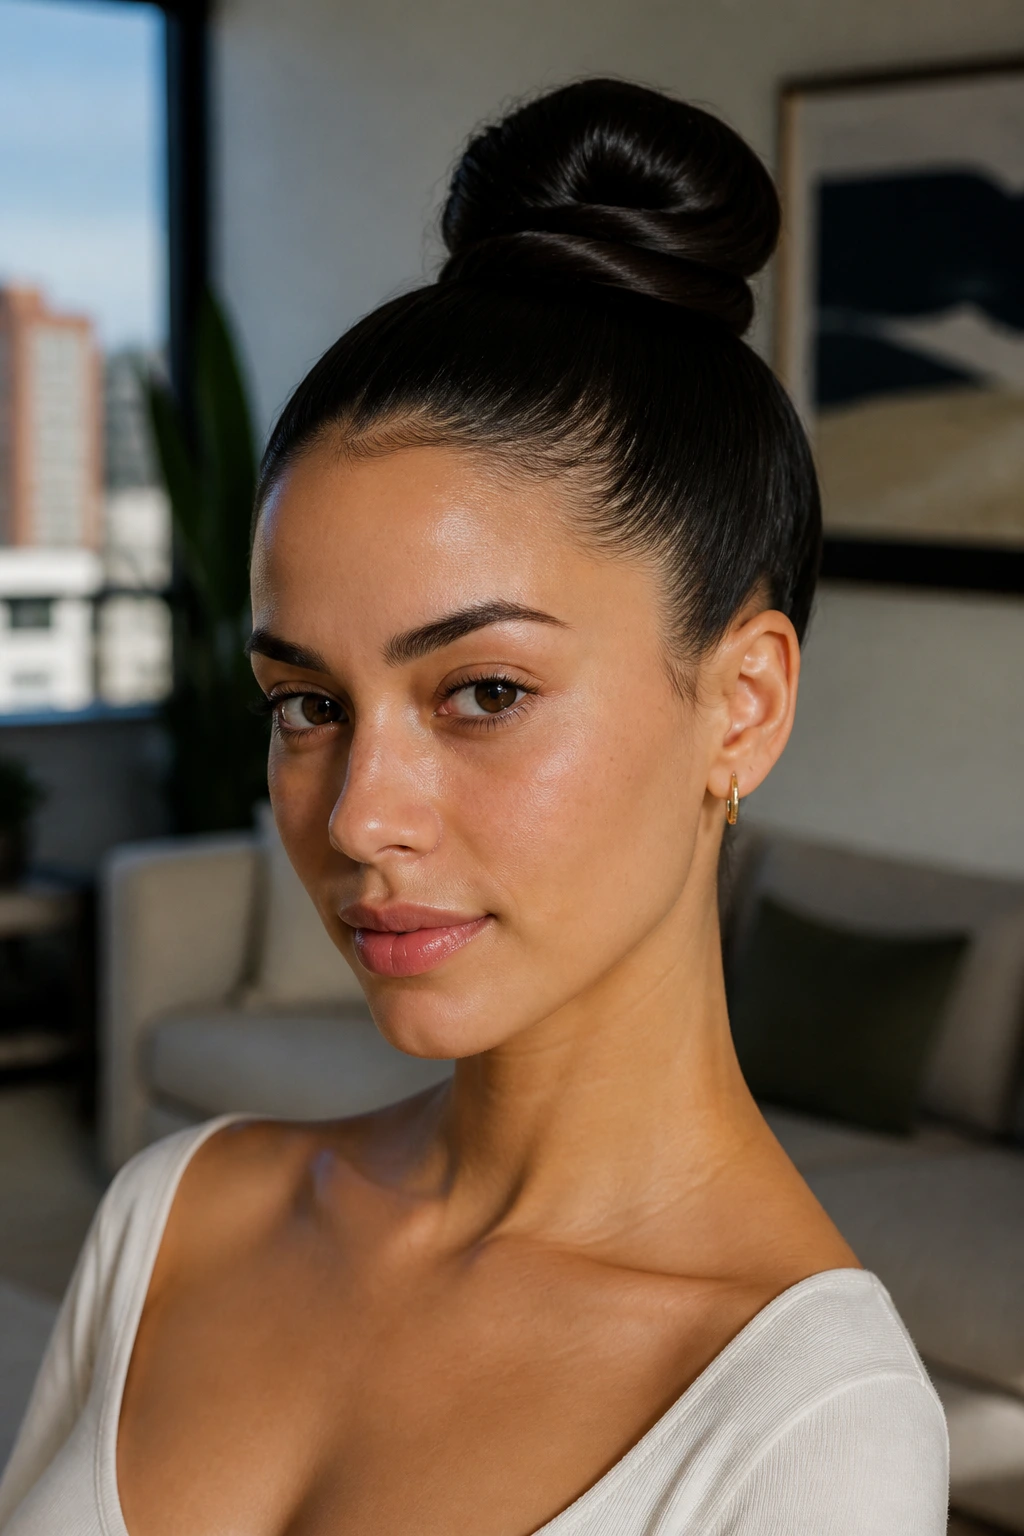
- Shape does the heavy lifting: A high bun draws the eye upward, which makes the face look more lifted even when the rest of the makeup is minimal.
- The base matters more than the bun itself: If the crown is smooth and the sides are flat, even a simple knot looks cleaner than a complicated updo built on frizz.
- They work with a lot of hair textures: Straight, wavy, coily, braided, or locked hair can all read sleek when the roots are controlled the right way.
- They can be dressed up or down fast: Swap a bare bun for a hair net, scarf, or statement earrings, and the whole mood changes in one step.
- They stay useful past the first wear: A well-pinned high bun is one of the few styles that can survive a long day, a humid commute, and still be rescued the next morning.
- The same shape can look very different: A center part, a side part, a wrapped braid, or a tucked knot all change the energy without changing the core idea.
1. Center-Part Glass-Finish Bun
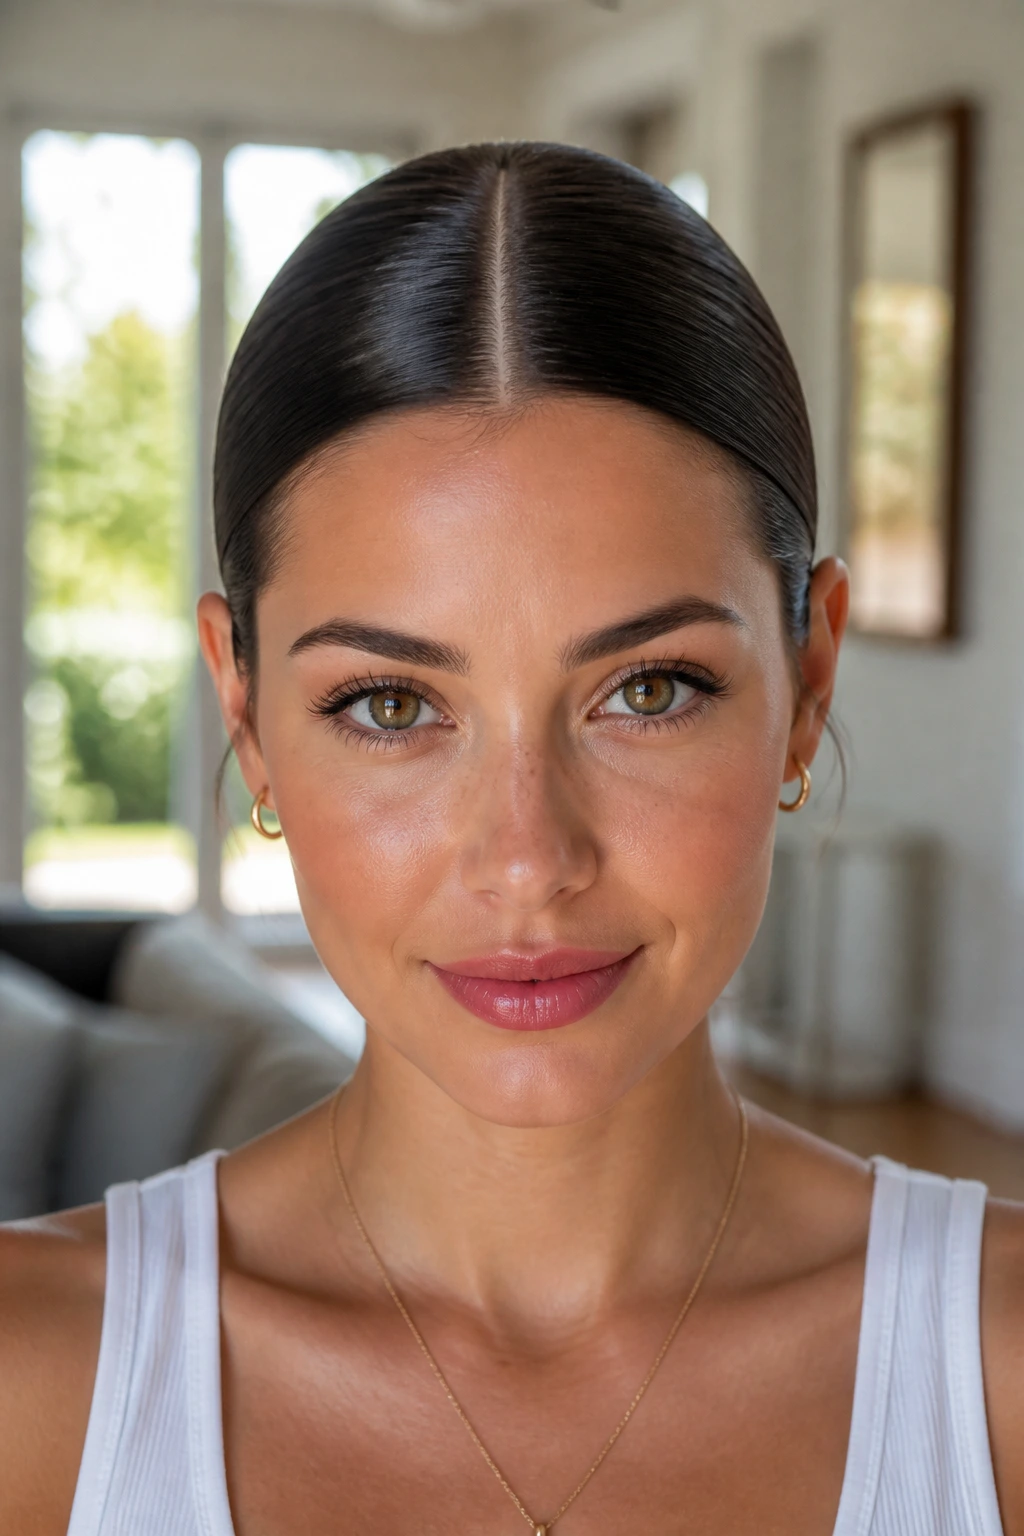
A center part gives this bun a clean, balanced spine. The look is sharp without being loud, which is why it works so well with a plain tee, a satin dress, or a tailored blazer that needs the hair to stay out of the way. The trick is to brush the part dead straight and keep the sides pressed close to the head before the ponytail goes up.
Use a wax stick or a tiny bit of gel at the temples, then smooth with a boar bristle brush until the surface feels flat under your palm. Wrap the tail into a tight coil and pin it low to the base so the bun reads round, not swollen. Best for: oval and heart-shaped faces. Best finish: glossy, not crunchy.
2. Deep Side-Part Snatched Bun
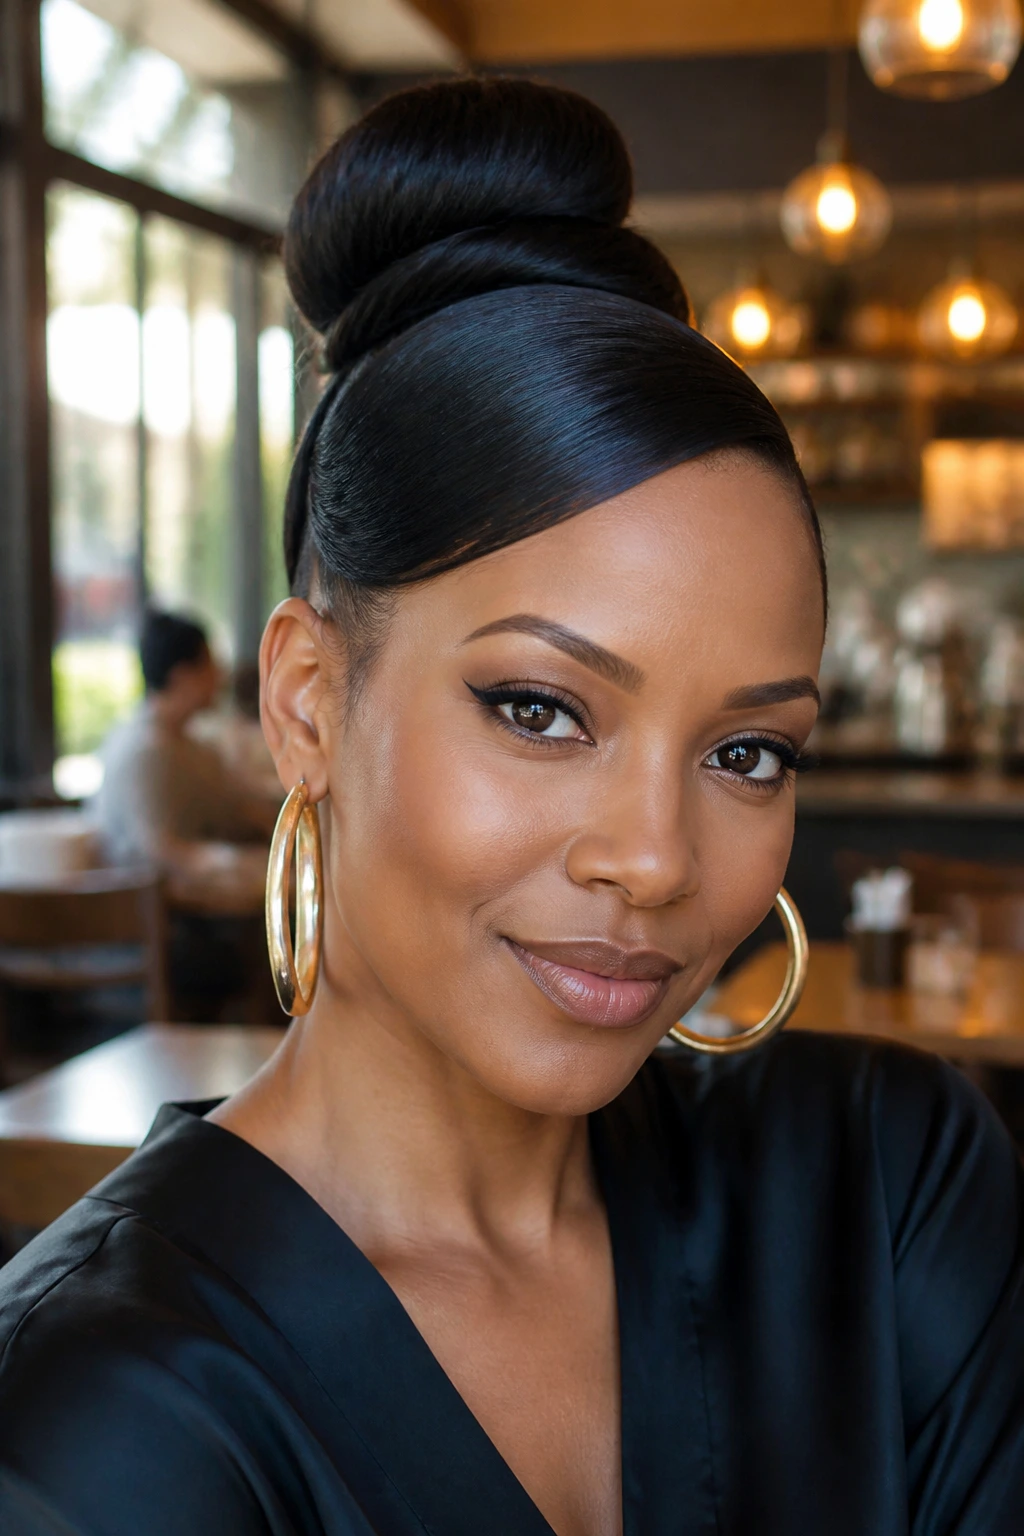
What a side part does is simple: it breaks the symmetry and adds instant attitude. Push the heavier side across the forehead, keep the bun high and compact, and let the diagonal line lead the eye up to the knot. It feels a little more styled than the center-part version, and it flatters sharp cheekbones in a way people notice before they can explain why.
This is the one I reach for when earrings are doing the work. A deep side part plus a tight bun leaves room for a bold hoop or a drop earring to show properly. If your hair slips easily, set the part with a light mist of hairspray before the ponytail goes in.
- Use a rat-tail comb for the part.
- Keep the bun small so the side sweep stays visible.
- Finish with a shine spray only on the top layer.
3. Ballerina Bun
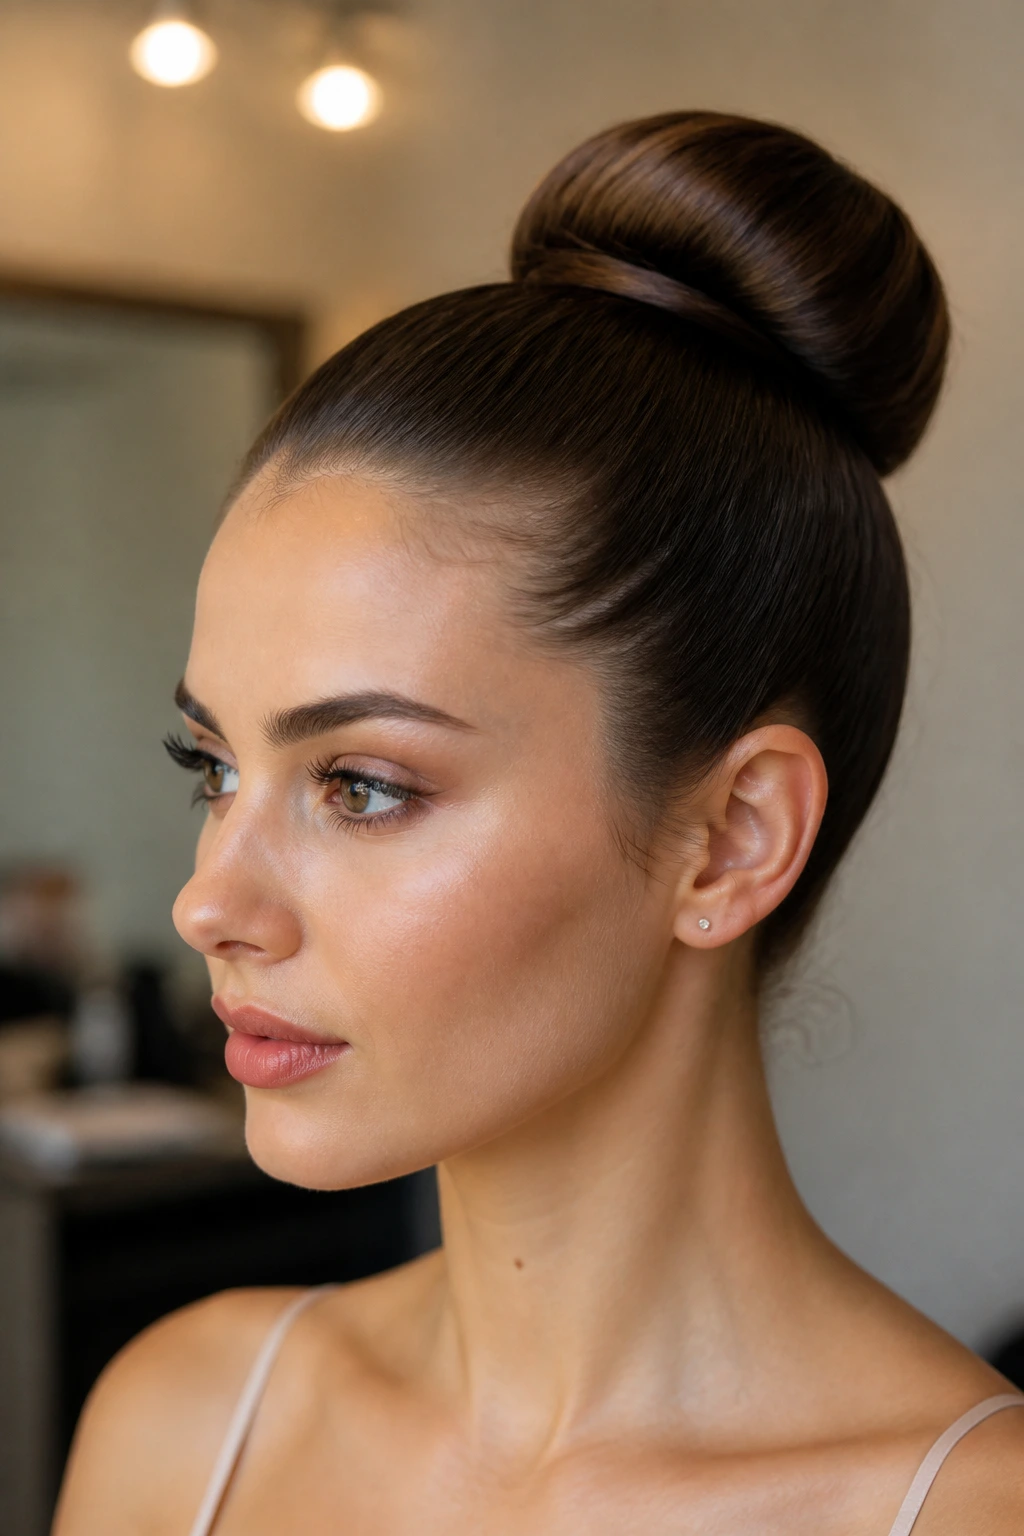
The ballerina bun is the purest version of the whole family. High, round, tight, and balanced, it sits like it was measured with a ruler. That sounds severe on paper, but in person it can look very clean, especially when the hairline is smoothed and the bun is wrapped neatly enough to hide every loose tail.
The older trick still works best here: make a firm ponytail at the crown, twist the tail, coil it around the base, and anchor it with pins that match your hair color. If your hair is thick or slippery, slip a small hair net over the finished bun before you pin the last section. It keeps the outline crisp for hours.
4. Braided-Base High Bun
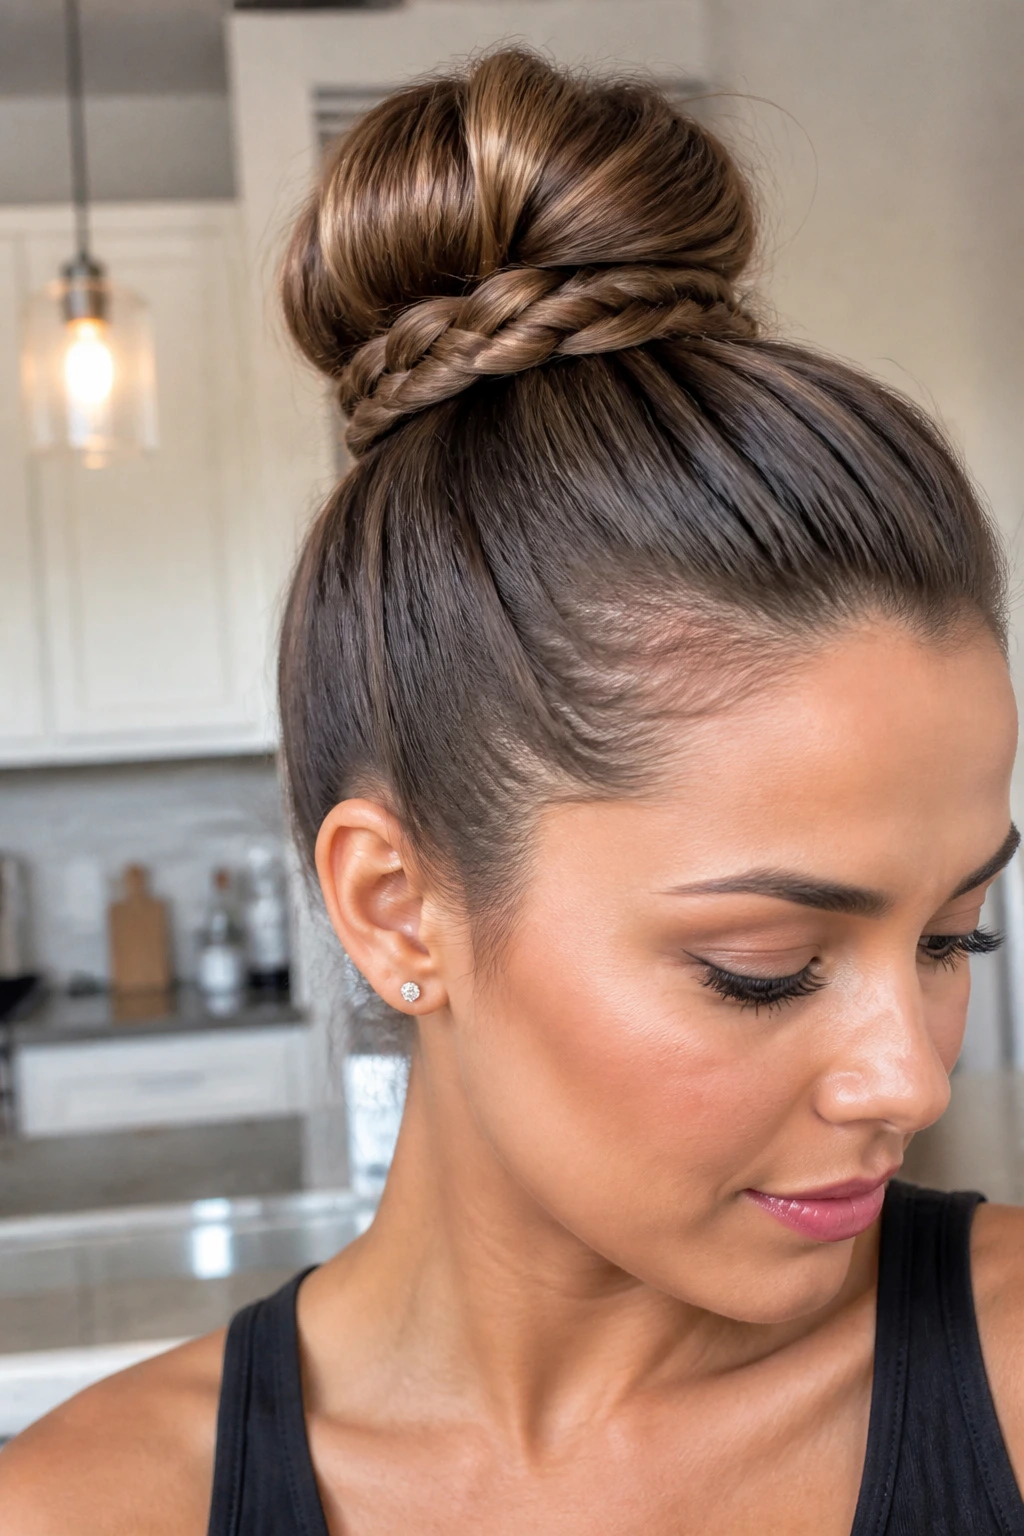
A braid at the base changes the whole grip of the style. Instead of trying to tame every strand into submission, you braid the ponytail first, then wrap that braid into a bun so the texture works with you instead of against you. The result is still sleek at the scalp, but the bun itself has a little architectural interest.
This is one of the better choices for hair that refuses to stay put. The braid gives the bun teeth, which means fewer pins and less sagging by the end of the day. It also hides frayed ends neatly, so the finish looks intentional even when the braid was done in five minutes flat.
5. Rope-Twist High Bun
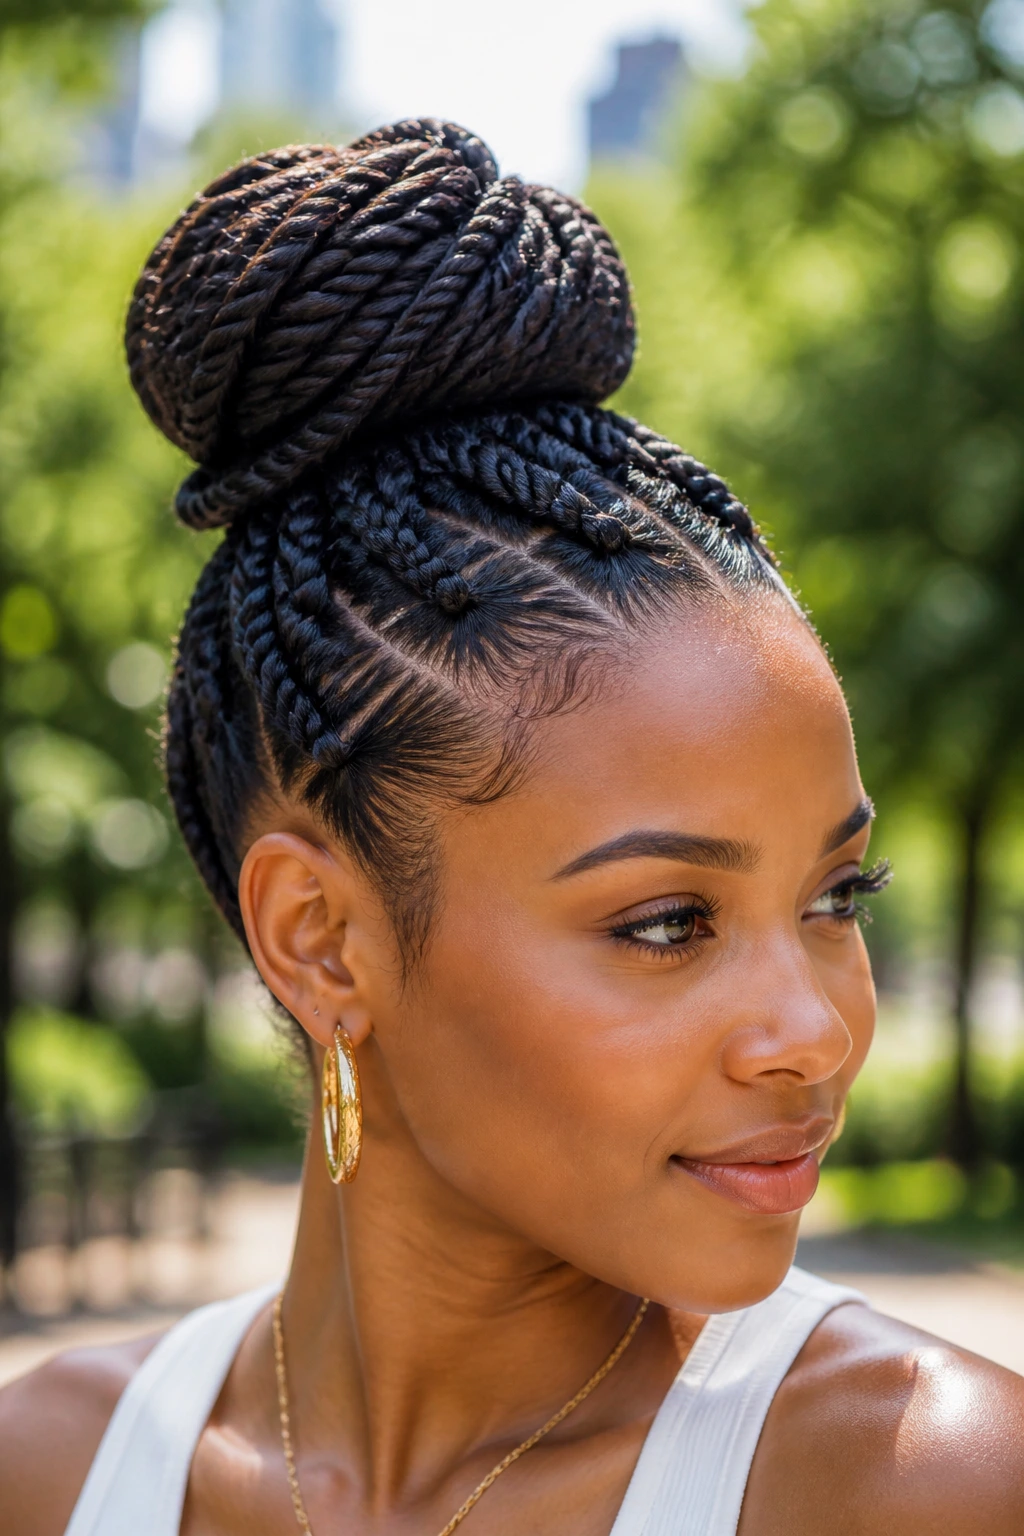
Two sections, twisted in opposite directions, can do a surprising amount of work. Rope twists add a narrow, polished texture that looks elegant without turning the bun into a fussy statement piece. You get the smoothness of a sleek style and the tiny ridges of the twist at the same time, which keeps it from looking flat under strong light.
Pull the hair into a high ponytail, split it into two pieces, twist each side firmly, then wrap them around each other before coiling the length into a bun. If your hair is layered, tuck the shorter ends under the twist as you go. Quick note: this style holds best when the hair has a little product on it already.
6. Donut-Shape Bun
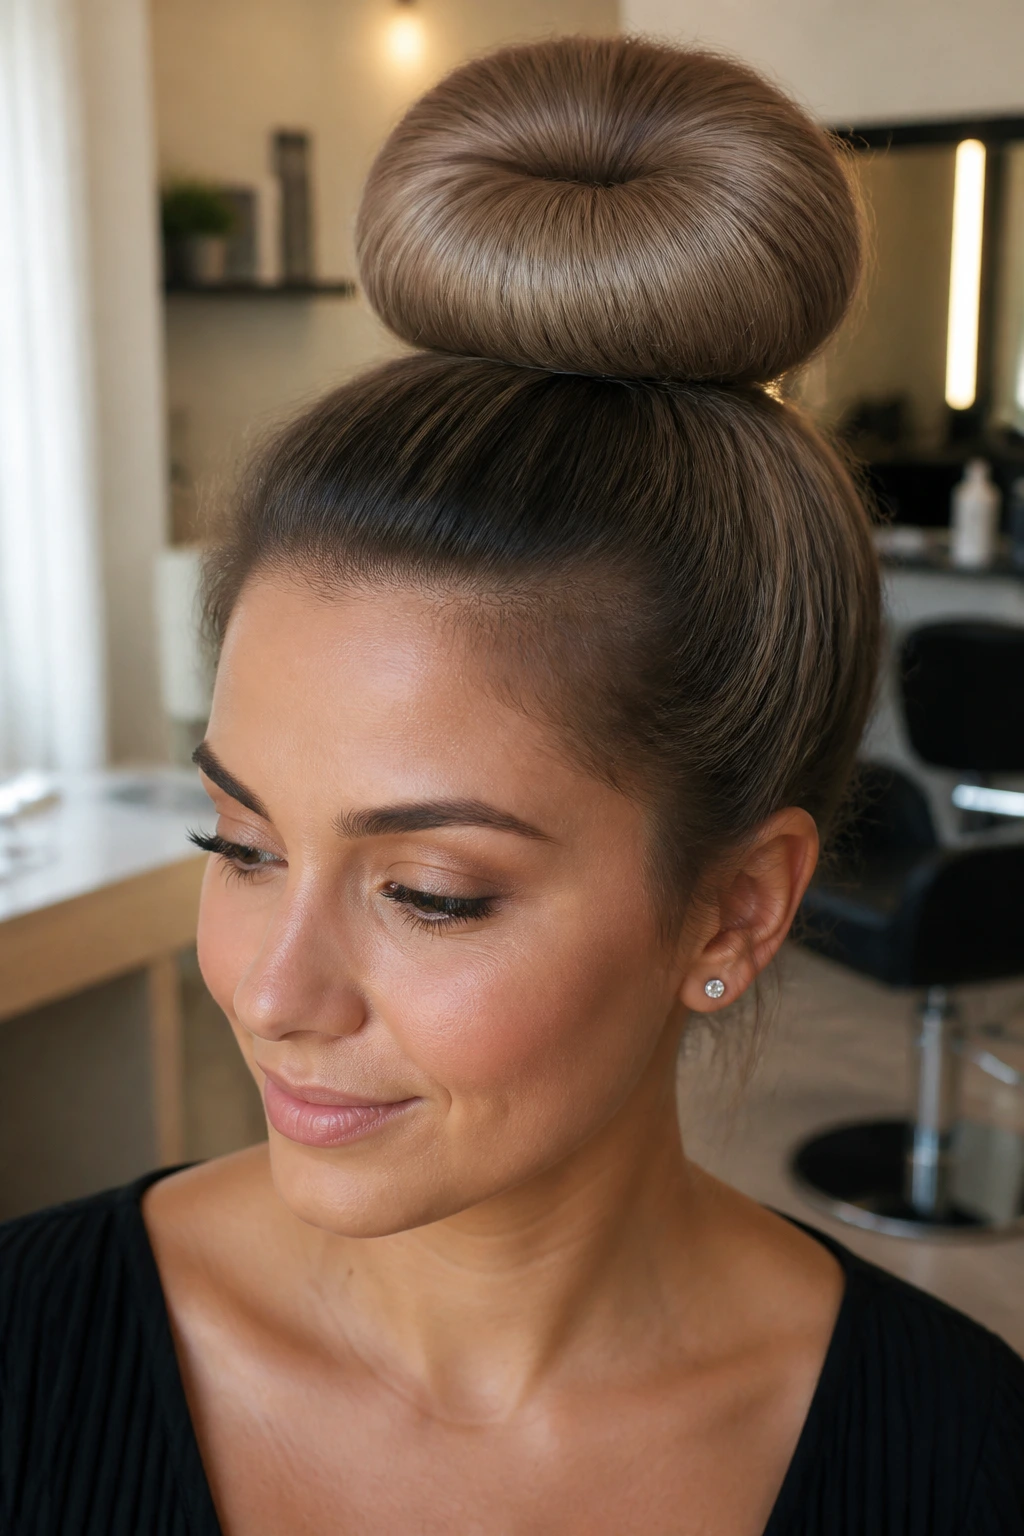
A bun donut sounds old-fashioned until you see how clean the shape can look at the top of the head. The padding gives the bun a neat, full circle, which is useful if your own hair is fine or if you want a bigger silhouette without teasing the roots into a mess. The outside can still look sleek, but the inside gets a little help.
Choose a donut close to your hair color, place the ponytail through the center, and spread the hair evenly before tucking the ends underneath. The mistake is stuffing the hair too fast. Slow hands make the circle look smooth. Fast hands make a lumpy ring that shows from the side.
7. Folded Knot Bun
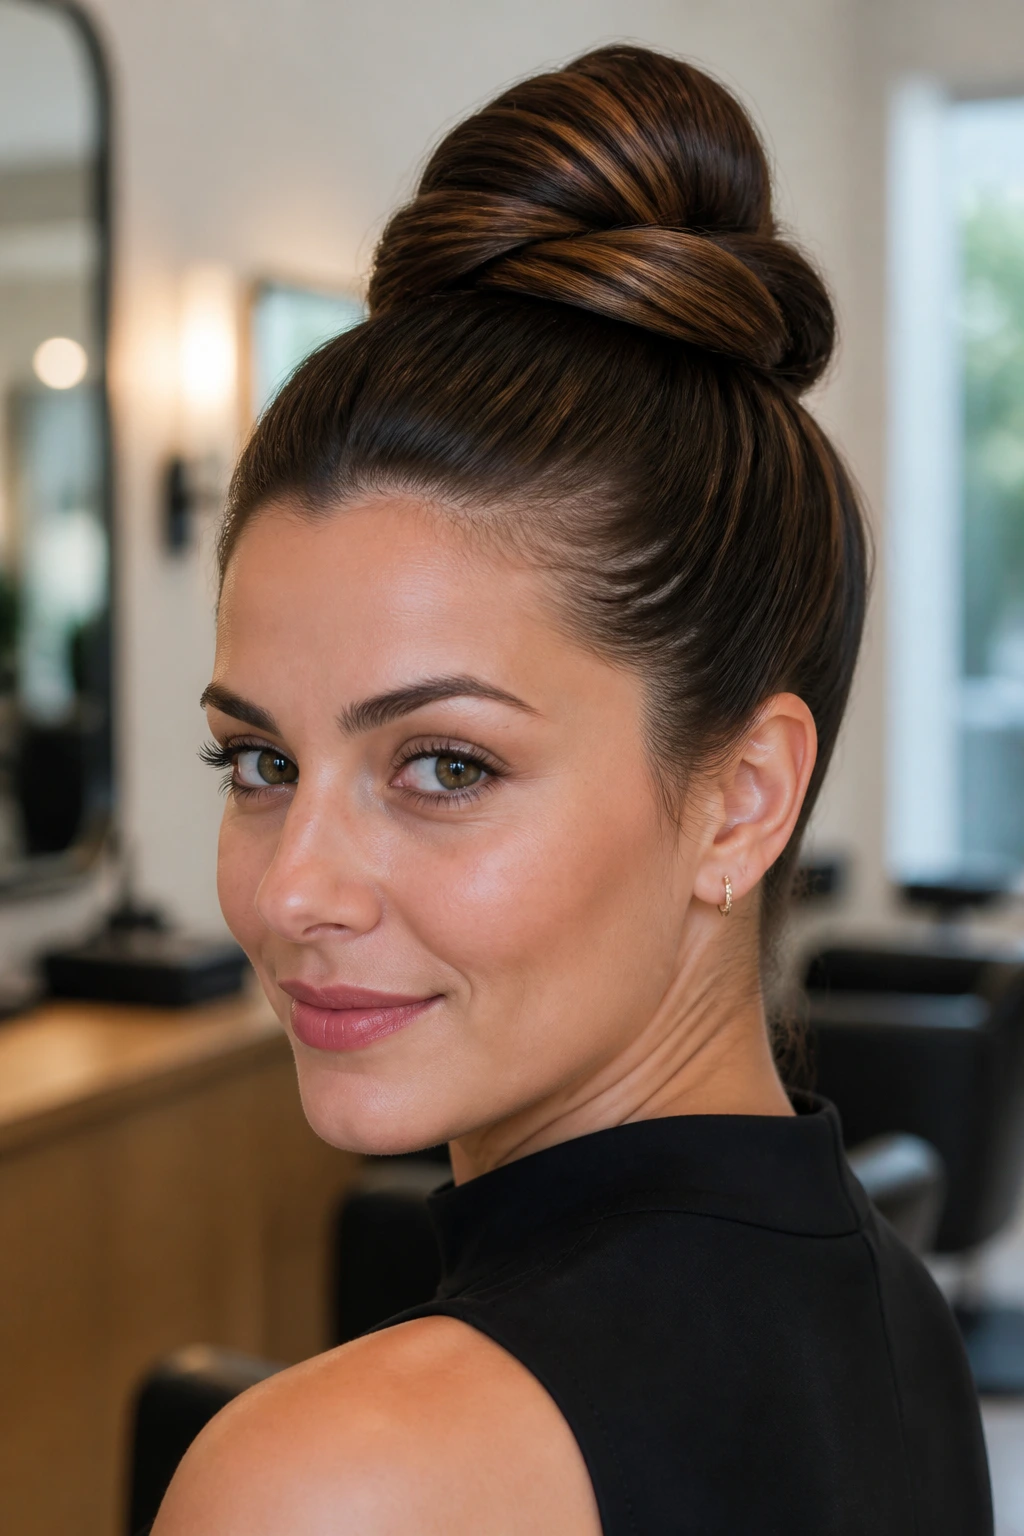
This one feels modern because the shape is a little less perfect. Pull the hair into a ponytail, fold the length in half or thirds, then secure the folded section so the ends disappear into the base. The bun looks compact, but not stiff. There’s a soft edge to it that works well when the rest of the outfit already has a lot going on.
It’s also a smart option for medium-length hair that doesn’t quite want to wrap into a huge knot. The fold creates volume without relying on teasing. A single extra pin at the bottom of the knot usually keeps it in place.
8. Bubble-Braid Bun
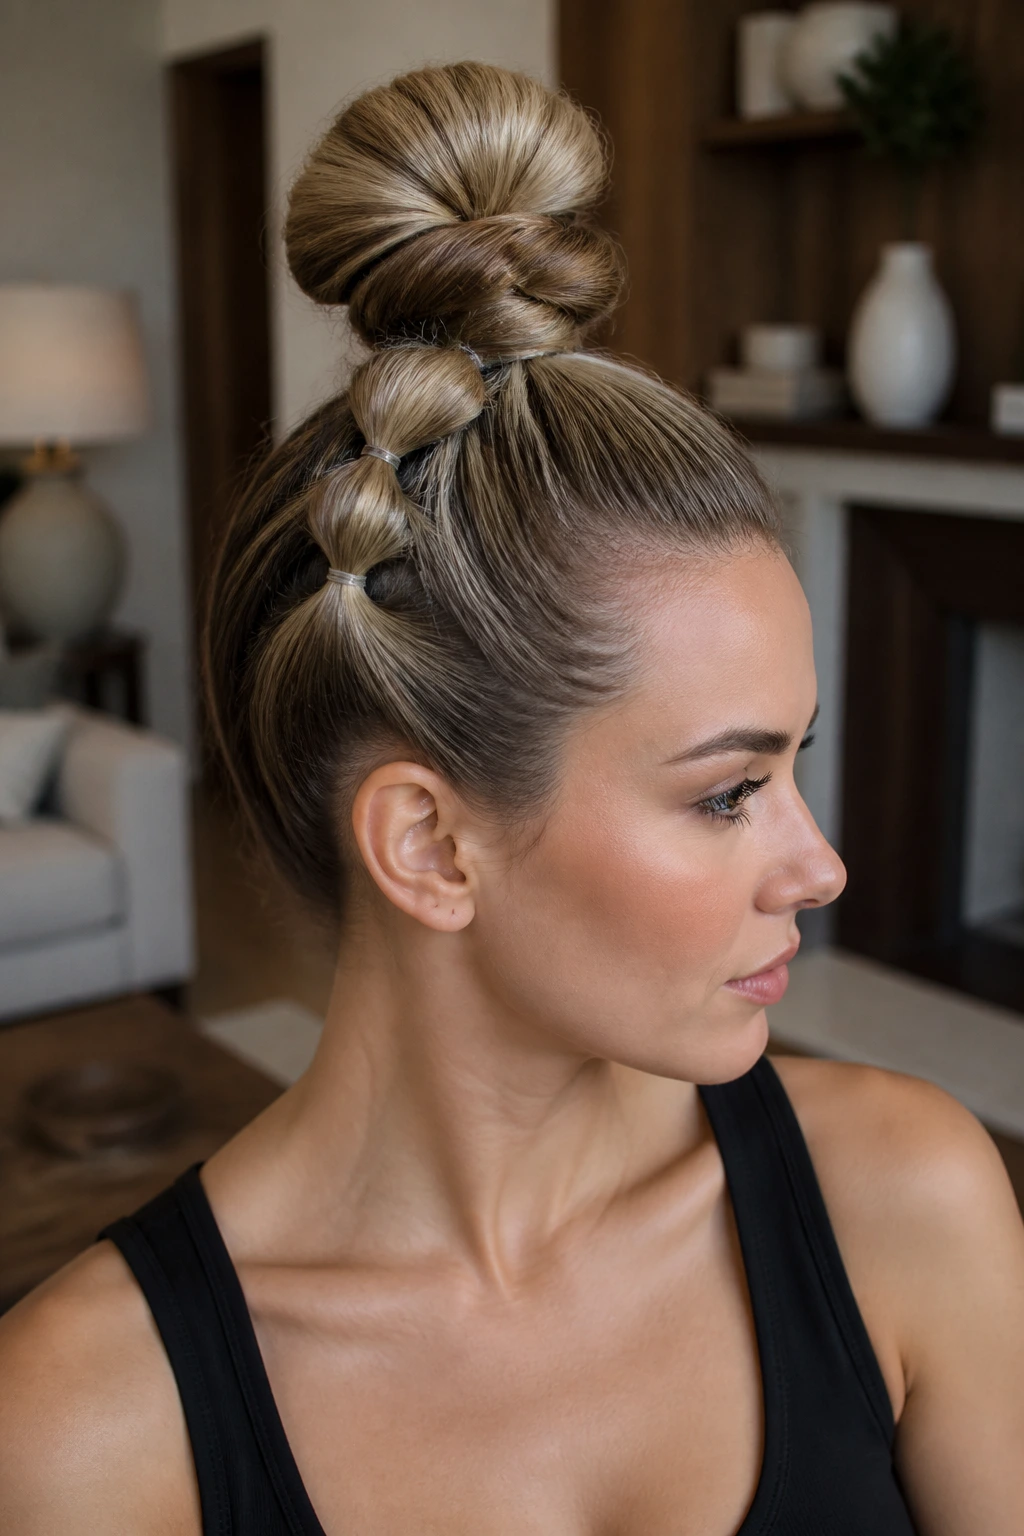
A bubble braid leading into a bun is a little playful, but the surface can still be slick and polished. That makes it one of the few high-bun styles that can lean dressy without feeling too strict. The “bubbles” break up the length before the bun, which gives you detail even if the actual knot is small.
Use clear elastics spaced a few inches apart down the ponytail, puff each section gently, then coil the tail into a bun and hide the last elastic under a pin. If you want the look cleaner, rub a touch of serum on the top of the braid only. The bubbles stay visible. The flyaways do not.
9. Flat-Twist High Bun
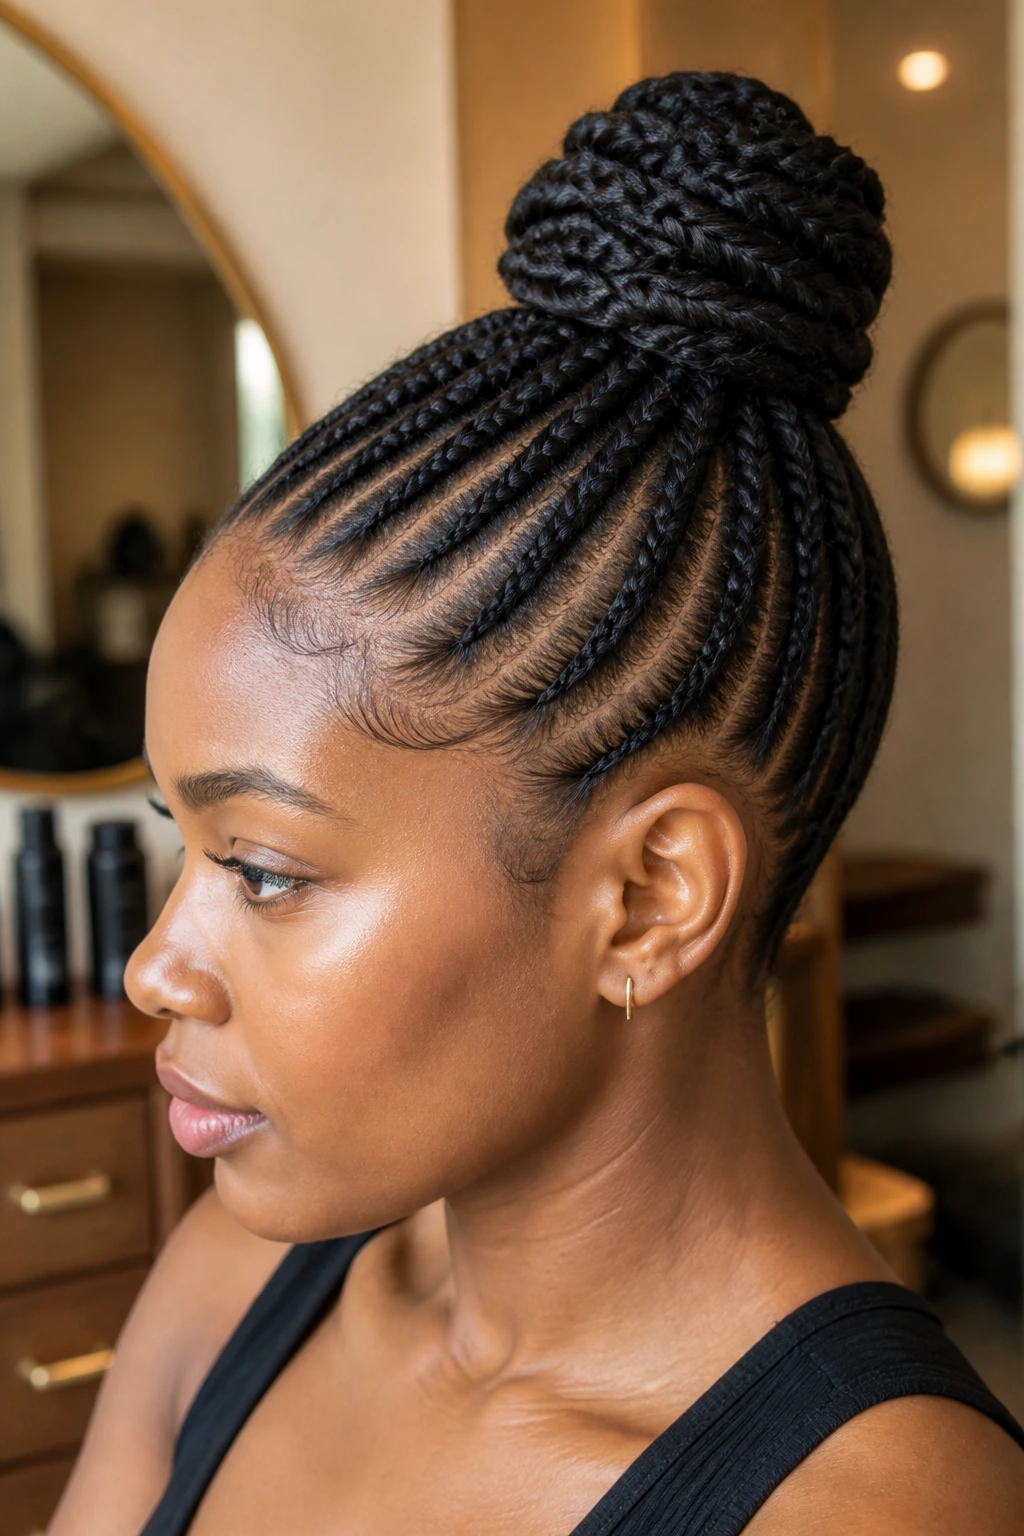
Flat twists sit close to the scalp and create a smooth path up to the bun. On textured hair, they do what a plain brush-and-ponytail method can’t always do: they keep the roots neat without forcing the whole head into a stiff, over-brushed finish. The bun itself can be small and tight, while the front stays sculpted.
This style is especially good when you want a protective look that still reads formal. The twist pattern adds detail at the crown, so you can keep the bun understated. A little edge control around the hairline sharpens the finish without making the style feel pasted on.
10. High Knot With Clean Edges
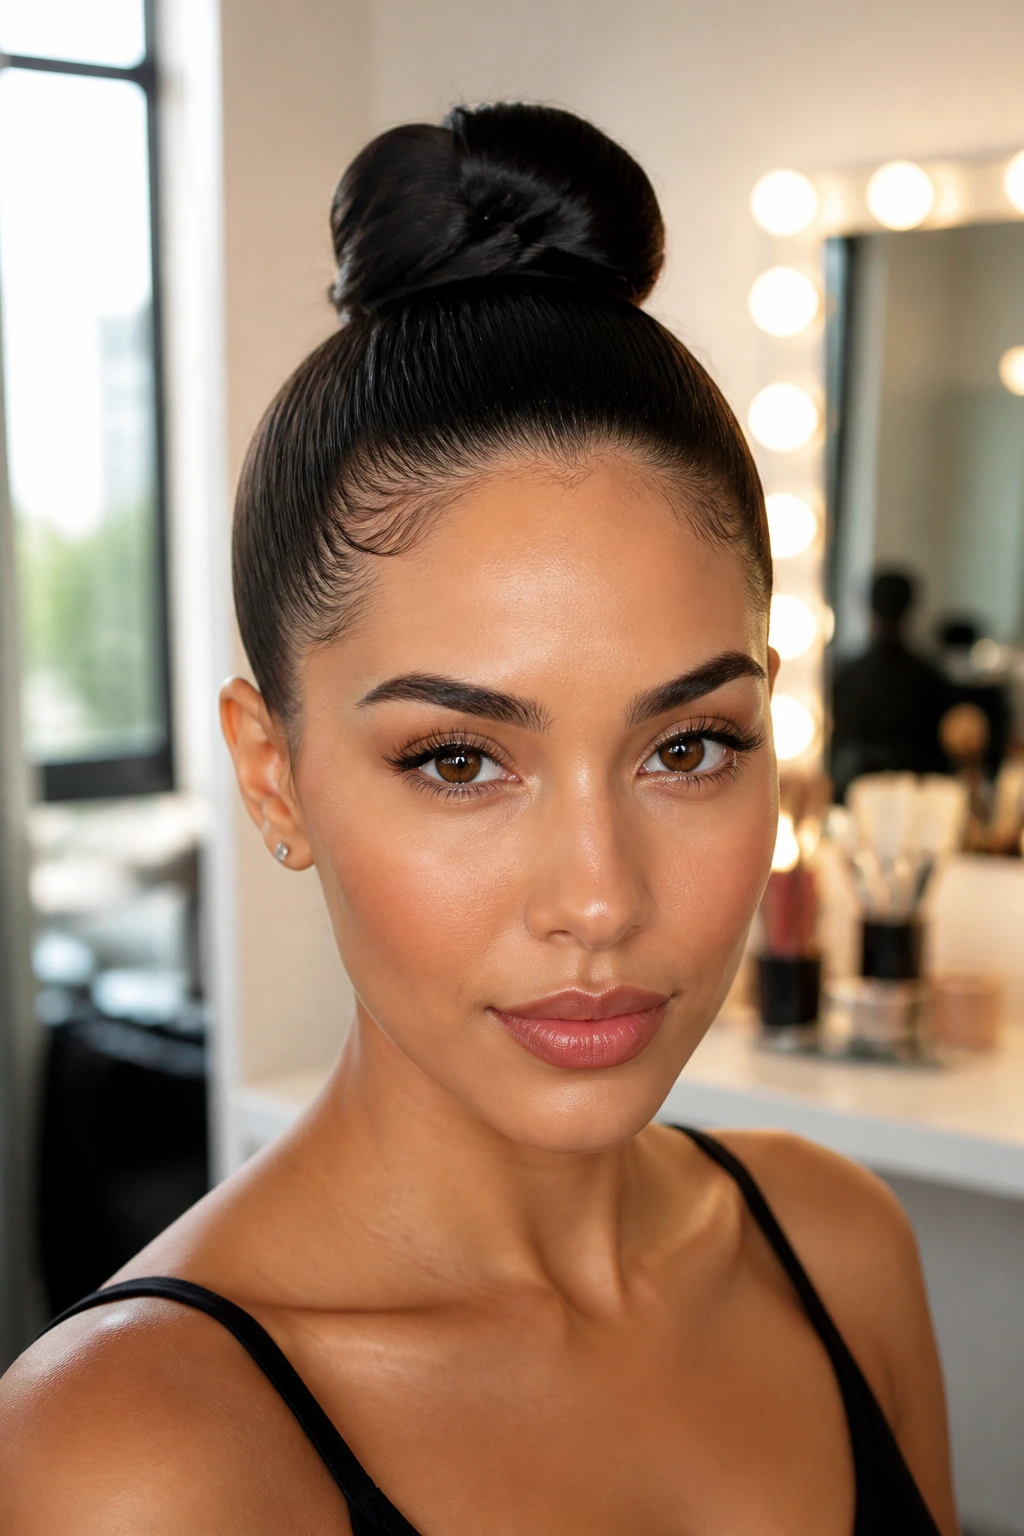
Sometimes the best high bun is the simplest one. Gather the hair into the highest point you can comfortably reach, twist it once or twice, and knot it around itself so the profile stays compact. The point is not volume. It’s precision. The bun should sit like a tidy knot, not a loose puff.
This version works when time is short and the rest of the look needs a calm anchor. It suits active days, travel, and those in-between hours when you want the face clear and the neck bare. Keep the sides smooth, and use only enough product to tame the halo of flyaways.
- Best for: quick dressing and high-heat days.
- Hold: medium to strong.
- Finish: clean, minimal, and practical.
11. Sculpted Baby-Hair Bun
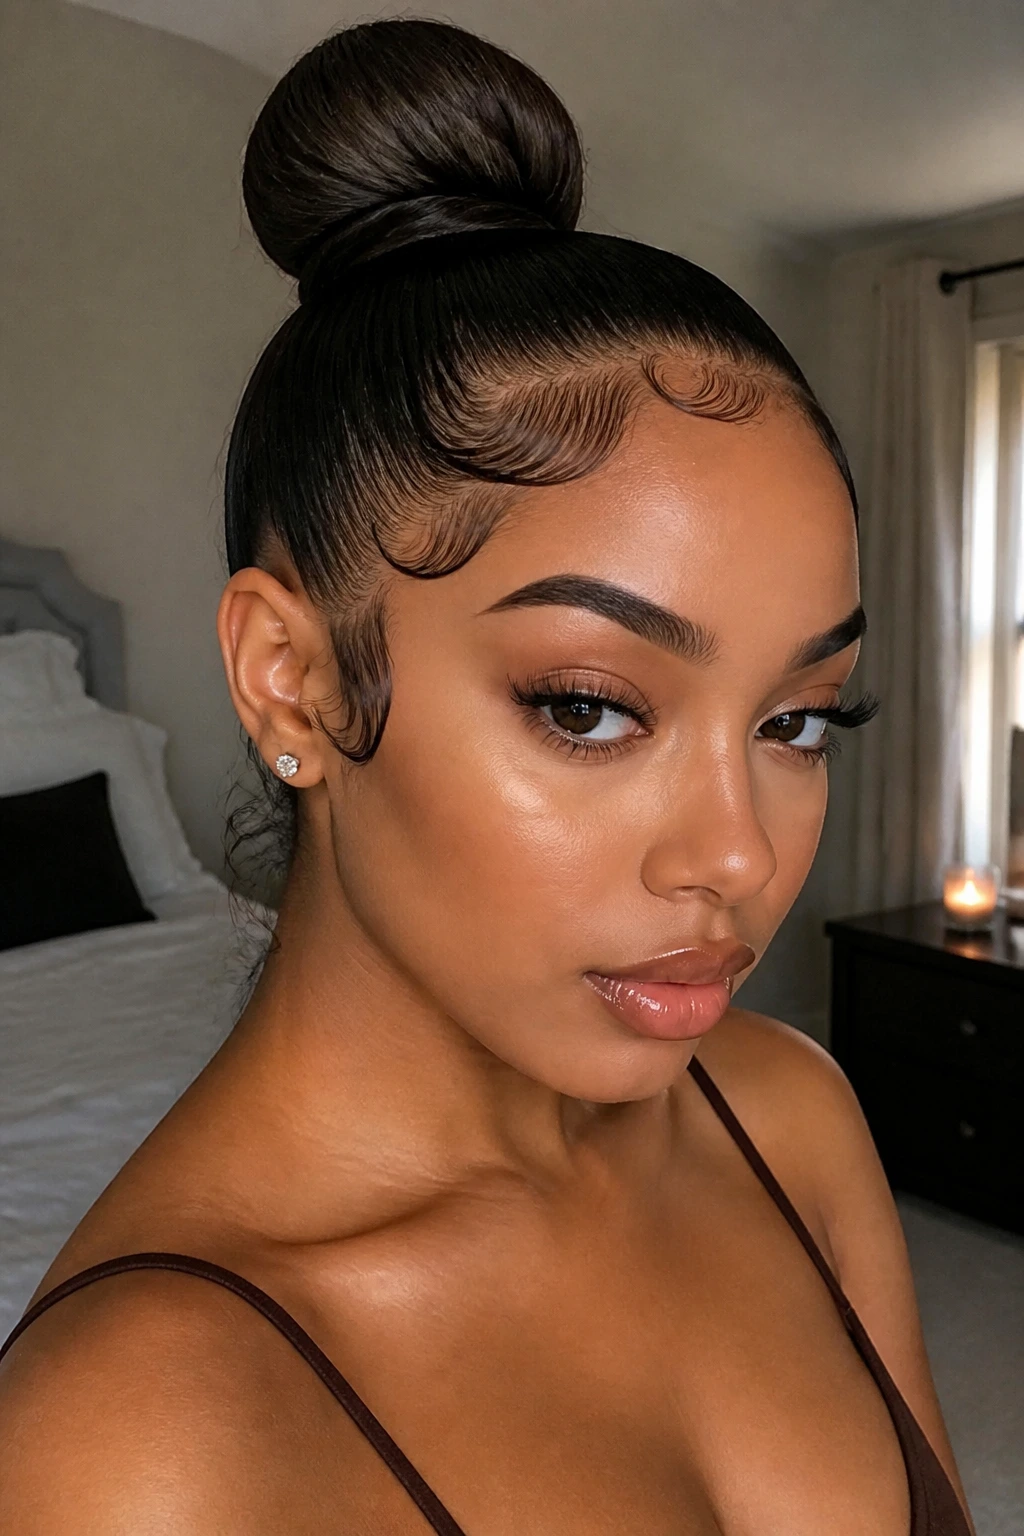
A lot of people skip the baby hairs and then wonder why the bun feels unfinished. A little bit of shaping around the hairline can soften a strict high bun and make the whole style look more complete. The key is to keep the edges deliberate, not swirled into a pattern that fights the rest of the hair.
Use a small edge brush, a pea-sized amount of gel, and a light hand. Smooth the hairline in thin sections, then leave the bun itself clean and tight so the baby hairs feel like a frame, not the main event. This works especially well with sleek makeup and bare shoulders.
12. Wet-Look Runway Bun
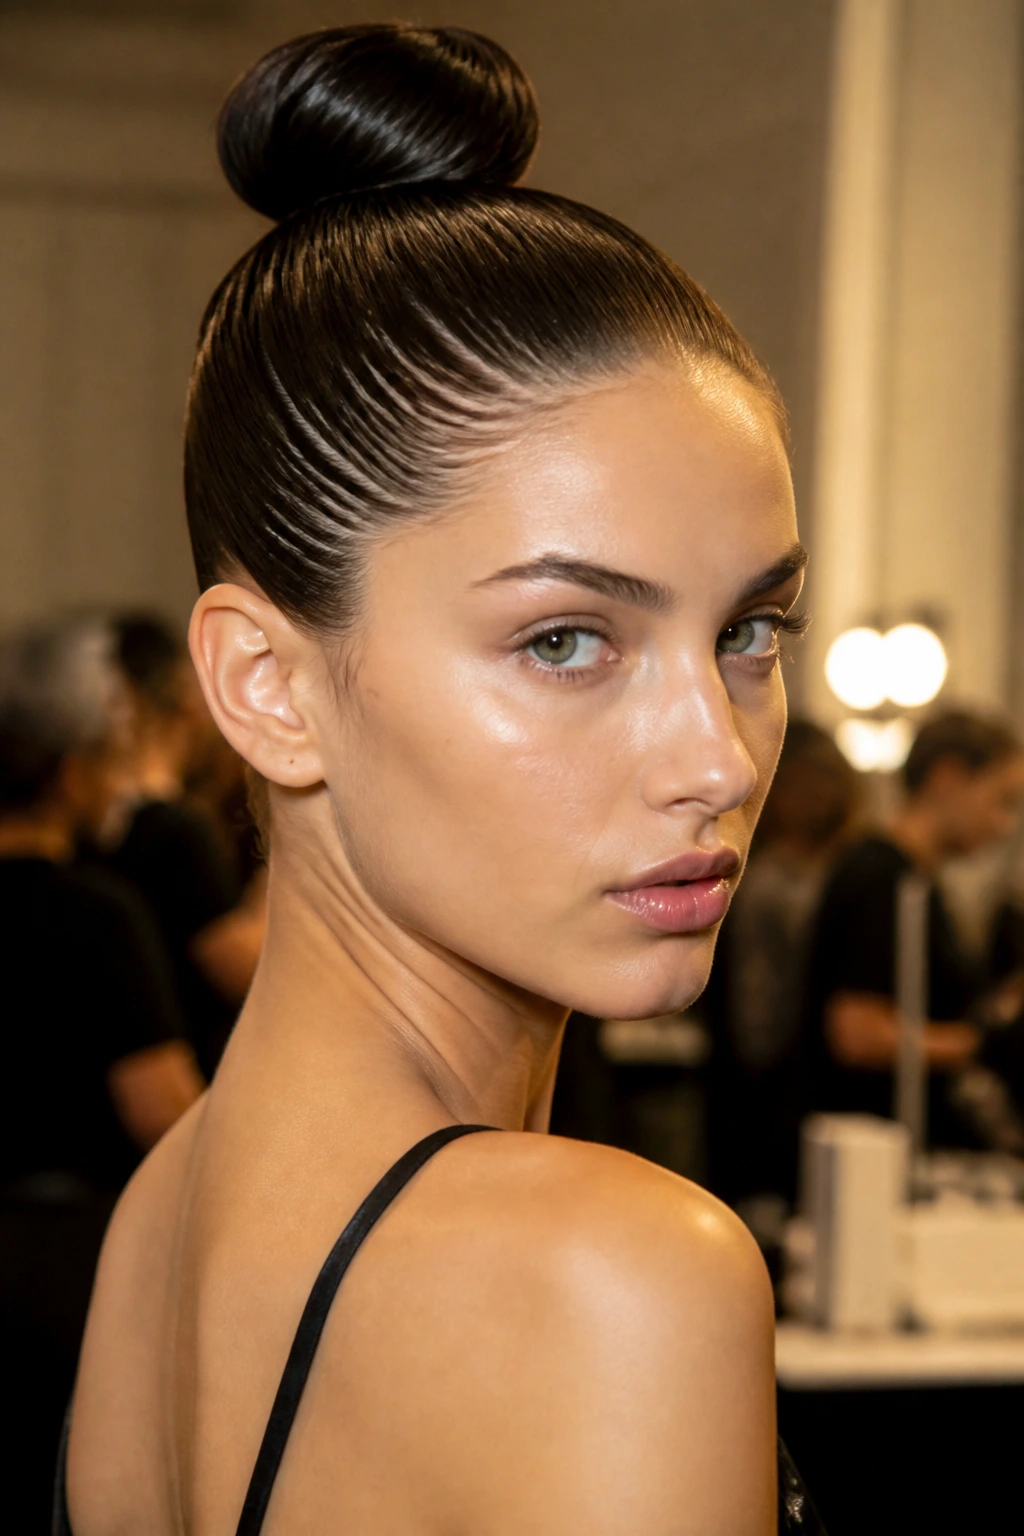
If you like a little drama, the wet-look bun has it. The surface stays glossy enough that the hair looks freshly set, even though the shape is actually pretty simple. Use styling cream or gel on damp hair, brush it flat, and let the shine do some of the work. The effect is bold, clean, and a bit severe in the best way.
This style can turn plain black clothing into a whole look. The shine catches light along the crown and makes the bun feel more editorial than everyday. Just don’t overload the roots. Too much product near the scalp turns glossy into greasy, and the difference is not subtle.
13. Off-Center High Bun
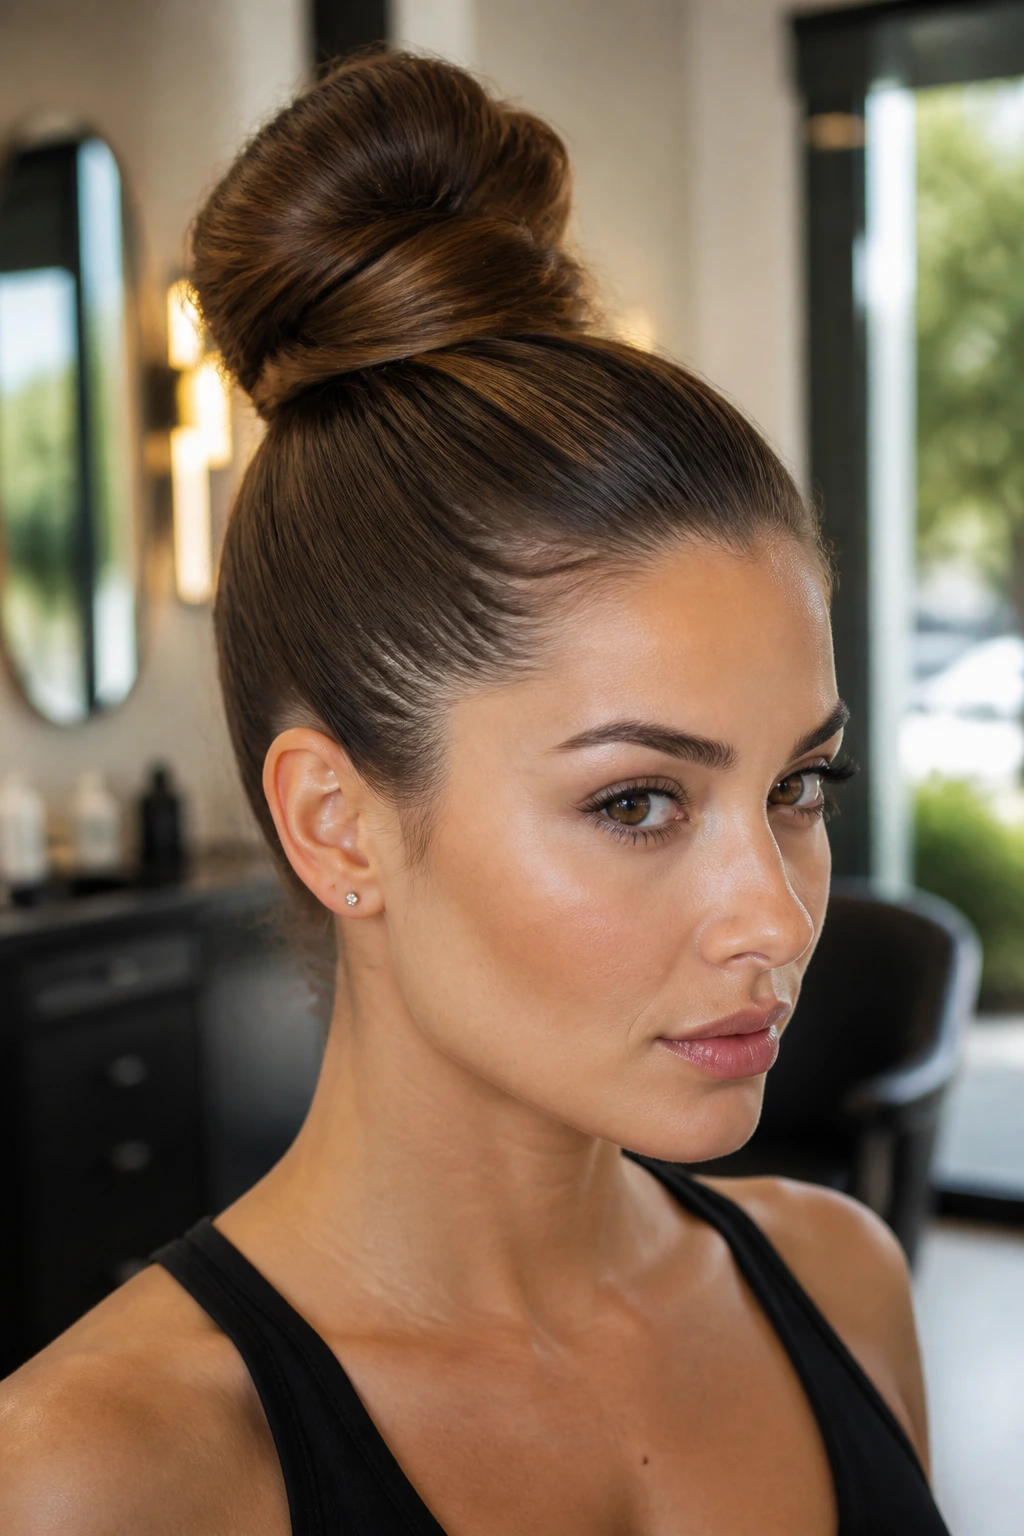
A high bun does not have to sit dead center to look sleek. Shift it slightly left or right and the style immediately softens. The line becomes less formal, which helps if your face feels too locked-in with a strict symmetrical bun. That little offset changes the mood without changing the effort.
Keep the sides smoothed toward the chosen side and place the bun just off the crown, not too far back. A slight offset also helps if one side of your hairline is shorter or more stubborn than the other. The asymmetry hides that better than a perfect center ever will.
14. Hair-Net Wrapped Bun
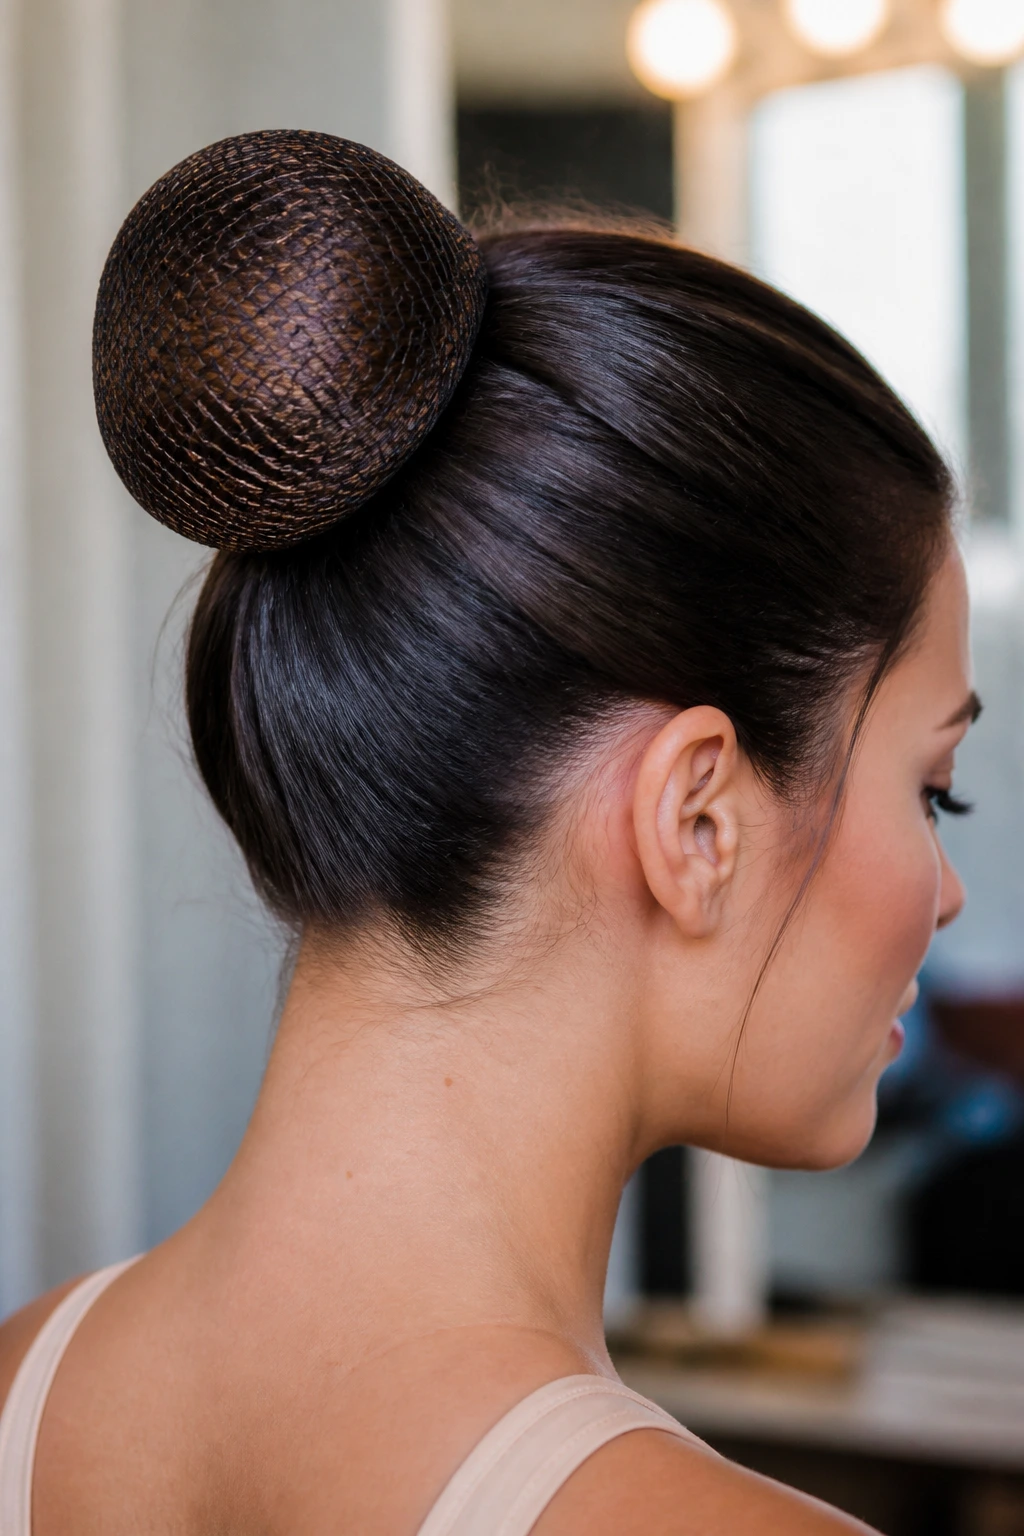
A hair net is old-school for a reason: it works. If you want the cleanest possible outline, stretch a matching net over the finished bun and pin the edges underneath. The result is a polished sphere with almost no loose ends and almost no movement. That matters for long events, stage work, or any day when the bun cannot collapse halfway through.
I prefer this method for thick hair because it keeps the bun from expanding as the day warms up. It also saves the shape if you need to move fast and do not have time for repeated touch-ups. Plain pins hold the bun. The net holds the finish.
15. Double-Elastic Lift Bun
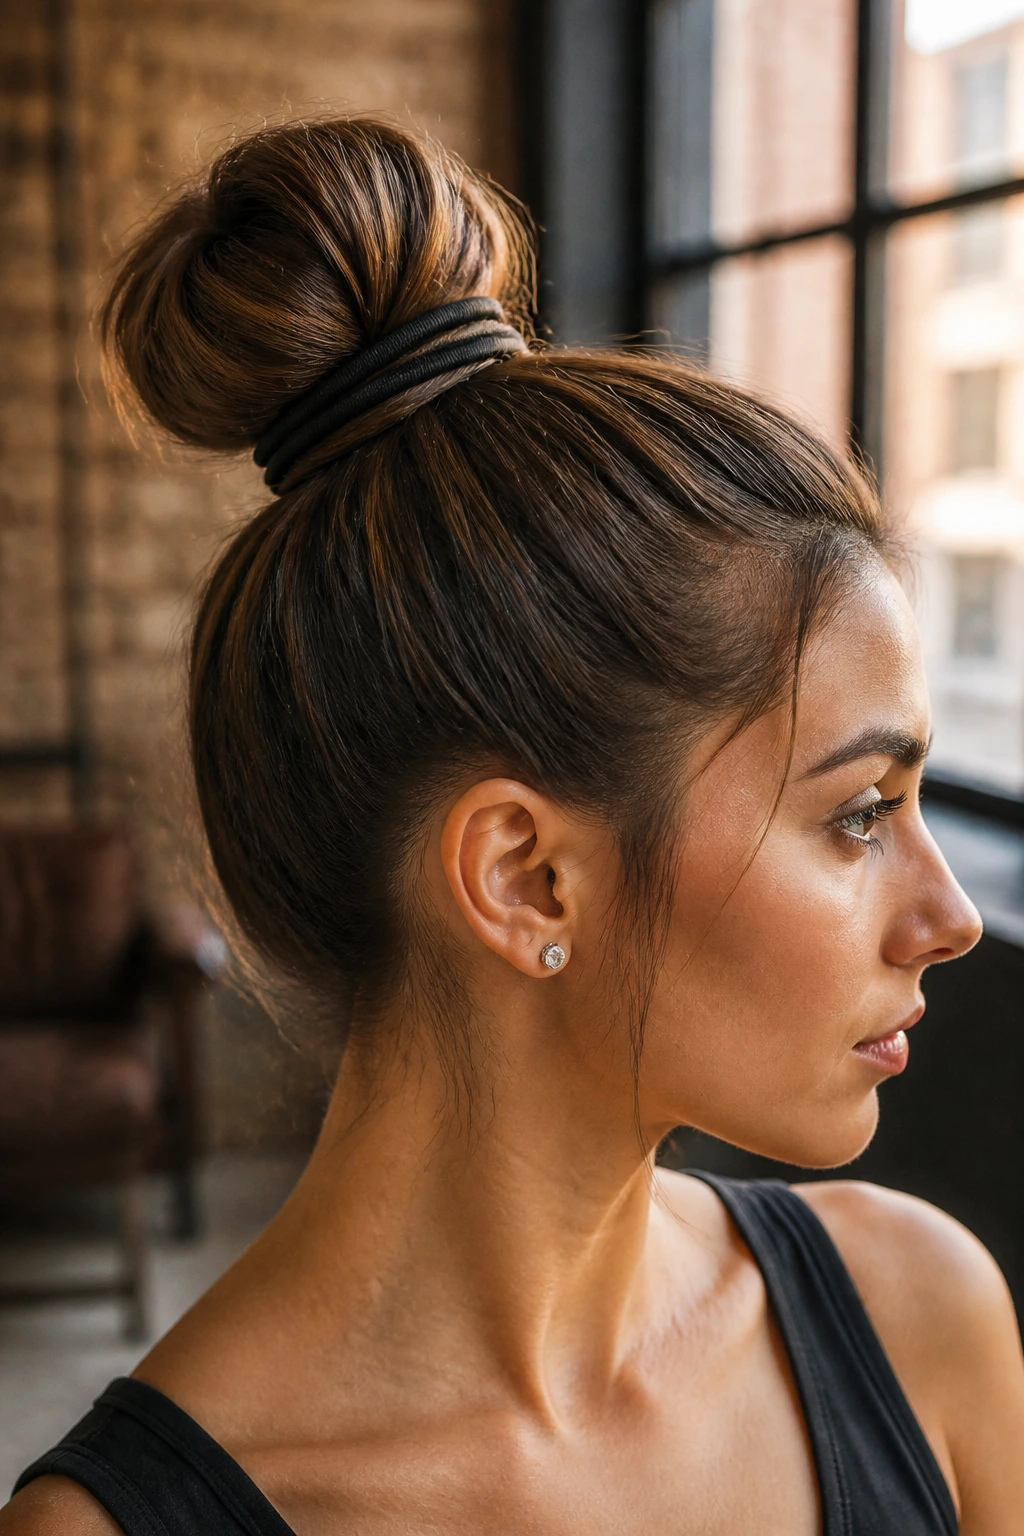
Here’s the trick for hair that feels too heavy to stay up on its own: use two elastics. The first makes a tight ponytail at the crown. The second goes just above it, which creates a little extra lift and makes the base feel firmer before the bun is wrapped. It is a small detail, but small details keep heavy buns from slipping.
This style works well on long, dense hair that tends to drag a ponytail down by midday. The extra elastic takes pressure off the pins later. If the bun feels too bulky, tug a few strands at the top very slightly before wrapping. Not enough to puff it up. Just enough to keep it from looking compressed.
16. Side-Swept Front Bun
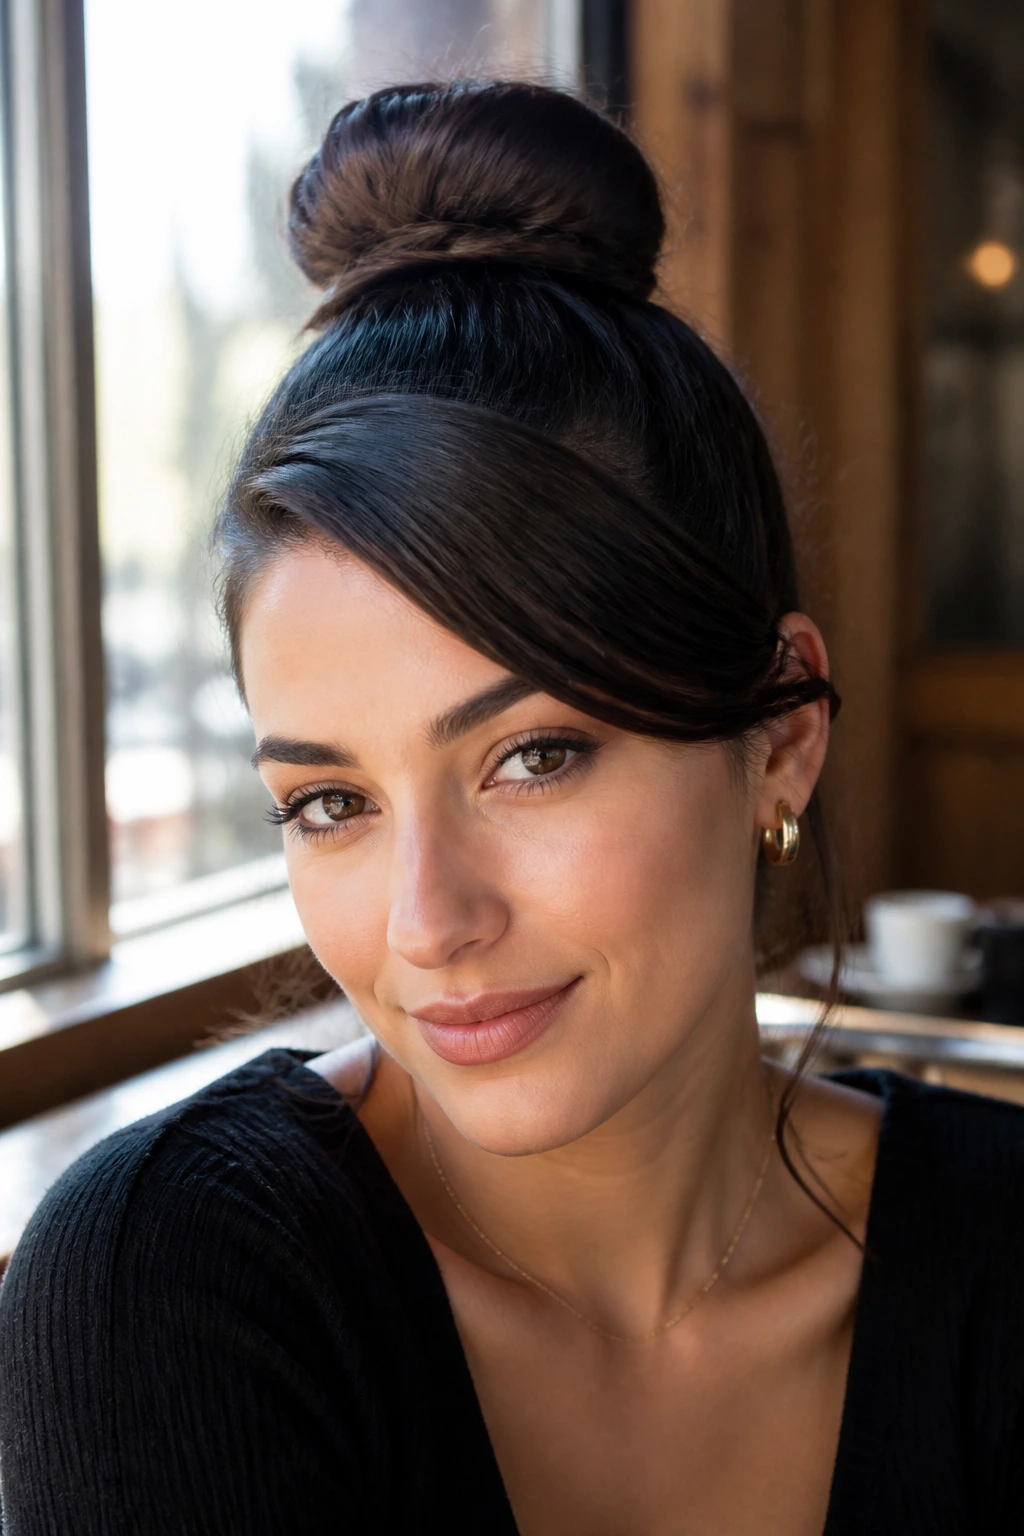
A side-swept front softens the face without losing the sleekness at the scalp. Brush the front section diagonally across the forehead before pulling everything into a high bun, then pin the sweep low enough that it stays smooth but high enough that it still lifts the eye line. The result feels glamorous in a quiet way.
This one especially likes a bold lip or a clean necklace line. Since the front carries a little motion, the bun can stay compact and simple. If your hairline is very straight, a tiny bend at the sweep makes the style look more natural than a rigid diagonal.
17. Halo-Braid Into Bun
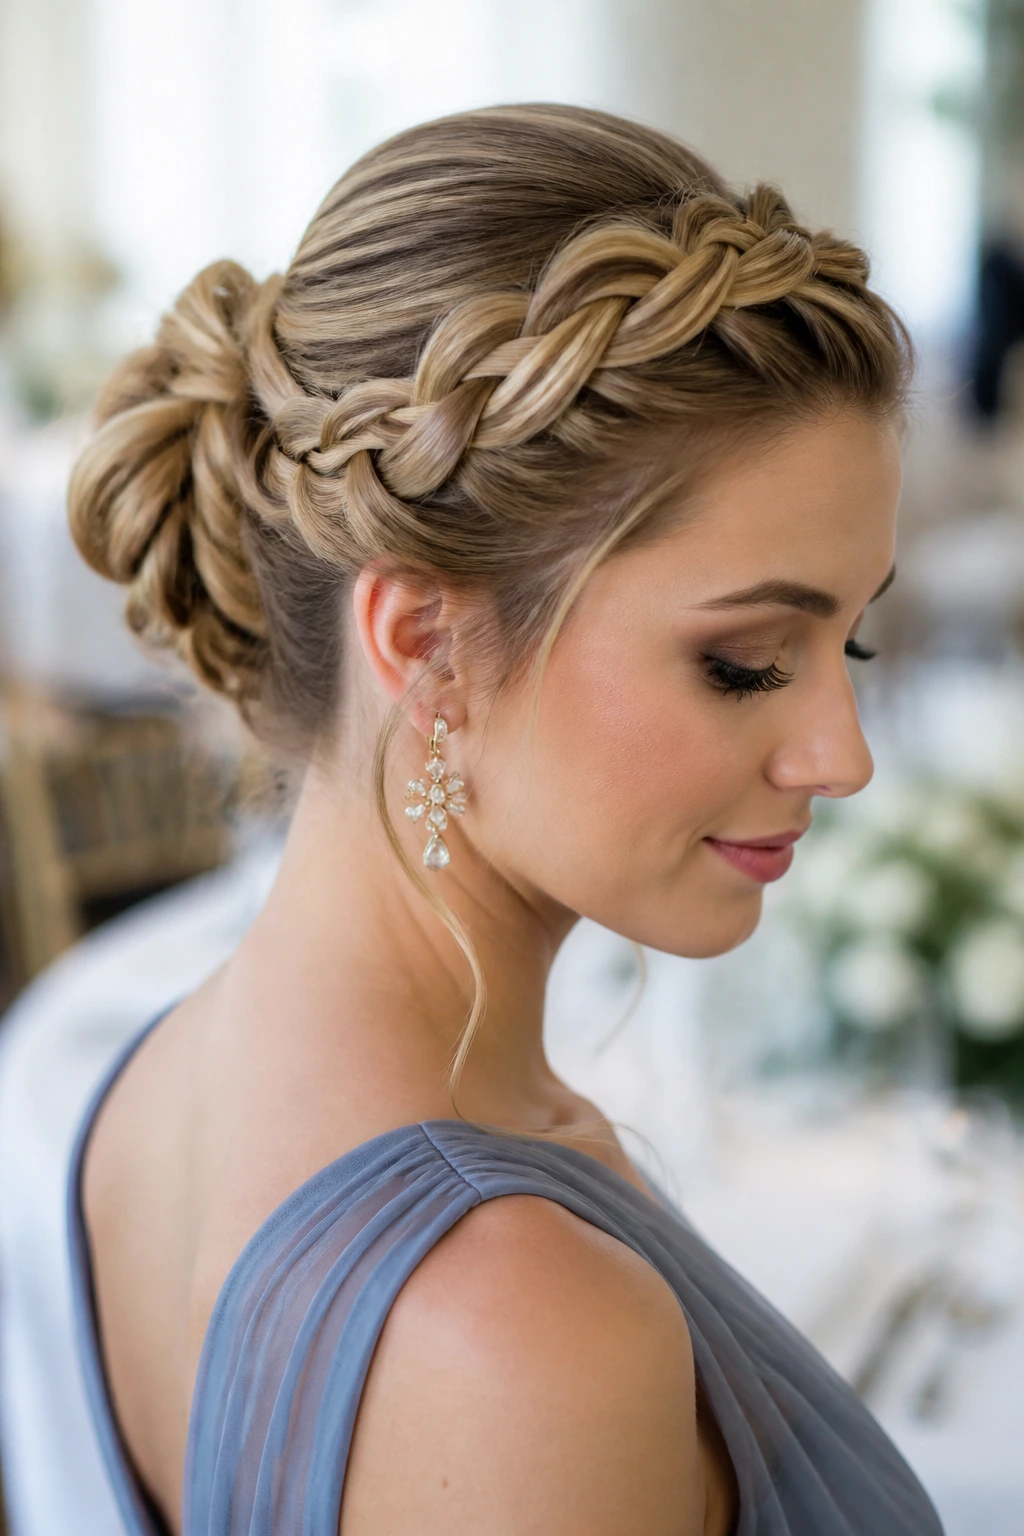
A halo braid changes the whole silhouette. Instead of starting and ending the style at the crown, the braid wraps the head and feeds into the bun, which creates a frame around the face before the bun even shows up. The look is polished, but it has enough detail that you do not need much else.
This works well for formal events and for anyone who wants the sleekness of a bun without exposing every inch of the hairline. The braid also helps shorter layers stay tucked in. If the braid feels too sweet, keep the bun very tight and small so the style leans cleaner than romantic.
18. Loop-Twist Bun
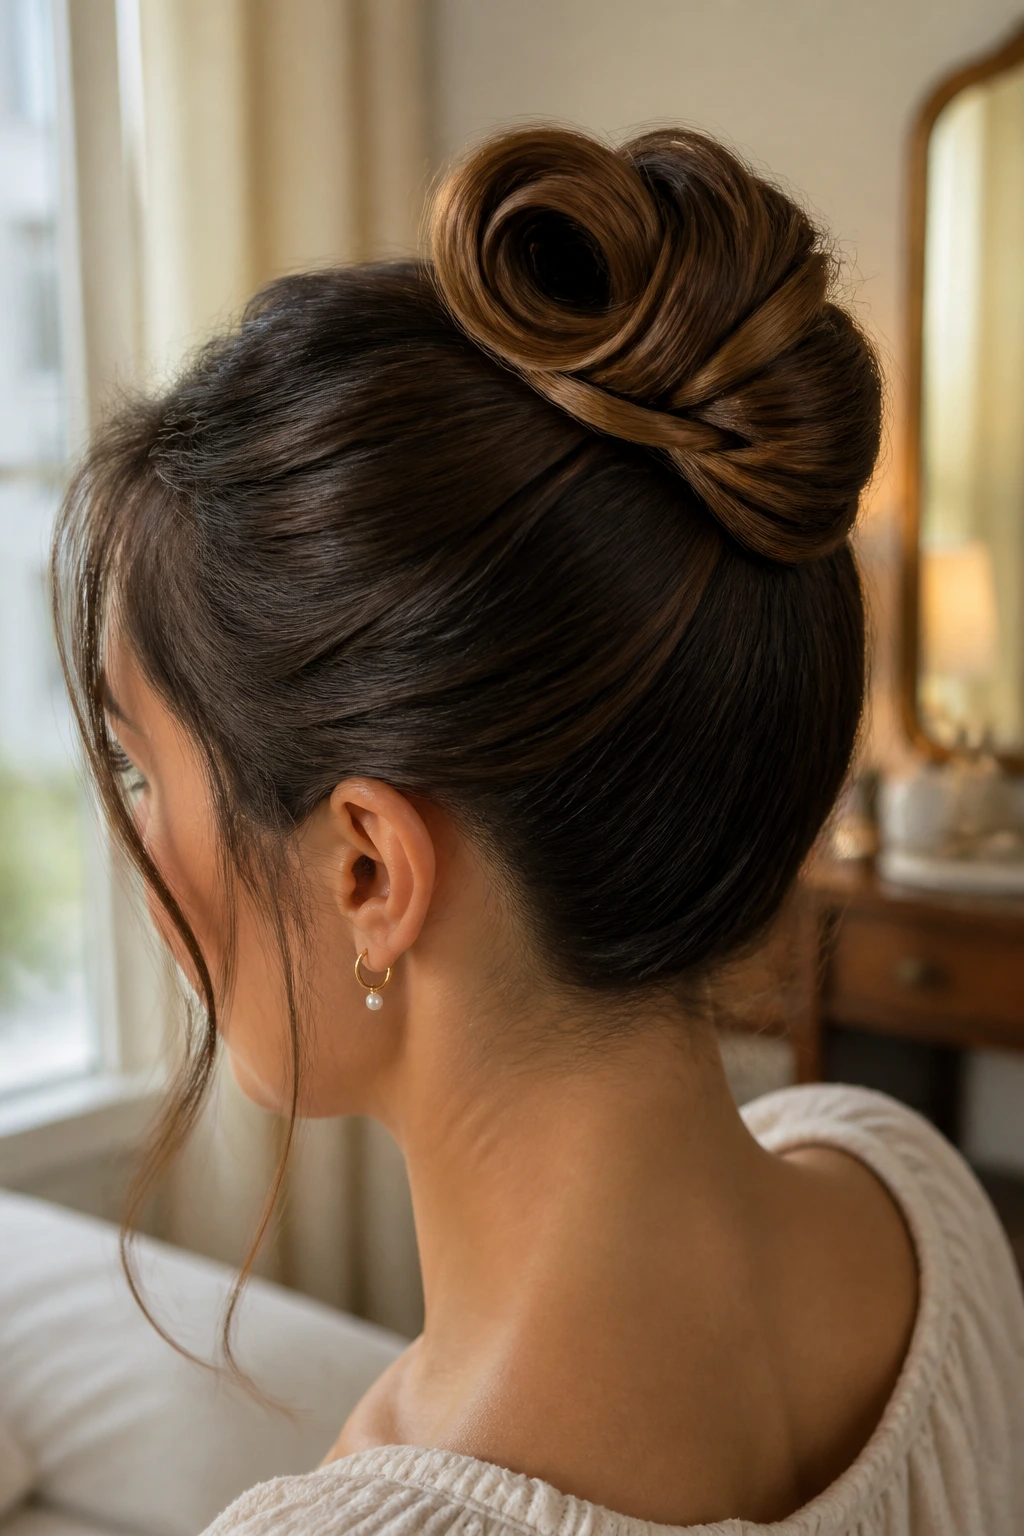
The loop-twist bun has a nice balance of structure and softness. Make the ponytail, twist the length once, then fold a loop before tucking the tail underneath. You get a little shape at the top and a folded finish at the back, which keeps the bun from looking like a plain coil.
This is one of those styles that looks more complicated than it is. It also works well if your hair is shoulder-length to mid-back and does not yet have the kind of length that makes a huge donut bun easy. The loop gives the style volume without requiring a lot of pins.
19. Tucked-Ends Topknot
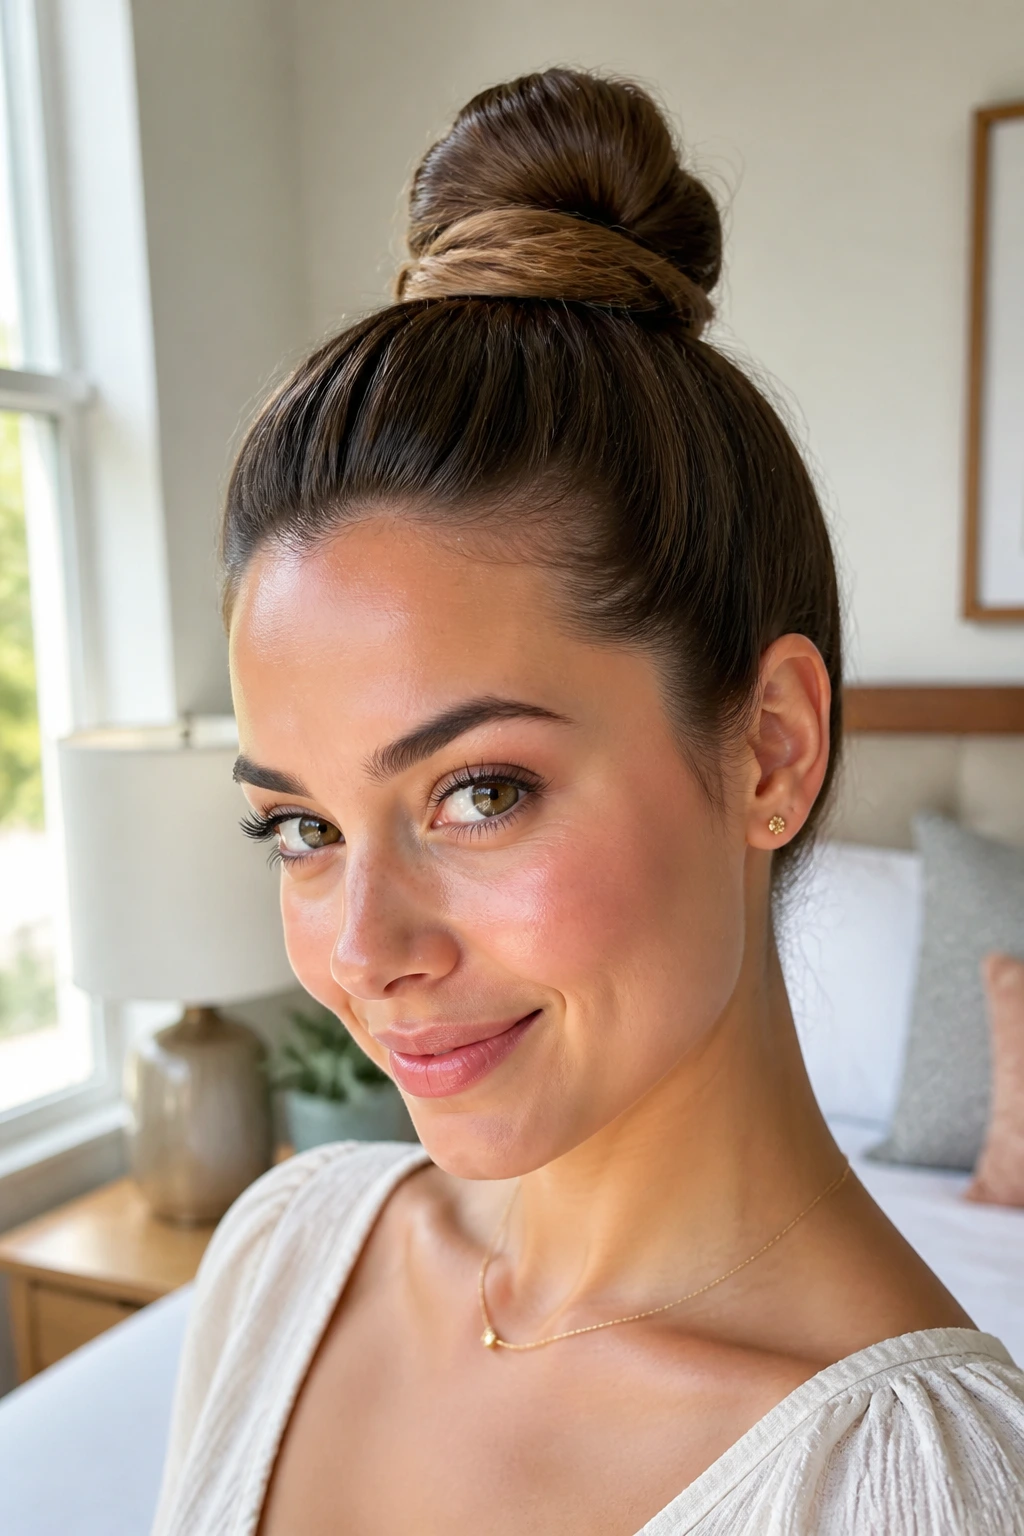
A tucked-ends topknot is all about hiding the rough parts. After the ponytail is twisted up, the ends are tucked under the knot and pinned in so nothing sticks out. The finish reads neat from the front and clean from the back, which is harder to do than people think.
If your layers are blunt, this style is a lifesaver. It lets the bun look compact even when the actual tail is uneven. Use a few extra bobby pins close to the base, not floating in the outer surface. Floating pins do less than people hope.
20. Curly-Hair Sleek Bun
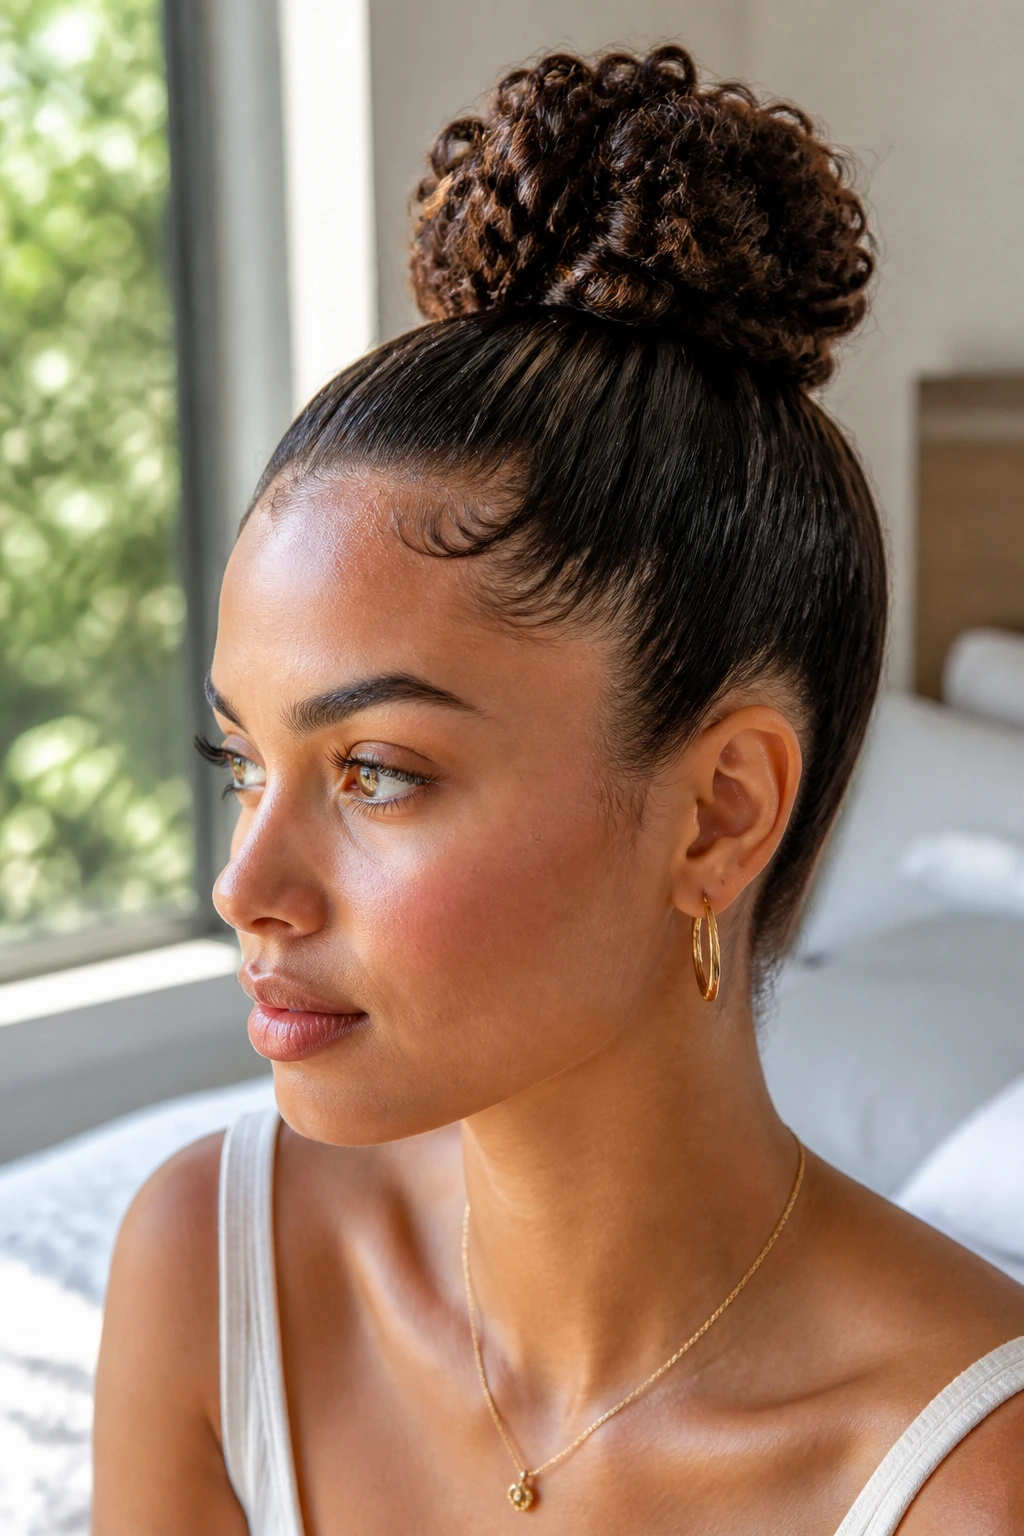
Curly hair does not need to be flattened into submission to look sleek. Smooth the roots with gel or cream, pull the curls into a high ponytail, and let the bun itself keep some texture. The contrast can look beautiful: controlled at the scalp, soft and full in the knot.
The best part is that the bun can still honor the curl pattern instead of hiding it. This style tends to look better when the hair is stretched first, even a little, so the crown can lie flat. If you need extra hold, use a silk scrunchie under the elastic so the curls don’t snag as they’re gathered.
21. Box-Braid High Bun
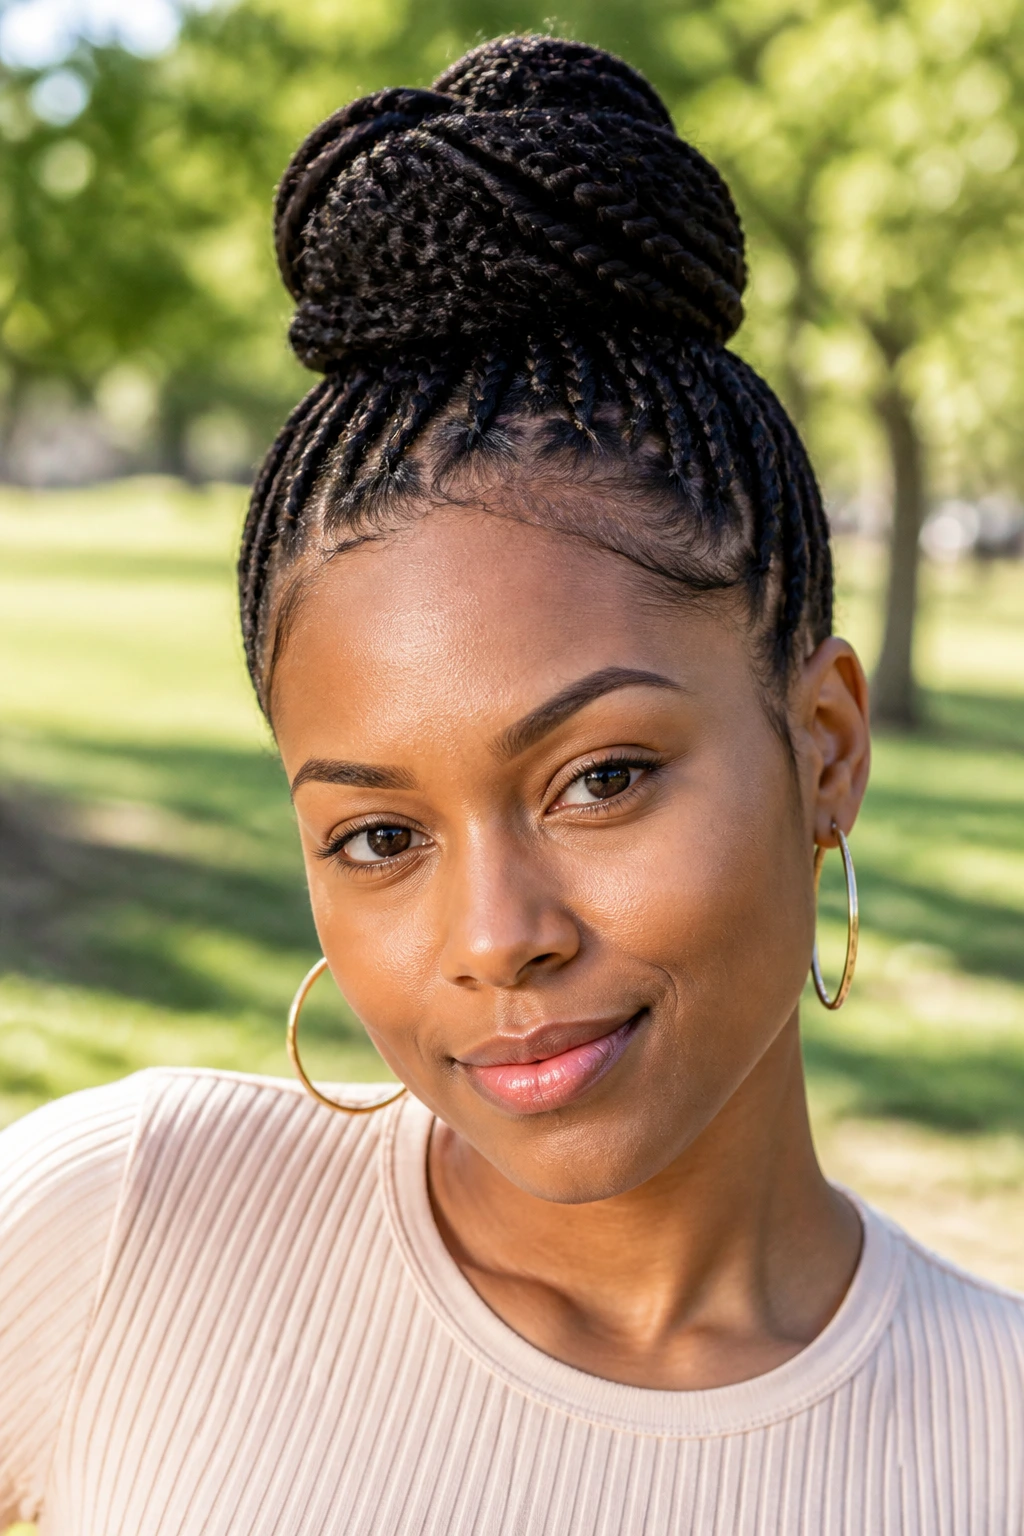
Box braids already carry structure, so the bun can be clean without much effort. Gather the braids high, wrap them around the base, and pin the ends under so the bun stays compact. Because the braid texture is doing the visual work, the finish looks rich even with a simple shape.
This is one of the easiest sleek-high-bun styles to wear for a full day. The weight distributes well if the bun is anchored tightly at the crown. A satin scarf around the edges before you leave the house can keep the front smooth for hours longer than you’d expect.
22. Loc Knot Bun
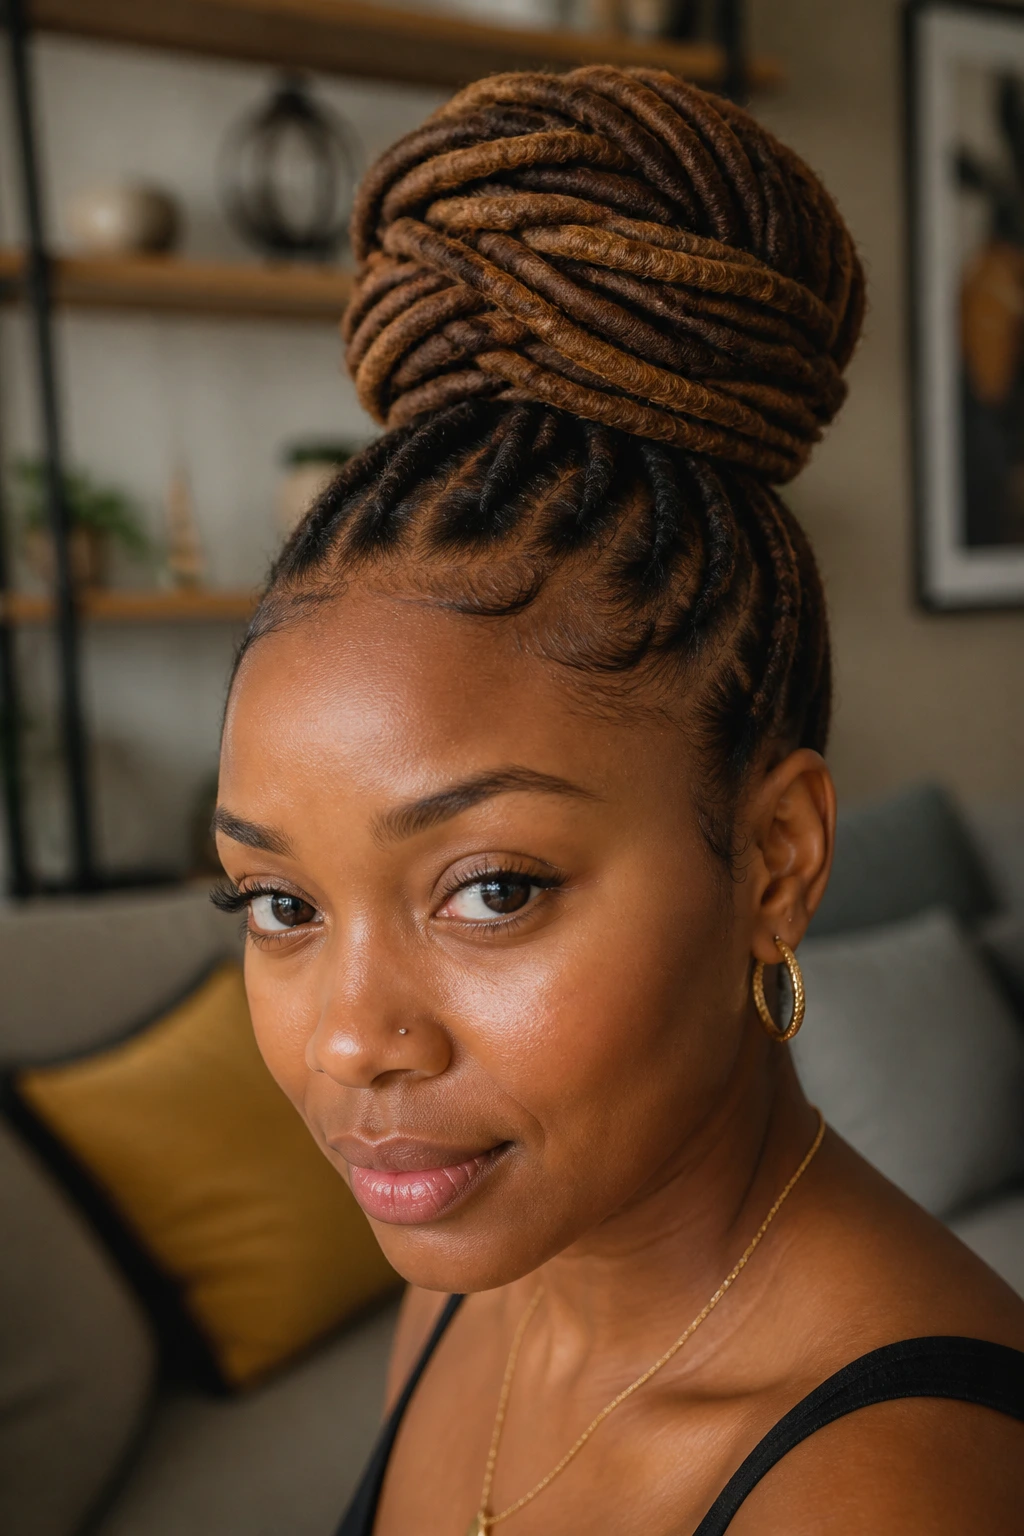
Locs make a strong high bun because the shape has body built in. Pull them up, wrap them around the base, and let the knot sit a little fuller than you would with straight hair. The style reads clean, but the texture keeps it from looking flat or overworked.
A good loc bun needs a sturdy elastic and at least a few strategic pins around the base. If the locs are long, fold them before you wrap so the bun stays tight against the head. The shape should feel secure, not strained. If your scalp hurts, the bun is too tight.
23. Coily Hair Coil-Smoothed Bun
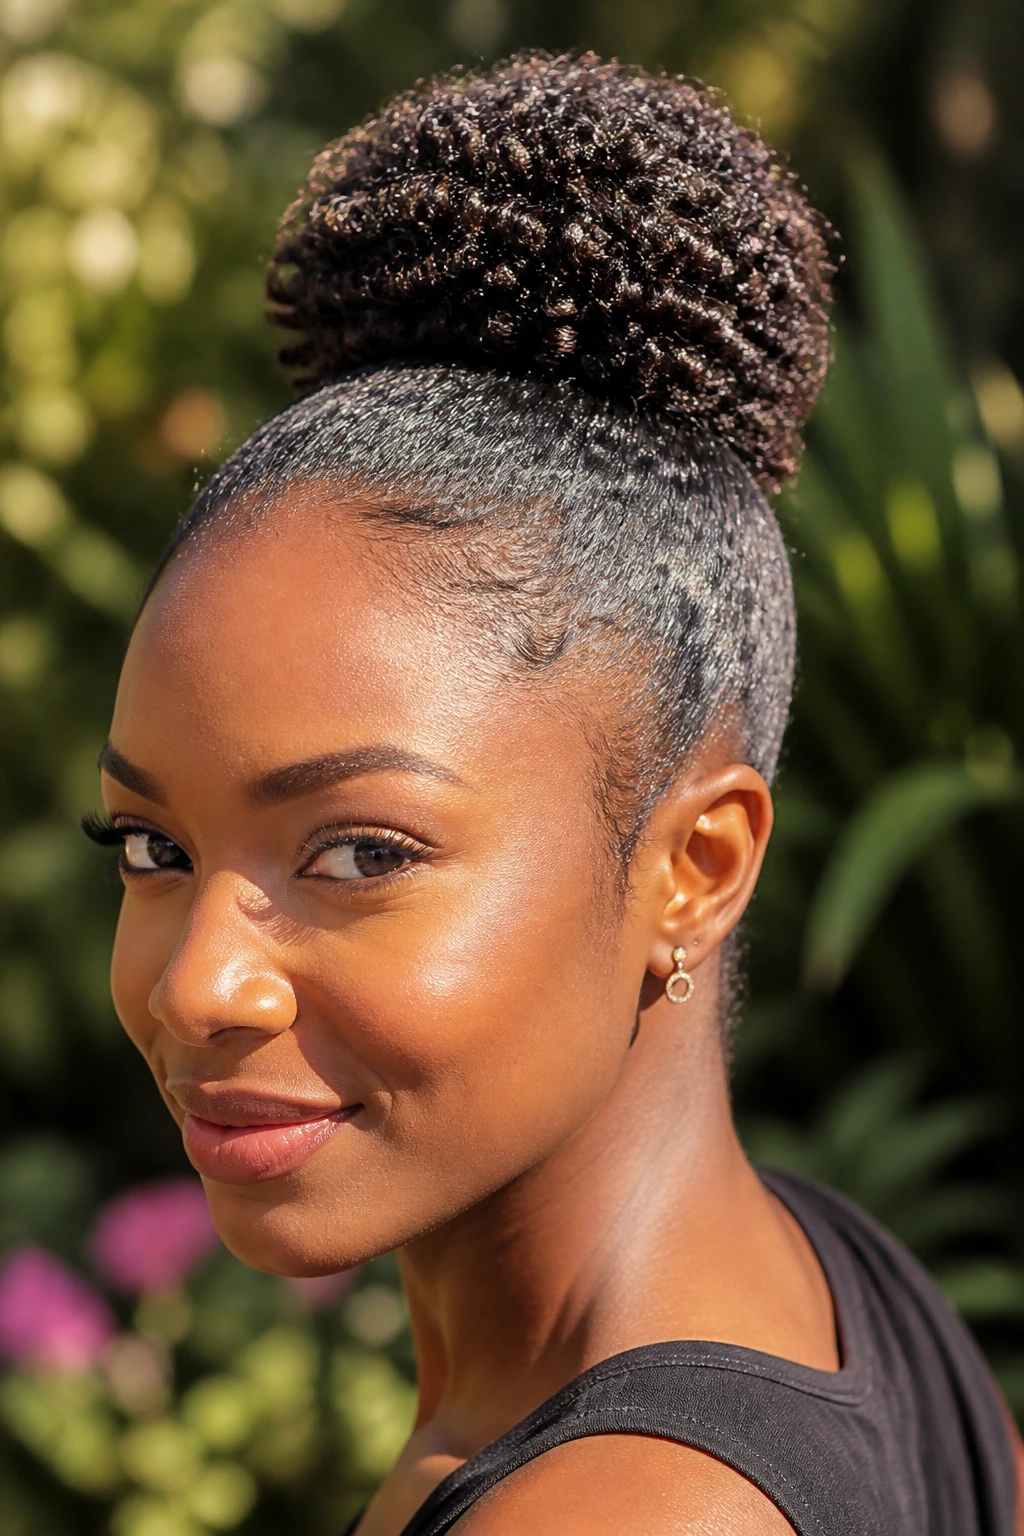
Coily hair can make a very sleek bun when the root work is handled well. Use a hydrating gel or styling cream to smooth the crown, brush the hair upward in sections, and let the coils gather into a high knot with a controlled surface. The look can be glossy without losing the natural body that makes coily textures so good in buns.
This is one of the styles where a little patience pays off. Work the sides in smaller sections so the surface stays flat instead of puffing up at the ears. If you need extra hold, lay a scarf across the edges for ten minutes while the product sets.
24. Hidden-Texture Bun
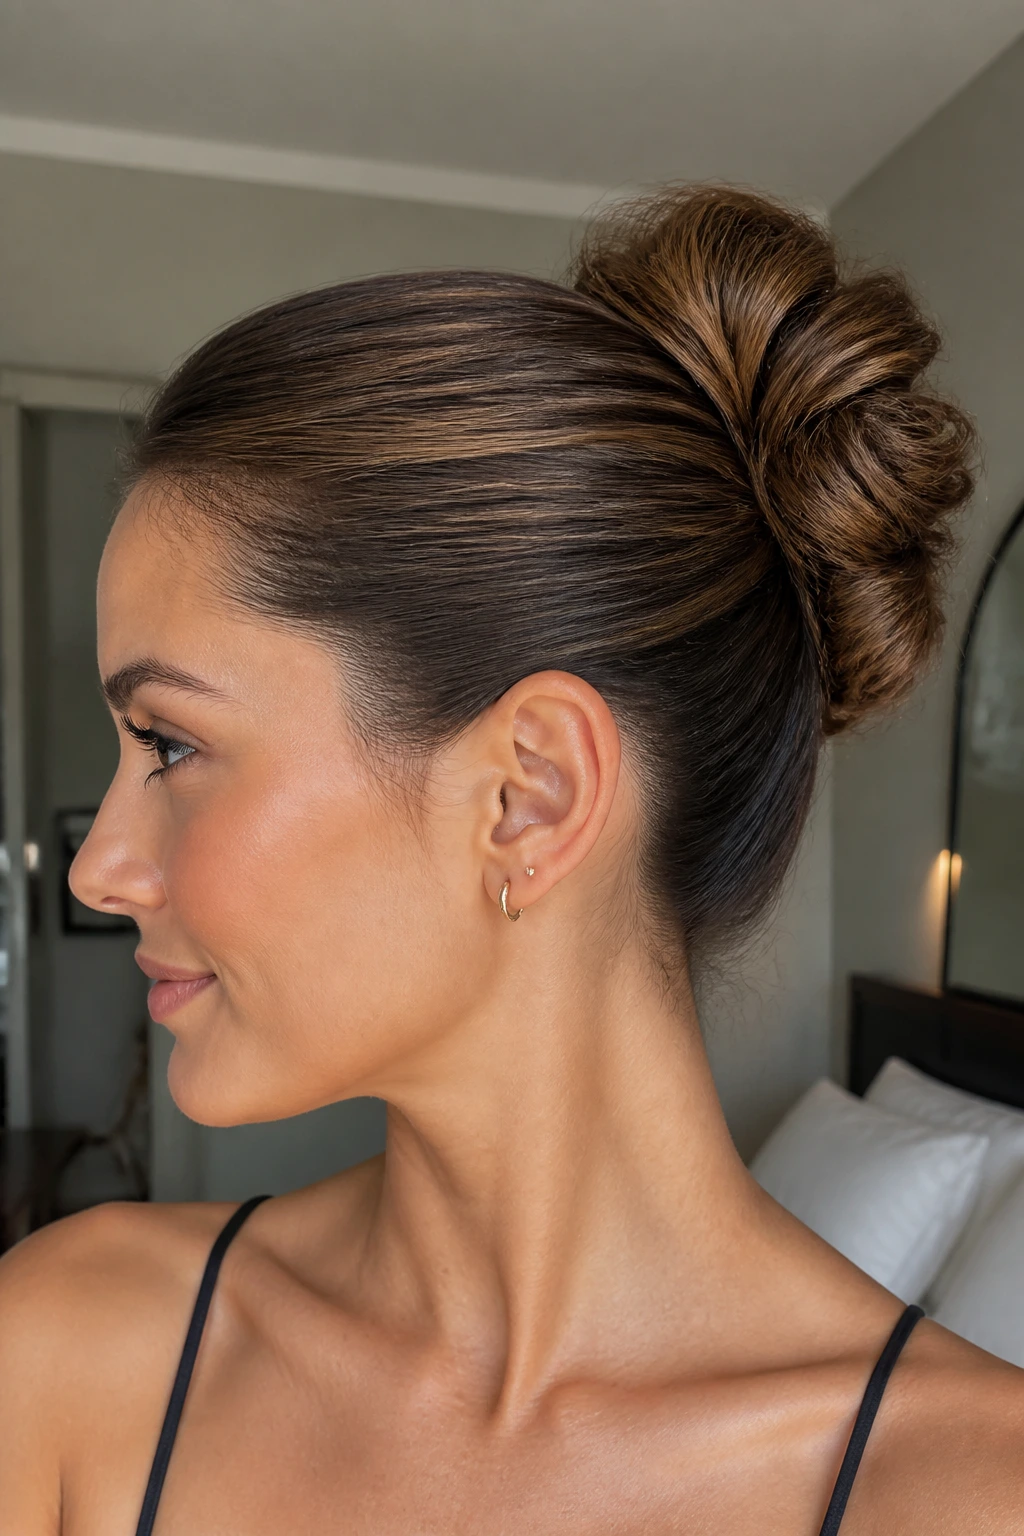
This bun is for anyone who likes the outside to look calm while the inside quietly carries volume. Smooth the visible top layer until it lies close to the scalp, but allow a textured or lightly teased interior to fill out the bun itself. From the front, it looks restrained. From the side, it has presence.
I like this version when the hair is fine but I still want the bun to look full. The trick is not to let the fluff show at the surface. Keep the outer layer sleek and let the body stay hidden inside the knot. That gives you shape without obvious teasing.
25. Earrings-First Bun
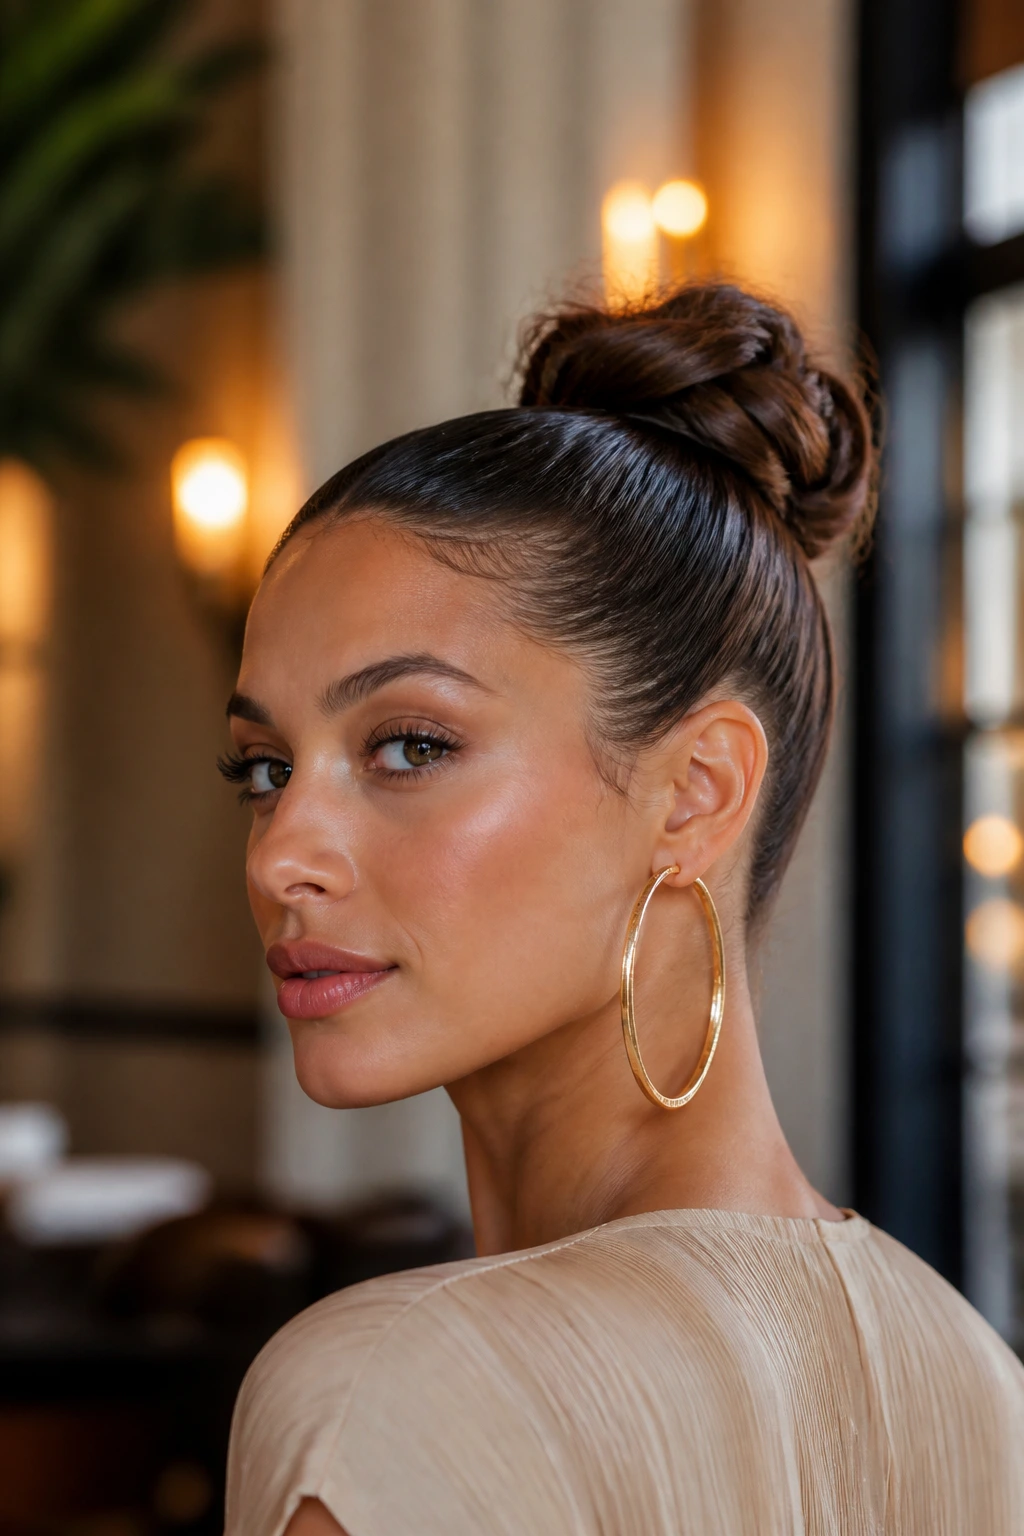
Some buns exist to make room for jewelry, and this is one of them. Pull the hair high and clean so the ears stay open, then keep the bun compact enough that big hoops or long drops can hang without competing for attention. The style becomes a frame instead of the main event.
This works especially well with strong collars, bare shoulders, or a neckline that already has structure. If the earrings are heavy, place the bun a touch higher so the line from ear to knot feels balanced. The eye should move easily from the face to the jewelry and back again.
26. Scarf-Wrapped Bun
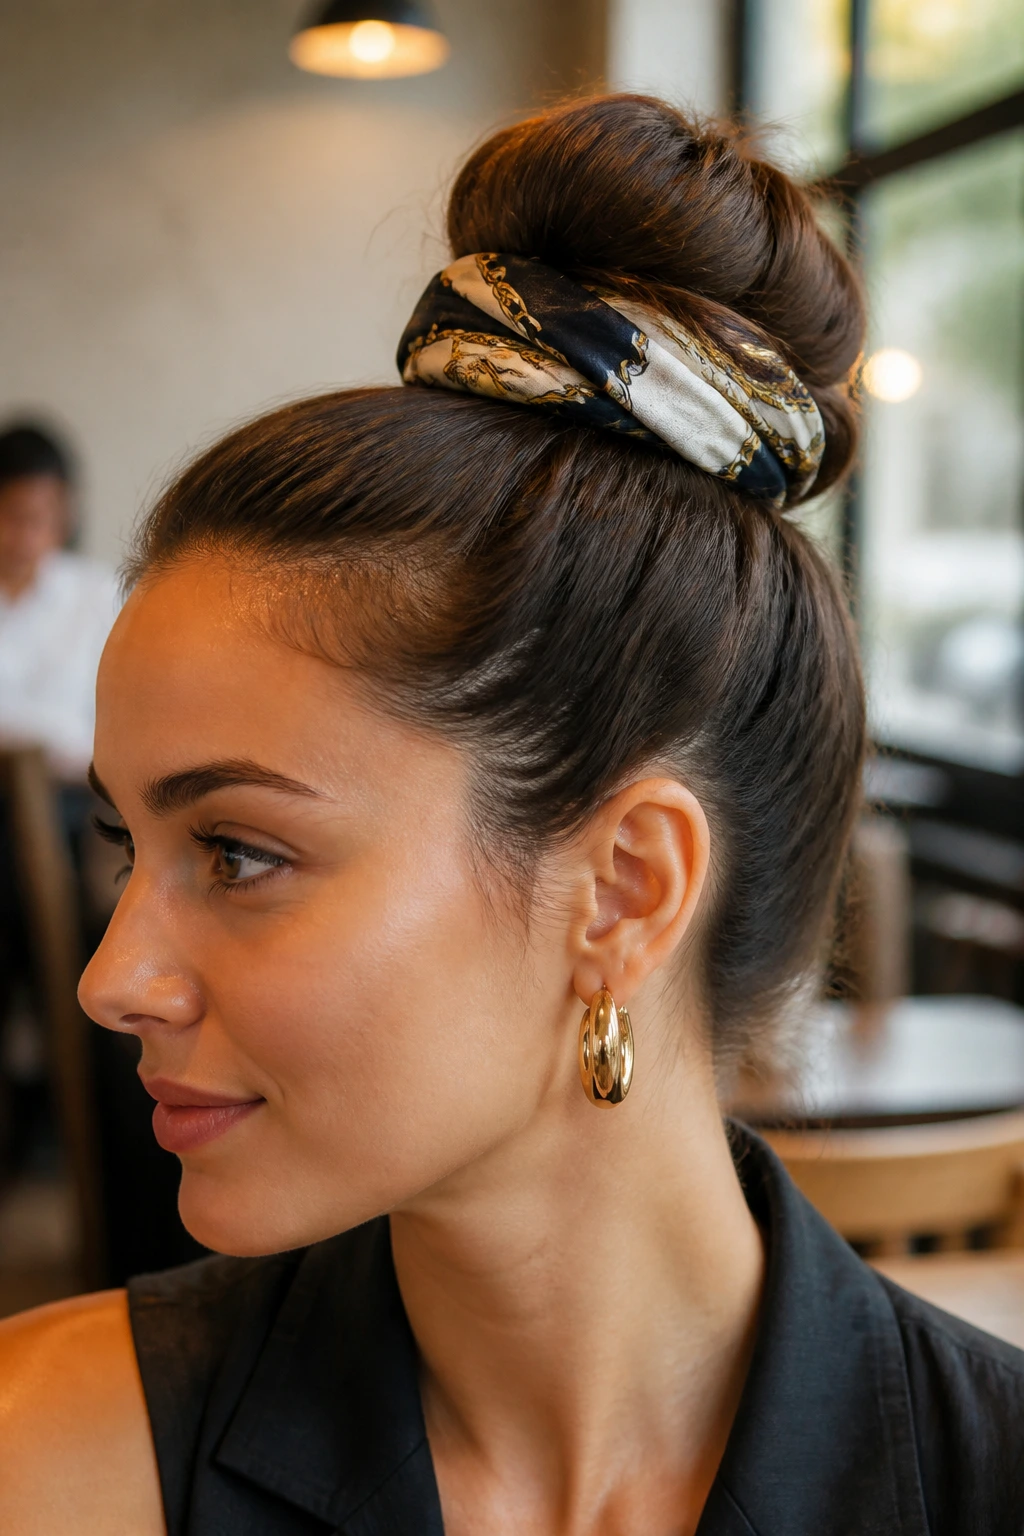
A silk scarf can change a plain high bun into something that looks styled on purpose. Wrap the scarf around the base, knot it once, and let the ends sit flat rather than flaring out. The bun stays sleek, but the scarf adds a clear finish point.
Choose a scarf that matches the outfit or gives it one bright note. This is one of the easiest ways to make a simple bun feel less severe. Keep the actual bun tight underneath, though. If the knot is loose, the scarf just becomes a distraction.
27. Curtain-Bang Bun
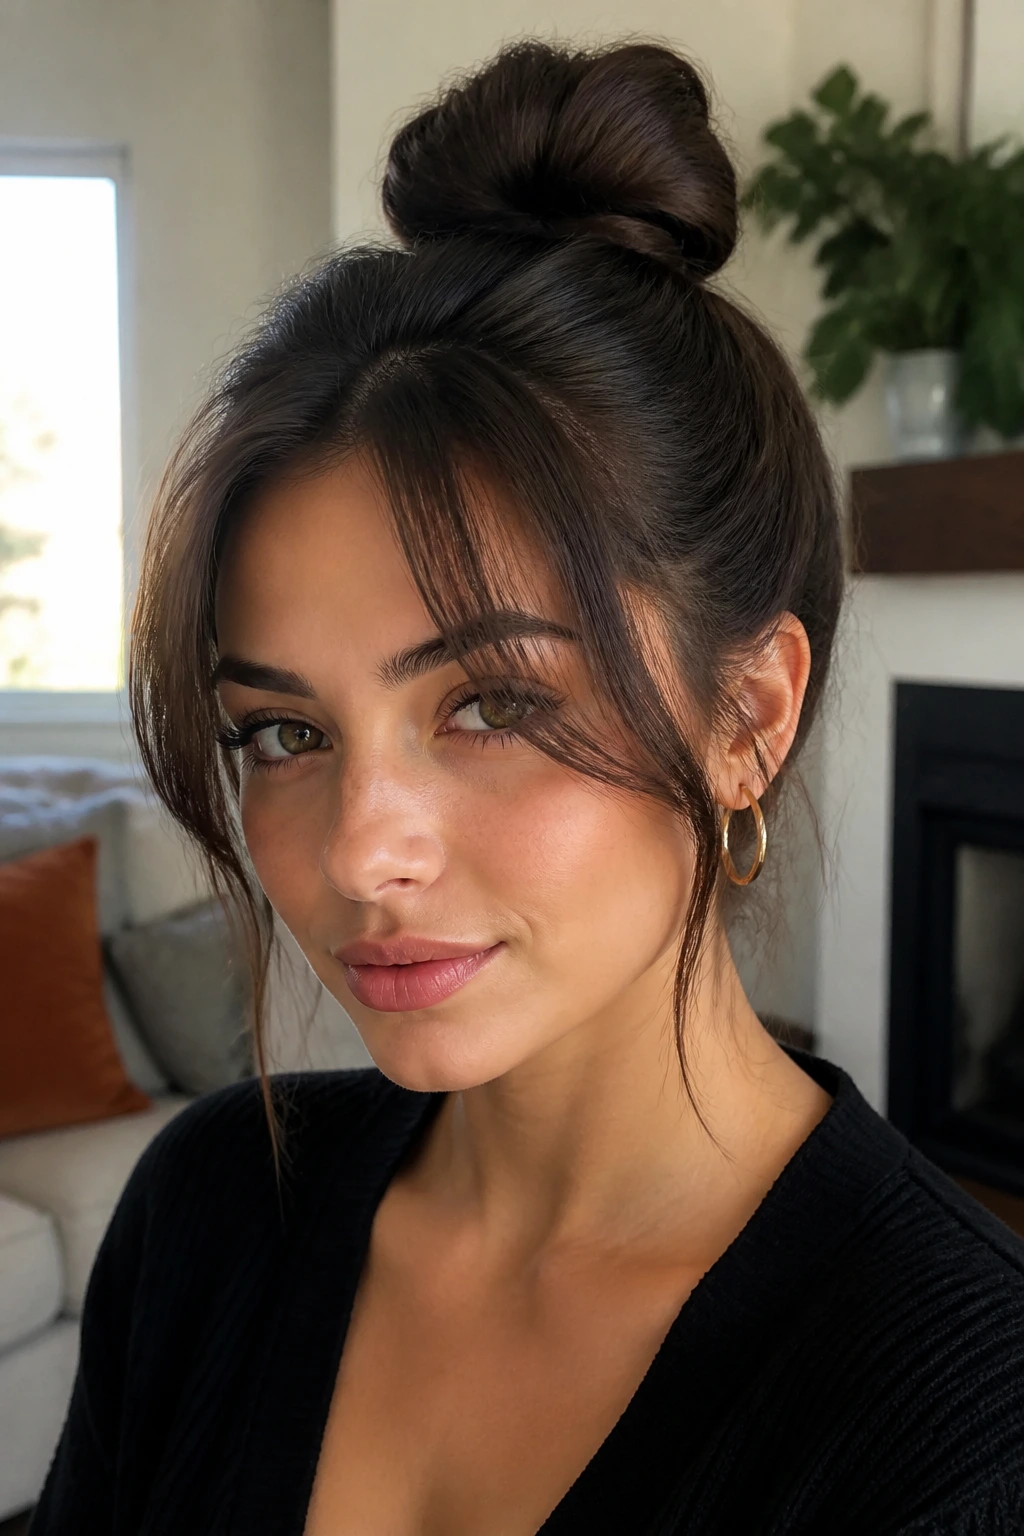
Curtain bangs soften a high bun fast. Leave the bangs loose in front, smooth the rest into a clean bun, and let the fringe fall in a gentle split around the eyes. The bun keeps the face open, but the bangs stop it from looking too strict.
This style is especially nice when you want structure without full exposure. The bangs make the bun feel a little less corporate, a little more lived-in. Dry the fringe first if it tends to separate. Nothing ruins the look faster than bangs that cling in uneven little pieces.
28. Slick-Sides-Only Bun
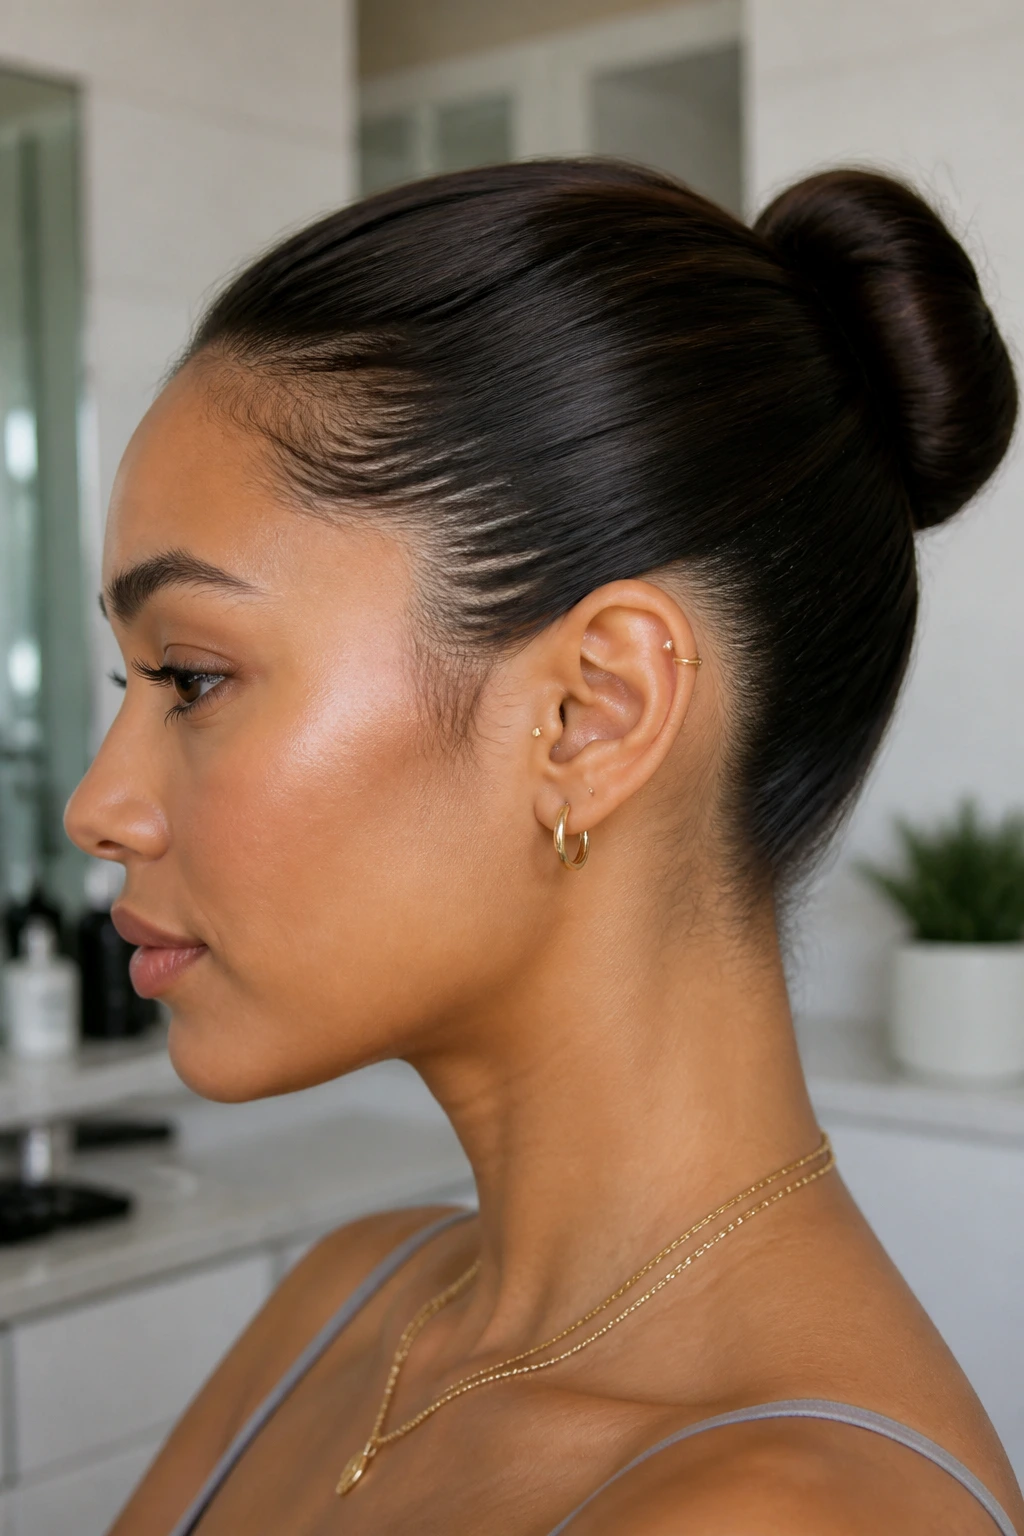
Sometimes the crown can keep a hint of texture and still look polished. The slick-sides-only bun leaves the top with a little softness while the sides are brushed flat and tight. That contrast feels modern, especially if the hair is naturally thick and a full-glass finish would take too much time.
This is a smart choice when you want control without overdoing the product. Focus gel along the temple and behind the ear, then leave the crown slightly less pressed so the bun has a natural lift. The bun itself should still be neat. The relaxation belongs in the crown, not the knot.
29. Short-Hair High Bun
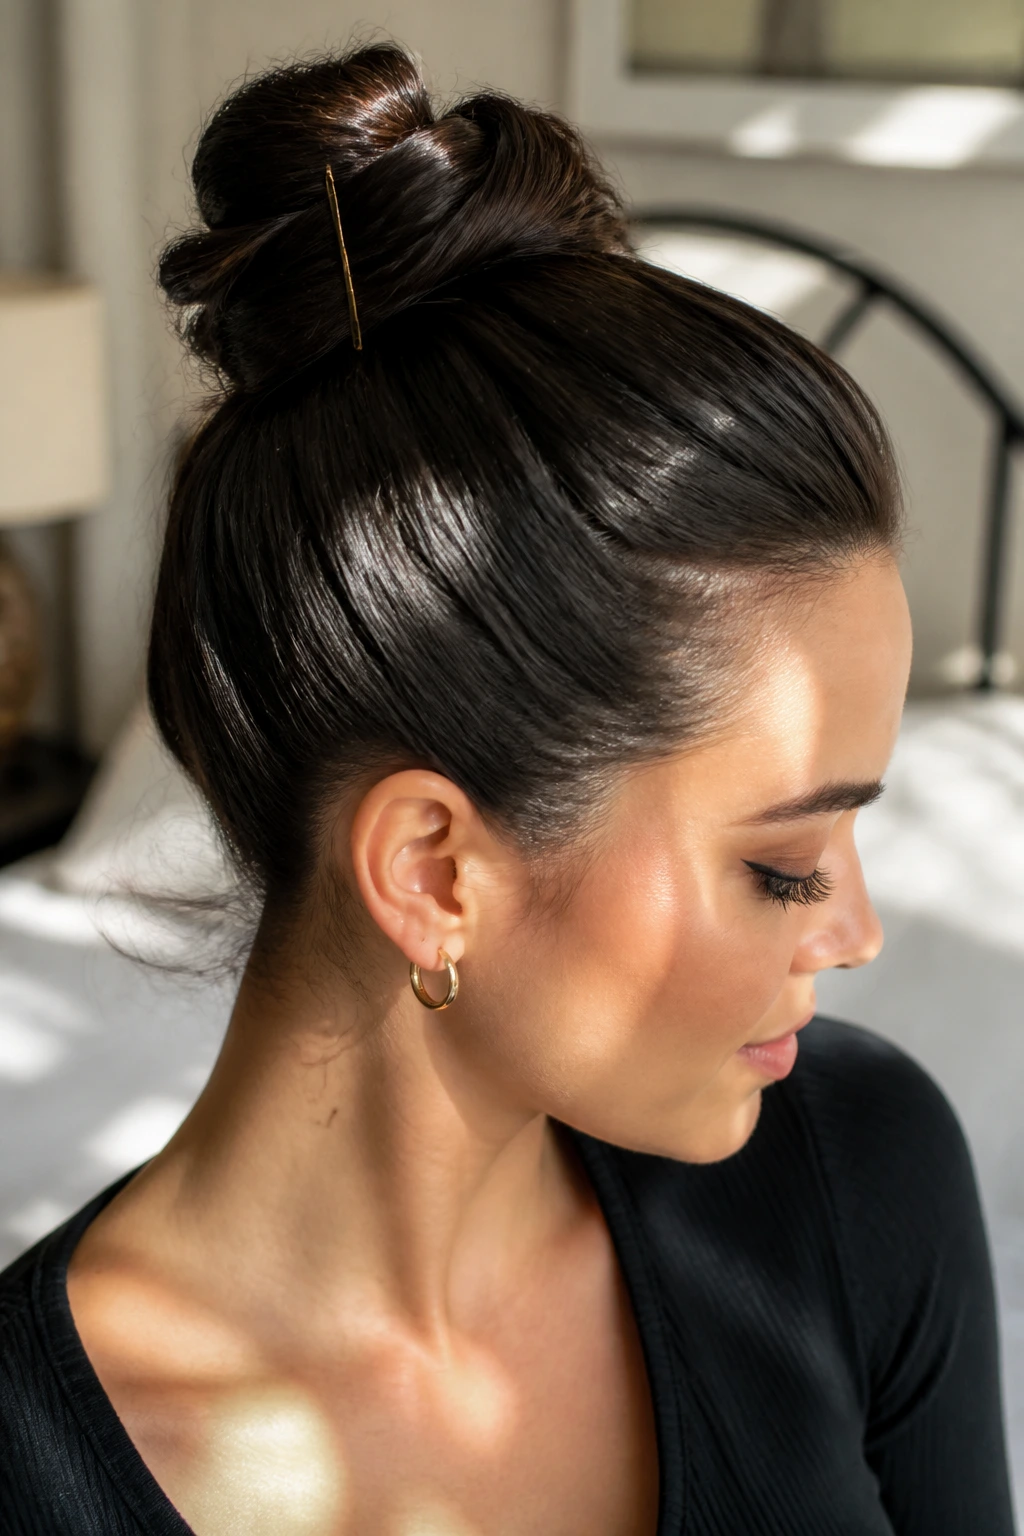
Shorter hair can absolutely make a high bun, but it wants a different method. Pull what you can into a small ponytail, use pins to tuck the shorter layers upward, and build the bun in tiny sections instead of trying to wrap all the hair at once. The finish is sleeker when you stop fighting the length.
This one depends on pins more than people expect. A few discreet bobby pins placed in a cross shape can hold the shorter pieces where an elastic can’t. If the ends poke out, tuck them under the bun and pin again. It’s a little fiddly. Still worth it.
30. Thick-Hair Anchor Bun
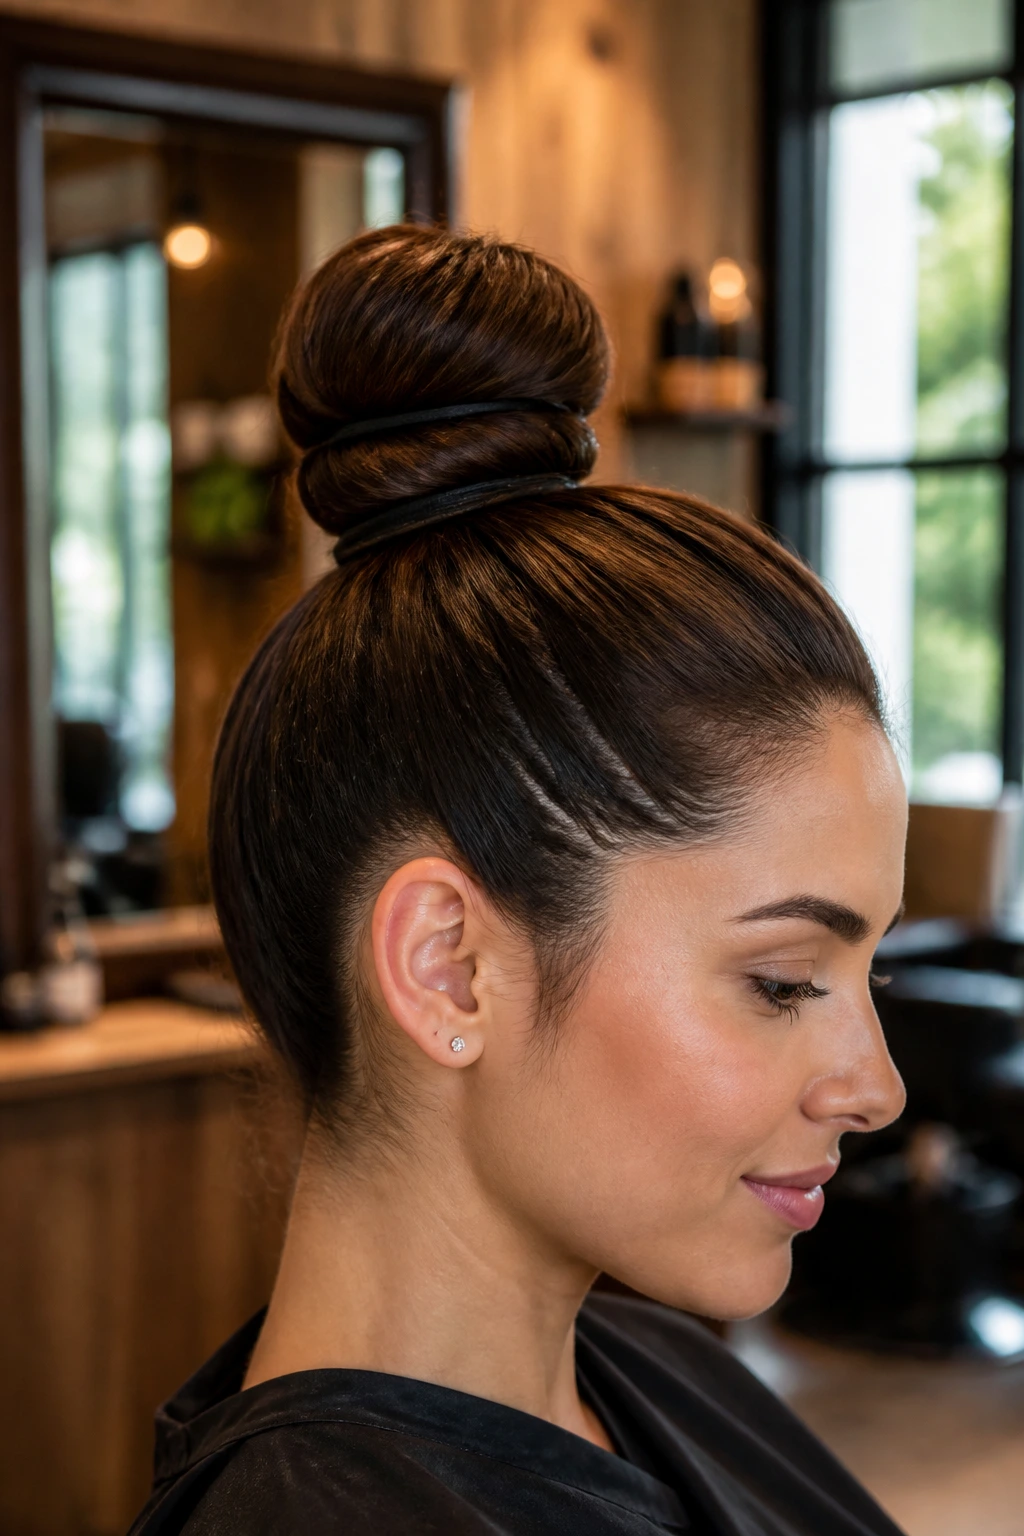
Thick hair needs an anchor before it needs style. That means a firm elastic, maybe a second elastic just below it, and pins placed at the base where the weight actually sits. Once that foundation is stable, the bun can be wrapped in a way that looks sleek instead of mushroomy.
The thing people get wrong is trying to make the bun too small. Thick hair usually looks better when the knot is allowed a little width, because over-compressing it makes the shape fight back by puffing out. Aim for controlled fullness, not a tiny ball that cannot hold its own weight.
31. Fine-Hair Padded Bun
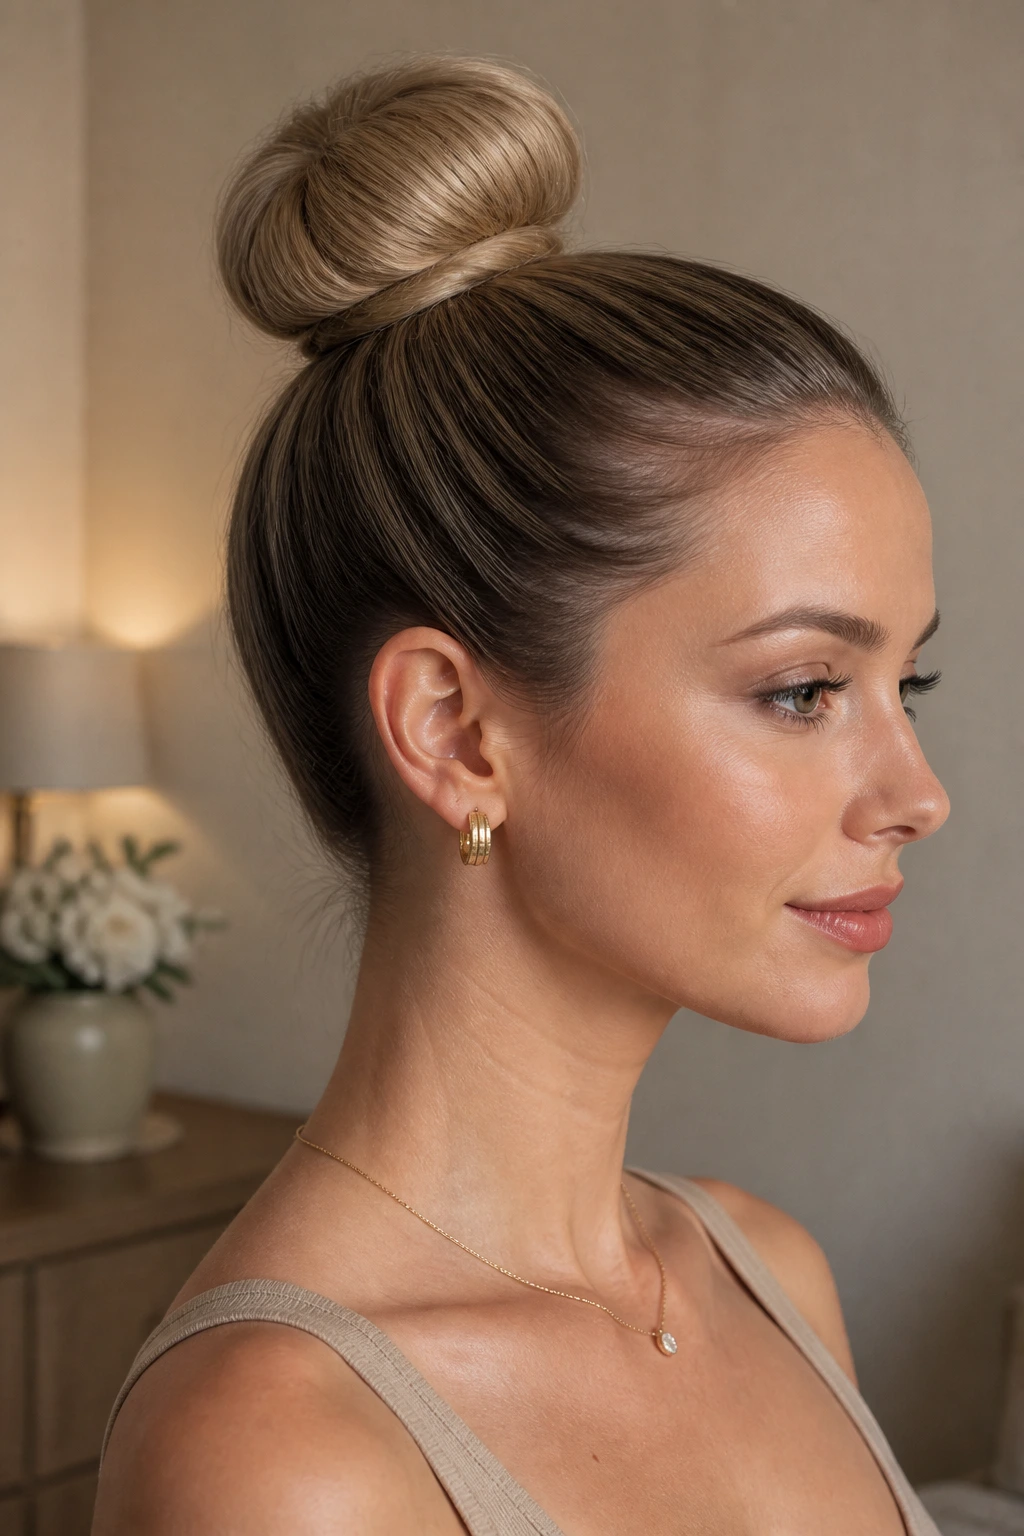
Fine hair benefits from a little structure under the surface. A bun pad, sock, or lightly teased ponytail can make the bun look fuller without making the top look messy. The outside still needs to stay smooth, but the support underneath gives the style enough body to register from the side.
The danger here is adding so much padding that the bun looks fake. Keep the padding close to the base and cover it fully with hair. A soft mist of hairspray at the end helps the shape stay put without making the ends feel brittle.
32. Cornrow-Base Bun
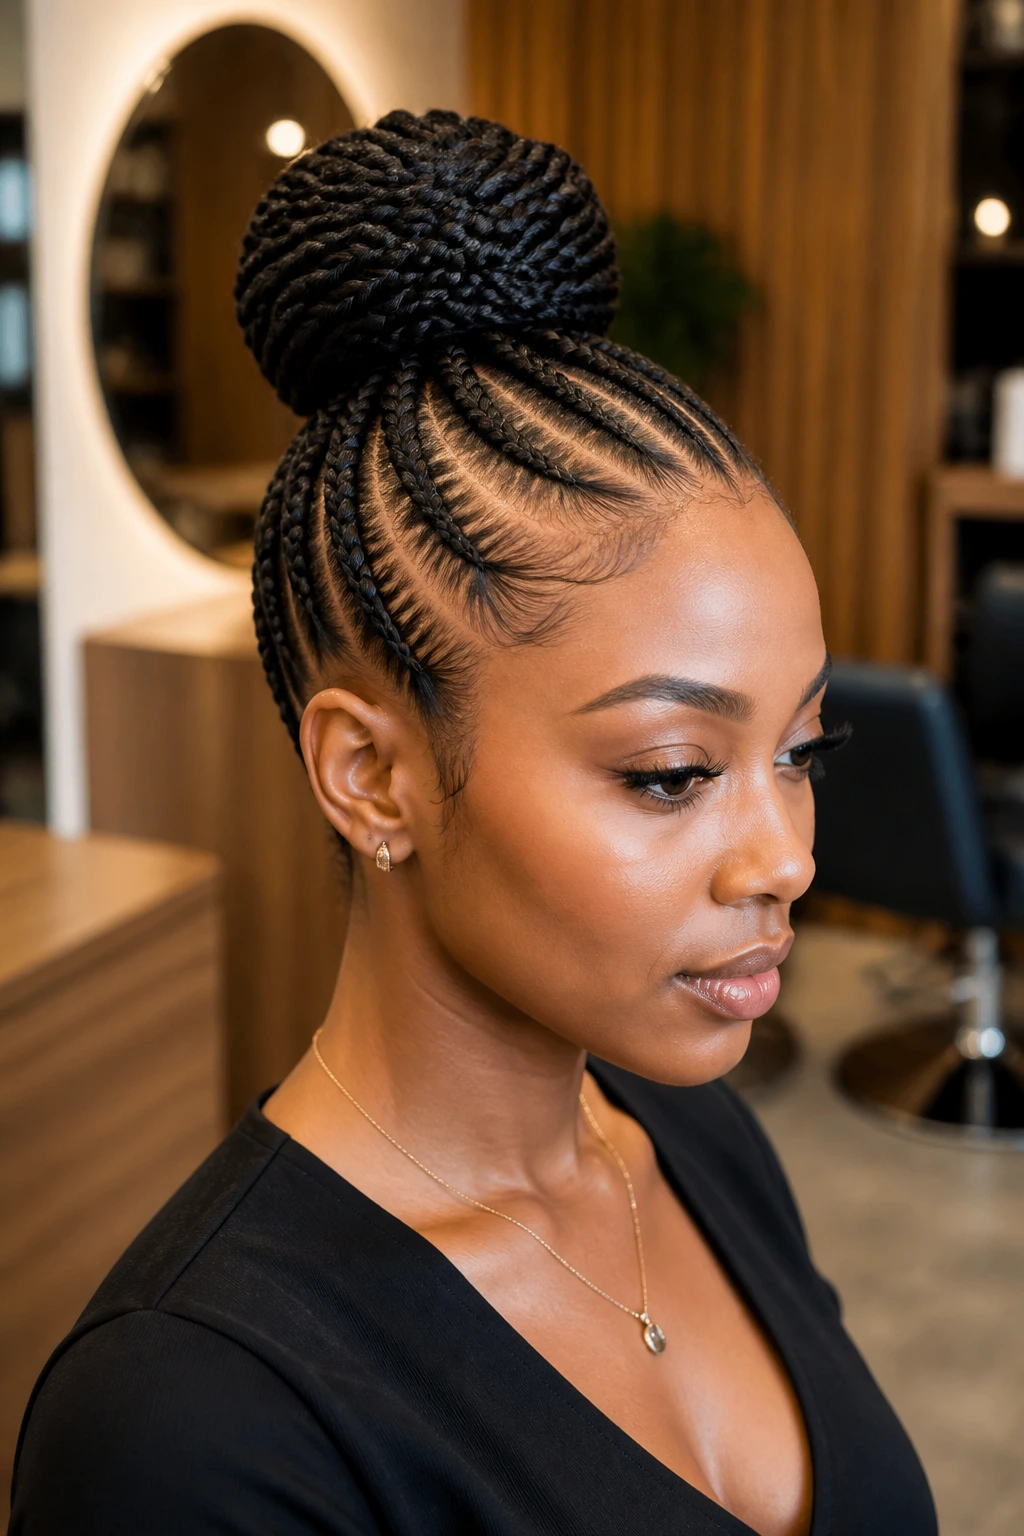
Cornrows feeding into a high bun bring order to the hairline and a very clean sweep up toward the crown. The braids create a visible path, so the bun feels designed from the start instead of assembled at the last minute. It’s a strong look, and it stays neat for a long time.
This style works well when you want maximum control with minimal daily fuss. The cornrows hold the front flat, and the bun can stay compact with far fewer touch-ups. If you want more impact, keep the bun small and let the braid pattern do the talking.
33. Pin-Tucked Minimal Bun
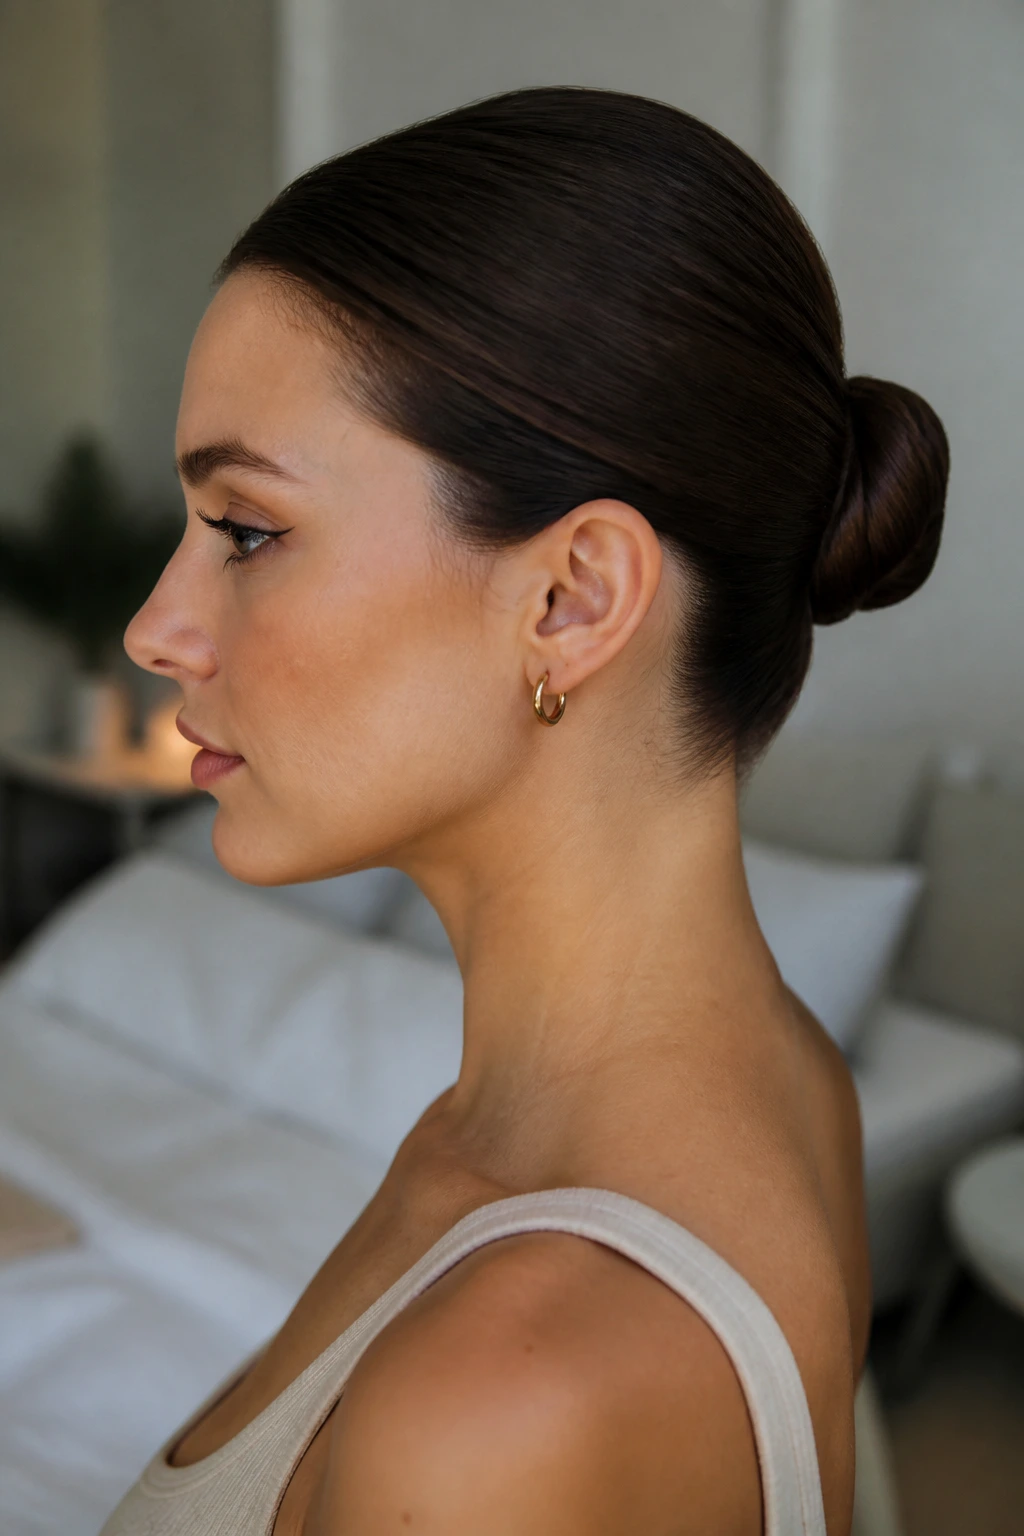
This is the bun for people who hate visible hardware. Use pins only where the structure needs them, tuck the ends under carefully, and keep the surface so smooth that the bun looks like it grew that way. No extra fluff. No obvious wraps. Just a tight, elegant knot.
It pairs well with minimal makeup and simple clothes because it doesn’t ask for attention. The challenge is patience. If you rush the tucking, stray ends show up in bad light later. Take the extra minute. It saves you ten minutes of fixing in the mirror.
34. Braided Crown Bun
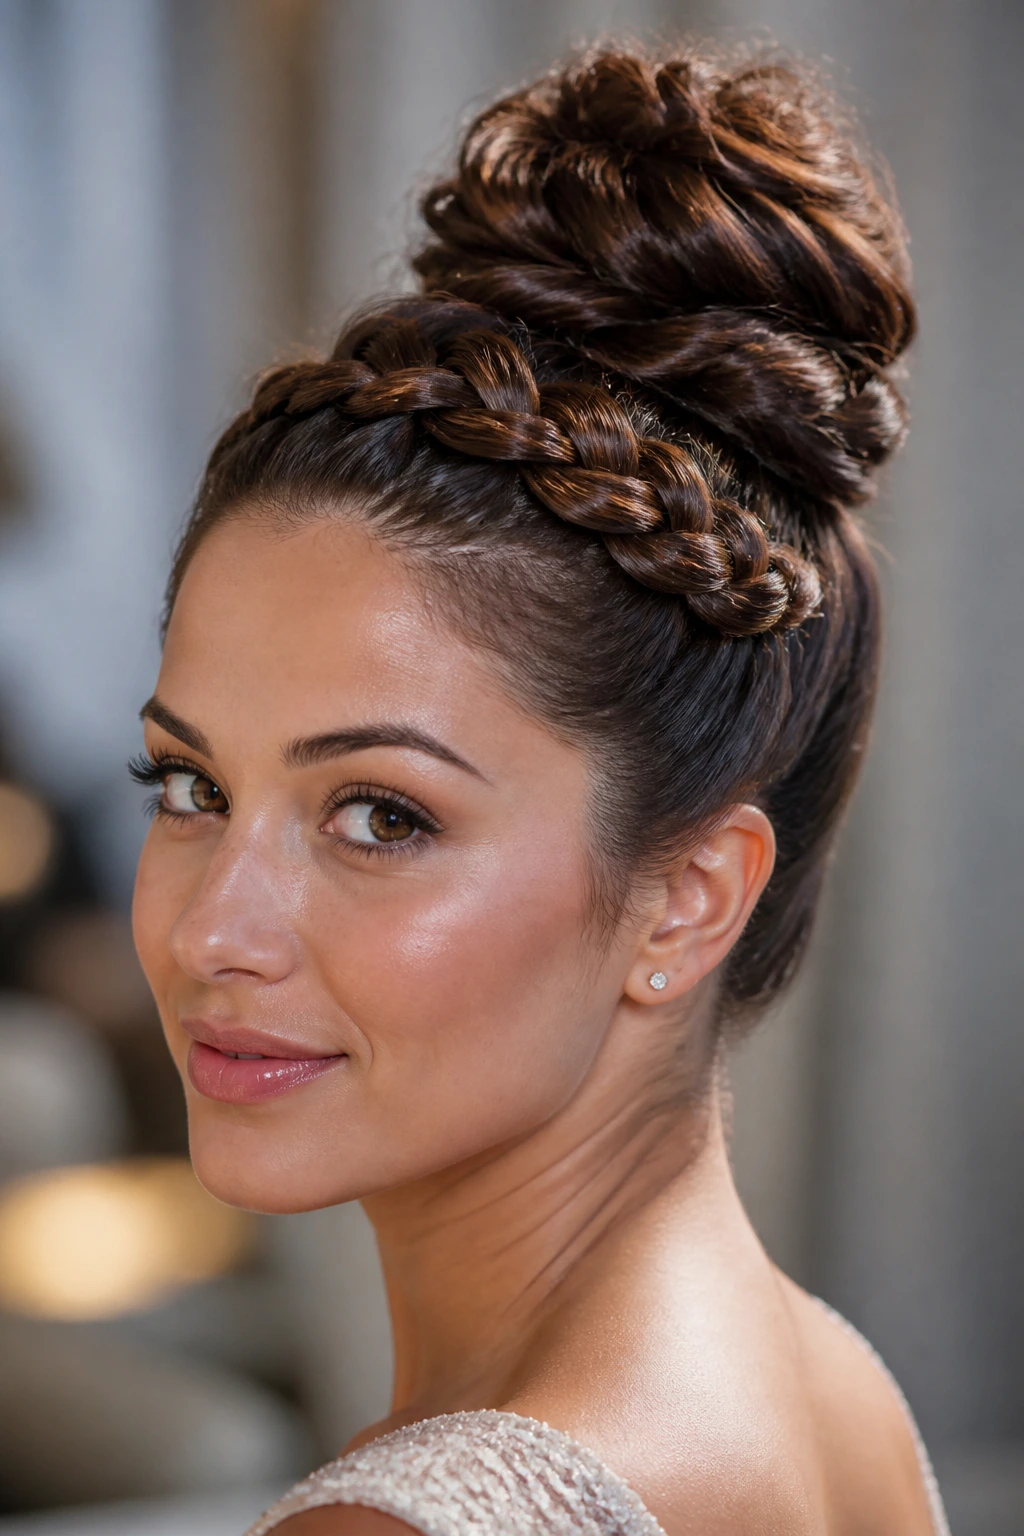
A braided crown leading into a high bun creates a halo effect without sacrificing the sleek top. The braid traces the front hairline, then rises into the bun, which gives the style shape from every angle. It’s formal enough for a ceremony, but it doesn’t need to feel stiff.
This version works especially well when you want the bun to be the endpoint, not the only feature. The crown braid gives the eye a path to follow. Keep the braid tight and the bun compact, or the whole look starts to lean ornate in a way that loses the clean finish.
35. Evening Chignon Bun
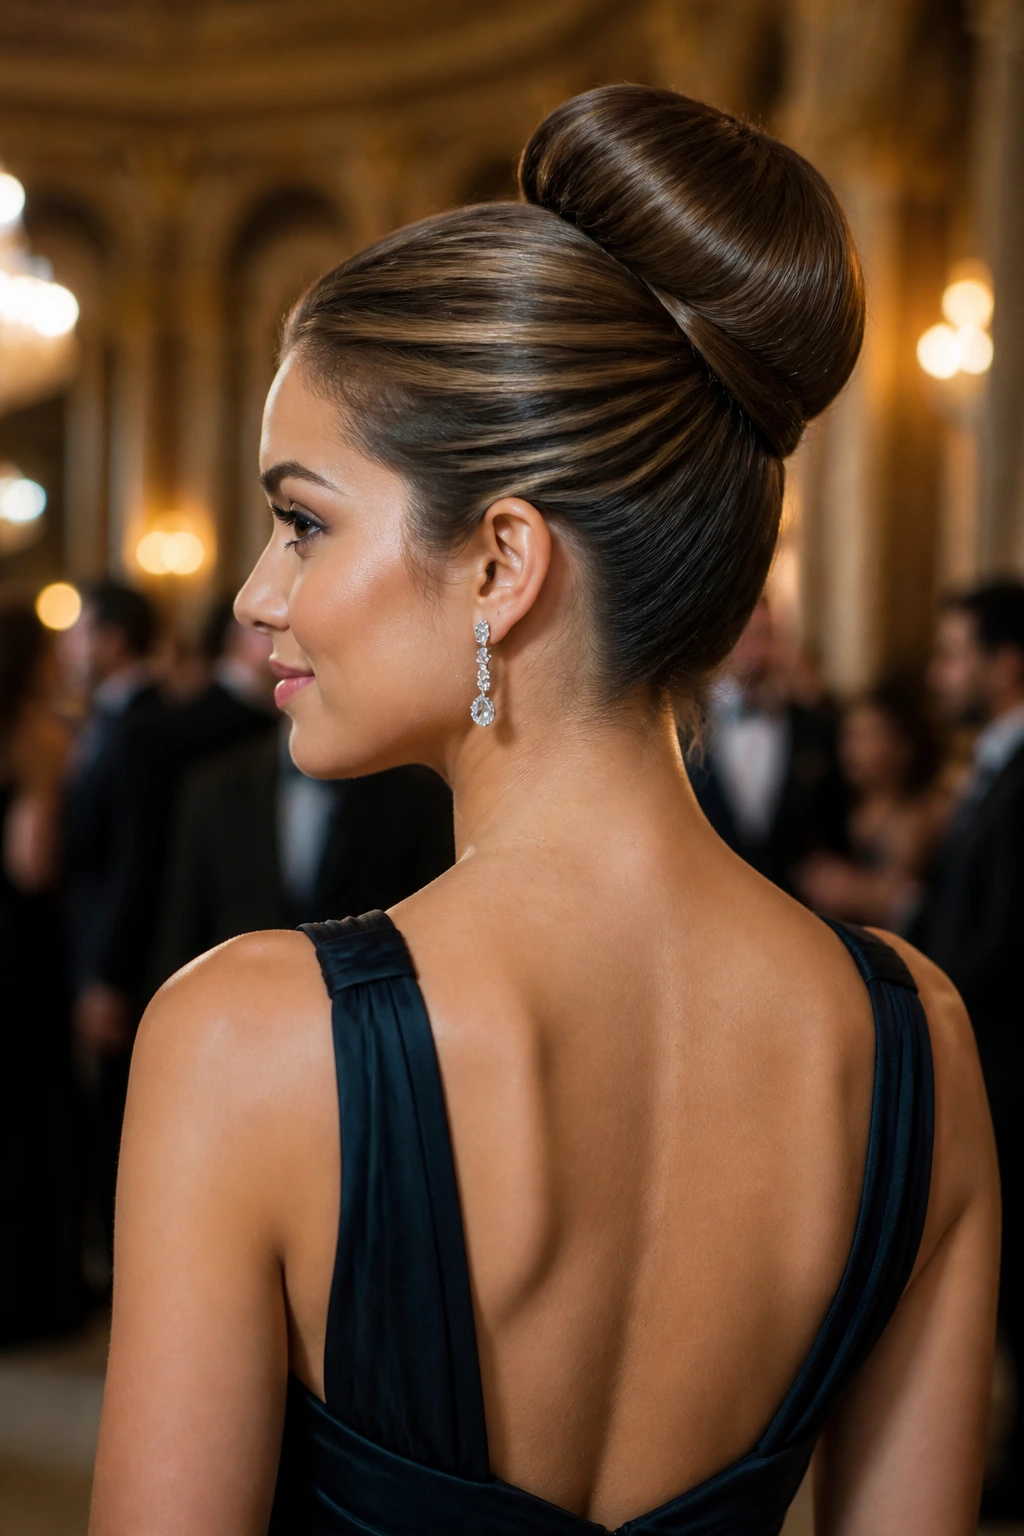
A high chignon is the elegant cousin of the everyday knot. It sits higher than a classic low chignon but stays more elongated and refined than a round ballerina bun. The profile looks deliberate, almost tailored, which is why it works so well with formal dresses and sharp tailoring.
The best version is smooth on the outside, softly rolled at the center, and pinned so the base disappears into the hair. If you want a finish that feels expensive without being flashy, this is the one. Keep the line clean, keep the pins hidden, and let the silhouette do the work.
Why a Sleek High Bun Looks Better When the Base Is Flat
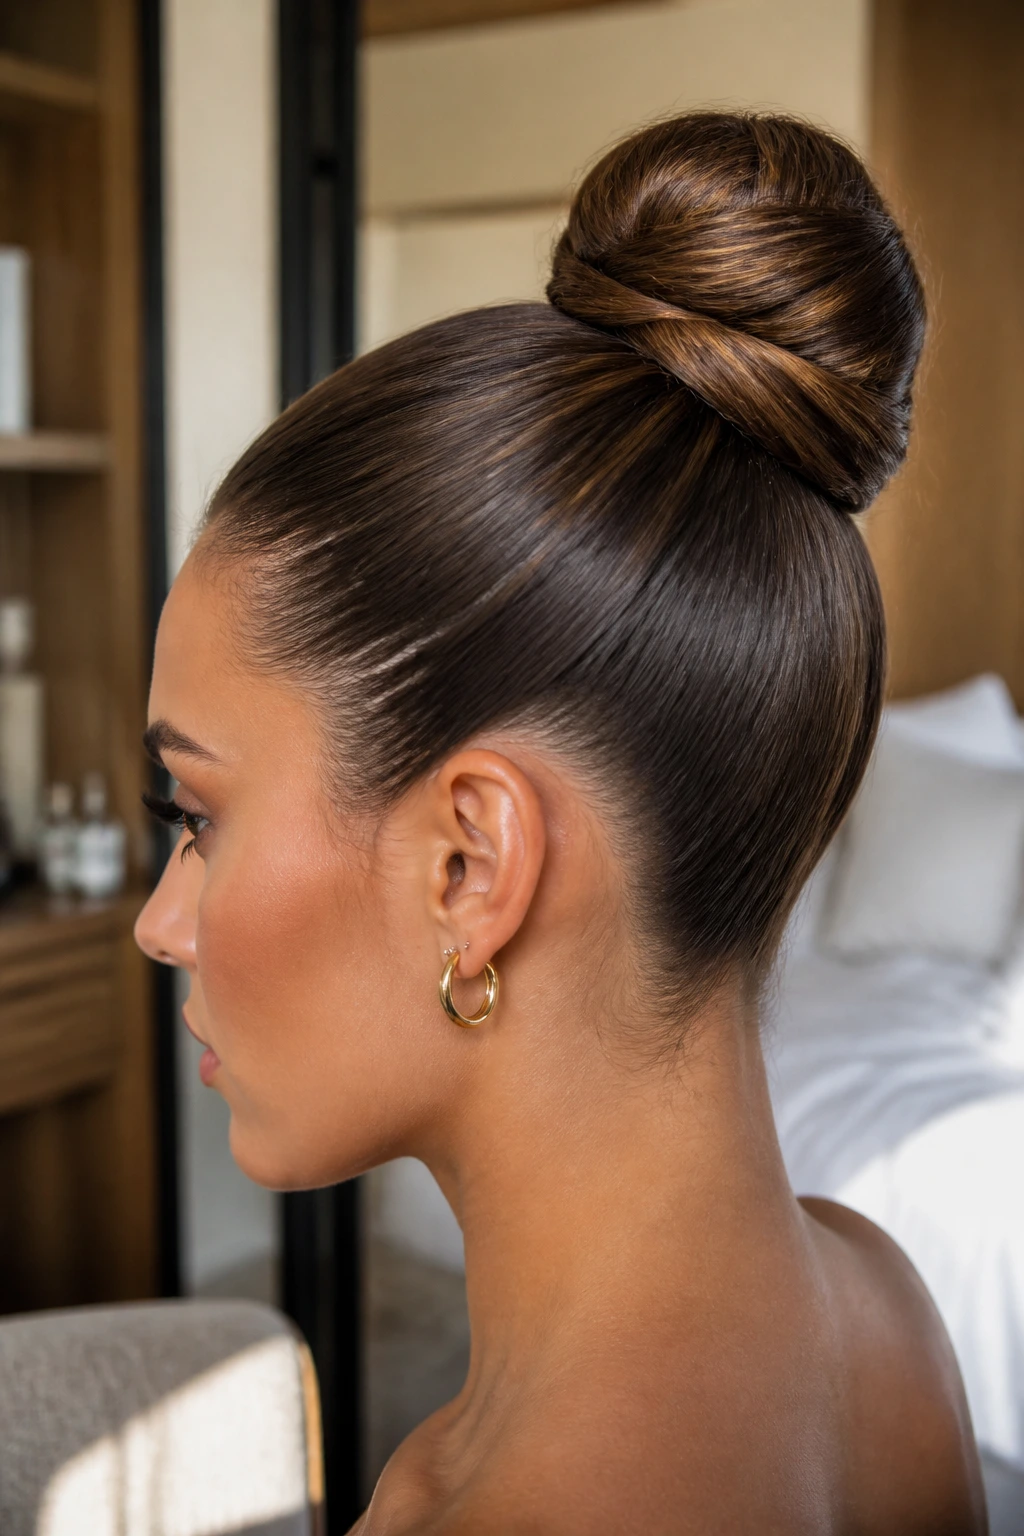
A sleek high bun lives or dies at the scalp. The bun itself can be tiny, twisted, braided, padded, or wrapped, but if the hair underneath is puffed out near the temples, the whole thing reads messy. A flat base gives the eye a clean path upward. That’s the whole game.
The other piece is tension. Too little, and the bun slips. Too much, and the hairline starts looking pulled and angry. You want the hair secure enough to hold, but not yanked so hard that the face looks tight. A firm brush, a smooth part, and pins placed near the base usually do more than a mountain of product ever will.
I also think people underestimate the back view. The front might look neat in the mirror, but the bun has to survive being seen from the side, from above, from the seat behind you in a car. That is where the clean base pays off. The shape stays readable. The style does not collapse into one fuzzy lump.
The Brushes, Elastics, and Pins Worth Keeping Nearby
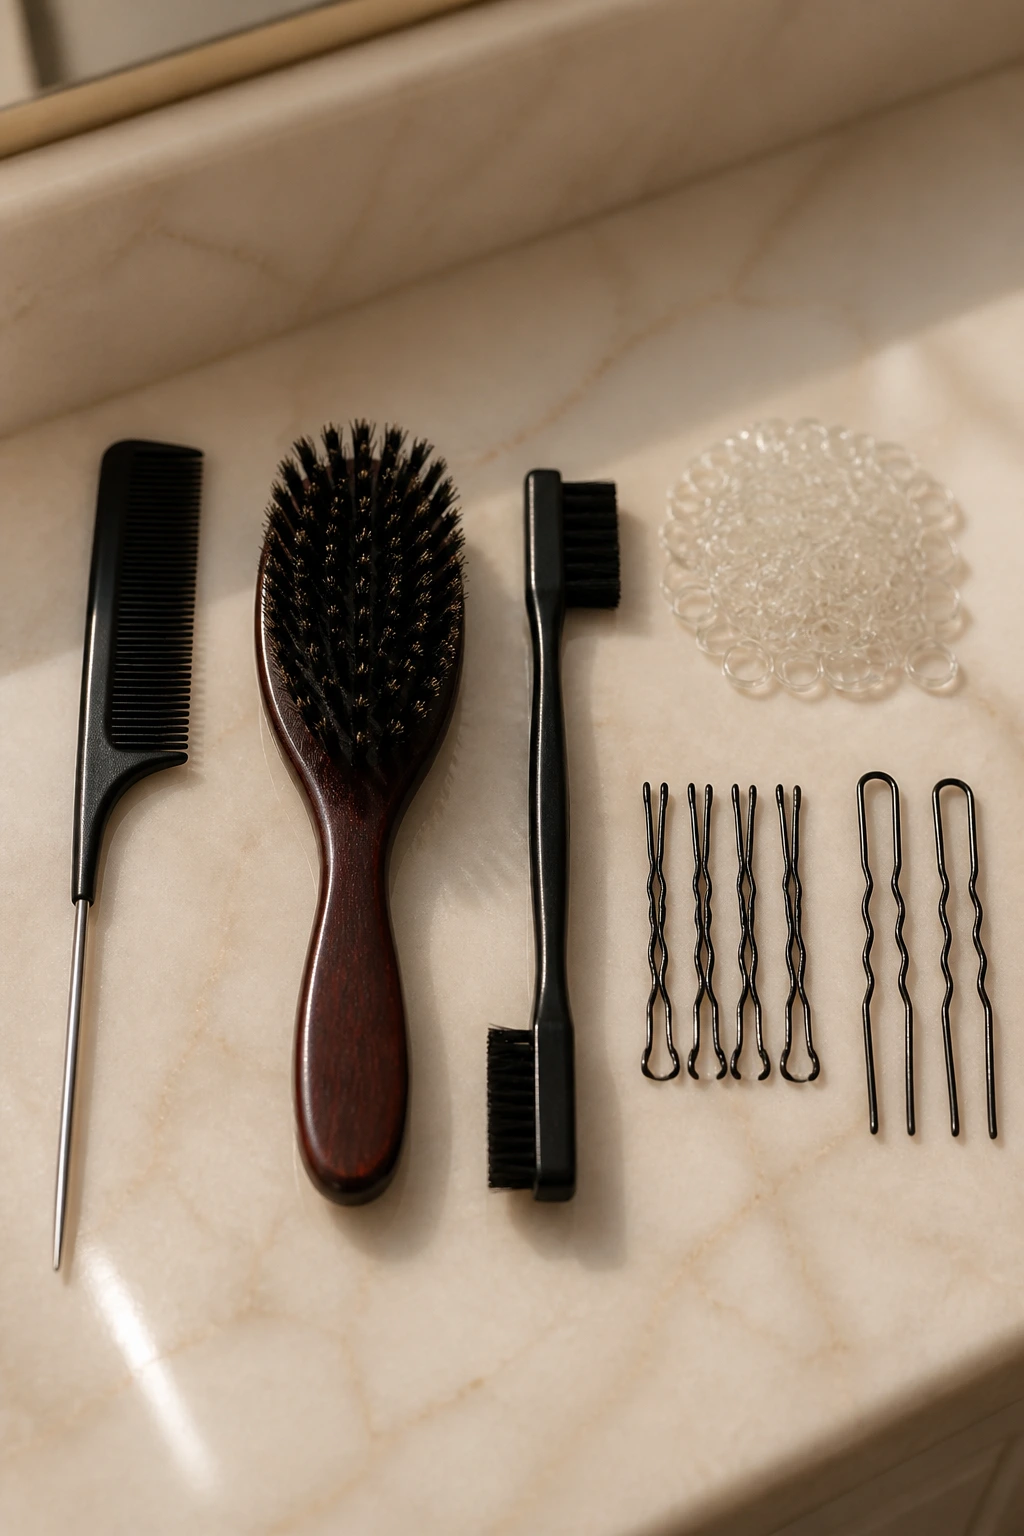
Some tools matter more than the rest. A slick bun is one of those styles where the right brush and the right elastic can save you ten minutes of frustration.
- Rat-tail comb: Best for a straight part and for separating the sections cleanly before the ponytail goes up.
- Boar bristle brush: Good for pressing the top layer flat without creating too much frizz.
- Edge brush or small toothbrush-style brush: Handy for the hairline and the tiny pieces near the ears.
- Strong elastic bands: Clear or hair-colored elastics hold the ponytail base better than loose fabric ties.
- Bobby pins and U-pins: Use bobby pins for smaller anchors, U-pins for larger buns that need support without bulk.
- Hair net: Worth owning if you like the cleanest possible outline or wear buns for long stretches.
- Wax stick or pomade: Useful for taming the crown and temples without drenching the hair in liquid product.
- Light hairspray: Good for setting the finish after the shape is done, not before.
- Silk scarf: Great for smoothing the style while the product sets and for protecting it overnight.
How to Match the Bun to Your Hair Type and Face Shape
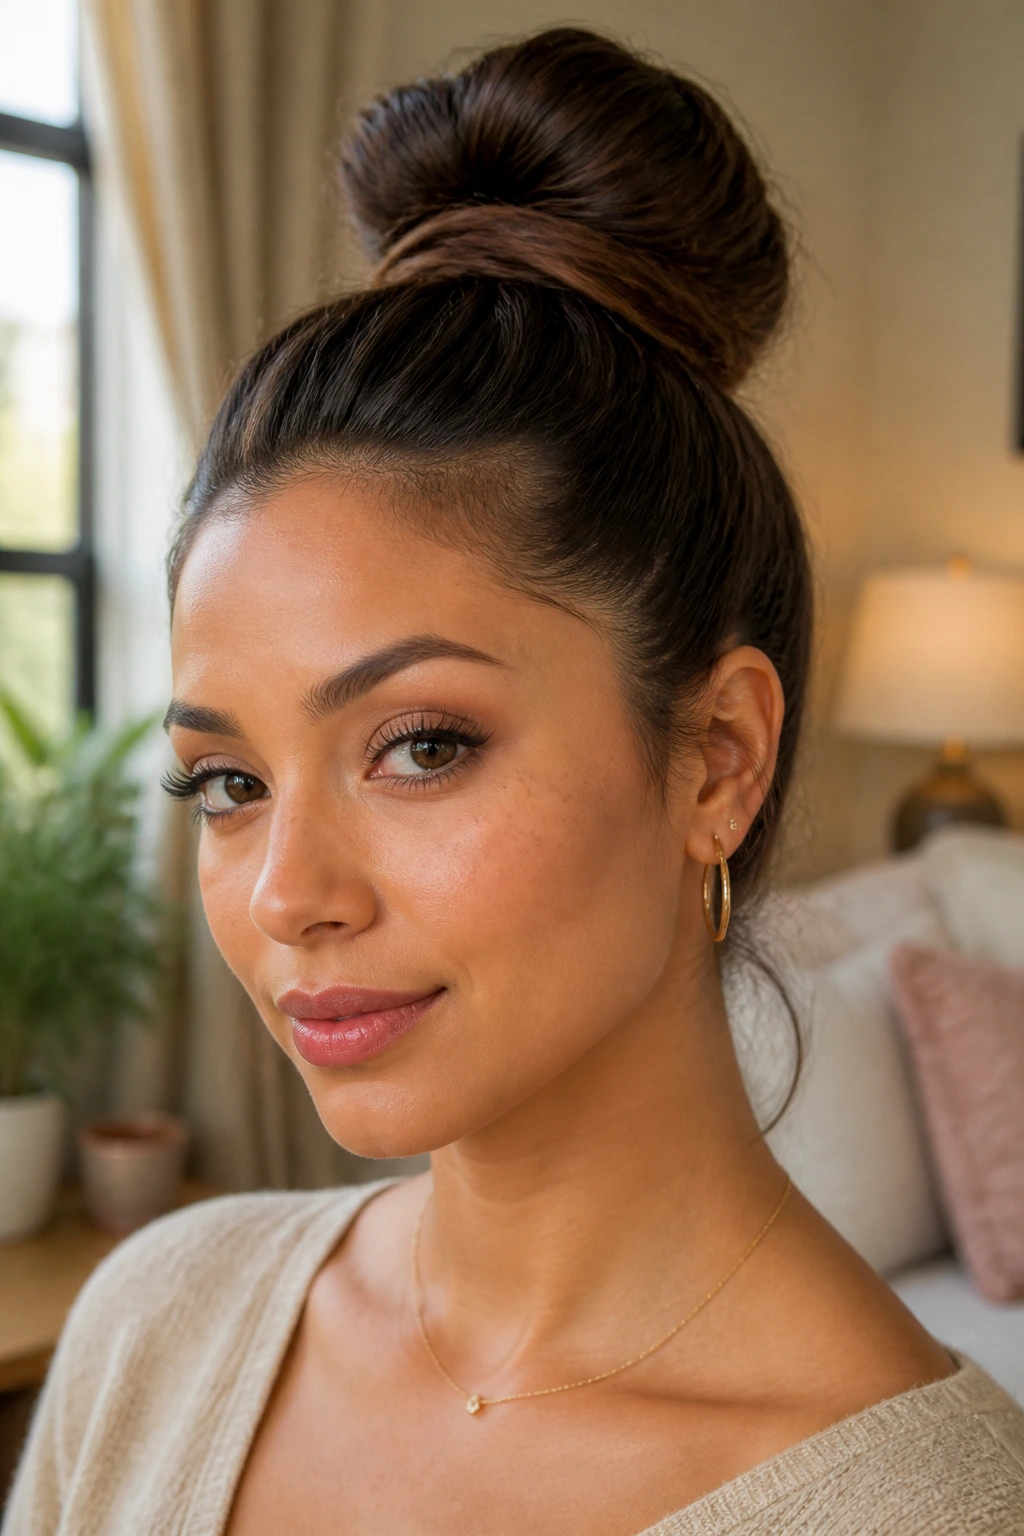
The same bun does not behave the same way on every head of hair, and that’s fine. The trick is to use the shape that helps your own hair work instead of fighting it.
Placement: If your face is long, keep the bun high but not too tall, so the shape adds lift without stretching the face further. If your face is round, a slightly higher crown and a tighter bun can add vertical line and make the profile feel a little sharper.
Texture: Fine hair likes padding, hair nets, and smaller coils. Thick hair likes stronger anchors and a bun that is allowed to stay a touch wider. Coily and curly hair usually look best when the roots are smoothed first and the bun is left with some natural body.
Outfit Pairing: Sharp collars, strapless tops, and structured blazers all work well with a clean high bun because they leave the neck open. Soft knits or sporty clothes can take a more minimal knot, while evening wear often benefits from a more sculpted or braided version.
Occasion: If you need the style to last all day, choose a version with a braid, net, or double elastic. If you only need a polished hour or two, the minimal pin-tucked knot is usually enough.
Small Polishing Moves That Change the Finish
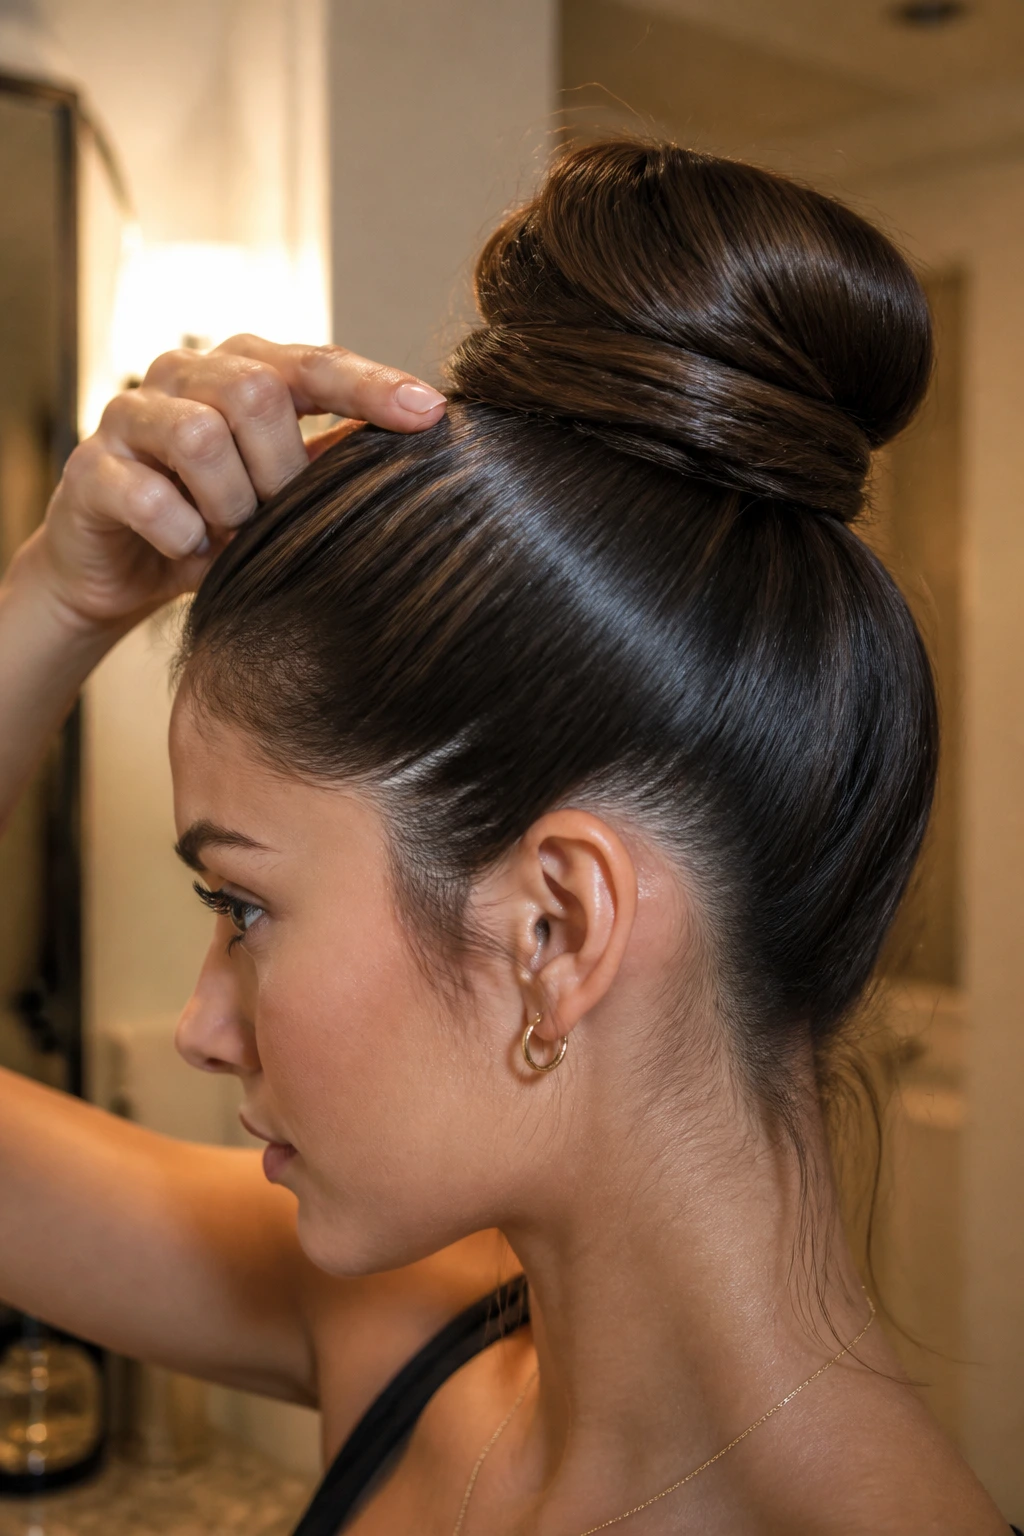
A sleek bun is a lot like a tailored jacket: the seams matter. One tiny adjustment can make it look expensive, and one sloppy move can make it look like you were late.
Smoothing: Brush the hair upward in sections instead of trying to yank everything into the ponytail at once. The surface stays flatter, and you do not get that weird bump near the crown that shows up in side profile shots.
Lift: If the bun feels too low after it’s pinned, slide the elastic base upward a half-inch before you twist. Do not rebuild the whole style unless you need to. A small height adjustment often fixes the silhouette.
Shine: Put gloss or serum only on the top layer. The ends and the bun itself can look a little more matte; that keeps the hair from turning into one reflective blob under bright light.
Detail: A neat hairline matters more than decorative pin patterns. A clean edge reads as polish. Visible crisscross pins usually just look busy unless they’re part of the design on purpose.
Common Mistakes That Make the Bun Sag or Puff Up
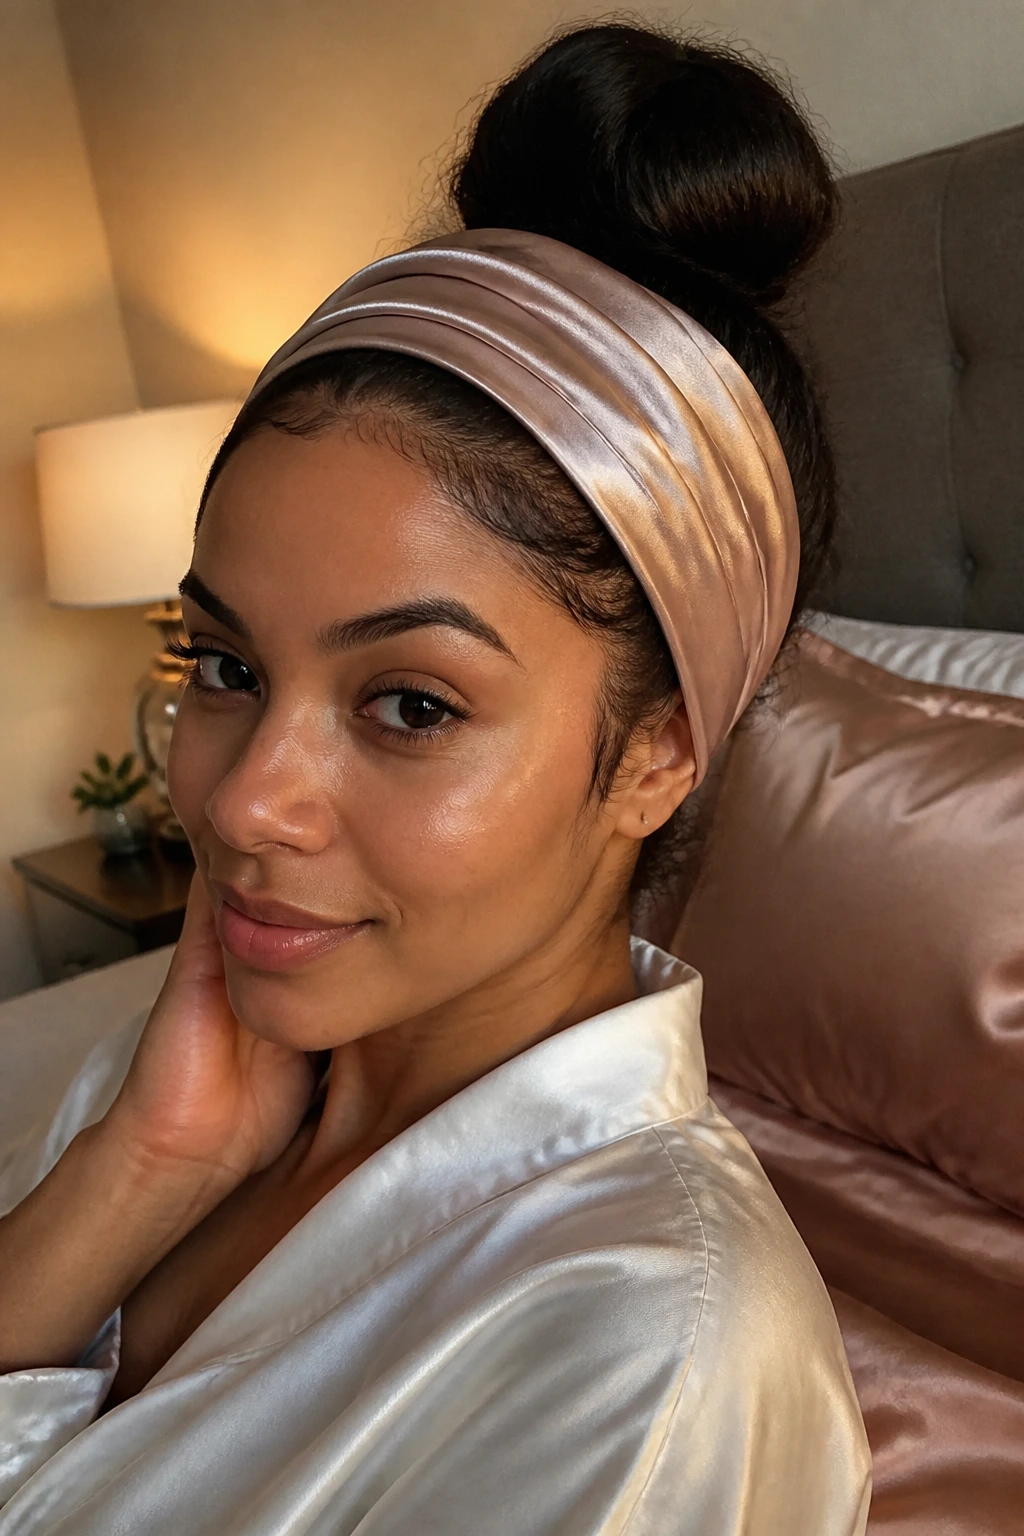
The first mistake is building the bun on hair that is too soft and slippery. Freshly washed, very clean hair can look nice, but it often slides around more than day-old hair. If your strands are like glass, use a little dry shampoo or texturizing spray at the roots before you start.
The second mistake is placing the ponytail too low and then trying to “fix” it by pulling the bun upward with pins. That usually creates a lopsided knot with sore scalp tension. Start at the crown, or close to it, and the bun will sit where it belongs.
Another common problem is overloading the hair with gel and then brushing it in unevenly. The result is shiny patches near the part and dull, sticky areas at the sides. Use less product than you think, spread it in thin layers, and brush it through before adding more.
And yes, too few pins is its own disaster. If the bun shifts when you turn your head, it needs support at the base, not more hairspray sprayed from a distance. Pins placed in opposing directions hold better than a single row shoved into one side.
Variations and Adaptations to Try
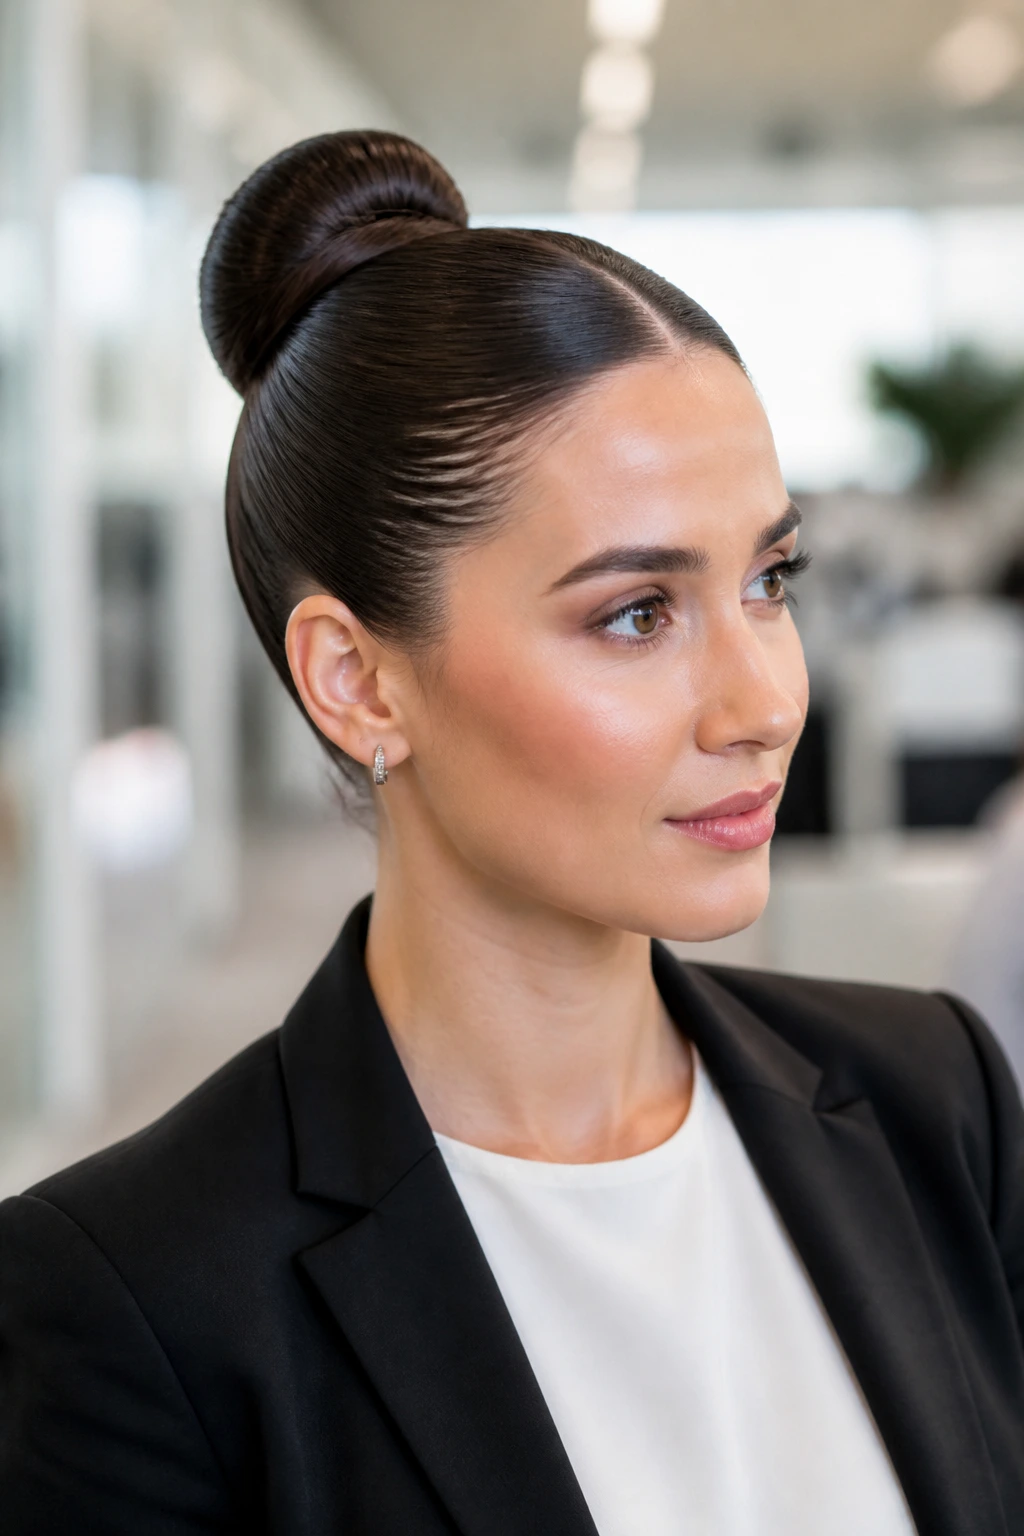
The Glossy Office Bun: Keep the part straight, the sides flat, and the bun small. Swap in a touch more shine spray and skip decorative pins. This version reads neat under a blazer and doesn’t fight a busy schedule.
The Protective Braided Bun: Start with braids, twists, cornrows, or locs, then build the bun from the gathered length. It reduces daily handling and keeps the style clean for longer stretches. Great when you want the polished look without redoing your hair every morning.
The Soft Glam Bun: Leave a little bend near the front, keep the bun compact, and add earrings or a scarf. This is the version that feels dressy without tipping into strict territory. A tiny curve at the front changes the whole mood.
The Gym-to-Dinner Bun: Double elastic, strong pins, no loose ends. Keep it tight enough to survive movement, then refresh the hairline with a damp brush and a touch of gel before heading out. Practical, but not dull.
The Short-Hair Faux Bun: Use a bun maker or small padding and tuck the shorter layers underneath. The style looks fuller than the length would suggest, which is useful when the hair is between lengths and refuses to cooperate.
Overnight Care, Refreshing, and Long-Wear Maintenance
A sleek high bun can usually survive a day without much trouble, but overnight care changes everything. If you want to keep the style, wrap the hairline with a silk scarf or sleep on a satin pillowcase so the edges do not rough up against cotton. If the bun feels too tight to sleep in comfortably, remove it and rebuild it the next day. A sore scalp is not a sign of good styling.
For next-day refresh, mist the hairline lightly with water, smooth with a little gel or cream on the brush, and re-pin any sections that have shifted. Do not soak the whole bun. That only makes the surface frizz once it dries. If the style started with braids, locs, or a net, it will usually hold shape longer than a simple wrapped knot.
If you sweat a lot or live in humidity, plan on rebuilding the bun rather than endlessly patching it. Fresh pins and a clean part do more than endless finger-fixing. Sometimes a five-minute redo beats a thirty-minute battle.
Frequently Asked Questions
How do I keep a sleek high bun from looking greasy?
Use product on the surface, not the whole head. A thin layer of gel or wax at the hairline and part is enough for most styles; if the bun itself gets coated, it starts to look heavy instead of polished.
Can I do a sleek high bun on natural curls or coils without straightening my hair?
Yes. Smooth the roots with gel or cream, then let the bun keep some of the natural texture. That usually looks better than forcing every strand flat, especially if your hair is dense or shrinkage-prone.
What if my bun keeps slipping down?
The base is usually too loose or the elastic is too soft. Use a stronger band, place the ponytail higher, and add crosswise pins at the base of the bun so the weight has something to catch on.
Is a high bun bad for fine hair?
Not if you build support under it. A small bun pad, a second elastic, or a few hidden pins can give fine hair enough structure to hold a clean shape without teasing the crown into a cloud.
How tight should a sleek high bun be?
Tight enough to stay put, but not so tight that the hairline feels pulled by the end of the day. If you see little white tension marks at the scalp or get a headache, loosen it and rebuild.
Can I wear one for two days in a row?
Usually, yes, if the bun is pinned well and the hairline is protected overnight. The shape may need a small reset the next morning, especially around the temples and nape, but you do not have to start from scratch every time.
What’s the easiest version for beginners?
A center-part high bun or a simple topknot with clean edges. Both rely on the same basic steps: smooth the root, secure a high ponytail, wrap the length, and pin the base. Fancy versions can wait.
Do I need hair net or bun donut?
No, but both help when you want a cleaner outline. A hair net is better for keeping the bun tight and smooth; a donut is better if you want fullness and a more even round shape.
A Clean Finish
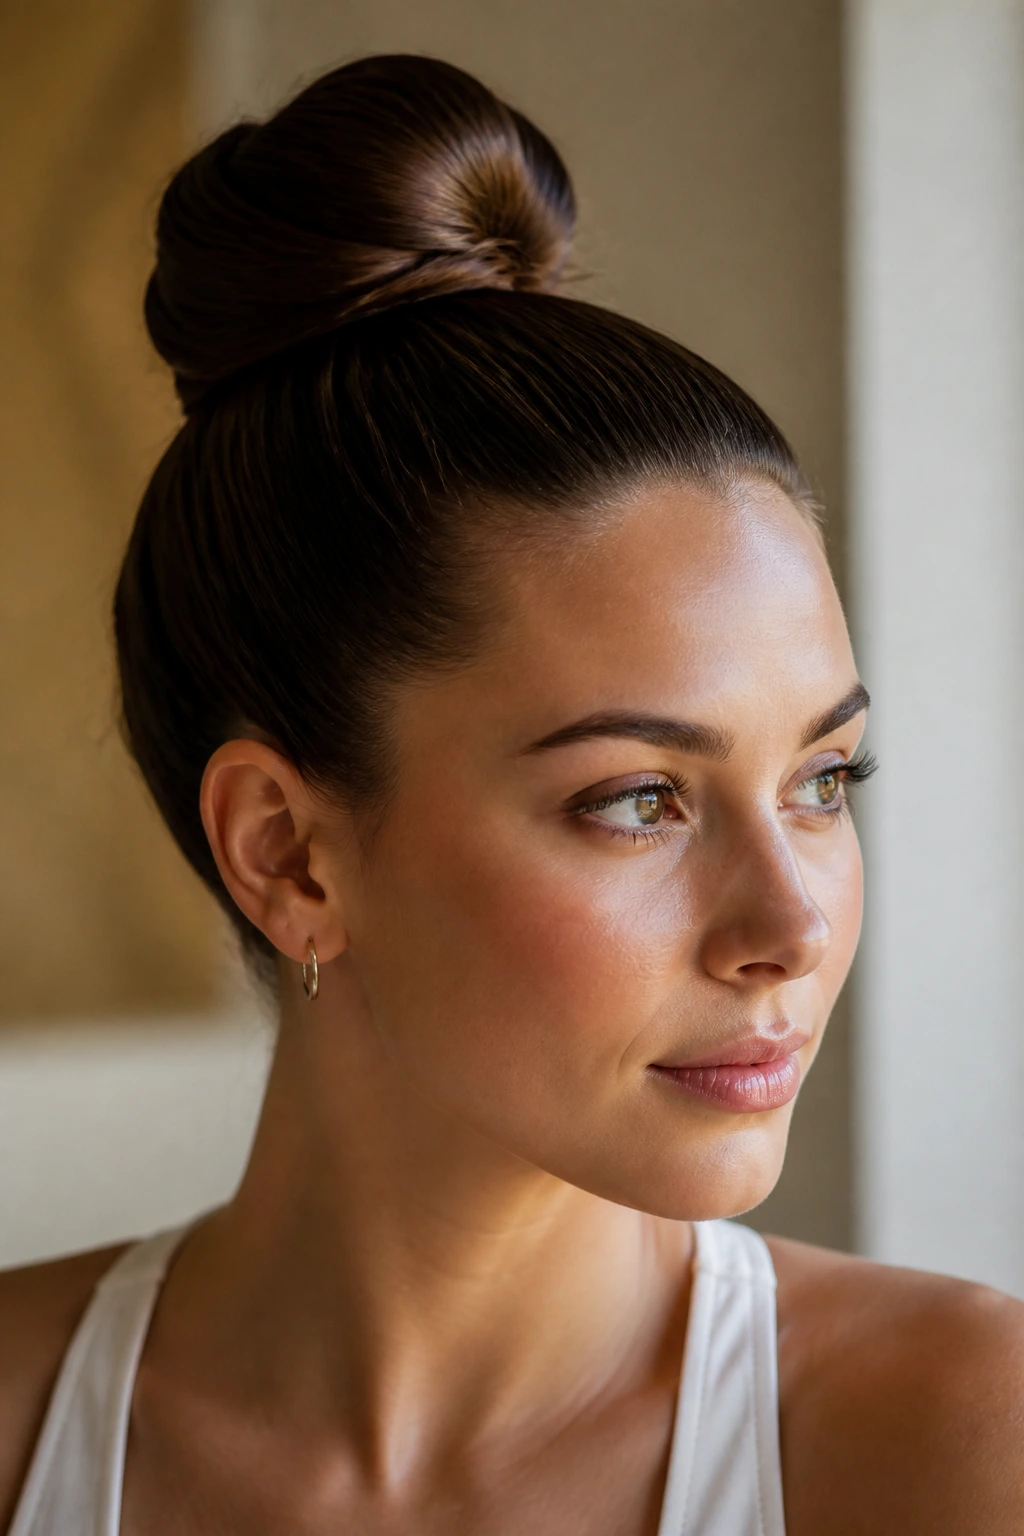
A sleek high bun works because it respects the head it sits on. It does not need to be huge. It does not need to be packed with accessories. The good versions are built with a steady hand, a clean part, and enough restraint to stop before the style turns fussy.
Pick the shape that fits your hair texture, the time you have, and the mood you want to wear. Some days that means a glassy center-part knot. Other days it means a braided base, a scarf wrap, or a tiny pin-tucked bun that disappears into the outfit and leaves the face to do the talking. That flexibility is the whole point.
