



Bridal hair can go sideways in two very specific ways: it ends up stiff enough to crack, or soft enough to fall apart before the cake is cut. Messy buns for brides live in the narrow, useful middle. They give you shape. They give you movement. And when they’re built well, they sit under a veil, clear the neckline of a dress, and still look like hair instead of a helmet.
The difference between a good bridal messy bun and a rushed one is usually hiding in the setup. Day-old hair grips better than freshly washed silk. Curls need time to cool before you touch them. Pins need to go into the base, not just the fluff on top. Those details sound small until you watch a bun collapse under a heavy comb or sag after an hour in humid air.
I love this category because it’s not trying to be one thing. A messy bun can be low and romantic, high and airy, braided and tucked, or soft enough to read almost like a chignon. That flexibility matters on a wedding day, when the hair has to cooperate with the dress, the veil, the earrings, the weather, and the fact that someone will hug you from the side every six minutes. The styles below cover that range without turning into a pile of vague inspiration photos.
Why This Collection Feels More Useful Than a Wall of Bridal Hair Photos
-
Different Necklines, Different Buns: A low knot clears a backless gown, while a higher bun keeps a strapless dress from feeling visually heavy at the shoulders.
-
Veil-Friendly by Design: These styles leave a clean anchor point for a comb, which means the veil can sit above the bun instead of fighting it.
-
Built for Real Hair Textures: Fine, thick, curly, and medium-length hair all get a version that doesn’t depend on fake fullness or endless backcombing.
-
Easy to Personalize: A few pearl pins, a braided wrap, or two curled face pieces can change the mood without rebuilding the whole style.
-
More Stable Than They Look: A good messy bun isn’t random; it has a hidden base, a pin map, and enough structure to survive a long reception.
How to Choose the Right Messy Bun for Your Dress, Veil, and Hair Texture
A bridal bun should start with the dress, not the other way around. If the gown has a detailed back, a heavy collar, or a row of buttons you actually want people to see, a low bun usually wins. It leaves the fabric visible and keeps the hair from competing with the dress. If the neckline is open and simple, a mid or high bun can give the whole look a little lift.
Hair texture matters just as much. Fine hair tends to slip, so it usually needs more rough texture at the roots and a little hidden padding. Thick hair can support a bigger, looser shape, but it also gets heavy fast if the pins are all doing the same job. Curly hair has its own rule: don’t fight the curl pattern unless the entire wedding look is leaning sleek.
Veil Weight Changes Everything
A cathedral veil needs a more deliberate anchor than a short birdcage veil. The comb should sit above the bun’s seam, not inside the softest part of the knot. If the veil is heavy, ask for a wider base or a tighter hidden braid. That one decision keeps the hair from sagging at the end of portraits.
Decide How Much Movement You Want
Some brides want a bun that barely moves. Others want soft edges, a few released pieces, and enough looseness that the style feels alive in photos. Both are valid. The trick is knowing which version belongs to the dress and which one belongs to your personality.
1. The Soft Low Knot With Face-Framing Veil Pieces
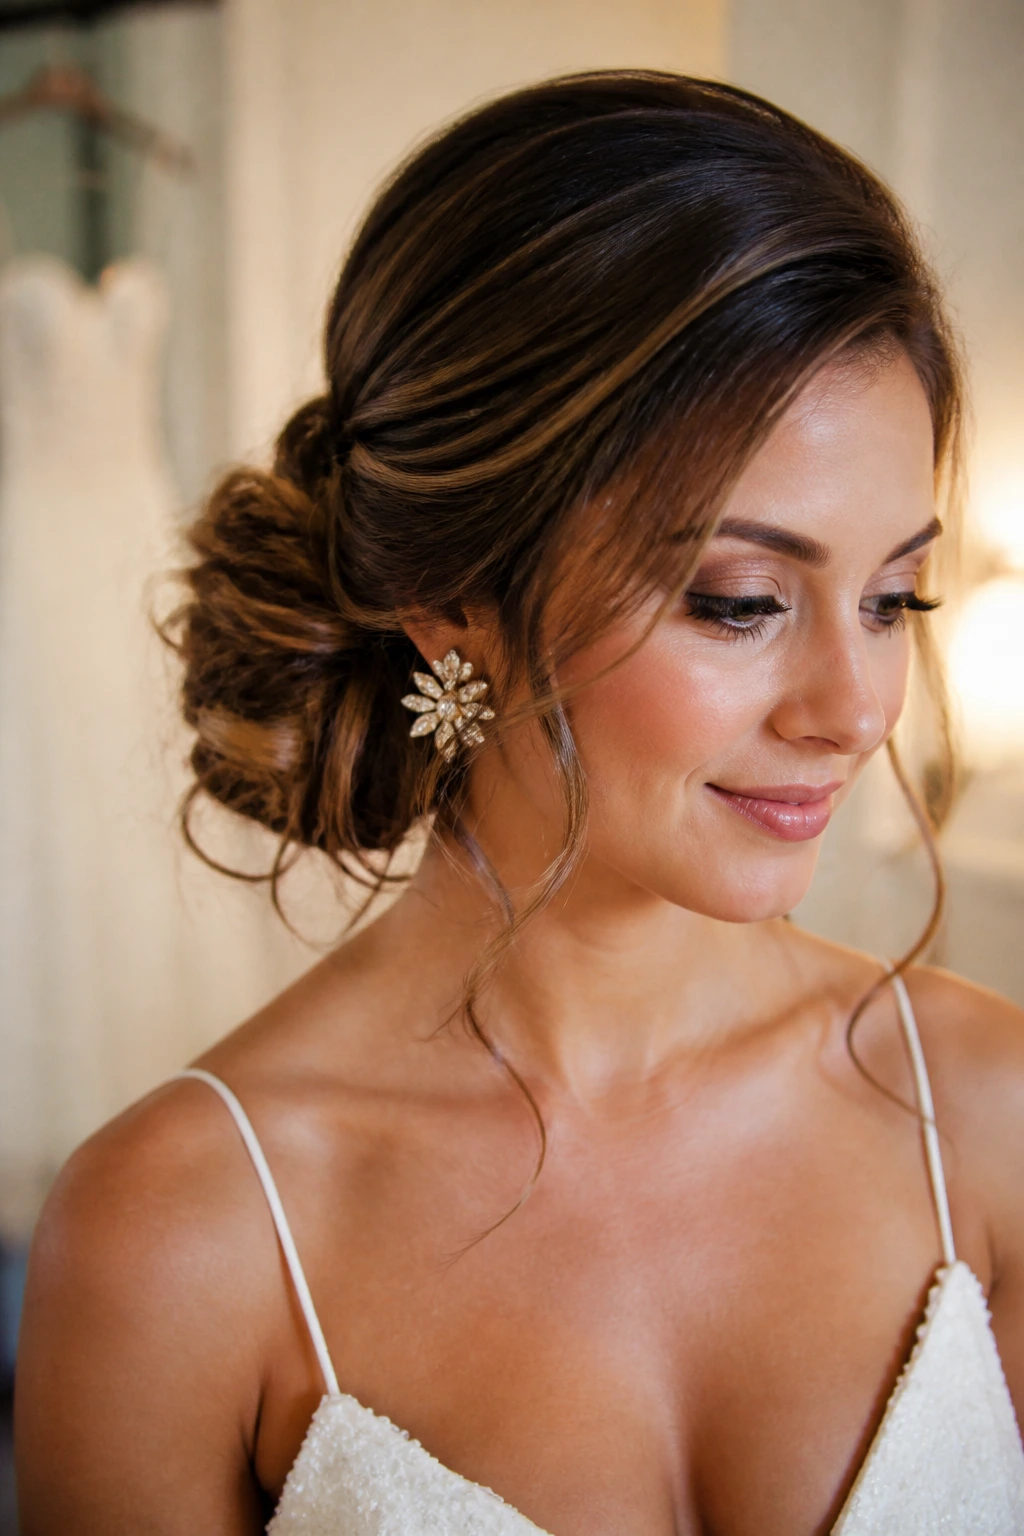
This is the bridal messy bun I’d hand to someone who wants the safest possible sweet spot. It sits at the nape, keeps the neckline clear, and lets a veil comb anchor cleanly just above the knot. The face-framing pieces should be soft, not wispy to the point of disappearing; think curl, bend, and a little swing when you turn your head.
Why It Works
A low knot is forgiving because the weight sits close to the head. That makes it easier to pin, easier to veil, and easier to wear for ten hours without feeling like the style is pulling backward. The loose front pieces keep the look from getting too formal, which matters if the dress is simple and the makeup is softly done.
- Best with: Strapless, sweetheart, or square necklines that need a little softness near the face.
- Ask for: A tucked base at the nape with two curved face pieces left long enough to hit the cheekbone or jaw.
- Avoid: Tiny front tendrils that stop at the corner of the mouth; they look accidental and are hard to keep tidy.
Pro tip: Curl the front pieces away from the face and let them cool before touching them. If you pull them apart while they’re warm, they go flat and lose that clean bend.
2. The Puffed Crown Chignon That Lifts the Whole Look
A little crown height changes everything. Not a lot. Just enough lift to give the face room and stop the bun from sinking into the back of the head. This version looks especially good when the dress has a clean bodice or a lower neckline that needs some shape up top.
The crown should be softly padded, not backcombed into a nest. I’m not a fan of over-teased bridal hair; it photographs as stiff and tends to shed tiny broken pieces by the time the ceremony starts. A light root lift, a few cross-pins, and some brushed-out curl at the surface does the job better.
The nice part is that this bun reads polished from the front and relaxed from the back. That balance is the whole point. It gives the hair a little architecture without making it look like it was lacquered into a shell.
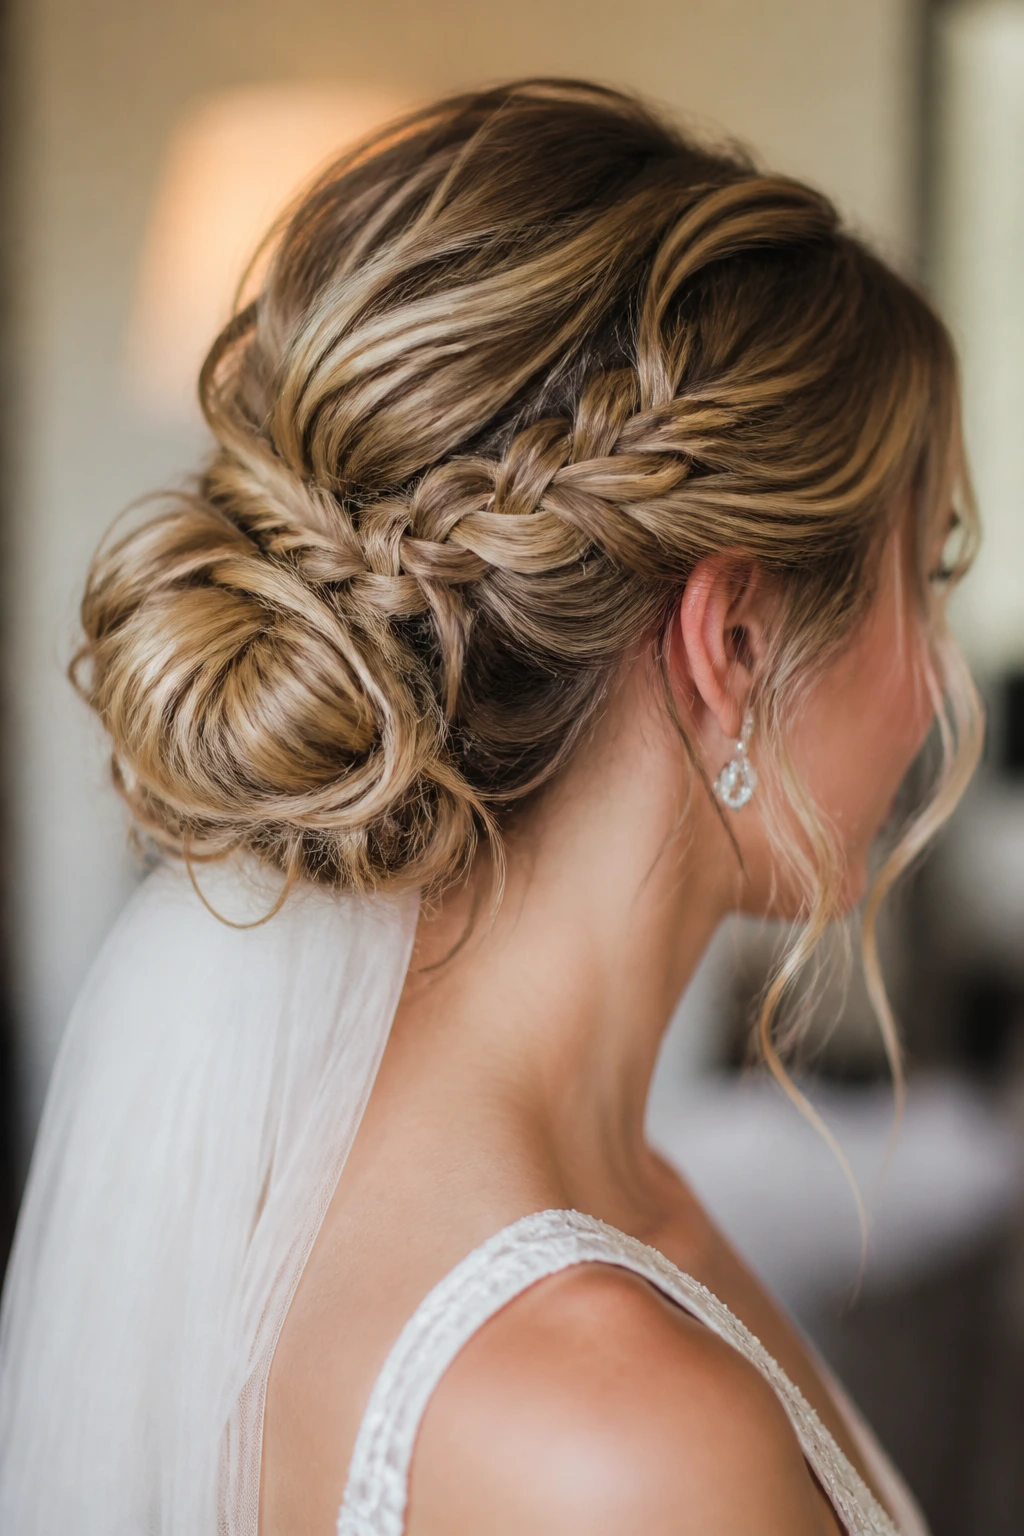
3. The Braided Messy Bun With a Hidden Base
Why does this version show up so often in bridal trials? Because the braid does the heavy lifting. It builds grip, adds shape, and keeps the bun from unraveling when the rest of the hair is loosely pinned. You still get that undone finish, but the structure underneath is stronger than it looks.
How to Keep the Braid from Taking Over
The braid should disappear into the bun, not scream for attention unless that’s the whole plan. A loose Dutch braid works well when the hair is thick enough to hold a visible pattern. For finer hair, a smaller braid tucked under the wrap gives you texture without stealing the show.
A stylist can begin with a low ponytail, braid the tail, then coil and pin it into the base so the braid peeks through only at one or two spots. That hidden route keeps the style from looking too literal. It also gives the bun extra teeth, which is handy if the wedding involves heat, dancing, or a veil that weighs more than expected.
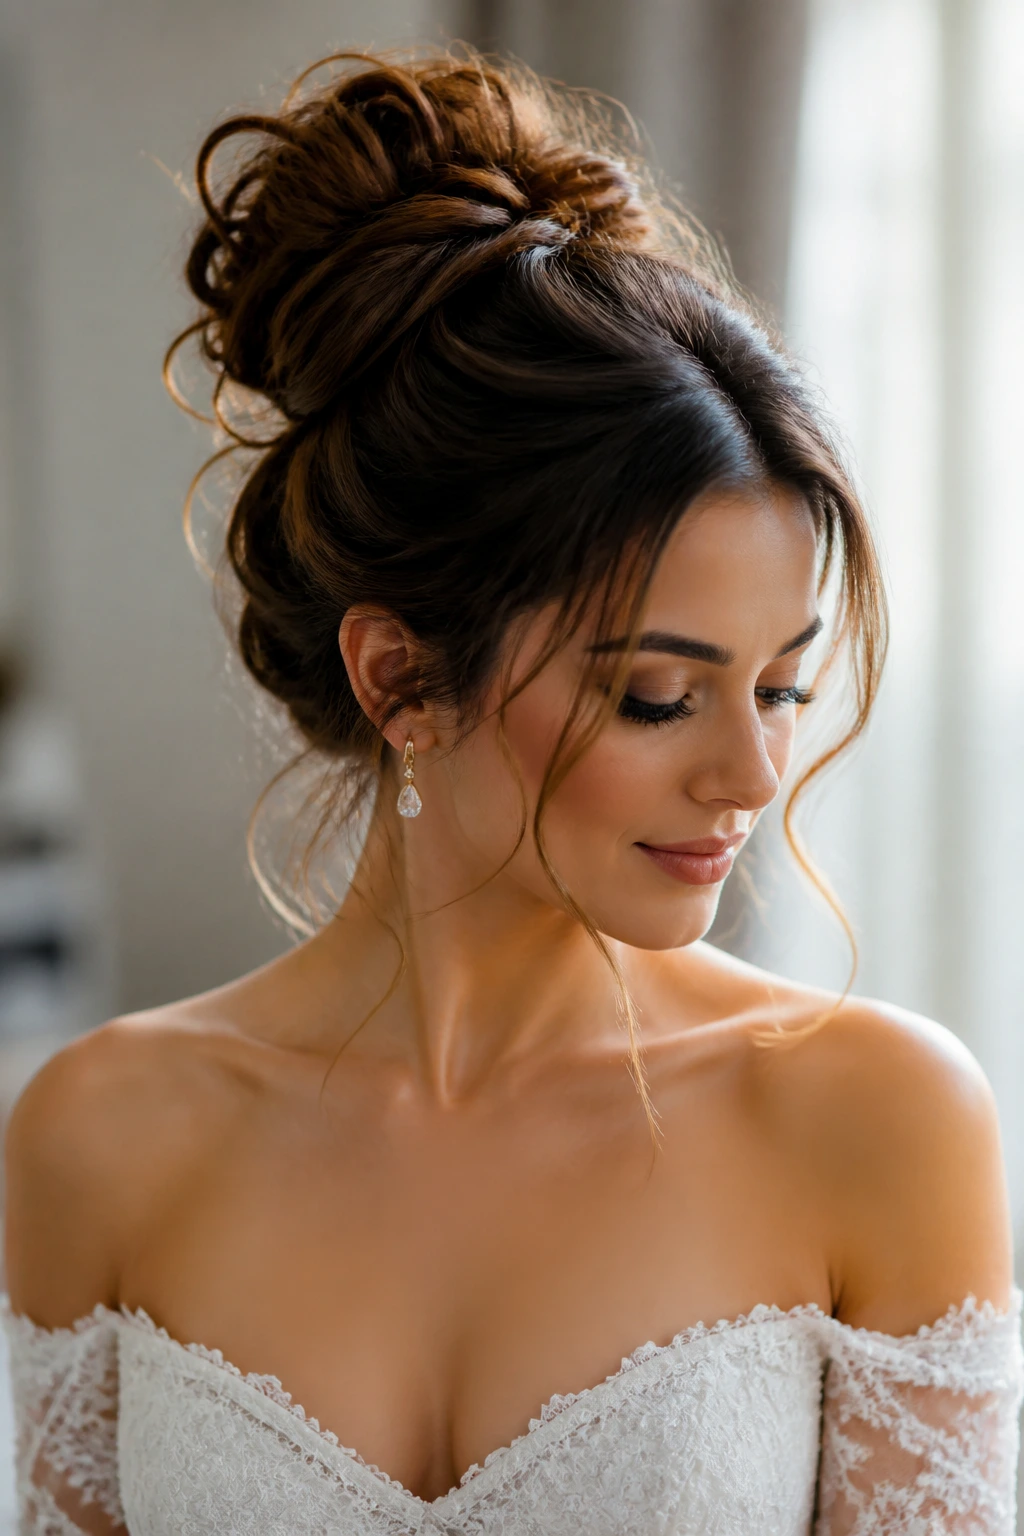
4. The High, Loose Bun for a Clean Shoulder Line
Picture a gown with bare shoulders and a sharp collarbone. This is the bun that lets that shape breathe. It sits high enough to open the neck, but it stays loose enough to avoid that tight ballet finish brides sometimes regret halfway through portraits.
The trick is keeping the bun airy around the edges while pinning the center tighter than it looks. If the whole style is loose, it will drift. If only the outer loops are loose, the shape still holds. That’s the version I like most. It looks spontaneous, but only because someone did the boring structural work underneath.
- Best with: Off-the-shoulder dresses and clean necklines that need a bit of height.
- Best hair: Medium to thick hair with enough length to wrap the base once or twice.
- Watch for: The bun sitting too close to the crown, which can make the head look taller than it is.
A few loose ends at the perimeter are enough. Too many, and the style starts reading unfinished.
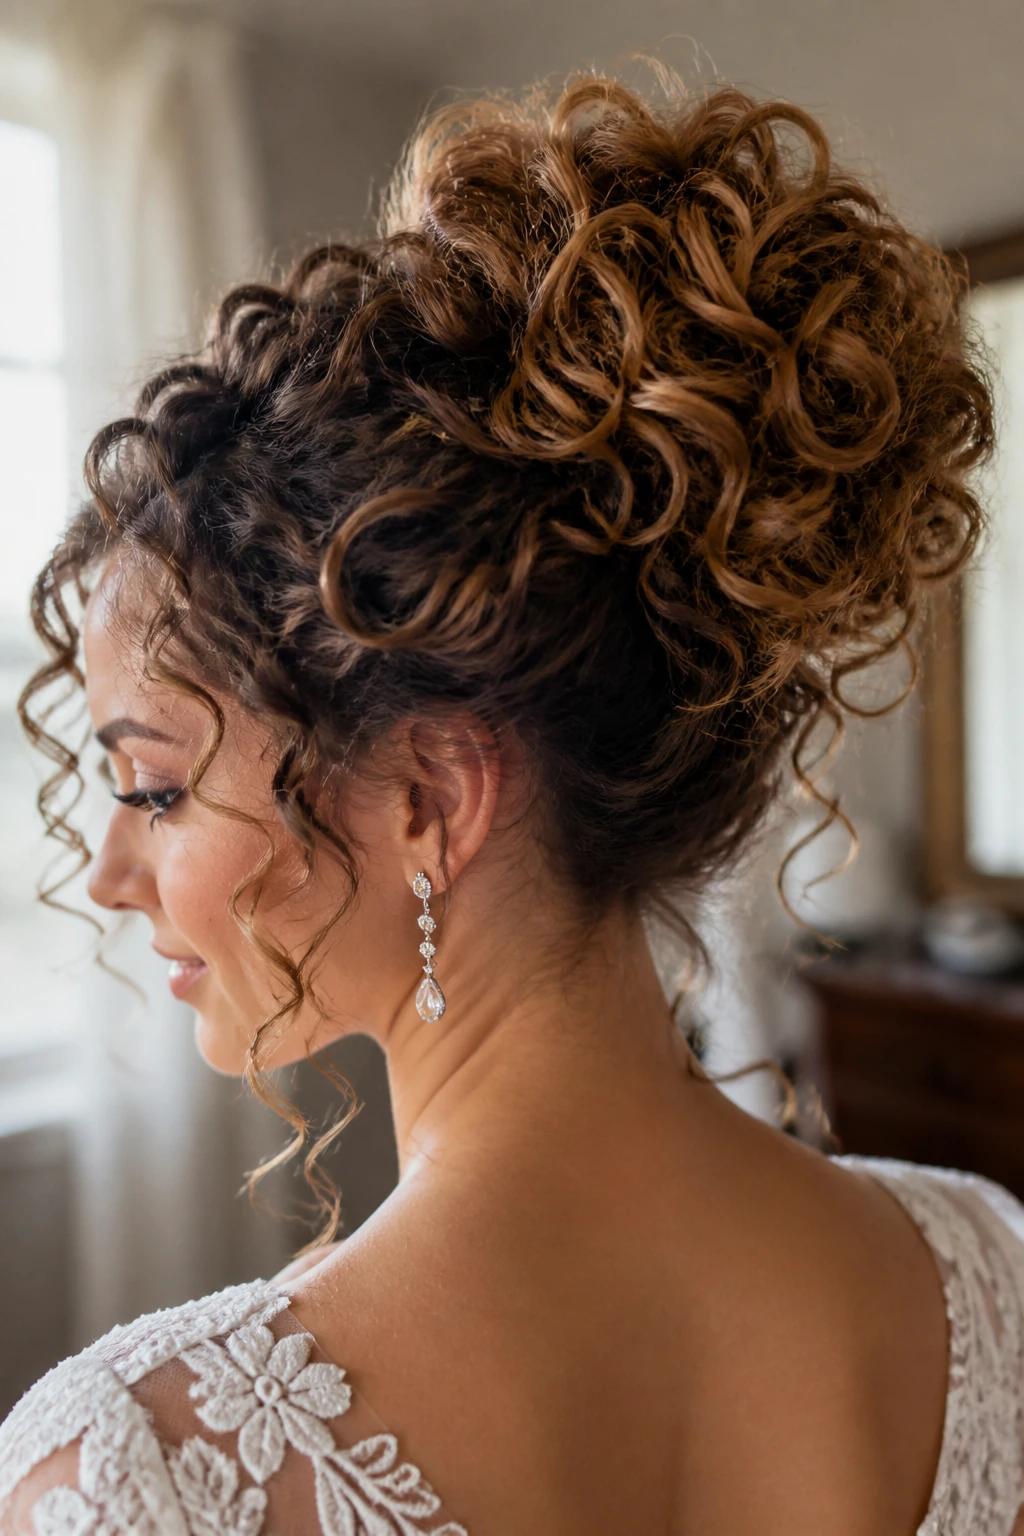
5. The Curly Halo Bun That Keeps Texture Front and Center
Curly-haired brides get shortchanged by too many bridal looks that assume every strand should be smoothed into obedience. This one doesn’t do that. It keeps the curl pattern visible, pulls the curls into a soft halo, and lets the texture do the visual work.
The bun itself should be built after the curls are set and cooled, not after they’ve been brushed into puffed-out confusion. Separate the curls with fingertips, not a paddle brush. Then gather and pin in sections so the bun looks rounded from the back but still has obvious curl movement around the edges.
This is one of the rare bridal styles that can look better as the night goes on. The curls soften a touch, the shape gets a little freer, and the bun still holds. That’s a nice trade.
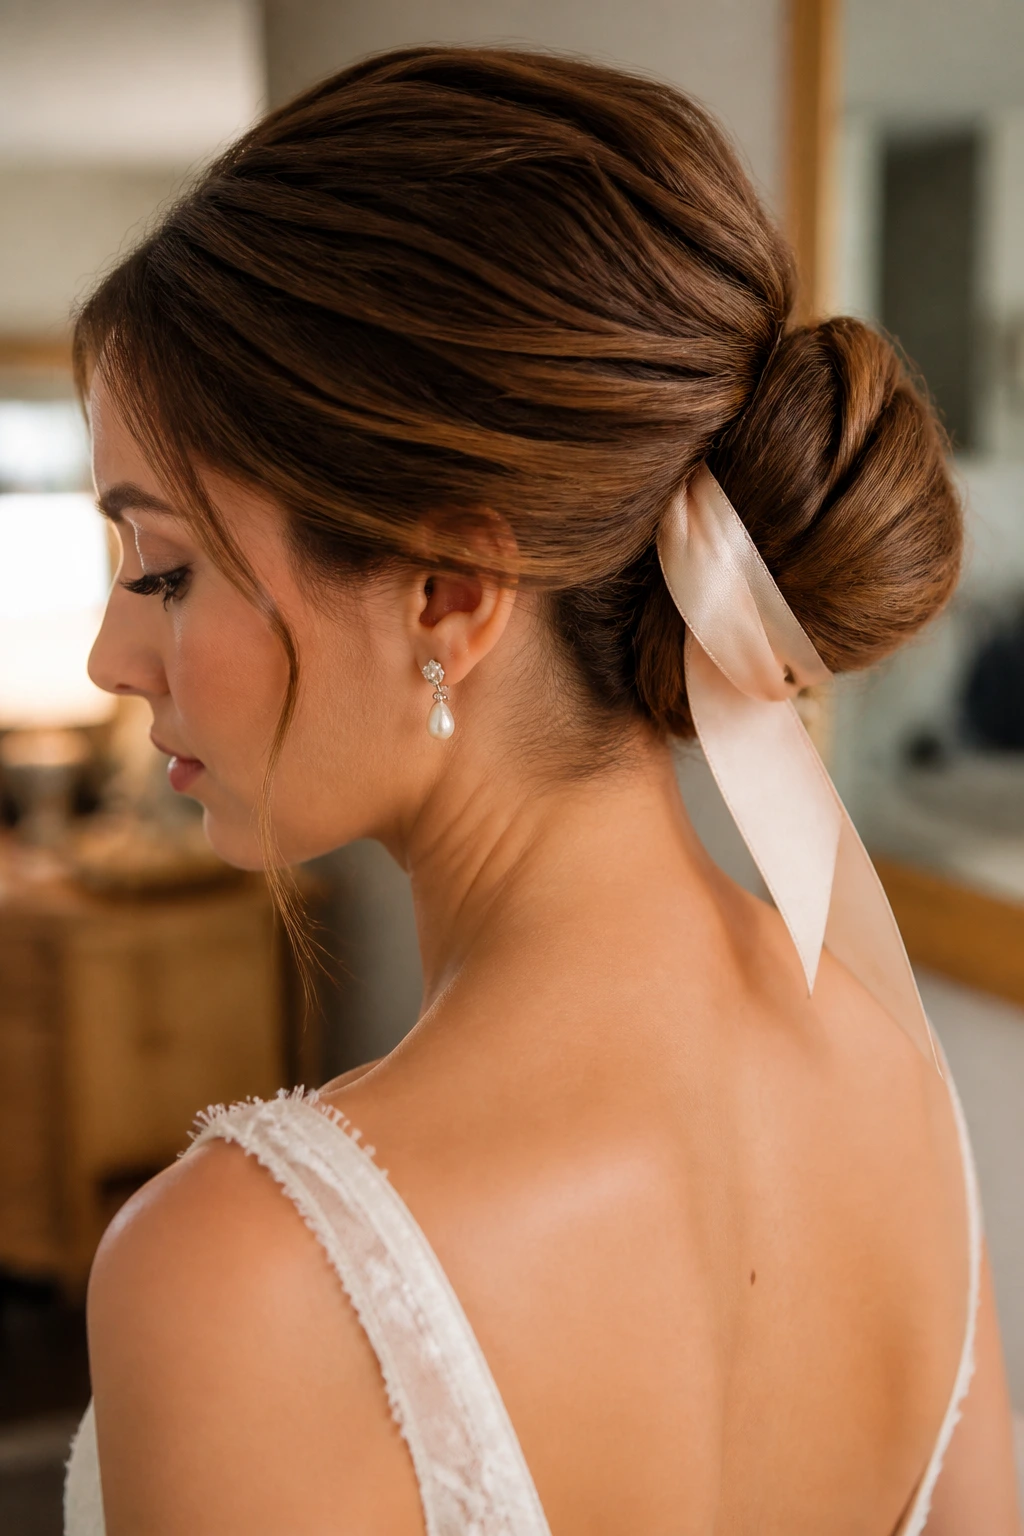
6. The Ribbon-Wrapped Bun With a Clean, Quiet Finish
Unlike the fully textured boho bun, this version keeps the messy part restrained. The bun itself stays soft, but a satin ribbon or narrow silk tie wraps the base and gives the style a finished edge. The contrast matters. Hair stays loose; the detail stays deliberate.
It works best when the dress already has one strong feature—maybe a dramatic back, a strong shoulder line, or a heavy earring. The ribbon adds polish without making the hair compete with the rest of the outfit. I like it especially for brides who want romance but not too much fuzz around the hairline.
A narrow ribbon can be hidden under the bun and tied in a short tail, or it can trail just enough to show from the side. Keep the fabric matte if the dress is ornate. Save shine for the earrings.
7. The Side-Swept Asymmetrical Bun for a Little Drama
A side-swept bun gives the face a different frame than the standard centered knot. It pulls the eye diagonally, which can be flattering if the gown has one-shoulder detail, an angled neckline, or a strong side part. It’s also a nice choice when a bride wants something softer than a formal chignon but less loose than a boho knot.
Who Should Ask for It
This shape suits brides who wear one standout accessory on one side. A crystal comb. A single oversized earring. A flower cluster tucked behind one ear. The bun and the accessory get to talk to each other instead of both shouting.
The asymmetry should look intentional, not like the bun slid off-center. That means the stylist needs to balance the bulk underneath, not just pin hair sideways and hope for the best. A slight part, a sweep across the crown, and a compact anchor base keep it from drifting.
8. The Slightly Undone French Twist Bun
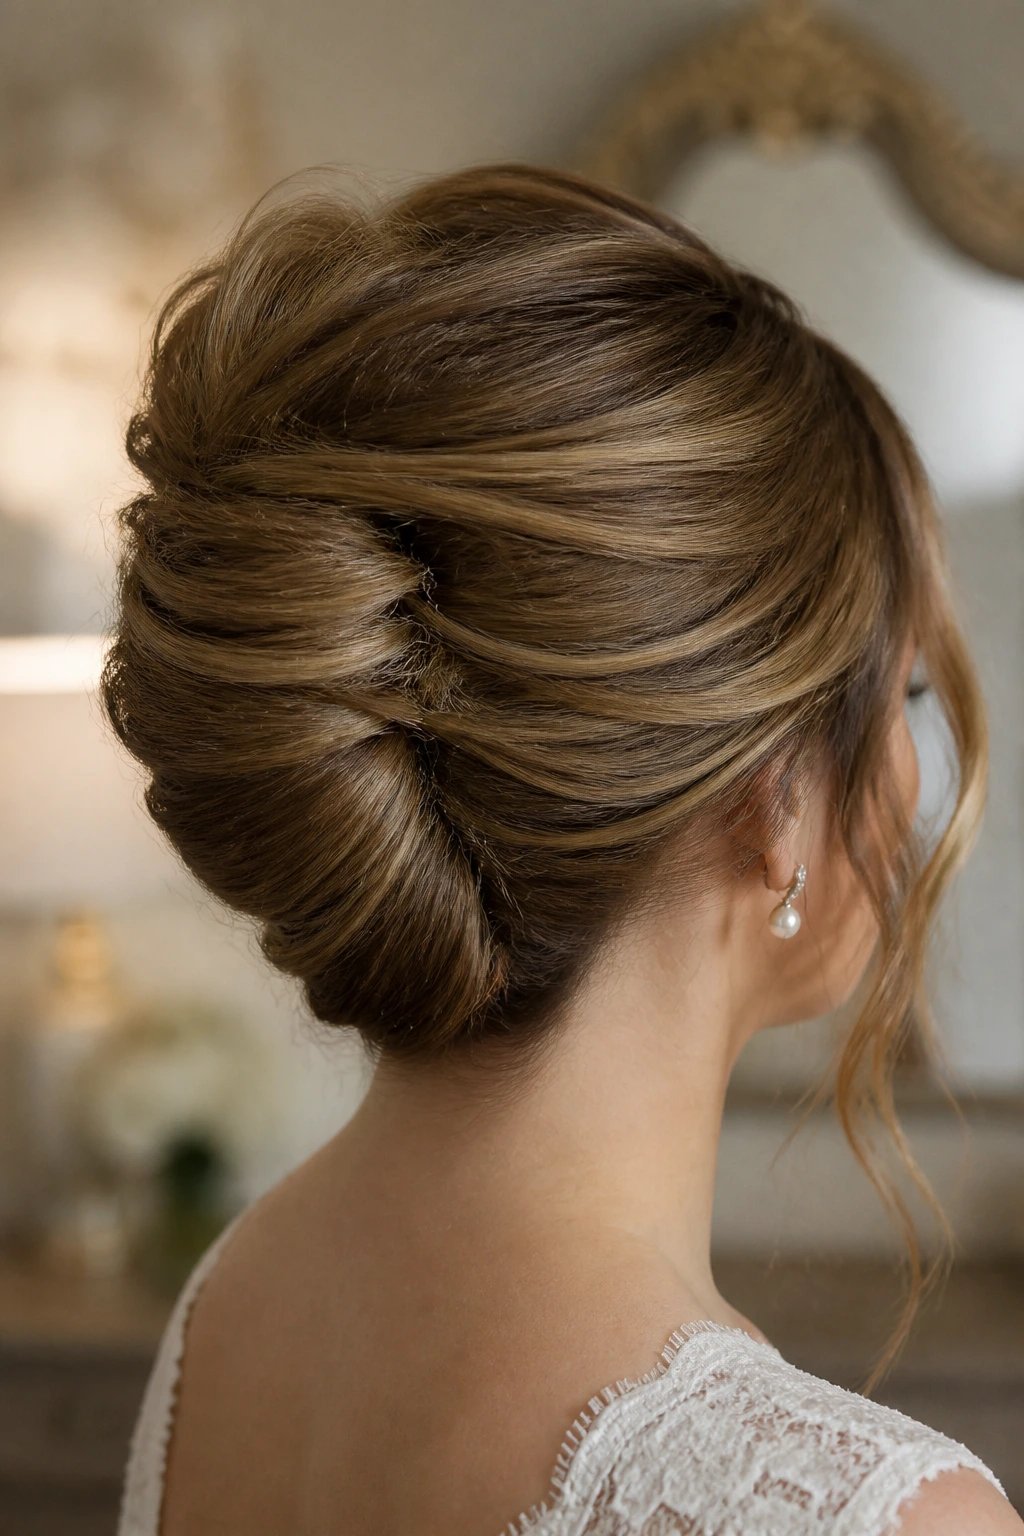
This is the choice for a bride who likes clean lines but doesn’t want a stiff shell. The twist gives you structure; the loosened ends and softened surface keep it from feeling formal in the old-fashioned sense. It’s one of those styles that looks calm from across the room and more interesting up close.
The key is to twist the hair vertically, then loosen the outer edge just enough that the shape breathes. If you pull it apart too much, the whole thing loses definition and starts looking like a half-done updo. Too tight, and it turns severe. Somewhere in the middle is the sweet spot.
Use this when: You want the bun to sit neatly against a structured dress but still feel soft around the edges.
Skip it if: Your hair is so layered that the ends keep springing out in all directions. You’ll spend the whole day chasing them back in.
9. The Full, Cushiony Bun for Thick Hair
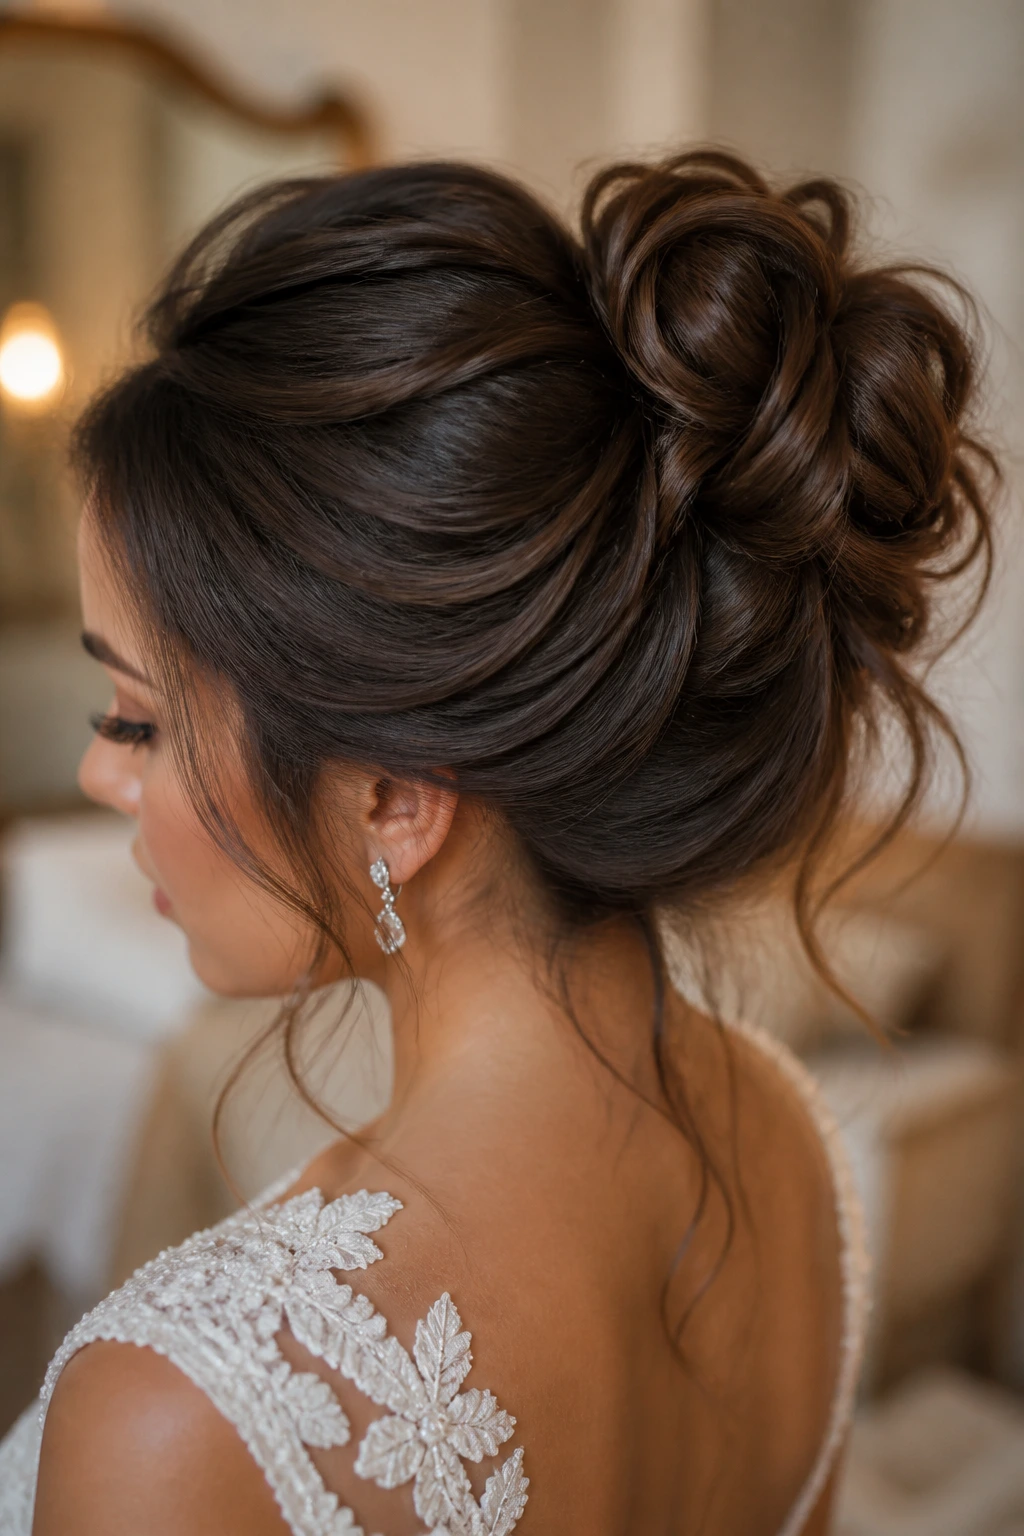
Thick hair can build a bridal bun with presence. No filler, no fake bump, no desperate backcombing. This style uses the natural mass of the hair and shapes it into a fuller knot that sits confidently at the back of the head.
The challenge is control. Thick hair tends to create its own opinions if it isn’t divided into sections first. The best buns for it are usually built in two or three wrapped coils, each one pinned separately, rather than one giant coil that tries to do everything at once. That keeps the structure from feeling heavy.
A little surface looseness helps too. If the bun is packed too tightly, thick hair starts to look bulky instead of lush. Leave a few controlled flyaways around the edges, and the shape will feel softer without losing the richness that thick hair naturally brings.
10. The Minimal Low Bun With Pearl Pins
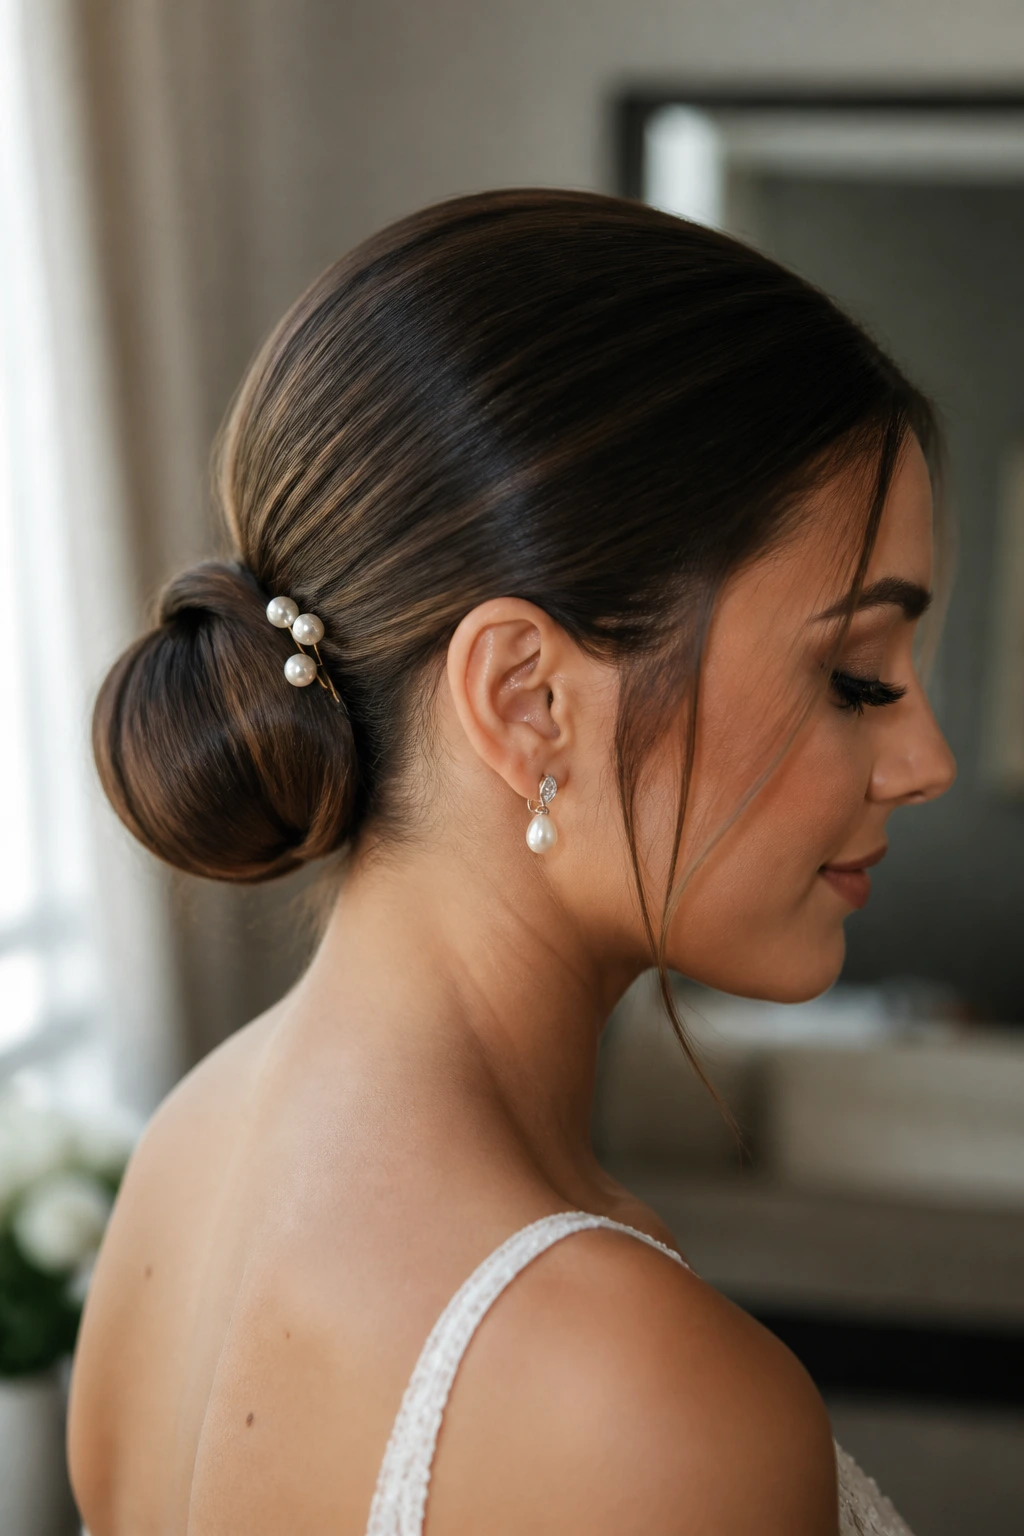
Sometimes the smartest bridal hair is the least noisy. This version keeps the bun low, smooth enough to read elegant, and just textured enough to avoid looking slick. Then the pearl pins do the decorating. Not a dozen. A few well-placed ones.
Best Accessories for This Look
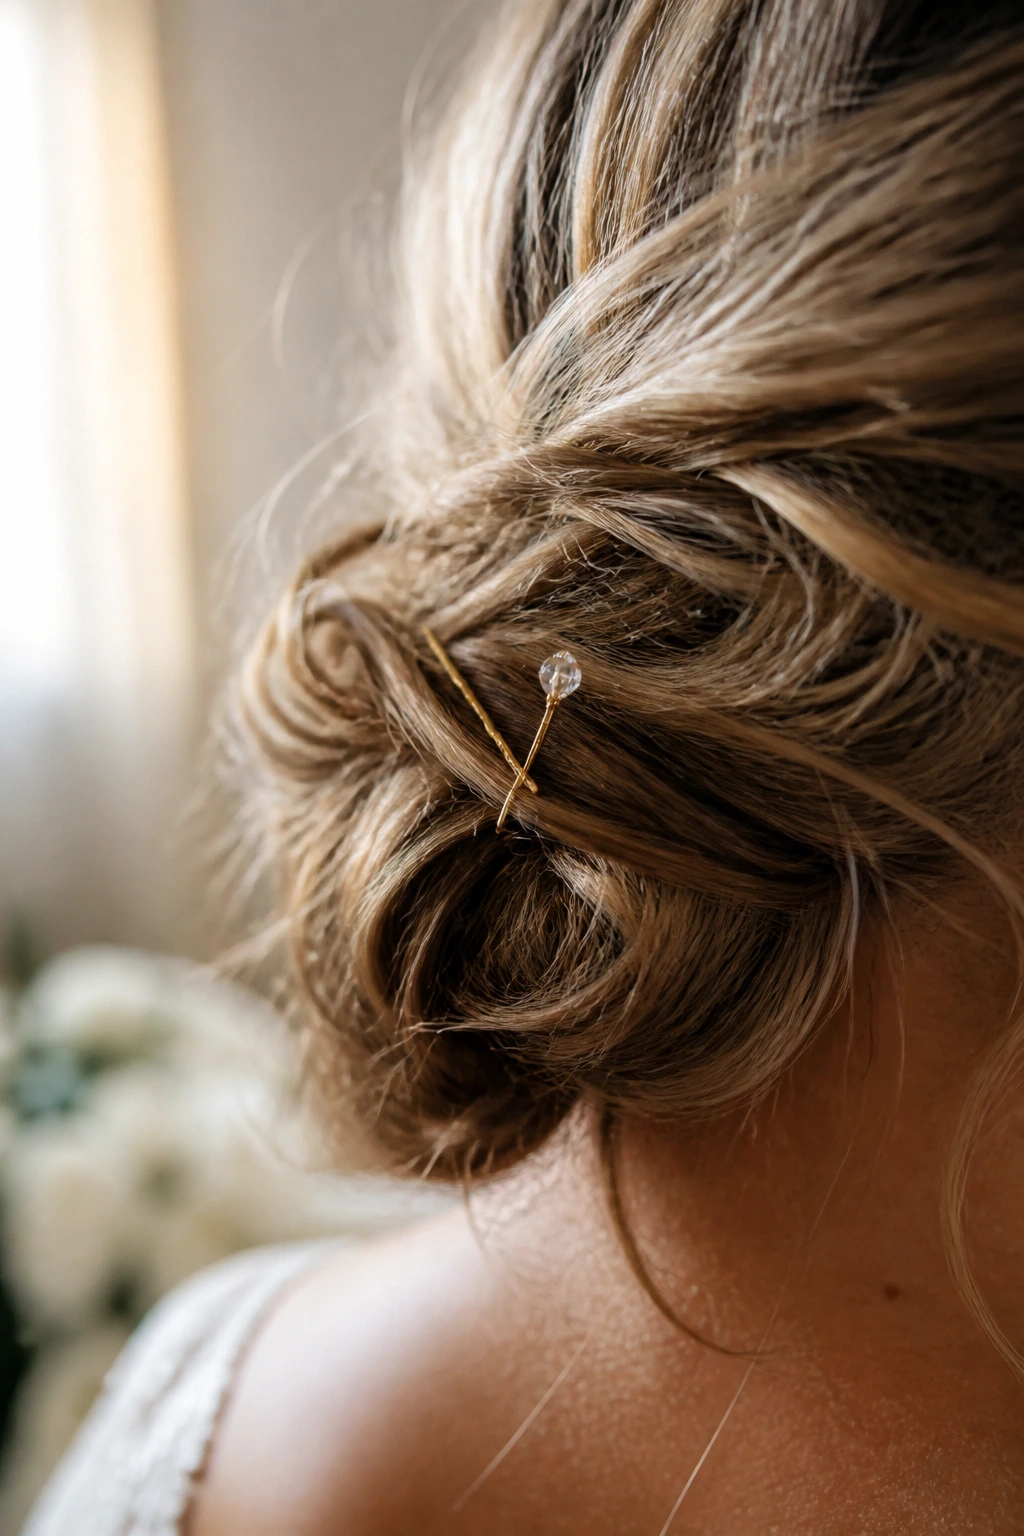
Pearl pins work best when they’re clustered near the seam of the bun or tucked into one side of the wrap. If you scatter them everywhere, they start to look like confetti. Three to five pins is plenty for most hair densities. More than that can weigh down the bun and make the accessory feel busy.
The charm of this style is restraint. It lets the jewelry and dress do some of the talking while the hair holds the frame together. If the veil is full and the earrings are already strong, this is the bun that keeps the whole look from tipping into excess.
11. The Braided Crown Into Bun for Brides Who Want More Detail
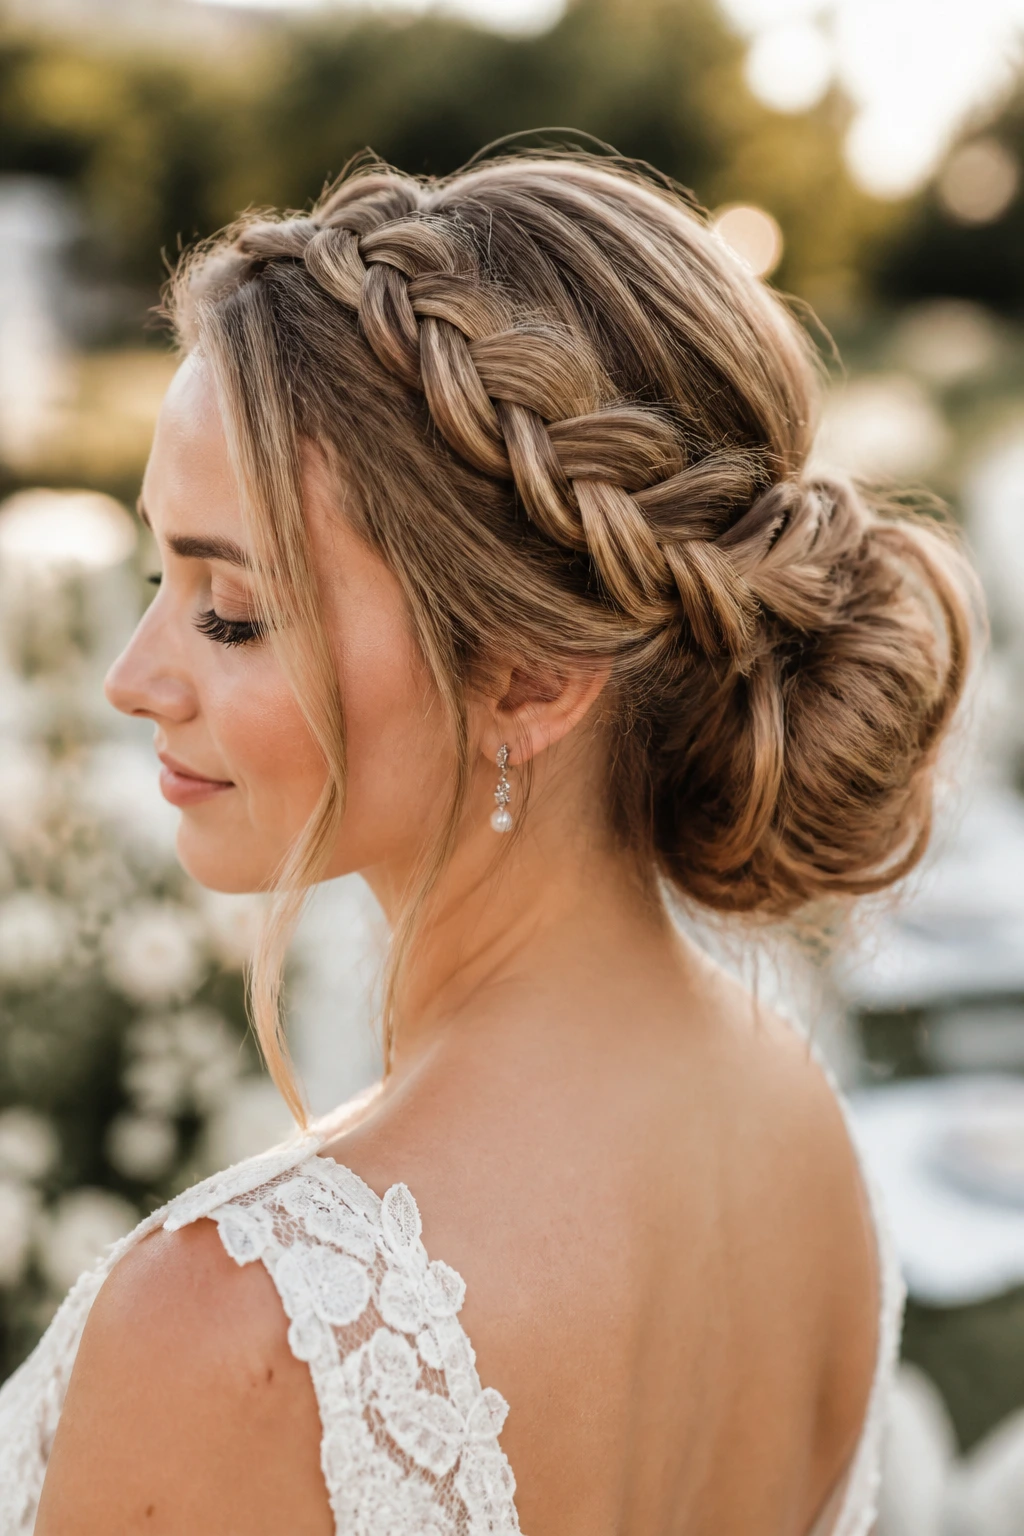
This one starts with a braid that tracks along the hairline or crown, then disappears into a low or mid bun. It gives you visible work at the top and a softer, more relaxed finish at the back. The effect is rich without being fussy.
How do you keep it from becoming too busy? Keep the braid loose and let it flatten a little once it reaches the back. A tight, glossy braid at the crown can pull the eye away from the face. A wider, softer braid adds shape and then steps out of the way.
It’s especially good for outdoor ceremonies, garden settings, and dresses with lace or embroidery. There’s a reason. The braid gives the hair a little echo of texture that feels at home next to fabric with detail.
12. The Soft Mid Bun for Brides With Shorter Lengths
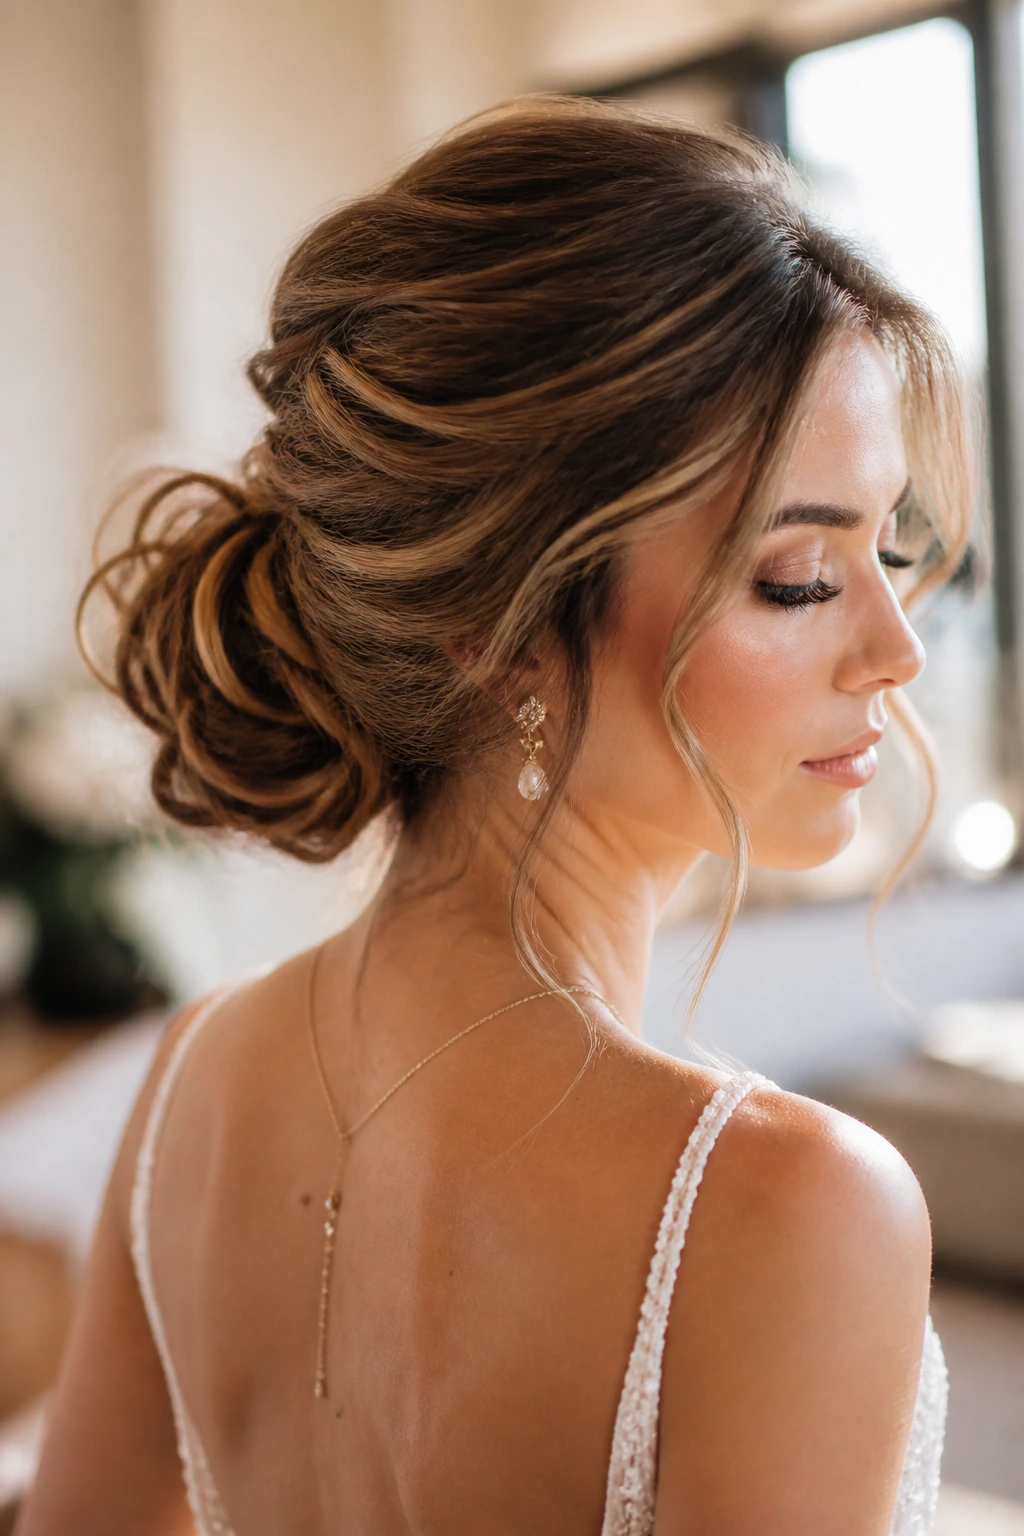
If the hair doesn’t reach the middle of the back, a mid bun can be kinder than a low one. The bun can sit where the hair naturally wants to gather, which means fewer stubborn ends and less tension on the scalp. That matters. Bridal styles shouldn’t feel like a tug-of-war.
This version usually looks best when the outer loops are loose and the base is pinned in close. The goal is fullness without pretending the hair is longer than it is. A little padding at the center can help, but only if it vanishes under the hair. If you can see the helper, the illusion is broken.
I like this one for brides who want the top of the dress visible. It clears the back enough to show detail while still feeling soft in profile.
13. The Double-Twist Bun That Looks Complicated and Isn’t
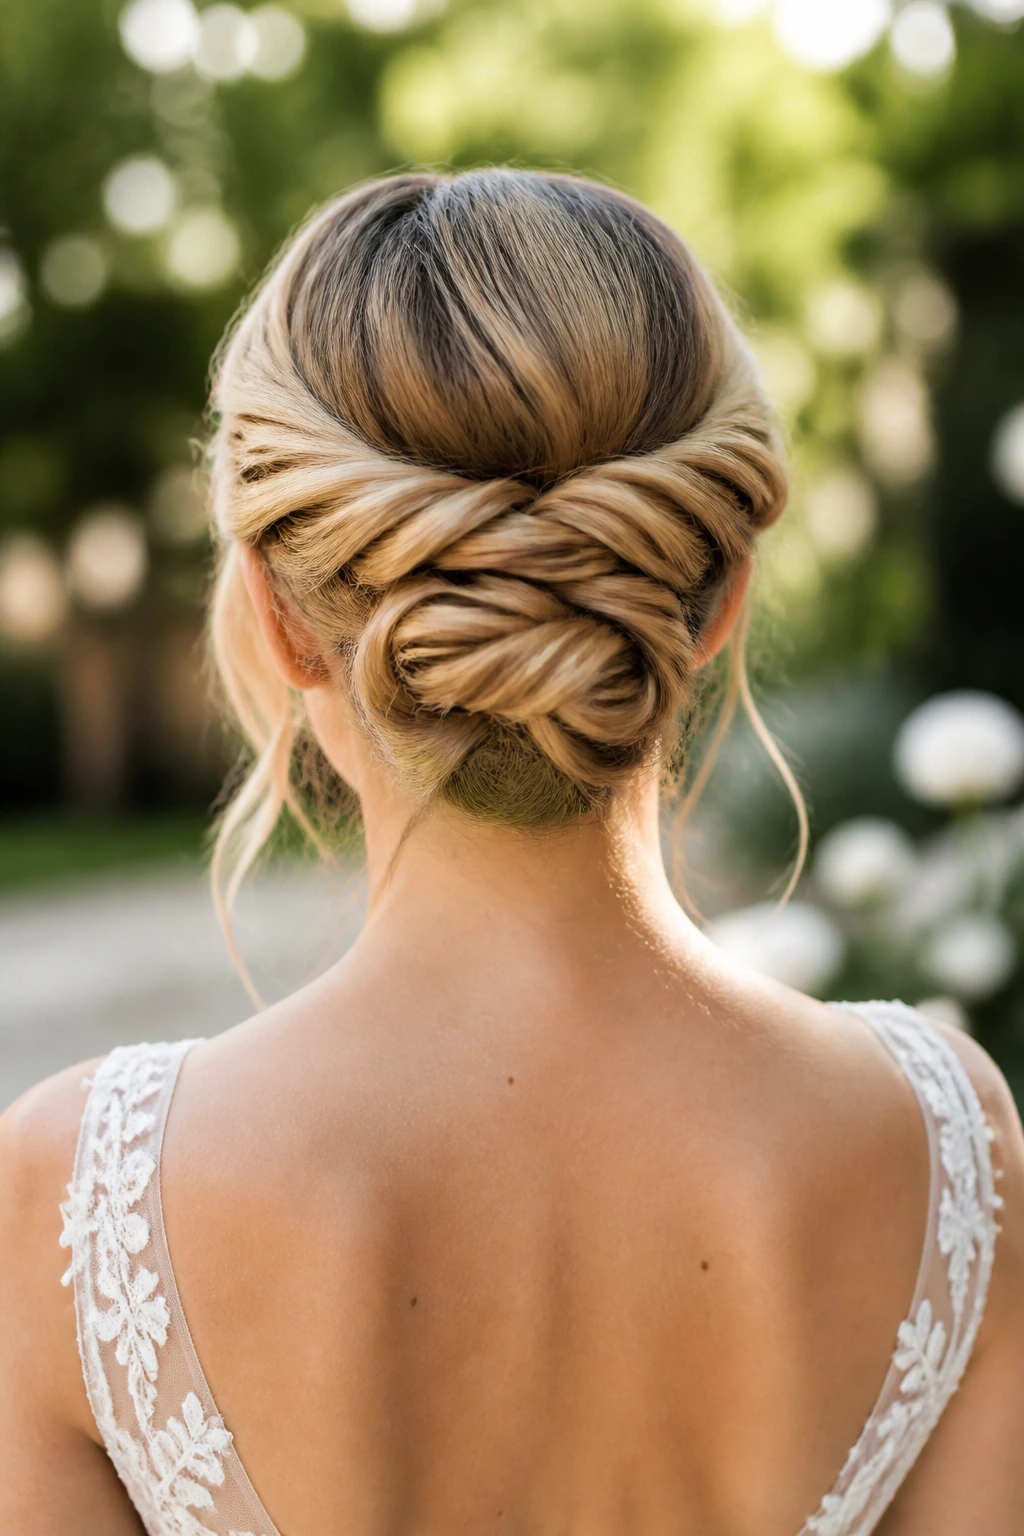
On the surface, this style looks like a whole event. In practice, it’s two twisted sections wrapped into a shared base. That’s why I keep recommending it to brides who want texture but don’t want layers of braids, coils, and pins everywhere.
The best part is the movement. A double-twist bun has visible lines, so the hair doesn’t collapse into one round shape. It keeps the eye moving across the back of the head, which is useful if the dress is minimal and needs a little hair detail to keep things interesting.
Unlike a braided bun, this one stays softer at the edges. It’s a good fit for brides who want the knot to feel romantic, not rustic.
14. The Boho Bun With Wand-Waved Tendrils
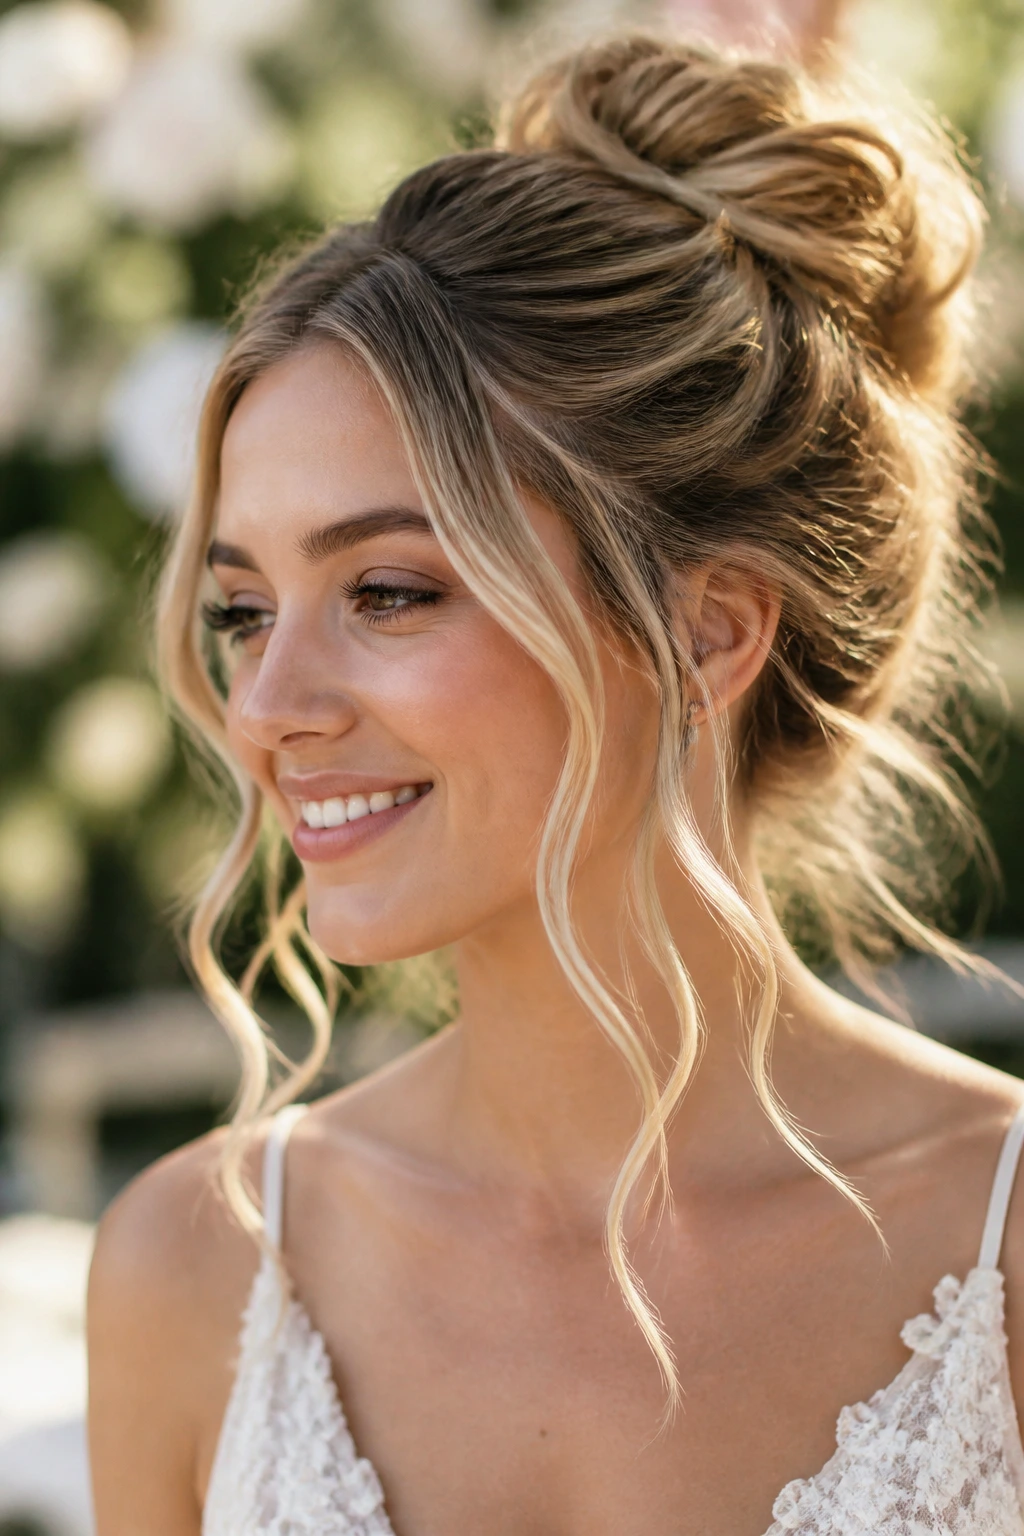
This is the version that leans into softness. Loose waves at the front, loose texture through the bun, and a few broken pieces around the ears give it that relaxed bridal feel without crossing into chaos. It’s a fine line, but it’s manageable.
The tendrils should be shaped, not abandoned. A one-inch wand or iron gives a bend that holds up better than straightened hair curled at the end. Start the wave higher up on the strand so it doesn’t look like a last-minute touch.
- Best with: Garden weddings, flowy sleeves, and lace gowns that already feel soft.
- Best accessory: A tiny comb, dried flowers, or nothing at all if the dress has enough detail.
- Not ideal for: Very formal satin gowns, where too much broken texture can fight the fabric.
The whole style works because it looks touched by air, not by neglect.
15. The Sleek-Base, Loose-Top Bun
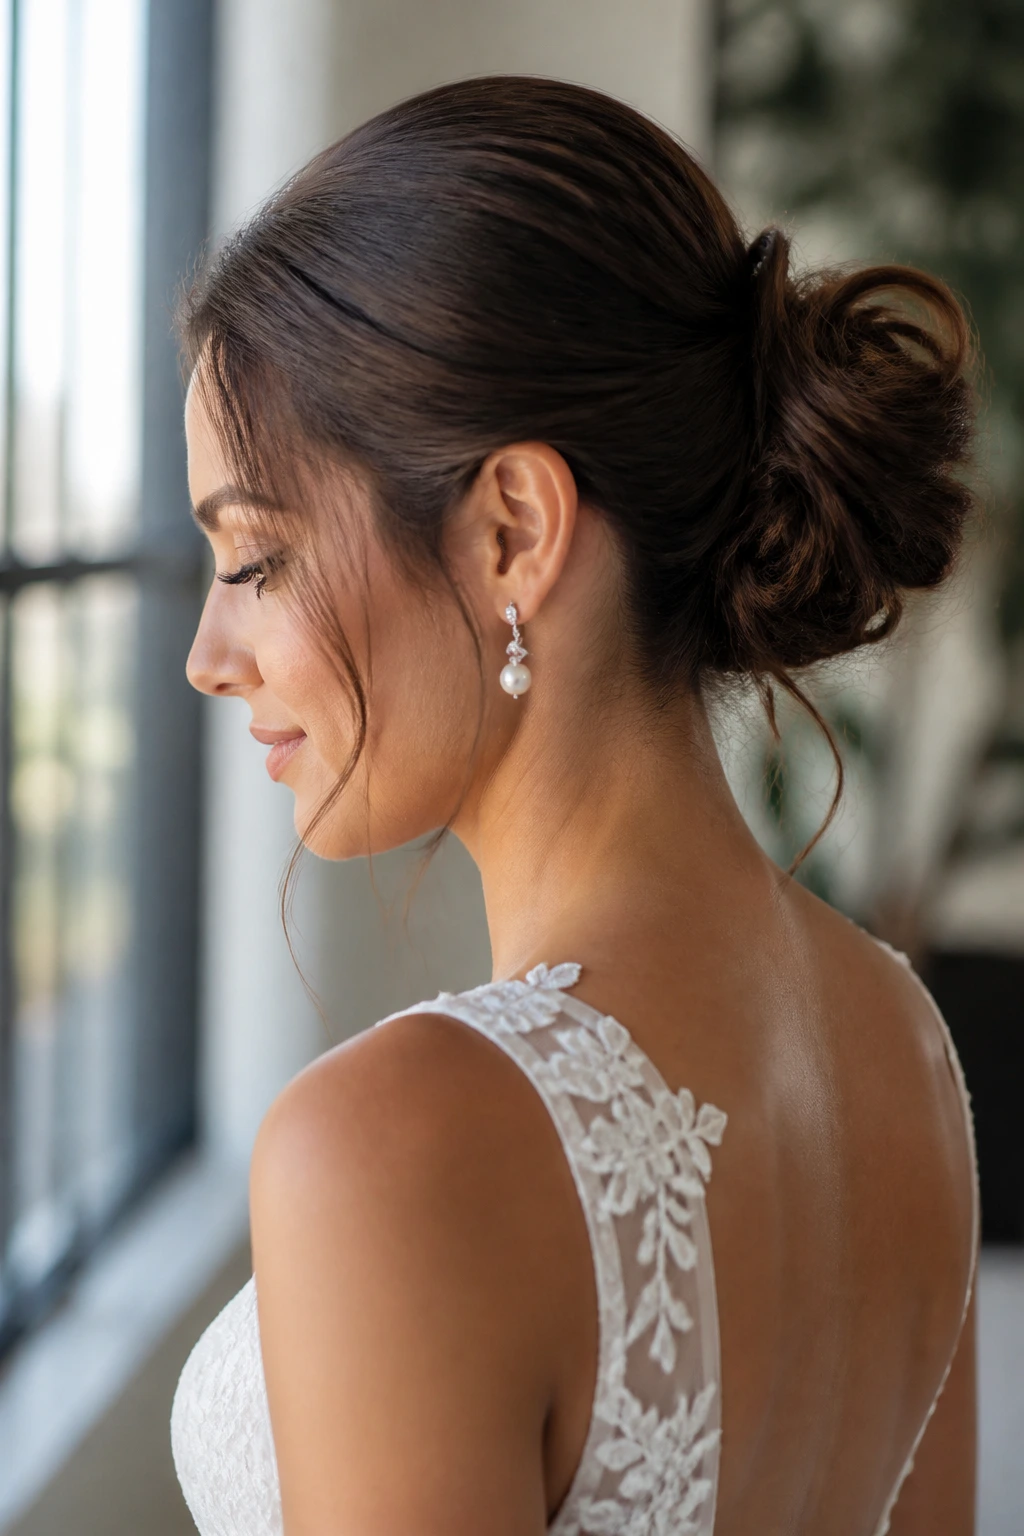
This one is for brides who want a little polish at the hairline and freedom in the bun itself. The top is smoothed back cleanly, often with a subtle side part or center part, while the bun stays loose and softly pinned. It gives you control where you need it and softness where you want it.
I like it with modern dresses and sharper silhouettes. The sleek crown keeps the profile neat in photos. Then the bun adds enough movement that the style doesn’t go flat or severe.
The main warning: Don’t over-slick the front. If the roots are too tight and shiny, the bun ends up looking disconnected from the rest of the hairstyle. The transition should feel blended, not pasted on.
16. The Flower-Threaded Bun That Carries the Bouquet Upward
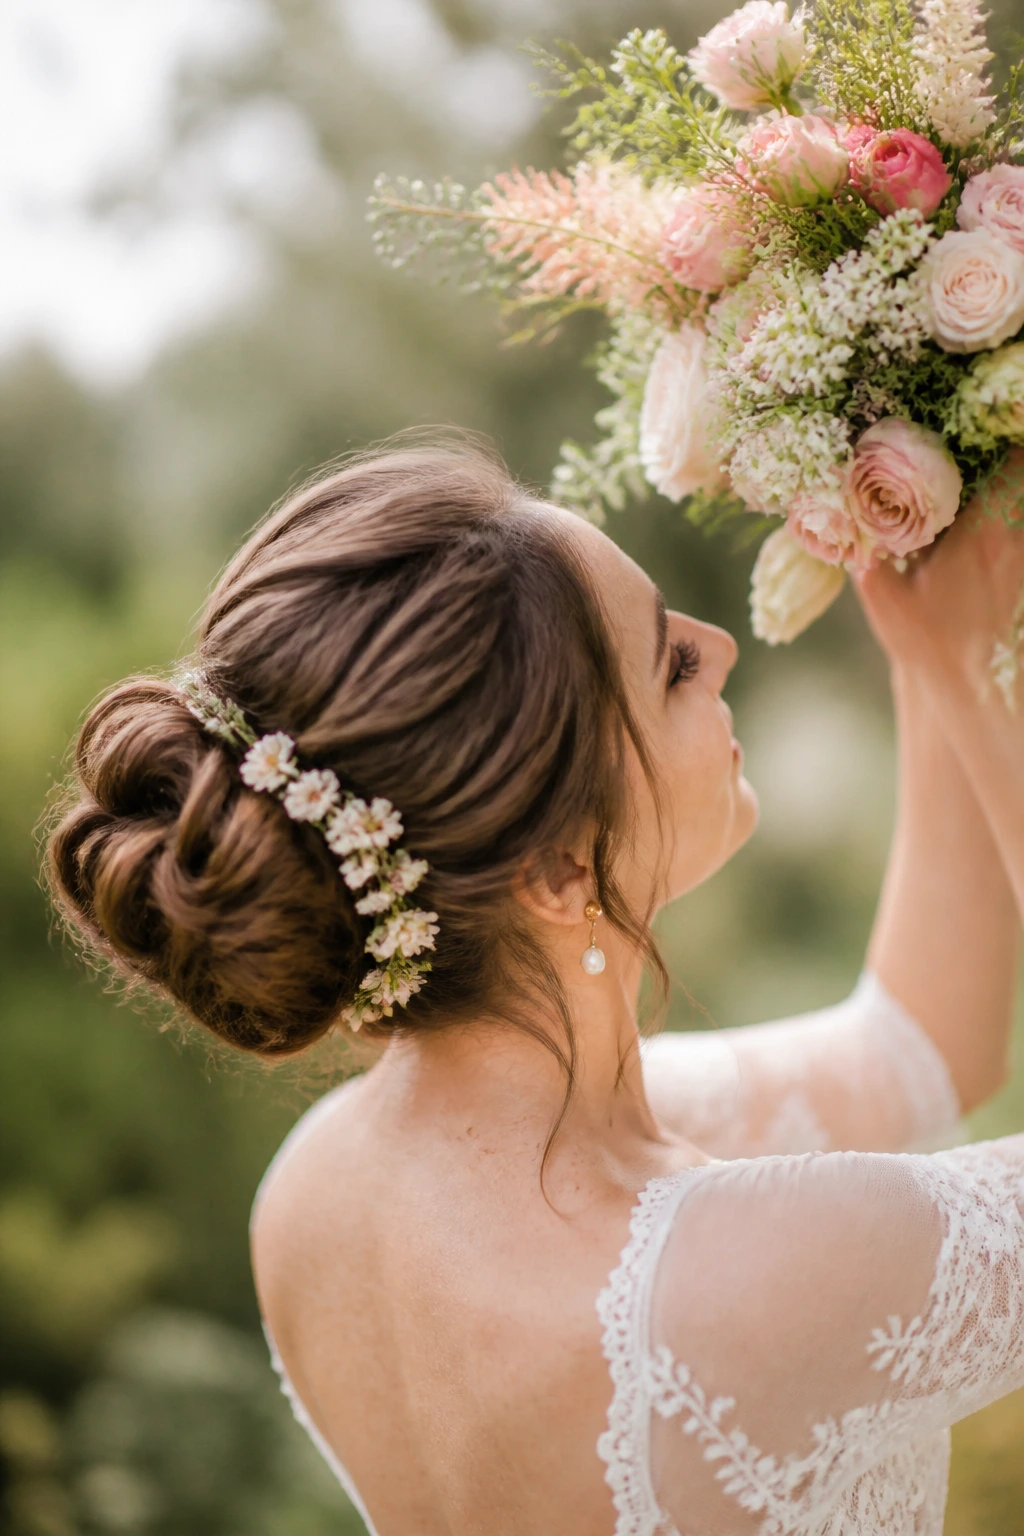
Fresh flowers can be gorgeous in a bun, but they need space to breathe. This style builds a loose, sturdy base first, then slips in one or two small blooms or sprigs. Think jasmine, baby’s breath, ranunculus, or a tiny rose clipped into the seam. Anything larger needs more structure than most messy buns can give.
What Makes It Work
The flowers should echo the bouquet, not duplicate it. If the bouquet is lush and dense, the hair flowers should be tiny and selective. If the bouquet is airy and loose, the bun can carry a little more foliage. The goal is to feel connected, not matchy in a way that looks costume-like.
The bun itself should not be overtextured when real flowers are involved. Too much hair chaos competes with the petals. A softer, cleaner base lets the floral detail do its job without getting lost.
17. The Tucked Bun for a Backless Gown
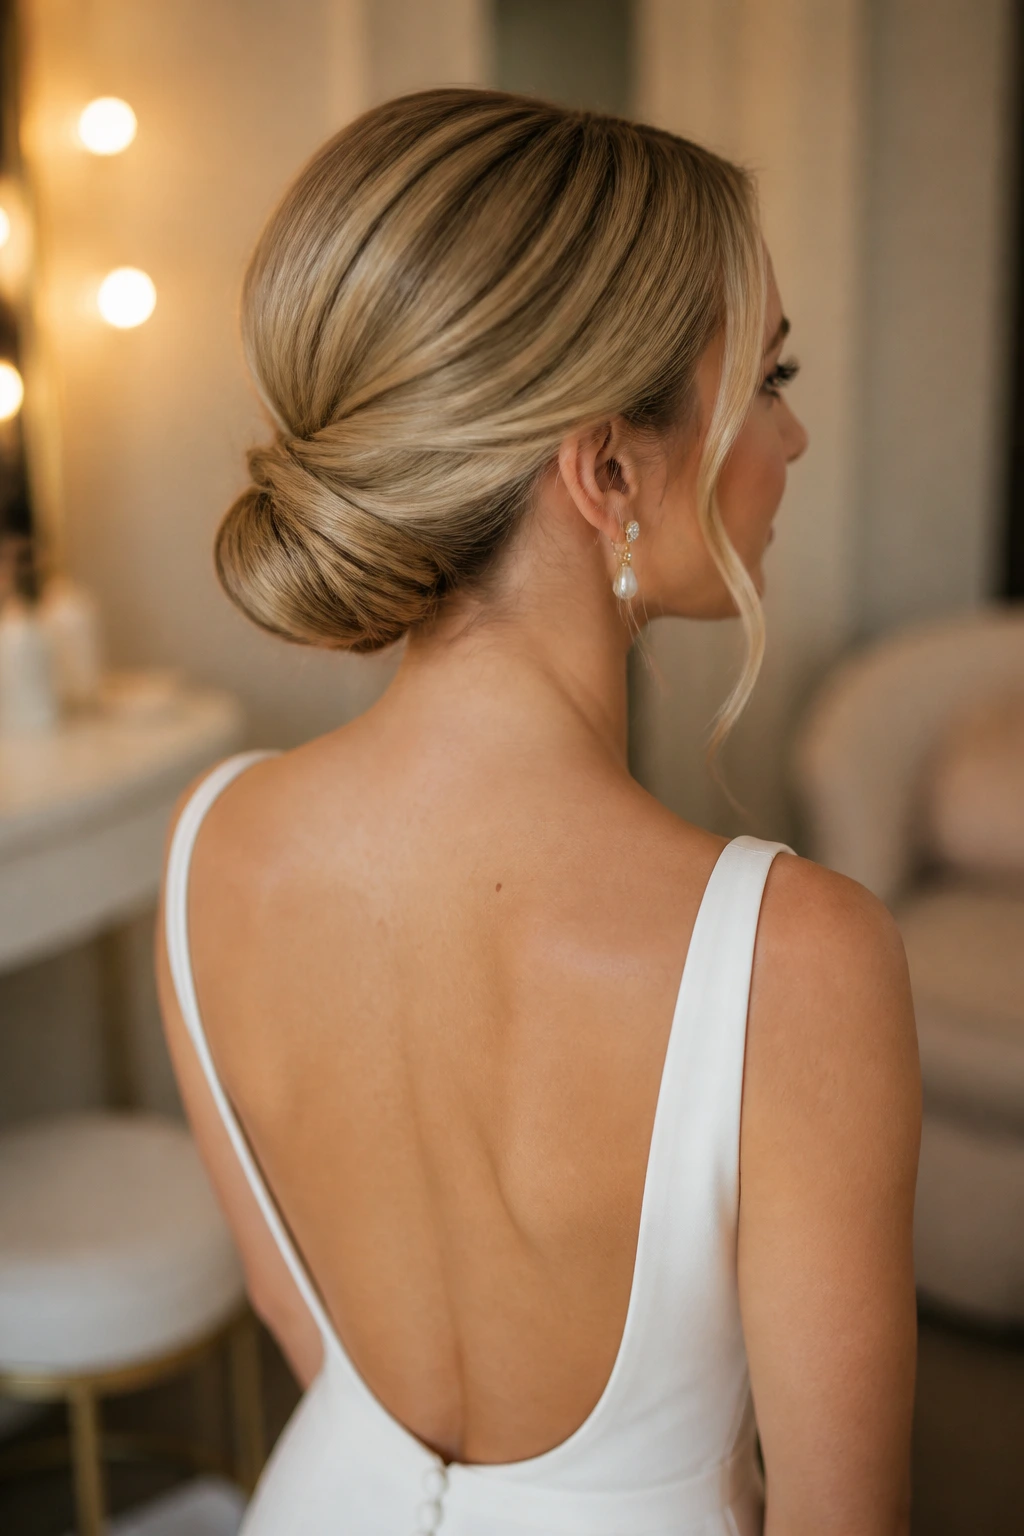
Backless dresses and visible straps need hair that gets out of the way fast. A tucked bun does that job beautifully. It sits low, hugs the head, and keeps the back open so the dress can do its thing. The bun can still be messy in shape, but the mess lives inside the wrap, not around the edges.
This is a style where the pinning matters more than the looseness. You want the bun to look soft from the side but secure from behind. That usually means layering pins in different directions and anchoring into the base at two or three points.
If the back of the gown is the star, don’t bury it under a large bun. Keep the hair compact enough that the dress reads clearly from the ceremony aisle and in the photos taken from behind.
18. The Ultra-Secure Dance-Ready Bun
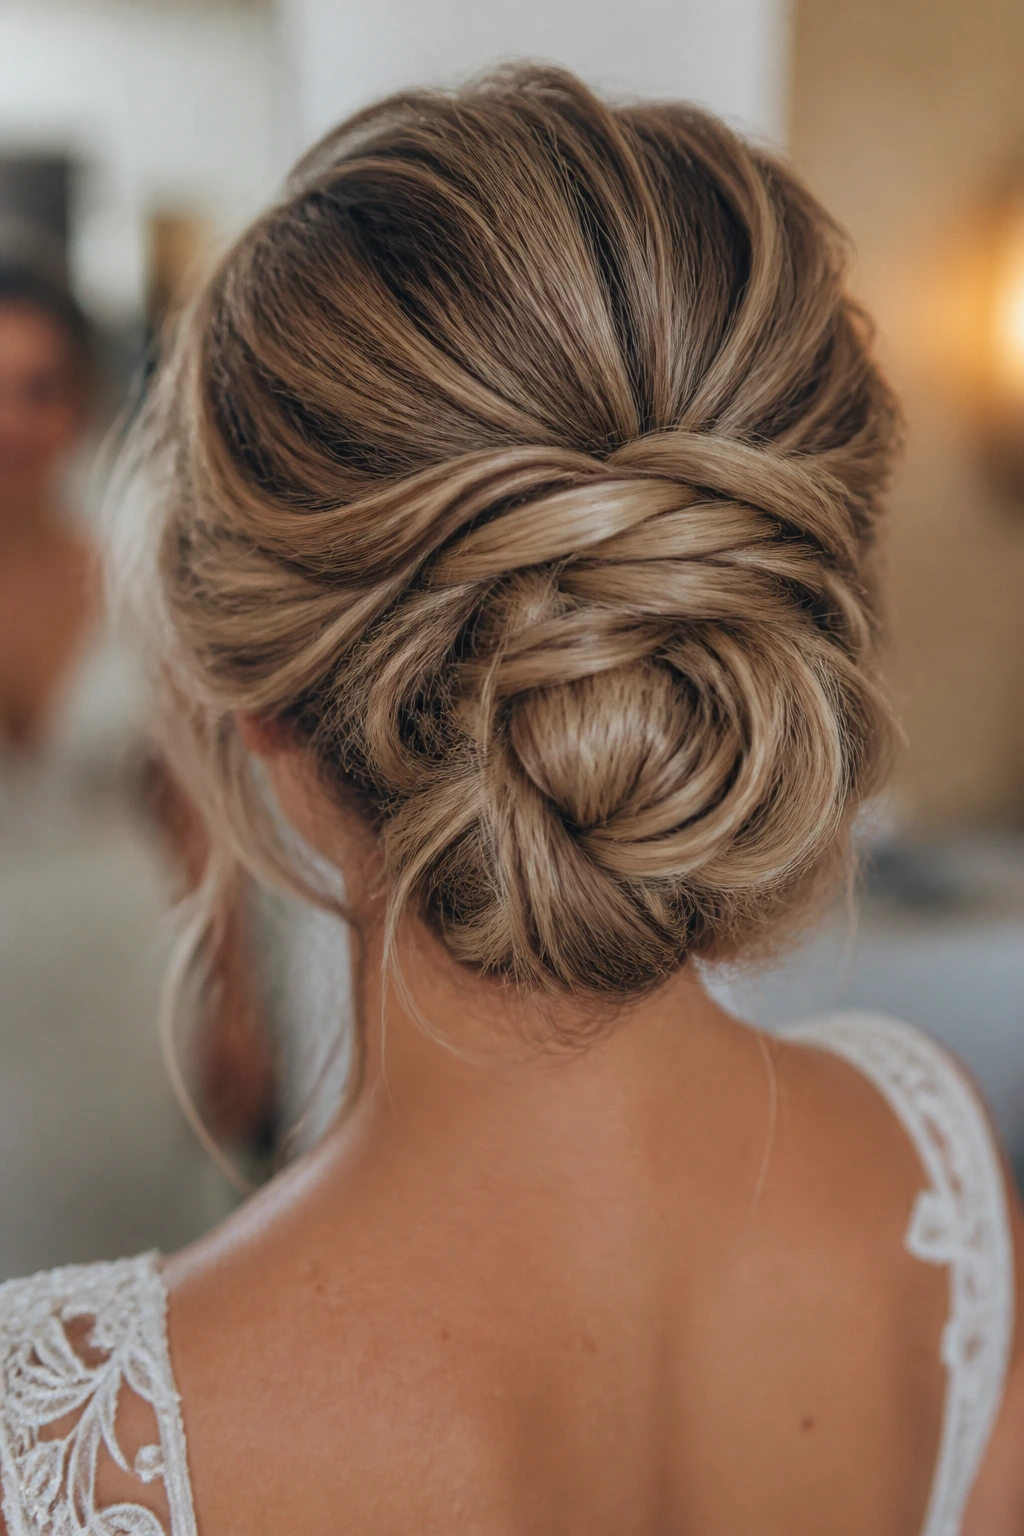
Can a messy bun survive hugging, dancing, and a few emotional hair flips? Yes, if it’s built like a small fortress. This version uses more structure than the others, but it still looks soft at the surface. The secret is a firm hidden base, often with a little braid or coil underneath, plus pins crossed in multiple directions.
What to Ask For
Tell the stylist you want movement on the outside and security underneath. That sentence matters. If you only say “messy,” you may get a style that looks lovely in the chair and shaky two hours later. A dance-ready bun needs the same front softness as the softer styles, just with a stronger anchor.
A touch of hairspray on the final surface is useful here, but don’t drown it. You want the shape to hold, not stiffen. The difference shows as the night goes on.
19. The Softest Final Look: A Loose Knot That Still Feels Finished
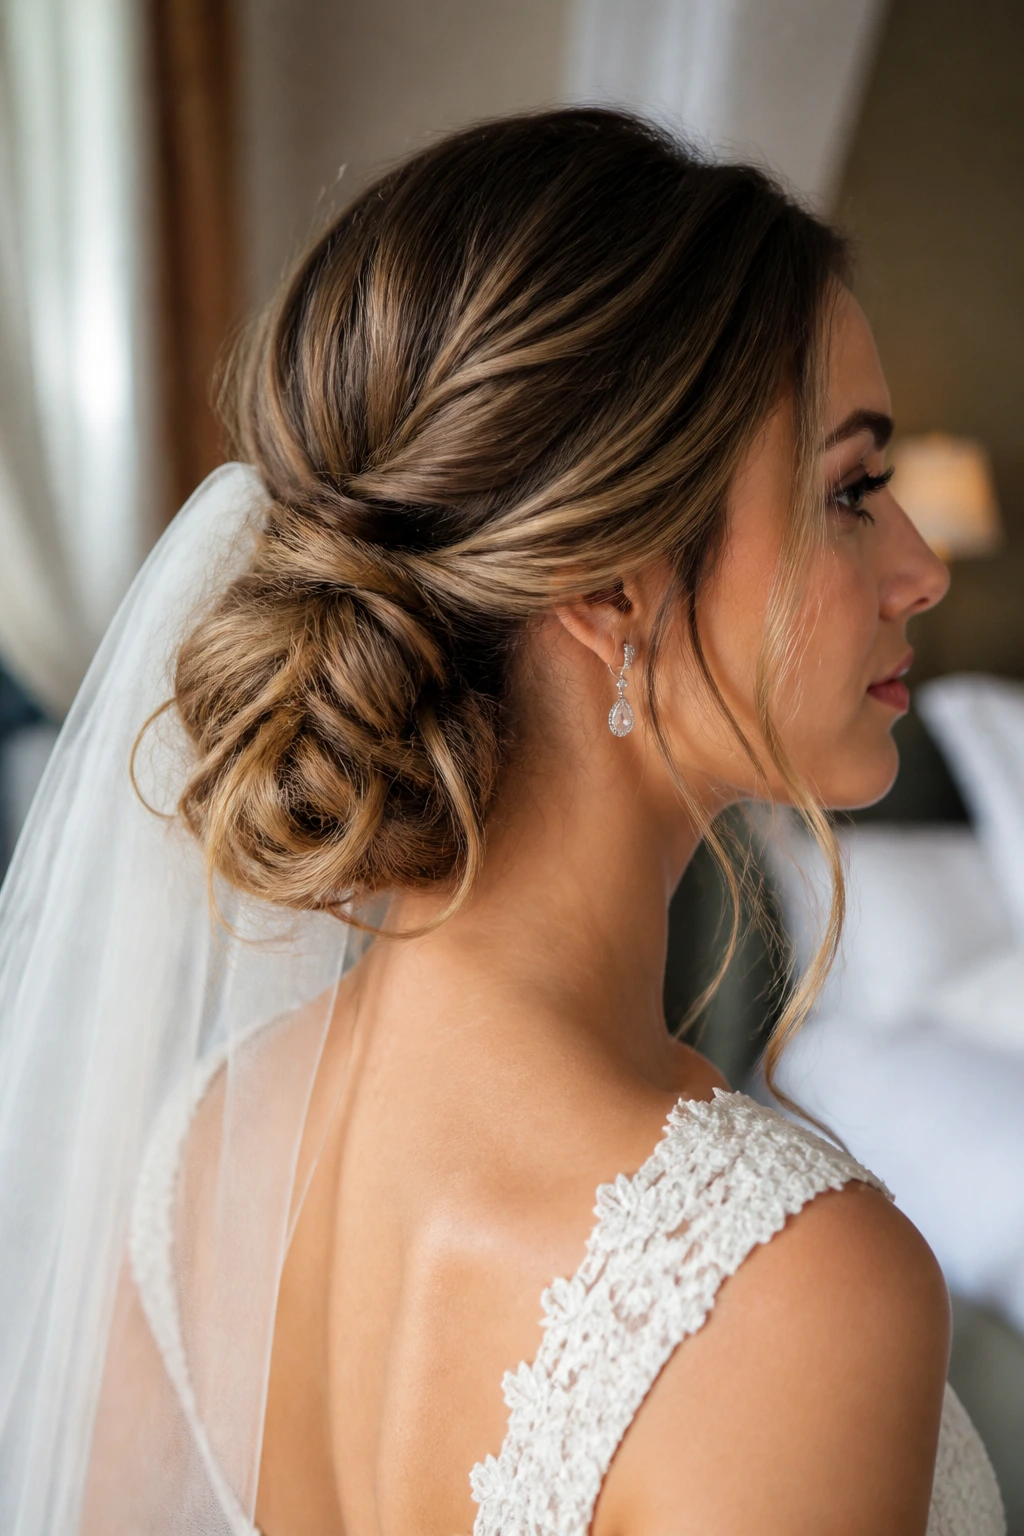
This is the style for brides who want the least amount of hair fuss while still looking intentional. It’s a loose knot, often low or mid, with enough structure to hold a veil or a comb and enough softness to keep the face open. Nothing about it is loud. That’s the point.
The charm is in the small decisions: a bend at the front, a little width at the base, a seam hidden under one twist, maybe two pins where a dozen would have looked clumsy. The result reads relaxed, but it doesn’t read unfinished. There’s a difference, and brides notice it fast once they’ve seen both versions.
If you want the kind of bun that survives the ceremony and still looks right when the photos turn candid, this is a strong place to land. It doesn’t ask for much. It just needs clean prep and a careful hand.
How These Buns Hold Up Under Veils, Hugs, and Dancing
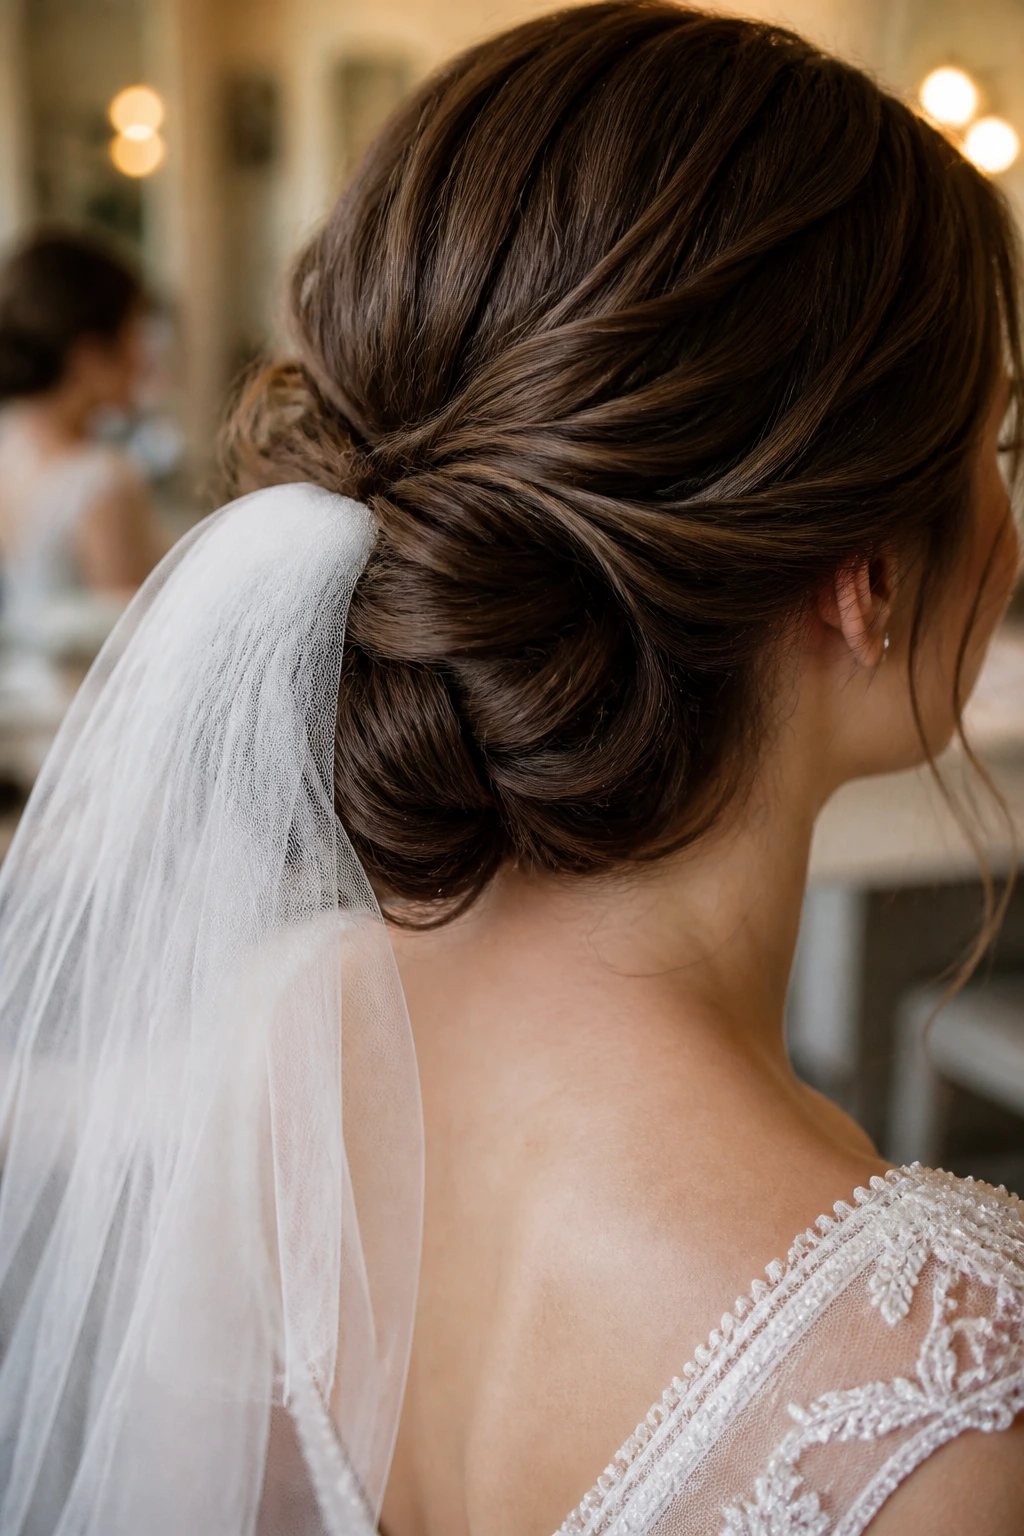
A bridal messy bun lasts because the base does the work, not because the surface is coated in enough spray to freeze it in place. If the foundation is pin-anchored to the scalp, the surface can stay soft and still hold. That’s the sweet spot. The bun moves a little, which looks good in photos, but it doesn’t drift apart when the veil comes off.
The other thing that matters is weight. A big comb, a long veil, or a cluster of flowers all pull downward. If the style is very loose to begin with, that pull shows fast. A better move is to build a wider base than you think you need, then let the outer edges stay soft. The structure hides under the texture.
A Stylist’s Decision Tree in Plain English
- Heavy veil or big comb: Choose a lower, firmer bun with a wider anchor.
- Simple veil or no veil: You can go looser, especially through the crown.
- Thick hair: Split the bun into sections so the weight spreads out.
- Fine hair: Add grip with powder, texture spray, or a tiny hidden cushion.
- Curly hair: Keep the curl pattern visible and pin in clusters instead of flattening everything.
Essential Tools for Bridal Messy Buns
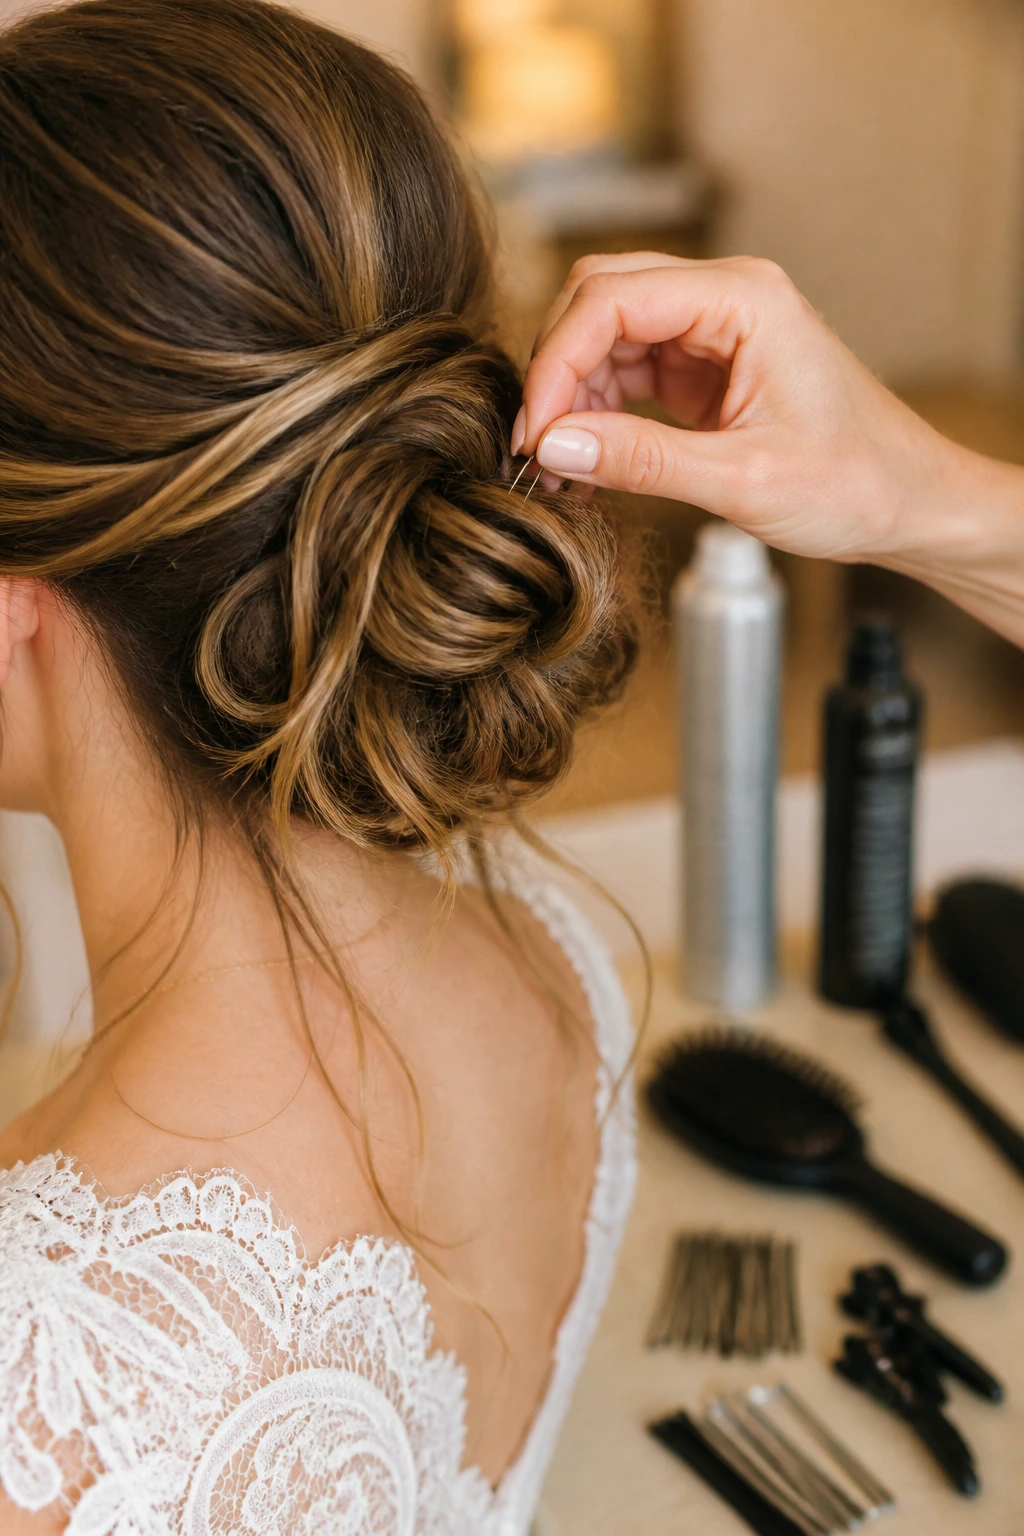
- 1-inch curling iron or wand: Gives bend and movement without creating ringlets that fall flat too fast.
- Rat-tail comb: Useful for clean parts, sectioning, and lifting the crown in small, controlled amounts.
- Teasing brush: Helps build root grip without shredding the hairline.
- Long bobby pins: Better for anchoring the bun base into the scalp than short, flimsy pins.
- U-pins: Handy for holding bulk inside the knot without leaving a line of obvious pin heads.
- Sectioning clips: Keep face-framing pieces and loose sections out of the way while you build the shape.
- Texturizing spray or dry shampoo: Adds grit to silky hair so it stops slipping around.
- Flexible-hold hairspray: Keeps movement in the hair instead of locking it into a hard shell.
- Hair net, optional: Great for fine hair or extra security under a veil if your stylist knows how to hide it.
- Mini flat iron, optional: Useful for smoothing just the front pieces or bending a stubborn end.
Smart Prep and Product Choices Before the Chair Time Starts
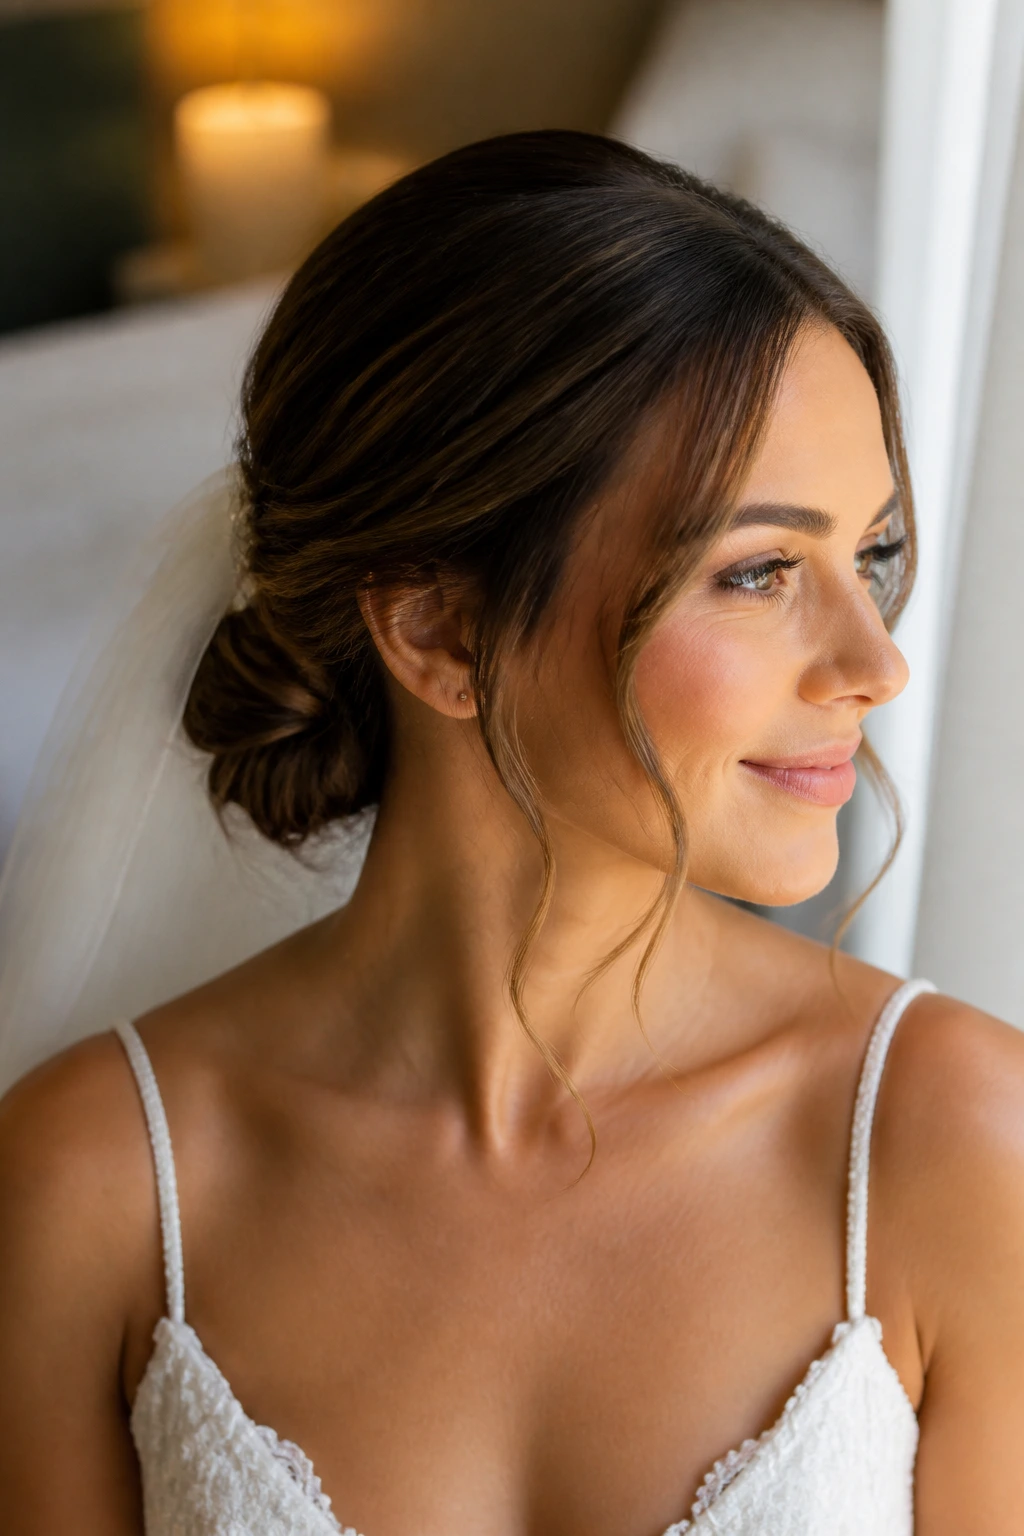
Hair prep sounds boring until you see what happens when it’s skipped. Freshly washed hair is often too slippery for a bun that needs to stay put. One-day-old hair tends to behave better, especially if the roots get a little dry shampoo or texture spray. If your hair gets oily fast, a light blow-dry with mousse at the crown can give you a cleaner base without making the strands too slick.
Product order matters. Heat protectant first if you’re curling. Then texture. Then the shape. If you spray heavy-hold hairspray before the bun exists, the hair gets sticky in the wrong places and you end up fighting your own prep. A better sequence is easy: build bend, let curls cool, brush or finger-comb them apart, then pin.
Silky hair usually needs more grit. Coarse hair often needs more control. Fine hair benefits from a little root lift and maybe a hidden cushion or two. Curly hair may need less shaping and more strategic pinning. The product list is not the same for every head, and that’s why a bridal trial is worth the time.
How to Match the Bun to the Dress, Veil, and Jewelry
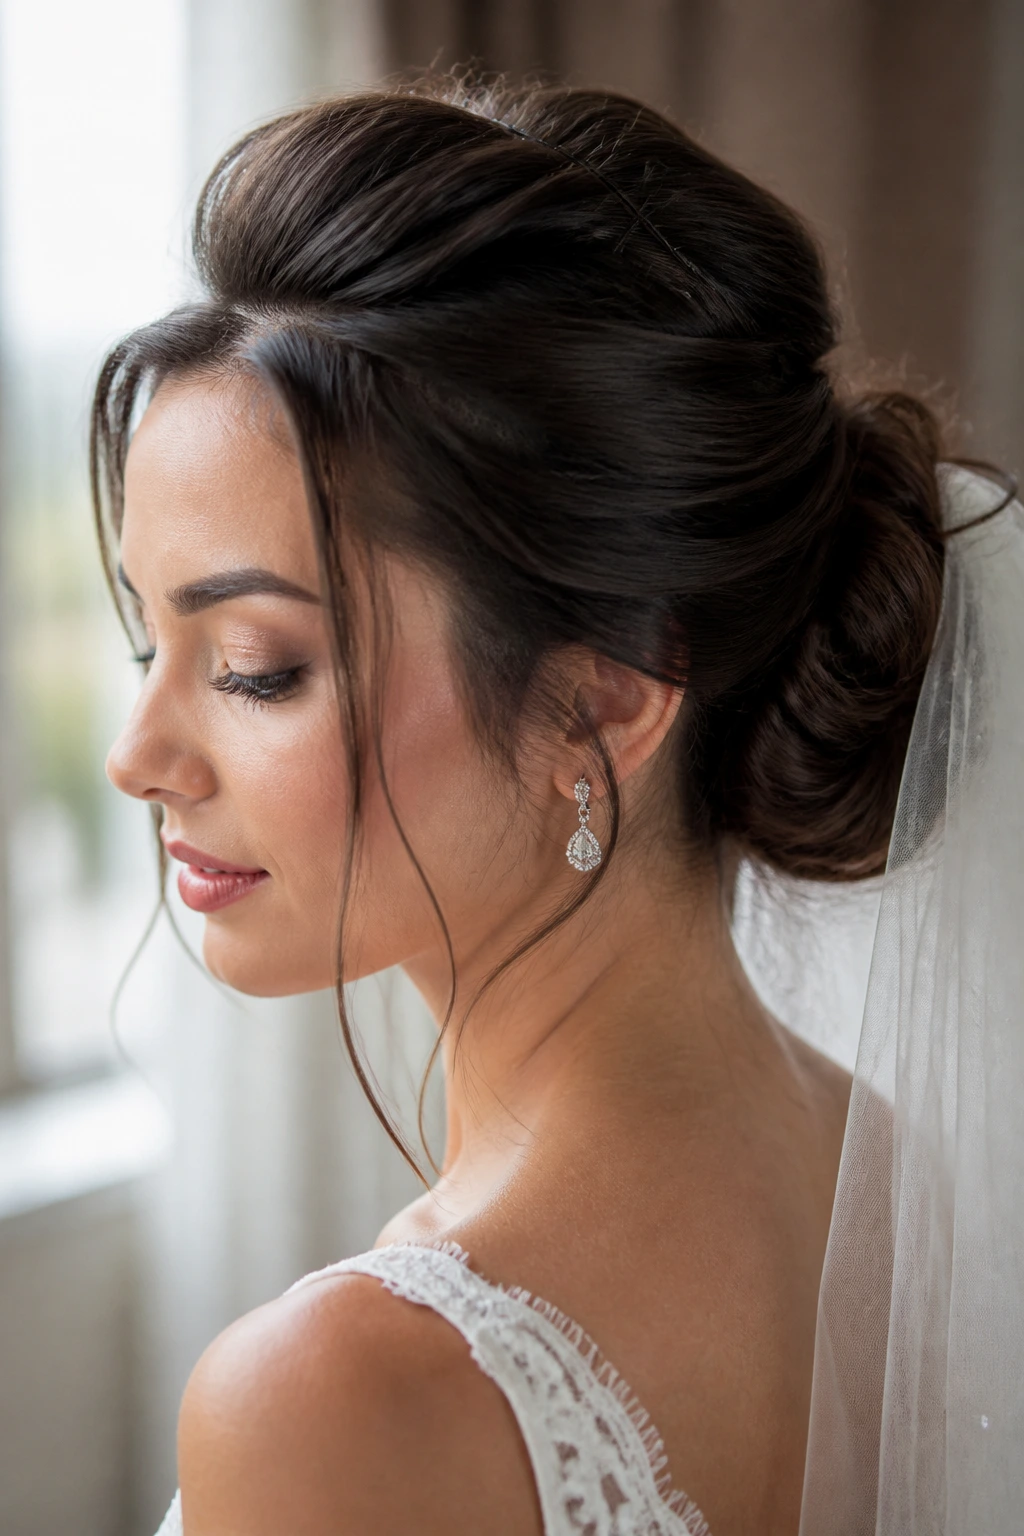
Placement: Low buns leave the back of a gown open and calm, which is useful for lace backs, buttons, and cutouts. Mid buns create a softer, more balanced look when the dress has detail all the way around. High buns lift the face and neck, especially with strapless or bare-shoulder dresses.
Accessories: One comb, one cluster of pins, or one set of flowers is usually enough. If the bun already has a lot of texture, the accessory should be small and specific. If the bun is cleaner, a more visible comb can carry the whole look without feeling crowded.
Veil: Pin the veil above the bun’s seam whenever possible. If it sits too deep in the knot, the weight can drag the style apart during the ceremony. A stylist can hide the comb with a twist or braid so the veil looks like it belongs there instead of sitting on top as an afterthought.
Jewelry: Heavy earrings and a high bun can be a strong combination, but the hair should stay simple enough that the face doesn’t feel crowded. If the earrings are delicate, a bun with more texture or a floral pin can keep the look from reading bare.
Additional Tips and Texture Boosters
Volume Boost: Backcomb only the root area you can’t see in profile. You want lift, not a cloud of shredded hair. A small spray at the roots and a quick cool shot from the dryer can give the hair more grip before the bun goes up.
Softness: Leave two face pieces instead of four. More than that, and the front can start to look fussy. Curl them away from the face and let the ends taper naturally.
Anchor Trick: Pin the bun in layers. One pin should catch the base, another should cross over it, and a third can hide the seam. That cross-pin habit does more for hold than piling spray on the surface.
Make-It-Yours: For a minimalist look, smooth the crown and keep the bun tight at the center. For a boho look, loosen the outer loops and add one braided strand or a few pinned tendrils. For a romantic look, tuck in pearl pins or tiny flowers near the seam, not scattered all over the bun.
Common Mistakes to Avoid With Bridal Messy Buns
-
Starting with hair that’s too clean: Freshly washed hair slips, especially if it’s fine or straight. The fix is simple: wash earlier, or rough up the roots with dry shampoo and texture spray before styling.
-
Making the bun loose everywhere: If the whole style is soft, the structure collapses once the veil or comb adds weight. Keep the outside loose and the inside pinned tighter than it looks.
-
Using too much hairspray too soon: Heavy spray before shaping makes the hair sticky and hard to move. Shape first, spray last, and use flexible hold instead of a shell.
-
Ignoring the veil anchor point: A veil comb shoved into a soft knot will drag it down. Ask for a firmer base where the comb can grip the head, not just the hair.
-
Choosing face pieces that are too short: Tiny front pieces often spring up or frizz out. Longer pieces that reach the cheekbone or jaw are easier to curl, tuck, and retouch.
-
Pinning only into the bun itself: Pins that don’t catch the scalp or the underlying sections won’t hold. Cross the pins into the base at different angles so the bun has something to latch onto.
Variations and Adaptations to Try
Fine-Hair Builder Bun: Add a small hidden cushion or bun form under the wrap, then use texture spray before pinning. Keep the surface soft, but don’t rely on air alone to create fullness.
Curly-Hair Preservation Bun: Leave more curl pattern visible and pin the curls in sections instead of brushing them out. This keeps the bun from turning into a puff that loses shape by the reception.
Shorter-Length Bridal Bun: Build a mid bun with tucked ends and a few invisible pins rather than forcing a low knot. This works better when the hair reaches the shoulders or collarbone but not far past them.
Minimalist Satin Bun: Smooth the crown, keep the bun compact, and use one polished accessory like a pearl comb or a slim barrette. This suits dresses with strong lines and fewer embellishments.
Garden Bride Bun: Add one or two small flowers or a tiny sprig of greenery near the seam. Keep the rest of the bun airy so the floral detail doesn’t look crowded.
Dance-All-Night Bun: Use a tighter hidden base, more cross-pinning, and a slightly firmer spray on the outer layer. The style will still move, but it won’t unravel when the dancing starts.
Night-Before Prep, Touch-Ups, and End-of-Day Care
The night before matters more than most people think. If your hair needs texture, braid it loosely or rough-dry it with a bit of mousse so it wakes up with some shape already in it. Sleep on a silk pillowcase if you can. It cuts down on friction, which means fewer puffed-out ends and less morning frizz around the hairline.
On the wedding day, keep a tiny emergency kit close: 4 to 6 spare bobby pins, a few U-pins, and a travel-size spray. If a twist loosens, tuck it back into the existing seam instead of building a whole new section on top. That’s the fastest fix and the cleanest one. If the veil comes off after the ceremony, check the anchor point once before the reception begins.
At the end of the night, remove the accessory first, then the veil, then the pins one by one. Don’t yank at the bun. Hair that has been pinned and sprayed all day needs a calm exit, or it tangles into itself. A little detangling mist and a wide-tooth comb through the ends is enough. The scalp will thank you.
Frequently Asked Questions About Bridal Messy Buns
Can fine hair really hold a bridal messy bun?
Yes, but it needs help at the base. Texture spray, root lift, and a small hidden cushion make a huge difference, and the bun should be pinned into the scalp instead of sitting on top of fluffy strands.
Should I wash my hair the day of the wedding?
Usually, no. Hair that’s washed the day before tends to grip better, especially if you want a bun that stays in place through photos and dancing. If your hair gets oily fast, keep the roots clean with dry shampoo instead of starting from scratch.
Will a messy bun work with a long veil?
It can, as long as the comb has a strong anchor point. A lower or wider bun tends to handle veil weight better than a very soft top knot, and the veil should sit above the bun’s seam.
How do I keep the bun from looking too sloppy?
Leave softness at the edges, not everywhere. The center and underside need to be secure, while the face pieces and outer loops can stay loose. That balance is what keeps the style from looking unfinished.
Can curly hair do these styles without being straightened first?
Absolutely. In many cases, it looks better when you leave the curl pattern intact. The key is to shape the curls into sections and pin them where they naturally want to sit instead of forcing them flat.
What if the bun starts to sag during the day?
Add a few cross-pins at the base and avoid pulling the outer texture apart. If the style is already built, a stylist or bridesmaid can lift the lower section slightly and anchor it again without rebuilding the whole thing.
Is a messy bun too casual for a formal dress?
Not if the structure is clean and the accessories are controlled. A low, pinned bun with pearl pins or a veil comb can look every bit as formal as a slick chignon, just softer around the edges.
Can I do one of these styles at home?
Yes, but pick the simpler versions if you’re not used to pinning hair. The low knot, the tucked bun, and the minimalist bun are the most forgiving. Anything with a braid, flowers, or asymmetry usually goes smoother with a trial run.
The Last Pin
A bridal messy bun works when it looks soft but behaves like it has a plan. That’s the whole trick. You want movement at the edges, grip at the base, and just enough personality that the style feels like part of the dress instead of a separate decision.
The best version for you will depend on the neckline, the veil, and the way your hair naturally wants to fall. If those three things line up, the rest gets easier fast. And once the bun is pinned, sprayed, and tucked into place, it should let you forget about it for the rest of the day—which, on a wedding day, is about the highest compliment hair can get.
