



Curly hair does not need to be flattened to look formal. In fact, some of the best prom hair has a little air in it, a little lift at the crown, and a few pieces that refuse to behave perfectly. That’s part of the charm. When people search for updos for prom night and curly hair, they’re usually trying to solve two problems at once: keep the style intact through hours of dancing, and avoid ending up with a stiff little helmet that doesn’t look like them.
I’ve always trusted curls more than I trust a shellacked bun. Curls bring their own grip, their own shape, and a built-in softness that straight hair has to fake with teasing and a small mountain of spray. The trick is not fighting that texture. It’s anchoring it. Pins hidden inside a coil. A twist that leans into the bend. A bun that softens at the edges instead of collapsing into chaos.
The 19 looks below are built for real prom-night life: hugging, photos, warm gyms, humid sidewalks, and that one friend who insists on taking eighty pictures before you even leave the driveway. Some are polished, some are romantic, some have a little drama. All of them respect the curl pattern instead of sanding it down.
Why These Prom Updos Hold Their Shape on Curly Hair
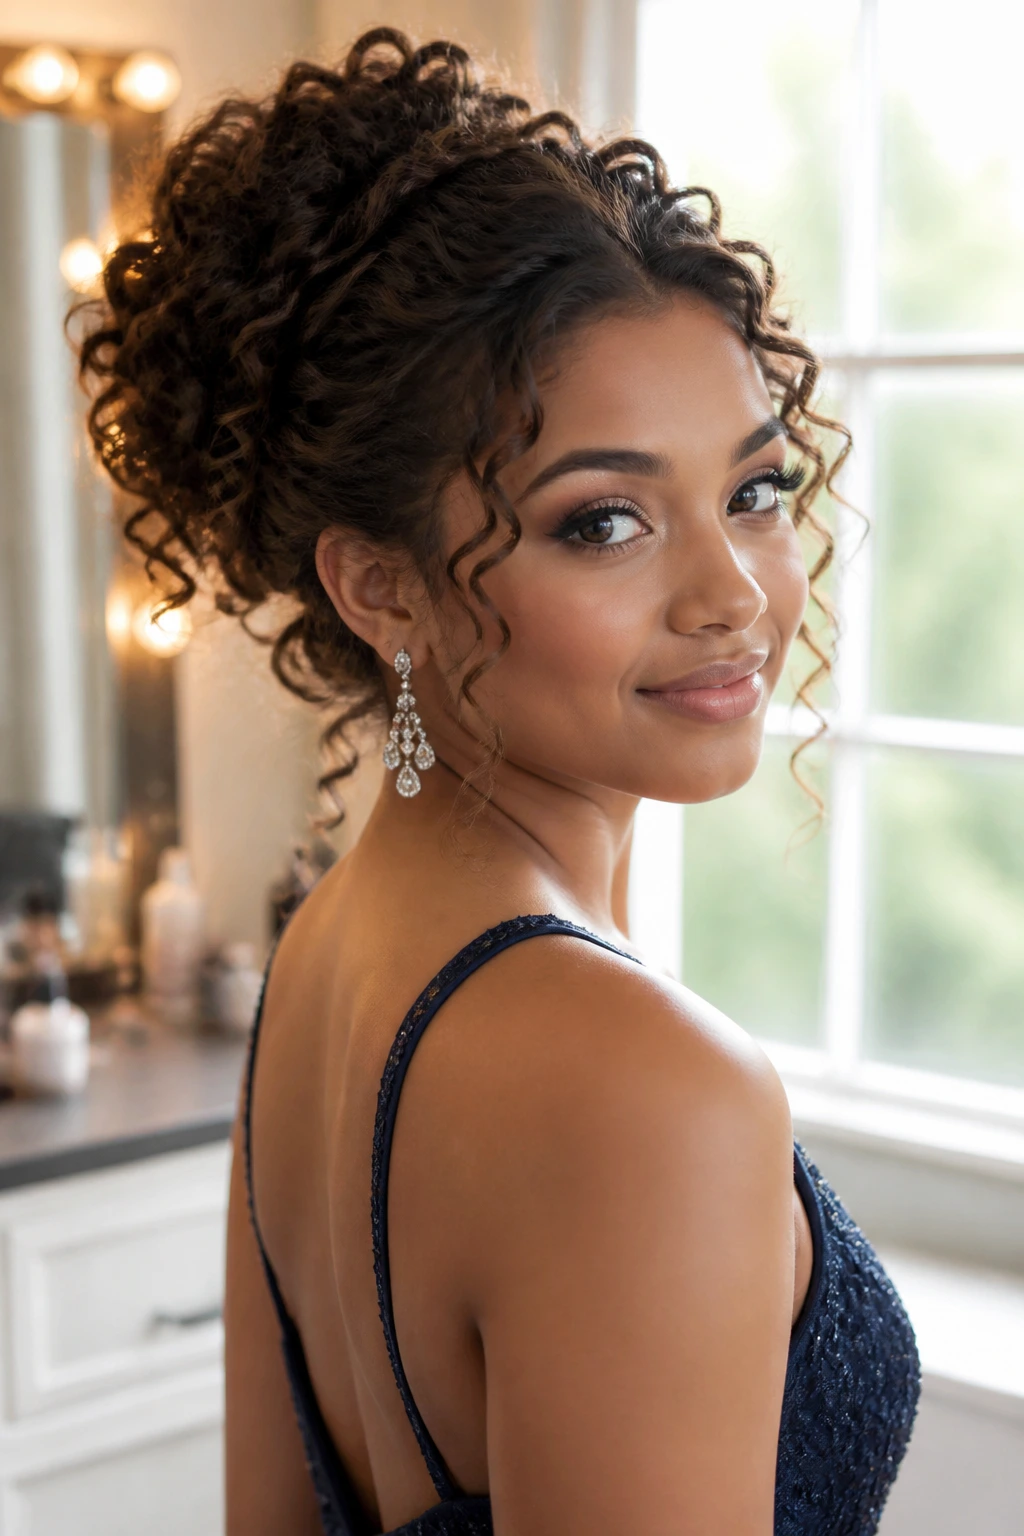
- Curl texture gives pins something to grab: Bobby pins slide right out of silky straight hair, but they catch in a coil, a braid, or a tightly wound twist and stay put much better.
- Softness reads as intentional on curls: A few flyaways around the hairline do not ruin the style here; they make the updo look lived-in instead of overworked.
- Different necklines need different shapes: Low buns sit beautifully with open backs, while higher crowns balance strapless or busy bodices without crowding the shoulders.
- Curly hair forgives small imperfections: If one twist sits a little wider than the other, the curl pattern hides the difference. That’s a real gift on a long night.
- Humidity has less power when the style has structure: A braid, tuck, or wrapped bun can loosen a little and still look finished, which is more useful than a style that only looks good at minute zero.
- Accessories have room to matter: Pearls, jeweled pins, ribbons, and combs show up better when the curls already bring texture and volume.
1. Curly Low Chignon with Face-Framing Spirals
A low chignon is the quiet overachiever of prom hair. It sits at the nape, keeps the neckline clear, and lets your curls do their thing without turning the whole style into a cloud of volume. What makes it work on curly hair is the contrast: the bun stays compact while two or three spirals at the front soften the face and keep the style from looking too strict.
This is the one I’d reach for with a dress that has a detailed bodice or a bold neckline. It doesn’t fight the outfit. It supports it.
The best version starts with a middle or slight side part, then gathers the back into a loose knot that’s pinned flat against the neck. Leave the front curls untouched until the very end. They should move when you turn your head. If they’re frozen in place, you’ve gone too far.
Good for: medium to long curly hair, especially if you want the back to stay neat in photos.
Best detail: one wrapped curl around the base makes the whole bun look finished, even if the shape underneath is messy.
2. Braided Crown Halo with a Hidden Bun
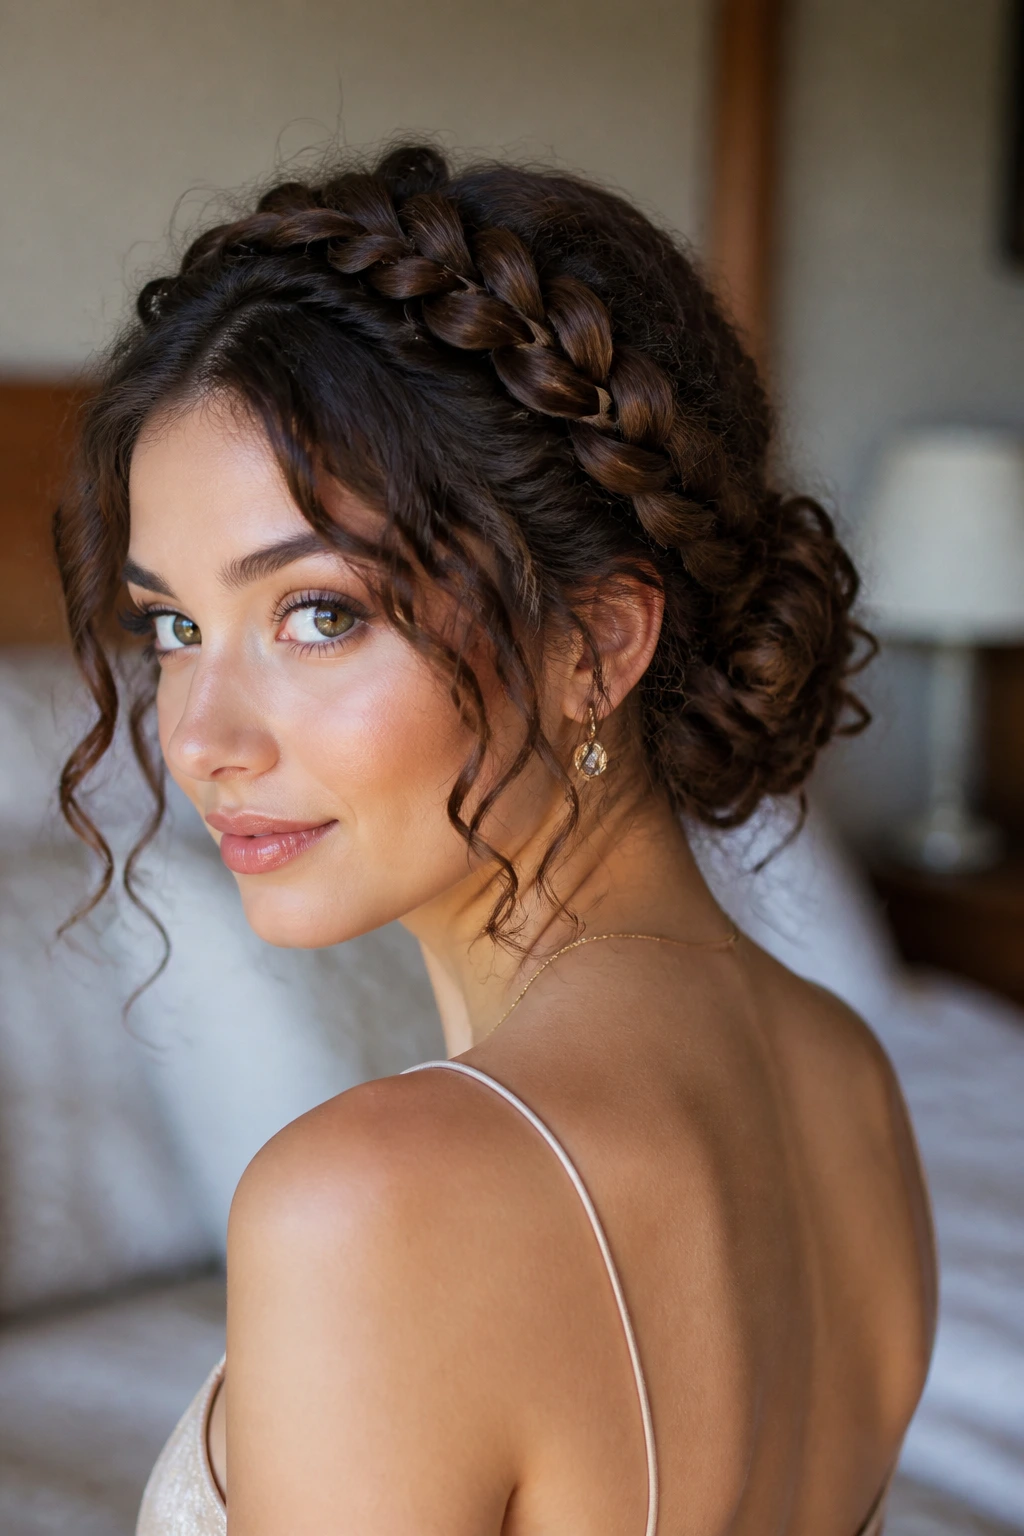
A braided crown halo does something smart: it creates its own frame. Once the braid circles the head, the rest of the hair can disappear into a tucked bun or coil at the back, and the whole style still reads clearly from the front. On curly hair, that braid picks up texture fast, so it looks fuller without much teasing.
Why it stays up so well
The braid acts like a built-in anchor. Instead of relying on a single elastic and a pile of pins, you’re building a path around the head and tucking the ends into a secure base at the nape. That means less pulling, less slipping, and less drama when you’re halfway through the night and the air feels warm.
It’s a strong pick for thick curls and for anyone who wants a romantic look without having hair in their face. A few pearl pins tucked where the braid meets the bun make it feel deliberate.
- Works best with: dense curls and layered hair that can make ordinary buns feel lopsided.
- Watch the braid tension: too tight and it flattens the curl pattern near the hairline.
- Use: U-pins for the hidden bun if your hair is heavy; regular bobby pins may not be enough.
3. Twisted Gibson Tuck for Dense Curls
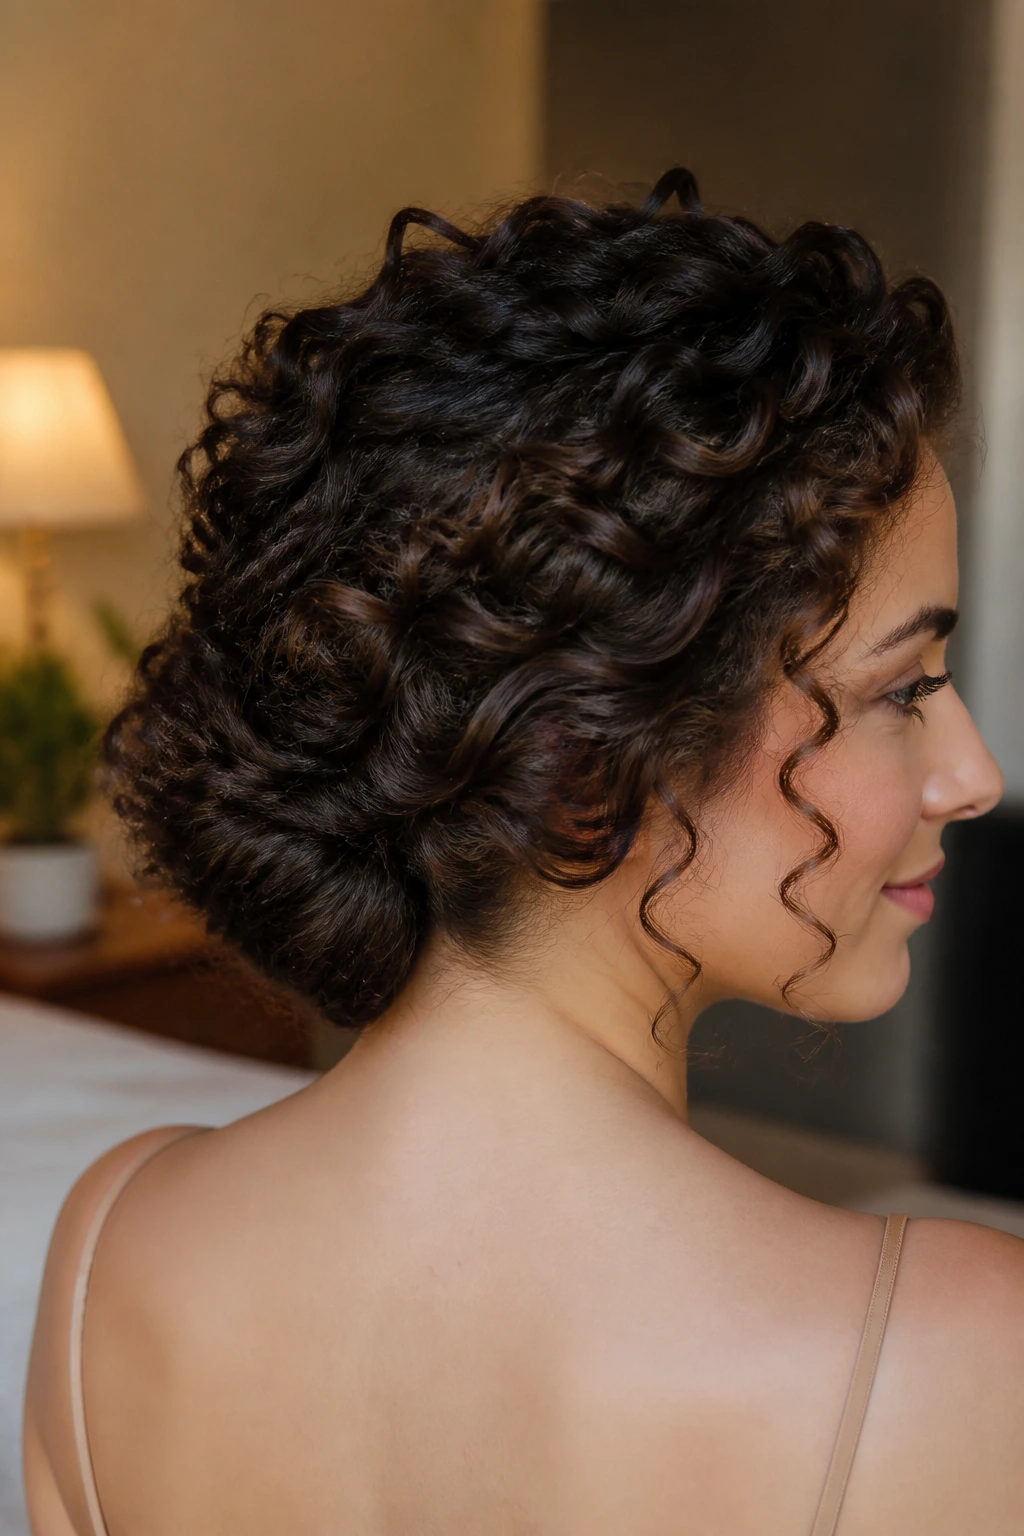
Can a Gibson tuck work on curly hair? Absolutely, if you give the curls enough room to fold instead of forcing them into a skinny roll. This style is one of my favorites for thick hair because it removes bulk from the shoulders but keeps the texture visible right along the tuck line. The result feels polished without looking steamed into place.
The move here is to twist the hair at the nape into a wide pocket and tuck the ends upward so they disappear under the roll. Curly ends actually help. They cushion the tuck and make the shape look softer.
If your hair is very dense, split the back into two sections before rolling. One thick section often fights you. Two smaller sections behave much better and pin with less strain on the scalp.
Best for: thick, springy curls that would rather fold than lay flat.
A small detail that matters: spray the inner side of the tuck, not the outer surface. That keeps the outside shiny and the inside sticky enough to hold.
4. High Curly Puff with a Wrapped Base
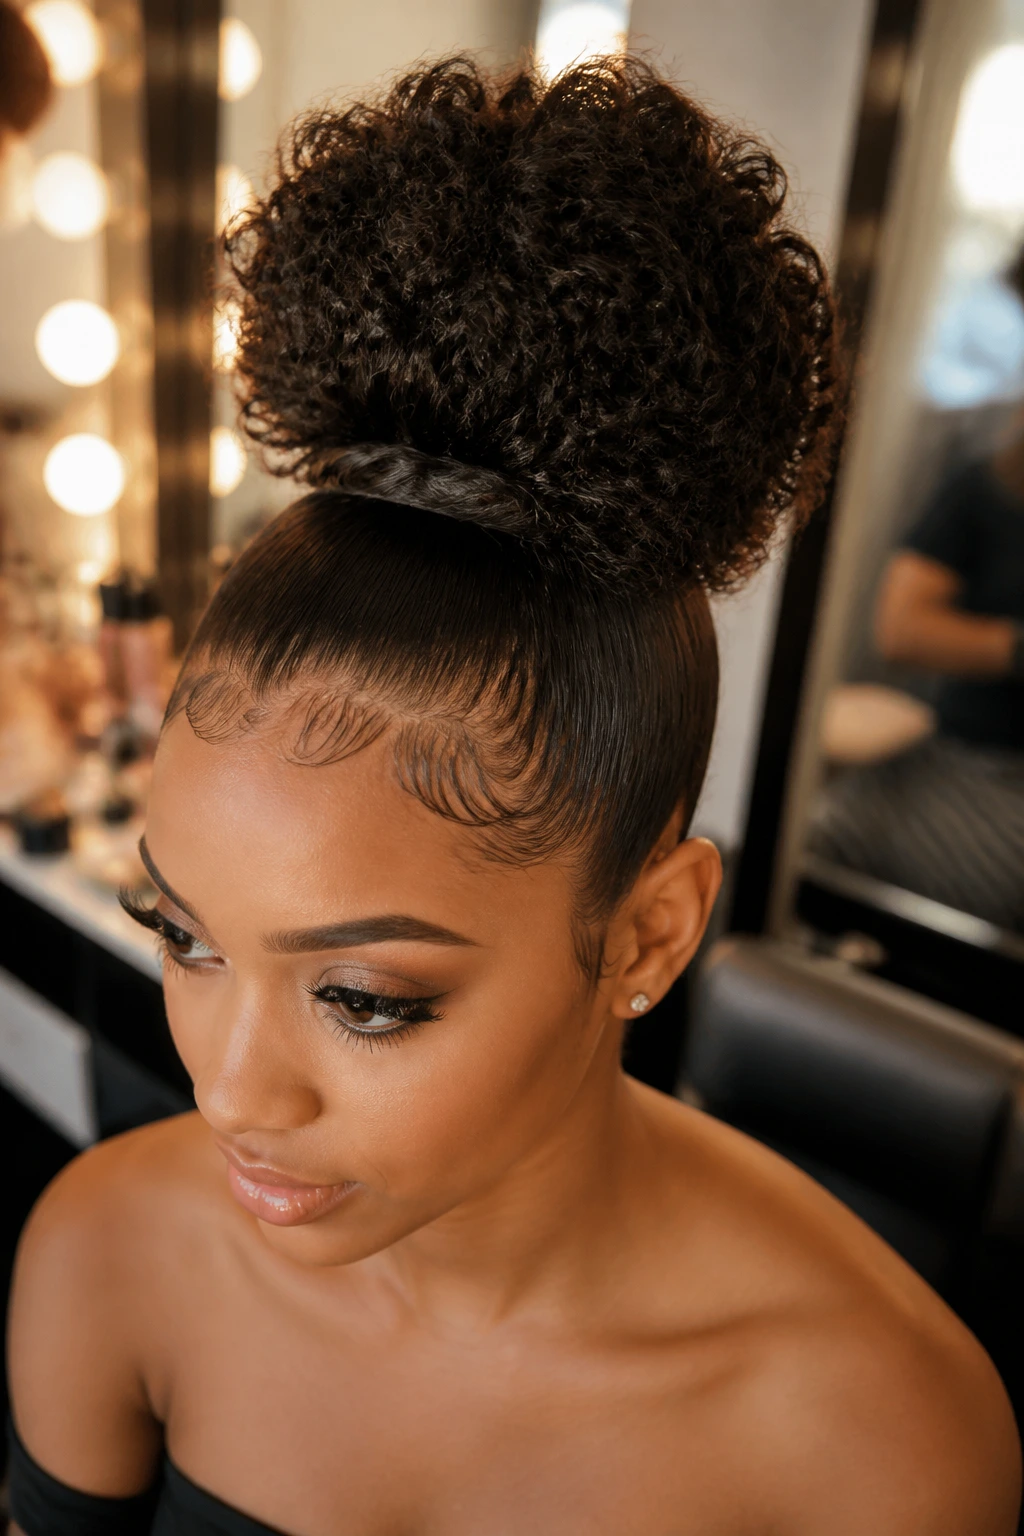
A high curly puff gives you height, energy, and a clean shoulder line. It’s the prom style for the person who wants the dress, earrings, and jawline to stay visible. On curly hair, the puff can look regal instead of casual if the base is wrapped tightly and the crown is smoothed just enough to keep the shape tidy.
This works especially well with strapless dresses, sharp necklines, or anything that needs vertical balance. A puff placed too low can look accidental. High and centered reads as a choice.
Where people get it wrong
They either flatten the crown too much or leave the base too loose. Both mistakes make the puff droop. The fix is simple: secure the ponytail high, wrap a braid or a coil around the elastic, and pin that wrap at the underside so the front stays clean.
A little edge control at the hairline is fine. A hard, shiny shell is not.
5. Side-Swept Low Bun with a Deep Part
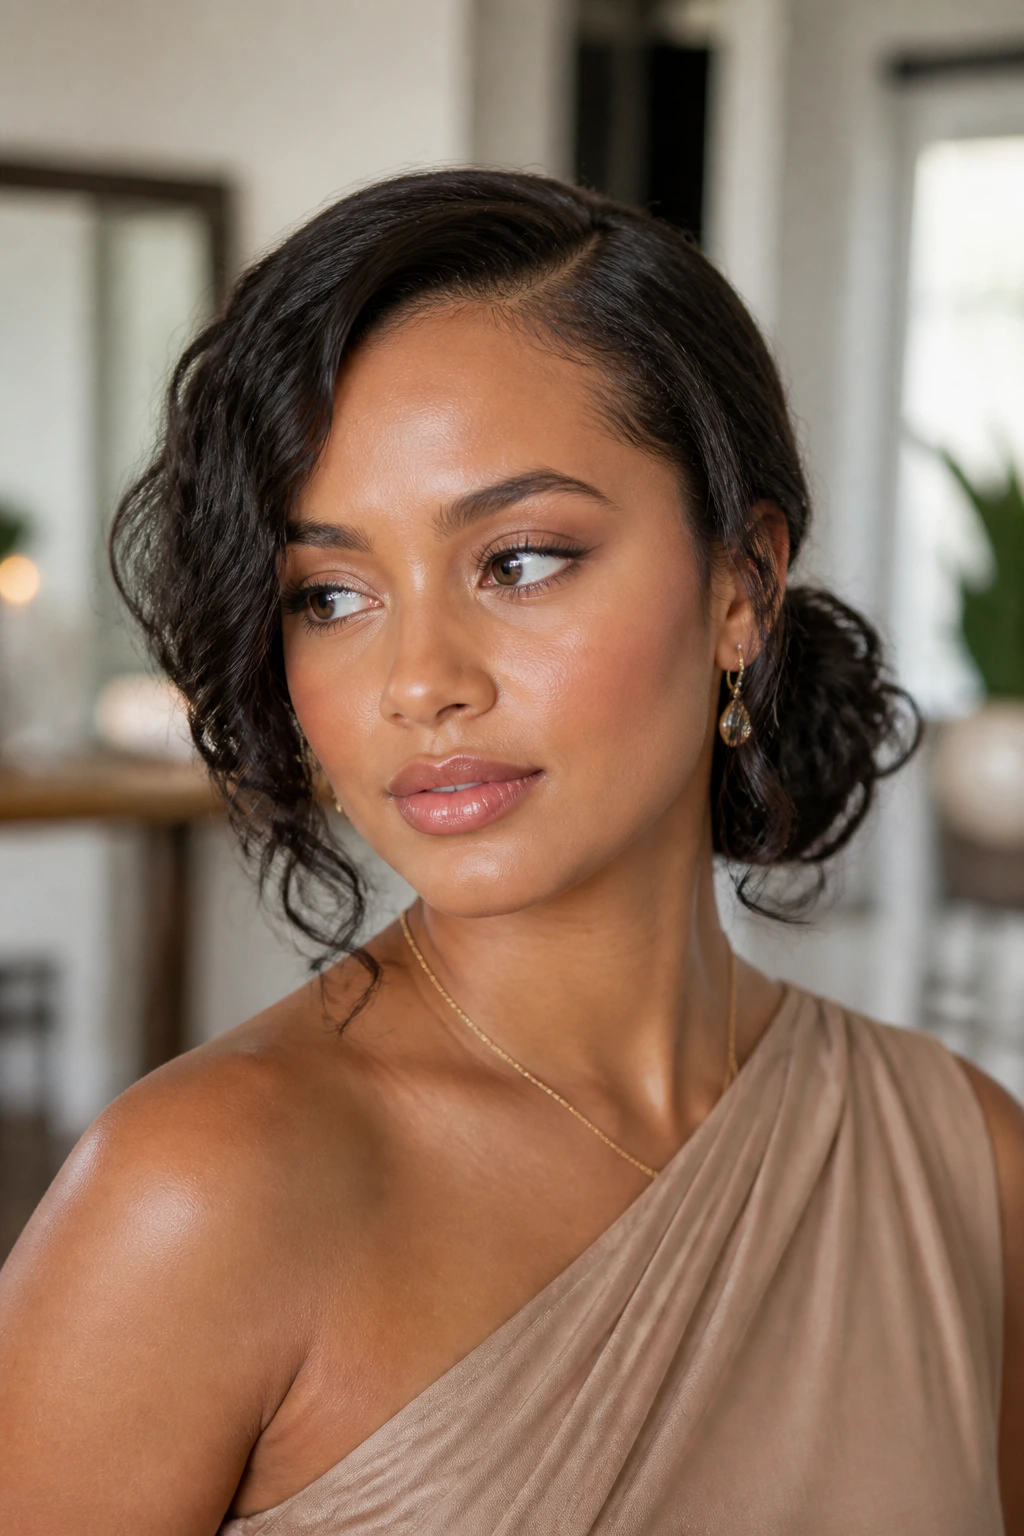
A deep side part changes the whole mood of curly hair. It gives the front more drama, lets one side skim the cheekbone, and makes a basic low bun look richer than it has any right to. There’s something especially pretty about the asymmetry here. One side feels structured. The other side spills a little.
This style flatters round and oval faces in particular because the side sweep creates a longer line across the forehead before the hair drops into the bun. It’s also good if your dress has one shoulder or a strong neckline on one side. The hair and the outfit can talk to each other instead of competing.
Keep the bun compact and slightly off-center, not dead in the middle. A perfectly centered bun with a side part can look too rigid. A tiny shift makes the whole thing breathe.
Tip: curl the front section before pinning it back. A pre-shaped wave sits better than a section forced into place with spray.
6. Rope-Braid Bun with Glossy Ends
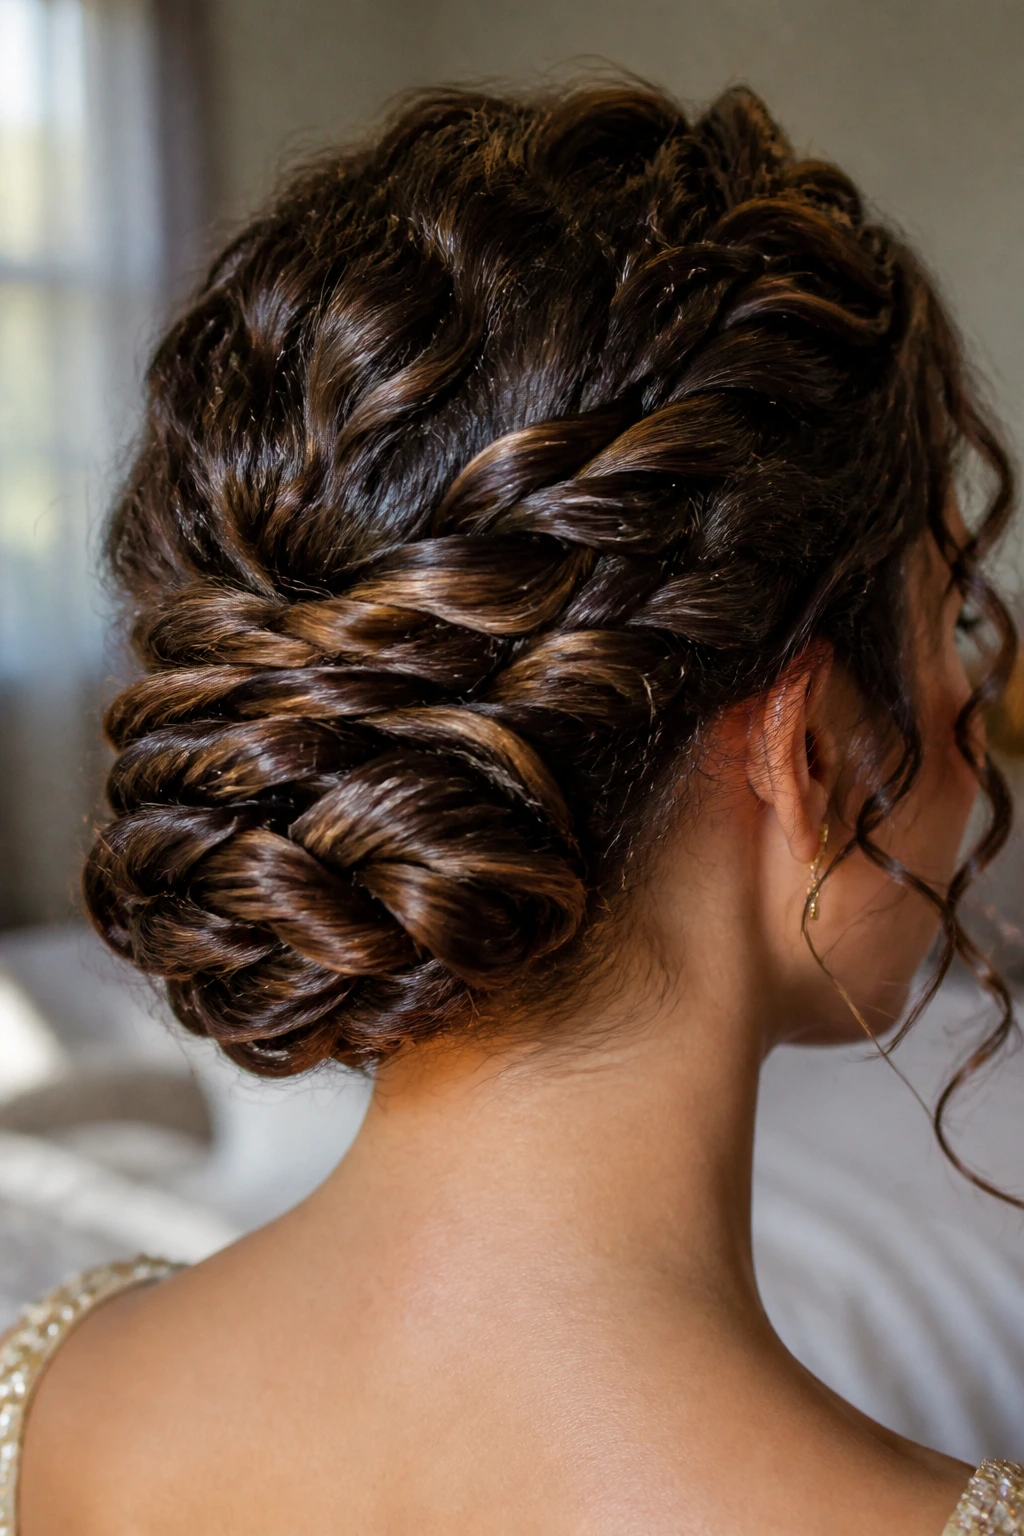
A rope-braid bun is one of those styles that looks more complicated than it is. Two sections twisted around each other make a rope, and that rope can be coiled into a bun that feels modern and clean. On curly hair, the twist catches on itself and holds surprisingly well. That’s the part I like.
Unlike a standard bun, which can go flat at the edges, the rope braid gives you visible structure. You get lines. Texture. A little shine where the light hits the twist.
This is a strong choice if you have medium-length curls and want something that won’t swallow your dress. The ends can be tucked under the bun or left in a tiny loop for a softer look. If the hair is layered, pin the loose ends underneath in two directions so they don’t pop out later.
Best way to finish it
Smooth the outer surface with a light cream or serum, then stop. Do not keep adding product until the hair starts looking wet. A glossy rope braid is pretty. A greasy one looks like you skipped washing day by accident.
7. Curly French Twist That Still Shows Texture
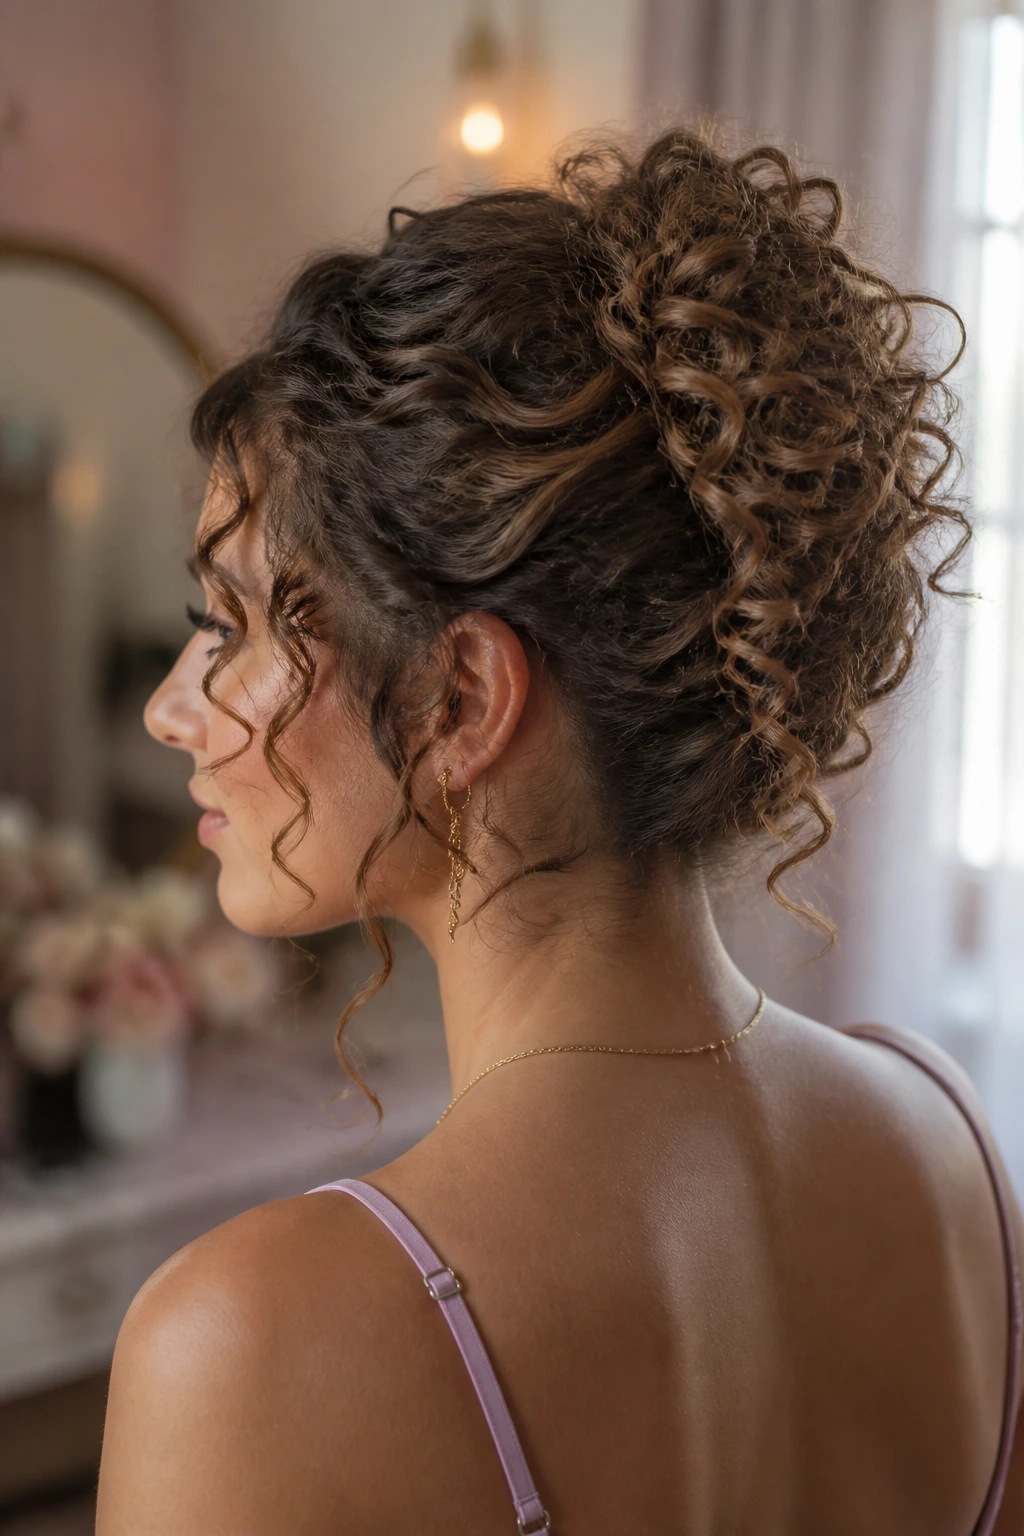
A French twist on curly hair sounds fussy, but it’s actually one of the easiest formal looks once you stop trying to make it sleek from root to tip. The trick is to keep the twist wide enough to show curl texture along the fold. If you press it too flat, the style loses the one thing that makes it worth doing.
This works beautifully for gowns with a clean back because the vertical line of the twist draws the eye upward. It also feels secure. The hidden pins sit inside the roll, and the heavier the curl pattern, the more natural grip you get.
How to keep it from collapsing
Build the twist on slightly rough-dried hair, not on freshly smoothed strands. A little grit gives the pins something to hold. Then tuck the ends upward in layers instead of shoving everything into one thick roll. That’s where most people lose the shape.
If you want the finish to feel softer, pull out two narrow tendrils near the temples. Keep them narrow. Chunky face pieces can make the twist feel underdone.
8. Half-Up Knot into a Full Curly Cascade
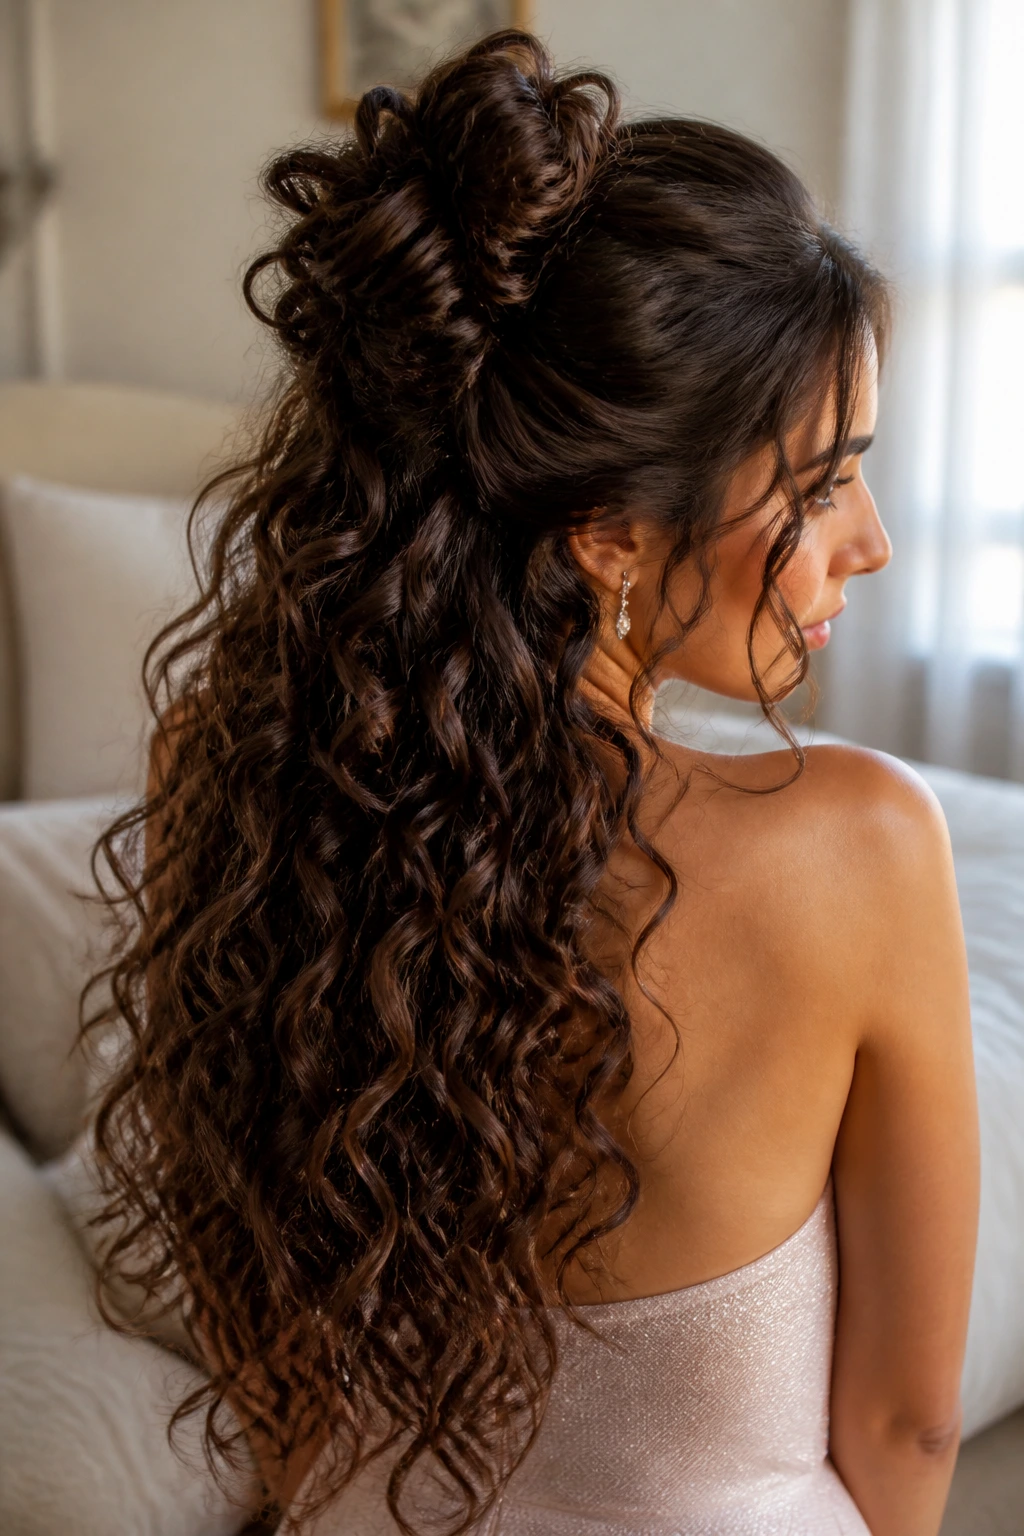
Not everyone wants every curl pinned away. Fair enough. A half-up knot gives you the lifted front of an updo while still showing off length and spring through the back. On prom night, that balance can be a lifesaver if you want to keep the hair romantic and avoid the tension of a full pinned style.
This is especially nice for long curls that look better when they move. Let the top section gather into a knot or tiny bun at the crown, then leave the rest cascading down the back. If your curls are very dense, pin the half-up section first and then shape the loose lengths around it so the silhouette doesn’t become bulky.
Best use case
This is the look for someone who wants to dance without worrying about every strand, but still wants hair movement in photos. It also works well if you’re wearing hair accessories and don’t want them lost in a fully wrapped bun.
A little mist of flexible spray at the top keeps the knot stable. Keep the lengths soft. Don’t stiffen the whole head just to make the top survive.
9. Pearl-Pinned Low Roll
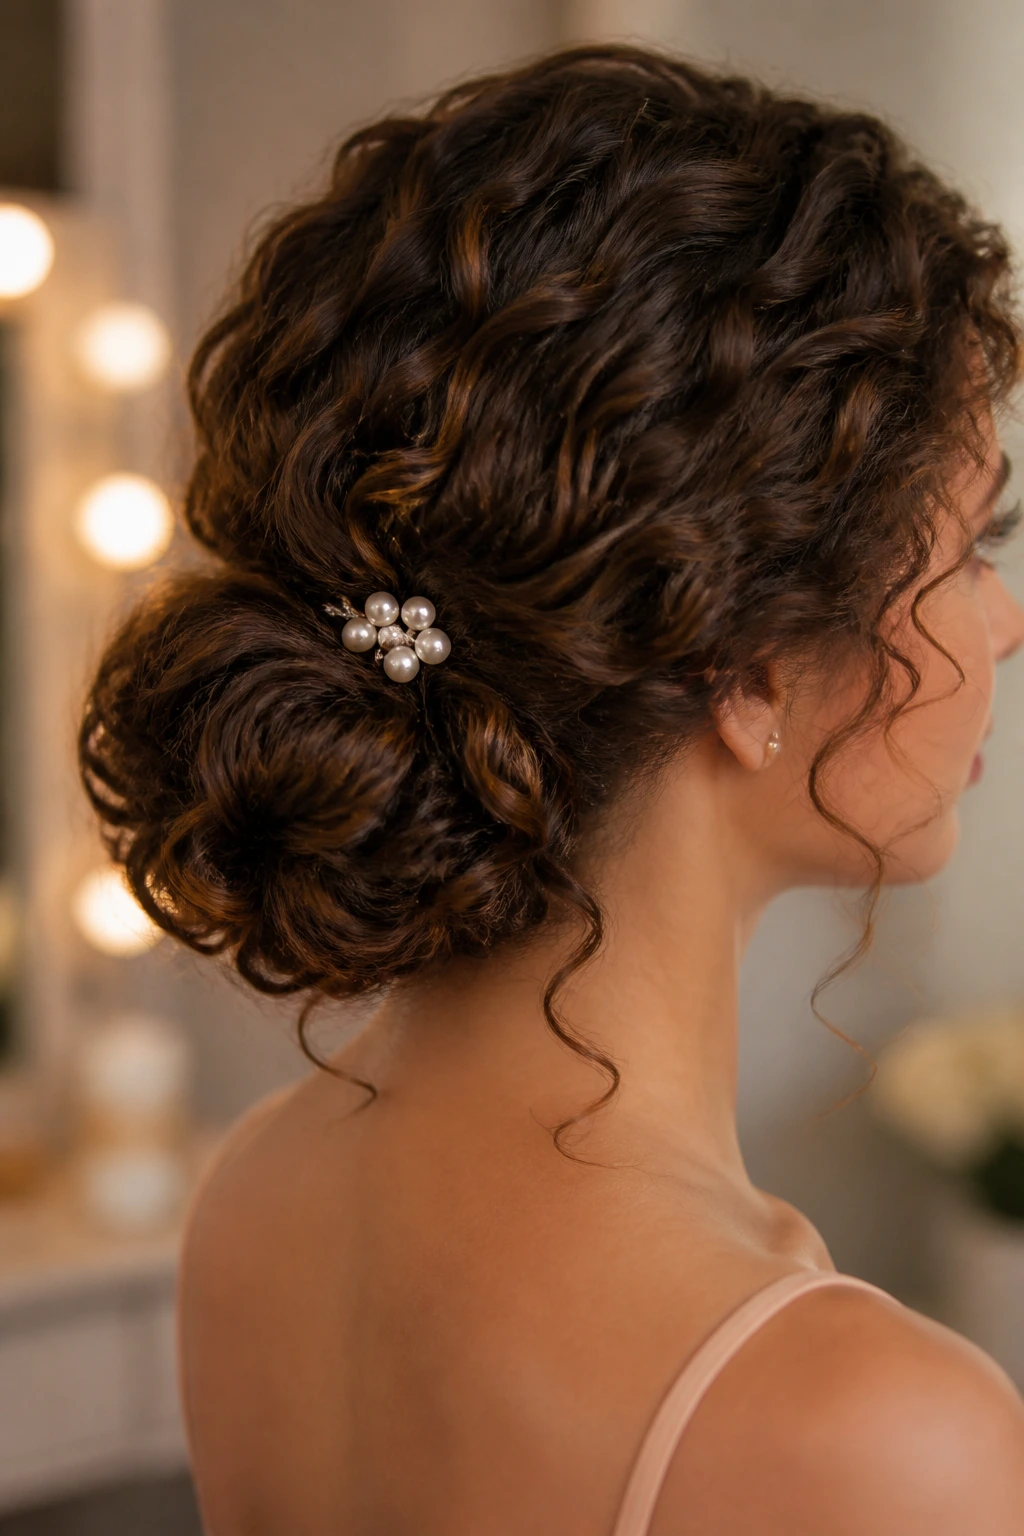
Pearl pins can make a low roll feel expensive in the best possible way. Not shiny-for-the-sake-of-shiny. Just finished. A low roll sits neatly along the nape, and the pearls give it enough visual interest that you do not need extra braiding or height. That simplicity is the point.
What makes this one special
It relies on clean placement. A neat center or soft side part, a roll tucked low, and a small cluster of pearls on one side. That’s it. Keep the accessory placement slightly off-center so the eye has somewhere to land. If the pearls are spread everywhere, the style starts to look busy.
I like this for dresses with satin, silk, or smooth fabric because the hair doesn’t have to compete for attention. The roll can be soft around the edges, which is good news for curly hair that refuses to go razor-clean.
Use this when: you want elegant, not fussy.
Skip heavy sprays here: the pearls already bring the shine.
10. Braided Mohawk Updo for Bold Volume
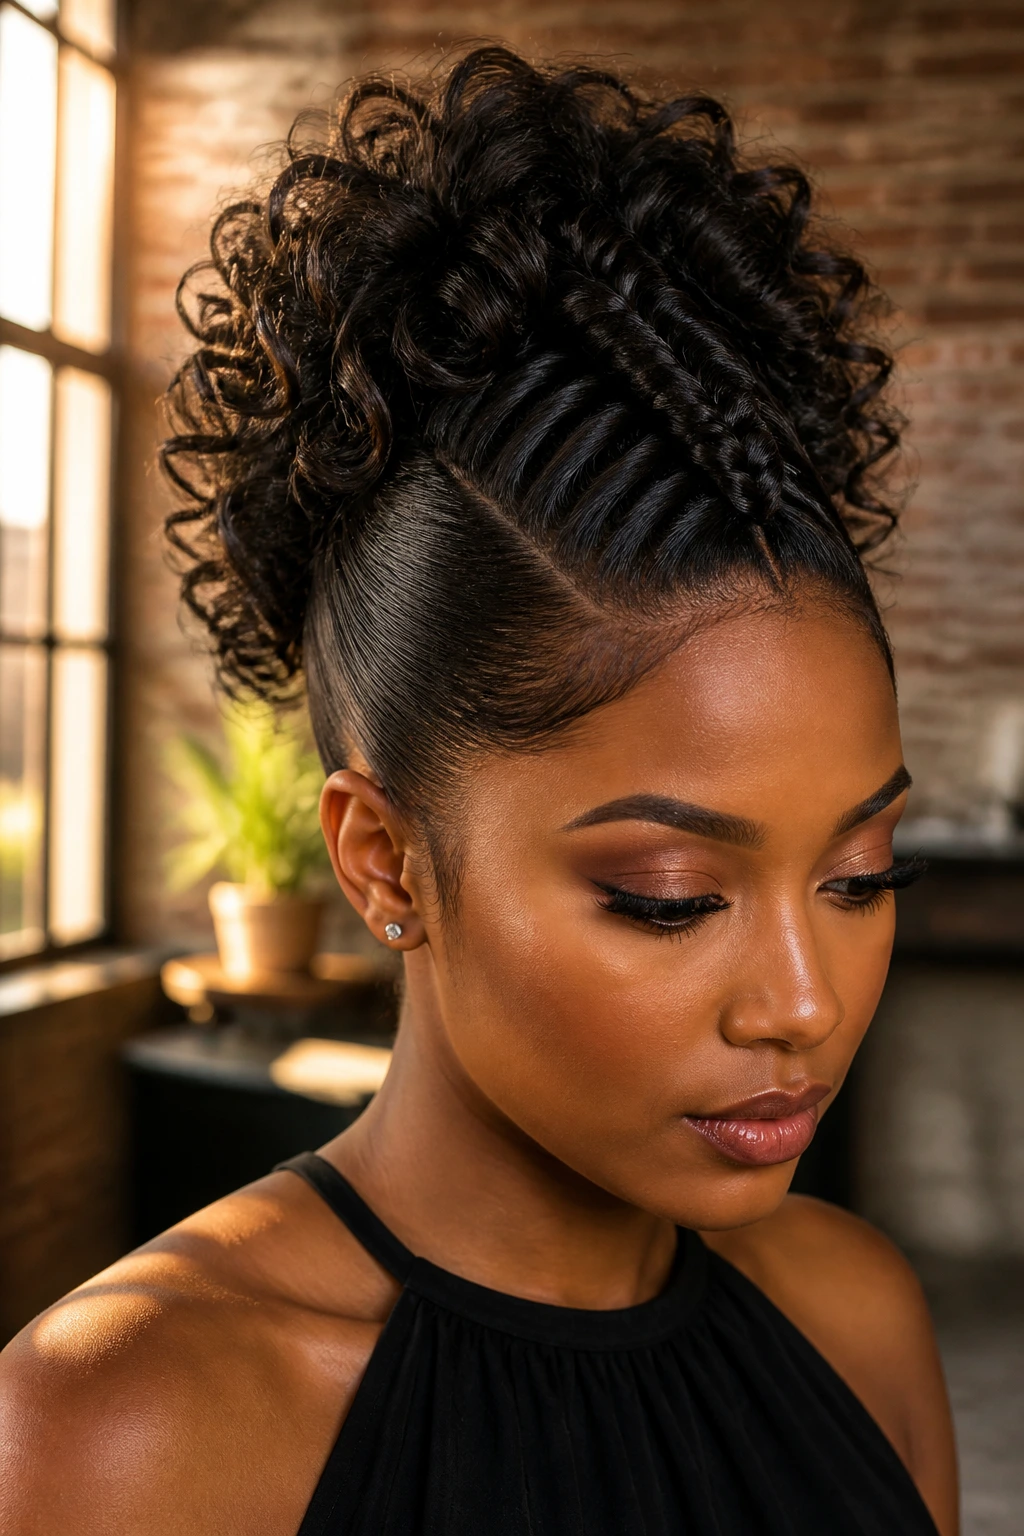
This is the style for the person who wants people to notice the hair before they notice the shoes. A braided mohawk updo builds a strong center line from forehead to nape, then lets the sides stay tight or swept back while the top carries the drama. On curly hair, it has real attitude.
The middle braid gives shape. The curls piled around it give softness. That contrast is what makes the look work.
It’s especially good for long faces and for dresses with a strong shoulder or a lot of structure. If the outfit is already delicate and floaty, this can still work — but it will own the room. Which may be exactly what you want.
A practical note
Braid the center section first and secure it before loosening the outer curls. If you try to shape everything at once, the style turns into a puff with a braid somewhere in the middle, which is not the same thing at all. The mohawk line should stay visible when you look straight on.
11. Knotted Nape Bun with Hidden Pins
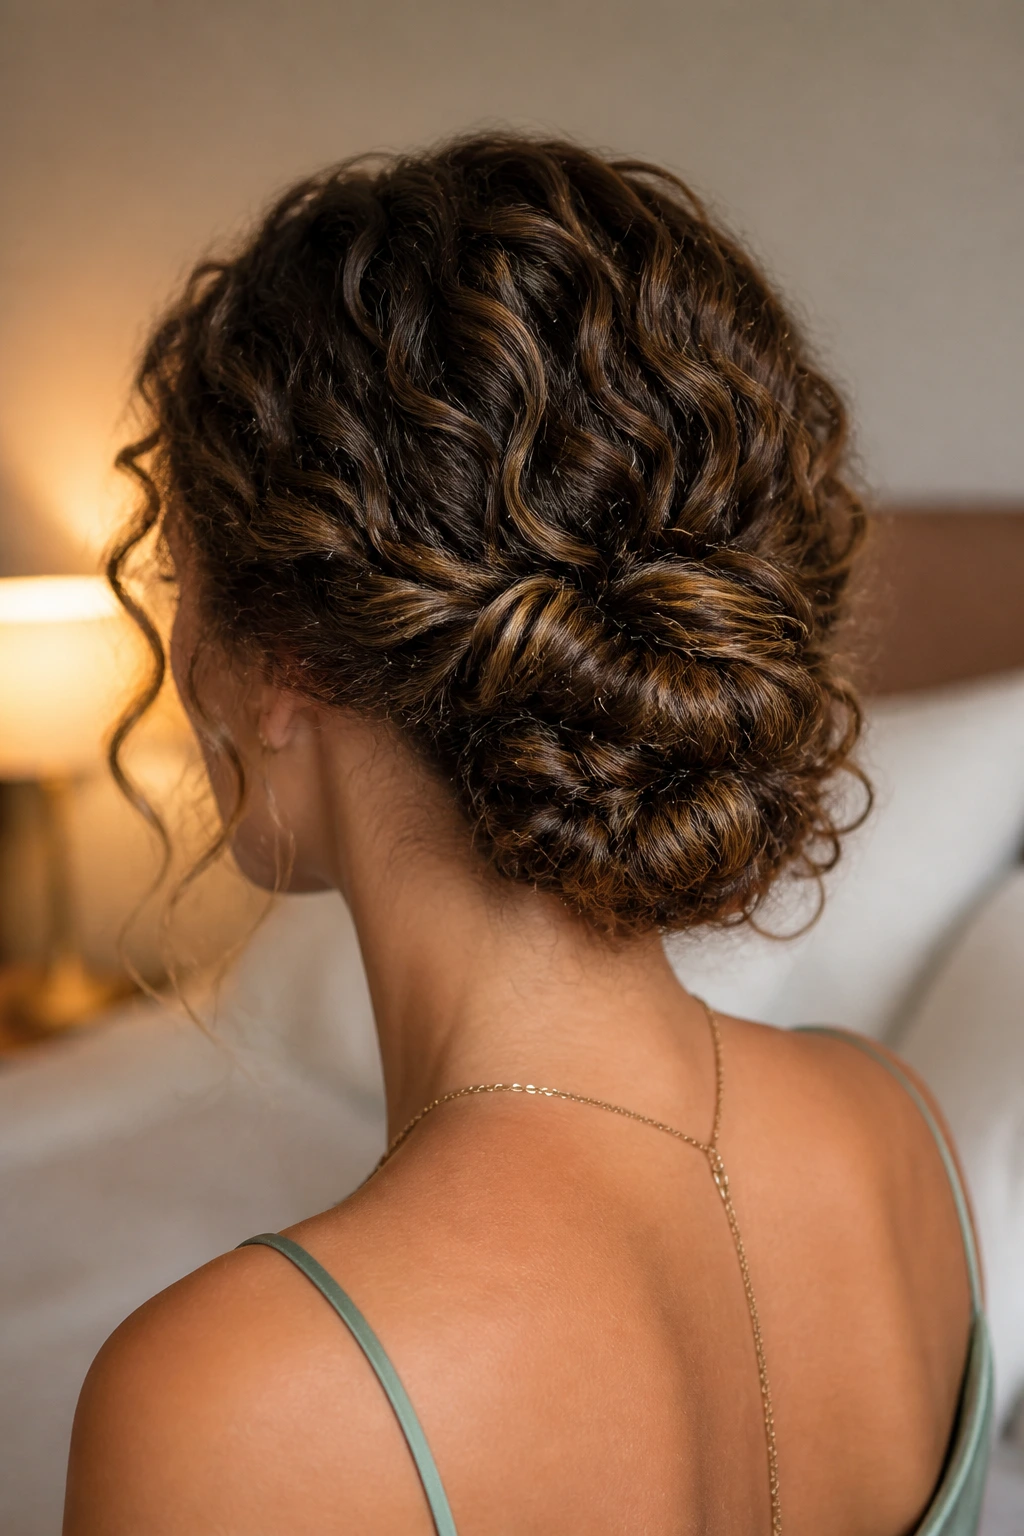
What if you want something sculptural but not braided? Go with knots. A knotted nape bun uses two or three looped sections tied into each other and pinned low, almost like a fabric fold made out of hair. Curly texture helps because it fills the spaces between the knots and keeps the bun from looking flat.
This style has a nice handmade feel. Not messy. Handmade.
It works best when the hair is divided into manageable sections and each knot is pinned as you go instead of waiting until the end. That way the base stays secure and the top can be shaped later. If your hair is layered, leave the shortest ends tucked inward so they don’t fray out of the bun.
Best detail: the outside of the knot should look soft, but the inside needs to be tight. That contrast is what keeps the shape.
12. Sleek Front Curly Bun with Lift at the Crown
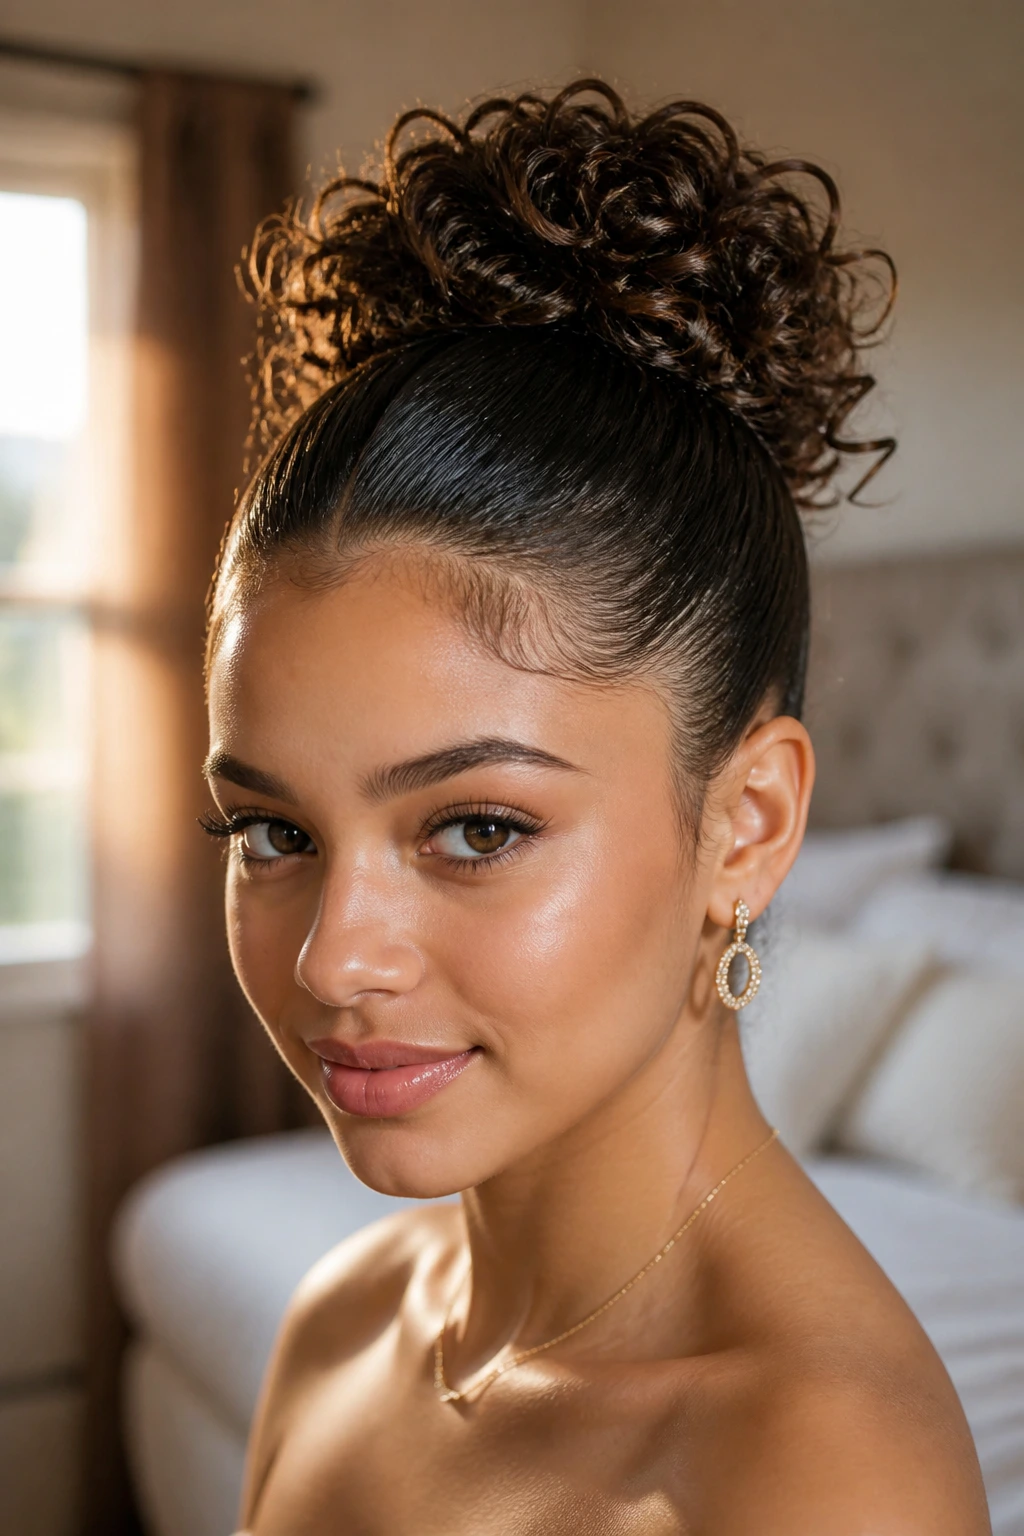
A sleek front with curly volume at the back gives you two moods at once. The front reads polished — clean part, smoothed temples, maybe a little gel at the hairline — while the bun or gathered back section keeps the curl pattern alive. It’s a good compromise if you like neatness but do not want to erase your texture.
The lift at the crown matters. Without it, the style can look dragged back too tightly. A small amount of root volume keeps the profile balanced and helps the bun sit higher without looking stiff.
This is one of the best looks for mixed textures, too. If your roots are looser and your ends are tighter, the transition looks intentional here. You smooth what needs smoothing and leave the rest alone.
Keep this in mind
Do not drag the front so tight that your brows and temples lift with it. Prom hair should stay comfortable enough to last through dinner. If the scalp starts feeling pulled before the photos even begin, loosen it and re-pin.
13. Waterfall Braid into a Low Updo
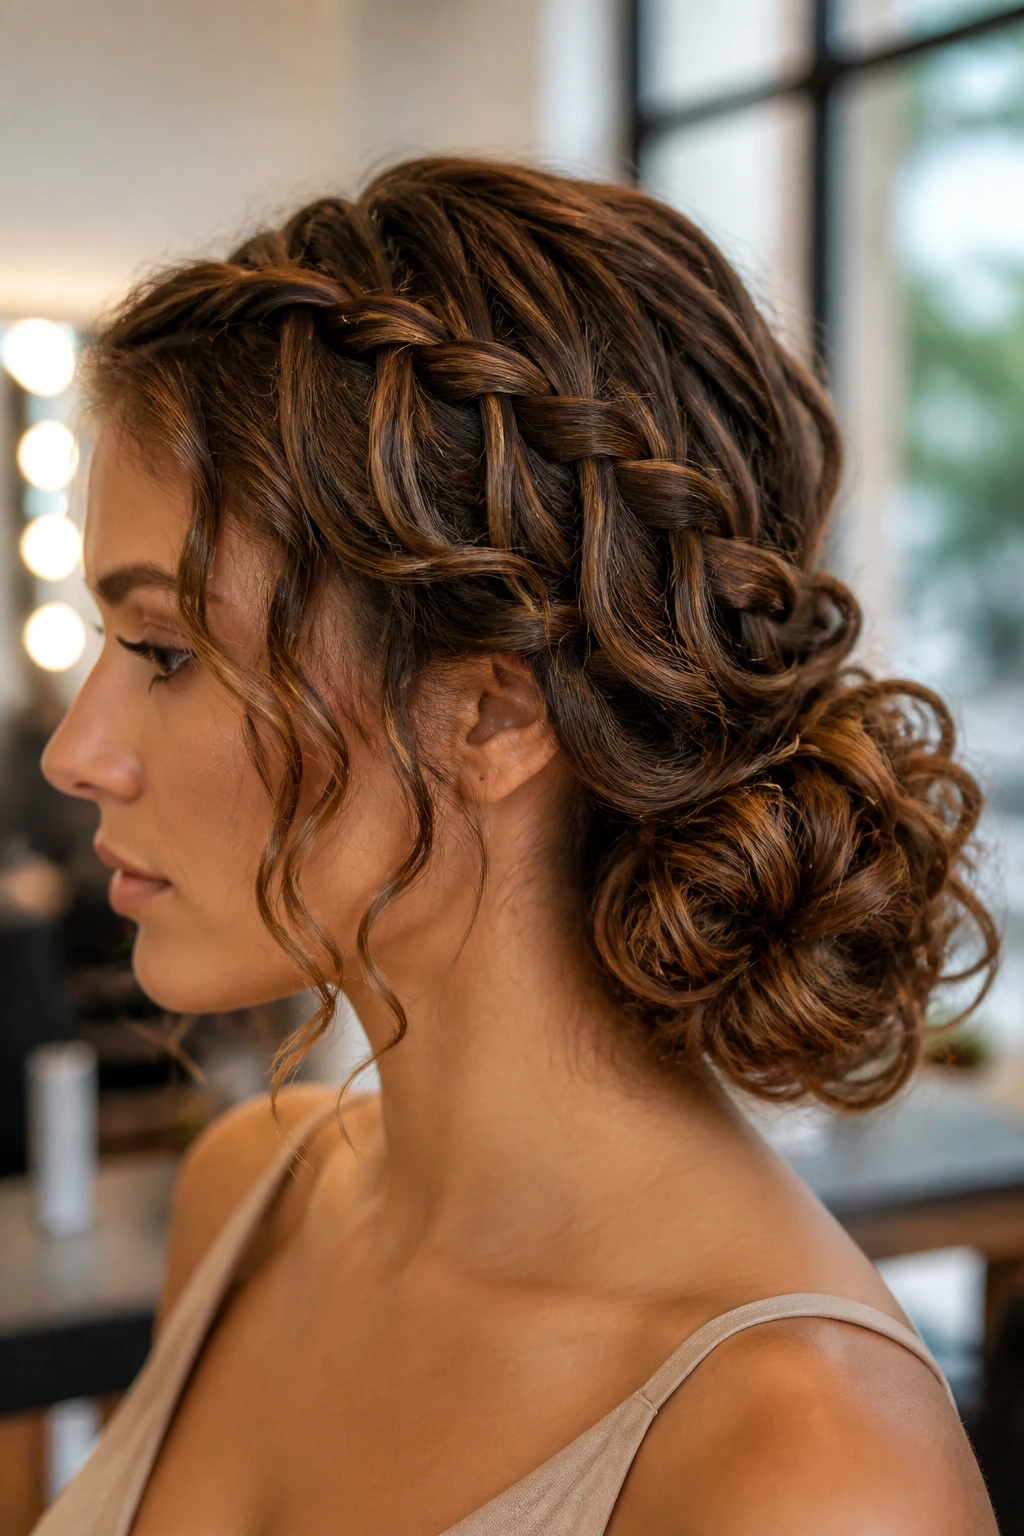
A waterfall braid brings movement before the updo even begins. Strands drop through the braid like little curved ribbons, and on curly hair those dropped pieces keep their shape in a way straight hair often can’t. Then the remaining length folds into a low bun or tucked roll at the neck.
This is a beautiful option for long curls because it shows off the pattern near the face and then controls the length at the back. It feels soft from the front and secure from the side, which is a nice combination for prom.
How to keep it from turning busy
Keep the waterfall braid narrow. One wide braid plus a full bun plus big curls can get crowded fast. Let the braid do one job: frame the head. Let the bun do the other: anchor the length.
If you’re nervous about loose pieces falling, pin the braid every few inches as you work down the head. That sounds fussy, but it saves time later. And less fighting with the braid means less frizz.
14. Double Twisted Crown Bun
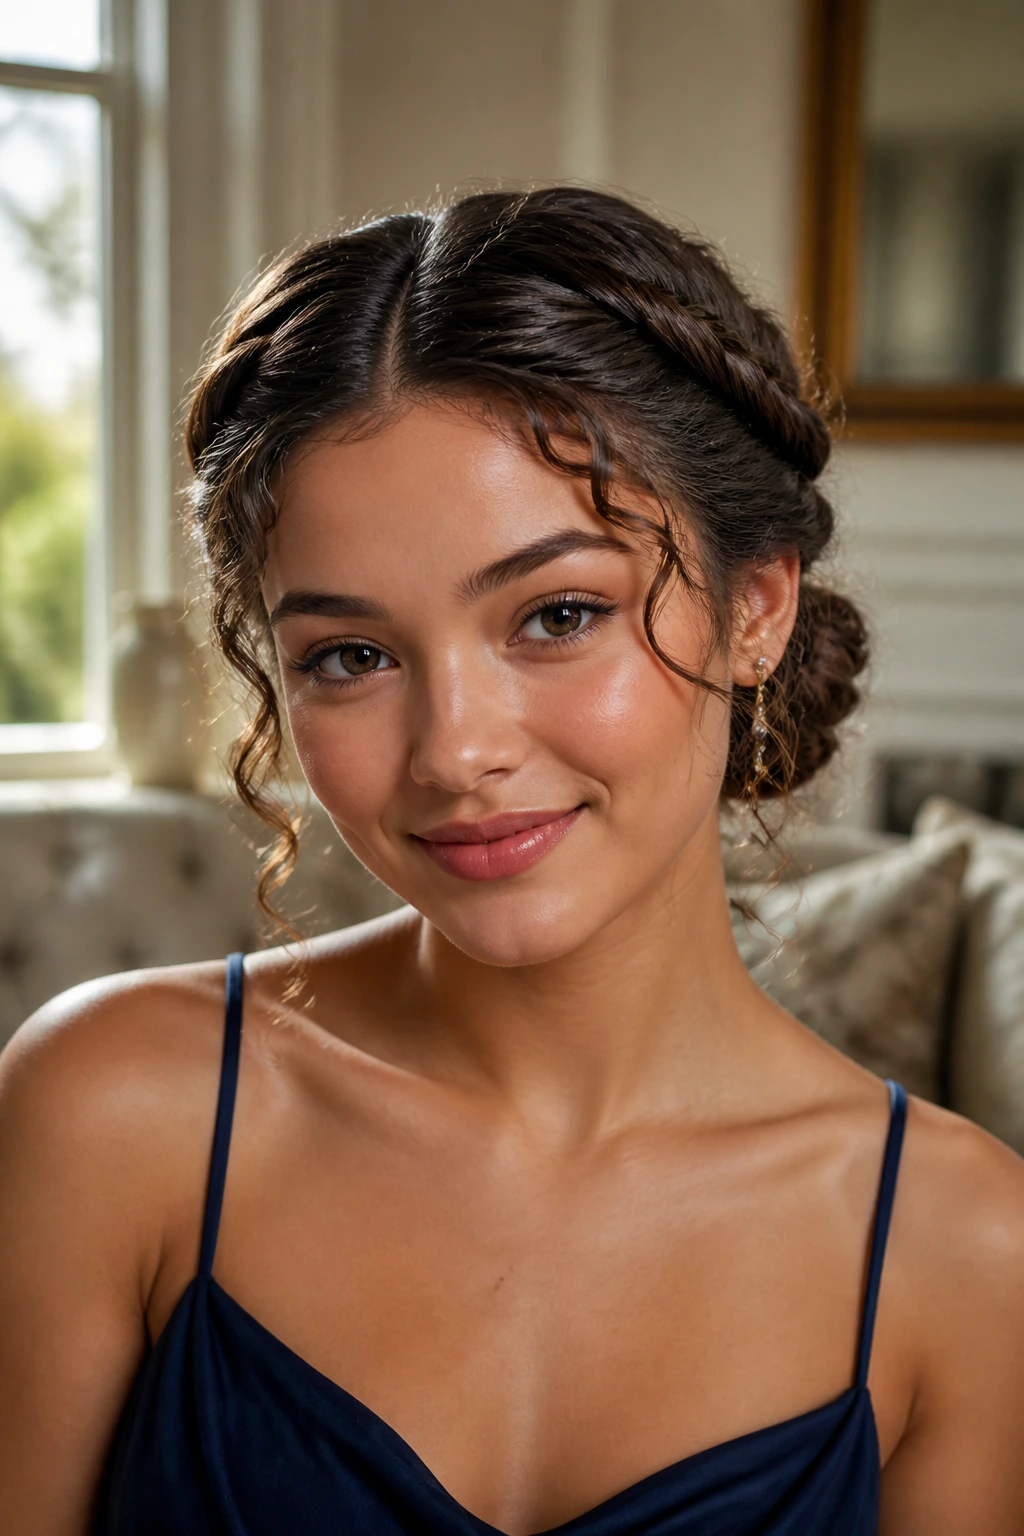
Two twists from the temples to the back can do what one braid sometimes can’t: create symmetry without looking severe. This style is especially nice on curly hair because the twists pick up width and texture fast. The result looks fuller than a sleek crown, but not as heavy as a full braided halo.
I like this for center parts and for dresses with a balanced silhouette. The twists mirror each other, then meet at the nape in a bun, roll, or tucked coil. It’s structured. Not fussy. There’s a difference.
Why it reads well in photos
From the front, the twists create clear lines around the face. From the back, the meeting point gives the eye a clean anchor. That makes it one of the easier styles to photograph from multiple angles without needing a million touch-ups.
A tiny bit of shine spray on the twists is enough. You want definition, not slickness.
15. Clipless Cloud Bun with Scattered Pins
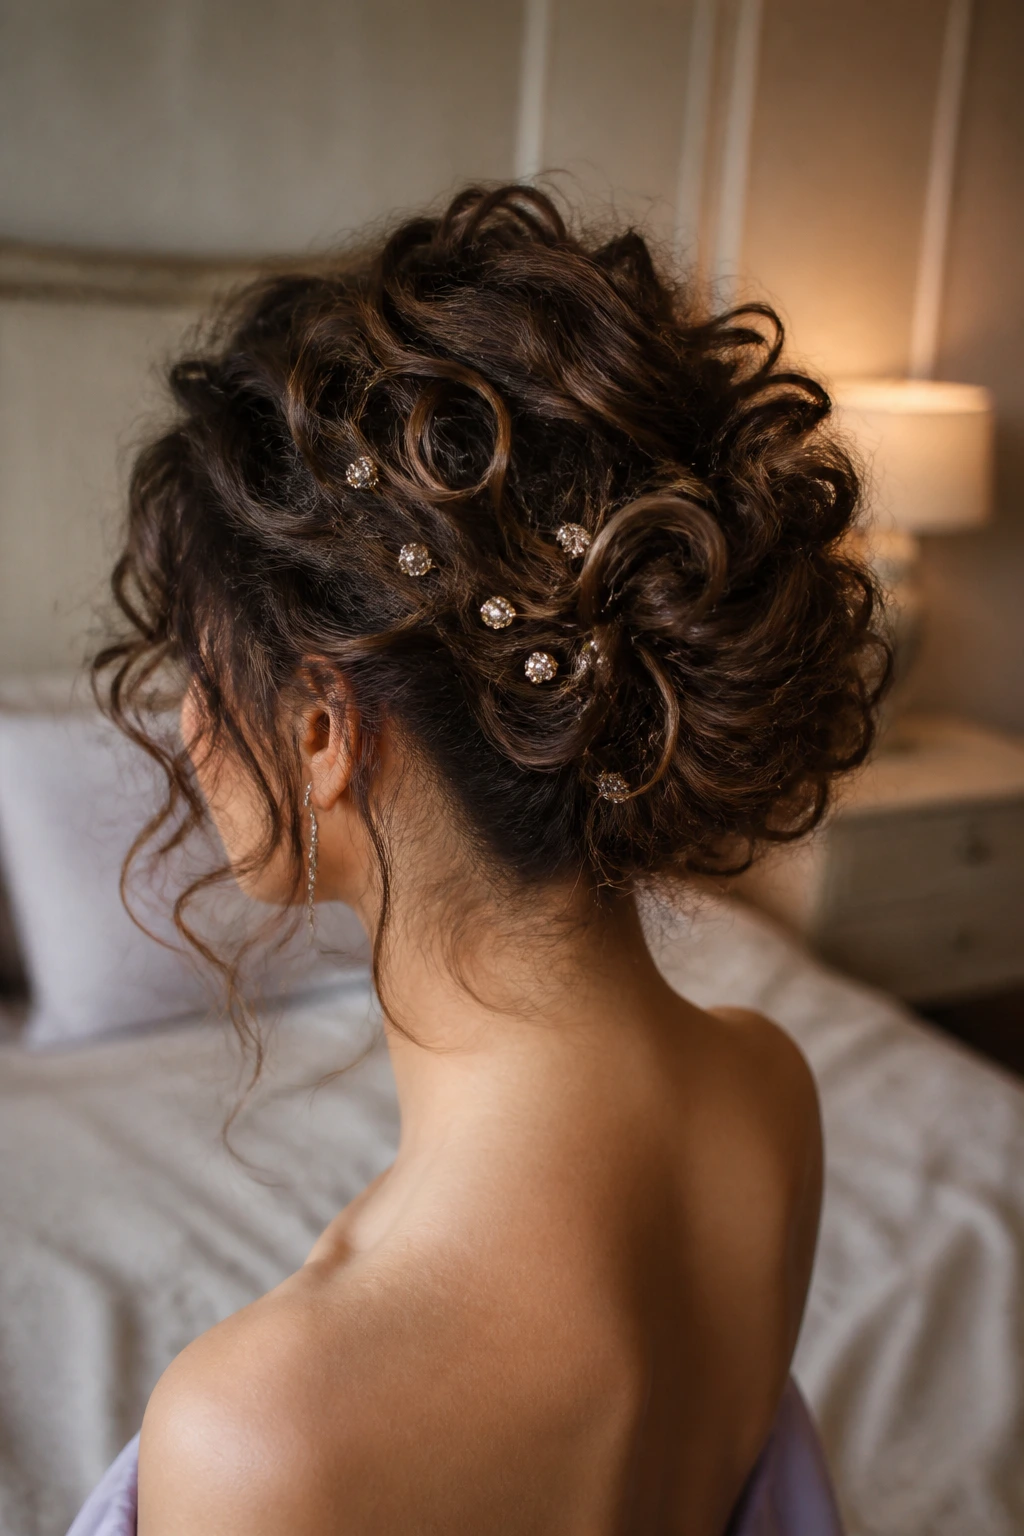
A cloud bun is what happens when you stop pretending every updo has to be tidy. The curls are gathered into loose loops and pinned into a rounded shape that looks soft, airy, and larger than a standard bun. On curly hair, this can be gorgeous because the texture naturally fills out the shape.
The word “clipless” matters here. You do not need a big claw clip to fake the volume. Pin the loops one at a time, and let the curls sit where they want. That little bit of freedom is what gives the style its shape.
This one suits romantic dresses, tulle, lace, and anything that already has a soft outline. It is not the best choice if you want a razor-clean silhouette. It is the best choice if you want the hair to feel like an extension of the dress instead of an afterthought.
Pro move: scatter a few pins with pearl tips across one side only. The asymmetry keeps the style from feeling too cute.
16. Side Bun with Long S-Curl Tendrils
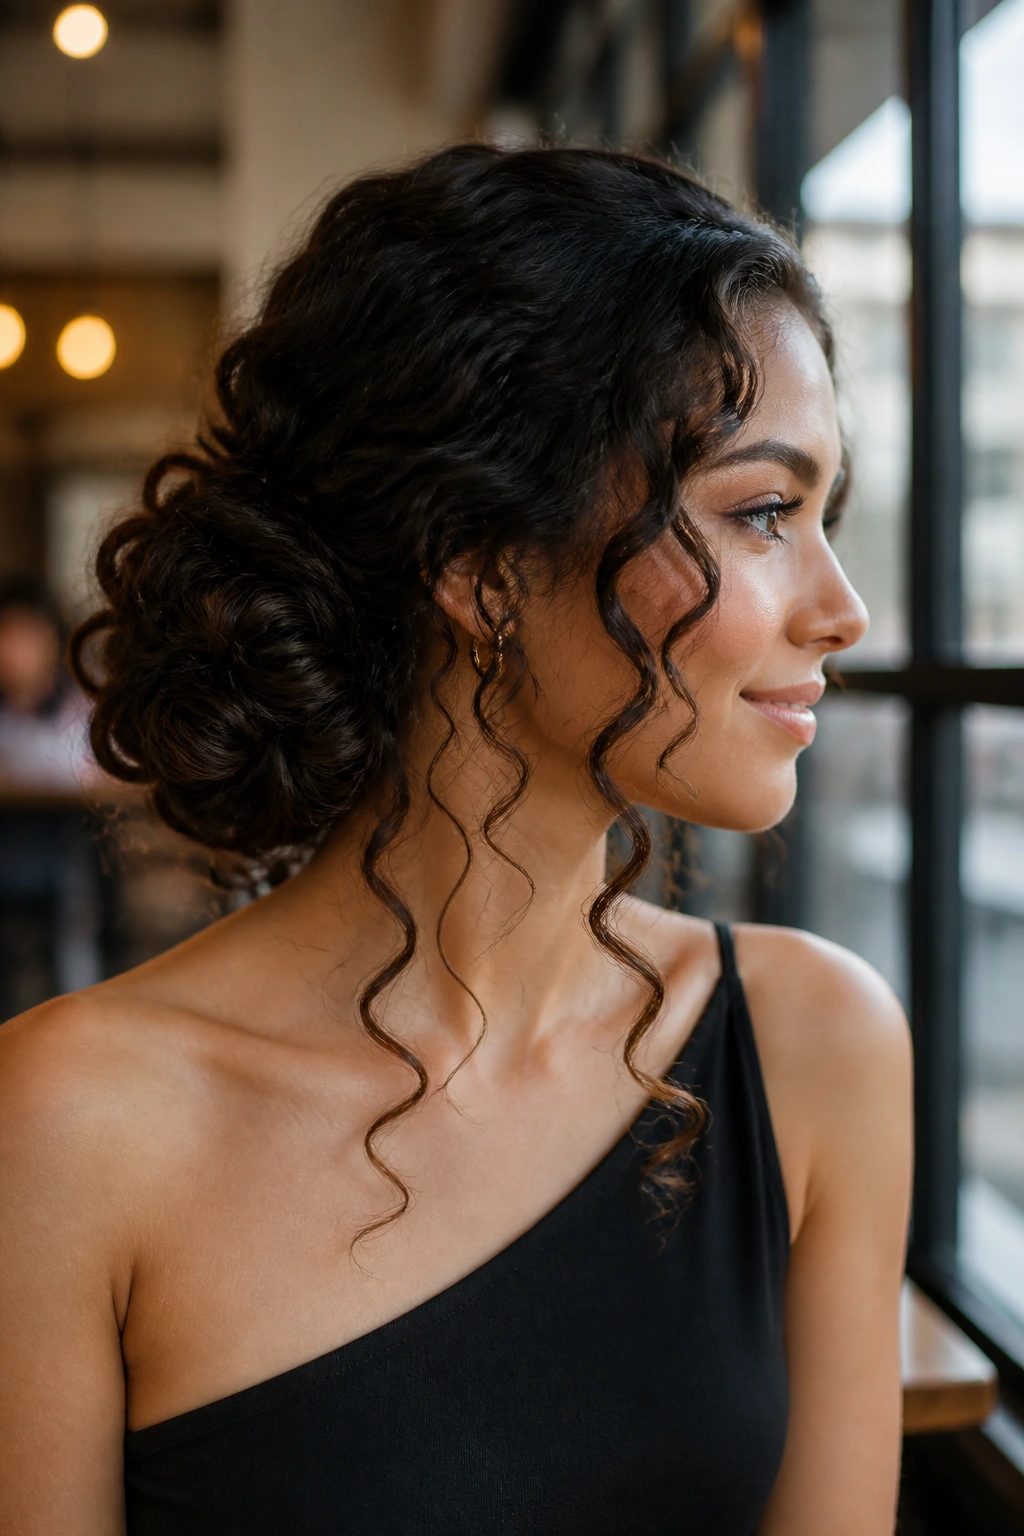
A side bun works best when you let it lean into the drama. Gather the curls low and off to one side, then leave a couple of long S-shaped tendrils to brush the collarbone. On curly hair, those tendrils give the style movement even when the bun itself stays still.
This is an easy winner with one-shoulder gowns or dresses that already have a side detail. The hair and the dress can point in the same direction, which gives the whole look more intention. A center bun would fight that. A side bun joins in.
Keep the tendrils under control
Shape them with fingers and a little cream, not a brush. Brushing out the curl pattern kills the line. You want them sculpted, not fluffy. If one curl tries to spring too high, pin it lower and let it fall naturally after it cools.
17. Rolled Nape Chignon with Ribbon
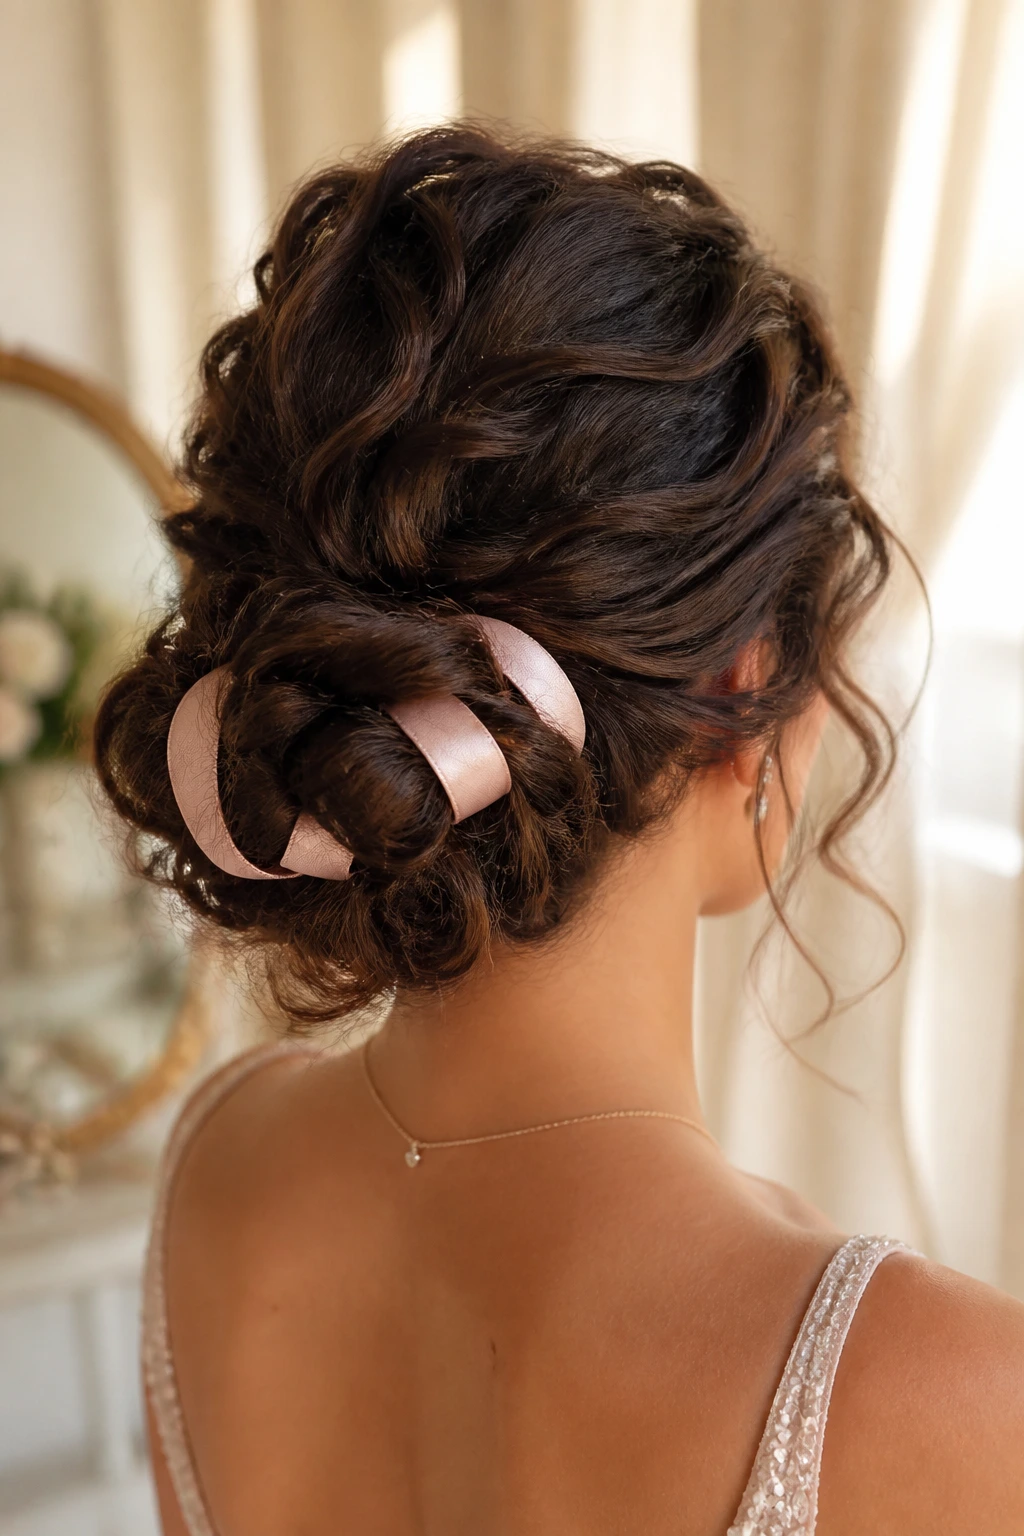
Ribbon can be smarter than sparkle. A satin ribbon woven through a rolled nape chignon gives the style a finished edge without stealing the show from the dress. It also helps the eye read the shape of the bun, which is useful when curly texture gets thick and hides the structure.
This style works best when the ribbon matches or quietly echoes one color already in the outfit. Not a perfect match. Just a nod. A deep navy ribbon against black curls, a blush ribbon with soft pink makeup, a dark green ribbon with gold jewelry — those combinations feel considered without looking too coordinated.
A small styling note
Tie or tuck the ribbon after the roll is pinned. If you try to build the roll around the ribbon from the start, the fabric can slip and loosen everything. The ribbon should finish the style, not hold the whole thing together.
18. Braided Topknot with Loose Fringe
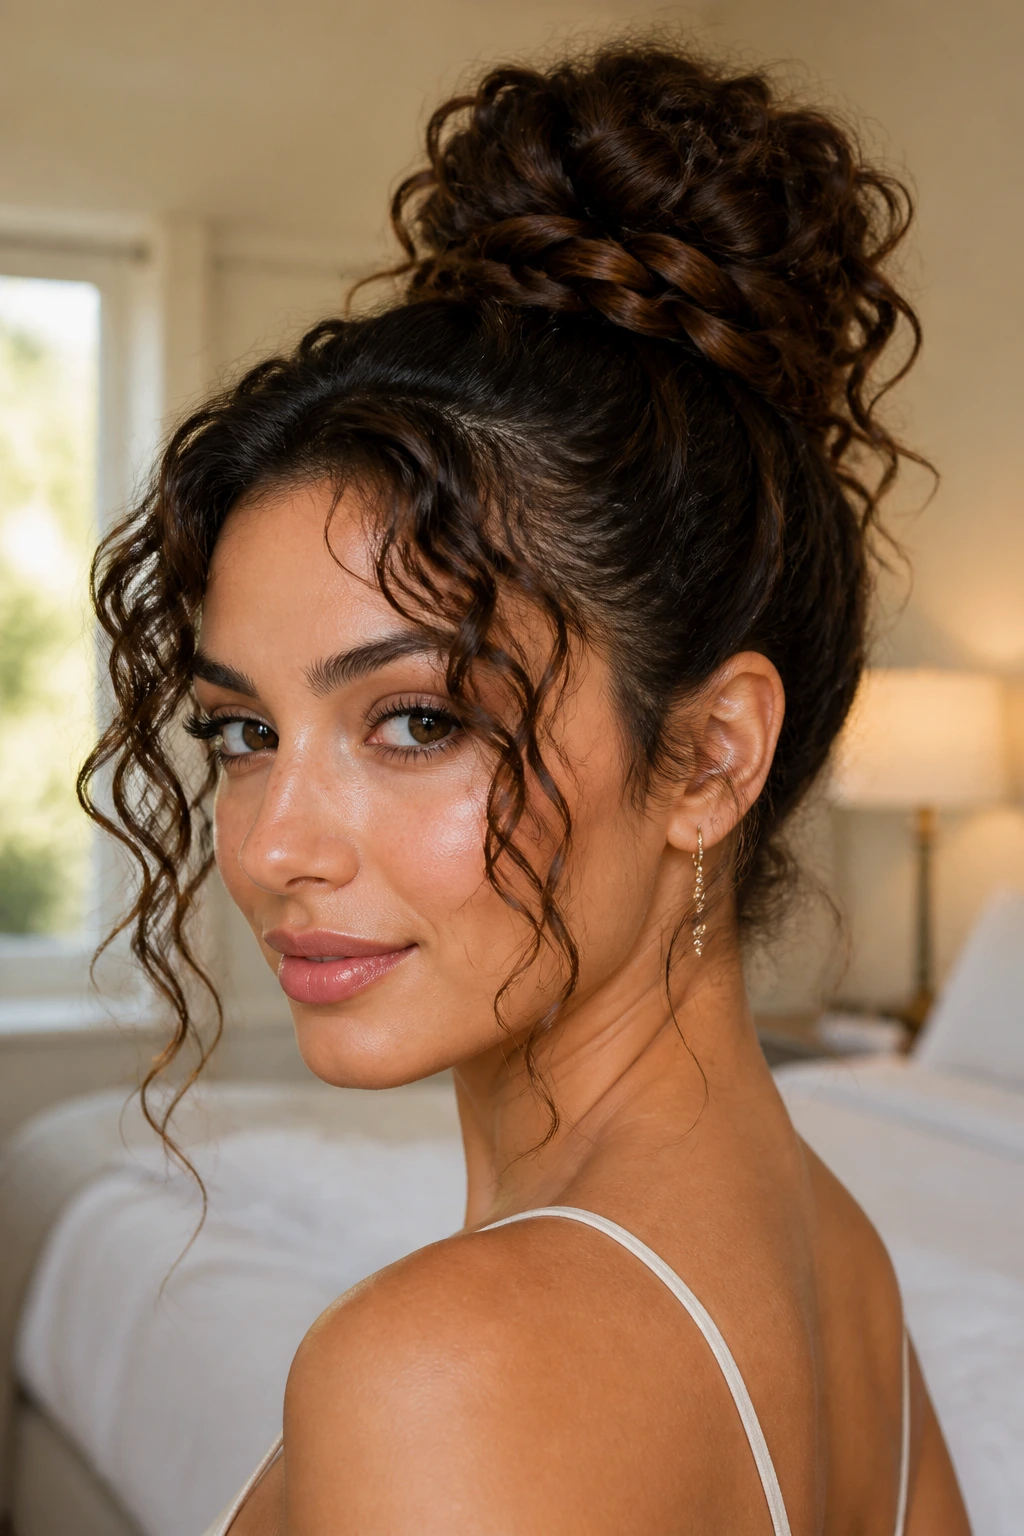
A topknot can look prom-ready if you give it enough structure at the base. A tight braid feeding into the knot keeps the silhouette controlled, while a loose fringe or a few front curls soften the forehead and cheekbones. On curly hair, the knot gets enough body to feel rich instead of tiny.
This is a smart choice for shorter curly lengths, too, because the braid can pull the available hair upward and make the bun appear larger. If you have layers, tuck the shortest bits under the knot and pin them from underneath. Anything sticking straight out at the top will ruin the shape.
Best with: statement earrings and a simple neckline. The topknot already brings energy, so the rest can stay clean.
One warning: if the bun sits too far forward, it can make the head look top-heavy. Keep it just behind the crown.
19. Romantic Curly Updo with Jewel Pins
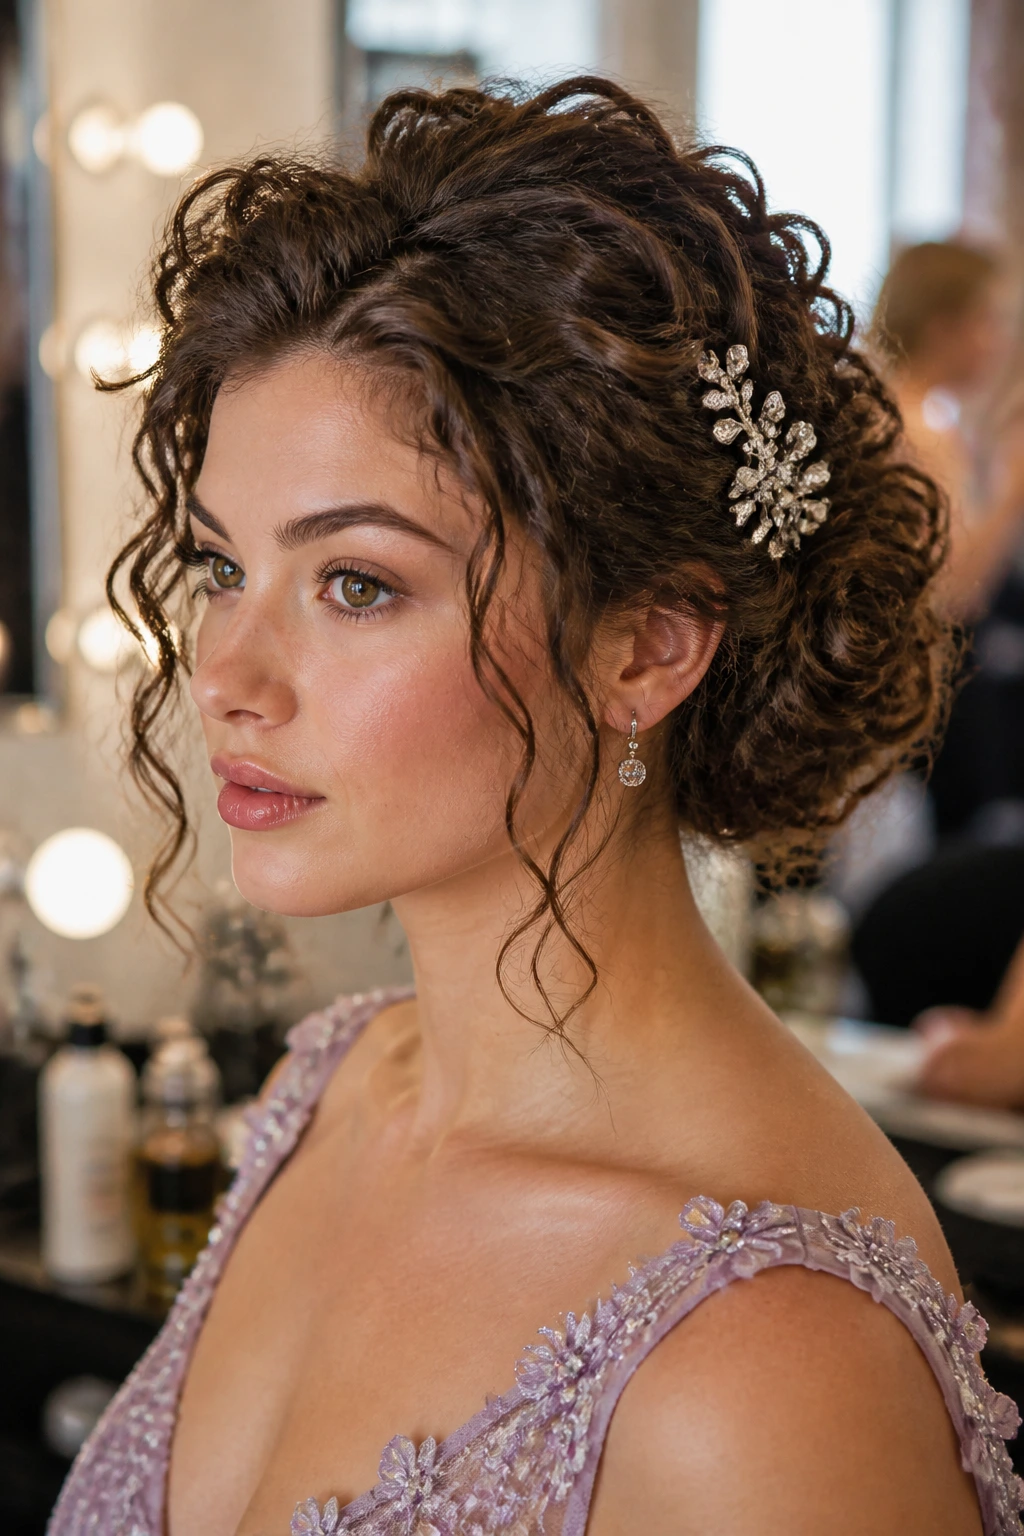
This is the look for when you want the hair to feel soft, shiny, and a little special without drifting into costume territory. Build a low or mid-height updo from curled sections, then tuck jewel pins through one side in a small cluster. The hair should still look like hair. The pins should feel like punctuation.
I save this style for the people who want a little sparkle but not a tiara moment. The curls can be looped, pinned, and left slightly loose at the edges so the updo looks airy instead of stuffed. That soft shape lets the jewel pins stand out without turning the style into a craft project.
If you have one accessory only, make it count here. Three well-placed pins beat a scatter of random glitter every time.
Why Curly Hair Gives These Updos More Life
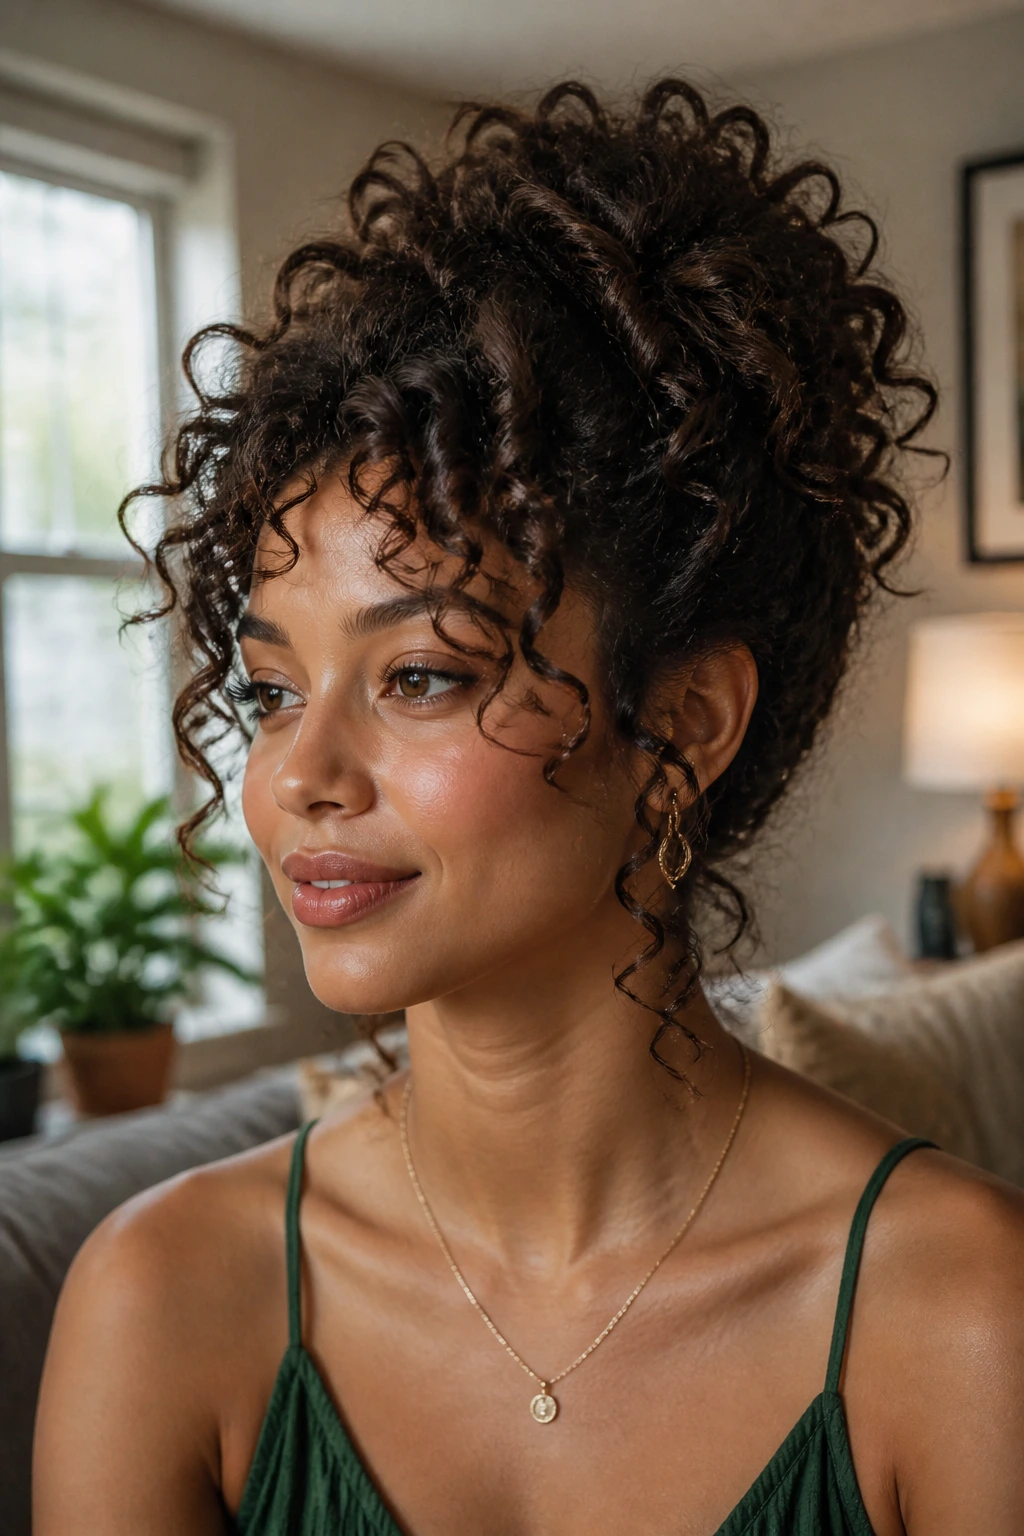
Curly hair brings built-in structure, and that matters more than most people think. A pin set into a coil holds better than a pin set into straight strands, which means the style can survive movement without needing a half can of spray. That grip is useful. It saves time and it saves your scalp.
There’s also the shape factor. Curls create shadows, ridges, and soft edges that make an updo look layered even when the actual build is simple. A low bun made from curly hair has more depth than the same bun made from slicked hair because the curls do the visual work for you. You do not need to overcomplicate the style to make it look finished.
Humidity changes the equation, but not in the scary way people imagine. Curly styles rarely need to stay perfect. They need to stay recognizable. A twist can loosen a little and still look deliberate. A puff can soften and still hold its silhouette. That’s why curly prom hair often ages better over a long night than a style that begins too polished and ends up looking brittle by midnight.
The part people skip
The prep matters as much as the pinning. Curly hair that’s hydrated, detangled, and set with a little grip gives you far better results than hair that’s dry, fluffy, and begging for help. You can absolutely make a beautiful style with what you have. Start with texture that’s cooperative, not offended.
The Pins, Brushes, and Sprays Worth Keeping on the Vanity
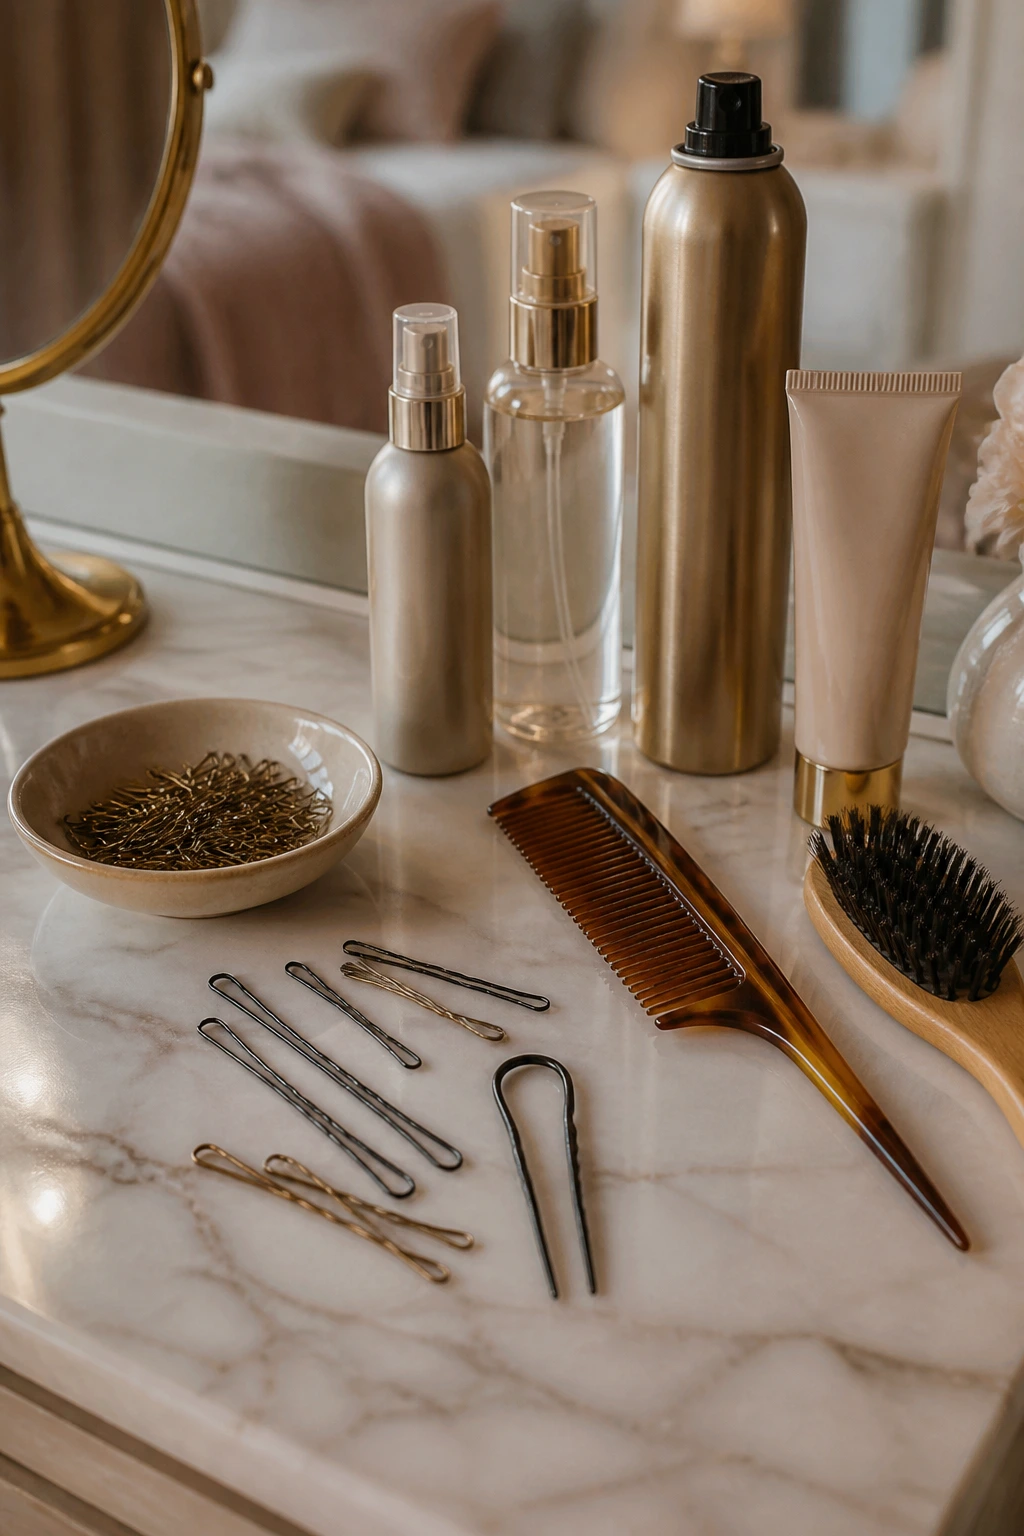
- Bobby pins in two sizes: Short pins are good for tight spots near the temples and nape; longer pins help anchor buns and rolls with more hair.
- U-pins: These are the unsung heroes for large curly buns because they slide into dense shapes without crushing them.
- Tail comb: A fine tail comb gives you clean parts and helps section curls without tearing through the pattern.
- Wide-tooth comb: Use it for detangling with conditioner or leave-in, not for rough styling.
- Sectioning clips: Four or six clips keep the hair organized while you work one area at a time.
- Lightweight mousse or foam: This gives curls body and memory without the heavy feel of a thick cream.
- Flexible-hold hairspray: You want hold, not cardboard. A spray that still lets the hair move a little is the sweet spot.
- Curl cream or leave-in conditioner: Helpful for smoothing the surface and keeping the curl clumps intact.
- Shine serum or oil: Use sparingly on the outer layer and ends. Too much near the roots can make the style slip.
- Satin scarf or bonnet: Useful for setting the style if you need to pause before the event or preserve the shape afterward.
Smart Product Picks for Prom-Ready Curls
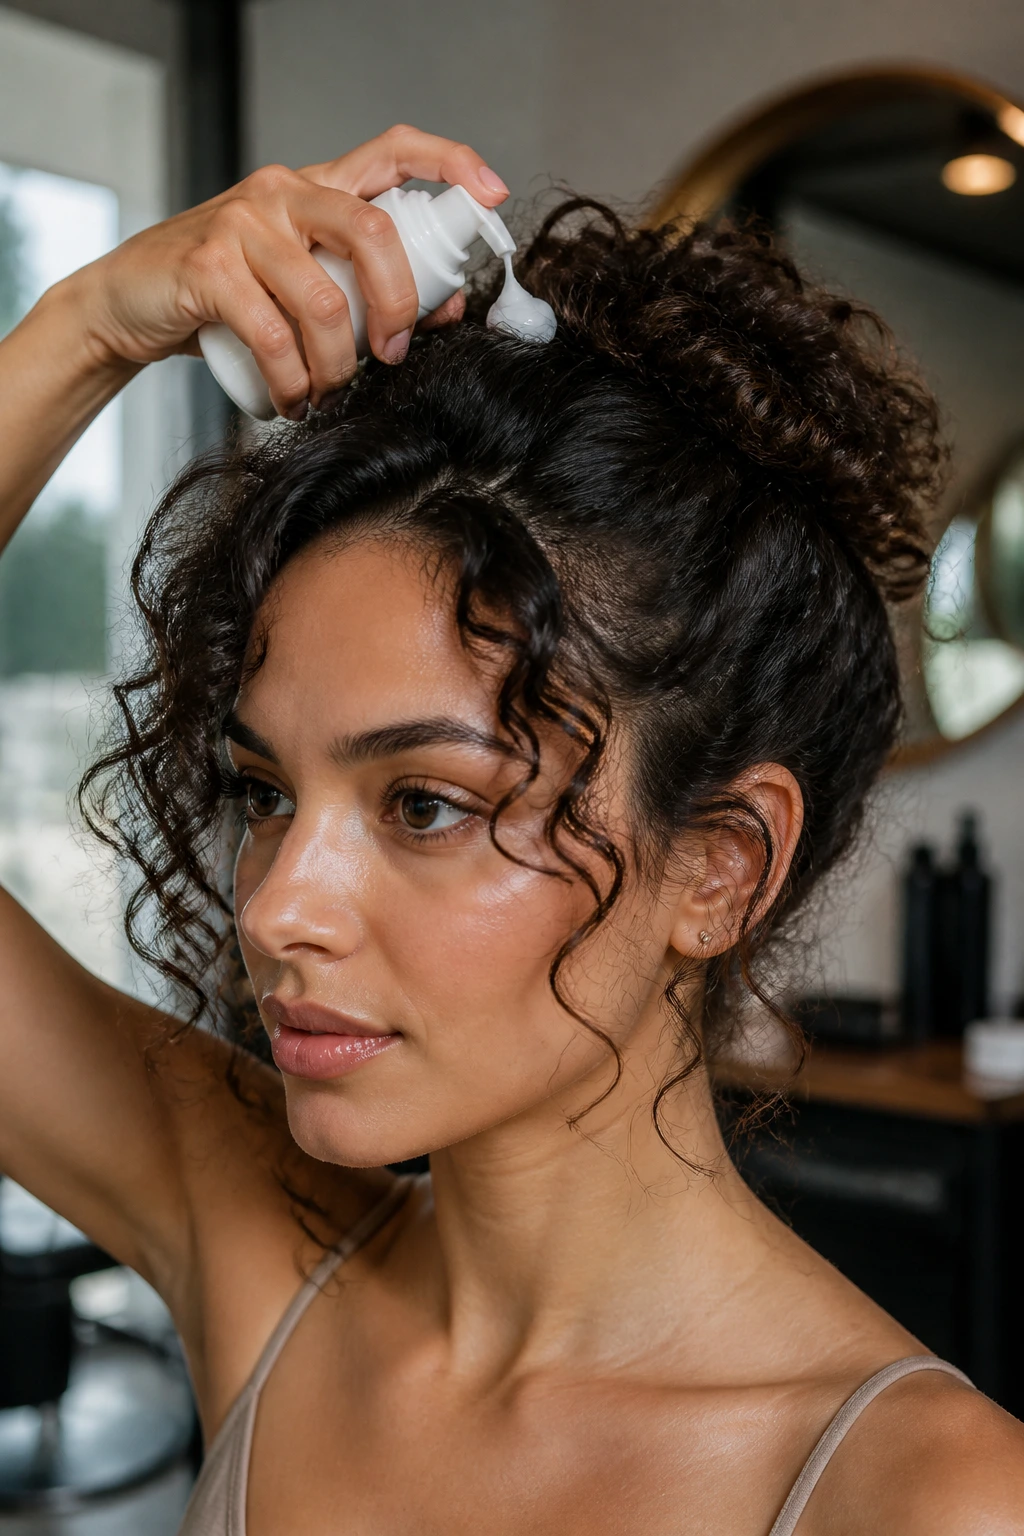
The best styling product depends on the curl pattern and the job you need it to do. Fine curls usually need lighter mousse, foam, or a soft gel because heavy creams drag them down by the second pin. Coarse or very dense curls often want a cream underneath a stronger gel so the surface stays smooth while the shape underneath stays strong.
If your hair frizzes fast, choose products with enough slip to keep the curl clumps together during styling. That matters more than chasing a “perfect” finish. A little frizz control on the crown can make a whole updo look cleaner, but plastering the whole head in product often creates a dull, sticky surface. Nobody wants that.
For pins, look for ones with a grippy coating or slightly ridged edges. They hold better in curly hair than the slick, shiny kind. And if your hair tends to slip out of elastic bands, use a covered elastic or a small coil tie first, then anchor with pins. The elastic sets the base; the pins finish the job.
Quick prep by texture
Fine curls: mousse at the roots, a light spray at the end, and fewer heavy creams.
Thick curls: leave-in plus gel, then pin while the hair still has some softness.
Coils and tighter textures: moisture first, then a firm shape with lots of anchor points at the base and the nape.
How to Wear These Styles With Dresses, Earrings, and Makeup
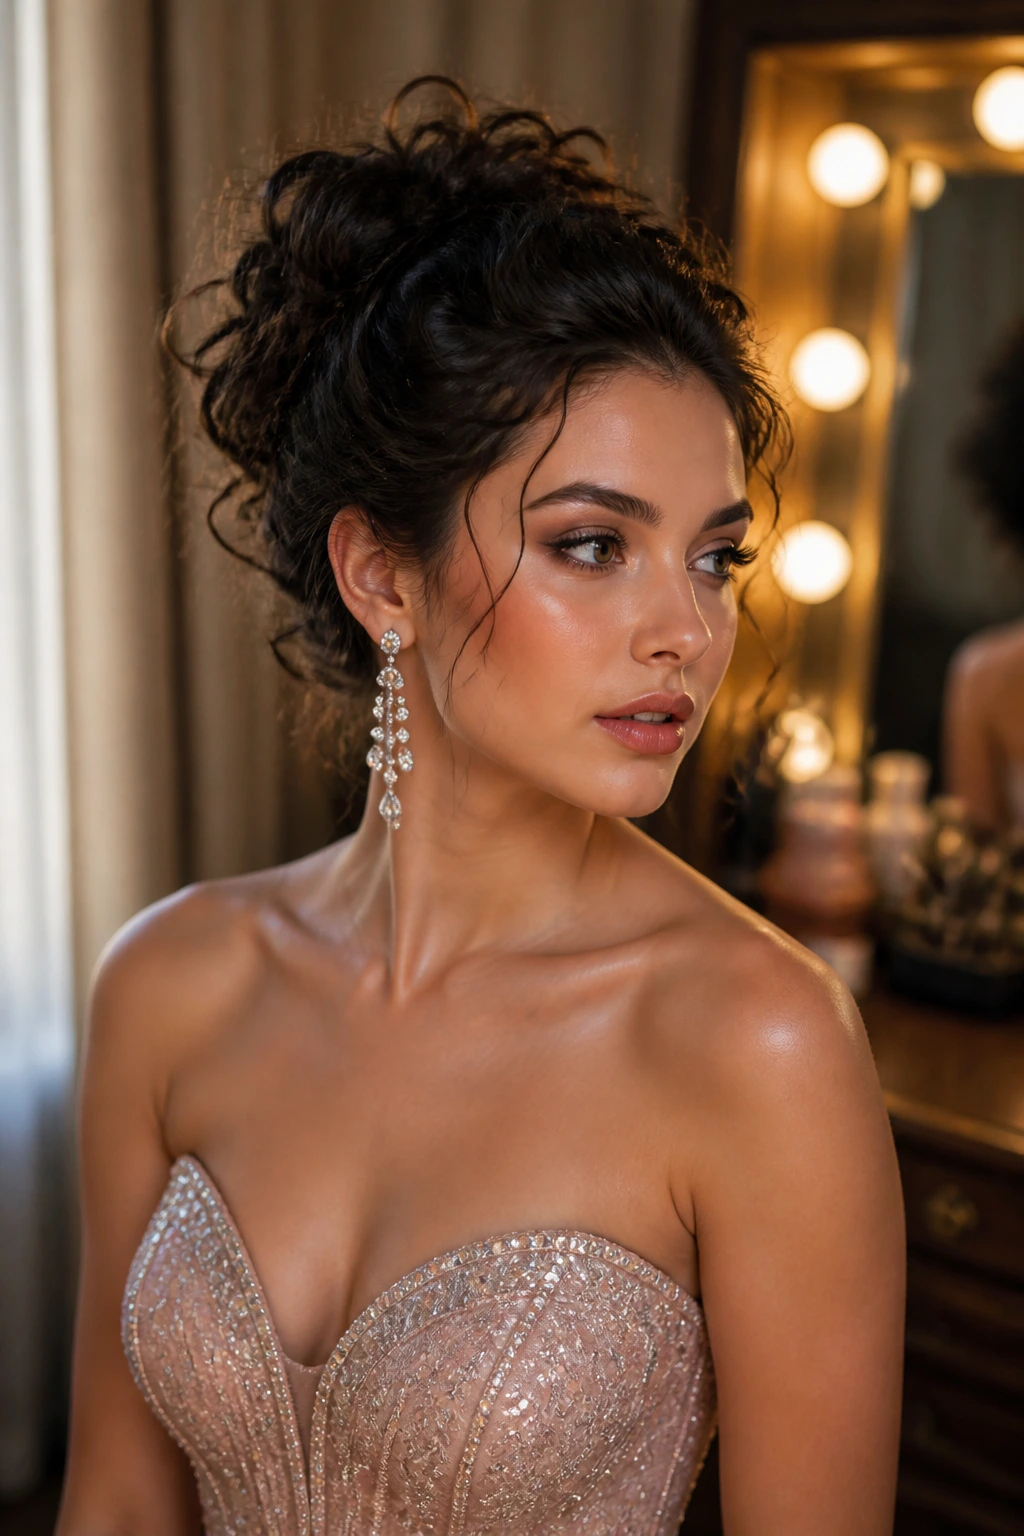
Presentation: If the dress has a busy neckline, keep the updo low and compact so the eye has one clear place to land. If the dress is simple or strapless, height at the crown or a braids-heavy style gives the silhouette more presence from across the room.
Accompaniments: Drop earrings work well with low buns and French twists because they have room to move. Studs or small pearl clusters fit better with braided crowns and pearl-pinned styles, where the hair already brings enough detail. A clean neckline, a satin clutch, and a soft lip finish the look without crowding it.
Portions: Leave out only as much hair as the style needs. Two slim face-framing curls are often enough. Four can look dreamy. More than that can start to read unfinished, especially if the rest of the hair is pinned tightly. If your curls are very dense, one intentional tendril can be stronger than a whole halo of loose pieces.
Beverage Pairing: Keep the drink simple while getting ready. Clear water, iced tea in a light-colored cup, or a pale mocktail keeps the dress and finished hair out of trouble. Dark sodas and sticky drinks have no business near a white collar or a fresh curl pattern.
Extra Polish and Personal Touches
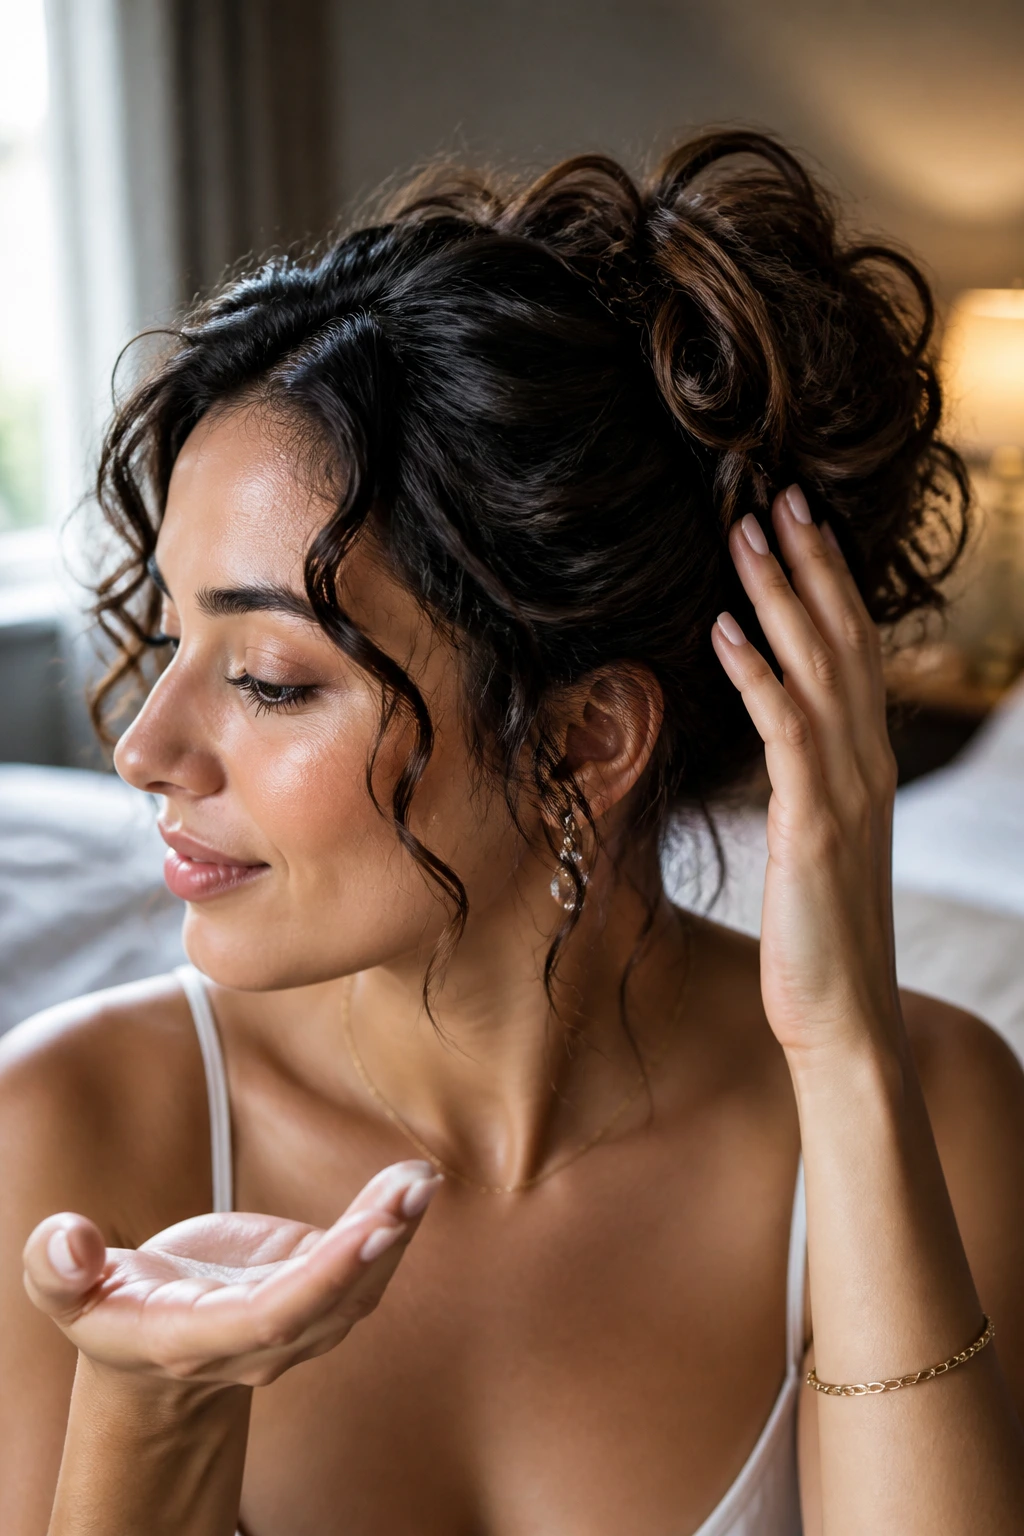
Frizz Shield: Smooth a pea-size amount of serum over the outer layer of the style after the pins are set. Warm it between your palms first. If you apply it cold and heavy, it can clump the curls at the top and flatten the shape you just built.
Accessory Upgrade: Add pins, combs, or a ribbon only after the structure is secure. If you put the accessory in too early, you end up moving it three times and loosening the style around it. That’s how a neat bun turns to mush.
Volume Move: Lift the top layer gently at the crown with the tail of a comb or your fingertips. Not a lot. Just enough to keep the profile from looking pressed down. Curly updos look better when the head has some shape above the ear line.
Make-It-Yours: If you want a softer look, leave the temples a little looser. If you want something sharper, smooth the front with gel and tuck the edges cleaner. Both approaches work. The right one is the one that fits the dress and your own face.
Mistakes That Flatten Curly Updos
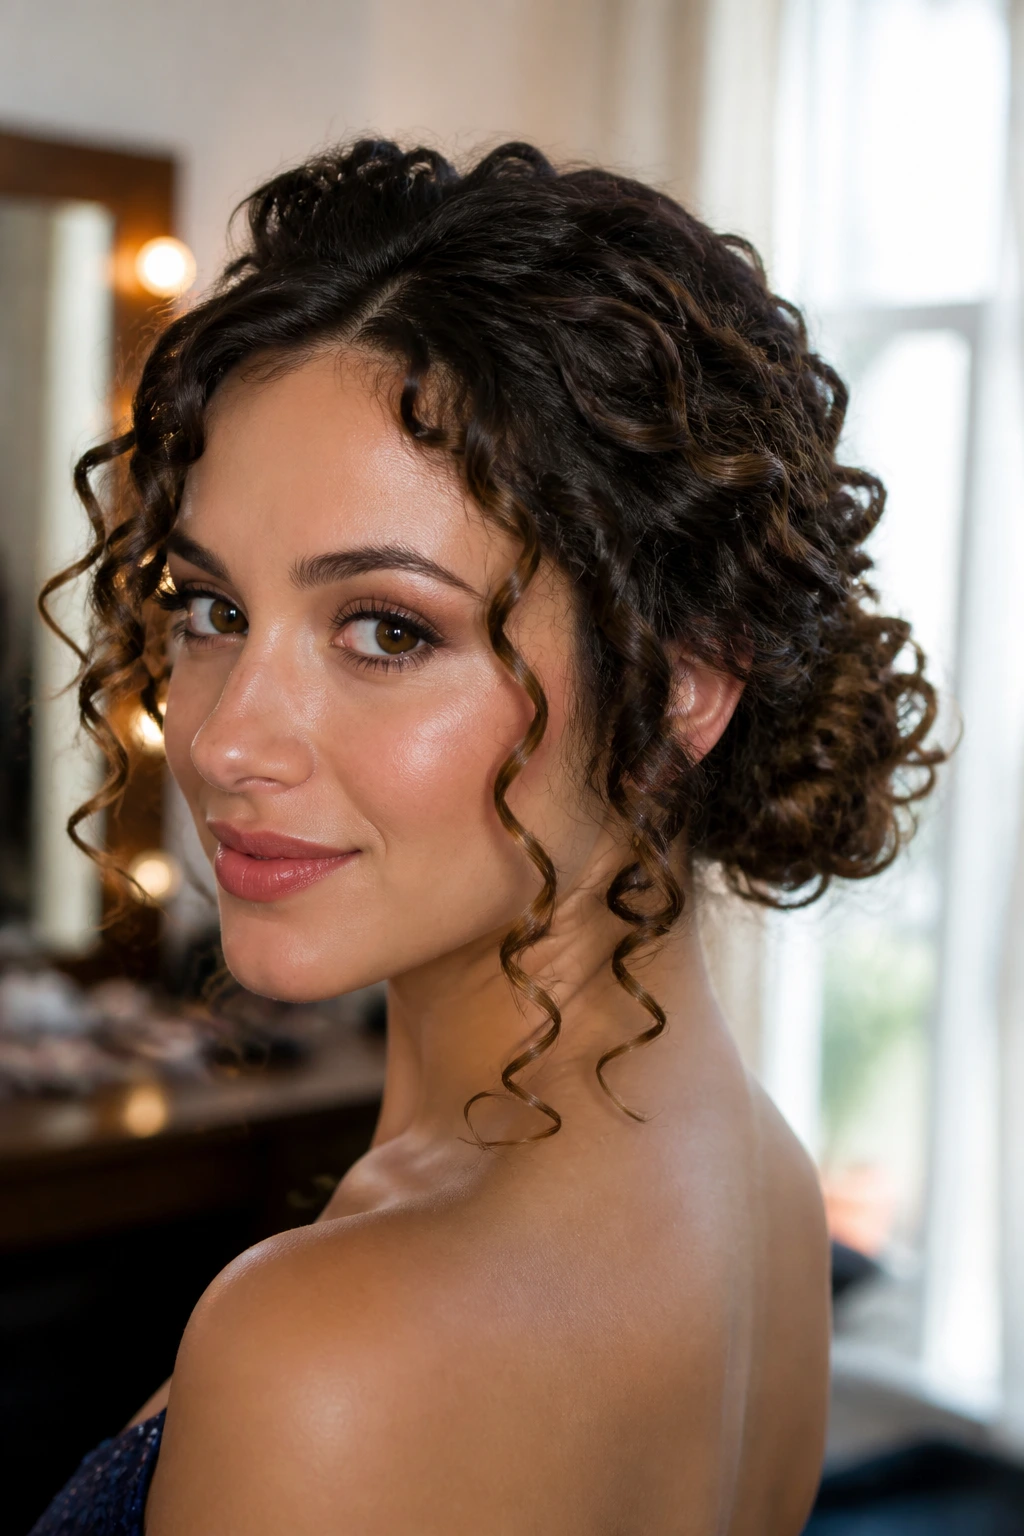
The first mistake is starting with tangled, dry hair and hoping the updo will somehow fix itself. It won’t. Dry tangles split curl clumps, make the style bulky in the wrong places, and force you to use extra product just to get a grip. Detangle with leave-in or conditioner first, then let the hair dry into workable curls.
Another common problem is over-brushing. Curly hair brushed too hard turns into a cloud that looks bigger but holds worse. A wide-tooth comb or fingers are safer once the curls are already shaped. If you need smoothness at the crown, work that section alone instead of attacking the whole head.
Pins matter more than people think. If you push bobby pins into slick sections with no anchor, they slide. If you crisscross them over a twist or braid, they stay. The fix is to pin through texture, not over it. Think catch points.
Heavy cream is another trap. A little can help the surface. Too much makes the style slippery and dull. You want enough moisture to keep the curl clumps together, not so much that every pin starts skating around.
And yes, skipping a trial run is a mistake. Not because every style needs a full rehearsal, but because the hairline, the part, and the accessory placement should be tested once before prom night. That tiny dry run tells you if the style sits too high, pulls too tight, or needs a few more pins on one side.
Ways to Adapt the Looks for Different Curl Patterns
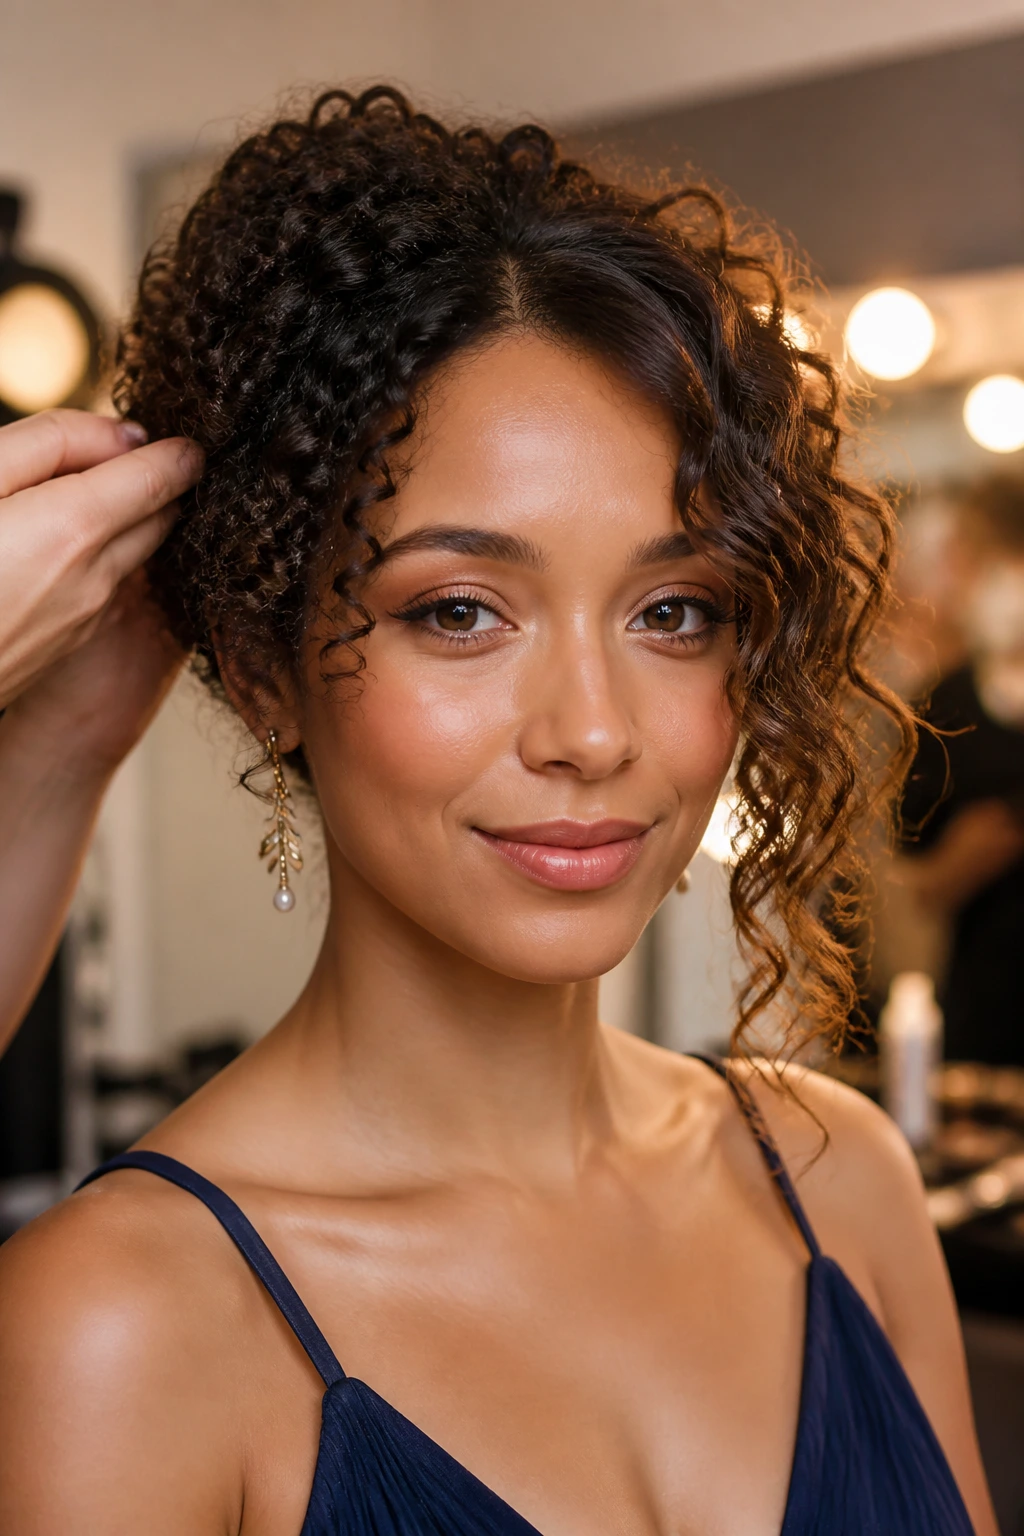
Fine-Curl Lift Version: Use lighter mousse, smaller pins, and tighter twists so the style doesn’t collapse under its own weight. A high puff or a compact chignon works better than a huge cloud bun here because the shape stays visible longer.
Thick-Curl Armor Version: Choose styles with braids, twists, or multiple anchor points, then pin from the inside out. Braided crowns, rope buns, and Gibson tucks usually hold best because the hair grips itself before the pins even go in.
Shorter-Length Faux Updo: If your hair stops around the shoulders, build the style with mini sections and let the ends disappear under itself. Topknots, side buns, and tucked rolls work well here, especially if you add a few hidden bobby pins at the nape.
Coily Texture Version: Moisture first, shape second. Use a cream or butter only where the hair needs slip, then set the style with firm pins and a gelled hairline. A halo braid or a high puff tends to show coil texture without forcing it flat.
Minimalist Accessory Version: Skip the jewels and use one ribbon, one pearl comb, or nothing at all. The curl pattern is already decorative. Too many accessories can make the hair look busy, which is a shame when the shape is doing the heavy lifting.
Keeping the Style Fresh After the First Dance
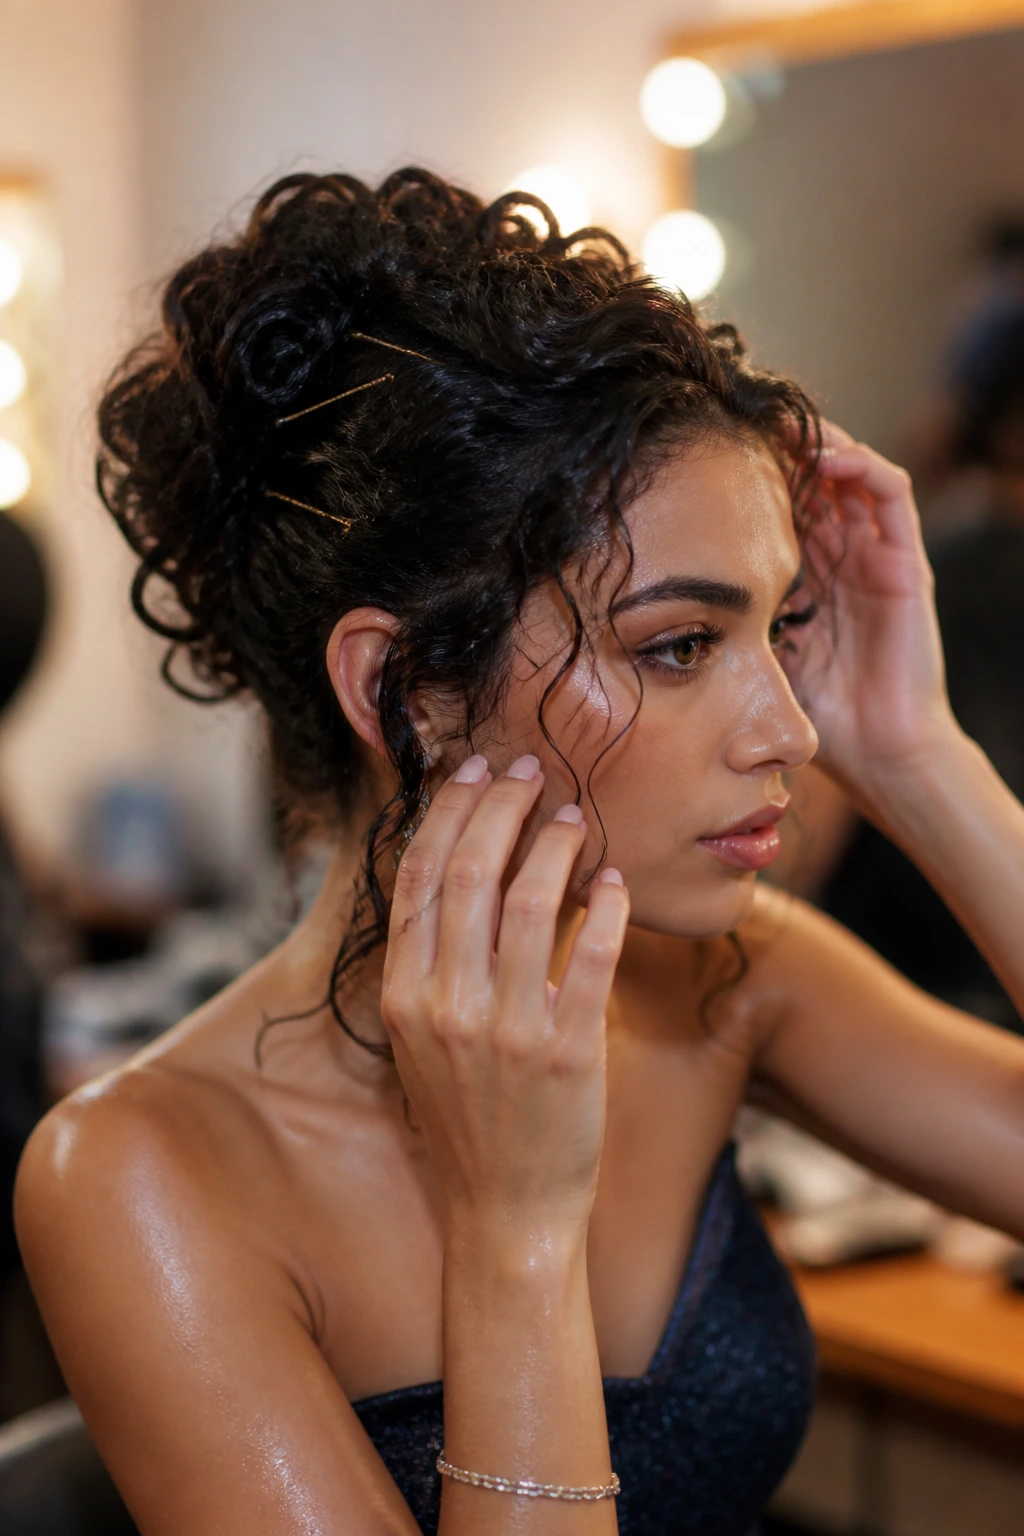
Prom hair does not need to survive a week. It does need to survive a night. That means a little maintenance beats a full rebuild. If the style starts loosening at the nape, tuck in a spare bobby pin instead of tugging the whole bun tighter. If the front gets frizzy, smooth only the outer layer with damp fingers or a touch of serum.
If you plan to keep the look into the after-party or save it for a second event, sleep on a satin pillowcase or wrap the hair with a satin scarf and pin the loose parts gently. Do not pile the head on top of itself and expect the shape to hold. Curly updos can be refreshed, but they do not love being crushed overnight.
For next-day wear, mist the curls lightly with water, press them back into shape with your hands, and re-pin the spots that lifted. If the style used a lot of product, wash it out sooner rather than later. Curls are happiest when they are clean enough to bounce again.
Questions About Curly Prom Updos
Can I do these styles on short curly hair?
Yes, but you’ll want to favor topknots, tucked rolls, side buns, and half-up shapes. Shorter curls usually need more hidden pins and a stronger base, but they can still look formal without extensions.
Should I straighten my curls first?
I wouldn’t. Once curls are straightened, you lose the grip and the natural shape that make these updos easier to hold. If you want smoother roots, focus only on the top section and leave the rest curly.
How do I keep the style from frizzing in humidity?
Start with hydrated curls, use a flexible-hold product, and lock the shape with pins instead of drowning the hair in spray. A little frizz on curly hair is fine; a style that falls apart because it was coated too heavily is not.
Can I use clip-in extensions with these looks?
You can, especially for braided crowns, big buns, and puff styles. Clip them underneath the visible layers so the added length supports the shape without showing through the front.
What if my curls are different lengths?
That’s common, and it’s manageable. Use the longer sections for the visible twist or braid, and tuck the shorter layers toward the center of the bun where they can’t escape as easily.
How far ahead should I try the style?
A few days before the event is enough. You’re checking how the parts sit, whether the pins hold, and whether the style feels comfortable after ten minutes, not trying to build the whole look in advance.
What if the updo starts sagging during the night?
Pin from the inside of the loosened section toward the scalp, not just over the top layer. One well-placed pin near the base usually fixes more than three random ones on the surface.
Do these styles work for all curl types?
Yes, though the method changes. Loose curls usually need more product control and a gentler finish, while tighter coils need stronger anchoring and a bit more moisture. The shape can stay the same even when the prep changes.
A Prom Look That Still Feels Like You
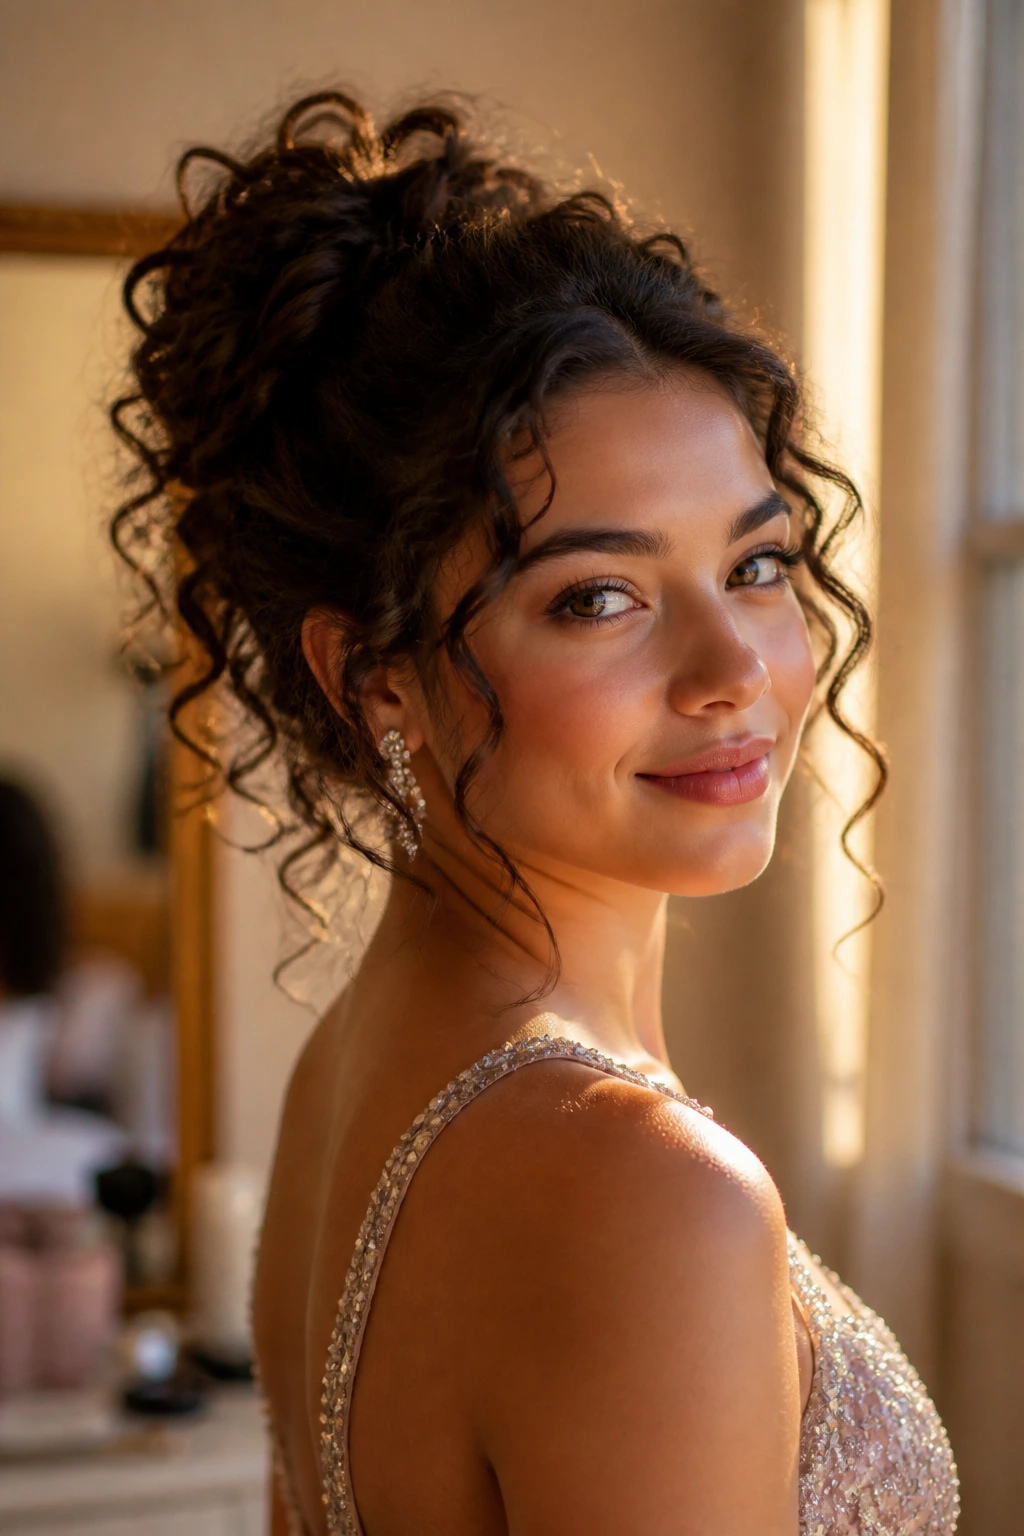
The best prom updo on curly hair is not the one that forces your texture into silence. It’s the one that gives the curls a job to do. Hold the shape. Frame the face. Catch the light. Stay put while you dance.
That’s why these styles work so well: they let the hair keep its own voice. Some are neat, some are soft, some lean dramatic, but none of them depend on flattening the curl pattern into something it was never meant to be. Pick the silhouette that fits your dress, pin it well, and let the texture do what it already does best.
