



Straight layered haircuts can look razor-clean or oddly sleepy, and the difference is usually only an inch or two of placement. On straight hair, every line shows. A layer that starts too high can kick out at the ends; a layer that starts too low can disappear and leave the shape heavy around the shoulders. The sweet spot is more exact than most people think.
That’s why I like straight layered haircuts when they keep at least one line blunt and honest. You get movement without losing the edge, which is the whole point of a sharp look. The shine reads better, the silhouette looks more deliberate, and even a simple center part can feel finished instead of flat. If you’ve ever had hair that looked fine from the front and strange from the side, you already know how unforgiving straight hair can be.
Some of these cuts are sleek and architectural. Others have a little swing near the jaw or collarbone so the ends don’t sit like a board. The trick is choosing where the movement lives — around the face, through the interior, or along the hem — and not pretending every layer should do the same job.
Why These Straight Layered Haircuts Stand Out
- Clean lines stay in charge: Every style in this collection keeps a perimeter, so straight hair still looks crisp instead of wispy.
- Movement goes where it counts: The layers sit at the cheekbone, jaw, collarbone, or back interior, not sprinkled everywhere like confetti.
- Styling stays sane: Most of these cuts need a quick blow-dry and one controlled pass with a flat iron, not a full salon marathon.
- The face gets shape fast: A small face frame or side sweep changes the whole read of the haircut without sacrificing length.
- Color shows better: Balayage, highlights, and lowlights separate more clearly on straight hair when the cut creates clean planes.
- Grow-out is easier to manage: The right layering pattern can stay neat for weeks instead of flipping into a triangle or fraying at the ends.
Why Straight Layered Haircuts Need Exact Layer Placement
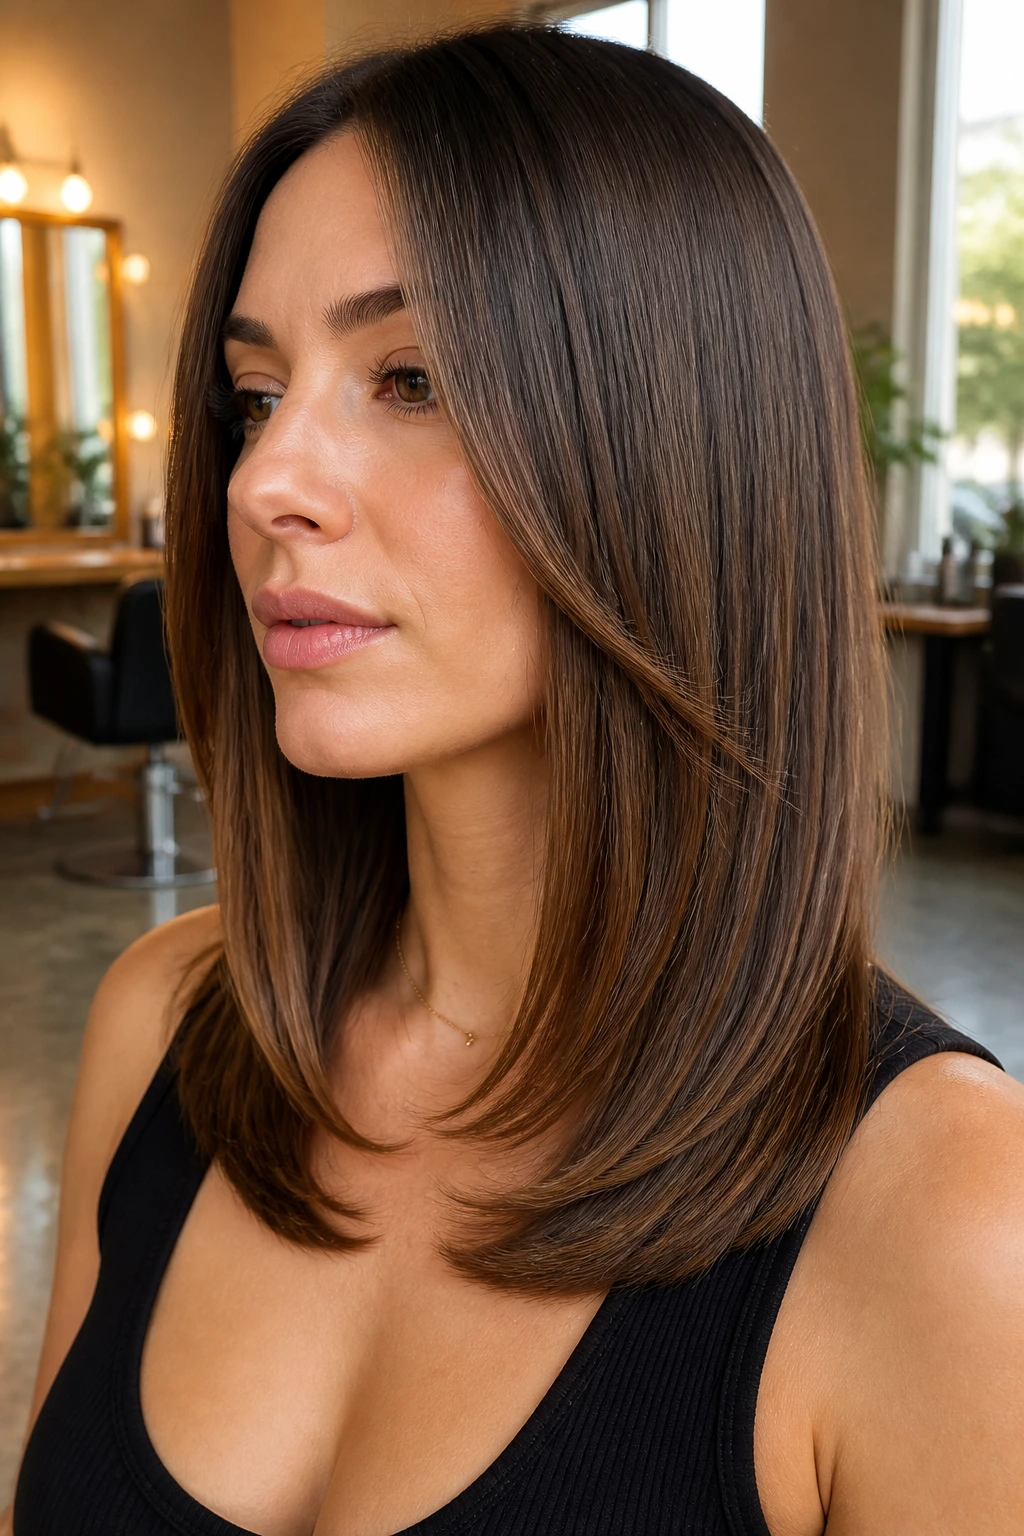
Straight hair is honest. That’s the blessing and the headache.
A curl can hide a slightly uneven layer. Straight strands cannot. If a layer starts in the wrong place, you’ll see it every time you pass a mirror, especially when the light hits from the side and draws a hard line across the hair. That is why straight layered haircuts need a cleaner map than wavier textures. The cut has to do the work that bend and texture usually do for free.
The weight line matters more than people think
The main thing I watch in a straight cut is where the weight sits. If all the weight drops to the bottom, the hair can look thick but lifeless. If too much weight gets removed near the crown, the top can puff out and the ends can kick away from the neck.
A good layered shape keeps one area in control. Maybe that’s a blunt hem at the collarbone. Maybe it’s a long U-shape that leaves the back slightly fuller. Maybe it’s a bob with internal layers that move when you tuck one side behind your ear. The exact choice changes the mood, but the idea stays the same: one strong line, one supporting movement pattern.
Shine shows every decision
Straight hair reflects light in a way textured hair does not. That means a well-placed layer can look glossy and sleek, while a badly placed one can look chopped or thin. I think this is why layered cuts on straight hair feel so satisfying when they’re right. You can see the geometry.
And yes, color changes the reading too. Balayage stripes and face-frame highlights separate more clearly when the cut creates actual planes. On a good layered shape, the light lands on the ends, then slips down the longer panels. It looks deliberate. On a messy one, everything blends into one flat sheet.
The face frame should do a job, not just exist
A lot of people ask for face-framing layers without naming the landing point. That’s where the trouble starts. A layer that begins at the cheekbone does a different thing than one that begins at the jaw or collarbone. One opens the eyes. One narrows the lower face. One softens the neck line when the hair is tucked behind the ears.
Pick the job first. Then choose the layer.
How to Ask for the Right Layer Map at the Salon
Bring a photo if you have one, but don’t stop there. Photos help with mood; they do not always explain the actual cut line. The better move is to name exactly where you want the shortest layer to land, where you want the perimeter to stay blunt, and how much movement you can live with on an ordinary Tuesday morning.
If you want straight layered haircuts that stay sharp, say things like: “Keep the bottom edge blunt,” “Start the face frame at the cheekbone,” or “I want internal movement, not a choppy surface.” Those phrases are useful because they describe the structure, not just the vibe.
Say where the weight should stay
If your hair is fine, ask for less removal around the crown and more softness near the ends. If your hair is thick, ask where the bulk should come out so the sides do not flare. If your hair grows in a strong part, mention the cowlick or the bend at your temple. Those little details change where a stylist will place the layers, and they matter more than most people expect.
Be specific about styling time
A cut that looks sharp in 25 minutes can behave very differently from one that needs 10. Tell your stylist how much heat you use, whether you air-dry, and whether you want the ends to turn under or stay straight. If you flat iron every day, the layer mapping can be tighter. If you barely style your hair, the cut needs a little more forgiveness in the interior.
Ask for one strong line and one supporting line
That’s the simplest way I know to keep straight hair from getting messy. One line is the perimeter. The other is the movement inside it. When both are clear, the cut looks deliberate even as it grows.
1. Collarbone Lob with Barely-There Layers
This is the haircut I reach for when straight hair needs to look polished without looking stiff. The length sits right at the collarbone, so the ends catch a small bend and the shape feels finished even when you do very little to it. The layers are subtle enough that they soften the outline, not so aggressive that they steal the line.
What to ask for
Ask for a blunt lob that skims the collarbone, then add very light internal layers beginning about 1 to 2 inches below the chin. That keeps the front pieces from hanging like a curtain while the bottom edge still stays crisp. If your hair is fine, keep the layers sparse. If it is thick, the stylist can remove a little more weight through the interior without touching the hem too much.
Why it works
- The blunt edge keeps the cut from going fuzzy.
- The slight layering gives the hair a small swing when it moves.
- The collarbone length is long enough to tuck behind the ear, which sharpens the whole silhouette.
- It grows out cleanly, so you’re not stuck with a weird shelf line in three weeks.
A flat brush and a 1-inch round brush are enough for most days. Pull the front sections forward while drying, then turn the ends under just a touch. Not a curl. Just a bend.
Best move: finish with a pea-sized drop of lightweight serum on the last 2 inches only. If you coat the root area, the whole shape goes flat and loses the clean edge that makes this lob work.
2. Long U-Shape Layers with a Clean Perimeter
A U-shape is the quiet overachiever of long straight hair. The back stays fuller, the sides taper slightly, and the whole cut looks intentional instead of dragged down by its own length. It is a smart choice if you want movement without a lot of visible chopping.
The curve matters. On straight strands, a soft U keeps the ends from looking like they were cut with a ruler and forgotten. You still get that long, sleek line, but the corners are softer and the hair lands with more grace around the shoulders and mid-back.
Why it’s worth the salon chair time
This cut is especially good if your hair is dense or sits heavy at the ends. The U-shape stops it from forming a boxy outline. If you wear a center part, the shape looks balanced. If you like a subtle side part, the longer face pieces fall nicely without pulling the whole cut off to one side.
A lot of people think long hair needs lots of layers to feel light. It does not. Sometimes the sharpest version is a perimeter with a small curve and a few long layers placed below the chin. That’s enough.
Quick details to remember
- Keep the longest point in back, not at the sides.
- Ask for the face frame to stay long if you want the shape to feel sleek.
- Dry the hair with the nozzle pointed downward so the cuticle lies flat.
- If the ends flick out, the front layers are probably sitting too high.
This one looks especially good with glossy, dimensional color because the curve lets the highlights move from front to back instead of getting trapped in one flat sheet.
3. Cheekbone Face-Framing Layers with a Center Part
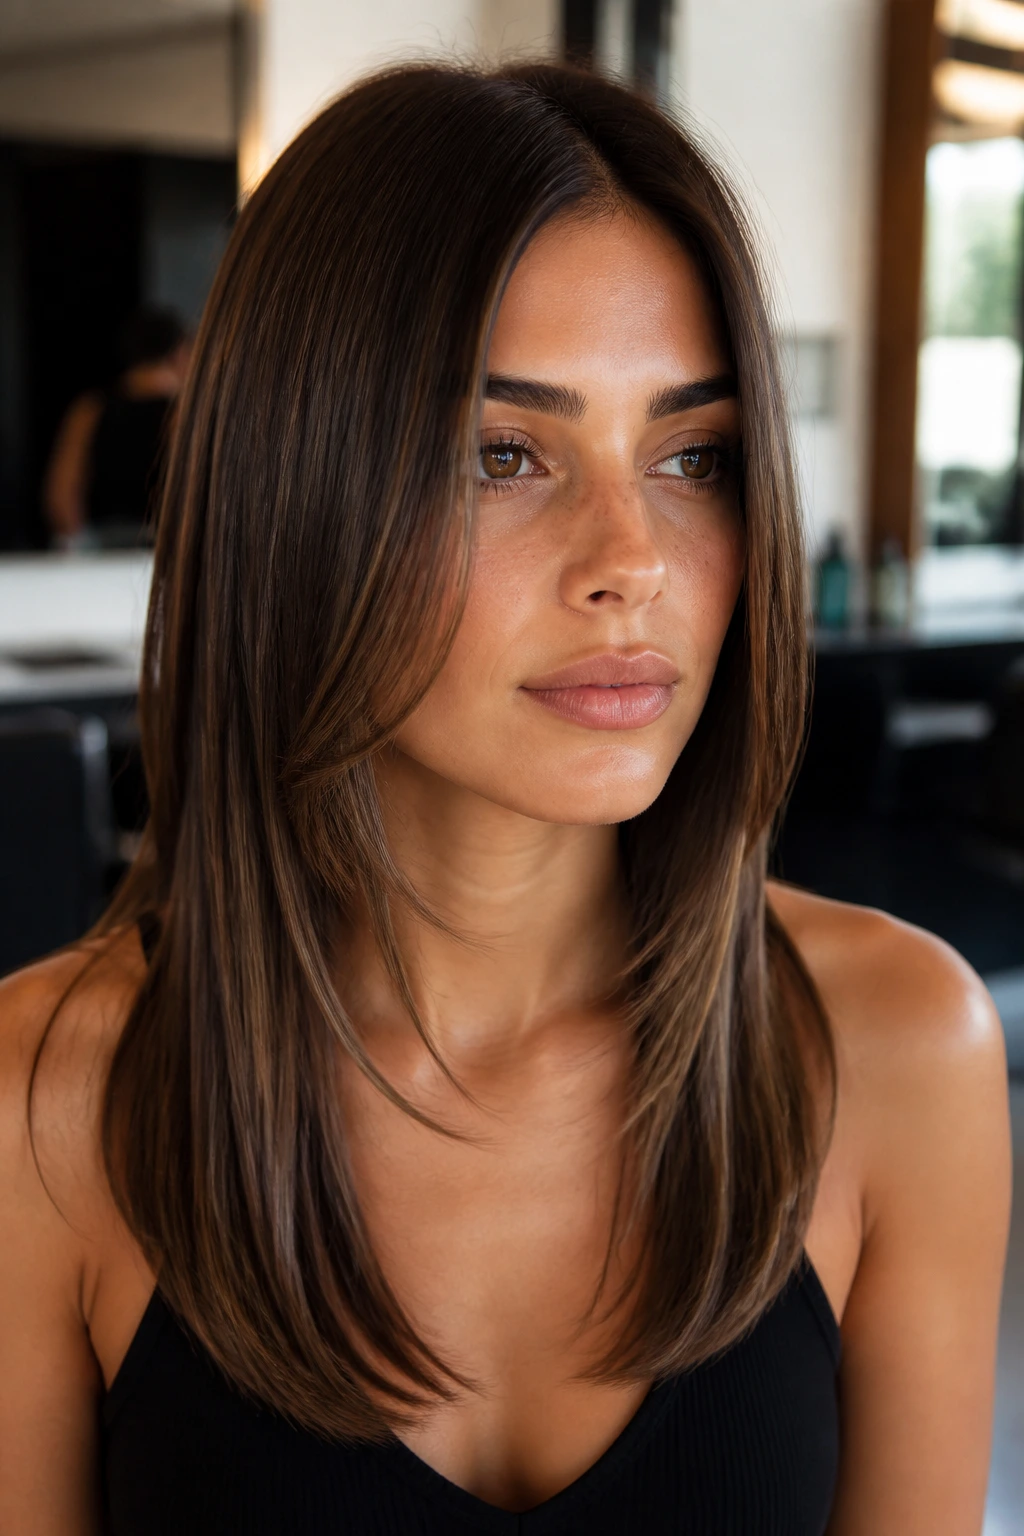
Why does such a small face frame change the whole haircut? Because straight hair shows every inch of shape, and a cheekbone layer lands exactly where the eye notices first. That tiny bit of lift around the face can sharpen the whole look without making the length feel thin.
This cut works best when the center part is clean and the front pieces are cut to follow the cheekbone, then slide down toward the jaw. It’s less about drama, more about control. The rest of the hair can stay long and calm while the front does the visual work.
How to wear it
A smoothing cream at the mid-lengths and ends keeps the front pieces from puffing outward. Blow-dry the front away from the face first, then let them cool in place. That one step makes the difference between a layer that bends and a layer that sticks out in a weird little angle.
If you want a sharper read, tuck one side behind the ear. That exposes the cut line and makes the face frame look cleaner. It also shows off earrings, which sounds shallow until you see how well it works with a sharp haircut.
Best for
- People who keep a center part
- Hair that is naturally straight or mostly straight
- Anyone who wants the cheekbones to stand out a little more
- Longer lengths that need a front-focused shape
If your forehead is wide, this cut can soften the upper half without hiding your face. If your jaw is narrow, keep the face frame a touch longer so the ends do not crowd the chin.
4. Invisible Internal Layers for Pin-Straight Hair
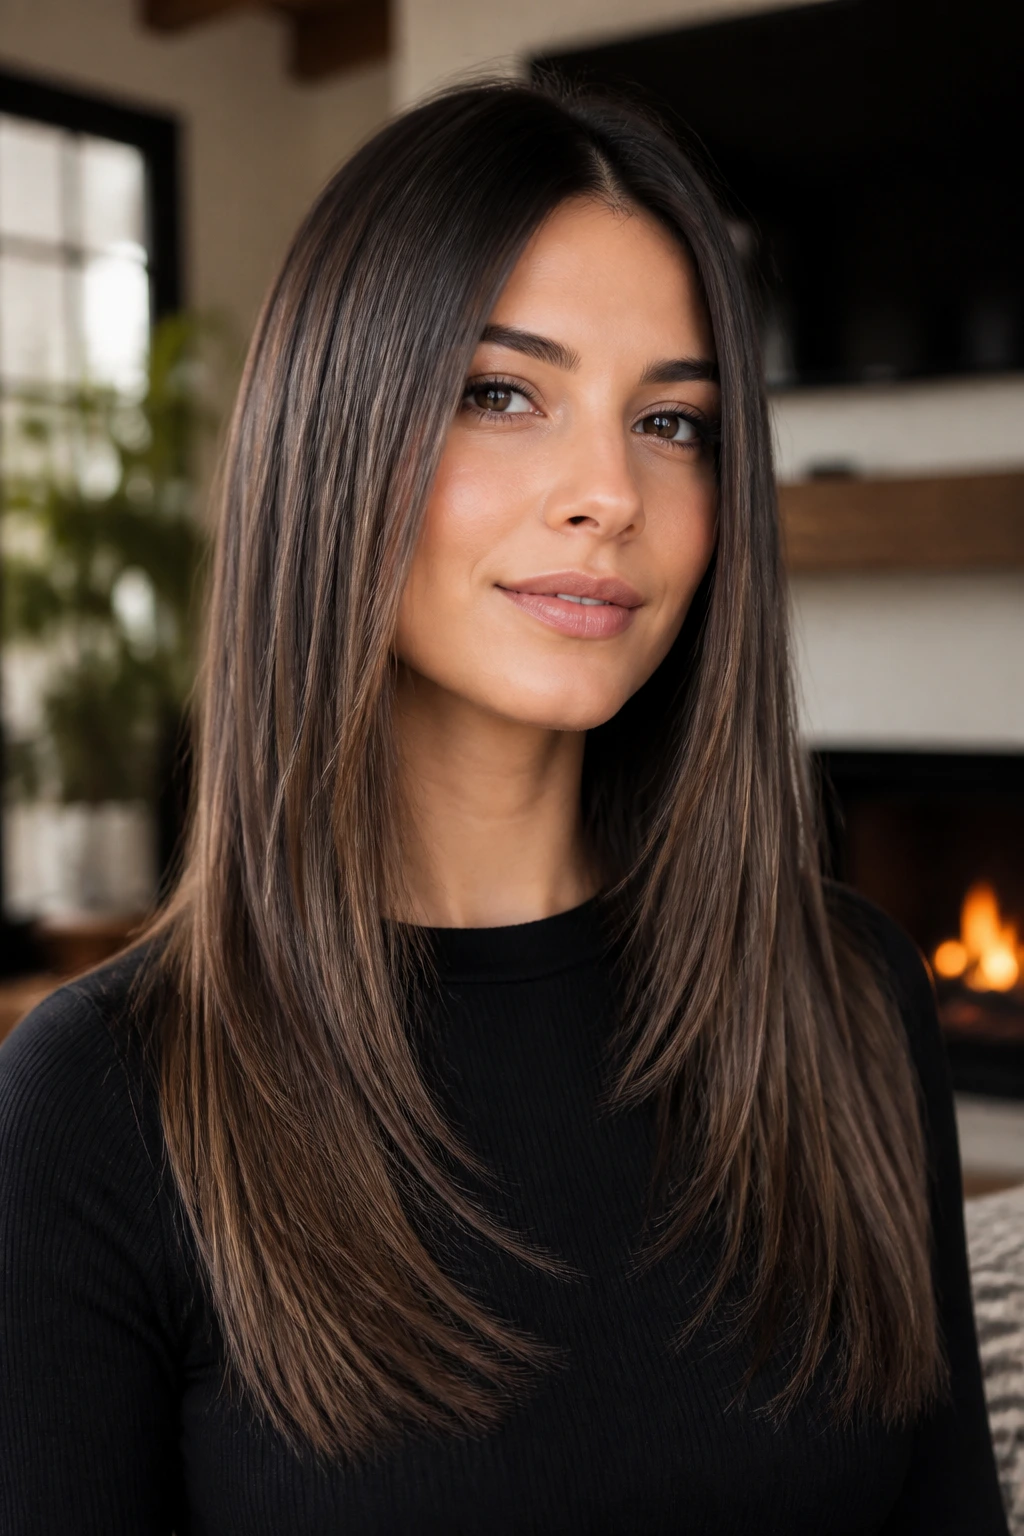
Pin-straight hair can look luxurious, but it also has a habit of falling flat in the least flattering way. Invisible internal layers fix that by taking weight out from inside the haircut instead of carving obvious steps into the surface. On straight hair, that difference matters a lot.
The outside line stays almost untouched. That is the whole appeal. From a distance, the hair reads smooth and even. Up close, you get movement, lift, and a little swing when the hair turns at the shoulders.
The part most people miss
Internal layers are not the same as a heavily textured cut. If they are done too aggressively, the ends can look hollow. The better version removes bulk under the top layer, especially around the back of the head and just below the cheek line. The result is a shape that moves when you do, not a cut that looks carved up on a hanger.
Good if your hair does this
- lies flat at the crown
- feels heavy but fine at the ends
- gets stuck under coats and scarves
- shows every rough snip like a neon sign
A paddle brush and a fast blow-dry are usually enough. The trick is keeping the root smooth while letting the interior layers breathe. If you’re using a flat iron, keep it away from the crown and use it only where the bend starts.
One sentence tip: If the haircut looks too blunt after styling, it usually needs more internal movement, not more surface layers.
5. Choppy Midi with Piecey Ends
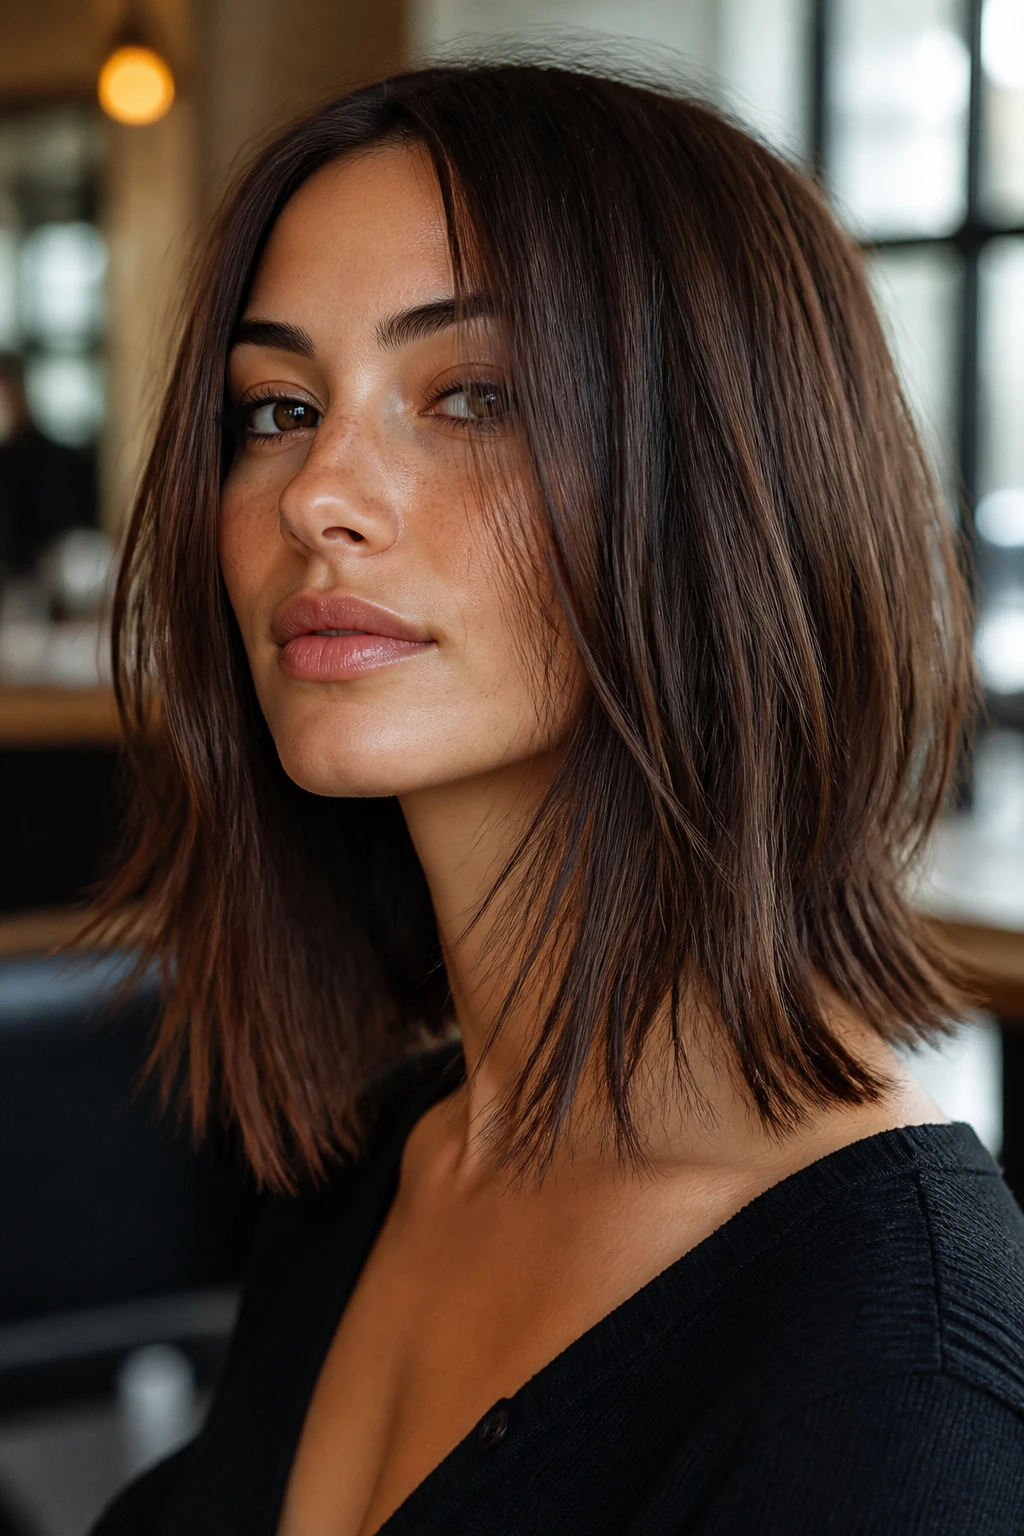
This is the cut that makes straight hair look intentional even when you barely style it. The length sits around the shoulders or just below, and the layers are choppier than the softer looks above. But — and this matters — the perimeter still needs a clear edge. Without that, the whole thing turns into frizzed-out fuzz.
The magic is in the pieces near the ends. They should fall in separate ribbons, not one fuzzy blob. That means the stylist has to be careful with the texture work. I prefer point-cutting here over heavy razor work unless the hair is very thick. A blunt-ish hem keeps the sharp look alive.
When it’s the right call
If your hair falls flat by noon and you hate fussy blowouts, this is worth a look. The uneven pieces give the cut some grit. It doesn’t need perfect styling to feel current, and that is a relief for people who don’t want to spend twenty minutes making their hair behave.
A side part can make this cut look slightly more angular. A center part makes it feel cleaner and more symmetrical. Both work. The real question is how much texture you can tolerate around the face.
A few useful notes
- Ask for the shortest layers to stay below the chin if you want to avoid a fluffy crown.
- Keep the ends piecey, not shredded.
- A texturizing spray at the mid-lengths helps the separation last.
- Skip heavy oils near the top; they collapse the structure fast.
This is one of the easiest styles to make look edgy without going full shag.
6. Straight Lob with Curtain Bangs
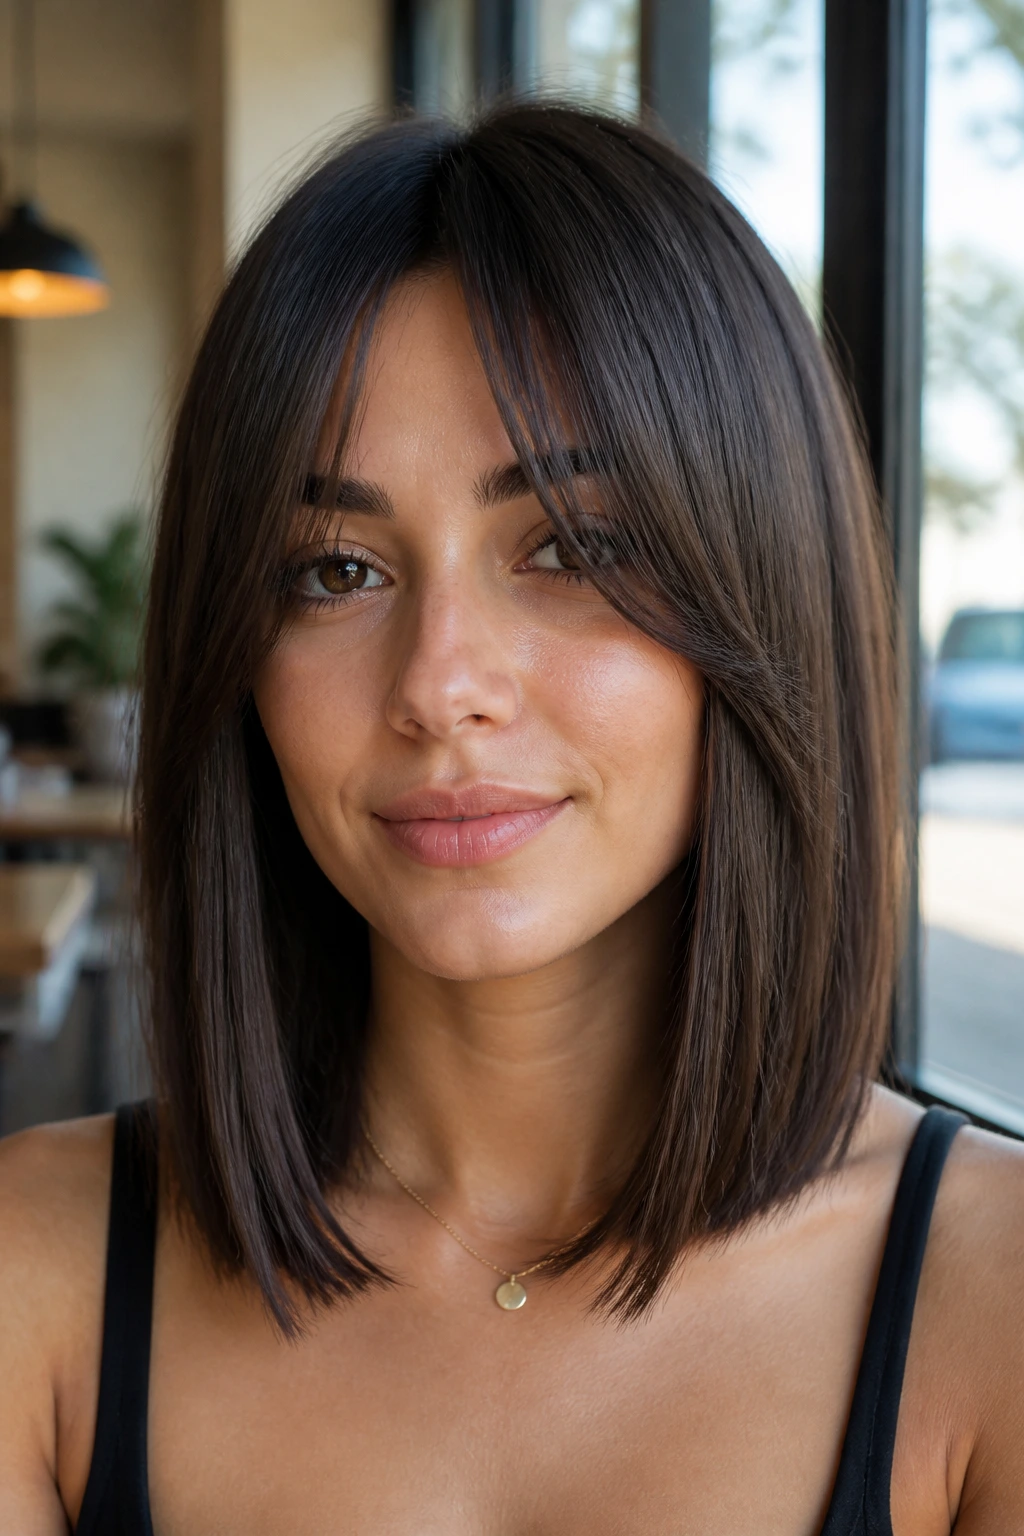
Curtain bangs on straight hair can be very good or very annoying. There is not much middle ground. When they’re cut well, though, they frame the face with a clean, almost editorial line and make a straight lob feel sharper at the front than a plain long bob ever could.
The trick is to keep the bangs long enough to part around the eyes and cheekbones. Too short, and they get stiff. Too wide, and they start stealing focus from the rest of the haircut. I like this version best when the lob itself stays fairly sleek and the bangs are the only soft point in the cut.
Why this one holds up
Curtain bangs create a front-to-back transition that straight hair often needs. Without them, a long bob can feel a little abrupt around the forehead. With them, the eye moves down the face and into the longer shape.
The bangs should open cleanly in the middle and blend into the first layer near the jaw. If there’s a hard disconnect, the look gets heavy. The soft blend is what keeps the line sharp.
Styling note
Dry the bangs first. Always. If they sit around the face while the rest of the hair dries, they can bend in a weird way and refuse to cooperate. Use a small round brush or your fingers plus a dryer nozzle, then let them cool before touching the rest of the head.
This cut is especially strong with a little face-frame color around the bangs. It gives the shape a bright edge without turning the whole head into a highlight map.
7. V-Cut Layers for Long Length
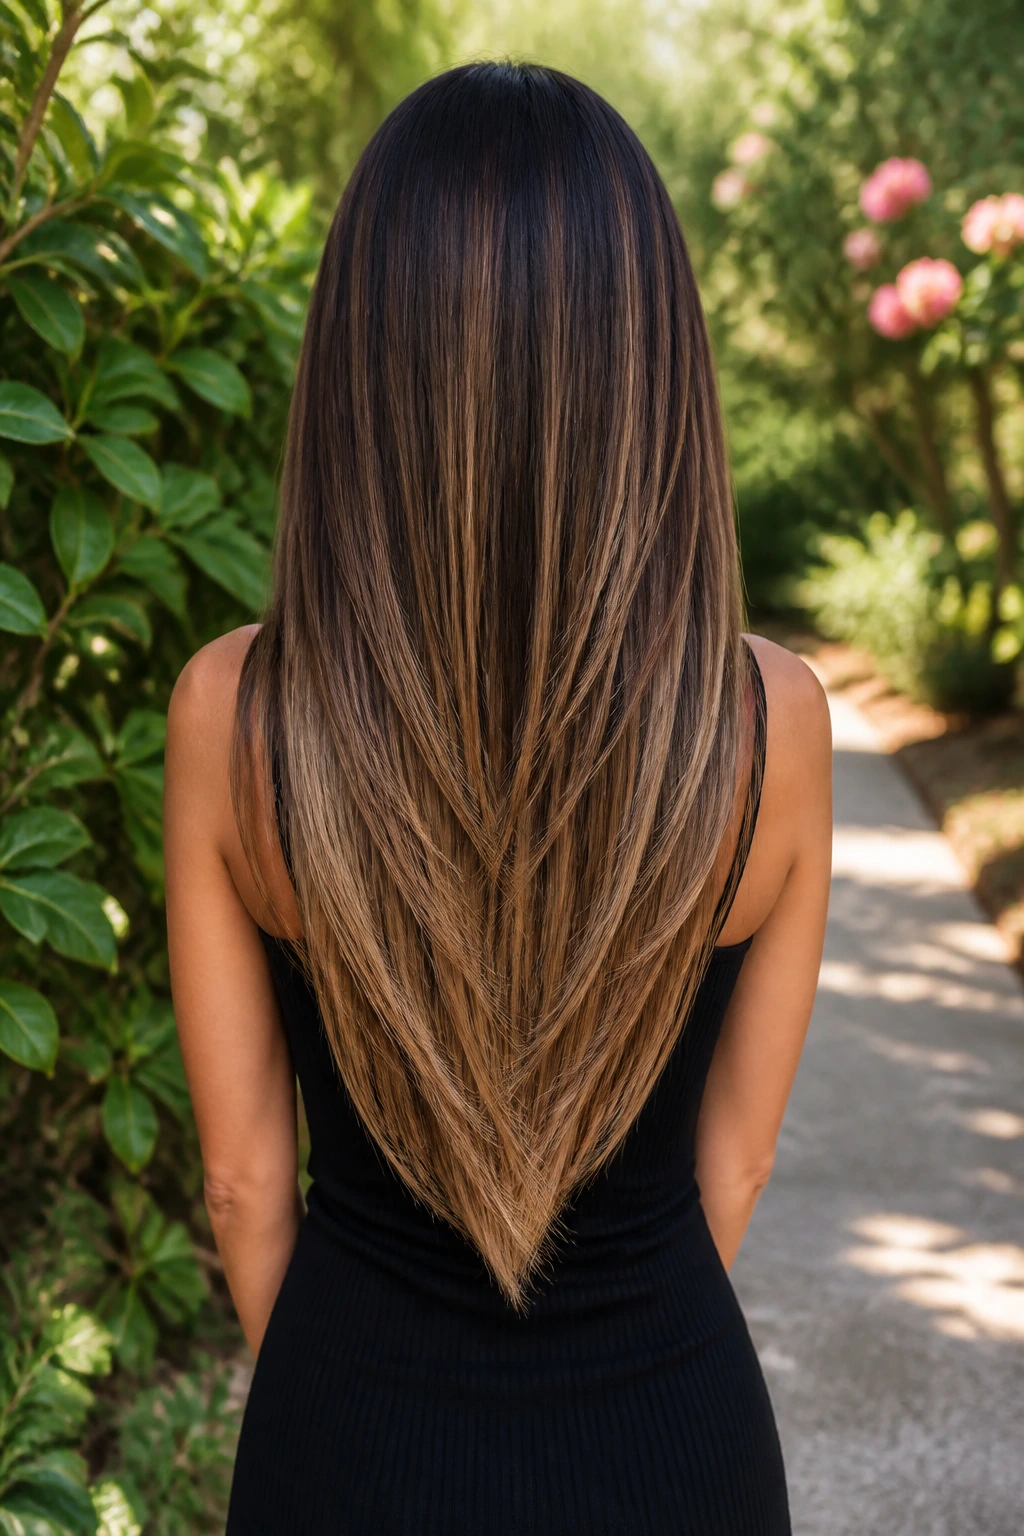
The V-cut is for the length lover who still wants the ends to move. The back drops into a subtle point, the side pieces stay longer, and the layers blend so the hair doesn’t feel like one giant sheet. On straight hair, the shape looks polished when the point is narrow and the sides are clean.
It can go wrong if the point is too deep. Then the back starts looking stringy. The right V keeps enough fullness through the center so the cut still feels lush. That balance is what makes it sharp rather than dramatic for drama’s sake.
What makes it useful
The V-shape gives long straight hair a visible silhouette from the back, which matters more than people think. If all your length falls in one rectangle, the style can look heavy even when the hair is healthy. A V softens that and gives the eye a place to travel.
It also pairs well with lowlights or balayage because the longer side panels catch light at different points than the center back. That separation makes the shape easier to read.
Ask for this
- Keep the point subtle, not sharp enough to look triangular.
- Let the shortest layers stay low enough to preserve length.
- Clean up the hem every 8 to 10 weeks if you want the point to stay obvious.
- Use a flat iron only on the last few inches if you want the ends to turn in neatly.
One blunt opinion: if your hair is already very fine, don’t overdo the V. You want shape, not see-through ends.
8. Precision Bob with Internal Weight Removal
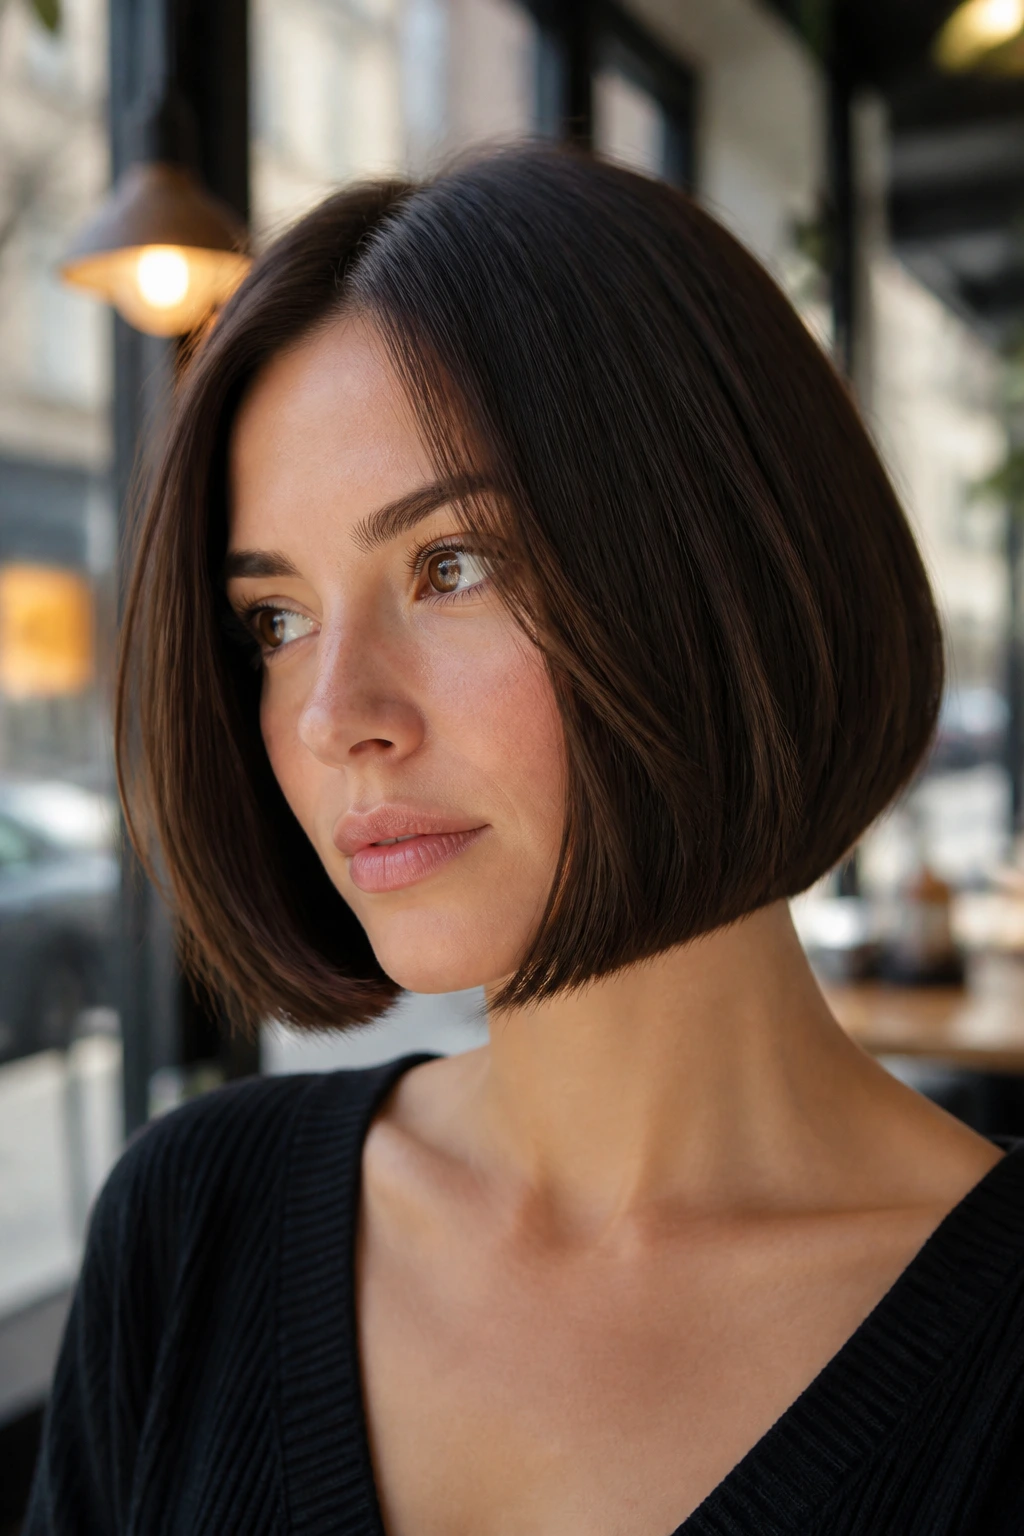
A precision bob on straight hair is surgical in the best way. The outside line stays clean and even, usually somewhere between the jaw and just below it, while the inside loses enough weight to keep the shape from ballooning. It is a strong haircut. No fluff. No apology.
This is the cut I’d choose for someone who likes structure and wants the neck to look longer. It can be slightly rounded under the chin or kept more straight and blunt, but the perimeter has to be exact. If the line wobbles, the whole point is gone.
What to watch for
Internal weight removal is where the magic happens, but it’s also where the trouble lives. Too much and the bob gets airy in a bad way. Too little and it sits like a helmet. The best version removes bulk under the surface while leaving the outline solid enough to catch a clean edge in the mirror.
Styling helps a lot here
A quick blowout with a paddle brush or small round brush is enough for many hair types. If you prefer a flat-iron finish, keep the iron moving in one pass and tuck the ends under just slightly. The goal is a neat bend, not a curl.
This cut especially suits someone who likes shirts with open collars, earrings that frame the jaw, and a style that looks intentional even on an ordinary day. It is not a messy haircut. That is the charm.
9. Butterfly Layers on Straight Hair
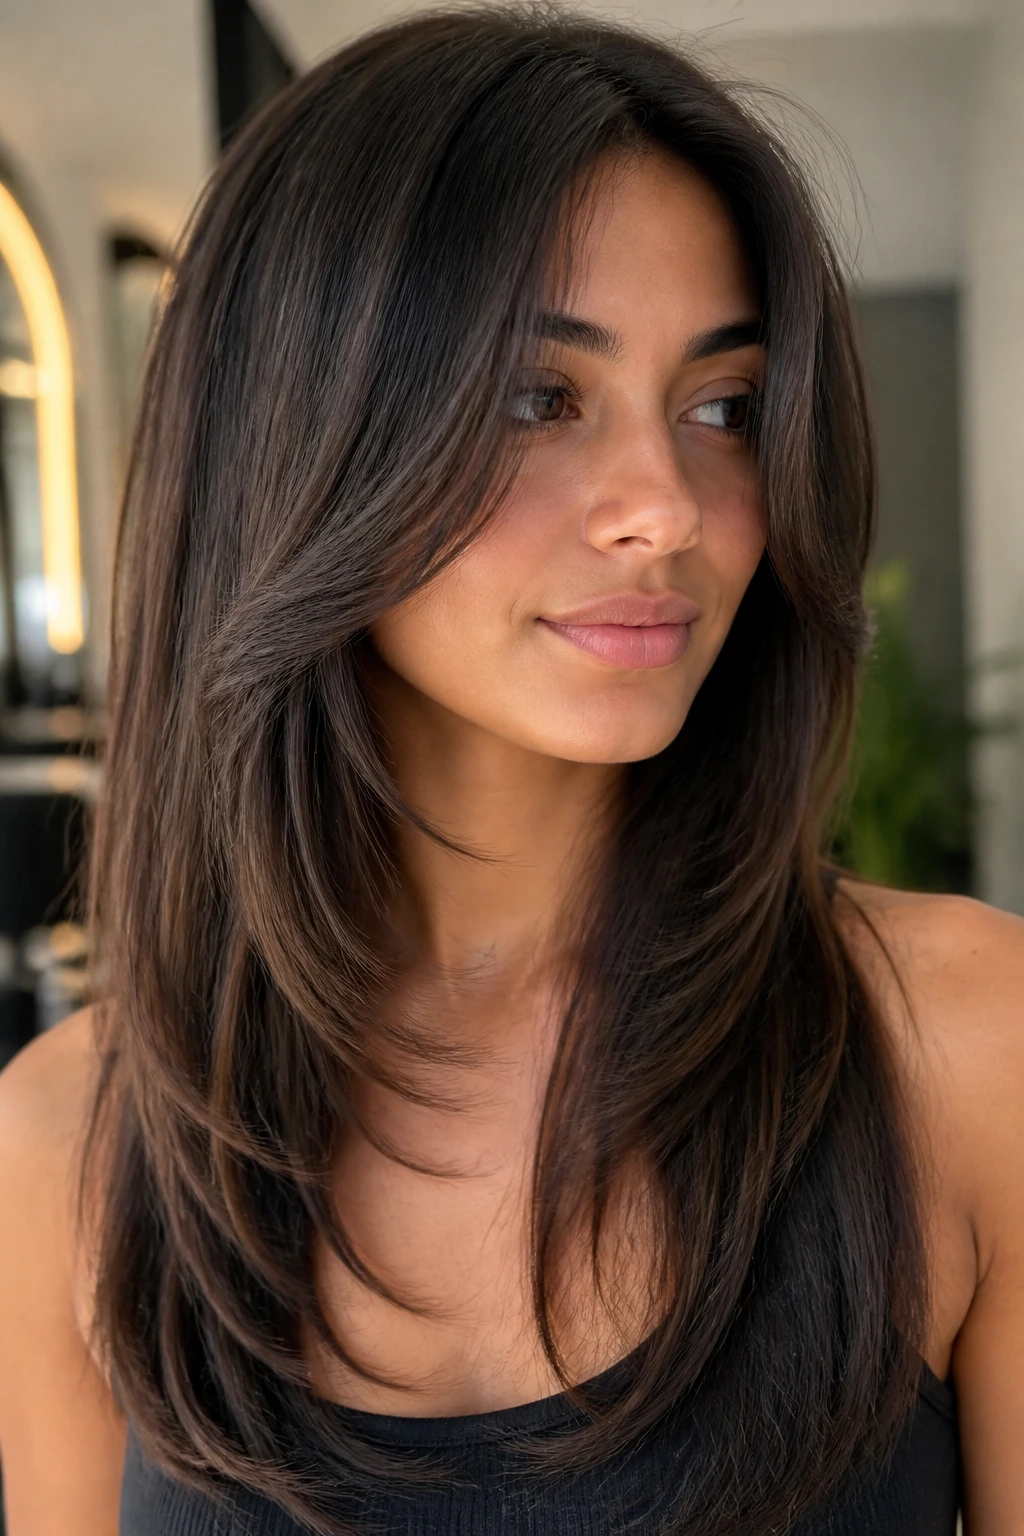
Butterfly layers can look too fluffy if they’re cut with a heavy hand, but on straight hair they can be sleek and dramatic in the good sense. The shorter front pieces lift away from the face, while the longer layers keep the length intact. That contrast gives the haircut its shape.
I like this cut when someone wants softness at the front without giving up a long back. It creates movement around the cheekbones and collarbone, which can make the whole cut feel lighter. The trick is to keep the layers controlled, not sprayed all over the head like confetti.
Why it works on straight hair
The front layers are visible right away. That’s useful. Straight hair tends to show where the cut starts and ends, so the butterfly effect reads clearly without needing curls to create volume. The longer back panel keeps the finish grounded.
If you wear your hair blown out and smooth, the lifted face pieces sit like framing on either side of the face. If you wear it pin-straight, the layers still show, but they look cleaner and more graphic.
Best way to wear it
Use a round brush or large velcro rollers at the front only. You don’t need that much volume through the whole head. In fact, too much lift at the crown can make the cut feel old-fashioned. Keep the top smoother, let the face frame do the visual work, and let the rest fall in a long line.
This is one of the better choices if your hair is long and you’re tired of it looking like a single heavy panel.
10. Angled Lob with a Sharp Front Line
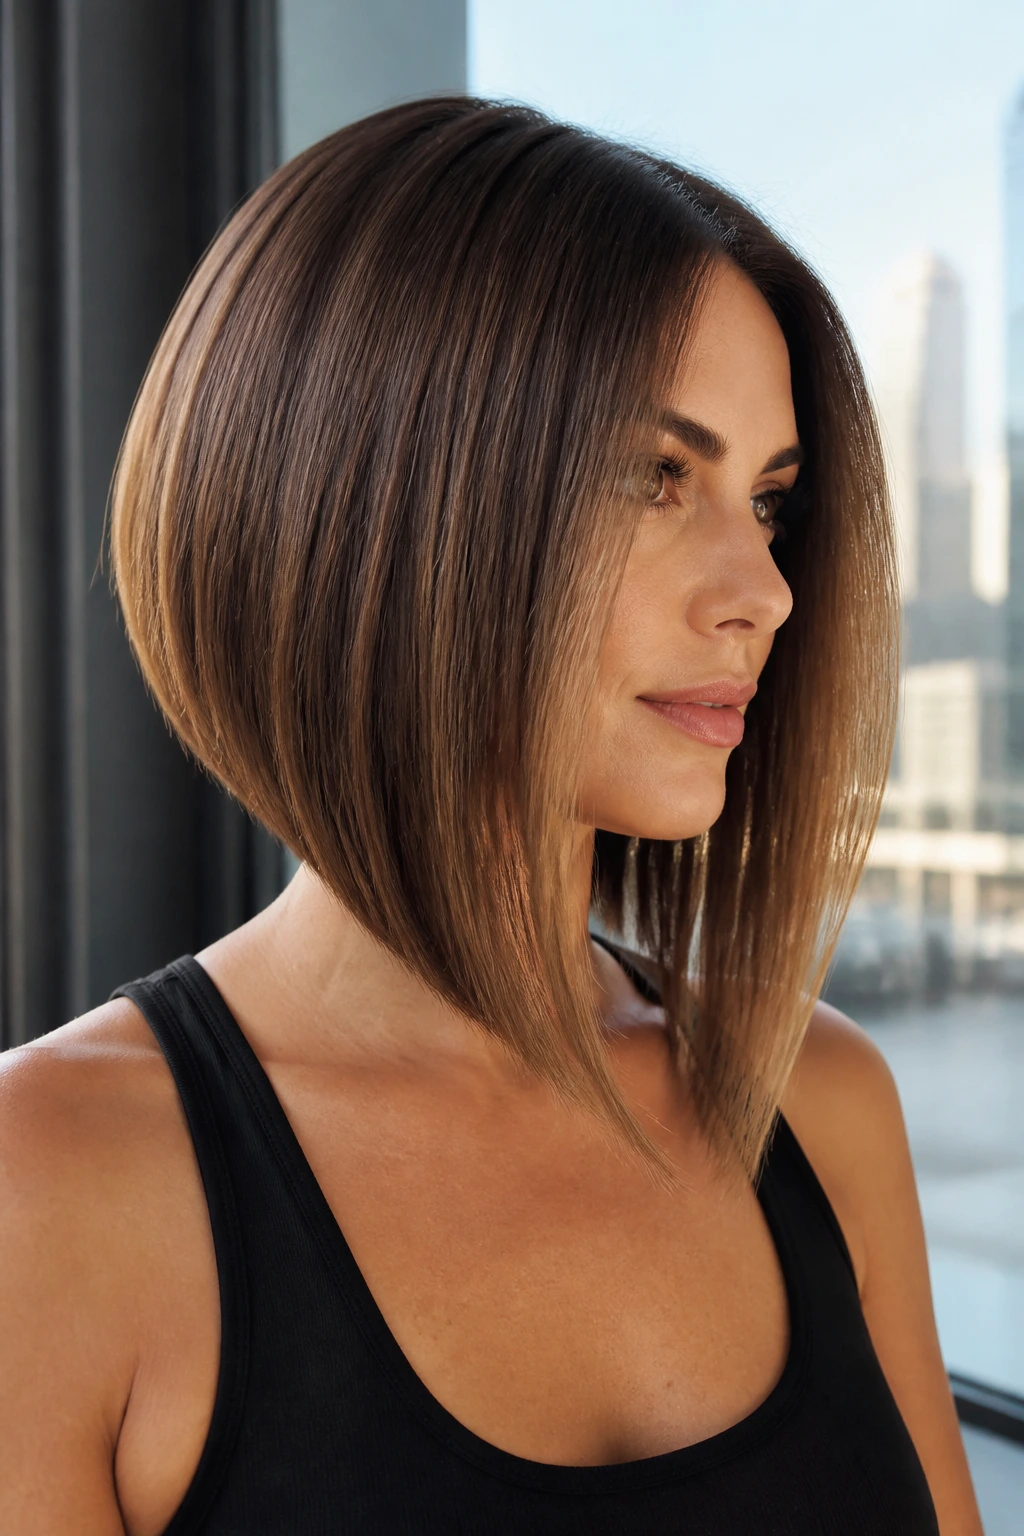
An angled lob looks like it means business. The front pieces sit a little longer, the back is slightly shorter, and the line between them is crisp enough to notice immediately. On straight hair, that angle reads clearly and gives the cut a strong profile from the side.
The style is a nice fit if you like structure but don’t want a boxy bob. The angle pulls the eye forward and lengthens the neck. It also gives the illusion of movement even when the hair is smooth and still.
How to keep it from looking dated
Keep the angle subtle. If the front is dramatically longer than the back, the cut can start to feel heavy and stylized in a way that isn’t always easy to live with. A modest angle gives you the clean line without making the silhouette too aggressive.
A few good pairings
- side part for more asymmetry
- center part for a sharper, more even read
- tucked one side for a little edge
- flat ironed ends if you want the angle to look precise
If your hair flips at the shoulders, this cut can either help or annoy you, depending on where the longest front point lands. A good stylist will place the angle below the shoulder bend so the ends don’t kick out every time you move.
Best tip: ask for the front length in actual reference points, like jaw, collarbone, or upper chest. “Longer in front” is too vague.
11. Side-Part Sweep Layers
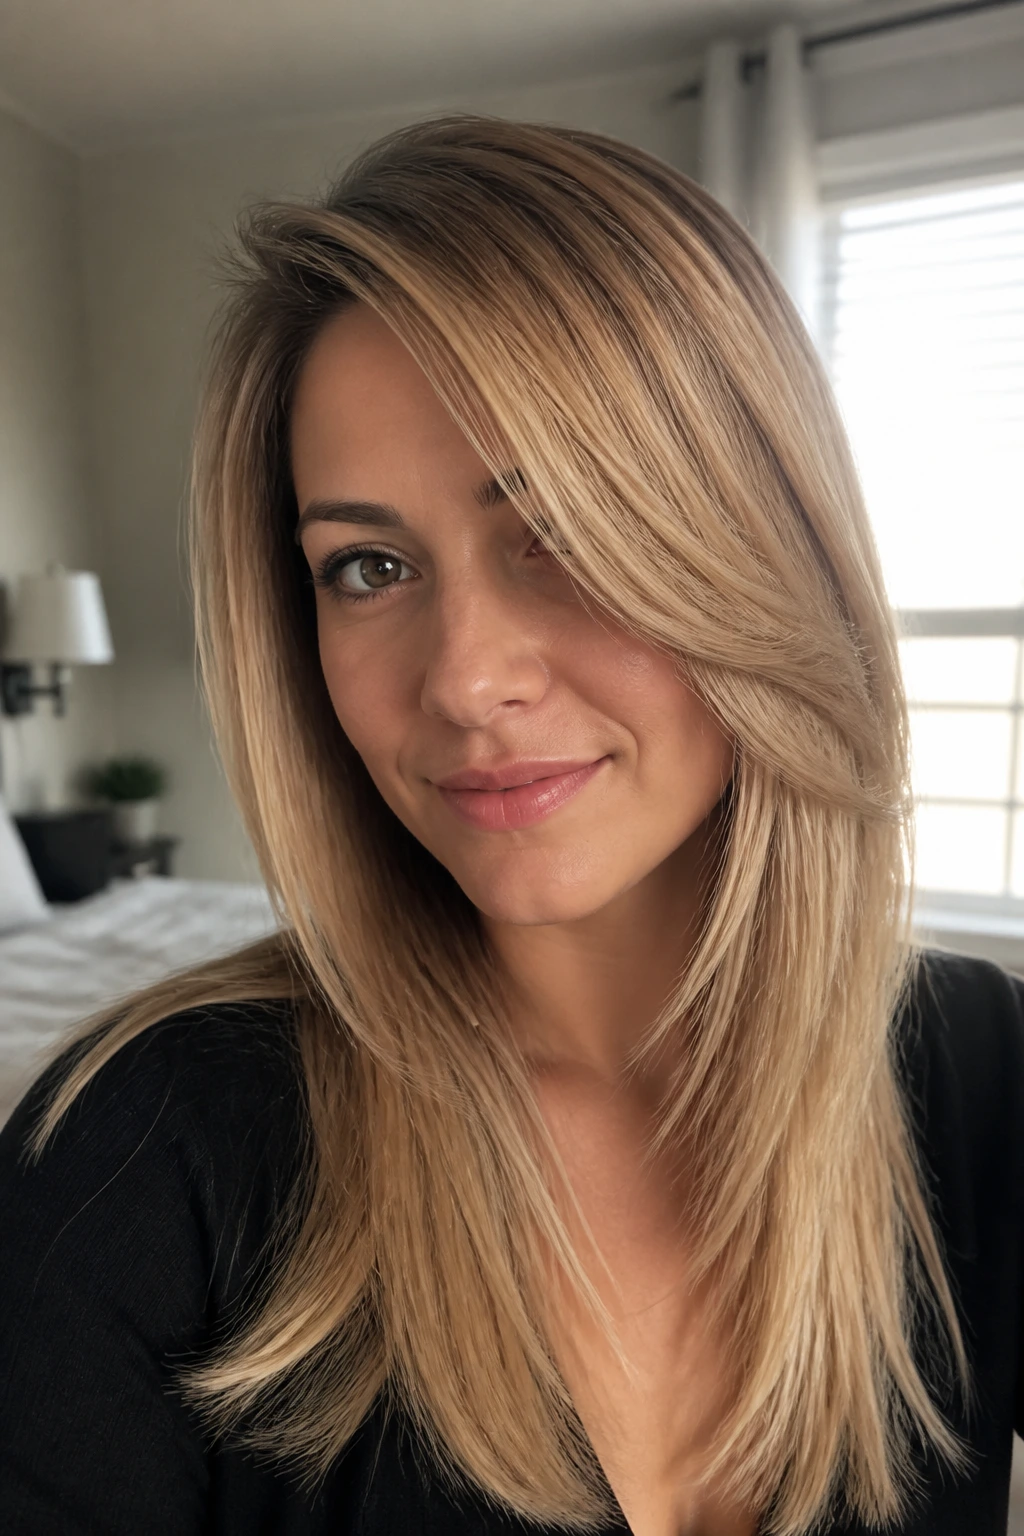
Side-part layers are underrated. Everyone talks about center parts, but a deep or medium side part can give straight hair a cleaner sense of movement, especially if you want the face to look a little narrower or you want one side to feel more dramatic than the other.
The key is the sweep. The front pieces should move across the forehead and settle toward the cheekbone, not collapse into the eye or sit in a stiff ridge. That means the layers need to be cut with the part in mind. A side part changes where the hair falls, which changes everything.
Why it looks sharp
Straight hair with a side part gets instant direction. The eye follows the line from the crown down toward the jaw, which makes the haircut feel more sculpted. If you have a long face, this can add a bit of width. If your face is round, a slightly deeper side part can add length.
This cut pairs well with a blow-dry that keeps a little lift at the root on the heavier side. Nothing dramatic. Just enough height to stop the hair from sticking flat to the scalp.
Who it suits
People with a strong cowlick can sometimes hide it more easily with a side part. People who wear glasses often like this shape because the sweeping front pieces sit neatly around the frames. And if your hair is medium to thick, a side part can help the top stay from looking too helmet-like.
One sentence that matters: A side part only looks polished when the front sweep has a soft bend, not a hard fold.
12. Long Layers with Bottleneck Bangs
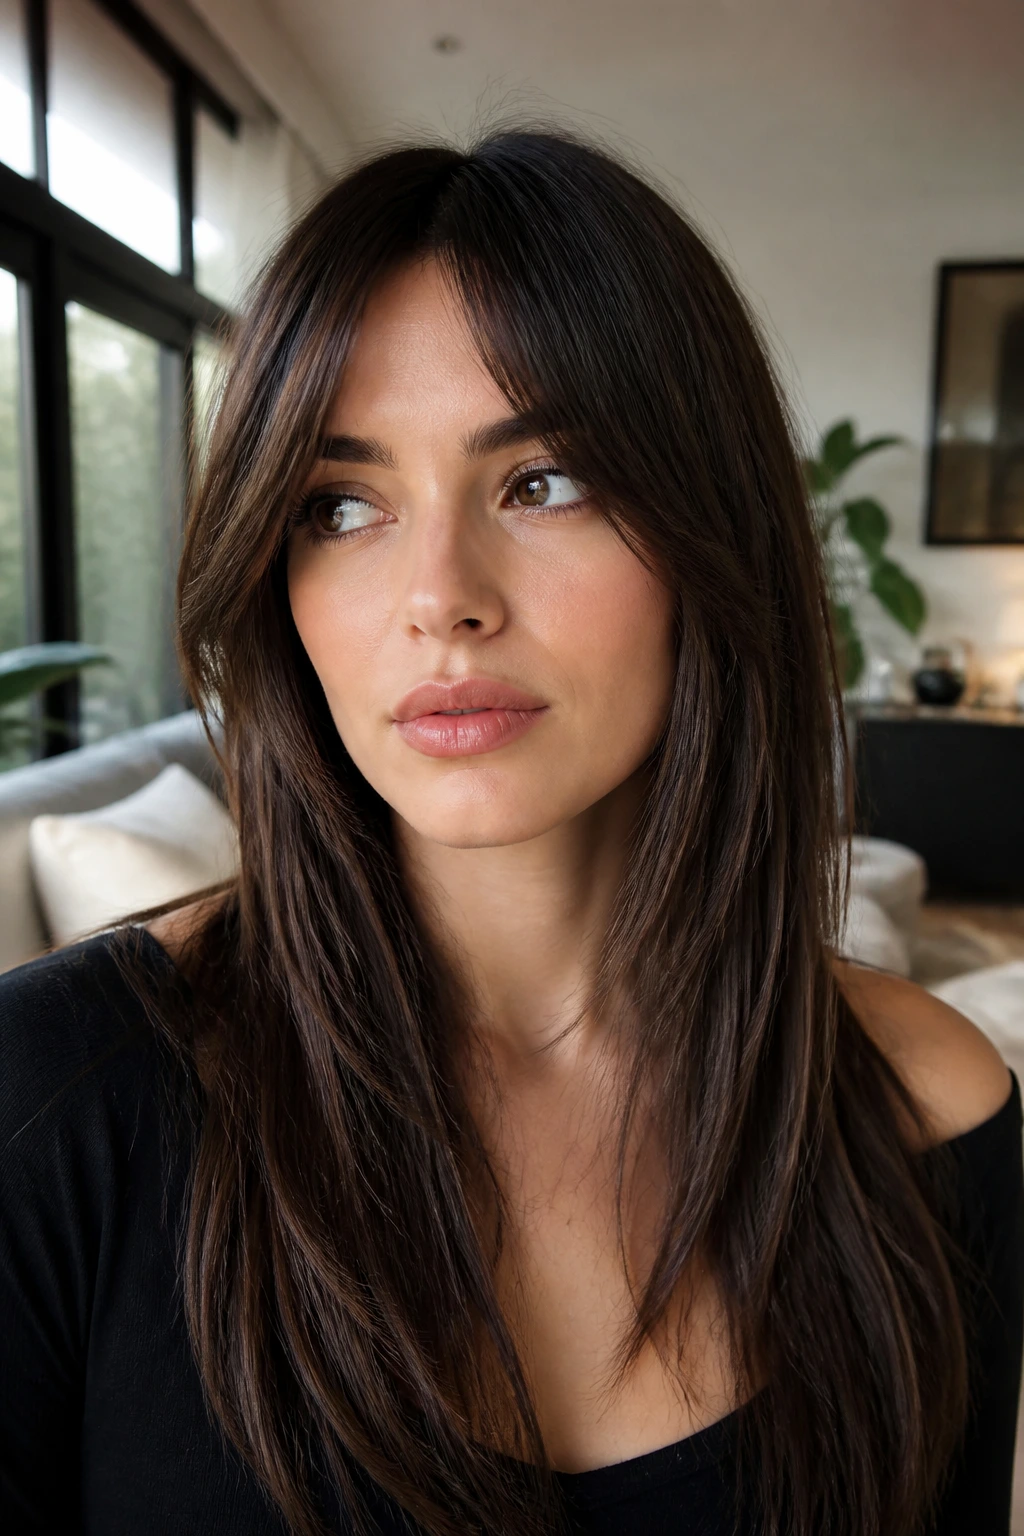
Bottleneck bangs sit in that nice middle ground between curtain bangs and a full fringe. They start narrower near the center, open gradually, and blend into the sides without looking abrupt. On straight hair, they bring shape to the forehead while keeping the rest of the length sleek.
I like this version when someone wants the face to feel framed but doesn’t want the bangs to take over. It’s less dramatic than a heavy fringe and more modern than a straight-across line. The longer side pieces help the bangs flow into the rest of the haircut.
Why they work with long layers
The bangs give the top half of the haircut some activity, while the long layers keep the bottom half calm. That balance matters on straight hair because you need some visual movement somewhere or the whole style can go flat. Bottleneck bangs do the job without forcing the rest of the cut to become busy.
A subtle bend at the ends of the bangs helps them sit correctly. Use a small round brush or even your fingers and a dryer nozzle. Don’t over-roll them. That’s how they get too round and lose the clean edge.
Good if you want
- a softer forehead line
- movement without short layers everywhere
- a shape that grows out easier than blunt bangs
- a style that looks neat even when the rest of the hair is tucked behind the ears
This cut looks especially good with long, straight lengths that need a little front interest.
13. Modern Rachel Cut for Straight Hair
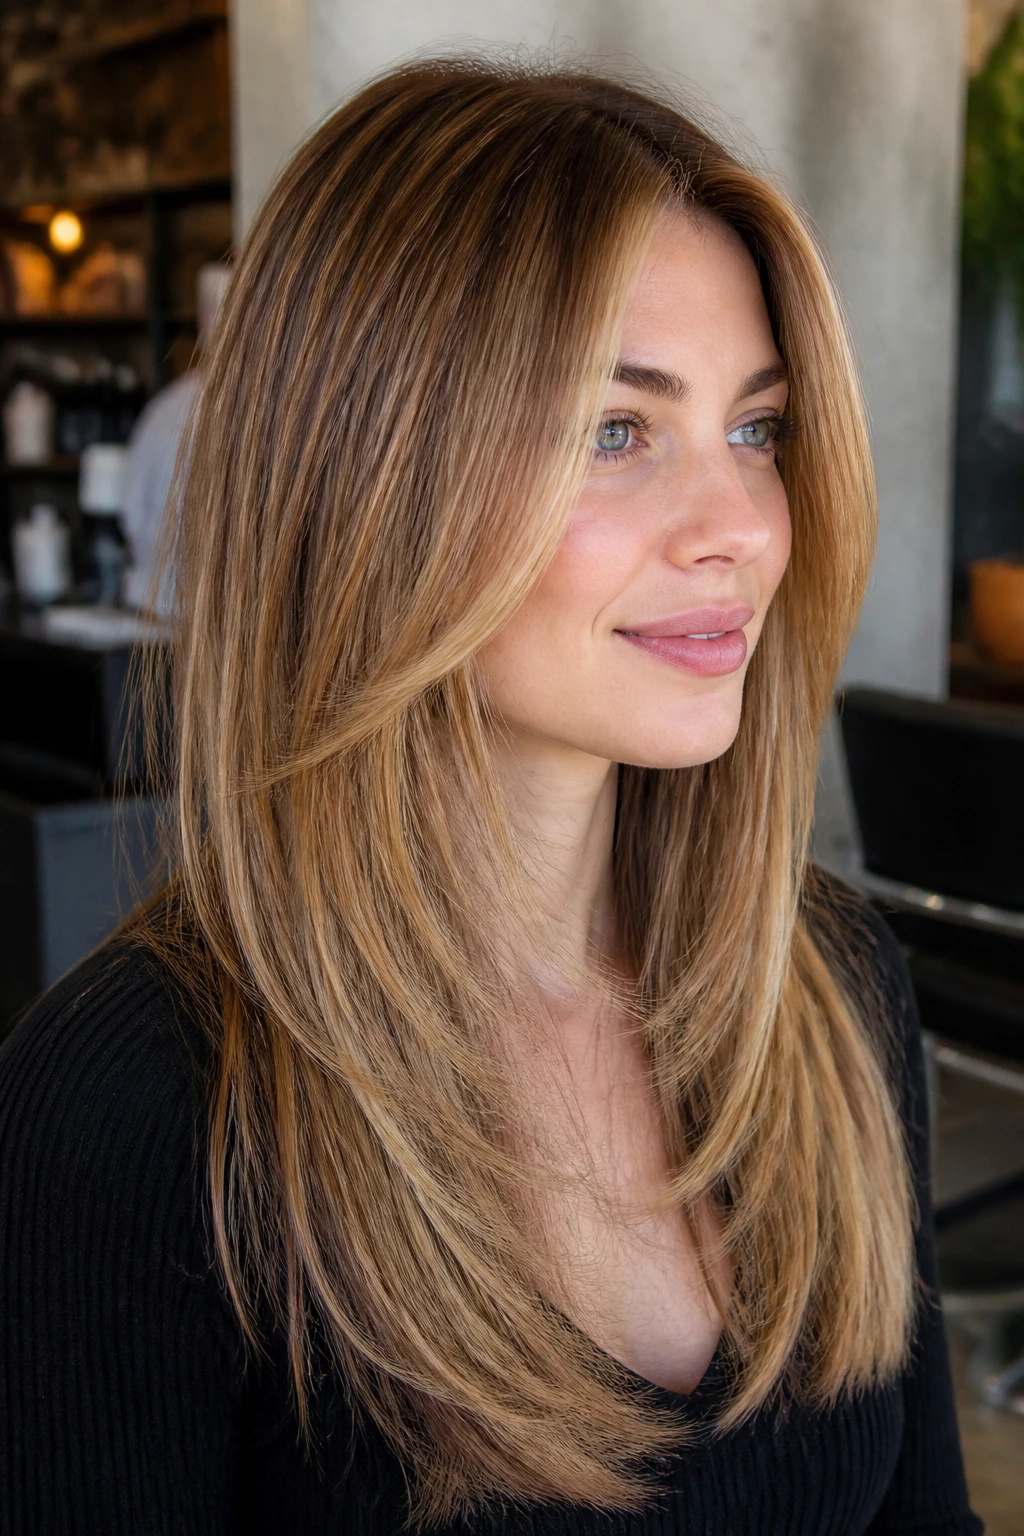
Yes, the Rachel still lives. But the cleaner version is what works on straight hair. Think long face-framing layers, visible movement through the front and sides, and a softer, flatter crown so it does not balloon into a dated shape. The idea is to borrow the energy, not the exact silhouette.
The modern version keeps the ends smoother and the layer starts lower. That matters. If the shortest layer sits too high, the whole haircut can turn fluffy around the temples, which is the last thing straight hair needs.
What makes it feel current
The shape is more controlled now. The front pieces sweep into the jaw or collarbone, and the back stays long enough to keep the line grounded. If the hair is blow-dried smooth with a bit of bend at the ends, you get that layered, polished look without the heavy 90s flip.
Who should try it
This is a solid option if you want to feel like your hair is doing something without losing length. It works on medium-density hair, straight or mostly straight textures, and faces that benefit from a frame around the cheekbones and mouth. It’s also friendly to balayage because the layers give the color places to show off.
If you want the modern version to stay sharp, keep the ends trimmed clean. A shaggy finish ruins the whole point.
14. Razor-Cut Shag-Lite Layers

A shag-lite version gives straight hair attitude without turning it into a full shag. The layers are lighter, a little piecey, and usually concentrated around the mid-lengths and face. The ends still need some structure, though. Without that, the haircut loses the sharp look and starts to read as simply messy.
This cut is useful if your hair is thick enough to support movement but not so thick that it needs dramatic removal. The razor can soften the layers and make them feel airy. I’m careful with this one on very fine hair, because too much razor work can make the ends fray.
The good part
The texture is the point. Straight hair can sometimes feel too perfect, and this cut loosens it up. It gives the front pieces a little swing, especially if you wear your hair with some separation at the ends. A touch of styling cream or lightweight texture spray can keep it from sticking together.
The catch
The sharper the texture, the more maintenance it needs. If you let it grow too long, the layers can drift into a vague shape instead of staying intentional. That’s fine if you like softer haircuts. It’s not great if you want crisp lines.
This is a good cut for someone who likes polish but doesn’t want a severe look. There’s a little grit in it. That’s the appeal.
15. Layered Bob with Tucked-Under Ends
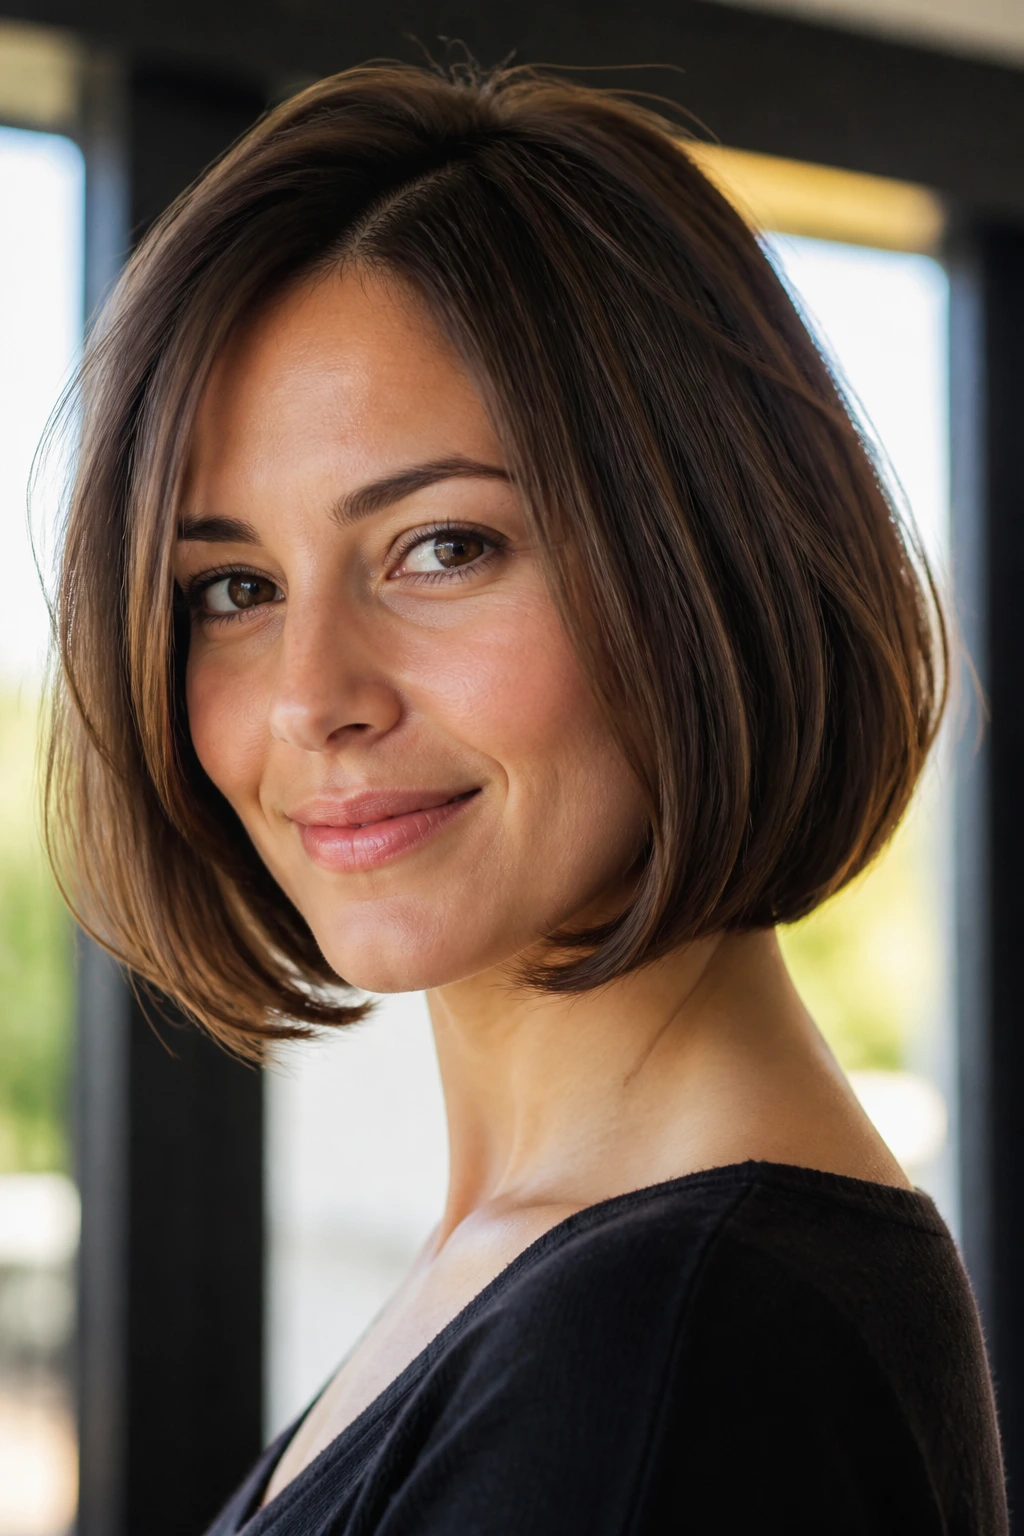
A layered bob with ends that tuck under has a certain neatness to it that I always notice on straight hair. The hem sits around the jaw or just below it, the layers stay modest, and the finish curves inward just enough to hug the neck. It feels tidy without being stiff.
This is one of the best cuts if you want short hair that still reads soft. A blunt bob can look very bold. This version keeps the line but adds enough movement so the shape doesn’t feel like a block. The tucked-under finish also makes the haircut look especially clean when the hair is freshly blown out.
Why it works
The inward bend brings the eye back to the face. On straight hair, that little turn under the chin is enough to make the whole cut look considered. It also keeps the ends from flipping out, which is a common frustration at this length.
A side part or center part can both work, but the cut needs a neat drying pattern. Blow the hair down first, then guide the ends inward with the brush. If you skip that step, the bob can puff out at the jawline.
Best for
- Jaw-length or chin-length styles
- People who want a tidy outline
- Hair that is straight enough to hold a smooth bend
- Anyone who likes a collarbone-to-jaw transition that looks controlled
This one has a strong little old-school charm, but done right, it stays clean and current.
16. Fine-Hair Tapered Layers

Fine hair needs a careful hand. Too many layers and it starts to look thin at the ends; too few and it hangs flat as a board. Tapered layers solve that by keeping the perimeter blunt enough to support the shape while giving the interior a small amount of lift.
The cut should move gradually. No abrupt jumps. The shortest layers often land below the cheekbone, not up near the crown, which helps preserve density where fine hair needs it most. The result is a shape that looks airy without looking sparse.
What to avoid
Don’t ask for “lots of texture” if your hair is fine and straight. That phrase usually gets translated into too much thinning. What you want instead is controlled tapering through the sides and a solid edge at the bottom.
Styling note
A light mousse at the roots and a heat protectant through the lengths can make a huge difference. Dry the roots first, then smooth the ends last. If you overwork the front with a brush, it can end up flatter than the rest and make the haircut look lopsided.
This cut is one of the quietest ways to get straight layered haircuts that still look sharp. It doesn’t shout. It just sits well.
17. Thick-Hair Debulked Layers with a Blunt Hem
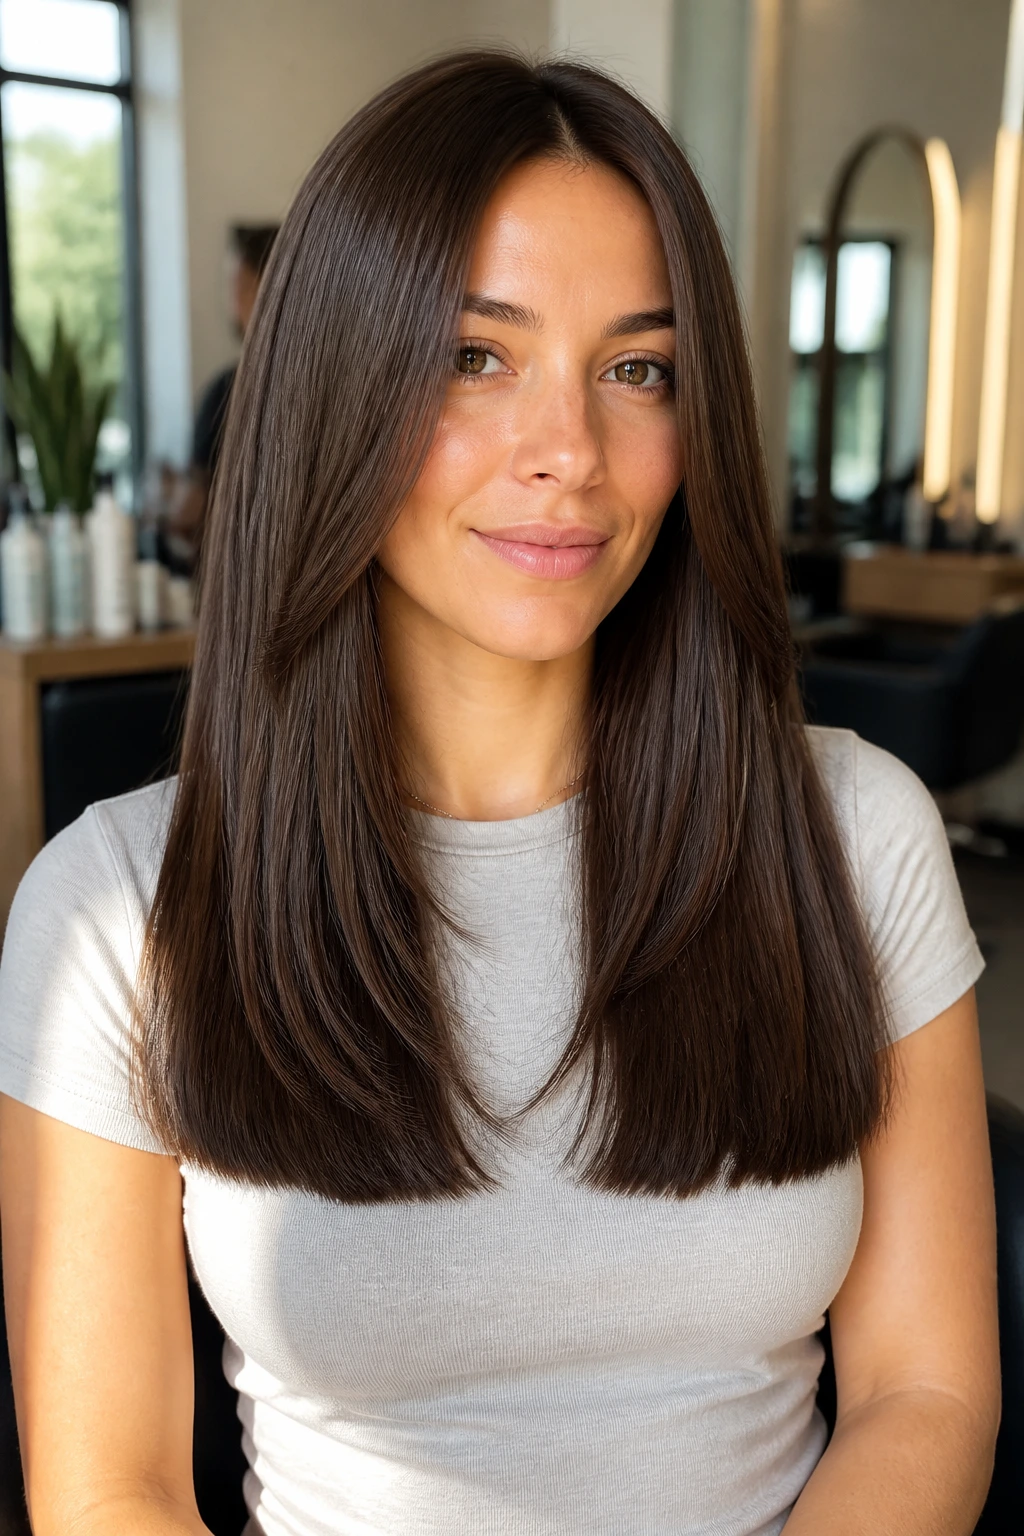
Thick straight hair needs room to move, but it also needs discipline. That’s why debulked layers with a blunt hem make so much sense. The interior gets enough weight removed to stop the cut from ballooning, while the bottom edge stays heavy enough to keep the shape crisp.
If thick hair gets over-layered, it can turn into a triangle or flare out around the shoulders. That’s the problem this cut solves. It trims the bulk where the head needs flexibility and keeps the line where the eye wants structure.
Good signs in the chair
You want the stylist to show you where the weight is coming out. Around the nape? Through the sides? Just under the top section? That placement matters more than the word “layers.” A good thick-hair cut should feel lighter when you move, not see-through when you look at the ends.
Styling reality
Thick straight hair often needs more heat than fine hair to lie properly. That does not mean blasting it dry until it’s fried. It means working in clean sections, using a nozzle, and smoothing the ends while they’re still warm. If the hair puffs at the root, the layers were probably cut well but finished poorly.
This cut is the one I’d choose for someone who wants a sharp shape without the bulk that makes thick hair feel like a helmet.
18. Mid-Length Swooping Layers
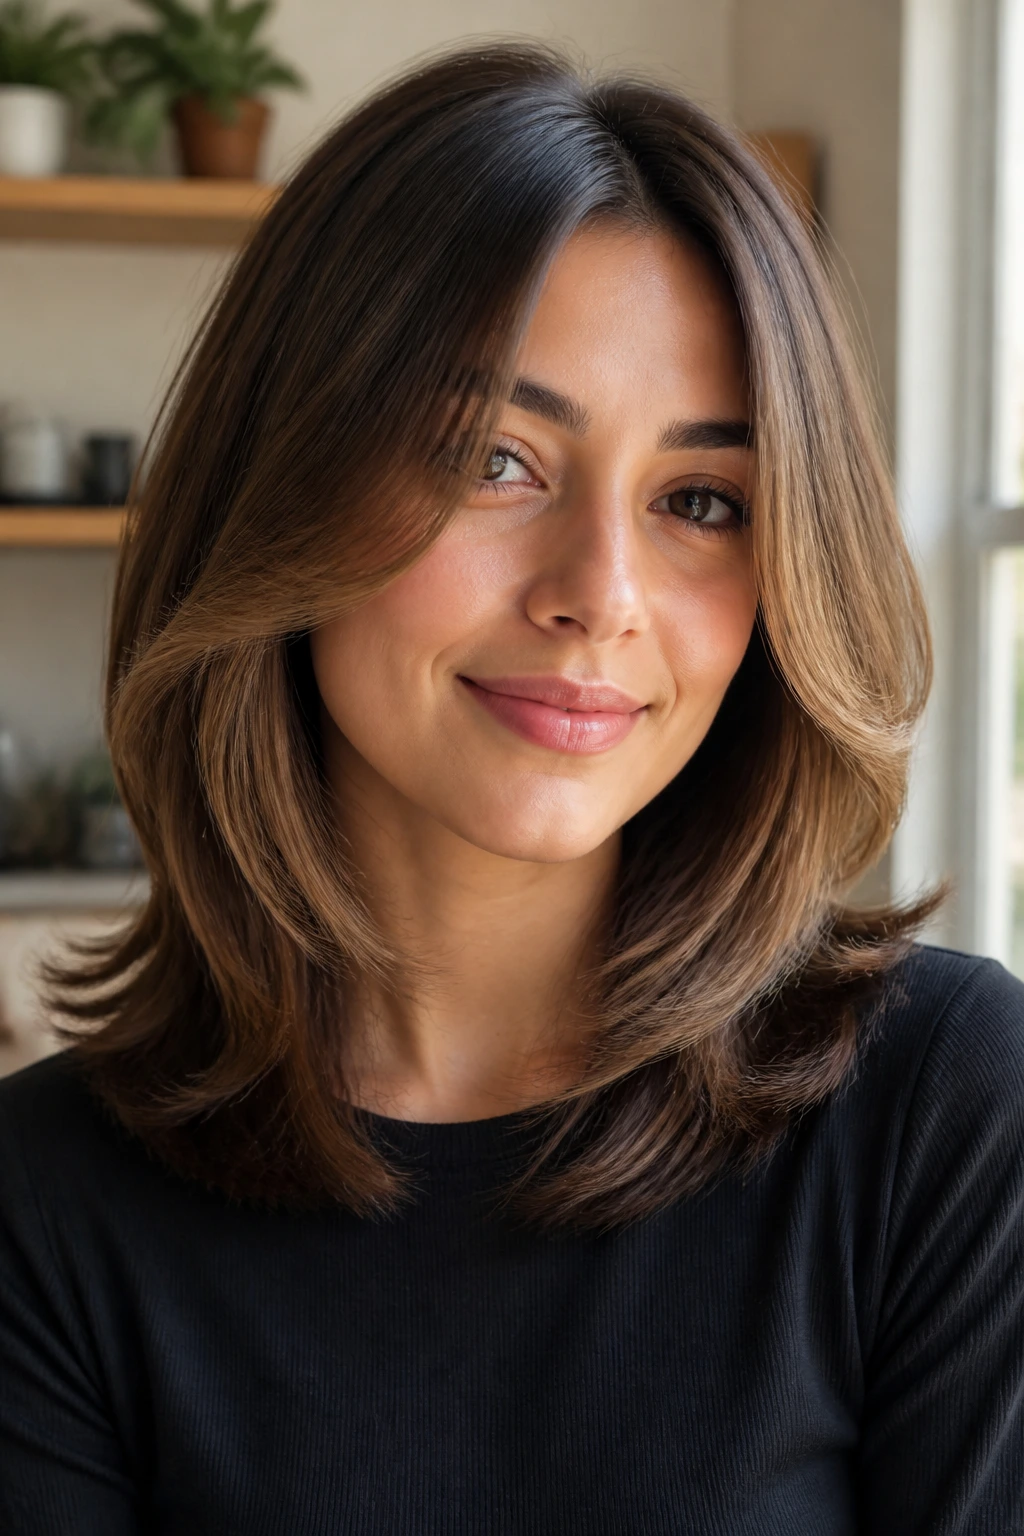
Mid-length layers with a soft swoop give straight hair movement in the middle instead of all at the ends. That matters. If the entire shape only changes near the hem, the haircut can still feel heavy. A mid-length sweep breaks up the mass while keeping the line intact.
The face frame usually starts around the mouth or jaw and curves gently into the rest of the cut. It’s not a dramatic bang moment. It’s a controlled bend that keeps the front pieces from hanging flat. When the style is blown smooth, the swoop looks elegant without trying too hard.
Why this cut reads well from every angle
The side profile is where it shines. From the front, you see the framing. From the side, you see the soft drop through the middle of the hair. That makes it one of the better choices for people who feel their straight hair looks boring in profile.
It also pairs nicely with a center part if you want symmetry. If you want a little edge, shift the part slightly off-center and let one side land closer to the cheekbone. Small adjustment. Big change.
Best styling habit
Work the mid-lengths with a round brush and keep the ends under control. Do not chase volume everywhere. Let the swoop happen in one zone. That’s what keeps the haircut sharp.
19. Jaw-Starting Face Frame
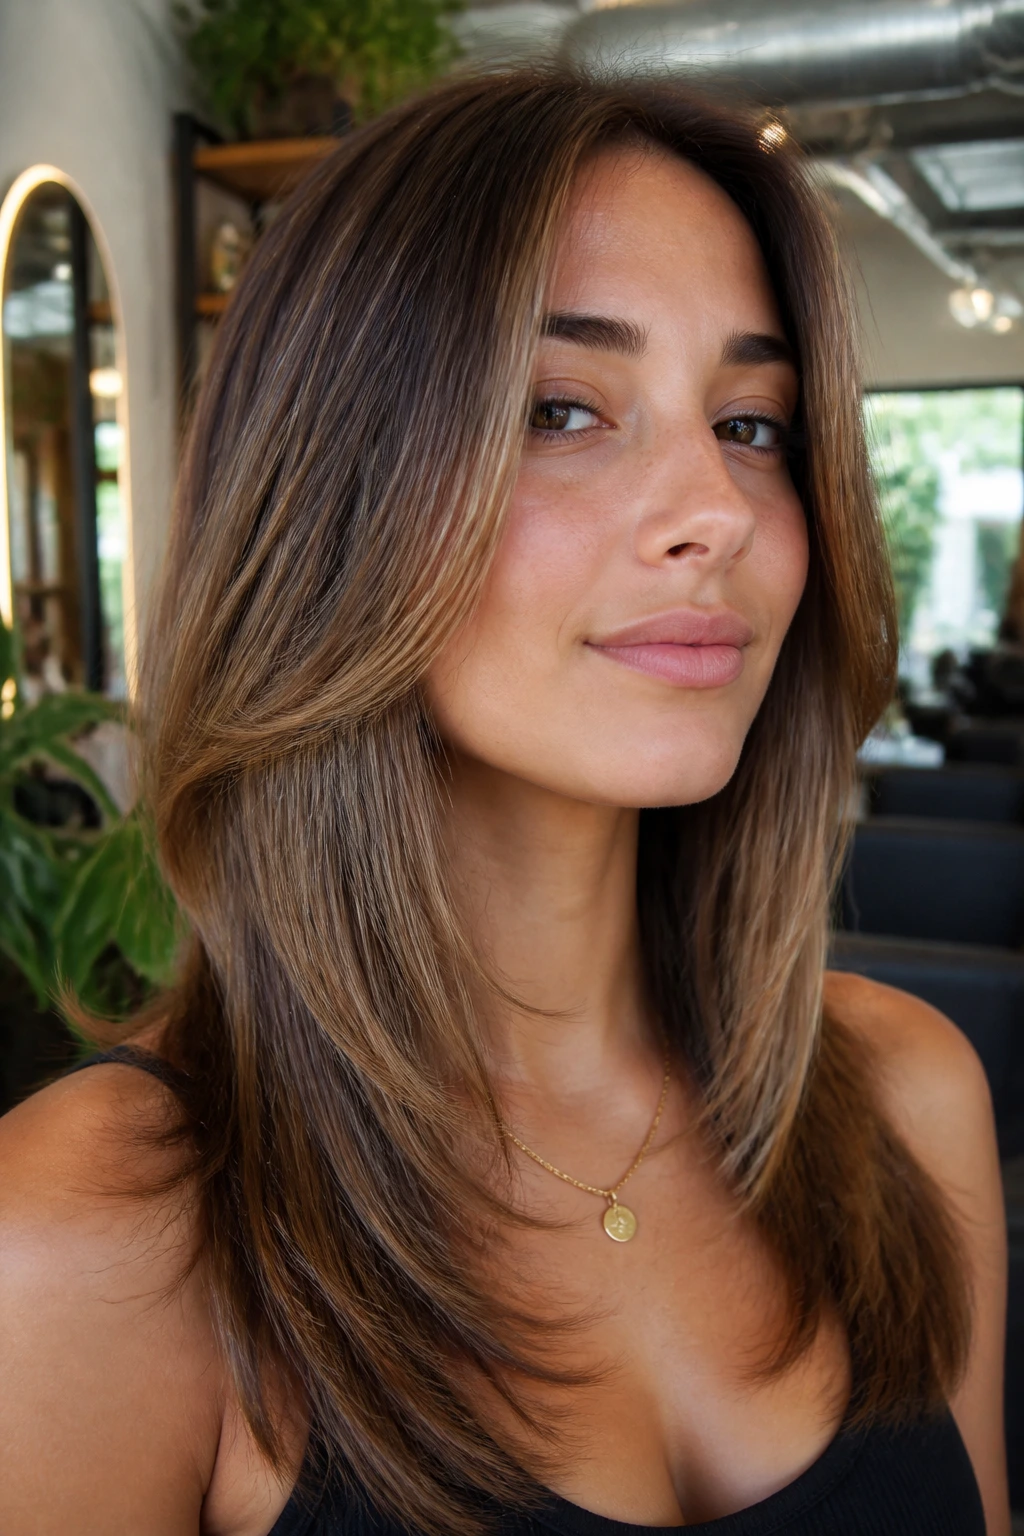
A jaw-starting face frame is one of the cleanest ways to change straight hair without sacrificing length. The shortest pieces begin right around the jaw, which makes the lower face feel framed and the rest of the hair stay long and calm. It’s a strong move if you want contour without a lot of visible layering.
This cut is especially useful if you dislike bangs but still want something to happen around the face. It opens the cheek area and gives the hair a small directional line. On straight strands, that line shows up clearly, which is exactly why it works.
When it’s most flattering
- if your face shape needs a little width near the lower half
- if you want to soften a pointed chin
- if you wear your hair tucked behind the ears often
- if you want the cut to stay strong even when it’s straightened flat
The jaw is a decisive place to begin a layer. Too high, and it can feel fussy. Too low, and the effect gets lost. At the jaw, the frame does its job without taking over the rest of the haircut.
A slight inward bend at the ends gives it polish. That bend can be from a brush, a flat iron, or a quick wrap around a large round brush. Keep it subtle.
20. Extra-Long Layers with Blunt Ends
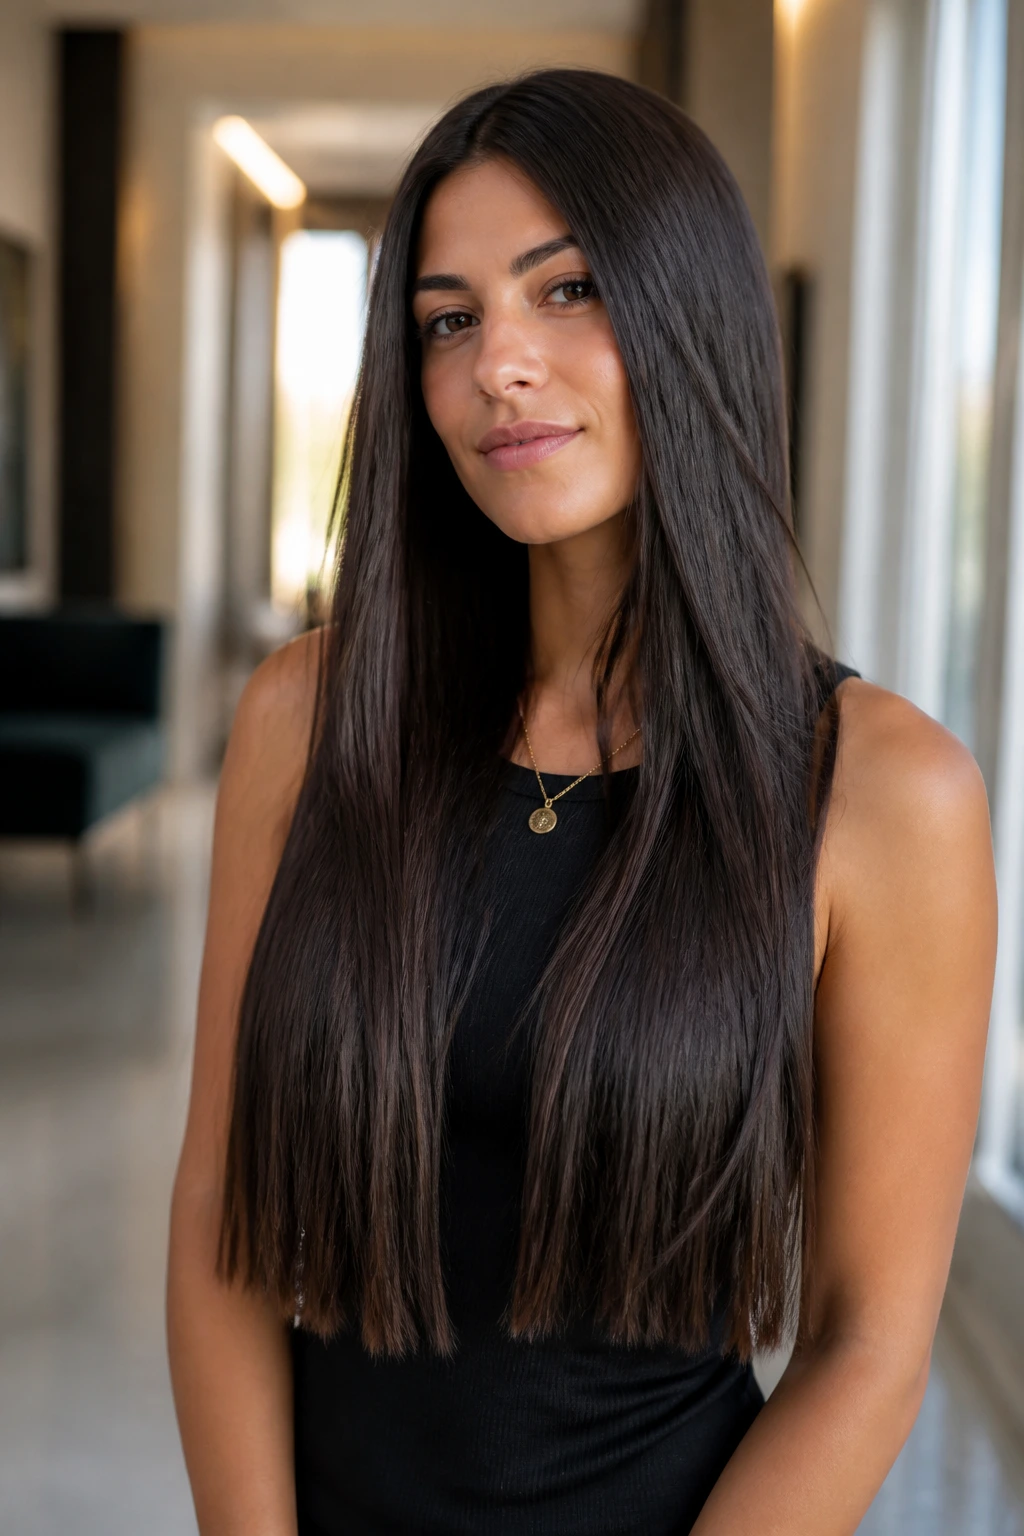
Extra-long hair does not need to be weighed down by a single sheet of hair from scalp to tip. A few well-placed layers can keep the movement alive while a blunt end protects the shape. That combination is strong on straight hair because it gives you the sleekness everyone wants and enough movement that the style doesn’t feel dead.
The layers should be long enough to blend smoothly into the length. If they’re too short, the cut can turn wispy in the middle and too thin at the bottom. The blunt end keeps everything anchored. That’s the part I like most.
Why it stays sharp
Long straight hair can look luxurious, but it can also go flat in a way that reads tired. A small amount of layering creates separation, especially if you wear a center part and let the front pieces slide past the shoulders. The blunt hem then draws a clean line under the whole thing.
If you add balayage or soft lowlights, the long layers help the color show in sections rather than all at once. It’s less about drama and more about depth. The haircut does the organizing.
Good to know
- Ask for the shortest layer to stay well below the chin.
- Keep the ends trimmed on a regular schedule so the blunt line doesn’t fray.
- Use a light oil only on the last few inches.
- If the hair starts to look too heavy, remove weight from the interior instead of shortening the front pieces.
This is the version for people who love long hair and still want it to look deliberate.
How to Wear Straight Layers for a Sharp Everyday Finish
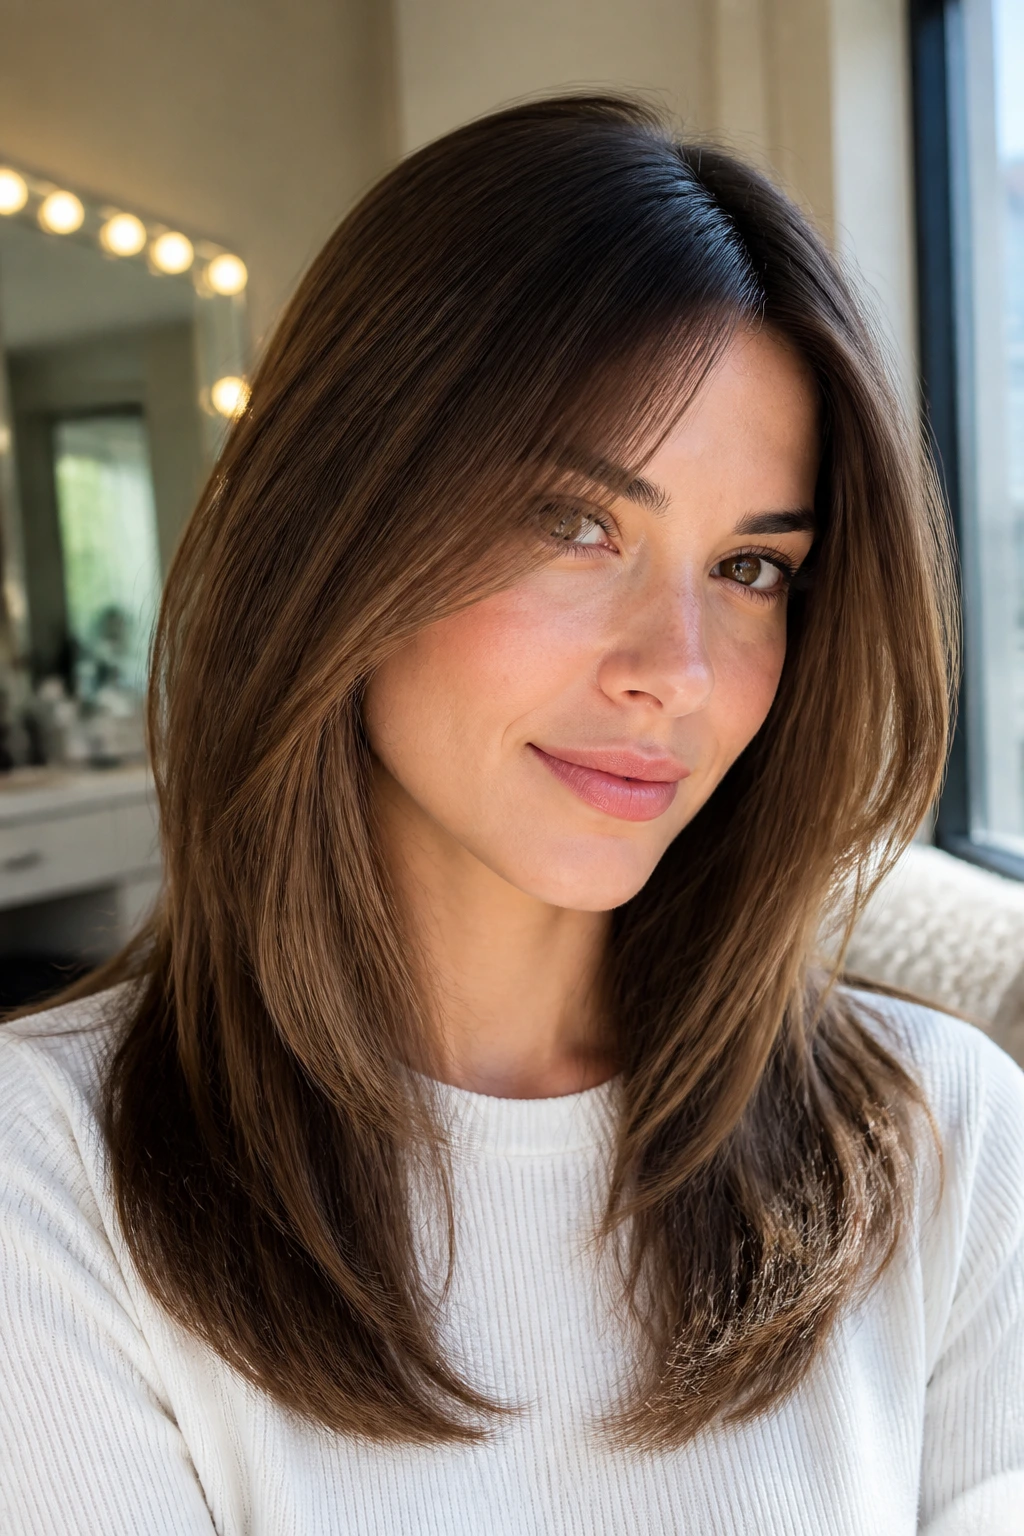
A sharp layered cut on straight hair needs a finish that respects the line. The mistake is treating every cut the same. A collarbone lob wants a different styling hand than a long V-shape or a blunt bob with internal layers. The shape should decide the method.
Silhouette: Keep the strongest line visible. If the cut has a blunt hem, let it show. If it has a face frame, smooth the front pieces away from the face so the shape opens cleanly around the cheekbone or jaw.
Styling Time: Most of these cuts look polished in 10 to 20 minutes if the hair is already clean. A round brush adds bend at the ends. A flat iron gives the sharpest finish, but use it in one smooth pass and stop chasing tiny sections that don’t need heat.
Outfit Pairings: Straight layered haircuts look especially clean with open collars, square necklines, crew necks, and earrings that sit close to the jaw. The haircut and the neckline should not fight each other. If the hair is long and sleek, a collar that shows the neck line keeps the whole look from feeling crowded.
Best Setting: Day-to-day wear is where these cuts earn their keep. They also hold up well when tucked behind one ear, clipped half back, or pulled into a low ponytail that still shows the layer pattern at the front.
A final practical note: if the ends are turning out when you want them under, the brush angle is usually the problem, not the haircut.
Essential Tools for Styling These Cuts
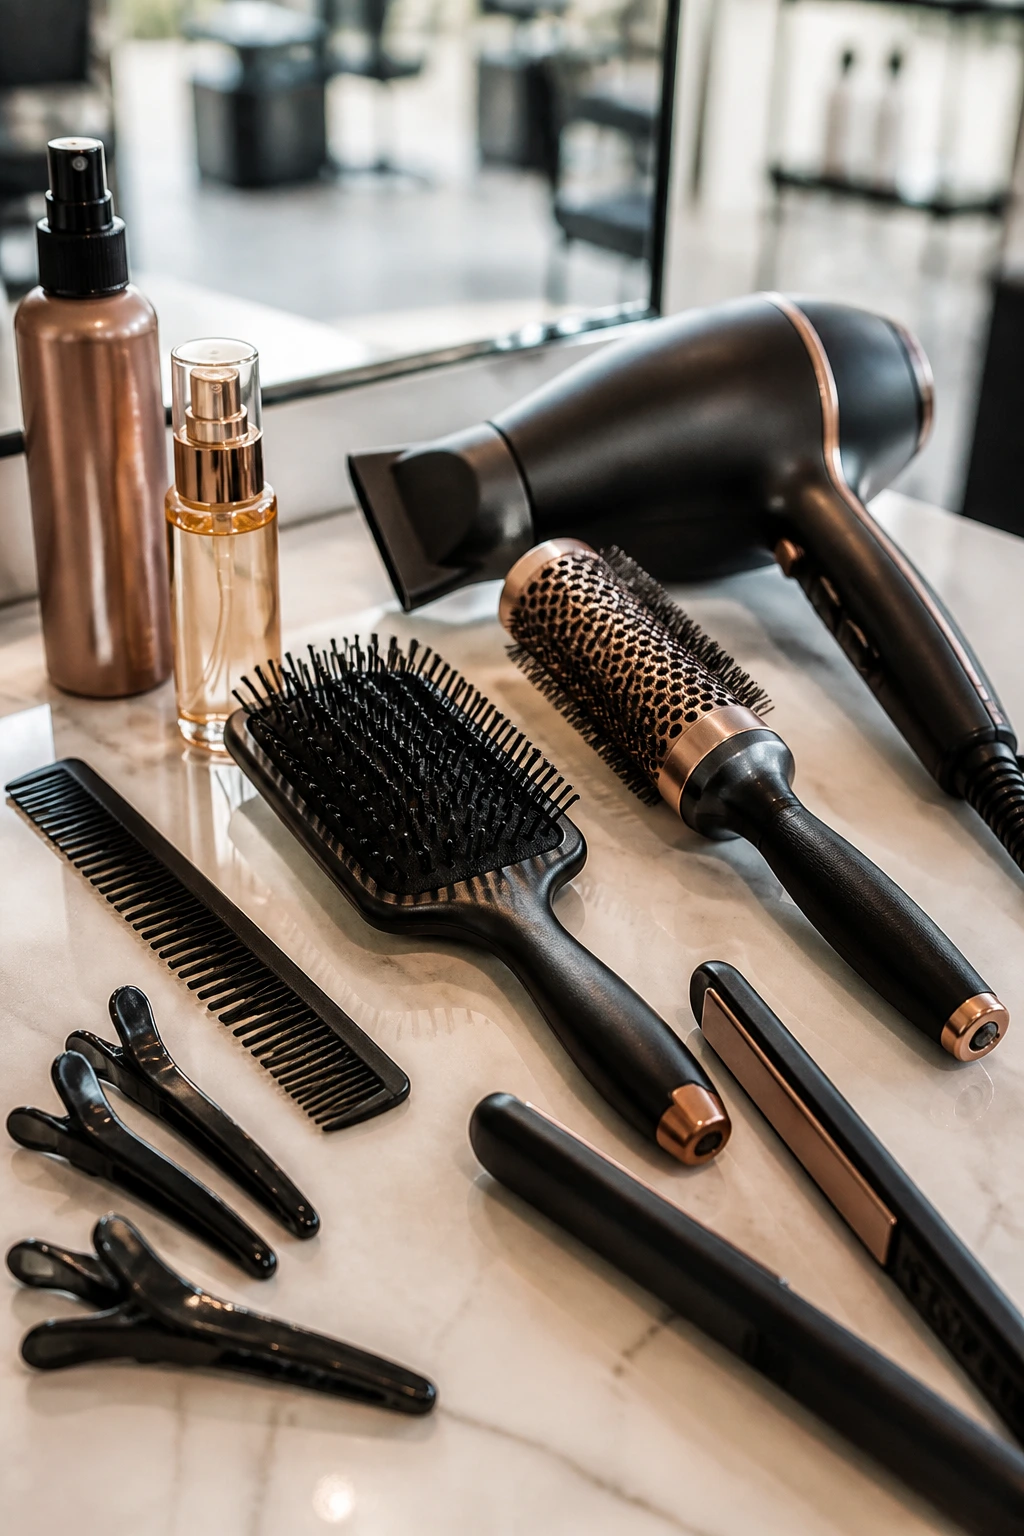
A sharp haircut is easier to live with when the tools are right. You do not need a drawer full of gadgets. You need a few that work hard and don’t leave the hair puffy or rough.
- Blow dryer with a narrow nozzle: The nozzle helps push the cuticle smooth and keeps the airflow pointed where you want it.
- 1- to 1.5-inch round brush: Best for bending the ends under or softening face-framing pieces without making them curl.
- Paddle brush: Useful for long, straight cuts when you want quick smoothing and minimal volume.
- Flat iron with smooth plates: Handy for precise, sleek finishes. Keep the temperature moderate so the ends don’t look crispy.
- Sectioning clips: They make it much easier to keep the crown, sides, and face frame separate while styling.
- Heat protectant spray: Non-negotiable if you’re using hot tools more than once a week.
- Lightweight serum or oil: Use it only on the last 2 inches so the shape stays clean.
- Fine-tooth comb: Helpful for smoothing the root area and setting a precise part.
If your hair is thick, add a vent brush. If it is fine, skip heavy brushes that pull too much tension into the strands.
Smart Product Picks for Straight Layered Hair
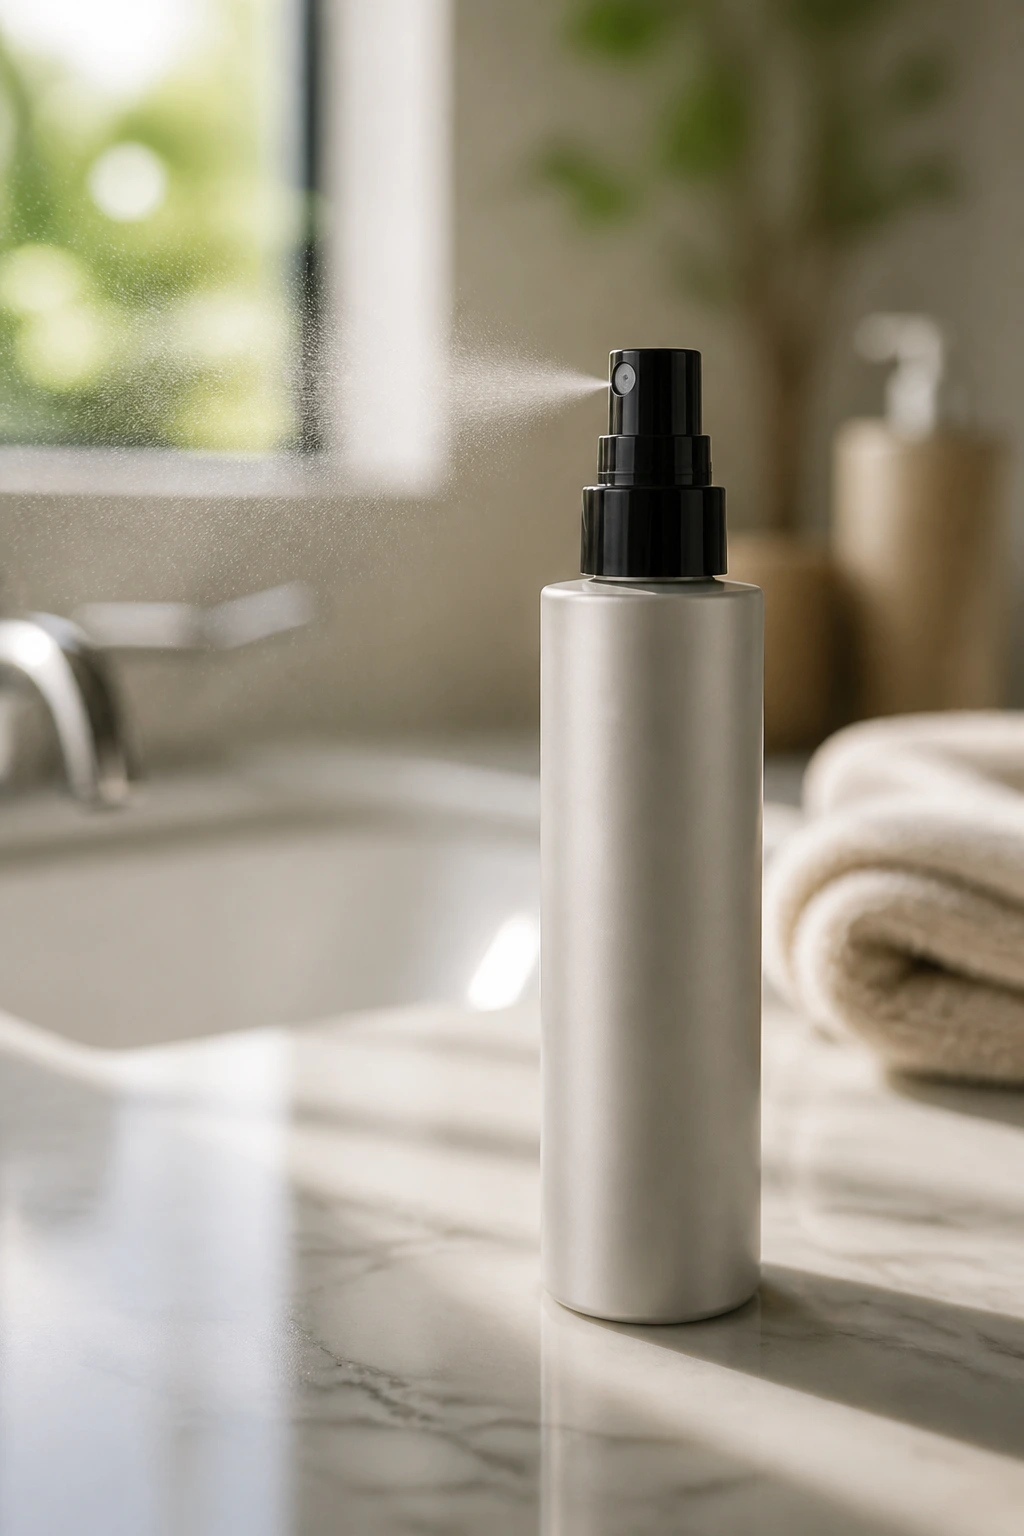
Product choice matters more on straight hair than people think. A heavy cream can bury a good haircut. A light one can make the same cut look expensive and clean.
For fine hair, choose a heat protectant with a light mist texture and a mousse that does not leave a sticky shell. Fine straight layers need lift at the root, but they also need the ends to stay separated. A heavy oil on the mid-lengths will flatten everything within an hour.
For thick hair, look for a smoothing cream that can handle frizz without coating the hair like wax. Thick straight layers usually need help lying down at the cut line, especially around the back of the head and the ends near the shoulders. A small amount goes a long way.
For highlighted or balayaged hair, use a color-safe shampoo and conditioner that do not strip the tone every time you wash. Straight layers show color placement very clearly, so brassiness and dullness are harder to hide. A purple shampoo can help blonde ribbons stay clean, but don’t overuse it or the hair can look dull and flat.
Dry shampoo is useful at the crown if your straight hair collapses fast. Just do not pile it onto the ends. That creates a dusty finish that ruins the clean look of the haircut.
Why Balayage and Highlights Change the Way Straight Layers Read
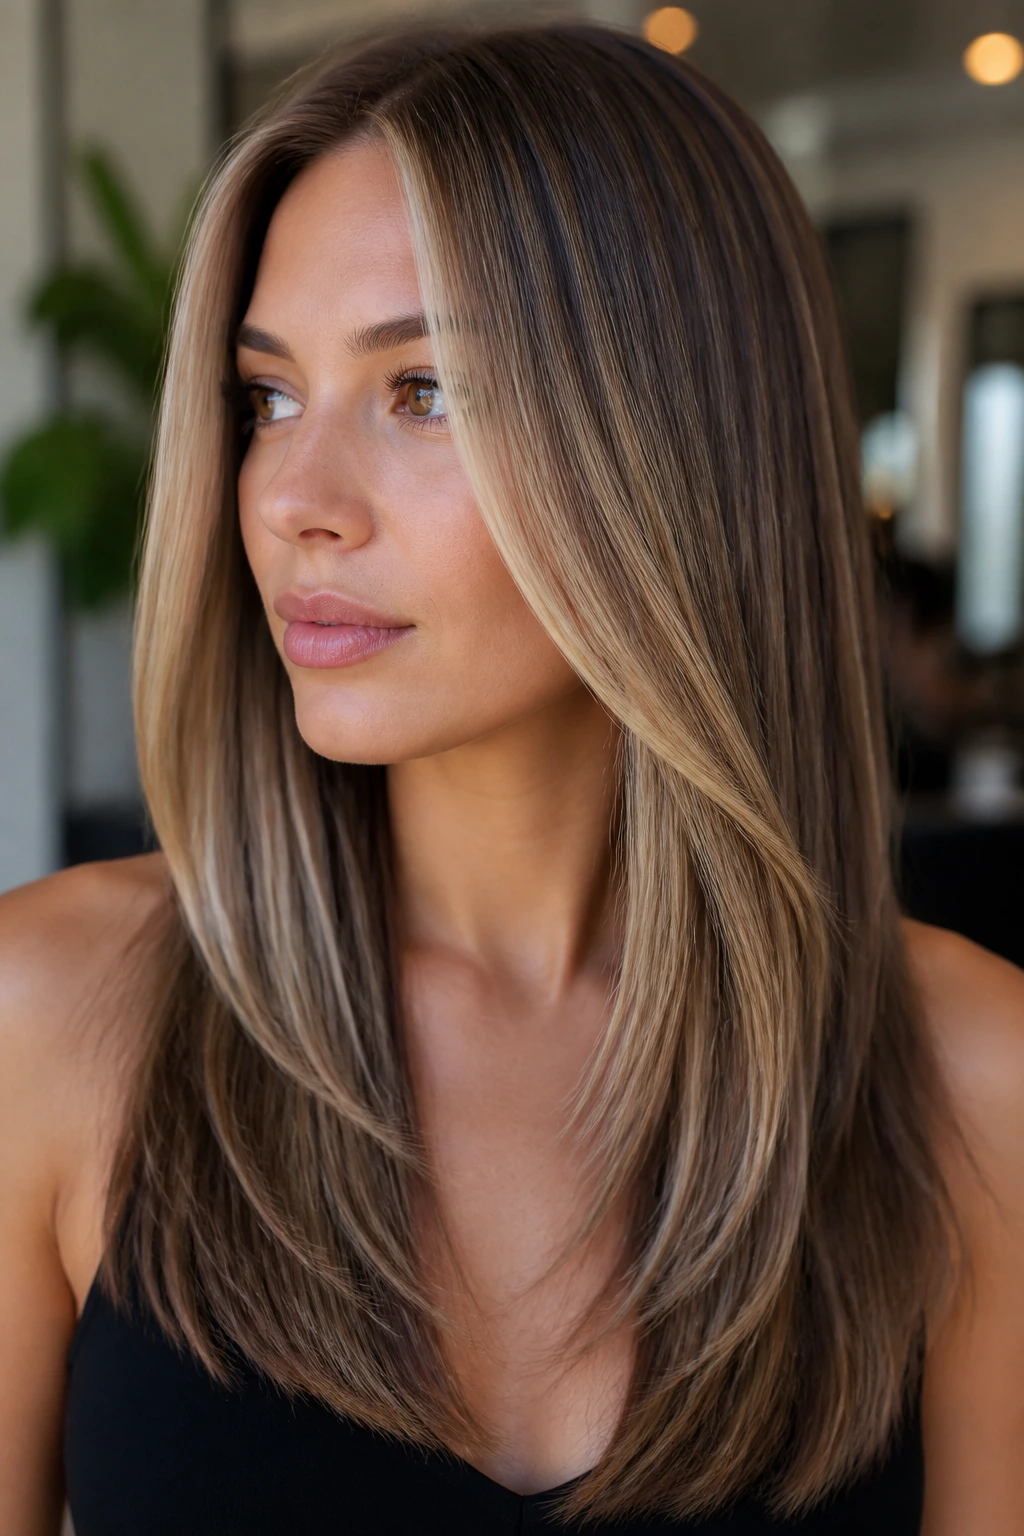
Straight layers and color are close cousins. The haircut creates the planes; the color shows you where those planes live. That is why balayage can look especially strong on straight hair. The ribbons sit on the surface and fall across the layers in a way that makes the shape easier to read.
Face-framing highlights are the obvious place to start. A lighter ribbon around the cheekbone or jaw can sharpen the front pieces without changing the cut itself. If you already have a layered lob or long U-shape, that little bit of color makes the movement visible even from across a room.
Lowlights matter too. They can add depth to choppy mids, butterfly layers, or longer straight cuts that risk looking flat. The darker pieces separate the layers and stop the hair from looking like one giant sheet of one color.
The only caution is placement. If the color is too scattered, it muddies the line. Straight hair doesn’t hide that. Keep the bright pieces where the layers move and the darker pieces where you want the eye to slow down.
Additional Tips and Finishing Moves
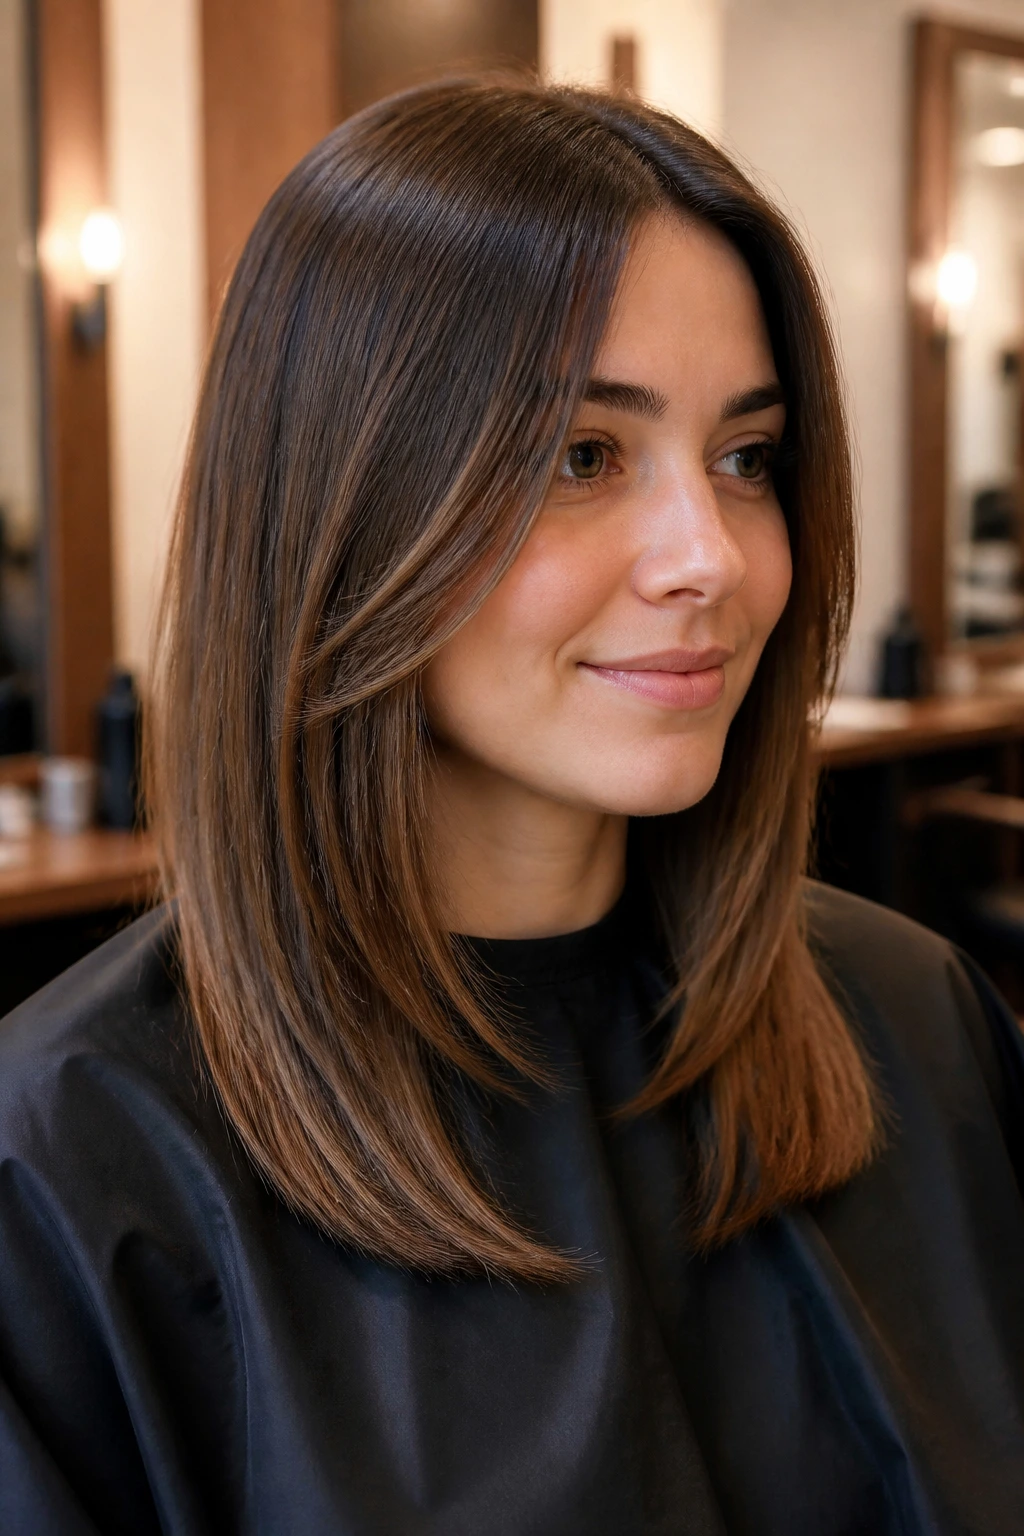
Gloss Boost: A drop of serum through the last few inches can make straight layers look cleaner, but only if you keep it away from the roots. Coat the mid-lengths and ends lightly, then comb through with your fingers.
Curve Control: If your ends keep flipping out, the issue is often the brush angle or the way the hair cools. Wrap the ends under while they’re warm, then let them cool in that shape before touching them again.
Color Placement: If you wear balayage, keep the brightest pieces around the front layers and the top of the longer panels. That placement makes the haircut look more intentional than random brightness sprinkled everywhere.
Make-It-Yours: Fine hair should keep layers low and sparse. Thick hair can carry more internal removal. If you wear glasses, keep the front pieces a little longer so they don’t crowd the frames. If you like wearing hair behind one ear, ask your stylist to keep that side slightly cleaner.
I also like a quick “tuck test” in the mirror. Tuck one side behind the ear and look at the shape. If the haircut still holds together, the balance is good. If it collapses, the front pieces probably need a cleaner transition.
Keeping the Shape Between Salon Visits
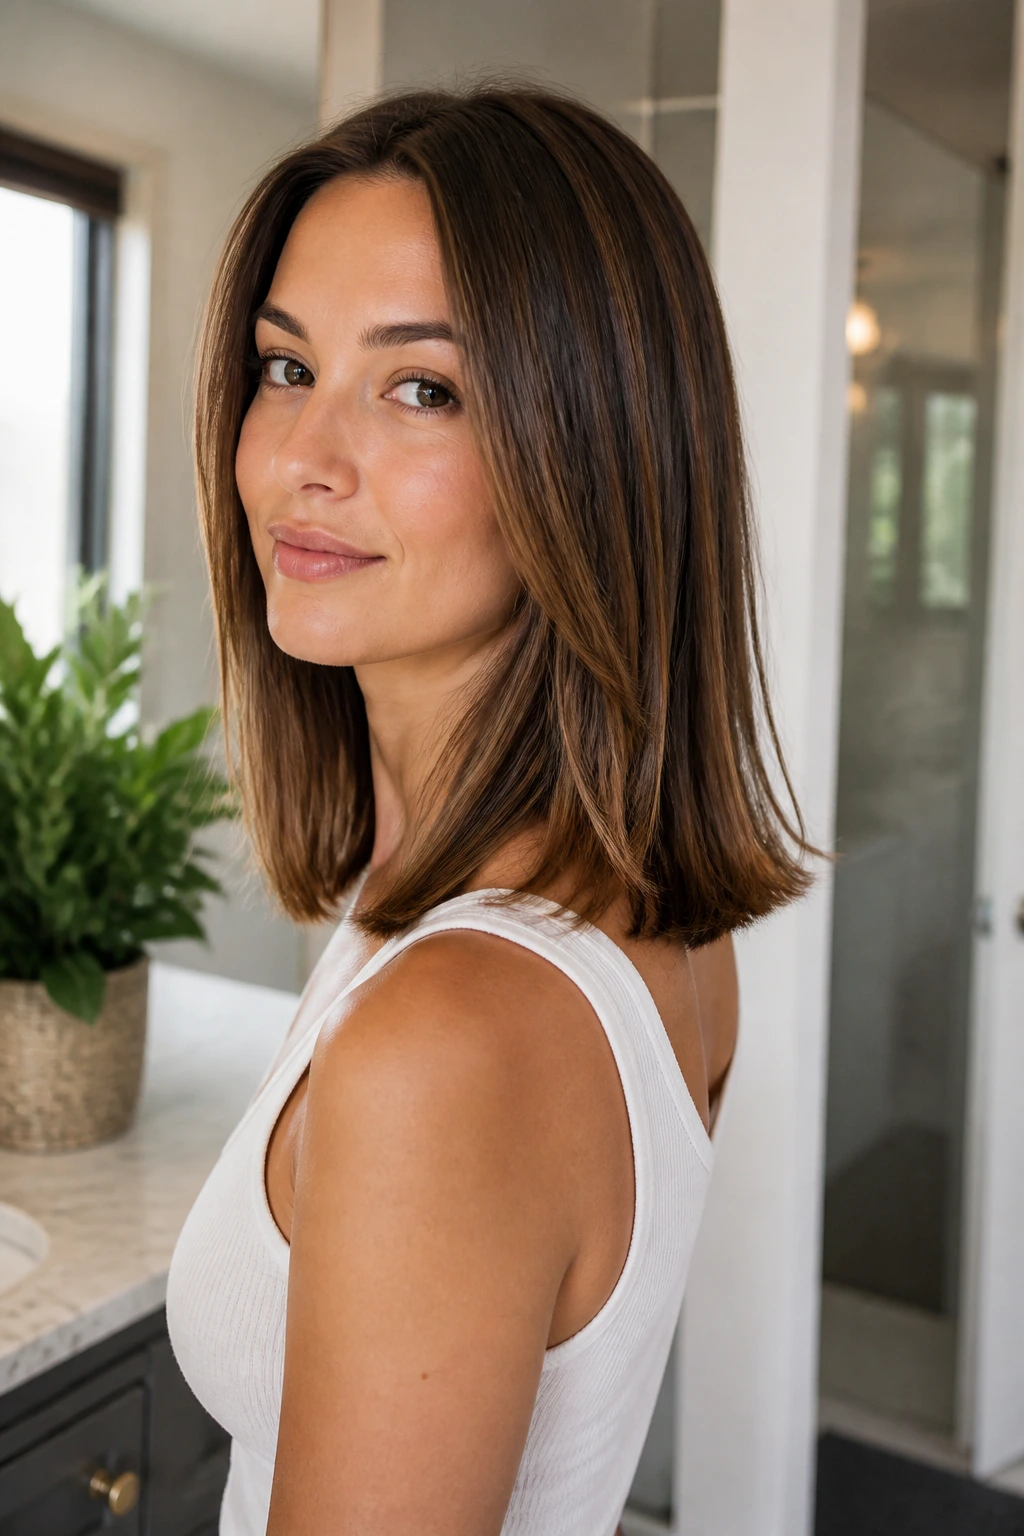
Straight layered haircuts hold best when the edges stay honest. Once the ends start to fray, the whole cut loses its sharp look. The timing depends on the length and how much structure is built into the haircut, but a few reliable windows help.
Trims by length
- Bobs and sharp lobs: every 5 to 7 weeks if you want the line to stay crisp
- Shoulder-length cuts: every 6 to 8 weeks
- Long layered styles: every 8 to 12 weeks, depending on how fast your hair grows
- Curtain bangs or bottleneck bangs: a small trim every 3 to 4 weeks if you want them to keep their shape
What to do at home
Keep heat on the lower end that still gets the job done. Straight hair tends to show damage at the ends before it shows anywhere else. Use a microfiber towel or an old soft T-shirt to blot the water instead of rubbing it rough. Sleep on a silk or satin pillowcase if your hair gets fuzzy overnight. That small change can save the front pieces from looking rough in the morning.
If you notice the ends flipping out more than usual, don’t assume the cut is ruined. Sometimes it just needs a quick dusting and a better blow-dry pattern. Small corrections go a long way with straight hair.
Common Mistakes That Make Layers Look Choppy
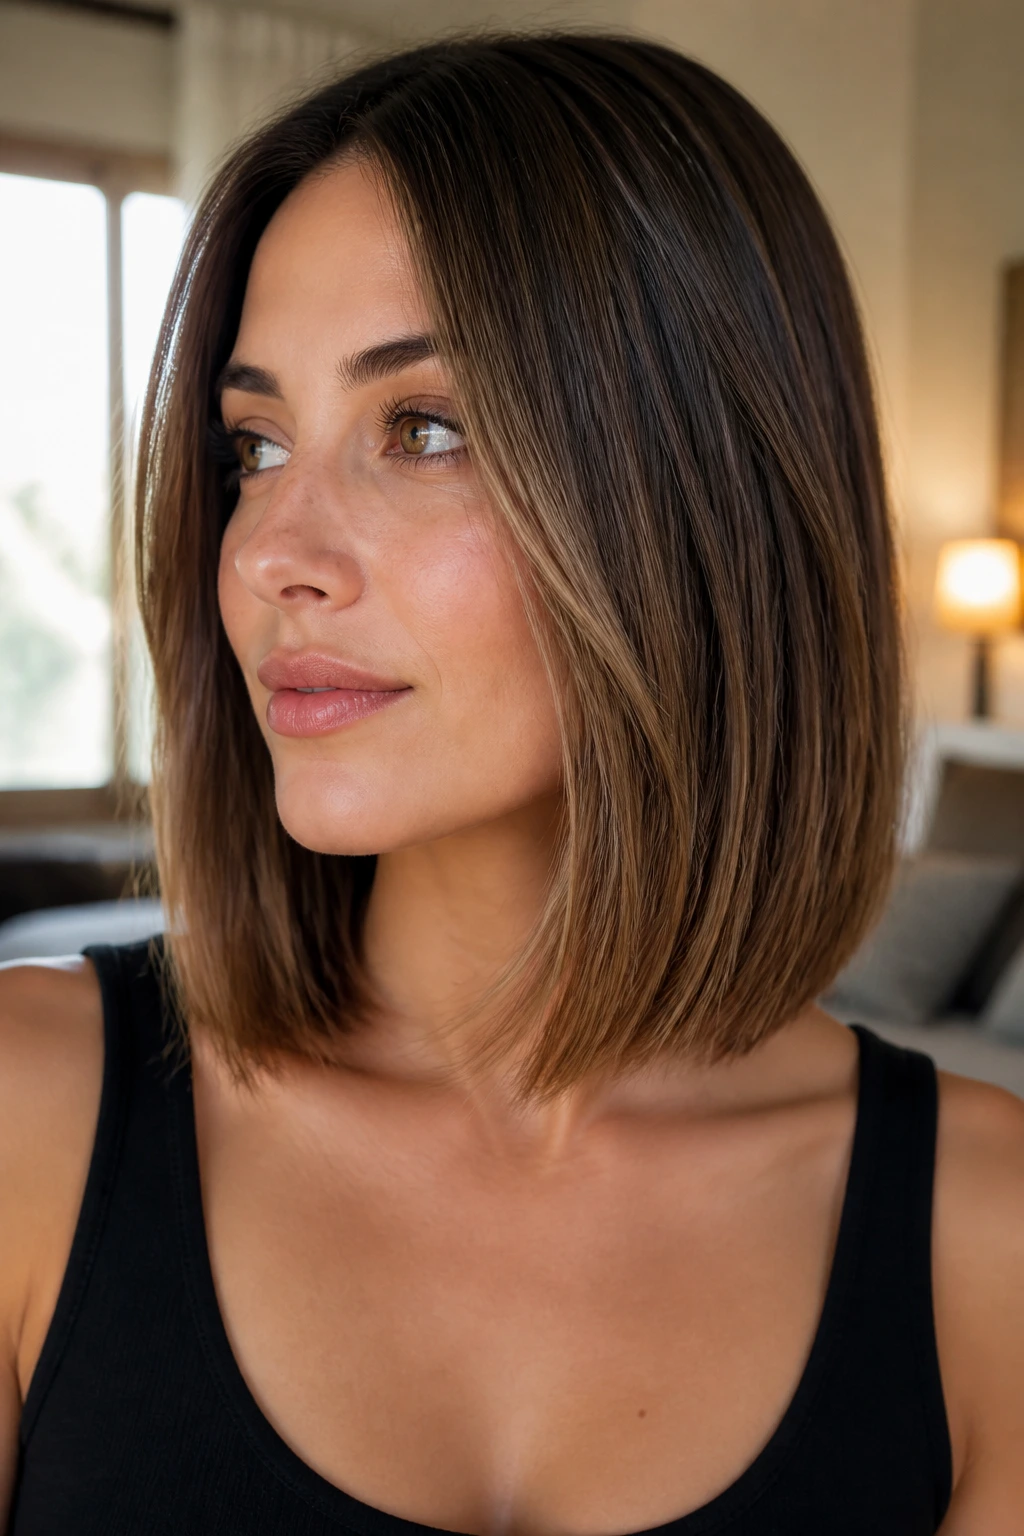
The first mistake is cutting too high around the crown. The symptom is a puffed-up top layer with thin, separated ends underneath. The fix is to keep the shortest layers lower and preserve more weight near the crown, especially on fine hair.
The second mistake is over-thinning thick hair. It sounds helpful, but the result can be a wispy outline and flyaway ends that never sit right. Ask for bulk removal where the hair is dense, not all over the surface. Thick hair needs shape, not random stripping.
The third mistake is forgetting that straight hair shows every line. A layer that looks soft in curly hair can look like a hard shelf in straight hair. The fix is cleaner blending and a blunt perimeter to anchor the look.
The fourth mistake is styling too much volume into the roots when the cut is already layered. The result is a round shape that fights the line. Keep root lift minimal unless the haircut is specifically built for it.
The fifth mistake is placing face-framing layers too high. If the shortest piece hits above the cheekbone when you wanted jaw movement, the haircut can feel disconnected. Be specific about where the front pieces should land, and ask your stylist to show you the front in the mirror before they finish.
Variations and Adaptations to Try
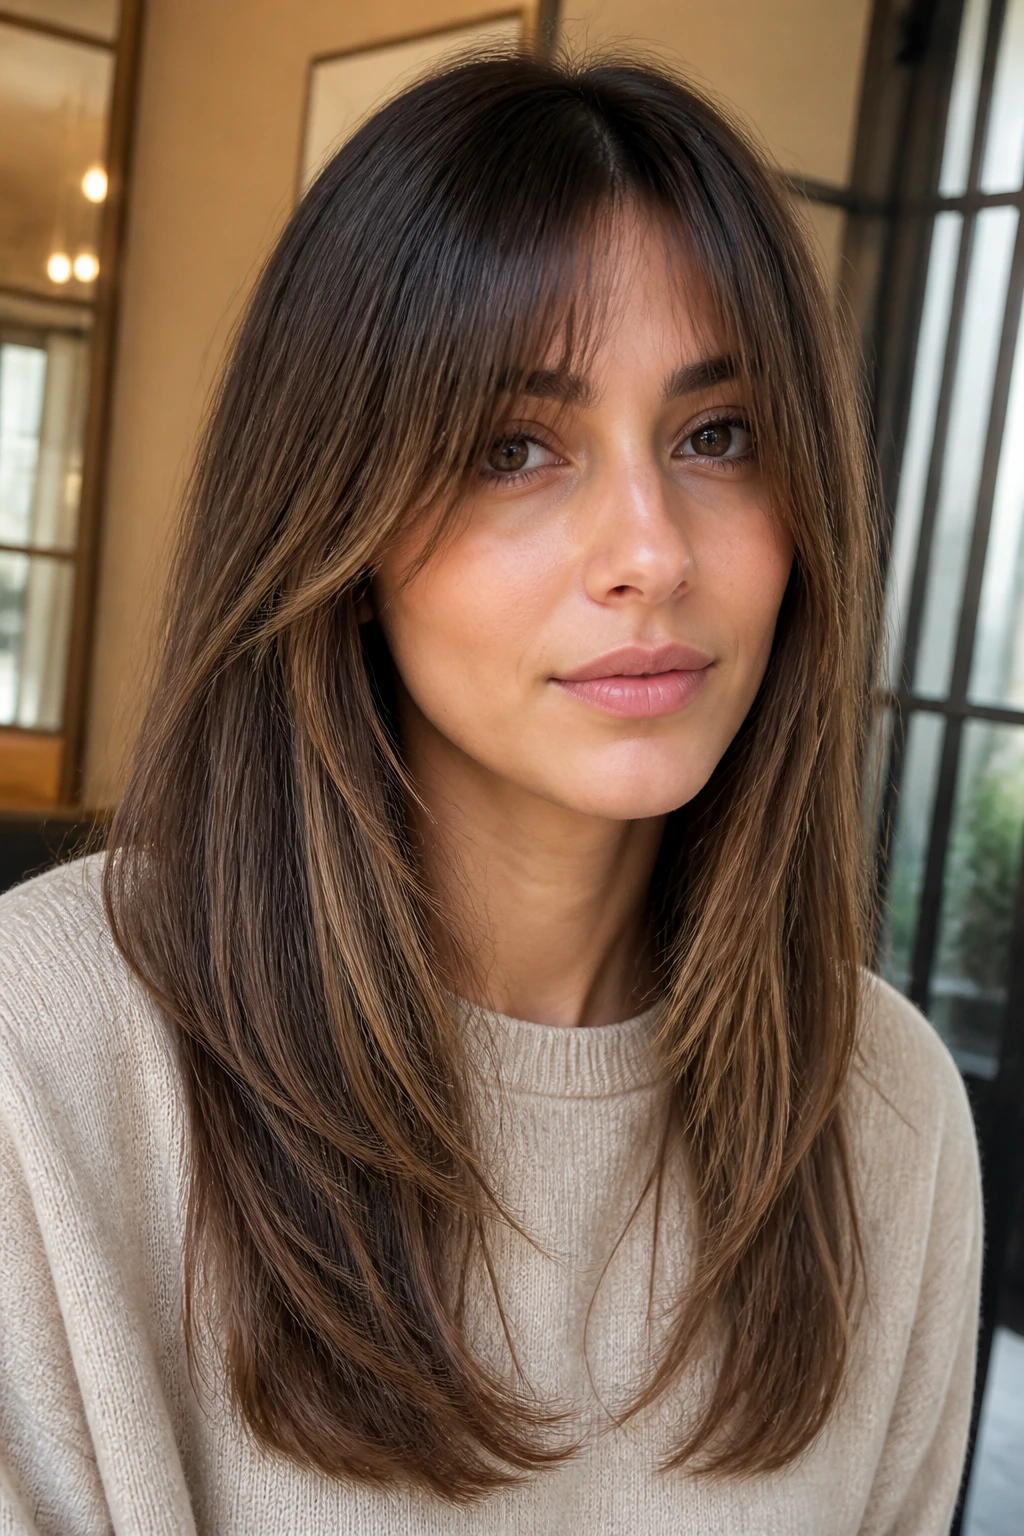
Fine-Hair Glass-Line Version: Keep the perimeter blunt and let the layers stay long and subtle. This version keeps the ends from looking thin while still giving the hair a little movement near the face.
Thick-Hair Air-Control Version: Ask for more internal weight removal and a slightly longer face frame. The goal is to reduce bulk without exposing too much of the neck or making the ends look stringy.
Balayage Ribbon Version: Place the brightest color around the front layers and the outer edges of the longest pieces. Straight hair shows those ribbons cleanly, which makes the layer pattern easier to read.
Fringe-Forward Version: Add curtain bangs or bottleneck bangs to any of the longer cuts. The front gets a stronger focus, and the rest of the hair can stay sleek and calm.
Low-Maintenance Grow-Out Version: Keep all layers below the chin and let the perimeter stay blunt. This grows out more gracefully and needs less salon correction between trims.
Heat-Light Version: If you want to style with minimal heat, choose a cut that bends naturally at the collarbone or jaw. The hair will settle into shape faster, and you won’t need to force every section into place.
Frequently Asked Questions
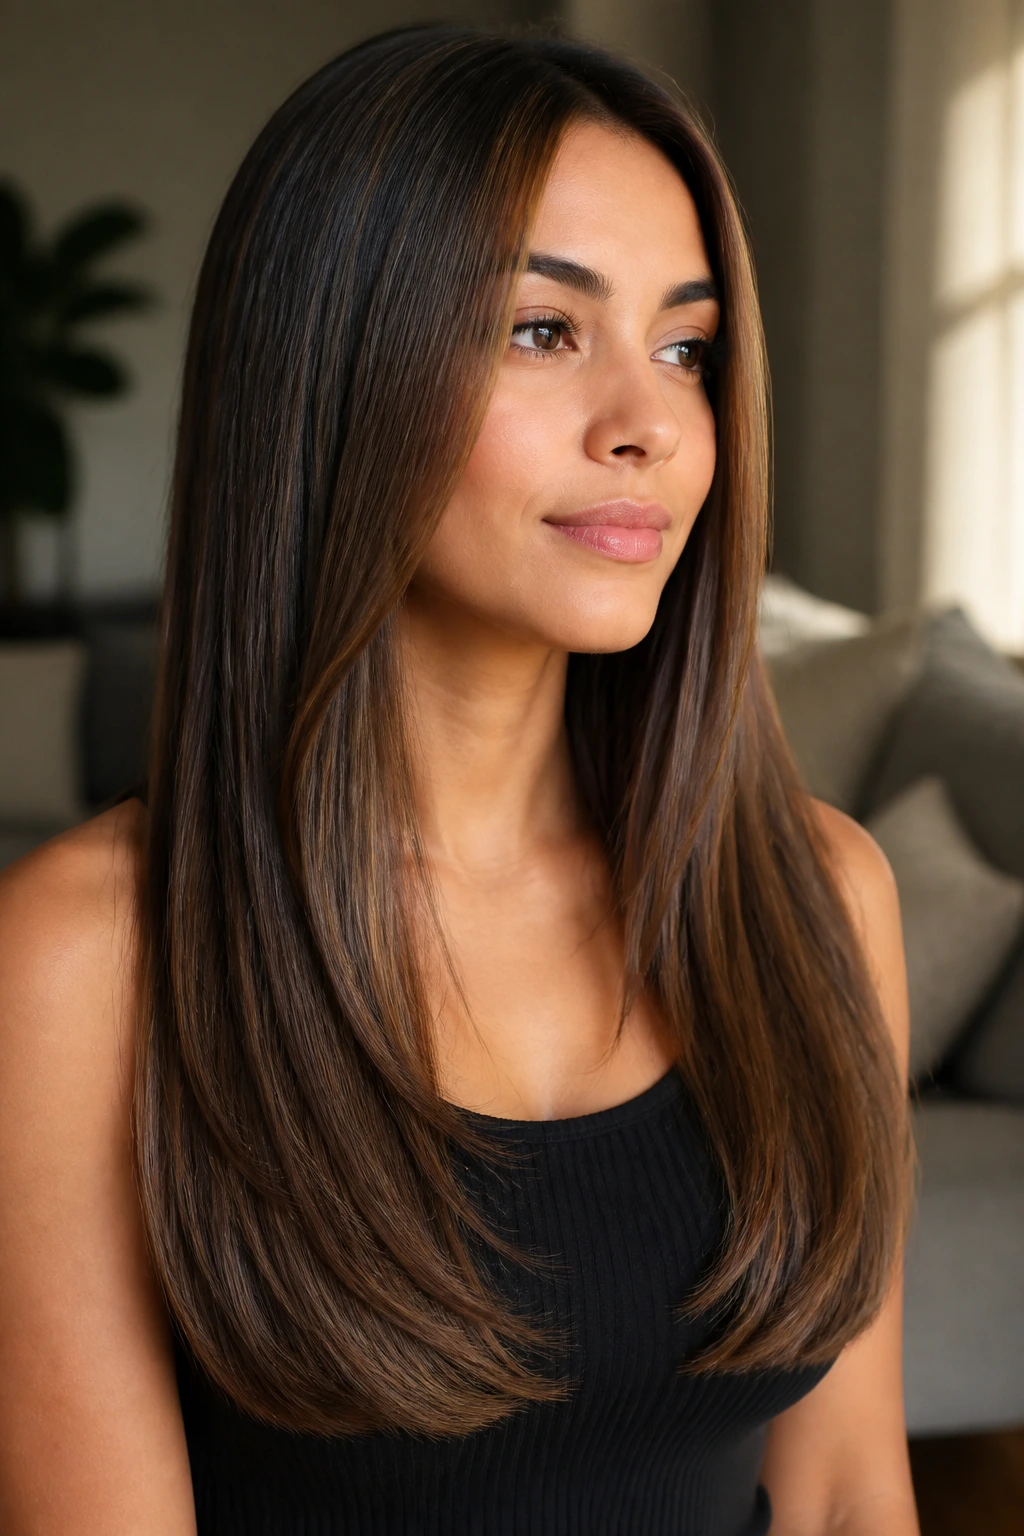
Do layers make straight hair look thinner?
They can, if they’re cut too high or too aggressively. The safer move is to keep a blunt perimeter and use longer internal layers so the hair still looks full at the ends.
What straight layered haircut is best for fine hair?
A collarbone lob, a fine-hair tapered cut, or a blunt bob with very light internal layers usually works best. These shapes keep the hair from looking see-through while still adding a little movement.
Can I get layers if I wear my hair pin-straight every day?
Yes, but the layers need to be placed carefully because straight hair exposes every cut line. Ask for smoother blending and avoid heavy texturizing near the surface.
Are curtain bangs good with straight layered haircuts?
They are, as long as they’re cut long enough to part cleanly and blend into the face frame. Short, stiff curtain bangs on straight hair can look awkward fast.
How do I keep straight layers from flipping out at the ends?
Dry the hair with the ends guided under, then let them cool in that shape before touching them. A slightly longer layer start or a cleaner blunt hem can also help if the flip-out keeps happening.
Which cut gives the sharpest look overall?
A precision bob, angled lob, or collarbone lob with subtle layers tends to look the cleanest. Those cuts hold a visible line, which straight hair needs if you want the style to read crisp.
What if my hair is thick and keeps bulking up around the shoulders?
Ask for weight removal inside the cut, not just at the ends. Thick hair often needs the interior opened up while the outer line stays blunt.
How often should I trim straight layered hair?
Shorter cuts usually need trimming every 5 to 7 weeks, while long layered hair can go 8 to 12 weeks. Bangs need more frequent cleanup if you want them to stay in place.
The Sharpest Finish
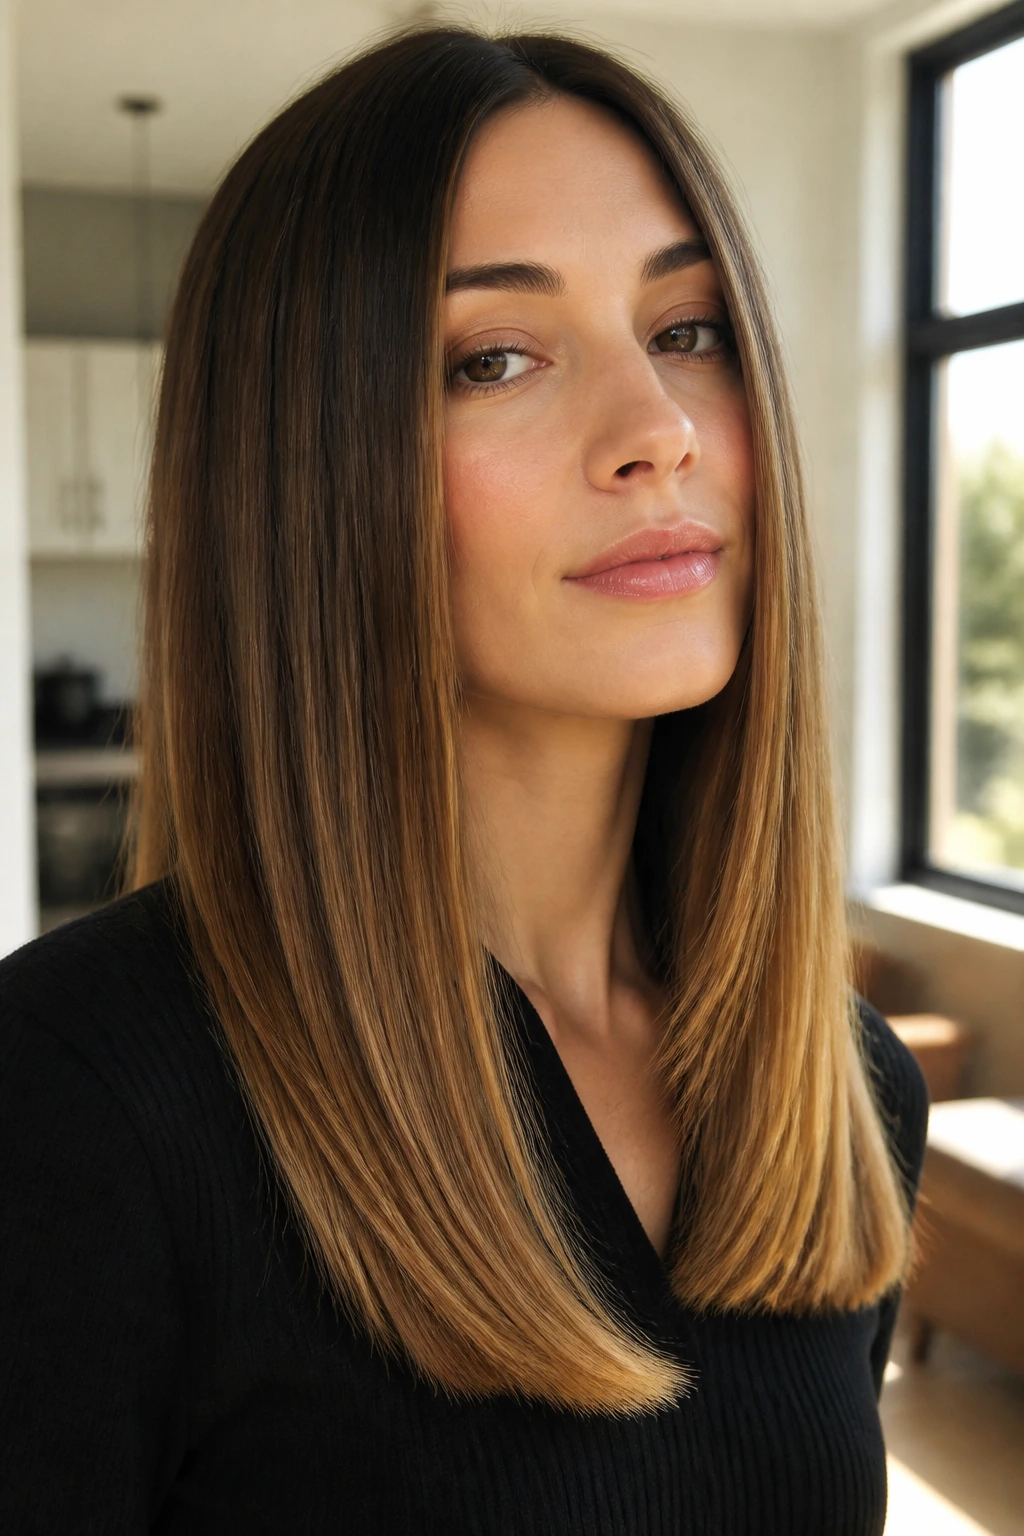
Straight hair can be fussy in a very specific way. It doesn’t forgive sloppy layer placement, but it also rewards precision better than almost any other texture. That is why these straight layered haircuts work: they keep one clear line in charge and let the layers support it instead of stealing the show.
If you want your next cut to look sharp, bring a photo, name the exact landing point for the shortest layer, and decide whether you want the ends to stay blunt or swing softly under the shoulders. That one conversation changes everything.
