



A tribal braid with beads can look sharper than a full glam style when the parting is clean and the bead choice stays disciplined. One row of clear beads, a crisp center part, and ends that sit flat against the neck can look polished in a way loose waves never will.
People usually blame edge control when a braided style looks unfinished. Not really. The real difference comes from the architecture: braid width, section symmetry, bead weight, and where the eye lands first.
The word tribal gets used loosely online, but the looks people usually mean sit somewhere in the family of Fulani-inspired braids, feed-in cornrows, stitch parts, knotless roots, and beadwork. That mix gives you room to be neat, dramatic, or restrained. Done right, it never looks fussy.
Why You’ll Love This Collection
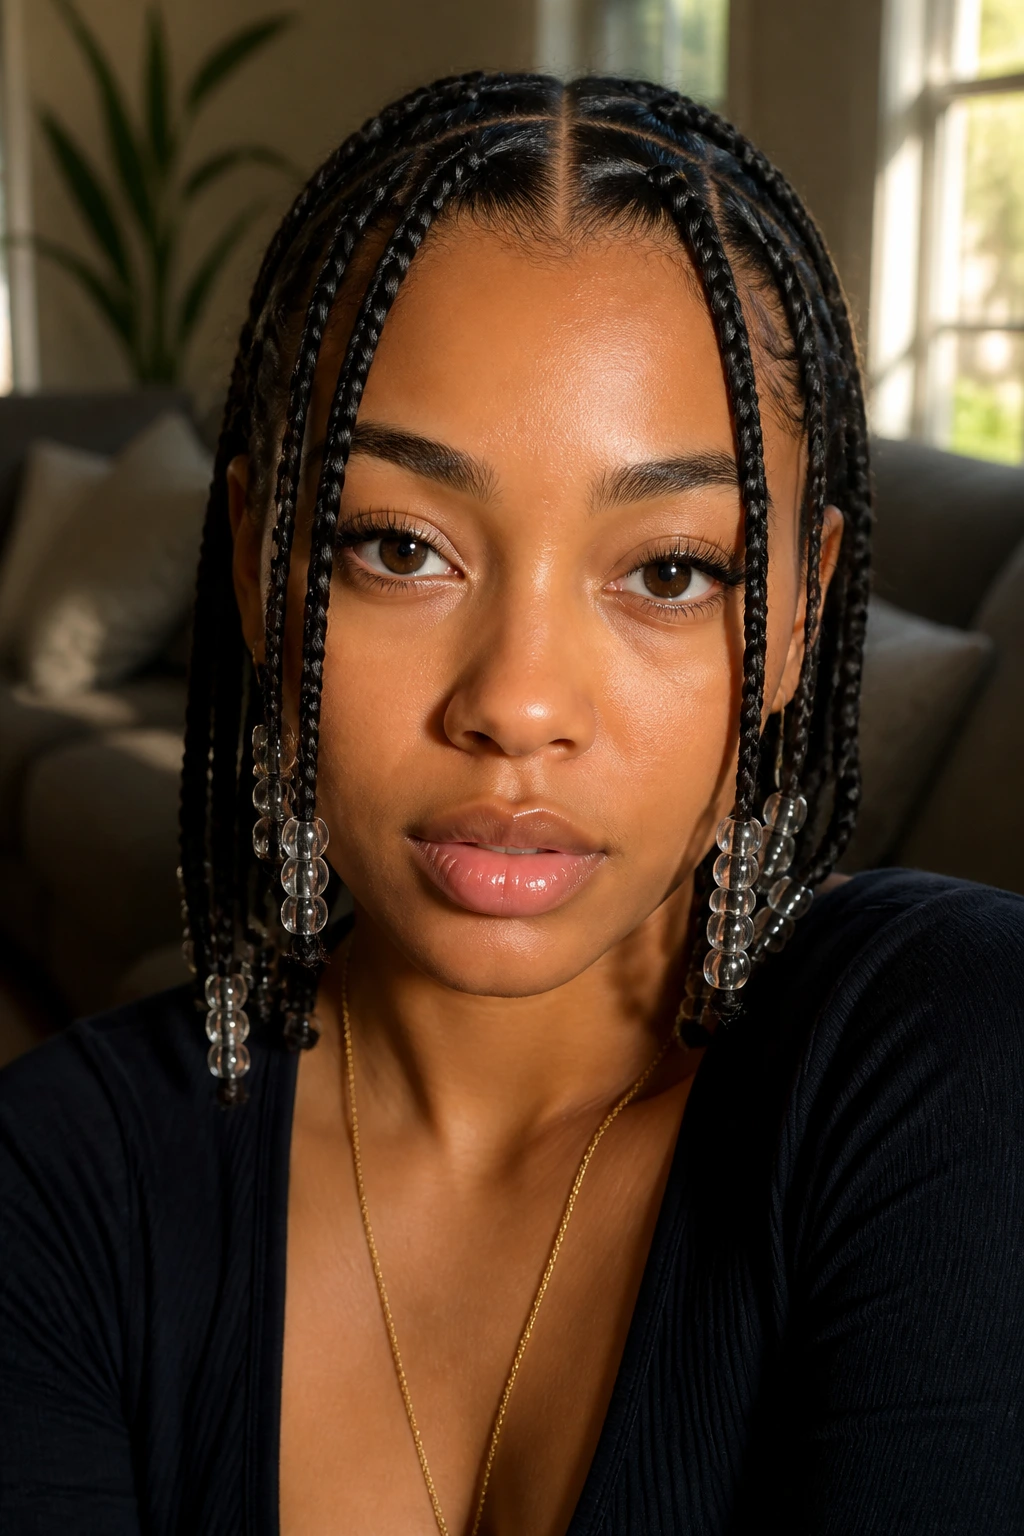
-
Face-framing control: The way the front rows are parted changes how the beads sit near your cheeks and jaw, which can make the style look clean instead of crowded.
-
Built-in polish: Clear, gold, wood, or shell beads replace the need for extra accessories; one good bead choice does more than a pile of random clips.
-
Protection with shape: Feed-in rows and knotless roots keep the hairline calmer while still giving you the sculpted look people notice from across the room.
-
Flexible length: Shoulder-length braids, waist-length braids, and bobbed versions all work here because the structure does the heavy lifting.
-
Easy to tailor: A few beads near the face read neat and minimal, while full-length bead accents give a louder finish when you want it.
-
Works across settings: The same braid pattern can look office-friendly, weekend-casual, or event-ready just by changing bead size, color, and placement.
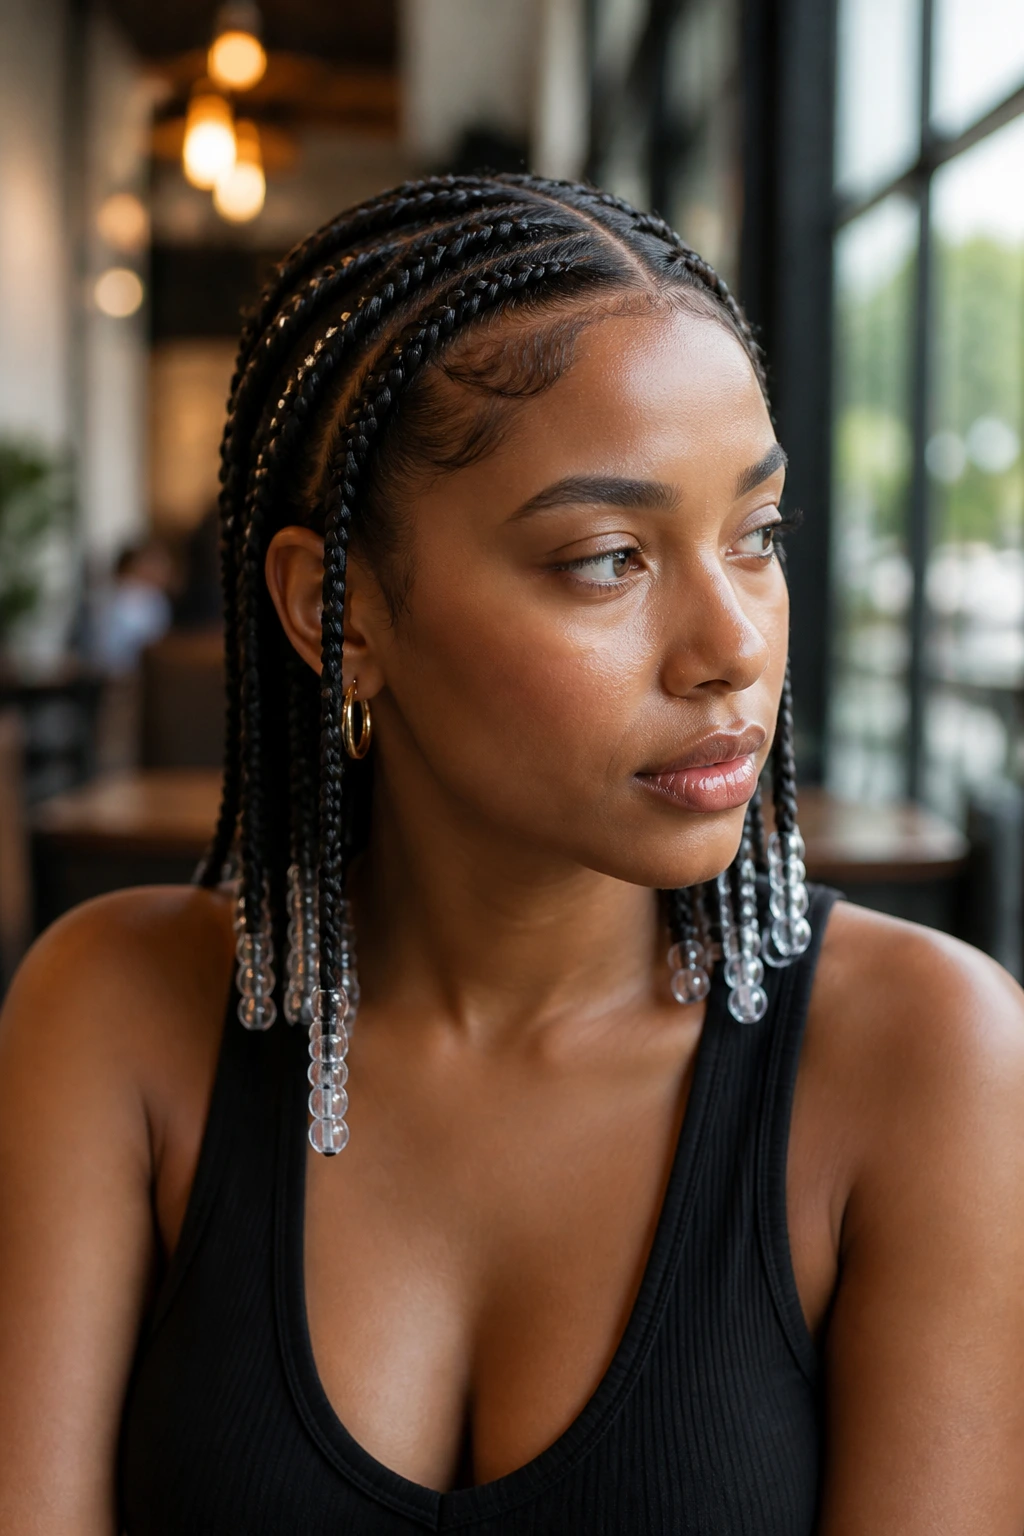
1. Center-Part Feed-In Tribal Braids with Clear Beads
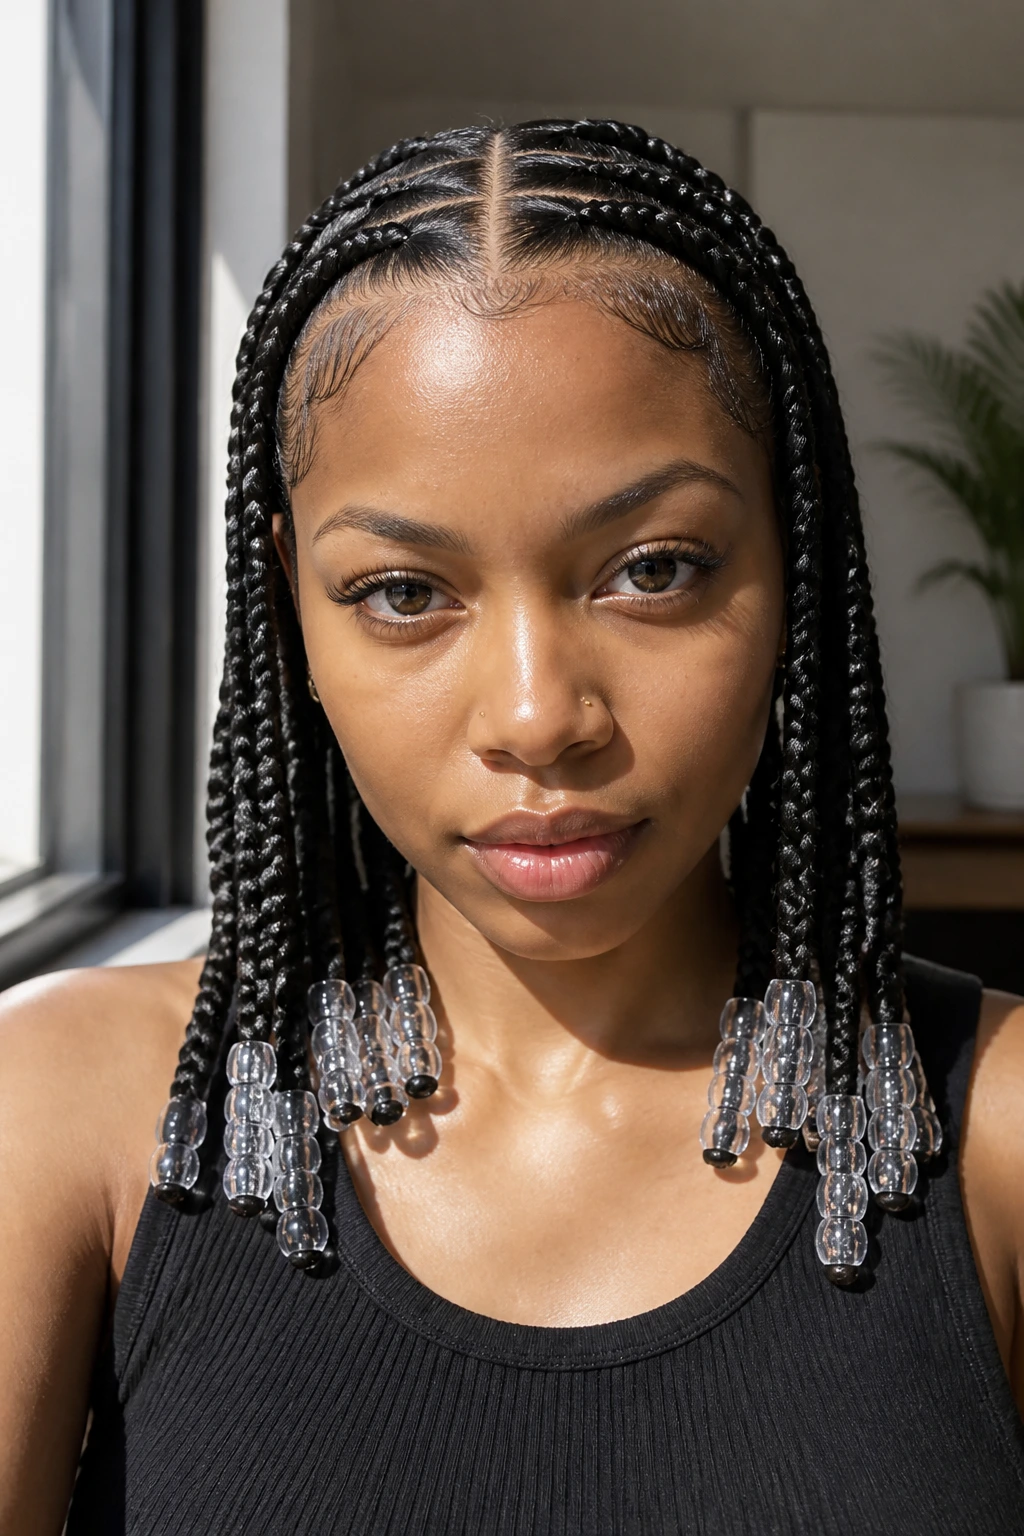
A center part is the straightest path to a polished look, and clear beads keep it from feeling overdone. The eye follows the line down the scalp first, then lands on the bead tips, which is exactly where you want the style to finish.
Keep the front rows narrow—about the width of a pencil—so the middle part stays clean and the braids don’t spread too wide around the face. Transparent acrylic beads in a medium size, roughly 10–12 mm, work especially well because they show the braid ends without fighting the pattern. This one reads crisp in daylight and even cleaner under soft indoor light.
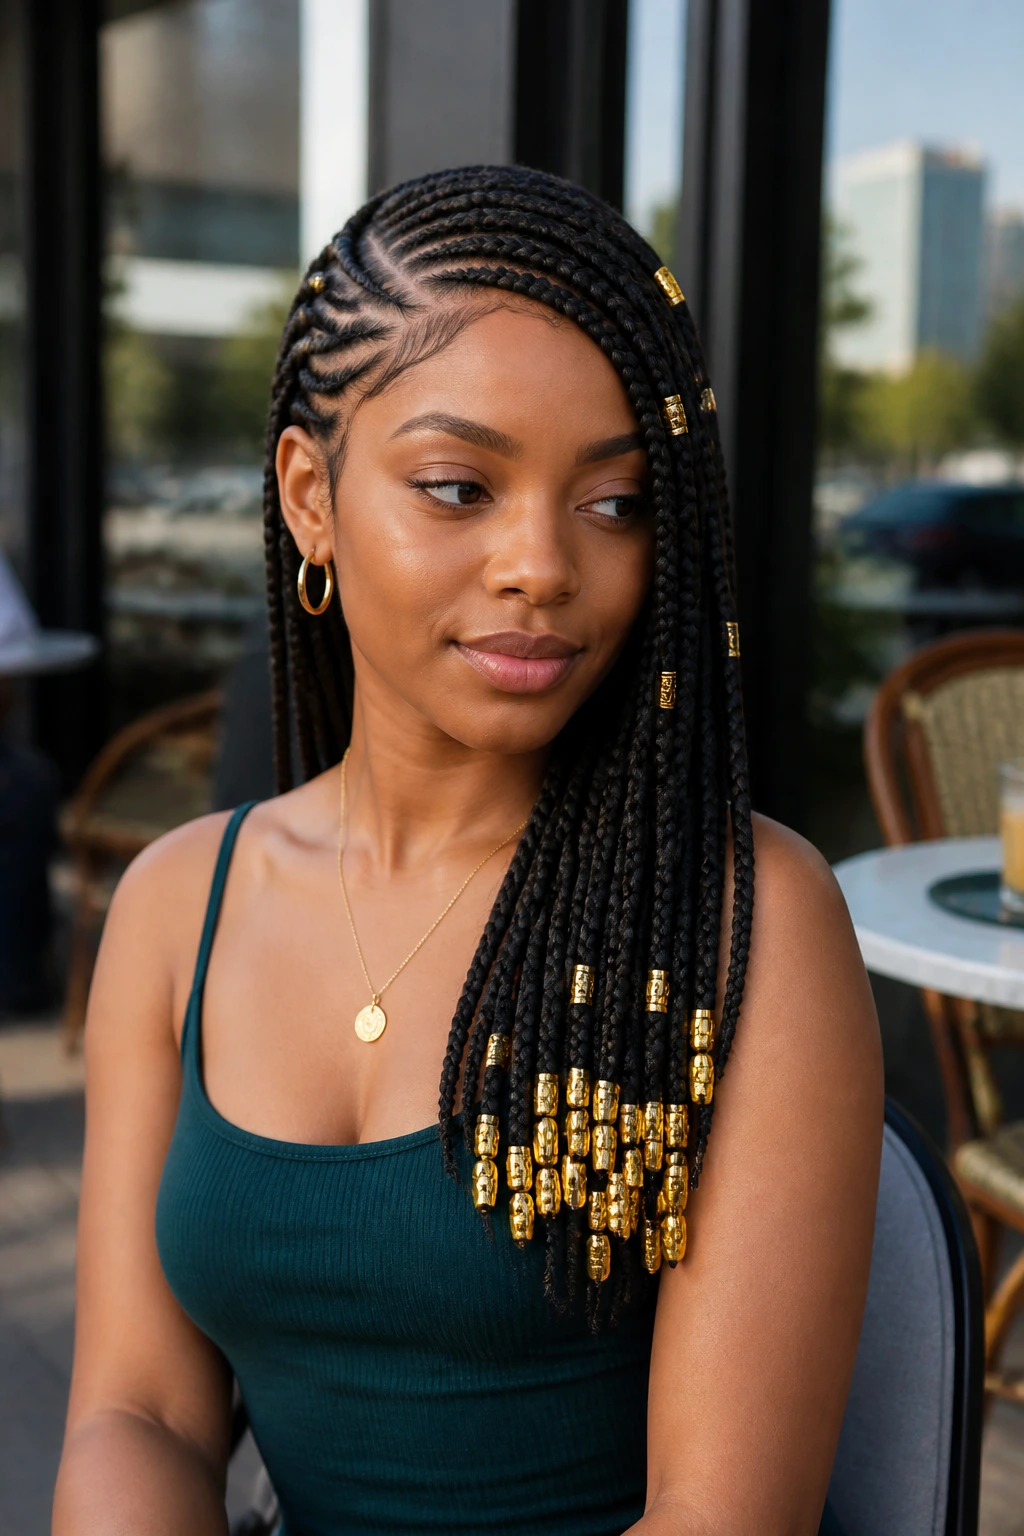
2. Side-Swept Tribal Braids with Gold Bead Accents
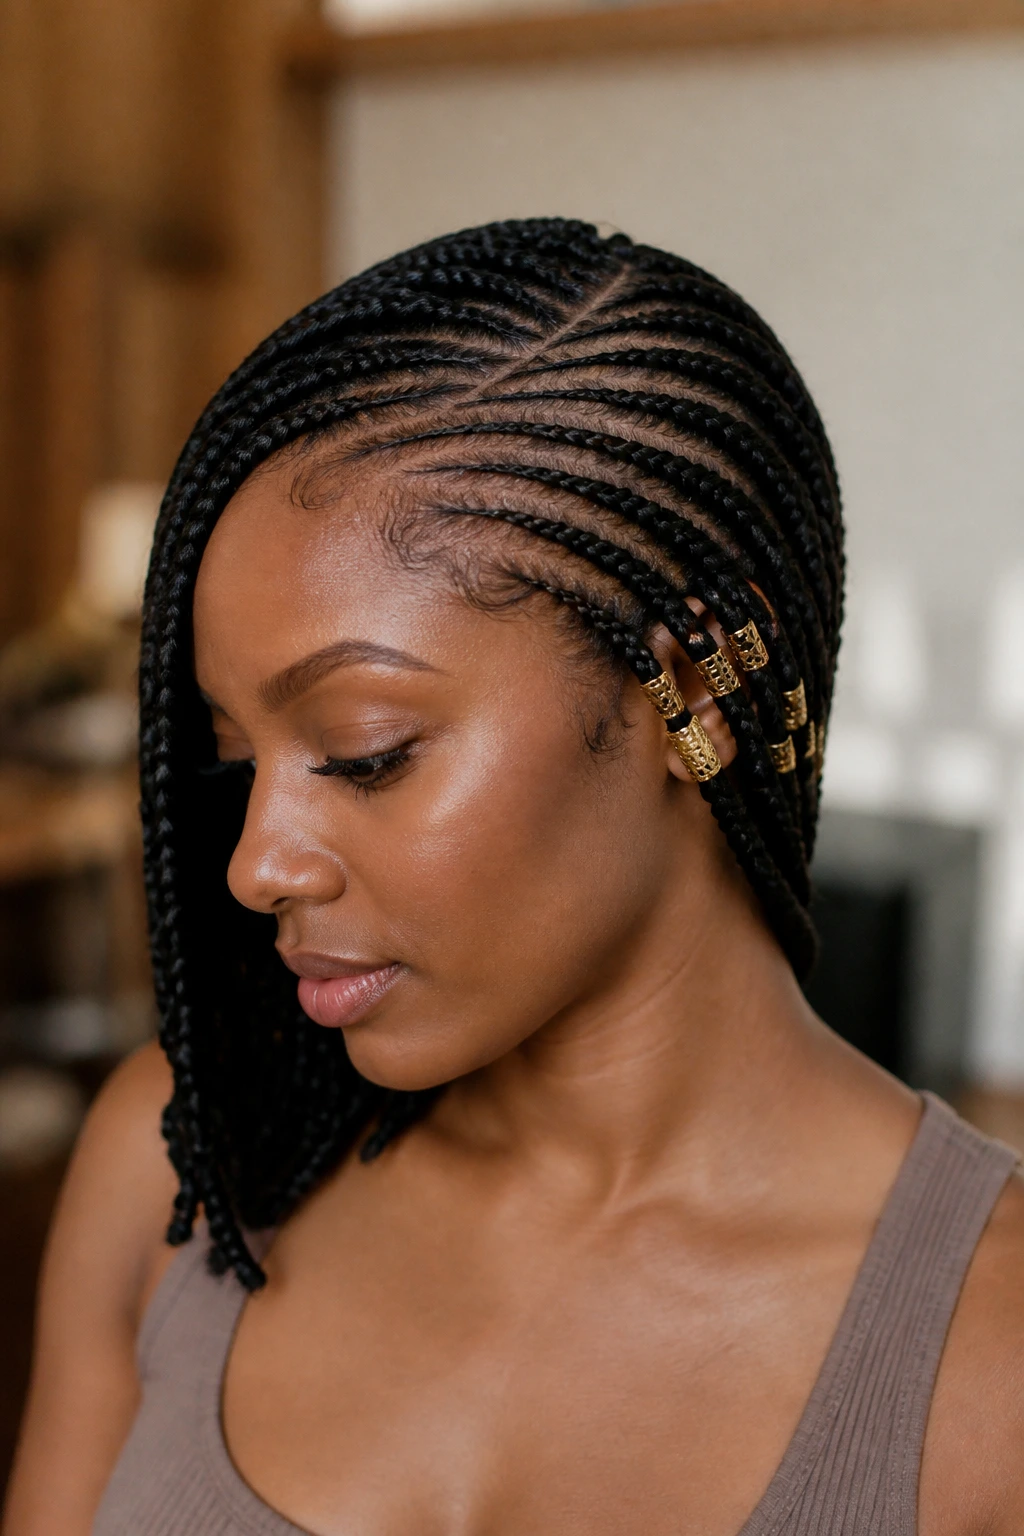
Why does a side part feel softer than a center part? Because the braid line moves diagonally, and that small shift changes the whole mood. A side-swept set with a few gold beads near the front can look polished without feeling severe.
I like this version when the face shape needs a little movement around one temple. Keep the heavier bead placement on the lower side so the braids fall in a controlled slope instead of puffing out near the top. Gold cuffs or tiny gold barrels are enough here; too many metallic pieces and the style starts to fight itself.
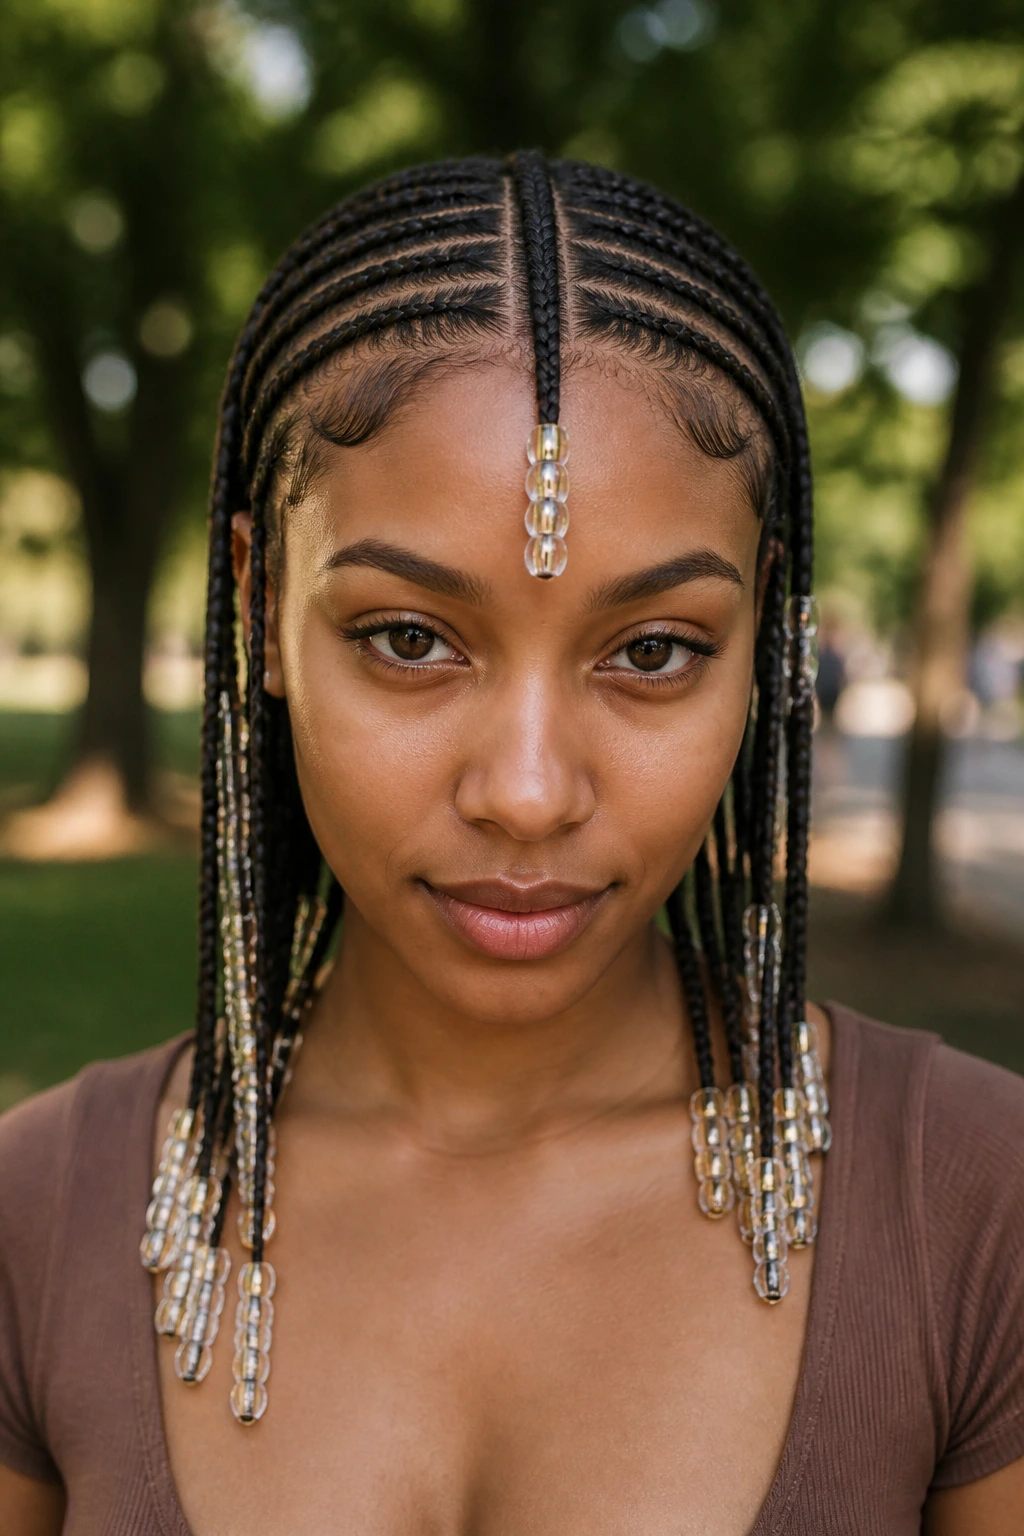
3. Fulani-Inspired Braids with a Single Center Row
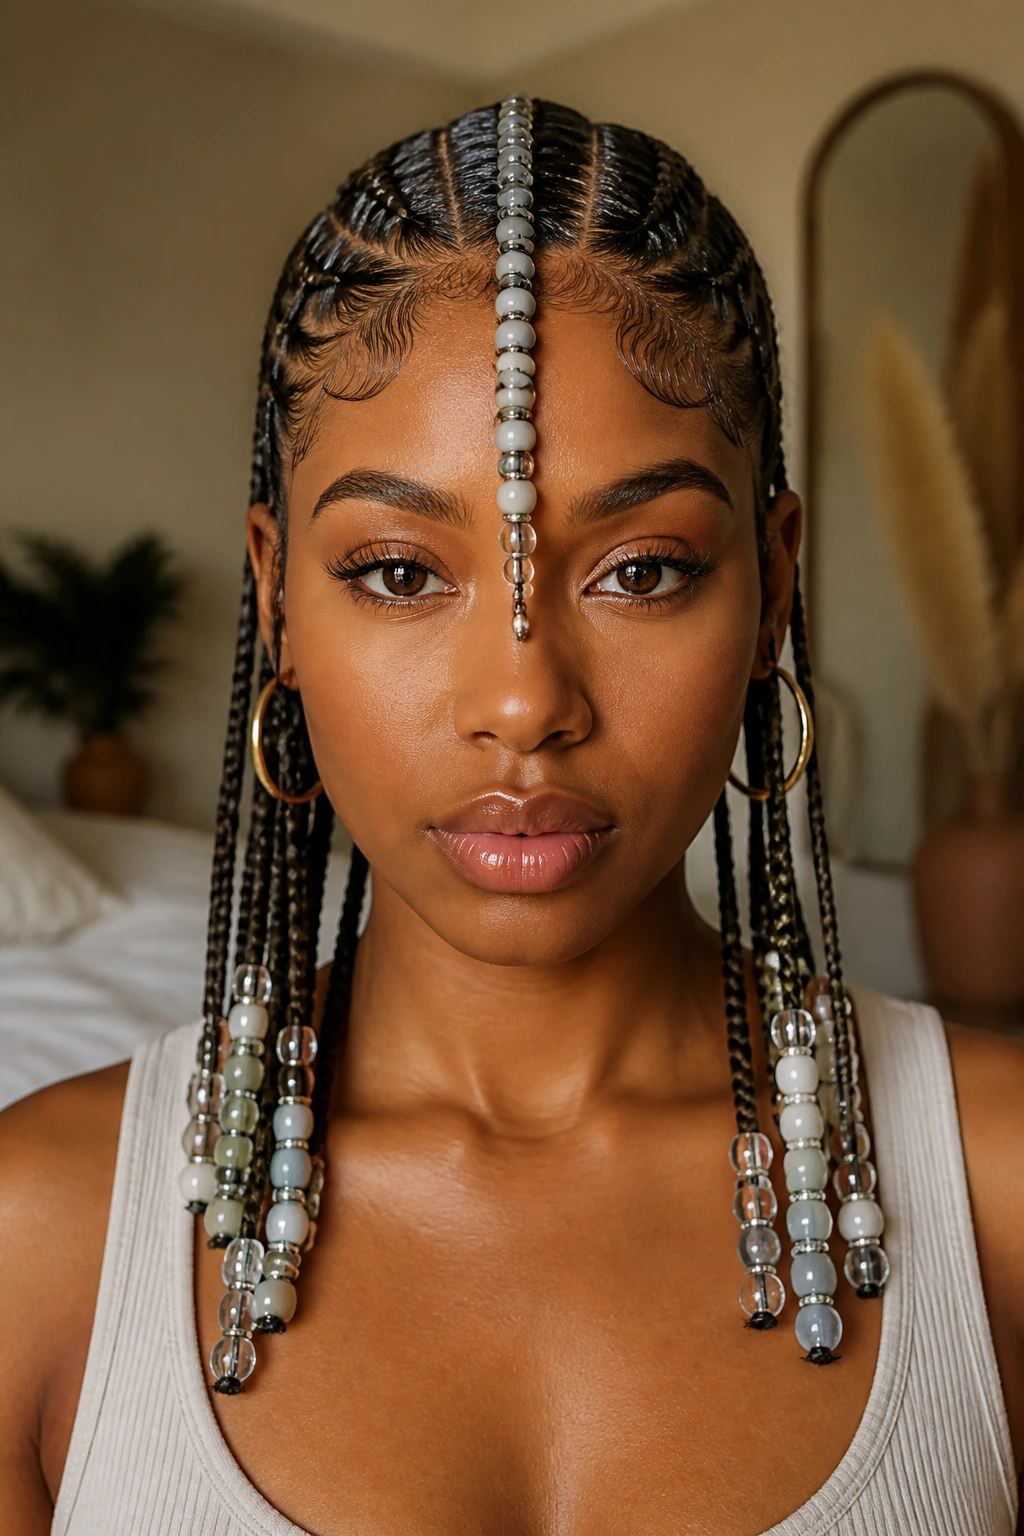
One central braid can do a lot of work when the rest of the set stays neat and restrained. That’s the appeal of a Fulani-inspired layout: a strong middle line, lighter braids around it, and beads used like punctuation instead of decoration overload.
The polished finish comes from balance. If the center braid is thicker, let the side braids stay slimmer and keep the beads the same color family—clear, cream, or warm amber usually looks calm and deliberate. A single face-framing braid with beads can be more elegant than five heavily decorated rows, which is a funny thing, but there it is.
4. Stitch Braids Pulled into a Low Ponytail
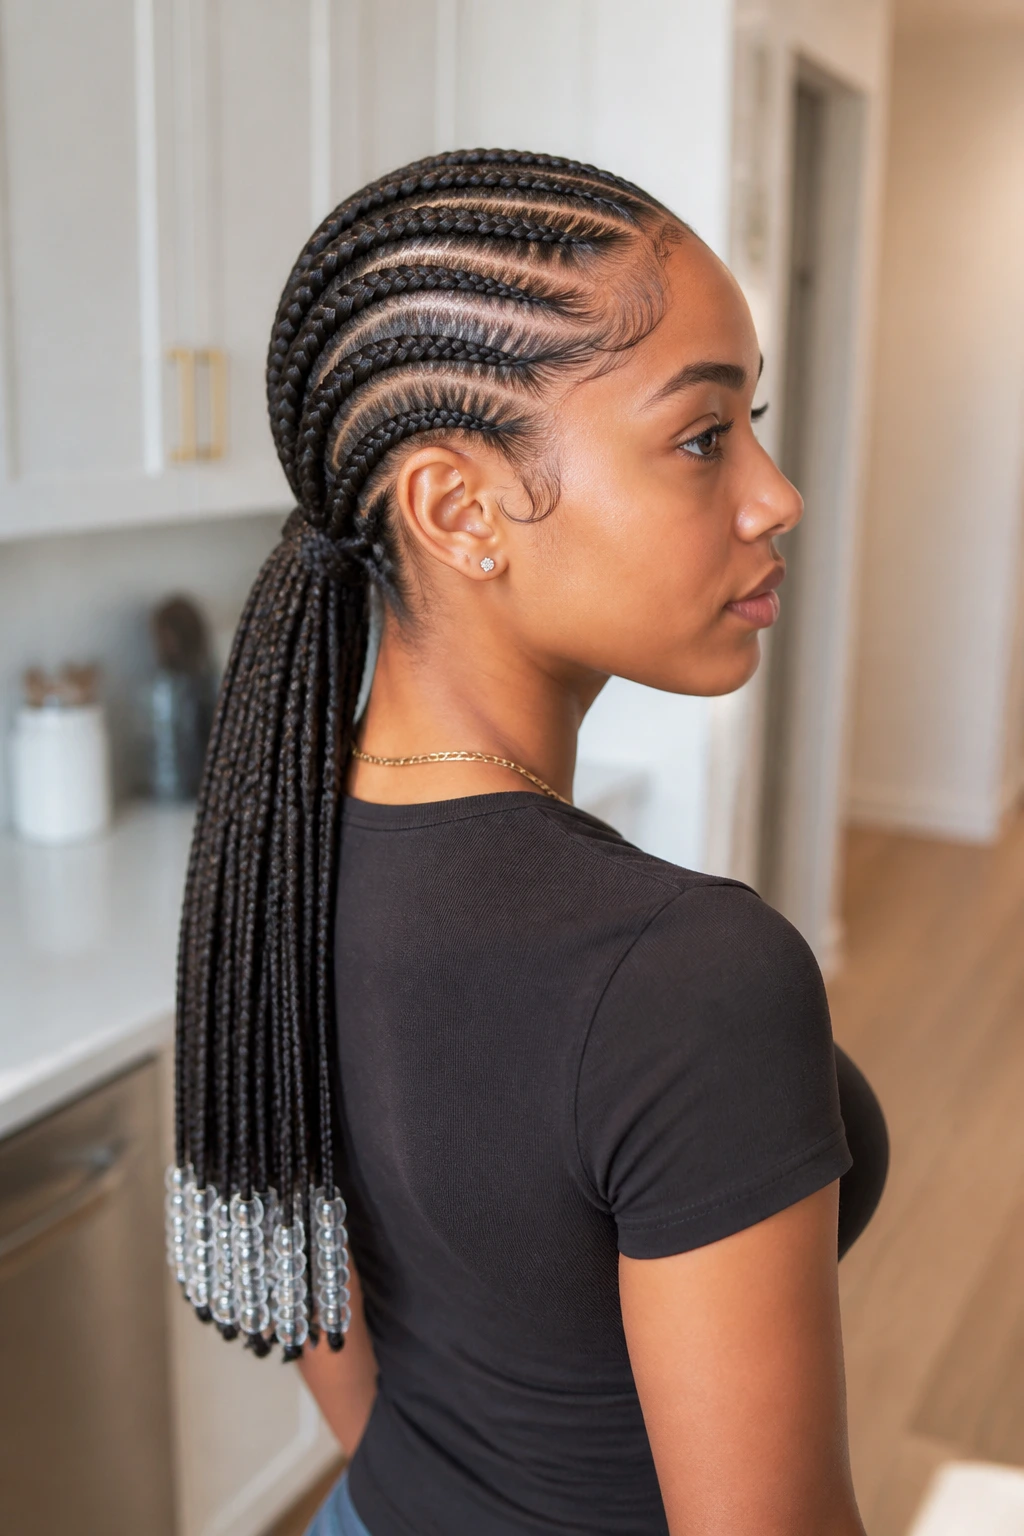
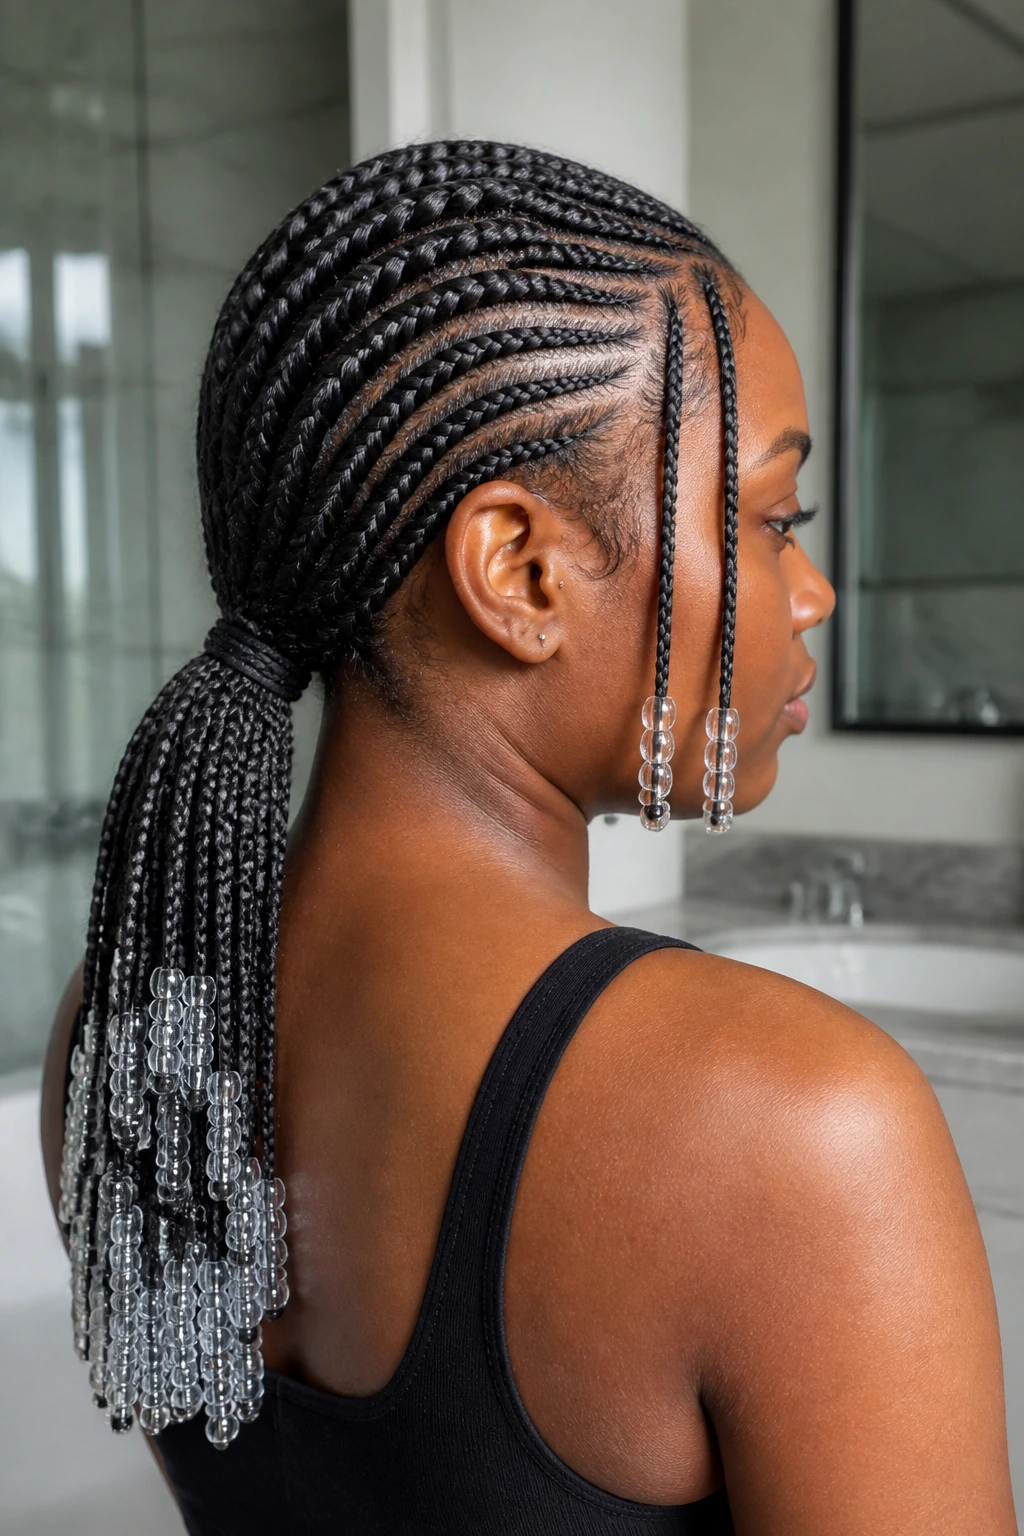
A low ponytail makes stitch braids look almost architectural. The raised braid ridges on top give you structure, then the ponytail brings everything back down to one controlled point at the nape.
This version is one of my favorites for polished wear because it keeps the beads out of the face and lets them move at the back instead. Add beads only to the ponytail ends or to two front braids, and the style stays sleek instead of loud. If you want the ponytail to sit flat, wrap the base with one braid instead of piling on a scrunchie.
5. Triangle-Part Tribal Braids with Transparent Beads
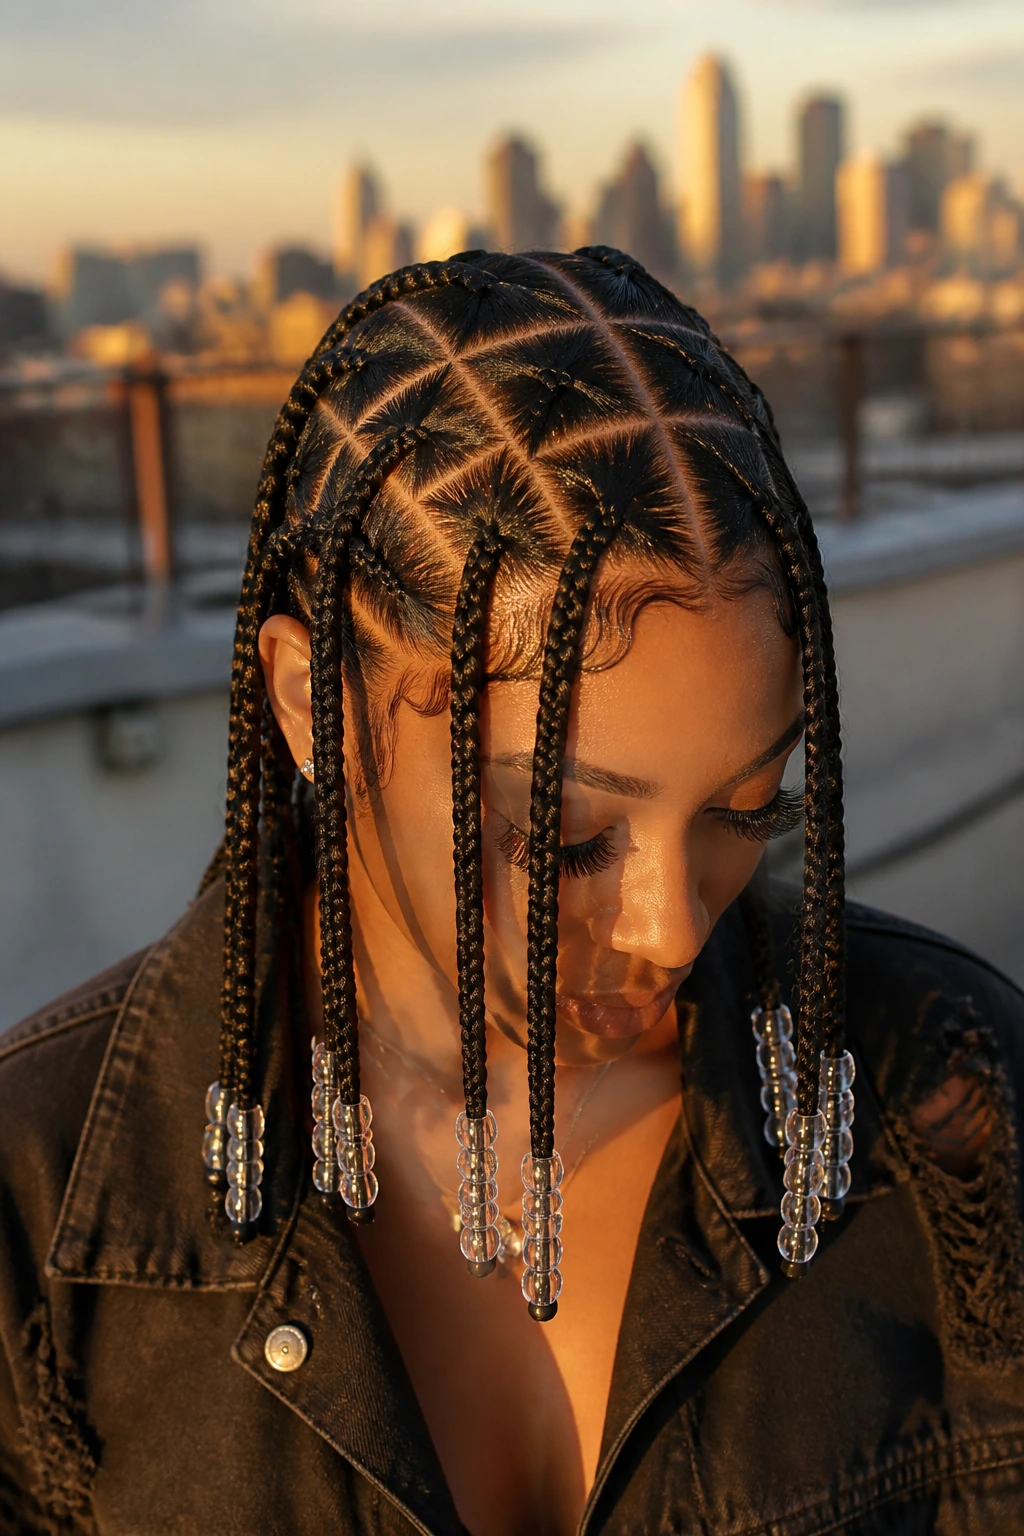
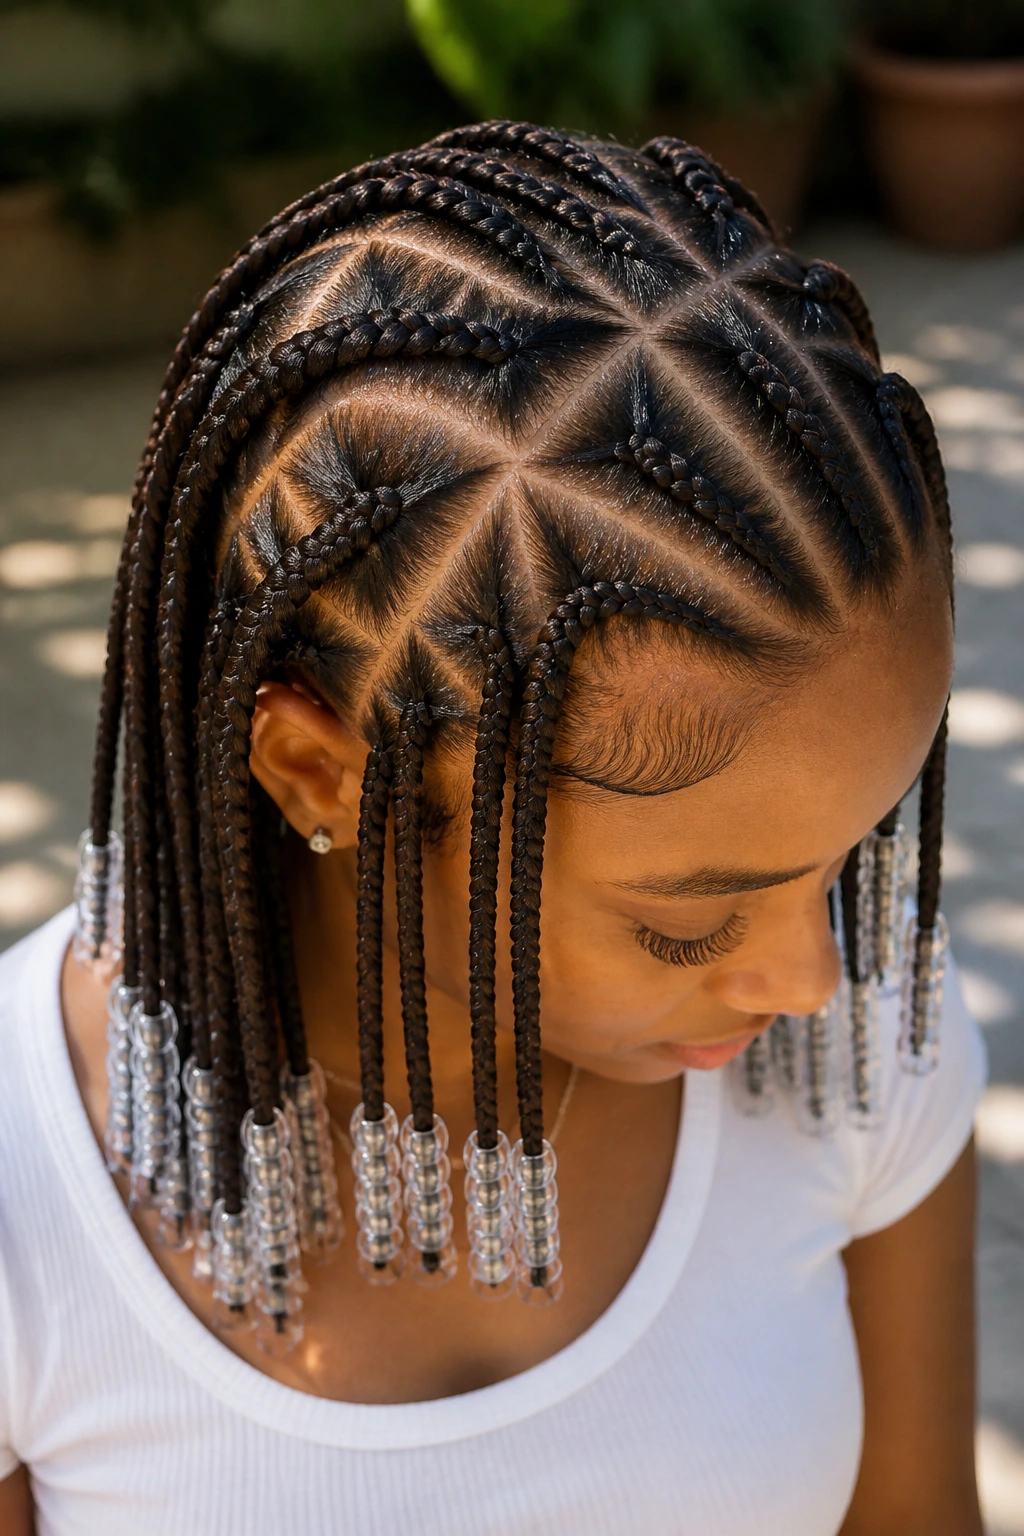
Triangle parts make a braid set look sharp from the first inch. The geometry does half the styling for you, which is handy when you want the finished result to read clean from above, not just from the mirror.
Transparent beads are the smart match here because the parting is already doing the visual work. A smoky clear bead or pale crystal bead keeps the lines visible and stops the top of the style from looking busy. If your parts are crisp, you can get away with fewer accessories. Honestly, that is the better move.
6. Braided Crown with Shell and Wood Beads
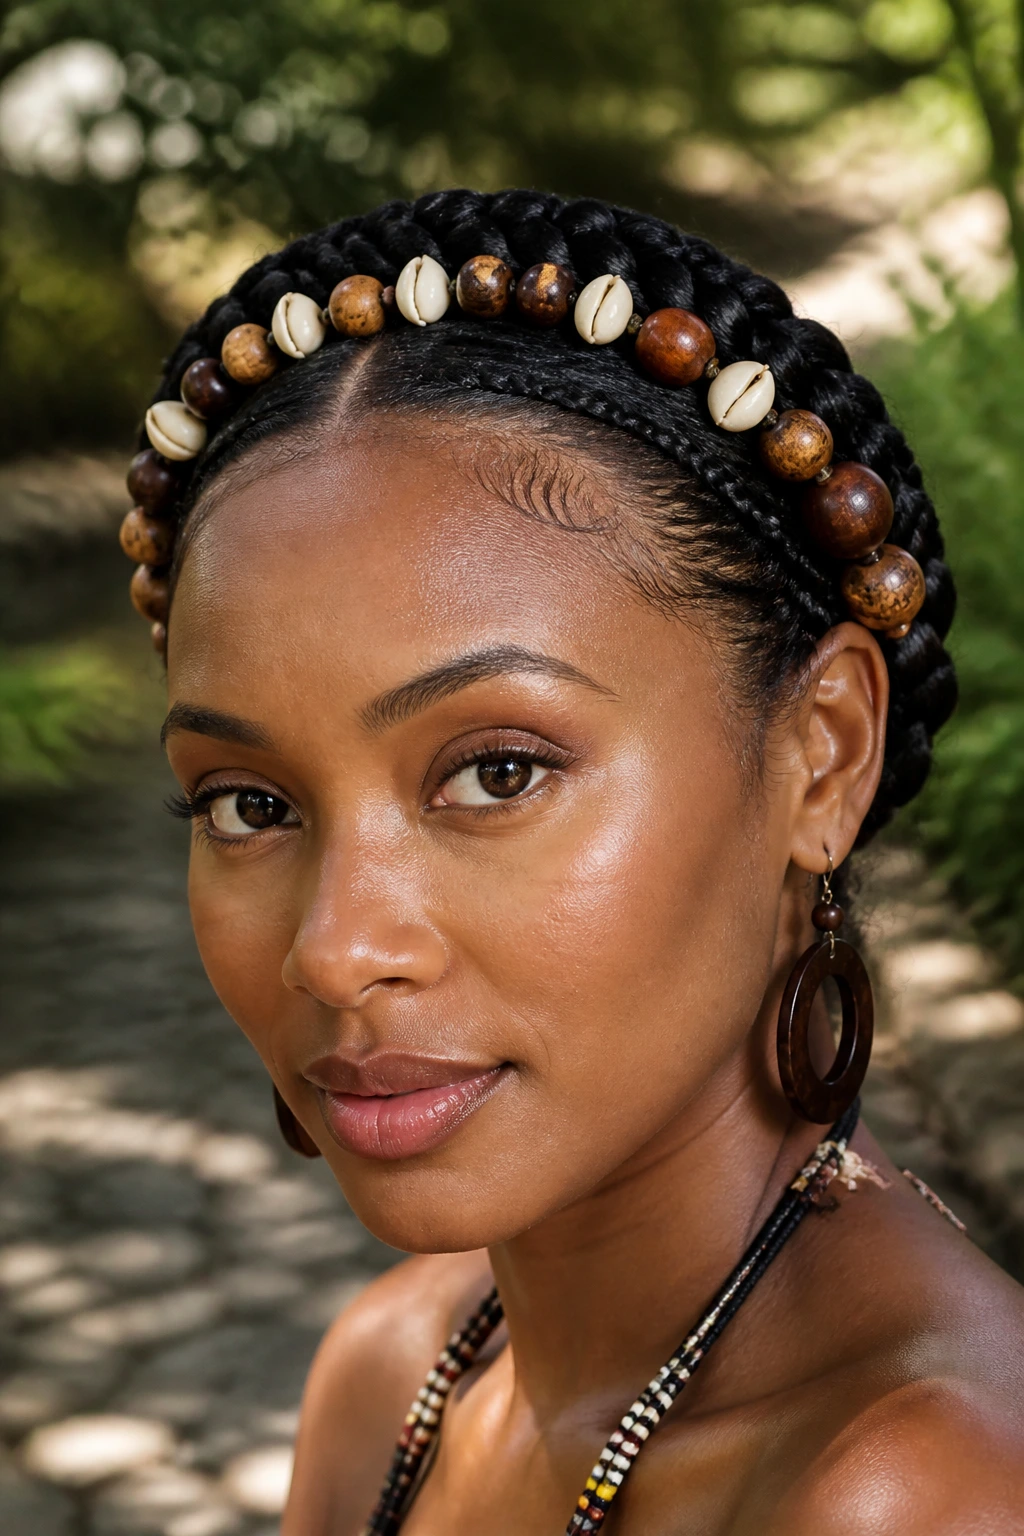
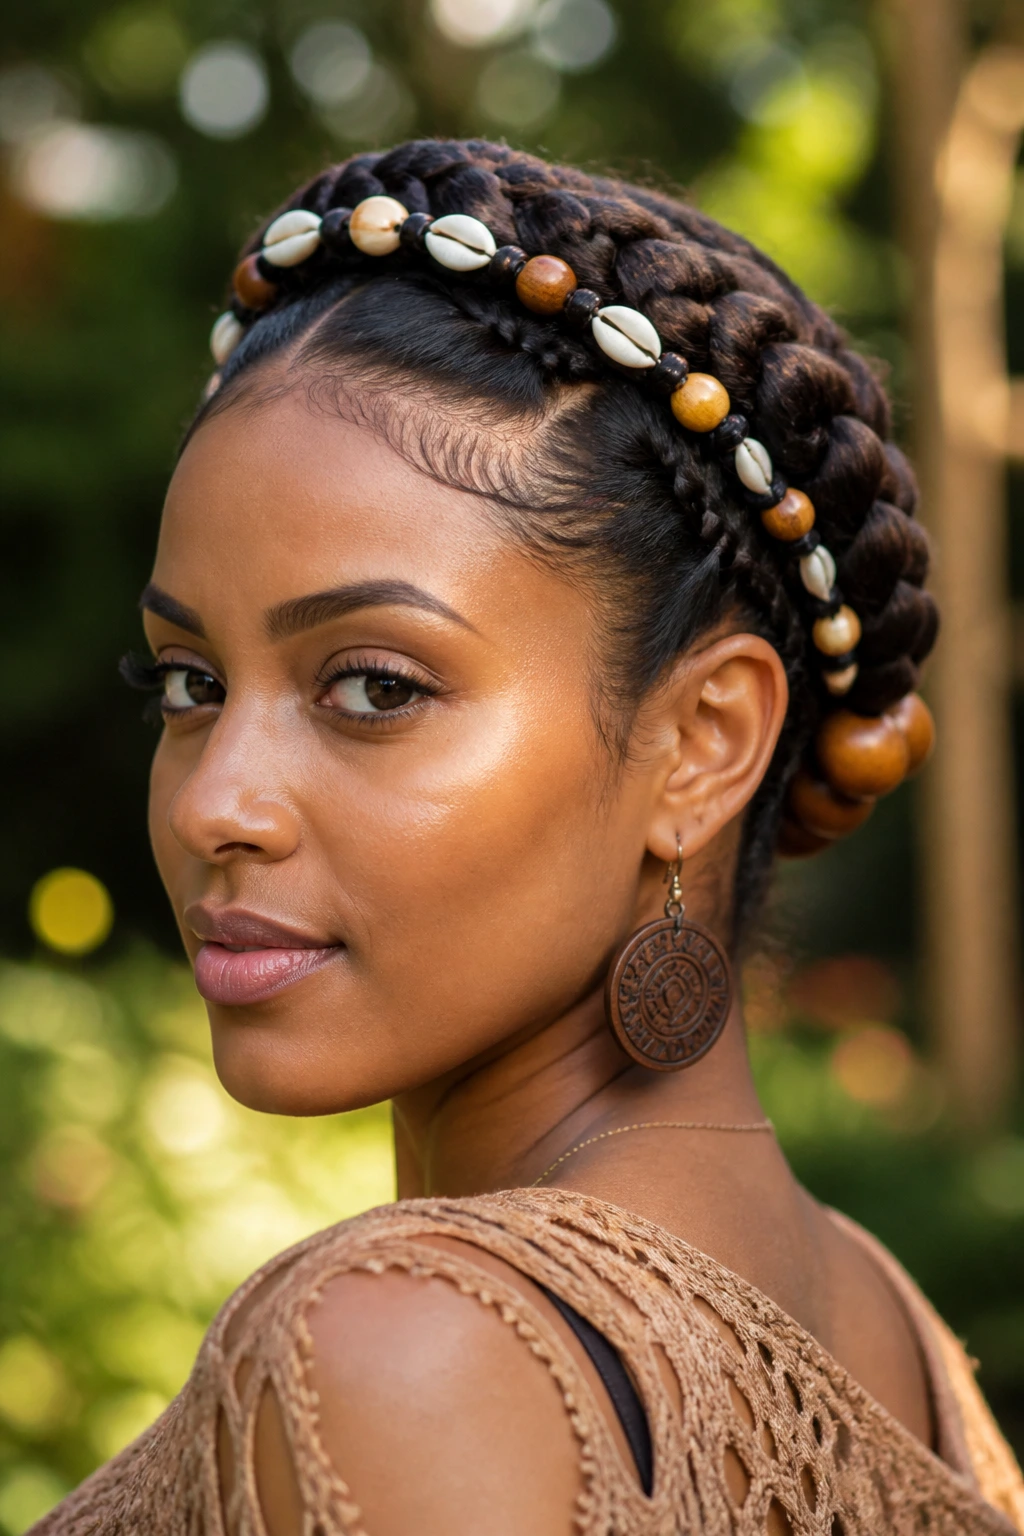
Shell and wood beads bring a matte finish that feels grounded and tidy at the same time. When they sit along a braided crown, they form a soft frame instead of shouting for attention.
Keep the braid rows close to the hairline and place the bigger beads toward the back half of the crown. That way the front stays open and polished while the back carries the texture. A mixed bead palette can work here, but I’d keep it to two materials at most—wood and shell, or wood and a small gold accent. More than that starts to look busy fast.
7. Half-Up, Half-Down Braids with Beaded Ends
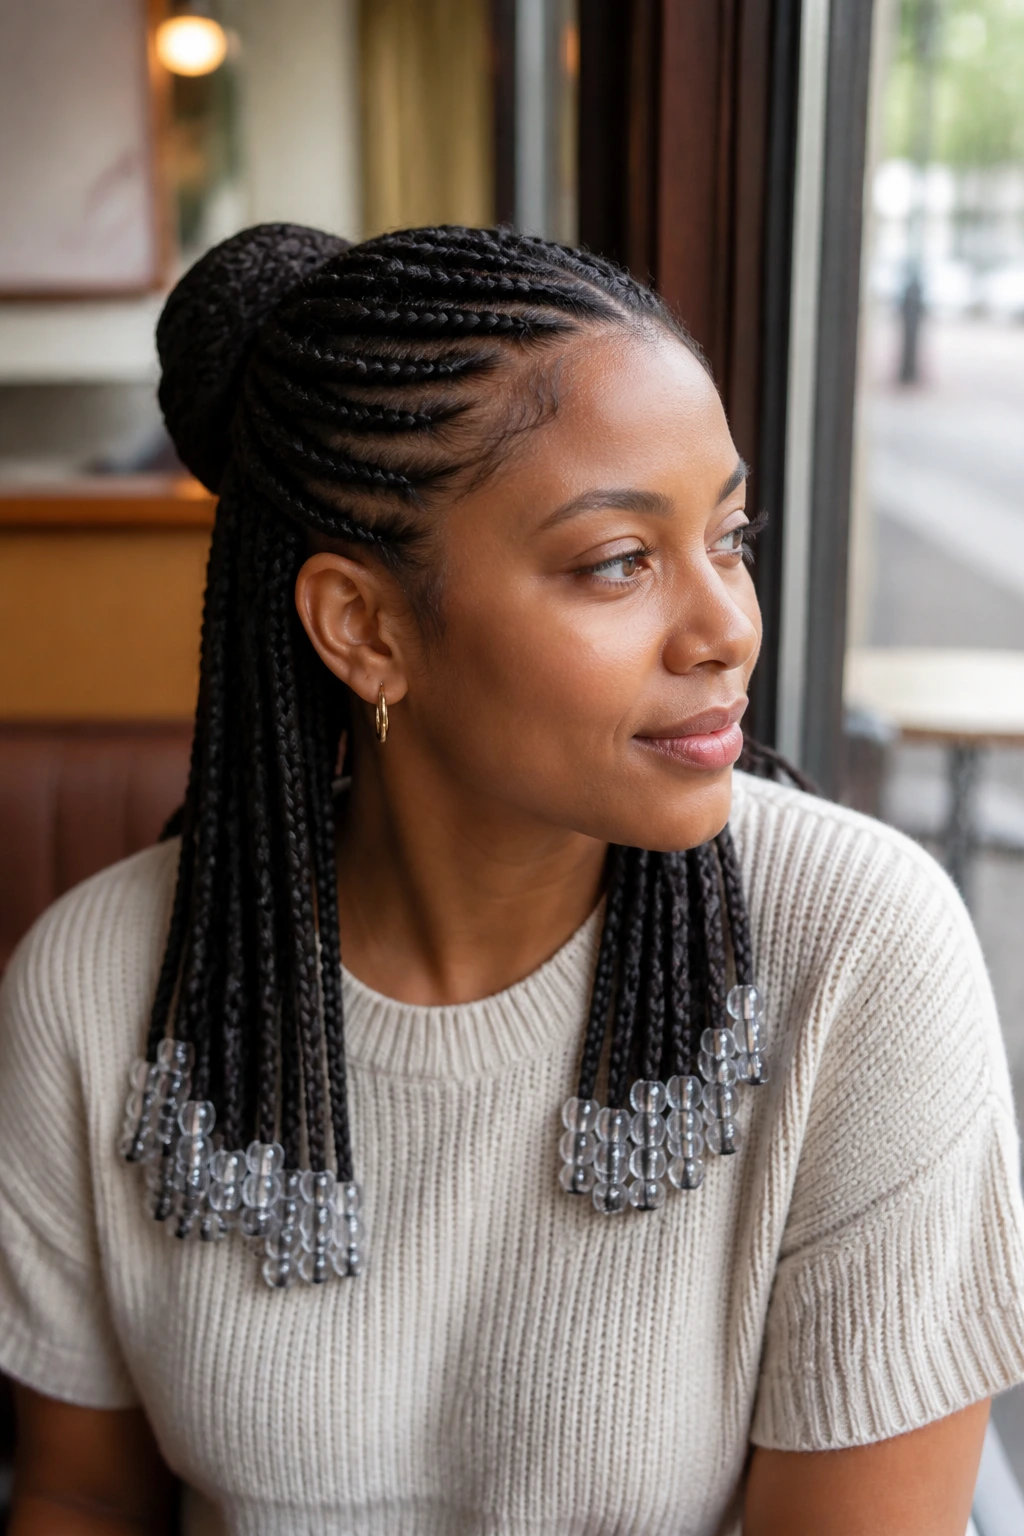
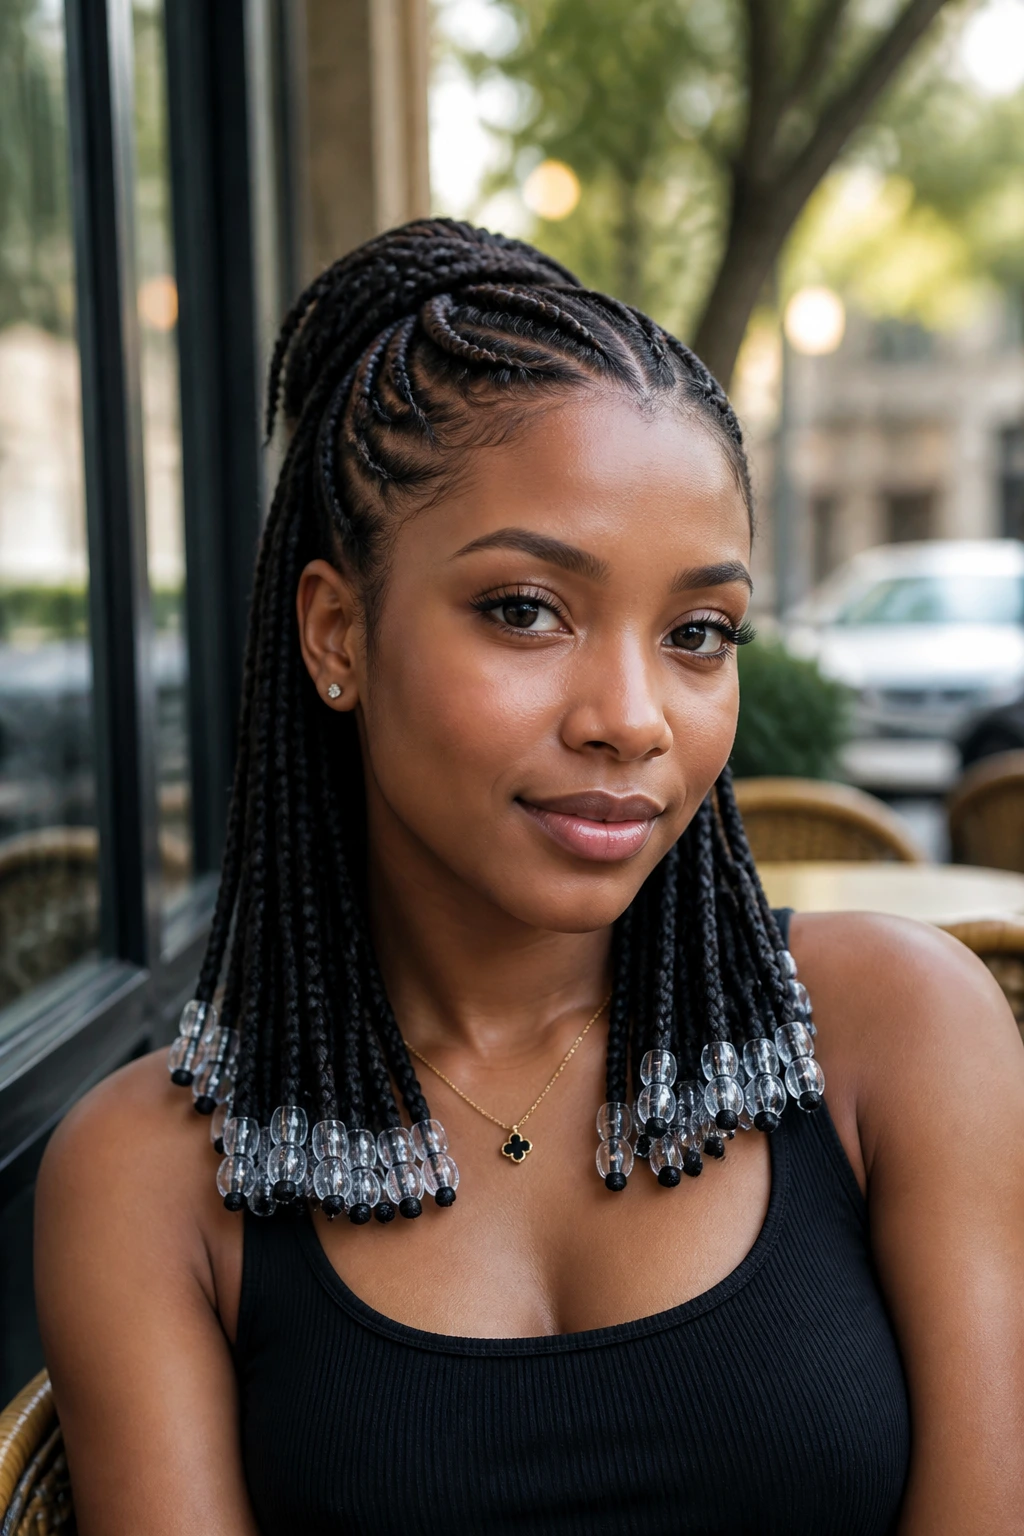
A half-up, half-down style is useful when you want movement without letting the whole look sprawl. The top section gets pulled neatly away from the face, and the beads on the loose ends provide enough motion to keep the style from feeling stiff.
This version is especially good for medium-length braids because the bead tips don’t drag the whole style down. I’d keep the top knot or top ponytail smooth and low-profile, then let the lower braids carry the beadwork. If the beads are all the same size, the finish reads deliberate instead of mixed-up.
8. Jumbo Feed-Ins with Oversized Beads
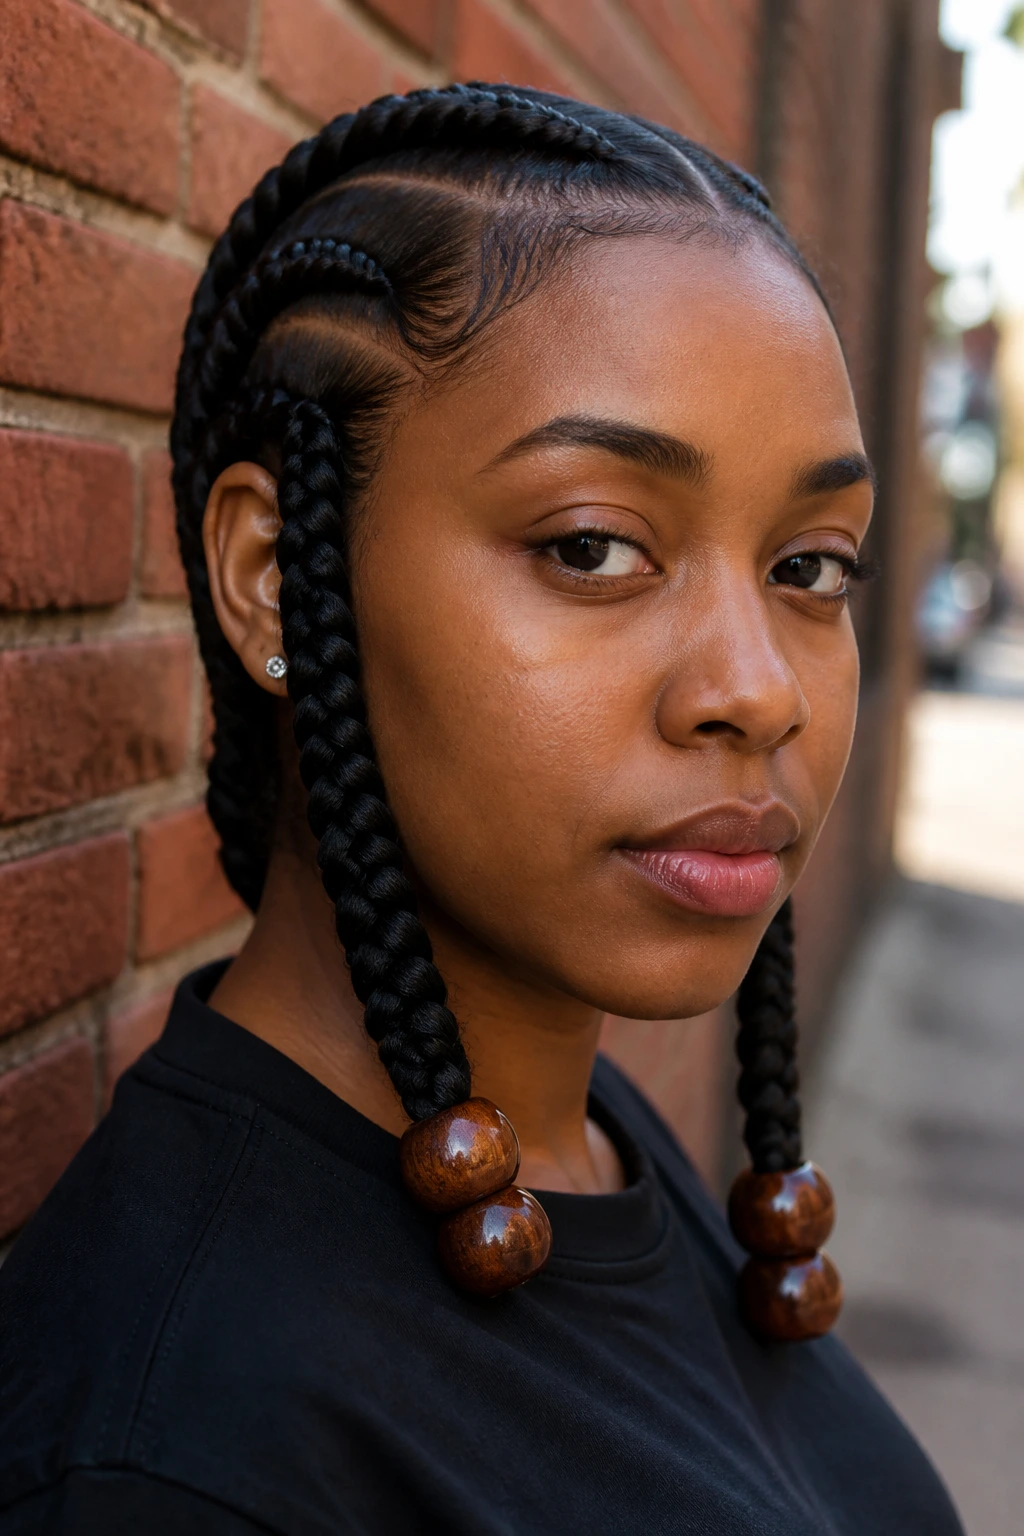
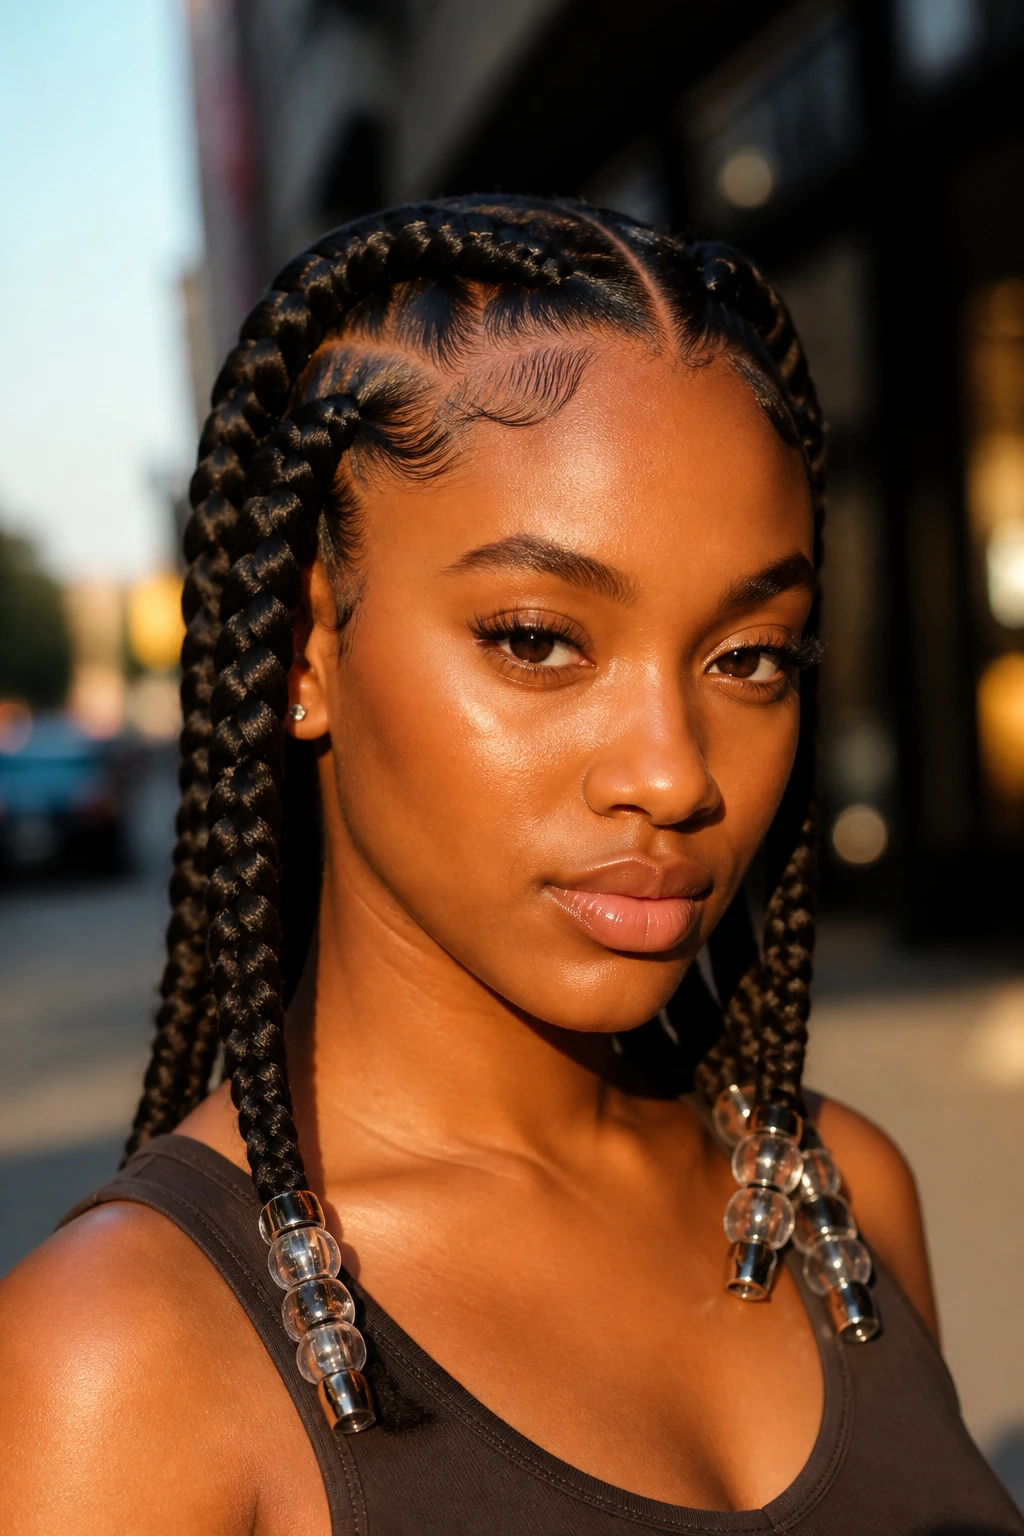
Big braids need fewer accessories, not more. That’s the trick. Jumbo feed-ins already have presence, so oversized beads work best when they are spaced out and repeated with restraint.
Choose a bead that’s broad enough to sit over the braid tip without pinching it—think 16 mm or slightly larger if the braid ends are thick. Clear, amber, or matte black beads look polished here because they echo the boldness of the braids instead of competing with them. A full row of giant beads would be too much. Two or three focal points? That has a spine.
9. Small Knotless Braids with Seed Beads
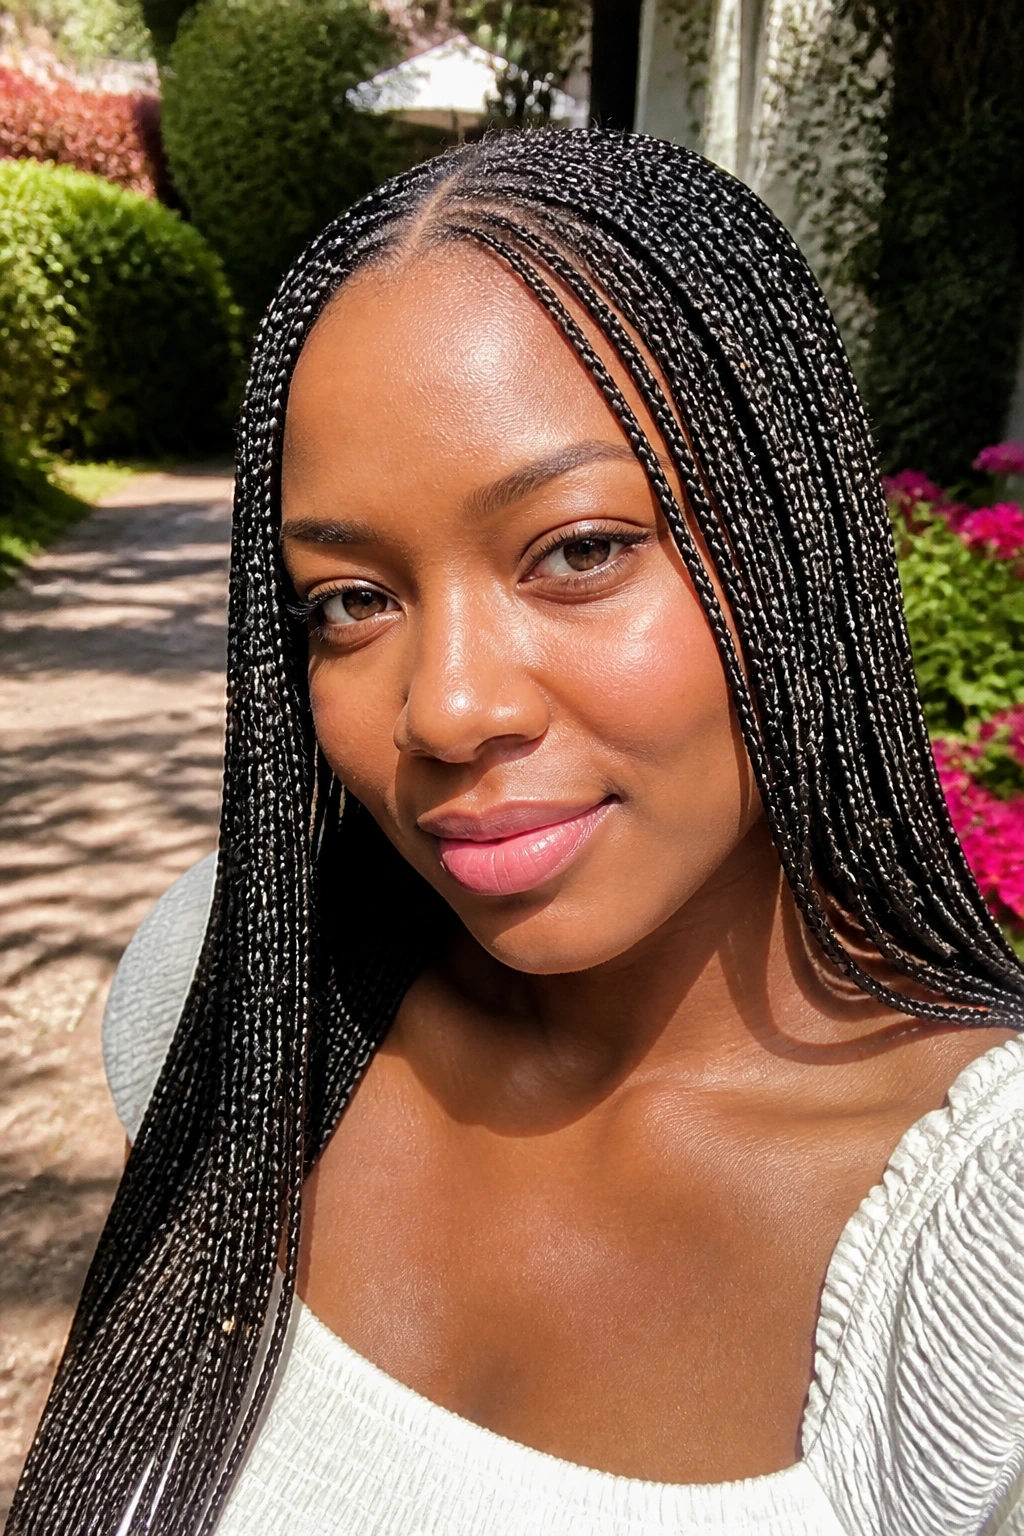
Small knotless braids give you the neatest, lightest finish in the whole bunch. Add seed beads and the style stays delicate, which is ideal if you want polish without a heavy swing at the ends.
This is one of the best options for finer hair or for anyone who hates bead weight near the scalp. The braid count can be high, but the bead size should stay tiny—small glass or acrylic seed beads keep the look controlled. If you want a little shine, mix one subtle metallic bead into every fourth or fifth braid. Don’t flood the whole set with sparkle.
10. Curly Leave-Out Tribal Braids
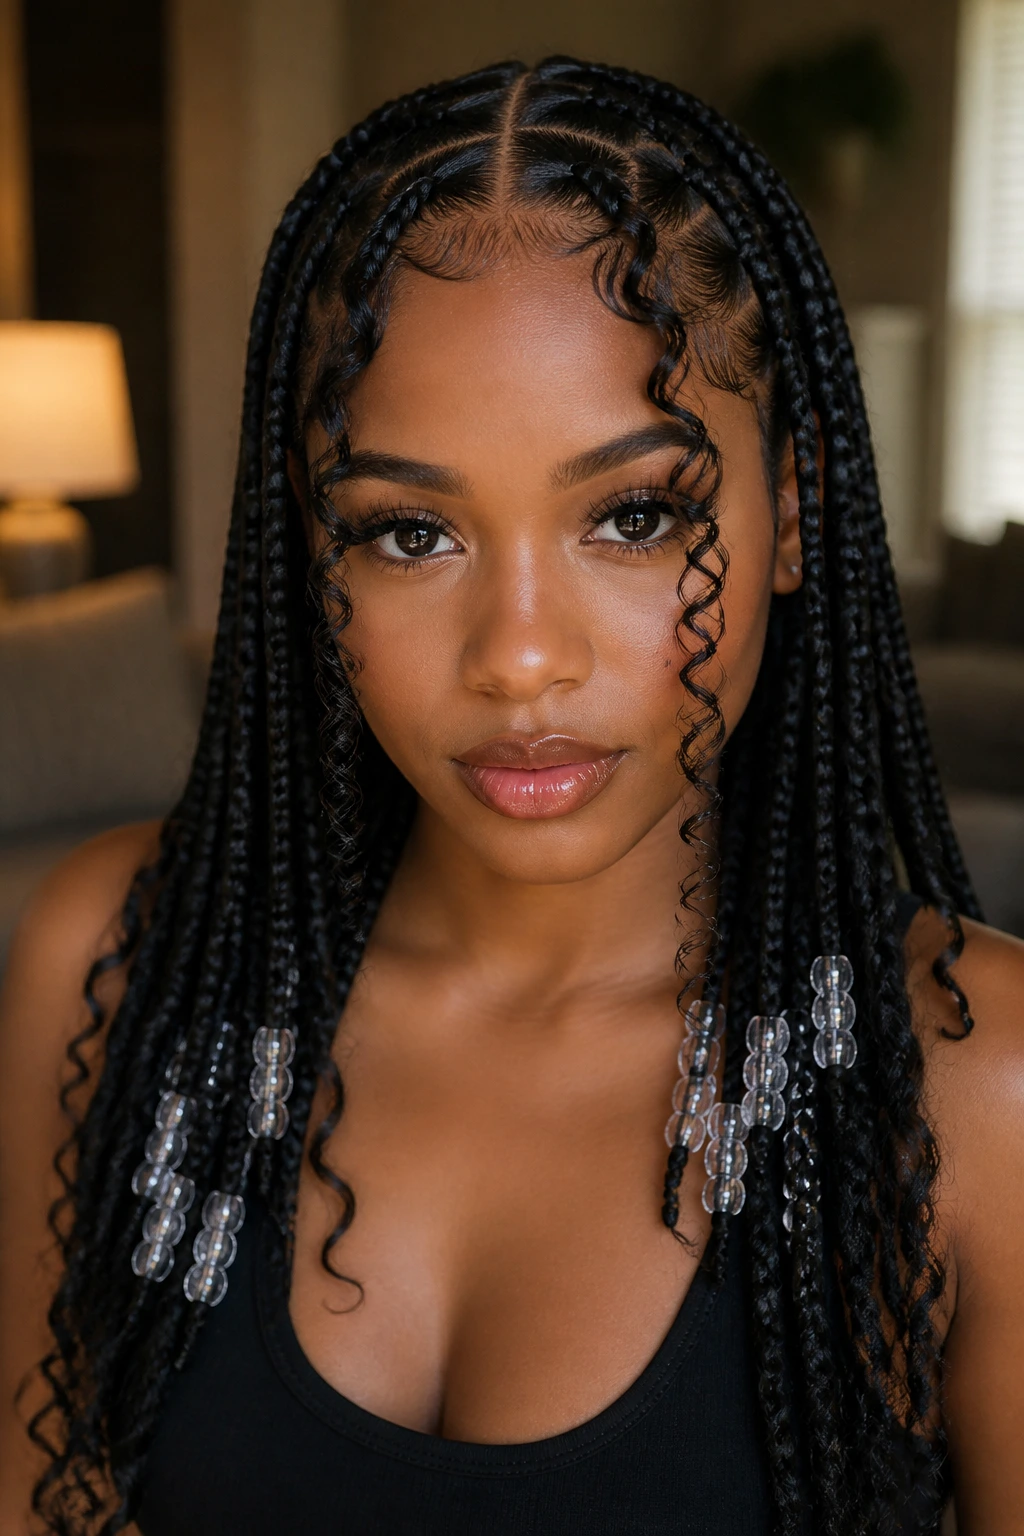
A little curl changes everything. It softens the straight lines of the braids and keeps the style from reading too severe, which is useful when you want polished but not rigid.
The curl leave-out should be shaped on purpose, not left to frizz. A flexi-rod set or a clean wand curl at the front gives you a controlled frame, and a light mousse keeps it from puffing up. Beads work best on the braids that stay straight, while the curls take the softer role. That contrast is the whole point.
11. Tribal Braids Wrapped into a Sleek Low Bun
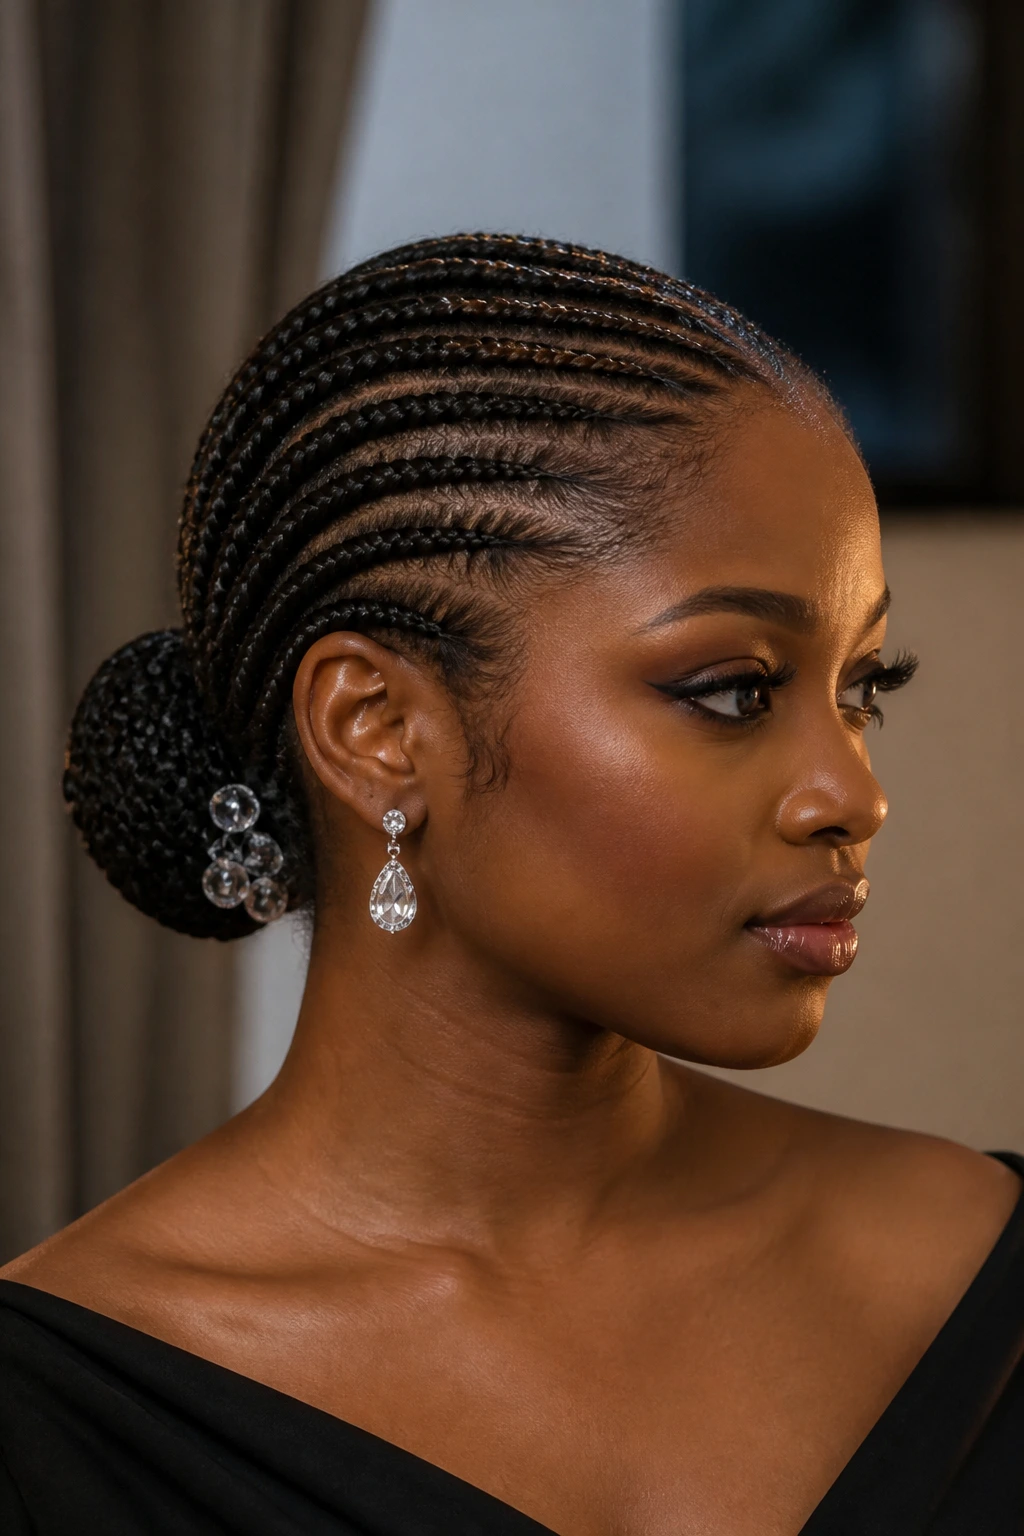
A low bun turns beads into a finish rather than the headline. That can be the smartest move of all when you want a polished style for a formal event or a work setting.
Sweep the braids tightly to the nape and wrap them into a flat bun that sits close to the head. Leave one or two beaded strands out if you want a hint of movement, or tuck every bead inside the bun for a cleaner silhouette. If your roots are frizzy, smooth them with mousse before wrapping. A neat bun exposes every flaw, so this one rewards patience.
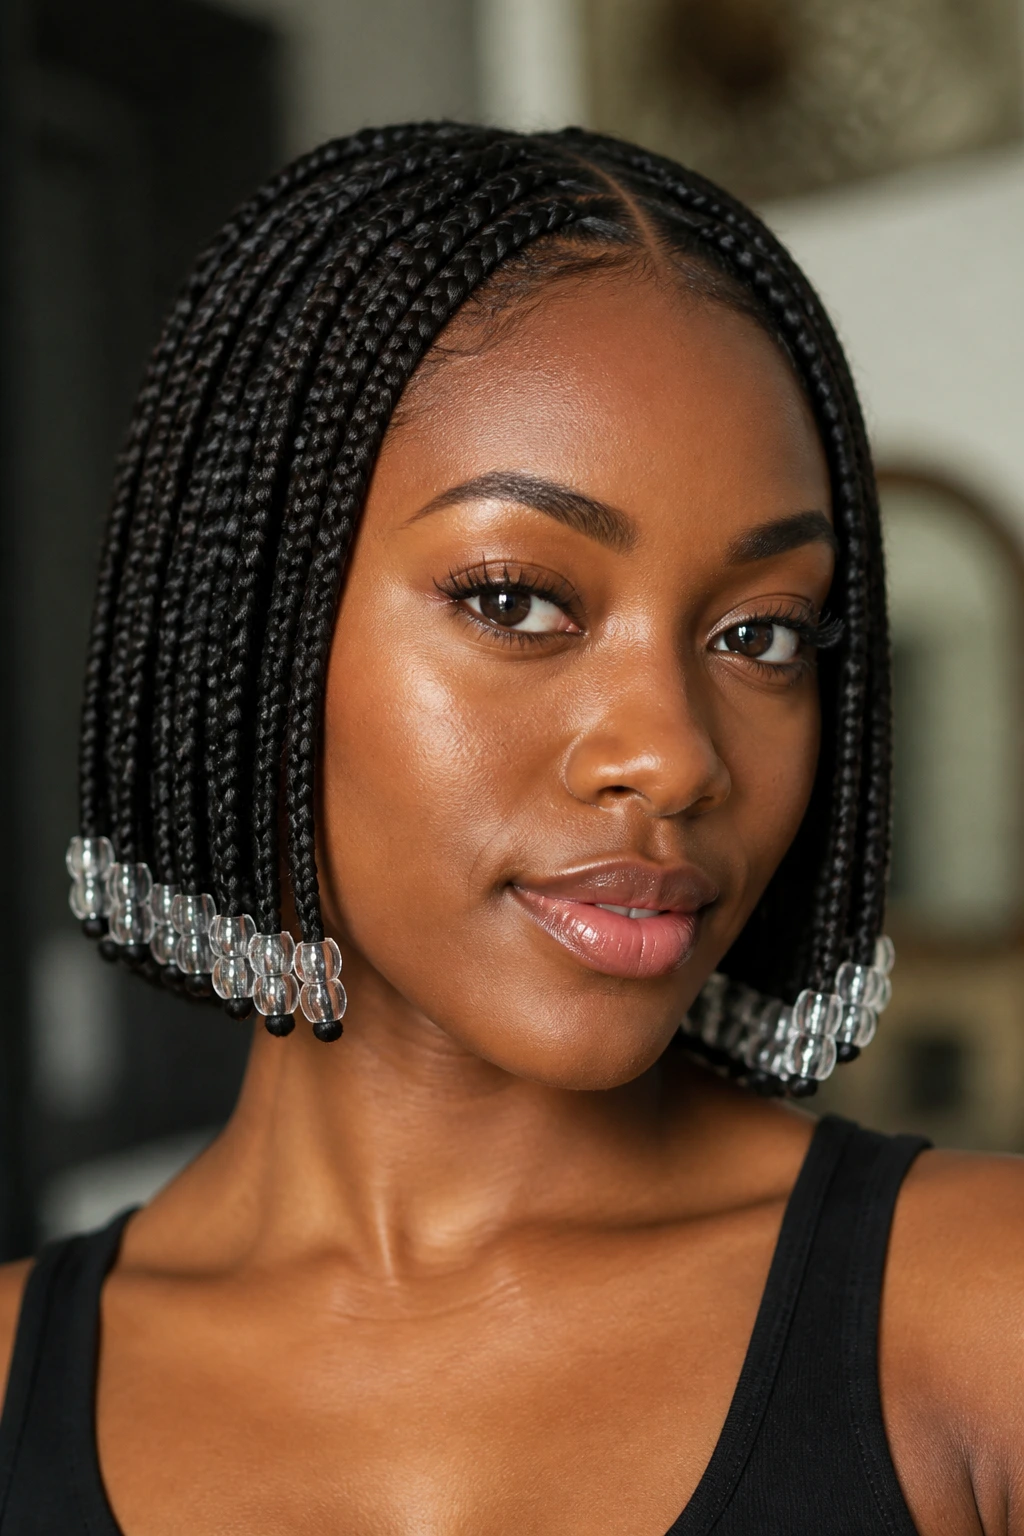
12. Braided Bob with Beads at the Ends
A bob-length braid set is neat by nature. It lands above the shoulders, so the bead tips don’t swing as wildly, and that helps the whole look stay sharp.
Beads at the ends only are enough here. Too many bead rows on a bob can make the style feel top-heavy, especially if the braid ends hit just below the chin. I like this length with a blunt line and one simple bead color—clear, smoke, or warm brown. The point is to keep the shape clean and the movement controlled.
13. Zigzag-Part Braids with Metallic Beads
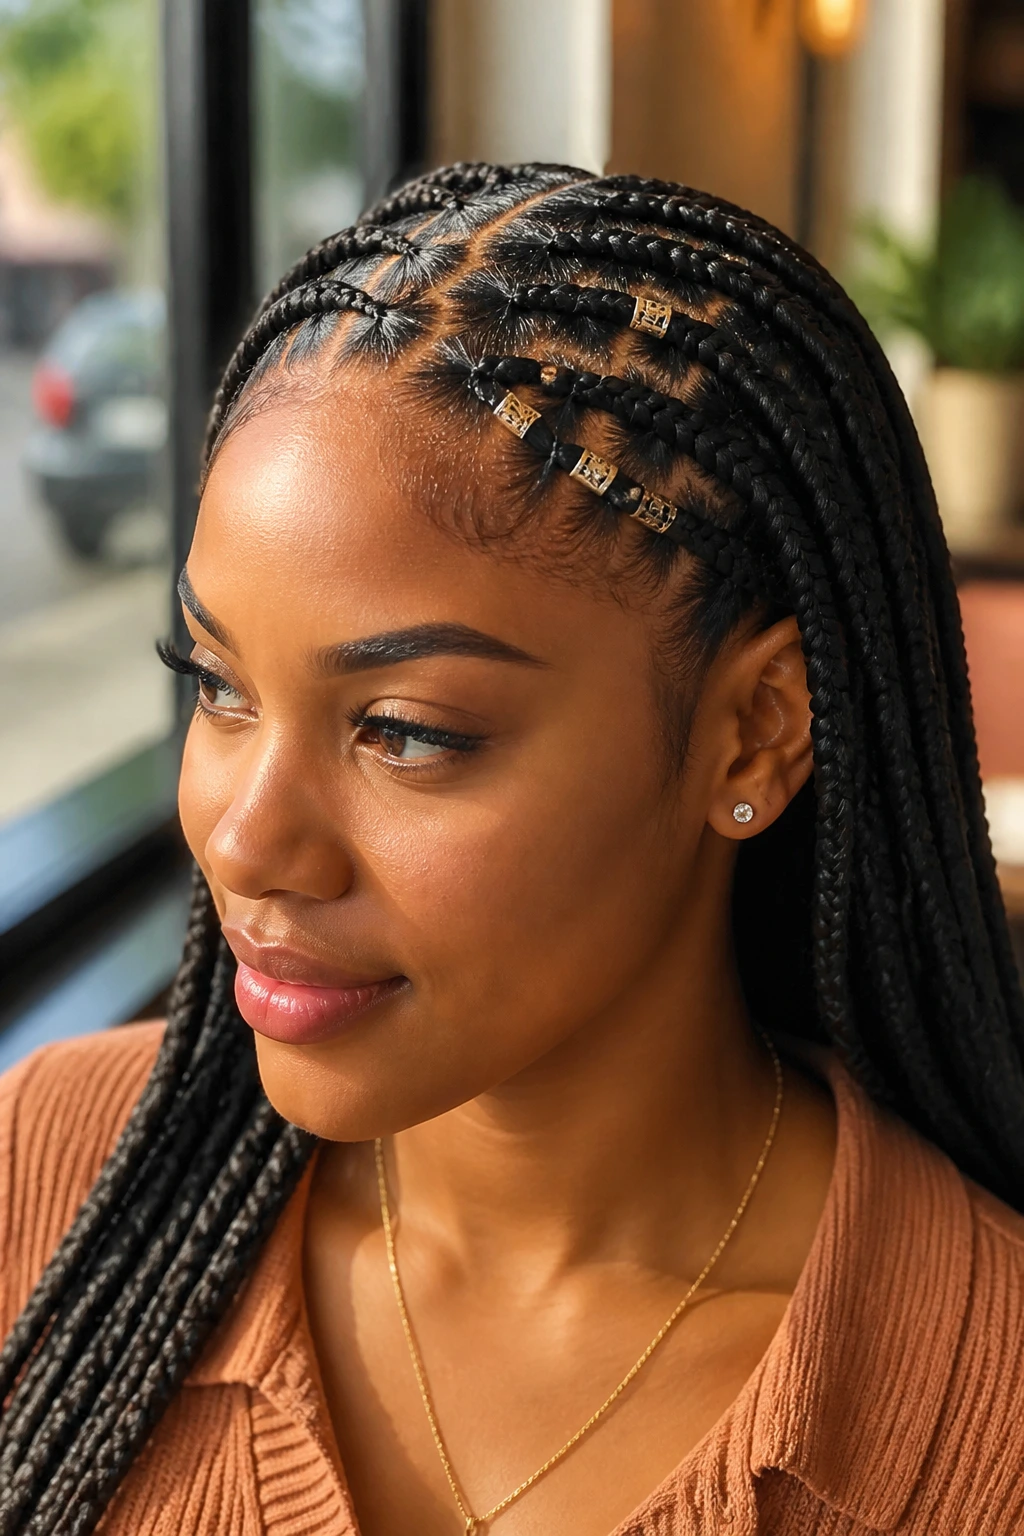
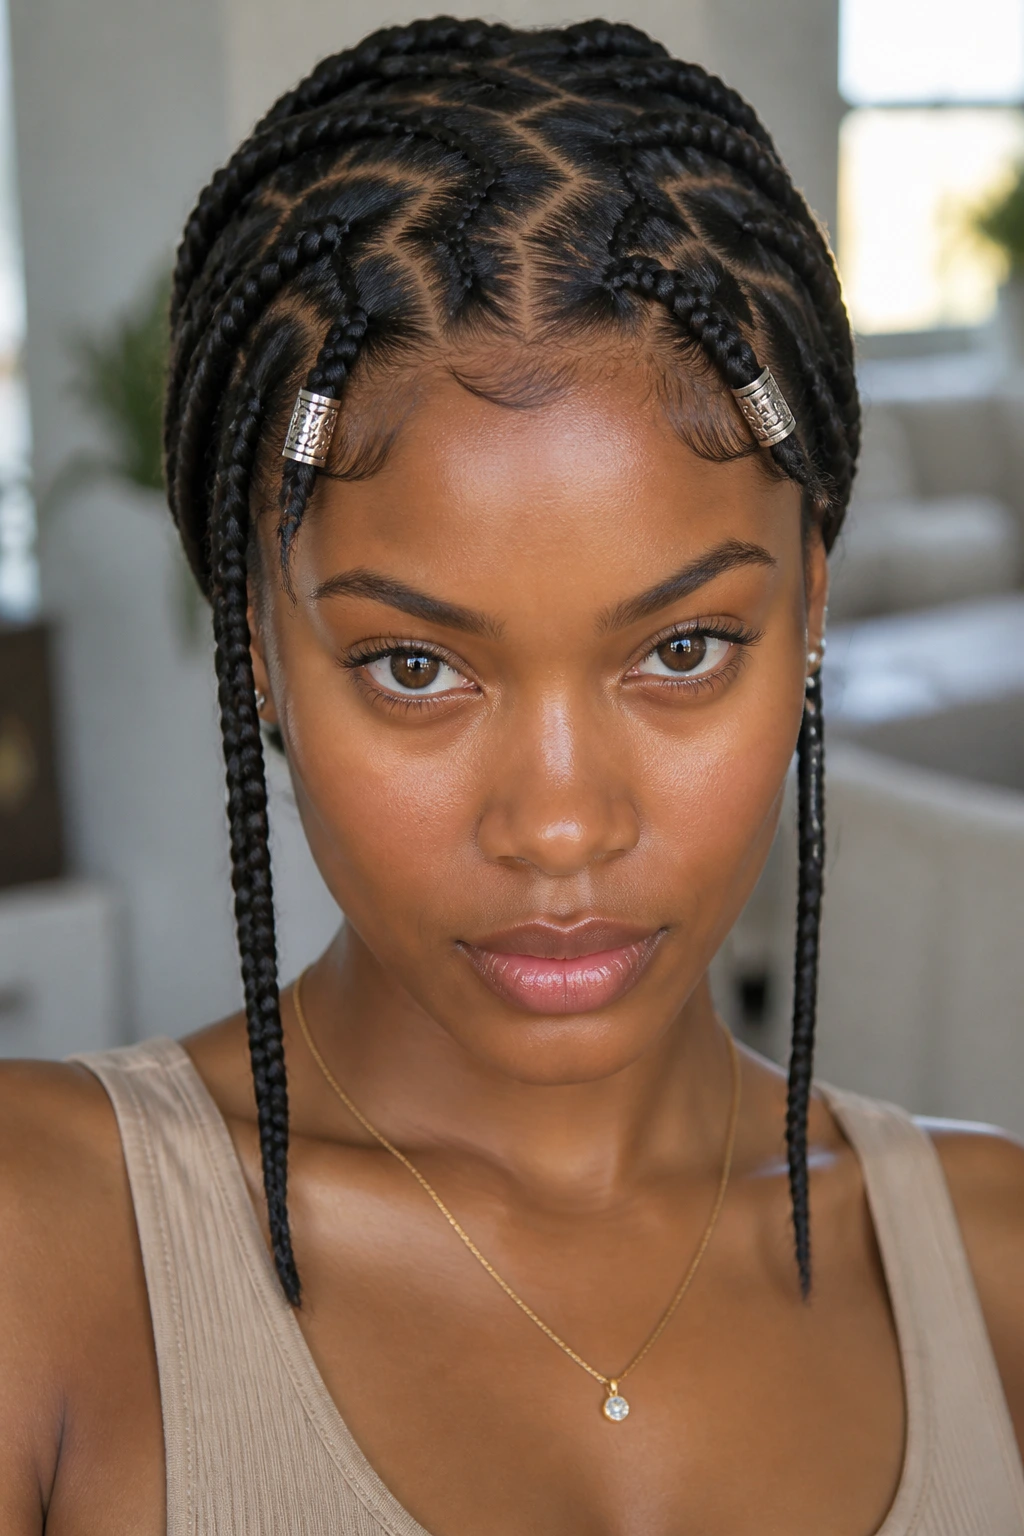
Zigzag parts give the scalp pattern a little bite. They’re graphic, and that means the bead choice should stay lean if you want the style to read polished instead of chaotic.
Metallic beads fit this look when they are used like highlights, not like confetti. A few gold or bronze pieces near the front rows are enough. If you use too many shiny accents, the parting gets lost and the braid set starts looking noisy from a distance. The zigzag should be the star. Let it be.
14. Goddess Tribal Braids with Controlled Curls
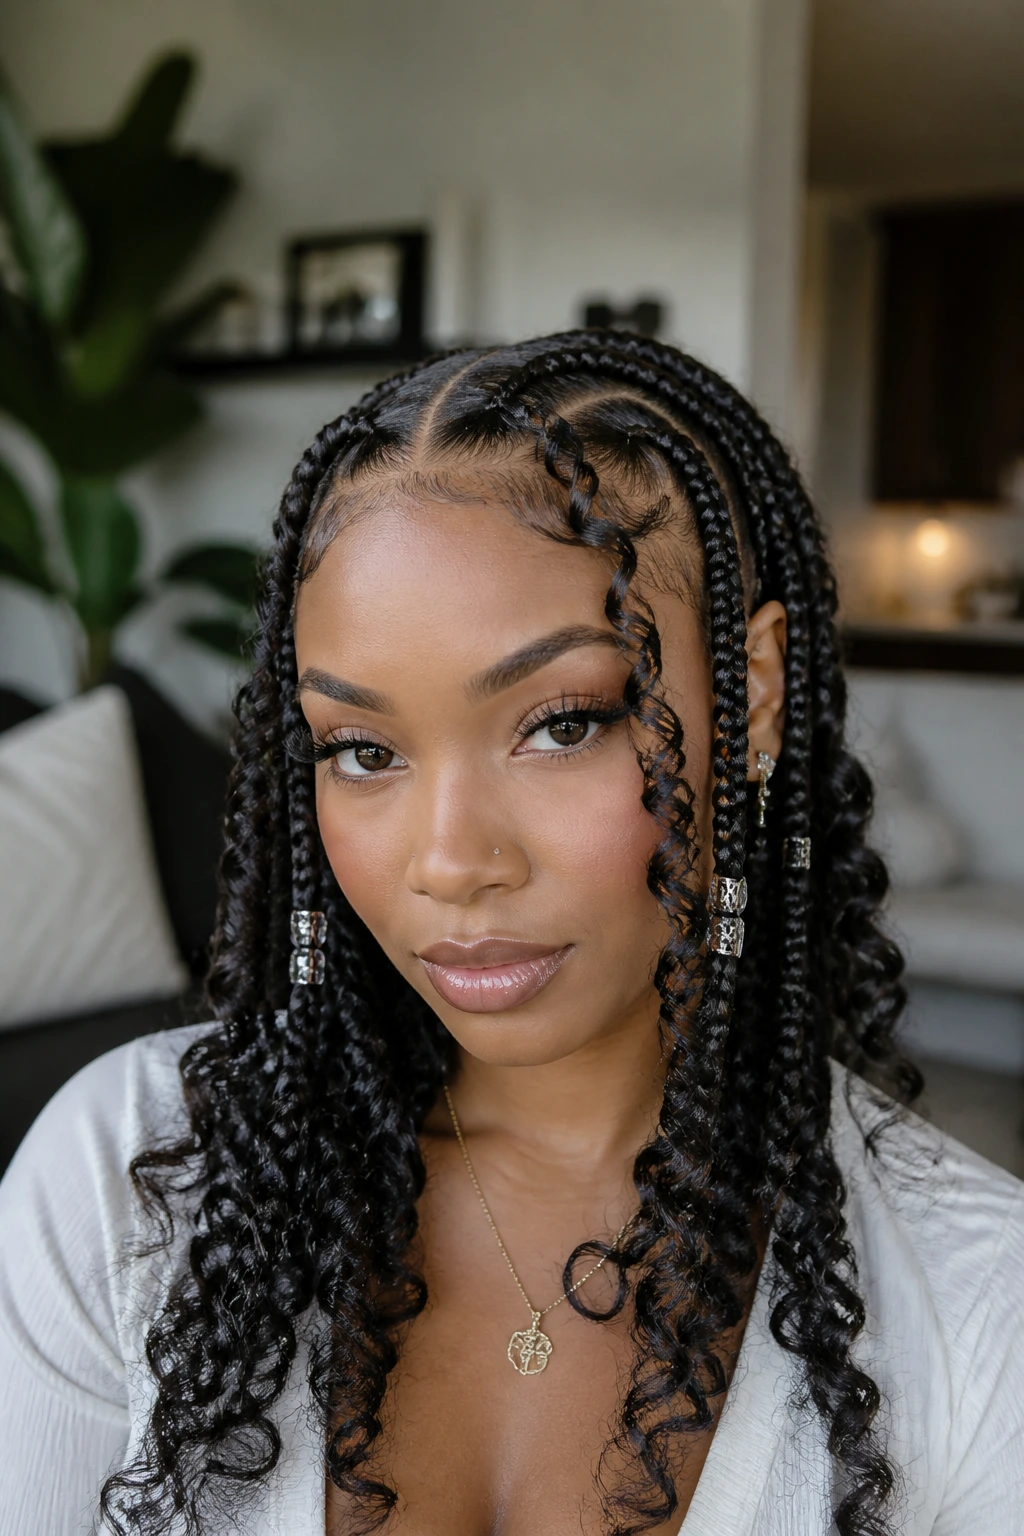
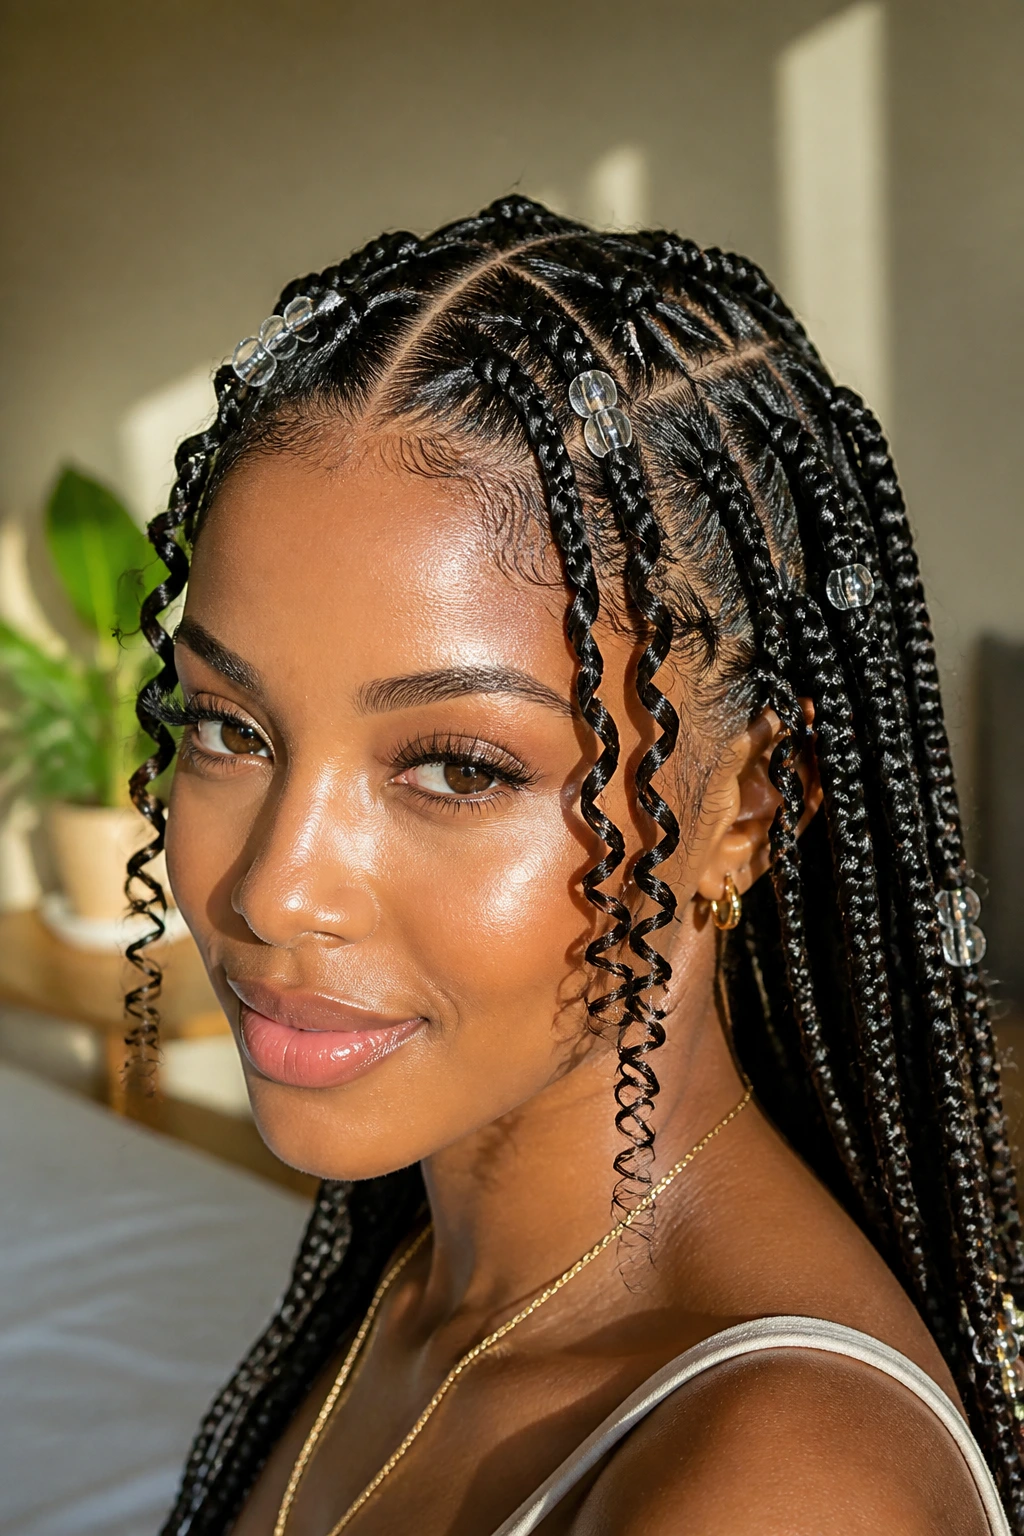
Goddess braids with loose curls can look gorgeous, but only when the curls are shaped and placed with some discipline. Random curl frizz at the ends makes the whole style look tired by midday.
Keep the braided sections neat and let the curls fall in planned spots—usually around the face and at the lower half of the length. Beads work best on the braided rows, not inside the curls, because that keeps the style from becoming too busy. A single bead family in clear or soft gold finishes the look better than a mix of three.
15. High Ponytail Tribal Braids
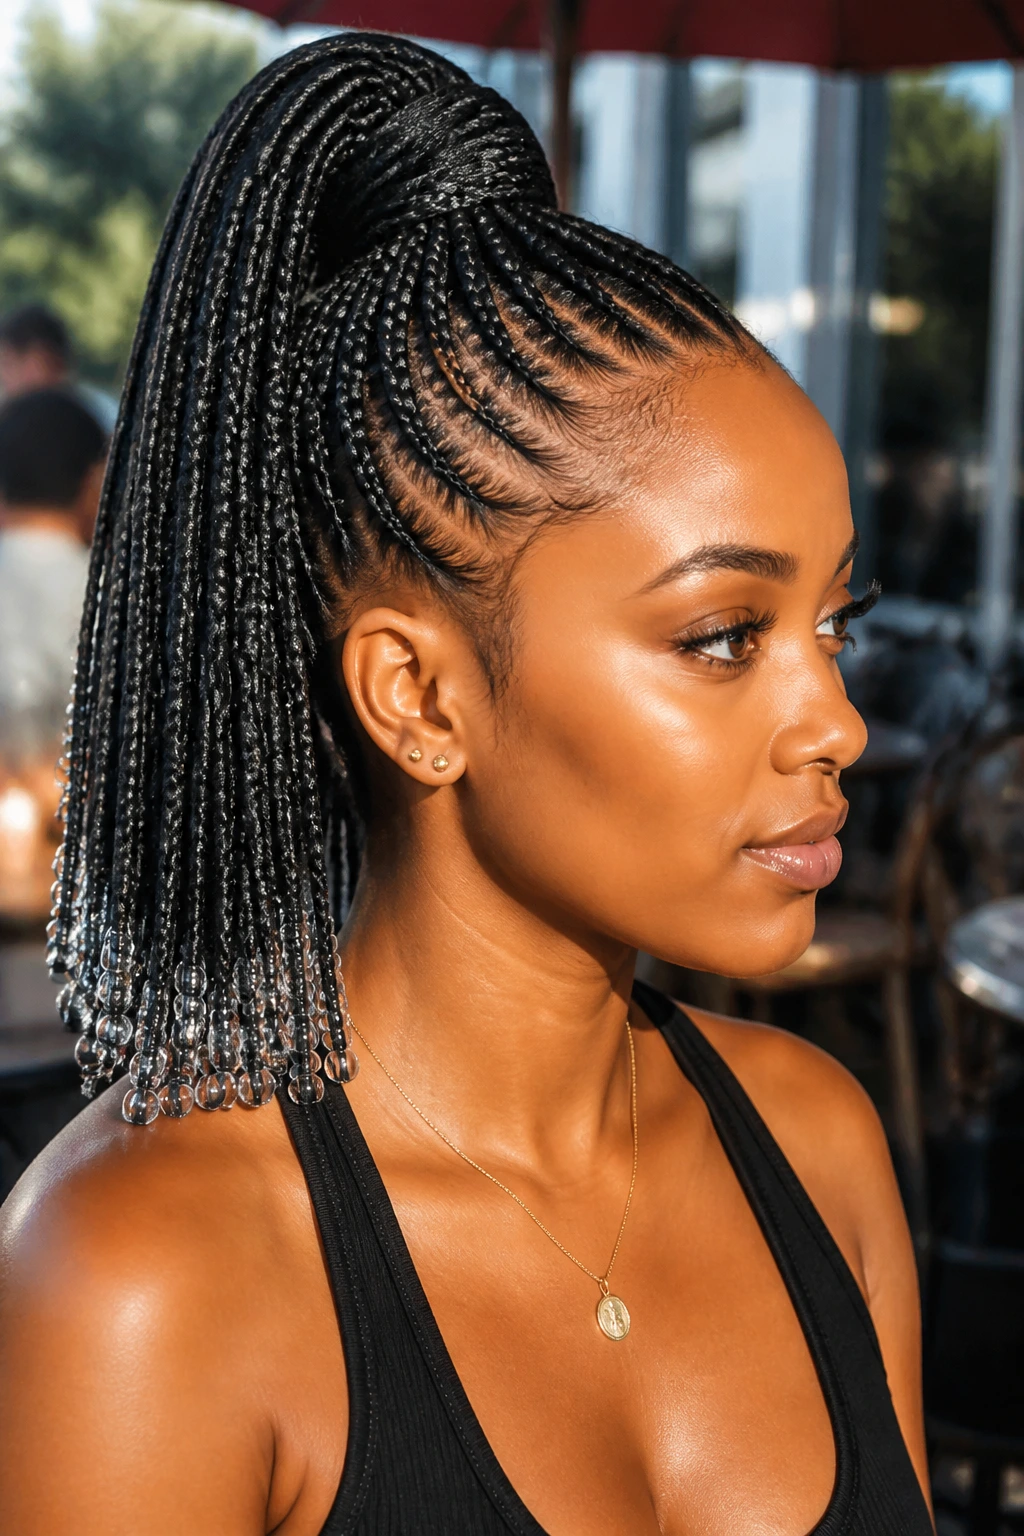
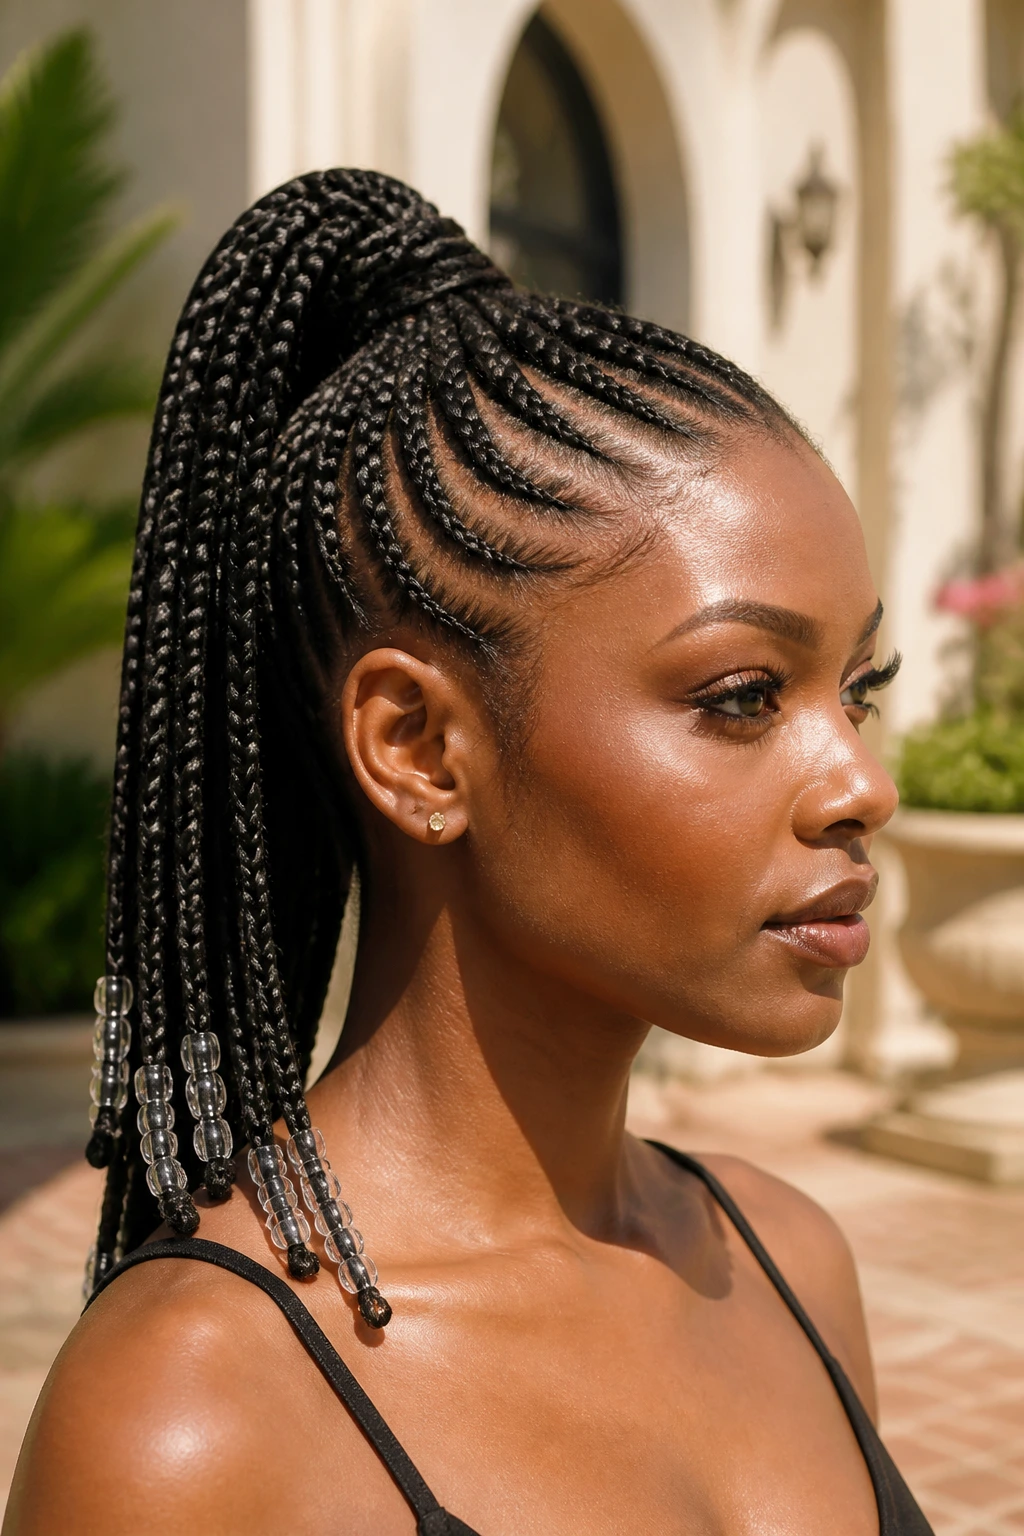
A high ponytail lifts the face in a way few other braid styles can. It also changes how the beads move; they bounce upward instead of hanging low, which makes the style feel more energetic and less formal.
This version looks best when the braids are pulled tight enough to sit cleanly at the crown but not so tight that the edges get angry. The bead ends can stay simple—one consistent size across the ponytail is cleaner than a random mix. If you want a sharper finish, wrap one braid around the ponytail base so the elastic disappears.
16. Waist-Length Braids with Even Bead Spacing
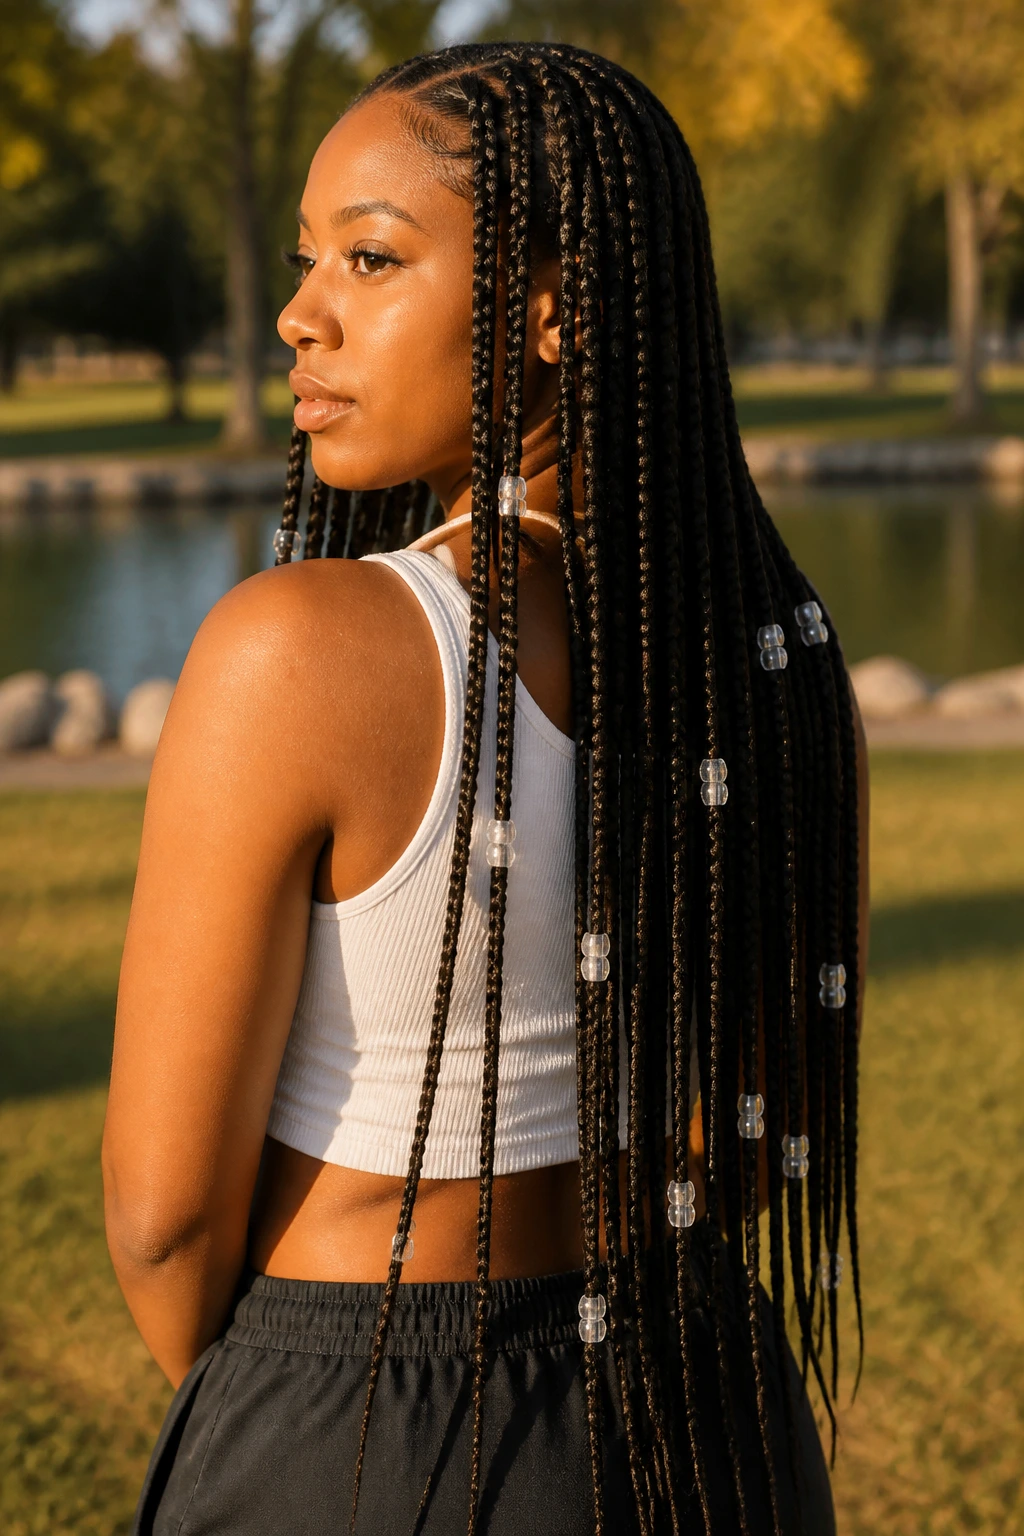
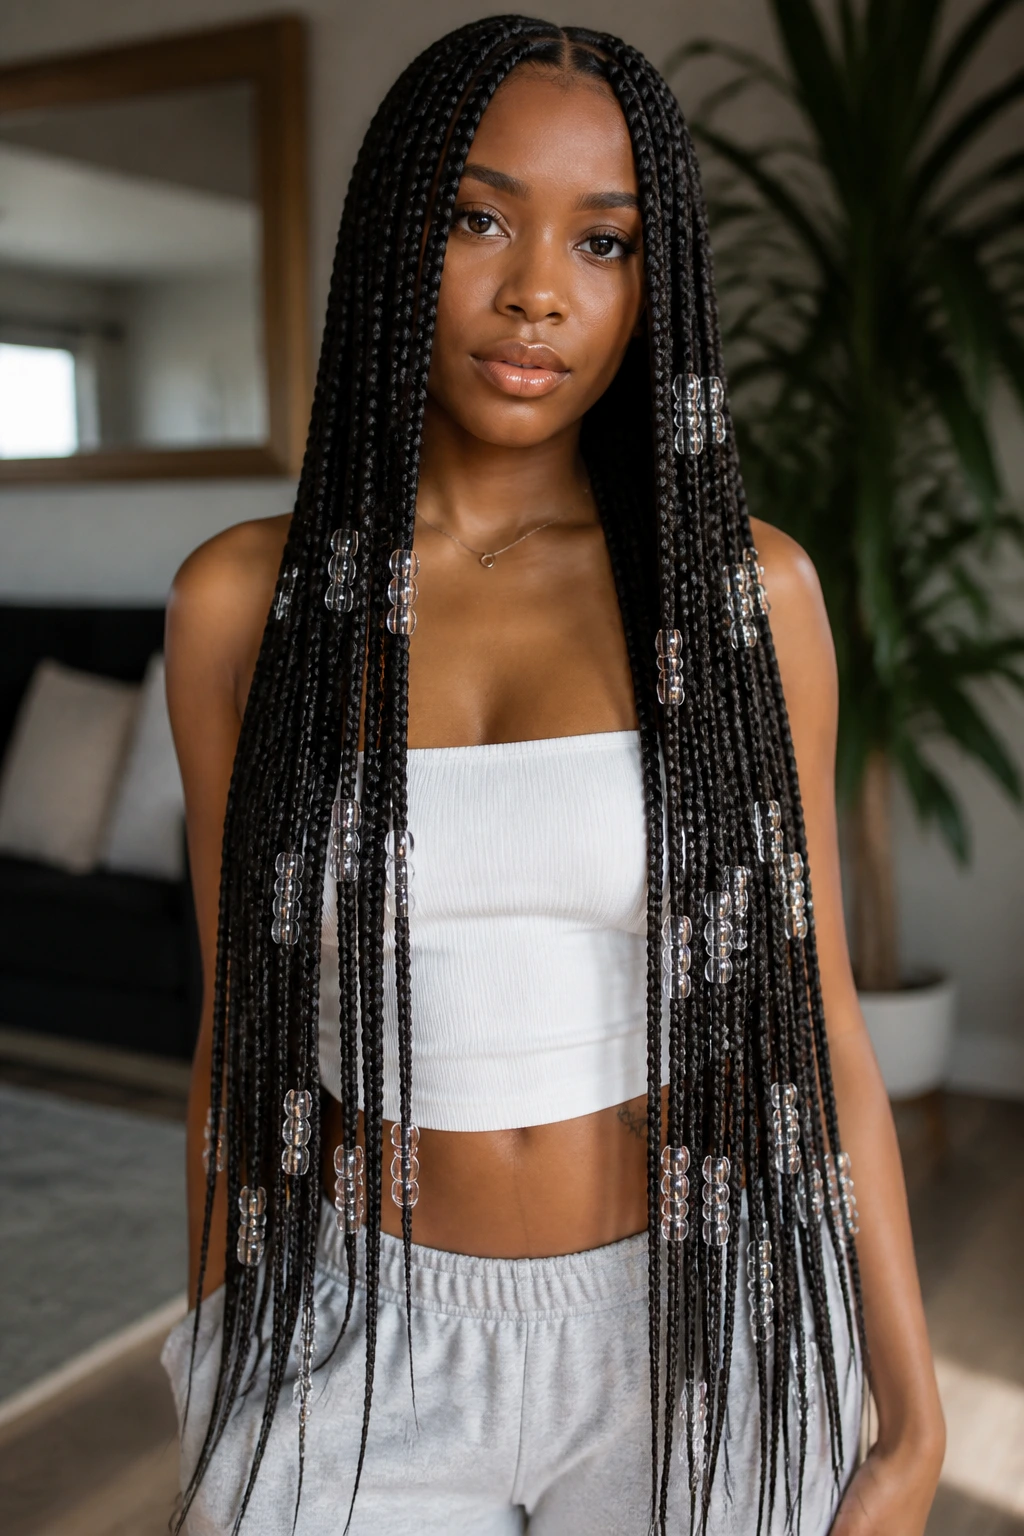
Long braids are where spacing matters most. If the beads are placed at random intervals, the style reads messy. If they repeat in even clusters, the whole look becomes calm and rhythmic.
Try bead clusters every 6 to 8 inches on the lower half of the braids, keeping the upper portion cleaner. That gives the hair room to move while still showing the beadwork in a way that feels intentional. Waist-length braids already create drama on their own; the bead spacing should support that, not compete with it. Long hair is a lot of visual territory. Use it wisely.
17. Minimal Bead Accent Braids
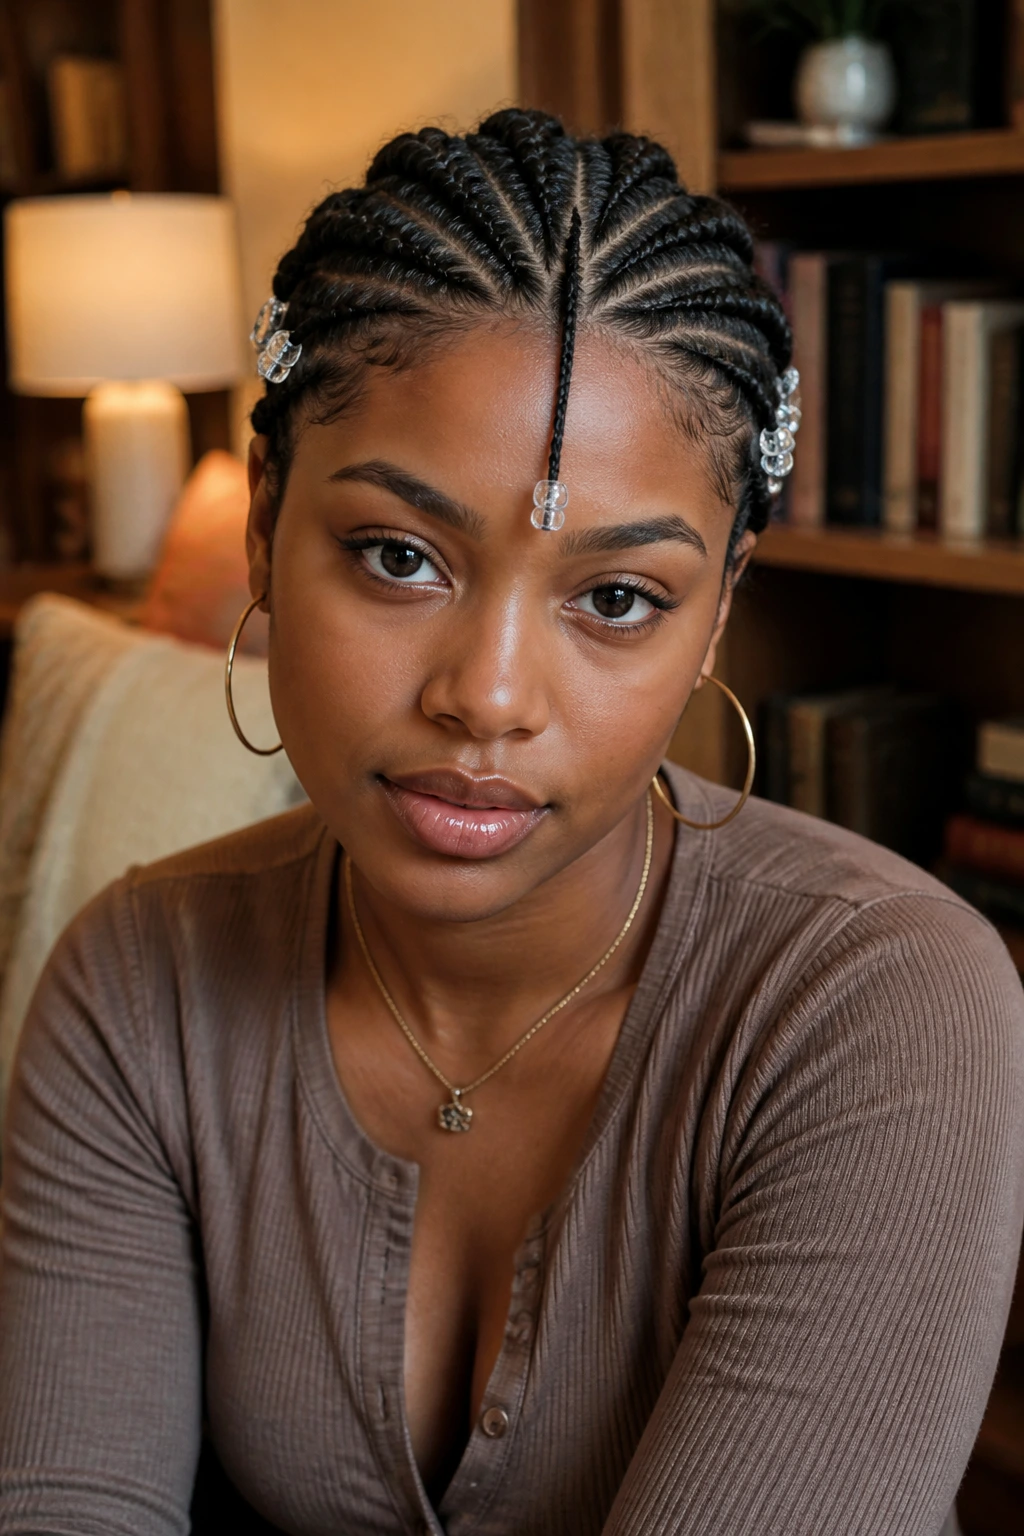
Minimal bead accents are for people who want the finish, not the fuss. One bead at the end of a front braid, or a single accent row on each side, can be enough to make the whole style feel complete.
This is where restraint pays off. Clear or matte beads are the safest choice because they keep the eye on the braid pattern itself. If you want a polished look for daily wear, this is the version I’d reach for first. It’s quiet, tidy, and a little smarter than a fully loaded set.
18. Bronze and Red-Toned Braids with Warm Beads
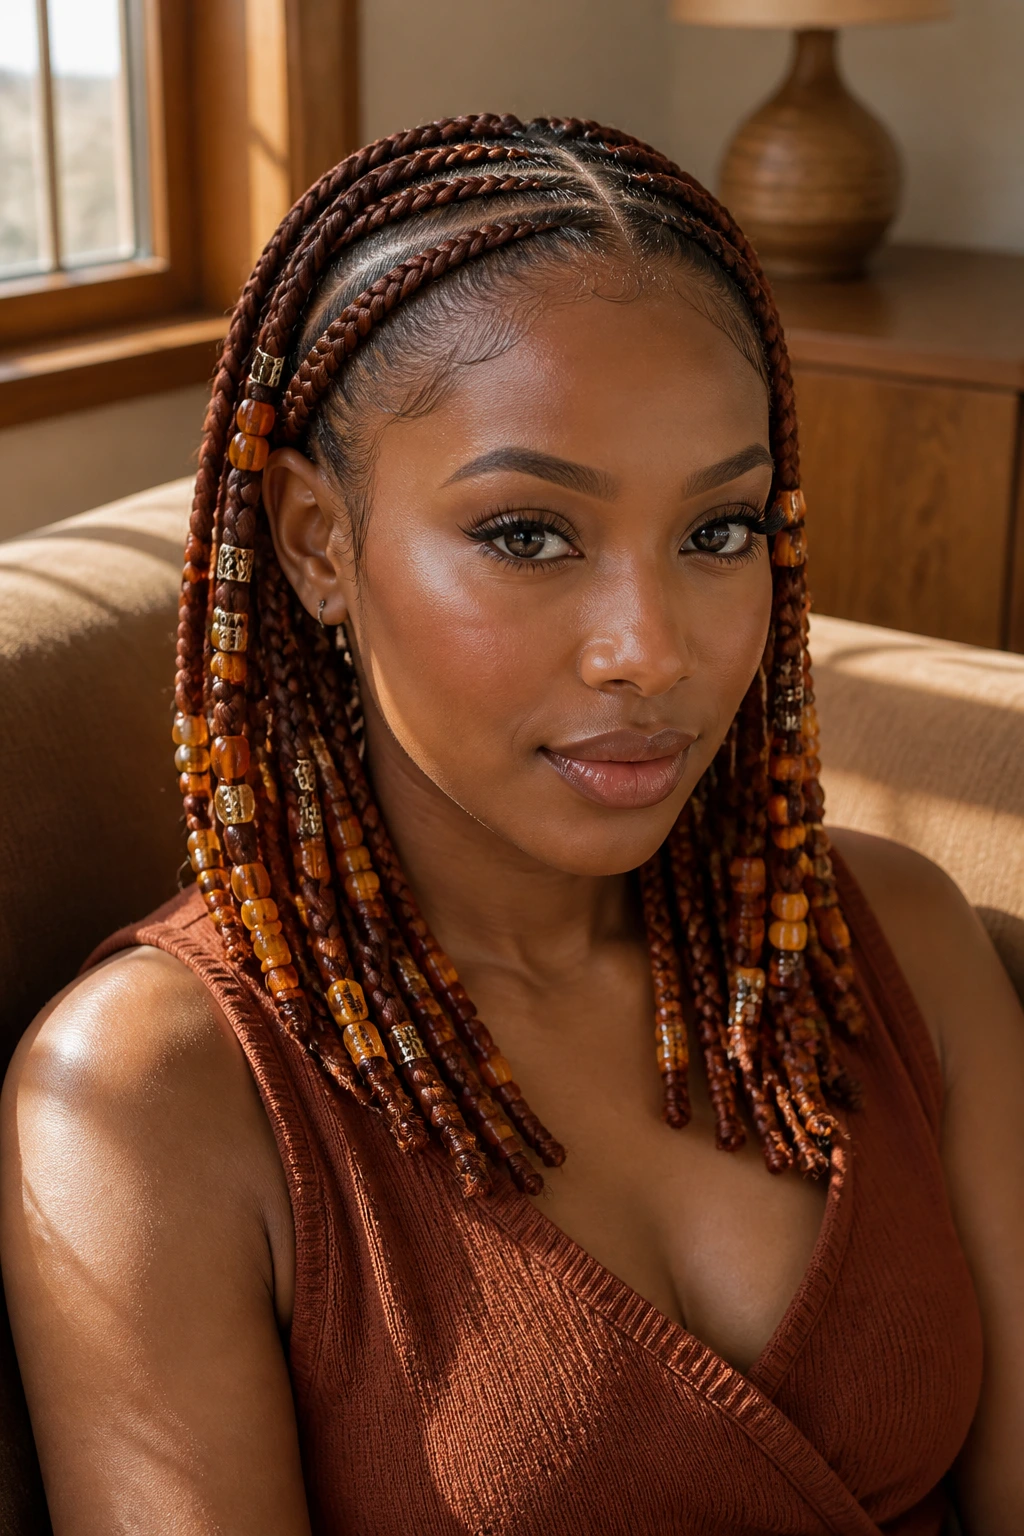
Warm braid colors need warm beads. That’s the whole equation. Bronze, copper, amber, and deep red tones create a richer finish than cool plastic shine when the hair color already leans warm.
A polished look here comes from repeating the same warm family across the set. A bronze braid with amber bead accents looks finished; bronze plus silver plus clear plus black starts to feel like a drawer of leftovers. If your skin tone and wardrobe already run warm, this version tends to sit especially well. The color story does the quiet work.
19. Wrapped-Ends Braids with Bead Charms
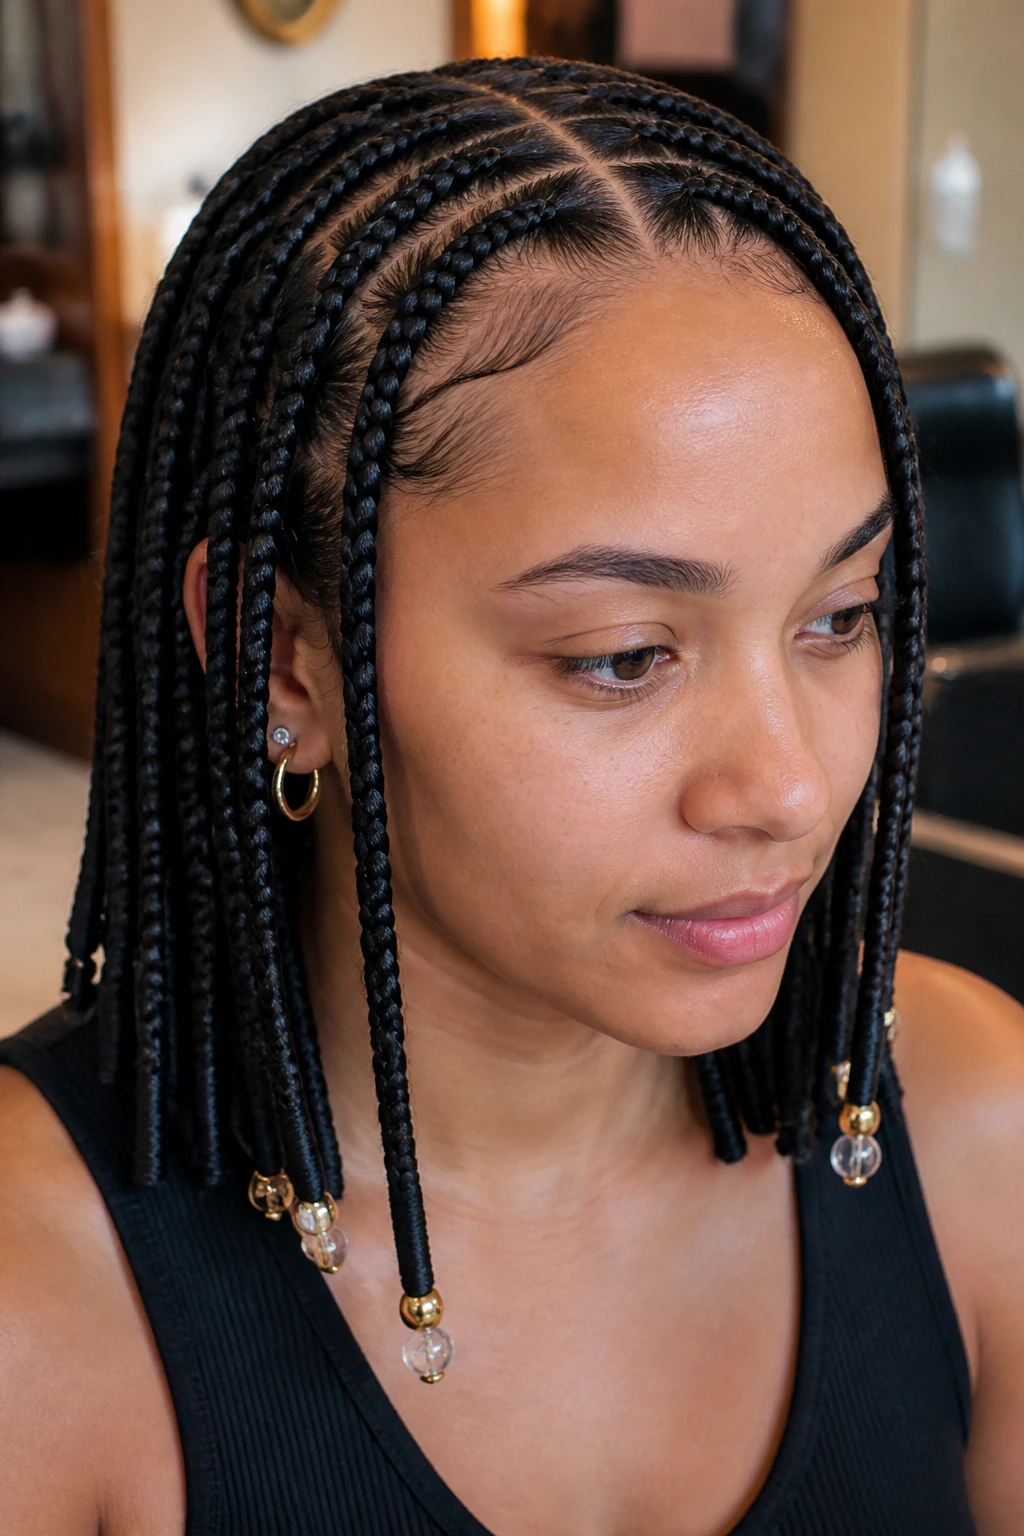
Wrapped ends give the braids a handmade feel, and bead charms add just enough movement to keep that feeling from going flat. I like this style when the goal is polished but not sterile.
Use thread, string, or thin braid wrap in one color family, then attach a single bead charm or two near the tips. The key is keeping the wraps tight and smooth so they don’t puff up after a day of wear. If the wraps are messy, the beads can’t save them. They just make the mess more obvious.
20. Kids’ Tribal Braids with Soft Beads
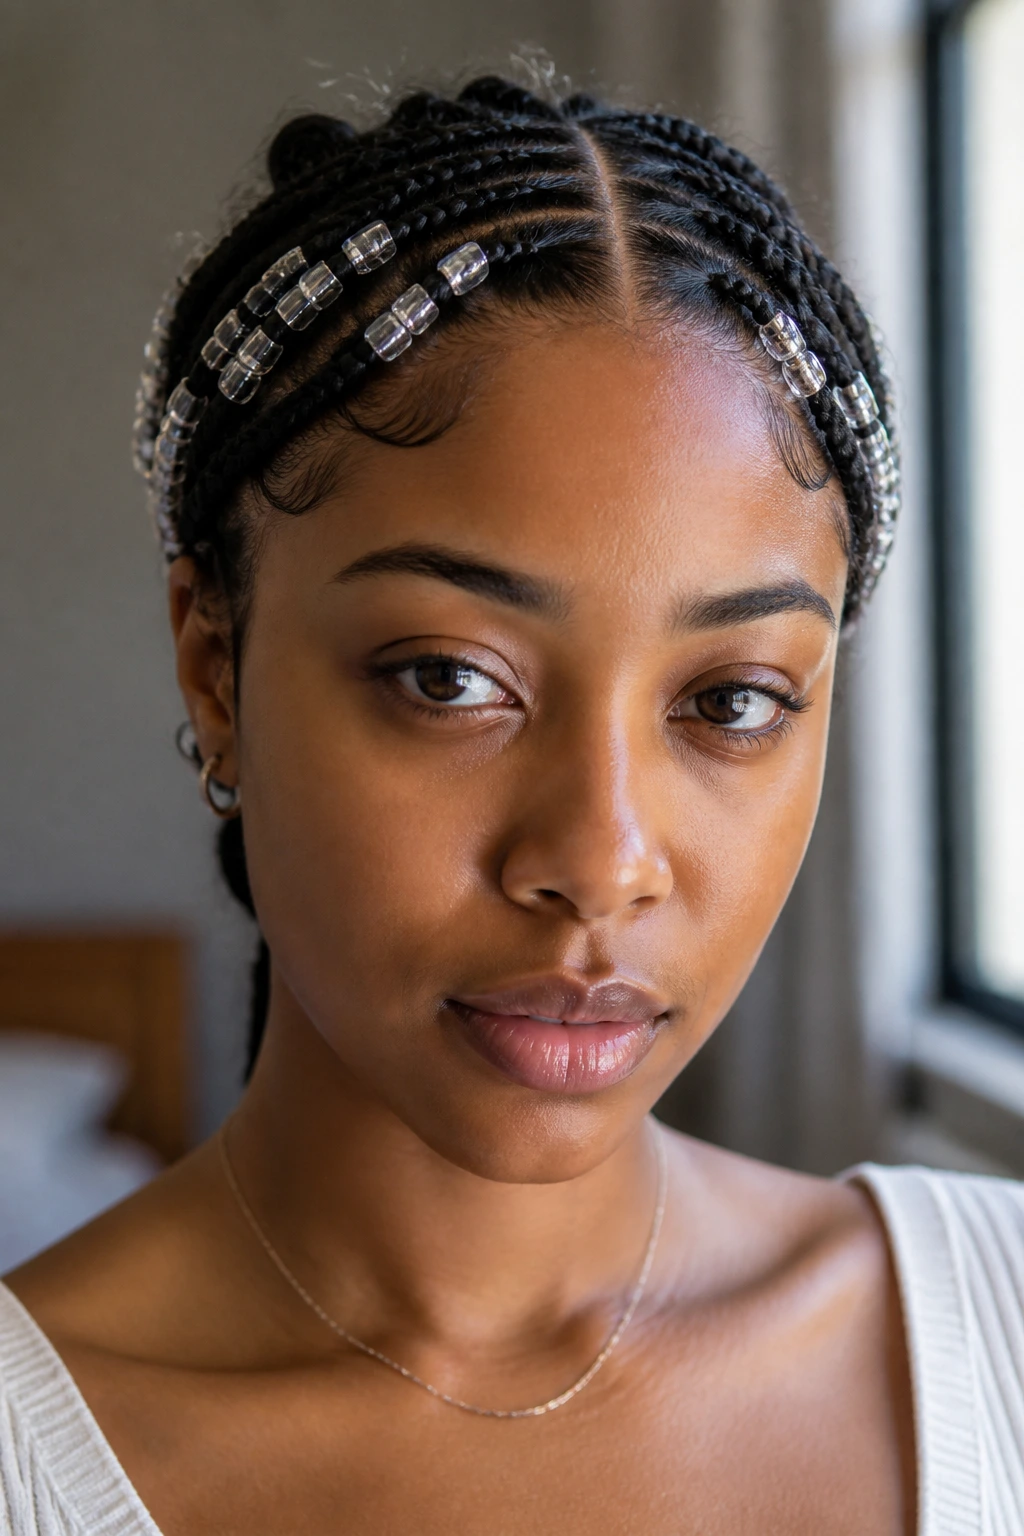
Kids’ braids need two things above all else: comfort and simple maintenance. Soft, rounded beads do both jobs better than hard, heavy pieces that slap against the scalp.
Keep the sections small enough to lay flat but not so tight that the hairline feels stressed. Lightweight acrylic beads with rubber stoppers help them stay put without pulling down the ends. A polished look for kids does not require fancy materials. It needs neat parting, low tension, and a bead choice that won’t be annoying by lunchtime.
21. Office-Sleek Micro Tribal Braids
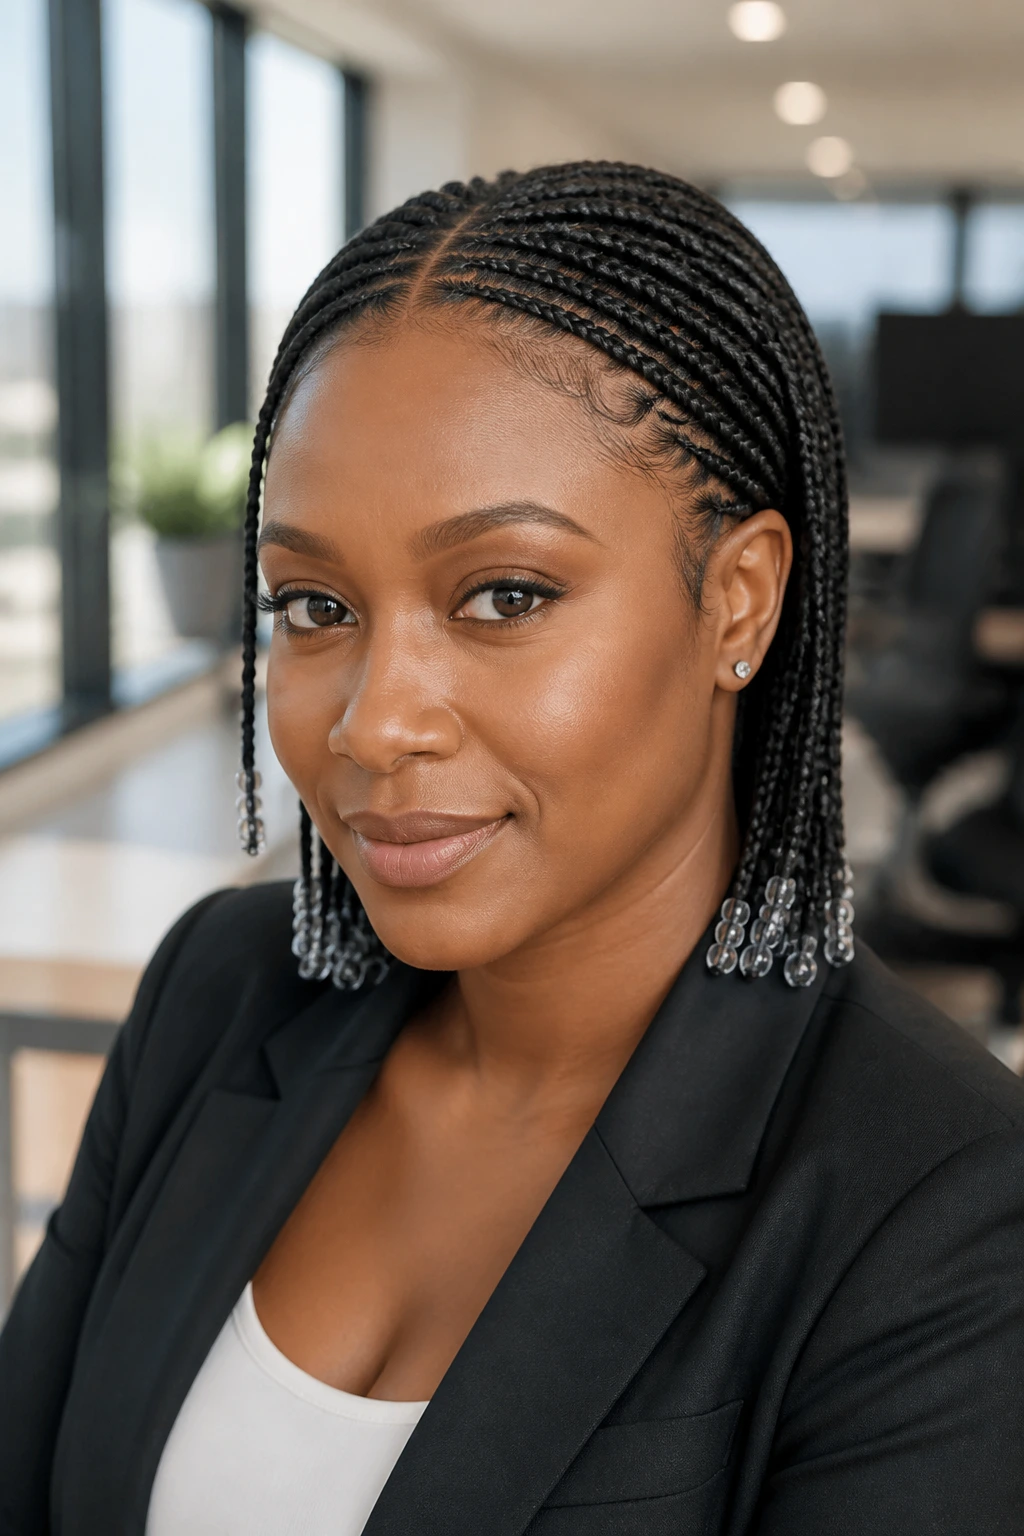
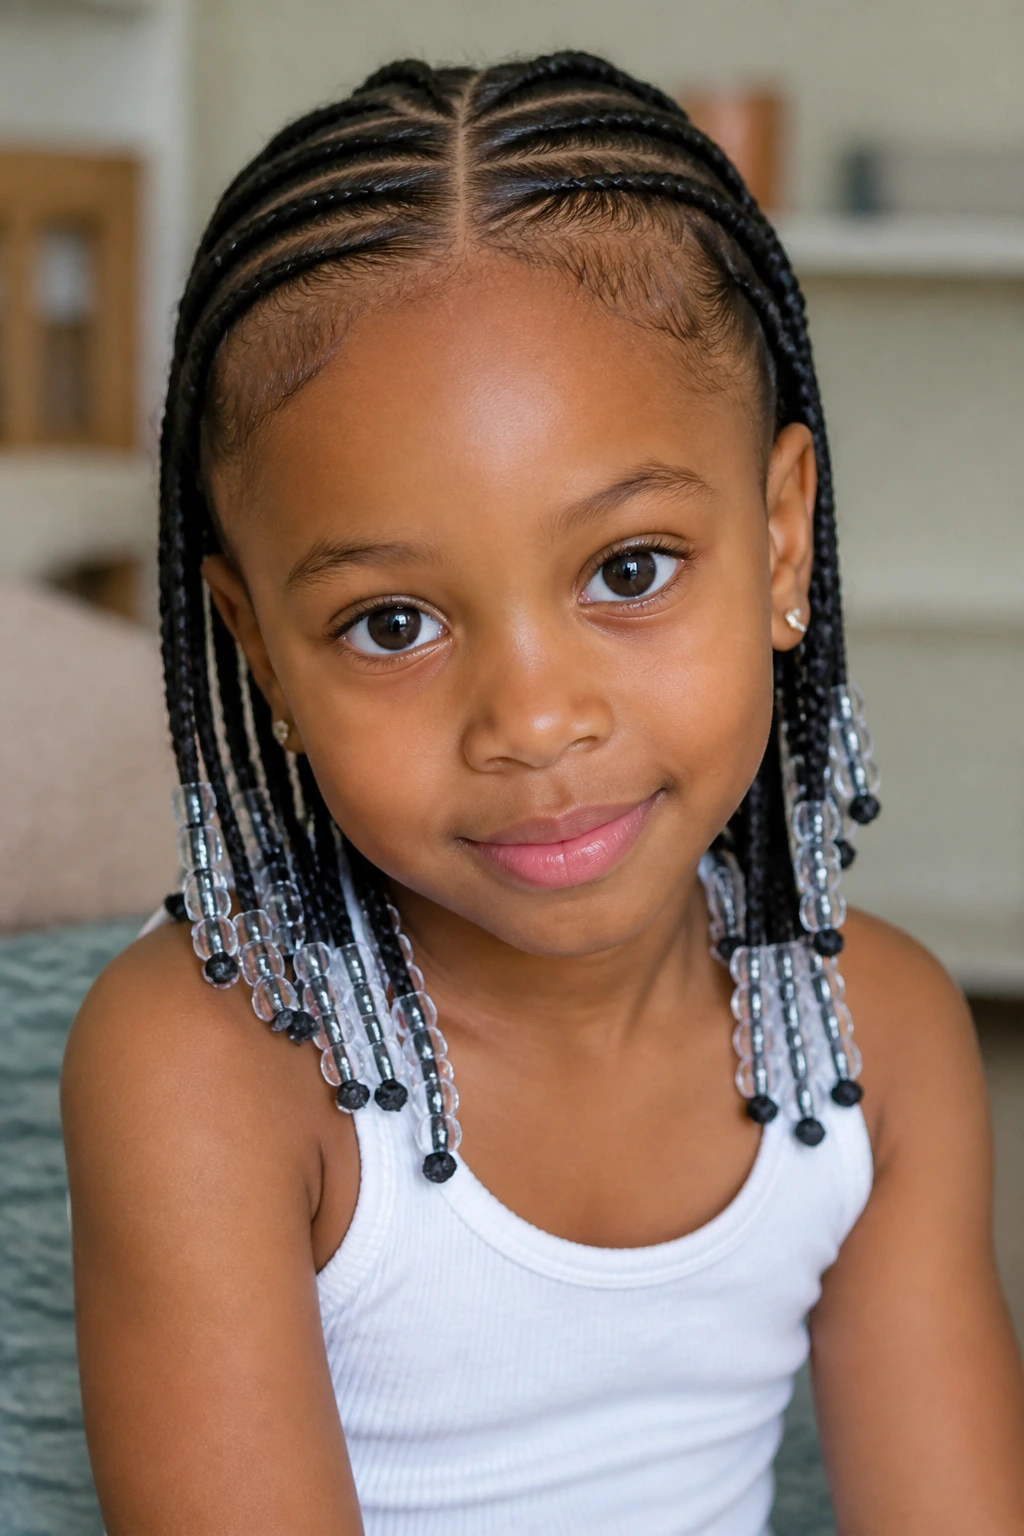
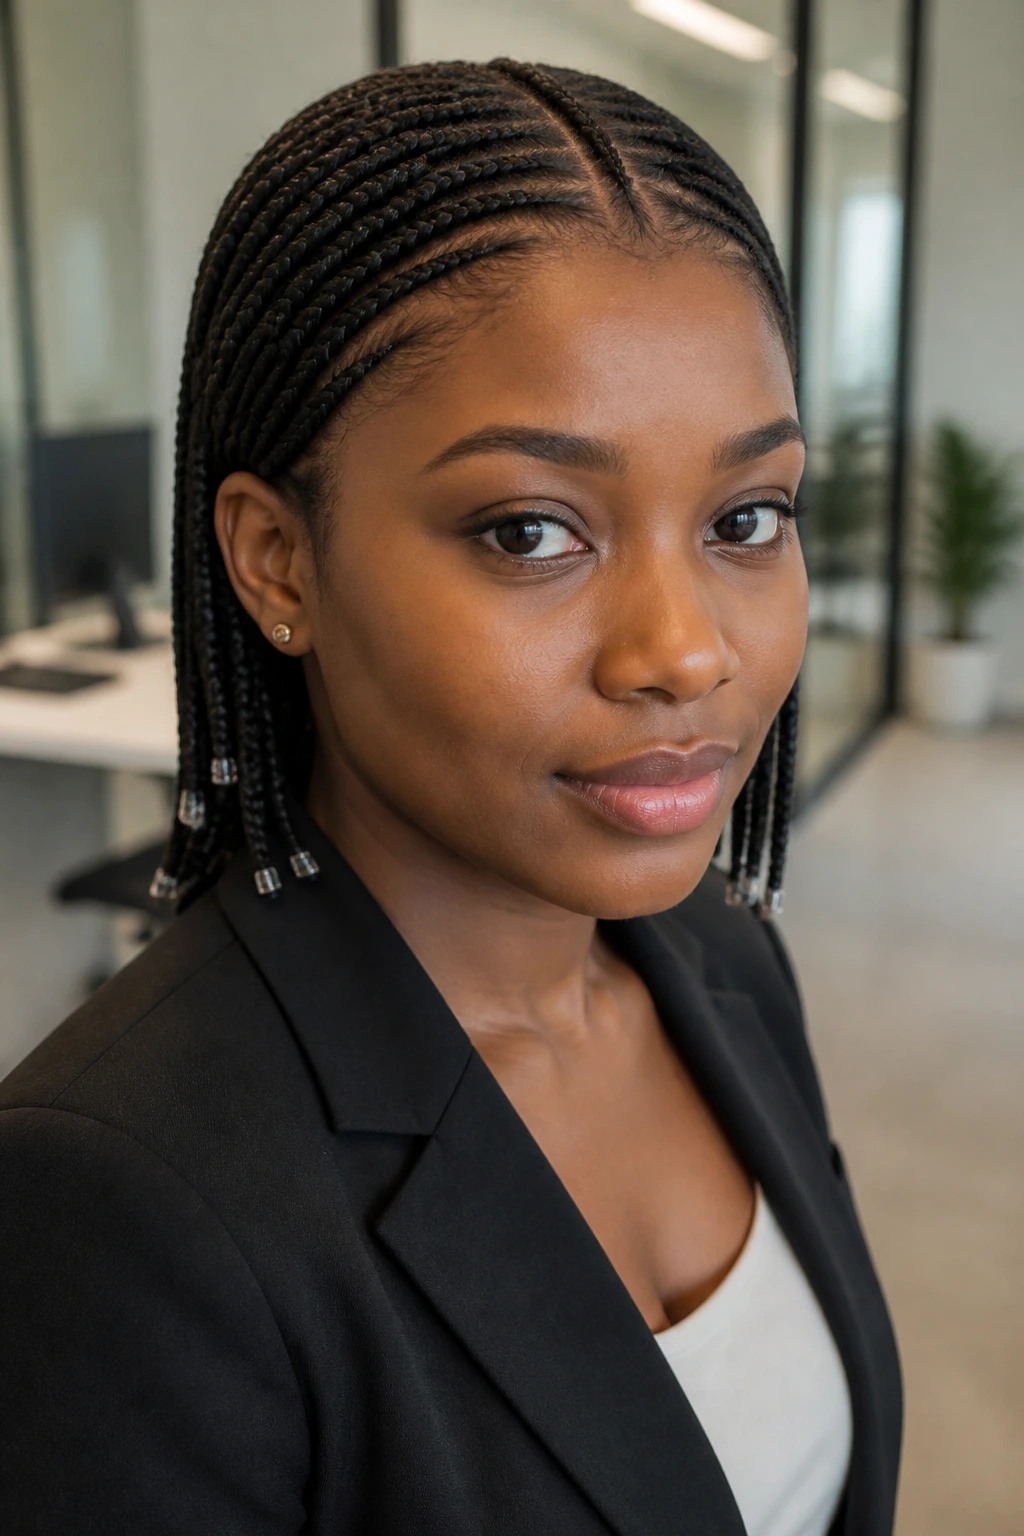
Micro braids can look incredibly refined when the parts are tiny and the beadwork stays minimal. This is the version that reads most like a finish statement rather than a loud accessory.
Use narrow rows, small clear or matte beads, and a low-shine product finish so the scalp line stays crisp. I’d avoid oversized metal pieces here; they pull attention away from the structure and can make the set look busier than it is. If you want a braid style that survives a long workday without needing constant fussing, this is the clean one.
22. Event-Ready Tribal Braids with a Glossy Finish
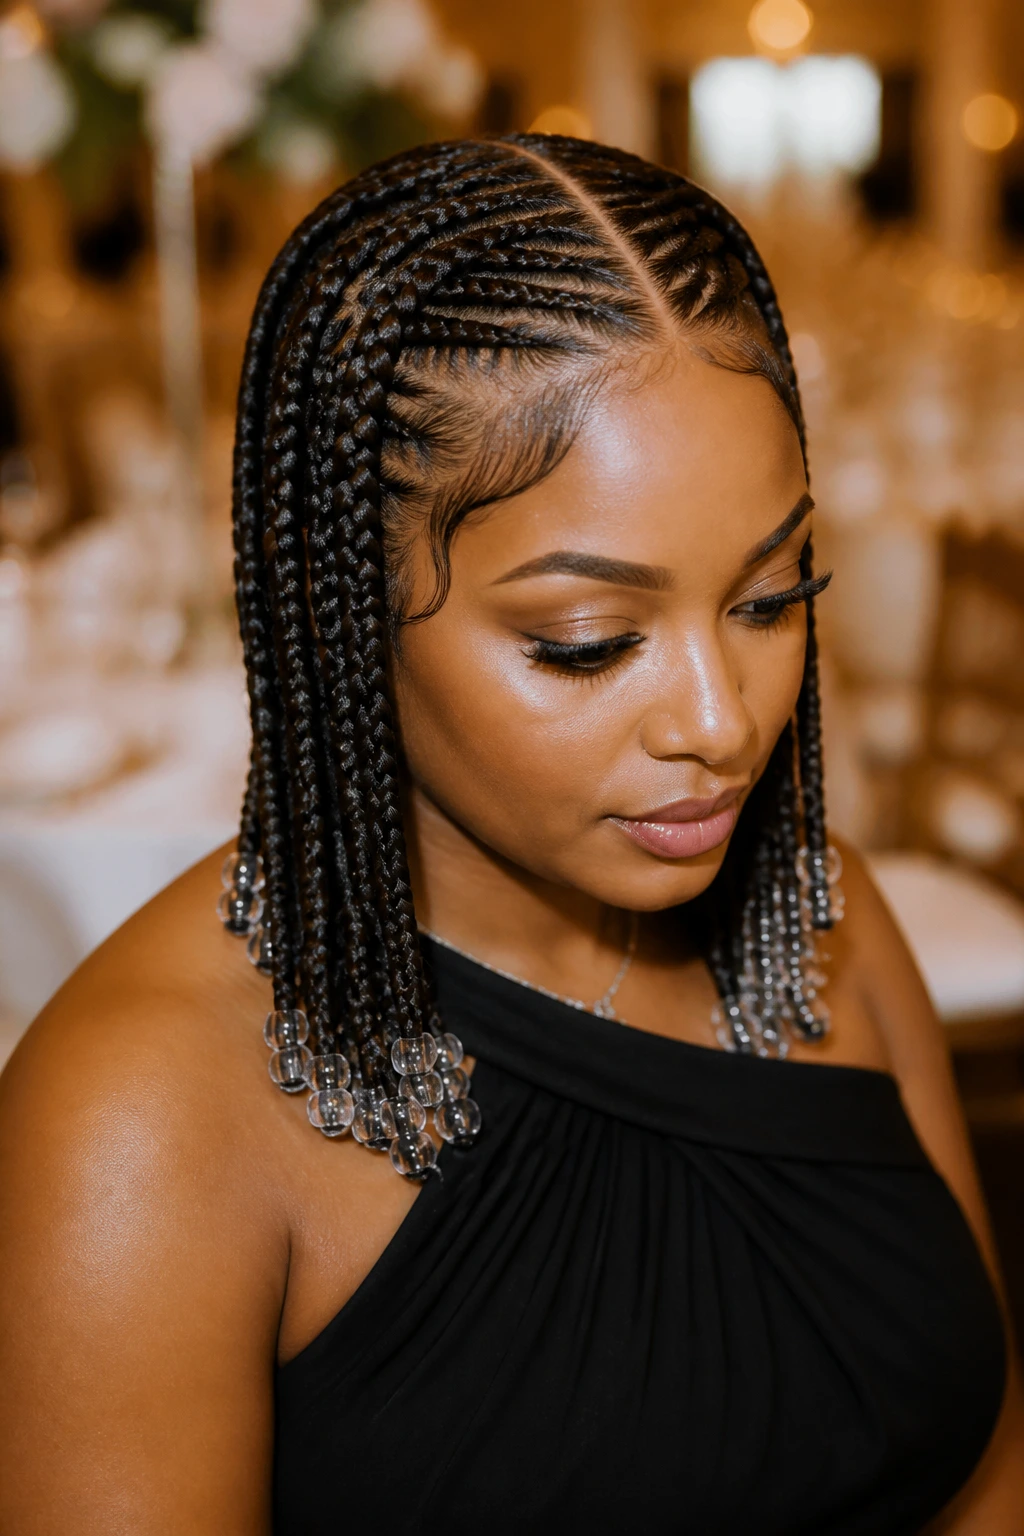
A polished event style needs a strong line, smooth roots, and beadwork that repeats without drifting off script. Middle part, side part, or a shaped crown all work; what matters is that the final silhouette looks deliberate from every angle.
A light mousse set, clean parting, and a bead palette of one or two tones will carry the look better than any extra decoration. Clear, gold, or smoked beads are the safest bet for photos because they catch light without turning noisy. If I had to choose one rule here, it would be this: finish the braids first, then add the beads. Don’t let the beads try to rescue the braid work.
Why Beads Change the Shape of Tribal Braids
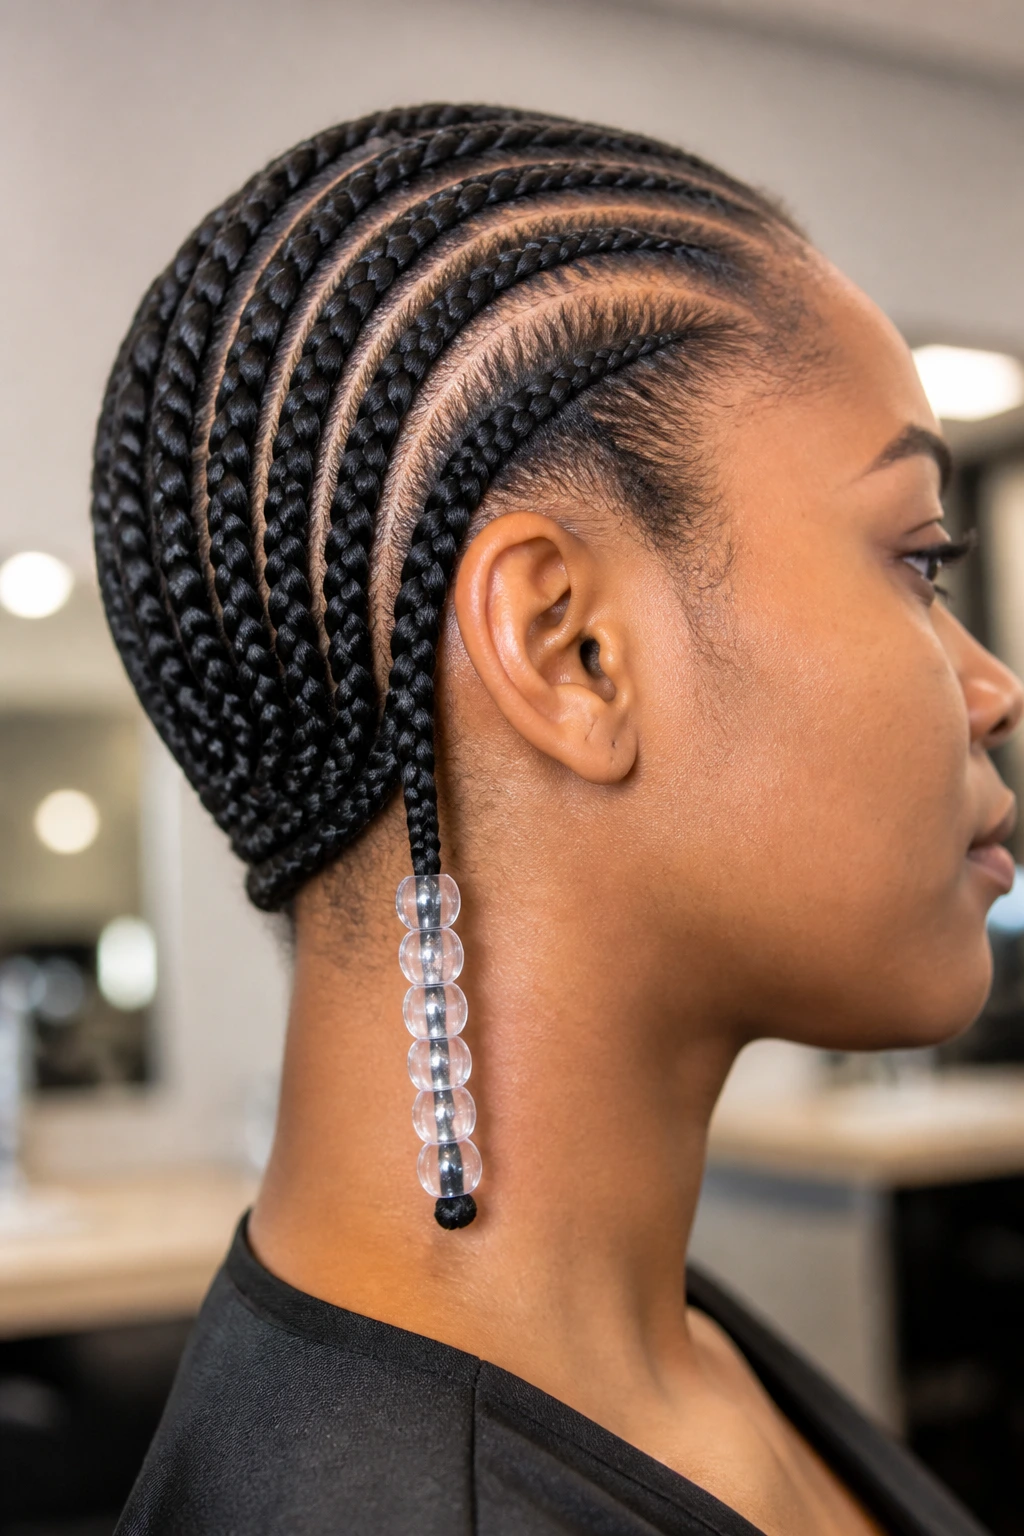
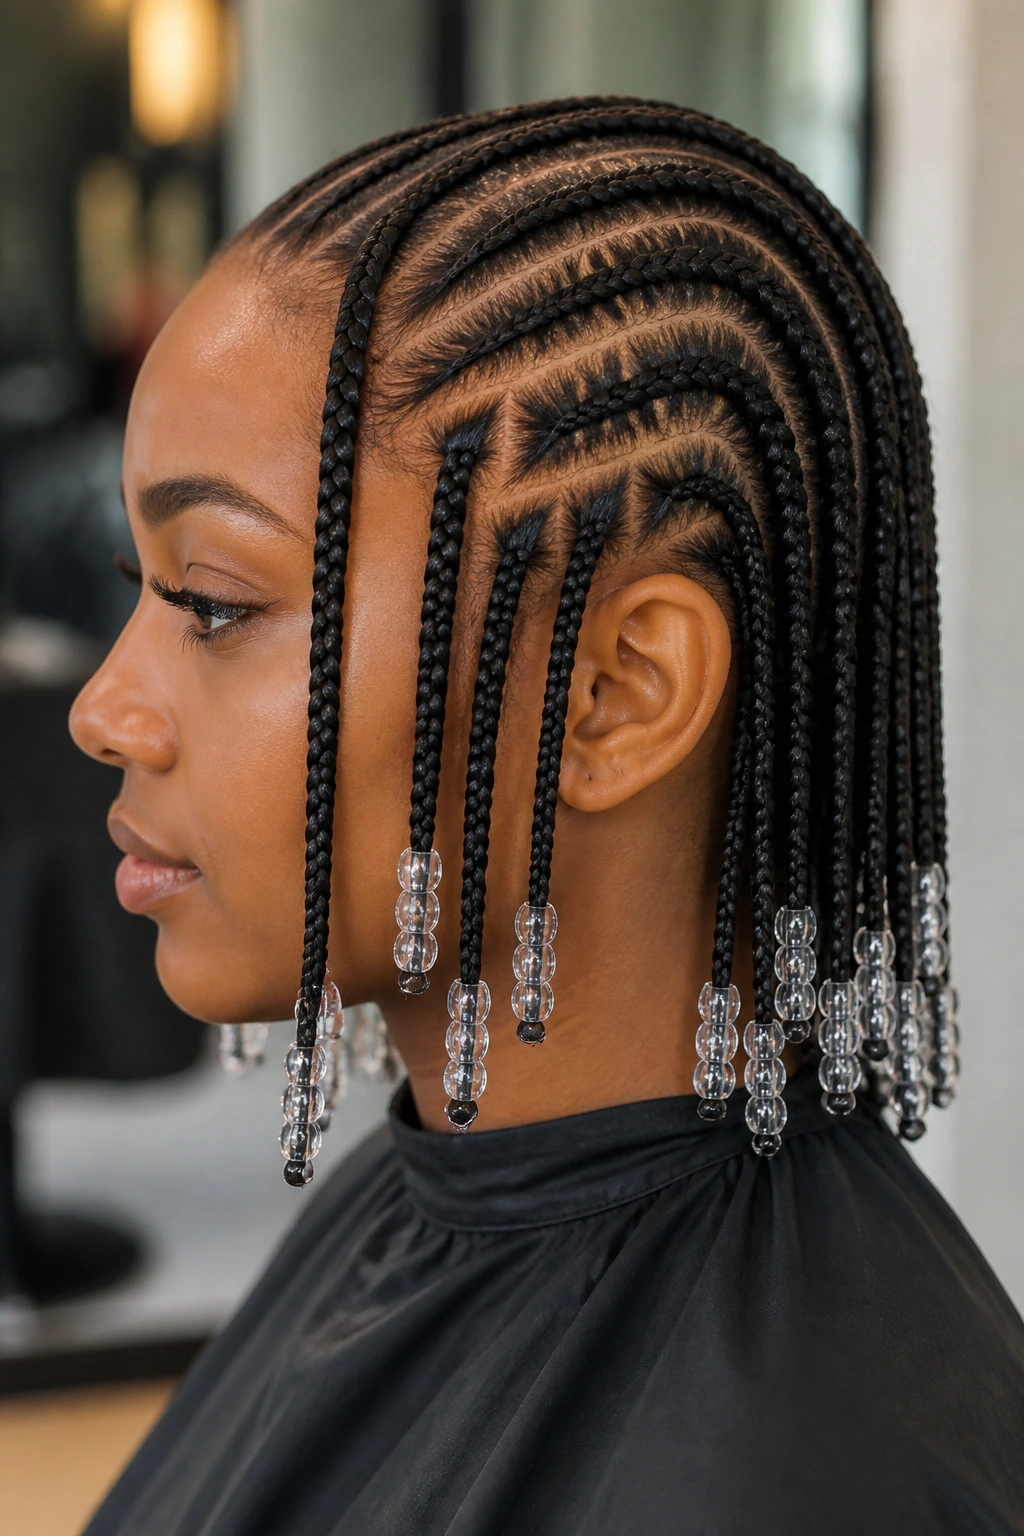
Beads do more than decorate the ends. They change where the eye stops, how the braid swings, and how heavy the whole style feels on the head. A braid without beads can look unfinished if the tips are loose or uneven; the right bead gives the line a clean ending.
Material matters more than most people think. Clear acrylic reads bright and neat, wood looks soft and matte, metal adds a sharper edge, and shell brings a little texture without too much shine. The polished versions of tribal braids usually keep one material family and repeat it on purpose. That repetition is what makes the style feel finished instead of random.
Weight is the sneaky part. Heavy beads on the front rows can tug at the hairline and make the braids droop by the end of the day. Put the weight lower, or reduce bead size near the temples, and the shape holds up better. Tiny change. Big payoff.
Essential Tools for Clean Parts and Neat Ends
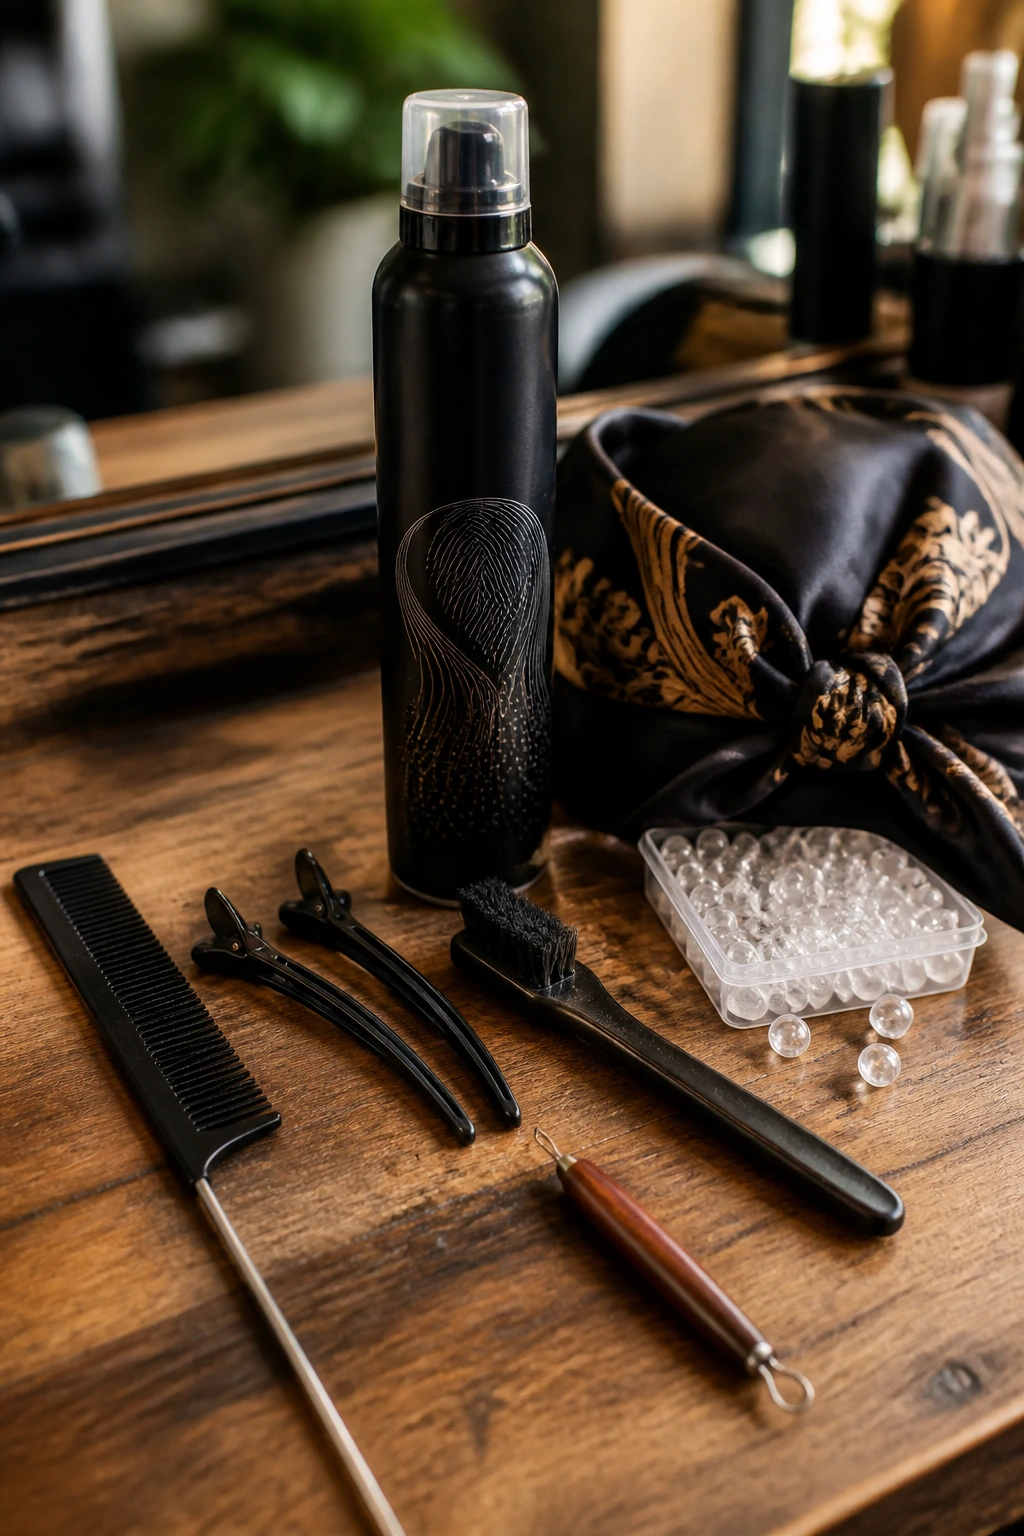
-
Rat-tail comb: The pointed tail is the fastest way to carve straight parts and clean section lines.
-
Hair clips: Clip the unused sections out of the way so your parting doesn’t wander while you braid.
-
Styling mousse: A light foam helps the rows lay down and cuts down on little frizzy pieces at the surface.
-
Edge brush: Use it to smooth the hairline after parting, not to scrape it into the ground.
-
Braiding gel or pomade: A small amount keeps the front rows neat; too much creates flakes and buildup.
-
Braiding hair or extensions: Pre-stretched hair gives feed-ins a smoother finish and saves time during installation.
-
Beads in 2–3 sizes: Small for accents, medium for most rows, and larger only when the braid count is low.
-
Bead threader or narrow funnel: Makes loading beads onto braid tips much faster, especially if the opening is tight.
-
Small elastics or rubber stoppers: Useful for slippery ends and bead placements that need extra grip.
-
Satin scarf or bonnet: Protects the style at night and keeps the roots from frizzing up.
-
Scalp applicator bottle: Helps you place oil or lightweight scalp treatment between the parts without soaking the braids.
Choosing Beads, Braiding Hair, and Finishes That Read Polished
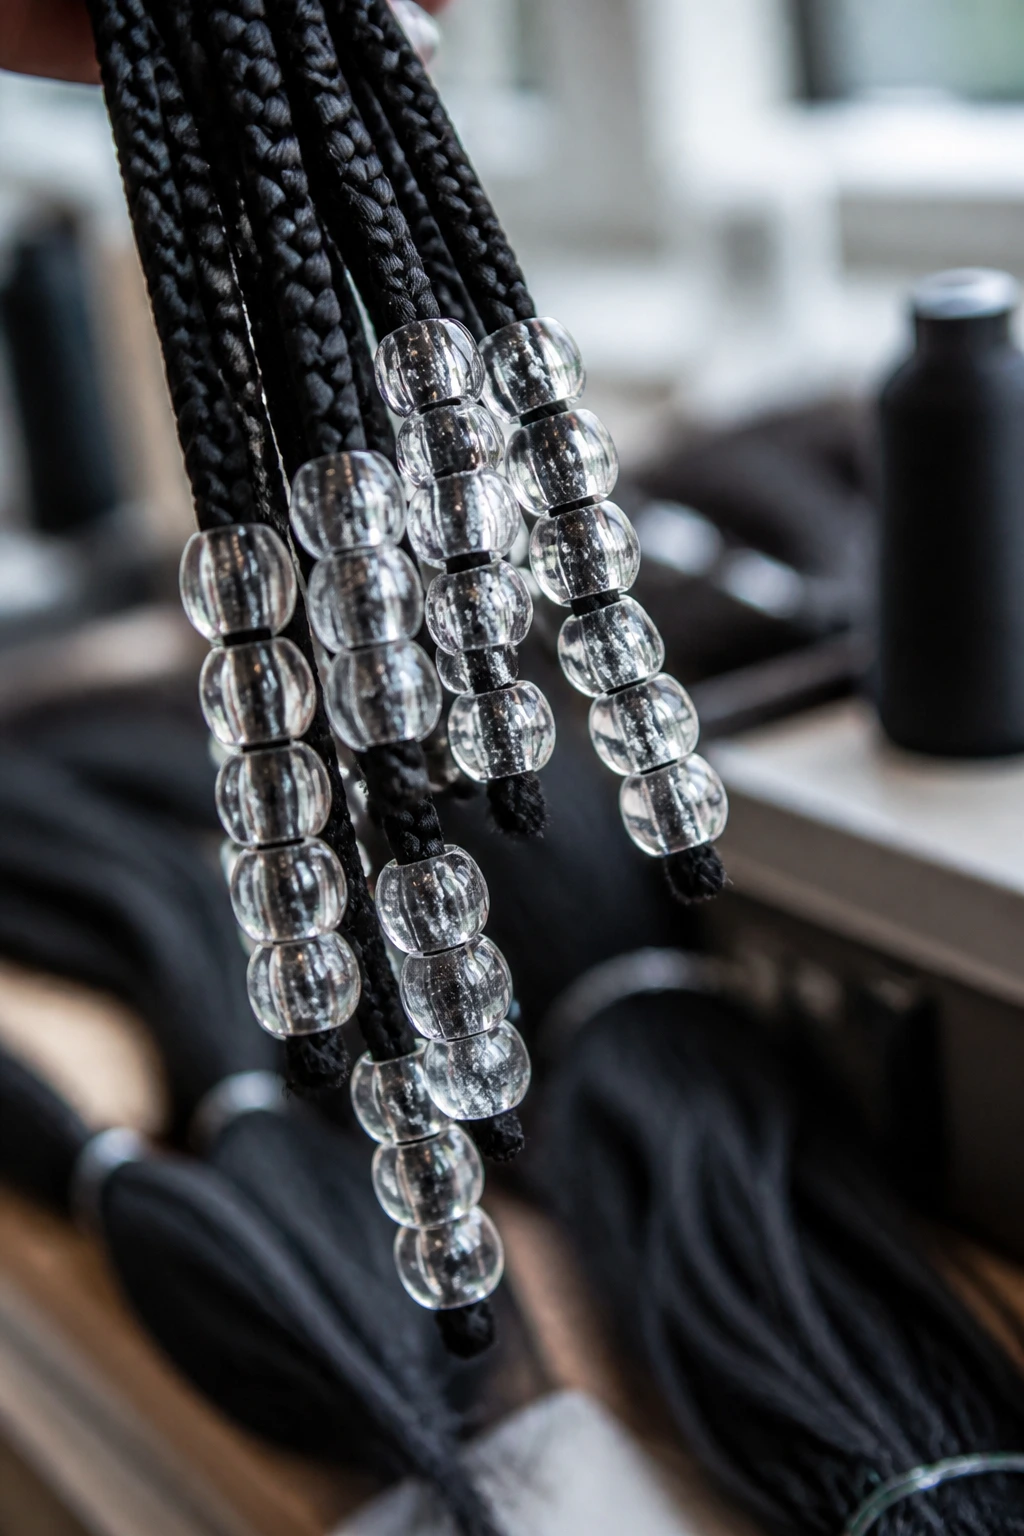
If the goal is a clean finish, start with the braid hair itself. Pre-stretched braiding hair lays flatter at the root, blends more cleanly into feed-ins, and keeps the braids from looking bulky near the scalp. For a natural-hair-only version, smaller sections and neater parting matter even more because the braid structure has less help from added hair.
Beads need a plan. Clear acrylic is the easiest place to start because it matches almost anything and lets the braid ends stay visible. Wood and shell beads look softer and more textured, but they work best when the braid pattern is simple. Metallic pieces—gold, bronze, silver—should be used like seasoning. Too much, and the style starts to feel busy.
One thing I’d skip is throwing three bead colors into the same set unless the braid layout is very simple. Mixed bead palettes can be fun, but they’re hard to keep polished. If you want a clean read, repeat one color family at the front, a second on the longer braids, and stop there. The style needs room to breathe.
How to Wear Tribal Braids with Beads for Different Settings
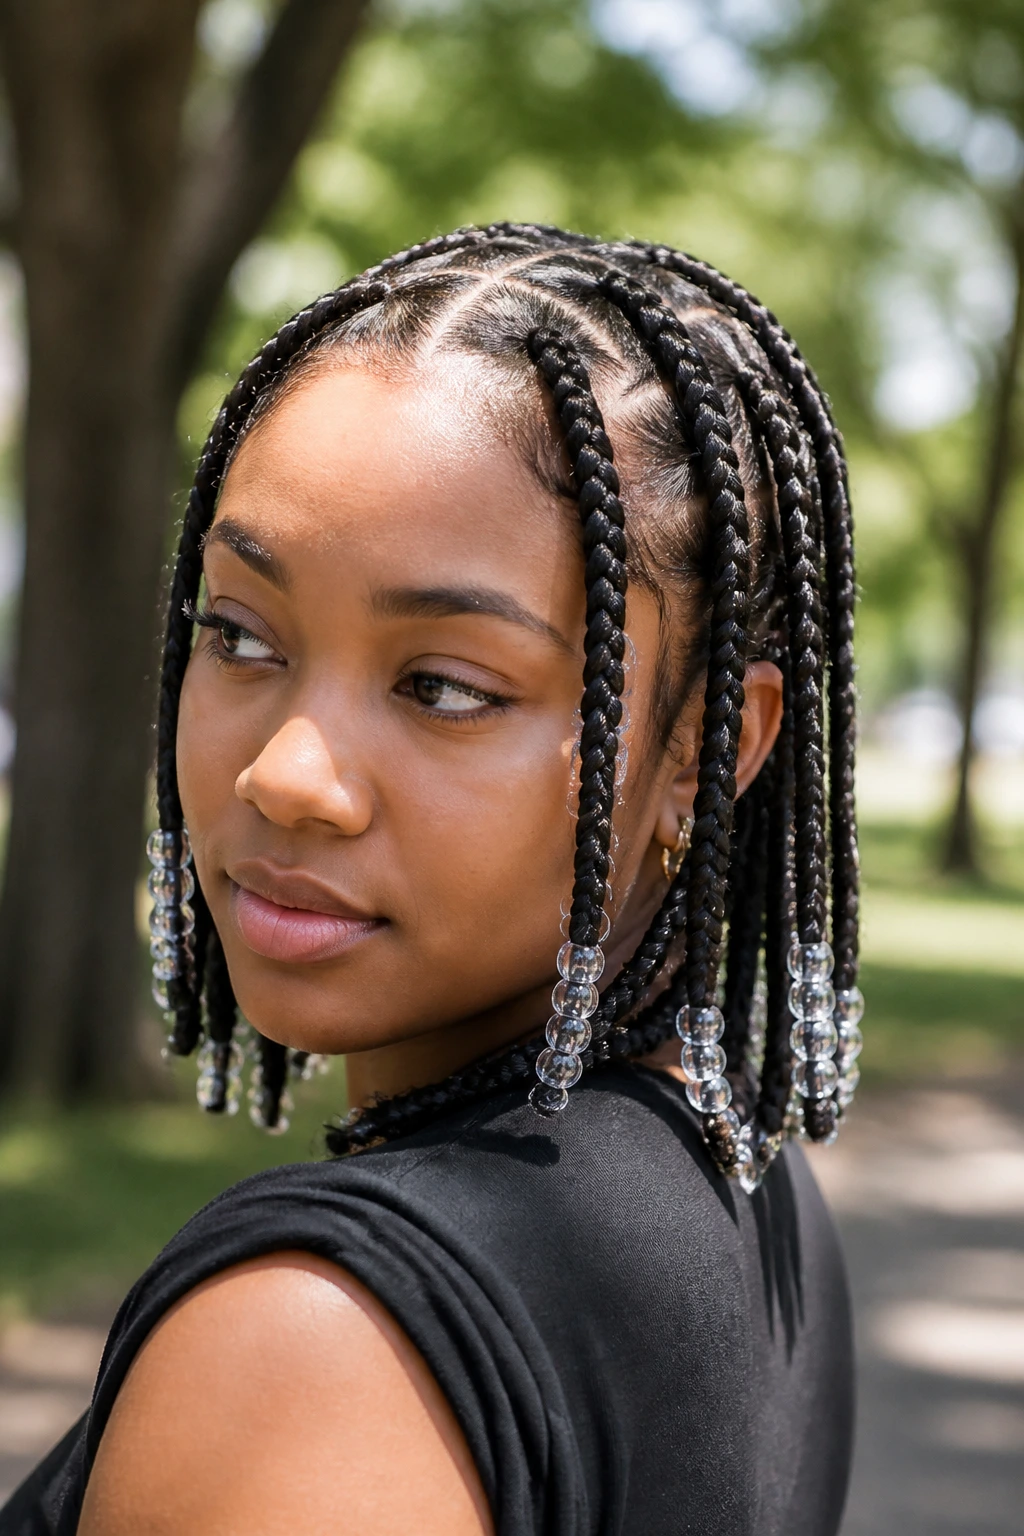
Presentation: Keep the front rows crisp and the bead placement deliberate. A few beads framing the face or sitting low at the ends usually look cleaner than scattering them all over the head.
Outfits: Scoop necks, crisp collars, off-the-shoulder tops, hoop earrings, and satin scarves all pair well because they let the braid line stay visible. Heavy necklaces or too many competing accessories can clutter the look fast.
Scale: Smaller beads and tighter spacing read neat and restrained. Bigger beads make a stronger statement, but they need fewer rows and more visual breathing room.
Event Fit: For work or formal settings, keep the bead palette close to the braid color or skin tone. For weekends, festivals, or photos, one accent color—gold, amber, smoked clear—can carry the style without making it look chaotic.
Small Styling Details That Make a Big Difference
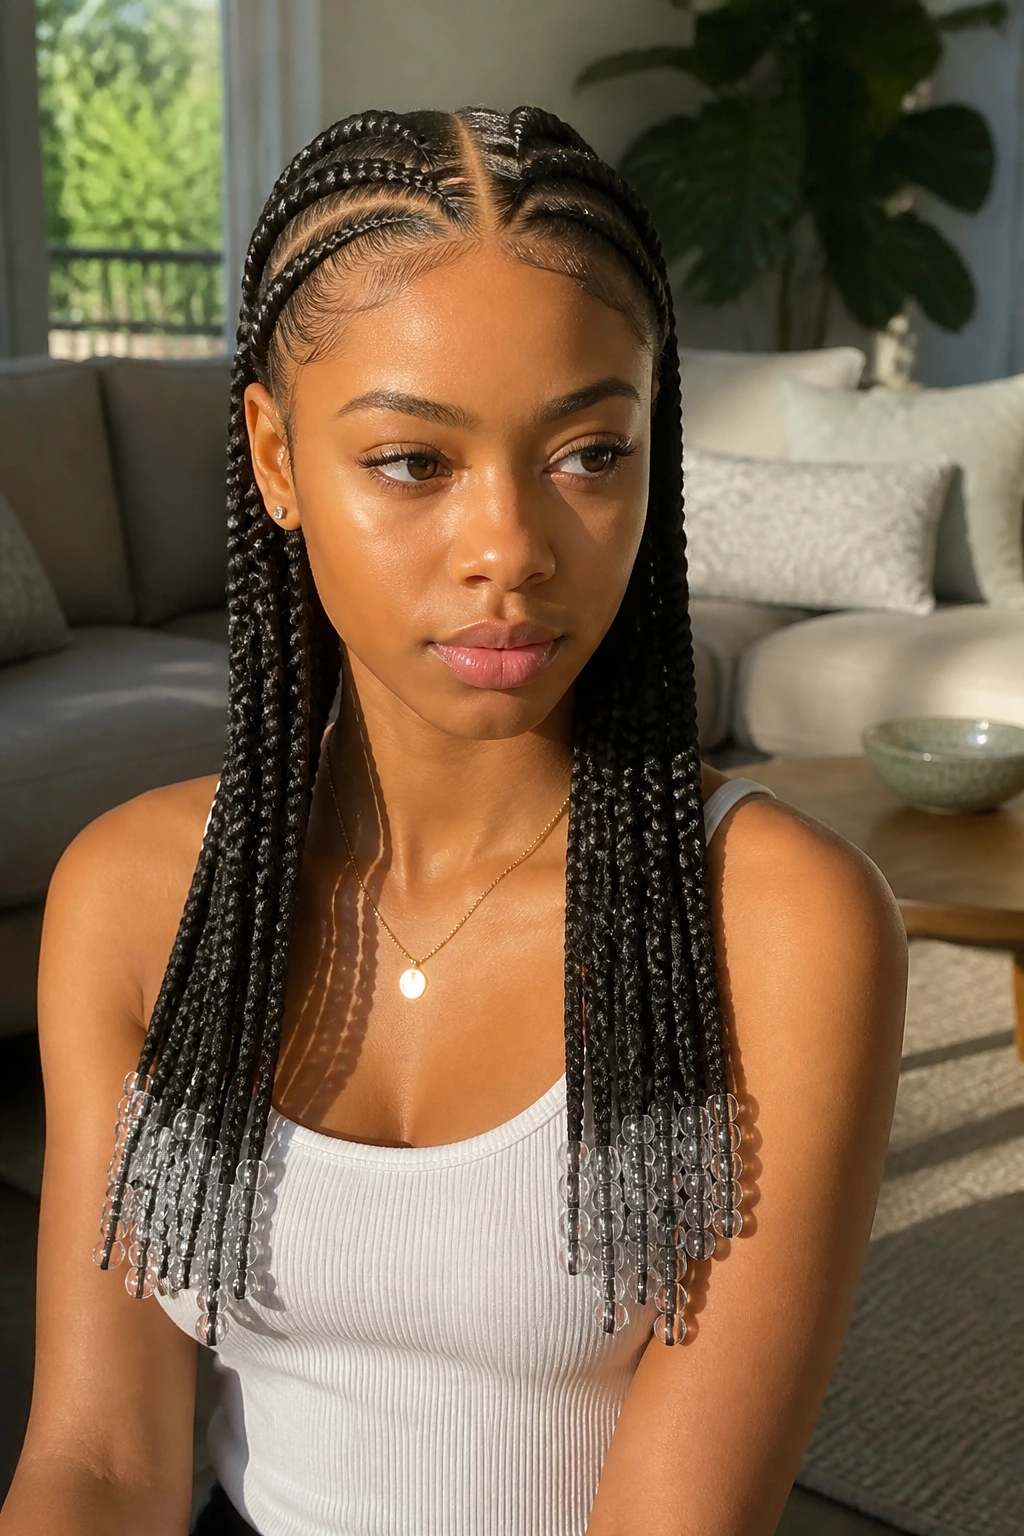
Parting lines: Straight parts are not the only polished option, but they are the easiest one to keep tidy. If you’re doing zigzags or triangles, make the shapes crisp enough that they read on purpose.
Bead spacing: Repeat the same gap between bead clusters across the set. Uneven spacing is one of those things people feel before they notice it.
Edge finish: A neat hairline helps, sure, but slicked-back edges alone do not save a crooked braid pattern. Start with the parts and braid tension first.
Accent control: Leave one braid near the face bead-free if the rest of the set is heavy. That little empty space keeps the style from looking crowded.
Length control: When the braids are very long, place the beadwork lower. When the braids are short, keep the bead size smaller so the ends do not overpower the cut.
Common Mistakes That Make Beaded Braids Look Messy
-
Using too many bead styles at once: Clear beads, metal cuffs, shells, and bright plastic pieces can all be pretty on their own. Put them together without a plan and the braid pattern gets lost. Fix it by choosing one main bead family and one small accent.
-
Making the front rows too heavy: If the temples feel tugged down or the beads swing into the cheeks, the front is carrying too much weight. Switch to smaller beads near the hairline and save the larger pieces for the back rows.
-
Rushing the parts: Crooked sections show up in photos and under bright light. Clip the hair, redraw the line if needed, and slow down before the first braid is even started.
-
Leaving product buildup at the roots: White flakes near the parting make the style look older than it is. Use less gel, smooth it in a thin layer, and wipe away the excess before braiding.
-
Skipping night protection: Satin is not optional if you want the braids to stay neat. Without it, the roots frizz, the bead tips catch on pillowcases, and the style starts to look tired early.
Variations and Adaptations to Try
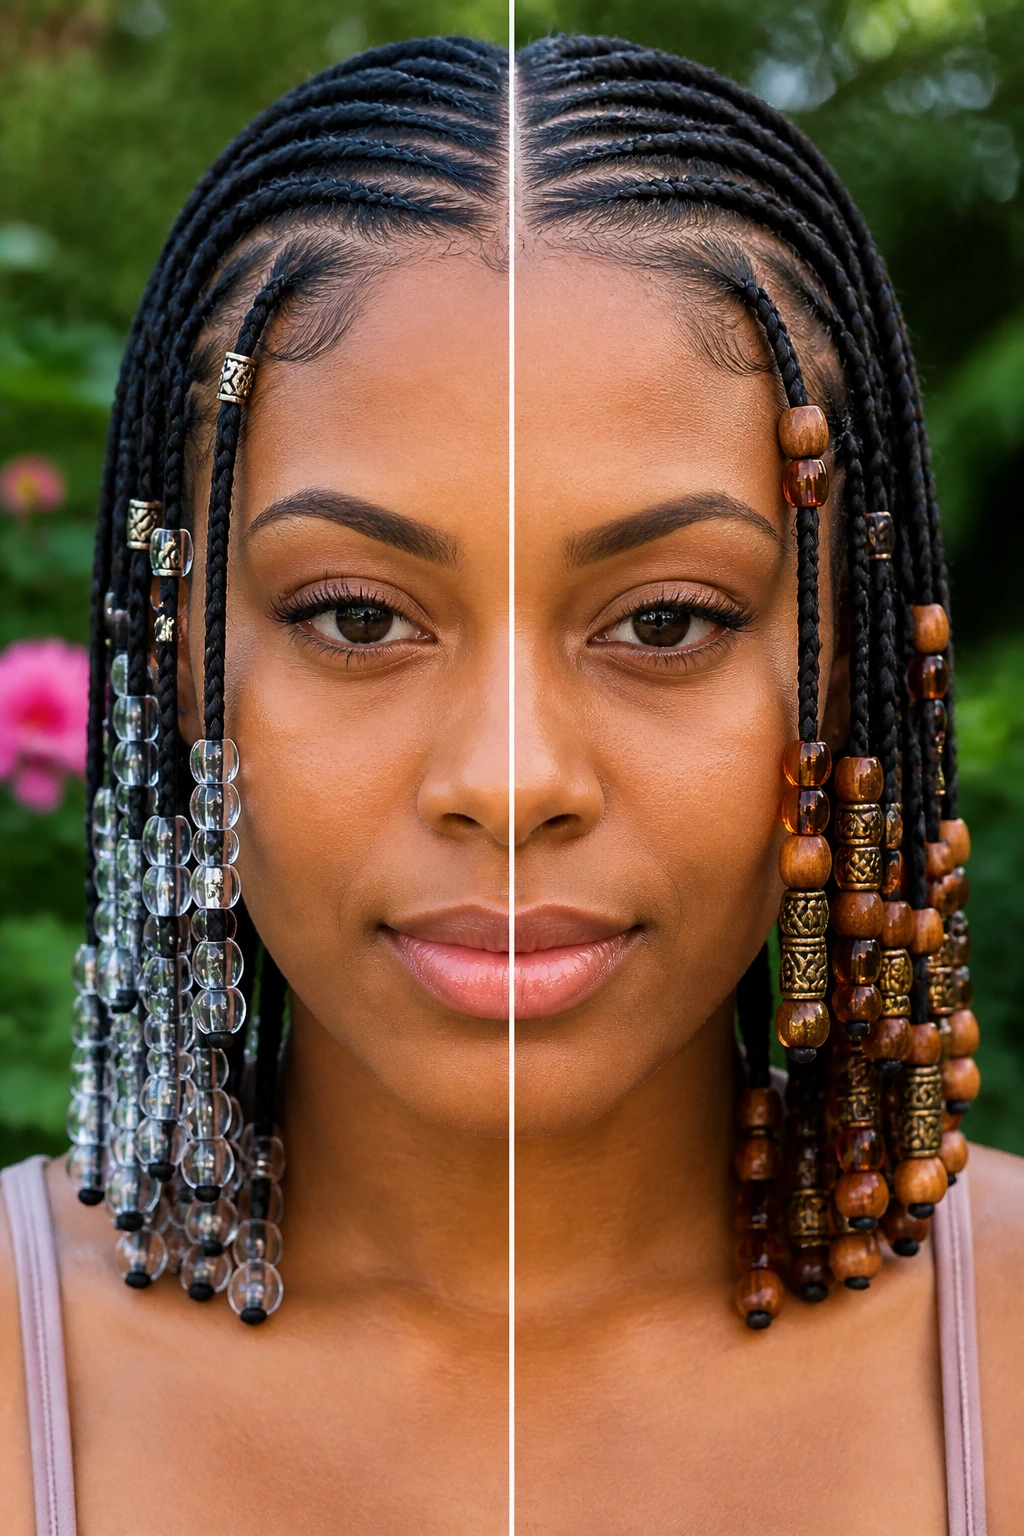
Soft Glass Edit: Use clear or lightly smoked beads only, with very little metal. This version looks calm and polished, and it works well when the braid pattern is already detailed.
Earth-Tone Weave: Mix wood, amber, and bronze beads for a warmer finish. It’s a smart choice if you like matte makeup, linen textures, or outfits that already lean earthy.
Minimal Office Row: Keep only the front braids beaded, and use tiny pieces in one color. The look stays neat enough for a strict setting while still giving you a little movement near the face.
Boho Curl Accent: Add controlled curls at the ends or near the face, then keep the beads limited to the straight braids. This keeps the style softer without letting the curls take over.
Lightweight Starter Version: Choose smaller parts, shorter length, and soft plastic beads with rubber stoppers. It’s the least fussy route for anyone who wants the look without the weight.
How to Keep Tribal Braids and Beads Looking Fresh
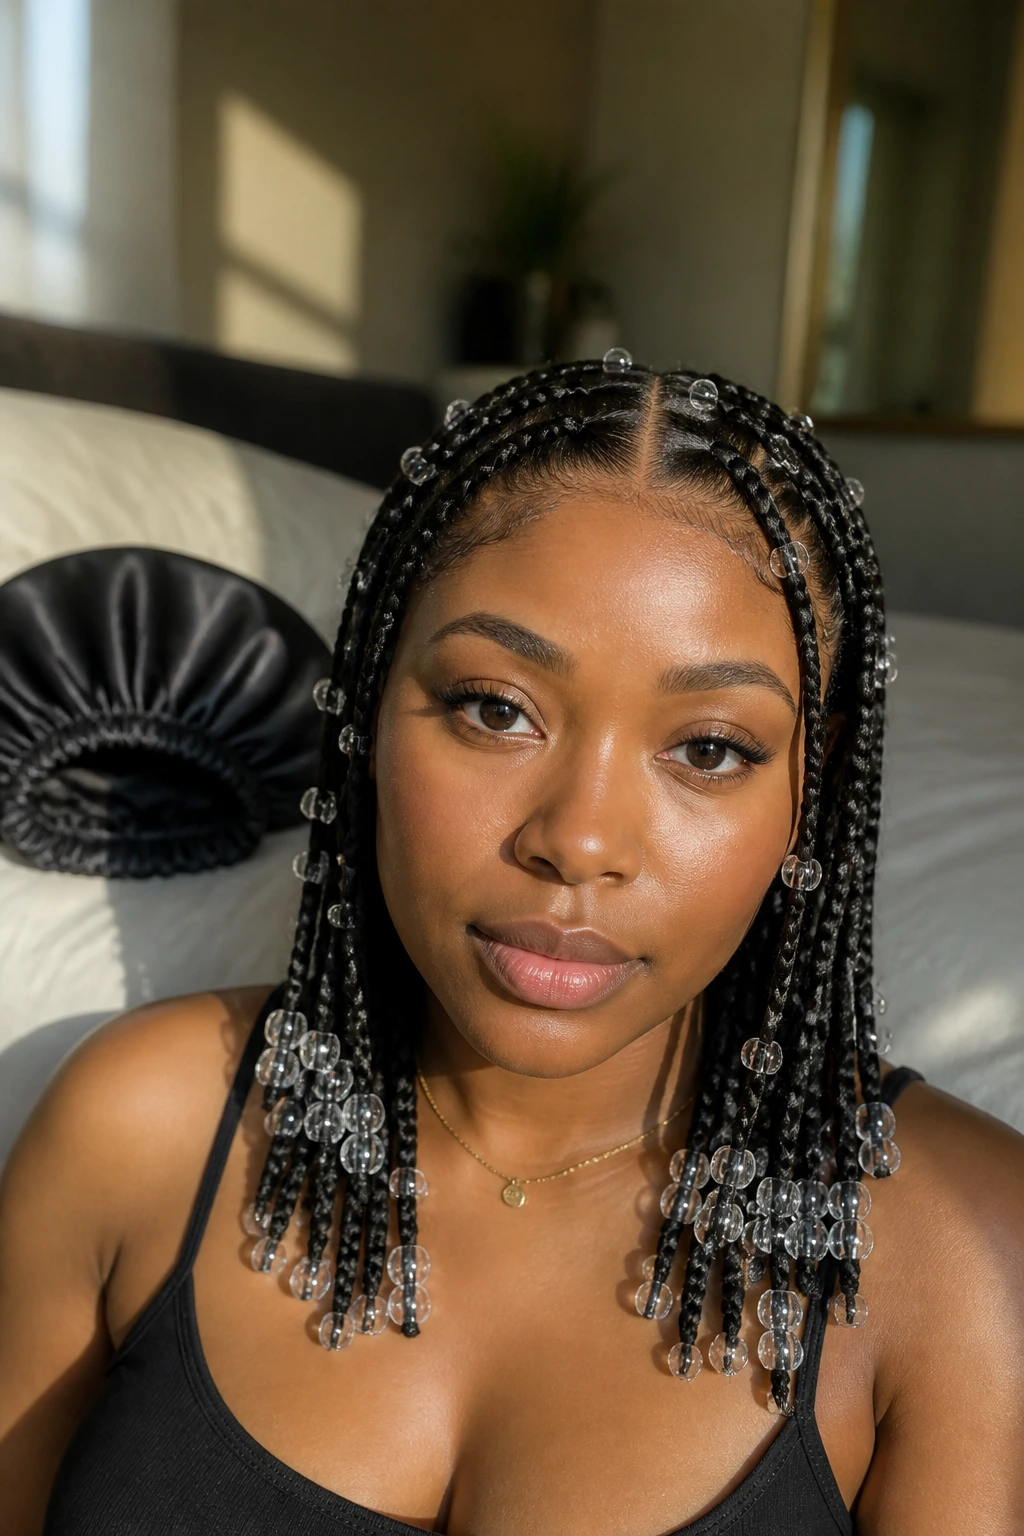
Sleep matters more than most people want to admit. A satin bonnet or scarf every night keeps the roots from puffing up and stops the bead tips from grinding against cotton pillowcases. If the bonnet keeps slipping, a wrap scarf over it usually solves the problem.
Every few days, check the scalp for buildup and the bead ends for slippage. A small amount of lightweight oil on the scalp—placed with an applicator bottle—can keep the skin from feeling dry, but don’t drown the braids in it. Too much product makes the roots sticky and attracts lint.
Washing depends on how much product you use, but a gentle scalp cleanse every 2 to 3 weeks is a good rhythm for most styles. Let the braids dry fully afterward. Damp roots under heavy beads are a bad combo; they feel musty, and they can start to smell off if you leave them tucked away too long.
Most braided bead styles look best within 4 to 6 weeks if the tension is gentle and the scalp stays calm. Smaller, lighter versions can sometimes last a little longer, but the moment the braid line starts to fray or the beads begin sliding, it’s time to refresh or take the style down. Pushing past that point is how a clean style turns tired.
Frequently Asked Questions
How long does a tribal braid with beads install usually take?
It depends on braid size, length, and parting style. A simple set with medium braids can take a few hours, while micro parts or detailed triangle and zigzag layouts can stretch much longer because the sectioning takes time.
Which beads look the most polished?
Clear acrylic and smoked clear beads are the easiest polished choice because they blend with almost any braid color and don’t overwhelm the pattern. Gold and bronze are close behind, but they work best when the rest of the style stays quiet.
Can I wear beads on short hair?
Yes, but the braid ends need enough length to secure the bead safely. Shorter styles usually look best with smaller beads and fewer clusters so the weight stays under control.
How do I stop beads from slipping off?
Use a small elastic, a rubber stopper, or a double knot at the braid tip before adding the bead. If the braid ends are too silky or too short, the bead will slide unless you give it something to hold.
Will beads pull on my edges?
They can if the front rows are heavy or if the braids are too tight. Keep the beads lighter near the hairline and let the weight sit lower on the head whenever possible.
Can I wash braided styles with beads in them?
You can, as long as you keep the scalp cleanse gentle and dry the style thoroughly afterward. A diluted shampoo or scalp cleanser works better than soaking the whole head, because wet beads and damp roots are a miserable combination.
What if my parts are not perfectly straight?
Don’t panic. Slight irregularity disappears once the braid pattern and beads are in place, especially if the spacing is even. What makes a style look messy is not one small wobble; it’s a whole set of uneven parts and rushed finish work.
Can tribal braids with beads work for formal settings?
Absolutely, if you keep the bead palette tight and the braid pattern clean. A low bun, a center part with clear beads, or a sleek half-up style can look formal without needing extra decoration.
A Style That Still Feels Fresh
The polished version of tribal braids with beads is not about stacking on more detail. It’s about repeating one clear idea—straight parts, sane bead choices, and a finish that doesn’t fight the braid pattern. That’s why some styles feel calm from across the room while others look busy before you’ve even finished the mirror check.
Start with one bead family and one braid shape, then build from there. Once you see how much a small change in bead size or parting changes the whole read, the style stops feeling decorative and starts feeling like architecture.
