



A good Dutch braid does something most hair styles try hard to fake: it looks organized before you even smooth the flyaways. That raised braid line catches the eye in a way a flat braid never quite does, which is why Dutch braid hairstyles keep showing up when someone wants a polished easy look without spending half the morning in the mirror.
The trick is that the braid sits on top of the hair instead of sinking into it. That one detail changes everything. Parts look cleaner, texture reads better, and second-day hair suddenly has a job to do. A little grit helps. So does a steady hand, a rat-tail comb, and the willingness to redo the first inch if the part is crooked.
I’ve always liked Dutch braids for the same reason I like a well-cut jacket: they do not need extra noise. You can wear them tight and sleek, soft and airy, or pulled into a bun, ponytail, or crown. Once you know which variation suits your hair length and the day in front of you, the style stops feeling fussy and starts feeling like a quiet shortcut.
Why These Dutch Braid Hairstyles Earn Their Keep
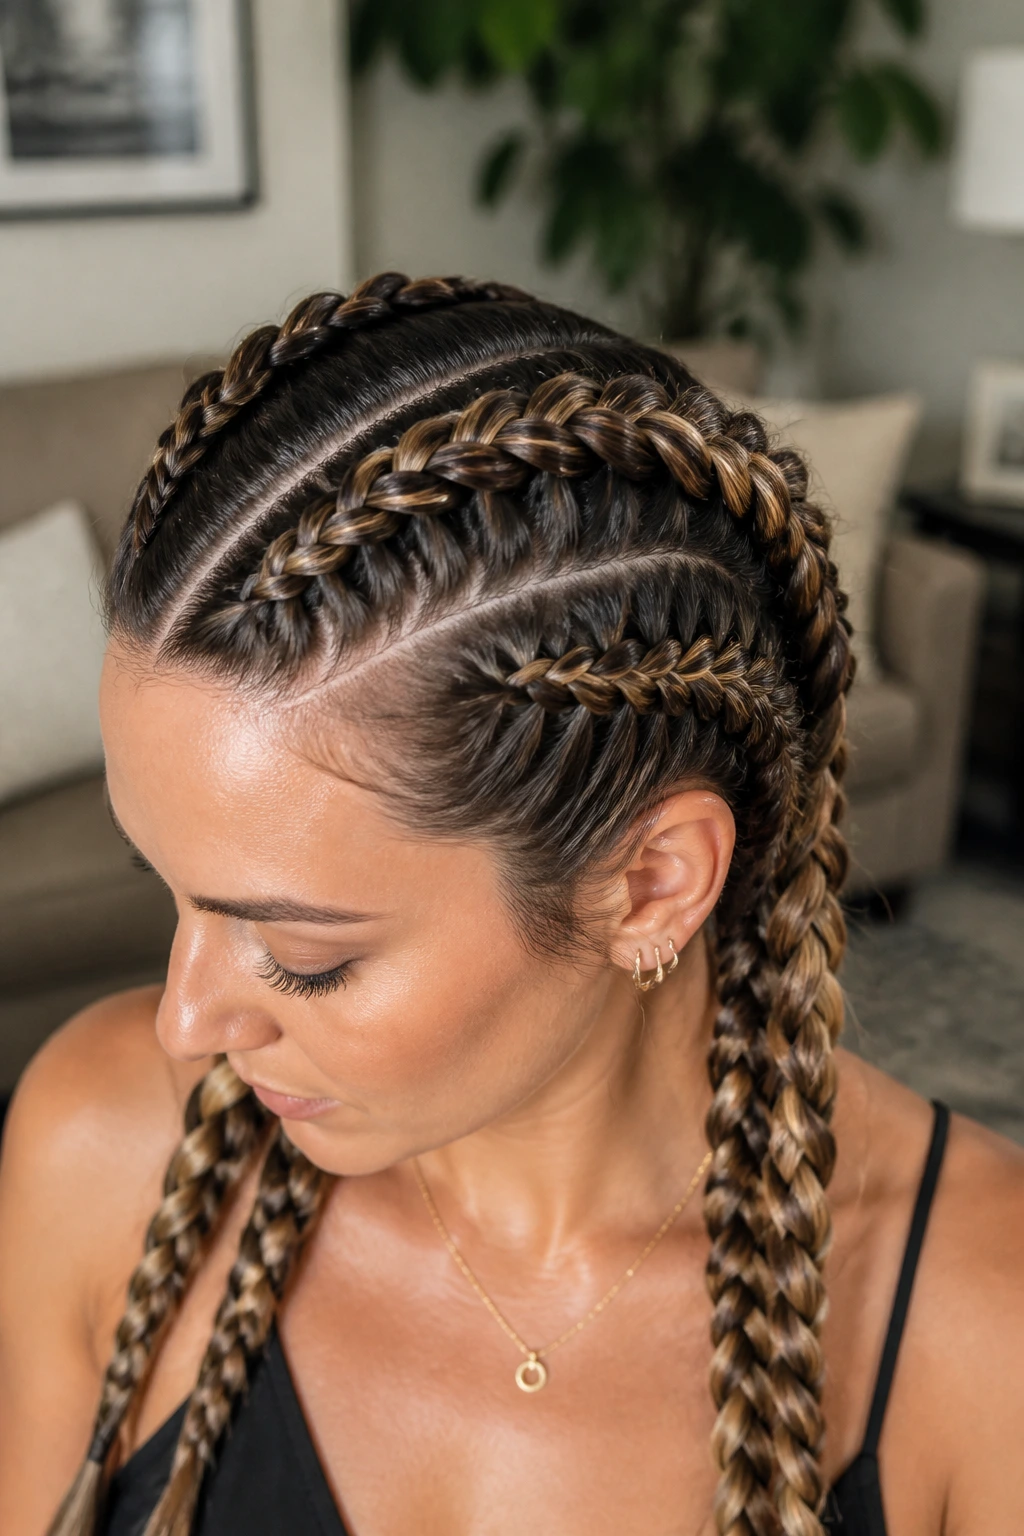
- The braid line stays visible: Because the strands cross under, the braid has height and definition instead of disappearing into the hair.
- Second-day hair finally has a use: Slight oil at the roots gives the sections grip, which makes braiding faster and less slippery.
- The finish can shift fast: A center-part twin braid can look sporty, then turn dressy with a low bun or a ribbon.
- They tame the front in one move: The hairline, crown, and side pieces stay put without a pile of pins.
- Accessories actually make sense here: Cuffs, scarves, elastics, and small clips sit neatly on the braid ridge instead of getting lost.
- The style scales with your hair: One braid, two braids, a halo, a ponytail, or a tucked chignon all start from the same basic hand motion.
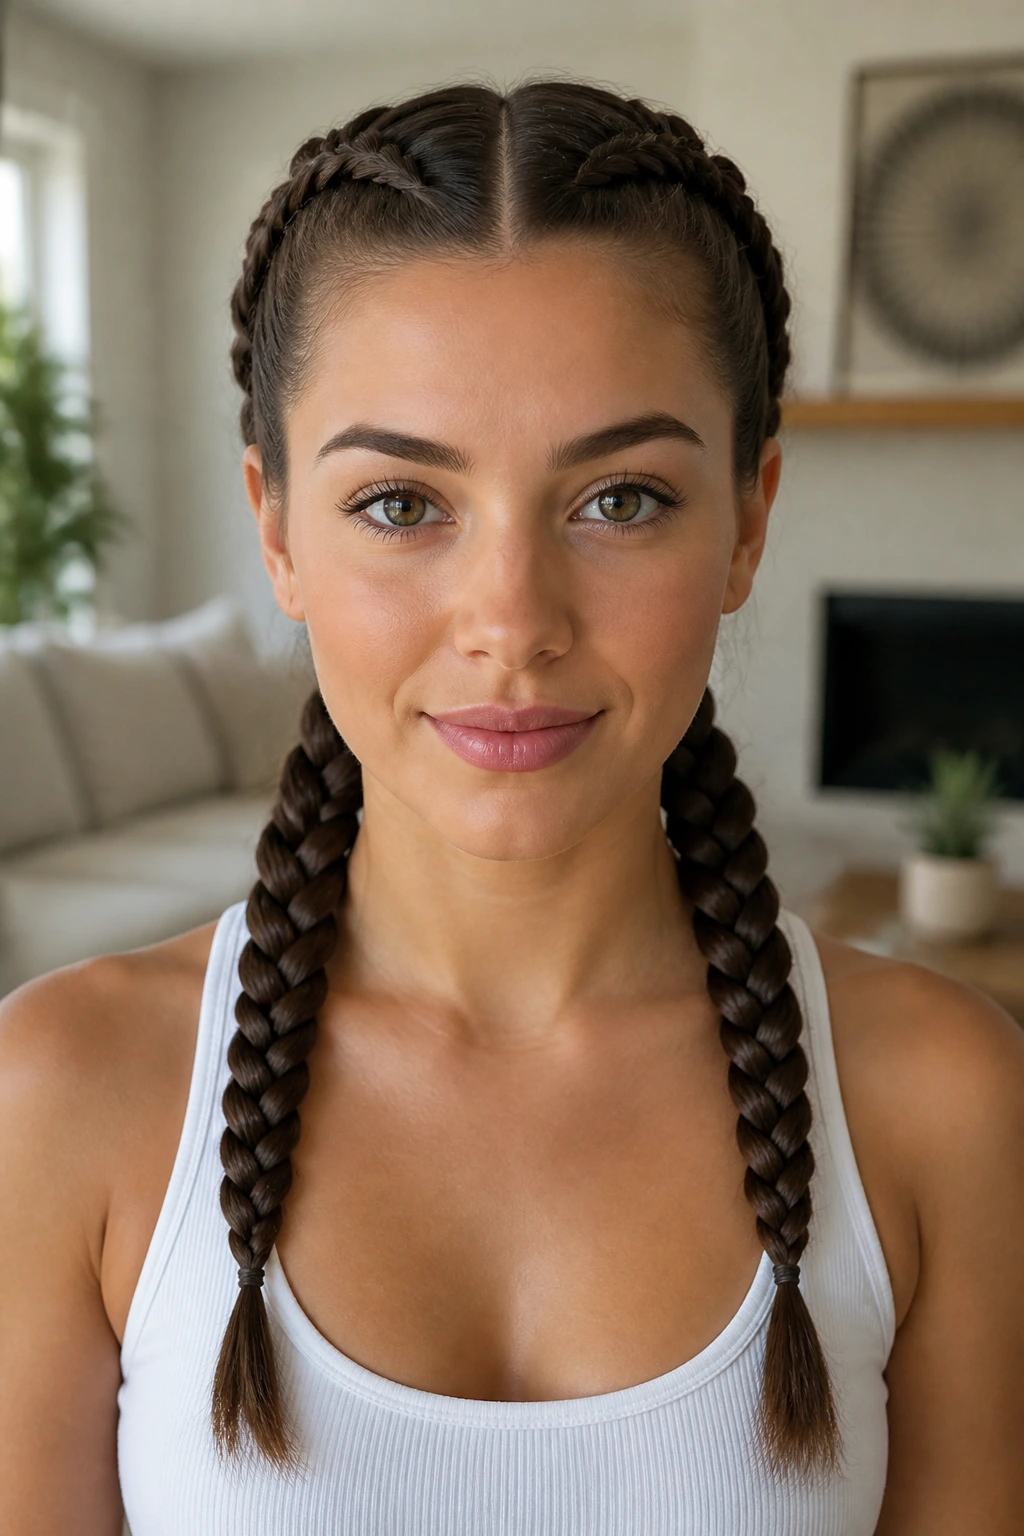
1. Classic Center-Part Twin Dutch Braids
A clean middle part and two even Dutch braids give you the kind of finish that looks deliberate even when the rest of your outfit is plain. The symmetry is the point. It frames the face, keeps the hair off the neck, and works especially well when the hair has a little lived-in texture from the day before.
Why it reads so polished
The center part creates balance, and balance does a lot of work here. Each braid sits like a mirrored line, so even a simple T-shirt and jeans look more finished. If your hair is medium to long, this style gives the cleanest payoff for the least drama.
A tiny amount of styling cream at the roots helps the sections stay neat. Keep the braids snug through the crown, then ease the tension a little through the lengths so the ends don’t look stiff. That contrast keeps the look tidy instead of severe.
Good when you want:
- Hair fully off the face
- A style that survives wind better than loose waves
- Something that fits school, errands, or a low-key dinner
- A base for buns or pinned-up ends
Best move: Finish with a small elastic, then pinch the outer edges of each braid just a little. Not too much. You want shape, not fluff.
2. Side-Swept Dutch Braid with Loose Ends
Why do this one? Because a single braid swept over one shoulder has a softer line than twin braids and still keeps the front under control. It’s the style I reach for when I want the braid to look intentional, not sporty.
Start the part off-center and braid close to the hairline on the heavier side. Let the braid travel diagonally toward the back, then leave the tail loose or curl it lightly. The contrast between the tight top and the looser finish makes the whole thing feel more natural.
What makes it work
The side sweep gives you a little asymmetry, which is useful if your face shape feels overwhelmed by a dead-center part. It also plays nicely with long layers; the front pieces can fall softly while the braid does the heavy lifting.
If your hair slips easily, braid it on hair that’s been brushed smooth and misted lightly with water or leave-in spray. That tiny bit of dampness gives the sections grip without turning the braid mushy.
3. Double Dutch Braids Gathered into Low Buns
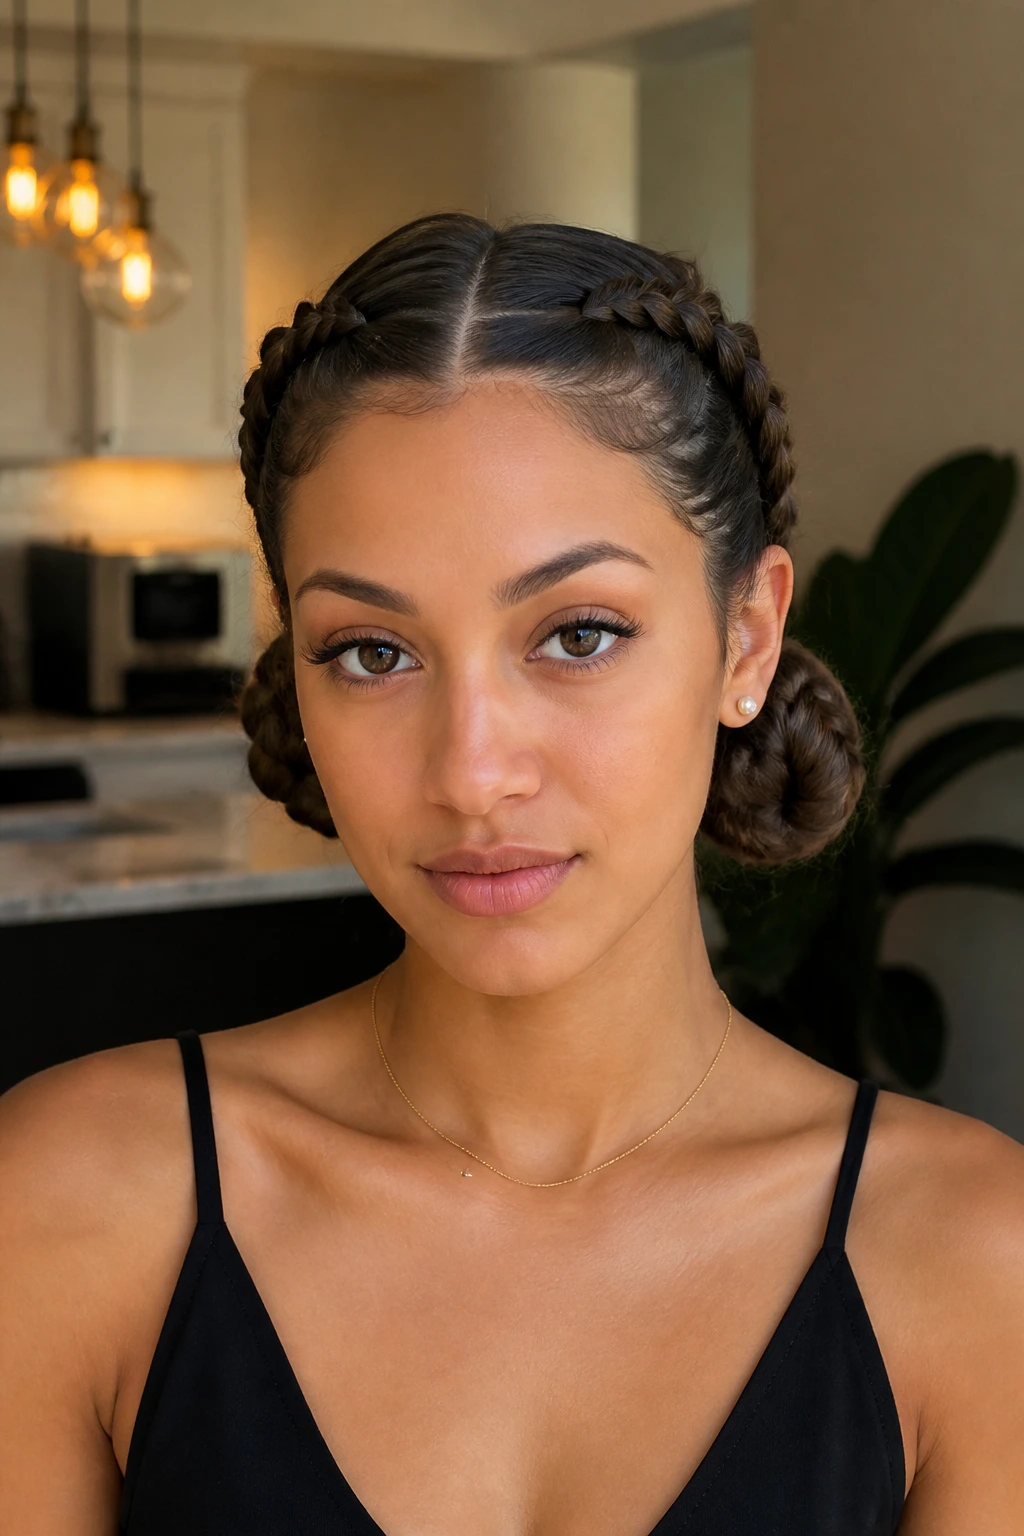
Two Dutch braids are already practical. Twist the ends into low buns, and they start acting like a proper tucked-up style instead of a casual gym braid. The buns keep the lengths contained, which is handy when you don’t want ponytail ends swinging around your shoulders.
This version looks neat from the front and solid from the back. That matters more than people admit. A lot of braided styles only look finished from one angle, but this one holds up when you turn your head, sit in a car, or peel off a jacket.
A quick shape guide
- Part the hair straight down the middle
- Braid both sides to the nape
- Coil each tail into a low bun
- Anchor with bobby pins or U-pins
A little edge smoothing at the front helps, but don’t overdo the gel. The buns should look secure, not shellacked. If your hair is thick, leave the buns slightly loose so they don’t turn into hard little knots.
4. Dutch Crown Braid Halo
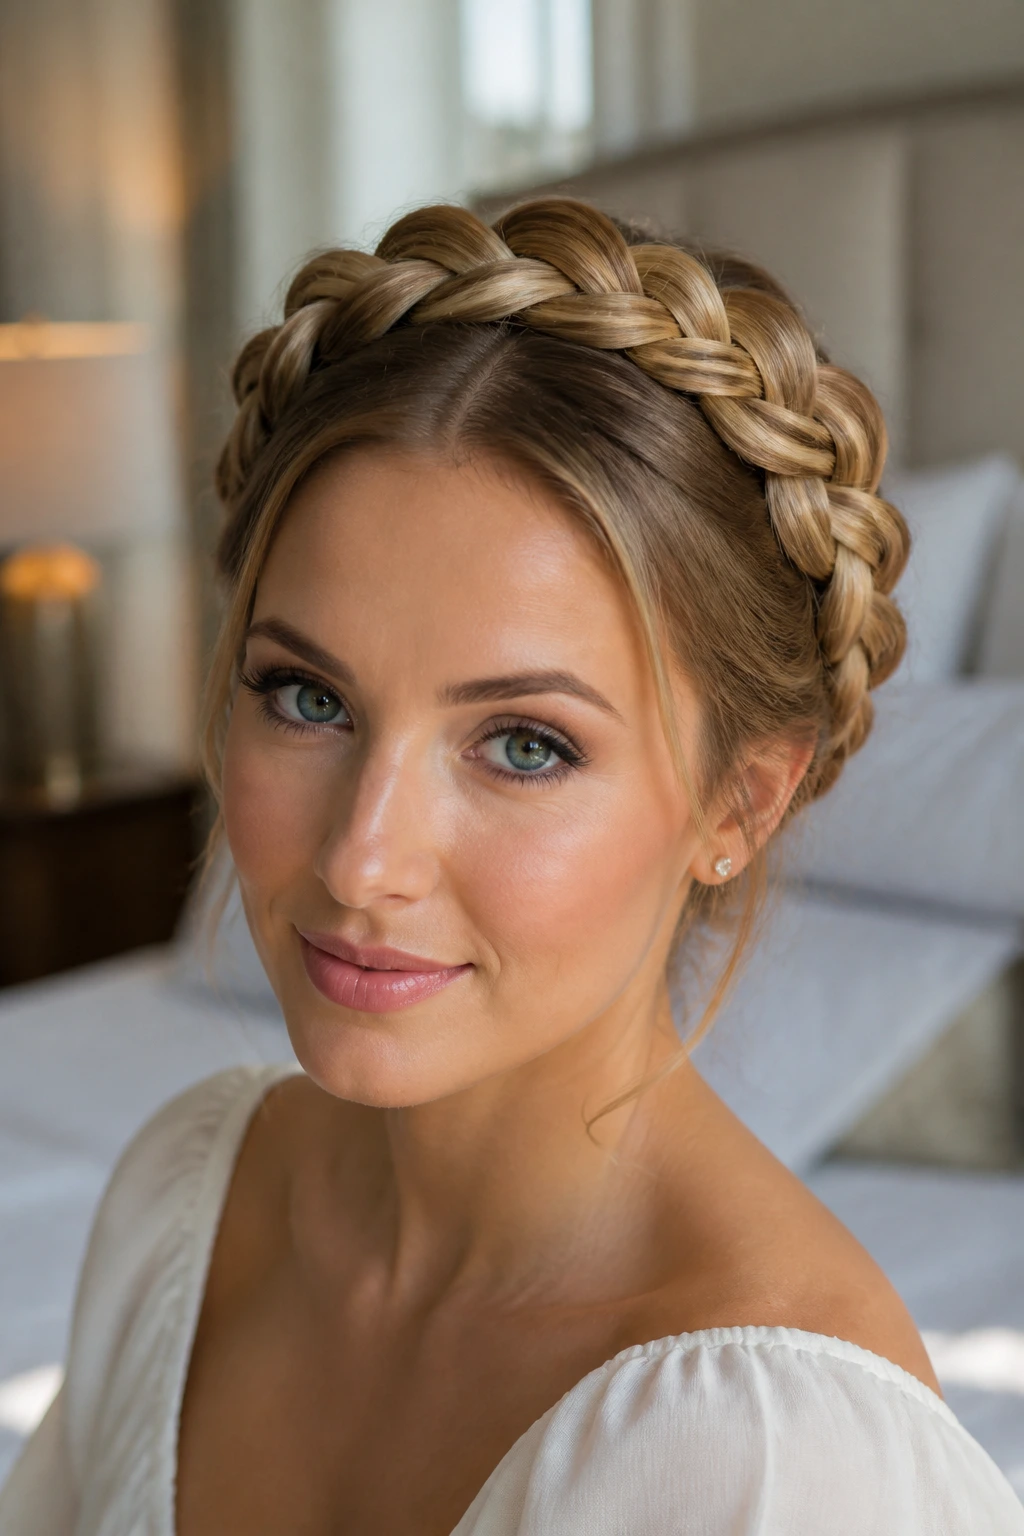
A Dutch crown braid has a quiet sort of formality to it. It wraps around the head like a built-in headband, and because the braid sits raised, the shape is visible even from across the room. That makes it one of the easiest styles here to dress up without adding accessories.
It works best when the parting is tidy and the braid follows the hairline evenly. If your arms get tired halfway through, stop and pin the first section into place before finishing the circle. That’s not cheating. It’s practical.
The halo shape is especially useful for medium-length hair that feels awkward in a ponytail. You’re not fighting the length; you’re redirecting it. Leave the ends tucked low at the back, or hide them under the braid for a cleaner finish.
5. High Dutch Braid Ponytail
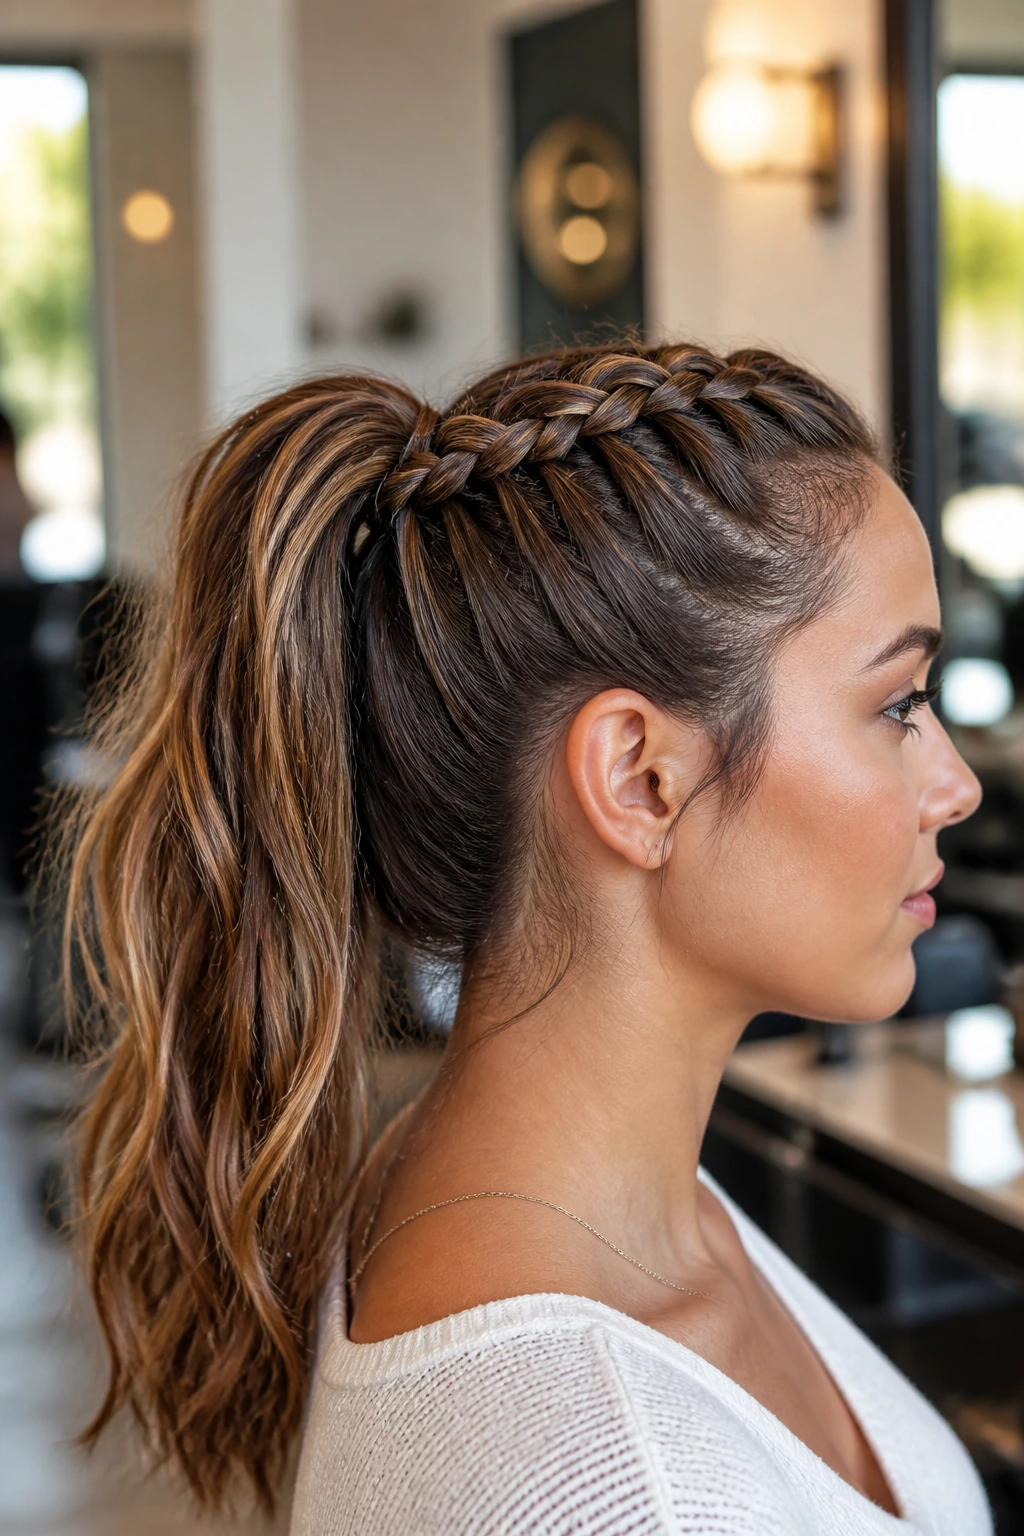
A high ponytail with a Dutch braid at the crown has a sharper edge than a plain ponytail. The braid gives the top of the style structure, and the lifted tail keeps the silhouette from collapsing as the day goes on. It’s one of those styles that looks like more work than it actually is.
The key is to braid only as far as you need before gathering the rest into a ponytail. If you braid too far down, the pony can start to look heavy and boxy. Stop near the crown, secure the braid, then pull the tail through with a smooth elastic.
Best for
- Thick hair that needs lift
- Long hair that gets flat fast
- Days when you want movement but not loose pieces
- Adding wrap-around hair or a cuff at the base
A little teasing at the ponytail base can help if your hair is fine. Keep it subtle. You want bounce, not a knot hidden under a cloud.
6. Half-Up Dutch Braid with Soft Waves
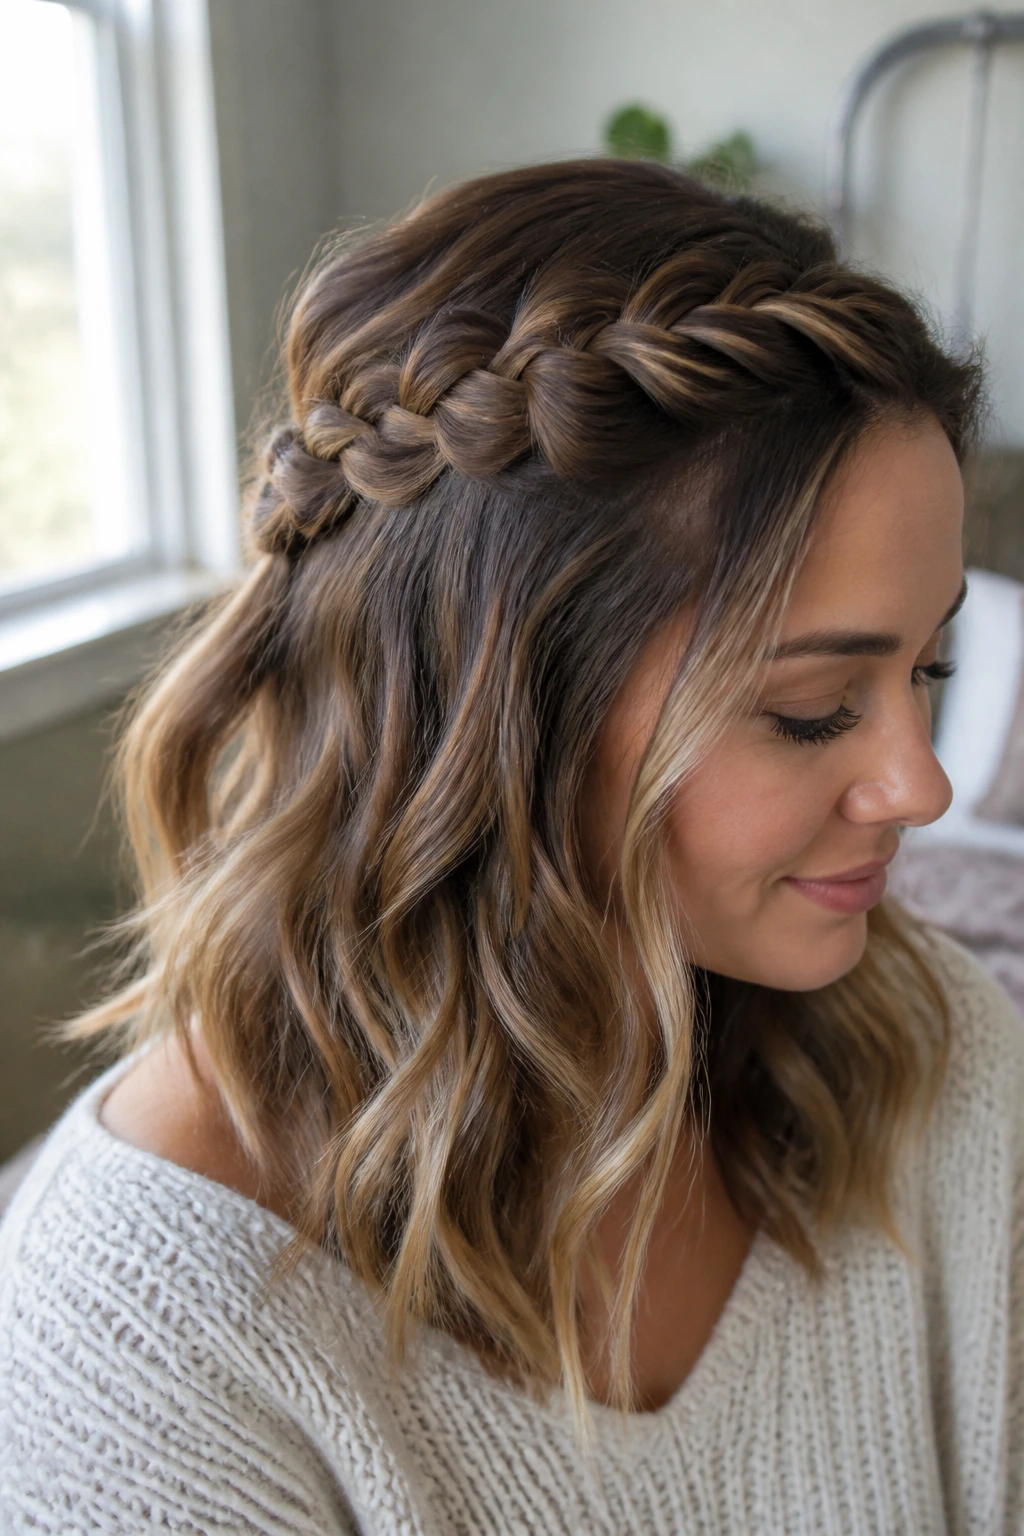
This is the version for people who want some hair down but don’t want it in their face by noon. The Dutch braid takes only the top section, usually from the temples back, and the rest stays loose in waves, curls, or a gentle bend from a curling iron.
The contrast is what makes it feel polished. Tight braid up top. Softer texture underneath. That mix keeps the look from getting stiff, and it works especially well on shoulder-length or longer hair.
Why it stays flattering
The braid lifts the hair away from the face, which opens up the features, while the loose lengths keep the style from feeling too controlled. If you have layers, let a few shorter face-framing pieces fall naturally. They break up the shape in a good way.
A light mist of flexible hairspray on the braid itself helps the top stay neat without freezing the waves below.
7. Dutch Fishtail Hybrid
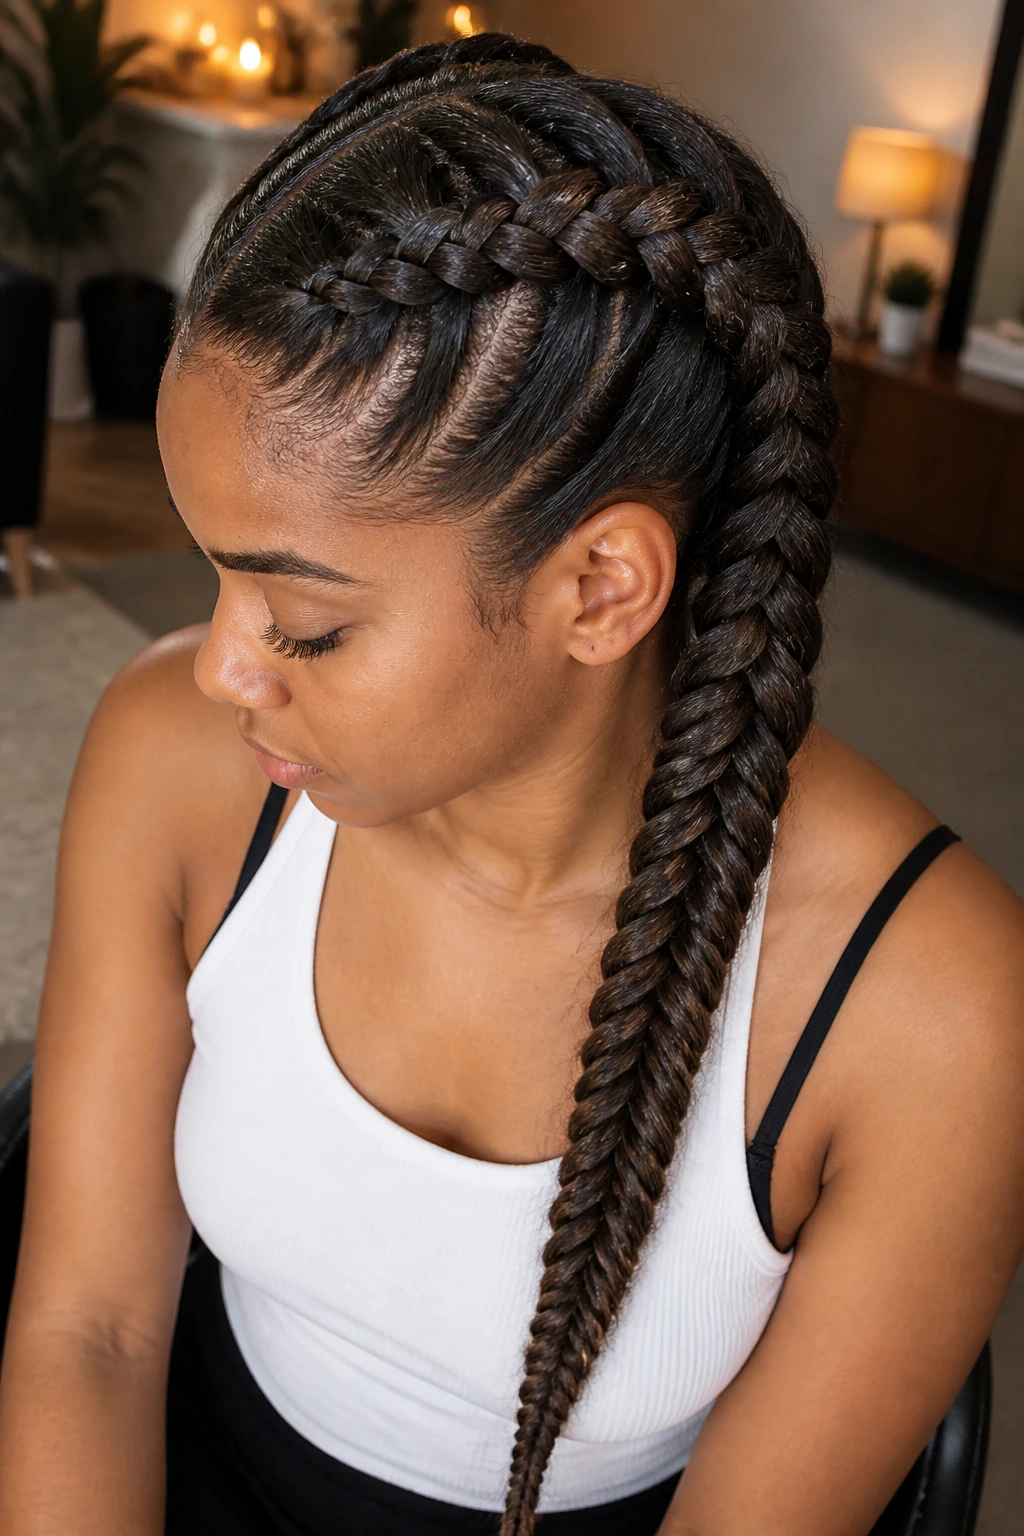
A Dutch-fishtail hybrid has a more detailed look than a plain Dutch braid, but it’s still doable once you get the rhythm. The braid starts with the underhand Dutch crossing, then shifts into fishtail sections through the length. That change in texture makes the tail look denser and more intricate.
What makes it different
Unlike a regular Dutch braid, this version gets narrower and more woven-looking as it goes. It’s a nice choice if the rest of your outfit is simple and you want the hair to carry some of the visual work. It’s also useful on very long hair, where a standard braid can sometimes feel too plain.
The trick is to keep the top sections even before switching techniques. If the Dutch base is lopsided, the fishtail part will only make that more obvious. So take the extra minute at the crown.
A good option for weddings, dinners, or any day you want a braid that looks slightly fancier without needing curls or a curling wand.
8. Single Dutch Braid with a Low Tuck
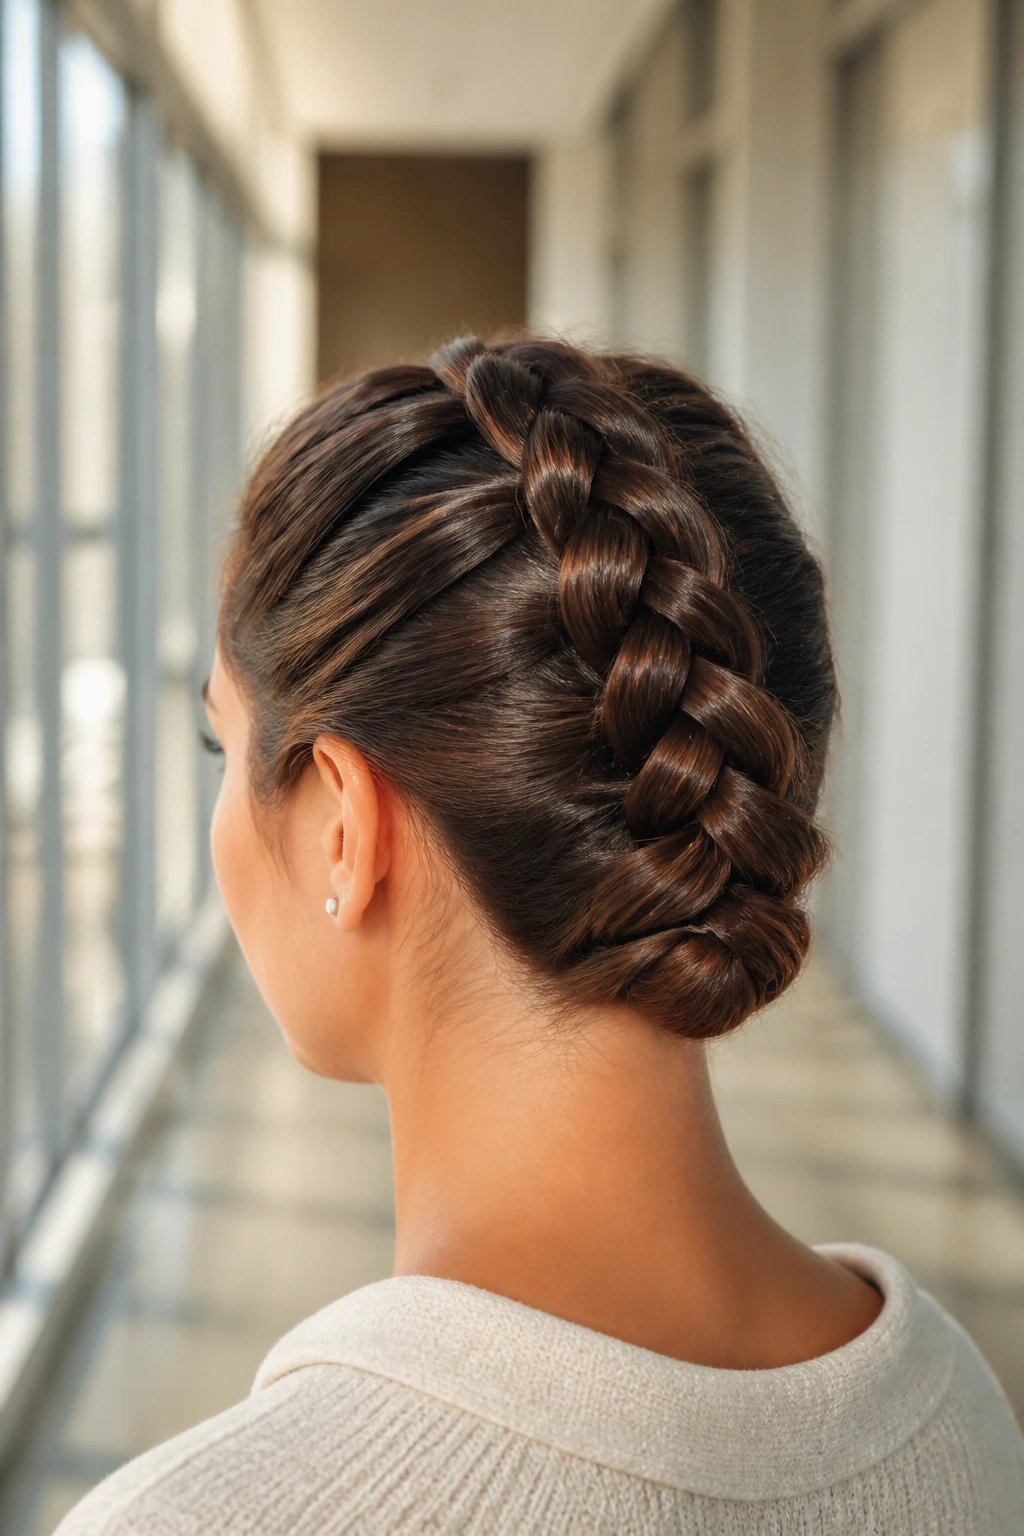
This style starts as a single Dutch braid and ends with the tail tucked under the nape. Clean. Simple. A little old-school in the best way. It keeps the neck clear and leaves you with a shape that looks deliberate rather than improvised.
I like this one for humid days, because the tucked end removes the part that usually frays first. The braid itself can stay neat for hours, and the tucked tail keeps the finish compact.
If you want a smoother silhouette, brush the tail under and pin it flat with a couple of bobby pins crossed in an X. If you want something softer, let a tiny bit of the tail poke out and curve under naturally.
9. Dutch Braids with Curled Ends
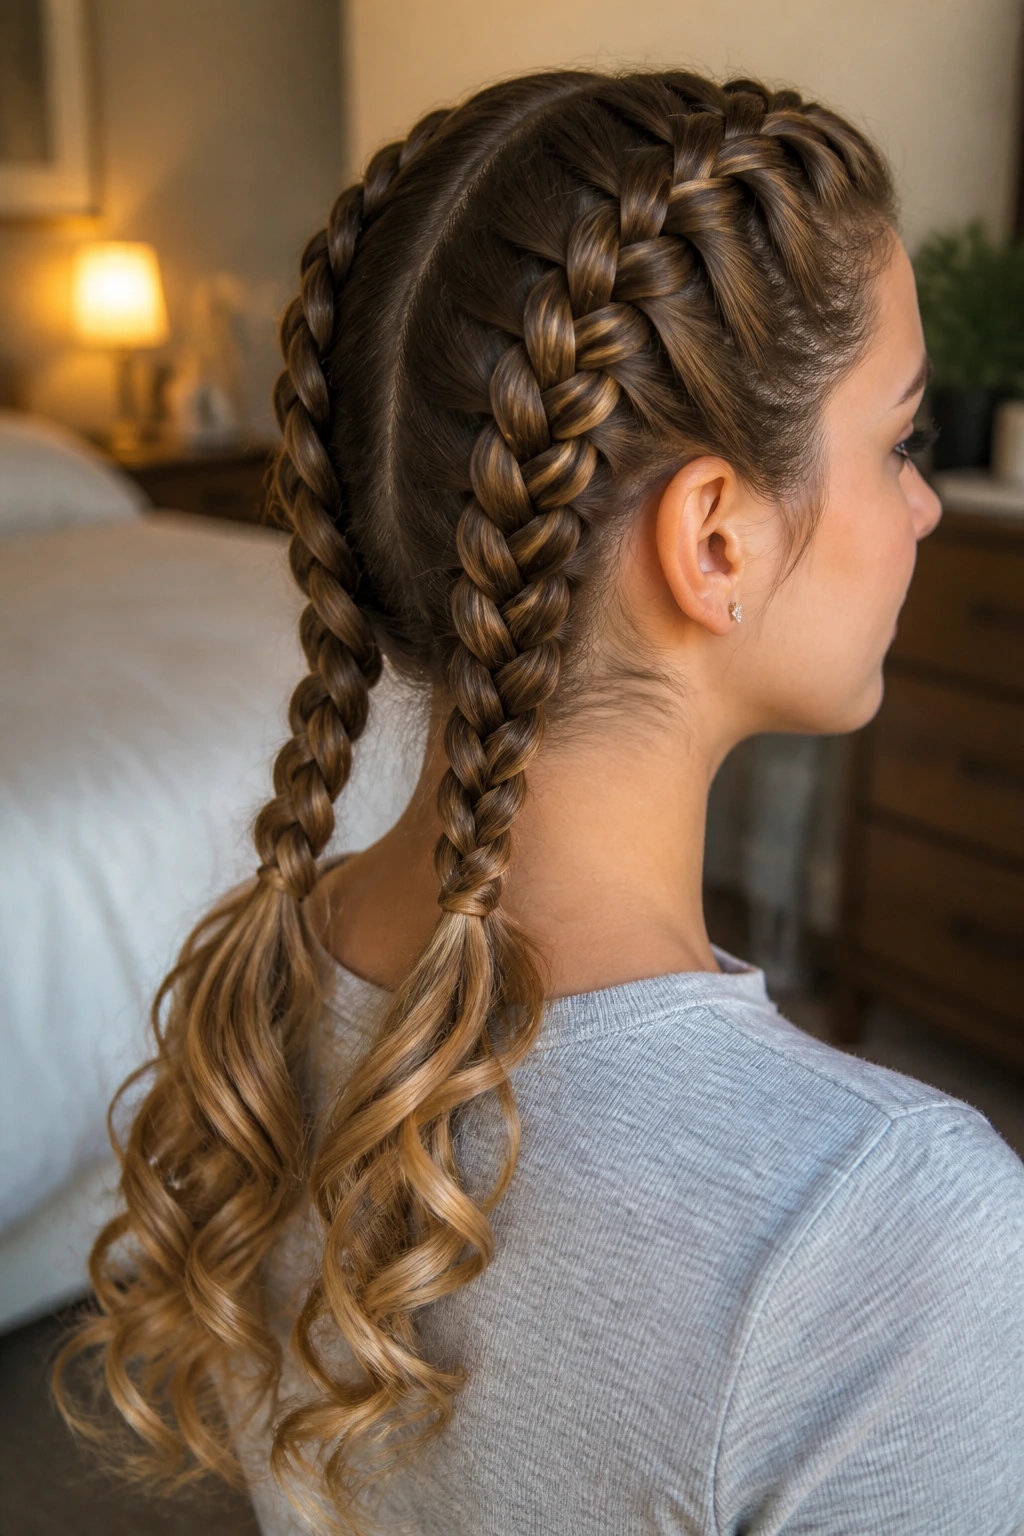
Straight braid ends can look a little blunt. Curling the tails changes that fast. It softens the finish, adds movement, and gives twin or single Dutch braids a less sporty, more dressed-up feel.
The easiest version uses loose curls at the ends of the braids, not all the way through the top. That keeps the crown crisp while the tails do the prettier work. If your hair holds curl well, use a 1-inch wand and wrap only the last 3 to 4 inches.
Small detail, big difference
The braid texture and the curl texture should not fight each other. Keep the braid firm enough to read clearly, then let the curled ends create the softer shape. That’s the balance.
This is one of the better Dutch braid hairstyles for a polished easy look when you want movement without committing to a full curled style.
10. Bubble Ponytail with a Dutch Braid Base
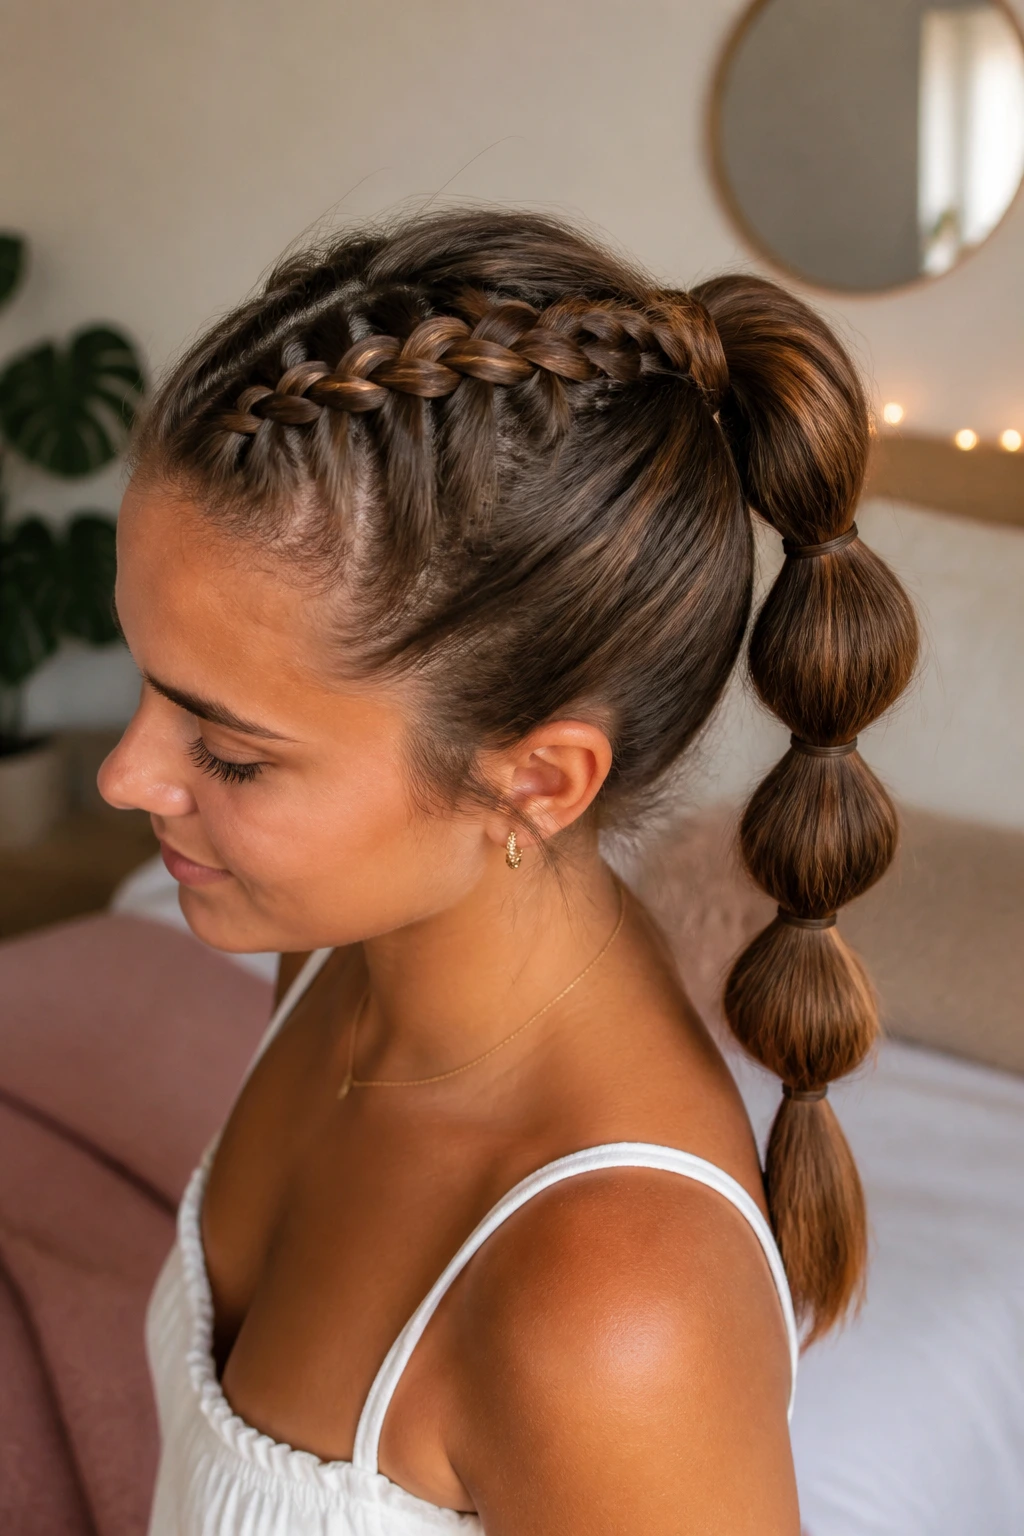
A Dutch braid feeding into a bubble ponytail gives you structure at the top and something playful through the length. The braid controls the roots, the bubbles add volume, and the style stays interesting even when the rest of the outfit is minimal.
It’s also one of the easiest ways to fake complexity. The sections are just ponytail elastics spaced evenly down the tail, then gently pulled apart. That little puff between elastics creates the “bubble” shape.
Quick notes
- Braid from the hairline to the crown
- Secure the rest into a ponytail
- Add elastics every 2 to 3 inches
- Tug each section outward with your fingers
Use clear elastics or small bands that match your hair color if you want a smoother look. Use bold elastics if you want the bubbles to stand out more. Either way, keep the braid section neat so the ponytail doesn’t feel messy by accident.
11. Crown-to-Nape Dutch Updo
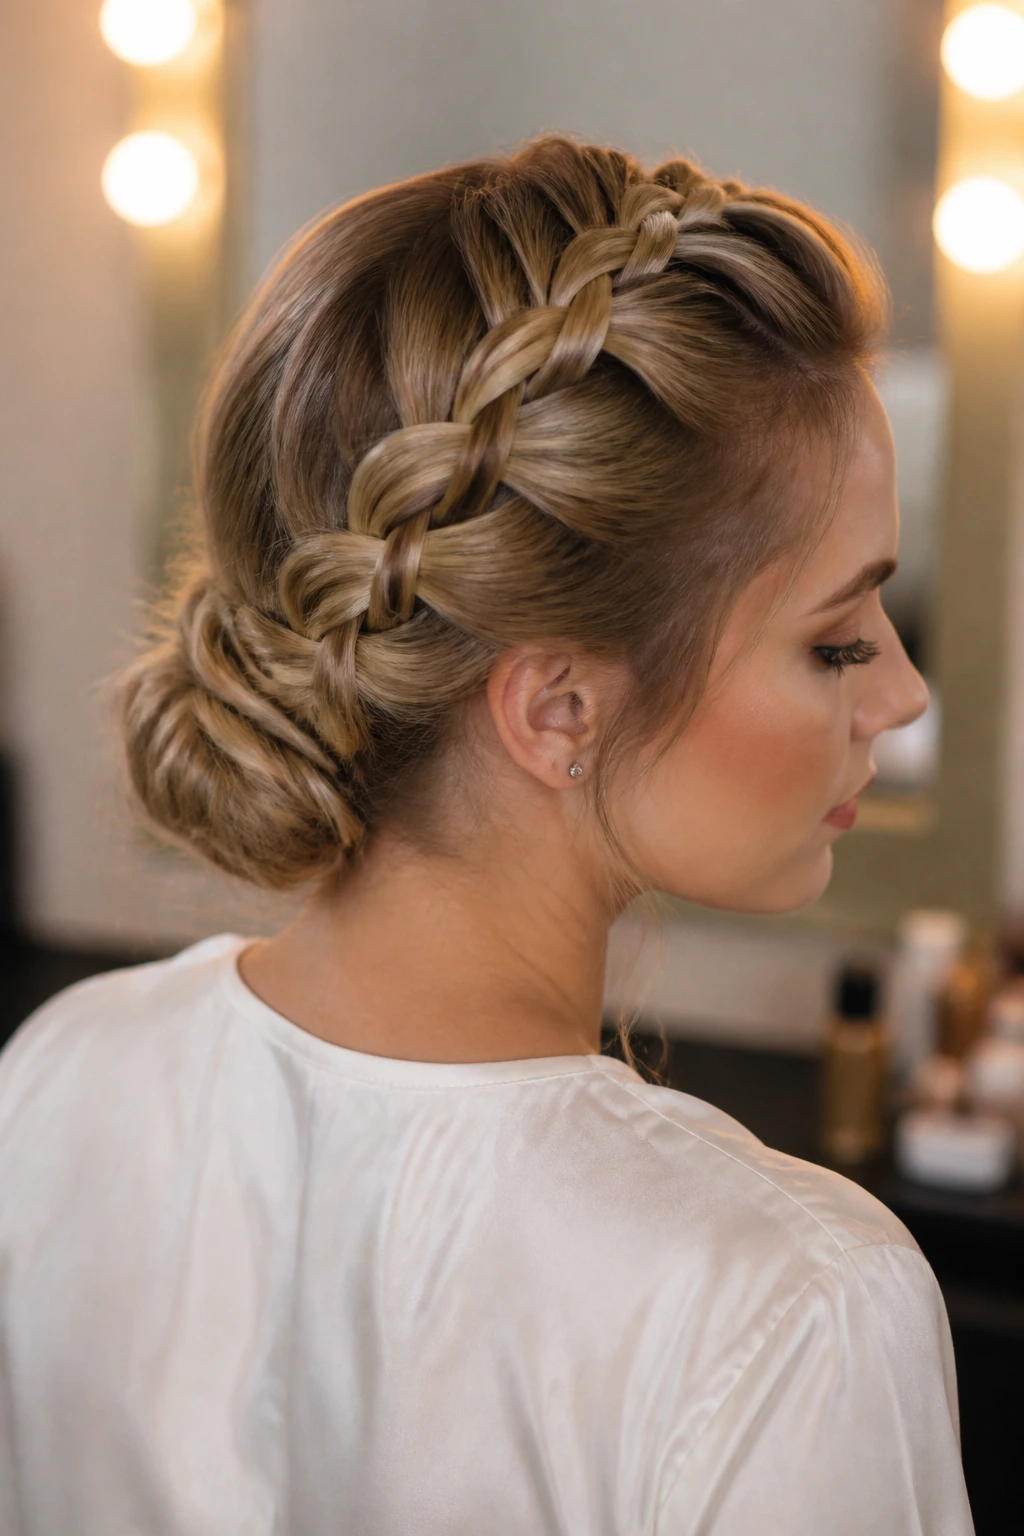
What happens when you want the braid to disappear into the updo instead of sitting on display? You get this. The braid starts at the front or side, wraps around the head, and feeds into a tucked bun or pinned twist at the nape.
This style looks more involved than it is. The visual trick is the continuous line: your eye follows the braid around the head, then lands at the low knot. That’s why it feels finished even without extra accessories.
H3: Where this style shines
- Weddings and dressy events
- Hair that needs to stay up all day
- Medium to long lengths
- Thick hair that holds pins well
If the bun feels bulky, flatten the base with a few bobby pins before you tuck the ends. A touch of shine spray on the braid can help, but go light. You want a smooth finish, not a wet look unless that’s the plan.
12. Dutch Braid Mohawk
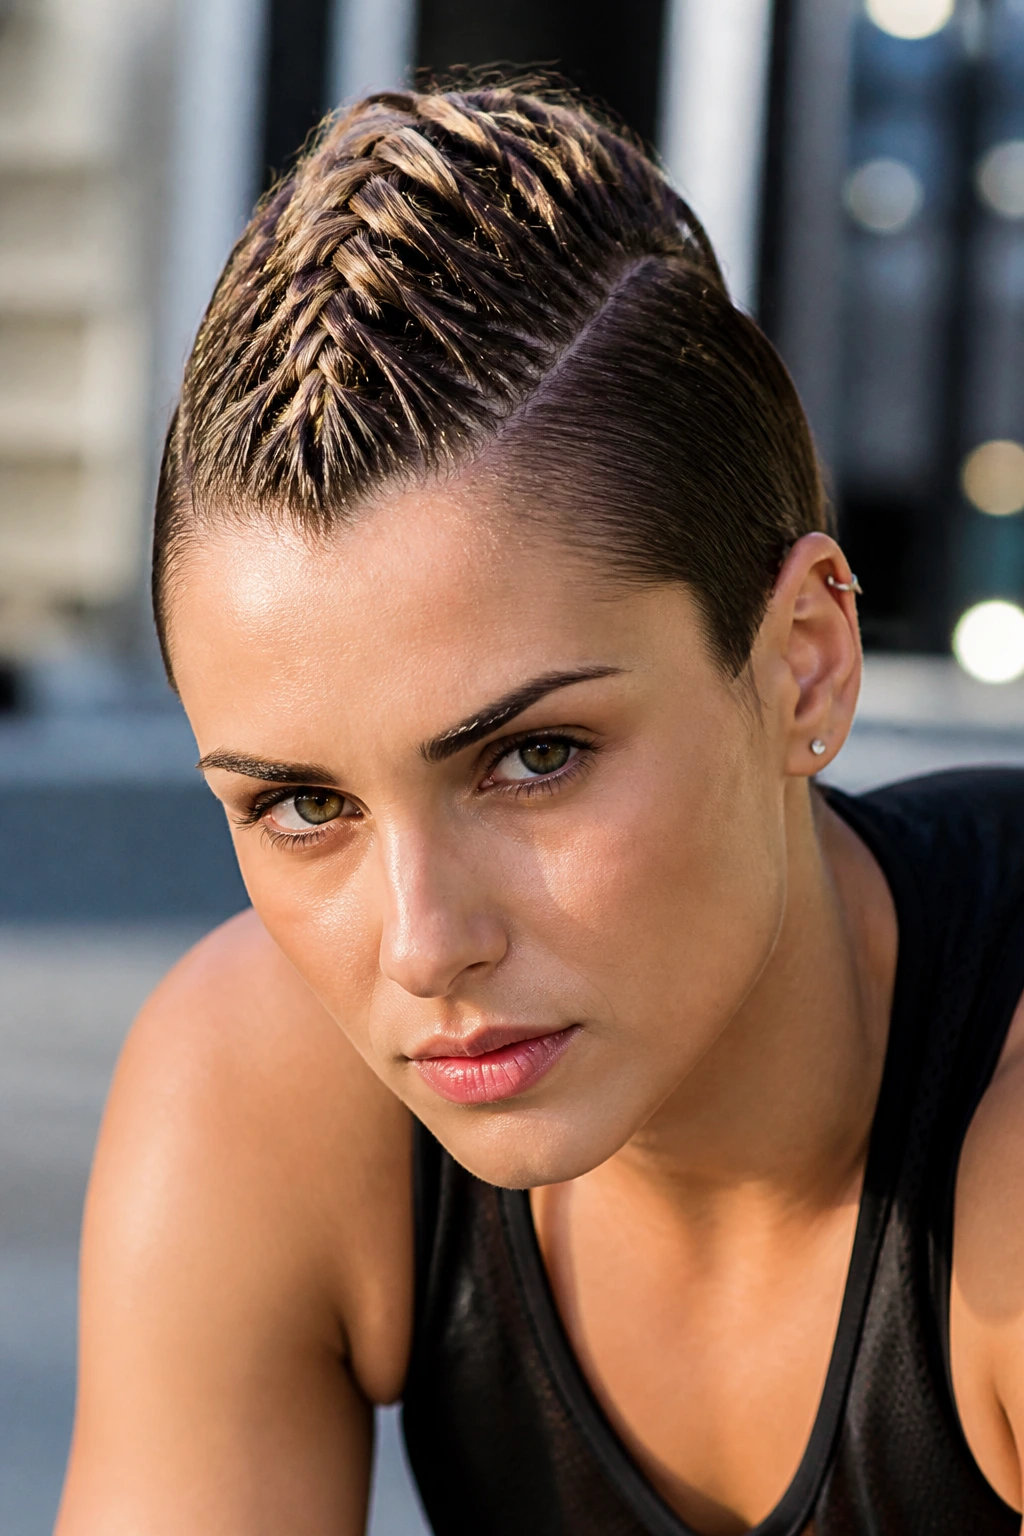
A Dutch braid Mohawk is for anyone who likes a little edge with their polish. The braid runs down the center of the head, and the sides stay tight, slicked, or pinned. It creates height without needing teasing that turns into a mess by lunchtime.
The style is sharper than a crown braid and more focused than twin braids. If you have short-to-medium hair, it can make the crown look fuller. If your hair is longer, the braid can end in a ponytail or bun at the back.
Be precise with the parts on either side. Uneven side sections are the fastest way to make this style look accidental. And yes, a fine-tooth comb helps here. Use it.
13. Dutch Braid into a Messy Bun
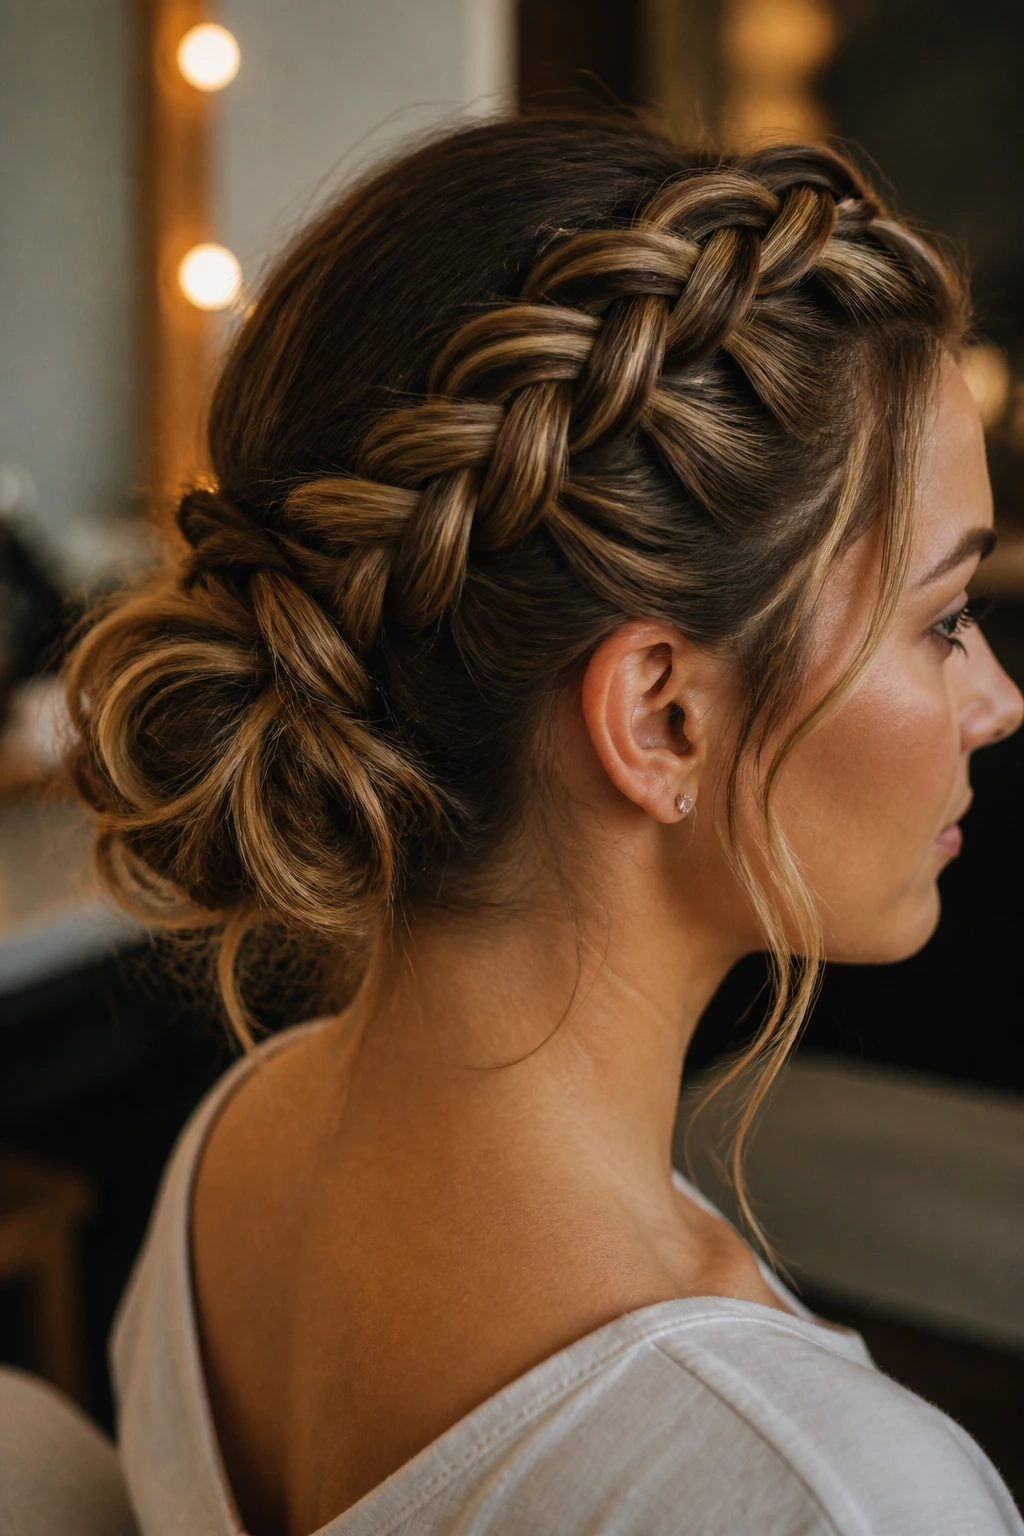
There’s a reason this combo keeps showing up: the braid handles the front, and the bun finishes the job without fuss. The braid can be centered or side-swept, but the end goal stays the same — a bun that looks anchored instead of dropped in at the last minute.
The nice part is that the bun does not need to be perfect. In fact, if it’s too neat, the whole style can feel severe. Let a few loops loosen. Leave the braid clean, and allow the bun to be a little more relaxed.
How to keep it balanced
Start with a firm braid through the scalp, then stop once you reach the back of the head. Twist the lengths into a bun, pin from multiple directions, and tug the outer edges slightly so the bun has shape.
This is one of the easiest styles to wear for long days because the braid keeps the crown from loosening while the bun keeps the length out of the way.
14. Dutch Braided Headband
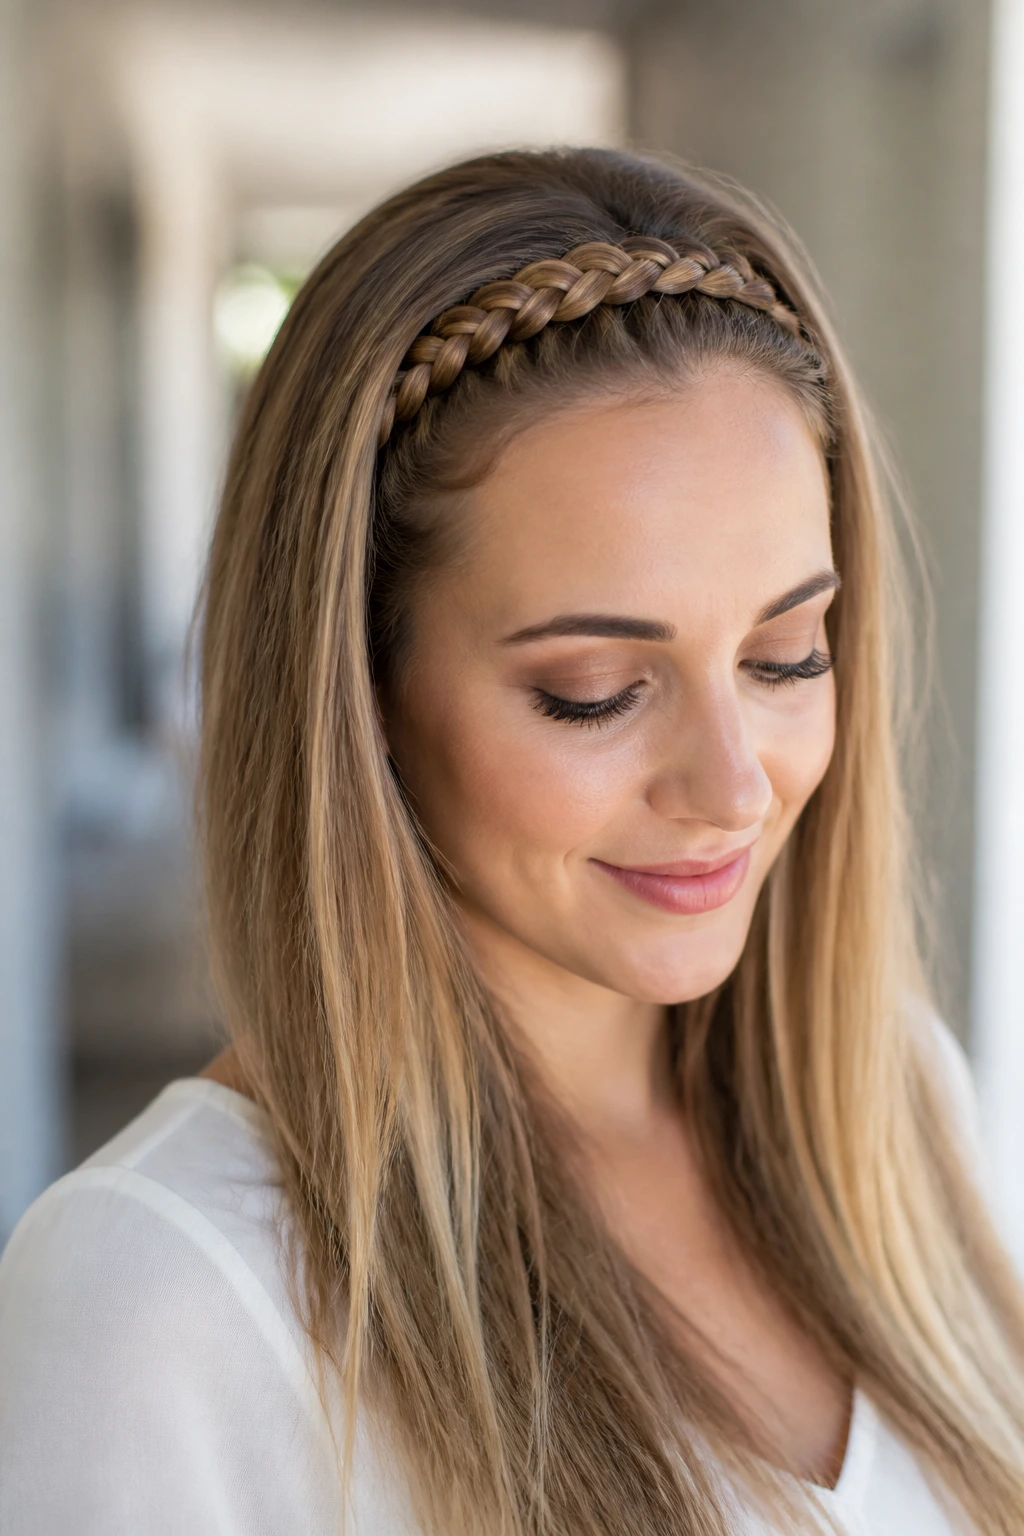
A Dutch braided headband is one of my favorite “I did something” styles. It uses a braid along the front hairline, then pins or blends it across the top like a built-in headband. The rest of the hair can stay down, straight, wavy, or tucked behind the shoulders.
The beauty of this style is that it works even when the rest of the hair is not cooperating. Slight frizz? Fine. Flat roots? Still fine. The braid creates the shape where it matters most, right around the face.
If you want it to look clean, keep the braid narrow and controlled. If you want it softer, gently widen the braid after securing it so it sits a little fuller across the crown.
15. Ribbon-Woven Dutch Braid
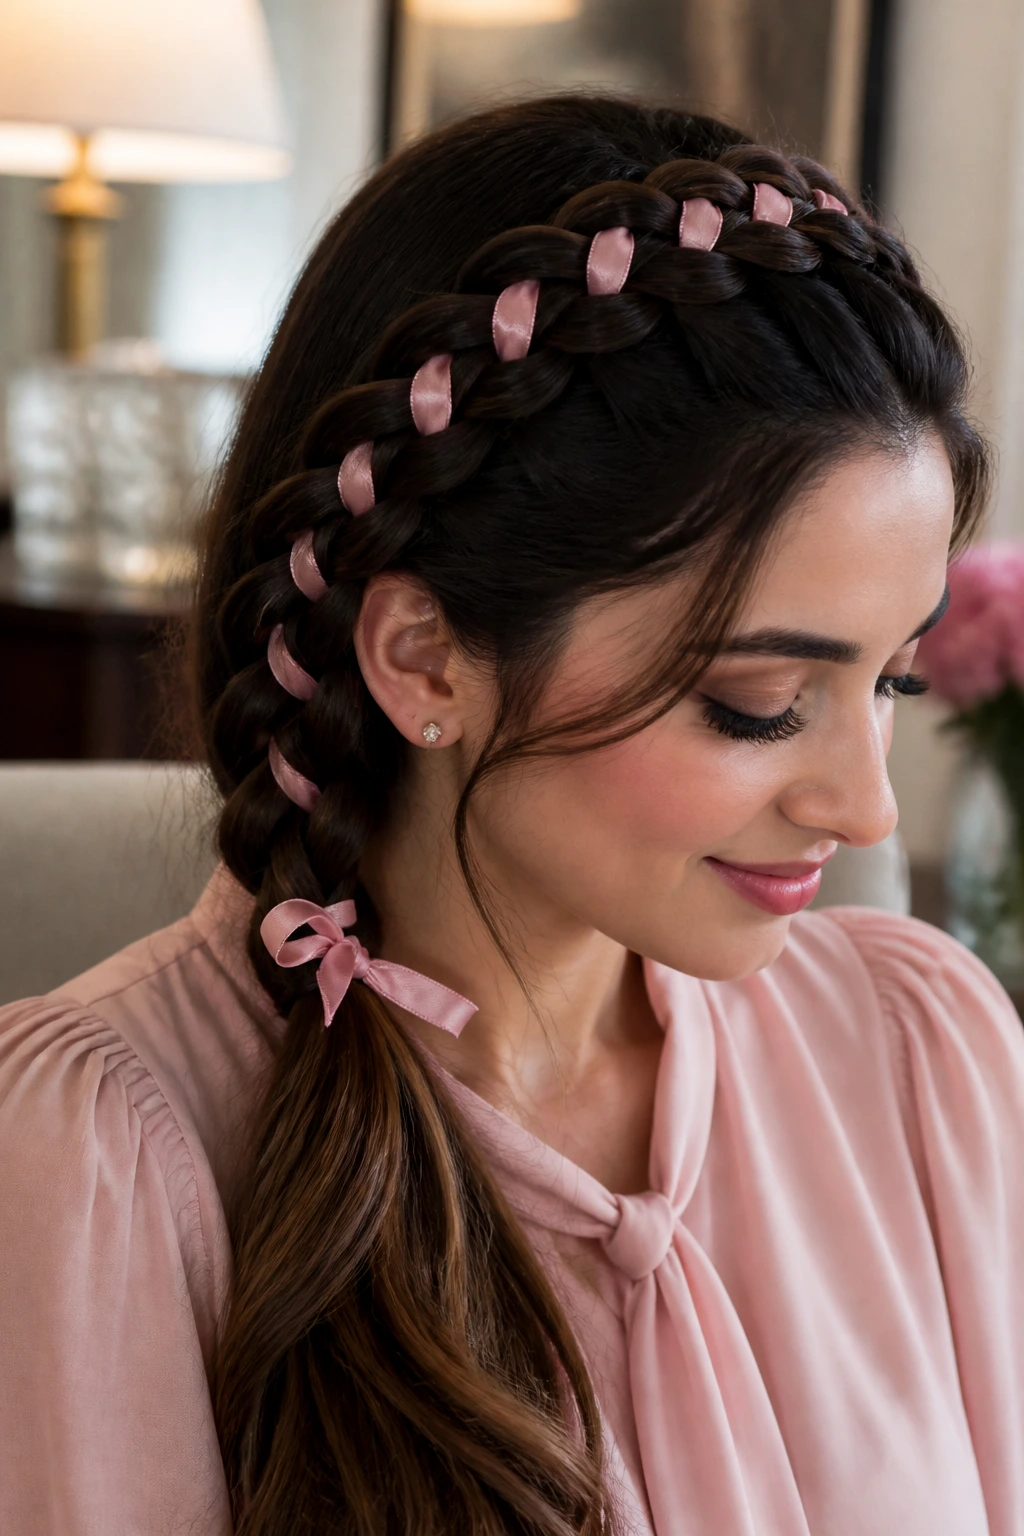
A ribbon woven into a Dutch braid changes the whole mood of the style. Same braid structure. Different finish. The ribbon gives you color, contrast, and a detail that looks planned rather than added at the end.
Choose a ribbon with enough body to stay visible, but not so stiff that it fights the braid. Satin works well for dressier looks. Grosgrain gives a firmer line. Keep the ribbon flat as you feed it into the sections so it doesn’t twist up and disappear.
A few things worth knowing
- A thin ribbon is easier to braid in cleanly
- Matching ribbon color to an outfit keeps the style subtle
- Contrasting ribbon makes the braid the focal point
- A bow at the end can look sweet, but it can also tip into childish fast
I prefer the version where the ribbon is tucked and the tail is left simple. Less fuss. More polish.
16. Double Dutch Braids into a Low Ponytail
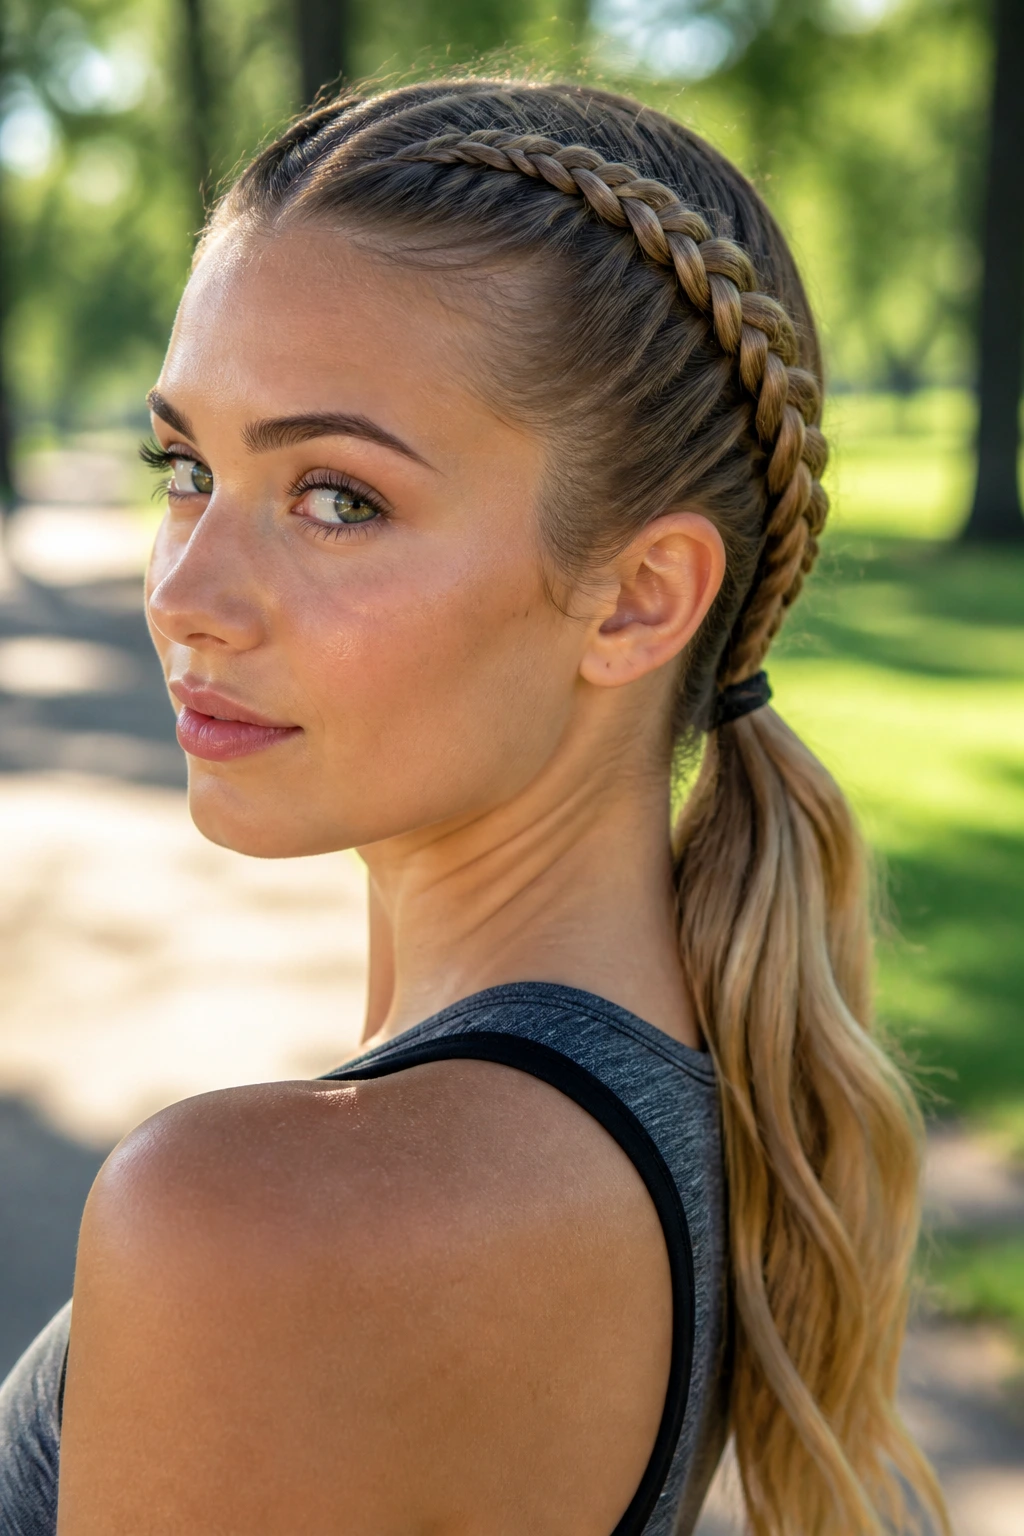
This one sits right between sporty and sleek. The twin Dutch braids start at the front, run down each side of the head, and meet at the nape in a low ponytail. Because the braids control the top half, the ponytail itself can stay smooth and neat.
It’s a practical style if you need hair off your neck but do not want a bun. The low ponytail keeps the shape soft, and the twin braids make the top feel intentional instead of thrown together.
If your hair is thick, use a strong elastic at the base and then wrap a small strand around it. That simple step cleans up the finish more than most people expect.
17. Deep Side-Part Dutch Braid with a Sleek Front
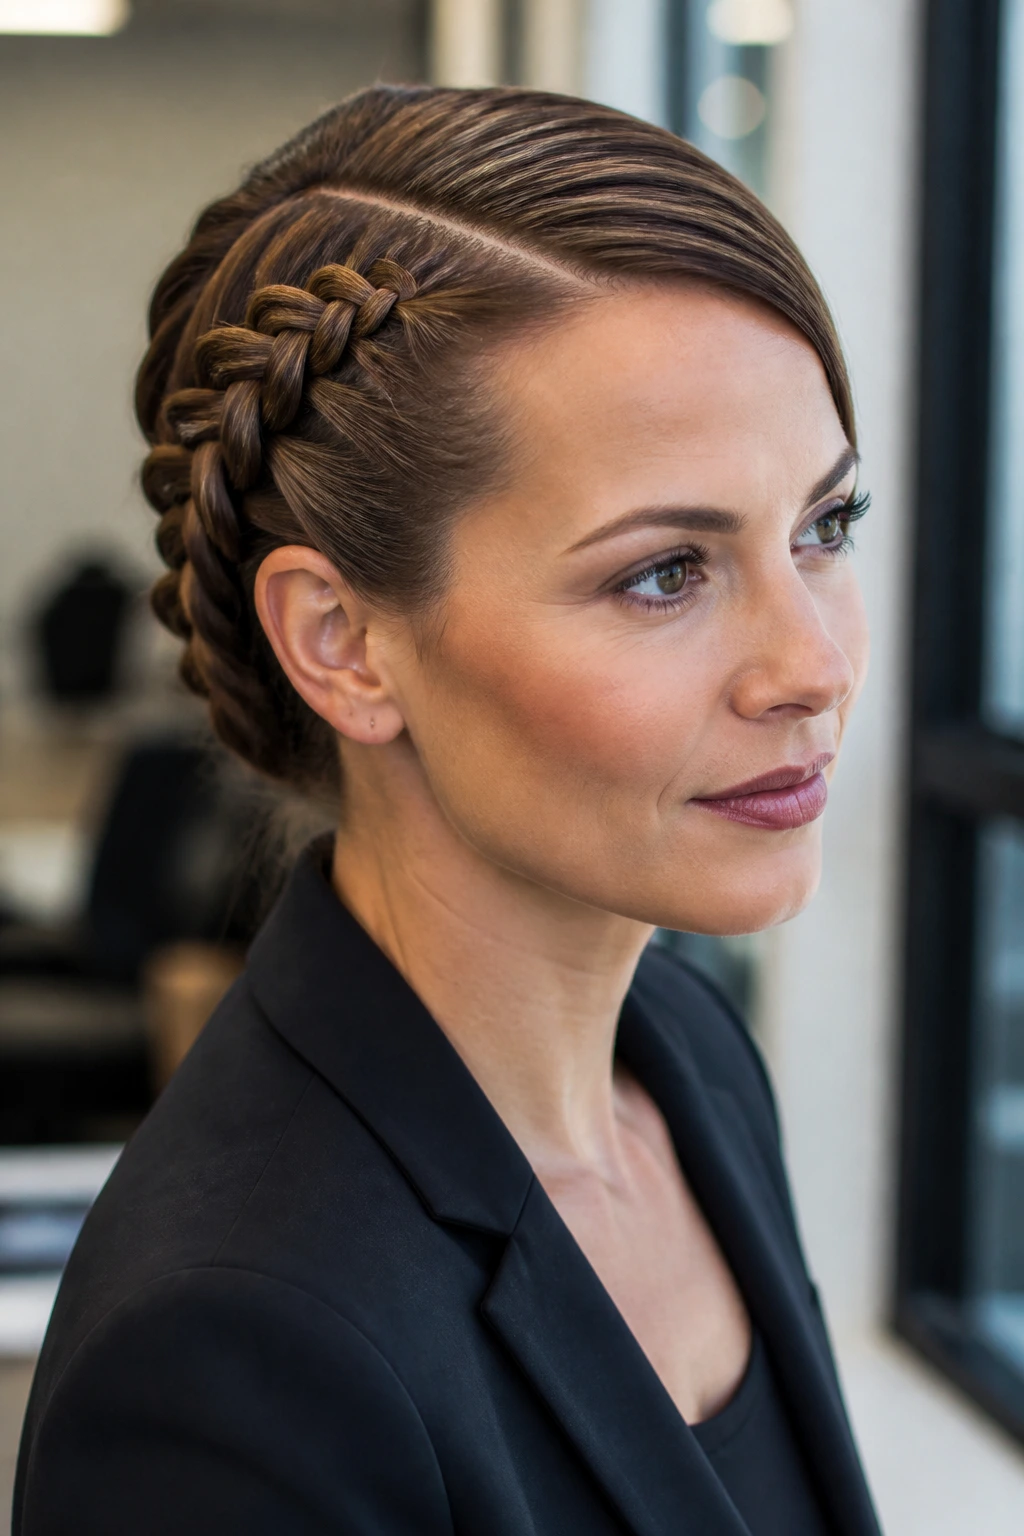
A deep side part changes the whole mood of a Dutch braid. It gives the style a longer line across the forehead and makes the braid feel a little more dramatic without adding any extra steps. The sleek front is the point here — the smoother the part and top section, the sharper the contrast with the braid.
This works well when you want a braid that feels grown-up and tidy rather than playful. Think blazer, hoops, and a clean neck line. The braid can fall over one shoulder or tuck back into a low tail.
Why it holds its shape
A deep side part gives the front section more weight, which helps the braid sit still instead of popping up unevenly. A small amount of styling gel or cream at the roots helps, especially if your hair tends to separate at the crown.
Keep the front surface smooth, then let the braid add the texture. That mix is the whole appeal.
18. Dutch Braid Space Buns
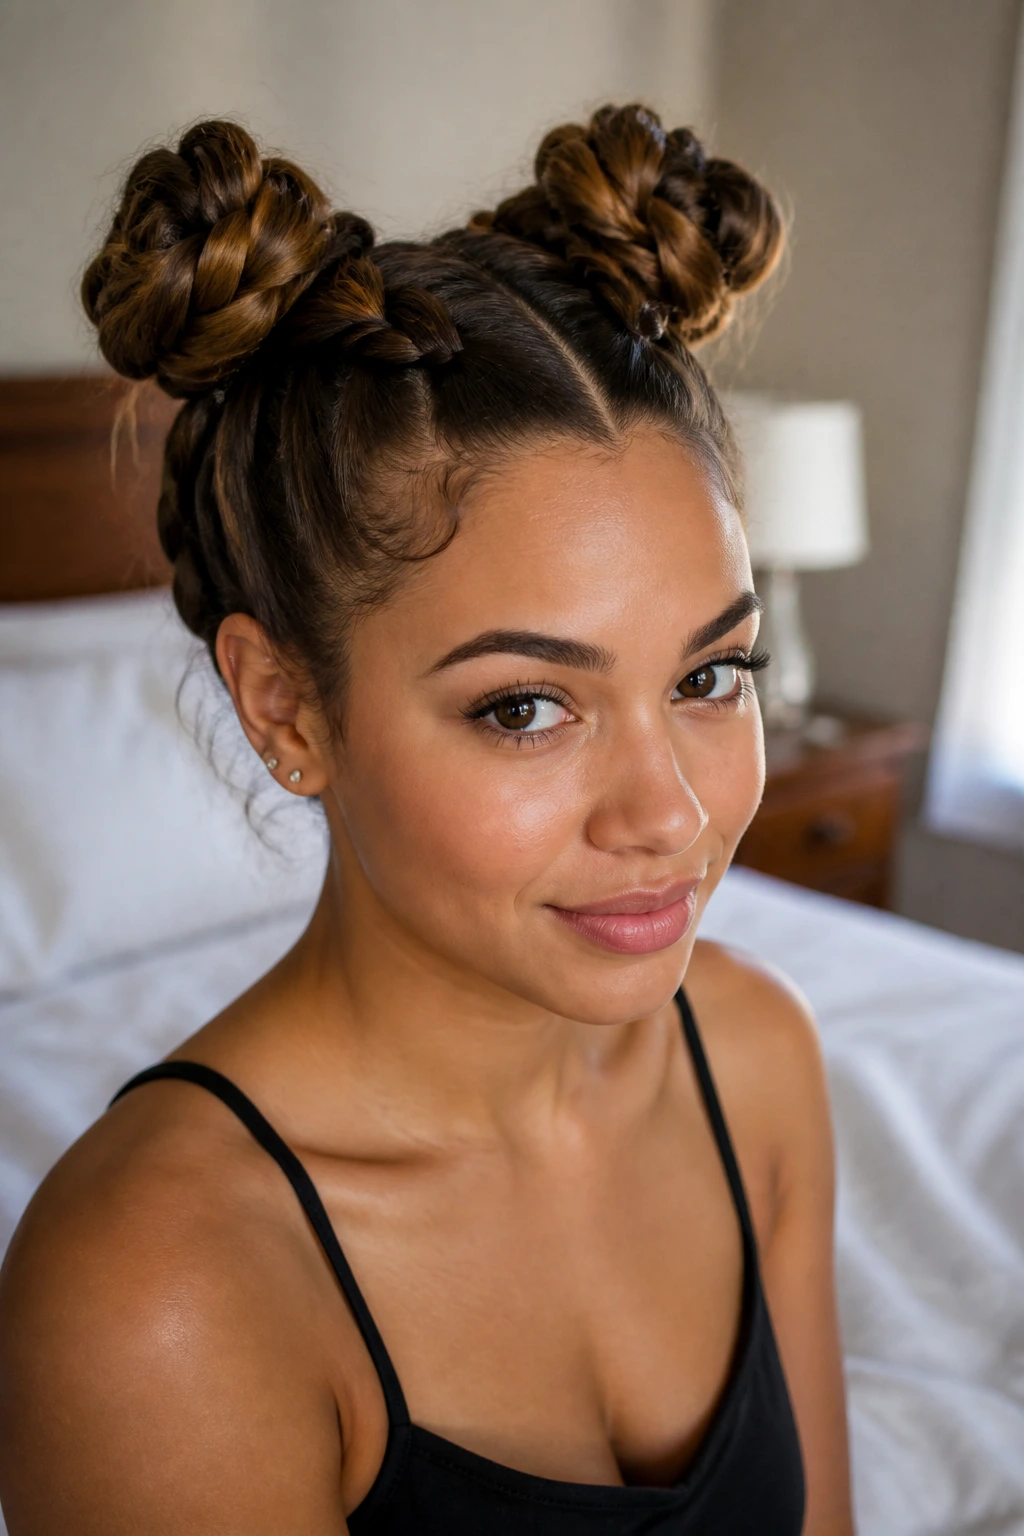
Space buns can look childish fast if the base is sloppy. A pair of Dutch braids fixes that. The braids add structure on the scalp, and the buns give the style shape at the top instead of leaving everything flat.
The key is to keep the braids even and the buns fairly compact. If the buns are too big, the style starts to look costume-like. If they’re too tiny, they disappear. Somewhere in the middle is the sweet spot.
This is a good pick for festival days, casual events, or any time you want something fun that still reads clean in the mirror. Add a little shine spray on the crown and you’re done.
19. Dutch Braided Low Chignon
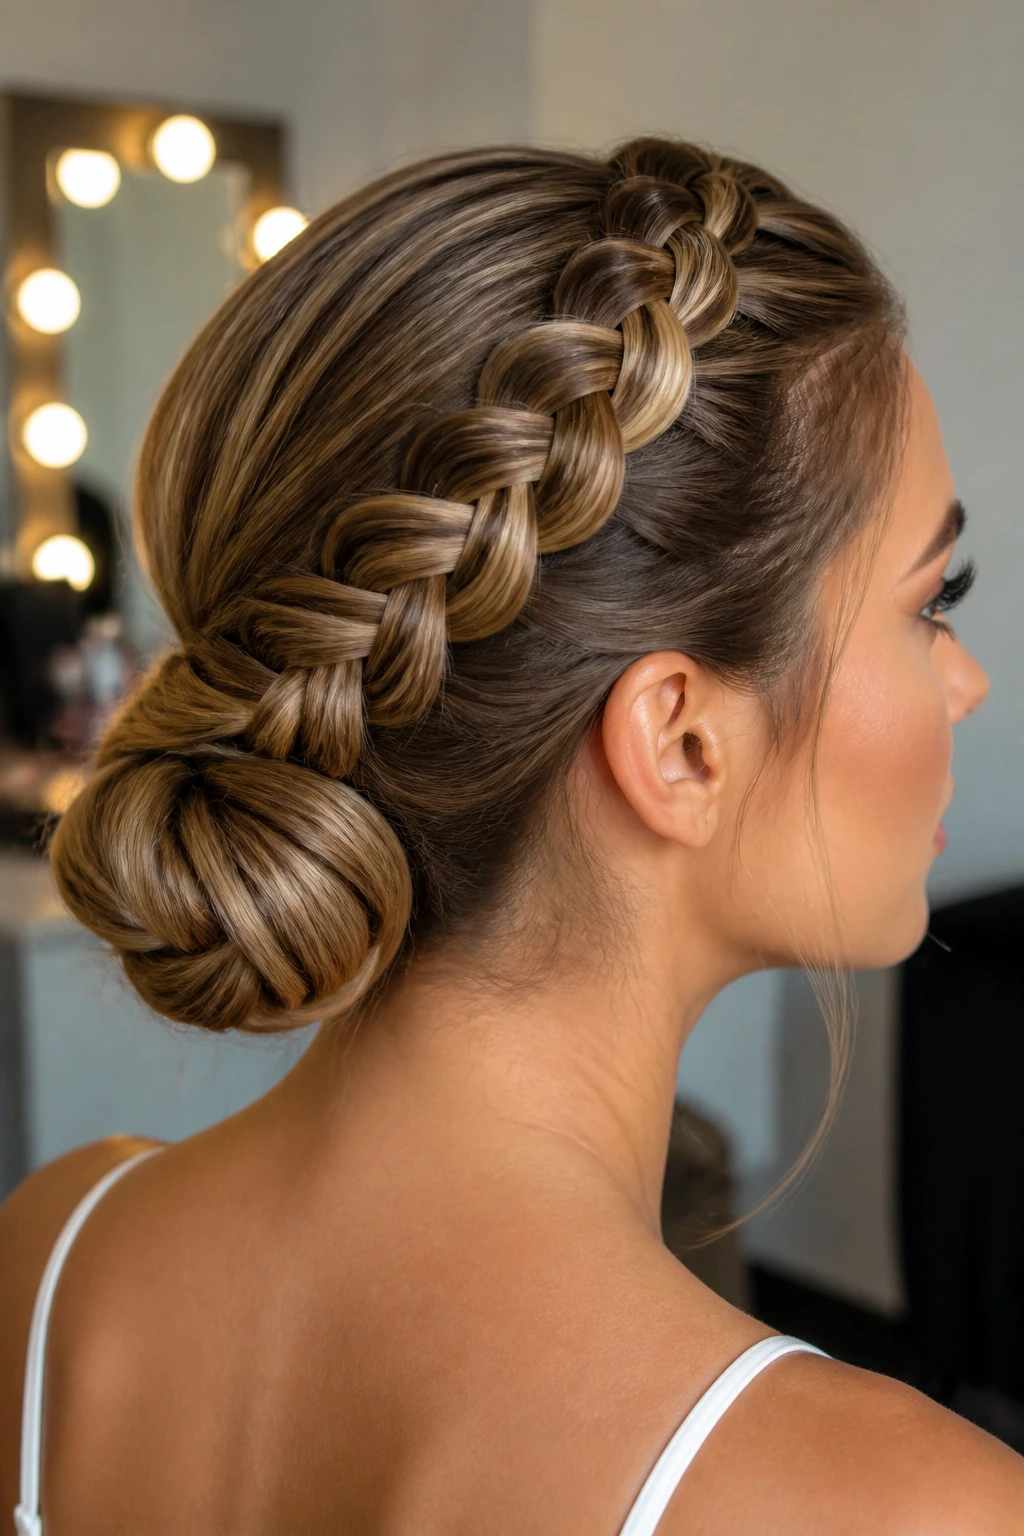
A low chignon made from a Dutch braid is polished in the old-fashioned sense — neat, controlled, and a little formal without feeling stiff. The braid moves straight into the twist or coil at the nape, which keeps the shape anchored and the finish compact.
This one is best when you want the braid detail visible but not dominant. It’s more about the line of the style than about the braid itself shouting for attention. That makes it useful for events where your hair should stay in place, not steal the room.
Use pins that match your hair color if you can. A visible pin here or there is fine. A forest of shiny metal is not.
20. Dutch Braid with a Silk Scarf
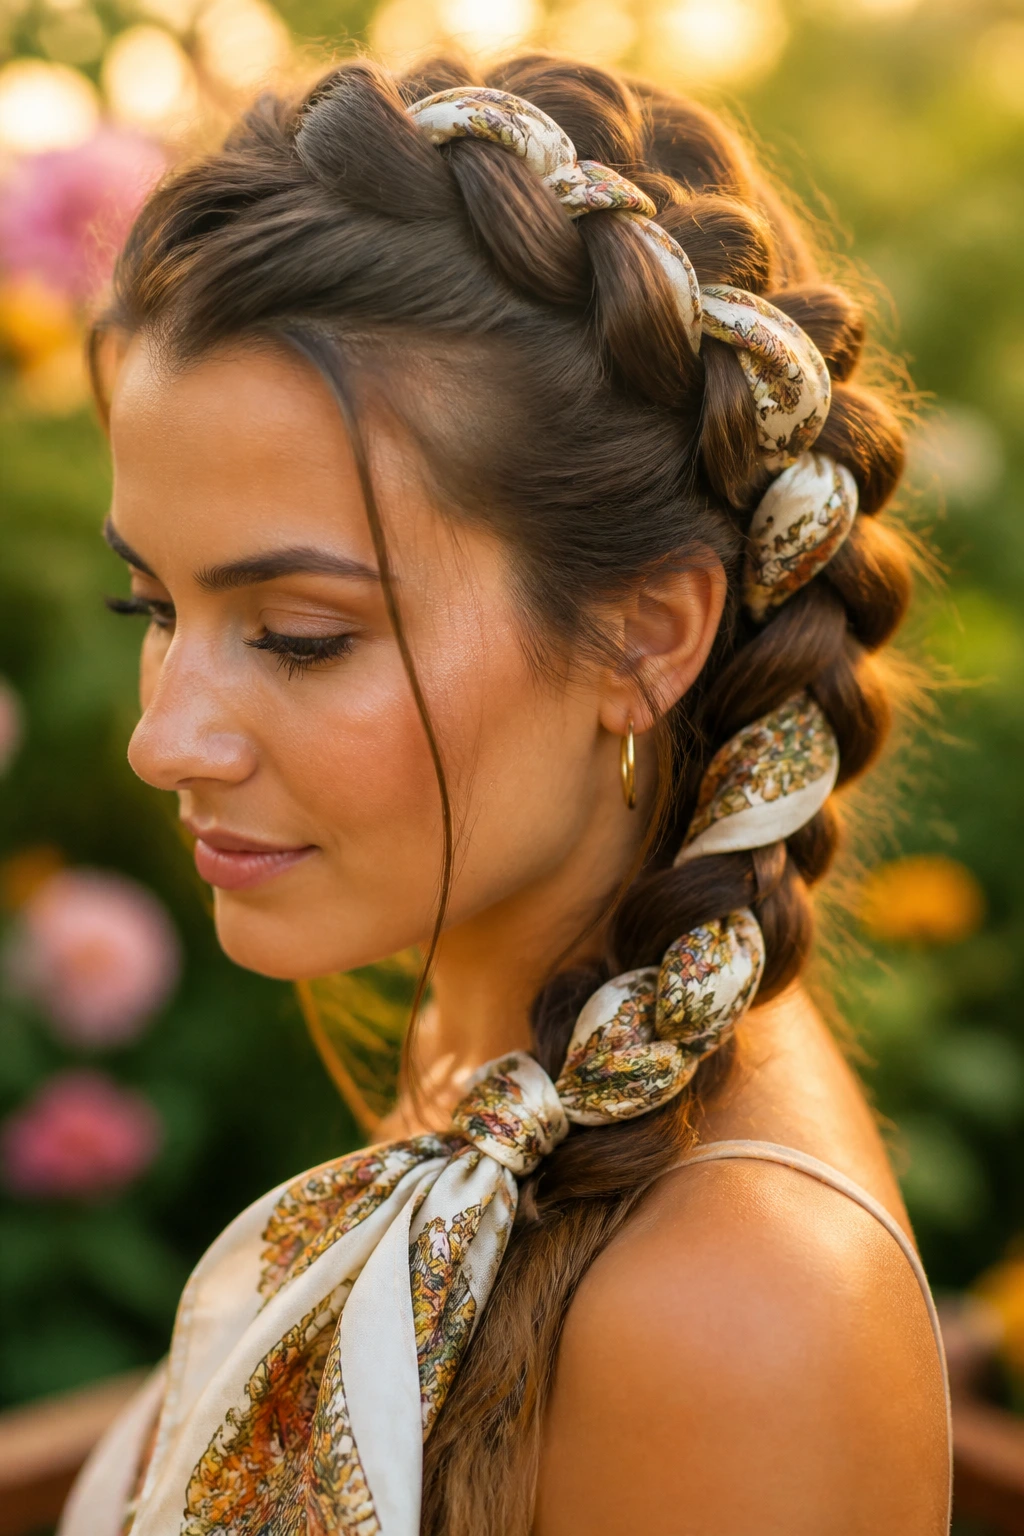
A silk scarf changes the mood of a Dutch braid almost instantly. Tie it into the braid, wrap it around the base, or knot it near the tail. The style gets softer, more styled, and a little less expected.
The scarf also helps if your ends are dry or uneven, because it gives them a deliberate finish instead of leaving them exposed. That matters more than people think. A rough tail can drag down an otherwise neat braid.
Good ways to wear it
- Woven through a single braid
- Tied around the ponytail base
- Wrapped like a headband with braid detail beneath
- Knotted at the end of twin braids
Keep the scarf fabric smooth and not too bulky. A heavy cotton scarf can make the braid puff up in the wrong places. Silk or satin sits better.
21. Jumbo Dutch Braid
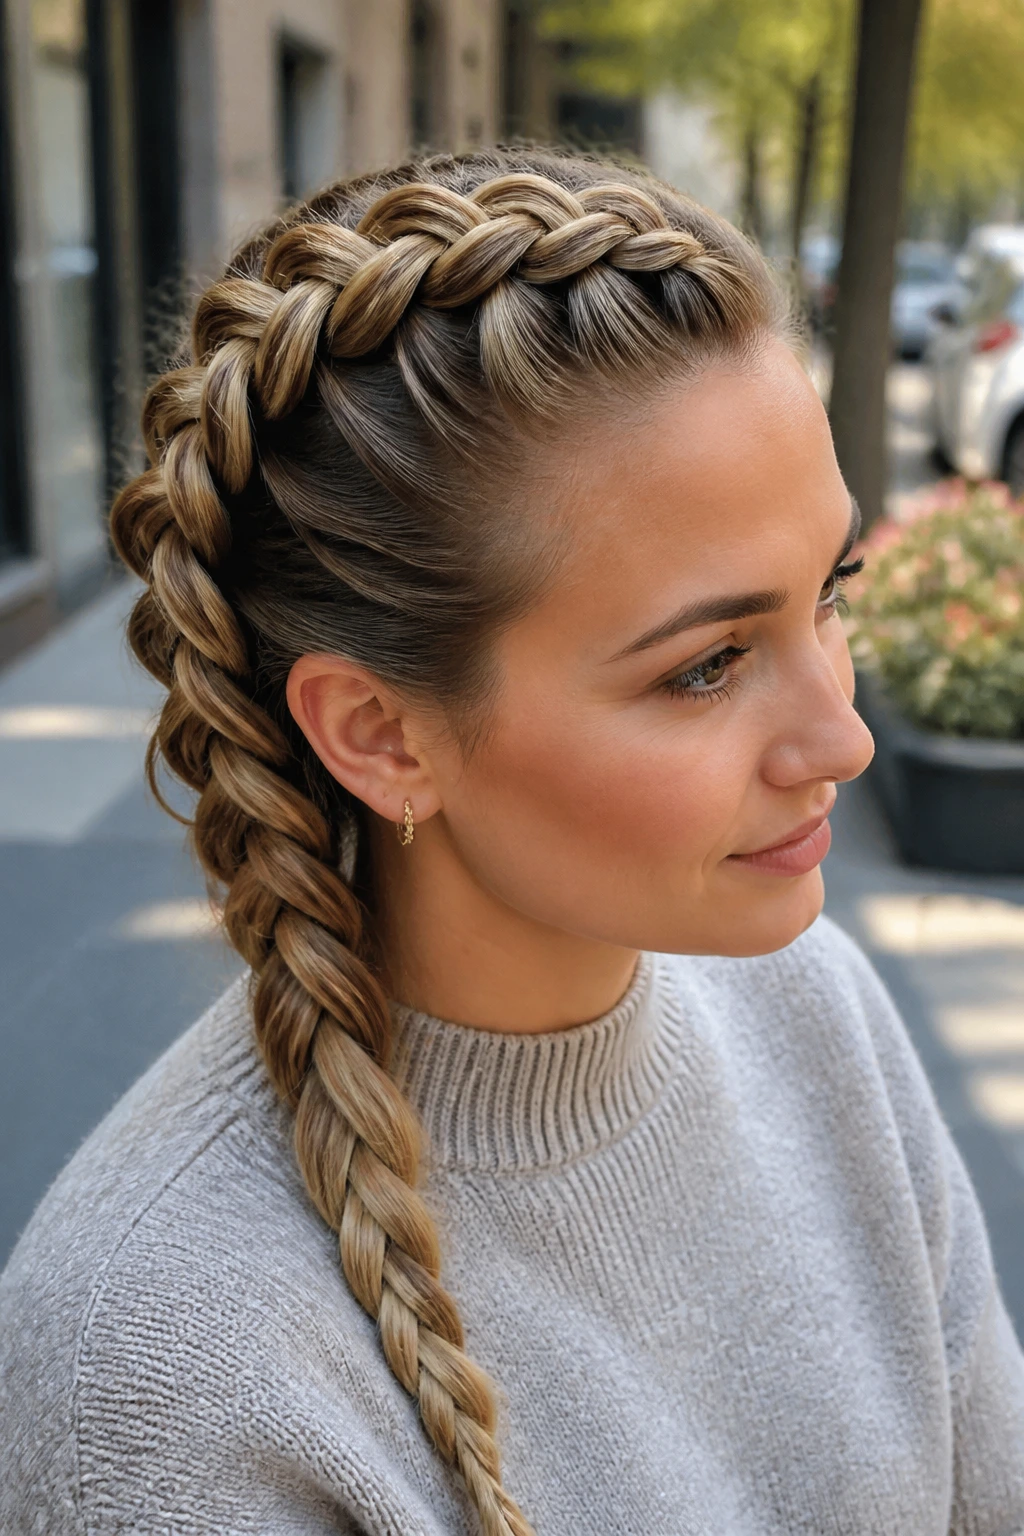
A jumbo Dutch braid makes a point, and the point is volume. Instead of many tiny sections, you use larger panels of hair, which creates a thicker braid with a strong, graphic line. It looks bold, but the technique is still simple.
This style works well on dense hair or with added extensions. If the hair is fine, a jumbo braid can look fuller with a little gentle pancaking after you secure the ends. Just do it slowly, inch by inch, or the braid will loosen too fast.
What to watch for
- Bigger sections need cleaner parting
- Too much tension can make the braid feel heavy
- A soft finish keeps it from looking blocky
- Dry shampoo helps if the roots are slick
The best jumbo Dutch braids look solid at the top and soft through the tail. That contrast keeps them from reading as one thick rope.
22. Micro Dutch Accent Braids
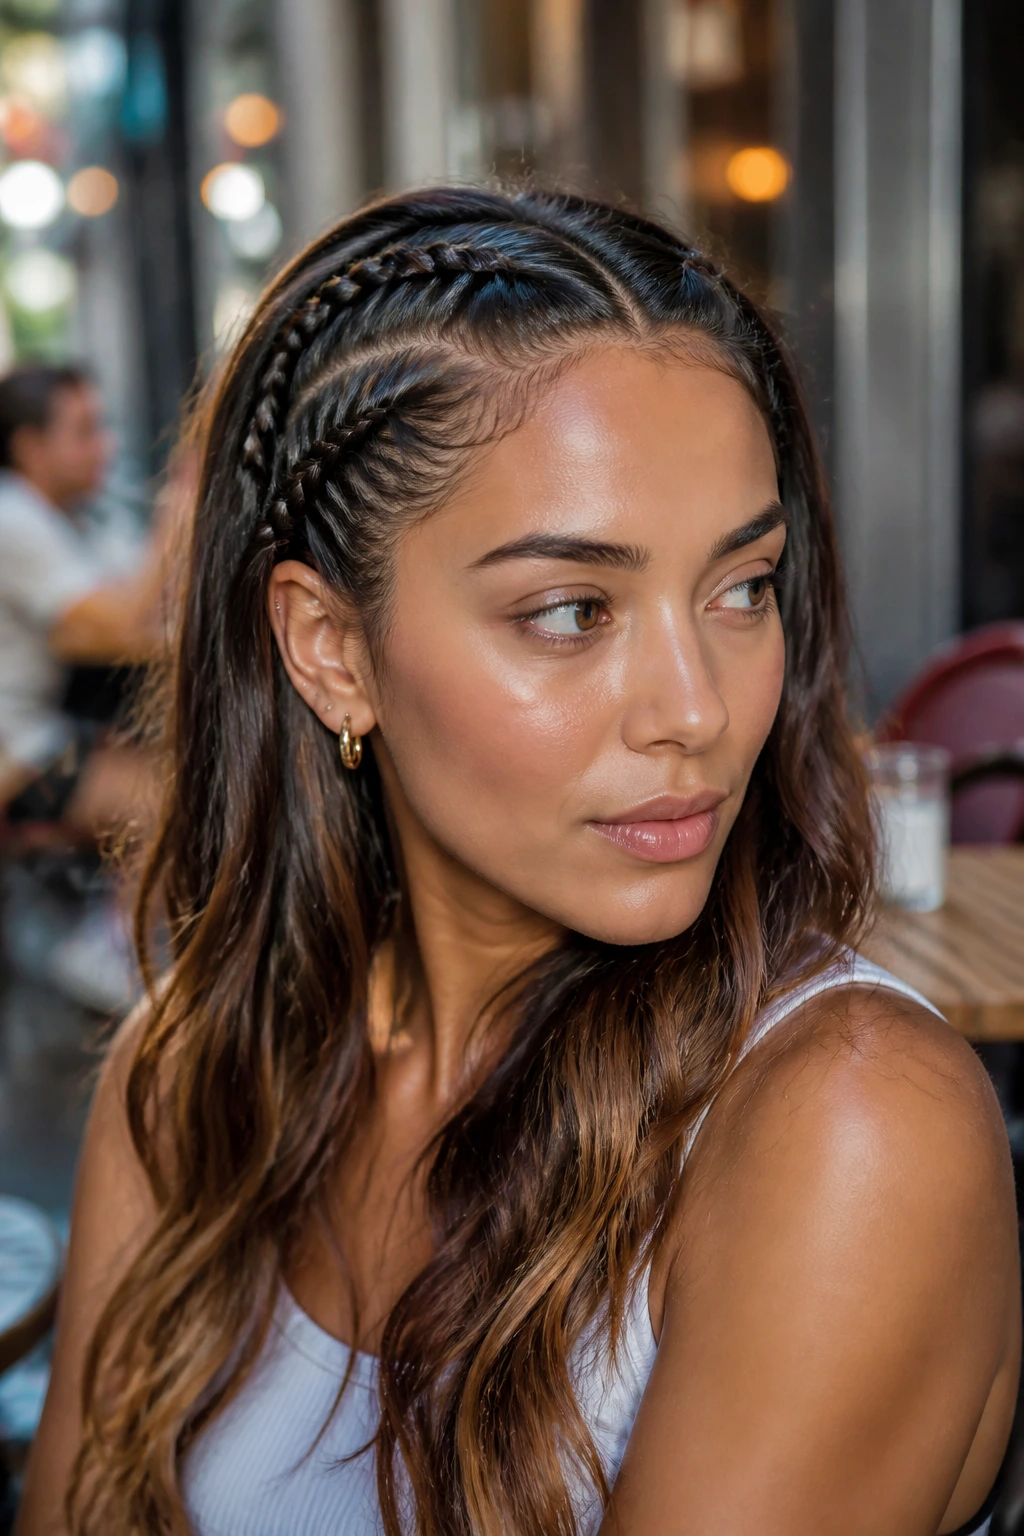
Tiny Dutch accent braids are a good answer when you want structure without committing to a full head of braids. Add one or two narrow Dutch braids near the temple, along the part, or beside a loose ponytail, and the whole style gets a little more edge.
They’re especially useful on layered hair, where a full braid can be hard to keep even. Small accent braids let you control just the front or one side. That’s enough to change the silhouette.
A small clear elastic or a tiny metal cuff at the end can make the look feel finished. If you leave them bare, the braid can disappear into the rest of the style. A touch of definition helps.
23. Dutch Braid with Hidden Elastic Ends
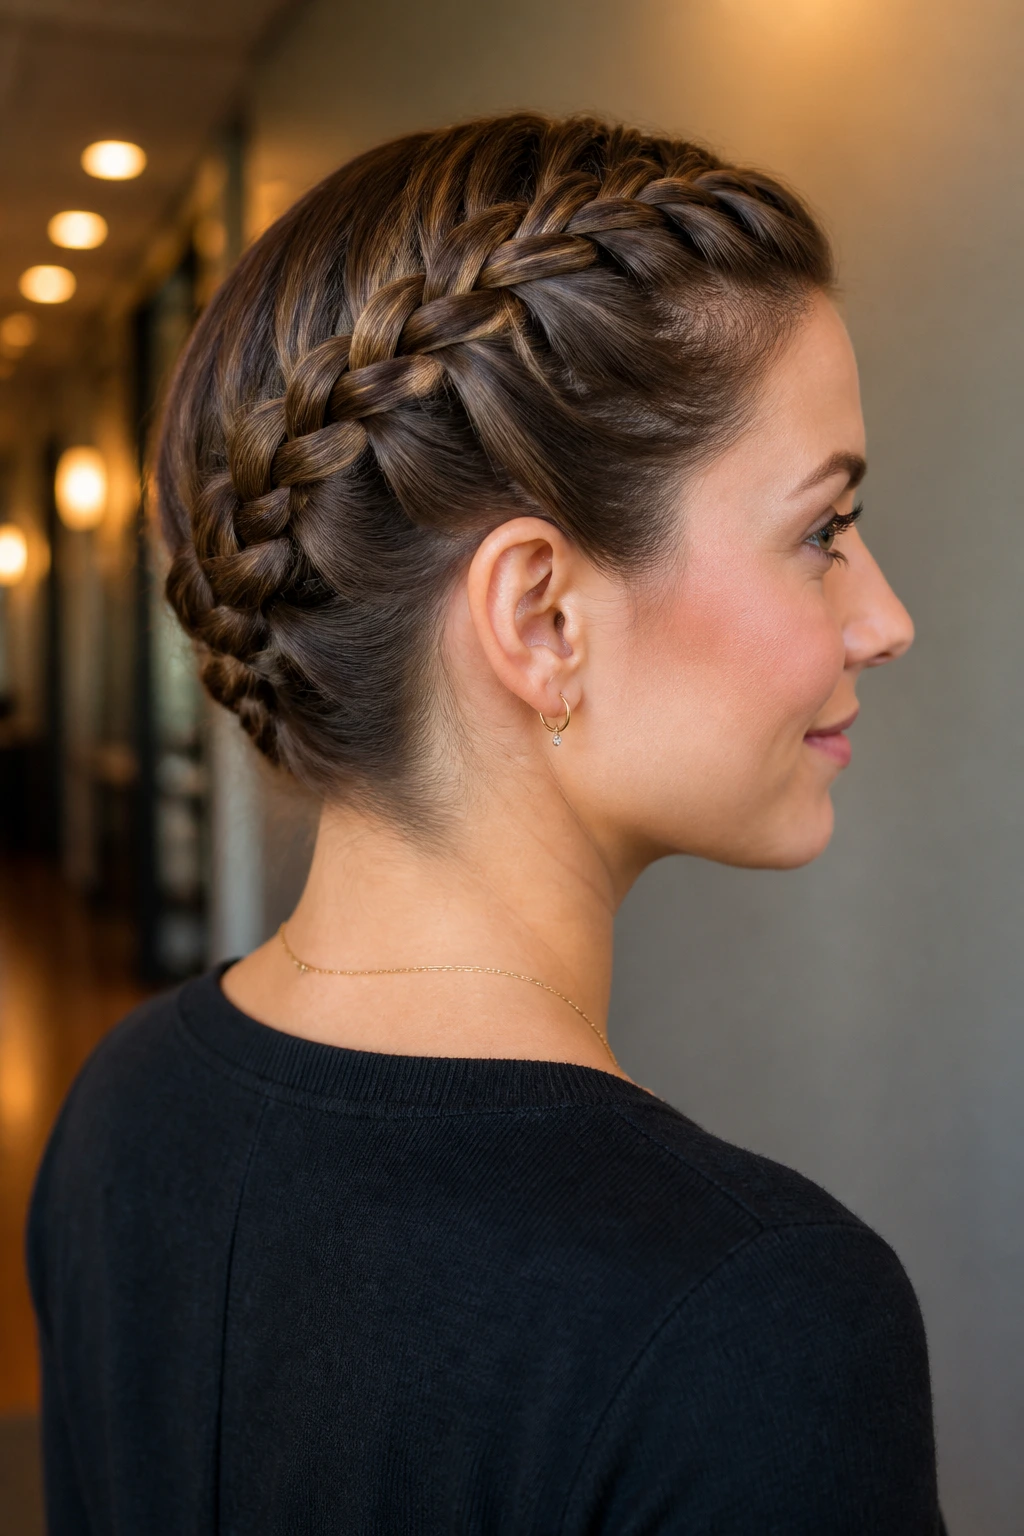
Some styles are polished because you don’t see the hardware. This is one of them. The Dutch braid ends get tucked under, pinned flat, or wrapped so the elastic disappears into the shape of the style.
That clean finish makes a bigger difference than people expect. The braid itself may be simple, but the hidden end keeps the eye moving without landing on a visible band. It’s neat in a way that feels intentional, not minimal for the sake of being minimal.
Small finishing rules
- Match the elastic to the hair color if you can
- Tuck the tail under a pin or back into the braid
- Smooth the last inch with a touch of serum
- Check the back in a second mirror
This is a strong choice for workdays, presentations, or any setting where you want the braid to look finished from front to back.
24. Dutch Braid on Curly or Coily Hair with Defined Ends
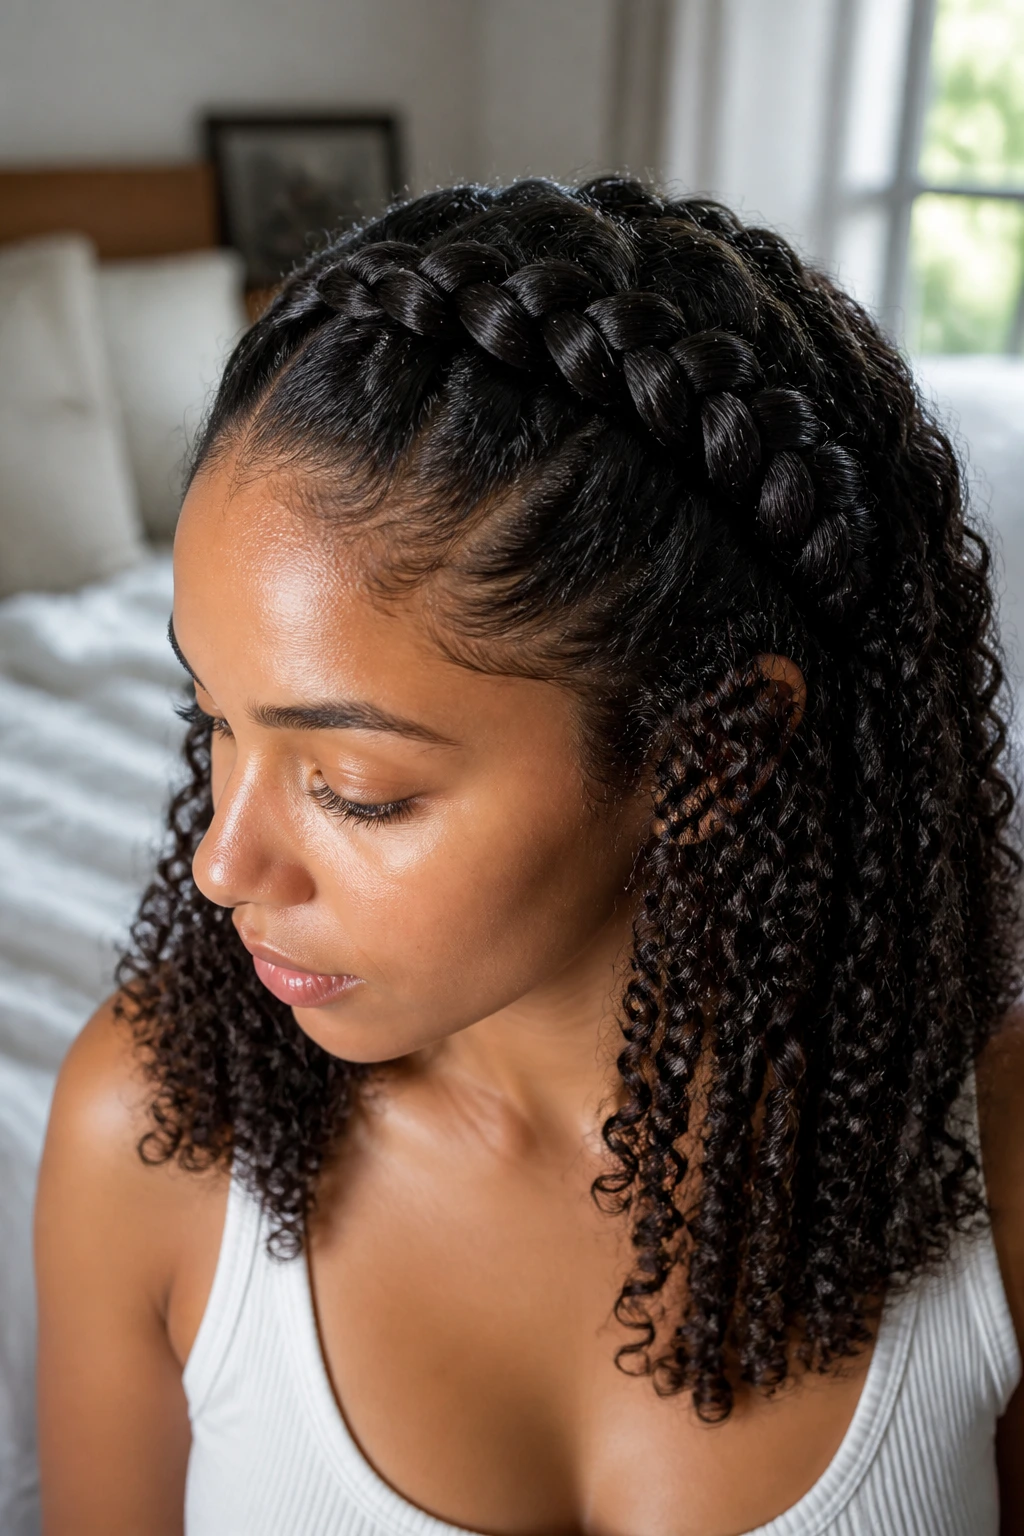
Dutch braid hairstyles can look especially rich on curly and coily hair because the braid picks up texture instead of fighting it. The sections have grip, the braid line stays visible, and the finish often looks fuller right away. If you want the style to stay neat, start with detangled hair and a light leave-in.
The shape matters more than forcing every strand flat. Smooth the roots, braid with steady tension, and let the ends stay defined, stretched, or tucked depending on the length. A braid that respects the hair’s texture usually looks better than one trying to erase it.
If your curls shrink fast, use a bit of product at the ends to keep the finish from looking frayed. A soft curl cream or styling butter on the last few inches can help the tail hold its shape.
25. Dutch Braid with Curtain Bangs and Soft Face-Framing Pieces
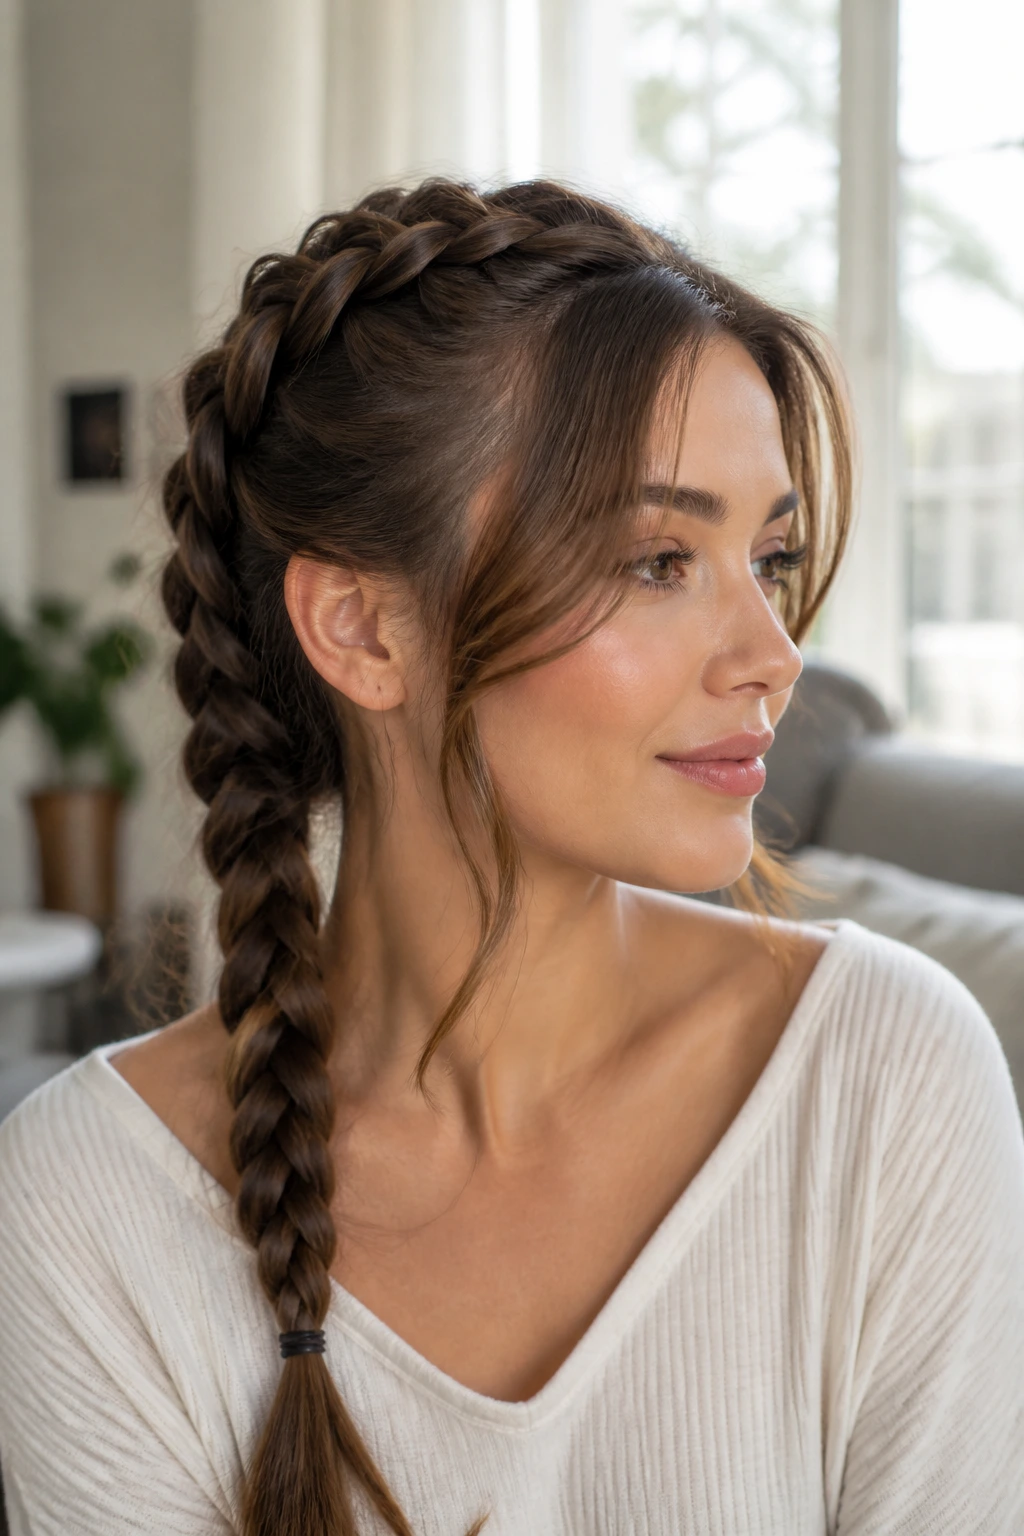
A Dutch braid paired with curtain bangs or soft face-framing pieces gives you the clean braid line without closing off the face. The front pieces break up the shape in a way that feels relaxed, especially if the braid is tight through the crown and looser through the tail.
This is the style for people who want structure but do not want every strand pulled back. The bangs or face-framing pieces soften the braid, which keeps the look from tipping into severe. On straight hair, it reads elegant. On wavy hair, it reads easy.
If the front pieces keep falling into your eyes, curl them slightly away from the face or pin just the shortest layers back for a few hours. That tiny adjustment keeps the style useful without killing the softness.
Why Dutch Braid Hairstyles Feel So Clean on Busy Mornings
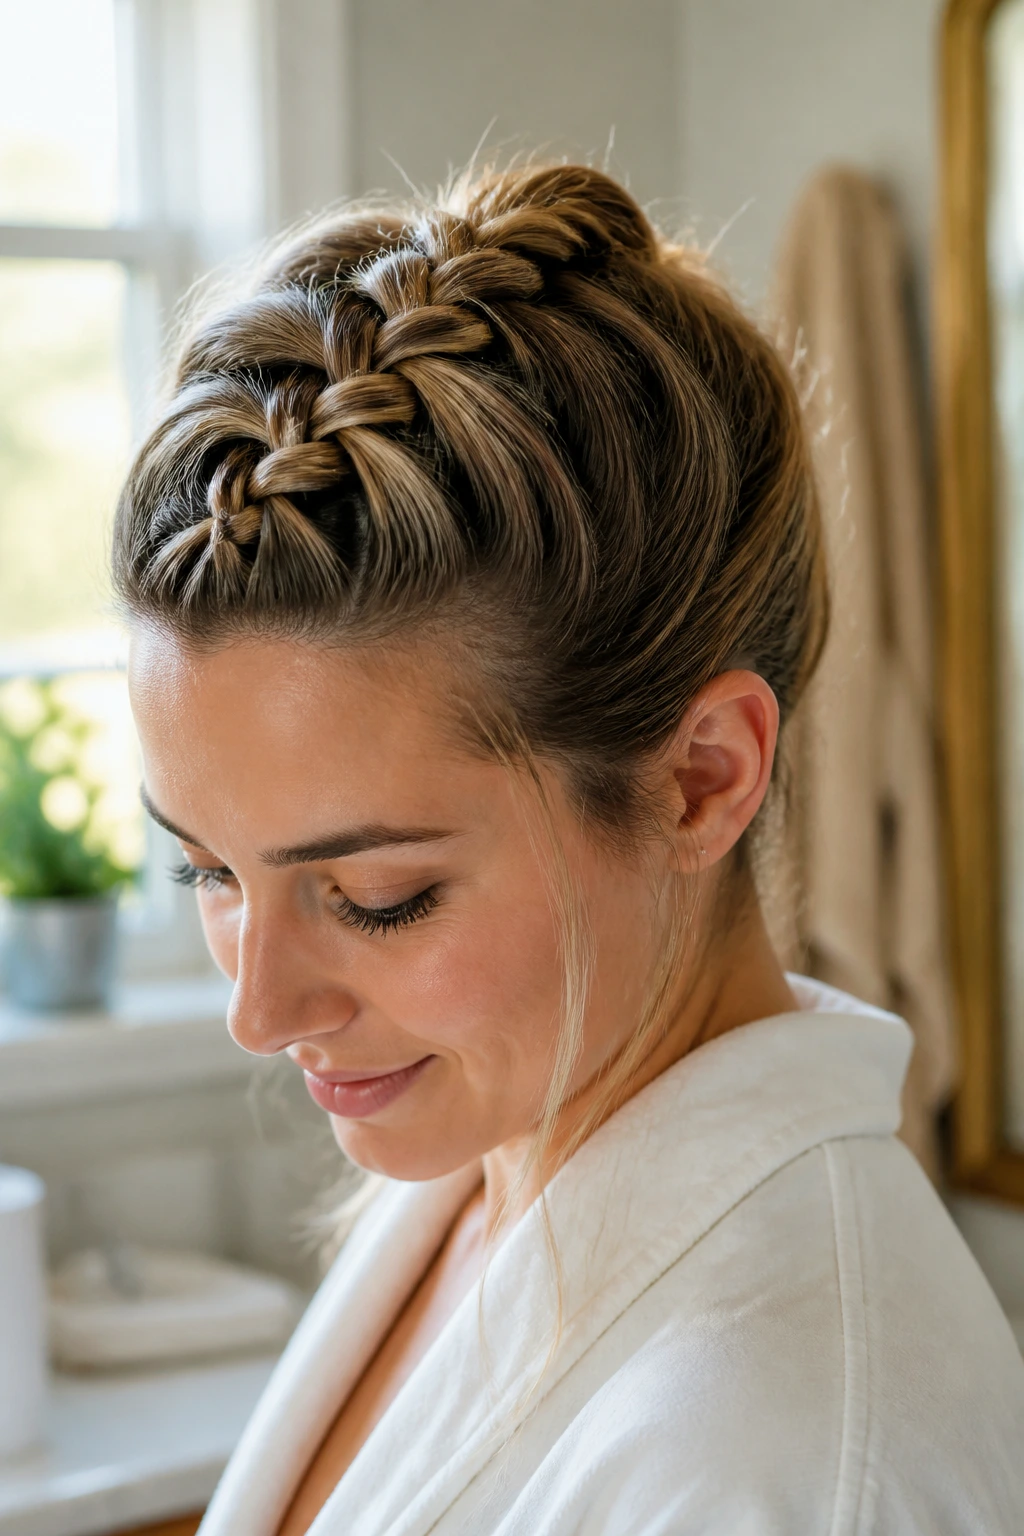
The braid sits higher than a standard plait, and that raised shape gives the eye something to follow. Once the part is clean and the first few crossings are even, the rest of the braid tends to look better than people expect. You do not need a perfect blowout for this. You need a decent part, steady hands, and hair that has enough grip to hold the sections.
That grip is why second-day hair often behaves better than freshly washed hair. Clean hair can slip all over the place, especially if it’s fine or silky. A bit of dry shampoo, texturizing spray, or light styling cream gives the strands friction. Friction is your friend here.
The other reason these Dutch braid hairstyles work is simple: they control the front of the head first. The hairline, crown, and side sections are the parts that make a style look neat or messy from a distance. Nail those, and the rest falls into place.
Essential Tools for Clean Dutch Braids
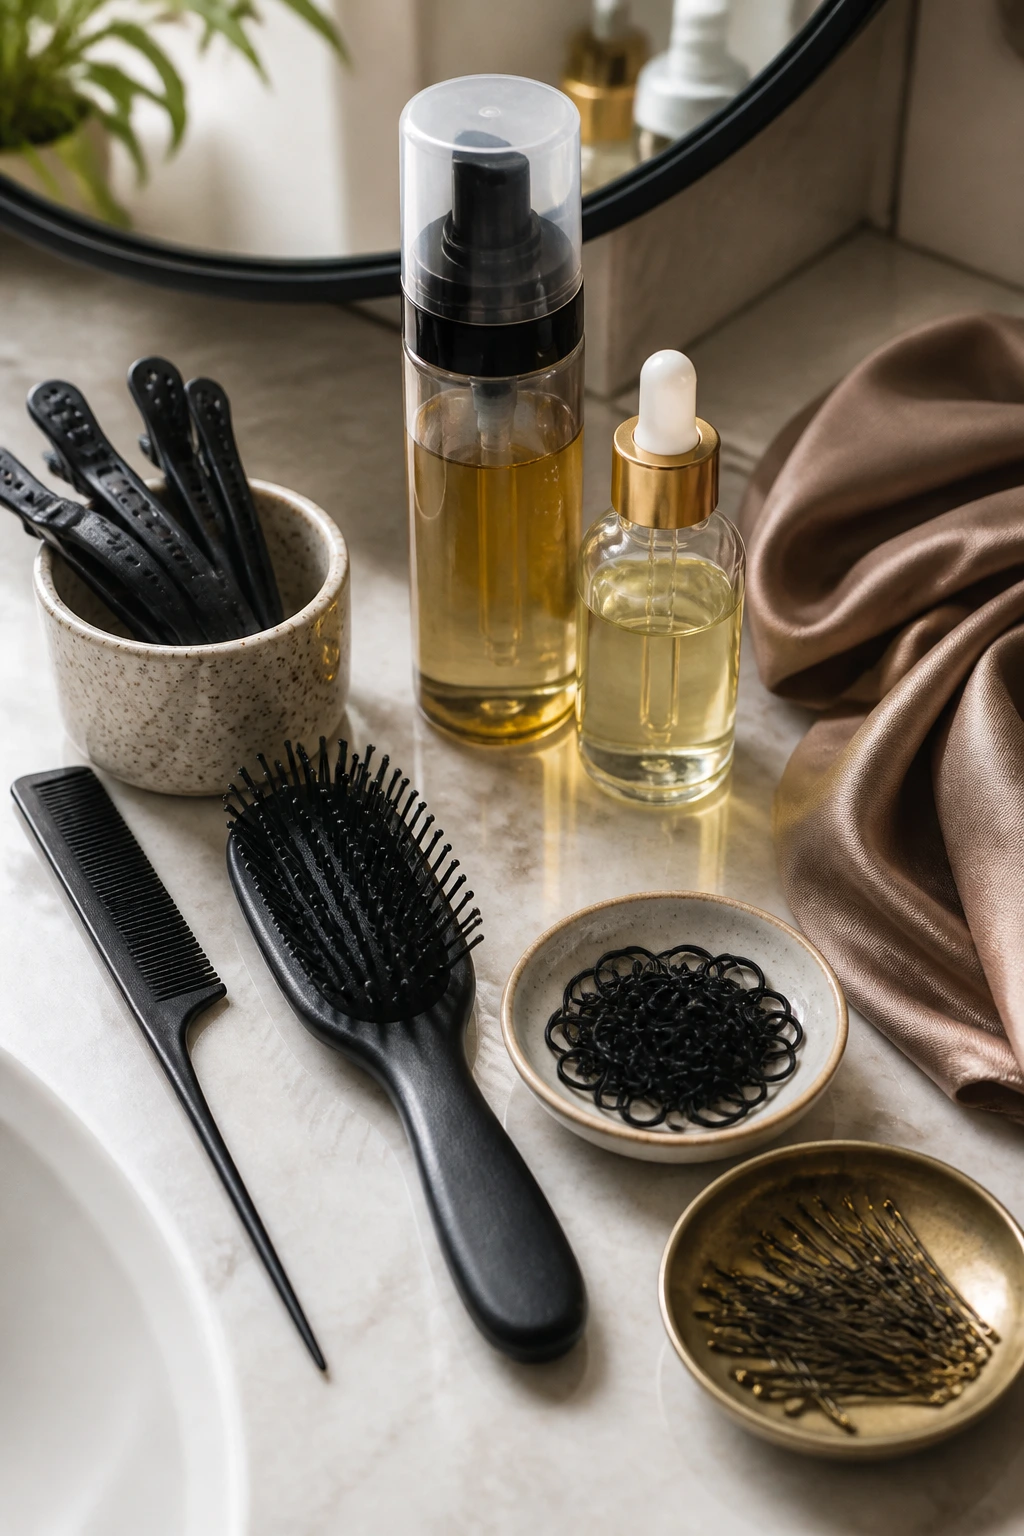
- Rat-tail comb: The pointed tail makes clean parts and sectioning much easier than using your fingers alone.
- Brush or detangling comb: Smooths knots before you start, which helps the braid stay even.
- Sectioning clips: Keep the loose hair out of the way while you braid one side at a time.
- Light-hold gel, cream, or mousse: Adds grip and calms frizz at the roots without making the hair stiff.
- Small elastics: Clear or hair-colored bands keep the ends tidy and less visible.
- Bobby pins or U-pins: Useful for buns, crowns, and tucked styles that need hidden support.
- Hair oil or serum: A tiny amount on the ends can tame roughness, but do not drench the braid.
- Silk scarf or bonnet: Helps preserve the braid overnight and keeps the front from puffing up.
- Mirror with good light: A hand mirror or two-angle mirror setup saves you from lopsided braids at the back.
How to Prep Hair for Dutch Braid Hairstyles That Hold
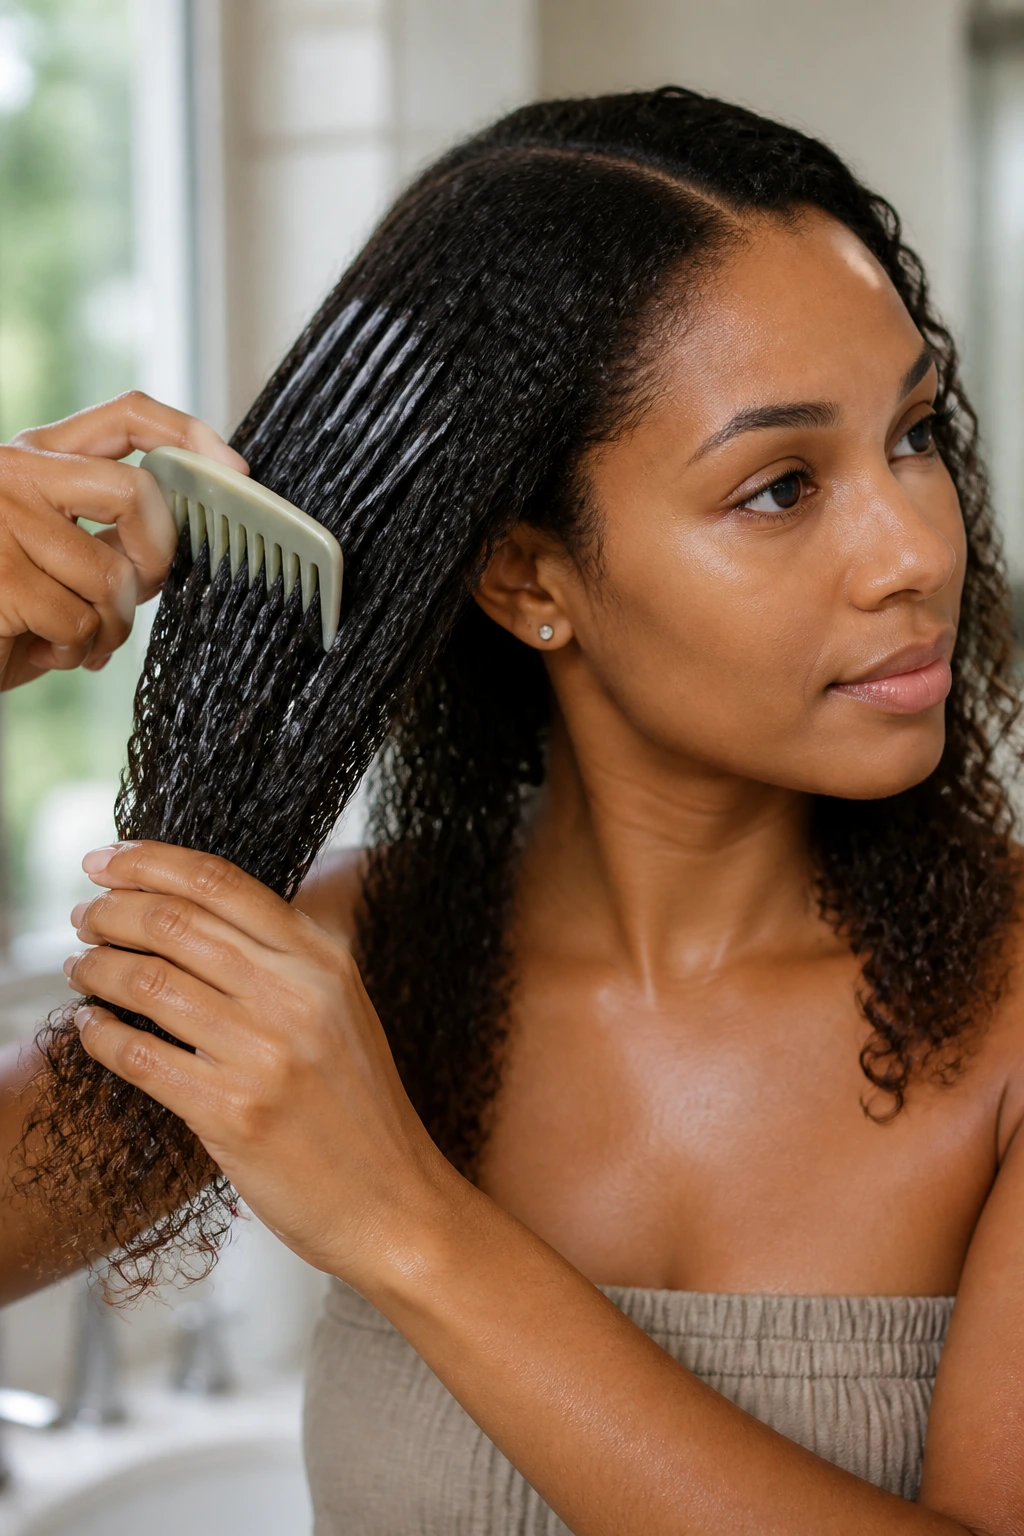
Clean hair is not automatically the best base. If your strands are very fresh and slippery, the braid can slide apart before you finish the second side. Hair with a little texture usually braids faster and stays put longer, which is why so many people get better results on day two.
Detangle first. Always. Start at the ends and work upward so you do not drag knots toward the crown. If your hair is curly or coily, stretch it a bit before braiding if you want the sections to stay neat and visible. If you like the braid to blend into your texture, keep the prep softer and use a light leave-in.
A small amount of product goes a long way. Too much gel can make the braid hard to hold and sticky at the fingertips. Too little, and the flyaways win. I like to think of it as enough hold to guide the hair, not enough to glue it down.
Practical Tweaks for a Smoother, Fuller Finish
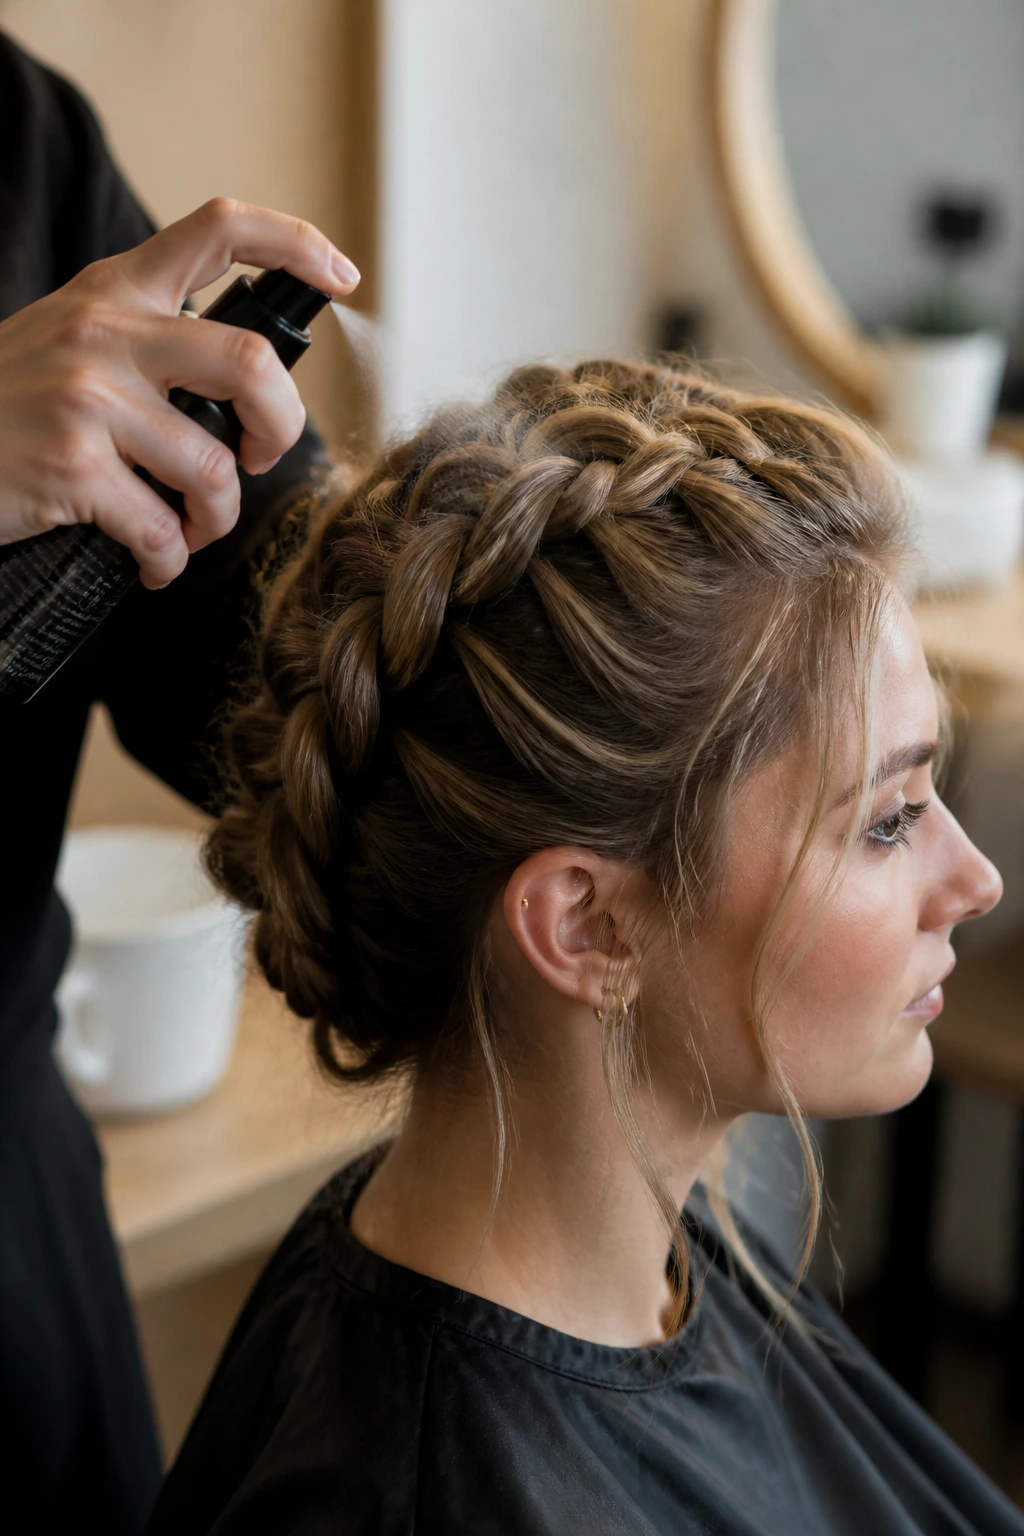
Texture Prep: If your hair is too soft to grip, mist the roots lightly with dry shampoo or texturizing spray before sectioning. The braid will behave better, especially around the crown where slipping starts.
Clean Parting: Use the tail of a comb and take your time with the first part. A crooked part is hard to hide later, and the whole style looks off even if the braid itself is tidy.
Fuller Look: After you secure the braid, gently pull at the outer edges one inch at a time. That “pancaking” move widens the braid without wrecking the pattern.
Finish Control: Smooth the top with a toothbrush-sized edge brush or your fingertips, then stop. Over-smoothing is a trap. Hair that is too polished can start looking flat and overworked instead of clean.
Common Mistakes That Make Dutch Braids Look Sloppy
- Crooked first sections: If the first inch is uneven, the whole braid leans. Fix it early. Redo the part instead of hoping the braid will even itself out later.
- Braiding too loosely at the crown: Loose top sections make the braid puff out and slide. Keep the first crossings firm so the style has structure from the start.
- Using too much product: Heavy gel or cream makes the hair tacky and hard to separate cleanly. Use a small amount, then add more only if you need it.
- Ignoring the ends: A rough, frayed tail can ruin an otherwise neat braid. Tuck it, curl it, or wrap it so the finish looks deliberate.
- Pancaking before the braid is secure: Pulling too soon can loosen the braid all the way to the scalp. Tie off the end first, then widen the braid carefully.
- Forgetting the back view: The front may look perfect in the mirror while the back slips sideways. Check the shape from behind before you leave the bathroom.
Variations and Adaptations to Try
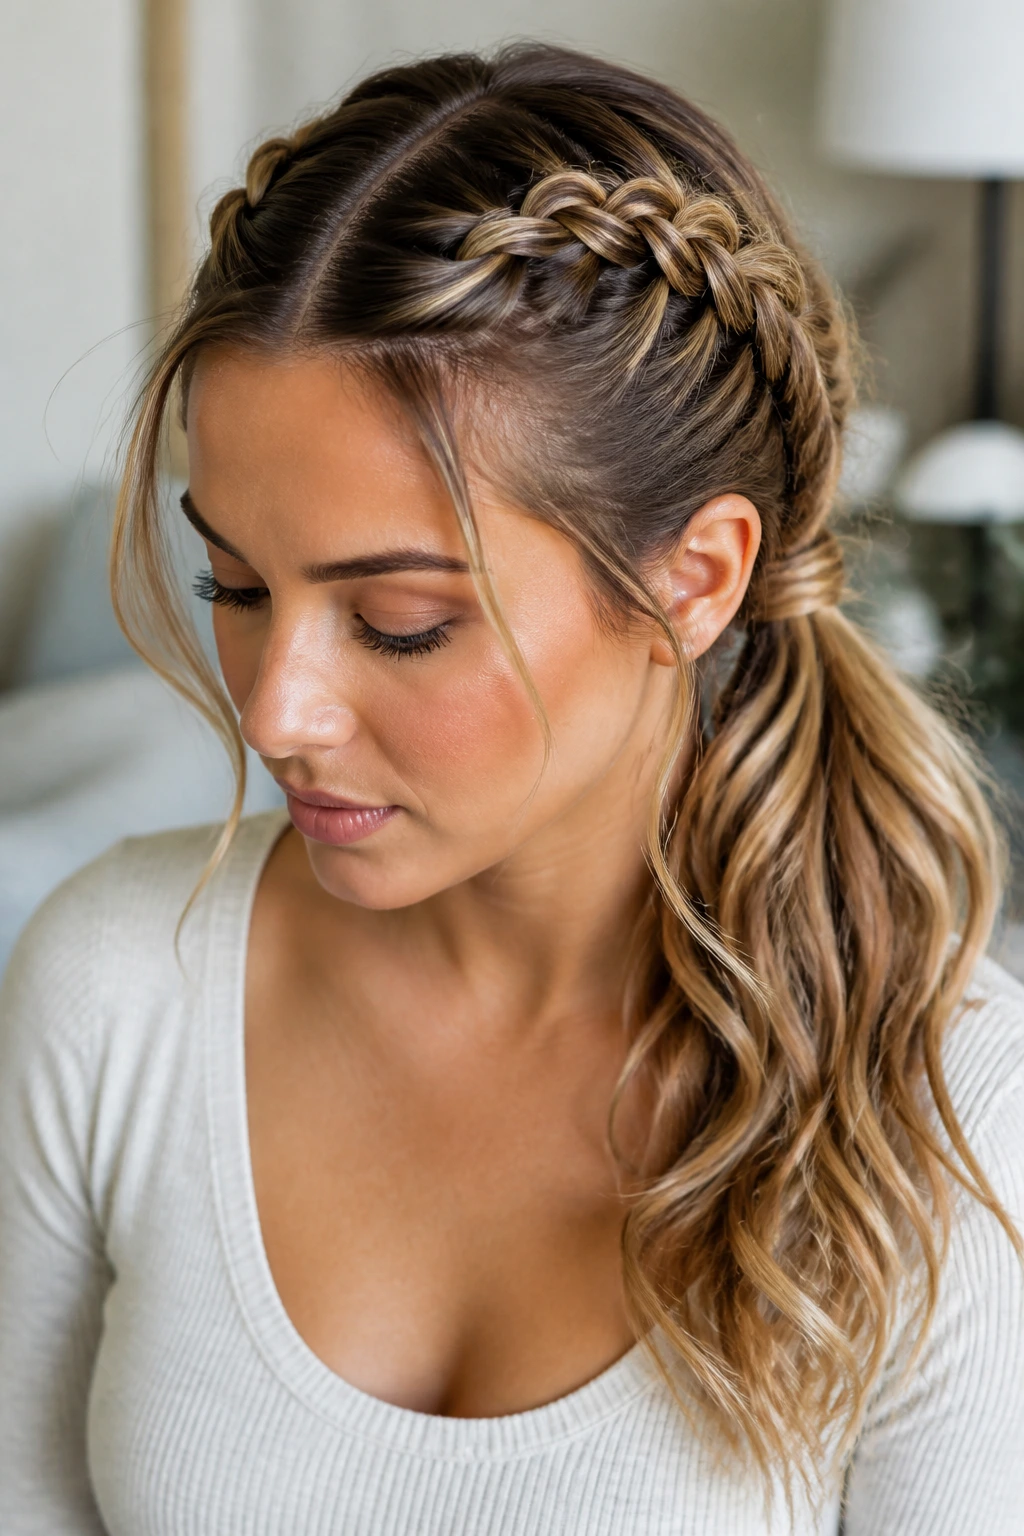
The Sleek Office Edit: Keep the part deep or centered, smooth the roots with a light gel, and finish with a low ponytail or tucked tail. It’s the neatest version in the group and works when you want the braid to look calm, not playful.
The Soft Romantic Finish: Pancake the braid a little, leave a few face-framing pieces loose, and curl the tail or front pieces lightly. This version keeps the braid visible but softens the edges enough for dinners, dates, or dressier outfits.
The Protective Texture Version: On curly or coily hair, braid on stretched or gently detangled hair and keep the tension even rather than tight. Add leave-in on the mid-lengths and a touch of oil at the ends so the style stays comfortable and the braid line stays visible.
The Accessory Swap: Thread a ribbon, scarf, or braid cuff through one braid to change the mood without changing the structure. This is the easiest way to move from everyday wear to something that feels more styled.
The Short-Hair Workaround: If your hair is bob-length or layered, braid only the top section and pin the ends under with bobby pins. You still get the raised braid detail at the crown, which is the part that carries the look.
Night Care and Day-Two Refresh
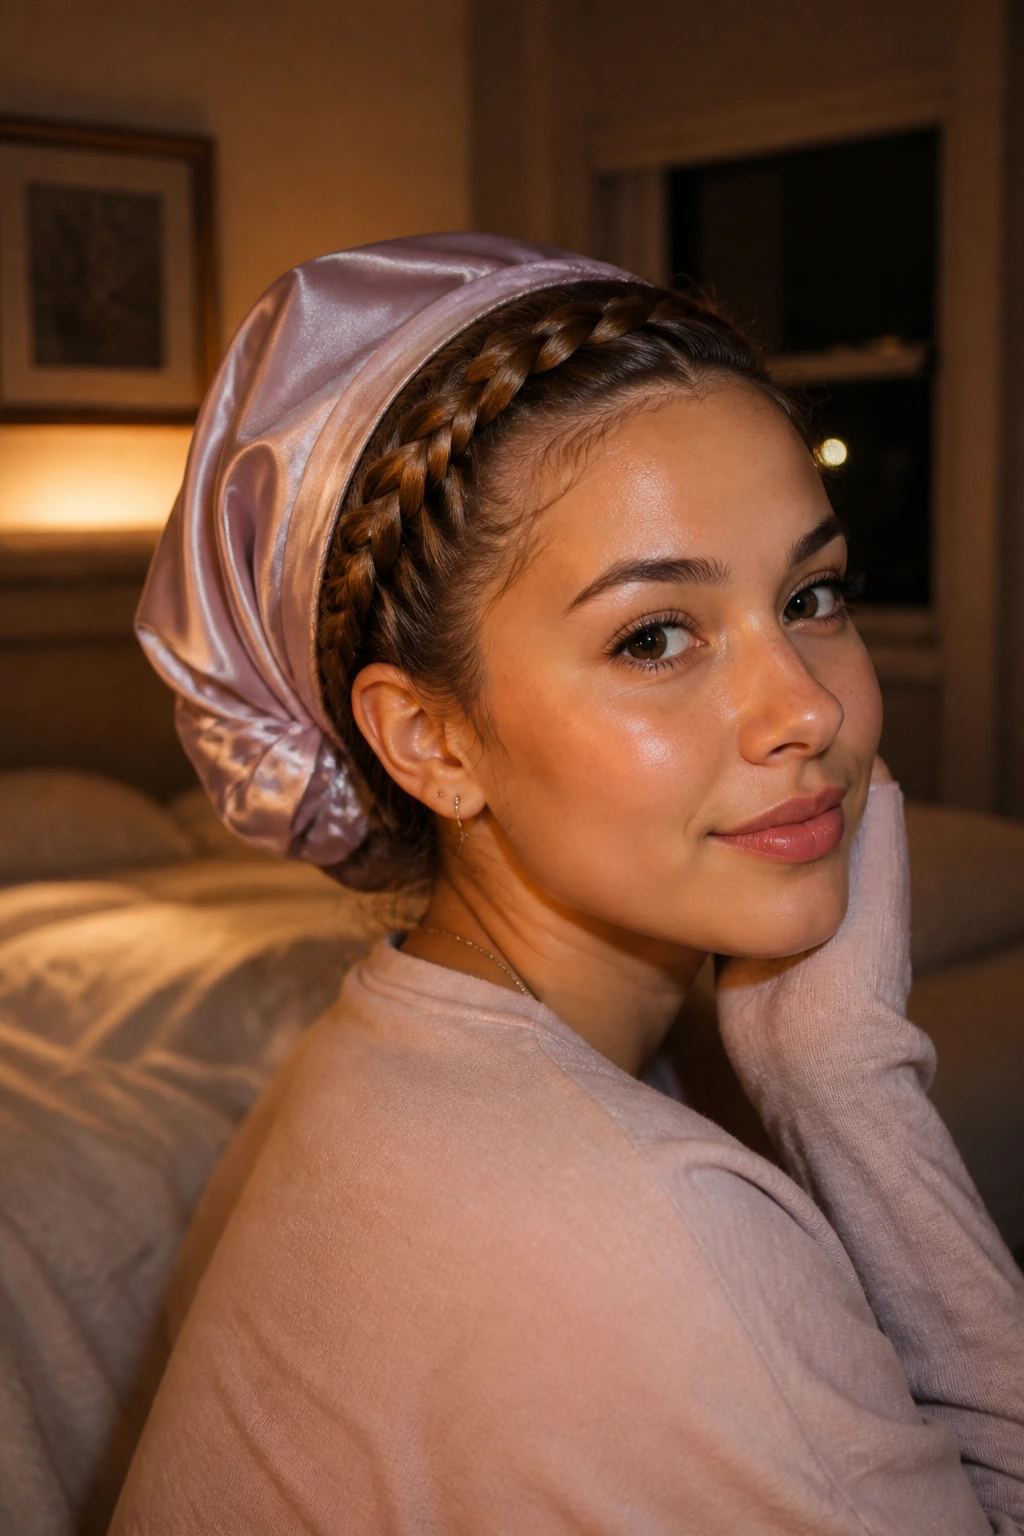
Dutch braids usually hold up well overnight if you protect the shape before bed. A silk scarf or bonnet keeps the braid from rubbing flat, and it also cuts down on the fuzzy halo that shows up around the hairline by morning. If the style is pinned up, use extra bobby pins so the bun or tuck does not loosen while you sleep.
If you plan to wear the braid for more than one day, keep the scalp comfortable. A little dry shampoo at the roots helps if oil starts building up, but do not pile on product. Too much refresh spray can make the braid stiff and dull.
In the morning, smooth the top with clean hands and retighten any elastic that has started to slip. If one side looks puffier than the other, pinch the braid edges on the fuller side and leave the tighter side alone. That usually evens things out fast.
Frequently Asked Questions
Are Dutch braids easier on second-day hair?
Usually, yes. A little natural oil gives the hair grip, so the sections don’t slide as much while you braid. If your hair is freshly washed and silky, add a light texturizing spray or dry shampoo first.
What’s the difference between a Dutch braid and a French braid?
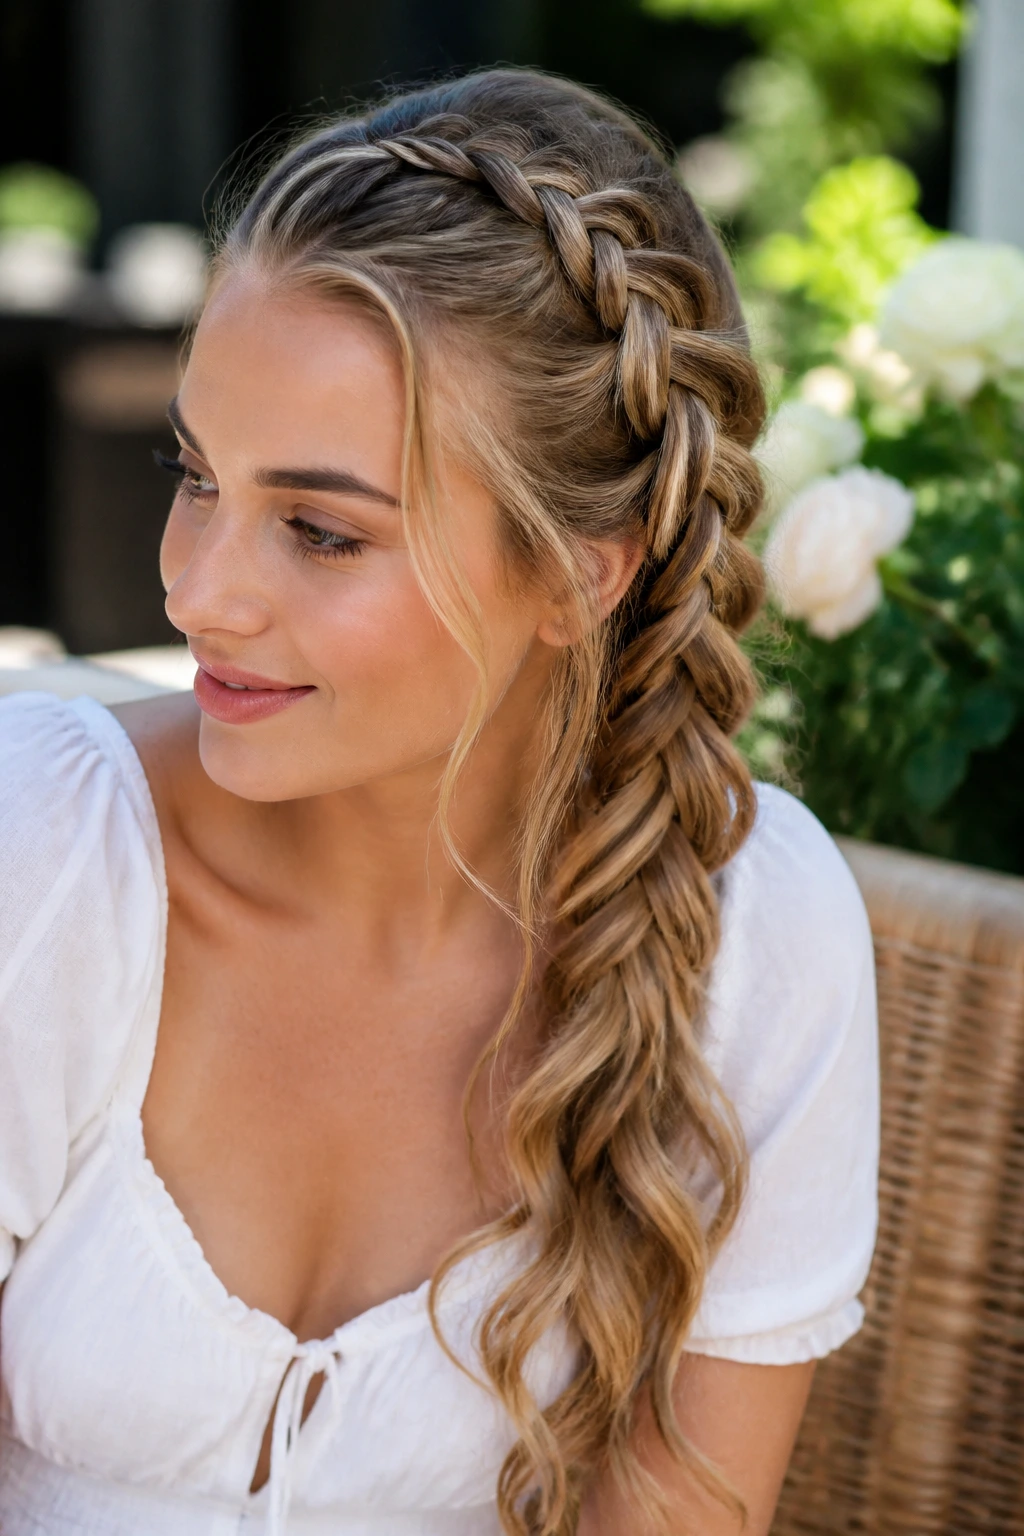
In a Dutch braid, the strands cross under, which makes the braid sit raised on top of the hair. A French braid crosses over and lies flatter against the head. That raised look is why Dutch braids read so clearly.
Can I do Dutch braids on short hair?
Yes, but you may need to stop the braid higher and tuck the ends under with pins or an elastic. Bob-length hair often works better for half-up braids, accent braids, or crown sections than for long twin braids.
How do I make my Dutch braid look fuller?
Finish the braid first, then gently pull the outer edges apart from top to bottom. Go slowly, because one hard tug can loosen the whole shape. A little dry shampoo at the roots can also make the braid look thicker before you even start.
Why does my braid keep slipping apart near the crown?
The crown is usually too smooth or the first sections are too loose. Add more grip with dry shampoo, braid the first inch more firmly, and keep the sections even so the style has something to hold onto.
Can curly or coily hair hold a Dutch braid?
Absolutely, and it often looks rich and full because the texture gives the braid body. A leave-in conditioner and a small amount of styling cream help with slip, and larger sections keep the braid from shrinking into a tight little rope.
How long can I wear Dutch braids?
Most people can wear them for one to three days if the scalp feels comfortable and the style stays neat. After that, the roots usually start to puff, especially around the hairline and nape. If the braid gets itchy or tight, take it out sooner.
What if one braid comes out tighter than the other?
Unpin it and fix the part before you try to “balance” the braid with loose pulling. The tension problem almost always starts at the top, not the tail. Correct the crown first, then rebraid the length.
A Neat Finish That Actually Works
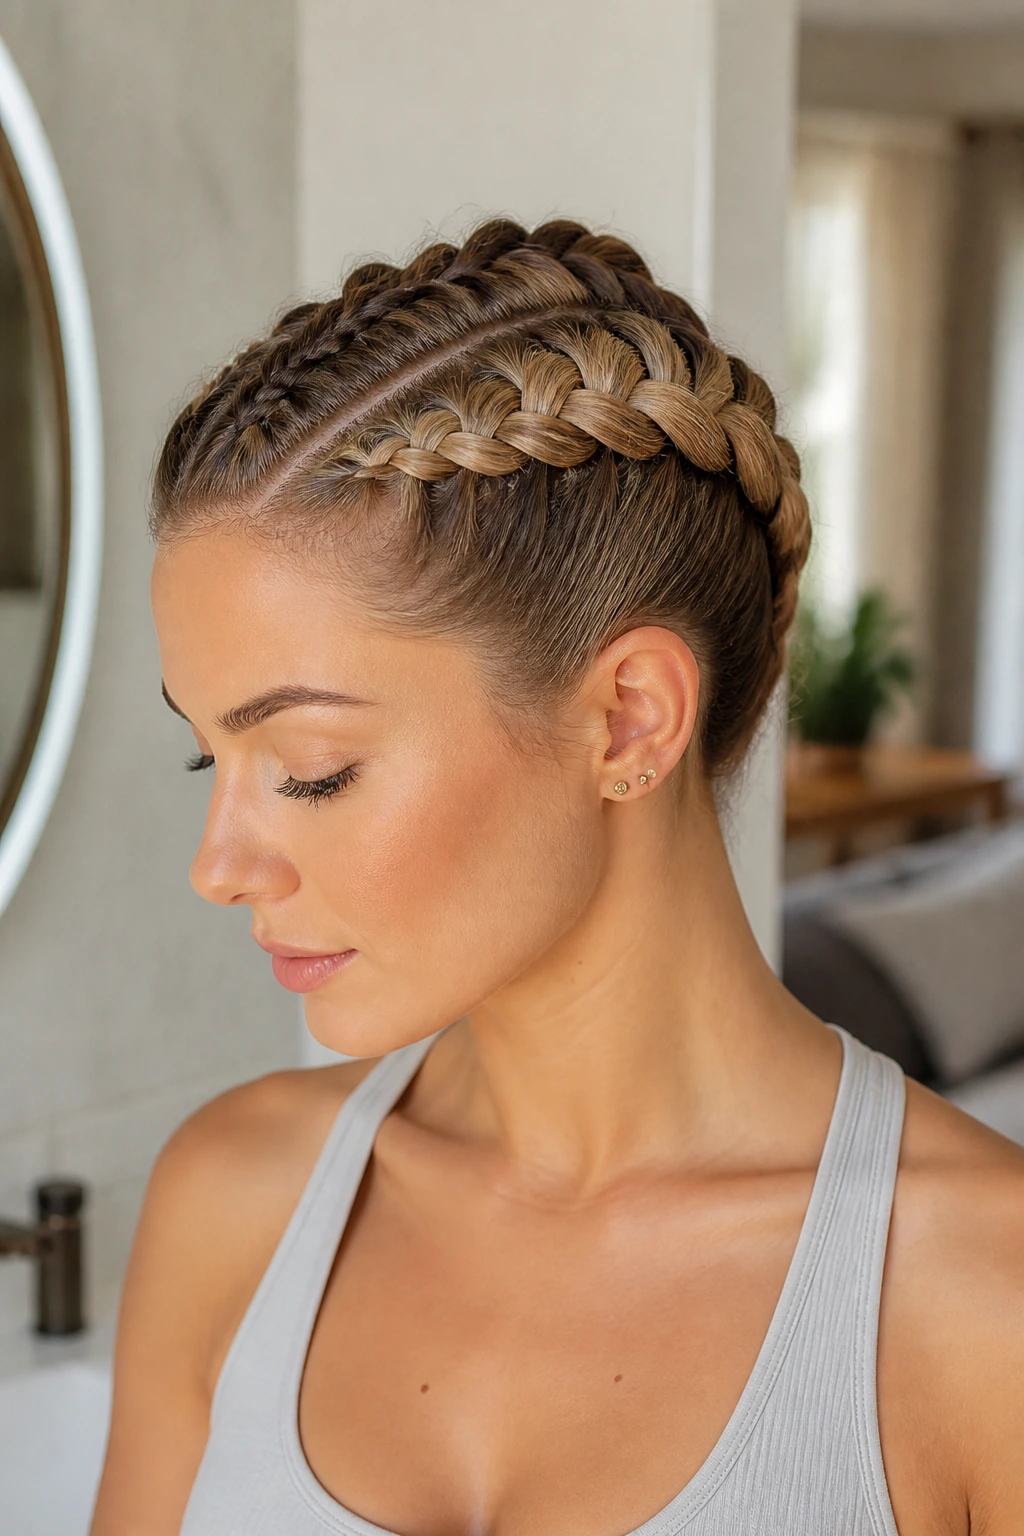
The best Dutch braid hairstyles do not look impressive because they’re complicated. They look good because the part is clean, the tension is steady, and the braid has a shape that holds its own from morning to night. That’s a lower bar than most people expect, and a more useful one.
Once you know which version fits your hair length, texture, and schedule, the style gets easier every time you do it. A twin braid on a Tuesday. A halo for a wedding. A tucked ponytail when the weather is fighting you. That range is the real appeal.
And the nice thing about Dutch braids is this: when the base is right, the style keeps paying you back long after the mirror check is over.
