



Long hair has a way of behaving for exactly one mirror check. After that, the shape starts negotiating with gravity, a few face-framing strands make a quiet escape, and the back of the style begins to soften whether you asked it to or not.
That’s why updo hairstyles for long hair need a different mindset than the buns and twists people toss together on shorter cuts. Extra length adds weight, extra weight pulls at pins, and a silky blowout can slide right out of a style that looked fine in your hands five minutes earlier.
The good updos are the ones that respect that reality. They use the hair’s length as structure, not as a problem to hide. They anchor where the head is widest, keep tension off the hairline, and let the ends disappear in a way that looks deliberate instead of improvised. Some are sleek. Some are loose and pretty in that slightly undone way. A few are fast enough for a weekday and a few make sense when you want the hair to look sculpted, not merely pinned.
Why These Long-Hair Updos Earn Their Place
-
Weight Control: Long hair needs a real anchor point, usually at the nape or crown, or the style starts sagging toward the shoulders halfway through the day.
-
Layer Management: These styles account for shorter pieces around the face and at the crown, so you are not spending twenty minutes chasing flyaways with a comb.
-
Texture Friendly: Some work best on day-two hair, some on freshly blown-out lengths, and that matters more than most people admit.
-
Occasion Range: The same set of techniques covers a quick coffee run, a workday, a wedding, and the “I need my hair off my neck right now” emergency.
-
Pin Efficiency: Good long-hair updos use pins in the right spots, which means fewer pins digging into the scalp and fewer styles collapsing at the sides.
-
Shape Variety: You are not stuck with one giant bun. Twists, knots, braids, rolls, and wrapped ponytails all count when the structure is solid.
1. Sleek Low Bun with a Clean Center Part
A sleek low bun is the cleanest answer when long hair feels like too much hair. The center part gives the style a sharp line, and the bun sits low enough that the weight settles close to the nape instead of dragging the whole shape backward. If your hair is straight or recently smoothed, this one looks almost architectural.
I like this style when the rest of the outfit is doing the talking. A silk blouse, a crisp blazer, a dress with a higher neckline — the bun keeps the look from feeling fussy. Use a little smoothing cream on the palms, brush the lengths into a low ponytail, then twist and wrap the ponytail into a tight coil. The trick is not to overbuild the bun. A compact bun reads cleaner and stays put longer.
What makes it work: the center part balances the face, and the low placement keeps the heaviest part of the hair from fighting the style.
A fine-tooth comb and a handful of bobby pins are enough, but if your hair slips easily, mist the roots with a touch of texturizing spray first. That tiny bit of grip changes everything.
2. Braided Crown Tuck That Hides Every Loose Layer
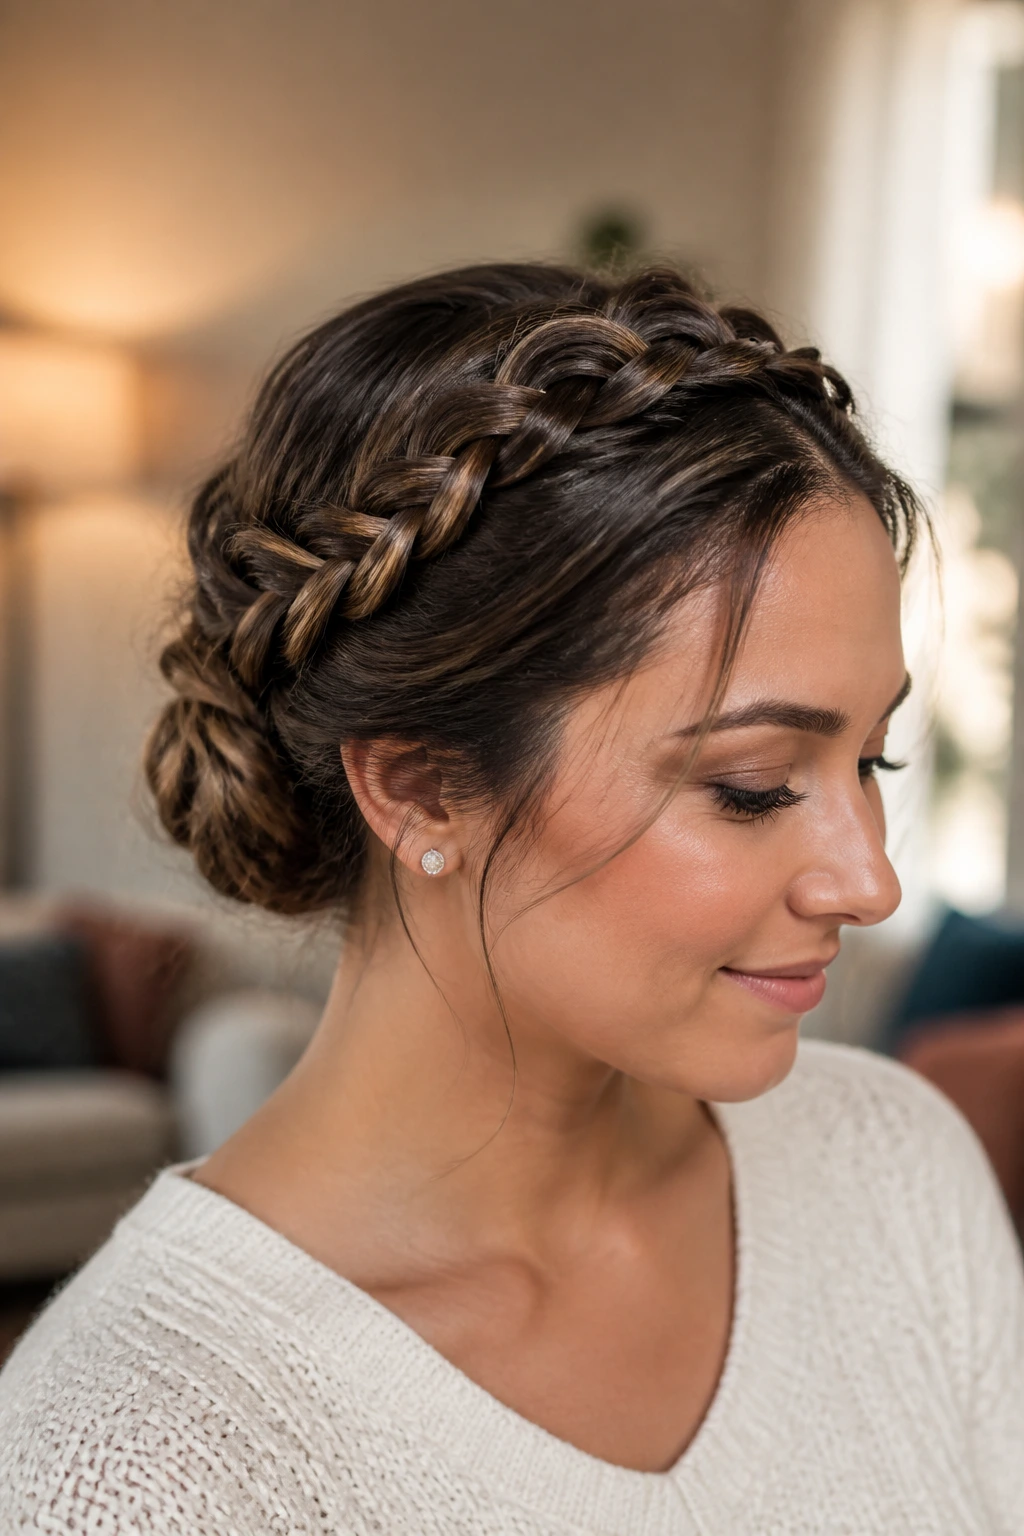
Need a style that swallows layers instead of negotiating with them? This is the one. Two braids, one from each side, move across the crown and meet low in the back, where the ends are tucked into a small bun or roll. It looks intricate from the outside, but the structure is forgiving, which is exactly why it works on long hair.
What keeps it from falling apart
- Start the braids slightly behind the hairline, not right at the edge, so the style has room to sit.
- Braid loosely enough that the plaits lie flat, then pinch the outer loops a little for width.
- Cross the ends under the joined section and pin into the base with U-pins if the hair is thick.
The charm here is that it hides the messy bits long hair can create at the neck. Ends disappear. Layers behave. And the finished shape stays softer than a strict braided crown, which makes it work for daytime events as well as dressier ones.
3. Soft French Chignon with a Loose Nape
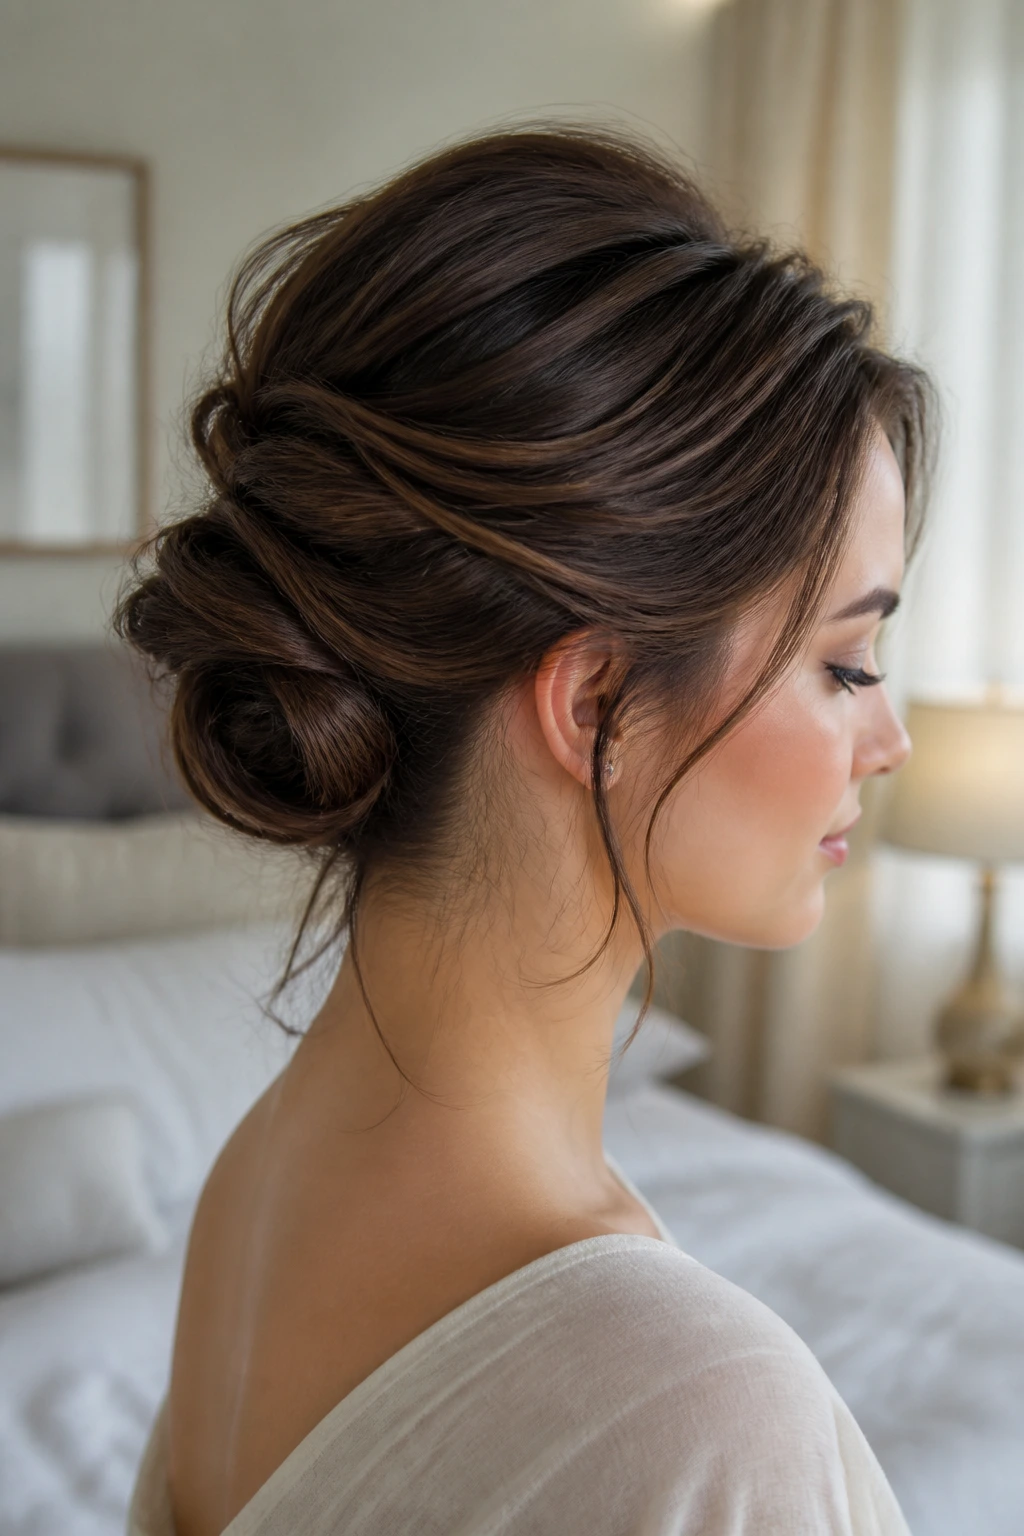
A French chignon is what I reach for when I want polish without the hard edges. It twists vertically at the back, then folds into itself at the nape, which gives long hair a neat line instead of a heavy lump. Leave a little softness at the temples and the style stops looking severe.
The best version of this starts with a low ponytail that is pulled only halfway through on the last wrap. That loop becomes the shell. Tuck the ends inside, pin vertically up the seam, and let a few pieces sit lightly against the ears. The nape should look smooth, not plastered.
There’s a reason this style keeps showing up at formal events. It frames the neck, keeps the silhouette narrow, and works especially well when the hair is very long and one simple twist would otherwise turn bulky. If the hair is thick, split the ponytail into two sections before folding. Cleaner shape. Less weight.
4. High Wrapped Ponytail Bun That Lifts the Face
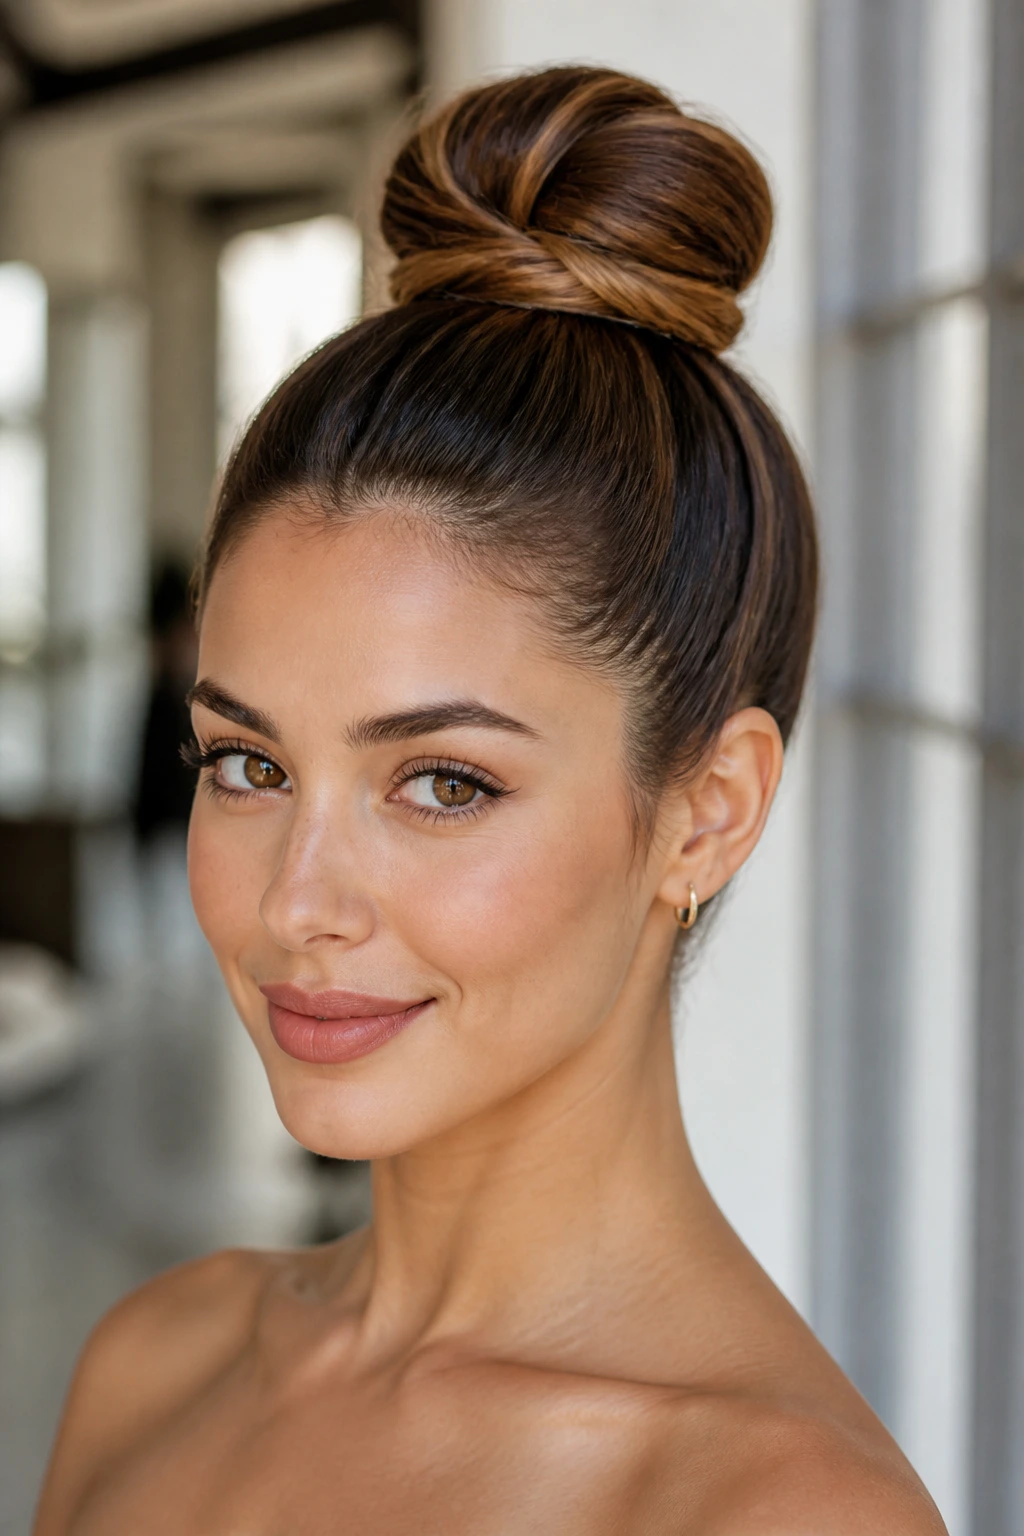
A high wrapped ponytail bun changes the whole mood of long hair. The crown gets a little lift, the face opens up, and the back reads as taller and more deliberate than a low bun ever will. That little bit of height matters. A lot.
This style starts with a ponytail placed at the upper back of the head, not quite at the very top, so the weight stays manageable. Wrap the tail around the base, then pin through the underside where the bun meets the elastic. If your hair is heavy, stack two elastics first. One elastic often sags under long lengths; two give the bun something to bite into.
It looks especially good when the ends are smoothed rather than teased into a cloud. Think controlled lift, not drama for its own sake. A narrow wrapped base and a round, full bun balance the face and make long hair feel lighter on the neck.
5. Twisted Halo Bun with a Centered Finish
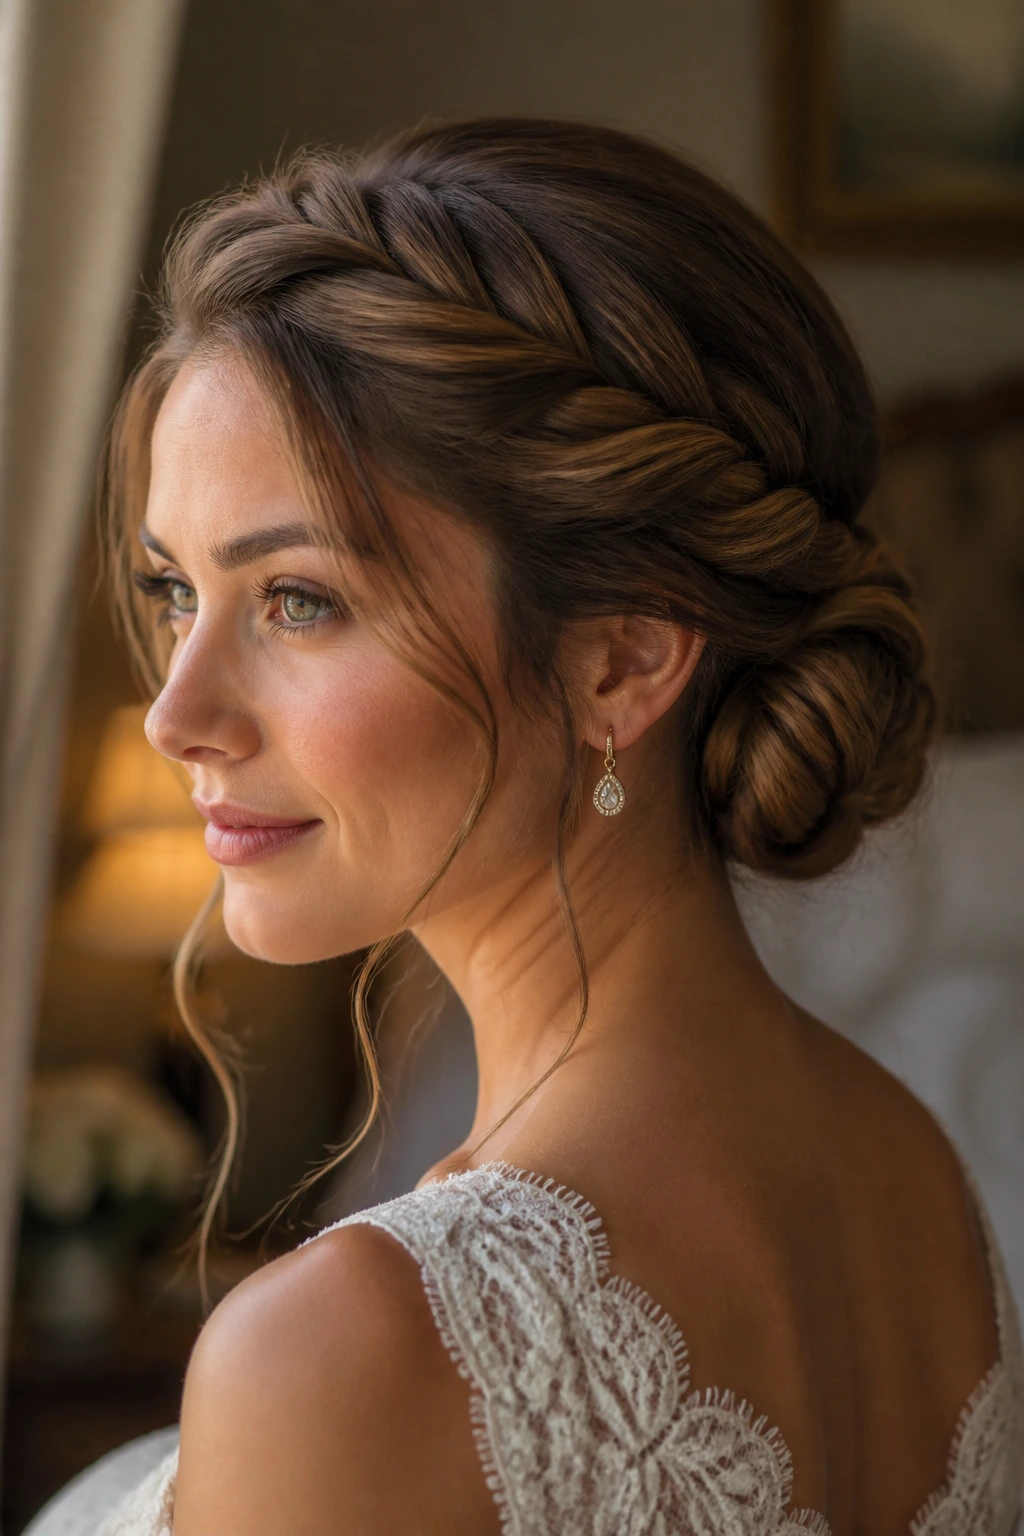
This one reads romantic, but not sugary. Two twisted sections run along the sides of the head like a halo, then meet at the back where the remaining length becomes a low bun. The effect is soft around the face and cleaner at the back than a full braided crown.
Why it holds: the twists add shape without the stiffness of three-strand braids, and they lie flatter against the head, which is a blessing if your hair is long and full. You do not need perfect symmetry. In fact, a tiny bit of unevenness helps the style feel less staged.
A small detail makes this better: twist each side section away from the face before bringing it back. That direction creates a gentle sweep at the temples and gives the front a lifted edge. If the ends poke out of the bun, leave them. Tuck every inch and the style can start looking overworked.
6. Bubble Ponytail Updo with Sectioned Volume
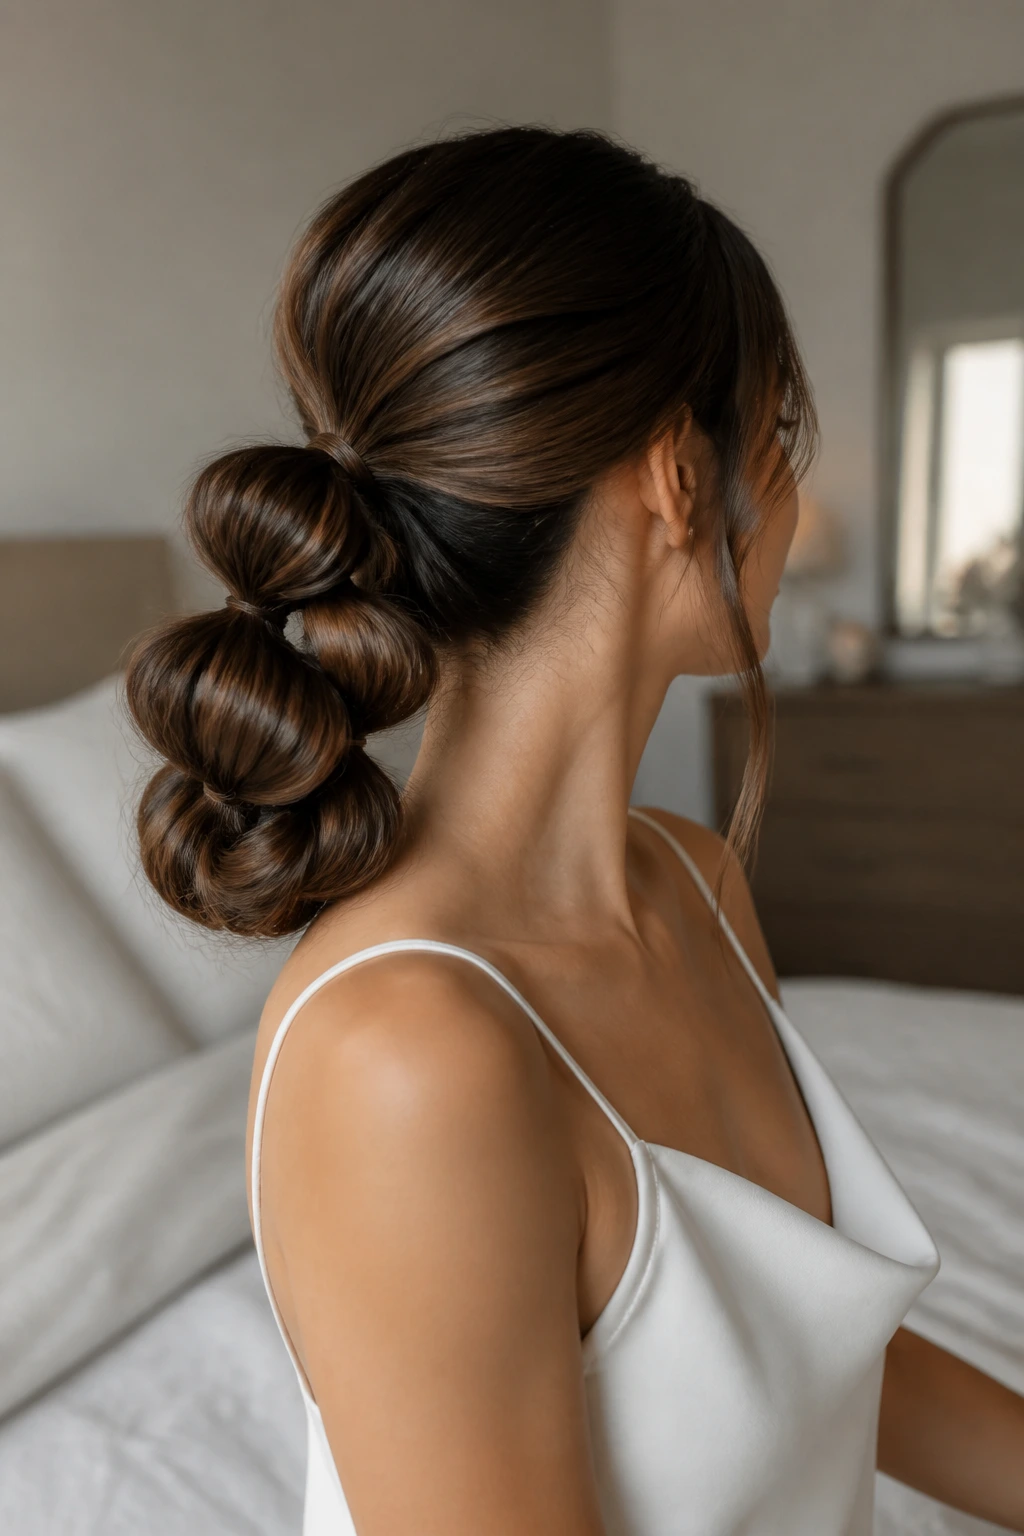
Bubble styles can look playful, but on long hair they become a smart way to control length without making the whole head feel flat. Instead of one thick ponytail, the hair is tied at intervals with clear elastics, puffed slightly between each tie, then folded or pinned into a low updo shape.
The visual rhythm matters here. Those little rounded sections stop the style from looking like one heavy rope of hair. On very long hair, that is a gift. It breaks up the weight and gives you shape without needing perfect smoothing.
The quick version
- Build a low ponytail and secure it tightly.
- Add another elastic two to three inches down.
- Gently pull each section outward to make the “bubble.”
- Fold the bubble chain upward and pin it into a tucked shape.
It works well on hair with some texture already in it. Freshly washed, silky hair can slip, so a bit of dry shampoo at the roots helps the bubbles keep their width.
7. Double Dutch Braid Bun with a Solid Base
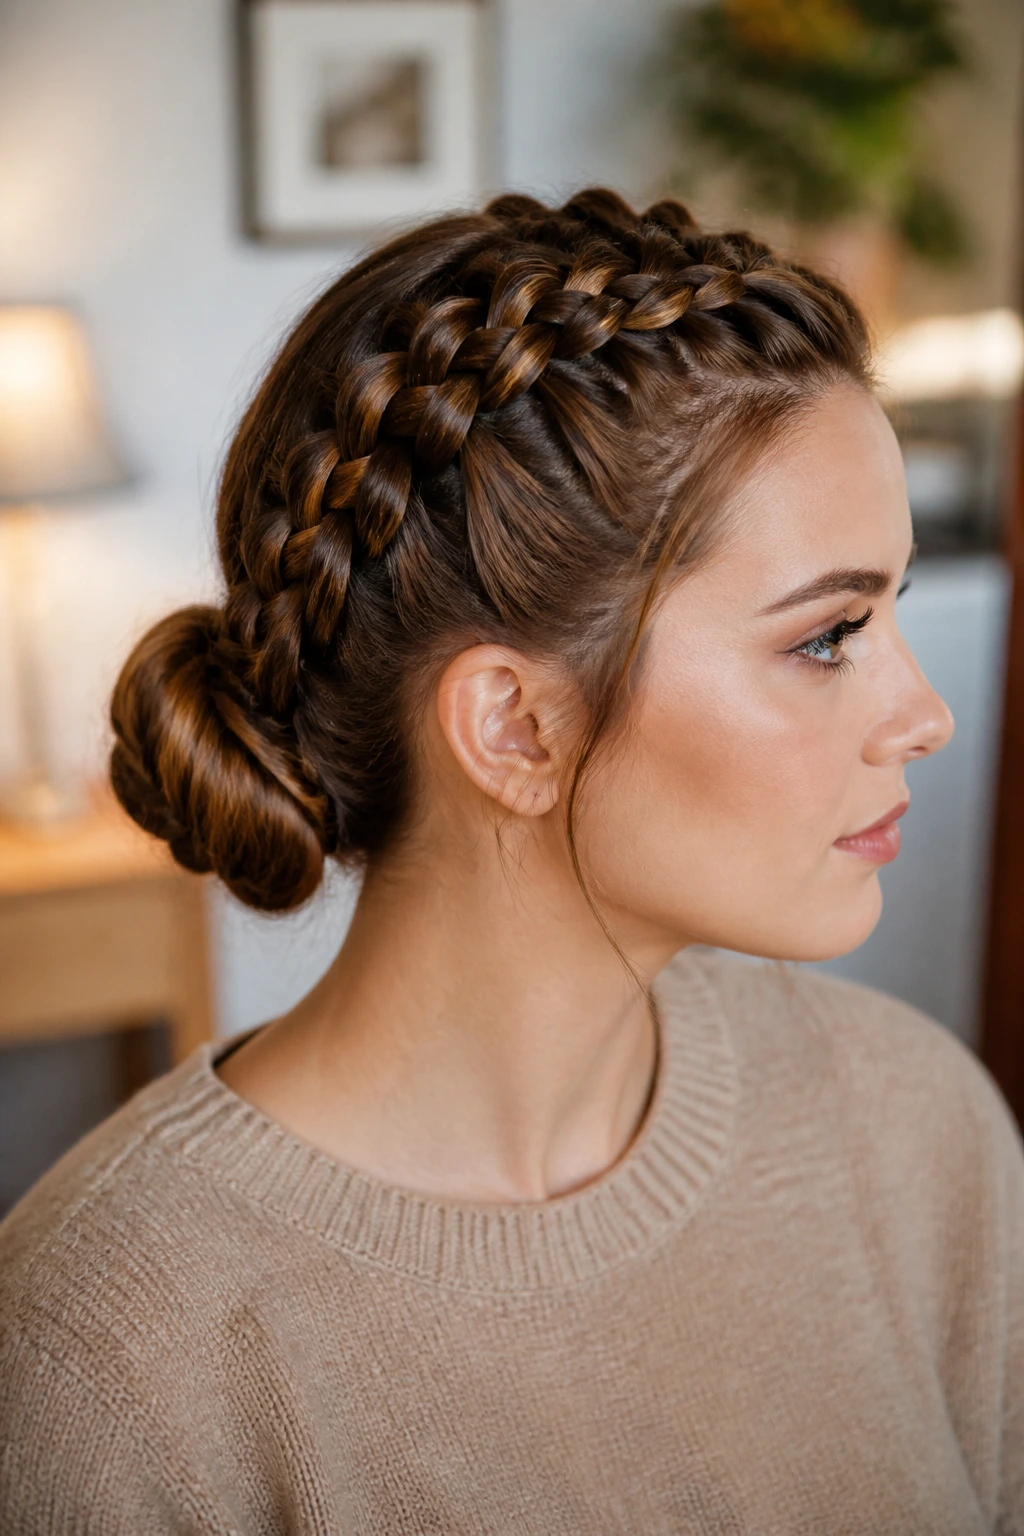
If your hair refuses to stay in a soft twist, give it braid structure. Two Dutch braids start near the front and run along the scalp, then feed into a low bun at the back. The braid pattern sits on top of the hair instead of disappearing into it, which gives the whole style more grip.
I like this on long hair that feels too slippery for a plain bun. The braids hold the sides down, and the bun at the back handles the length. That split of jobs is what makes it so dependable. You are not asking one elastic to do everything.
The finish can lean sporty or polished depending on how tight you braid. Pull the braids snug for a clean shape, or widen the outer edges a little after braiding if you want softness. Either way, pin the bun low and use the braid tails to hide the elastic.
8. Rope-Twist Knot for Fast, Clean Styling
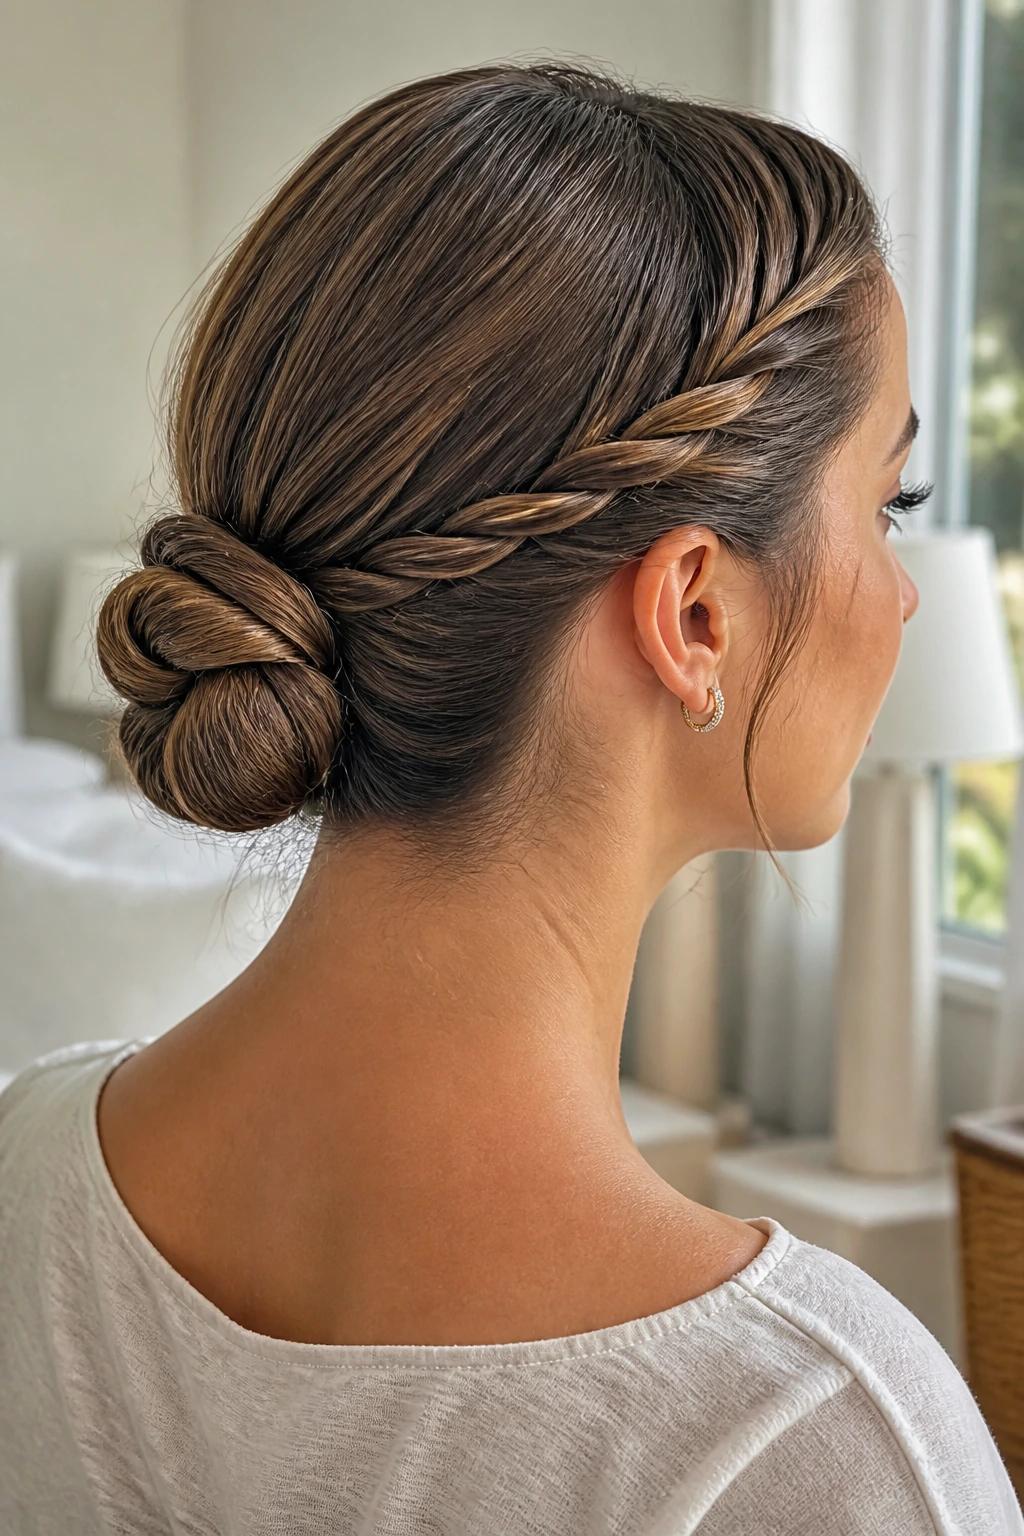
Rope twists are underrated. They take less effort than a full braid, they sit neatly on long hair, and they create a cleaner line than finger-twisting ever will. Two twisted sections from the temples meet at the back, where the length is coiled into a knot and pinned flat.
The nicest part is speed. If you have ten minutes, this style is in play. Separate each side into two strands, twist them away from the face, then twist the two strands around each other until they look almost cord-like. Do that on both sides, bring them together, and pin them into a compact knot.
It is especially useful when long layers keep slipping out of braids. Rope twists catch more evenly and give the front of the head a tidy frame. A little shine spray on the finished surface keeps the ropes looking deliberate instead of frayed.
9. Gibson Tuck for Long Hair and Soft Ends
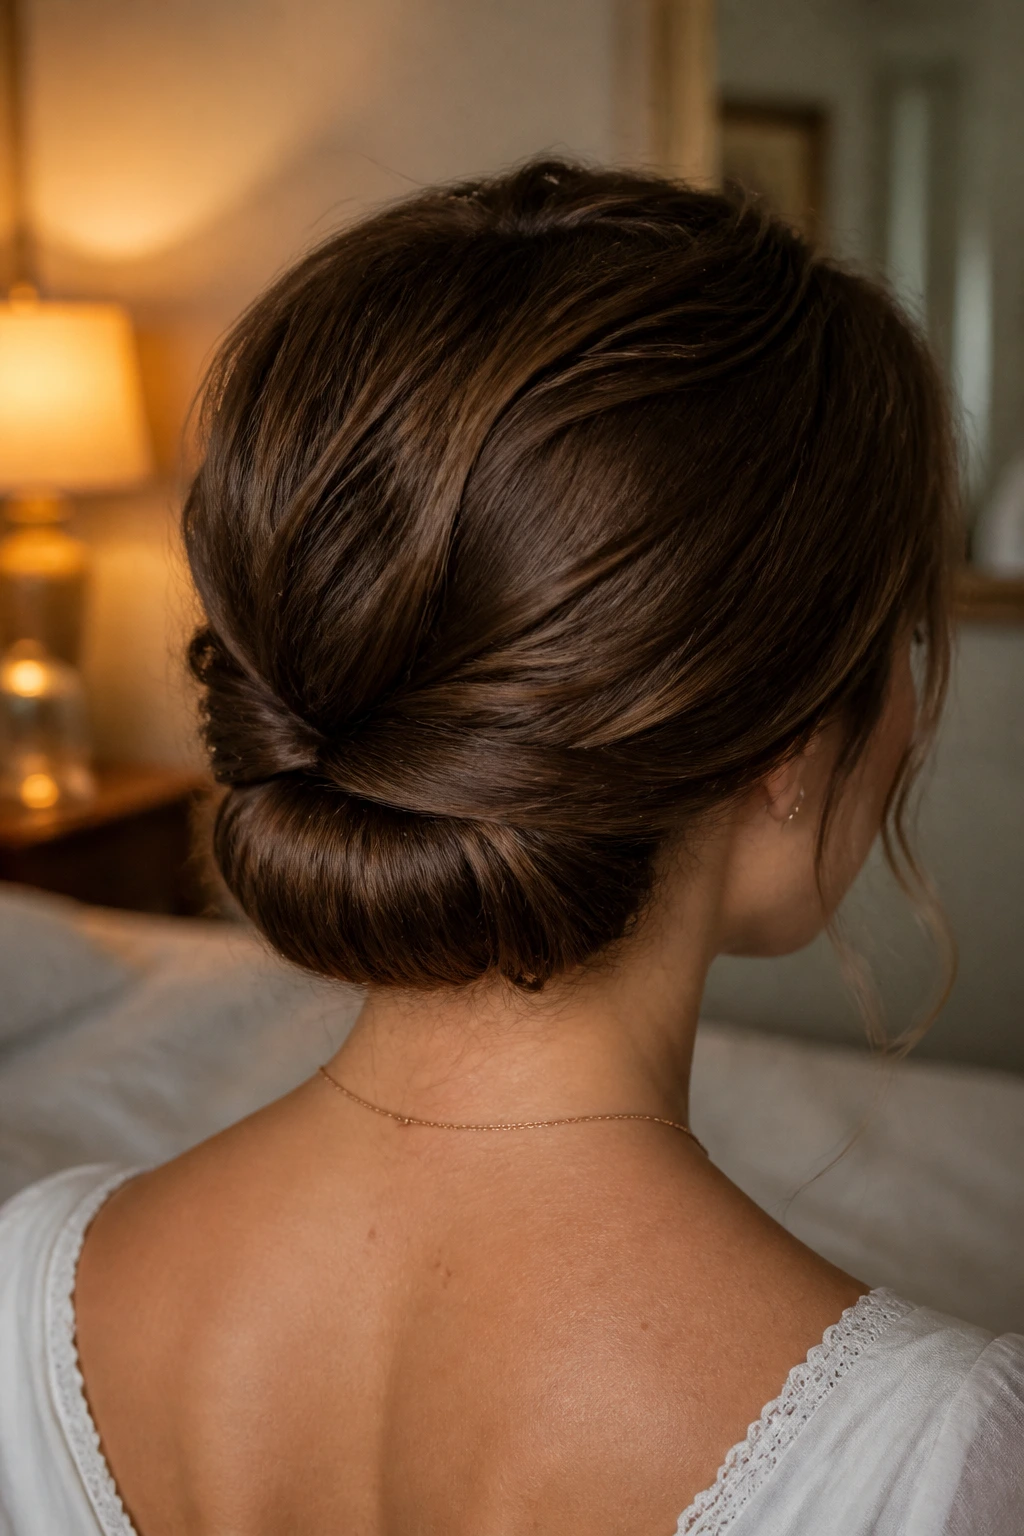
The Gibson tuck has a vintage shape that suits long hair better than people expect. The ends disappear into a rolled band of hair at the back, and the result sits lower and softer than a traditional bun. It has a sort of neat, tucked-in look that feels calm.
Long hair needs a stable base for this style, so start with a low ponytail, then split the space above the elastic slightly and pull the ponytail through that opening. From there, roll the length upward and tuck the ends inside the fold. Pins go along the inside seam, not just at the edges.
This is one of the best options when you want the hair off your shoulders but do not want a hard, formal shell. The silhouette is gentle. The neck looks longer. And the whole thing works even better if the hair has a little bend or wave, because the texture helps the tuck stay rounded.
10. Pinned Crown Half-Up Bun with Hidden Anchors
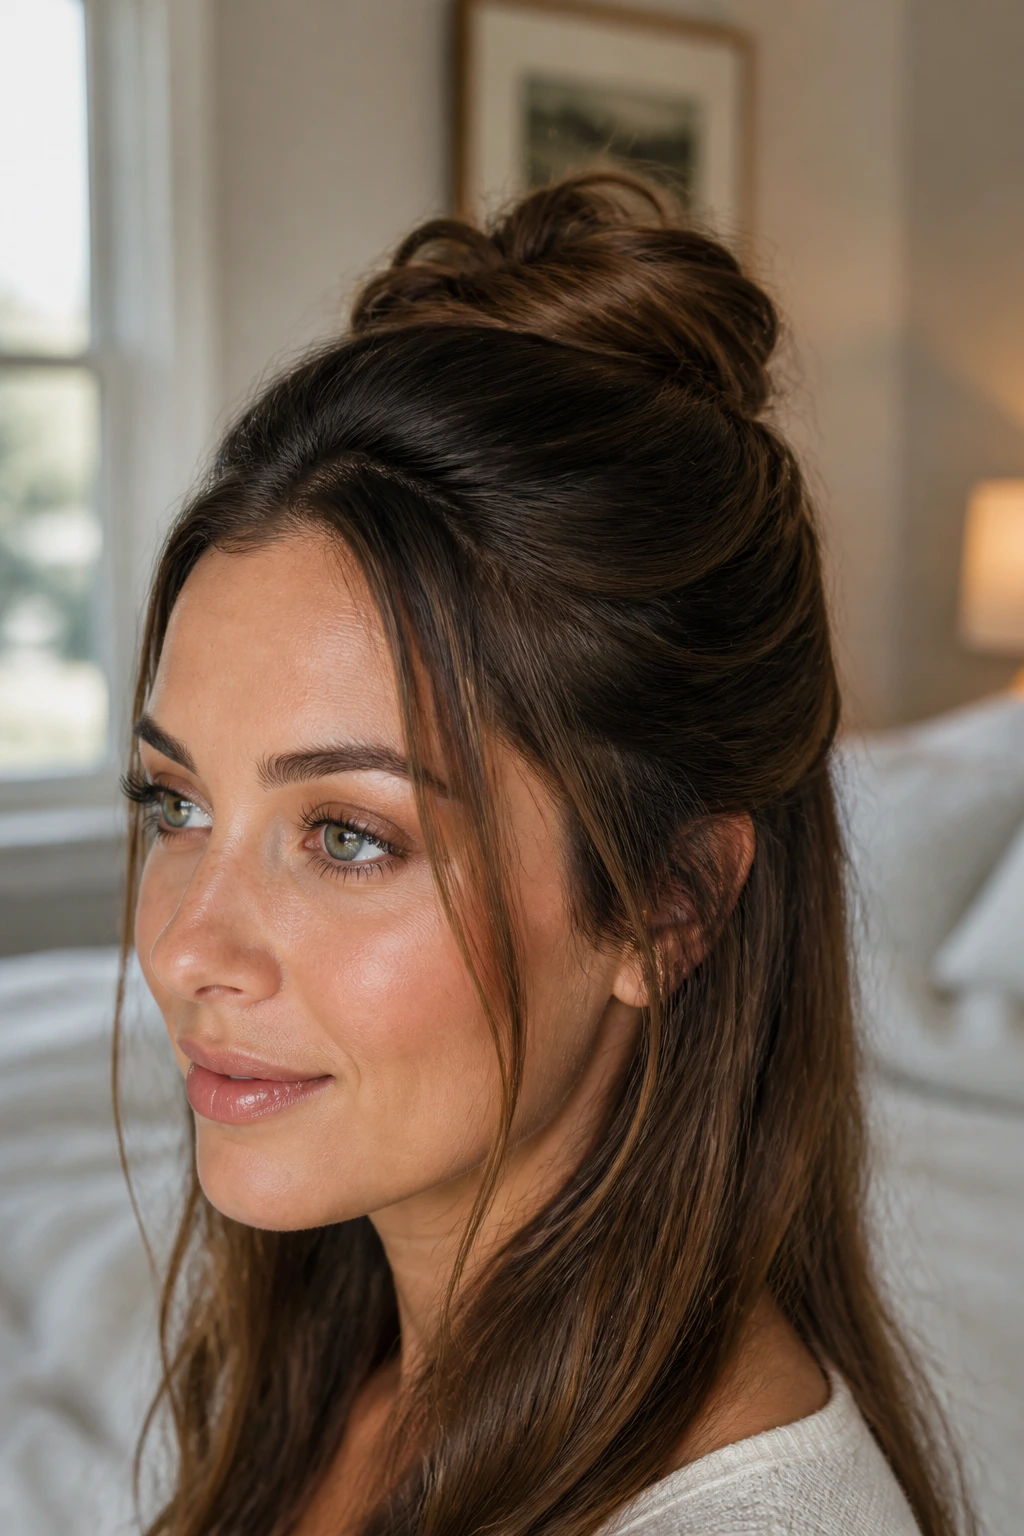
Some days call for a full updo, and some days call for cheating a little. This pinned crown half-up bun lifts the top section of long hair into a compact bun while leaving the lower lengths loose, which makes it easier on heavy hair and faster to build than a full twist.
The key is hidden anchors. Take the hair from temple to temple, secure it into a small ponytail, then twist it into a bun and pin the base from underneath. The lower layers should stay loose and smooth, or the whole style starts to look busy.
This one is useful when your hair is freshly washed and too slippery for a full braided style. It gives height at the crown, keeps the top from flattening, and still leaves movement through the ends. A small tease under the bun can help, but keep it subtle. The point is lift, not a bump you can see from across the room.
11. Braided Low Knot for Second-Day Hair
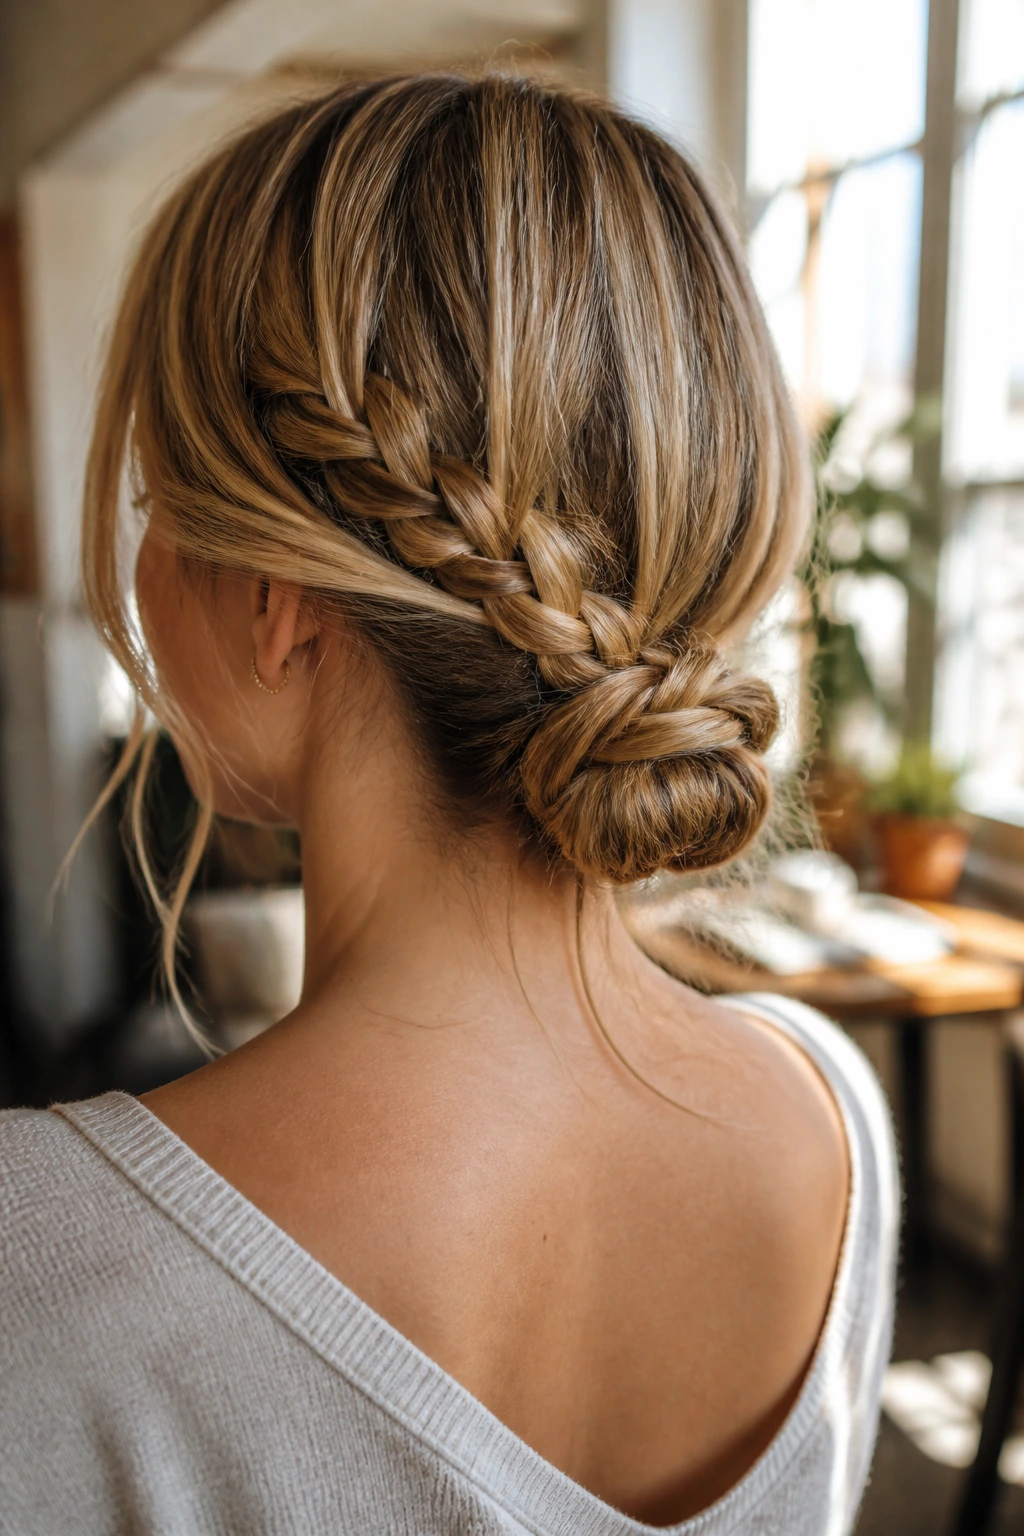
Second-day hair can be a gift here. It has just enough grit to hold a braid, and that braid becomes the backbone of a low knot that feels more secure than a plain wrapped bun. Start with a single braid at the back or one braid from each side, then coil it into a knot at the nape.
The texture is half the charm. Hair that is a little lived-in behaves better in this style than hair that has been freshly conditioned to a slick shine. If the roots are too soft, a bit of powder or dry shampoo gives the braid something to grip.
What I like most is the finish. It sits low and compact, which keeps it from puffing out too much under a coat collar or scarf. If you need one style that can survive a long day and still look intentional by evening, this is a strong pick.
12. Rolled Banana Bun with a Smooth Shell
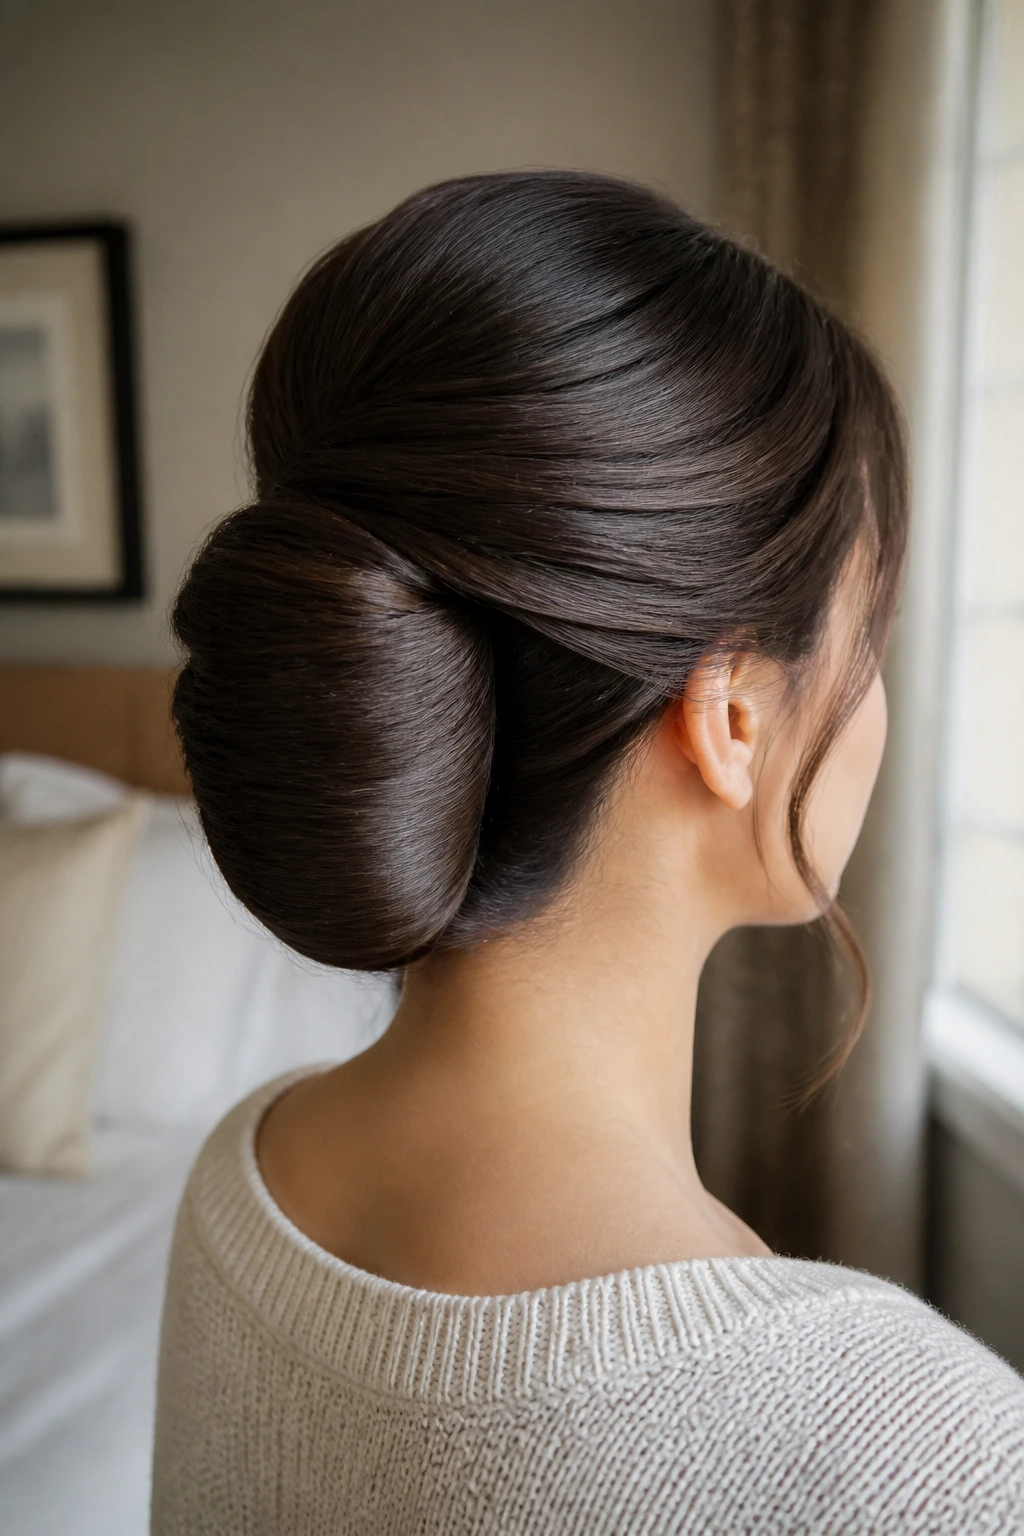
A banana bun is a cousin of the French twist, but the shape is longer and softer, which flatters long hair that would look too bulky in a tighter roll. The hair is swept up, rolled vertically, and tucked so the outside forms a smooth shell.
It helps to think of this style in two parts: gather first, roll second. If you try to pin as you go, the shape gets lumpy. Smooth the lengths back, hold them flat against the head, then begin rolling the ends inward from one side. Use pins along the seam and one or two at the top edge where the weight pulls hardest.
This style loves long hair because the extra length gives the roll real body. It is also one of the cleaner options when you want the back to look neat from every angle. If your hair is layered, leave the shortest pieces around the face a little softer so the roll does not feel too strict.
13. Sculpted Braided Bun for Formal Events
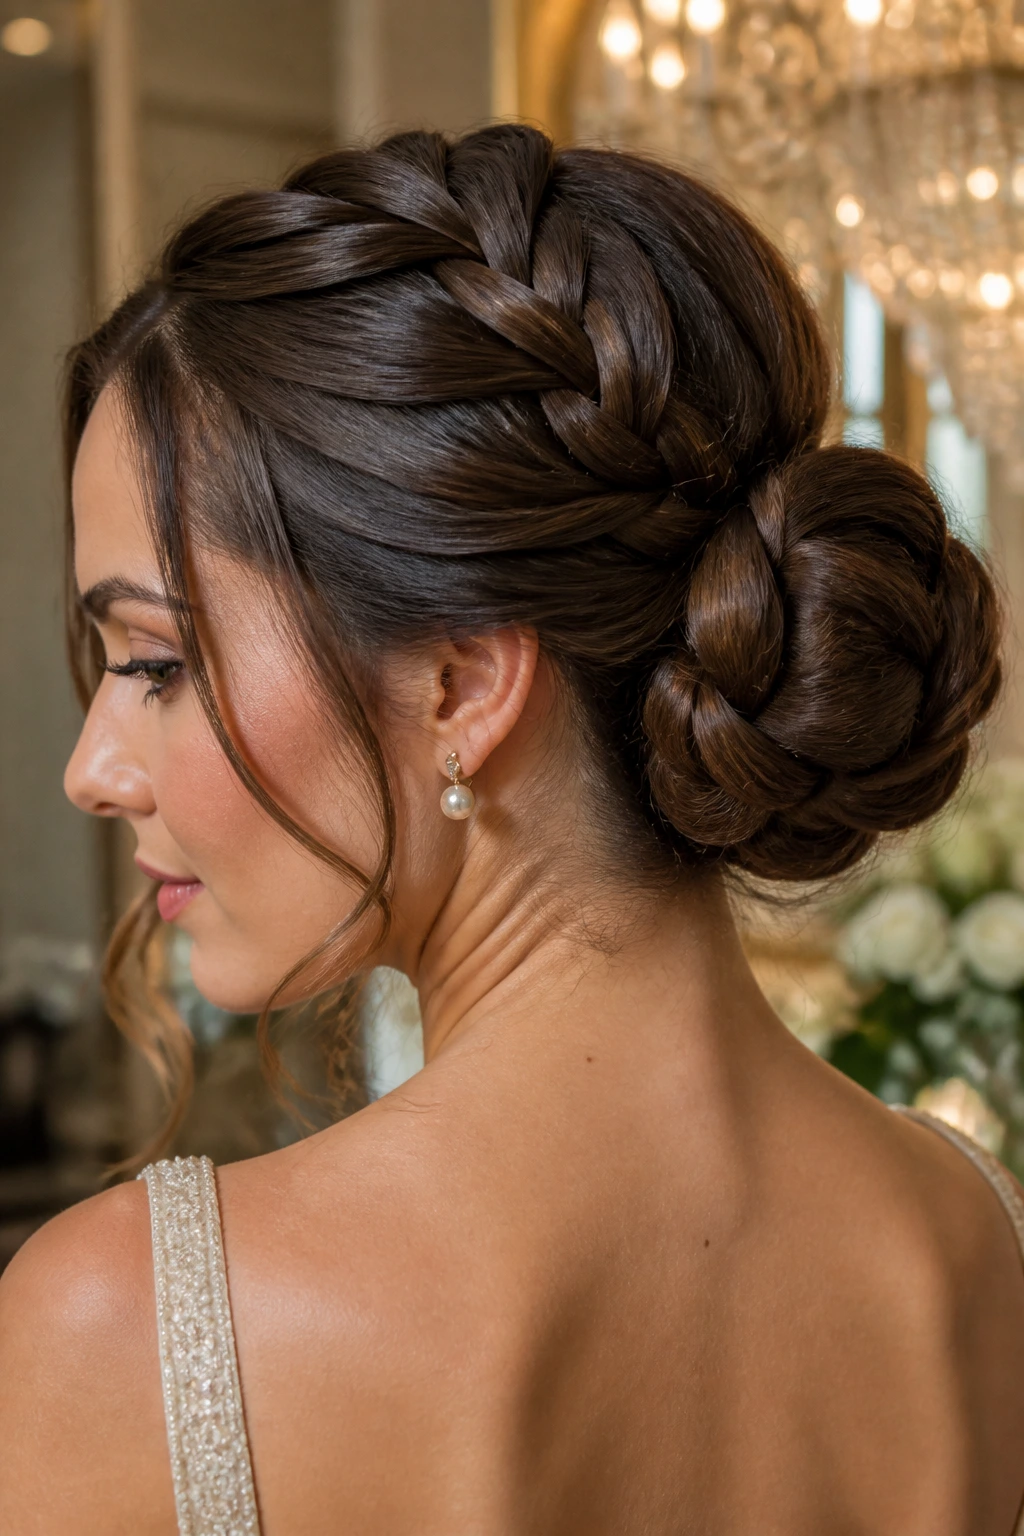
A sculpted braided bun looks like the hair has been arranged on purpose, which, frankly, is the point. The braid becomes the visible texture, then gets coiled into a bun with each section pinned so the pattern still shows. It is more deliberate than a messy bun and less severe than a plain chignon.
What to focus on
- Keep the braid centered before you coil it.
- Pin the braid in layers so the shape stays round.
- Let the braid’s outer edges stay a little full; that keeps the bun from looking thin.
This works best when you want the updo to read as polished from across a room. Long hair gives you enough braid length to build a thick bun, so you can use that to your advantage. A slight shine on the surface and a matte hold underneath creates a nice contrast — smooth from a distance, textured up close.
14. Side-Swept Knot with a Deep Part
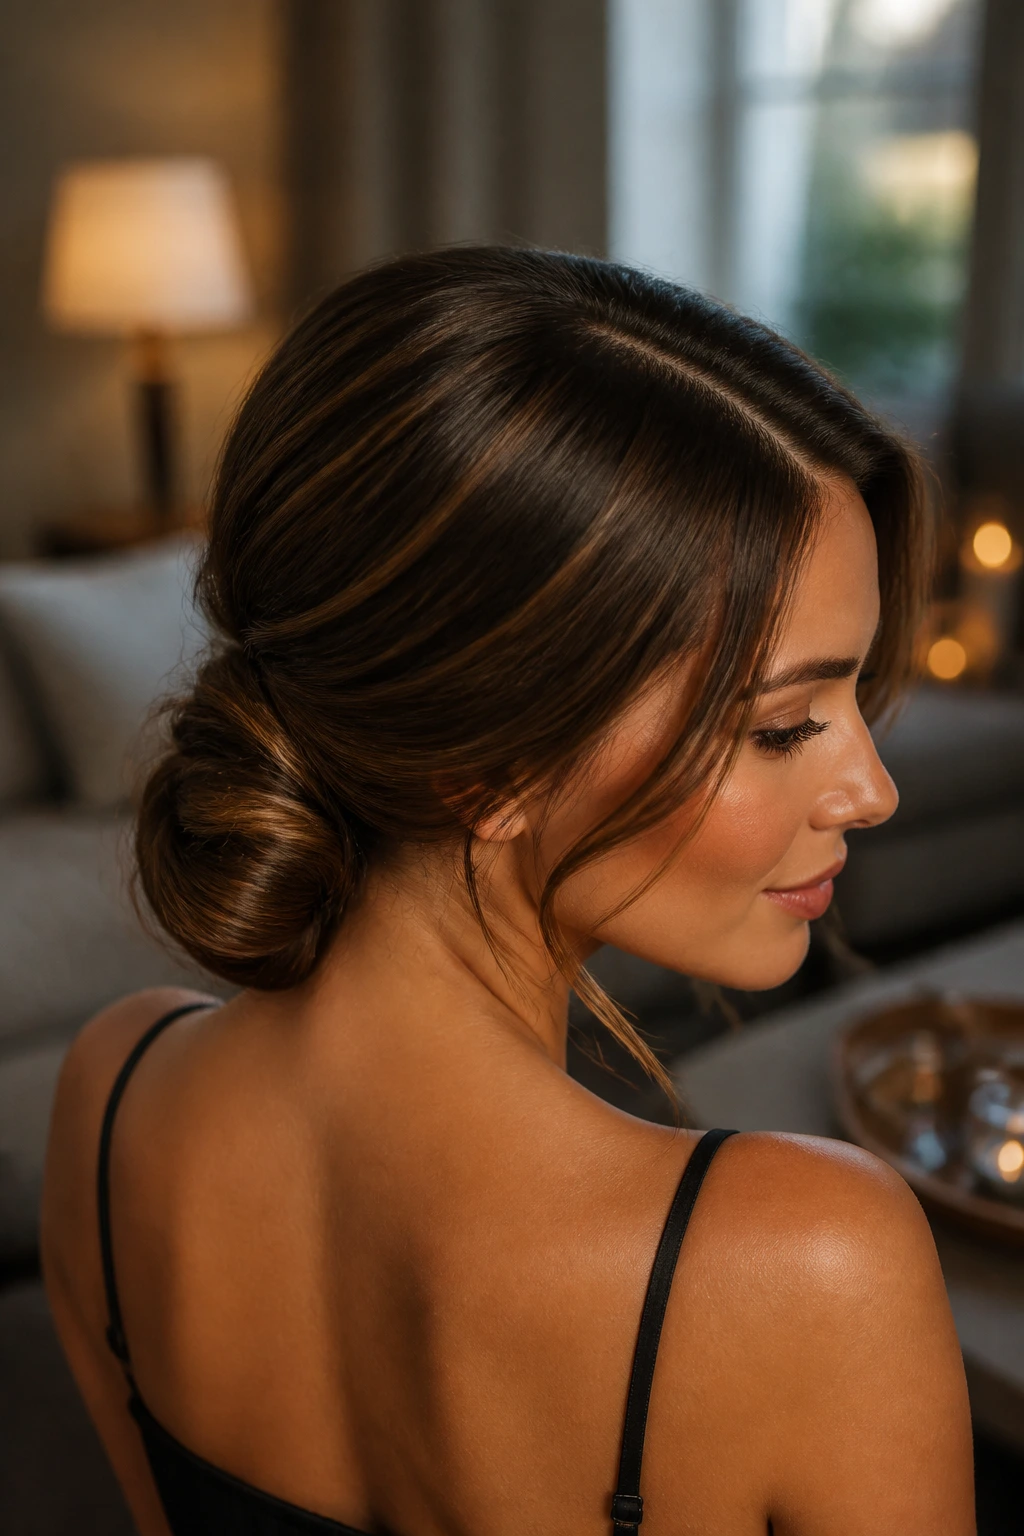
A side part changes the whole personality of an updo. Sweep the hair low and to one side, gather it near the nape or just behind the ear, and tie it into a knot that sits off-center. The result feels softer and a touch less predictable than a middle-part bun.
This is one of my favorite choices for long hair when you want the face to look a little less open. The side sweep gives the forehead some shadow, and the knot itself can be compact or loose depending on the occasion. Keep the front smooth and let the back stay textured. That contrast is what makes it feel finished.
It also solves a practical issue. Long layers tend to separate less when they are directed to one side before pinning. If your hair usually splits in two directions around the nape, a side-swept knot can make the whole process less annoying.
15. Crown Braid into a Low Bun
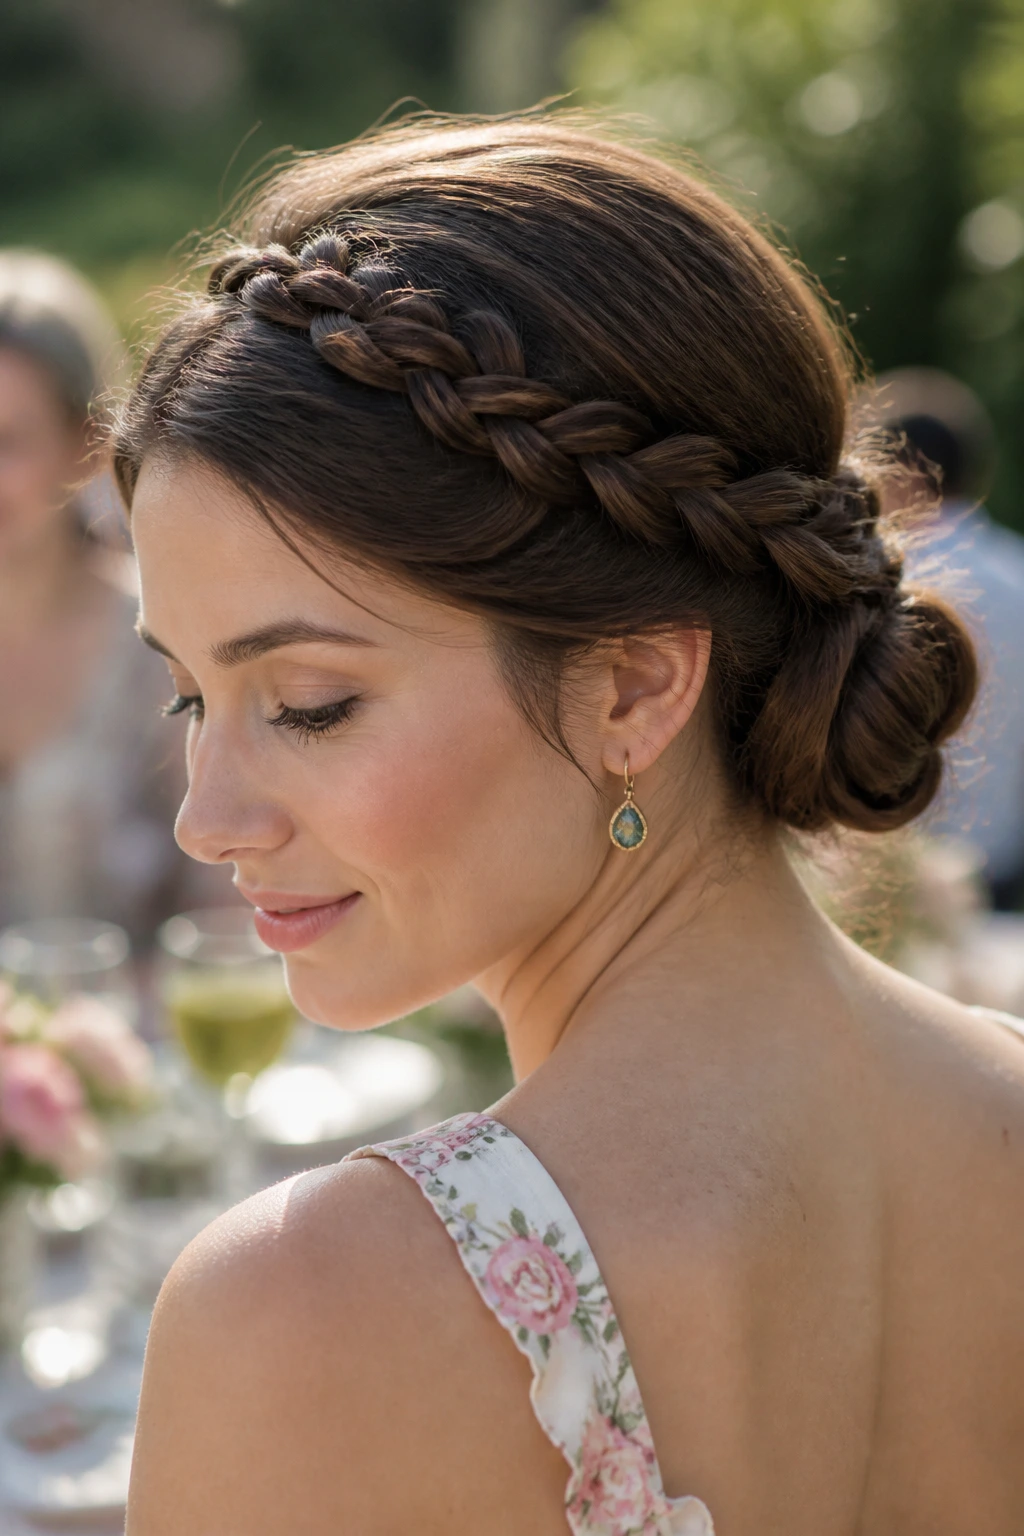
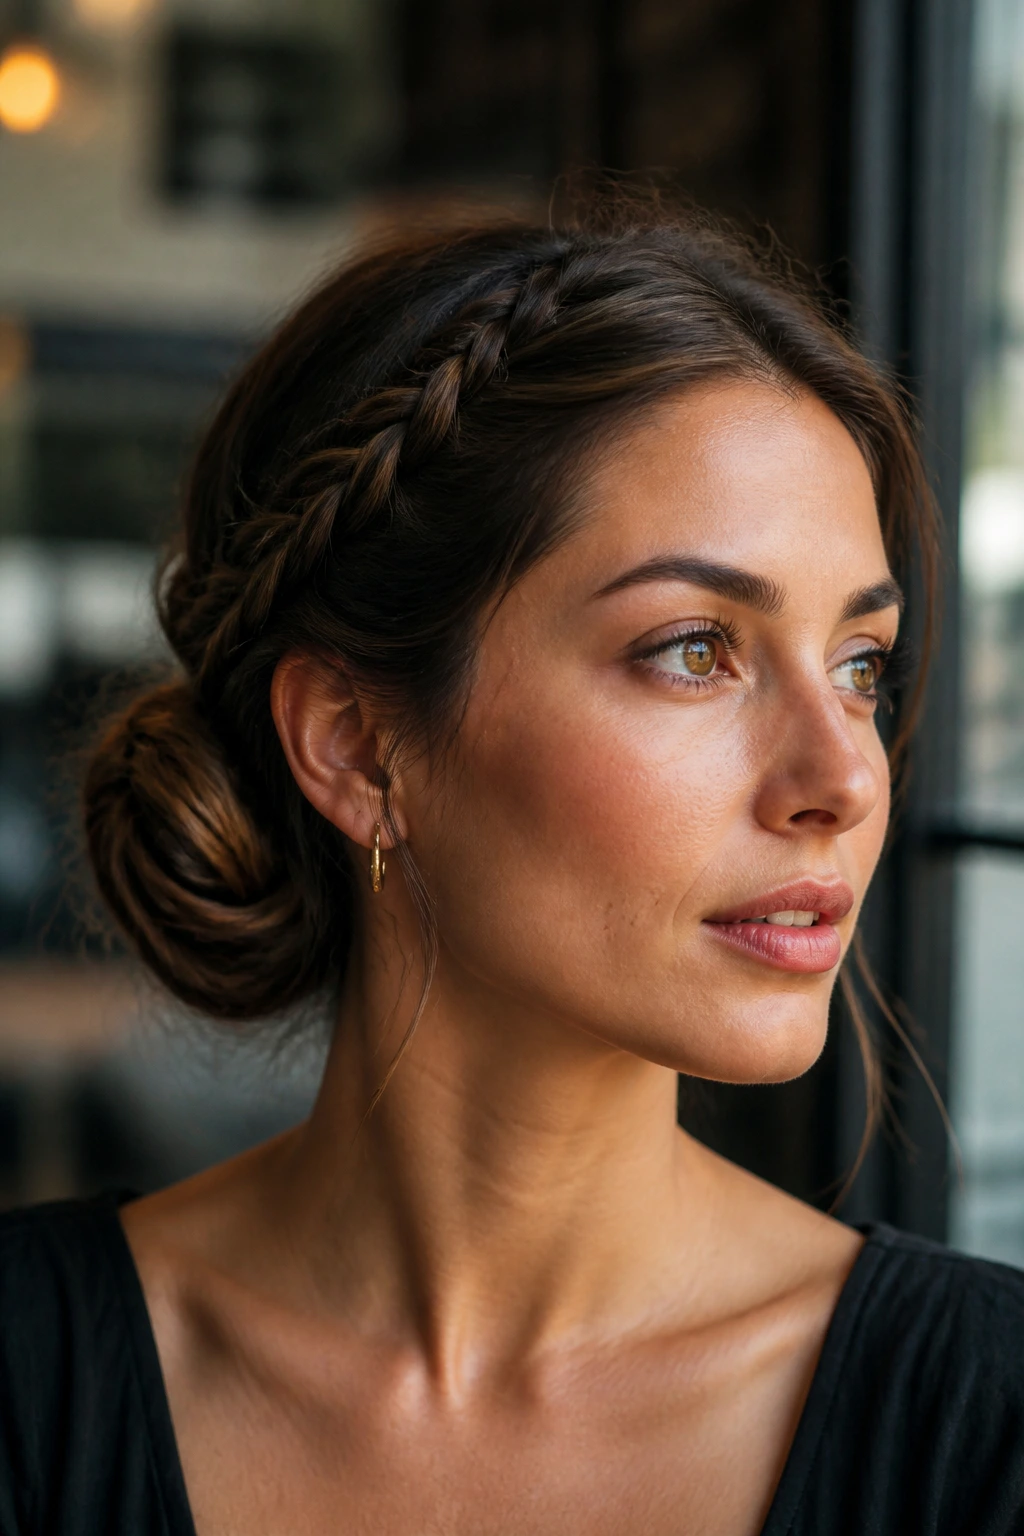
When you want the braid to do the talking, this is the move. A braid runs across the crown, often from one temple to the other, and the remaining hair folds into a low bun at the back. The braid gives the style a clear line, and the bun keeps the length from hanging loose.
The crown braid matters more than the bun here. Braid it firmly enough that it hugs the head, then pinch it wider after securing it if you want more visible texture. The bun can be neat or slightly messy, but the crown should look clean or the whole style loses its frame.
This one is useful on thick long hair because the braid helps control volume before the bun ever comes into play. It also behaves well in humidity. Braids tend to keep their shape even when loose waves would start to puff, and that is part of why this style keeps showing up for weddings, garden parties, and long workdays.
16. Knotted Ponytail Bun with Textured Lengths
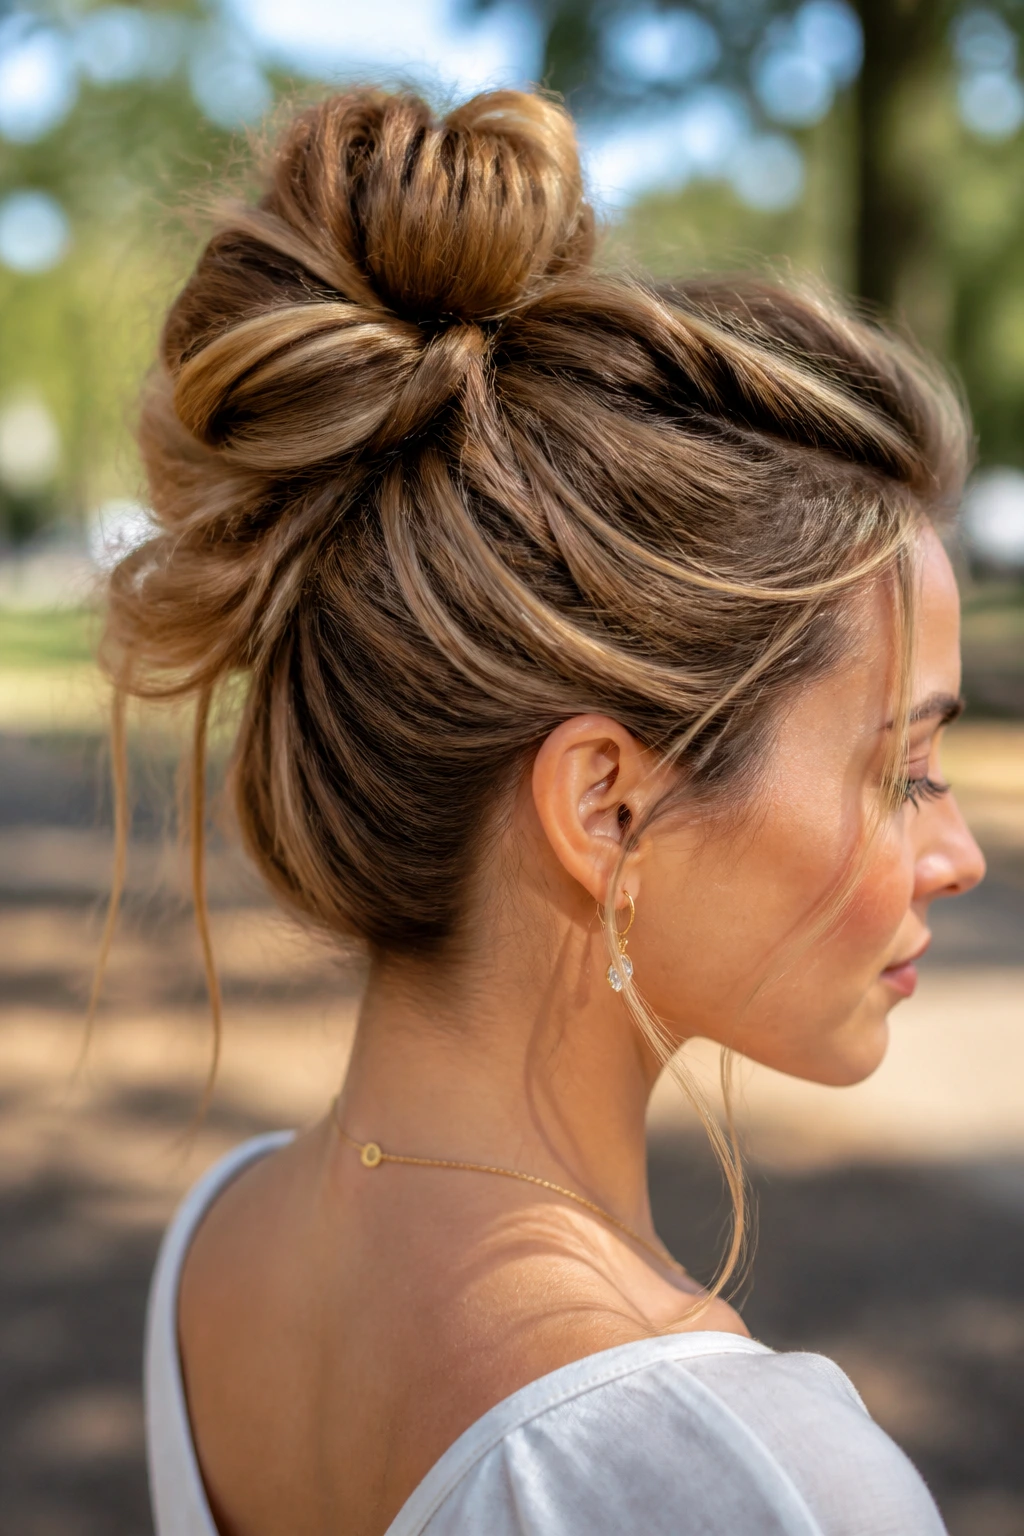
A knotted ponytail bun looks more complicated than it is. Split the ponytail into sections, knot them once or twice, then wrap or pin the remaining lengths into a bun. The texture is the point. Instead of one smooth coil, you get a layered knot that reads fuller and a little more modern.
Best feature: the knots create built-in grip, which is useful when long hair is too soft for a plain twisted bun. You are essentially giving the style more friction before it even hits the pins.
This works well if your hair has some wave or if you are willing to rough it up a little with texturizing spray. The style should look slightly dimensional, not polished to death. Keep the knots centered and pin through the densest parts of the bundle, not the edges. That is where the hold lives.
17. Faux Bob Updo That Tucks the Ends Away
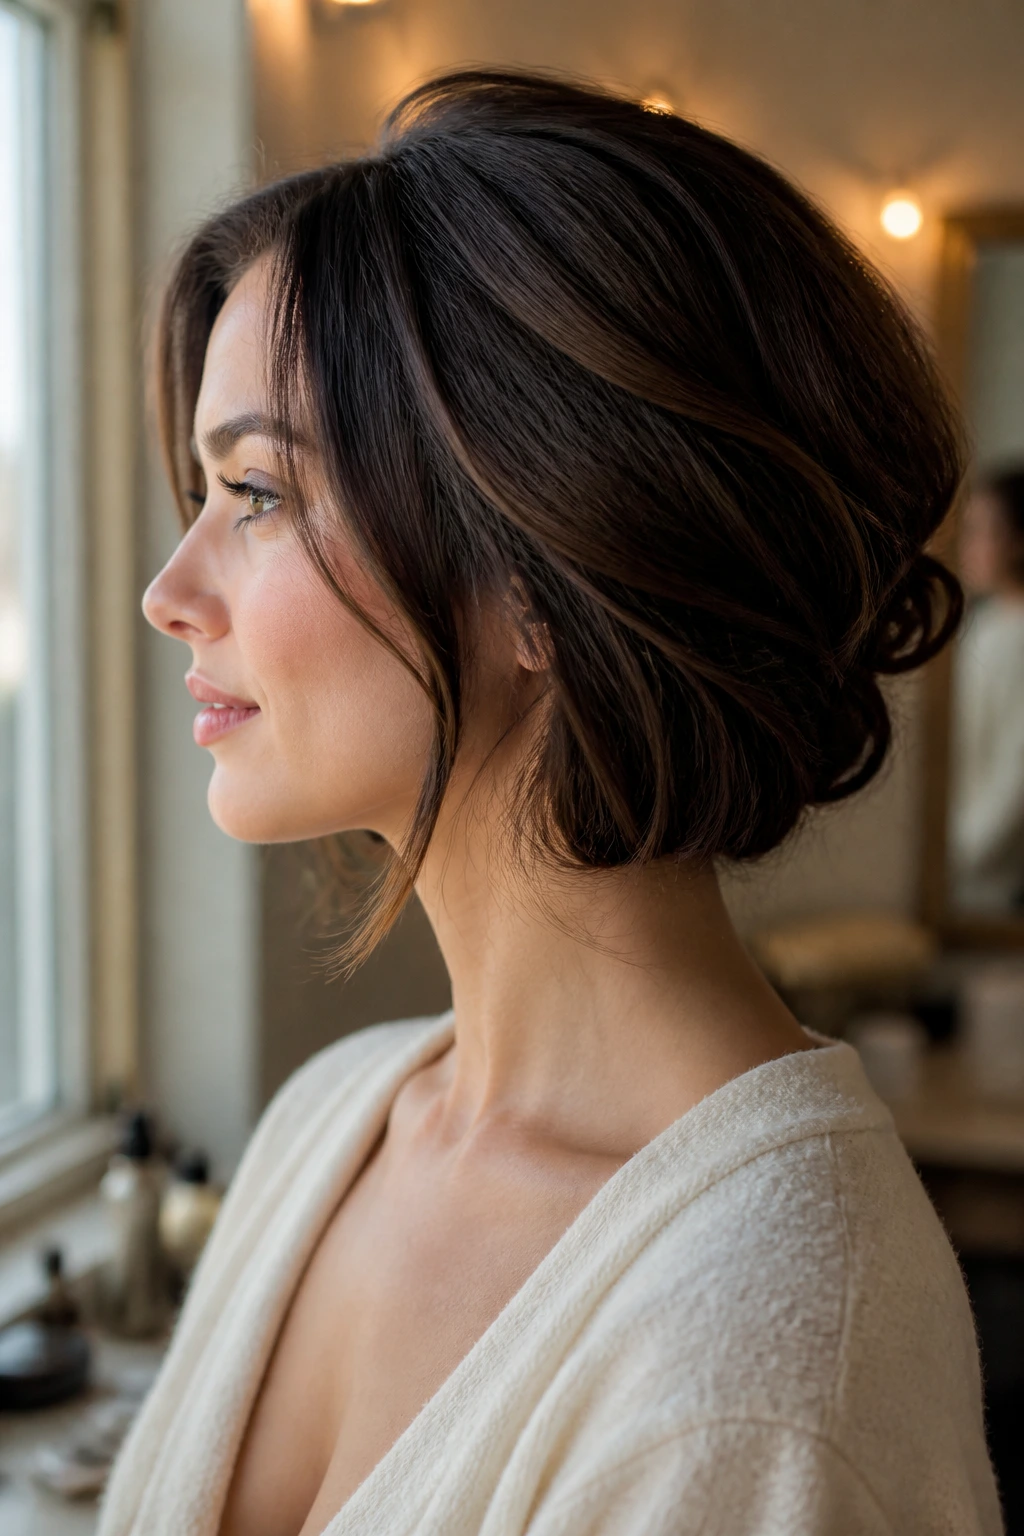
Want the drama of shorter hair without cutting a single inch? The faux bob tucks long lengths under themselves so the ends disappear and the visible shape sits around jaw level or a touch lower. It is a fun change, and it makes long hair feel surprisingly light.
The shape starts by folding the lengths upward, then tucking and pinning them underneath in sections. The front can stay smooth and tucked behind the ears, or you can leave a little wave around the face. Either way, the hidden ends are what make the illusion work.
This is one of those styles that rewards patience. If you rush the pins, the bob shape puffs in the wrong places and starts looking accidental. Keep the hidden folds flat against the head and check the side profile before you leave the mirror. The side view tells the truth.
18. Twisted Low Ponytail Updo with a Polished Base
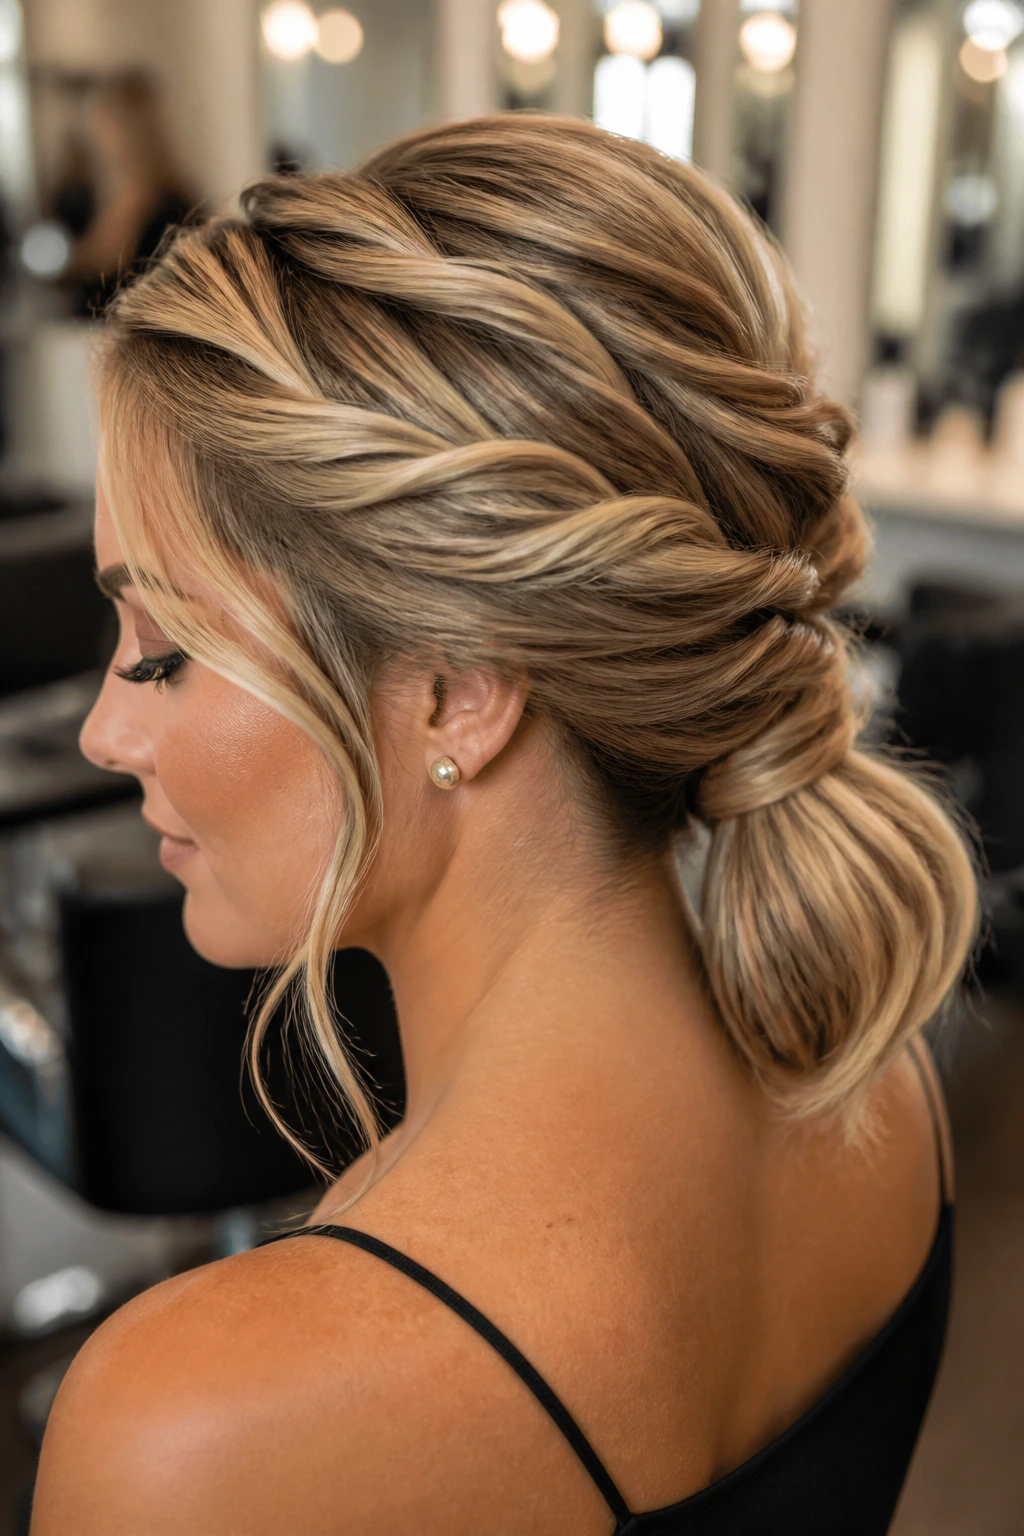
Twists are a good answer when braids feel like too much trouble but you still want structure. This style uses several twisted sections from the crown or temples, gathered into a low ponytail and folded into an updo shape at the back. The top stays smooth, and the lower part gets enough texture to hold.
Why it works on slippery hair
The twist pattern creates directional tension. Hair that wants to slide straight down gets redirected into lines that cross each other, and that crossing is where the pins catch. It is a small thing. It matters.
I like this style for long hair that has been straightened because it keeps the finish neat without needing a dozen pins. Start with slightly damp hands when smoothing the top so you do not add too much product. A little cream, a little spray, and a firm twist are enough.
19. Double Space Buns with Long-Hair Balance
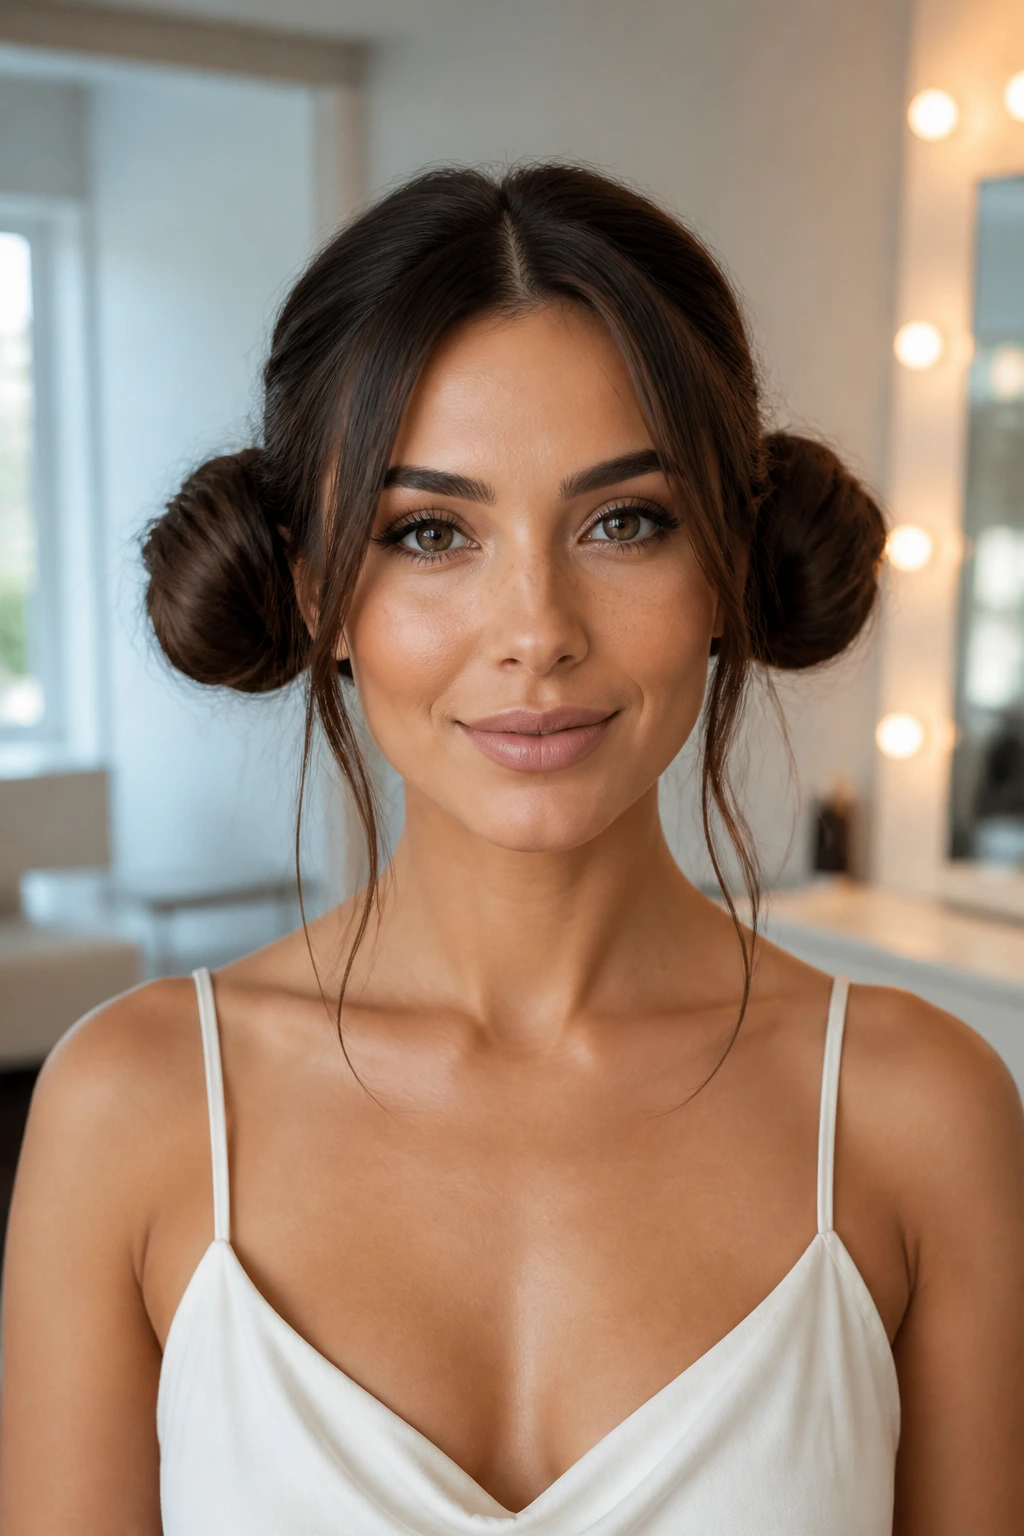
Space buns can go childish fast if they are too round or too high. On long hair, the better version sits lower and slightly farther back, with enough weight underneath to keep the shape from looking flimsy. Think balanced, not cartoonish.
A clean middle part helps, but the real trick is placement. Set each ponytail a little below the crown, wrap the lengths into two buns, and pin the inner edges so the buns lean toward each other slightly. That soft inward angle keeps the style from spreading too wide.
This is the most playful style in the group, and that is fine. Wear it for concerts, casual nights out, or any day when sleek and serious feel like the wrong mood. If the hair is very long, leave a little length trailing and tuck it under the buns so the overall shape stays compact.
20. Wrapped Low Ponytail with a Volumized Crown
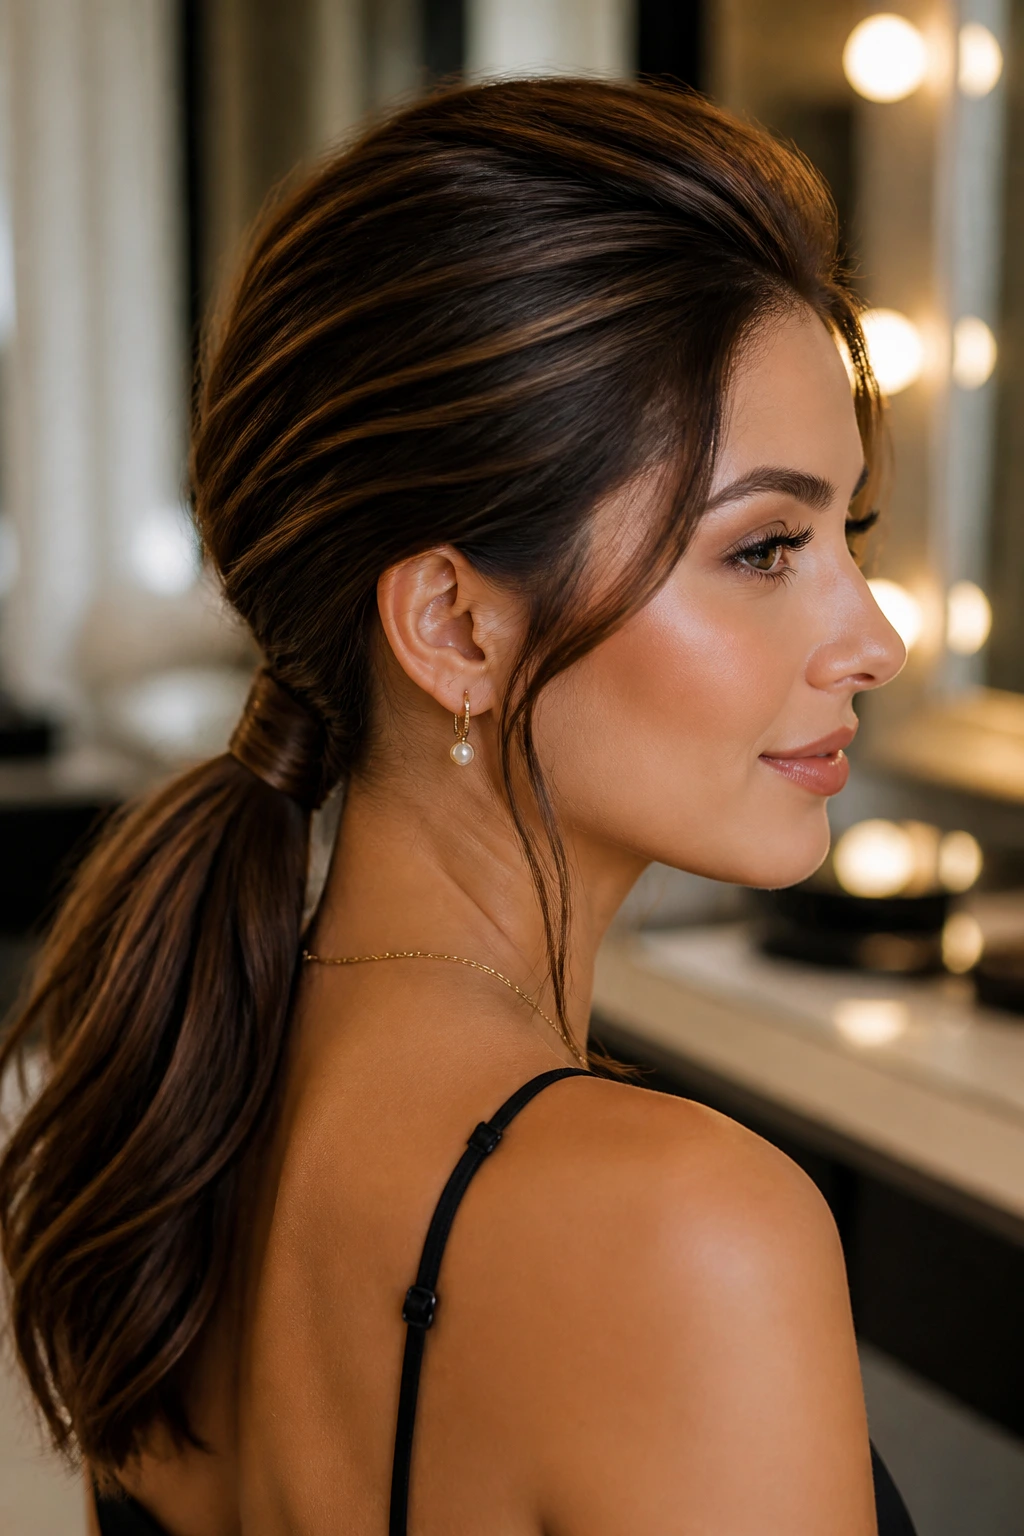
A low ponytail does not have to look flat. Add lift at the crown, wrap the base with a section of hair, and you get a style that reads like an updo without the fuss of a full chignon. The top has height, the back stays controlled, and the shape looks longer than a regular ponytail.
Backcombing a small section at the crown helps, but go easy. One or two gentle lifts with a tail comb is enough. Over-teasing turns the top into a mat, and that is not the look here. Smooth the sides over the lifted area, secure the ponytail low, then wrap a thin strand around the elastic.
This style works especially well on long hair that needs to look finished fast. It is also useful if you want a style that sits comfortably under a jacket collar. The low placement keeps the neck free, and the crown lift prevents the whole thing from feeling dragged down.
21. Elegant Wedding Chignon with Hidden Pins
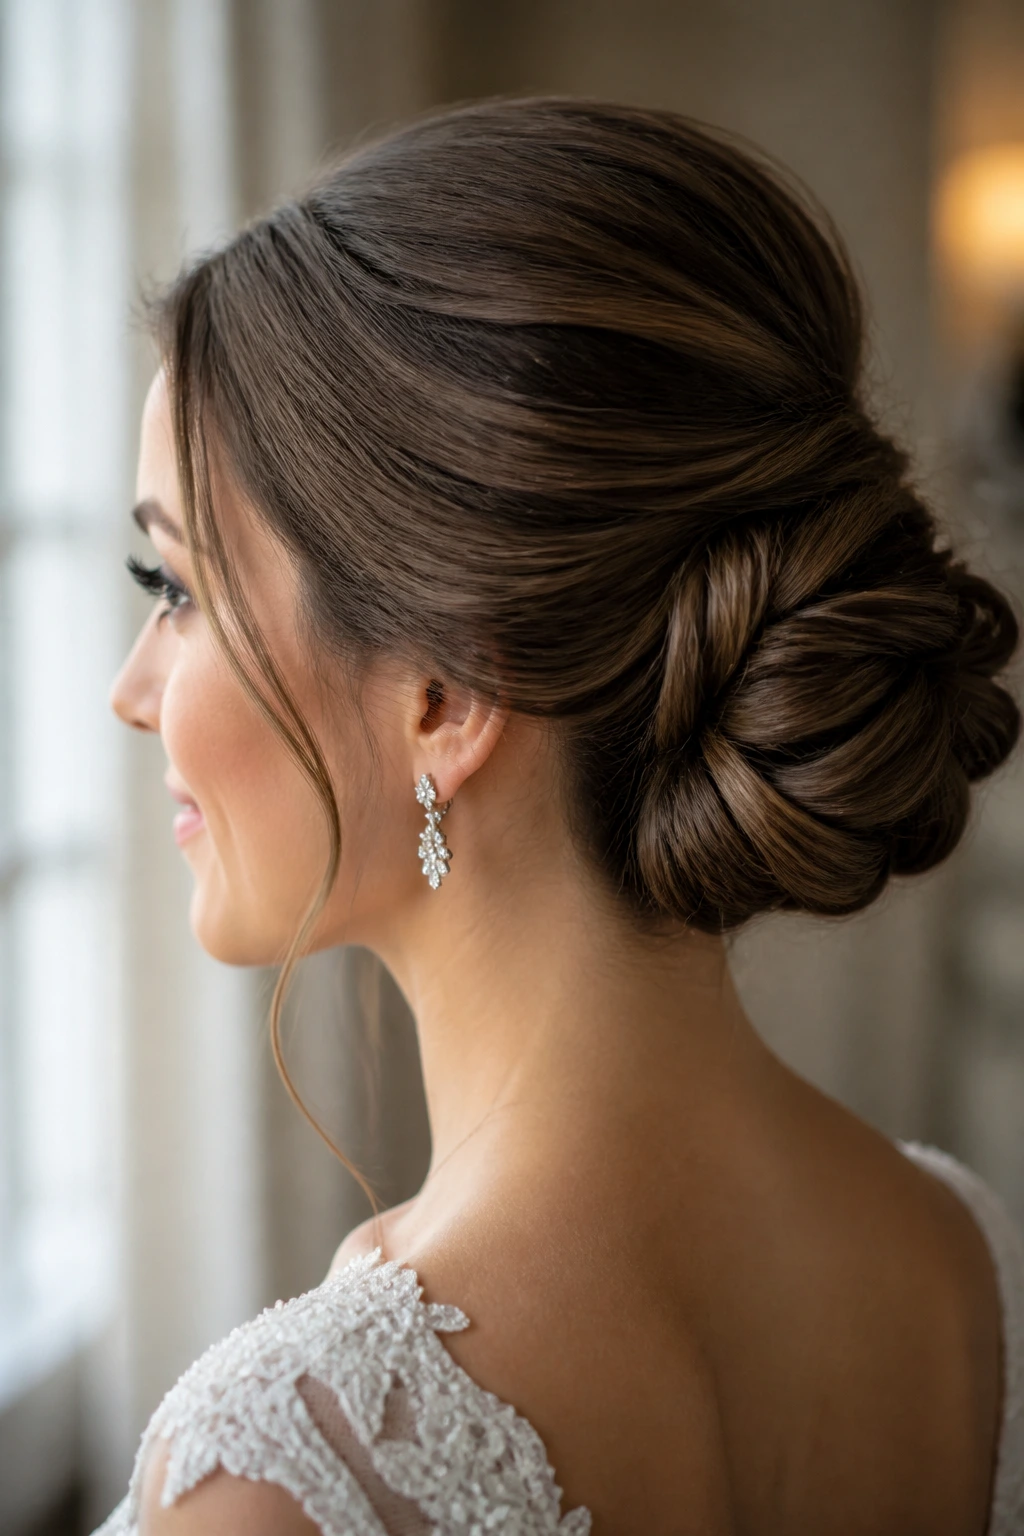
If the occasion calls for structure, this is the refined option. A wedding chignon on long hair often uses a low base, careful twisting, and hidden pins set in layers so the shape stays smooth from every angle. It is not a style for improvising in a rush.
The detail that matters most is the base. Build a firm ponytail, split the length if it is very thick, and tuck the sections one at a time so the bun does not bulge. A light mist of hairspray between layers helps the structure settle. Not a flood. A mist.
It is a good choice when you want earrings, neckline, or makeup to stand out, because the hair stays where it should and does not compete. The best versions look quiet from the front and carefully built from the side. That side profile matters more than people think.
22. Claw-Clip French Twist for Quick Long-Hair Days
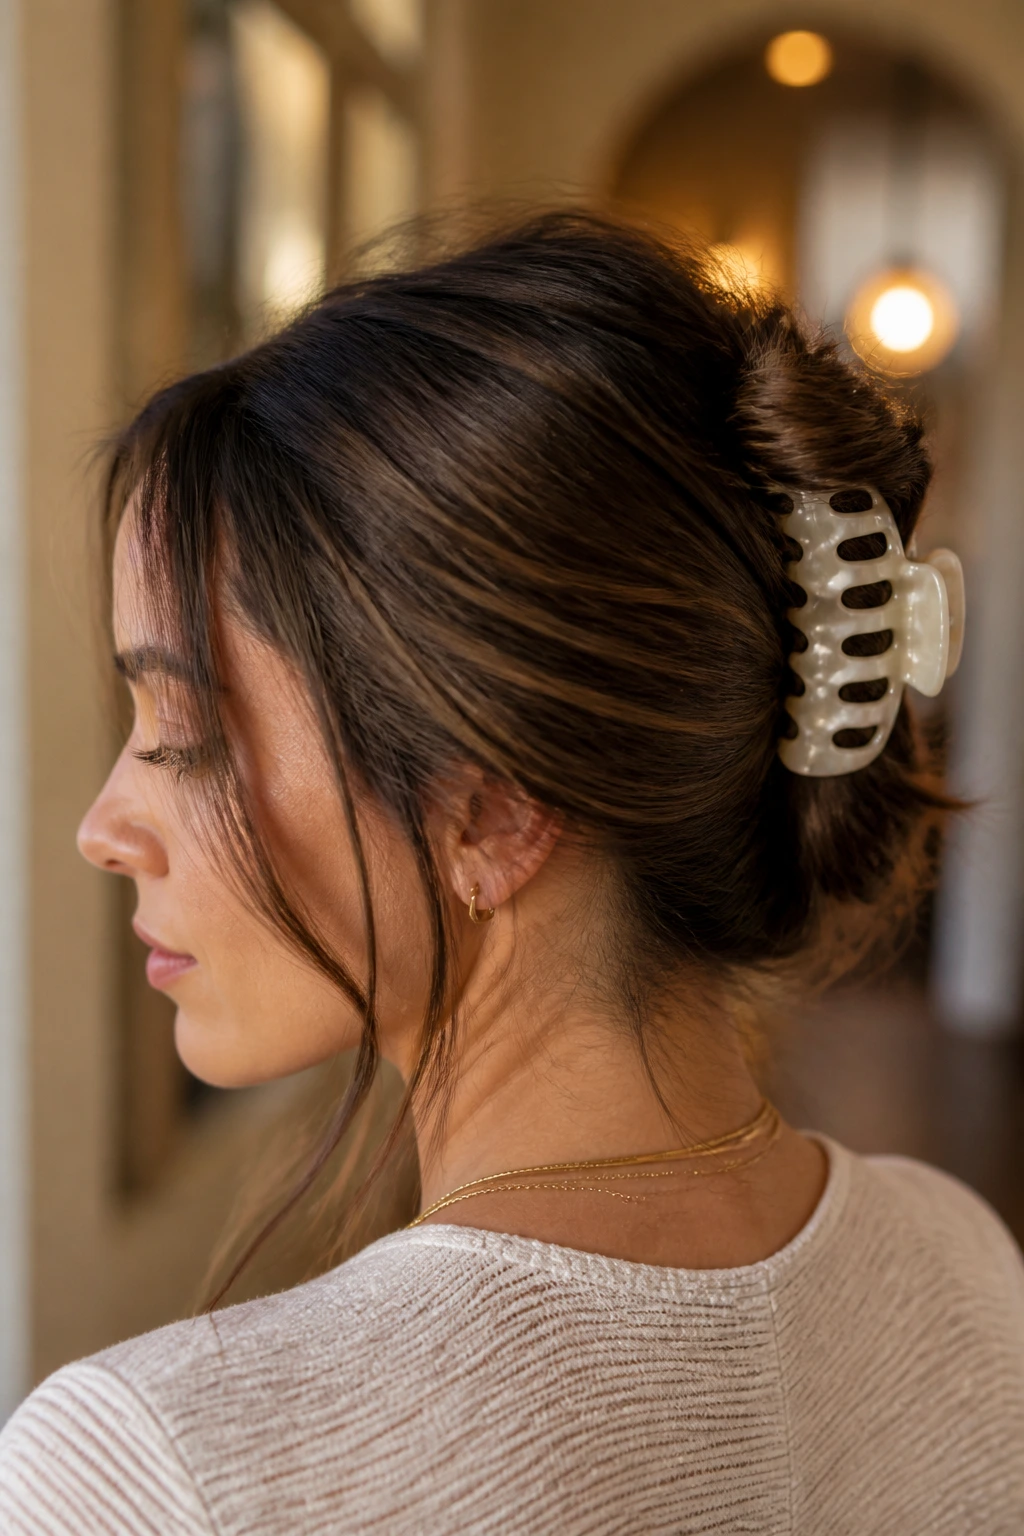
A claw-clip French twist is the style I reach for when I need the hair up and I need it there fast. Sweep the lengths upward, twist them vertically, and secure the shell with a large clip that can actually hold the weight of long hair. Tiny clips are decorative. They are not the same thing.
The shape is looser than a pinned French twist, which makes it more forgiving on day-two hair or hair that has not been fully smoothed. A few shorter layers can sit out near the temples without ruining the look. In fact, that softness keeps it from feeling too rigid.
If your hair is very thick, twist the lower half first and fold the top section over it before clipping. That creates a flatter base and keeps the clip from sliding down. It is the kind of style that looks casual until you realize it has stayed in place for hours. That is the whole point.
Why Long Hair Needs a Different Updo Strategy
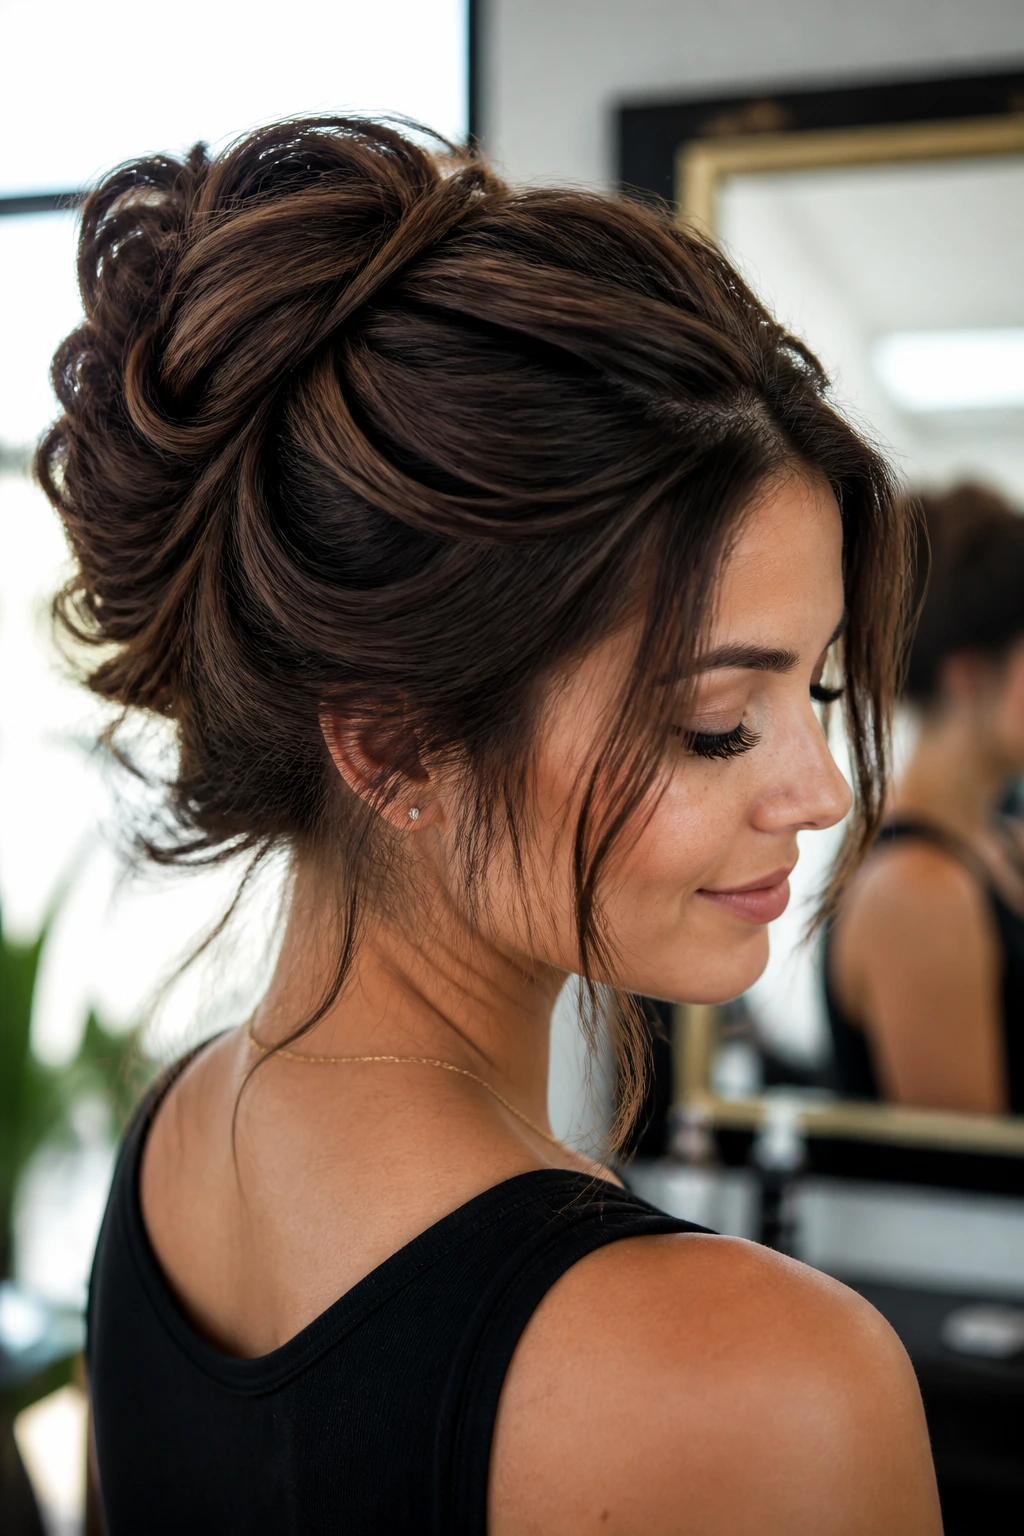
Long hair changes the rules because length changes the physics. A short bob can hold a twist with a couple of pins and a little spray. Long hair puts pressure on every anchor point, especially if the strands are smooth, thick, or freshly conditioned. The weight drags downward. The style has to be built for that.
The other problem is surface slip. Long hair often has more room to slide over itself, which means pins can slip out if they are only catching the outer layer. Good long-hair updos use crossed pins, sectioned bases, and a bit of rough texture near the roots so the hair has something to hold onto.
Weight, texture, and the nape
The nape is where a lot of styles fail. If the bun or twist sits too high, the whole shape starts to tip backward. If it sits too low without enough support, it collapses into a lump. The sweet spot is usually just above the collar line, where the style can rest without fighting your neck every time you move.
Layers change the game
Long layers are lovely, but they are mischievous in updos. Shorter pieces around the face and crown need a plan or they will peel out early. That is why braids, twists, and wrapped styles show up so often in long-hair work. They give those shorter pieces somewhere to live.
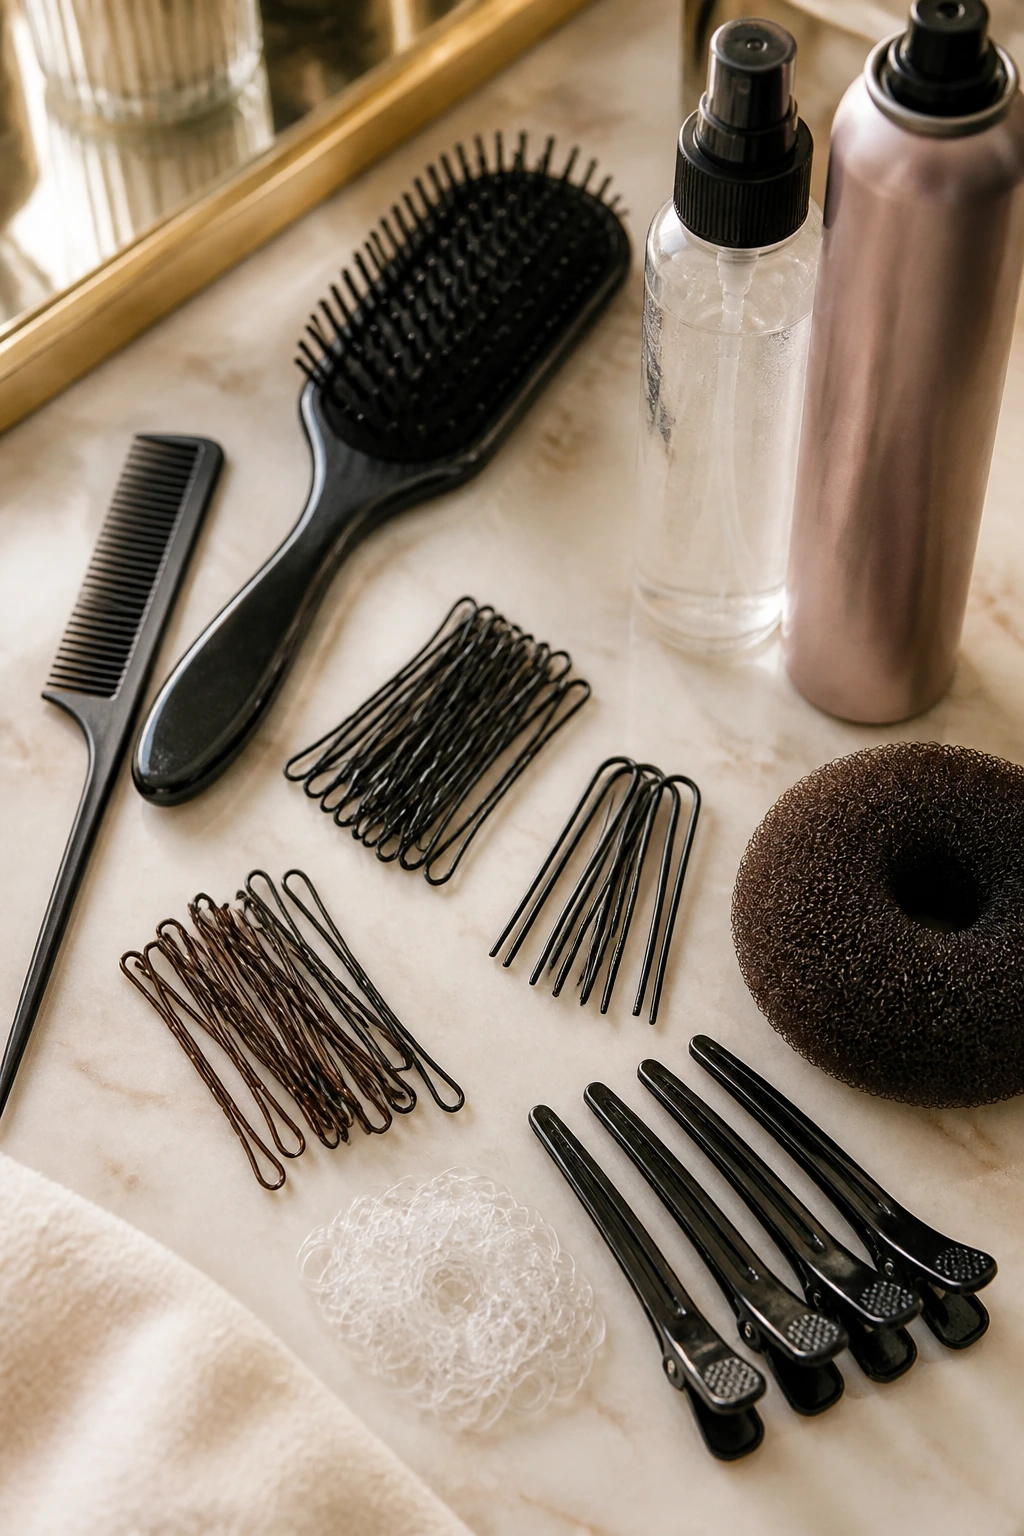
Essential Tools for These Styles
-
Tail comb: Useful for clean parts, sectioning, and lifting tiny pieces at the crown without mangling the rest.
-
Boar-bristle or smoothing brush: Helps gather long hair tightly without leaving a fuzzy halo around the hairline.
-
Bobby pins in two lengths: Short pins handle detail work; longer ones grip thick buns and heavier twists.
-
U-pins: Better than standard pins for dense buns or chignons because they slide into the structure without flattening it.
-
Clear elastics: Good for small braids, ponytail bases, and bubble sections where a visible thick band would interrupt the look.
-
Texturizing spray or dry shampoo: Adds grit to freshly washed or very fine hair so the style stops slipping.
-
Strong-hold hairspray: Use it after the shape is in place, not before. That order matters.
-
Sectioning clips: Keep the rest of the hair out of the way while you build the first twist, braid, or roll.
-
Hand mirror: Essential for checking the back. The front can lie to you.
-
Optional padding or hair donut: Handy for fuller buns, though long hair often gives you enough bulk on its own.
How to Prep Long Hair for Updo Hairstyles That Stay Put
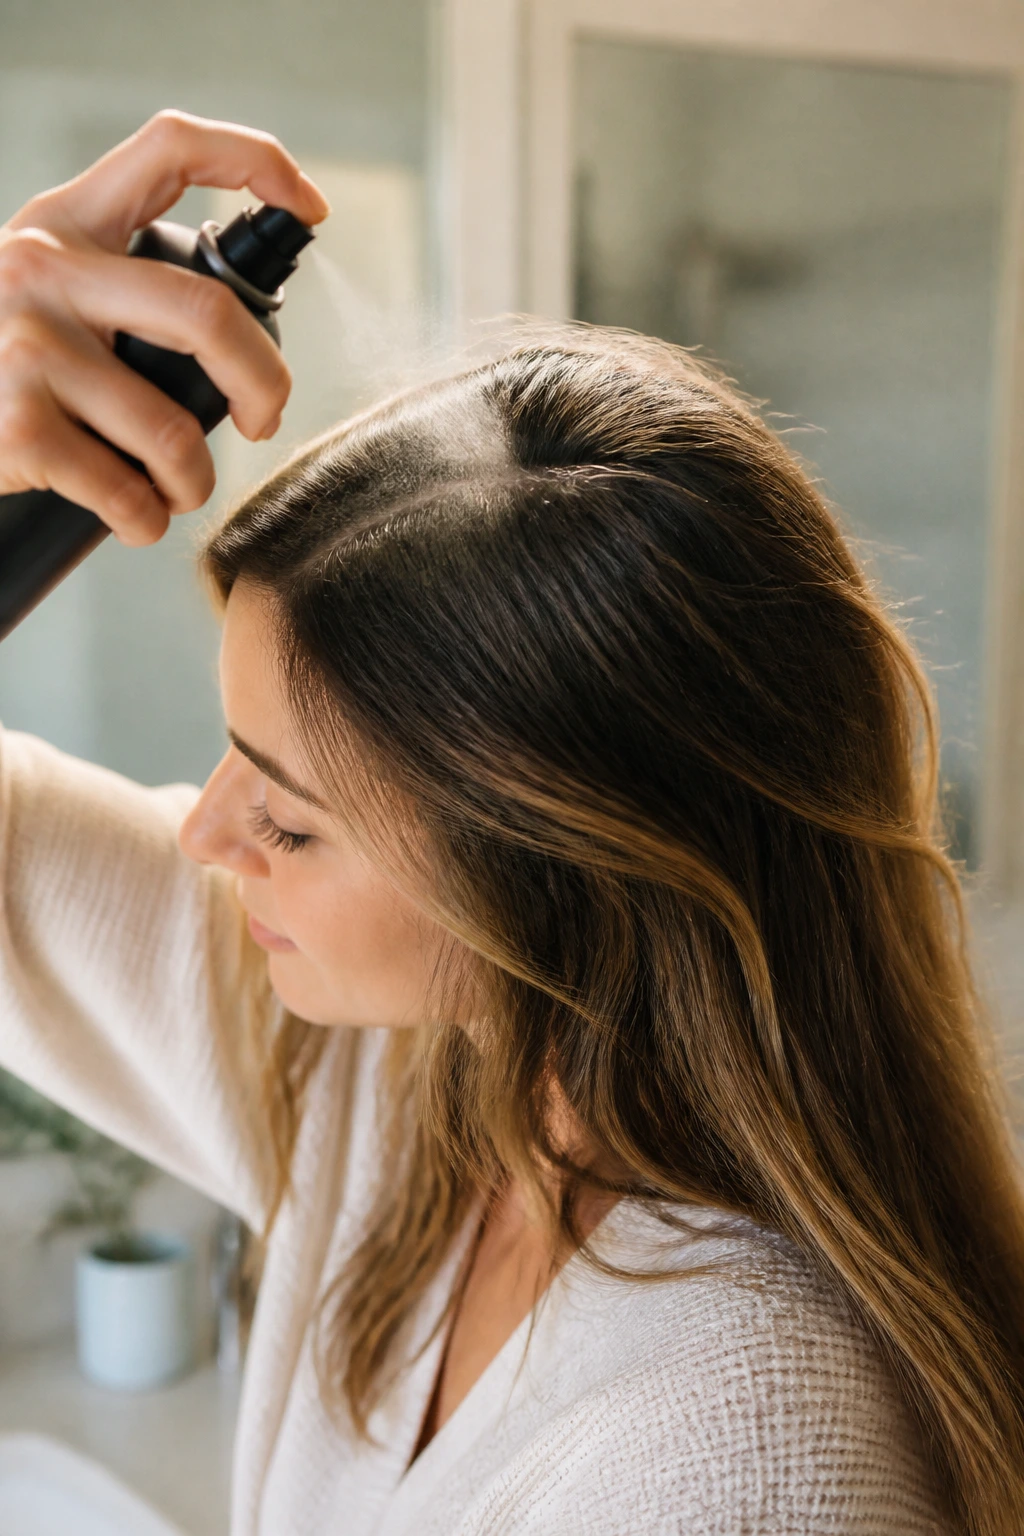
If the style feels slippery before you even start, stop fighting the hair and change the prep. A tiny bit of texture at the roots makes a bigger difference than drowning the lengths in product. Dry shampoo, a light mist of texturizing spray, or even just second-day hair can give your pins something to bite into.
Sectioning saves time, too. Pull the front pieces away from the nape first, then deal with the back in quadrants if your hair is thick. Long hair gets tangled in the process fast, and once the whole mass turns into one giant loop, the job gets annoying in a hurry.
Clean hair vs lived-in hair
Freshly washed hair feels silky, but silk and updos do not always get along. If you must style clean hair, rough-dry the roots and add a little grip before you begin. Day-two hair often behaves better because the natural oils help the strands stay together instead of skating apart.
Where to add product
Put the product where the structure needs help. The crown, the sides near the temples, and the base of the bun are usually the weak spots. Leave the ends alone unless you are smoothing them into a ponytail or roll. Too much product on the lengths can make them sticky without improving the hold.
How to Wear an Updo Comfortably All Day
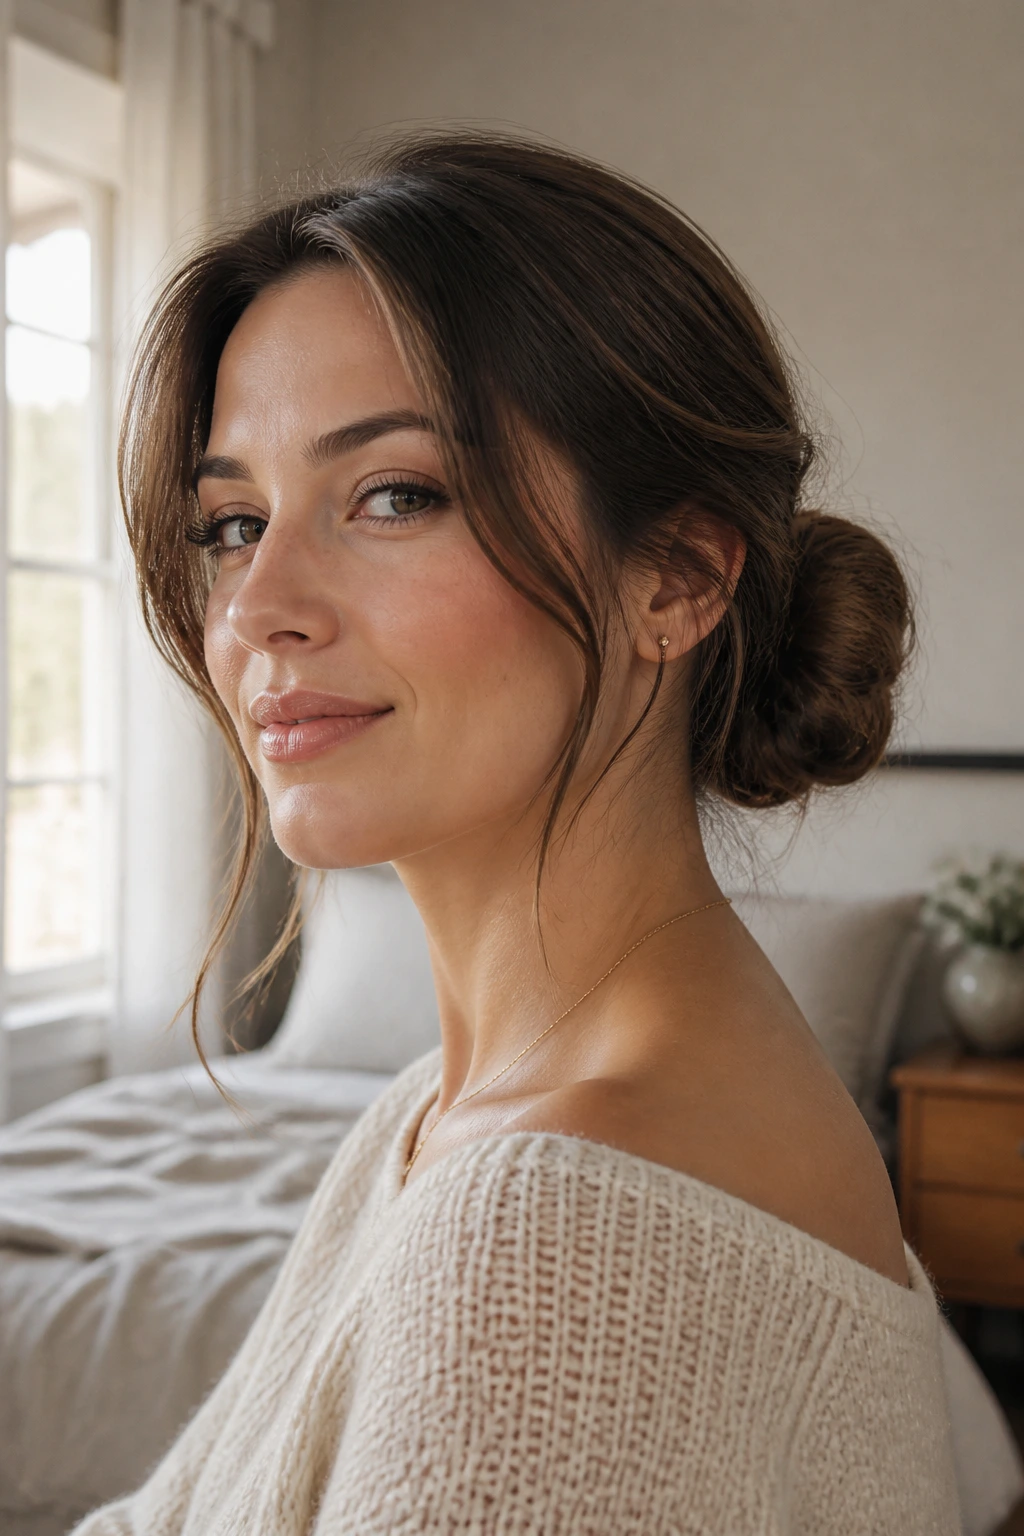
A pretty updo that hurts by lunchtime is a bad updo. Period. The hairline should feel secure, not pinched, and the weight should sit low enough that the scalp is not doing all the work. If you can feel a hard knot at the crown every time you turn your head, the shape is too tight.
Alternate the direction of your pins. One pointing up, the next pointing down, maybe one crossing the seam. That tiny detail spreads the tension and keeps the bun from torquing to one side. I also like to leave the hairline just a touch softer than people expect. A few gentle wisps around the temples can save a style from looking pulled into a helmet.
If you wear earrings, test the hairstyle with them in. Some buns look great until the clip or side knot collides with a hoop or drop earring. Hair, jewelry, neckline — all three have to get along.
Additional Tips and Finish Boosters
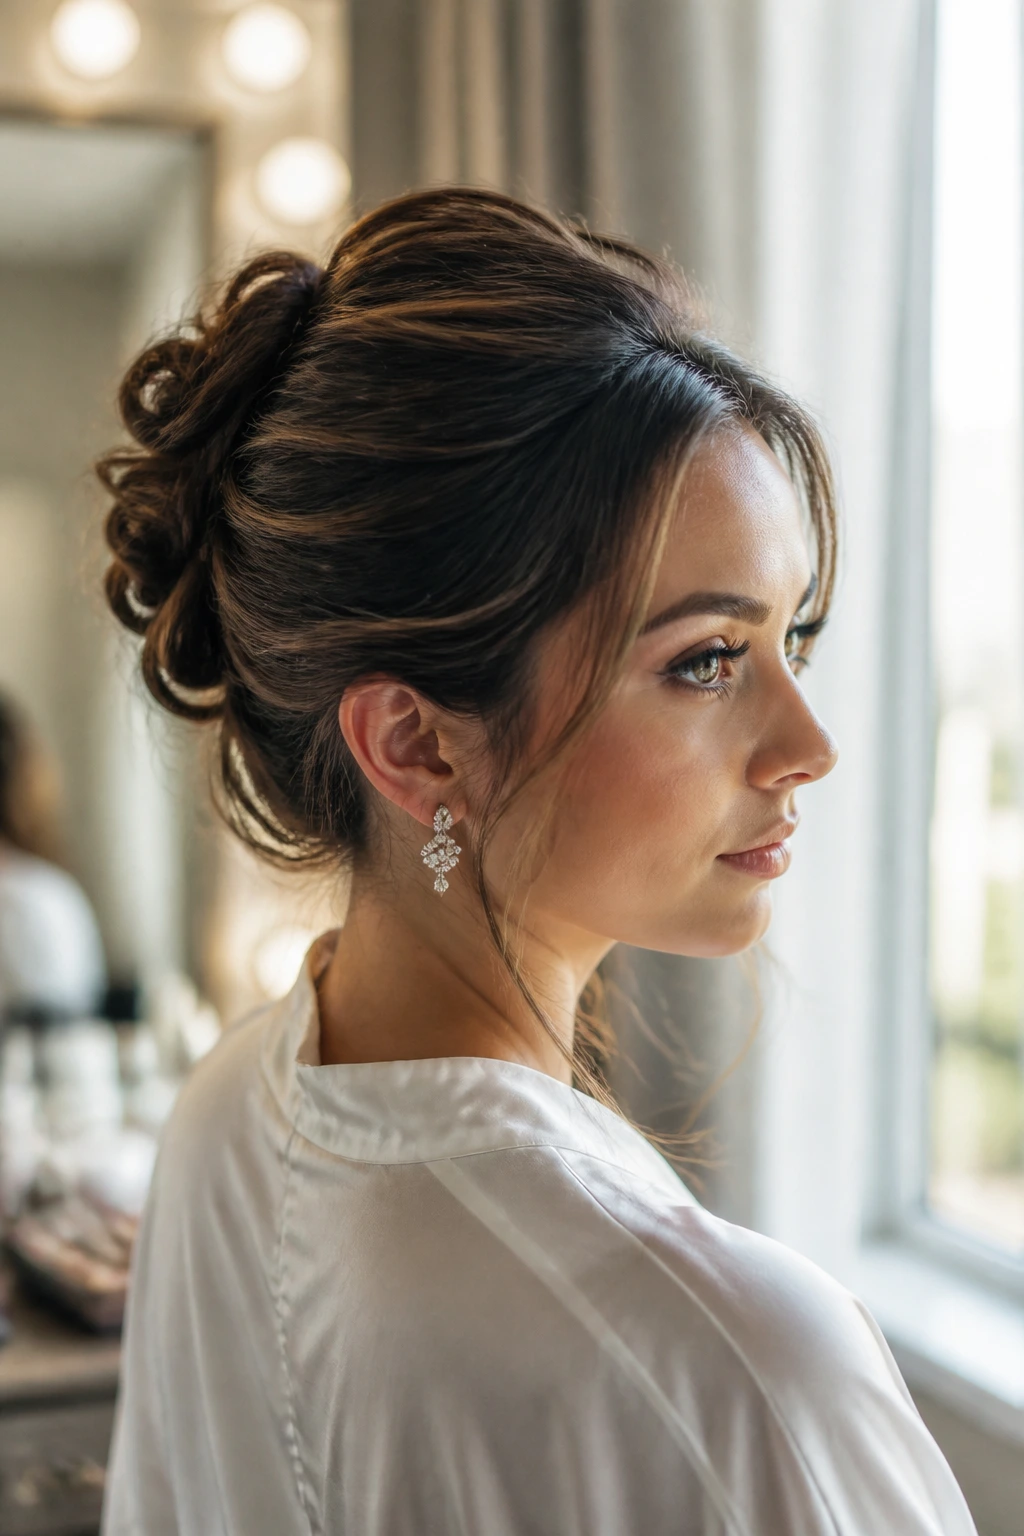
Texture Boost: If the hair is too smooth, dust a little dry shampoo into the mid-lengths before shaping the updo. The hair will grab itself instead of slipping away in your hands.
Polish: For sleek styles, smooth a pea-size amount of styling cream over the palms and press it over the surface only. Don’t rake it through the whole head unless you want the roots to collapse.
Customization: Want a softer finish? Pull a few side pieces loose after the pins are in. Want more lift? Set the ponytail one finger-width higher and use two crossed pins at the base.
Serving Suggestions: Hair accessories change the mood fast. A single pearl pin, a thin ribbon woven through a braid, or a metal clip at the nape can turn a plain bun into something more intentional.
Make-It-Yours: Curly hair looks best when the curl pattern is preserved in the bun or knot. Straight hair usually benefits from a touch more texture at the crown. Fine hair likes padding or braiding. Thick hair needs sectioning and a lower center of gravity. None of that is fancy. It’s just how the hair behaves.
Common Mistakes to Avoid with These Styles
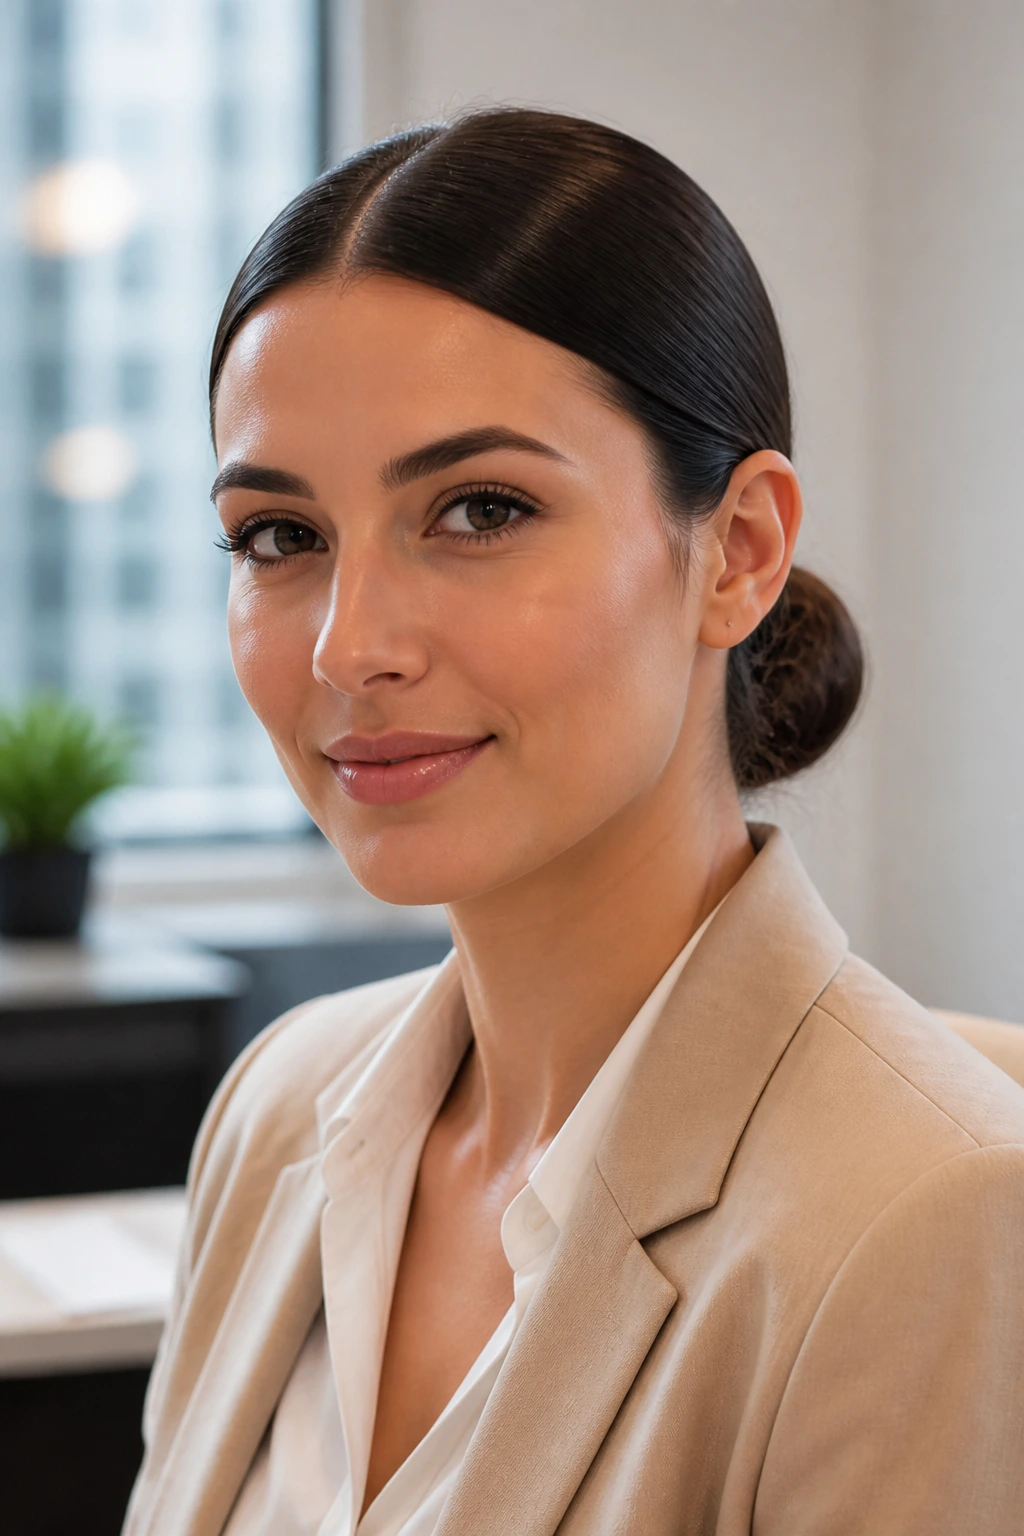
The first mistake is building the whole style on hair that is too clean and too soft. You may get a beautiful finish for two minutes, then the bun loosens and starts sliding. The fix is simple: add a bit of grit at the roots or switch to day-two hair when you can.
Another common problem is pulling the front too tight. The hairline starts to ache, the style looks severe, and the face loses softness. Ease up at the temples and let the shape do the work. Tight does not equal secure.
Using only one elastic on heavy hair is another trap. Long lengths can drag a ponytail base downward, especially in high buns and wrapped ponytails. Two elastics, or one elastic plus crossed pins, usually holds better.
Then there’s the pin problem. People push pins straight in and hope for the best. A better move is to slide the pin into the structure, turn it, and anchor it against another section of hair. That crosswise grip is what keeps the style from loosening.
Over-spraying before the style is set can freeze the wrong shape in place. Build the structure first. Finish with spray last. If the style needs a touch of shine, use that after the hold is secure.
Variations and Adaptations to Try
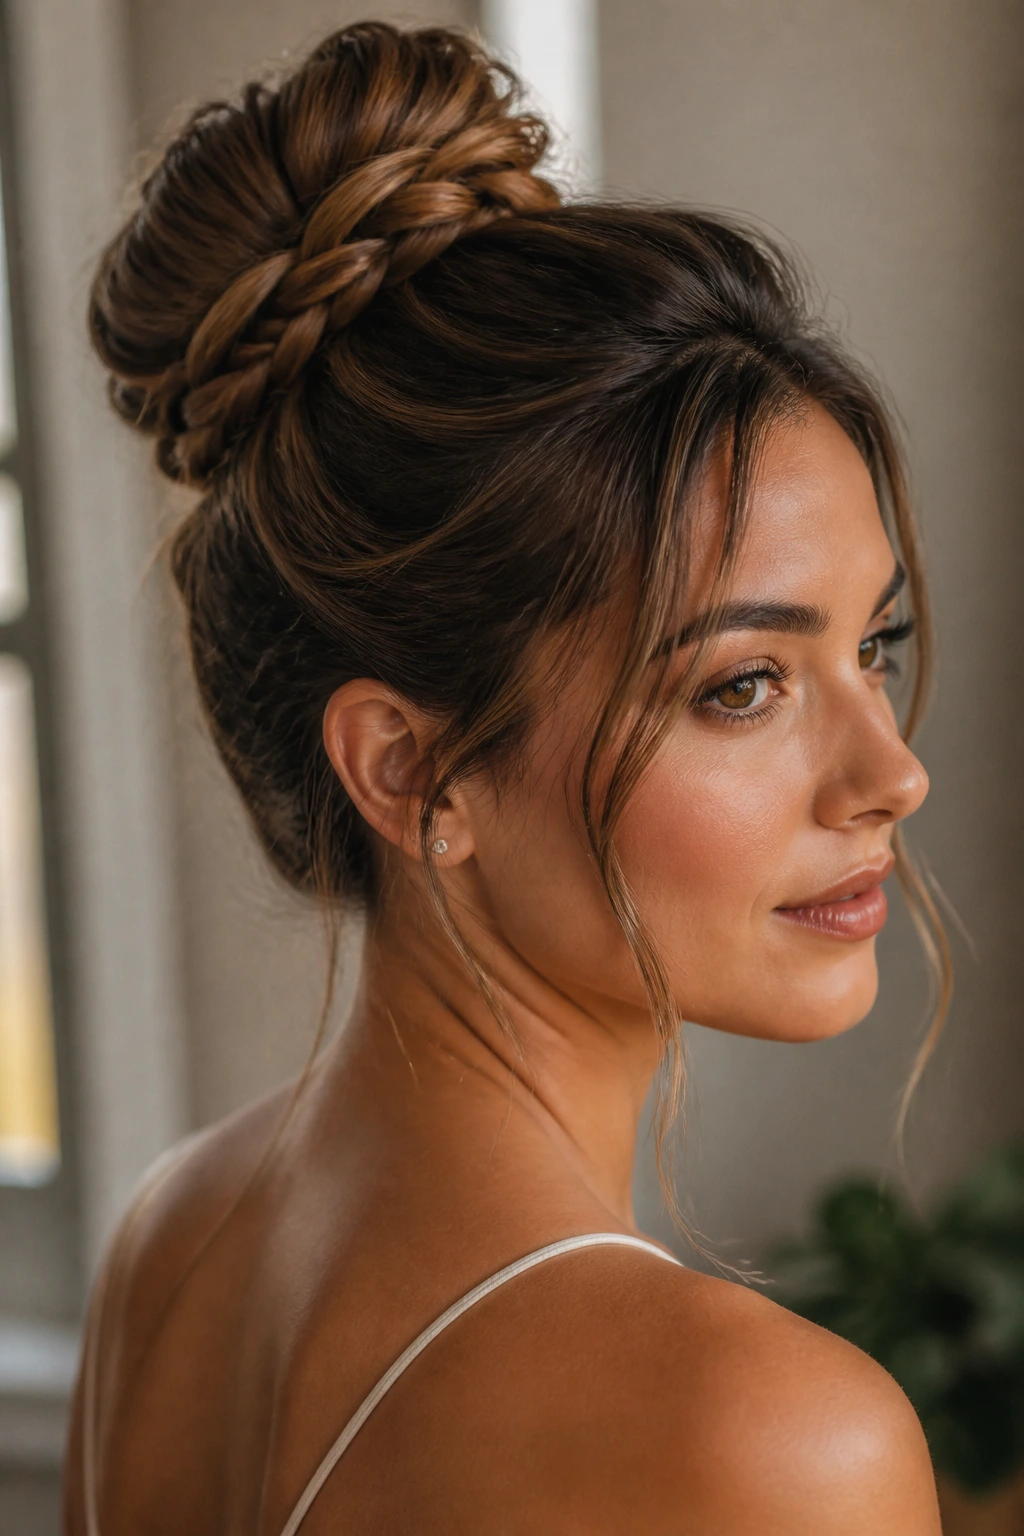
Fine-Hair Grip Layer: Start with dry shampoo at the roots, then add a small backcomb under the crown before building the bun or twist. Fine hair often needs that hidden lift so the style does not collapse flat against the head.
Curly-Hair Pattern Keep: Do not brush curls into a frizz cloud before pinning. Work with the curl clumps, coil them into the shape, and leave a few spirals out near the face. The style will look richer and hold its shape longer.
Thick-Hair Weight Split: Divide the hair into top and bottom sections before building the updo. That keeps the base from turning into a brick and makes the finished shape sit closer to the head instead of jutting out.
Layer-Friendly Pin Map: If shorter pieces are escaping, braid or twist just those front sections first and fold them back into the main style. It is a small extra step that saves a lot of chasing later.
Heat-Free Day-Two Edit: Skip straightening and use the hair’s existing texture. A little wave gives braids and knots more body, and the style usually lasts longer because the strands already have some bend in them.
Formal Shine Version: Smooth the surface with a light finishing cream and a mist of shine spray once the pins are secure. Use that version for evening events when you want the shape to look deliberate from across the room.
How to Refresh, Rework, and Protect the Style
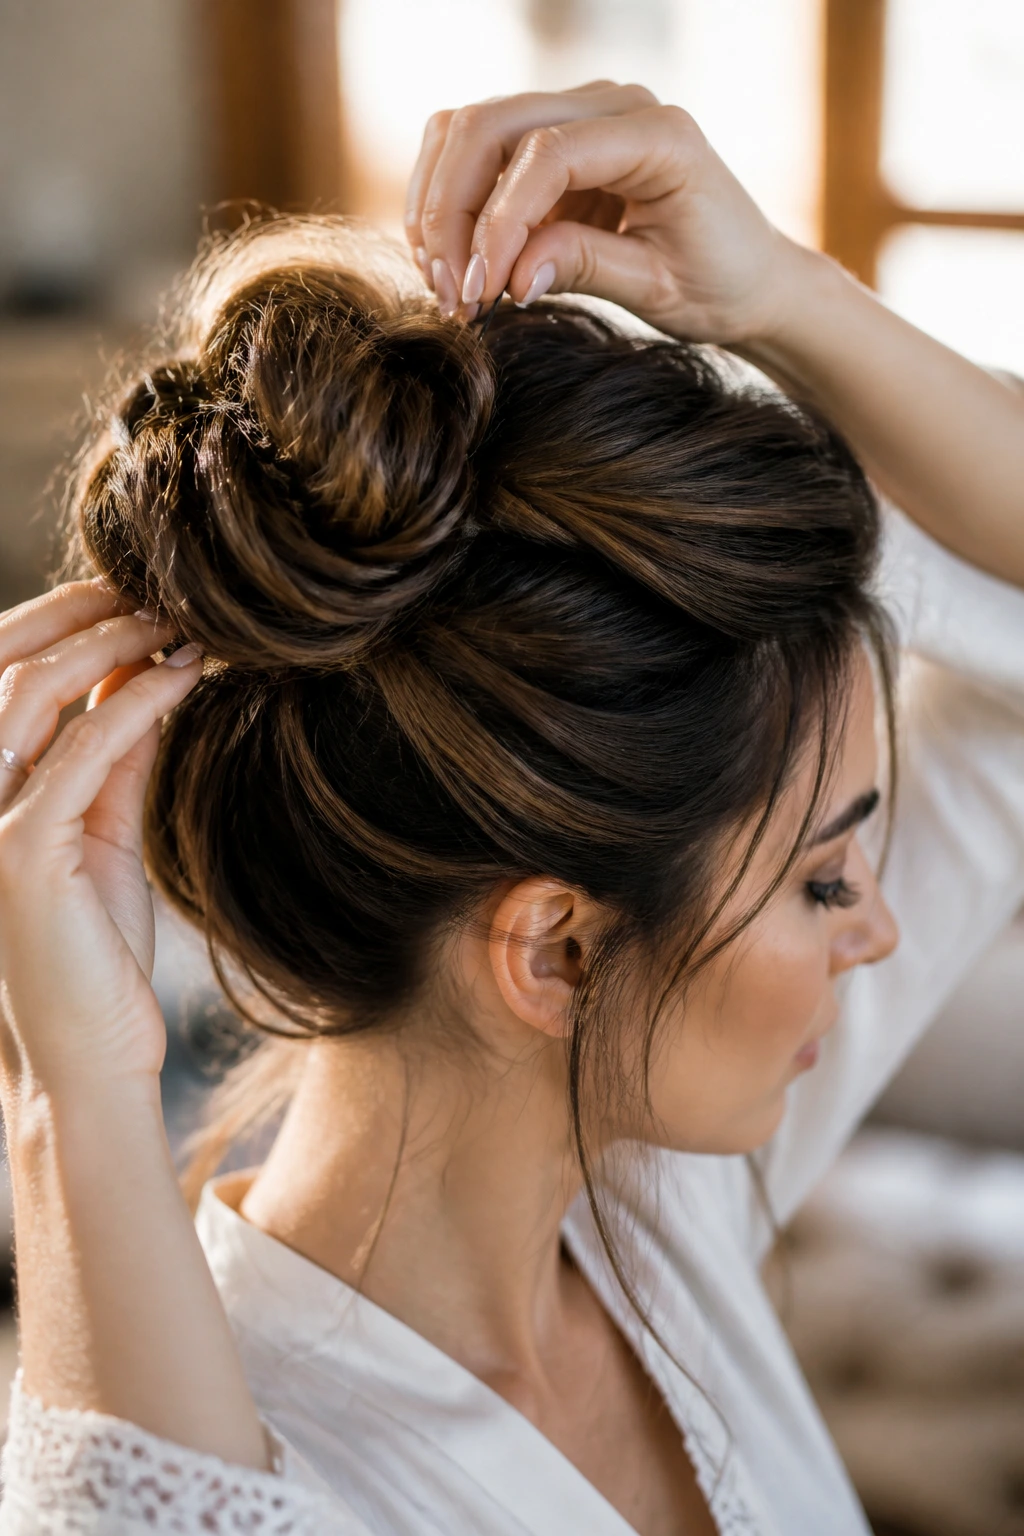
If you need an updo to survive from morning into evening, the first rule is not to keep touching it. Fingers loosen pins. They also pull at the surface and make the style puff in places you did not plan for. Check it once, maybe twice, then leave it alone.
For overnight wear, a satin pillowcase helps more than most people expect. If the style is soft or loosely pinned, you can also wrap a satin scarf around the hairline and tie it low at the nape. That keeps the front smooth and stops friction from roughing up the surface while you sleep.
Quick refresh method
In the morning, pinch the bun or twist back into shape with clean hands. Add one or two pins where the structure feels loose, then mist the surface lightly from a distance. Do not soak it. Damp hair and heavy spray can flatten the whole thing in a hurry.
If a few pieces fall out during the day, fix the base, not the loose piece itself. One extra pin at the seam usually solves the problem better than ten tiny emergency fixes that leave the style cluttered.
Frequently Asked Questions
How do I keep a long updo from sliding down?
Start with texture at the roots, then anchor the style low enough that the hair’s weight sits close to the nape or crown. Cross your pins instead of dropping them straight in. A style that sits on top of the hair usually slips; a style that is built into the hair tends to hold.
How many bobby pins do I actually need?
For long hair, fewer than people think on the front end and more than they expect in the back. A compact bun might hold with 6 to 8 pins, while a braided or sculpted style can take 10 to 14 if the hair is thick. The goal is not a pile of pins. It’s the right pins in the right seams.
Can I do these styles on freshly washed hair?
Yes, but you’ll usually need texture spray, dry shampoo, or a bit of backcombing first. Fresh hair is slippery, especially if it was conditioned heavily. If you can wait until the next day, the style usually holds with less product and less fuss.
What if my layers keep falling out around my face?
Twist or braid those shorter pieces separately before they go into the main style. That gives them enough length and grip to join the bun without slipping free. A tiny pin at the temple often helps more than a full extra can of hairspray.
Is teasing bad for long hair?
Not when it is small and intentional. A light backcomb at the crown or under the bun can help an updo stay elevated. The damage comes from aggressive, repeated tearing. Use a tail comb, keep it low, and smooth the outside gently after.
Which updo is fastest for very long hair?
The claw-clip French twist and the rope-twist knot are both fast. They use the hair’s own length without demanding a perfect braid or a dozen neat sections. If time is tight, those two are the ones I would trust first.
Can I wear these styles with thick, heavy hair all day?
Yes, but keep the base lower and split the hair into sections before pinning. Thick hair behaves better when one elastic or one twist is not carrying all the weight. A lower bun often outlasts a high one because it fights gravity less.
What’s the best style if I need something comfortable for several hours?
A low chignon, a braided low knot, or a wrapped ponytail usually feels the easiest on the scalp. They spread tension over a wider area and avoid the tight crown pressure that can make you want to rip the whole thing out by lunch.
The Styles Worth Reaching For
Long hair does not need to be tamed into one shape, and that is half the fun. The right updo can be sleek and spare, braided and romantic, or quick enough to build before you leave the house. What matters is not how many pins you use. It’s whether the style understands the weight of the hair sitting inside it.
Start with the version that matches your texture instead of the one that looks prettiest in a photo. That choice saves time, saves pins, and usually gives you a better result anyway. Once you know which shape your hair likes, the rest gets easier fast.
