



Half up half down hairstyles for curly hair live or die by the crown. Get that one section right, and the whole style looks intentional: the curls bounce, the face opens up, and the top doesn’t collapse into a sad little flat spot by lunchtime. Get it wrong, and the rest of the hair can be gorgeous while the front looks like it spent the afternoon under a backpack strap.
That’s why these styles are such a sweet spot. They keep the texture visible, they don’t force every curl into a full updo, and they give you room to choose your own level of polish. Some versions are neat enough for a wedding guest dress. Others look best with a hoodie and a damp diffuser blast ten minutes before you leave the house. Curly hair likes options. It also likes structure that doesn’t bully it.
The good versions all do the same thing in slightly different ways: they respect shrinkage, keep tension low around the edges, and use the shape of the curls instead of fighting it. That’s the whole game. And once you see how different half-up shapes behave on different curl patterns, the choices get easier fast.
Why This Collection Earns Its Place
-
Face-Framing Without Flattening: Half-up styles pull hair away from the face while leaving the lower curl pattern free to move, which keeps the style from feeling stiff or overworked.
-
Built for Real Curl Behavior: These looks make room for shrinkage, frizz, and volume at the crown instead of treating them like mistakes that need fixing.
-
Works Across Curl Types: Loose 2C waves, springy 3B spirals, and tight 4C coils can all wear half-up shapes; the trick is changing the amount of hair you section and the type of hold you use.
-
Good on Fresh or Day-Two Hair: A half-up style often grips better on second-day curls, but fresh wash-day curls can look sharper if you set the front with a little leave-in and gel.
-
Easy to Dress Up or Down: A plain twist and pin works for errands. Add braids, pearls, ribbon, or a barrette, and the same structure suddenly feels event-ready.
-
Less Stress Than a Full Updo: Because only part of the hair is secured, you avoid the heavy, tight feeling that can happen when every curl gets dragged into one knot or ponytail.
1. Twisted Crown Half-Up
Two rope twists at the temples change the whole mood of curly hair. The front stays lifted, the lengths stay loose, and the curls keep their shape instead of being buried under a heavy bun. It’s one of those styles that looks more complicated than it is, which is always a nice thing when you’re standing in front of a mirror with one bobby pin in your mouth.
Why It Works
- A twist gives you more hold than a simple tuck, especially if your curls are slippery or freshly conditioned.
- It keeps tension off the hairline, so the front doesn’t end up with that flattened, pulled-back look.
- The shape is forgiving. If one side sits a little higher, it still reads as deliberate.
Quick details: take a 1½- to 2-inch section from each temple, twist each piece back toward the crown, and pin where they meet. For dense curls, use two crossed bobby pins on each side. For finer curls, one pin and a tiny clear elastic can do the job.
One good rule: twist upward, not backward. That little angle keeps the crown lifted instead of stretched tight.
2. High Puff Half Pony
If your curls are thick, this is the style that stops you from fighting volume and starts using it. A high puff half pony keeps the crown tall instead of trying to flatten it into submission, which is why it looks best on hair with real density. The lower half hangs free in a clean, obvious curtain of curls.
The move is simple. Section off the top third of your hair, not half the head, and gather it high enough that the puff sits above the widest part of your head. A snag-free elastic works better than a sharp one here. If you want more lift, hold the base and gently tug the top section forward a little after securing it. Small adjustment. Big difference.
This style is especially good when the roots are a touch stretched and the ends still have shape. It gives you height without turning the whole look into a full ponytail, and that balance is the reason it works so well.
3. Braided Halo Half-Up
Want a half-up look that stays put past lunch? Put a braid around the crown. A halo braid gives you structure where curls usually start to fray first, and it does a nice job hiding flyaways without smothering texture. The bottom half still moves, which keeps the style from feeling too formal.
How to Build It
Start with a side part or middle part, then take a 1-inch section from each temple and braid back toward the crown. You can use Dutch braids if you want the braid to sit up a little more, or flat three-strand braids if you want something softer. Pin the ends behind the head and tuck them under the loose curls.
A little gel at the front hairline helps here, but do not overdo it. Too much product makes the braid look wet and can drag the roots flat. The sweet spot is just enough slip to smooth the front and enough grip to keep the braid neat.
This one shines on medium to long curls. On shorter hair, the braid can get swallowed by the texture, which isn’t a disaster, just a sign to keep the sections smaller.
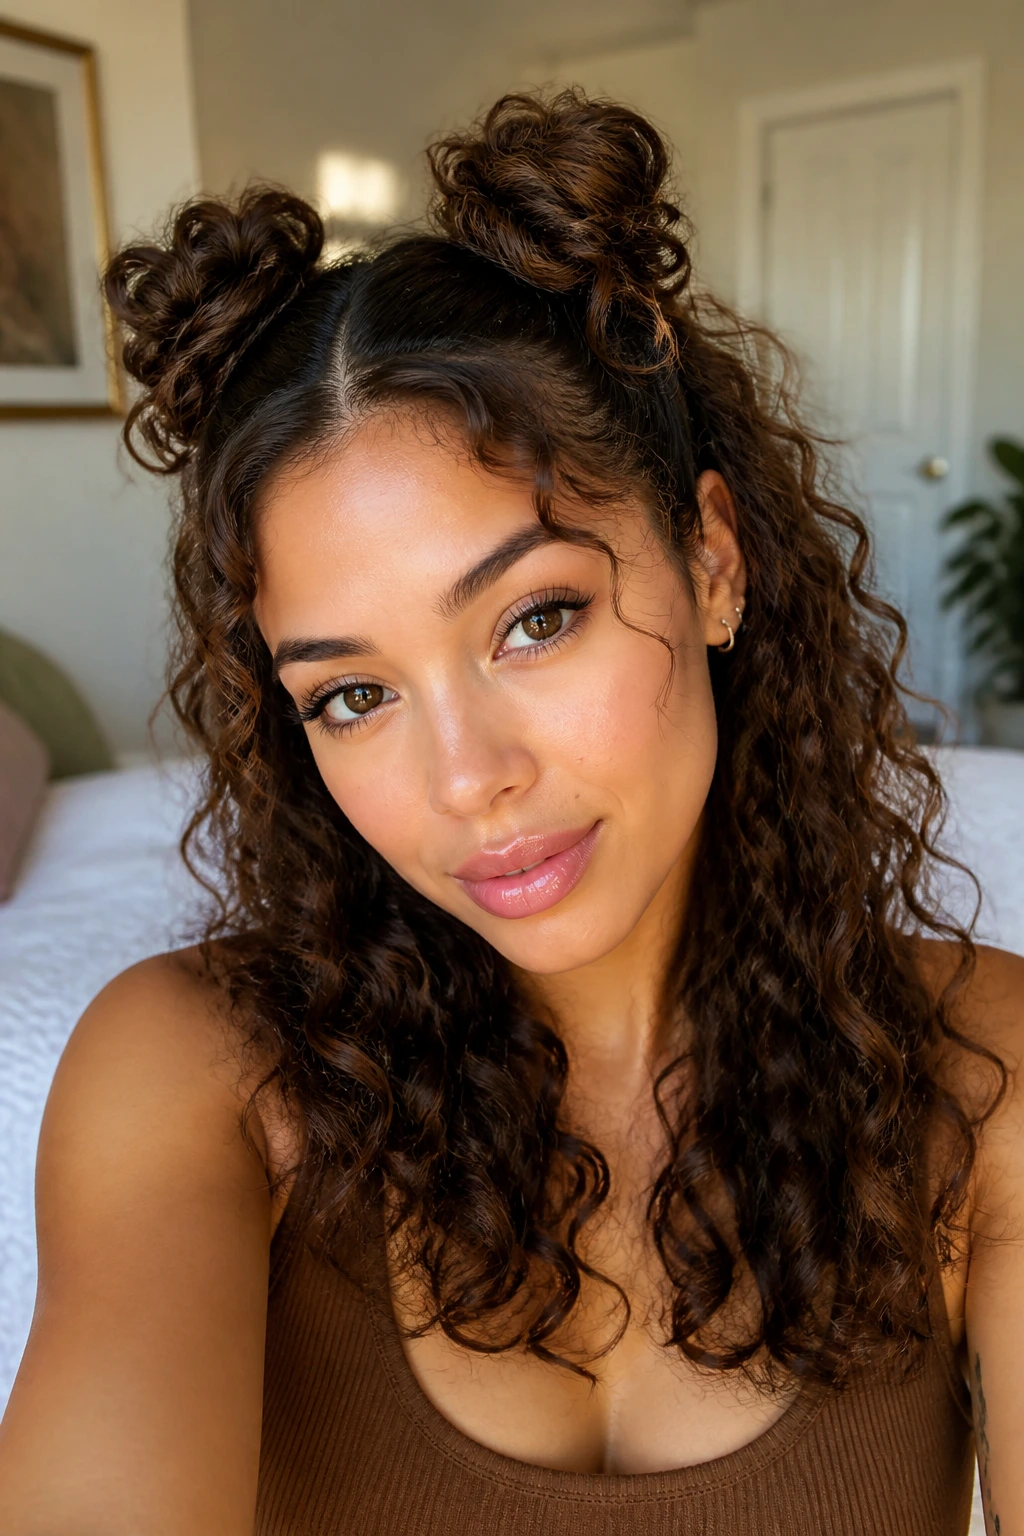
4. Mini Space Buns With Loose Curls
The style I reach for when curls are on day two and a little wild? Mini space buns. They have a playful shape, but they can be cleaned up enough to look polished if you keep the buns small and the rest of the hair defined. The contrast is the point: neat little buns on top, honest curls below.
Take two sections from the front half of the head, about 2 to 3 inches wide, and place each bun slightly above the ears. Twist each section once or twice, coil it into a tiny bun, and pin it with two bobby pins. Leave the back loose and separate the curls with your fingers instead of brushing them.
- Keep the buns small. Oversized buns can swamp the curl pattern below.
- Use pins, not just an elastic, if your hair is dense or layered.
- A little edge smoothing at the part makes the style look deliberate, not rushed.
The best part is that this style still has motion. It doesn’t lock your curls into a single shape, and that matters.
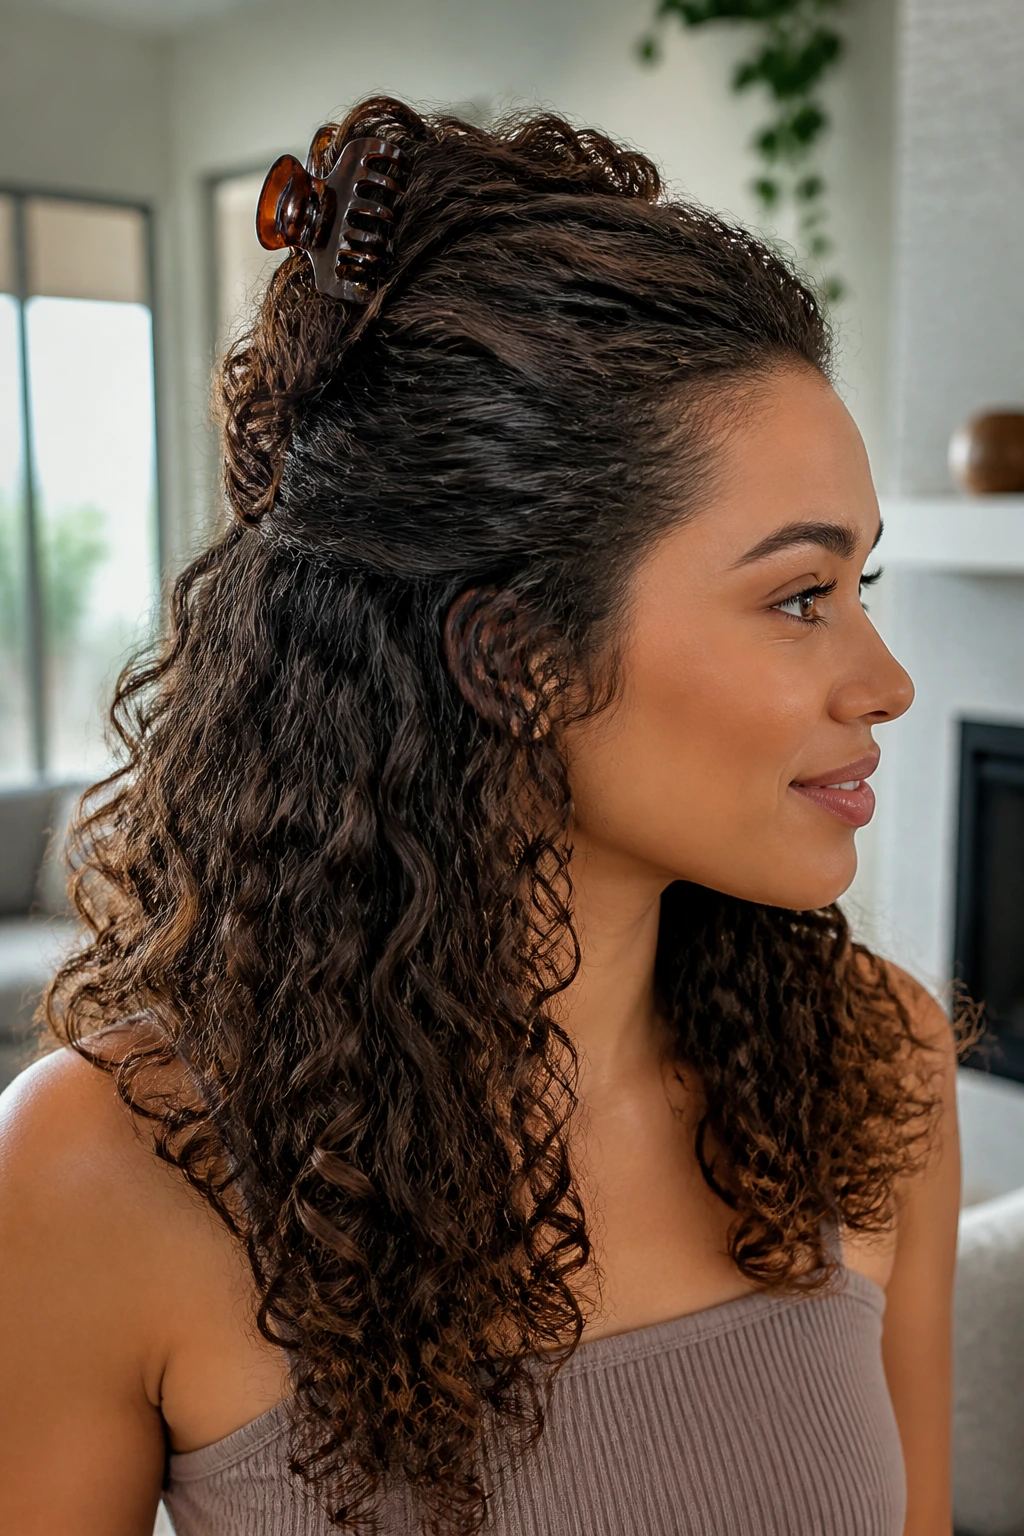
5. Claw-Clip Half Twist
A claw clip is the lazy person’s best friend, but that phrase undersells it. A good claw-clip half twist can look sleek, soft, or slightly undone depending on how tightly you twist the section before clipping it. On curly hair, the clip also spreads pressure more evenly than an elastic, which means less denting around the crown.
Start by gathering the top half of your curls as if you were making a half ponytail, then twist the section upward until it folds back on itself. Slide a medium or large claw clip over the twist and let the curls at the bottom fall where they want. If you have thick hair, go for a clip with wide teeth and a little grip texture on the inside.
This style is best when you want the front out of your face but don’t want a lot of structure. It also survives a quick mid-day reset better than most pinned styles. Take the clip out, shake the twist, and reclip. Done.
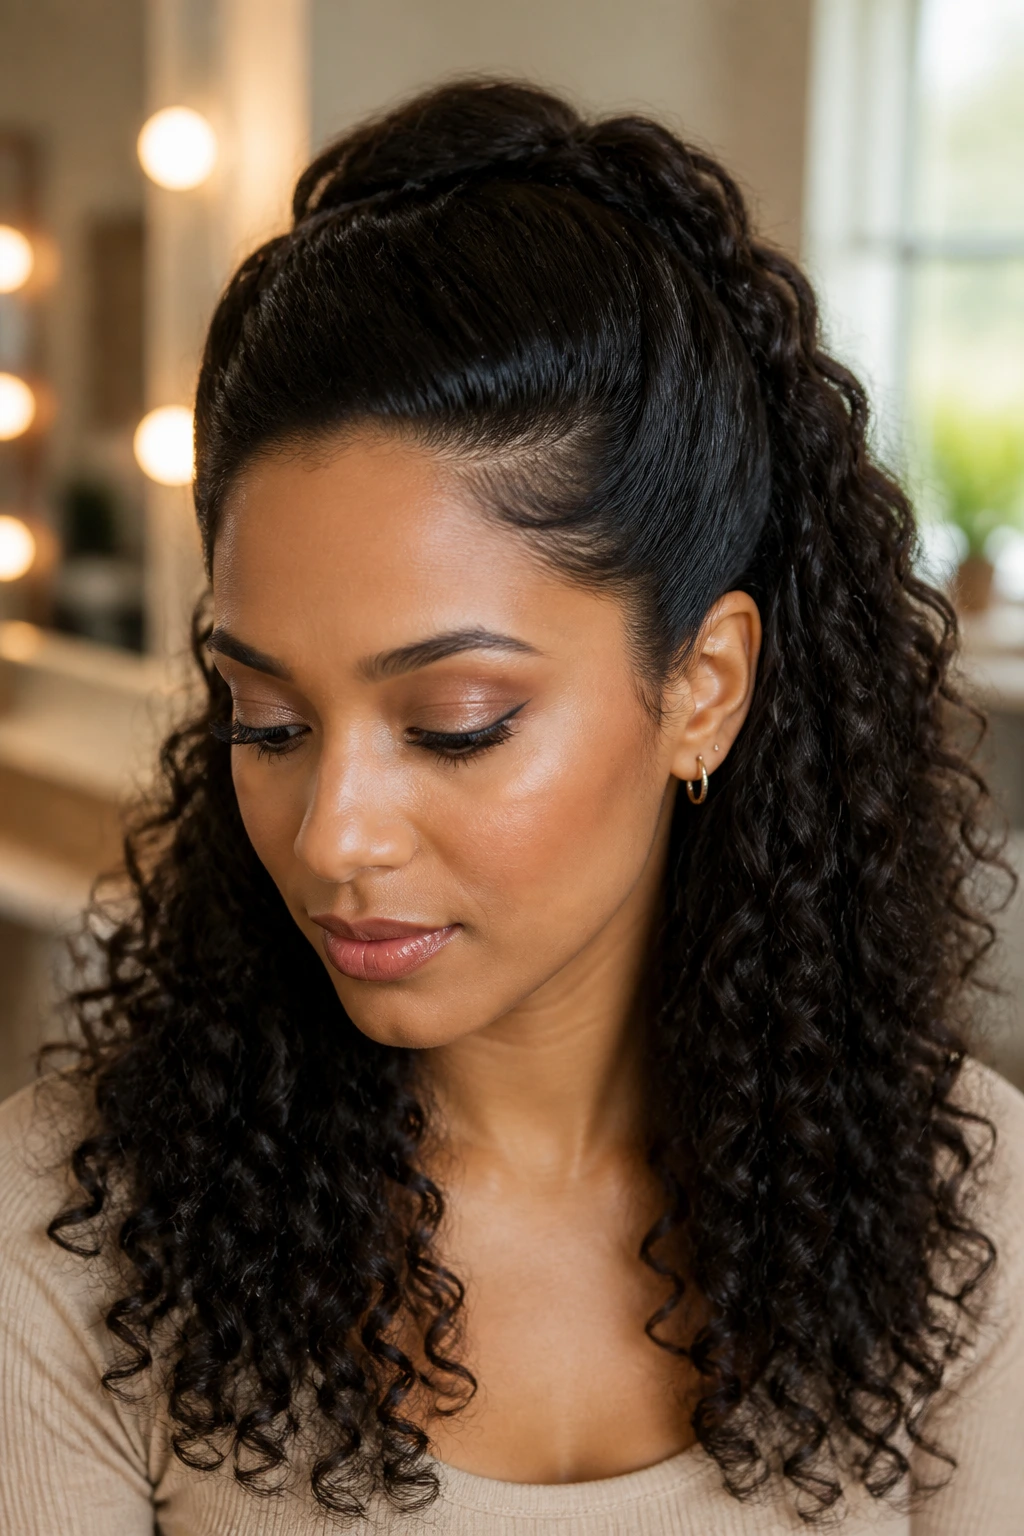
6. Sleek Crown With Defined Length
This is the polished one. The one that says you took five extra minutes and knew exactly where to spend them. A sleek crown with defined curls underneath looks especially sharp on hair that has a strong curl pattern and enough length to show off the contrast between smooth roots and full ends.
The trick is to smooth only the section you can see from the front and leave the lower curls alone. Use a rat-tail comb to draw a clean top section from temple to temple, then apply a thin layer of gel or gel cream along the part and hairline. Comb it back gently and pin or tie it at the crown. Diffuse or air-dry the loose curls below so they keep their shape.
If you use too much product, the crown can get crunchy and start to peel away in little flakes. A thin coat is enough. Seriously. A thin coat.
This style works best when you want a sharp silhouette, not a fluffy one. It reads clean in photos and doesn’t fight the curl pattern beneath it.
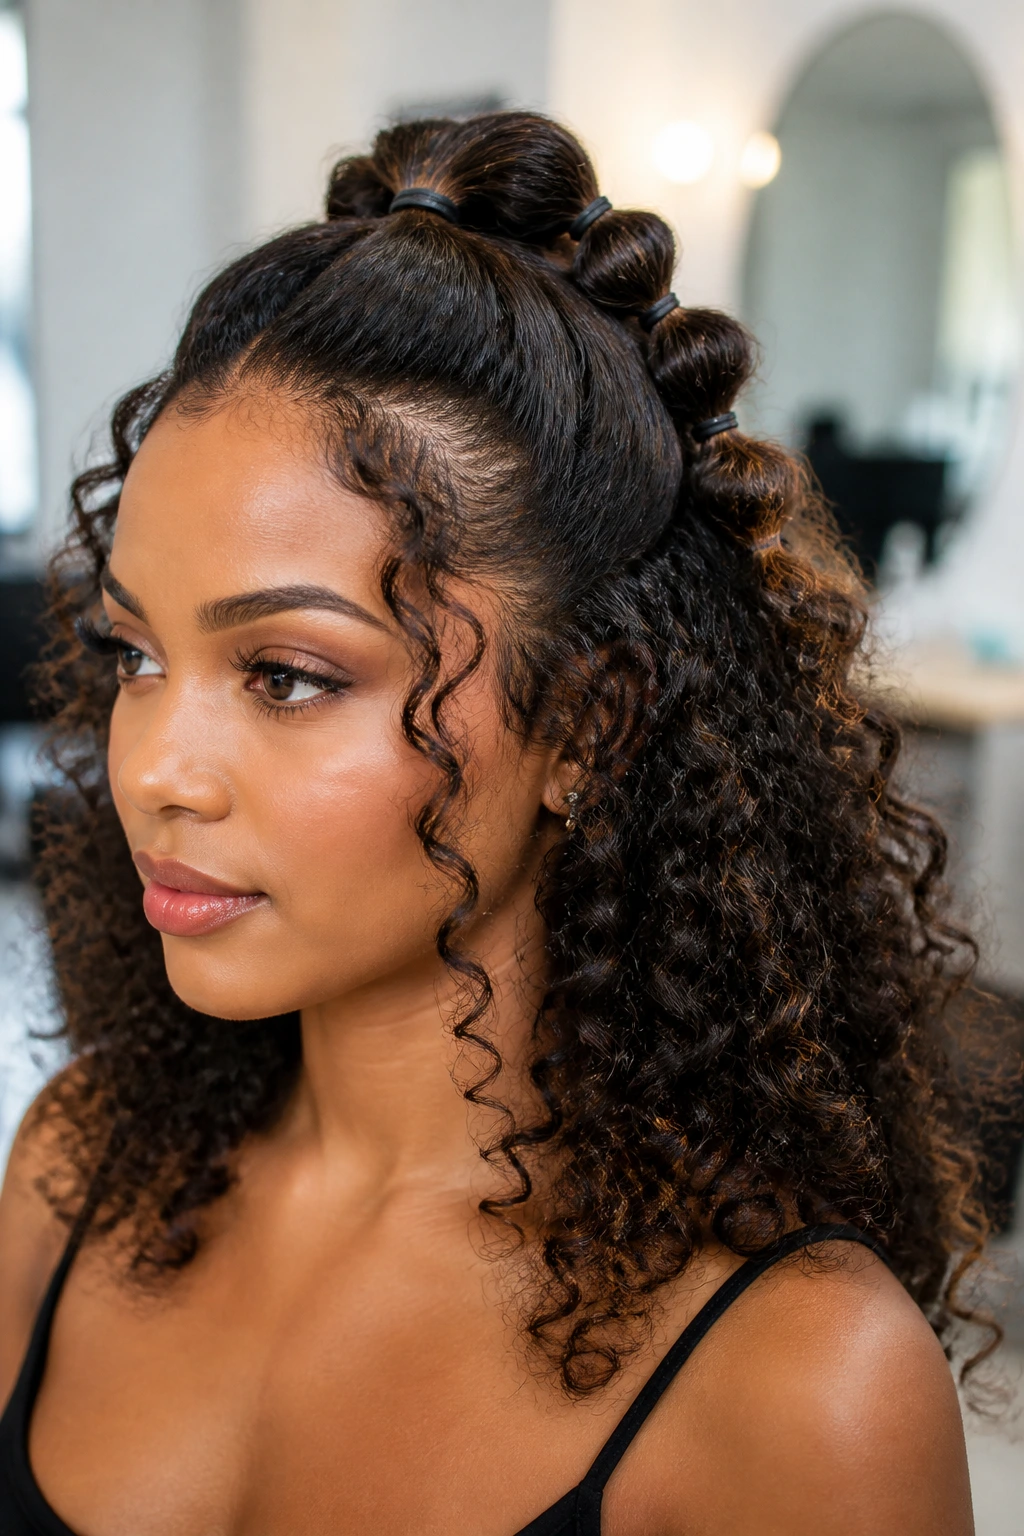
7. Bubble Half Ponytail
A bubble half ponytail gives curly hair a neat shape without asking it to act straight. The bubbles add structure, the curls add softness, and the whole thing feels a bit more playful than a standard half pony. It’s also a smart choice if the top section tends to puff out instead of lying smooth.
Gather the top half into a secure ponytail and tie clear elastics every 2 to 3 inches down the length of the pony. Then gently pull each section between the elastics outward just enough to create the bubble shape. Don’t yank. You want roundness, not a stretched-out sausage.
Use this style when the curls are defined but the crown needs control. It works especially well on long hair because the bubbles have room to show. If your hair is short, you can still do it, but keep the sections tiny and the elastics close together.
The nicest thing about bubble ponytails? They make day-two curls look like a choice.
8. Half-Up Top Knot
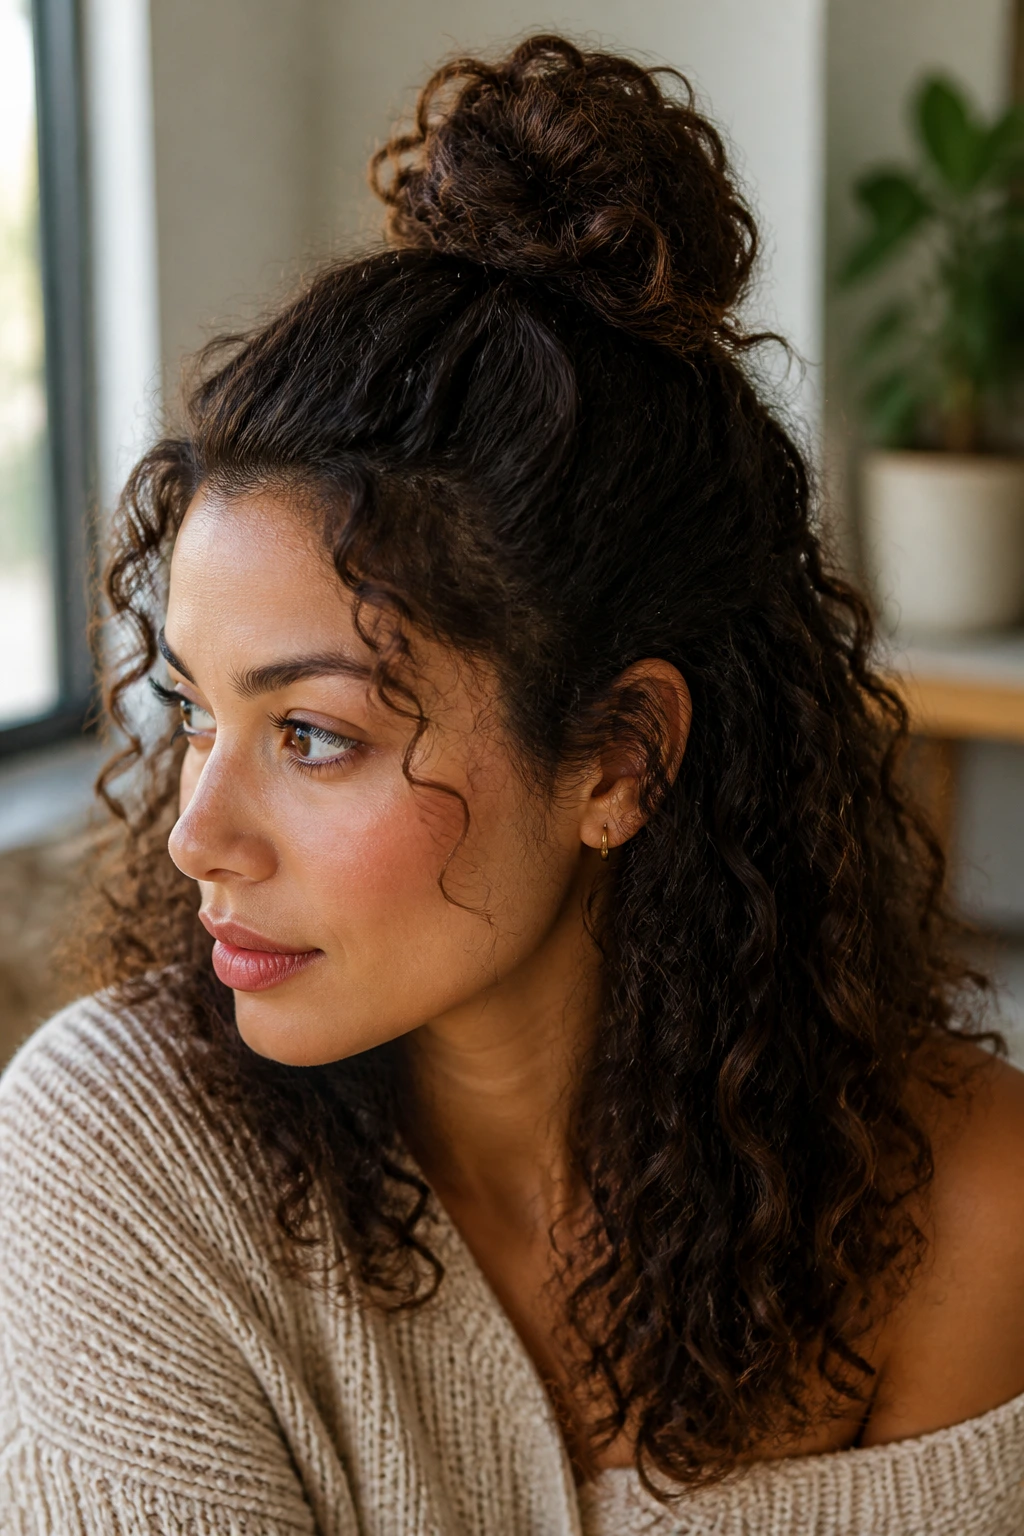
The half-up top knot is the easiest way to fake height when the crown has gone a little flat. It lifts the front, keeps the sides tidy, and lets the lower curls keep their full shape. That matters, because the whole style depends on contrast: compact knot on top, loose curls underneath.
Take the top section from the temples up, gather it at the crown, and twist it into a knot or small bun. Secure it with a snag-free elastic first, then anchor it with two or three bobby pins around the base. If the knot looks too neat, pull one small curl free near the front. That tiny messiness stops the look from feeling too severe.
This is the style I’d pick for medium to long curls that need a little lift but not a full updo. It also works when the ends are fresh and the roots are not. A little unevenness at the top is fine here. In fact, it helps.
9. Waterfall Braid Accent
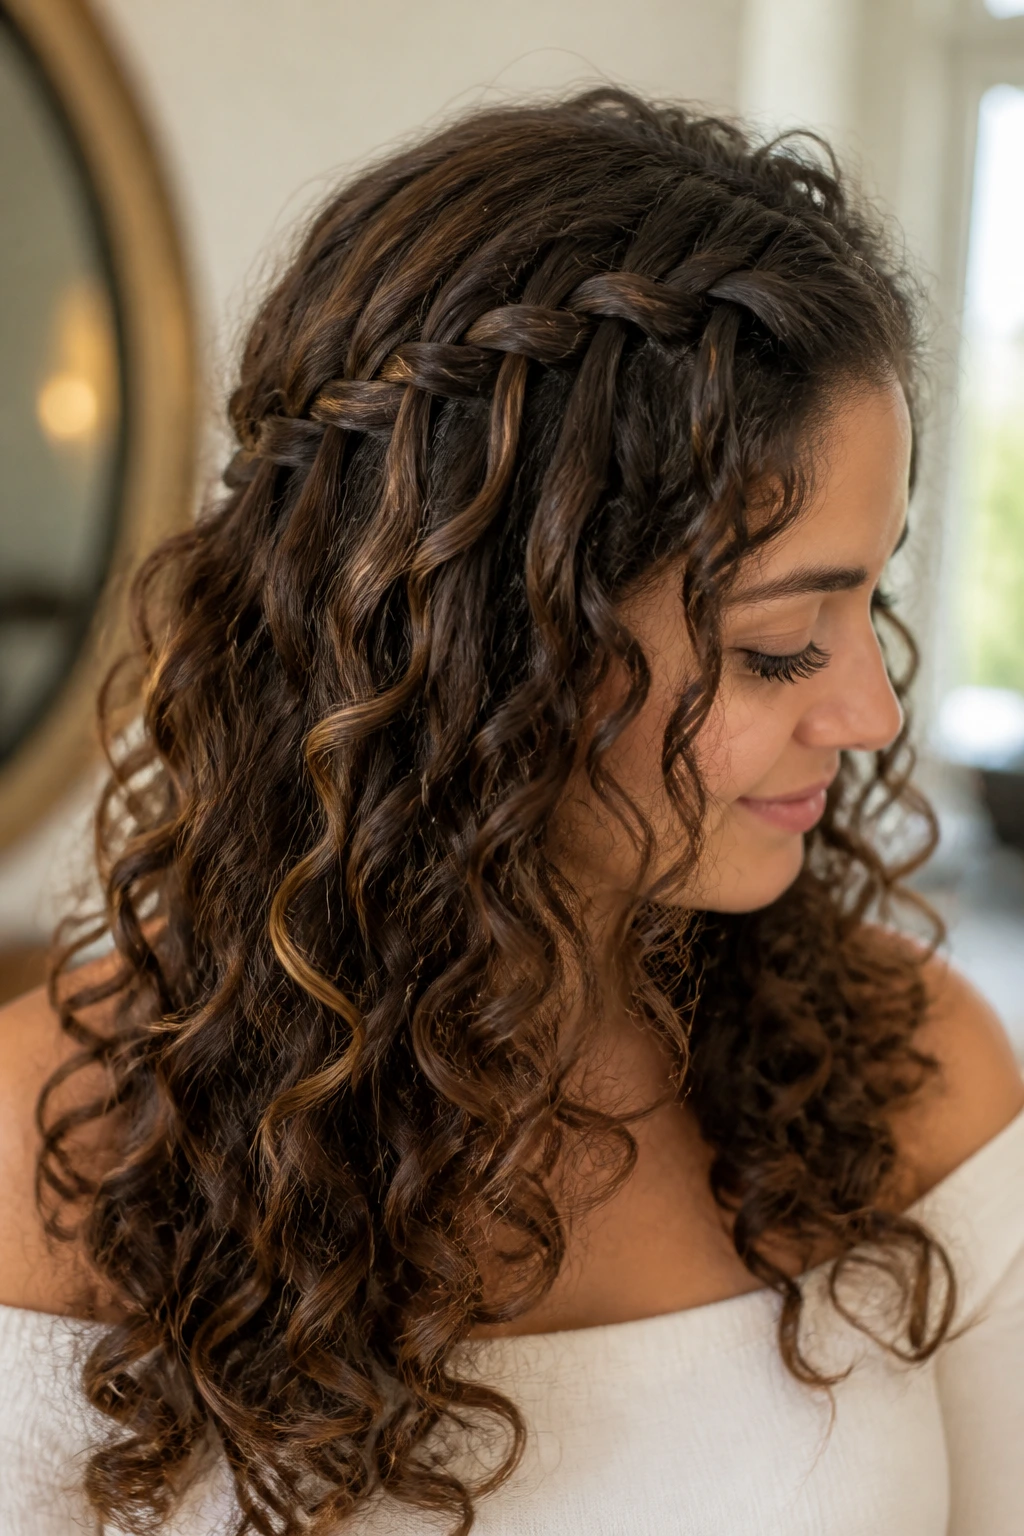
What if you want braid detail without covering the curls? That’s where the waterfall braid earns its keep. It sits along the crown, drops strands through as it moves, and leaves the lower half of the hair open and visible. On curly hair, the falling pieces blend into the texture instead of looking like a separate layer.
A waterfall braid works best when the hair is already detangled and lightly misted. Start near the front part, braid across the crown, and drop one section each time you cross over. Replace each dropped piece with a fresh strand from above. It sounds fiddly. It is. But once you do it a couple of times, the pattern becomes second nature.
Best use case: special occasions, date nights, or any day when you want people to think you spent more time on your hair than you actually did.
Watch for this: if the curls are too dry, the braid can look frayed. A drop of leave-in on the sectioning hand fixes that fast.
10. Rope-Twist Side Sweep
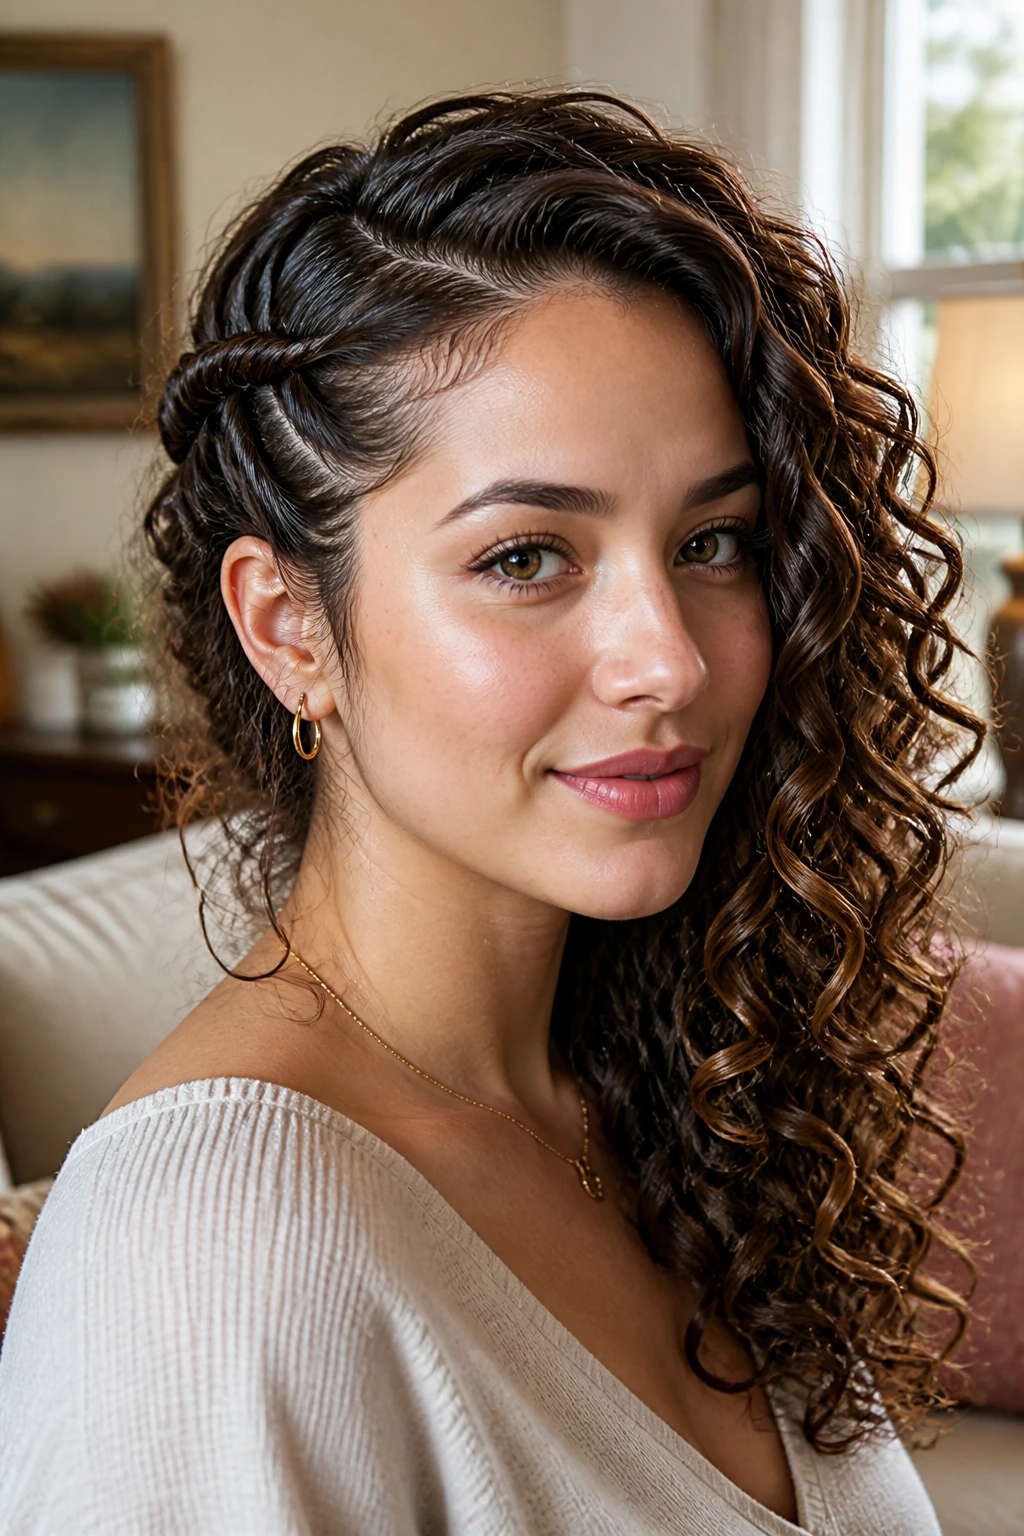
A side sweep gives curly hair a softer line than a straight-back half-up. One side stays open, the other gets twisted back, and the result feels a little lopsided in a good way. I like this on curls with some side volume, because the asymmetry gives the whole shape a bit of attitude.
Take a deeper side part than usual. On the fuller side, grab a 2-inch front section, split it into two pieces, twist them around each other, and pin them behind the ear. Leave the opposite side loose and let the curls fall forward a little. The shape ends up looking relaxed, but it still holds together.
This is one of those styles that looks better when the twist is not perfect. If the texture is slightly uneven, it reads softer. If the twist is too tight and glossy, the rest of the hair can feel detached from it. A little roughness helps.
11. Half-Up Messy Bun
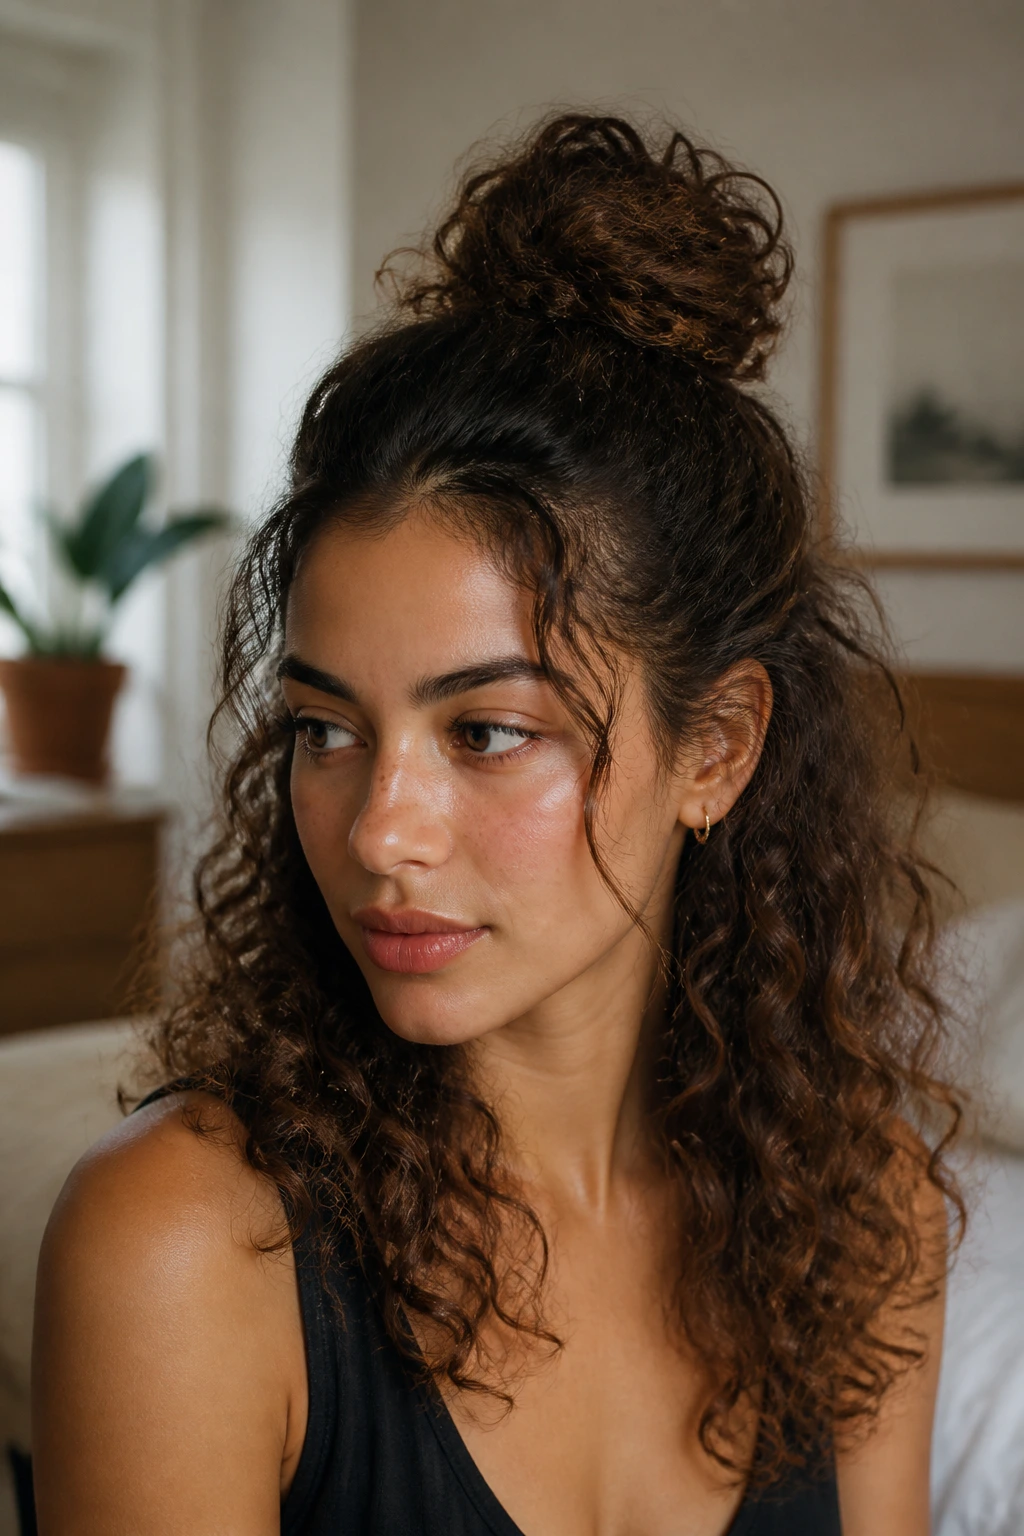
A messy bun on curly hair only works if you don’t try to make it too neat. That’s the whole trick. Pull the top half up, let some curls escape near the temples, and build a bun that feels soft instead of sculpted. The lower section should still look like real curls, not a brushed-out afterthought.
I’d use this on hair that’s been worn down for a while and needs a little rescue. Mist the top lightly, gather it with your fingers, and twist it just enough to form a bun at the crown. Leave the bun loose so the curls can fan out a bit. Pin the base, then stop touching it. That’s the hard part.
A slick bun here would look wrong. The charm is in the shape of the curls, the stray ringlets, the little bit of texture around the part. It’s casual, but not sloppy. There’s a difference.
12. Center-Part Half Pony
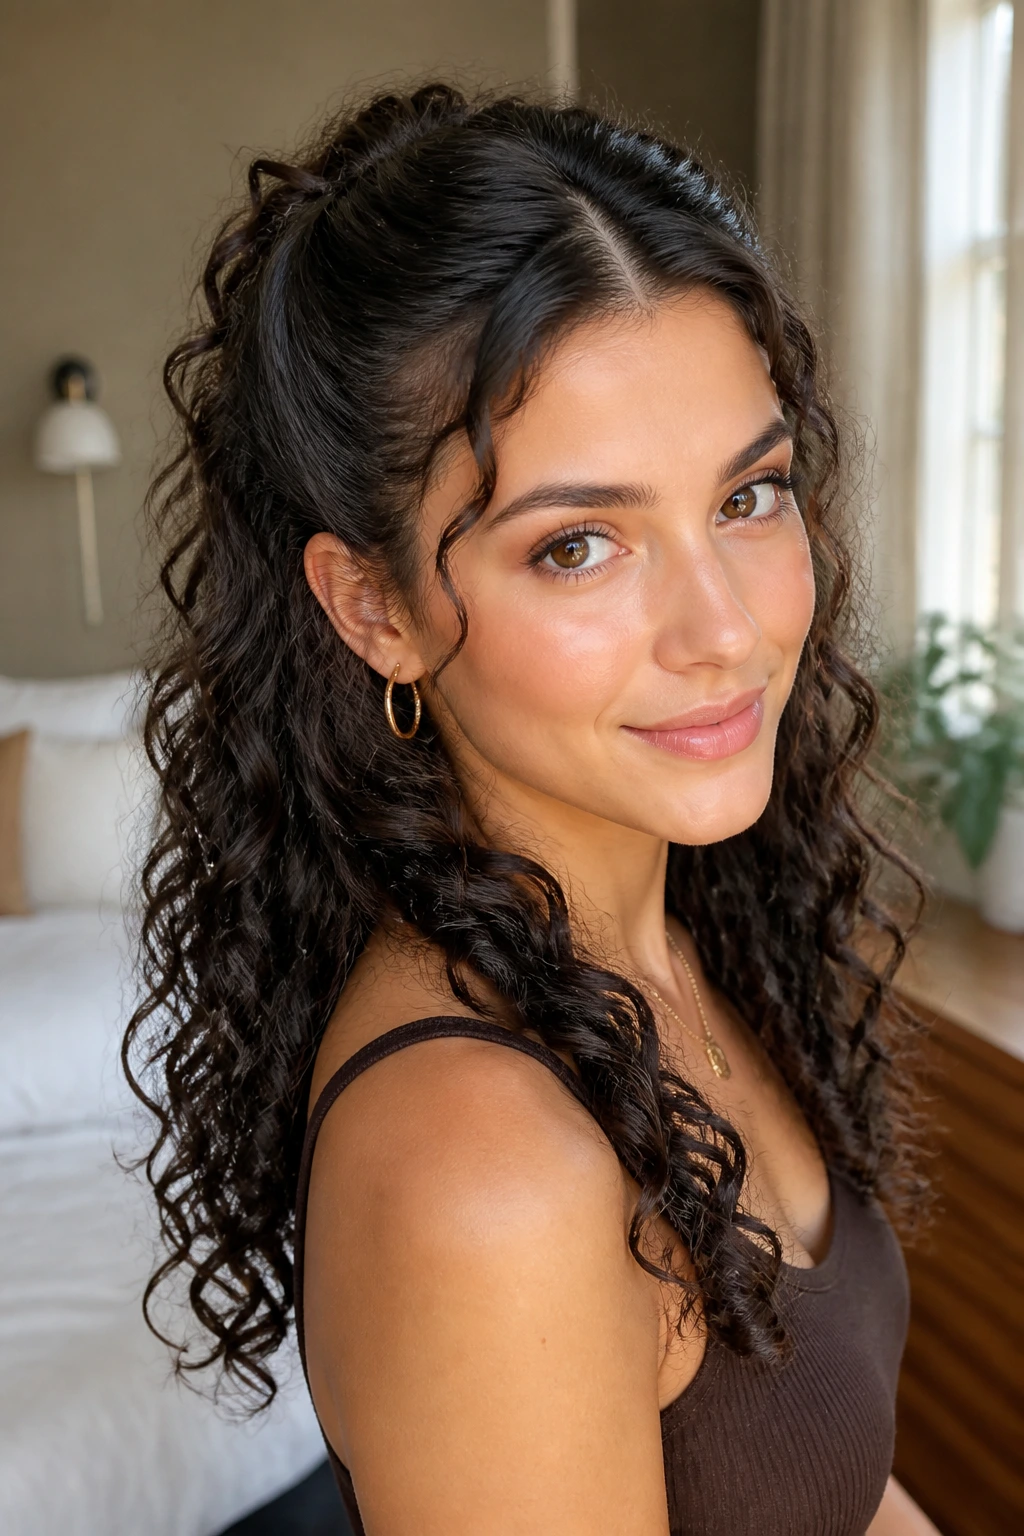
A center-part half pony feels cleaner than a top knot and less busy than a braid. It’s a good middle ground. The front stays symmetrical, the crown gets lift, and the curls below remain the main event. If you like balance over drama, this one is an easy favorite.
Part the hair cleanly down the middle, then take the front half back on both sides and meet it at the crown or slightly below it. Secure with a clear elastic, then tug the top very gently to keep the pony from sitting too flat. If you want extra shape, wrap a small curl around the elastic and pin it underneath.
This style suits long curls especially well because the lower length still hangs with weight. On shorter cuts, the pony can puff up in a nice way, but you may need one or two pins to keep the sides from slipping loose. It’s a simple structure. That’s why it works.
13. Crown Braid Into Pony
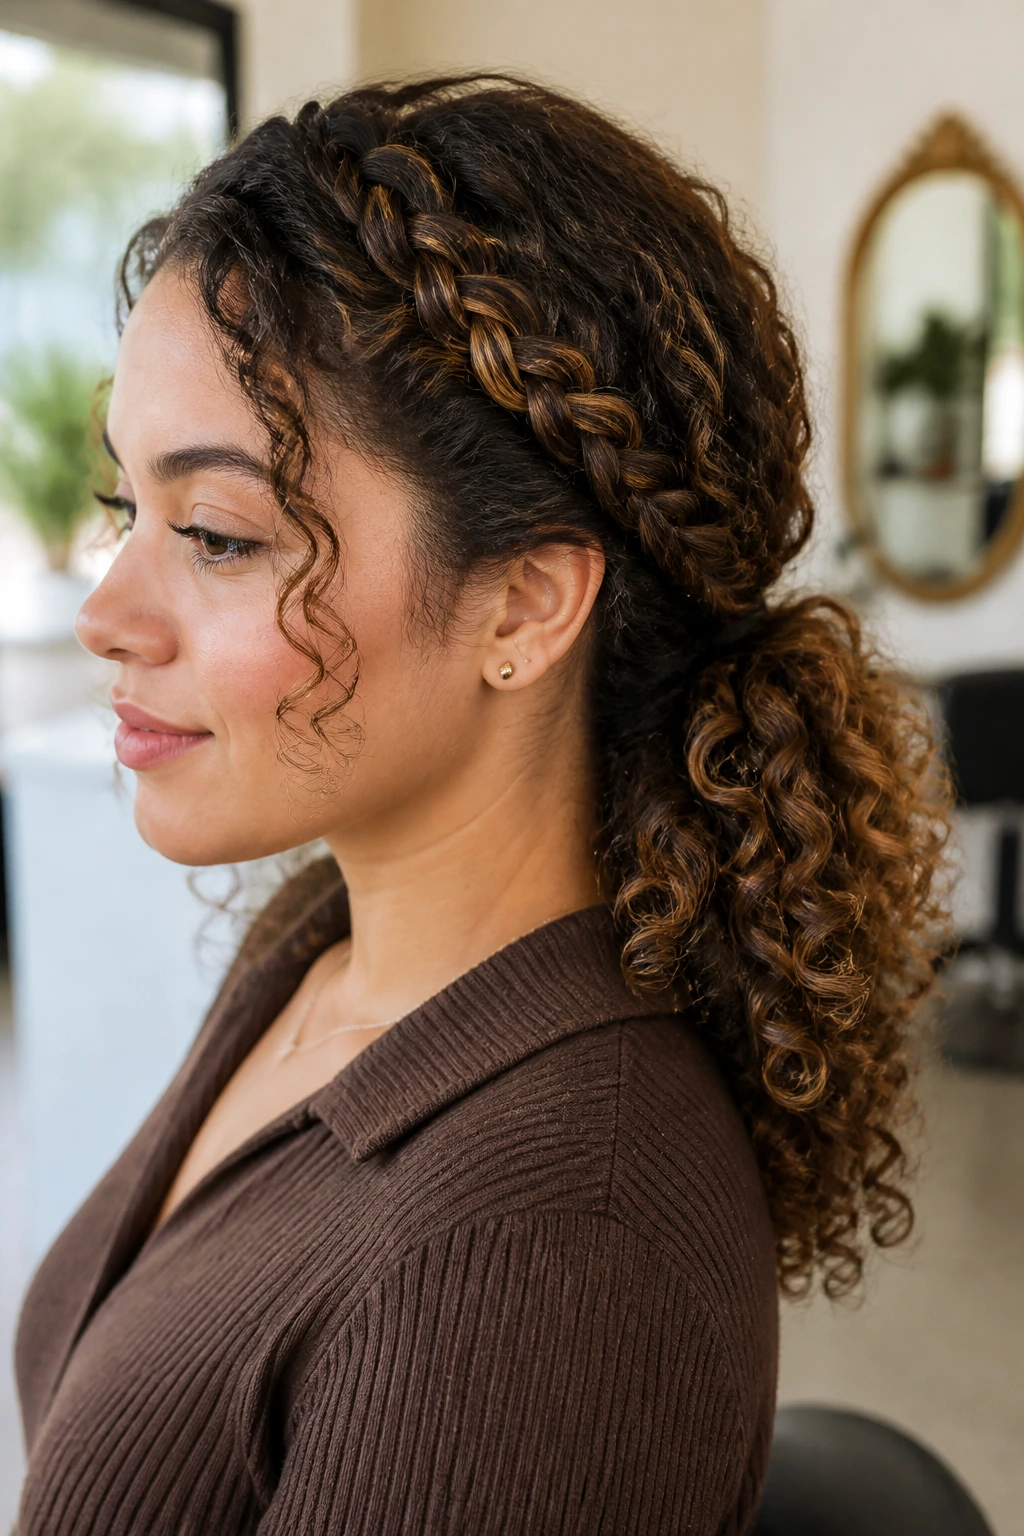
A braid that feeds into a ponytail gives you the best of both worlds: the polish of a braid and the shape of a pony. On curly hair, that braid also holds the top section together long enough to keep the crown from separating into a fuzz halo by the afternoon.
Build It Like This
Start a braid at one temple and work it across the crown toward the opposite side. Keep it low and close to the head, no bigger than about 1 inch wide, so it doesn’t overpower the curls. When you reach the back, gather the braid and the loose top section into a half ponytail. Tie it with a snag-free elastic and cover the band with a small curl if you want a cleaner finish.
This style is a good pick when you want structure without a full braided look. It also gives a lot of visual length to the top section, which helps if your curls shrink more on top than on the ends.
14. Side-Barrette Half-Up
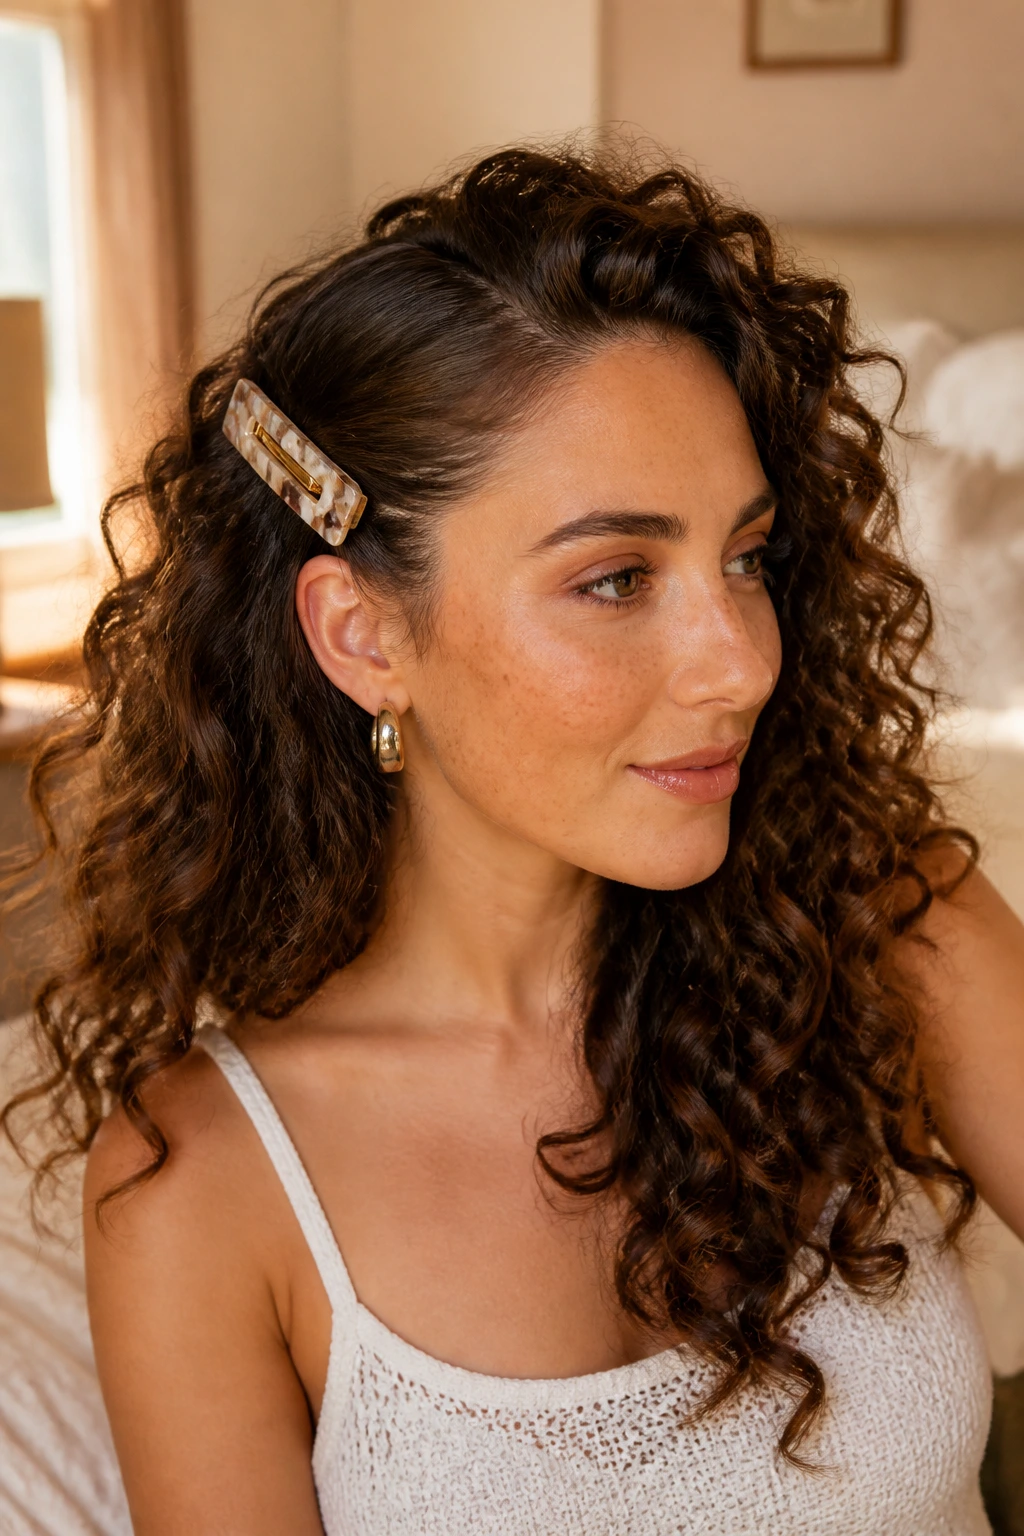
A strong barrette does a lot of heavy lifting here. One clip, one side, and suddenly the style has shape. This is the hairstyle version of a good jacket: not much effort, but it changes the whole outfit.
Choose a barrette with enough width to hold a 2- to 3-inch section of curls without pinching. Sweep one side back just above the ear, flatten it with your palm, and clip it in place. Leave the other side loose, or tuck a matching section back if you want symmetry. Gold, tortoiseshell, pearl, or matte black all work. The key is grip, not decoration.
This is best for medium-density curls, because extremely thick hair can overwhelm a tiny clip. If the clip feels strained, size up. Small accessories are cute until they snap open halfway through the day. Been there. Not worth it.
15. Folded Scarf Half-Up
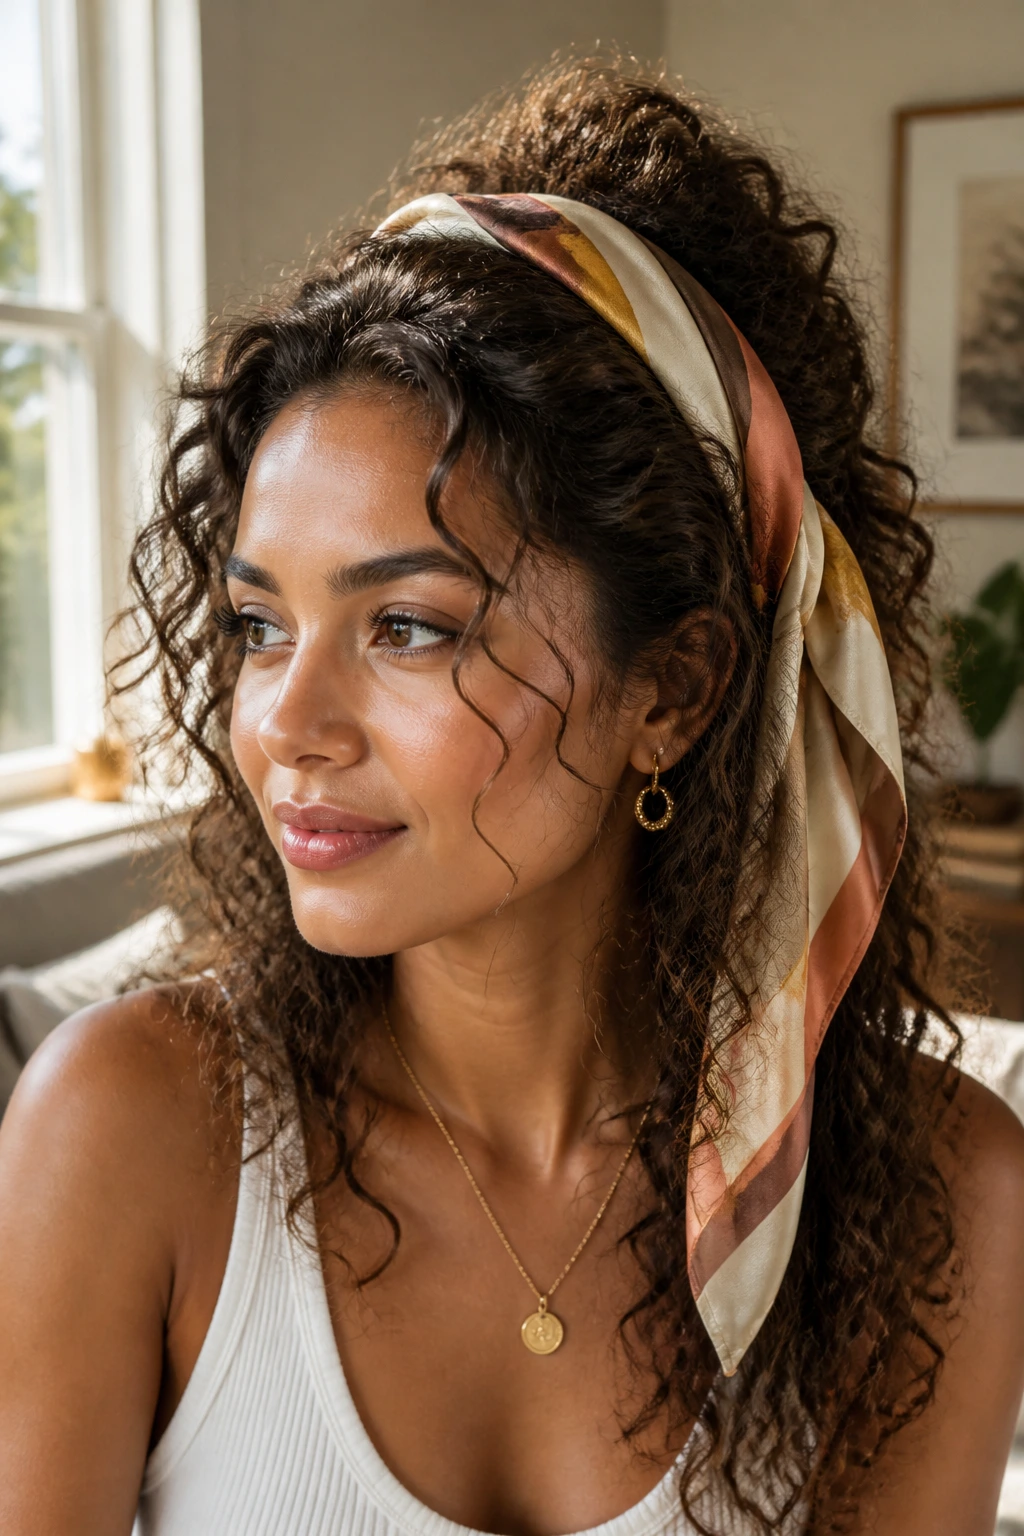
Can a scarf count as part of the hairstyle? Absolutely. It can also save a style that feels flat or ordinary. A folded scarf gives the half-up section a soft band of color and texture, and it works especially well when the curls themselves are doing most of the visual work.
Take a silk or satin scarf and fold it into a band about 2 inches wide. Gather the top half of your curls into a loose half pony or twist, then tie the scarf over the elastic and let the ends drape or knot off to one side. If the scarf slips, add a tiny hidden elastic underneath first. That little backup makes a big difference.
This style is nice when you want to protect the front a bit more, since the scarf reduces friction at the crown. It also gives second-day curls a fresh look without asking for a full restyle. A good scarf does not hide the hair. It frames it.
16. Half-Up Faux Hawk
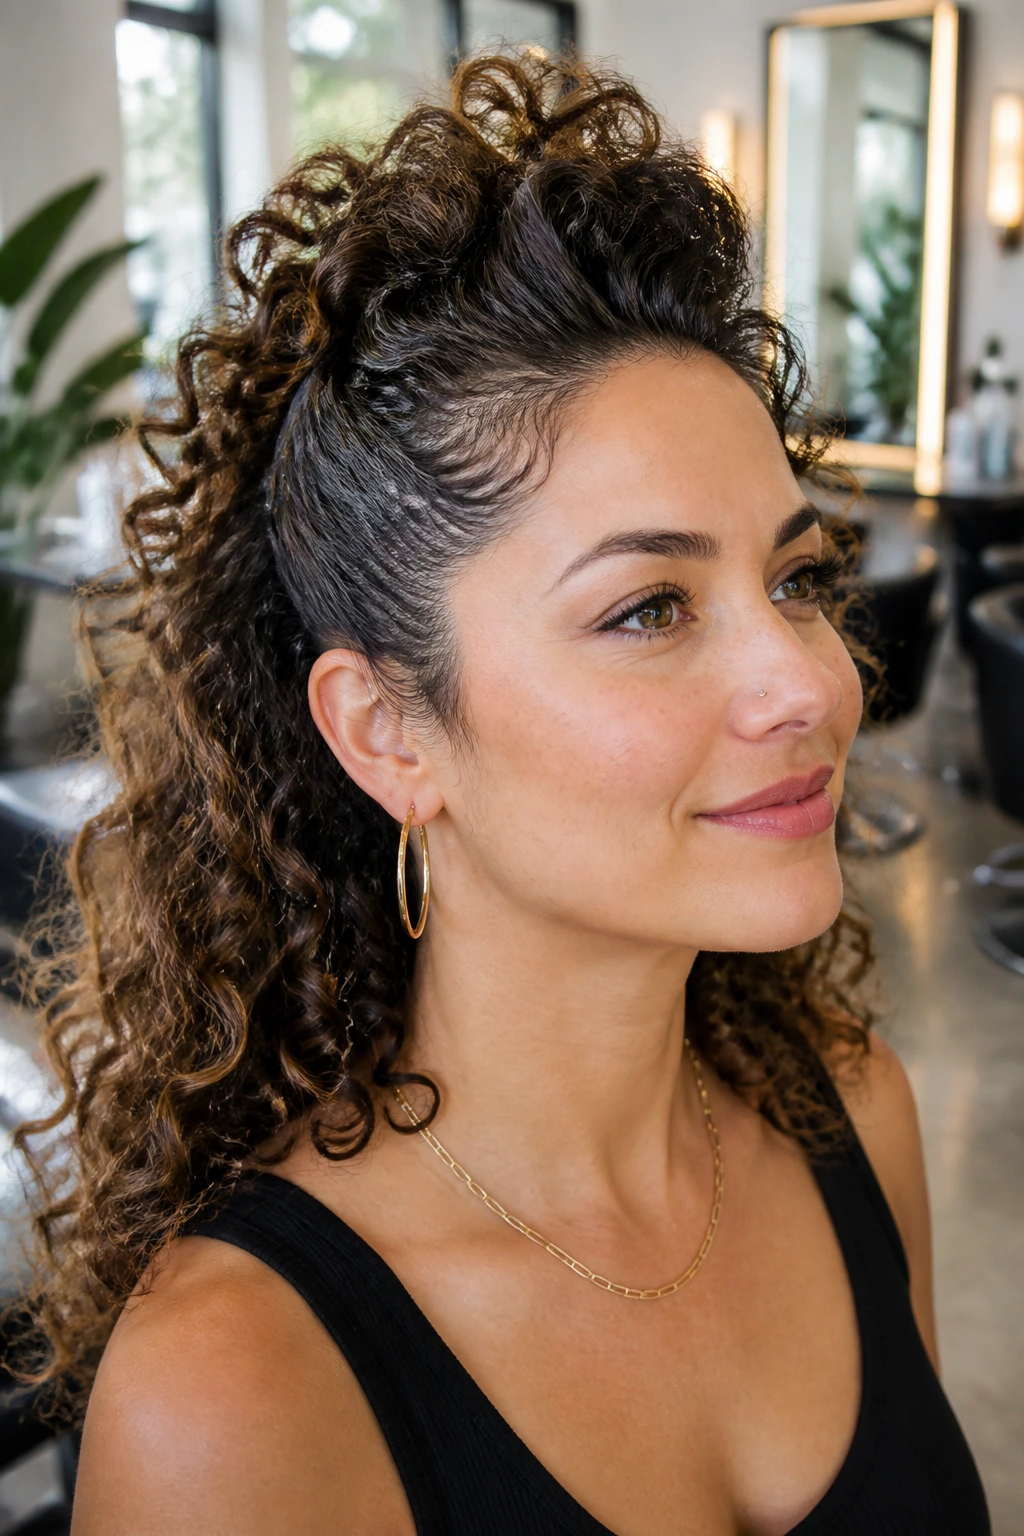
The faux hawk half-up is for people who like a little edge in their hair and do not mind a shape with opinions. The sides get pinned back, the center gets lifted, and the curls in the middle form a ridge that runs from front to back. It’s bold, but not fussy.
Pin the side sections back close to the head, starting around the temples and moving toward the crown. Leave the center strip loose, then fluff it upward with your fingers or a pick. You want height in the middle and control at the sides. If your curls are very soft, a bit of gel at the roots helps the center hold its shape.
- Use 4 to 6 bobby pins if your hair is dense.
- Keep the side sections smooth, not slicked down to the point of looking wet.
- Let the middle stay airy; that ridge is the point.
This style is one of the best ways to turn volume into a shape instead of a cloud.
17. Double Mini Braids Into Half Pony
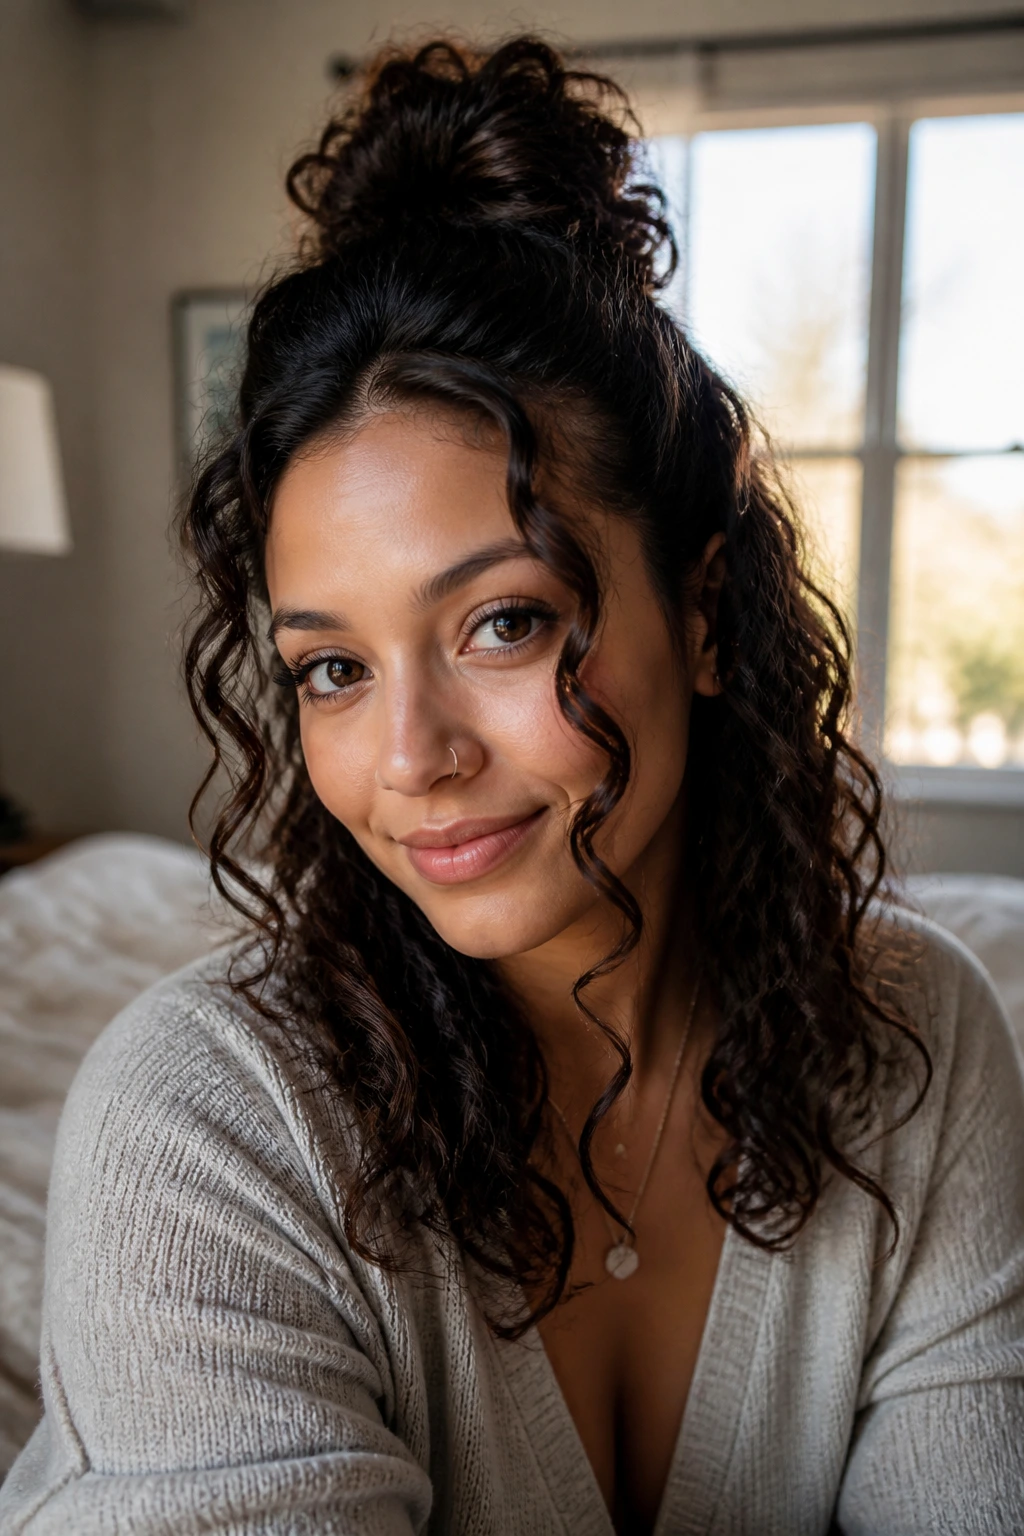
Two narrow braids can do more for curly hair than one big braid sometimes can. They add detail without taking over, and they give the front a bit of texture that blends nicely with loose curls. It’s a small move, but small moves often look the most natural.
Take one slim section from each temple, braid each one to about ear level, and bring them back to join into a half ponytail or half bun. The braids should be thin enough that the curls around them still show. If the braids are too thick, the style starts to read as a braid style first and a curly style second.
I like this on hair that has layers, because the braids help keep the shorter pieces under control. It also works well when the curls are a little more frizzy than usual. The braid texture disguises the roughness instead of making it obvious.
18. Crown Twist With Pearl Pins
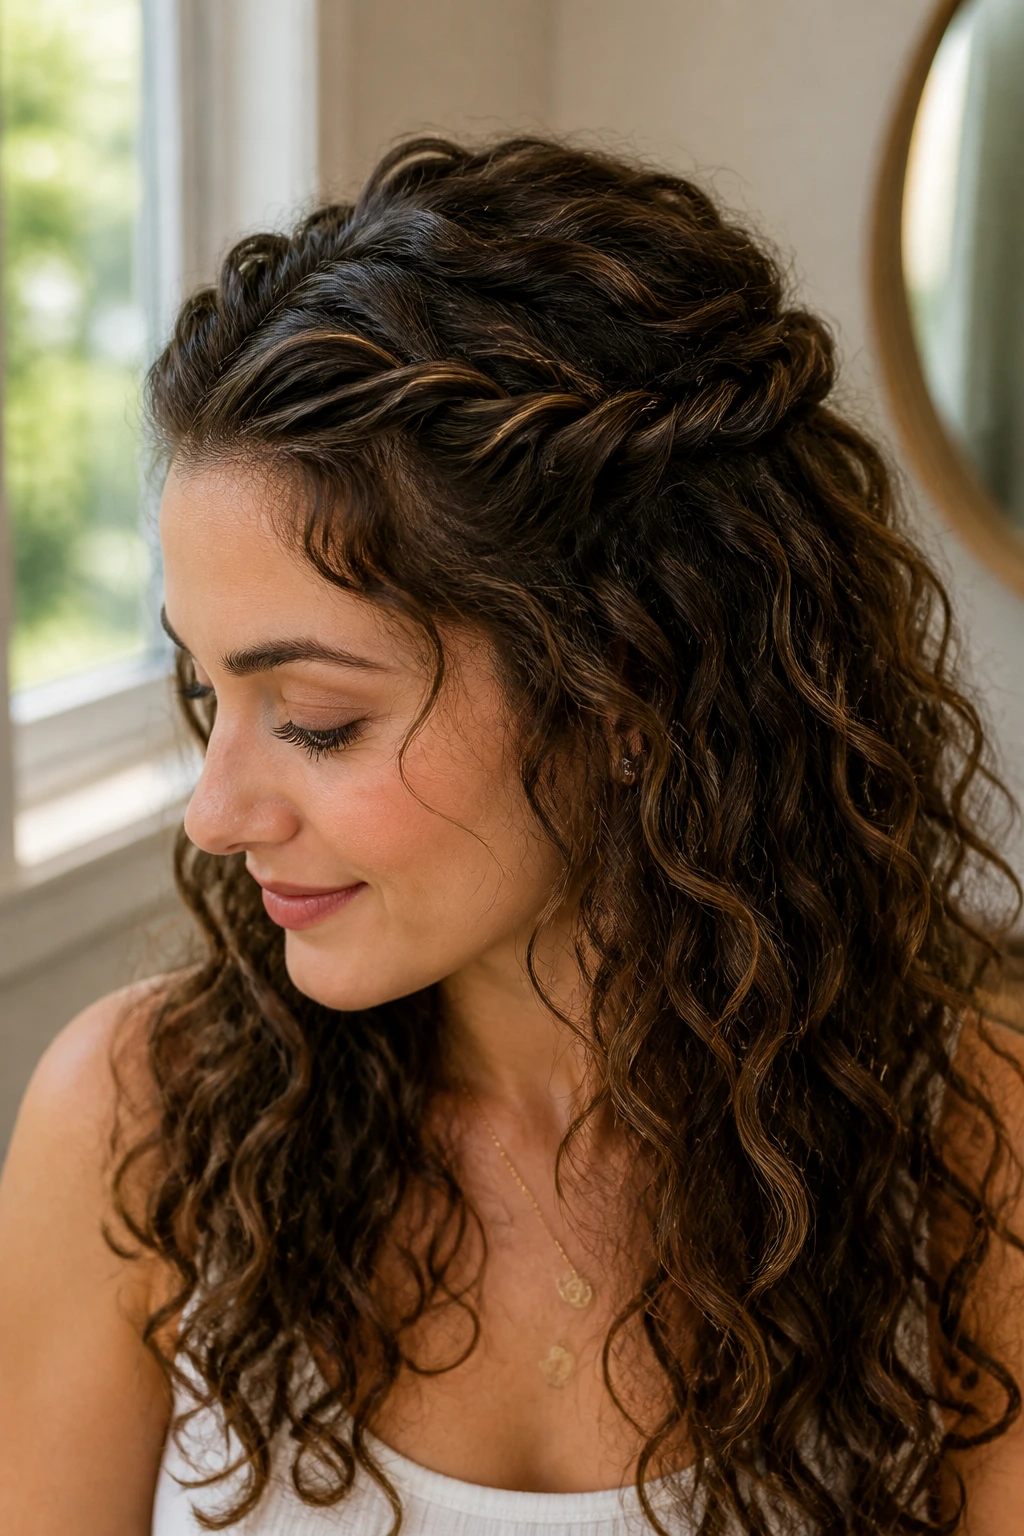
If the curls are already defined, decorative pins beat extra structure. A crown twist with pearl pins gives you shape around the front and a little shine without making the style heavy. It’s one of the easiest ways to push a simple half-up look into event territory.
Twist two front sections back from the temples, cross them at the crown, and secure them with pearl pins or decorative U-pins. Leave the lengths down and separate the curls just enough to keep them from clumping. The pins should look intentional, not crowded. Three or four well-placed pins are better than a handful of glittery noise.
This style favors medium and long curls because the detail sits best when there is enough length below it. Short hair can still wear it, but the pins need to be smaller and the sections more precise. Keep the rest of the look soft. The contrast is the point.
19. Braided Bun Crown Half-Up
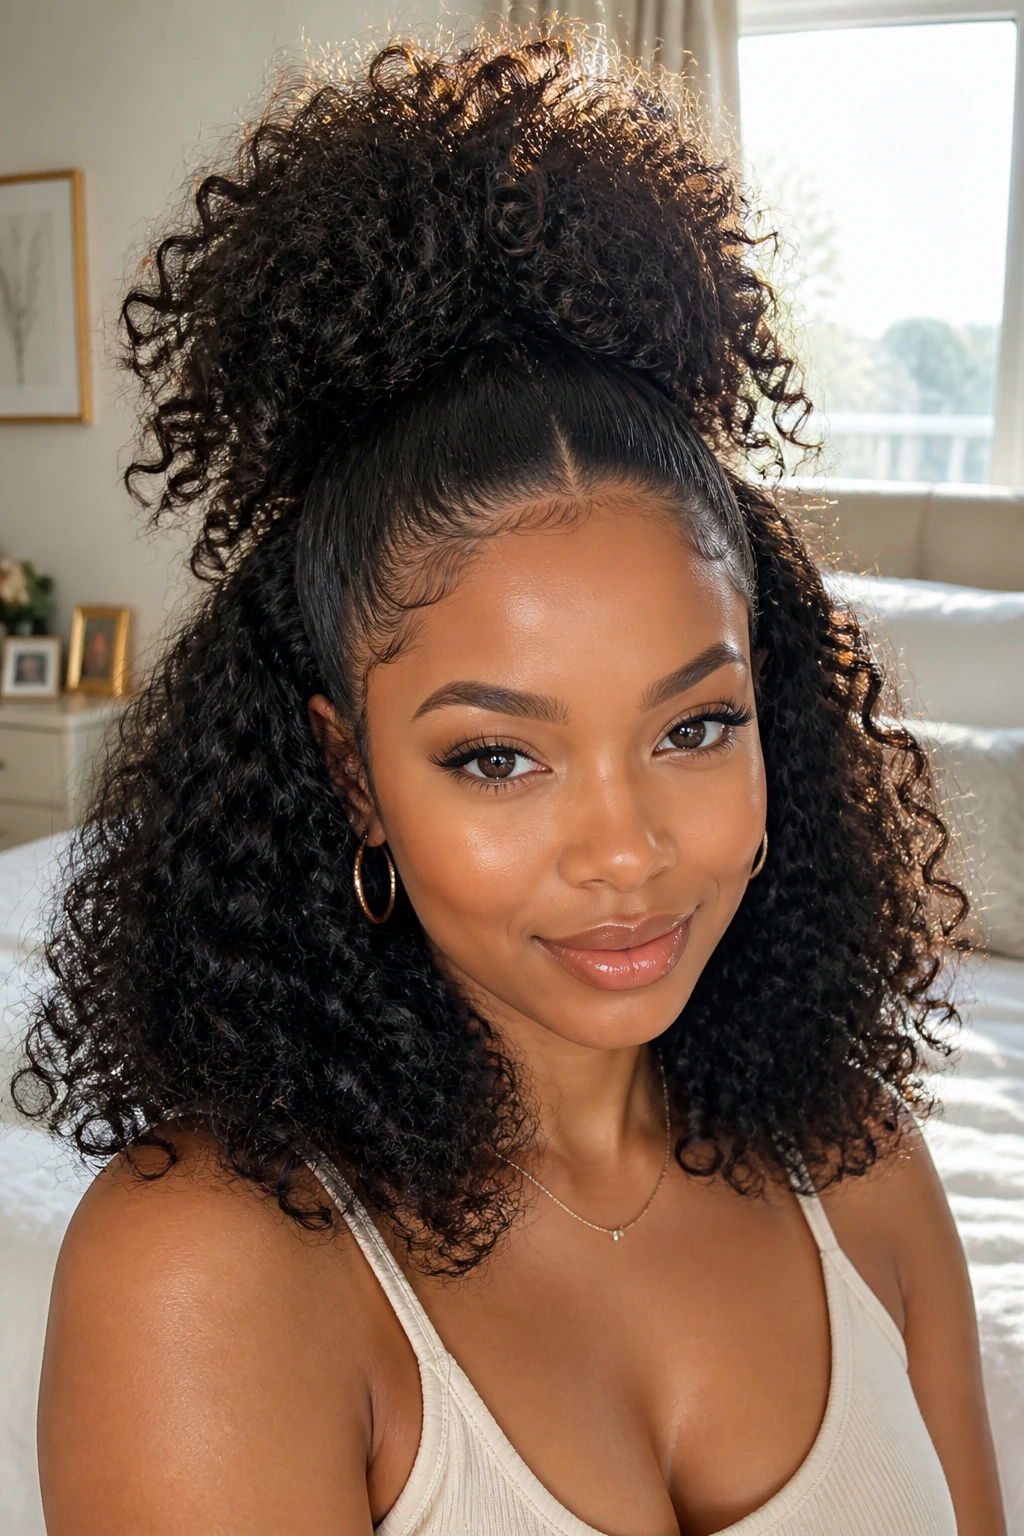
A braided bun at the crown has a nice old-school shape, but on curly hair it feels less formal than it sounds. The braid adds control, the bun adds height, and the loose length below keeps it from going stiff. It’s a balanced look, and I trust balanced looks.
Start with a section from temple to temple, braid it to the back, and coil the braid into a small bun at the crown. Secure the bun with U-pins or two crossing bobby pins. If the braid is thick, flatten the bun slightly so it sits closer to the head. The lower curls should stay full and visible.
This is especially good when you want the top section to look tidy but not severe. It also handles humidity better than a plain twist because the braid gives the base more grip.
20. Half-Up Pigtail Buns
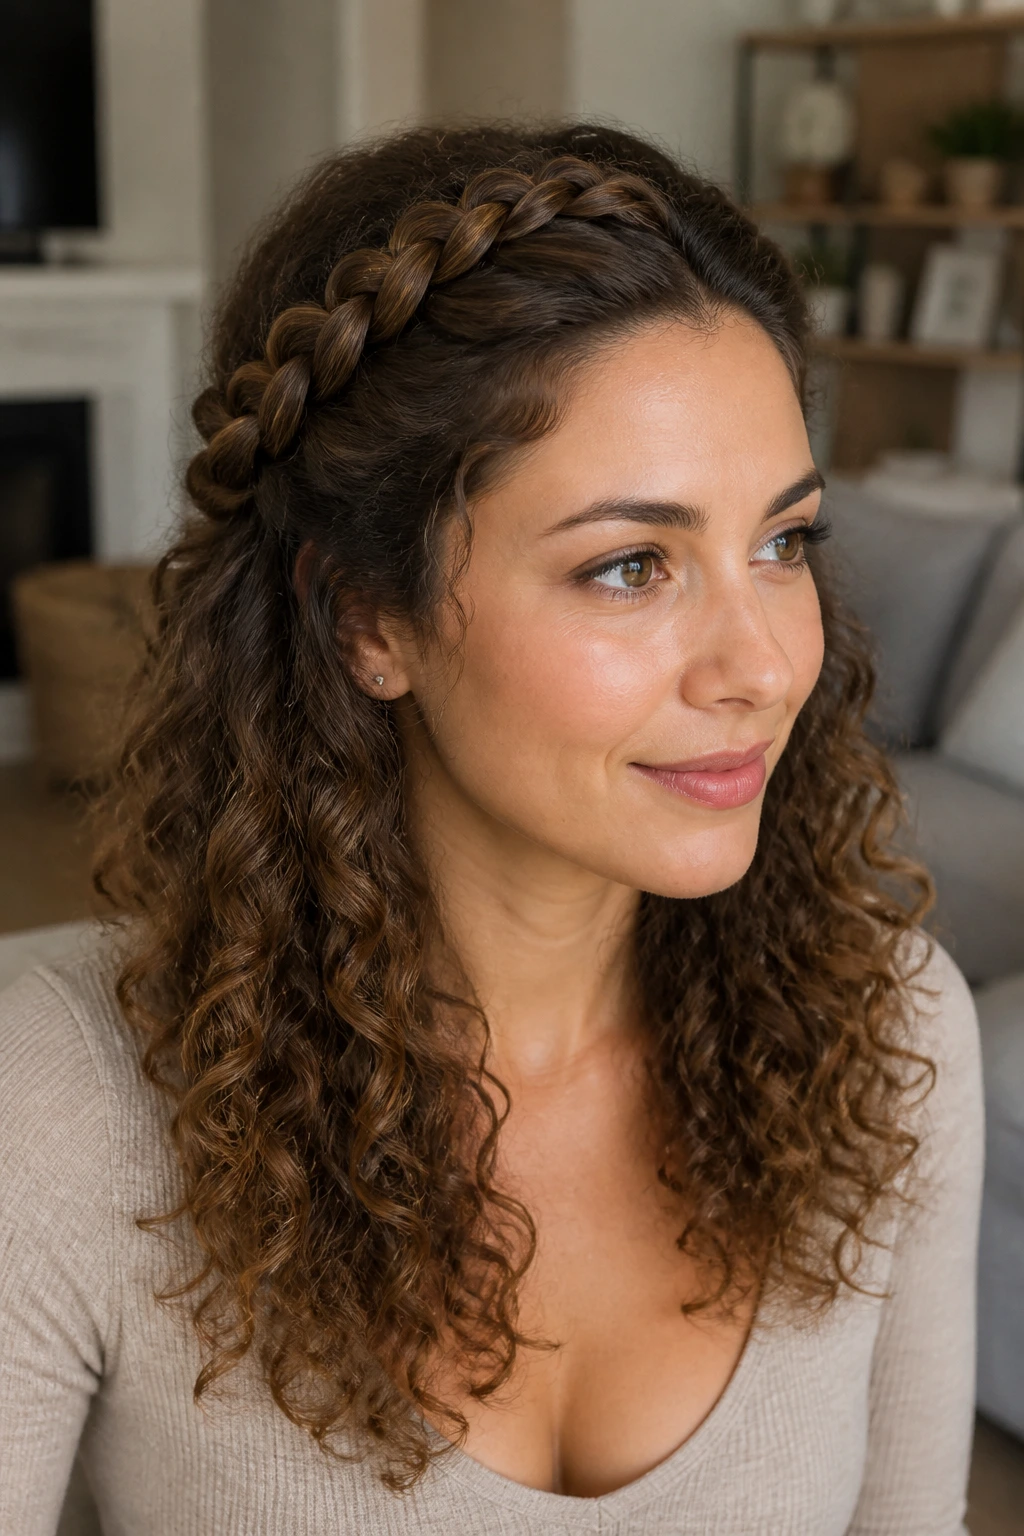
Two small buns can be charming without becoming childish. The difference is all in size and placement. Keep them tight, keep them small, and place them slightly back from the hairline so the curls below stay in view. Then the style reads fresh instead of costume-y.
Split the top half into two equal sections, twist each one, and wrap each twist into a tiny bun above the ears. Pin the buns snugly, then pull a few curls at the crown loose if you want more softness. If your hair is dense, anchor each bun with one elastic and two pins.
The lower curls give this style a lot of its shape, so don’t flatten them out trying to make the buns look bigger. Small buns. Full curls. That’s the formula.
21. Loose Flip-Over Half Pony
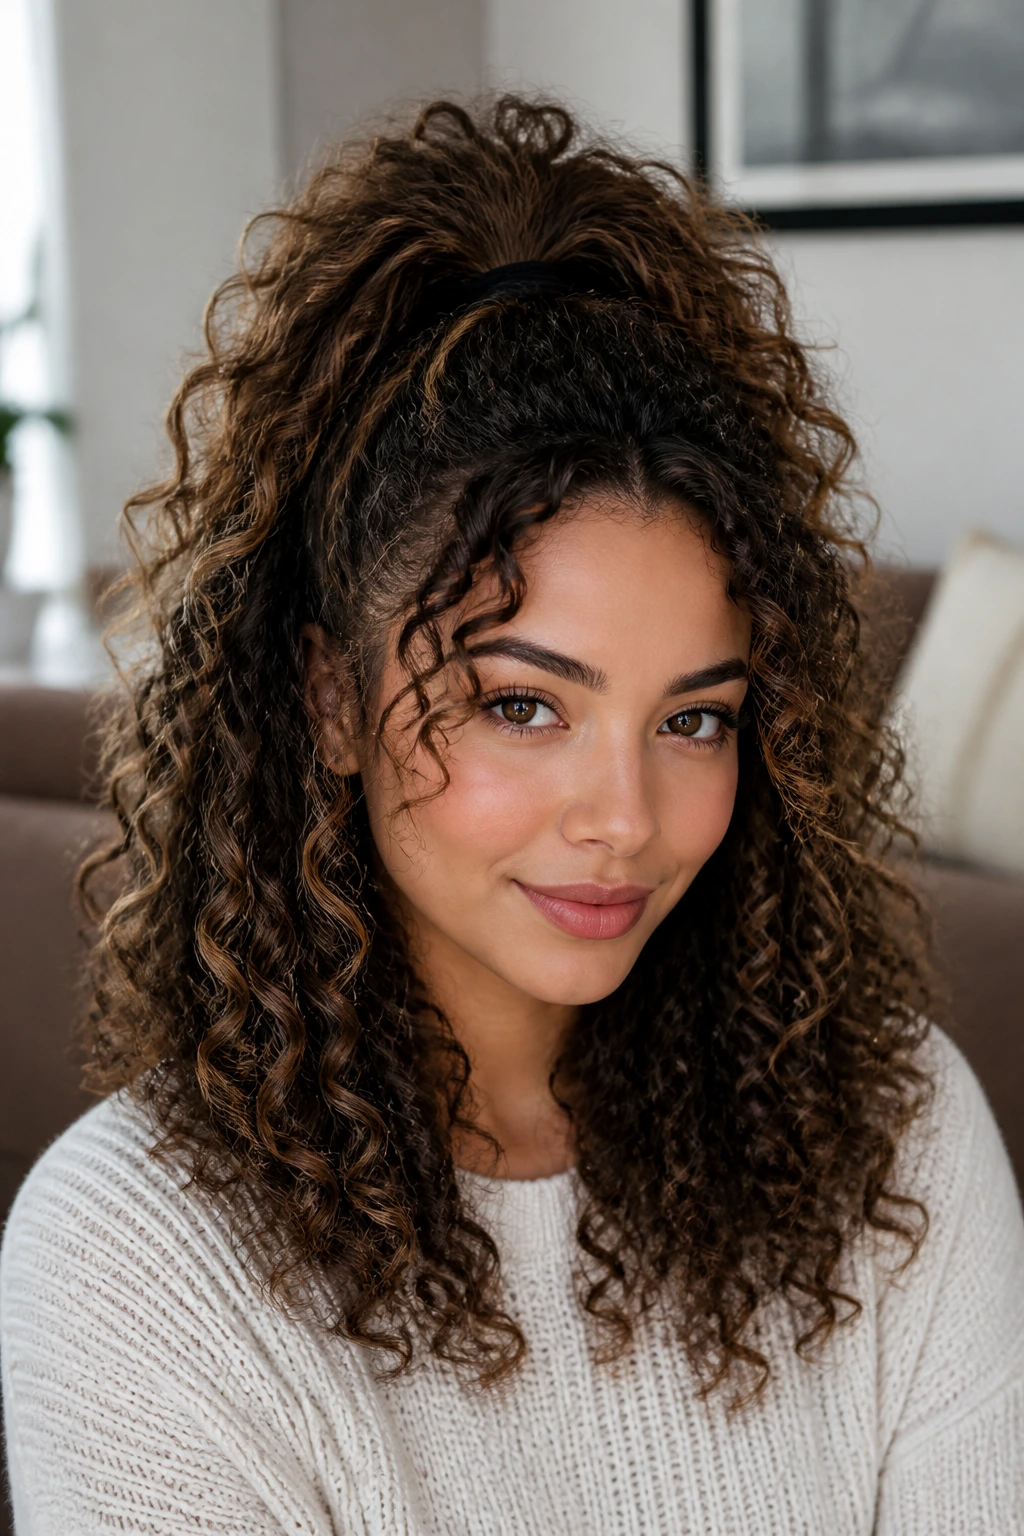
Sometimes the fastest fix is the best one. Flip-over half ponies take the top section, sweep it back without a hard part, and secure it high enough to create instant lift. Curly hair loves this move because the lack of a precise part keeps the crown from looking overmanaged.
Bend forward, gather the top half with your hands, and flip it back into place. Secure it with a soft elastic at the crown or just above it. Then finger-shape the front a little so it doesn’t sit as one flat shelf. That loose finish is what gives the style life.
This one is ideal for thick curls that need volume fast. It also works when the front has some frizz you don’t feel like controlling. That frizz becomes texture. Funny how that works.
22. Twisted Knot With Curly Ends
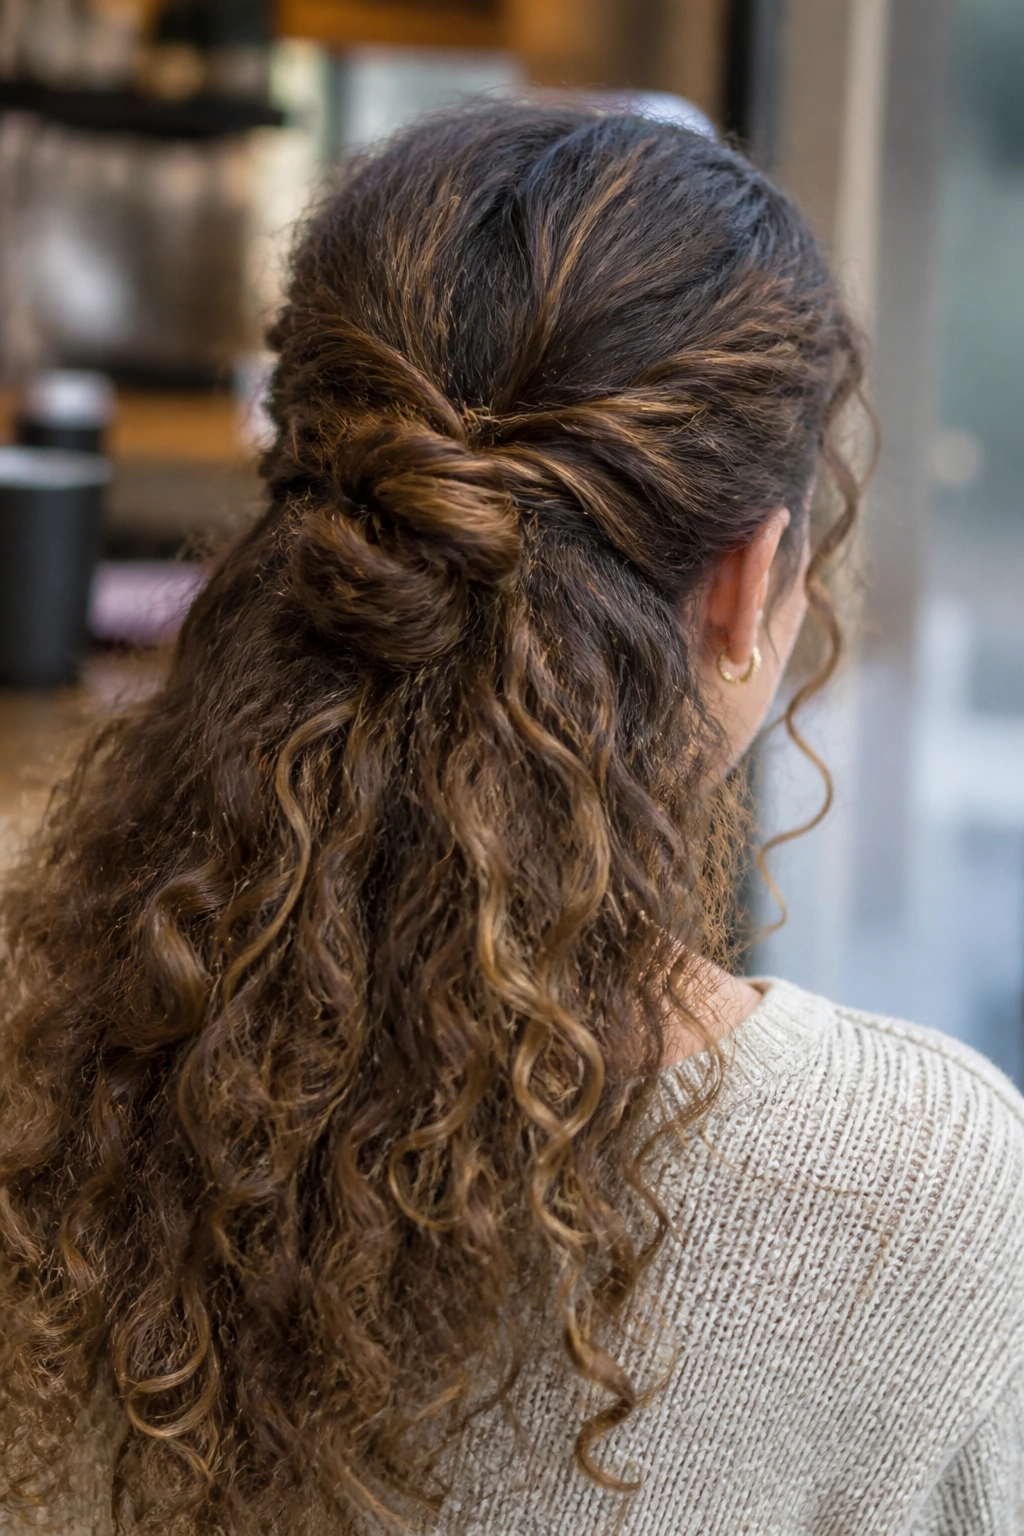
Two side twists tied into one knot make a half-up style that feels almost architectural. The knot sits at the back of the crown, the ends curl out below it, and the whole thing looks more deliberate than a quick twist but less formal than a braid.
Take one section from each side, twist them toward the back, and tie them together in a loose knot. Secure the knot with pins underneath. Leave the ends of the curls loose so they can bounce against the shoulders. If the knot looks too bulky, spread it slightly with your fingers rather than adding more pins.
- Best on shoulder-length to long curls.
- Works well when the front layers are at different lengths.
- Needs a little grip spray if your hair is very silky.
The texture contrast is what makes this one hold the eye. Tight knot on top. Soft ends below. Clean, but not boring.
23. Half-Up With Satin Ribbon
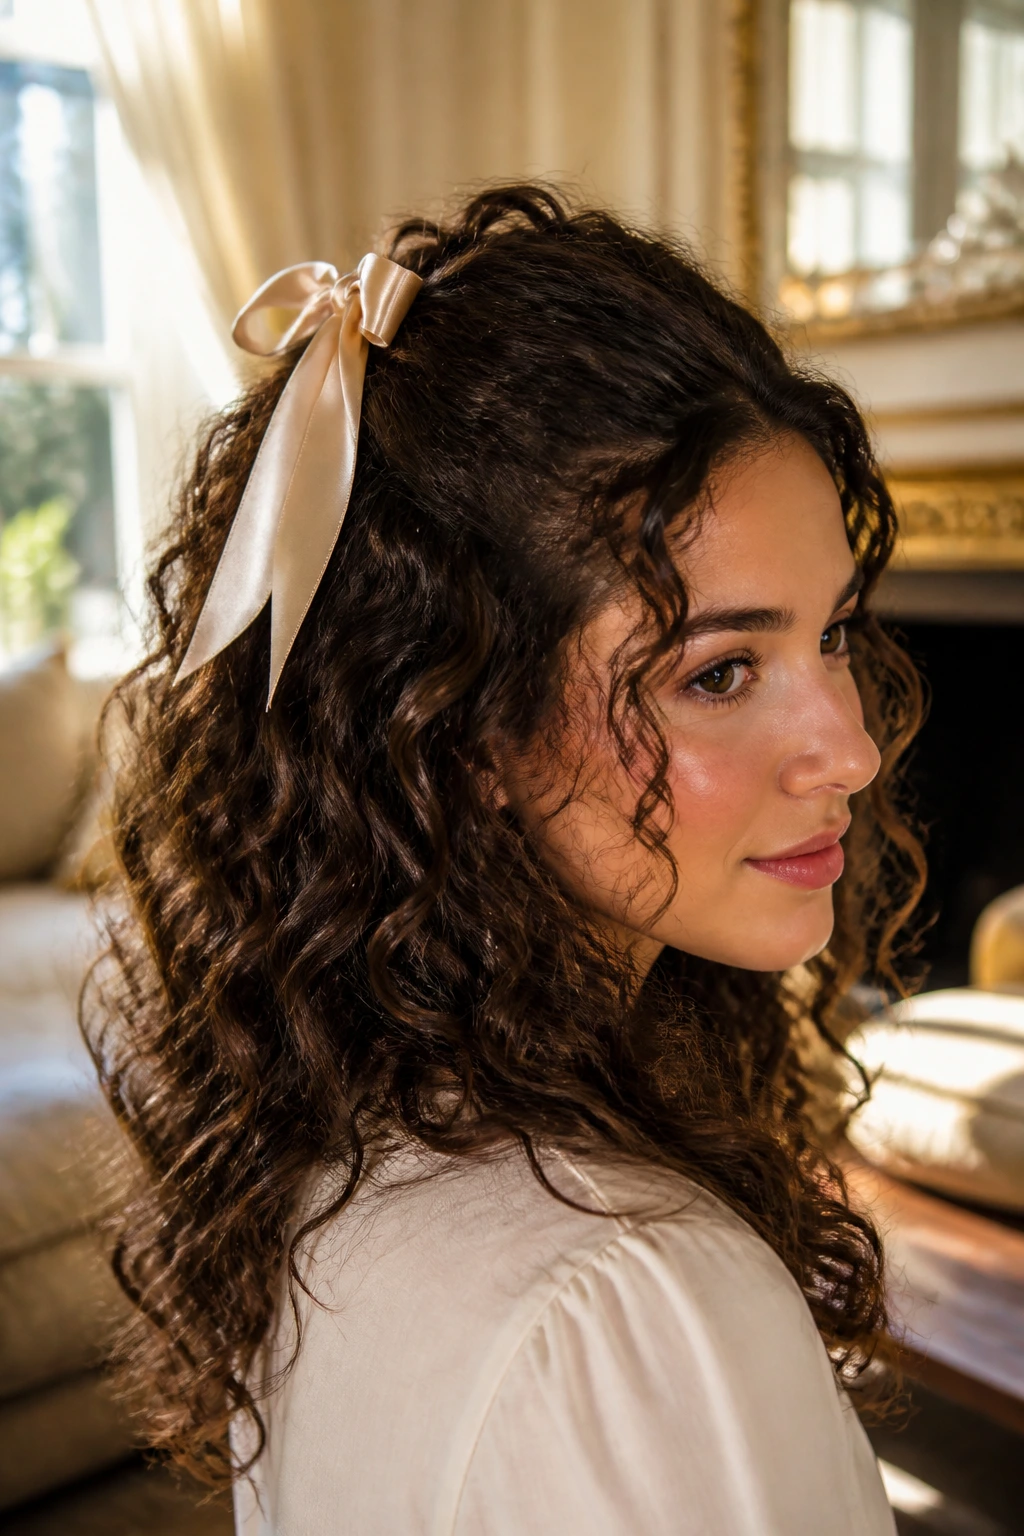
A satin ribbon can soften a style in one step. It adds a visible finish without adding weight, and it’s kinder to curly strands than rubbery elastics that dig in and leave dents. A ribbon also gives the half-up section a bit of movement, especially when the curls beneath it are full.
Gather the top section into a loose half pony or twist, secure it first with a clear elastic, then tie a 1- to 2-inch wide ribbon over the band. Let the ends hang, knot them off to one side, or wrap them around the base if you want a cleaner look. Velvet works for a heavier feel. Satin feels lighter and slides less against the hair.
This is one of those styles that looks like you meant to wear it. Which, admittedly, is most of the battle.
24. Pinched-Back Vintage Roll
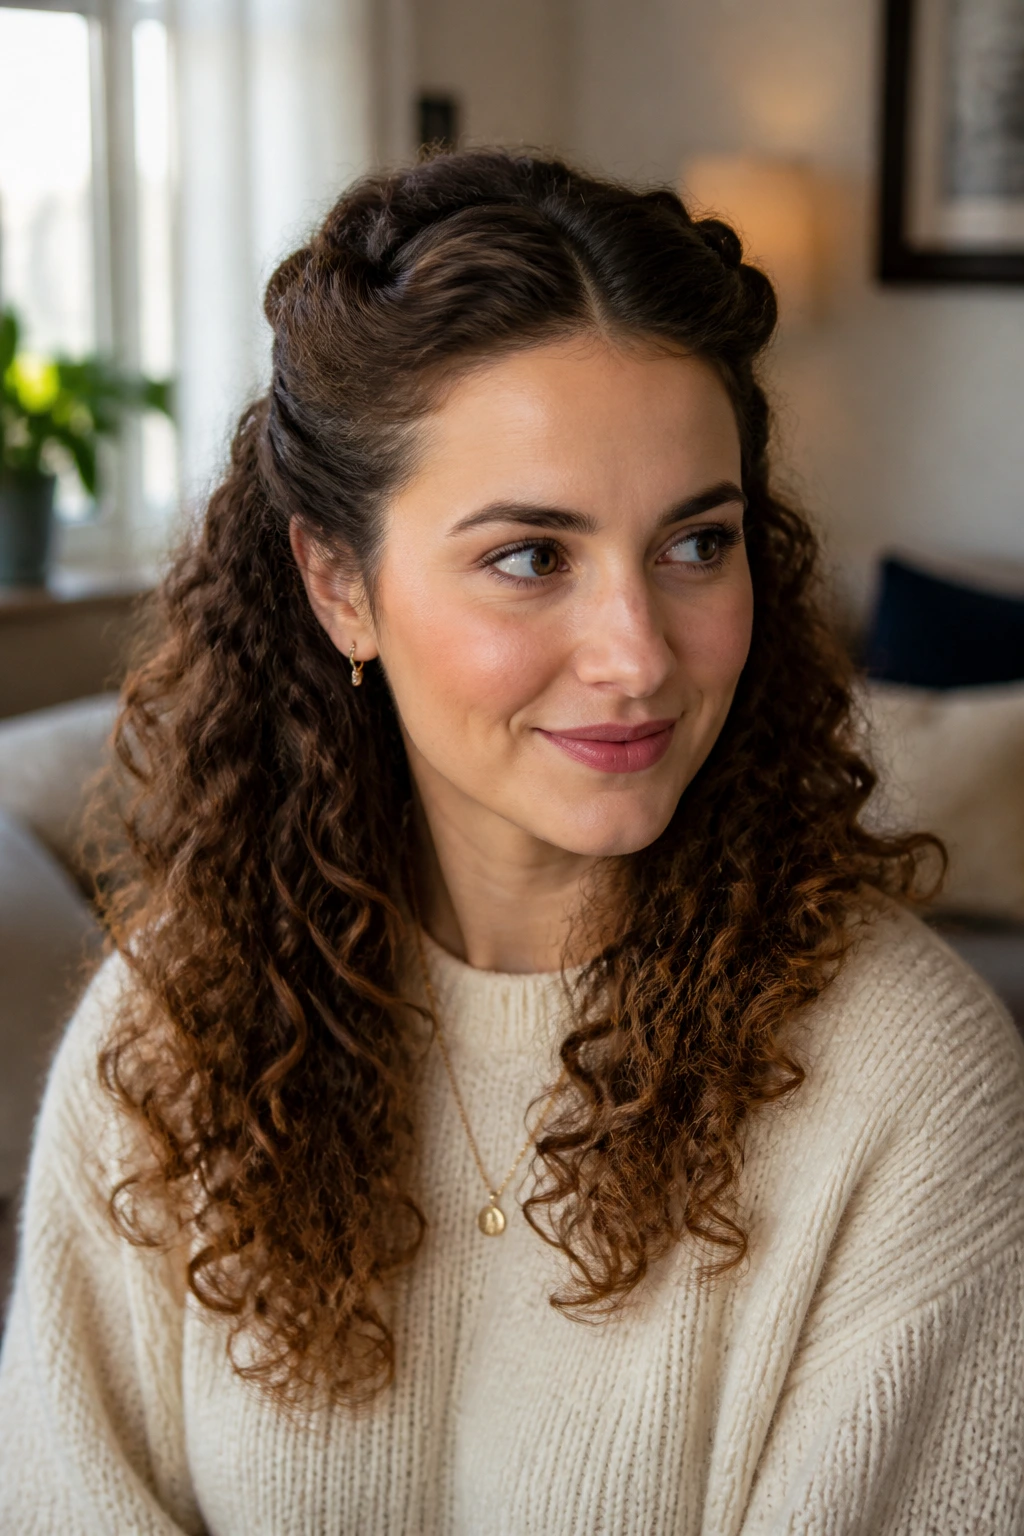
A vintage roll at the front gives curly hair a shape that feels a little old-Hollywood without looking stiff. The front sections are rolled inward and pinned back, while the rest of the hair stays loose and airy. It’s a nice choice when you want the face open but still want movement at the sides.
Work with two front panels, about 1 to 1½ inches each, and roll each one back toward the crown. Pin the rolls flat against the head with bobby pins hidden under the fold. Leave the rest of the curls alone. If the rolls start to unravel, cross the pins in an X. That usually solves it.
This style suits shorter curly cuts better than many half-up looks because it does not demand a lot of length in the top section. It also pairs well with side parts and soft volume at the ends. Clean, but not severe.
25. Sculpted Curly Mohawk Puff
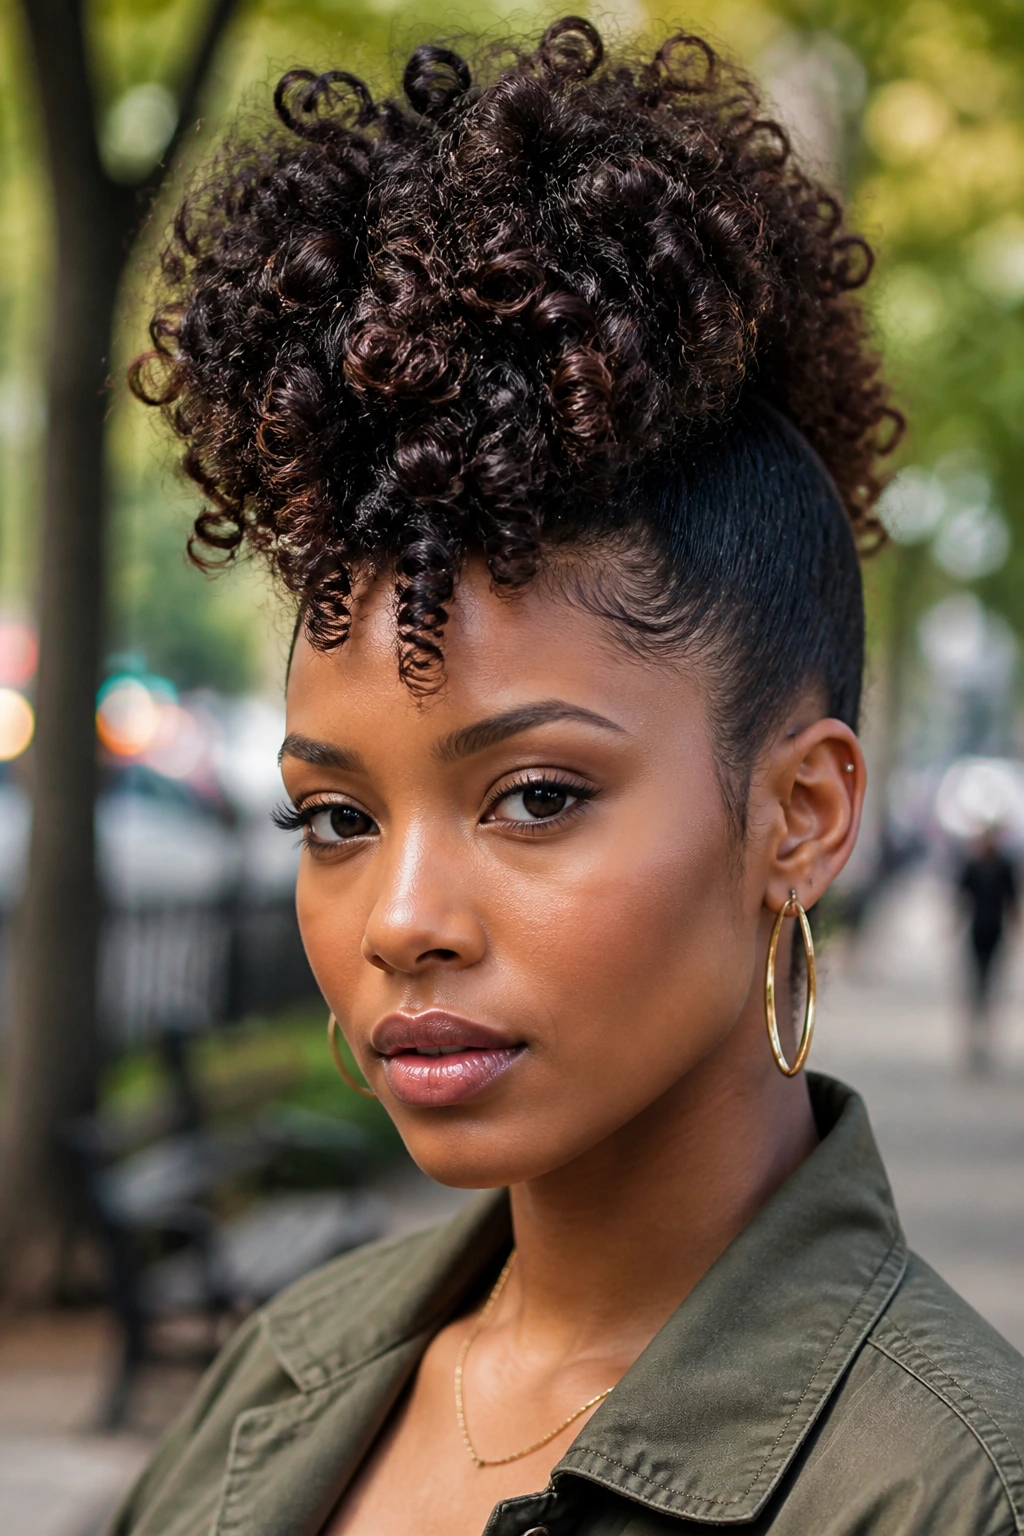
If you want drama, use it on purpose. A sculpted mohawk puff pins the sides close to the head and keeps the center high and full, which makes the curl pattern look bold instead of busy. It’s the kind of style that does not whisper.
Section the sides from the temples back and pin them flat along the head. Leave the center strip loose, then lift it upward with fingers or a pick until it forms a tall puff or ridge. A little edge control can sharpen the front, but the rest should stay soft and curly. Too much slickness kills the shape.
This style is a favorite for coily hair, especially when the density is high and the curls can hold a strong silhouette. It also works on looser curls if you want a more dramatic outline.
The shape is the entire point. Let it be big.
Why Half-Up Styling Works So Well on Curly Hair
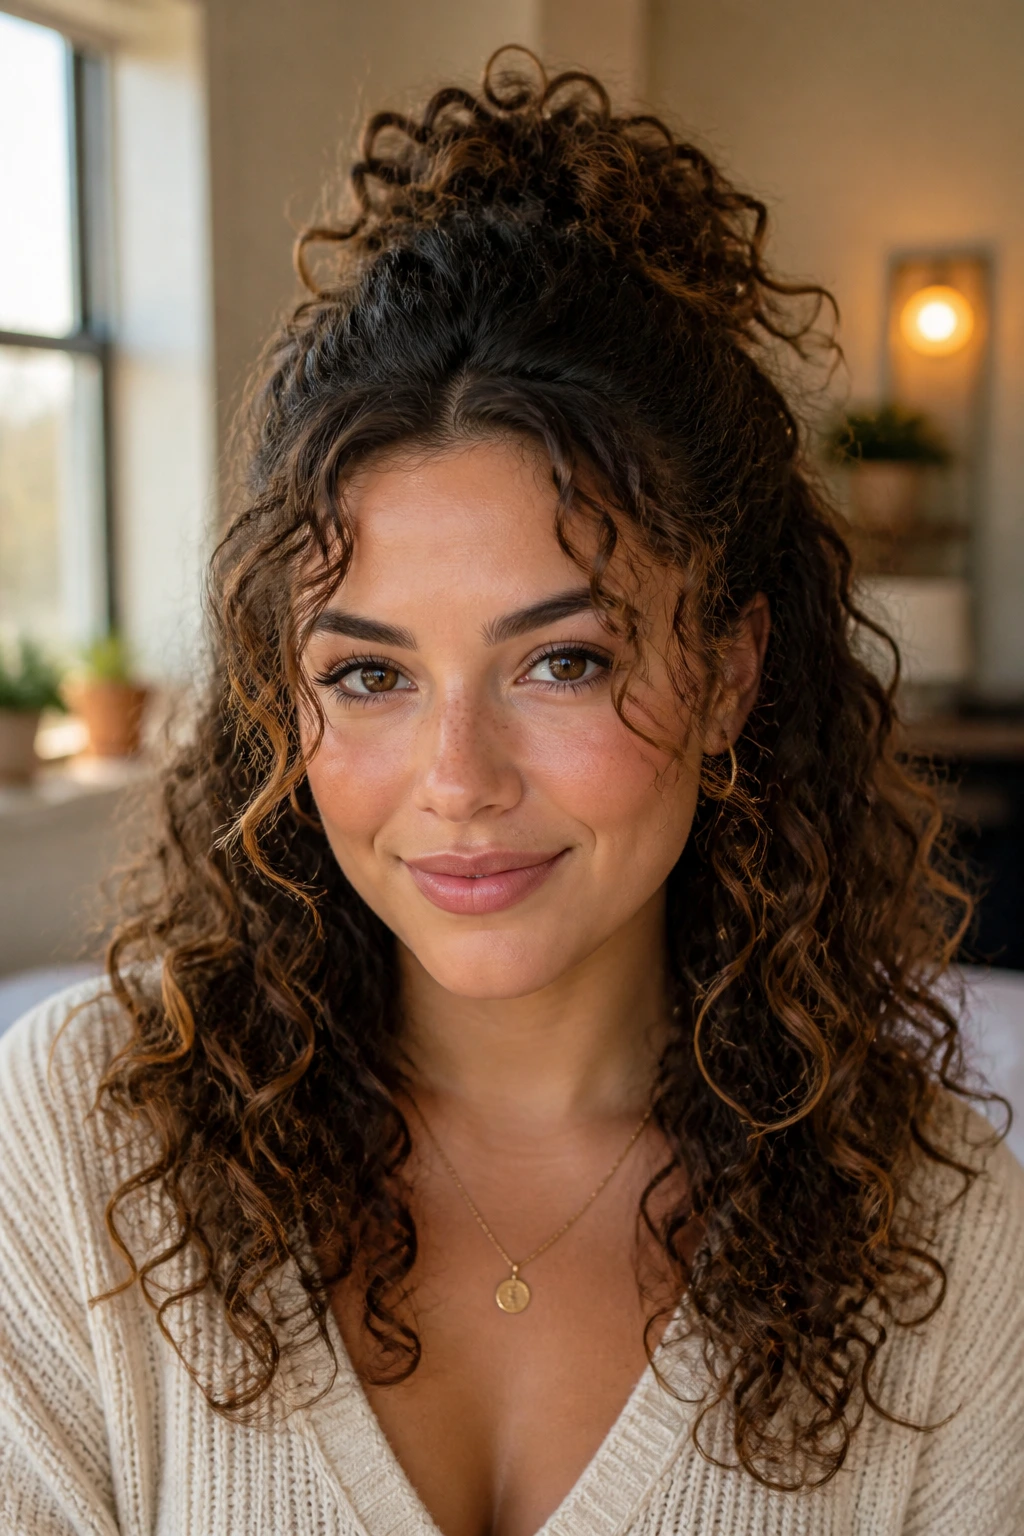
Curly hair has a memory of its own. It remembers moisture, friction, humidity, and the exact place where a clip spent the afternoon squeezing the crown. A half-up style works because it works with those facts instead of pretending they do not exist. The lower curls get room to breathe, and the top section gets just enough control to keep the whole look from fraying at the center.
The crown matters more than people think. That’s usually where curl definition collapses first, because it gets touched the most and absorbs the most pressure from pins, glasses, and hands. Pulling only part of the hair back keeps the visual lift where you need it most. It also prevents the bottom from losing its weight, which is the part that gives curly hair its swing.
There’s another small advantage here. Half-up styles let you mix textures on purpose. Smooth front. Puffy crown. Defined ends. Loose braid. Tight puff. The contrast makes curly hair look richer, not less tidy. And because the structure is partial rather than total, the style can survive a little weather, a little movement, and a little real life.
Essential Tools for These Hairstyles
-
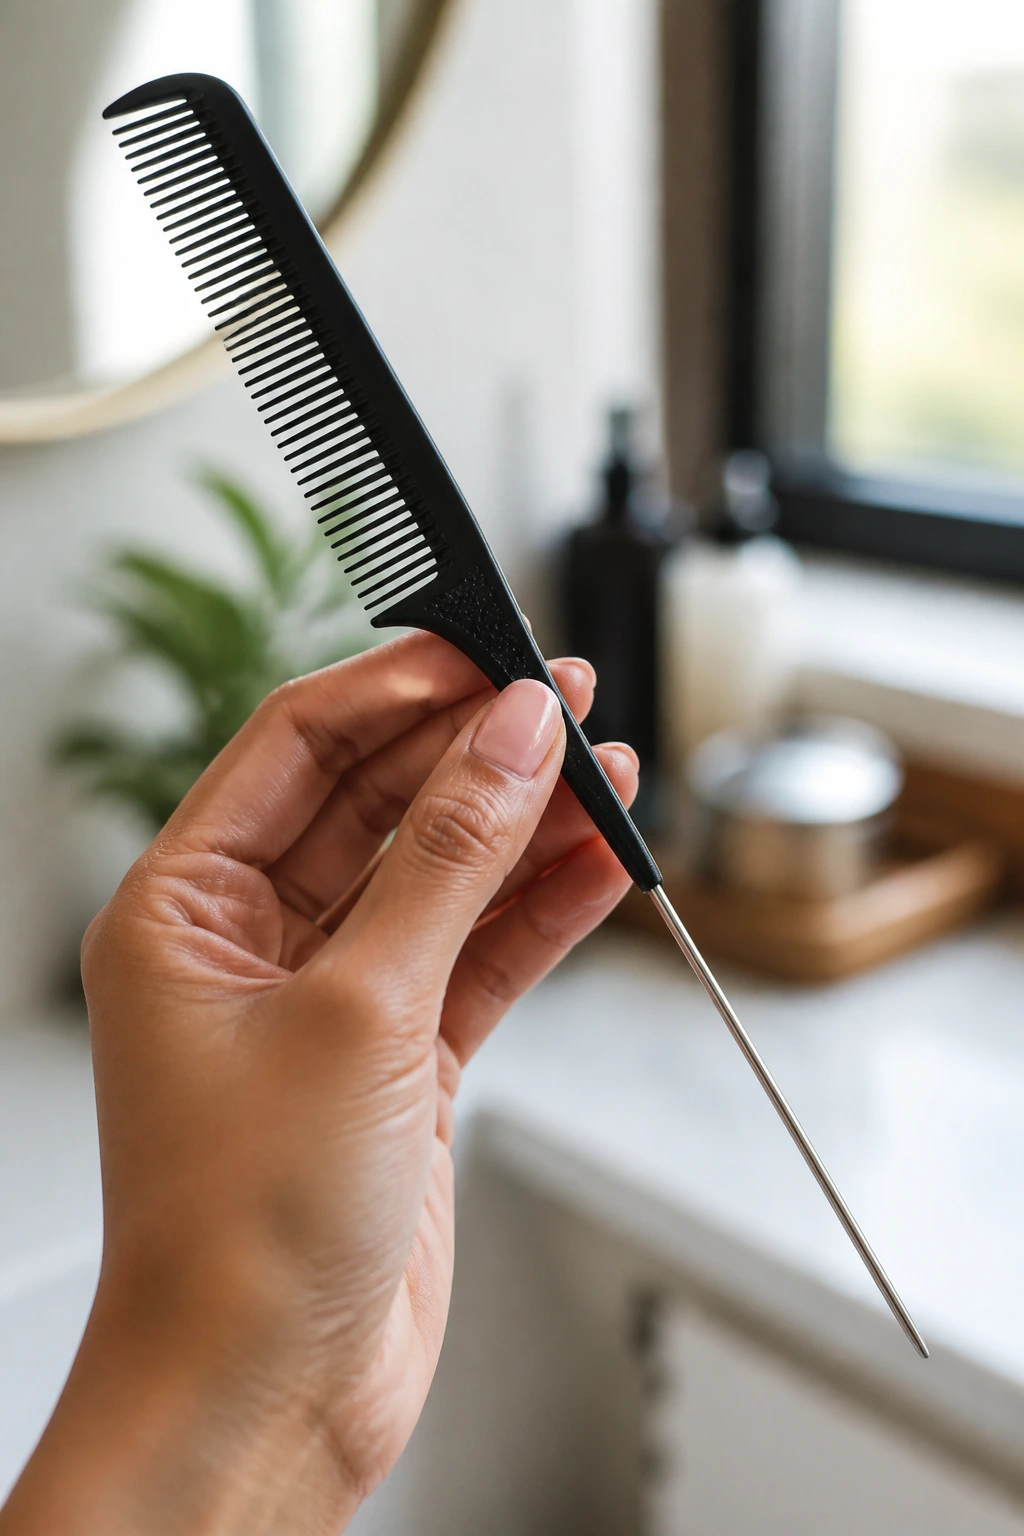
Rat-tail comb: Best for clean parts and neat sectioning, especially on sleek styles or braid-based looks.
-
Wide-tooth comb: Use this for detangling before styling so you do not shred the curl pattern.
-
Spray bottle with water or leave-in mix: A light mist wakes up frizzed-out sections without soaking the whole head.
-
Curl cream or leave-in conditioner: Good for smoothing the front, softening the twists, and reducing rough flyaways.
-
Mousse or lightweight gel: Helps the crown hold shape without weighing curls down.
-
Bobby pins and U-pins: Cross them for extra hold; plain pins slip easier on slippery curl textures.
-
Clear elastics: Use these for bubbles, puffs, and half ponies. Keep a few extra in your bag. They disappear like socks.
-
Medium or large claw clip: Useful for quick half twists and soft, non-tension styles.
-
Satin scarf or ribbon: Adds finish, reduces friction, and keeps the style from looking too plain.
-
Microfiber towel or cotton T-shirt: Better than a rough bath towel for drying and shaping curls before styling.
-
Diffuser attachment: Optional, but it helps set the top section and keep the curl pattern defined when you want volume with less frizz.
-
Small styling brush: Optional for sleek crowns and vintage rolls; a fine brush can smooth the front without disturbing the rest.
Smart Prep and Product Choices for Grip, Shine, and Hold
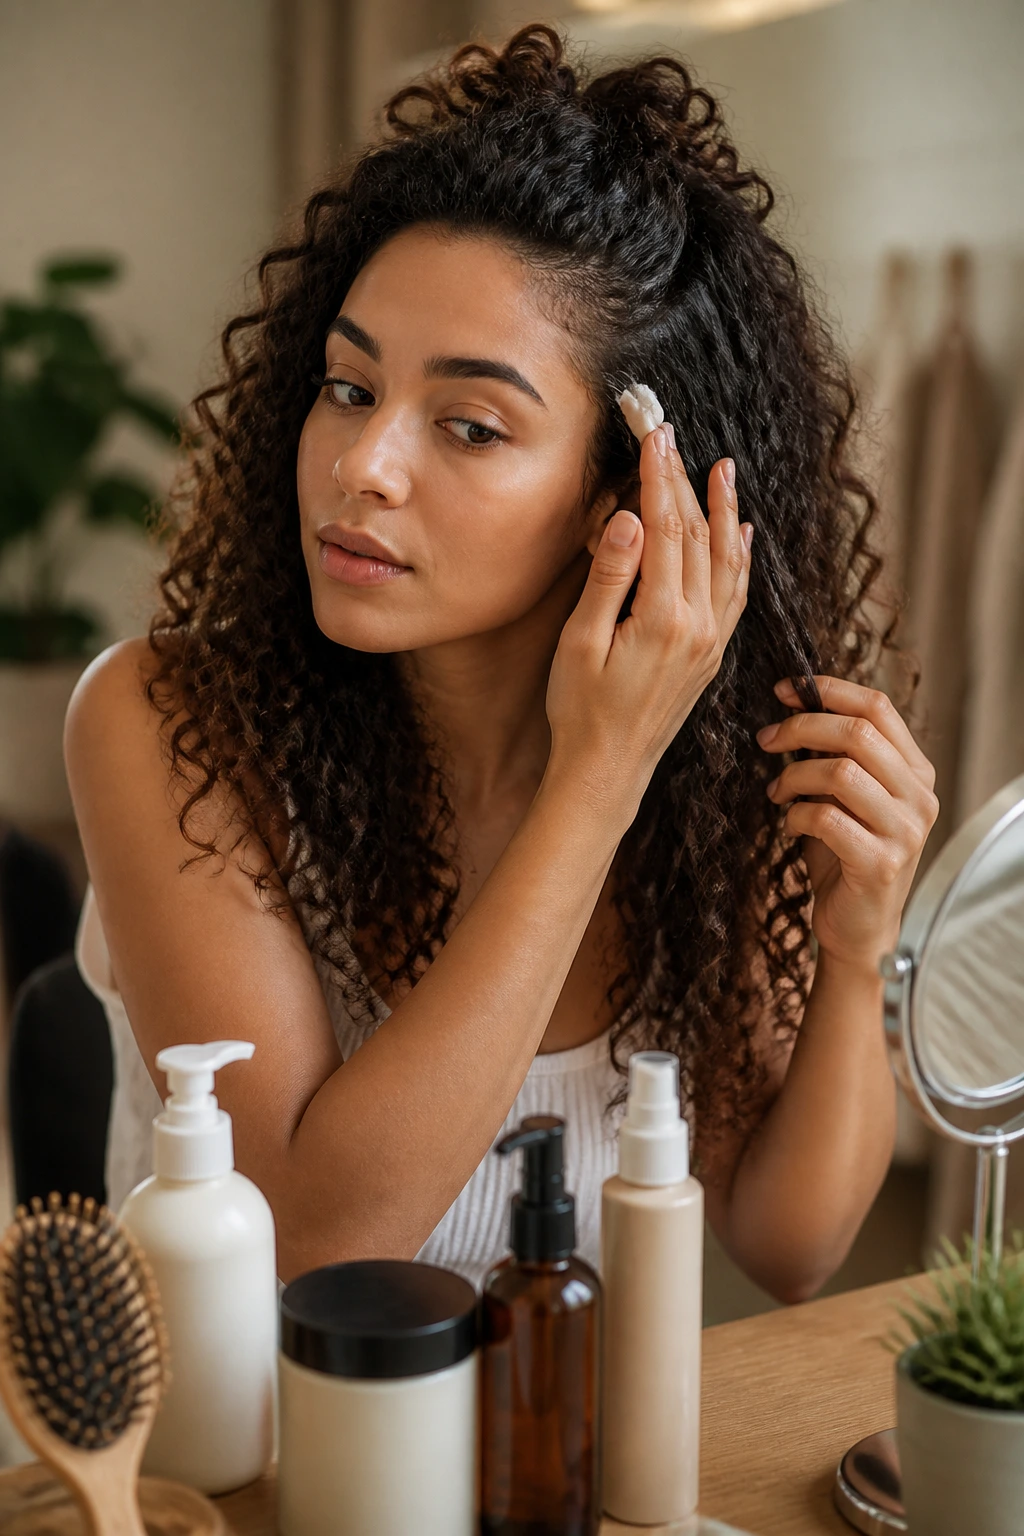
The product stack matters more than the accessory. If the hair is too slippery, pins slide out. If it is too dry, the crown frizzes before you finish the second side. The sweet spot is usually some moisture at the start, then a light layer of hold where the style needs structure. That means leave-in on the lengths, a touch of cream or gel at the front, and not much else unless your curls are very dense.
Fine curls usually do better with mousse or a light gel. Heavy cream can make the top section collapse before it ever has a chance to sit up. Dense curls and coils often need a cream-gel combo because they need both softness and grip. If the front looks fluffy but the pins keep slipping, the roots probably need more hold, not more oil.
Sectioning matters too. For most half-up shapes, start with a line from temple to temple and adjust from there instead of grabbing random top pieces. A clean section lets the style sit higher and keeps the bottom half from looking thin. For braid-heavy looks, work on slightly damp hair; for sleek looks, work on dry or nearly dry hair so the surface lays down cleanly.
Humidity changes the game, but it doesn’t ruin it. It just means you pick styles with better grip. Braids, twists, clips, and puffs usually handle moisture better than soft, loose swirls that depend on perfect smoothness. Save the soft swirls for days when the air is less bossy.
How to Wear These Styles in Real Life
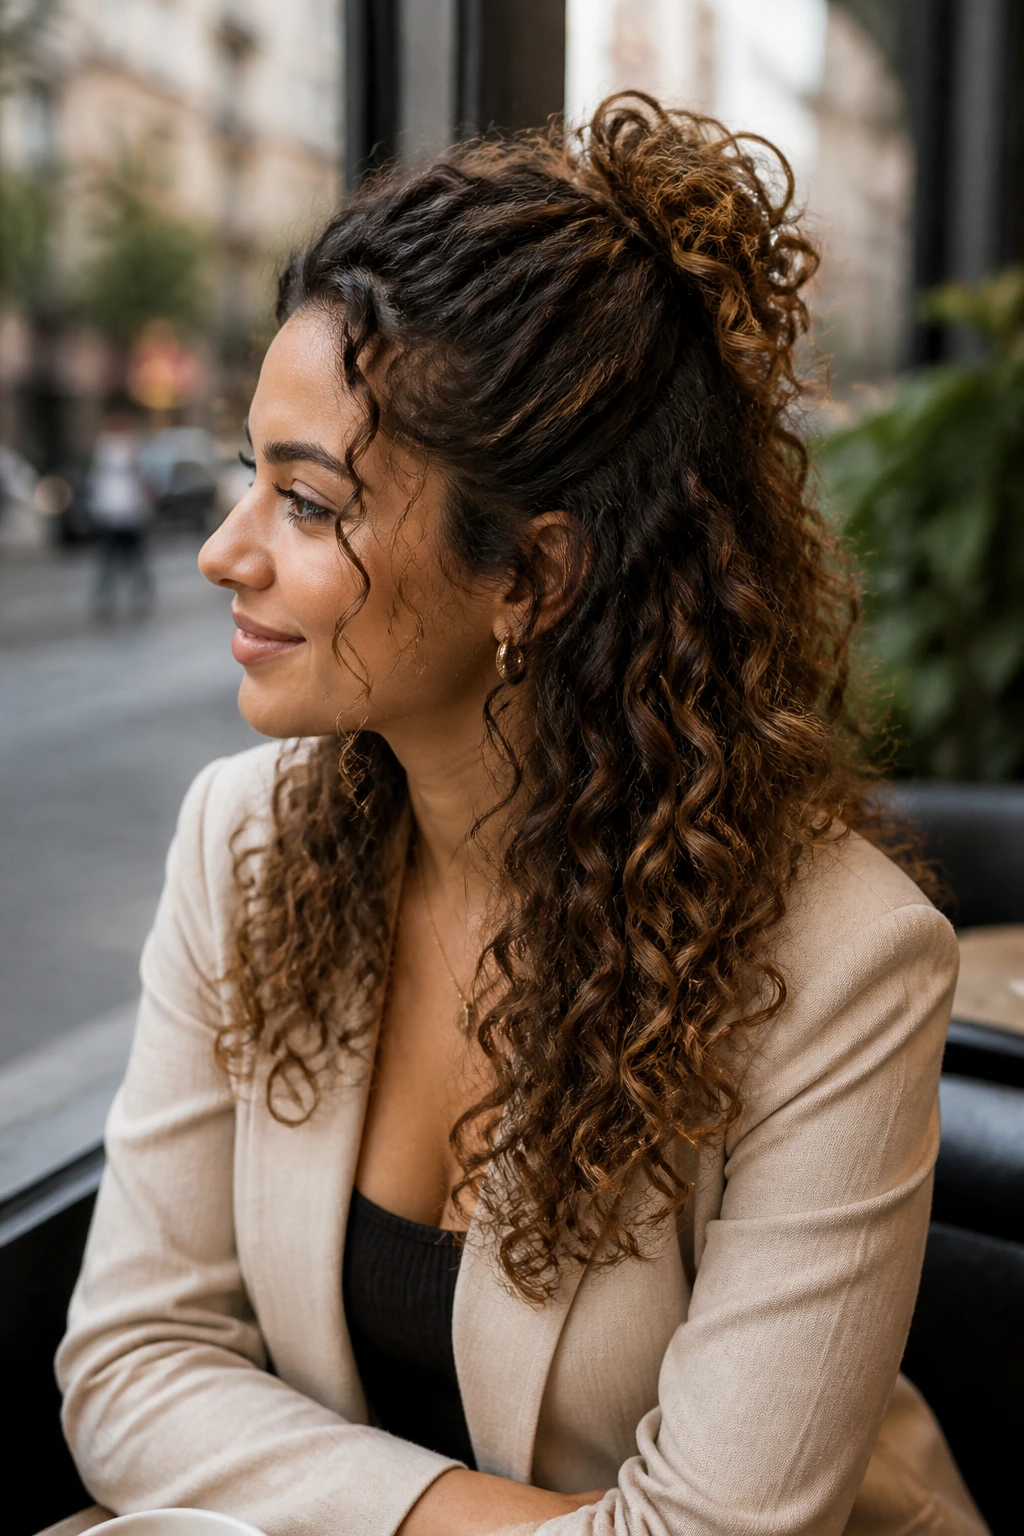
Workday: Choose the styles that stay put without a lot of fuss: the claw-clip half twist, the side-barrette look, or the sleek crown half-up. These keep the front away from your face and avoid the constant re-adjusting that happens with looser buns.
Weekend: Go bigger. The half-up top knot, mini space buns, and faux hawk puff all have enough character to feel playful without needing a lot of maintenance. If you are heading out and back in again, pick something you can re-pin once and forget.
Events: Braids, pearls, ribbon, and satin finish well on curly textures. The braided halo, crown twist with pearl pins, and ribbon-tied half-up all read dressier without asking the curls to become something else.
Warm, sticky weather: Styles with more control at the crown usually hold up better. Think braid into pony, twisted crown, or a puff half pony with a little gel at the roots. If the air is humid enough to make your bangs do improv, a tighter front is your friend.
Extra Tips and Finish Options
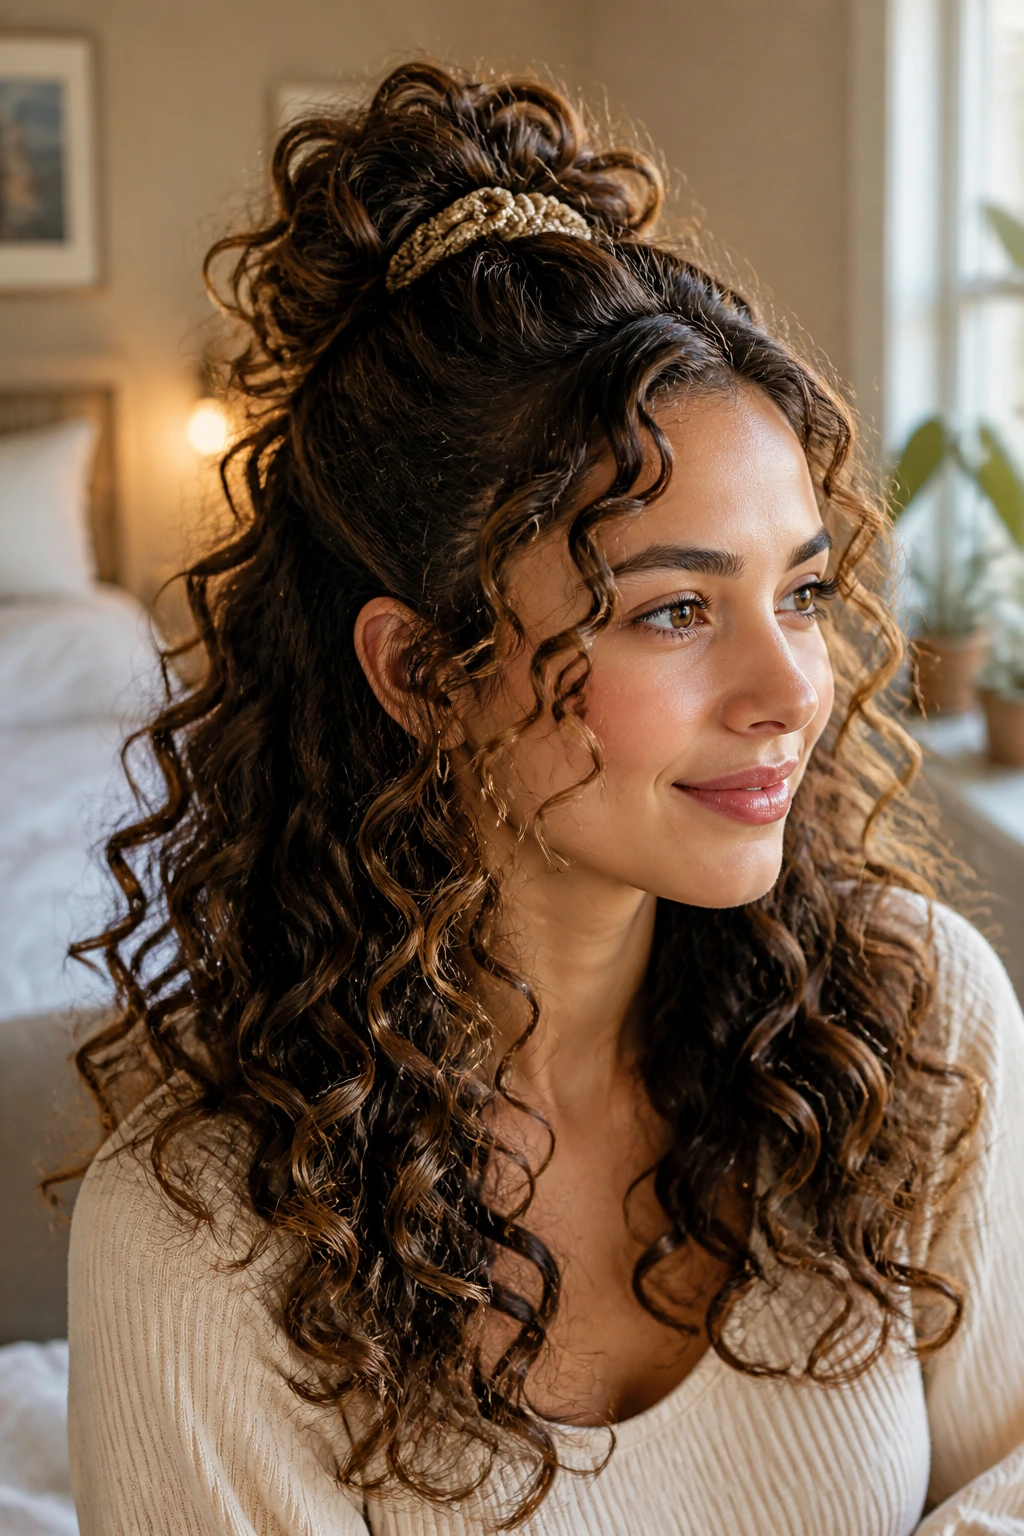
Shape Boost: Place the half-up section slightly higher than you think you need. Curly hair shrinks, and a style that looks balanced in the mirror can settle lower after ten minutes. Starting a little higher gives the shape room to relax.
Humidity Shield: Use a light mist of flexible-hold spray or a dab of gel at the hairline before pinning. That keeps the front from puffing up into a fuzzy frame around the face. Too much product is still a bad idea. Thin layer. Always thin.
Texture Play: If the lower curls have gone a little flat, scrunch a pea-sized amount of curl cream into the ends and lift them with your hands. The goal is movement, not perfect spirals. Perfect spirals are great when they happen. They are not the assignment.
Make-It-Yours: Swap the same shape between casual and dressy by changing the accessory. A claw clip makes the style relaxed. Pearls make it formal. A satin ribbon softens the look. A matte black pin makes it feel sharper. The structure stays the same, which is nice when you already know what fits your face.
Keeping the Style Fresh Overnight and Through Day Two
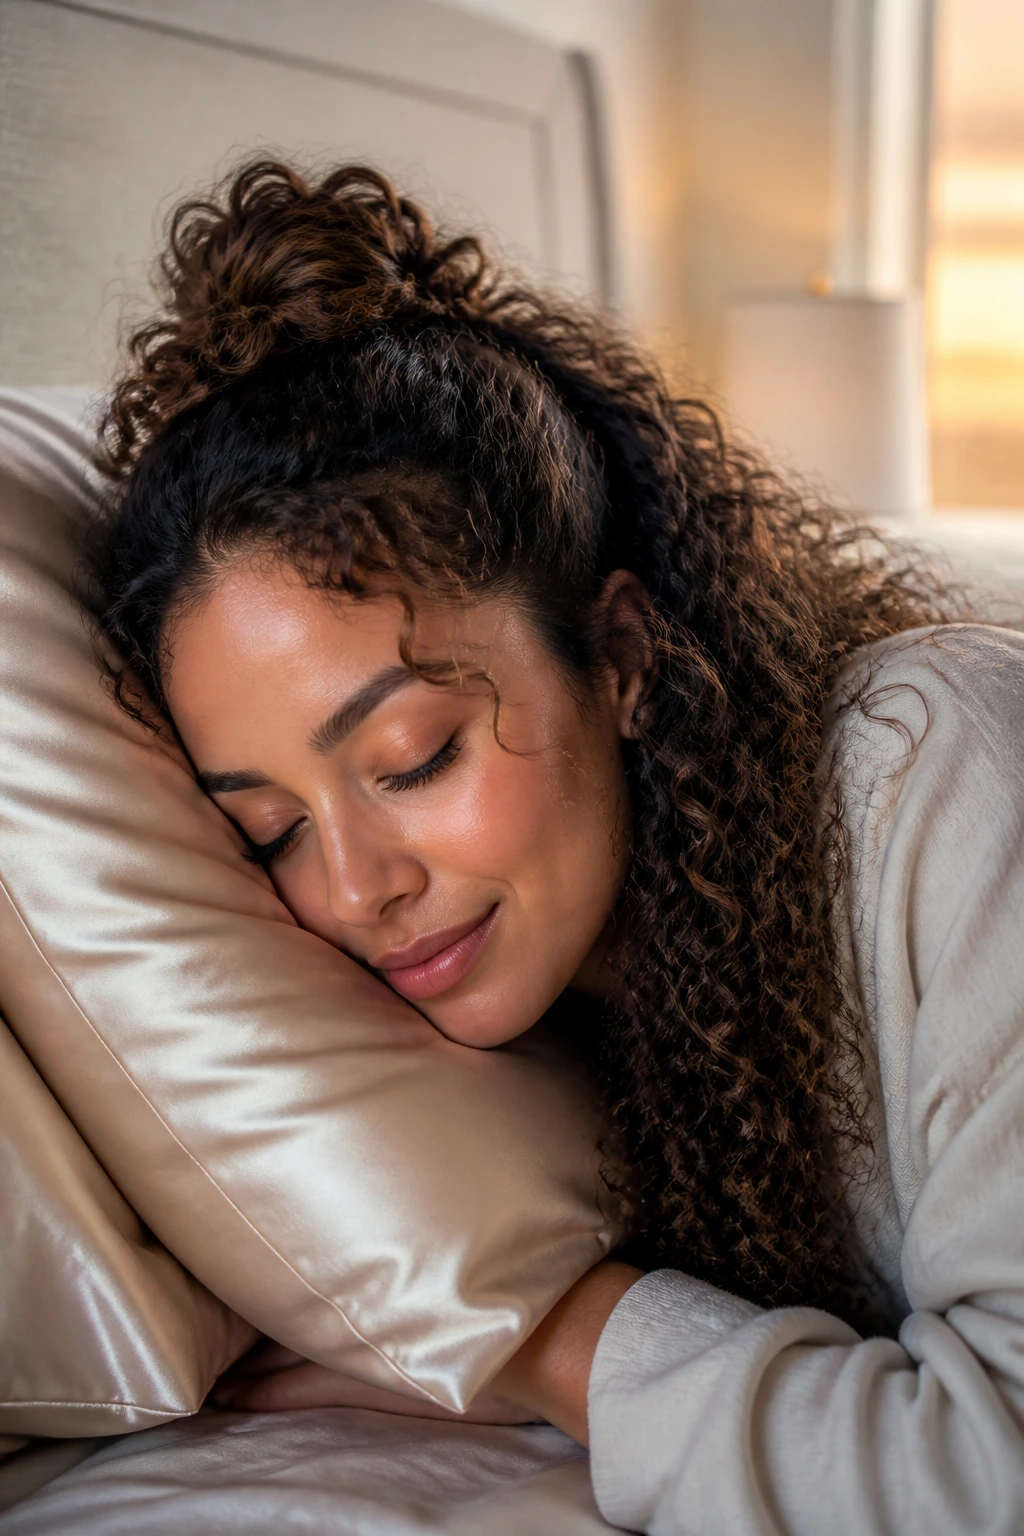
Most half-up curly styles hold best for one full day, then start asking for a small reset the next morning. That’s normal. The top section usually shows the first signs of wear, because it gets touched, flattened against pillows, and bent by whatever product you used to smooth it in the first place. The lower curls often survive better than the crown.
At night, protect the style with a satin scarf or a satin pillowcase. If the half-up section is loose, you can pineapple the lower curls gently and remove any decorative pins that poke when you lie down. For pinned or braided styles, do not sleep with sharp pins digging into your scalp. That’s the kind of thing that turns a decent style into a bad morning.
A quick refresh usually means a light mist at the roots, a little finger lift at the crown, and a tiny bit of leave-in on the ends if they look dry. If the top has gone limp, remake only the top section instead of starting from scratch. After two days, styles with a lot of cream or oil at the front often need a full reset because the base gets soft and slippery.
Dry shampoo can help at the roots if the hair is fine or the scalp feels heavy, but use a small amount. Curly hair can turn chalky fast if you overdo it.
Common Mistakes That Flatten the Crown or Frizz the Ends
Taking too much hair from the top: If the half-up section reaches too far down the back, the lower curls end up looking thin and the top gets weighed down. Keep the section roughly from temple to temple and stop there unless the style specifically calls for more.
Using the wrong elastic: Tight rubber bands create dents, breakage, and that annoying little puff of damage around the tie. Clear snag-free elastics or coated ties grip better and cause less fuss.
Styling bone-dry, tangled curls: The front frizzes, the pins snag, and the part looks rough. Mist the section lightly before pinning or braiding so the hair bends instead of tearing.
Overloading the crown with cream or oil: That makes pins slide and can flatten the lift you worked to create. Save the richer products for the lengths and keep the roots light.
Ignoring curl balance: A super-smooth crown with wild ends can look disconnected. A soft pin or a little curl refresh at the lower half helps the whole style feel like one idea instead of two separate ones.
Choosing accessories that are too small: Tiny clips and weak pins get lost in thick curls. Match the accessory to the density of the hair. If the hair is big, the hardware should be big enough to hold it.
Variations and Adaptations to Try
The Five-Minute Desk Version: Use a claw clip or one twist and one pin. This is for mornings when you need the front up fast and do not have the patience for braids, parts, or careful smoothing.
The Dress-Up Edit: Swap in pearl pins, a satin ribbon, or a polished barrette. The shape stays the same, but the finish changes immediately. This is the easiest way to turn a casual half-up into event hair.
The Low-Tension Protective Swap: Keep the half-up section looser and use twists instead of tight elastics. That reduces stress around the hairline, which is the better choice if your edges are fragile or the scalp feels tender.
The Short-Curl Version: Use smaller sections, more pins, and accessories with a stronger grip. Short curls often look best when the top section is compact and the lower curls stay close to the shoulders.
The Big-Texture Version: Lean into the puff, the volume, and the frizz a little. Use a high puff half pony or faux hawk shape, then let the texture do the heavy lifting. This version looks strongest when the hair has a lot of body.
The Humidity-Smart Version: Pick braid-based or twist-based styles and keep the front product-light but controlled. Humidity rarely ruins a well-pinned twist. It ruins loose ambition.
Frequently Asked Questions
How much hair should I take for a half-up style on curly hair?
Usually, from temple to temple is enough. If you take too much, the lower section looks thin and the crown gets heavy; if you take too little, the style can look accidental. On very dense hair, you can take a slightly deeper top section, but keep the front shape balanced.
Do these styles work on short curly hair?
Yes, but the section sizes need to shrink. Smaller twists, mini clips, tiny braids, and vintage-roll fronts work better than chunky buns or large puffs. If the hair barely reaches the crown, pinning and clipping usually beat tying.
What’s the best style for very thick curls or coils?
High puff half ponies, faux hawks, and strong twist styles usually hold best because they respect density instead of trying to flatten it. Thick hair needs hardware with grip and a shape that can carry weight.
How do I stop bobby pins from sliding out?
Push them into the hair with the wavy side facing down and open them against the direction of the section. A little product helps, but too much oil makes the pins slip faster. Cross two pins in an X if one alone is not enough.
Can I do a half-up style on day-two curls?
Yes, and sometimes day-two hair holds better than fresh wash-day hair. The hair has a little more texture, so clips and pins grip better. A light mist and a quick scrunch at the ends usually bring it back to life.
Should I stretch my curls first?
Only if you want a sleeker crown or more length showing. Stretching can make braids and top knots sit cleaner, but it can also erase some of the fullness that makes curly half-up styles look good in the first place.
What if my crown looks flat after I finish?
Lift the root with your fingertips, mist it lightly, and clip the section up for a few minutes while you do the rest of your makeup or clothes. A small root clip can help, too. Flat crowns usually mean the section was tied too tight or the product was too heavy.
Are these styles protective?
Some of them can be low-tension, but not all half-up styles are truly protective. Twists, loose braids, and soft puffs are gentler than tight ponytails or slicked-back looks. If protection is the goal, keep tension low and avoid repeated pulling at the same spots.
Can I wear a half-up style to bed?
Only if it’s loose and comfortable, and even then it may flatten by morning. A satin scarf or pillowcase is the smarter move. If you want the style to survive overnight, remove decorative pins and keep the tension soft.
The Half-Up Sweet Spot
Half-up curly styles sit in a very useful middle ground. They show off the texture, keep the face clear, and leave enough hair down that the style still feels like curls, not a helmet. That balance is why these looks work on so many curl types and why the same basic shape can feel casual, polished, playful, or dressed up with almost no extra effort.
The best version for you is the one that matches your curl density, your length, and how much time you want to spend in front of a mirror. Some days that means a claw clip and one twist. Some days it means braids, pearl pins, and a little patience. Either way, the structure should support the curls, not flatten them.
Pick the shape that fits the day, then let the texture do the rest.
