



A ponytail can look sharp after 50 — or it can look like you grabbed the nearest elastic and hoped for the best. The difference is usually not length. It’s placement, tension, and what you do to the hairline.
For women over 50, ponytail styles have to work with hair that may be a little finer, a little drier, and often a little more honest about its texture. That isn’t a problem. It’s useful information. A low wrapped tail hides an elastic that would otherwise look stark against silver strands; a crown-lift ponytail gives thinner hair some lift without turning it into a helmet; a side pony can soften a strong jaw or a pair of glasses in a way a tight high tail never will.
When a ponytail is done well, it clears the face, keeps the length visible, and makes the finish look intentional instead of rushed. The styles below lean on those details. Some are polished. Some are loose. None of them ask you to fight your own hair into submission.
Why These Ponytails Earn Their Keep
-
Less tugging at the temples: Low and mid placements keep pressure off the hairline, which matters if your scalp has gotten a little less forgiving over time.
-
Better shape around the face: Side parts, soft volume, and a few loose pieces stop the style from flattening your features.
-
Silver and gray look sharper with the right finish: A wrapped base or a clean part makes gray hair look deliberate, not unfinished.
-
Fine hair gets backup without heavy teasing: A little mousse, dry shampoo, or a small crown lift can make a thin ponytail look fuller without making it stiff.
-
Most of these styles reset fast: If the afternoon gets windy or the top goes flat, you can fix the shape with one brush, one elastic, and a couple of pins.
-
They work with real life: Glasses, earrings, collars, humidity, errands, dinner plans — these styles are built to handle all of it without falling apart.
1. The Low Wrapped Ponytail
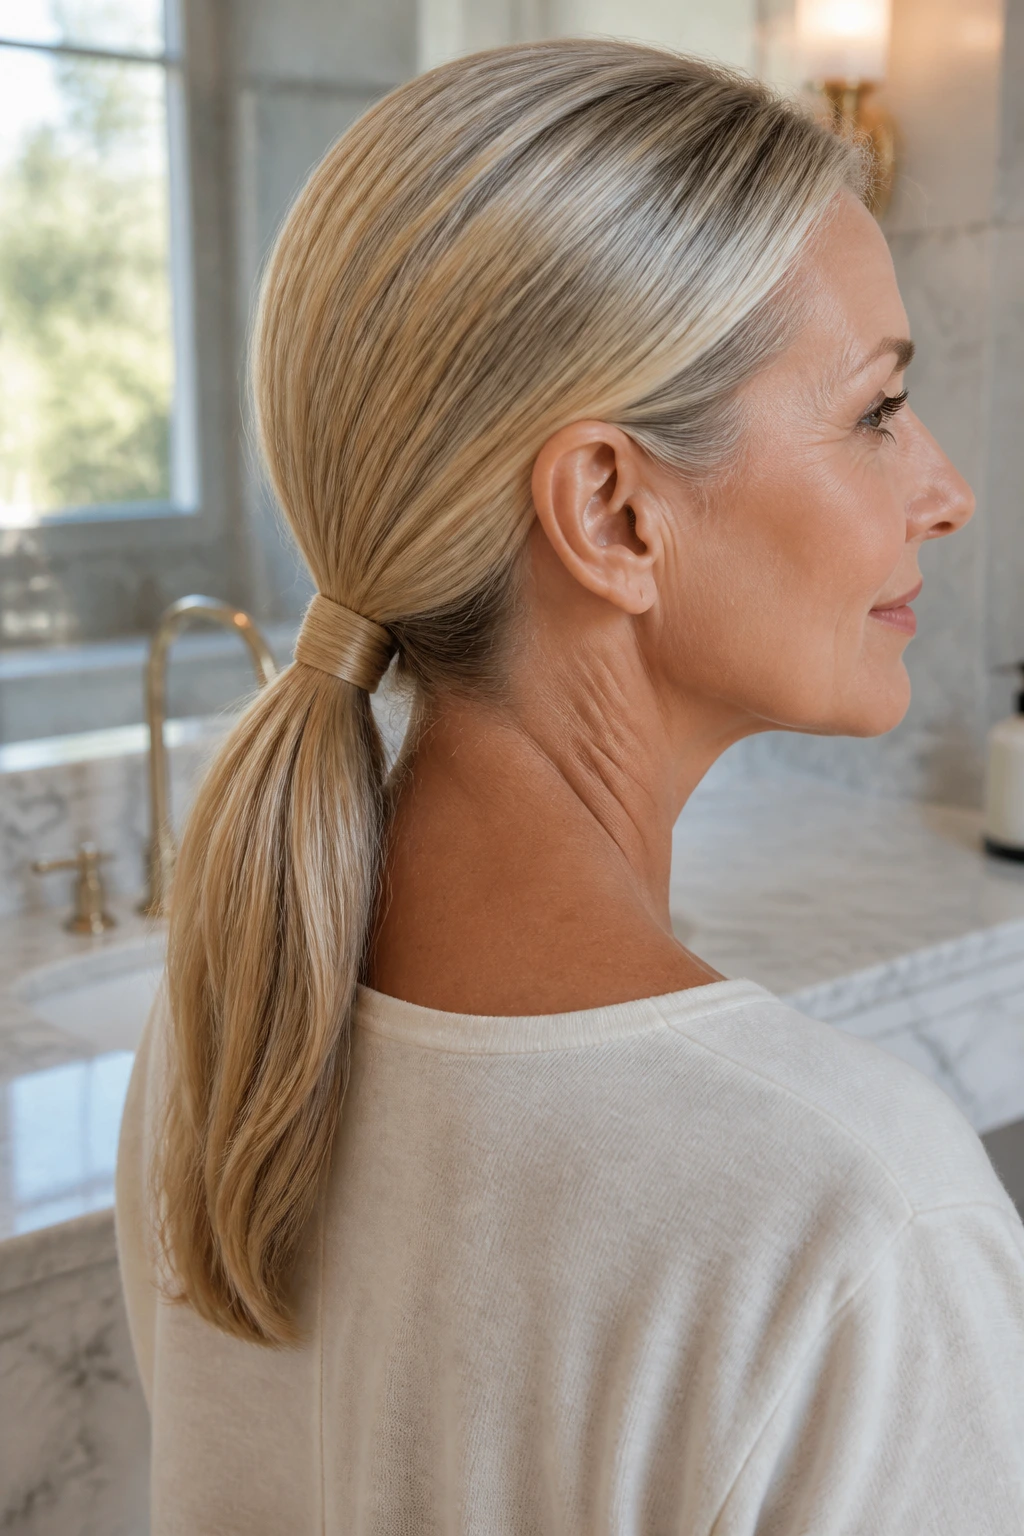
A low wrapped ponytail is the cleanest answer when you want polish without strain. It sits at the nape, hides the elastic with a strand of hair, and leaves the neck looking long instead of crowded.
Why It Works:
The low placement keeps tension off the crown, which is a gift if your hairline is more sensitive than it used to be. The wrapped base also gives even fine hair a finished look because you don’t see a thick black band at the back.
Key Products:
- 1 smoothing cream, pea-sized amount — keeps flyaways down without grease.
- 1 snag-free elastic — holds the ponytail without chewing up the ends.
- 2 bobby pins — one to secure the wrap, one as backup.
- Light shine spray — use only on the tail, not the roots.
Quick Steps:
- Make a clean side or center part and brush the hair low at the nape.
- Gather it with one hand at the base of your neck and smooth the top lightly with the other.
- Secure with an elastic, then take a ½-inch strand from underneath and wrap it around the band.
- Pin the wrap underneath the tail and mist the length with a little shine spray.
Tools for This Look:
- Tail comb for a crisp part
- Paddle brush for smoothing
- 2-3 bobby pins
- Small elastic
How to Wear It:
This one sits beautifully with a blouse collar, a blazer, or a turtleneck that would fight a higher ponytail. If you wear earrings, let them do the talking — the haircut stays quiet and neat.
Pro Tips for This Style:
- Wrap the hair strand while the elastic is still slightly visible; it hides better that way.
- If your ends are dry, curl just the last 2 inches under with a flat iron.
- Keep the ponytail low enough that it does not pull when you turn your head.
Variations on This Look:
- Soft Side-Part Wrap: shift the part a little off-center for a gentler line around the forehead.
- Twisted Wrap: twist the tail strand before wrapping it for a more dressed-up finish.
Common Mistakes to Avoid:
- Too tight at the crown: if the top looks strained, move the ponytail lower and loosen the brush-out.
- A bulky wrap strand: use a narrow piece of hair or the wrap will look clumsy.
- Skipping the finish spray: a light mist keeps tiny flyaways from breaking the line at the back.
2. The Soft Side Ponytail
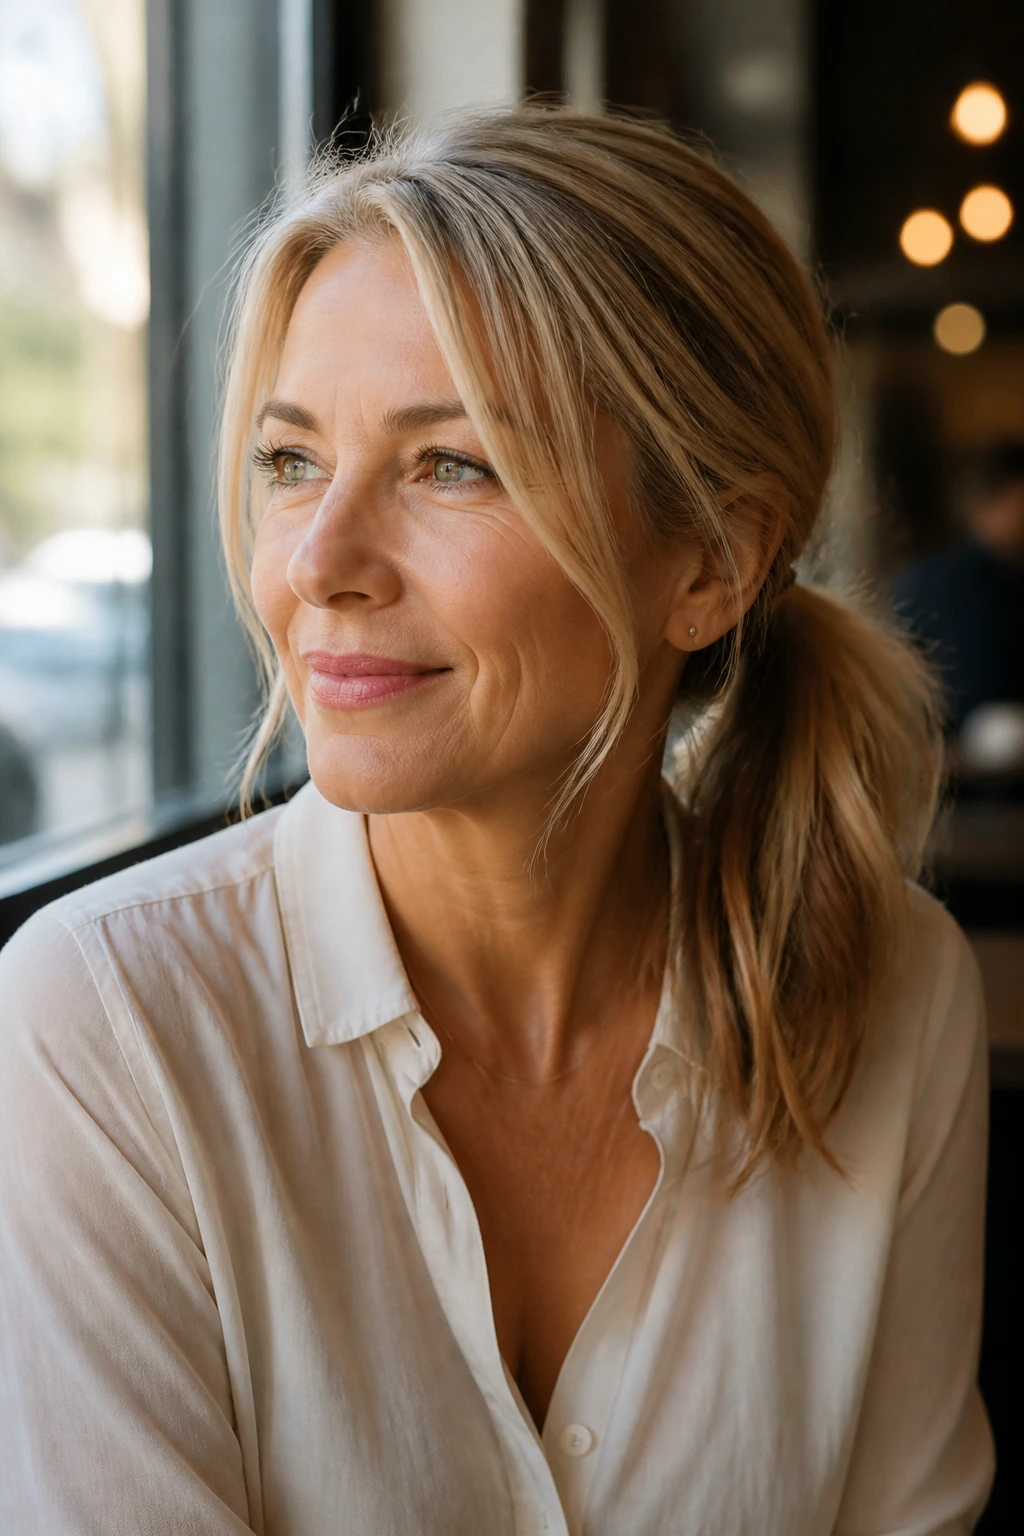
A side ponytail can look youthful in the best way — not childish, just relaxed and easy on the face. The trick is keeping it low enough and loose enough that it feels intentional.
Why It Works:
When the ponytail sits just behind one ear or at the base of the neck on one side, it creates diagonal lines that soften the jaw and neck. That shape is especially flattering if your hair is layered or if one side of your face carries more fullness than the other.
Key Products:
- 1 flexible-hold mousse — gives lift without crunch.
- 1 medium elastic — enough grip for the side weight.
- A few bobby pins — useful if layers escape.
- Texture spray — optional, but nice if the tail looks too flat.
Quick Steps:
- Part the hair slightly off-center and brush it toward the side you prefer.
- Anchor the ponytail low, behind the ear or at the upper nape.
- Smooth the top with your palms so the hair keeps movement.
- Pull out one or two face-framing pieces and let them fall naturally.
Tools for This Look:
- Paddle brush
- Tail comb
- 2-4 bobby pins
- Optional curling wand for soft bends
How to Wear It:
This style likes open necklines and simple necklaces. It also works well with glasses because the asymmetry keeps the face from looking boxed in.
Pro Tips for This Style:
- Keep the side part soft, not severe. Hard parts can make the look feel dated.
- If your layers are short, pin the shortest ones under the tail instead of trying to force them into the elastic.
- A slight wave in the tail keeps the style from looking too flat.
Variations on This Look:
- Loose Hollywood Side Tail: add soft bends through the length for a dressier feel.
- Pinned-Back Side Tail: tuck one side behind the ear and pin it flat for a cleaner line.
Common Mistakes to Avoid:
- Placing it too high: that turns the style into a school-picture ponytail fast.
- Ignoring layers: flyaway pieces at the side need either pinning or a deliberate curl.
- Over-smoothing the front: if the top is too flat, the style loses its softness.
3. The Crown-Lift Ponytail
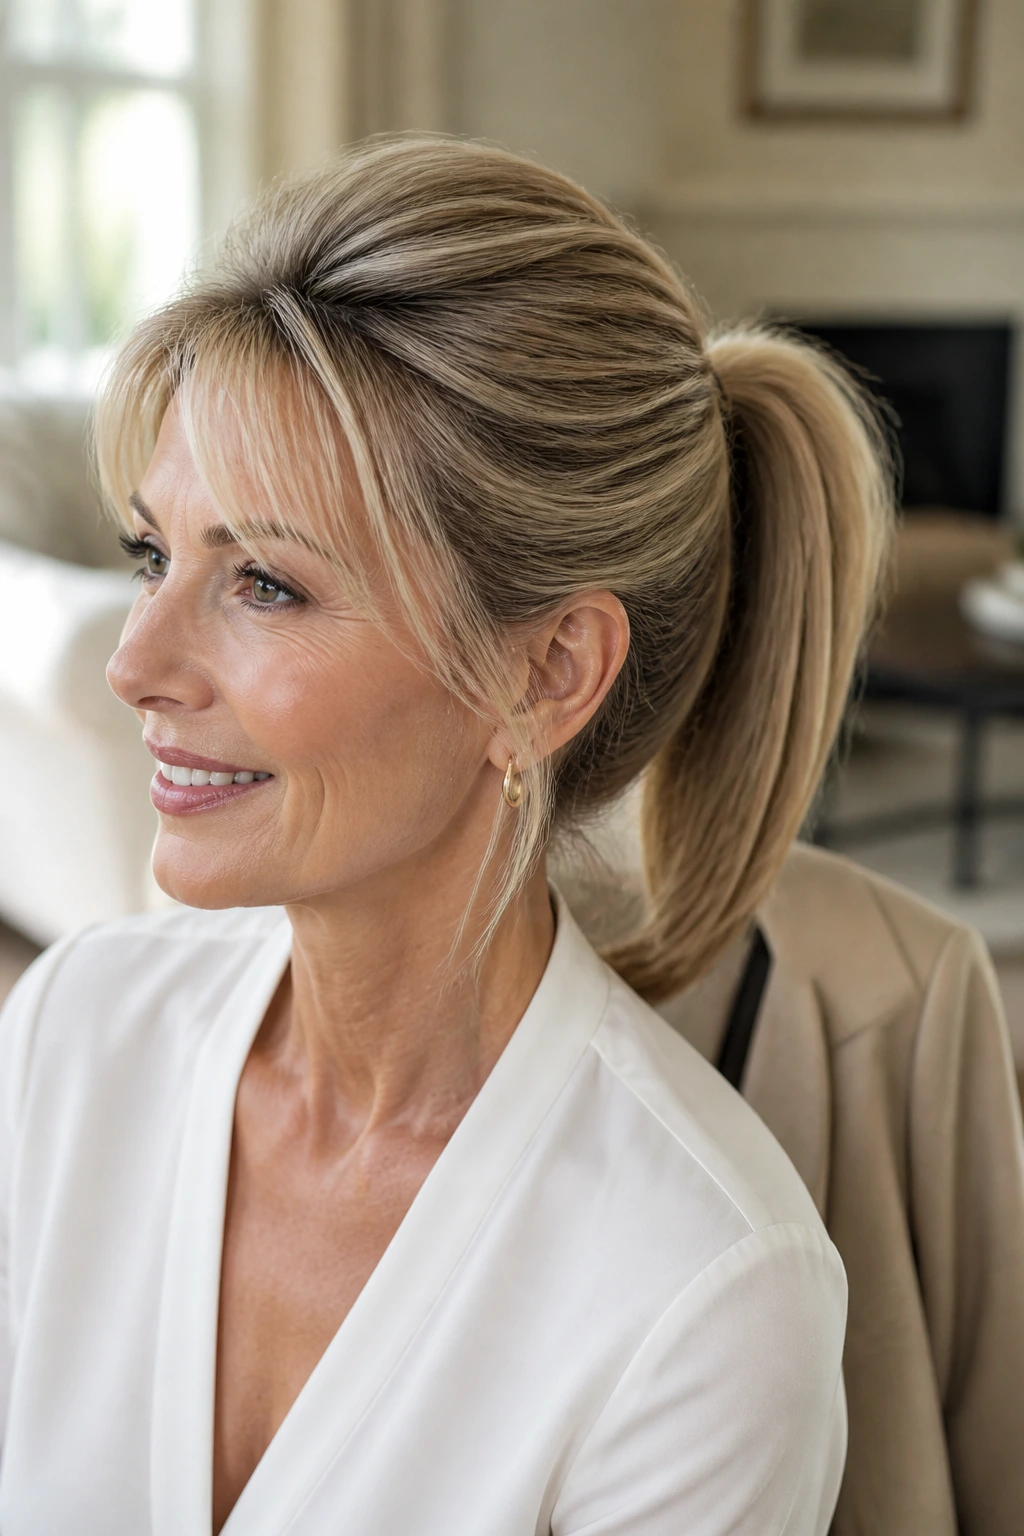
If your hair has lost a little height at the roots, this is the ponytail that quietly fixes it. You build lift at the crown first, then secure the tail low or mid-height so the top of the head doesn’t collapse.
Why It Works:
A modest crown lift makes the face look longer and the ponytail look fuller, especially on fine hair. It also keeps the style from clinging to the scalp in a way that can read severe.
Key Products:
- Dry shampoo — gives grip and a little grit.
- Teasing comb — use lightly, not like you’re building a nest.
- Medium elastic — holds the tail without slipping.
- Light hairspray — for the top only.
Quick Steps:
- Spray dry shampoo at the roots, especially at the crown.
- Lift the crown section and backcomb the underside once or twice.
- Smooth just the outer layer so it still looks clean.
- Gather the ponytail at mid-height and secure it.
- Pinch the crown gently with your fingers to keep the lift.
Tools for This Look:
- Teasing comb
- Round brush
- Elastic
- Hairspray
How to Wear It:
This is the one to use when you want a little height with a blazer, a button-down shirt, or anything that looks a bit plain on its own. The crown lift carries the outfit more than the hair length does.
Pro Tips for This Style:
- Tease only the hidden underside; leave the top layer smooth.
- Use dry shampoo before you need it, not after the hair is already limp.
- A small amount of root powder works well if your hair is very fine.
Variations on This Look:
- Soft Bouffant Tail: increase the crown lift and keep the ponytail low.
- Mid-Lift Office Version: keep the tease subtle and the tail tighter.
Common Mistakes to Avoid:
- Teasing too much hair: the top puffs out while the tail stays thin.
- Brushing the lift away: once it’s shaped, smooth with hands, not a brush.
- Using oily serum at the roots: it kills the lift in minutes.
4. The Sleek Mid-Ponytail

A mid ponytail sits right in the middle lane — not severe, not playful, just clean. It’s the style you use when you want the face open and the silhouette tidy.
Why It Works:
The middle placement keeps the neck free without pulling everything into a high, bouncy tail. On mature hair, that matters because it avoids exposing dry ends right at the face while still giving a lifted shape.
Key Products:
- Smoothing cream — a small dab only.
- Firm elastic — this style needs support.
- Tail comb — for the part and the surface.
- Hairspray — light mist, not shellac.
Quick Steps:
- Part the hair cleanly and brush it back to the middle of the head.
- Decide whether you want the tail at ear level or a touch higher.
- Secure with an elastic and smooth any bumps with the tip of a comb.
- Wrap a thin strand around the band if you want a more finished look.
Tools for This Look:
- Paddle brush
- Tail comb
- Elastic
- 1-2 bobby pins
How to Wear It:
It pairs well with tailored clothes, simple hoop earrings, and a strong lip color. On busy days, this is the ponytail that says you paid attention without looking overworked.
Pro Tips for This Style:
- Put product on your palms first, then smooth the top.
- If the hair is frizzy, use a toothbrush-sized brush with a tiny bit of cream around the hairline.
- Keep the tail centered unless your face shape prefers a slight offset.
Variations on This Look:
- Glossy Mid-Tail: use a shine spray on the length after the elastic is in.
- Textured Mid-Tail: rough up the tail with fingers for a less formal finish.
Common Mistakes to Avoid:
- Placing it too high for a sleek style: it starts looking sporty instead of refined.
- Overloading with serum: the hair turns stringy fast.
- Leaving the top bumpy: if the surface is messy, the whole style reads unfinished.
5. The Textured Wavy Ponytail
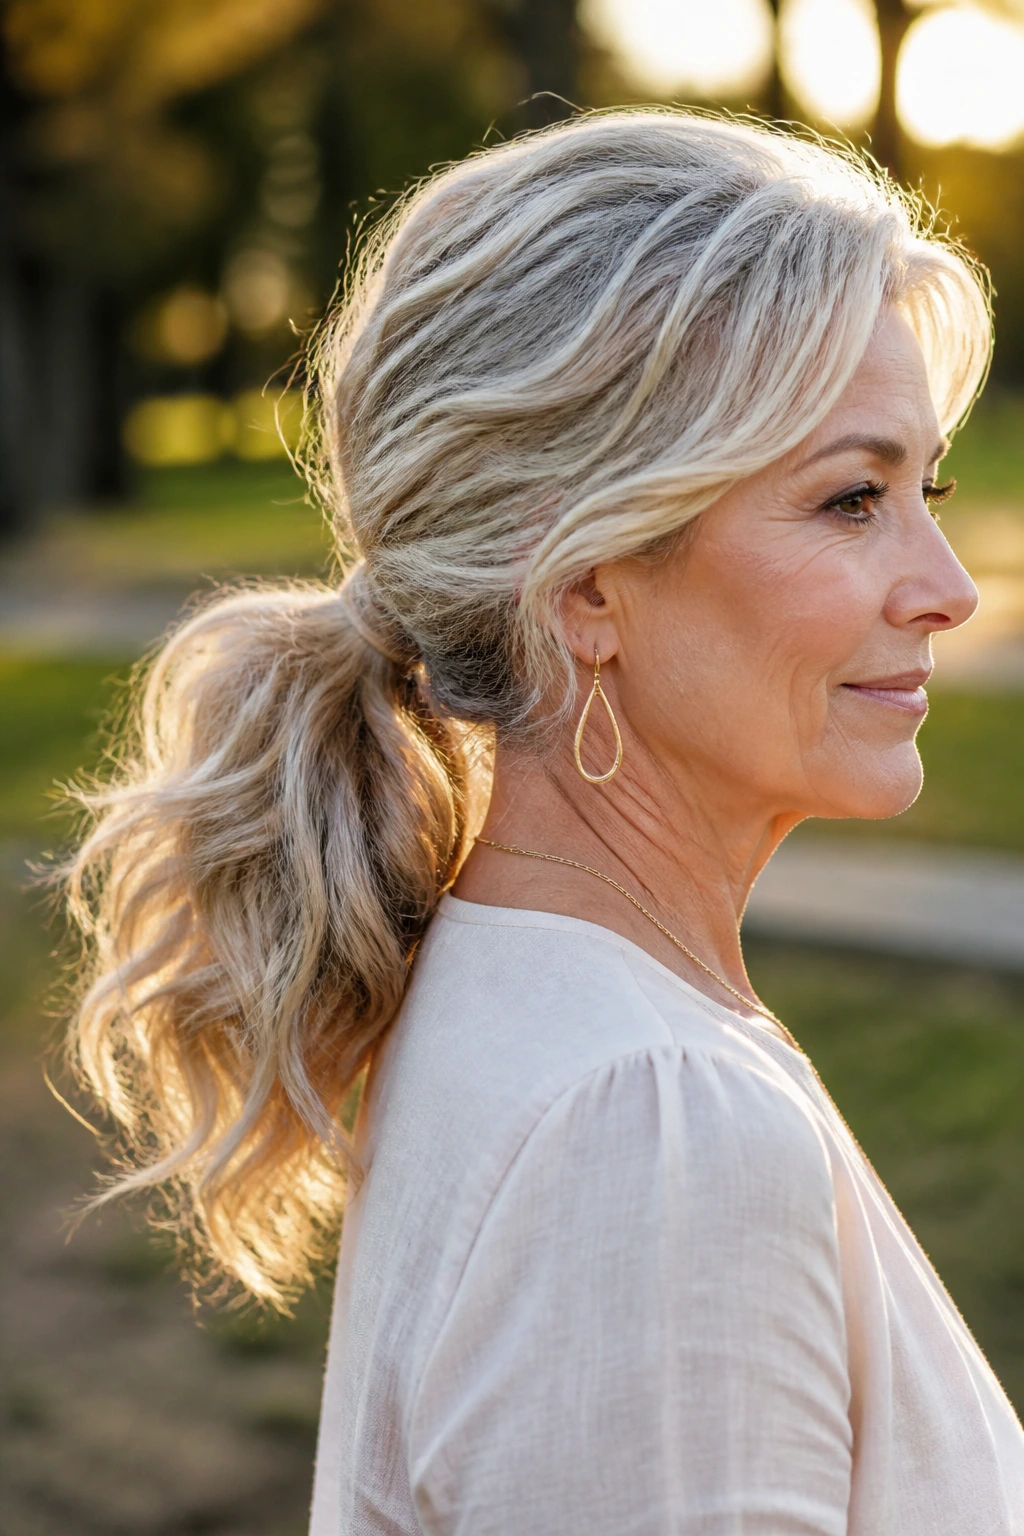
This one has a little movement and a little air. It’s not beach hair in the cliché sense; it’s a ponytail with bends, softness, and enough shape to keep the ends from hanging like a rope.
Why It Works:
Texture gives body to hair that may have thinned at the ends or lost some bounce. It also makes silver strands and highlights show up in a better way because the bends catch light differently.
Key Products:
- Wave spray or texturizing mist — light, not sticky.
- 1-inch curling iron or wand — optional, but helpful.
- Heat protectant — if you’re using heat, use this.
- Flexible-hold spray — keeps the wave soft.
Quick Steps:
- Add heat protectant and create loose bends through the lower half of the hair.
- Let the waves cool completely before gathering them.
- Pull the hair into a low or mid ponytail and secure it softly.
- Finger-separate the tail so the texture stays visible.
Tools for This Look:
- Curling wand
- Sectioning clips
- Elastic
- Wide-tooth comb
How to Wear It:
This works with sweaters, knit tops, and anything that looks too stiff with a sharp ponytail. The texture softens the whole outfit, which is handy if you don’t want your hair to compete with your clothes.
Pro Tips for This Style:
- Curl away from the face on the top layers for a more flattering bend.
- Keep the roots cleaner than the ends; dirty roots plus waves can look heavy.
- A mist of salt spray at the tail gives shape without crunch.
Variations on This Look:
- Soft Barrel Wave Tail: use larger sections and a bigger iron for smoother bends.
- Tousled Nape Tail: concentrate waves only from the ear down.
Common Mistakes to Avoid:
- Curling the whole head too tightly: the ponytail can start looking dated.
- Brushing out the waves too hard: finger-comb instead.
- Using too much product: the texture should move.
6. The Bubble Ponytail
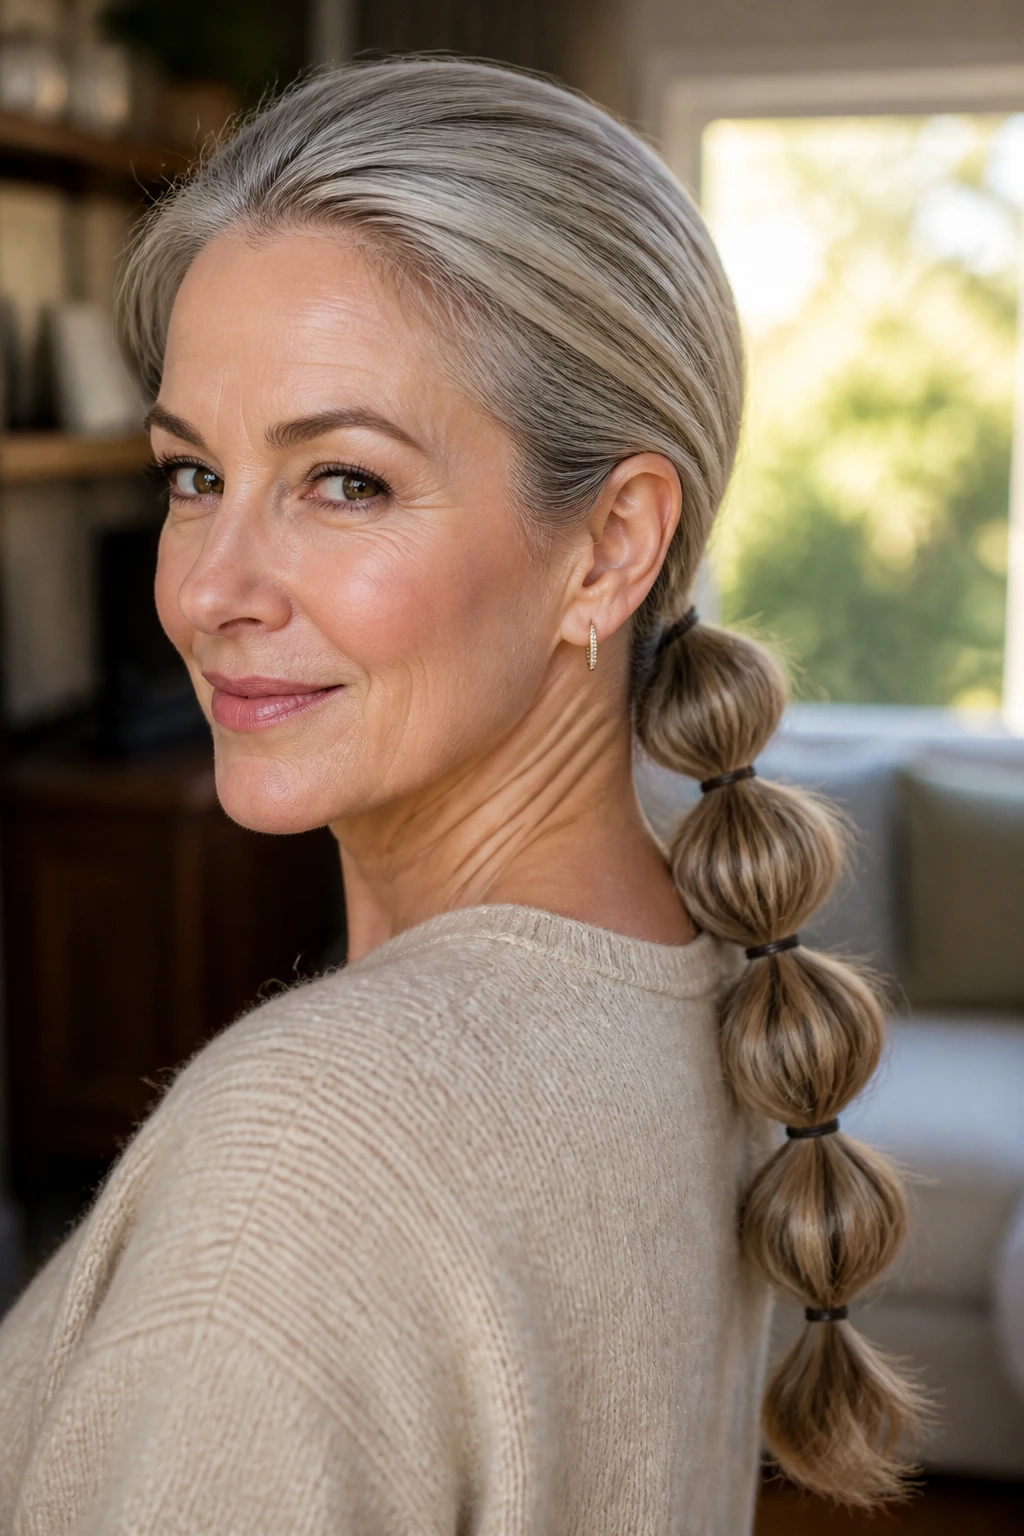
Bubble ponytails sound playful, but on adult hair they can look chic when the spacing is neat and the bubbles are slightly loose. The shape is what sells it.
Why It Works:
Sectioning the tail with small elastics gives the illusion of thicker, fuller hair because each bubble adds width. That makes it a smart choice when the tail itself feels a little thin at the ends.
Key Products:
- 4-8 clear elastics — depending on length.
- Light texturizing spray — helps the sections puff.
- Small bobby pins — optional for hiding seams.
- Smoothing cream — only at the crown.
Quick Steps:
- Secure the ponytail at low or mid height.
- Add a second elastic a few inches down the length.
- Gently pull each section outward to round it into a bubble.
- Repeat every 2-3 inches until you reach the end.
Tools for This Look:
- Clear elastics
- Tail comb
- Paddle brush
- Optional hairspray
How to Wear It:
Wear this when you want a ponytail that feels modern but not fussy. It looks especially good with simple tops because the shape itself does the work.
Pro Tips for This Style:
- Keep the bubbles symmetrical or the style starts to wobble.
- Use smaller sections if your hair is short; huge bubbles can collapse.
- A tiny tug on each section is enough — overpulling makes the tail lumpy.
Variations on This Look:
- Low Bubble Tail: use fewer, larger bubbles for a softer look.
- Ribbon Bubble Tail: thread a ribbon through the elastics for a dressier finish.
Common Mistakes to Avoid:
- Spacing the elastics too far apart: the bubbles lose their shape.
- Puffing too aggressively: you want round sections, not exploded ones.
- Using slippery serum on the length: the bubbles slide apart.
7. The Braided Base Ponytail
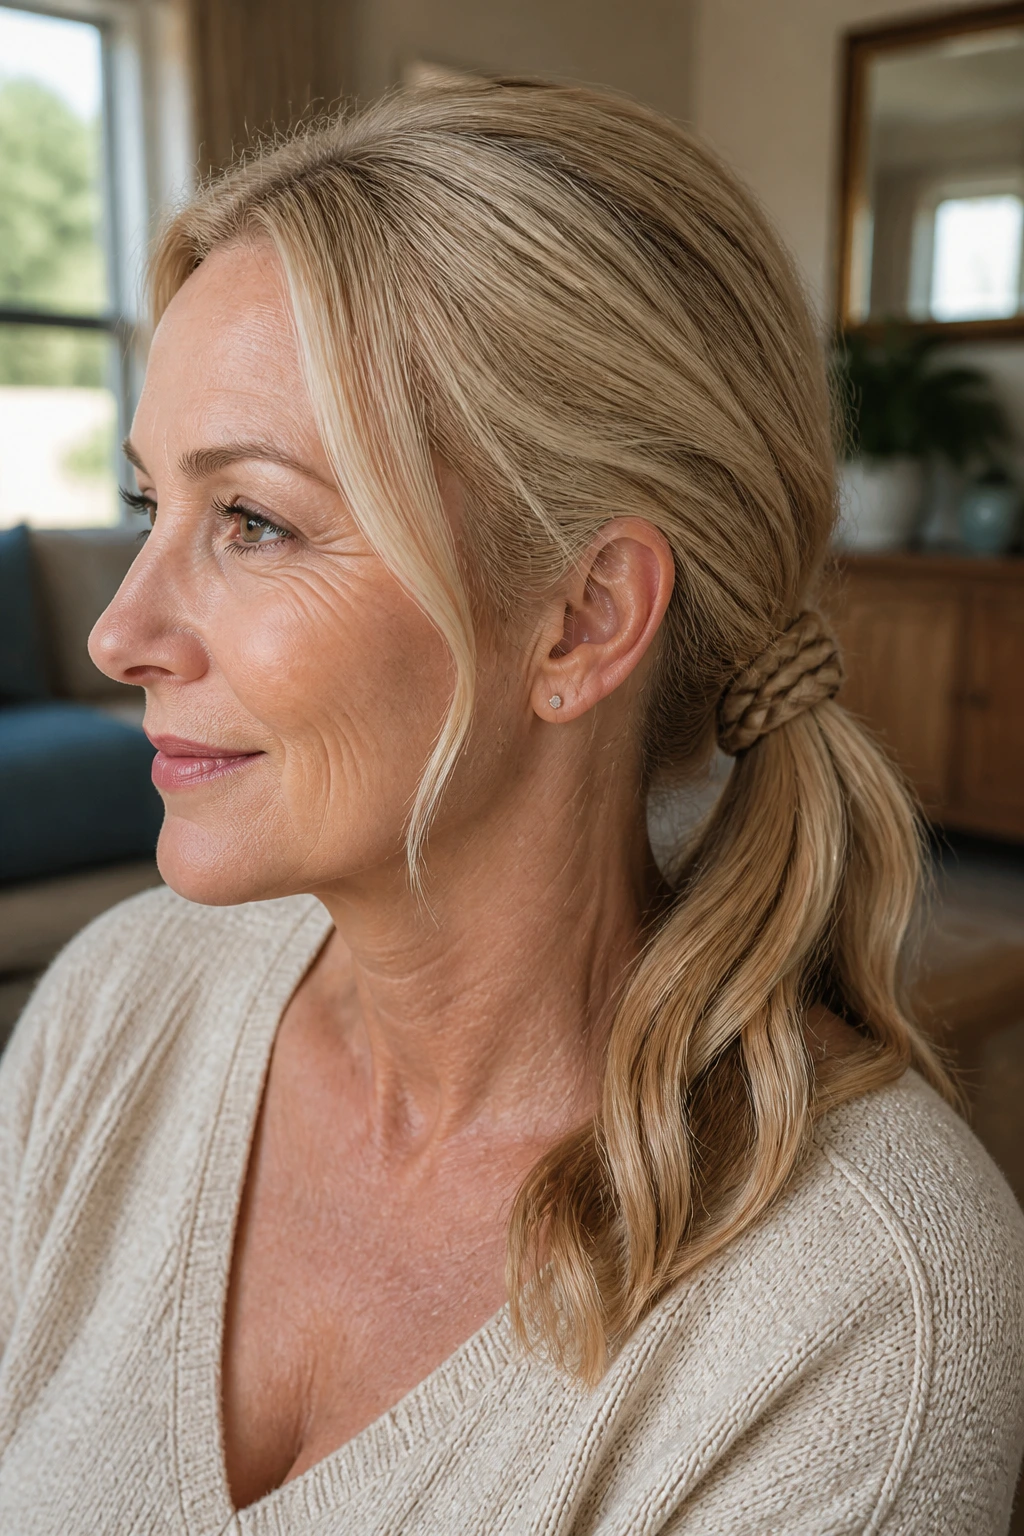
A braid at the base of the ponytail does two things: it hides the elastic and makes the whole style look more thought-out. It also works well when the top needs structure and the tail needs something to anchor it.
Why It Works:
Braiding near the base adds visual texture without demanding a full braid hairstyle. That’s useful if you want some interest but still want the easy wear of a ponytail.
Key Products:
- 1 elastic for the ponytail base.
- Small clear elastic for the braid, if needed.
- A bit of styling cream — helps the braid hold.
- 2 bobby pins — to tuck the braid end.
Quick Steps:
- Gather the hair into a low or mid ponytail and secure it.
- Braid a small section from the tail or from one side near the base.
- Wrap that braid around the elastic.
- Pin it underneath so only the woven texture shows.
Tools for This Look:
- Tail comb
- Small elastic
- Bobby pins
- Optional braid spray
How to Wear It:
This style reads a little more detailed, so it works well when the rest of your outfit is simple. It also helps if you want a ponytail that feels more finished for a dinner out.
Pro Tips for This Style:
- Keep the braid small; a huge braid can overpower the tail.
- If your hair is layered, braid the longest section and pin the shorter bits flat.
- Let a few small pieces live around the temples for softness.
Variations on This Look:
- Side Braid Wrap: braid from one temple into the tail base.
- Three-Strand Halo Base: braid a thin top section before gathering the rest.
Common Mistakes to Avoid:
- Braiding too loosely: the braid slides apart.
- Using too much product: the braid gets slick and won’t stay put.
- Letting the braid sit bulky at the nape: pin it flat.
8. The Scarf-Tied Ponytail
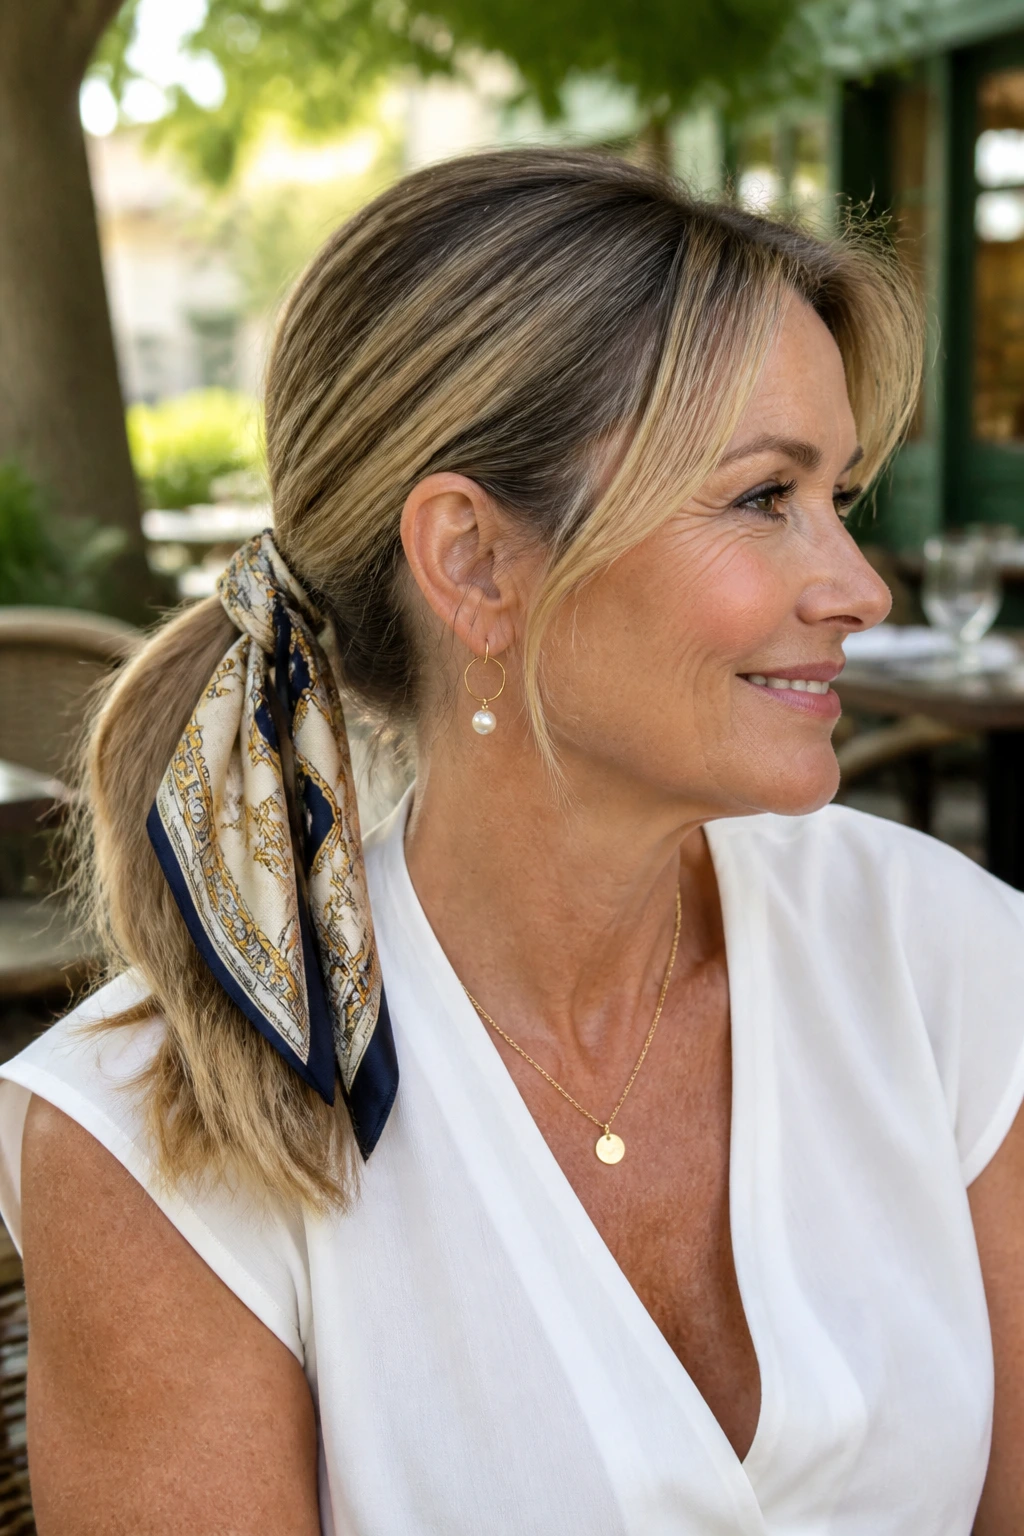
A scarf changes the mood fast. It adds color, covers the elastic, and gives a plain ponytail a little personality without needing much heat or product.
Why It Works:
A silk or satin scarf can protect the hairline and break up the look of a thin tail. It also looks especially nice with gray, white, or highlighted hair because the fabric and the hair catch light differently.
Key Products:
- 1 silk or satin scarf — long enough to tie.
- 1 elastic — underneath the scarf.
- Smoothing cream — optional, but helpful.
- 1 bobby pin — to secure the scarf tail if needed.
Quick Steps:
- Make a low or mid ponytail and secure it.
- Fold the scarf into a narrow band or tie it as-is.
- Wrap it around the elastic and knot it once or twice.
- Let the scarf ends hang beside the tail or tuck them neatly.
Tools for This Look:
- Elastic
- Scarf
- Bobby pin
- Small comb
How to Wear It:
This is a strong match for summer dresses, linen shirts, or plain black tops that need a little lift. The scarf becomes the accessory, so you can keep the rest simple.
Pro Tips for This Style:
- Choose a scarf with some grip; slippery silk can slide if the knot is weak.
- Keep the tail low if the scarf is large.
- If your hair is very fine, put the scarf over a wrapped base for more structure.
Variations on This Look:
- Neckerchief Knot: tie the scarf in a smaller knot for a neat finish.
- Retro Bow Tail: leave the scarf ends long and bow them off-center.
Common Mistakes to Avoid:
- Scarf too bulky for the hair length: it swallows the ponytail.
- Knot too loose: the scarf drifts down the shaft.
- Busy scarf plus busy outfit: too much pattern fights for attention.
9. The Rope-Twist Ponytail
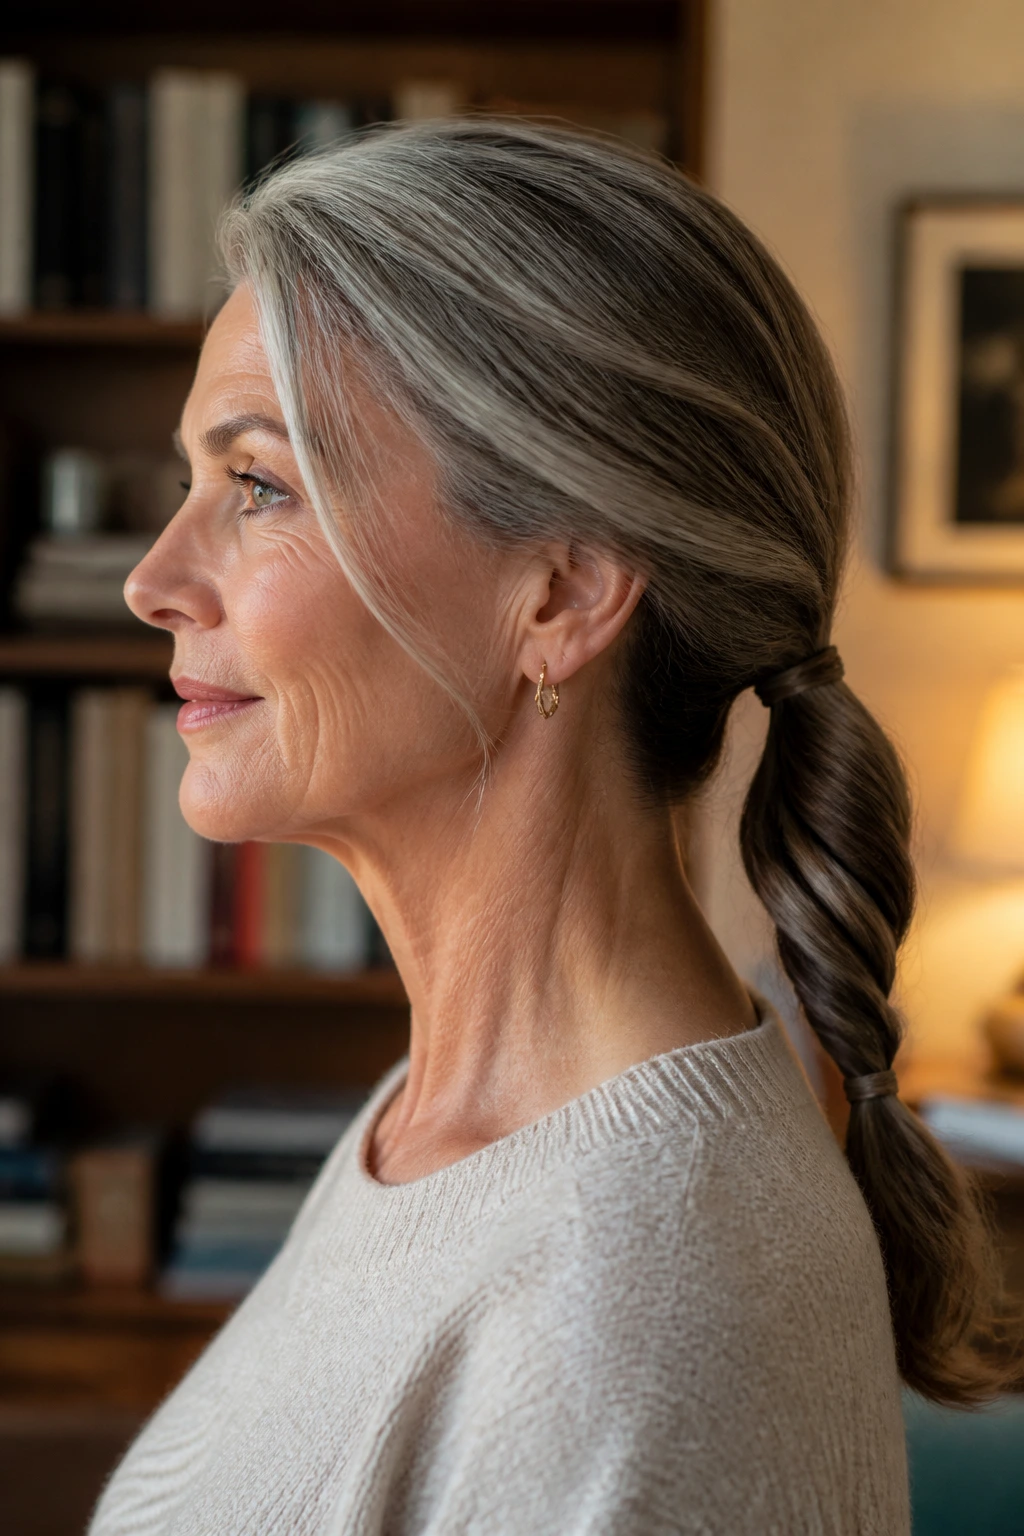
A rope twist gives a ponytail a subtle spiral that looks more complicated than it is. It’s one of those styles that makes people ask if you spent much longer on your hair than you did.
Why It Works:
Twisting two sections together adds texture and keeps the tail tidy without using a braid. On hair that has some wave or thickness, the rope effect makes the length look denser.
Key Products:
- 1 elastic for the base.
- A small amount of styling cream — just enough for control.
- 2 sectioning clips — optional but useful.
- Light spray — to stop frizz.
Quick Steps:
- Gather the hair into a low or mid ponytail.
- Split the tail into two equal sections.
- Twist each section clockwise, then twist them around each other counterclockwise.
- Secure the end with a tiny elastic.
Tools for This Look:
- Tail comb
- Two small elastics
- Clips
- Optional texture spray
How to Wear It:
It looks best with simple tops and structured fabrics because the hair itself carries the detail. If you need a ponytail that reads neat but not stiff, this is a strong one.
Pro Tips for This Style:
- Twist the sections firmly before wrapping them together or they’ll unravel.
- If your hair is layered, keep the twist loose enough that short pieces can hide.
- A tiny bit of cream at the end helps the rope stay smooth.
Variations on This Look:
- Loose Rope Tail: leave the twist softer for a casual finish.
- Twisted Crown Rope: start the twist from one side near the part and carry it back.
Common Mistakes to Avoid:
- Uneven sections: the rope ends up lopsided.
- Over-smoothing the top: the texture of the rope should be the point.
- Tightening the twist too much: the ponytail can look ropey in a bad way, not a good one.
10. The Half-Up Ponytail
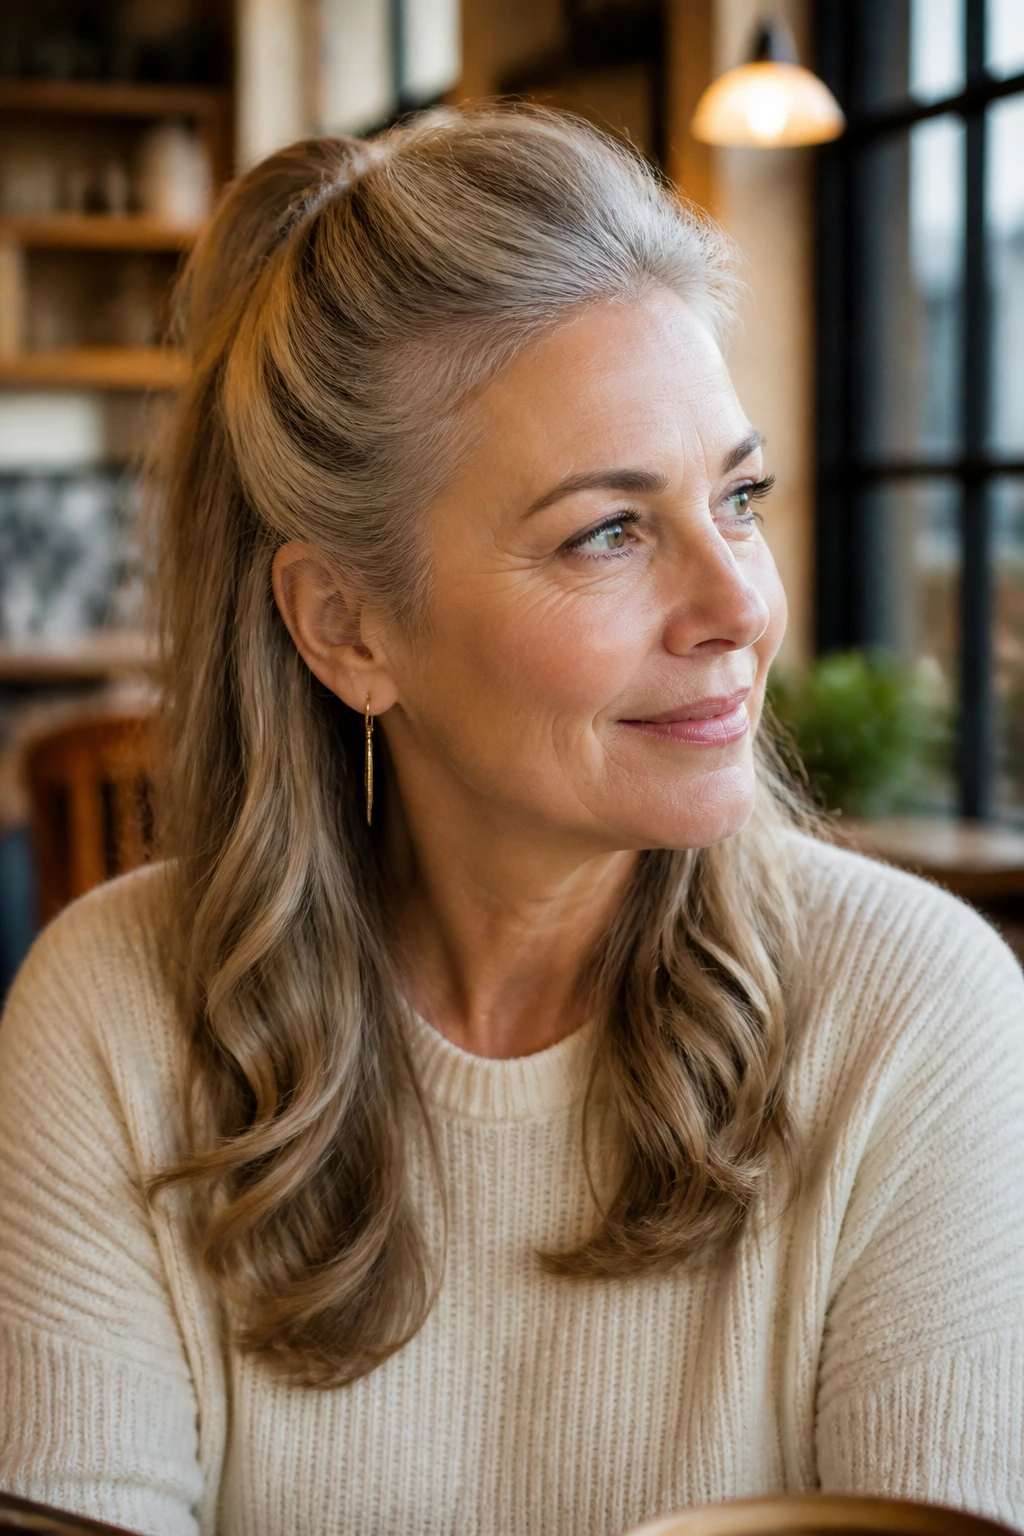
A half-up ponytail keeps the hair off the face while letting the rest fall. It’s practical, flattering, and especially useful if the crown needs lift but the ends still deserve to show.
Why It Works:
The lifted top section gives height without exposing every strand. That makes it a useful move for hair that’s fine at the front or for styles where the lower length is wavy, curly, or a little dry and you want to leave it alone.
Key Products:
- 1 small elastic.
- Root-lift spray or mousse.
- 2 bobby pins.
- Optional curling iron for the loose lower section.
Quick Steps:
- Section off the top half from temple to temple.
- Lightly backcomb the crown if you need lift.
- Secure the top into a small ponytail and smooth the section above it.
- Leave the lower hair loose or wave it for shape.
Tools for This Look:
- Tail comb
- Small elastic
- Brush
- Clips
How to Wear It:
It works nicely on casual days, but it can also be dressed up with earrings and a neat blouse. The lower hair keeps the style from feeling too tight or severe.
Pro Tips for This Style:
- Keep the sectioning line curved rather than straight; it looks softer.
- If your hair is short, use a tiny claw clip under the elastic for extra hold.
- Curl the loose ends away from the face to open the cheekbones.
Variations on This Look:
- Small Crown Pony: make the top section tighter and neater.
- Loose Half-Tail: keep the top soft and airy with fewer pins.
Common Mistakes to Avoid:
- Taking too much hair for the top section: the lower half looks thin.
- Making the top too tight: the style loses its lift.
- Leaving the divide visible and harsh: soften the line with fingers.
11. The Side-Swept Ponytail
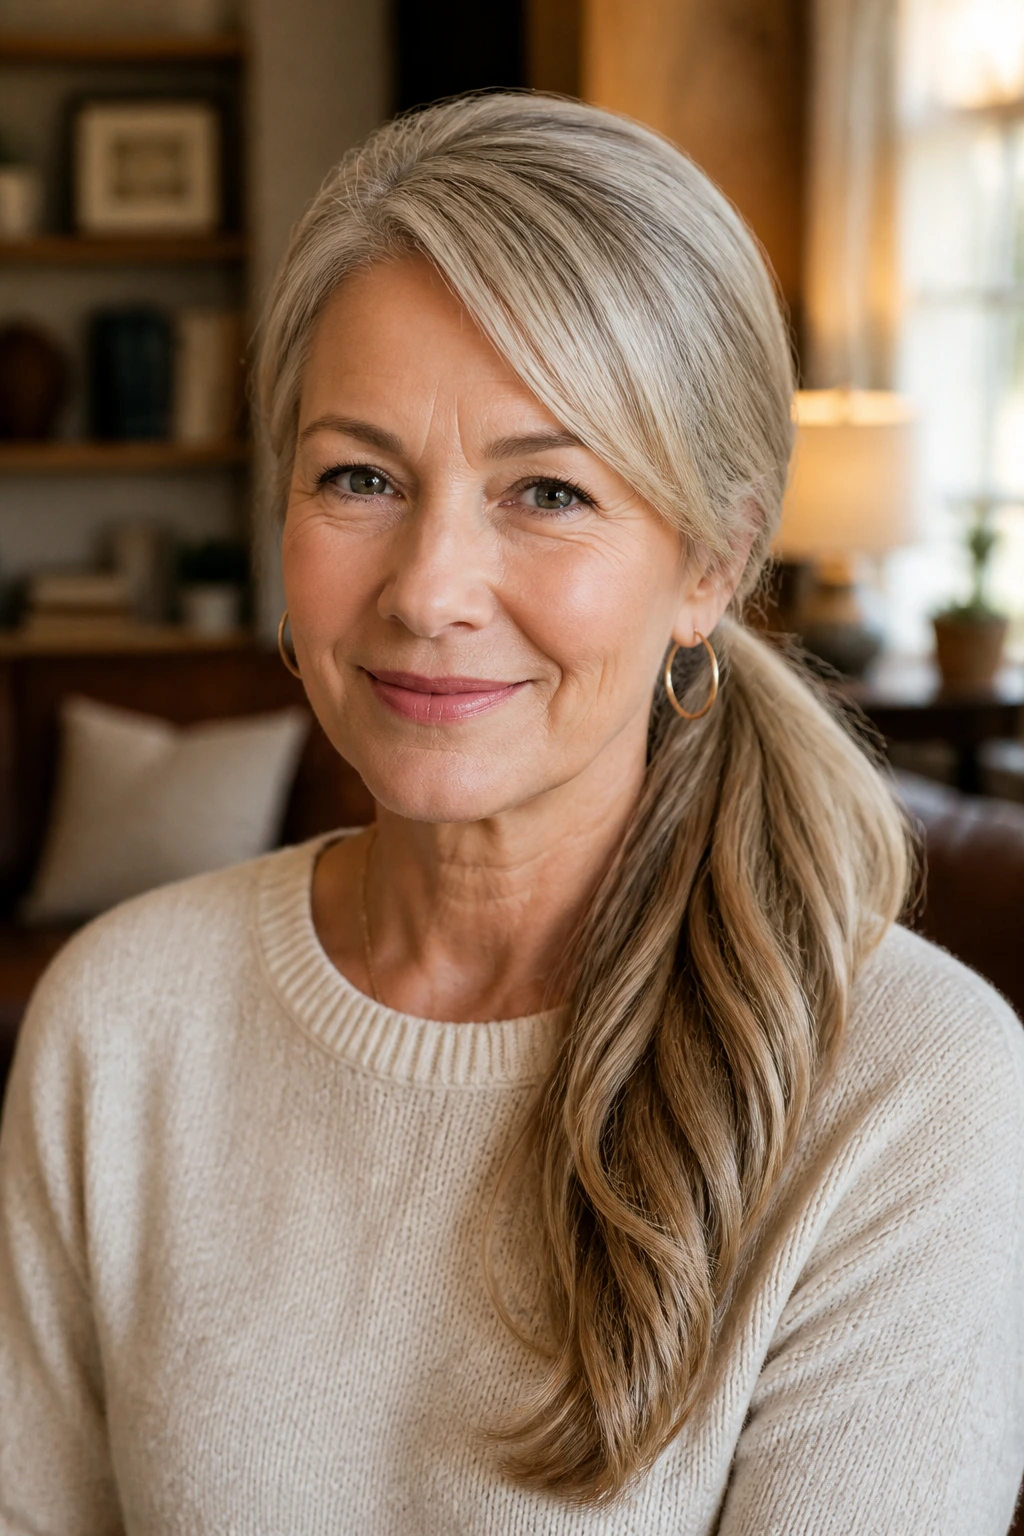
This one starts with a deep side part and ends with the tail draped over one shoulder. It has a little drama, but not the costume kind.
Why It Works:
A side-swept ponytail creates a diagonal line that’s flattering on almost every face shape. It also keeps hair away from one side of the neck, which can be useful if you wear longer earrings or a broader collar.
Key Products:
- Smoothing cream or light gel.
- 1 strong elastic.
- Bobby pins for the heavier side.
- Shine spray for the front.
Quick Steps:
- Create a deep side part while the hair is still damp or lightly misted.
- Smooth the hair toward the lower side of the head.
- Secure the ponytail just behind the ear or at the nape.
- Pull the tail forward over one shoulder and shape the front pieces.
Tools for This Look:
- Tail comb
- Paddle brush
- Elastic
- 2-4 bobby pins
How to Wear It:
It looks especially good with V-necks and off-shoulder tops because the hair sits in a clean diagonal. It also softens strong features without needing curls everywhere.
Pro Tips for This Style:
- Don’t force the part too far over; the hairline should still look believable.
- Tuck one side flatter if you want the face to feel more open.
- Keep the tail loose enough to move when you turn your head.
Variations on This Look:
- Soft Side Sweep: less parting, more natural fall.
- Formal Side Sweep: polish the top and curl the ends under slightly.
Common Mistakes to Avoid:
- Parting too aggressively: the style can read dated.
- Letting the heavier side sag: pin it flat if needed.
- Forgetting the shoulder line: the tail should rest, not fight, the neckline.
12. The Curly Defined Ponytail

Curly hair does not need to be flattened to qualify as a ponytail. In fact, the shape is often better when the curls stay defined and the crown stays a little controlled.
Why It Works:
Defined curls give natural width and movement, which is perfect if the goal is to keep hair from looking sparse. A ponytail also lets the curl pattern show off from the back without dragging the whole head upward.
Key Products:
- Leave-in conditioner.
- Curl cream or gel.
- Wide-tooth comb.
- Soft elastic.
Quick Steps:
- Apply leave-in and curl cream to damp hair.
- Detangle gently with a wide-tooth comb or fingers.
- Gather the hair into a low or mid ponytail without brushing out the curl pattern.
- Scrunch the tail lightly and let a few curls frame the face.
Tools for This Look:
- Wide-tooth comb
- Microfiber towel
- Elastic
- Diffuser, if drying with heat
How to Wear It:
This is one of the best ponytails for days when you want texture to be the point, not the thing you fight. It works with casual clothes and dressy ones because the curls provide their own finish.
Pro Tips for This Style:
- Never brush curly hair dry unless you want puff.
- Keep the elastic soft so the curl clumps don’t get crushed.
- A tiny bit of gel at the hairline keeps frizz from escaping.
Variations on This Look:
- Curly Pineapple Tail: sit the ponytail higher and let the curls spring.
- Low Curly Tail: keep it at the nape for a softer profile.
Common Mistakes to Avoid:
- Over-brushing the curls: the shape turns fuzzy fast.
- Using a tight elastic: it leaves a dent and breaks curl pattern.
- Pulling the top too smooth: curly hair often looks better with a little softness.
13. The Polished Straight Ponytail
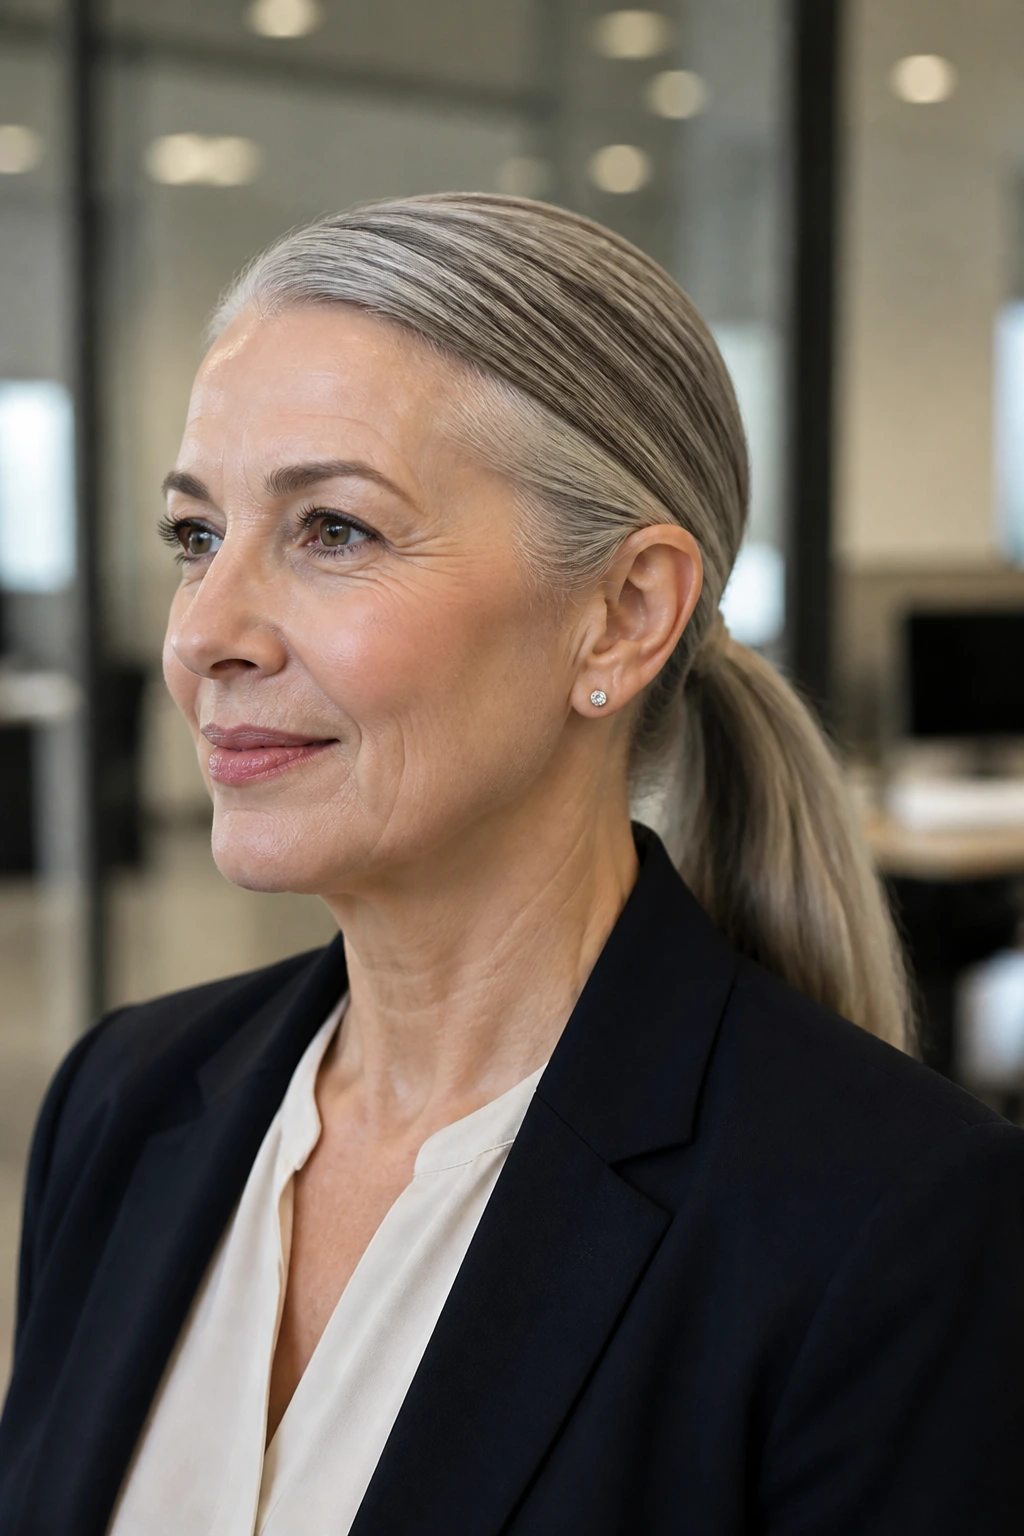
Straight ponytails can look sharp, but only when the surface is clean and the ends are trimmed or shaped. This is not the place for half-done smoothing.
Why It Works:
A straight ponytail shows off the line of the hair and the shine in a direct way. That makes it a good choice for gray or highlighted hair, where the color shifts are part of the appeal.
Key Products:
- Heat protectant.
- Flat iron or blow-dry brush.
- Smoothing serum.
- Firm elastic.
Quick Steps:
- Blow-dry or flat-iron the hair smooth in sections.
- Brush it back and gather at low or mid height.
- Secure the elastic tightly enough to hold but not so tight it dents the crown.
- Tame the surface with a drop of serum on the palms.
Tools for This Look:
- Flat brush
- Paddle brush
- Elastic
- Heat tool, if needed
How to Wear It:
This one works best with tailored clothing, open collars, and sharper makeup because the hair itself is clean and direct. It’s the style that says you meant to look put together.
Pro Tips for This Style:
- Trim dry ends regularly; this style exposes them.
- Use heat protectant every time, even on a quick pass.
- Keep serum off the roots or the sleek look goes limp.
Variations on This Look:
- Glass-Finish Tail: smooth with a little more shine product.
- Soft Straight Tail: leave a touch of bend at the ends.
Common Mistakes to Avoid:
- Trying to hide split ends with more serum: it only makes them cling together.
- Leaving the crown frizzy: the contrast looks messy.
- Using too much heat: that steals shine over time.
14. The Loose Nape Ponytail
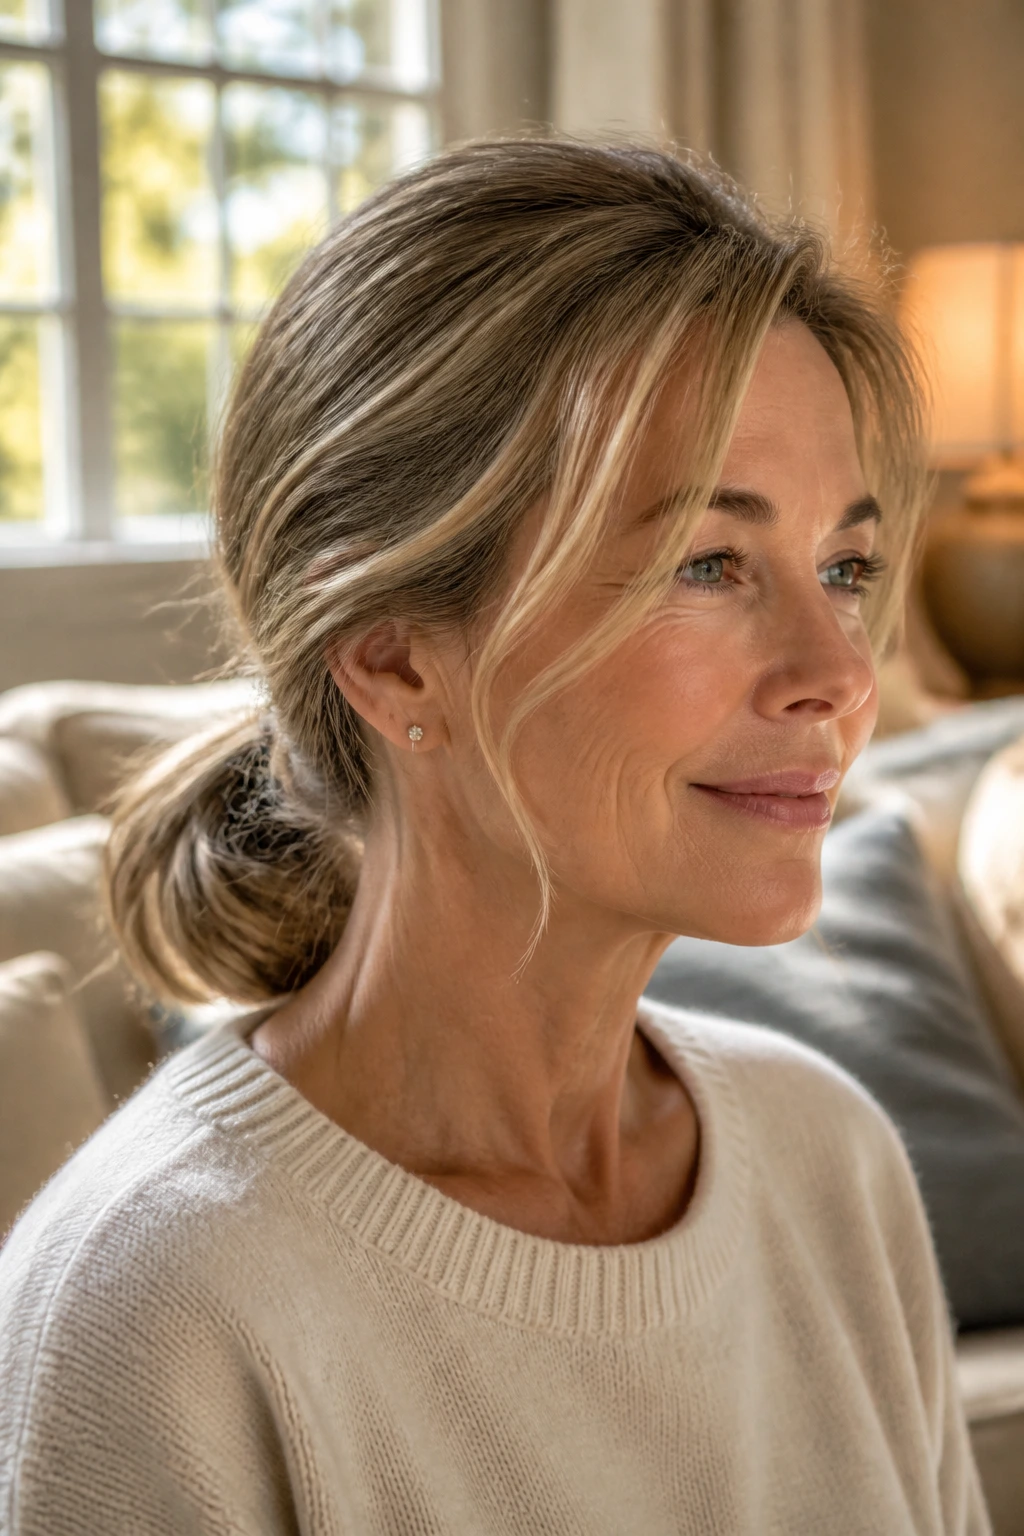
This is the ponytail for women who want softness more than structure. It sits low, lets a little movement stay around the face, and avoids the hard pulled-back look that can feel harsh.
Why It Works:
The looseness is not laziness. It makes the hairline look softer and gives the face room, which is often the more flattering choice when the hair around the temples is finer.
Key Products:
- Lightweight cream.
- Soft elastic.
- 1-2 bobby pins.
- Optional texture spray.
Quick Steps:
- Part the hair where it naturally wants to sit.
- Brush the back only enough to control it, not flatten it.
- Secure a low ponytail at the nape and loosen the top with your fingertips.
- Pull out a couple of short face-framing pieces.
Tools for This Look:
- Paddle brush
- Tail comb
- Elastic
- Pin set
How to Wear It:
This style is easy with knit tops, casual dresses, and days when you want the hair out of the way but not sealed down. It looks particularly good with soft makeup and simple studs.
Pro Tips for This Style:
- Keep one or two deliberate pieces loose instead of making the whole thing messy.
- If the ponytail looks too skinny, twist the tail slightly before the elastic.
- A little volume at the crown helps the loose shape feel finished.
Variations on This Look:
- Soft Nape Knot: loop the tail once before pinning.
- Relaxed Low Tail: leave the surface a little rough for extra texture.
Common Mistakes to Avoid:
- Making it too slack: a loose ponytail still needs shape.
- Forgetting the crown: flat top, soft bottom is a strange look.
- Leaving too many short ends loose: that reads like escape, not style.
15. The Tucked-Under Ponytail
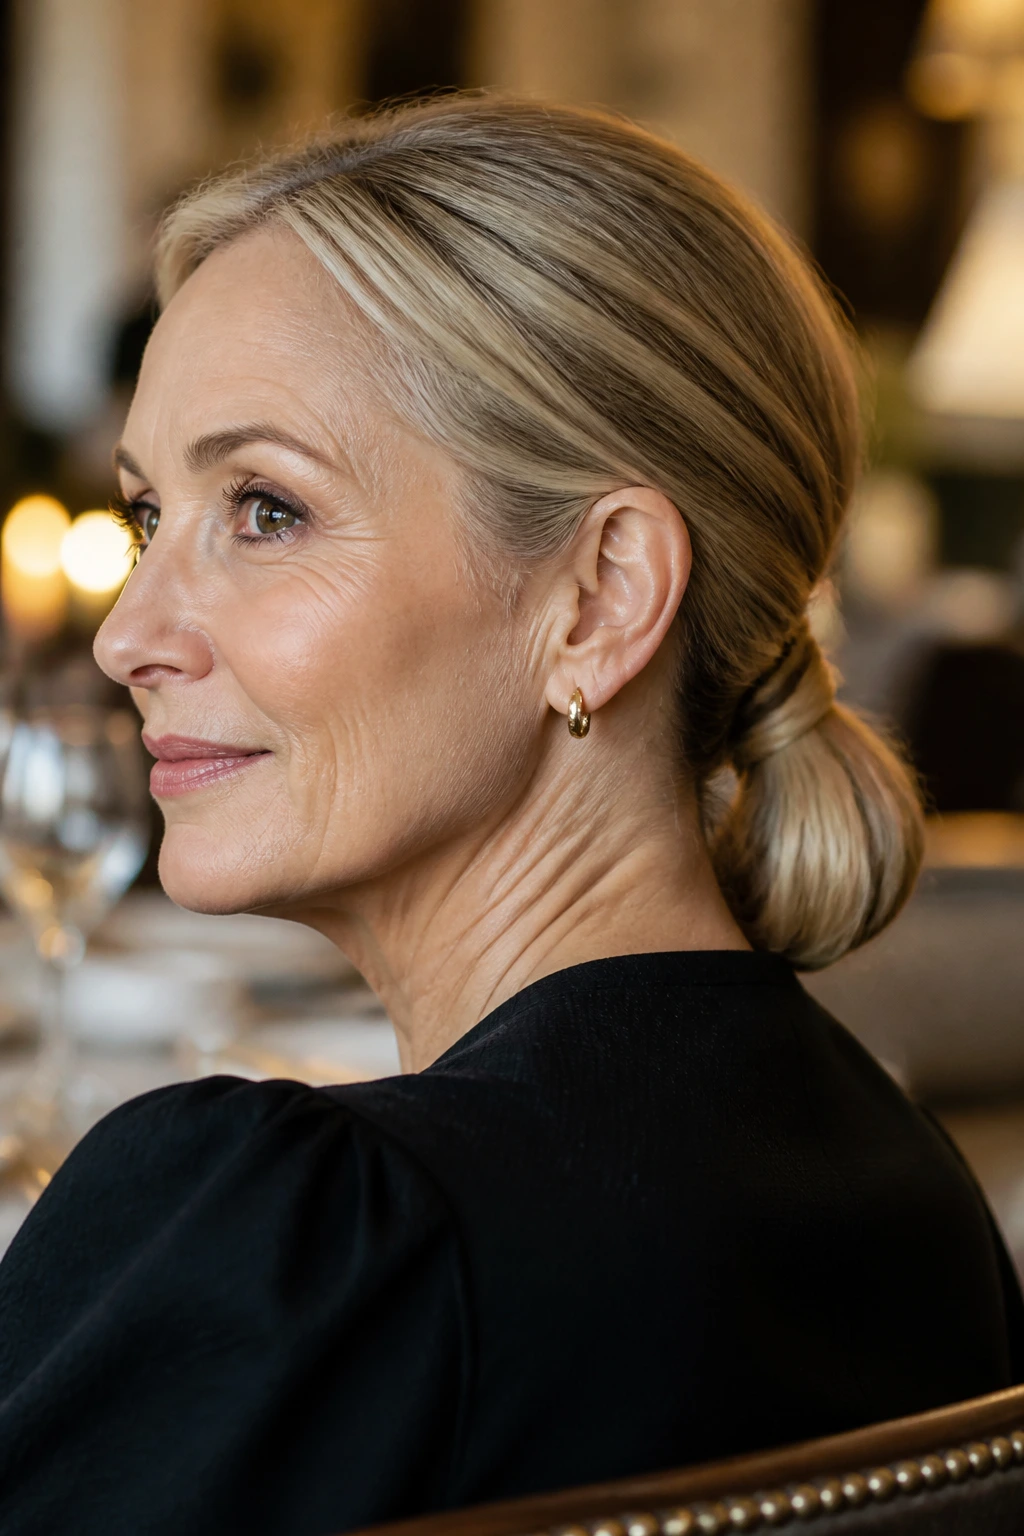
A tucked-under ponytail gives you the clean outline of a low style with a slightly bent finish. It can look almost like a faux chignon, which is handy when you want a little more polish than an ordinary tail.
Why It Works:
Tucking the ends under shortens the visible length and makes the style feel refined. It’s also useful if your ends are dry or if your hair has layers that don’t want to behave at full length.
Key Products:
- 1 elastic.
- 2-4 bobby pins.
- Smoothing cream.
- Hairspray for the tuck.
Quick Steps:
- Pull the hair into a low ponytail and secure it.
- Twist the tail inward toward the nape.
- Pin the folded end under the base so it sits close to the head.
- Smooth the top and check that no ends poke out.
Tools for This Look:
- Bobby pins
- Tail comb
- Elastic
- Small finishing brush
How to Wear It:
Use this with dressier clothes, a collarless blouse, or a jacket with a clean neckline. It looks tidy from every angle, which is half the point.
Pro Tips for This Style:
- Keep the tail a little loose before tucking; tight hair fights the fold.
- If the folded section is thick, anchor it with two crisscrossed pins.
- A light mist of hairspray helps the tuck stay put.
Variations on This Look:
- French Twist Tail: fold the ponytail higher and pin more vertically.
- Soft Roll Under: keep the fold looser for a gentler shape.
Common Mistakes to Avoid:
- Using too many pins in one spot: the tuck gets bulky.
- Tucking dry, brittle ends without smoothing them first: they stick out.
- Skipping support at the base: the folded section can sag by midday.
16. The Double-Wrap Ponytail
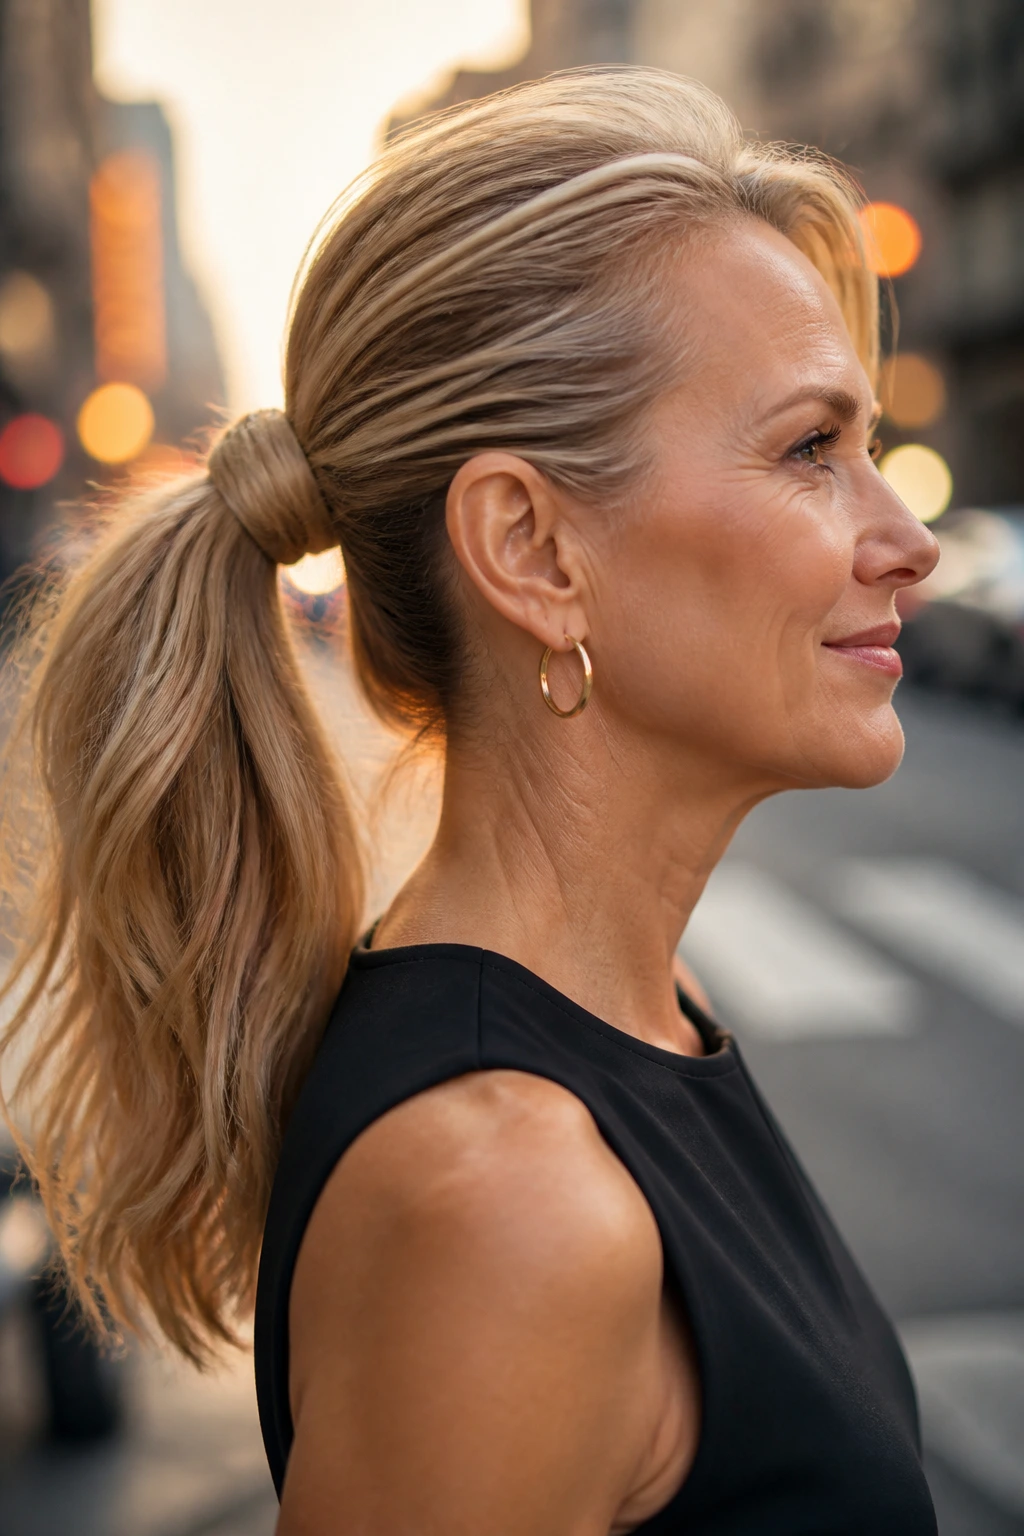
Double wrapping means two strands cover the elastic instead of one. It sounds small, but the result is a base that looks fuller and more deliberate.
Why It Works:
Two wrap strands make the ponytail base appear thicker, which is useful if the elastic would otherwise show through or if the tail itself is fine. The extra wrap also adds a neat, finished edge.
Key Products:
- 1 elastic.
- 2 narrow sections of hair for wrapping.
- 2 bobby pins.
- Light smoothing cream.
Quick Steps:
- Gather the ponytail at the chosen height.
- Split off two thin strands from underneath.
- Wrap both strands around the elastic in opposite directions.
- Pin them under the base and smooth the tail.
Tools for This Look:
- Tail comb
- 2 bobby pins
- Elastic
- Small sectioning clip
How to Wear It:
This is a useful style for work, events, or any day when you want the base to look thicker than it is. It pairs nicely with monochrome outfits because the hairline detail gets noticed.
Pro Tips for This Style:
- Keep the wrap sections equal in thickness.
- Use small pins, not giant ones, or they’ll show.
- If your hair is slippery, rough the wraps slightly with your fingers before pinning.
Variations on This Look:
- Twin Strand Sleek Tail: keep the wraps flat and glossy.
- Soft Double-Wrap Tail: leave the wraps a little looser for a gentler finish.
Common Mistakes to Avoid:
- Using thick wrap pieces: the base turns bulky.
- Pinning through only one layer: the wrap can slide.
- Leaving the wrap too far apart: the elastic shows through.
17. The Sporty Sleek Ponytail
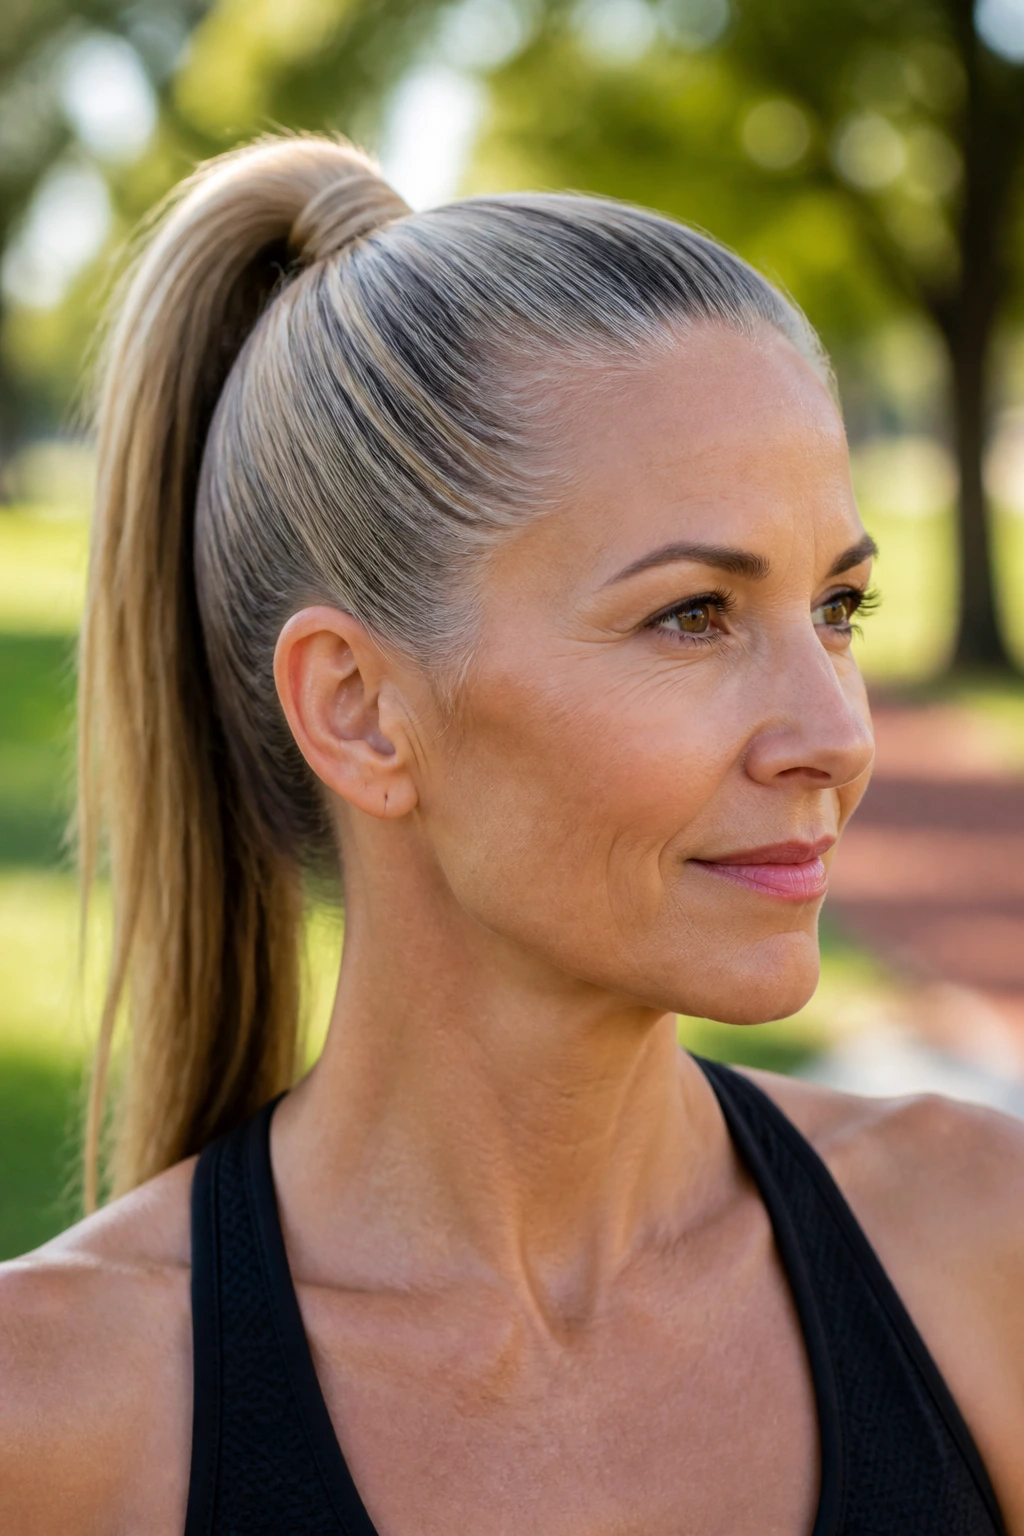
Sporty does not have to mean sloppy. A sleek athletic ponytail can look clean and modern when the top is smooth and the tail stays controlled.
Why It Works:
The high placement lifts the face and keeps the neckline clear, which helps when you want a practical style that still looks intentional. A good sporty ponytail also handles movement well; it stays put rather than bouncing into chaos.
Key Products:
- Strong elastic.
- Gel or styling cream.
- Boar-bristle brush.
- Hairspray.
Quick Steps:
- Smooth the hair back with a brush and a small amount of gel.
- Secure the ponytail high on the back of the head.
- Tighten the elastic once more if needed.
- Use a little cream at the hairline to keep flyaways in place.
Tools for This Look:
- Boar-bristle brush
- Elastic
- Tail comb
- Hair tie backup
How to Wear It:
This works for errands, walks, travel days, and any outfit that needs a crisp hairline. It can look sharp with a jacket too, if the rest of the look is simple.
Pro Tips for This Style:
- Don’t make the top slick enough to look wet unless that’s the point.
- If your hair is fine, add dry shampoo first for grip.
- Keep the height high enough to lift the face, but not so high it feels teenaged.
Variations on This Look:
- Clean High Tail: minimal product, maximum simplicity.
- Wrapped Sport Tail: hide the elastic for a more polished finish.
Common Mistakes to Avoid:
- Overusing gel: the hair gets crunchy and flat.
- Setting the ponytail too far forward: it can pull the face upward in an odd way.
- Ignoring the nape: if the back is messy, the style loses the sleek part.
18. The Bouffant Ponytail
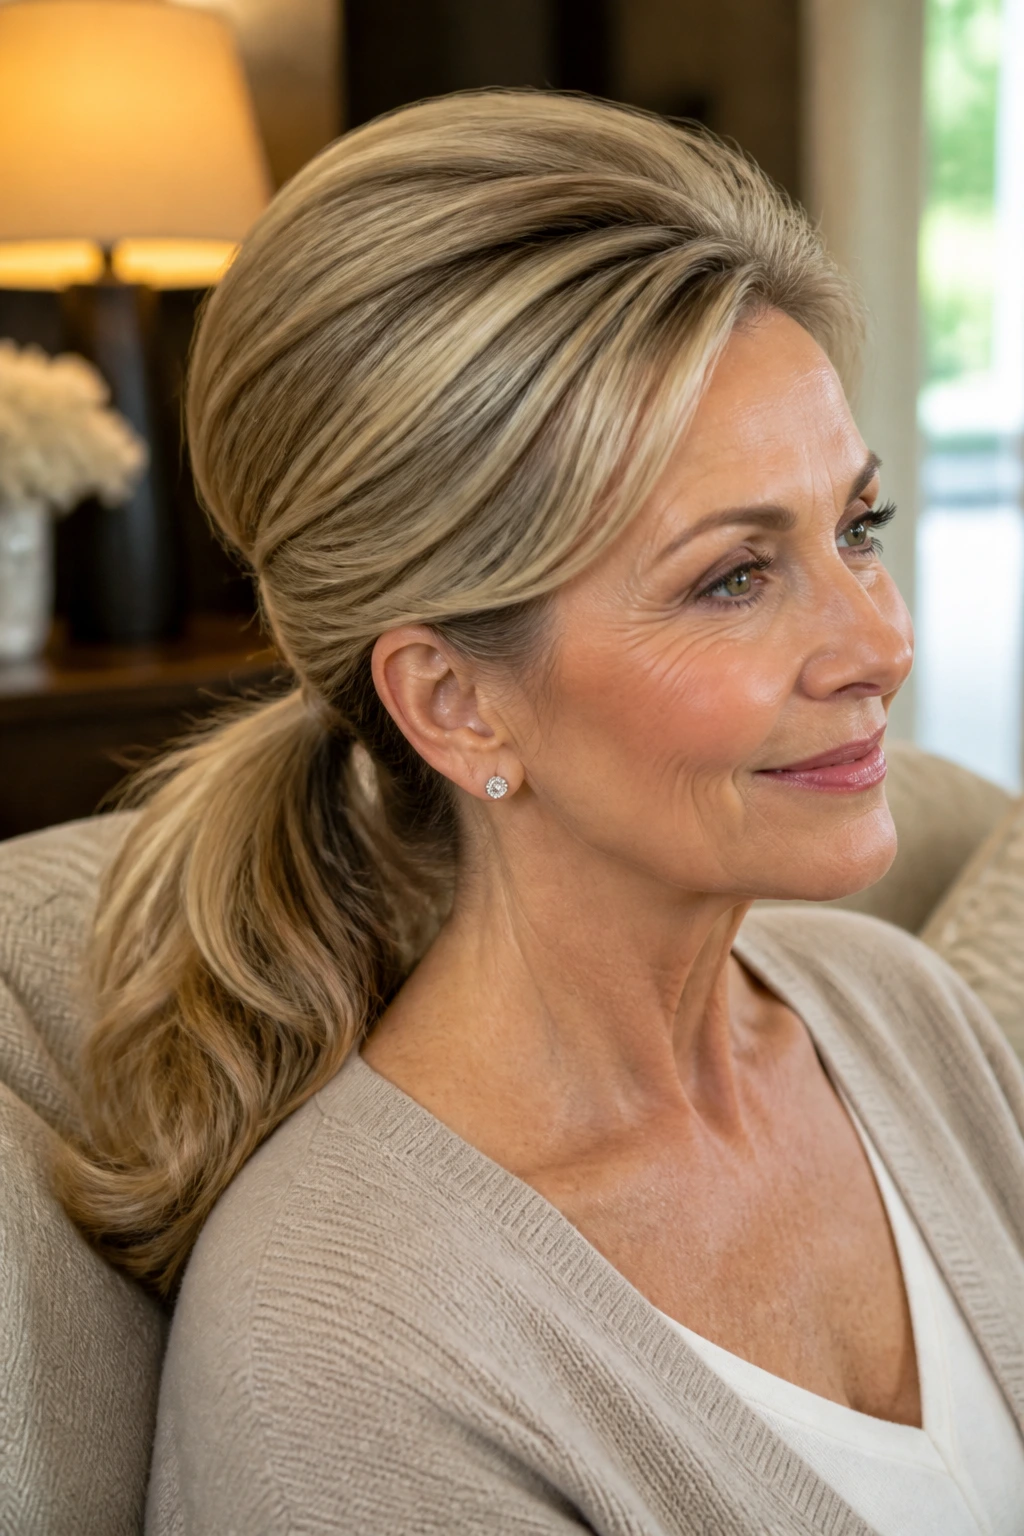
This one has a little old-school volume at the crown, but it works because the lift is controlled. The ponytail itself can be low, which keeps the style from turning into a costume.
Why It Works:
Bouffant volume adds height where mature hair often needs it most: at the crown. That lift changes the silhouette immediately, making the face look more open and the ponytail look fuller.
Key Products:
- Volumizing mousse.
- Teasing comb.
- Strong elastic.
- Light hairspray.
Quick Steps:
- Apply mousse at the roots and blow-dry with lift at the crown.
- Backcomb the crown underneath the top layer.
- Brush the outside smooth and gather the hair into a low ponytail.
- Set the crown with a little hairspray and finger-shape the volume.
Tools for This Look:
- Blow-dryer
- Round brush
- Teasing comb
- Elastic
How to Wear It:
This style suits evenings, nicer dinners, or days when you want a little presence without a full updo. It looks especially good with earrings because the lifted crown frames the face.
Pro Tips for This Style:
- Keep the volume concentrated at the crown, not all over.
- Smooth the top layer over the tease so it doesn’t look rough.
- A low ponytail keeps the style grounded.
Variations on This Look:
- Soft Crown Lift: less teasing, more gentle shape.
- Evening Bouffant: slightly more height and a wrapped base.
Common Mistakes to Avoid:
- Teasing the entire top section: it gets puffy in the wrong way.
- Letting the crown collapse before securing the tail: work faster.
- Hairspraying too much: the volume should move a little.
19. The Silver-Glow Ponytail
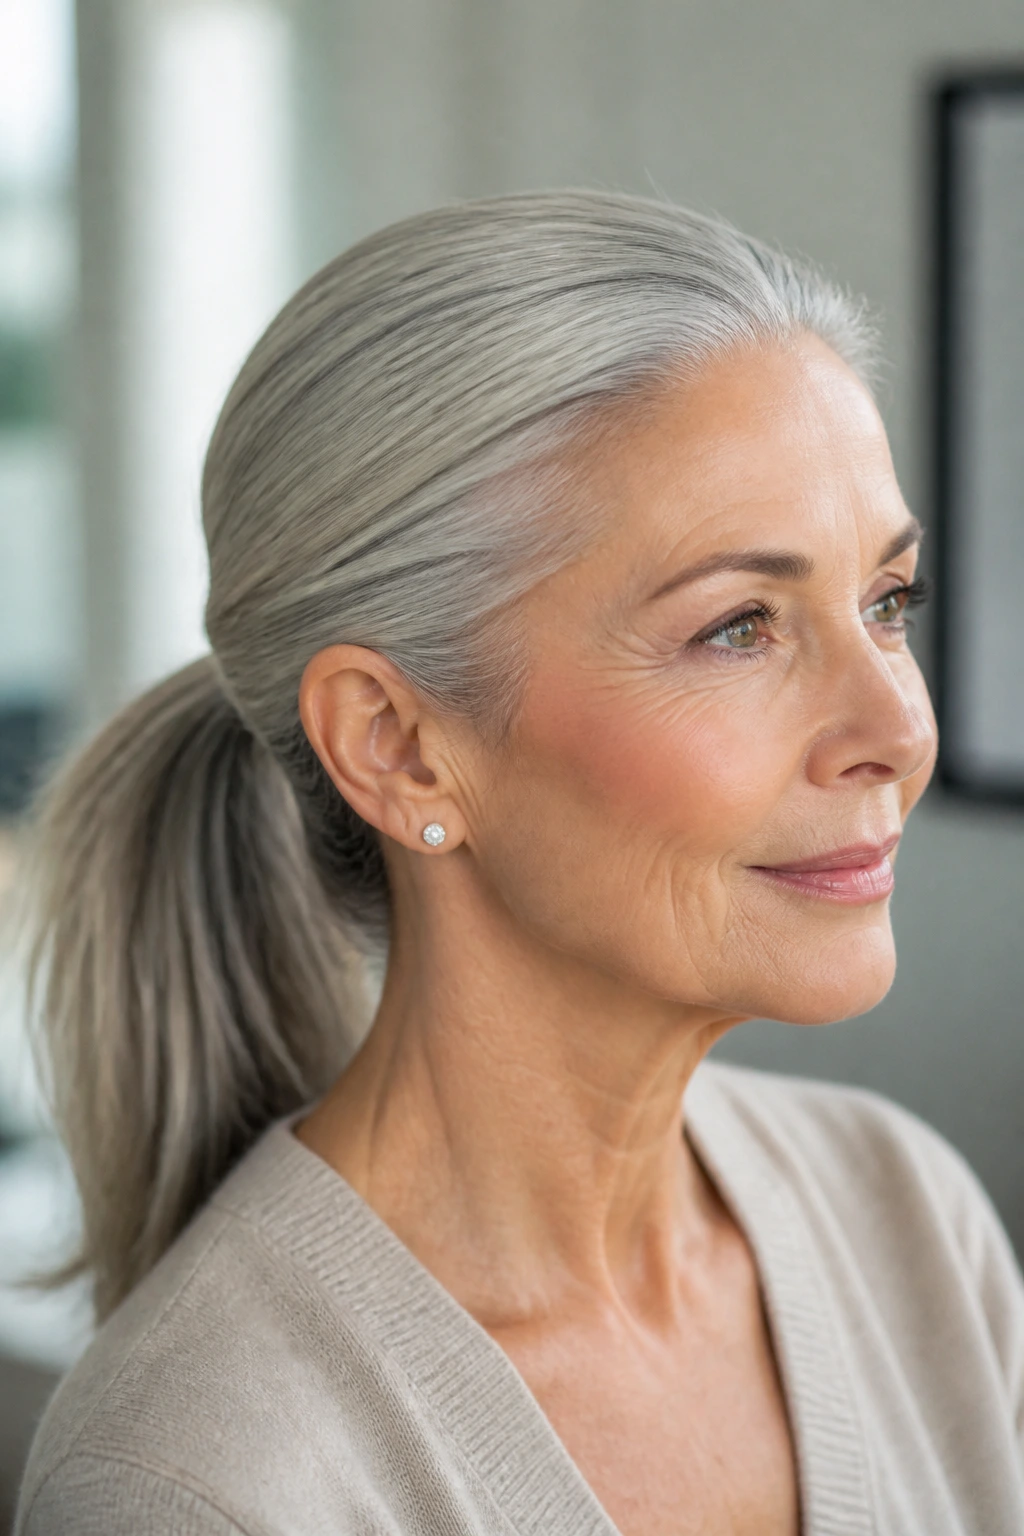
Gray and silver hair often looks best when the finish is clean enough to show the shine. This ponytail is all about letting that color story do its thing.
Why It Works:
Silver strands can be the best part of the whole style when they’re brushed smooth and not buried under too much product. A clean ponytail shape lets the color vary in the light, which looks sharp and modern.
Key Products:
- Purple or blue-toned shampoo, if needed.
- Lightweight serum.
- Soft brush.
- Shine spray.
Quick Steps:
- Smooth the hair after washing and dry it with gentle tension.
- Gather it into a mid or low ponytail.
- Keep the surface clean and avoid heavy oils at the root.
- Add a small amount of shine spray only to the tail.
Tools for This Look:
- Paddle brush
- Elastic
- Fine comb
- Blow-dry brush, if helpful
How to Wear It:
Wear this with simple clothes and strong colors that make the silver stand out — black, navy, white, deep green, even bright lipstick if you like a little contrast. The hair is the feature.
Pro Tips for This Style:
- Silver hair often shows frizz faster, so keep the humidity defense light but real.
- Do not overload with purple shampoo; too much can dull the shine.
- If your hair is coarse, use a tiny drop of oil on the ends only.
Variations on This Look:
- Glossed Silver Tail: more shine spray and a cleaner part.
- Soft Silver Tail: a little texture around the face for less severity.
Common Mistakes to Avoid:
- Trying to hide silver with heavy product: the shine disappears.
- Using yellowing products too often: tone can go flat.
- Pulling the hair too tight: silver hair often shows the stress more.
20. The Low Knot-Detail Ponytail
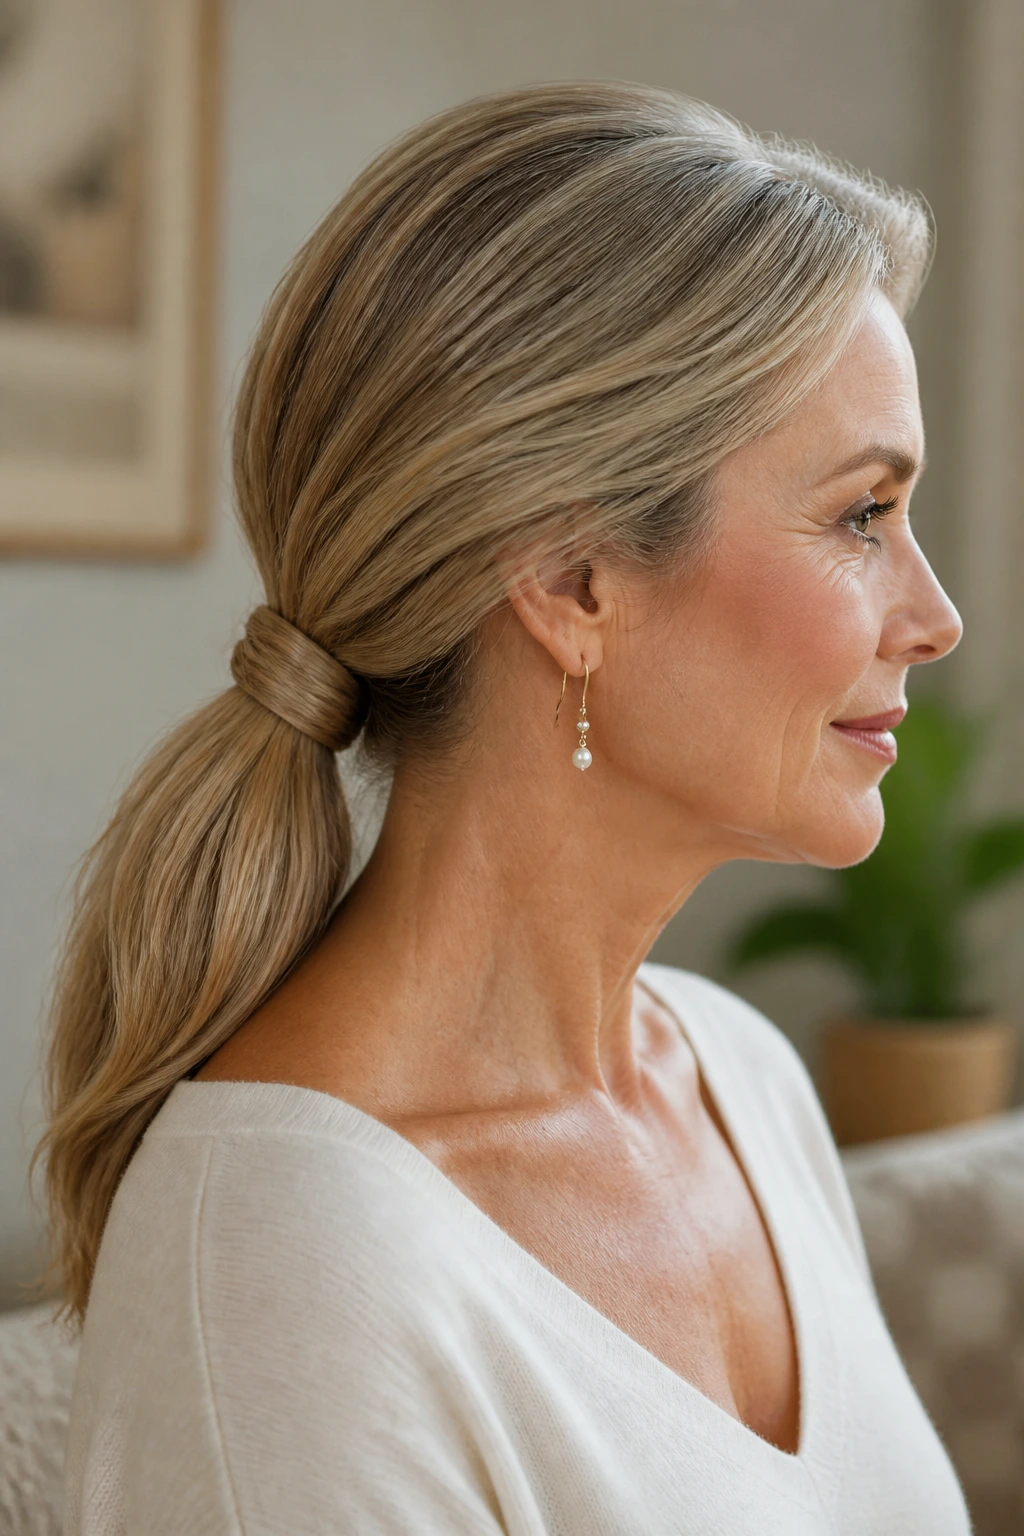
A knot detail near the base gives the illusion of something more intricate than a basic tail. It’s a good middle ground between plain and formal.
Why It Works:
The knot adds a focal point right where a ponytail can look boring. It also hides the elastic naturally if you keep the knot small and deliberate.
Key Products:
- 1 elastic.
- 2 thin hair sections for knotting.
- 2 bobby pins.
- A touch of styling cream.
Quick Steps:
- Make a low ponytail and split off two thin strands.
- Tie them into a simple knot over the elastic.
- Pin the ends underneath the base.
- Smooth the tail and shape the top with fingers.
Tools for This Look:
- Tail comb
- Bobby pins
- Elastic
- Small mirror for checking the back
How to Wear It:
This looks polished with dresses, cardigans, and anything that needs a quiet detail rather than a loud one. It’s especially nice when you want a little structure without curls or braid work.
Pro Tips for This Style:
- Keep the knot flat against the base or it will look bulky.
- Use slim strands, not thick ones.
- If your hair is very layered, secure the ends with pins under the tail.
Variations on This Look:
- Double Knot Tail: use two small knots stacked neatly.
- Side Knot Tail: place the knot slightly off-center for a softer line.
Common Mistakes to Avoid:
- Making the knot too large: the base turns lumpy.
- Using slippery product at the knot: it will loosen.
- Letting the knot sit too high: the shape stops reading as a ponytail.
21. The Voluminous Blowout Ponytail
This is the ponytail for people who love a round brush and want the hair to look bouncy even after being tied back. The ends keep movement, and the crown stays soft.
Why It Works:
Blowout volume gives the tail body from root to tip, which is a nice fix if your hair tends to fall flat once it’s tied up. It also keeps the silhouette lively, not stringy.
Key Products:
- Volumizing mousse.
- Round brush.
- Heat protectant.
- Medium elastic.
Quick Steps:
- Blow-dry the hair with a round brush, lifting at the roots.
- Keep the ends turned slightly under or out, depending on the shape you want.
- Gather the hair into a low or mid ponytail.
- Loosen the crown with your fingers and shape the tail with a soft bend.
Tools for This Look:
- Round brush
- Blow-dryer
- Elastic
- Sectioning clips
How to Wear It:
This ponytail is good for dinners, events, and days when you want the hair to look done without pulling everything up. It has enough body to stand up next to a dressier outfit.
Pro Tips for This Style:
- Blow-dry in sections; rushed drying flattens the finish.
- Let the hair cool before you tie it up or the lift drops fast.
- A large-barrel brush helps create that round, brushed-out feel.
Variations on This Look:
- Soft Blowout Tail: less volume, more movement.
- Big-Body Tail: more lift at the crown and tail ends.
Common Mistakes to Avoid:
- Tying the hair while it’s still warm: the shape collapses.
- Using too much mousse: the roots can get sticky.
- Skipping the round brush at the ends: that’s where the bounce lives.
22. The Clip-Back Mini Ponytail
Sometimes a full ponytail is too much, especially if the haircut is shorter or layered. A mini ponytail holds back the top section and lets the rest do its own thing.
Why It Works:
This is ideal for shoulder-length or in-between cuts where a full ponytail would look thin. The clipped top gives structure while the lower lengths keep movement and softness.
Key Products:
- Small elastic or mini clip.
- Bobby pins.
- Light styling cream.
- Optional wave spray.
Quick Steps:
- Take the top third of the hair and secure it back.
- Smooth the sides into the small pony without flattening the rest.
- Let the lower hair stay loose or wave it lightly.
- Pin any short layers that refuse to sit still.
Tools for This Look:
- Small elastic
- Mini clip
- Bobby pins
- Tail comb
How to Wear It:
It’s a strong everyday choice for hair that isn’t long enough for a full, heavy ponytail. It also works when you want your glasses, earrings, or neckline to stay visible.
Pro Tips for This Style:
- Use the top section only; don’t try to force all the hair up.
- Keep the pony small and neat.
- If the clip is visible, choose one that blends with your hair color.
Variations on This Look:
- Half-Mini Tail: tie slightly more hair for a fuller top.
- Pinned Mini Sweep: clip instead of tie for an even softer result.
Common Mistakes to Avoid:
- Trying to make a full pony from short layers: it will look sparse.
- Ignoring the lower section: it needs either shape or intention.
- Using a heavy clip on fine hair: it slips.
23. The Evening Wrapped Ponytail
This is the dressed-up one. Smooth, low, and wrapped with a little extra care, it has enough polish for dinner or a nicer event without becoming fussy.
Why It Works:
A low wrapped base and controlled tail create a clean line that works with jewelry, makeup, and more formal clothes. The style lets the face stay open while the hair still looks finished from the back.
Key Products:
- Smoothing cream or light gel.
- Firm elastic.
- A decorative pin, ribbon, or hair cuff.
- Shine spray.
Quick Steps:
- Blow-dry or smooth the hair until the surface is calm.
- Make a low ponytail at the nape and wrap the elastic with a narrow strand.
- Add a cuff, ribbon, or single pin if you want more detail.
- Set the tail with shine spray and shape the front pieces softly.
Tools for This Look:
- Tail comb
- Elastic
- Bobby pins
- Decorative accessory
How to Wear It:
This is the ponytail I’d pick with a dress, a silk blouse, or anything with a clean neckline. It keeps the hair polished without looking overbuilt.
Pro Tips for This Style:
- Keep the accessory simple if the outfit already has texture.
- Smooth the crown first, then add shine to the tail.
- Let the front pieces bend slightly instead of pinning them flat.
Variations on This Look:
- Ribbon-Wrapped Evening Tail: tie a narrow ribbon over the elastic.
- Metal Cuff Tail: use a slim cuff for a cleaner finish.
Common Mistakes to Avoid:
- Making it too stiff: formal hair should still move.
- Using a bulky accessory: it overwhelms the style.
- Leaving the ends dry and frayed: the tail is the last thing people see.
What Changes the Look More Than Length Ever Will
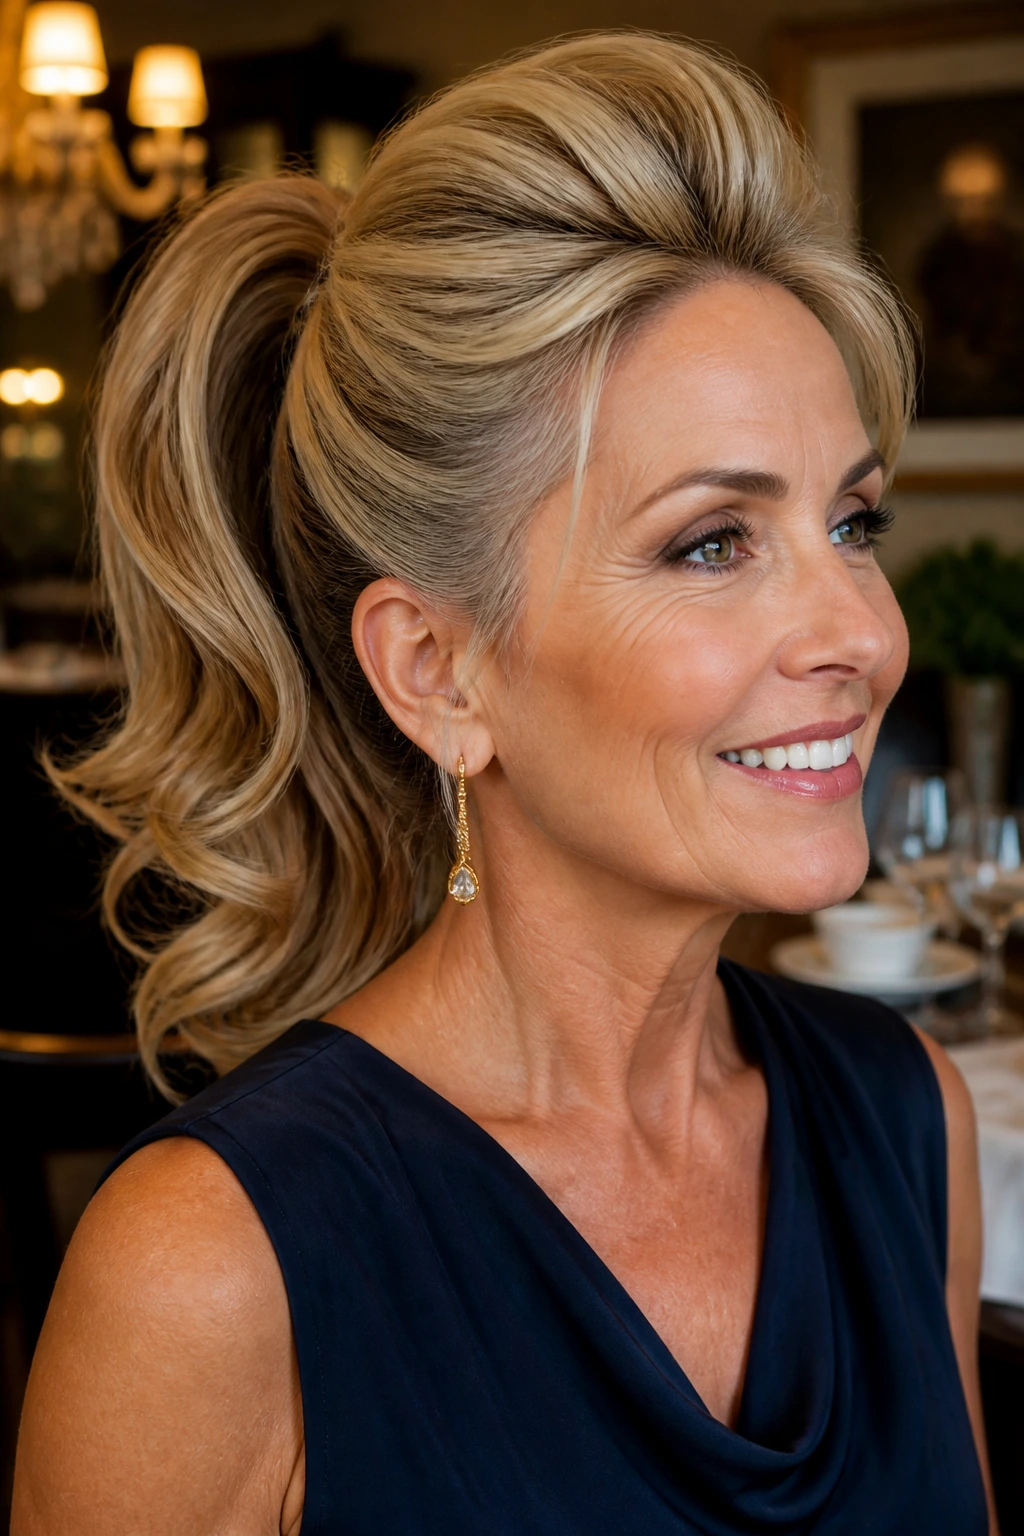
Placement matters more than most people think. A ponytail that sits two inches lower can look softer, calmer, and more expensive-looking than one pulled high and tight. That’s true whether your hair is silver, dyed, coarse, fine, curly, or straight.
The same goes for tension. Tight hair can make a face look tired because it pulls all the attention backward. A little slack at the crown, a little lift at the roots, or a little softness around the temples changes the whole effect. The style starts to feel like a choice instead of a restraint.
And yes, the finish counts. A wrapped elastic, a clean part, or one well-placed accessory can do more than another ten minutes of brushing ever will.
Essential Tools for These Styles

-
Tail comb: for clean parts, sectioning, and hiding the elastic with a wrapped strand.
-
Paddle brush: best for smoothing the surface without making the hair puff.
-
Boar-bristle brush: useful when you want a sleek finish on fine or straight hair.
-
Snag-free elastics: they hold better and are kinder to fragile ends.
-
Clear mini elastics: handy for bubble ponytails, braids, and tucked details.
-
Bobby pins: choose ones that match your hair color if they’ll show at all.
-
Texturizing spray: gives grip to fine hair and helps waves stay put.
-
Smoothing cream or light serum: tames frizz without turning the roots oily.
-
Dry shampoo: adds lift, grit, and a little life to day-old roots.
-
Round brush and blow-dryer: useful for crown lift, volume, and polished ends.
-
Curling wand or flat iron: optional, but worth it if you like movement in the tail.
Smart Product and Hair Prep Choices
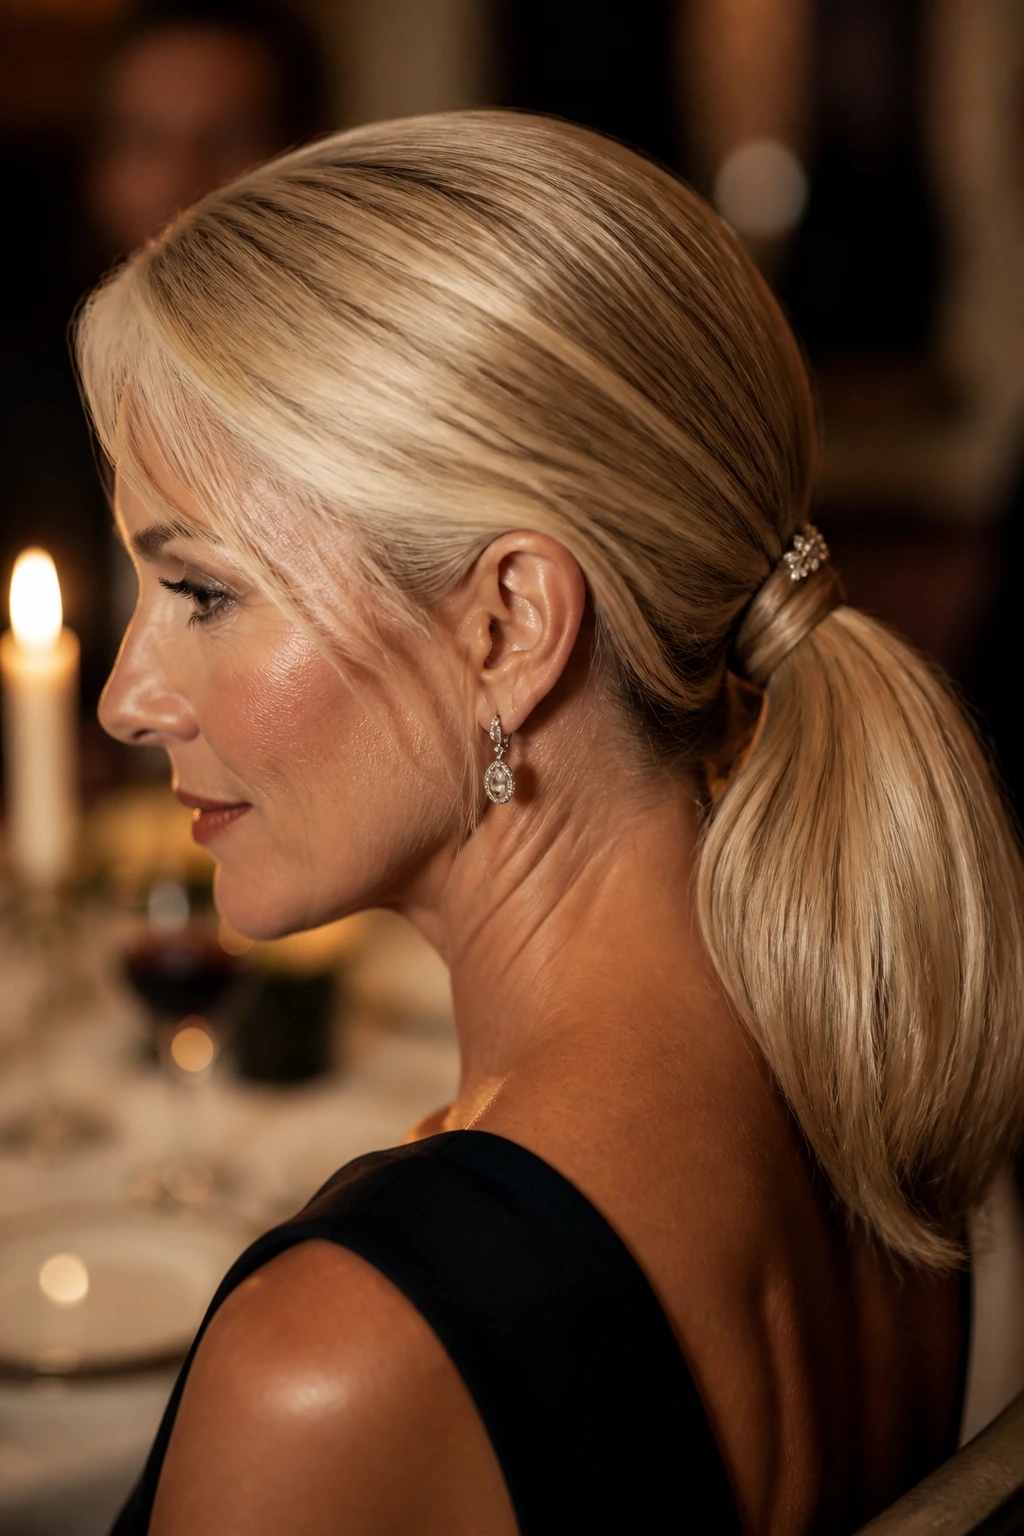
The right product can make a ponytail look fuller, softer, or cleaner in about ten seconds. The wrong one can make it slide out, puff up, or sit flat against the head like it gave up. That’s why the prep matters.
If your hair is fine, start with a mousse or root spray before drying. You want grip at the scalp and movement through the ends. If your hair is thick, use a light smoothing cream first and keep the ponytail base strong with a decent elastic; thick hair can eat weak bands alive. Curly hair usually does better with leave-in conditioner and curl cream, not heavy brushing. Gray or silver hair often likes a lightweight serum and a shine spray at the tail, because dry-looking silver can lose its edge fast if you overload it.
Heat tools are useful, but they should solve a problem, not become the style. A round brush gives volume, a flat iron gives polish, and a curling wand gives softness. Pick one job per tool. That keeps the whole look cleaner and saves time.
How to Wear These Ponytails With the Rest of Your Look
Placement: Low ponytails suit higher necklines, scarves, and structured tops. Mid ponytails are the easiest all-rounder. High ponytails are best when you want visible lift and the outfit stays simple up top.
Accents: If the ponytail is sleek, let earrings or lipstick carry the rest of the look. If the ponytail is textured, keep jewelry simpler so the hair doesn’t compete with itself. A scarf, cuff, or barrette works best when the rest of the outfit gives it room.
Scale: Thin hair usually looks best when the ponytail is proportionate — not too high, not too teased, not too decorated. Thick hair can handle braid wraps, bubbles, and bigger volume. Shorter hair often needs mini ponytails or half-up versions so it doesn’t look like it’s straining.
Setting: For work, neat mid and low styles are the safest bet. For dinner or events, wrapped bases, side-swept shapes, and blowout tails feel more finished. On errand days, a sporty sleek pony or soft nape tail keeps things easy without looking thrown together.
Additional Tips and Finishers
Root Lift: If the crown keeps collapsing, dry shampoo at the roots before styling and lift the section with your fingers while it sets. A tiny bit of volume at the top changes the whole silhouette.
Hairline Softening: Pull out a few face-framing pieces and bend them lightly with a curling wand or even your fingers while they’re warm. Sharp hairlines can look harsh; a little bend makes the style friendlier.
Accessory Move: Use one accessory, not three. A scarf, cuff, or clip should feel like the point, not the clutter.
Color Play: If your hair is silver, gray, or highlighted, choose styles that expose movement in the tail. Wrapped bases and waves show dimension better than one flat sheet of hair.
Make-It-Yours: If you like things neat, go sleek. If you like softness, leave a few strands free. If you want more drama, add crown height or a strong side part. The style should fit your face and your patience.
Keeping a Ponytail Fresh Beyond the First Hour
A good ponytail can last through a full day, but it usually needs a little help after lunch. The trick is to refresh the crown first, then touch the tail second. If the root area flattens, a quick puff of dry shampoo and a fingertip lift will do more than re-brushing the whole head.
For sleek styles, keep a travel-size smoothing cream or anti-frizz stick nearby. A tiny touch at the hairline is enough. If you use more, the style starts to go limp. For textured styles, don’t brush the wave out just because it settled. Shake the tail, scrunch it lightly, and re-set the part with your fingers.
Overnight care matters too. A low ponytail can be gently loosened, or better yet, taken out and re-secured in the morning so the base does not crease. If the hair is long enough, a silk pillowcase or scarf helps reduce friction. That matters more when the hair is gray, dry, or color-treated, because those ends tend to snag first.
Variations and Adaptations to Try
-
Fine-Hair Lift: Use mousse at the roots, dry shampoo at the crown, and keep the ponytail mid-height. A small crown lift makes the tail look twice as full without adding bulk.
-
Thick-Hair Control: Choose strong elastics, smooth in sections, and work with wrapped bases or braids. Thick hair looks best when the shape is controlled instead of squeezed.
-
Curly-Hair Respect: Leave curl pattern intact, use leave-in and cream, and avoid brushing the tail once it’s tied. The ponytail should hold the curl, not fight it.
-
Gray-Hair Shine: Use lightweight serum on the ends and a clean part at the top. Silver hair looks best when the finish is polished and the roots stay matte enough to keep volume.
-
Short-Hair Workaround: Try half-up tails, mini ponytails, or pinned-back sections. Short layers usually do better when they’re guided, not forced.
-
Heat-Free Version: Twist, braid, or use overnight texture instead of hot tools. It takes a little more patience, but the result often looks softer and less overworked.
Common Mistakes to Avoid
-
Pulling it too tight: The face gets dragged backward, and the scalp starts complaining. Use enough tension to hold, not enough to punish.
-
Putting every ponytail in the same spot: A high pony, low pony, and side pony each change the face differently. Placement is the style.
-
Overloading the roots with product: Too much serum or oil makes the top collapse and the ponytail slip. Keep heavy product on the length, not the scalp.
-
Ignoring the ends: Dry, frayed ends can ruin even a perfect base. Trim, curl, tuck, or smooth them so the tail looks finished.
-
Forgetting the back view: A ponytail should look good from behind, not only in the mirror. Check the wrap, the elastic, and the nape before you walk away.
-
Trying to force a style that fights your cut: Some layers want a low tail, some want a half-up shape, and some do not like a sleek finish at all. Work with the haircut you actually have.
Frequently Asked Questions
What ponytail height is most flattering for women over 50?
Low and mid heights are usually the easiest to wear because they soften the jaw and keep tension off the crown. High ponytails can work too, but they tend to look best when the top has a little lift and the tail itself is not too tight.
How do I keep a ponytail from pulling on my scalp?
Use a snag-free elastic, don’t brush the hair into a strained line, and choose a lower placement when possible. If your scalp is sensitive, a low wrapped ponytail or loose nape ponytail usually feels better than a slick high tail.
Can thin hair still look full in a ponytail?
Yes, but the tricks are different. Dry shampoo, crown lift, bubble sections, and wrapped bases help more than heavy product or aggressive teasing, which can make fine hair look even thinner.
What if my hair is layered and pieces keep falling out?
That’s normal. Pin the shortest layers under the ponytail, or choose a style that welcomes them — a loose nape pony, half-up pony, or textured tail usually handles layers better than a super sleek look.
Is gray hair harder to style into a ponytail?
Not harder, just different. Gray hair often shows frizz and dryness more clearly, so lightweight smoothing and a clean finish matter more. A polished part and a little shine on the tail usually make a big difference.
How can I make a ponytail look dressy without curling my whole head?
Wrap the elastic, use one accessory, and keep the top smooth with a little crown lift. You do not need full curls everywhere; a neat base and one polished detail often look more elegant.
What’s the best ponytail for glasses?
Low side ponytails, soft nape styles, and half-up versions tend to work well because they don’t crowd the temples. If you wear statement glasses, keep the hair slightly softer around the face so everything doesn’t compete.
Can I wear a ponytail if my hair is shoulder length or shorter?
Absolutely. Mini ponytails, half-up styles, and pinned-back versions are often better than forcing a full tail. Shorter layers usually look more deliberate when they’re partially gathered instead of stretched.
How do I keep the ponytail from looking flat by midday?
Start with dry shampoo or root spray at the roots, not after the hair collapses. A quick finger lift at the crown and a small refresh of the part usually restores the shape faster than redoing the whole style.
The Ponytail, Finished Well
A good ponytail after 50 does not need to shout. It just needs to look like you meant it. The best versions here have a little lift, a little softness, and enough control to stay flattering when you turn your head or step into a windy street.
The styles that hold up best are usually the ones that respect the hair you have now — its texture, its density, its shine, its quirks. Start there, then decide whether you want clean, soft, textured, or dressed-up. That’s where the useful ponytails live, and that’s where the good hair days start showing up more often.
