



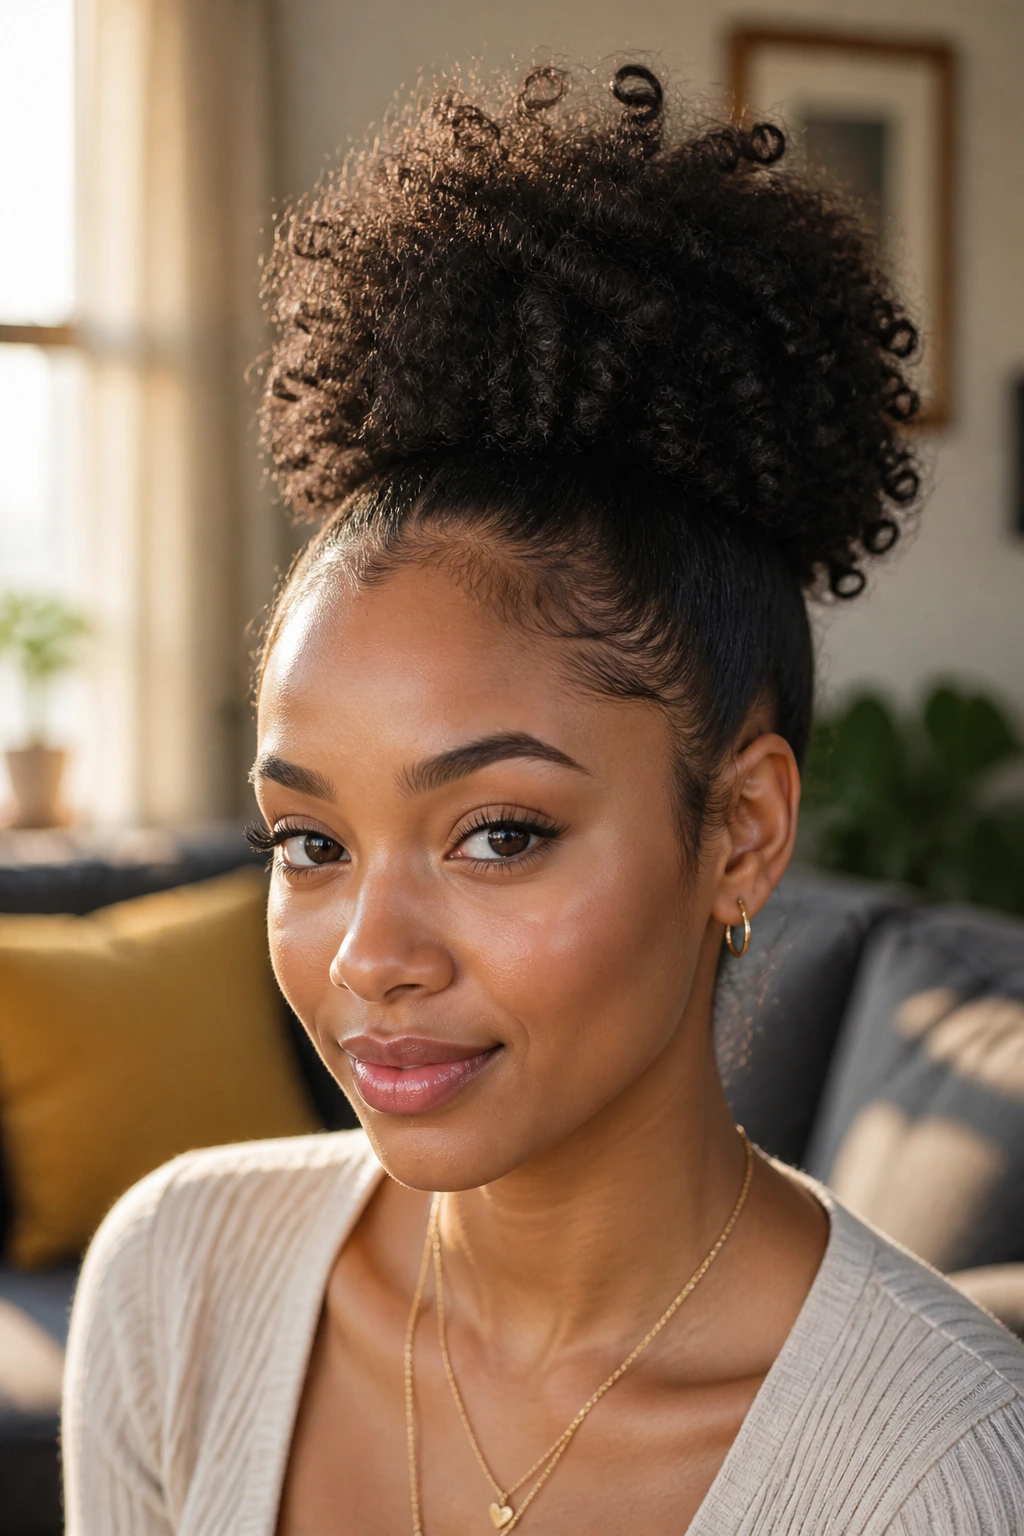
Cute puff ponytails for natural hair work because they let texture stay texture. The roots can be neat, the puff can stay soft, and the whole style still reads polished enough for errands, office days, brunch, or a last-minute dinner where you do not want your hair doing the most. That balance is the trick. Not flat. Not fussy. Just enough control at the base to make the shape look intentional.
The best puff ponytails always have a little point of view. A high puff lifts the face and makes cheekbones look sharper. A low puff feels calmer, almost tailored. A side puff can change the whole mood of a plain T-shirt and hoops, and a braided front can make the style look built, not thrown together. Natural hair gives you volume for free, but the real payoff is in the details: where the part sits, how tight the base is, whether the puff is stretched or fluffy, and how much shine you leave at the hairline.
And yes, tension matters. Repeatedly yanking the front into a hard ponytail is how a cute style turns annoying. The sweet spot is a secure base with enough give that your scalp does not start sending protest signals by noon. That’s the space these looks live in, and once you get used to it, you can move through them fast.
Why These Puff Ponytails Earn Their Keep
- Low tension, big payoff: A puff ponytail gives you height and shape without needing every strand pinned down, which makes it easier to keep the hairline comfortable.
- Works on several textures: Coils, twist-outs, braid-outs, stretched curls, and blown-out natural hair all make sense here; the style changes with the texture instead of fighting it.
- Fast to refresh: A little water, a touch of leave-in, and a satin scarf can bring the base back to life in a few minutes.
- Good for short and long hair: A cropped puff can look sharp and tidy, while longer hair gives you that fuller, rounder silhouette.
- Easy to dress up: A scarf, braid, puff cuff, beads, or a clean side part can take the style from plain to specific without adding a lot of time.
1. High Crown Cloud Puff
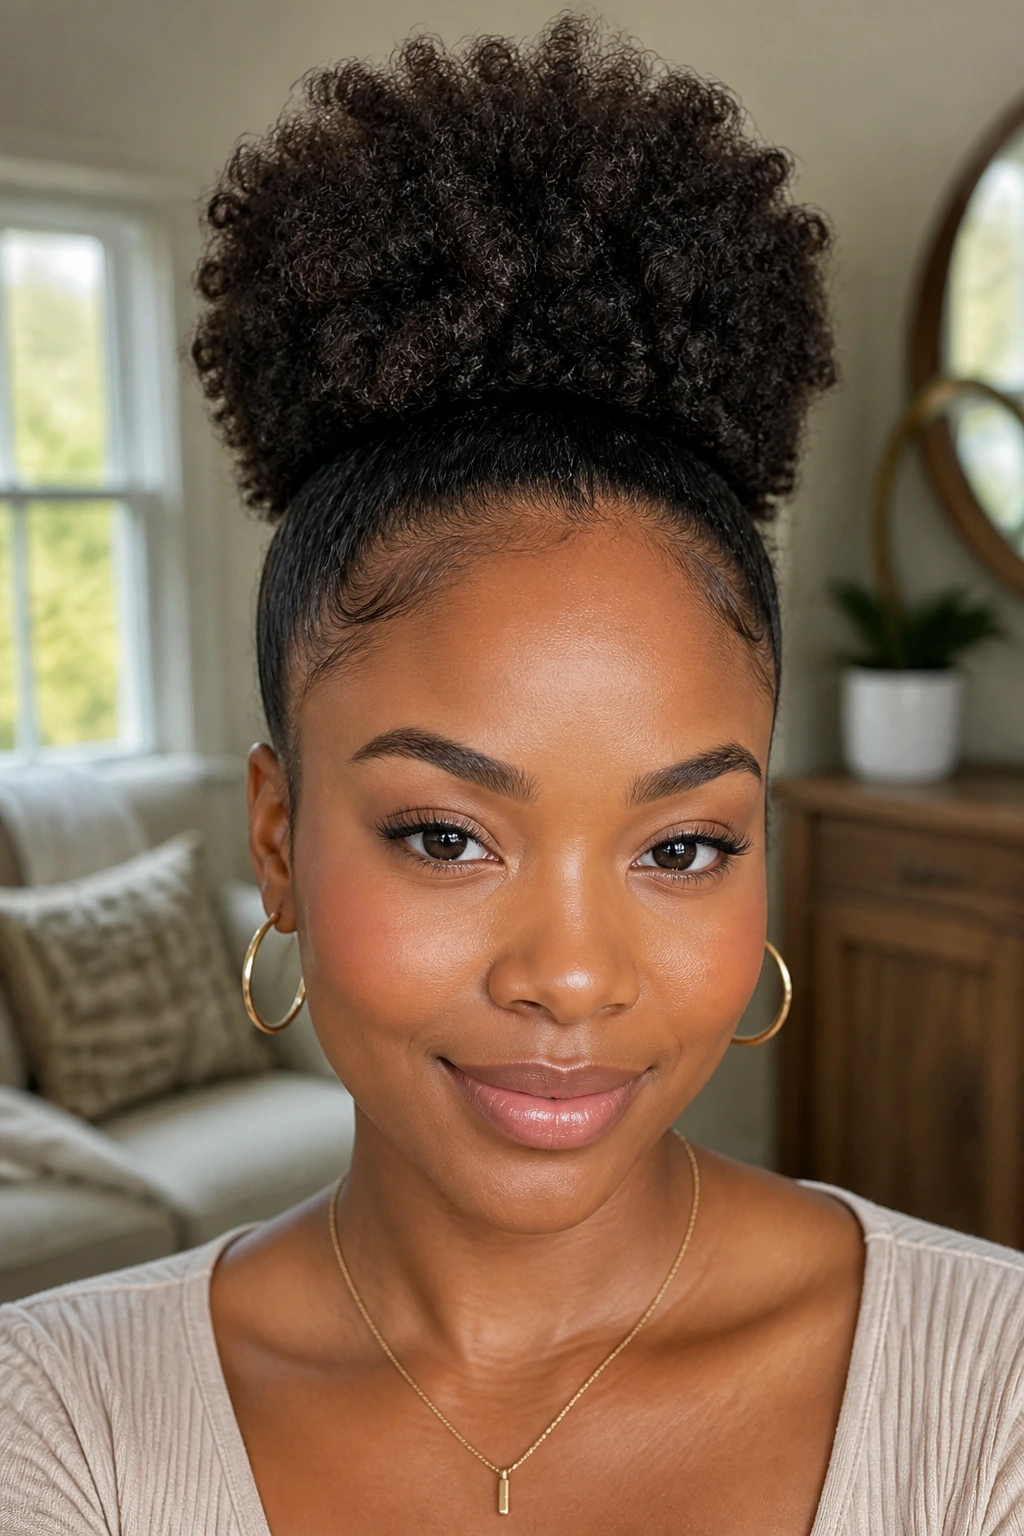
A high crown puff has a way of making everything on the face look more awake. It sits near the top of the head, pulls the eye upward, and gives you that round, airy shape that feels cheerful without trying too hard. I like it best when the base is smooth but not shellacked.
Use a soft brush, gather the hair just above the ears, and stop tightening the elastic once the puff has enough lift. If your hair is dense, a bungee or puff cuff can save you from wrestling a tiny elastic into a knot it cannot handle.
2. Low Nape Puff with a Sleek Base
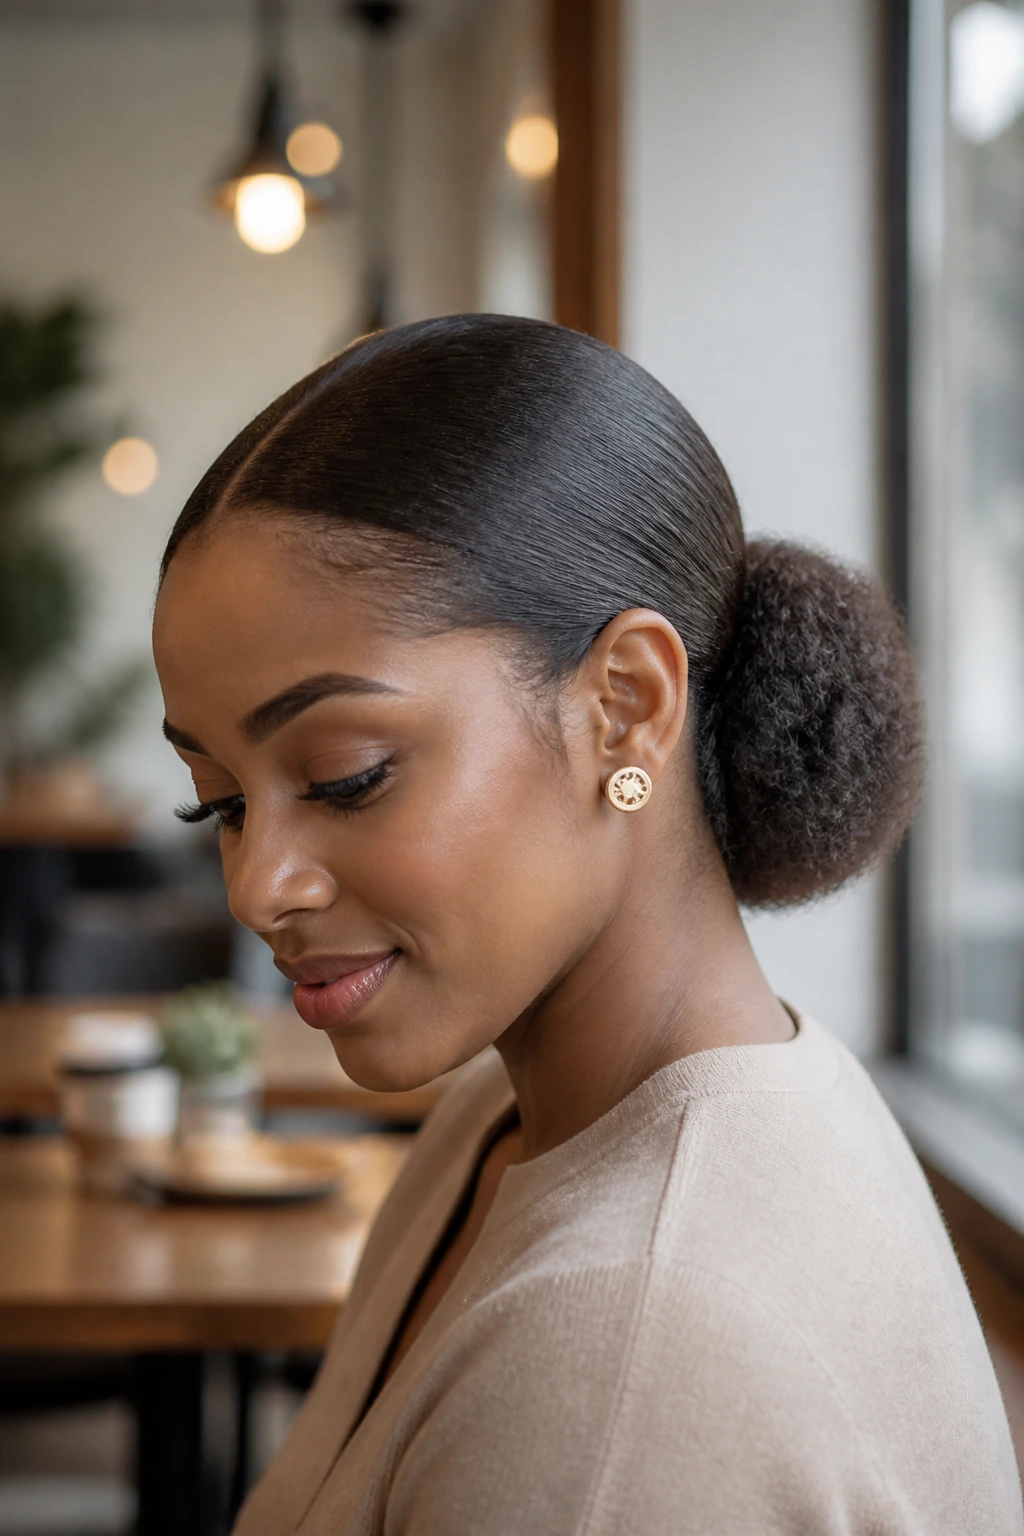
Why does this one keep showing up in real life? Because it works with collars, turtlenecks, jackets, and earrings that would compete with a higher style. The puff sits low at the nape, which makes the whole look feel calmer and a little more grown-up.
A narrow, neat base is the whole point here. Brush the front down, smooth the sides back, and let the puff open up below the occipital bone so the shape lands softly against the neck instead of hovering above it.
3. Deep Side-Part Puff
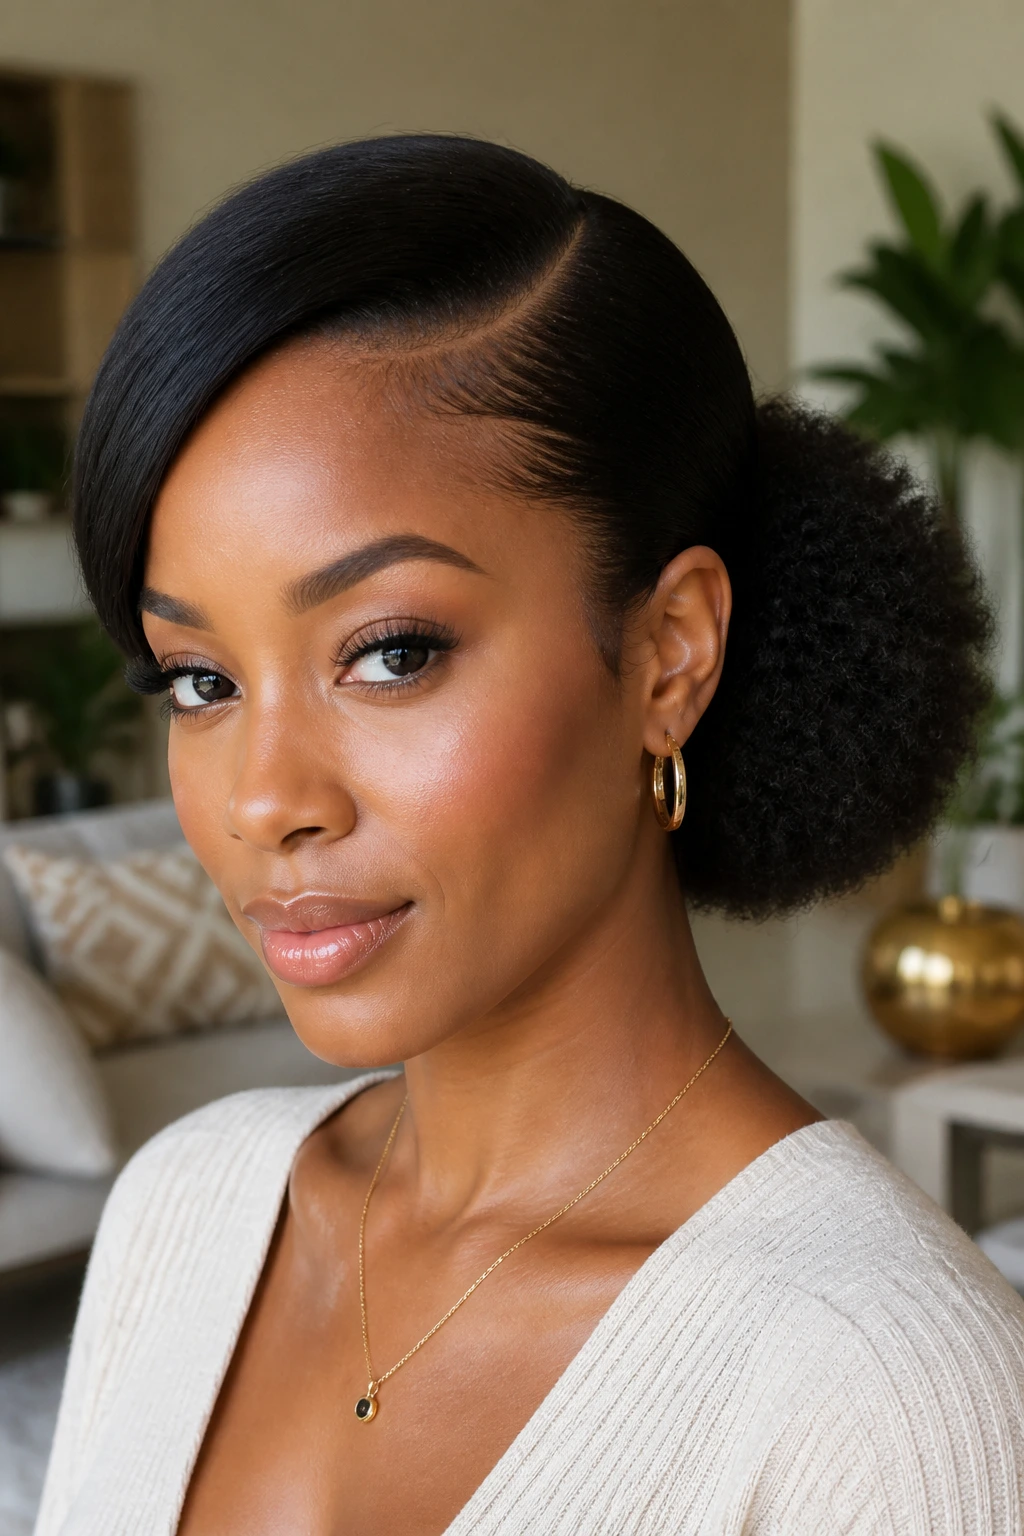
A deep side part does a lot of work with almost no effort. It shifts the weight of the style, breaks up symmetry, and gives the puff a little swing before the ponytail even starts. If your face tends to look long, this is one of the easiest ways to soften that line.
What Makes It Feel Different
The part creates a clear frame, then the puff does the volume. That combination is stronger than people think. I like this style on hair that has been stretched a bit, because the side sweep shows off the texture instead of hiding it.
- Part the hair with a rat-tail comb while it is still slightly damp.
- Smooth the heavier side first so the part stays clean.
- Let the puff sit a little behind the ear for a more relaxed shape.
4. Puff Ponytail with Twisted Front Pieces
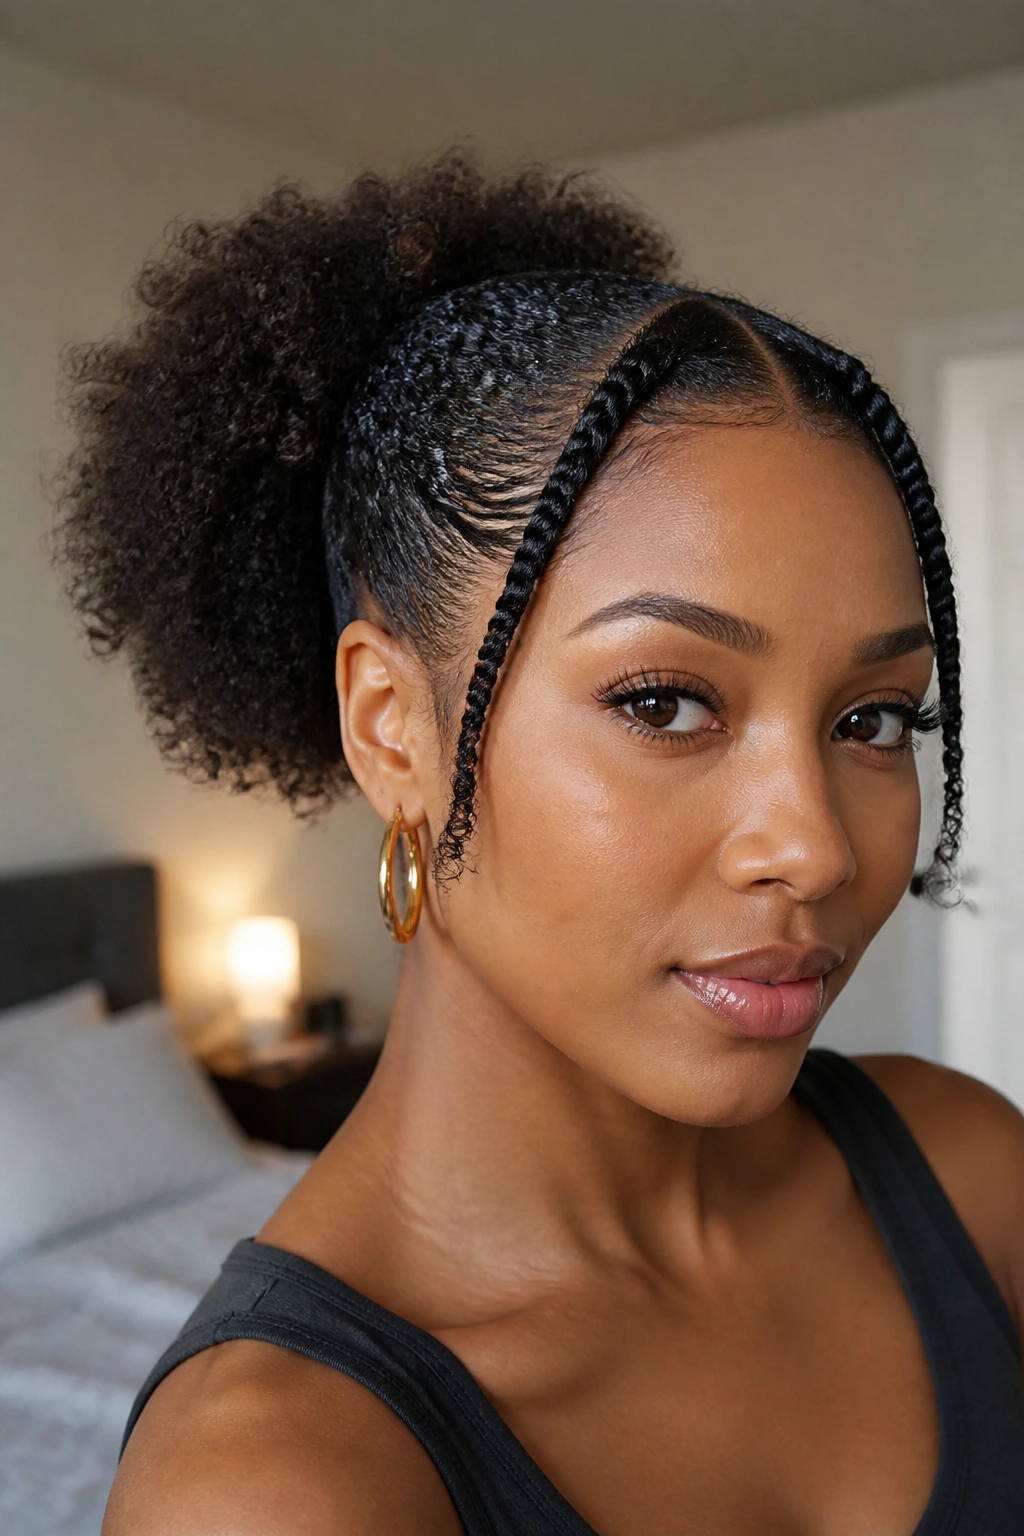
Twisted front pieces make a puff ponytail look considered. Two small twists at the temples give the hairline some structure, and they are forgiving on days when your edges need less brushing and more kindness. That matters.
The rest of the puff can stay loose and fluffy. I prefer this style when I want something that feels a little dressed-up but not stiff. It also hides the fact that the front took three extra minutes and the back did the actual heavy lifting.
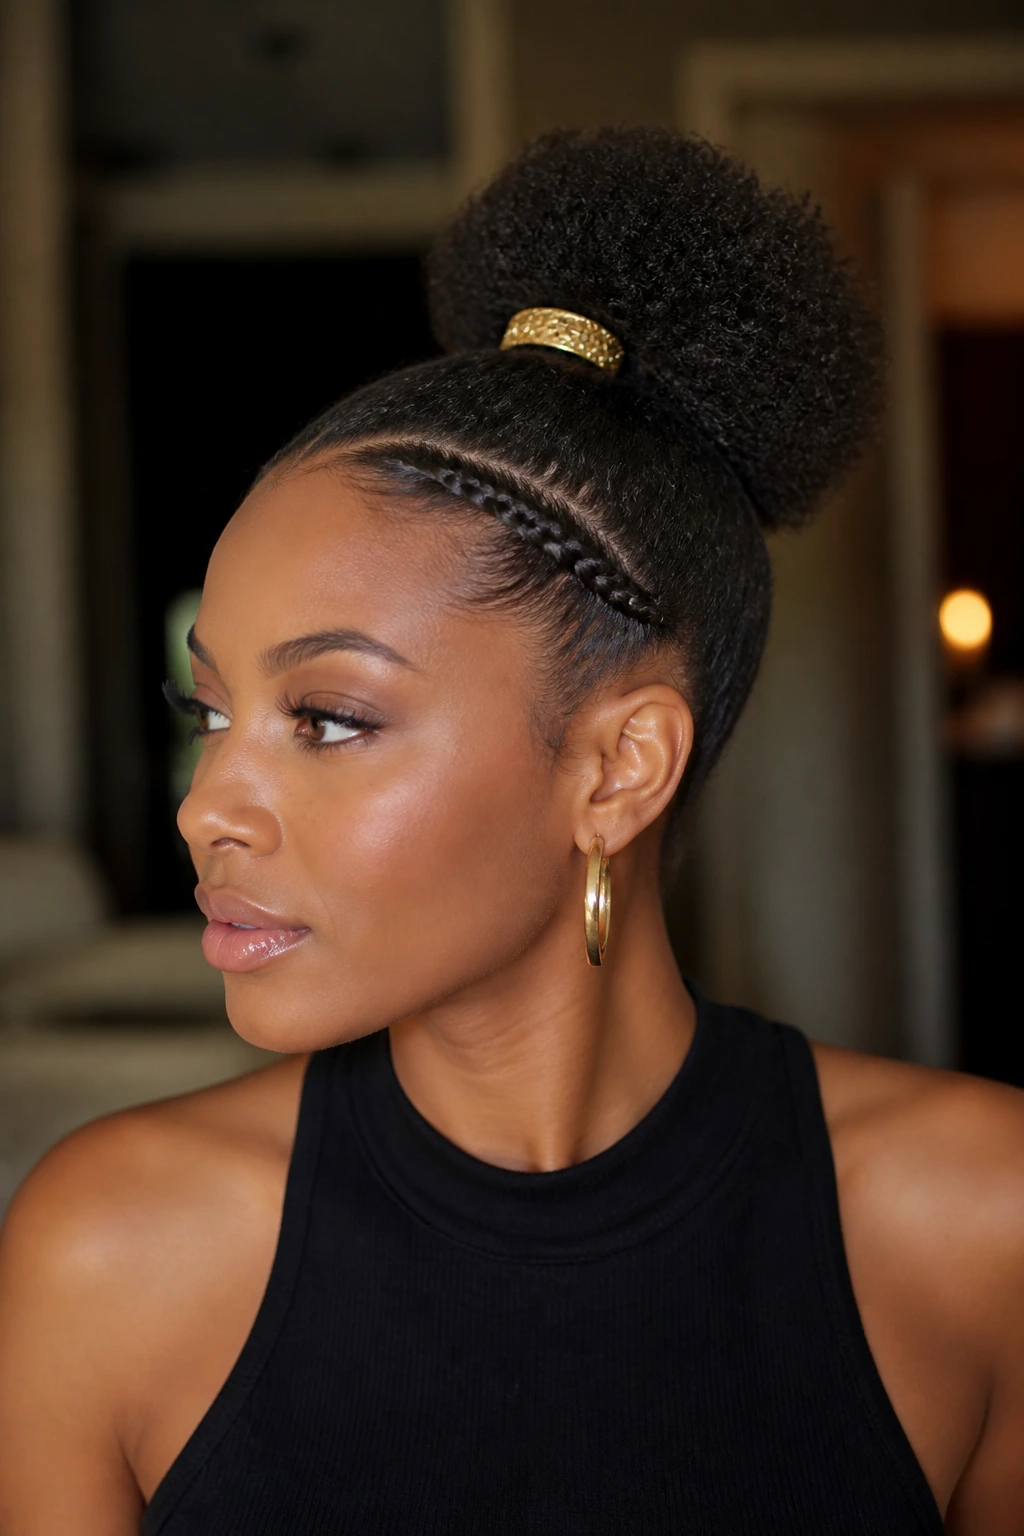
5. Braided-Band Puff
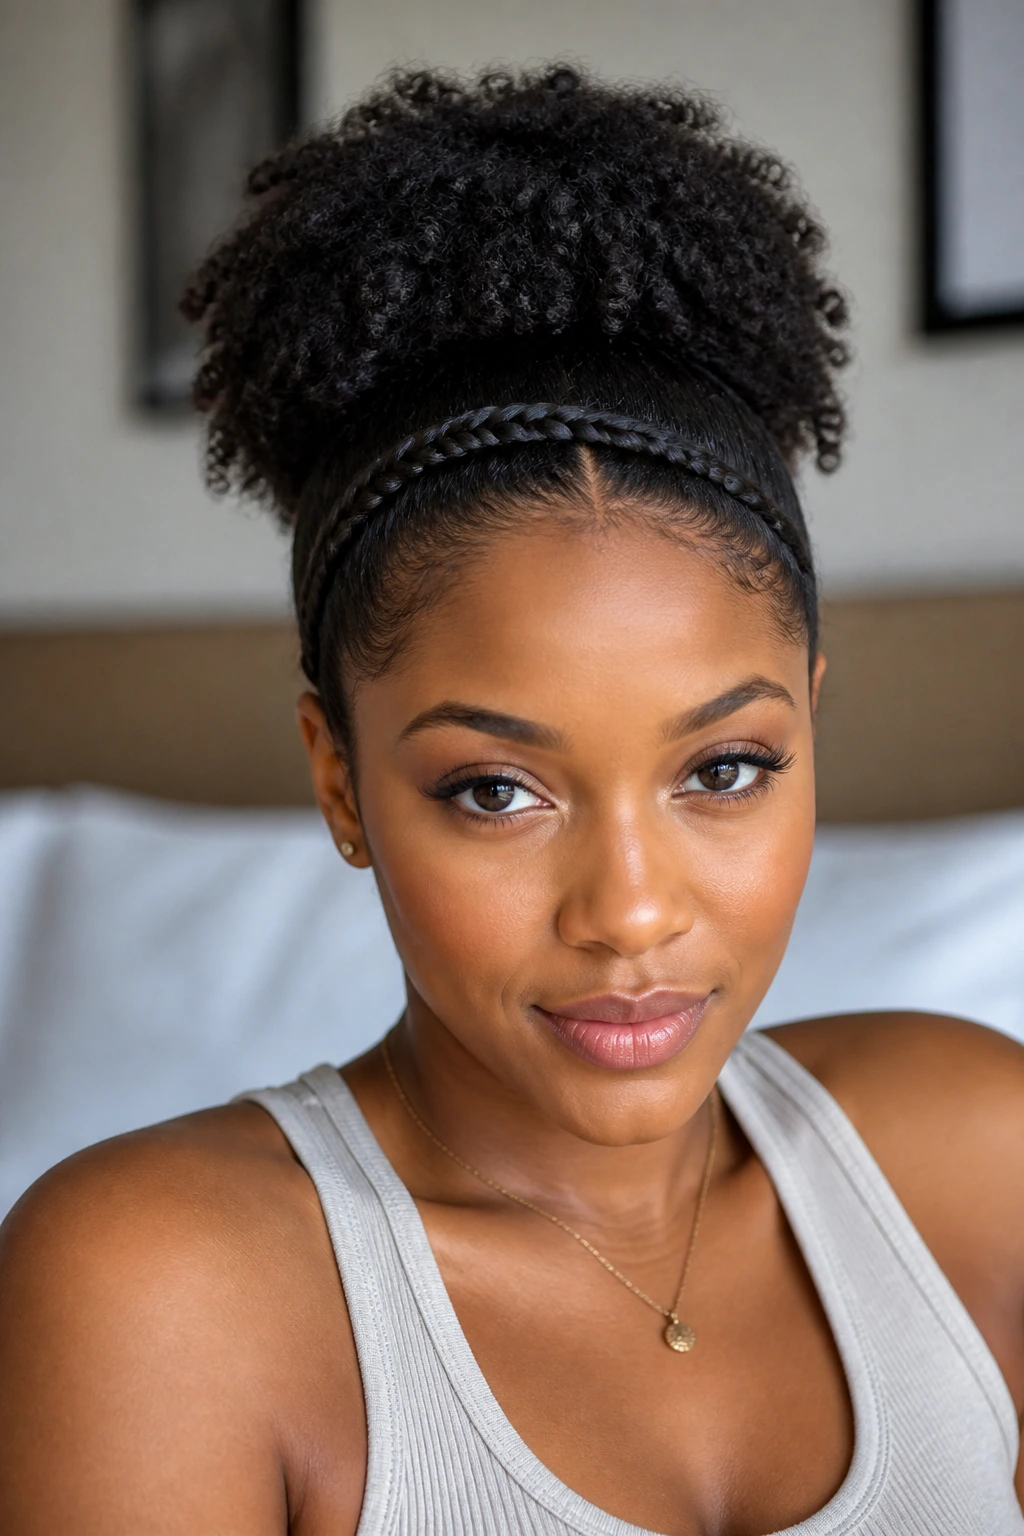
A braided band across the front changes the entire read of the style. Instead of a simple puff starting at the hairline, you get a built-in headband effect that gives shape and a bit of protection around the edges. It is one of those styles that looks like you planned ahead.
Keep the braid flat and close to the scalp, then pull the rest into a puff just behind it. The braid should frame the face, not sit so wide that it eats the whole forehead. Small difference. Huge payoff.
6. Half-Up Puff with Loose Back Curls
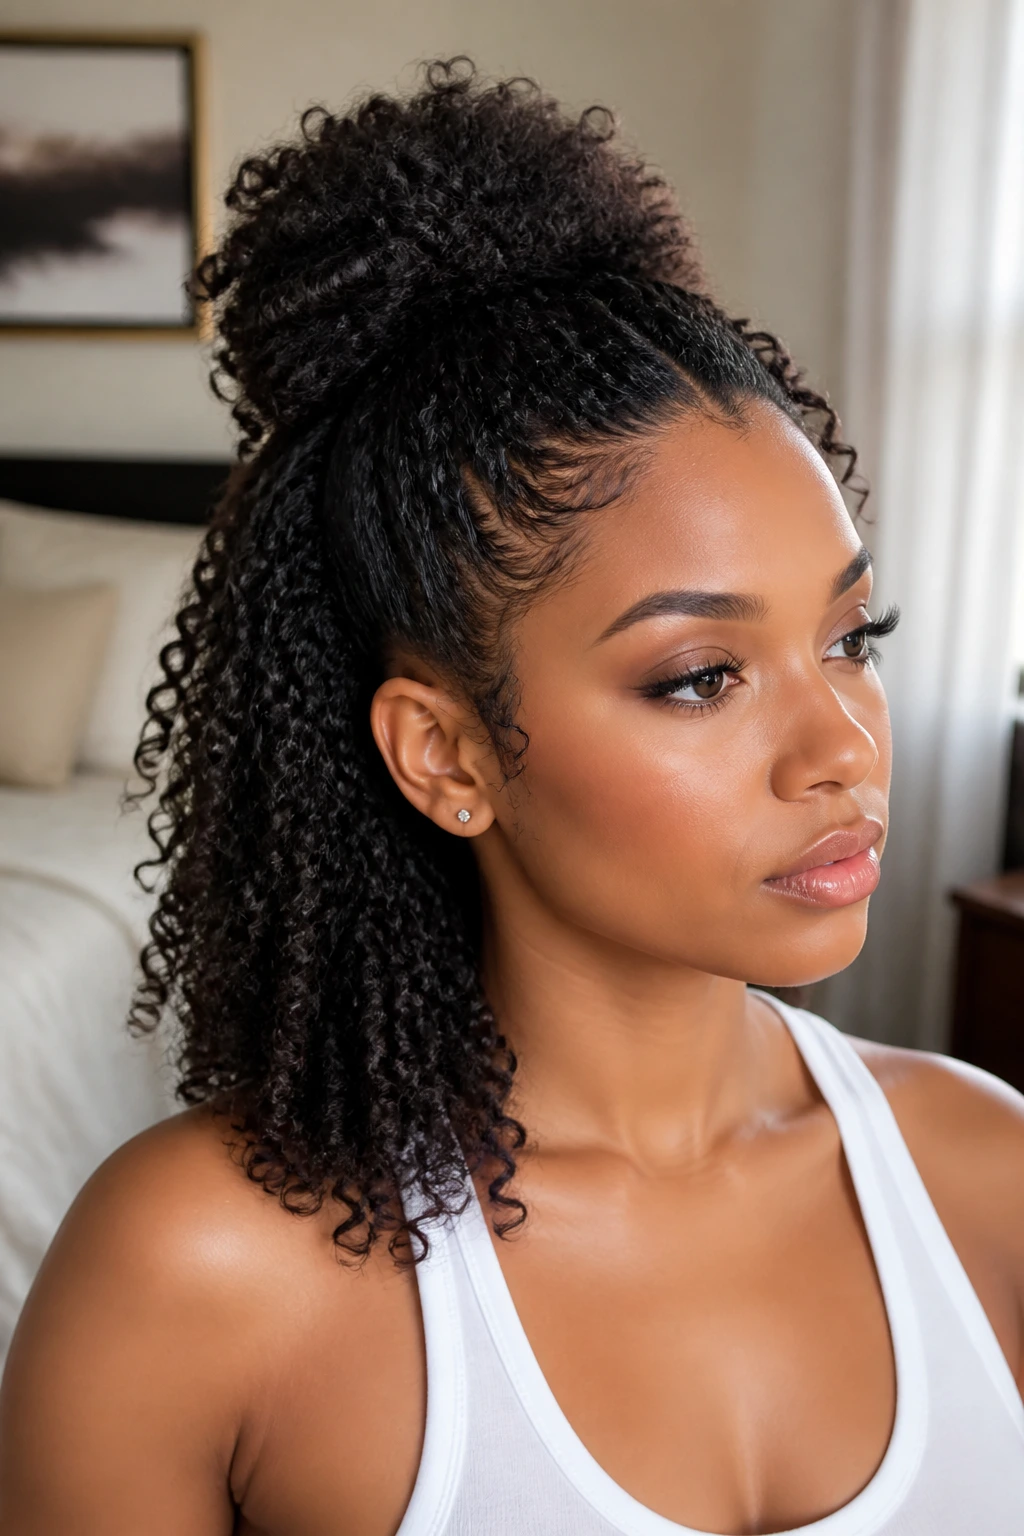
This one works when you want some hair up and some hair doing its own thing. The top section goes into a puff, while the back stays loose in curls, coils, or a twist-out. It reads playful, but not in a childish way.
Best when you want height without full commitment
The half-up puff gives structure at the crown and leaves the rest of the texture visible, which is helpful if you spent time defining the curls underneath. It also keeps the top out of your face while letting the length show.
If your back sections frizz faster than the top, mist them lightly before styling so the contrast still looks deliberate.
7. Twin Puff Ponytails
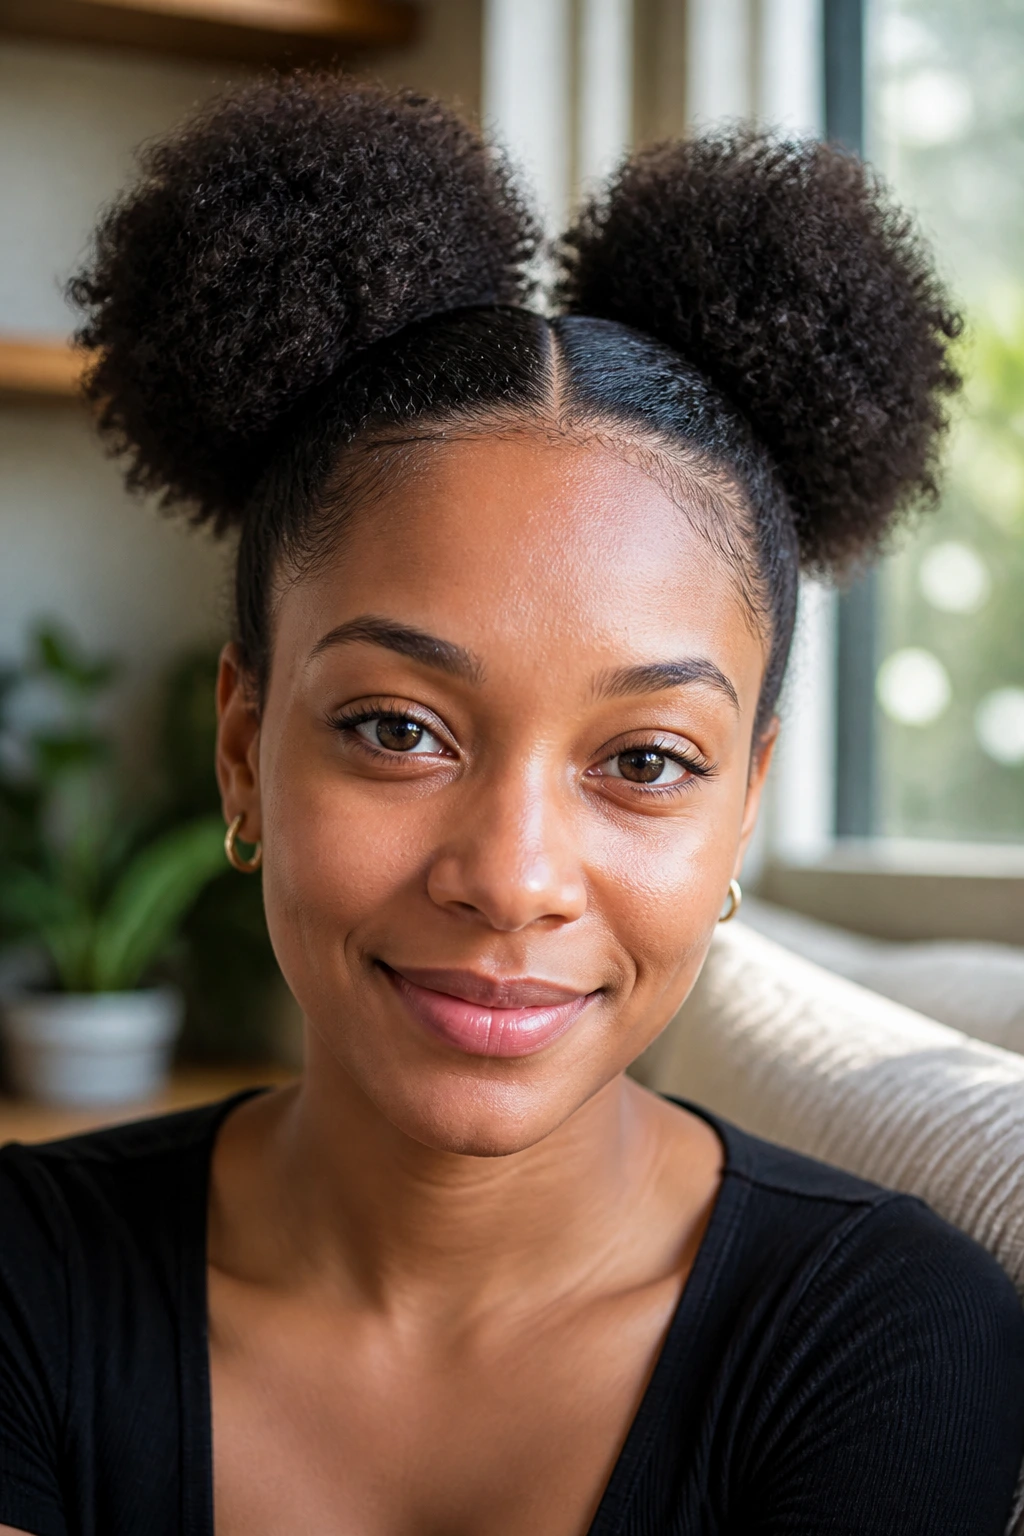
Twin puffs are the answer when one puff feels too heavy or too grown-up for the day. Split the hair down the middle, make two neat base sections, and let each puff sit high or low depending on the mood. The style has an easy charm that does not need much else.
I like it most when the parts are clean and the puffs are uneven on purpose only if the hair density forces that. If one side is fuller, leave it. Perfect symmetry is overrated anyway.
8. Bubble Puff Ponytail
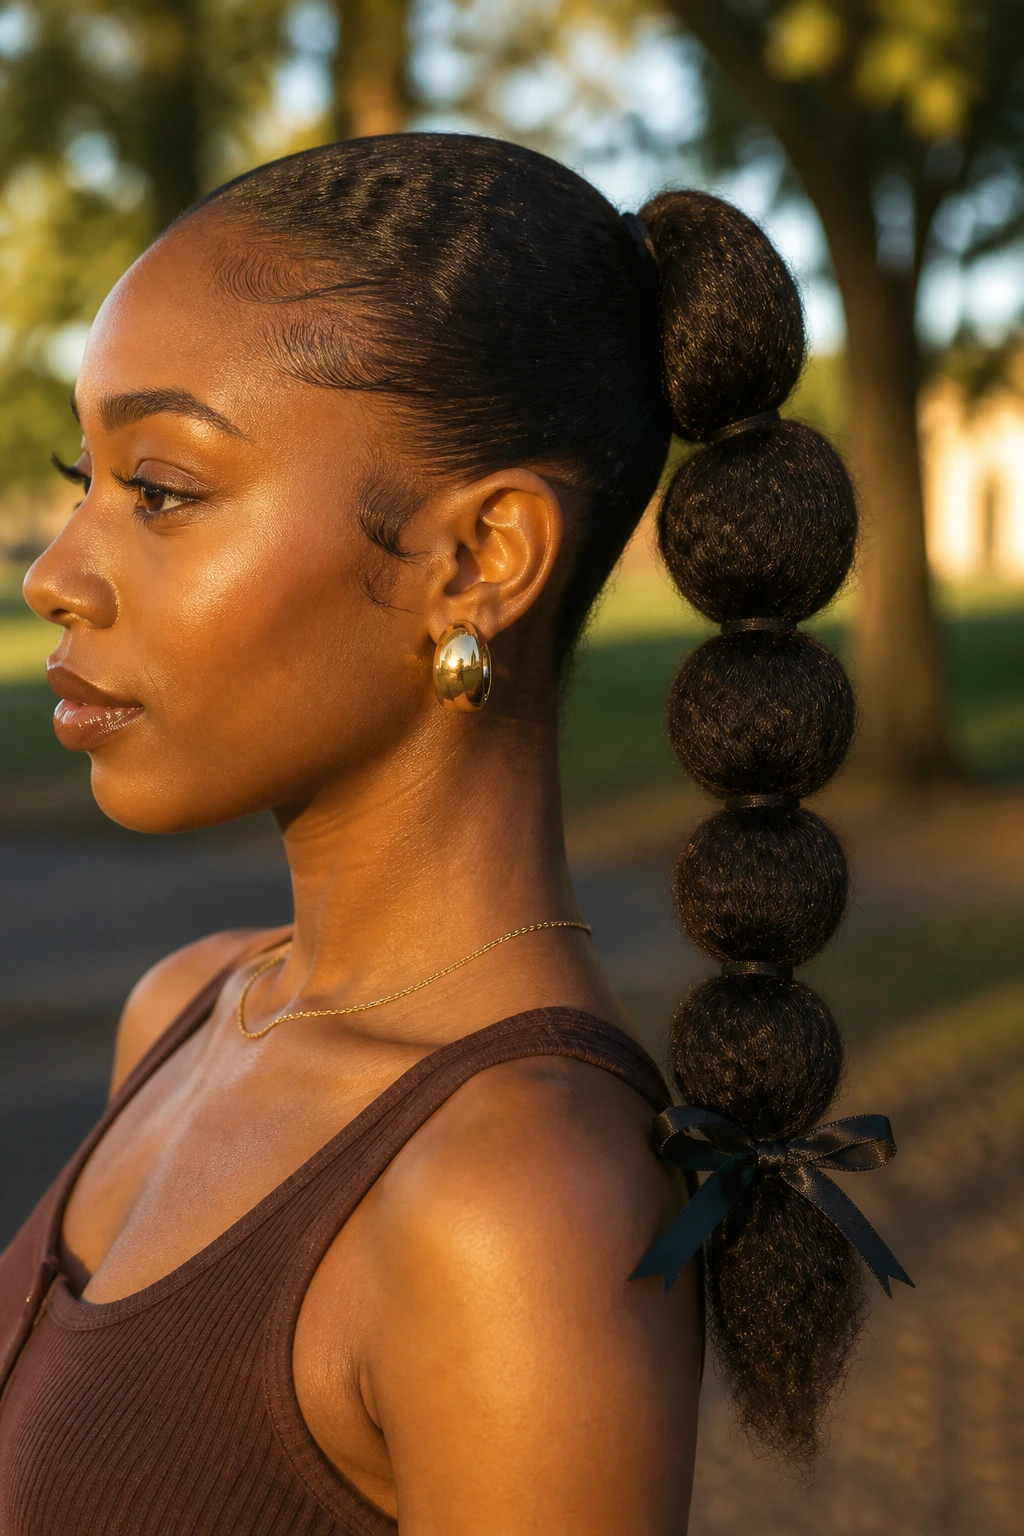
Bubble sections turn a simple puff into something more playful. Use small elastics down the length of the ponytail before the final puff, then gently pull each section into a rounded bubble. It gives shape to hair that might otherwise shrink into one compact cloud.
- Use snag-free elastics so removal does not turn into a session.
- Keep each bubble about 1 to 2 inches apart.
- Finish with a satin bow or a plain cuff if you want the style to look less sporty.
This style is especially useful on stretched hair. The bubbles stay visible longer when the texture has some length to hold them.
9. Wrapped-Scarf Puff
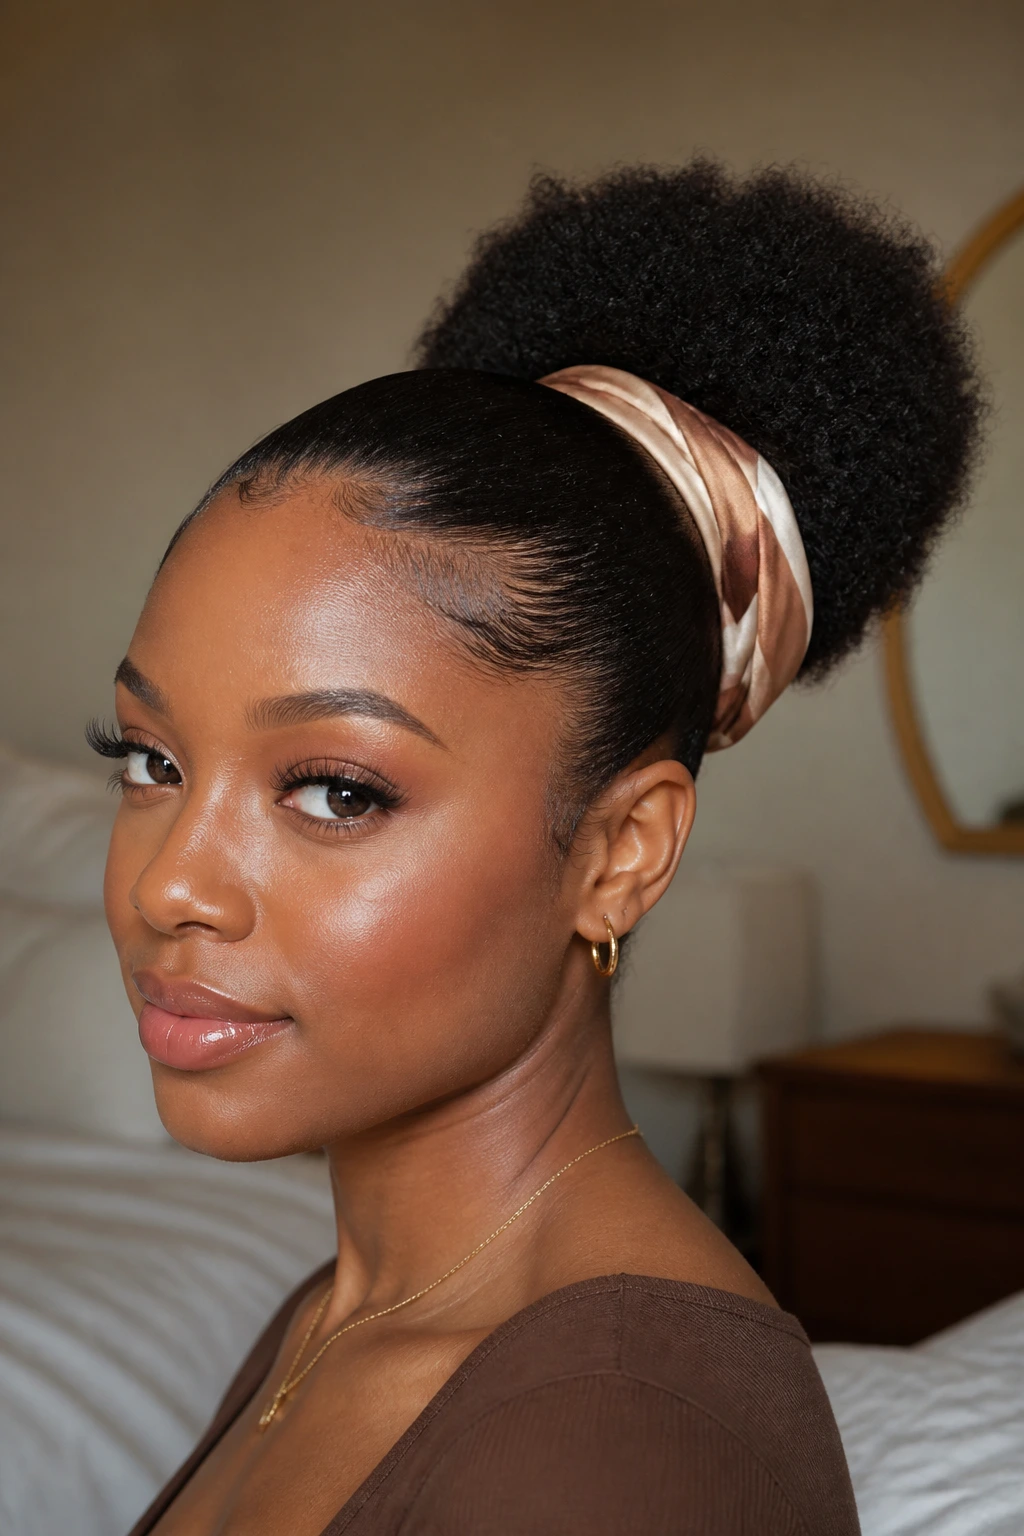
A scarf wrapped around the base does two jobs at once: it hides a plain elastic and gives the puff a little personality. Pick a satin or silk scarf if you want less friction, then knot it low and let the ends hang or tuck them in neatly.
The puff itself should stay rounded and free. The scarf is the accent, not the main event. A bright print can carry a whole outfit, especially when the rest of the styling is simple.
10. Mohawk Puff with Flat-Twist Sides
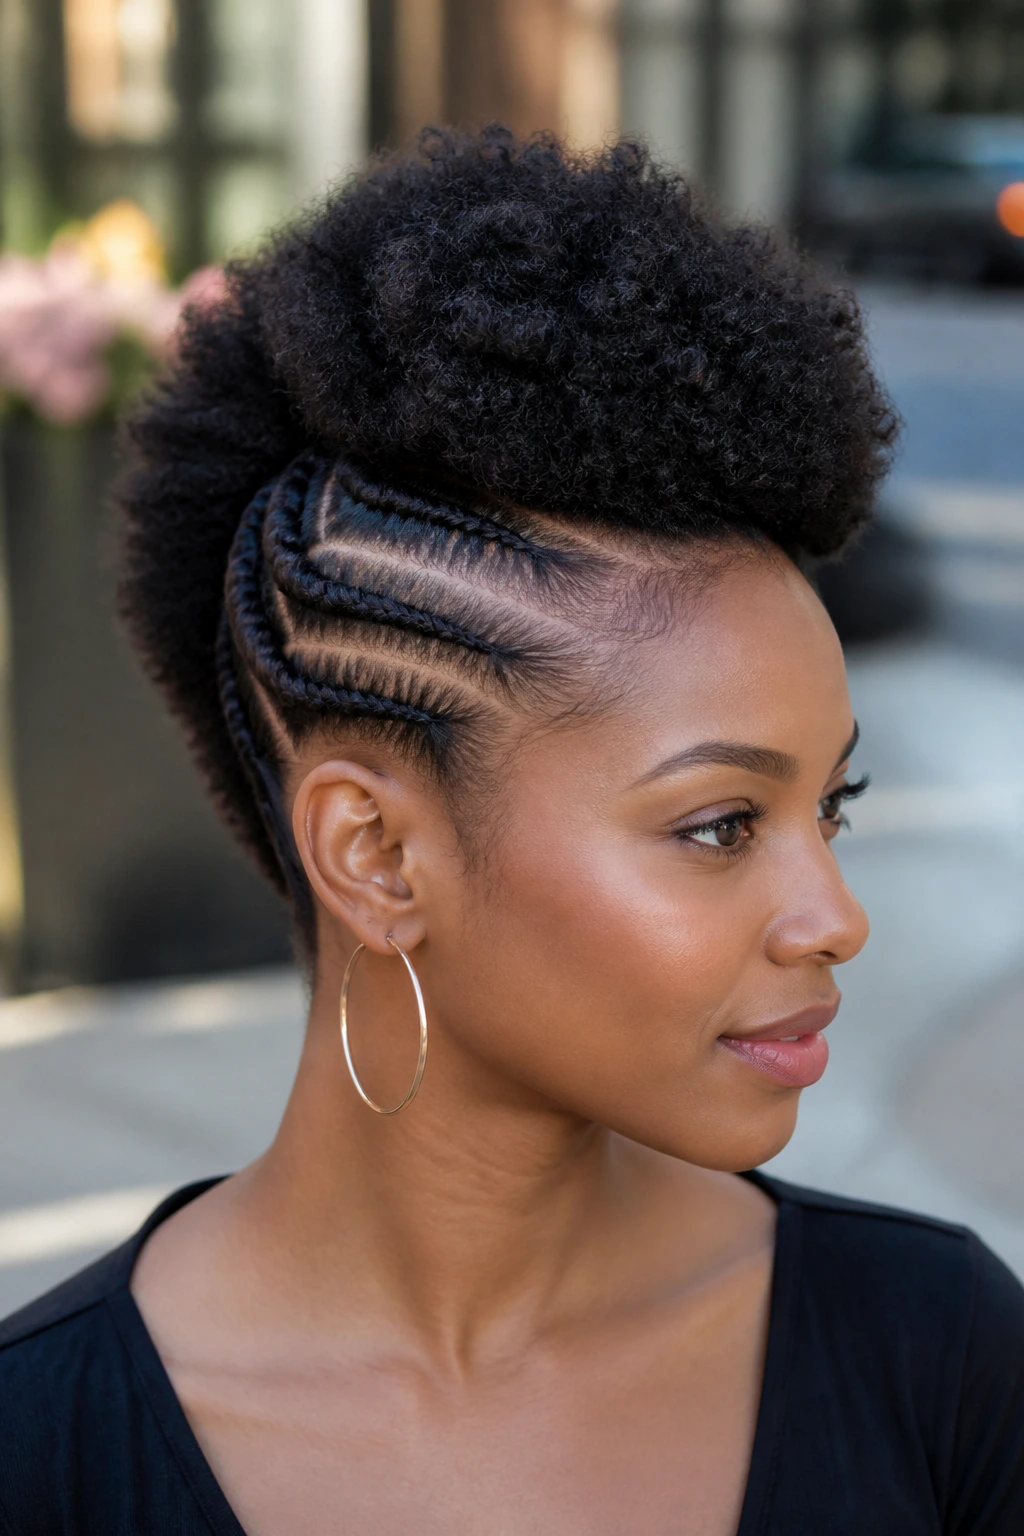
This style brings edge without turning into a full updo. The sides get flat twists or smooth braids, while the center section rises into a puff that runs from front to back like a soft mohawk. It is bold, but still wearable.
The trick is keeping the side sections tight enough to show the pattern but not so tight that the face looks pulled. A little lift at the crown helps the puff feel like the centerpiece instead of an afterthought.
11. Soft Center-Part Puff
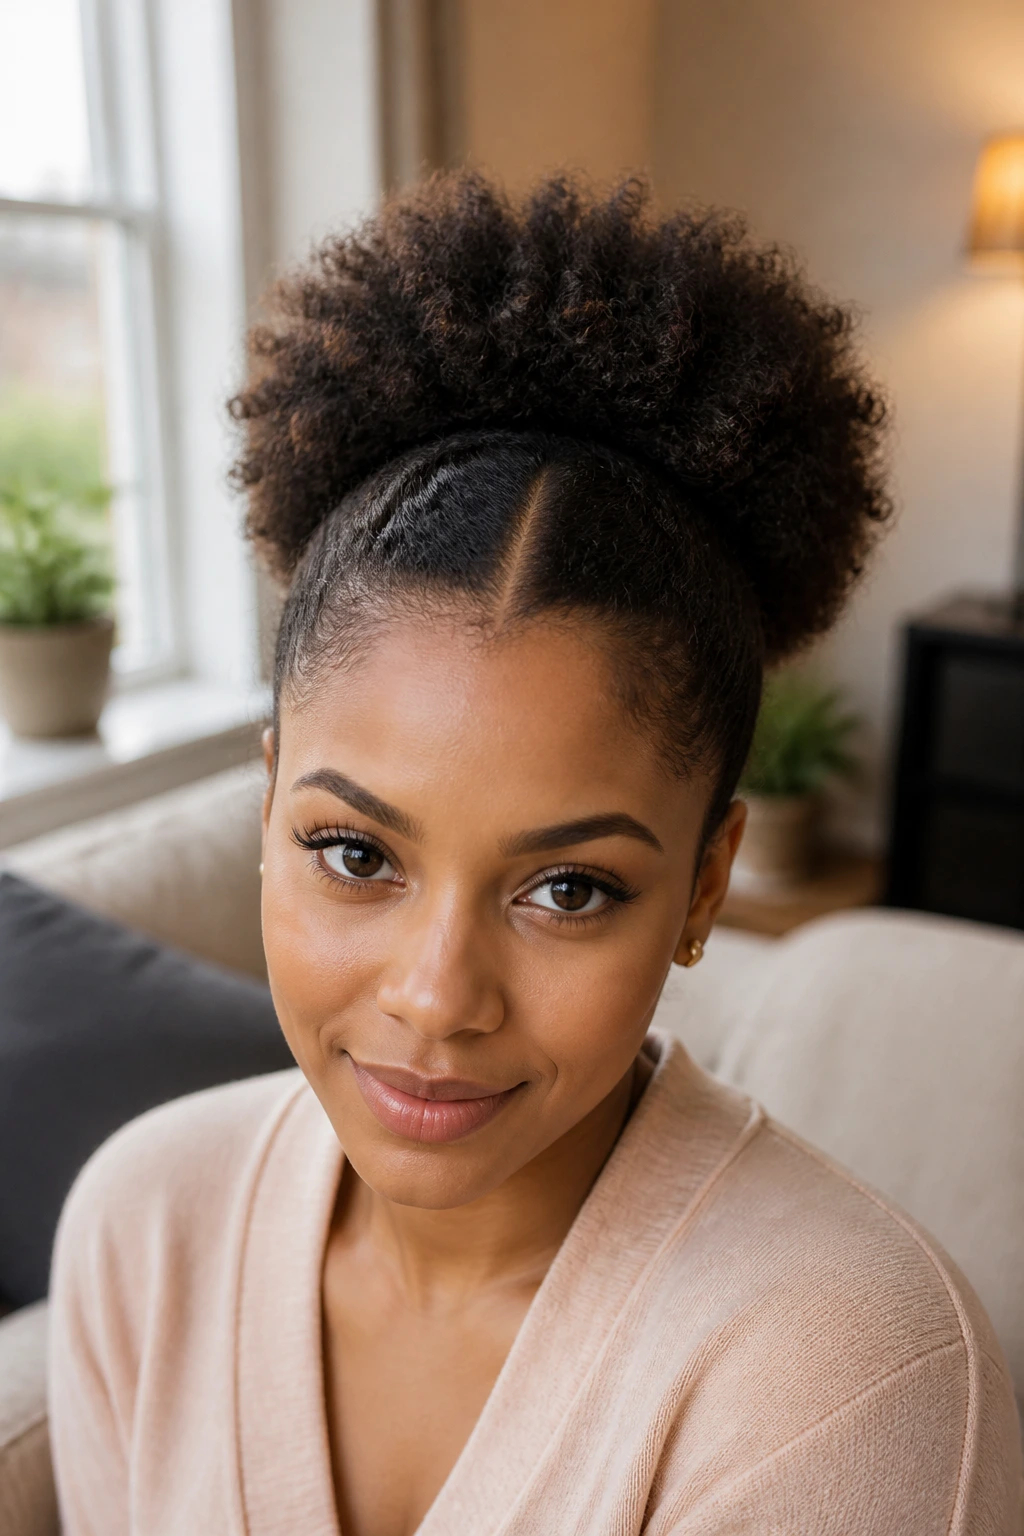
A center-part puff can look strict if the base is too polished, so I prefer a soft version. Leave a slight curve in the part, smooth each side with a brush, and let the puff sit in the middle with a round shape that keeps the look friendly.
This is the one I’d reach for on days when you want balance. It works with glasses, simple studs, and no-frills makeup. Nothing fights it.
12. Puff and Bang Combo
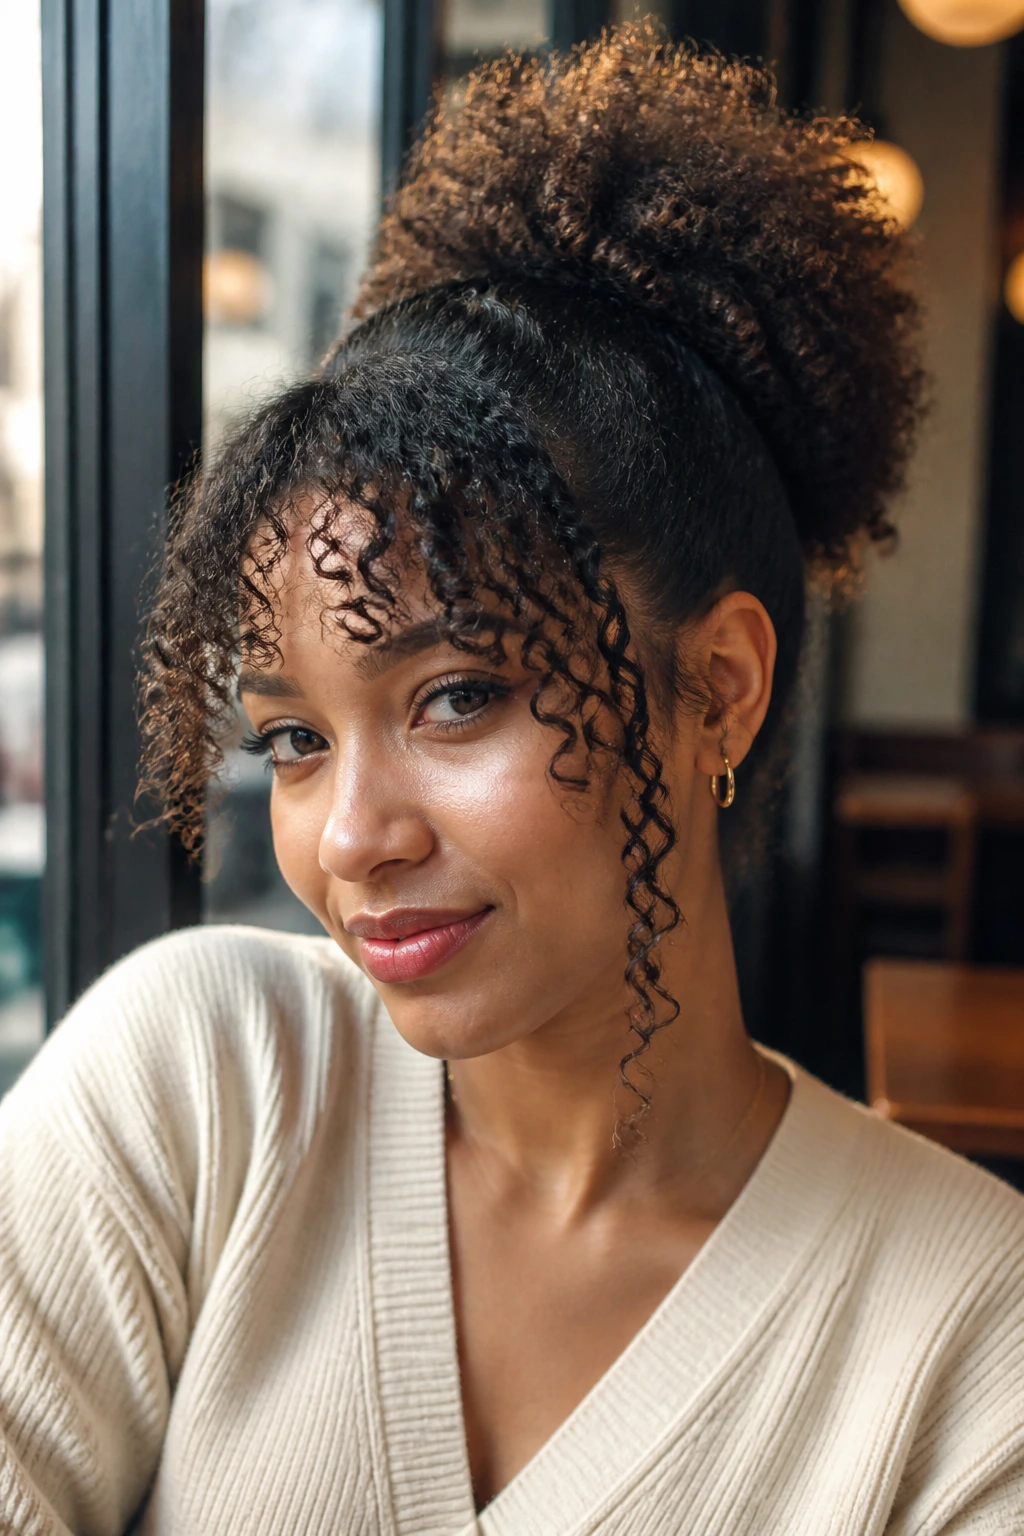
A puff with a curly bang gives you the best part of both shapes: the height of the puff and the softness of fringe around the forehead. It works especially well if your bang section has a little more definition than the rest of the ponytail.
The bang makes the whole style feel softer
Leave the front curls loose, then gather the rest into the puff. You do not need a heavy fringe for this to read well; even a few curved pieces at the front can change the whole face shape.
If your bangs shrink hard, stretch them slightly with a roller or twist set before styling.
13. Beaded-End Puff
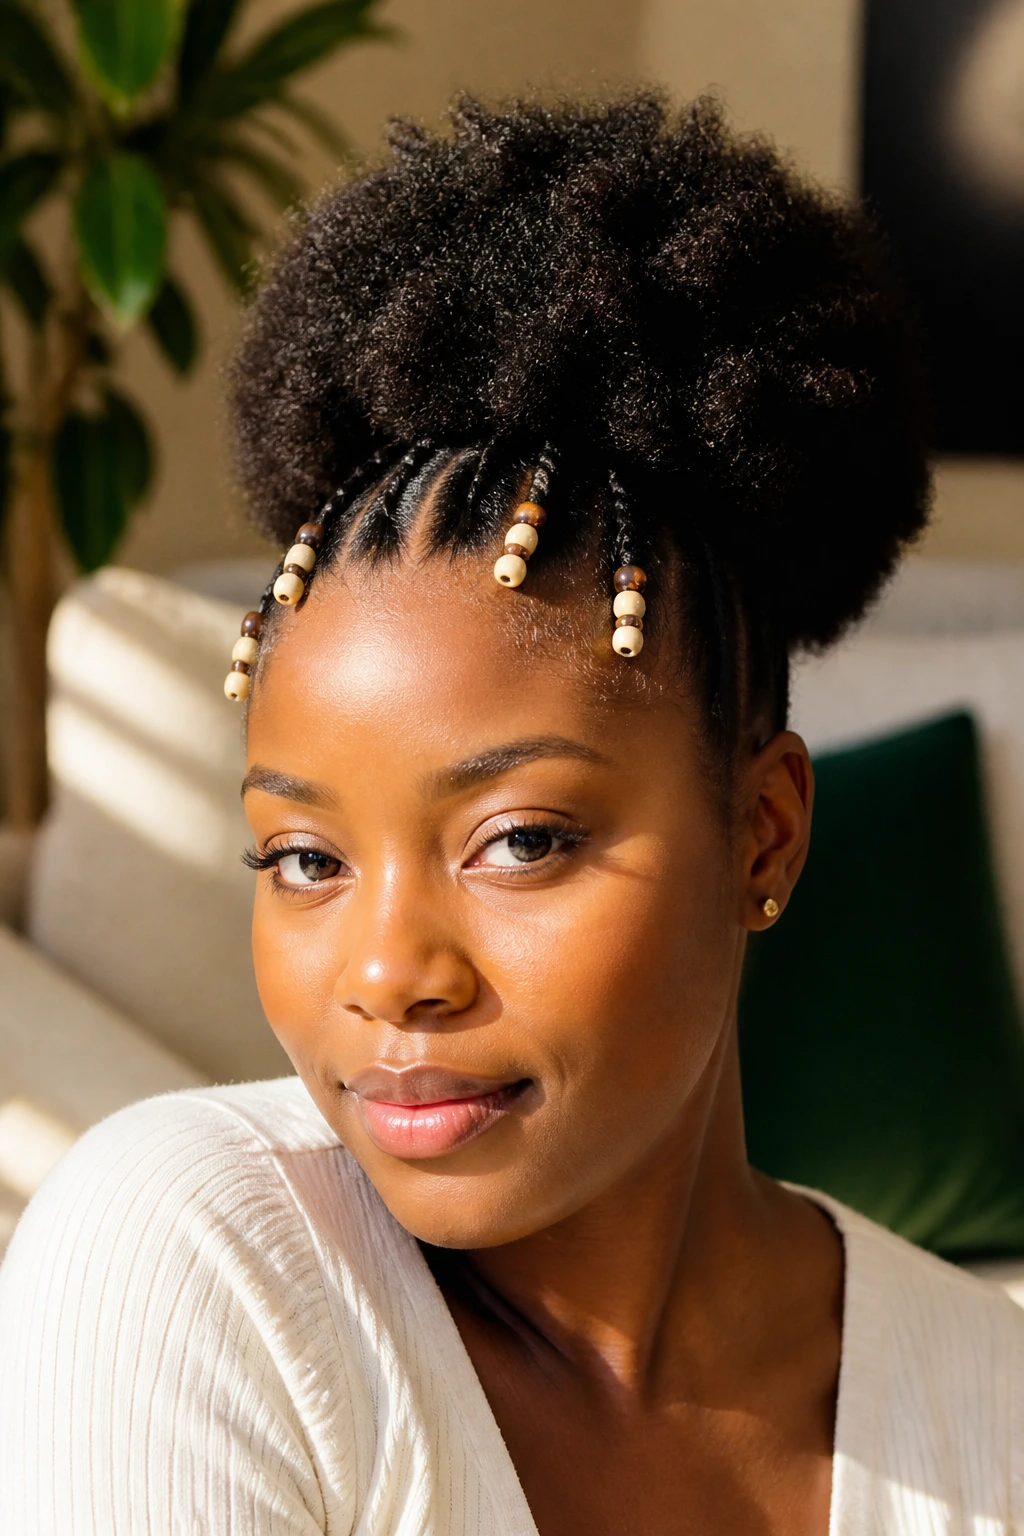
Beads at the front of the style give the puff a little sound and movement, which is exactly why this one feels lively. Add a few bead clusters to small braids or twists leading into the puff, then let the rest stay rounded and free.
- Use lightweight beads so the front sections do not pull.
- Keep the bead count low if the puff itself is already full.
- Pick colors that echo earrings, a shirt detail, or lipstick.
This look is best when you want the puff to feel decorated without getting crowded.
14. Claw-Clip Puff Lift
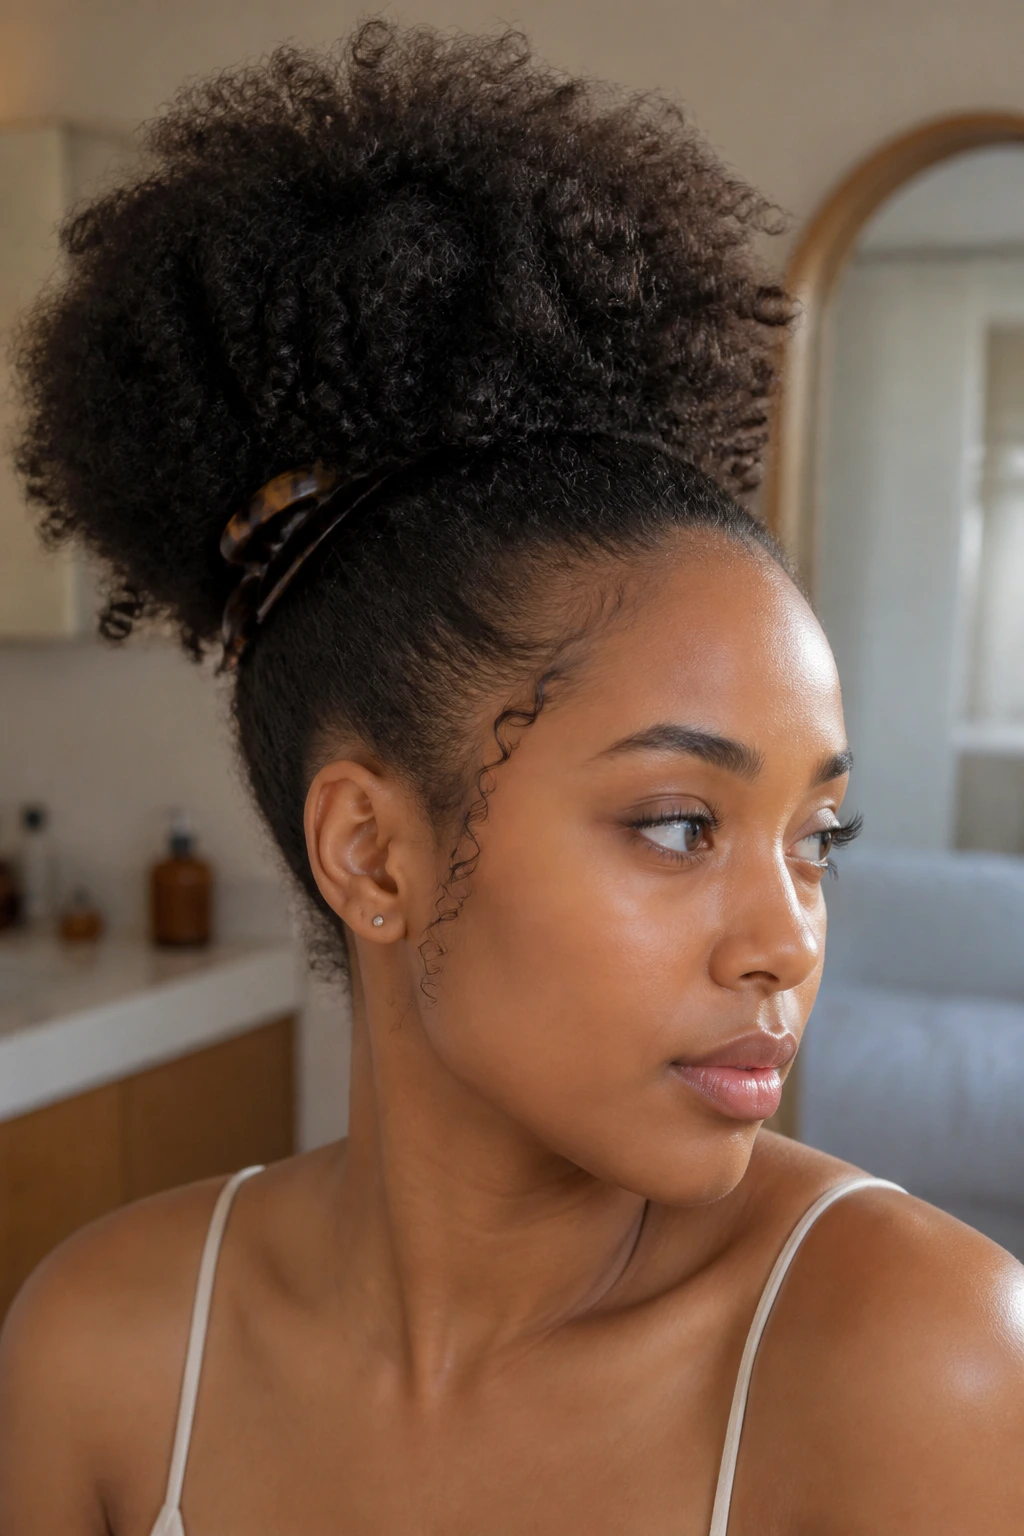
A claw clip can create a raised base before the puff starts, and that makes the whole style feel less flat. Use the clip to hold the gathered hair first, then secure the puff over it or just behind it. It works well when you want extra lift without a tight elastic grip.
Choose a clip with teeth that hold but do not snag. Plastic that bites into the hair too hard is not a shortcut. It’s a headache.
15. Stretch-Set Blowout Puff
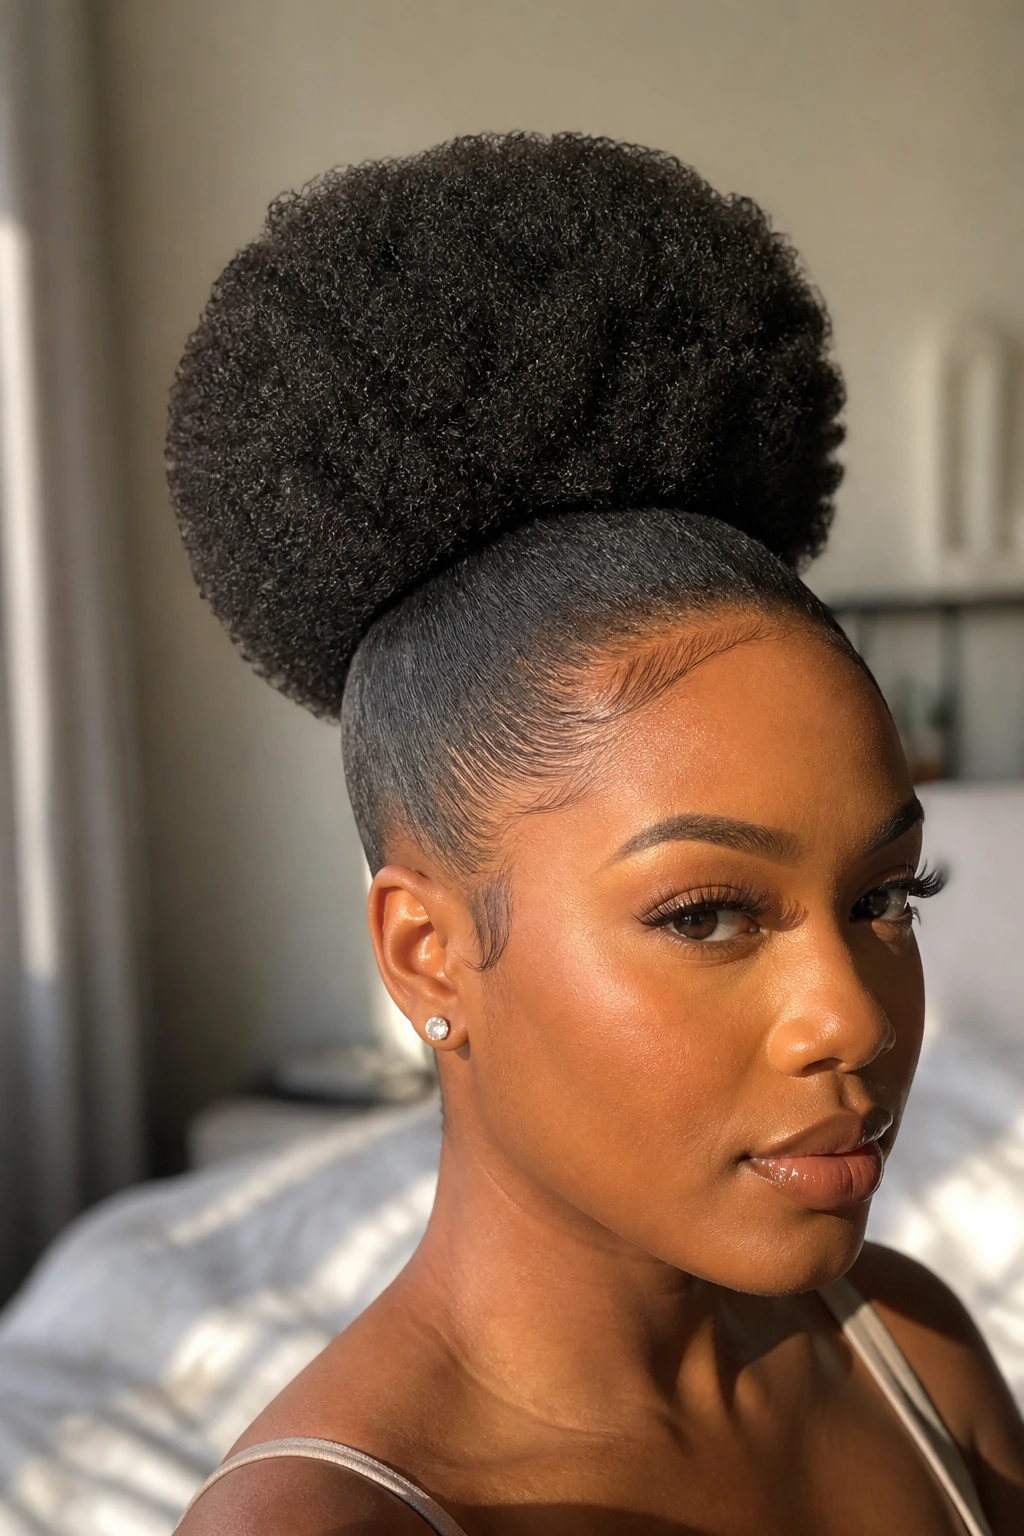
When natural hair is stretched, the puff gets bigger, smoother, and easier to shape. That is the whole appeal here. The ends have more length to drape, the ponytail sits with more lift, and the puff reads full without needing too much teasing.
I like this style when I want a puff that looks almost sculpted. Blowout hair or banded stretch hair gives you that elongated shape, especially around the crown and nape. The style also lasts a little longer before shrinkage starts arguing with you.
16. Finger-Coiled Puff Ponytail
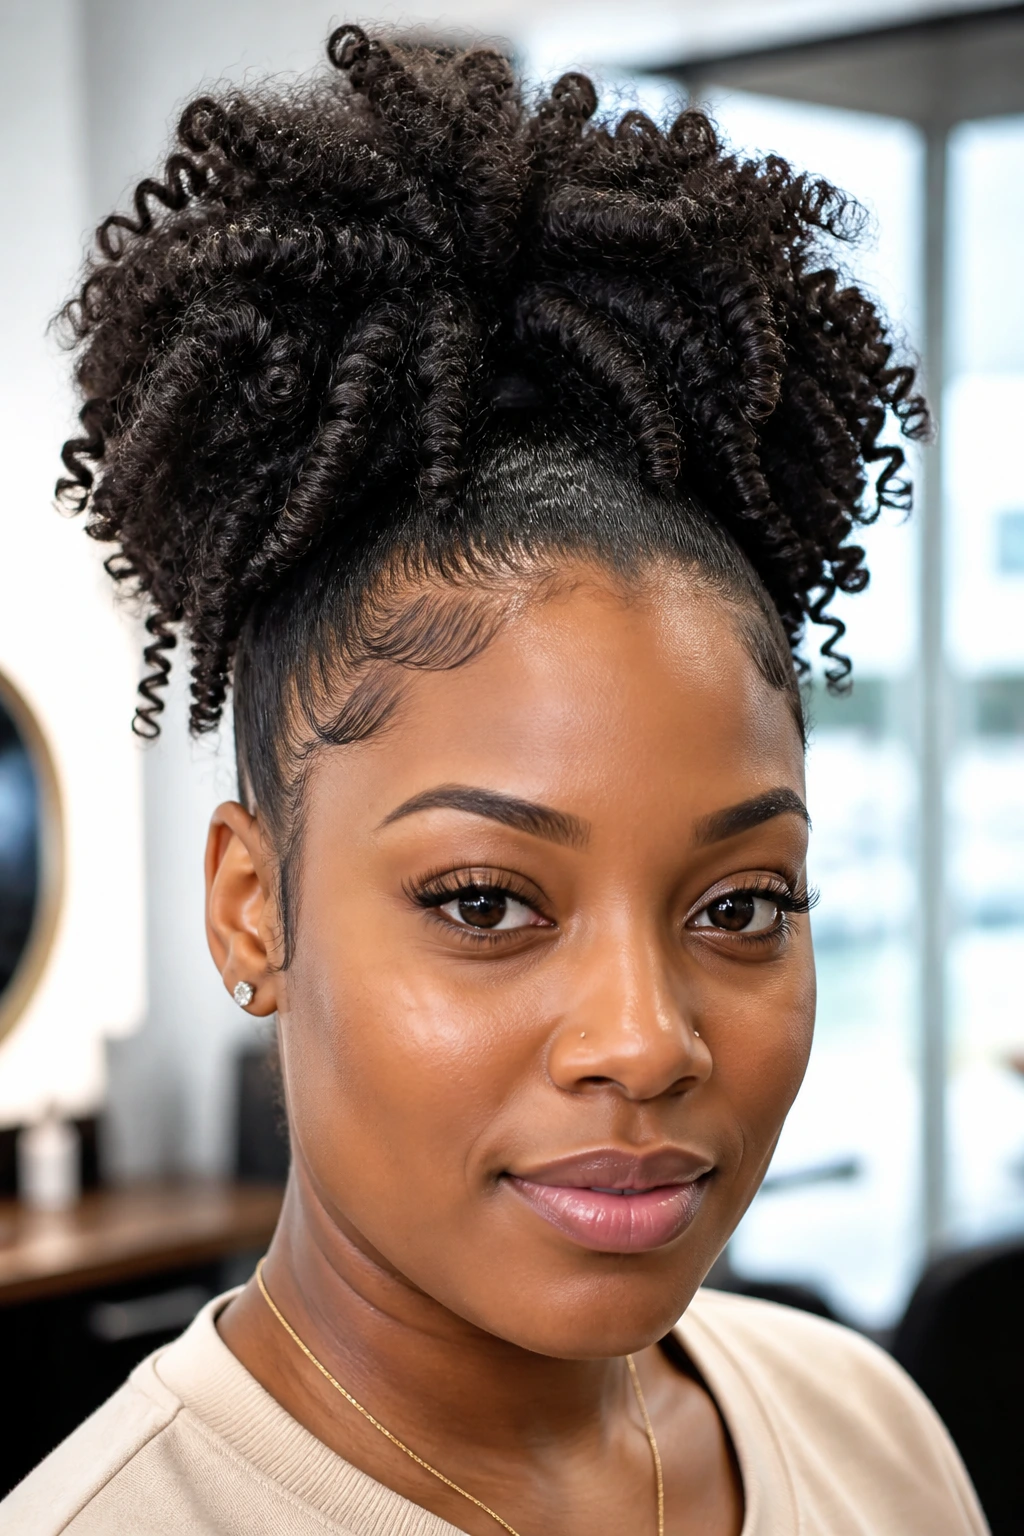
Finger coils around the puff make the texture more defined and deliberate. The base can stay smooth, but the loose ends carry little spirals that catch the eye. It is a strong choice when you want the puff to feel styled, not just gathered.
The best version keeps the coils soft enough to move. If they are too stiff, the puff loses that plush, touchable look. A small amount of cream and patience goes a long way here.
17. Pineapple Puff
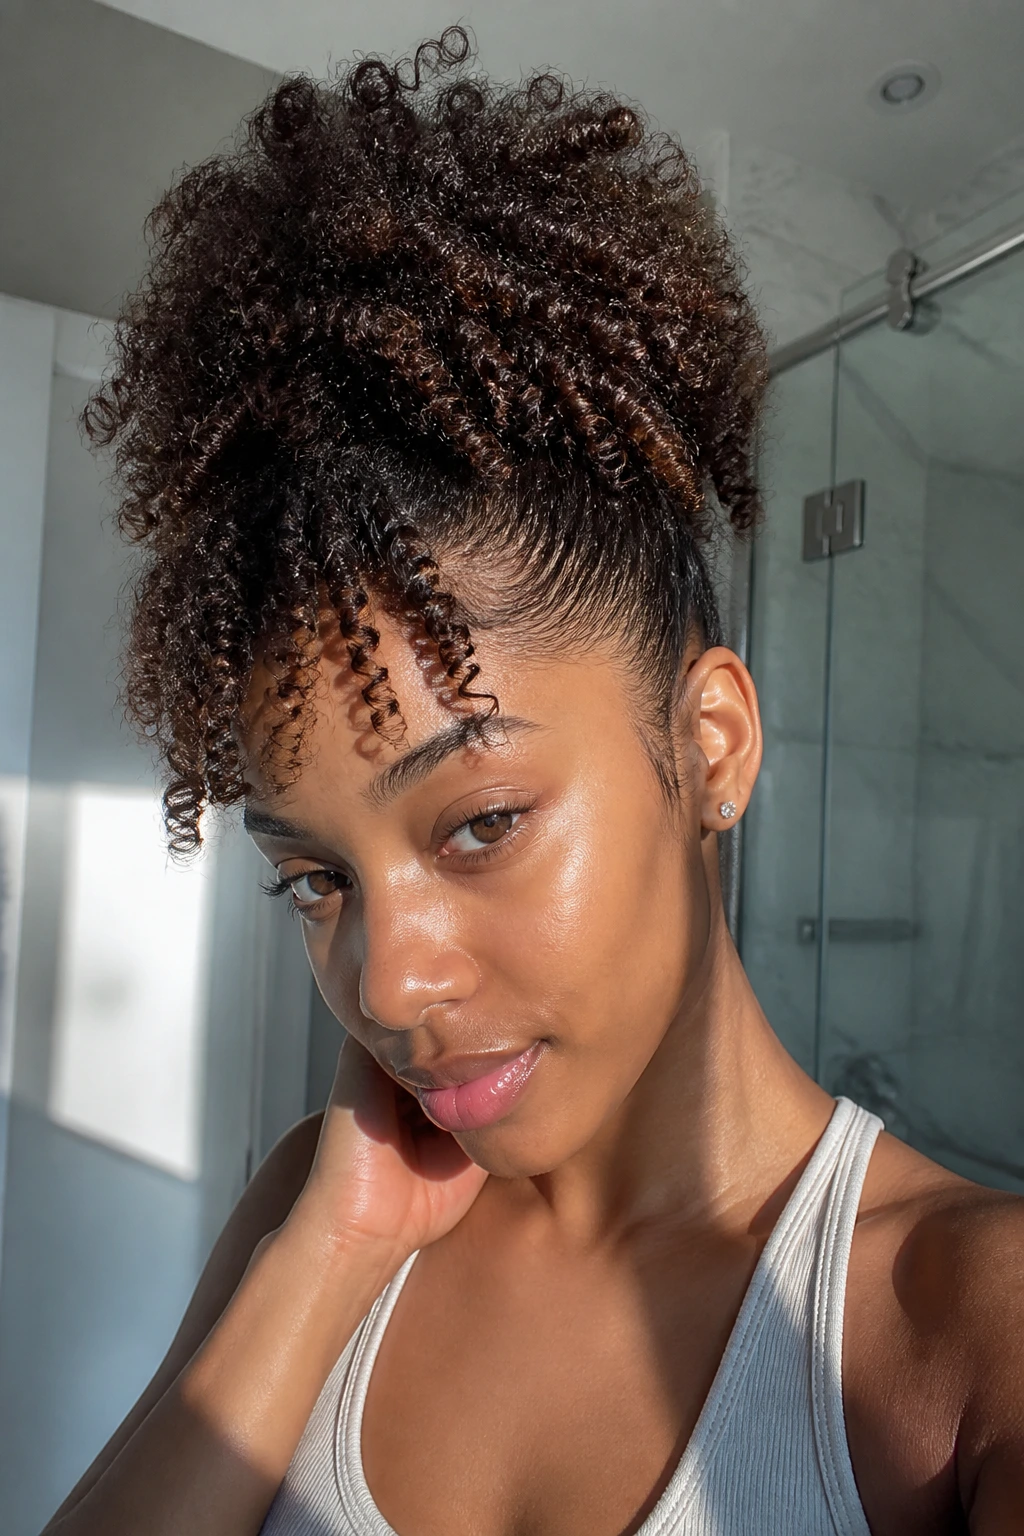
The pineapple puff is basically the high puff’s relaxed cousin. The base sits high and loose, and the curls or coils spill forward a little instead of forming a tight round ball. It is easy, quick, and very forgiving on second-day hair.
This style works when you do not want to spend time forcing shape into the ends. Let the puff remain slightly wild. That’s the charm.
18. Center-Part Low Puff
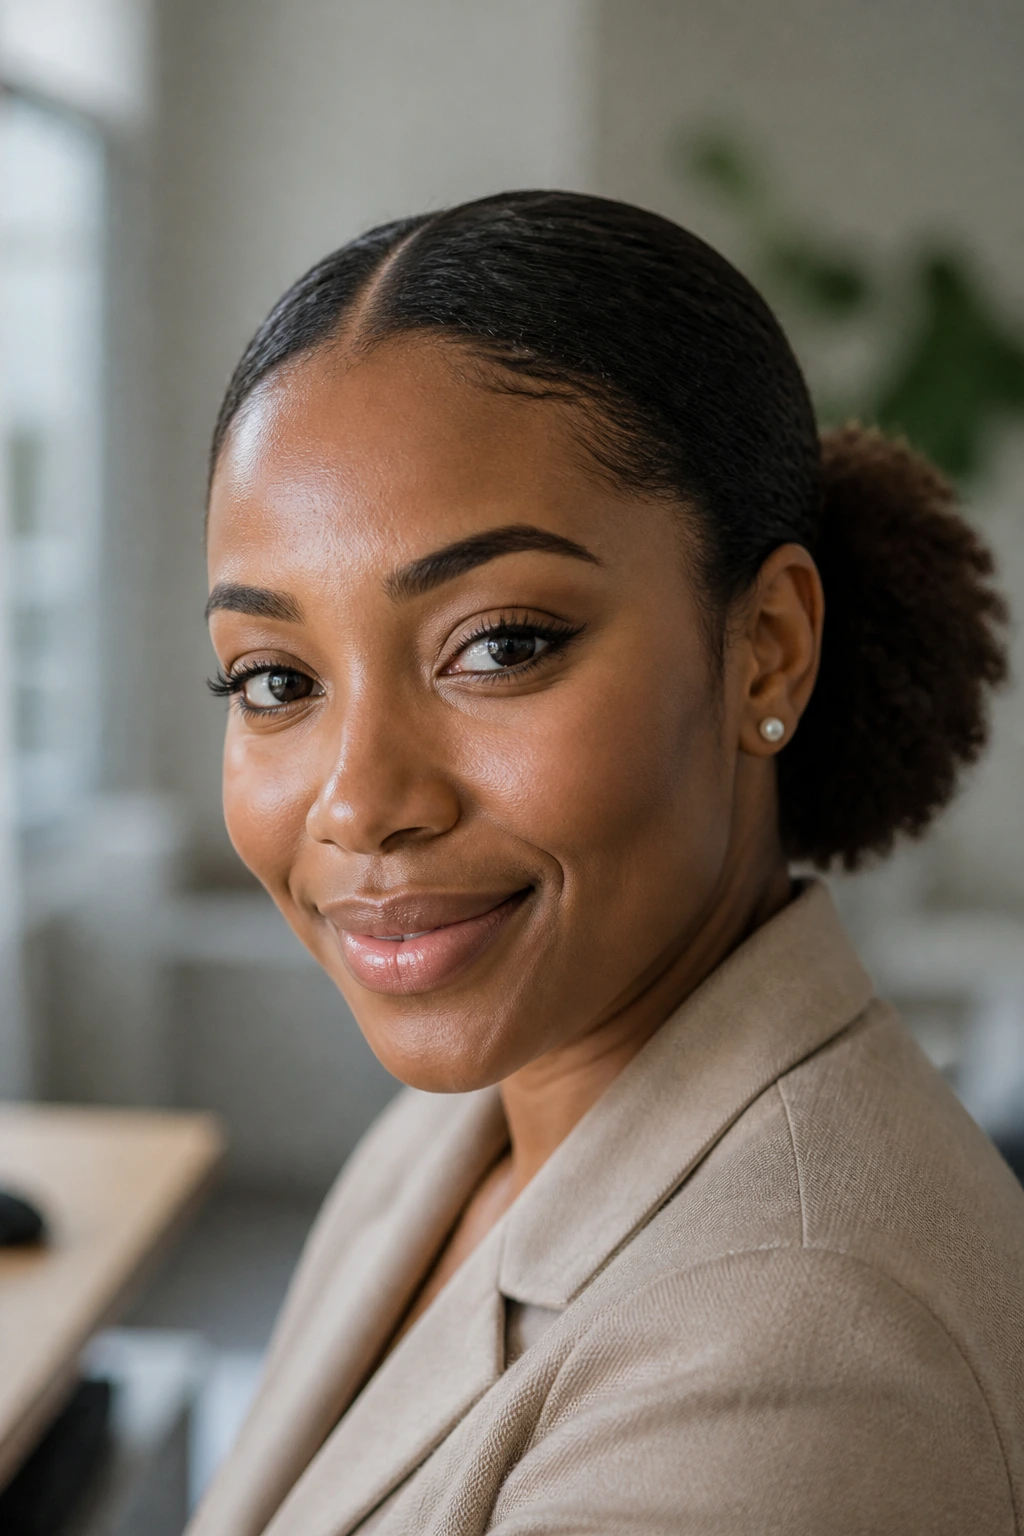
A low puff with a center part has a clean, symmetrical feel that works better than people expect. It keeps the style grounded, which is useful if your outfit already has a lot going on. The part gives the puff a neat start, and the low placement keeps it practical.
Clean lines, soft volume
I recommend this for workdays or events where you want your hair to look calm and deliberate. The base should be polished enough to show the part, but the puff itself should stay soft so the style does not feel severe.
- Use a fine-tooth comb for the part.
- Smooth each side with a light hand.
- Keep the puff a little lower than the jawline for the most balanced look.
19. Crown-Braid Into Puff
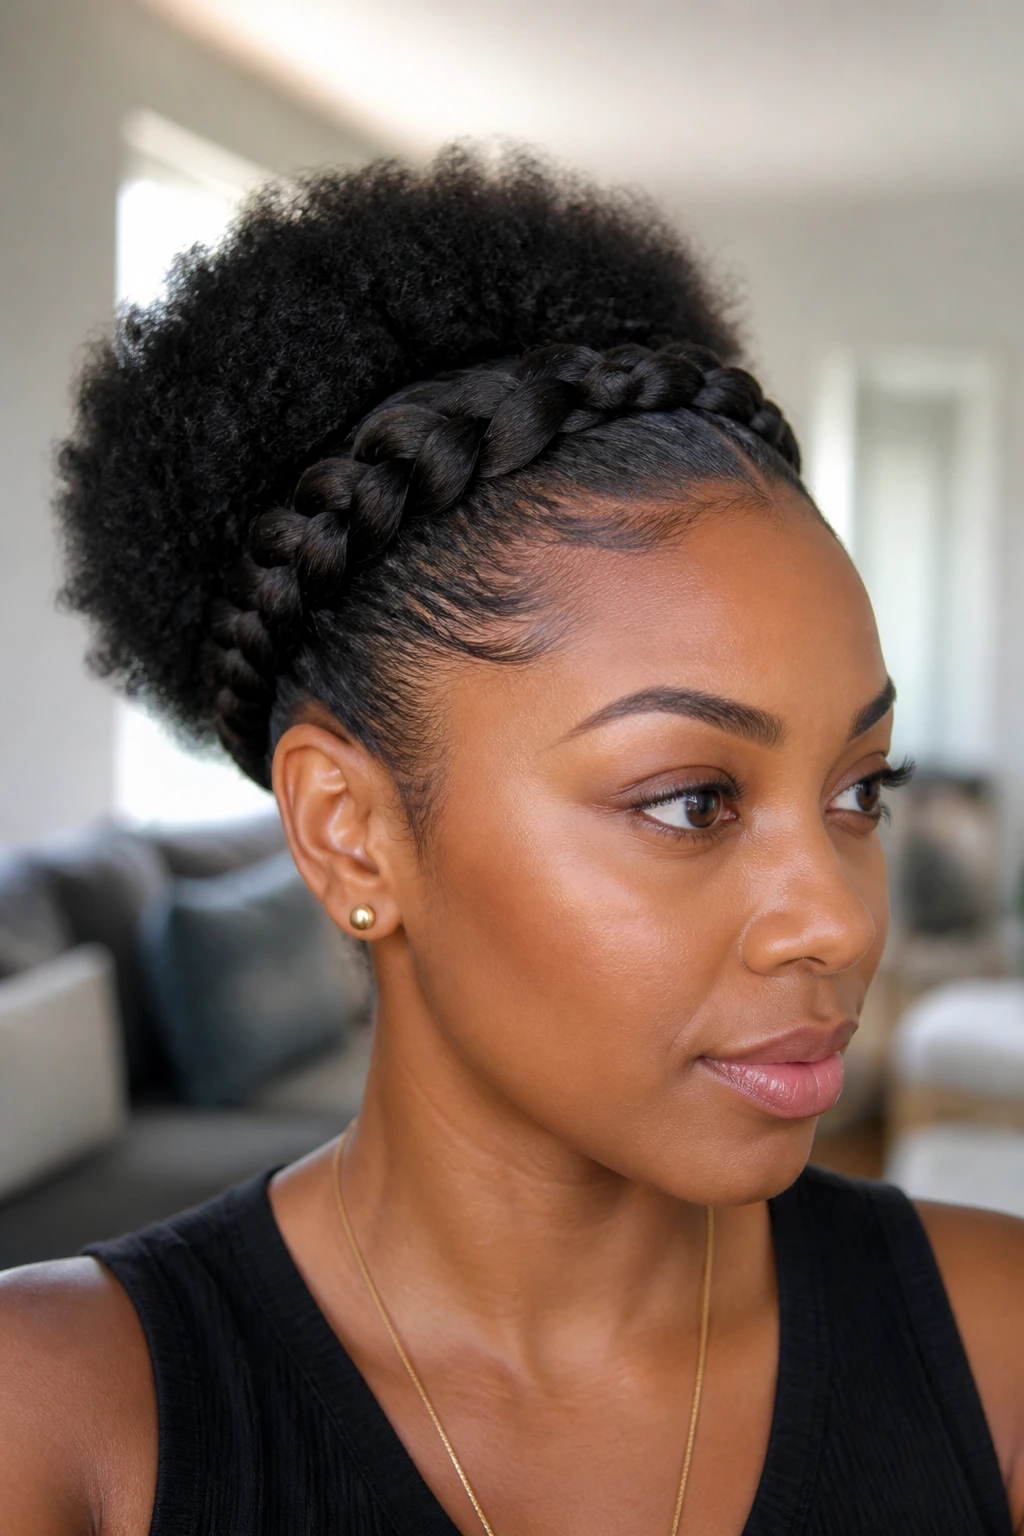
A crown braid into a puff gives you the feeling of a mini halo before the ponytail begins. The braid wraps around the front or sides, then gathers into a puff at the back or crown. It looks detailed because it is detailed.
This style is a solid pick when you want to keep the front controlled and still keep the overall shape airy. It also buys you a little extra time between refreshes because the braid keeps the hairline from looking messy too quickly.
20. Side Puff with Swooped Edges
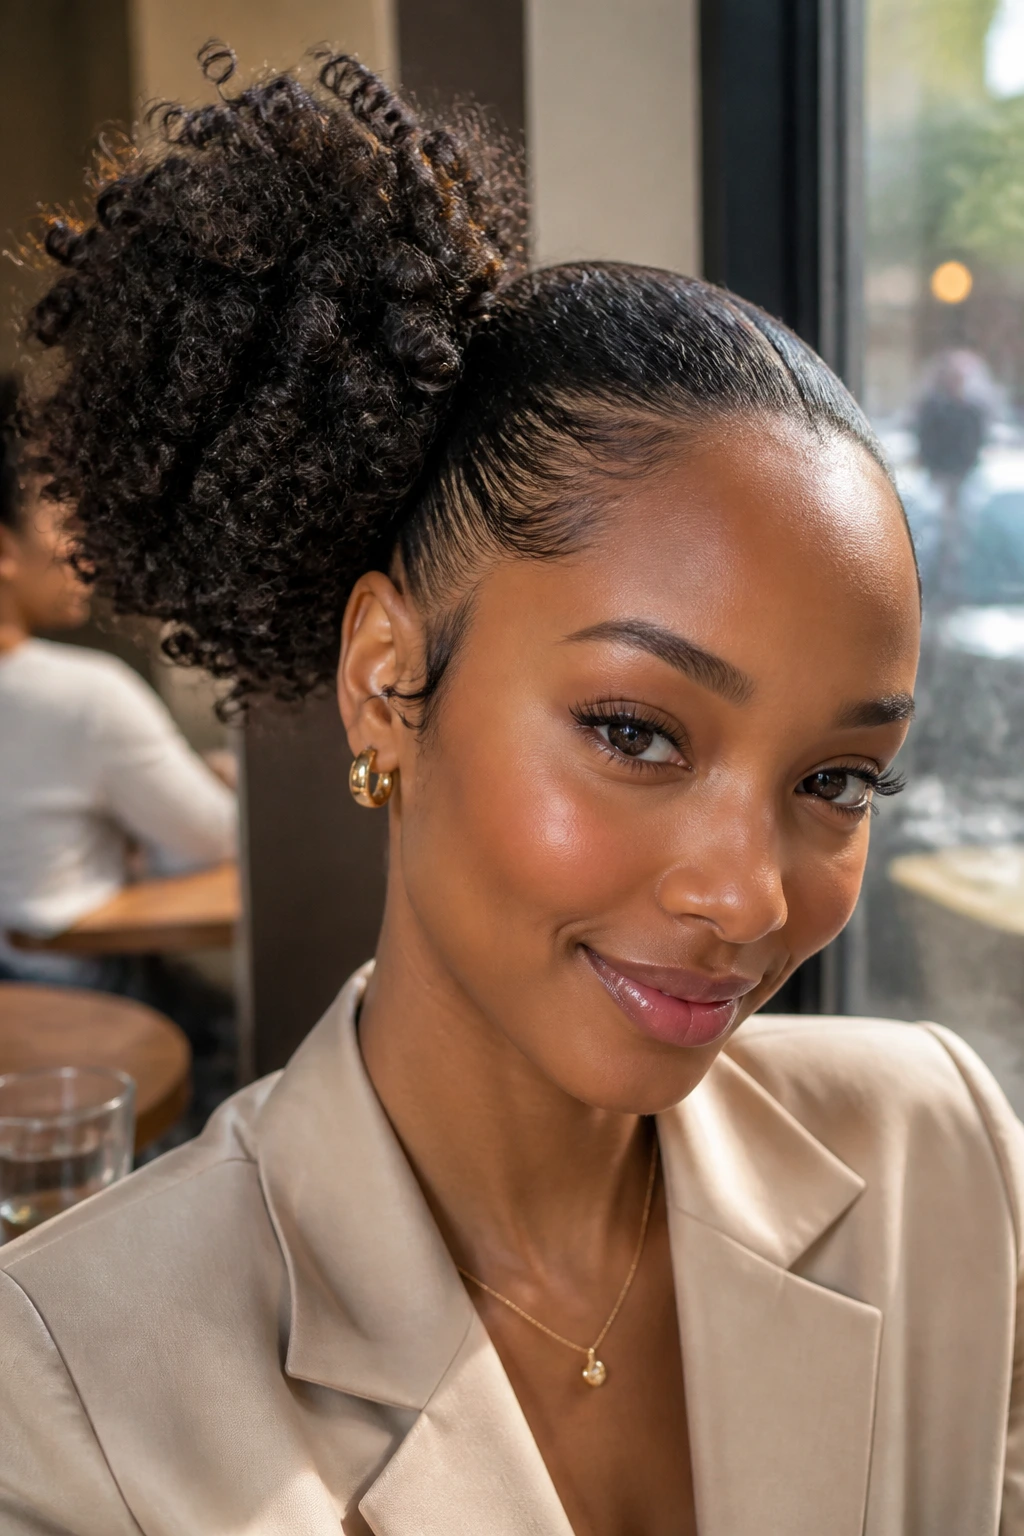
A side puff gives the face a soft diagonal line that regular puffs do not. Sweep the hair toward one side, then let the puff land near the ear or just behind it. The result is playful and a little glamorous without needing a lot of product.
The swooped edges matter here. Keep them smooth and intentional, but do not build a helmet out of gel. There’s a difference, and you can see it immediately.
21. Twist-Out Puff Ponytail
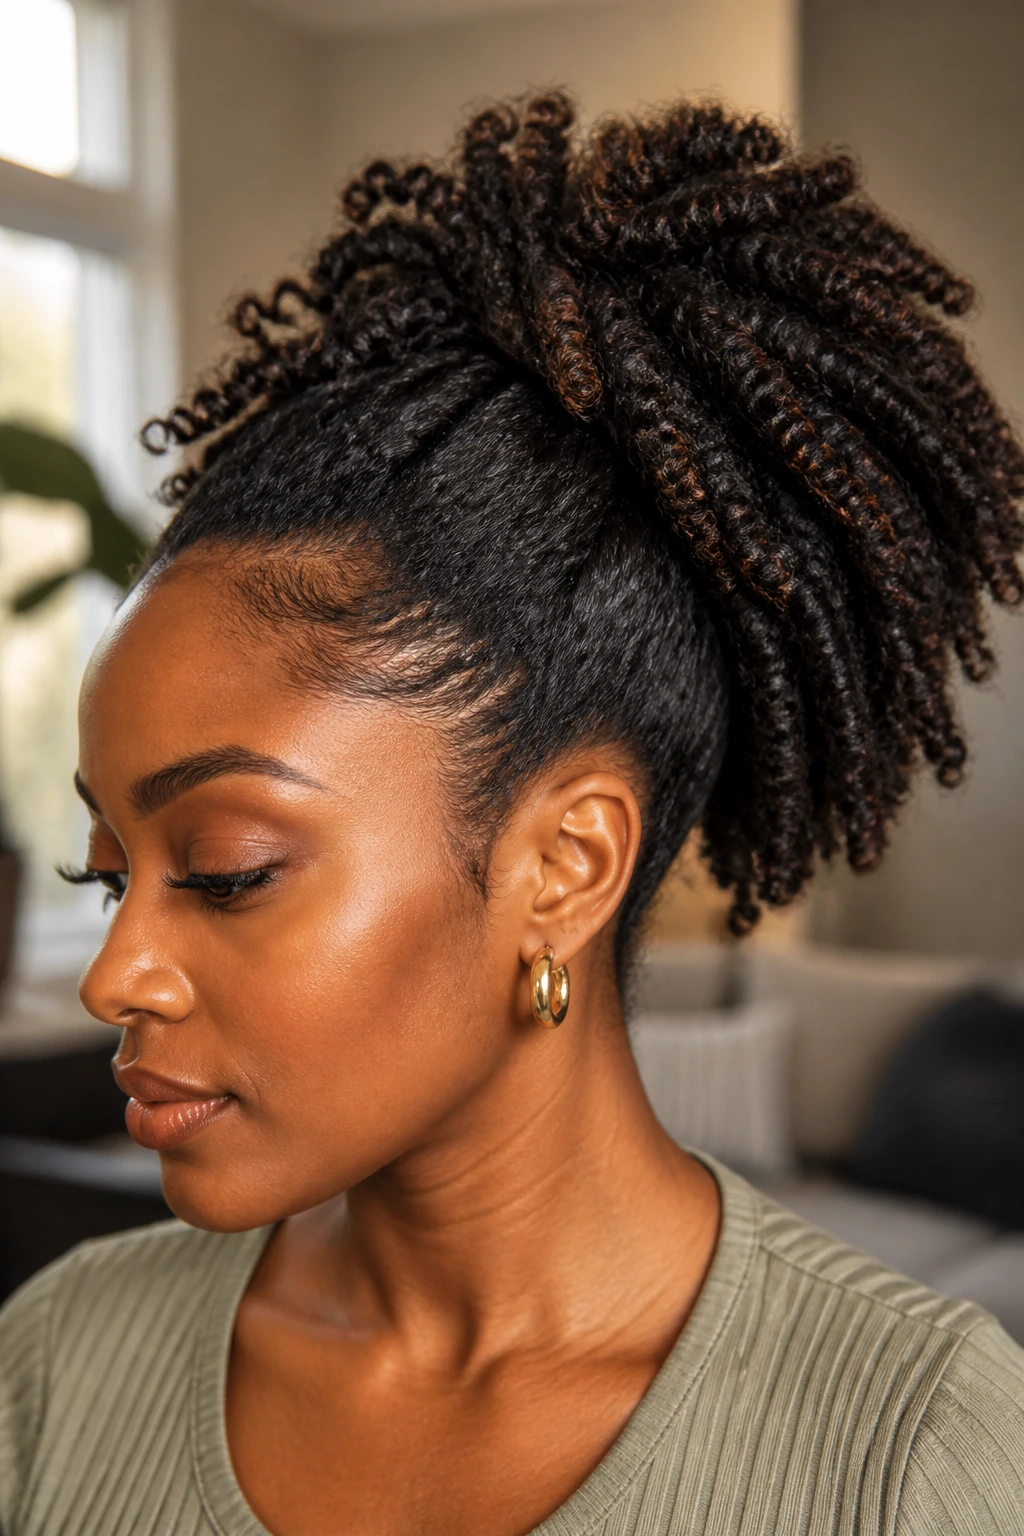
A twist-out puff keeps the texture visible. Instead of brushing everything into a single smooth cloud, you gather the hair while letting the twist-out pattern stay alive in the puff. That movement gives the style some depth.
If your twist-out is still a bit stiff, separate it gently with oiled fingers before securing the base. Too much separating turns into frizz fast. Too little and the puff looks flat. There’s a narrow lane here, but it’s a good one.
22. Sleek Sides, Full Puff
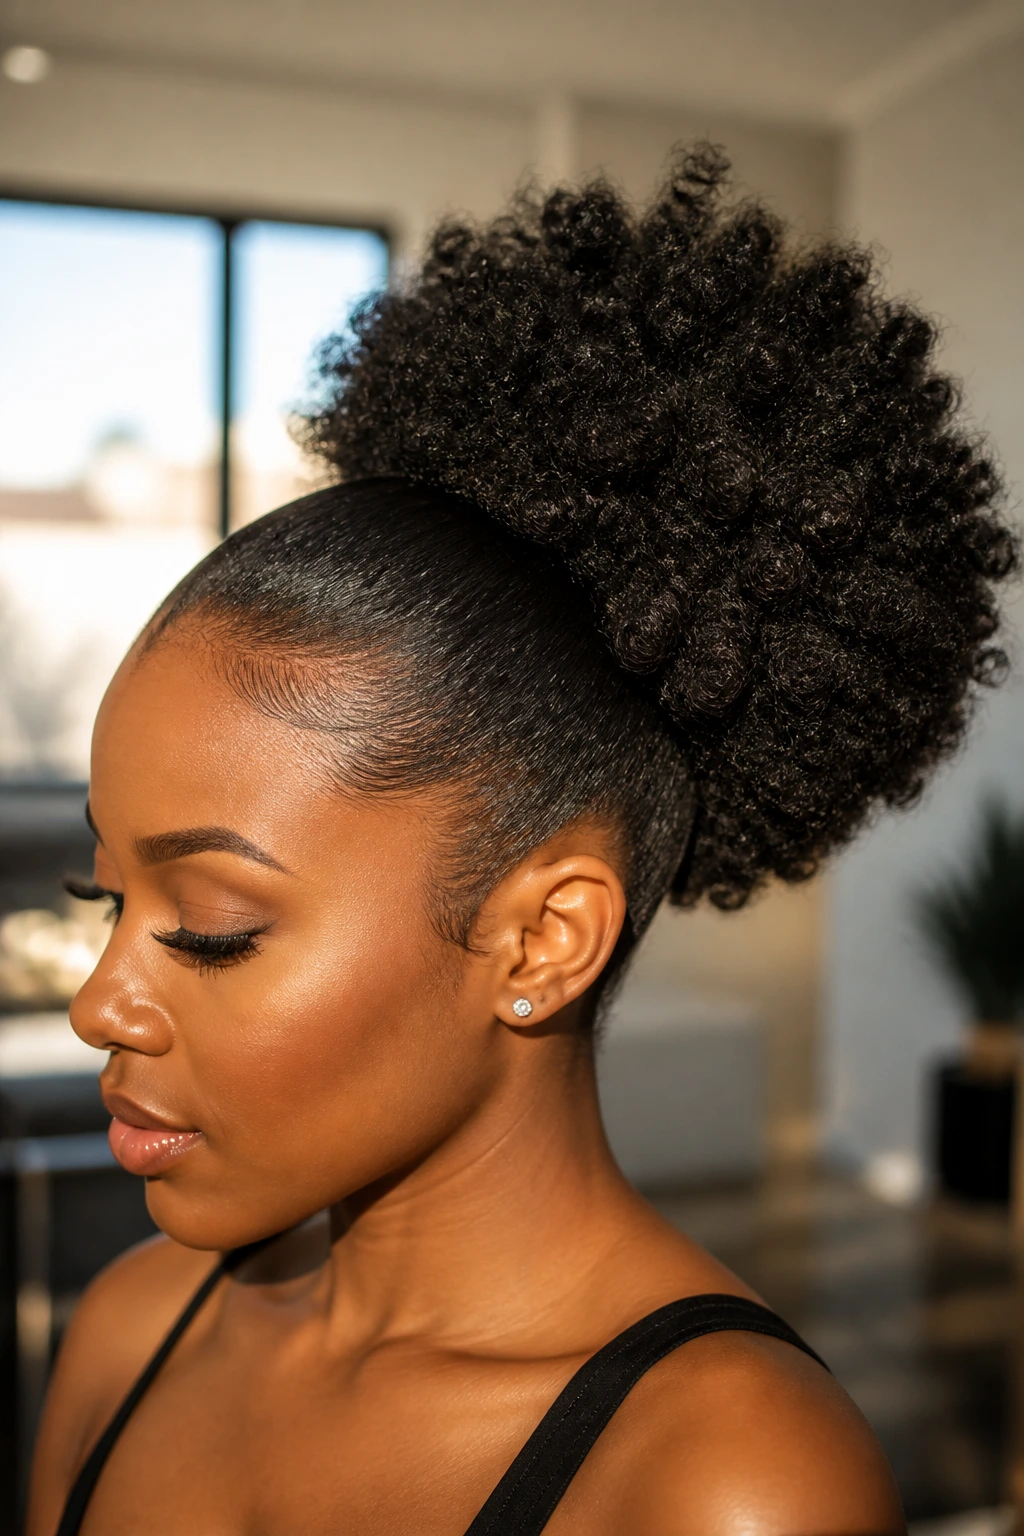
This is the style I reach for when I want the puff to feel big and the sides to stay disciplined. Brush the sides down, smooth the hairline, and let the puff do the talking. The contrast is the whole point.
A puff like this looks especially good when the sides are so clean that the texture seems to start only after the ponytail holder. That sharp transition makes the volume behind it feel more dramatic, even if the actual hair amount stays the same.
23. Feed-In Braids to Puff
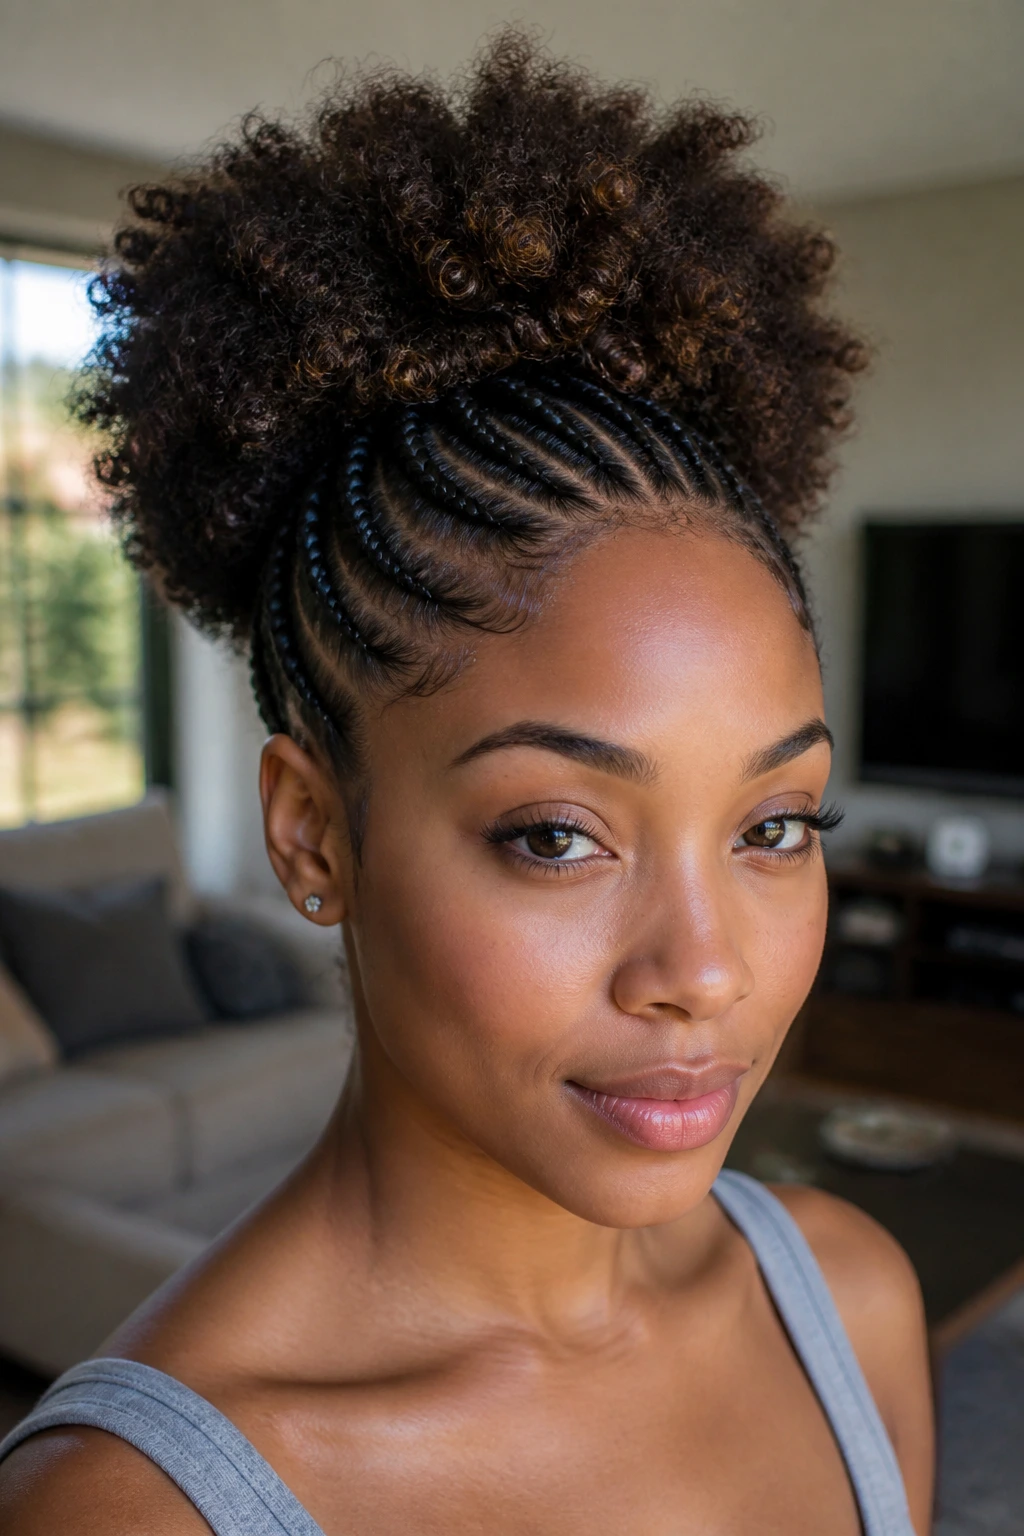
Feed-in braids create a neat lead-up to the puff and make the transition look intentional. The braids can start at the front or along the sides, then merge into the ponytail base. From there, the hair fans out into the puff.
- Keep the braids small and even at the hairline.
- Use a soft elastic at the join so the puff sits comfortably.
- Leave enough texture in the puff that the braids do not feel too formal.
This is a good option when you want the front to stay secure all day.
24. Ribbon-Tied Puff
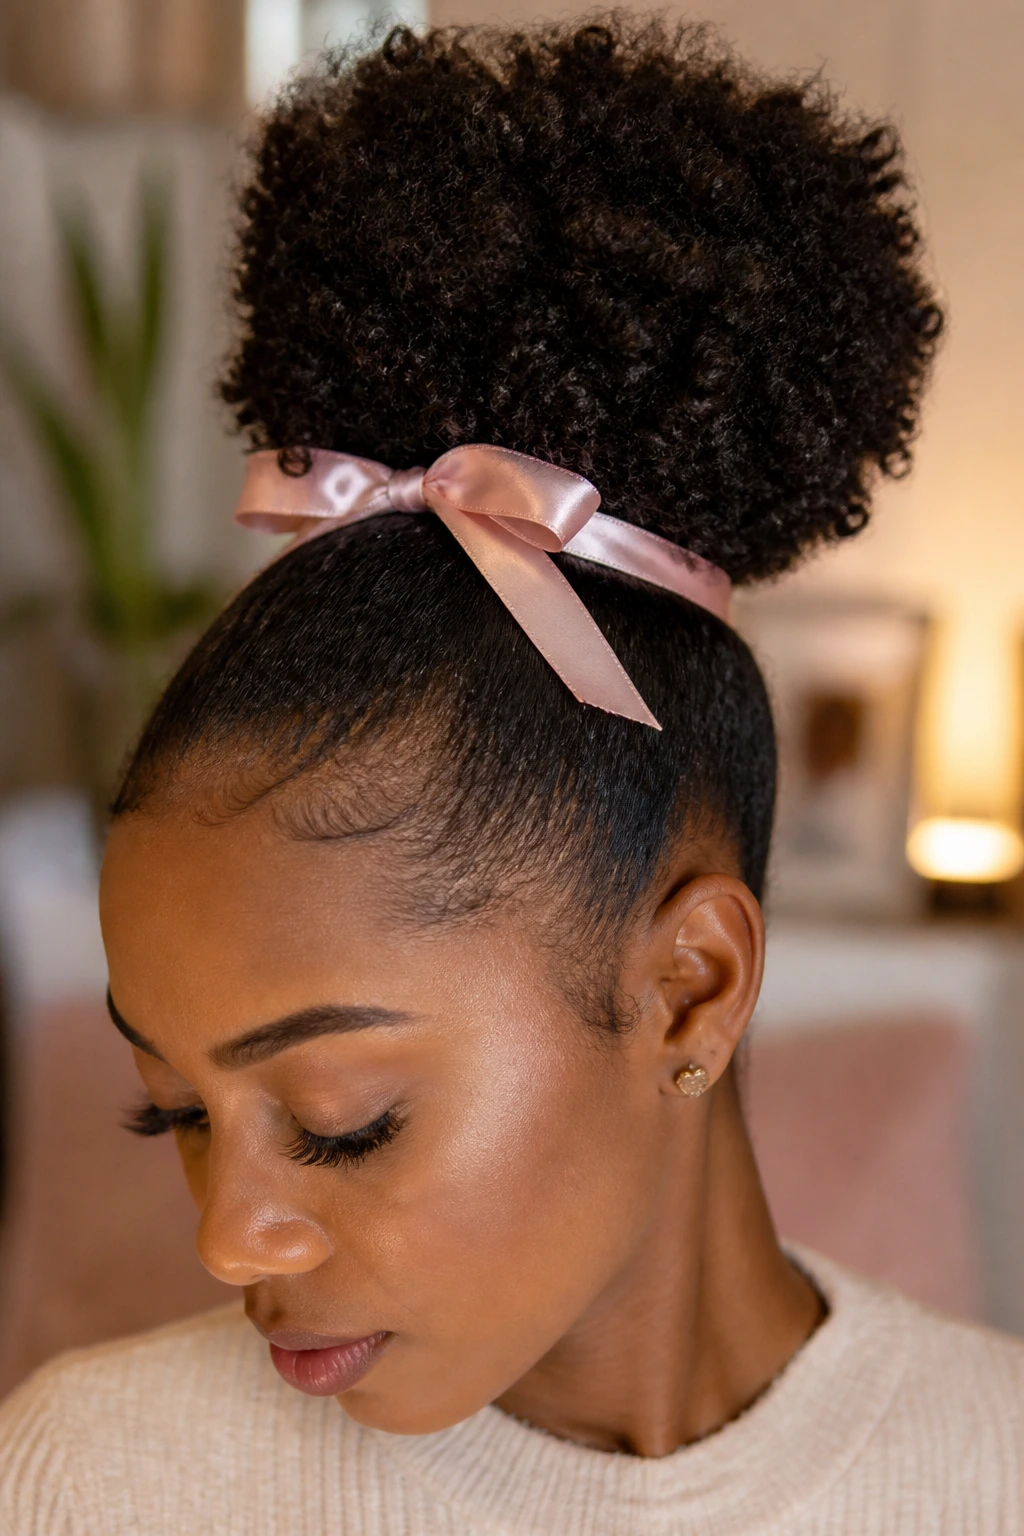
A ribbon tied around a puff changes the tone immediately. Satin ribbon feels sweet and polished. Velvet feels dressier. Thin grosgrain makes the style look more structured. The shape stays the same; the mood changes with the tie.
Why the ribbon works
The ribbon adds one focused detail instead of crowding the hair with a lot of extras. That makes it useful when the puff itself is already doing enough. You can tie it over the elastic, let the ends drape, or form a small bow just off-center.
For a softer effect, choose a ribbon that echoes one color in your outfit rather than matching everything.
25. Puff with Curly Tendrils
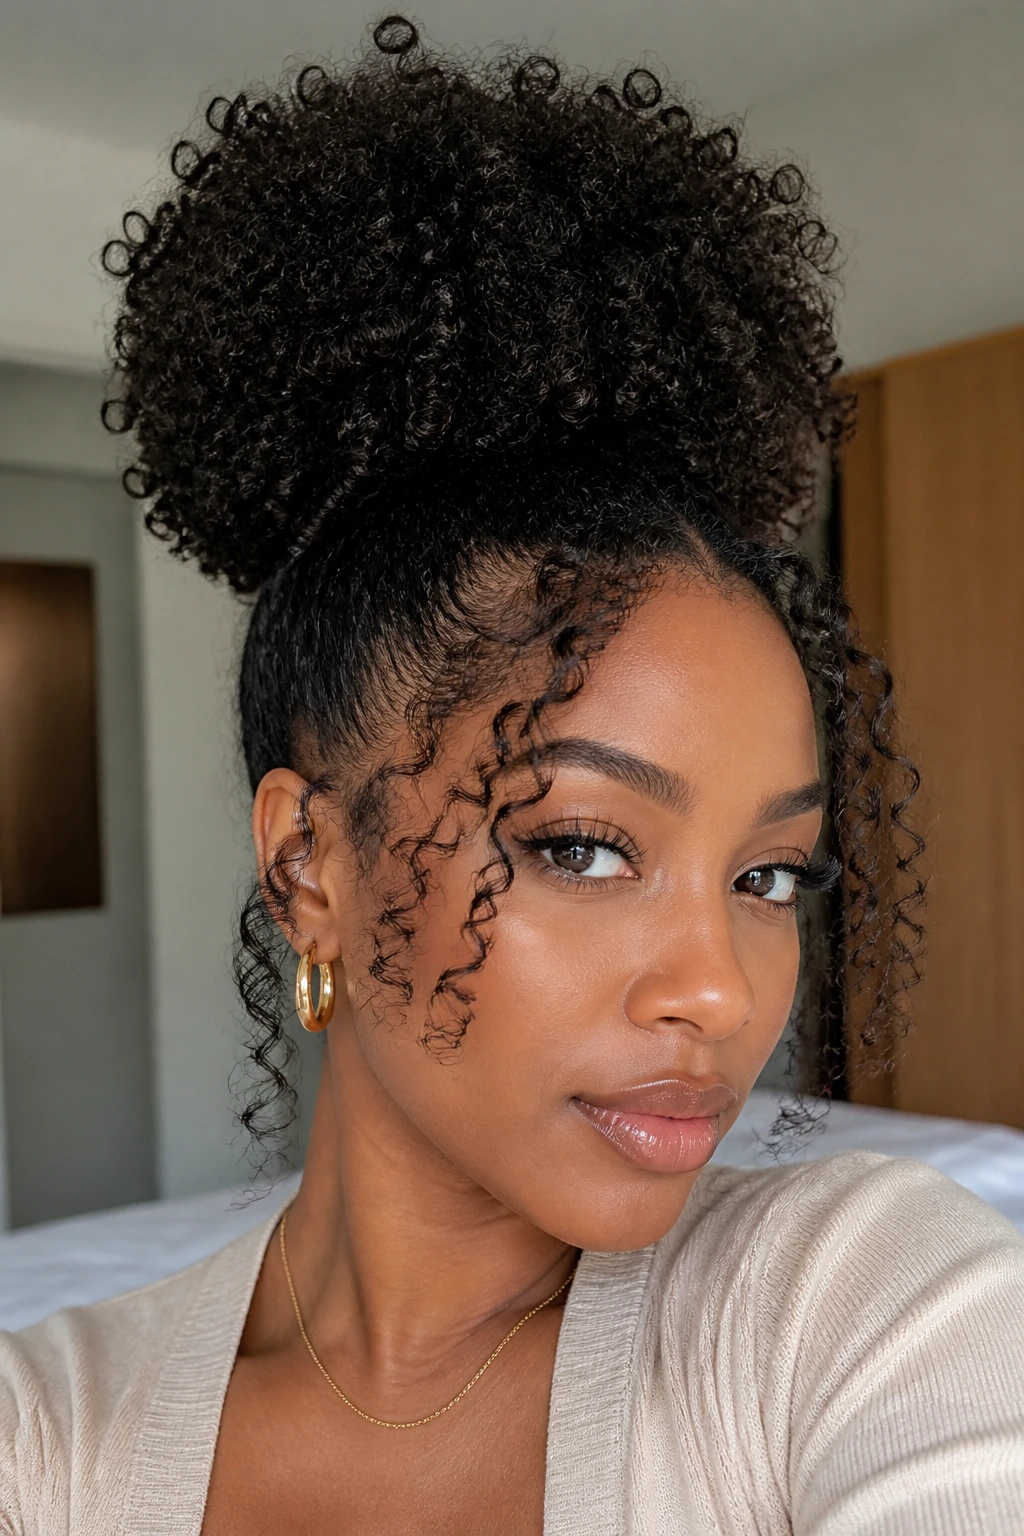
Leaving a few tendrils loose around the face can make a puff look softer and less buttoned-up. The key is restraint. Two or three curled pieces at the temples are enough. You do not need half the front hanging out.
This style works when the puff itself is full and you want the hairline to feel lighter. Curl the tendrils with a small flexi-rod, a finger coil, or a little water and cream, then leave them alone once they set.
26. Asymmetrical Puff
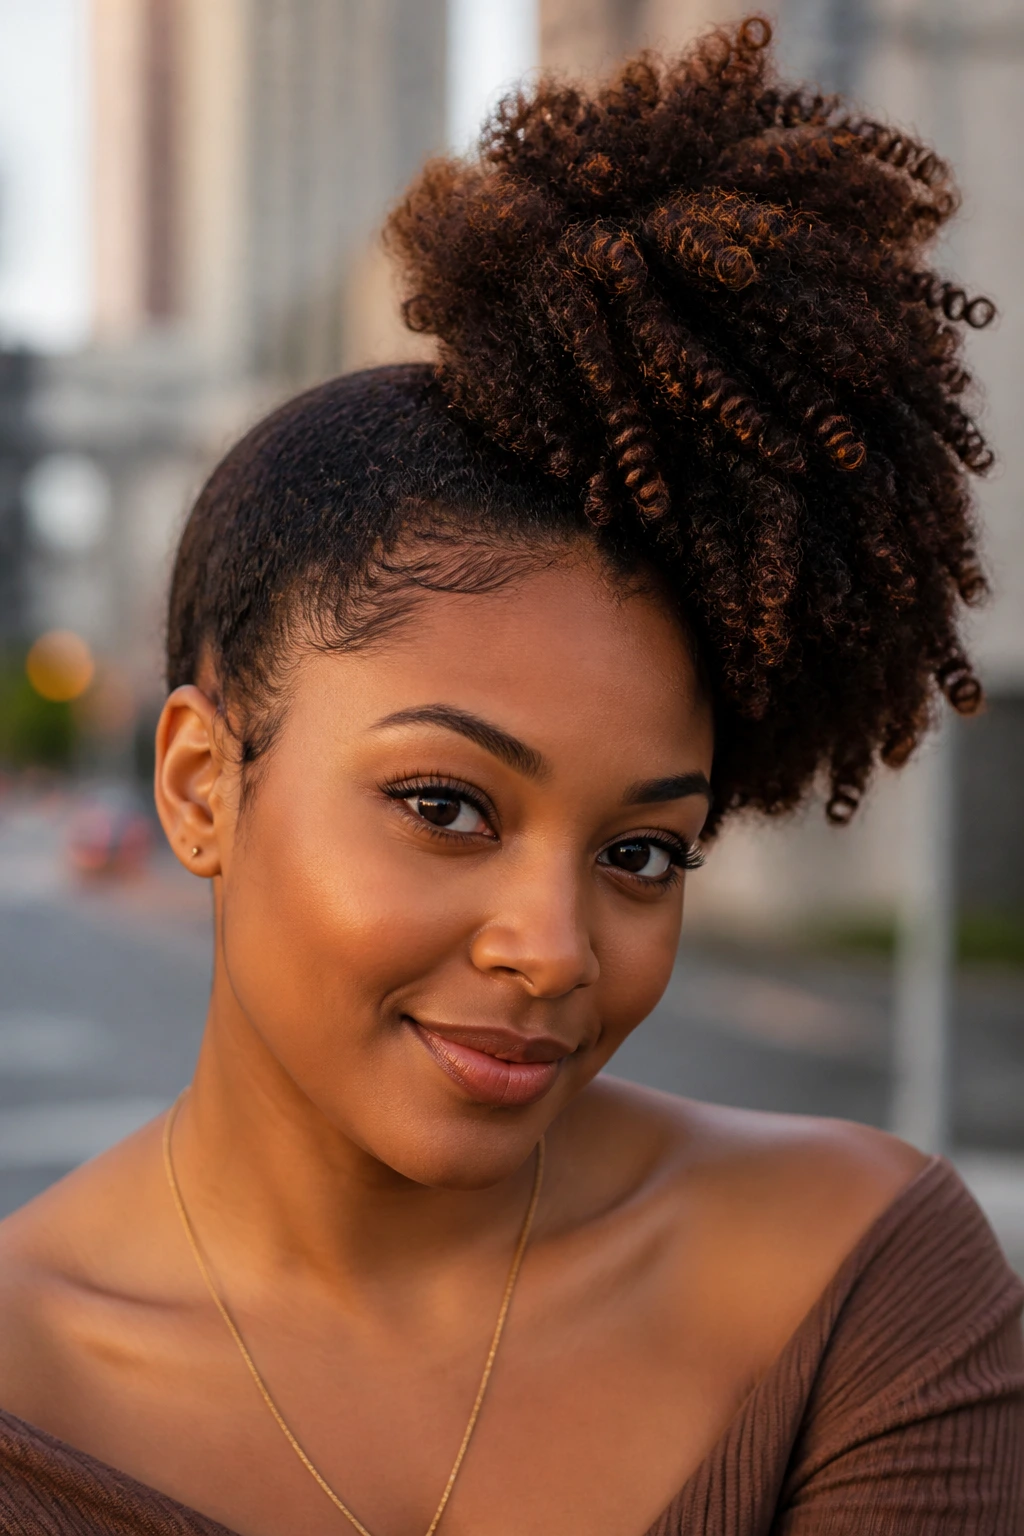
An asymmetrical puff tilts the whole style off center in a way that feels deliberate. One side can sit slightly higher, or the puff can be fuller on one side. It gives the head shape and motion, which is useful if your hair naturally wants to fall that way anyway.
I like this look when the outfit is simple. The puff becomes the line of interest. The best version looks unforced, not like you spent twenty minutes trying to make one side misbehave.
27. Triple Puff Mohawk
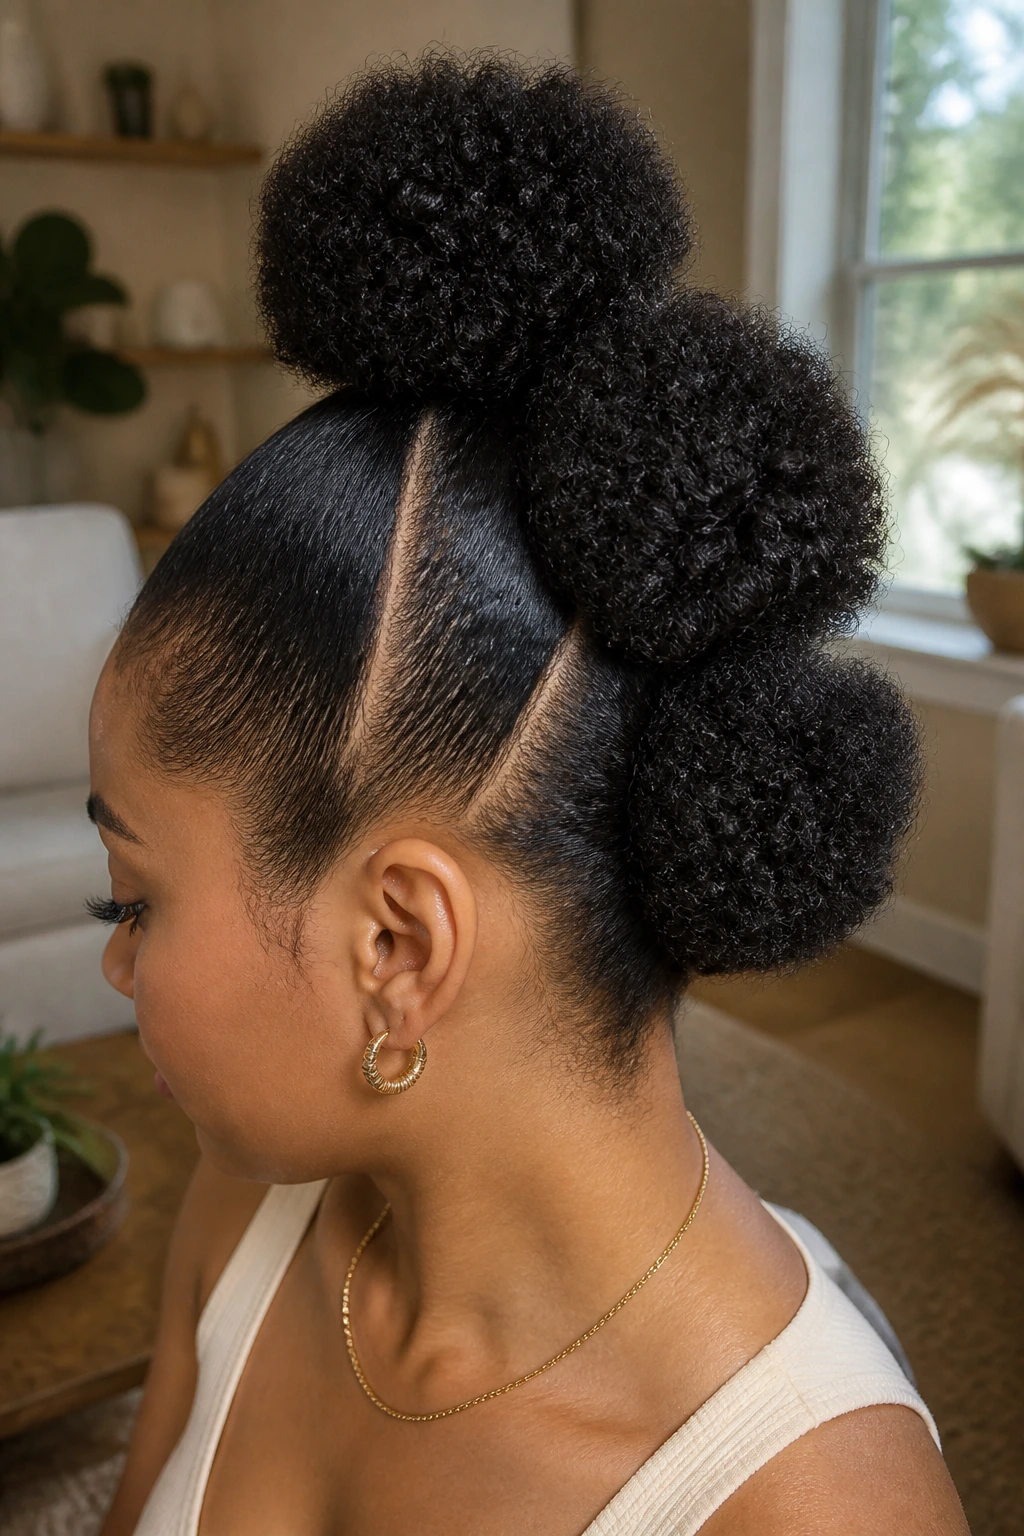
Three puffs in a row make a playful center strip that feels bold without getting heavy. You can separate the hair into three sections along the middle and secure each one with a small elastic. The puffs sit like soft bubbles from front to back.
This is one of the styles that gets mistaken for complicated. It isn’t. The trick is spacing the sections evenly and keeping the puffs rounded instead of tiny. Bigger sections read cleaner.
28. Front-Knotless Braids Puff
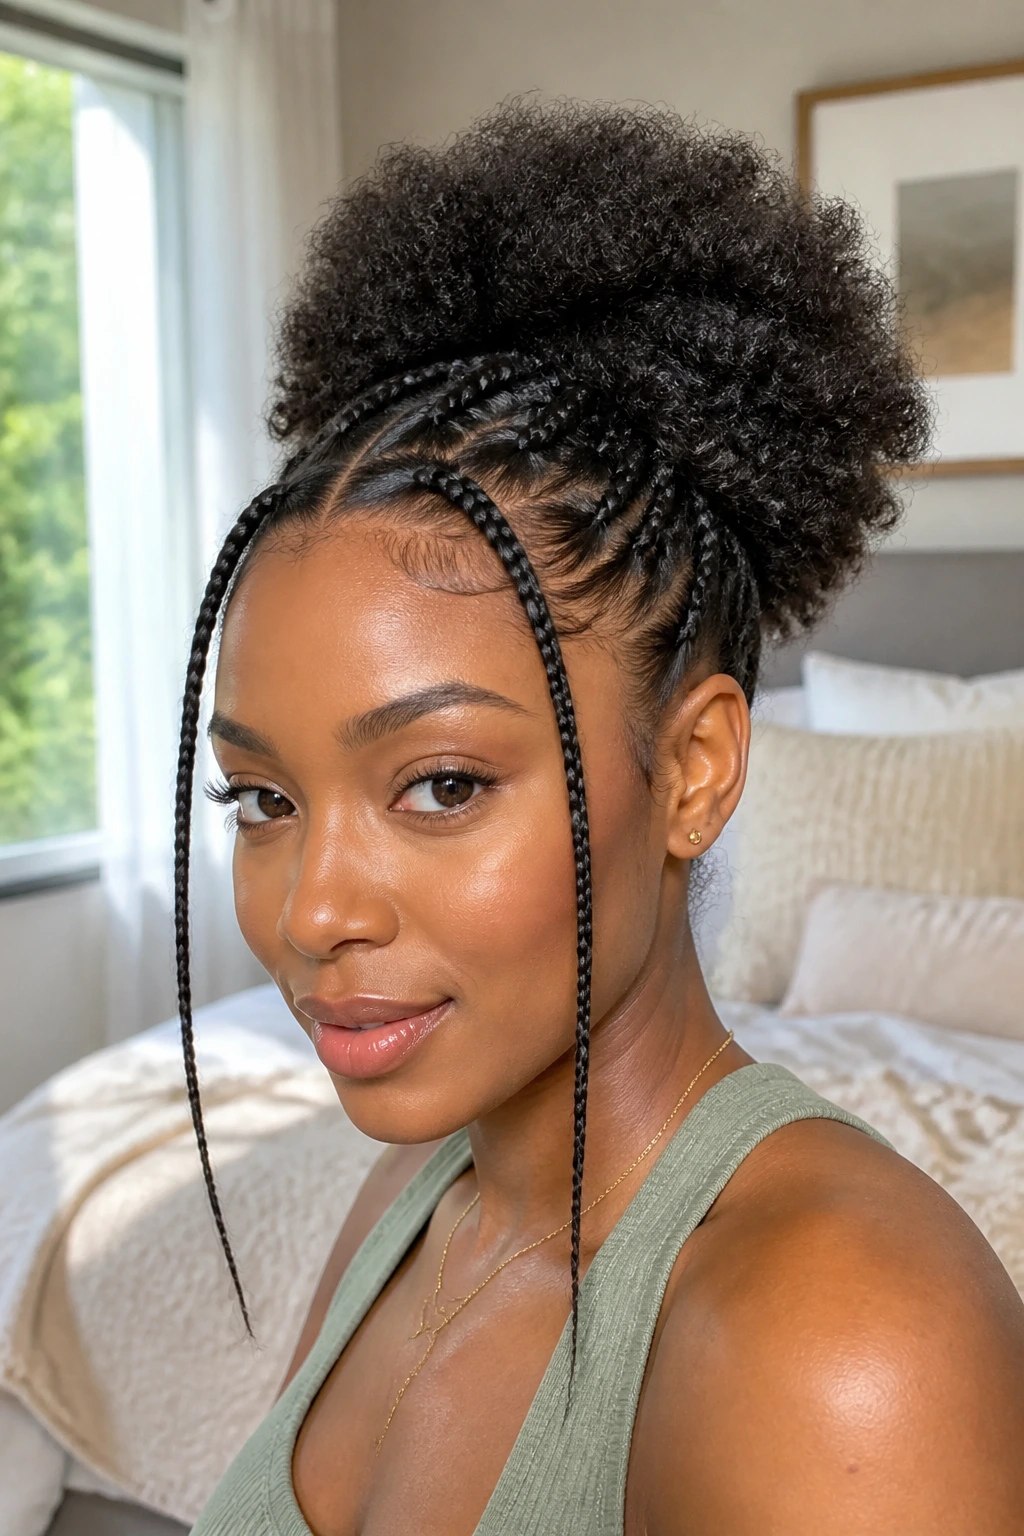
Small knotless braids at the front make the puff look more finished and help keep the hairline calm. They frame the face, guide the eye back to the puff, and give the style a little edge without taking over the whole head.
The back can stay fluffy and loose. That contrast is what makes it feel cute rather than severe. If the front braids are too thick, the puff loses its softness, so keep them narrow.
29. Flip-Over Puff with Crown Volume
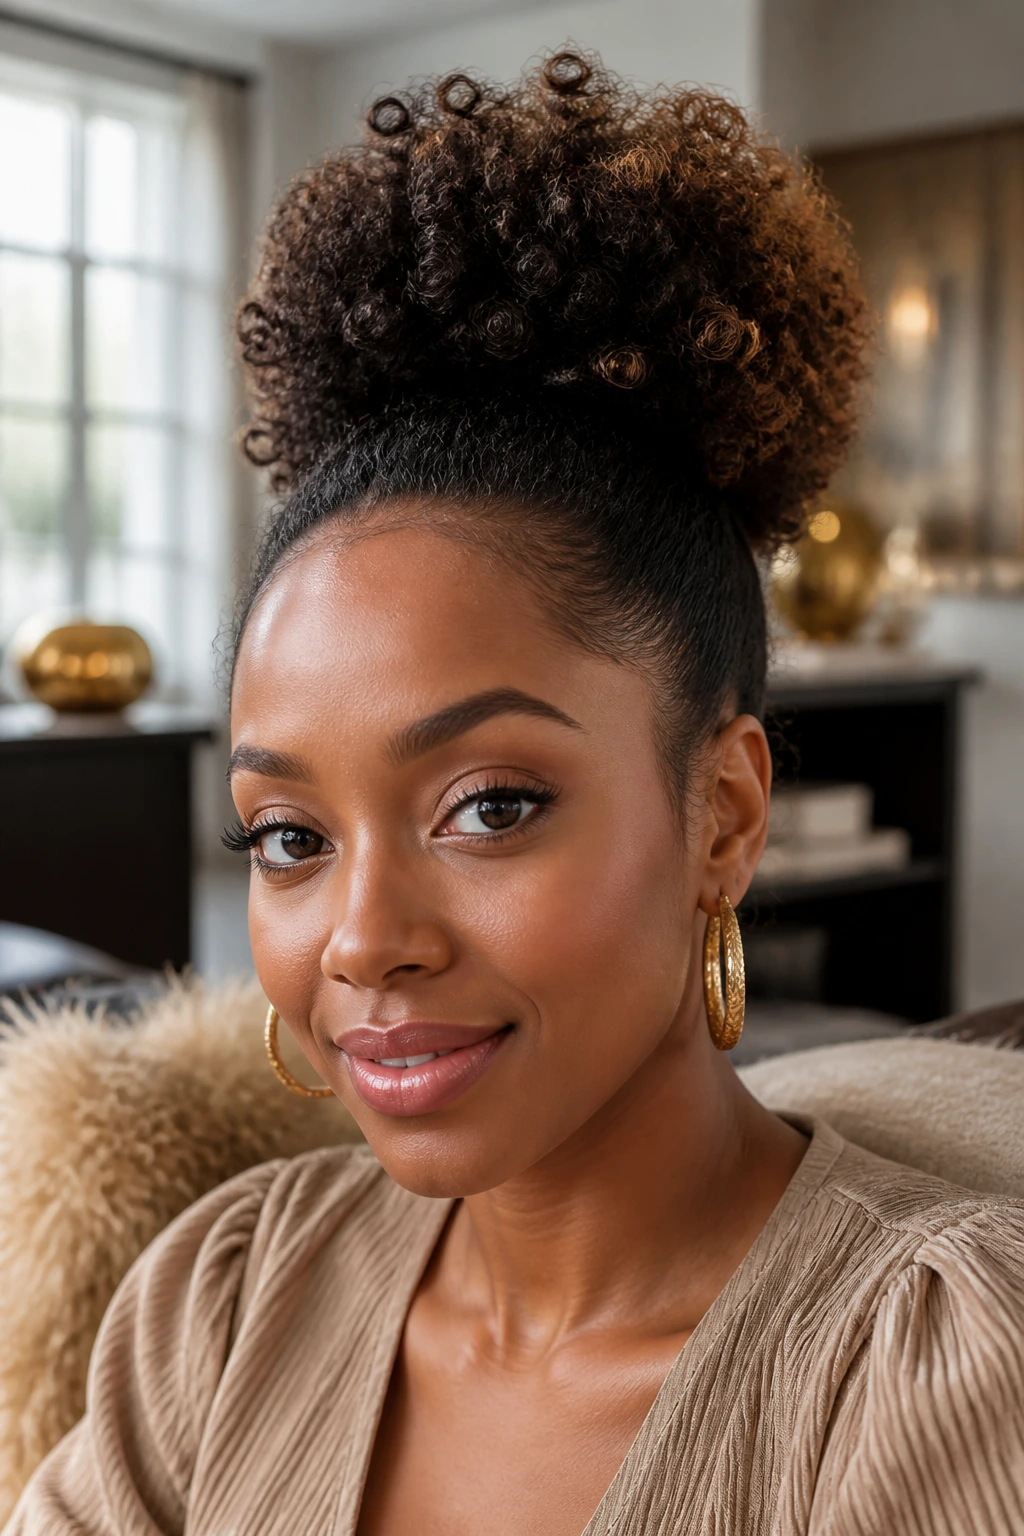
A flip-over puff has no hard part. The hair is brushed back and slightly over to create volume at the crown, then gathered into a puff that sits on top of that lift. It feels a little casual and a little glamorous at once.
The lack of a part is the point. Some days a defined line is too neat. This style gives the roots room to stay full, which is especially nice on thick natural hair that already has volume built in.
30. Tapered Puff with Natural Shape
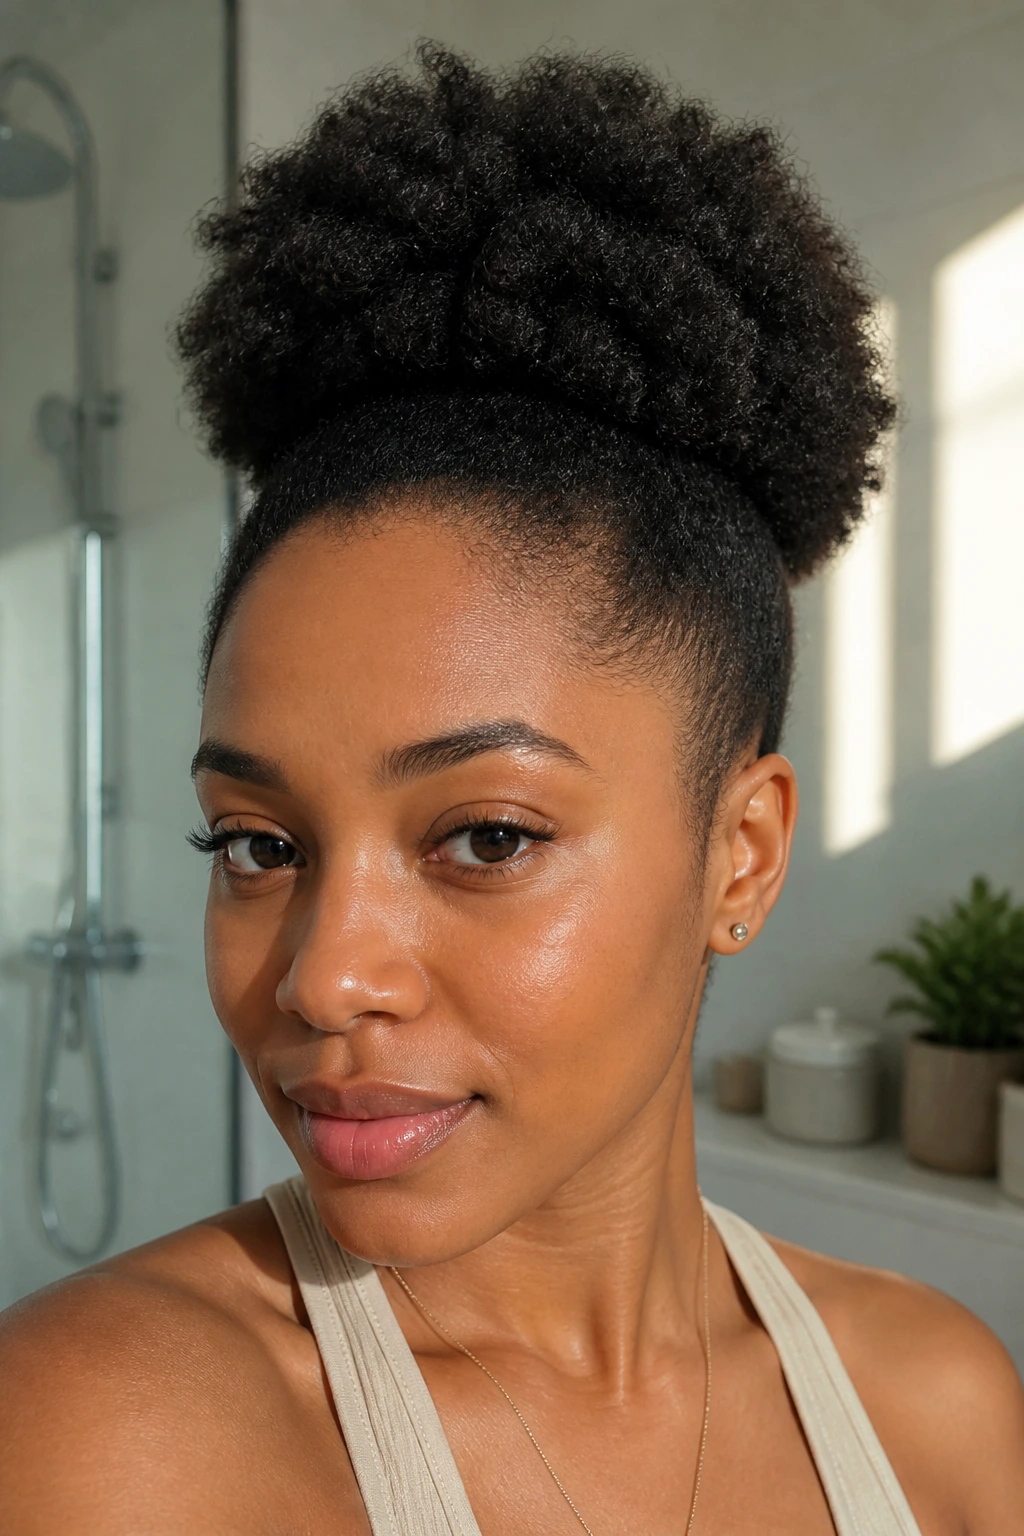
A tapered cut gives a puff a built-in shape, and that can save a lot of styling time. The shorter sides and back make the puff look fuller at the crown, while the shape itself keeps the silhouette tidy. You do not have to force much here.
Why the cut matters
With tapered hair, the puff already wants to sit in a specific way. That makes the ponytail look intentional even if you only used a brush, a tie, and a little moisturizer. If the cut has a clean outline, let it show.
- Use a light cream so the shorter sections do not clump.
- Keep the puff high enough to show the taper.
- Avoid heavy gel on the ends; it flattens the shape.
31. Puff Cuff Statement Ponytail
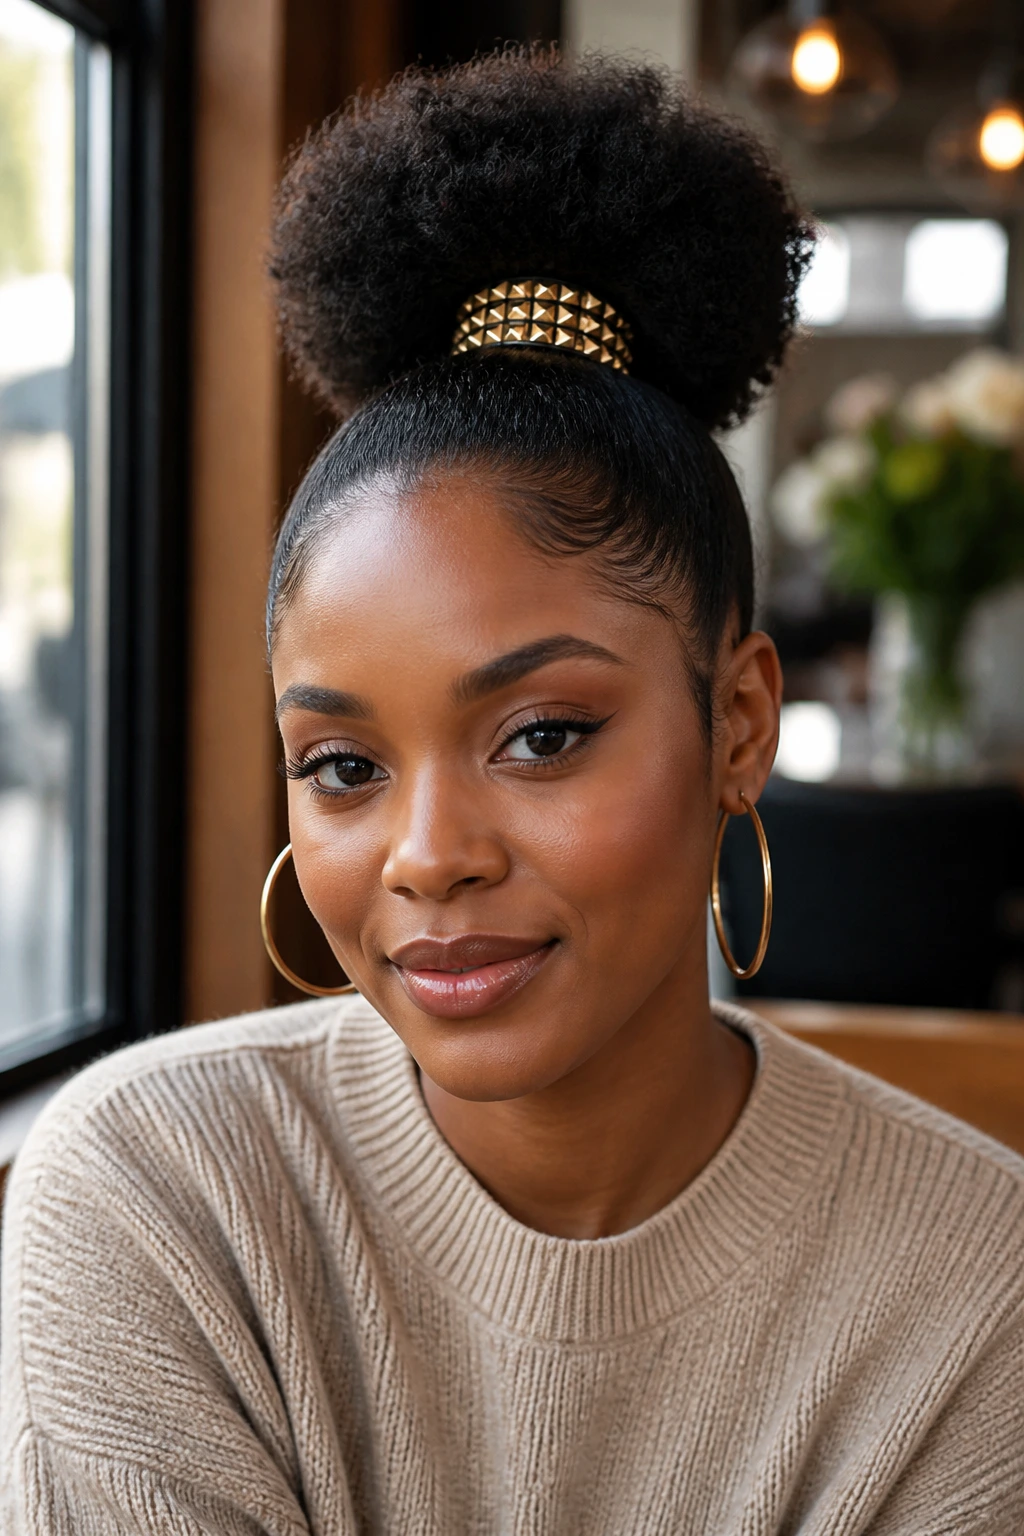
A puff cuff turns the base into a feature. Instead of hiding the ponytail holder, you frame it with a metallic or decorative cuff that sits right where the puff begins. It gives the style a finished edge that works well with earrings or a strong neckline.
I like this best with a smooth base and a puff that stays a little rounded rather than overly stretched. The cuff should feel like jewelry for the hair. Not armor.
32. Gold-Cuff High Puff
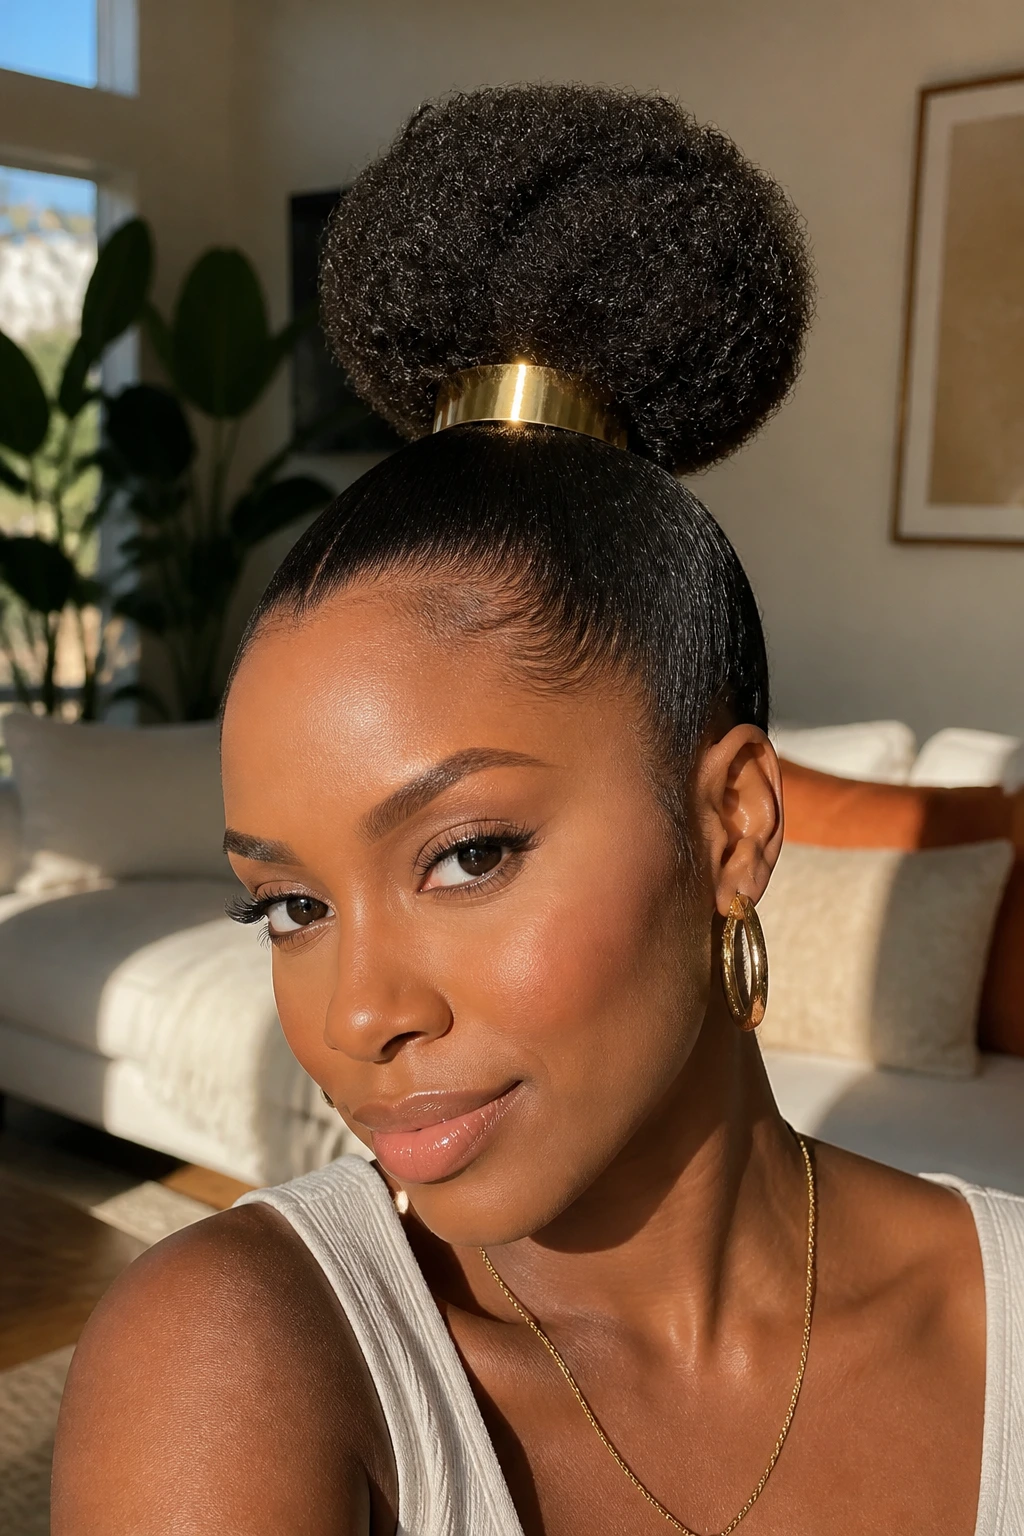
This version leans into shine. A gold cuff at the base of a high puff catches the eye and makes the style feel dressed up with almost no extra work. It is the kind of detail that photographs well, but more importantly, it looks deliberate in person.
Keep the base sleek so the cuff has room to stand out. If the hairline is busy with too much product, the metal loses its clean shape. One accent is enough.
33. Deep Side-Bang Puff
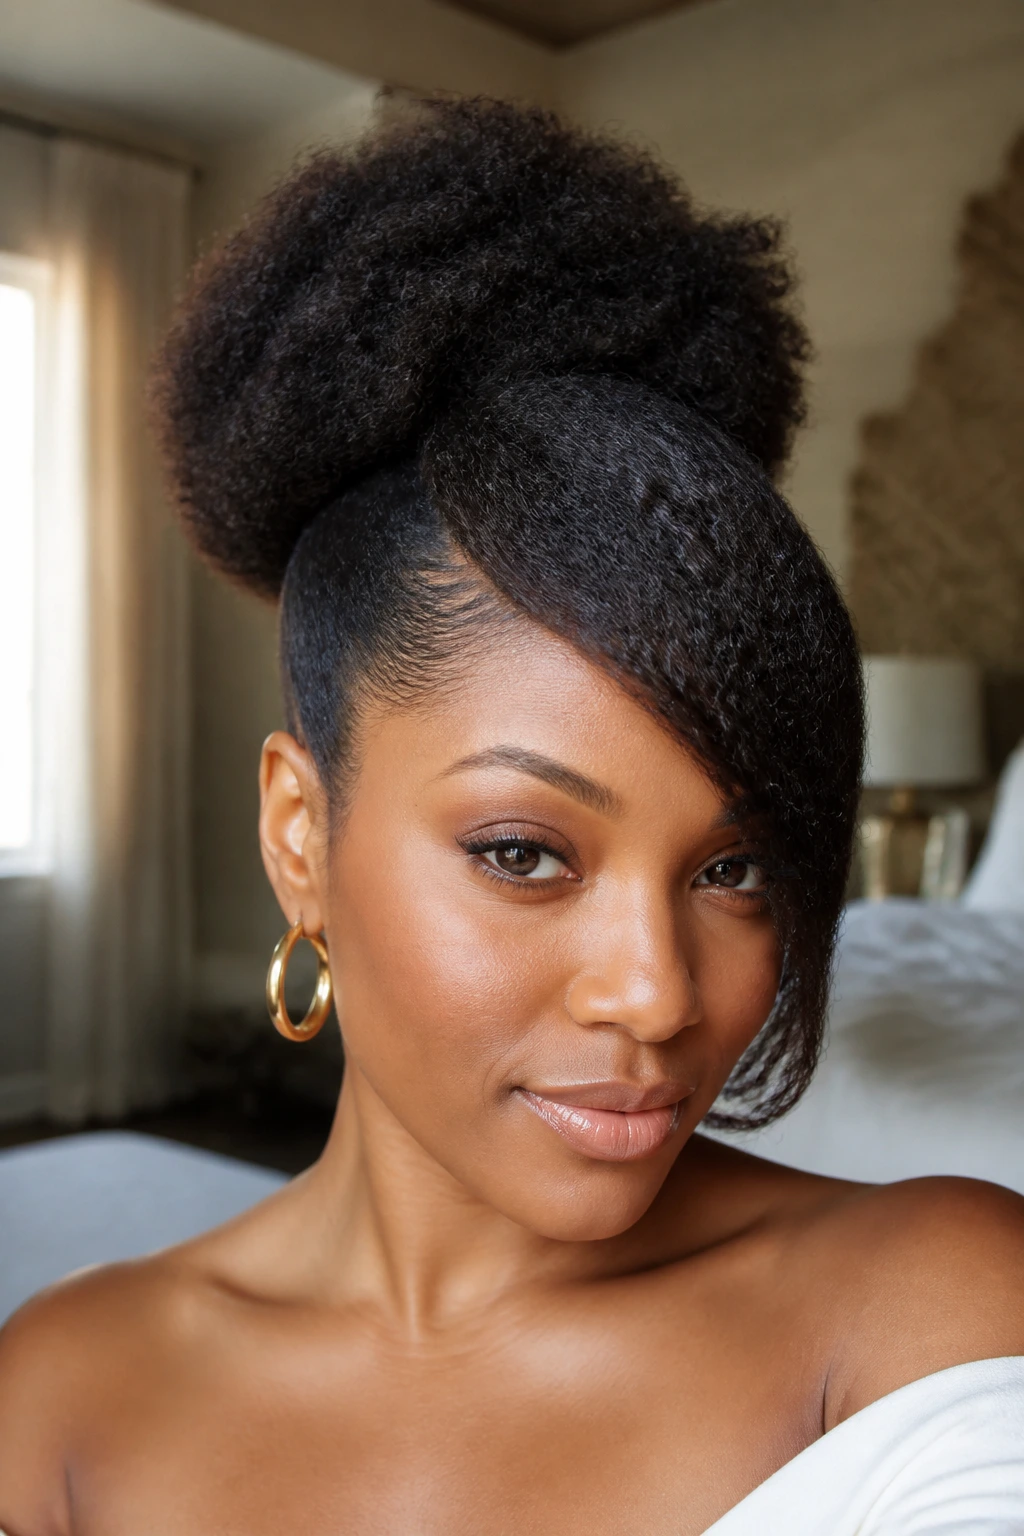
A side bang softens the forehead and gives a puff a little retro swing. The rest of the hair can stay up and full, but that one curved section changes the whole face frame. It is useful if you like structure but still want movement.
- Let the bang fall diagonally, not straight across.
- Keep it a touch longer than you think so it blends into the puff.
- Use a small roller or flexi-rod if the curl pattern is loose.
This is one of the better choices for dressier settings.
34. Halo-Twist Puff
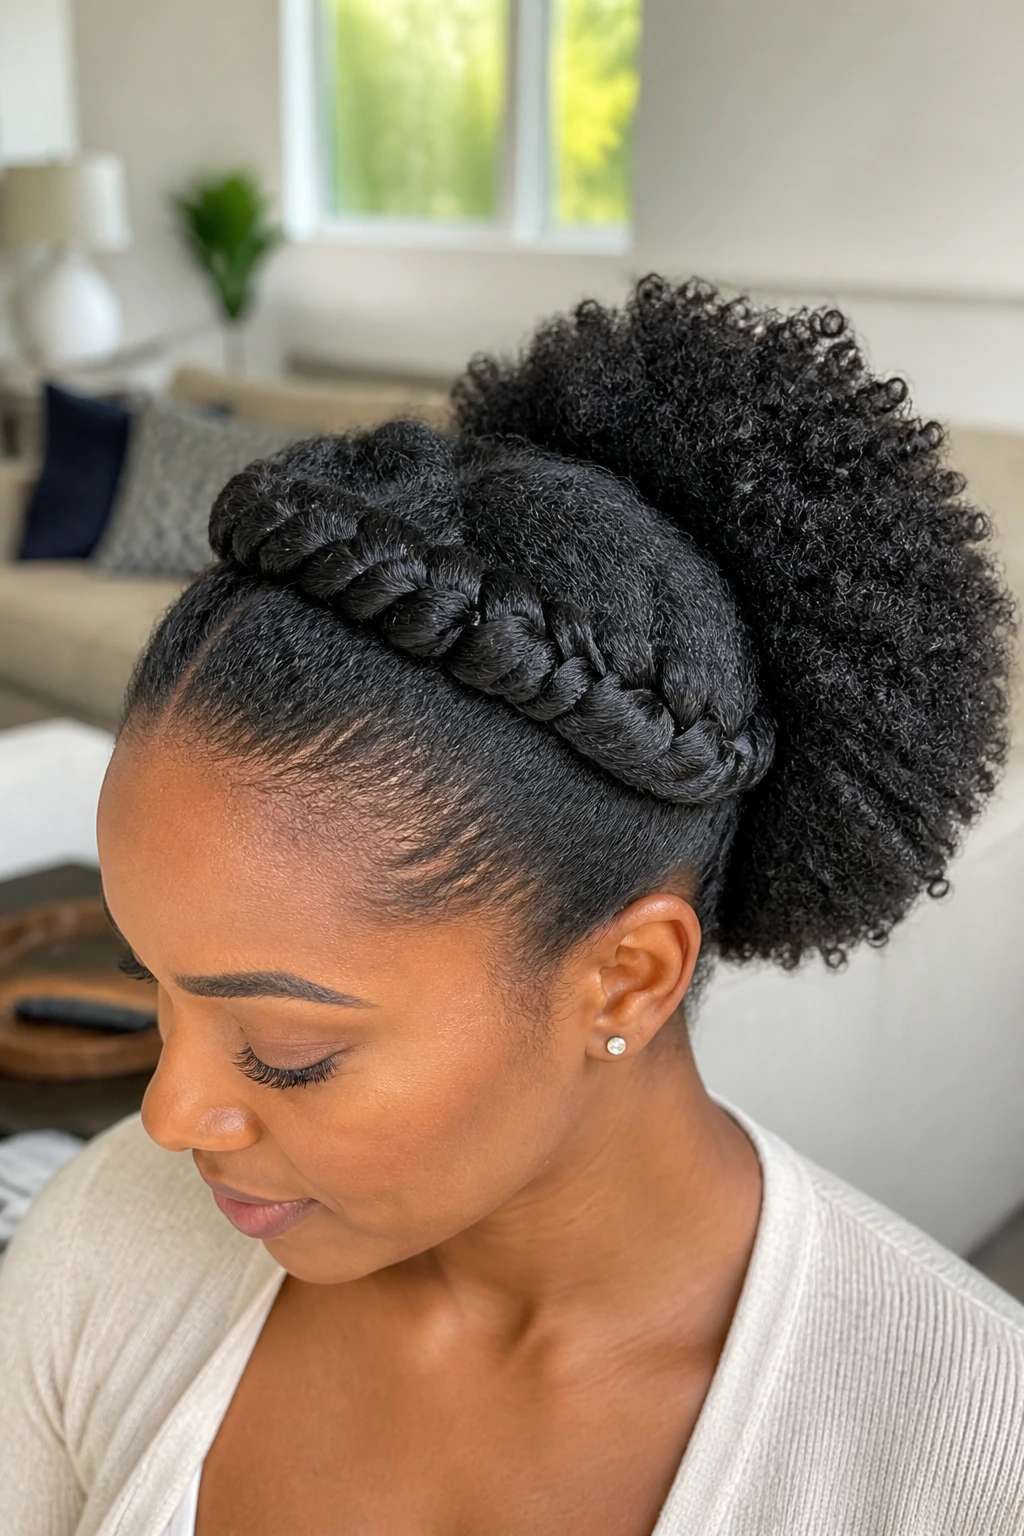
Halo twists give the top of the head a wrapped, finished look before the puff even starts. The twists circle the crown and guide the eye toward the ponytail, which keeps the style from feeling like a basic pull-back. It has structure, but not stiffness.
This works well when you want the puff to stay the focal point and the rest of the head to look neat. It also helps with growing-out hair because the twists can hide shorter or uneven sections near the front.
35. Braid-Out Puff Ponytail
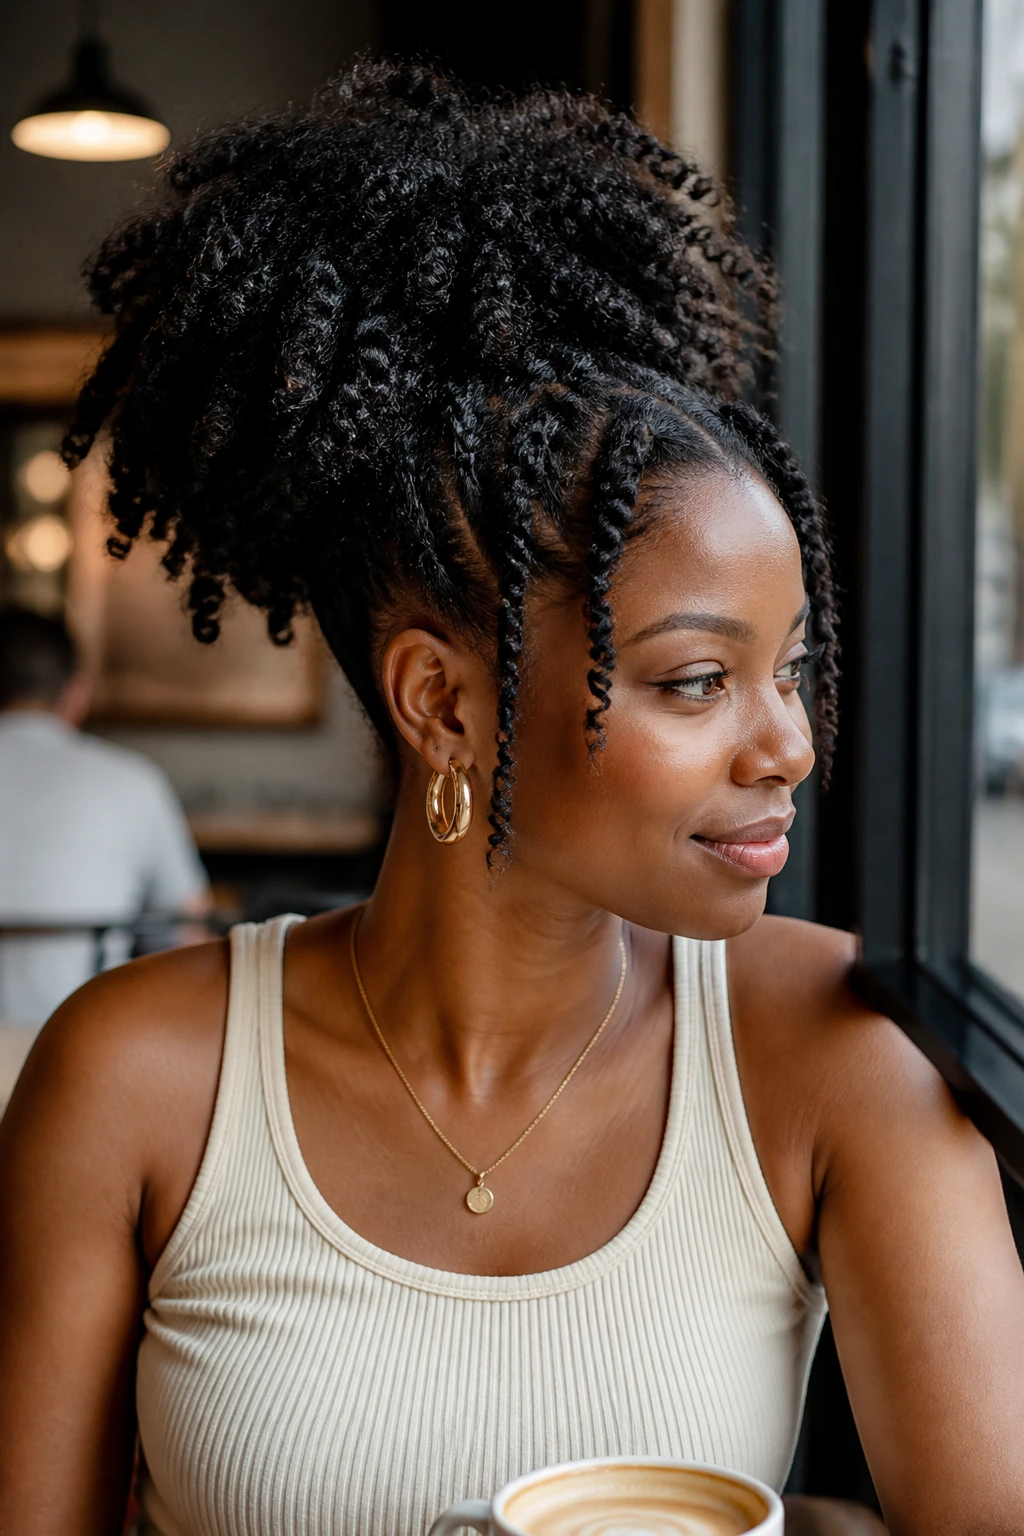
A braid-out puff keeps the definition of the set while still letting the ponytail live in the style. The gathered hair shows off the braid-out texture, which gives the puff more pattern and less roundness. That can be a good thing.
If your braid-out is dense, do not over-fluff it. The goal is movement, not a fuzz ball. A few deliberate separations are enough to show texture without losing the shape.
36. Coily Afro Puff
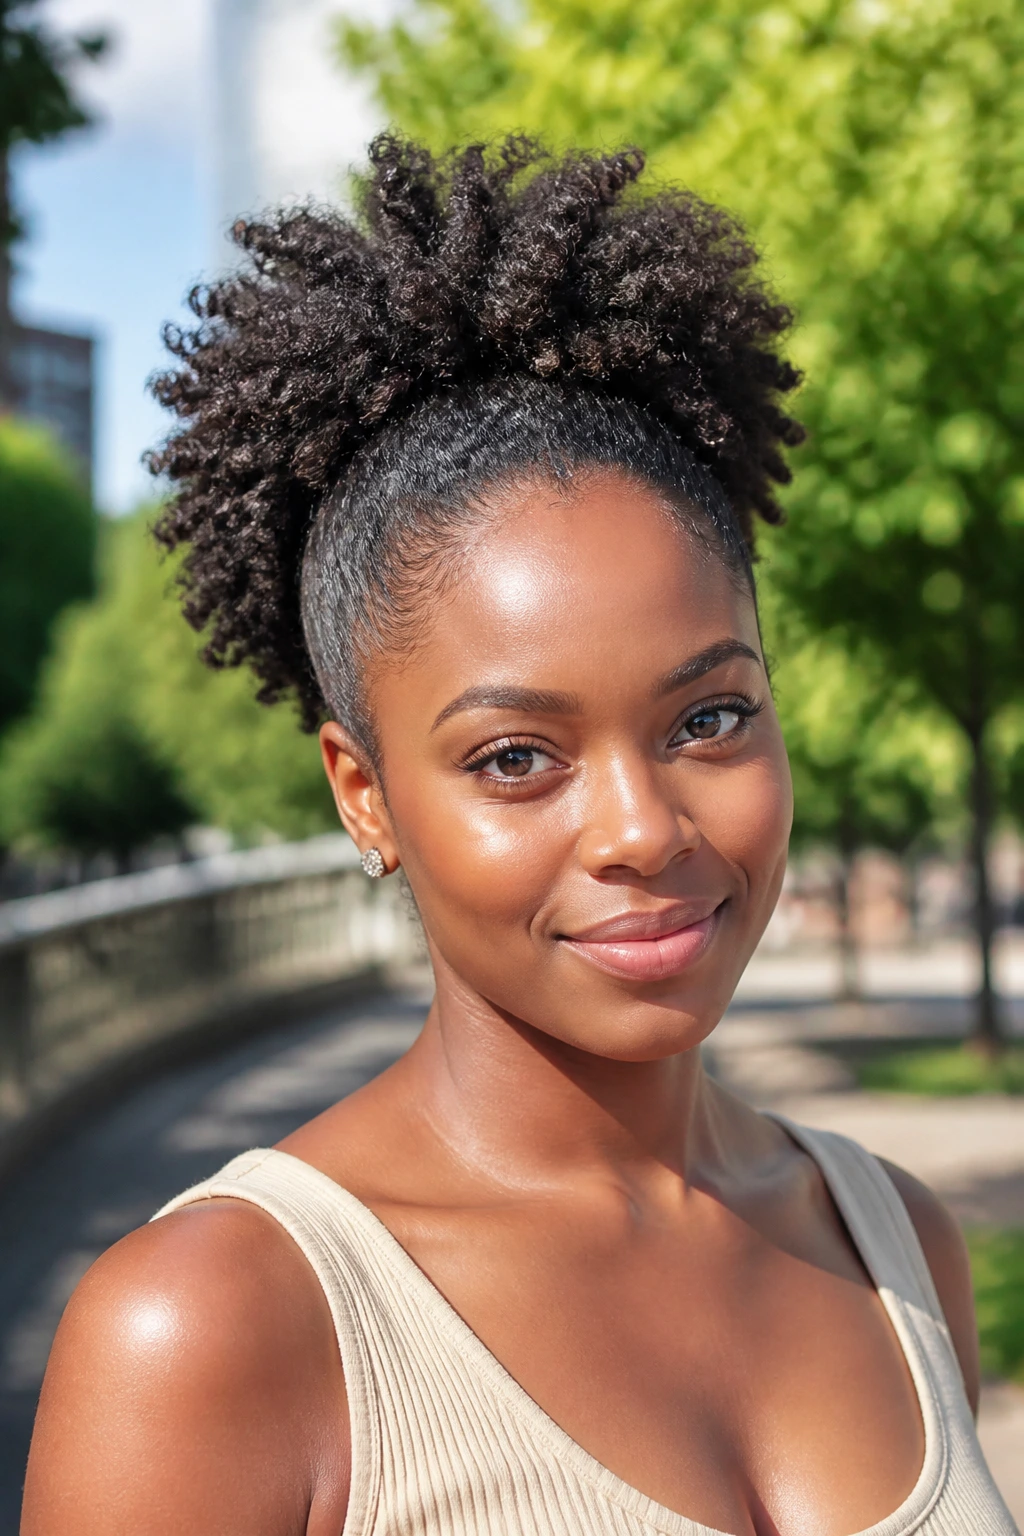
A coily afro puff leans all the way into texture. The puff sits full and rounded, with the coils left close enough to show their spring but not so brushed out that the shape goes loose. It is one of the most honest versions of the style.
Texture first, polish second
I think this looks best when the base is clean and the puff itself remains plush. The style does not need to pretend to be smooth. It needs to look cared for.
- Use a moisturizer that keeps the coils soft.
- Pick out only the outer layer if you want more size.
- Keep the elastic wide so it does not pinch the hair.
37. Wet-Look Puff
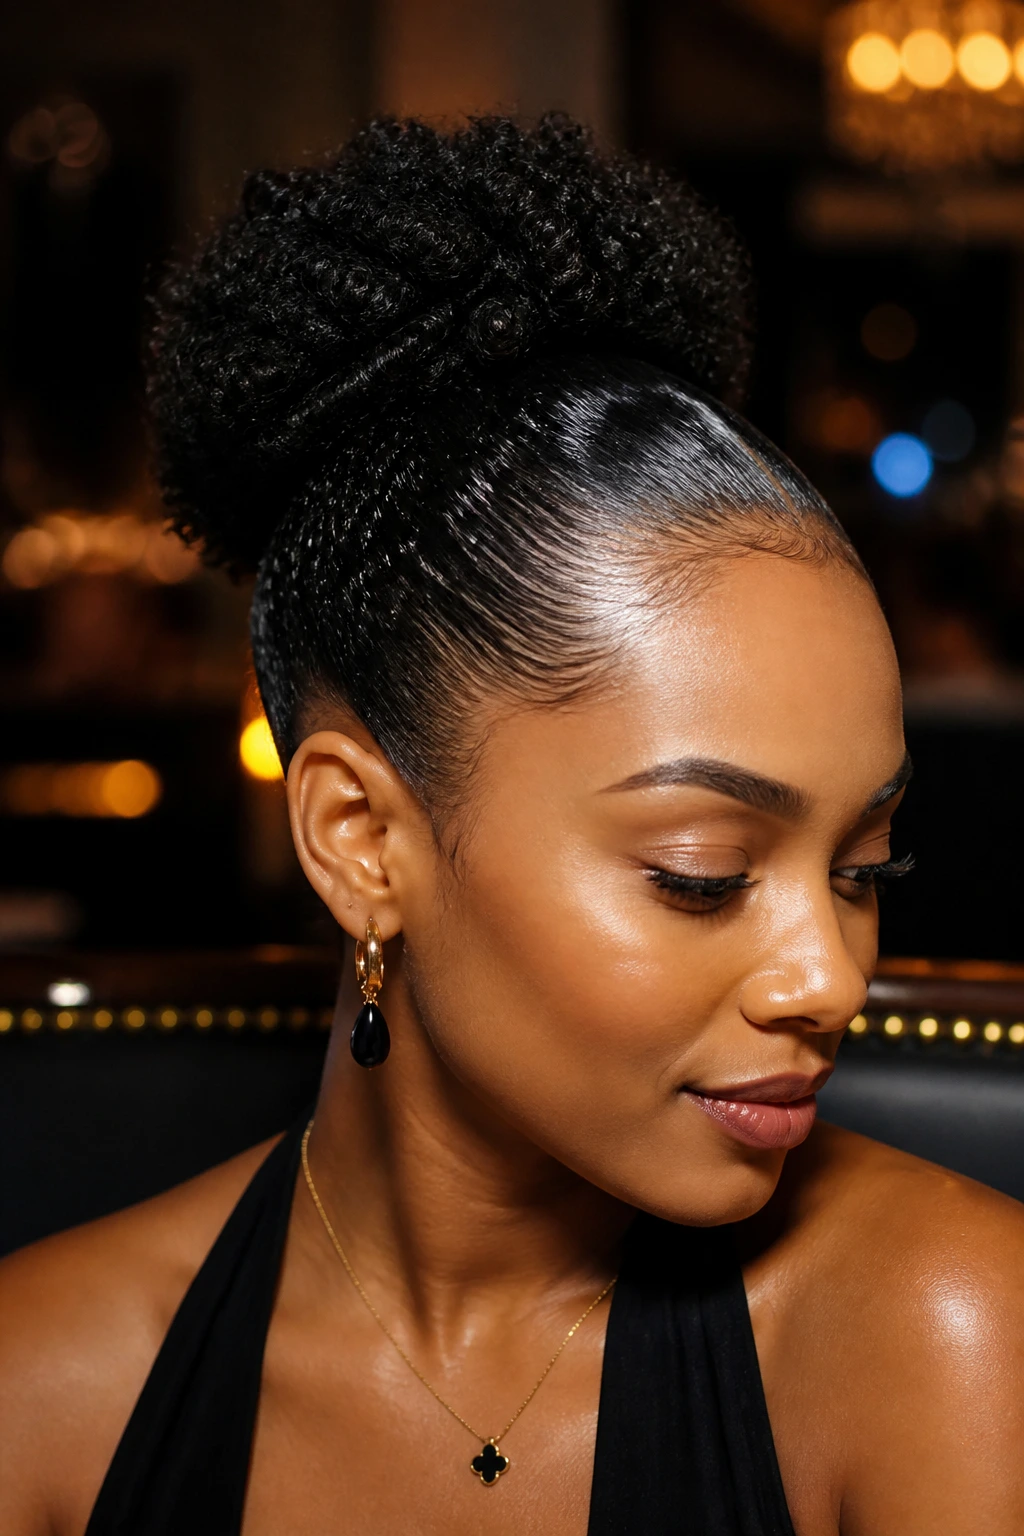
A wet-look puff keeps the base glossy and the puff compact enough to feel sleek. The finish is a little bolder than a standard puff, which makes it useful for evening events or any day you want sharper shine near the hairline.
Do not drown the whole head in gel. That is how the style gets hard and flaky. A thin, controlled layer at the base is enough; the puff itself can stay softer so the look does not become stiff.
38. Heatless-Stretched Puff
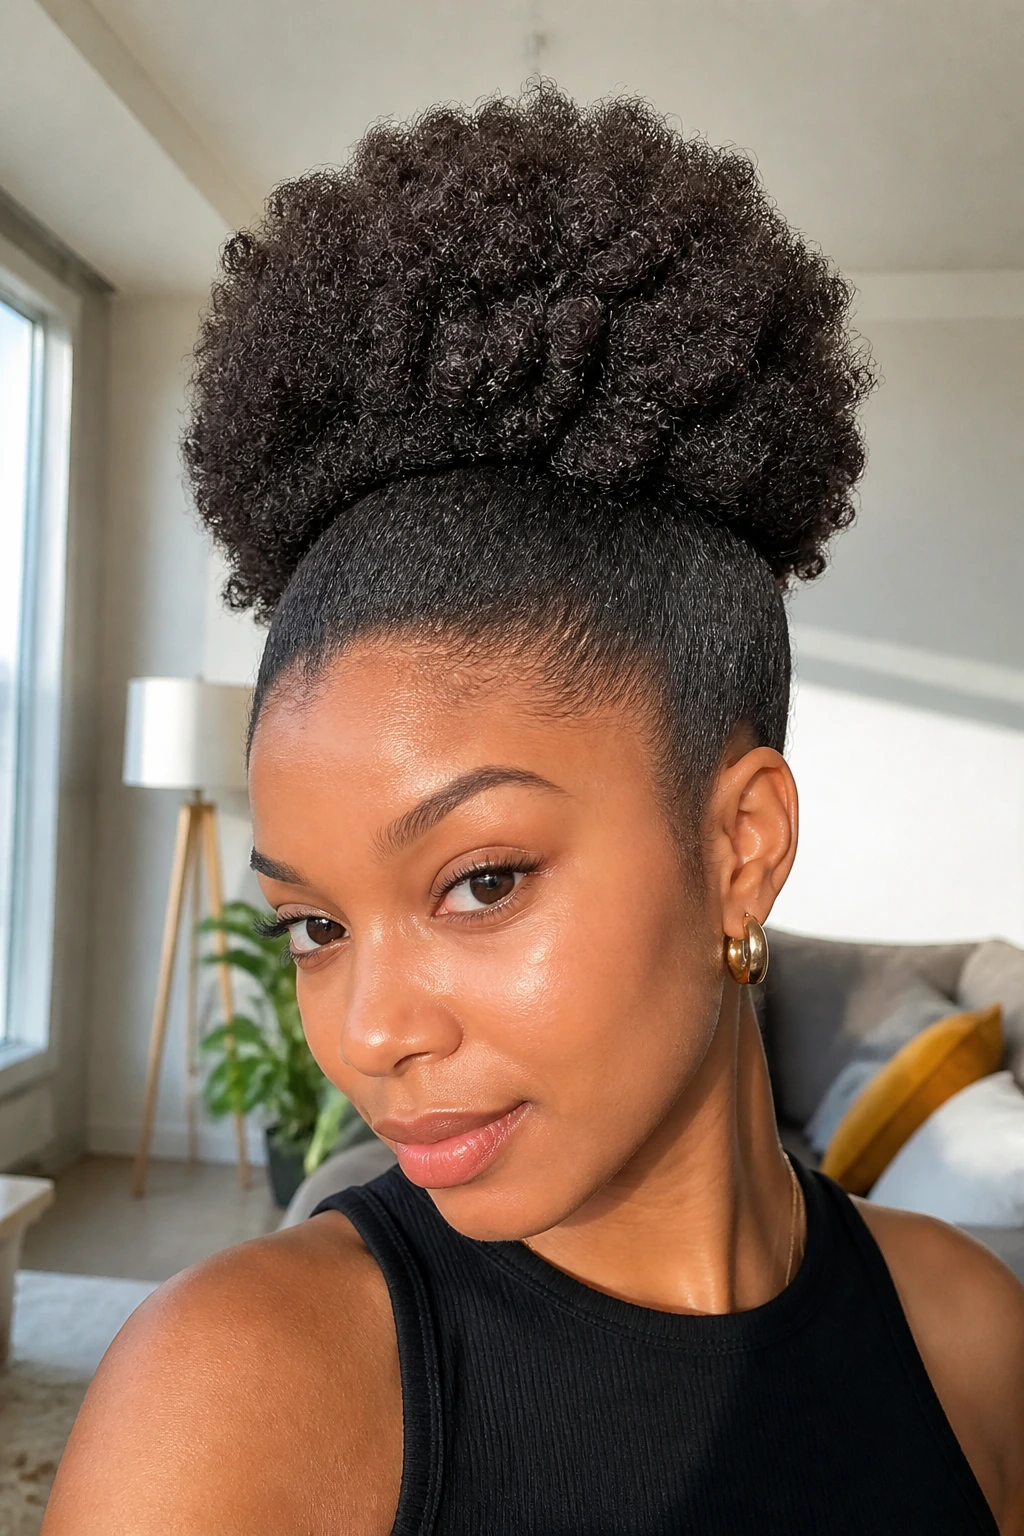
Heatless stretching changes the silhouette without putting heat on the hair. Banding, twists, and braids can lengthen the strands enough that the puff sits larger and more controlled. The result is smoother than a shrunken puff and easier to refresh the next day.
This is one of my favorite options when the hair needs a break from tools. It gives you a more elongated ponytail shape and keeps the ends from bunching up under the elastic.
39. Puff with Stackable Scrunchies
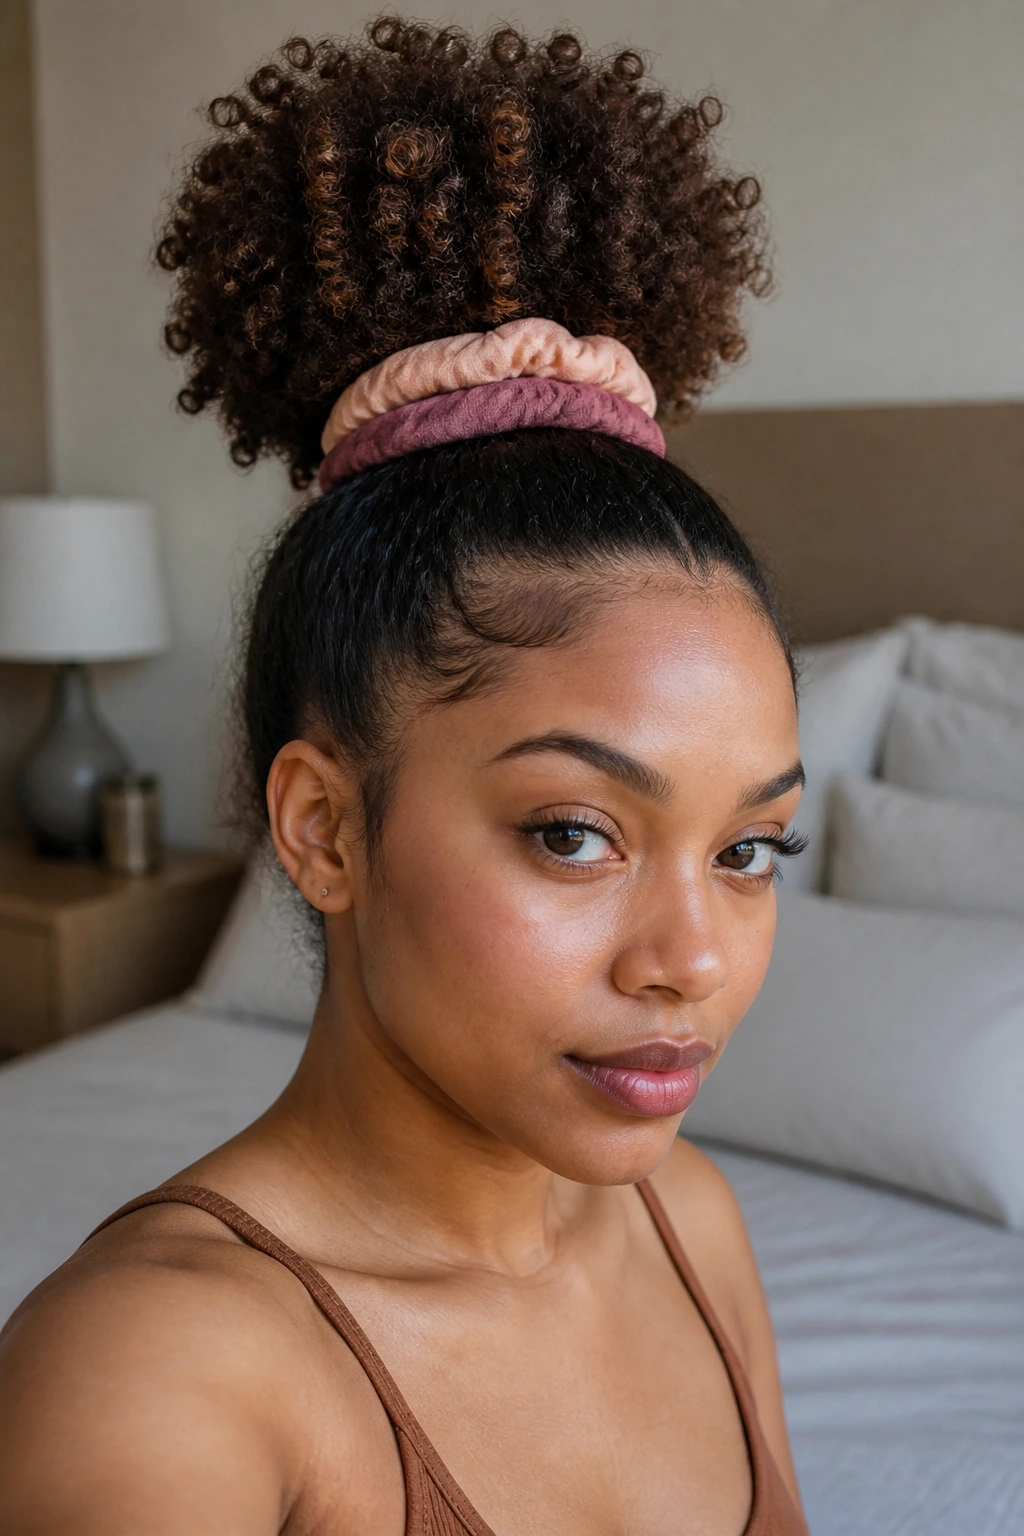
Stacked scrunchies make the base feel playful and a little quirky. Two or three in matching or clashing colors can turn a plain puff into a deliberate style choice. The puff stays the same; the personality comes from the base.
Pick scrunchies that are soft enough not to catch on coils. Thick fabric is better than cheap rubbery ties. The whole point is decoration, not tugging.
40. Glitter-Part Party Puff
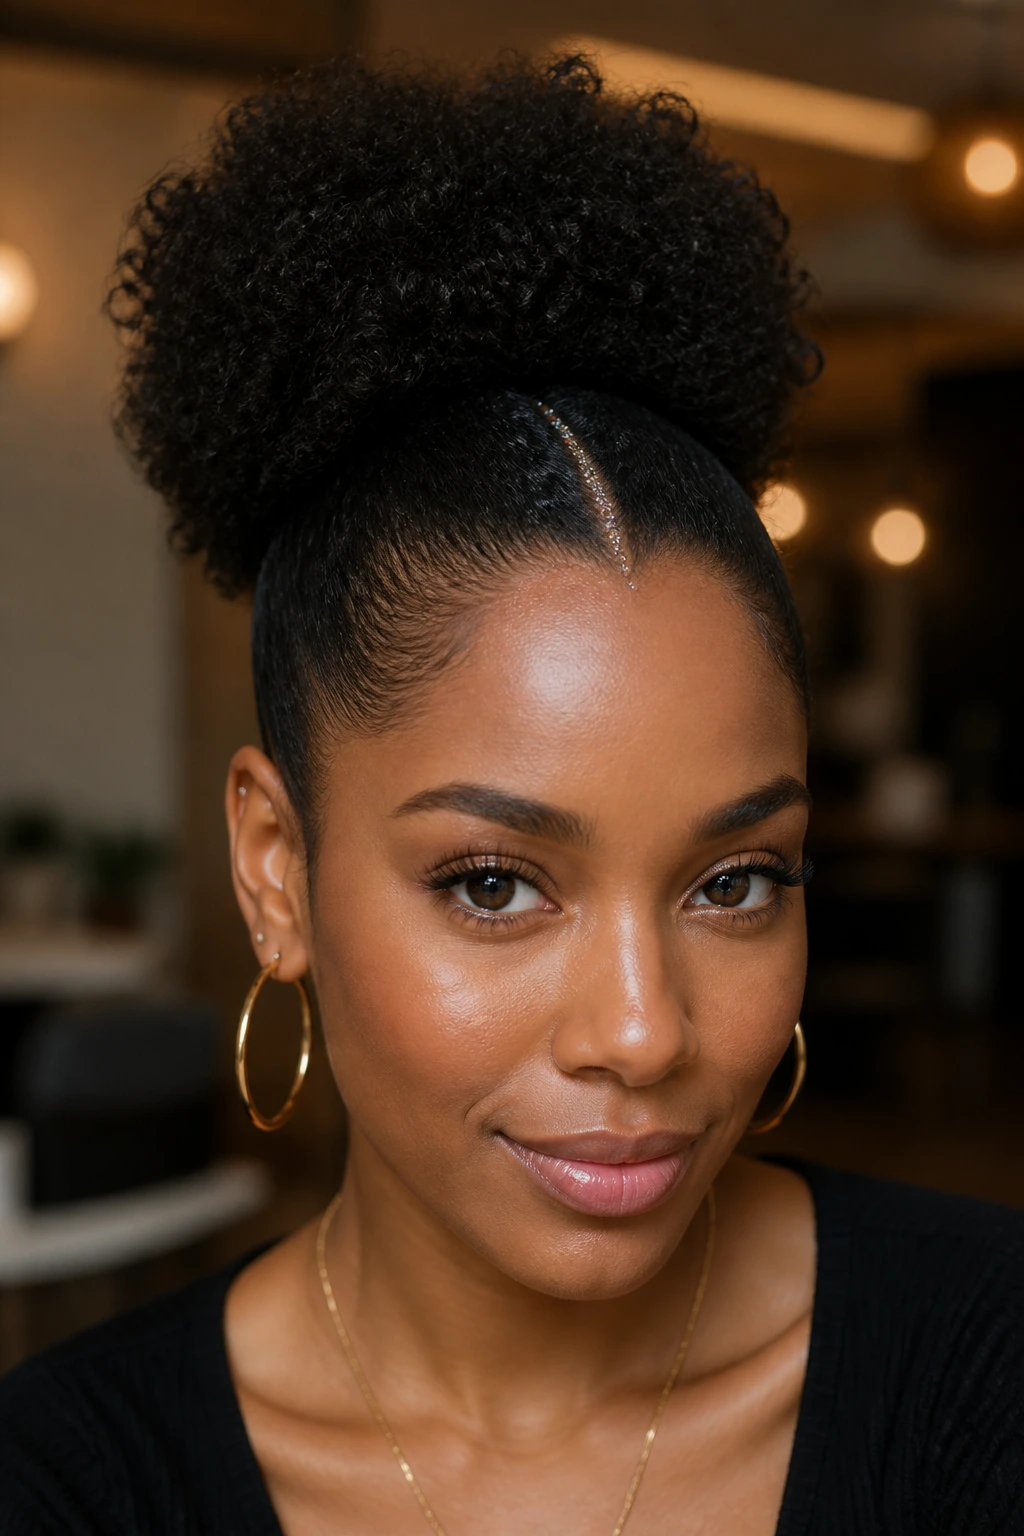
A tiny bit of sparkle along the part line can move a puff into event territory fast. It works for birthdays, concerts, and any day when plain hair feels underdressed. The puff itself can stay simple; the part carries the drama.
Use the glitter lightly. A thin line reads cleaner than a heavy stripe, and you do not want flakes dropping on your shirt all night. Less is better here.
41. Minimalist Clean-Line Puff
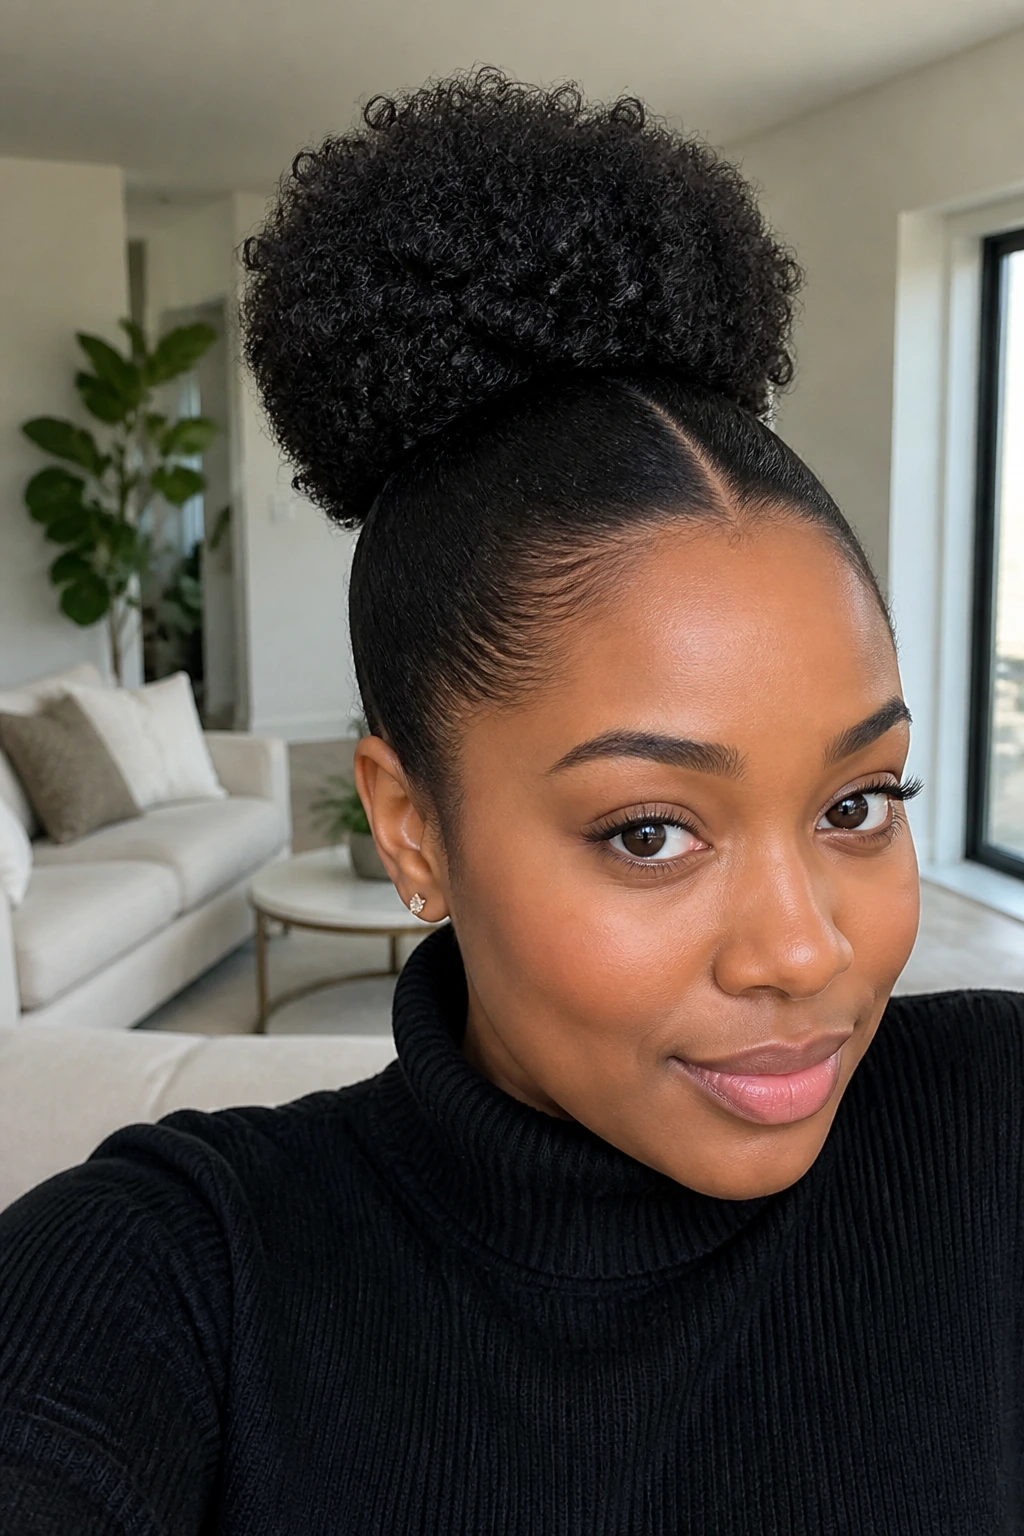
This one is for people who like their styles tidy and direct. A crisp part, smooth base, and full puff with no extra pieces gives a very clean outline. It is spare, but not boring.
The appeal is in the contrast: sleek in front, soft at the back. That split makes the style feel balanced and easy to wear with almost anything. You can keep the accessories minimal and still look finished.
42. Fluffy Cloud Puff with Extra Volume
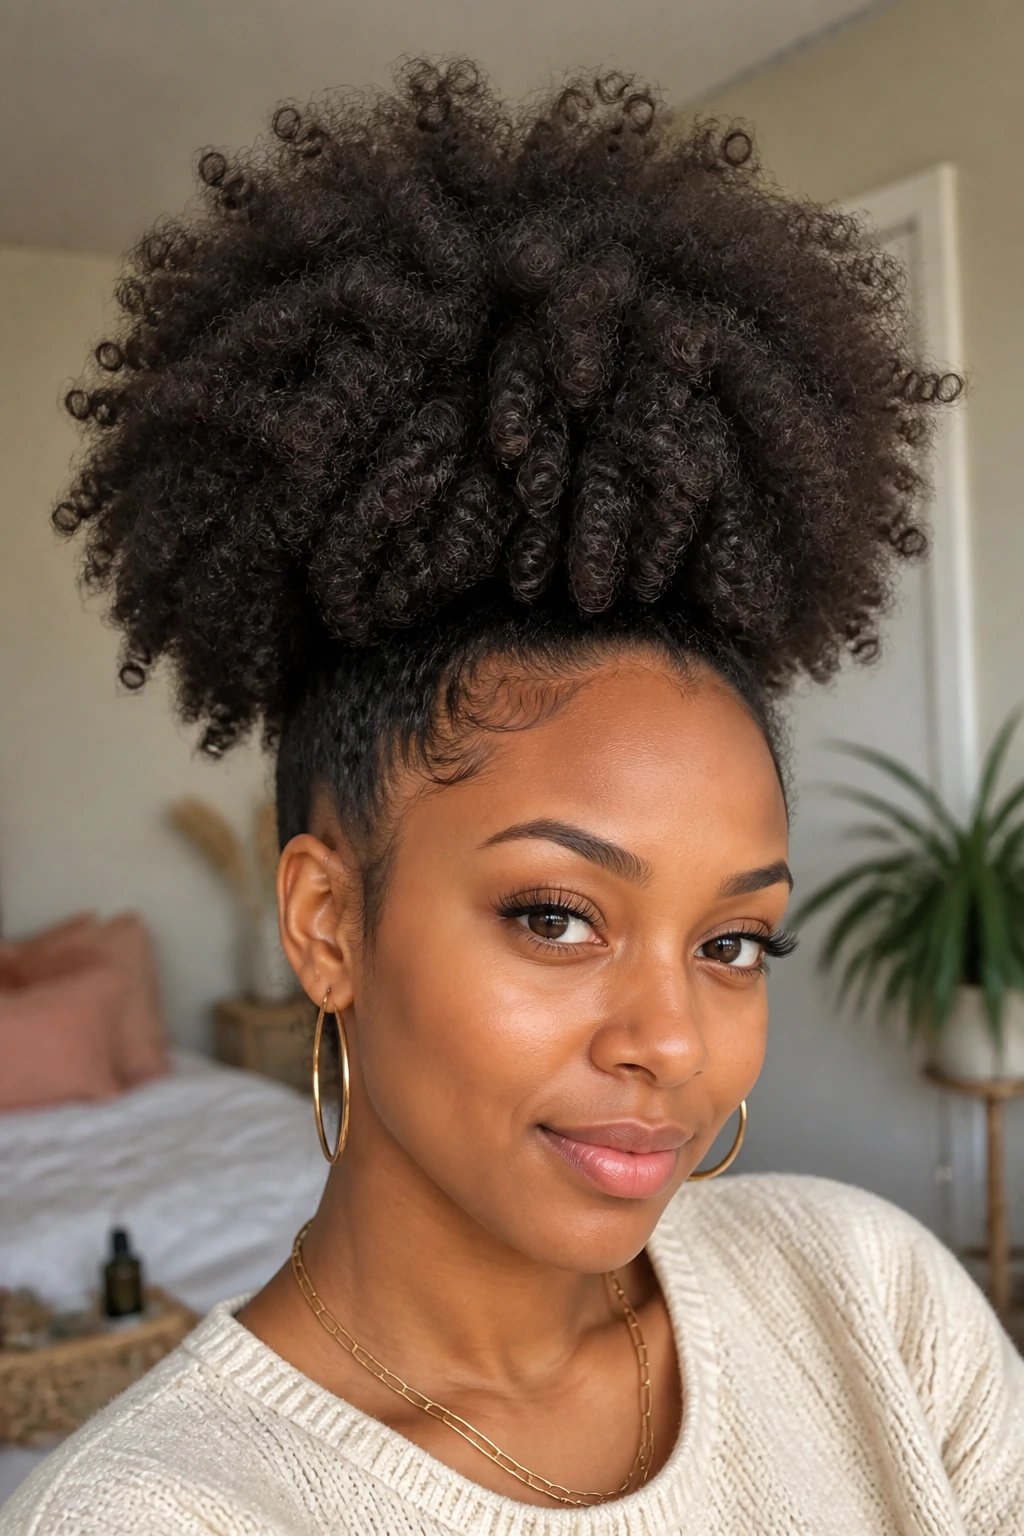
A cloud puff is all about softness and size. The puff is fluffed out more than a standard ponytail, with the texture left open so it looks airy and rounded. It feels big in a way that is cheerful, not heavy.
How to keep it from collapsing
Start with hair that has some stretch, then separate the curls gently with dry, clean fingers. If you add too much oil, the puff loses its cloud-like lift and starts to hang. That’s the catch.
A wide elastic or puff cuff helps the shape stay open. The style looks best when it keeps its loft all day instead of flattening at the back.
43. Short-Hair Mini Puff
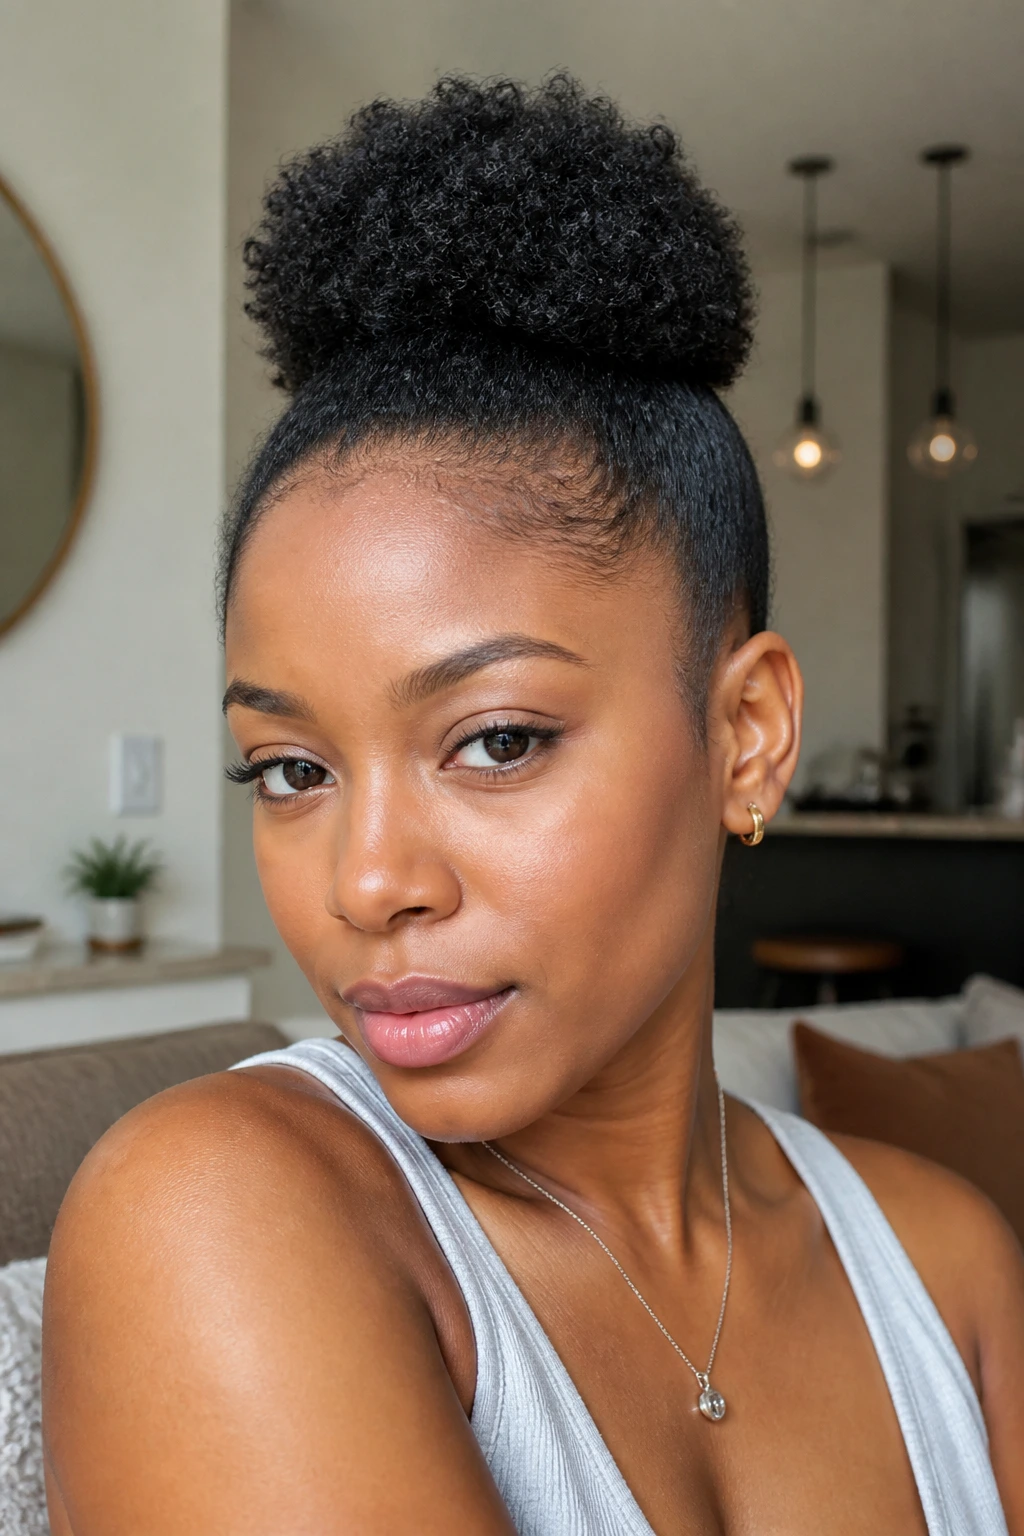
Short hair can do a puff too, and it often looks sharper than people expect. The size stays smaller, but the shape can still be neat and cute. A mini puff is especially good on tapered cuts or short natural hair with enough length at the crown to gather.
- Use a soft elastic, not a tight one.
- Keep the puff high enough to show shape.
- Leave the edges soft so the style does not look squeezed.
A mini puff is not a consolation prize. It is a different silhouette.
44. Max-Volume Showstopper Puff
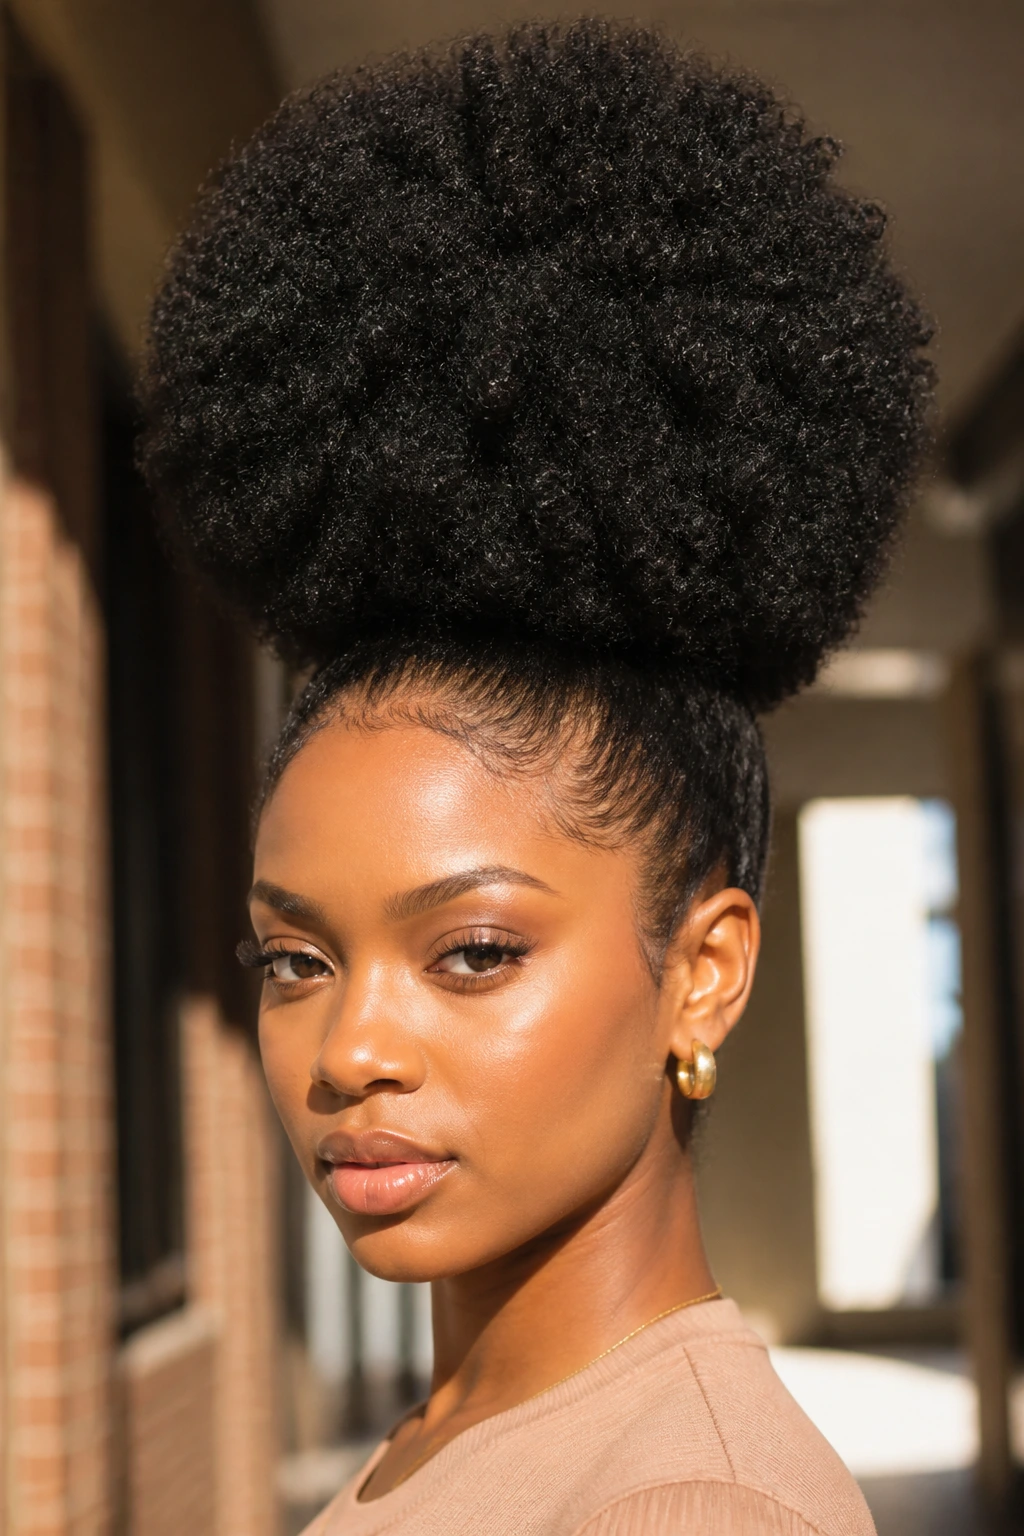
This is the dramatic one. The hair is stretched, fluffed, and gathered to create as much size as the length allows. The puff sits like a round cushion, and the base stays out of the way so the volume can do its job.
It works best when the hair has enough length to expand after being secured. If your strands are shorter, the style can still work, but the puff will read smaller and denser. Different effect. Still good.
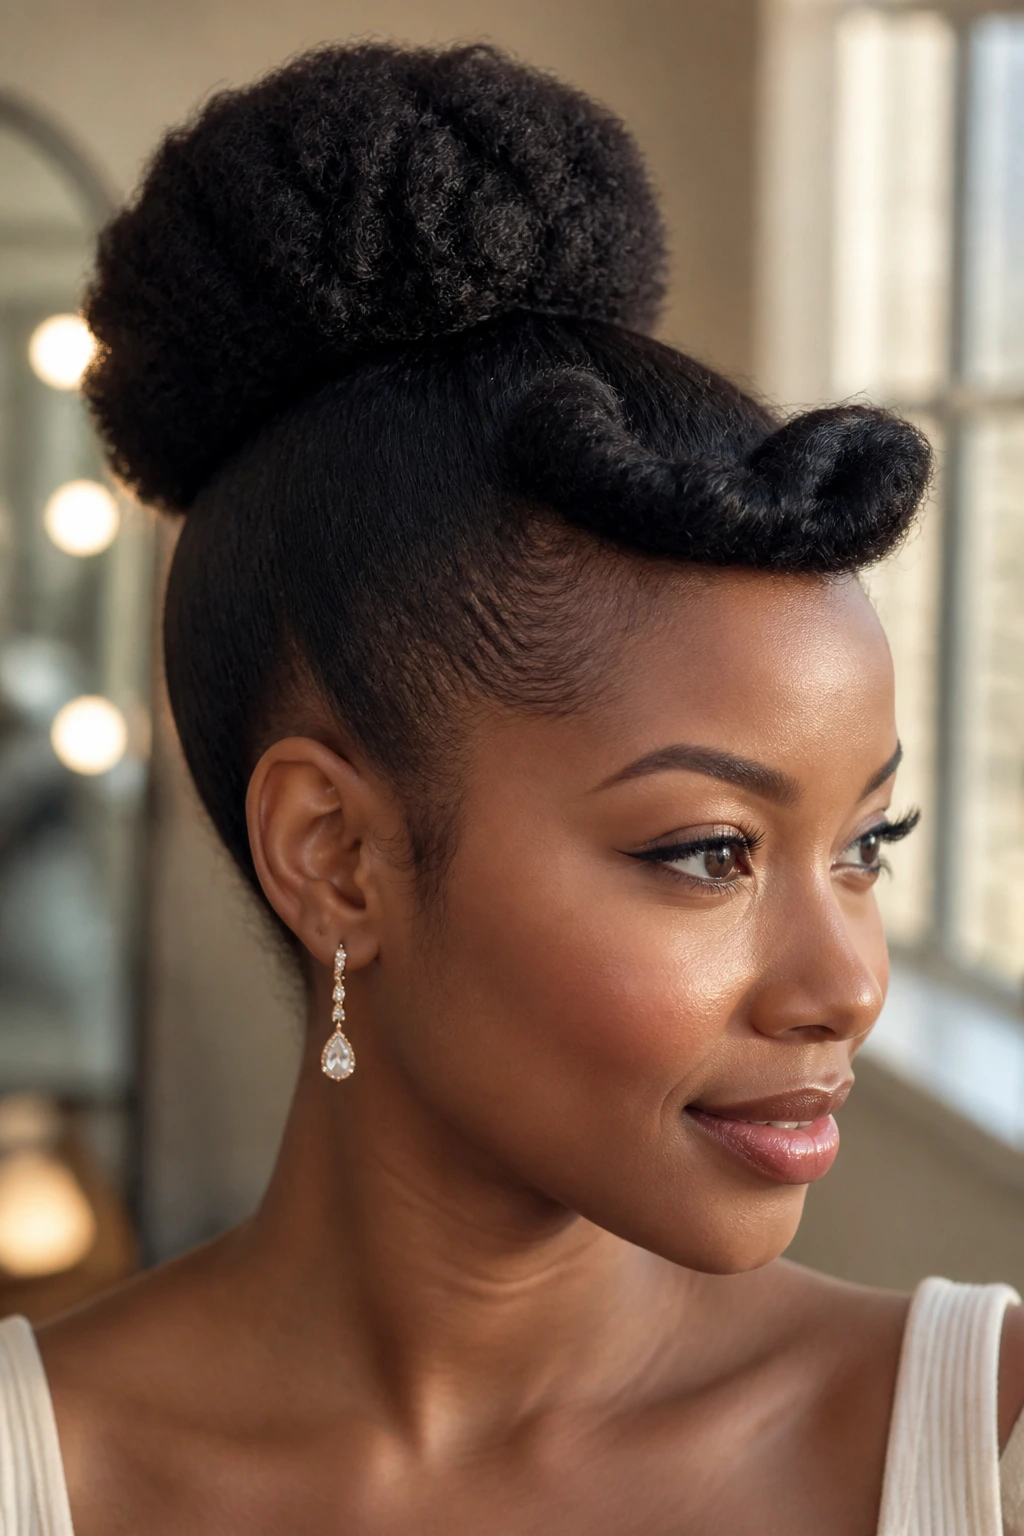
45. Soft-Roll Puff for Dressy Days
A soft roll near the front gives this puff a more dressed-up finish. Think gentle rolled sections or tucked front pieces that guide the eye back to the puff without turning the style into a full formal updo. It feels neat, soft, and a little polished.
That little rolled detail is enough to change the whole mood. You do not need more decoration if the roll and the puff already have shape. I’d wear this one with a bold lip or a pair of long earrings and stop there.
Why Puff Ponytails Sit So Well on Natural Hair
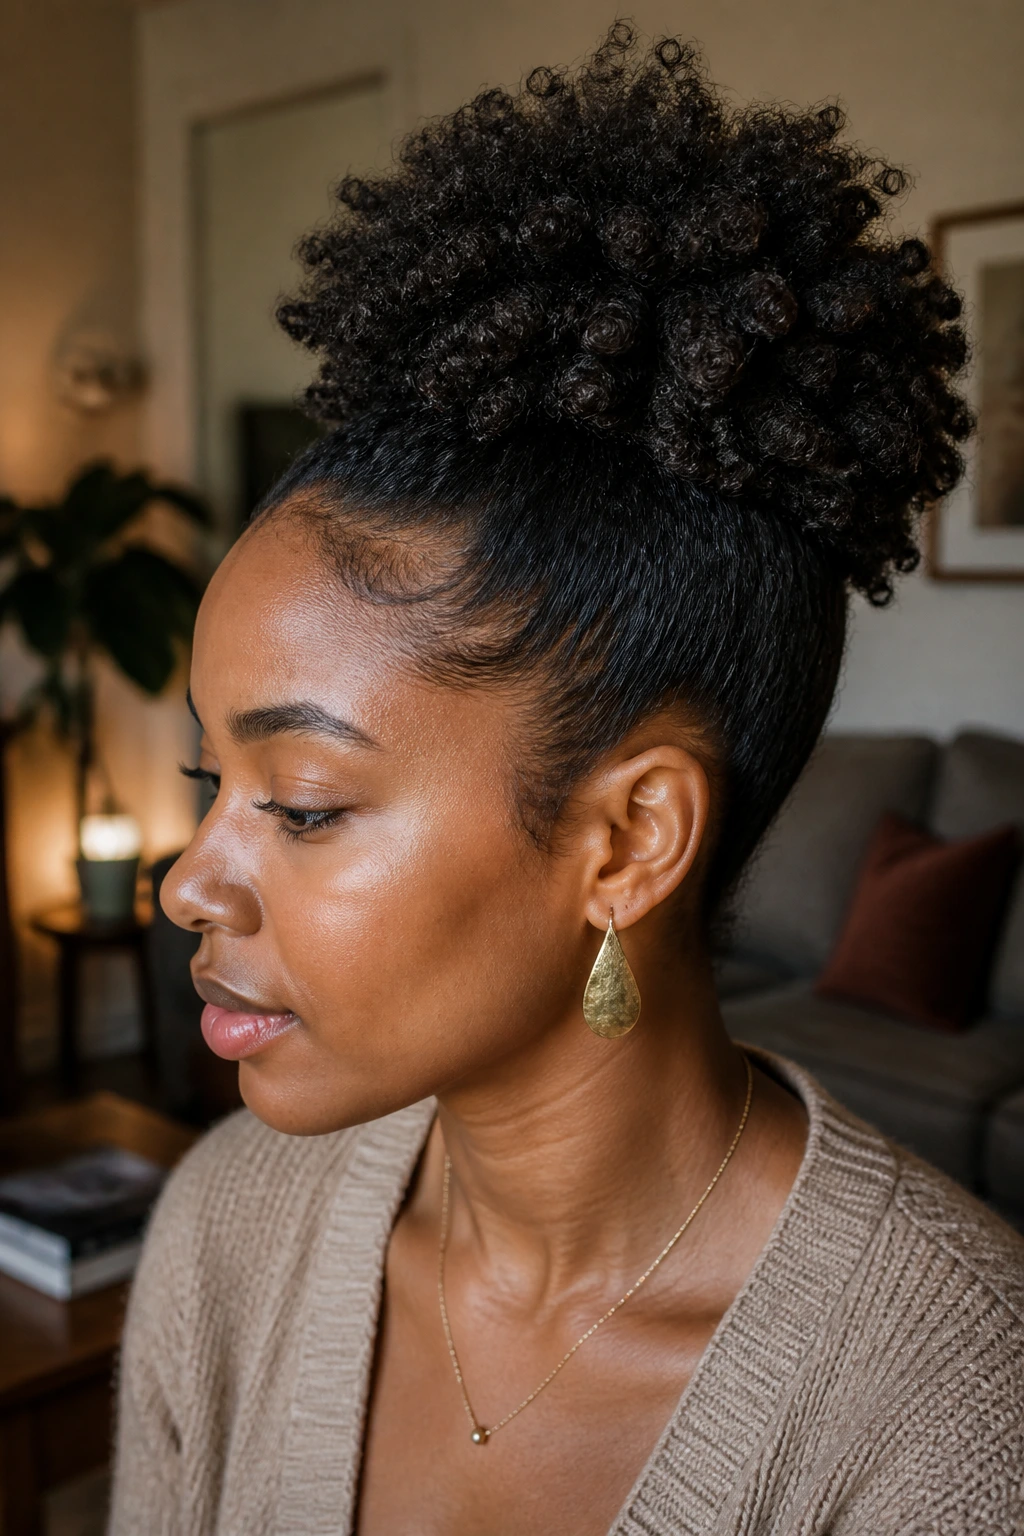
Natural hair gives a puff ponytail its best material: texture that can hold shape, soften at the edges, and expand without needing a lot of help. A puff works because it gathers the roots and leaves the rest of the hair free to do what it already wants to do. That is the part I like most. The style respects the curl pattern instead of flattening it.
The other reason it works is tension control. When the base is brushed smooth but not pulled tight, the hairline stays comfortable and the puff can still look neat. Stylists and dermatology guidance keep circling the same point for a reason: repeated hard pulling at the edges and temples is not worth the trade. A puff should be secure, not painful.
Texture also changes the silhouette in a good way. A twist-out puff looks fuller at the ends. A blowout puff sits longer and rounder. A coily puff keeps the body close and plush. Same idea. Different shape.
Essential Tools for These Styles
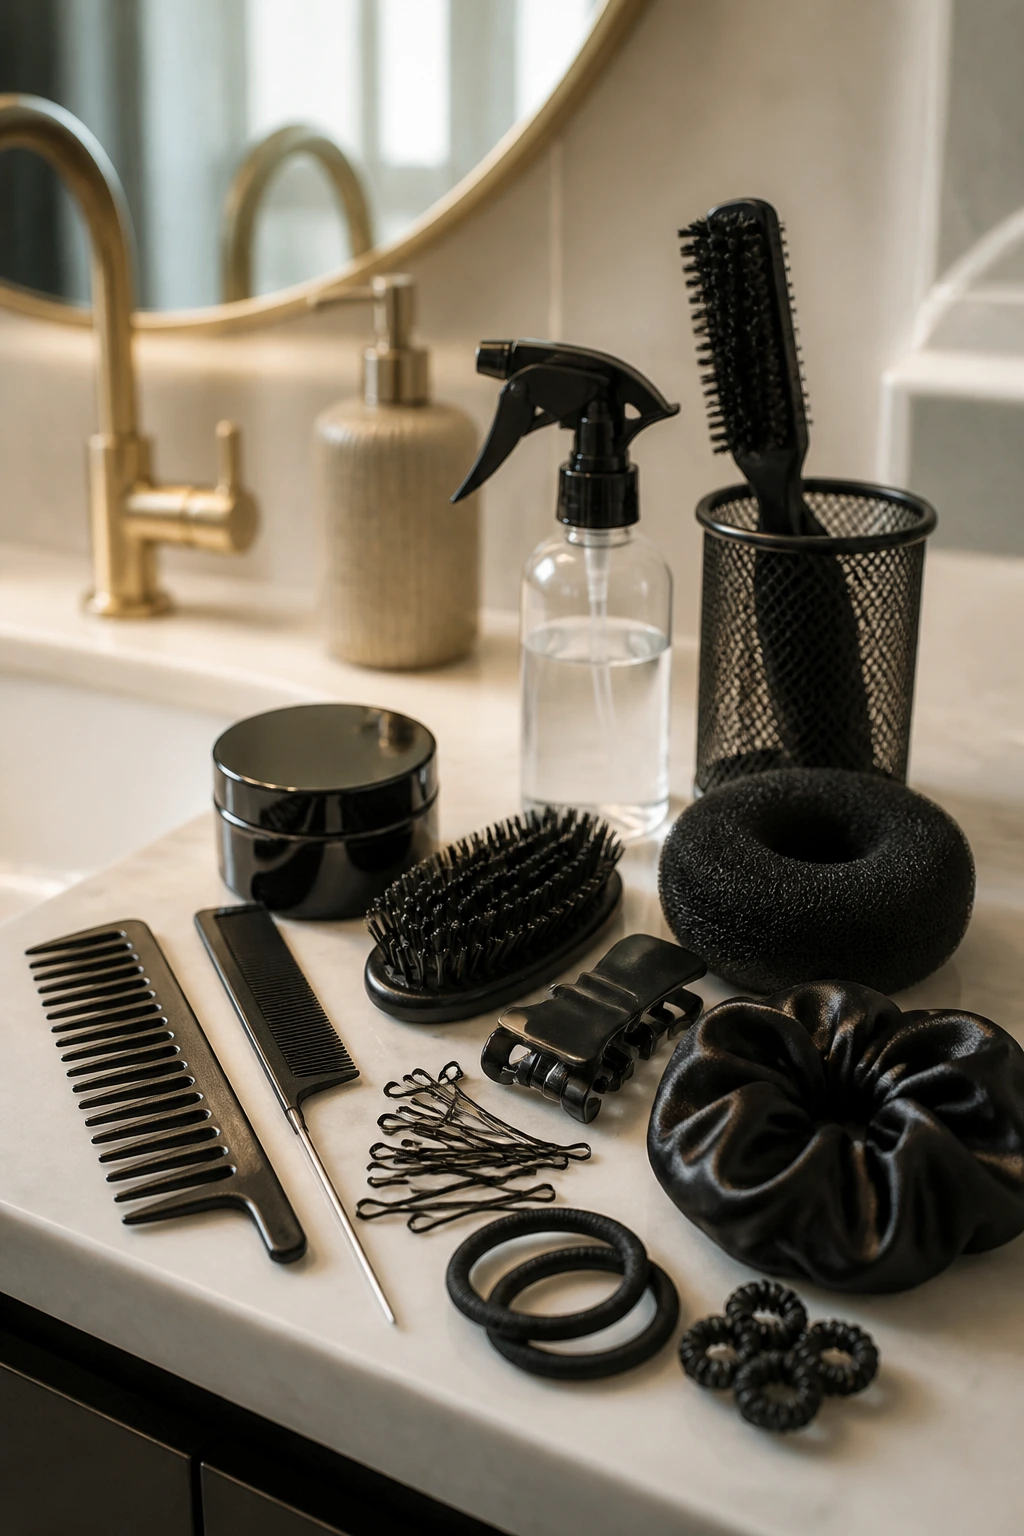
- Rat-tail comb: Best for clean parts and for separating sections without dragging through the scalp.
- Soft-bristle brush: Smooths the base without tearing at the hairline; this is the one I’d reach for first.
- Edge brush: Good for baby hairs and the front perimeter, but use it lightly.
- Snag-free elastics: Hold the ponytail without chewing up the curls when you take the style down.
- Bungee cord or puff cuff: Helpful when one elastic will not comfortably hold the amount of hair you have.
- Wide-tooth comb: Works for detangling and stretching without breaking up the curl too hard.
- Spray bottle: Water plus a little leave-in makes reshaping easier on refresh days.
- Satin scarf or bonnet: Keeps the base smoother overnight and cuts down on friction.
- Bobby pins: Useful for twisted fronts, braids, and scarf placement.
- Light-hold gel or edge control: Enough to smooth the front, not enough to freeze it.
- Leave-in conditioner or curl cream: Helps the puff stay soft instead of dry and rough at the ends.
- Puff cuff or decorative hair tie: Nice when you want the base to look finished instead of purely functional.
What to Buy for a Cleaner Puff and a Softer Hairline
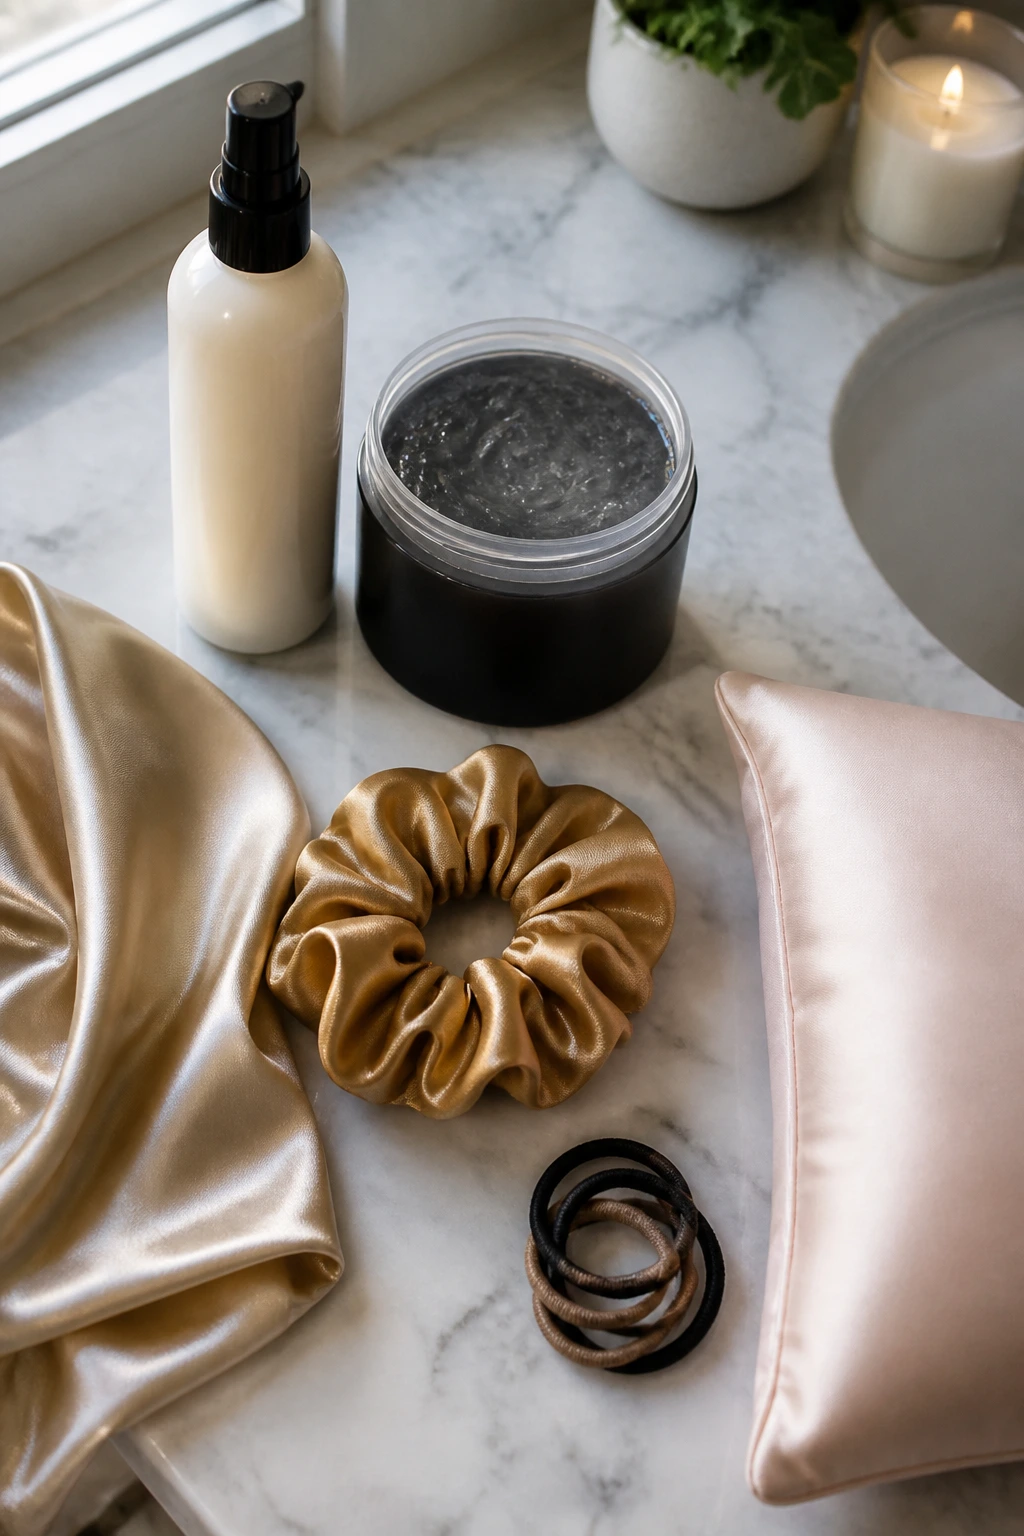
The product shelf can get noisy fast, so I keep this simple: buy for hold, slip, and comfort. A good leave-in should make the hair feel easier to gather, not greasy. A gel or edge control should smooth the front without turning white when it dries. And if the elastic has metal or a rough seam, leave it on the shelf. That kind of hardware is a breakage tax you do not need to pay.
For natural hair, I like a two-step finish more than a one-step miracle product. Cream gives the strands some softness, then a small amount of gel seals the base. If you use only gel, the style can look dry by midday. If you use only cream, the base may puff up too fast.
Satin accessories matter more than people admit. A satin scarf, satin scrunchie, or even a satin pillowcase changes how long the style stays neat. Cotton rubs. Satin slides. That is the whole story.
How to Wear These Puff Ponytails
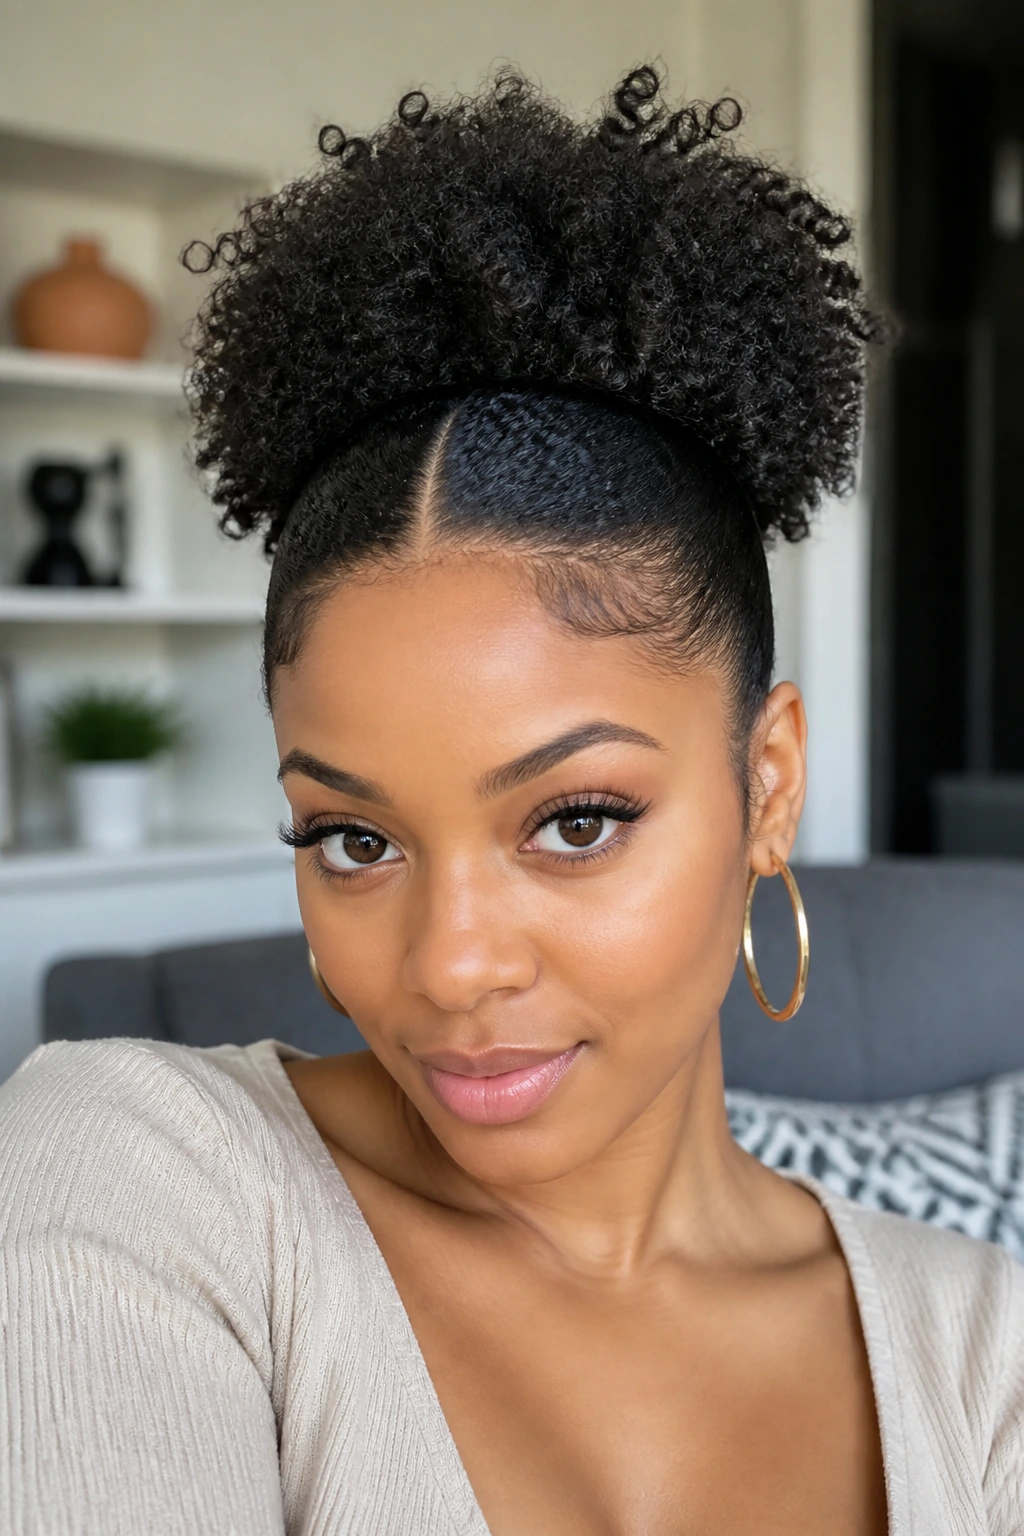
Presentation: Keep the hairline clean, then stop. That is usually enough. A puff looks best when the base is smooth and the puff itself is still touchable, so resist the urge to overbrush the volume out of it. One neat part and one good shape will do more than ten rounds of taming.
Accompaniments: Hoops, studs, scarves, and collar shapes all change the read of the style. A high puff pairs well with open necklines. A low puff loves turtlenecks and jackets. If the style already has beads or a cuff, keep the earrings simpler so the head does not feel crowded.
Portions: With puff ponytails, “more” is not always better. A narrow base with a fuller puff usually looks cleaner than trying to drag too much hair into a tiny elastic. On shorter hair, a mini puff can look sharper than a stretched style that keeps slipping. If the hair is dense, let the puff be broad instead of forcing a tiny shape.
Beverage Pairing: If you are getting ready for a long styling session, keep a cold drink with a straw nearby so you do not keep leaning into the mirror and disturbing the base. Iced tea or water works fine. Coffee, too, if that is your thing. Just keep it away from the front while the gel sets.
Extra Styling Tweaks That Change the Whole Look
Shine Boost: A pea-sized amount of light oil or gloss serum on the outer layer of the puff gives it a healthier finish, but keep it off the hairline unless you want the gel to slip. I prefer oil only on the ends and the outside halo of the puff.
Customization: Add one detail, not five. A braid at the front, a ribbon at the base, or a cuff around the elastic is usually enough. Too many extras turn a cute puff into a costume.
Serving Suggestions: If you want the style to look sharper, leave two face-framing pieces out and curl them lightly. If you want it softer, brush those pieces back and let the puff do the work. Either way, keep the part clean. Dirty parts age a style fast.
Make-It-Yours: For fine hair, use a little backcombing near the crown before gathering so the puff does not fall flat. For dense hair, keep the base smaller and let the puff expand. For color-treated hair, a leave-in with slip helps the ends stay smoother and less frizzy.
Keeping a Puff Ponytail Fresh Overnight
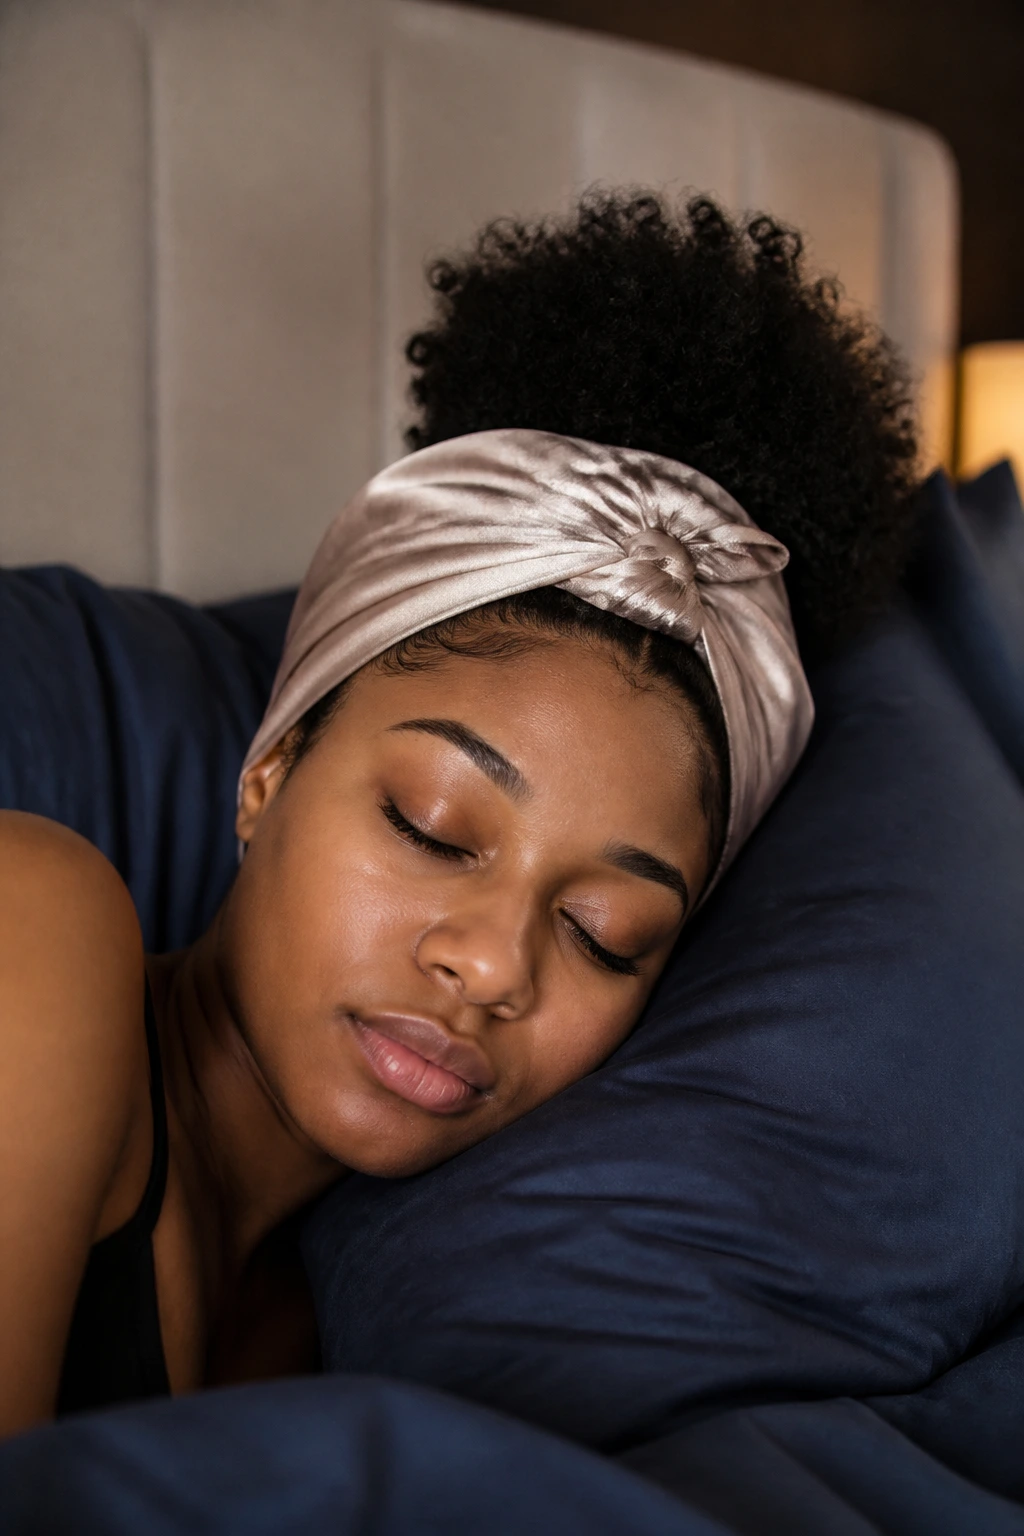
The easiest way to keep a puff looking decent the next morning is to treat the base like it needs protection and the puff like it needs air. Wrap a satin scarf around the edges and base, then either bonnet the rest or sleep on a satin pillowcase. Cotton will rough up the front in one night. It’s annoying, but true.
If the style has gel at the hairline, do not smash it flat under a tight scarf. You want the scarf snug enough to hold shape, not so tight that it dents the part or squeezes the puff. A loose pineapple on top of the head works well for high puffs, while low puffs usually do better with the scarf wrapped around the crown and nape.
In the morning, mist the base lightly with water or a water-and-leave-in mix, then smooth only the pieces that actually need it. A tiny dab of edge control can fix the front. The puff itself usually just needs fingers, not a brush. If the shape collapsed overnight, flip your head forward for ten seconds and fluff from underneath. That brings volume back faster than picking at the top.
Styles built on stretched hair usually last longer than wash-and-go puffs, because the base keeps its shape. Braided fronts and twisted sides also buy you time. If you know you want the style to last two or three days, start with less moisture at the roots and more at the ends, so the puff does not puff out of control by day two.
Variations and Adaptations to Try
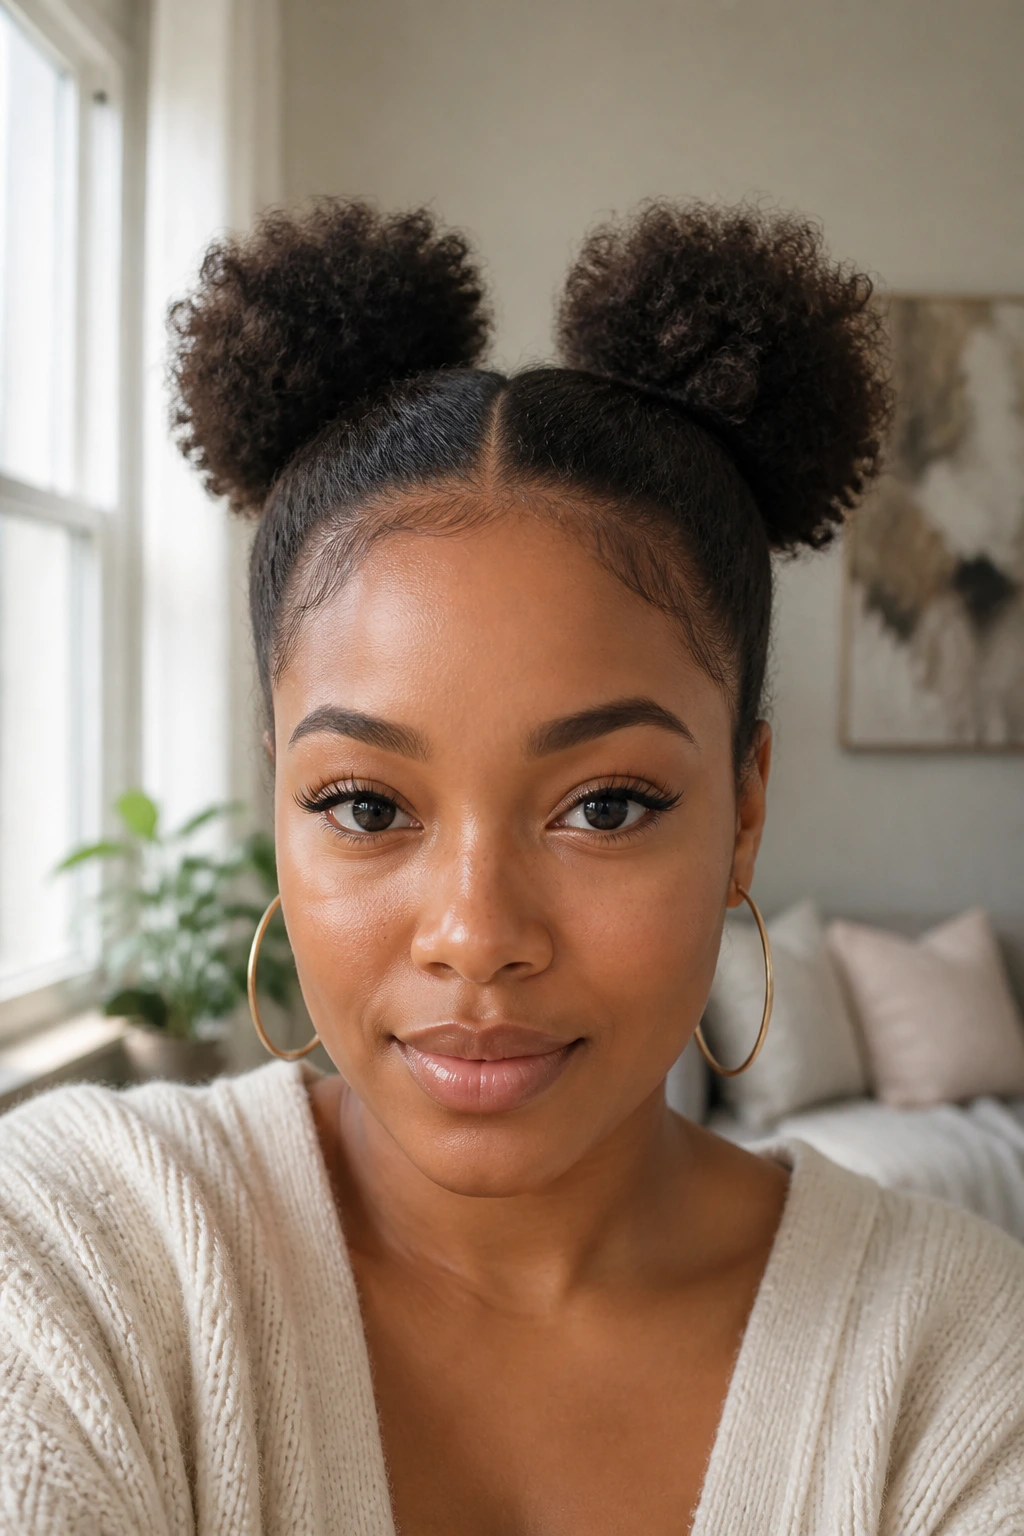
Short-Hair Safety Puff: If your hair is too short for a full puff, split the crown into a mini puff or two small puffs instead of fighting for one giant base. The result looks cleaner and is easier on the scalp.
Gym-Day Puff: Keep the base low tension, use a soft elastic, and skip heavy accessories. This version is about staying secure through movement, not staying camera-ready for twelve hours.
Event Puff: Add a cuff, ribbon, or a braid at the front and keep the edges neat. This is the version that works for birthdays, dinners, and photo-heavy days because the base looks finished from every angle.
Humidity-Proof Puff: Start with stretched hair, smooth the front lightly, and avoid overloading the puff with cream. Too much moisture can make the style swell in the wrong places.
Kid-Friendly Puff: Use soft scrunchies, avoid sharp pins, and keep the base loose enough that it does not tug. Kids move more. Their hairstyles should account for that.
Office Puff: A low nape puff with a center part or side part keeps the shape tidy enough for work without feeling stiff. It pairs well with simple earrings and a clean neckline.
Common Puff Ponytail Mistakes
The biggest mistake is pulling the base too tight. You can feel it right away: the scalp starts to ache, the front looks overly flat, and the style gets a harsh line at the hairline. The fix is simple. Loosen the elastic, or use a bungee or puff cuff so the hair can sit securely without being squeezed.
Another common problem is overusing gel and edge control. The hairline ends up crunchy, flaky, or white around the edges once it dries. That usually means too much product or layering two products that do not play well together. Use one thin layer, smooth it once, and stop.
Skipping stretch is a sneaky one. If the hair is very shrunken, the puff can turn into a tiny knot with a lot of bulk near the base and not much shape in the actual ponytail. Banding, twist-stretching, or a quick low-heat blow-dry on cool settings can fix that.
People also forget the back end of the style. Dry ends stick out, frizz fast, and make the puff look unfinished. A little leave-in on the lengths before gathering the ponytail helps the puff sit softer and rounder.
Frequently Asked Questions
How do I make a puff ponytail last longer on natural hair?
Start with stretched or at least mostly dry hair, then wrap the base at night with satin. A puff that begins on very damp hair usually shrinks and frizzes faster, especially around the crown and nape.
Can short natural hair do a puff ponytail?
Yes, but the shape changes. Shorter hair usually works better as a mini puff, a twin puff style, or a low puff rather than a huge crown puff that keeps slipping out of the elastic.
What keeps the puff from looking flat?
The key is to make the base neat while leaving the puff itself loose. If you brush the ends too much or pile on heavy cream, the volume disappears. Fluff with fingers after the ponytail is secure, not before.
Is edge control bad for natural hair?
Not by itself. The problem is repeated hard brushing and very tight styling at the hairline. Use edge control sparingly, keep the pressure light, and give your scalp breaks between slick styles.
What if my puff keeps sagging during the day?
The base is usually the problem. Try a wider elastic, a bungee, or a puff cuff, and gather the ponytail a little higher or lower so it sits on the part of the head that actually supports it.
Can I do these styles on blown-out hair?
Absolutely. Blown-out or heatless-stretched hair often makes the puff look bigger and the ponytail easier to shape. Just use less product, because stretched hair does not need much help to look smooth.
How do I stop the hairline from getting sore?
Loosen the ponytail, lower the tension, and avoid pulling the same sections into tight styles day after day. If your temples hurt, the style is too tight. There is no upside to ignoring that.
What is the easiest puff ponytail for beginners?
A high crown puff or a low nape puff with a soft brush and one elastic is the simplest place to start. Skip the braids, cuffs, and ribbons until the basic shape feels comfortable in your hands.
The Puff That Keeps Its Shape
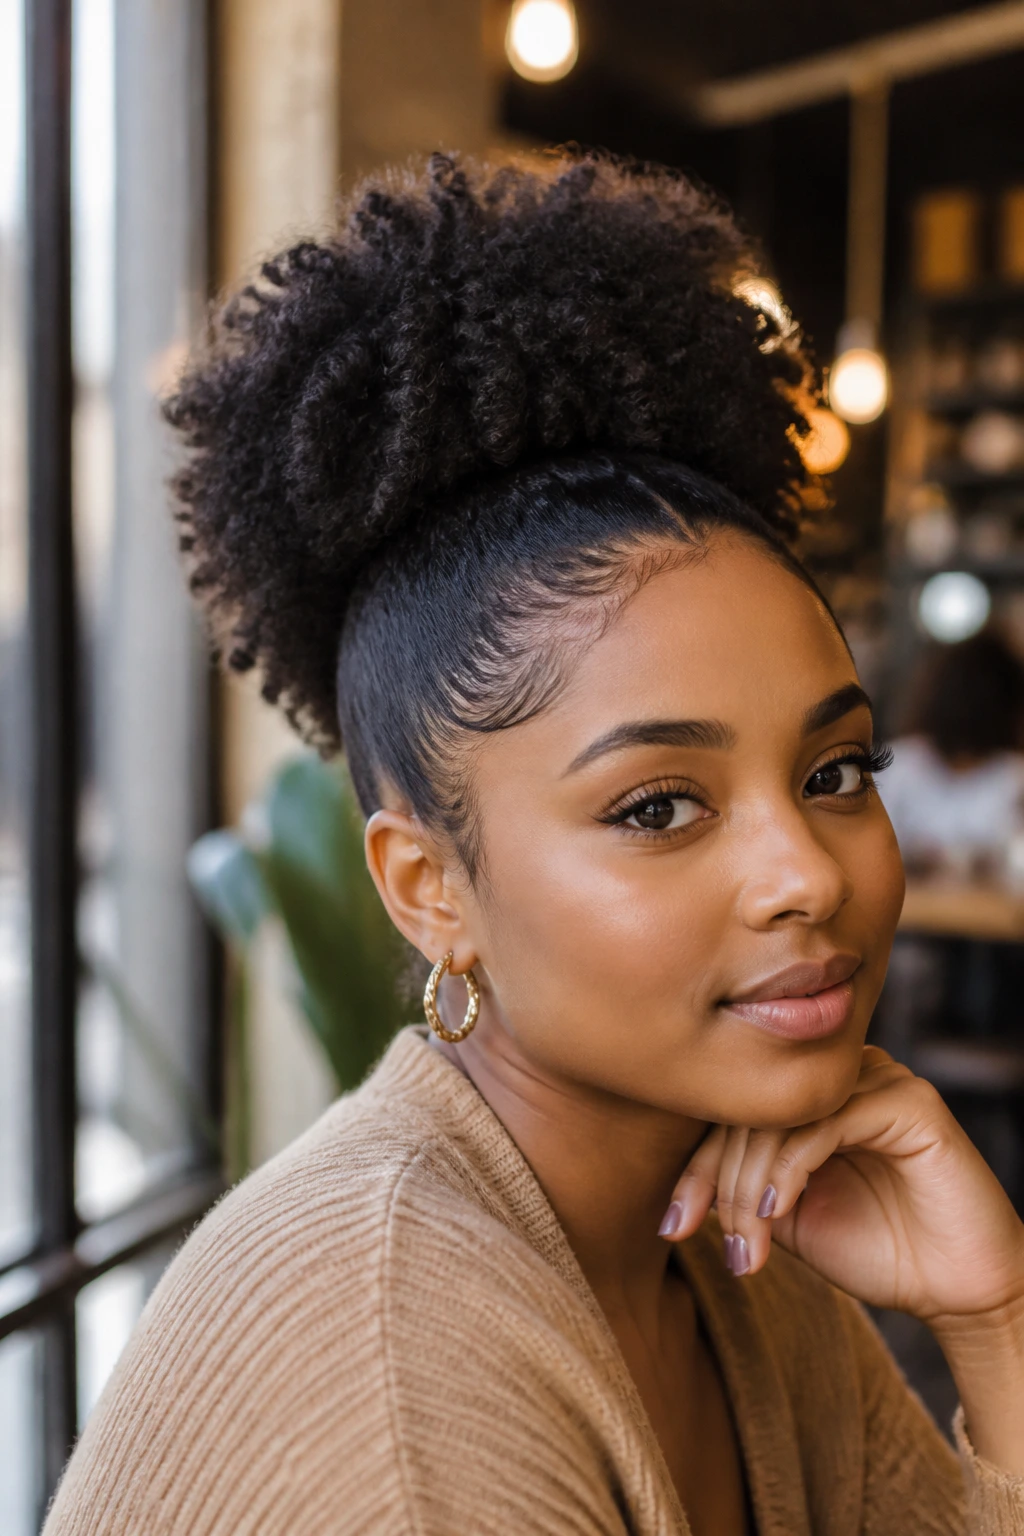
A good puff ponytail does not need to be elaborate to look thoughtful. It just needs the right balance: neat at the base, soft through the body, and comfortable enough that you are not thinking about it all day. That balance is what keeps these styles useful long after the mirror check is over.
If you keep one rule in mind, make it this: the puff should move, but the base should behave. Get that part right, and the rest becomes a matter of mood, accessories, and how much volume you want to leave on display.
