



A braid can look polished in five minutes, or it can fall apart before lunch if the sectioning is sloppy. That tiny difference is why braid hairstyles for women deserve more respect than the usual “just braid it” advice gets them.
The best braids change the shape of the whole head. They pull hair off the face, show off color, hide greasy roots on day two, and make a plain outfit look more deliberate than it felt ten minutes earlier. A clean braid can also save you from the weird in-between stage where your hair is neither down nor up and somehow annoying both ways.
There’s one catch people miss. Braids behave differently depending on hair texture, length, and how much grip the strands have that morning. Silky hair tends to slide; curls and coils tend to hold but can get stressed if the tension gets too sharp at the hairline. So the right braid is never only about the look. It’s about the way your hair wants to move.
Some of these styles are fast and quiet. Others are the sort you wear when you want the braid to do the talking. A few are protective, a few are formal, and a few sit right in the sweet spot where practical and pretty stop fighting each other. The useful part is learning which one belongs to which kind of day.
Why These Braid Hairstyles Are Worth Saving
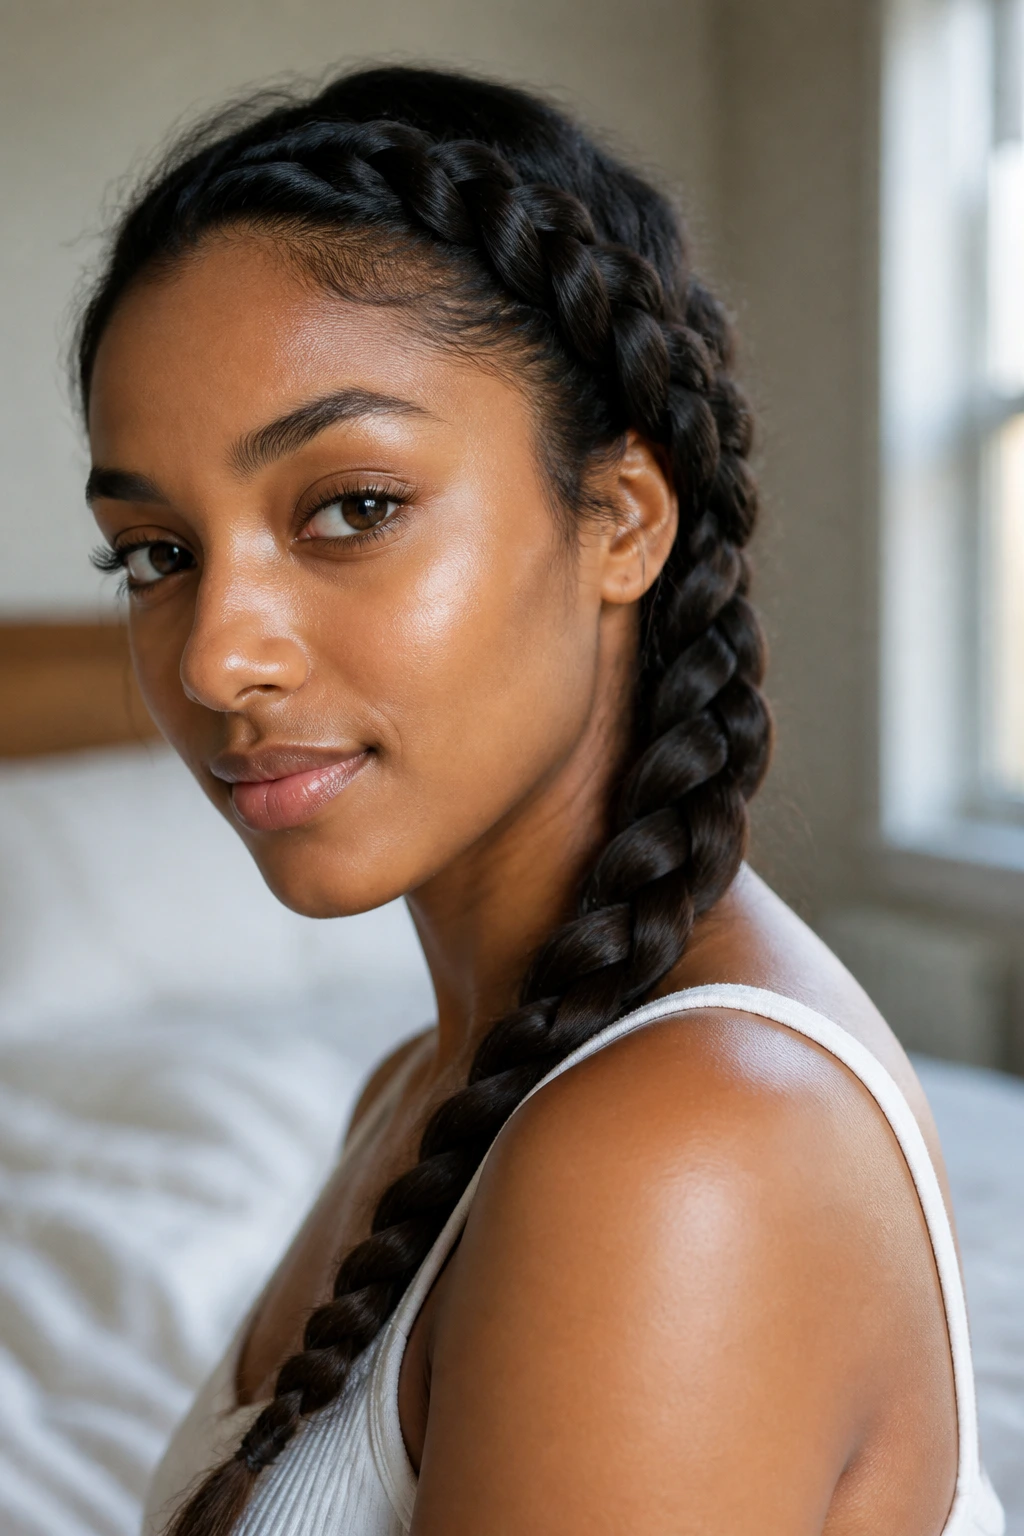
- They buy you time: A simple three-strand braid can be done in about 2 minutes once the knots are out, and even the fancier styles become manageable when your parts are clean.
- They change the silhouette fast: Braids pull the eye upward, lengthen the neck, and make layered hair behave instead of flaring out at every corner.
- They work on more than one hair type: Fine hair, thick hair, curls, coils, waves, and straight strands each have braid styles that make sense instead of fighting the texture.
- They stretch a style for more than one day: With a satin scarf and a little scalp care, several of these braid hairstyles for women hold their shape long enough to be worth the effort.
- They move from casual to dressed-up with one small change: Swap a clear elastic for a ribbon, add cuffs or pins, and the whole thing shifts its tone.
1. Classic Three-Strand Side Braid
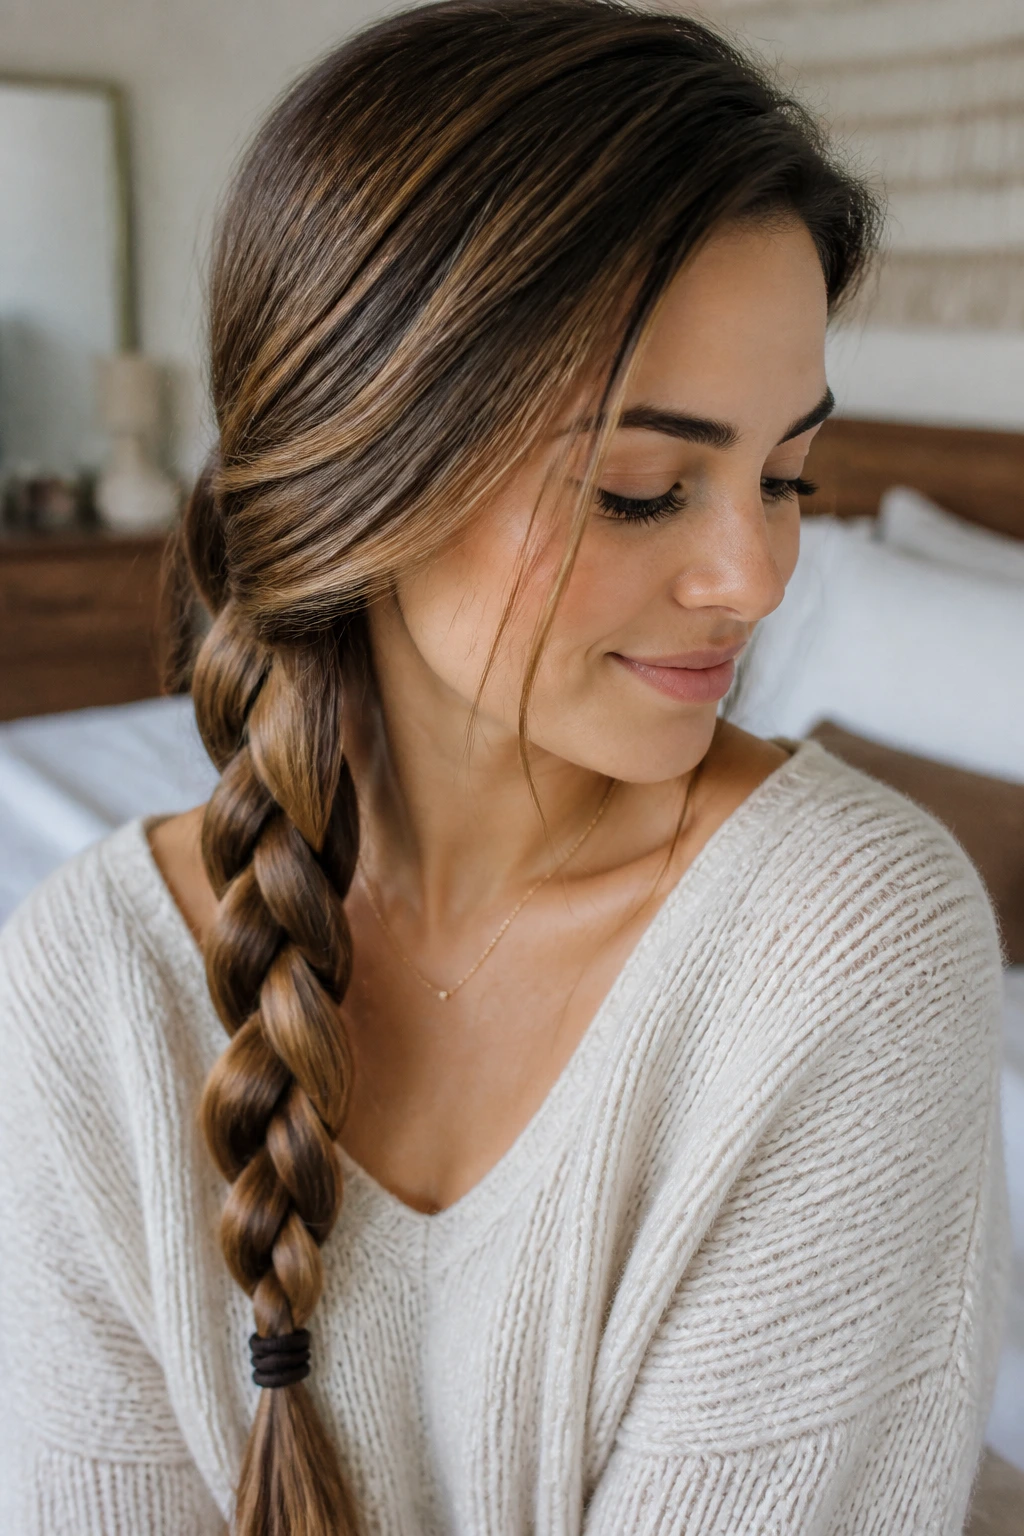
The classic side braid is the one people keep coming back to after they’ve tried three fancier versions and gotten tired of pretending the extra effort was worth it. It sits low, feels relaxed, and keeps the length visible instead of hiding it in a bun.
Why it still earns a spot
- Best on hair that reaches at least the shoulders.
- Faster to do on hair with a little grit from second-day texture spray.
- Looks cleaner if you start just behind one ear instead of from the crown.
- Takes one clear elastic and maybe one bobby pin if the ends are slippery.
A side braid is useful because it doesn’t demand perfect symmetry. If one side of your part is thicker than the other, no one notices once the braid drops over the shoulder. That makes it one of the most forgiving braid hairstyles for women who want something neat without spending twenty minutes fussing over the mirror.
Pro tip: If the braid looks flat, stop halfway through and tug the outer loops with two fingers. Don’t yank; just widen them a touch. That little move gives the braid body without turning it into a frizz cloud.
2. French Braid
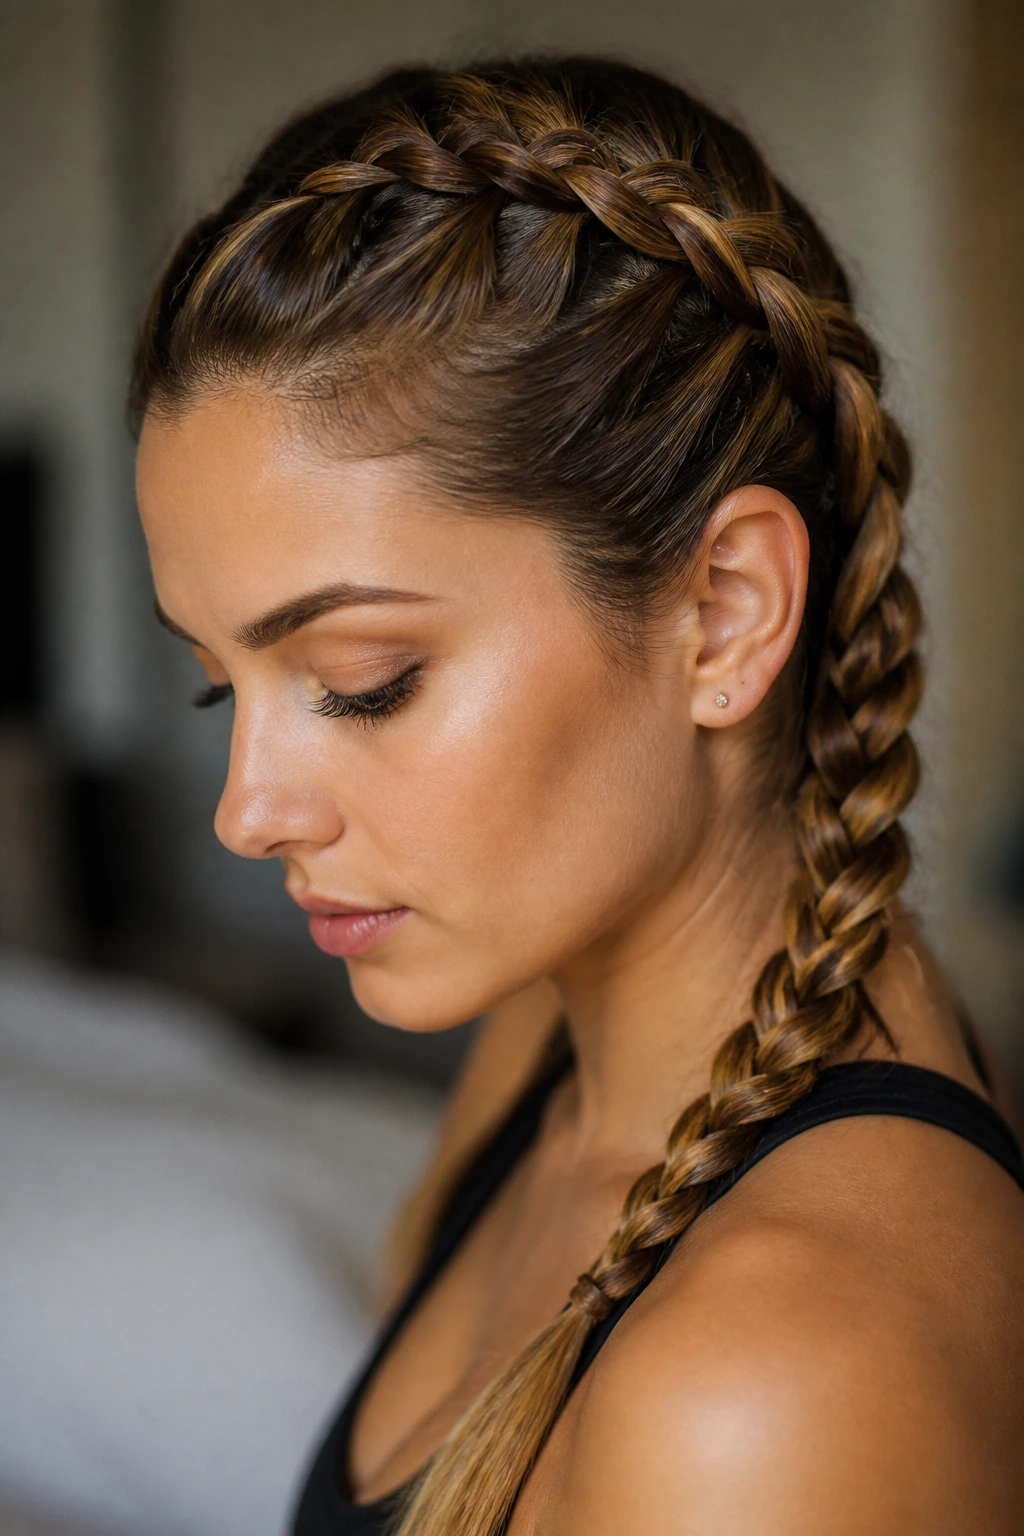
A French braid is the cleanest answer to hair that keeps falling into your face every ten minutes. It gathers the loose sections as it goes, which means the braid stays close to the scalp and feels secure without needing a pile of pins.
The trick is small sections. Really small. If you grab too much hair at once, the braid starts to bulge, and the smooth line that makes a French braid attractive disappears fast. Keep your hands close to the head, add hair in even half-inch sections, and keep the tension steady from the first cross to the last.
On layered hair, a French braid can be a little stubborn at the sides. A touch of mousse or styling cream before you start helps the shorter pieces stay in the braid instead of springing loose. That matters more than people think. A braid that constantly sheds wisps at the temples looks unfinished, even if the rest is tidy.
Use this style when you want one braid to do real work. It’s not just pretty. It behaves.
3. Dutch Braid
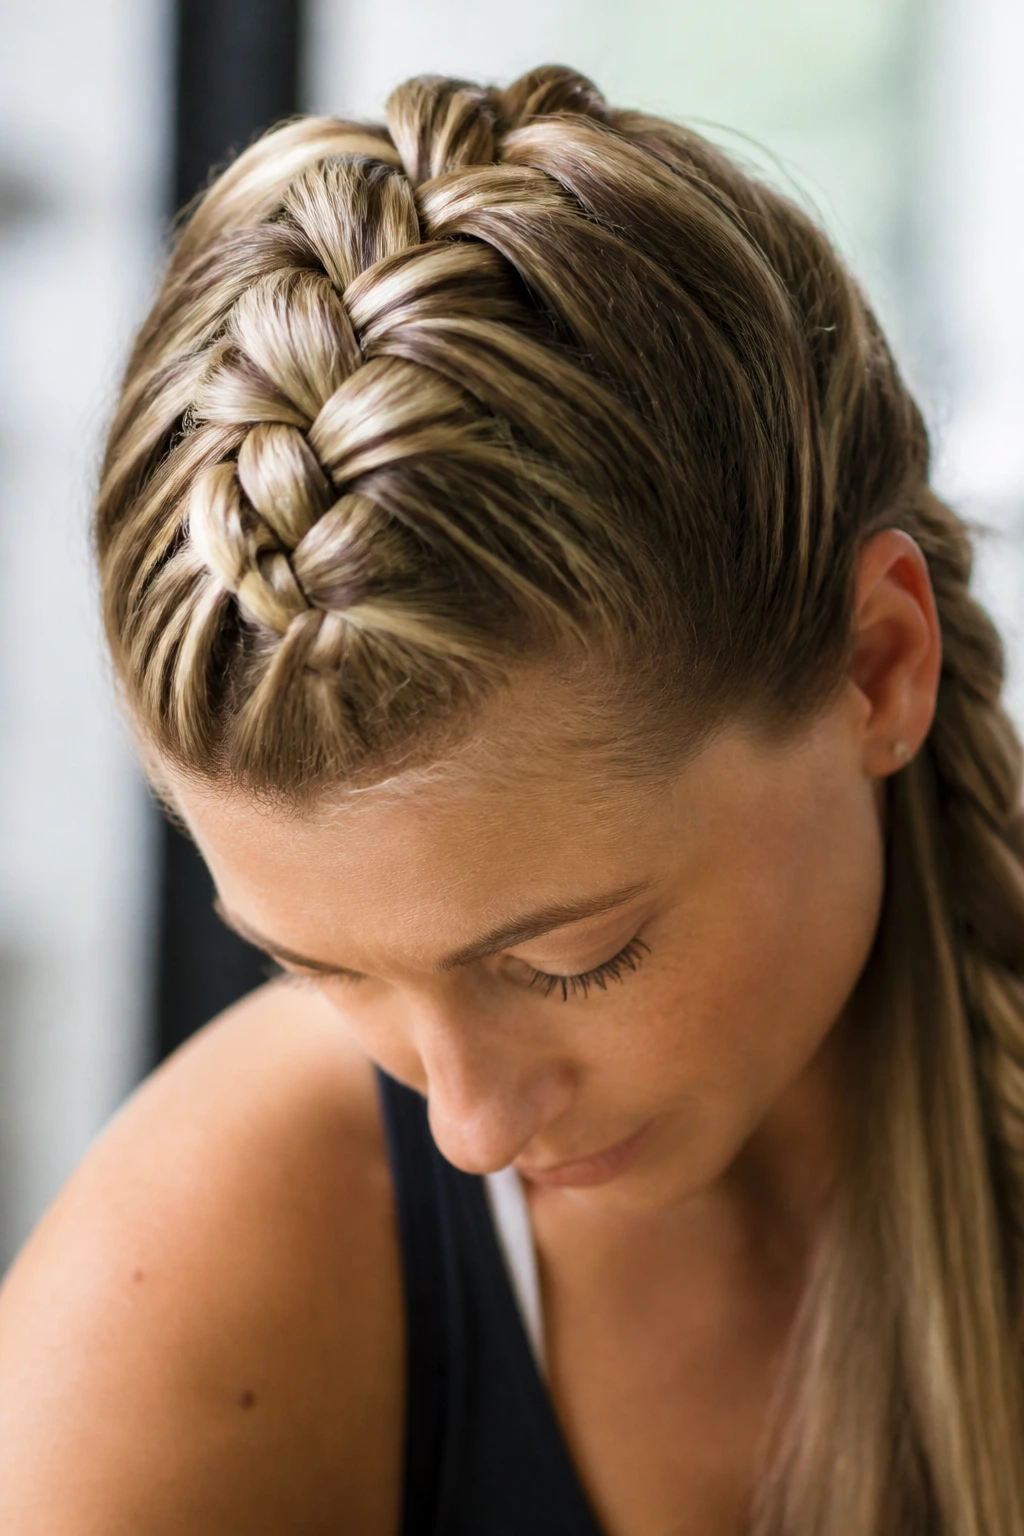
Why does a Dutch braid look fuller than a French braid on the same hair? Because the strands cross under instead of over, which pushes the braid outward and gives it that raised, rope-like shape. Same hair, different direction, totally different mood.
How to wear it without the bulky look
A Dutch braid is the one I reach for when the hair needs more presence. It shows up well in photos, holds its shape on thick hair, and gives fine hair a little extra body without fake volume tricks. The raised texture also makes the pattern easier to see, which is why this braid looks especially good on highlighted hair or balayage.
The part has to be clean. If the sections start wandering, the braid loses that tidy ridge down the center. Keep your fingers close, add hair evenly from both sides, and use a smoothing brush only on the top layer so you do not flatten everything else.
For a softer finish, pull the braid outward gently after you tie it off. Not much. Just enough to widen the loops and keep the braid from looking too tight against the scalp.
4. Fishtail Braid
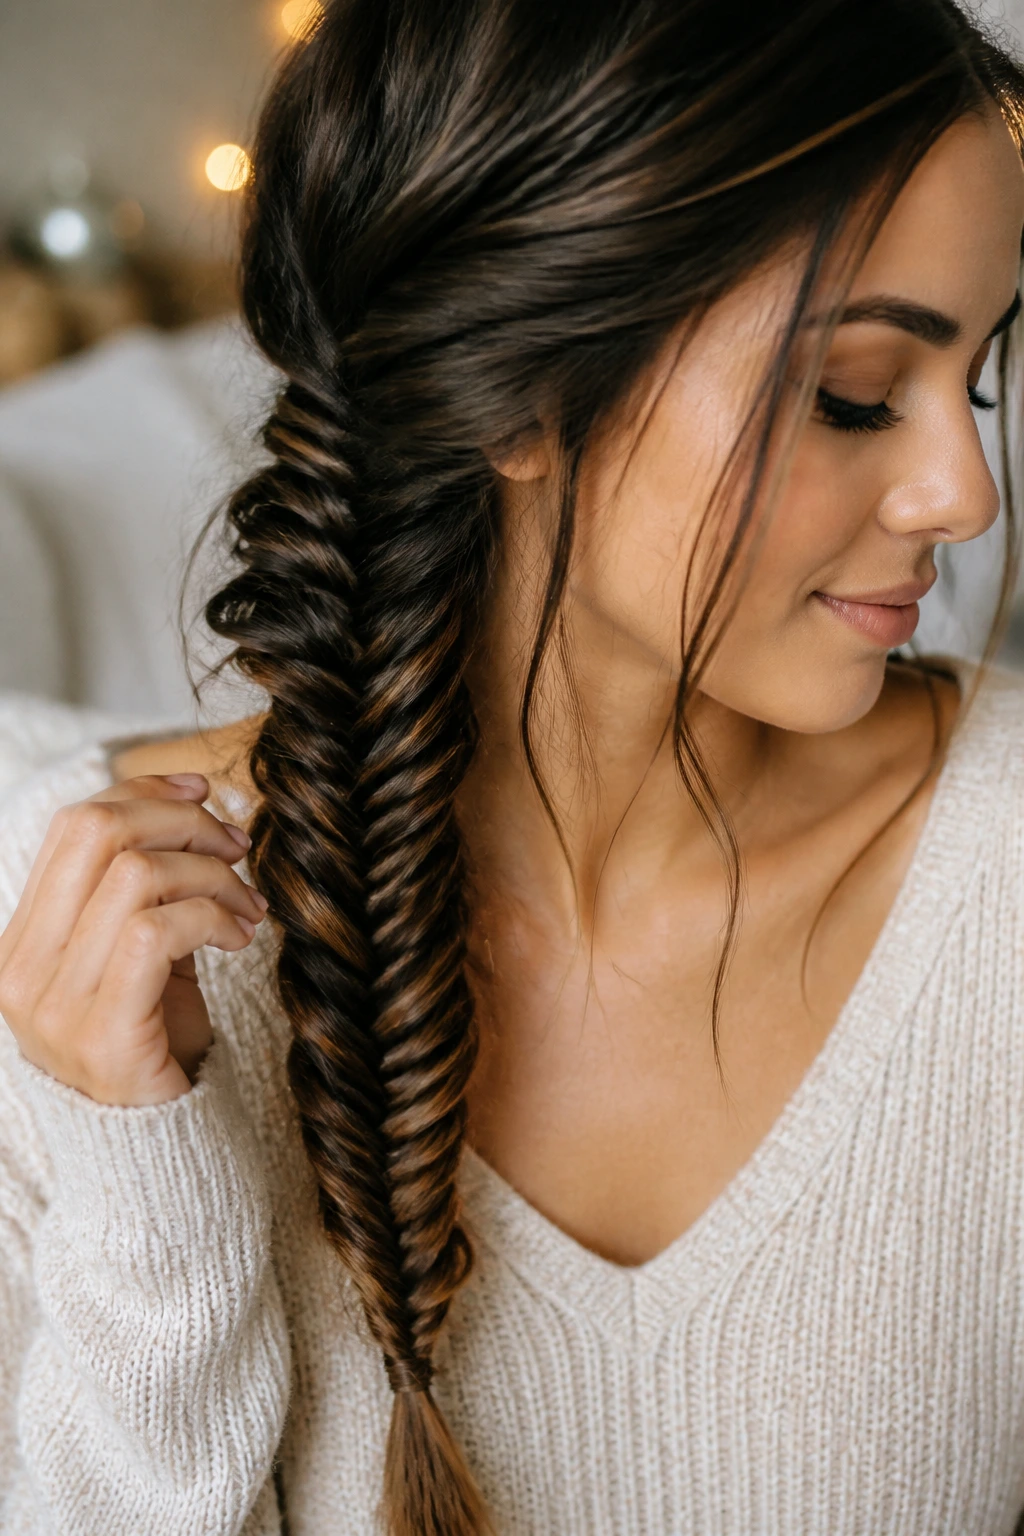
If your hair is fine and you hate braids that look heavy or chunky, the fishtail braid is the sneaky good choice. It looks intricate from a distance, but the actual pattern is built from tiny pieces and two main sections, which keeps it elegant instead of bulky.
What makes it different
- Works best on longer hair because the pattern shows more clearly.
- Uses very small strands from the outside edges of each section.
- Looks best once you loosen it a little after tying the end.
- Can be worn sleek or messy depending on how much you tug the loops.
The mistake people make with fishtail braids is making the pieces too large. Then it stops looking like a fishtail and starts looking like a confused side braid. Keep the pieces thin. If your hair slips, mist your hands with texture spray or a tiny bit of leave-in conditioner before you start.
There’s a reason fishtails keep showing up in braid hairstyles for women who want something that feels a little more detailed. They reward patience, and they photograph with a nice broken texture that regular braids don’t always give.
Best move: Tie the braid off, then press and pull each side outward with your thumbs for that soft, spread-out finish.
5. Rope Braid
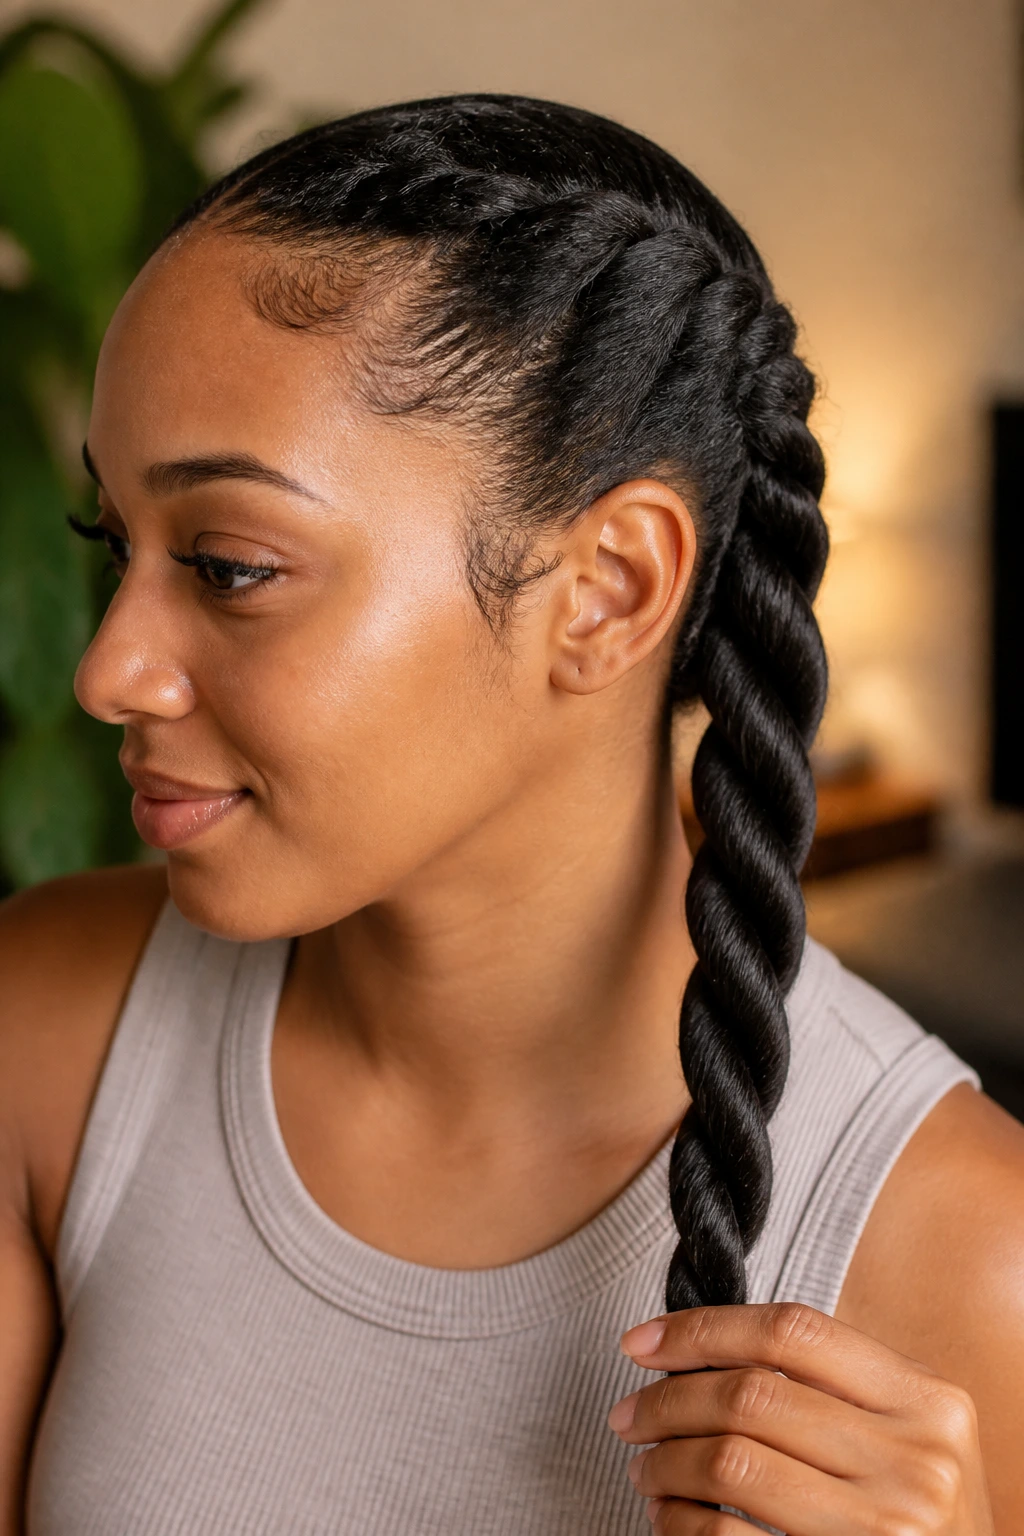
The rope braid is the one I recommend when someone says, “I can’t braid,” and what they really mean is, “I don’t want to think too hard before coffee.” It uses two sections instead of three, and once you get the twist direction right, the whole thing moves fast.
Twist each section in the same direction, then wrap them around each other in the opposite direction. That part matters. If you twist and wrap the same way, the braid loosens instead of locking into that neat spiral. On wavy or textured hair, the rope braid holds especially well because the strands grab each other instead of sliding apart.
I like this style on hair that has a little shine product or lightweight cream in it. Too much oil makes the sections slippery. Too little and the braid looks fuzzy by the second turn. There’s a sweet spot, and it’s somewhere around “smooth enough to move through the fingers, dry enough to keep a shape.”
It’s also a nice choice when you want a braid that feels polished but not precious. A rope braid does not demand a perfect part. It just needs steady hands.
6. Waterfall Braid
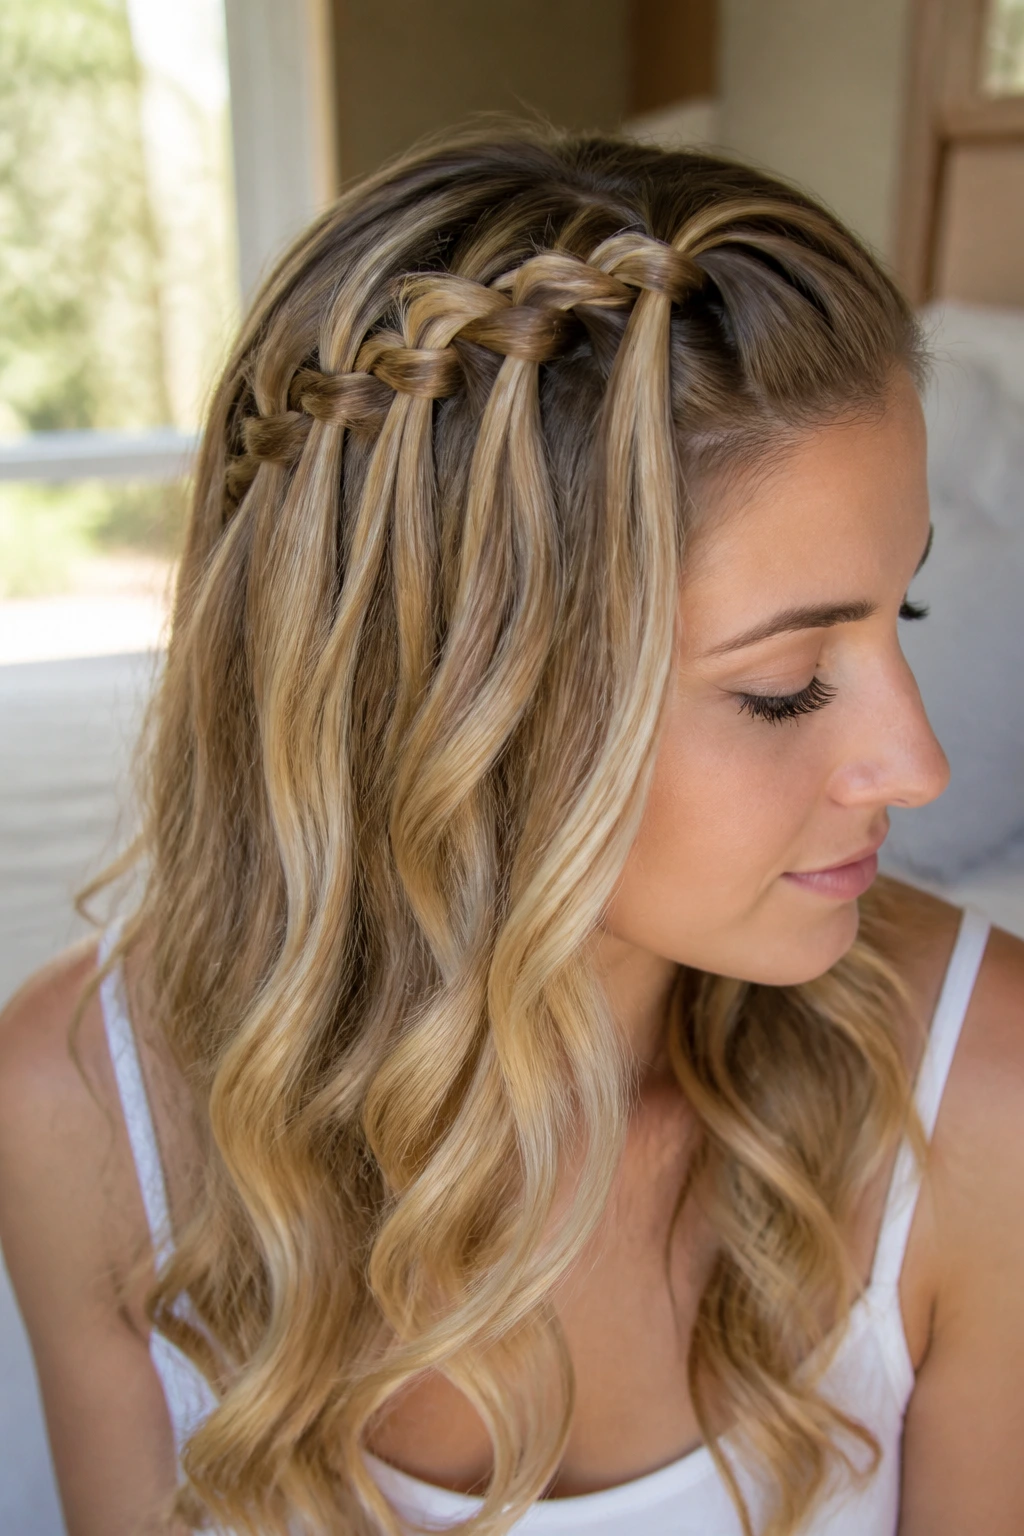
Unlike a French braid, a waterfall braid leaves one strand dropping out of the weave on each pass. That small change is the whole point. It creates the soft, cascading effect people love on waves, curls, and layered lengths.
The braid works best when the hair has some bend to it. Straight, silky hair can still do it, but the dropped pieces tend to look sharper than the braid itself. Soft curls or loose waves help the style feel intentional instead of fussy. If your hair is very slippery, a touch of mousse at the front keeps the braid from creeping apart while you work.
A waterfall braid is not the style for a rushed morning. You need a little patience around the front section, especially if you want the drops to stay even. Pin each released strand if you’re not ready to let the whole look hang loose yet. That extra step saves you from having one side collapse while the other side still looks tidy.
This is a braid for when you want the front of the hair to do the decorating and the rest to stay soft.
7. Crown Braid
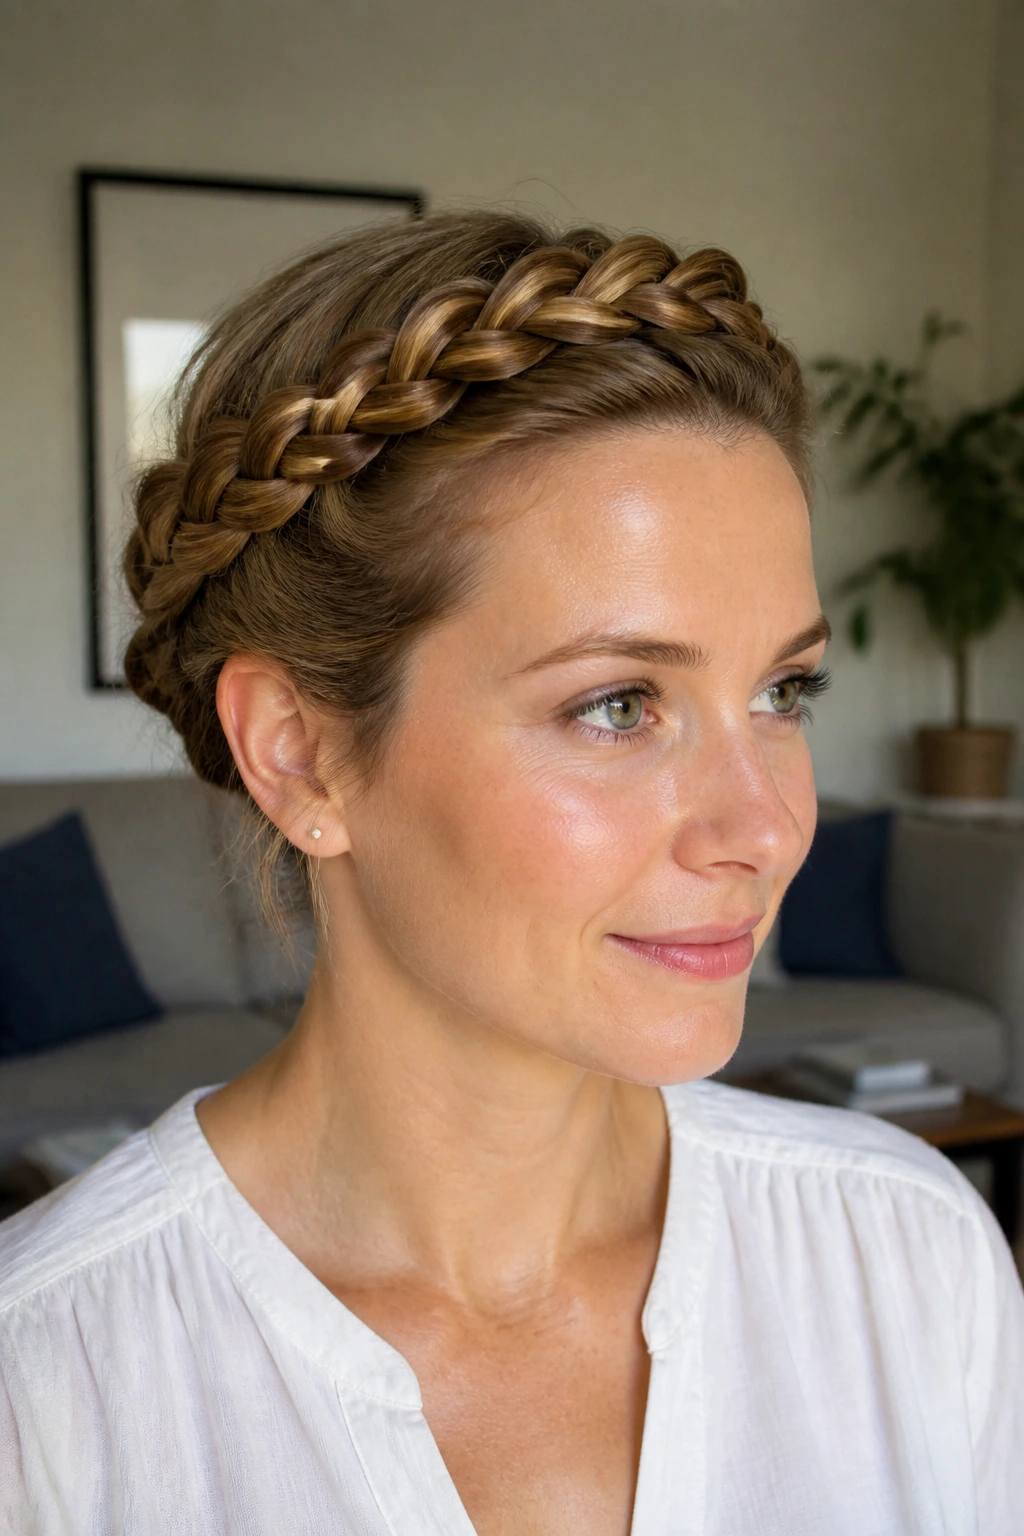
Few braid hairstyles for women make a plain outfit look more finished than a crown braid. It wraps around the head, which changes the whole frame of the face and keeps the neck clear at the same time. Handy. Also a little dramatic, in the best way.
Where it shines
- Best for medium to long hair.
- Holds well for events where you will be moving around a lot.
- Needs bobby pins that match your hair color if you want the ends to disappear.
- Looks cleaner when the part is set before you start.
The crown braid is one of those styles that rewards planning. If the braid begins too far forward, it can crowd the forehead. Too far back, and the shape gets lost. Start near one temple and work around the head with a braid that sits close to the scalp, then tuck the tail into the hidden side with pins.
A little texture at the roots helps. So does a dusting of dry shampoo if the hair is too clean and slippery. The braid needs enough grip to stay put, but not so much product that it turns stiff. That balance matters more than the decorative pin people often obsess over.
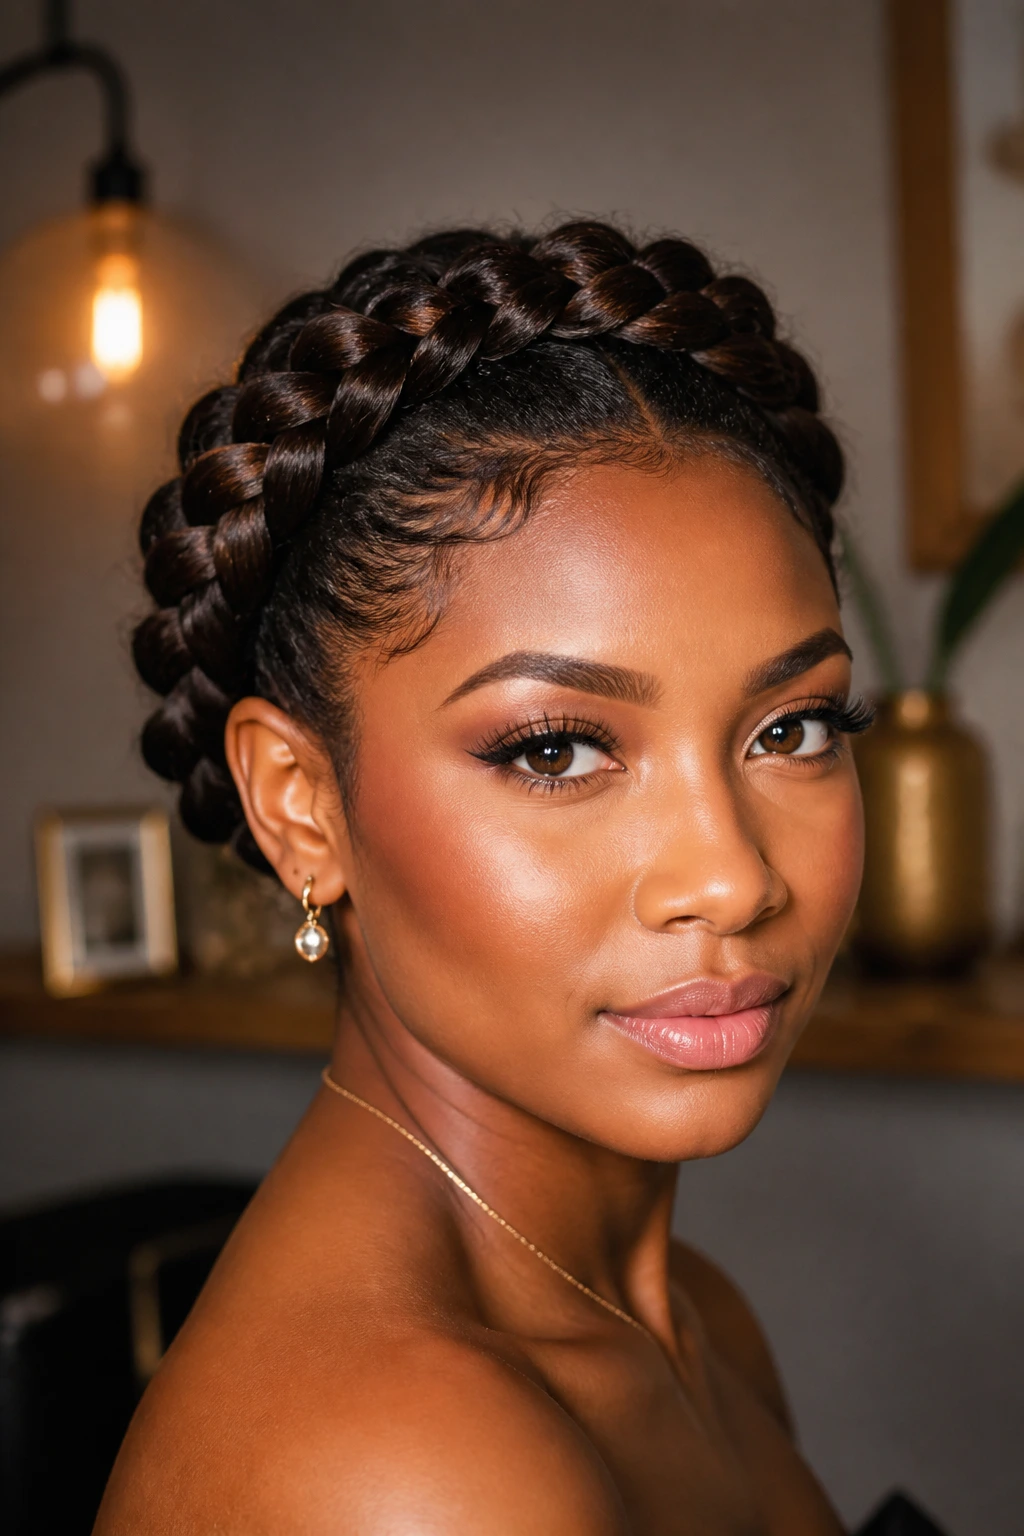
8. Halo Braid
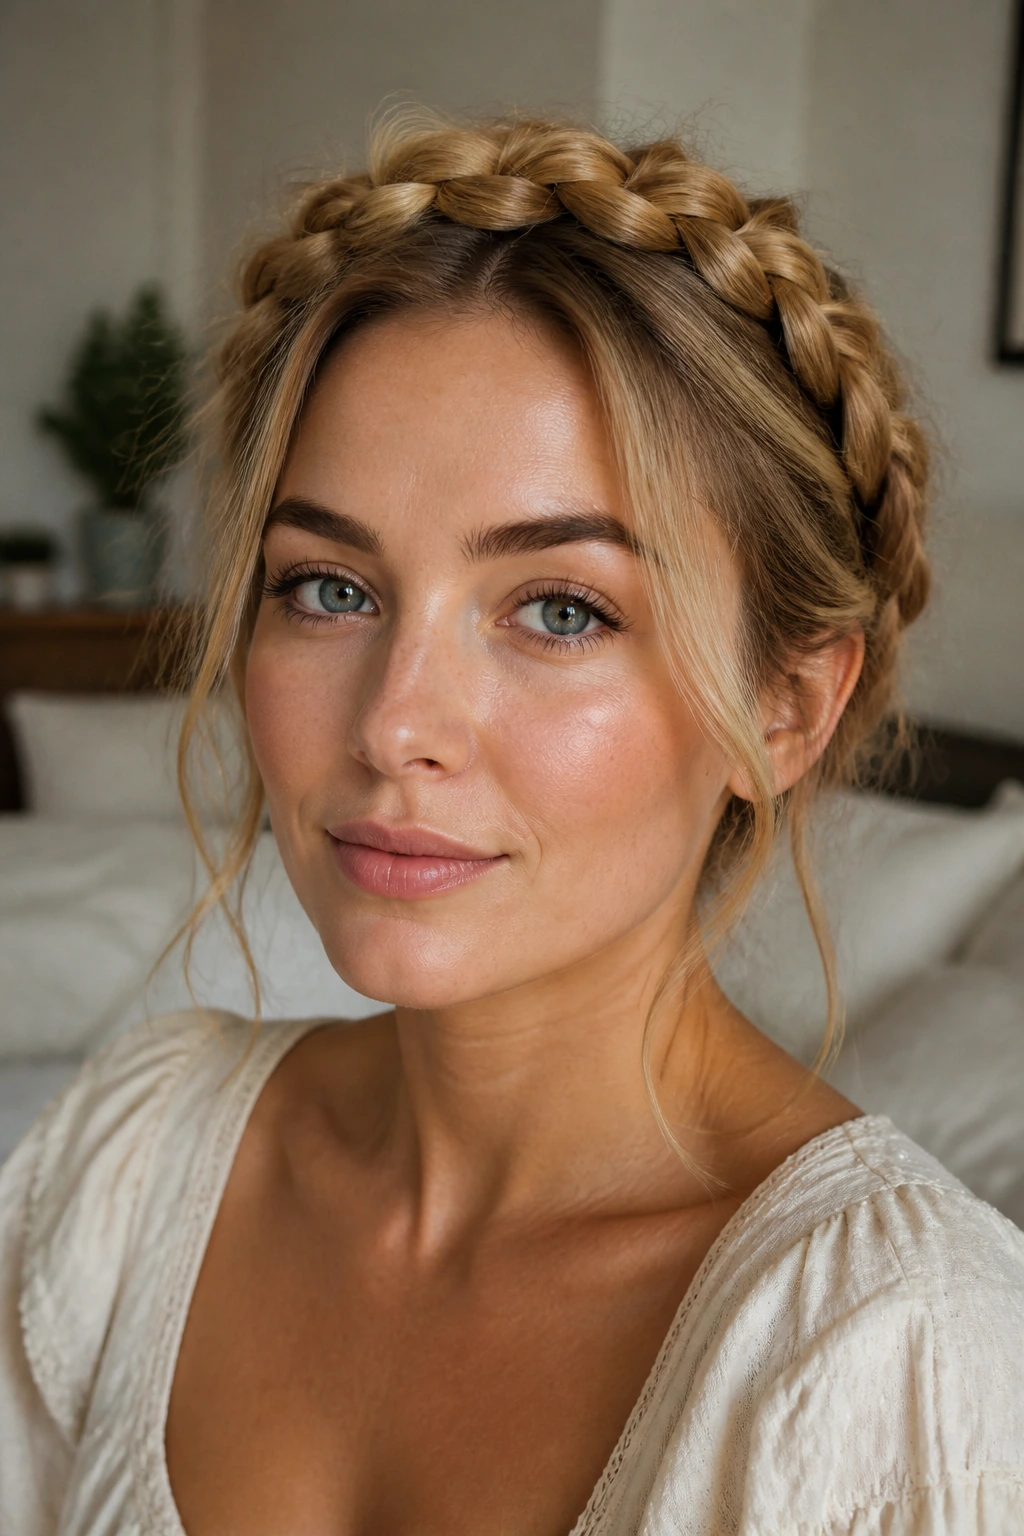
A halo braid is the softer cousin of the crown braid. It still circles the head, but it usually feels a little fuller, a little looser, and a little less formal. If the crown braid is neat and tailored, the halo braid is the version that lets a few wisps move around the face.
The style is especially good when the goal is to keep hair off the neck without making it look severe. Shoulder-length hair can do it, but longer hair gives you more to pin and tuck. Two braids crossed and secured around the head often look fuller than one braid wrapped all the way around, and I prefer that version because the seam is easier to hide.
This is one of those braids that forgives a soft finish. The braid does not need razor-sharp parts to look good. It actually benefits from a little looseness after the pins go in. Pull the outer edges gently and let the shape breathe.
If you’re choosing between crown and halo, think of crown as sleeker and halo as softer. That’s the real difference.
9. Boxer Braids
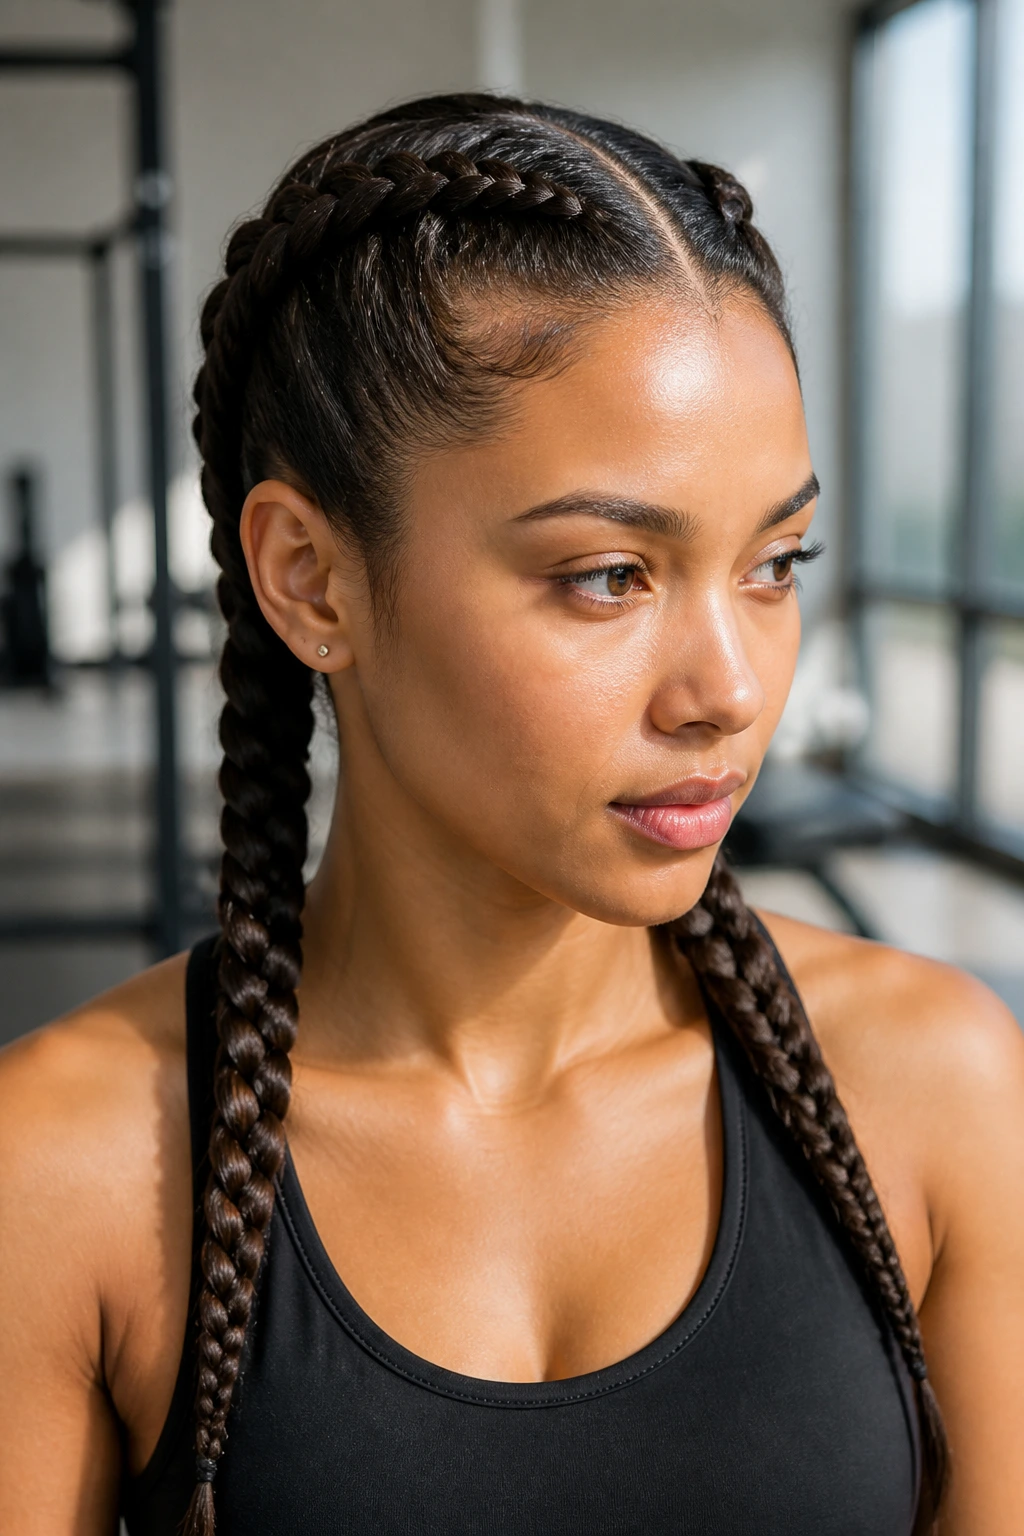
Why do boxer braids stay put through a workout, a commute, and half a day of running around? Because they sit tight against the scalp in two Dutch-style braids, which keeps the hair from bouncing around and breaking loose at the sides.
The center part has to be crisp. If the part zigzags, the whole style reads messy in a way that doesn’t feel intentional. Use a rat-tail comb, keep the sections equal, and add hair in small bites as you braid downward. The smaller the feed, the flatter and cleaner the line.
You do want them secure, but not cramped. If the braid pulls hard at the temples or behind the ears, loosen the first inch and start again. That first inch is where the discomfort usually starts, and once it’s wrong, the style nags you all day.
Boxer braids are practical first and stylish second. That order matters. They’re not here to float. They’re here to stay.
10. Feed-In Cornrows
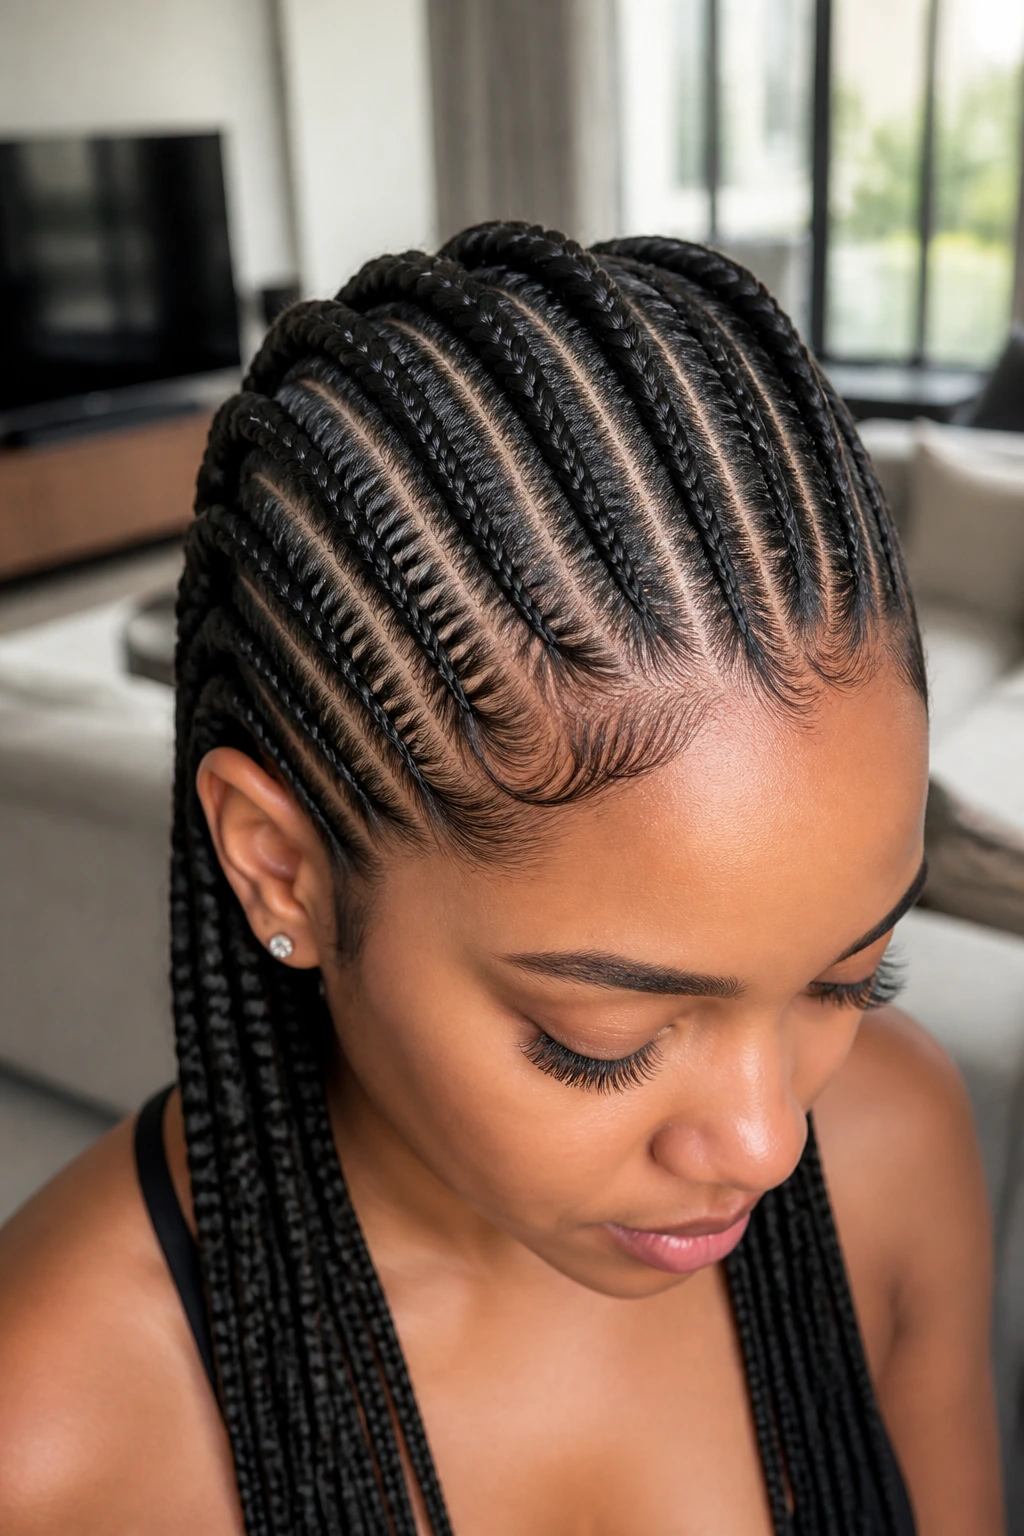
Feed-in cornrows have that clean, drawn-on look people love when they want the braid pattern to read from across the room. The neatness comes from gradually adding hair into the braid instead of dumping in a big section all at once, which keeps the root flatter and the line smoother.
Why the feed-in method matters
- The braid starts slim and builds gradually.
- The scalp line looks less bulky than a fast, all-at-once braid.
- It works well with extensions when you want length or fullness.
- The style can be curved, straight, or swept into a pattern.
The parting matters more than the braid itself here. If the sections are uneven, the whole style looks crooked before you’ve finished the second row. A good feed-in braid looks almost architectural. That means clean part lines, consistent width, and a hand that doesn’t rush the feed.
This style is a strong choice when you want a protective option with a polished finish. It keeps the hair close, cuts down on daily handling, and holds up better than a loose braid if you’re wearing it for more than one day. The trade-off is time. Good feed-in cornrows are not a five-minute job.
11. Stitch Braids
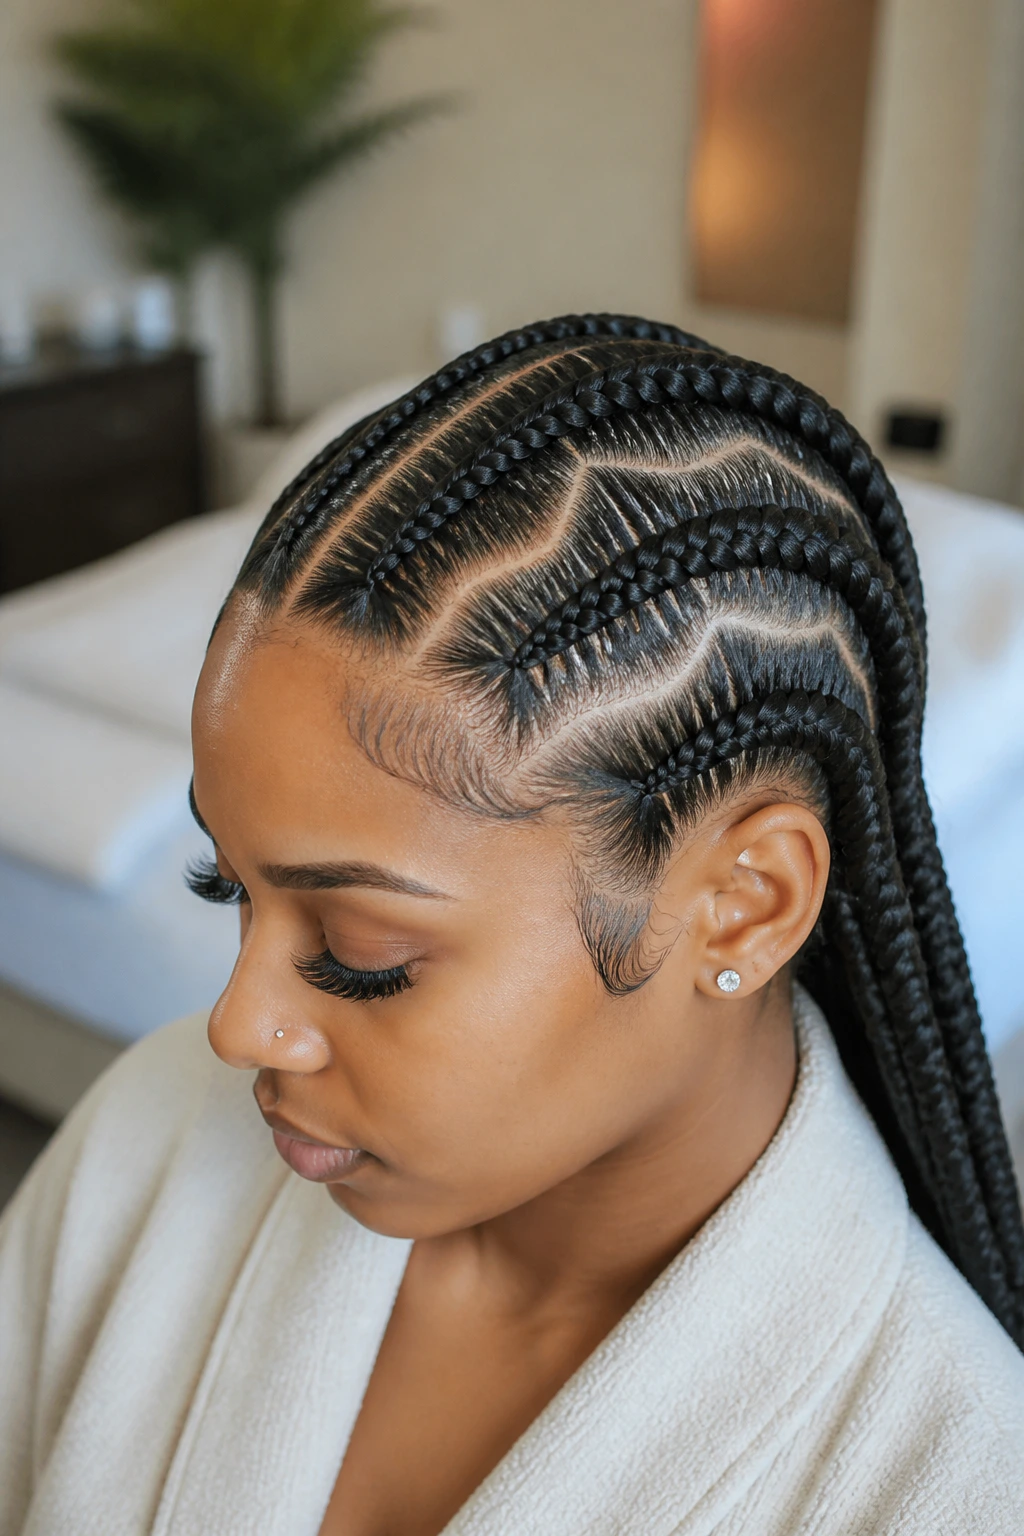
If a regular cornrow looks soft, stitch braids look precise. The rows are defined by sharp, visible sections that create a segmented pattern along the scalp. It’s a little more graphic, a little more modern-looking, and much less forgiving of messy parting.
You need a tail comb, a steady hand, and enough styling gel to keep the line smooth without making the hair crunchy. The best stitch braids have clean “steps” between the feed-in sections, and those steps only show up when each section is the same size. Change the width halfway through and the whole look goes lopsided fast.
I like stitch braids for women who want the braid to read as the main design element. There’s no pretending it’s an afterthought. It’s visible from the root, and that’s the point. The style also works well with straight-back layouts or curved patterns, depending on how dramatic you want the shape.
Keep the gel to the roots and part lines. If you cake it through the whole braid, the hair turns stiff and loses movement. Clean, not plastered.
12. Lemonade Braids
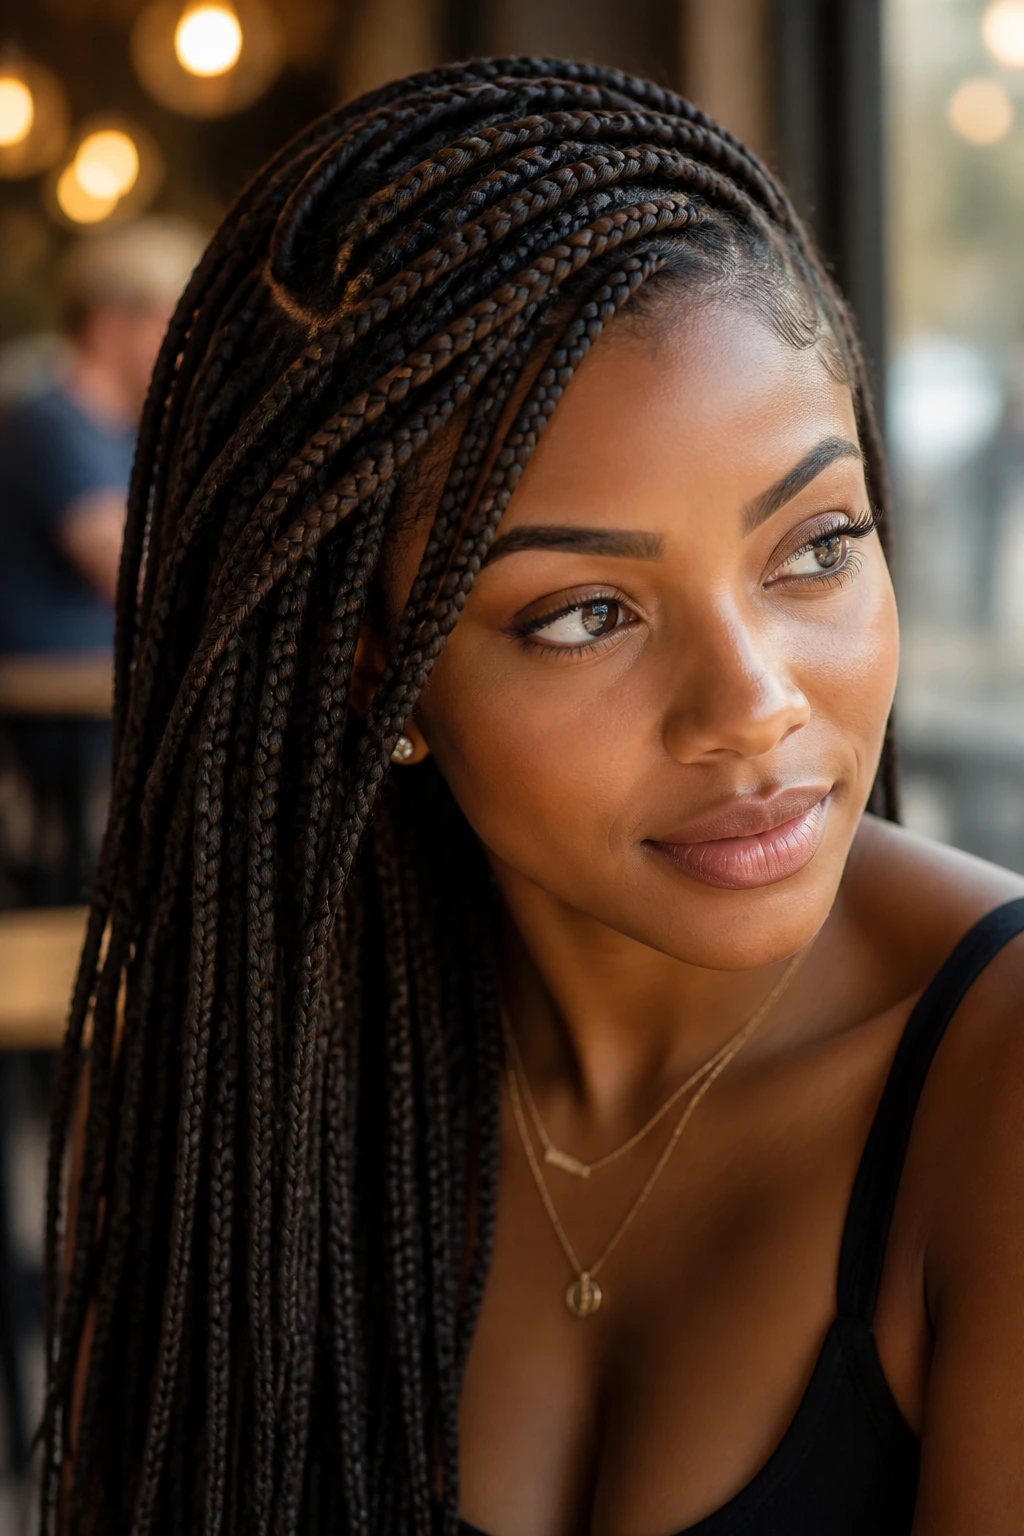
Lemonade braids sweep to one side, and that angle changes everything. The face stays more open on one side, the braid pattern feels longer, and the whole style carries a little more movement than straight-back cornrows do.
The side part should be obvious. A half-hearted part makes the style look undecided. Commit to the sweep, keep the rows smooth, and let the braids fall in a directional line rather than splitting them down the middle. That asymmetric shape is what gives lemonade braids their personality.
This is a good braid when you want your hair off the face but don’t want the look to go stiff or centered. It works especially well with hoops, cuffs, or one strong earring, because the side-swept pattern leaves room for jewelry to show. It’s also a nice option if you wear collars that tend to rub a center braid flat.
If you like a little edge in your braided hairstyles for women, this one delivers it without needing extra length or heavy accessories.
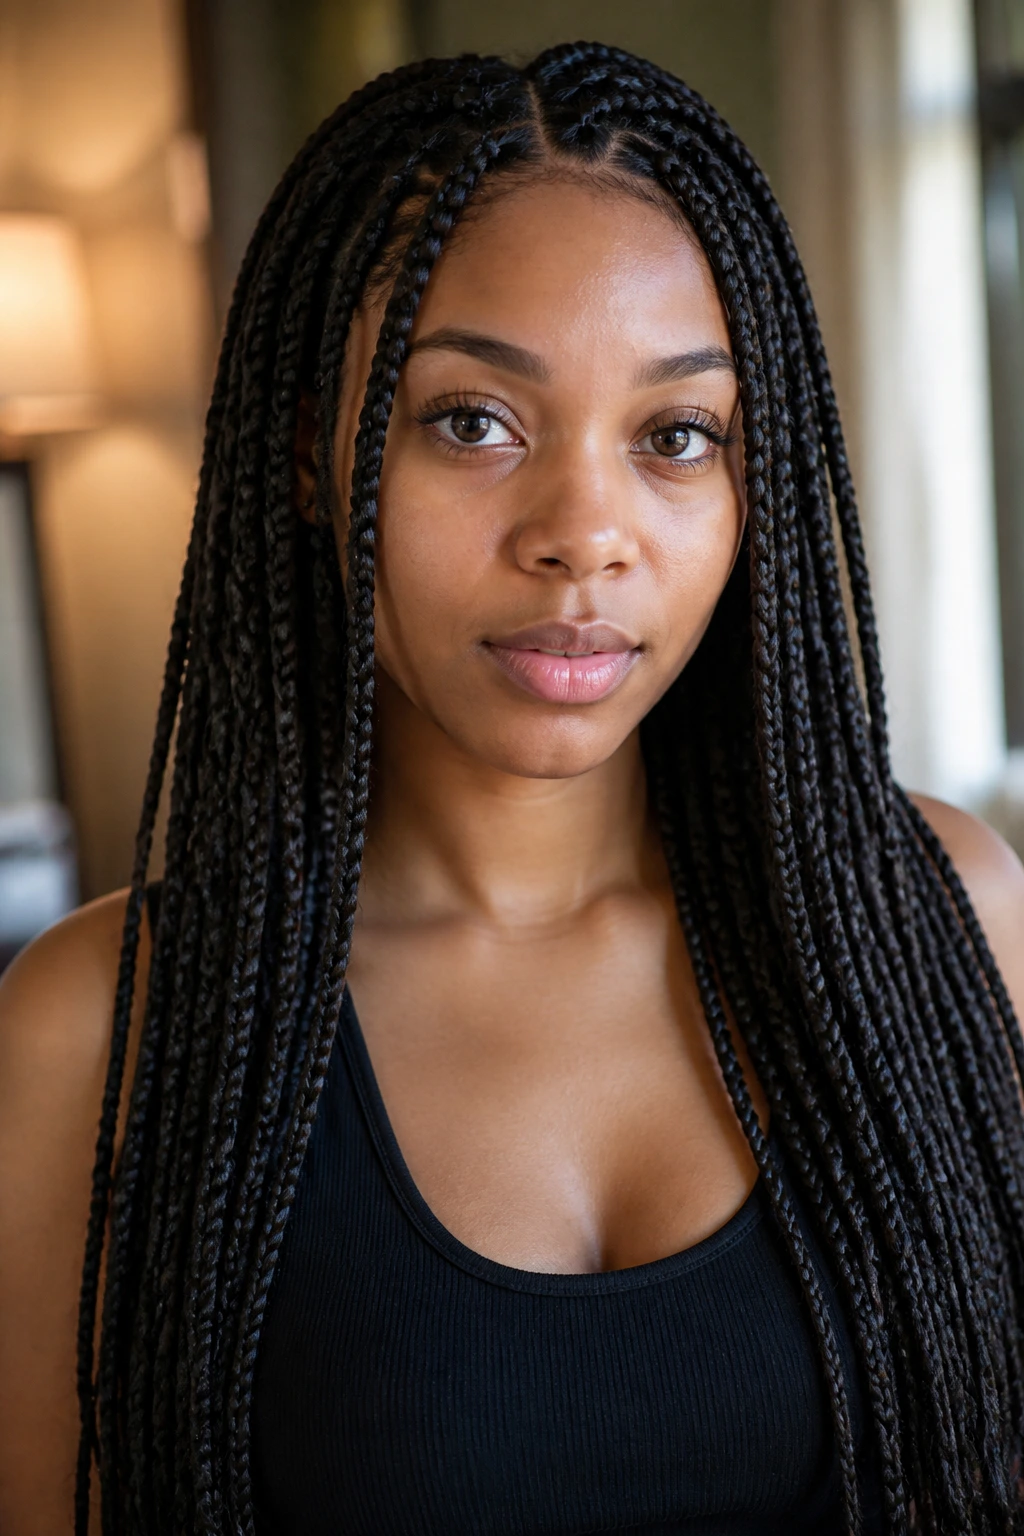
13. Knotless Box Braids
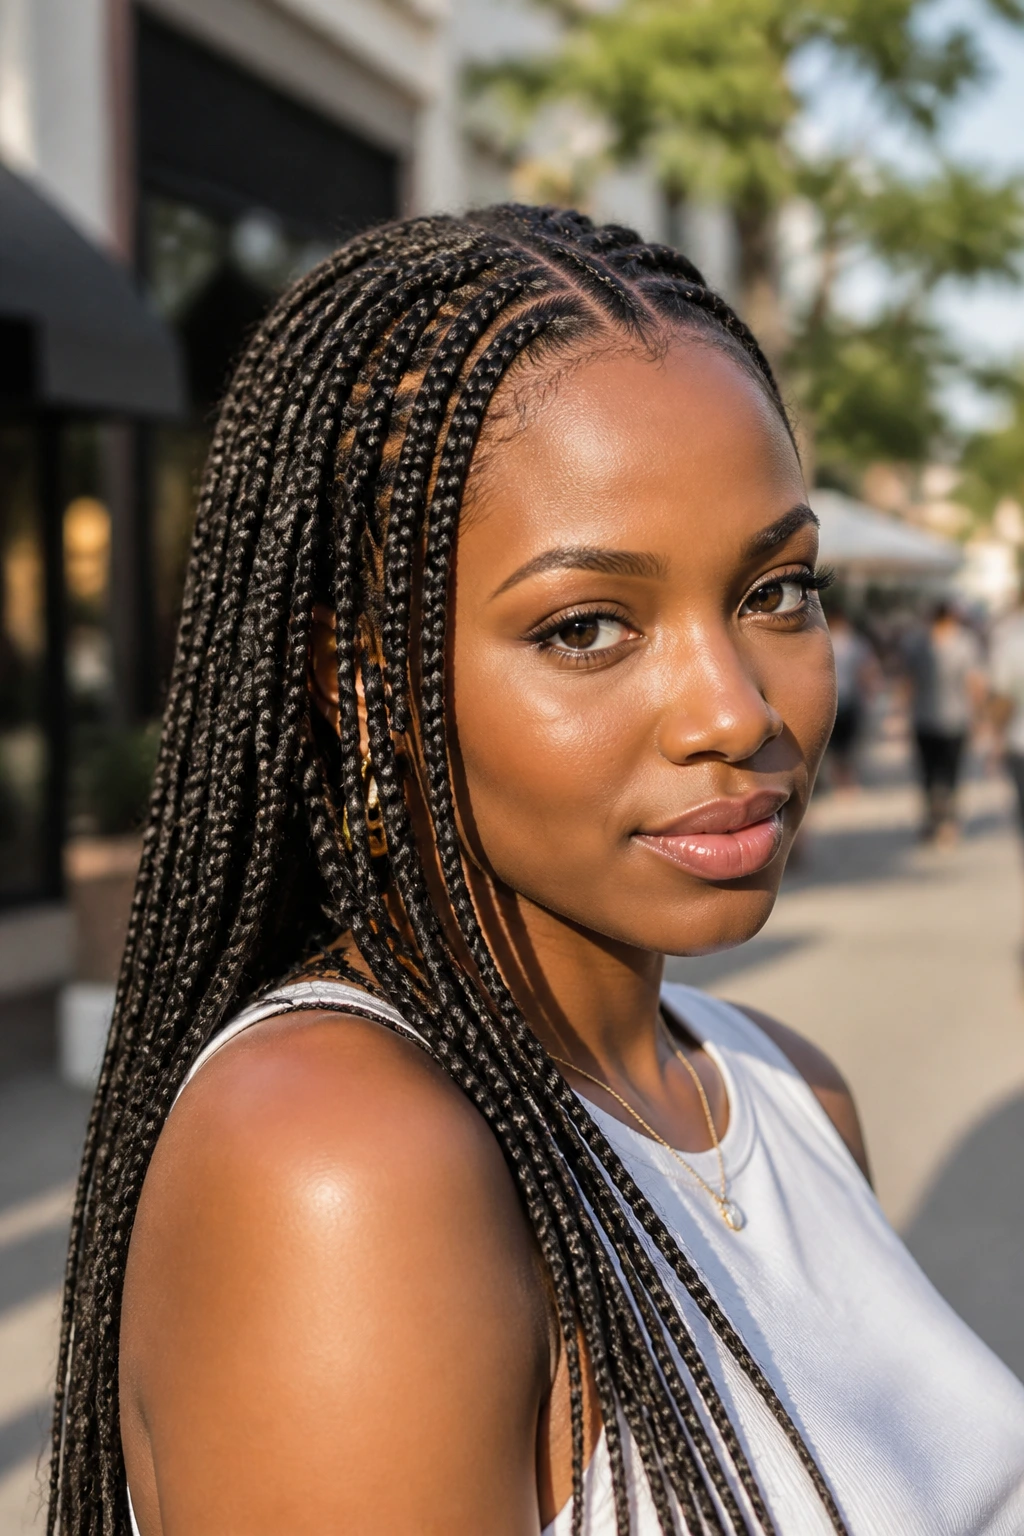
Knotless box braids are the style I recommend when the scalp needs a break. Instead of starting with a heavy knot at the root, the braid grows from your own hair and the added hair is fed in gradually, which gives the base a lighter feel and a more natural swing.
Why the install feels easier
The first few inches matter most. Because the braid doesn’t start with a bulky knot, the tension sits more evenly across the scalp. That usually makes the style feel kinder at the edges and less stiff when you move your head. It also lets the braid hang with a little more fluidity, which is why knotless braids often look softer than classic box braids.
They do take time. A proper install is not something you rush if you want the parts even and the tension consistent. Size matters too. Tiny knotless braids look delicate but take forever; jumbo knotless braids save time but need careful sectioning or they start to wobble.
If you want a protective braid style that still moves a little when you walk, this is one of the best choices in the whole list.
14. Jumbo Braids
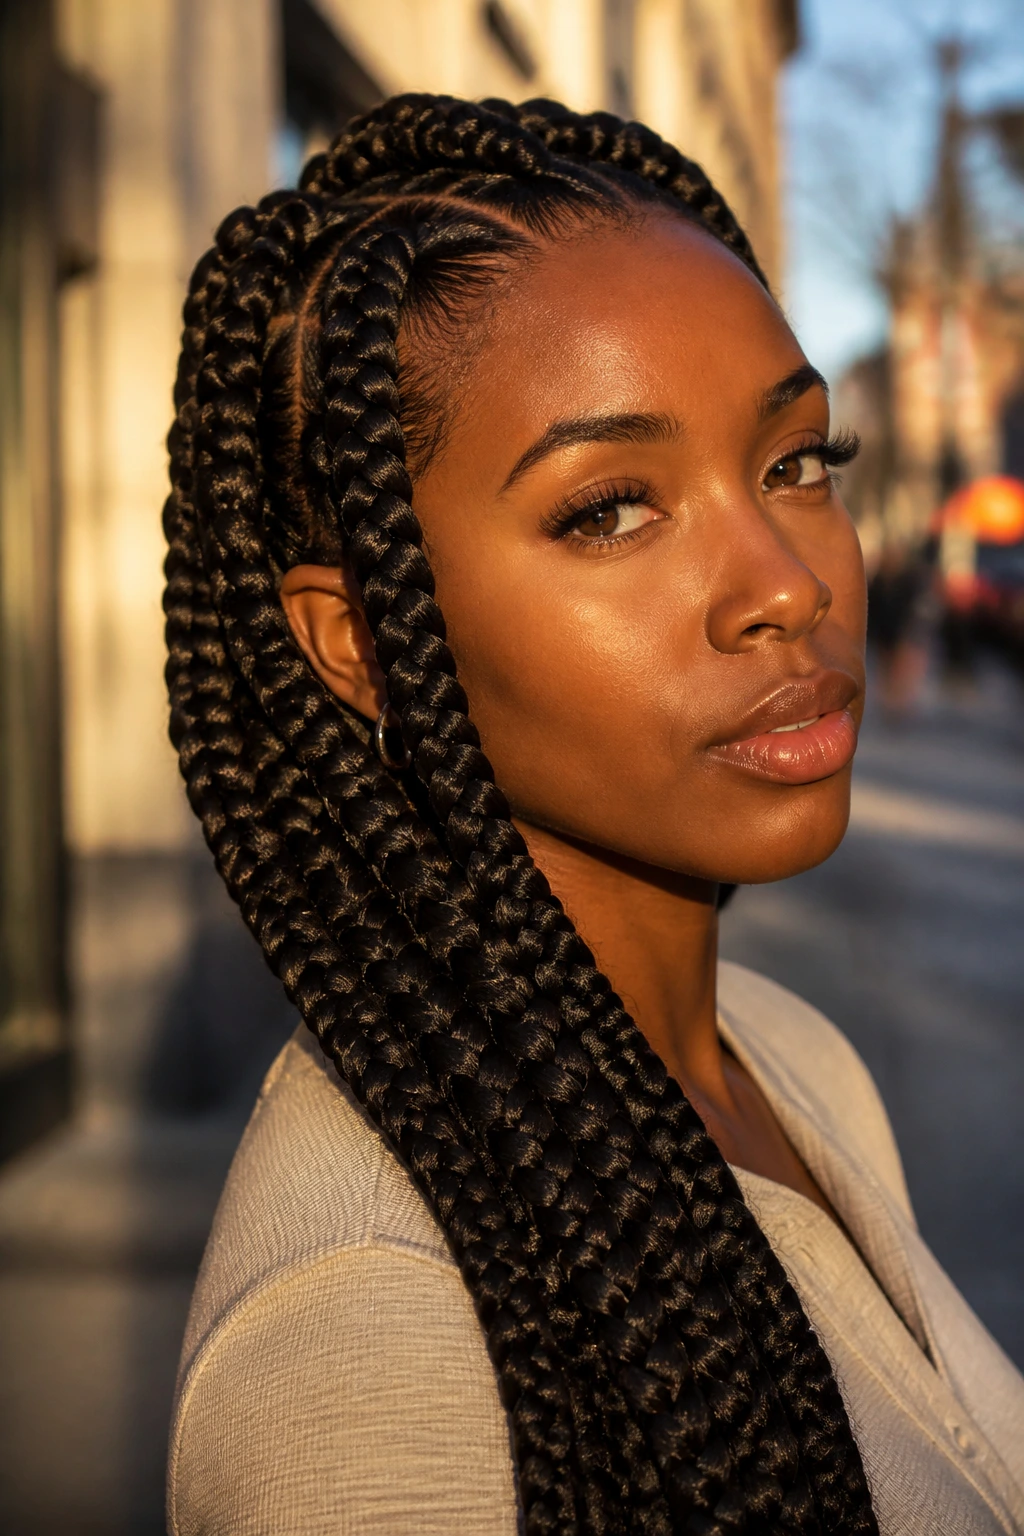
Jumbo braids are for the days when the braid is the outfit. Big sections, fast install, lots of shape. They can be box braids, feed-in braids, or oversized single plaits, but the point is the same: less time in the chair, more visual impact per braid.
The size makes them easier to maintain than tiny braids, which is one reason people who get bored with sitting still often choose them. They also show the braid pattern more clearly, so the style looks deliberate even when the rest of the outfit is simple. A black tee, gold hoops, and jumbo braids can read more put-together than a whole closet of effort.
The catch is weight. Big braids look great, but the sections need to be balanced so they don’t tug in one direction. If the style feels heavy at the root on the first day, it will only feel heavier after a few hours. Keep the sections clean and the parting even.
Jumbo braids make a strong case for doing less, but doing it on purpose.
15. Goddess Braids
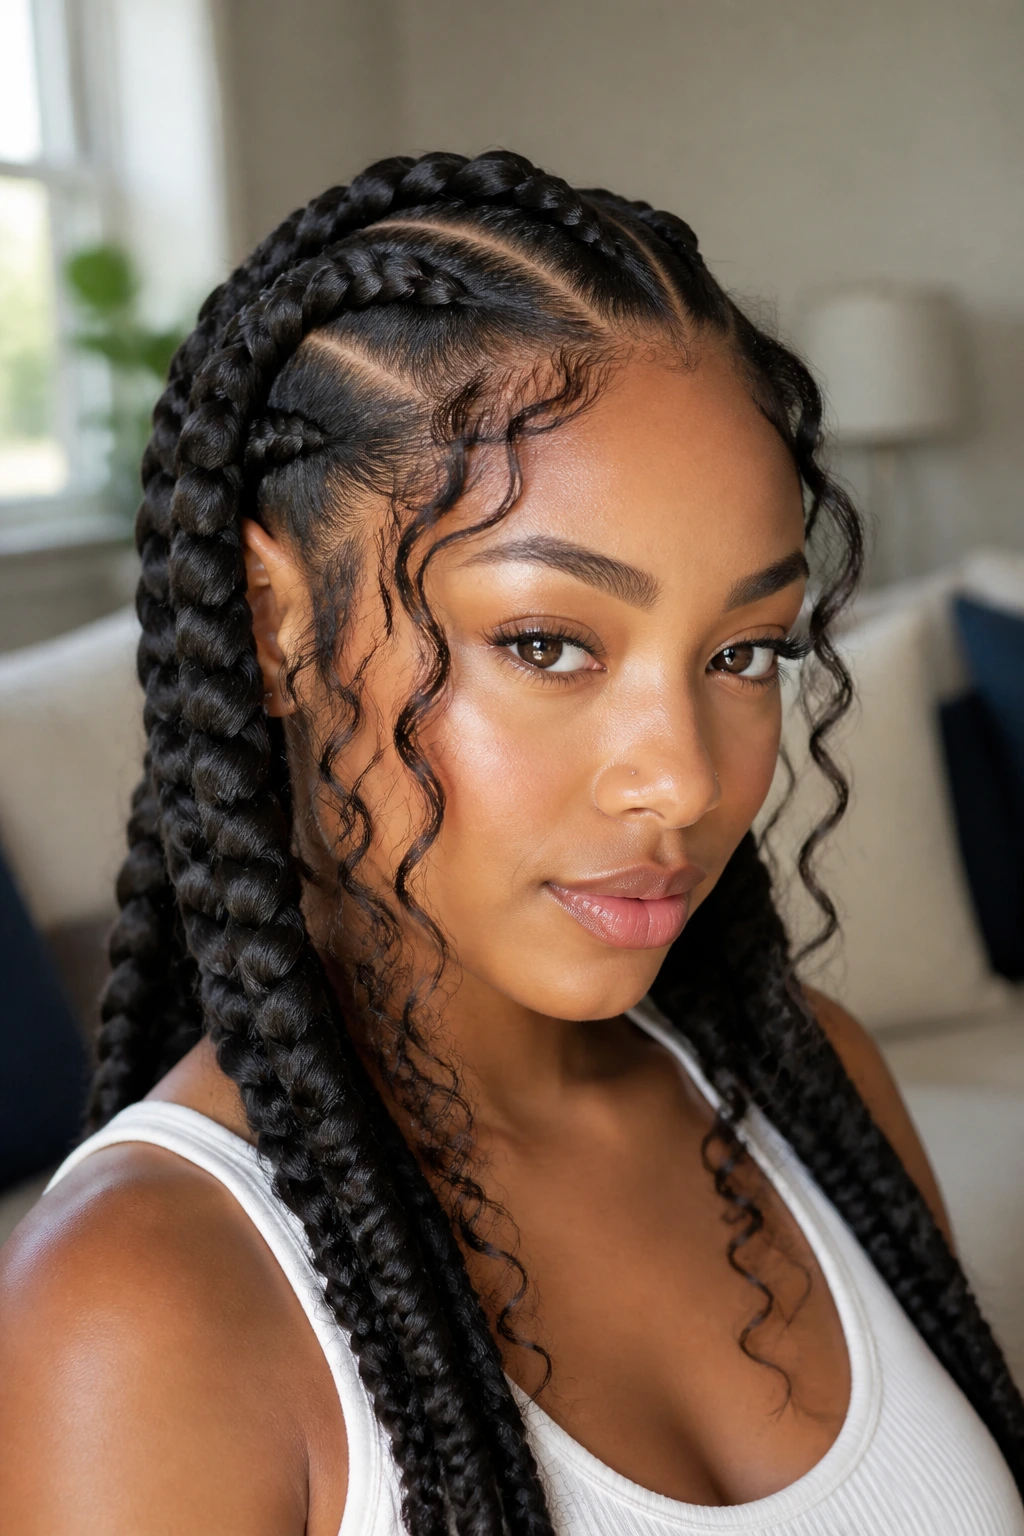
What makes goddess braids look softer than regular cornrows? Usually the thickness of the braid itself and the loose curly pieces tucked around it. That mix keeps the style from feeling too strict, which is why it lands so well for dressier moments.
The main braid should still be neat. The softness comes from the extras, not from sloppy parting. Curly tendrils, wavy extensions, or a few face-framing pieces give the style movement, while the base stays close enough to the scalp to hold its shape. If those loose pieces frizz too quickly, treat them like they matter — because they do. A small amount of mousse or curl cream keeps them from looking spent after the first hour.
I like goddess braids when you want braided hair with a little romance in it. Not sweet. Not fussy. Just less rigid than plain cornrows and more interesting than a single braid down the back.
How to keep the curls from going limp
Use synthetic curls only if they match the rest of the install, and don’t overload the braid with too many face pieces. One or two can look elegant. Six can look like you ran out of plan halfway through.
16. Fulani Braids
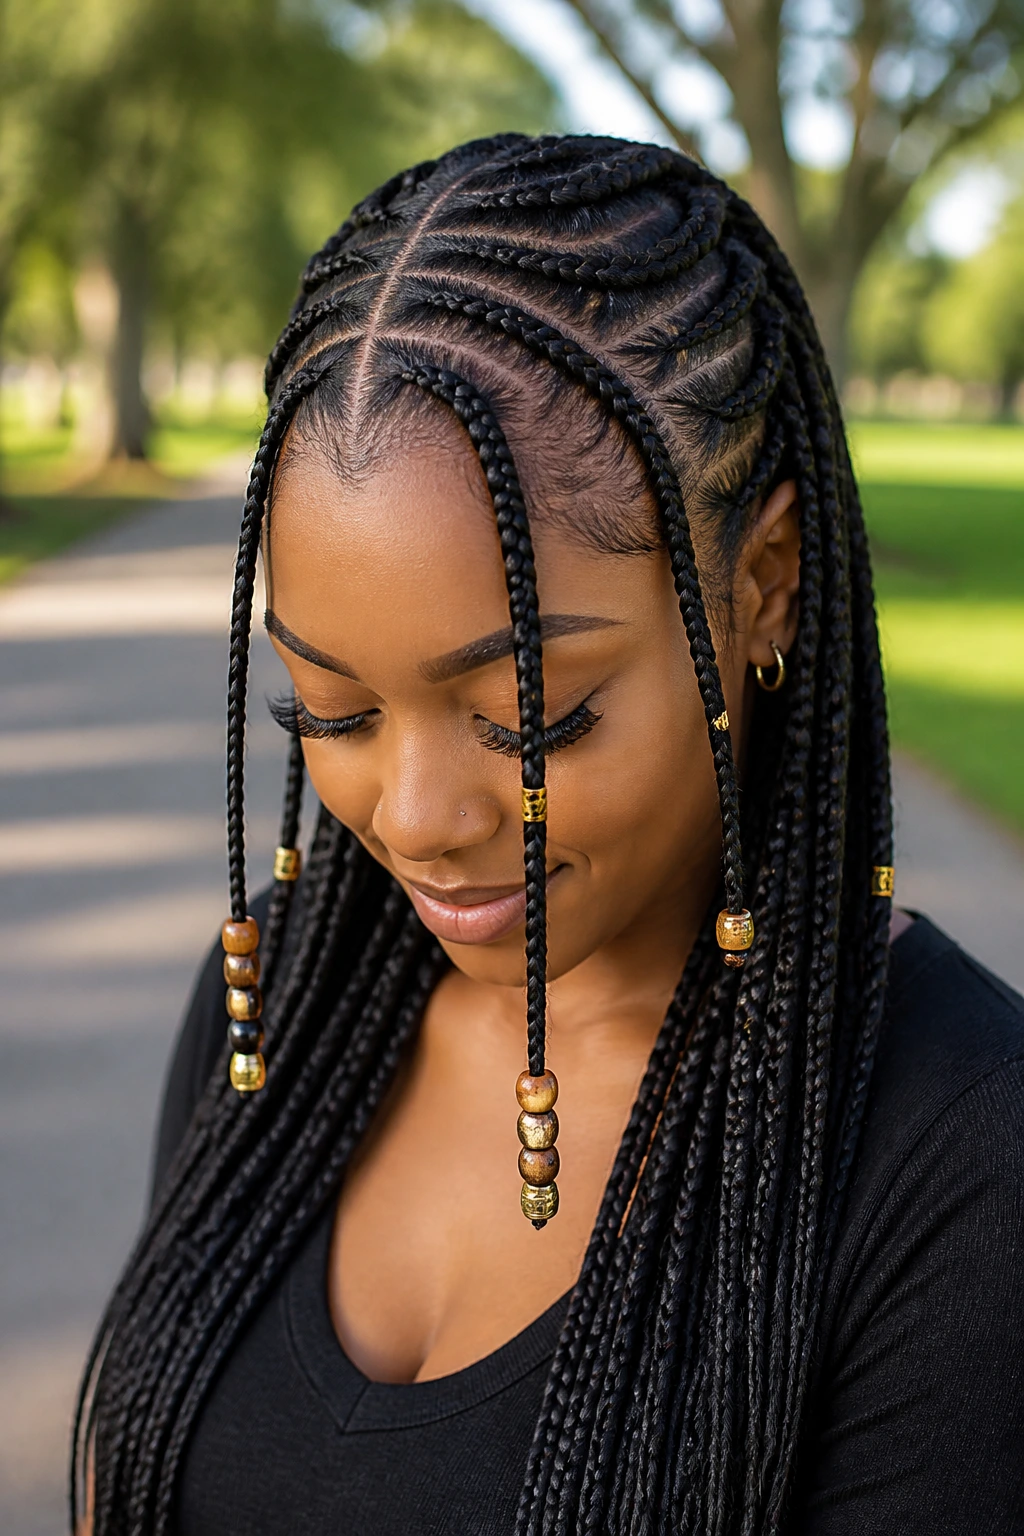
Picture a center braid, smaller side braids, and a few beads or cuffs that catch the eye as the head turns. That’s the basic shape of Fulani braids, and the reason the style stands out is that it has a clear pattern instead of looking like a random set of rows.
The parting is the first thing people notice. If the center line is crooked, the whole style loses its balance. Keep the rows clean and the braids even, then choose beads or metal cuffs that do not fight the pattern. The adornment should support the braid, not drown it.
Because Fulani braids carry a specific cultural history, they deserve more care than a generic “inspired by” label. Wear the style with respect, let the pattern remain visible, and avoid piling on so many extras that the design disappears under decoration.
This is one of those braid hairstyles for women that can look deeply personal when the details are handled well. The right parts. The right weight. The right finish.
17. Braided Ponytail
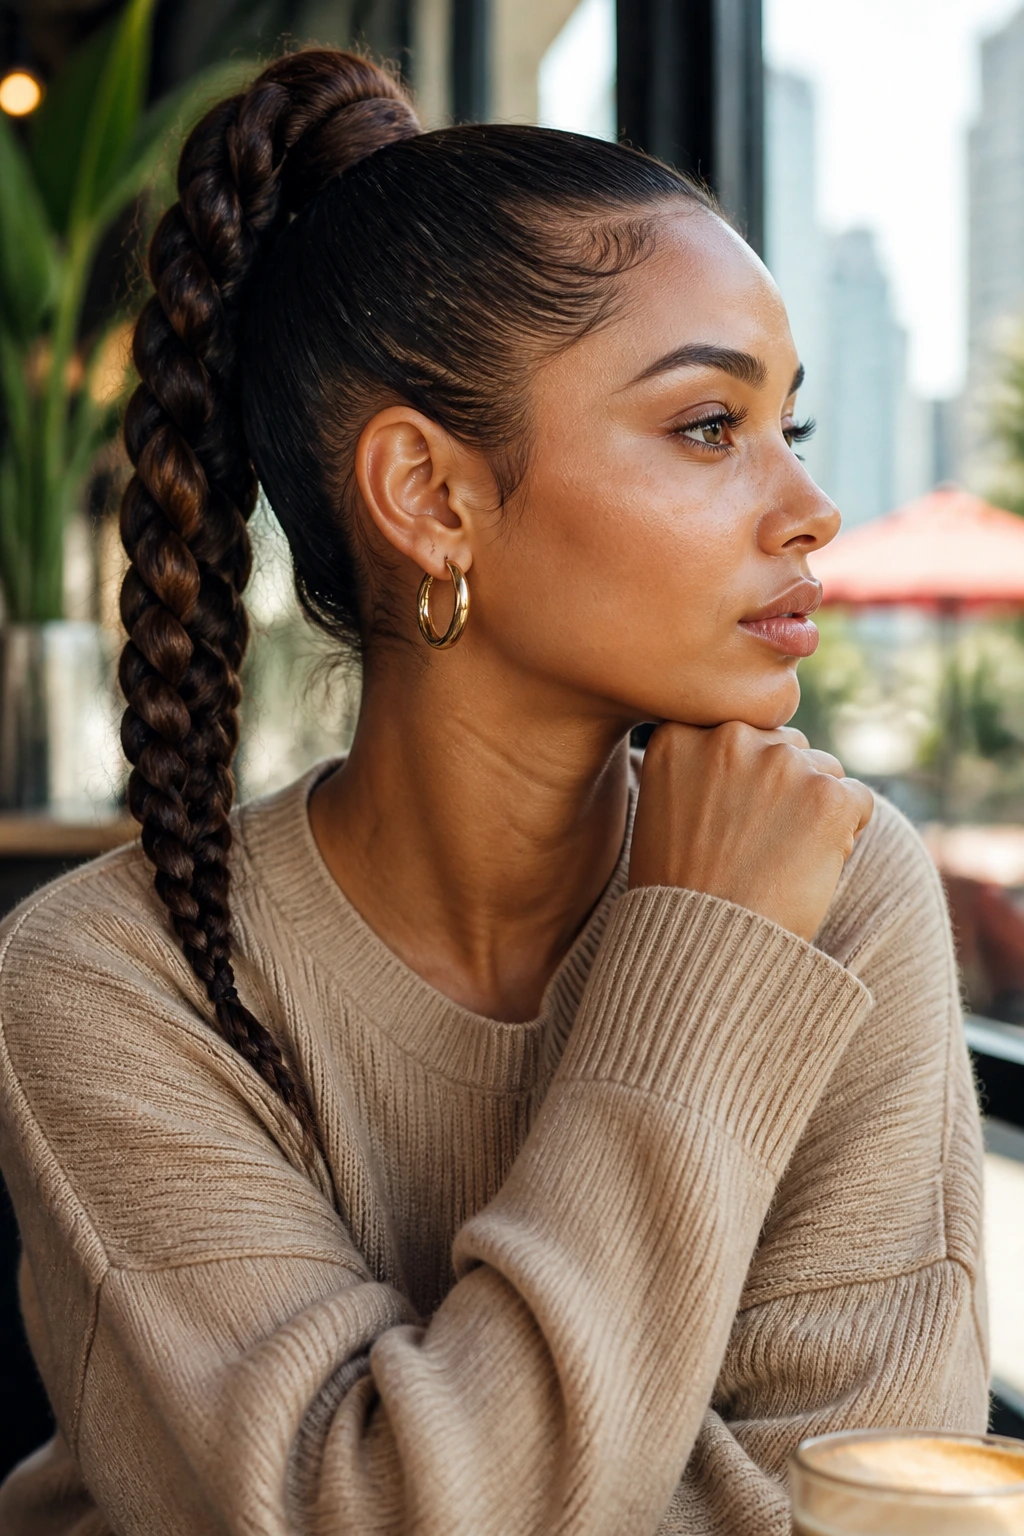
A braided ponytail gives you the clean base of a slick ponytail and the movement of a braid, which is a good trade when you want your hair tied back but not flattened into boredom. It works high or low, sleek or slightly puffed, and it is one of the easiest ways to make a basic ponytail look deliberate.
The base matters more than people expect. Smooth the hair at the crown first, tie it off securely, then braid the ponytail itself so the finished shape stays neat from the top down. If the base is bumpy, the braid can’t hide it. It will just carry the bumps with it.
I like this style for long hair because it shows off the length without letting the ends roam around. It also plays well with extensions if you want a bigger tail or a thicker look. A small wrap of hair around the elastic makes the style feel cleaner, and yes, that little move is worth the extra thirty seconds.
This is the braid you pick when you want tidy, but not severe.
18. Braided Bun
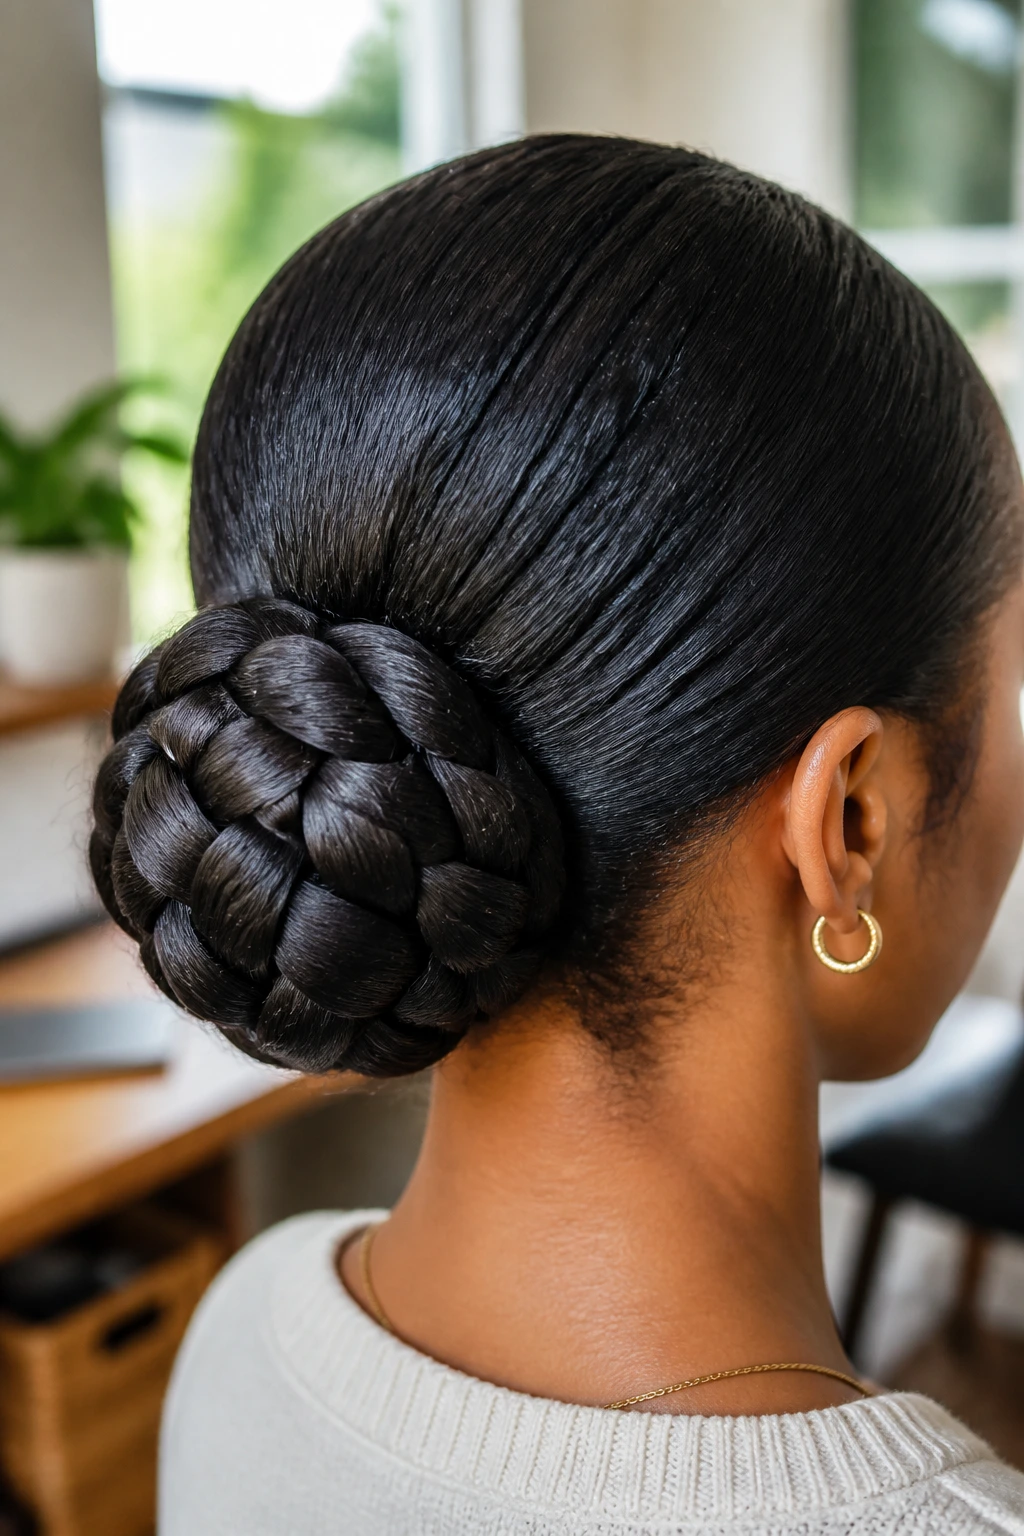
Unlike a loose braid that hangs freely, a braided bun keeps the length tucked in one place, which matters when you’re leaning over a desk, wearing a high collar, or just tired of hair brushing your neck every five minutes. It can sit low at the nape or high on the crown, and each version changes the mood.
The low braided bun feels softer and easier to pin. The high version looks sharper and holds the face open more. Both depend on a braid that is secure before it gets wrapped. If the braid is already loose, the bun will sag by lunchtime and make you fight it with pins.
This style is one of my favorites for days when the ends need to disappear completely. It’s practical, but it doesn’t look like you gave up. That’s a nice balance to have in rotation.
Keep a few extra bobby pins nearby, and don’t bury them all in one place. Spread the support around the bun so the weight doesn’t lean in one direction.
19. Half-Up Braided Crown
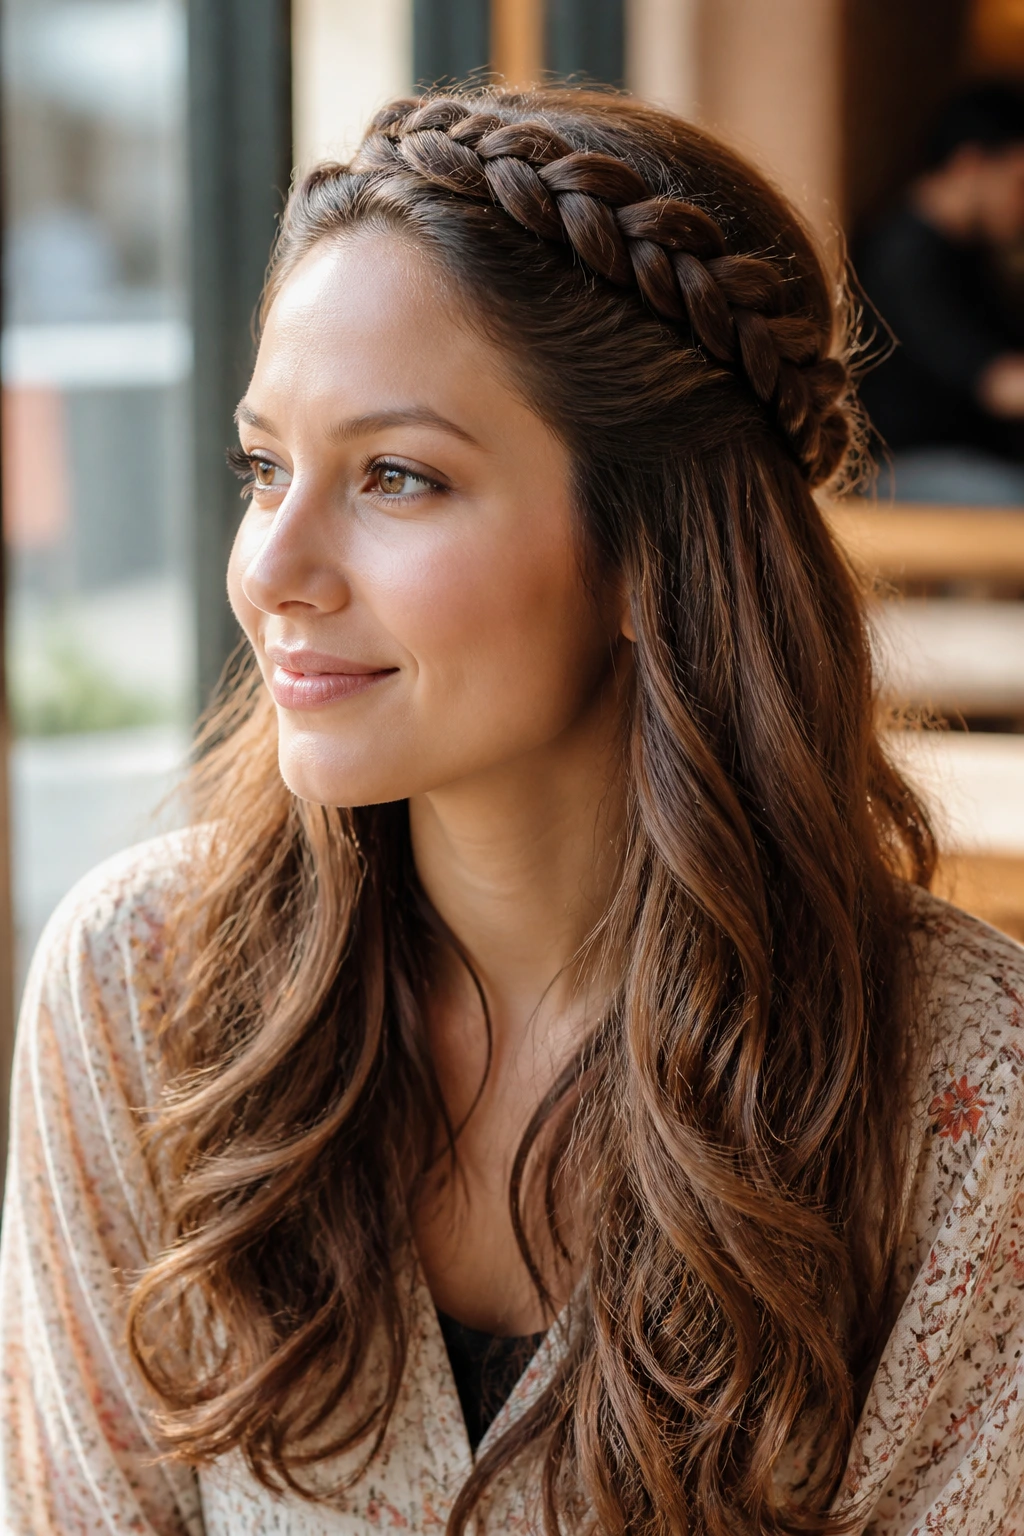
A half-up braided crown gives you the shape-control of a braided style and the softness of loose hair below it. That split is the whole appeal. You get structure around the face without losing the movement of the rest of the hair.
Why it works on a busy day
- It uses less hair than a full crown braid, so it’s faster.
- It leaves the bottom half free, which suits waves, curls, and layered cuts.
- It can be done with one braid or two small braids pinned together.
- It looks better when the top section is slightly smoothed before you start.
This is one of the easiest braid hairstyles for women who want something that looks a little styled without locking every strand into place. It also handles hair that isn’t quite long enough for a full wrap. The braid sits where the eye lands first, then the loose length softens the rest.
If you want to dress it up, curl the loose ends. If you want it low-key, leave the bottom section in its natural texture and keep the top braid neat.
20. Milkmaid Braids
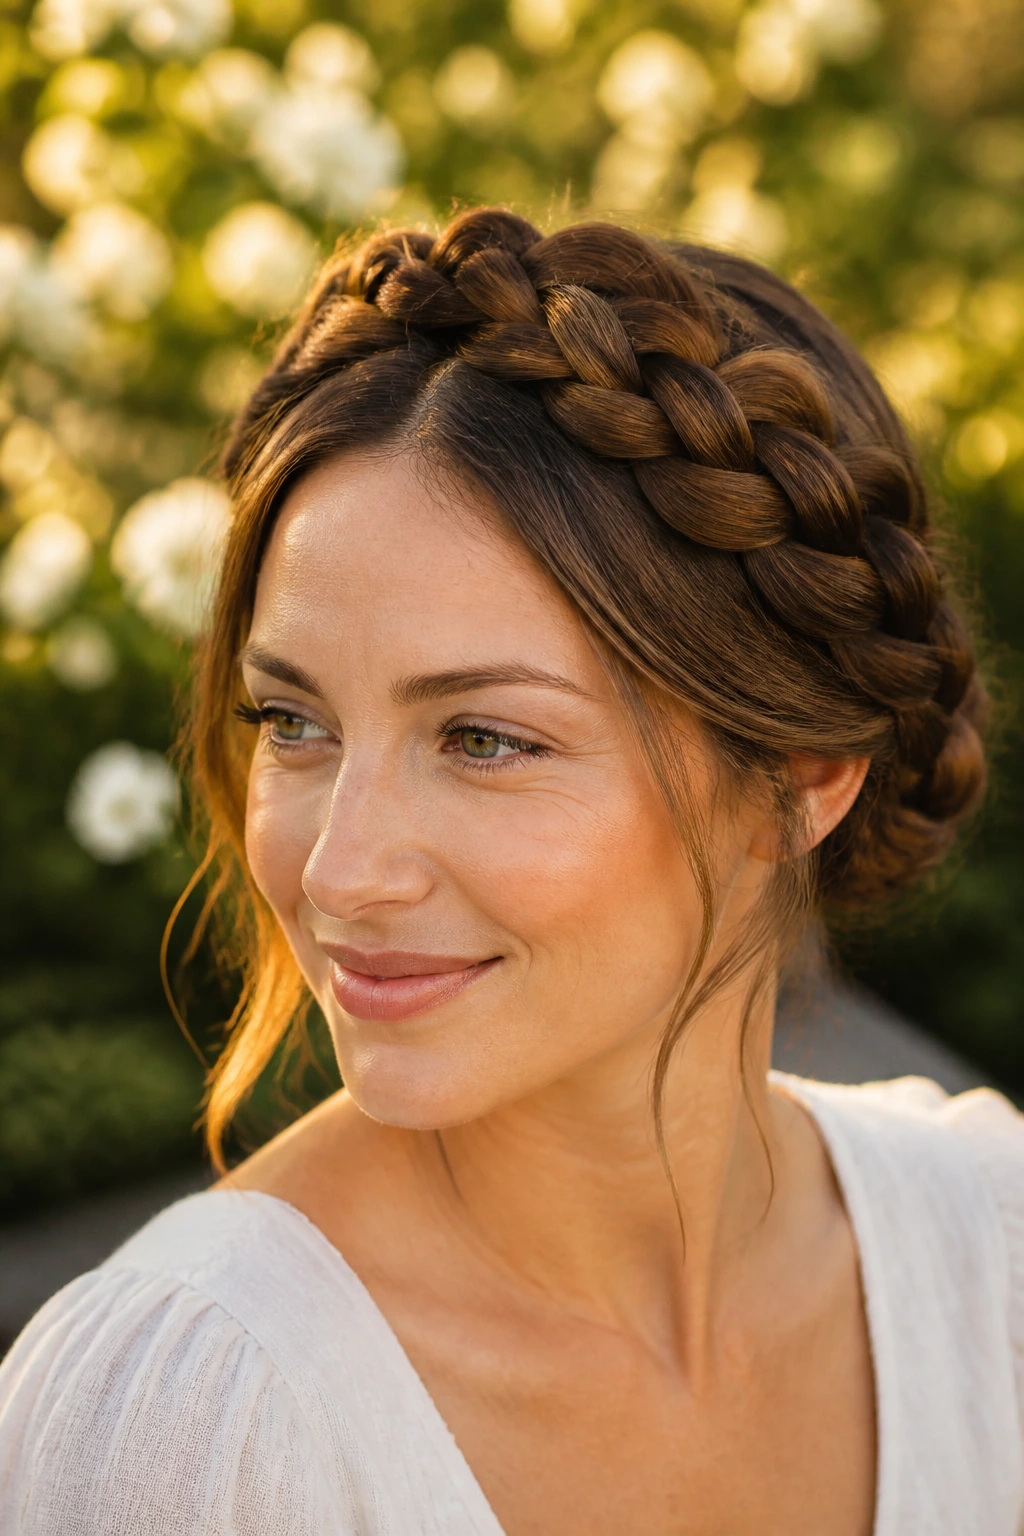
Milkmaid braids are the sleeper hit for women who want a style that looks fussy but is mostly pins and good placement. Two braids cross over the top of the head, and once they’re pinned right, the shape stays put in a way that feels almost suspiciously simple.
The trick is not to make the braids too tight before you wrap them. Leave them a little flexible so they can curve over the head without fighting the shape. If the hair is too short, tiny sections at the ends can slip out, so secure those ends first, then tuck them under the crossing point with bobby pins.
This style works especially well on hair that has a bit of wave or texture, because the braids grip each other and hold the crown shape more easily. Straight, silky hair can do it too, but you may need a few more pins and a little texture spray to keep the base from wandering.
Milkmaid braids sit in that pleasant middle ground between sweet and practical. They look like effort. They’re less effort than they look.
21. Side-Swept Mermaid Braid
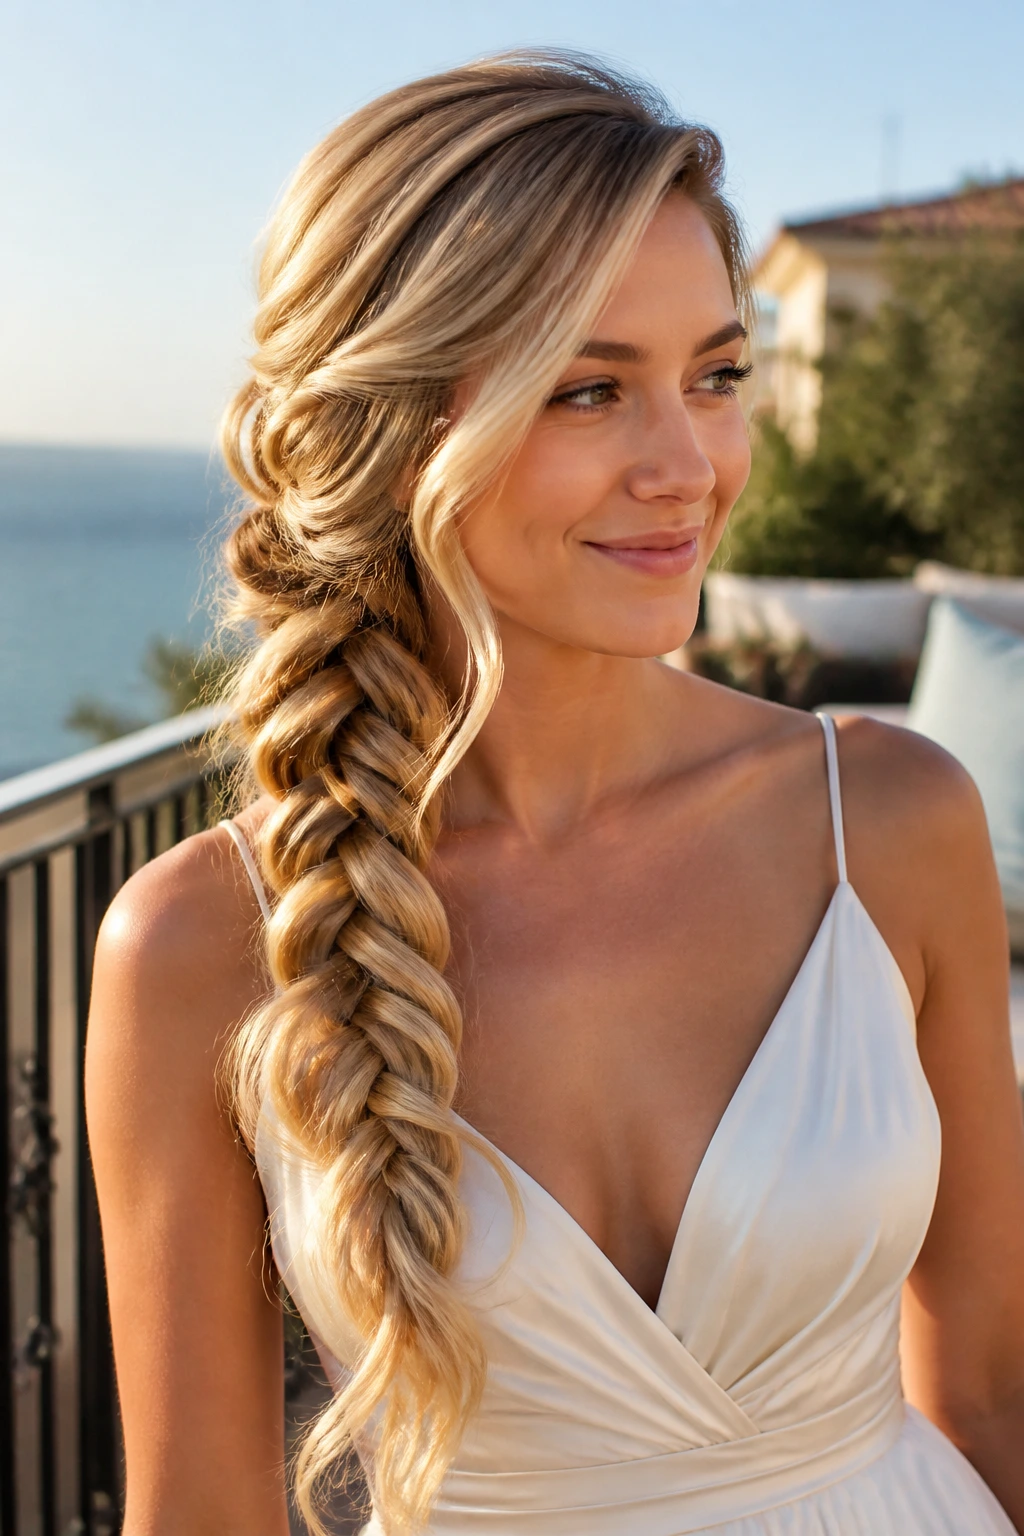
Why does a mermaid braid look bigger than a regular side braid? Because it’s usually loosened after braiding, which spreads the loops and creates that long, full, almost ribbon-like shape down one side. The braid itself may not be more complicated. It just gets treated with more drama.
A side-swept mermaid braid needs length, or at least the illusion of it. Long hair is easiest, but extensions can help if you want the braid to fall farther down the torso. The side part should be obvious, and the braid should start low enough that the sweep feels intentional rather than accidental.
This style is a favorite when the goal is softness with volume. It keeps the hair one-sided, which gives the face room, and the pulled-apart edges make the whole thing look fuller than it is. Don’t overdo the loosening, though. If the braid starts unraveling in chunks, you’ve gone too far.
A mermaid braid looks best when it still has a clear spine. Big does not have to mean sloppy.
22. Braided Bob
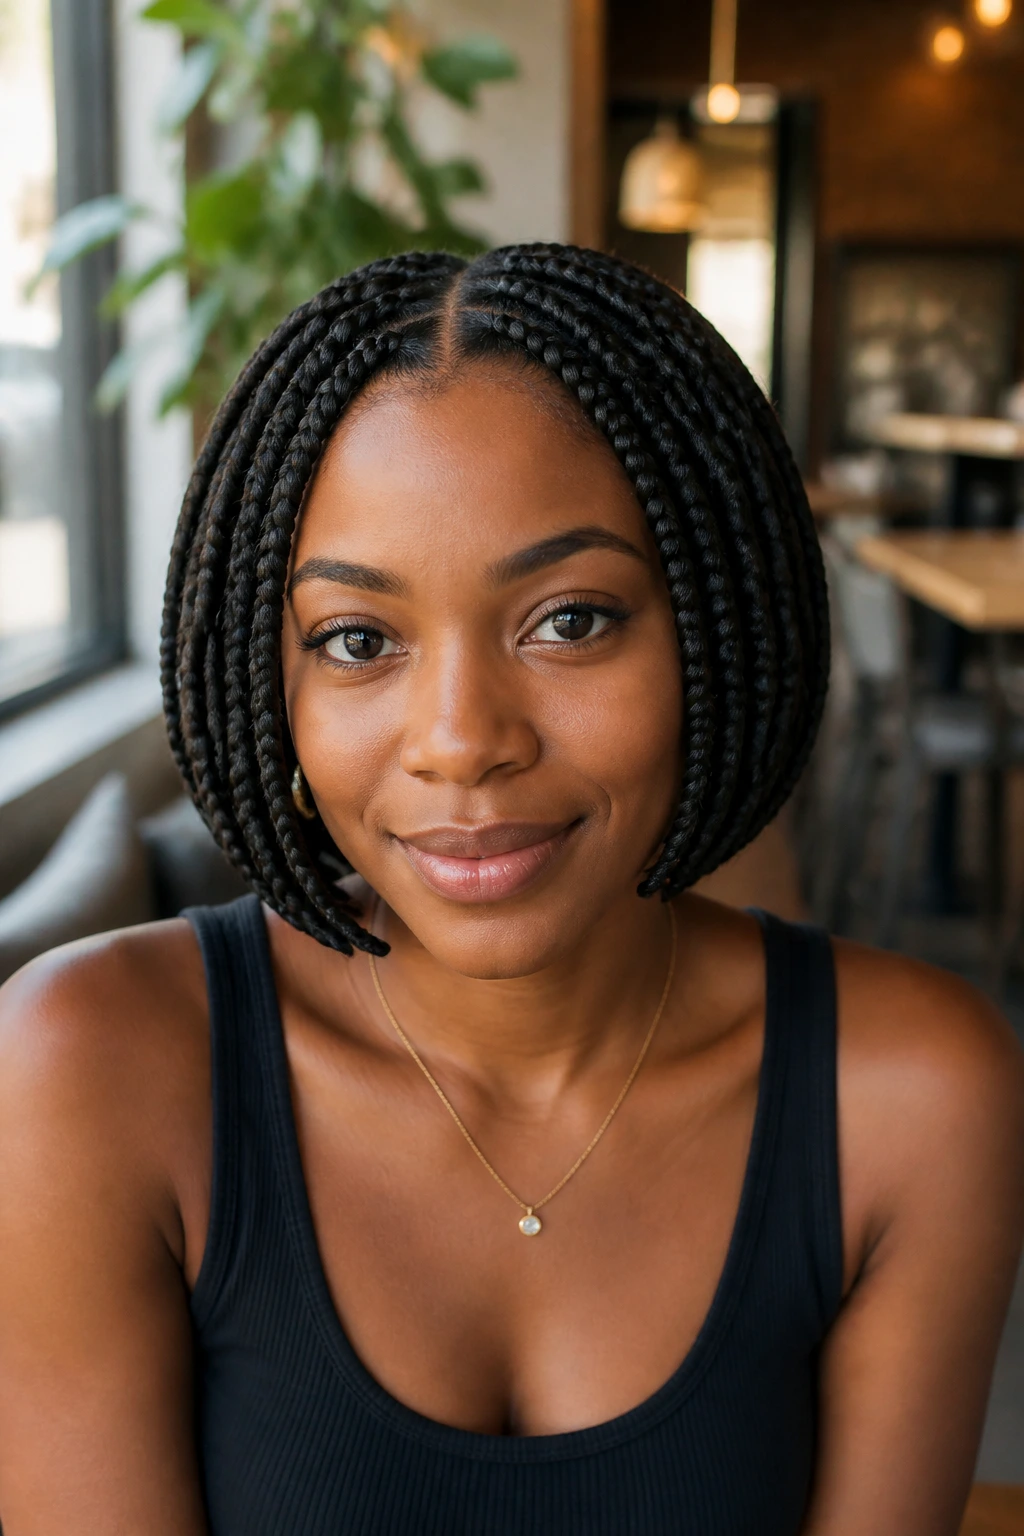
Short hair can absolutely be braided, and the braided bob proves it. The style works with chin-length to shoulder-length hair, usually through smaller braids, tucked ends, or compact sections that keep the silhouette close to the head.
What makes it work
- Mini braids can be pinned into a bob shape without dragging the hair down.
- Tucked ends stop the style from looking unfinished.
- Shorter lengths need cleaner parting because there’s less room to hide mistakes.
- Works well when you want braid detail without adding more length.
A braided bob is one of the smartest answers to short hair that feels too awkward to leave loose but not long enough for giant plaits. It keeps the neckline clear and the shape neat, which is useful on humid days when shorter layers start flipping around on their own.
The style can read modern or soft depending on how tight the parts are. A crisp center part gives it more structure. A loose side part makes it feel gentler. Either way, the clean outline is the thing that makes it work.
23. Pull-Through Braid
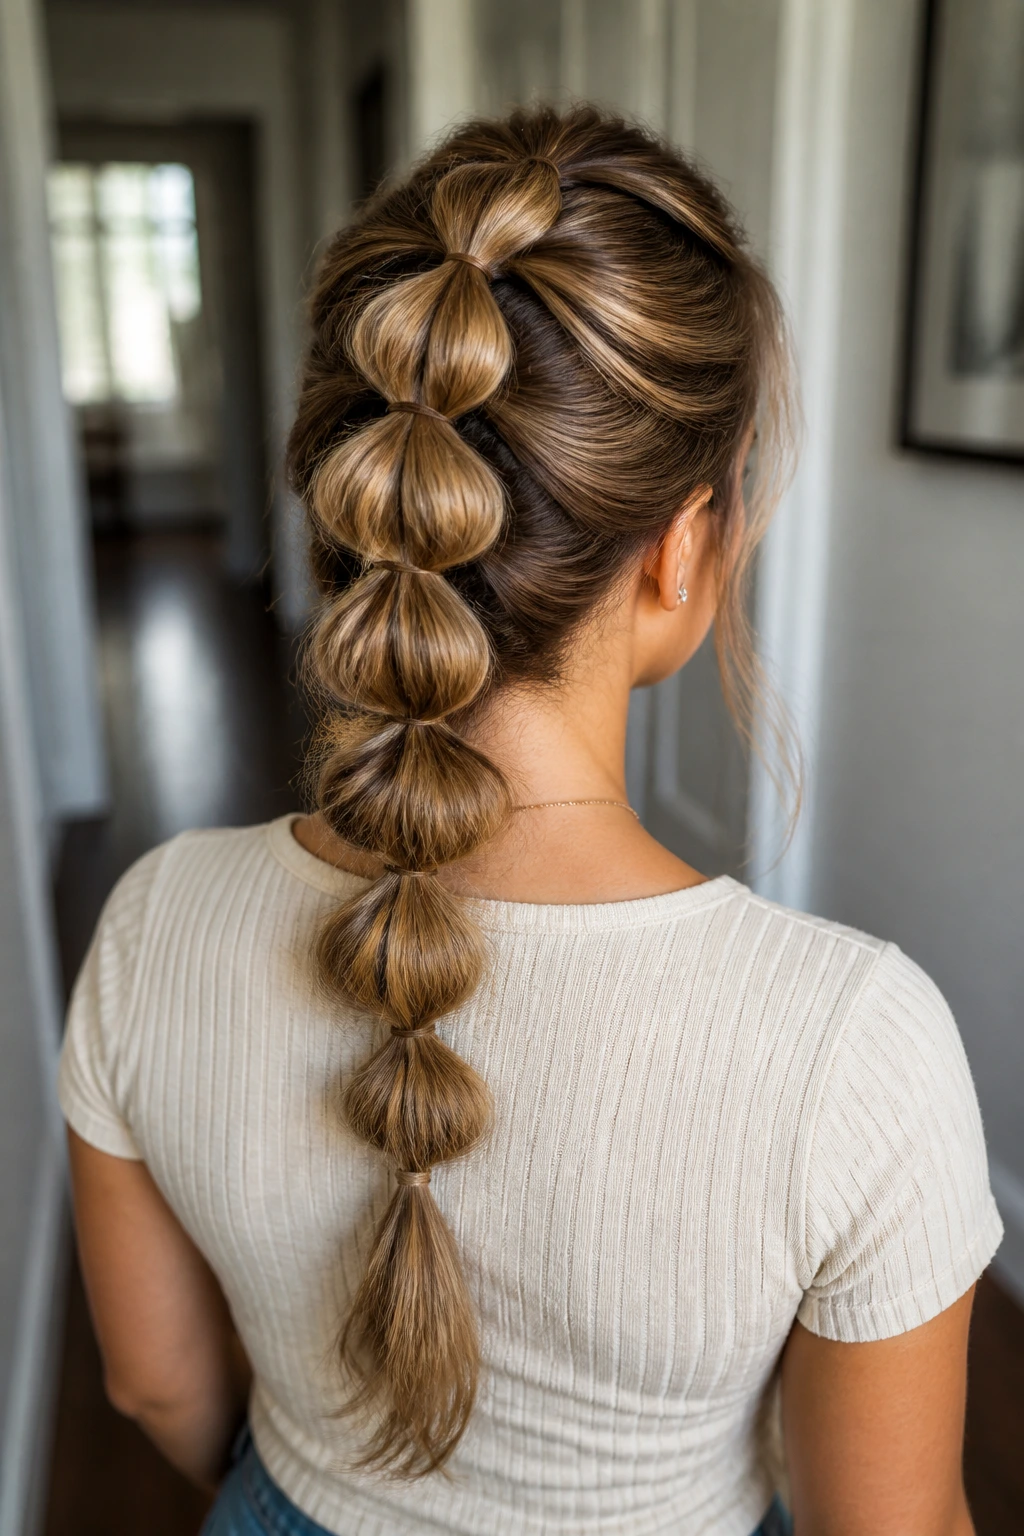
The pull-through braid is not a true braid in the strict sense, and that’s exactly why people with fine hair tend to love it. It uses a line of elastics and a looping technique to fake the fullness of a thick braid without needing the density to support a real one.
You start with small ponytails stacked down the back, then split and pull each section through the one below it. The result looks like a big, rounded braid, especially once you tug the loops outward a little. It is one of the easiest ways to create volume without teasing the whole head into a tangle.
The style does ask for clean elastics and a little patience with placement. If the ponytails are uneven, the whole braid will lean off to one side. Keep the spacing consistent, and the result looks much more deliberate than the method suggests.
For women with fine hair, this style can be a small miracle. It gives the illusion of a thick, full braid without asking the hair to be something it isn’t.
What Makes Braids Hold Their Shape Better Than Loose Hair
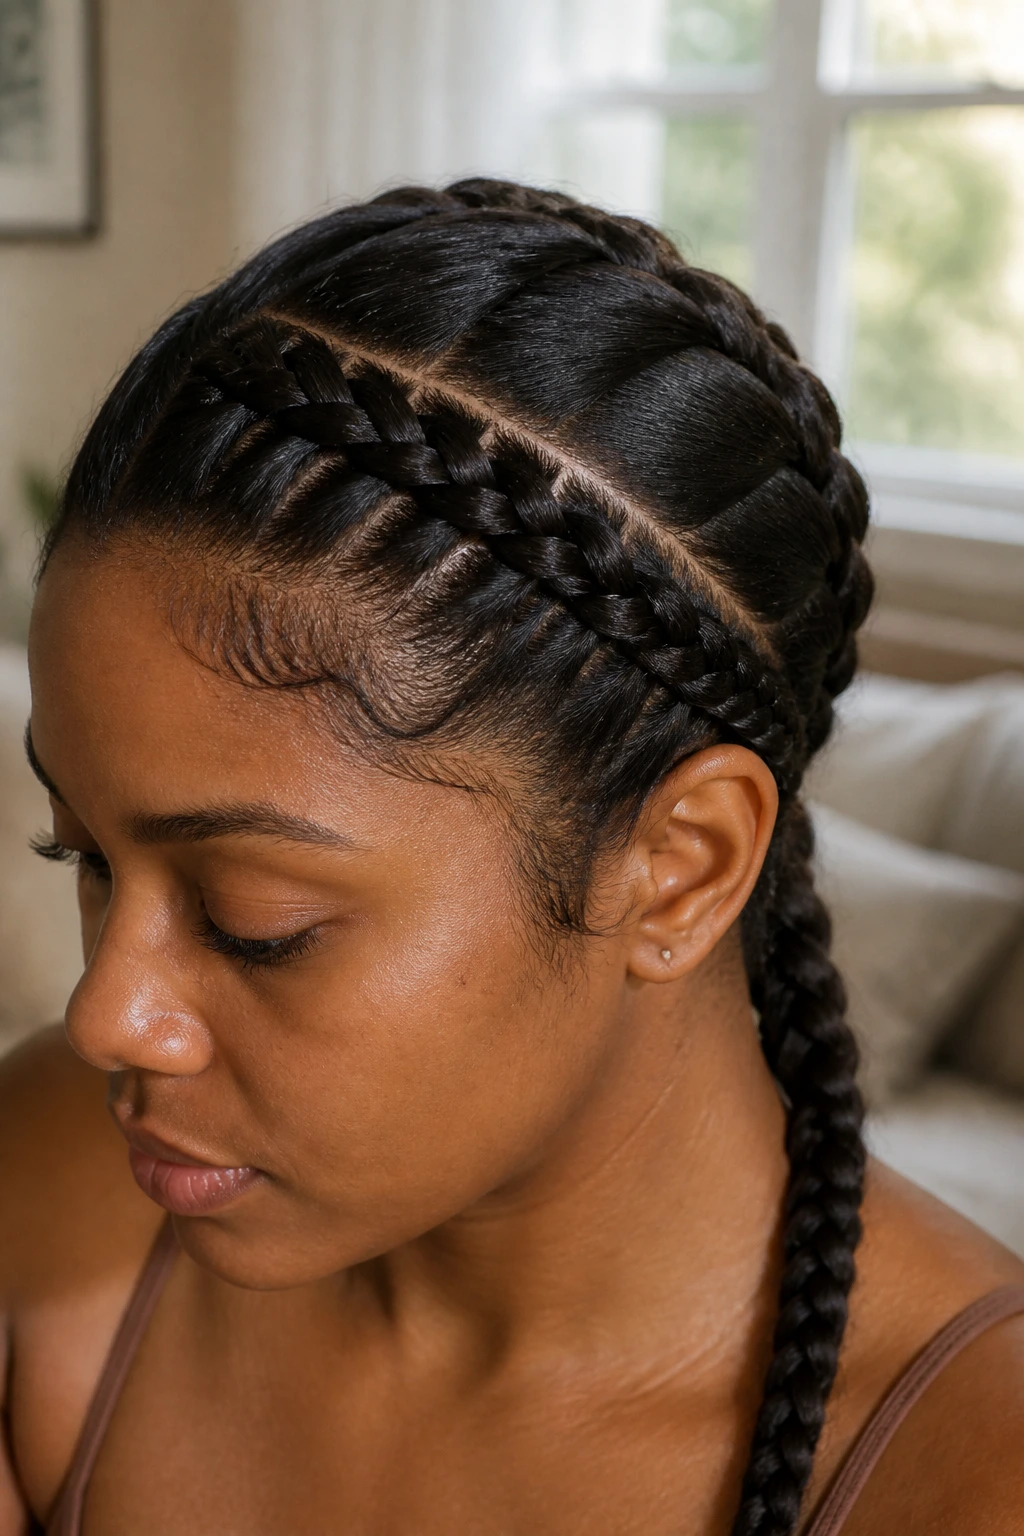
A braid has a structural advantage loose hair does not. Once the strands are locked into a pattern, they stop sliding around the head the same way, which means the style fights wind, collars, and humidity better than open lengths usually can. That is why braids hold up so well on commute days and why they’re still one of the strongest braid hairstyles for women who want a style that lasts past lunch.
Clean parts do half the work
The part is not decoration. It decides whether the braid looks neat or chaotic. If the sections are clean at the start, the braid can stay orderly even when the rest of the day gets messy. Rat-tail combs earn their keep here. So do sectioning clips, especially for styles like stitch braids, cornrows, and milkmaid braids where the eye notices every line.
Texture changes everything
Slippery hair needs grip. Curly or coily hair needs gentle handling and enough moisture to keep the braid from fraying. Straight hair often needs a little dry shampoo or texture spray to help the strands cooperate. One formula does not work for all hair types, and that is fine. That’s the part a lot of people skip, then wonder why their braid slides apart or feels too tight.
Tight is not the same as neat
This matters more than people admit. A braid can look clean without being yanked into place. If the first inch hurts, the braid is too tight. If the braid holds the shape but the scalp feels calm, you’ve probably got the tension right. That is the line to aim for, especially with protective styles and anything worn for more than one day.
Tools That Make Braiding Less Fiddly
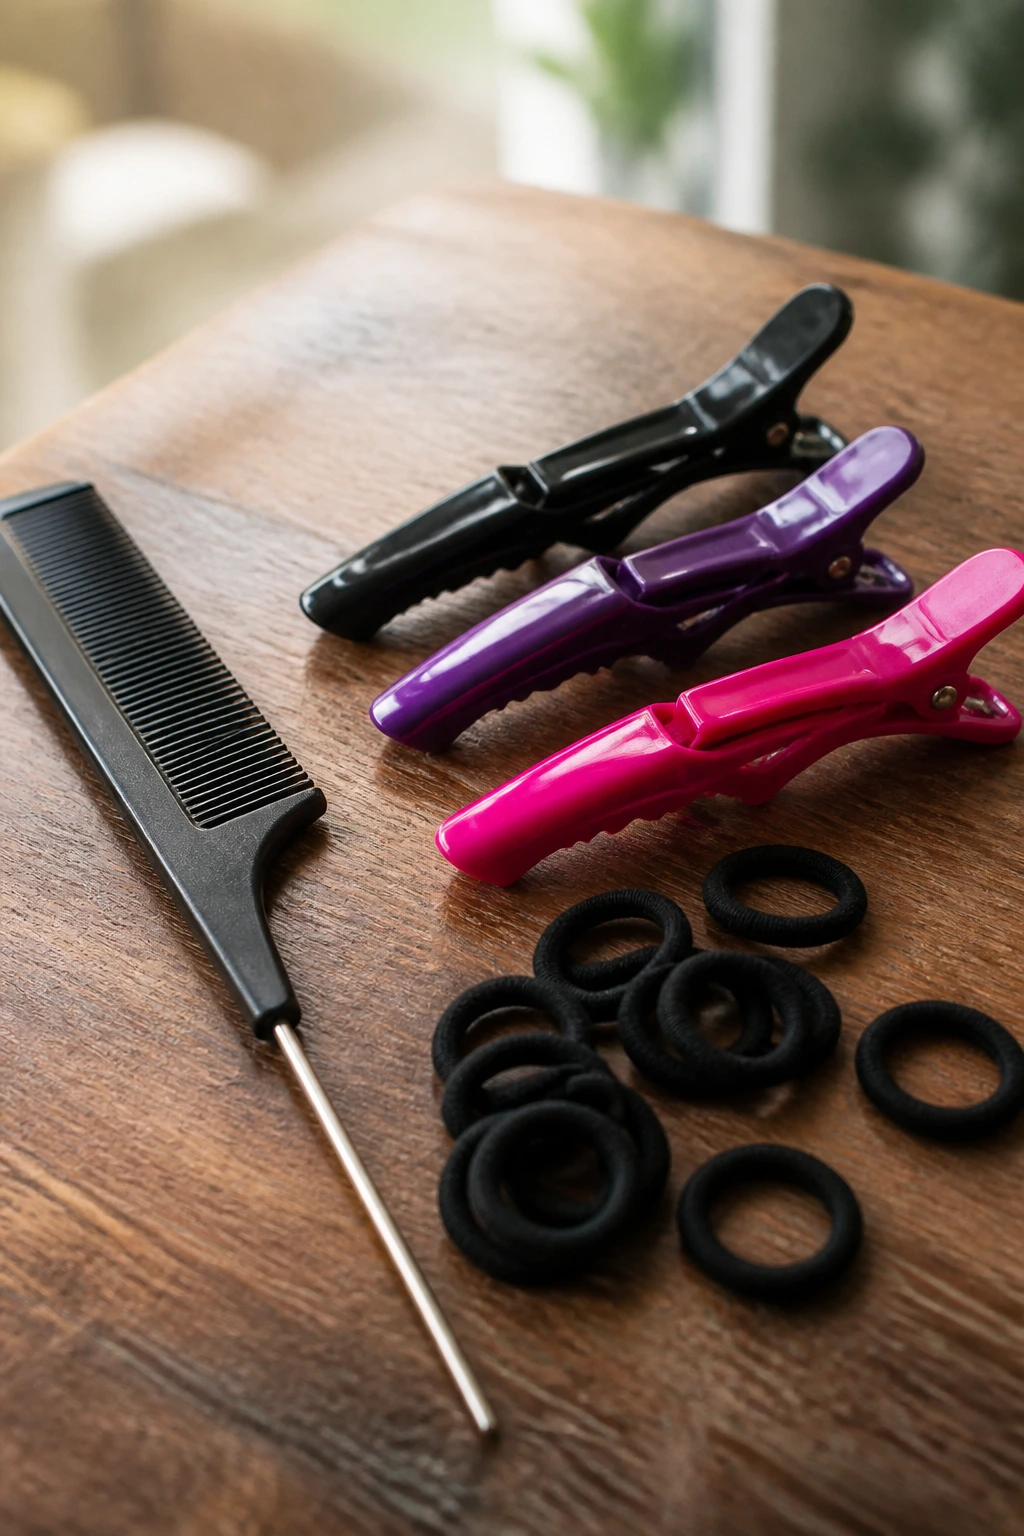
- Rat-tail comb: The pointed tail gives you clean parts and helps separate small sections without shredding the rest of the hair.
- Sectioning clips: Keep the unused hair out of the way so you don’t keep borrowing from the wrong side.
- No-snag elastics: Clear or small bands are best for ends, ponytails, and pull-through styles.
- Bobby pins: Useful for crown braids, milkmaid braids, buns, and any style where ends need to vanish.
- Mousse or light styling cream: Adds grip and keeps flyaways from escaping before you finish.
- Texturizing spray or dry shampoo: Helpful on very clean, slippery hair that needs a little more hold.
- Edge brush or small bristle brush: Smooths the hairline without flattening the whole style into a helmet.
- Satin scarf or bonnet: Keeps the braid from rubbing apart overnight.
- Braiding hair or extensions: Optional, but useful for knotless braids, box braids, jumbo braids, and fuller ponytails.
- Small hair oil or scalp serum: Best for longer protective styles, where the scalp needs a little relief without soaking the braid.
How to Choose the Right Braid for Your Hair Length, Texture, and Routine
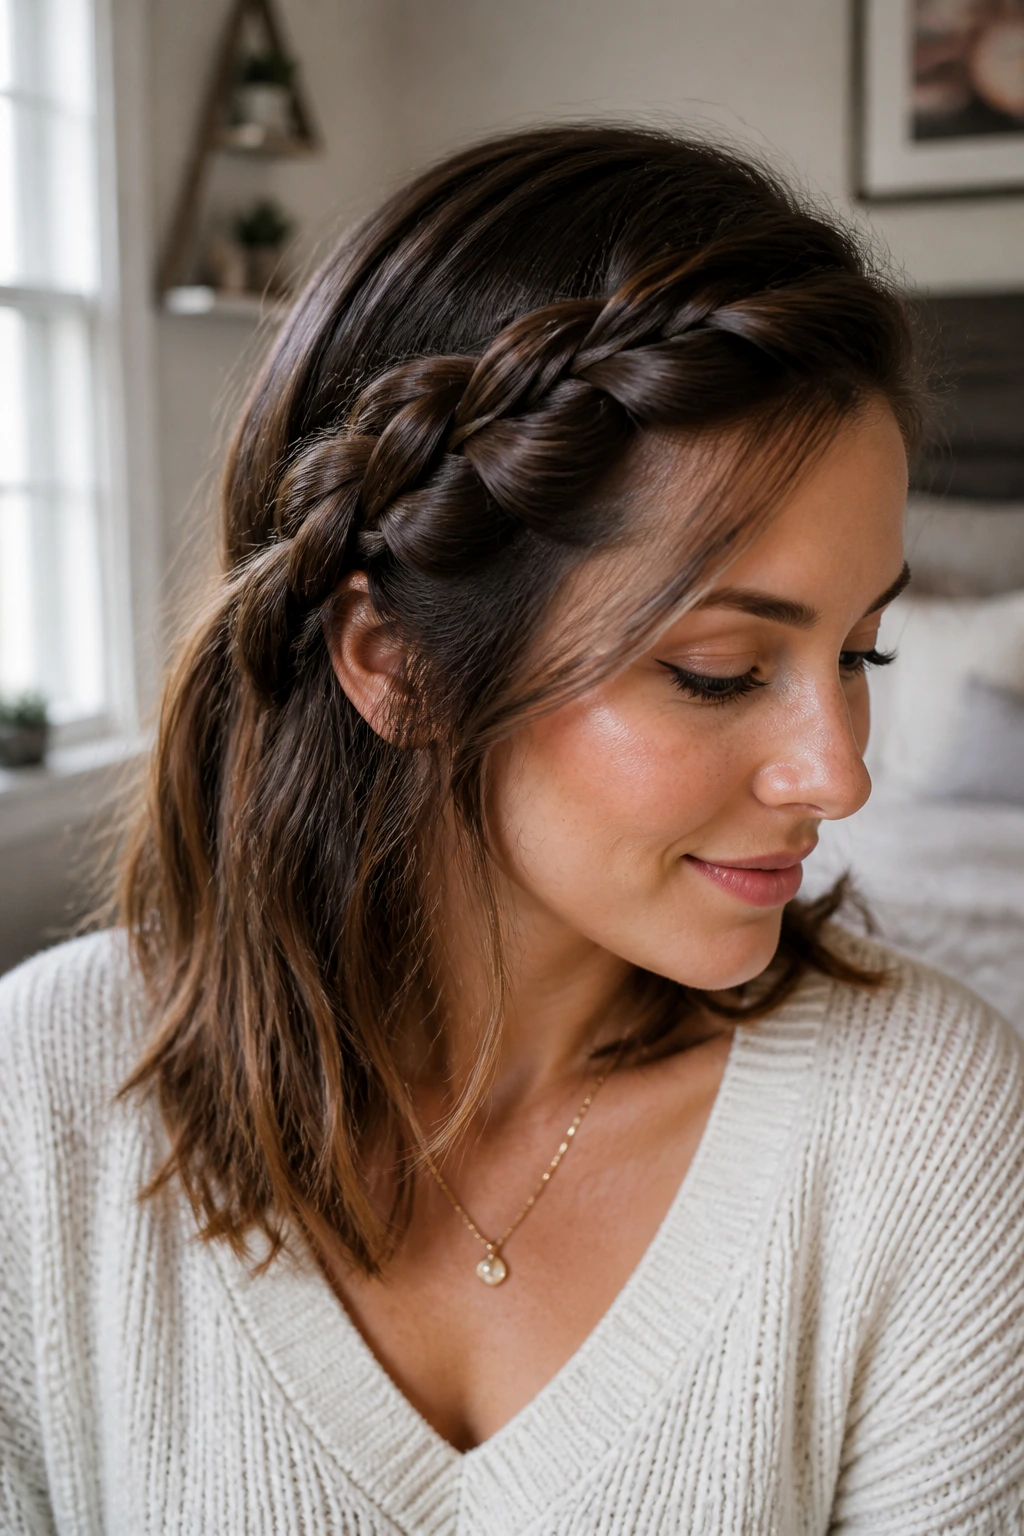
The best braid is the one that fits your real hair, not the hair you wish showed up on command. Fine, silky hair usually does better with styles that build volume through technique — pull-through braids, rope braids, Dutch braids, and French braids can all give it more shape without needing extra bulk. Thick hair can handle heavier styles like jumbo braids, goddess braids, and feed-in cornrows, but it also needs attention to weight. A style can look amazing and still feel like too much if the base is overloaded.
Short hair is not a dead end. Braided bobs, crown braids, half-up braids, and milkmaid styles can all work when the ends are tucked and the front sections are controlled. If your hair reaches the collarbone, you have more options than you think. Shoulder length opens the door to French braids, fishtails, and braided ponytails. Longer hair lets the braid itself become the main feature.
Your routine matters too. If you want something for the gym, boxer braids and cornrows are safer bets. If you need something for a dinner or office day, a side braid, braided bun, or half-up crown feels more polished. Protective styles like knotless box braids and Fulani braids make sense when you want the look to last. A loose waterfall braid makes sense when you want the hair to look done for a few hours, then come back out later.
How to Wear These Braids With Clothes, Jewelry, and the Rest of the Day
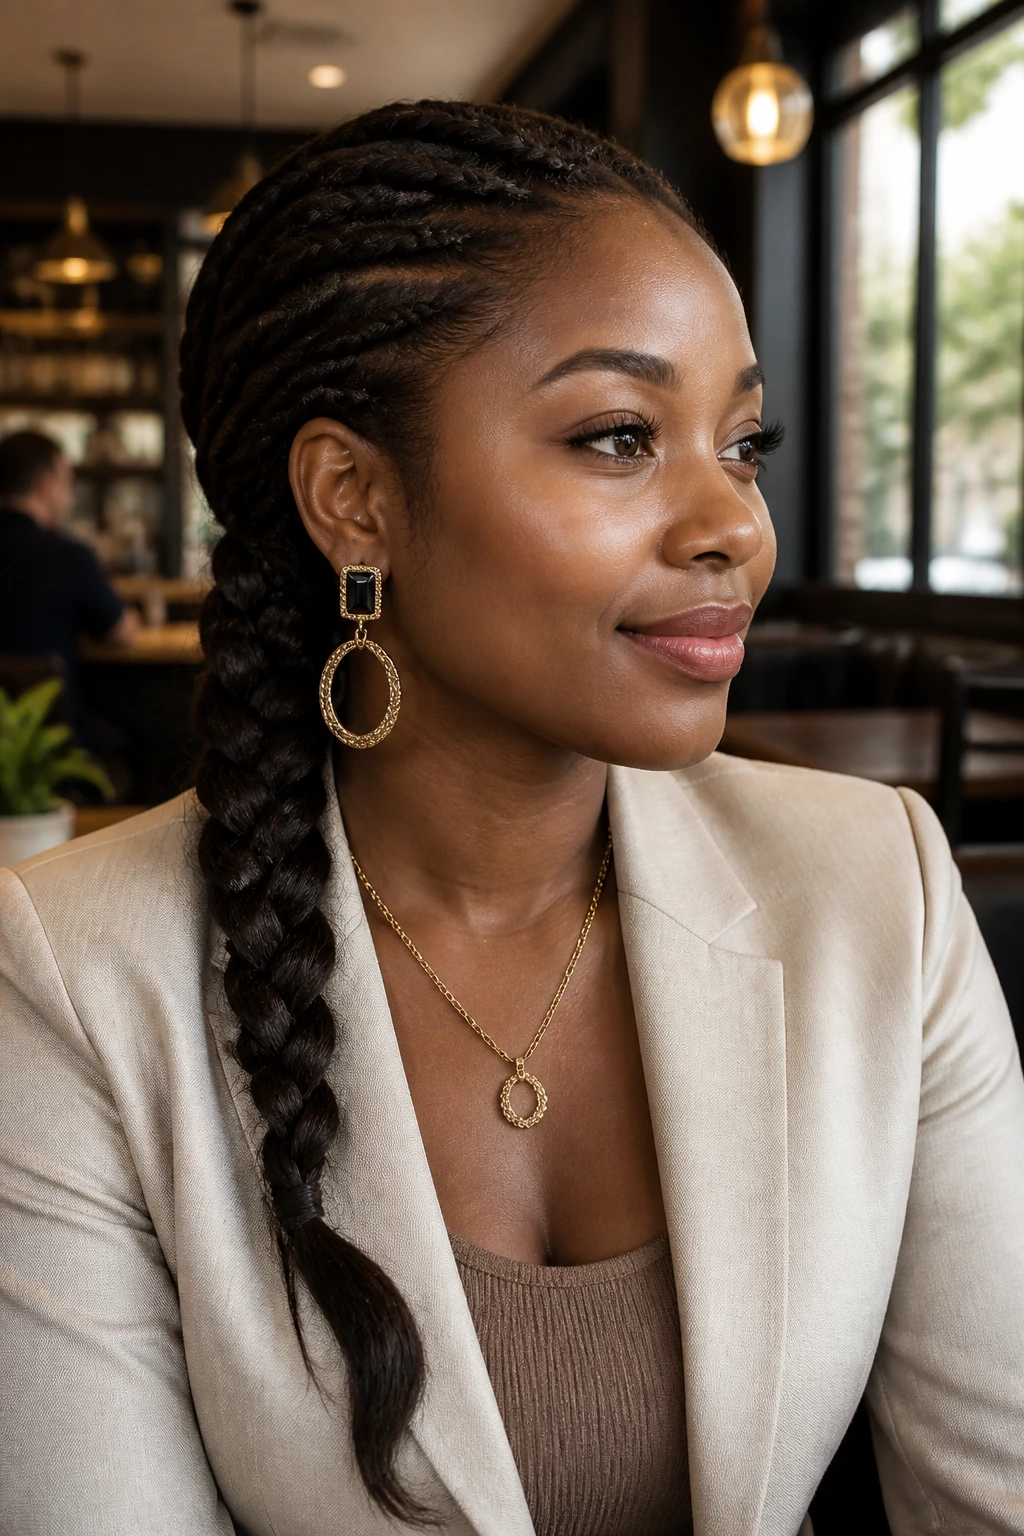
Presentation: Keep the braid finish aligned with the outfit. A sleek cornrow or stitch braid reads sharper with a structured jacket, while a loose side braid or waterfall braid feels better with soft knits, open collars, or anything that needs a gentler frame around the face.
Accompaniments: Earrings matter more than people think. Hoops, cuffs, and studs show off the parting around box braids, lemonades, and Fulani styles. Scarves, headbands, and ribbon ties work best when the braid already has a clear shape, not when it’s fighting a dozen other accessories.
Portions: Think about scale. A single braid down the back gives one clean line. Two braids give symmetry and a sporty feel. Full-head styles like knotless box braids or feed-in cornrows use the whole scalp as part of the design, so they need cleaner parting and more patience from the start.
Beverage Pairing: The closest braid equivalent is setting. A braid that has to survive coffee, a commute, or a long workday needs more hold and less loose structure than one you’re wearing for a short event. Boxer braids, braided buns, and knotless styles handle a long day better than a waterfall braid or mermaid braid, which are more about the moment than endurance.
Small Style Tweaks That Change the Whole Braid
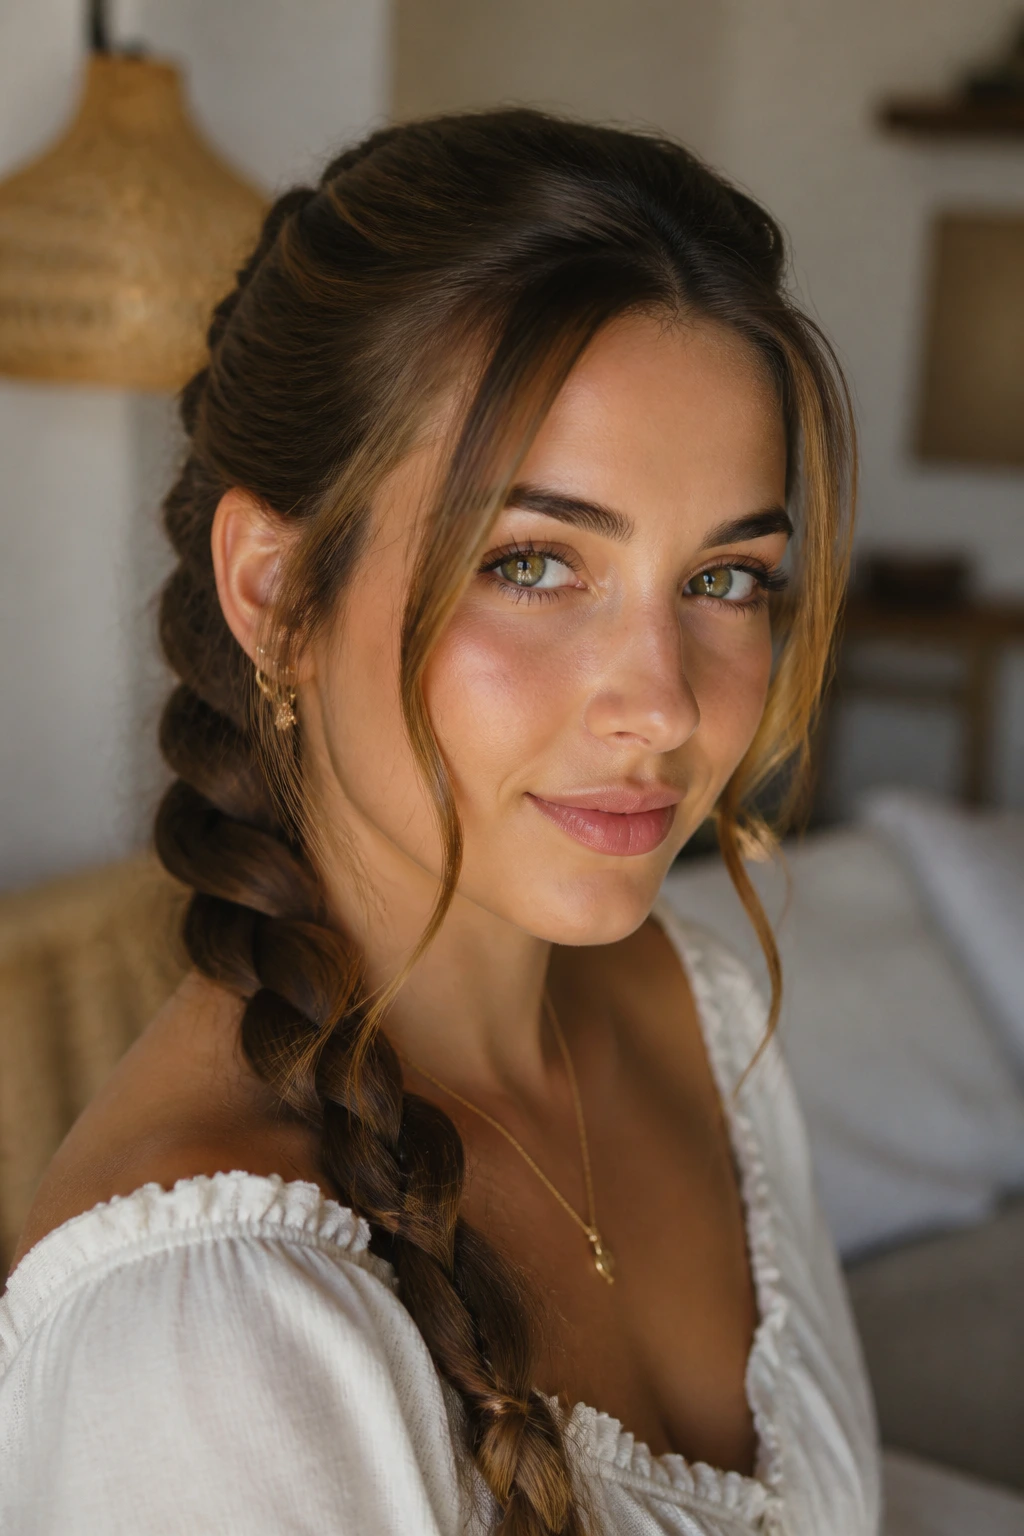
Texture Boost: If the hair slips too much, use a little texturizing spray or mousse before you begin. That tiny prep step can save you from having to redo the whole braid because the sections refused to stay in place.
Face-Frame Control: Leave a few soft pieces out if you want a gentler look, or keep everything tucked for a cleaner one. The braid itself can stay the same; the mood changes just from those front pieces.
Accessory Trick: Cuffs, beads, ribbon, and pins should match the braid’s size. Tiny braids look fussy with oversized beads. Jumbo braids can handle more obvious hardware. The balance matters.
Make-It-Yours: On curly hair, stretch the hair first if you want a smoother braid line. On straight hair, add a little grip so the braid doesn’t slip. On thick hair, keep the sections balanced. On fine hair, go easier on the tension and let the shape come from the pattern.
Common Braiding Mistakes and How to Fix Them
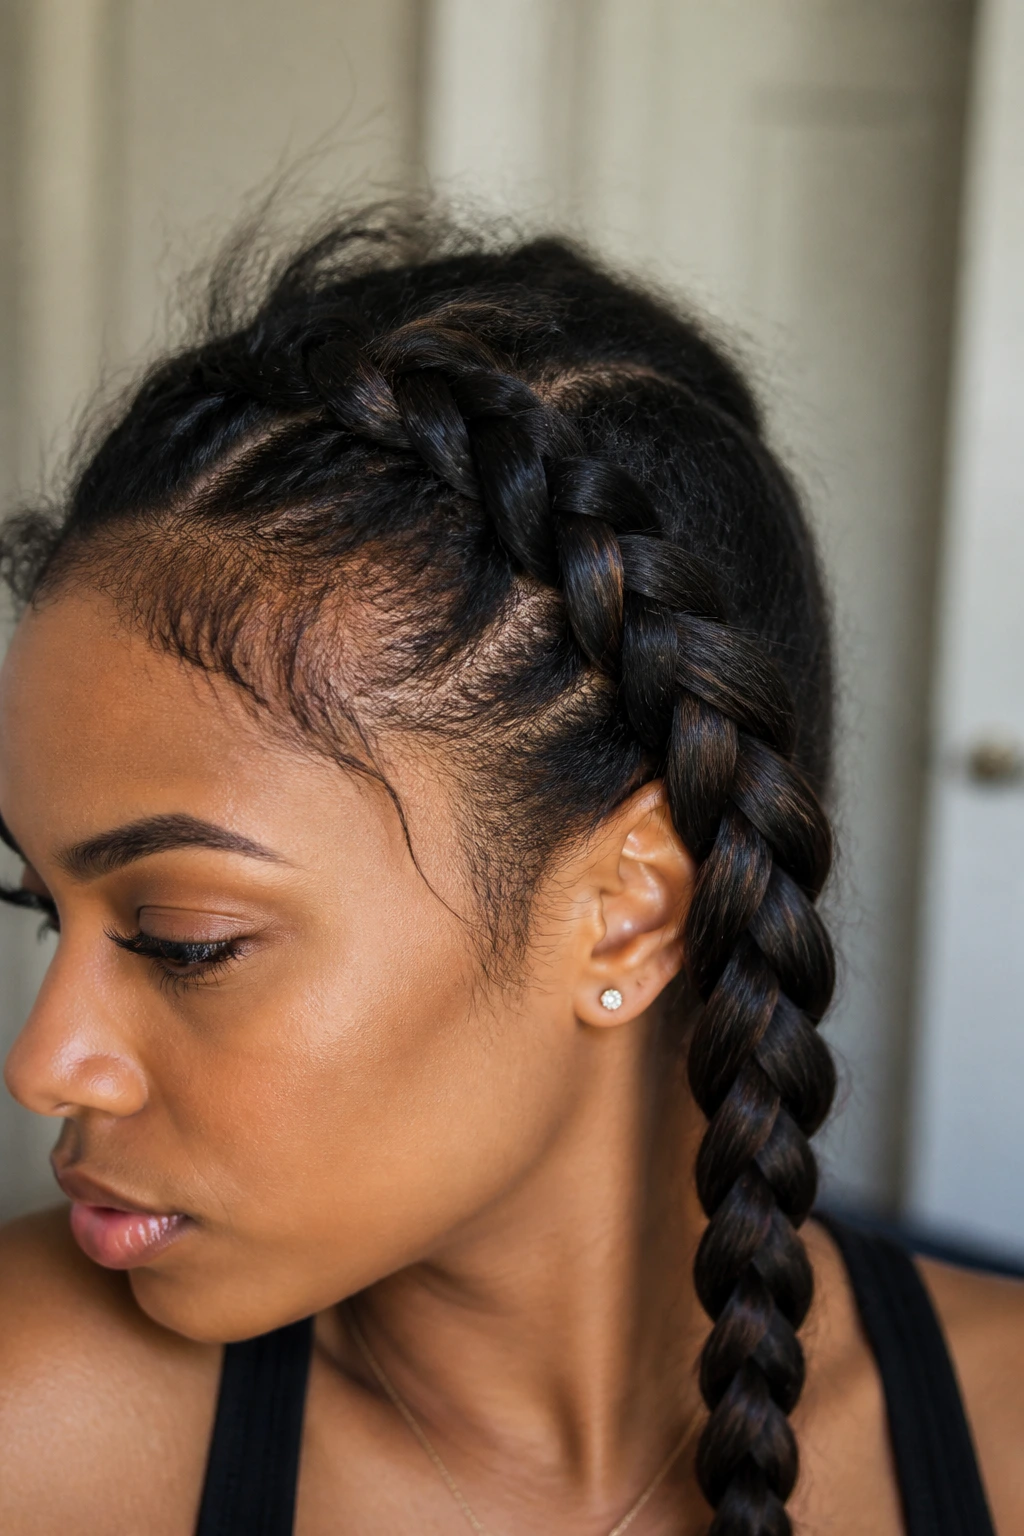
- Starting on tangled hair: The braid catches, the sections snag, and the finish looks bumpy. Detangle first with a wide-tooth comb or brush and a small amount of leave-in.
- Pulling too hard at the hairline: This causes soreness by the end of the day and can stress the edges over time. Loosen the first inch and rebuild the braid with steadier tension.
- Using sections that change size mid-braid: The braid twists and the shape starts leaning. Keep the pieces consistent from root to end.
- Skipping grip on very clean hair: Slippery strands slide apart before the braid sets. Use mousse, light cream, or dry shampoo to give the hair a little hold.
- Forgetting to secure the ends properly: The braid starts unraveling at the bottom. Tie it off with a snug elastic and, if needed, pin the tail under for extra security.
- Trying a style that fights your hair length: A braid that needs more length than you have will look forced. Pick a style that matches where your hair actually lands, not where you want it to be.
Variations and Adaptations to Try
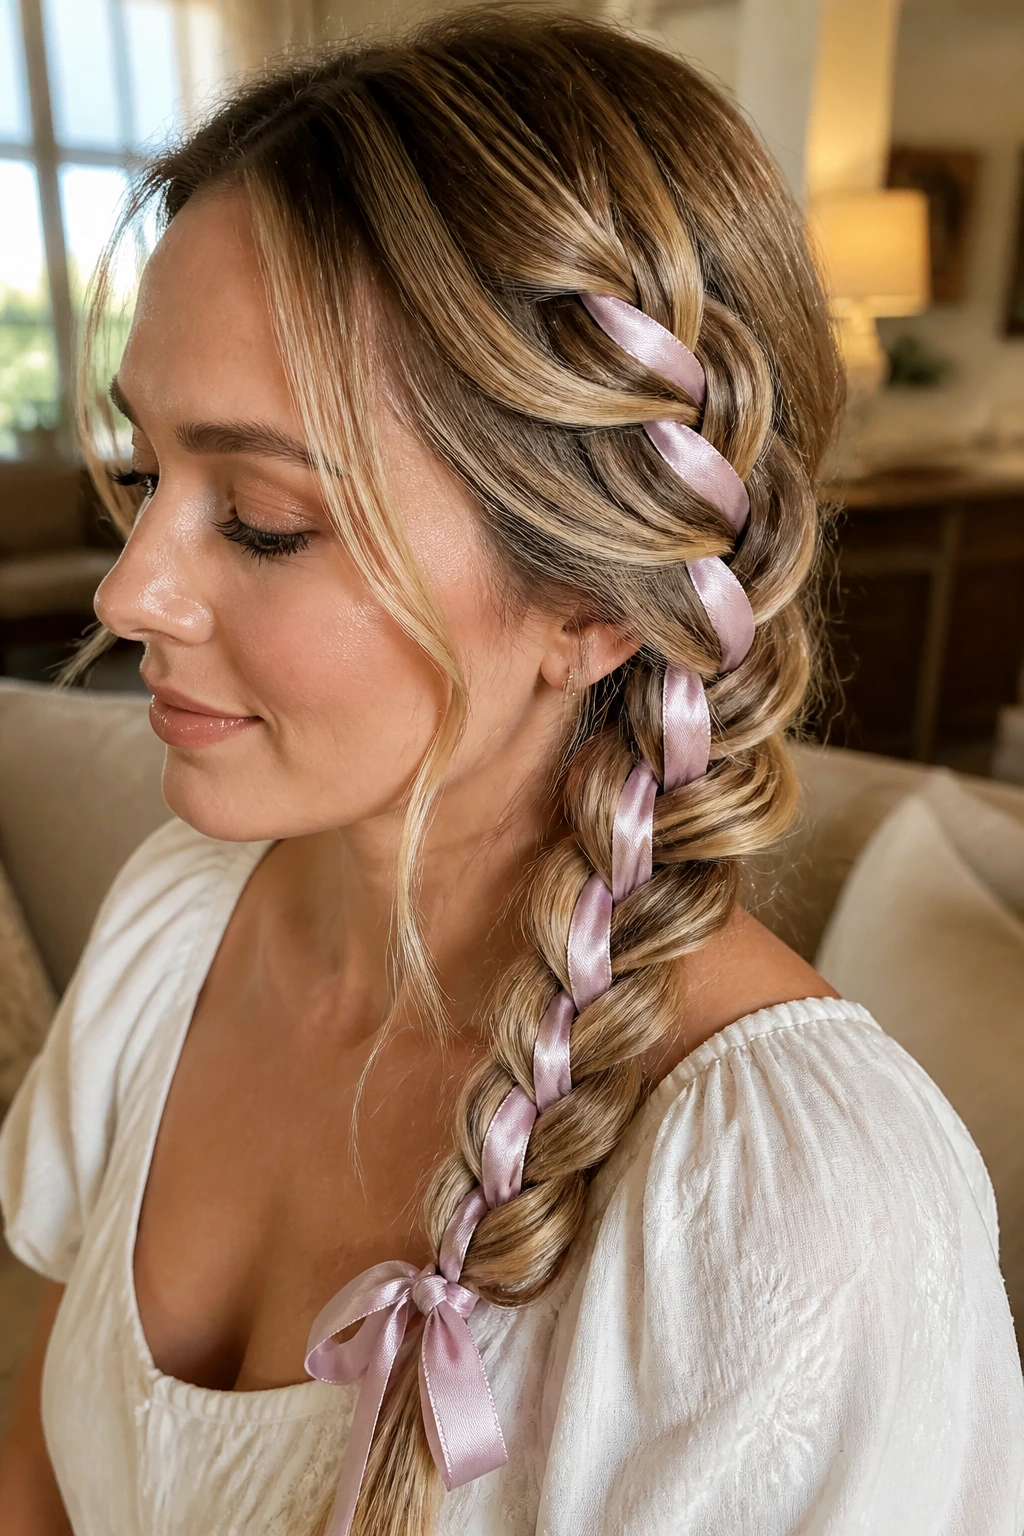
Ribbon-Woven Braid: Thread a ribbon through a side braid, ponytail braid, or milkmaid braid when you want color without adding bulk. A thin satin ribbon feels softer, while grosgrain holds shape better. I like this for events because it changes the whole look without changing the technique.
Beaded Finish: Add beads or cuffs to Fulani braids, cornrows, or simple braids when you want the ends to feel intentional. Keep the weight balanced so one side doesn’t drag more than the other. Small beads look lighter on fine hair; larger ones belong on thicker sections.
Curly-End Upgrade: Leave the ends of box braids, goddess braids, or a braided ponytail curly instead of tucking everything into a blunt finish. A little curl at the end softens the shape and keeps the braid from feeling too hard-edged.
Short-Hair Shortcut: Use crown braids, half-up braid crowns, and braided bobs when the hair stops before the chest. Small pins and tidy parting do more work here than length does, which is good news if you have a bob or lob.
Low-Tension Everyday Set: Choose larger sections, looser roots, and fewer passes if the style needs to stay comfortable all day. This adaptation is better for work, errands, or any day when you do not want to think about your hair after the first mirror check.
Side-Swept Drama: Move almost any braid to one side and the whole mood changes. Fishtails, rope braids, and mermaid braids especially benefit from the diagonal line because it gives the style movement without extra effort.
How to Keep Braids Fresh Overnight and Between Washes
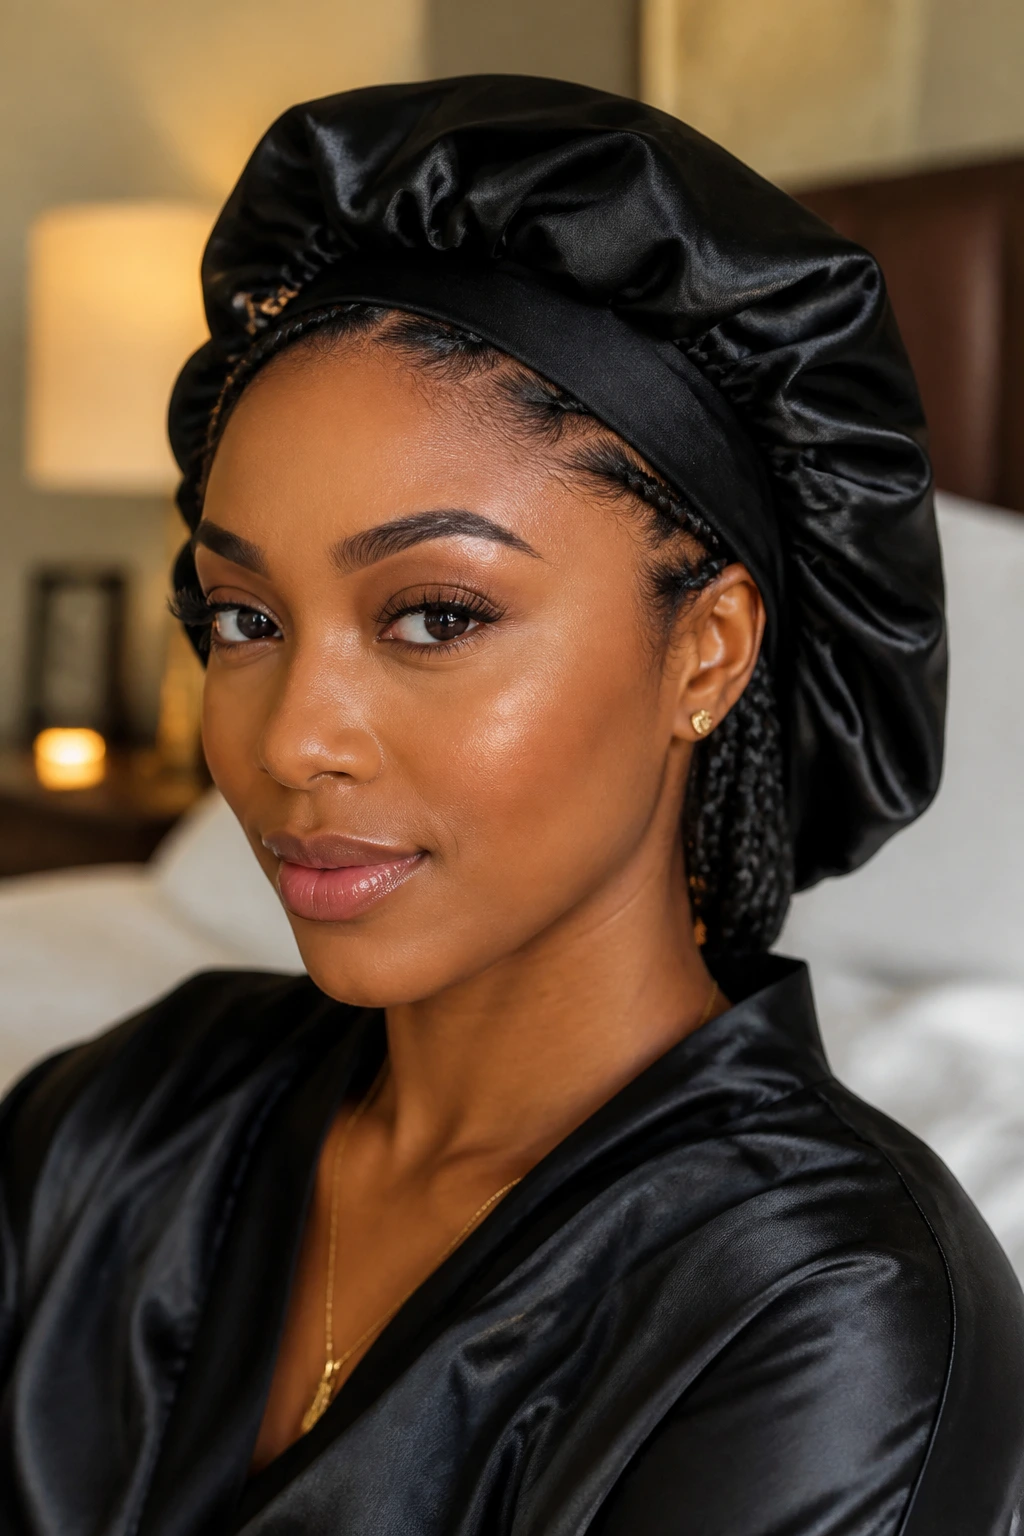
Loose braid styles usually stay neat for 1 to 3 days if you sleep with a satin scarf or bonnet. Protective styles like knotless braids, cornrows, and feed-in braids can stay in for weeks, but only if the scalp is cared for and the tension stays comfortable. If the hairline starts itching or the roots feel sore, do not try to “push through” it. That is your cue to loosen, refresh, or remove.
For overnight care, smooth the braid before bed, wrap the hair or cover it with satin, and avoid sleeping on a rough pillowcase. If the style has loose pieces — waterfall braids, mermaid braids, half-up braids — pin them lightly so they don’t get flattened into a kink. The first night matters most. If the braid survives that, the rest is easier.
For longer styles, use a small amount of scalp oil every 3 to 4 days, not every day. Too much product builds up fast and makes the roots look dusty instead of clean. A diluted scalp cleanser or gentle wash every 1 to 2 weeks keeps buildup from sitting too long. Protective braids should usually come down or get refreshed within 6 to 8 weeks, depending on hair type and how snug the install is.
Questions People Actually Ask About Braid Hairstyles for Women
Which braid lasts the longest?
Knotless box braids, feed-in cornrows, and stitch braids usually last the longest because they sit close to the scalp and hold their shape well. On loose hair, a braided ponytail or Dutch braid tends to survive the day better than a soft waterfall braid.
What braid works best on fine hair?
Pull-through braids, rope braids, and Dutch braids can give fine hair more fullness. If the hair is too slippery, add a little texture spray or mousse first so the sections stay where you put them.
Can I braid freshly washed hair?
Yes, but very clean hair can be slippery. If your strands are smooth and soft, use a little leave-in conditioner or mousse and let the hair dry partway before braiding.
Do braids damage hair?
They can if the tension is too tight or the style stays in too long. A braid that hurts the scalp, pulls at the edges, or leaves dents around the temples is too tight and needs to be redone or removed.
How do I keep braids from frizzing so fast?
Start with detangled hair, keep your hands smooth while sectioning, and sleep with a satin scarf. For loose styles, a light mist of hairspray on the finished braid helps more than heavy oil does.
Can short hair really be braided?
Absolutely. Braided bobs, crown braids, milkmaid braids, and half-up styles can all work on chin-length or shoulder-length hair with enough pins and clean parting.
What if my braid keeps coming undone at the end?
The sections may be too large, or the braid may need a tighter tie-off. Use a small elastic, hold the last few crossings firmly, and tuck the ends under if the hair is especially slippery.
How do I remove protective braids safely?
Cut the extension hair below your natural length, work slowly, and use a little oil or detangling spray as you unravel. Finger-detangle first, then comb. Rushing removal is where breakage starts.
Braids Worth Keeping in the Rotation
A good braid does more than keep hair in place. It changes how the rest of the day feels. The right one can make you look organized when your desk is not, calm when your morning was not, and a little more finished than you felt ten minutes earlier.
That’s why these braid hairstyles for women keep coming back around. Some are fast. Some are protective. Some are the sort you wear when you want the braid itself to be the main event. The point is not to master all 23. The point is to keep three or four that fit your hair, your hands, and your actual schedule.
Pick one that matches the amount of effort you can spare, then wear it until it becomes second nature. The best braid is usually the one you can do twice without swearing at the mirror.
