



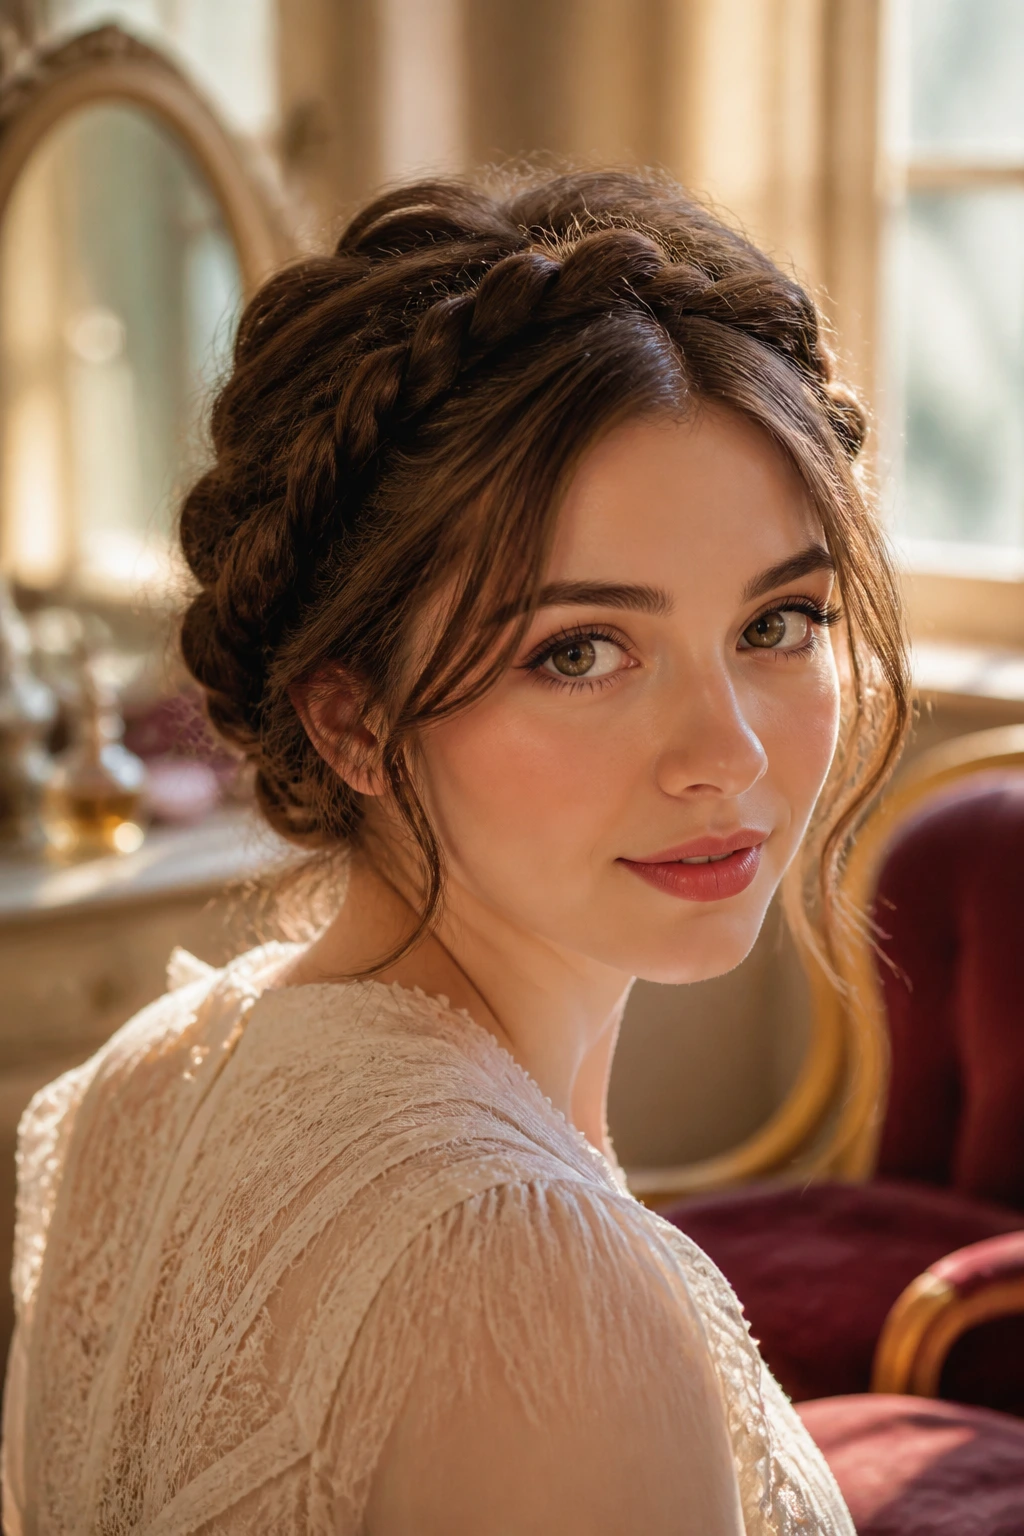
A braid can look plain in a bathroom mirror and then, with the right part, a ribbon, and a tucked end, suddenly feel like it belongs near a powder compact and a velvet chair. That shift is the whole charm of braid hairstyles with a vintage vibe. The braid pattern matters, sure, but the silhouette matters more: a clean side part, a little lift at the crown, a low tuck at the nape, a barrette that looks like it has a story.
The best retro-inspired braids borrow from eras that understood shape. They don’t scream for attention. They sit neatly, frame the face, and make room for the details that actually sell the look — pearl pins, satin scarves, combs, ribbons, even a single wave dropped loose near the temple. That’s why these styles still hold up on straight hair, curls, coils, relaxed hair, and locs. The architecture changes. The mood stays.
And there’s a practical side to that nostalgia, too. A well-placed braid can hide a rough wash day, tame grown-out layers, and give you polish without asking for a hot tool marathon. The styles below range from screen-star soft to pin-up sharp, with enough variation that you can borrow the decade you want and leave the rest behind.
Why You’ll Love This Collection
-
Face-framing shape: These styles put the braid where the eye sees it first, so even a simple plait feels intentional instead of accidental.
-
Accessory-friendly: A ribbon, pearl clip, scarf, or comb changes the mood fast, and you do not need a drawer full of extras to make that happen.
-
Works across hair types: Loose braids, tucked buns, crown styles, and loc-friendly shapes all show up here, with notes on how to adjust the tension and finish.
-
Gentler than constant heat: A braid set, a clean part, and a little product can give you shape without leaning on curling irons or flat irons every time.
-
Easy to dress up or down: The same braid can look like a weekday style with plain elastics and then shift into old-Hollywood territory with a glossy finish and one good pin.
-
Built for real life: These looks can hide frizz, stretch a wash day, and still read polished under a hat, veil, or scarf.
1. Milkmaid Braid With Soft Face Pieces
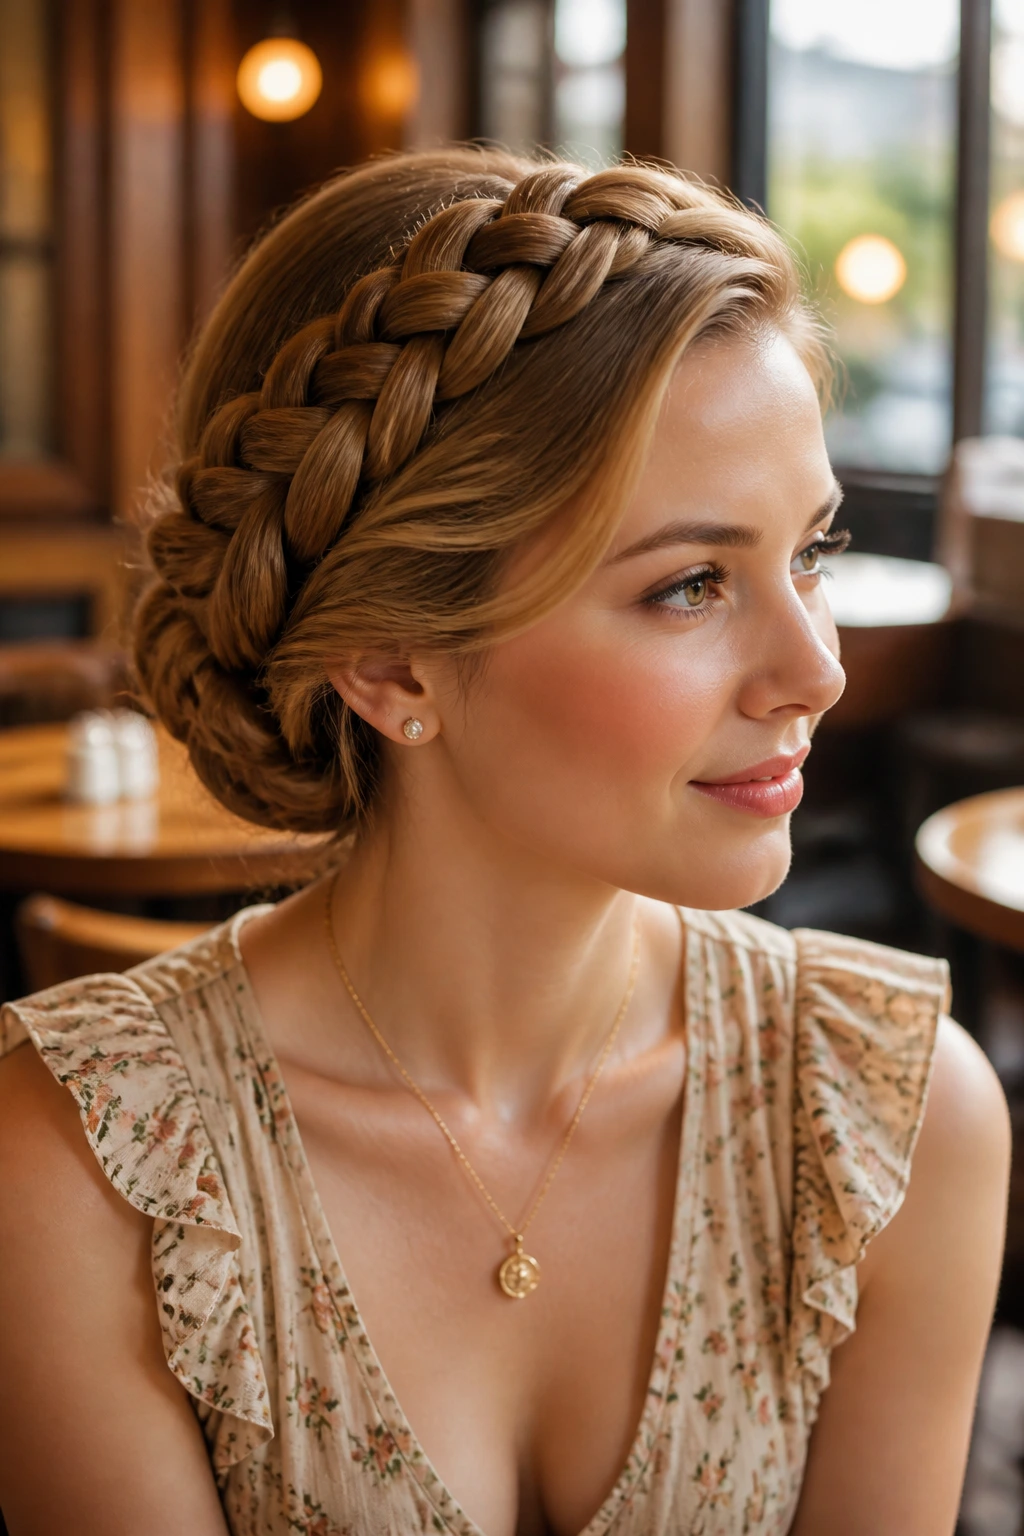
A milkmaid braid gets its vintage charm from the shape alone. The braids wrap across the crown like a soft halo, but the version that feels most flattering leaves a few face pieces loose instead of pulling everything tight. That little bit of softness keeps it from reading costume-y.
I like this on medium to long hair, especially when the hair has a bit of grip. If your strands are slippery, a mist of dry shampoo at the roots helps the braid hold its line. Pull the braids outward slightly once they’re pinned, not too much, just enough to thicken the shape and keep the crown from looking flat.
2. Side-Swept Crown Braid
A deep side part changes the whole story. Instead of the braid sitting centered and sweet, it sweeps across the forehead and curves back toward the nape, which gives it a more screen-star, 1930s feel. The asymmetry is the trick.
This works especially well when the front is smooth and the braid itself has a little width. Use a rat-tail comb to make the part clean, then braid loosely enough that the texture shows. A slim decorative comb tucked above one ear is enough; you do not need much else.
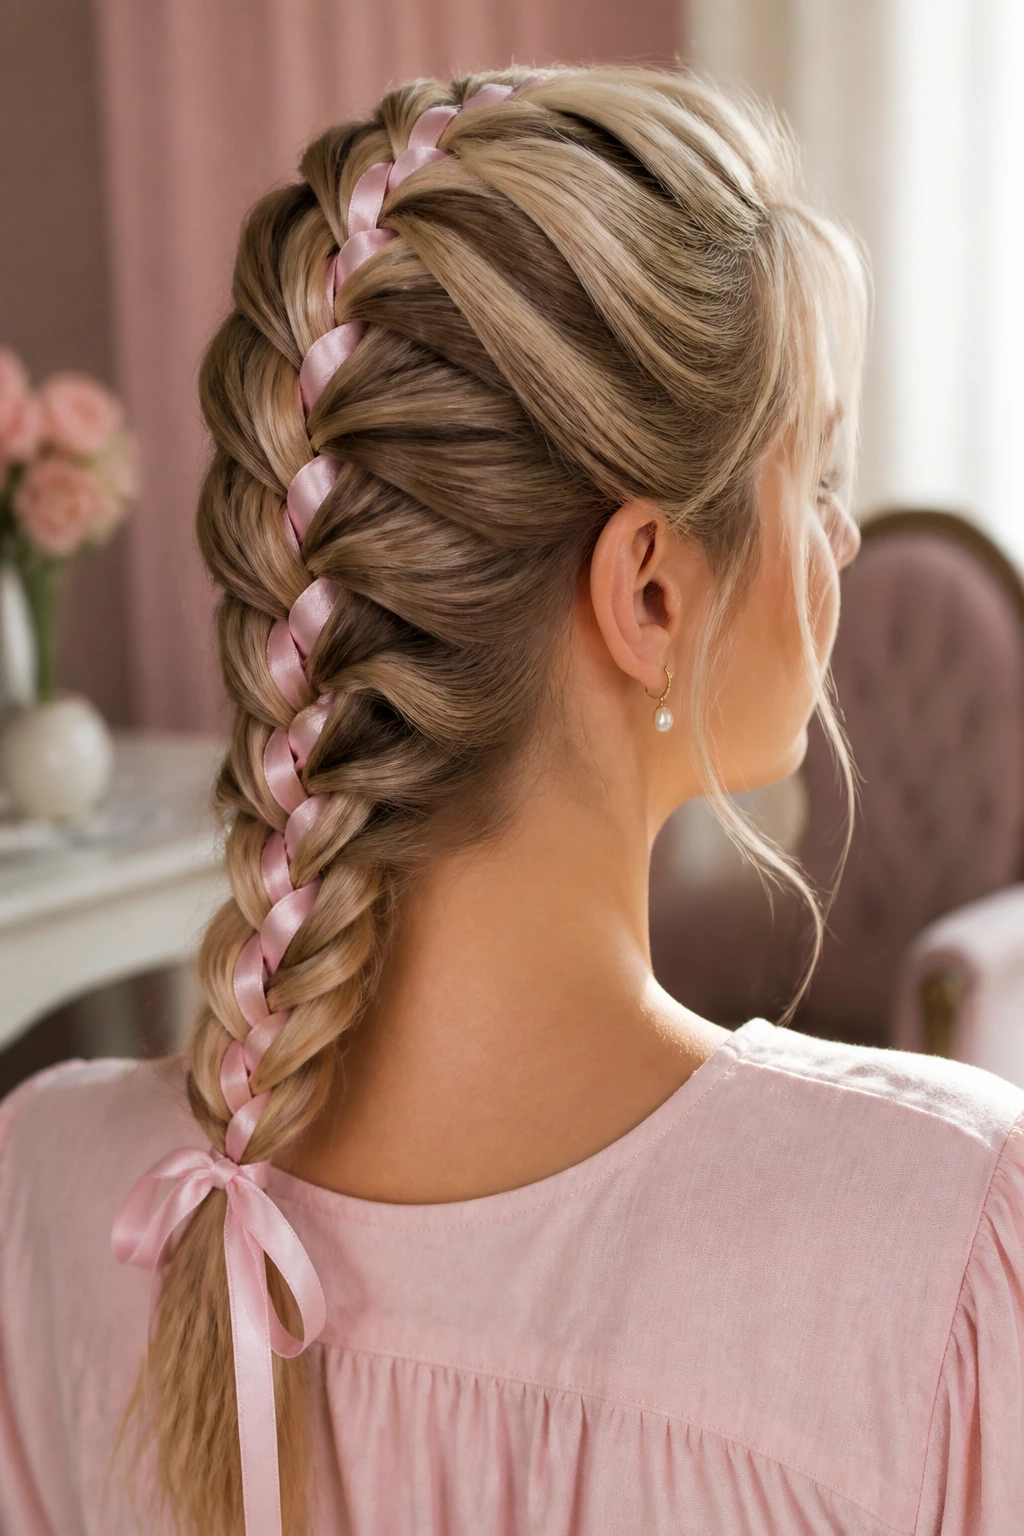
3. Ribbon-Woven French Braid
If you want one move that instantly pushes a braid into retro territory, weave in a ribbon. Not a giant craft-store bow. A narrow satin ribbon in black, ivory, red, or a color pulled from your outfit does the job better.
Keep the braid neat at the scalp and let the ribbon peek through at regular intervals. That little rhythm looks deliberate and polished. Best of all, it works on straight, wavy, or stretched curly hair, and the ribbon can be tied at the nape or left in long tails for a more playful finish.
4. Victory Rolls and a Braided Bun
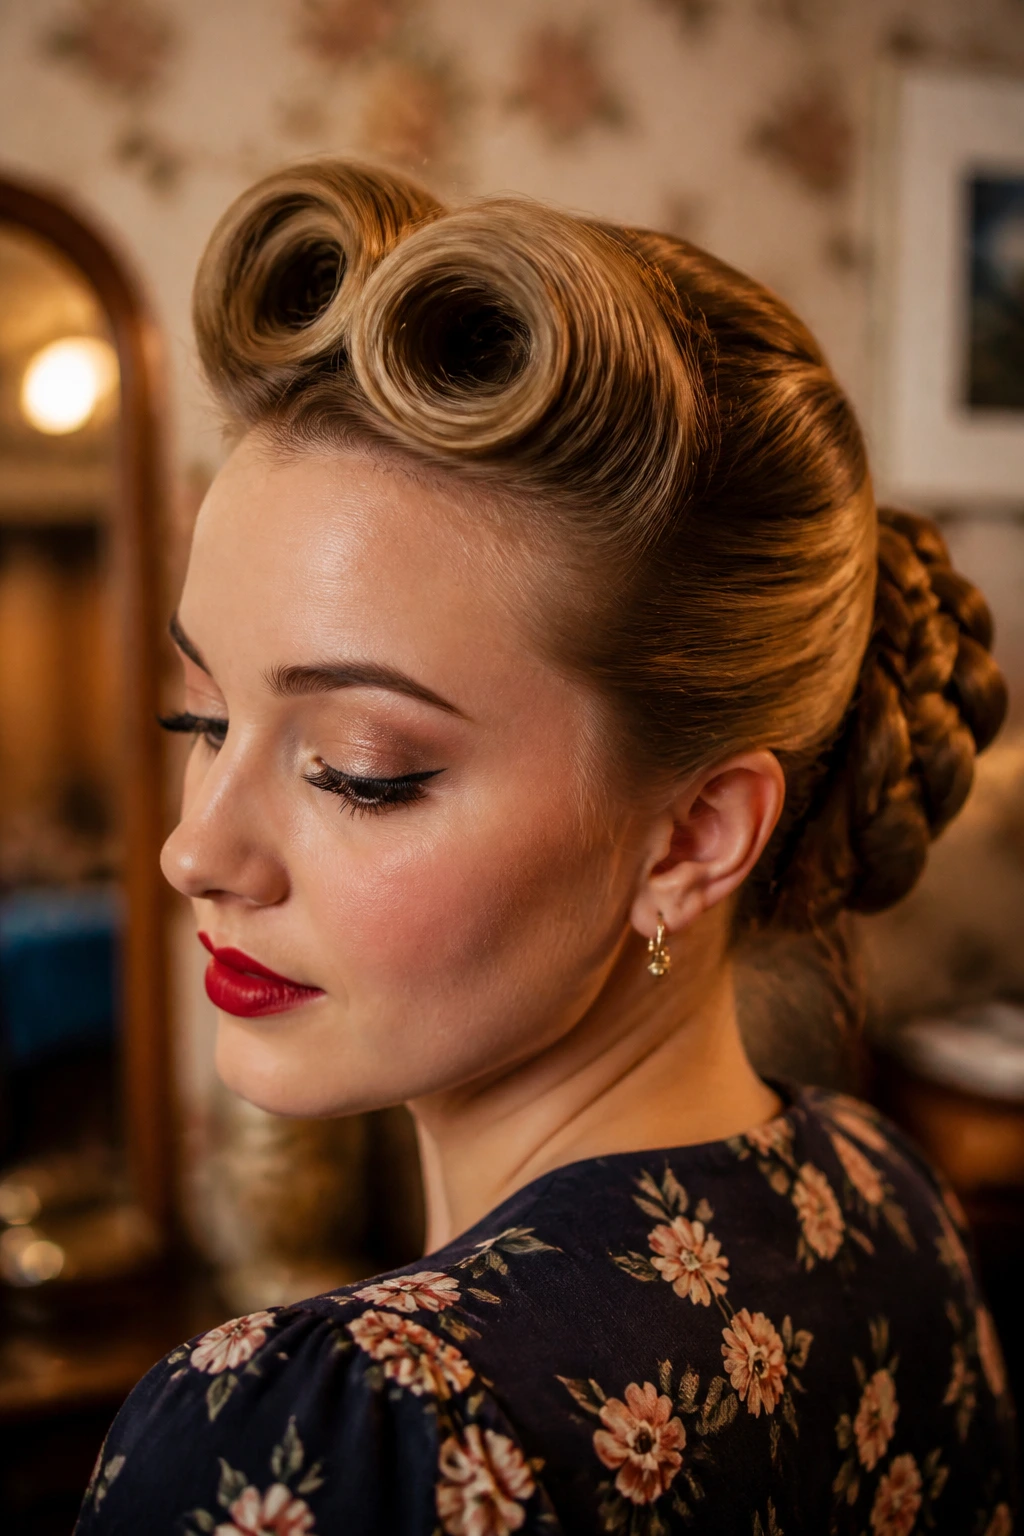
This is the one that announces pin-up before you say a word. Victory rolls at the front give you height and curve, while a braided bun at the back keeps the shape clean and finished. It’s a strong look for events, photos, or any day you want the hair to do some talking.
The front needs structure. Use setting mousse or a light foam, then roll the hair inward and pin it flat. The braid at the back should sit low and compact so the whole style doesn’t tip into overdone territory. One good pin-up style is enough. You don’t need five.
5. Braided Low Chignon
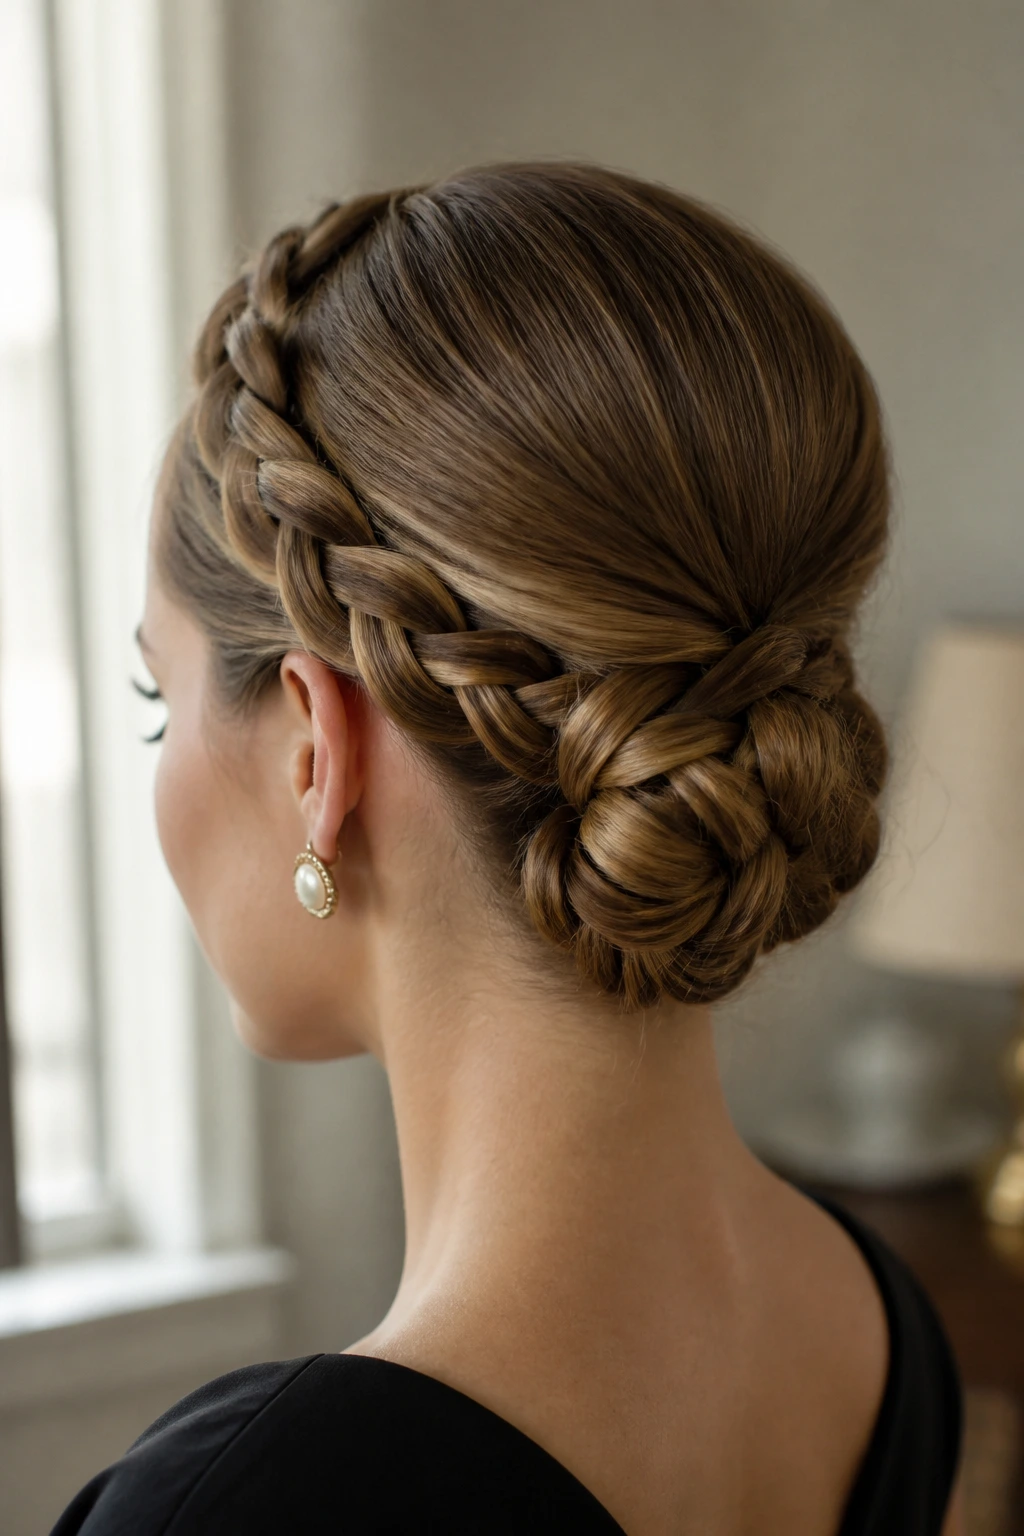
The low chignon is the quietest style in this group, but it may be the most dependable. A braid folded into a nape-level knot feels polished without being fussy, and it gives off that mid-century dinner-party air that never really goes out of style.
I reach for this when the hair is a little worn at the ends but still clean at the roots. Smooth the top with a small amount of cream, braid the length, then coil it into a low knot and pin it from underneath. Pearl pins work here, but one strong gold pin is enough too. Less often reads better.
6. Fishtail Halo Braid
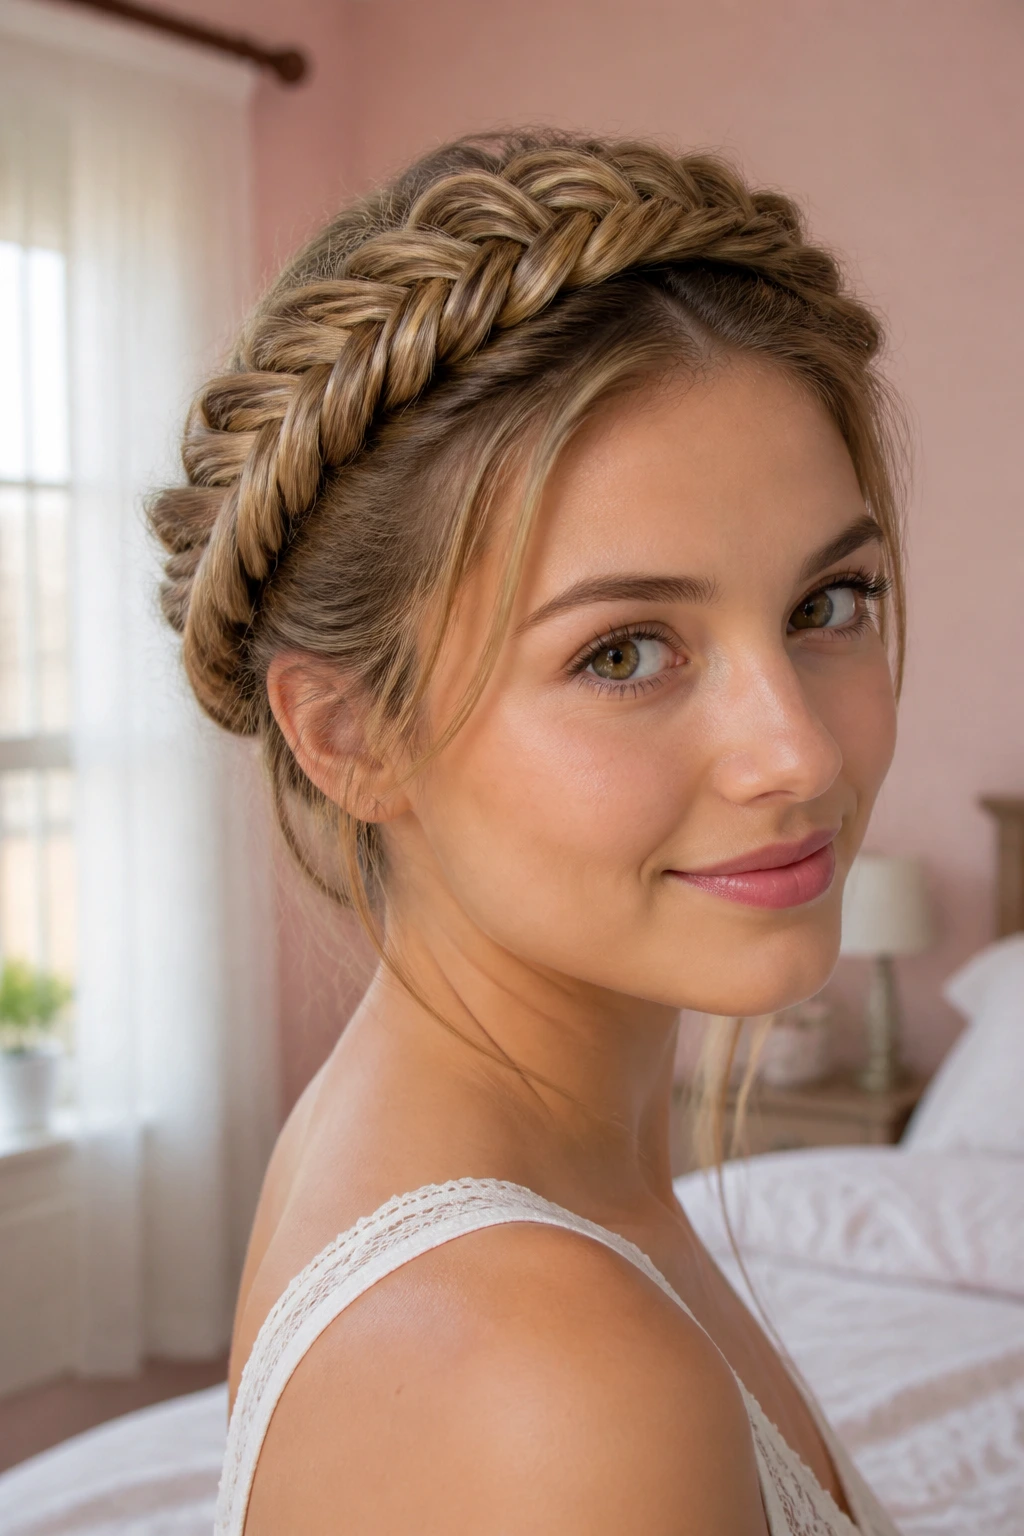
A fishtail braid brings texture, and when you wrap it around the head like a halo, the whole look turns softer and more detailed. It has a slightly old-world feel, almost like a braided wreath worn with better lighting.
This one loves fine or medium hair because the weave creates the illusion of density. Pancake the braid gently by pulling the outer loops apart after you finish. Do it slowly. If you tug hard, the shape goes fuzzy fast, and the braid loses the crisp edge that makes it look intentional.
7. Rope-Twist Faux Bob With a Deep Side Part
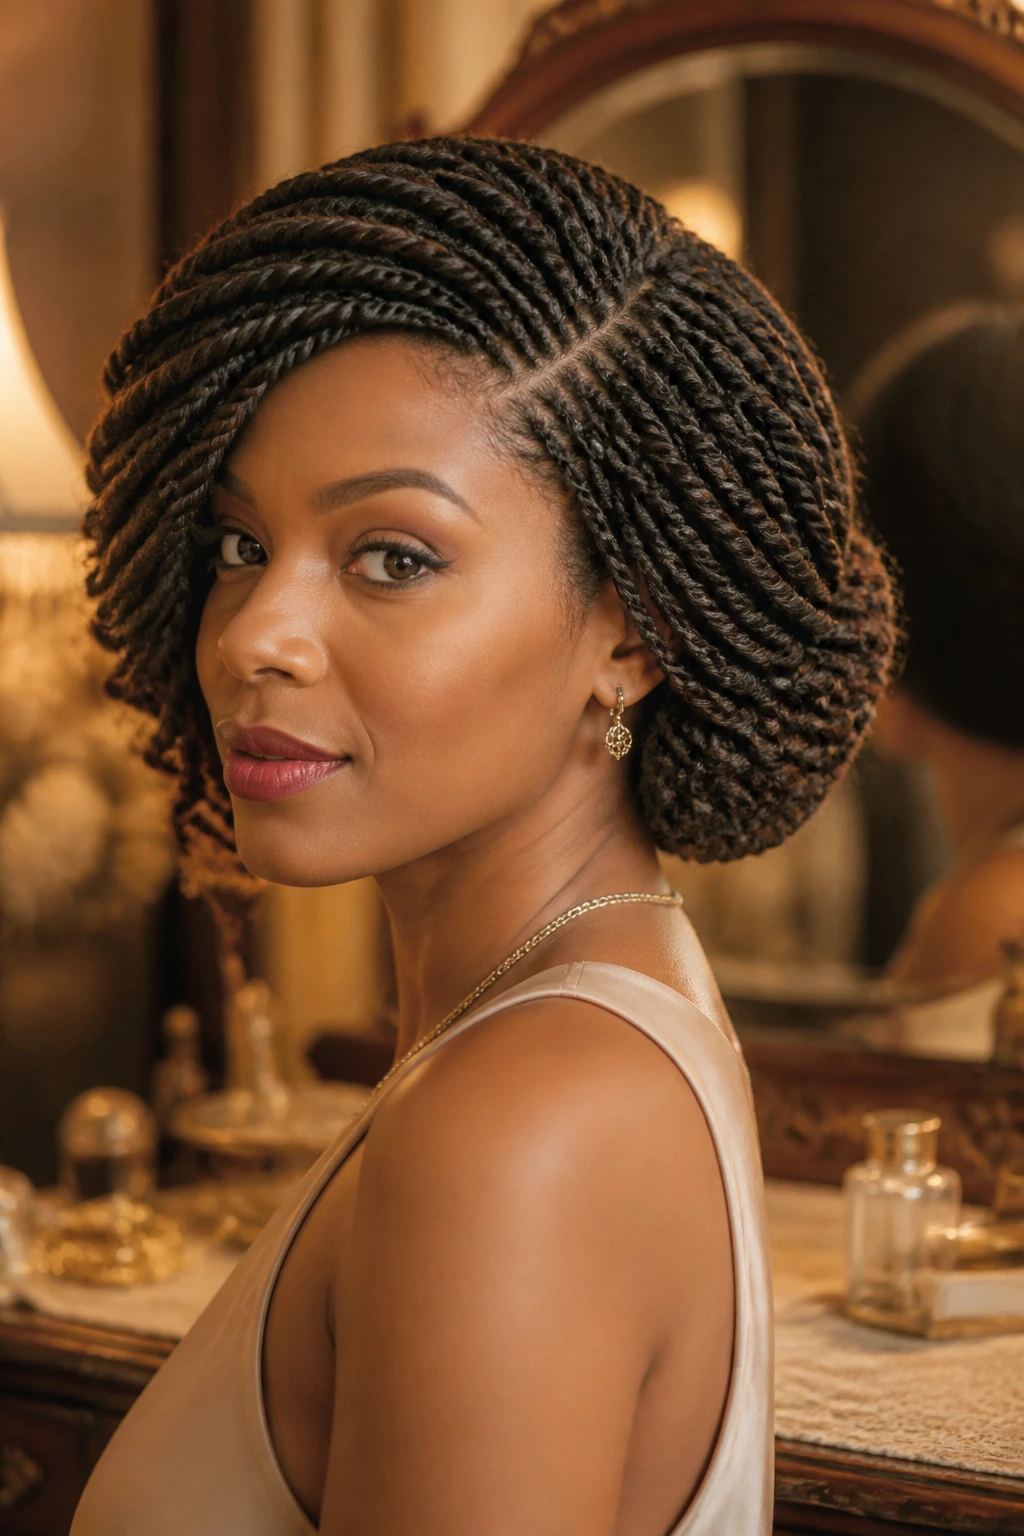
Short hair without the haircut. That’s the charm here. Rope twists tucked under at the nape can fake a bob shape, especially when the front is parted deeply and allowed to skim the cheekbones.
This is a smart option for shoulder-length hair that you want to wear up without looking like you simply pinned it back. The twists should sit close to the head, not puff out. Use hidden bobby pins in the same shade as your hair, and let the ends disappear under the tuck. The result reads 1920s in the best way — neat, chic, and a little theatrical.
8. Braided Pompadour Updo
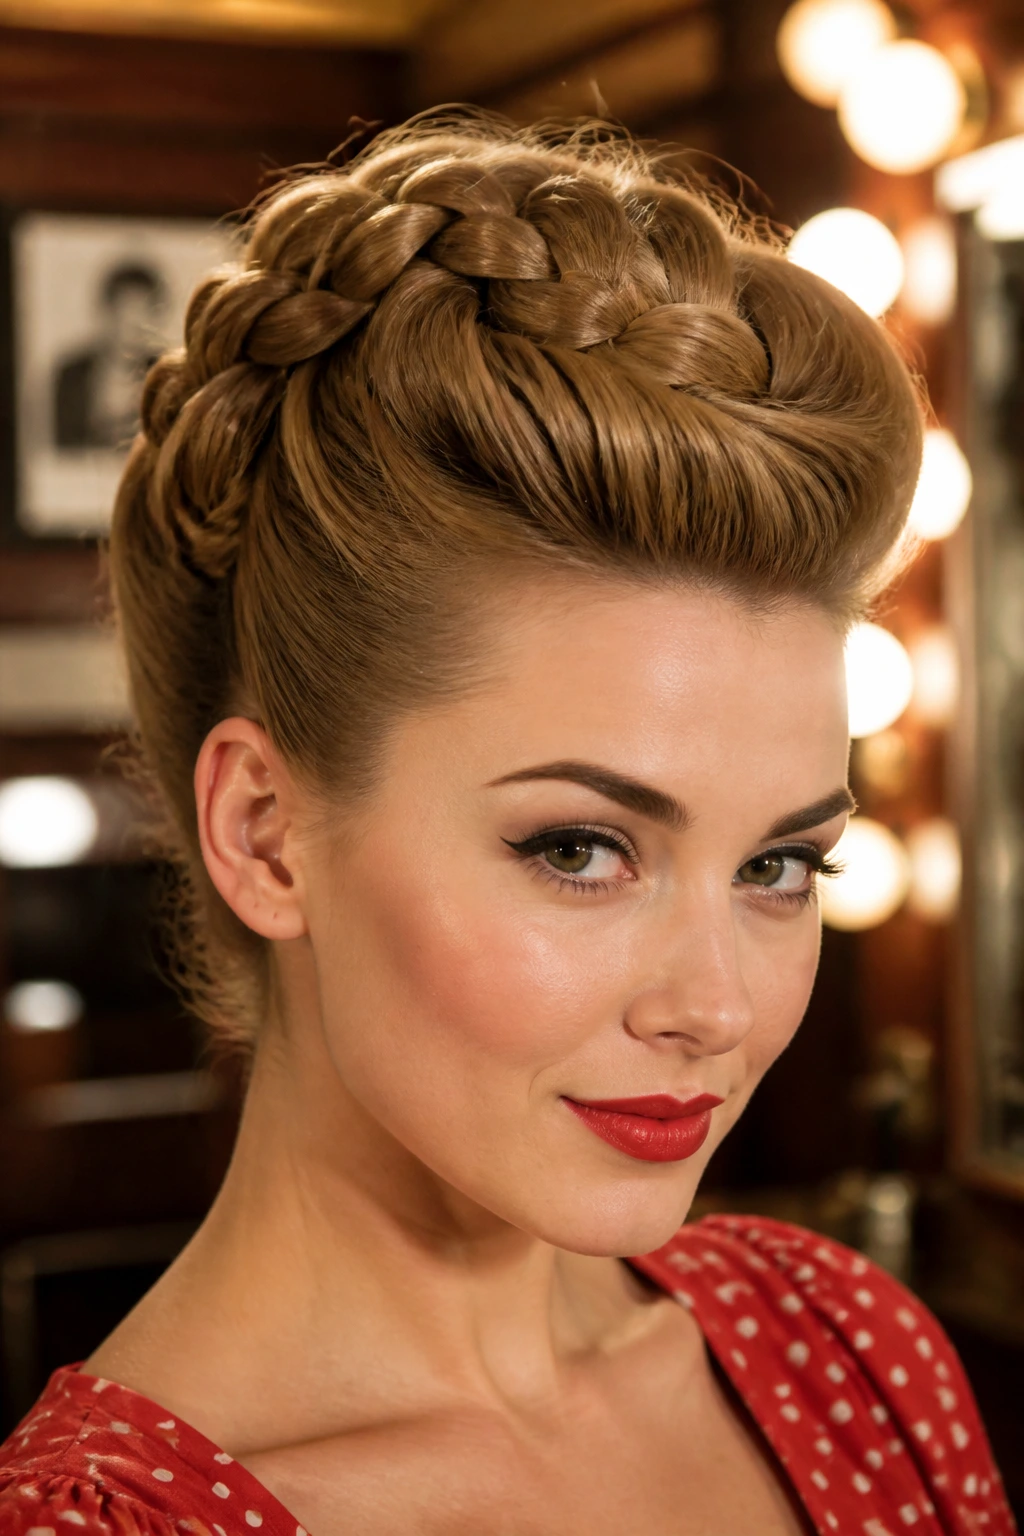
A braided pompadour is all about lift. The front rises away from the forehead, the braid feeds back, and the whole style lands in a sculpted updo that feels halfway between 1940s glamour and later rockabilly polish.
This style needs height at the crown, so don’t flatten it with heavy cream. A little mousse, some teasing at the roots, and a firm pinning hand are the real tools here. Keep the sides sleek. If the front gets too wide, the whole thing starts to look bulky instead of shaped.
9. Scarf-Tied Side Braid
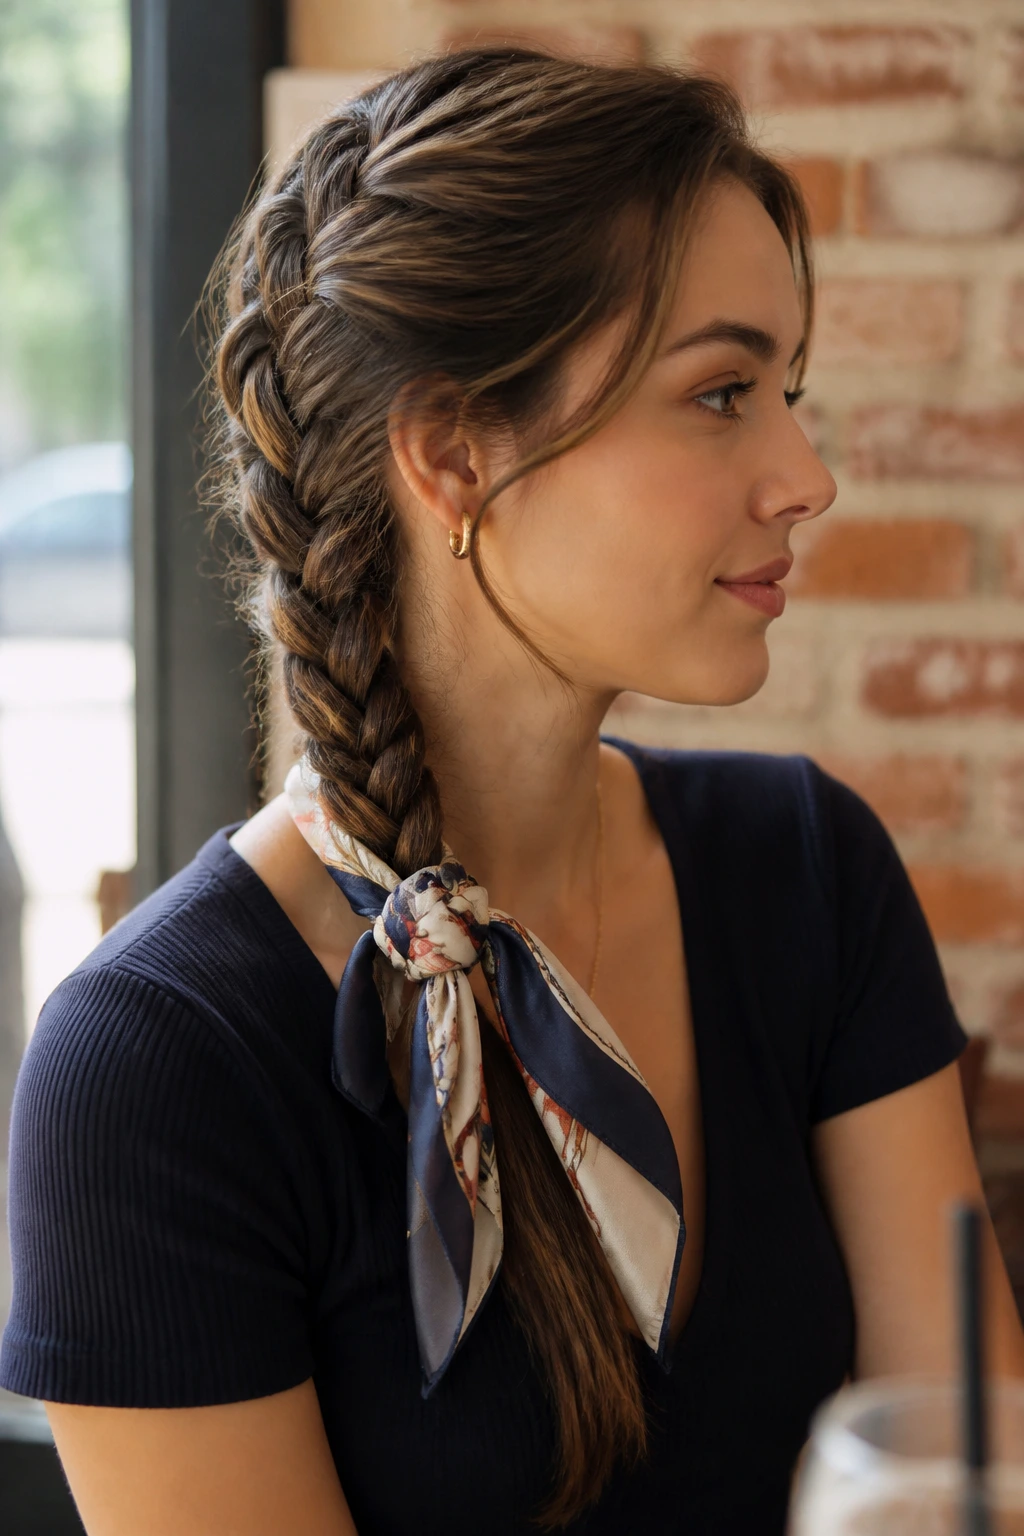
A scarf turns a simple side braid into something with actual personality. Tie it at the end, weave it through the braid, or wrap it around the base near the shoulder. Any of those choices works, but I prefer the one that lets the fabric trail a little.
This has a cheerful 1950s road-trip feel without needing much effort. A silk or satin scarf slides better than a stiff cotton one, and it sits flatter against the hair. If your braid is thick, keep the scarf narrow. Too much fabric and the whole thing starts fighting itself.
10. Double Dutch Braids With Curled Ends
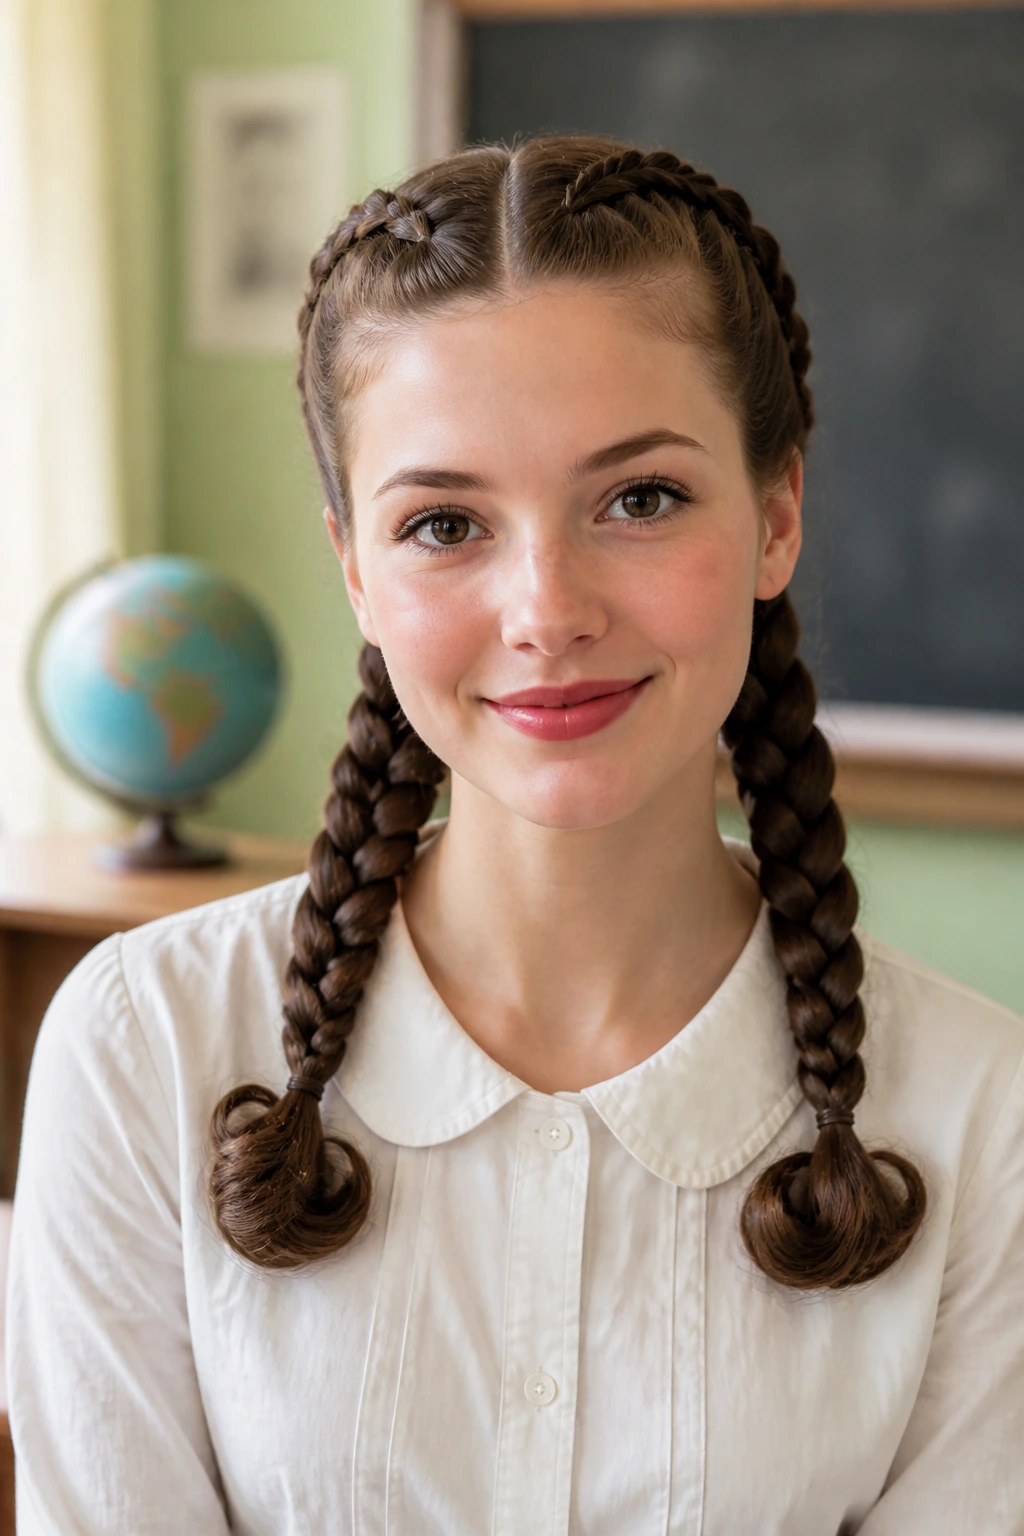
Double Dutch braids can look sporty, which is fine, but the vintage version needs a softer finish. Keep the parts crisp, braid close to the scalp, and curl or bend the ends so the style doesn’t stop dead at the elastics.
That little curve at the end changes the mood. It gives the braids a more old-school, school-photo, sock-hop feel. If your hair is blunt-cut, that matters even more because the ends are what the eye notices last. A clear elastic and a light mist of hairspray are enough to hold the shape.
11. Braided Gibson Tuck
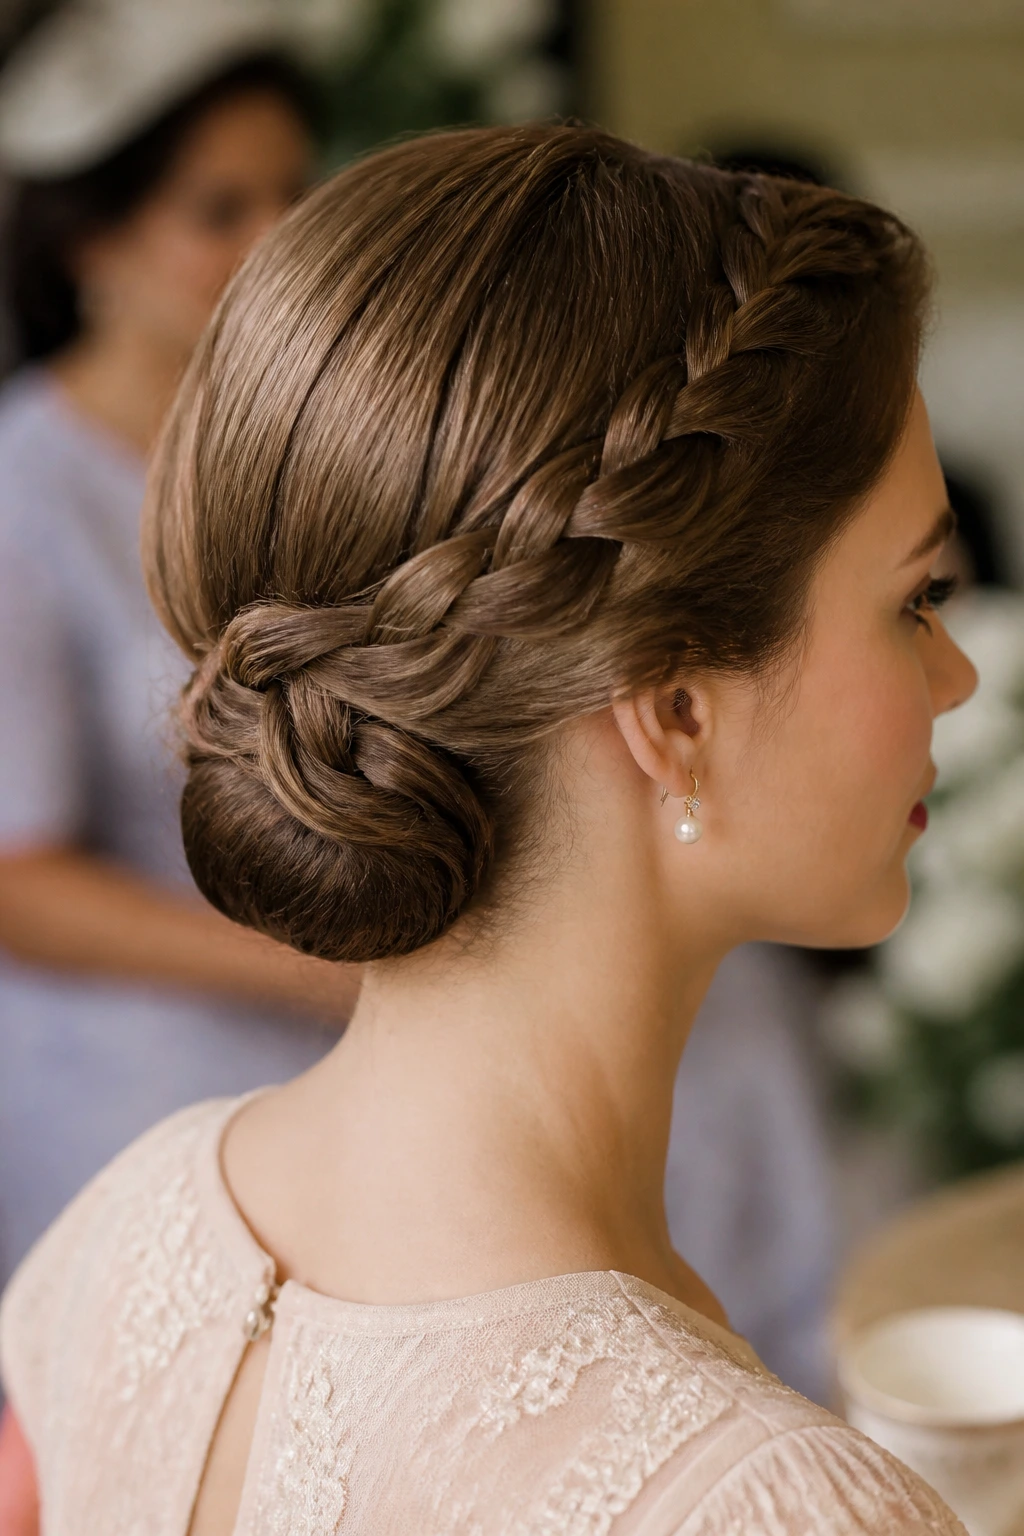
The Gibson tuck is one of those styles that looks much harder than it is. A braid disappears into the nape, creating a soft rolled shape that nods to Edwardian hair but still works with a plain blouse or a formal dress.
The key is the smoothness of the top and the neatness of the tuck. If the roots are puffy, the style loses its refined feel. Stretch the hair first if needed, braid the length, then fold the braid inward and pin it low and flat. It is a lovely choice when you want vintage without volume sitting on top of your head.
12. Loop-Pinned Braid Bun
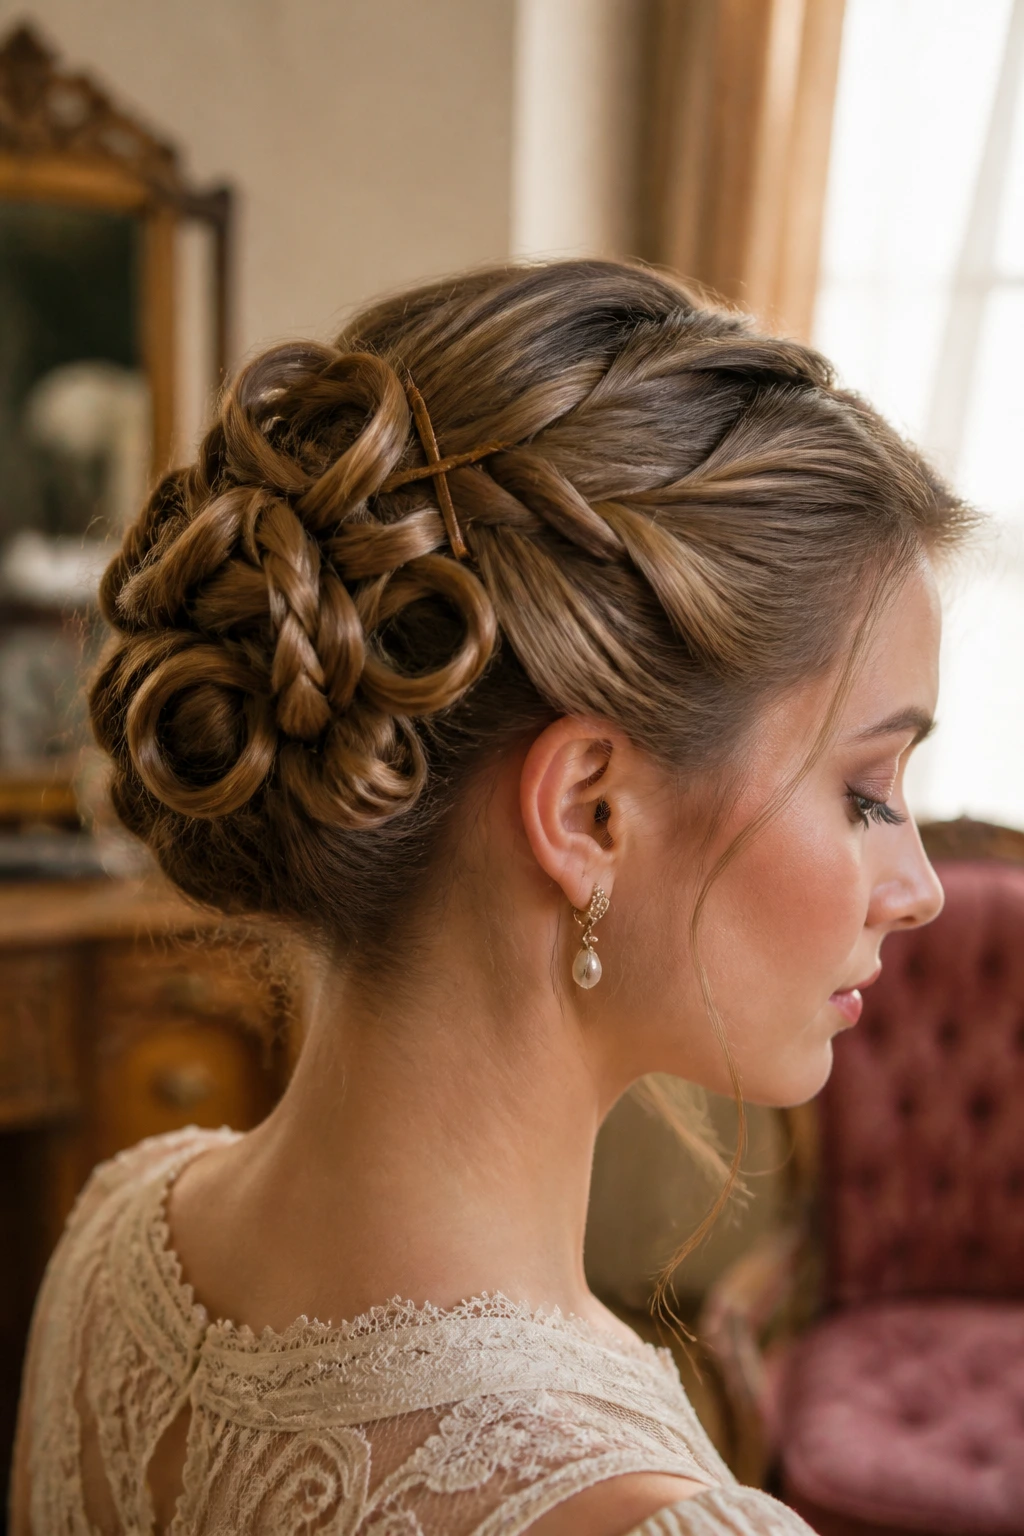
Looped braid buns have a little quiet drama. Instead of making one round knot, you fold sections of the braid into soft loops and pin them so the woven texture stays visible. That gives the style a 1930s tea-room elegance.
This is a good one for medium hair because the loops create the illusion of fullness. Use crossed bobby pins so the bun doesn’t sag by midday. The finish should feel airy, not sprayed into a shell. Leave the texture visible. That’s what makes it interesting.
13. Braided Bang With Loose Waves
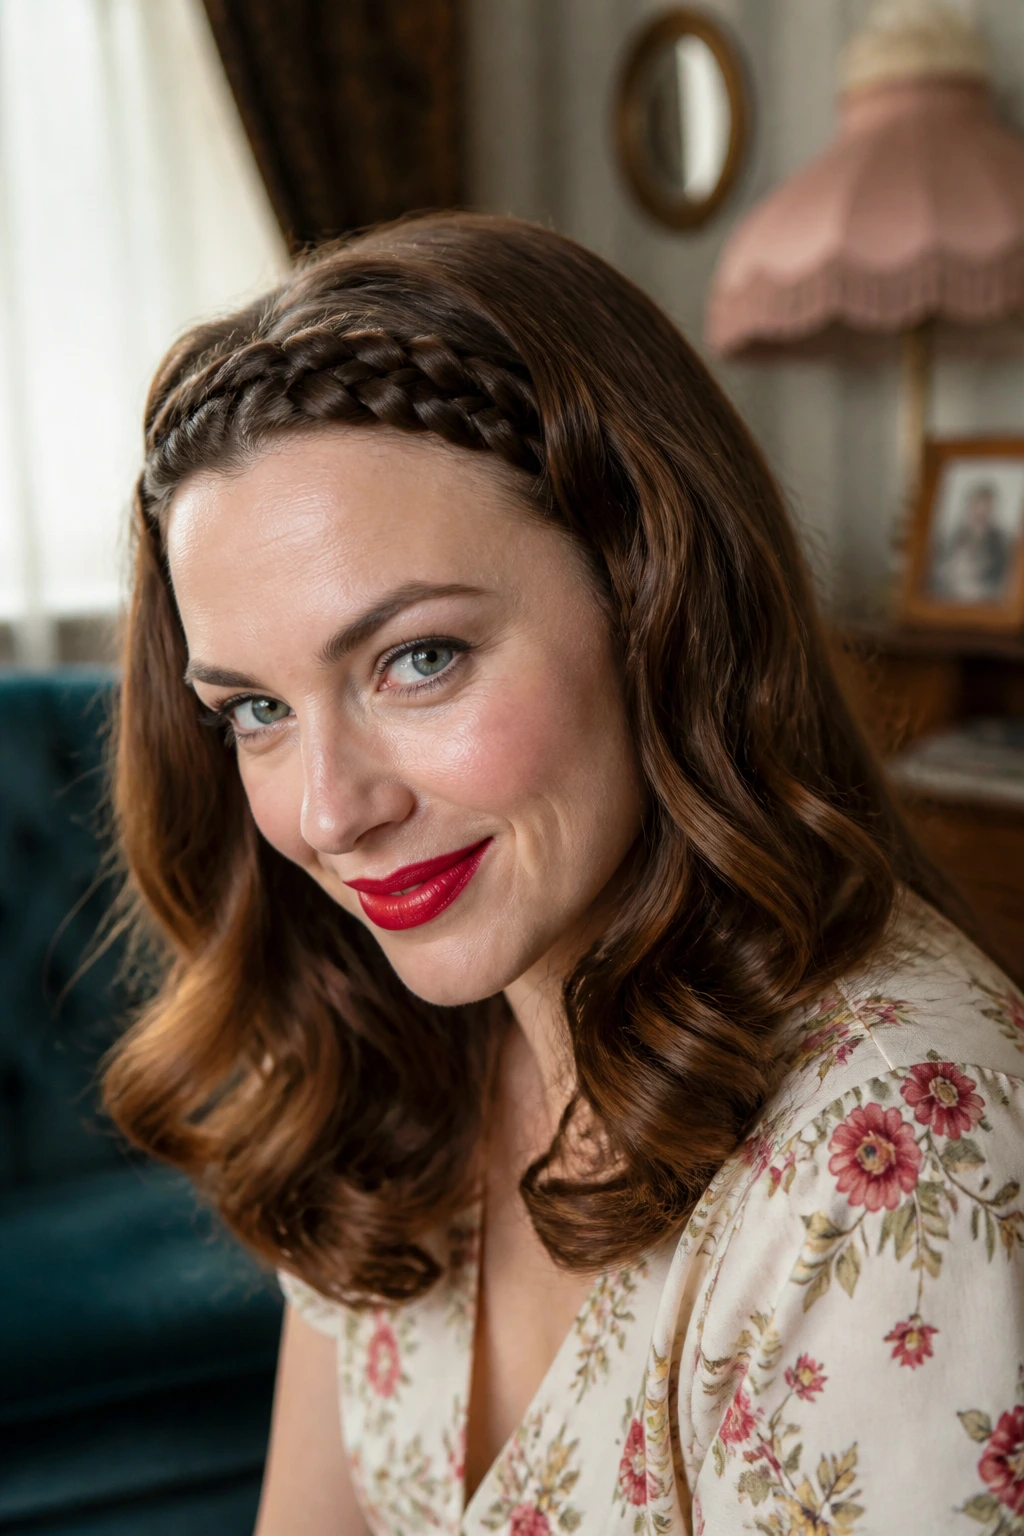
A braid across the front hairline can do more than keep hair out of your face. When the rest of the hair falls in loose waves, the braid acts like a frame, and the style ends up with a very wearable pin-up feel.
I like this when someone wants a retro detail without committing to a full updo. Keep the braid small and close to the part, then brush the rest into soft waves or bends. If your hair is very straight, a large-barrel iron or a set overnight gives the look more dimension. Without that movement, the braid can feel disconnected from the rest of the hair.
14. Basket-Weave Half-Up
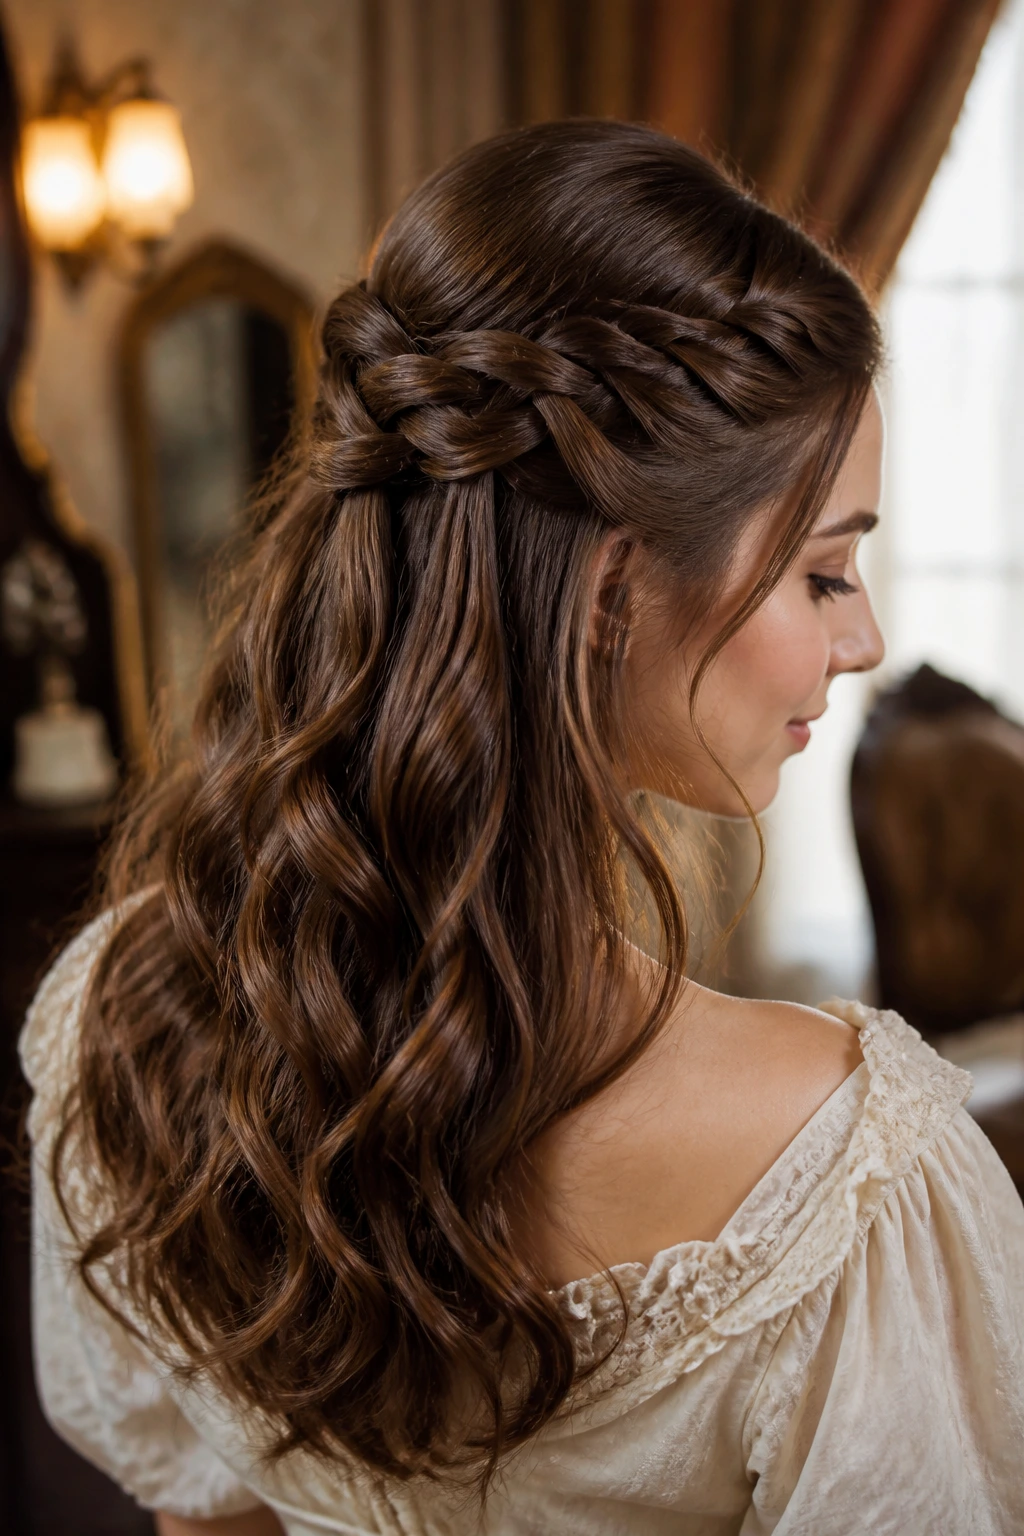
Basket-weave styling looks fancy because the crossing pattern does most of the work. Two or more braid sections cross over one another in a half-up shape, leaving the rest of the hair loose. It’s a nice bridge between formal and easygoing.
This one has Victorian and prom-night energy at the same time, which sounds like a strange combination until you see it on the head. The trick is to keep the crossing points tidy and the loose hair soft. A deep side part helps keep it from feeling too young or too precious.
15. Pin-Up Pigtail Braids
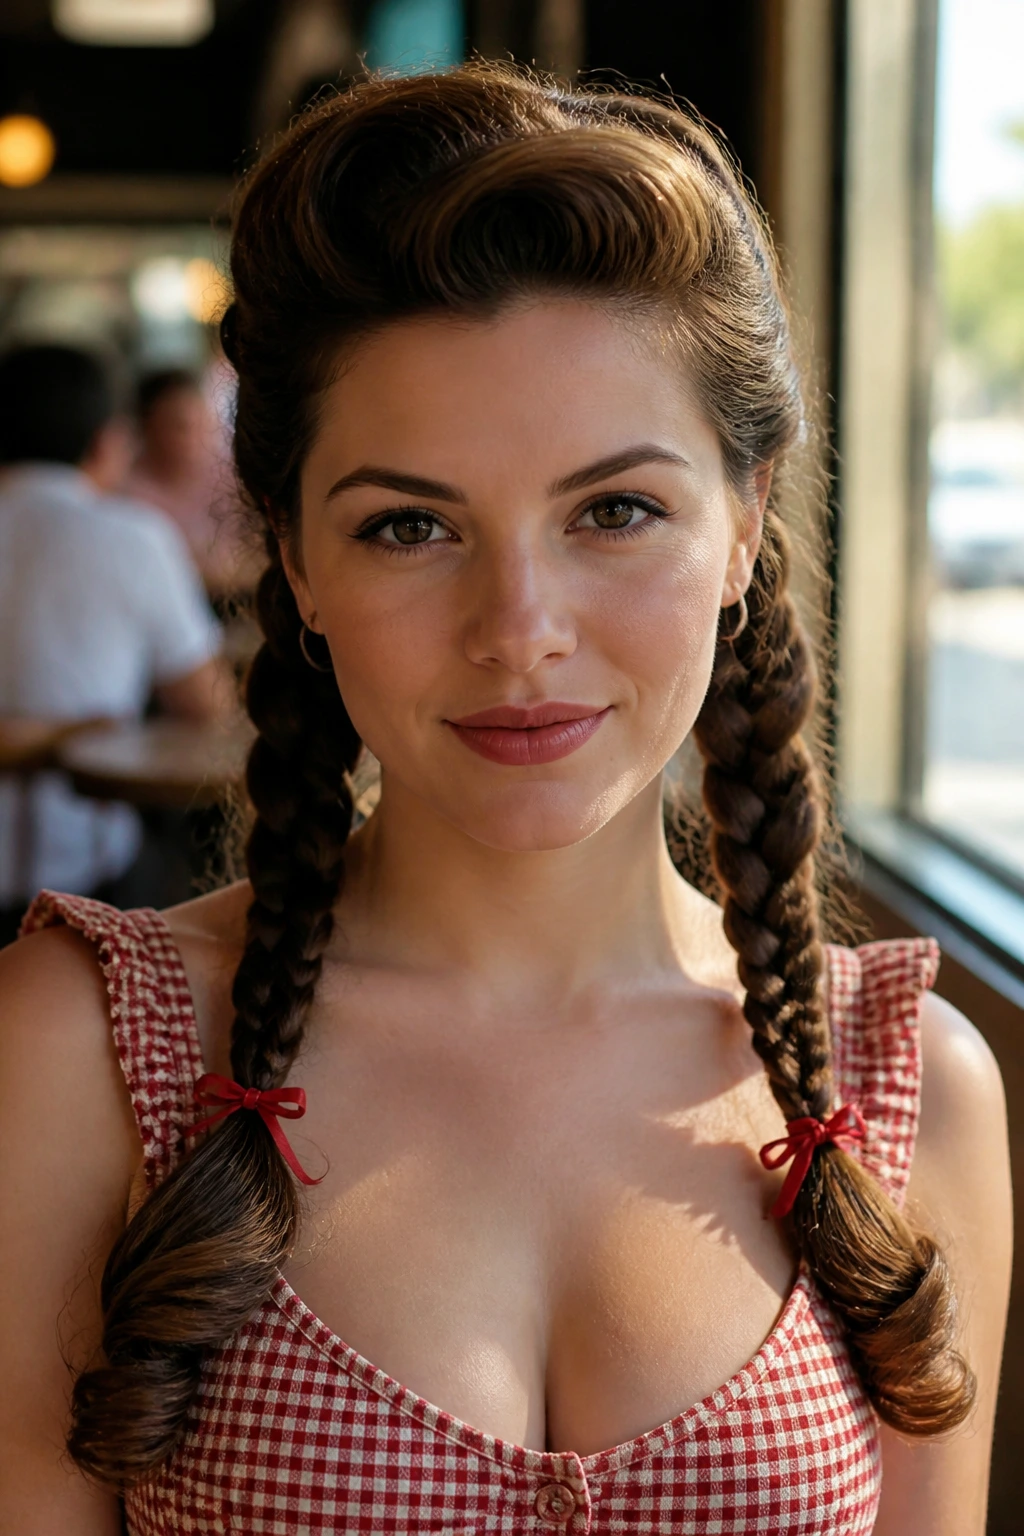
Pigtail braids can look childish if they’re tiny and tight. Make them fuller, keep the parts clean, and add a little curl or bend at the ends, and the whole thing shifts into retro territory fast.
This is a good daytime style when you want something playful but not messy. Narrow ribbon bows or slim elastics at the ends help. I’d skip oversized scrunchies here. They overwhelm the shape and drag the look out of the era you’re aiming for.
16. Old-Hollywood Side Braid
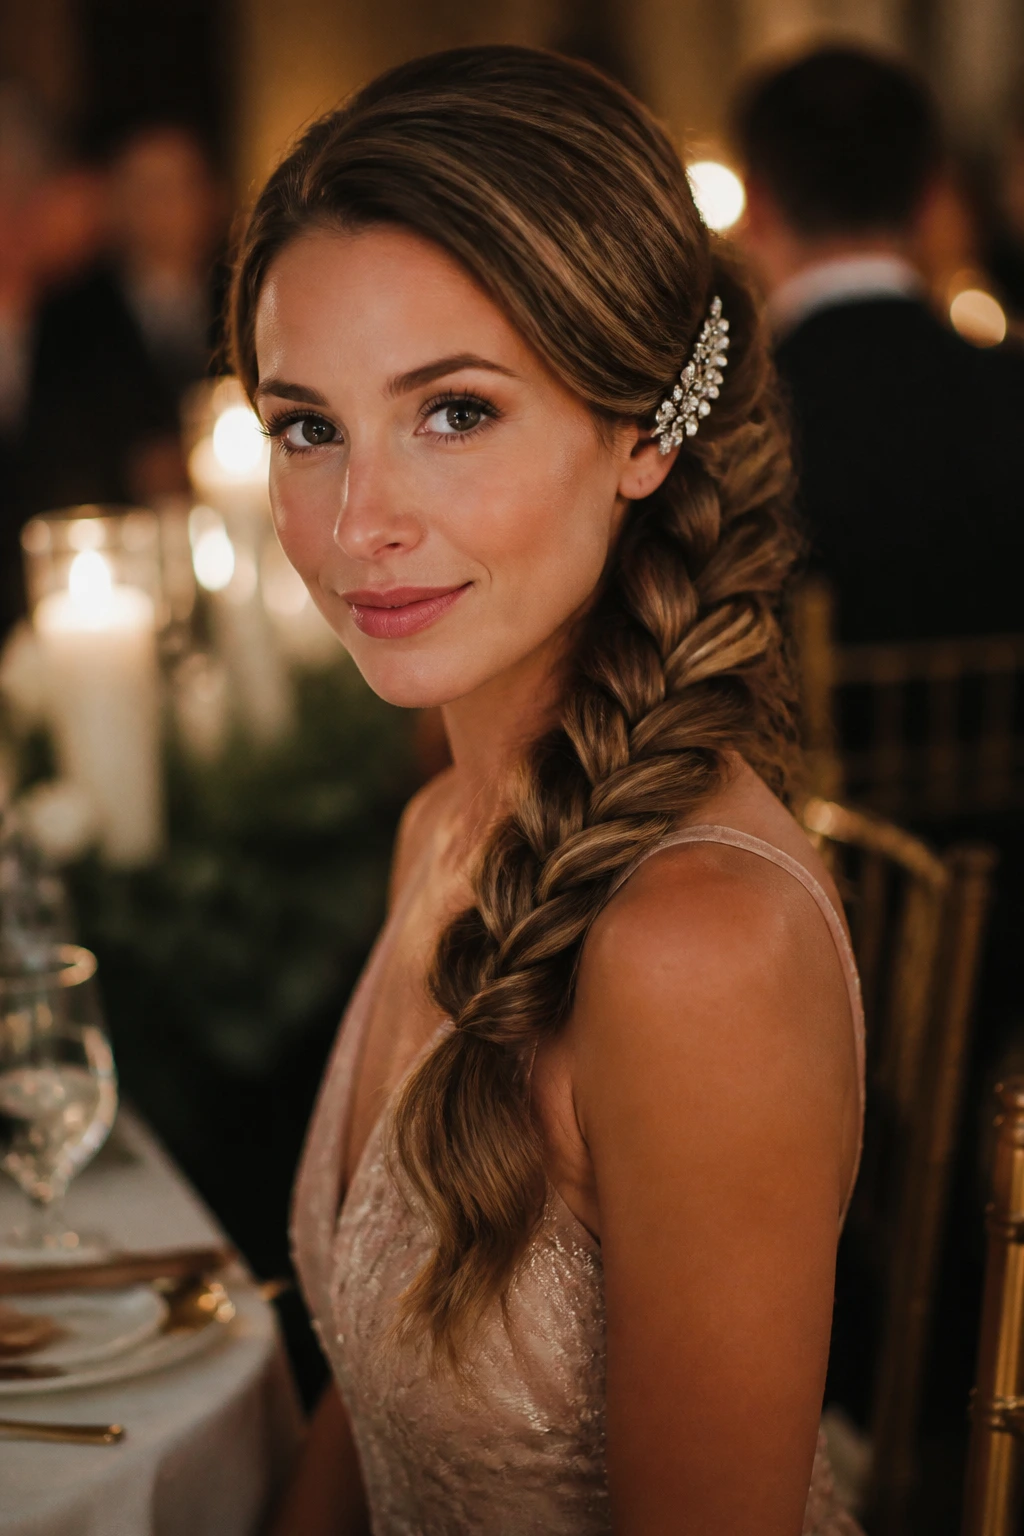
A side braid becomes glamorous when the front stays smooth and the braid lands over one shoulder like it knows exactly where the camera is. The look feels especially good with glossy hair and one decorative clip near the ear.
This is a style I’d choose for a formal dinner or a wedding guest look. Pull a little volume into the crown first, then braid loosely enough that the weave has shape. The end should soften, not stick out like a tail. If you want the braid to read more vintage, tuck the elastic under a wrapped section of hair and hide it.
17. Braided Ponytail With Rolled Ends
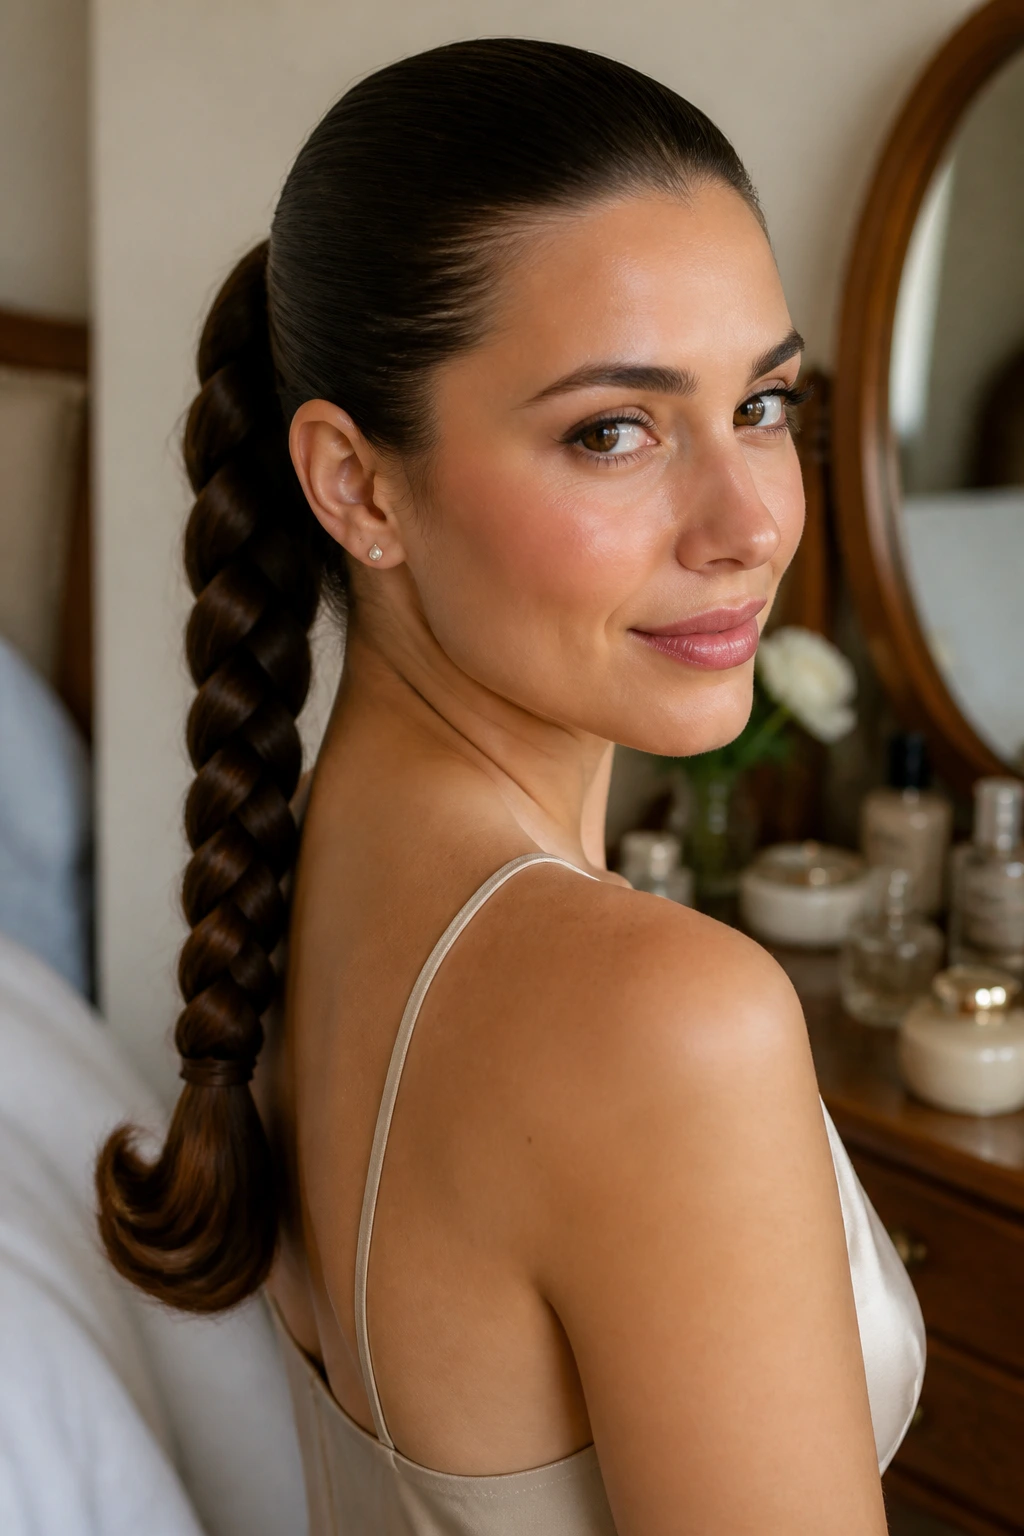
A braided ponytail with rolled ends feels like 1960s glam trimmed down for real life. The ponytail stays sleek at the root, the braid carries the length, and the ends turn under just enough to look intentional.
This style works best when the pony sits low or mid-height rather than high and sporty. Wrap a small strand around the base, secure it with a pin, and use a roller or curl on the final inches if your hair tends to stick straight out. That rolled finish is the detail that keeps it from looking like a standard braid thrown into a ponytail holder.
18. Tucked Halo Braid
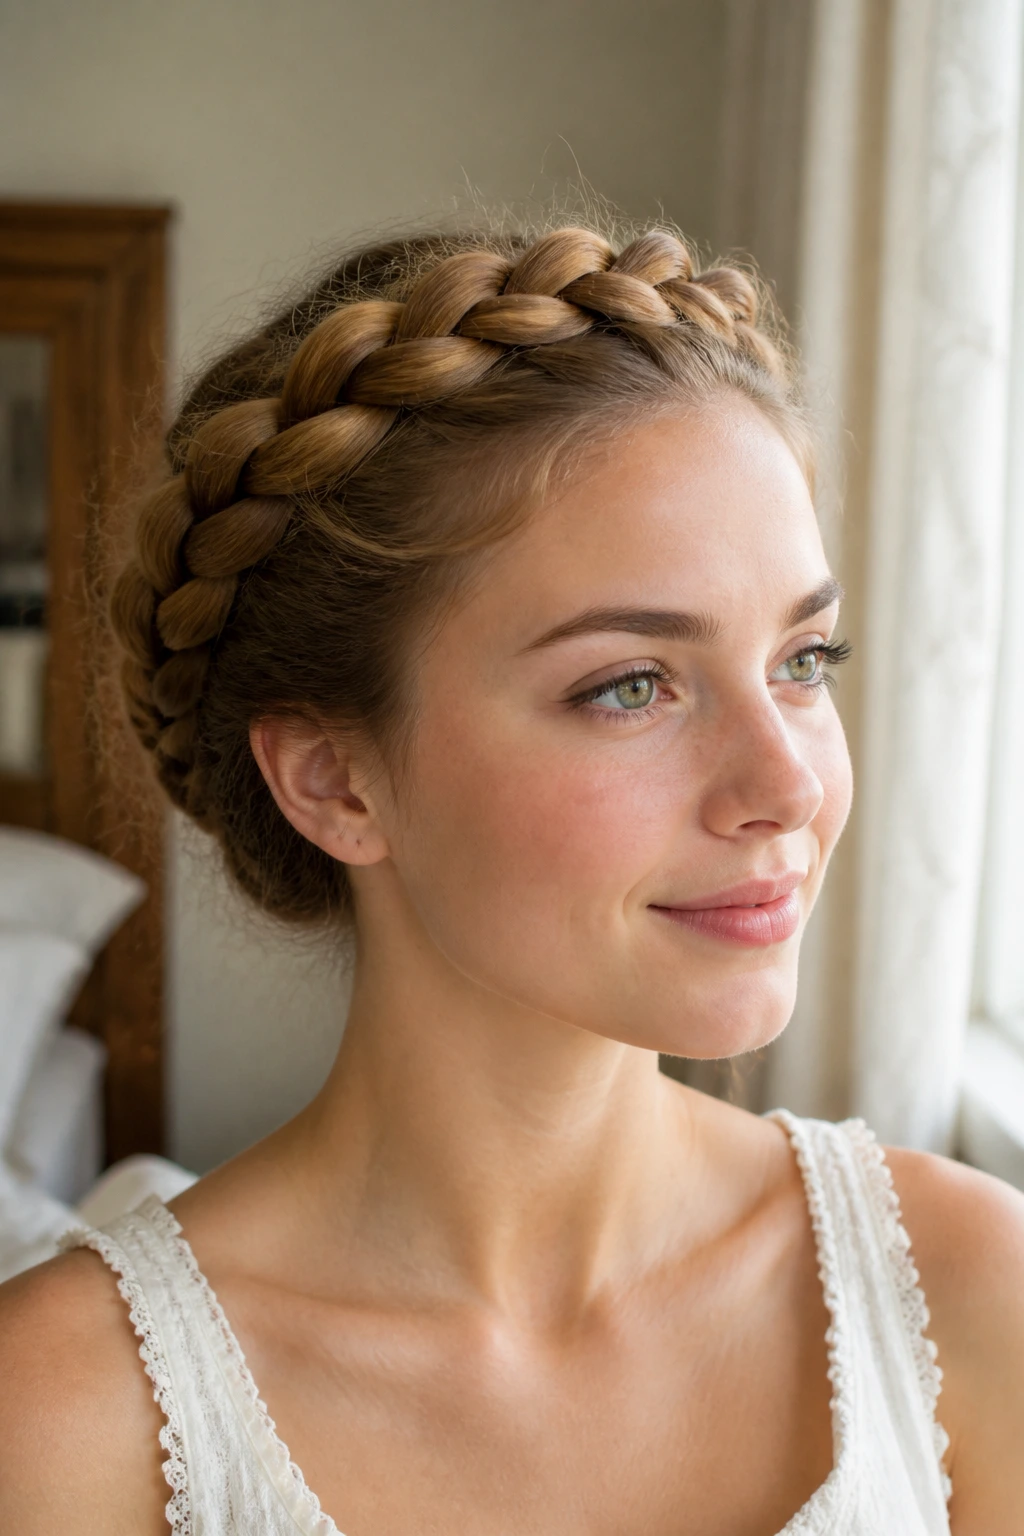
A halo braid becomes more refined when the ends vanish cleanly into the nape. That tucked finish gives the style a smoother outline than a looser crown braid, and the effect is elegant without feeling stiff.
This works well for formal occasions, but it’s also one of the better styles for when you want hair completely off the neck. If your hair is layered, pin the shorter pieces first and then hide them under the braid line. A bit of shine spray on the top layers helps the braid sit like one continuous ribbon rather than a pile of separate sections.
19. Laced Ribbon Braid Over Soft Curls
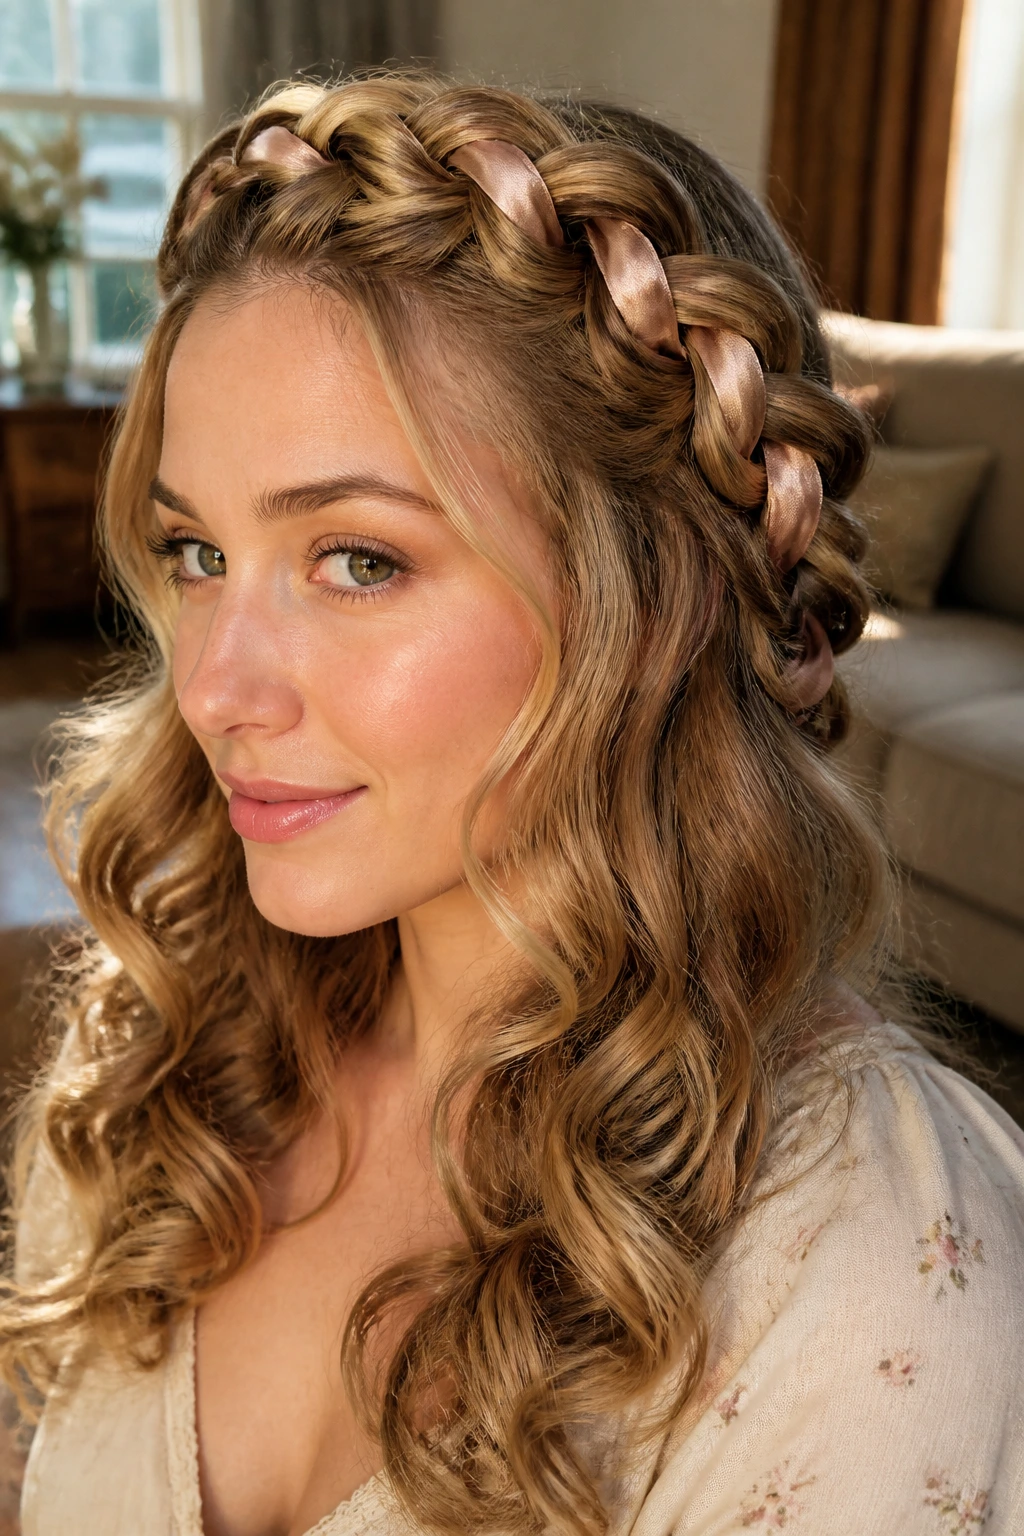
Ribbon lacing is not subtle, and that’s the point. A braid threaded with ribbon and laid over brushed-out curls looks very much like it belongs in a studio portrait or a dressed-up afternoon look.
Choose a ribbon that can take a little bending without wrinkling too badly. Satin works, but so does a soft grosgrain if you want more structure. Keep the braid wide enough to show the ribbon at regular intervals. If the curls underneath are too tight, the braid loses its vintage softness and starts feeling busy instead of composed.
20. Marcel-Wave Braid Accent
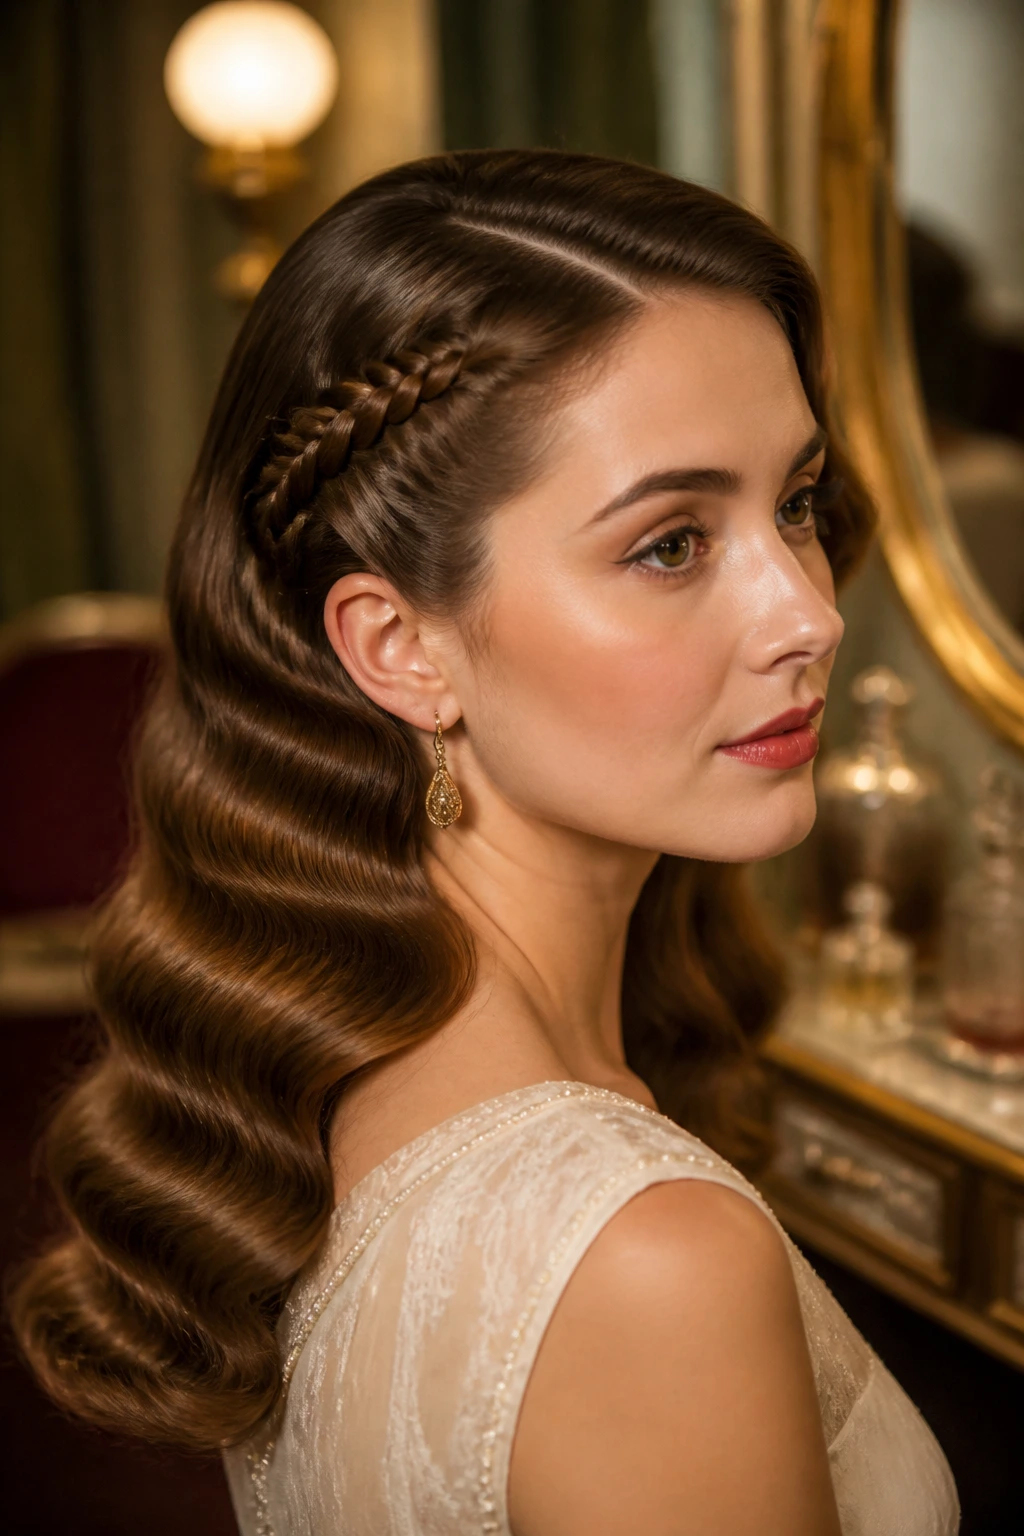
Finger-wave and Marcel-wave styling does not need a full head of sculpted waves to read vintage. Sometimes a single braid tucked beside a set of polished waves is enough to make the whole look feel like an old film still.
The waves should be soft and glossy, not crunchy. A braid near the part or along one side helps break up the uniformity and gives the hair a little more movement. This is one of those styles where finish matters more than complexity. Clean shine, neat sections, and a gentle curve at the front do most of the work.
21. Low Braided Bun With Pearl Pins
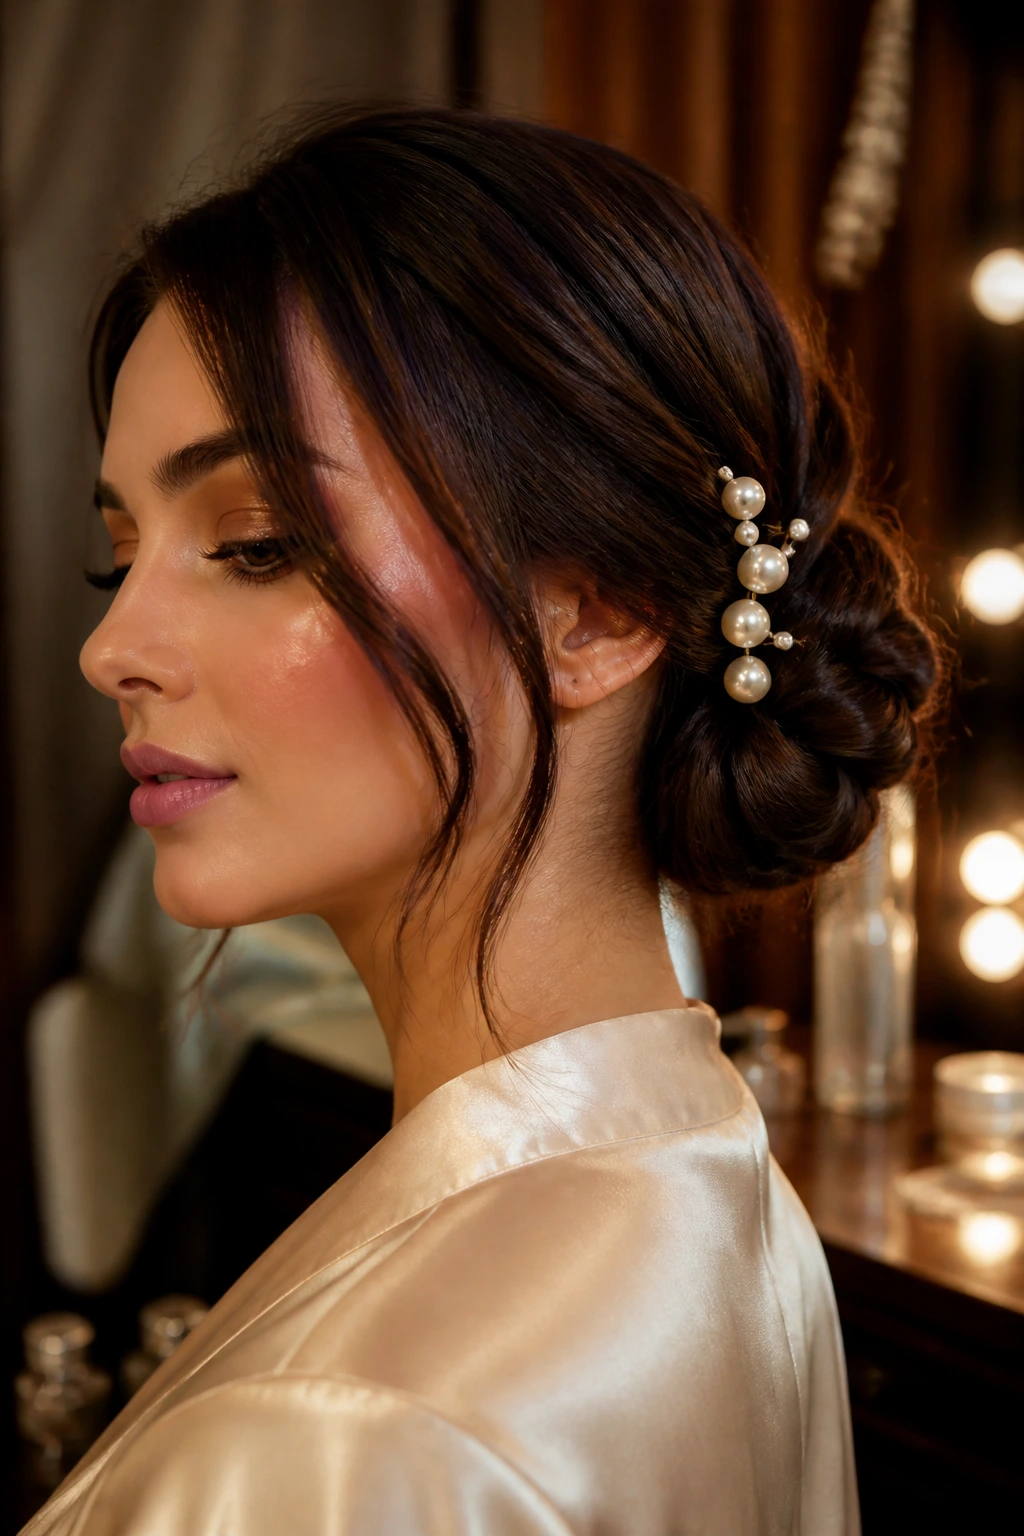
Pearl pins earn their keep here. A low braided bun already has a formal shape, but the little pin points turn it into something that looks deliberately styled rather than merely gathered.
Place the pearl pins asymmetrically so the eye travels across the bun instead of stopping at one obvious spot. That keeps the look from drifting into bridal-only territory. This style is a good match for satin, velvet, or any fabric that already carries a bit of shine. It likes a smooth crown and a clean nape. Messy roots would fight the whole point.
22. French Braid Into a Faux Bob
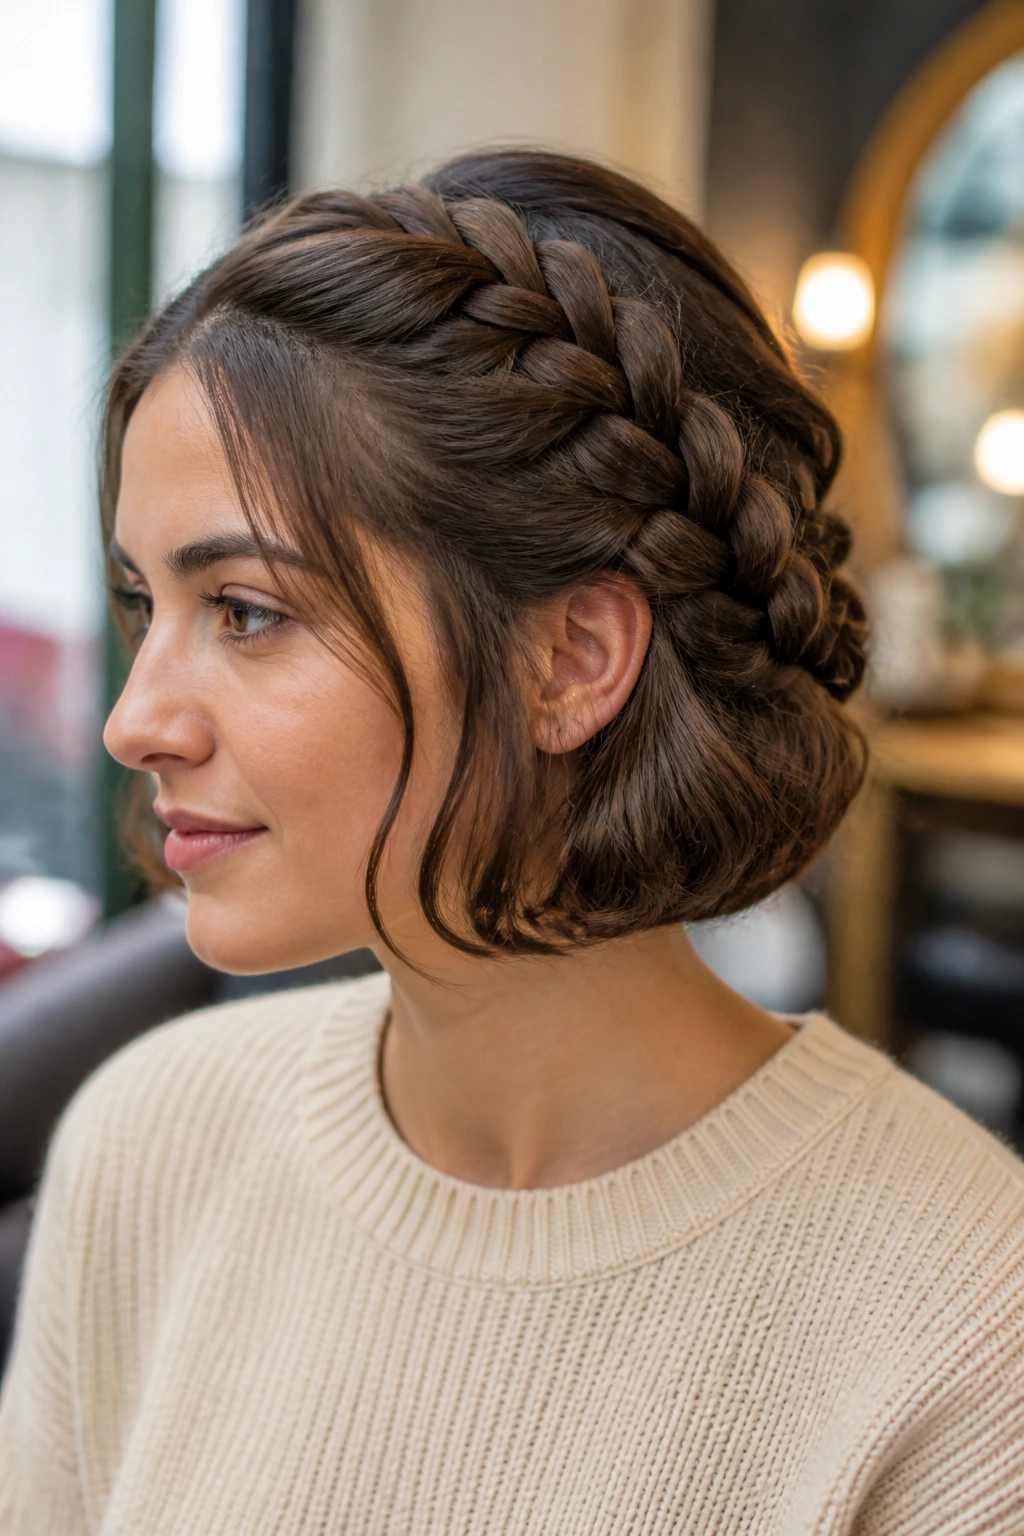
A French braid that tucks into a faux bob is one of the smartest tricks in the group. You get the vertical line of the braid and the illusion of shorter hair in one move, which is a nice nod to 1920s style without actually cutting anything.
This works especially well on medium-length hair that reaches the collarbone or below. Braid from the crown, tuck the ends under, and pin them flat so the bob shape sits just below the jaw. If the crown is too flat, you lose the vintage lift. If it’s too bulky, the bob reads like a costume wig. Balance matters.
23. Dutch Braid Crown With Bandana
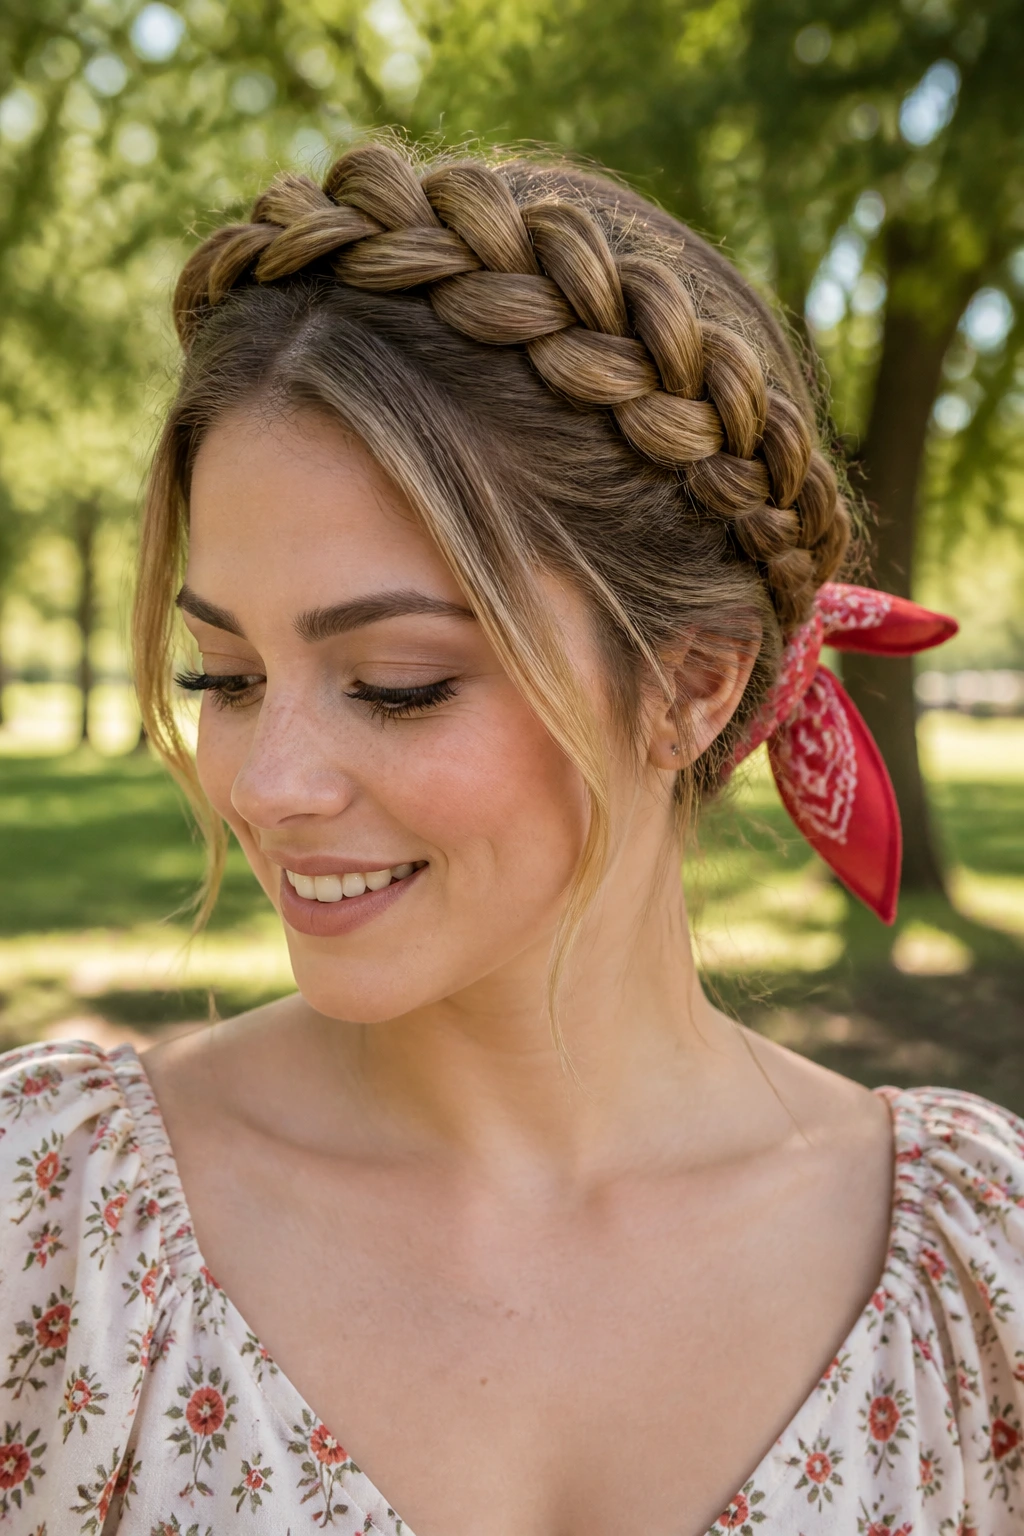
Bandanas belong in this conversation. A Dutch braid crown paired with a tied bandana feels practical, a little retro, and surprisingly polished when the ends are tucked neatly at the back.
This one works well for days when you want the hair secure and out of the way but still styled enough to feel finished. Use the bandana to echo the outfit rather than overpower it. A red bandana with a simple white shirt feels classic. A patterned one can be lovely too, but keep the braid itself clean so the look doesn’t get noisy.
24. Side Braid Tucked Under a Beret
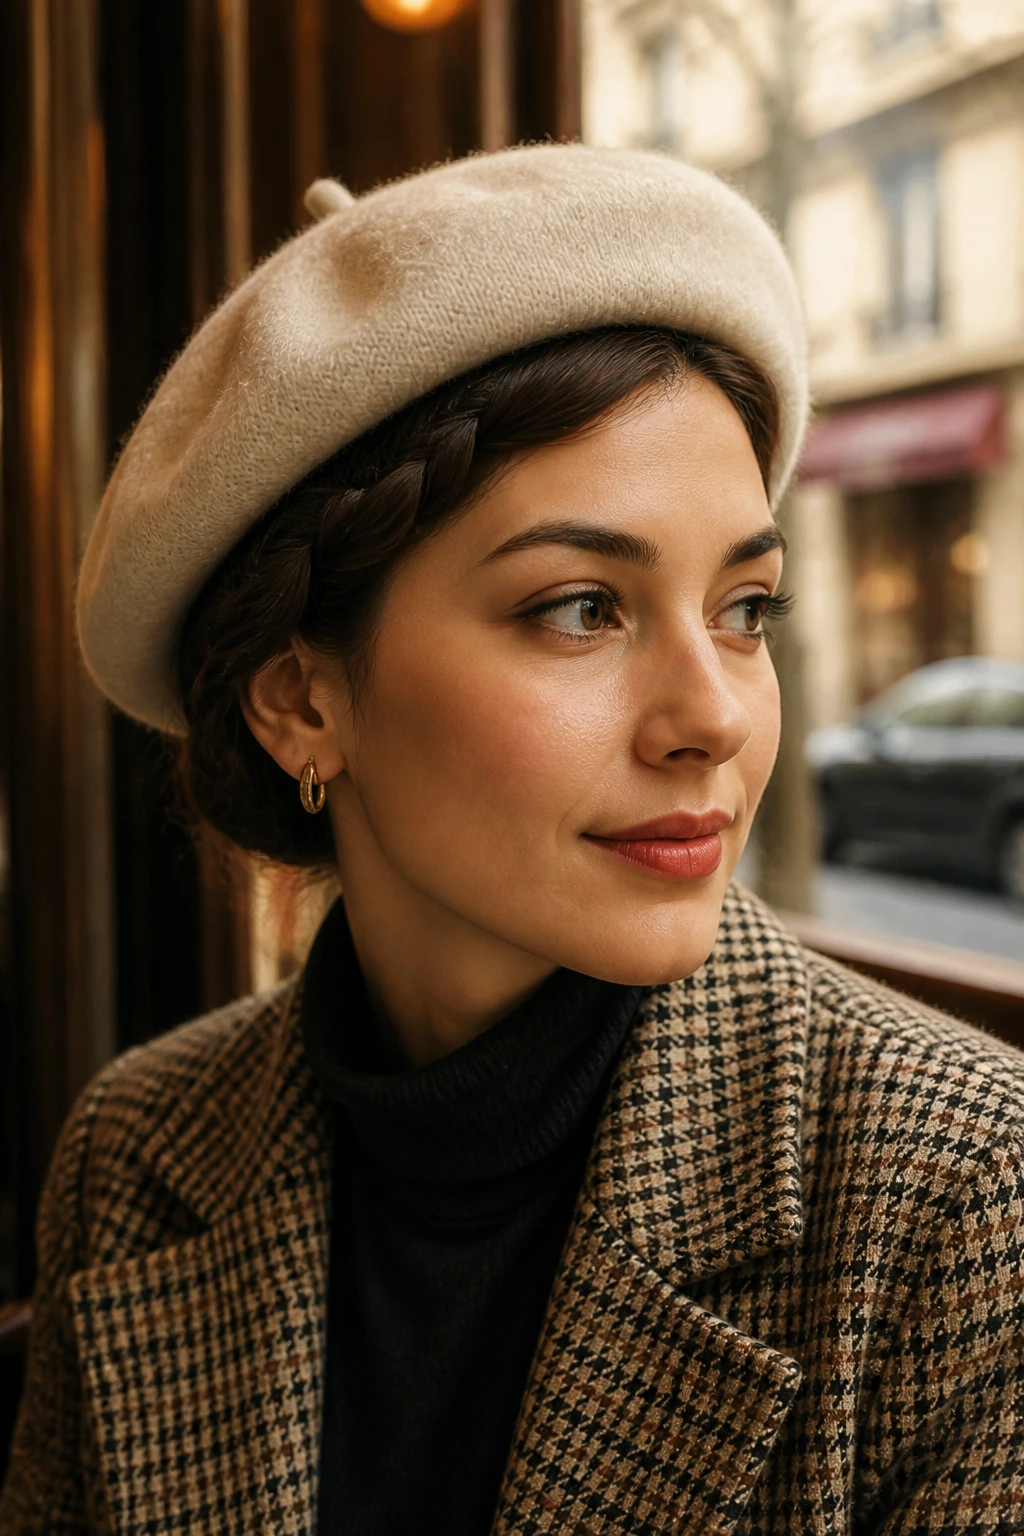
A braid under a beret gives you a vintage shape without asking for much length. The braid can sit low and side-swept, then disappear under the hat in a way that makes the whole thing feel Parisian, mod, or just quietly chic.
This is a good option for shorter hair or for anyone who wants the hat to do some of the styling. Don’t let the braid puff out too much under the beret. That flattening can be useful. A little bit of visible braid at the side is enough to show the texture without fighting the hat.
25. Cornrow Halo With Brushed-Out Curls
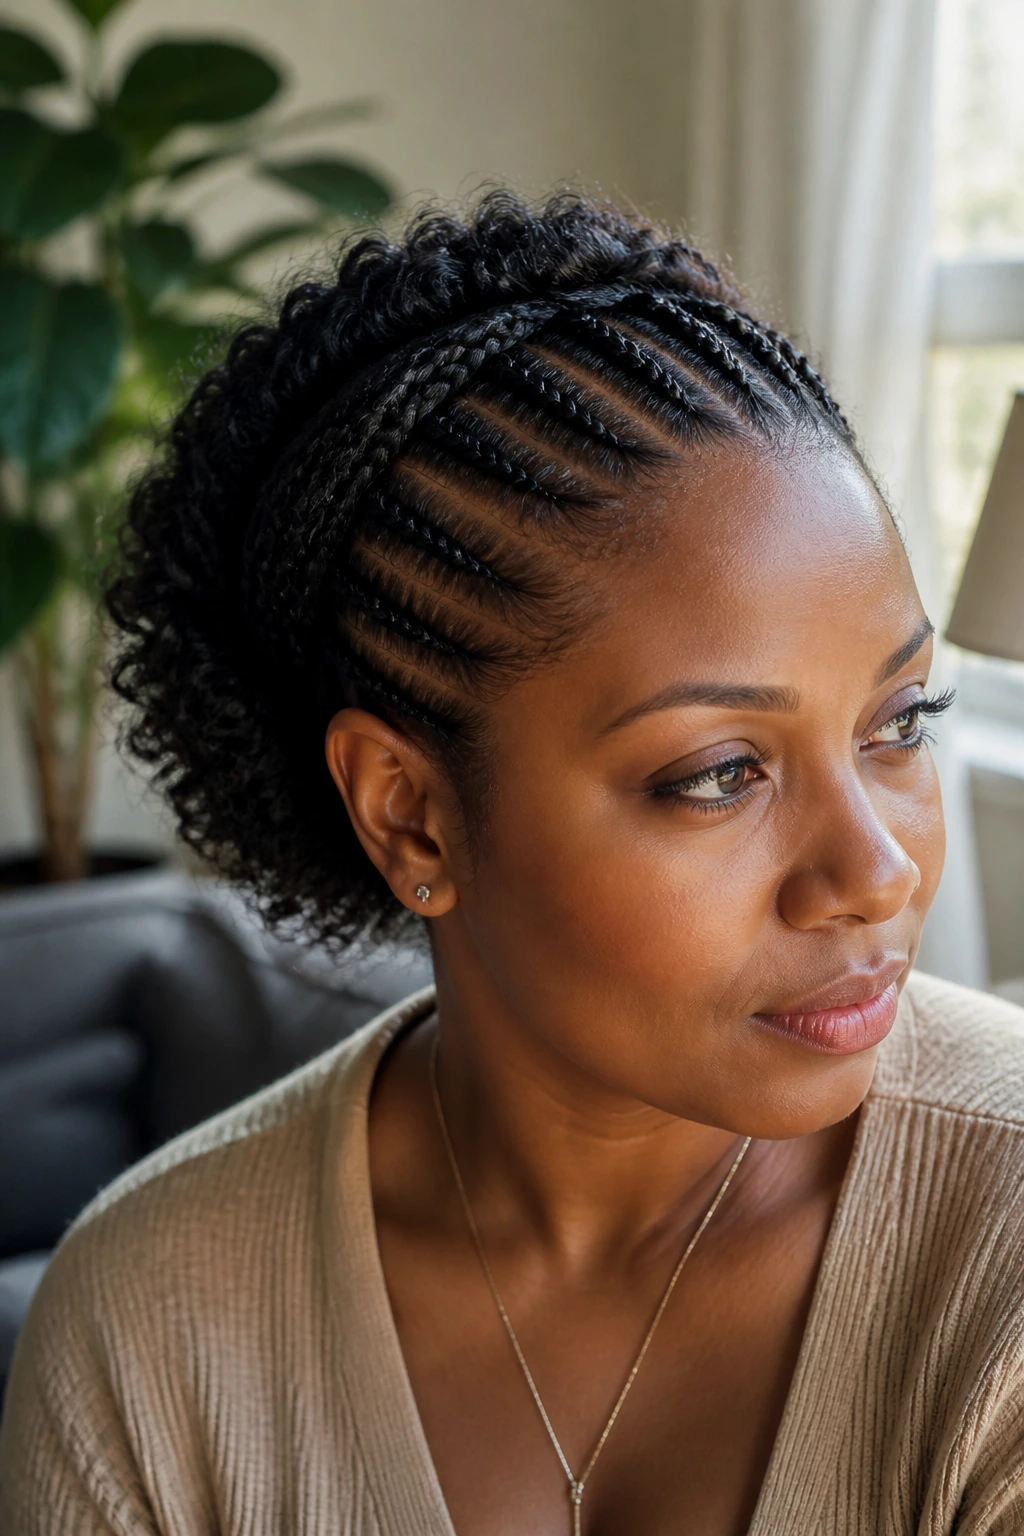
Cornrow halos work when the silhouette stays soft at the crown. The braiding can be neat and close, but the shape should round gently around the head instead of sitting hard and flat. That gives the style a glamorous vintage read on textured hair.
Brushed-out curls or a soft puff at the back make the look feel fuller and more period-inspired. Keep the edges smooth, not lacquered. A small amount of edge control is plenty. Too much product, and the style starts looking stiff before it has a chance to look elegant.
26. Feed-In Braid Ponytail With Flipped Ends
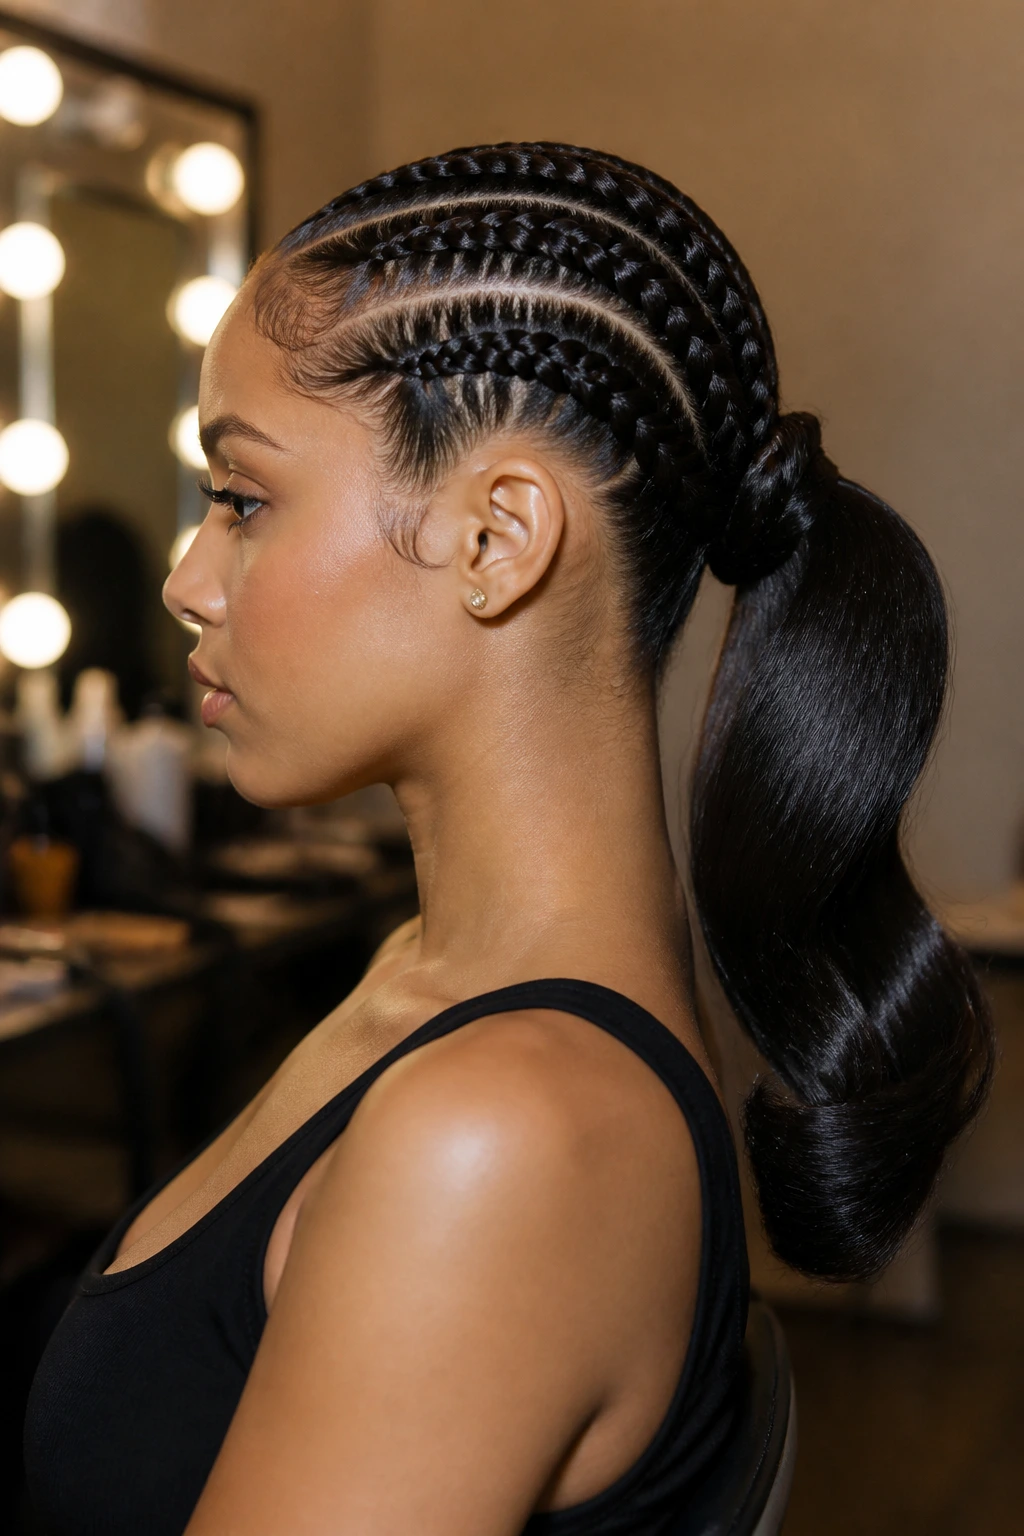
A feed-in braid ponytail can lean retro if the finish bends instead of spikes. The feed-in method keeps the front sleek and controlled, while the ponytail shape gives you room to play with a curled-under or flipped finish at the end.
This style is especially good if you want a braid that stays neat for more than one event. The pony can sit high for a bolder look or lower for something softer. Either way, the ends should feel finished. A blunt, straight hang does less for the vintage mood than a turn or curl at the bottom.
27. Goddess Braid Updo
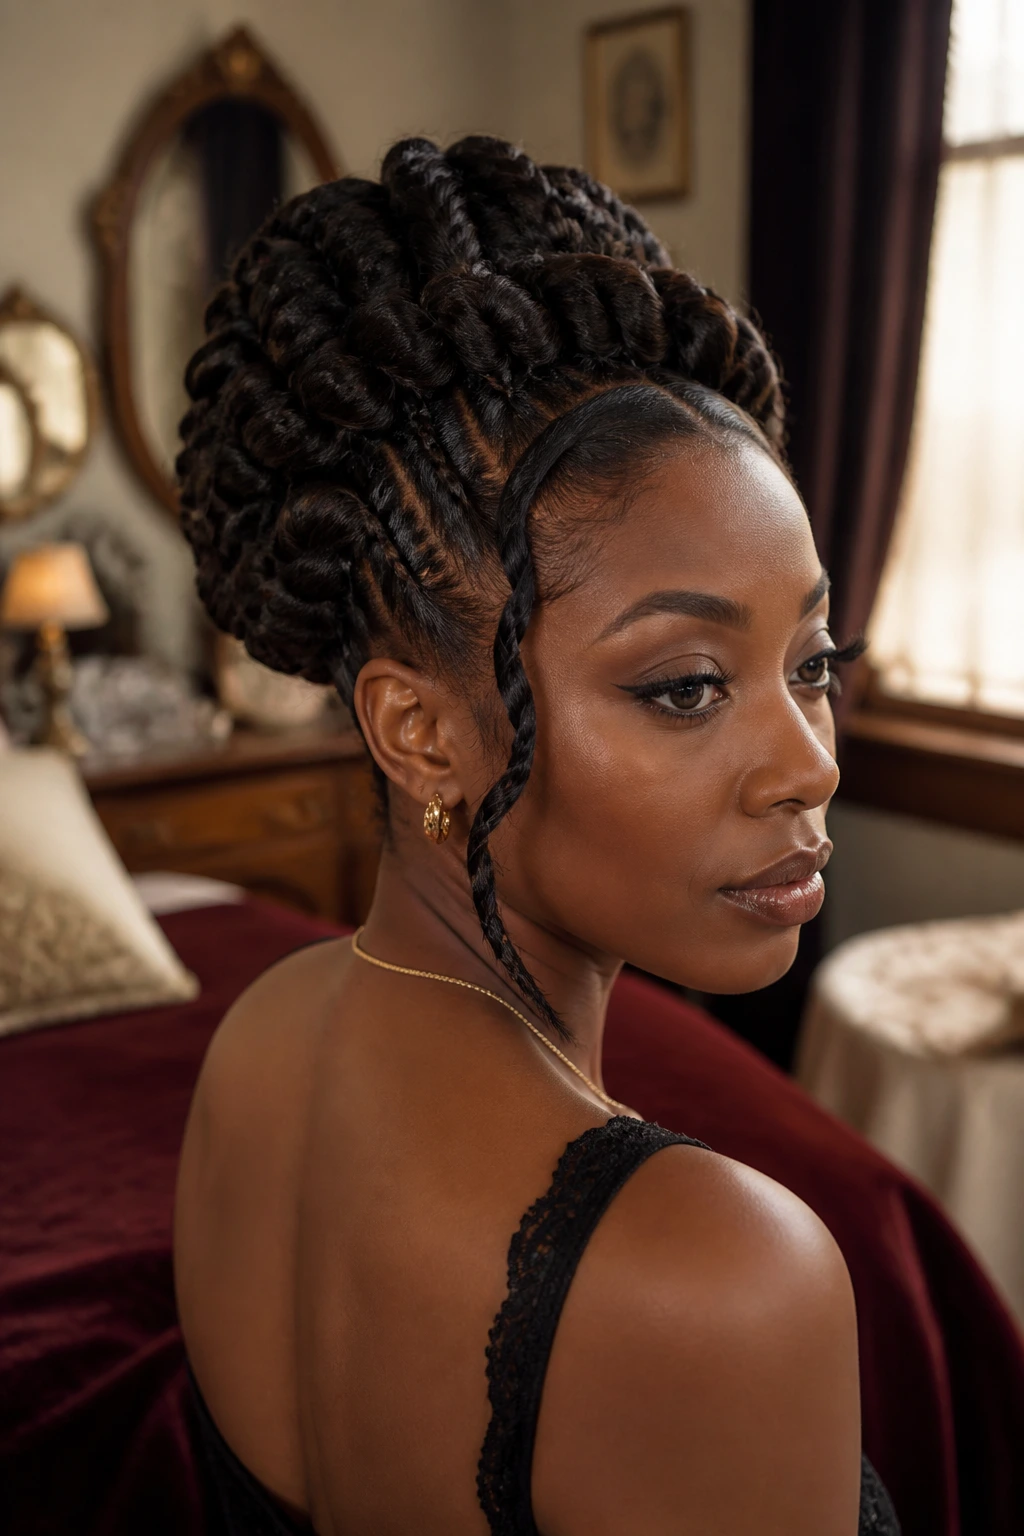
Goddess braids like structure. The thicker braid lines create shape fast, and when they’re pinned into an updo, the result feels sculpted and substantial without being heavy.
I’d use this when I want the hair to make a statement without relying on tiny details. Leave one braid to curve near the face or along the hairline, and keep the back compact. This style looks especially strong on natural hair and extensions because the braid thickness gives the updo real presence. Thin braids can work, but they need more careful pinning so the shape doesn’t collapse.
28. Braided Loc Bun With Side Swoop
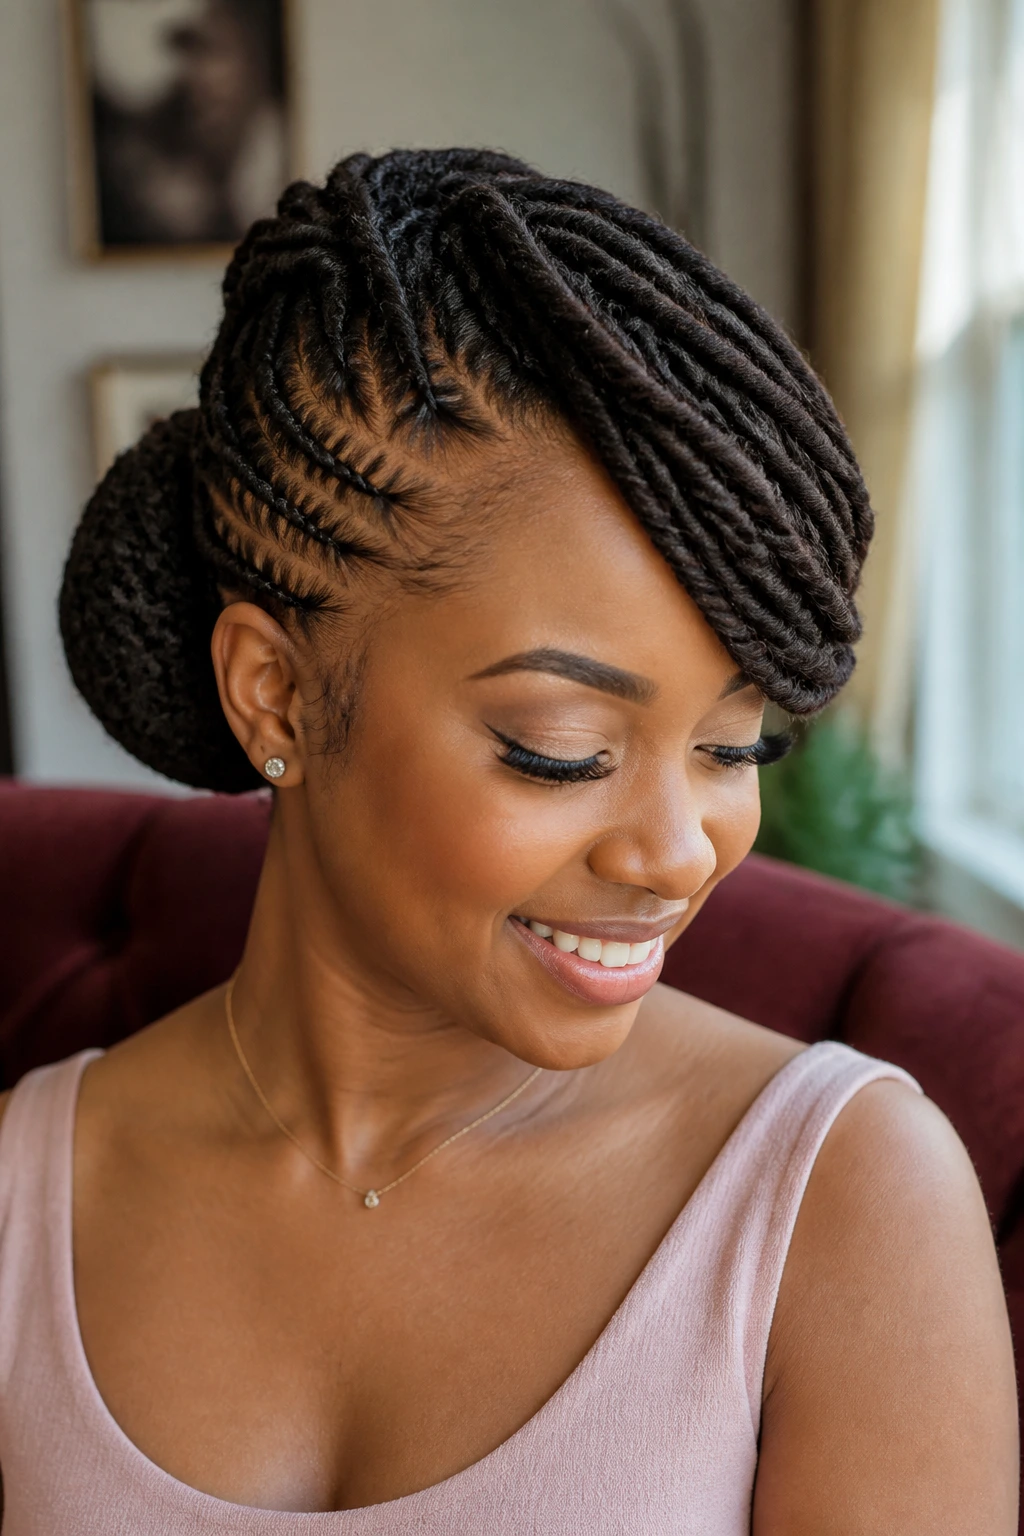
Locs can absolutely wear a vintage shape. A braided or wrapped loc bun with a side swoop at the front feels polished, regal, and much more flexible than people expect.
The side swoop matters. It softens the silhouette and keeps the bun from looking too severe. Tie the locs down at night with a satin scarf so the front stays smooth, and let the bun sit low enough to read elegant instead of stacked. This is one of the strongest looks in the group if you want structure without sacrificing the texture of your hair.
29. Rope-Twist Crown on Locs
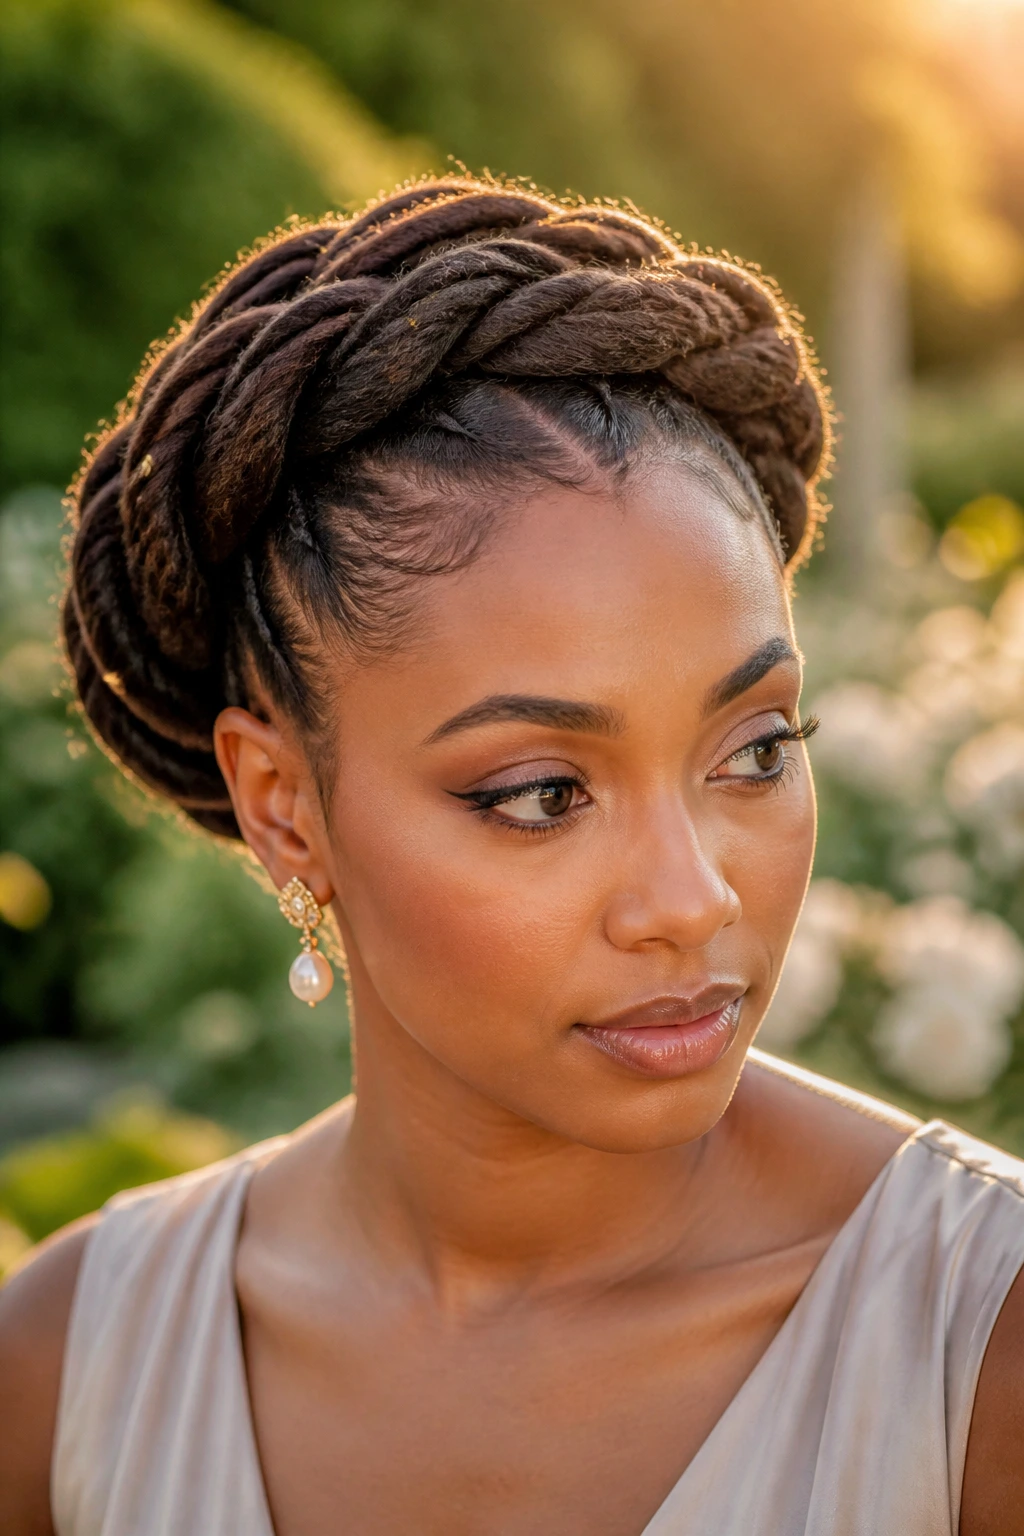
A rope-twist crown on locs looks best when the line stays low and clean. The twist moves around the head in a circle, then settles into a tucked finish that feels a little Grecian, a little vintage gala, and very secure.
This style is useful when you want something formal that won’t fight the weight of the locs. Use pins with enough length to hold, not tiny ones that bend on contact. A smooth part and a polished front help the crown read as intentional. If the front is fuzzy, the whole shape loses its edge.
30. Loose Braid Over One Shoulder With Victory Rolls
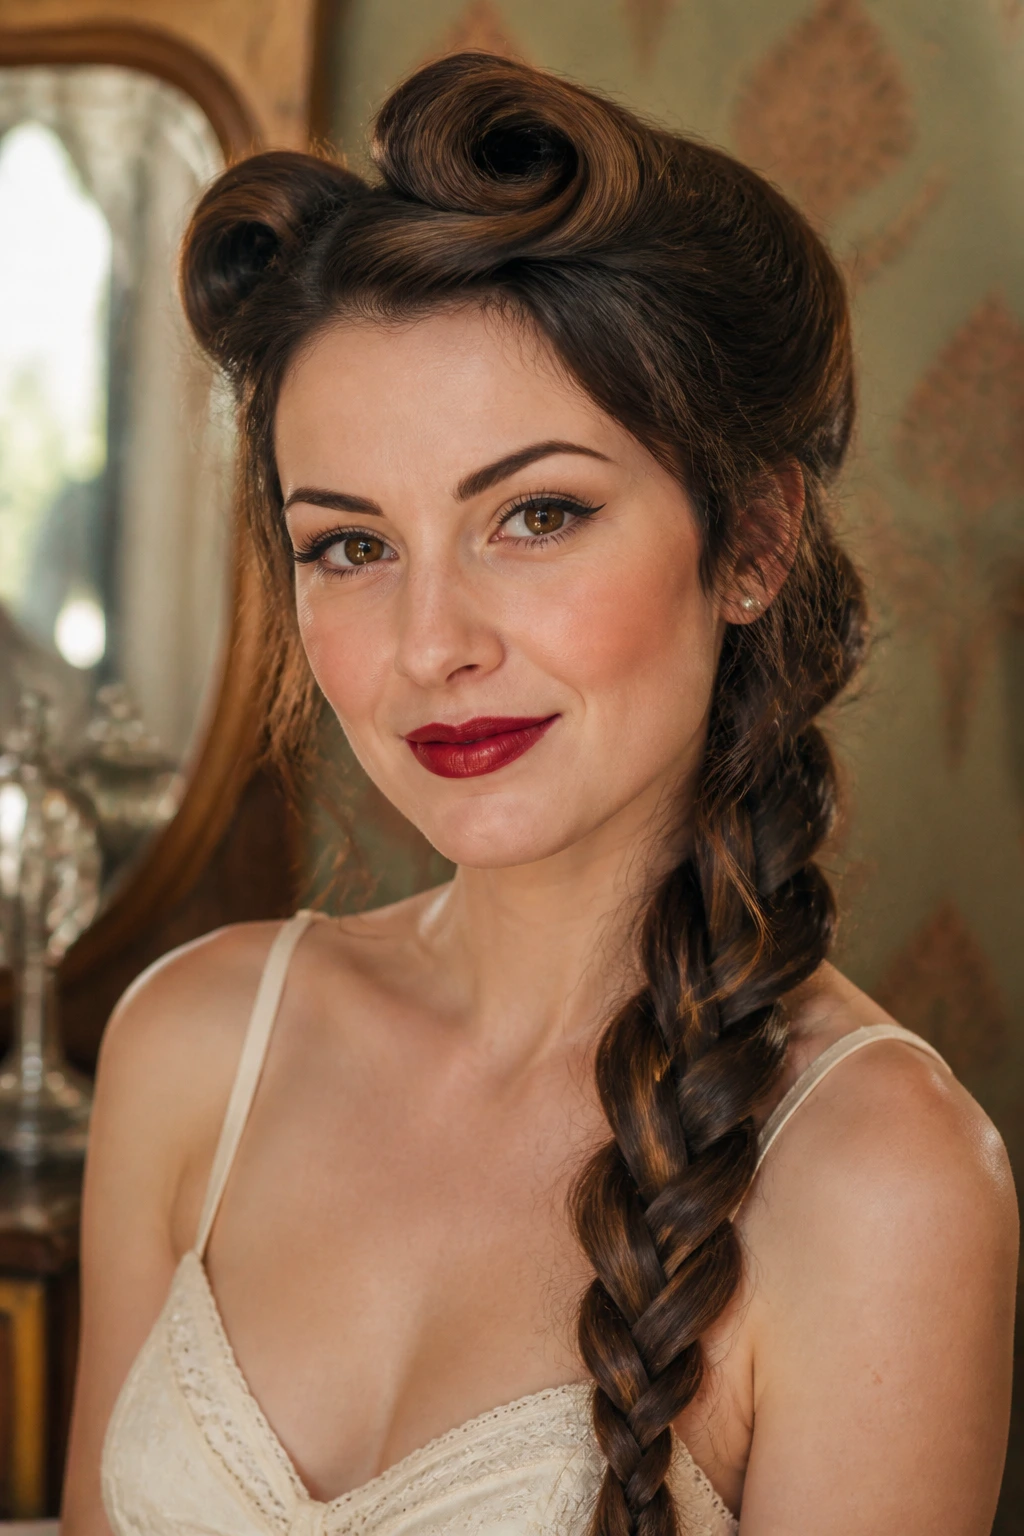
The one-shoulder braid gets a lot prettier once you steal a little height at the crown. Add victory rolls or a rolled front section, and suddenly the braid feels like it belongs to a pin-up portrait instead of a gym bag.
Keep the braid loose enough that the texture shows, then pull the front upward just enough to create volume. A side-swept shape works better here than a centered part. This is one of those styles that looks best when it isn’t too perfect. A slight bend, a soft edge, a little gloss — that’s the recipe.
31. Knotted Braid Chignon
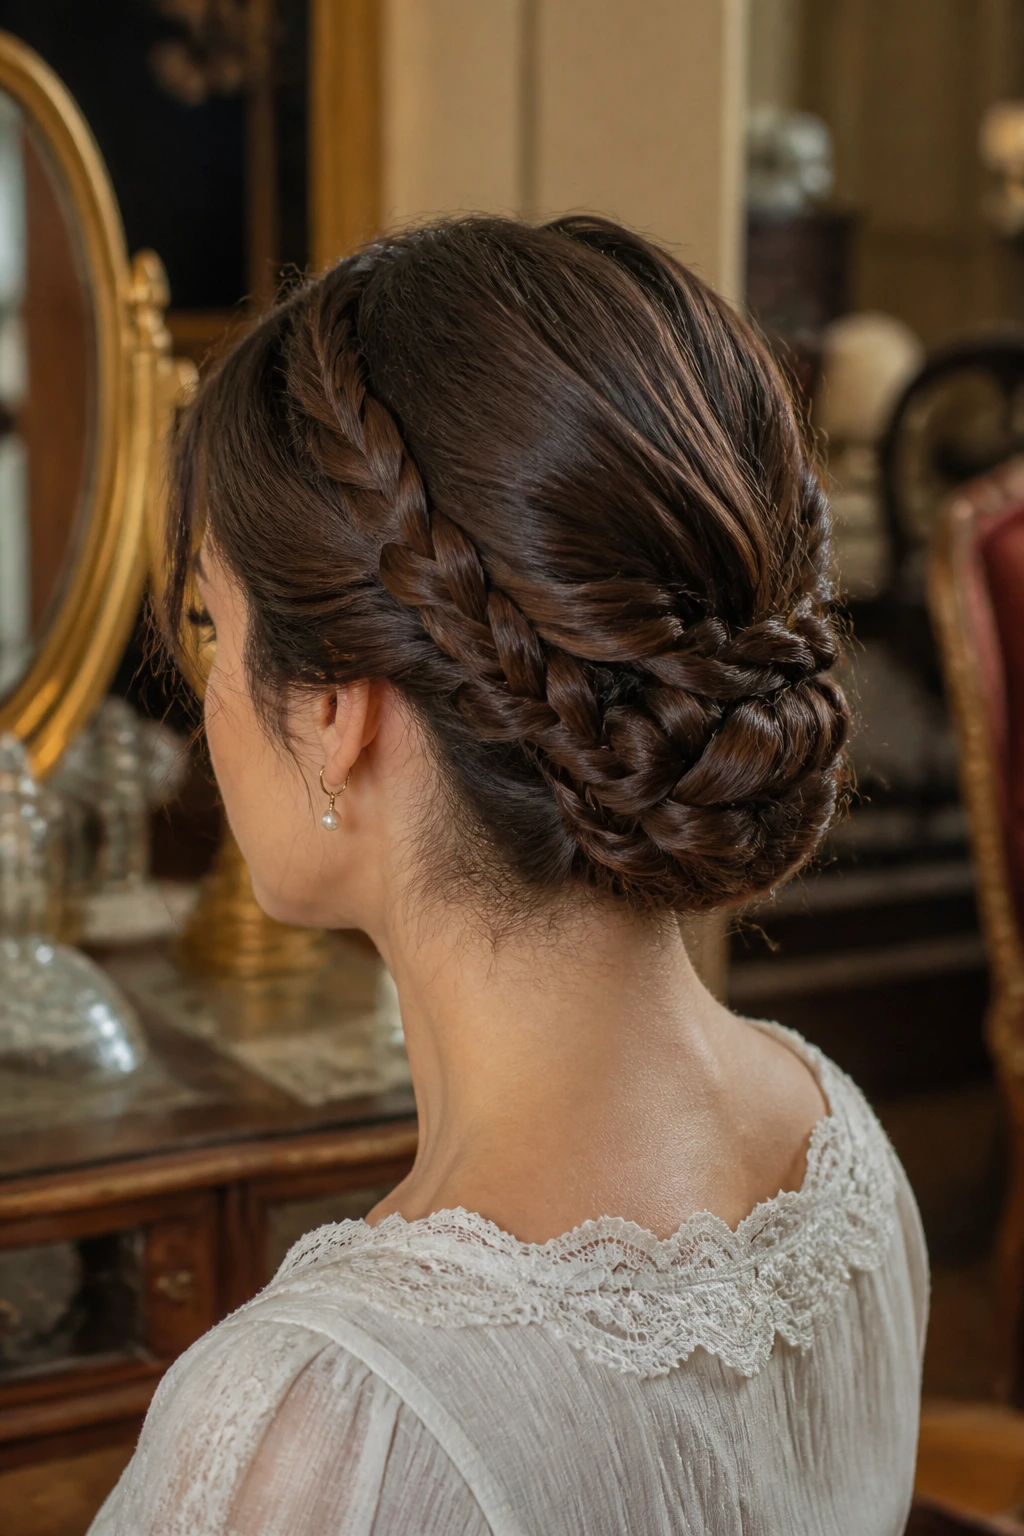
A knotted chignon is for when you want texture, not volume. The braid is looped or knotted at the nape so the woven pattern stays visible, and the result feels understated in the way good vintage hair often does.
This style is lovely for sharper necklines and earrings that deserve room. Keep the knot low and flat, then use pins to shape the braid rather than forcing it into a perfect ball. A neat finish matters more than symmetry here. If a few braid loops peek out, that can actually help the style look richer.
32. Two Braids Into a Tucked Updo
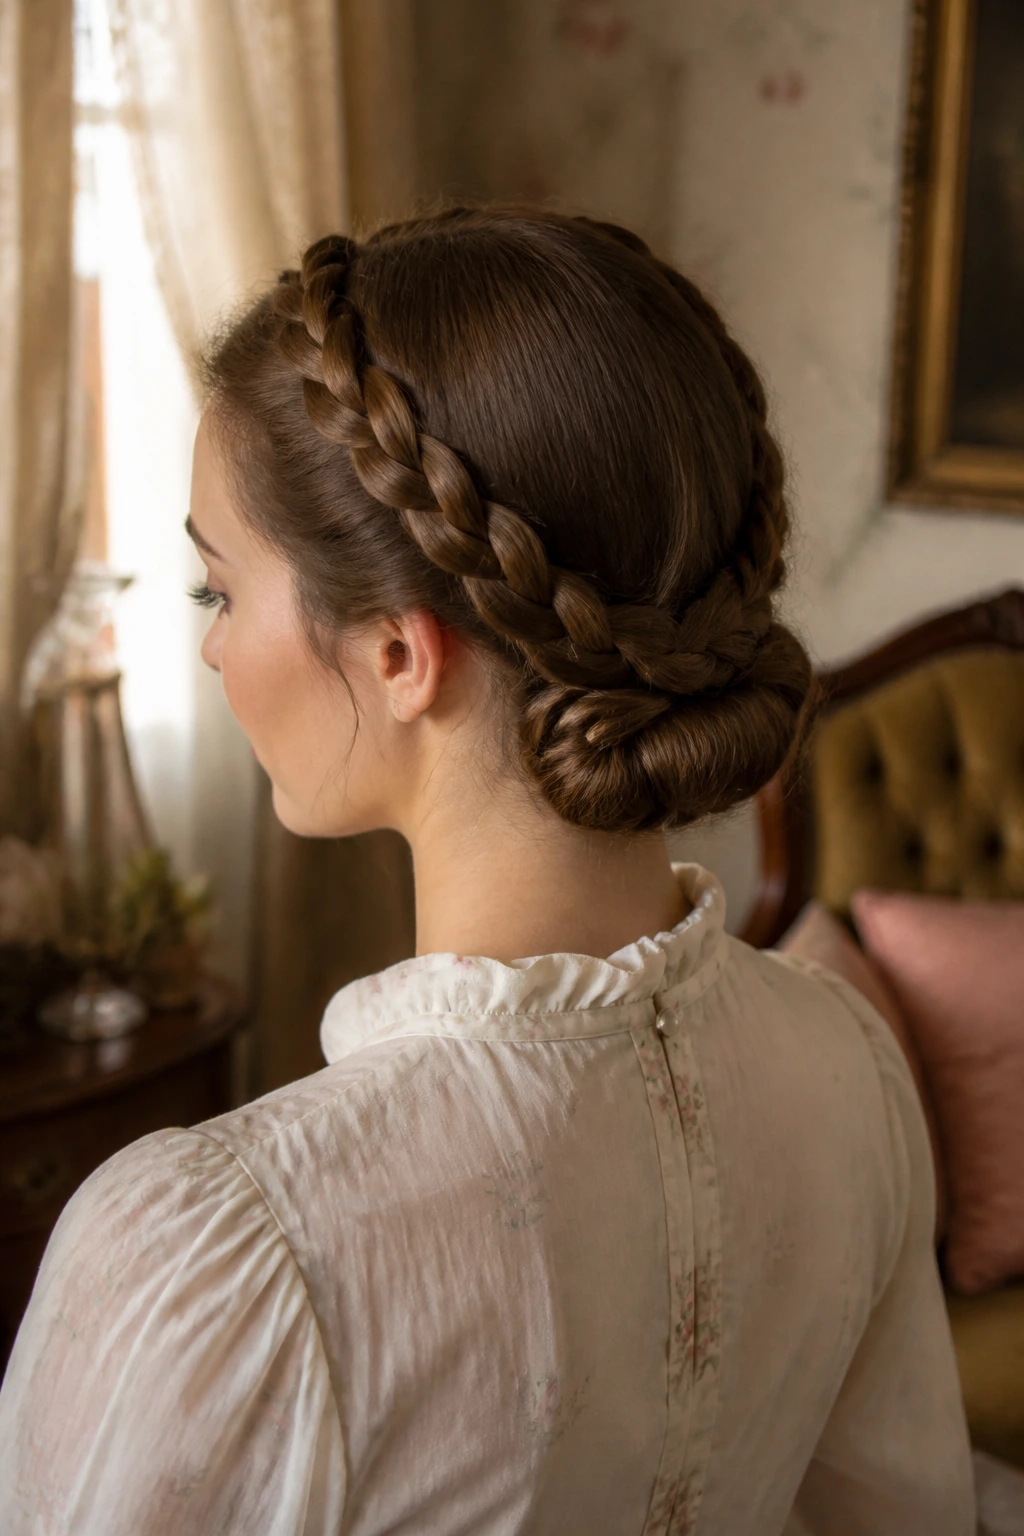
Twin braids can read adult if you keep the parts clean and the ribbons slim. Feed the two braids into one tucked updo at the back, and the style gains enough structure to feel vintage instead of childish.
This works especially well on straight or stretched hair because the sections stay tidy and the tuck sits flat. If you have layers, pin the shorter pieces first. The goal is a smooth outline, not a lumpy nest of pins. You can finish it with a barrette or leave it plain, depending on how much detail you want on top.
33. Braided Headband With Rolled Front
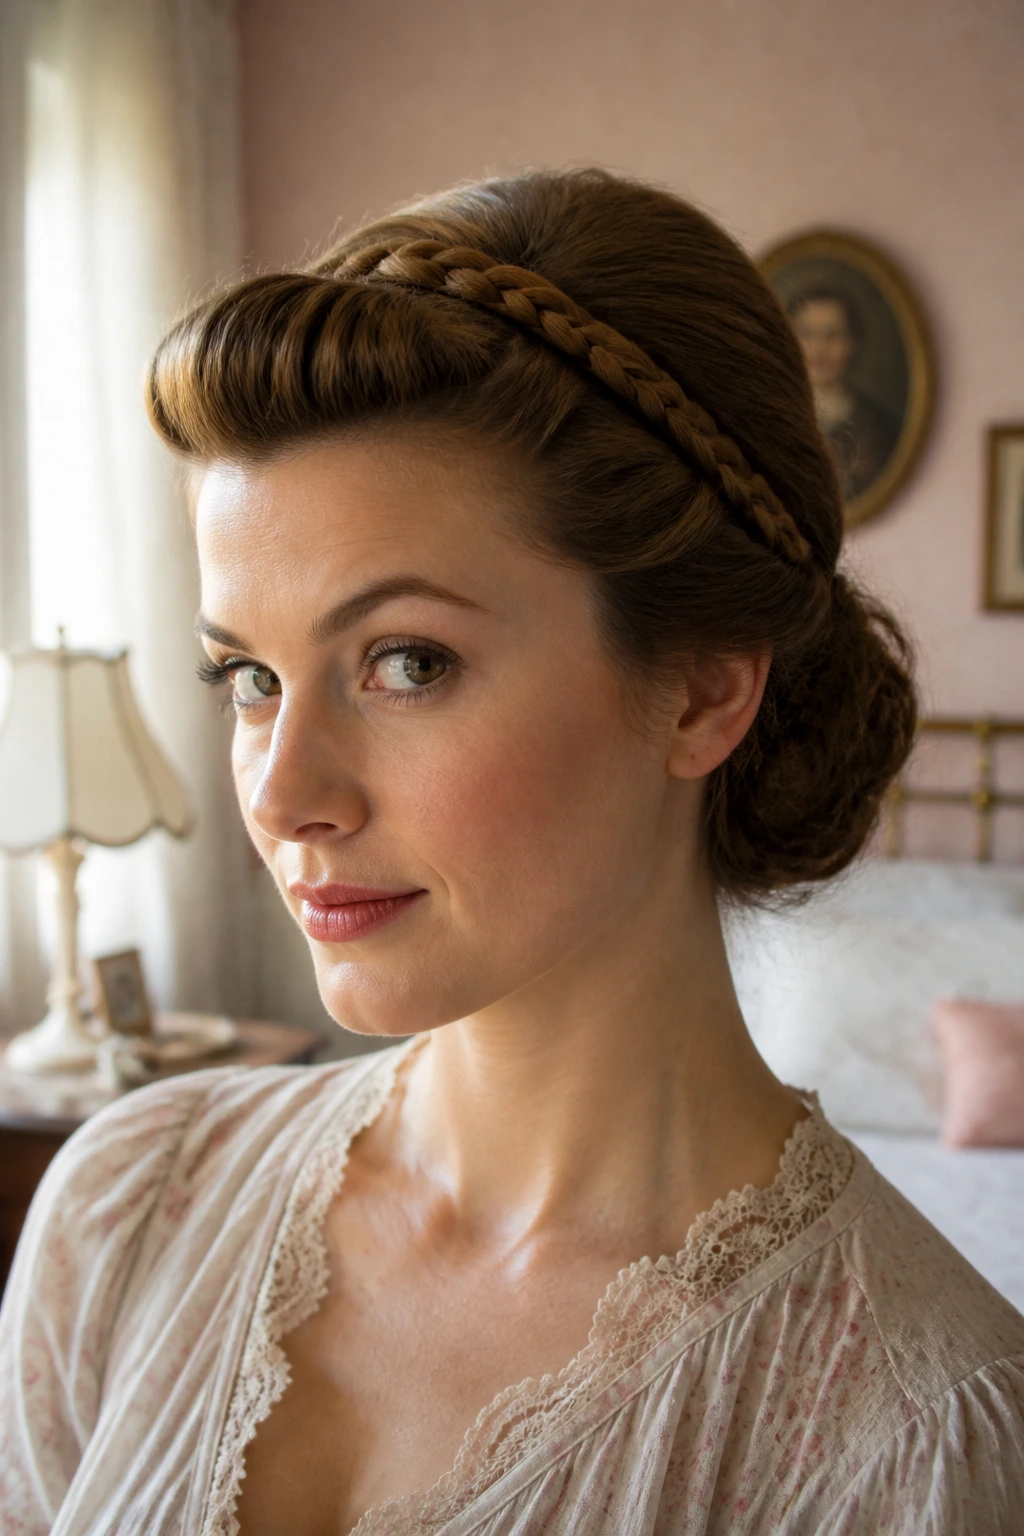
A braided headband is a shortcut to that hostess-at-the-door feeling. The braid acts like a built-in accessory across the front, while the rest of the hair can be rolled, pinned, or left softly tucked back.
This style is handy when the crown needs help and the ends don’t need to be on display. A little teasing at the roots behind the braid gives the look some lift. If the braid is too wide, it can overpower the face. Thin, neat, and slightly curved is usually the better choice.
34. Center-Part Twin Braids With Ribbon Bows
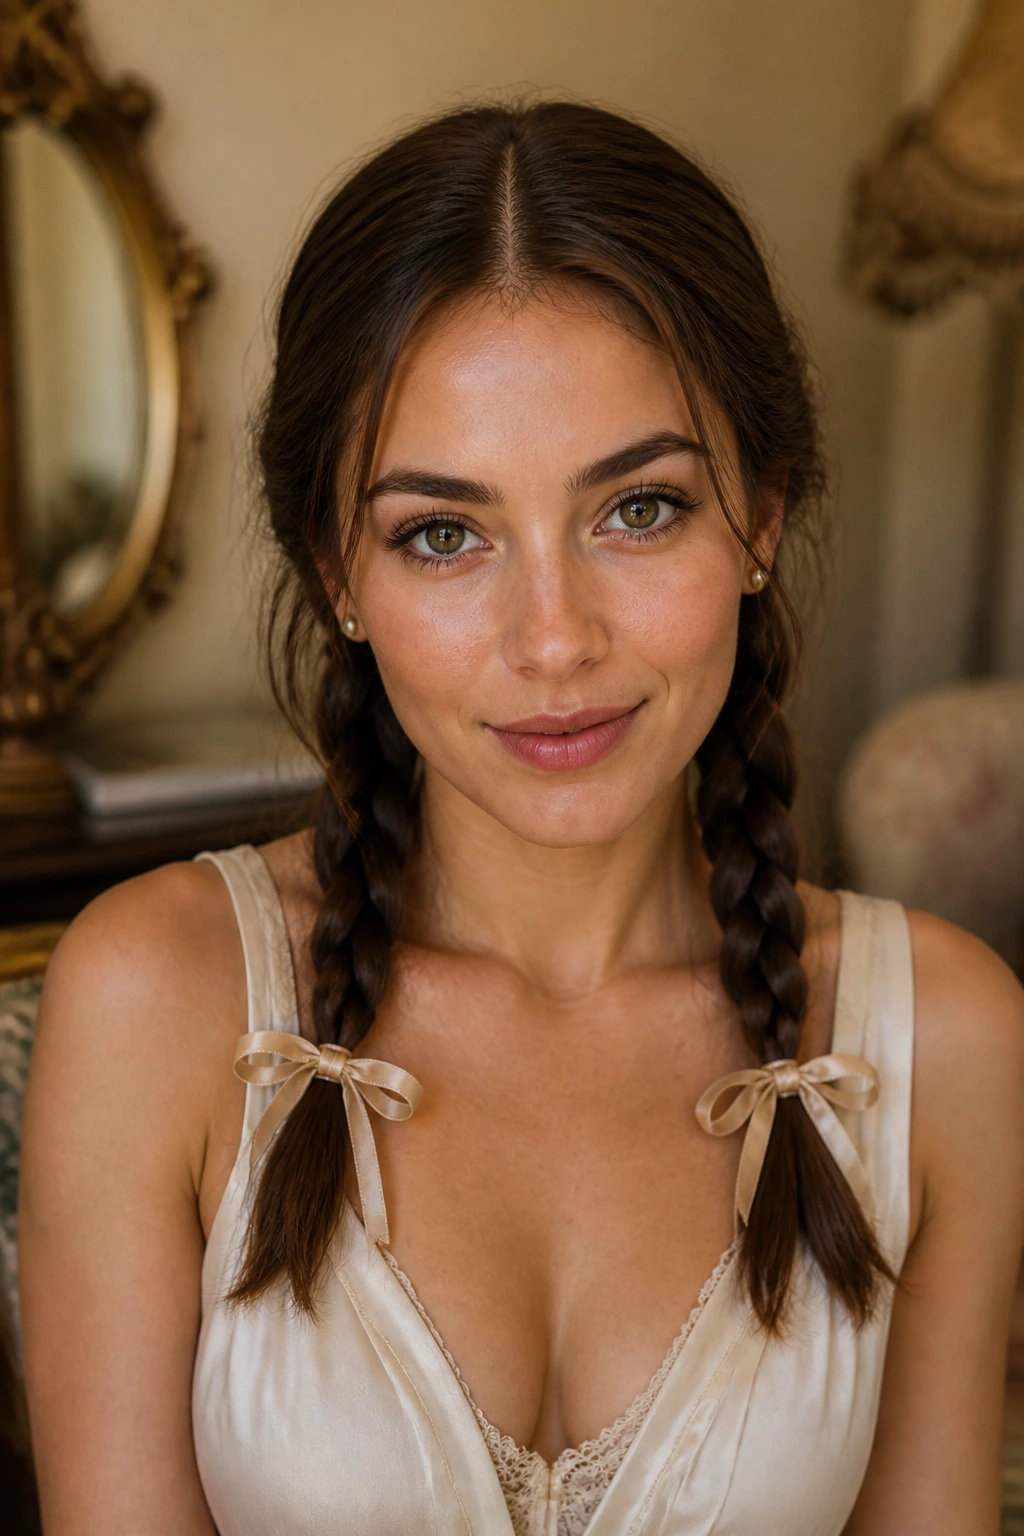
Ribbon bows at the ends of twin braids are a small move with a big effect. On their own, the braids are simple. Add slim bows in satin or velvet, and they suddenly feel like a vintage school portrait, picnic look, or soft retro nod.
The difference between cute and polished is mostly in the part. Keep it sharp and even, and let the braids fall straight rather than twisting wildly. If the bows are too thick, the style starts leaning childish. Narrow ribbon reads more grown-up and much more deliberate.
35. S-Curve Side Braid With a Vintage Clip
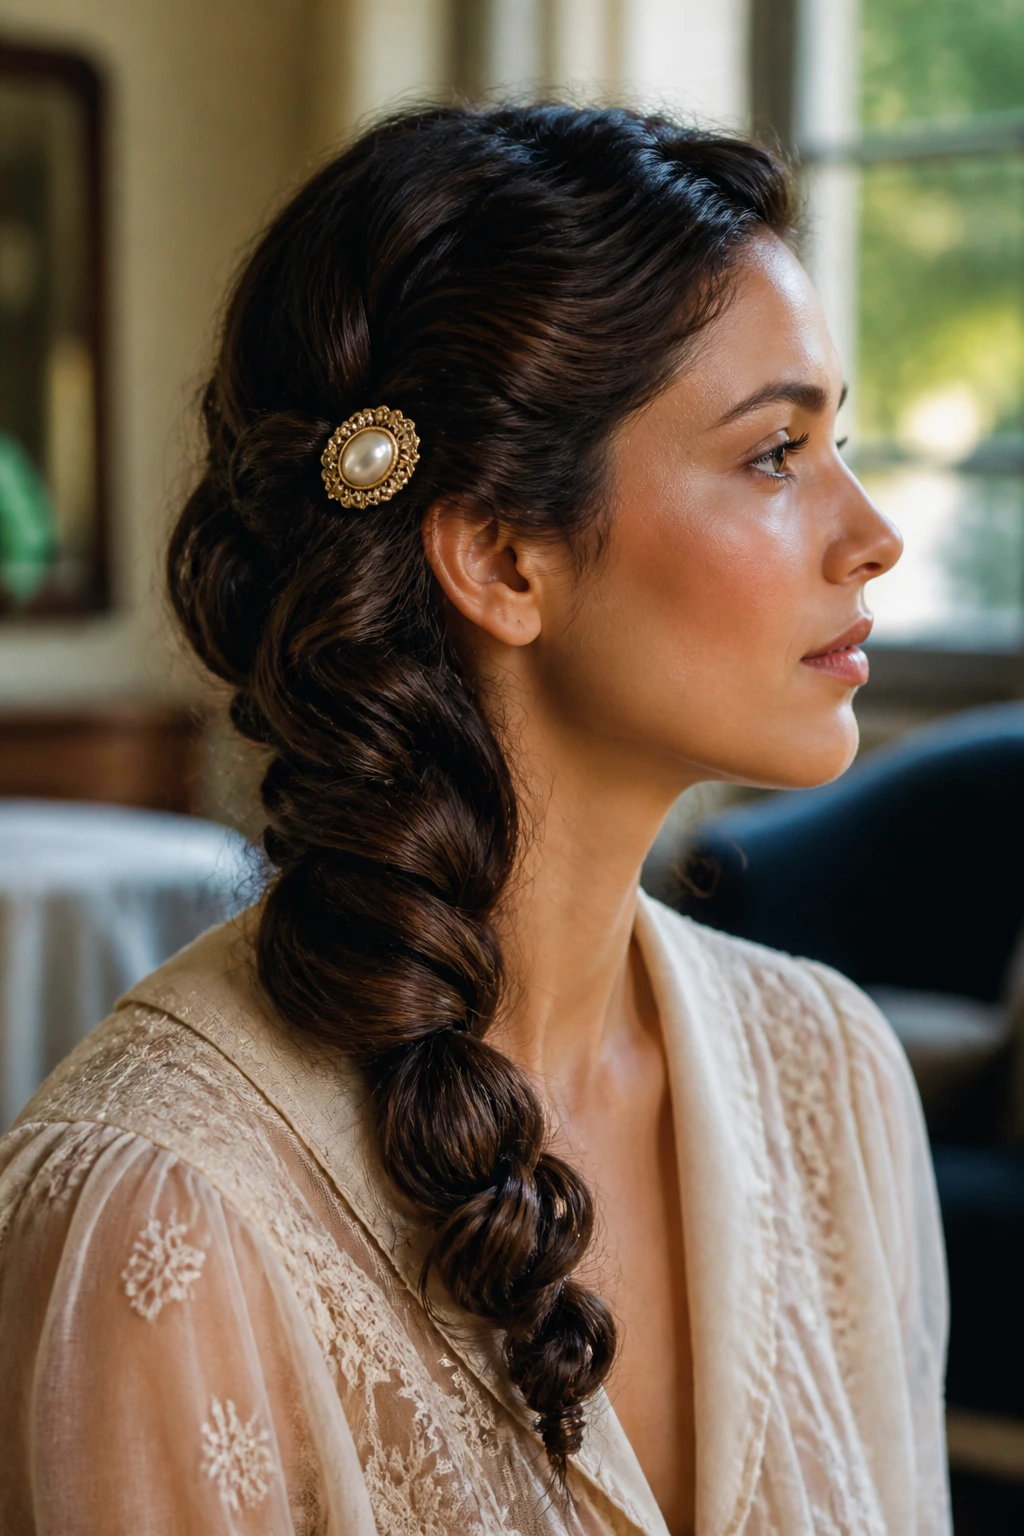
An S-curve side braid is the most editorial look in the bunch. Instead of falling straight down the shoulder, the braid is arranged in a gentle curve, then fixed with a vintage-style clip near the ear or lower on the braid.
This is a good choice when you want something more styled than a standard side braid but not as formal as a full updo. Keep the braid a touch loose so it can bend gracefully. The clip should look like a finishing touch, not a rescue mission. One strong accessory is enough. Two, maybe. After that, the braid starts losing its line.
Why Vintage Braids Still Work So Well
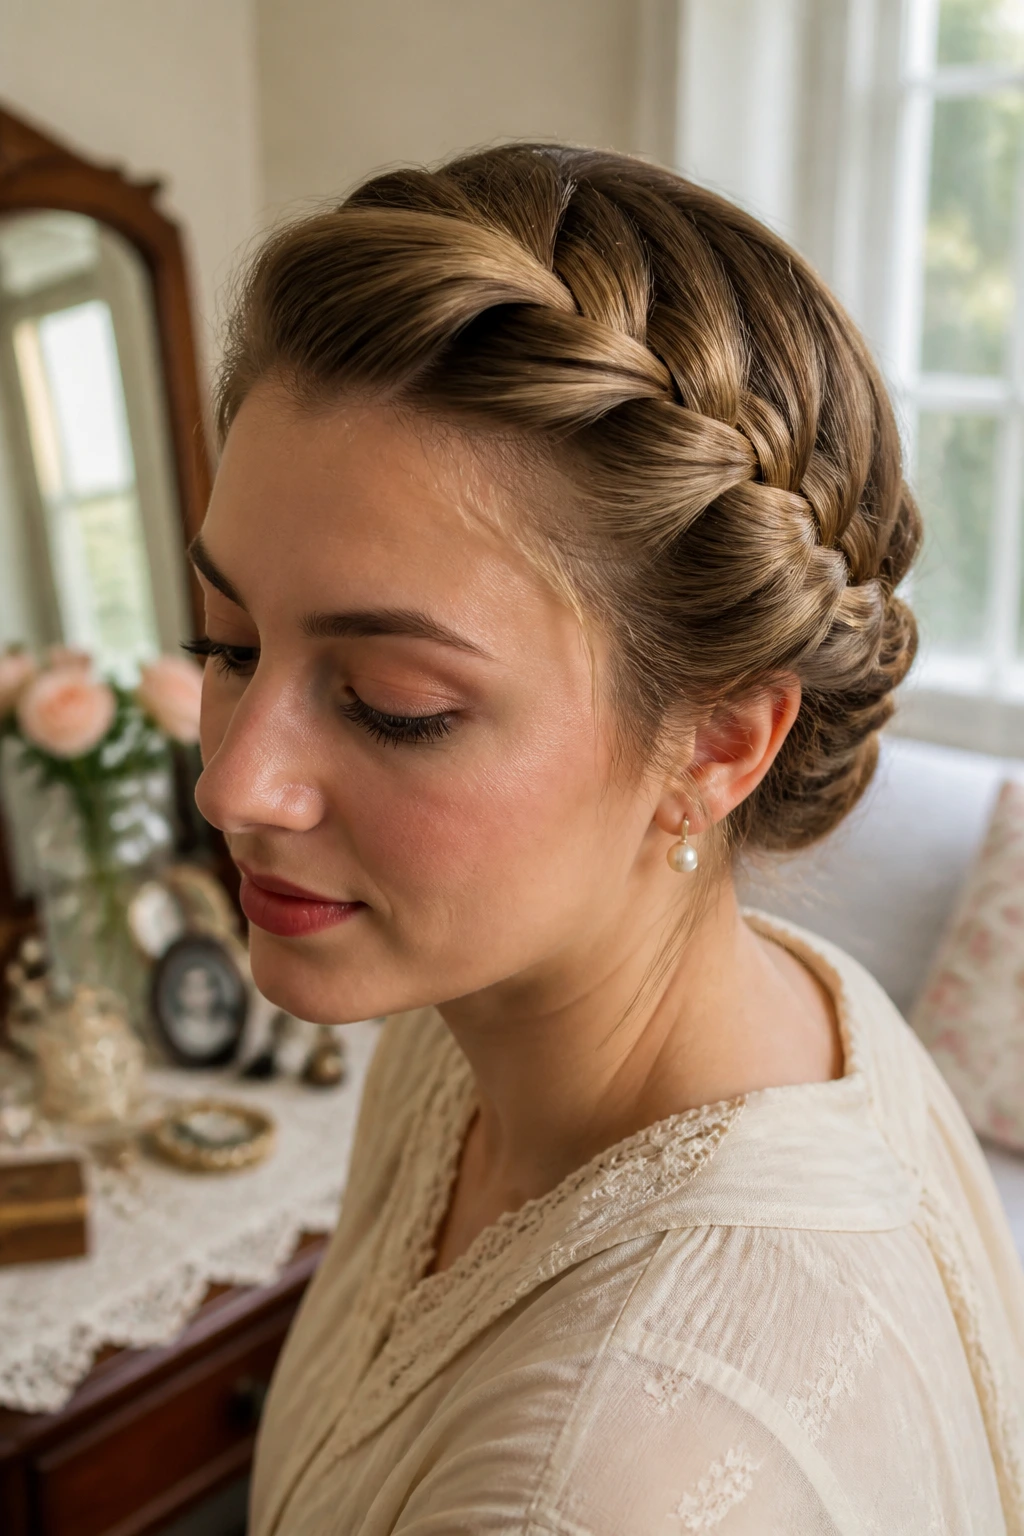
A vintage braid works because it understands structure. Clean parts, controlled volume, tucked ends, and one deliberate accessory are the ingredients that make the style read as retro rather than random. The braid itself is only half the story. The silhouette around it is what gives it a decade.
That is also why these looks are so forgiving. A loose strand near the temple can soften a severe shape. A side part can make a braid feel more cinematic. A ribbon or comb can move the look from daytime to evening in seconds. The style changes less than you’d think; the framing does most of the heavy lifting.
There’s a health angle here too. Gentle tension matters. Dermatologists have long warned that repeated pulling at the hairline can strain edges over time, so these styles work best when they’re snug, not tight. If your scalp aches, the braid is already too ambitious. Ease off. Hair should look arranged, not braced for battle.
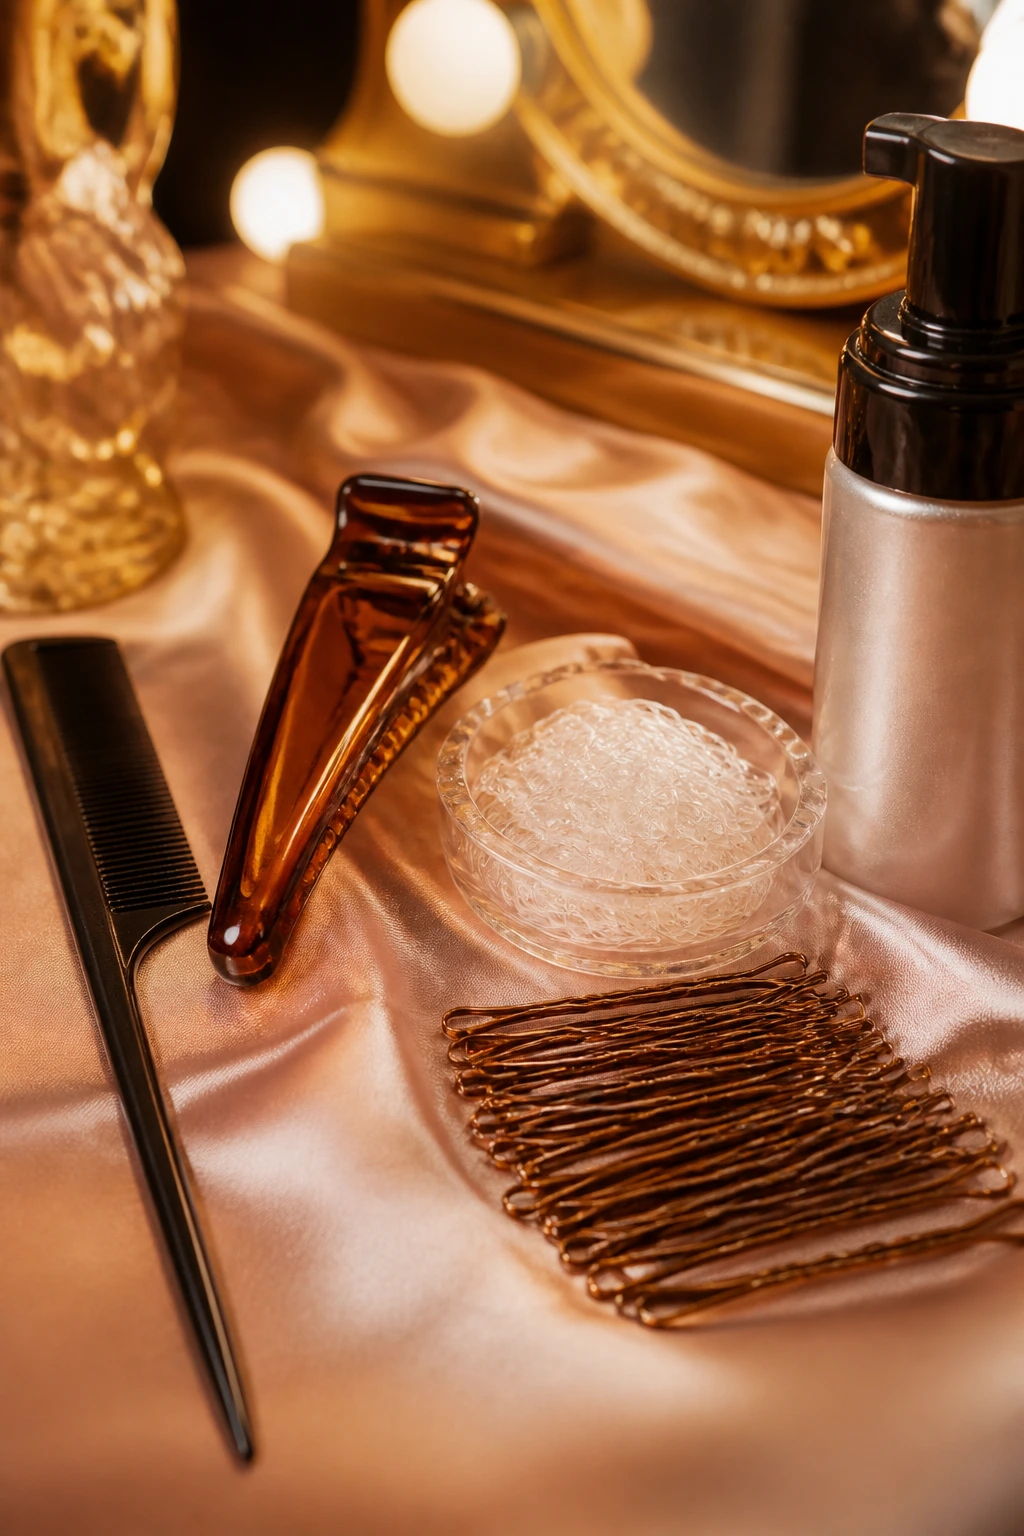
Essential Tools for the Look
-
Rat-tail comb: Best for clean parts, sectioning, and those sharp side sweeps that make the style feel finished.
-
Duckbill clips: Keep separate sections out of the way while you braid or roll the front.
-
Small clear elastics: Useful for securing the braid ends without making the finish bulky.
-
Bobby pins in your hair color: These disappear better than shiny pins when you tuck ends or shape a bun.
-
Setting mousse or foam: Helps hold the shape, especially for braids, rolls, and smooth crown sections.
-
Light-hold hairspray: Sets flyaways without turning the hair stiff or sticky.
-
Satin ribbon or scarf: The fastest way to tip a braid into vintage territory.
-
Pearl, shell, or rhinestone comb: One well-placed clip changes the whole mood.
-
Edge brush: Handy for softening baby hairs or smoothing the front without overdoing it.
-
Wide-tooth comb: Better for curls, coils, and loc prep than a fine comb that pulls too hard.
Prep Hair So the Braids Sit Cleanly
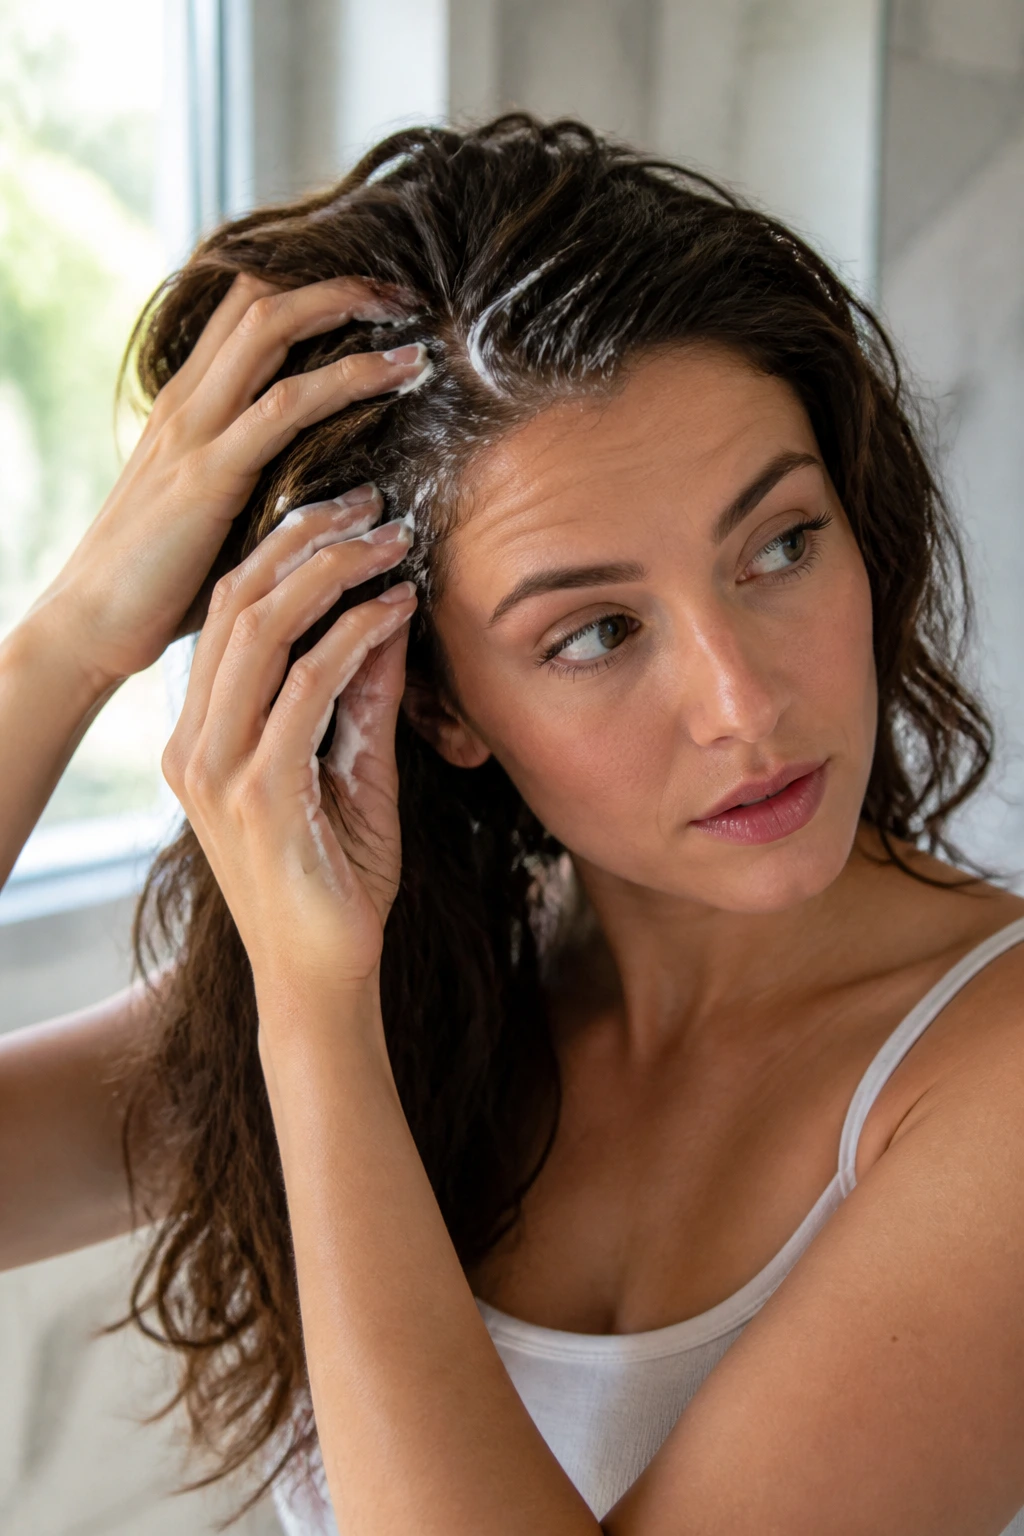
A vintage braid starts before the braid starts. Hair that is too slick, too damp, or too full of product will fight the shape, and the result is always more work than it should be. I prefer hair that has some grip but still moves — usually day-old hair or freshly dried hair with a little mousse.
If your hair is straight or fine, a mist of dry shampoo at the roots gives the braid something to grab. If your hair is curly or coily, stretching it first can help the parts stay visible and the braid lie flatter. That doesn’t mean blasting it with heat. Banding, blow-drying on low, or a gentle stretch method usually does the job.
Skip the urge to load on cream. A little is enough. Too much product makes the braid feel slippery, and then you’re chasing sections instead of shaping them. The best vintage styles have control, not grease.
Accessories That Make the Style Feel Vintage
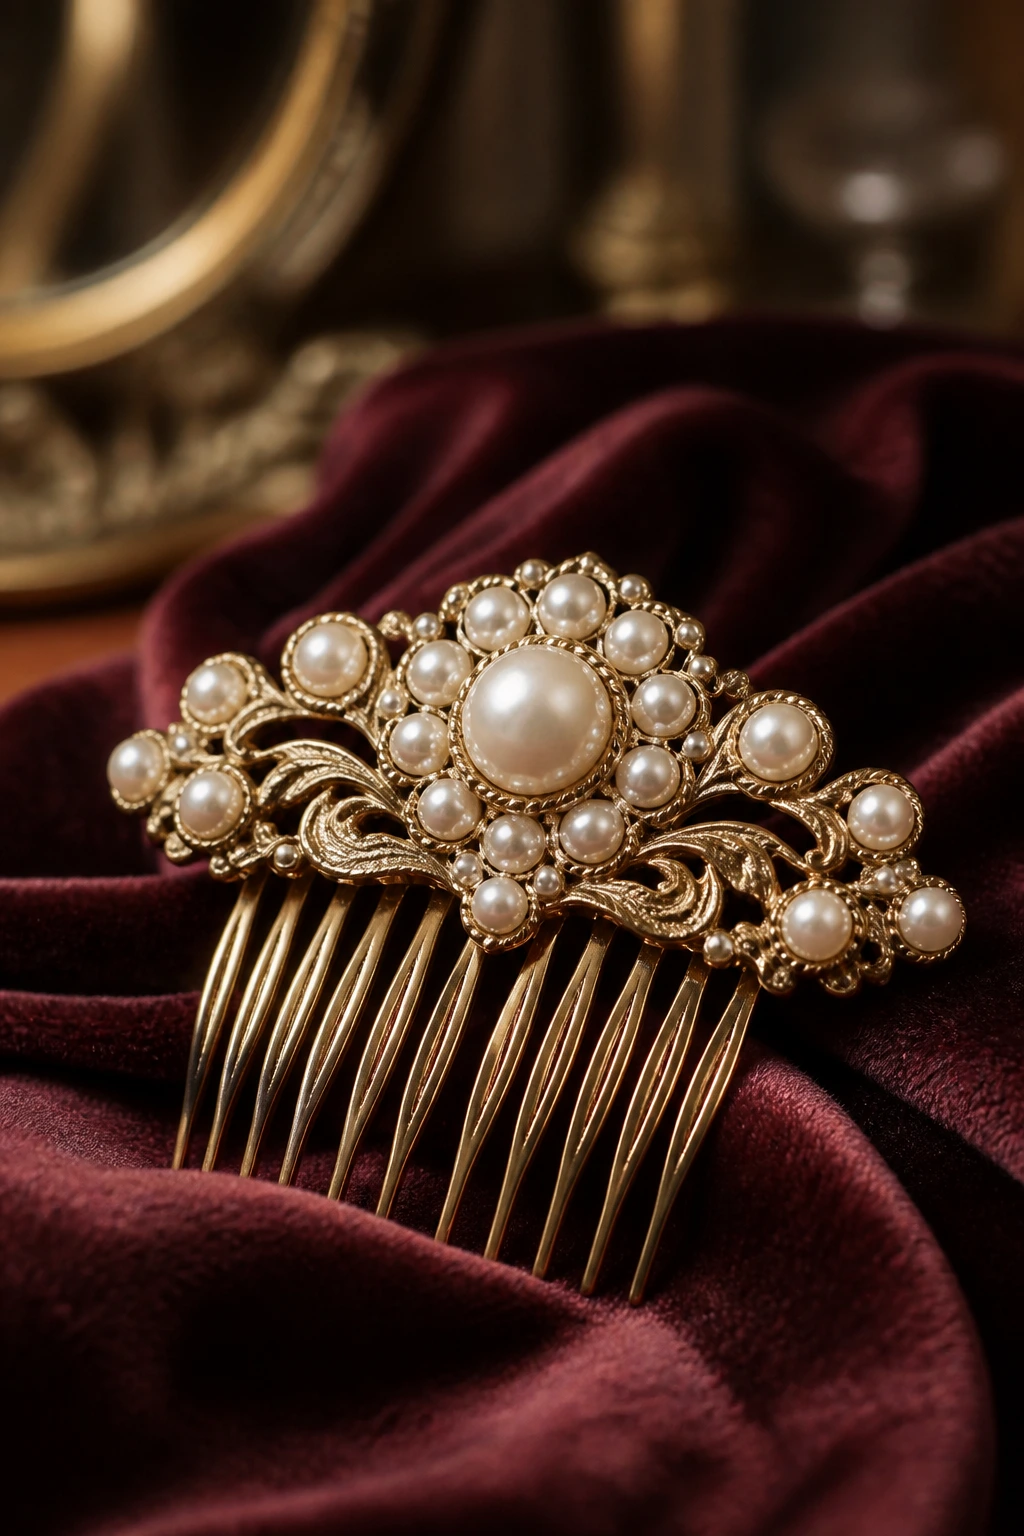
A braid can be technically perfect and still miss the mood if the accessory choice is off. The easiest way to make it feel vintage is to use something with a bit of old-fashioned texture: satin, velvet, pearls, tortoiseshell, brushed metal, or a soft patterned scarf. Shiny plastic clips can work, but they need a strong reason to be there.
Ribbons are the fastest win. So are slim combs tucked into a bun or a low side braid. I’d be cautious with oversized bows unless the whole look is meant to lean playful. The more formal the braid, the smaller the finishing detail usually needs to be.
If you want the style to feel like real vintage instead of costume, match the accessory to the rest of the outfit. A black ribbon with a white blouse looks clean. Pearl pins with satin or velvet feel graceful. A bandana reads casual and crisp. The accessory should support the braid, not compete with it.
Choosing the Right Style for Your Hair Length and Texture
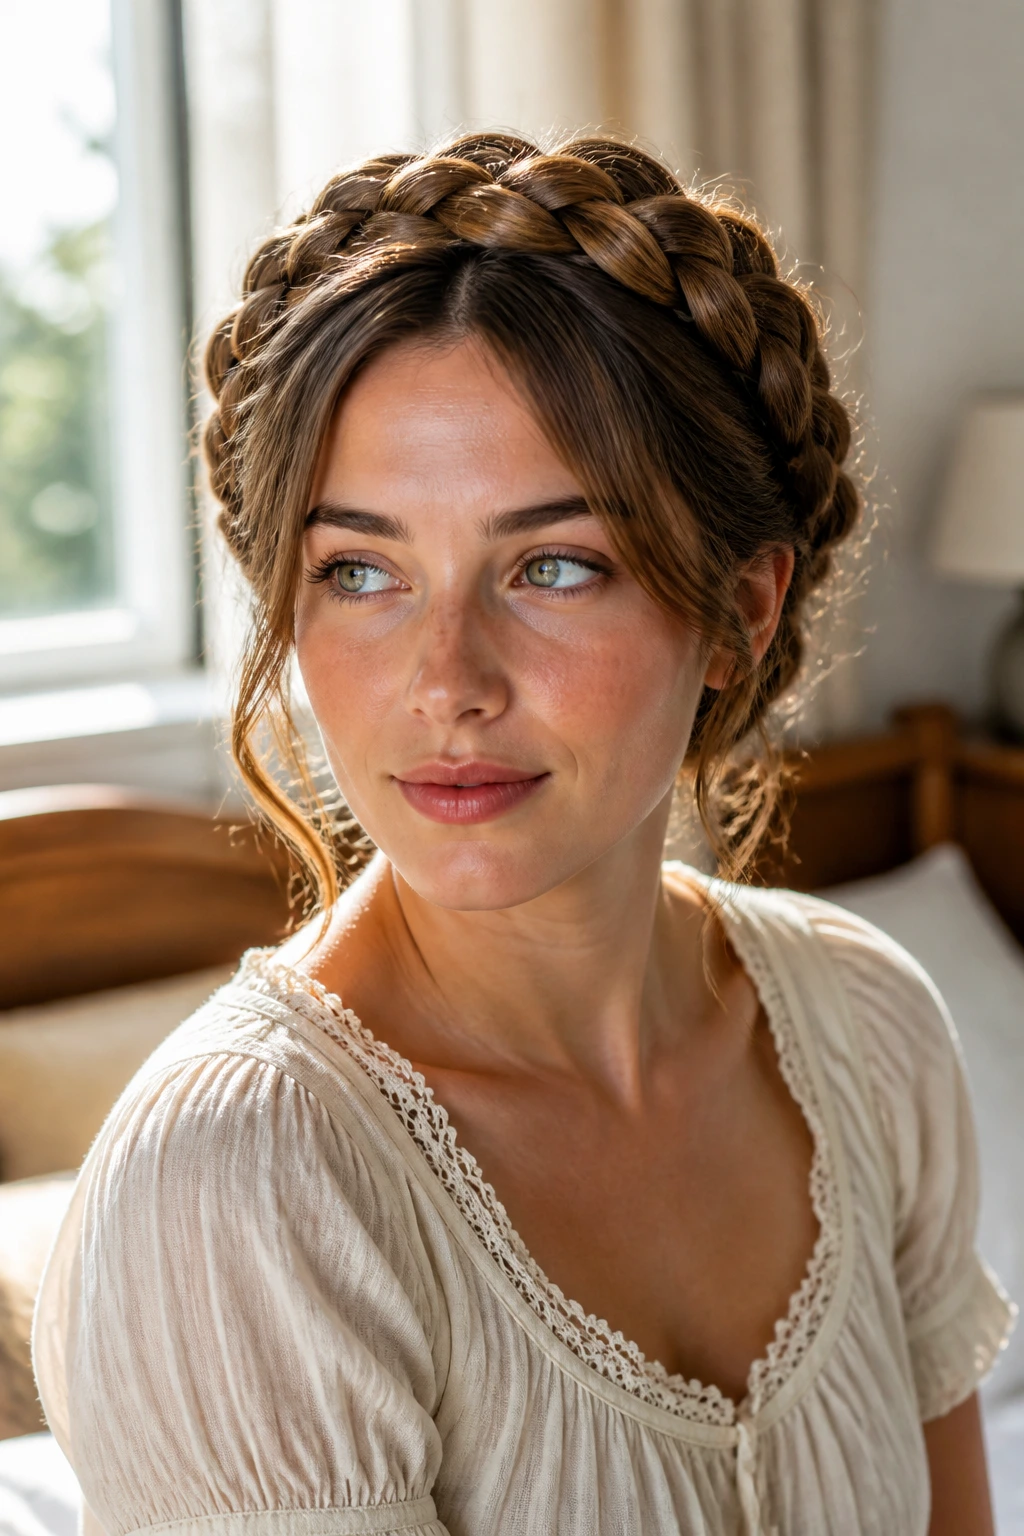
Short Hair
Shorter hair works best with tucked styles, scarf tricks, faux bobs, and braided headband shapes. You want designs that use pinning and framing more than length. Rope twists, side braids, and tucked halos are the most forgiving when the hair doesn’t reach the shoulders.
Medium-Length Hair
Medium length is the sweet spot for most of these looks. Milkmaid braids, braided chignons, French braids into faux bobs, and ribbon-woven styles all land nicely here because the braid has enough length to wrap but not so much that the style gets heavy.
Long Hair
Long hair gives you the most options, but it also asks for more control. Without enough pinning, the braid can drag down the whole style. Use longer braids for side sweeps, halo wraps, victory-roll combinations, and low buns that need extra volume.
Curly, Coily, and Textured Hair
Textured hair gives these looks an extra layer of character. The key is choosing the right amount of stretch and the right amount of moisture. Too dry, and the braid frays. Too wet, and the parts collapse. A balanced stretch and a light styling cream usually give the best result.
Locs
Locs shine in sculpted buns, crown twists, braided wraps, and side-swoop styles. The vintage vibe comes from the silhouette and the finishing pieces, not from forcing the locs into a shape that doesn’t suit them. Keep the front smooth and the base secure, and the style holds its own.
Practical Tips for a Cleaner Finish
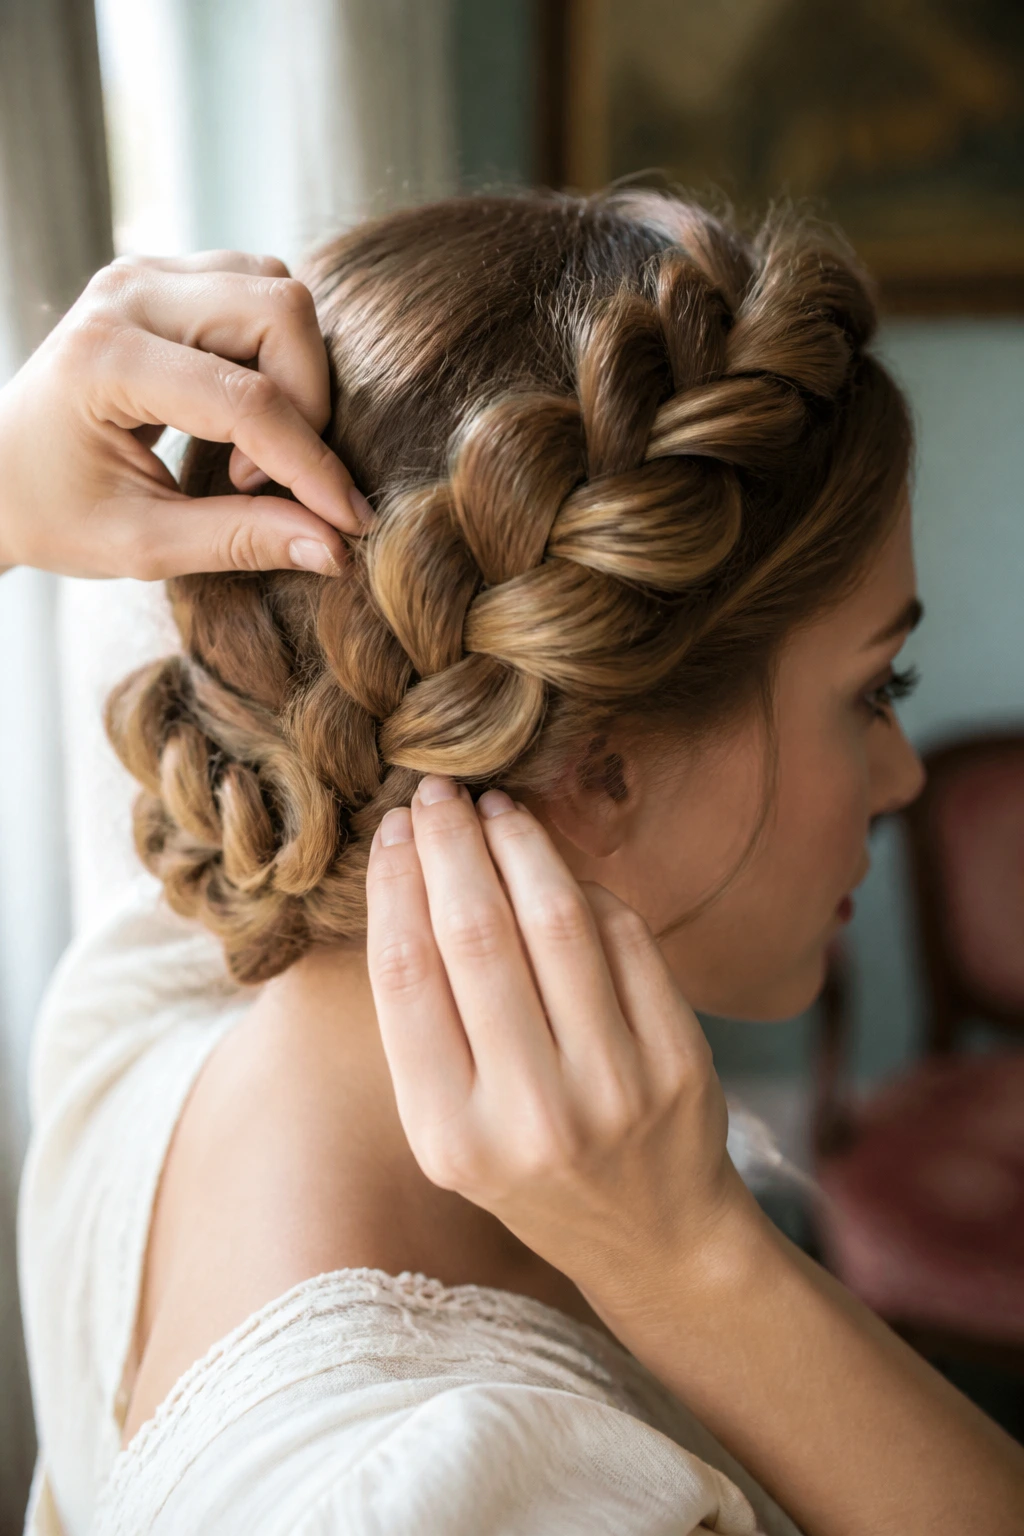
Parting matters more than people admit. A clean part is the difference between a retro braid and a braid that looks like it happened in the car. Use the tip of a rat-tail comb, check the line in two mirrors if you need to, and keep the part steady all the way back.
Don’t over-tighten the front. The braid can be snug through the middle and still leave the hairline comfortable. If the skin around your temples feels pulled, loosen it and start again. Sore edges do not photograph better. They just hurt.
Shape the braid after it’s secured. Gently pull at the outer loops if you want more width, but do it in small steps. A little pancaking goes a long way. If you pull too hard, the braid turns fuzzy and loses that neat vintage line.
Use pins like anchors, not decorations. Hidden pins should carry the weight. Decorative pins should sit where the eye can see them. If one pin is doing both jobs, the style usually slips faster than you want.
Common Mistakes That Flatten the Finish
-
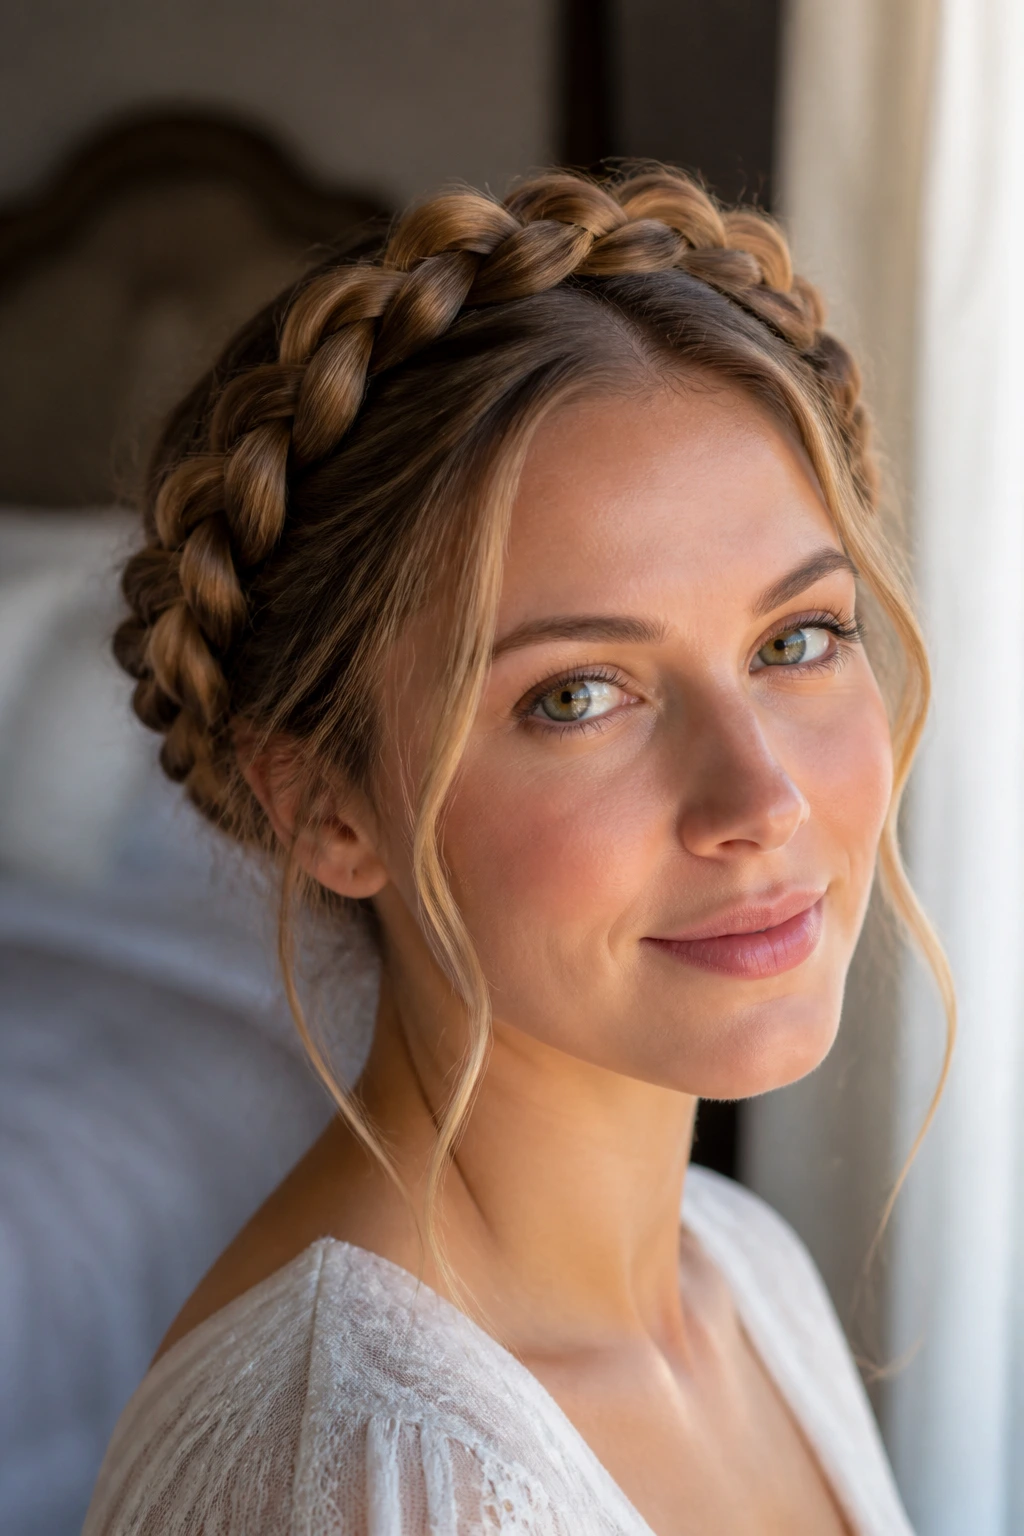
Braiding too tightly at the hairline: The scalp starts to ache, the front looks severe, and the style loses the softness that makes it vintage. Leave a little room near the hairline and secure the braid a touch farther back.
-
Using too much product: Heavy cream or sticky gel makes the hair look wet and flat instead of polished. Start with less than you think you need, then add only a touch more if the flyaways insist on showing up.
-
Skipping the prep step: Hair that hasn’t been stretched or detangled will puff in random places and make the braid uneven. Take the time to smooth and section first. It saves you from fixing the same loose pieces over and over.
-
Choosing accessories that are too large: Giant bows, oversized clips, or wide scarves can overwhelm the braid and push it into costume territory. One focused detail usually looks better than three loud ones.
-
Leaving ends unfinished: A braid that just hangs straight down can feel too modern or too casual for the mood. Tuck, curl, tie, or pin the ends so the finish has a clear point of view.
Variations and Adaptations to Try
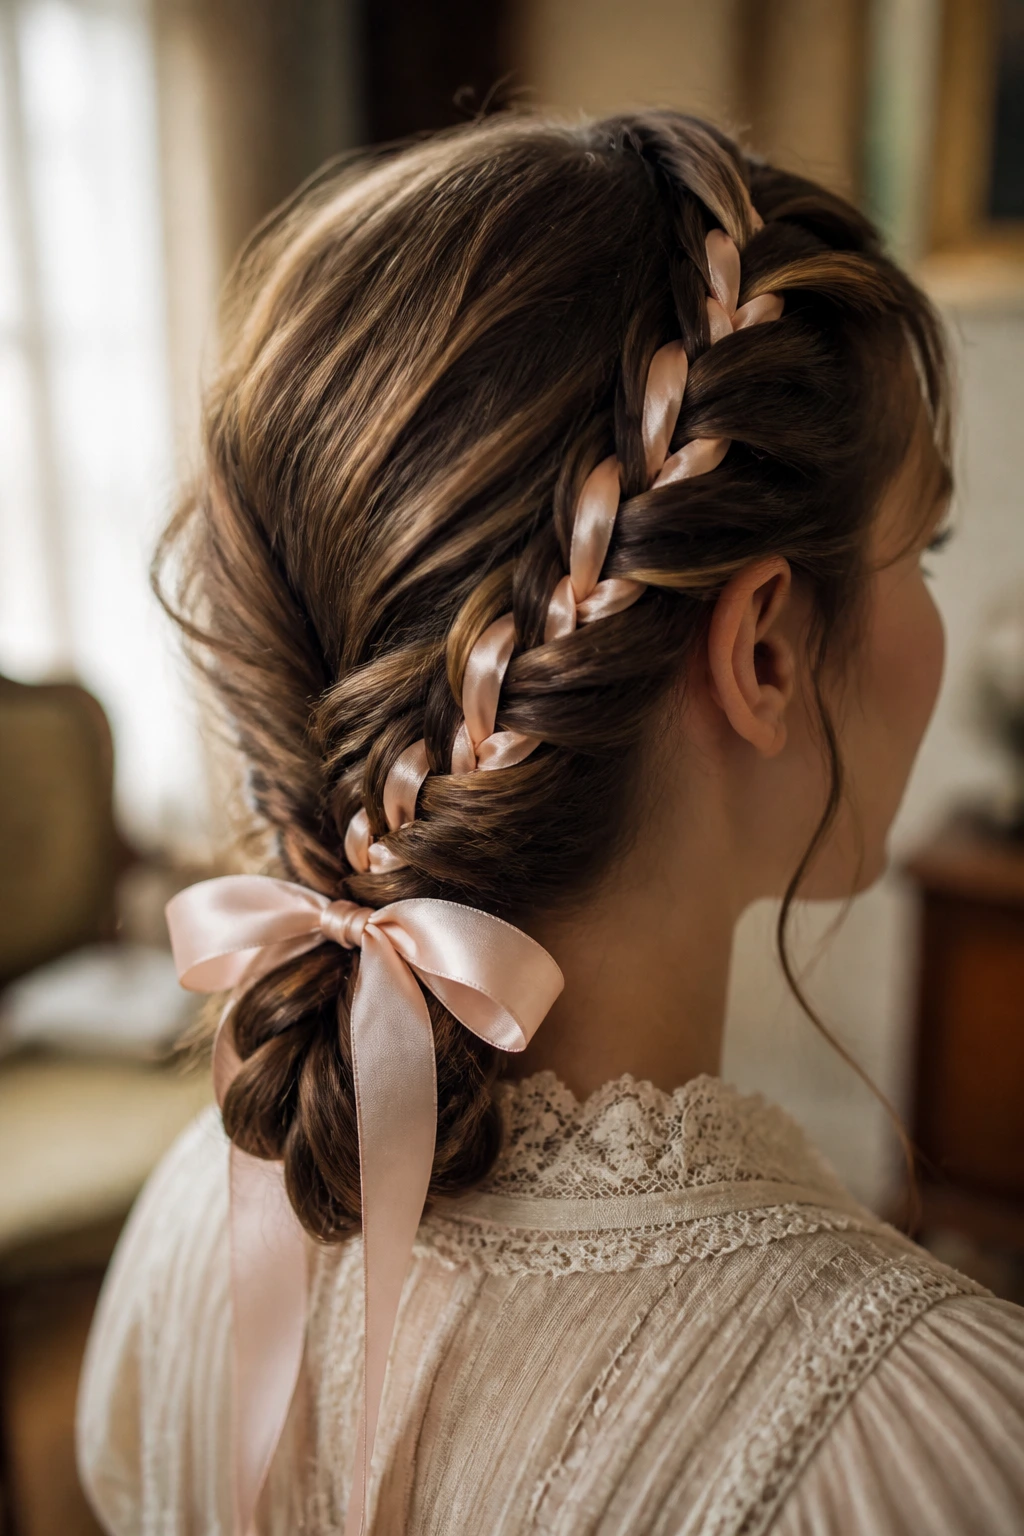
Ribbon-First Retro: Swap decorative pins for a single ribbon woven through the braid and tied low at the nape. This version is softer and easier to wear on a day when you want the vintage mood without a formal updo.
Heat-Free Hollywood: Set the front with mousse and a few pinned rolls, then let the rest of the braid do the work. No curling iron required, and the look still reads polished if the hair is stretched and smooth before you start.
Loc-Friendly Sculpture: Use rope twists, wraps, or braided sections to build the shape around locs rather than against them. The silhouette is what sells the vintage feel here, so keep the crown smooth and let the locs create the body.
Short-Hair Faux Vintage: Work with mini braids at the hairline, a tucked nape, and a scarf or beret to finish the shape. This is the best route when the hair does not reach the shoulder but you still want a retro outline.
Soft-Glam Evening Version: Add a deeper side part, a little crown lift, and one pearl clip or comb. Keep the braid low and glossy. The look should feel dressed up, not overloaded.
Keeping the Style Fresh Overnight and the Next Day
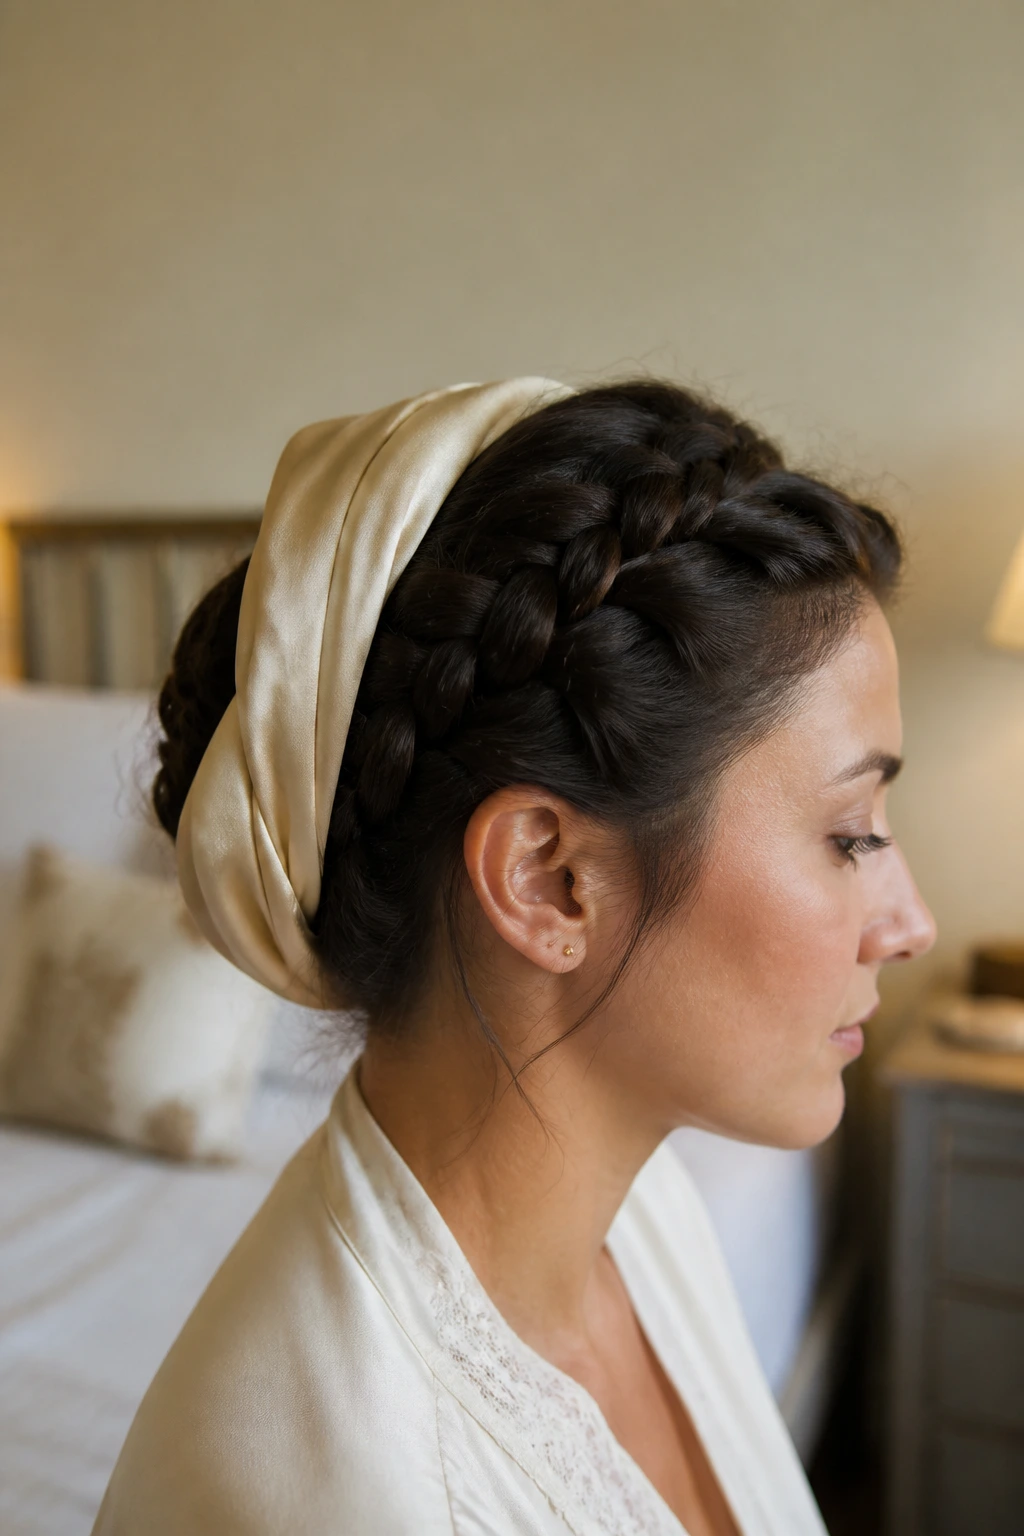
Braids hold their shape better than loose curls, but they still need a little care if you want them to survive past one evening. A satin scarf or bonnet cuts down on friction, which means fewer frizzy flyaways in the morning and less flattening at the crown.
If the style includes rolls or a tucked bun, wrap the scarf around the shape rather than pressing it down flat. That one detail makes a bigger difference than people expect. For side braids, lay the braid over your shoulder before covering it so it doesn’t twist awkwardly overnight.
The next day, use a tiny amount of mousse or a light cream on your palms and smooth only the outer layer. Re-pin any sections that loosened. If the braid itself still looks good, stop there. A vintage style should look cared for, not rebuilt from scratch at dawn.
Frequently Asked Questions
Which vintage braid hairstyle works best on short hair?
The best options are tucked halos, side braids, braided headbands, and faux-bob styles. They rely on pinning and shaping more than length, so you can get the retro outline without forcing your hair into a long braid it doesn’t naturally have.
Can I do these styles on natural curls without heat?
Yes, and some of them look better that way. Stretch the hair with banding, braiding, or a gentle blow-dry on low if you need cleaner parts, then keep the braid tension moderate so the texture still shows.
What accessory makes a braid look vintage the fastest?
A satin ribbon or a small pearl comb usually changes the mood fastest. A scarf also works well, especially if the rest of the style is simple and the color sits nicely with the outfit.
How tight should the braid be?
Snug enough to hold, loose enough to breathe. If the front feels painful or the braid starts tugging at the temples, it’s too tight. The prettiest vintage braids tend to have controlled shape, not a stretched scalp.
Do these styles work with locs?
Yes. Locs do especially well in crown wraps, low buns, side swoops, and rope-twist shapes. The key is to build a clear silhouette and use enough pins or wraps to keep the weight distributed.
How long will a vintage braid style last?
Loose braids and pinned updos usually look best for one to three days, depending on humidity, product, and sleep care. Extension braids can last much longer, but those need separate maintenance and should never feel painful at the roots.
What if my braid looks flat after I finish it?
Pull the outer braid loops apart a little, lift the crown with the tip of a comb, or add a small accessory near the part. Flatness usually means the braid needs shape around it, not more braid on top of it.
Can I wear these styles under a hat or veil?
Yes, and some of them improve under a hat. A side braid, tucked chignon, or low crown braid sits especially well under berets, pillbox hats, and veils because the shape stays low and tidy.
A Vintage Finish That Still Feels Like You
The best vintage braid is never a costume by accident. It has a point of view. A little polish at the crown, a braid that knows where to land, one ribbon or clip that looks chosen rather than grabbed — that’s usually enough.
What I love most about these looks is how adaptable they are. You can make them gentle, sharp, romantic, formal, playful, or plain old practical, and the decade reference still lands. Start with one shape that suits your hair length and texture, then change the mood with the part, the finish, and the accessory. That’s where the fun lives, and it’s a lot less complicated than it sounds when the braid is doing the heavy lifting.
