



Spring twists have a way of looking polished on day one and a little softer by day three, which is exactly why I keep coming back to them. The texture does half the work for you. No curling wand. No fussy finishing pass. Just that springy, coiled movement that sits somewhere between neat and playful, which is a very nice place for hair to live.
The best cute spring twist styles aren’t the ones packed with extra noise. They’re the ones that let the shape do something useful: skim the jaw, open up the neck, pull weight off the shoulders, or give the face a cleaner frame. A shoulder-length set looks breezy. A bob looks sharper. Long twists can feel glamorous without turning into a heavy sheet of hair that drags all afternoon.
And here’s the part people miss: the same spring twist install can read soft, sporty, elegant, or a little dramatic depending on the part, length, and front pieces. That’s where the good stuff is. Once you start treating the front half, the crown, and the ends as separate design choices, these styles stop feeling like “just twists” and start feeling like a real rotation.
Why These Spring Twist Styles Stand Out
-
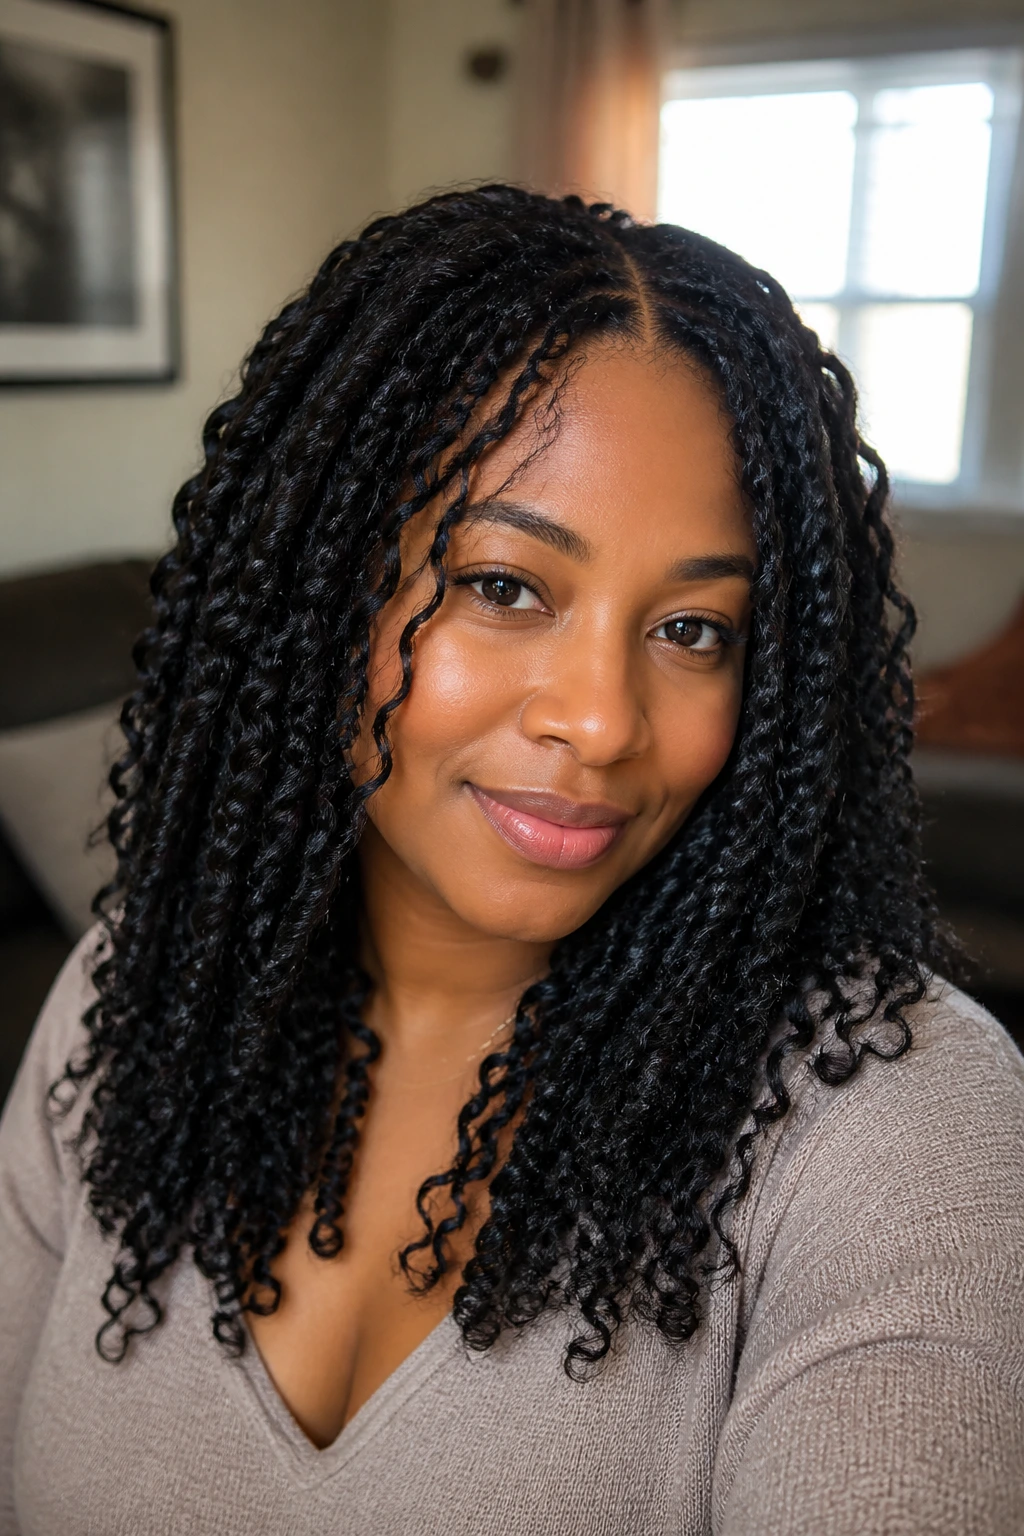
Lightweight movement: Spring twist hair already has bend and bounce, so these styles look alive even when you keep the finish simple.
-
Parting changes everything: A clean middle part, a deep side part, or triangle sections can make the same install feel completely different.
-
Front pieces matter more than people think: A few face-framing twists can soften a strong jawline, shorten a long face, or stop a blunt bob from looking too boxed in.
-
Accessories do not have to do much: One cuff, one scarf, or a single row of beads can carry the whole look when the parting is neat.
-
The style grows out with some grace: Small frizz at the roots tends to blend into the texture instead of shouting for attention, which is a blessing if you like your hair to live past the first fresh-install day.
What Makes Spring Twists Easy to Wear
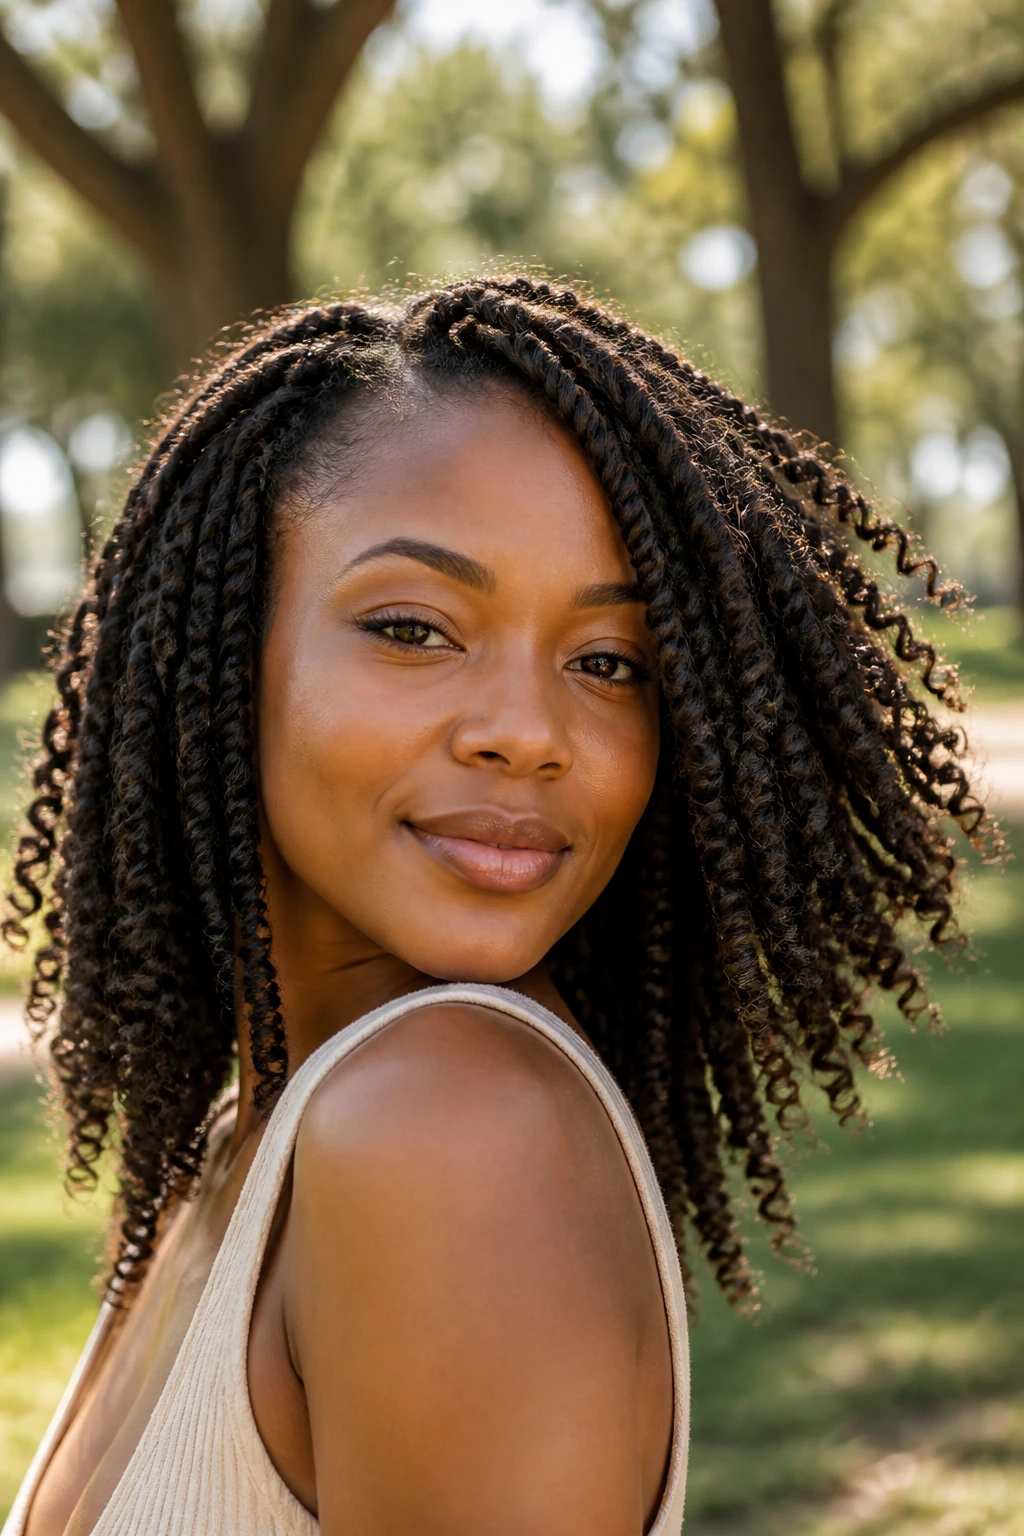
Spring twists sit in a nice middle ground. They have more movement than straight twists, but they are not as fussy as loose curly styles that tangle if you so much as blink at them. The coil pattern hides a lot. That matters.
If you’ve ever had a protective style start looking tired because one section got roughed up, spring twists are kinder. A little frizz at the crown just reads like texture. The key is clean sectioning and sane tension at the root. Tug too hard and the whole style starts barking at your scalp. Keep the base neat and the rest of the twist can be soft.
I also like that the style can shift tone without a reinstall. Tuck one side behind the ear, flip the ends, pin the front into a half-up shape, or tie on a scarf, and the whole look changes. Easy. Not boring. That’s the sweet spot.
A small detail that changes the whole thing
The hairline is not the place to show off. Light tension at the edges, slightly larger parts in the front if your scalp is sensitive, and a little spacing between sections will make the style wear better than a super-tight install that looks sharp for two hours and miserable after that.
What to Ask for Before the First Twist Goes In
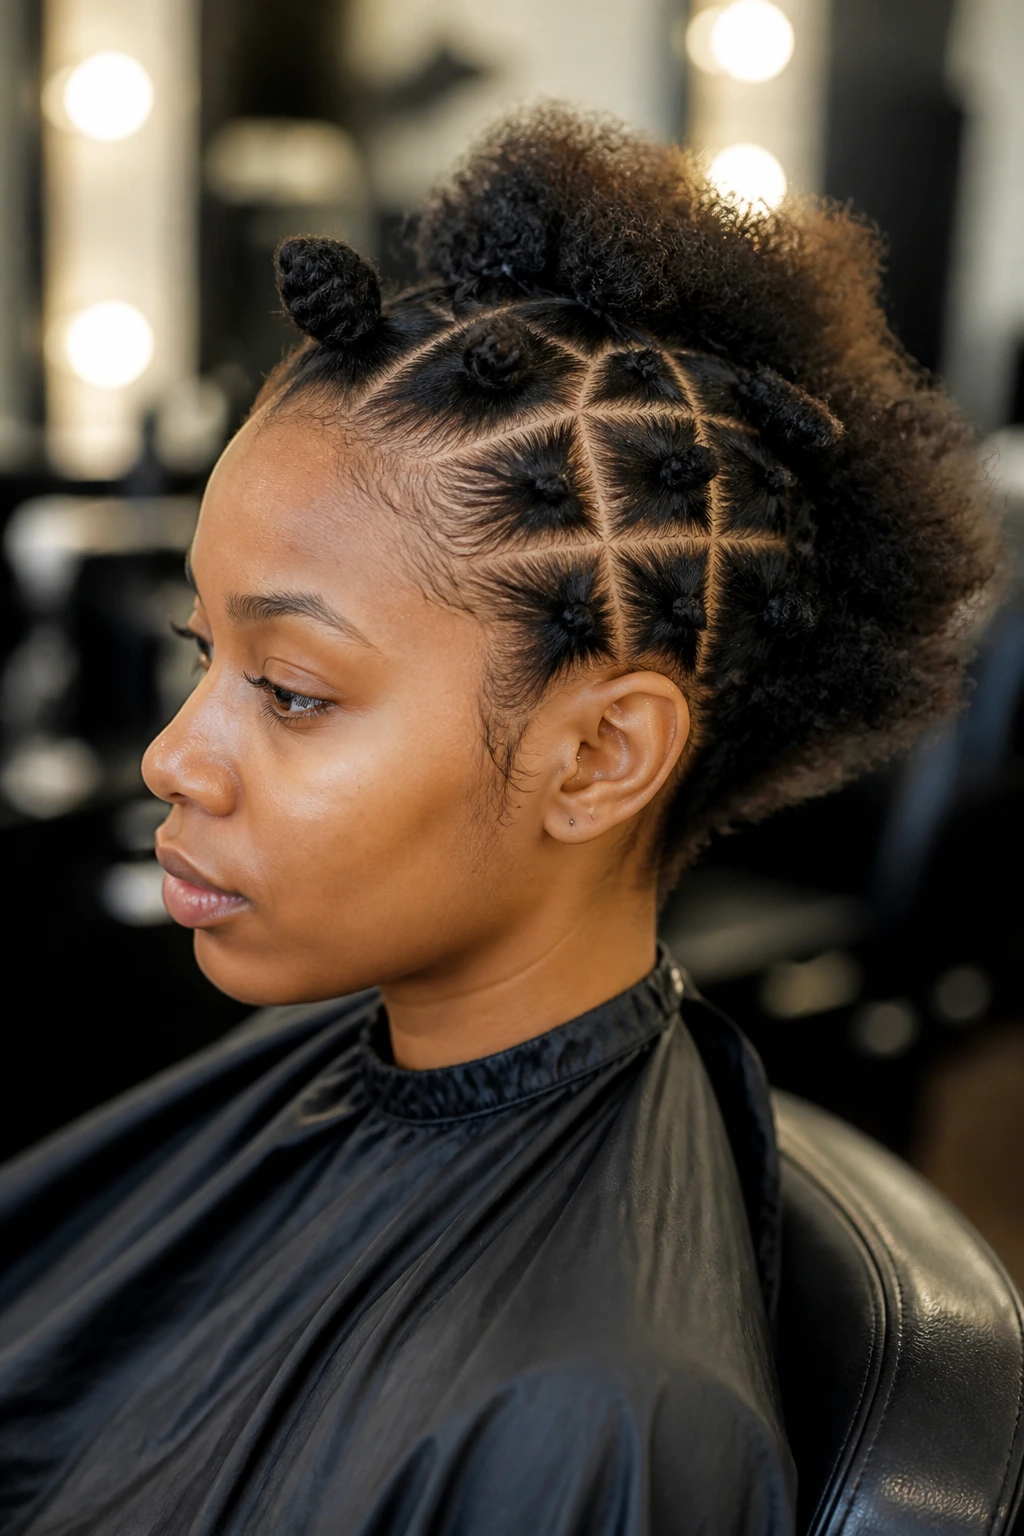
The style looks much better when the planning happens before the first section is parted. Ask for length first, because length changes everything else. A chin-length bob needs less hair and sits closer to the face. A mid-back look needs more volume control. Waist-length twists look gorgeous, but they also ask more from your neck, your sleep routine, and your patience.
Part size is the next conversation. Smaller parts give you more density and a fuller finish, while medium parts keep the style lighter and faster to install. If you wear glasses, hoop earrings, or headphones most days, ask for pieces that won’t crowd your ears and temples. That tiny adjustment saves you from constant fiddling.
If your hairline is tender or you know your scalp gets irritated fast, say so upfront. A good install does not have to feel like a tug-of-war. Clean parts, moderate tension, and a little softness around the hairline are not signs of a weak style. They’re signs that somebody actually knows how hair behaves once you leave the chair.
1. Shoulder-Skimming Spring Twist Lob
A lob is where spring twists start to feel breezy instead of bulky. The ends hit around the shoulders, so the style swings when you walk but doesn’t take over your whole frame. I like this length because it gives you enough hair to play with, without the daily drag of a long install.
Why It Flatters the Neckline
The shoulder-skimming length keeps the twist pattern visible and stops the style from bunching at the collar. It also works cleanly with side parts, middle parts, and one pinned front section.
- Easier to tuck into a coat or blazer.
- Uses less hair than longer installs.
- Keeps earrings from disappearing into the style.
Best move: leave the front slightly longer than the back. That tiny slope makes the lob feel intentional instead of chopped.
2. Chin-Length Spring Twist Bob
A chin-length bob makes spring twists look sharp. No drama. Just clean shape and a little swing at the jaw. If you want a style that reads neat from every angle, this is one of the easiest wins in the whole lineup.
The trick is keeping the ends close enough to the face that the texture frames your features instead of hiding them. One side tucked behind the ear looks polished; both sides loose keeps it softer. This is also the length I’d choose if you hate twists brushing your shoulders all day.
It’s small enough to feel light, but not so short that it loses personality. That’s the appeal.
3. Deep Side-Part Curtain Spring Twists
Why do side parts make spring twists look softer? Because they break up the strong vertical line and give the front pieces somewhere to fall that isn’t dead center on the face. The whole style gets a little more movement, a little more shadow, and a lot less stiffness.
How to Wear It
Keep the heavier side just long enough to skim the cheekbone, then let the thinner side sit close to the temple. A single gold cuff near the part gives the eye a place to land.
If you like a style that looks good both down and half-pinned, this one earns its spot. It also photographs well in real life, which matters more than people admit. The part does half the styling for you. The rest is just placement.
4. Half-Up Crown Spring Twists
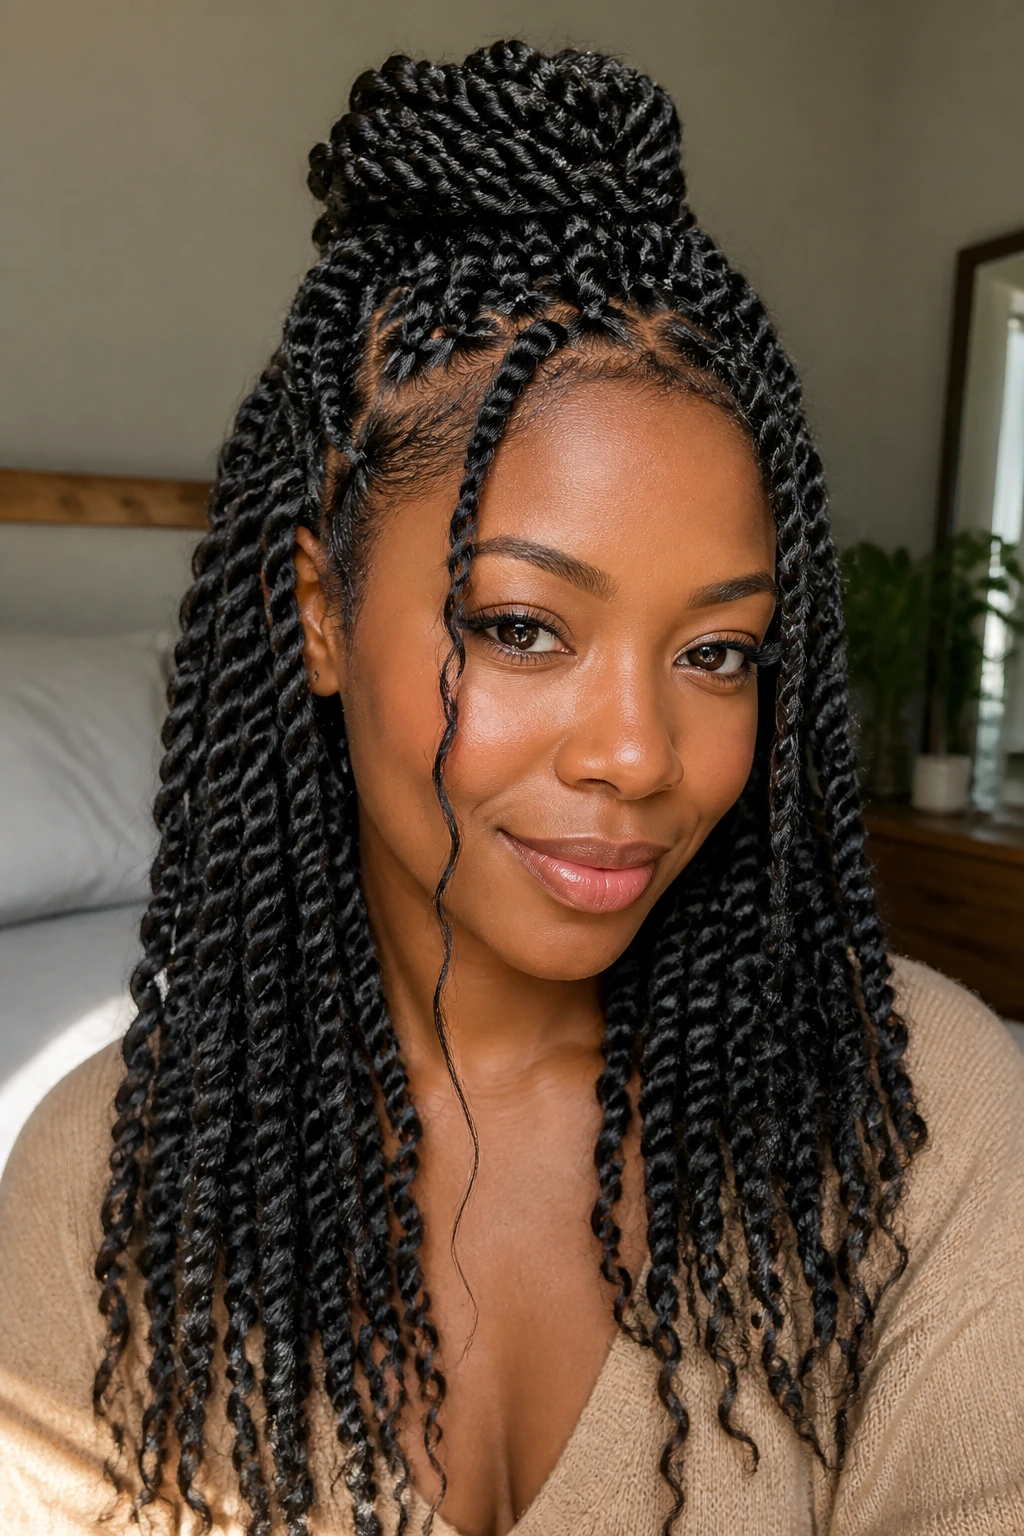
Half-up spring twists are the practical compromise that still looks finished. Pulling the top section up opens the face, and leaving the rest down keeps the twist texture visible where it matters most. It’s the kind of style that can go from errands to dinner without a full redo.
The crown section looks best when it’s not too tight. Gather it gently, wrap a small twist around the base, and let the back stay loose and springy. If the top is slicked back hard and the rest is fluffy, the contrast can work — but it needs clean edges to pull it off.
A few face-framing strands make this style feel softer. Without them, it can tip into severe territory fast.
5. High Pineapple Spring Twist Ponytail
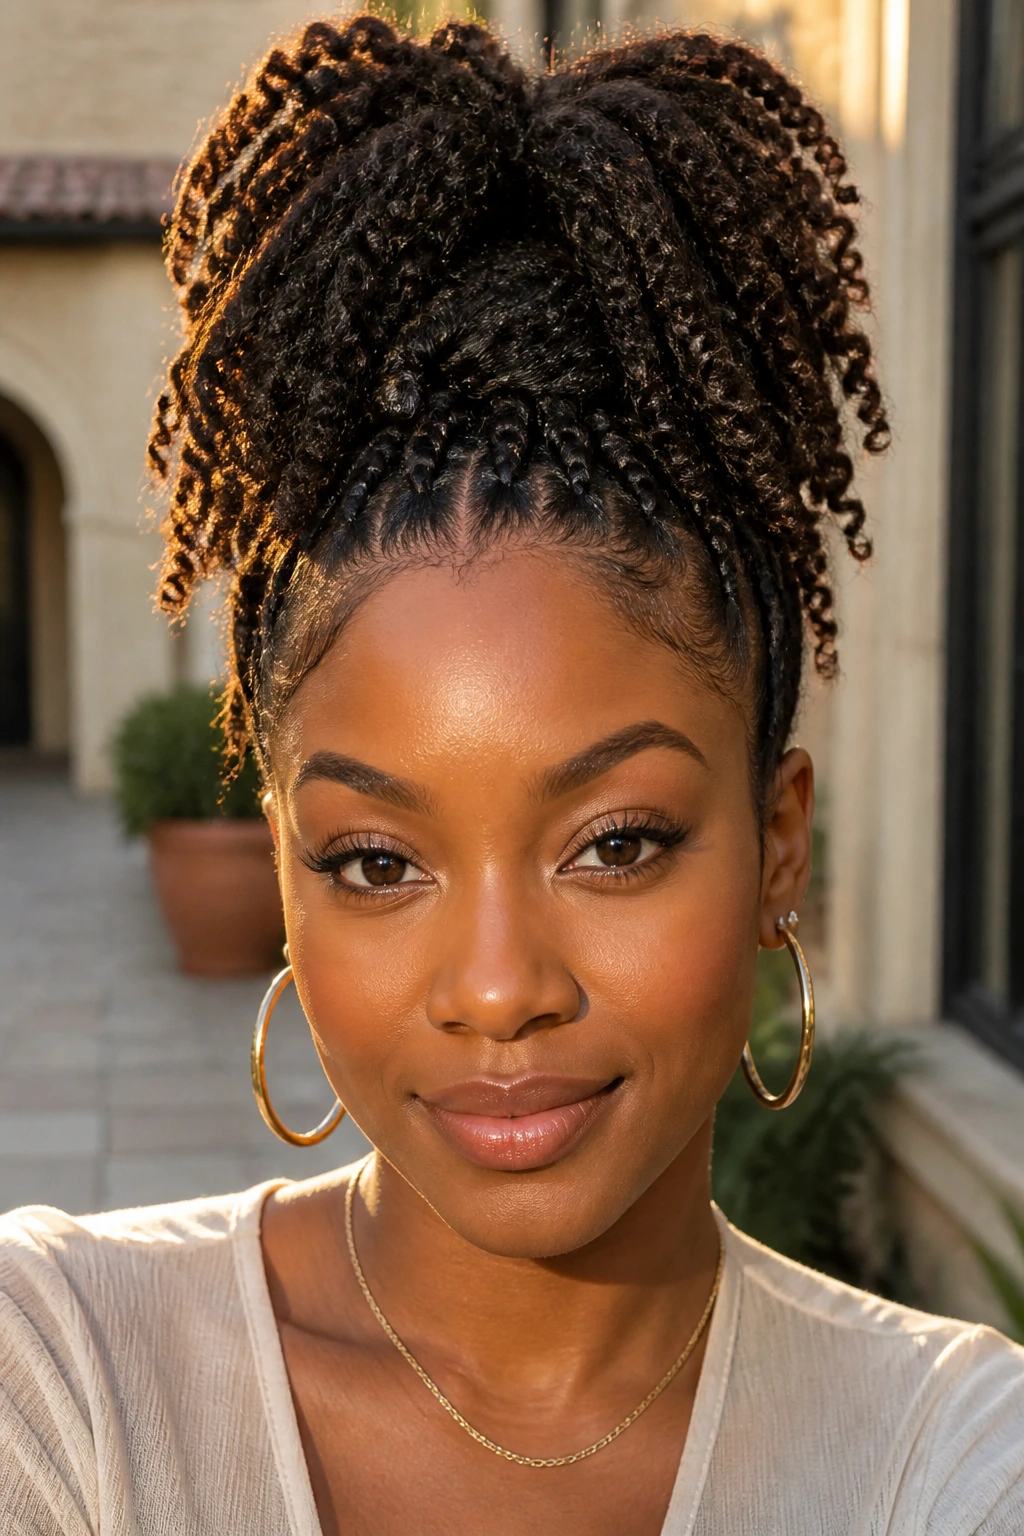
A high pineapple ponytail gives spring twists a little lift and a lot of attitude. Everything sits up and away from the shoulders, so the face opens right up. It’s a smart choice when the weather is warm or when you want the style to feel lighter without changing the install.
The base should sit high enough that the ponytail falls forward and out, not straight down your back. That’s the difference between a pineapple and a plain ponytail. A wrapped base hides the band and makes the whole thing look more finished.
This look is also friendly to a busy day. You can pull it up fast, reset it with a scarf at night, and wear it down again the next morning. Not fancy. Just useful.
6. Low Wrapped Spring Twist Bun
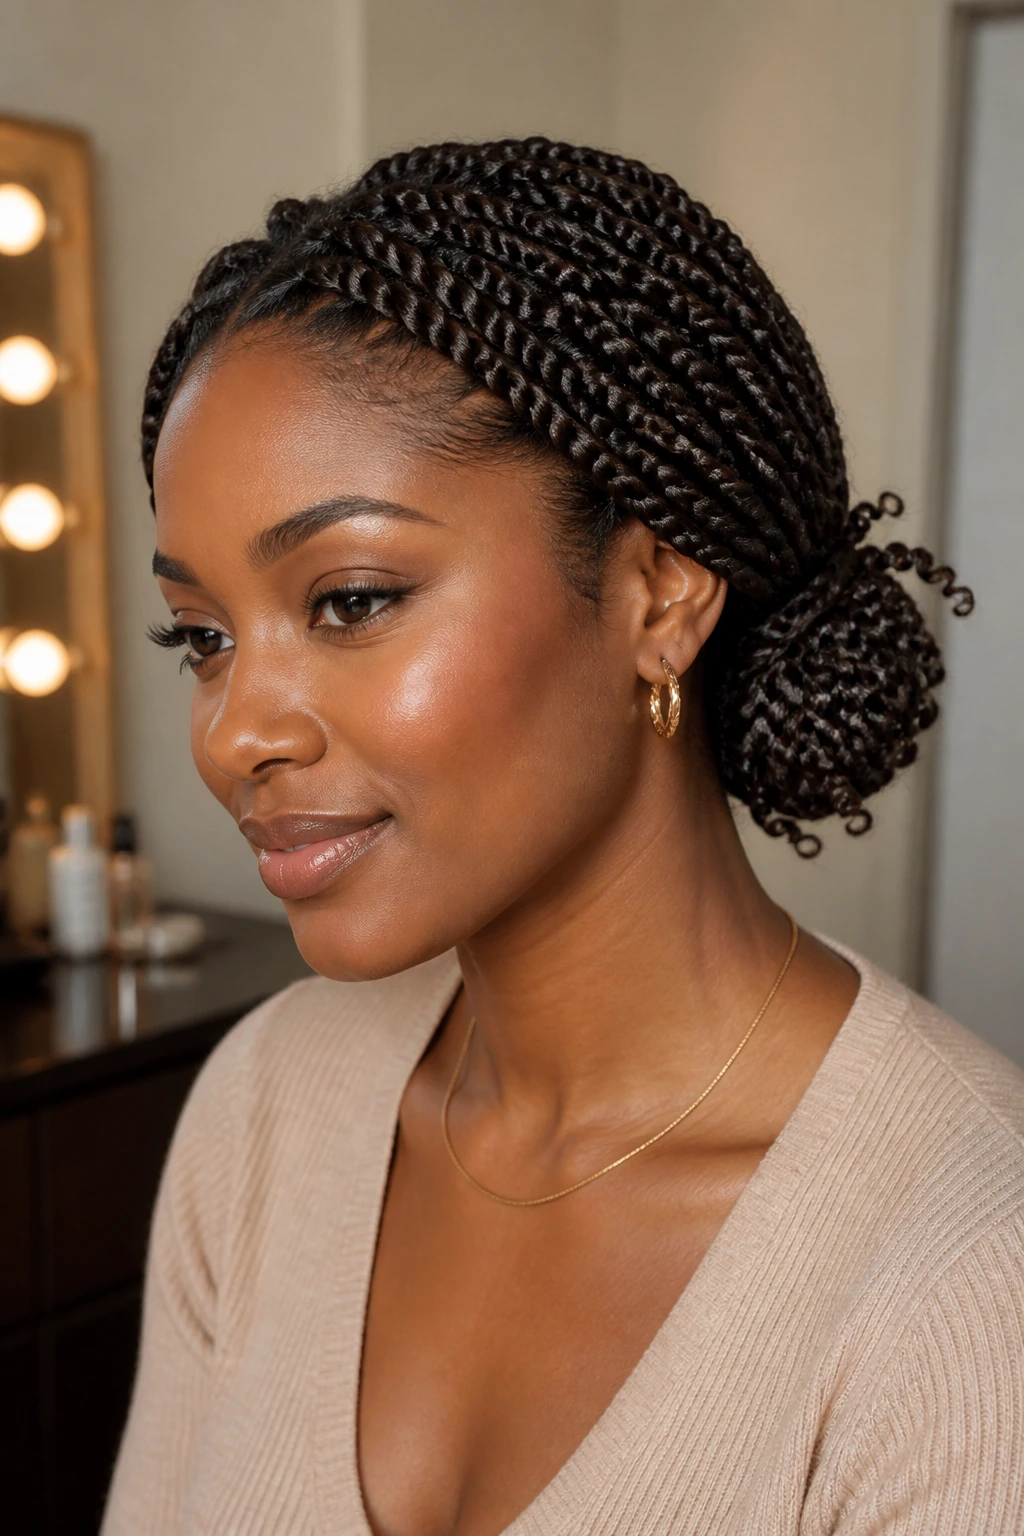
A low bun is where spring twists turn polished. Gather the twists at the nape, wrap them into a soft knot, and leave a few ends peeking out instead of forcing everything into a hard shell. The result looks composed without feeling stiff.
This style works especially well when the twists are medium length. Too short and the bun gets fussy. Too long and it starts to feel heavy unless you pin it carefully. A low wrapped bun is one of my favorites for dressier days because it looks intentional with almost no extra effort.
If your parts are clean, you don’t need much else. One scarf or one cuff is enough.
7. Triangle-Part Spring Twists
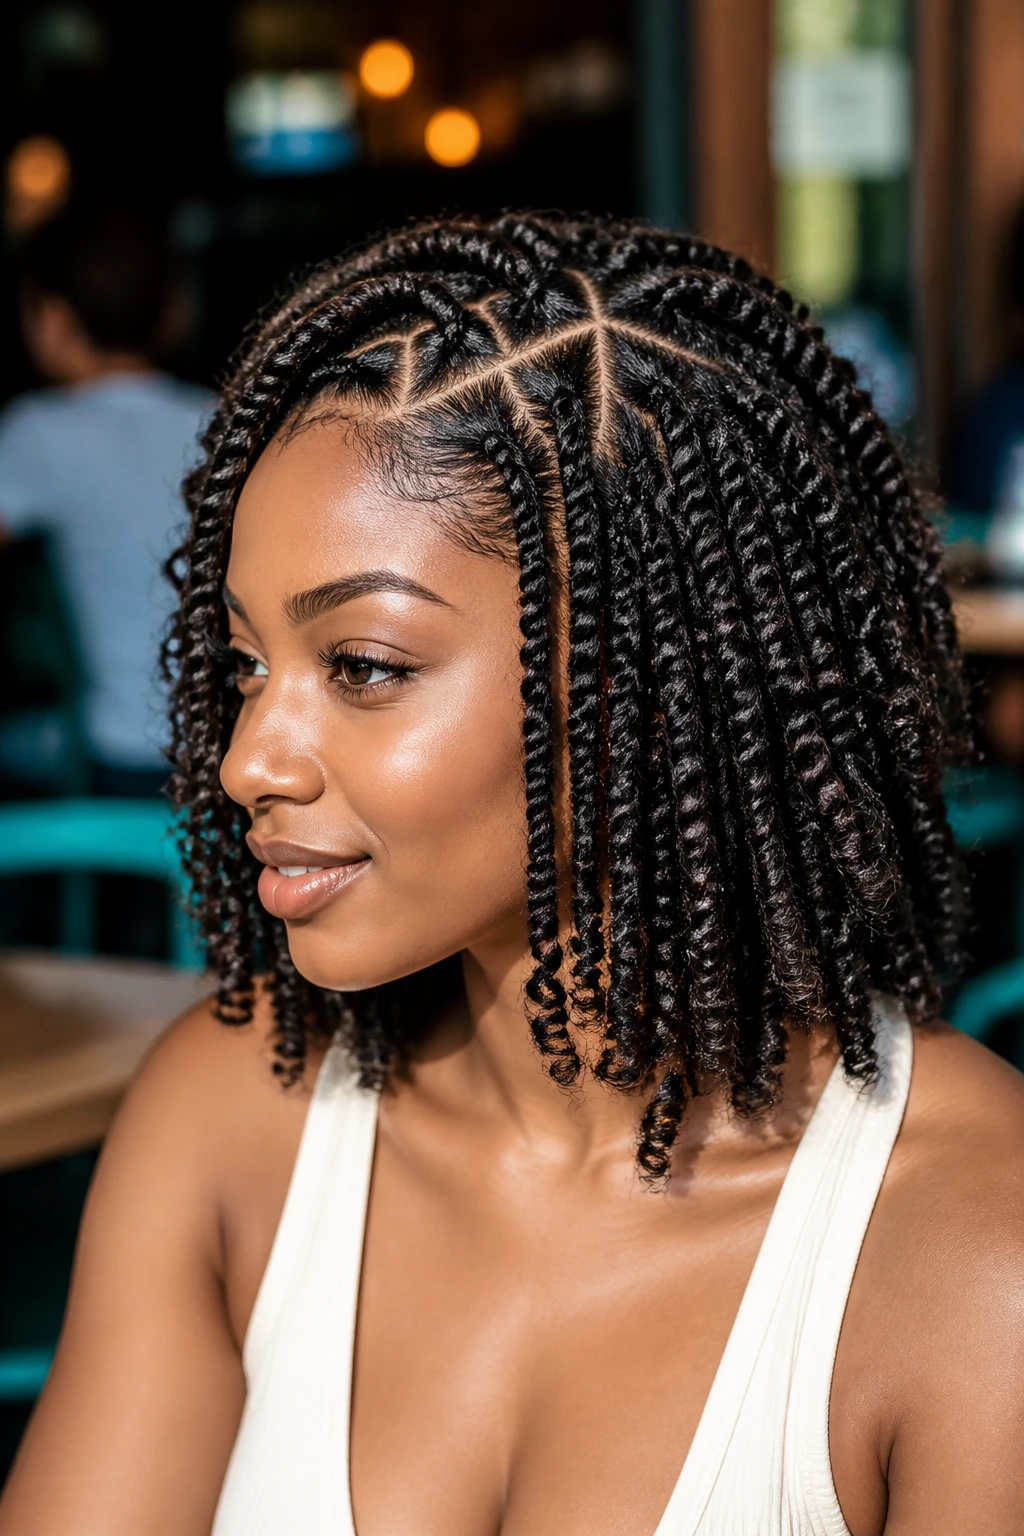
Triangle parts make the whole install look more thought-out. The geometric shape breaks up the scalp in a way that reads fresh even when the actual style is simple. That little change at the root is often the difference between “nice twists” and “oh, I like that.”
This style works beautifully on medium-length installs because the parting detail stays visible. On long twists, the pattern is still there, but the hair does more of the talking. On short twists, the triangles can carry the whole look.
I’d pick this when you want the style to be cute without adding accessories. The parting is the accessory.
8. Layered Face-Framing Long Twists
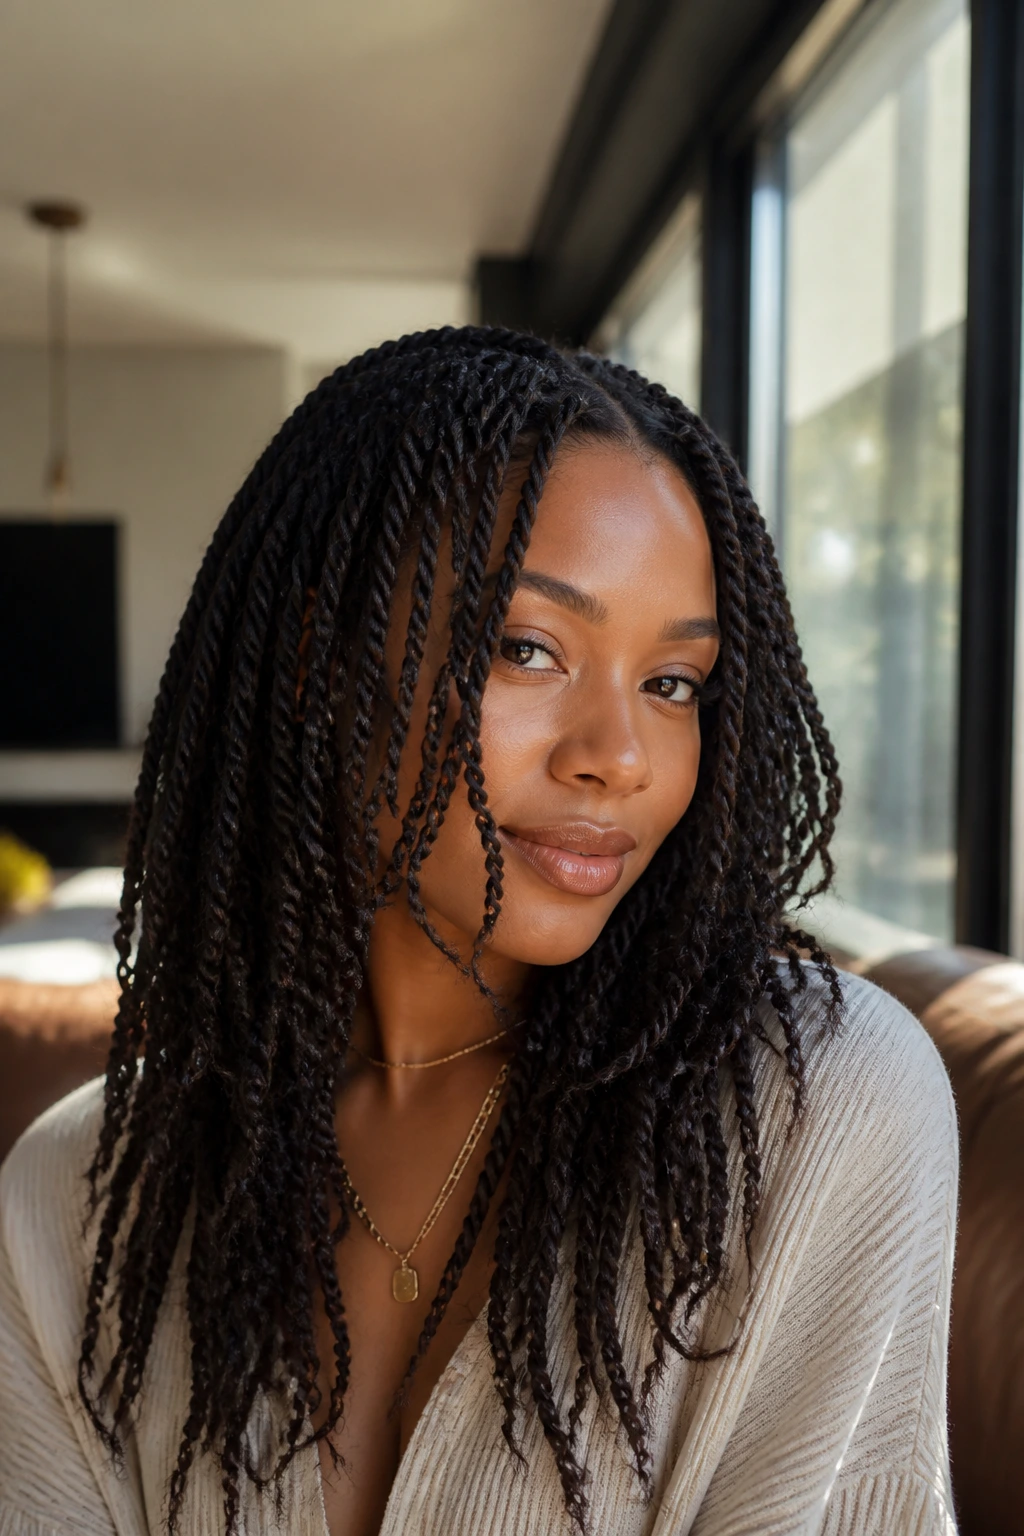
Long twists can get heavy fast, so layers are doing a lot of work here. Keep the front a touch shorter, let the center sections fall longer, and the whole style starts to move instead of hanging like one solid block. That shape is kinder to the face and easier on the neck.
The best layered versions leave a few twists grazing the cheekbones and jaw. It softens the line, especially if your hair is naturally dense. You can still wear them down, but you won’t feel like you’re carrying a curtain.
Long is fine. Long and shapeless is the problem.
9. Honey-Ombre Spring Twists
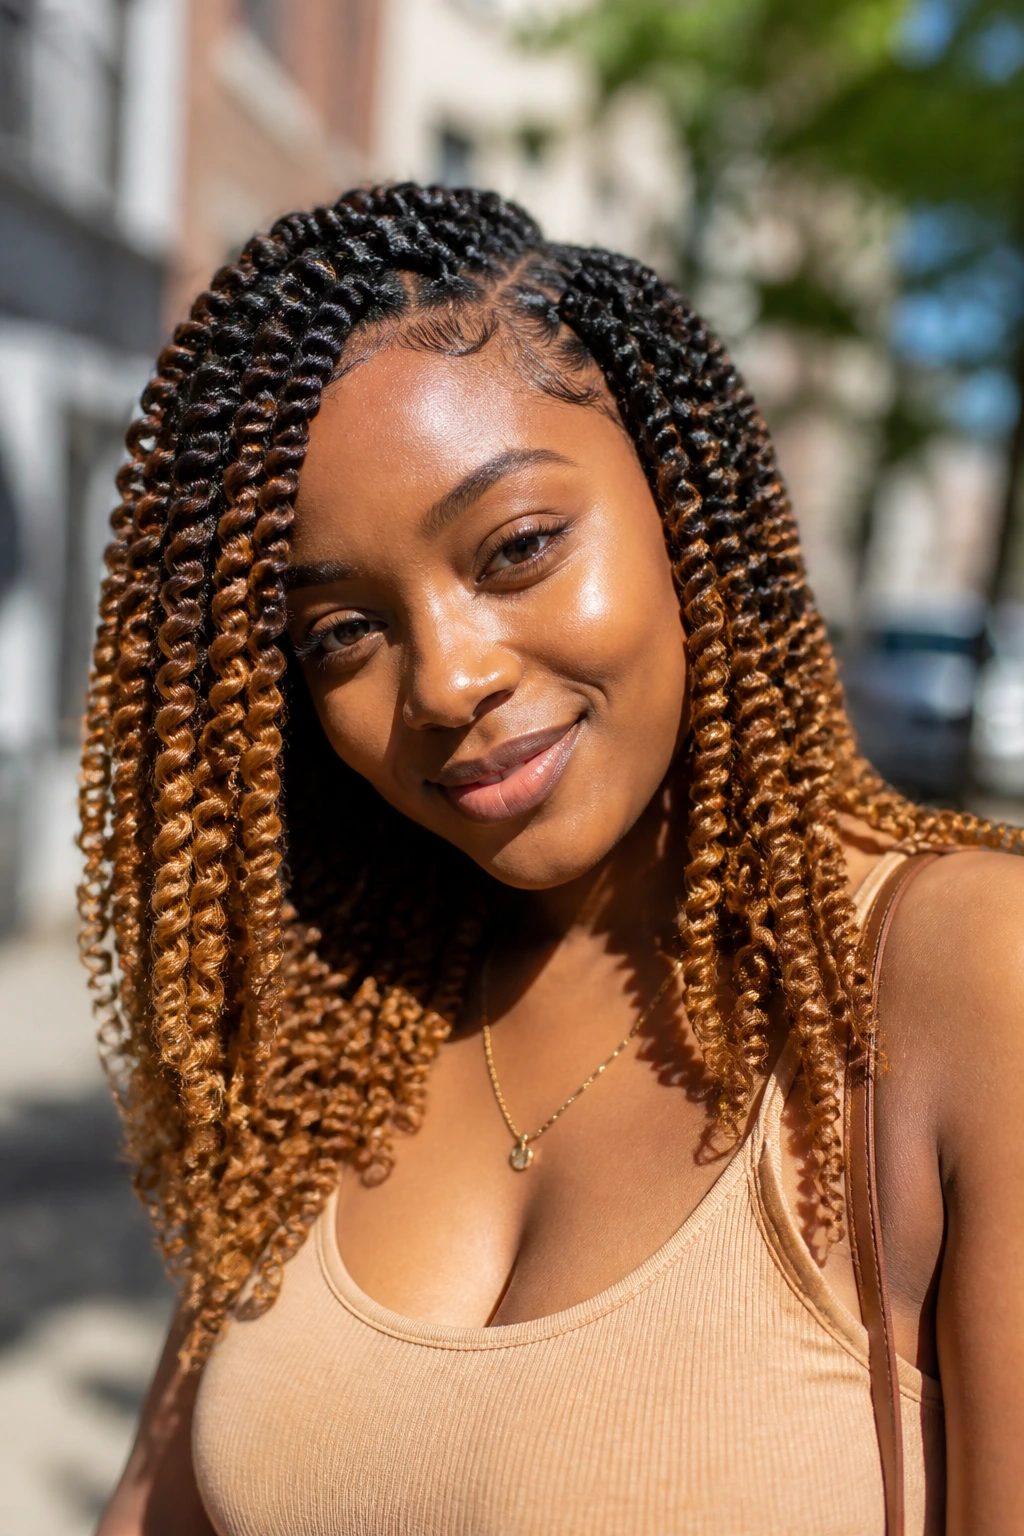
Color changes the mood faster than almost anything else. Honey-ombre spring twists warm up the whole style and make the spring pattern stand out, especially when the lighter ends catch the light against a darker root.
What I like about ombre in twists is that the gradient doesn’t need to be perfect to look good. In fact, a little variation keeps it from looking flat. If you’re nervous about bold color, start with a soft honey, caramel, or cinnamon fade instead of a loud contrast.
This is the style I’d choose when you want the twists to feel softer and more playful without piling on beads or cuffs.
10. Beaded-End Spring Twists
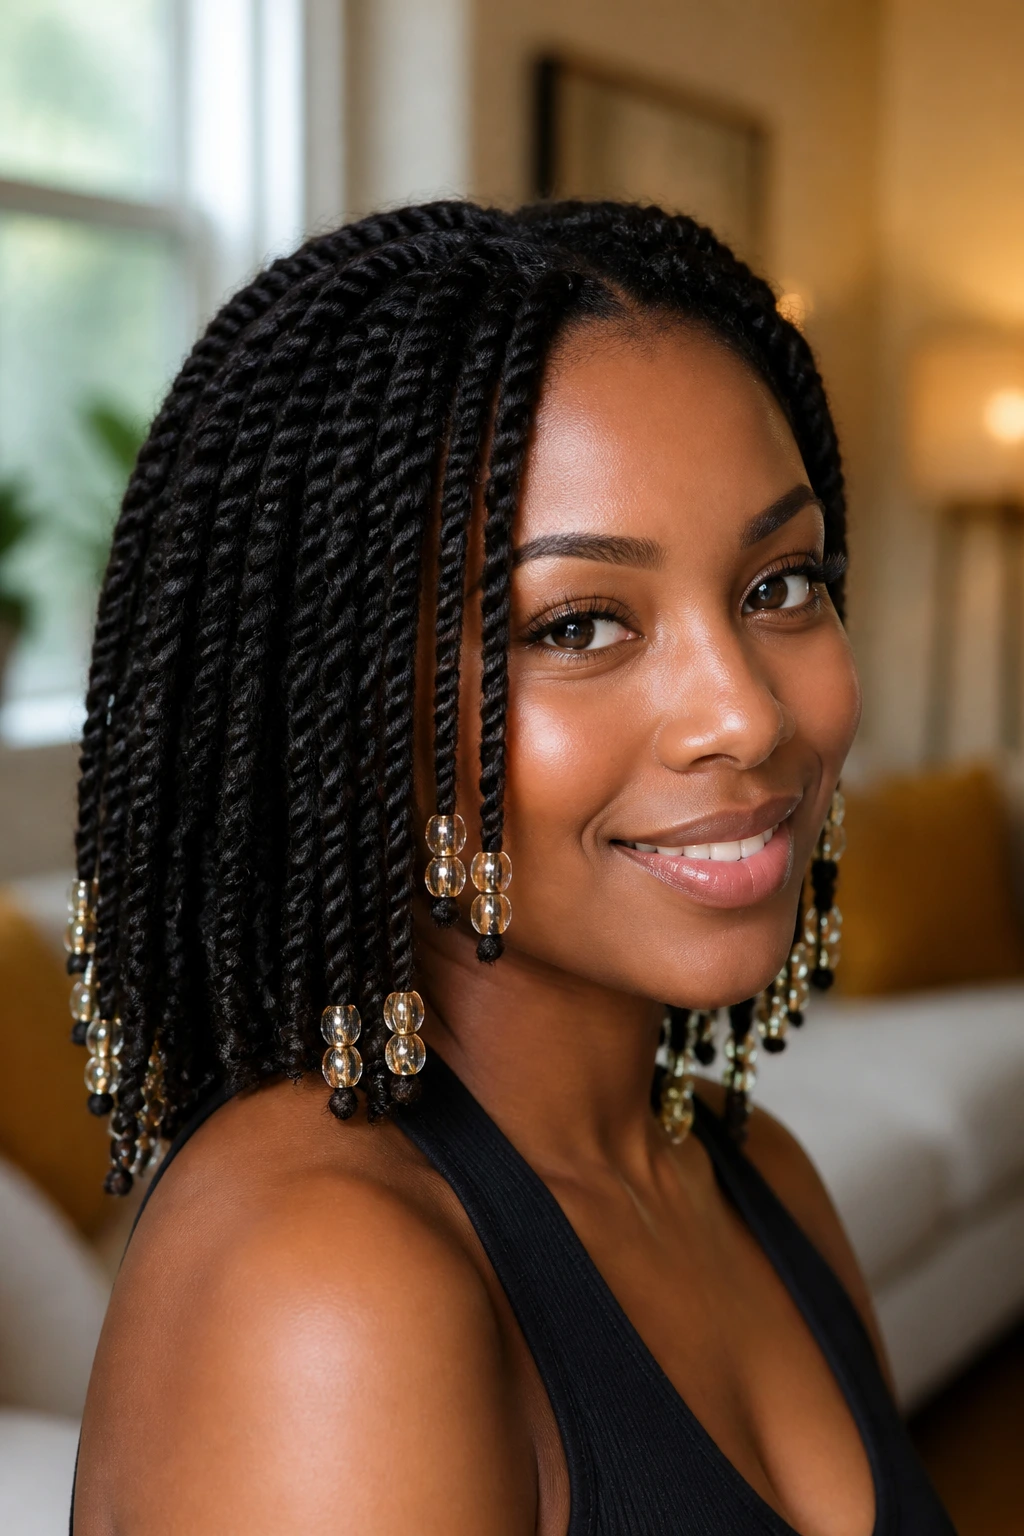
Beads change the sound of the style, which is a funny thing to notice until you wear them. A few beads at the ends add movement and a little weight, so the twists swing with a soft clatter instead of floating silently.
Keep the bead placement selective. A row at the front or just around the face is usually enough. Load every single twist and the style starts to feel busy. Two or three accent sections do more work than a full head of hardware.
This look has a little nostalgia in it, but that’s part of the charm. It feels playful without turning childish.
11. Space Buns With Loose Spring Twists
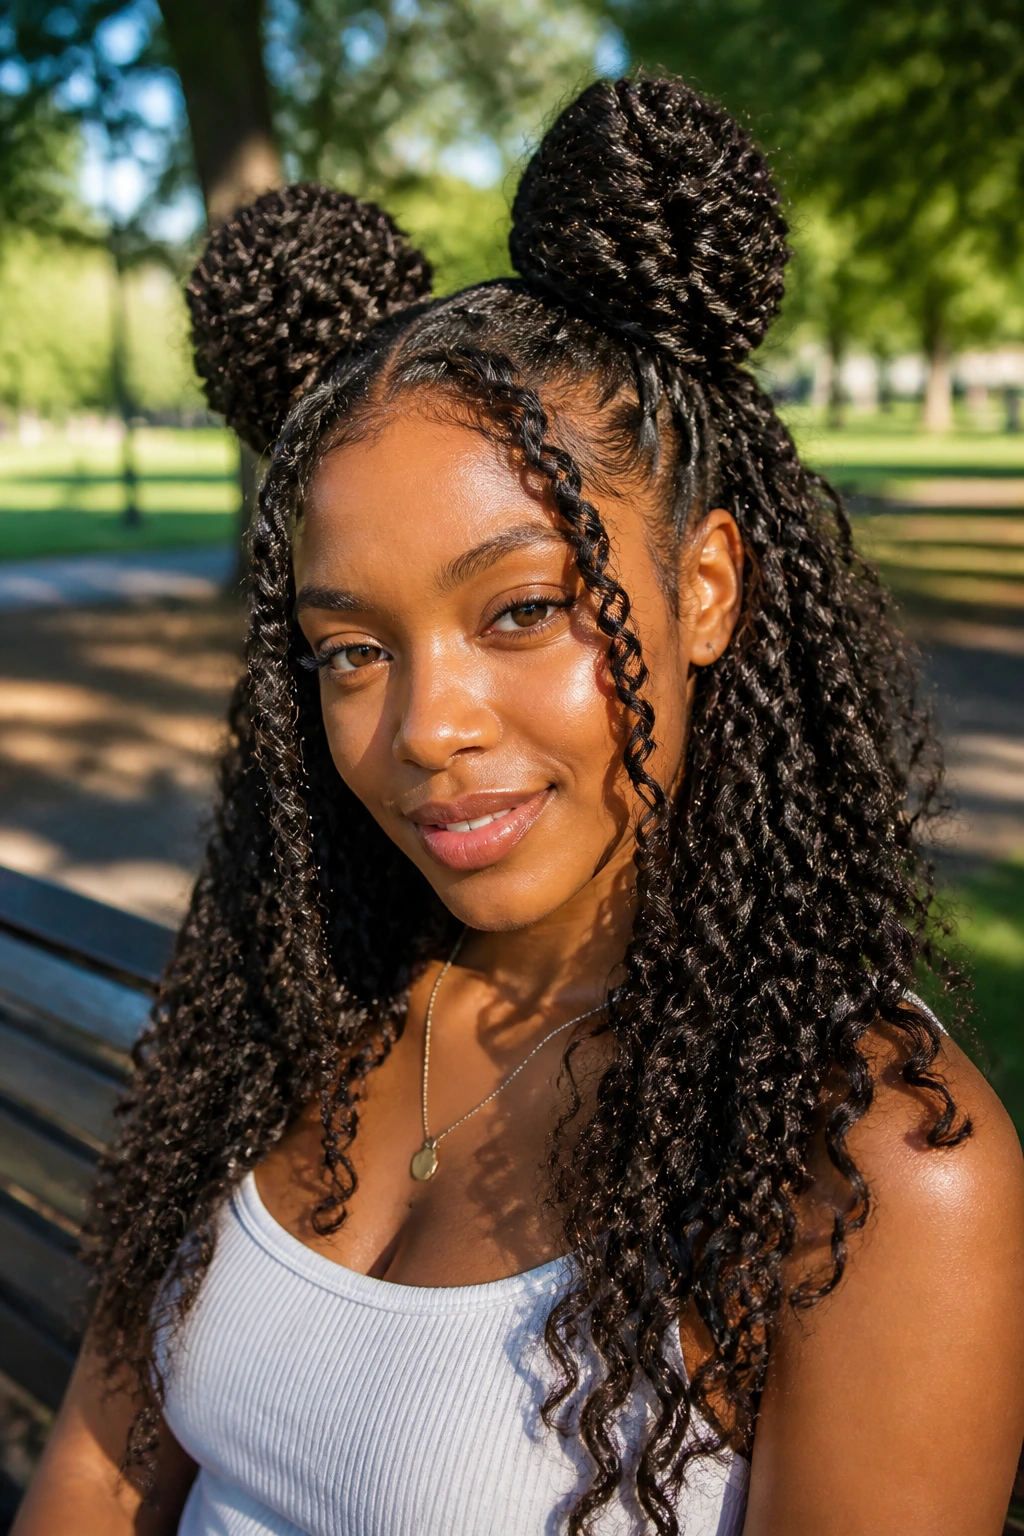
Space buns give spring twists a lift and a little mischief. Split the hair into two high sections, twist each one into a bun, and leave the rest to hang loose. The contrast between the tight top and the springy bottom keeps the look from feeling flat.
I like this style for weekends because it keeps hair off the face while still showing off length. If the buns are too neat, the style can lose its personality. A few loose ends and one or two face pieces help a lot.
It’s playful, yes, but not juvenile if the parts are clean and the buns sit evenly. That balance matters.
12. Asymmetrical Side-Swept Spring Twists
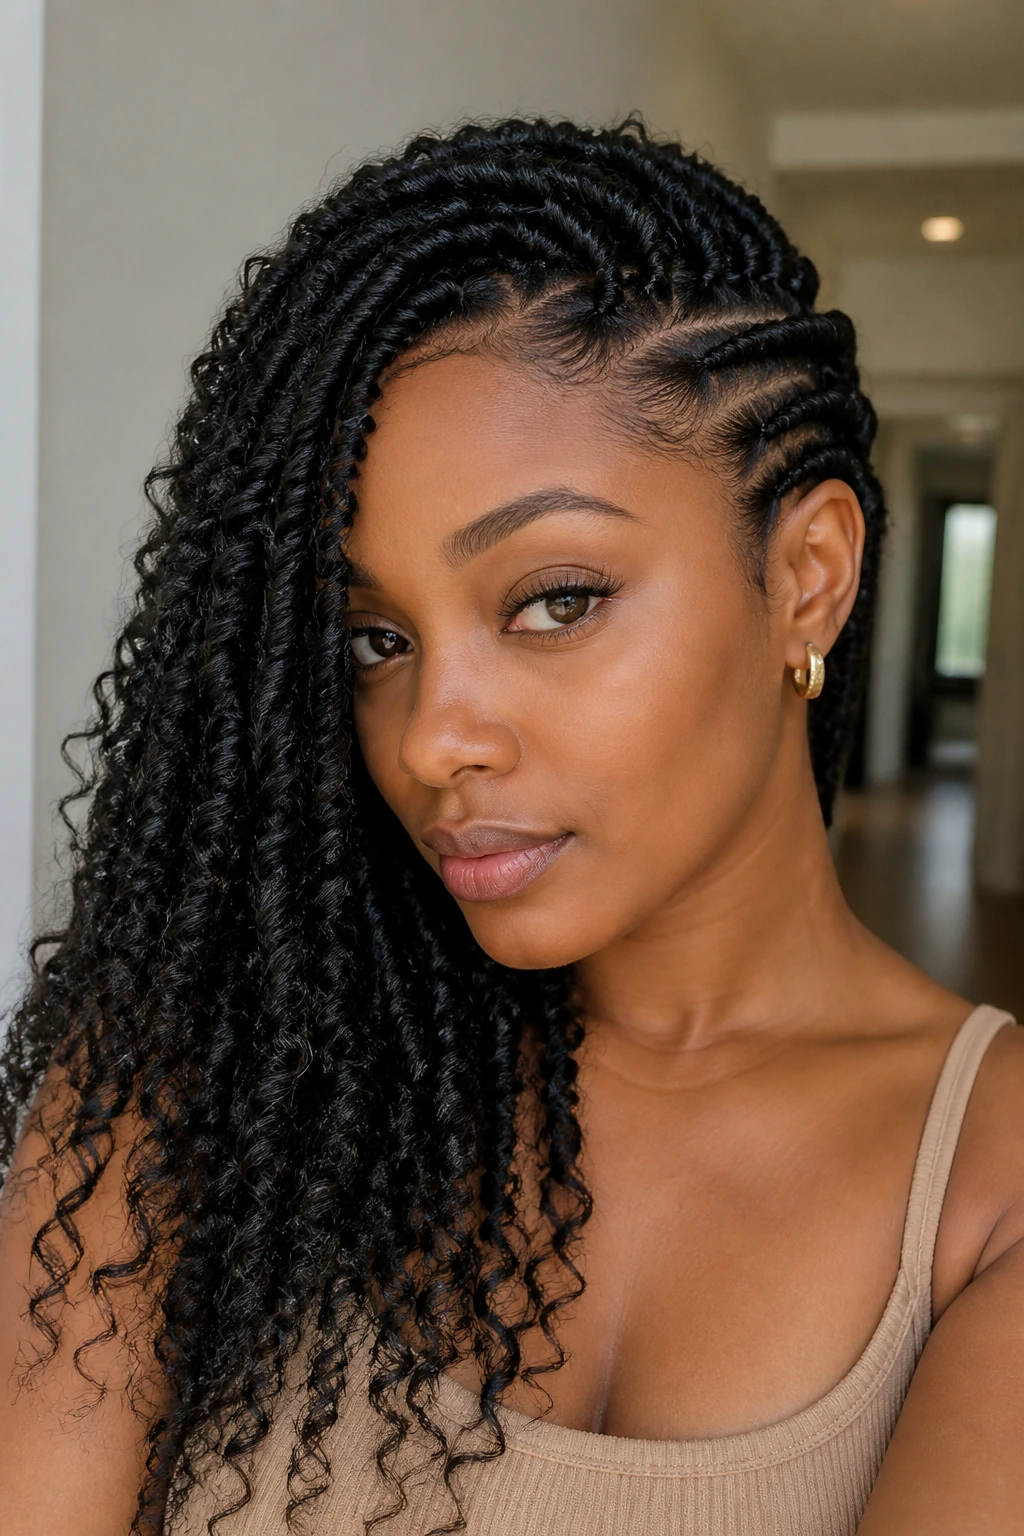
One side pinned, one side flowing. That’s the whole idea, and honestly it works because it feels a little unexpected. The asymmetry keeps spring twists from looking too predictable, especially on medium or long lengths.
Pull the heavier side across one shoulder and pin the opposite side close to the scalp or temple. The exposed ear and shoulder make the style feel lighter, even when the hair is dense. If you want to show off earrings or a neckline, this is a smart pick.
It’s one of those styles that looks like you made a plan, even if you only spent three minutes with a mirror and two pins.
13. Jumbo Spring Twists
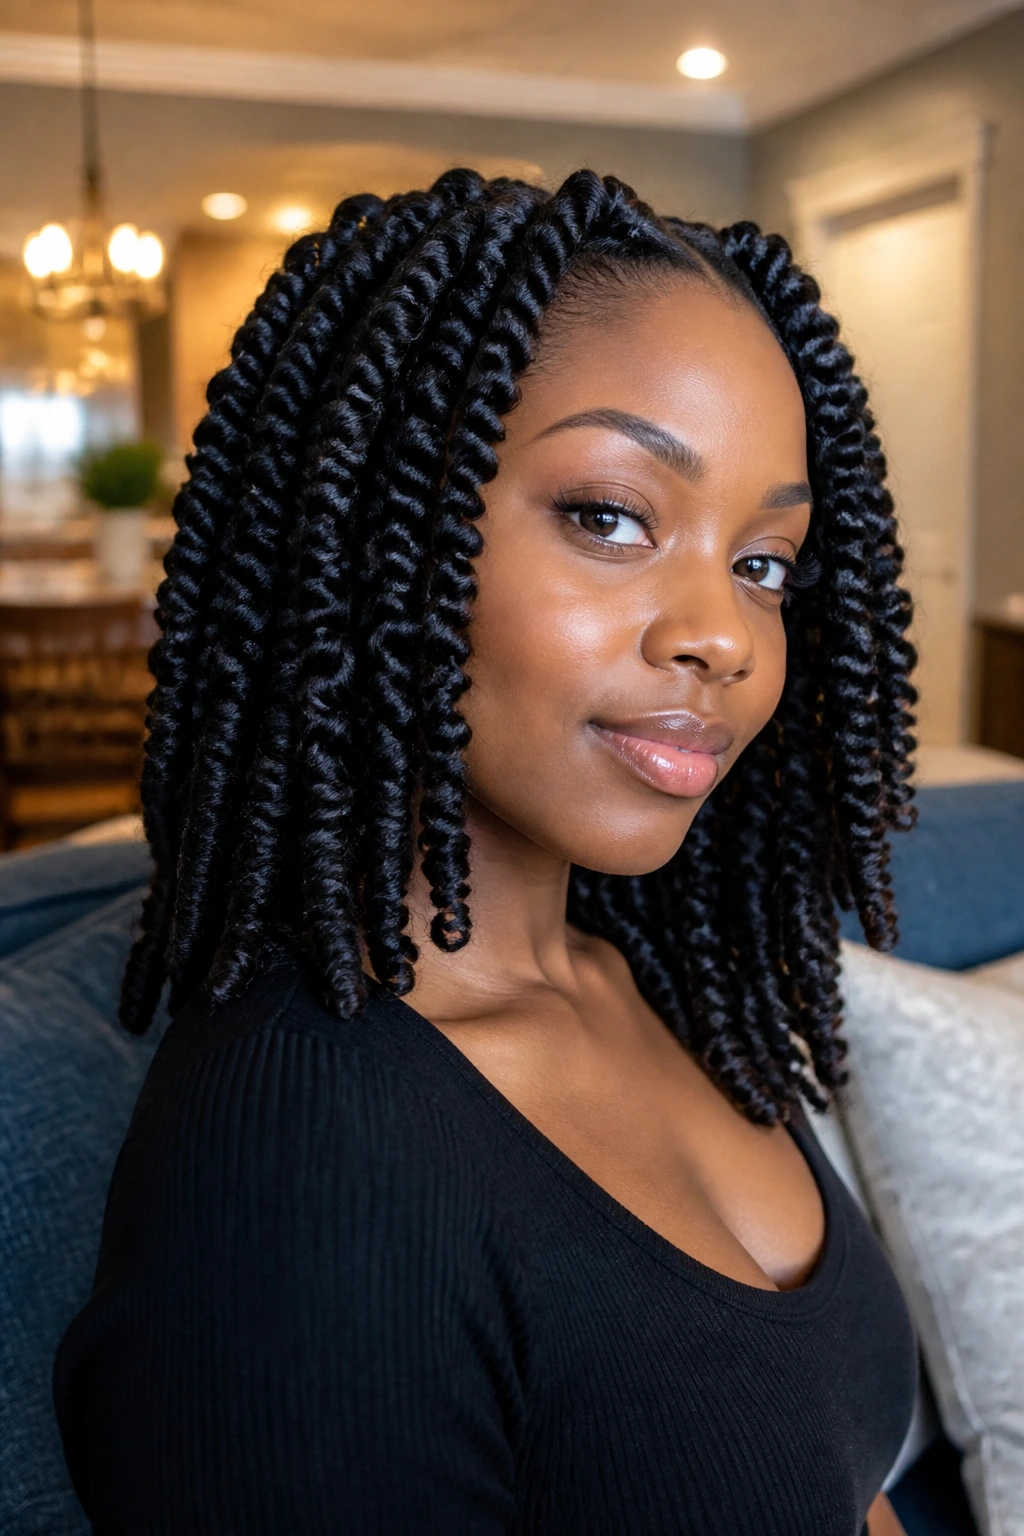
Jumbo twists are all about speed and shape. Bigger sections mean fewer pieces, a faster install, and a chunkier finish that reads bold without needing extra accessories. I like them when I want the texture to look obvious from across the room.
The tradeoff is weight. Jumbo twists can feel heavier if you go too long, so shoulder length or collarbone length often works best. The style gets the full benefit of the thicker rope-like shape without pulling too hard on the roots.
If you’re deciding between jumbo and regular size, think about how much time you want to spend styling it later. Fewer, larger twists are easier to pin up. They just need a little care at the hairline.
14. Micro Spring Twists
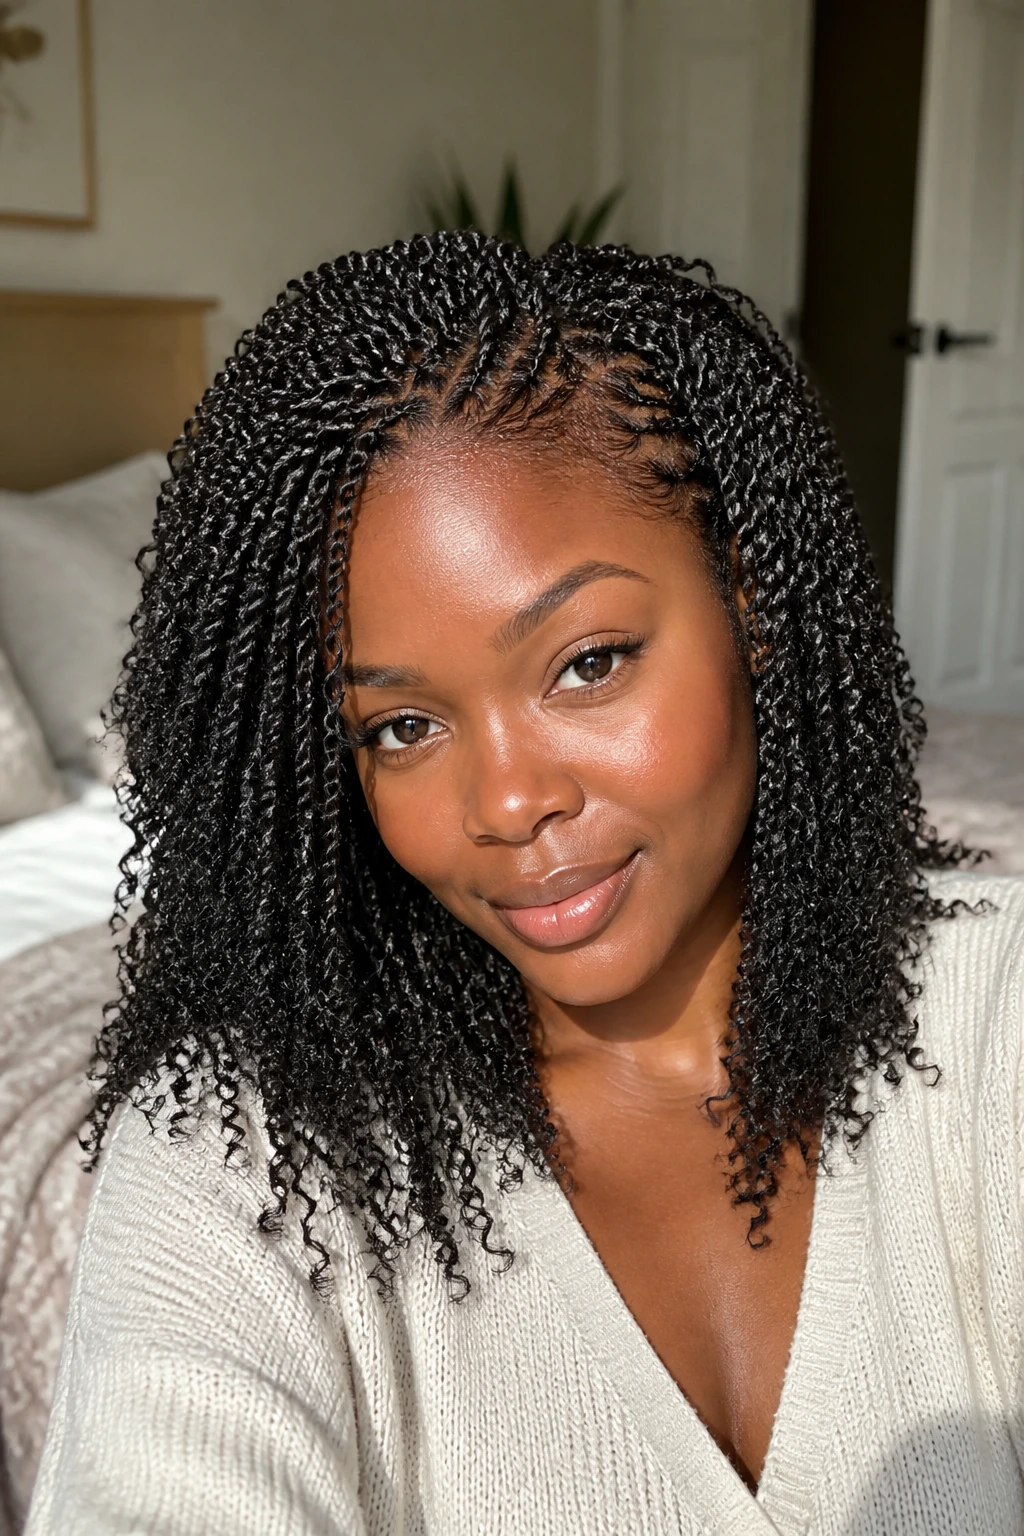
Micro spring twists give you density and a softer overall look. They take longer to install, but the finish can look wonderfully full without feeling chunky. The smaller sections create a finer texture that moves more like a cloud than a rope.
This is a good choice if you love detail. The style looks richer up close because the parting is tighter and the twist pattern stacks beautifully. It also gives you more styling options, since small twists tuck, knot, and pin more easily than larger ones.
The downside is time. This is not the style for people who want out of the chair fast. But if you want lots of movement and a delicate finish, micro size makes sense.
15. Spring Twist Faux Hawk
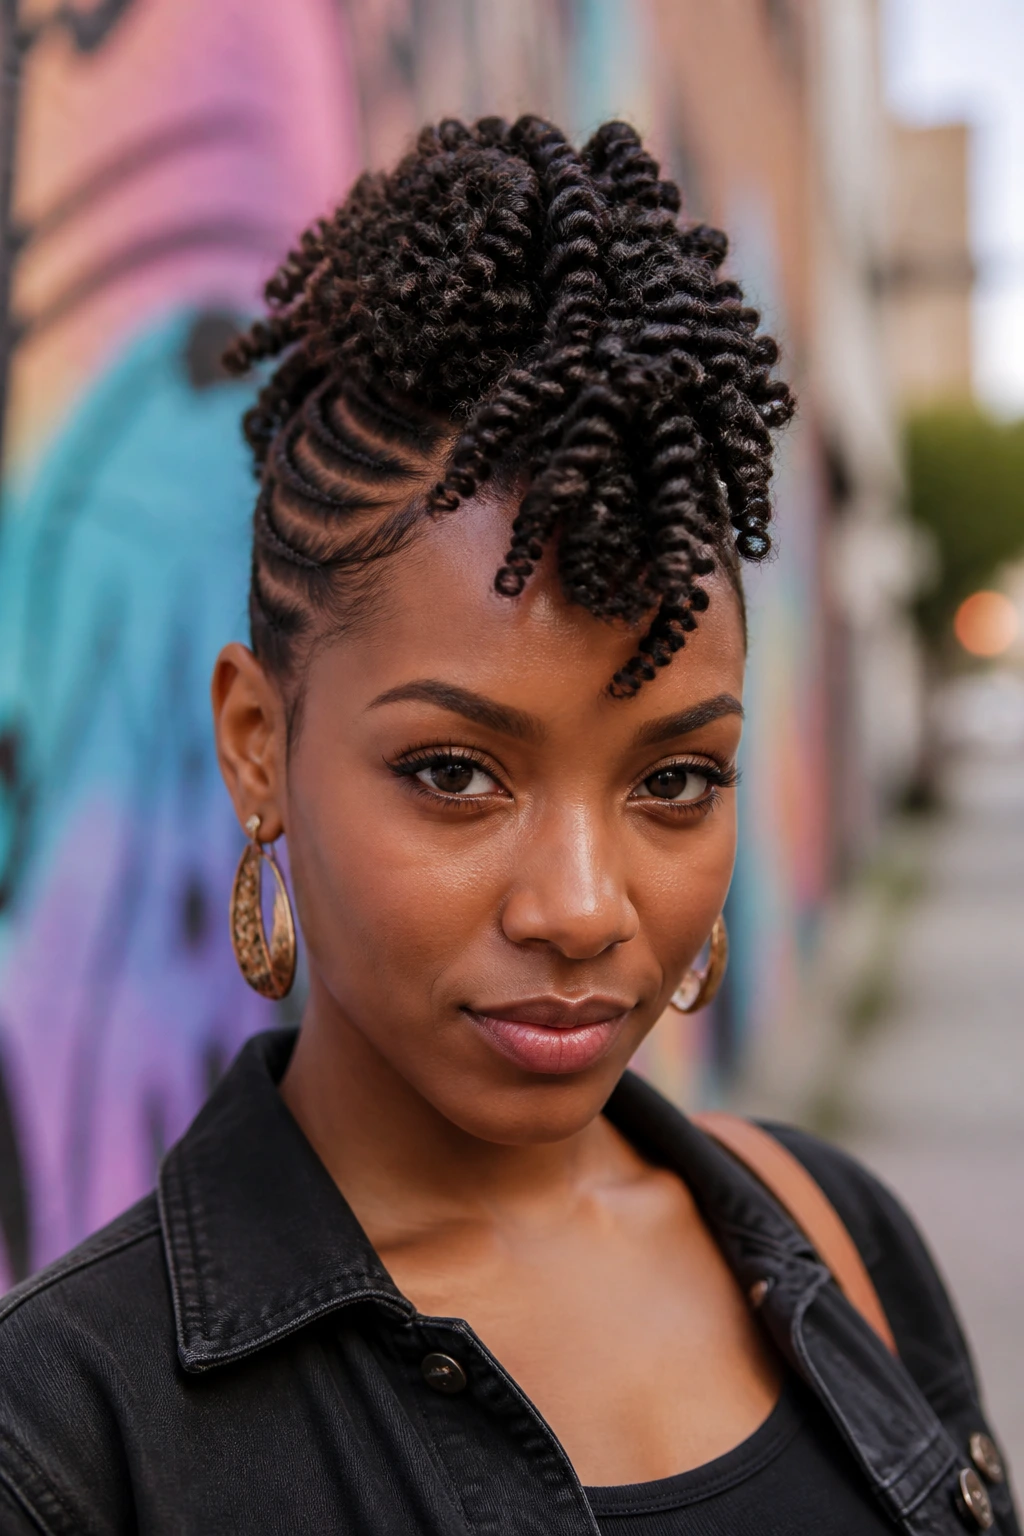
A faux hawk pulls the eye straight down the center and leaves the sides cleaner and tighter. With spring twists, that shape feels bold but still soft enough to wear in normal life. It’s a nice middle ground between “fun” and “I’m committing to the look.”
Pin the side sections close to the head and let the center ridge rise a little higher. The contrast is what makes it work. If the sides are too loose, the shape disappears. If the middle is too flat, it turns into a basic updo.
This is one of the better styles when you want your twists to feel styled instead of simply worn.
16. Tucked-Under French Roll Spring Twists
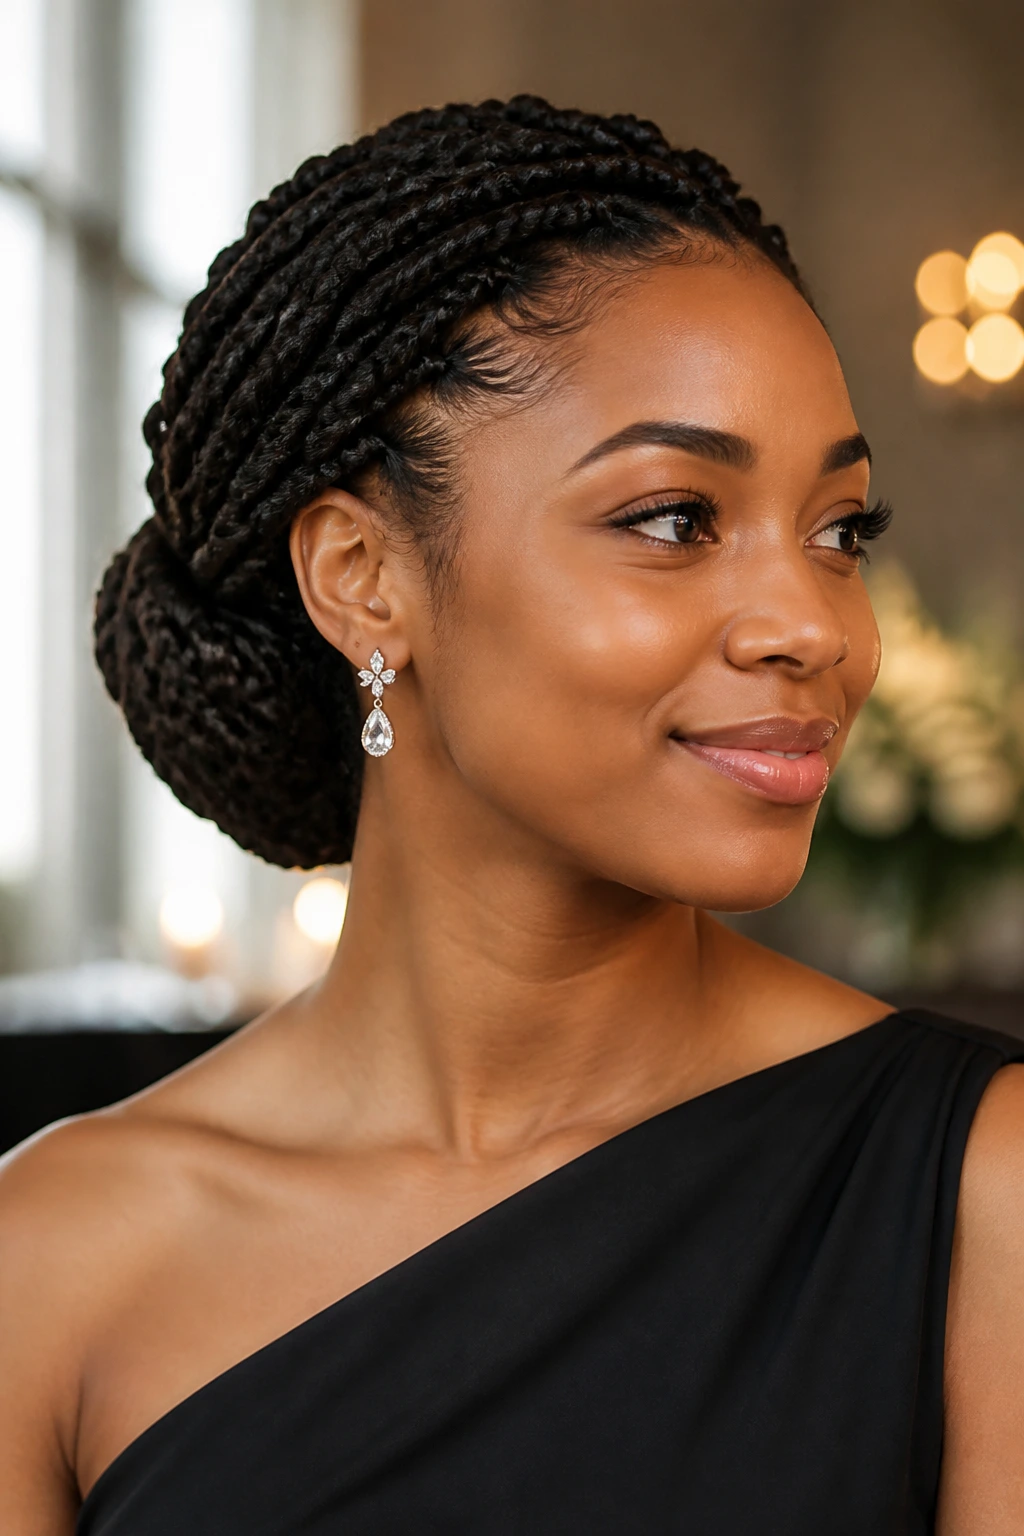
The tucked-under French roll makes spring twists look more formal without losing their texture. Sweep the hair back, tuck the length under itself, and pin it low so the twist pattern still shows. The roll should feel soft at the edges, not shellacked in place.
I like this for events because it changes the mood instantly. The style reads elegant, but the springy hair keeps it from looking too severe. A scarf at the base or one decorative pin is enough.
It’s the kind of look that rewards neat sectioning. If the roots are tidy, the roll looks intentional. If the parts are sloppy, the whole thing loses its shape fast.
17. Braided Crown and Hanging Twists
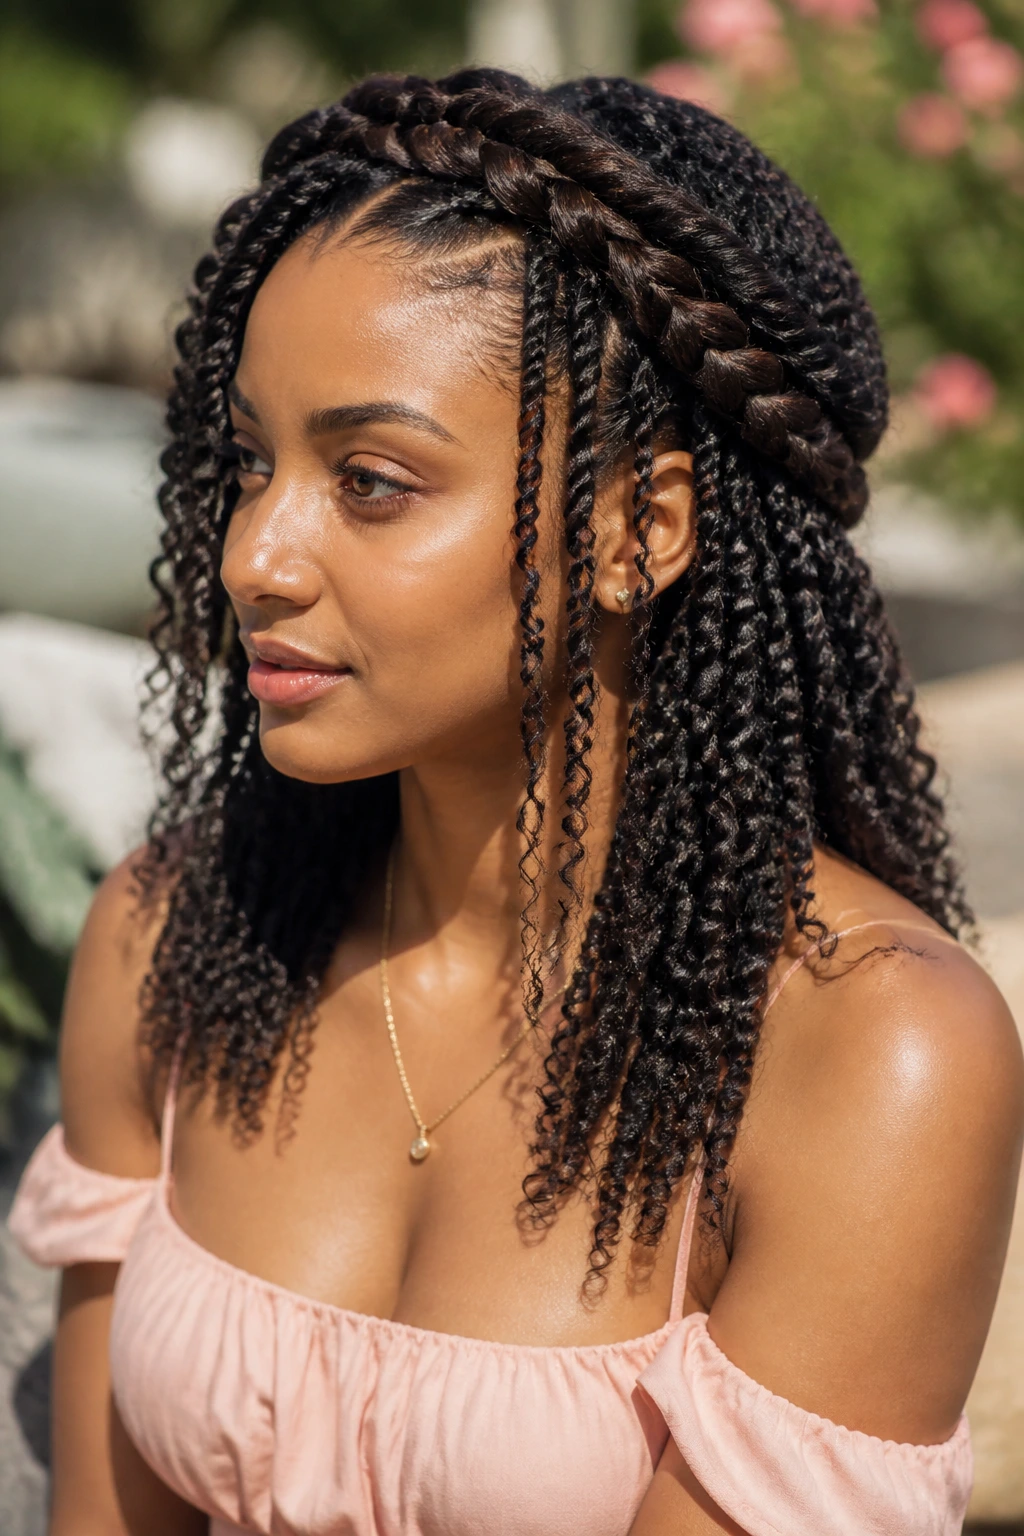
A crown braid around the front with twists falling loose behind it gives you that romantic, slightly lifted shape that photographs well from the side. The braid frames the hairline and keeps the front tidy, while the loose twists keep the texture front and center.
The braid doesn’t have to be tight to work. In fact, a slightly soft braid tends to blend better with spring twists than a hard, glossy one. That softness is part of the charm. The crown creates structure, and the twists do the rest.
This style is lovely when you want the face open but still want to wear the length down. It has enough detail to feel dressed up without looking overworked.
18. Scarf-Tied Spring Twists
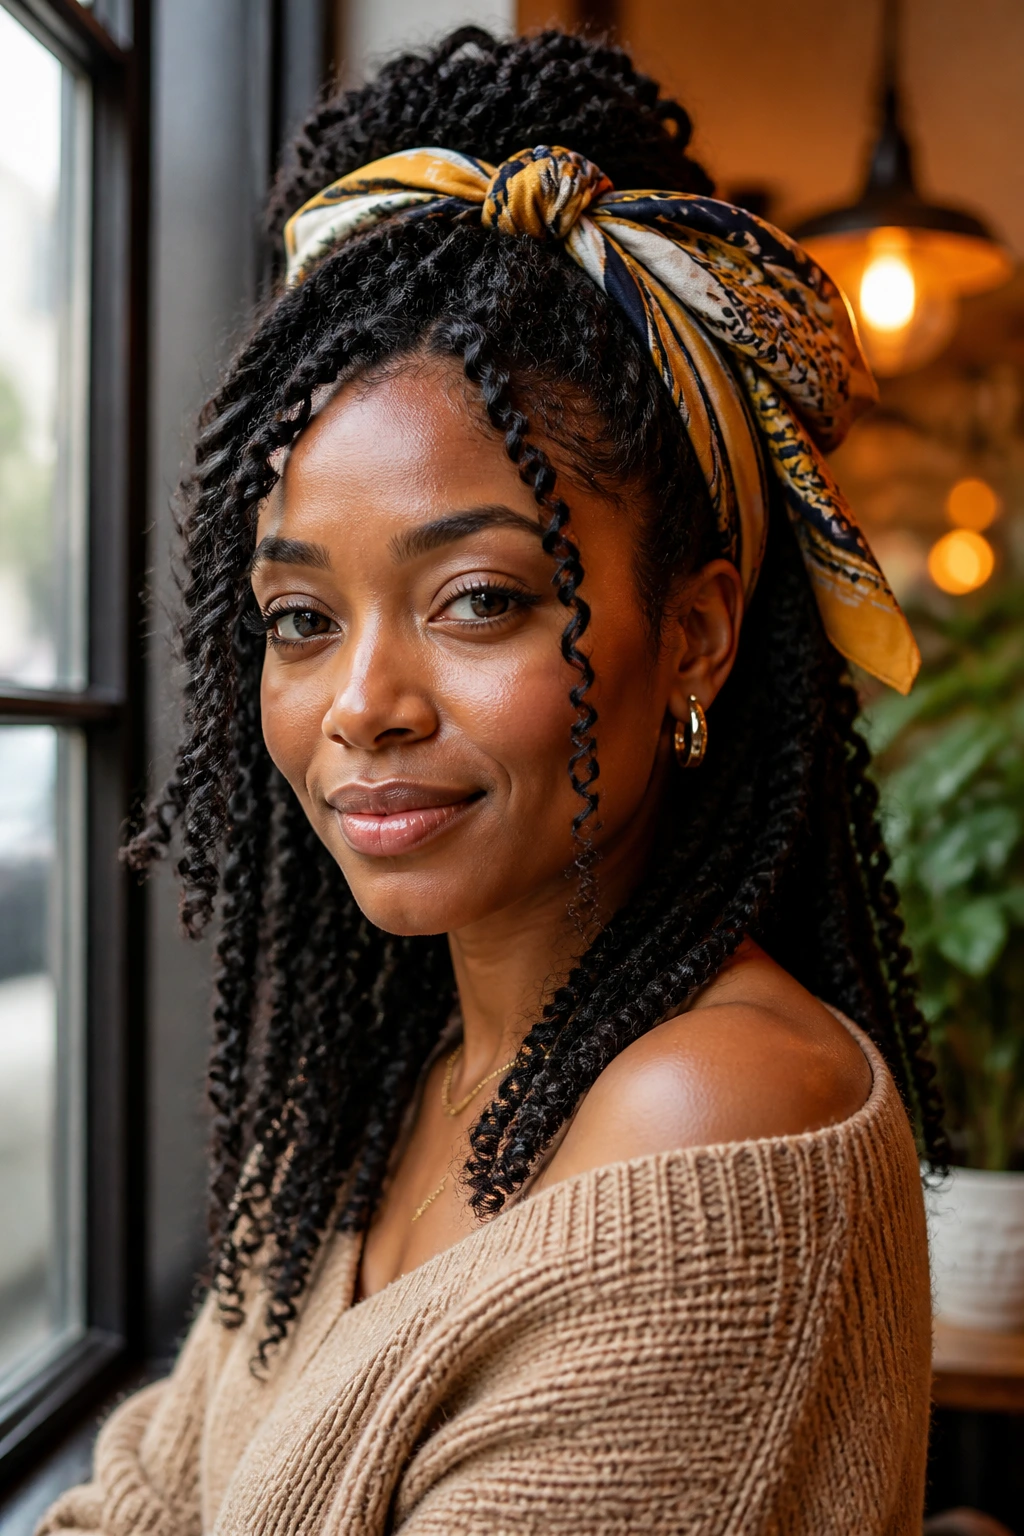
A scarf can do more for spring twists than a drawer full of accessories. Tie it around a half-up section, wrap it at the base of a bun, or use it to frame the hairline. The fabric adds color and softens the edges in one move.
I like scarves when the install is clean but you want a different mood without changing the structure. A printed scarf makes the style playful. A satin scarf in a solid color feels calmer. Either way, the texture of the twists stays visible underneath.
It’s the fastest way to make a familiar install feel new again.
19. Spring Twist Bob With Curly Bang Pieces
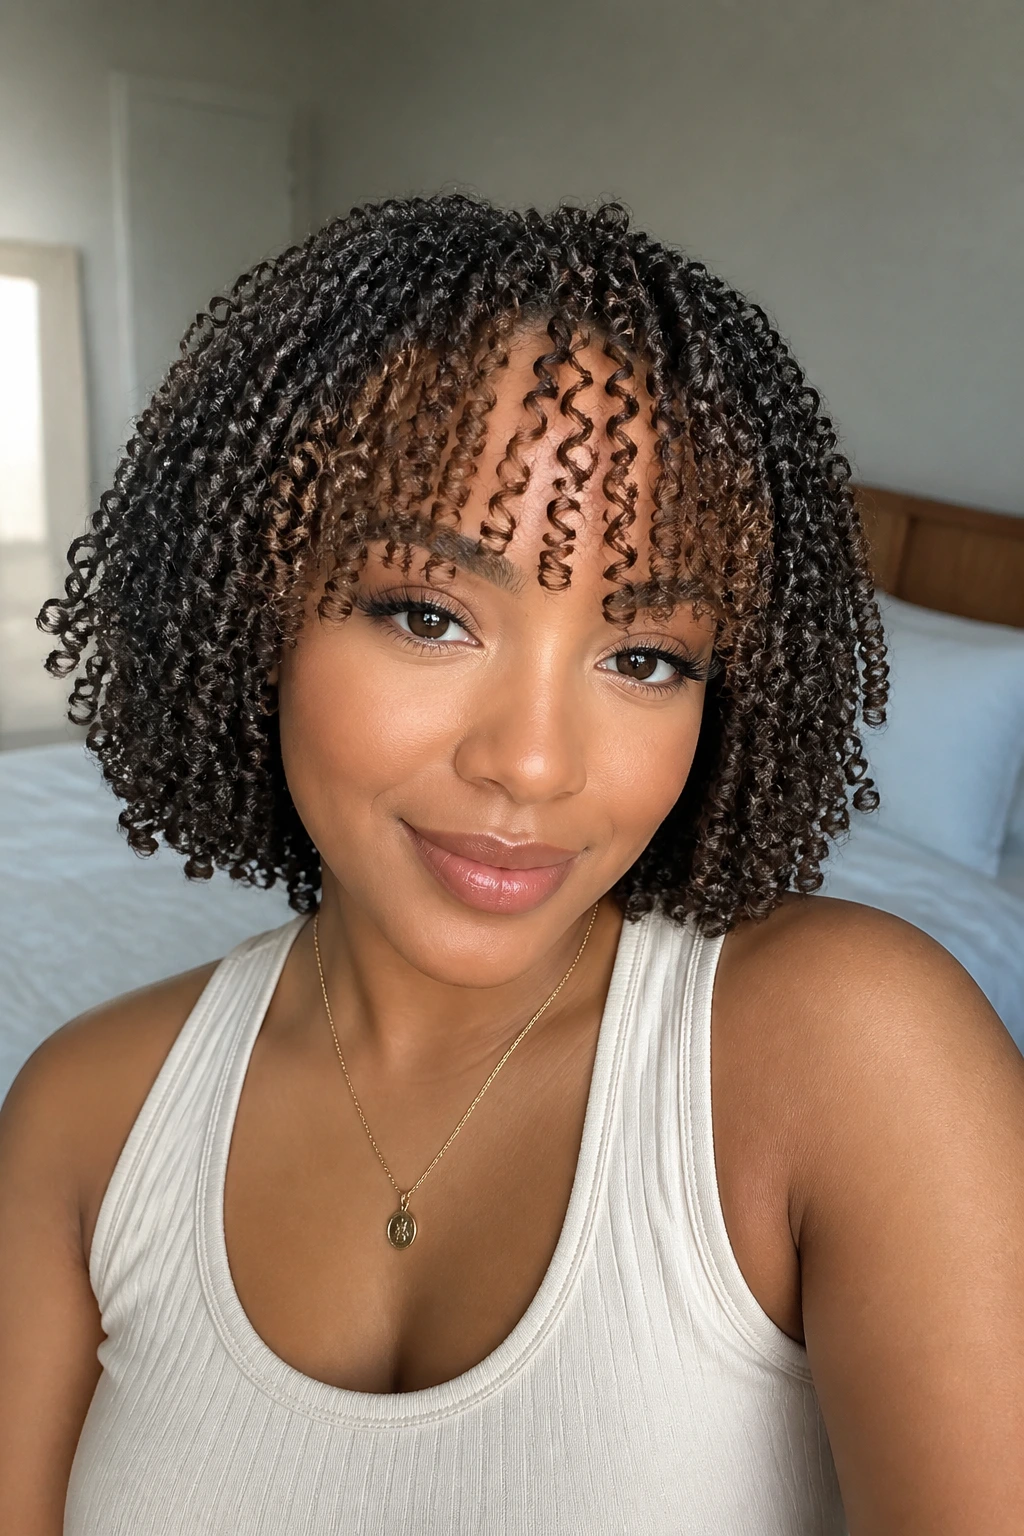
This one is all about the front. A bob already gives spring twists shape; adding a few curly bang pieces breaks up the line and stops the cut from looking too sharp. The front pieces should sit a little lighter than the rest so they move across the forehead instead of crowding it.
If you like face-framing without a full fringe, this is a very good compromise. The bang pieces can be tucked, swept, or pinned depending on the day. They also soften a strong part line, which is handy when you want the bob to feel a little looser.
The result is cute without trying too hard. That’s usually the sweet spot.
20. Flipped-End Shoulder-Length Spring Twists
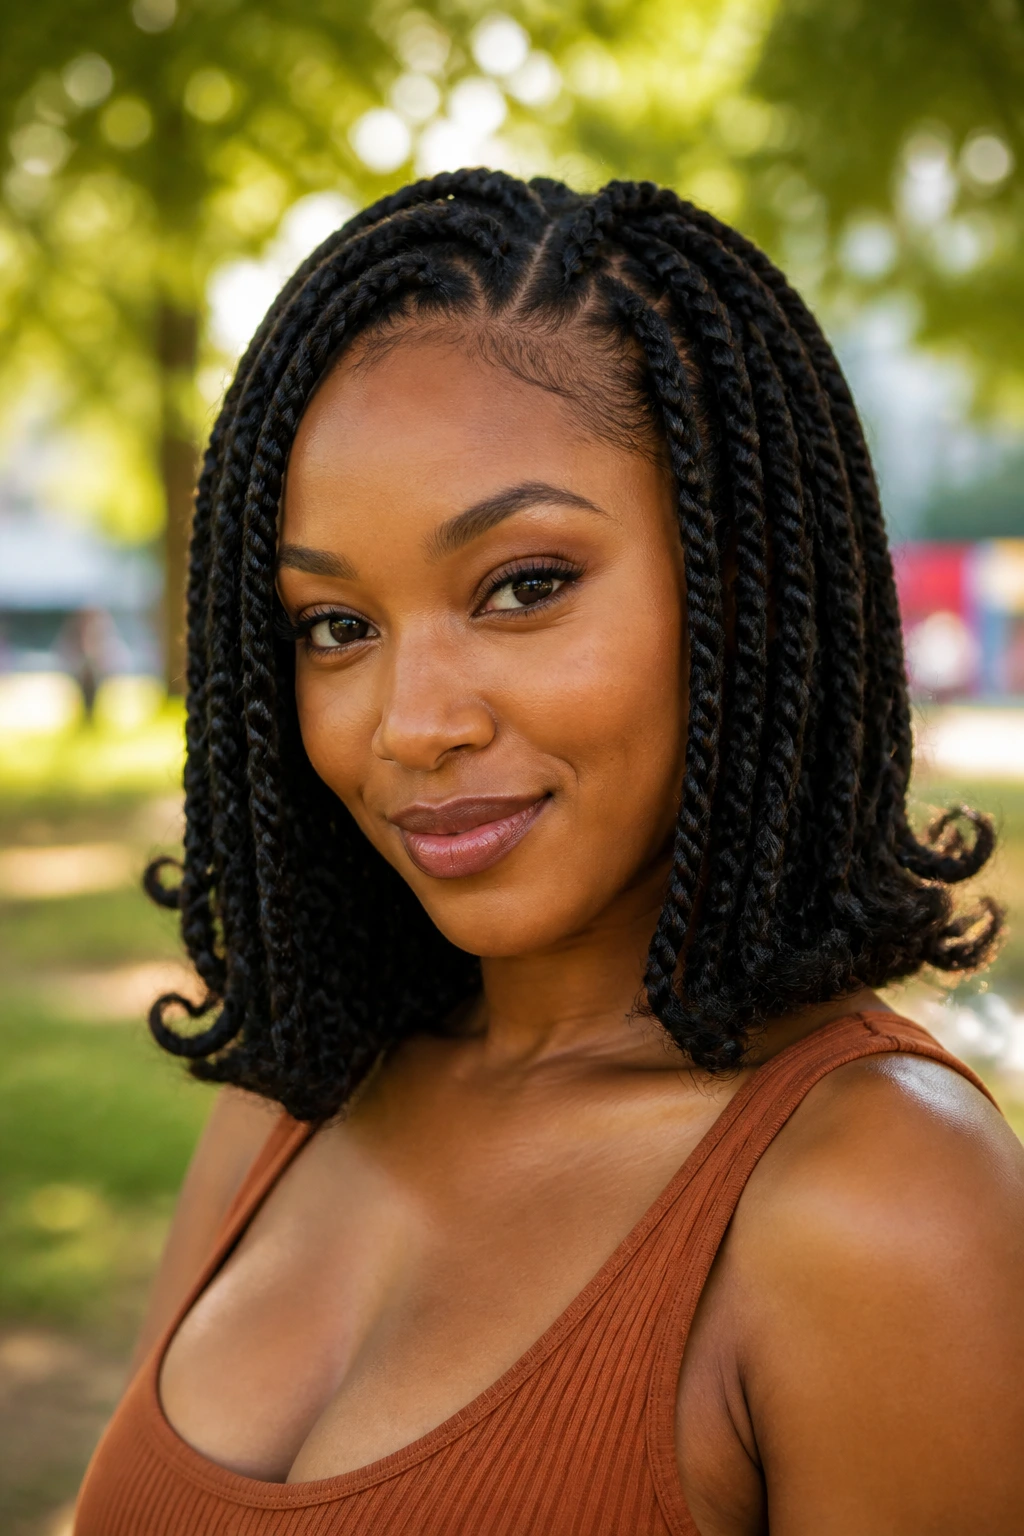
Flipped ends give shoulder-length spring twists a little kick. Instead of hanging straight down, the last few inches angle out slightly, which makes the whole style feel lighter and more animated.
This works especially well if the length lands right at the collarbone. Too short and the flip disappears. Too long and the shape gets lost under the weight of the hair. The trick is subtle movement, not a dramatic curl.
I’d wear this when I want the style to look finished even with a plain outfit. The flipped ends do the talking.
21. High Bun With Face-Framing Tendrils
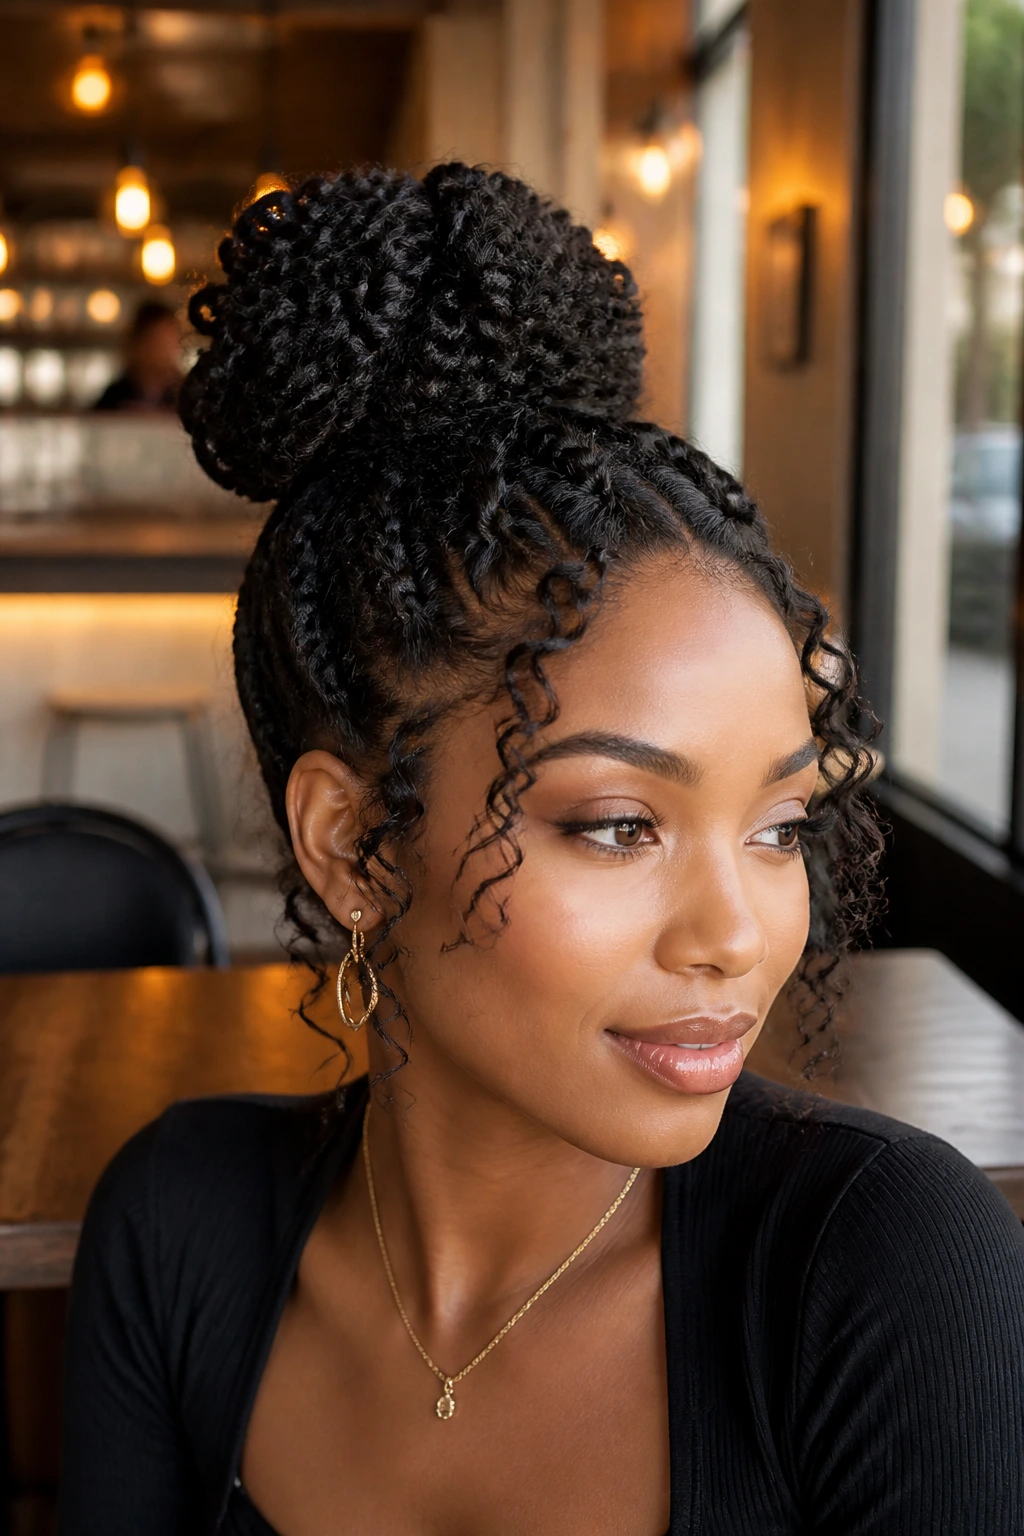
A high bun keeps the bulk off your neck, and a few loose tendrils stop it from feeling too severe. That mix is why this style stays useful. The bun gives structure; the front pieces give softness.
Keep the bun slightly rounded rather than tight and tiny. Spring twists look better when they have a little body up top. The loose strands at the temples should be intentional, not accidental. A couple of neat pieces around the face is enough.
This is the style I’d choose when I want clean lines but don’t want my hair to disappear completely.
22. Layered Mid-Back Boho Spring Twists
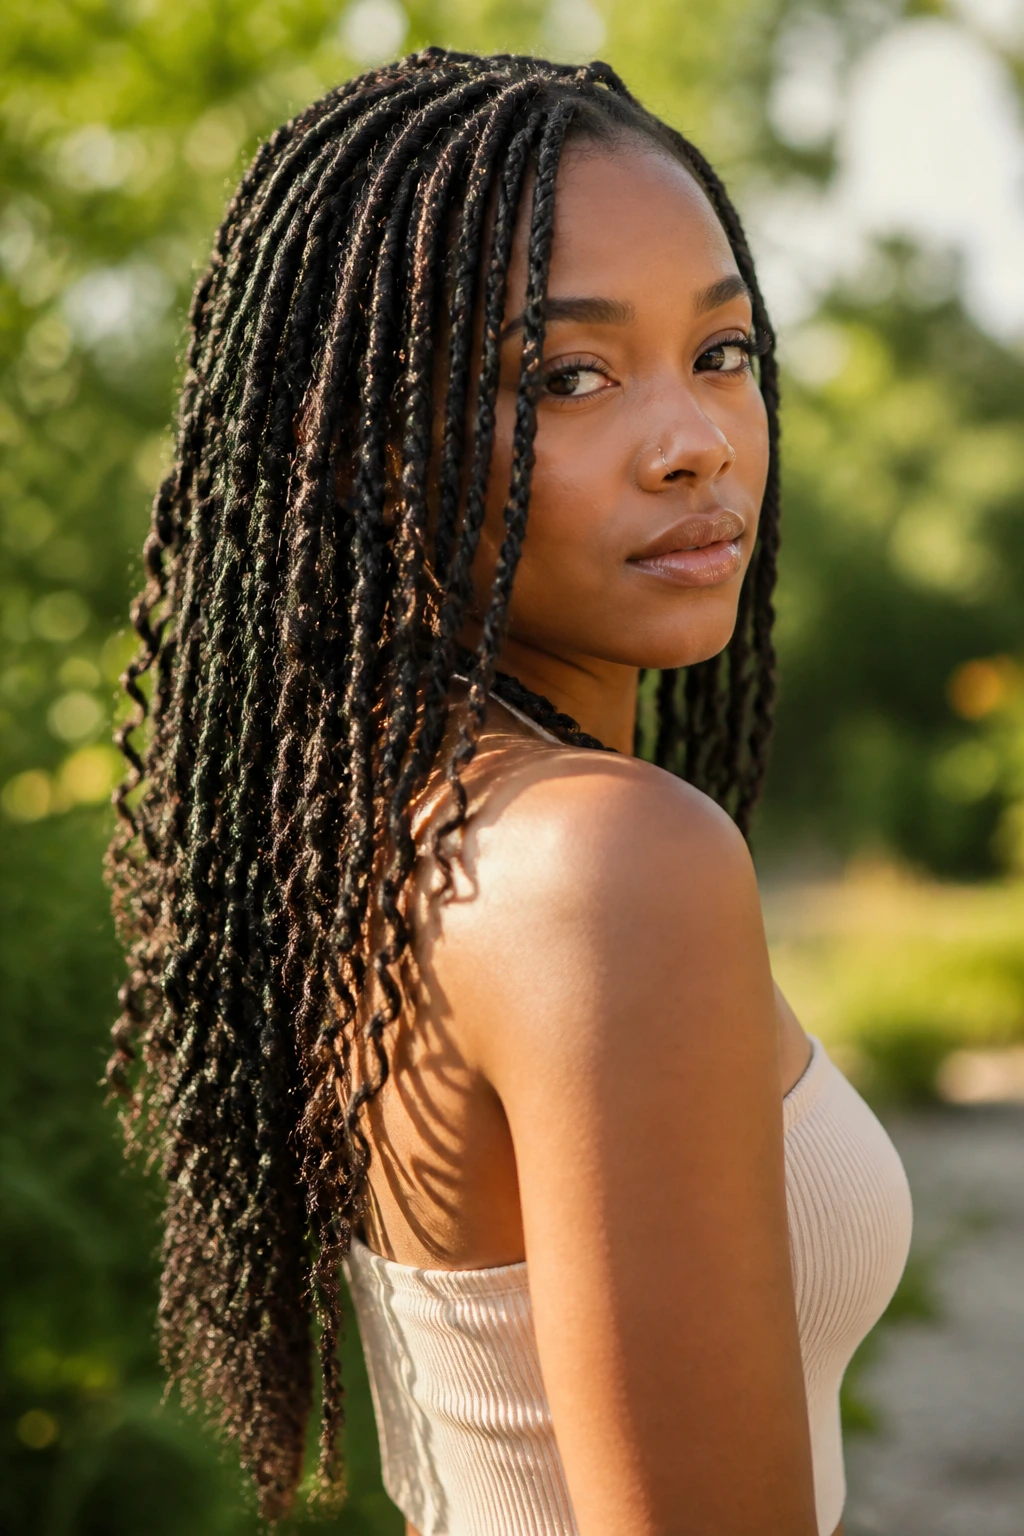
Boho twists with layered lengths bring a softer, more relaxed finish to the whole look. The added curly pieces keep the style from reading too flat, and the mid-back length gives enough drama without the full weight of waist-length hair.
This style is best when you want movement. Lots of it. The mixed lengths catch the eye and keep the ends from forming one heavy line. A few cuffs near the front can help, but the layered texture already does plenty.
If you like your protective style with a bit of vacation energy, this is the one.
23. Tapered Nape-Grazing Spring Twists
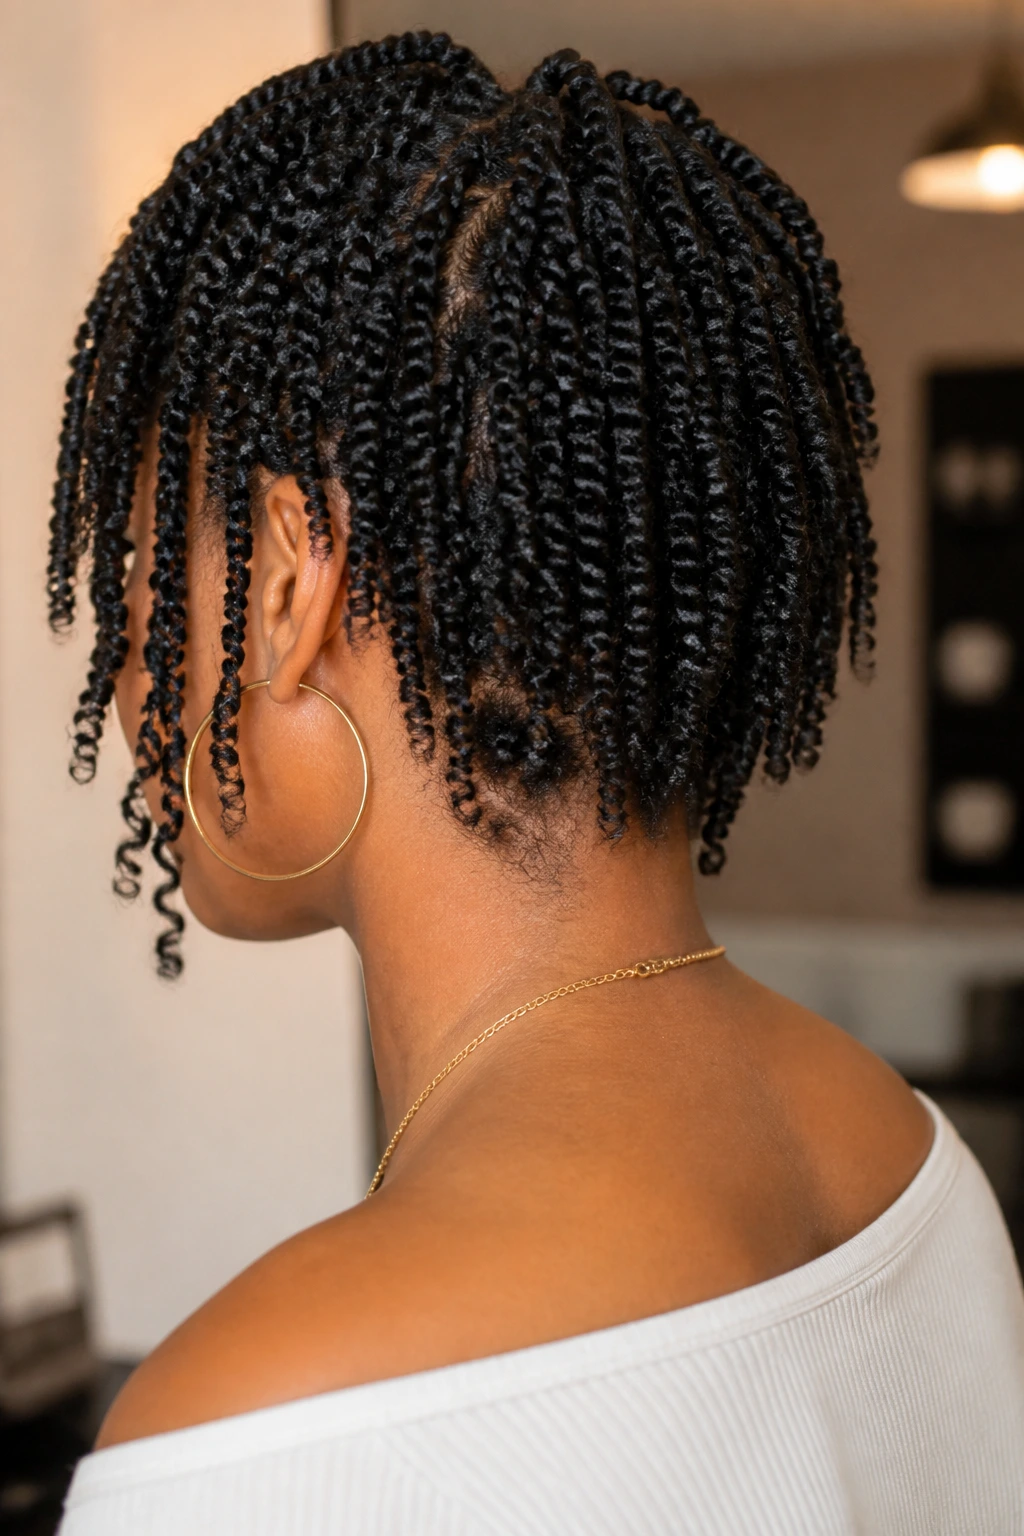
A tapered nape keeps the back light and gives the style a cleaner silhouette. The shortest pieces sit close to the neck, while the sides and front stay a touch longer. That shape can make spring twists feel tailored instead of simply long.
It’s a very useful cut if you dislike bulk at the collar or under jackets. The lighter back also helps the style dry and refresh more easily after washing. Small detail, big difference.
This is one of the more understated looks in the lineup, which is exactly why it works. Not every cute style needs to announce itself.
24. Ring-Stacked Spring Twists
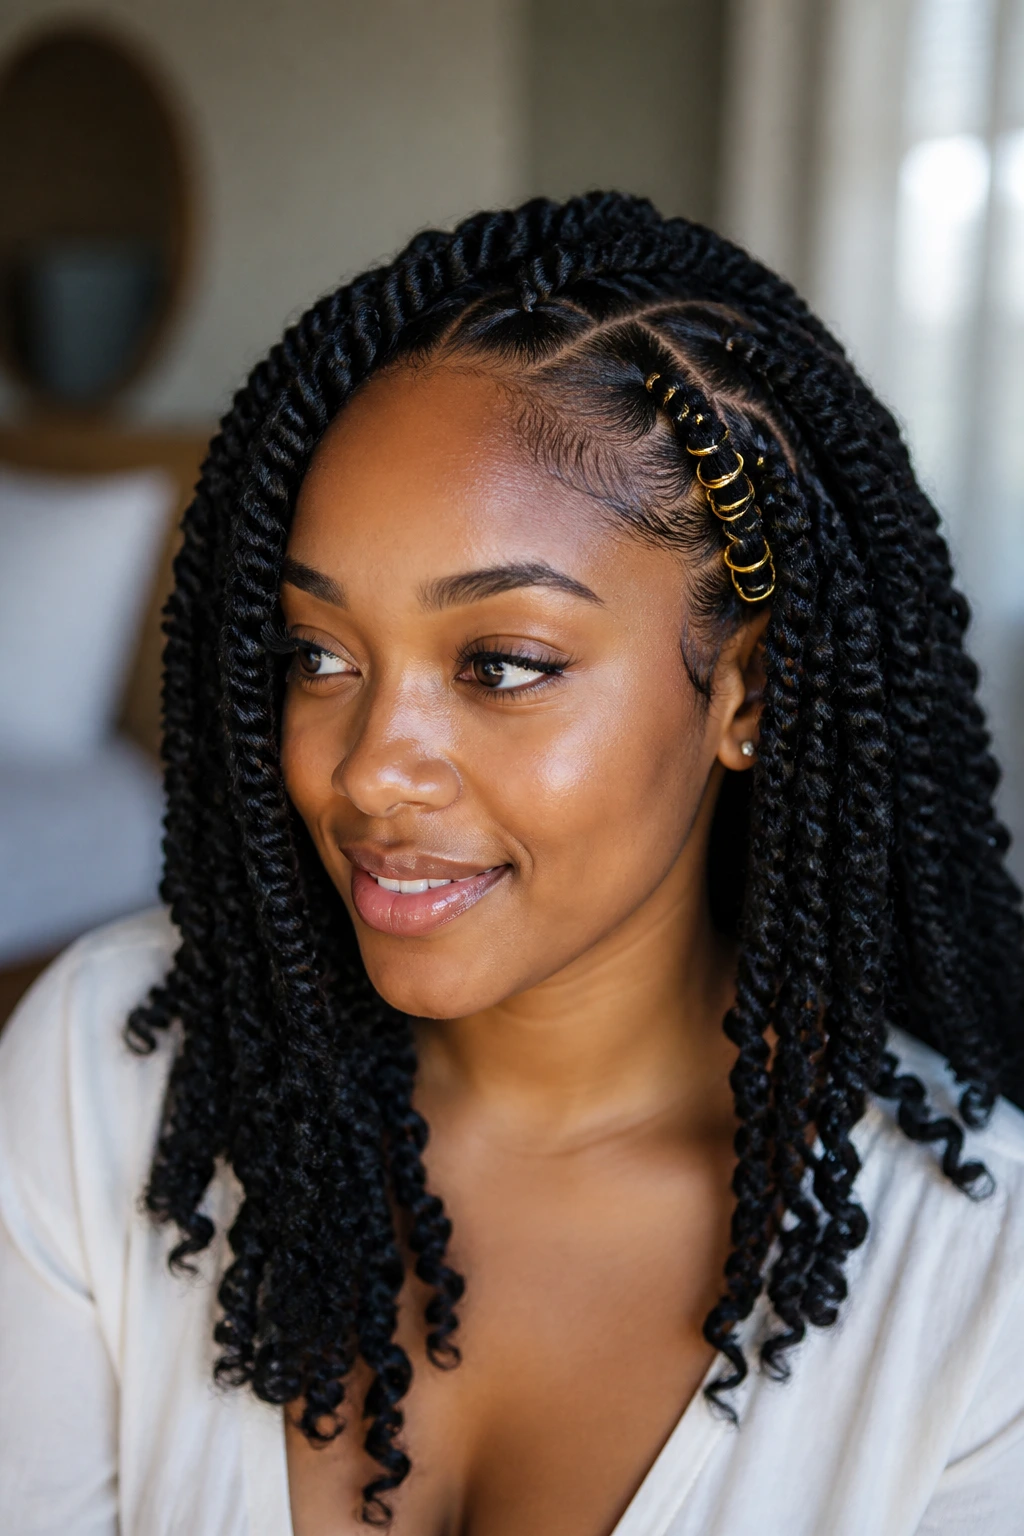
Hair rings can turn a plain set of spring twists into something with texture and rhythm. Stack them near the front or spread them out at the part line; either way, they catch the eye without requiring a new install.
The best part is how little you need. Three or four rings in the right places often look stronger than a full scatter. Keep the metal tones consistent if you want the look to feel clean. Mixed metals can work too, but they need a deliberate hand.
This is a good style when you want something that looks styled in five minutes flat.
25. Shell-Trimmed Waist-Length Spring Twists
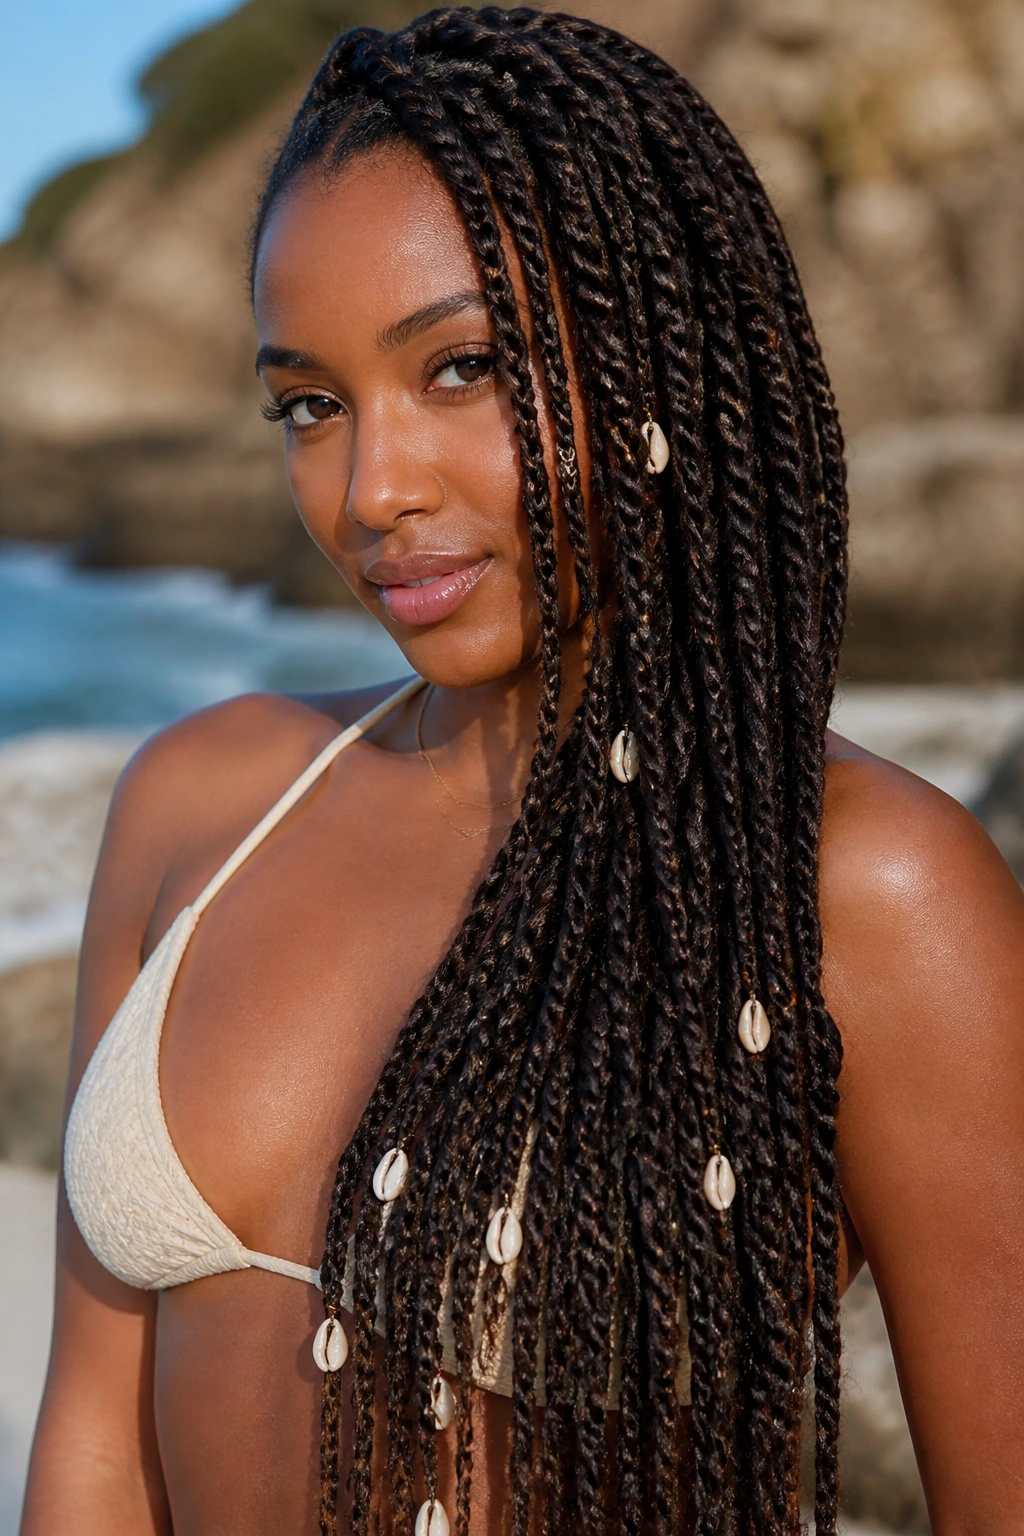
Long twists with shell accents bring a beachier feel, but the look only works if the shells are used sparingly. A few pieces near the ends or around the front keep the style feeling fresh. Too many shells and the hair starts to clink instead of move.
Waist-length twists have presence. The shells should support that, not compete with it. I like this version when the hair is worn loose and the parting is clean, because the length already gives you drama.
If you want one style in the whole set that feels the most vacation-ready, this is it. It has a little movement, a little shine, and just enough ornament to matter.
How to Choose the Right Spring Twist Look for Your Face and Routine
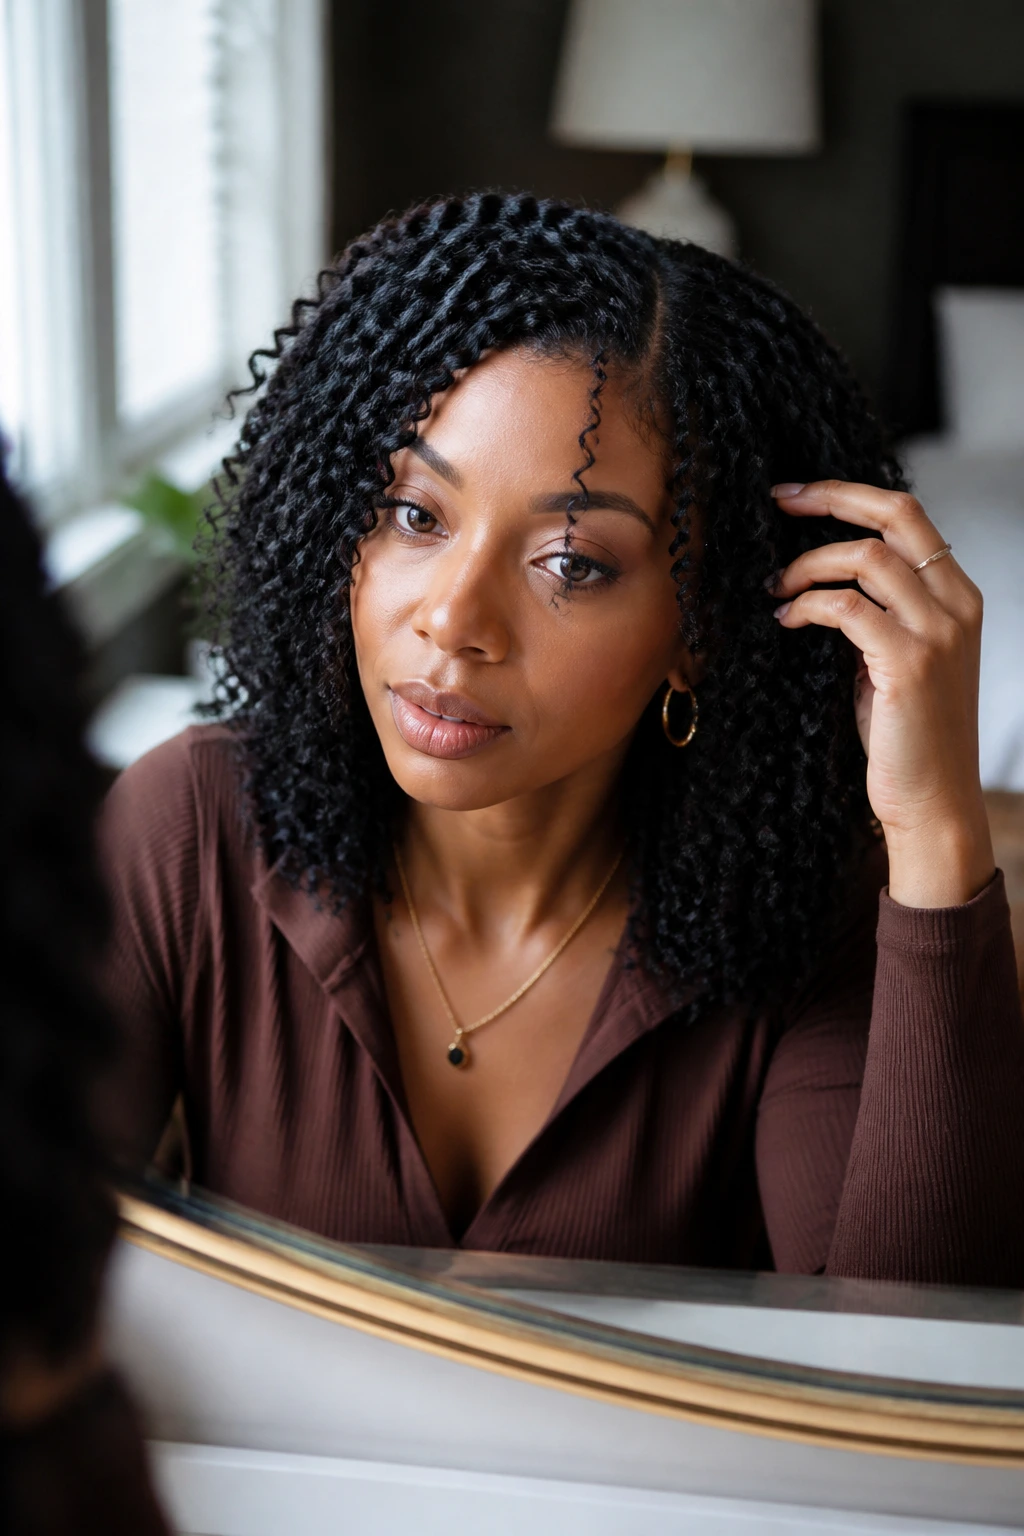
The best style is not the prettiest one on a model with different hair, a different neck length, and a different daily routine. It’s the one that fits the way you actually wear hair. If you need your twists tucked behind your ears, start with a bob, lob, or shoulder-skimming length. If you pin your hair up half the week, choose a medium length with enough bulk to hold a bun without collapsing.
Face shape matters too, but not in a rigid, recipe-like way. A strong jaw can look softer with chin-grazing pieces or a side part. A longer face tends to like width at the cheeks, so curtain pieces, space buns, or a fuller bob usually help. Rounder faces often do well with some height at the crown or a little asymmetry that keeps the shape from sitting too evenly.
If your hairline is sensitive
Go lighter at the front. Medium parts, shorter front twists, and fewer heavy accessories will save you from that sore, tight feeling that ruins a good install. Cute is nice. Comfortable wins.
If you live in a bun
Choose a length that still folds neatly. Shoulder-length or mid-back twists are usually easier to wrap than very long ones, which can turn into a knot of their own.
Essential Tools and Hair Supplies
-
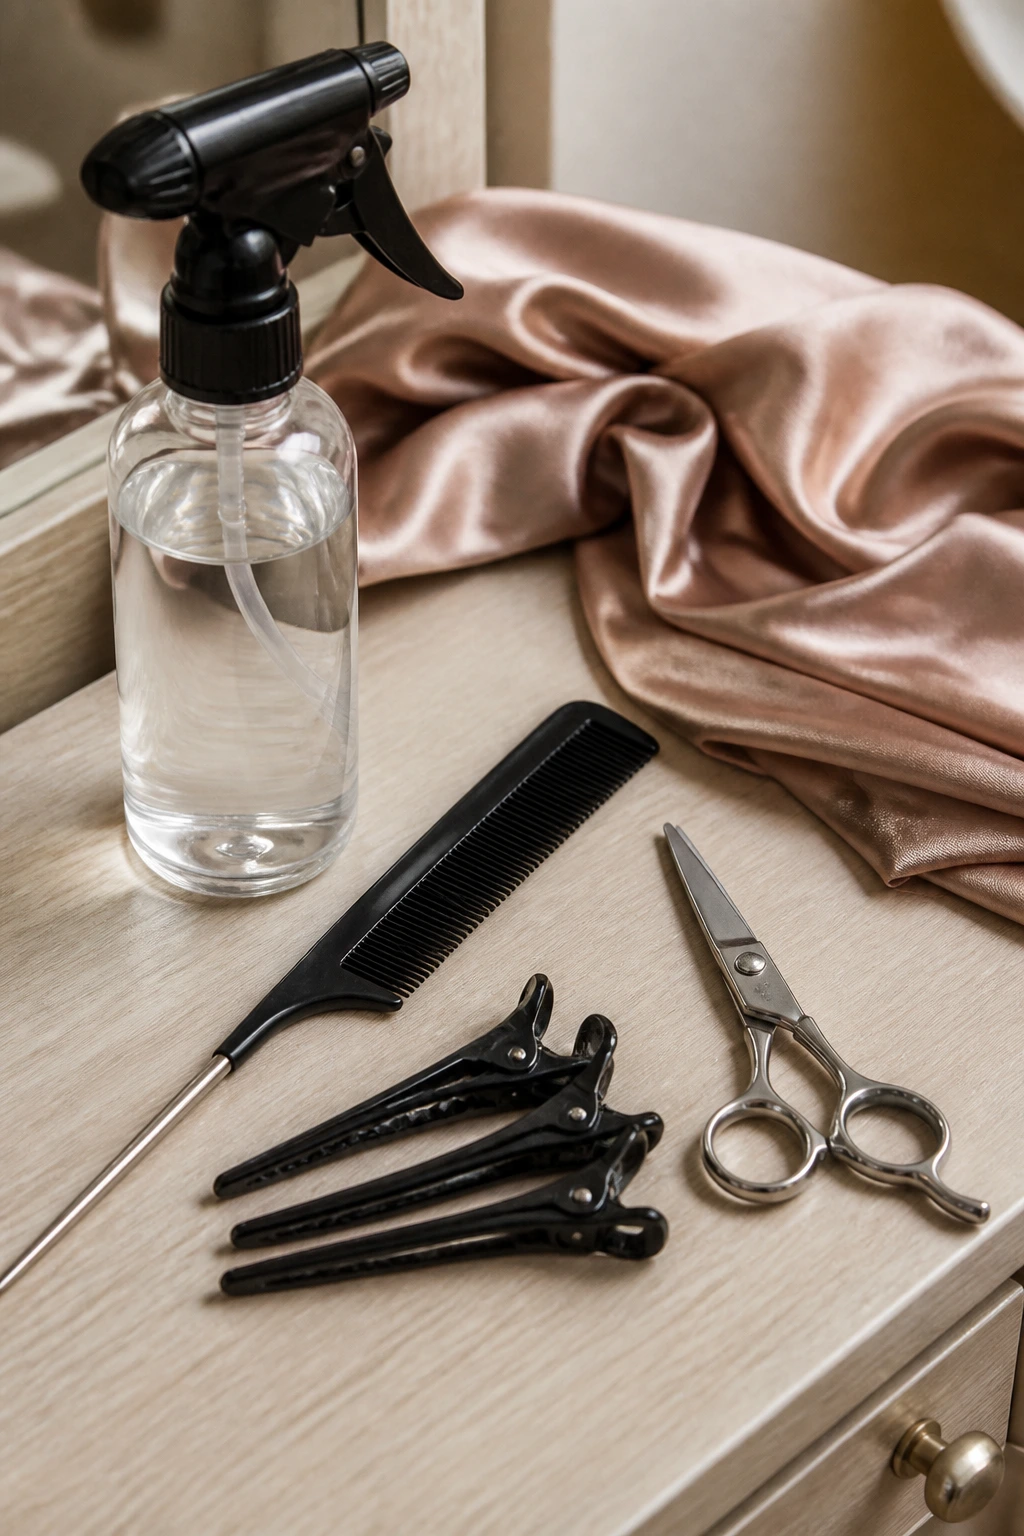
Rat-tail comb: For clean parting lines and section control; the thin tail matters more than the comb teeth here.
-
Sectioning clips: Keep the rest of the hair out of the way so your parts stay neat instead of fuzzy.
-
Styling mousse or wrap foam: Helps settle the twist pattern and smooth the surface without coating it in grease.
-
Light braiding gel or edge control: Use sparingly at the roots if your hair needs a little grip; too much leaves residue.
-
Satin scarf and bonnet: The nightly wrap is what keeps the crown from fraying into fuzz.
-
Edge brush: Handy for smoothing the hairline without dragging product through the whole style.
-
Small elastics or thread: Useful for ponytails, half-up looks, and securing buns before pinning.
-
Hair cuffs, beads, rings, or shells: Optional, but they change the mood fast when used with restraint.
-
Spray bottle with water and a little leave-in: Good for light refreshing; mist, don’t soak.
-
Hair scissors: For trimming stray extension ends or cleaning up a piece that sticks out awkwardly.
Smart Shopping and Hair-Choice Tips
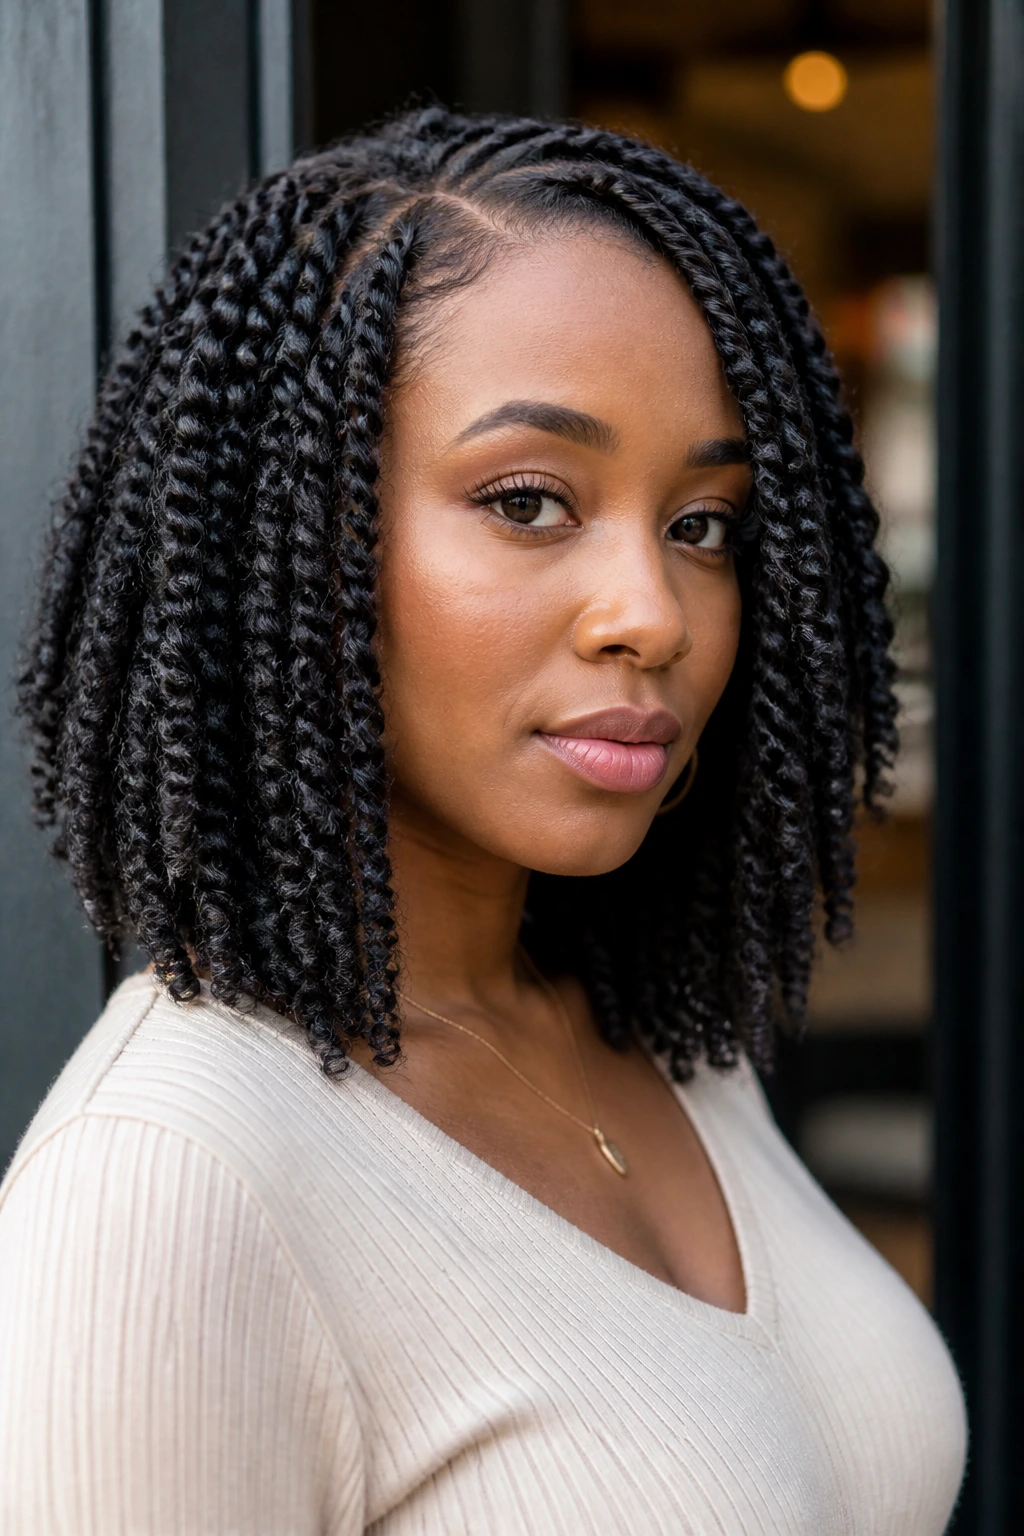
Hair choice makes more difference than people expect. Spring twist hair that’s pre-fluffed and soft will usually install faster and sit more naturally than hair that’s too shiny or too stiff. If you want a looser, fuller movement, water-wave or spring-textured extension hair works well. If you want the twists to keep a tighter coil and hold their shape longer, choose a springier texture with more bend.
Length matters on the shelf before it matters on your head. A chin-length bob may only need 3 to 4 packs, depending on density, while long, full installs can take 5 to 7 packs. If you are unsure, buy one extra pack from the same texture and color family. Running short halfway through an install is a miserable sort of shopping trip.
Color is another easy choice point. Dark brown and black read clean and simple. Honey, auburn, burgundy, and soft blonde blends can make the twist texture more visible because the coil catches light along each bend. I’m not a fan of hair that’s so glossy it looks plastic under indoor lighting. A little matte finish tends to look better in real life.
If you want the style to feel lighter at the root, choose medium-density hair instead of overstuffing each section. Heavy hair looks lovely for about ten minutes, then the weight starts arguing with your scalp.
How to Keep Spring Twists Looking Fresh
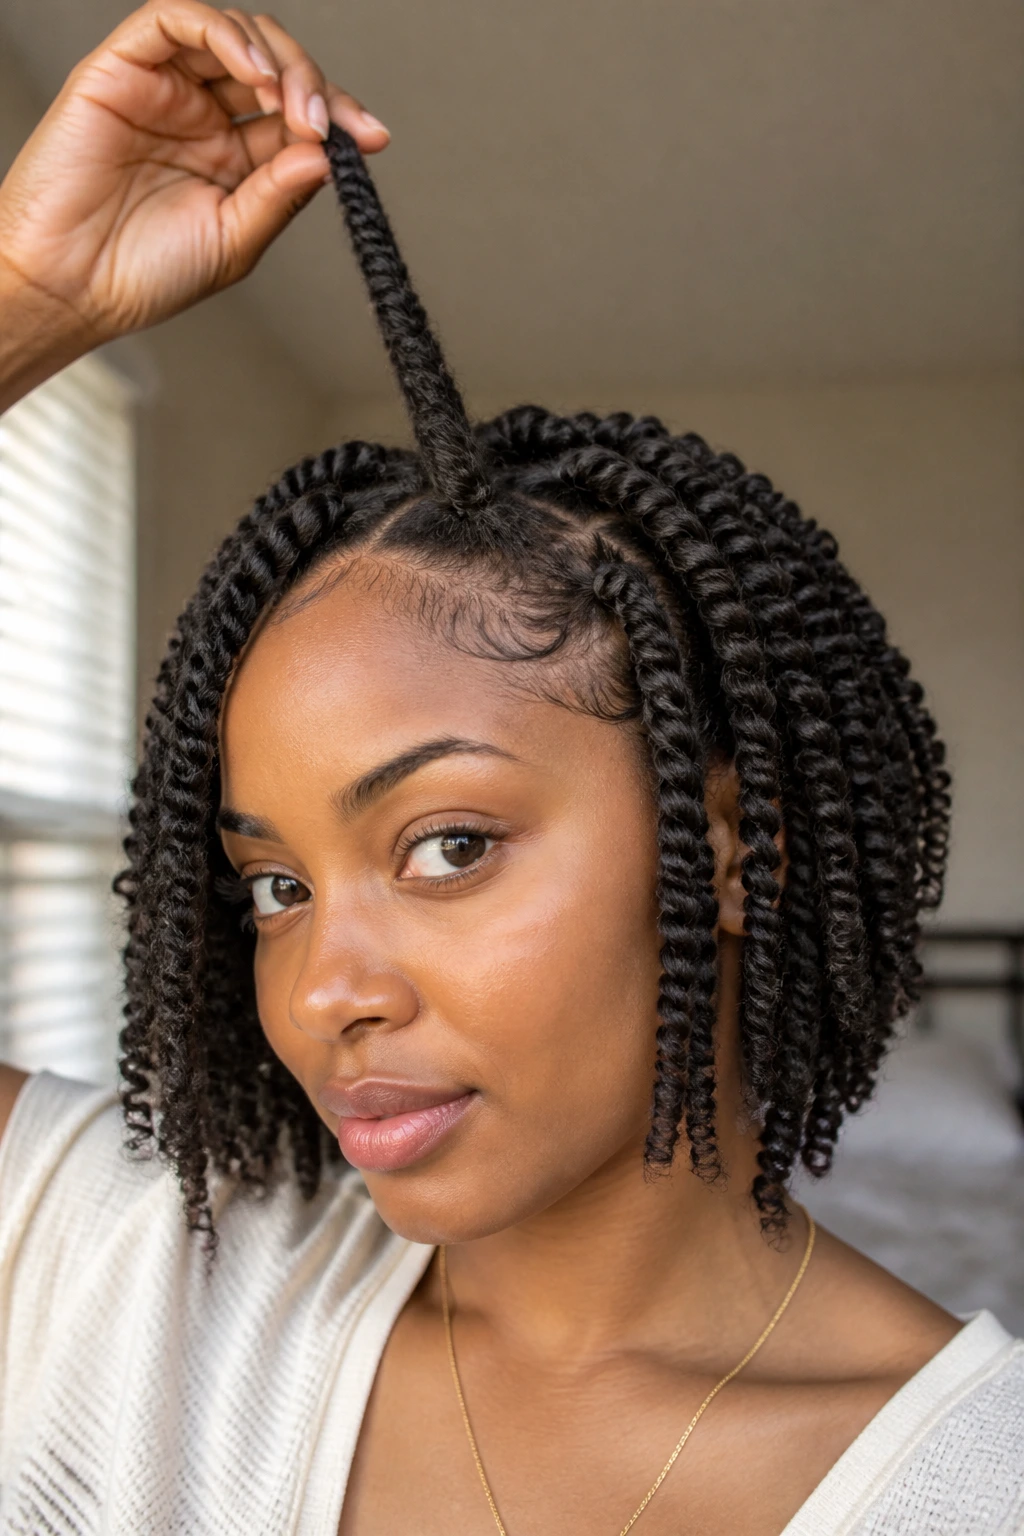
Night routine: Put the twists into a loose pineapple or flat section, then wrap the hair with a satin scarf before you add the bonnet. That double layer keeps the crown from roughing up against cotton pillows and flattening the front pieces.
Morning reset: Mist your palms lightly with water or a diluted leave-in spray, then smooth the top and the outer surface of the twists. Don’t drench the hair. A damp scalp line is enough to wake the style up without making it soggy.
Frizz control: Use mousse on your hands and palm-roll the pieces that start to look fuzzy. A little frizz is fine. A twisted halo of fuzz at the crown is not.
Accessory refresh: Swap one cuff, move the scarf, or change where the side part sits. Small changes keep the look from feeling stale without touching the whole install.
Scalp comfort: If the roots feel tight, stop styling the hair up for a day or two and let it hang loose. Constant pulling is how a cute set of twists turns into a headache with good lighting.
Mistakes That Make Spring Twists Frizz Early
-
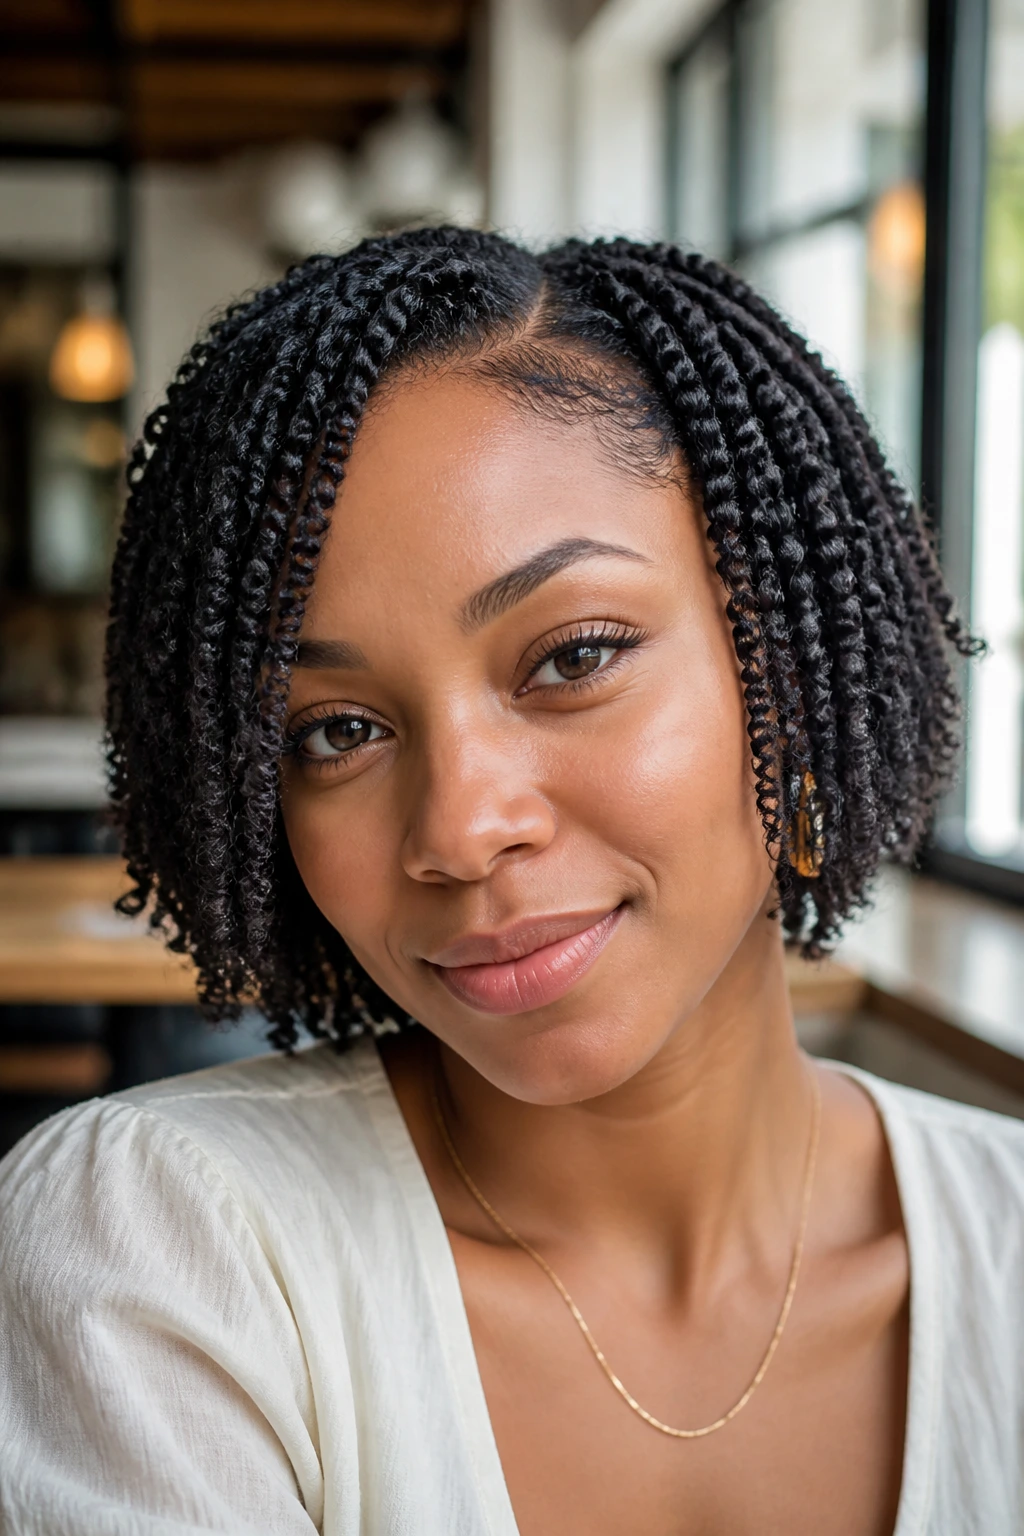
Tight roots from the start: If the scalp is sore on day one, it will only feel worse later. Ask for lighter tension around the hairline and temples.
-
Too much oil, grease, or heavy cream: Spring twists do not need a shiny coating. Heavy products make the surface sticky, collect lint, and flatten the coil pattern.
-
Sleeping without a wrap: Cotton pillowcases rough up the crown and front pieces fast. Satin is not optional if you want the style to last.
-
Overloading the ends with accessories: Too many beads or rings can pull on the lower sections and make the style feel uneven. Use accents, not armor.
-
Keeping the style in too long: Once the roots start matting and the nape tangles, the install has passed its nicest point. Stretching it too far usually makes removal harder and rougher on your hair.
Easy Ways to Change the Mood of the Style

Soft Office Twist: Keep the length around the shoulders, use a deep side part, and skip the heavy jewelry. The clean line reads neat without feeling stiff.
Weekend Playful: Go for space buns, a few beads, or a scarf tied around the crown. The style looks brighter when there’s some movement near the face.
Dress-Up Bun: Choose the low wrapped bun or French roll, then add one metallic cuff at the side. That’s enough to make the look feel deliberate.
Protective and Low-Tension: Use medium parts, a shorter length, and fewer pinned styles. This version is the most useful if your scalp gets tired fast or you wear twists for long stretches.
Color-First Version: Pick honey, burgundy, or ombré extension hair and keep the styling simple. When the color is doing the talking, the shape can stay calm.
Maintenance, Sleeping, and Wash-Day Care
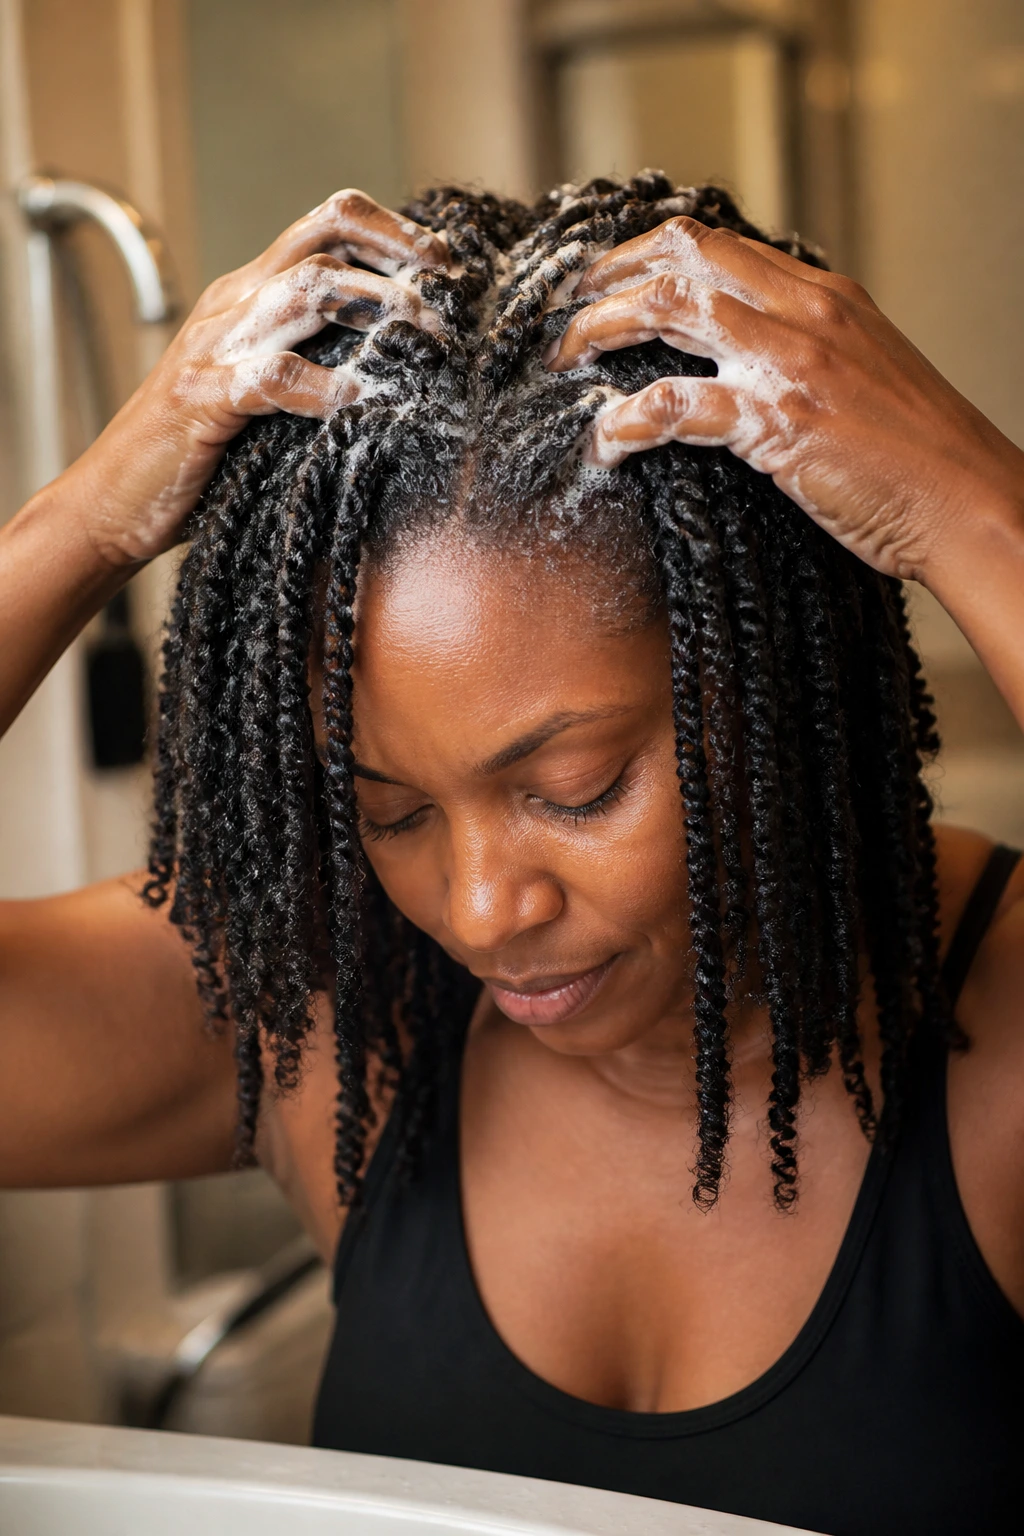
Spring twists usually behave best when they are cleaned lightly and left alone between washes. A full soak every few days is too much. The style does better with a gentle scalp cleanse every one to two weeks, depending on how much product you use and how active your routine is. Use a diluted shampoo on the parts, massage the scalp with the pads of your fingers, and let the water run through without scrubbing the twist lengths like you’re washing a towel.
Drying matters more than people think. If the roots stay damp too long, the style can smell musty and feel heavy. Pat the hair with a microfiber towel or a plain T-shirt, then let it air-dry fully. If you’re in a hurry, use a cool or low setting and keep the airflow moving. Dense installs take longer to dry than they look like they should.
At night, keep the scarf and bonnet routine going. That is what preserves the parting and keeps the crown from becoming fuzzy before its time. If the front pieces start getting flat, switch the part slightly or tuck one side behind the ear for a day. Small changes reduce stress on the same points over and over.
Removal is part of maintenance too. Don’t wait until the style is a tangled mat at the nape. If you notice heavy buildup at the roots, slip in the comb with patience and start taking the install down section by section. Hair is kinder when you don’t rush it.
Frequently Asked Questions
How long do spring twist styles usually last?
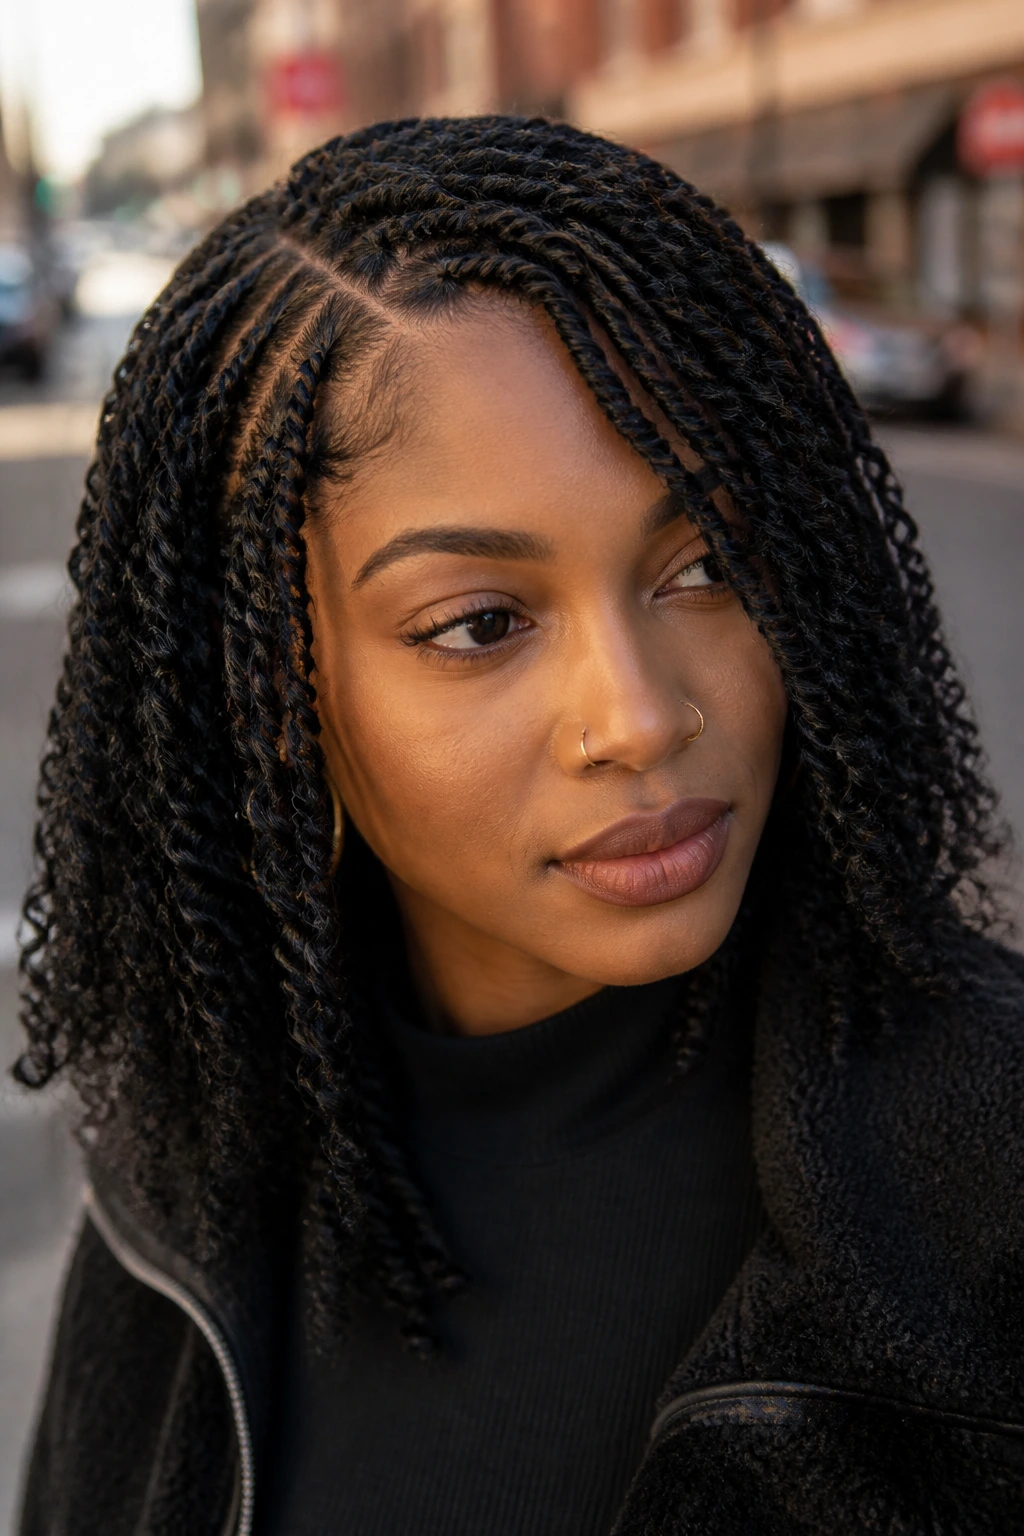
A well-installed set can last about 4 to 8 weeks, depending on length, density, and how gently you maintain the roots. Smaller twists and lighter tension usually stretch a little longer, while larger, heavier styles tend to ask for removal sooner.
What hair works best for spring twists?
Spring-textured or water-wave synthetic hair is the usual pick because it already has that coiled, springy shape. If you want a softer finish, choose hair that fluffs easily; if you want more defined coils, go with a tighter texture that holds its bend.
Can you do spring twists on short natural hair?
Yes, but the install needs enough length for the base to grip without pulling. If the hair is very short, a stylist may use a different prep method or recommend a style with smaller parts and lighter extensions so the roots are not stressed.
What’s the difference between spring twists and passion twists?
Spring twists usually have a tighter, more coiled look, while passion twists lean looser and more wavy. Spring twists tend to read a little neater and spring back with more obvious texture, which changes the whole finish of the style.
How many packs of hair do you need?
For a bob or lob, 3 to 4 packs is often enough if the pieces are medium-sized. Long, full looks may need 5 to 7 packs. It’s smarter to buy one extra pack than to run short halfway through.
Can you wash spring twists without ruining them?
Yes, if you keep the wash gentle and focus on the scalp. Use diluted shampoo, avoid rough scrubbing, and dry the style fully afterward. The twist lengths should be treated like textured fabric, not loose hair that needs vigorous washing.
What if the roots start slipping early?
Usually that means the sections were too smooth, the base was too loose, or too much product sat at the root. You can sometimes save the look with a little mousse and a neat re-twist on the loose sections, but if several rows are slipping, it’s better to repair them before they unravel further.
Are spring twists heavy?
They can be, if the length is long or the hair is packed too densely. Shoulder-length and chin-length styles usually feel lighter on the scalp, while waist-length installs need more careful sectioning and a more modest amount of hair per twist.
Spring Twists Worth Wearing More Than Once
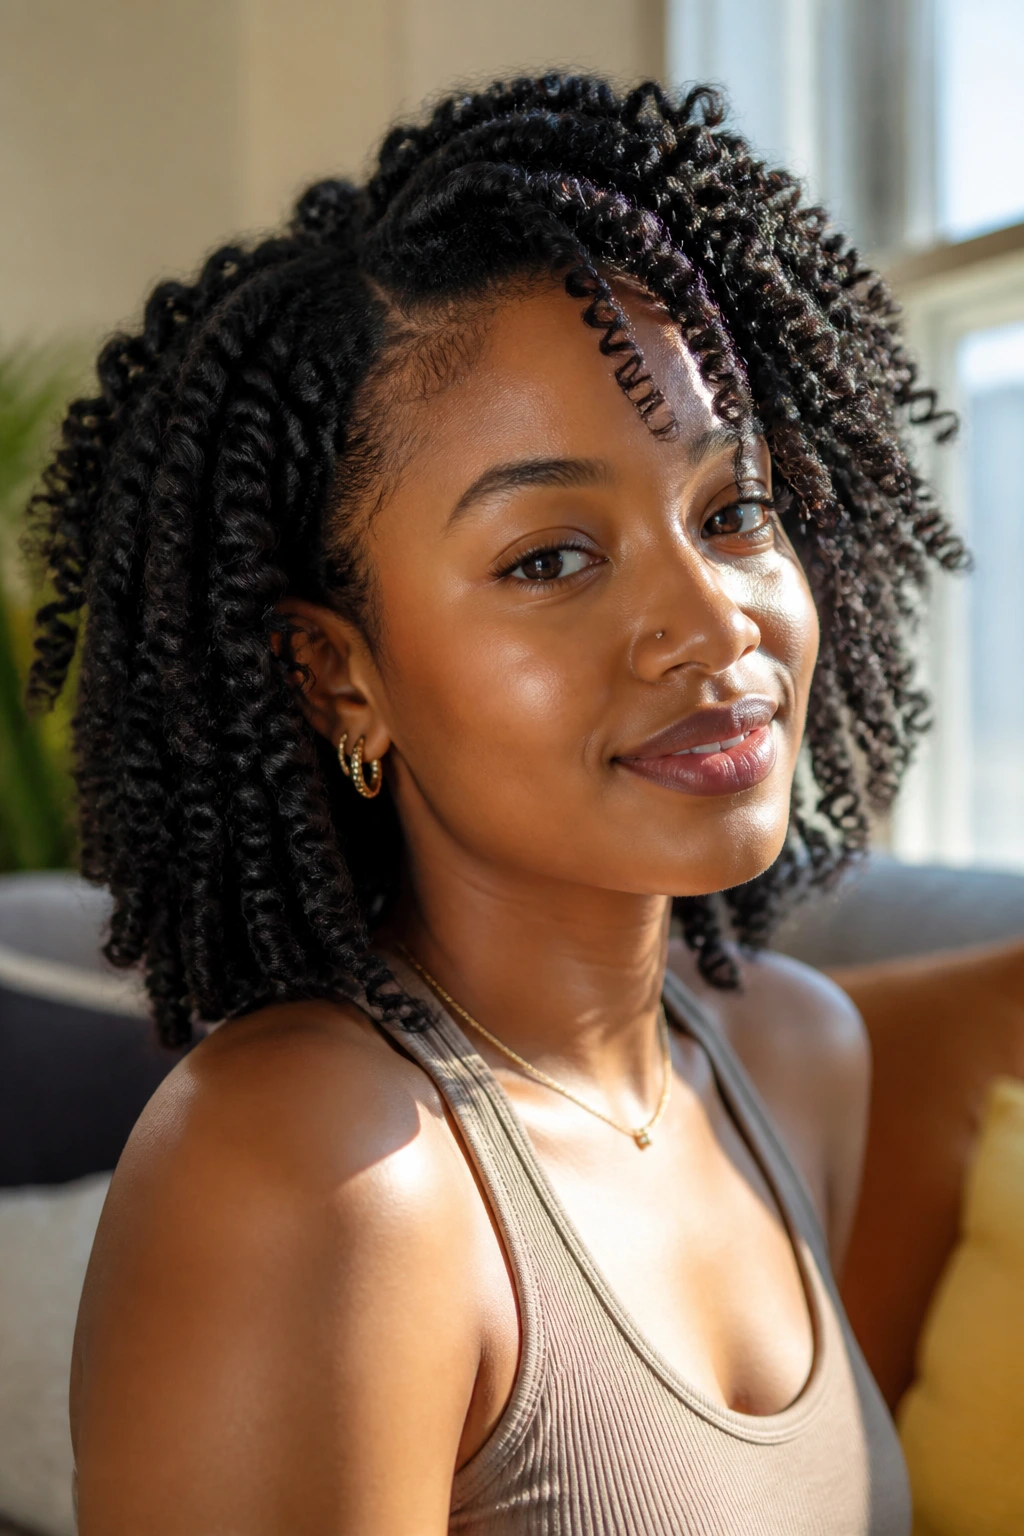
The nicest thing about spring twists is that they don’t ask for one fixed personality. The same texture can sit as a bob, a bun, a side-swept cascade, or a scarf-tied twist set, and each version changes the mood without losing the protective-style appeal. That kind of range is rare enough that I don’t take it for granted.
If you’re choosing between lengths, start with the life you actually live. If you pin your hair up, build around that. If you want movement, keep the ends lighter and the front softer. If you want the style to last without constant fuss, stay honest about tension and weight. The prettiest spring twist styles are the ones that still feel good on day six.
