



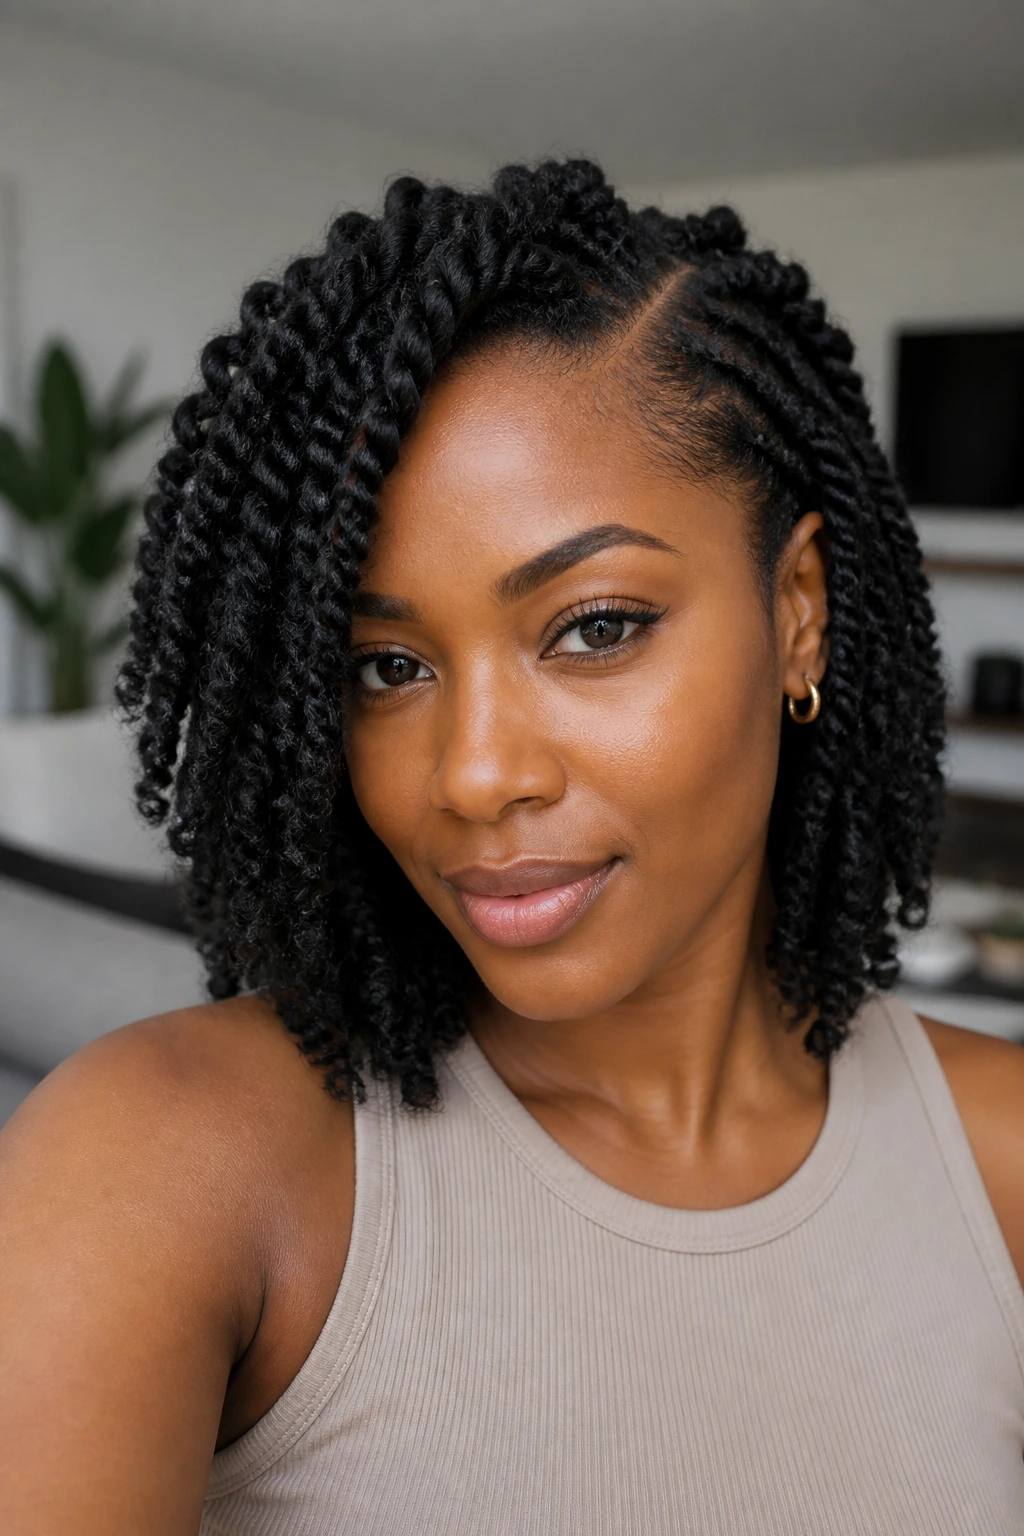
Spring twist styles for medium length hair work because the hair has room to move, but not enough length to turn every twist into a tug-of-war with your neck. That’s the sweet spot. The twists bounce. They skim the shoulders. They don’t swallow your face or drag your roots the way extra-long sets sometimes do.
Medium-length hair also gives you a little more freedom than people expect. You can wear the twists down and loose on one day, then pin, tuck, wrap, and stack them the next without the whole style collapsing into a heavy lump. That matters. A twist style only looks “easy” when it still looks good on day four.
And there’s a practical upside that gets missed a lot: the middle-length zone makes parting, shaping, and accessorizing easier to see. Triangle parts show. Beads show. A side sweep shows. Even a simple bob shape looks intentional instead of unfinished. The styles below lean into that, and they’re better for it.
Why This Collection Fits Shoulder-Grazing Lengths So Well
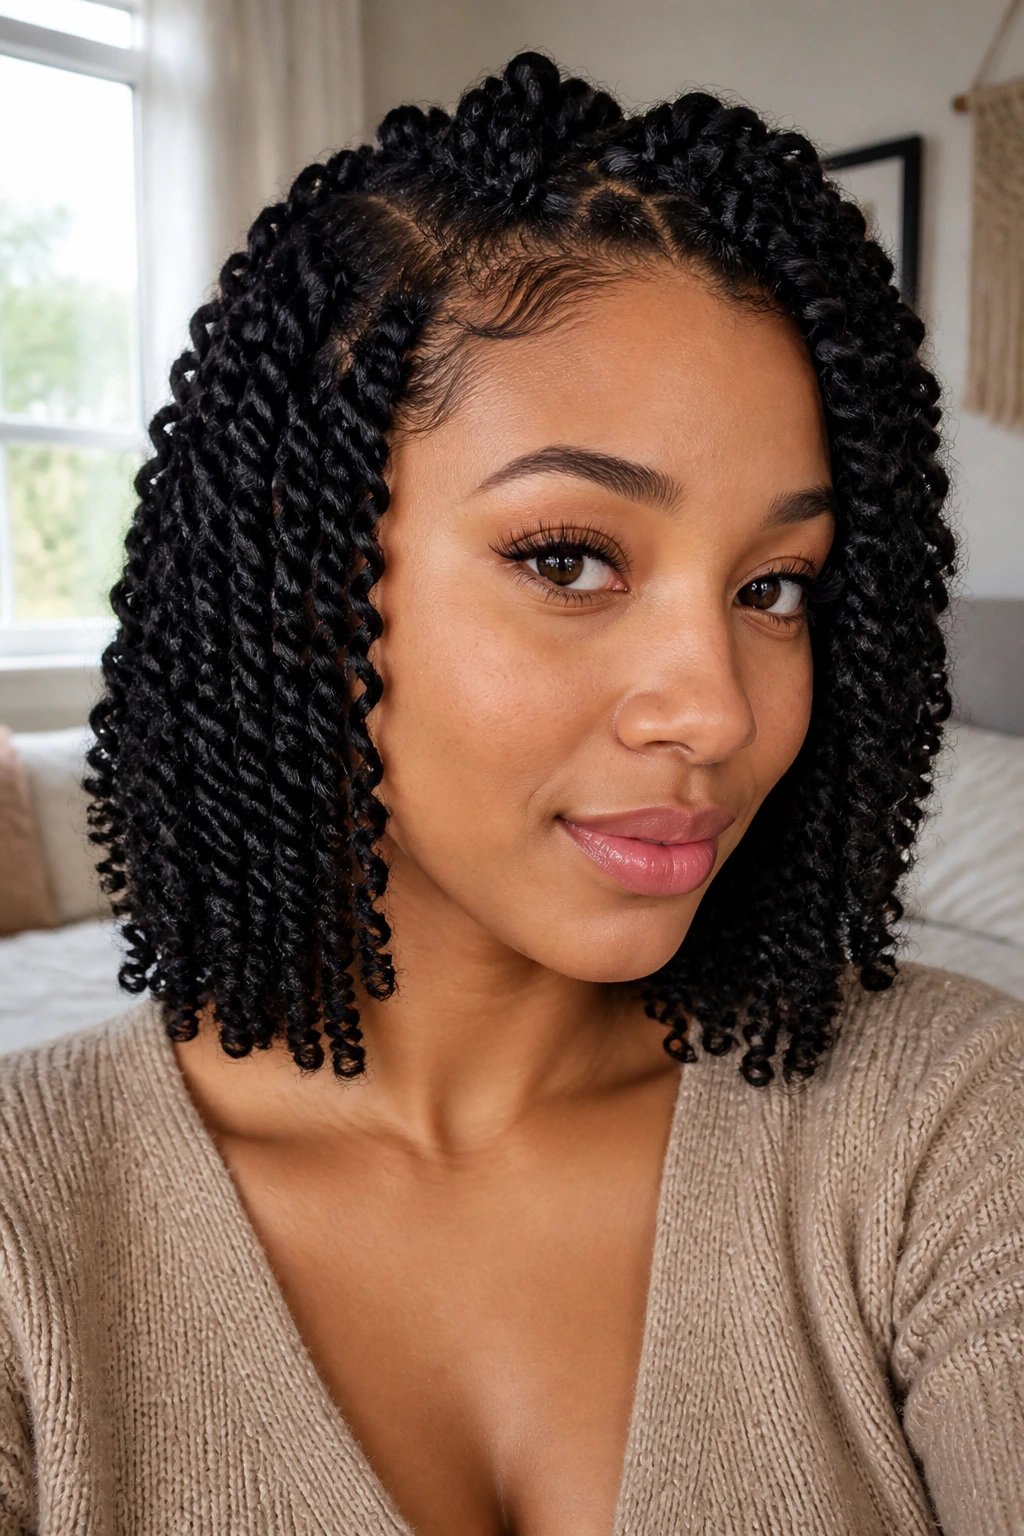
- Less weight at the scalp: Medium-length spring twists usually need less extension bulk than waist-length styles, so the roots feel lighter and move more naturally.
- More styling range: You can wear these twists down, half-up, in a ponytail, tucked under, or pinned to one side without fighting the length.
- The parting actually matters: On shoulder-grazing hair, triangle parts, zigzags, and deep side parts stay visible instead of disappearing into a curtain of hair.
- Accessories don’t get lost: Beads, cuffs, scarves, and clips show up clearly on medium-length twists instead of vanishing in the length.
- The silhouette stays clean: A collarbone-skimming set keeps the shape neat, which is half the reason spring twists look so good in the first place.
- Night care is simpler: A medium set folds into a bonnet or scarf more easily than a long one, which helps the style hold its bounce.
1. Shoulder-Skimming Classic Spring Twists
This is the version I point people toward when they want the cleanest possible spring twist look on medium length hair. The ends sit around the collarbone or just below it, so the twists swing when you walk but never feel like they’re taking over your whole head. It’s tidy. It’s easy to read. It looks finished from every angle.
Why it works on medium hair
Medium length gives this style the structure it needs. The twists are long enough to show off the curl pattern, but short enough to keep the base neat and the movement lively. If your hair sits right around the shoulders, this shape usually lands in that sweet spot where it frames the face without crowding it.
- Best for: first-time spring twist wearers and anyone who wants a safe, classic shape
- Face effect: softens a sharp jawline and keeps attention around the cheekbones
- Styling note: a middle part looks crisp; a side part makes it feel softer
- Watch for: twists that end too low and start hanging like long ropes
My blunt tip: keep the ends just grazing the shoulders. Once they fall much past that, the style starts losing the airy spring twist feel.
2. Deep Side-Part Spring Twists
A deep side part changes the whole mood of medium length hair. Suddenly the same twists look sharper, more deliberate, and a little more dramatic without needing extra hair or extra length. The asymmetry does the work for you.
That part line also gives the roots some lift, which is useful if your hair tends to lie flat at the crown. Sweep the heavier side across the forehead, let the other side sit lower, and the style gets a built-in shape that feels much more expensive than the actual effort involved.
This is the style I’d choose when I want the twists to frame one eye and show off earrings on the other side. It’s a small adjustment. Big payoff.
3. Half-Up Crown Spring Twists
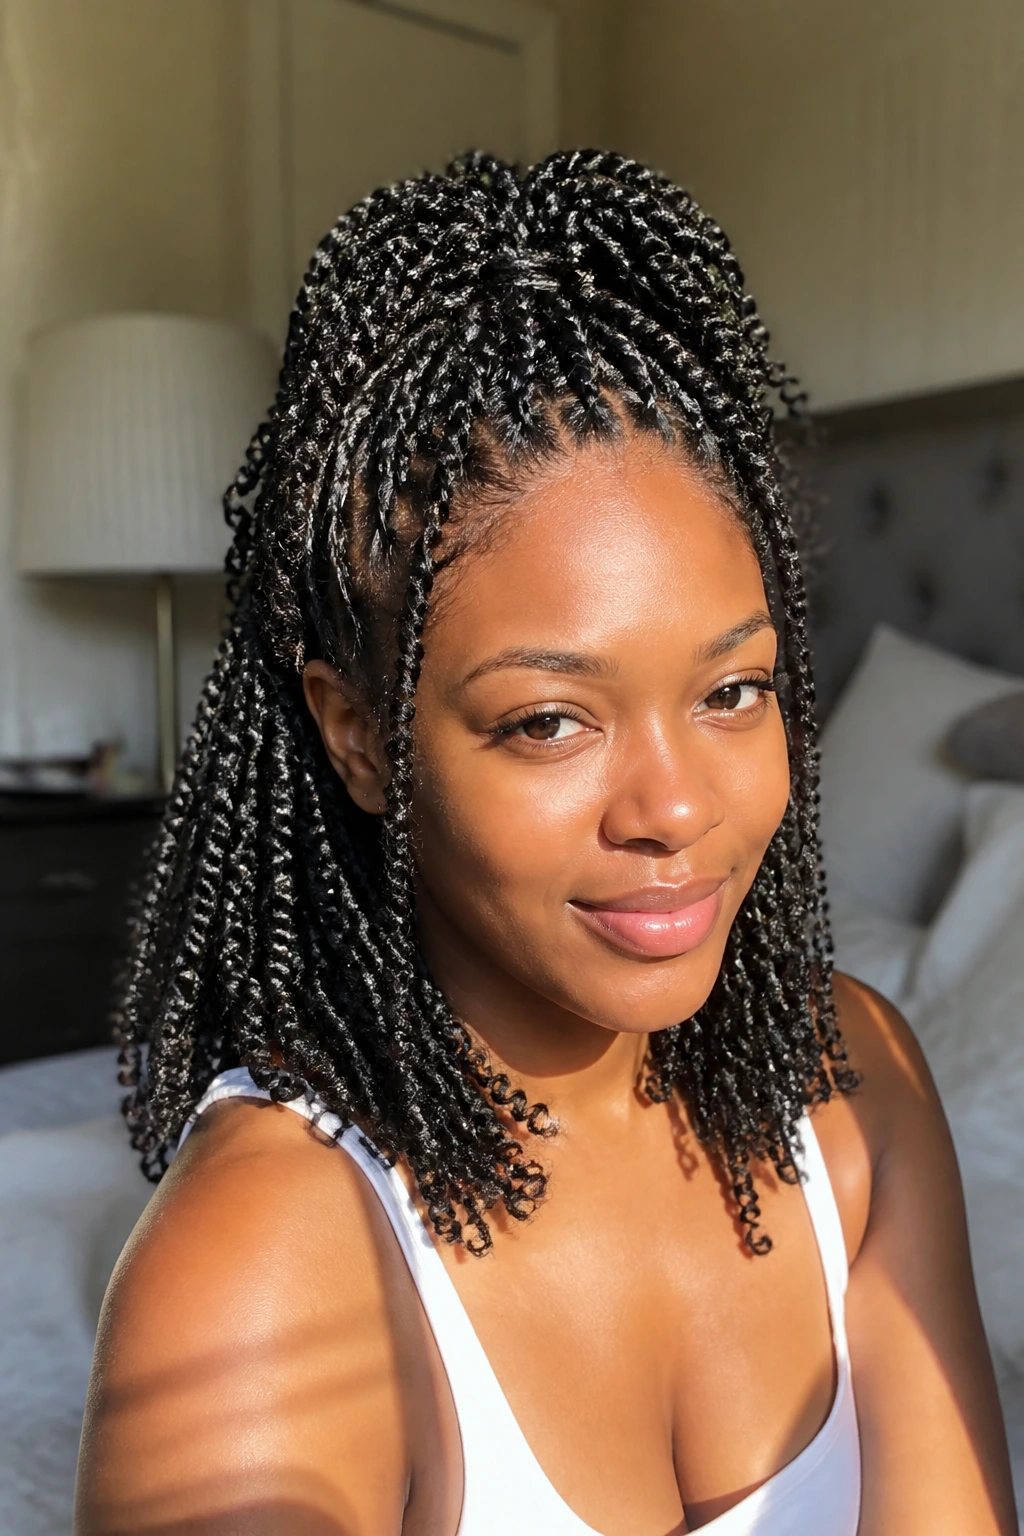
Half-up spring twists are the answer when you want the face open but don’t want to commit to a full updo. Pull the top section back into a small puff, knot, or clipped crown, and let the rest fall loose. On medium length hair, that top section is usually just enough to lift the style without making it look top-heavy.
It’s one of those looks that works on a workday and still looks right at dinner. Not fussy. Not flat. The crown lift shows off the parting at the front, while the loose back keeps the springy movement people love about this style.
How to wear it
Use a snag-free band or a few hidden pins instead of yanking everything into one tight bundle. Leave a couple of face-framing twists loose if you want a softer line. If the top feels bulky, you’ve probably grabbed too much hair in the front section.
4. Low Puff Spring Twists
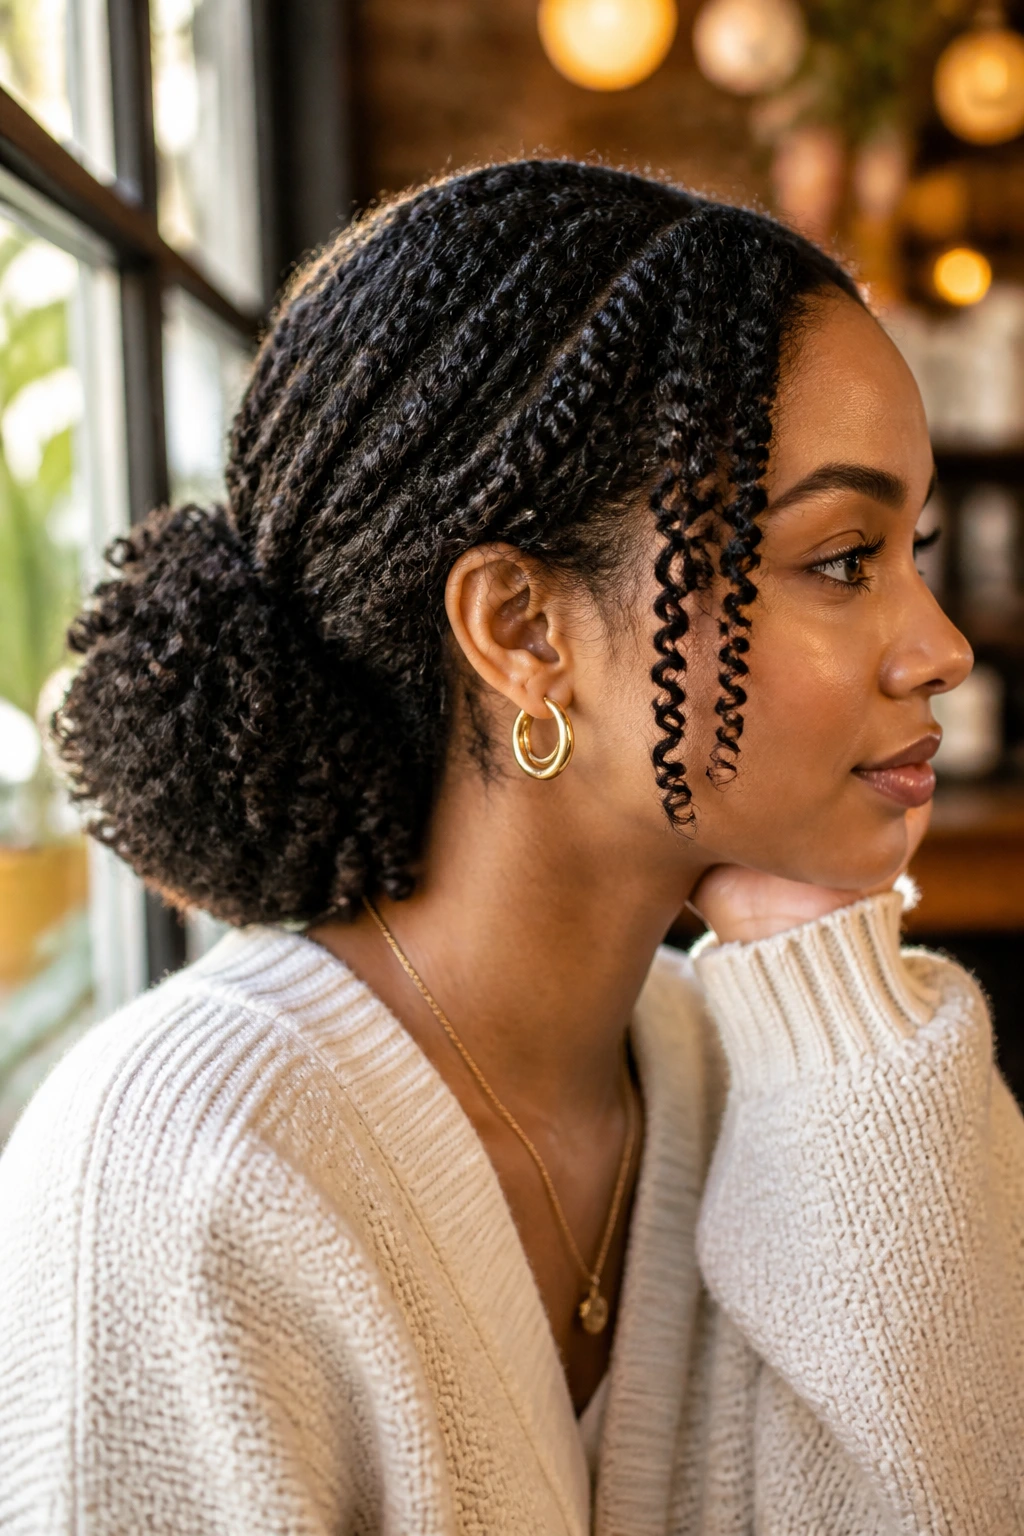
A low puff with spring twists gives you a nice compromise between down and up. Gather the top and middle section loosely at the nape, leave the bottom twists hanging, and you get a shape that opens the face without hiding the length. It’s especially useful on medium hair that has a little shrinkage or uneven ends underneath.
The look has a relaxed feel, but it still reads polished because the puff sits low and the twists keep their shape below it. I like this one on days when the front needs a reset but the rest of the style still looks good. You know the feeling. The roots are fine. The back is fine. The front wants a little mercy.
A low puff also gives you a clean place to add a clip, a small scarf, or a couple of cuffs without crowding the whole head.
5. Layered Bob Spring Twists
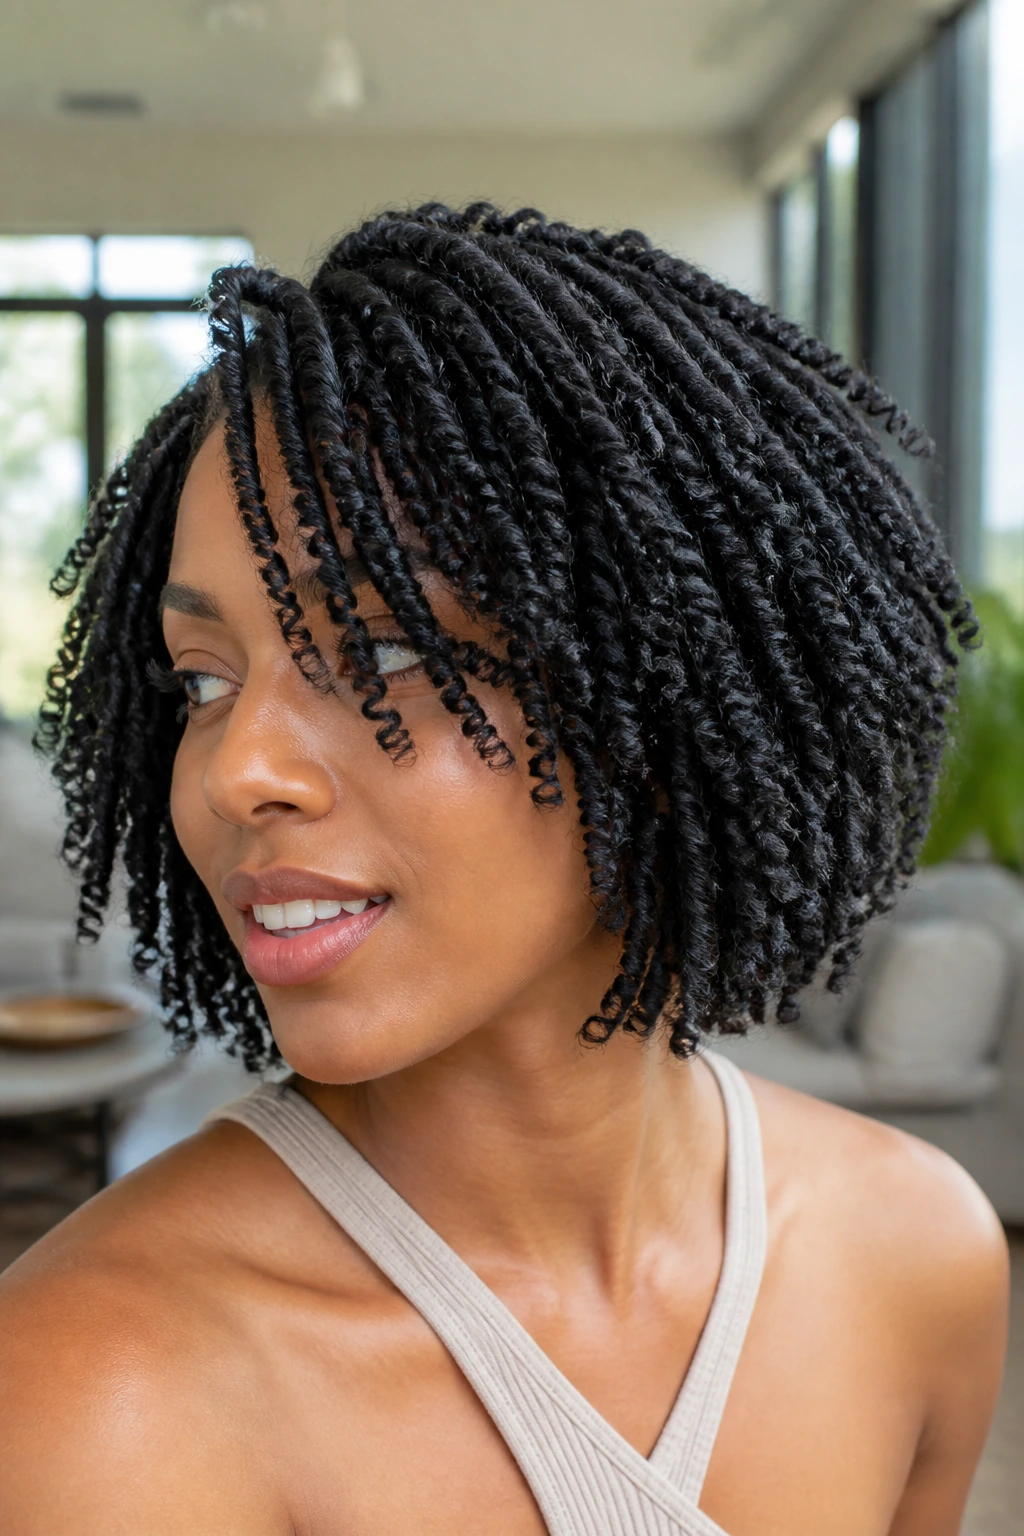
A layered bob takes the bluntness out of medium length spring twists. Instead of every twist landing at exactly the same point, the shape tapers slightly, so the style moves when you turn your head. That little difference matters more than people think. It stops the set from looking boxy.
This works especially well if your hair density is on the fuller side. A straight-across line can make thick twists feel heavy. Layers break up the outline and keep the ends from sitting in one stiff block around the jaw and neck.
The best part? It gives the illusion of more movement even when the twists are freshly installed and still a bit stiff from setting. That first day can be awkward with some styles. Not this one.
6. Boho Spring Twists With Loose Ends
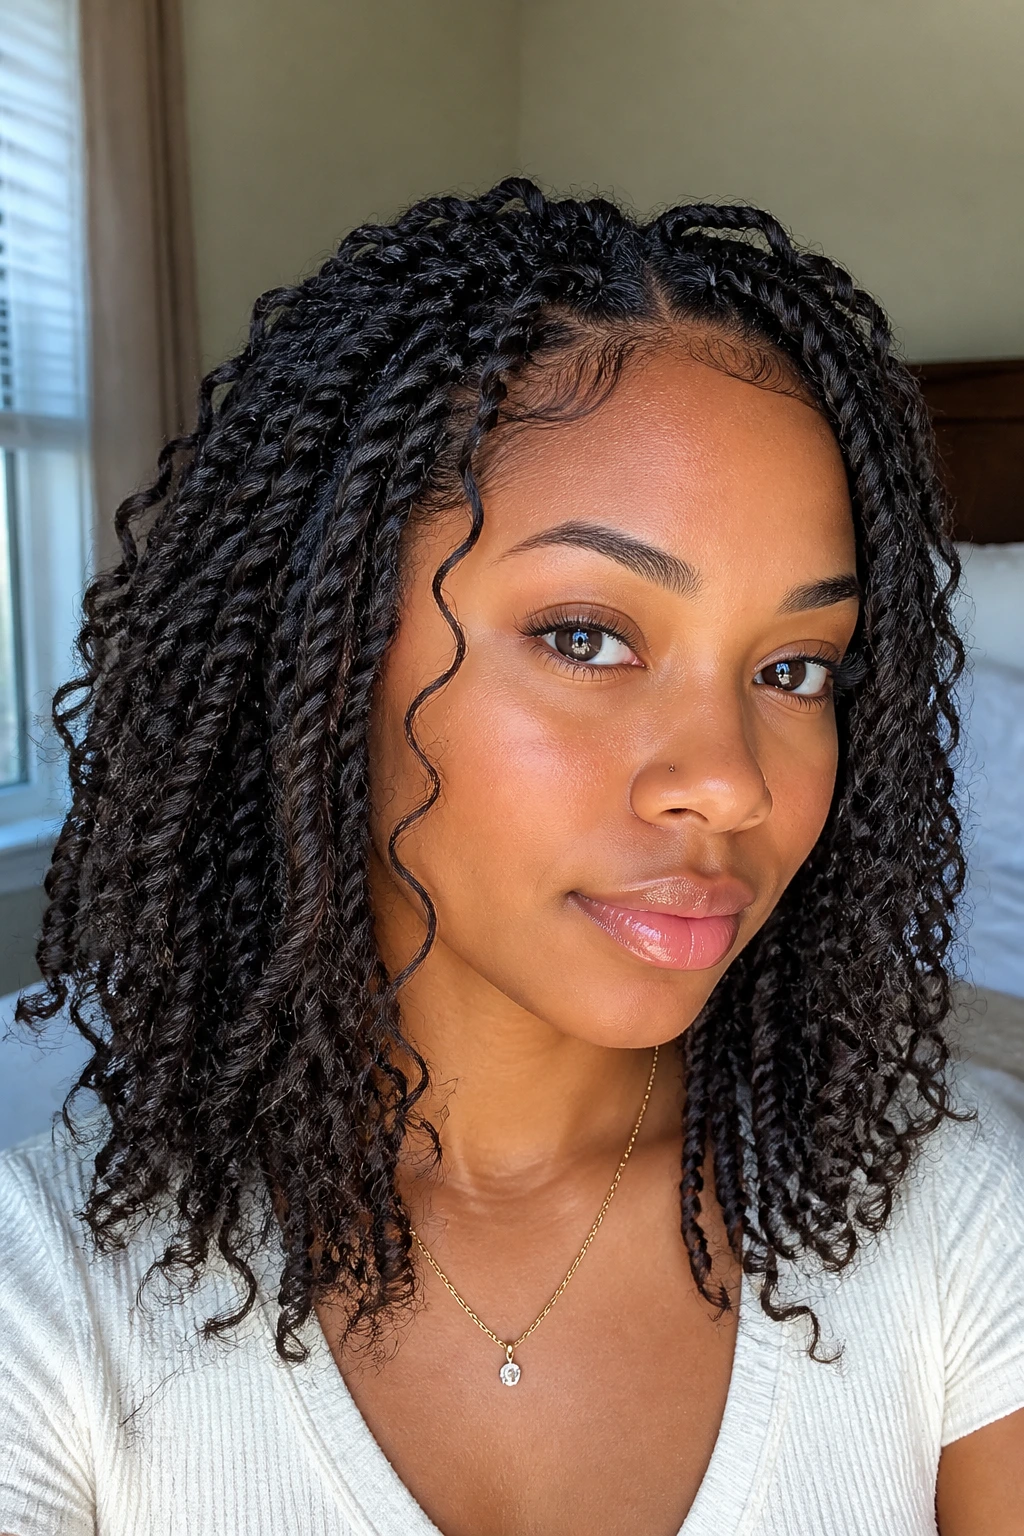
Boho spring twists are for people who want a softer, less uniform finish. A few loose curly pieces around the hairline, a few left to peek through the length, and the whole style starts to feel more relaxed. On medium length hair, that looseness works better than it does on very long twists because there’s less chance of the style turning into a tangled cloud.
The trick is restraint. Too many loose pieces and the style starts looking unfinished by day two. A few carefully placed strands around the temples and near the ends are enough to shift the mood. You want texture, not chaos.
If you’ve ever looked at a twist set and thought, I want this to feel a little less strict, this is the version to try.
7. Goddess Spring Twists With Curly Pieces
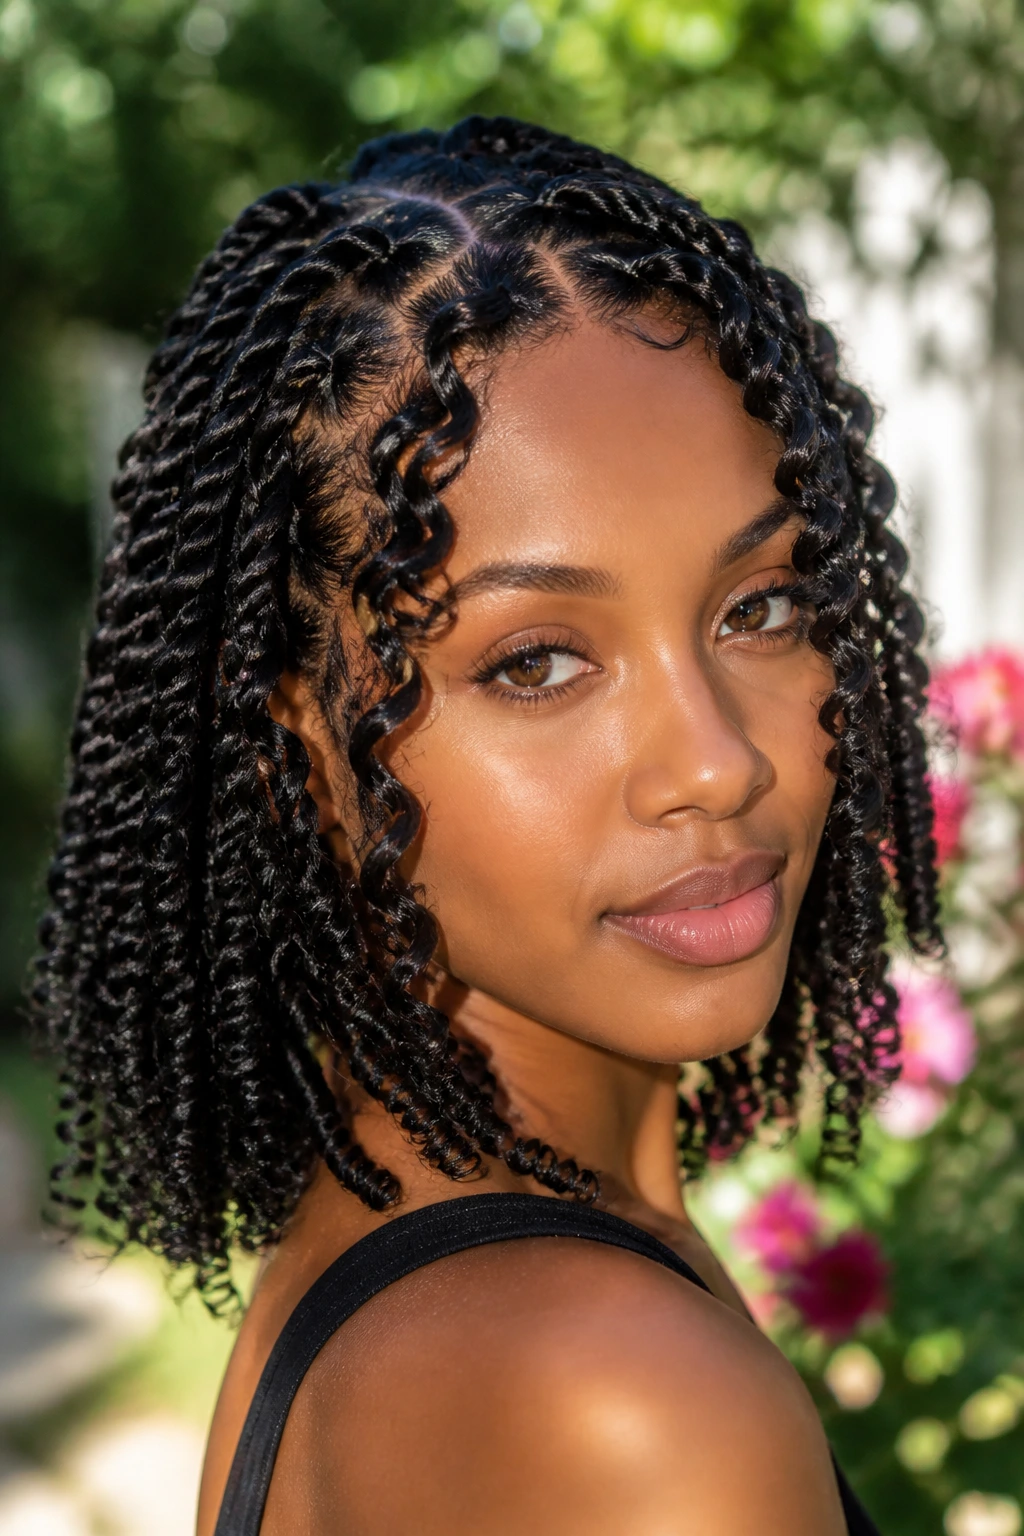
Goddess spring twists are the more sculpted cousin of the boho version. The curly pieces are deliberate, placed where they’ll frame the face and break up the line of the twists without making the whole head look messy. That’s the big difference. Boho feels airy. Goddess feels styled.
Medium length hair gives the curls room to show up without disappearing into too much length. You can place a few near the crown, tuck a couple near the ears, and let the rest keep their spring twist structure. The result is softer around the face and a little more romantic, which is a nice contrast if the rest of your wardrobe leans simple.
I’d pick this version when the twists need to look finished but not severe. It has movement, but it still has control.
8. Side-Swept Spring Twists
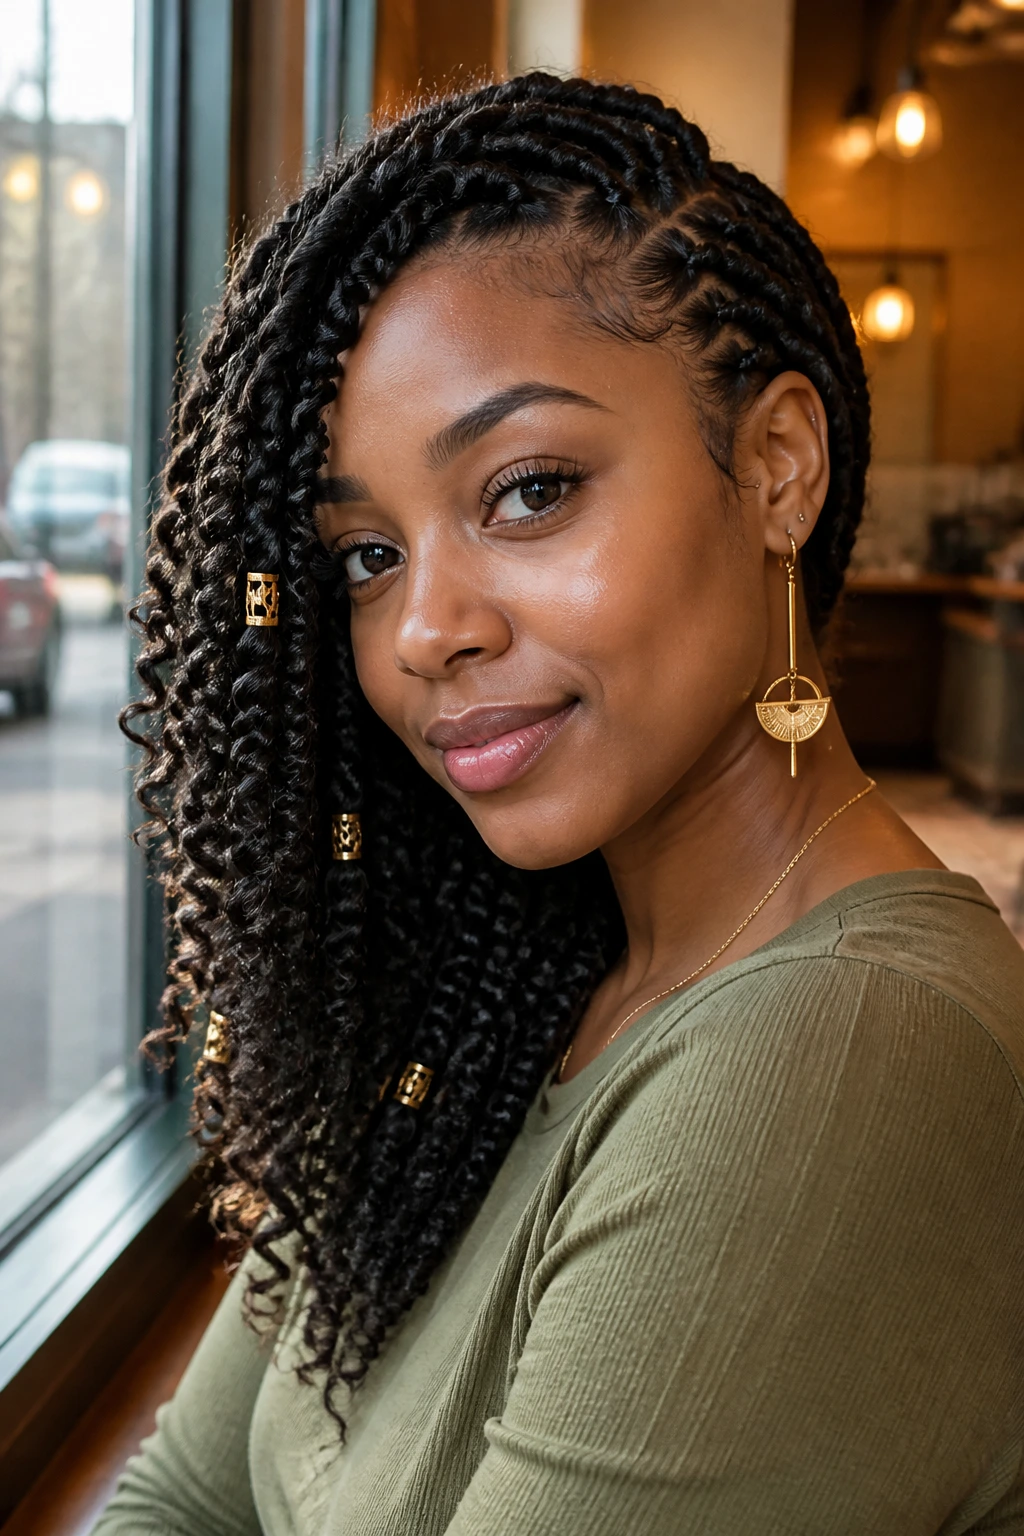
Side-swept twists are one of the easiest ways to make medium-length hair look intentional fast. Pull all the twists over one shoulder, pin the opposite side behind the ear or at the nape, and let the length fall in a thick curtain. The shape is simple. The effect is not.
This style is useful when you want the twist pattern to show off instead of hiding in a symmetrical middle-part curtain. It also gives you a better view of any beads, cuffs, or colored tips you’ve added. A side sweep changes the whole silhouette without asking for new hair or a fresh install.
If I had to pick one styling move that never really fails with spring twists, this would be near the top.
9. High Ponytail Spring Twists
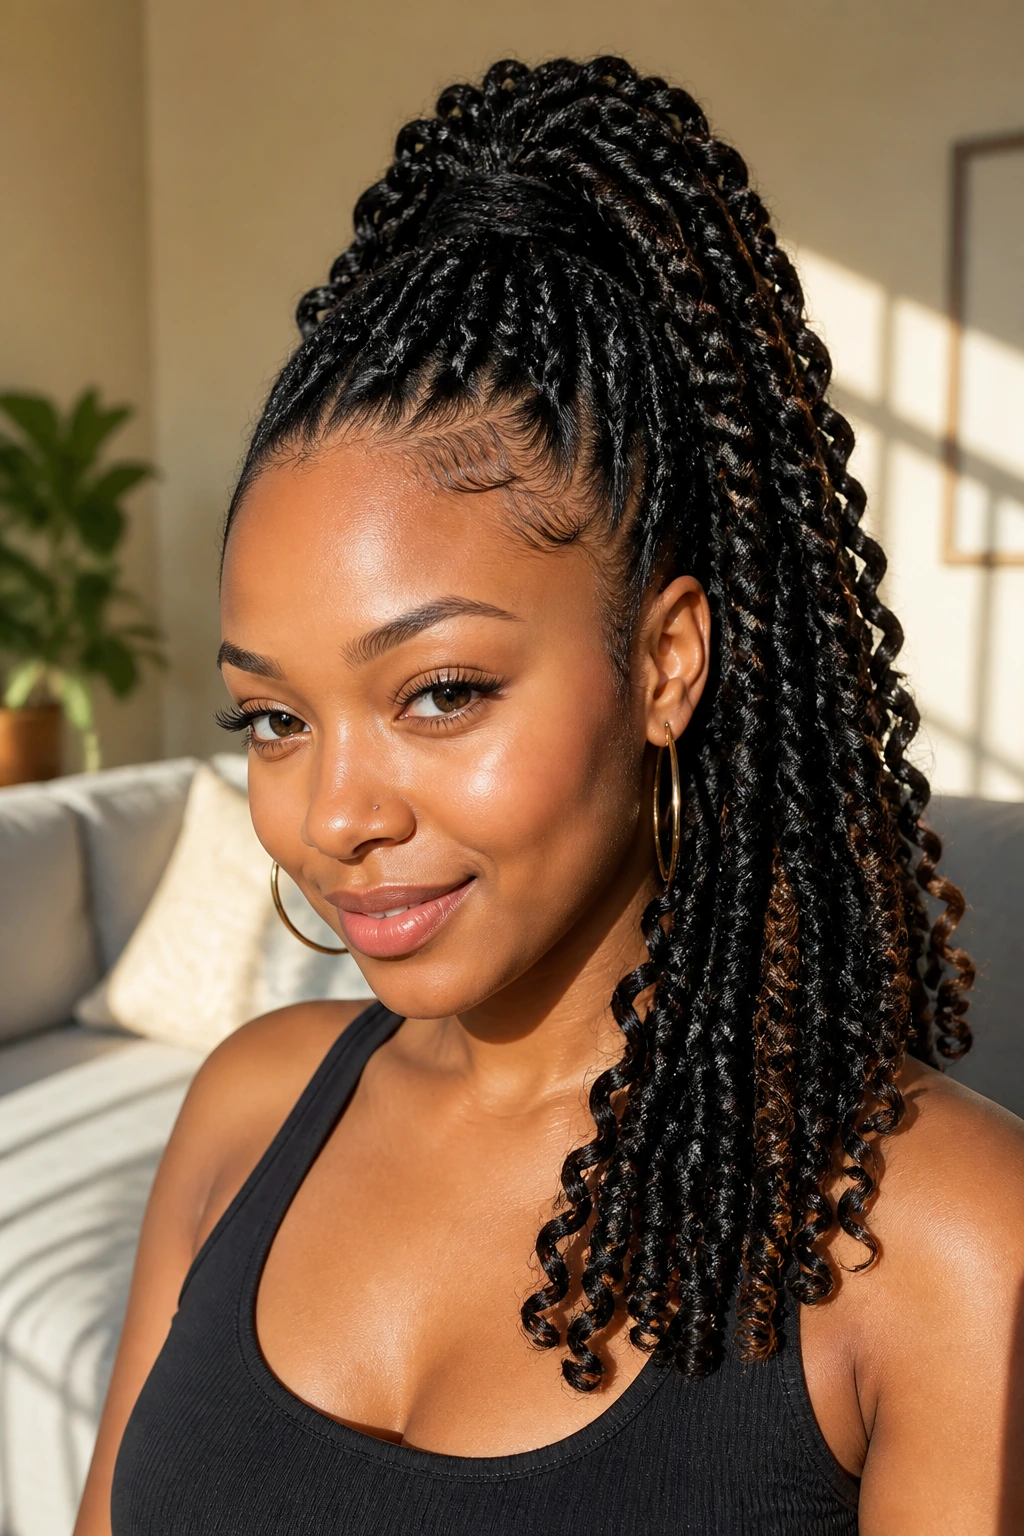
A high ponytail on medium length spring twists has more lift than people expect. The style pulls the twists upward just enough to create shape at the crown, then lets the ends fall in a thick tail that still feels playful. It’s a neat option when you want the hair off your neck but don’t want a bun.
The key is not over-tightening the base. That’s where people go wrong. A high ponytail should sit firm, yes, but it shouldn’t feel like the roots are being squeezed into a corner. Use a strong band, wrap a twist around the base if you want to hide it, and stop there.
This one works well for movement-heavy days. Walking around. Running errands. Anything that makes a loose set of twists annoy you by noon.
10. Flipped-End Spring Twists
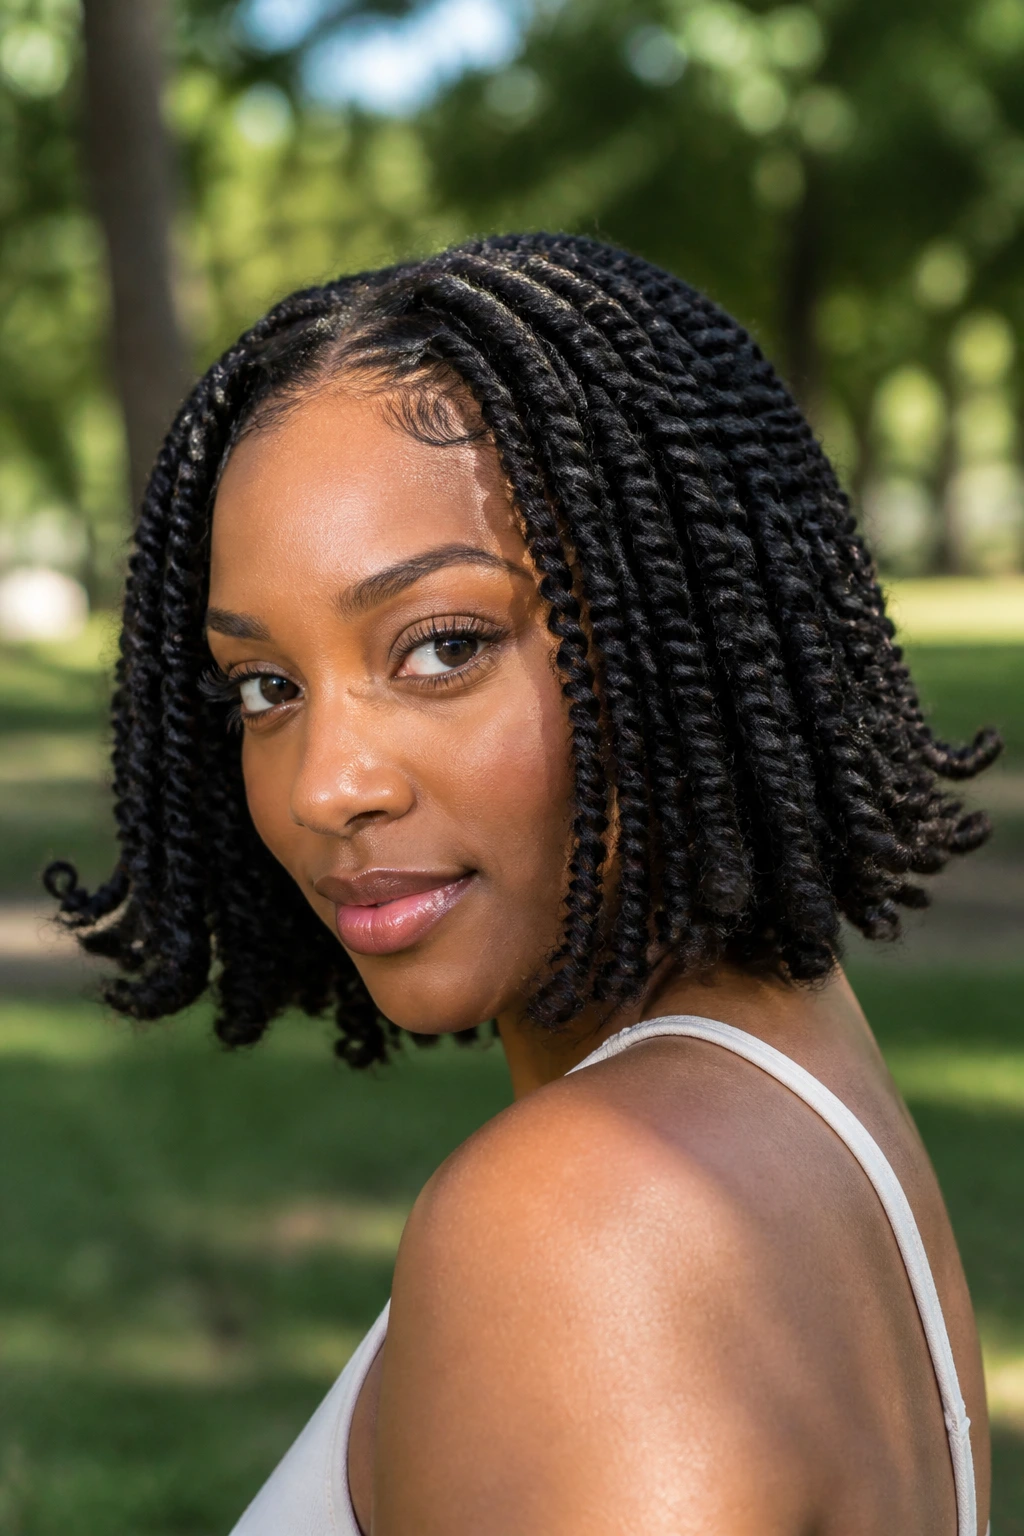
Flipped-end spring twists lean into the springy part of the style instead of hiding it. The ends curl outward a little, almost like a soft flick, so the whole set looks more animated at the shoulders. On medium length hair, that flipped finish shows clearly. You see it right away.
The shape makes sense if your twists naturally want to puff at the ends instead of hanging straight. Rather than fighting that, shape it. Use a little mousse, finger-roll the ends, and let them settle with a gentle bend. The style looks lighter because the bottom edge isn’t blunt.
I like this version because it keeps medium length hair from looking too square. The flipped ends break the line just enough.
11. Triangle-Part Spring Twists
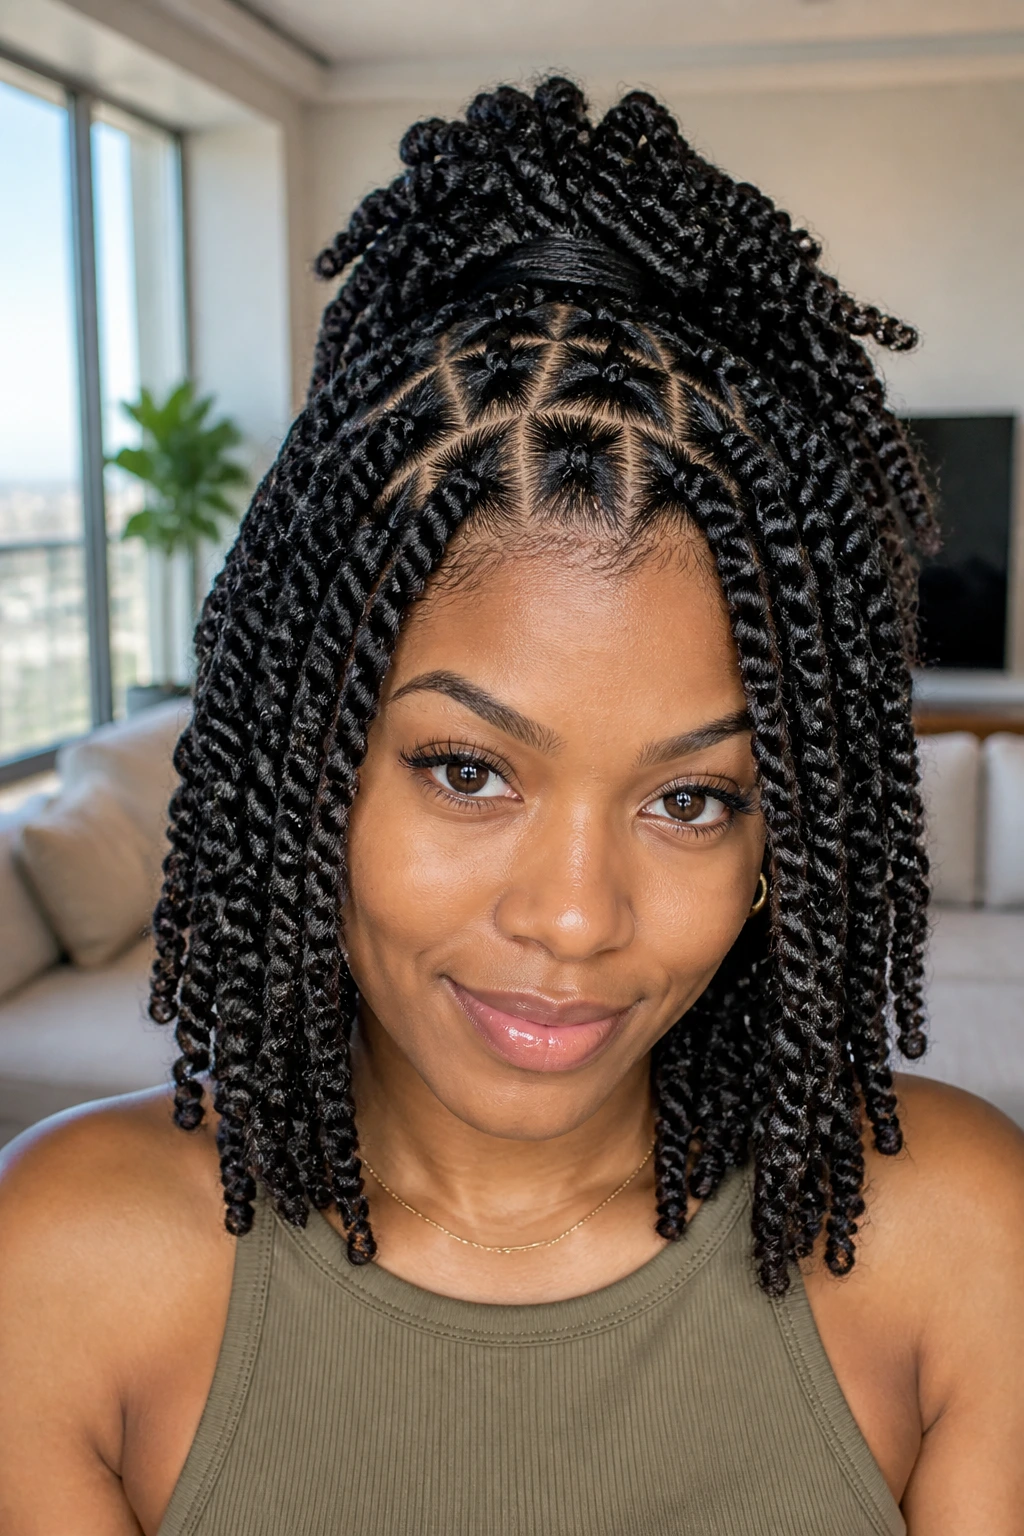
Triangle parts are one of those details that people notice even when they can’t explain why the style looks better. The parting pattern gives the scalp some geometry, and medium length hair shows it well because the part lines don’t disappear into a huge curtain of twists.
This style is a nice choice if you want the install itself to be part of the look. The twists can be simple. The triangle parts carry the visual interest. That’s why I like it. It means you don’t have to pile on accessories to make the set feel finished.
A clean triangle part also looks good when the twists are pulled into half-up styles later. The pattern still peeks through.
12. Beaded Spring Twists
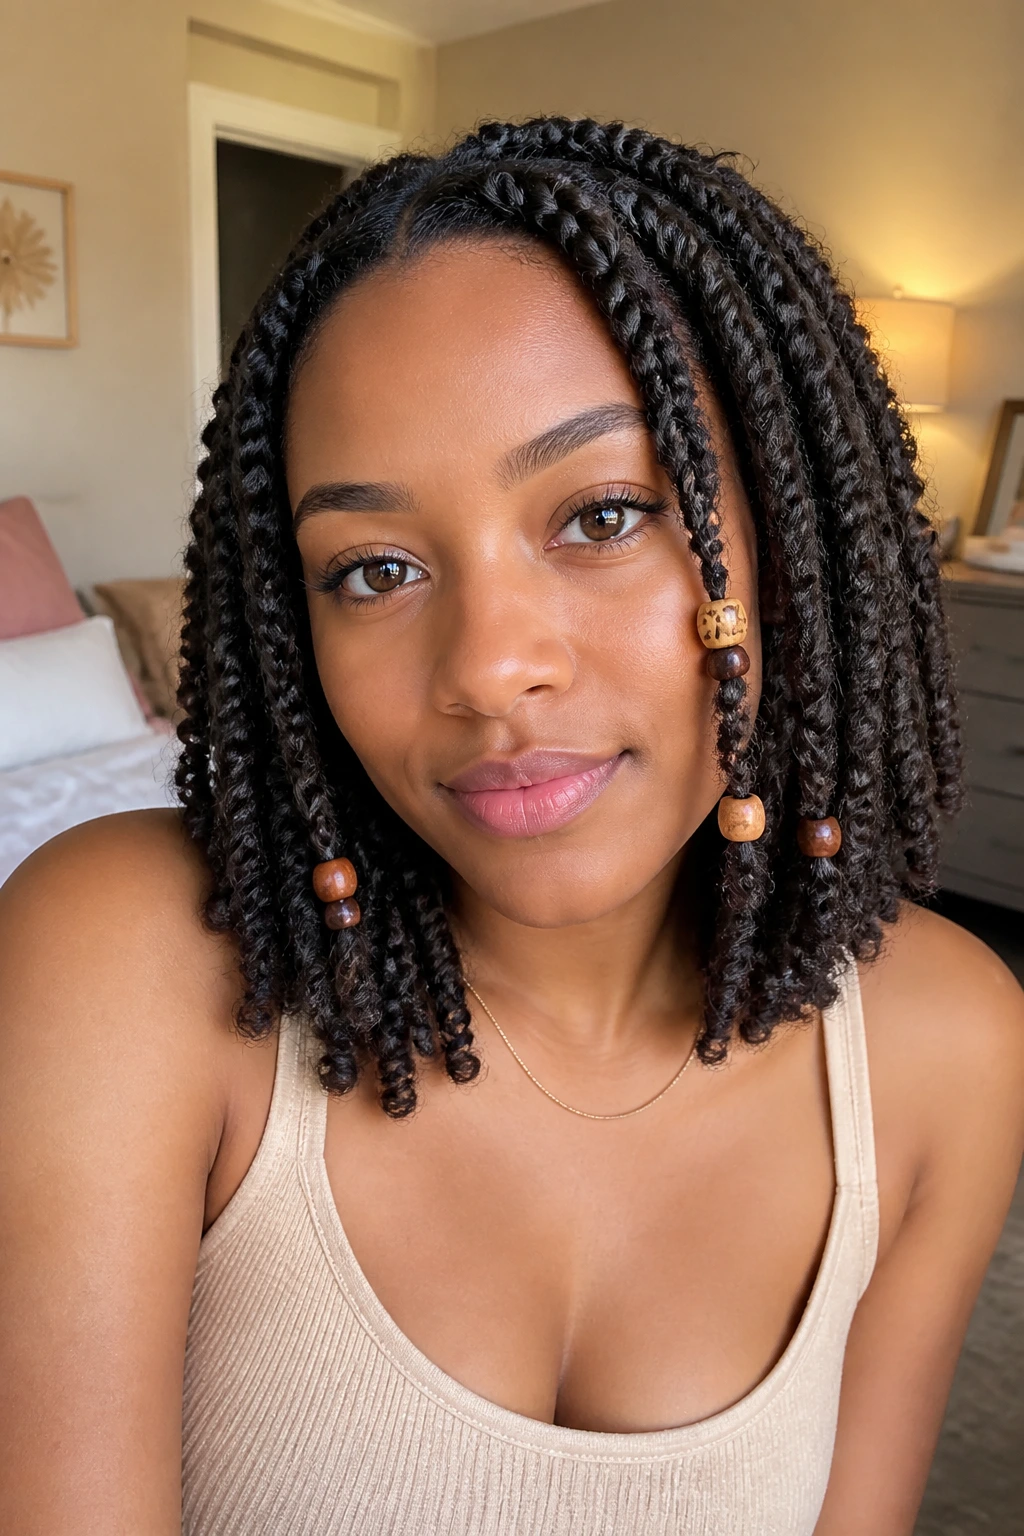
Beads and medium-length spring twists get along better than beads and very long twists. Why? Because the beads are visible, the ends don’t drag under their own weight, and the shape stays balanced. The style sounds softly when you move, which some people love and some people absolutely do not. No middle ground there.
Keep the bead count under control. A few on the face-framing pieces can be enough. If you scatter them across every twist, the set starts to feel busy and heavy at the bottom. That’s not the look here.
This works especially well with shoulder-skimming lengths because the beads sit right where the eye lands. They don’t get lost.
13. Faux-Hawk Spring Twists
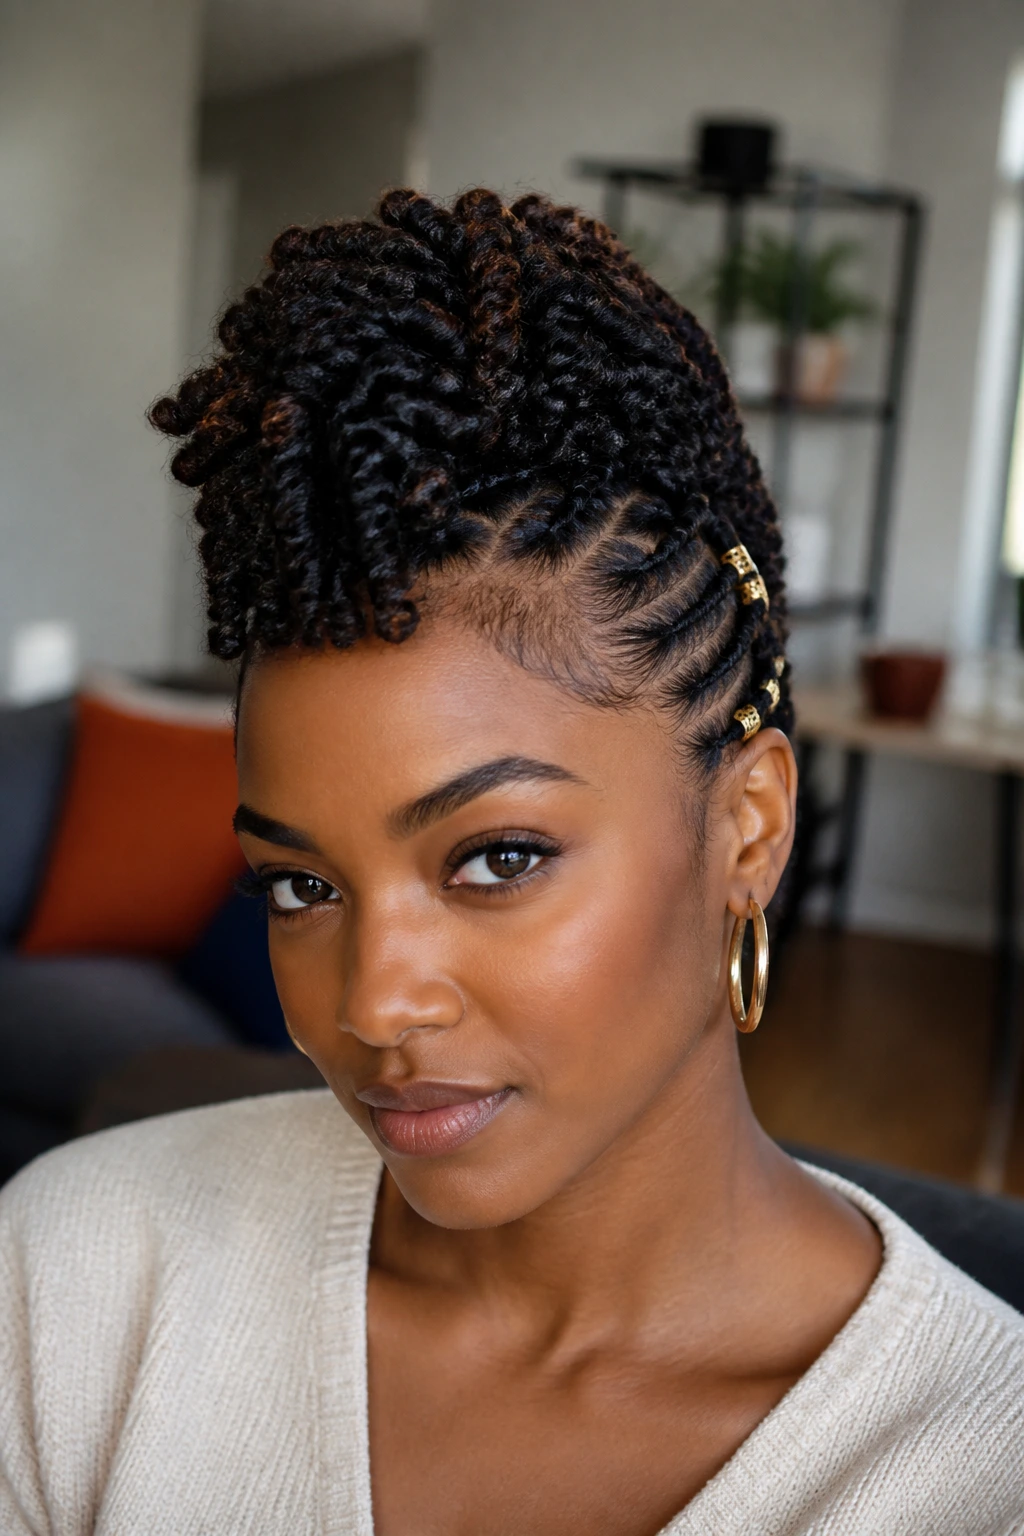
The faux-hawk version is all about contrast. Pin the sides upward or back, leave the center row loose, and the whole style suddenly feels sharper and more structured. Medium length hair is ideal for this because the twists are short enough to build height without toppling over.
I like this style when the set needs more edge. It looks strong, but not stiff. The center ridge gives you movement, and the pinned sides keep the face open. It’s also one of the easiest ways to turn an ordinary twist install into something that feels more styled on purpose.
If your hair is thick, this shape can look especially good because the center has enough body to stand up on its own.
14. Jumbo Spring Twists
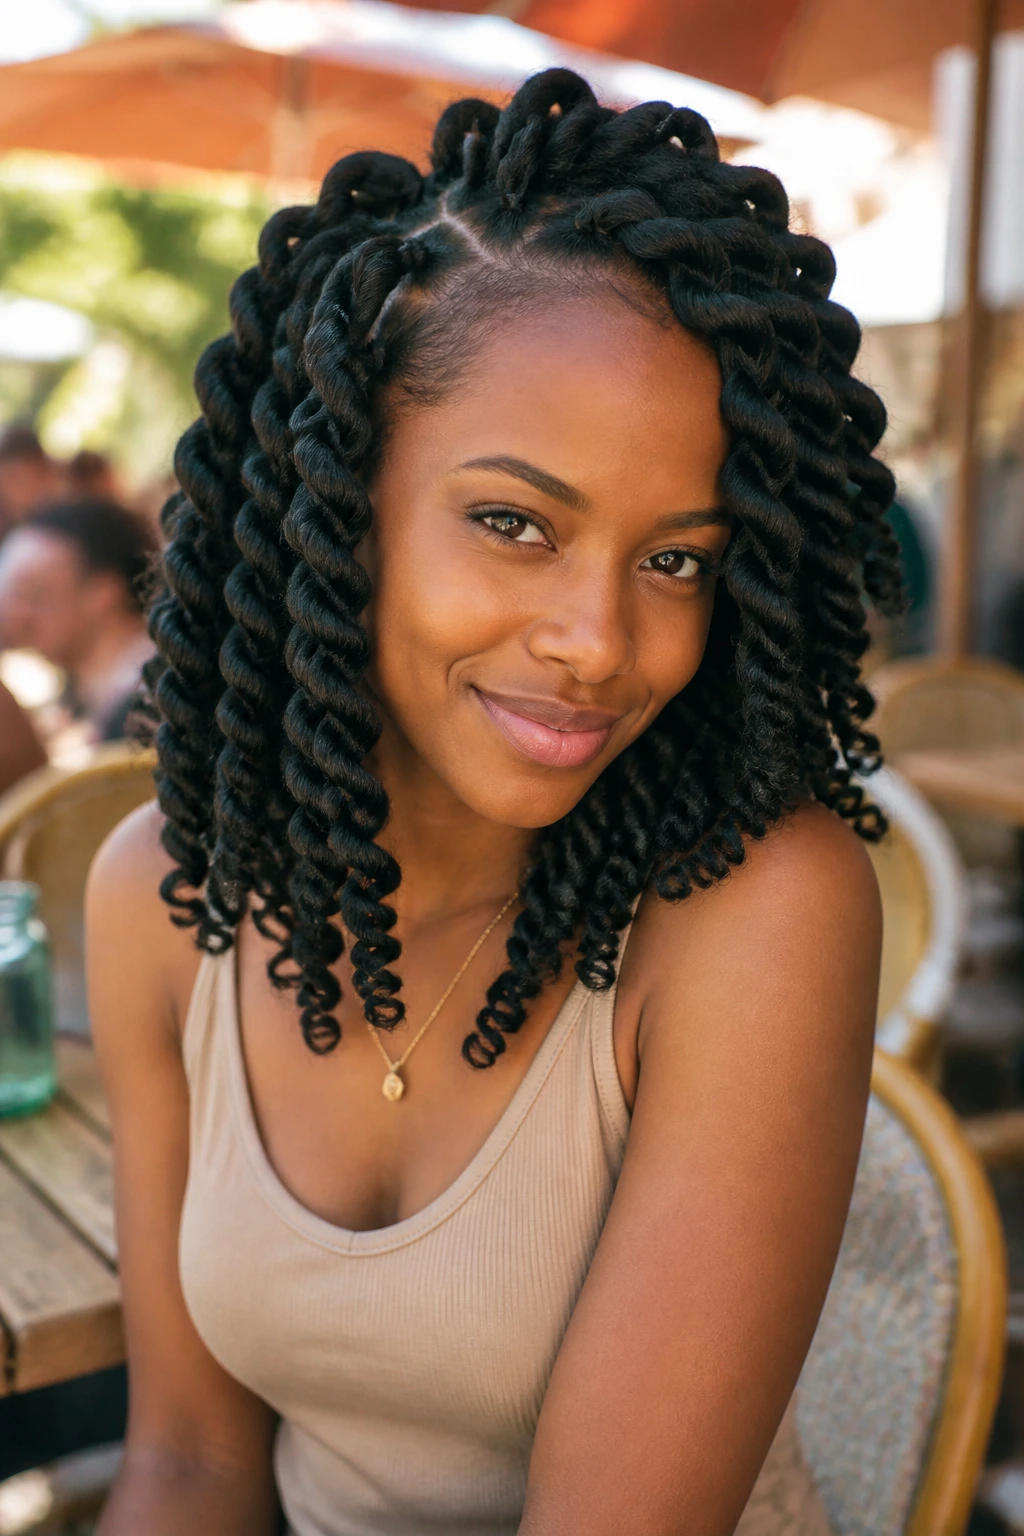
Jumbo spring twists make medium-length hair look fuller in the best way. The sections are bigger, the parting is more obvious, and the style reads bold from a distance. It’s the opposite of fussy. You get the texture without spending hours splitting tiny sections.
This is the version I’d pick if you want lower install time and a thicker silhouette. The tradeoff is that the scalp pattern is less intricate, but that may be a plus. Jumbo twists on medium length hair don’t need a complicated design to look good. They just need clean sections and a decent shape at the ends.
One warning: don’t overstuff each twist with extra hair. That’s how you end up with heavy roots and uneven tension.
15. Micro Spring Twists
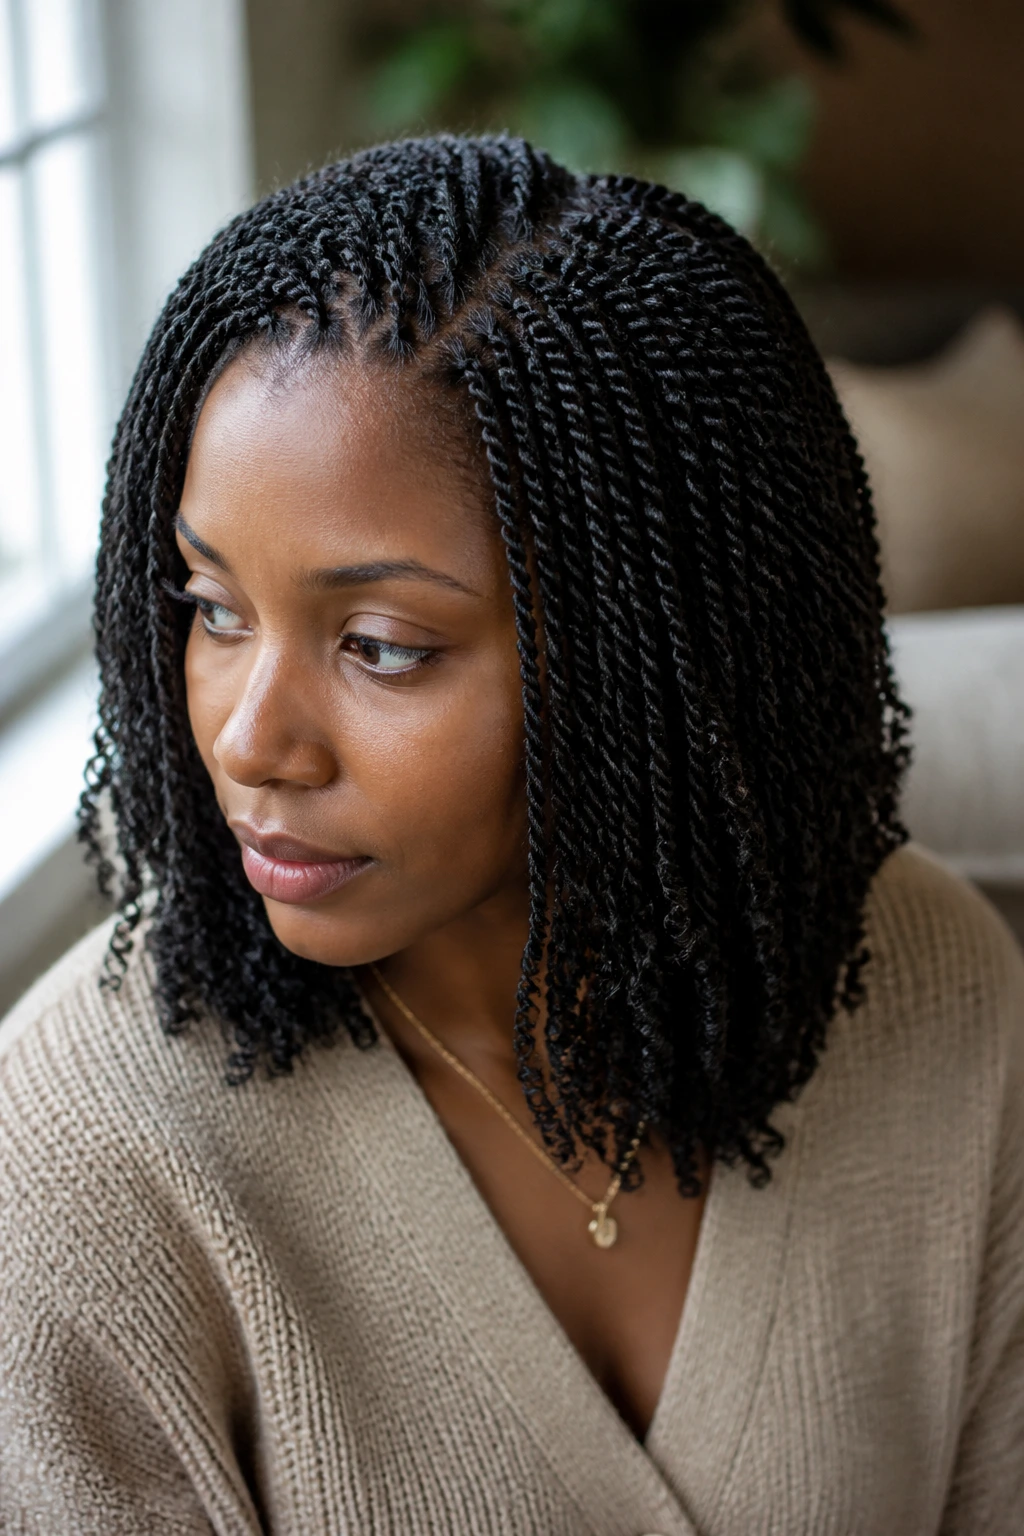
Micro spring twists are for people who like detail. Lots of detail. The smaller sections create a denser, more textured finish, and medium length hair gives the style enough room to move without dragging the twists into the shoulders like a curtain of rope. It takes longer to install, though. Much longer.
The upside is control. Micro twists lie close together, so the parting looks clean and the whole set can be styled in more ways than people expect. Ponytail, half-up, tucked under, side sweep — all of it works. The down side is maintenance. Tiny twists can frizz faster if you sleep rough or use too much product.
If you like your styles neat and you don’t mind a longer chair session, this one has a lot to offer.
16. Tucked-Under Bob Spring Twists
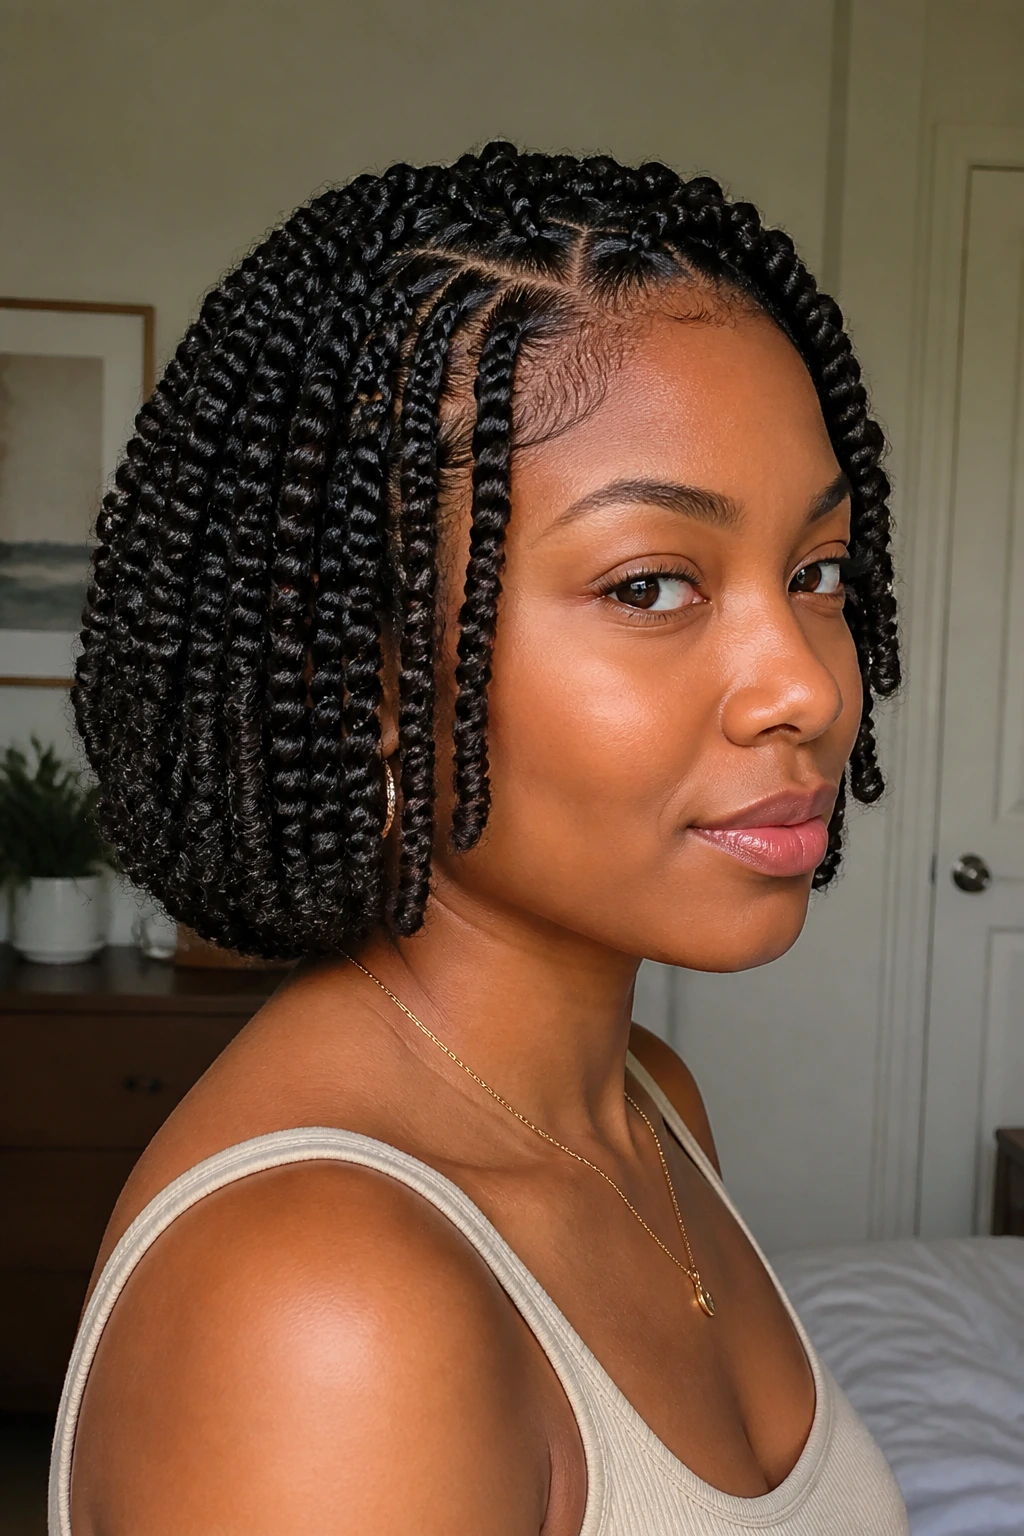
A tucked-under bob is one of the neatest ways to handle spring twists on medium length hair. The ends are folded inward at the back, either pinned or shaped so they curve under instead of hanging straight. The result is a rounded silhouette that feels polished without looking severe.
This style works well if your hair naturally fluffs up at the ends or if the twist length lands a little longer than you wanted. Tucking under can save the shape. It also gives the neck a cleaner line, which matters more than people think when the hair sits right at the shoulder zone.
I especially like this on days when you want the twists to look structured and quiet. It doesn’t shout. It just sits well.
17. Colored Tip Spring Twists
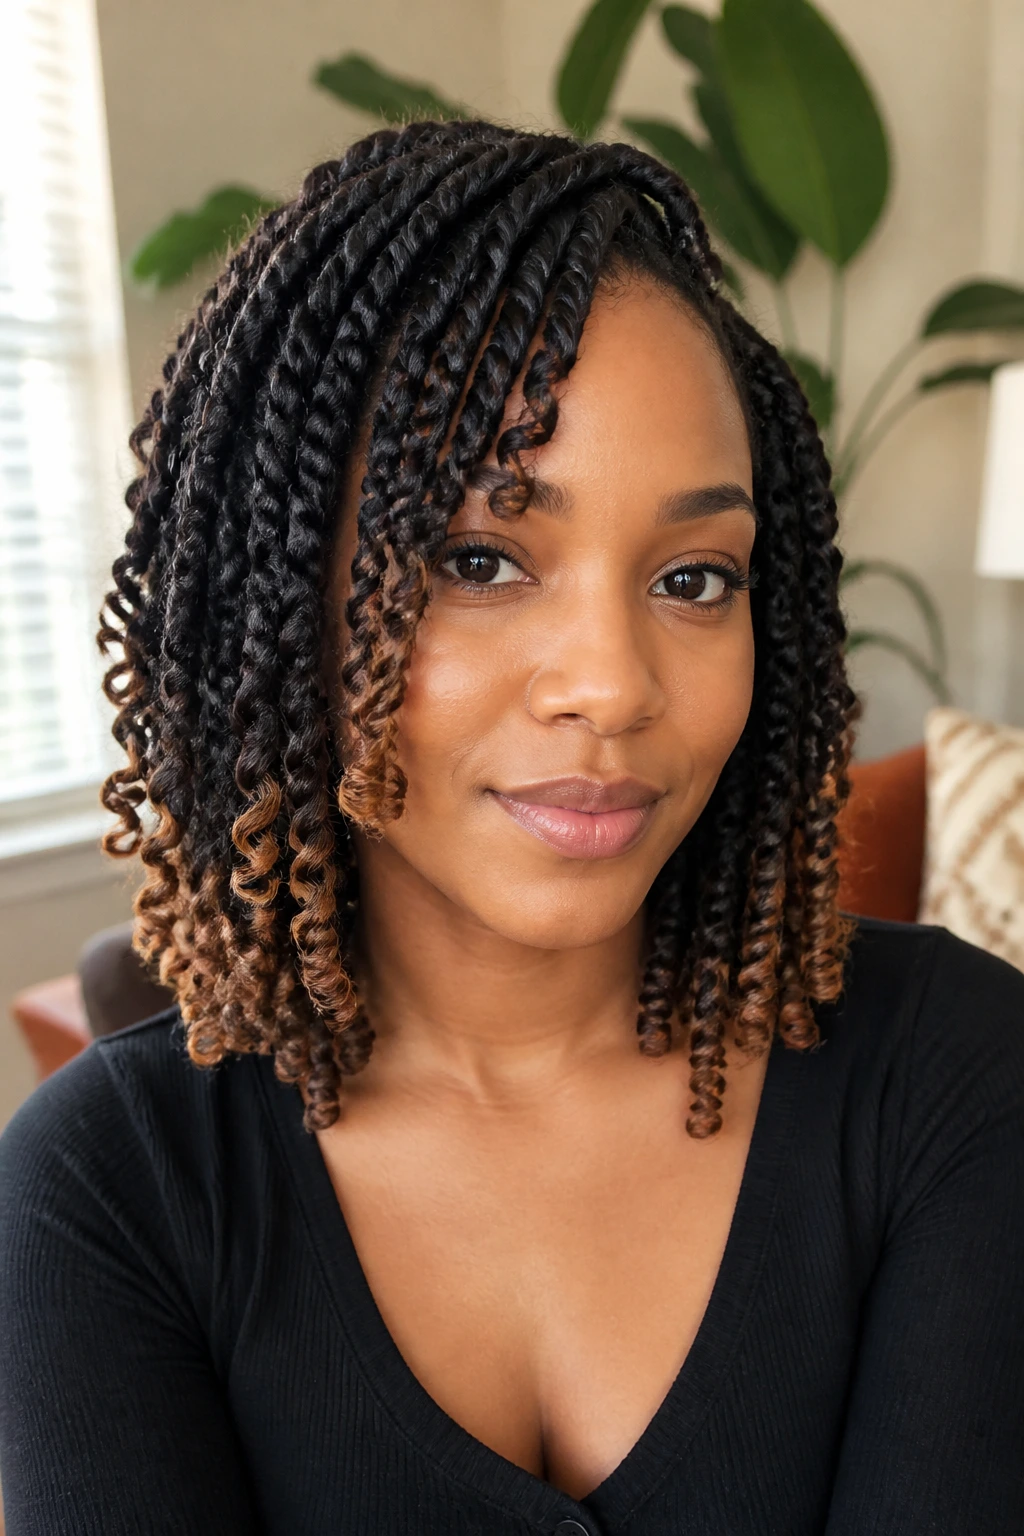
Colored tips are the easiest way to make spring twists feel custom without rethinking the whole install. A few caramel ends, copper tips, burgundy pieces, or a soft honey dip can add movement to medium-length hair because the color shows when the twists swing. You don’t need a full bright head to get that effect.
The best part of this look is how the color changes the edge of the style. The roots stay natural, but the ends pick up light and break up the shape. If you’ve got warm skin undertones, softer browns and golds tend to look especially easy. If you want contrast, go deeper or richer at the ends.
A little color goes a long way here. You do not need the whole head shouting at once.
18. Scarf-Accent Spring Twists
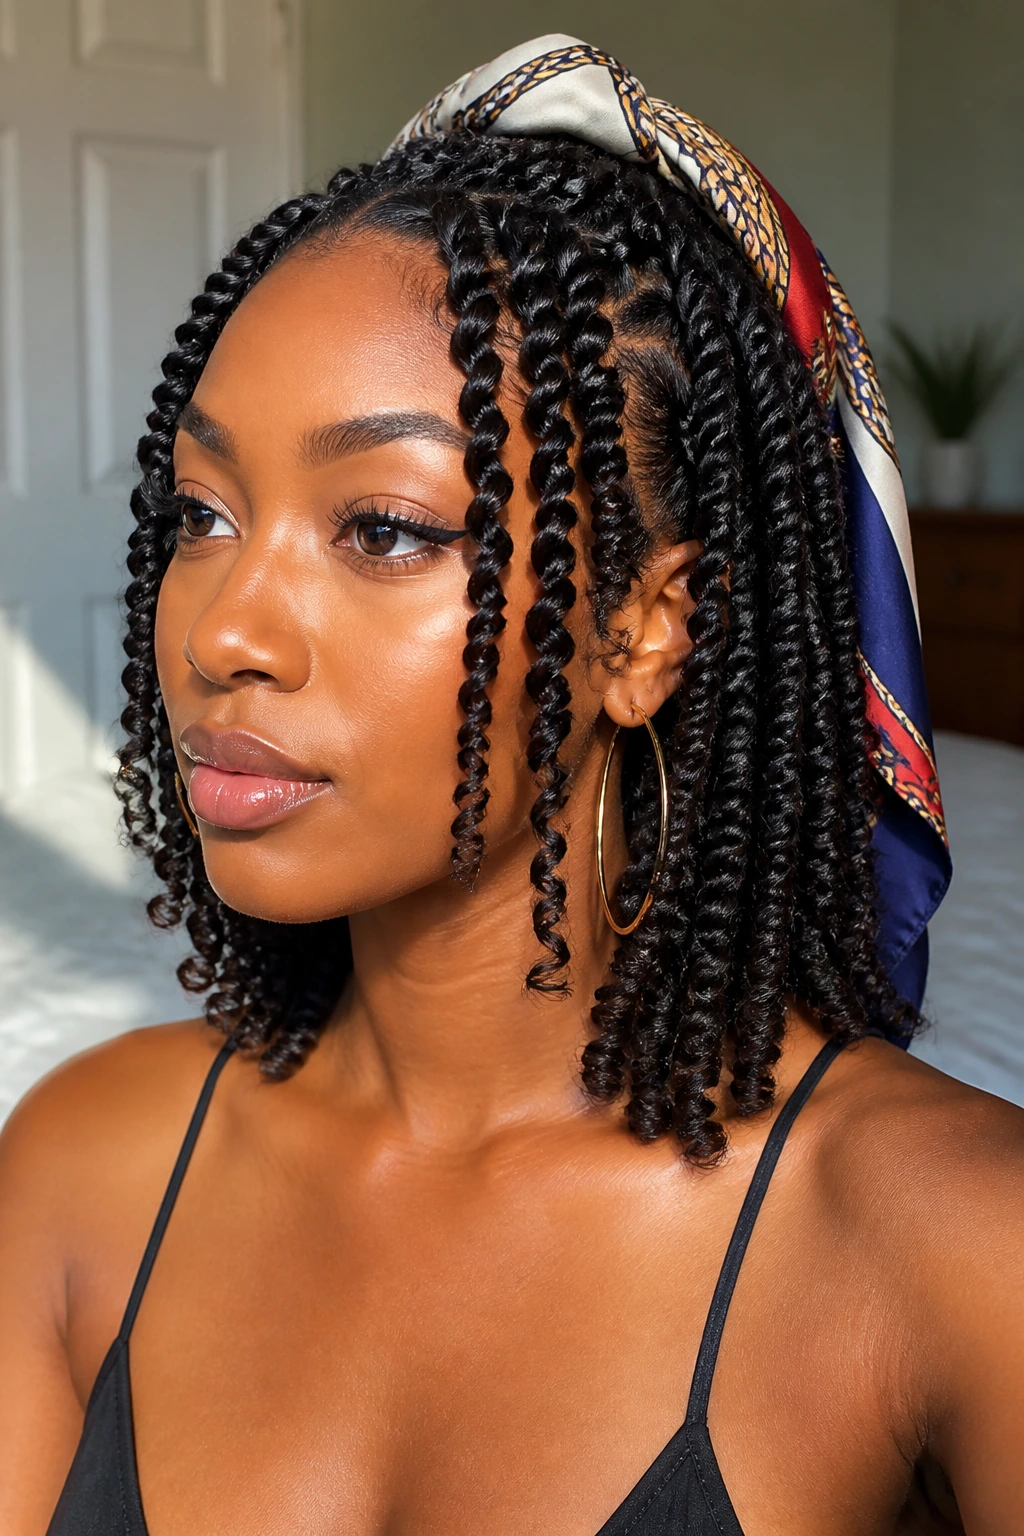
A scarf turns spring twists into a different look without touching the install. Wrap it at the crown, tie it near the nape, or use it as a headband, and medium-length twists suddenly feel more dressed. The shorter length helps here, because the scarf stays visible instead of disappearing into too much hair.
This is one of my favorite ways to refresh a set that’s on its second or third wear. You can cover the front rows, protect the hairline, and still leave enough twist length showing to keep the style recognizable. A silk or satin scarf is the smartest choice if you’re actually trying to protect the hair, not just decorate it.
A scarf also buys you time on a day when the roots need a break. That alone makes it worth knowing.
19. Top-Knot Spring Twists
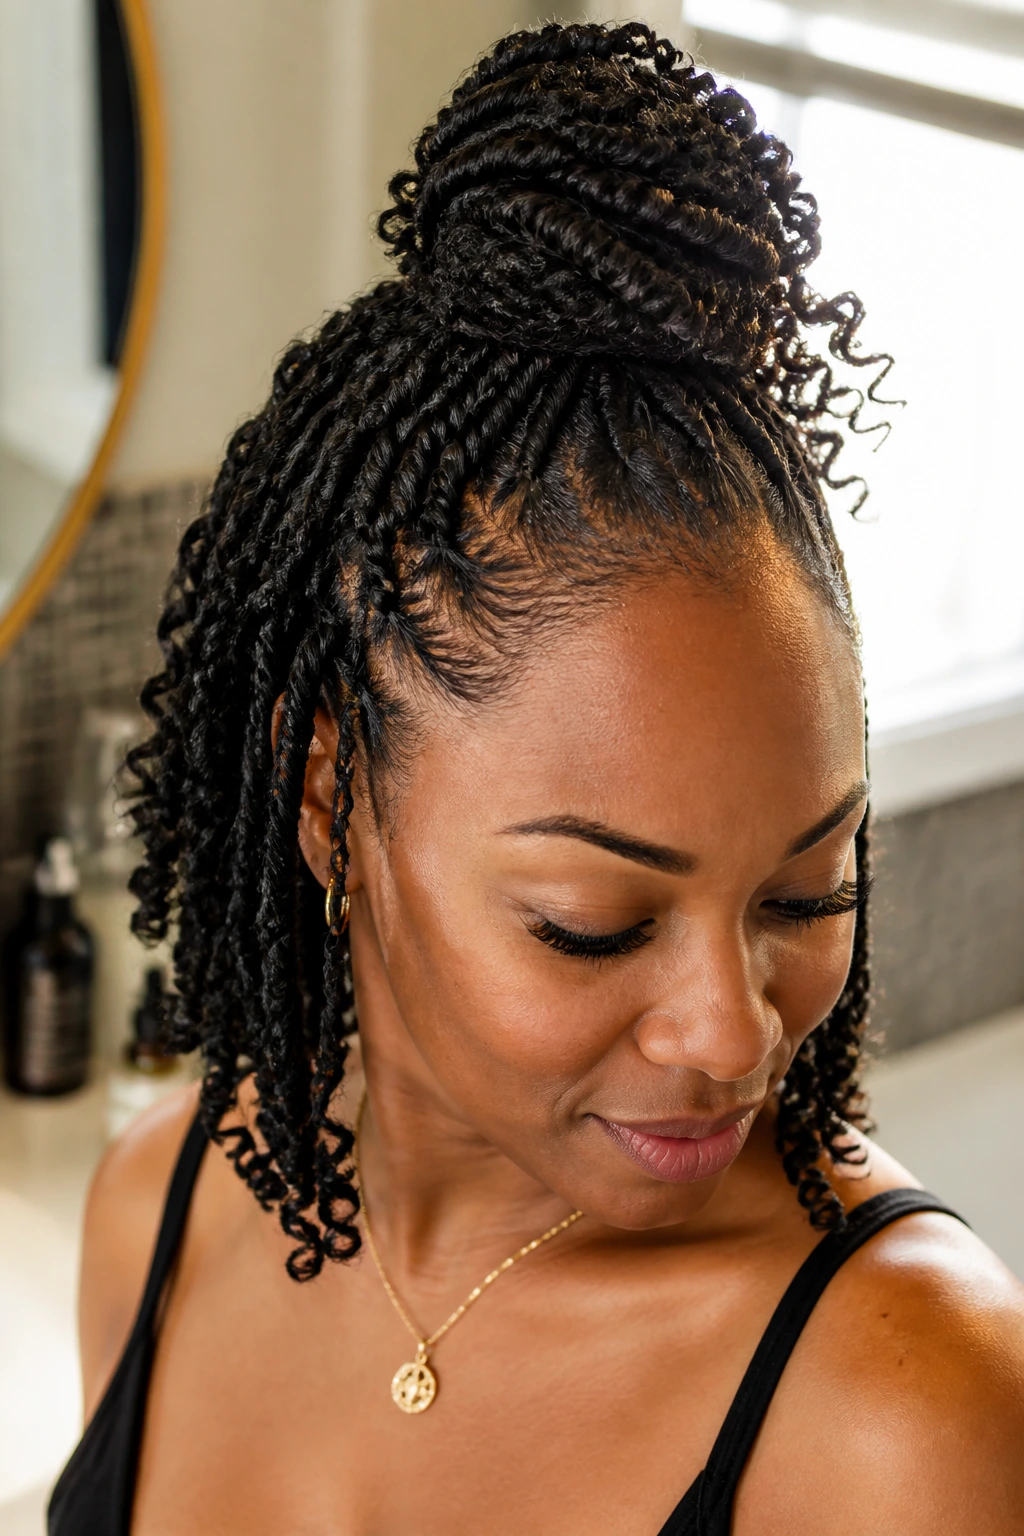
A top knot gives medium-length spring twists a lifted shape that can look surprisingly neat. Pull the twists up high, twist or wrap them into a knot, and let a few ends fall out if you want it less strict. The style is compact, but because the hair isn’t extremely long, the knot stays rounded instead of turning into a heavy tower.
This is the one I’d use when I want the hair out of the face and the neck, but I still want the twist texture to be visible. It works better on medium-length hair than on super-long sets because the weight stays manageable. No big sag at the crown.
If the knot feels too bulky, split it into two smaller wraps instead of forcing everything into one lump.
20. Zigzag-Part Spring Twists
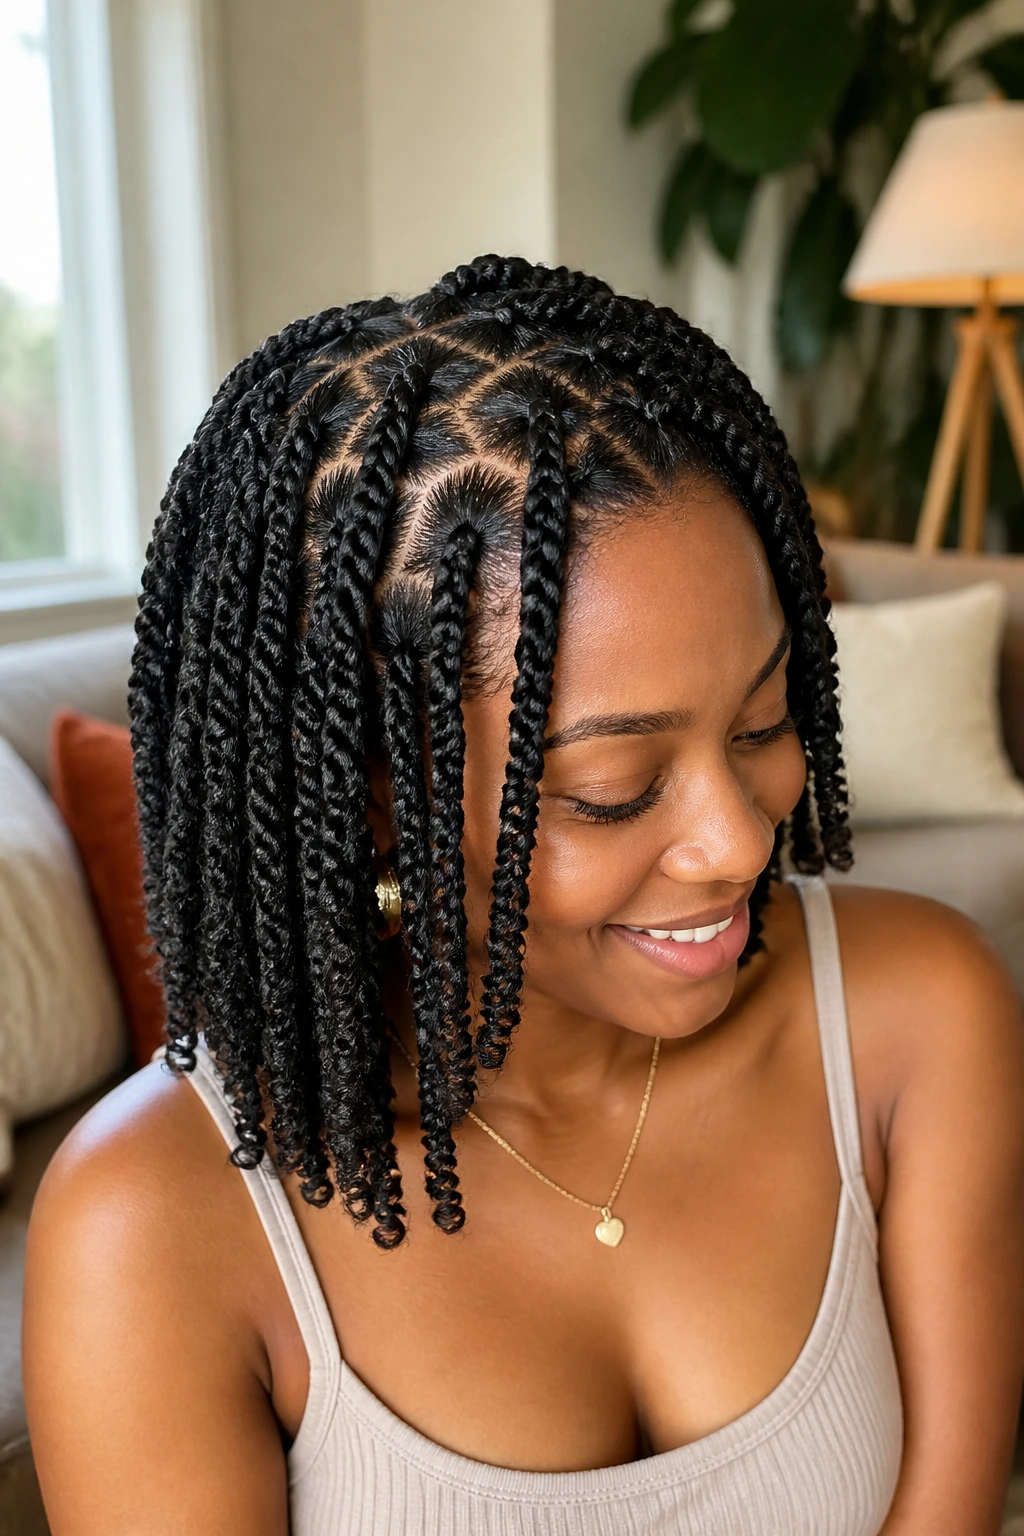
Zigzag parts are for people who like the scalp pattern to do some of the talking. On medium-length hair, the zigzag is still visible, which is the whole point. It gives the install a playful edge without changing the twist shape itself.
This style is especially nice when the rest of the look stays simple. The parts add personality. The twists can stay classic. That balance keeps the style from looking overworked. It also helps if you’re tired of straight lines and want something that feels a little more custom.
Use a rat-tail comb and take your time with the parting. A messy zigzag looks messy. A clean zigzag looks intentional.
21. Wet-Look Defined Spring Twists
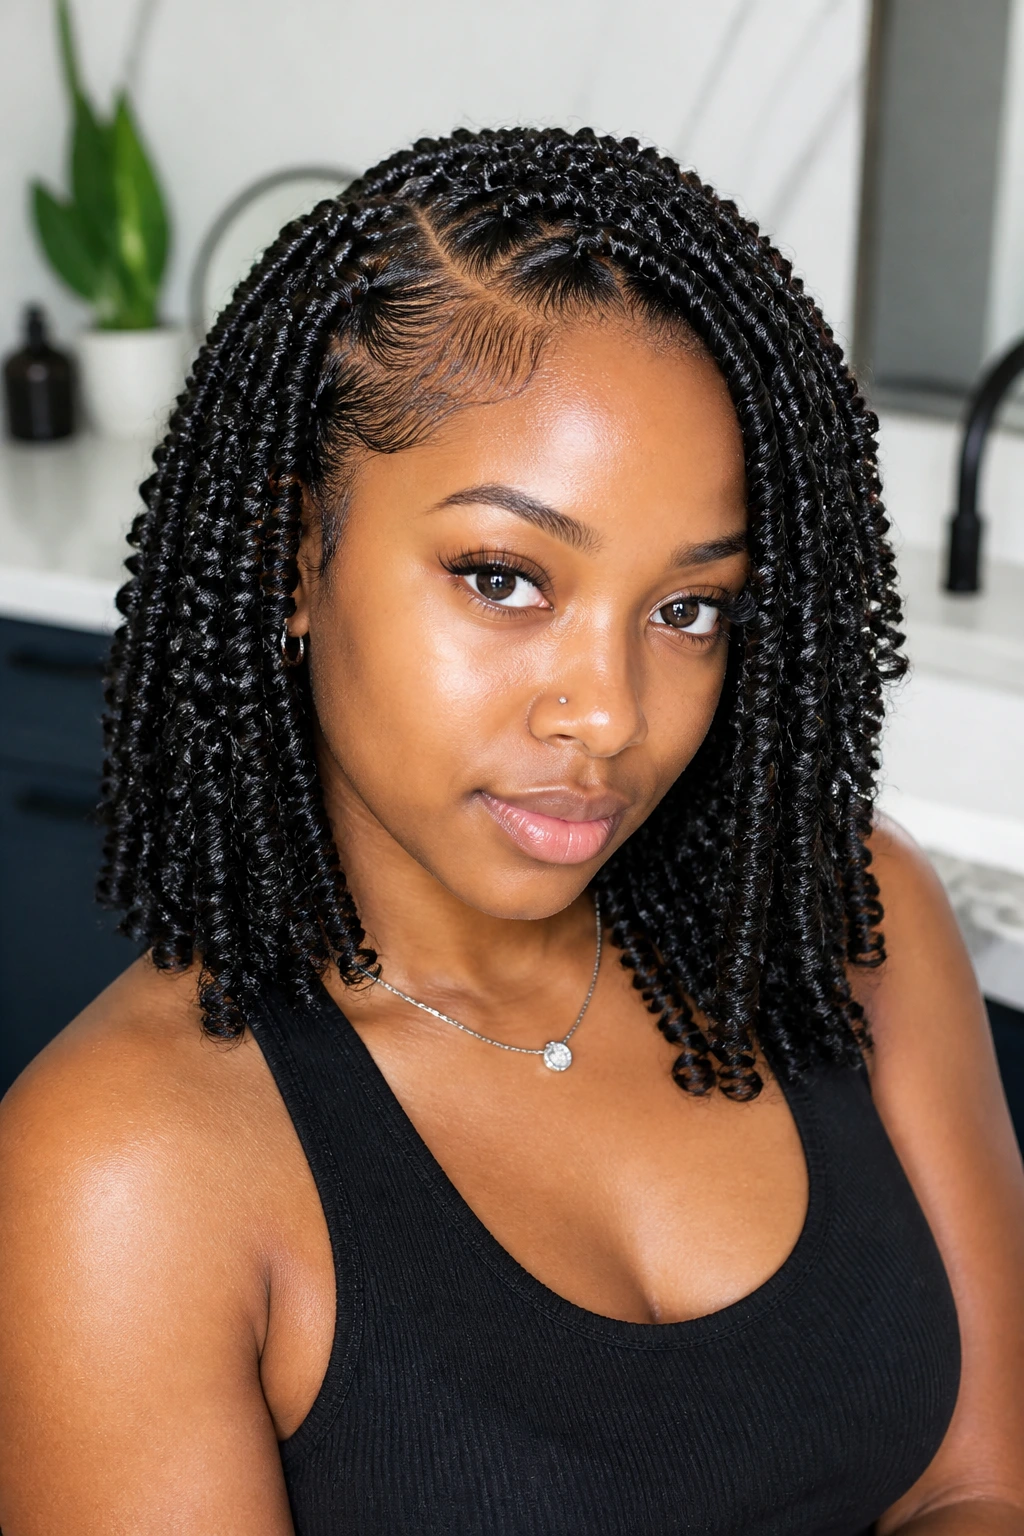
The wet-look version is all about smoothness at the crown and a slightly glossy finish through the length. It’s the kind of style that looks like it was set with care, because it was. Medium-length hair is a good match here since the twists don’t have to battle a huge amount of length to hold that neater shape.
Use foam or a light setting mousse, smooth the surface with your hands, and tie it down while it dries. Don’t drown the twists in product. That’s how you get buildup instead of shine. The finish should look clean, not greasy.
This style works well when you want a more dressed-up result without changing the actual install. A sharp part and a smooth top do most of the work.
22. Airy, Scalp-Friendly Spring Twists
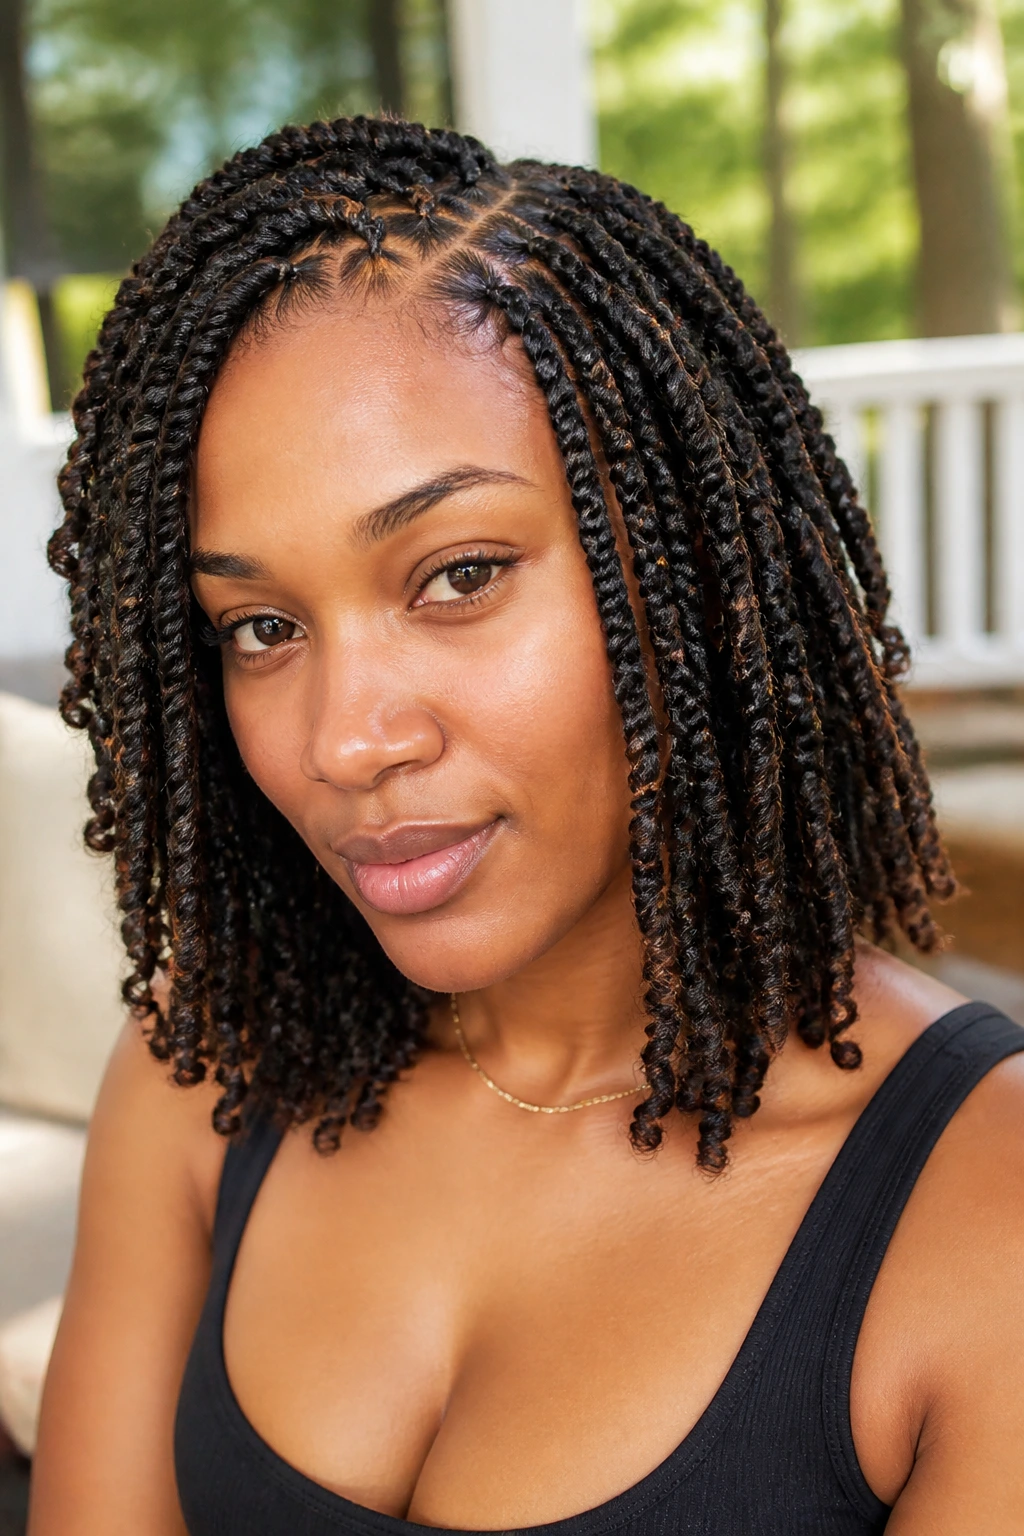
This version is less about drama and more about comfort. The parts are clean but not tiny, the tension stays light at the edges, and the twists leave enough room at the scalp to breathe. On medium-length hair, that balance is a gift. You get the style without the constant awareness of the style.
I’d pick this when the hairline needs a break or when I know the set is going to stay in for several weeks. The goal is not to make the style look loose or sloppy. It’s to make it wearable. There’s a difference, and it’s a big one.
This is also the version that tends to age better. When the roots start to shift a little, the whole set still holds its shape.
23. Asymmetrical Lob Spring Twists
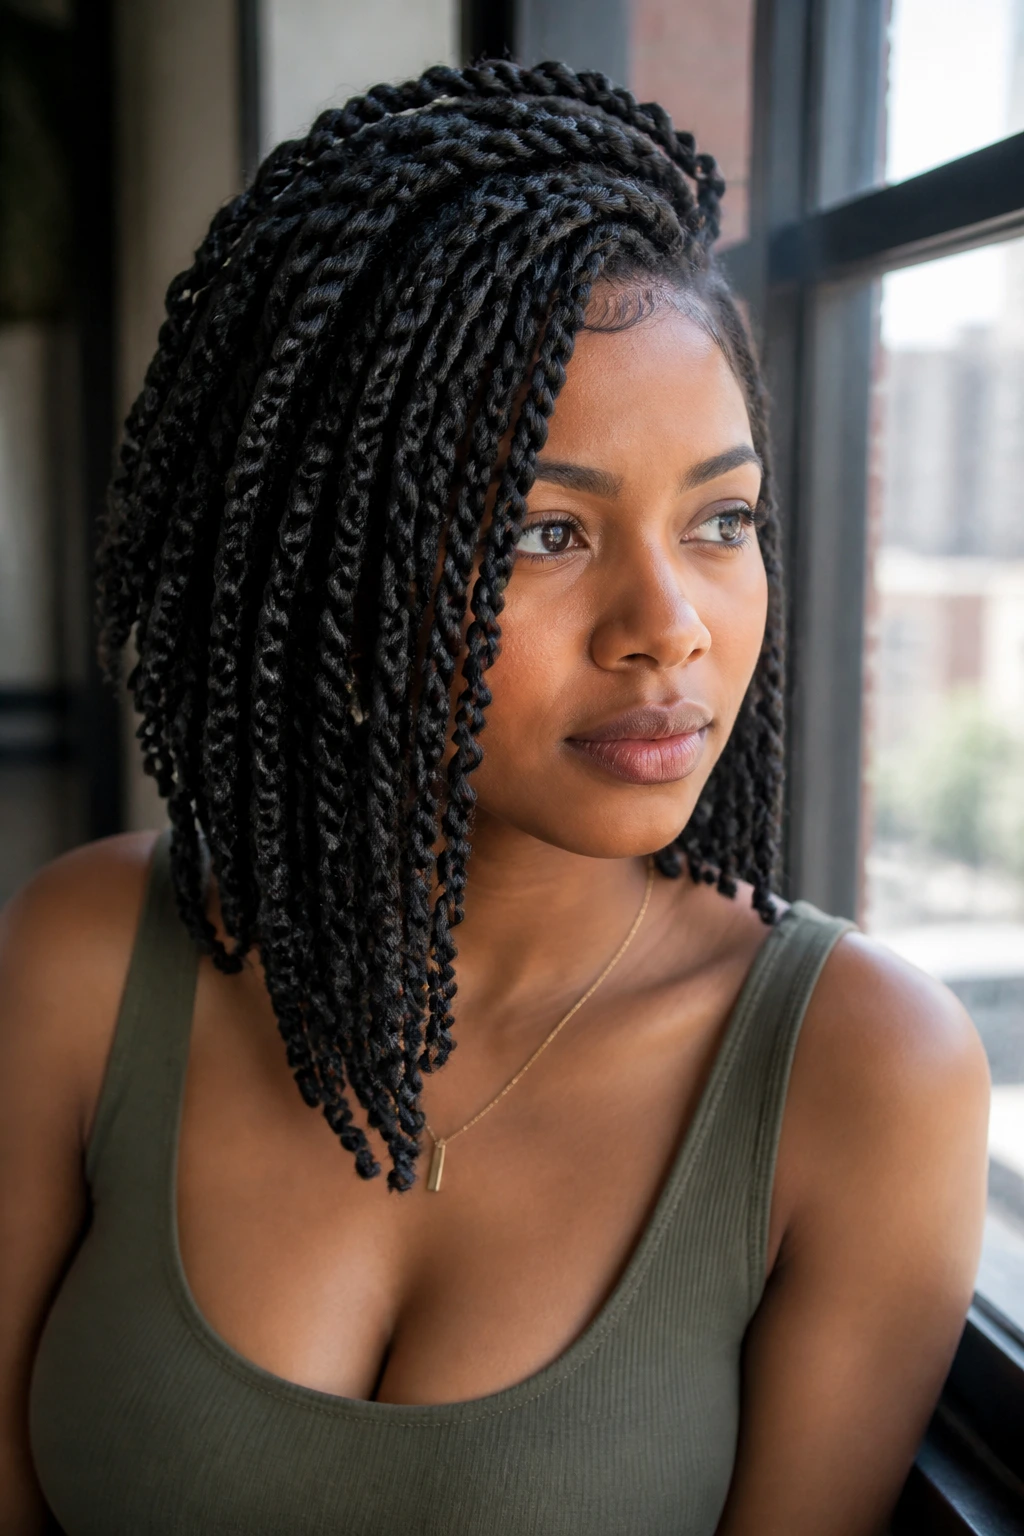
An asymmetrical lob gives spring twists a cleaner fashion shape than a straight-across cut. One side sits a little longer than the other, and the difference is enough to make the style feel modern without becoming precious. Medium length hair is ideal for this because the shape stays visible.
This is a smart choice if you want a twist style that looks tailored. The asymmetry helps the hair fall in a way that frames the face, and it gives you a built-in side-sweep without needing to pin everything. It also looks good in photos, though that’s not the real reason to wear it. The real reason is that it solves the “my hair is medium, so what shape do I give it?” problem.
If you want one medium-length spring twist style that feels clean but not plain, this is a strong candidate.
Why Spring Twists Fit the Medium-Length Sweet Spot
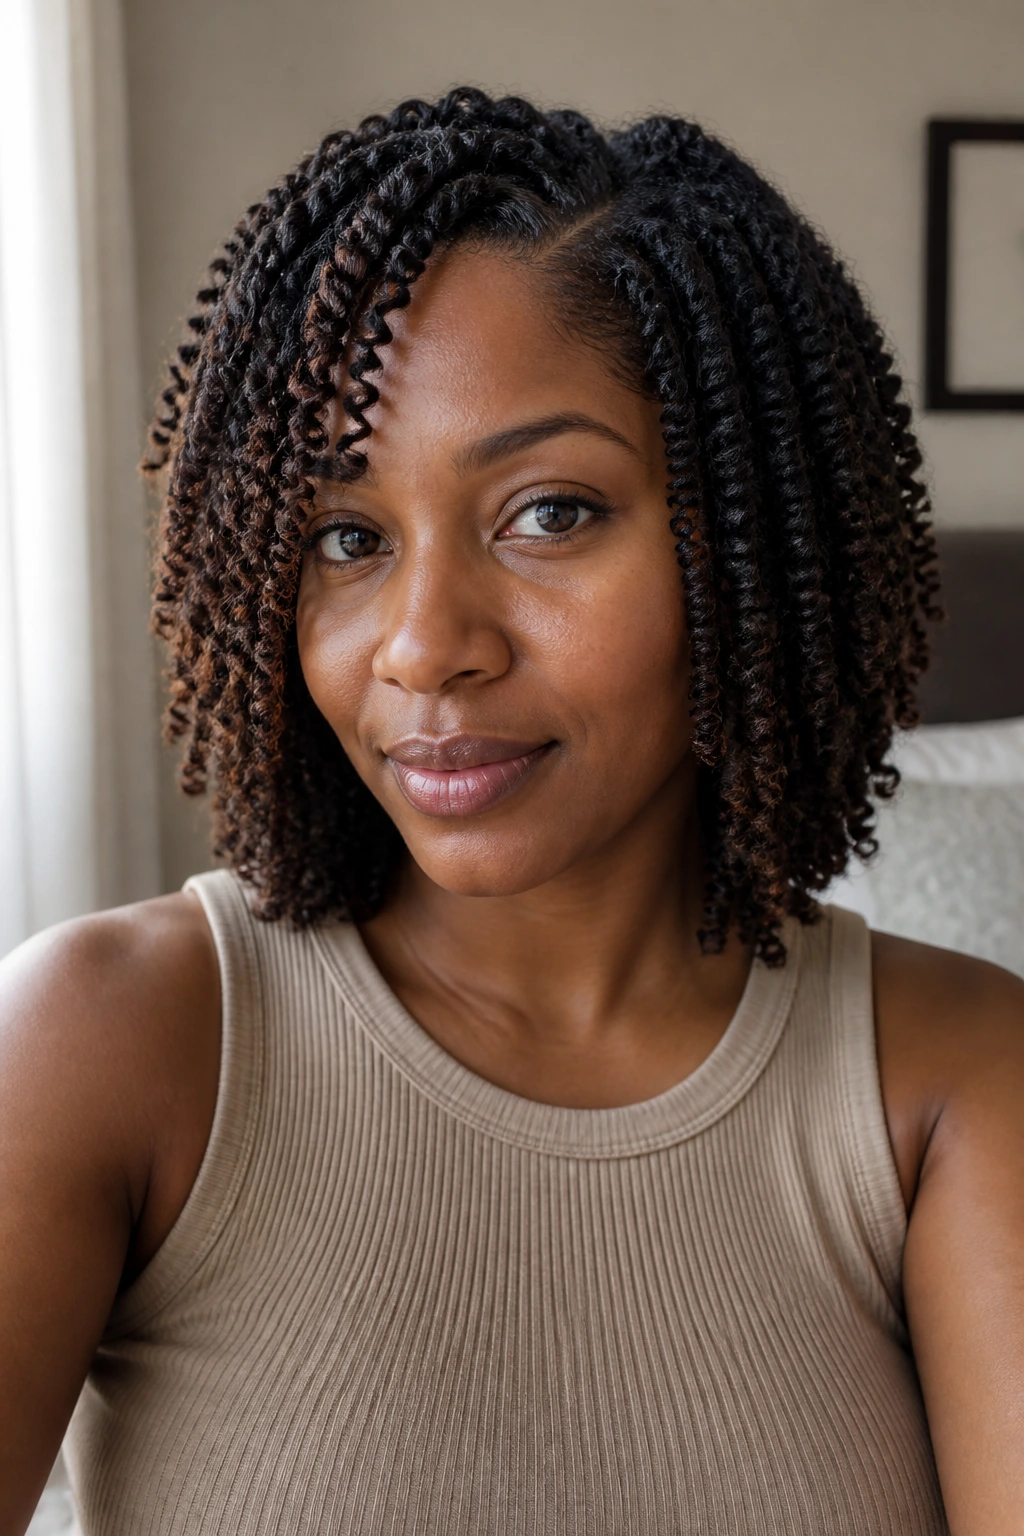
Medium-length hair gives spring twists a kind of balance that long styles have to work harder for. The twists can move without dragging. The parting stays visible. The neck doesn’t disappear under a curtain of hair. That matters more than people think, especially when you’re trying to wear the style for more than a few days.
There’s also a shape advantage. At collarbone or shoulder length, spring twists can frame the jaw, skim the shoulders, and still be pulled up when needed. You don’t have to choose between “down and pretty” and “up and practical.” You can move between both. That flexibility is why medium-length spring twists hold up so well as a protective style.
And, honestly, the style just looks cleaner at this length. The springy texture stays springy. The ends stay lively. The whole set feels lighter on the head, which is usually the first thing people notice once they wear a set that fits properly.
Essential Tools for a Clean Install and Easier Styling
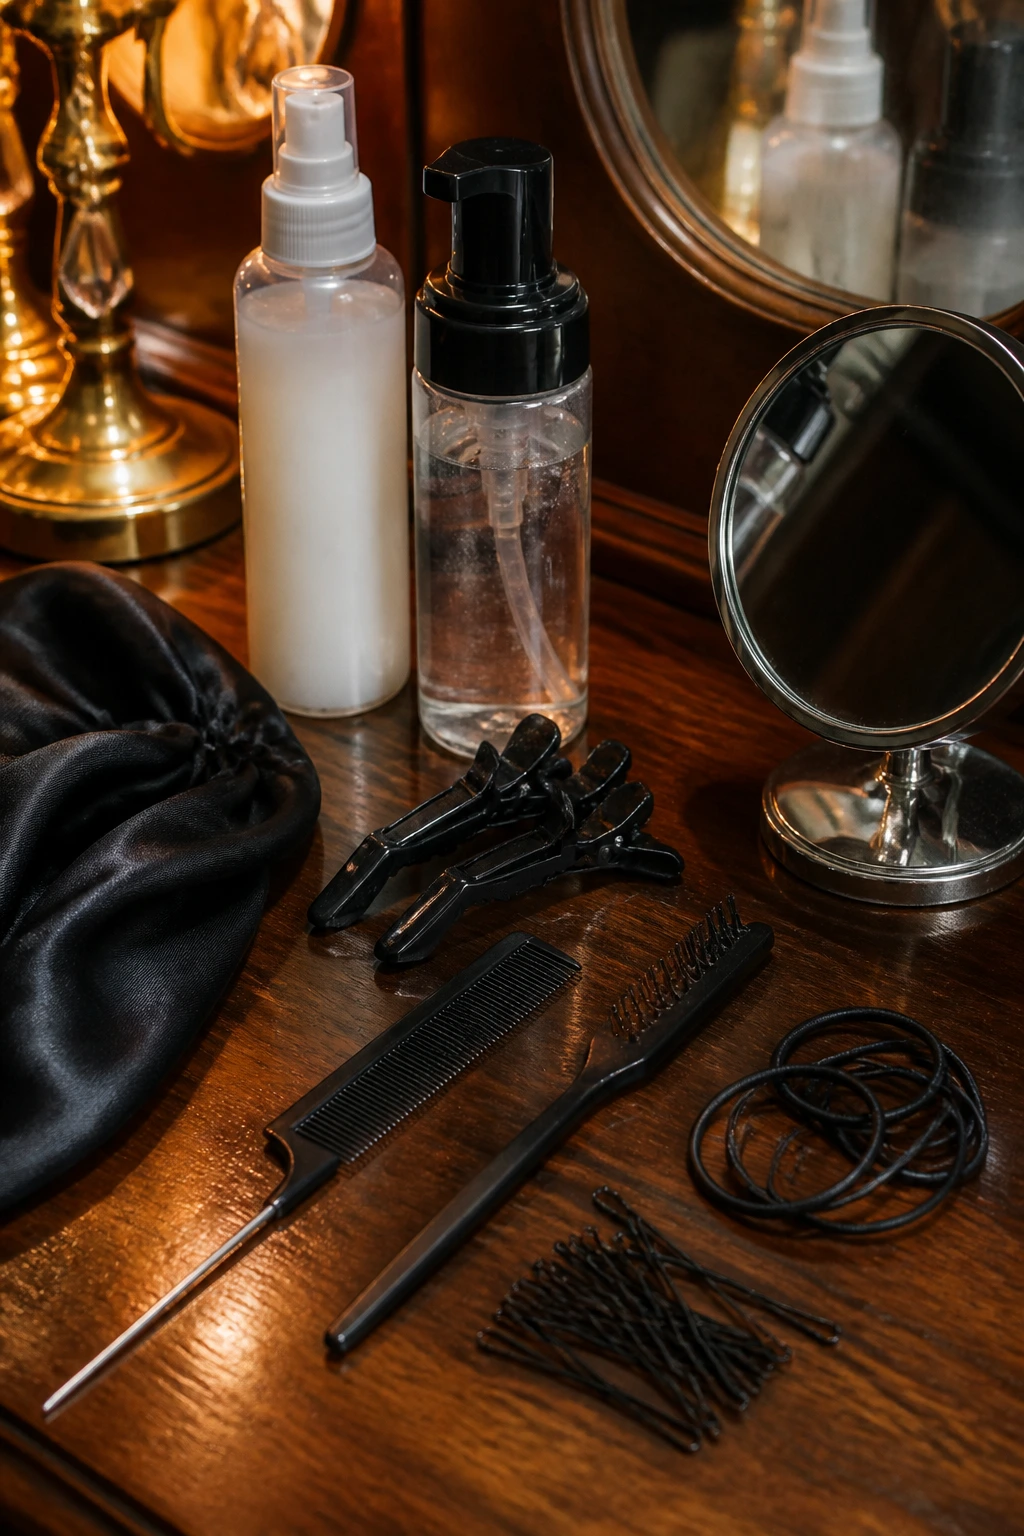
- Rat-tail comb: The point makes clean parts, and clean parts are half the battle with spring twists.
- Hair clips or sectioning clamps: These keep the hair separated while you work so the parts don’t blur together.
- Moisturizing leave-in conditioner: Use a light layer before styling so the hair stays soft without getting slick.
- Styling mousse or foam: This helps calm frizz, set the roots, and smooth the surface after the twists are installed.
- Edge brush: Handy for the front hairline and any flyaways around the crown.
- Satin scarf or bonnet: Night protection matters. Cotton will rough the twists up fast.
- Bobby pins: Useful for half-up looks, side sweeps, and tucked-under shapes.
- Snag-free elastic bands: Good for ponytails and top knots, especially if you’re pulling the hair up often.
- Small mirror: A second mirror helps you check the back parting and the nape without guessing.
- Beads or cuffs, optional: These are finishers, not necessities, but they can change the mood of a medium-length set fast.
Picking Twist Size, Hair Type, and Parting Without Guesswork
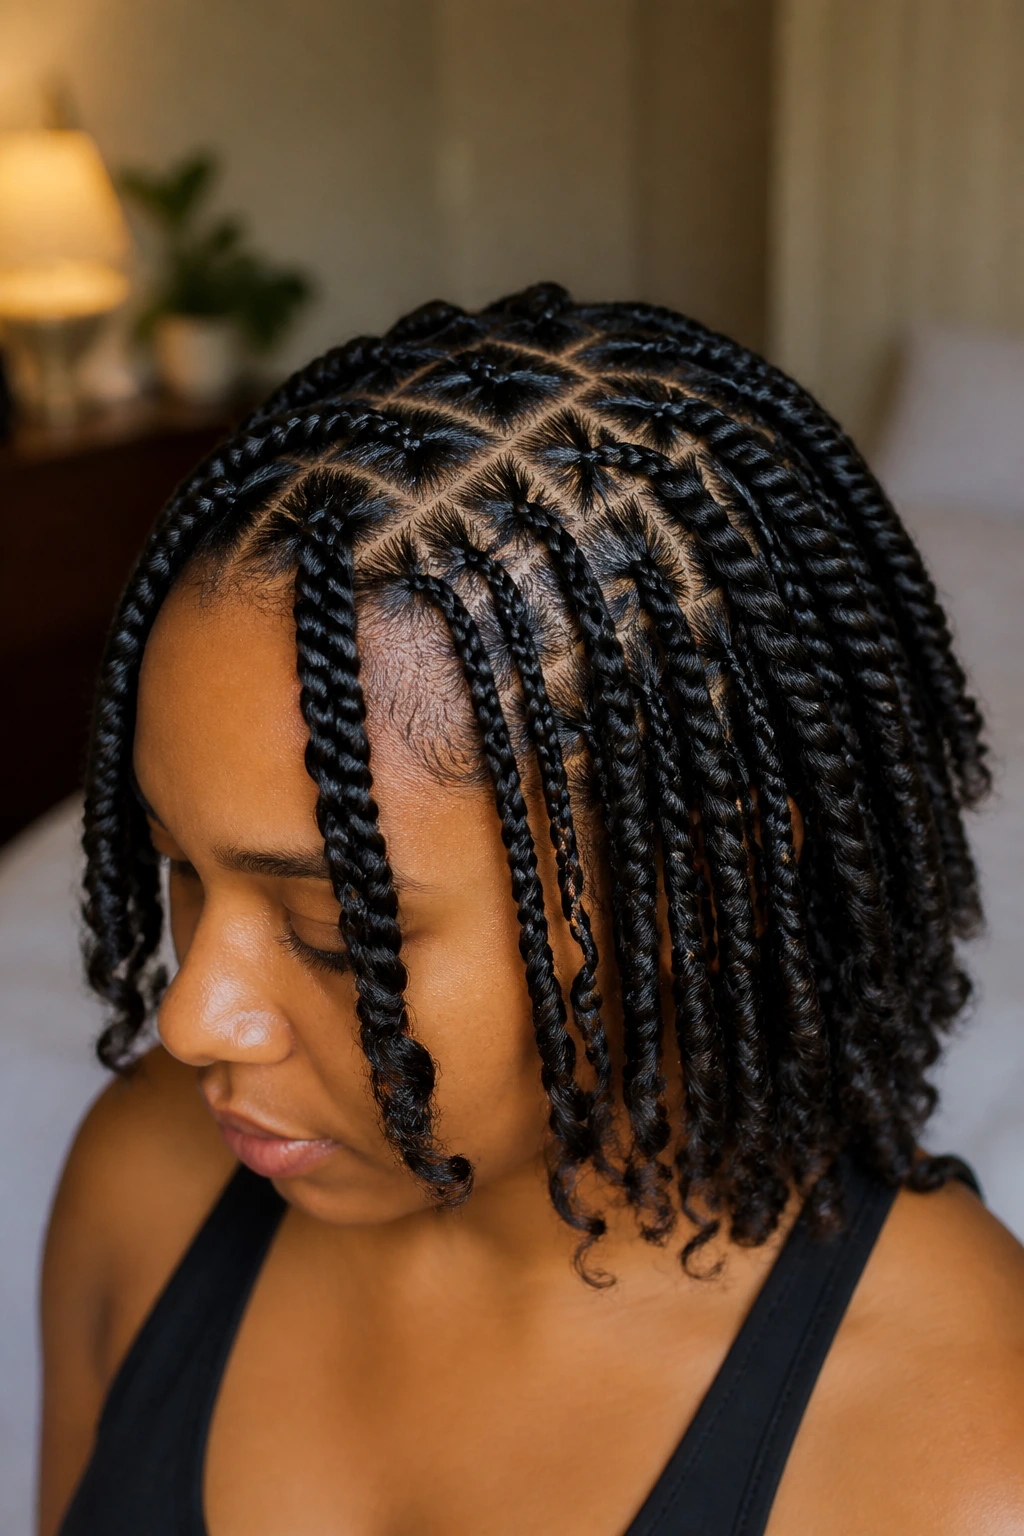
The size of the twists changes the whole look, and medium-length hair gives you room to decide whether you want soft and chunky or tight and detailed. If your hair is fine or low-density, a medium-sized part usually gives the best balance. Tiny twists can expose too much scalp. Huge twists can put too much weight in one place. The middle is usually smarter.
Hair texture matters too. Denser natural hair often holds neater part lines and can support a fuller twist without collapsing at the root. Finer strands usually need a gentler hand and a lighter build so the base doesn’t feel overloaded. If your hair has a lot of shrinkage, factor that in before choosing the final visible length. What looks shoulder-length when stretched can sit much higher once it’s dry.
The extension hair matters as much as the parting. Soft, pre-fluffed synthetic hair usually twists better than stiff hair straight out of the pack. Separate it a little, stretch it lightly, and let the fibers relax before you start. That keeps the finished twist from looking broomy at the ends, which is a real thing and a real problem.
How to Keep the Style Smooth Between Wash Days
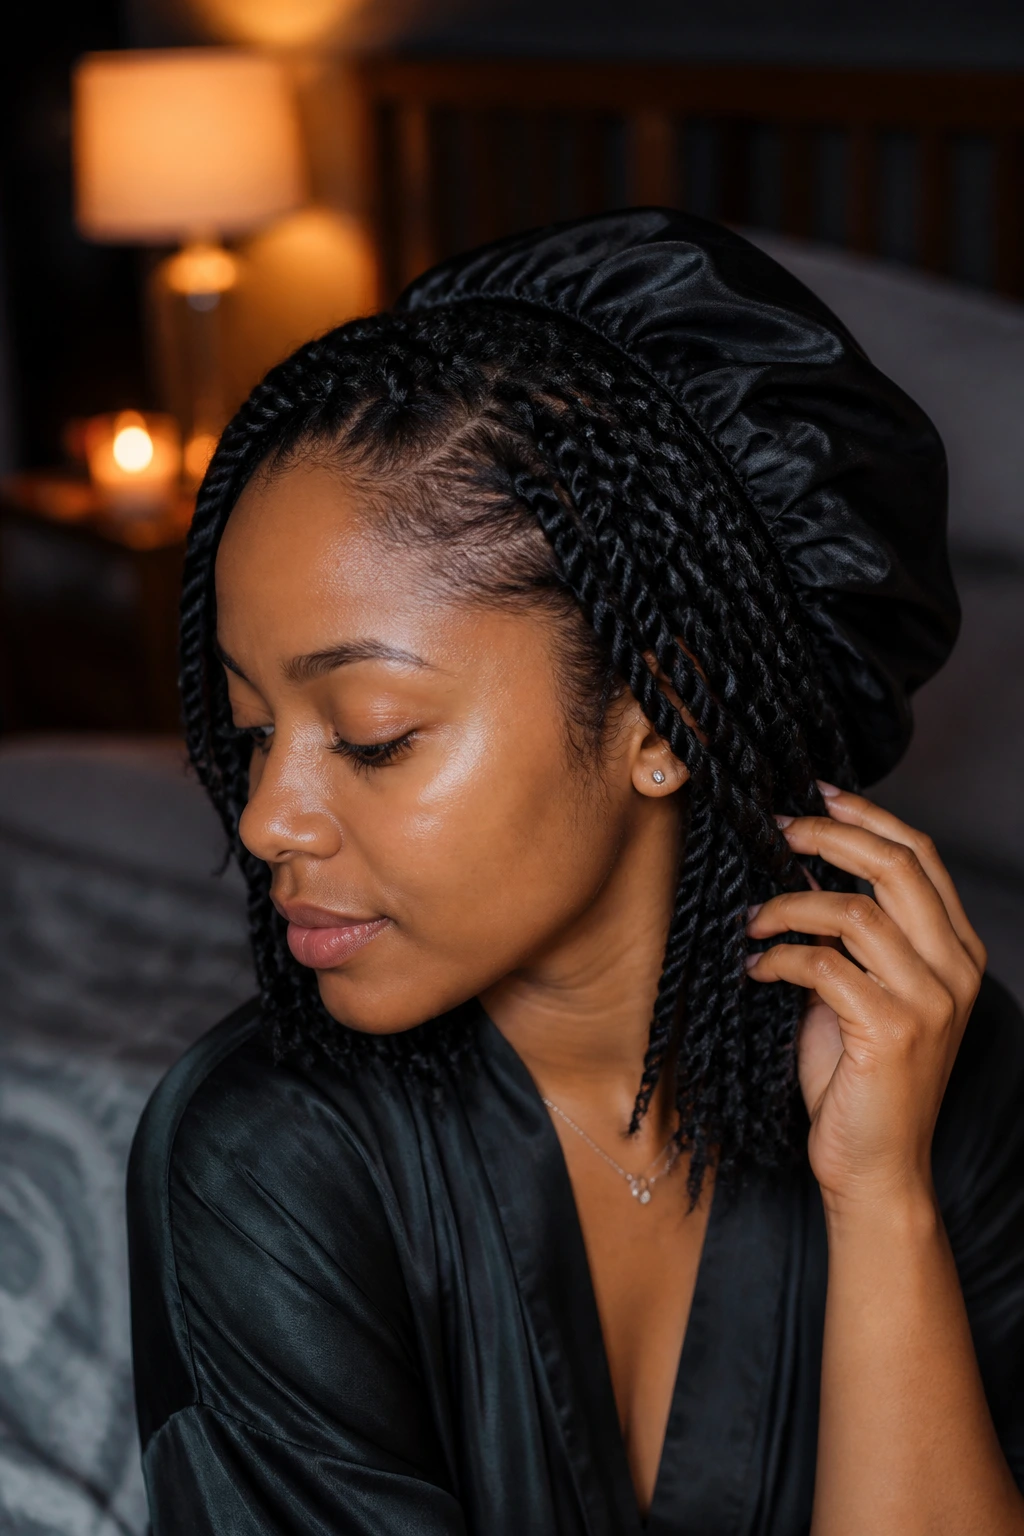
Night care: Wrap the twists in a satin scarf or bonnet every night. If the scarf slips, use a bonnet over it. The goal is to flatten the roots a little without crushing the whole shape.
Frizz control: A light mist of mousse or foam on the outer layer can calm puffiness without soaking the twists. Work it in with your palms, not a rough towel. Towel friction is how a neat set turns fuzzy fast.
Scalp comfort: If the scalp feels dry or tight, use a small amount of scalp oil or a light spray directly on the part lines, not across the whole head. Too much product only builds up and makes the roots look dusty.
Fast refresh: The front rows usually need the first refresh. Smooth them with an edge brush, pin the style into a half-up shape, or switch to a side sweep for a day. Small changes keep the set feeling new.
Wash-day stretch: If you wash the twists, use diluted shampoo on the scalp and let the water run through the hair rather than rubbing the lengths hard. Rough scrubbing ruins the twist shape faster than anything else.
The Mistakes That Make Medium-Length Spring Twists Look Off
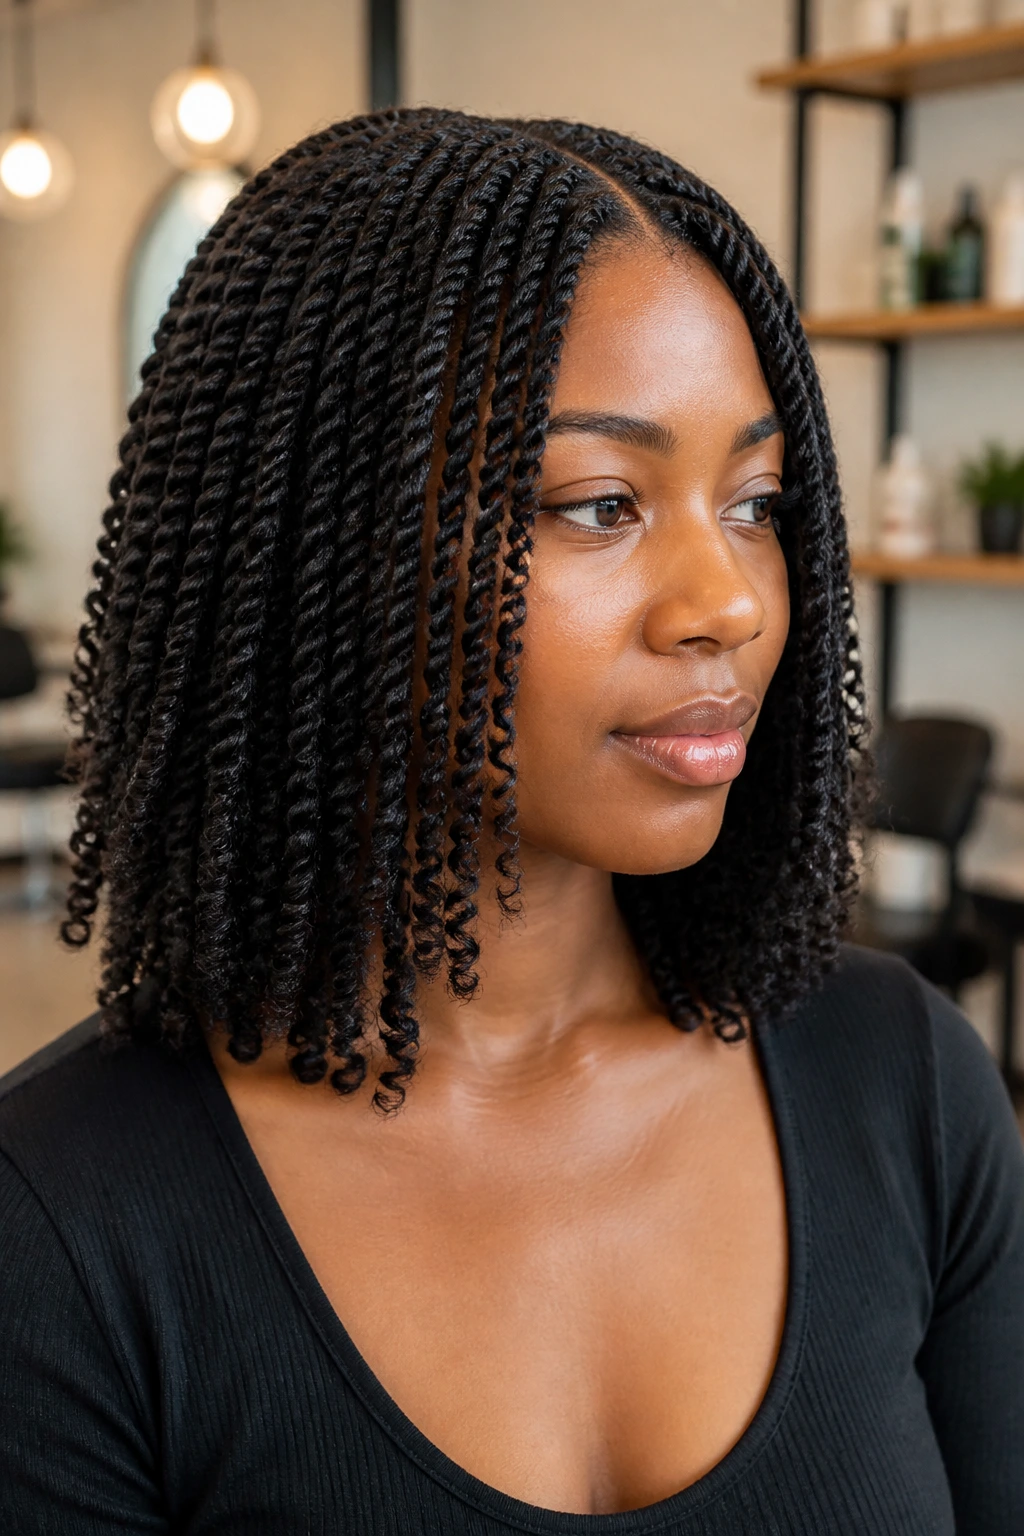
- Packing too much hair into each twist: The roots feel stiff, and the style sits in a heavy block. Fix it by using smaller sections at the hairline and the crown.
- Pulling the front too tight: If the temples ache or the hairline lifts when you move your face, the tension is wrong. Rework it before the style settles in and starts causing breakage.
- Skipping the shape check in the mirror: Medium-length hair shows every uneven row when you wear a half-up or side-swept look. Check both sides before calling it done.
- Using too much greasy product: Build-up makes the twists look dusty and dull, especially near the roots. Keep product light and use it sparingly.
- Sleeping on cotton pillowcases: The ends rough up fast, and the frizz starts at the crown. Satin or silk is the fix. Every time.
- Choosing a style that fights your length: A shape meant for waist-length twists can look awkward on medium hair. Pick a lob, bob, ponytail, tuck, or side sweep instead.
Fresh Variations Worth Trying
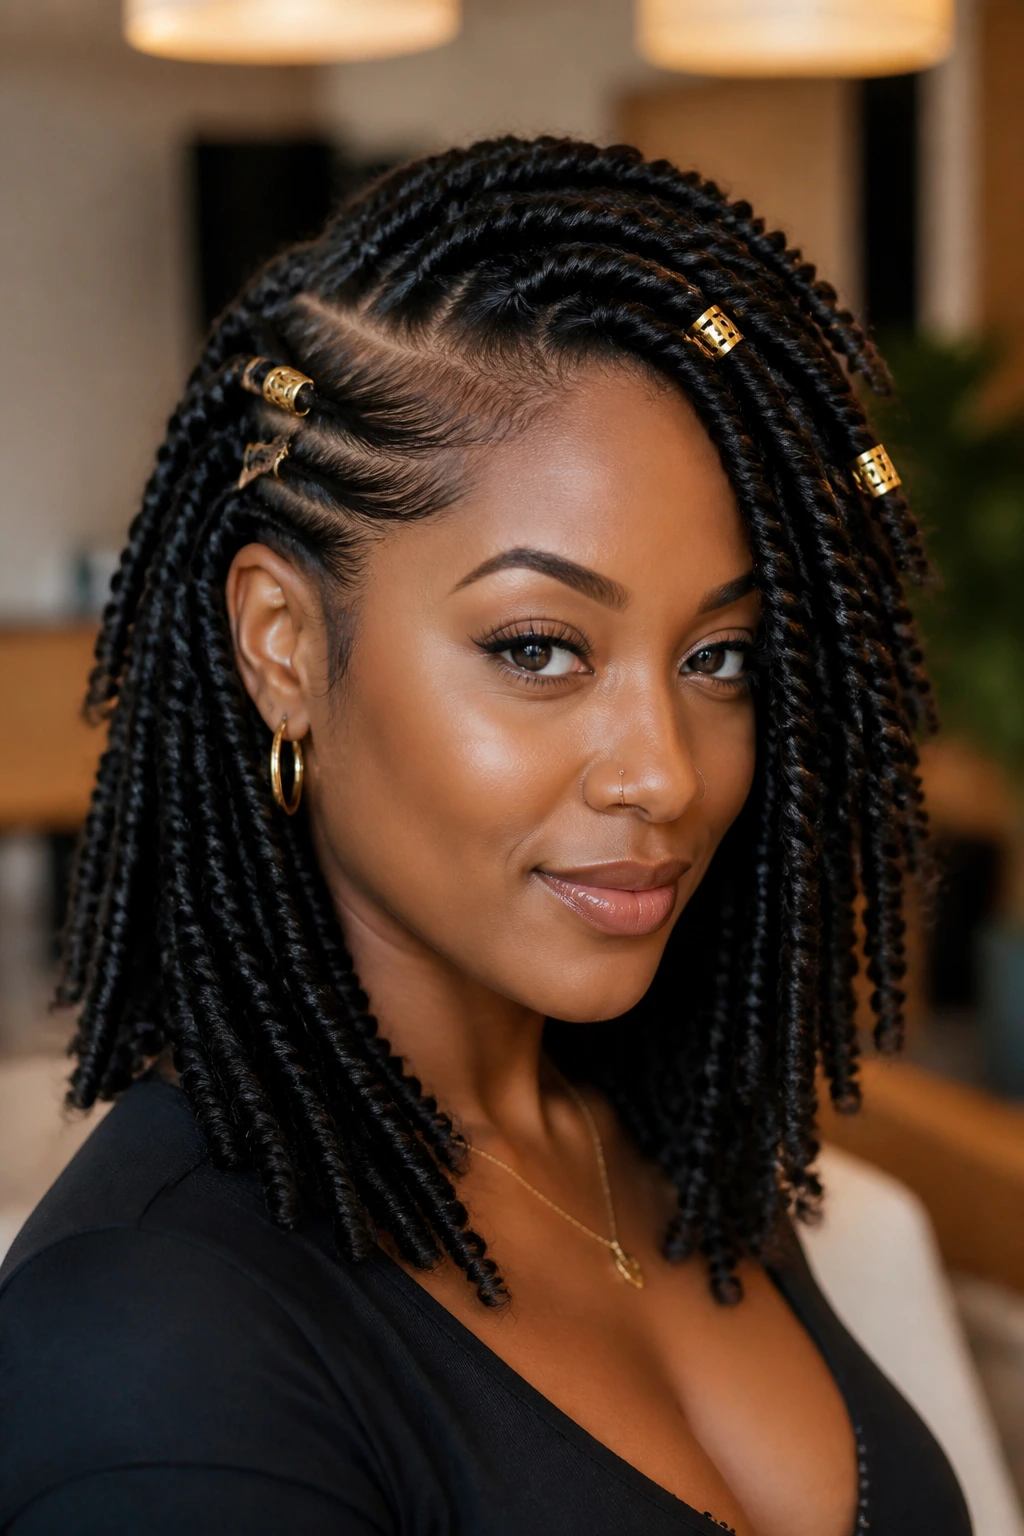
Soft Office Set: Keep the parts neat, skip the heavy accessories, and let the twists fall in a clean shoulder-skimming line. This is the quiet version that still looks deliberate.
Warm Color Fade: Add brown, copper, or honey-toned tips to the ends for a softer contrast. Medium length keeps the color visible without making the whole set feel loud.
Low-Tension Protective Set: Use slightly larger parts, lighter extension hair, and fewer add-ons around the hairline. It’s the version to choose when comfort matters more than detail.
Texture Mix: Blend a standard spring twist base with a few goddess curls near the front. The contrast keeps the style soft without losing the twist structure.
Polished Event Shape: Try a deep side part, one pinned side, and a few cuffs on the front row. It takes an ordinary set and gives it a more dressed-up finish.
Frequently Asked Questions About Medium-Length Spring Twists
How long do spring twists usually last on medium length hair?
Most sets look their best for about four to six weeks, depending on tension, hair density, and how well you sleep with them protected. After that, the roots usually start to bunch and the ends lose their spring.
Can spring twists work on fine hair?
Yes, but the part size matters. Fine hair usually looks better with medium sections and lighter extension hair so the twists don’t weigh the roots down or expose too much scalp.
Can I wear spring twists in a ponytail or bun?
You can, especially on medium length hair where the weight is still manageable. Just avoid yanking the base tight every time you style it up, because repeated tension at the same spot can wear the hairline down.
Do I need to wash spring twists?
Not often, but the scalp may need cleansing if it gets oily or itchy. A diluted shampoo or gentle scalp cleanser applied with a nozzle bottle works better than scrubbing the length hard.
What if my twists start frizzing early?
That usually means the wrap at night is too loose, the product is too heavy, or the hair was handled rough while drying. A light foam refresh and a tighter satin wrap usually help.
Are beads a bad idea on medium-length twists?
Not at all. They just need to be used with some restraint. A few beads on front pieces can look sharp; loading every twist can make the ends feel heavy and noisy.
Can I get a polished look without using a lot of accessories?
Yes. A clean side part, neat edges, and a tucked-under bob shape can carry the whole style on their own. Accessories are optional, not a requirement.
What should I avoid if my hairline is sensitive?
Avoid tiny, tight parts at the temples and any style that pulls the front rows backward hard. A scalp-friendly set with a gentle side part usually wears much better over time.
The Medium-Length Advantage
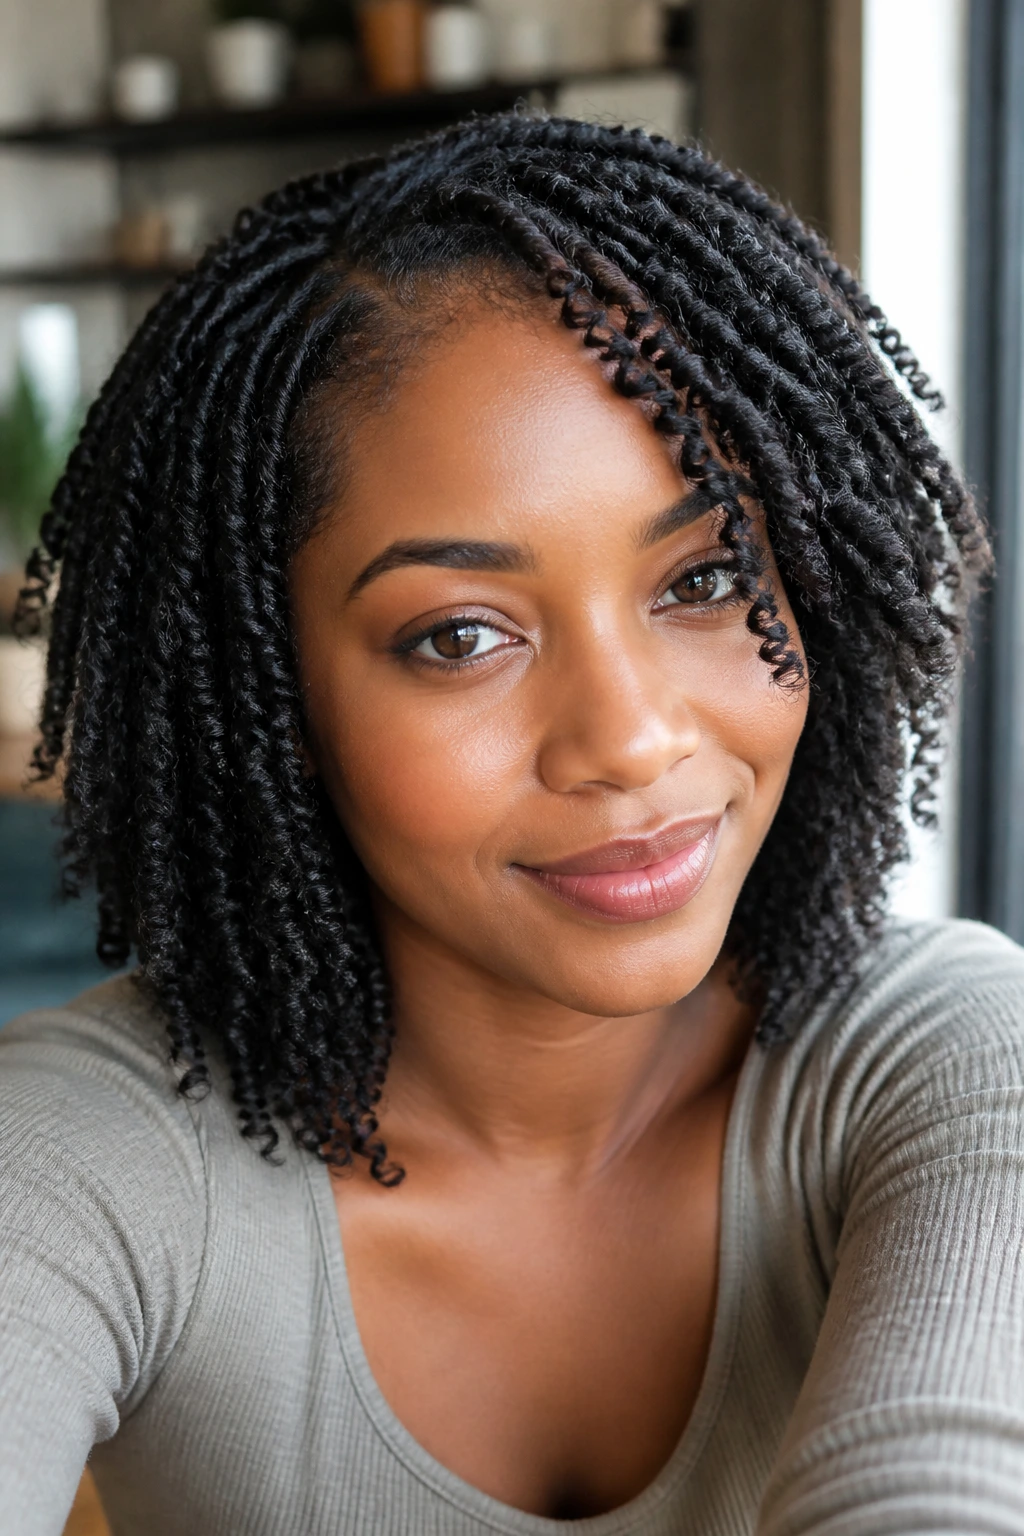
Medium-length hair gives spring twists room to breathe, and that’s why these styles keep working. They don’t need to be huge to have presence. They don’t need to be long to feel finished. The shape can be soft, sharp, playful, or neat, and the hair still behaves.
That balance is the real appeal. You get enough length for ponytails, buns, side sweeps, and scarves, but not so much that the style turns into a maintenance project every time you leave the house. Pick the shape that matches your mood, keep the tension kind, and let the twists do what they do best: move a little, frame the face, and stay interesting without trying too hard.
