



Straight hair is honest.
It shows the part line, the pin placement, the flyaways you missed at the crown, and the bobby pin that slid half an inch south while you were still getting dressed. That can be annoying. It can also be a gift. With the right shape and a little grip, 23 hairstyle ideas for straight hair can look cleaner, sharper, and more deliberate than styles that depend on curl or volume to do the heavy lifting.
The detail that matters most is this: sleek strands don’t need more drama. They need better structure. A low bun with a wrapped base looks polished because the surface is smooth. A bubble ponytail works because each elastic creates a clean break. A tucked ear, a ribbon, or a tiny bend at the ends can change the whole mood of the style without turning it into a production.
I keep coming back to the same thing when I style straight hair: small moves read big. Shift the part by a half-inch and the face changes. Swap a black elastic for a ribbon and the ponytail stops looking like gym hair. Add one barrette where the length wants to fall flat, and suddenly the hair has shape instead of just length.
Some of these looks take five minutes. Some need a flat iron, a tail comb, and a bit of patience. None of them rely on wishful thinking. They work because they respect what straight hair actually does, which is slip, lie flat, and reveal every choice you made.
Why These 23 Looks Work on Straight Hair
-
Slip becomes structure: Smooth strands can slide out of styles fast, so the ideas below use anchors, wraps, braids, and tucked ends that hold shape instead of fighting gravity.
-
Shine does the decorating: Straight hair already catches light along the surface, which means a center part, a sleek pony, or a pin-straight bob looks finished without extra curl.
-
Small accessories go further: A single barrette, ribbon, or French pin reads clearly on straight lengths because the hair doesn’t swallow the detail.
-
They fit different densities: Fine hair, thick hair, long hair, and lob-length hair all show up here, not just the waist-length crowd.
-
They age well through the day: Many of these styles still look intentional after a few hours because they’re built around shape, not perfect volume.
-
They don’t demand a salon blowout: A brush, a few pins, and the right product are enough for most of them.
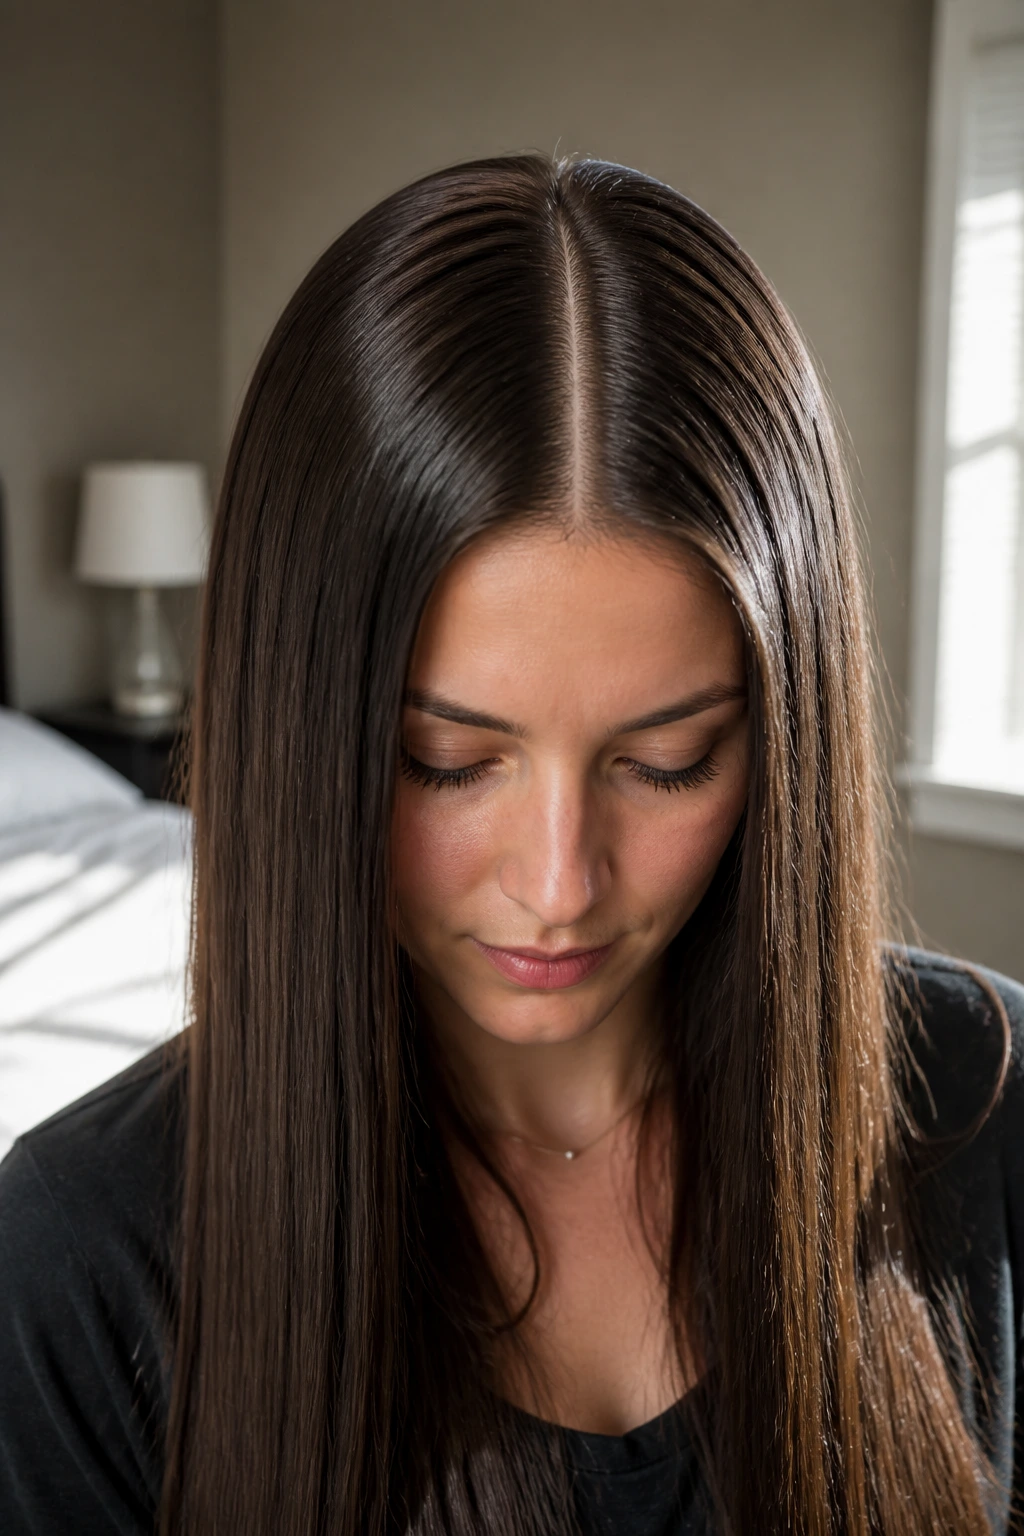
1. Glass-Hair Center Part
A dead-straight center part with glossy lengths has a sharpness that curly styles can’t fake. It looks crisp in the best way, almost architectural, and straight hair is one of the few textures that can pull it off without needing a mountain of styling products.
Why It Works
The key is not shine for shine’s sake. Too much serum and the roots go greasy; too little and the ends look dry and split. A clean blow-dry with a nozzle, one slow pass of a flat iron at 300–350°F, and a pea-size amount of smoothing serum through the mid-lengths are usually enough.
Best For
- Hair that’s already naturally straight or slightly wavy.
- Medium to long lengths where the center part can travel all the way down cleanly.
- Times when you want the hair to look crisp with very little visual clutter.
My take: this look lives or dies by the part line, so use a tail comb and check it in a mirror before you decide it’s done.
2. Low Sleek Bun at the Nape
A low bun at the nape looks almost severe when it’s done well, which is exactly why it works. Straight hair gives you that smooth, close-to-the-head finish without a lot of coaxing, and the result feels tidy instead of fussy.
The trick is to brush the hair back with a boar bristle brush or fine paddle brush, then smooth the hairline with a tiny bit of gel or styling cream. Twist the length into a bun right at the dip of the neck, where the head naturally curves. If your hair is layered and ends keep poking out, tuck them under and pin them flat with two crossed bobby pins.
This is one of those styles that gets better when the hair is not freshly washed. Day-two texture gives the bun enough grip that it stays in place longer, and the front stays sleek without sliding around every time you turn your head.
3. Half-Up Twist with Face-Framing Pieces
Why do some half-up styles look sweet while others look accidental? Placement. On straight hair, a half-up twist works because it lifts the crown just enough to create shape, but leaves the length clean and smooth underneath.
How to Style It
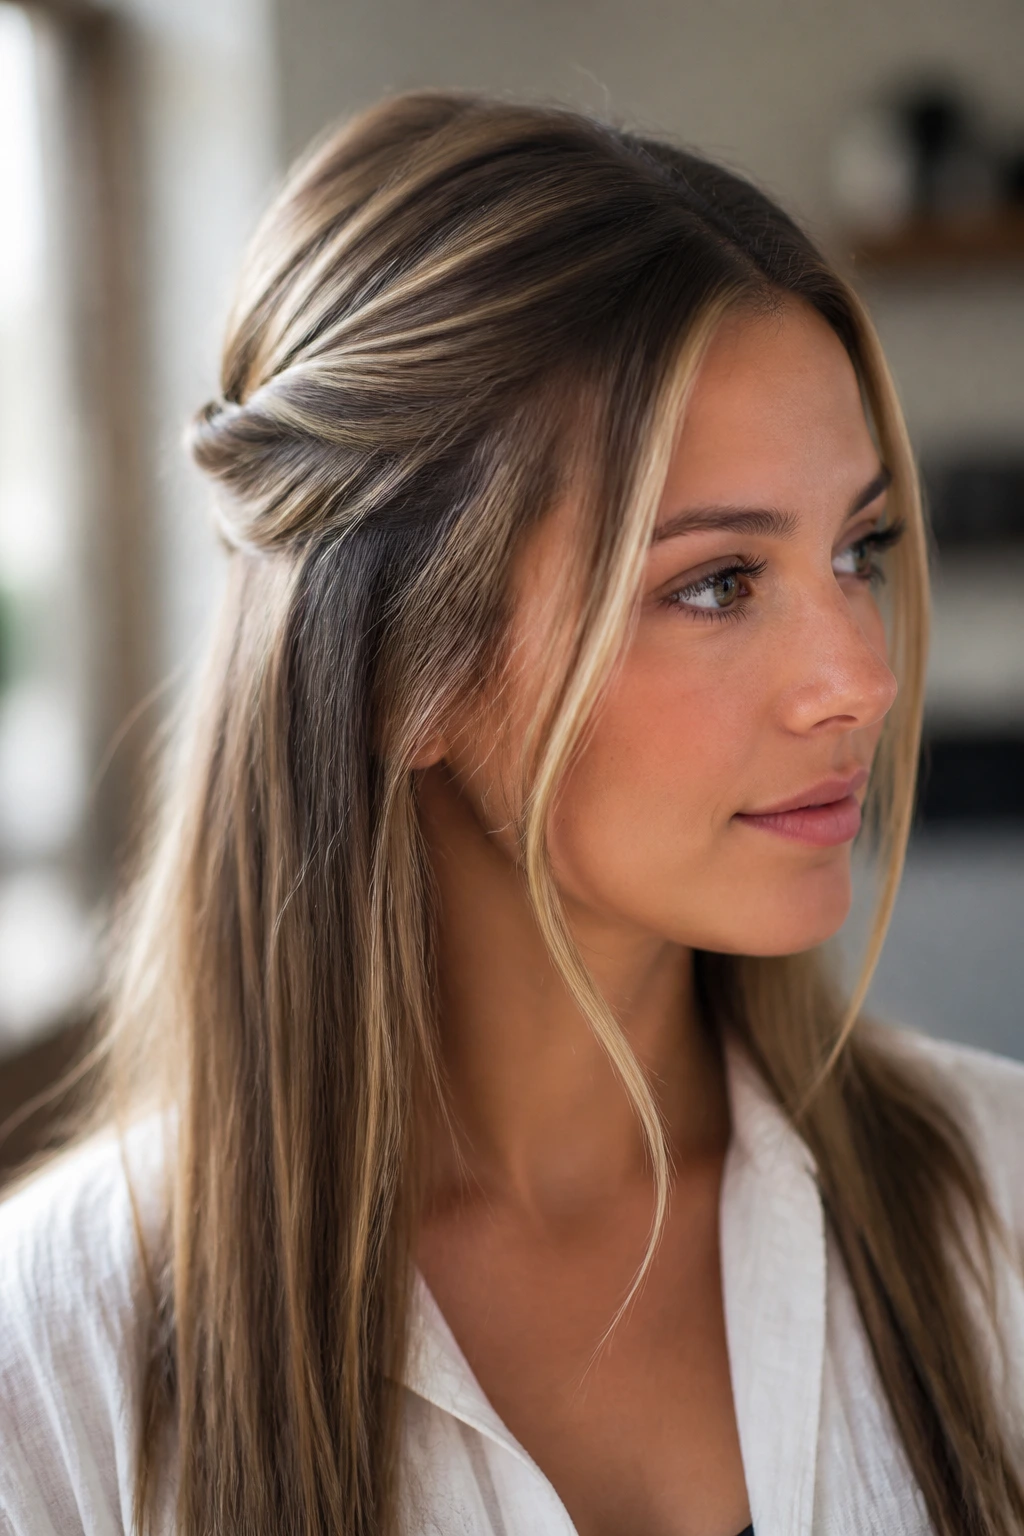
Start by taking a section from each temple and twisting them back toward the crown. Secure the twist with a small clear elastic or two crossed pins. Leave thin face-framing pieces out on both sides, then either keep them straight or give them a one-inch bend toward the jawline if you want a softer finish.
This style is a smart choice for medium-length straight hair that tends to fall flat at the crown. The twist creates interest without asking the whole head to hold curl. And if the top layer is too slippery, mist the roots lightly with texture spray and wait 20 to 30 seconds before you twist.
4. Blunt Lob with Tucked-In Ends
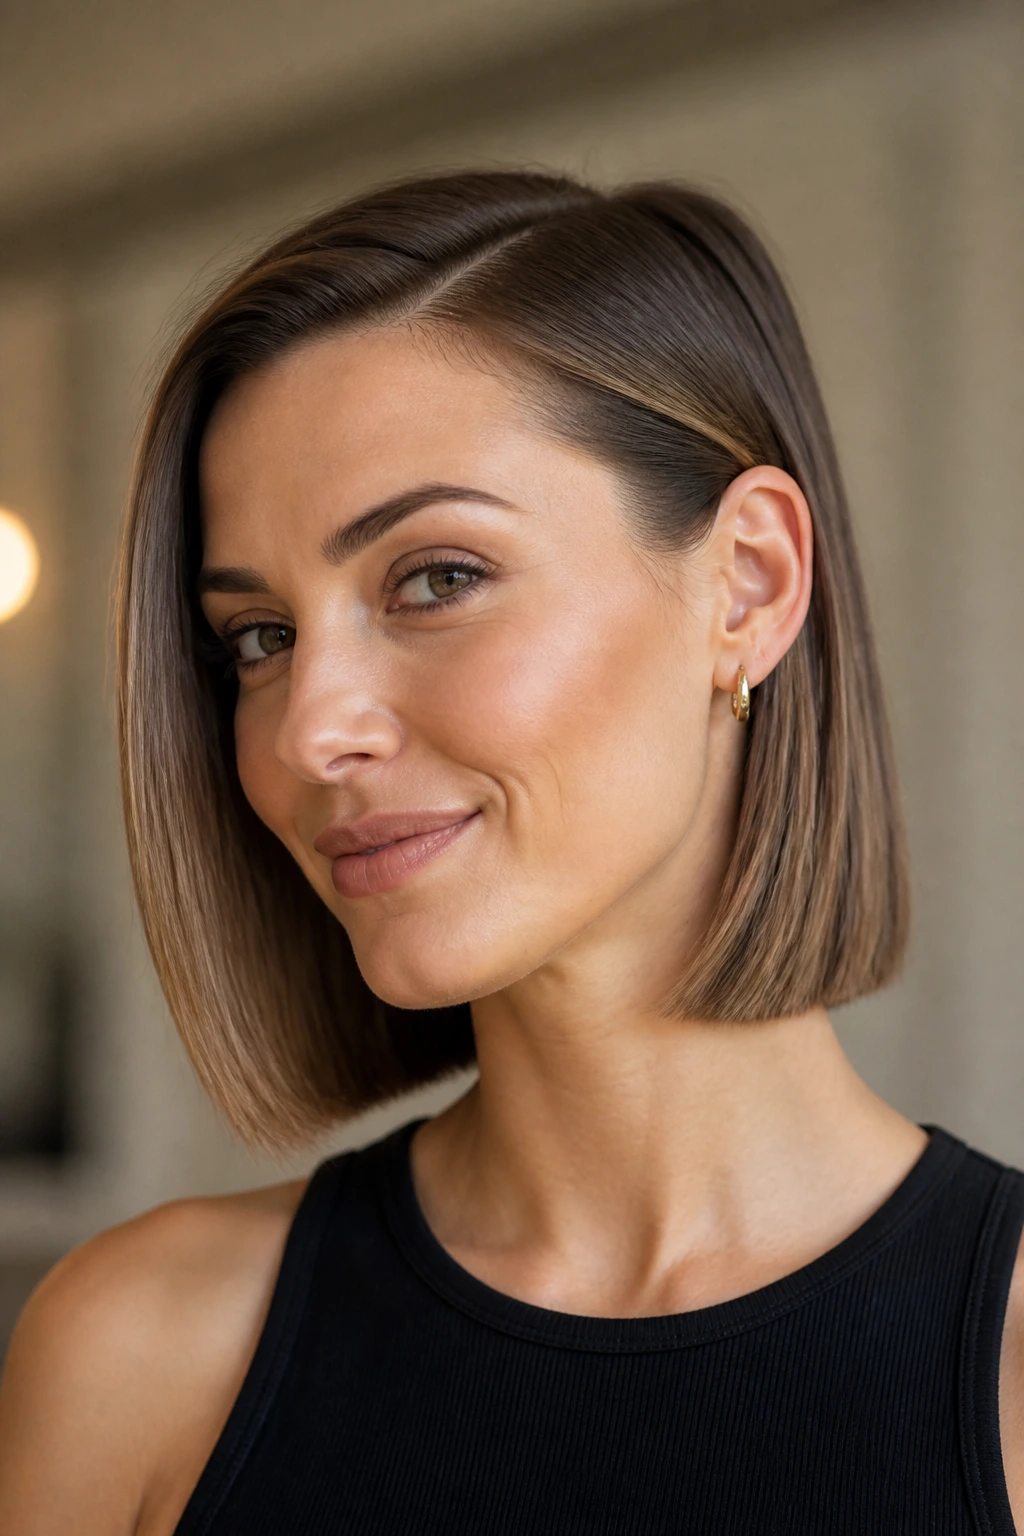
If your hair hits somewhere between the chin and the shoulders, this one is worth keeping in your back pocket. A blunt lob with tucked-in ends reads polished, but it doesn’t ask for a full updo.
Picture this: the ends curve just under the jaw, one side is tucked behind the ear, and the whole shape looks deliberately quiet. That’s the appeal. Straight hair gives the line of the lob a clean edge, and the tucked ends stop the style from feeling too stiff.
Key Details
- Use a flat iron or round brush to create a soft inward bend at the ends.
- Tuck one side behind the ear and secure it with a tiny barrette if it keeps slipping.
- Add a side part if your face needs a little asymmetry.
It’s a small thing, but that bend at the hem of the haircut changes everything. Flat ends can look unfinished; slightly tucked ends look like you meant it.
5. High Ponytail with a Wrapped Base
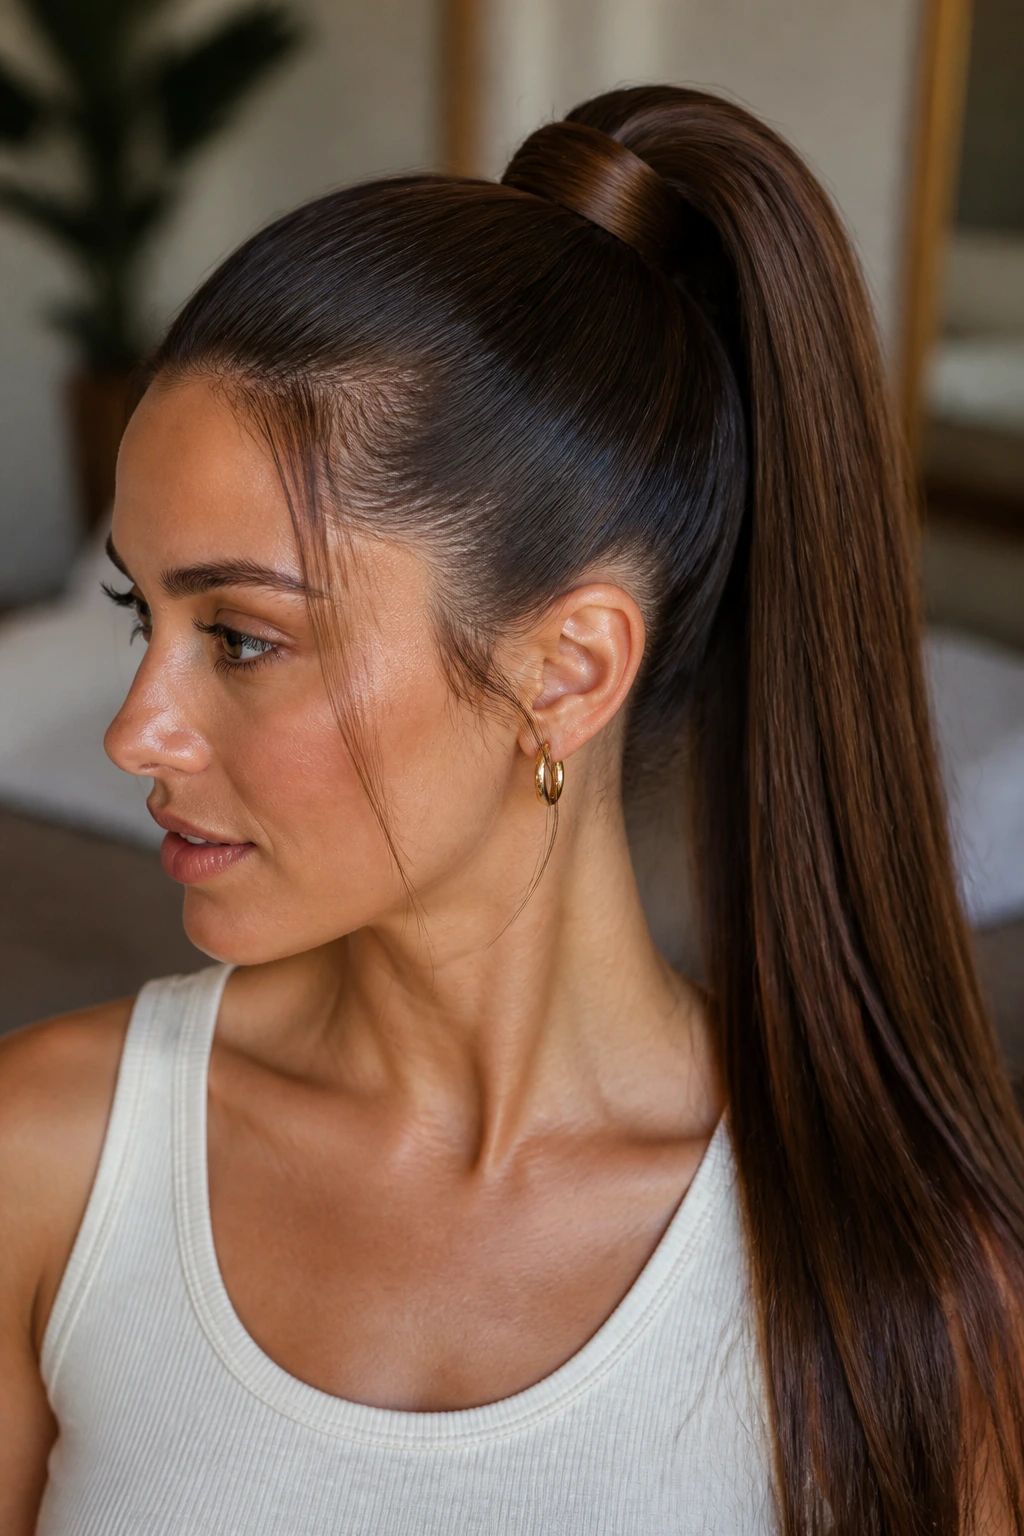
A high ponytail on straight hair has a very specific energy: clean, lifted, and a little uncompromising. That’s not a bad thing. In fact, it’s why the style works so well. The smoother the hair, the more the ponytail looks like one solid piece instead of a puffed-up bundle.
Pull the hair up to the crown or just above it, then brush the sides tight with a fine comb. Once the elastic is secure, take a one-inch strand from underneath the ponytail, wrap it around the base, and hide the ends under a pin. That little wrap matters. It turns a basic pony into something with finish.
Keep the crown smooth, but don’t chase perfection so hard that you flatten the top of the head completely. A tiny bit of lift at the front keeps the style from looking harsh.
6. Bubble Ponytail Down the Back
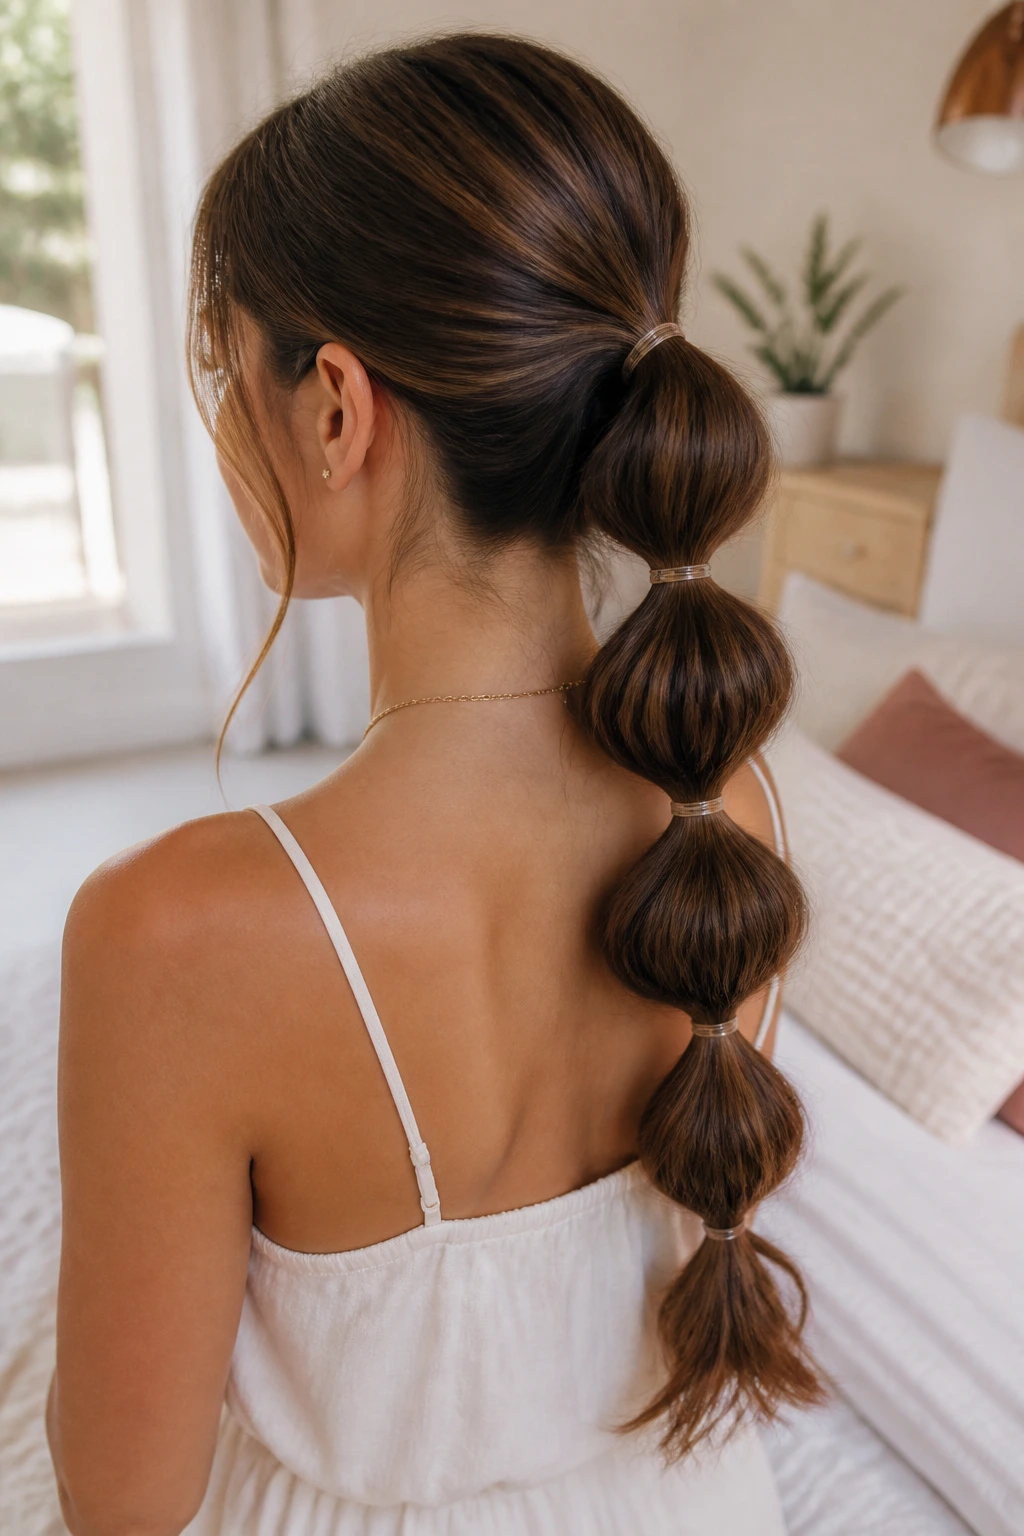
A bubble ponytail is what happens when you want length, but you also want the hair to look styled. Straight hair makes the bubbles clear and even, which is the whole point. Each section puffs cleanly between elastics instead of collapsing into a soft blur.
Why this one stands out: unlike a braid, a bubble ponytail doesn’t need weaving skills or lots of hand work. You just tie the length every few inches, gently pull each segment outward, and let the hair do the rest.
How to Get the Shape Right
Use clear elastics spaced 2 to 3 inches apart down the tail. If your hair is thick, space them a little farther apart; if it’s fine, keep the bubbles tighter together so the sections don’t look skimpy. Tug each bubble just enough to round it out, then stop. Over-pulling makes the style look uneven fast.
This works especially well for long straight hair that tends to go flat by midday. The repeated ties give the ponytail a little structure, and the shape stays readable even if the ends loosen a bit.
7. Claw-Clip Roll
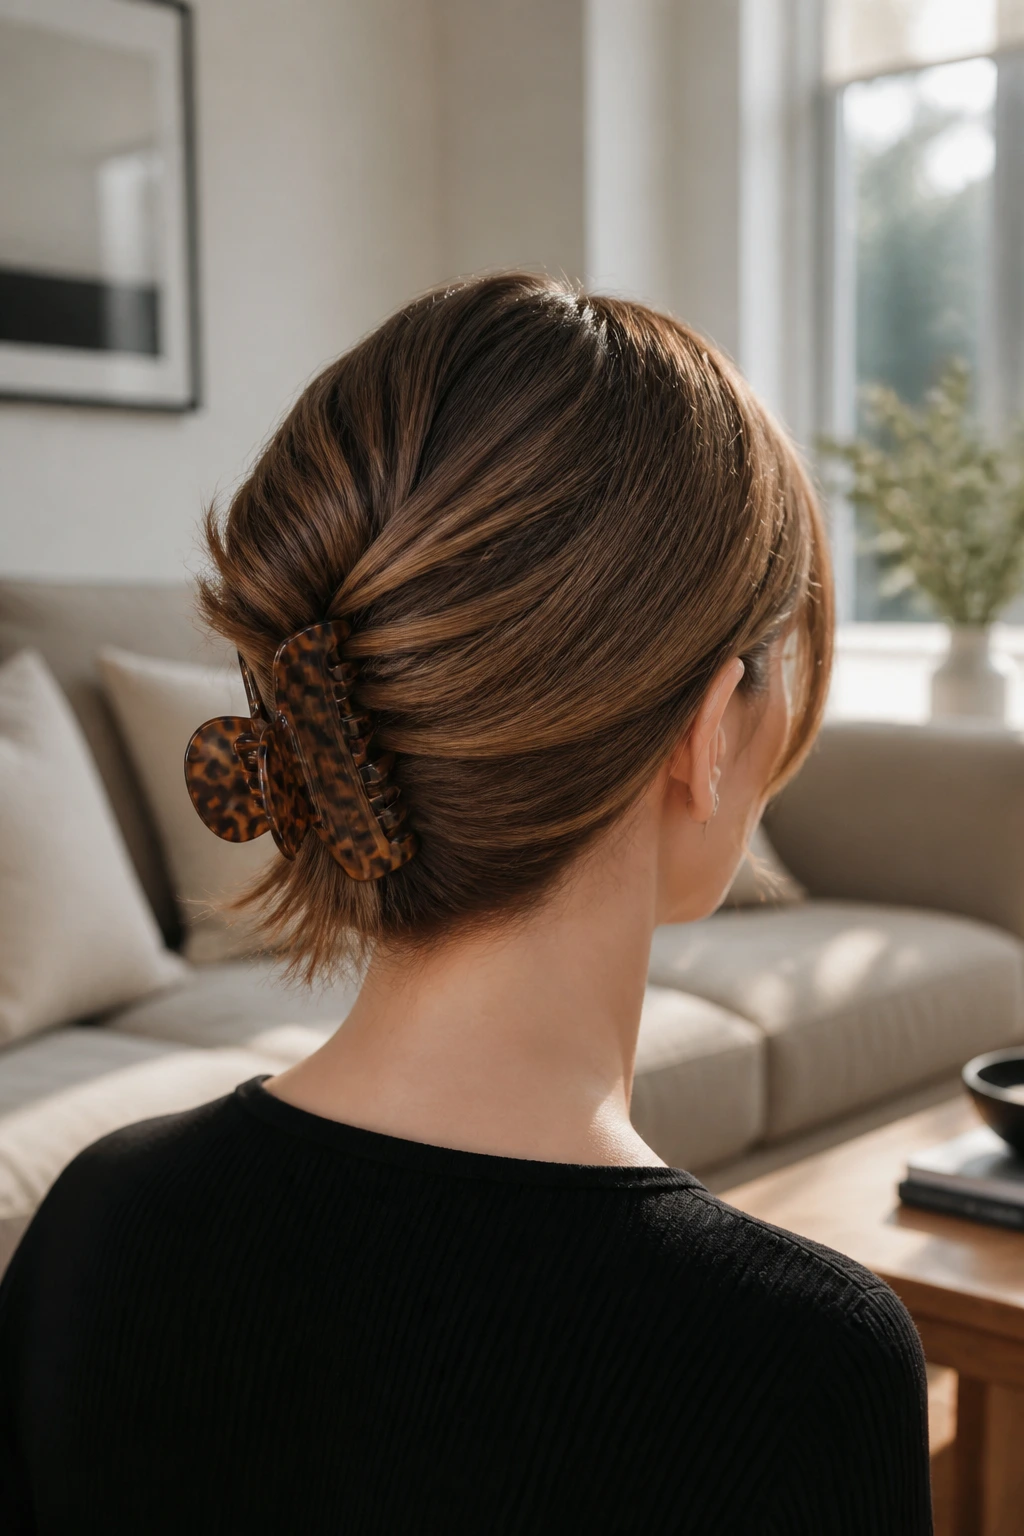
The claw clip roll is one of those styles that looks casually thrown up, but only if you’re honest about the work behind the scenes. Straight hair can be slippery in a claw clip, so the trick is a twist that feels snug before the clip ever goes in.
Gather the hair at the back of the head, twist it upward, then fold the length under once before clipping. The ends can fan out a little. In fact, on straight hair, a few loose ends sticking out can make the style look better, not worse.
What Makes It Hold
- Pick a clip with teeth long enough to catch the twist, not just the surface.
- Use a little dry shampoo at the roots if the hair feels like polished glass.
- If the clip keeps sliding, pin one crossed bobby pin beneath it as a hidden anchor.
This is the kind of style that saves you on days when you want your hair off your neck but don’t want a tight ponytail dent.
8. Deep Side Part with One Ear Tuck
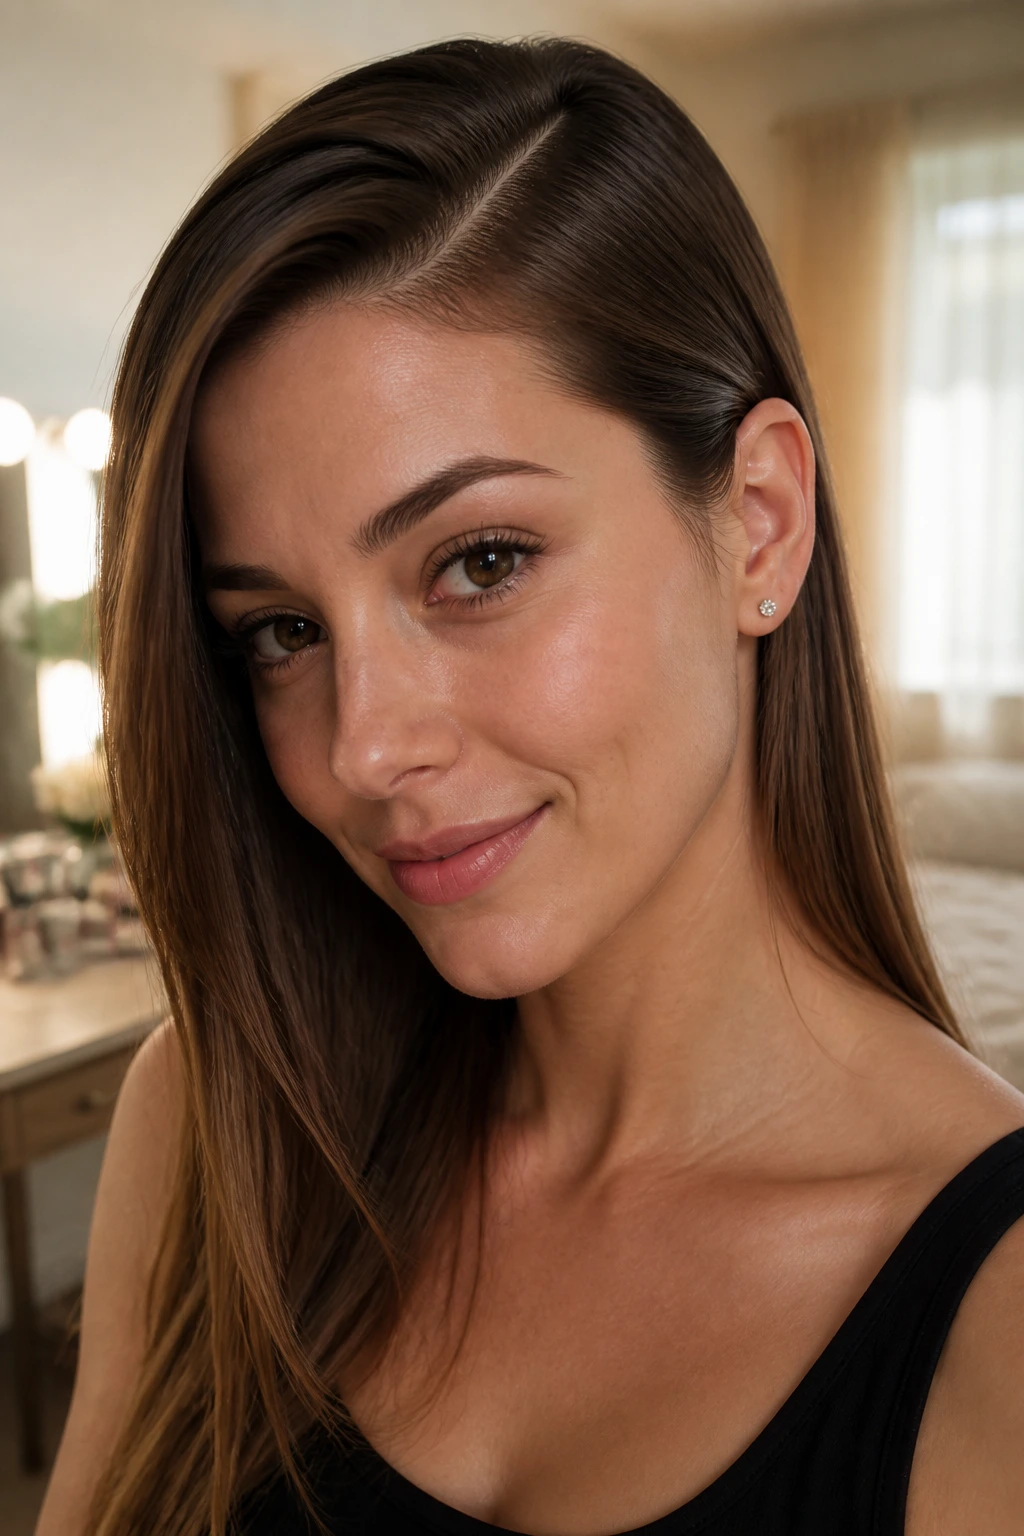
A deep side part changes the entire mood of straight hair. It adds shape immediately, and the asymmetry keeps the length from looking too static. Then the ear tuck finishes the job.
Why It Works So Fast
Straight hair shows part lines clearly, which is actually useful here. Shift the part about 1.5 to 2 inches from center, brush the heavier side across the forehead, and tuck the lighter side behind one ear. If the tucked side keeps slipping forward, pin it just above the ear with a small decorative clip or a plain bobby pin hidden under the top layer.
This is a good option when you want to keep the hair down but don’t want it hanging in a flat curtain. It also works with makeup that has a strong brow, lip, or eyeliner moment, because the part frames the face without swallowing it.
9. Mini Braids Along the Hairline
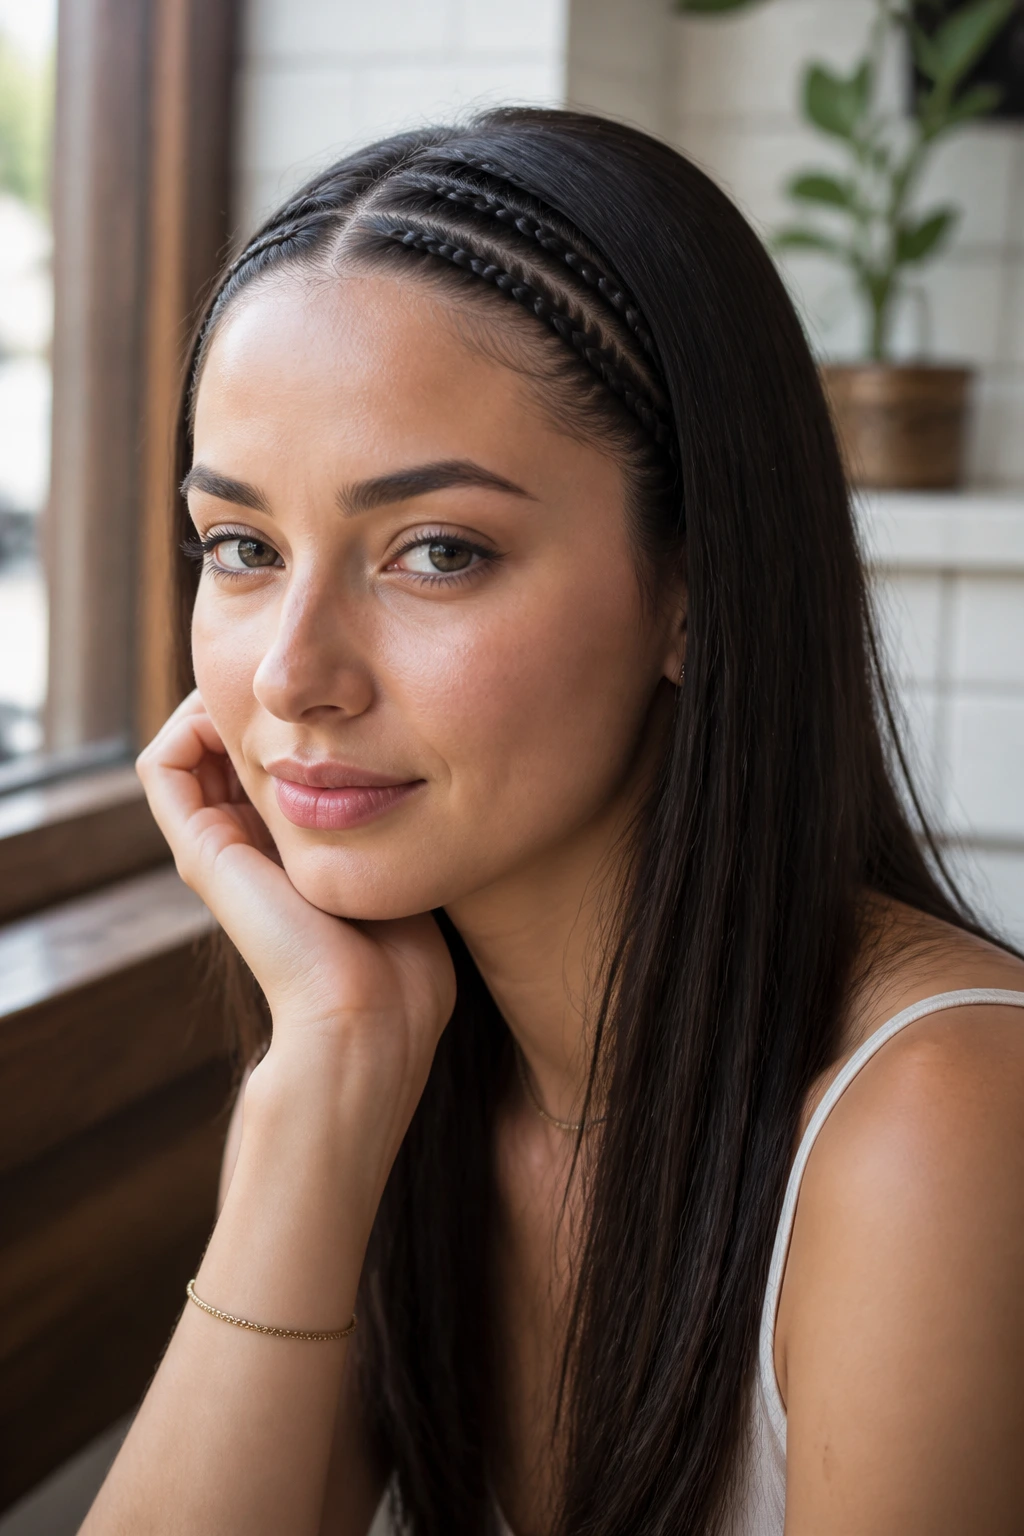
Mini braids are the kind of detail that looks tiny until you see them on straight hair. Then they suddenly matter a lot. A narrow braid at the temple or just above the ear adds texture where the hair would otherwise lie flat.
You do not need a full braided crown to get the effect. Two or three slim braids at the front are enough. Keep the rest of the hair straight and smooth so the contrast stays clean. If your hair is silky, a touch of dry texture spray before braiding helps the strands grip each other instead of slipping apart.
Good Placement Ideas
- One braid tucked behind the ear on each side.
- Two tiny braids starting near the temple and blending into the length.
- A single side braid pinned back as a detail line.
The best part is how low-commitment this is. You get interest near the face, but you don’t have to redo the whole head if one braid loosens.
10. Low Ribbon-Tied Ponytail
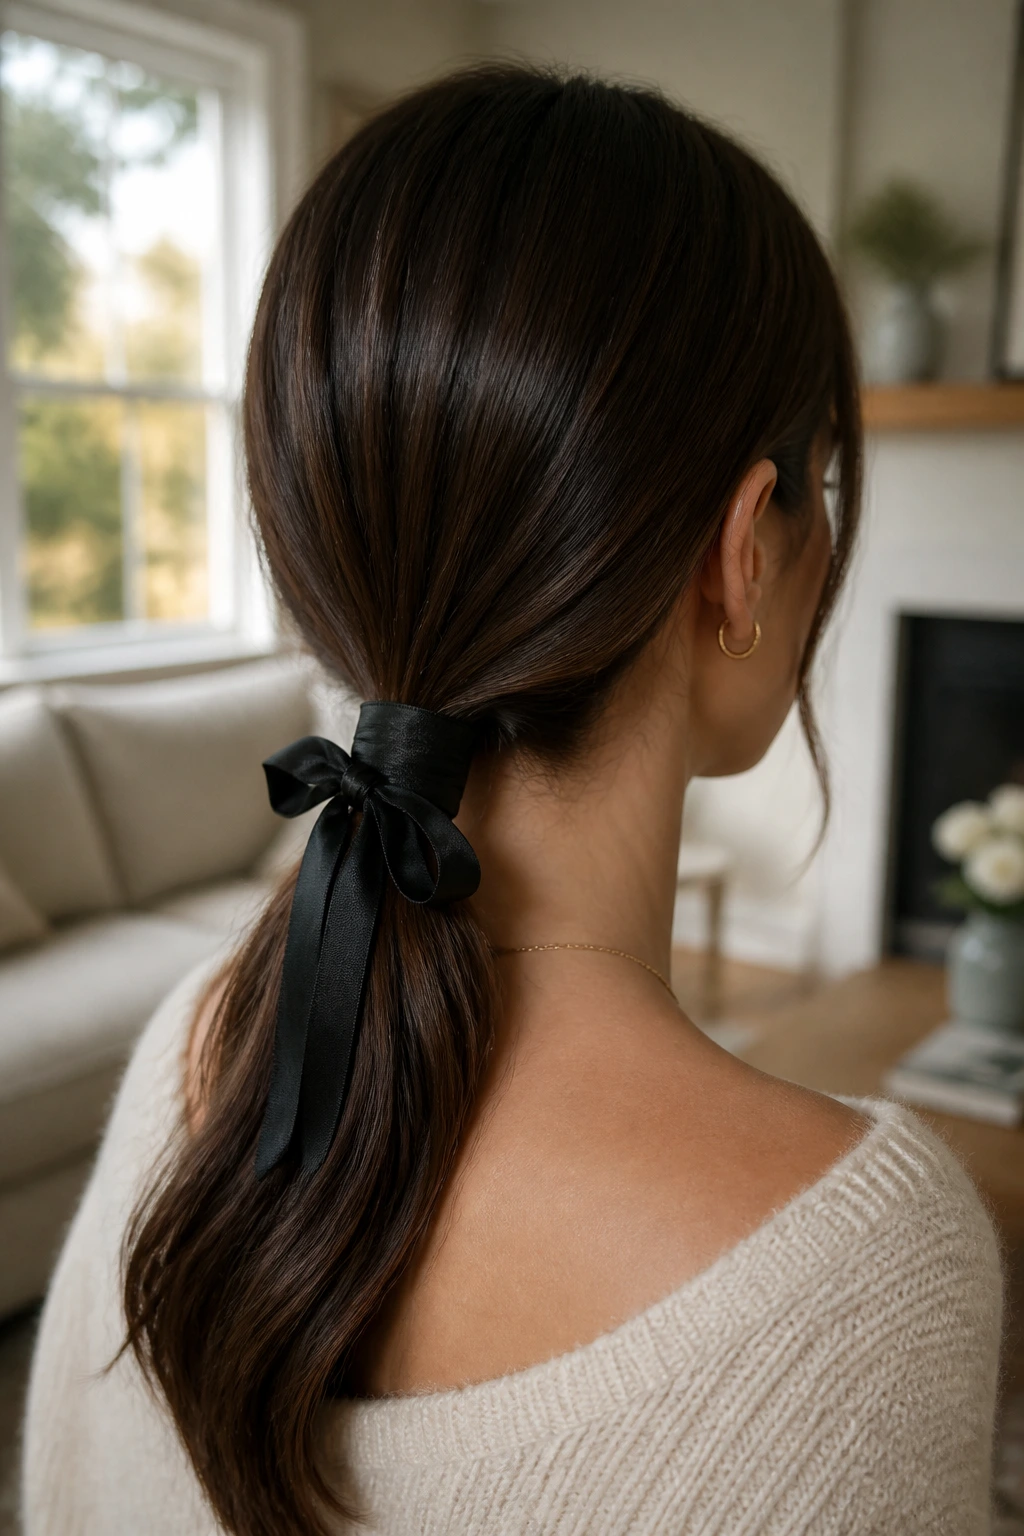
A low ponytail with a ribbon at the base is simple in the way a white shirt is simple. Clean. Clear. Harder to mess up than it looks. Straight hair helps because the ponytail hangs in one smooth line, and the ribbon becomes the focal point.
Choose a ribbon that has enough body to hold a bow or knot—grosgrain, velvet, or a sturdy satin finish all work. Floppy craft ribbon can droop in a way that feels accidental. Tie the ponytail low, about an inch above the nape, then cover the elastic with the ribbon and let the tails fall long.
This style looks especially good when the hair has a soft bend at the ends, not a hard kink. A single pass of the flat iron through the bottom two inches is usually enough. Keep the rest of the pony relaxed.
11. Sleek Double Buns
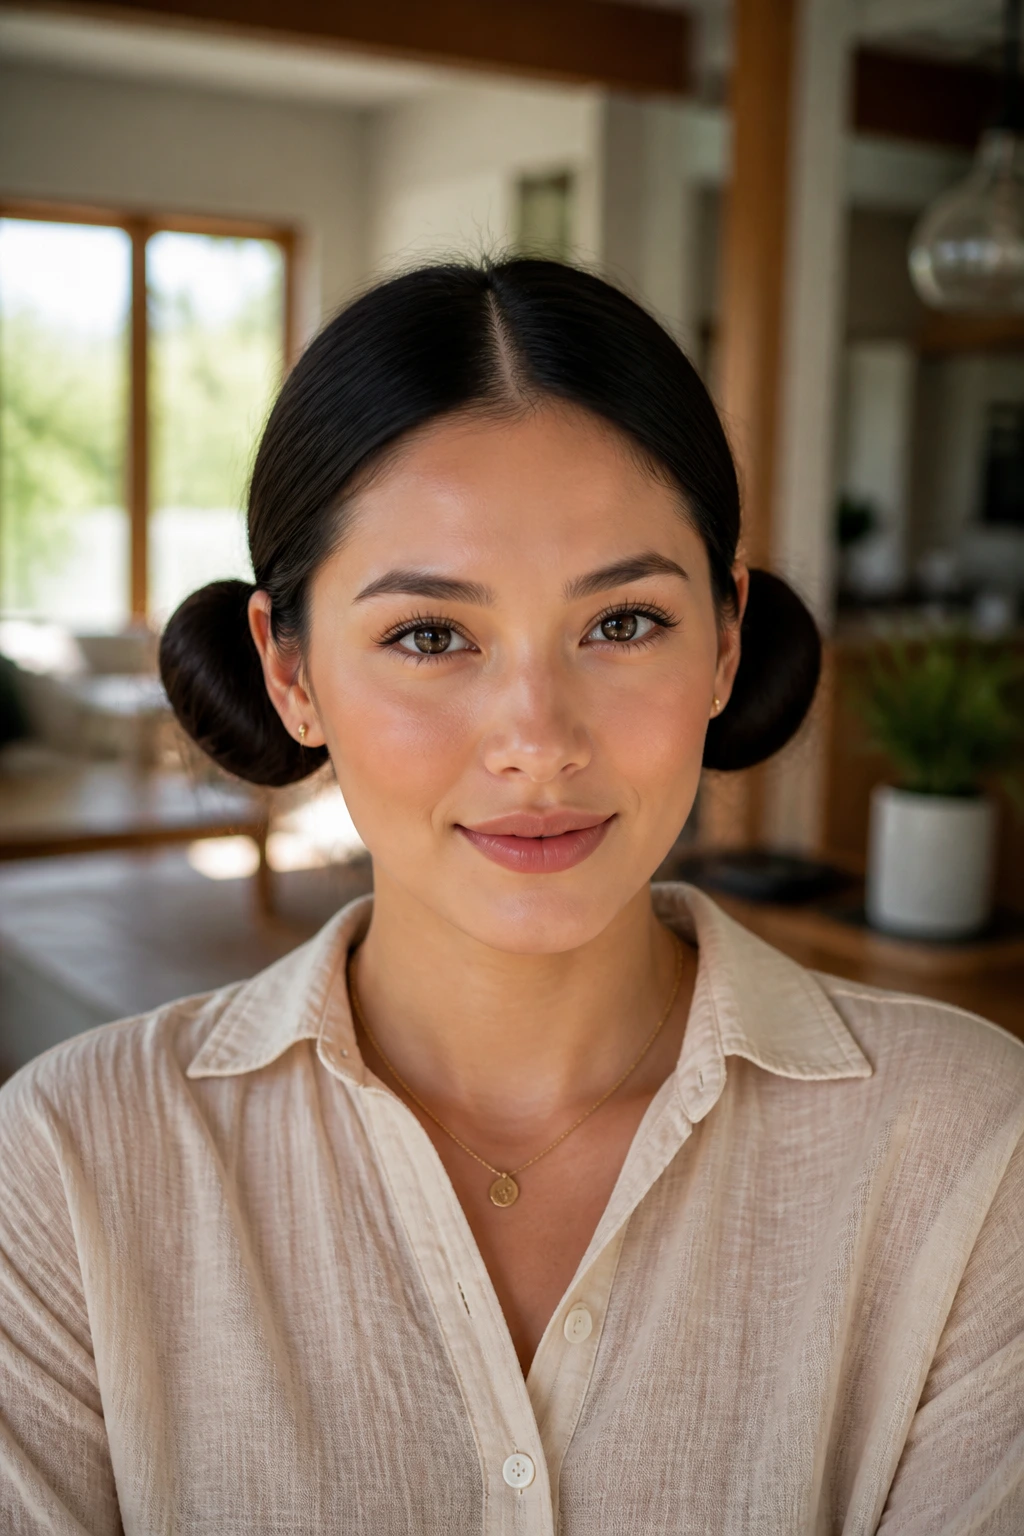
Double buns can drift childish if they’re puffed up or placed too high. Keep them low and smooth, though, and straight hair gives them a neat, tailored look. Think less playground, more deliberate symmetry.
Part the hair down the center, gather each side low behind the ears, and twist each section into a compact bun. Use enough pins to lock the shape, because smooth hair loves to escape the first loose loop it finds. A little gel at the hairline keeps the part clean and the front sections flat.
This style is good when you want your hair off your neck but don’t want one heavy bun sitting at the nape. The twin shape balances the head visually, which can be useful on rounder or softer face shapes. And because the buns sit apart, they hold better than one oversized knot on silky lengths.
12. French Pin Chignon
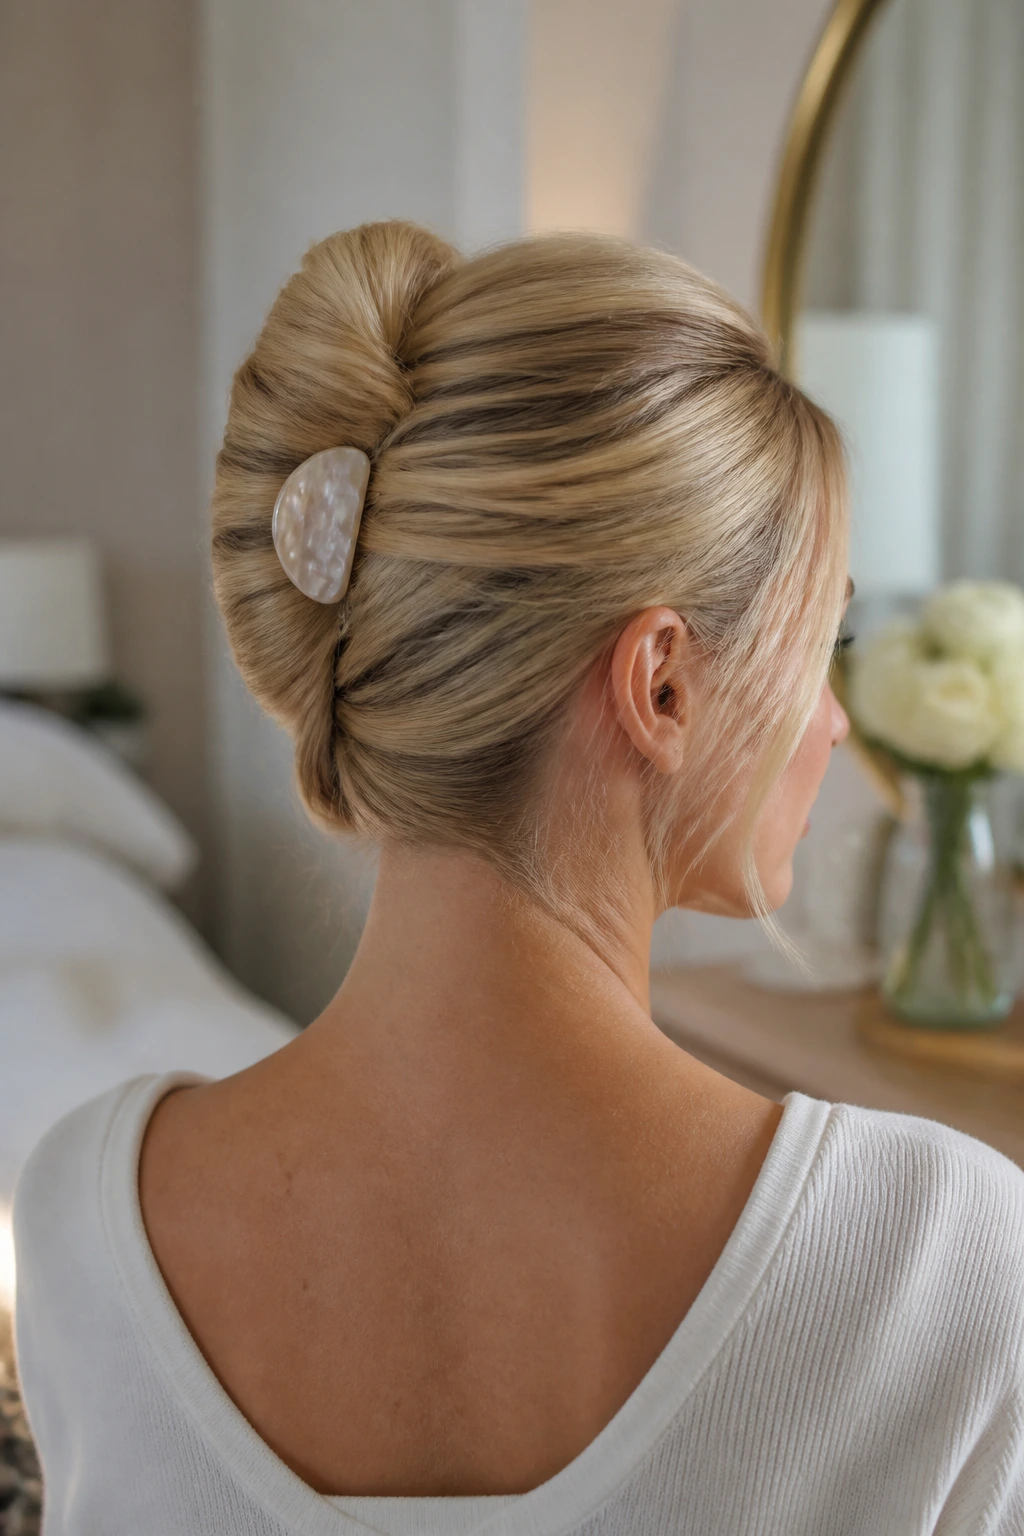
A French pin chignon has that tidy, sculpted look that always seems harder than it is. Straight hair is a better starting point than many people think, because the smoothness helps the roll sit close to the head instead of getting bulky.
Twist the hair upward from the nape, fold the length into a vertical roll, then slide a French pin through the shell of the twist so it catches both the roll and the scalp-side section. If the hair is long and thick, use a second pin from the opposite direction. That part is not glamorous. It is necessary.
A little dry shampoo at the roots gives the pin something to bite into. Without it, the chignon can feel too slippery and may loosen by lunch.
13. Half-Up Bow Tie
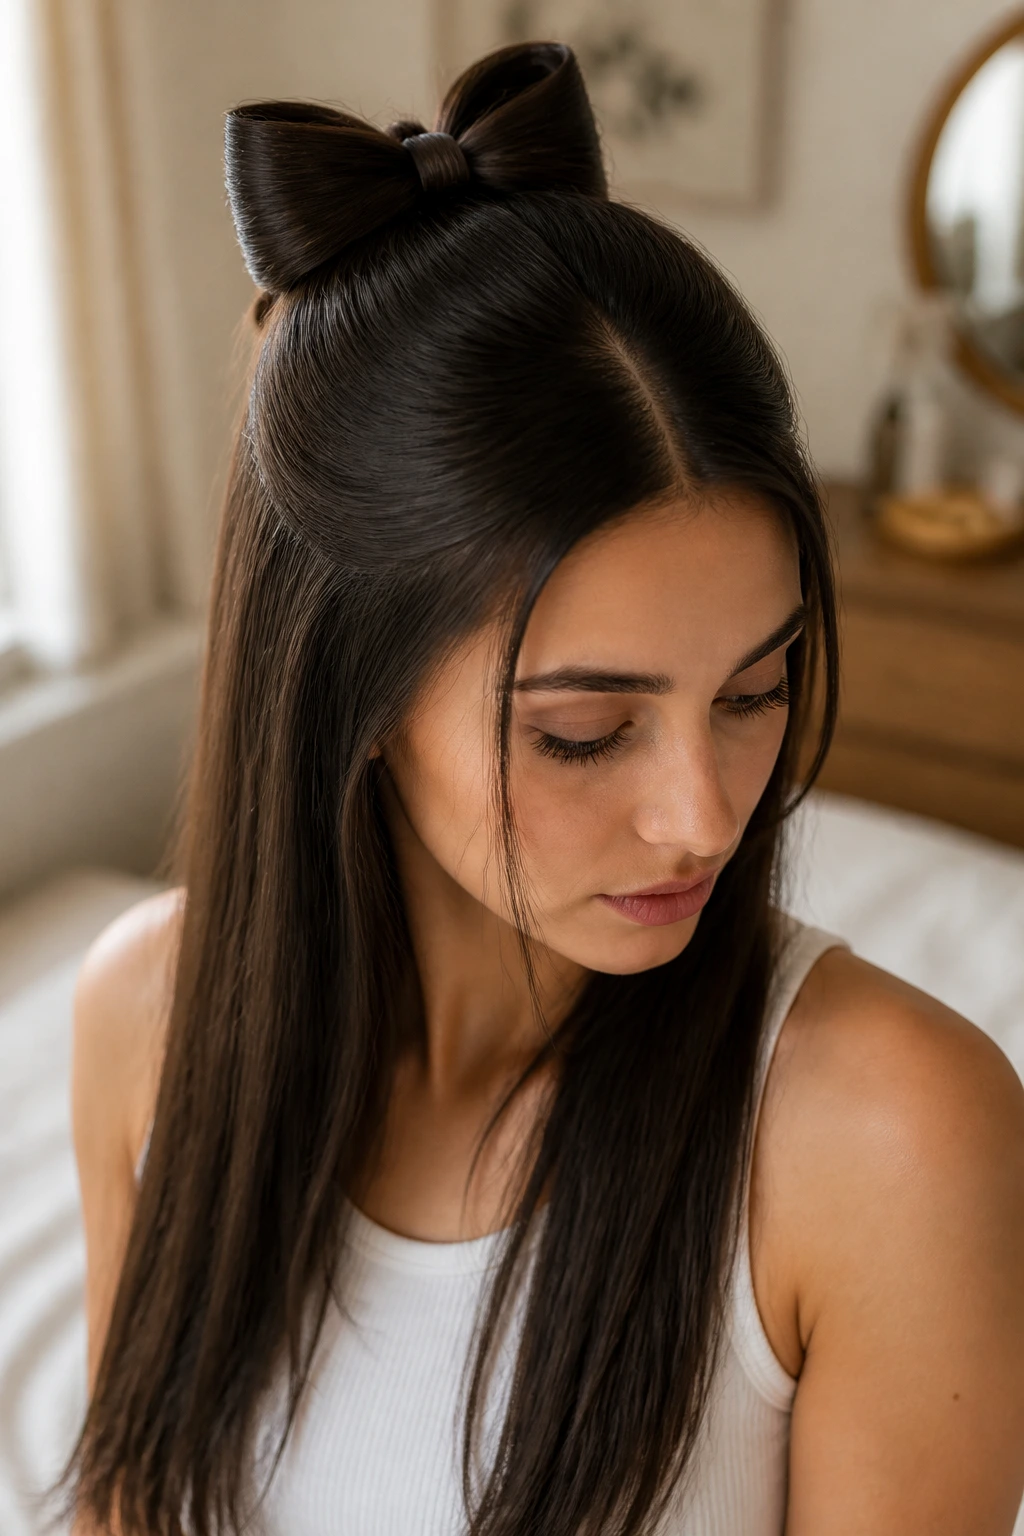
Straight hair is one of the few textures that makes a bow shape look crisp instead of fuzzy. That’s why a half-up bow tie works so well here. The top section stays smooth, the length hangs clean, and the bow becomes the feature.
You can make the bow from your own hair or tie a ribbon around the gathered section and shape it into loops. Either way, keep the half-up section centered at the crown or slightly higher if you want a more lifted silhouette. Leave the rest of the hair straight, or give the ends the faintest inward bend so the bottom doesn’t feel too severe.
This is one of the rare styles that can look playful without losing polish. The straight texture is what keeps it from feeling overworked.
14. Wet-Look Slick Back
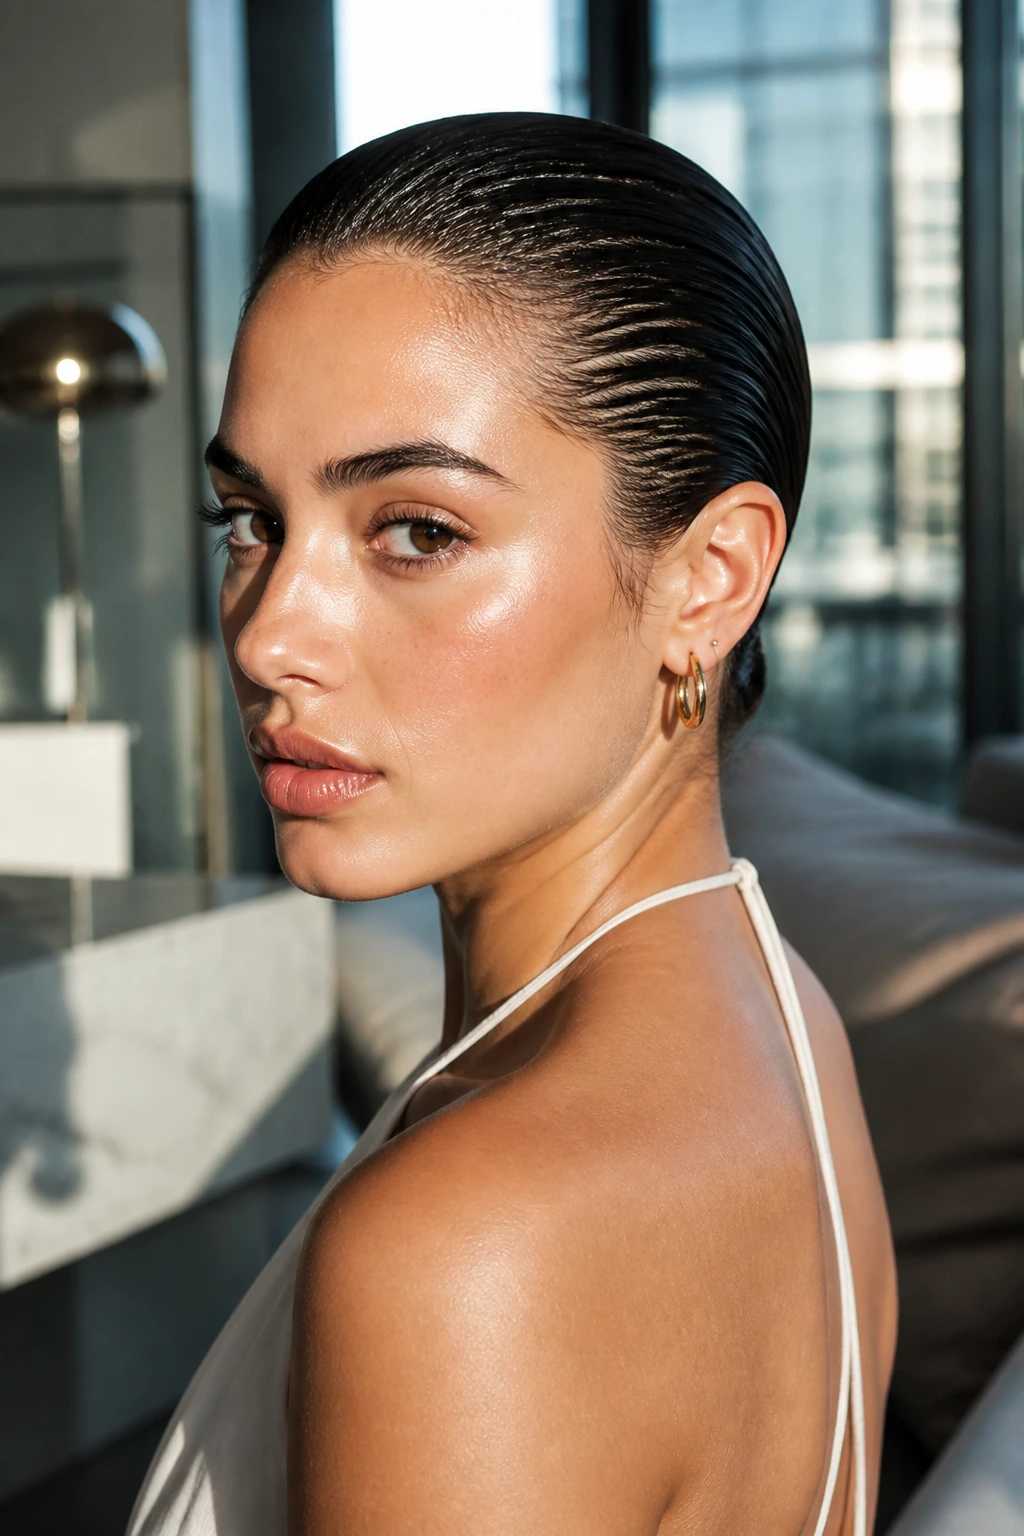
A wet-look slick back is all about commitment. Half measures look greasy. A clear plan looks sharp. On straight hair, the style can be striking because the hair naturally lays flat and close to the head.
Apply gel or a strong styling cream to damp roots and mid-lengths, then comb everything backward in clean lines. Use a fine-tooth comb to smooth the surface and a toothbrush or small edge brush for the hairline if you want the front extra neat. The length can stay loose, or you can tie it into a low ponytail or bun.
The danger here is overload. If you pile on product, the hair can clump and separate at the wrong spots. Use enough to hold the shape, then stop. The shine should look intentional, not like the product is still wet.
15. Braided Crown on Straight Hair
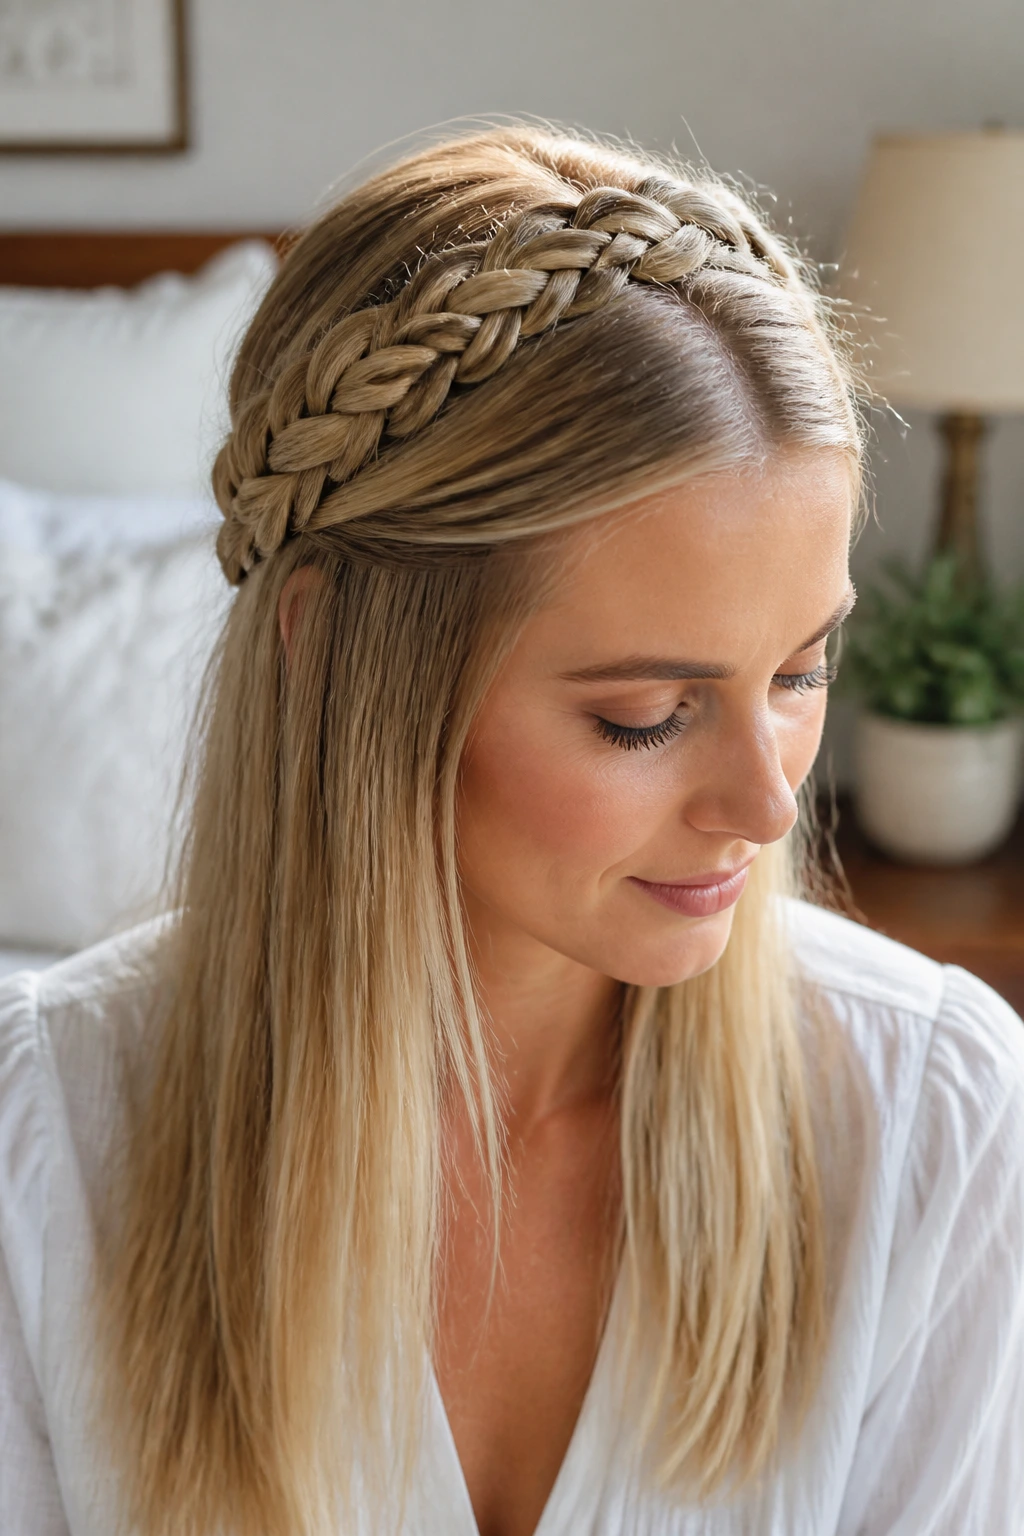
Can straight hair handle a braided crown without sliding apart? Yes, but only if you prep the surface first. The smoothness that makes straight hair glossy is the same thing that makes braids loosen.
How to Keep It Anchored
Start with a touch of texture spray or dry shampoo at the roots and through the first few inches of the length. Part the hair, braid each side into a Dutch braid or rope braid, then wrap the braids across the crown and pin them low and hidden. Small pins, not giant ones, work better because they disappear into the braid.
This style is strongest on second-day hair. Freshly washed hair can be too slippery to stay put, especially near the temples where the head moves a lot. If you need the style to last, set the braids a little tighter than you think, then gently widen them after they’re pinned so they still look soft.
16. Face-Framing Layers with Flipped Ends
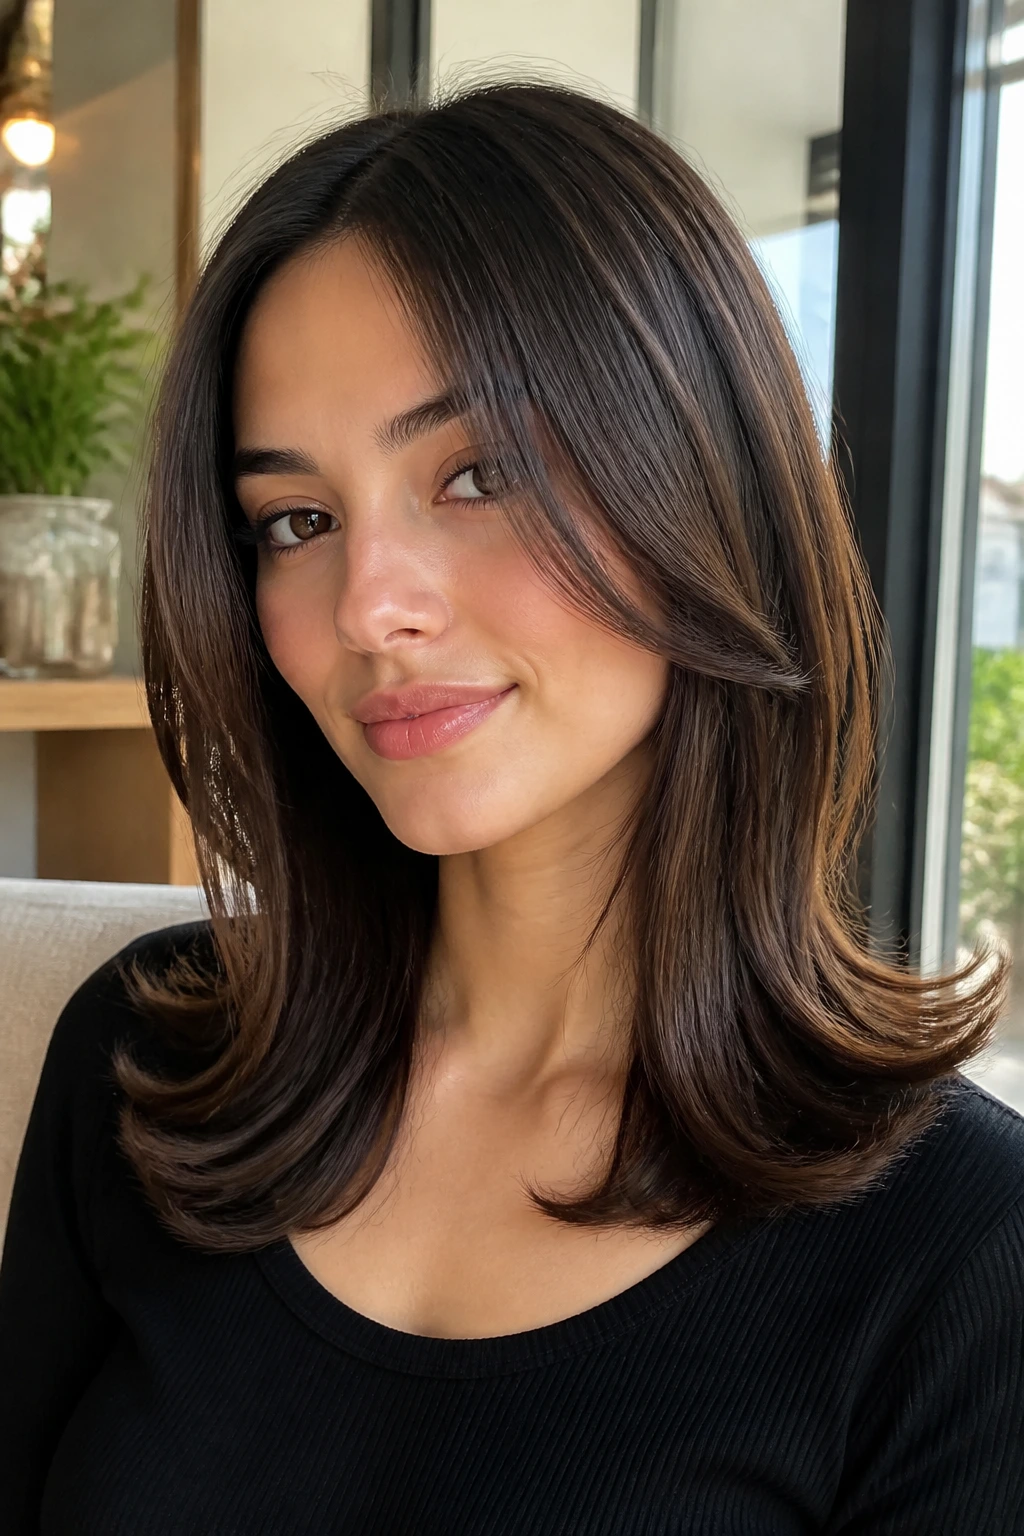
Straight hair with layers can look plain if the ends fall dead-straight all the way down. A soft flip at the ends solves that fast. It gives the haircut a shape that shows up from across the room, not just in the mirror.
Use a flat iron or blowout brush to turn the last 1 to 2 inches of each face-framing layer slightly outward. Not into a curl. Just enough bend to keep the ends from collapsing into the neck or cheek. The flip should look light, almost like the hair changed its mind at the last second.
This style works best when the top stays sleek and the movement happens only at the edges. That contrast keeps the finish clean. It also happens to be one of the easiest ways to make long straight hair feel less heavy without losing length.
17. Half-Up Top Knot
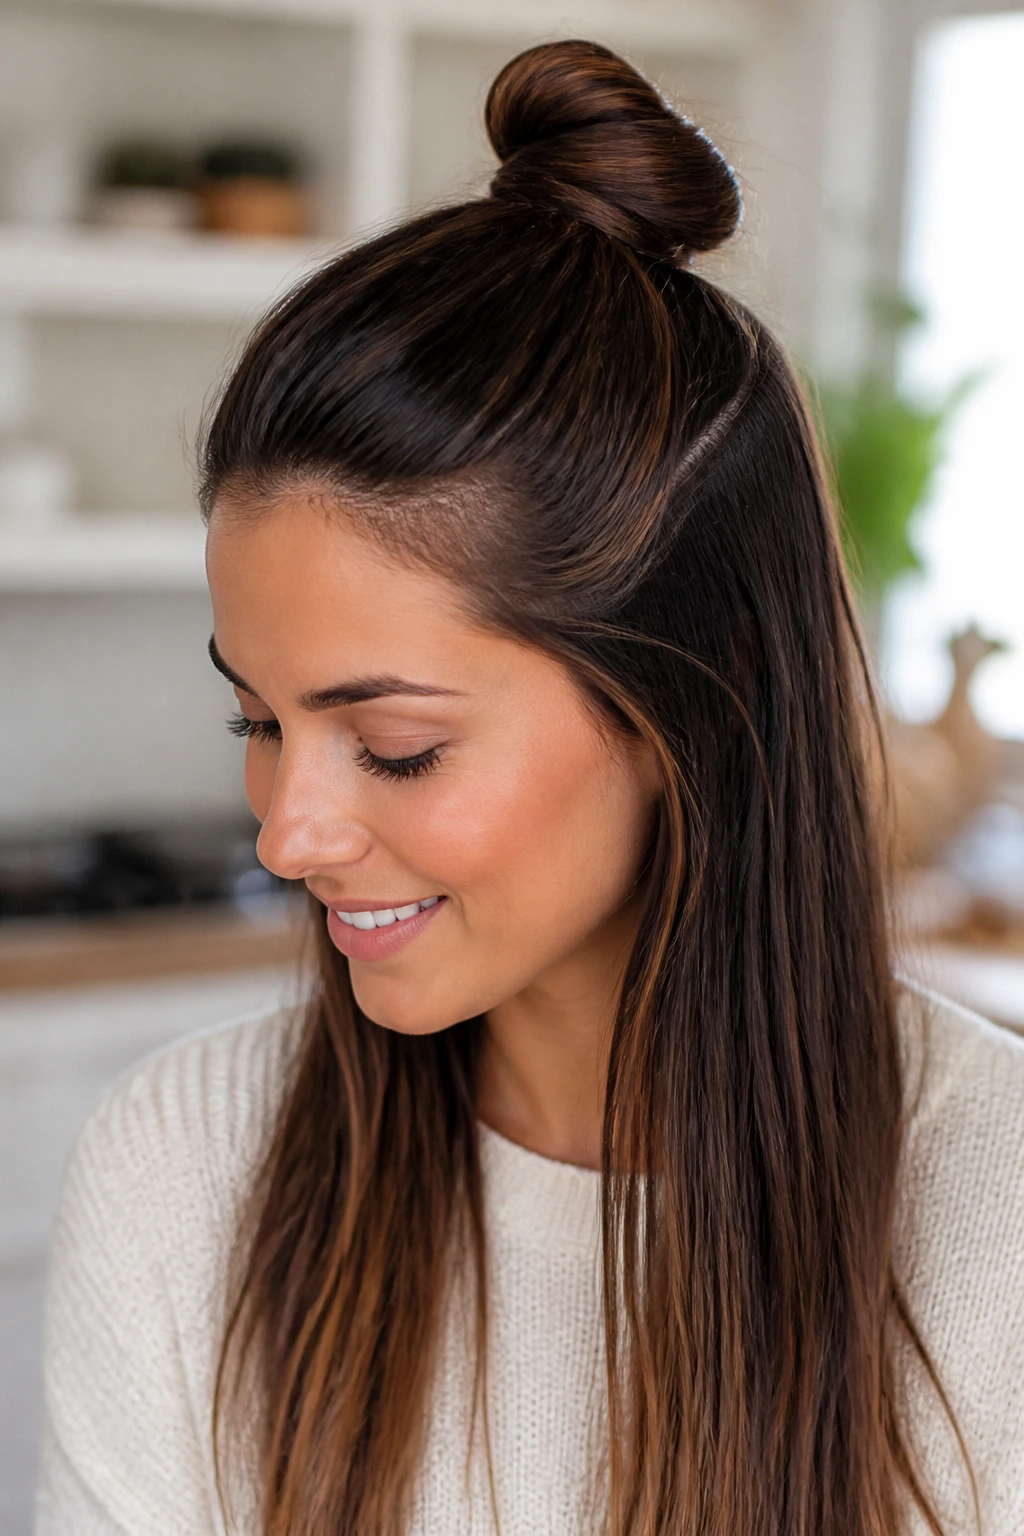
A half-up top knot gives you the usefulness of an updo without taking all the length away. On straight hair, the top knot sits cleanly because the strands don’t puff up and fight the knot as much.
Gather the crown section, twist it into a small knot, and anchor it with a clear elastic and two pins if needed. Leave the rest of the hair down and straight. If the knot feels too small, stretch it slightly at the sides to give it a bit more shape without turning it into a bun that swallows the head.
This is one of my favorite styles for thick straight hair on warm days. It removes enough bulk from the top to feel lighter, but the lengths still give the style movement.
18. Low Twist Pony with a Scarf
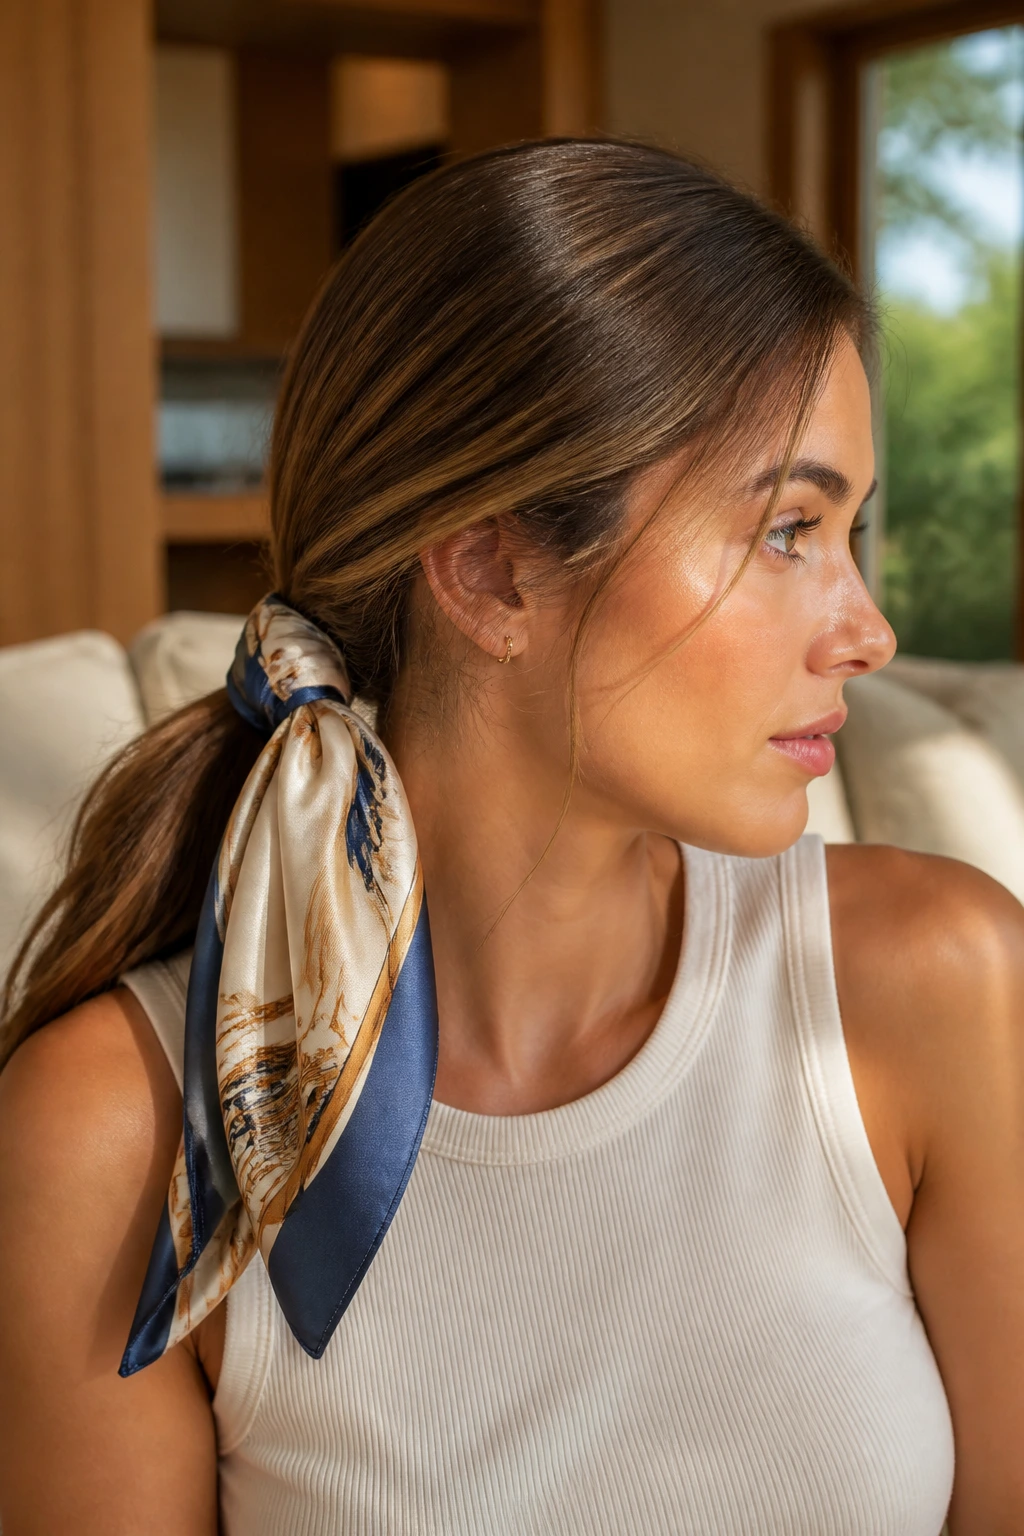
A scarf changes a ponytail fast. It adds color, covers the elastic, and gives a plain low pony a little attitude. Straight hair is a good match because the long, clean line of the tail lets the fabric stand out instead of disappearing into the style.
Tie the hair into a low ponytail or a low twist pony, then knot a silk or cotton scarf around the base. Let the ends hang loose or wrap them once around the elastic for a tidier finish. A scarf with enough width tends to sit better than a skinny strip that keeps twisting on itself.
If your hair is very slippery, secure the pony first with a snag-free elastic and then add the scarf. Don’t rely on the fabric alone to hold the style. That usually ends with the pony drooping by the end of the day.
19. Straight Hair Pigtail Braids
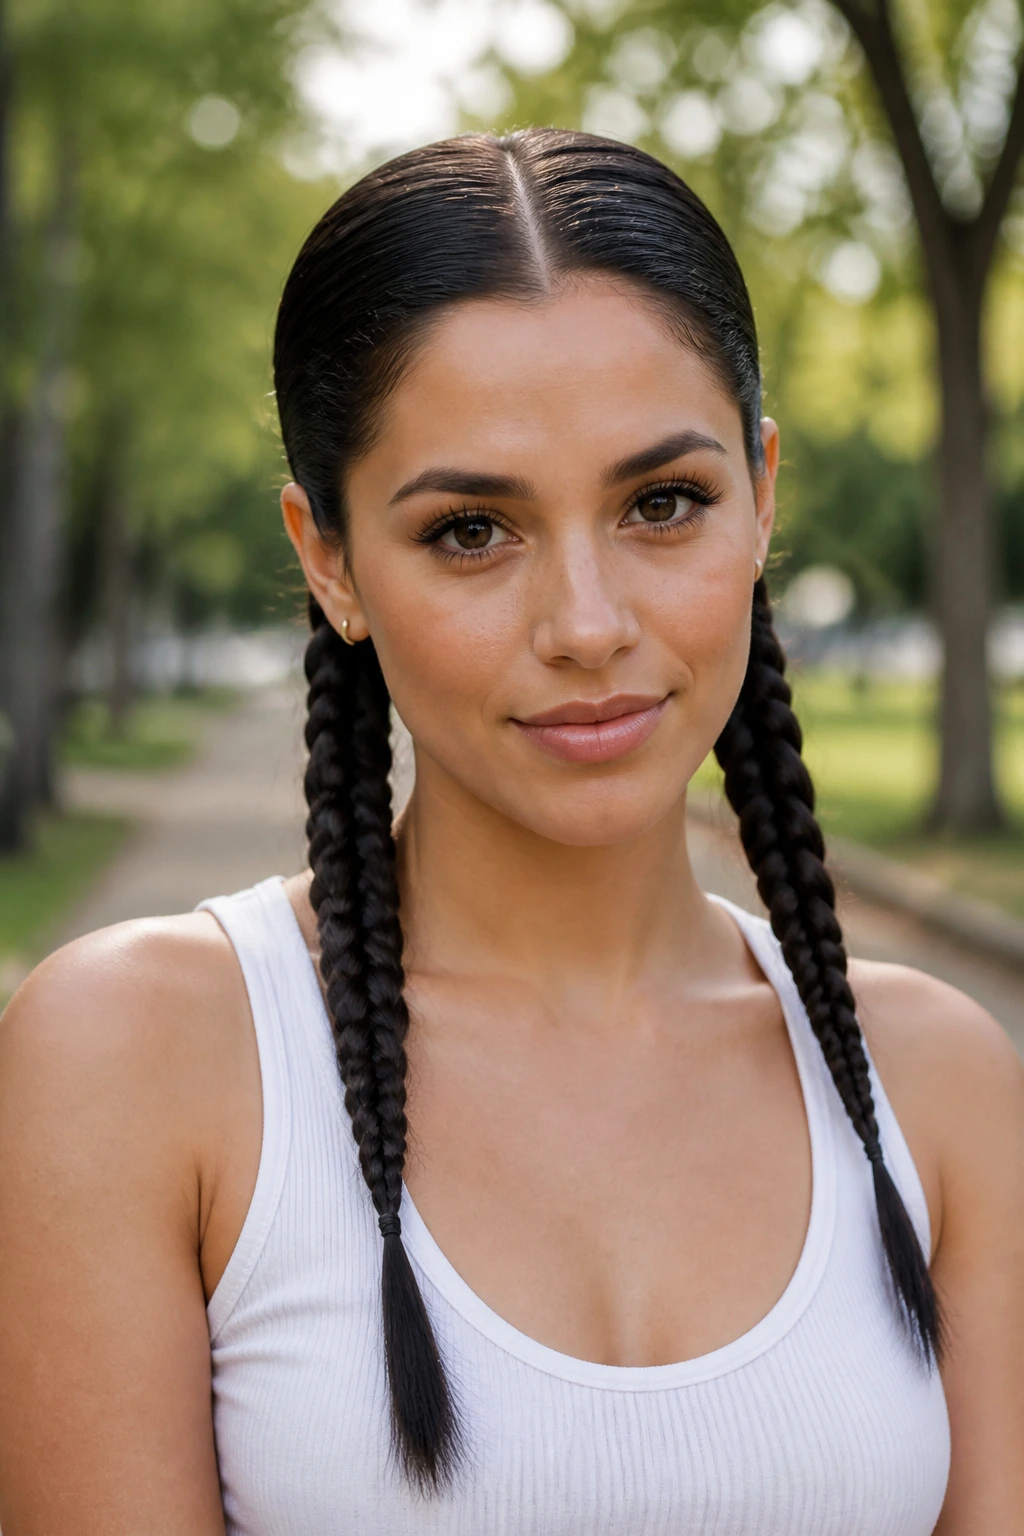
Pigtail braids don’t have to look schoolish. On straight hair, they can feel crisp, athletic, and even a little polished if you keep them sleek and centered.
Part the hair down the middle, then braid each side from just behind the ear or from the crown, depending on how much length you want to show. Tight braids look sharper; looser braids feel softer. If you want the style to read more grown-up, leave the braids low and long rather than puffing them out.
Best Uses
- Days when you want the hair off your face.
- Hair that’s one day past clean and a little more cooperative.
- Situations where you need the style to stay put for hours.
Add a light mist of hairspray over the finished braids if you have lots of flyaways. Straight hair loves to release those tiny top layers.
20. Sleek Straight Bob with an Ear Tuck
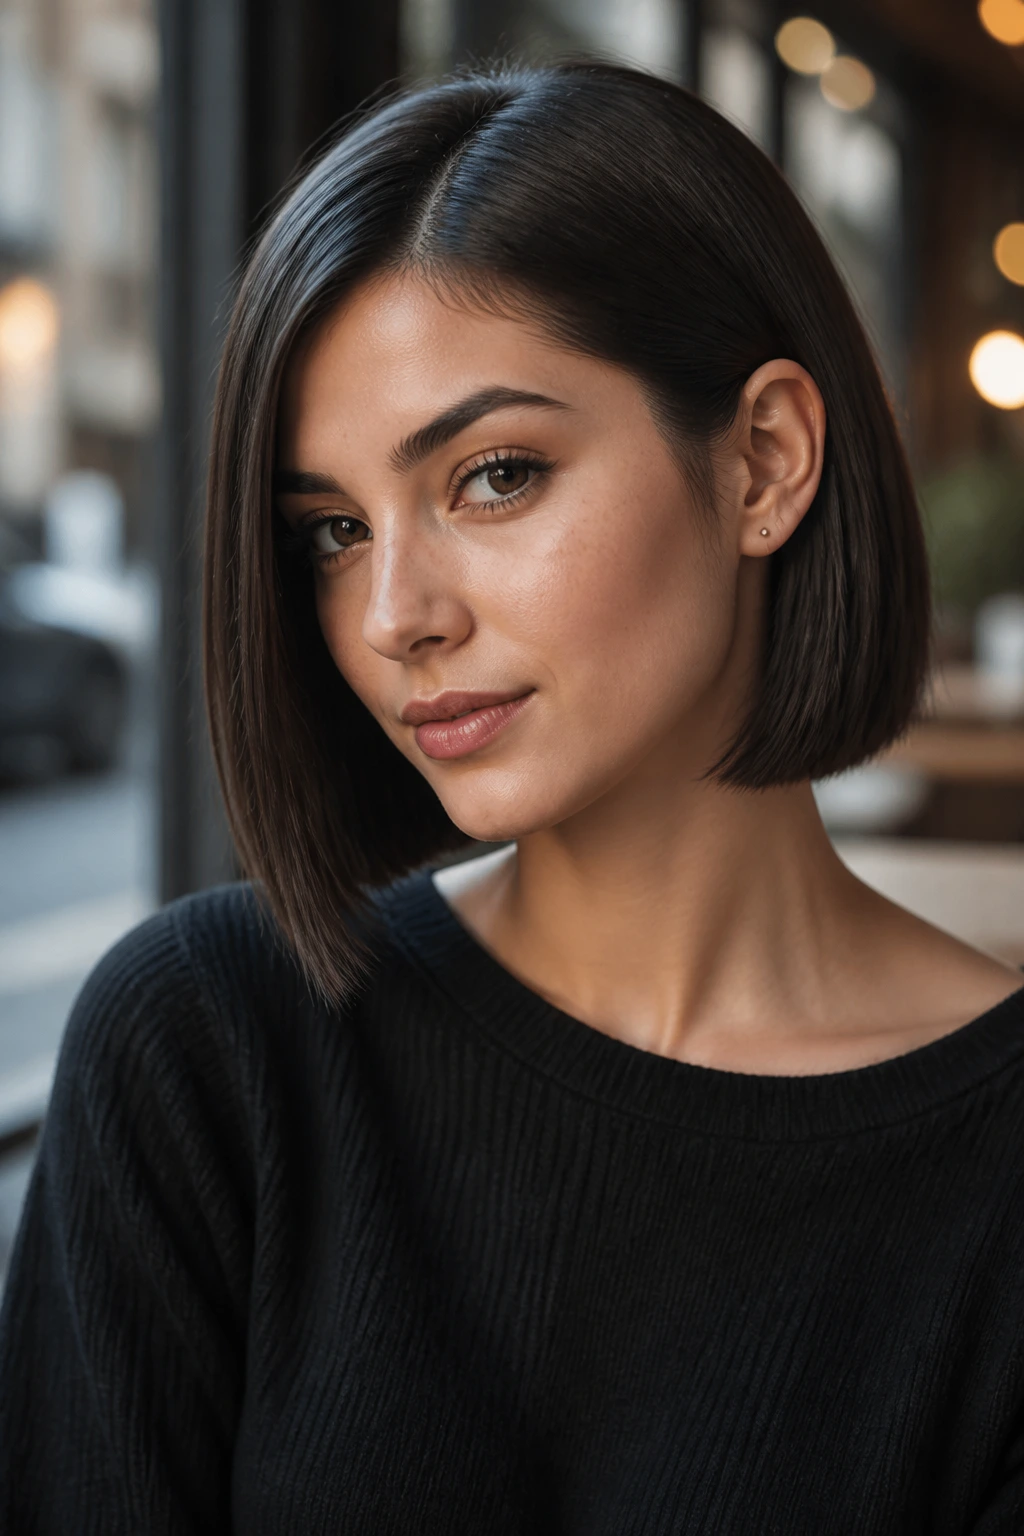
Short straight hair can be unforgiving. It can also be gorgeous when the line is clean. A sleek bob with one ear tucked shows off the jaw and the neck, and the shape looks intentional because there isn’t a lot of extra fluff hiding the cut.
If the bob is chin-length or just below, blow-dry it smooth and use a flat iron only where the ends need help. Tuck one side behind the ear and let the other side hang forward. A small earring or a tiny barrette becomes part of the style, which is half the fun here.
The reason this works so well is simple. Straight bobs already have a natural edge. The tuck gives that edge direction.
21. Rope Braid Ponytail
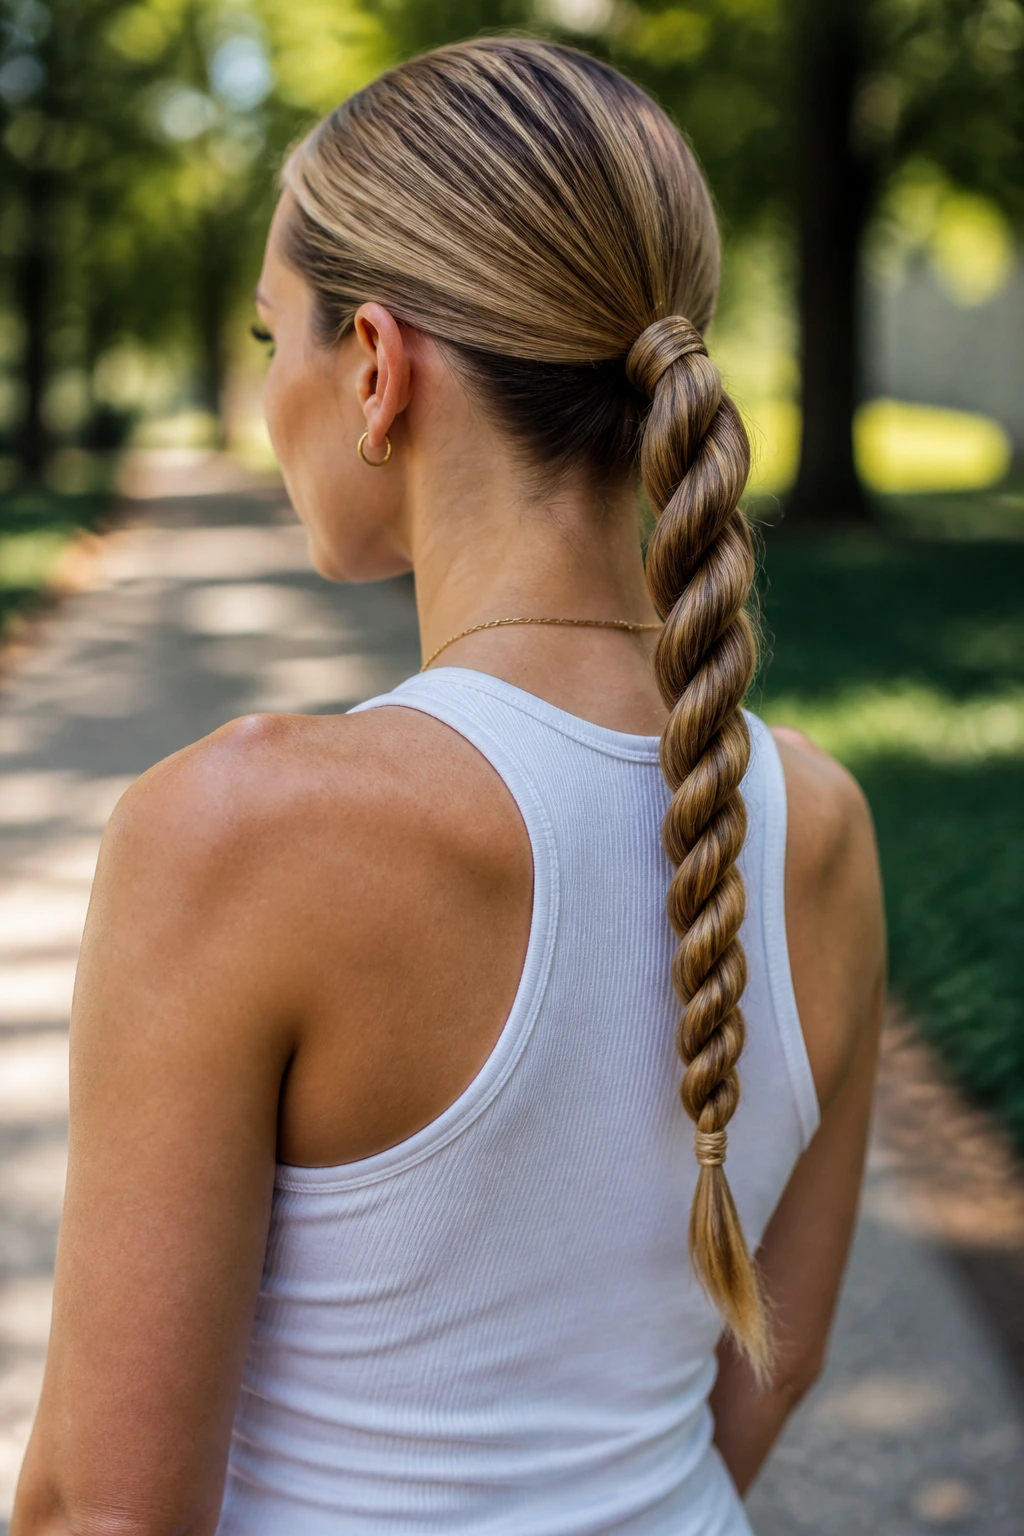
A rope braid ponytail is easier than a three-strand braid and still looks deliberate. On straight hair, it creates a clean spiraled line down the back that holds its shape better than you might expect.
Start with a ponytail, split it into two equal sections, twist both sections in the same direction, then wrap them around each other in the opposite direction. That twist-direction rule matters. Skip it and the braid unwinds. Secure the end with a clear elastic, then tug the braid a little at the outer edges if you want a fuller look.
This is one of the better options for hair that is too slick for a regular braid to stay neat all day. The rope braid has a tighter structure and fewer crossing points to slip apart.
22. Barrette Ladder
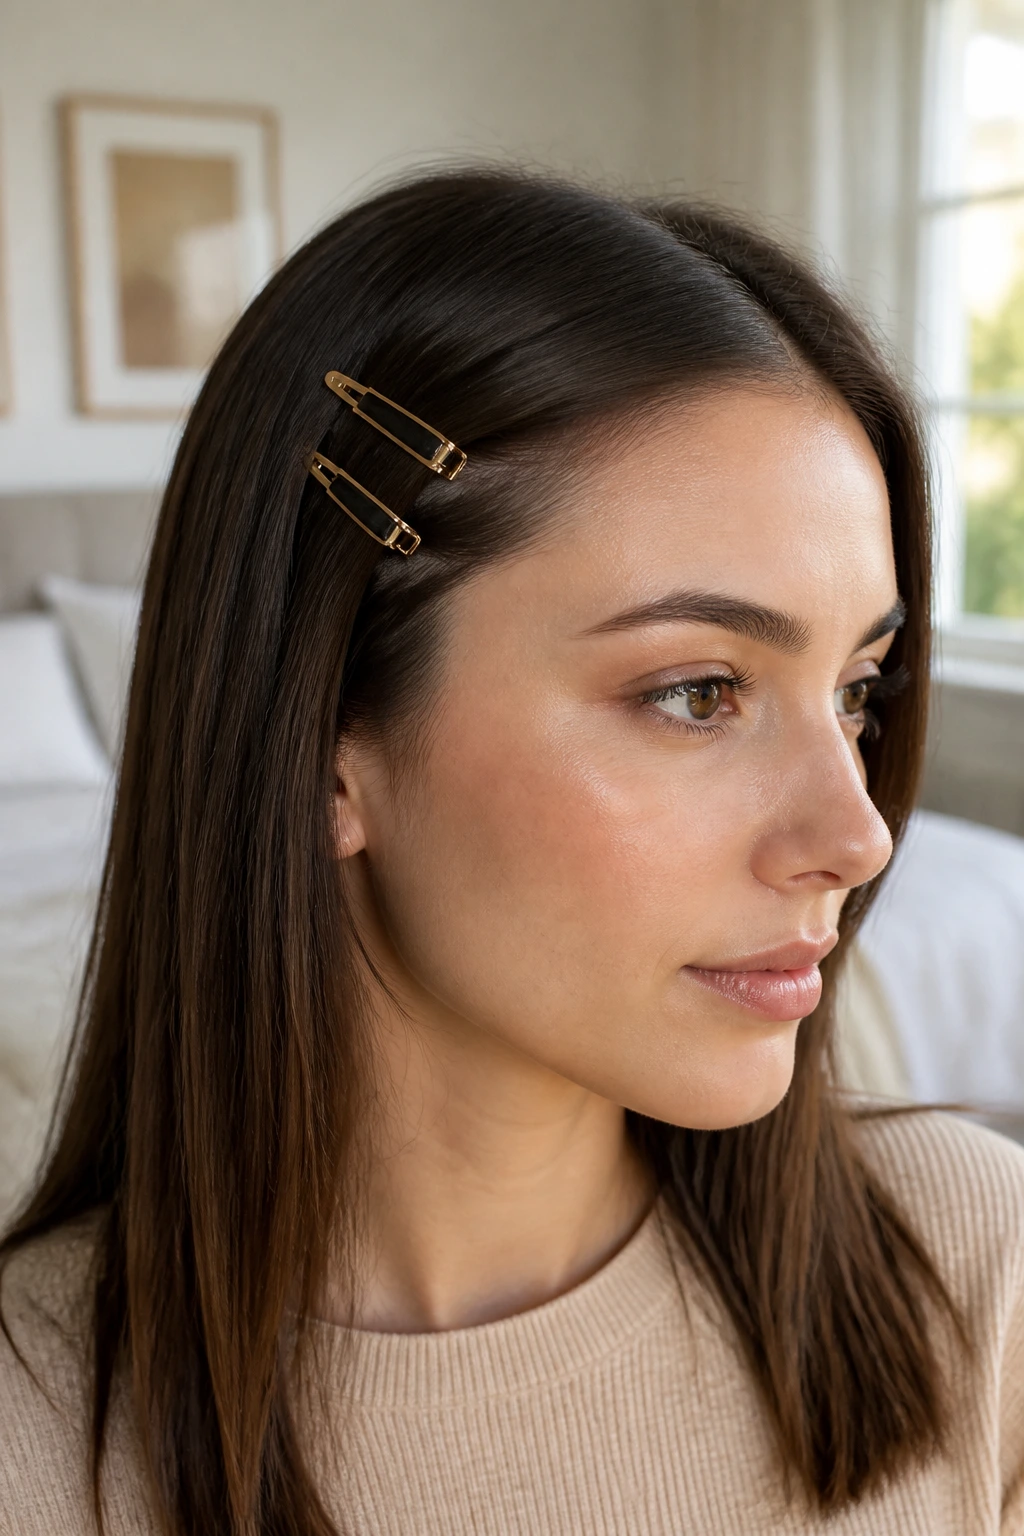
A barrette ladder is a tiny styling move with a big payoff. Instead of using one clip to hold a side section back, stack two or three small barrettes in a row. Straight hair makes the line of clips look clean and readable, not crowded.
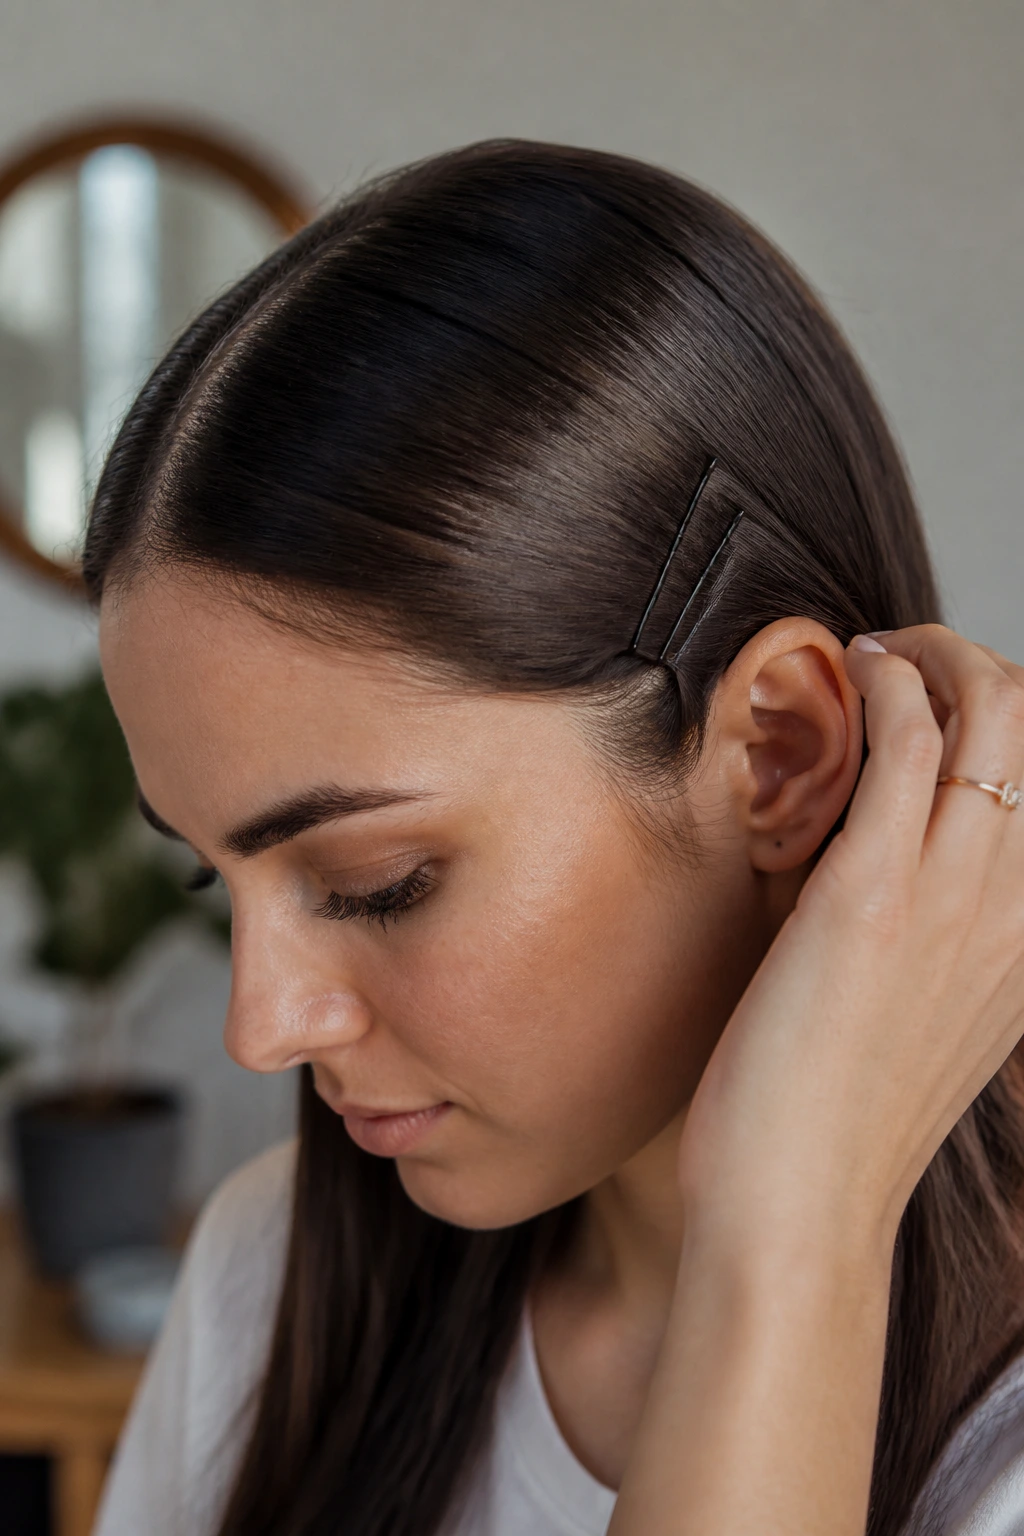
Pull a side section back from the temple, then place the first barrette close to the hairline. Add the second a little lower or slightly behind it. Keep the rest of the hair straight and loose so the clips become the focal point. If the clips keep sliding, crisscross two bobby pins underneath the top layer to give the barrettes something to catch.
This is a good choice when you want to add interest without changing the whole style. And if you’re using colorful clips, the straight lengths act like a plain backdrop.
23. Low Loop Bun
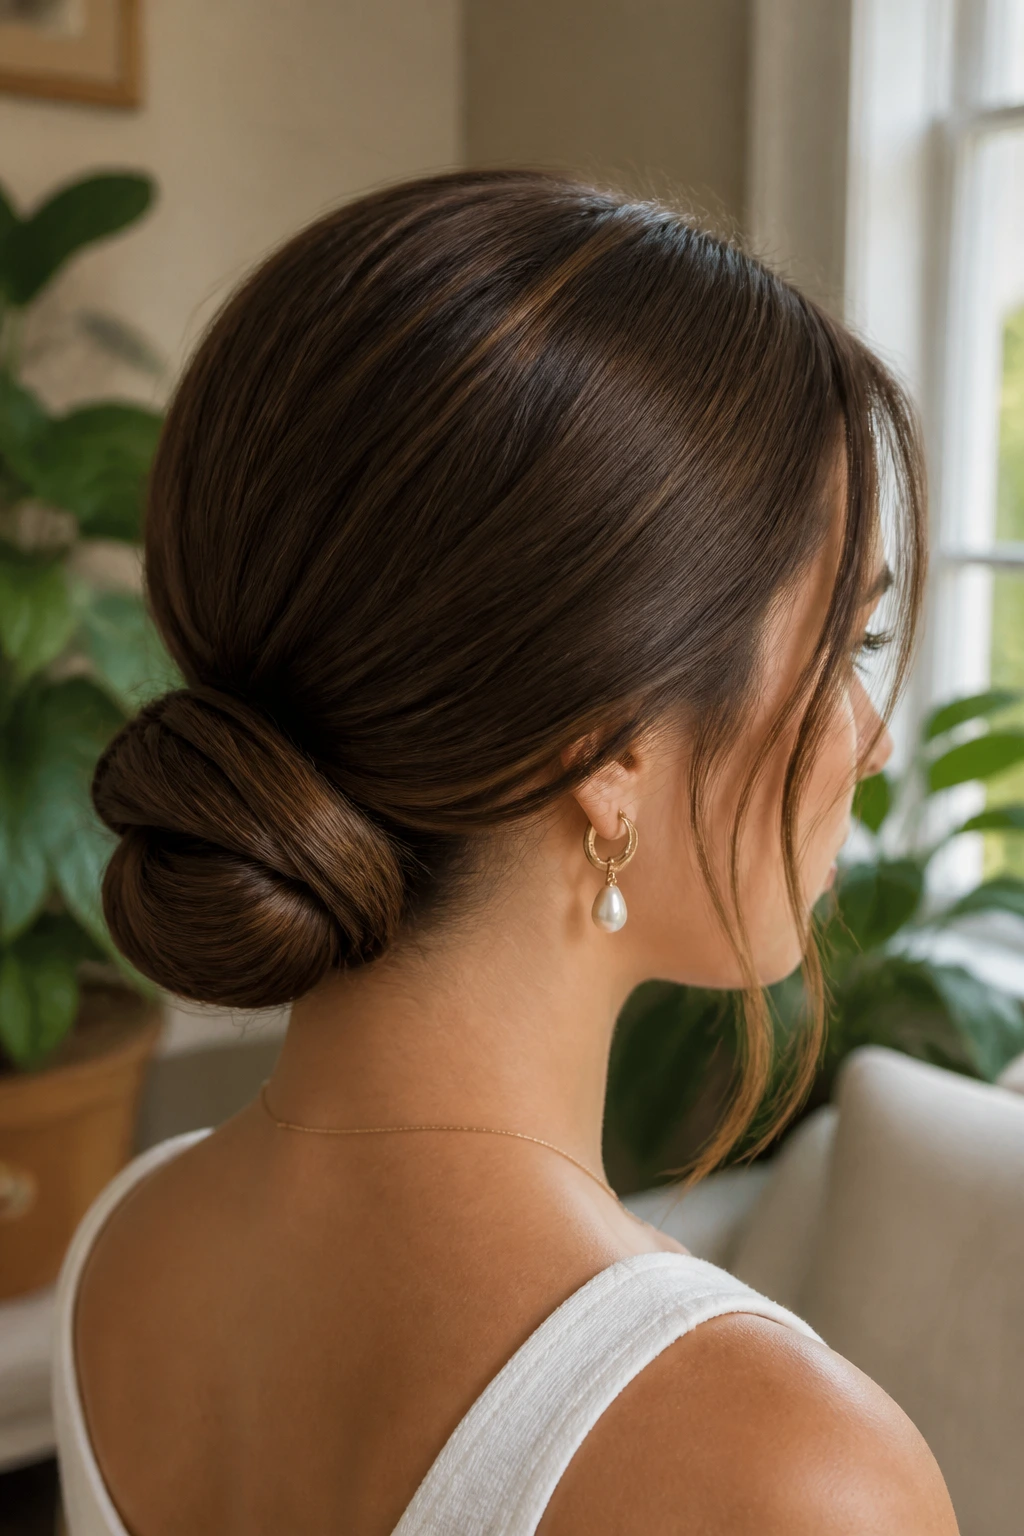
A low loop bun is what happens when you stop pulling the ponytail all the way through the elastic and leave a soft fold instead. Straight hair gives the loop a clean outline, which is why this style can look more refined than a full knot.
Tie the hair into a low ponytail, then on the final loop through the elastic, stop halfway so the ends are still tucked at the base. Spread the loop slightly, then pin the loose ends under the bun so they disappear. The shape should sit low and smooth, right above the nape.
This style is useful when you want the back of the hair controlled but not tight. It also works well on medium-length straight hair that doesn’t always have enough length for a full bun but still needs to look finished.
The Prep That Keeps Sleek Styles from Slipping
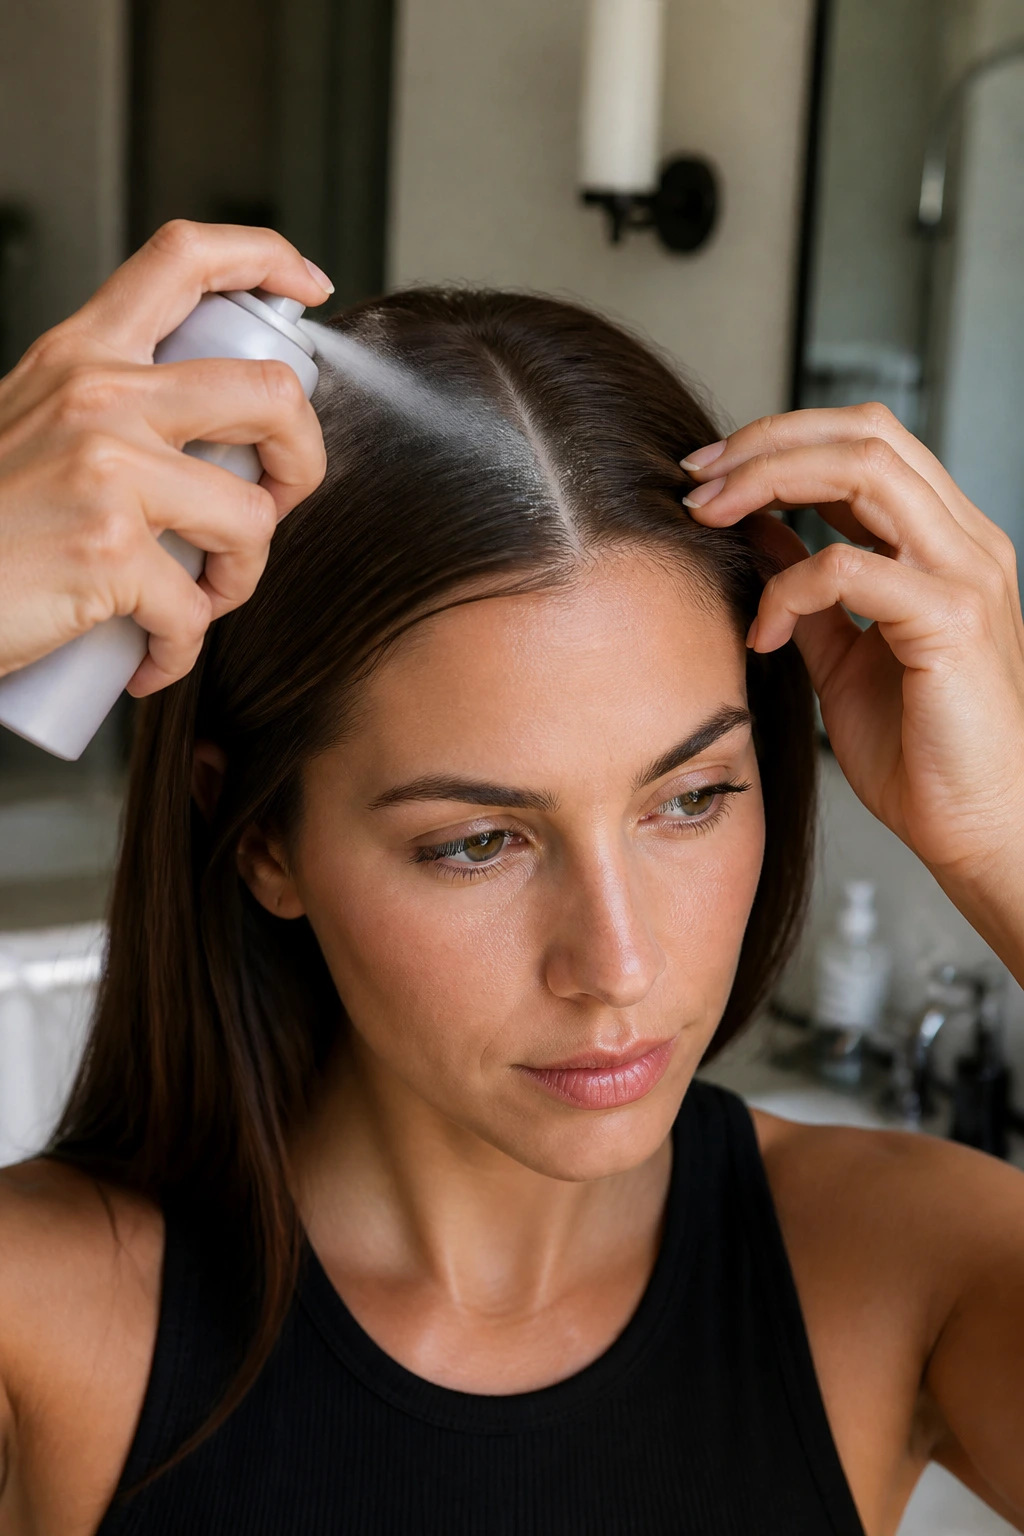
Straight hair needs a little prep before it gets styled, and the prep is usually smaller than people think. That’s the part everyone gets wrong. They assume more product means more hold, then wonder why the roots look greasy and the ends feel heavy by noon.
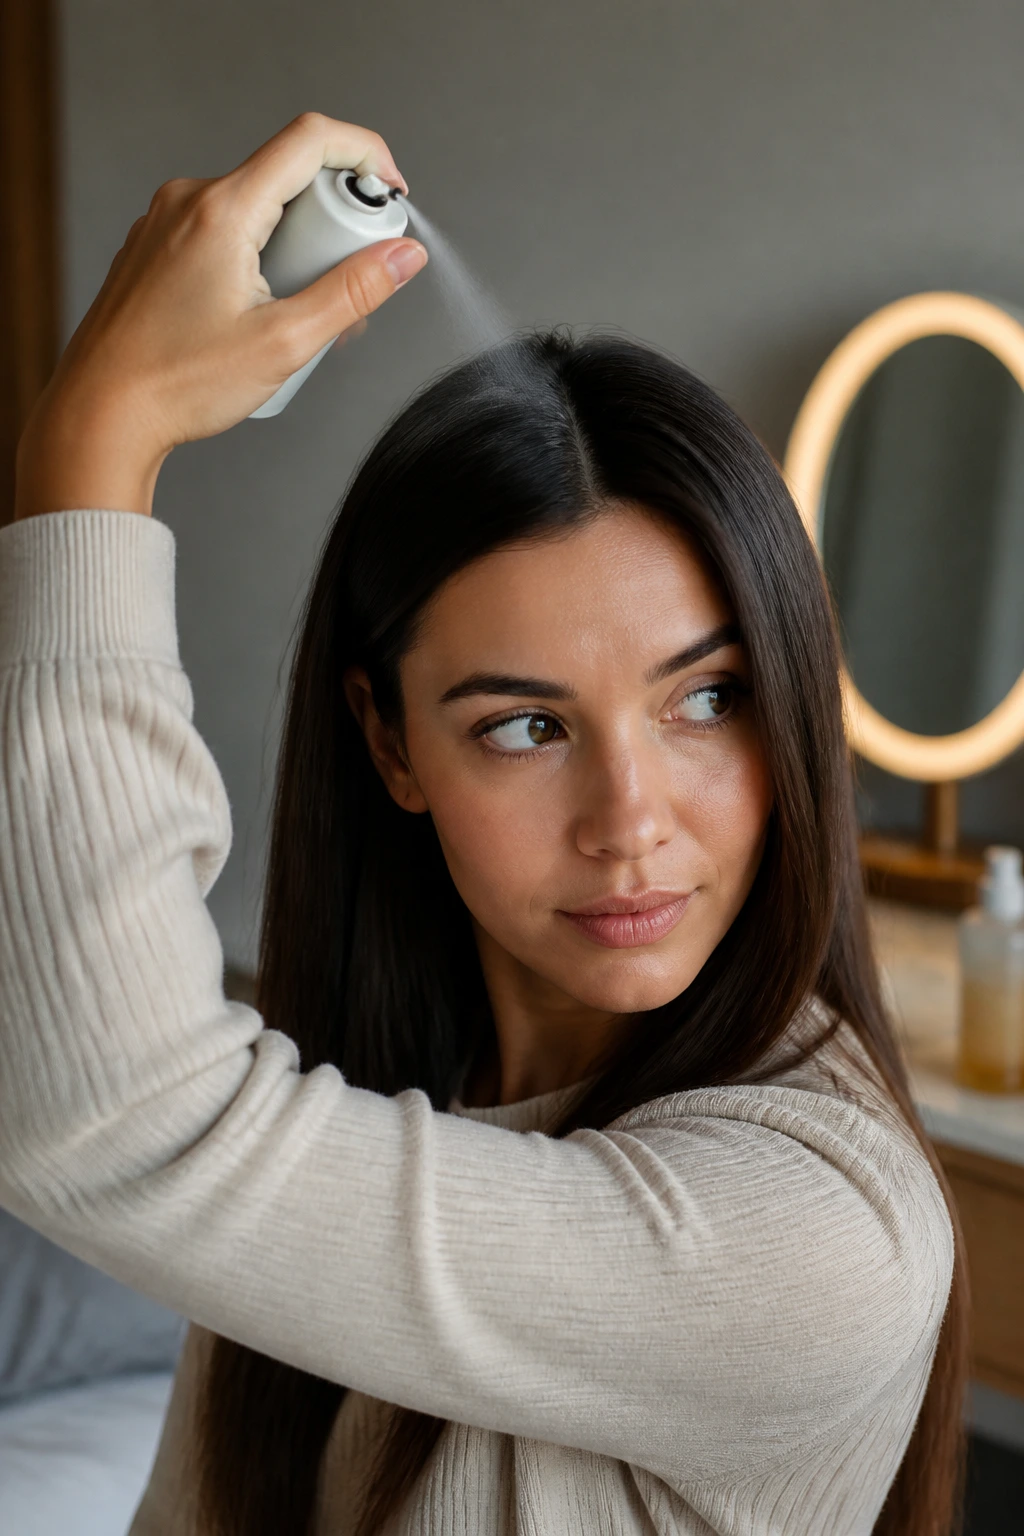
The better move is to create grip where the hair slides the most. A light mist of dry shampoo or texture spray at the roots gives pins and elastics something to catch. If the style depends on a braid or twist, a tiny bit of roughness near the scalp helps a lot. You do not need to turn the whole head matte. You just need the first inch or two to behave.
Freshly washed hair can be too slippery for some of these looks, especially braids, wrapped ponytails, and French pin updos. If the hair feels glassy clean, work a little mousse or styling cream into damp roots, then blow-dry with your head upside down or with a nozzle for control. The result should feel soft, not crunchy. That’s the balance.
Heat helps, but only when you use it with a plan. A flat iron at 300–350°F is enough for most straight hair to flatten frizz and sharpen the outline. Repeated passes do not make the style better. They just make the ends look tired. One slow pass, maybe two on the stubborn pieces, is usually enough.
Essential Equipment for These Looks
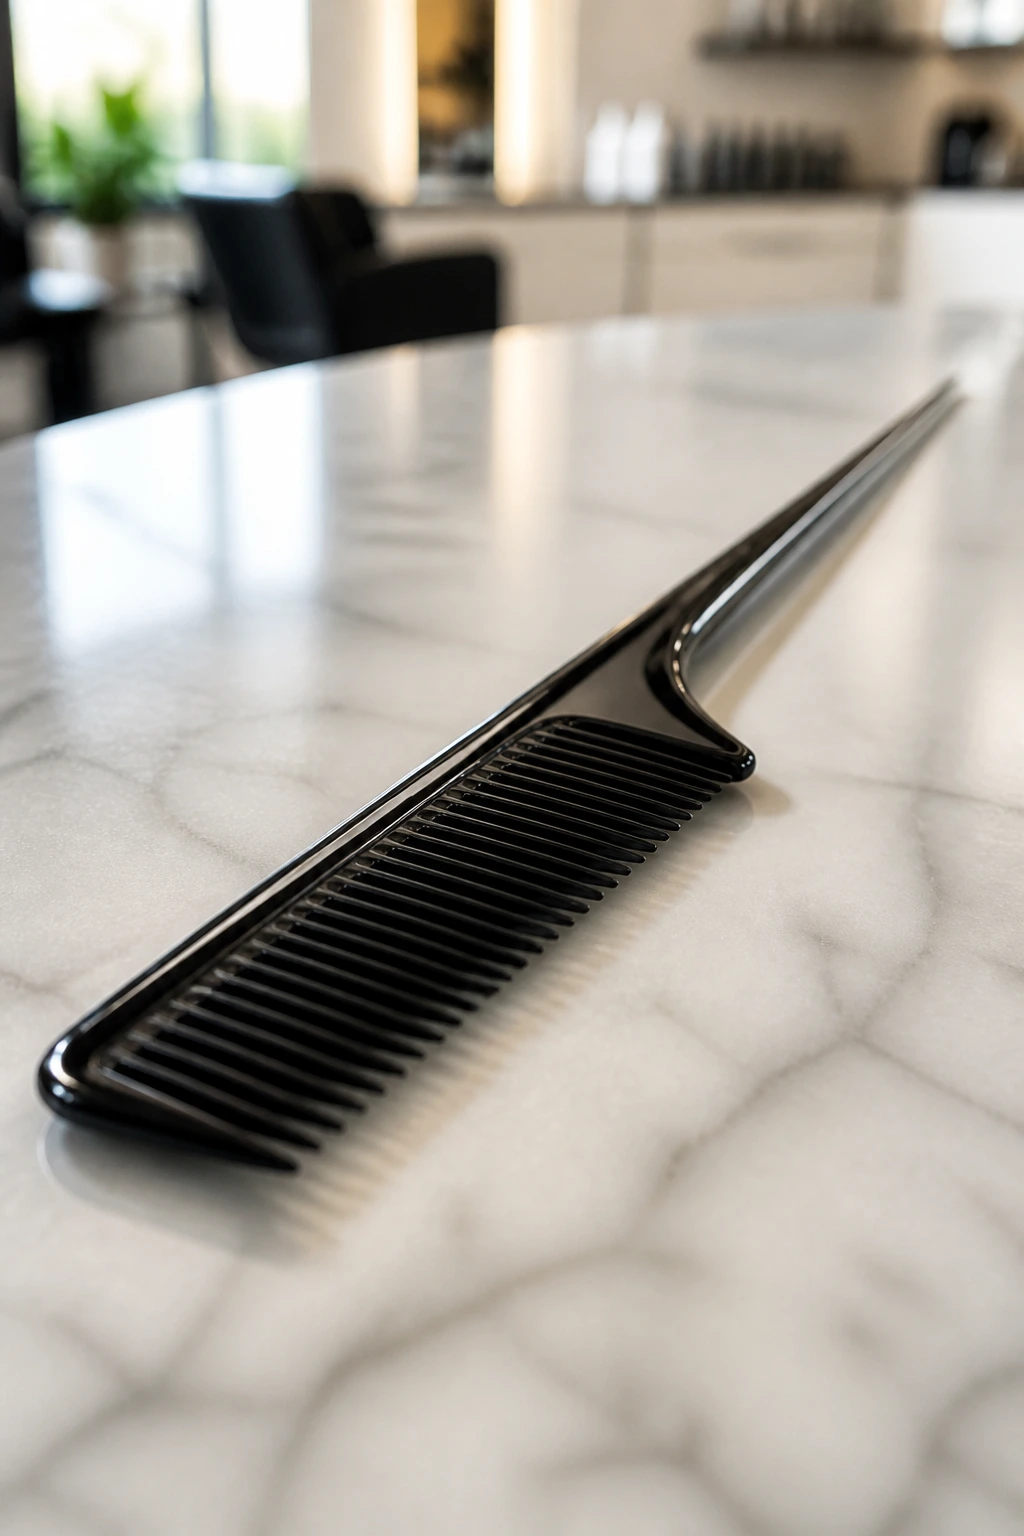
- Tail comb: Best for clean parts, neat sections, and small face-framing pieces that need to look intentional.
- Boar bristle brush or smoothing brush: Helps polish ponytails, buns, and slicked-back styles without leaving hard brush marks.
- Fine-tooth comb: Useful for wet-look styles and for tucking hair close to the head.
- 1-inch flat iron: Good for straightening bends at the ends, flipping layers, and smoothing stubborn pieces.
- Blow dryer with a nozzle attachment: Keeps the cuticle smoother when you want a sleek finish instead of volume.
- Heat protectant spray: Worth using any time you touch the hair with a hot tool.
- Clear elastics and snag-free ties: Better for ponytails and braids because they disappear and don’t shred the hair.
- Bobby pins in two shades: Match one pack to blondes or brunettes; hidden pins are half the battle.
- French pin or U-pins: Great for chignons and loop buns where you want a cleaner hold than a claw clip gives.
- Claw clip: Choose one sized to your hair density; too small and it slips, too large and it feels floppy.
- Texture spray or dry shampoo: Gives fine, slippery hair enough bite to hold a style.
- Smoothing serum or lightweight cream: Best for ends, not roots.
- Hair ribbon or scarf: Useful when you want a ponytail or braid to read as finished rather than purely practical.
Smart Product Shopping for Straight Hair
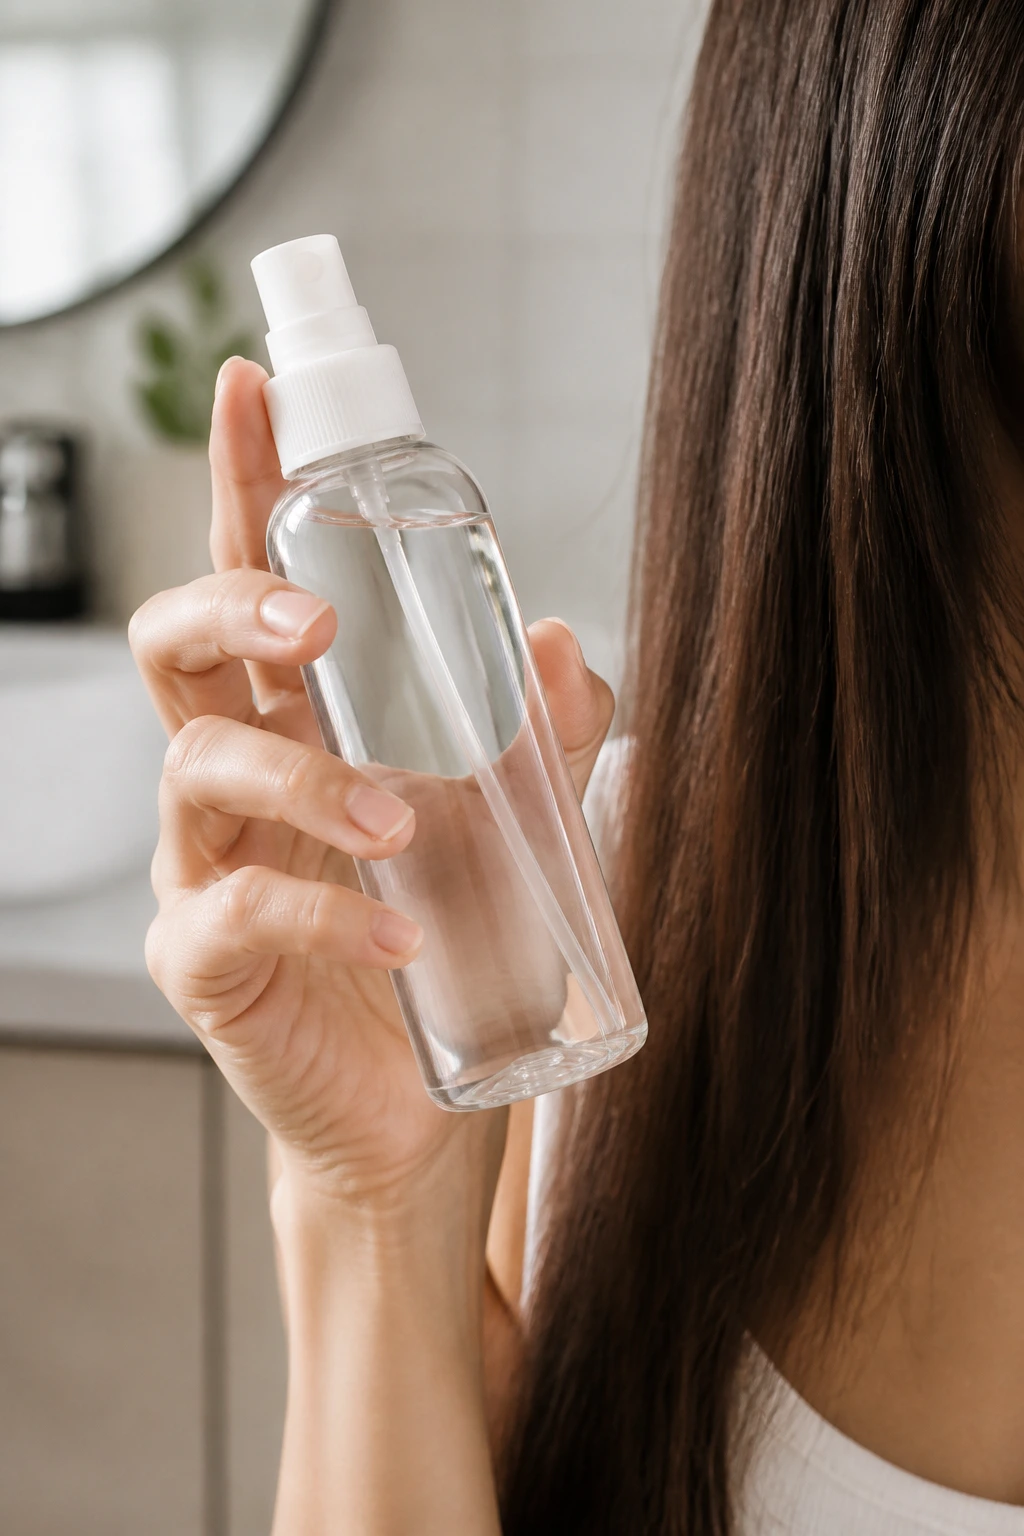
The right products for straight hair usually fall into one of two buckets: grip or gloss. You need both, but you rarely need both at the same spot on the head. Roots usually want grip. Mid-lengths and ends usually want gloss.
If the hair is fine and silky, buy a lightweight texture spray and a flexible hairspray. Heavy creams can collapse the style before you finish pinning it. Fine straight hair often does better with products that feel almost dry to the touch once they settle. If the hair is thick or coarse, a little more cream through the lengths can help keep the finish smooth.
When it comes to elastics, skip the bargain bands that snap after one use. They shred straight strands and leave that weird half-bent ridge in the hair. Clear elastics are useful for braids and bubble ponytails; snag-free covered ties are better for low buns and smooth ponytails. If you use bobby pins, buy ones with decent tension. Cheap pins lose their grip fast and slide right out of polished hair.
Finishers matter too. A shine spray can be nice, but a mist is enough. If the bottle coughs out a wet stripe, it’s too much. Look for a fine spray that lands like a veil, not a splash. Same thing with dry shampoo: powdery is fine; chalky and white is not unless you’re working on very light blond hair.
How to Wear These Styles Without Overthinking the Rest
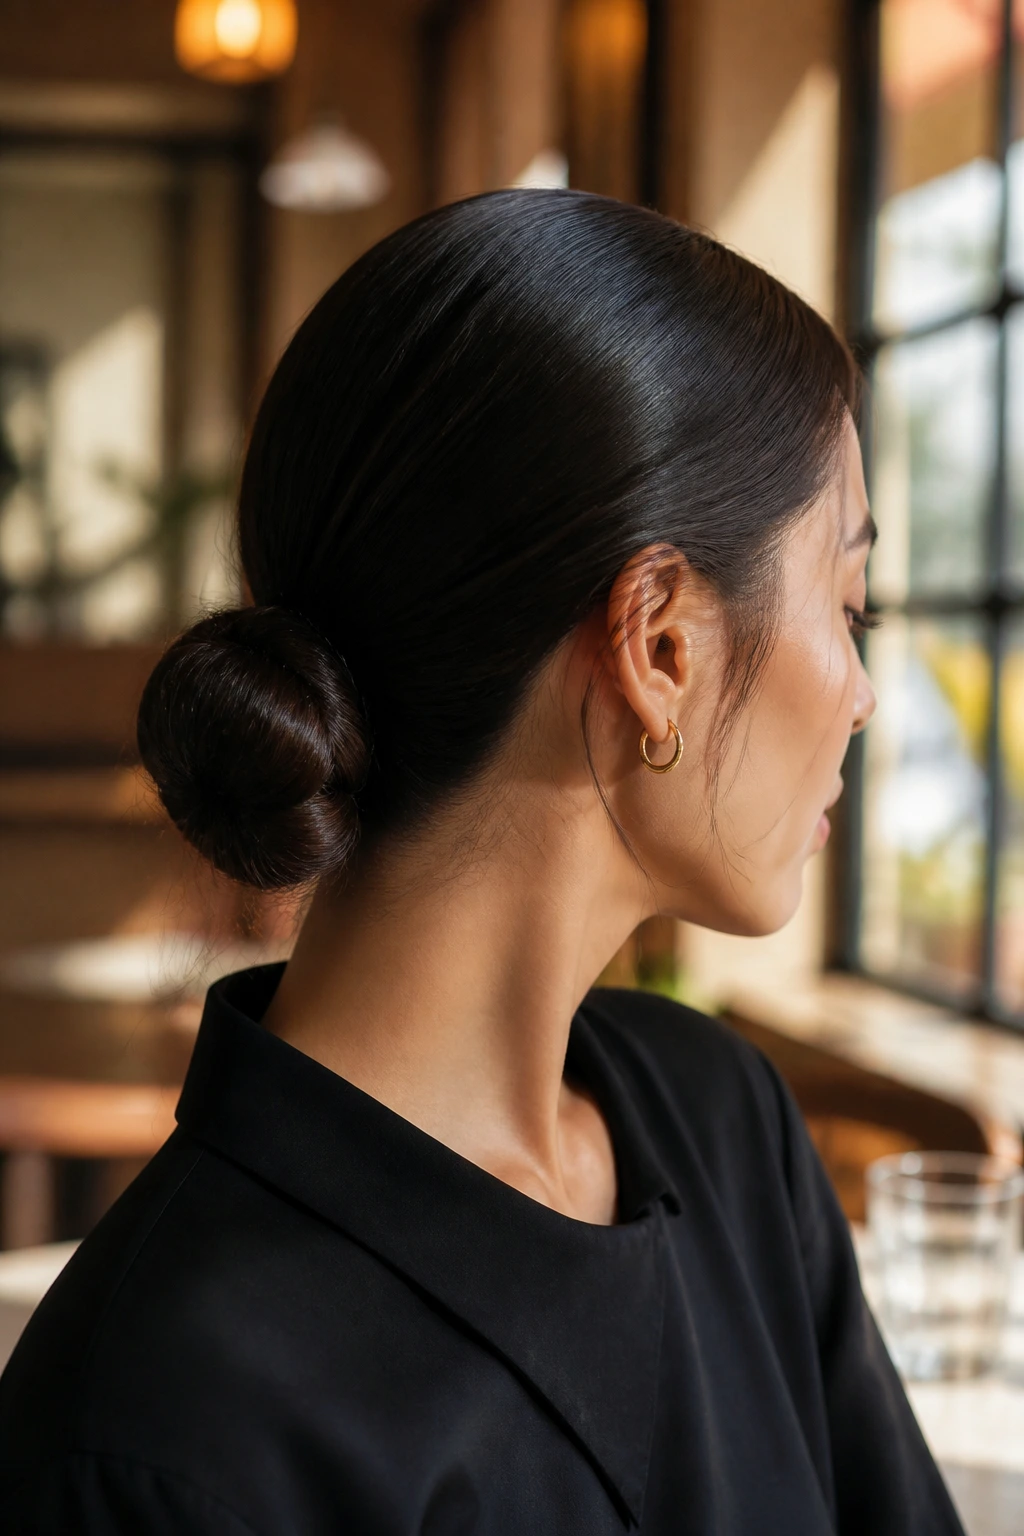
Workdays: The low sleek bun, French pin chignon, tucked bob, and side-part ear tuck have the cleanest lines for a shirt collar, blazer, or anything with a neckline that would clash with a lot of bulk. They keep the hair from stealing focus.
Dressier moments: Glass-hair center parts, ribbon-tied ponies, and half-up bow ties give straight hair enough polish to sit next to earrings or a strong lip without feeling overdone. They look especially good when the rest of the outfit is simple.
Off-duty days: Bubble ponytails, claw-clip rolls, mini braids, and barrette ladders make sense when you want something that feels easy but still styled. They work with denim, knits, and T-shirts because they don’t ask for perfection.
Wear time: If you need a style to survive from morning through late afternoon, choose something that anchors at the nape or uses multiple points of hold. One loose clip on slippery hair is asking for trouble.
Additional Tips and Finishers
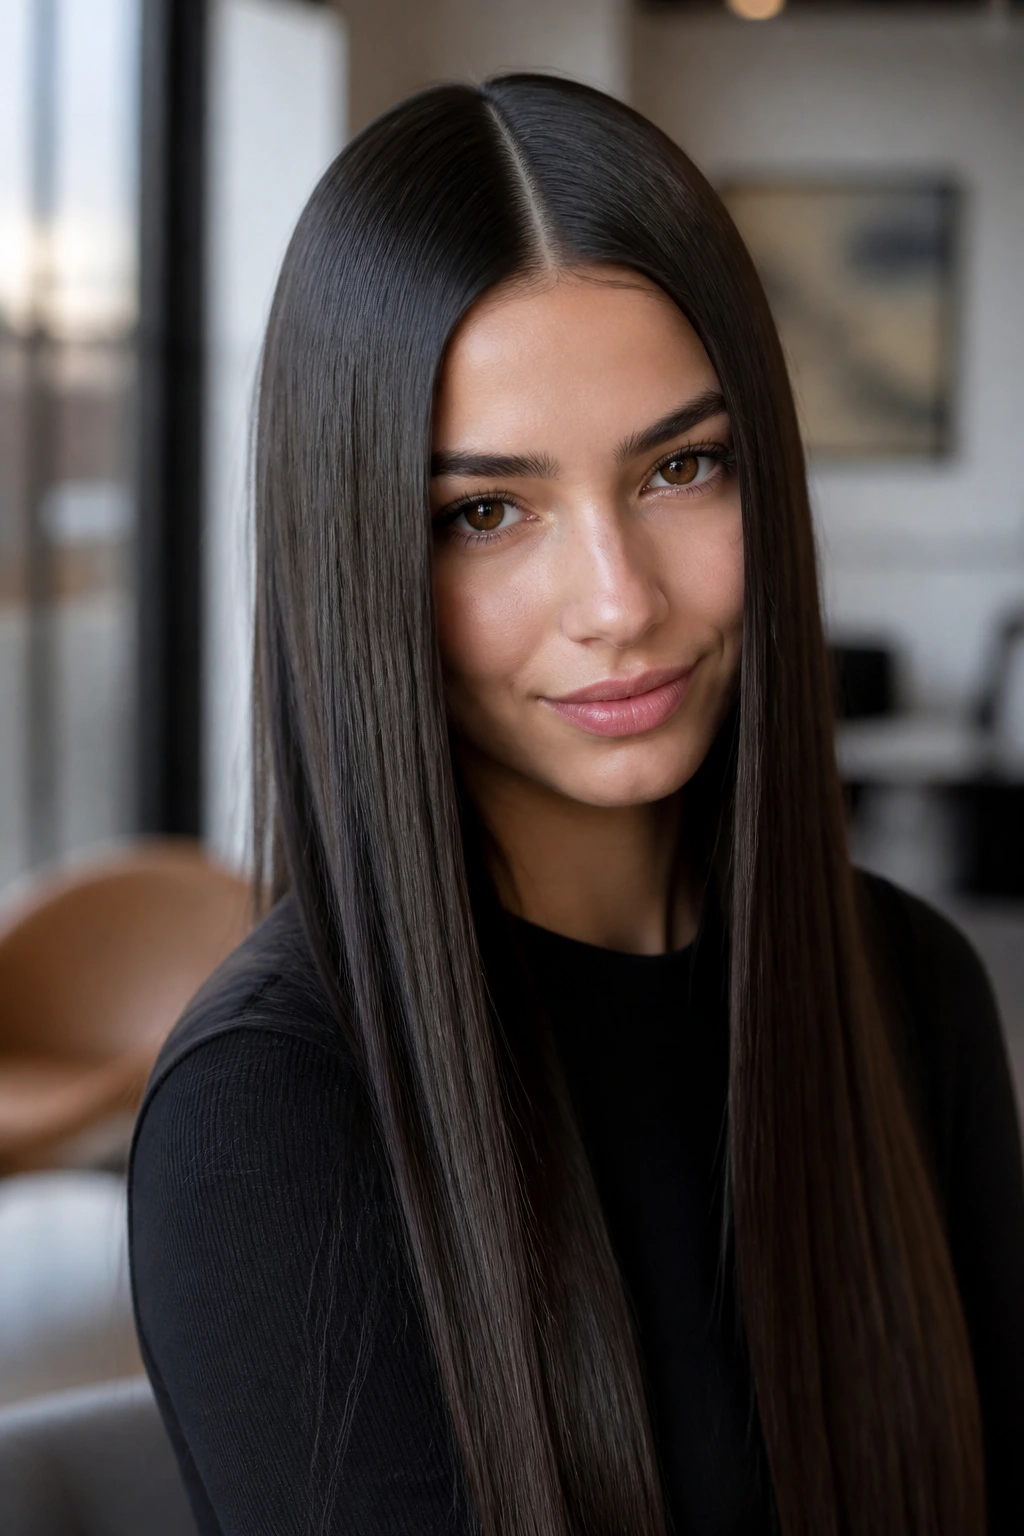
Texture First: If your hair is too smooth, spray texture product at the roots and the first few inches of length, then wait 20 to 30 seconds before styling. That tiny pause matters. Wet product slides; dry product grips.
Place the Weight Low: Straight hair often looks more stable when the strongest part of the style sits at the nape or just below the ears. High styles can work, but they need firmer anchoring.
Keep the Ends Clean: Nothing ruins a sleek pony or bun faster than frayed ends sticking out in every direction. A drop of serum rubbed between the palms and pressed lightly over the last inch of hair usually fixes that.
Use Accessories with Purpose: One ribbon, one barrette, one clip. You do not need all three. Straight hair already gives you a clean canvas; too many extras can make the style feel busy.
For Heat-Free Styling: Braid damp hair, let it dry, then undo the braid for a soft bend. It’s not a replacement for a flat iron if you want pin-straight lengths, but it saves time on days when a little movement is enough.
Common Mistakes to Avoid
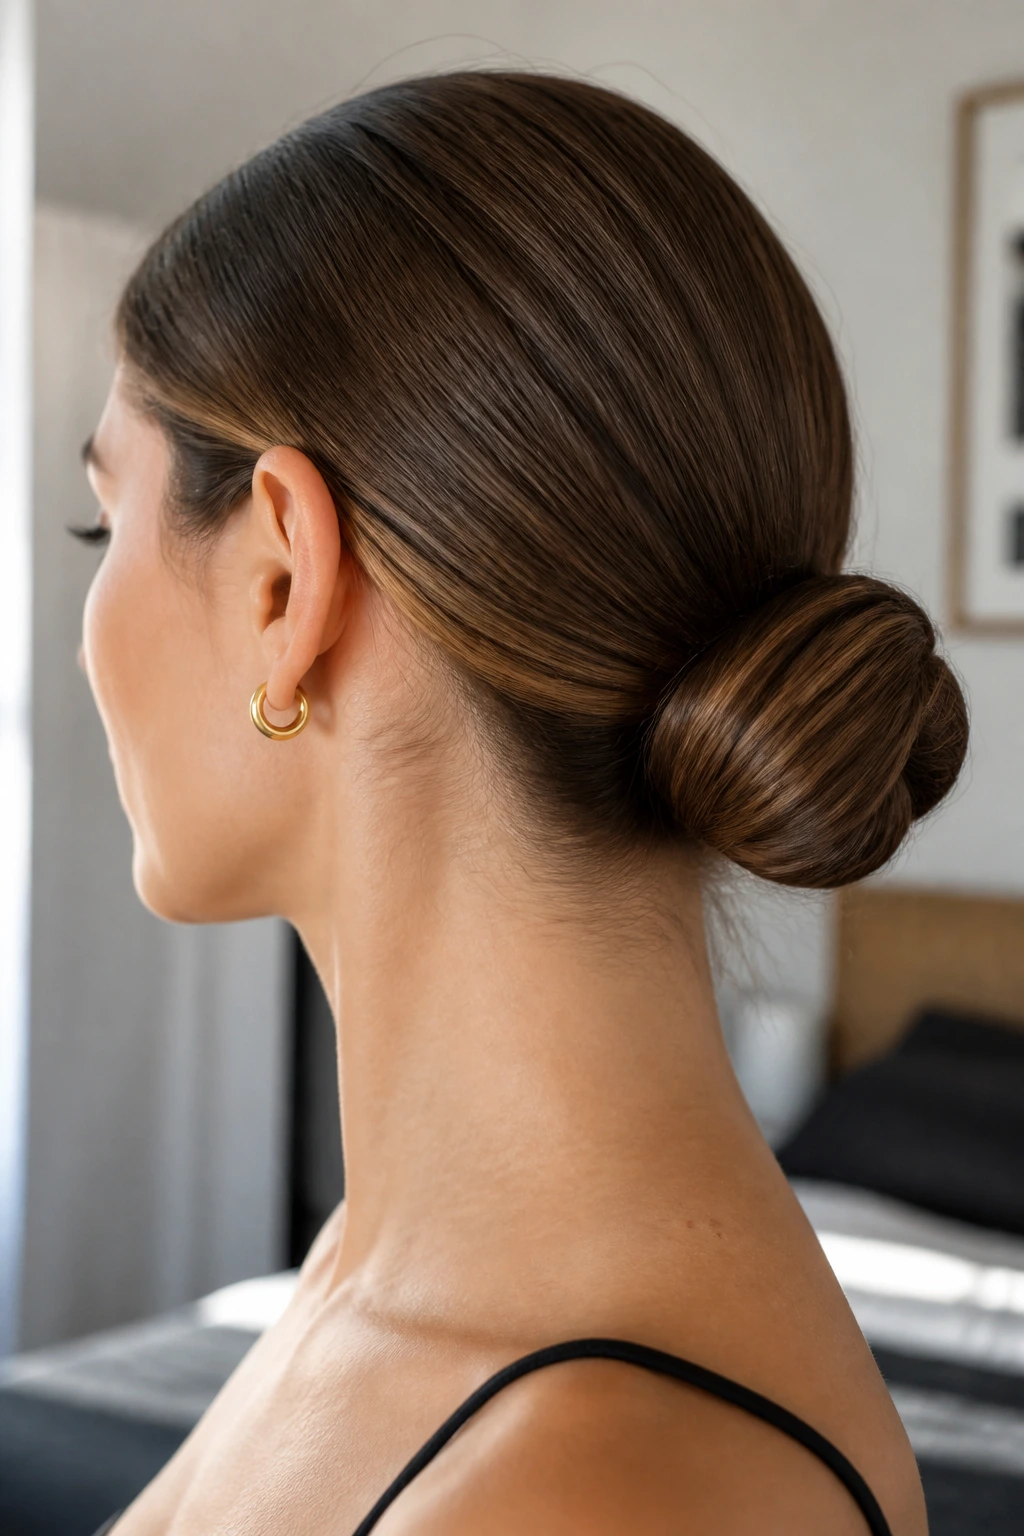
Starting with hair that is too clean: Freshly washed straight hair can be so slippery that pins won’t stay put. If you know you’re doing a bun, braid, or clip style, add a little dry shampoo or texture spray first.
Using too much serum near the roots: Shine on straight hair should live on the lengths and ends. When it reaches the scalp, the whole style starts looking oily instead of polished.
Choosing the wrong accessory size: A tiny claw clip on thick hair slips fast. A huge clip on fine hair feels awkward and catches too much air. Match the tool to the density.
Pulling hair too tight at the hairline: It can give the style an off, strained look and leave obvious dents. Smooth the front, yes. Yank it back like you’re trying to erase your forehead, no.
Ignoring the part line: Straight hair shows a part more clearly than wavy hair does, so if the line is crooked or fuzzy, the whole style reads messy. Use a tail comb and check both mirror angles before you move on.
Leaving the ends unfinished: On straight hair, the ends are not background noise. If they look rough, the whole style looks cheaper. A quick bend, tuck, or ribbon tie usually solves it.
Variations and Adaptations to Try
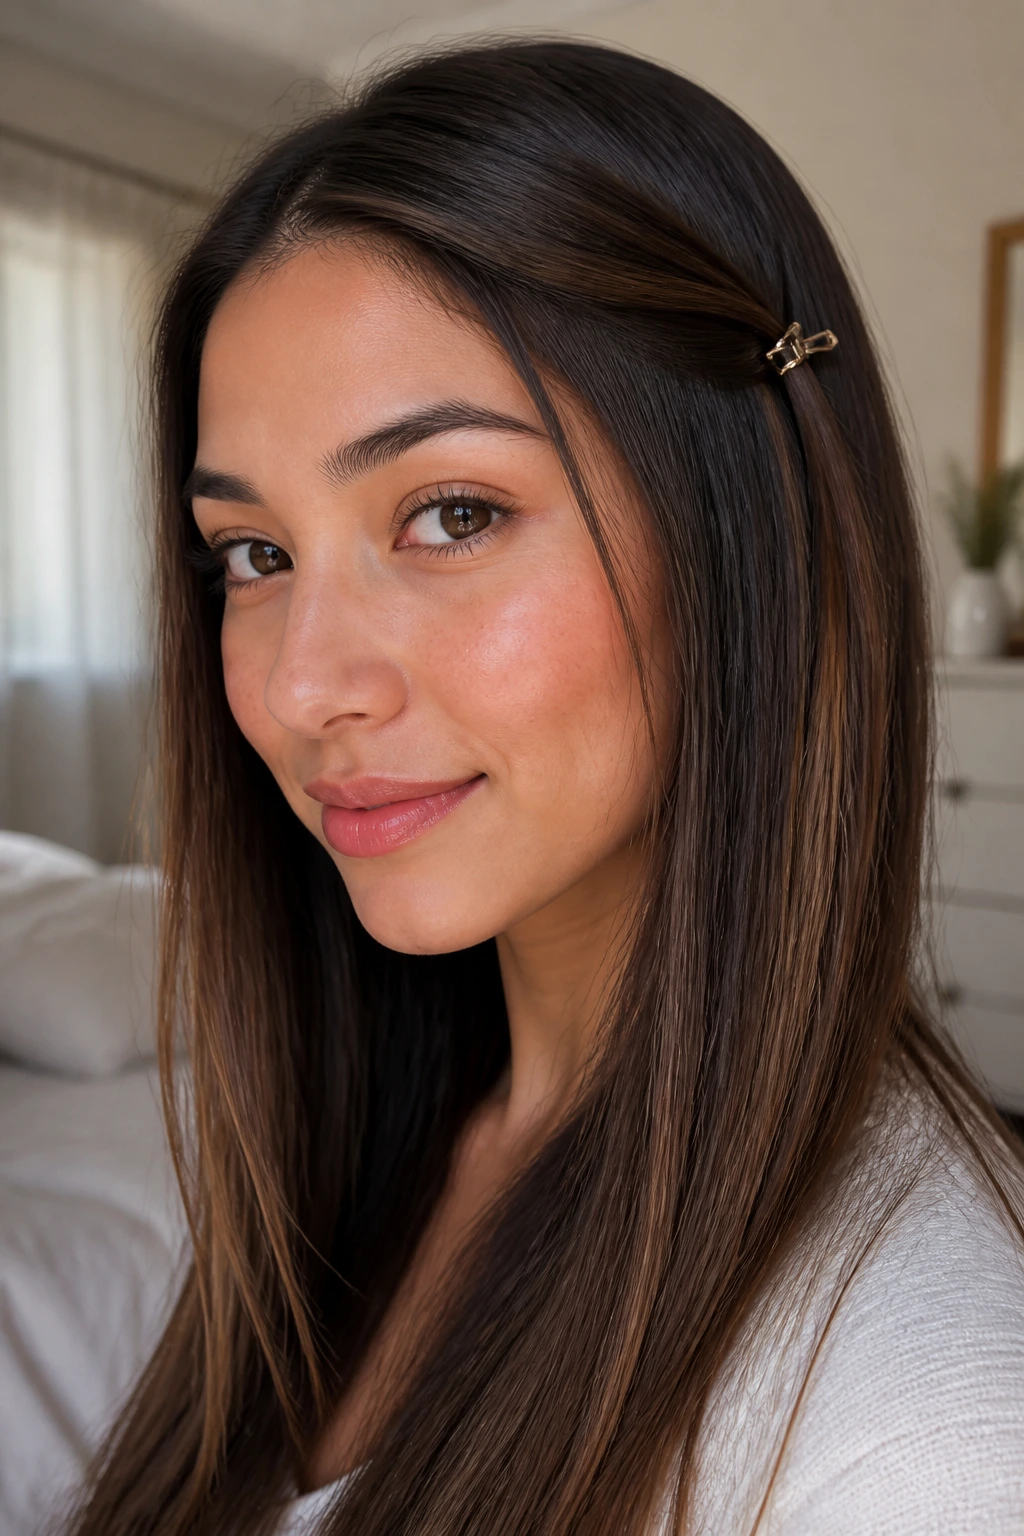
Fine-Strand Friendly Version: Choose styles with smaller anchors—mini braids, barrette ladders, side tucks, and low ribbon ponies. Use lightweight spray instead of thick cream, because fine straight hair gets weighed down fast.
Thick-Hair Version: Go for styles that distribute the weight: double buns, rope braid ponies, French pin chignons, and claw-clip rolls. You’ll usually need one extra pin or elastic than you think, and that’s normal.
Short-Cut Adaptation: Bobs and lobs do better with tucks, deep side parts, small barrettes, and a bent-under finish at the ends. Skip styles that rely on long wrapping length unless your cut has enough pieces to hold the shape.
Humidity-Ready Version: Keep the shape lower and tighter. Low buns, slick backs, and braided crowns survive damp air better than loose ponytails, and a humidity-resistant hairspray at the crown helps keep flyaways from standing up like static.
Heat-Free Version: Use overnight braids, scarf ties, and clipped twists to build shape without hot tools. You won’t get the razor-sharp gloss of a flat iron finish, but you’ll keep the hair healthier and still look put together.
How to Keep These Styles Looking Fresh
Most straight-hair styles last longer than people expect if you treat the first few minutes after styling like the settling period. Let the pins cool, let the product dry, and do not keep touching the hair every ten seconds. That’s where a lot of the collapse starts.
For buns, ponytails, and wrapped styles, the best overnight move is a low loose braid or a silk scarf if you want to preserve the smoothness. A satin pillowcase helps too, especially with the glass-hair looks and the bob styles that depend on a clean surface. If you sleep directly on a high ponytail, you’ll wake up with a bend in a place you did not ask for.
Second-day refresh is usually simple. Shake the roots out, add a tiny amount of dry shampoo near the part and crown, then smooth the front with a brush dampened with a little water or leave-in mist. If a style uses gel, a pea-size amount emulsified between the fingertips can reset the hairline without requiring a full wash.
If a braid or twist loosens during the day, don’t rebuild the entire style. Tighten just the anchor points and pinch a little hairspray onto the problem pieces. That tiny repair often gets you another few hours without the whole thing looking reworked.
Frequently Asked Questions
Which straight hairstyles hold best on fine hair?
Mini braids, barrette ladders, low ribbon ponies, and side tucks usually hold better than big wrapped buns on fine hair. They need less bulk to stay put, and they don’t depend on the hair having a lot of natural grip.
How do I keep a sleek ponytail from slipping down?
Brush the hair into place, secure it with a snug elastic, and wrap a small strand around the base if you want extra hold. If the hair is very slippery, add dry shampoo at the roots before you gather it so the elastic has something to catch.
Can these styles work on short straight hair?
Yes, but the best options are the ones that lean on shape rather than length: deep side parts, ear tucks, mini barrettes, bob bends, and small half-up sections. Short hair usually looks better with one strong detail than with a lot of competing pieces.
What product keeps flyaways down without making hair greasy?
A light flexible hairspray or a tiny amount of smoothing cream on the fingertips usually works better than heavy oil. Use the smallest amount you can get away with, then press it only onto the halo of flyaways and the hairline.
How long can I wear a sleek bun or ponytail?
Most of them look best the day they’re styled and the next day if you restyle the front. After that, the elastic dents and the smoothness start to go soft, especially if you’ve been sleeping on it.
Do I need heat for these hairstyle ideas?
No, but a flat iron or blow dryer helps with cleaner edges and bent ends. If you want a heat-free version, use damp braids, scarf ties, or a dry texture product and work with the hair’s natural fall.
Why do my bobby pins slide out of straight hair?
Usually because they’re inserted upside down or into hair that’s too clean and slick. Slide the wavy side toward the scalp for more grip, and anchor the pin into a section that already has some tension from a twist or braid.
What’s the easiest style here for a rushed morning?
The low loop bun, claw-clip roll, ear tuck, and ribbon pony are the fastest wins. They don’t need perfect sectioning, and they still look deliberate if you spend one extra minute smoothing the surface.
A Few Last Pins
Straight hair doesn’t need to be rescued. It needs shape, grip, and one or two choices that look like they were made on purpose. That’s why these styles keep working: they respect the way smooth hair falls instead of trying to force it into something else.
The best part is how much mileage you can get from a few small moves. Shift the part. Wrap the elastic. Add a braid, a clip, or a ribbon. That’s usually enough to turn plain length into a style that feels finished, and it’s why I keep coming back to these looks when the hair has to cooperate without a lot of drama.
