



Heavy long hair can go flat in the exact places you want it to look alive: the crown, the cheekbone area, the front that hangs around your face. Long hair with medium layers for volume solves that problem by taking weight out of the middle of the shape instead of hacking the ends into thin, sad wisps. The length stays. The movement comes back.
The sweet spot matters more than most people think. If the shortest layer sits too high, the haircut starts to look choppy and the bottom can feel sparse fast. If it sits too low, the hair still behaves like one heavy sheet, which is why so many long cuts look great right after a salon blowout and then collapse before dinner.
Medium layers are the useful middle ground. They give the stylist room to build a fuller silhouette, open up the face, and keep the ends from turning into a dead straight line. The difference between flat and full is often just a couple of inches of placement — and that tiny shift changes everything.
Why These Layers Make Long Hair Feel Lighter
- The weight comes off where it matters: Medium layers remove bulk from the middle of the length, so the roots aren’t dragged down by a dense curtain of hair.
- The shape lifts without losing length: You keep the swing of long hair, but the top section stops sitting like a heavy blanket against your head.
- The cut still works in a ponytail: Unlike very short layering, this shape leaves enough length around the perimeter to look polished pulled back.
- The grow-out is more forgiving: Medium layers soften into the rest of the cut instead of leaving you with a harsh shelf line after a few weeks.
- Heat styling behaves better: A round brush, curling iron, or even a quick bend with a flat iron has more structure to hold onto when the hair isn’t overloaded with weight.
1. Butterfly Layers Starting at the Collarbone
Butterfly layers are the loudest way to cheat volume without sacrificing the length people came for in the first place. The shortest pieces usually sit around the collarbone or just below it, which gives the front half a visible lift while the lower half stays long and swingy. On dense hair, the shape looks almost like two haircuts living together — a lighter top and a fuller bottom.
Why It Works
The magic is in the drop from short face-framing pieces into longer layers through the back. That difference creates movement without making the ends look hollow. If your hair tends to sit flat at the crown and puff out only near the shoulders, this cut redistributes the weight so the whole shape moves more evenly.
- Shortest layer: usually collarbone to upper chest
- Best styling tool: a 1.5- to 2-inch round brush
- Hair type it likes: medium to thick straight or wavy hair
- Watch-out: the front can get too dramatic if the shortest layer starts above the chin
Pro tip: Ask your stylist to show you where the shortest layer falls when your hair is parted the way you actually wear it. Butterfly layers change a lot between a center part and a deep side part.
2. A Soft U-Cut with Interior Medium Layers
A U-shaped cut is the quiet favorite. The hemline curves gently, so the eye reads fullness at the ends instead of a sharp point. Then the interior medium layers step in and stop the middle from feeling heavy. The result is cleaner than a shag, smoother than a V-cut, and much easier to live with if you hate obvious layers.
What I like about this shape is how it behaves in real life. It looks good air-dried, but it looks even better with a bend from a blow-dry brush because the curved perimeter catches the light differently along the bottom. If your hair is fine-to-medium, this is one of the safest ways to add volume without making the ends look see-through.
3. V-Shaped Layers That Keep the Ends Swingy
Why do V-cuts keep showing up in long hair? Because they solve the “heavy bottom, flat top” problem without making the haircut look all one note. The center falls slightly longer than the sides, so the silhouette narrows toward the middle and creates a little drama through the back. It’s more directional than a U-shape, and that’s the point.
How to Wear It
A V-cut likes movement. A straight, airless blow-dry can make it look severe, while loose bends from a curling wand bring out the taper and keep the ends from looking limp. If your hair is thick and grows out fast, this shape gives you a visible outline for longer than very soft layers do.
The one thing I’d avoid is over-texturizing the tail of the V. Once the point gets too thin, the whole cut starts to feel fussy. Keep the ends substantial.
4. Curtain Bangs with Long Face-Framing Pieces
Curtain bangs are a volume trick hiding in plain sight. They split the front of the hair, open up the face, and create lift right where flat hair usually shows first. When they blend into medium layers, the front doesn’t look chopped; it looks intentional, like the haircut has a bit of motion before you even touch it with a brush.
If you’ve got a long face, curtain bangs can shorten the visual length and bring balance. If your face is rounder, keep the shortest part of the bang a little lower — closer to the cheekbone than the eyebrow — so the shape stretches the face instead of widening it. This is one of those cuts that depends a lot on where the first bend lands.
5. A Long Shag with Piecey Medium Layers
A long shag is for people who don’t want their hair to behave too politely. The layers are piecey, the texture is more broken up, and the volume comes from separation rather than smoothness. That means the shape looks better once it’s slightly roughed up. Too neat, and it can fall flat. A little mess, and it wakes up.
It’s especially good on naturally wavy hair because the hair already wants to bend; the shag just gives that bend a place to live. I wouldn’t choose it if you love sleek ends and uniform shine. I would choose it if you want a cut that looks better on day two, after dry shampoo and a few finger-combs.
6. Rounded Layers for Thick, Heavy Hair
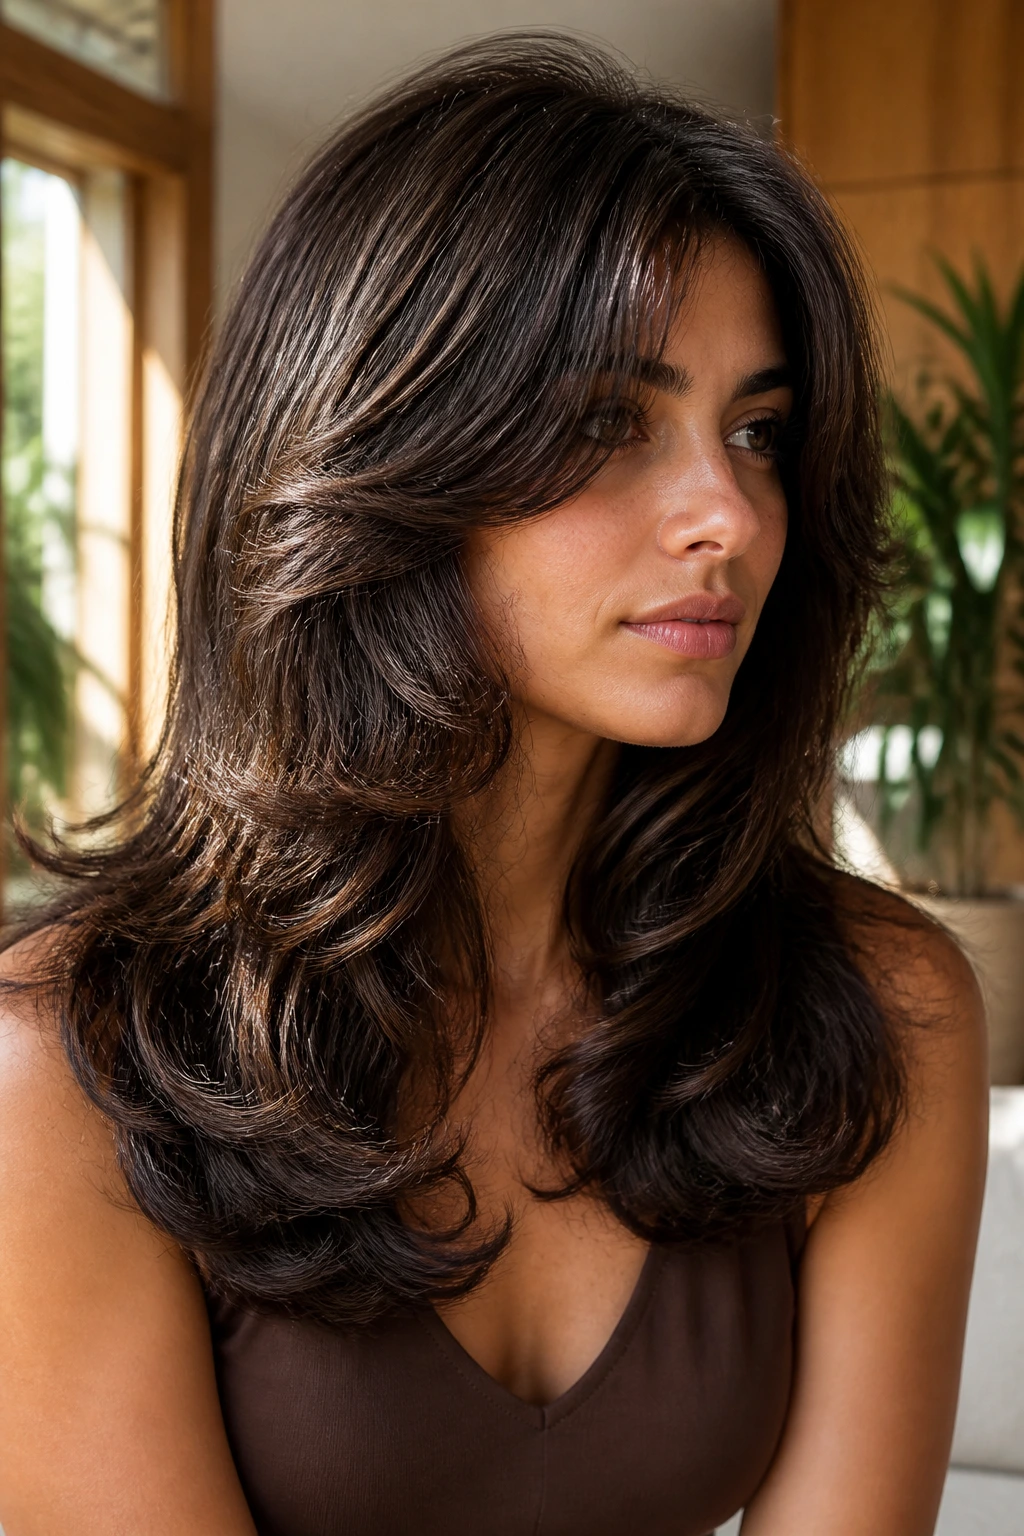
Thick hair doesn’t need more hair; it needs a smarter outline. Rounded layers spread the density across the head so the sides don’t balloon while the bottom collapses. The silhouette feels softer than a hard V and more controlled than a shag, which matters if your hair has enough body to eat a haircut for breakfast.
This is the cut I’d hand to someone who keeps saying, “My hair looks huge at the top and flat at the ends.” The roundness helps the weight fall more evenly. If the stylist thins the ends too much, though, the shape goes fuzzy fast. Keep the perimeter strong. Let the volume live inside the cut, not only on the surface.
7. Invisible Layers for Fine Hair
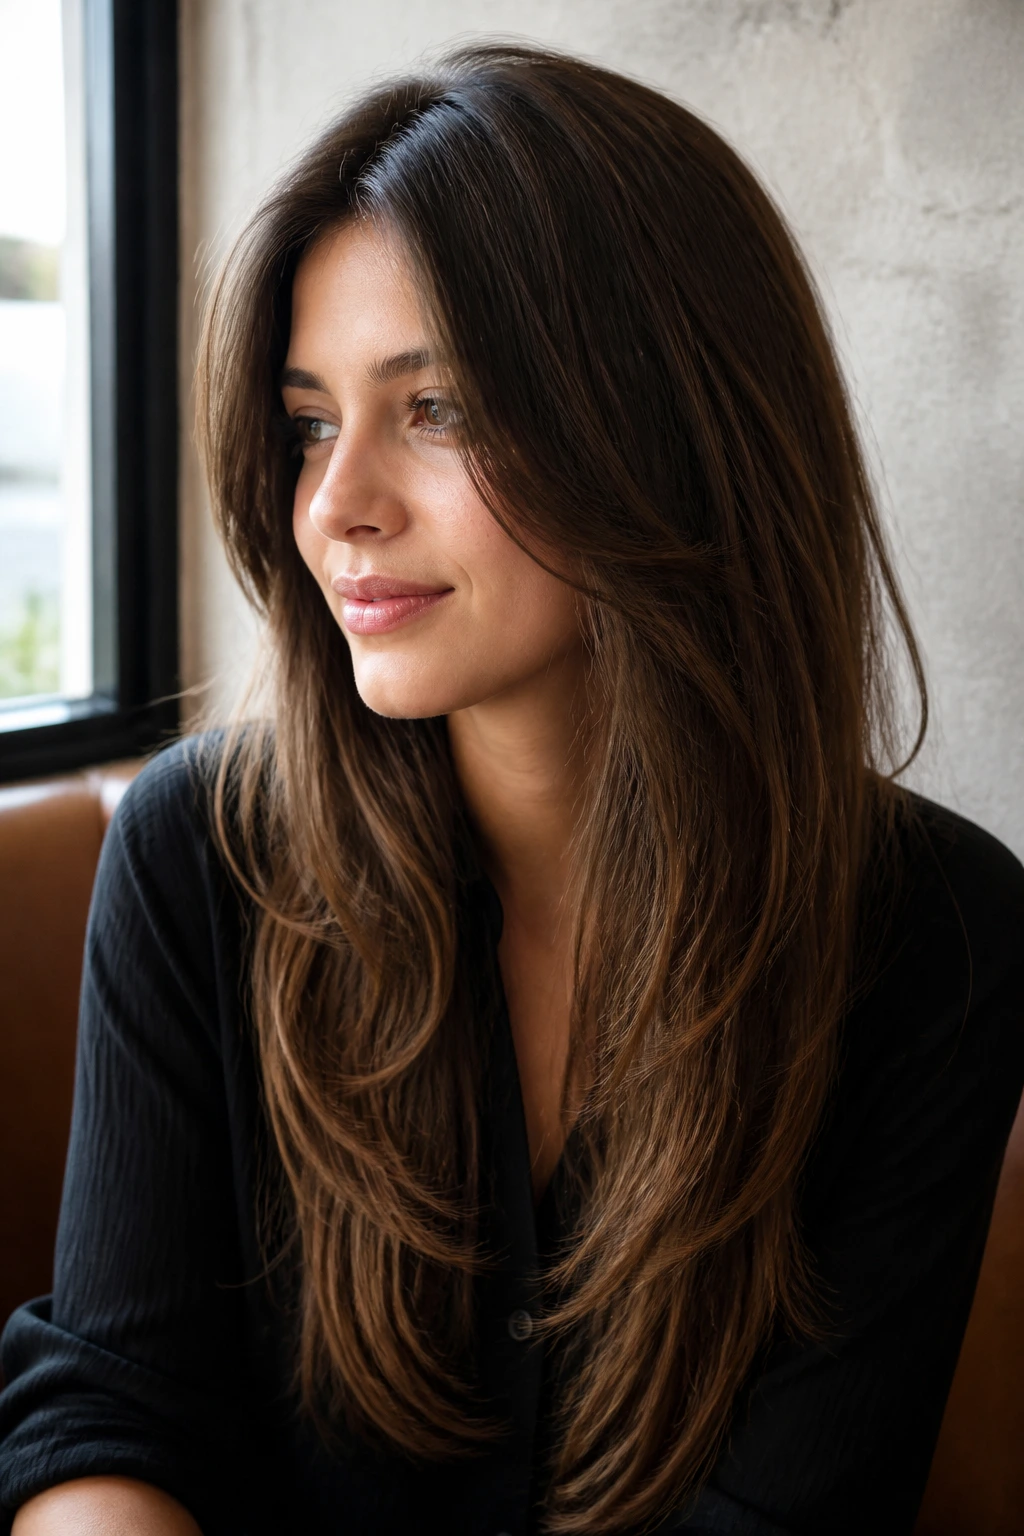
Fine hair and visible layers can be a risky pair. Too much cutting, and the ends go wispy before the hair ever has a chance to look full. Invisible layers solve that by moving weight internally, so the haircut gets lift without obvious steps. From the outside, it still reads as a clean, long shape.
This is one of the smartest choices if your hair already feels delicate. Ask for soft internal layering rather than dramatic “pieces.” The stylist should leave enough thickness at the ends that the last few inches still look substantial, because that’s what fine hair needs most. Volume on top is nice. Density at the bottom is what keeps the haircut from looking tired.
8. Feathered Blowout Layers
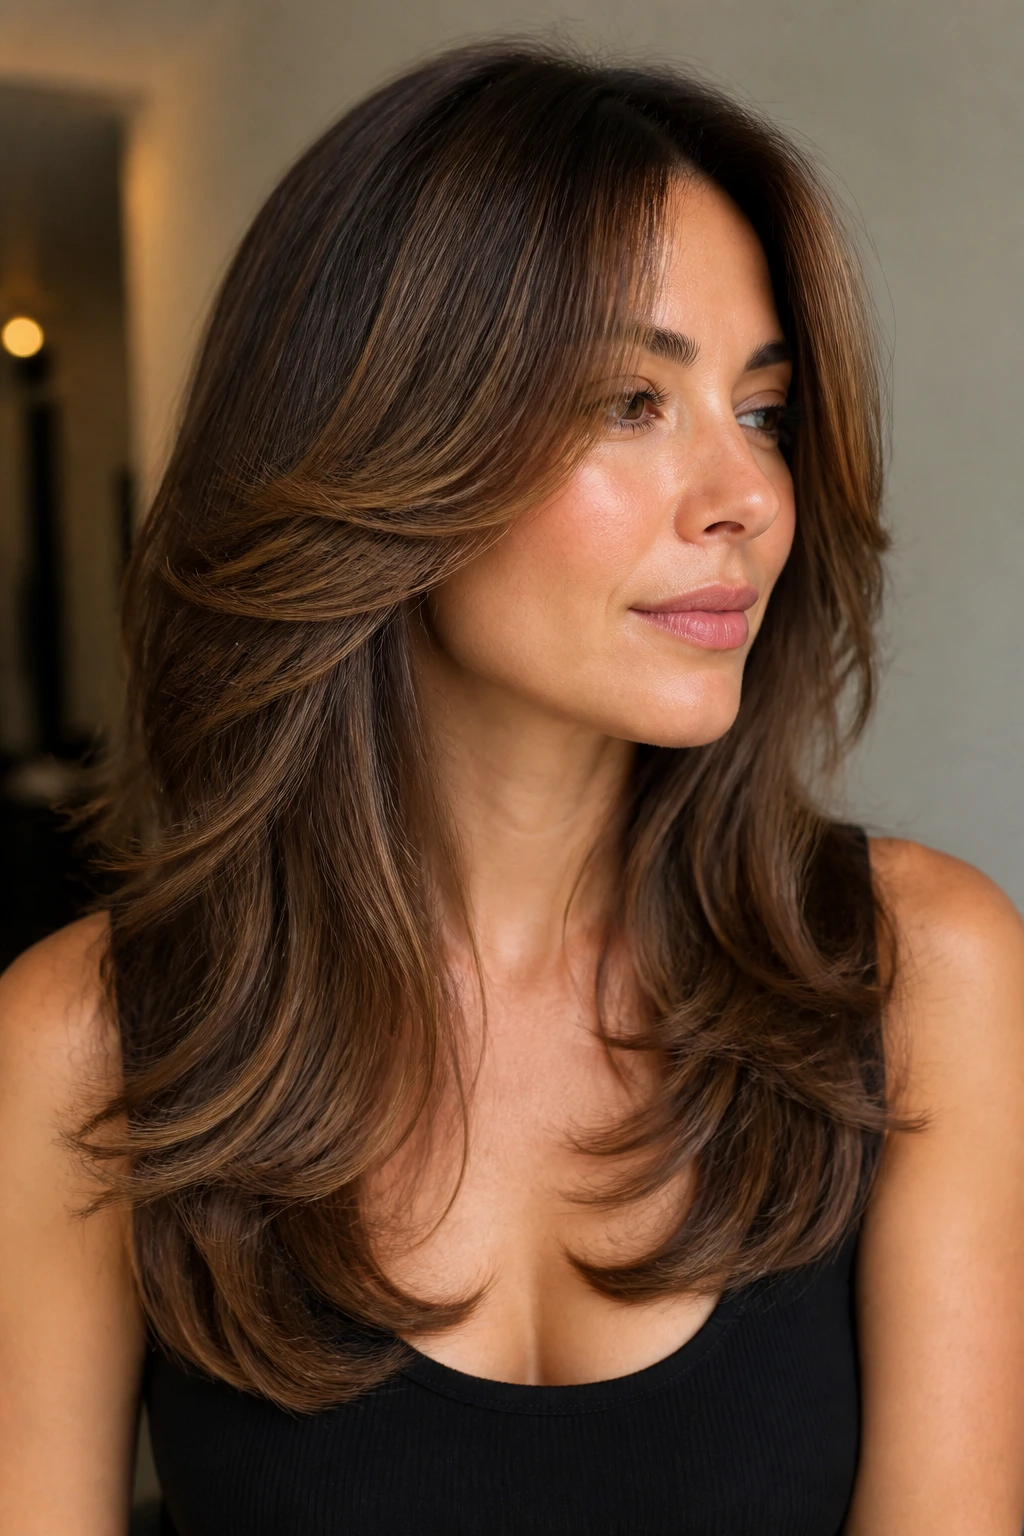
Feathered layers are the old-school glamour version of long volume, and I mean that in the best way. They’re softer than a shag, smoother than a razor cut, and built to move away from the face instead of hanging straight down. When you blow them out with a round brush, the ends flip just enough to create shape without going full pageant hair.
The cut works because it leaves enough length in each layer for the brush to guide it. That means the style has a little bounce even when the hair isn’t freshly washed. If your hair tends to fall flat at the temples, feathering the front pieces back can make the whole face look more open in a way that’s hard to fake with product alone.
9. Deep Side Part with Sweeping Layers
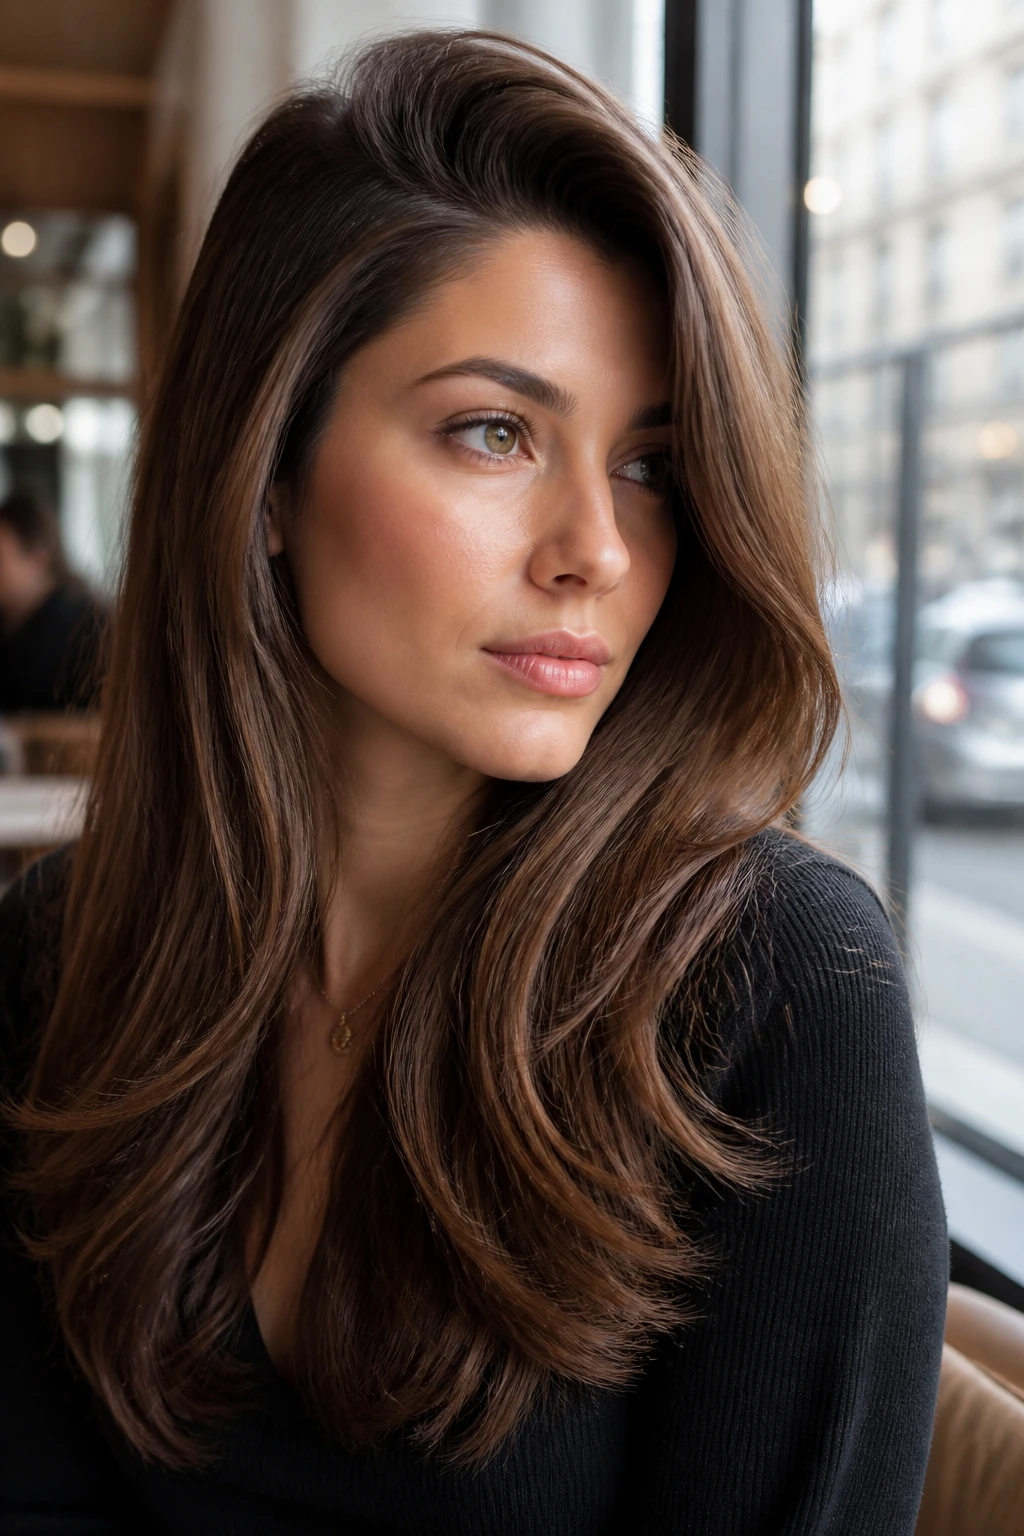
A deep side part can make long hair feel twice as full before you touch a curling iron. It shifts the root direction, gives one side a natural lift, and lets the layers sweep across the forehead and cheekbones. If your hair clings to your scalp at the crown, this is one of the fastest fixes.
The cut matters here. A side part works best when the layers are long enough to follow the part without separating into little choppy shelves. I like this with medium layers that start below the chin and blend into longer interior pieces. It looks polished, but not stiff, which is a nice thing to say about hair and a rare thing to actually get.
10. Air-Dried Waves with Medium Layers
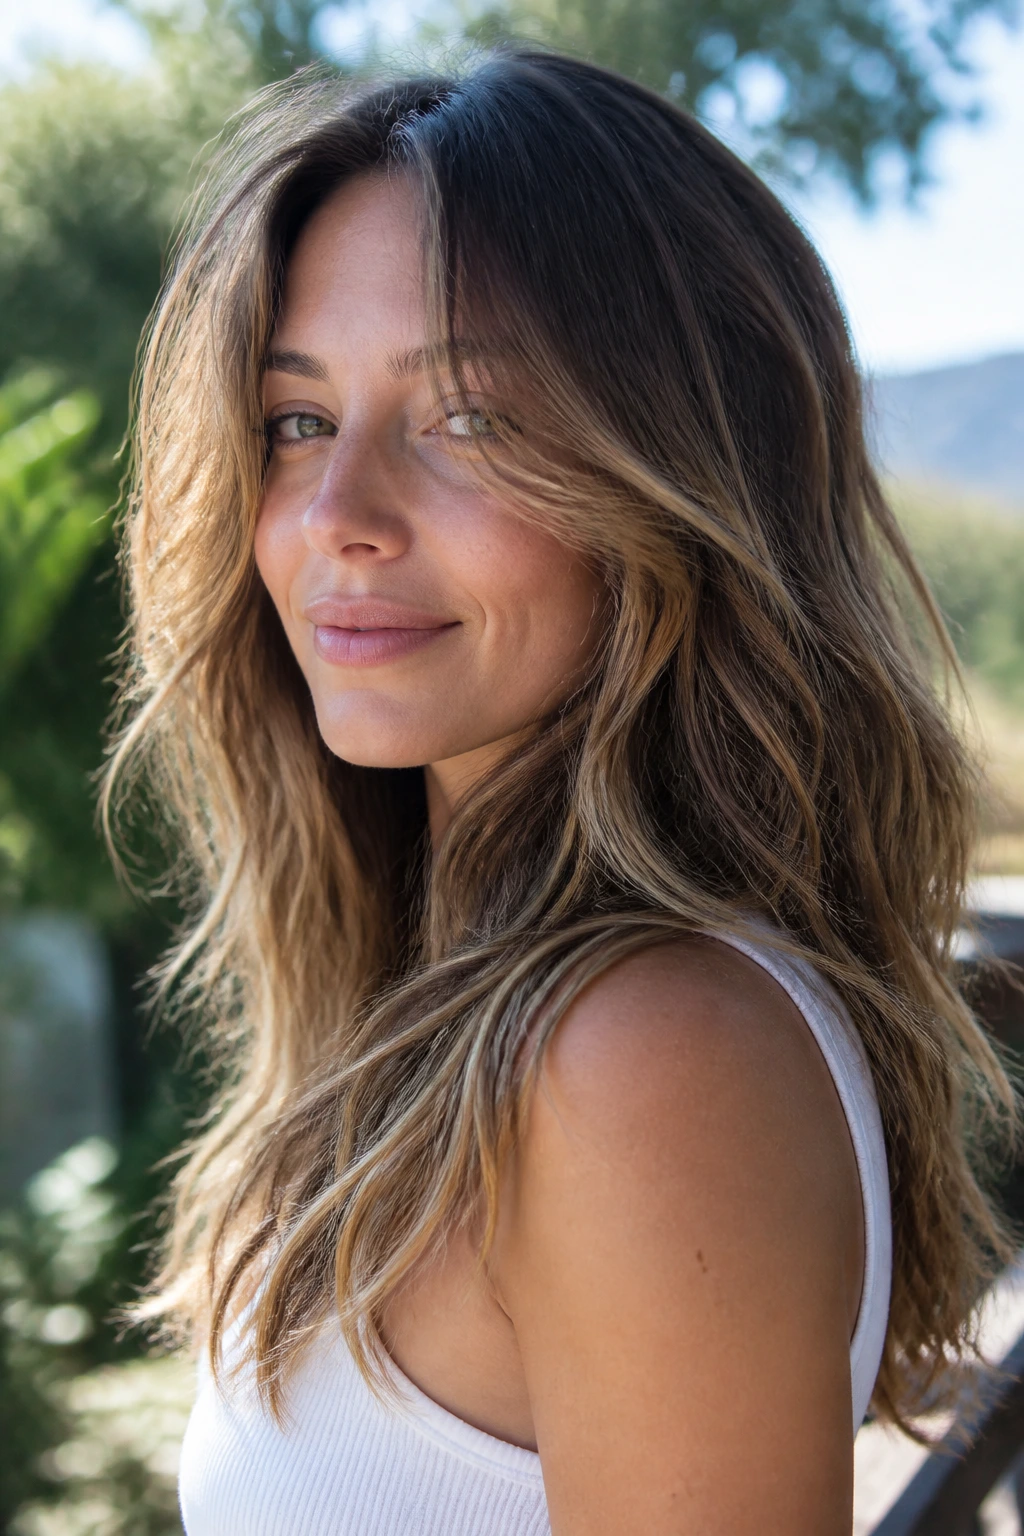
Air-dried layers are where a good cut earns its keep. If the hair has any natural bend at all, medium layers let that bend show instead of burying it under weight. The volume comes from the curl pattern, the product, and the fact that the hair isn’t being stretched into a straight line while it dries.
The key is restraint. Use a light mousse or foam through the roots and mids, then scrunch and leave it alone. No endless touching. No brushing once it starts to set. Hair that air-dries into waves needs room to form its own shape, and medium layers make that possible without turning the ends into fluff.
11. Curved Ends with Internal Weight Removal
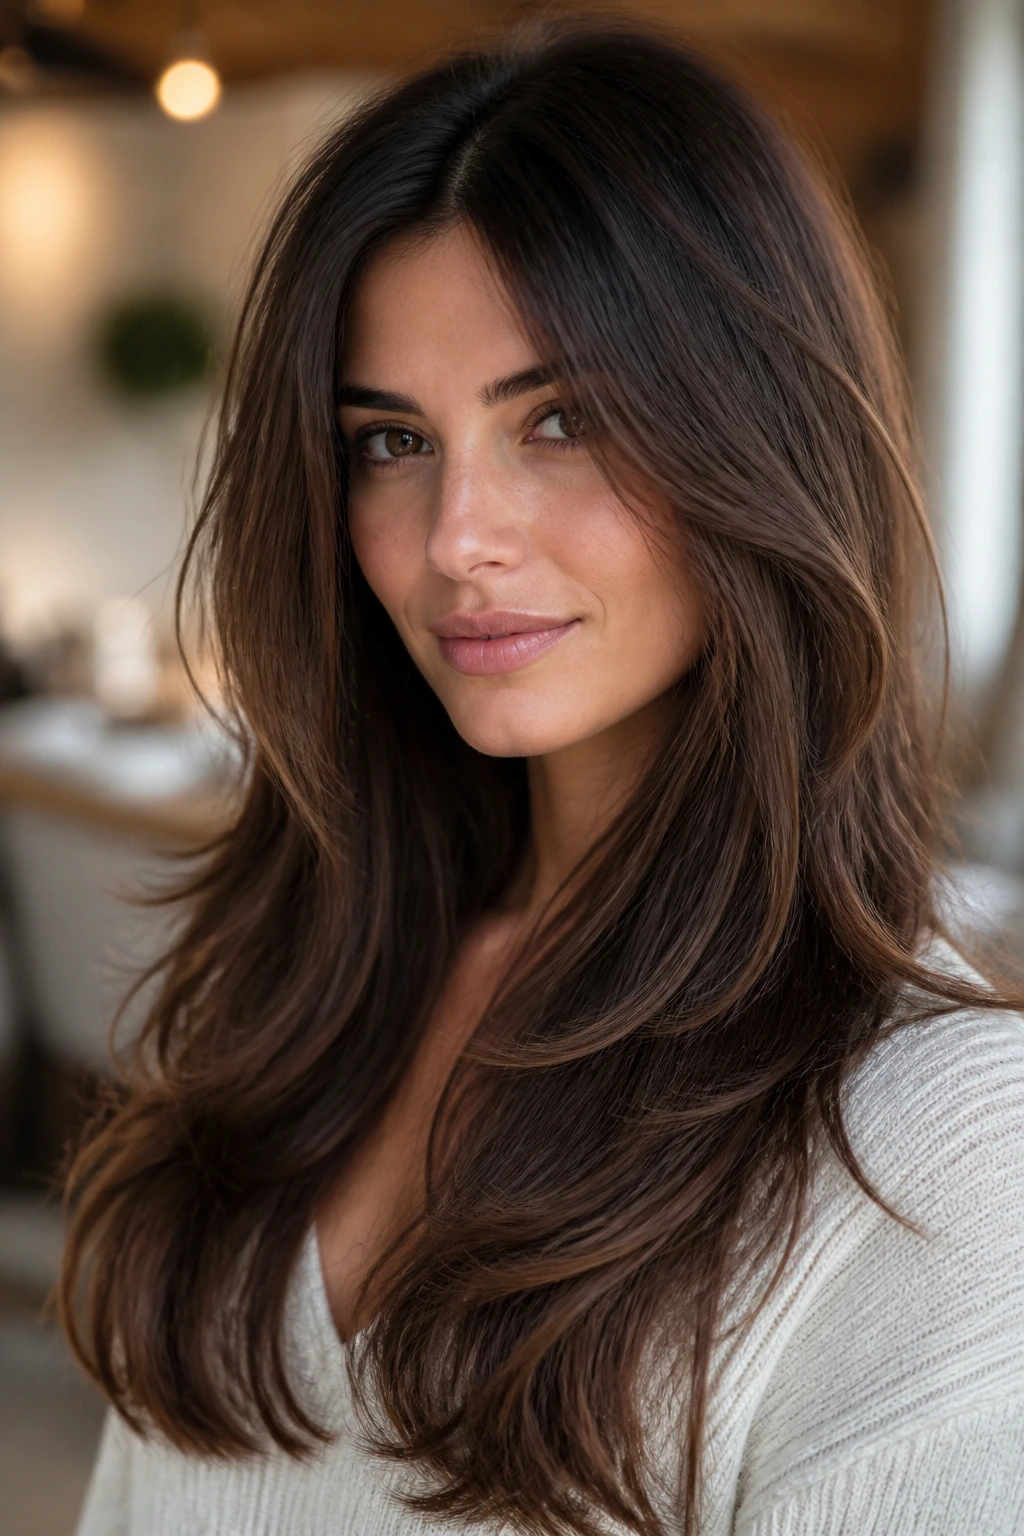
The ends should bend, not kick. That’s the whole point of this cut. Curved ends keep long hair from feeling boxy, while internal weight removal stops the middle from sitting too heavily on the scalp and shoulders. The shape looks especially good on straight or barely wavy hair because it gives the eye a line to follow.
I like this for people who want volume but hate obvious shaggy texture. It’s smoother, cleaner, and easier to wear to work without looking overstyled. If your ends flip out in a way you don’t like, the cut may be too blunt underneath or the layers may start too high. A good curved shape should move, not fight you.
12. Razor-Cut Layers for Straight, Dense Hair
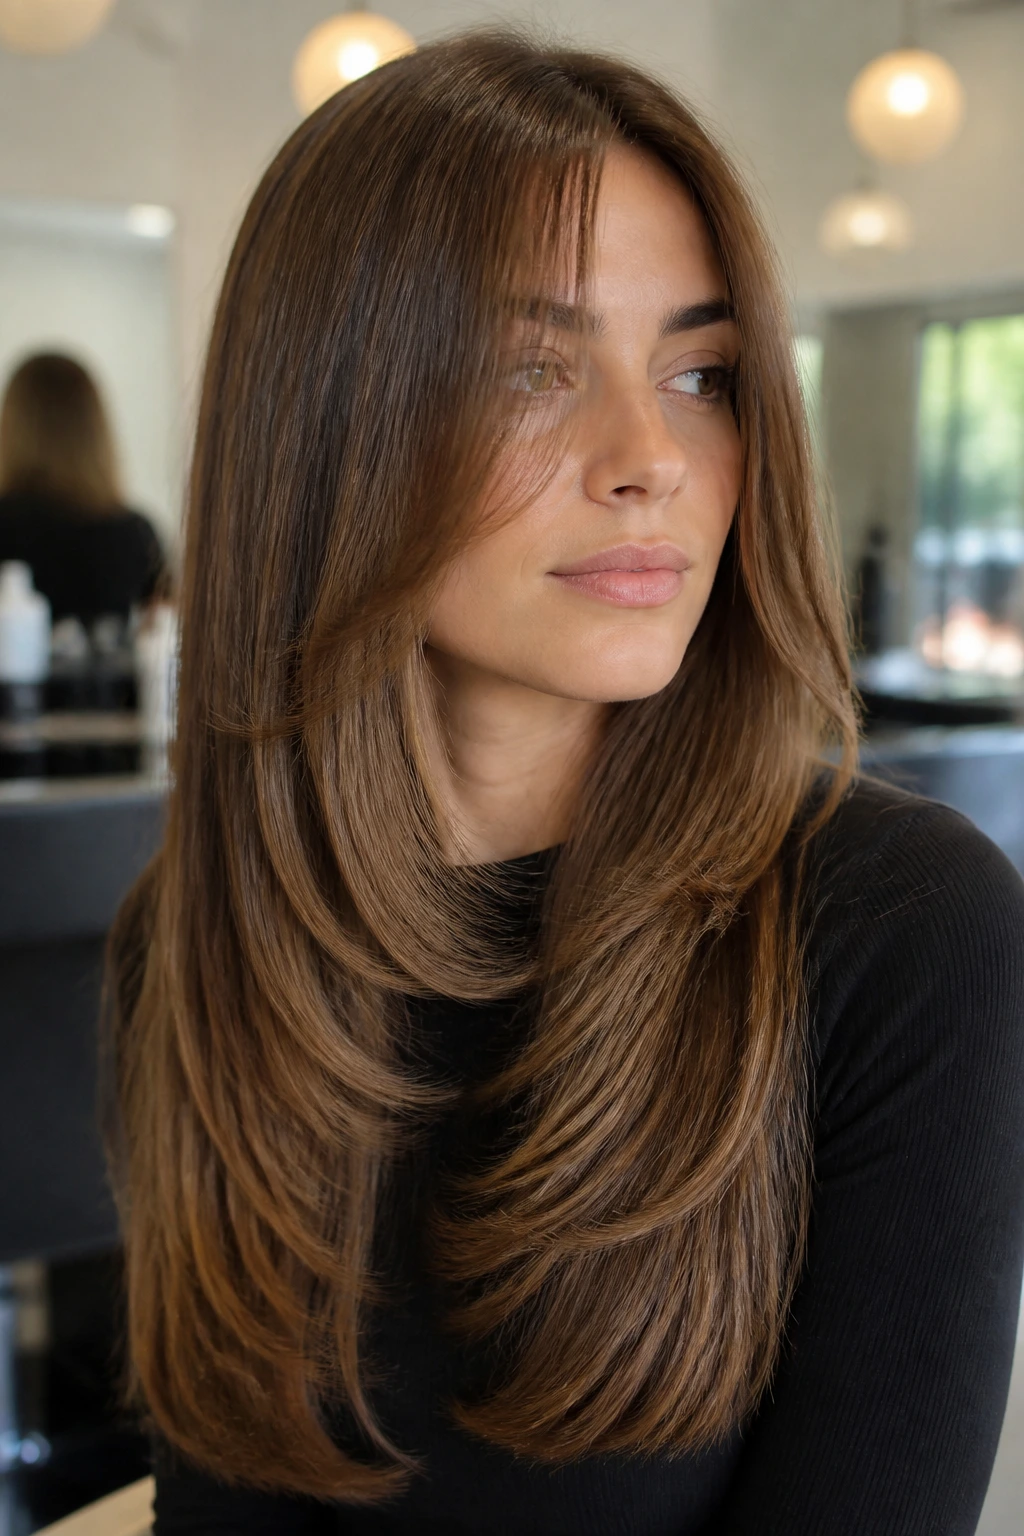
Razor-cut layers can be excellent on straight, thick hair — if the person holding the razor knows when to stop. The blade softens the line, breaks up heaviness, and gives the hair that slightly airy finish that scissor-only cuts sometimes miss. On dense hair, the difference can be dramatic.
The catch is frizz. If your hair already fuzzes up when the humidity changes, too much razor work can make the ends look thirsty and rough. This style works best when the interior is cut for movement but the perimeter is left with enough strength to keep the whole shape grounded. Think of it as controlled looseness, not shredding.
13. Velcro-Roller Volume Layers
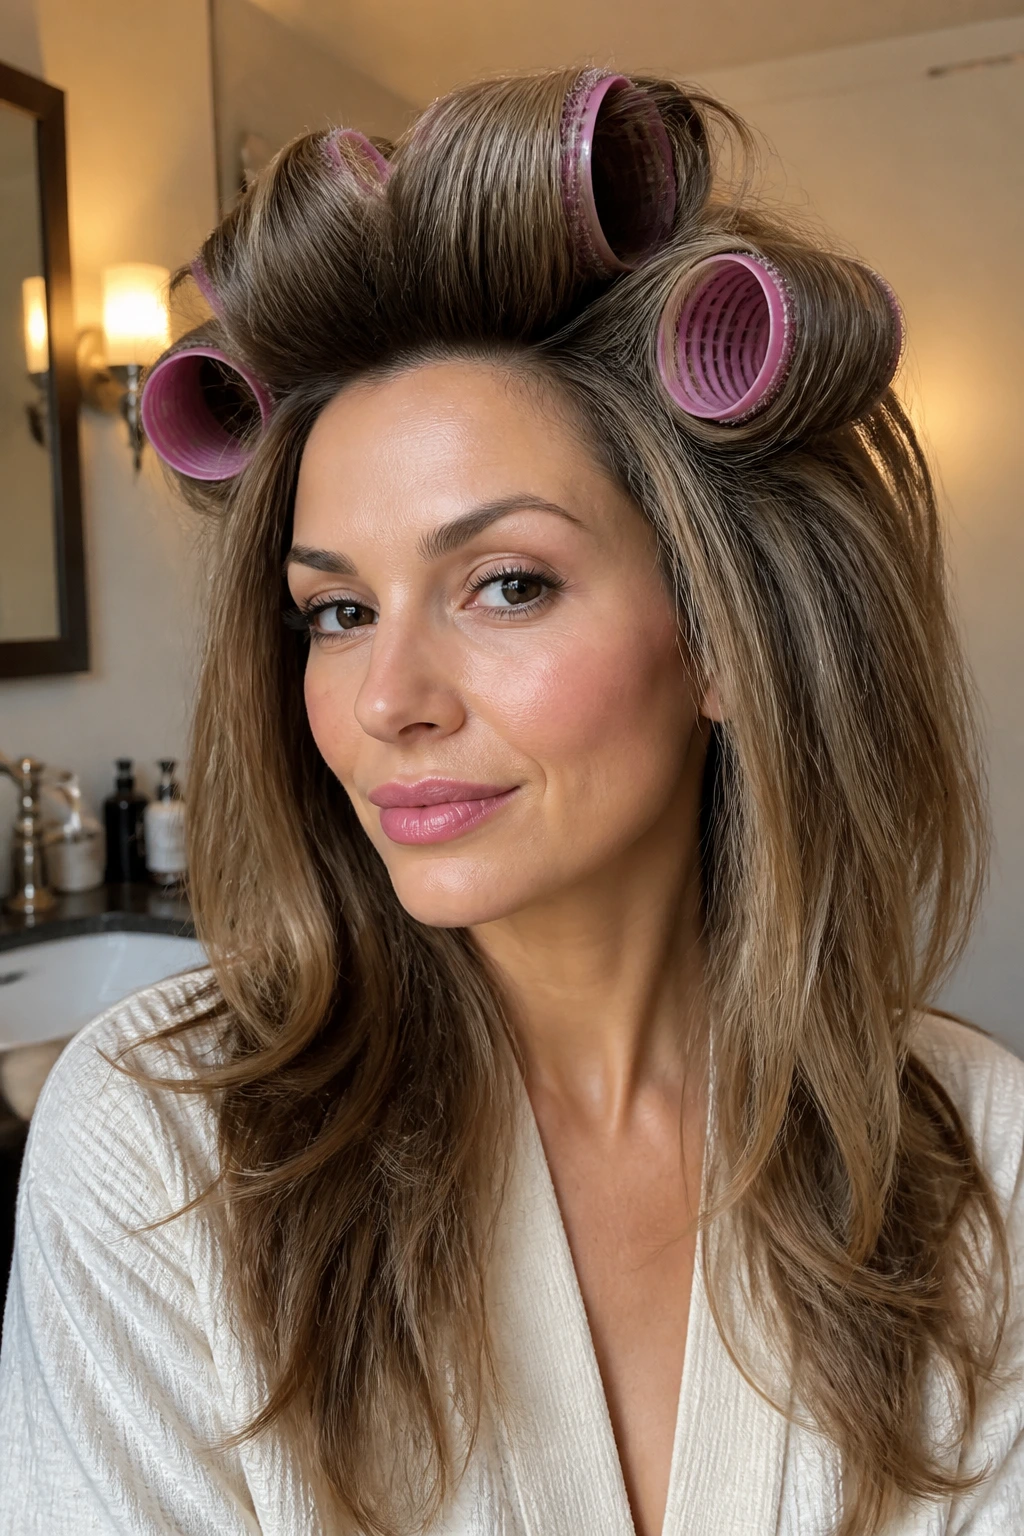
Velcro rollers are one of the least glamorous tools in the bathroom drawer and one of the best. On medium layers, they grab the hair at the root, set the bend in place, and keep the front pieces from going limp the minute you step outside. If you want volume that lasts longer than a curling iron curl, rollers still do the job.
The best part is how specific they are. A few large rollers at the crown and along the top sections can lift the cut without needing to redo the entire head. Use them while the hair is warm, not dripping wet, and let the sections cool fully before removing. That cooling time is where the shape hardens.
14. Tousled Beach Layers with Frayed Ends

Tousled beach layers are for hair that looks better with a little salt in the air and a little disorder in the shape. The medium layers keep the long lengths from hanging like ropes, while the frayed texture gives the hair separation and movement. It’s less about polish and more about a lived-in bend that still looks deliberate.
Don’t drown this cut in sea-salt spray. That’s where people go wrong. A light mist through the mid-lengths is enough; too much and the hair turns dry, crunchy, and oddly dusty-looking. A soft wave with healthy ends always beats a heavily sprayed, brittle finish.
15. Bottleneck Bangs with Long Medium Layers
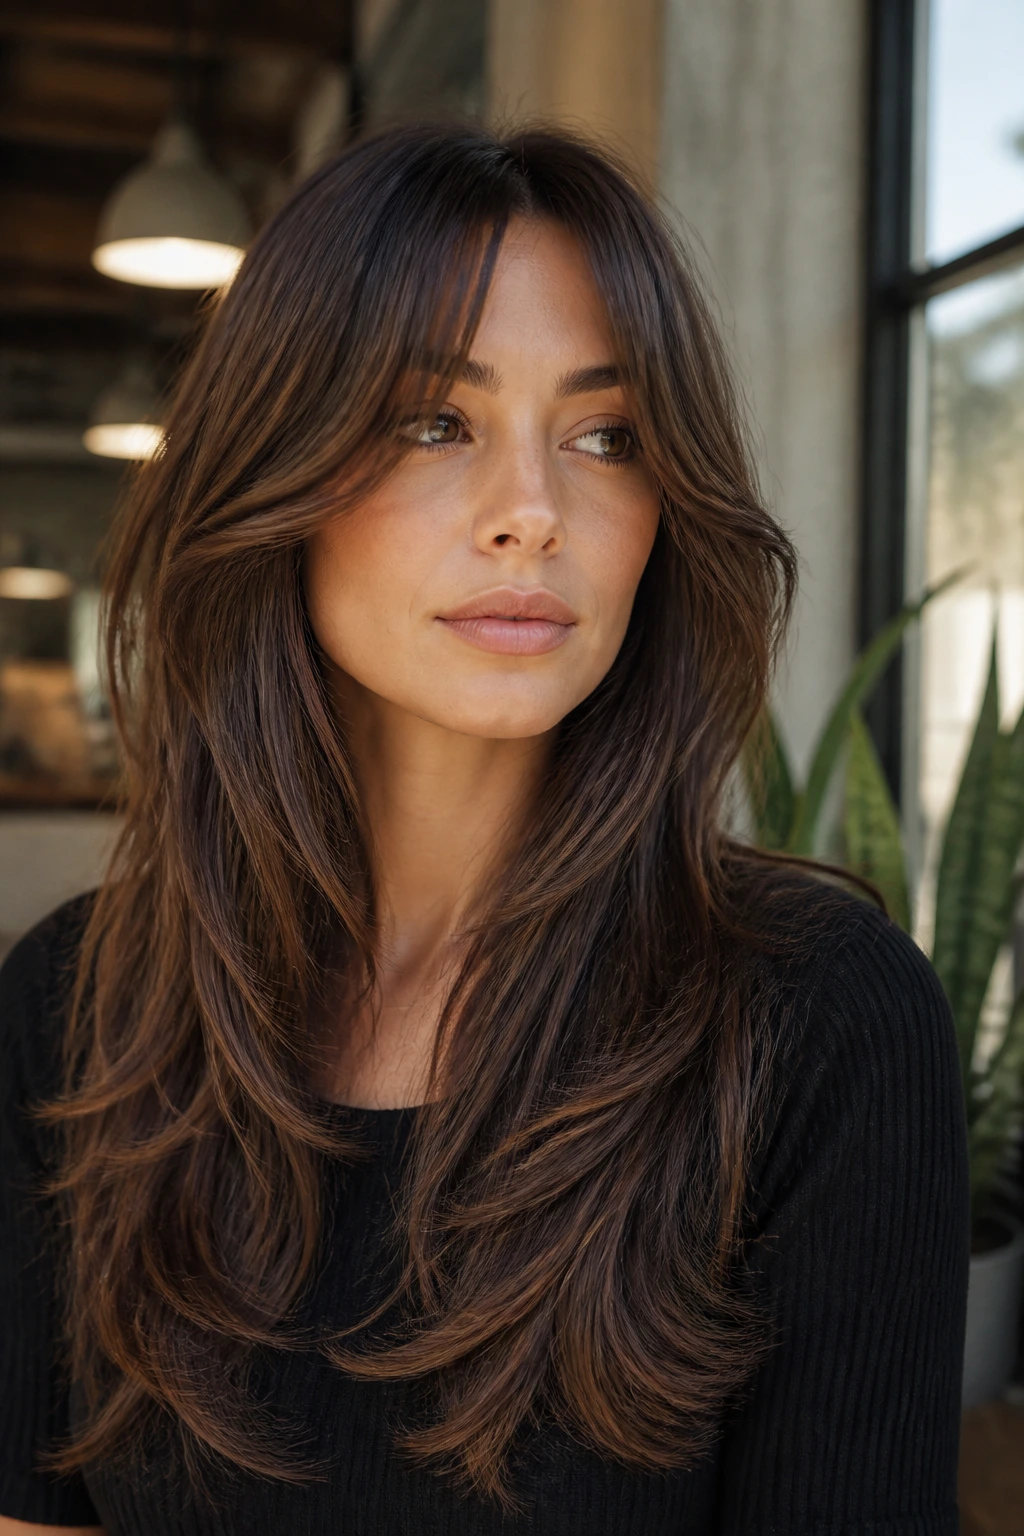
Can bangs add volume without swallowing your face? Bottleneck bangs do exactly that. They start narrower at the center, then widen softly near the cheekbones, which gives the front of long hair a lift without chopping the whole look into a strict fringe. Paired with medium layers, the shape feels balanced and modern without trying too hard.
This is a good move if curtain bangs feel too wide or if blunt bangs feel too heavy. The bottleneck shape leaves the eyes open and the cheeks framed, while the longer layers through the rest of the hair keep everything connected. It’s one of those cuts that looks best when the front is styled with a bit of bend, not blown flat.
16. Center Part Layers with Root Lift
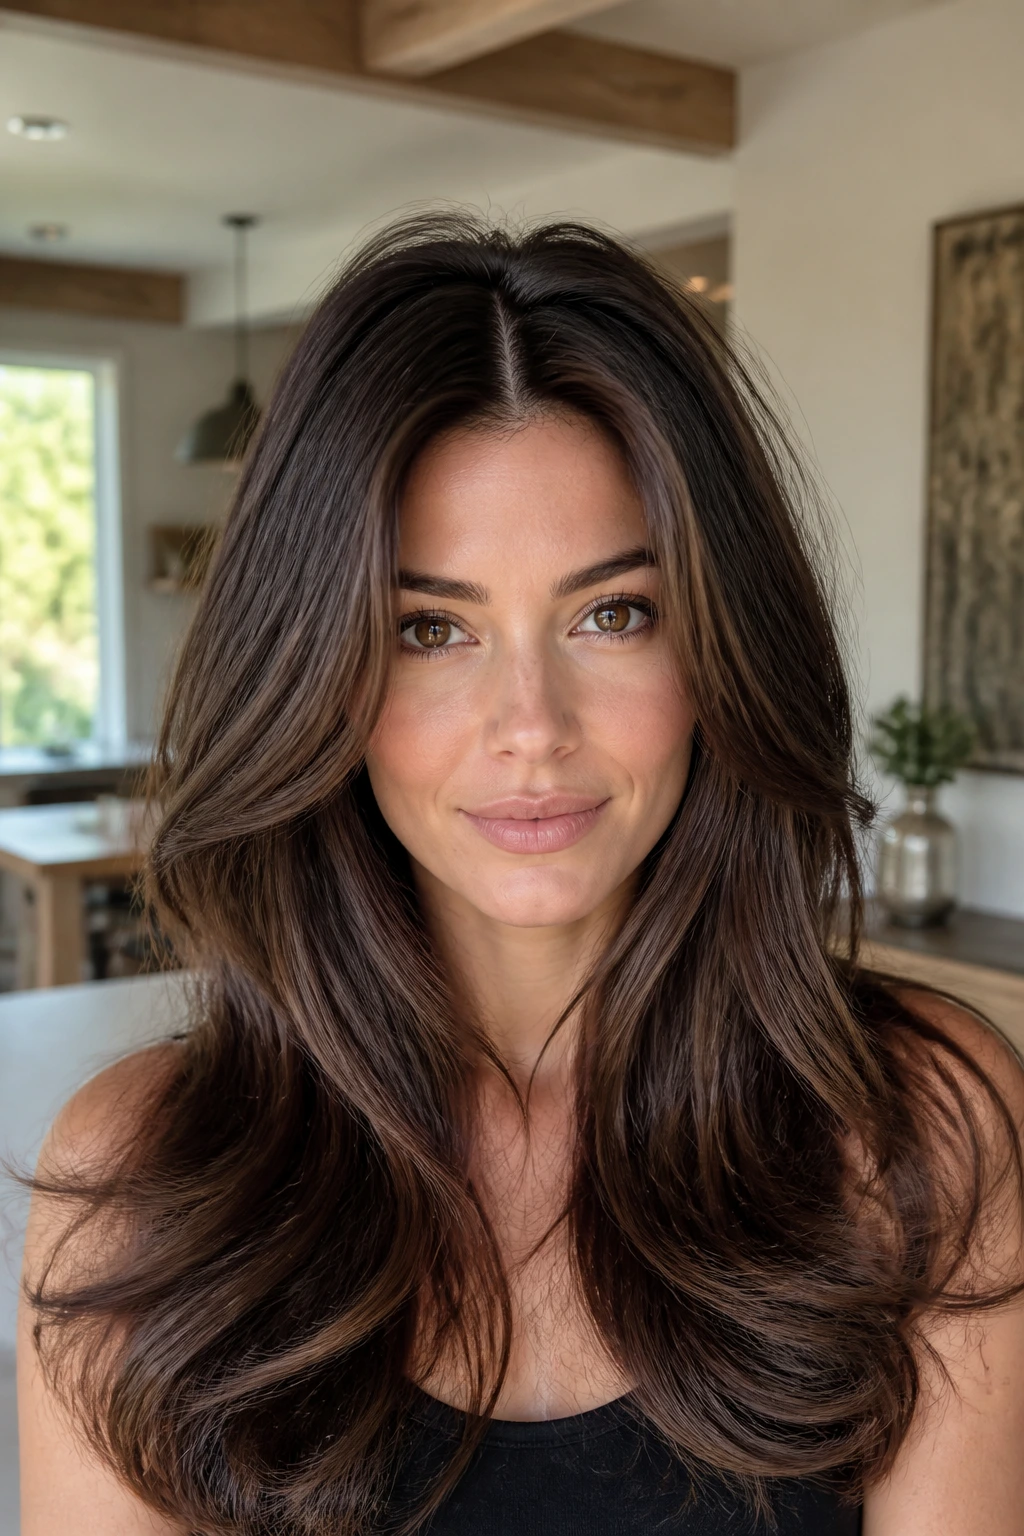
A center part can be brutally honest. If the layers are wrong, it shows every flat spot. If the layers are right, the hair looks clean, symmetrical, and fuller at the root than you’d expect. The lift comes from the way the layers fall away from the face and create movement on both sides at once.
This is the style for someone who likes a neat shape but still wants volume. Root-lifting mousse, a blow-dryer nozzle, and a round brush at the crown make a big difference here. The cut itself should keep enough weight around the face so the style doesn’t split into skinny rails on either side.
17. A Soft Wolf Cut for Long Hair
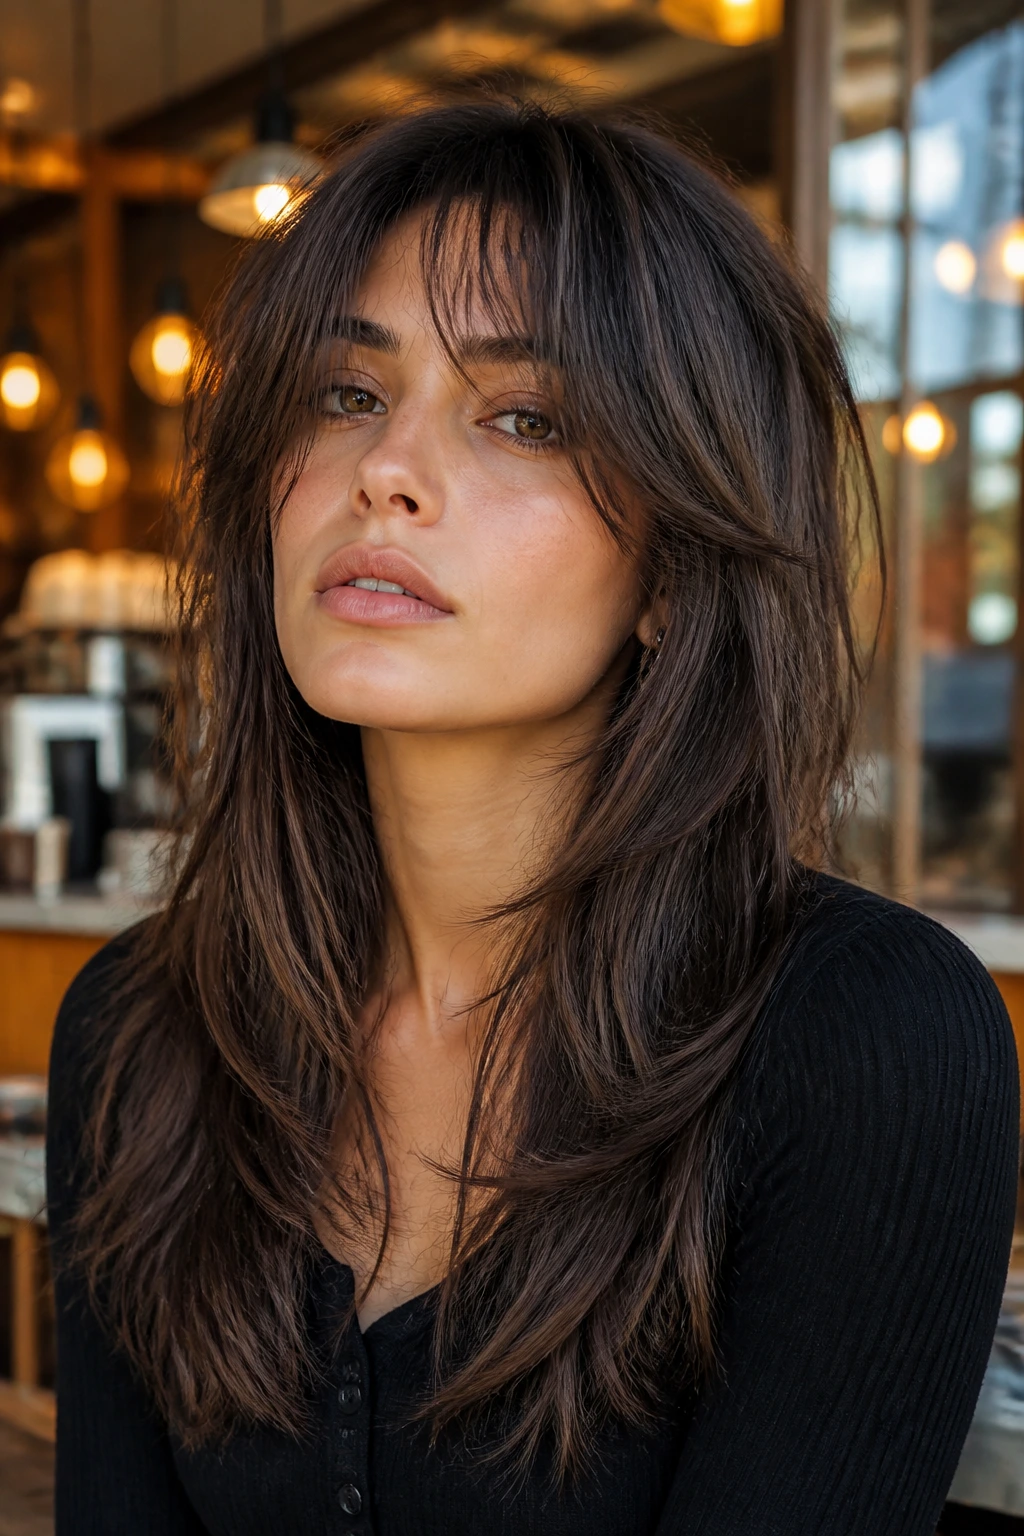
A soft wolf cut is the loose, wearable cousin of the full punk version. It keeps the crown a bit shorter, lets the layers kick out more visibly, and gives long hair a little attitude without dragging it into costume territory. On wavy hair, it can look fantastic. On very fine hair, it can go a little flat if the layers are too aggressive.
What makes the soft version work is control. The perimeter stays long enough to keep the silhouette grounded, while the upper layers add lift and separation. It’s not the haircut for someone who wants every strand to sit in place. It is the haircut for someone who likes a little motion and doesn’t mind when the hair has opinions.
18. C-Cut Layers Around the Face
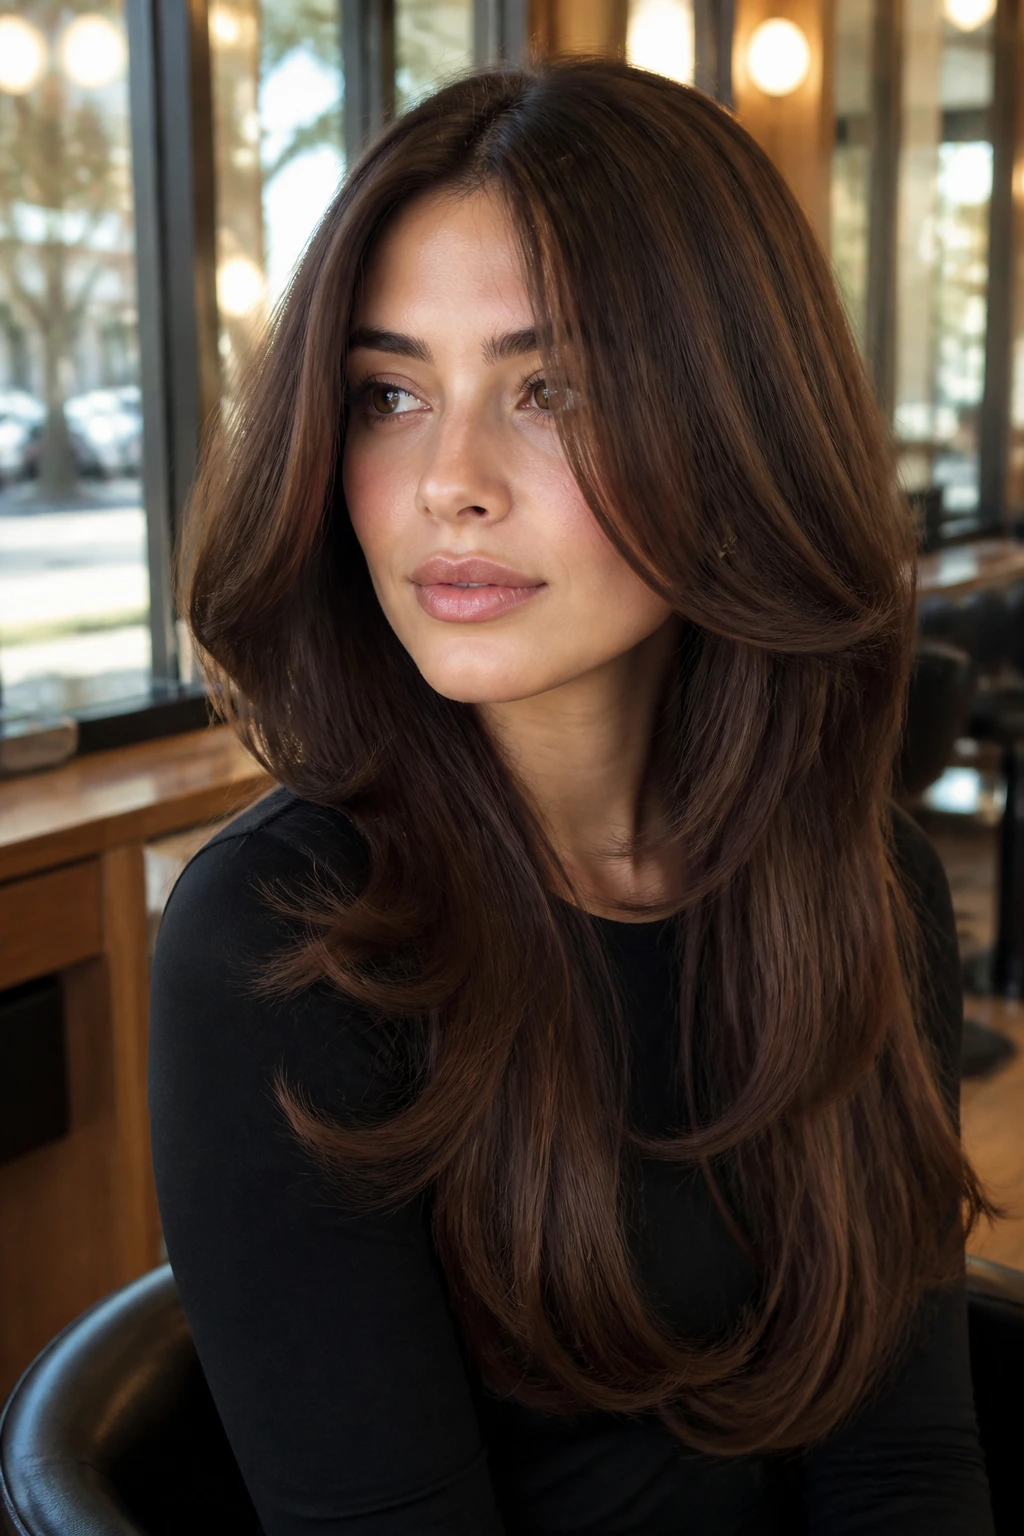
C-cut layers curve inward around the face, which gives the front of long hair a softer outline than a blunt step or a sharp angle. The shape matters because it directs attention toward the cheeks and jaw without making the face frame look disconnected from the rest of the cut. It’s subtle, but not boring.
This cut works well when you want the volume to feel framed rather than scattered. The curl of the C helps the hair fold back toward the face, which is especially useful if your hair wants to hang straight and cling at the sides. A round brush or a soft hot-tool bend brings the shape to life fast.
19. Curly Long Layers That Keep Shape
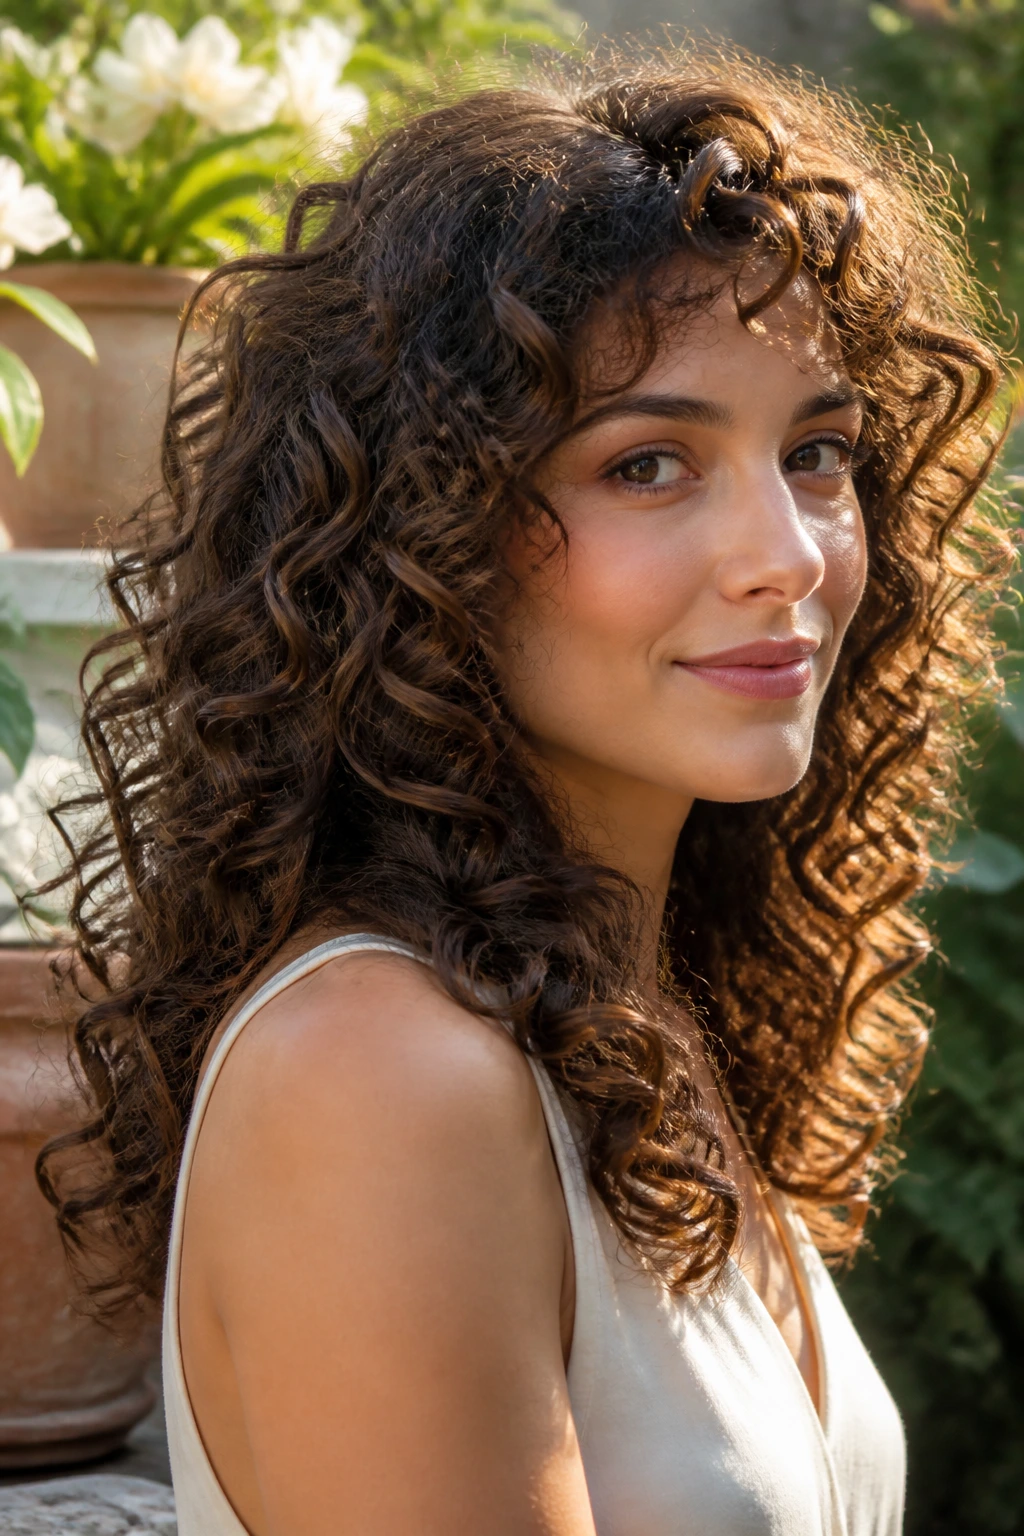
Curly hair needs layers, but not the wrong kind. Medium layers on curls should encourage spring, not slice the shape apart. Done well, they keep the curls from stacking into a pyramid and help the volume sit through the whole head instead of only at the sides.
Dry cutting is often the smarter move here because curls shrink in a way that wet hair can hide. The shortest layer should respect the shrinkage pattern, or the cut can bounce up much higher than expected. I’d rather see a curly cut that looks a little long in the salon chair than one that lands too short once it dries.
20. A Blunt Perimeter with Hidden Internal Layers
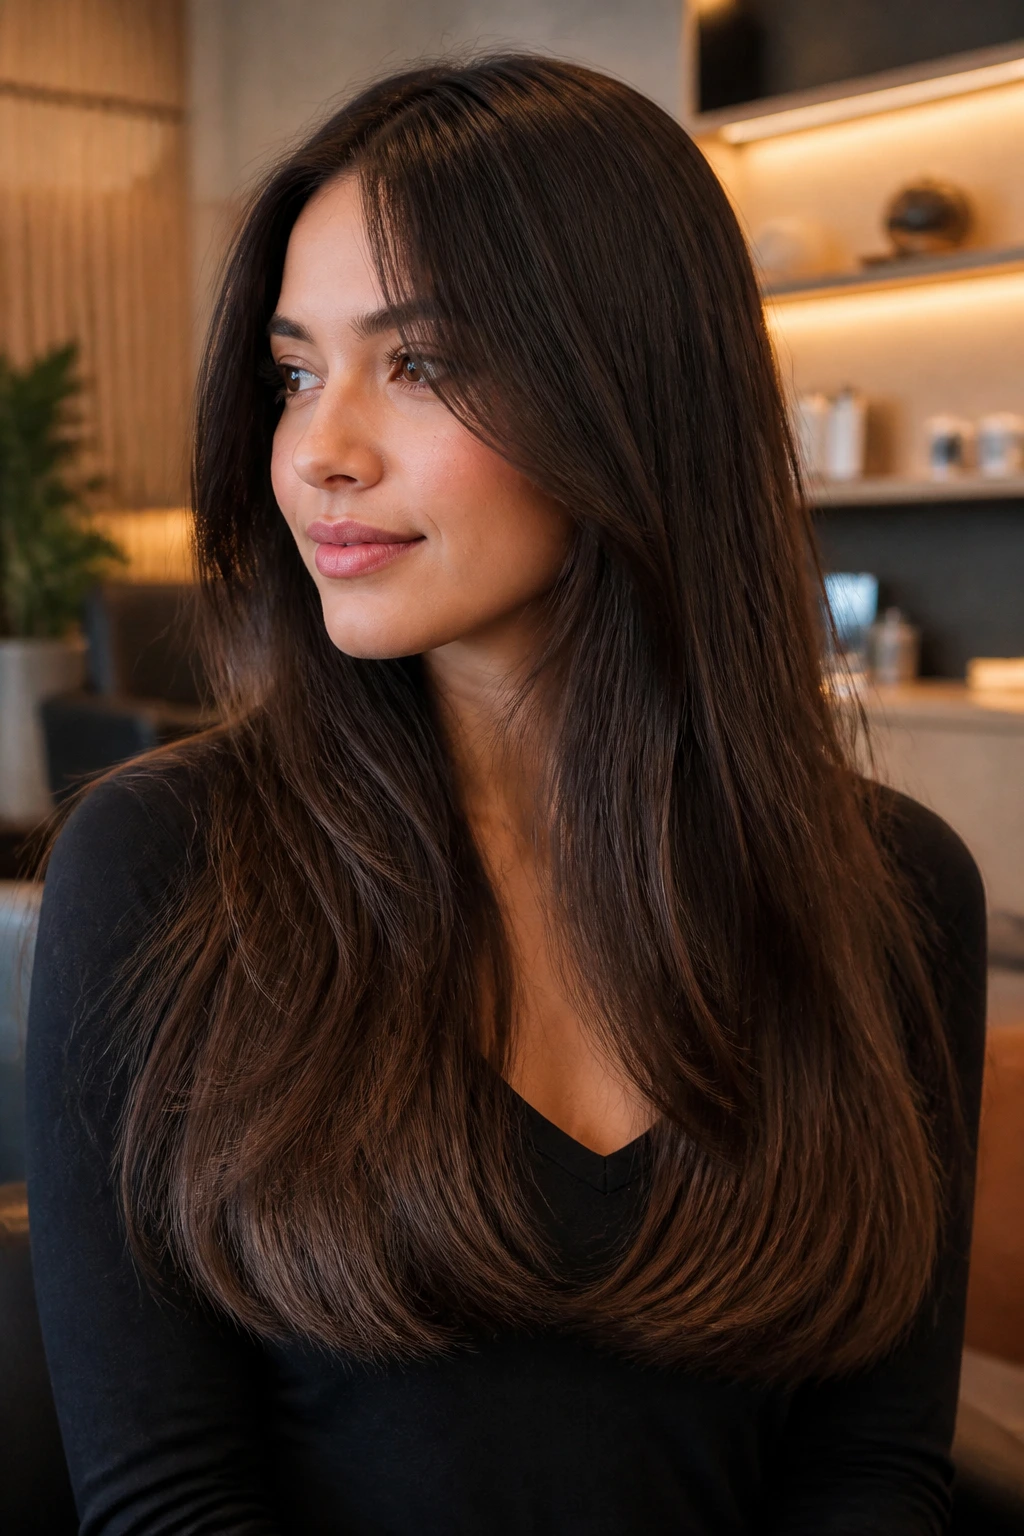
This is the one I reach for when someone wants fullness at the ends but still needs lift in the body of the hair. The perimeter stays blunt and solid, which keeps the bottom from looking scraggly, while hidden internal layers remove the weight that makes long hair fall flat. It’s neat. It’s practical. It still moves.
If your hair is fine, this is a smart compromise. Too many visible layers can make the ends disappear; too few make the whole cut hang like a sheet. Hidden layers let the root and mid-lengths breathe without telegraphing every snip. It’s the haircut version of quiet competence.
21. Ponytail-Friendly Layers That Still Frame the Face
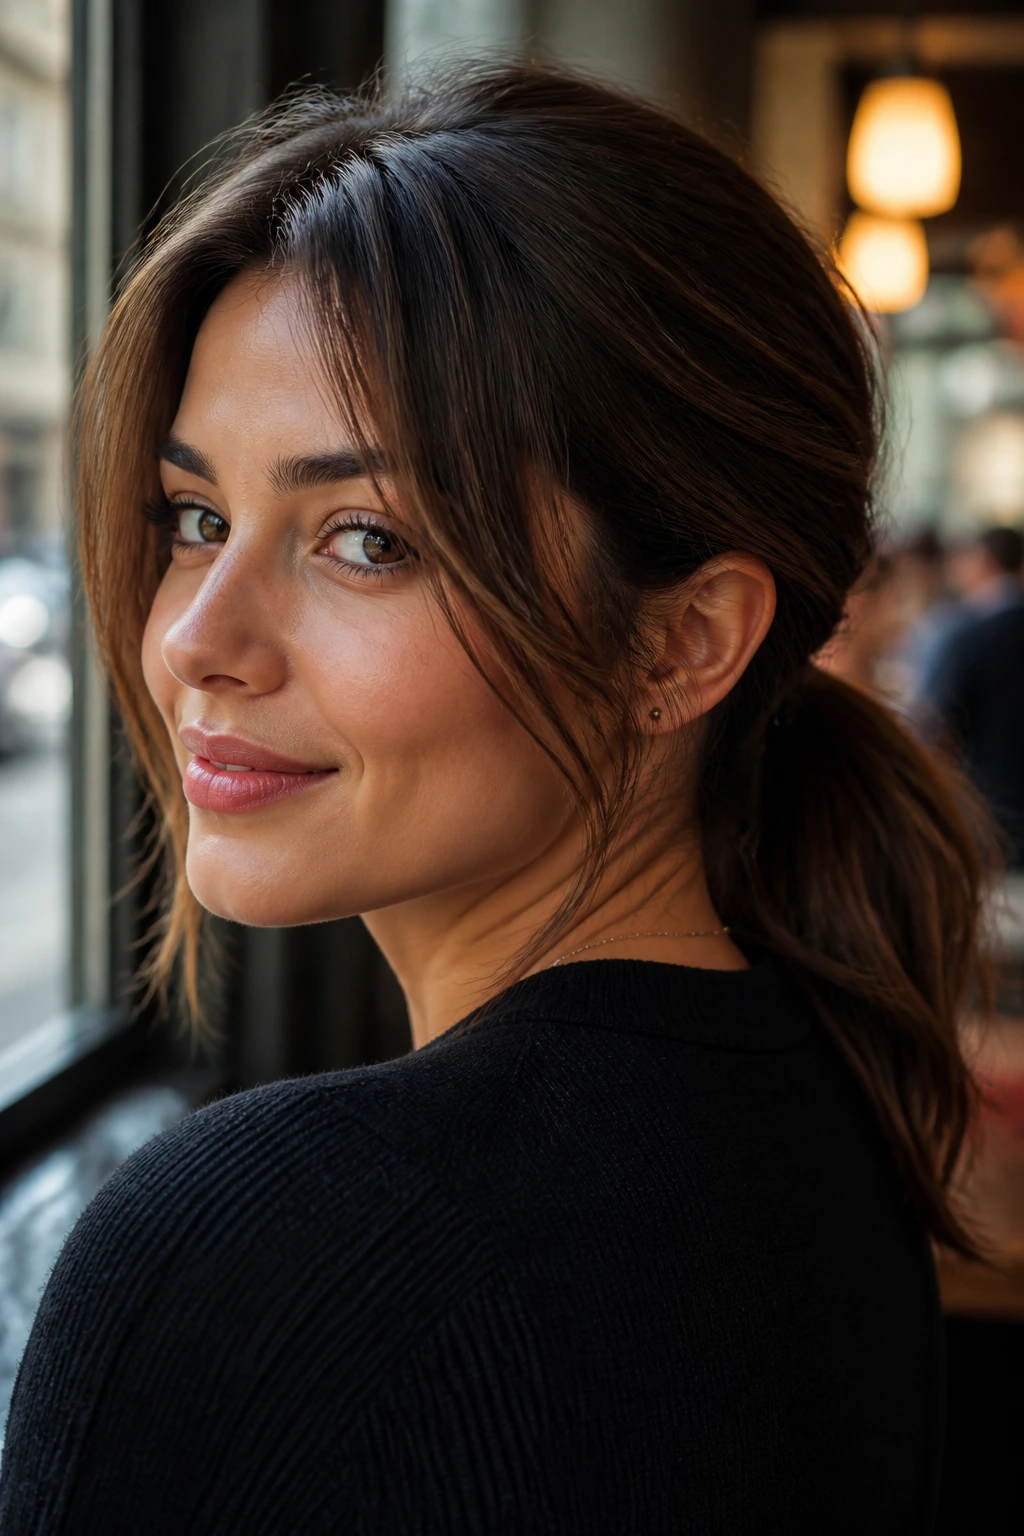
Some layered cuts look wonderful down and a little sad in a ponytail. This one avoids that problem. The face-framing pieces stay long enough to tuck back, while the mid-length layers keep the hair from losing shape when it’s tied up. If you wear your hair up more often than down, that matters.
I’d ask for this if you need a cut that survives workouts, office buns, and rushed mornings. The key is not cutting the front too short. Shorter pieces feel lively in a photo and annoying in real life when they fall out of clips every twenty seconds. Keep the frame long enough to cooperate.
22. Red-Carpet Blowout Layers
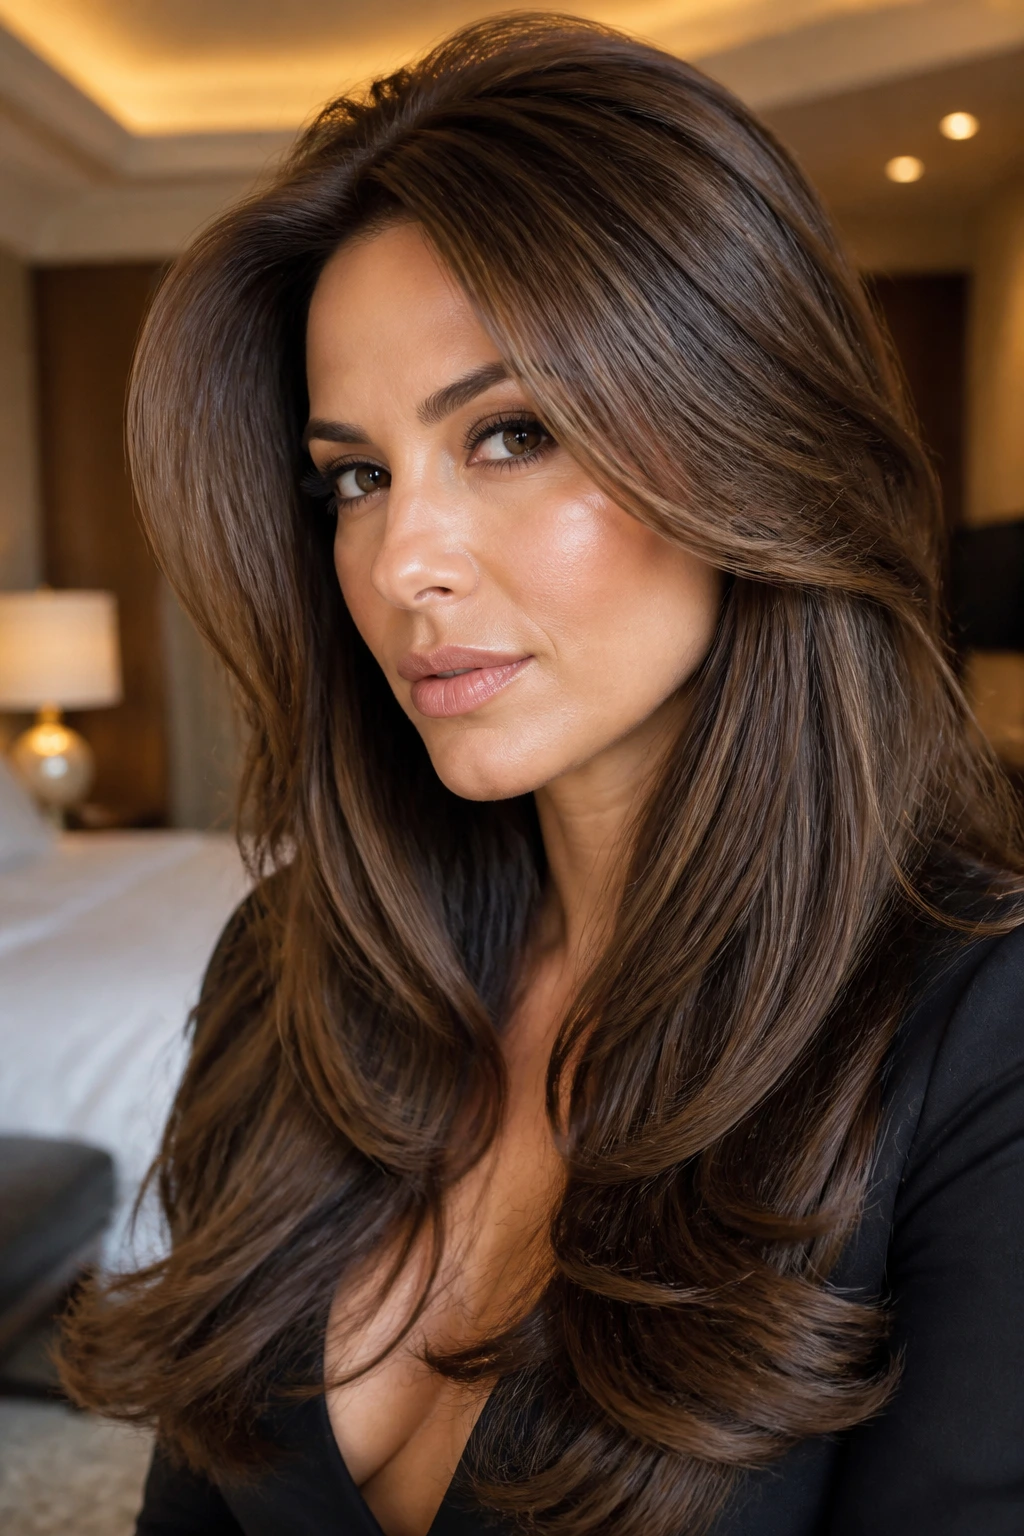
Red-carpet blowout layers are all about gloss, swing, and a finish that looks expensive because it’s smooth from root to end. The layers are there, but they don’t shout. They guide the blowout so the hair moves in one polished direction, with volume sitting at the crown and a soft curve through the mids.
This style asks for a little effort. A round brush, a nozzle on the dryer, heat protectant, and a finishing cream on the ends all matter. Skip the heavy oils at the roots. They collapse the lift you just built. The goal is movement with control, not a fluffy cloud.
23. Easy Grow-Out Layers That Stay Full
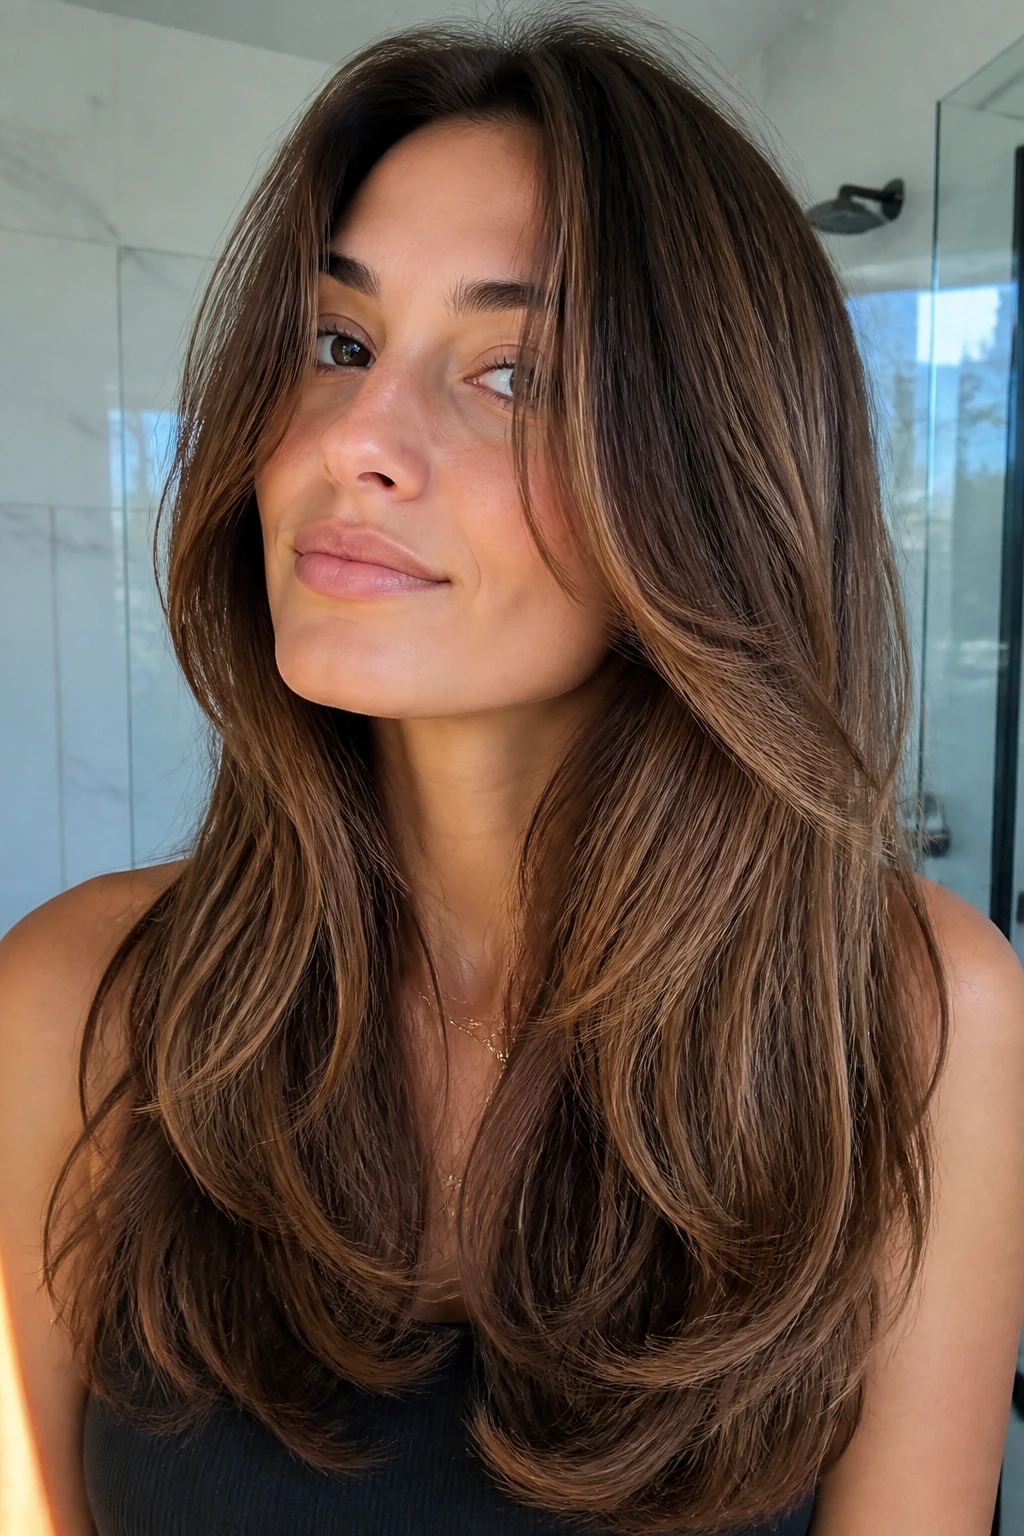
The best haircut is the one that still looks intentional six weeks later. Easy grow-out layers do that by keeping the shortest pieces low enough to blend as they lengthen, while the rest of the hair stays thick through the bottom. You don’t get a harsh step line. You get a soft shift.
This is the most practical option in the bunch, and I mean that as a compliment. If you don’t want a high-maintenance salon schedule, ask for medium layers that start lower in the shape and keep the ends full. It’s the cut that lets you skip a trim without looking like you forgot your appointment.
How Long Layers Get Their Lift Without Looking Thin
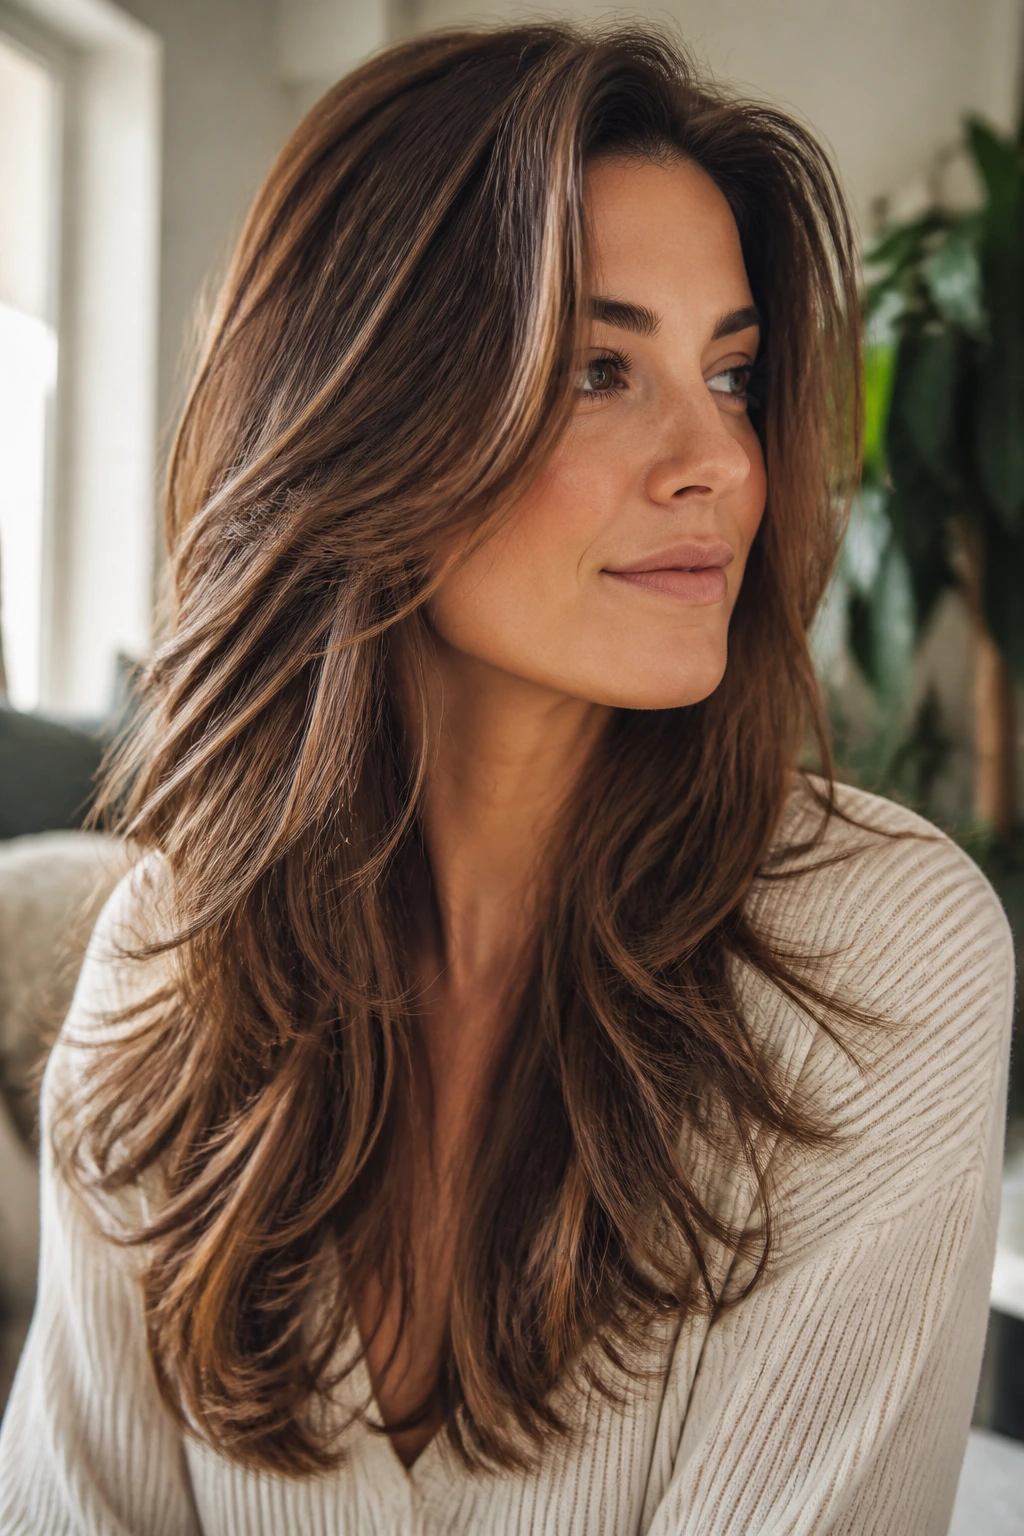
The shape of long hair changes more from weight removal than from length removal. That sounds obvious until you see how many cuts take off too much from the bottom and leave the ends stringy. With medium layers, the trick is to move bulk out of the center of the hair so the roots can rise and the perimeter still looks solid.
The best versions of this cut have a clear weight line. You can feel it when the hair moves: the crown isn’t dragging, the mids don’t sit like a block, and the ends still hold enough density to frame the shoulders. That’s the difference between volume and fluff. One feels full. The other feels like the haircut ran out of hair.
The shortest layer matters more than the number of layers. One good layer placement around the collarbone can change how the whole head falls. Too many people ask for “lots of layers” when what they actually need is one smart shift in the front and a bit of internal removal through the back.
Tools and Products That Matter
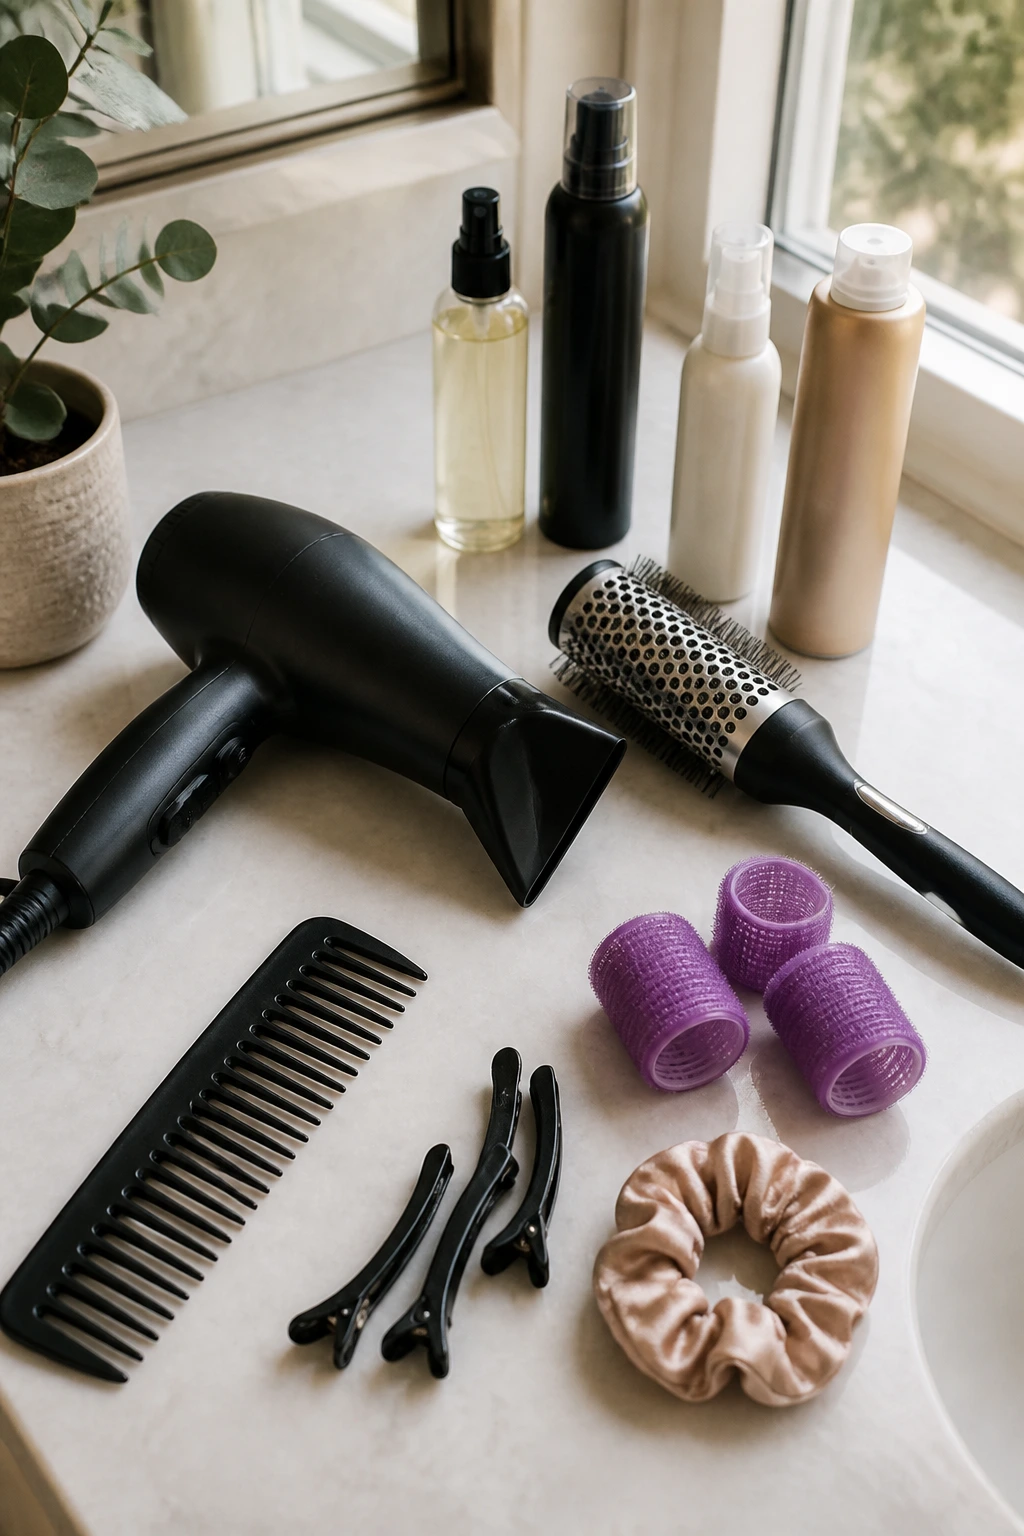
- 1.5- to 2-inch round brush: Big enough to build bend without creating tiny curls that collapse fast.
- Blow dryer with a nozzle attachment: The nozzle directs airflow, which keeps the layers smooth instead of frizzy.
- Velcro rollers: Useful for setting the crown and face frame while the hair cools.
- Heat protectant spray: A non-negotiable if you blow-dry or hot-tool the cut more than once a week.
- Root-lifting mousse or foam: Best at the crown and around the part where the hair goes flat first.
- Lightweight texturizing spray: Adds separation to shaggy, beachy, or feathered layers without making the hair stiff.
- Dry shampoo: Helps day-two volume, especially on fine hair that collapses at the roots.
- Wide-tooth comb: Better than a brush on damp wavy or curly hair, because it keeps the layer pattern intact.
- Sectioning clips: Make blowouts easier. Skipping them usually means the top gets styled and the back gets ignored.
- Silk scrunchie or soft tie: Useful for preserving layer shape in ponytails and loose buns.
How to Ask for the Right Layer Placement at the Salon
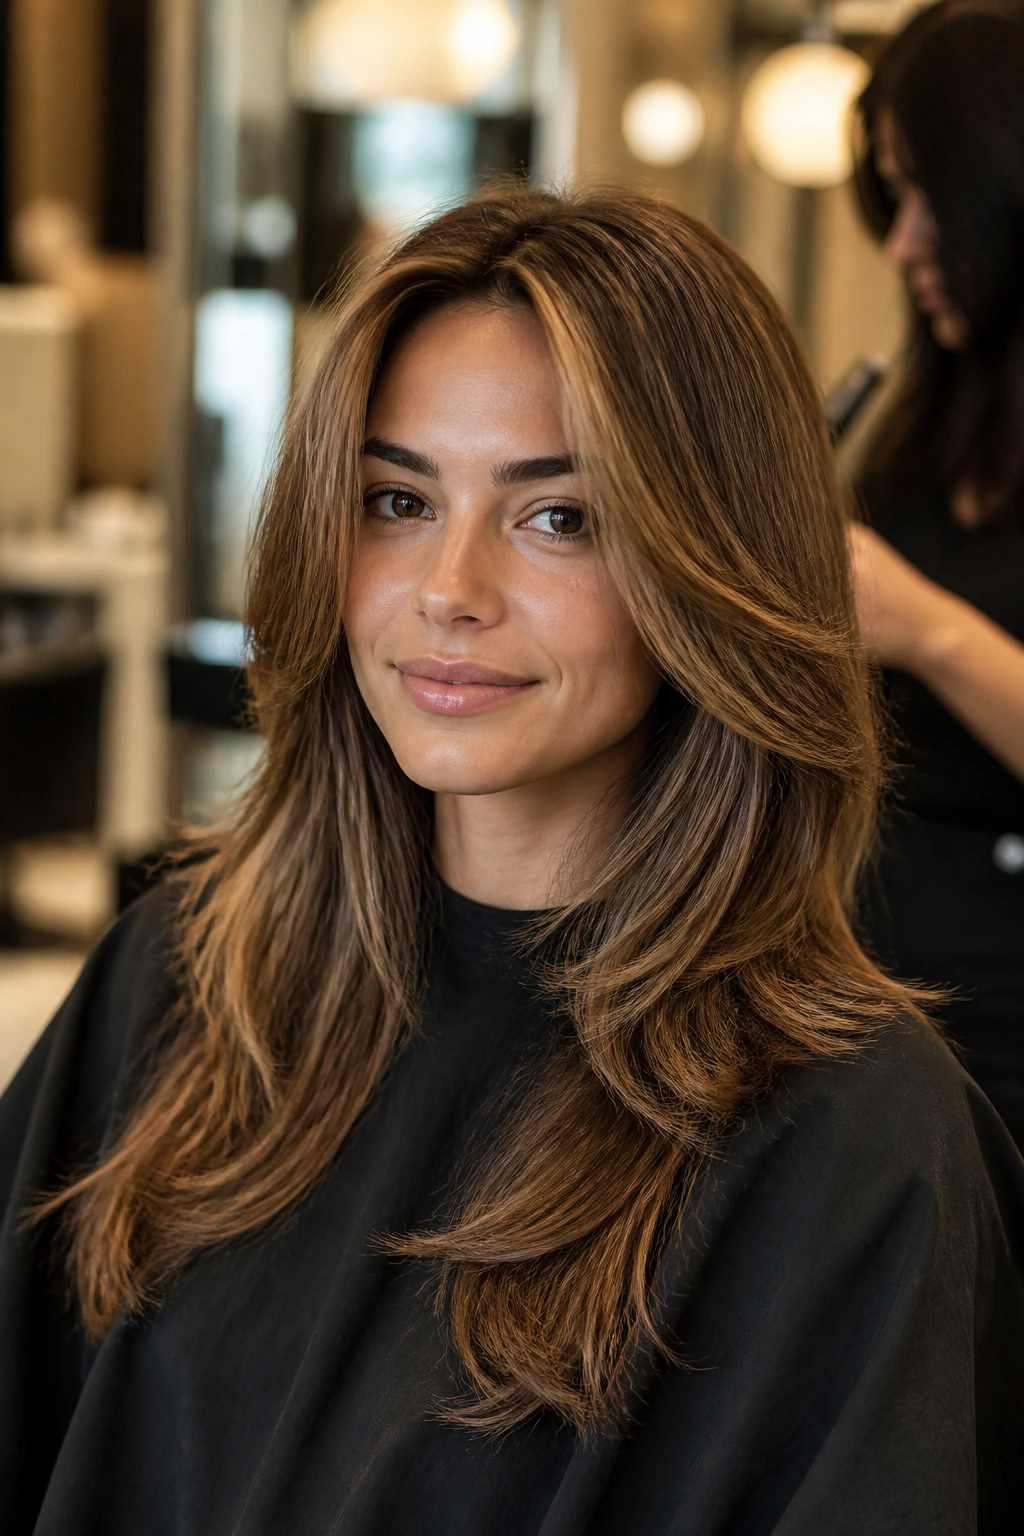
Bring photos. Two is better than one. One from the front, one from the back. Haircuts are sneaky that way; the front can look perfect while the back turns into a triangle or a mullet-shaped surprise.
Tell the stylist where your part lives and how you actually wear your hair. If you always wear a center part, say so. If you side-part and clip one side back half the week, say that too. Layers are not neutral; they’re cut to fall a certain way, and the part line changes the whole math.
The most useful thing you can say is where you want the shortest layer to land. Collarbone? Chin? Lip level? Those words are more helpful than “face-framing” alone. Also mention your texture honestly. Fine hair needs restraint. Thick hair needs weight removed with care. Curly hair needs shrinkage respected. That’s not fussiness. That’s the haircut talking back later if nobody listens now.
How to Wear These Layers for Air-Dried Days, Blowouts, and Updos
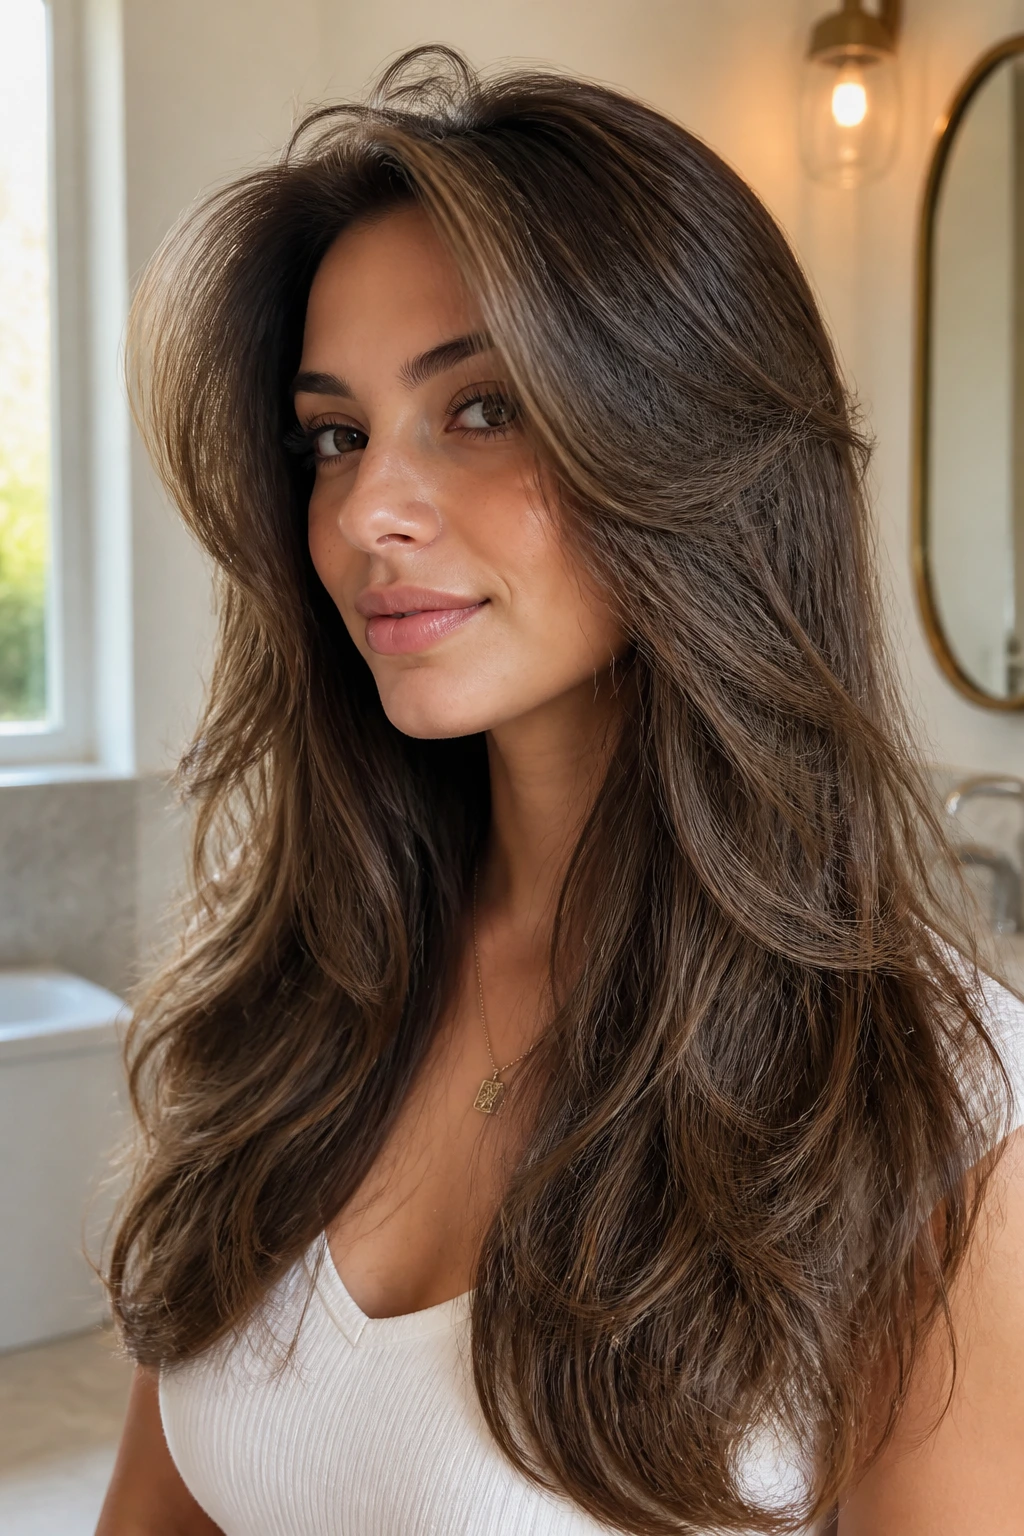
Presentation: Let the haircut’s strongest point show first. On a blowout day, that means a lifted crown and ends that curve under or away from the face. On an air-dry day, it means letting the bends fall where they naturally want to fall instead of fighting them into perfection.
Accompaniments: Pair the cut with the right part, bangs, or clip style. A deep side part gives instant lift. Curtain bangs or bottleneck bangs make the front feel fuller. A claw clip or low twist should leave a few face-framing pieces out so the volume doesn’t disappear the minute the hair goes up.
Scale: Keep the layer placement matched to density. Fine hair does better with longer, lighter internal layers and a fuller perimeter. Thick hair can take more visible shaping through the mids, especially if the ends need to move instead of sit in a block.
Finish: Choose the finish based on what your hair already does. If it bends naturally, use mousse and a diffuser or air-dry cream. If it’s straight and stubborn, lean on a round brush or rollers. If you want a glossy, polished look, finish with a drop of serum only on the last inch or two — not at the root, unless you enjoy flat hair on purpose.
Small Tweaks That Add More Lift and Shine
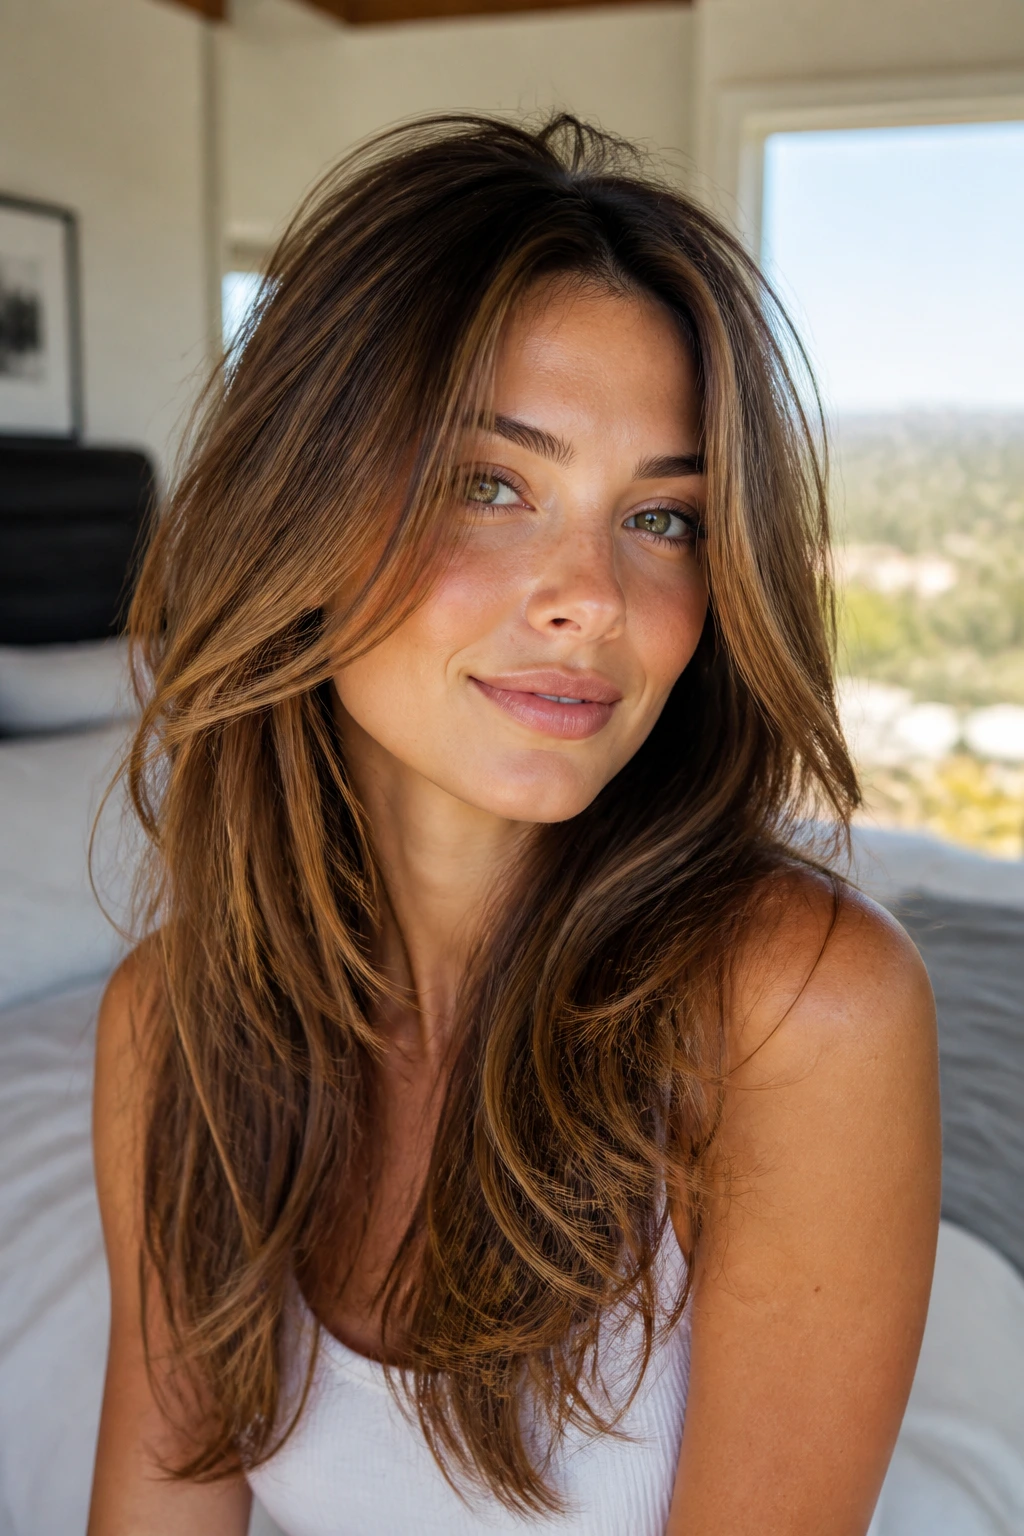
Root Boost: Lift the crown while drying by aiming the nozzle against the direction the hair falls. It sounds small. It isn’t. Hair remembers the direction it dries in, and the root is where the whole shape gets judged.
Texture: Use less product than your instinct tells you. A walnut-size amount of mousse is usually enough for long hair; more than that and the mids can get sticky, which kills movement fast.
Shine: Put smoothing cream or serum only on the ends and surface, not through the roots. The first inch around the scalp is where volume dies if you coat it with anything heavy.
Make-It-Yours: For fine hair, ask for softer internal layers and keep the perimeter blunt. For thick hair, let the stylist remove bulk through the interior so the cut can breathe. For curly hair, respect shrinkage and shape the curl pattern, not just the wet outline. For straighter hair, build bend with heat tools rather than trying to force texture that isn’t there.
Common Mistakes That Flatten the Shape
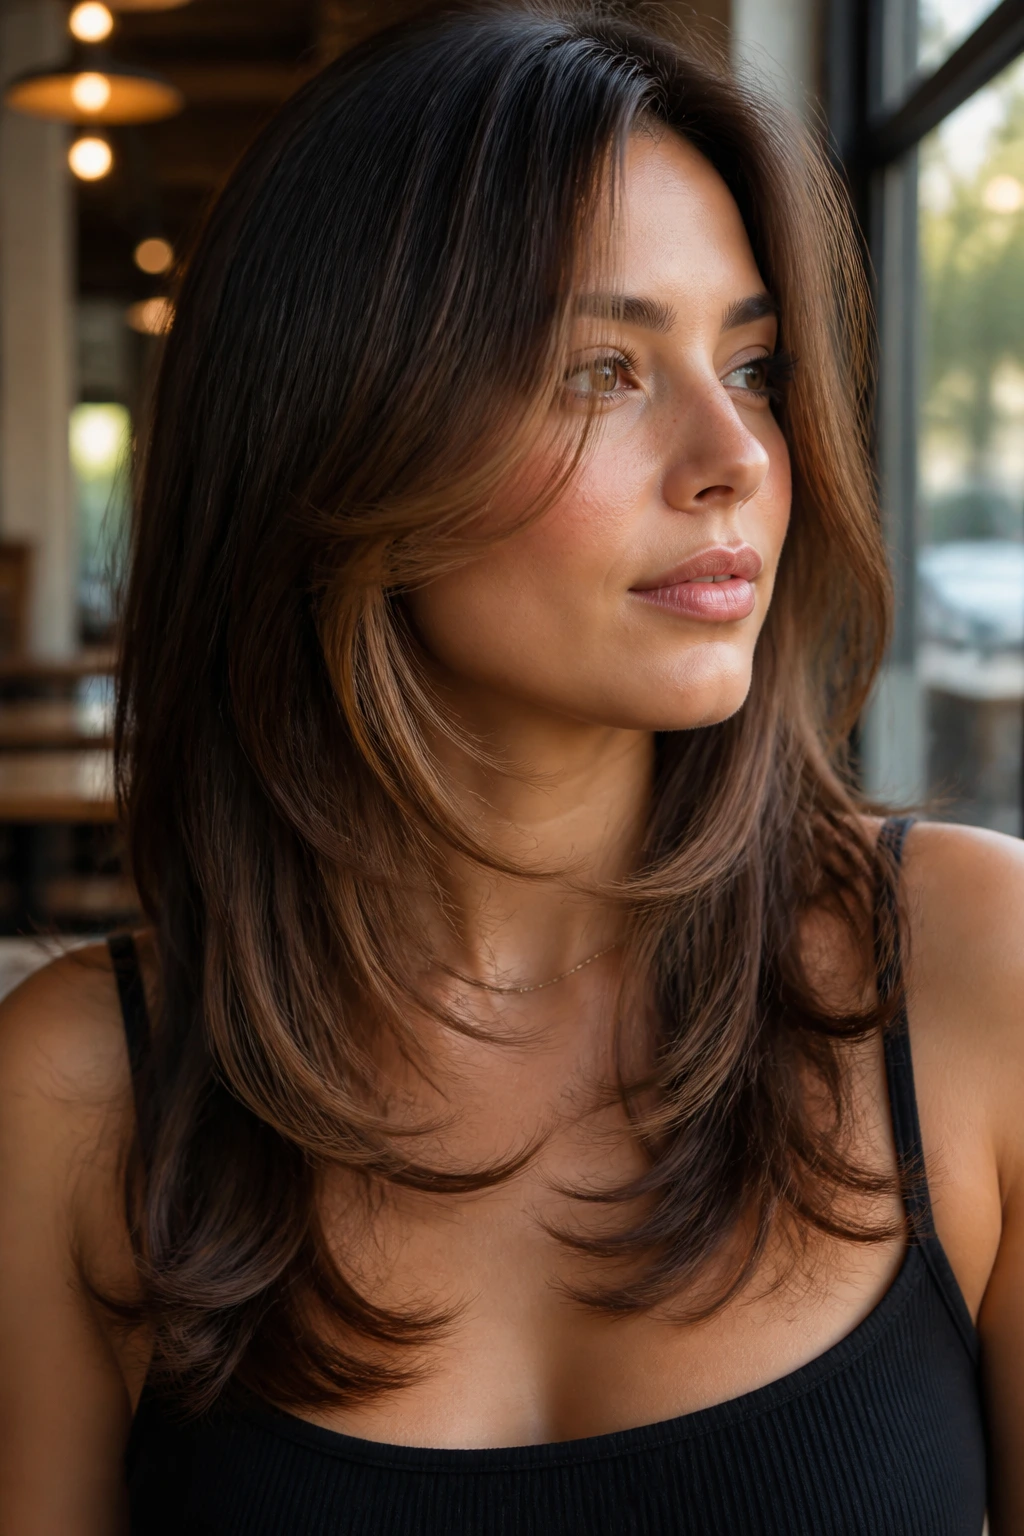
The first mistake is asking for layers that start too high. The haircut may look exciting in the chair, but the ends thin out faster than you expect and the whole shape loses density. If you want fullness, keep the shortest visible layer lower than the jaw unless you really want a more dramatic cut.
Over-thinning is the next problem. Fine hair especially can get wispy and dry-looking if the stylist uses too many thinning shears or razor passes. The fix is simple: ask for soft blending, not aggressive texturizing. You want movement, not see-through ends.
Product buildup can sabotage the volume you paid for. Heavy oils, thick creams, and too much dry shampoo create a dull, coated root that won’t lift. Clarify when the hair starts feeling waxy, and keep heavy products away from the scalp.
Ignoring your part line is another easy way to wreck a good cut. If the stylist cuts around a center part and you wear a deep side part every day, the shape can fall strangely on one side. Say how you part it before the scissors come out.
And then there’s the styling mistake nobody wants to hear: blasting the hair with heat but never setting the crown. The ends might look finished, but the top goes limp in an hour. Clip the crown, let it cool, and stop rushing that part. It pays you back.
Named Variations and Texture Swaps to Try
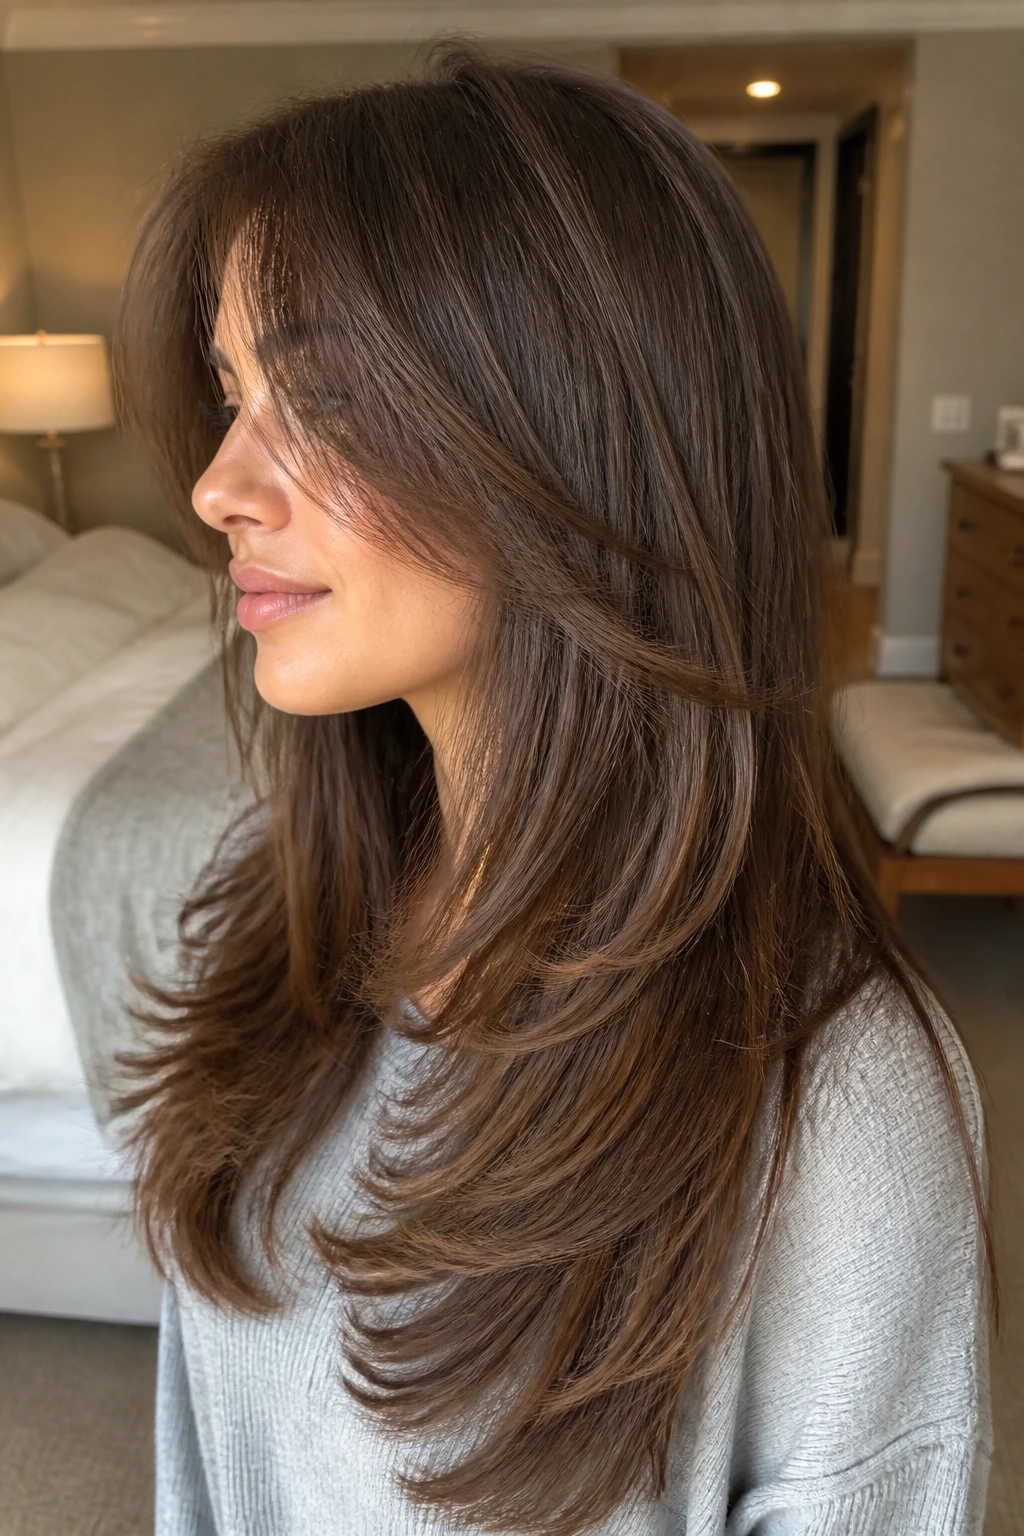
The Fine-Hair Float: Keep the layers long, soft, and mostly internal, then pair them with root-lifting mousse and a light round-brush bend. The goal is fullness without losing the last few inches of density.
The Thick-Hair Airflow Cut: Use deeper internal layering through the mids and keep the perimeter curved or blunt enough to hold shape. This version lets heavy hair move instead of ballooning.
The Curly Halo Shape: Cut for curl shrinkage and keep the shortest pieces low enough to respect bounce. The volume sits around the head instead of making the hair puff outward at the sides.
The Blowout Frame: Add stronger face-framing pieces and longer medium layers through the back so a round-brush finish has somewhere to land. This is the one for people who love smooth, glossy hair with swing.
The Grow-Out Softie: Ask for layers that begin lower and blend gradually into the length. It stays neat longer, which matters if salon visits are spaced out.
How to Keep the Cut Fresh Between Trims
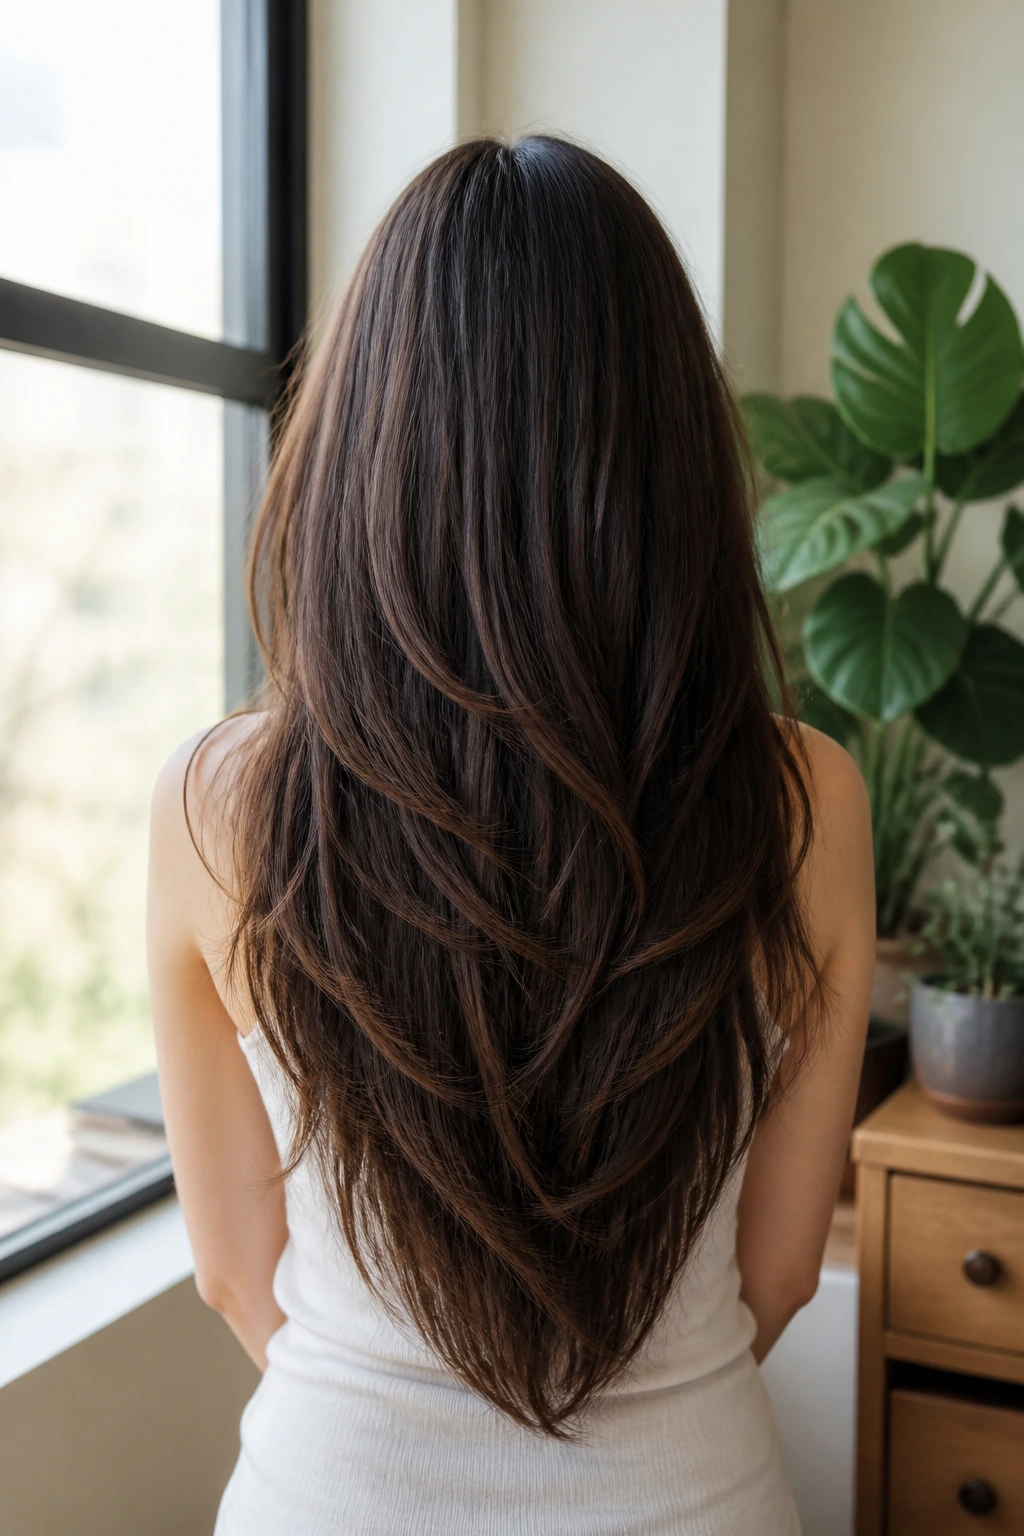
Long layered hair looks best when the ends are taken care of before they get ragged. For most people, a trim every 8 to 12 weeks keeps the shape alive. If you heat-style often or your hair splits quickly, 6 to 8 weeks is safer. Waiting too long doesn’t just lengthen the time between appointments; it changes the way the layers sit.
At home, protect the ends at night with a loose braid, a soft scrunchie, or a silk pillowcase. That won’t stop hair from growing, but it will stop the layers from tangling themselves into a knot by morning. Dry shampoo is fine, but don’t build your whole volume routine on it. Too much product at the scalp makes the root heavy, and heavy roots are volume’s enemy.
If the shape starts feeling tired before the trim, usually you do not need a full haircut. A tiny dusting at the ends and a refresh around the face frame often brings the whole thing back. Hair is rarely asking for a big rescue. Most of the time it just wants a clean edge and a little lift.
Frequently Asked Questions
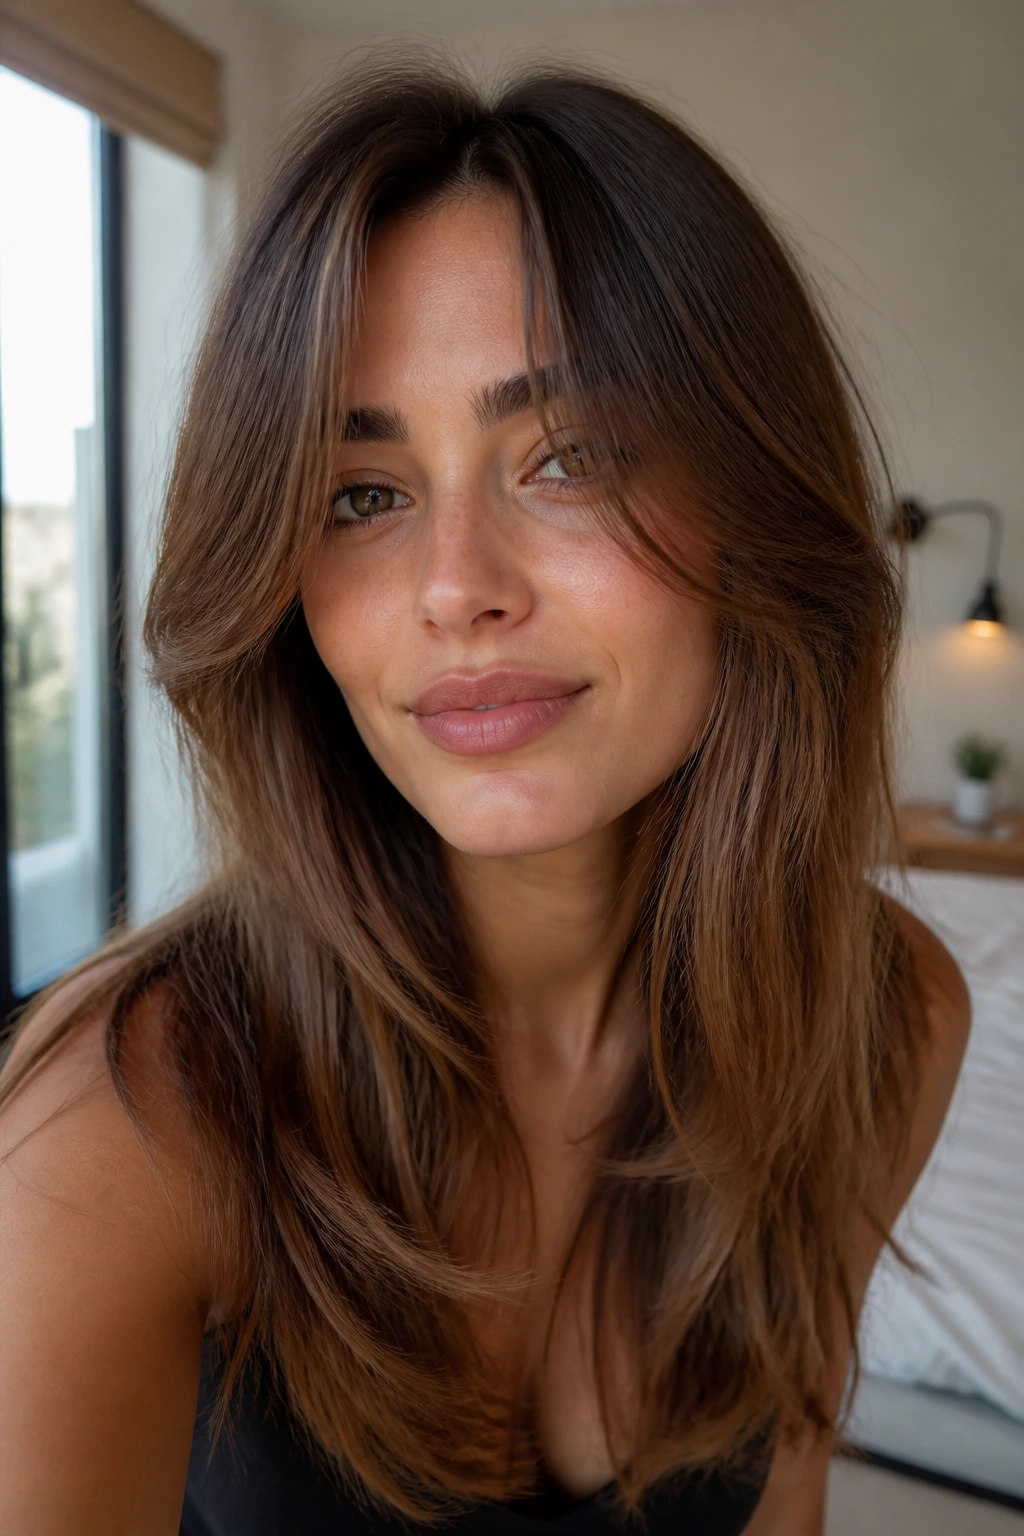
Will medium layers make long hair look thinner?
Not if they’re placed well. The problem is usually over-cutting the ends or stacking too much texture into fine hair. Keep the perimeter full and ask for internal movement instead of heavy thinning.
Where should the shortest layer start?
That depends on how dramatic you want the shape to be, but collarbone, lip level, and chin are the most useful reference points. If you want volume without a shaggy finish, the collarbone zone is the safest starting place.
Are medium layers good for fine hair?
Yes, if the layers are soft and the ends stay strong. Fine hair usually looks best with invisible layers or a blunt perimeter plus hidden weight removal, because too much obvious layering can make the hair look sparse fast.
Can curly hair handle medium layers?
Absolutely, and often it needs them. Curly hair without layers can turn into a triangle or a heavy block. The real trick is cutting with shrinkage in mind, usually dry or at least with a strong sense of how the curl behaves once it springs up.
How do I keep the volume from disappearing by lunchtime?
Set the roots while the hair is warm, not hot, and let them cool in place. A little mousse at the crown, a round brush or rollers, and a light mist of flexible spray do more than a giant cloud of product.
What if my layers flip out in a weird way?
That usually means the shortest layer is sitting too high or the last inch is too blunt for your texture. If the cut is already done, wrap the ends under with a round brush or bend them slightly inward with a flat iron to bring the shape back into line.
Can I still wear my hair up with these layers?
Yes, but the way you ask for the face frame matters. If you want clean ponytails and buns, keep the shortest front pieces long enough to tuck behind the ear. Shorter pieces look cute for a minute and then spend the whole day escaping.
How do I explain this cut to a stylist?
Say where you want the shortest visible layer to land, how you part your hair, and whether you want obvious layers or hidden ones. A photo helps, but the real detail comes from telling them how the hair lives when you leave the chair.
The Shape That Keeps Its Lift
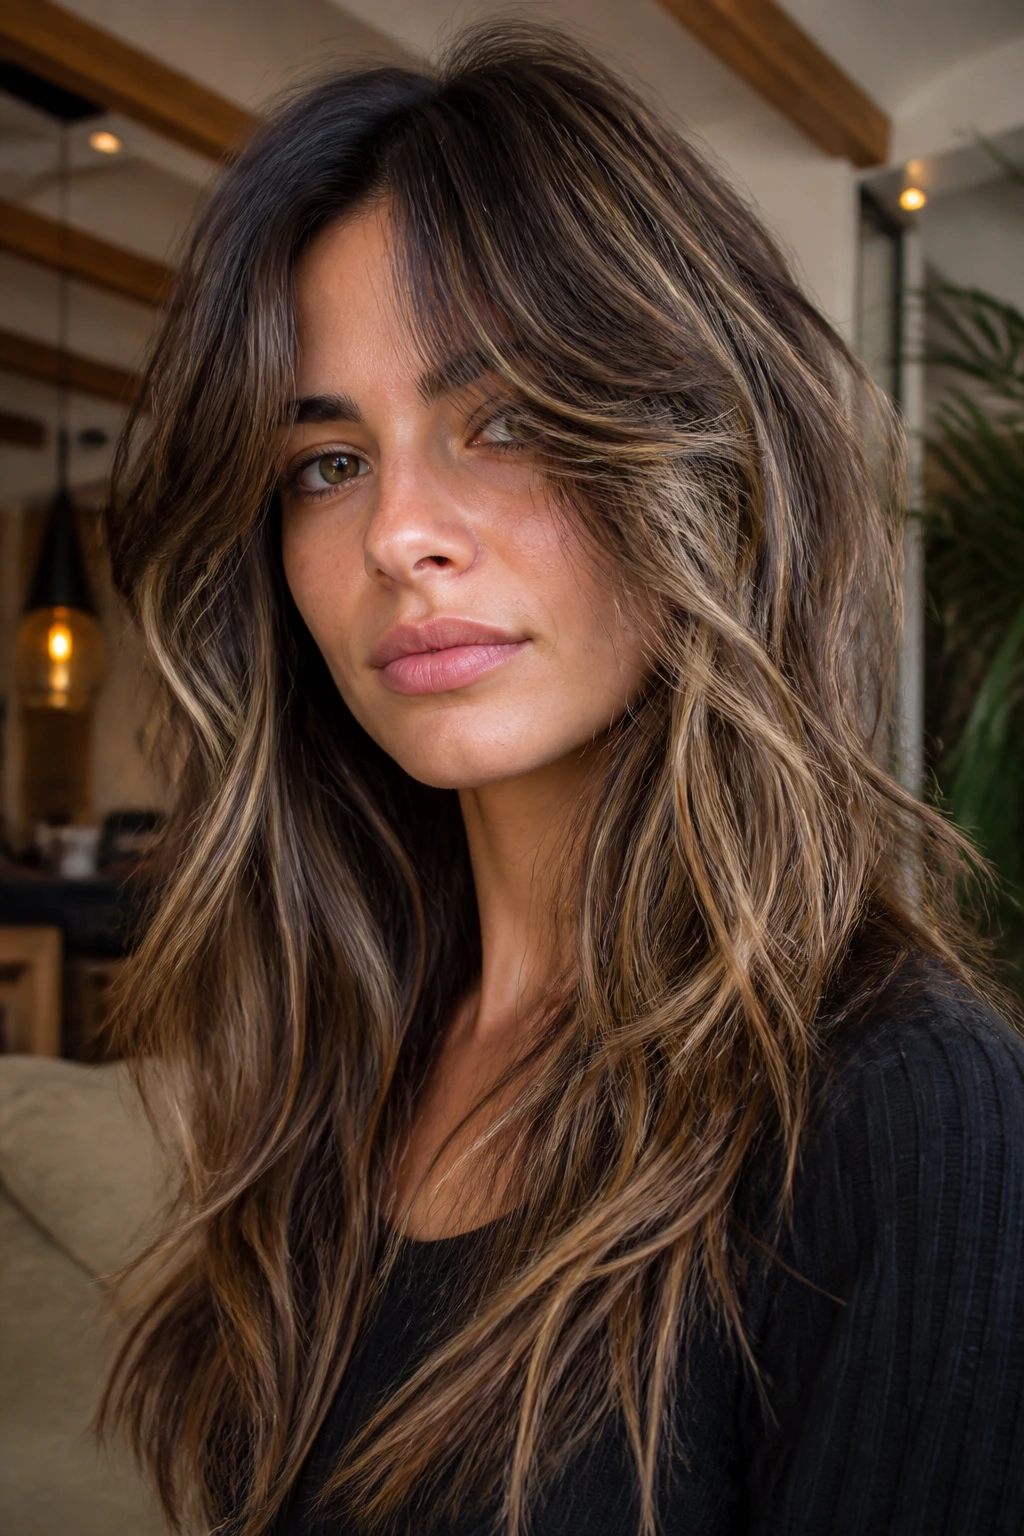
Long hair does not need to be chopped short to feel lighter. It needs the weight moved to better places. That’s why medium layers keep showing up in good salon cuts: they give the hair room to move without taking away the length that makes long hair feel like long hair.
If the cut is shaped well, you’ll see it in small ways first — the crown lifts a little easier, the front bends instead of hanging, and the ends stop looking like they’re holding up the whole head by themselves. That quiet shift is the real win. Not drama. Not fuss. Just hair that behaves like it has a little energy in it.
The best version is the one that matches how you actually wear your hair, not how it looks in a perfect mirror shot. Choose the layer placement with your part, your texture, and your daily routine in mind, and the volume tends to take care of itself.
