



A good mohawk on natural hair doesn’t need a razor line or a dramatic cut to look sharp. On Black women, the shape can be soft, sculptural, playful, polished, or a little bit fierce — sometimes all at once. That’s what makes natural mohawk hairstyles for Black women so useful: they let the middle strip do the talking while the sides stay sleek, twisted, braided, or tucked away.
The trick is balance. Too much tension at the hairline and the style starts looking tight in the wrong way. Too little structure and the whole shape collapses into ordinary puff territory. The best versions work with shrinkage instead of fighting it, which is why a twist-out hawk, a flat-twist frohawk, or a braided side-panel look often lands better than a style that’s trying too hard to be crisp. Natural hair likes a little room to move.
And that room can change the whole mood of a look. One day it’s a high puff hawk with gold cuffs and a strong side part. The next day it’s a low, tucked frohawk that keeps the crown full and the edges calm. Same basic silhouette. Different energy. That flexibility is the reason people keep coming back to mohawks on textured hair, and the styles below show just how far you can push the shape without losing the hair’s own texture.
Why These Mohawk Looks Keep Working on Natural Hair
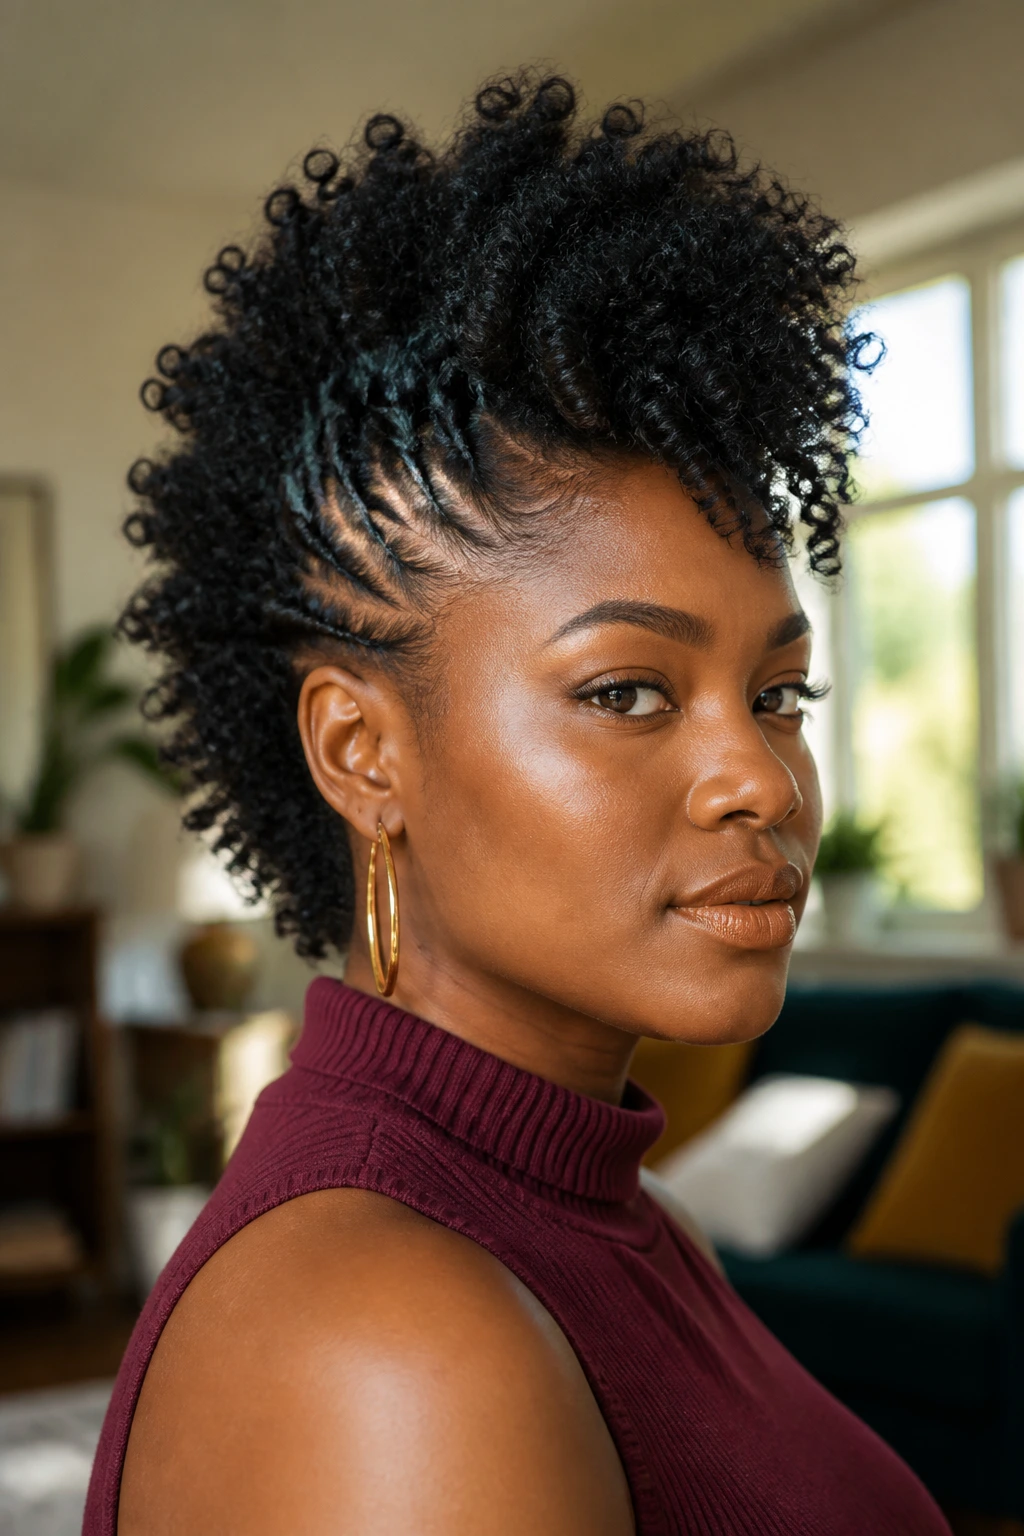
-
The shape follows your texture: Natural coils and curls already build height in the center, so the mohawk outline feels like a smart fit instead of a fight.
-
You can go soft or structured: Some versions lean fluffy and full; others use cornrows, flat twists, or pins to make the middle line look cleaner and longer.
-
They protect the edges when done right: Keeping the sides smooth or tucked can reduce daily combing on fragile areas around the temples and nape.
-
They work at different lengths: Short TWA hair, shoulder-length curls, stretched twist-outs, and long locs can all be shaped into some version of the look.
-
They play well with accessories: Hair cuffs, scarves, pins, and colored thread change the whole feel without needing a full restyle.
-
They can be dressed up fast: A mohawk silhouette reads polished even when the styling itself only takes a few minutes and a handful of bobby pins.
1. Twist-Out Frohawk with Soft Side Swoops
A twist-out frohawk gives you that full, fluffy ridge down the center without making the style feel stiff. The side hair is usually pinned flat or twisted back in small sections, then the middle is fluffed so the curls sit high and wide. It has movement. It has shape. It doesn’t look overworked.
What makes it work
This is one of the easiest natural mohawk hairstyles for Black women because it starts with a style you probably already know how to do: two-strand twists. After you unravel them, the center section gets volume almost by accident, which is the best kind of volume. The sides stay controlled, but not crunchy.
If your twist-out usually stretches a little at the roots, that works in your favor here. Let the crown stay a touch tighter if you want more lift. Let the ends frizz a little if you want the hawk to look softer and fuller.
- Best on: Medium to long natural hair with a defined twist-out pattern.
- Styling note: Pin the side sections under, not across the top, or the silhouette gets lumpy.
- Finish: A light oil on the ends is enough. Heavy butter will weigh the center down.
Pro tip: Separate the twist-out with your fingers first, then use a pick only at the roots. If you go straight in with a pick, the shape gets wide before it gets tall.
2. Bantu Knot Mohawk with Sculpted Front
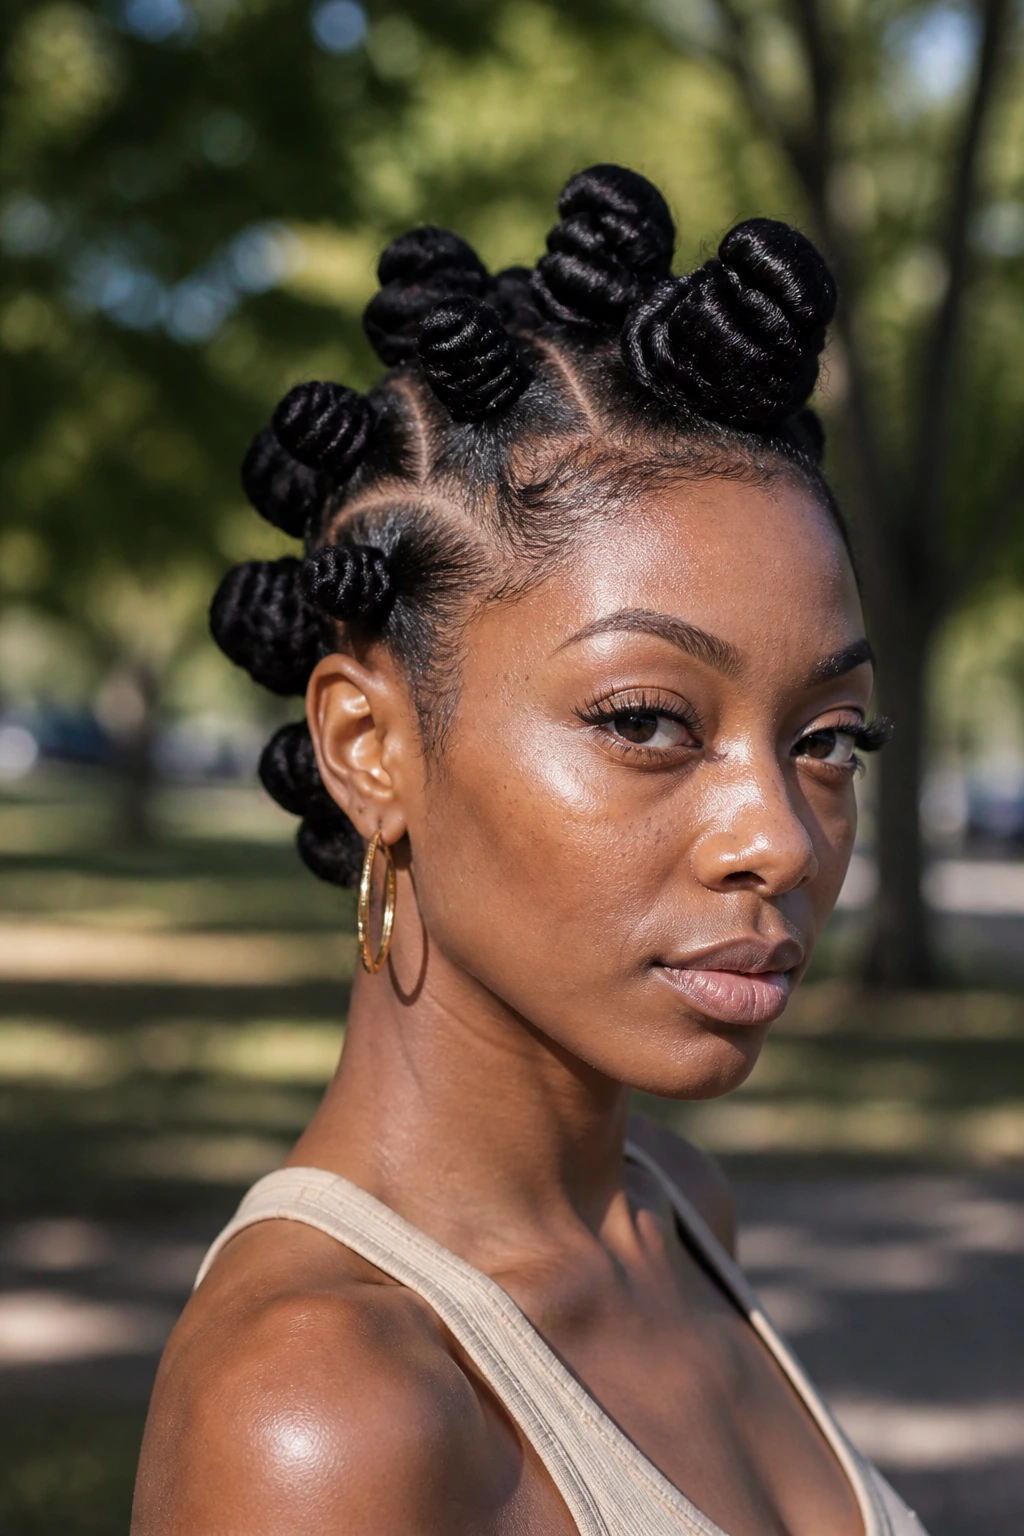
Bantu knots don’t have to stay as knots. When you take them down or combine them with a pinned side shape, you get a mohawk that has little pockets of definition running through the middle. It’s structured, but not severe.
The front can be the real star here. I like when the first knot or two sit slightly higher on the forehead, almost like a built-in crown. It gives the style a sense of intention without needing a lot of accessories.
Best for
This version fits hair that holds a set well, especially if the knots were made on stretched hair. If your strands are thick and springy, the knots hold their shape beautifully and the unraveling creates a chunky curl pattern that looks fuller than a twist-out.
You can wear the knots intact for a sculptural look or loosen them into mini puffed sections. Either way, the sides should stay neat and close to the head. That contrast is what makes the mohawk line readable.
Use this when: you want a style that lasts a few days and still looks interesting on day three.
3. Flat-Twist Mohawk for Stretch and Definition
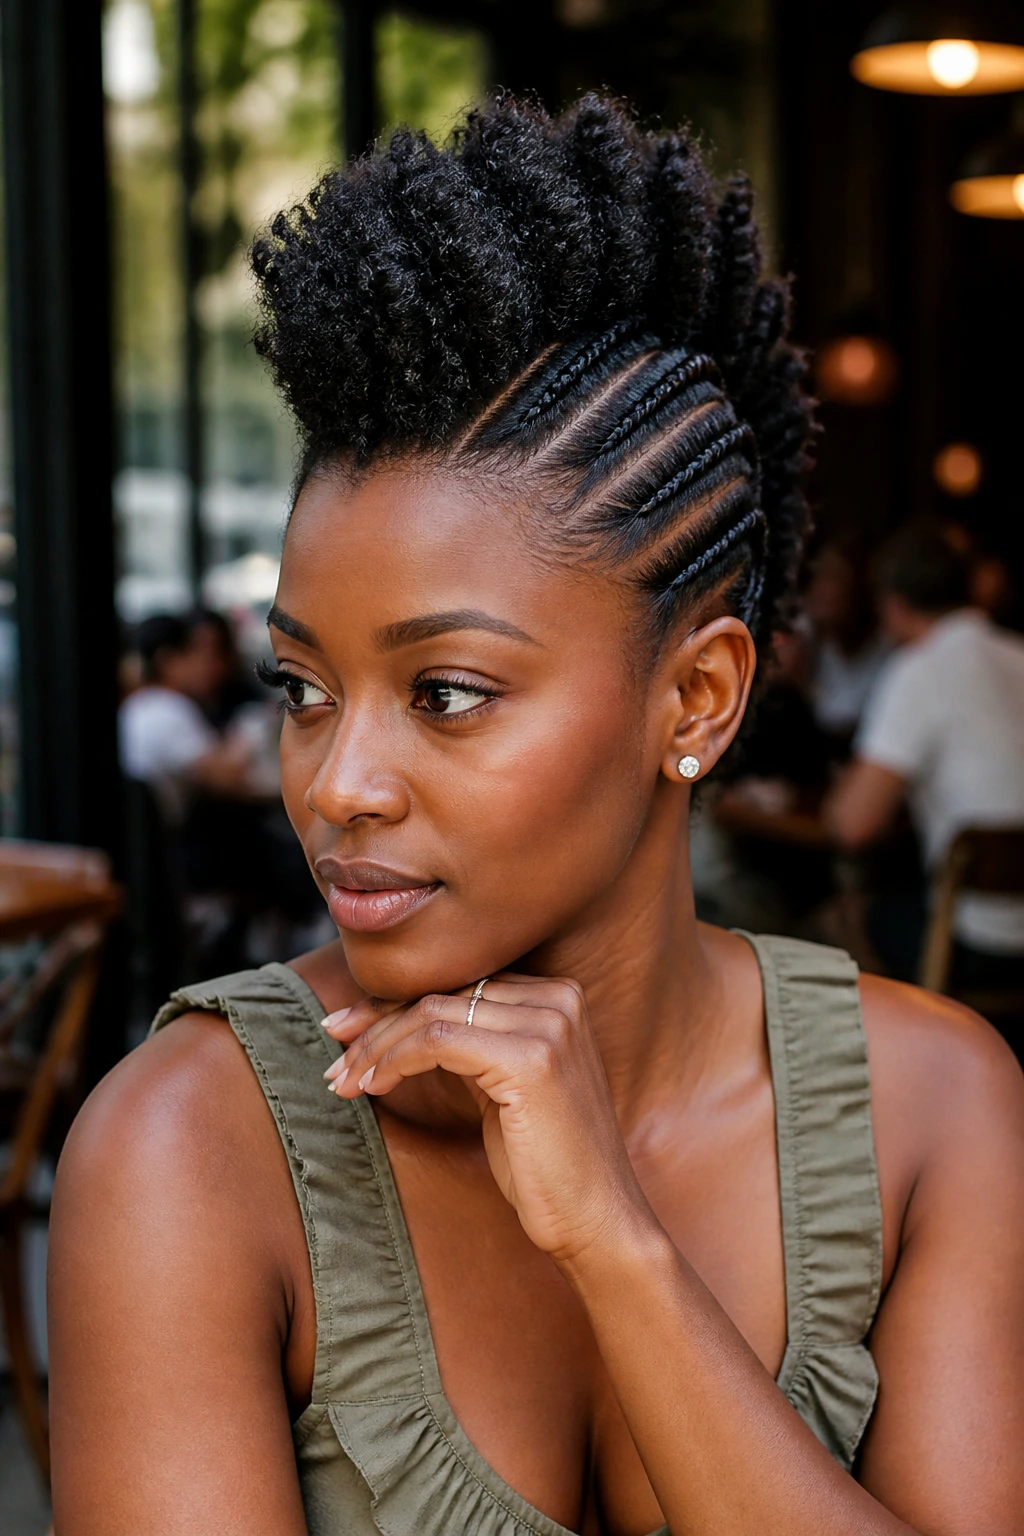
Flat twists are one of those styles that quietly do a lot of work. They pull the sides in, stretch the roots, and build a clean line down the middle that makes the whole head look longer. There’s no guesswork here. The shape is built in.
The center ridge can stay twisted, or you can let the ends puff out for more movement. I prefer the second version on hair that’s dense at the crown, because the little bit of fluff keeps the style from looking too neat.
Why it looks different from a braid hawk
Flat twists sit a little softer than cornrows. They don’t grip the scalp as hard, and that makes them easier to wear if your hairline is sensitive. The visual effect is still neat, though, and that’s the sweet spot.
If you’re styling for a workday, this is one of the best choices in the whole lineup. It reads polished from across the room, but up close it still feels like natural hair. No fake shine. No shellacked edges. Just shape.
Try this: twist the center section forward at first, then pin it back slightly once you see where the height lands.
4. High Puff Hawk with Clean Side Parts
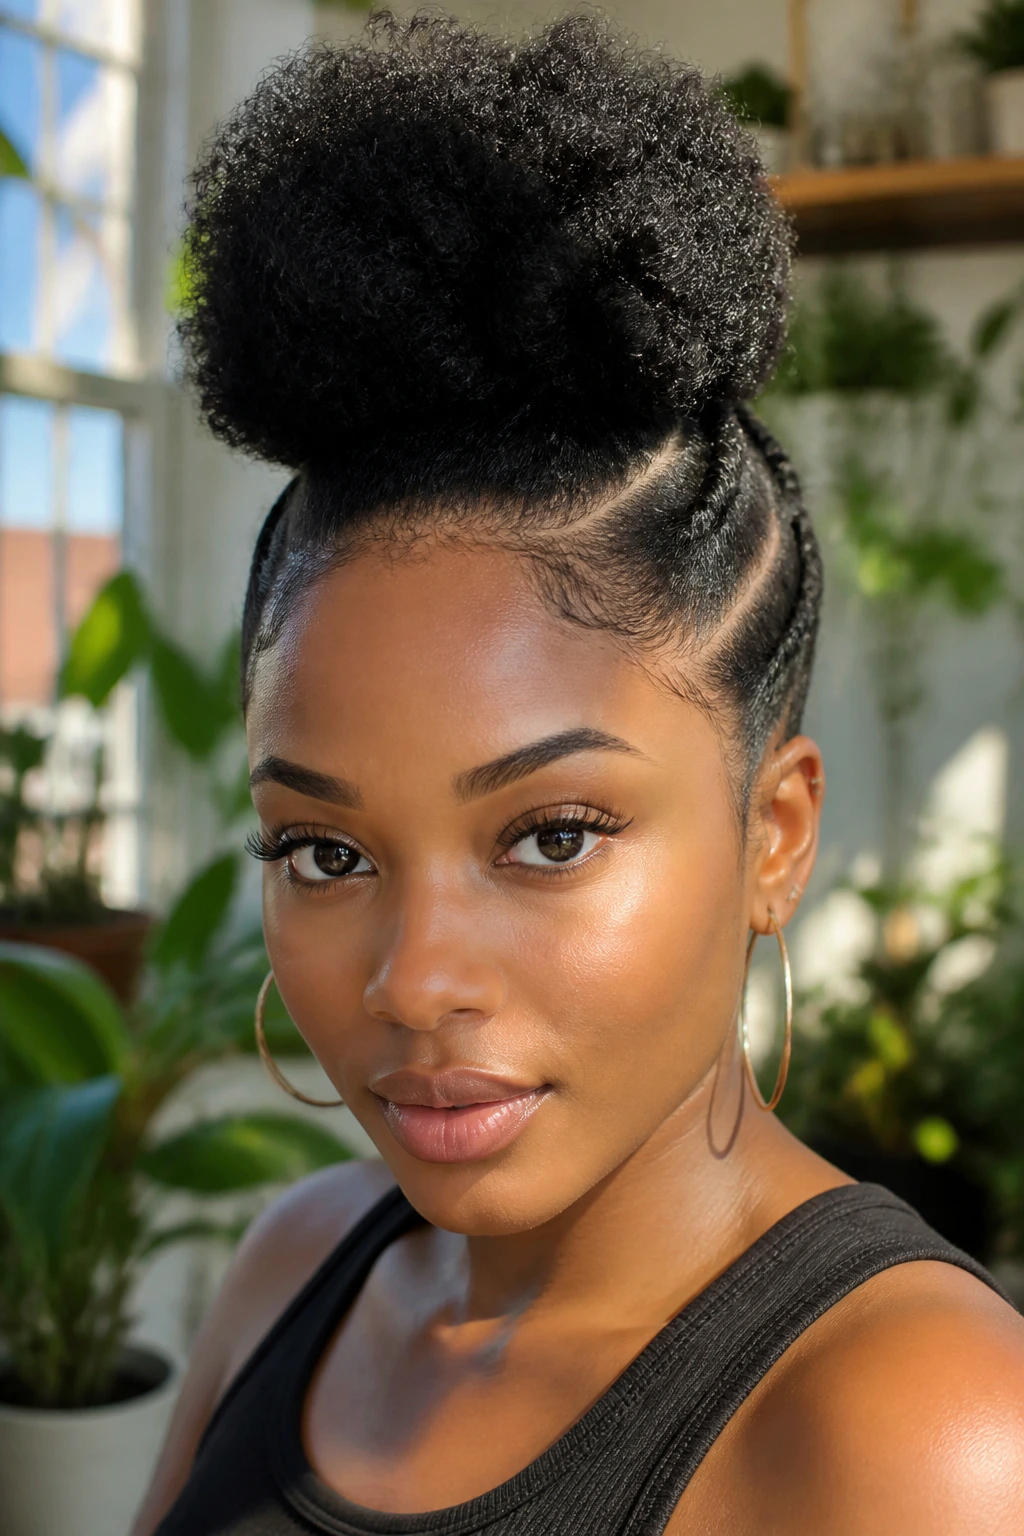
A high puff hawk is the style I reach for when I want the quickest payoff. The sides are parted and smoothed into neat sections, while the center is gathered into one or two puffs that sit high on the head. It’s simple, but the silhouette does a lot of heavy lifting.
The clean parts matter here. Without them, the puff can drift into regular updo territory. With them, you get that mohawk line immediately — front to back, no confusion.
For Black women with dense curls, this style is useful because it doesn’t ask the hair to fight shrinkage. The puff is the structure. You can stretch the center first with banding or a soft blow-dry on cool air, or you can let it stay compact and choose a tighter puff for a rounder finish.
Best detail: Keep the band hidden with a coil of hair or a wrapped satin strip. A visible elastic can make even a nice puff look unfinished.
5. Cornrow Sides with a Curly Center Strip
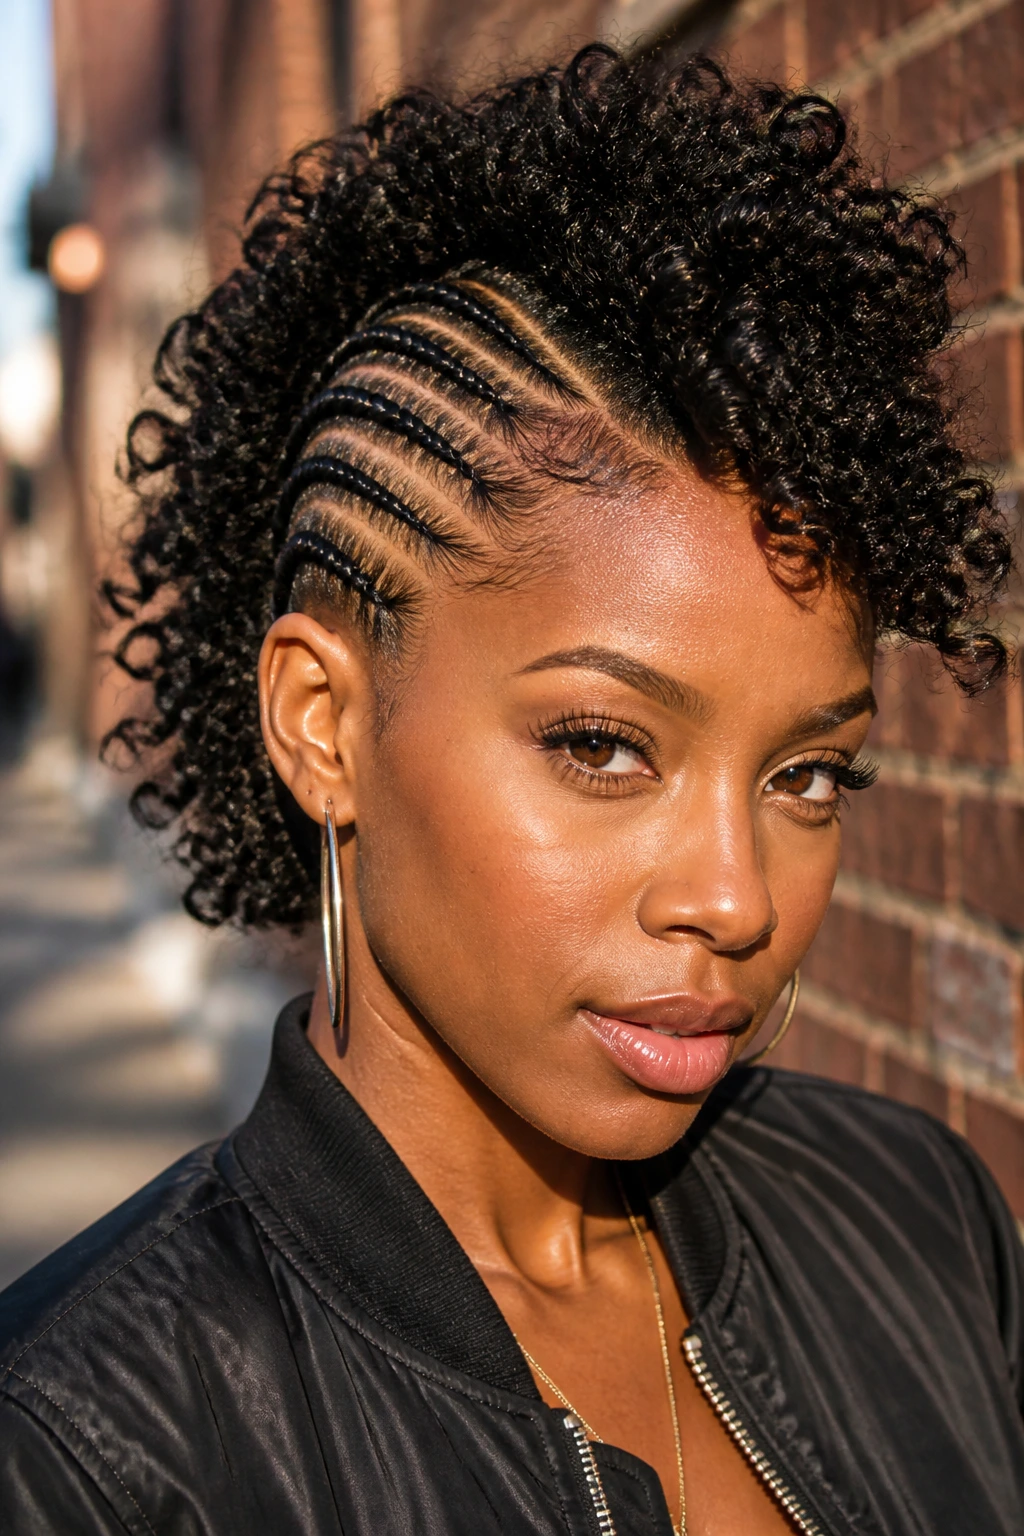
This one has attitude in the cleanest possible way. Cornrows on the sides hold everything close, then the center strip stays loose and curly so the contrast hits immediately. Sleek, then soft. Tight, then airy.
The best version doesn’t overfill the middle. You want the curls to sit in a defined lane, not spill over the braids and blur the whole shape. That middle strip can be a twist-out, a flexi-rod set, or even a wash-and-go if your curl pattern clumps well.
How to keep it balanced
Use smaller, cleaner braids on the sides if your hair is short. If it’s longer, feed the braids back toward the center instead of backward toward the nape; that keeps the mohawk profile more obvious.
This is a good style when you want your face open but not stripped bare. The braids frame the cheeks, the curls soften the top, and the whole look lands in that sweet spot between sharp and friendly. That’s harder to do than it sounds.
6. Tapered Cut Mohawk with Finger Coils
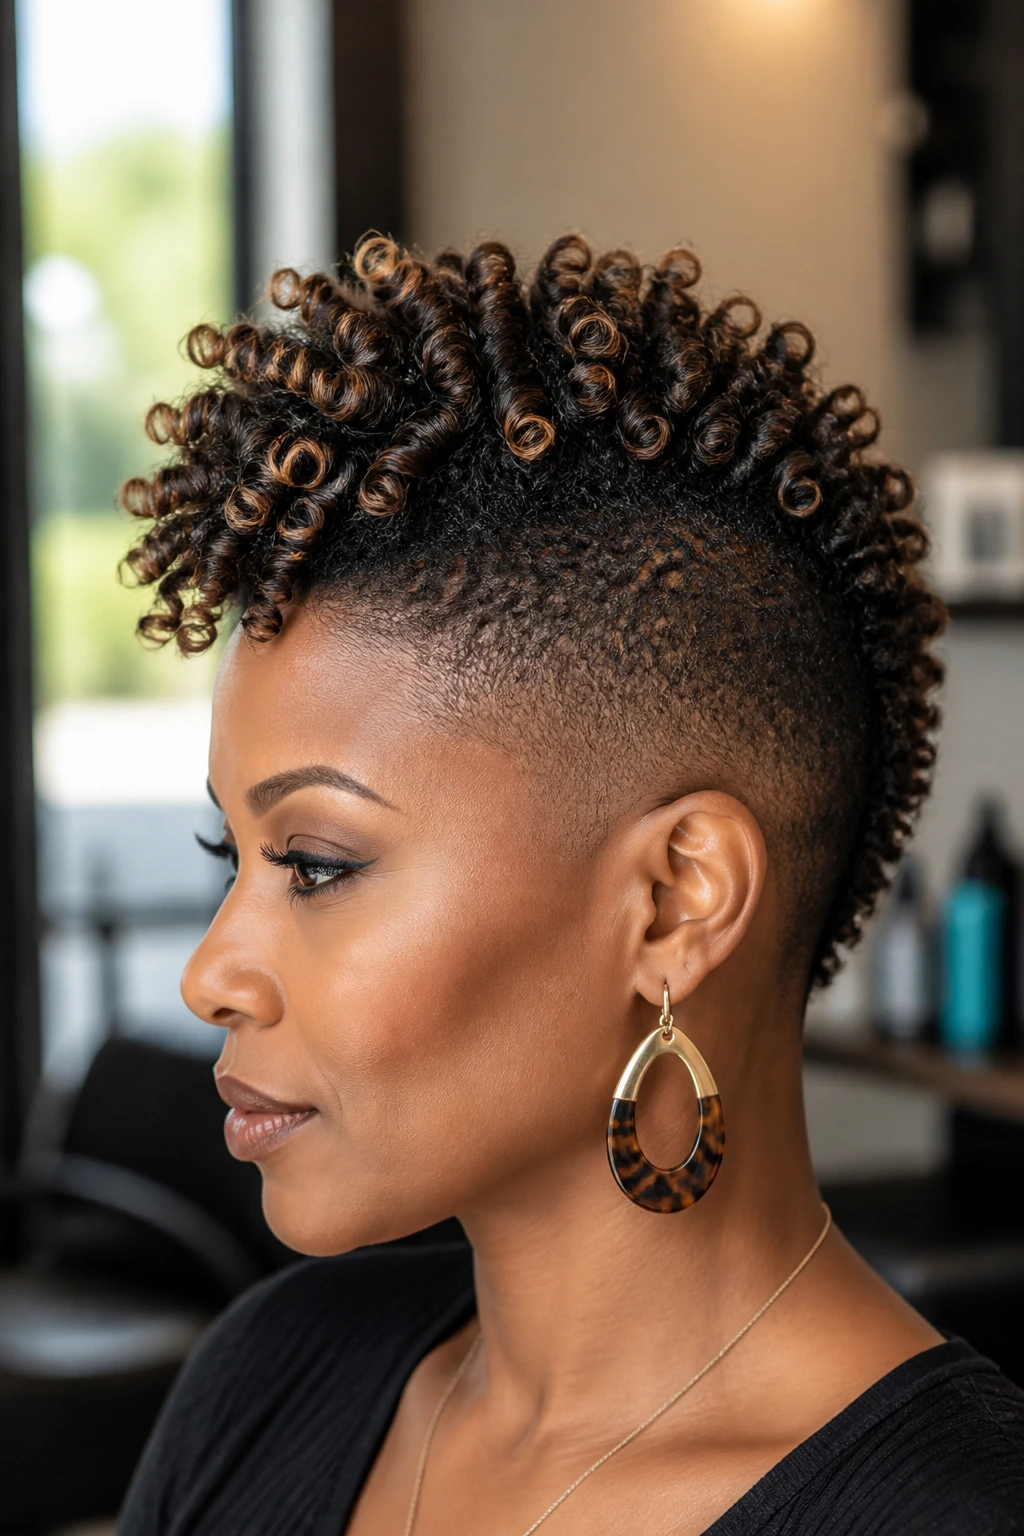
A tapered cut changes the whole conversation. Instead of pinning, tucking, or braiding the sides, the haircut itself creates the mohawk shape. Shorter edges. Full center. Clean outline. Done.
Finger coils in the center make the look feel deliberate instead of accidental. They give the hawk a defined texture at the top so the cut doesn’t look flat when the coils dry. If your hair is tightly coiled, this style can look almost architectural, especially when the top is a little longer than the crown.
Why I like it
There’s very little daily fussing once the shape is cut in. That matters. Not every mohawk has to be a wrestling match with pins and gel. Sometimes the best one is the one that asks less of you.
Keep the coils moisturized, but not slippery. If they get too soft, they lose their outline and start collapsing into each other. A light cream, a dab of gel on the ends, and a satin bonnet at night usually keep them in line.
Good to know: this is one of the few mohawk styles that looks better when the sides stay short for a while. Letting the taper grow out slowly is part of the charm.
7. Two-Strand Twist Hawk for Protective Styling
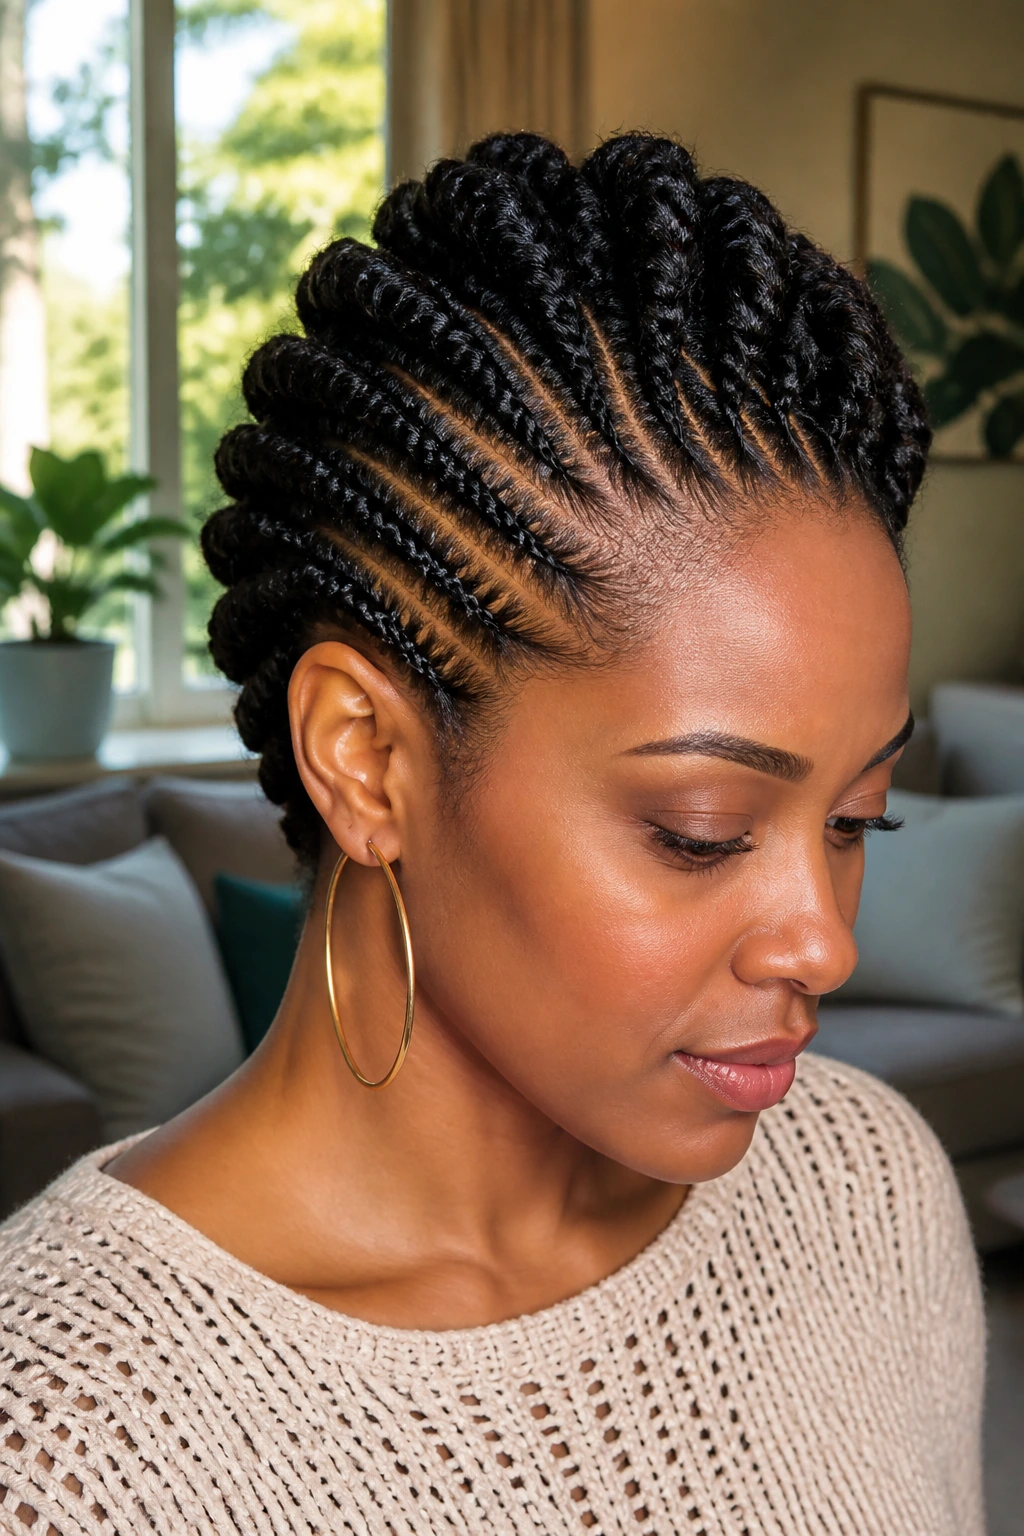
This is the protective version of the mohawk, and it earns that label. The sides get twisted down in rows or chunky sections, while the center is built from larger twists that sit along the ridge of the head. Less combing. Less tugging. More time between full restyles.
A twist hawk can be as neat or as soft as you want. Small twists look more polished and hold the shape longer. Chunky twists feel fuller and can be unraveled later into a twist-out hawk, which gives you two styles for the price of one. That’s a nice trick, not a gimmick.
Best on
Hair that needs a break. Color-treated curls. Ends that get dry fast. Or just weeks when you’re tired of detangling every morning.
If you want it to hold, start on stretched hair and use a little holding foam on each twist. Too much product will make the sections stiff and flaky. Too little and the center loses its line before the day is over.
Small detail that helps: twist each section in the same direction all the way through the head. Mixed directions can make the center look fuzzy in places where you wanted clean lines.
8. Braided Crown Mohawk with Loose Ends
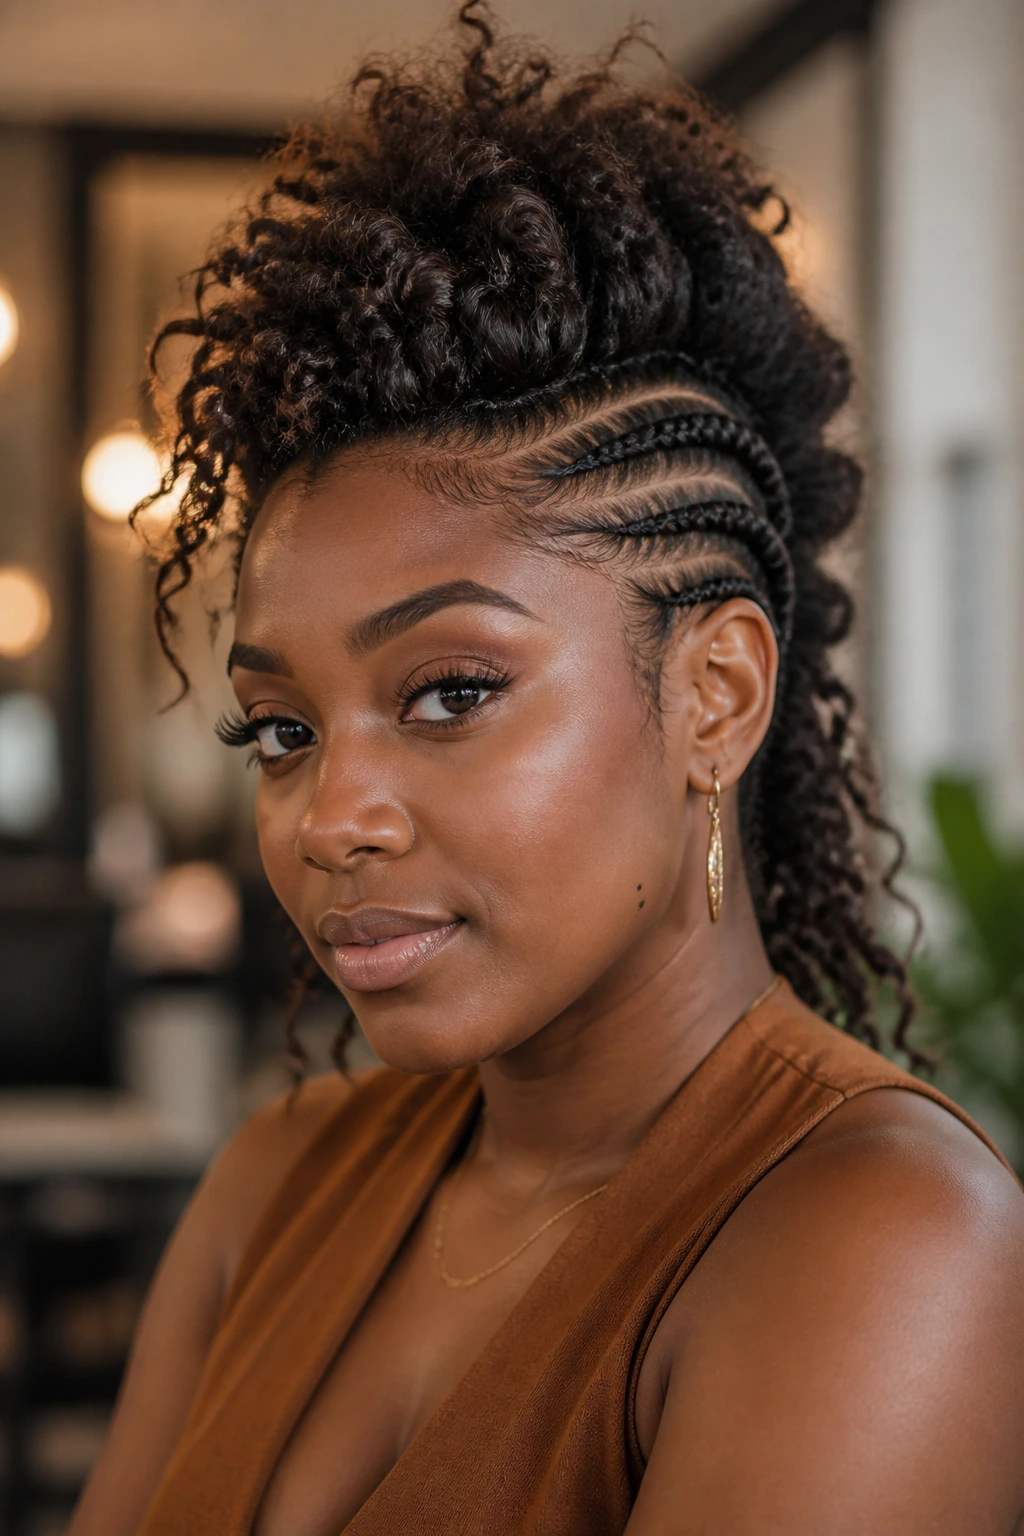
This one feels more regal than dramatic, and I mean that in the best way. Braids sweep across the sides like a crown that’s been pulled tight around the head, while the center is left loose at the ends so the hawk still has some bounce.
You can make the braid pattern as simple or as detailed as you want. A single curved braid on each side gives the style a clean outline. More feed-in braids give it texture and a little extra weight, which helps if you want the center puff or curls to stay put.
The loose ends should be intentional. Let them curl, bend, or tuck under slightly. Straight, limp ends can make the style feel unfinished, especially if the crown is beautifully braided and the center looks forgotten.
Use it for: weddings, portraits, holidays, or any day when you want the mohawk shape to feel dressed up without turning hard-edged.
9. Flexi-Rod Spiral Mohawk
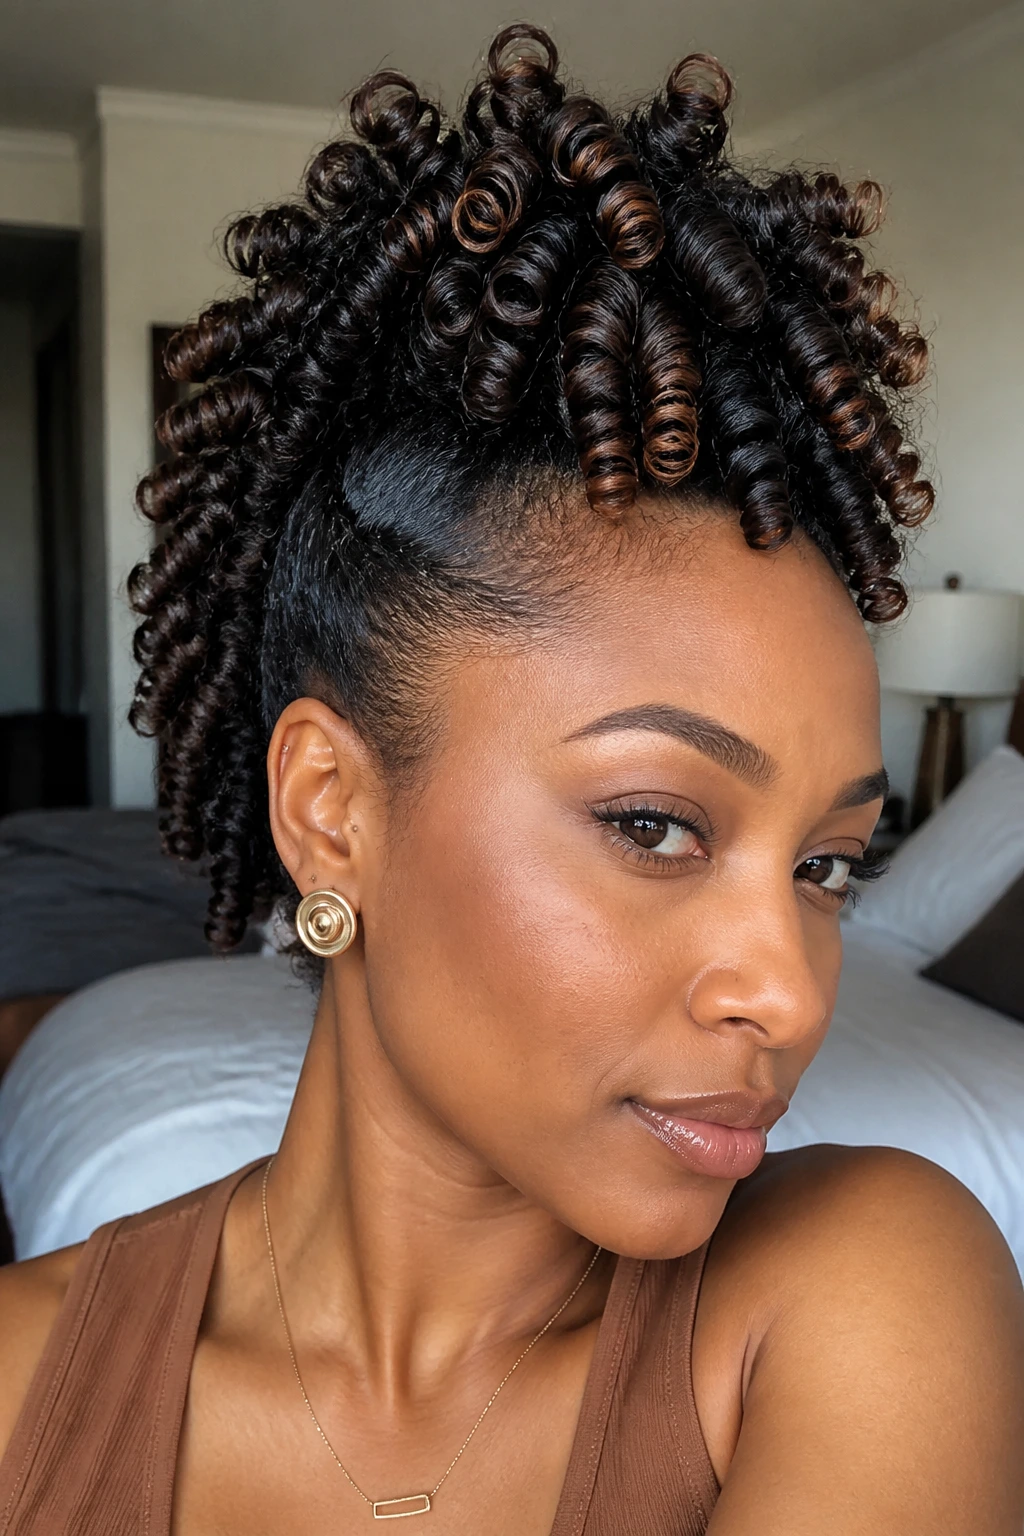
A flexi-rod set mohawk is pure curl payoff. The rods give the center section those springy, shaped spirals that sit high and glossy, while the sides stay pinned, braided, or flattened back. The result looks bouncy even before you touch it.
This style needs patience. Let the rods dry all the way through. If the hair is still damp near the roots, the spirals fall faster than they should and the shape loses height. That’s the annoying part, but it’s also the part most people rush.
How to get the most from it
Set smaller sections if you want tighter curl definition. Use larger rods if you want width and a little less frizz. And don’t separate the curls too much. One pass with oiled fingers is enough if you want the spirals to keep their lane.
The magic here is movement. The curls catch air when you walk, which makes the style look alive even on a quiet day. It’s one of the prettiest mohawk styles for textured hair because it doesn’t hide the curl pattern. It puts it in the front row.
10. Pineapple Mohawk on Medium-Length Hair
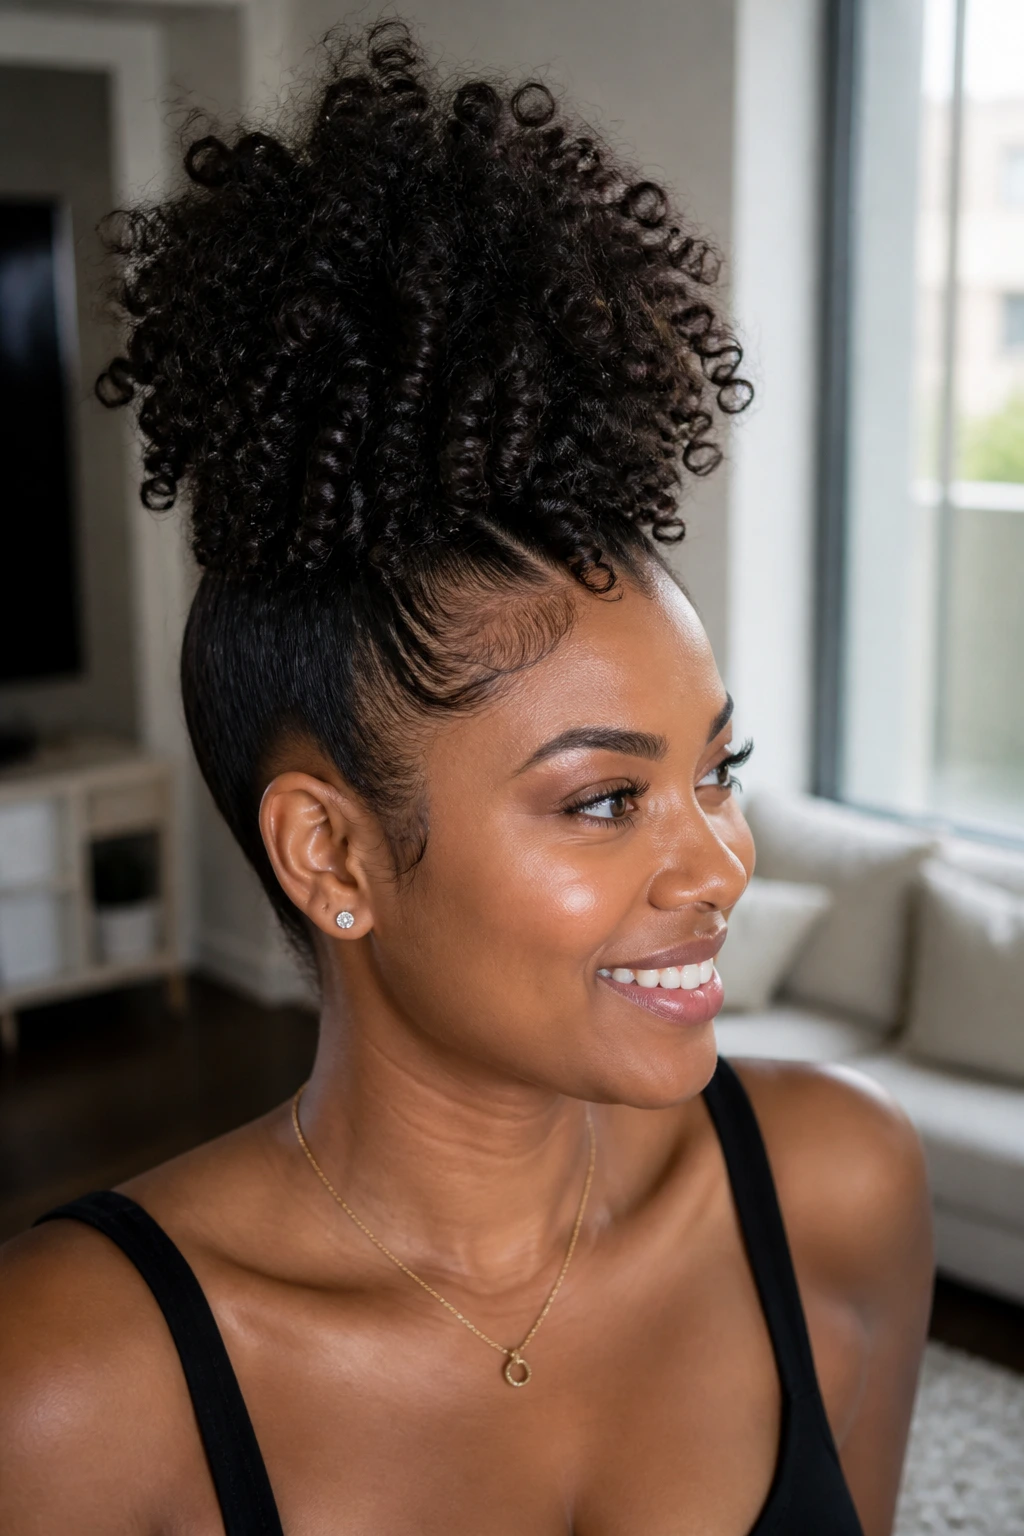
A pineapple hawk is exactly what it sounds like: the center hair is gathered and lifted, while the sides are smoothed or tucked so the full shape sits up high. On medium-length natural hair, it can look playful in a way that doesn’t feel childish. That’s a hard line to walk, and this style walks it well.
The center isn’t meant to be perfect. A little frizz is part of the look. Actually, it’s part of the charm. If the puff lands too neat, it stops reading like a hawk and starts reading like an ordinary high ponytail.
Where it works best
This is a smart choice for hair that’s been stretched a bit but still has curl at the ends. It keeps the volume concentrated in the middle while giving the sides a controlled finish.
I’d use this style when you want something fast that still looks styled. It doesn’t need a dozen parts or a complicated braid pattern. A clean side section, a wrapped band, and a few pins are enough.
One caution: don’t make the front too tight just to force height. The hawk shape should sit up naturally, not look like it’s being pulled into place.
11. Loc Mohawk Updo with Hanging Ends
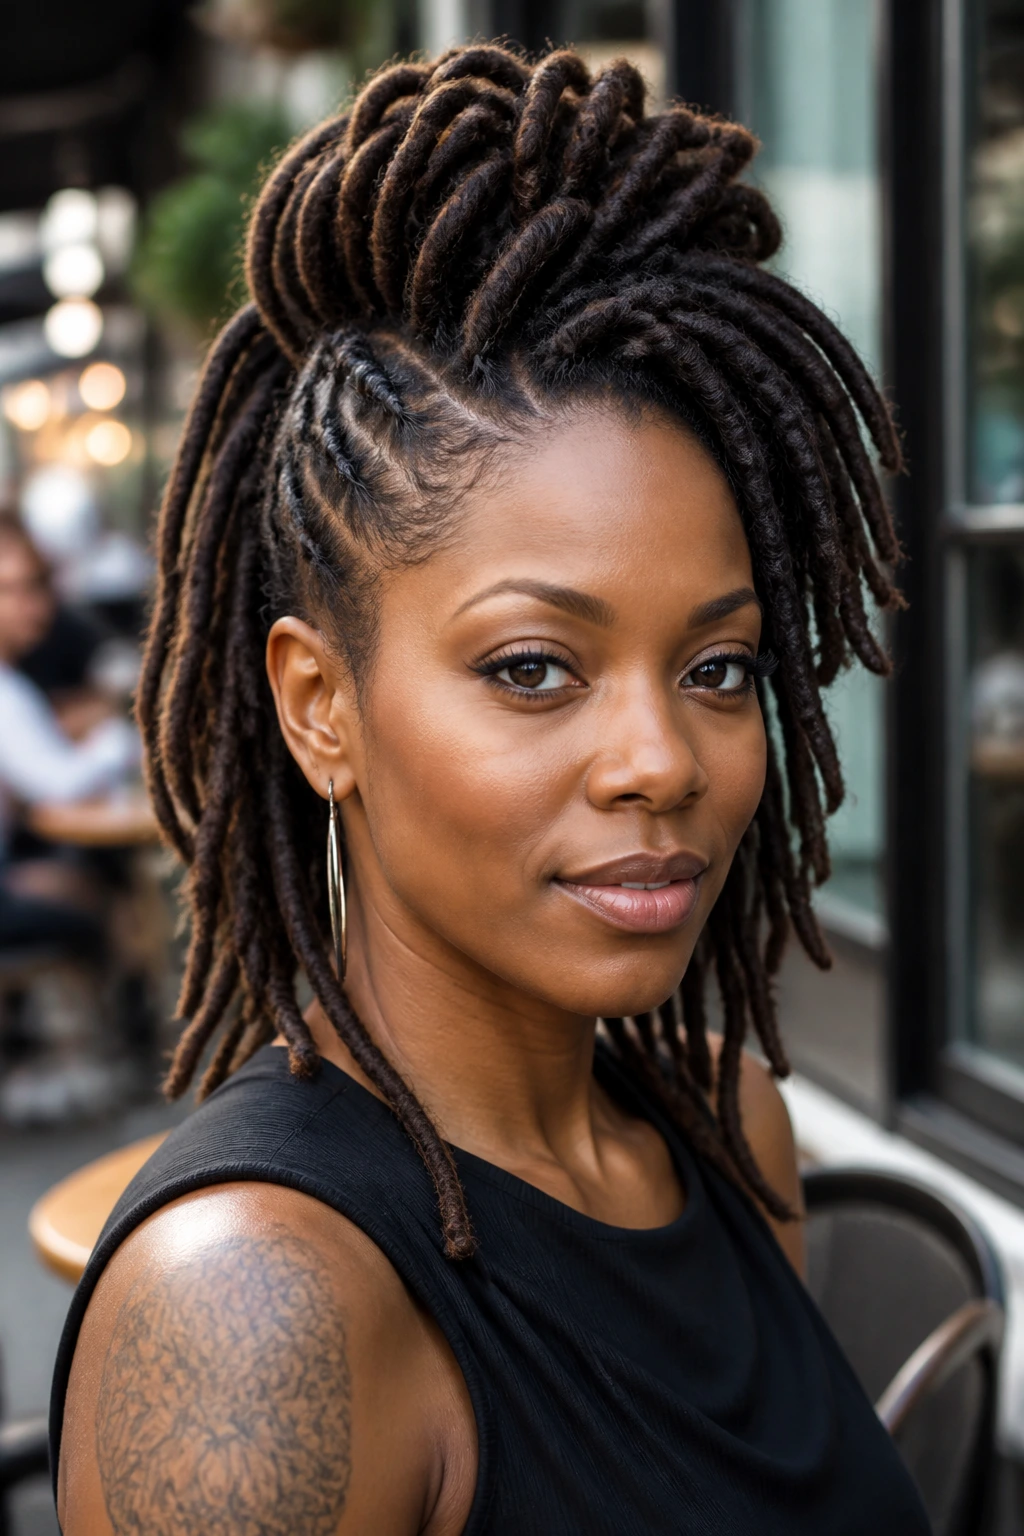
Locs make a mohawk look almost effortless because the texture itself already creates strong lines. You can pin the sides back and let the center locs stack into a ridge, or you can gather the middle into a fuller updo and leave the ends hanging for shape.
The best loc hawks usually have a clear front point. The front should lead the eye into the center strip, not drift sideways. That can be as simple as two locs crossing near the forehead and disappearing into the middle.
Why it stands out
Locs hold accessories well. Cuffs, thread, beads, and small rings add structure without cluttering the shape. You don’t need many of them. Three or four placed with intention usually beat a whole handful scattered around.
This style is also kind to busy days. Once it’s pinned, it tends to stay where you left it. The only real job is making sure the pins are secure and the base isn’t pulling on the roots. A style that looks bold and still lets you move your head freely is worth protecting.
12. Feed-In Braid Mohawk
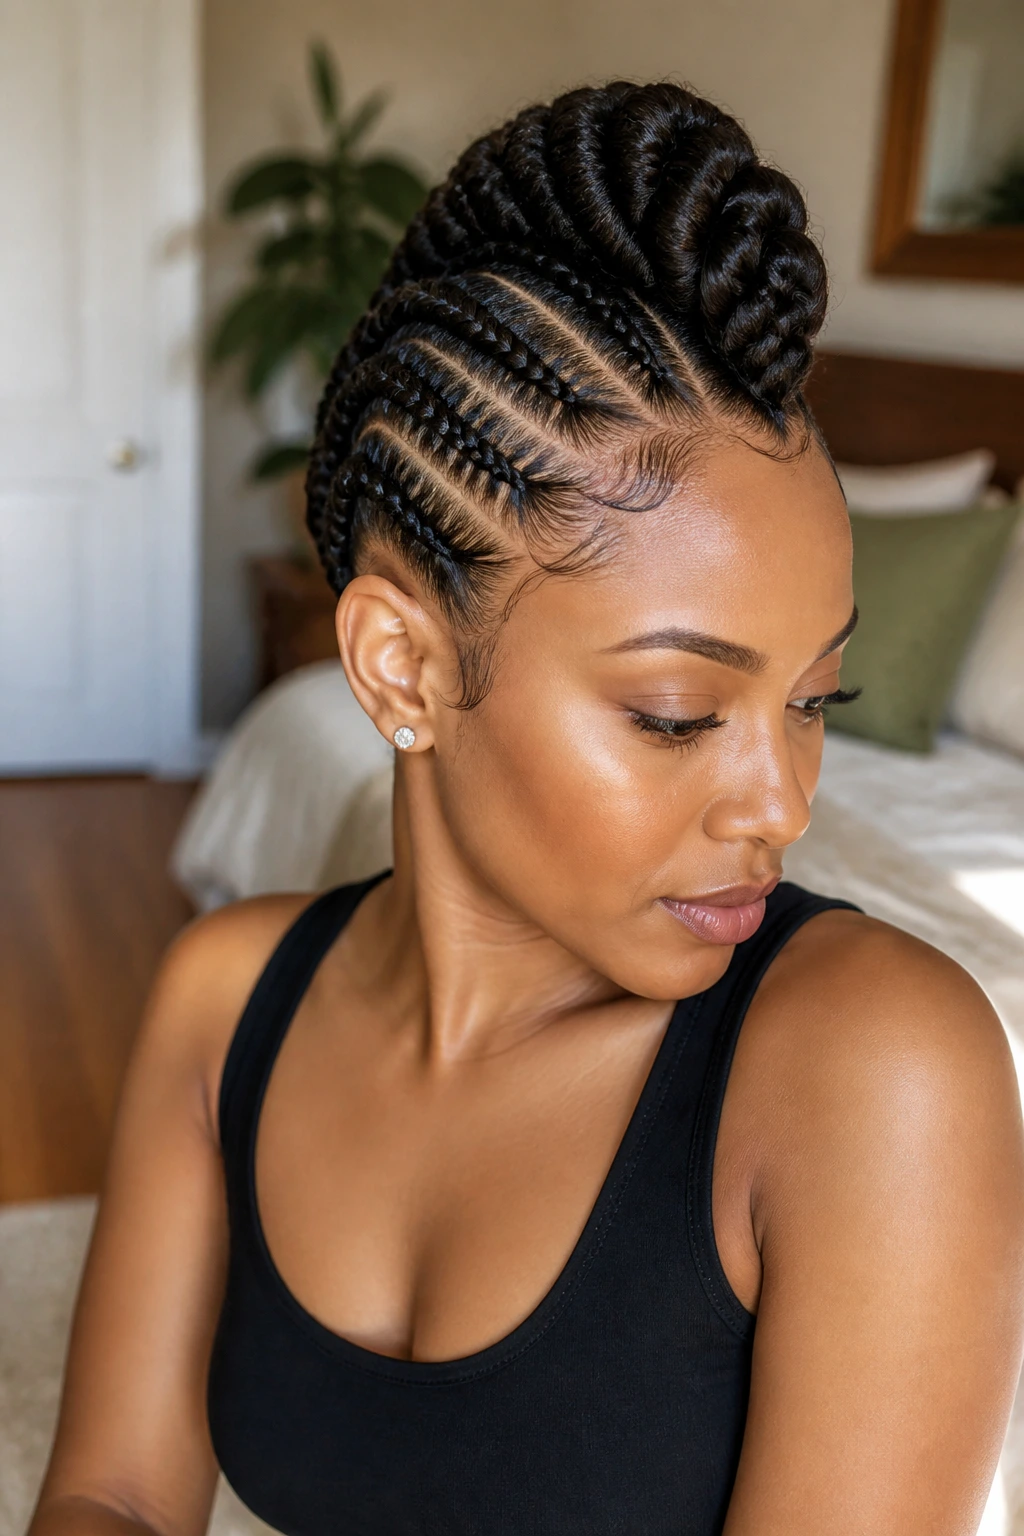
Feed-in braids change the game if you want a mohawk with strong lines and a smooth profile. The braids start small near the hairline, then grow thicker as hair is added, which keeps the shape sleek without looking bulky at the front.
This style is a good fit when you want the mohawk to last and you don’t want to restyle every morning. The braid pattern can be straight back, curved, or slightly angled to make the center ridge feel taller. Curved braids usually look softer. Straight lines look cleaner.
The center section can stay braided too, or you can leave it out in a ponytail, a puff, or loose curls. That choice changes the whole mood. Braided center? More structured. Free center? More movement.
A useful rule: if your hairline is delicate, keep the feed-in tension light at the front and let the thickness build farther back. The style should sit on your scalp, not bite into it.
13. Perm-Rod Set Hawk with Side Cornrows
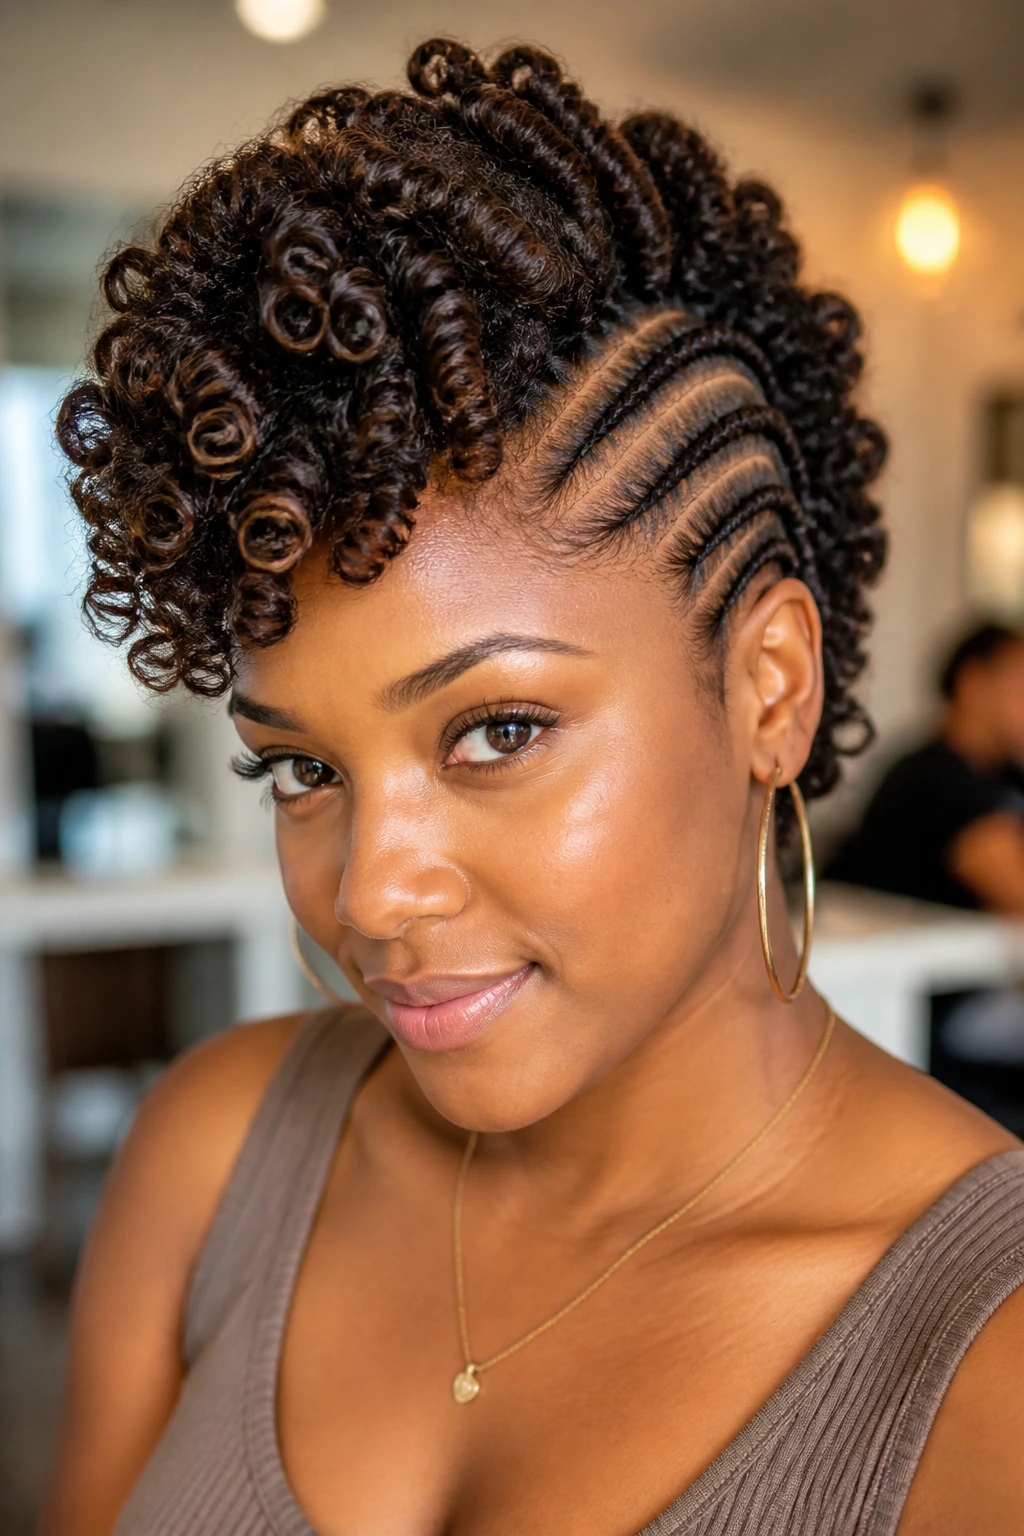
This one is for people who like springy curl definition but want a little extra height. Perm rods create dense little curls, and side cornrows keep the base flat so the whole style looks lifted. The result is almost spring-like. Tight in the best way.
The rod size matters. Smaller rods make a more compact texture; medium rods give you a softer coil that’s easier to shape into a mohawk line. If your hair has a lot of shrinkage, medium rods usually give you a better silhouette because the curls stay visible after drying.
The shape trick
Take the rods out carefully and separate only a little. Too much separating turns those defined curls into a fuzzy cloud, which can be lovely on its own but loses the hawk line.
This style is especially good when you want a mohawk that looks lively from every angle. The side cornrows provide the frame, and the rod set does the rest. You get a clean outline without sacrificing texture.
14. Side-Swept Faux Hawk with a Headband Accent
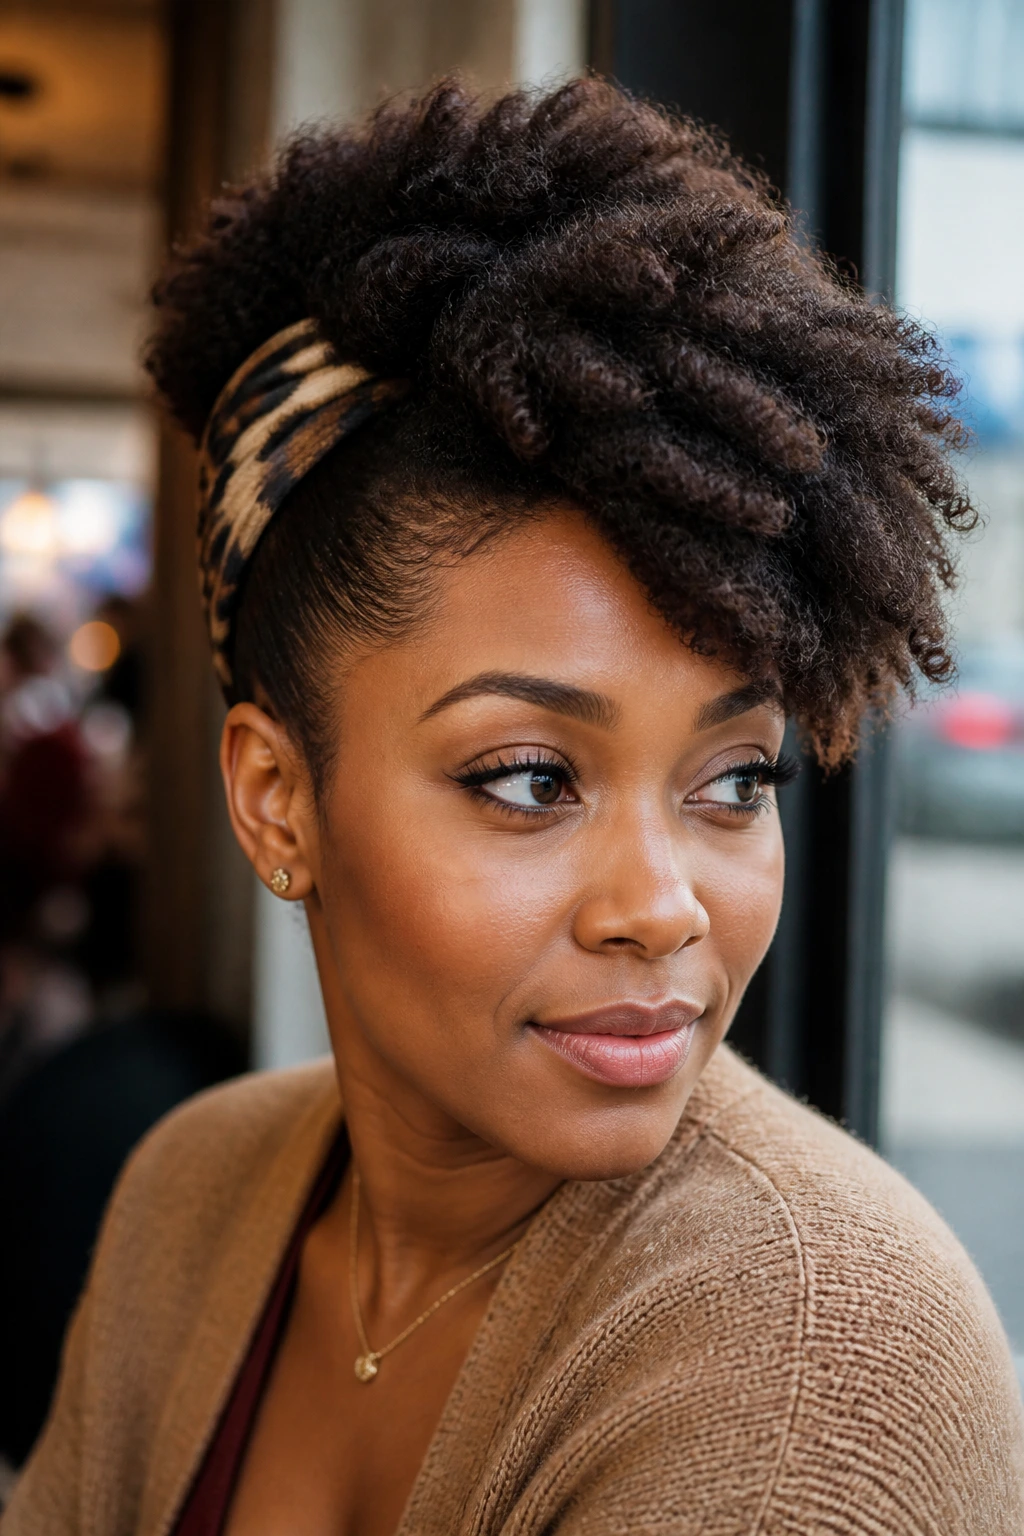
A headband faux hawk is one of the quickest ways to get the mohawk shape without braiding or twisting anything too deeply. The hair is swept up and inward toward the middle, then a band or scarf helps anchor the sides and keep the center lifted.
This is a good rescue style for hair that’s on day three or day four and still has enough texture to hold a shape. It also works when you’re transitioning between wash days and don’t want to start from scratch. The band gives the illusion of structure, which is sometimes all you need.
Style note
Pick a headband that grips without digging in. A stretchy satin band can be kinder than a stiff plastic one, especially if your hairline is sensitive. If the band is too tight, the style starts looking strained around the temples.
The swept shape feels softer than a braid hawk and less formal than a sculpted updo. That makes it easy to wear with jeans, a blazer, a gym set, or a dress. The hairstyle can move with your day instead of setting the tone for it.
15. Chunky Flat-Twist Updo Hawk
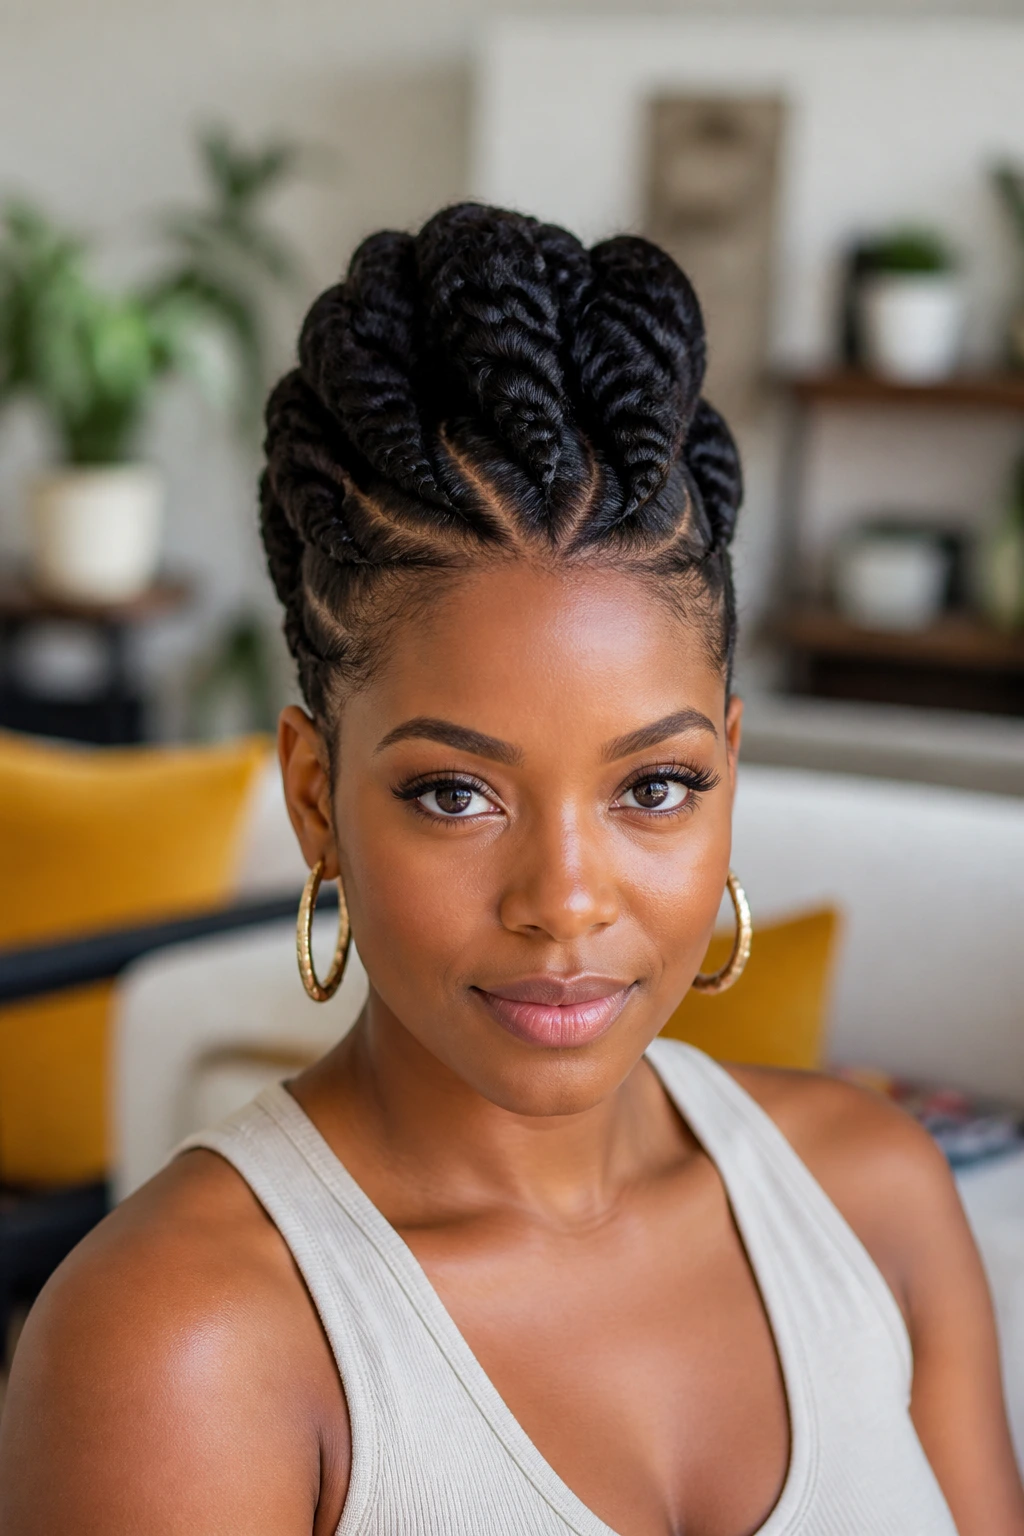
Chunky flat twists give the mohawk a kind of rolled texture that I think gets overlooked. They’re thicker than neat cornrows, easier to shape than loose twists, and less fussy than a pinned curl set. The center can be tucked upward into a crown-like ridge, or left to coil softly at the ends.
This is a good choice when you want the style to look hand-crafted. Not messy. Hand-crafted. There’s a difference. The twist lines should be visible, but the finish shouldn’t look overly polished to the point of becoming stiff.
Best use
If your hair is a mix of densities — tight at the crown, softer at the ends — chunky flat twists help even that out. They hold the front and sides in place while leaving enough body in the middle to keep the mohawk shape from sinking.
A light mist of water before twisting makes the hair more obedient. Don’t soak it. Damp is enough. Wet hair and heavy gel together can make the style dry too flat at the root.
16. TWA Mohawk with Defined Finger Coils
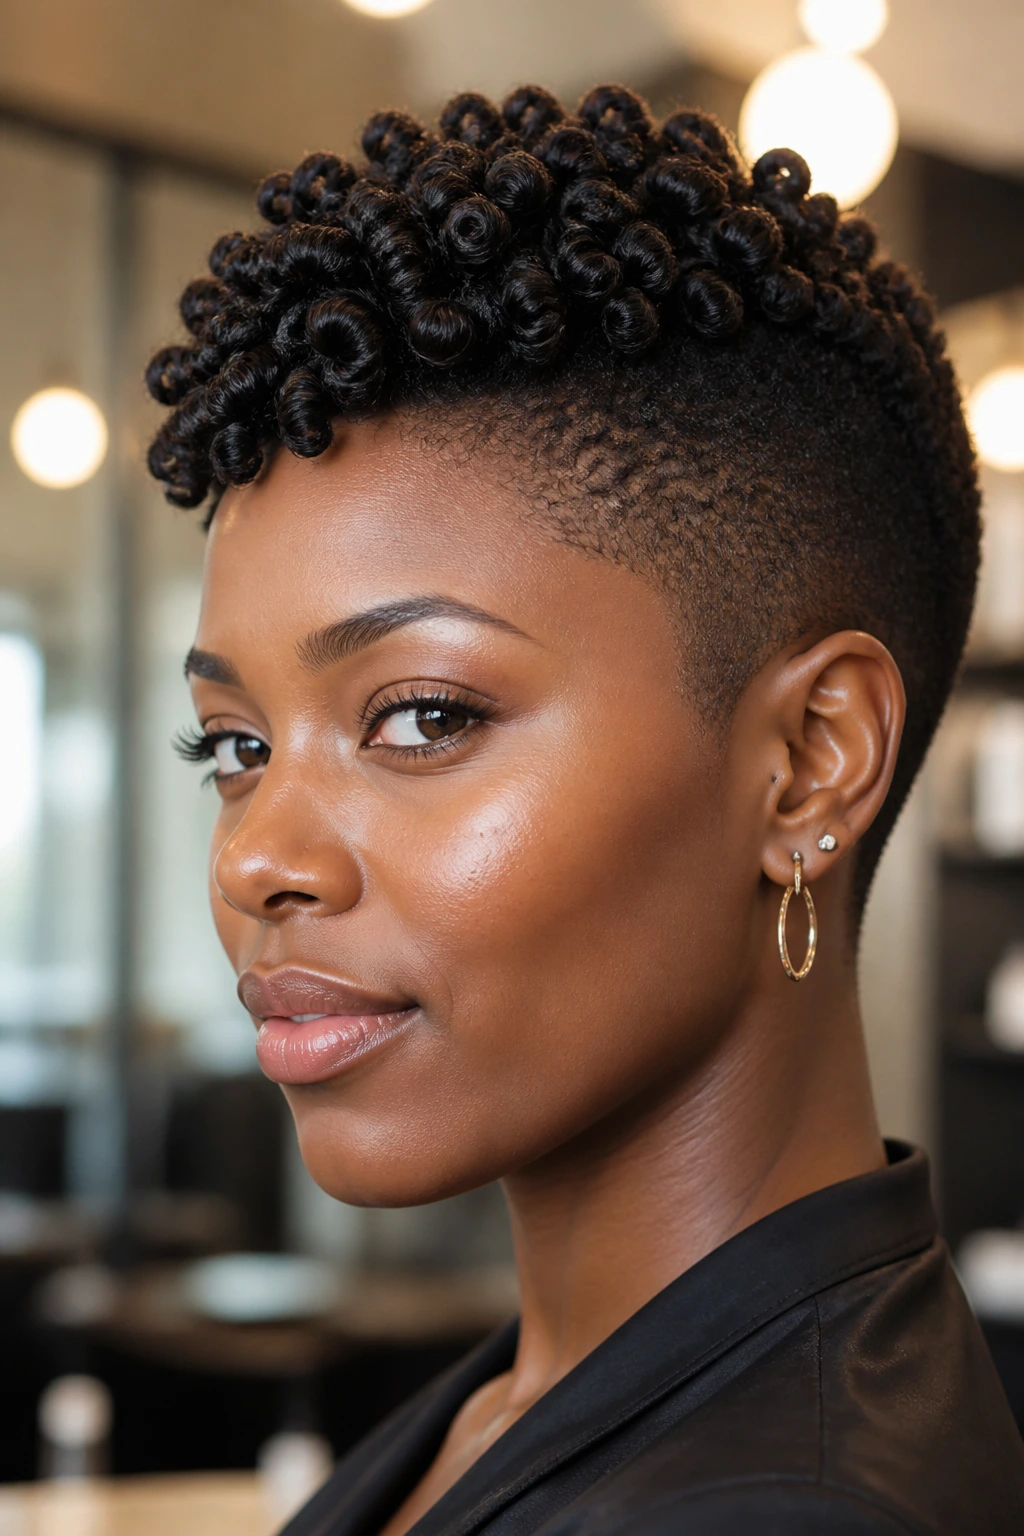
Short hair can absolutely carry a mohawk. A TWA hawk with finger coils proves it every time. The sides are shaped low and close to the head, while the center coils are defined enough to create a small but sharp ridge.
This style works because it doesn’t pretend short hair has long-hair volume. Instead, it uses tight texture and clear sectioning to build shape where the hair already wants to go. That honesty is why it looks so good.
If your hair is cut evenly all around, the center section can still stand out with a little product and patient coiling. Use a small amount of styling cream first, then add coil gel only where you need hold. Too much and the coils clump into little blobs. Too little and they disappear.
My opinion: short mohawks often look better than long ones when they’re clean and simple. There’s nowhere for the style to hide, so every line matters.
17. Side Braids Leading Into a Fluffed Center
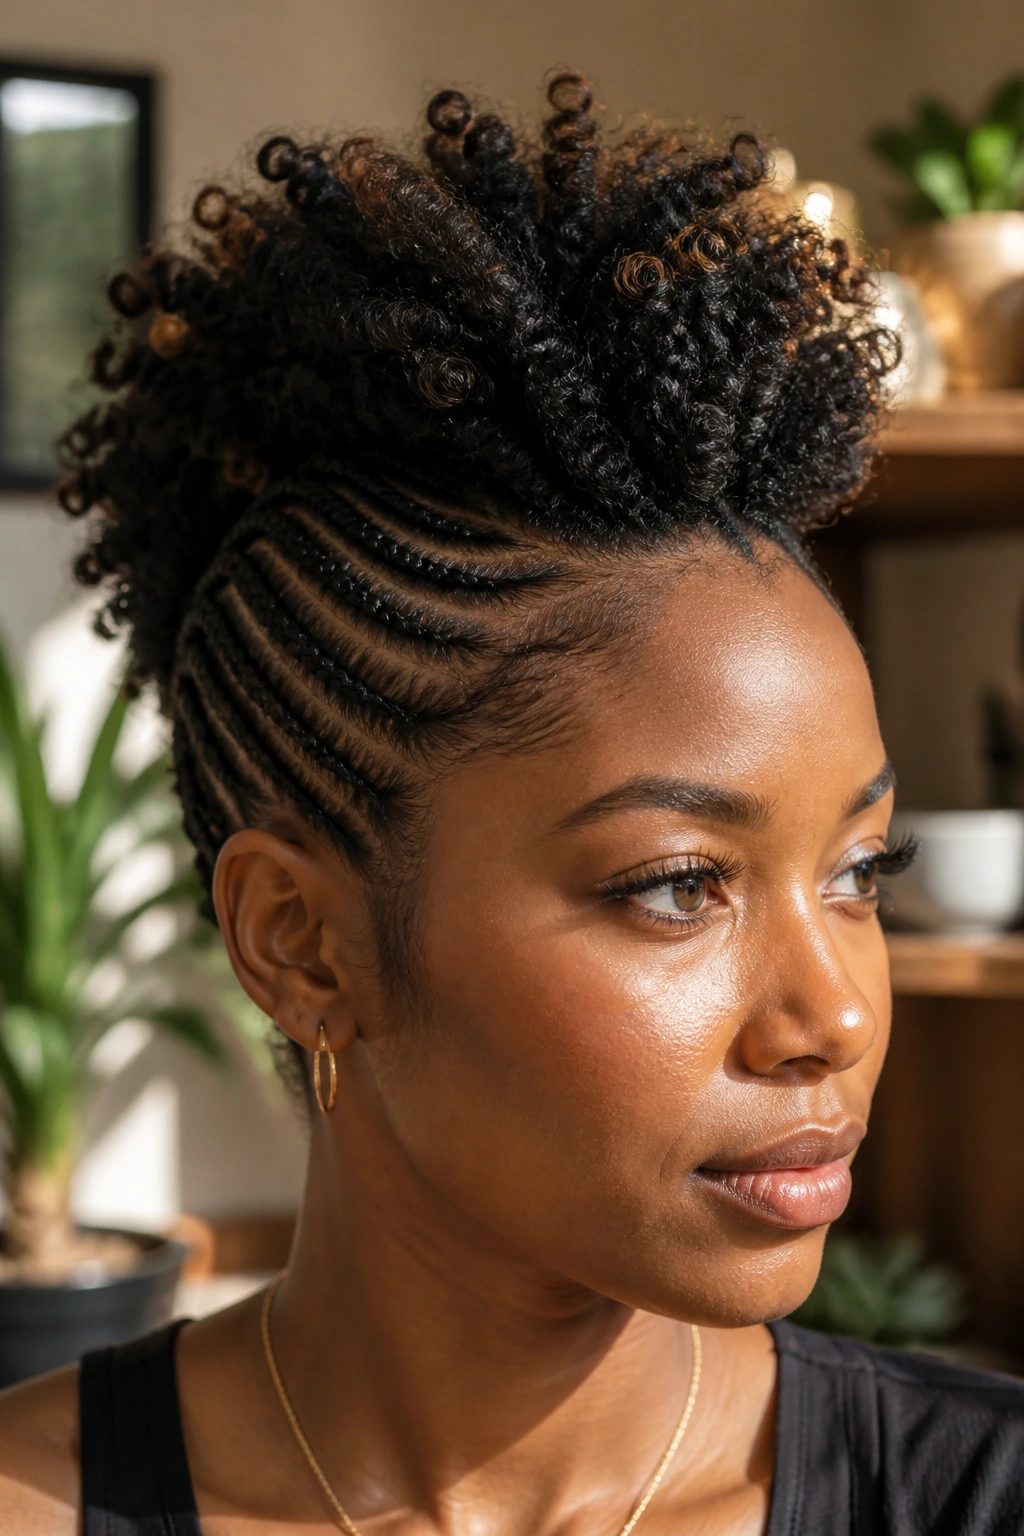
This style takes a simple idea and makes it feel a little richer. The sides are braided back toward the center, but the middle is left fluffy, stretched, or lightly curled. The braids act like rails. The center becomes the showpiece.
I like this on medium-length hair with some natural shrinkage because the braids control the perimeter while the center keeps personality. You can fluff the middle with a pick or leave it more defined, depending on how soft you want the hawk to look.
The transition from braided sides to loose center should be smooth. If the braids stop too abruptly, the style looks chopped. If they’re fed in neatly, the eye moves straight into the middle strip and the whole thing feels intentional.
A small but useful note
Match the braid size on both sides. Uneven side braids create a lopsided outline, and unless that’s the look you want, it just reads as rushed.
18. Halo Braid with Curly Top Hawk
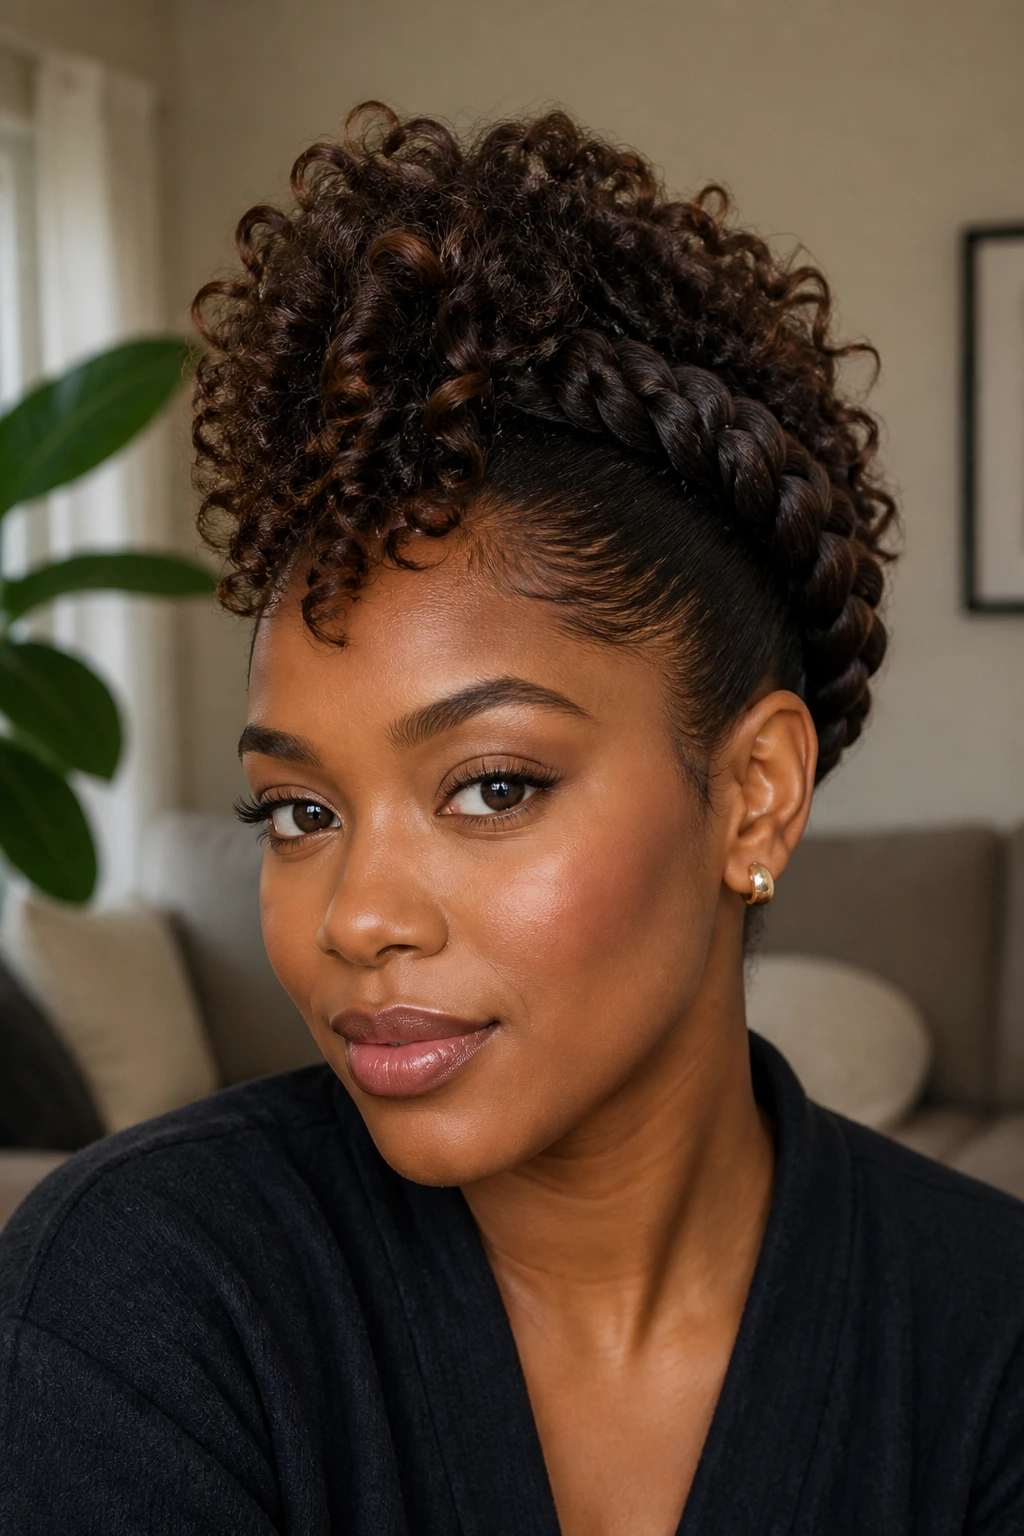
A halo braid on the sides or around the crown can make a mohawk feel almost ceremonial. The braid wraps the head, then the center stays curly and raised like a soft crest. It has drama, yes, but not the loud kind. More like a statement you notice twice.
This style is especially good when you want the face open and the top full. The braid frames the forehead and temples, which gives the center curls room to breathe. You can use a twist-out, a rod set, or a stretch-and-fluff finish in the middle.
What I like most is the contrast. The halo braid is compact and tidy. The curls are loose and alive. That push-pull keeps the style from looking flat in photos or in person.
Use a thin braid if you want the mohawk to stay airy. A thick braid can crowd the sides and make the center look smaller than it is.
19. Mohawk Ponytail with Wrapped Base
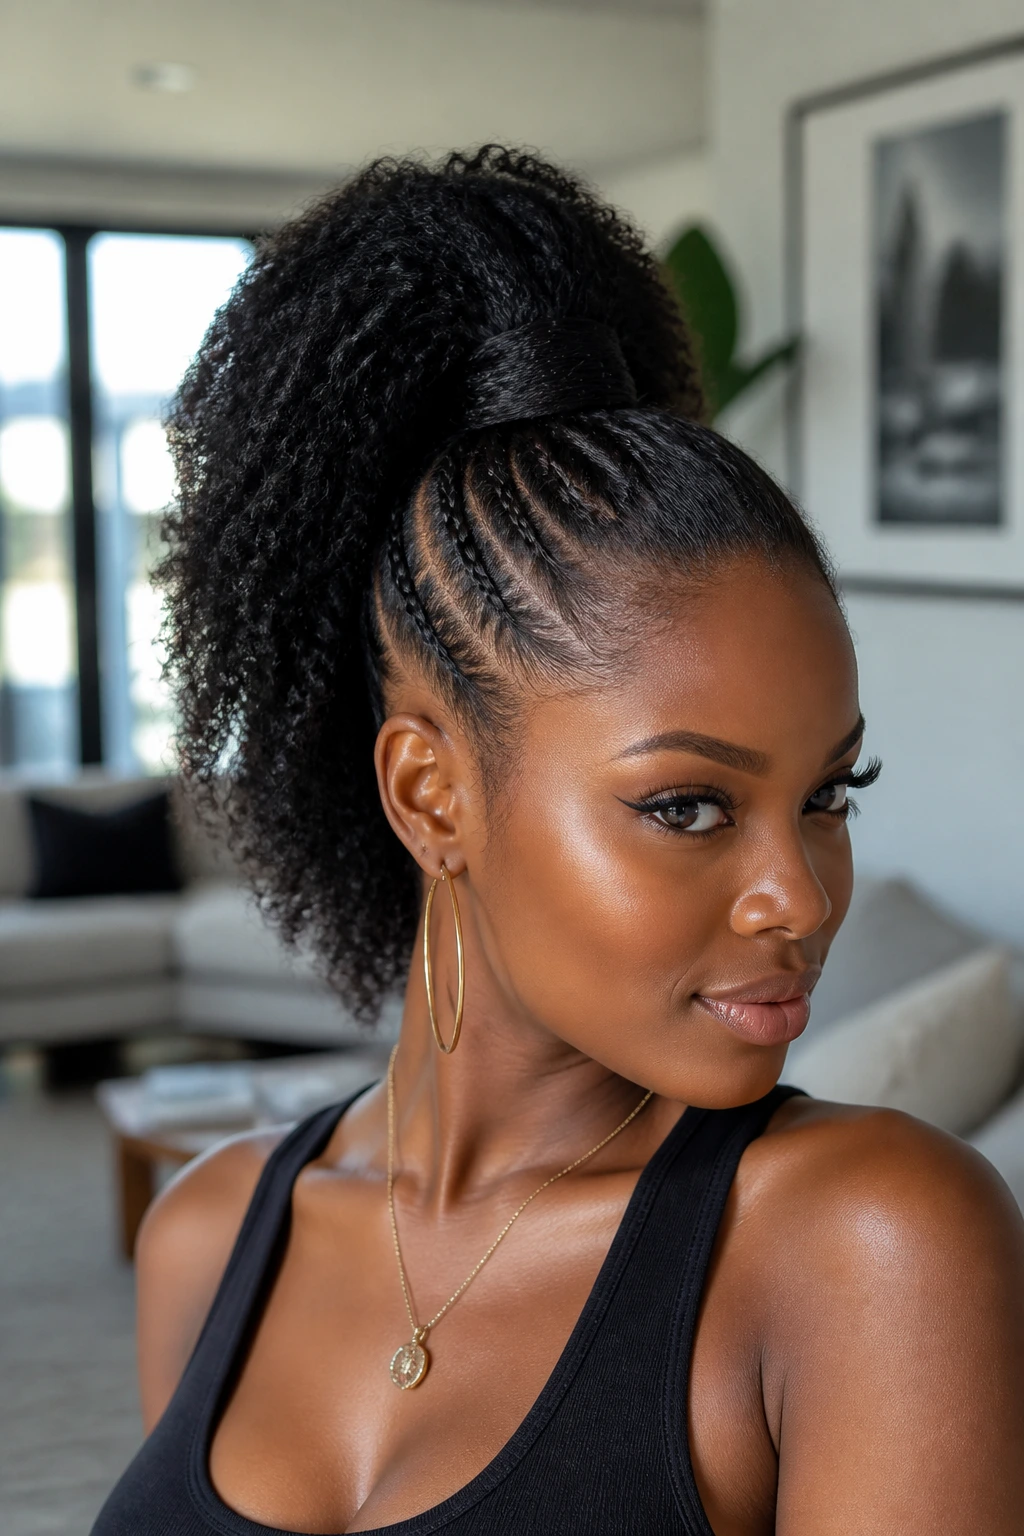
A mohawk ponytail sounds plain until you see it done well. The sides are slicked or braided in, the center hair is lifted into a ponytail, and the base is wrapped with a strand of hair or a scarf for a clean finish. It’s one of the most reliable shapes on this list.
The ponytail can sit high for a sharper look or mid-height for something softer. High gives more edge. Mid-height gives more length. Either way, the side panels need to be smooth so the eye reads the center immediately.
This is also a smart style if you want to add clip-ins or a little extra hair for fullness. The wrapped base hides the join, which keeps the ponytail from looking like an obvious add-on. Just don’t overload it. Too much hair turns the hawk into a heavy lump, and nobody wants that.
Best on days when: you need one style to move from errands to dinner without changing a thing.
20. Knotless Braid Mohawk with Beaded Ends
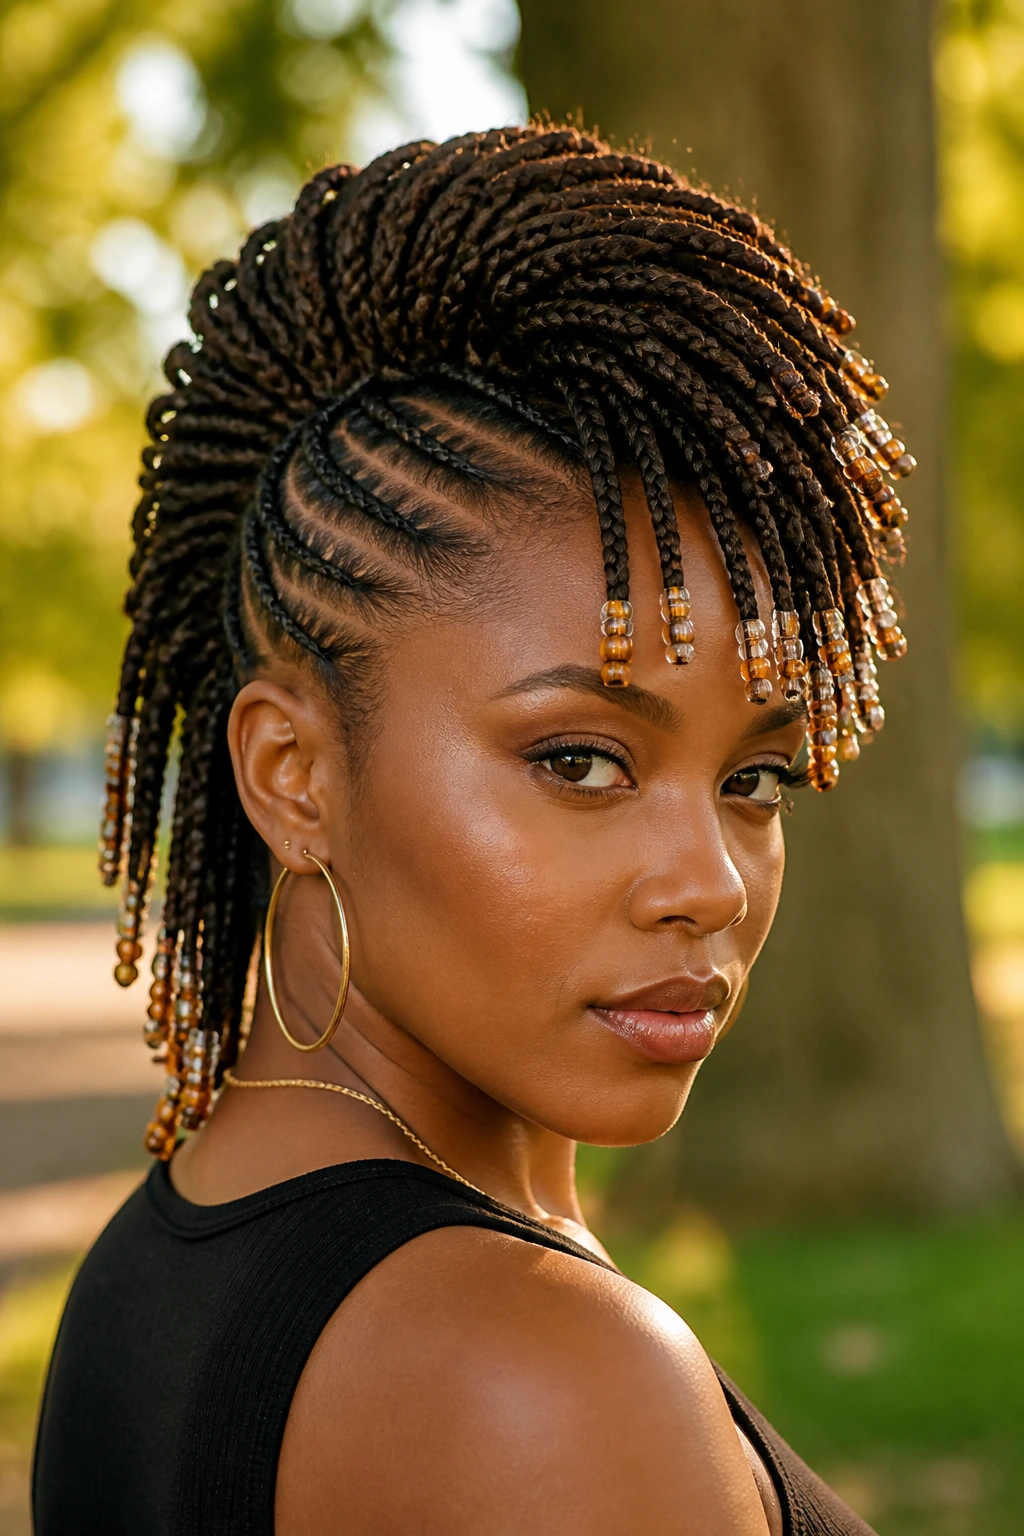
Knotless braids make the mohawk lighter at the front because they don’t start with a bulky knot at the root. That matters if your scalp gets sore or if you dislike the heavy look of traditional braid starts. The braid ridge stays smooth, and the beaded ends add a little sound and movement.
The center can be a full braid strip, or it can alternate with loose sections for more texture. Beads are optional, but they do help the style feel finished. I’d use them sparingly — a few on the ends or around the front braids usually gives enough detail.
Why it works
The knotless base keeps the profile sleek. The beads bring the personality. Together, they create a mohawk that’s detailed without feeling crowded.
If you plan to wear this one for a while, make sure the braids aren’t pulling at the temples. Long wear should still feel calm around the edges. Tight styles always show themselves later.
21. Rolled Tuck Mohawk for Stretchy Length
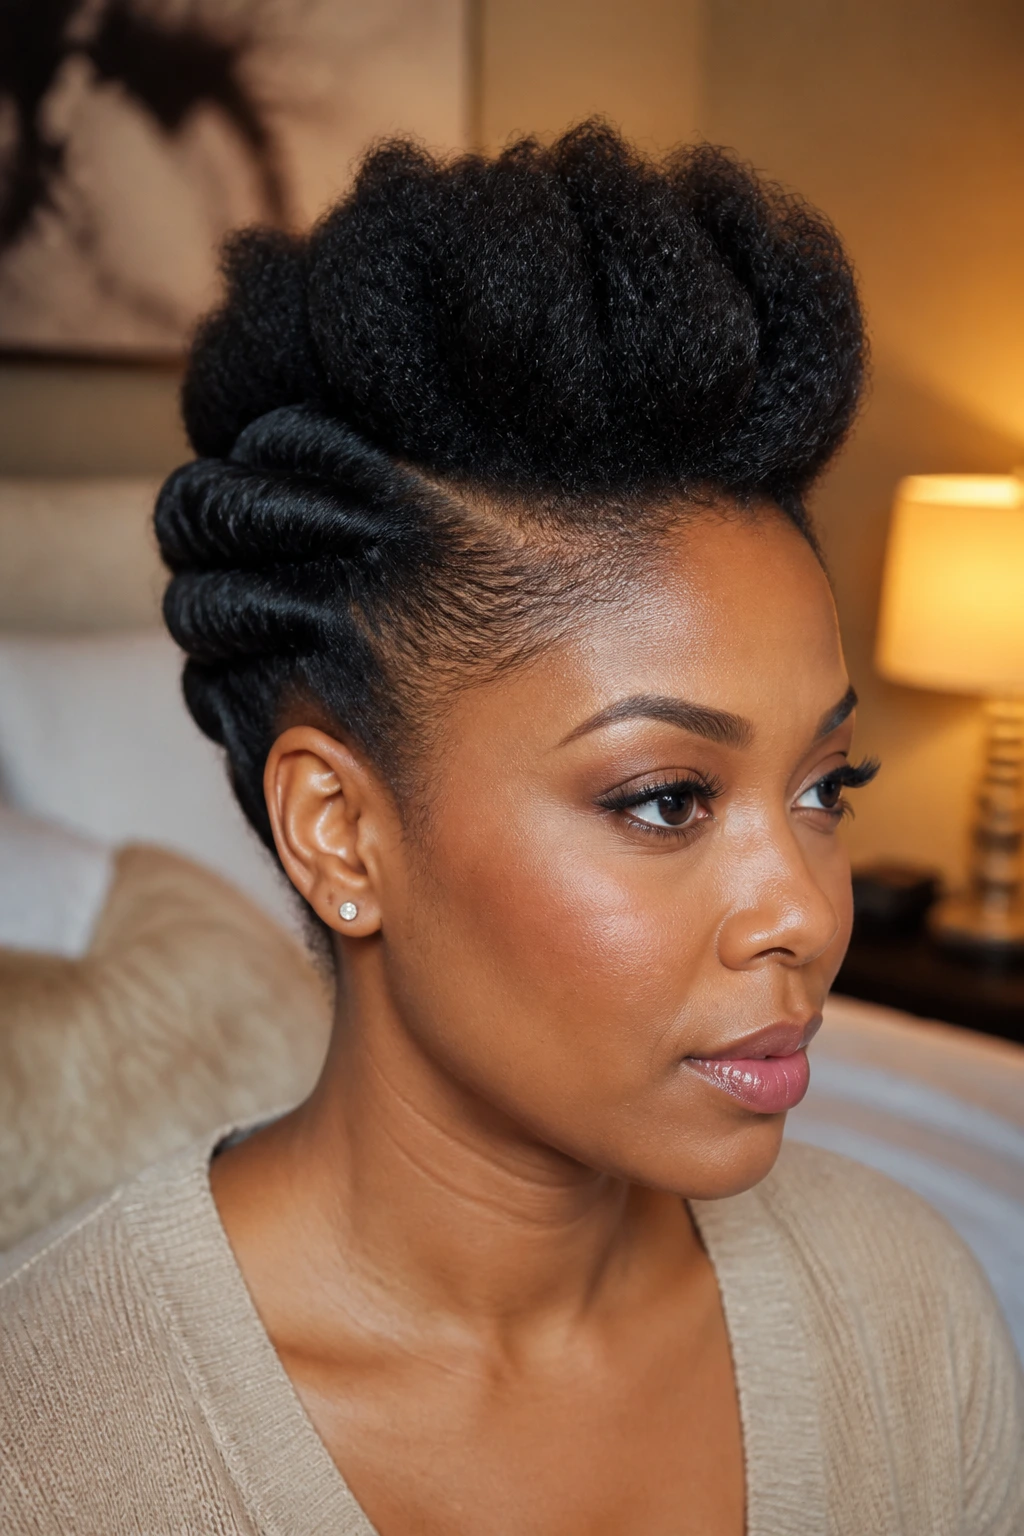
Rolled tuck styles are underrated. The sides are rolled inward and pinned, almost like folded fabric, while the center stays lifted. On longer natural hair, that creates a mohawk with soft layers and a neat finish that doesn’t rely on braids at all.
This is a good option when your hair is stretched but not straightened. The texture gives the rolls grip, and the center can be tucked, coiled, or puffy depending on what the hair is doing that day.
The look feels understated compared with braided mohawks, but it has a quiet strength to it. That’s not a cliché; it’s the actual effect. The shape sits close to the head, and the center ridge has enough fullness to keep it interesting.
Tip: use pins from underneath the roll, not straight across the top. Hidden pins keep the style cleaner and stop the whole thing from looking stitched together.
22. Asymmetrical Afro Hawk with One Side Tucked
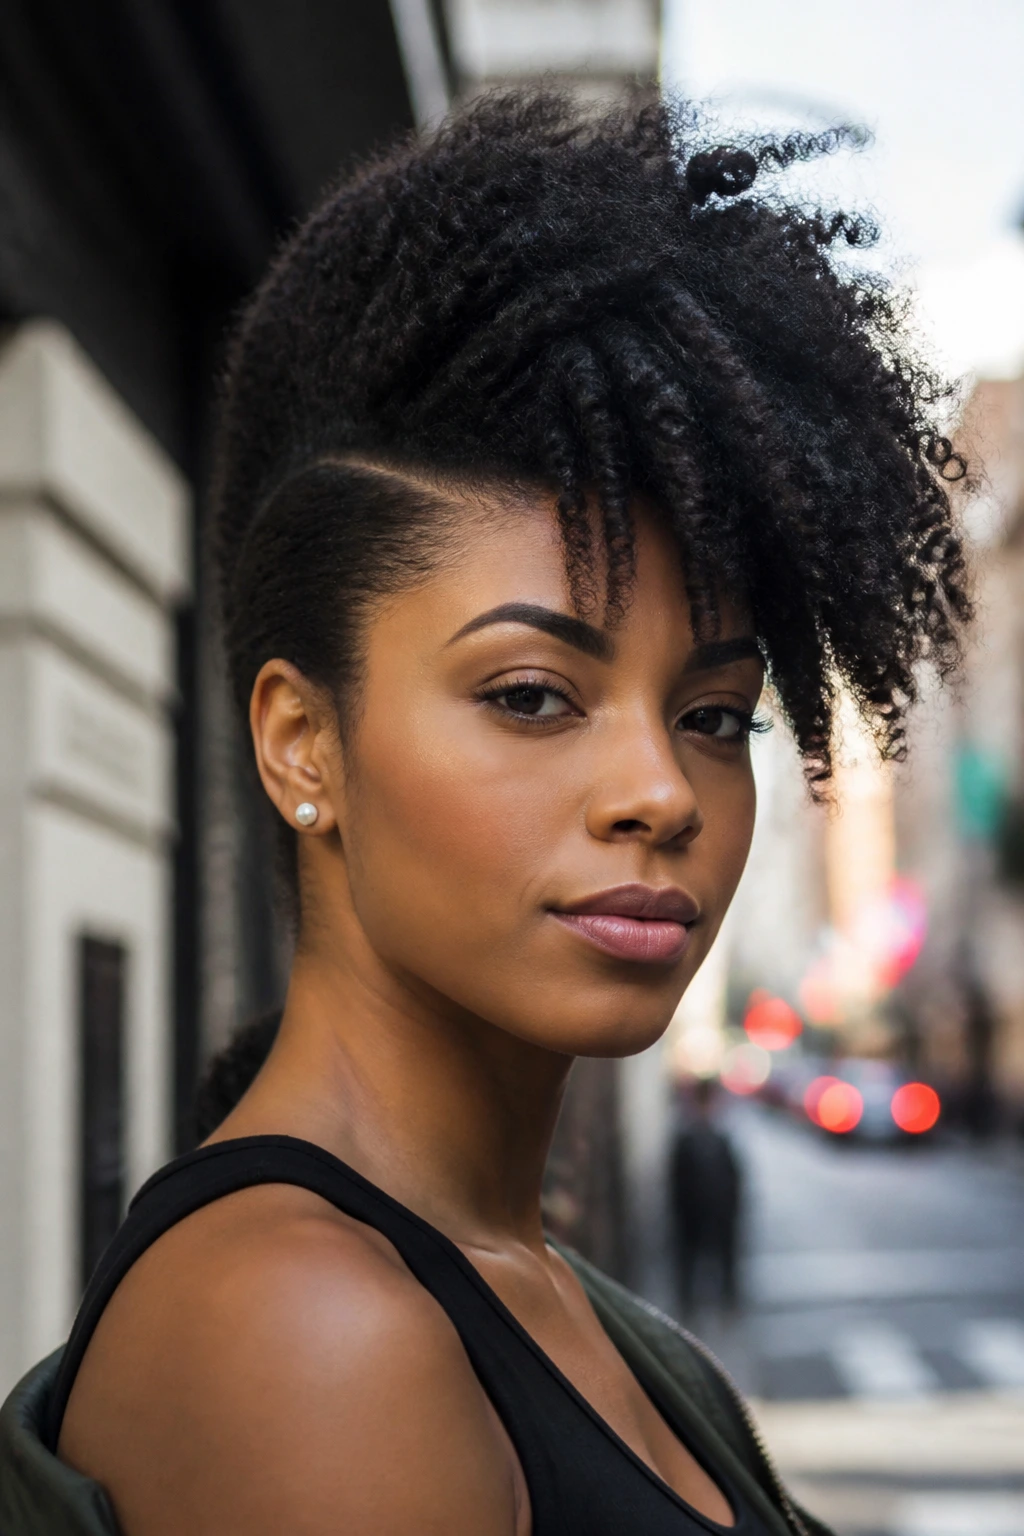
Sometimes the best mohawk is the one that refuses symmetry. An asymmetrical afro hawk keeps one side more tucked or flatter than the other, while the center and opposite side carry the bulk. It feels modern, but it’s still grounded in natural texture.
This works especially well if your hair has a strong curl pattern and a little random volume. One side can be pinned close to the head, while the other side is left fuller and a touch wild. The shape ends up looking intentional, not messy, because the contrast is obvious.
I like this look when a standard centered mohawk feels too predictable. It’s the same basic idea, but the imbalance gives it motion. You get a little swing when you turn your head, and that’s half the fun.
Who it suits
People who like hair with personality. People who don’t mind a shape that shifts a little during the day. People who are fine with the style looking more organic than polished.
23. Accessorized Mohawk with Cuffs, Pins, and Scarves
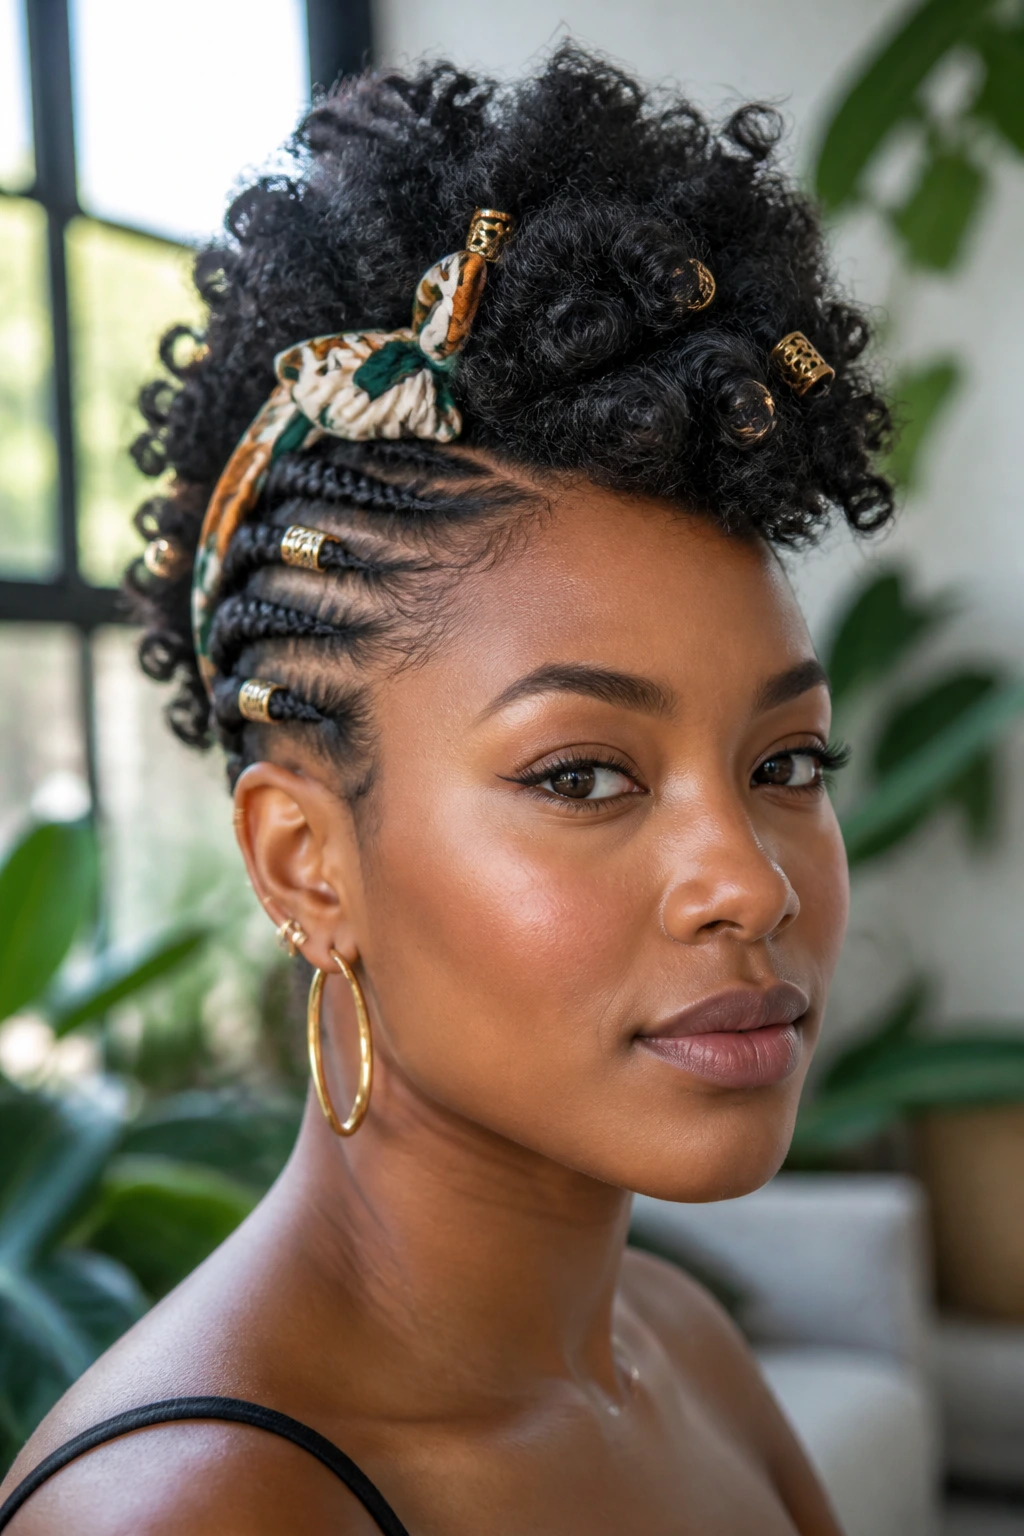
If you already have a mohawk you like, accessories can take it somewhere new without redoing the whole head. A few cuffs on braids, a narrow scarf wrapped through the center, or small pins along the sides can turn a plain silhouette into something far more personal.
The key is not to pile everything on at once. Pick one accent and let it work. Hair cuffs on the center ridge. A printed scarf at the base. Pearl pins along a flat-twist side. Too many details compete with the shape, and then the style loses the clean line that made it work in the first place.
This is one of the easiest ways to refresh natural mohawk hairstyles for Black women when the hair itself is already set. You’re not changing the structure. You’re changing the mood.
Small opinion: one scarf done well beats ten accessories used carelessly. Every time.
Why the Mohawk Shape Flatters Coils, Curls, and Kinks
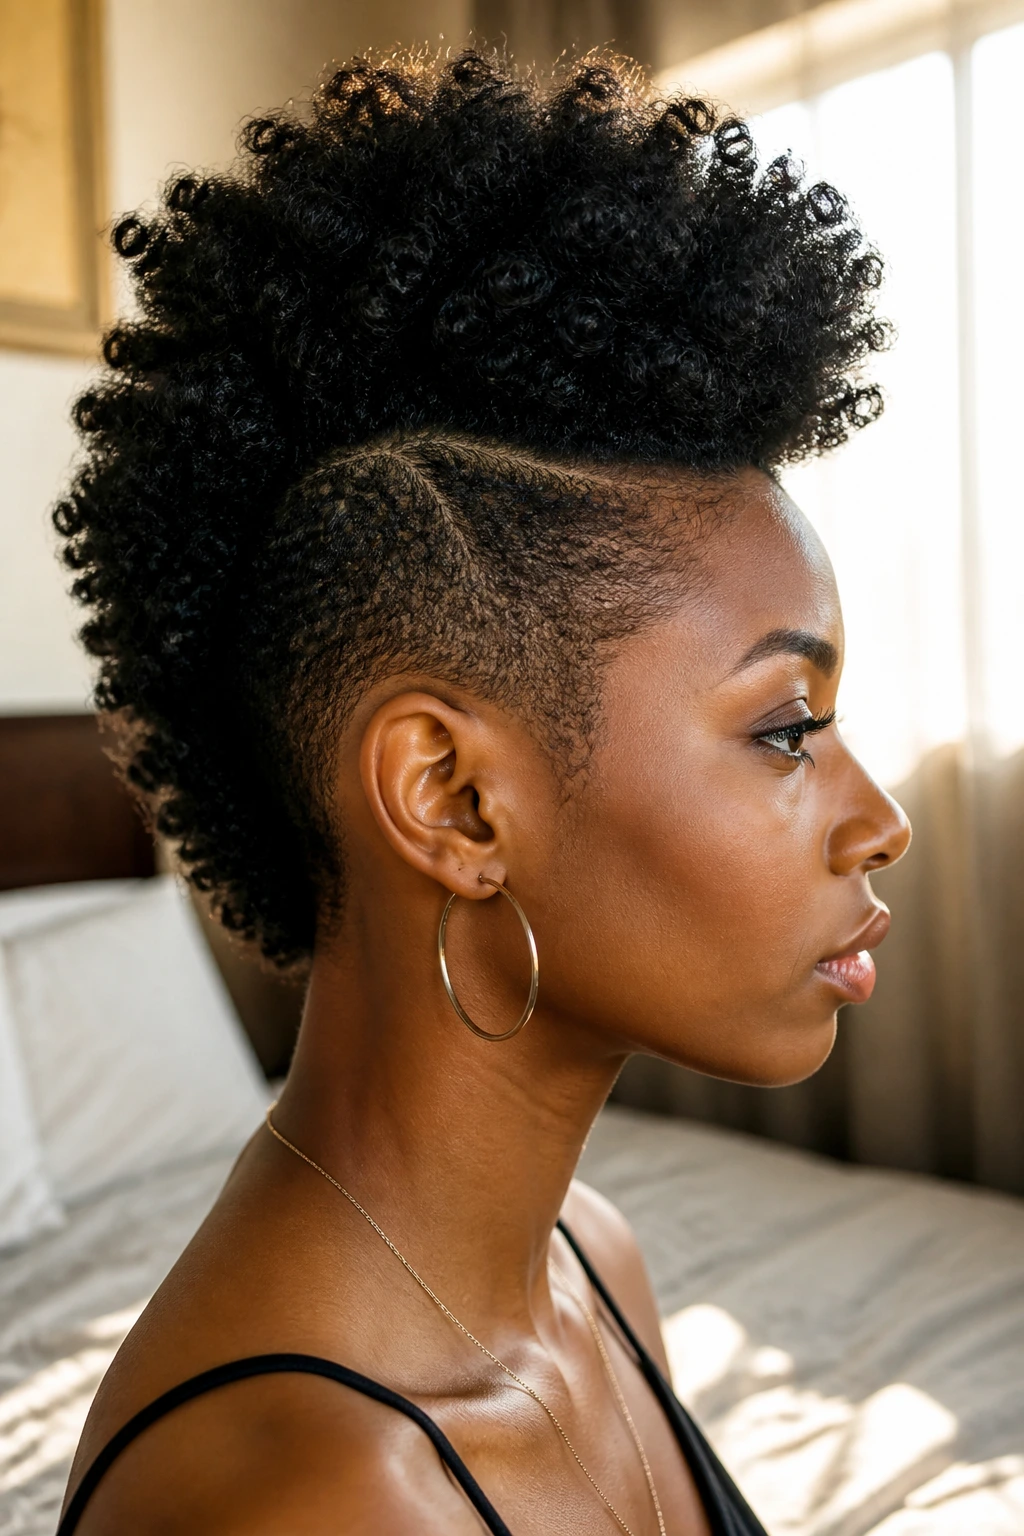
The mohawk silhouette works on textured hair because it follows the body of the hair instead of flattening it. Coils want to spring up. Curls want to stack. Kinks create natural fullness that already reads like shape. A mohawk just organizes that energy into one clear line.
There’s also a practical side. When the sides are smoothed, braided, or tucked, the top becomes the focal point. That means the style doesn’t need a lot of extra work to look finished. A twist-out hawk can look deliberate with one side part and three pins. A braid hawk can look expensive with a clean braid base and nothing else. Texture does the heavy lifting.
And then there’s the shrinkage question, which matters more than people admit. Natural hair shrinks. Sometimes a lot. Mohawk styles handle that well because they don’t rely on length alone. They rely on direction, height, and contrast. Short hair can still stand tall. Longer hair can still stay compact. The shape holds because the structure is built into the style, not borrowed from the length.
Essential Tools for These Styles
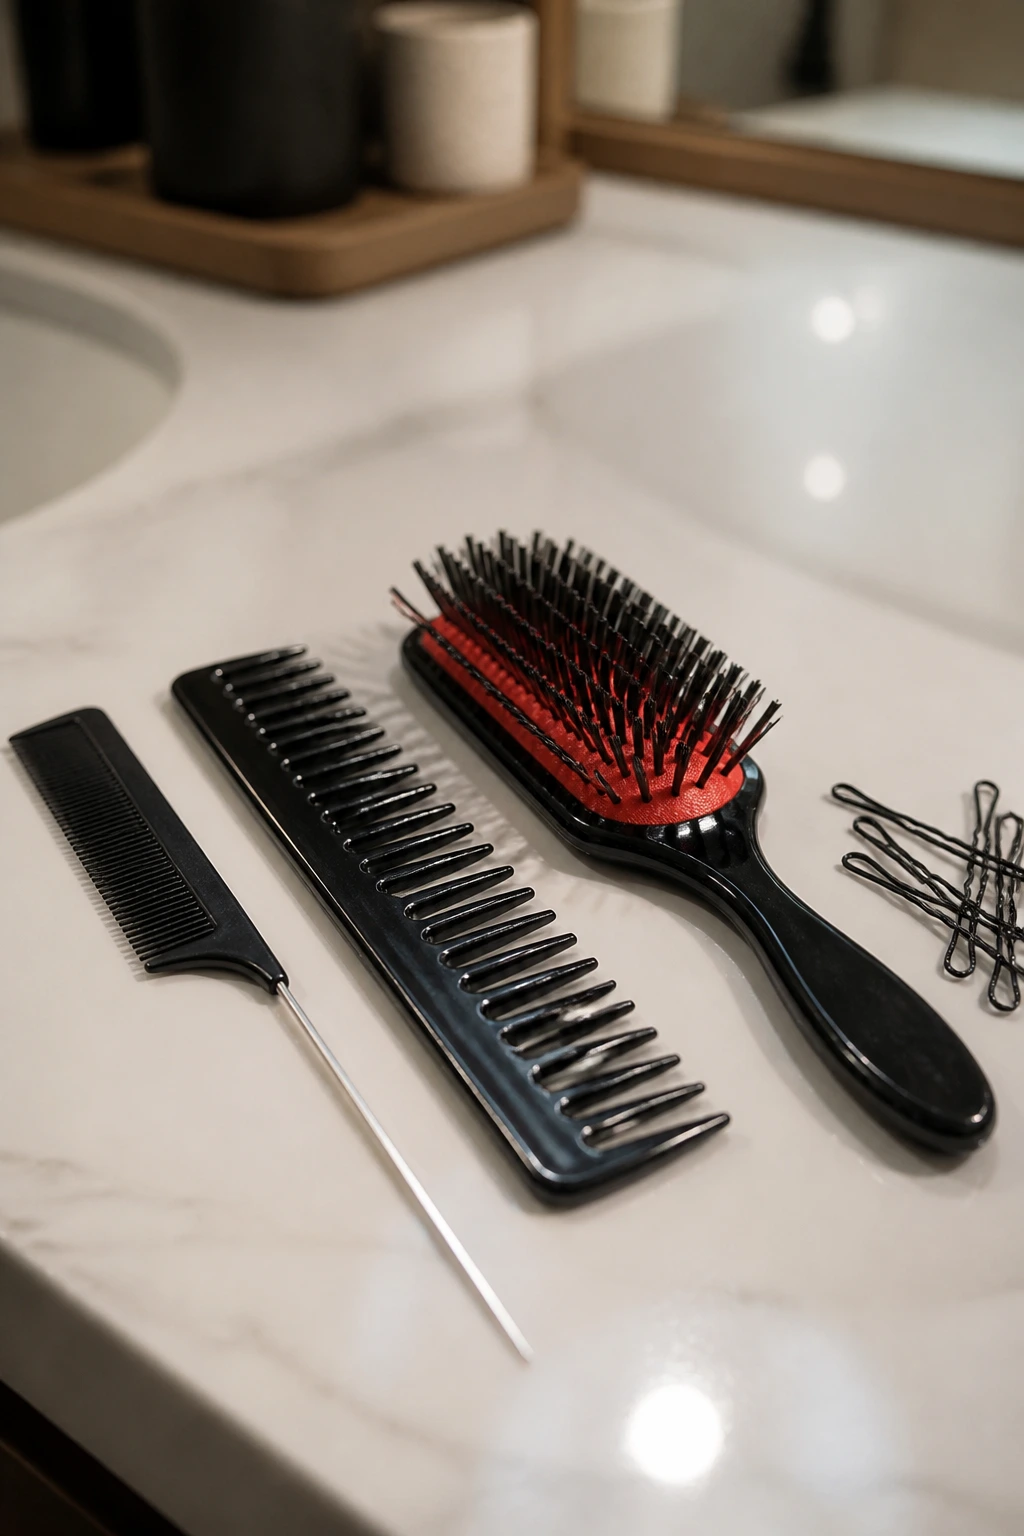
- Rat-tail comb: Useful for crisp parts, side sections, and clean braid lines.
- Wide-tooth comb: Better for detangling without ripping through curls before styling.
- Denman brush or paddle brush: Helps smooth the sides when you want a sleeker mohawk base.
- Bobby pins and hairpins: The unsung heroes. Get the strong ones with a decent grip.
- Edge brush: Handy for finishing hairlines without overloading them with product.
- Styling gel or edge control: Use a light hand. You want hold, not a helmet.
- Mousse or foam wrap lotion: Great for twist-outs, flat twists, and rod sets that need shape without crunch.
- Satin scarf or bonnet: Keeps the style from frizzing itself apart overnight.
- Spray bottle with water: Helps reset sections before twisting or braiding.
- Hair clips: Separate the center strip from the sides so the mohawk line stays clear.
- Pick: Best for lifting roots in twist-outs, puff hawks, and afro hawks.
- Optional hair accessories: Cuffs, thread, beads, and scarves change the style fast without restyling.
Smart Product Picks and Hair Prep

The best product choice for a mohawk is usually the one that gives hold without drying the hair into a brittle shell. For side sections, a water-based gel or foam works better than a thick waxy edge product because it spreads more evenly and rinses out cleaner. For the center, pick the product based on the texture you want. Cream for soft definition. Mousse for lighter hold. Gel only when the style needs more structure.
Prep matters more than people think. If the hair is dirty, tangled, or half-dry in the wrong places, the mohawk won’t sit right. Start with detangled, moisturized hair that has a little stretch. That might mean a quick blow-dry on low heat, a banding method, or a stretched set from the night before. You do not need bone-straight hair. You need hair that cooperates.
And keep moisture where it belongs. The center can handle more product than the sides, which need smoothness and hold, not heavy buildup. A little leave-in at the ends is enough for many of these styles. Too much cream at the root can make pins slip, braids puff out faster, and puff hawks collapse before lunch.
How to Choose the Right Mohawk for Your Hair Length and Face Shape
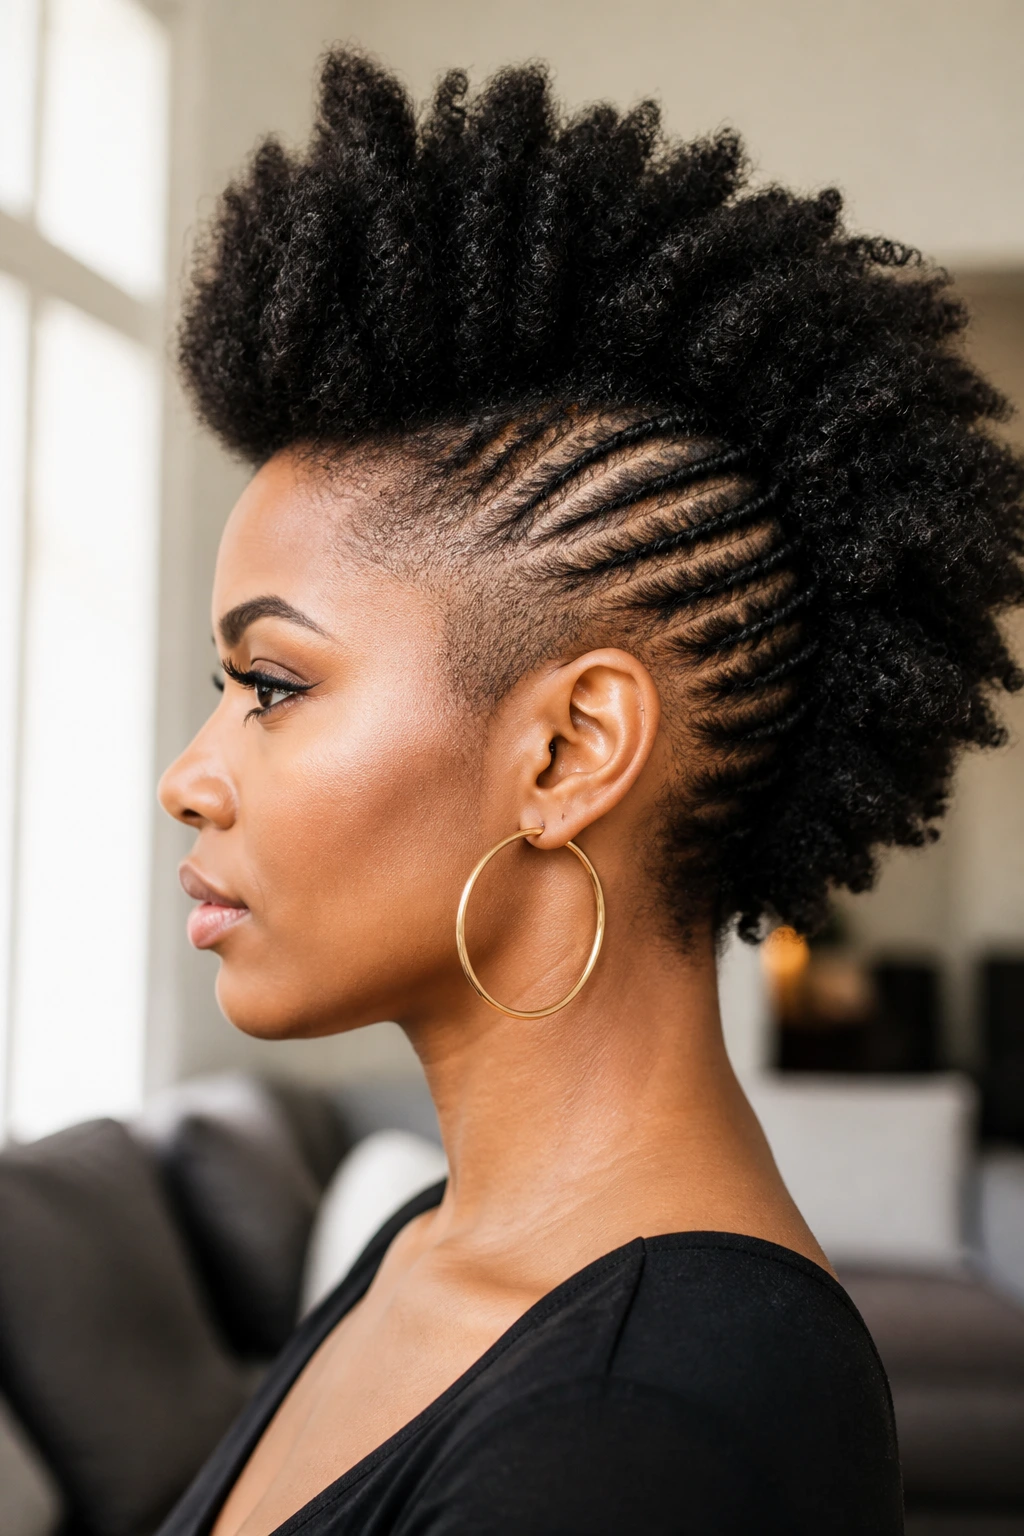
Not every mohawk needs the same amount of height. A round face often looks nice with a taller center strip that stretches the line upward. Longer faces can handle more width and a softer, wider hawk. If your face shape doesn’t fall neatly into those buckets, fine. The point is to decide where you want the eye to go.
Short hair usually works best with tighter shapes: finger coils, TWA hawks, braided sides, or a rolled tuck. Medium hair gives you more options — twist-outs, puffs, rod sets, and side braids all fit comfortably there. Long hair can do the biggest versions, but it can also get heavy, so don’t force extra height if the hair keeps falling sideways.
Texture matters too. Tight coils build natural lift, which is a gift. Looser curls may need more pinning or product support. Locs, braids, and twists already bring their own shape, so those styles often need less styling pressure and fewer products than loose natural hair. Pick the version that fits the hair you actually have, not the photo you saved three weeks ago.
Styling Tips That Make the Shape Read Better
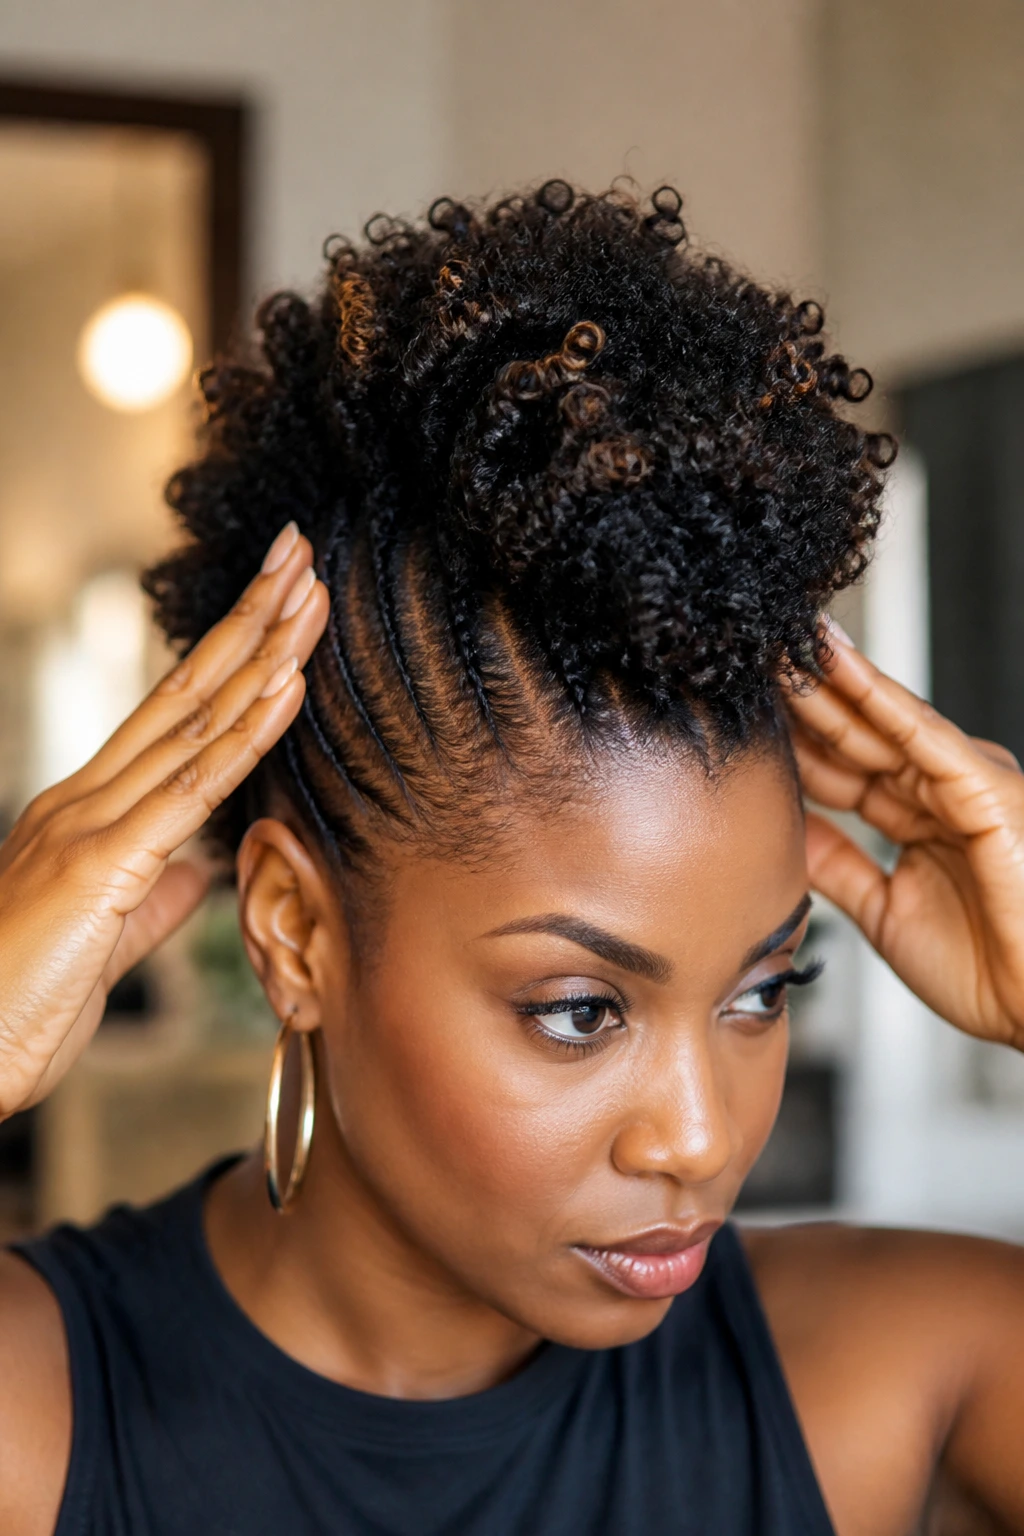
Shape Boost: Push the side sections slightly behind the ear line instead of pinning them exactly on it. That tiny shift opens the face and makes the center look taller.
Time Saver: Set the center section first. Once you know where the ridge lands, it’s easier to tuck the sides where they belong. Starting with the middle saves a lot of fiddling.
Texture Control: Use foam on twist-outs and rod sets when you want a softer finish. Use gel on braided or slicked sides only. Mixing the two everywhere usually creates flakes or dull patches.
Accessory Move: Put the ornament where the eye should stop. A cuff near the crown draws the gaze upward. A scarf near the nape softens the back. A pin near the front says, “look here.” Small difference, big effect.
Protective Upgrade: If the front hairline is sensitive, keep the front section looser and let the shape come from behind it. A mohawk that respects the edges will last longer and feel better on day two.
Common Mistakes to Avoid
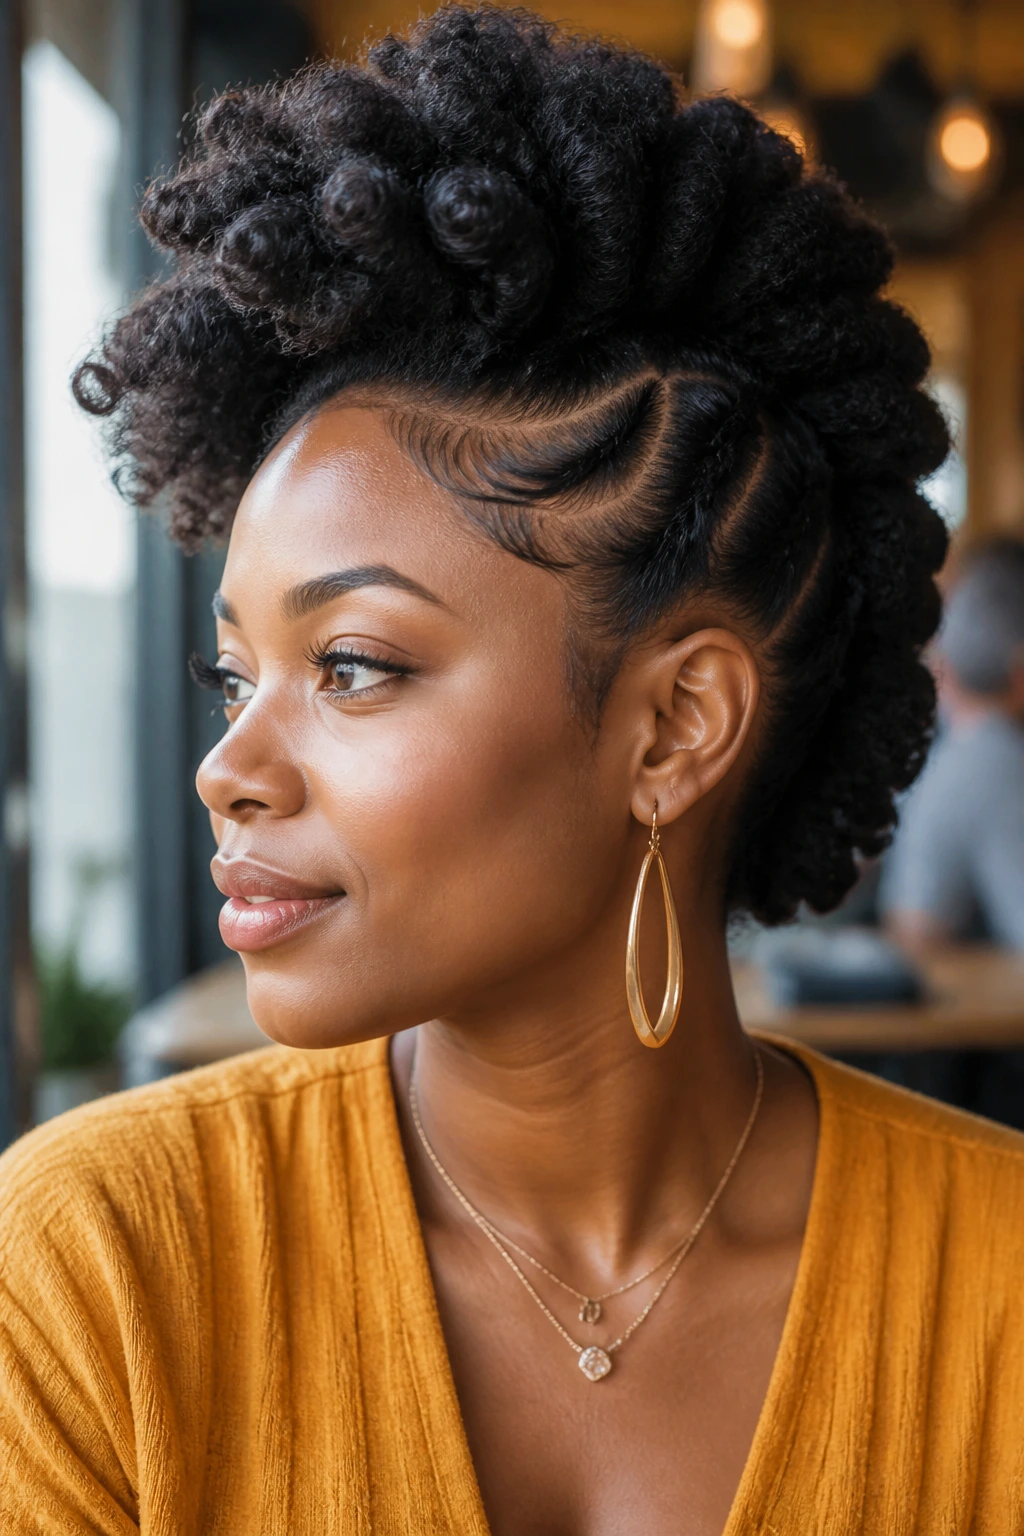
The first mistake is pulling the sides too tight. You’ll know it’s wrong because the style looks sharp for an hour and feels sore by evening. The fix is simple: loosen the tension at the temples and use pins for support instead of force.
Another one is skipping prep and trying to force shape on tangled, dry hair. That gives you bumps in the wrong places and a center strip that falls apart. Detangle first, add a little moisture, and work section by section. The style will hold better and feel kinder on the scalp.
Too much product is a sneaky problem. Heavy gels and thick creams can make the sides greasy and the middle limp. Start small. Add more only if the hair actually needs it.
People also over-accessorize. A mohawk already has enough shape. If you add beads, cuffs, scarves, and colored pins all at once, the silhouette gets lost under the decoration. Choose one or two focal points and leave the rest alone.
Finally, there’s the “forgot the back” problem. A mohawk has a front view and a back view. If the nape is frizzy, the whole style looks unfinished from behind. Check the back in a mirror before you leave the house. That tiny habit fixes a lot.
Variations and Adaptations to Try

Soft Office Hawk: Keep the sides smooth and the center low. This version works well with flat twists, a low puff ridge, or a neat twist-out that doesn’t rise too high. It reads polished without looking stiff.
Festival Feather Hawk: Add color thread, cuffs, or a scarf tied into the center section. The base style can be simple; the accessories do the talking. Good for when you want the hair to feel playful instead of formal.
Protective Vacation Hawk: Use braids, twists, or loc updo sections so you can leave the style alone for a few days. Less daily combing. Less fuss in humidity. More time to enjoy the rest of the trip.
Short-Hair TWA Hawk: Keep the sides close and build the center with finger coils or tiny twist-outs. This version proves you don’t need length for shape. You need clean sectioning and a little patience.
Full Frohawk: Let the center stay big and fluffy while the sides are tucked close. This is the most dramatic version in the group, and it looks especially strong on dense, coily hair.
Loc-Friendly Hawk: Stack locs into the center ridge and pin the sides back. Add cuffs if you want, but skip anything that makes the roots feel heavy. Locs already carry enough texture on their own.
How to Wear These Styles for Different Moments
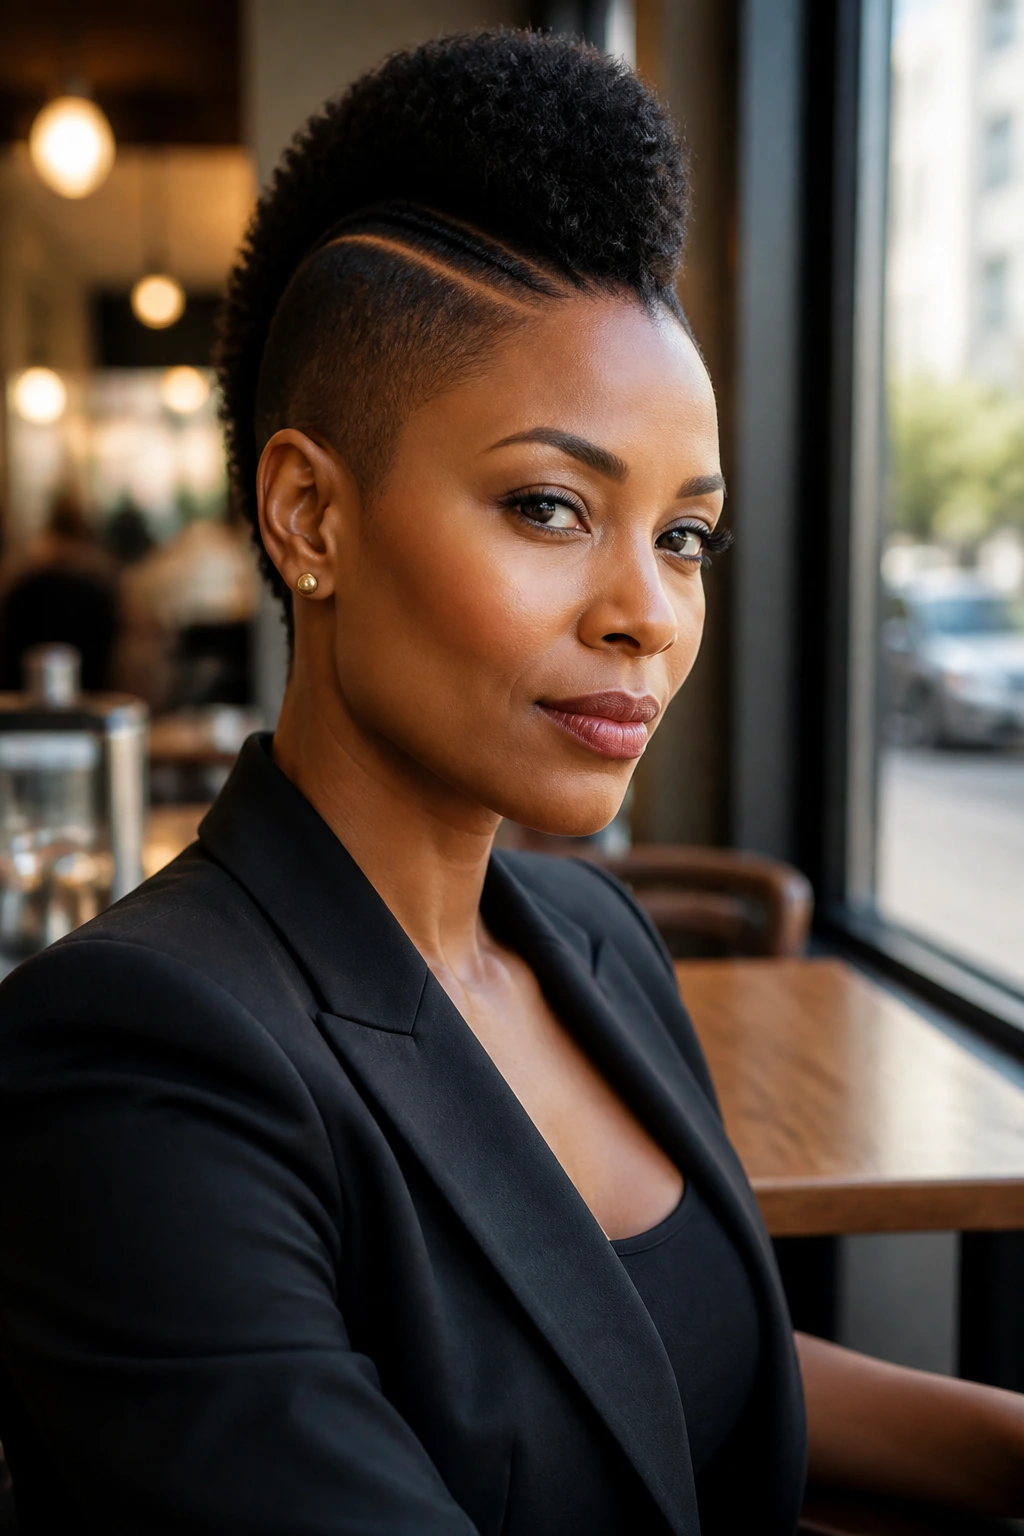
Presentation: Keep the center line clean and the sides purposeful. Even a messy mohawk should look arranged, not accidental. A crisp part or a strong twist direction helps the shape read instantly.
Occasions: The same hawk can work for work, weekends, dates, and dress-up events if you change the finish. Sleek sides and a low profile feel more formal. Big curls, beads, and cuffs push it into statement territory.
Longevity: Styles with braids, twists, or locs generally last longer than loose puff versions. If you need a hairstyle to stay put for several days, build the structure into the base instead of relying on daily refreshing.
Accessories: Use them to sharpen the silhouette, not bury it. One scarf. One cuff cluster. One pinned side. That’s usually enough. More than that and the shape starts to disappear under the decoration.
Make-Ahead, Night Care, and Refreshing
If you’re planning one of these styles ahead of time, start the night before with stretched, detangled hair and a clean parting map. That saves a lot of morning frustration. Twist-outs, flat twists, and rod sets benefit from overnight setting; braid hawks and tucked styles usually hold better once they’ve been pinned and left alone for a few hours.
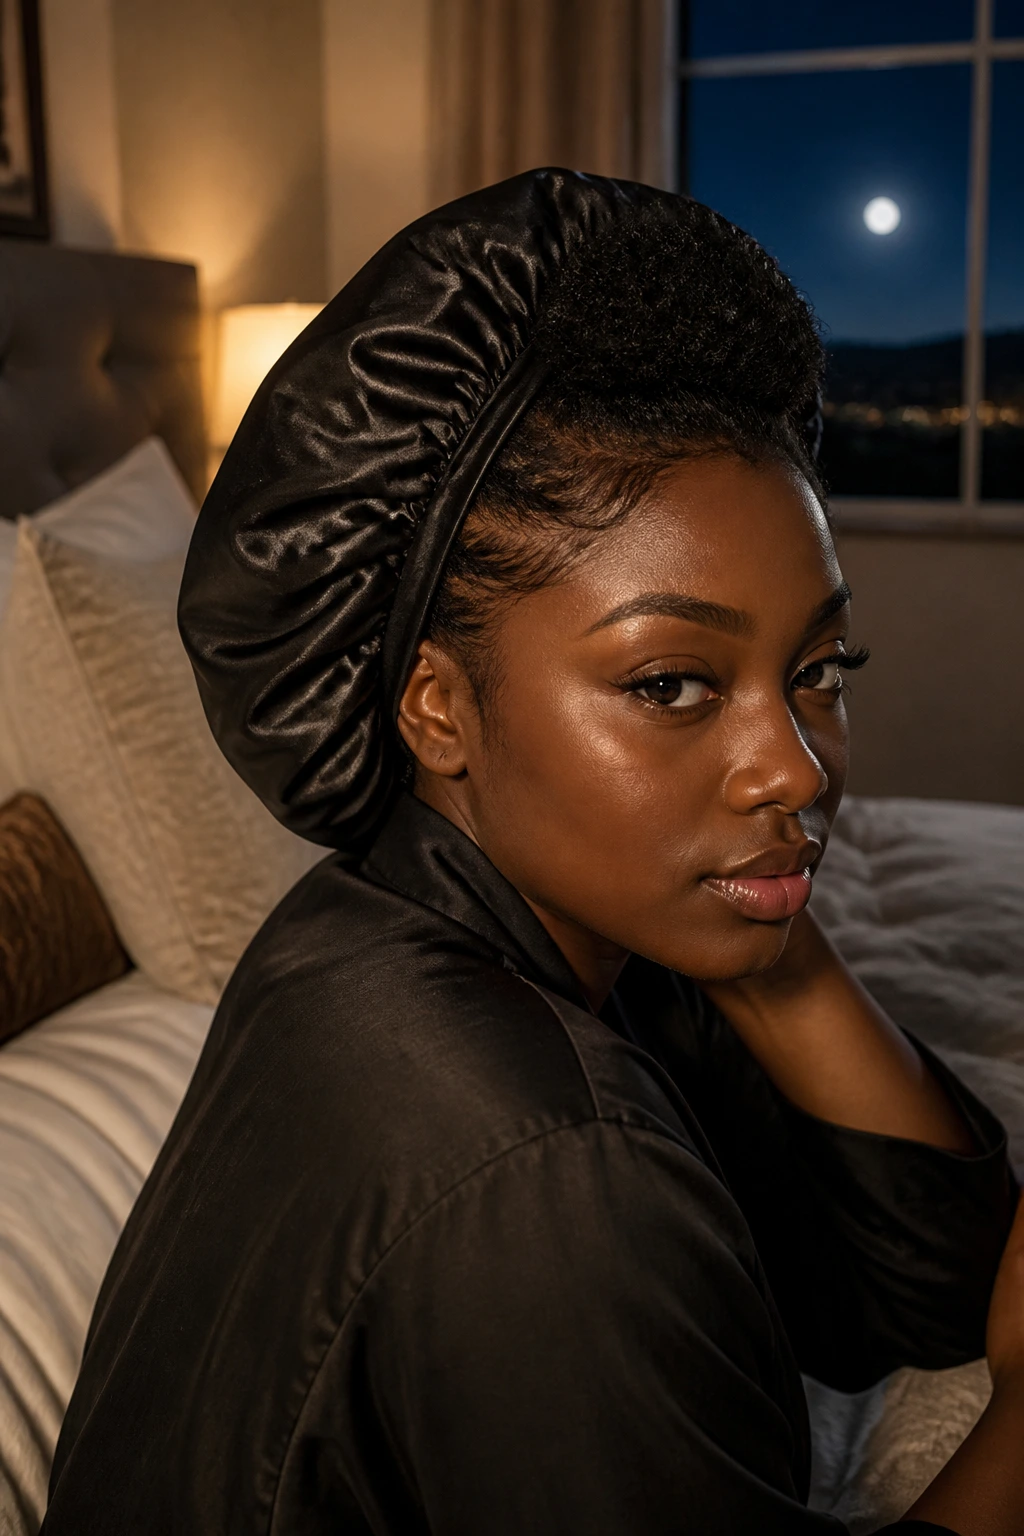
At night, satin is non-negotiable if you want the style to stay neat. A bonnet works for most versions. A scarf is better for slicked sides or headband-based looks because it keeps the edges from puffing up. If the center is fluffy and you want to preserve lift, loosely cover the sides and avoid crushing the top.
Refreshing depends on the style. Twist-out and puff hawks can be revived with a light mist of water, a tiny amount of leave-in, and a quick finger fluff. Braid, twist, and loc styles usually need less. You may only need to smooth the sides and retie the wrap. If the style starts looking dry, don’t drown it in product. A little moisture on the center and a clean line at the sides usually fixes more than people expect.
Frequently Asked Questions
Can natural mohawk hairstyles for Black women work on short hair?
Yes. Short hair can look especially sharp in a TWA hawk, finger coils, flat twists, or a tucked style with close sides. The key is to build shape with sectioning and product, not length.
Do mohawk styles damage edges?
They can if the sides are pulled too tight or worn that way for too long. Keep the front loose enough that it doesn’t ache, and use pins or soft wraps for support instead of yanking the hair flat.
How long do these styles usually last?
Loose styles like twist-out hawks and puff hawks often last a few days with refreshes. Braided, twisted, and loc-based versions can last much longer because the structure is built into the style itself.
Can I do a mohawk without braiding my hair?
Absolutely. Twist-outs, puffs, rod sets, finger coils, rolled tucks, and headband faux hawks all work without braid-heavy styling. They’re often faster, too.
What if my hair keeps falling flat in the center?
That usually means the roots need more lift or the product is too heavy. Try stretching the center first, use a lighter hold product, and lift only the roots with a pick once the style is set.
Can I add braiding hair or clip-ins?
Yes, and it’s a useful trick for fuller mohawks. Keep the added hair light enough that the base doesn’t sag, and hide the attachment point under the center ridge or wrapped base.
Which styles are best for low-maintenance weeks?
Twist hawks, braid hawks, loc hawks, and tucked styles tend to be the easiest to live with. They hold their shape longer and don’t need daily rebuilding.
How do I keep the style from looking frizzy too fast?
Use satin at night, avoid touching the center all day, and don’t overload the hair with heavy cream. Frizz is part of natural texture, but good prep keeps it soft instead of puffy in the wrong spots.
A Shape That Lets Natural Hair Speak
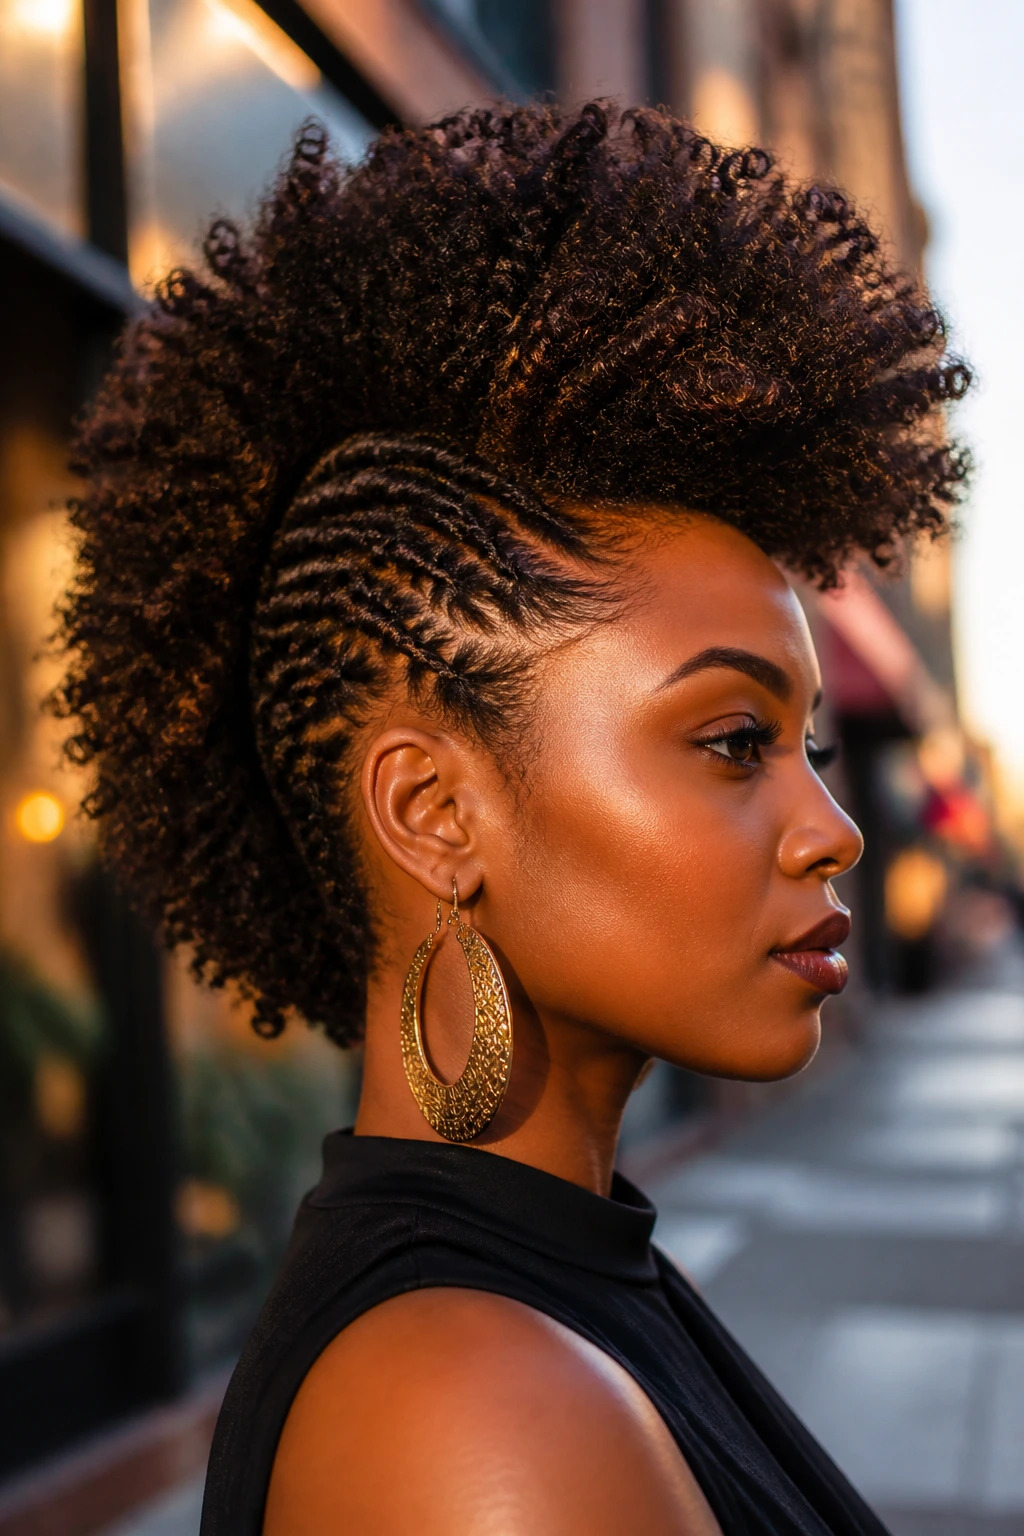
The nicest thing about a mohawk on Black hair is that it doesn’t hide the texture. It frames it. A good one gives coils a tall center, gives braids a strong line, and gives twists enough room to breathe without losing the outline. That balance is why these styles keep showing up again and again.
Pick the version that fits your hair, not the one that looks busiest on a mood board. A well-placed flat twist or a clean puff hawk often says more than an overworked style ever could. And once you learn how your own hair likes to sit, the options open up fast.
The shape is bold, yes. But it’s also practical, flexible, and kind of fun to wear. That’s a rare mix.
