



A mohawk can be razor-sharp, soft, sculpted, or almost romantic; the shape does the heavy lifting, and the rest is attitude. That’s why Mohawk styles for women keep showing up in salons, on red carpets, and in weekend mirror selfies: the silhouette can flip from punk to polished with a few inches of hair and the right product.
If you’ve only seen the version with shaved sides and a stiff strip down the middle, you’re missing the fun part. The crest can be braided, twisted, pinned, picked out, slicked, curled, or built from locs and extensions. A 1/4-inch fade reads cleaner than a full skin shave if you want a softer edge, while a 2- to 3-inch crest gives fine hair more visual weight without making it look overworked.
The best part is the range. Short pixies, waist-length curls, relaxed hair, braids, and locs can all wear some version of the shape if the center line is clear and the sides are controlled. The styles below move from hard-edged to soft, because that’s the easiest way to see where the mohawk stops being a haircut and starts being a whole vocabulary.
Why This Collection Has Real Range
-
No single level of commitment: Some looks need clippers and a trim every 2 to 3 weeks; others only need bobby pins and a can of hairspray.
-
Works across textures: Straight hair, coils, curls, braids, and locs can all carry the center ridge in a different way without losing the mohawk shape.
-
Short or long, there’s a version for it: A pixie hawk, a braid hawk, and a waist-length ponyhawk are all in the same family, just with a different mood.
-
Soft or sharp is your choice: A shaved side gives you that clean, graphic line; a pinned faux hawk keeps the silhouette without making the cut permanent.
-
The grow-out stage is manageable: Tapers, braid-ins, and twisted crests give you somewhere to go when the shape starts getting fuzzy.
1. Razor-Edge Shaved-Side Mohawk
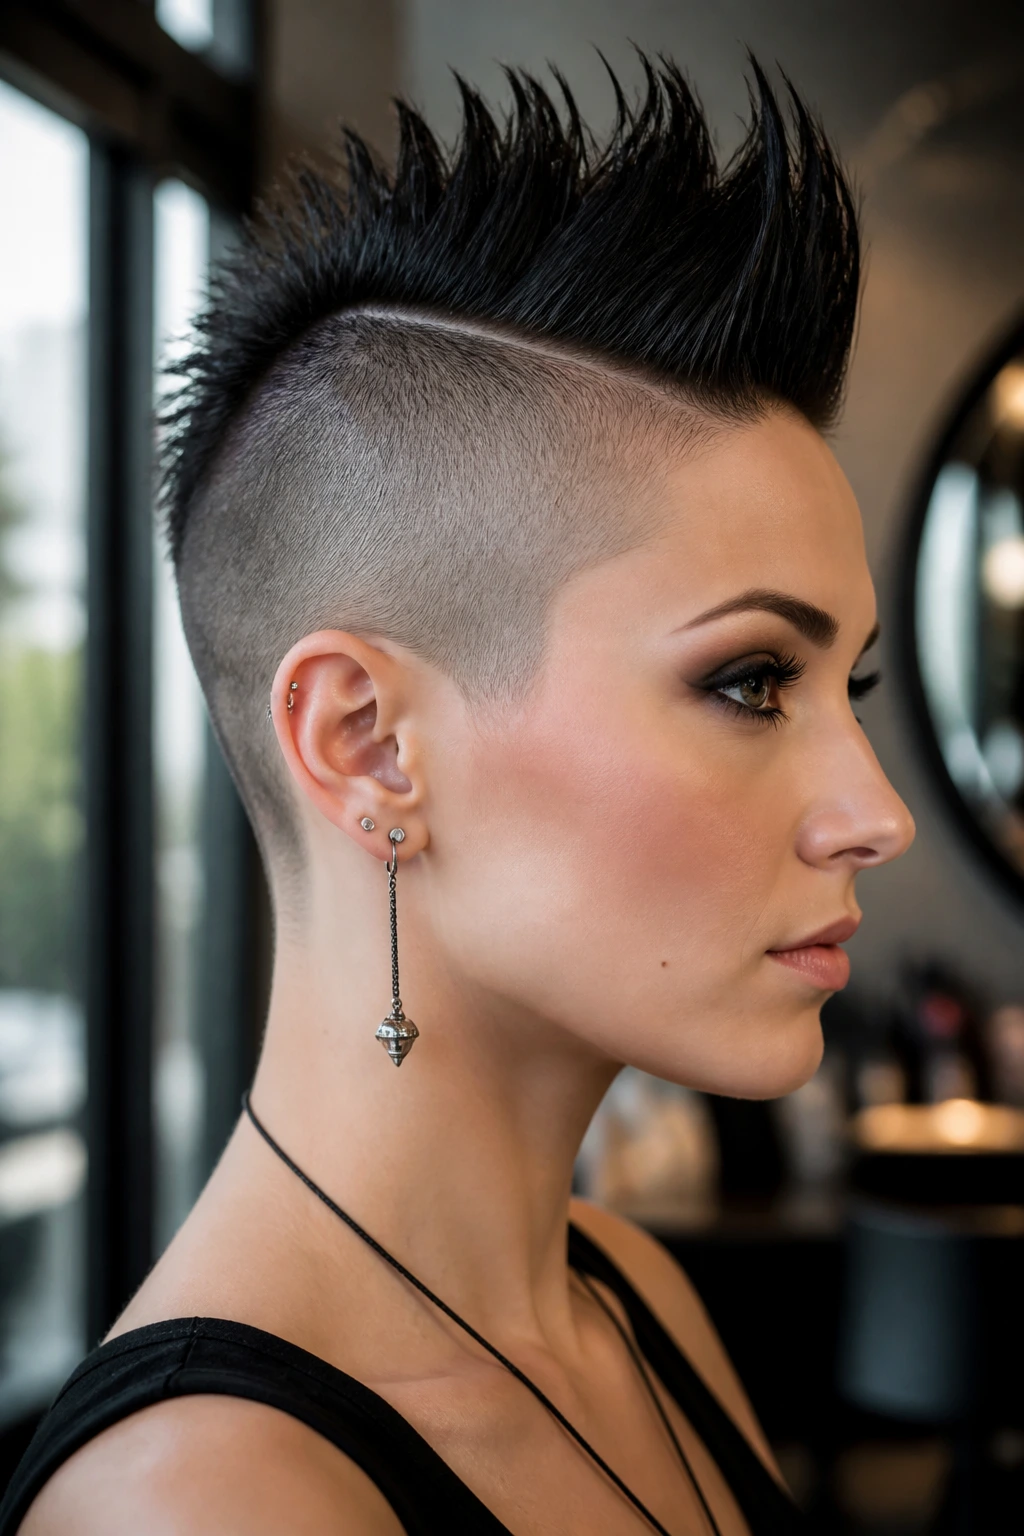
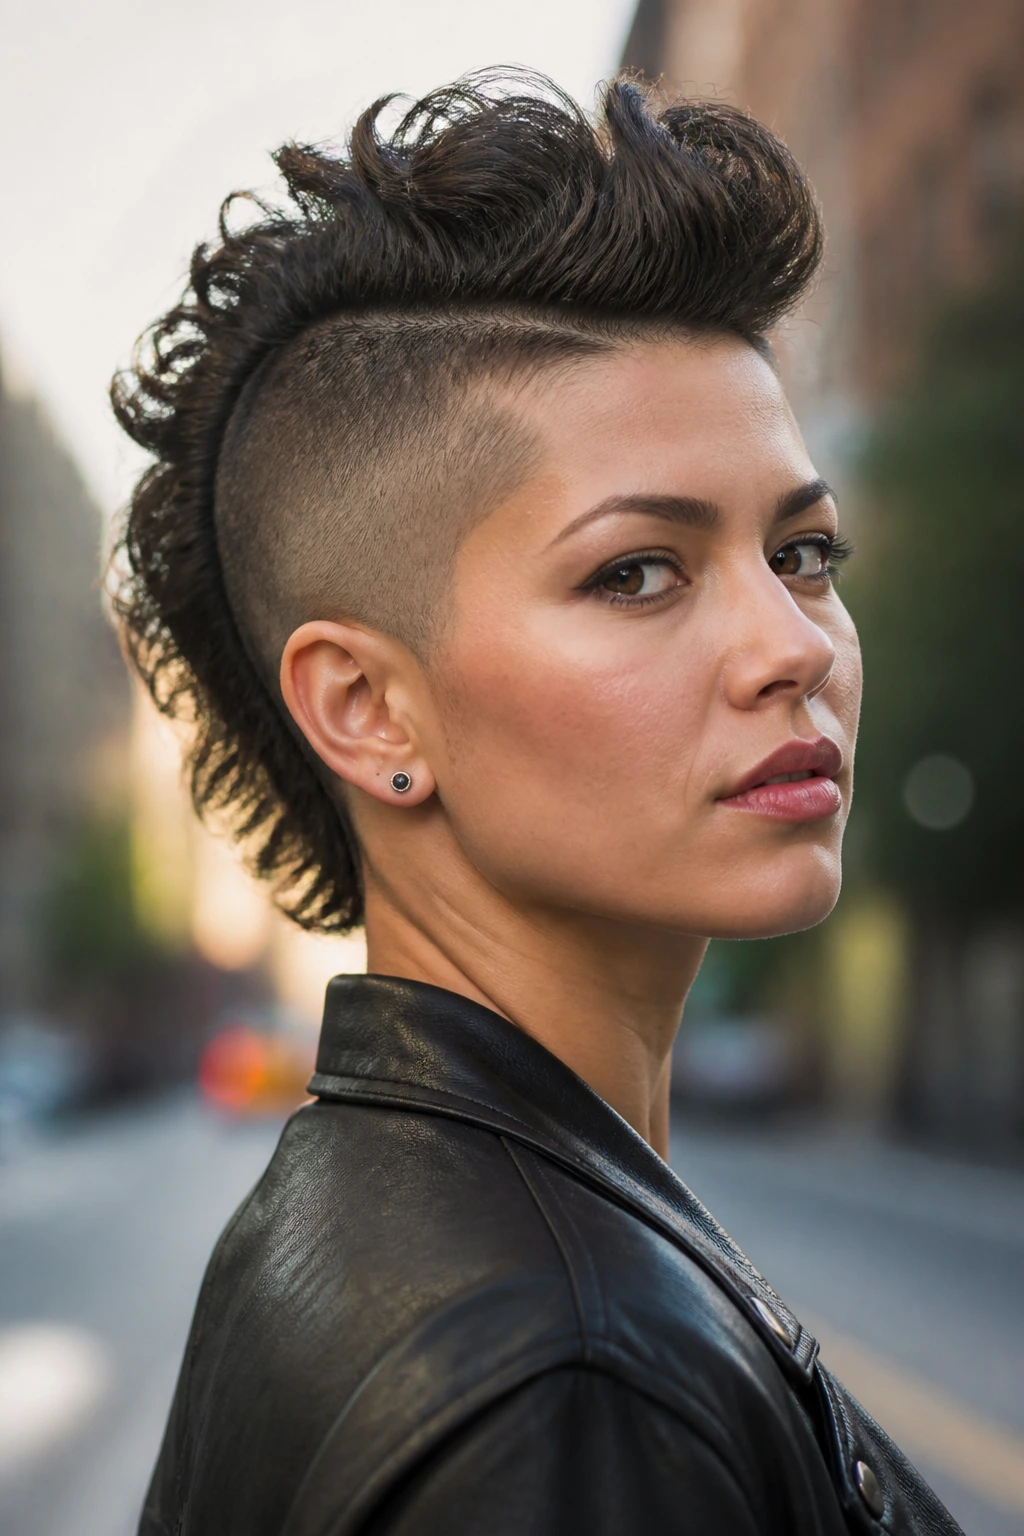
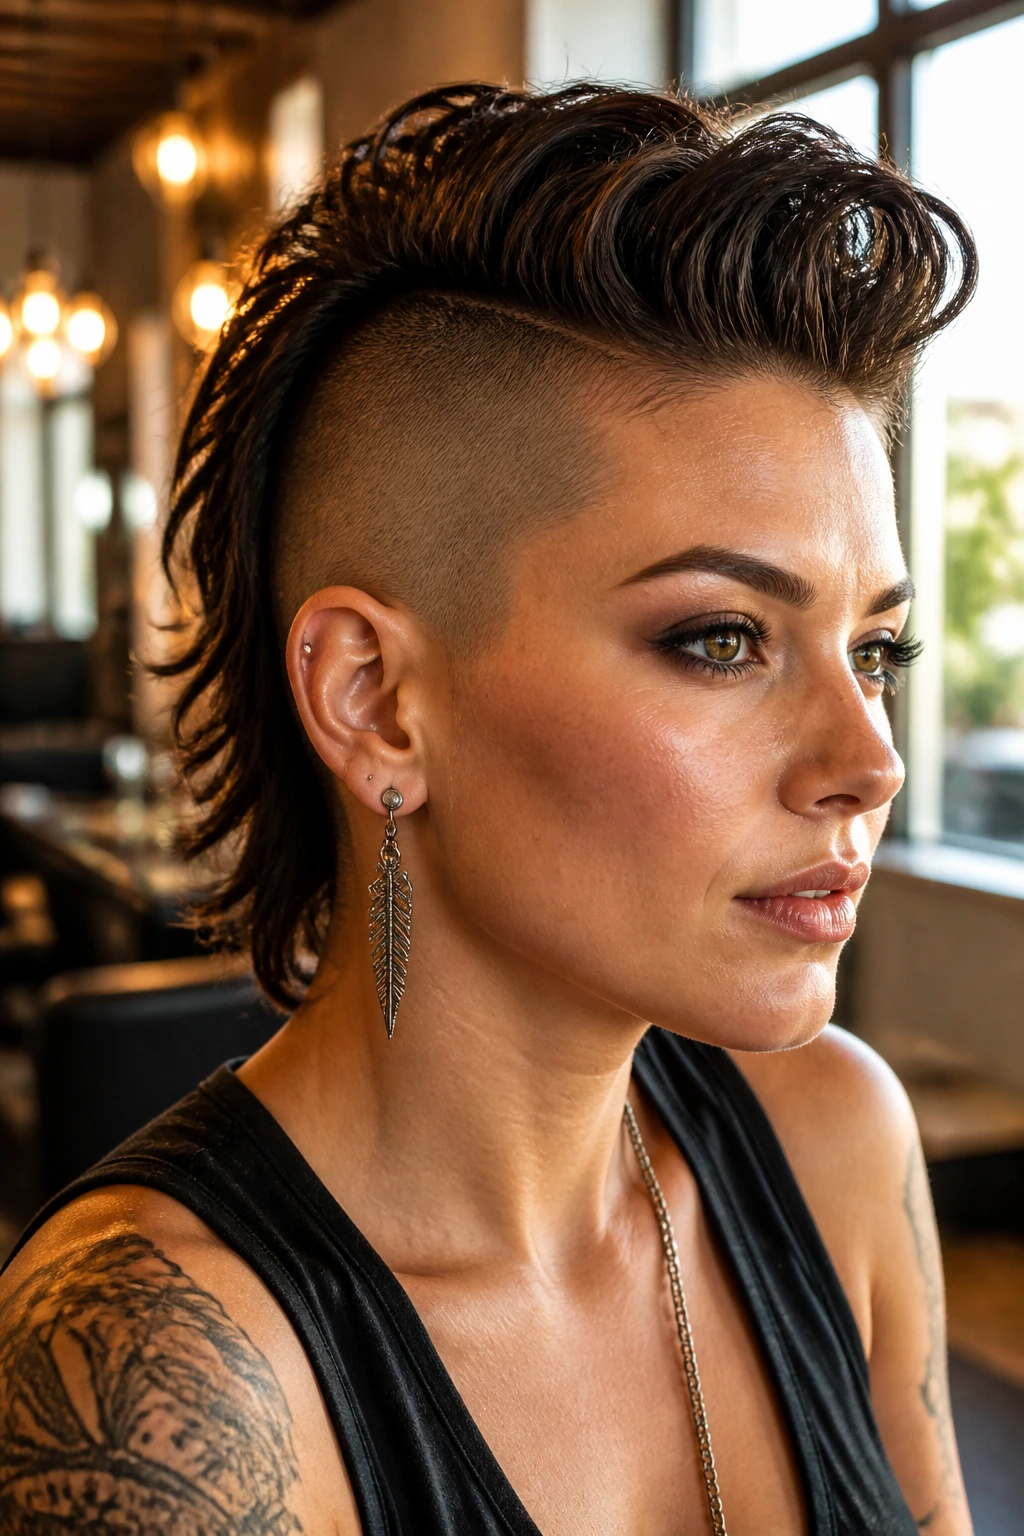
This is the version most people picture first: cleanly clipped sides, a narrow center ridge, and a top that stands up instead of lying politely to one side. The shape looks strongest when the crest stays around 2 to 3 inches and the sides are taken down with a #0 or #1 guard, because the contrast is what makes the line read from across the room.
I like this cut on women who want a sharp outline and do not mind upkeep every 2 to 3 weeks. A matte paste at the roots keeps the top piecey; too much gel turns it into a helmet. If your hair is fine, blow-dry against the grain first, then lift the front with a tail comb before the product dries.
2. Soft Faux Hawk with Bobby Pins
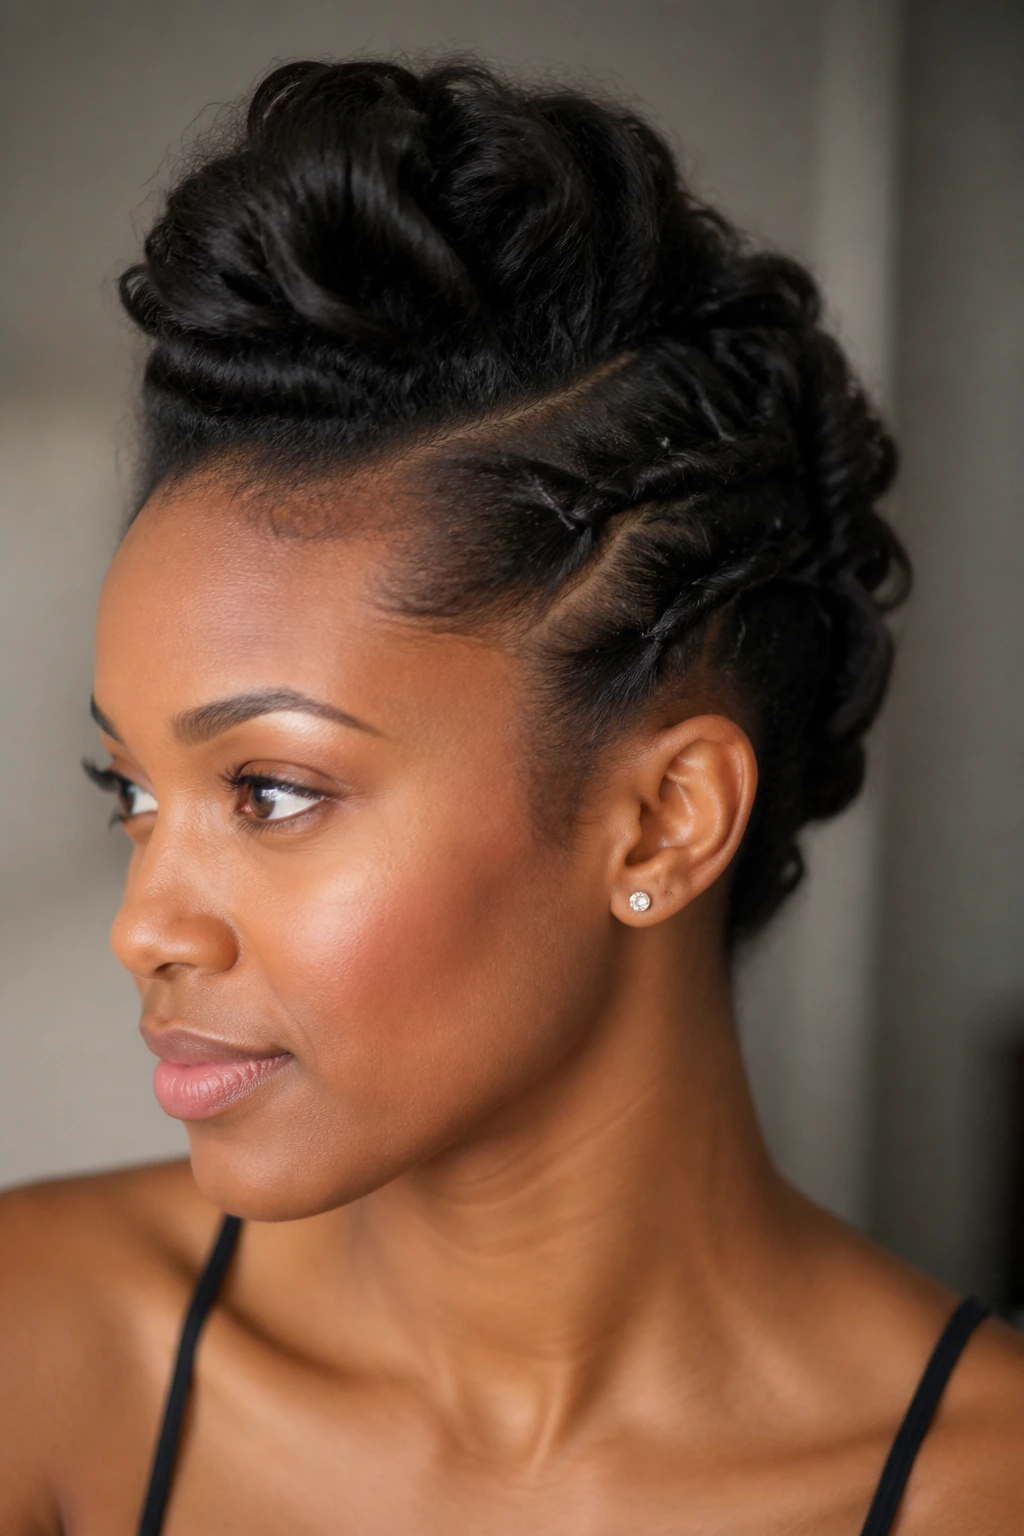
No clippers, no commitment, no problem. Pull both sides back in small sections, twist them flat against the head, and pin every 1 to 2 inches so the center strip stays high while the rest disappears behind the ears. The result looks polished from the front and still keeps a little softness around the face.
This one is my favorite for medium and long hair when you want the mohawk idea without the shave. A mist of flexible-hold spray is enough; you do not need crunchy lacquer unless humidity is being rude. Hide the pins under the top layer and leave one or two face-framing pieces loose if the forehead needs softening.
3. Curly Frohawk with Lift at the Crown
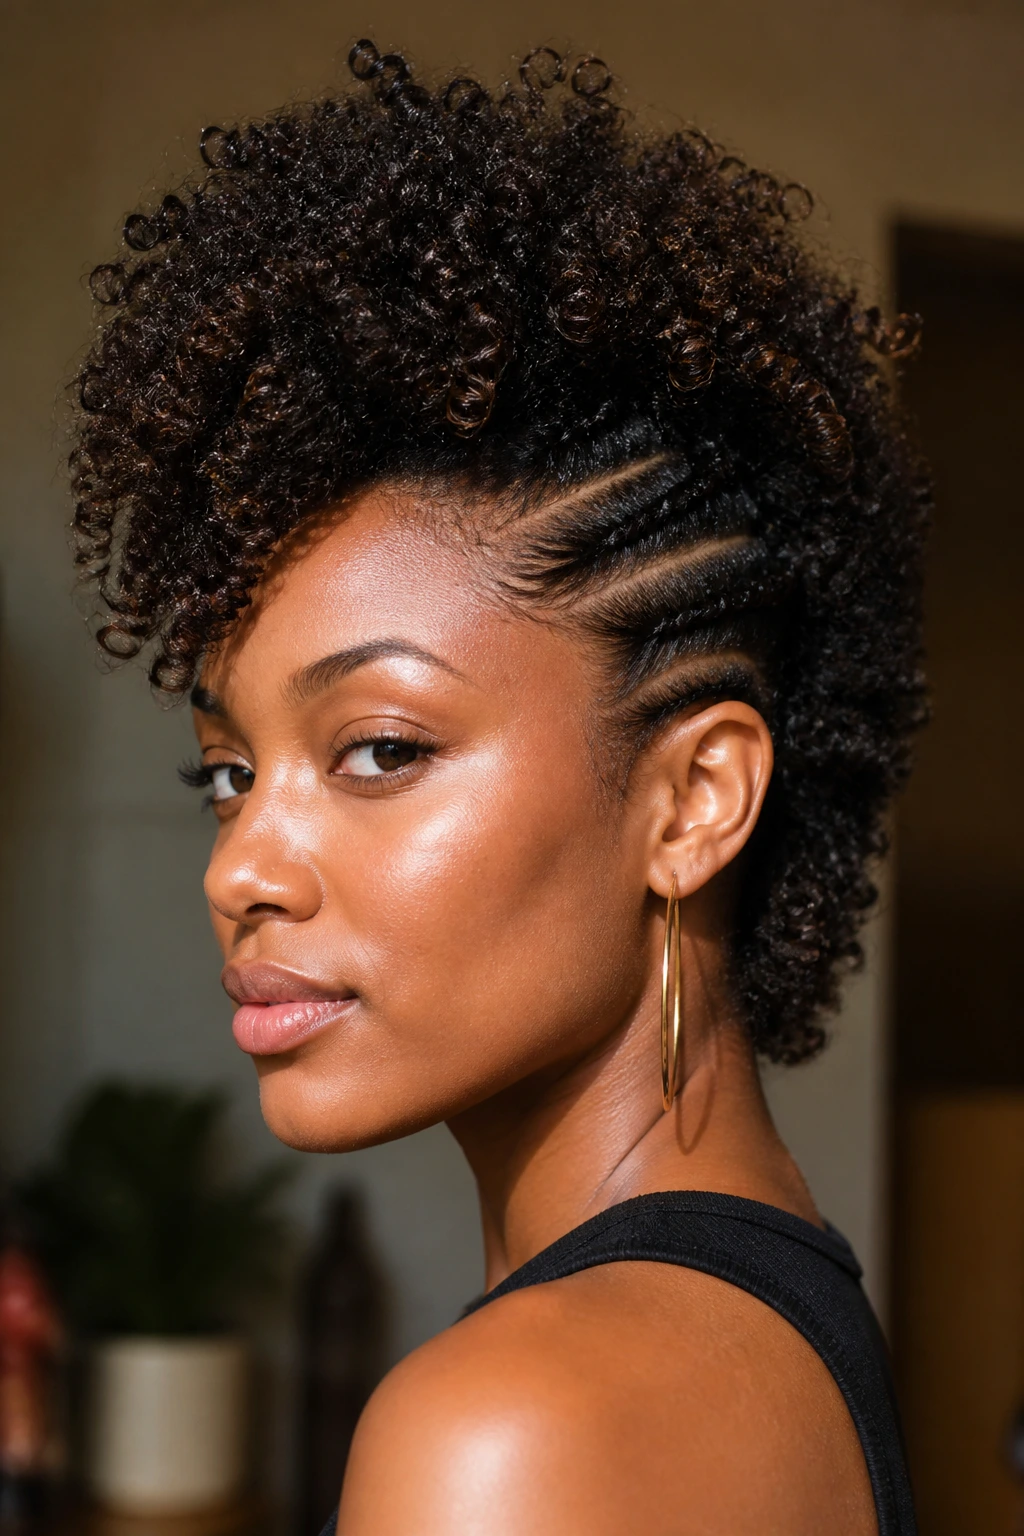
Why does this look feel so alive? Because the curl pattern does half the work before you even touch a comb. Use curl cream on damp hair, then diffuse at the roots for 8 to 12 minutes before picking the crown upward and pinning or braiding the sides flat.
This style is especially good for 3b to 4c curls when you want volume without fighting the natural bend. The trick is to stretch the roots a little while leaving the ends springy. If the curl clumps are too uniform, separate them with oiled fingers; if the shape gets wide at the temples, tighten the side sections closer to the scalp.
4. Cornrow Mohawk with a Clean Center Ridge
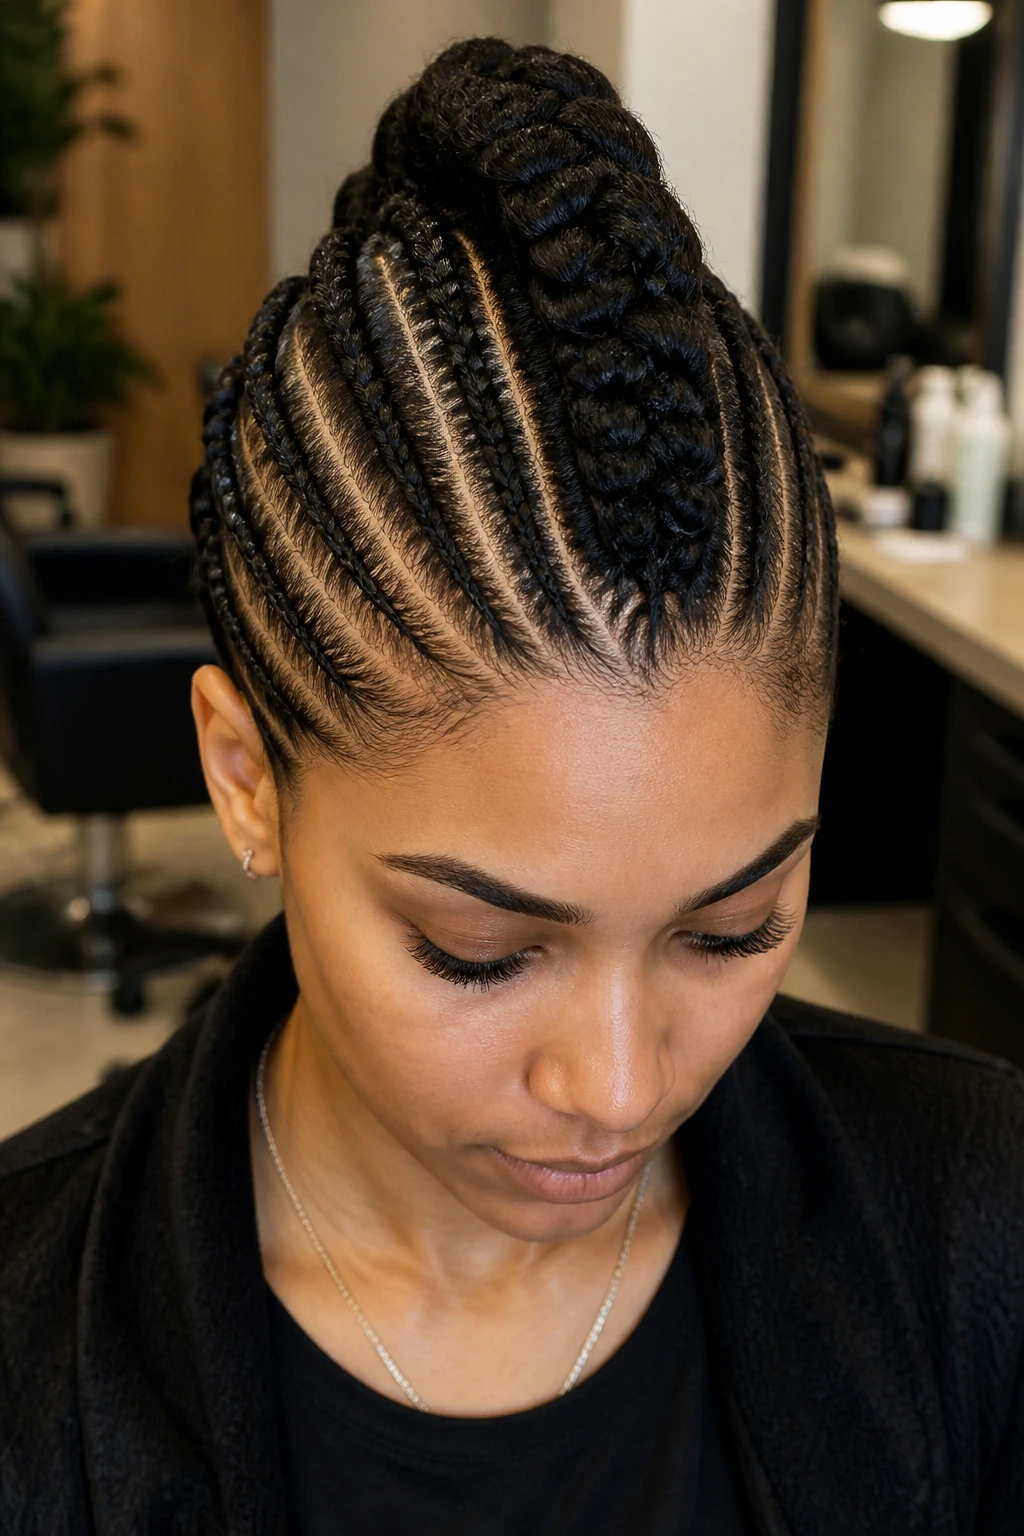
A cornrow mohawk gives you structure that lasts beyond one evening. The sides are braided straight back or in feed-in rows, and the center strip stays loose, braided, or twisted upward so the whole head reads as one strong line. On medium-length natural hair, 4 to 8 cornrows per side is usually enough to keep the shape clean without turning the scalp into a grid.
This is one of the best choices if you want a protective style with attitude. The braids should feel snug, not painful, and the first day is the easiest time to add beads or cuffs if you want them. Too many accessories can crowd the silhouette, so I’d keep the hardware restrained unless the event calls for drama.
5. Sleek Wet-Look Mohawk
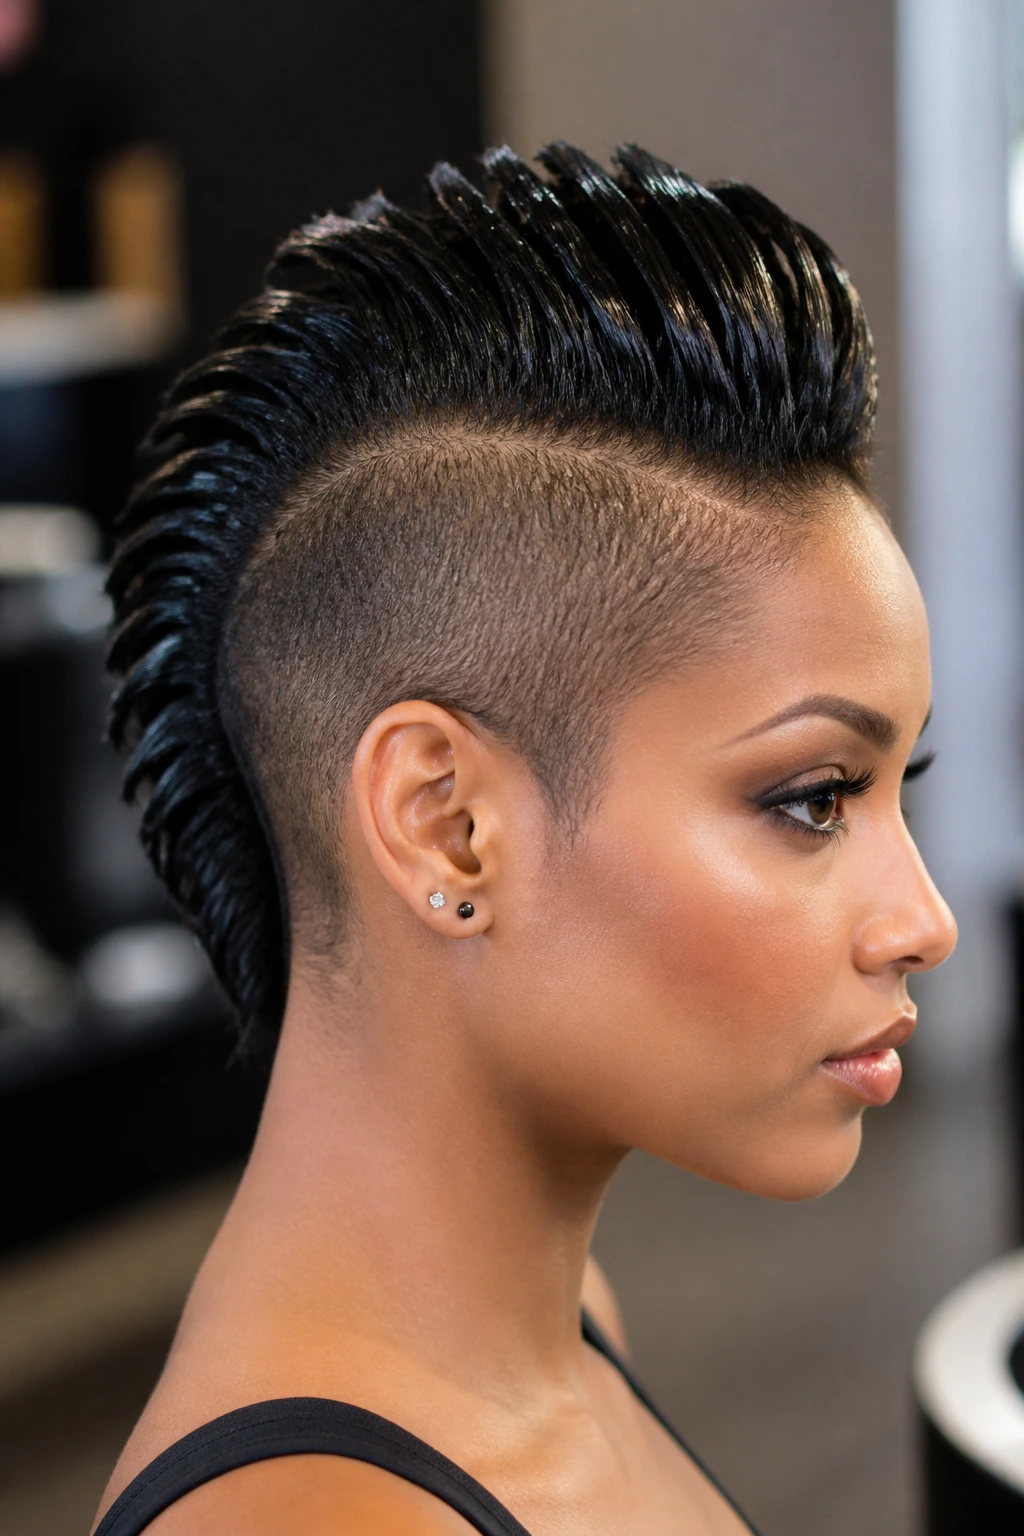
A wet-look mohawk lives and dies by clean parting and patience. Brush a strong gel through damp hair, smooth it from the forehead to the crown, and comb the sides flat with a fine-tooth comb until the surface looks glassy. The top should be slick rather than stiff, with the ridge clearly visible instead of puffed out.
I prefer this on straight or relaxed hair, or on curls that have been stretched first with a blow-dryer. Use a shine spray at the very end, not a heavy oil, or the whole style will collapse by midday. It is a one-night hairstyle for many people, which is fine; not every look needs to survive three days of sleep.
6. Loc Mohawk with Tapered Sides
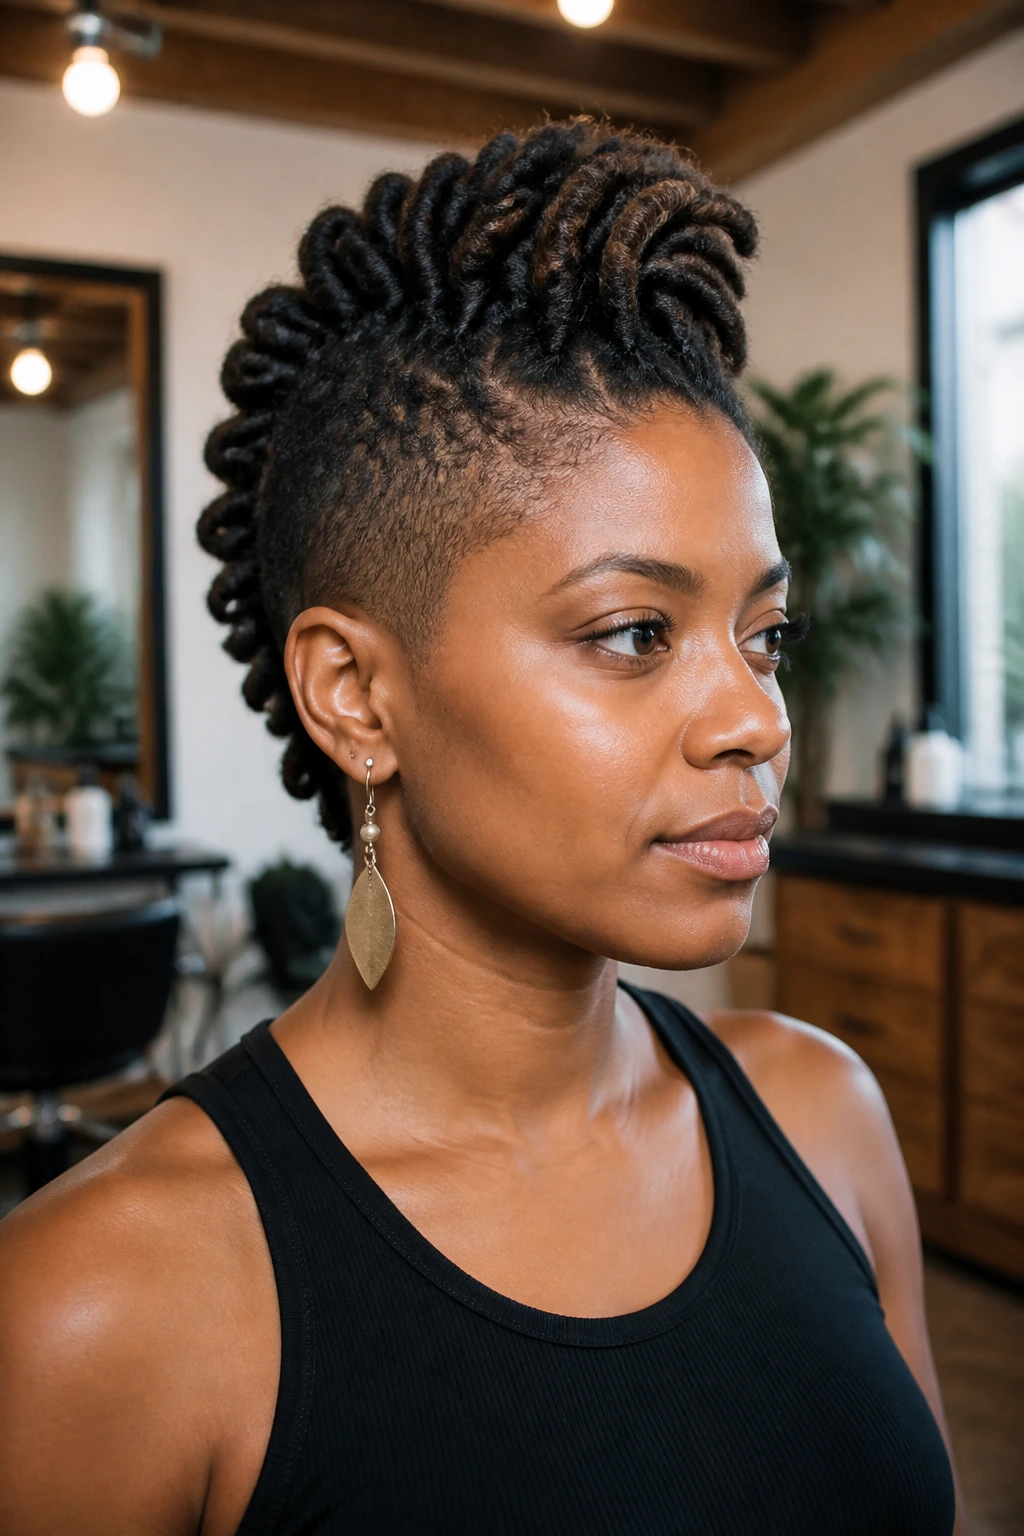
Locs make a mohawk feel grounded and sculptural at the same time. The sides can be tapered low for shape, while the locs in the center are swept up, knotted, or left to fall in a rope-like ridge down the scalp. The silhouette gets especially good when the locs are not packed too tightly; a little breathing room makes the texture easier to read.
If your locs reach the shoulders, use U-pins and a few wrapped elastics to keep the crest lifted at three or four points. Heavier locs need more anchoring than people expect. The style looks best when the hairline is neat, because the front edge is where the whole cut either looks deliberate or messy.
7. Taper Fade Mohawk
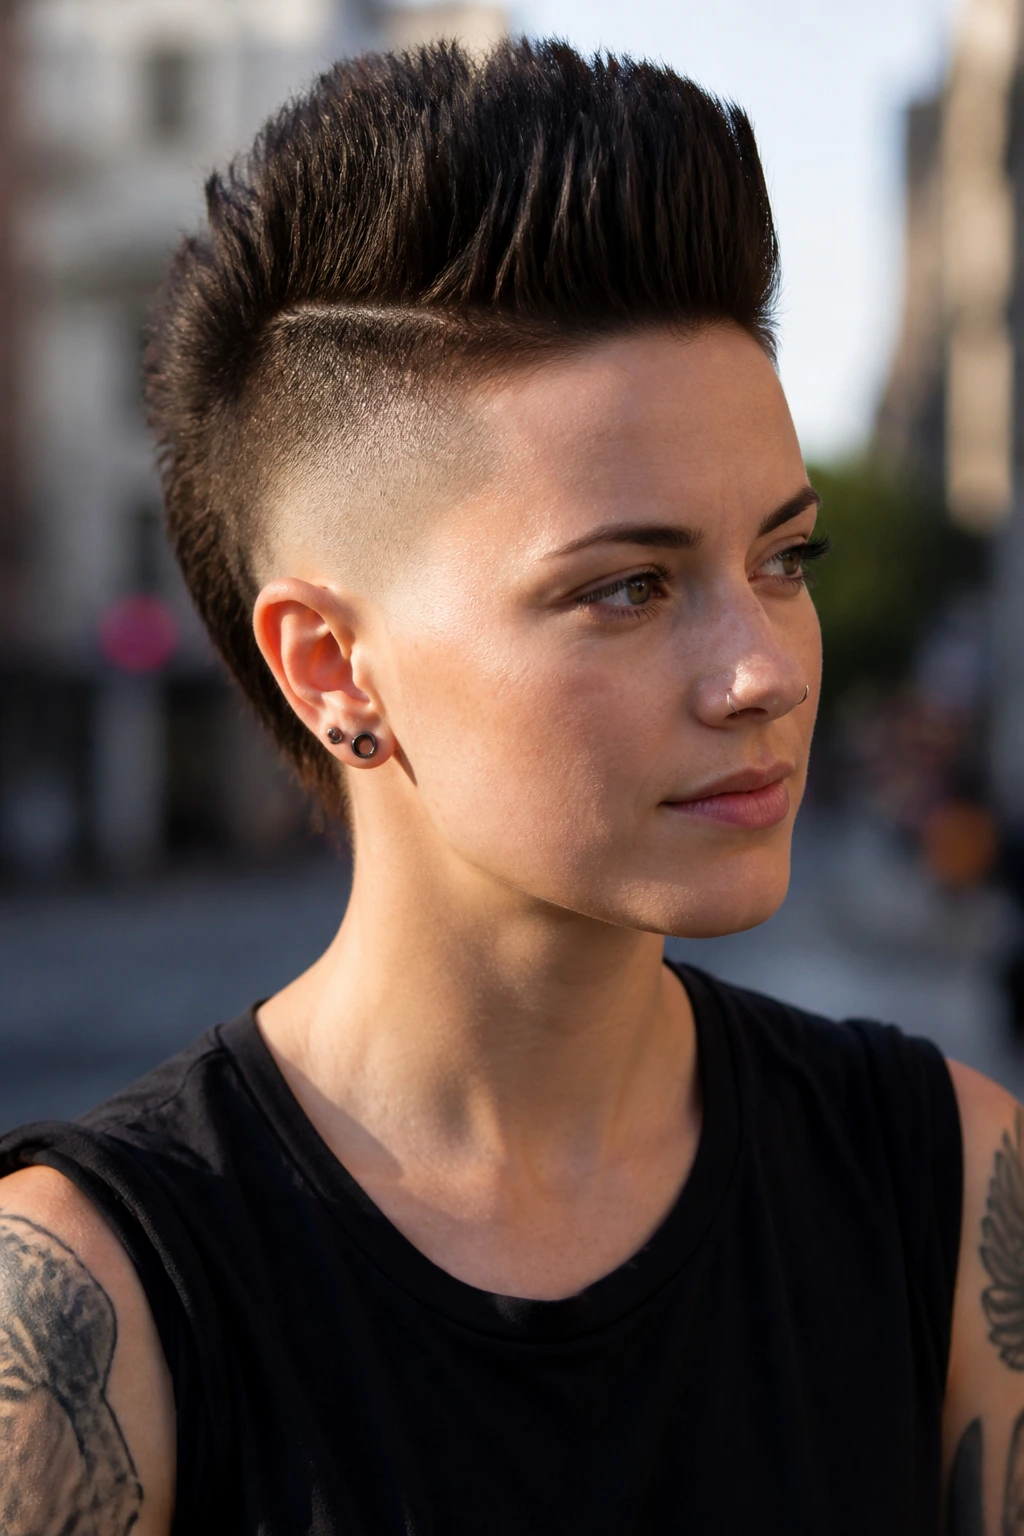
A taper fade mohawk is the softer cousin of the shaved-side version. Ask for a fade that starts around the temples and melts down toward the ears, leaving the center ridge intact but letting the sides fade instead of vanish. That cleaner transition is easier to grow out and less harsh on rounder face shapes.
This cut works well when you want edge without a hard line. Keep the top around 2 to 4 inches if you want height, or leave it shorter for a tighter profile. A light styling cream is usually enough; a huge amount of product only flattens the fade and makes the crown look greasy.
8. Pixie Mohawk with Choppy Texture
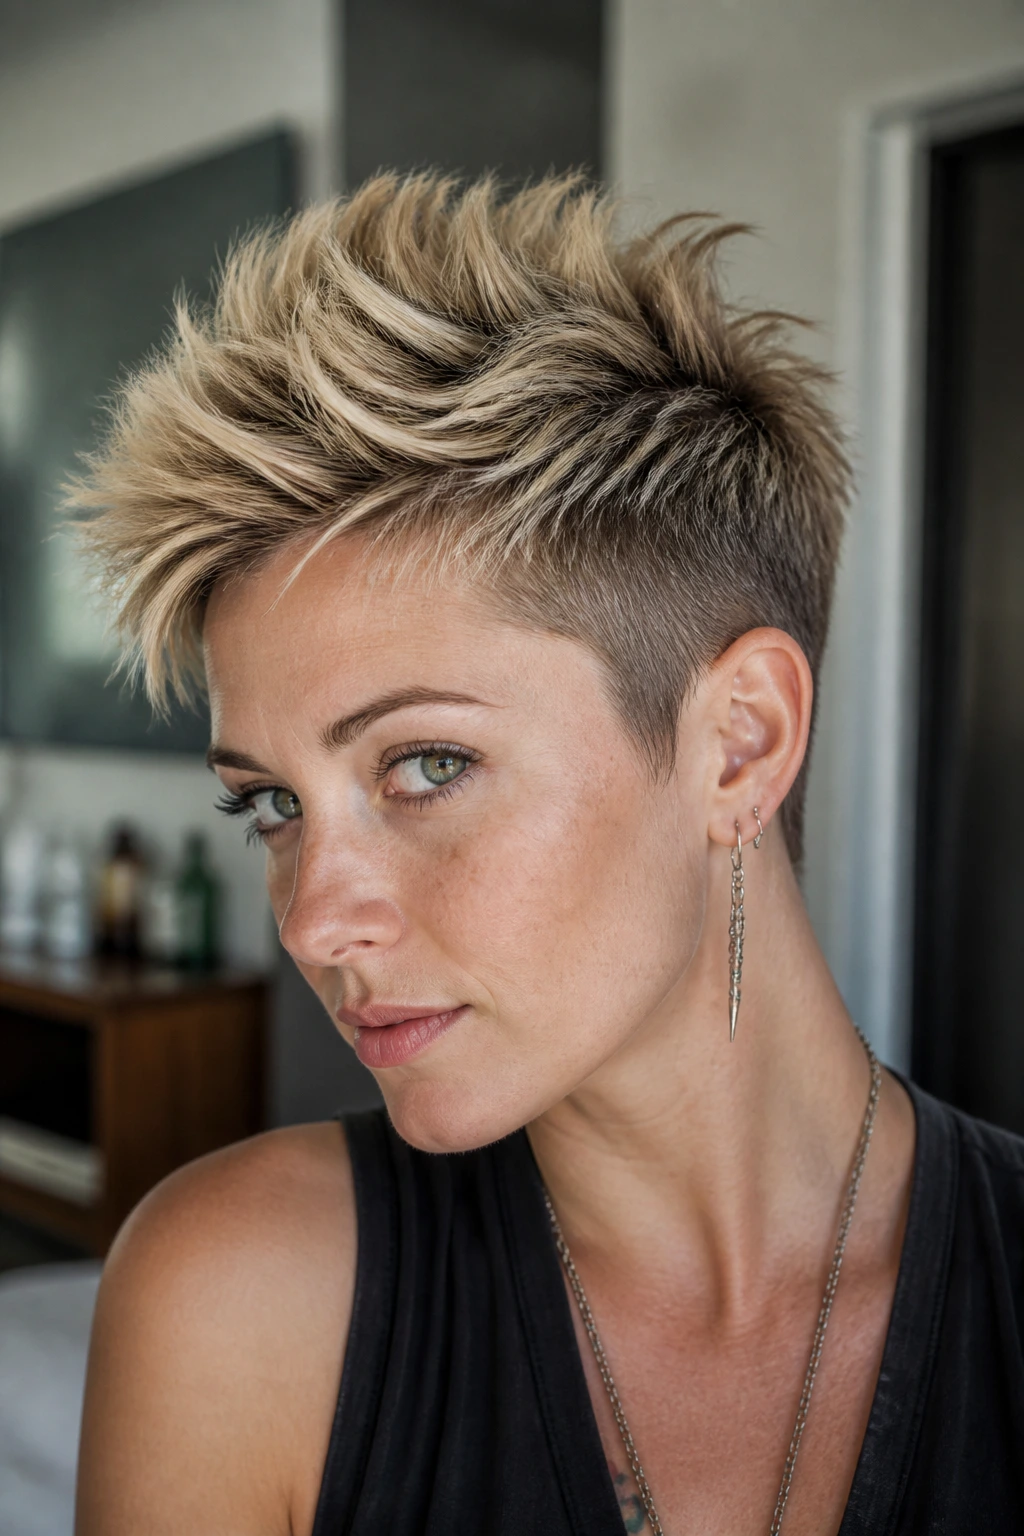
Short hair loves this shape when the layers are cut with a little bite. The crest sits on a pixie base, so the top only needs to rise 1 to 2 inches above the sides to read as a mohawk. It’s more about direction than height, which is nice if your hair tends to fall flat the second you walk outside.
Work a pea-sized amount of texturizing paste through dry hair, then pinch the ends upward with your fingertips. If the top is fine, a quick blast of root spray before styling gives it enough grip to stay lifted. The whole point is piecey movement, not a perfect ridge.
9. Teased Volume Mohawk
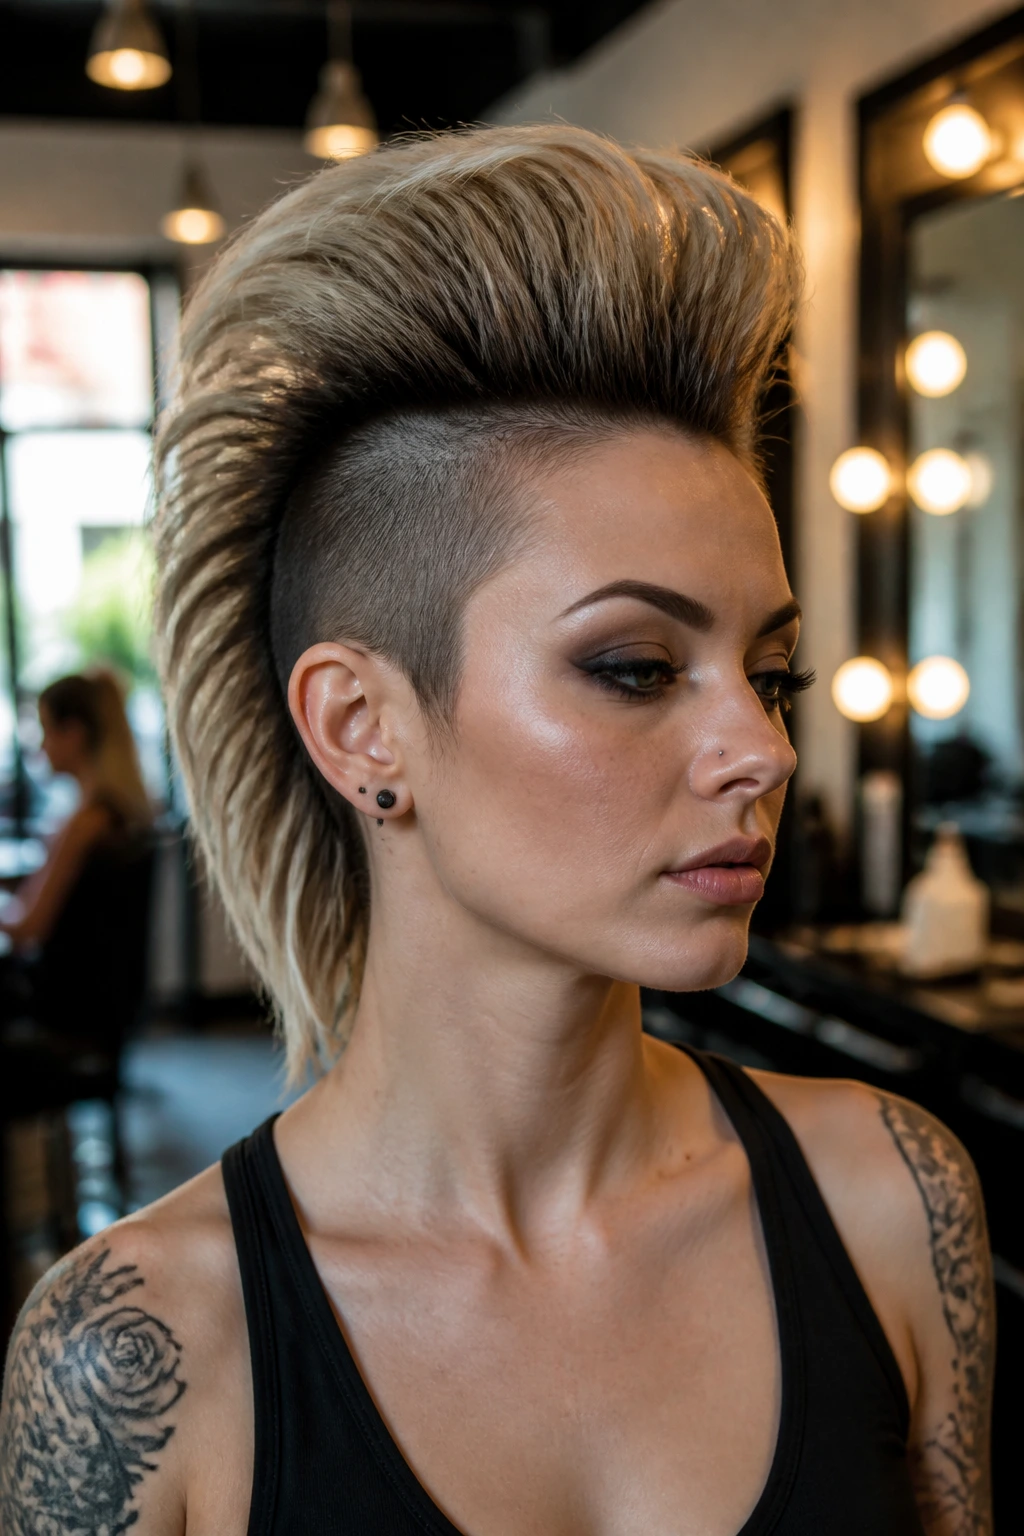
This one is for people who like hair with some swagger. Backcomb the roots in 1-inch sections at the crown, smooth the surface lightly with a brush, and mist with flexible hairspray so the top holds shape without looking like a nest. It reads especially well on straight or slightly wavy hair, where the teasing can build a visible arch.
The danger is obvious: too much backcombing and you get dull, tangled fluff. Keep the teasing close to the roots and stop before the ends. A tail comb is better than a teasing brush if your hair is fine, because you want control more than raw volume.
10. Long Hair Ponyhawk
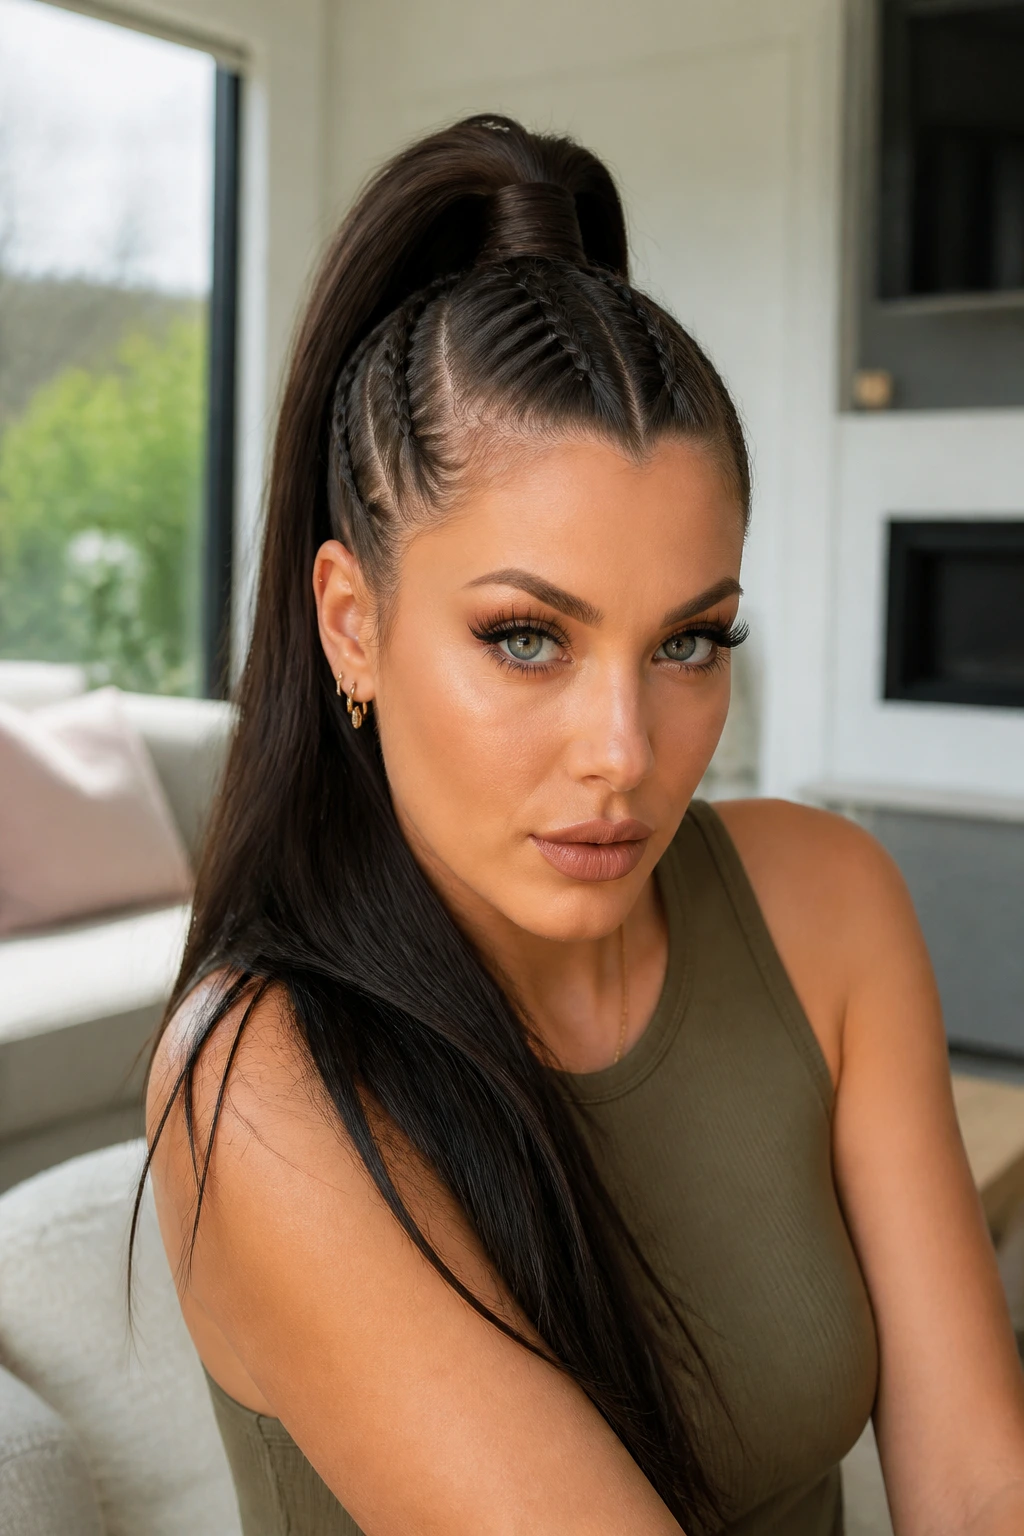
Long hair can do a mohawk without losing its length, and that’s the part people forget. Pull the hair from temple to crown into a central ponytail, then smooth the sides down or braid them back so the length concentrates through the middle. If the hair is very long, wrap a strand around the elastic so the base looks deliberate instead of gym-class casual.
This style is a nice bridge between “I want drama” and “I don’t want to cut anything off.” It works best when the crown section is secure at one strong anchor point, then supported with a second elastic a few inches below if the hair is thick. The result is sleek up top and still dramatic down the back.
11. Dutch Braid Mohawk
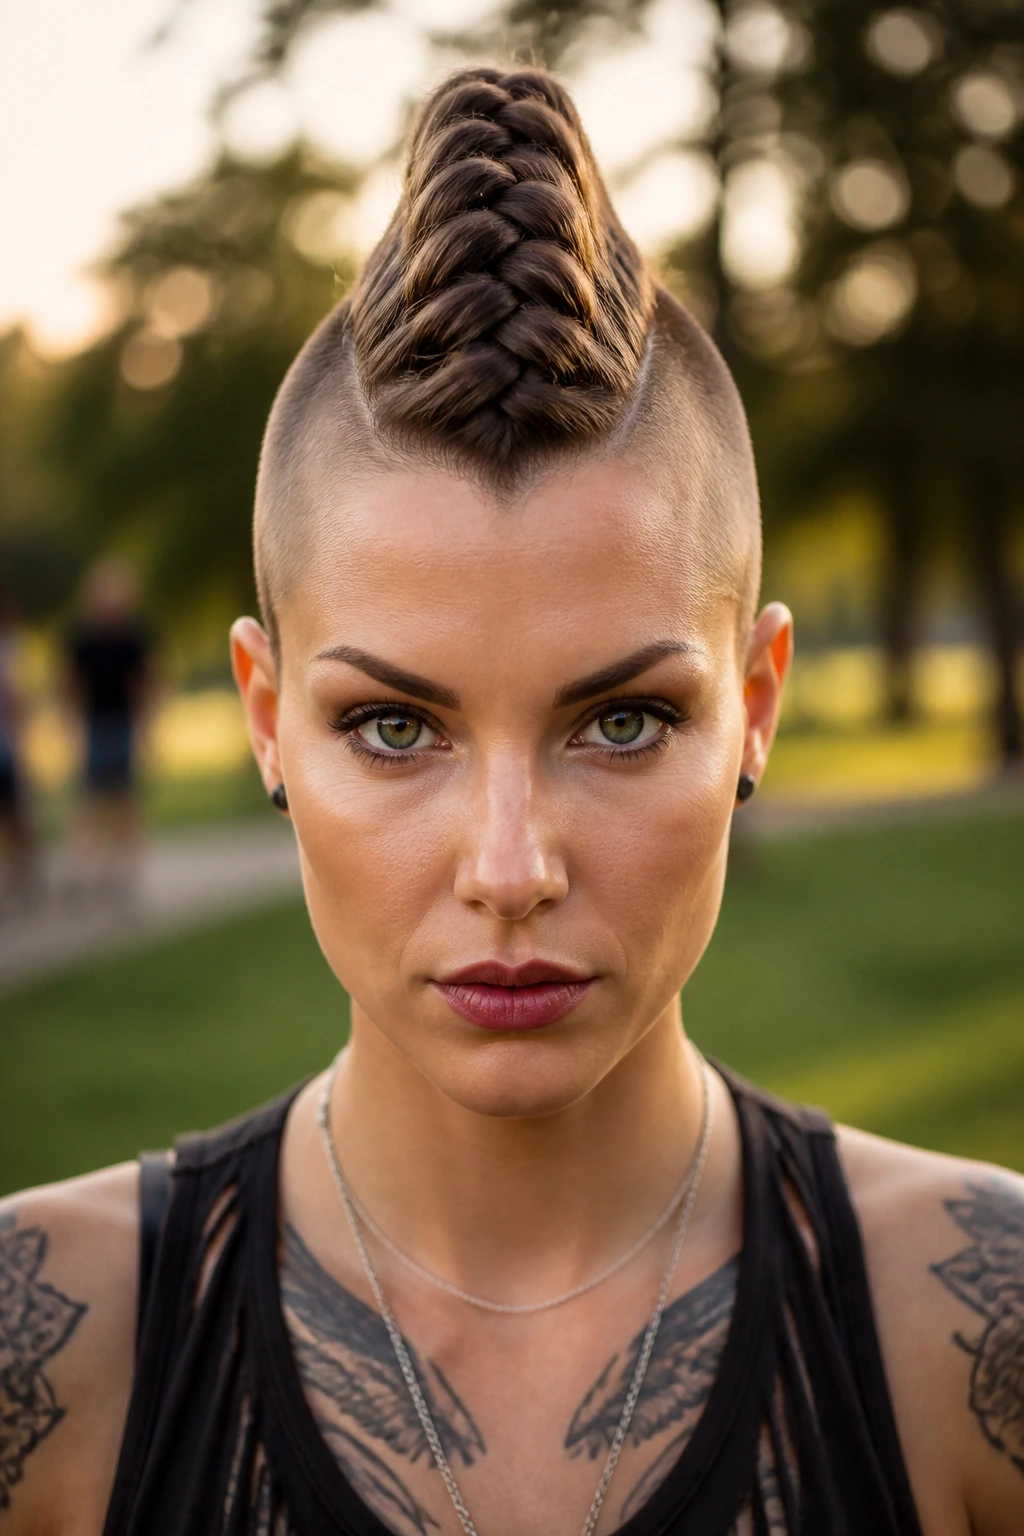
A Dutch braid mohawk gives you visible texture right down the center line. Instead of laying the braid flat, the strands pop upward, which makes the braid read like a raised ridge rather than a flat row. That tiny difference is what makes the style look intentional instead of like an ordinary braid with an identity crisis.
I like this for medium to long hair because the braid holds better with a little grip. Lightly mist dry hair with texture spray before braiding, then tighten each crossover evenly so the ridge stays symmetrical. If you want more edge, braid only the top half and leave the ends loose and curled.
12. Rope-Twist Mohawk
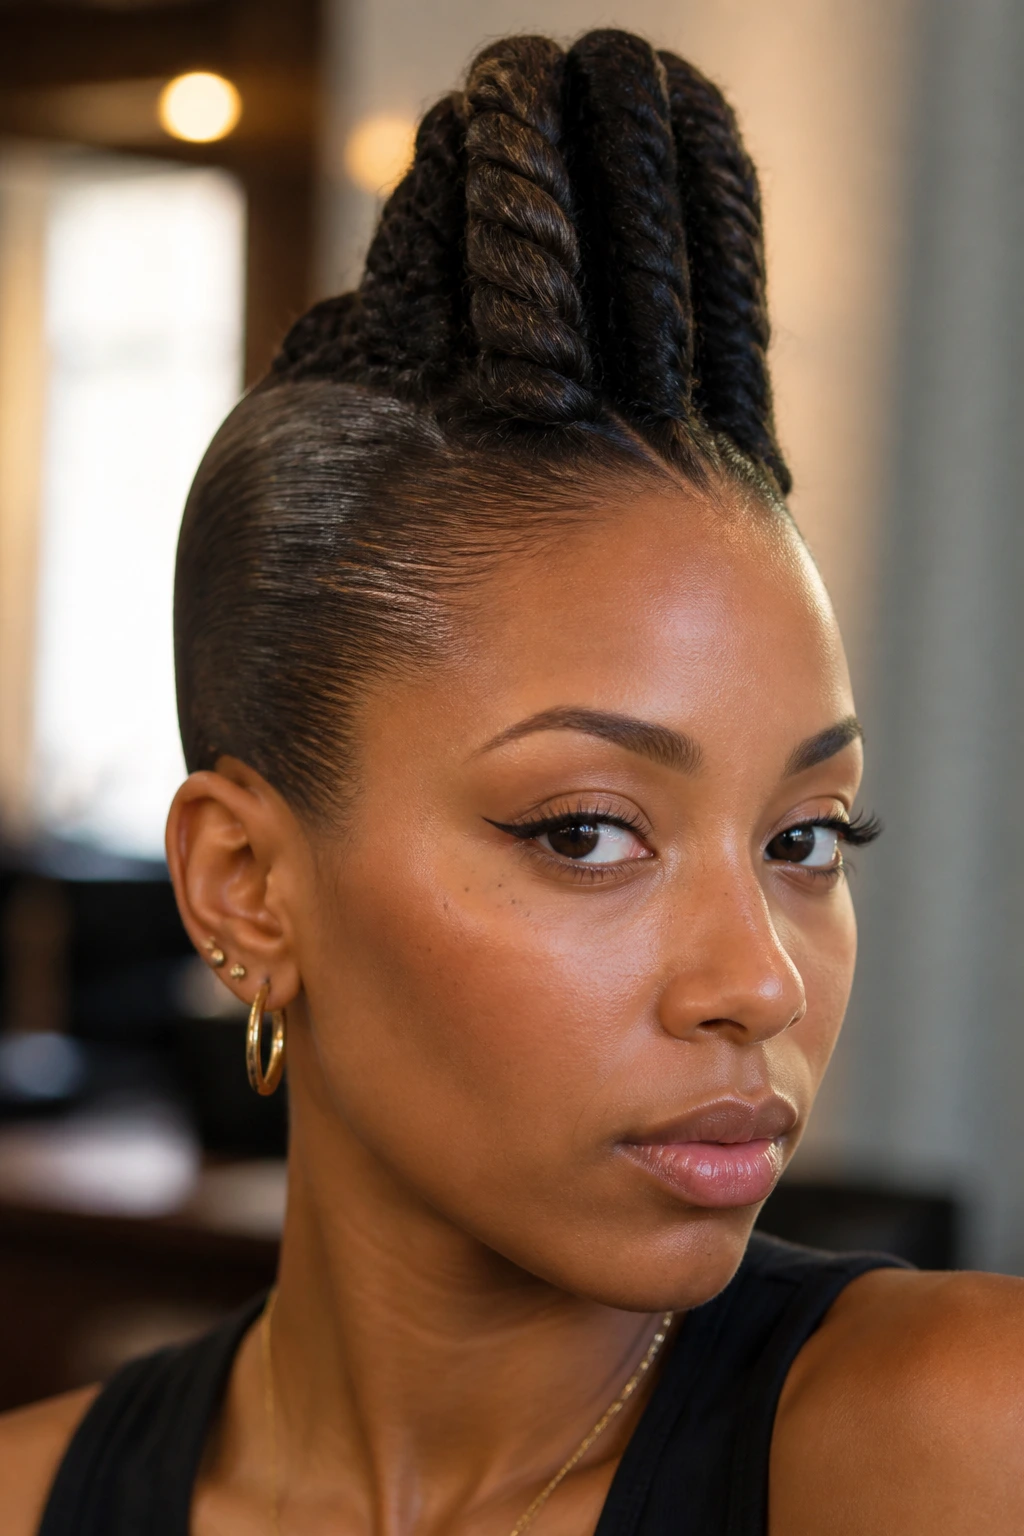
A rope-twist mohawk is one of the easiest ways to get height without putting too much tension on the scalp. Split the center section into two strands, twist them around each other, and pin the twist upward in sections or leave it hanging as a defined crest. It has a cleaner, softer line than a braid.
This is a smart choice for finer hair or anyone who wants a protective style that does not feel heavy. Keep the sides flat with gel or simple twists, then secure the crest every 2 to 3 inches with pins if the hair is long enough to slip. The finish looks neat, but not stiff.
13. Finger-Wave Mohawk
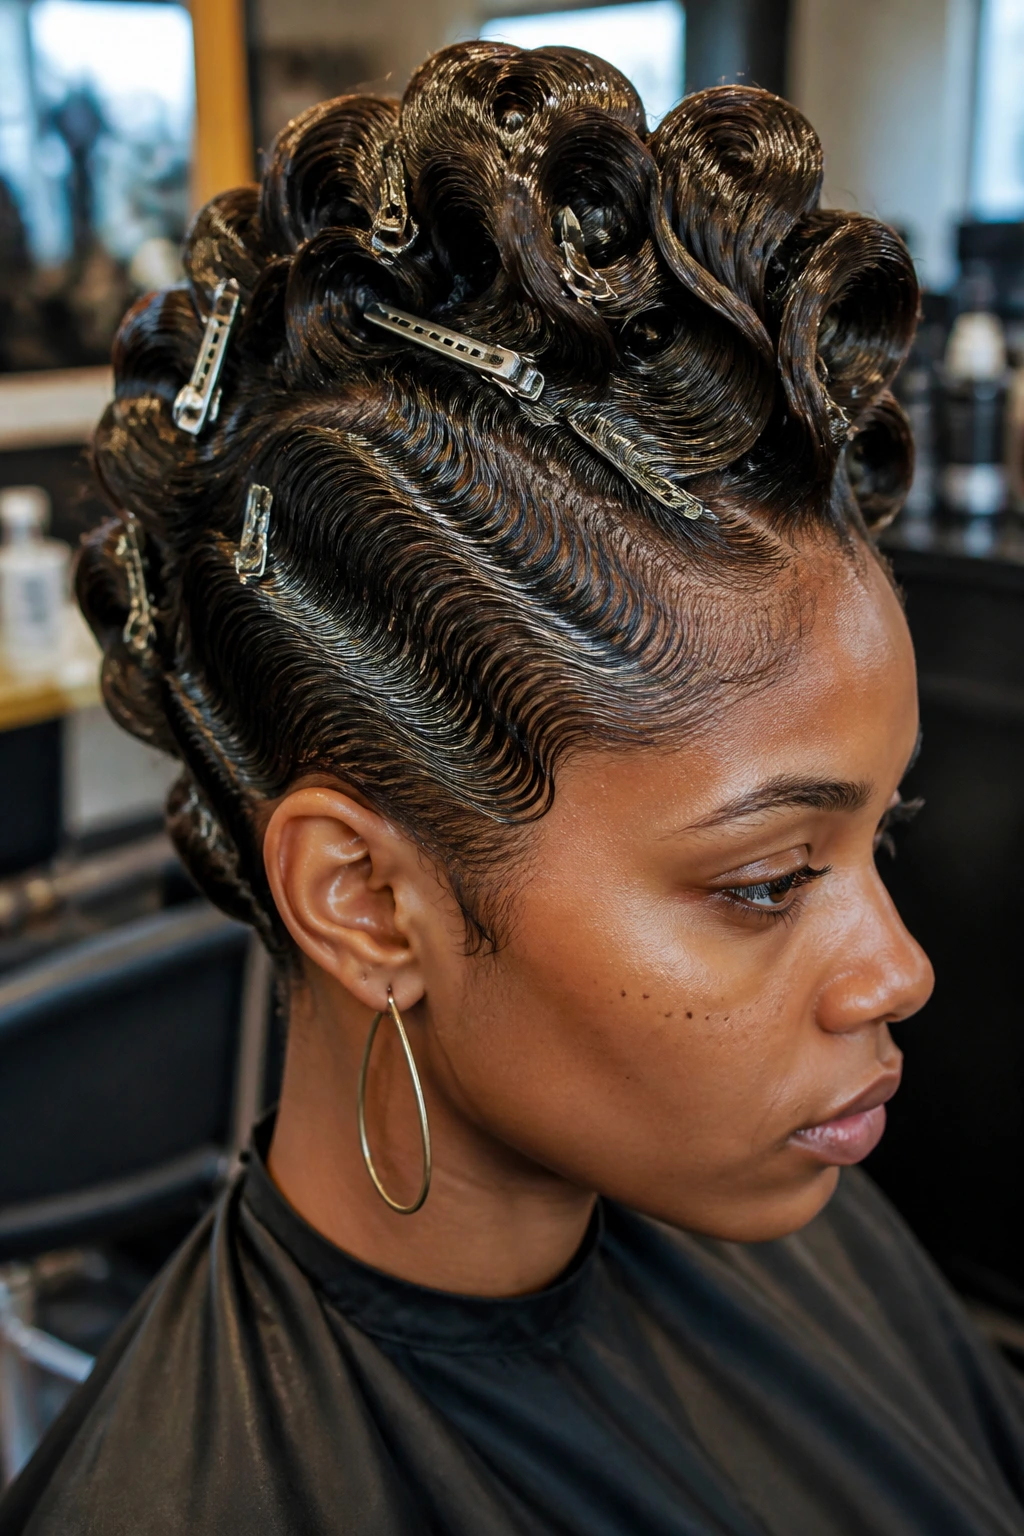
Finger waves make a mohawk feel vintage instead of punk, and I love that contrast. The sides are molded into S-shaped waves with setting gel, while the center keeps enough lift to preserve the hawk shape. It is a very specific look, which is exactly why it works so well.
Use clips to hold each wave while the hair dries under a hood dryer or air dries in place. If the hair is short, the wave pattern can sit close to the scalp and still feel elegant; if it is longer, the top can flare into a small crest. A little shine spray at the end brings the pattern out.
14. Color-Blocked Mohawk
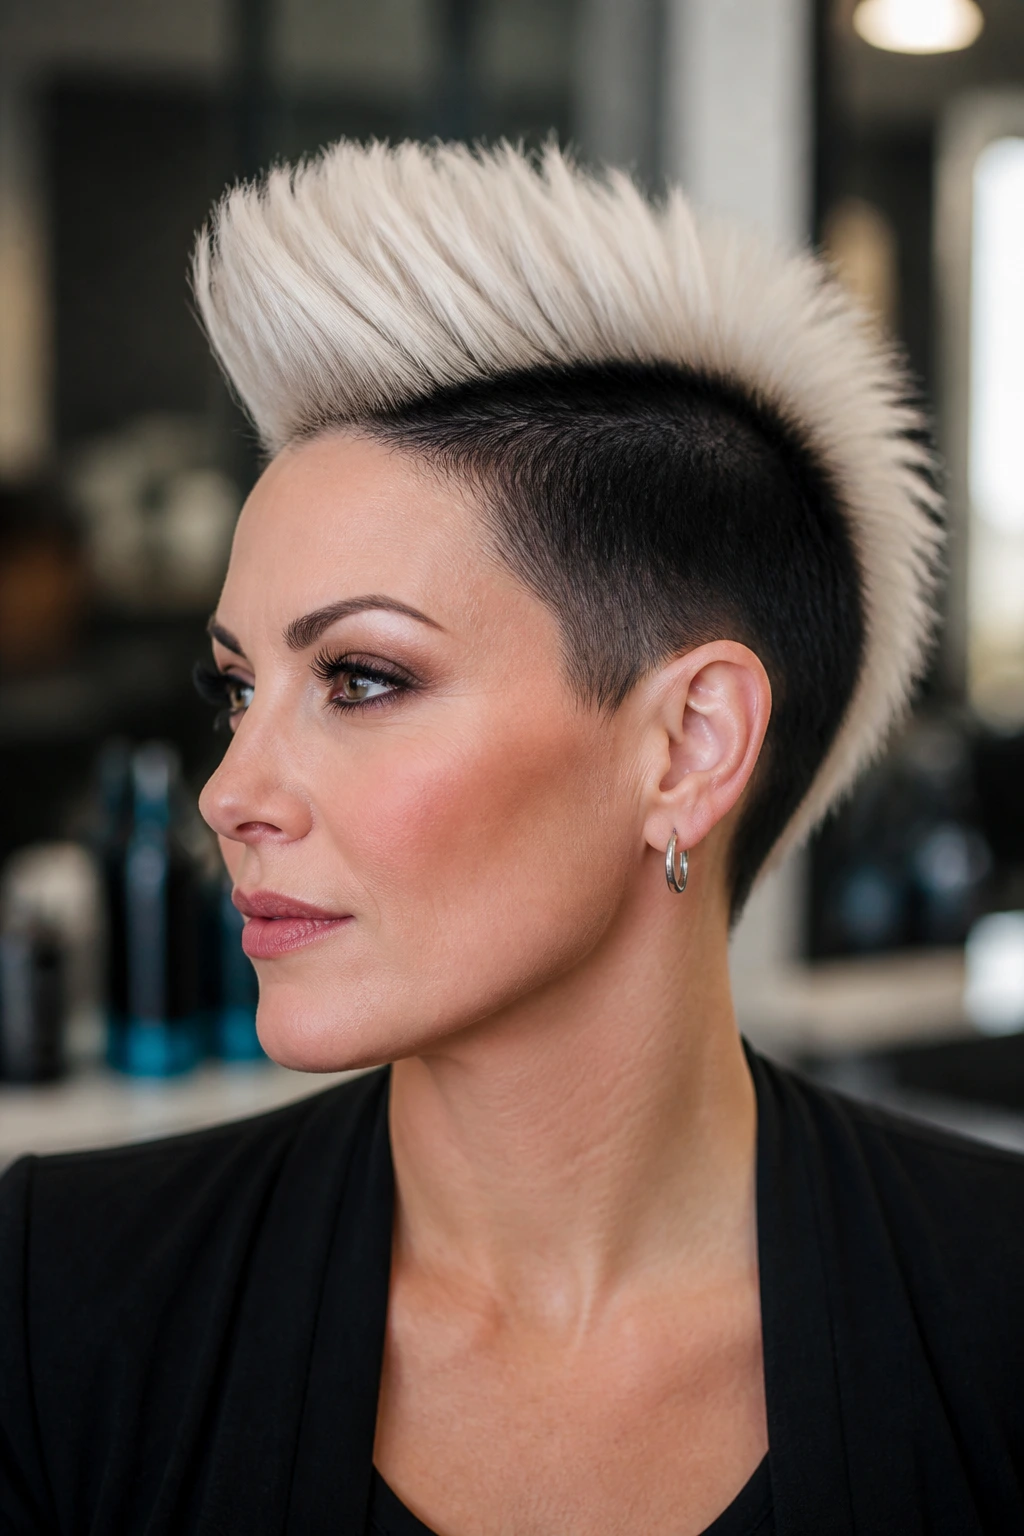
A color-blocked mohawk turns the shape into a graphic statement. Think dark sides with a platinum crest, black roots fading into copper ends, or a vivid strip of red running through a neutral base. The haircut itself can be simple, because the color does the loud speaking.
The best version is usually one or two high-contrast shades, not five. Too many colors and the eye stops reading the ridge. If you are using semi-permanent color, keep the sides cleaner and the crest simpler so the whole head does not compete with itself.
15. Half-Up Mohawk
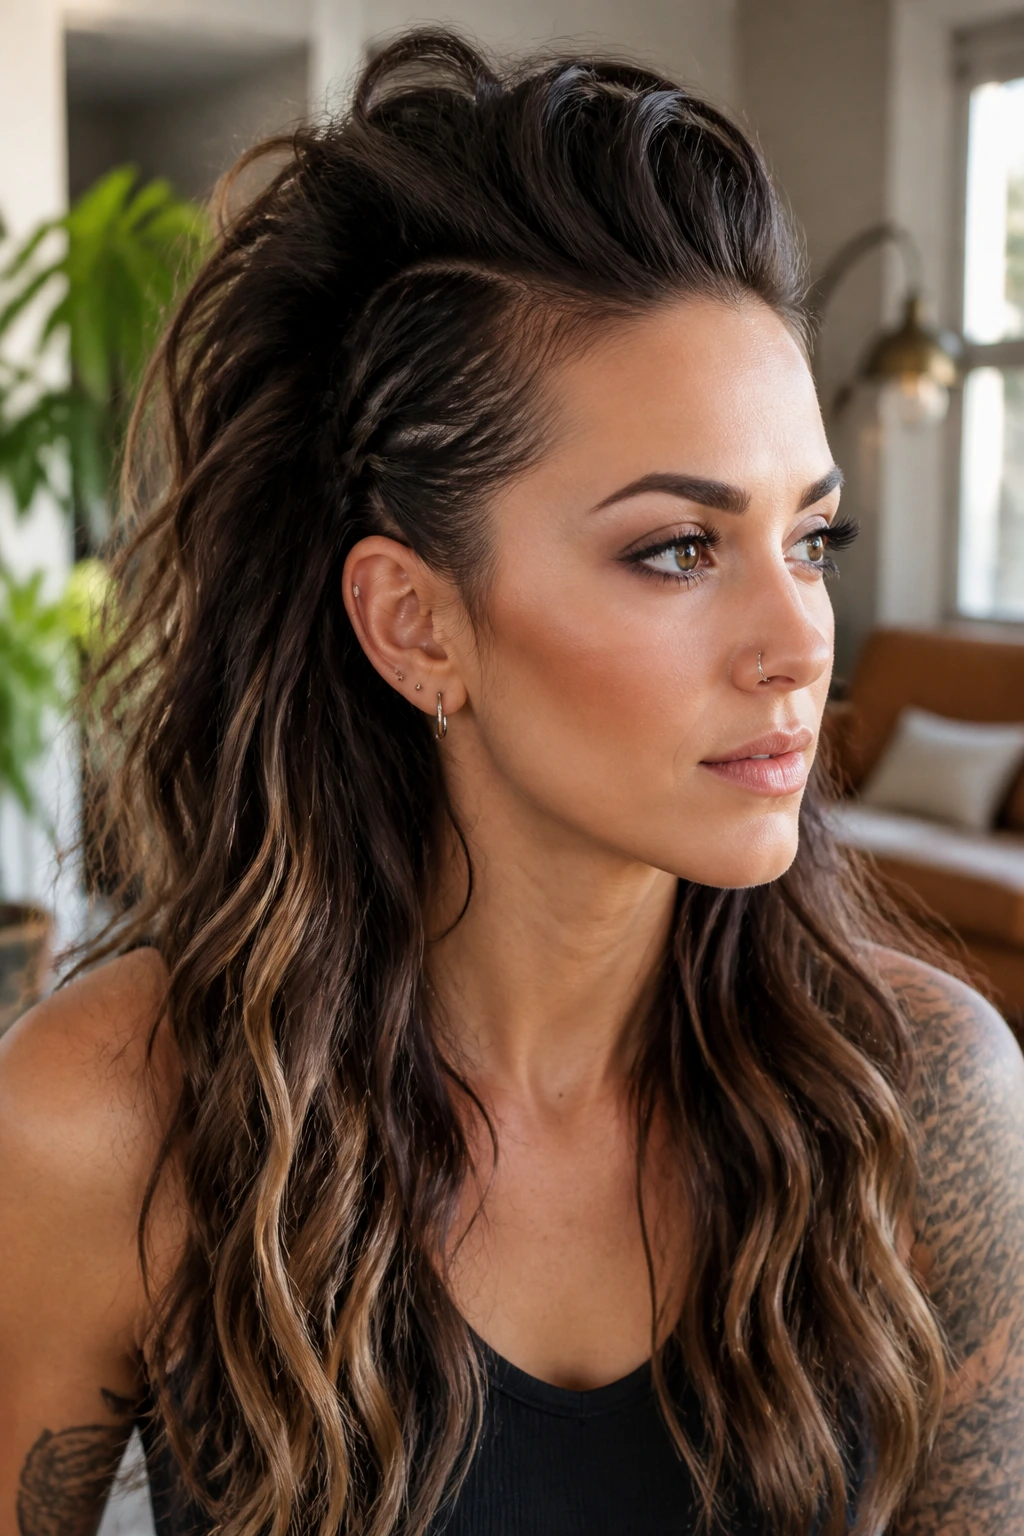
A half-up mohawk is the best friend of anyone growing out a cut. Pull the hair from the temples and crown into a raised center section, then leave the rest down so the look keeps length while still giving you that hawk shape. It is casual enough for day wear and neat enough to feel styled.
The trick is placement: keep the lifted section narrow near the forehead and wider at the crown so it does not collapse. Use a small clear elastic or a hidden pin if the top is layered. The loose hair underneath softens the profile, which is handy when you want less edge.
16. Messy Textured Mohawk
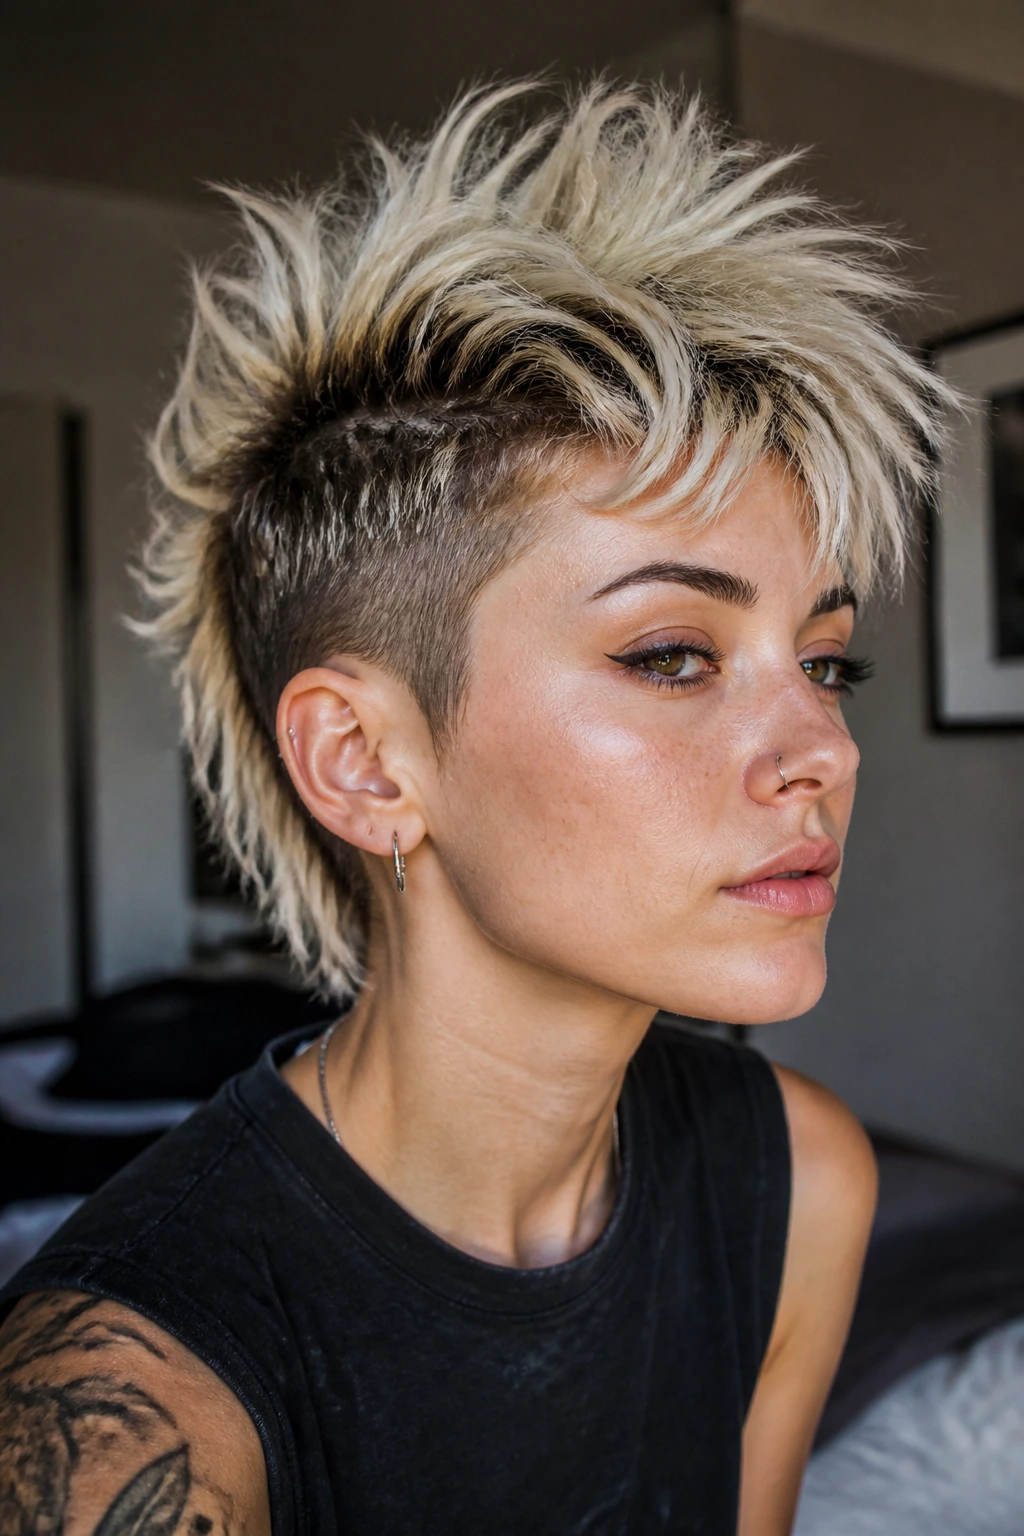
This one looks better the less you fuss with it. Dry shampoo at the roots, a little sea-salt spray through the mid-lengths, and a rough blow-dry in the opposite direction of growth can give you a piecey, lived-in hawk with almost no polishing. It’s the style for people who want attitude without precision.
The key is to stop before the hair gets too uniform. Separate a few strands with your fingers and leave the ends uneven on purpose. A messy mohawk can fall apart fast if you overload it with cream, so matte products are your friend here.
17. Pinned-Up Formal Mohawk
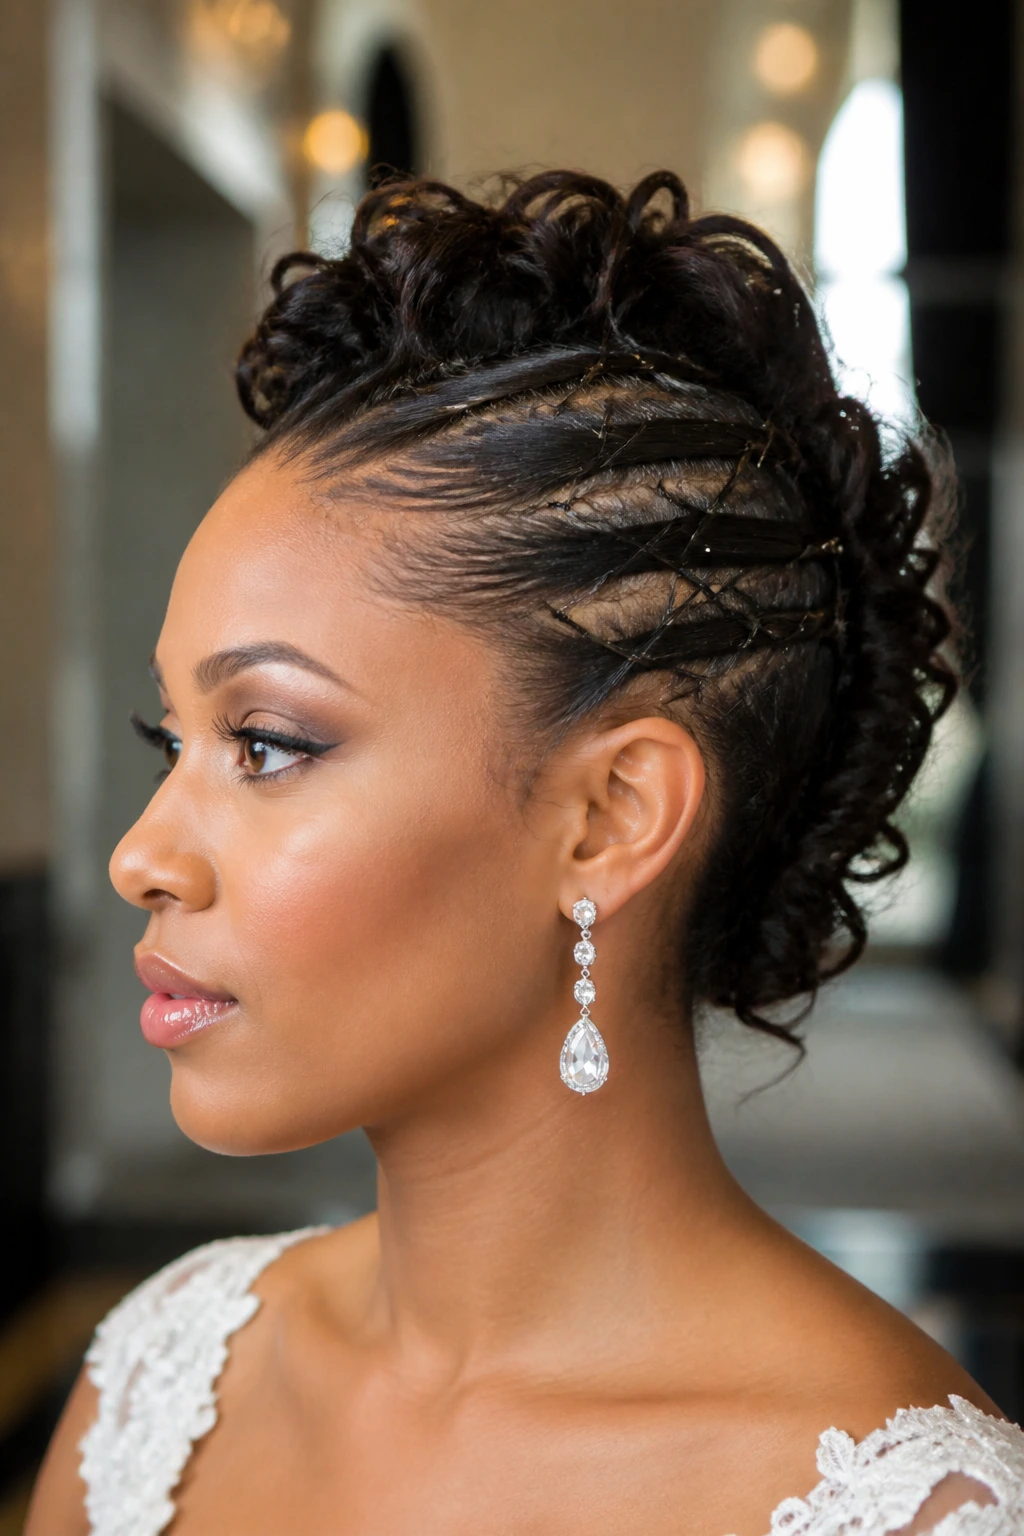
Can a mohawk be formal? Absolutely, if the pins are doing the architecture quietly. Curl the hair in 1-inch sections, then pin the curls upward along the center line so the crest looks like a row of rolled fabric rather than a spiky strip. It’s one of the nicest ways to make the shape wedding-friendly.
You’ll probably need 12 to 15 bobby pins, maybe more if the hair is thick or layered. Place them in an X pattern for grip. This version looks best with a strong side part or neatly swept sides, because the polish comes from restraint, not from piling on extras.
18. Beaded Braid Mohawk
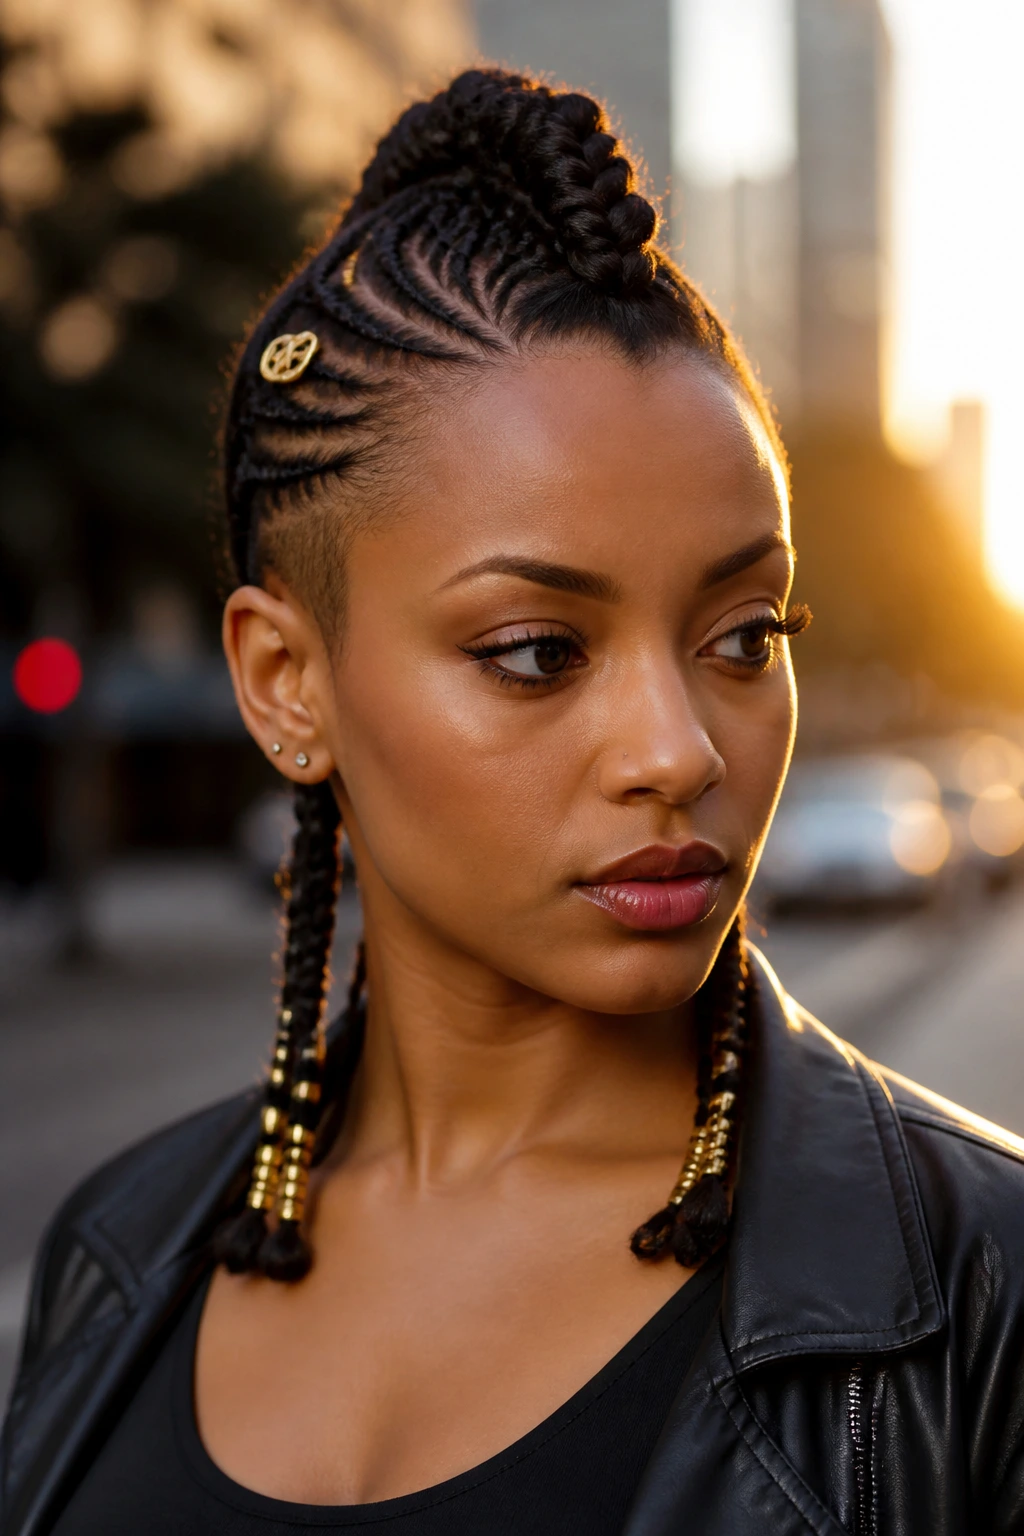
Beads change the whole mood of a braided mohawk. A center braid or set of braids can carry a few carefully placed cuffs, gold rings, or small beads that move when you walk but do not drag the hair down. Keep the decoration balanced—usually a few accents near the ends is enough.
I’d choose this for braids or locs that already have some length, because the ornaments need space to show up. Too many beads at the crown can make the style look busy. A little metallic detail on one side and a clean braid on the other is often stronger than an all-over bead storm.
19. Shaved-Design Mohawk
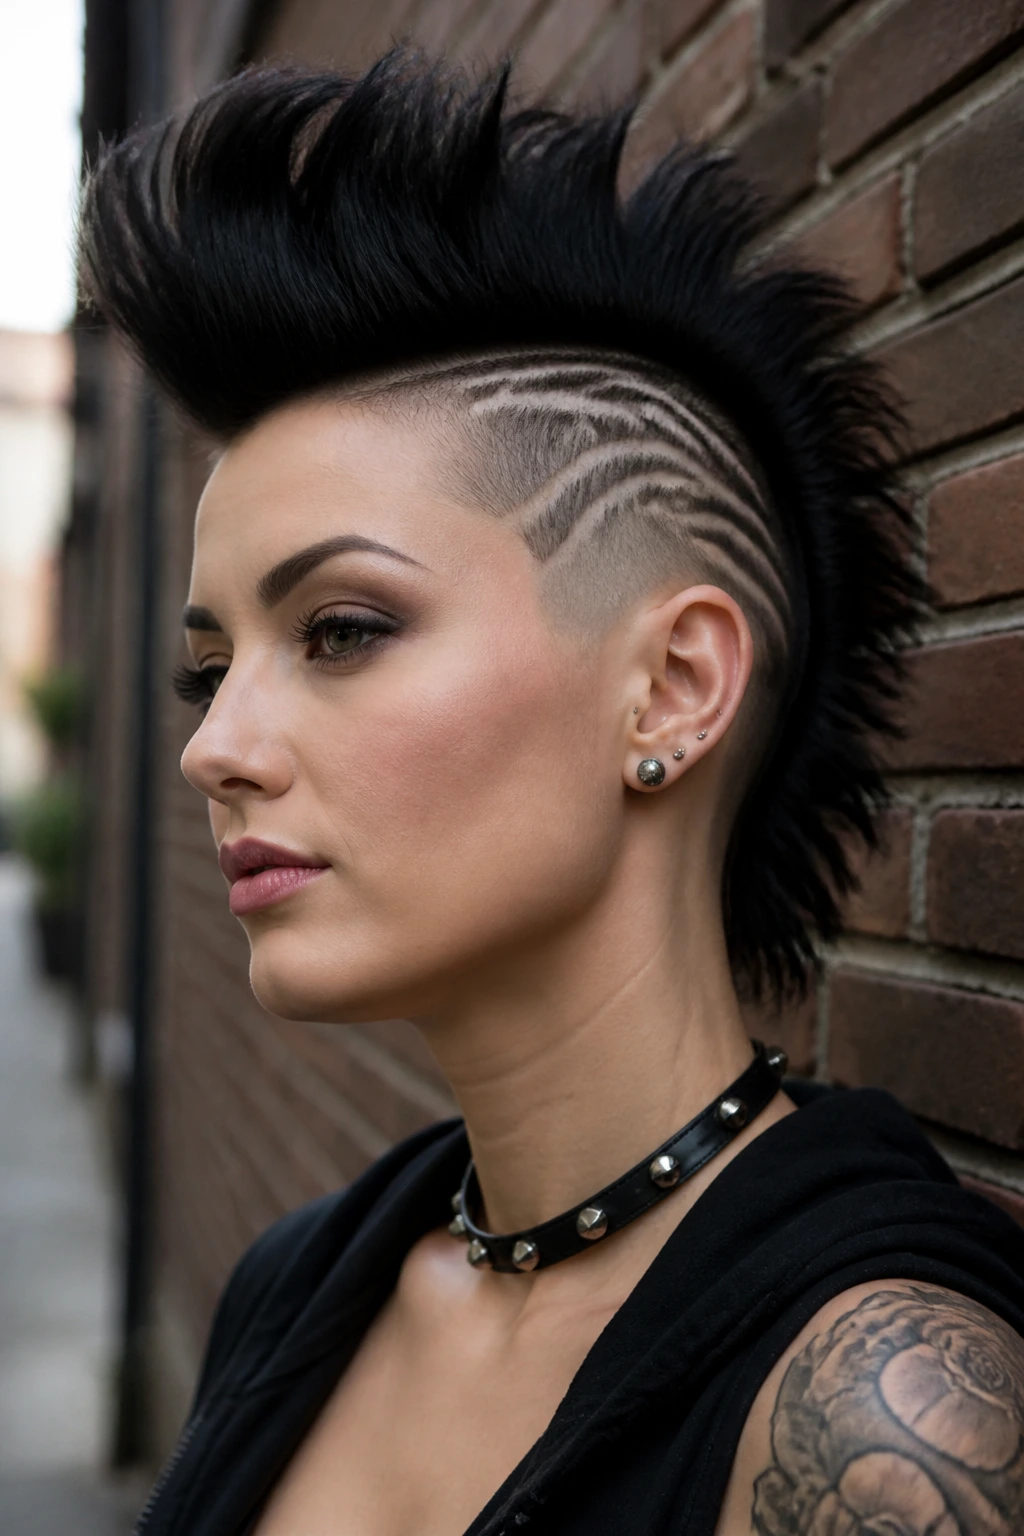
If you want the haircut to have personality from every angle, shaved designs are the move. Clean line work, a curve near the temple, or a geometric cut into the fade can make the mohawk feel custom instead of standard. The design should follow the head shape, not fight it.
This style needs regular upkeep, usually every 2 weeks, because the pattern blurs fast once the hair grows out. Softer swoops tend to age better than sharp zigzags, which can look choppy when the new growth comes in. If you commit to the design, keep the crest relatively simple so the side art stays the star.
20. Flat-Twist Mohawk
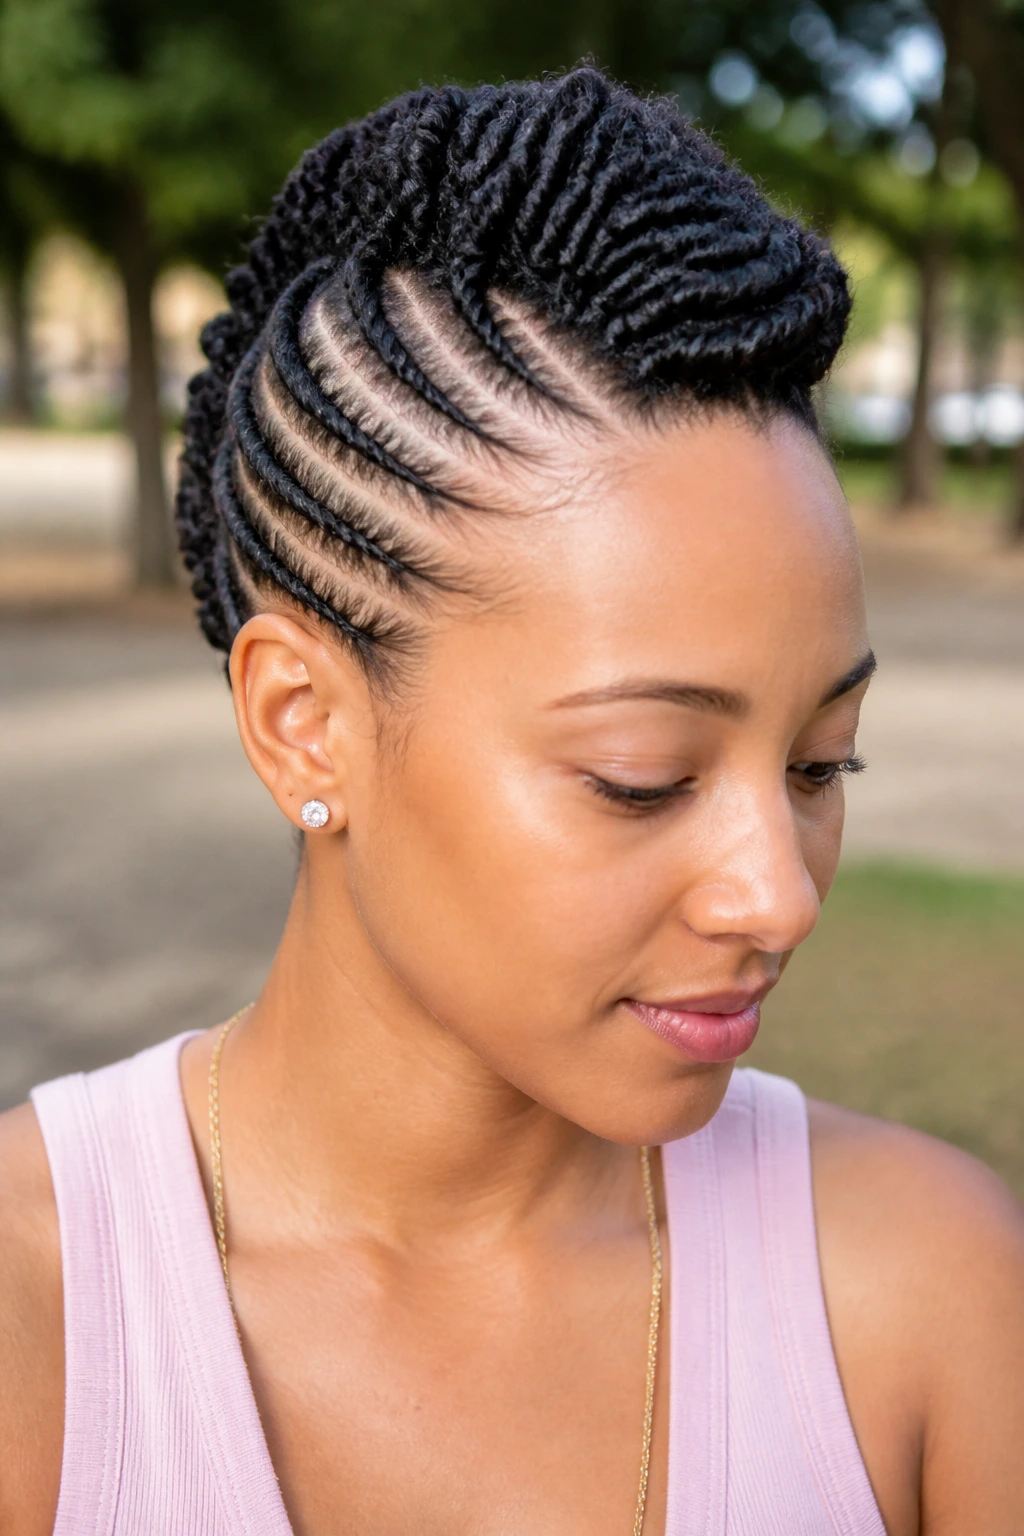
A flat-twist mohawk is the protective style that quietly does the work. The sides are twisted close to the scalp, feeding upward into the center ridge, and the whole look stays neat without a lot of daily manipulation. It is less tense than tight braids, which matters if your scalp gets sore easily.
This is a good shape for natural hair that needs a few days of low-fuss wear. Use a cream with slip, not a sticky gel, so the twists stay smooth. Wrap the head at night with a satin scarf and the style can hold its shape for several days before you need to refresh the front edges.
21. Picked-Out Natural Mohawk
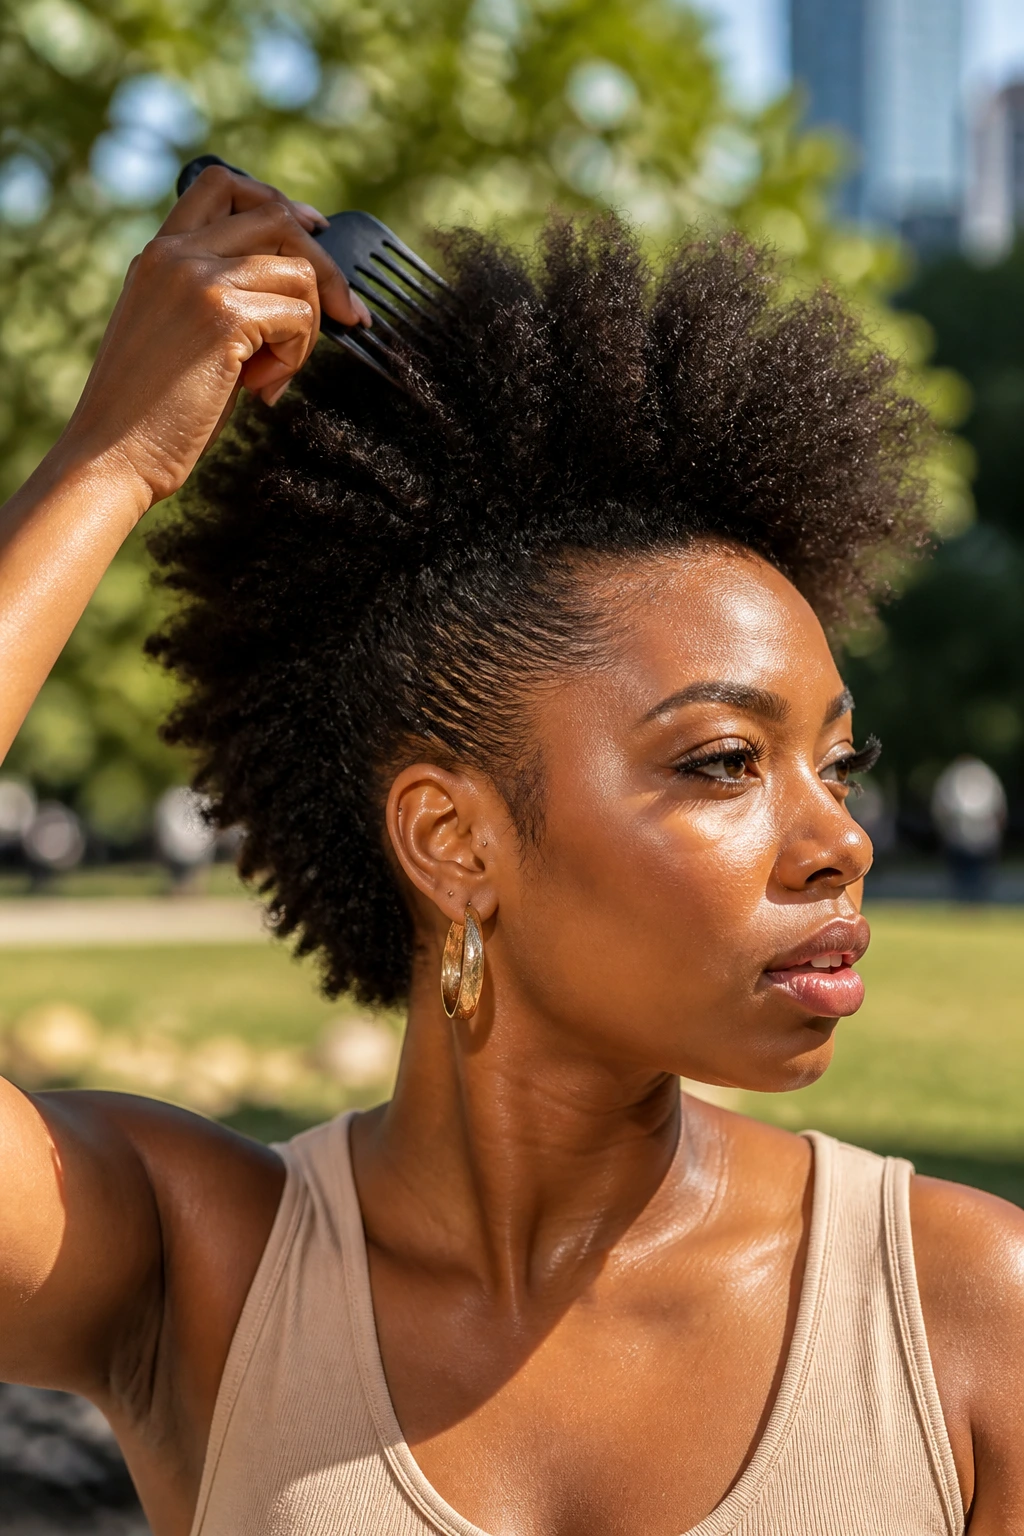
A picked-out mohawk celebrates natural texture instead of flattening it. Use a wide-tooth pick at the roots to build height through the crown, then keep the sides moisturized and pressed close enough to keep the silhouette clean. The result is round, airy, and alive.
The biggest mistake here is picking from the ends upward, which makes the hair frizzy instead of lifted. Work only near the scalp and stop when the crown reaches the height you want. A little cream on the edges helps, but the real shape comes from the root lift.
22. Wet-Look Frohawk
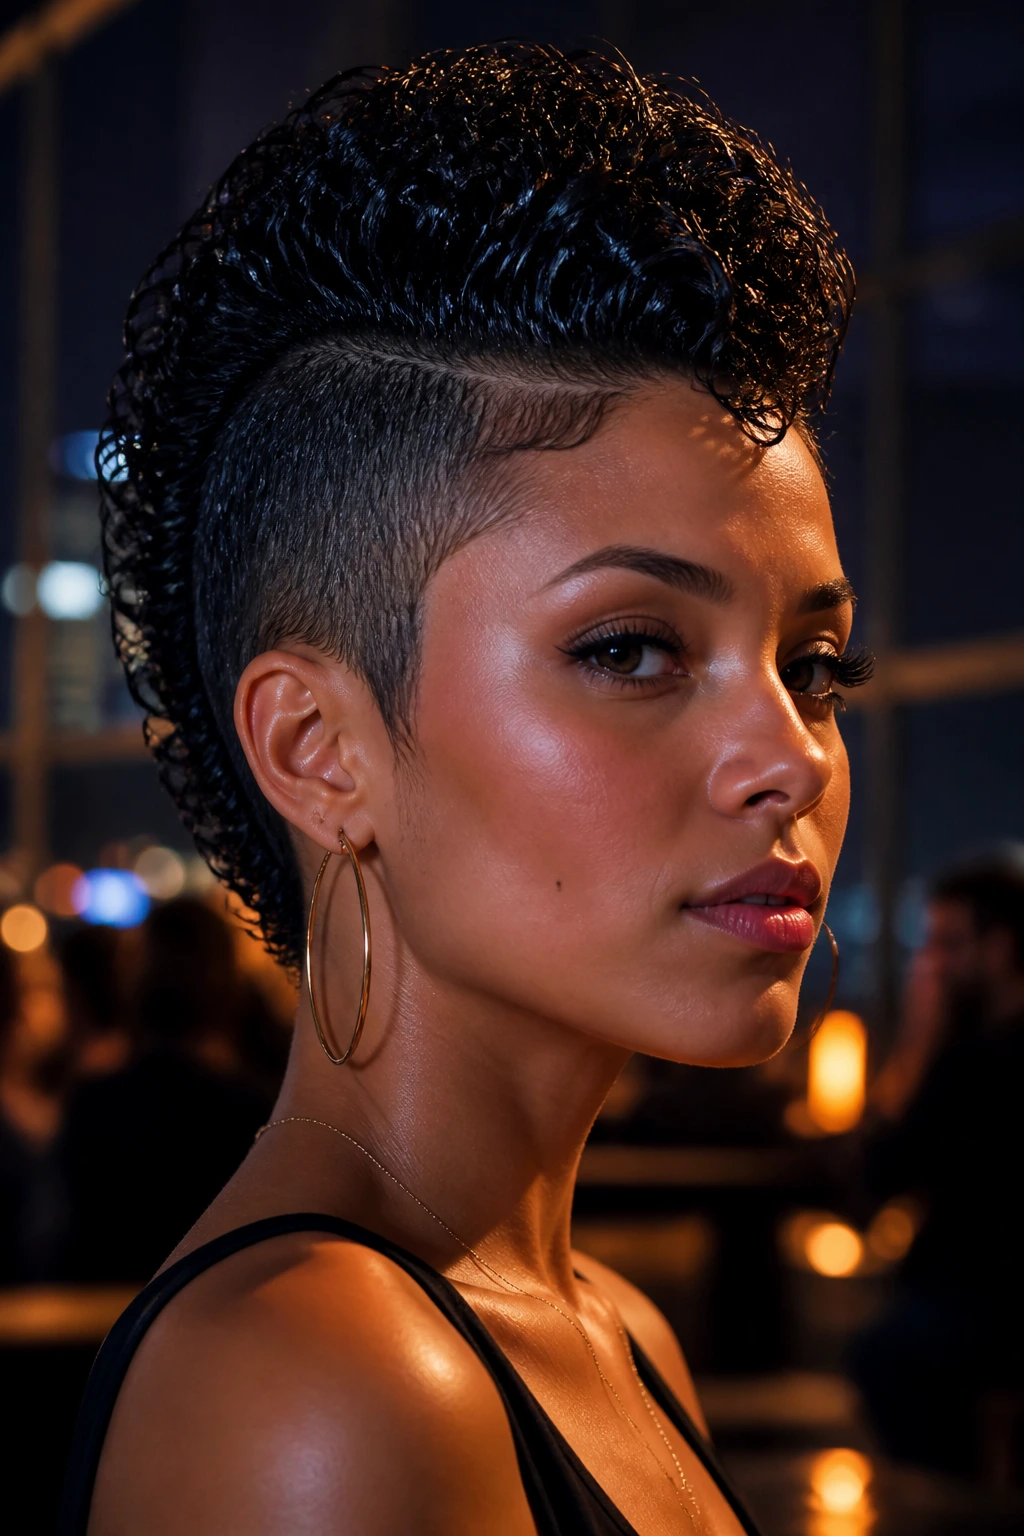
This is the glossy cousin of the curly frohawk, and it leans much more dramatic. Coat the curls with gel or a curl-defining glaze, smooth the sides, and leave the center ridge damp-looking and defined rather than fluffy. The shine catches the eye first; the shape follows right behind it.
I like this look for evenings because it has enough polish to feel dressed up without becoming stiff. Don’t drown the hair in product. A gel cast is enough, and you can scrunch lightly once the top has set if you want the curls to separate a bit more.
23. Two-Strand Twist Mohawk
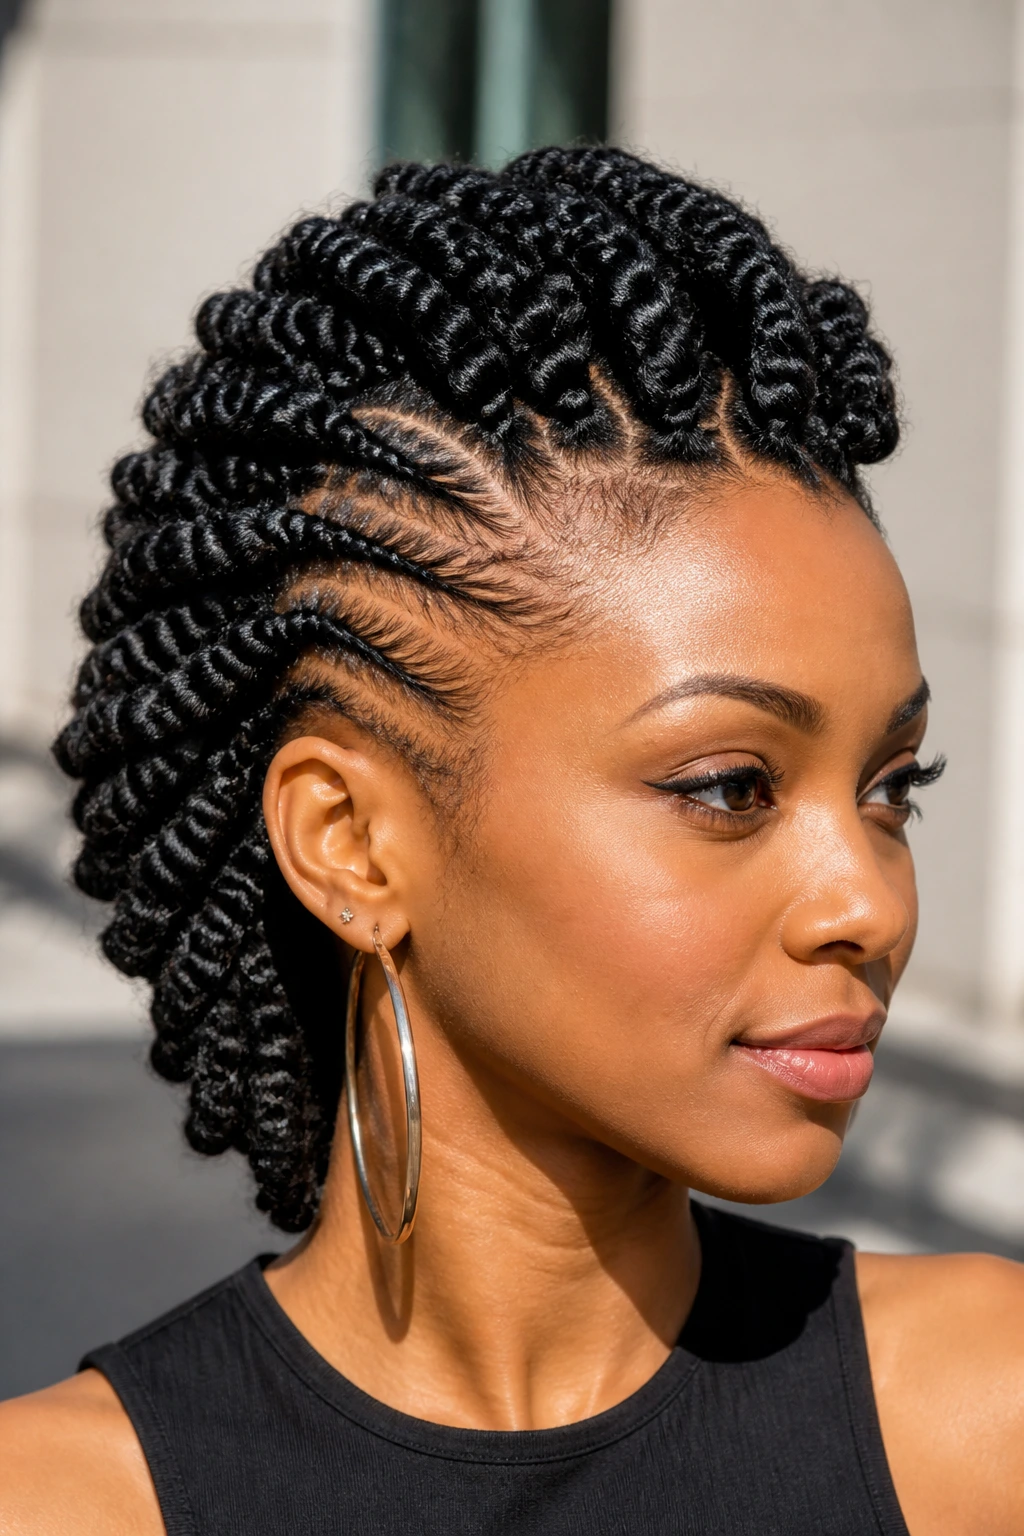
Twists give the mohawk a softer line than braids, and that softness is the charm. Chunky two-strand twists can run down the center and stand up nicely when pinned at the base, or they can be worn as a twist-out for a fluffier crest the next day. Either way, the shape stays textured and touchable.
This version is good if you want movement without losing the structure of a hawk. Twists also keep the scalp calmer than some tighter braid styles, especially when the sections are kept medium-sized. If you unravel them later, you get a second look out of the same prep, which is never a bad thing.
24. Braided Ponyhawk
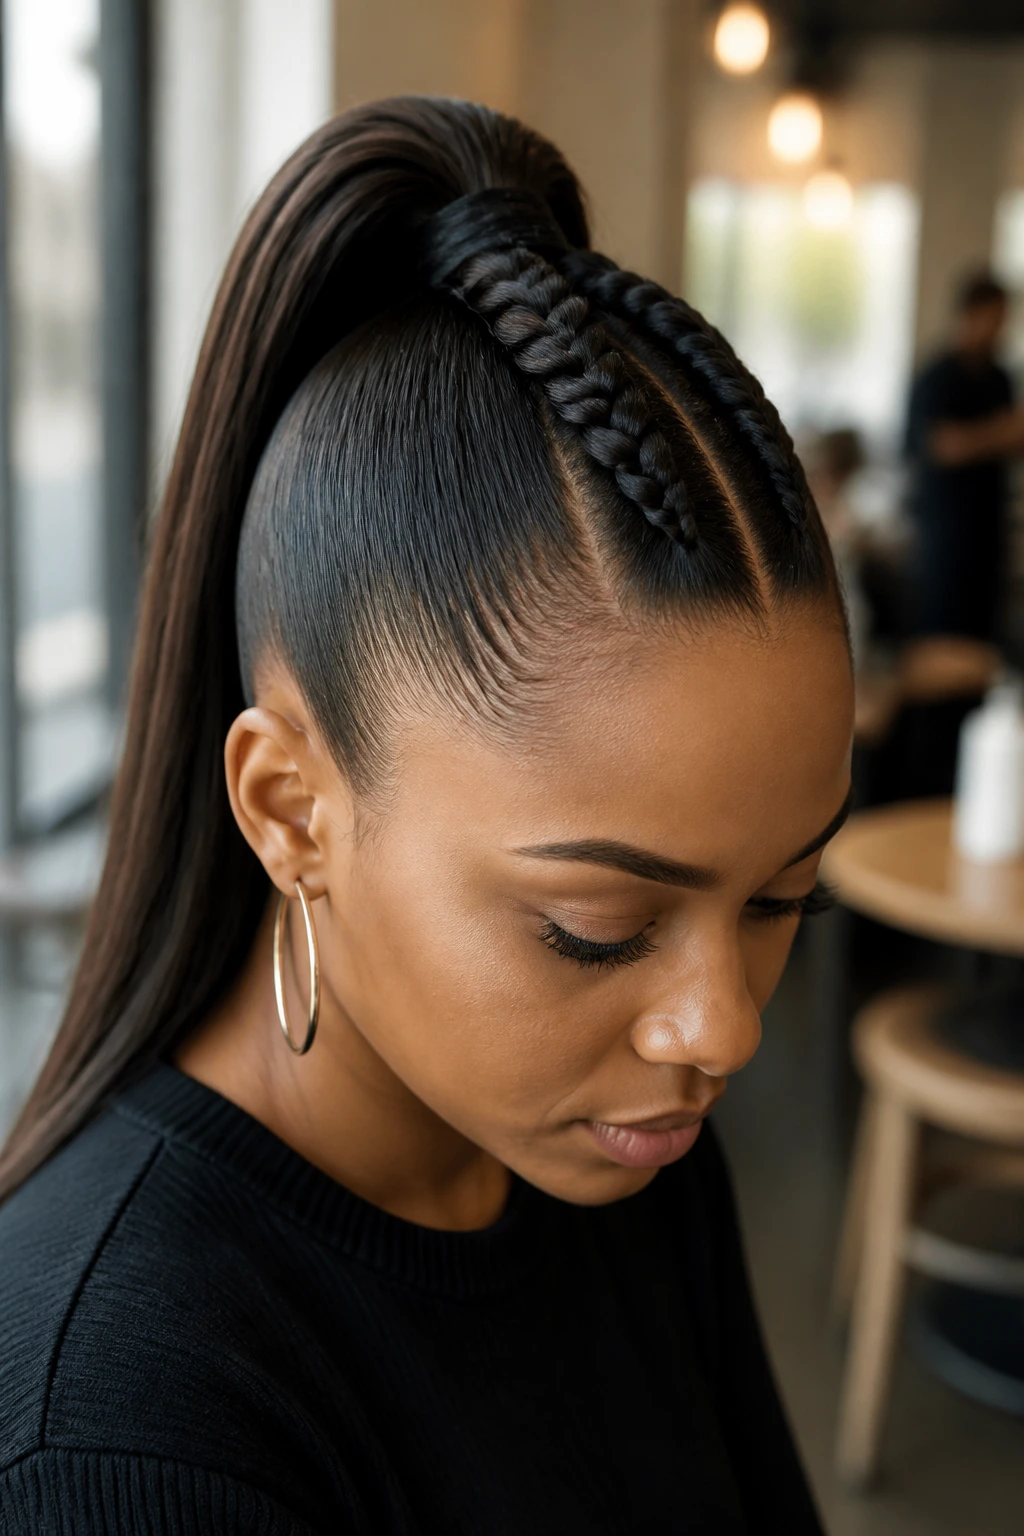
A braided ponyhawk sits somewhere between a braid and a ponytail, and that in-between quality is useful. The center is braided back into one strong line, then gathered into a pony or long tail at the crown or the back of the head. It’s neat enough for a busy day and secure enough for wind.
This one works best when the braid is tight at the scalp and the ponytail is anchored with a strong elastic. If the hair is layered, wrap a section around the base so the whole thing looks cleaner. The style is practical, but it still reads as a mohawk because the sides stay smooth and the center carries the shape.
25. Short Afro Mohawk
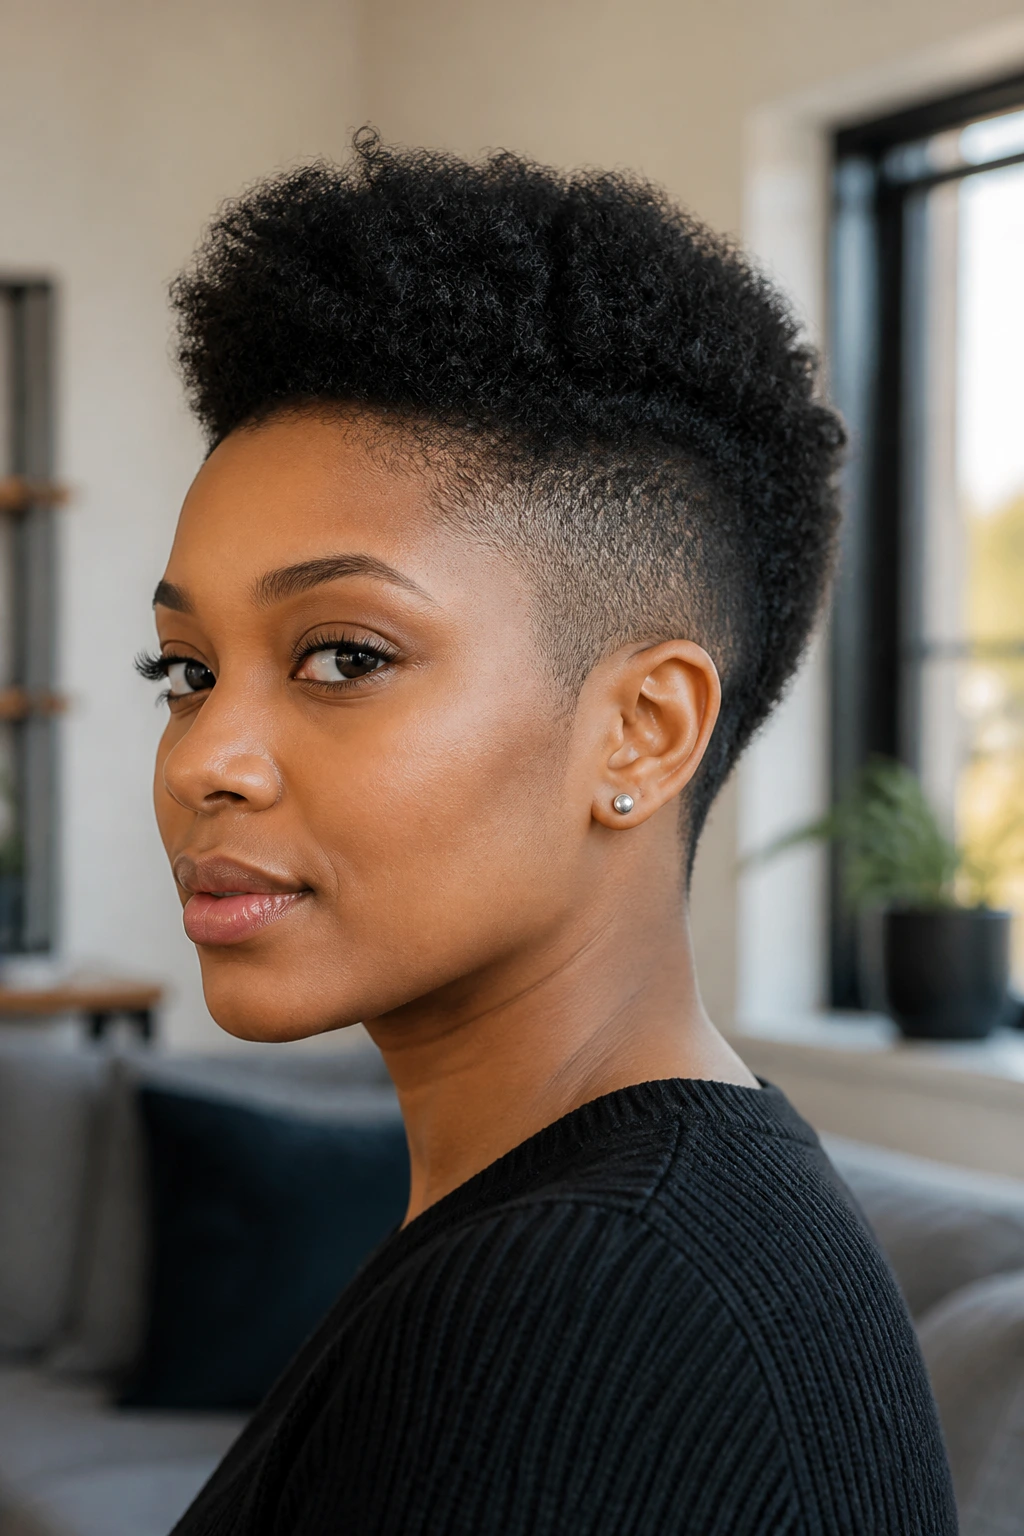
A short afro mohawk keeps the silhouette rounded and proud instead of tall and spiky. The sides are clipped low or tapered, while the crown is shaped into a compact afro strip that sits like a little cloud down the middle. It’s one of the easiest ways to wear the hawk shape on short natural hair.
Use a leave-in and a small pick or your fingers to shape the top every morning. You do not need to overwork the curl pattern. The beauty here is in the clean outline and the fullness at the center, not in making every coil obey.
26. Bang-Framed Mohawk
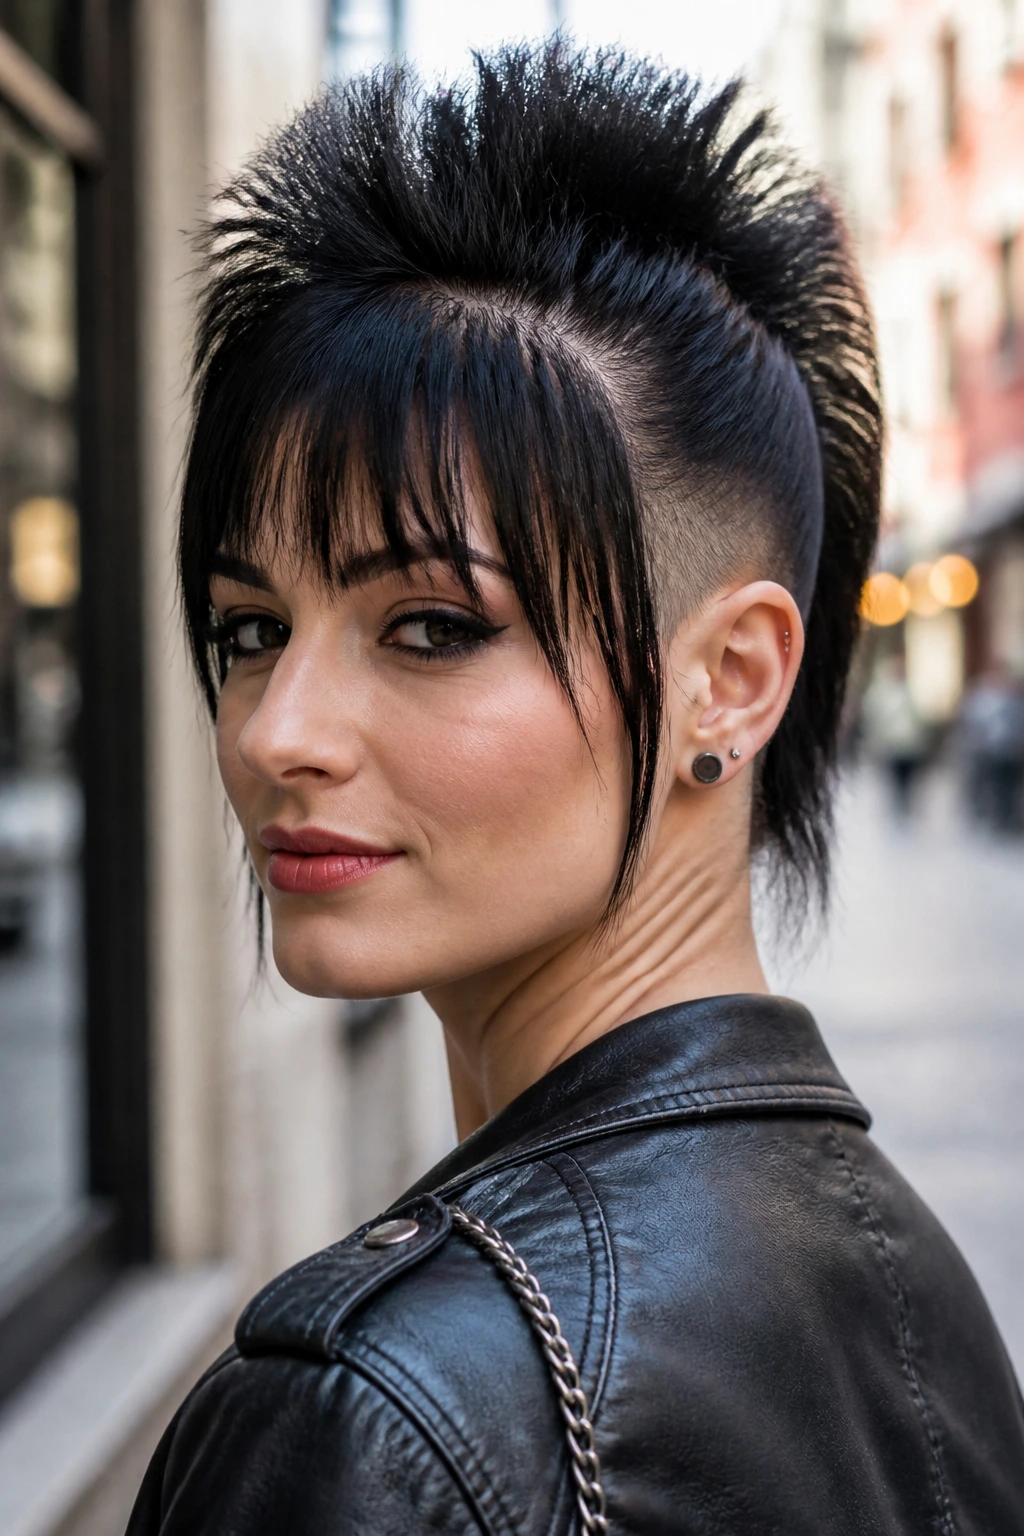
What if you want the mohawk shape without baring your whole forehead? Keep bangs in the mix. A bang-framed mohawk leaves fringe forward or side-swept while the sides taper back, which gives the style a softer, more face-framing feel. It’s a smart choice if a severe hairline makes you uncomfortable.
The bangs can be blunt, wispy, or curved depending on the haircut. If the fringe is long enough, blow it under slightly so it sits with the crest instead of against it. That little bend helps the whole shape feel intentional, not accidental.
27. Bridal Mohawk
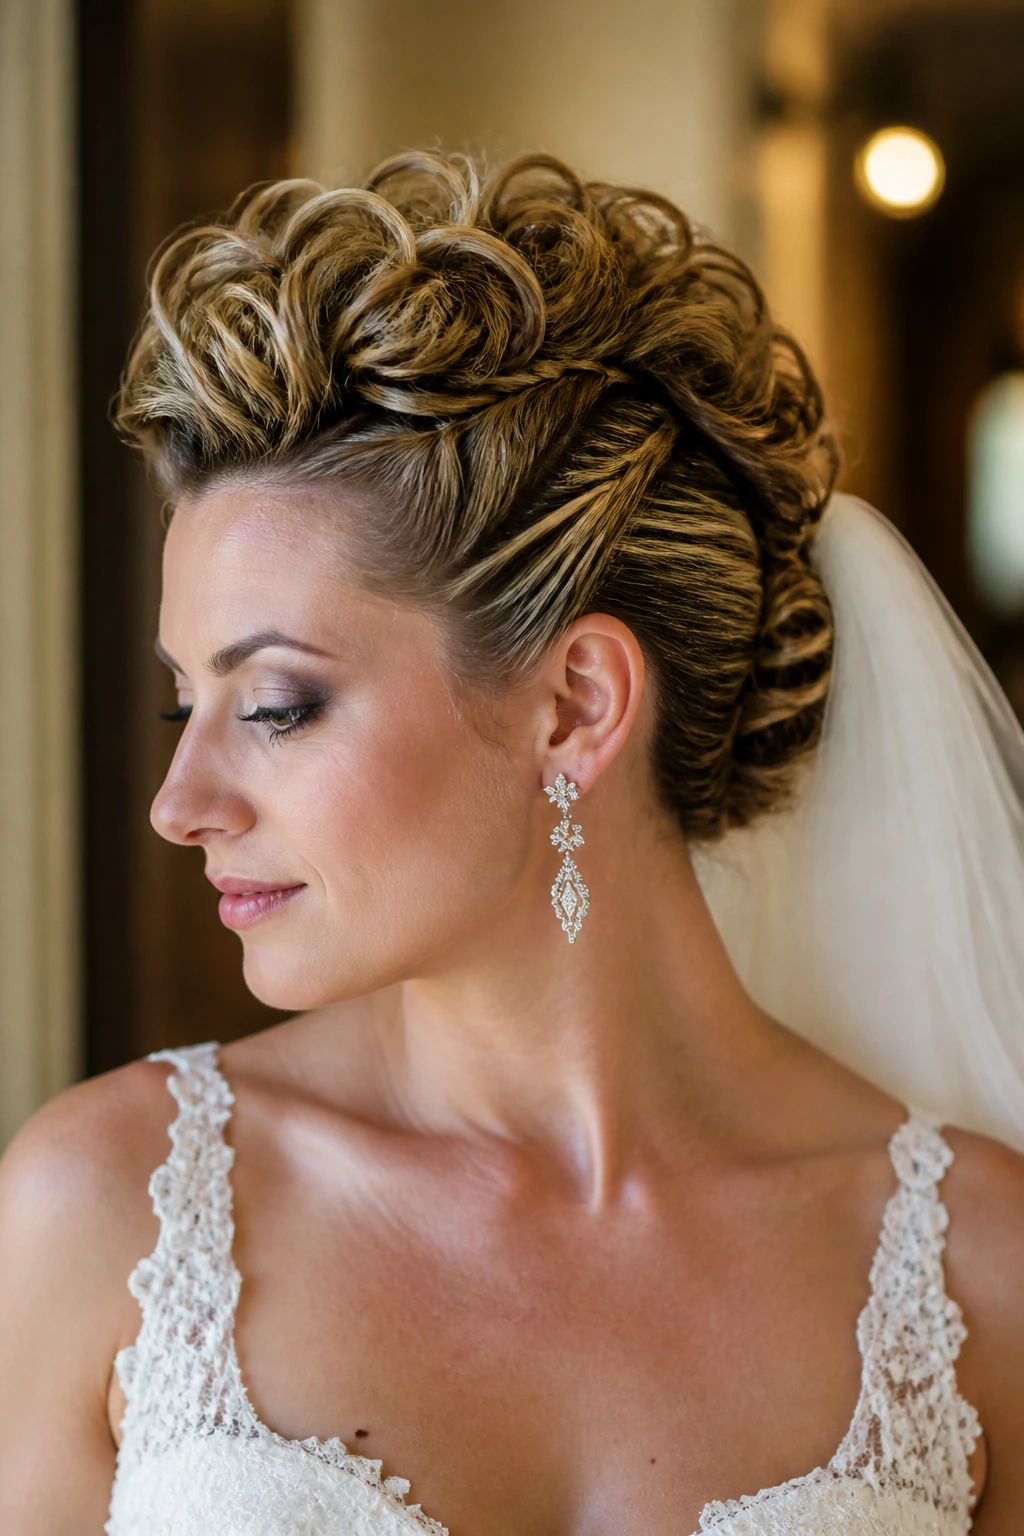
A bridal mohawk is all about soft structure. The sides are pinned back, the center crest is built from curls or waves, and a veil can be anchored low enough to stay hidden but high enough to balance the shape. It gives you the drama of a hawk without stealing the room from the dress.
This style benefits from extra pins and a flexible-hold spray, not shellac. You want movement when you turn your head. If there are statement earrings involved, keep the sides clean so the face stays open and the accessories have room to breathe.
28. Extension Mohawk
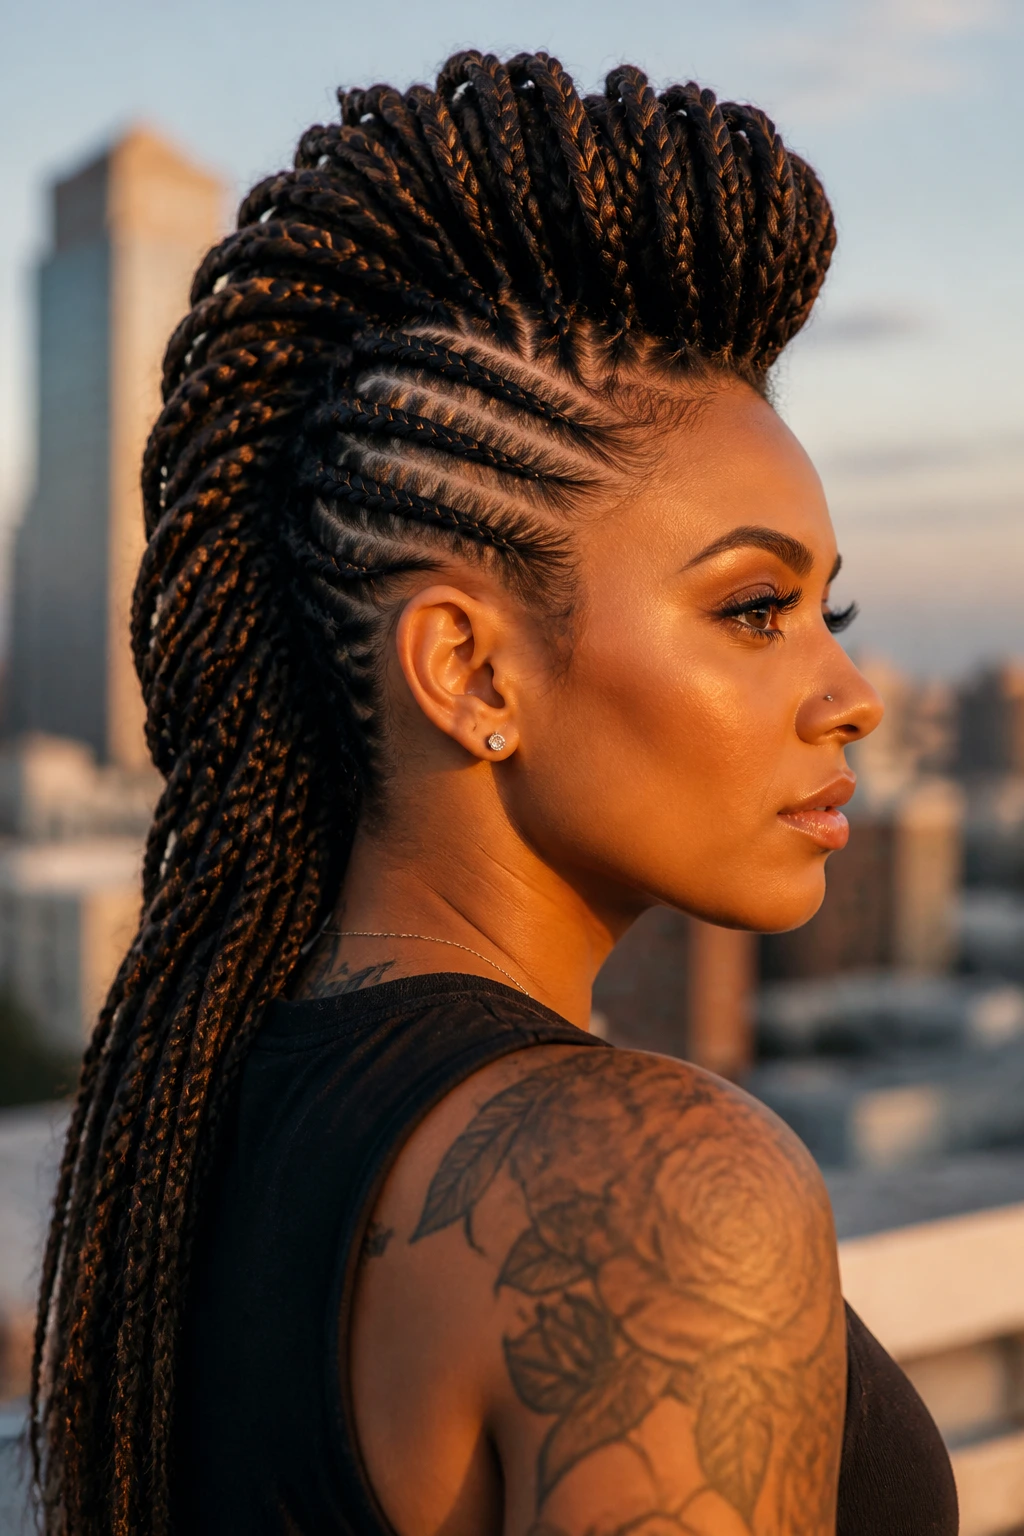
A mohawk with extensions is for when you want height that your natural length won’t give you yet. Clip-ins, pony extensions, or added braiding hair can build a crest that sits higher and longer than your own hair would manage on its own. It’s a fast way to make the silhouette feel larger.
The only catch is weight. If the additions are too heavy, the center starts pulling the shape down instead of up. Anchor the pieces in more than one place and blend the natural hair well around the base so the extension work disappears into the style.
29. Asymmetrical Mohawk Bob
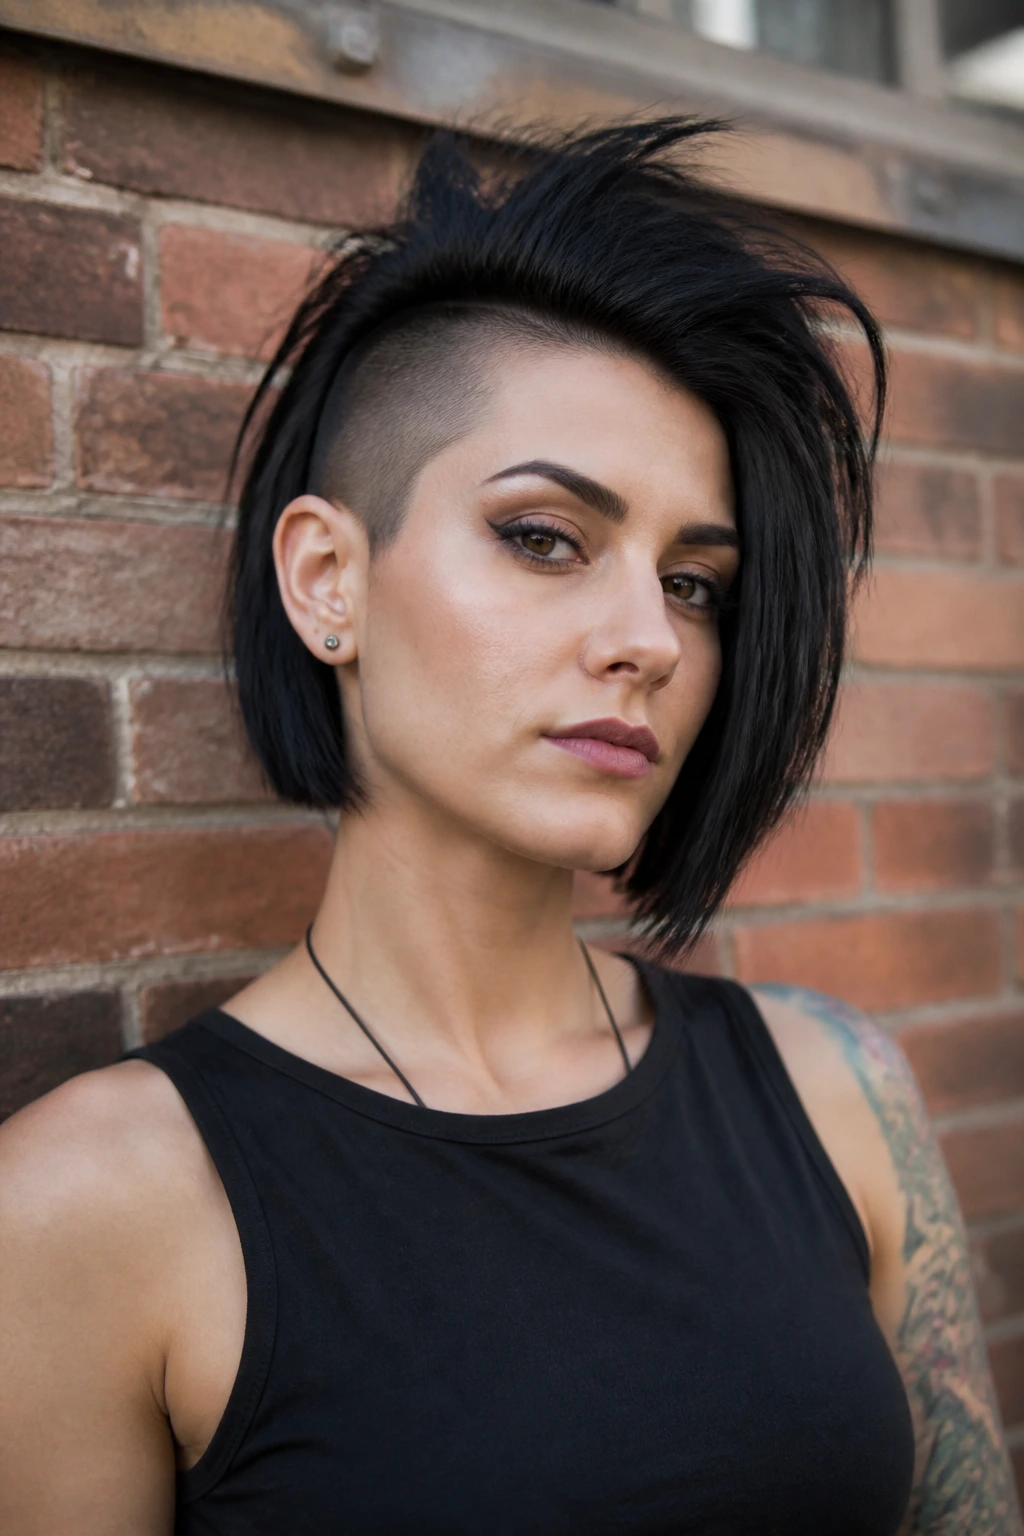
An asymmetrical mohawk bob has that sharp, editorial line that makes people stare twice. One side may be slightly longer than the other, or the crest may lean diagonally so the shape feels off-center in a deliberate way. It’s clean, but not predictable.
This cut shines when the bob is blunt and the top is controlled with smoothing cream or a flat iron. The asymmetry should be obvious enough to notice, but not so severe that it looks lopsided. A bit of bend in the ends keeps it from feeling too rigid.
30. Spiky Mohawk
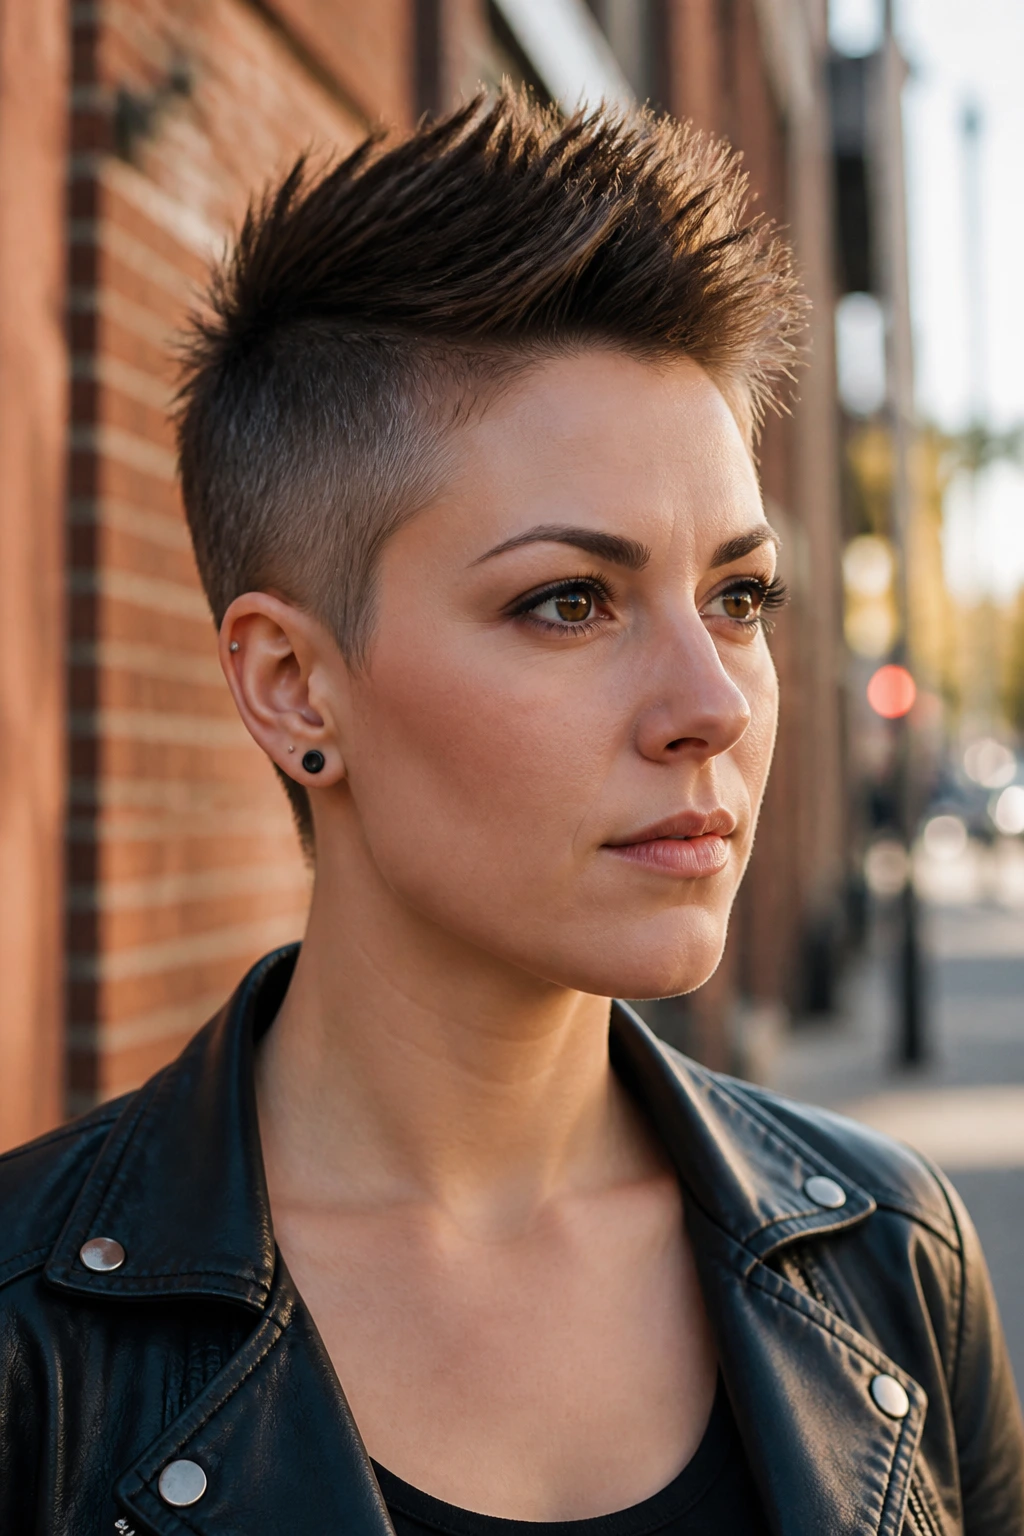
Short, spiky, and a little rude—in the best way. This version only needs a small amount of wax or pomade, worked through 1- to 2-inch sections and pushed upward with the fingertips. The spikes do not need to match perfectly; a little unevenness makes the style feel alive.
It’s a strong choice for short hair that naturally has some lift. Don’t use heavy cream, because spikes collapse under soft products. If the sides are faded or tapered, the top reads even louder, which is exactly what this cut wants.
31. Romantic Soft Mohawk
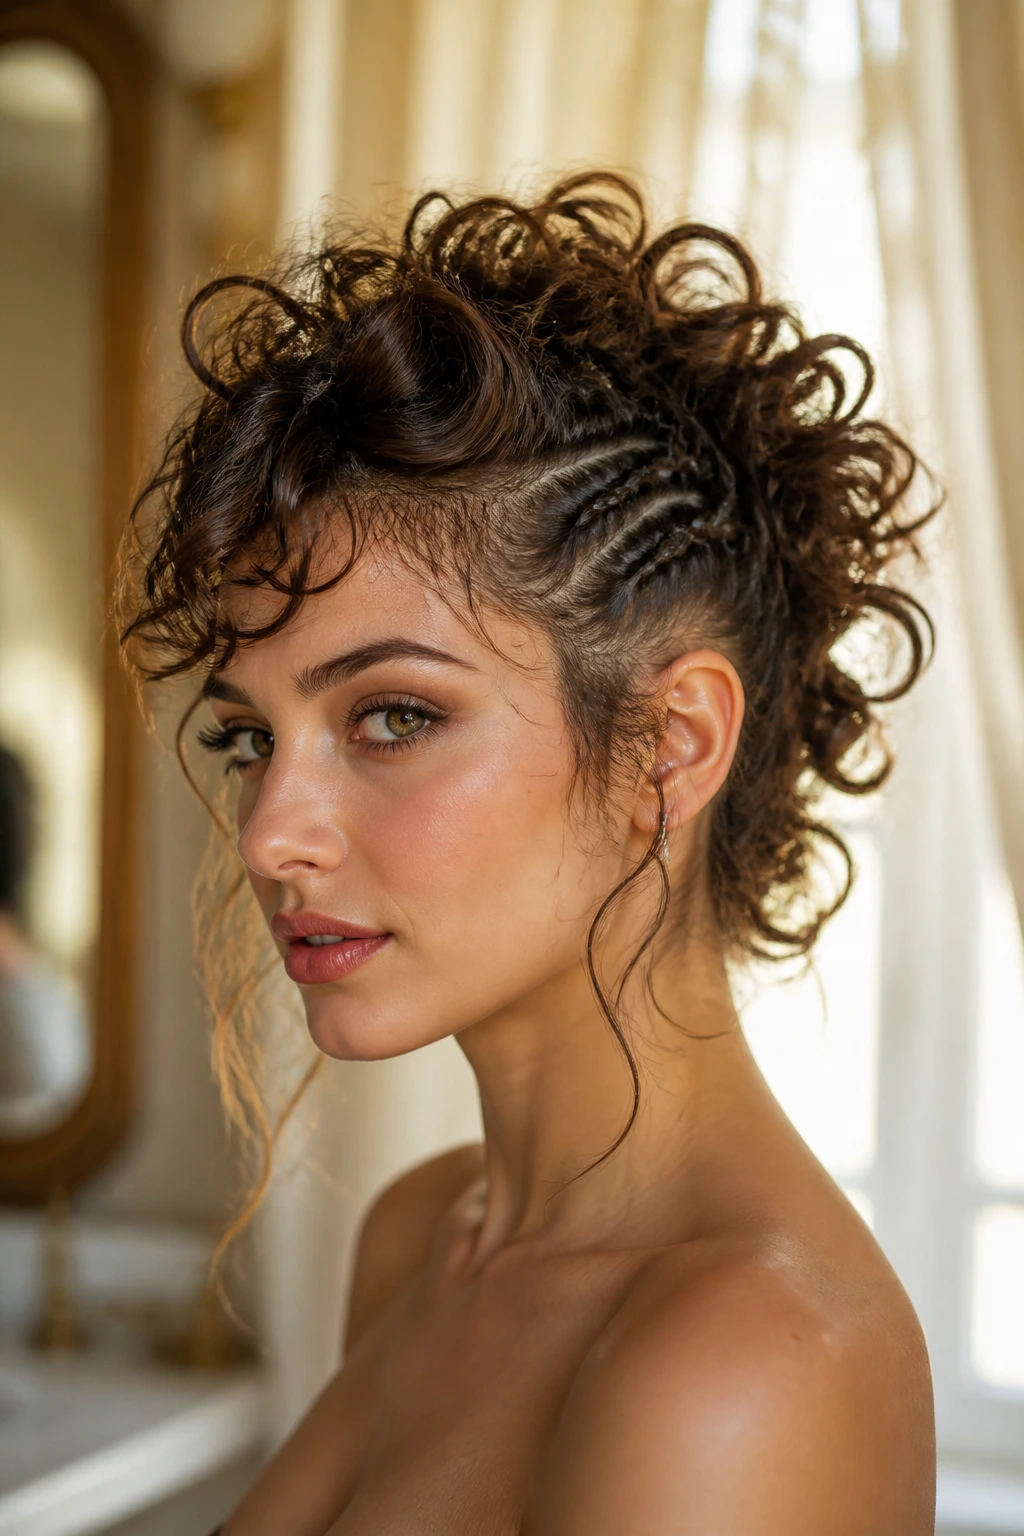
A soft mohawk is the answer for anyone who likes the silhouette but not the edge. Loose curls or waves are pinned upward with a few tendrils left around the face, so the crest feels airy rather than hard. It’s mohawk-shaped, but gentler, almost like formal hair that wandered into rebellion.
Large-barrel curls, flexi rods, or a 1-inch iron can all build the movement. The sides should be neat, but not slicked into place so hard that the face loses softness. I’d call this a good choice for dinners, parties, and any event where you want shape without sharpness.
32. Platinum Mohawk
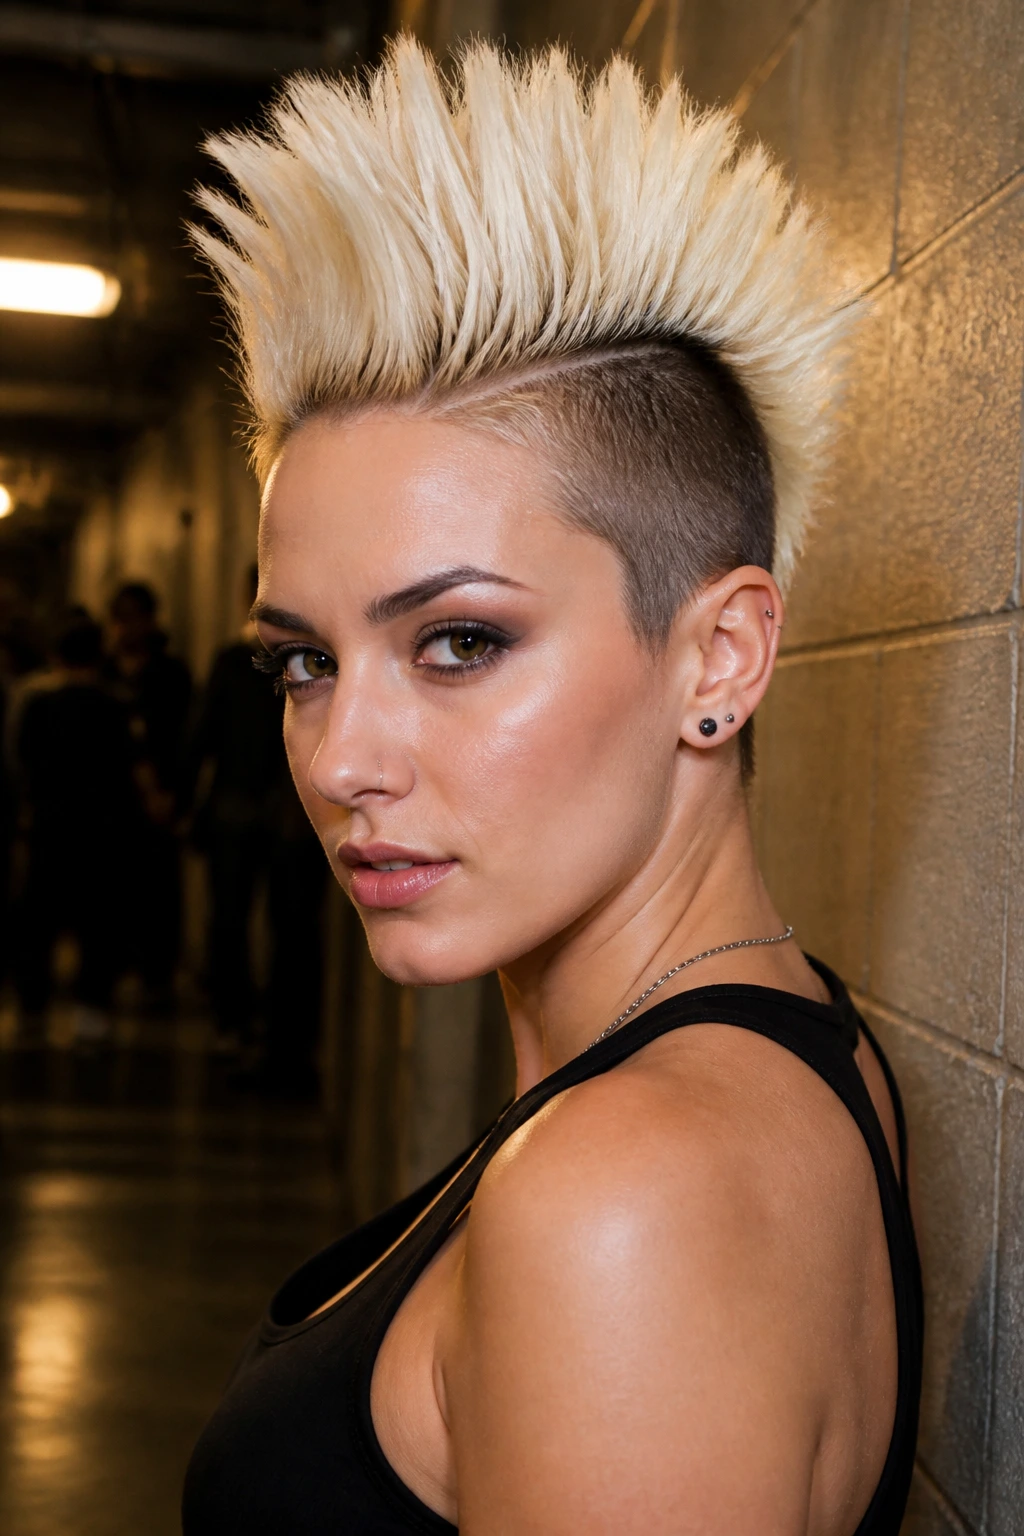
Color can make the cut louder without changing the haircut at all. A platinum crest against darker sides turns the center strip into the main event, and the contrast is immediate. But bleach is not a casual move, so the style only works if the hair can take the maintenance.
Bond-building treatment, purple shampoo, and regular moisture masks matter here. A platinum mohawk looks best when the cut itself is simple and the shape is clean, because light color highlights every line. If the texture is rough and the tone is uneven, the effect gets noisy fast.
33. Bantu-Knot Mohawk
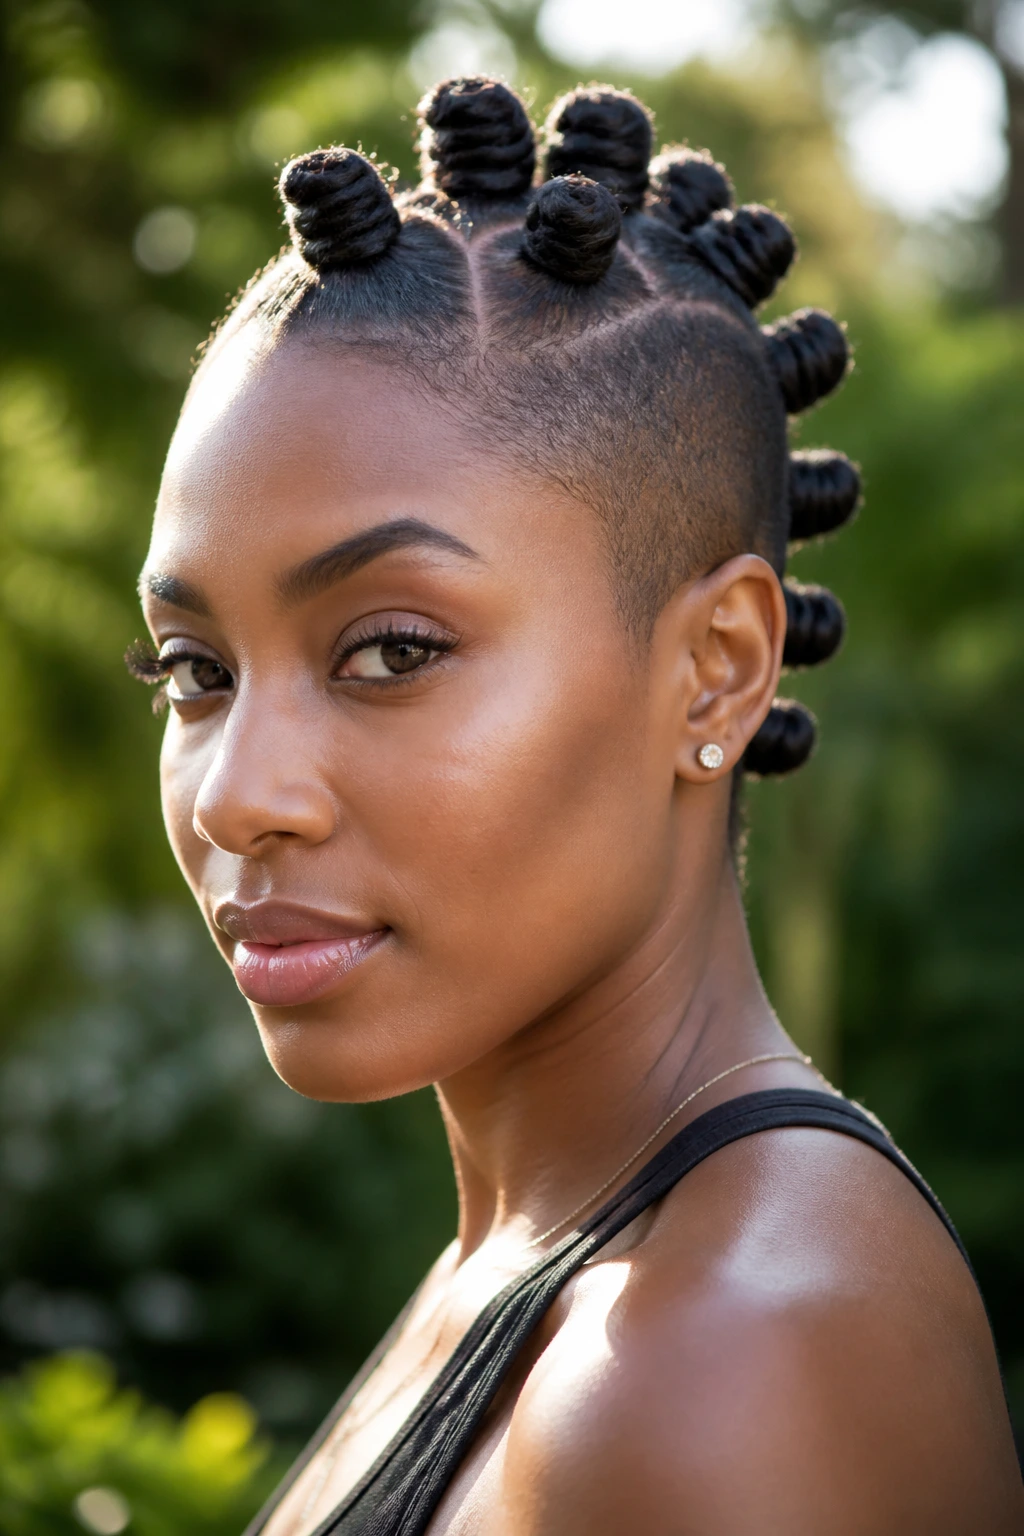
A Bantu-knot mohawk is sculptural in a way that almost no other mohawk style is. The center strip is divided into sections and twisted into small knots that run from the forehead to the crown, leaving the sides flat and neat. You can wear the knots as-is or unravel them later for a second look.
This is a strong protective option on coily hair because the sections stay controlled without needing constant restyling. Keep the knots even in size—usually 6 to 10 knots depending on head size—so the line stays balanced. A satin scarf at night keeps the knots from puffing up.
34. Mohawk Bun Hawk
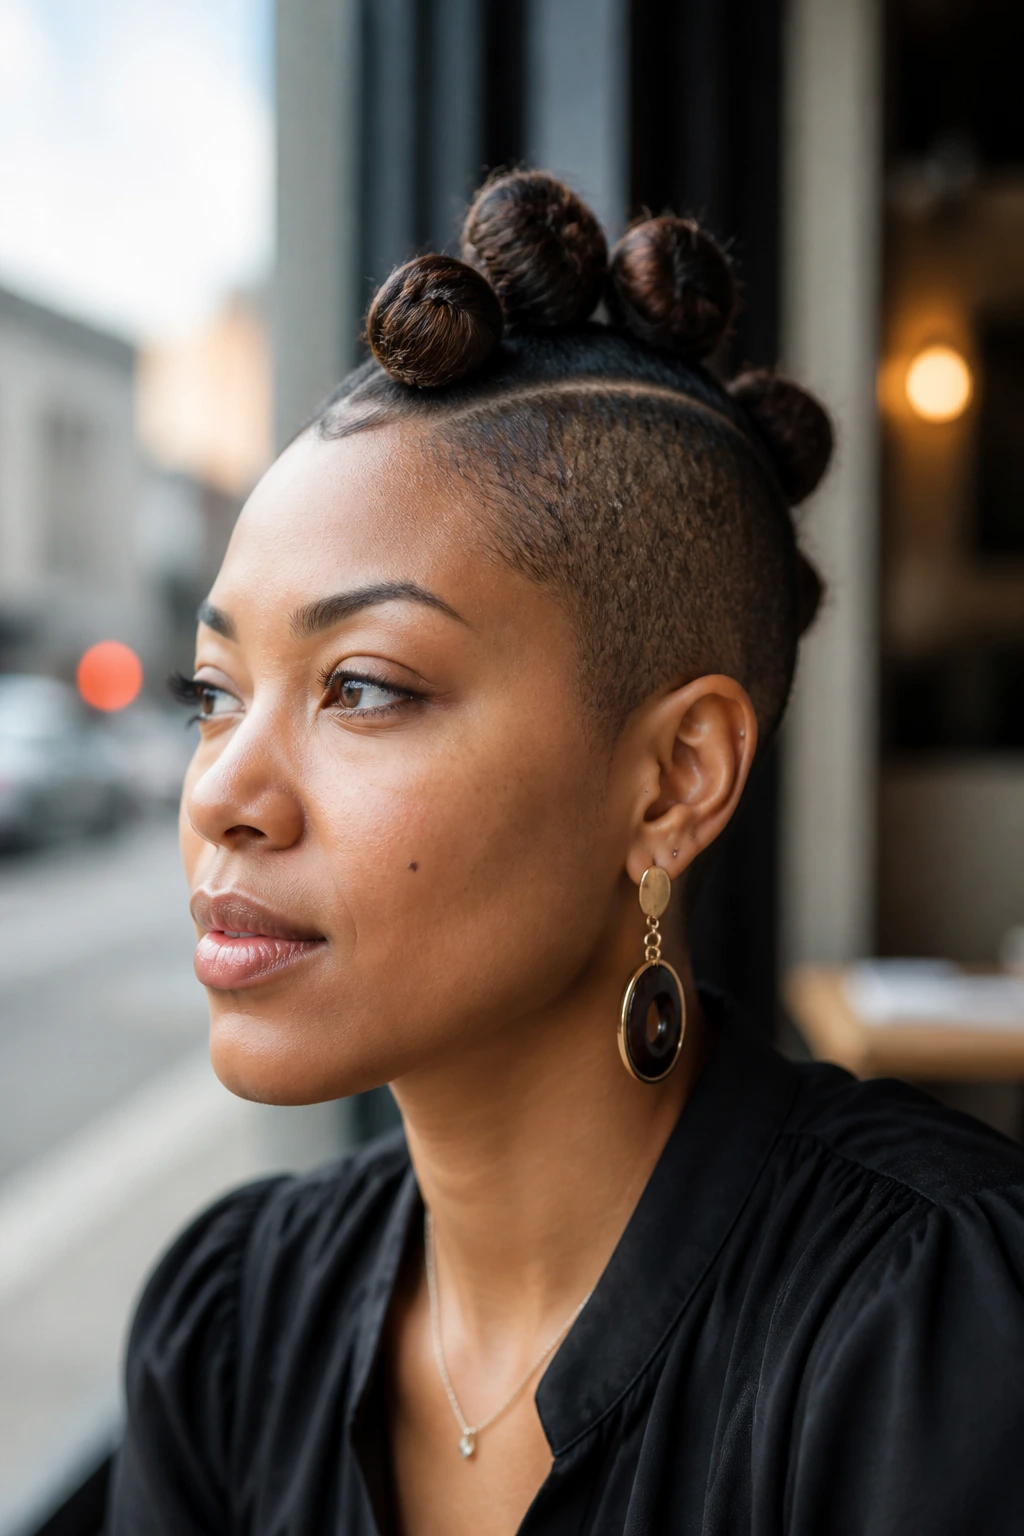
A bun hawk is the neat cousin of the ponyhawk. Instead of one long tail, the center section is split into 2 to 4 small buns or gathered into one stacked bun line, which makes the shape feel playful and architectural at the same time. It’s a good option when you want the profile of a hawk but need your hair completely off your neck.
The buns should sit close enough together that the eye reads them as one ridge, not random knots. Use small elastics and hidden pins so the base stays invisible. This is the kind of style that works at the gym, at brunch, or at a gallery opening if you smooth the edges.
35. Twist-Out Mohawk
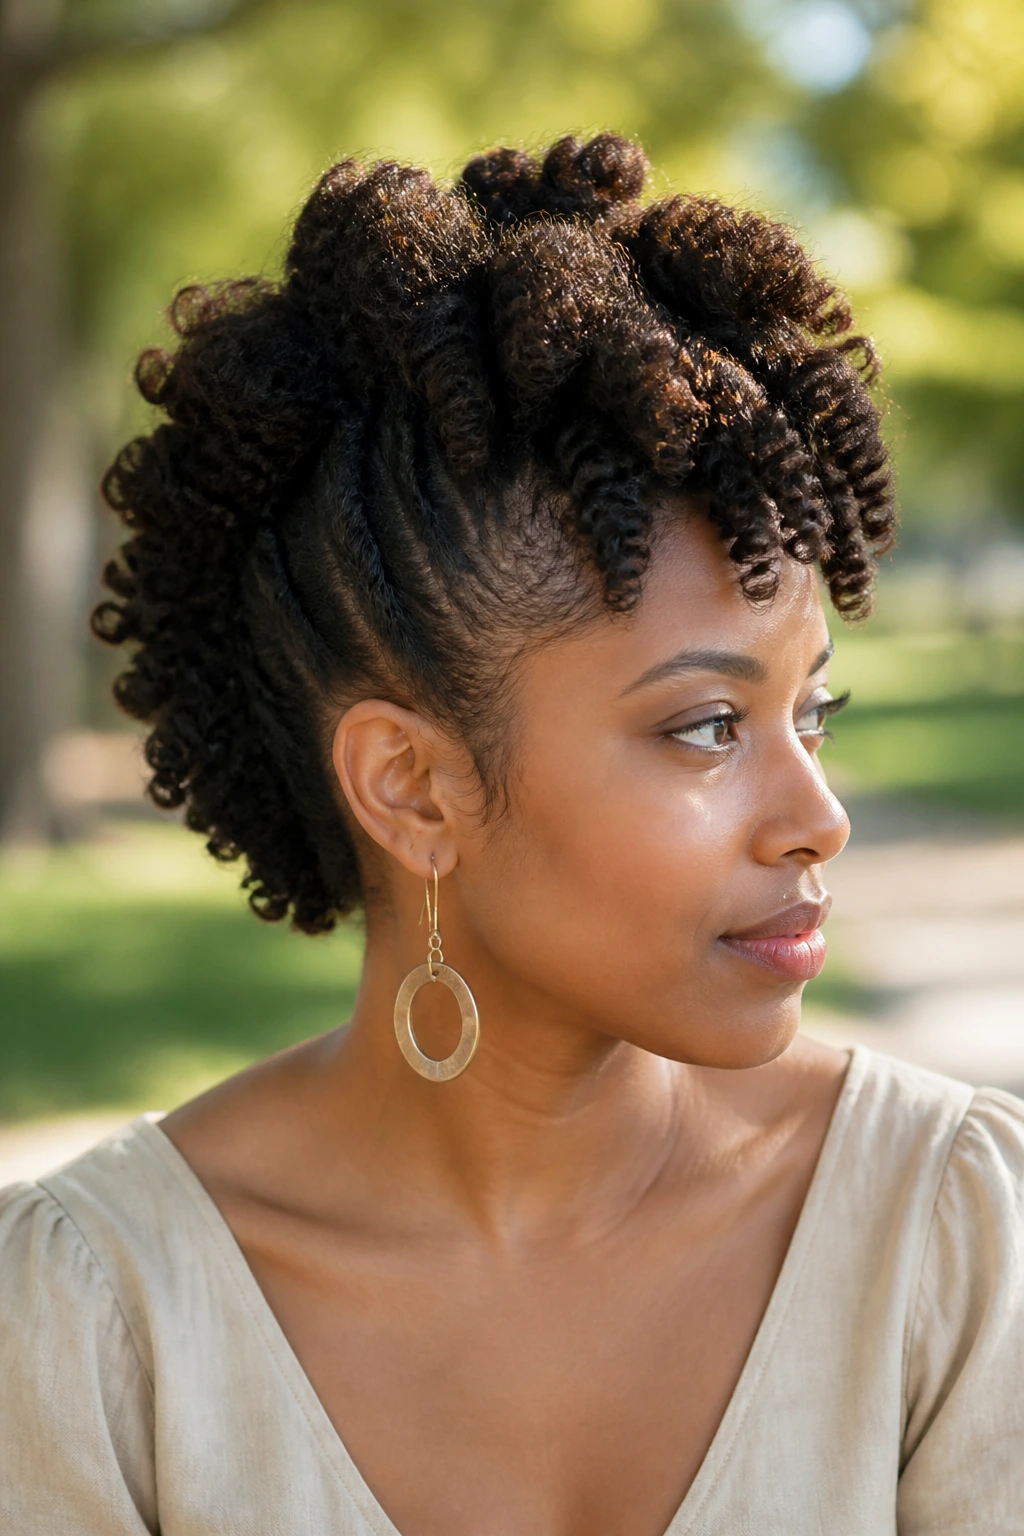
A twist-out mohawk gives you softness, width, and definition all at once. Prep the hair in twists, let it dry fully—overnight is safer than rushing it—and separate only once the hair is completely set. The center crest comes out fluffy and shaped, with enough texture to feel interesting up close.
The sides can be slicked, twisted down, or lightly pinned back, depending on how clean you want the line to look. I like this one because it gives you a mohawk shape without forcing the hair into a hard ridge. If the twist-out is too frizzy, a little oil on the fingertips during separation helps tame the halo without flattening the curl.
Why Mohawk Styles for Women Work on So Many Hair Types
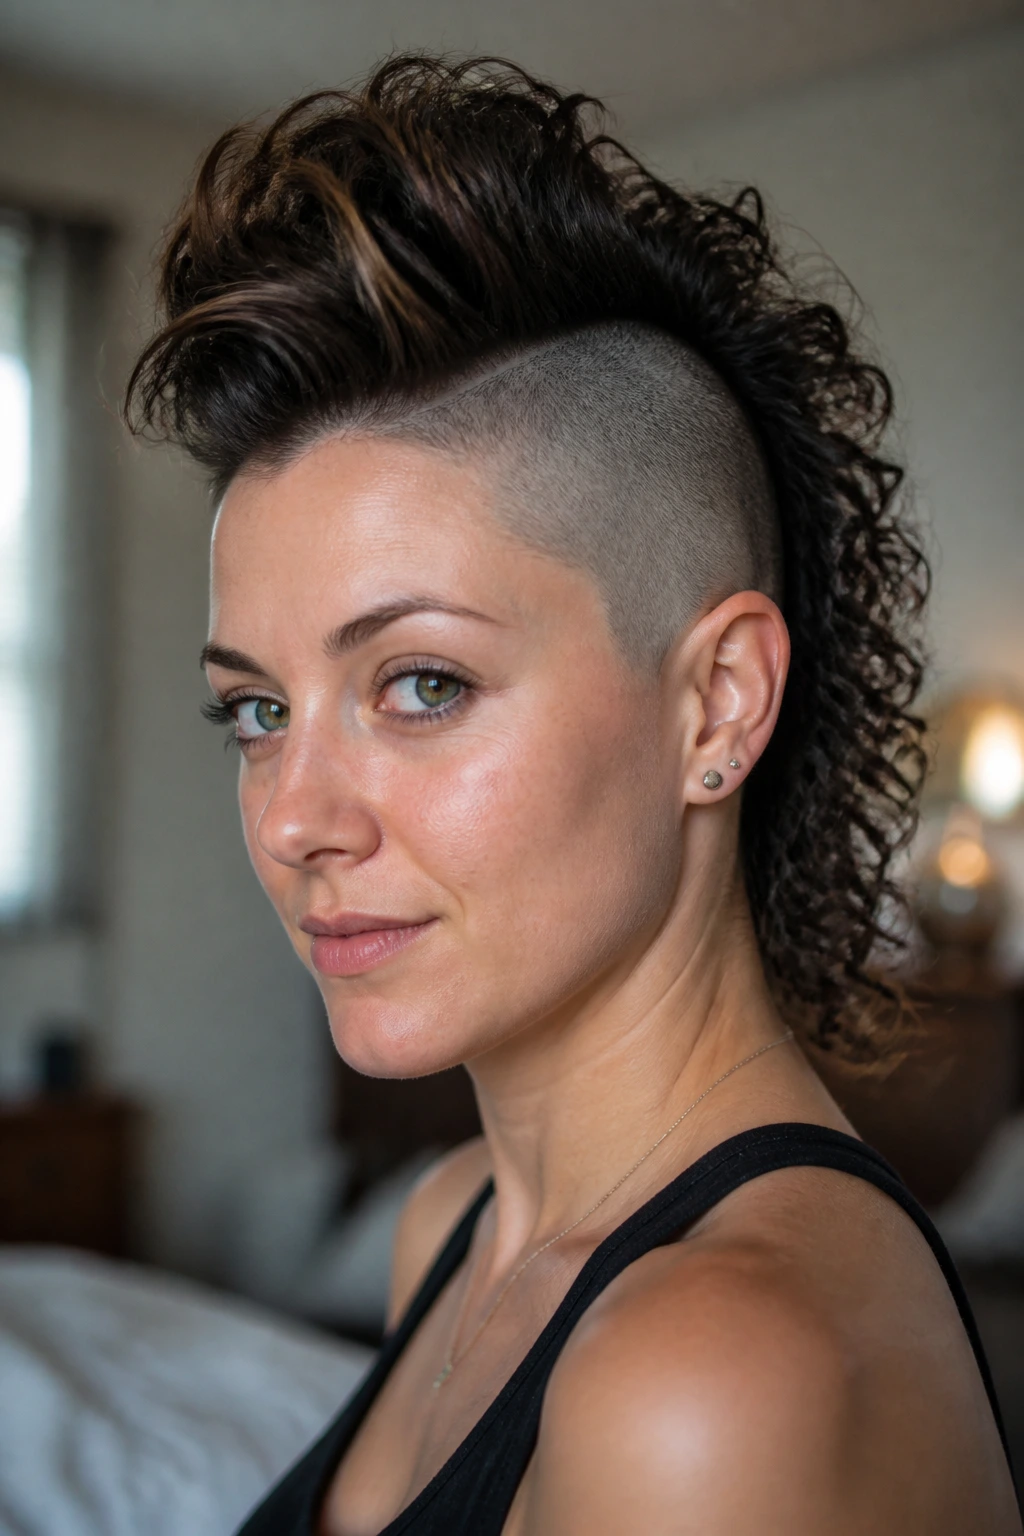
The mohawk shape has one built-in advantage: it creates contrast. Narrow the sides, lift the middle, and the head gets a line that the eye follows immediately. That line can be strict or soft, which is why the same haircut can feel sharp on straight hair and plush on curls.
Face shape matters too, but not in a rigid, one-size-fits-all way. A wider crest can soften a strong jaw, while a tighter ridge can sharpen a rounder face. If you want less edge, use a taper instead of a hard shave. If you want more, keep the parting line visible and the sides clean.
The shape also plays nicely with texture because it doesn’t demand one exact finish. Curls can swell the center strip. Braids can hold the ridge in place. Straight hair can be teased, waved, or gelled smooth. That flexibility is why mohawks keep surviving every wave of hair trends that tries to bury them.
Tools That Keep the Crest in Place
-
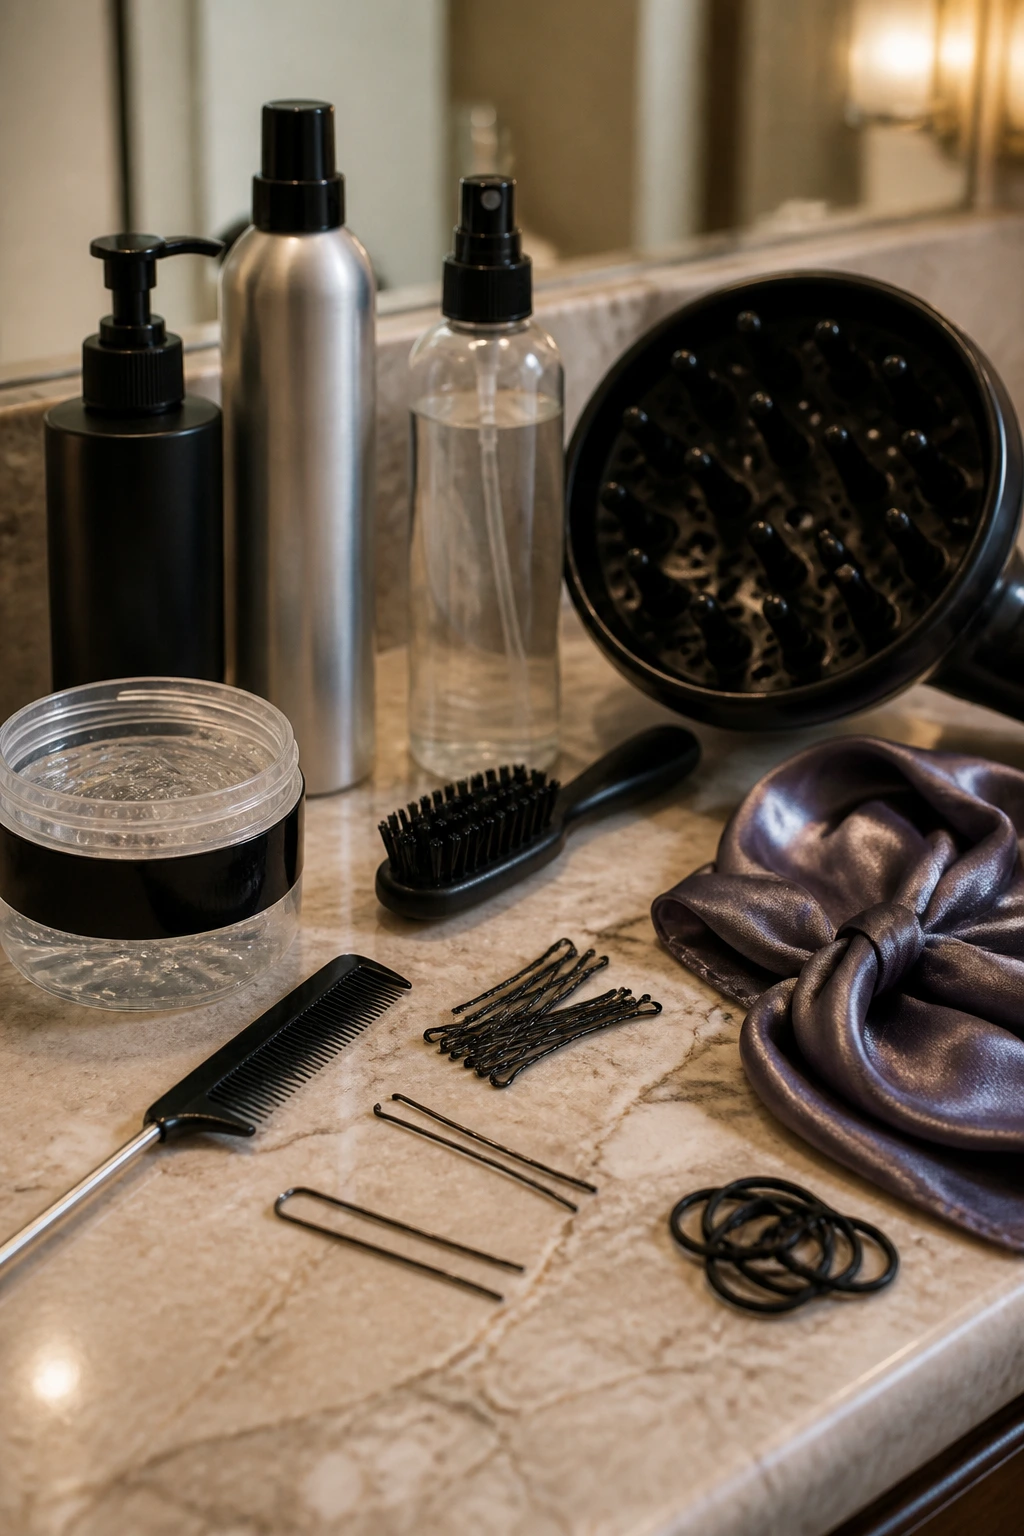
Tail comb: The pointed end makes clean partings and helps lift roots without mashing the style flat.
-
Bobby pins and U-pins: Use these to anchor faux hawks, bun hawks, and pinned-up formal versions; stronger hold comes from crisscrossing the pins.
-
Strong-hold gel: Best for wet looks, smooth sides, and slicked-back sections that need to stay in place all day.
-
Flexible-hold hairspray: Good for keeping movement in curls, waves, and teasing without turning the hair stiff.
-
Edge brush: A small brush helps smooth the hairline and keep the front edge neat, especially on sleek or bridal styles.
-
Texturizing spray or powder: Useful for pixie hawks, teased volume styles, and any crest that needs grit.
-
Blow-dryer with diffuser: The diffuser protects curl shape while lifting the roots, which matters for frohawks and twist-outs.
-
Flat iron or curling wand: Optional, but useful for smooth asymmetrical shapes, finger-wave prep, or soft romantic versions.
-
Small clear elastics: Handy for ponyhawks, braid hawks, and bun hawks where the base needs to disappear.
-
Satin scarf or bonnet: Not glamorous, not optional. It protects the shape overnight and saves you from starting from scratch in the morning.
How to Pick the Right Mohawk Style for Your Texture and Face Shape
Fine Hair
Fine hair does better with lighter, smaller versions of the shape. Teased volume, pixie mohawks, and soft faux hawks usually hold better than heavy braid styles because they do not drag the hair down. Use root spray first, then lift with a comb before the product dries.
Thick Hair
Thick hair can carry weight, which sounds great until the style collapses under it. Braids, loc hawks, taper fades, and bun hawks tend to behave well because they manage bulk instead of fighting it. You’ll want stronger pins and a little more patience when sectioning.
Curly and Coily Hair
Curly hair is where the mohawk shape gets its best personality. Frohawks, picked-out crowns, twist-outs, flat twists, and Bantu-knot versions all make sense here because the texture builds height on its own. Moisture matters more than brute hold; dry, crispy curls fall apart faster than soft ones.
Straight or Relaxed Hair
Straight hair usually needs grip. Dutch braids, wet looks, teased volume, and finger waves are the easiest routes because they give the style a shape that won’t slide around by lunchtime. If the hair is very silky, texture spray is worth using before you start pinning or braiding.
Locs, Braids, and Extensions
These textures already have structure, so the job is mostly about direction and balance. Keep the weight centered, use pins where the roots need support, and avoid stacking so many accessories that the shape turns top-heavy. One clean line beats three competing ones.
Styling Tricks That Keep the Shape Crisp Without Turning It Crunchy
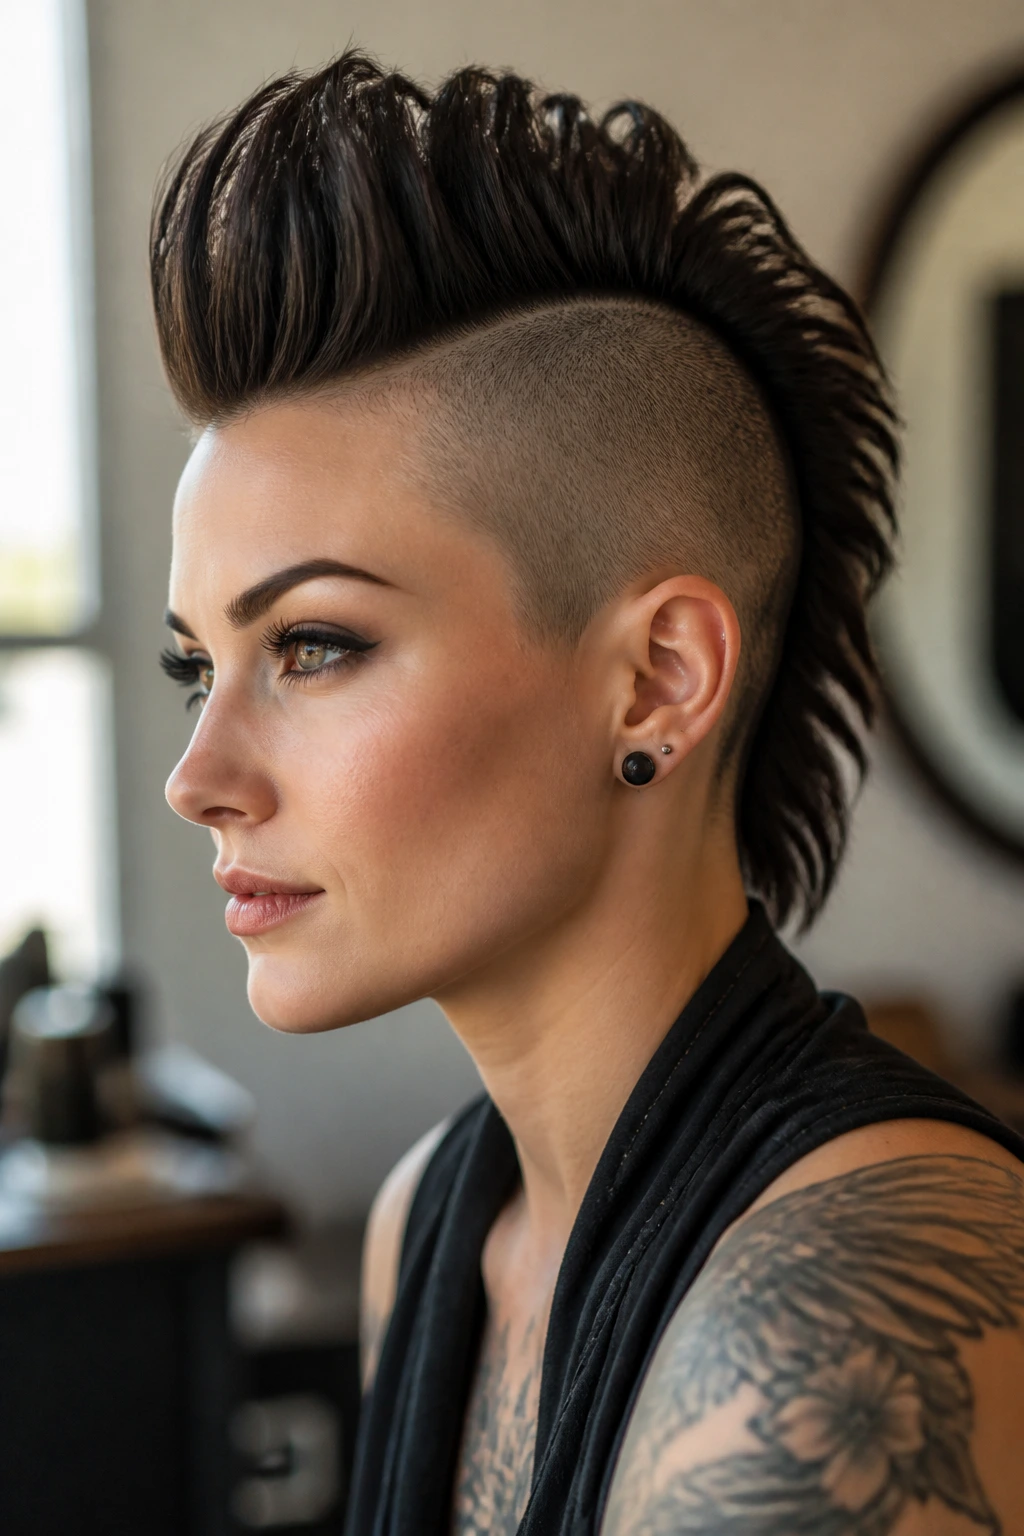
Root lift: Start at the roots, not the ends. If you blow-dry hair in the direction you want it to fall, it will collapse faster; dry it the opposite way first, then mold it into the hawk shape.
Hold: Use product in layers. A light mousse or root spray first, then a little gel or paste where the crest needs structure, then a fine mist of spray at the end. Dumping everything on at once usually creates flakes and flatness.
Finish: Separate only the parts that need separation. If you rake through every curl or twist, the style loses its shape and starts to puff in the wrong places. Fingers do a better job than brushes for the final touch.
Night care: Satin matters. A scarf or bonnet keeps the sides smooth and stops the crest from getting crushed while you sleep. If the shape has pins or twists, recheck them in the morning instead of assuming they survived untouched.
Clean edges: The line around the temples and nape changes the whole look. Even a dramatic hawk feels polished when the edges are brushed and the parting is sharp.
Common Mistakes That Flatten the Look
-
Overloading the hair with product: The symptom is obvious—sticky roots, white flakes, and a crest that sags by the end of the day. Start lighter than you think, then add more only where the hair needs grip.
-
Making the center strip too wide: A crest that spreads across half the head stops reading as a mohawk and starts reading as a fuzzy updo. Keep the ridge narrow enough that the eye can follow one line.
-
Ignoring the sides: Loose edges ruin even a well-built hawk. Smooth the sides with a brush or twist them tight enough to stay close to the scalp.
-
Using the wrong pins: Tiny decorative pins look cute until the hair slides out of them. Match the pin size to the hair’s thickness, and cross them when the style is heavy.
-
Skipping the dry time: Wet styles need to set. If you touch or sleep on them too soon, the shape droops and the front line turns sloppy.
Variations and Alternatives to Try

Boardroom Faux Hawk: Keep the ridge low, the sides smooth, and the finish soft. This version gives you the mohawk idea without the shaved edge, which makes it easier to wear in conservative settings.
After-Dark Wet Crest: Push the shine higher, use a firmer gel cast, and leave the crest slick and glossy. It feels more dramatic than the daytime version and works well with bold earrings.
Protective Braid Hawk: Think cornrows, flat twists, or rope twists feeding into a central strip. It’s one of the better choices when you want the shape to last several days with minimal manipulation.
Low-Key Grow-Out Hawk: This is for the awkward stage when the cut is no longer crisp. Use a taper, a half-up shape, or a soft faux hawk while the sides catch up.
Color-First Hawk: If the cut is simple, a single bold color can do the heavy lifting. Keep the shape clean and let the hue carry the drama.
Keeping the Cut Sharp Between Wash Days
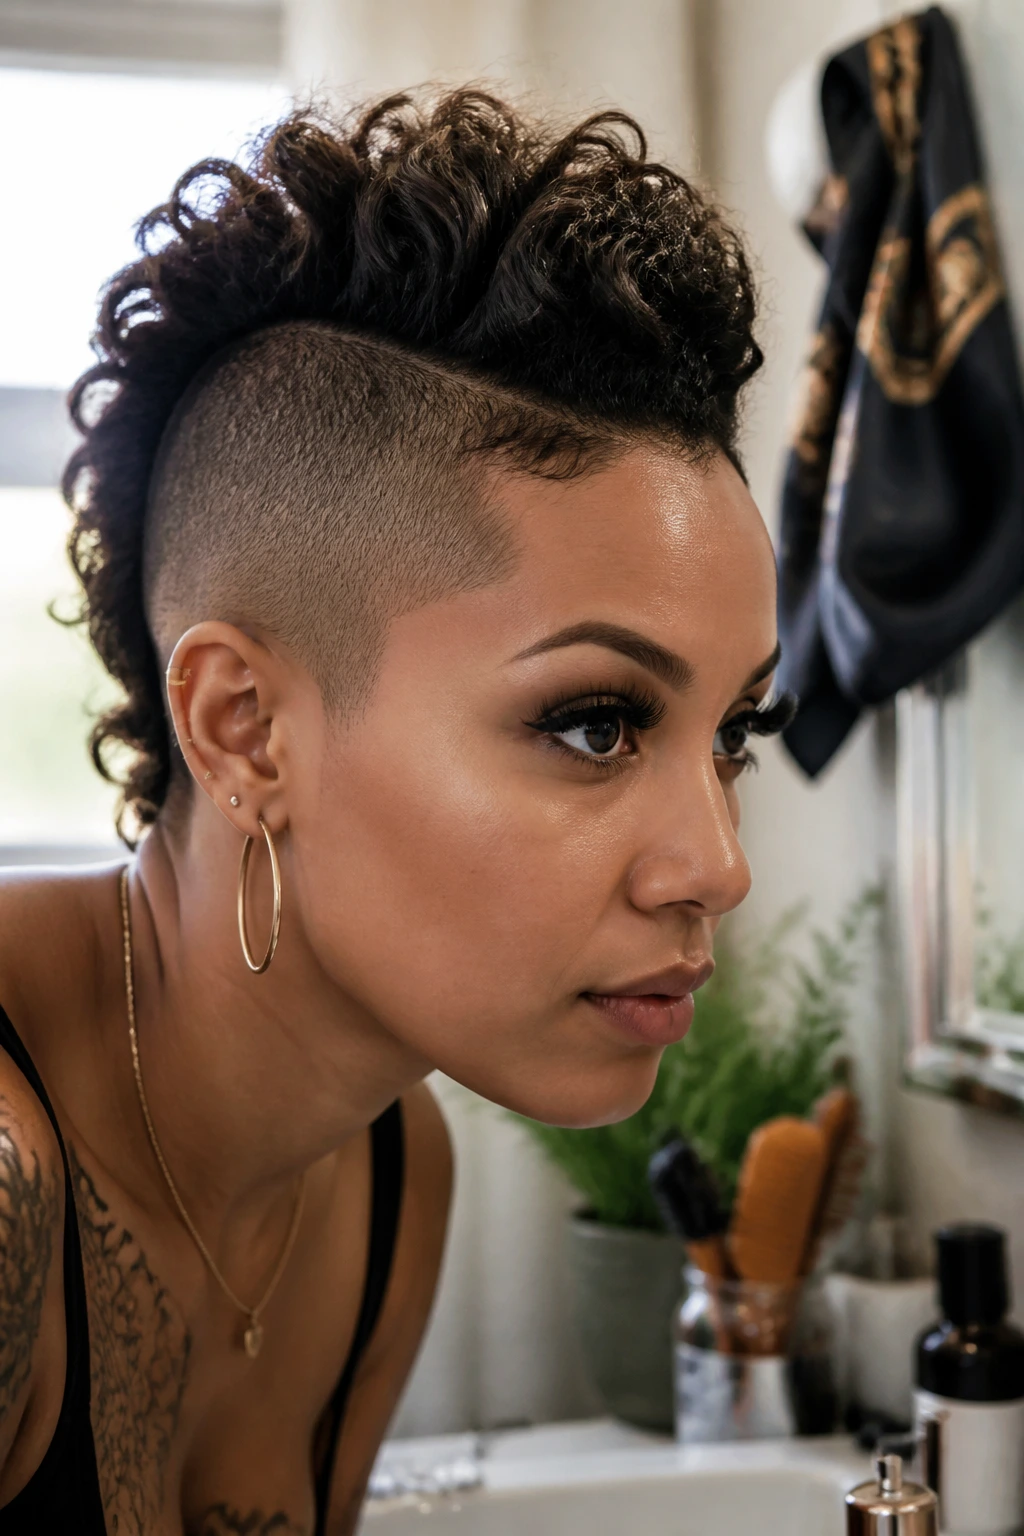
The best mohawk maintenance is boring in the useful way. Clean the hairline every couple of days, refresh the sides with a brush or a dab of edge control, and re-pin any section that starts drifting. If the style relies on curls or twists, sleep with a satin scarf and leave the pins alone unless they’ve shifted.
For shaved or faded sides, touch-ups usually fall every 2 to 3 weeks, depending on how fast your hair grows. Braided and twisted versions can last longer, but the scalp still needs attention. If the roots look fuzzy or the front edge stops reading clearly, a quick refresh is usually enough.
Wash-day timing depends on the style. Wet looks and strong-gel styles often need a cleanse after 1 to 2 days to avoid buildup. Protective versions can stay in longer, but you should keep the scalp clean and stop if the hair starts feeling sore or brittle. The shape matters, but comfort matters too.
Questions People Ask Before They Commit
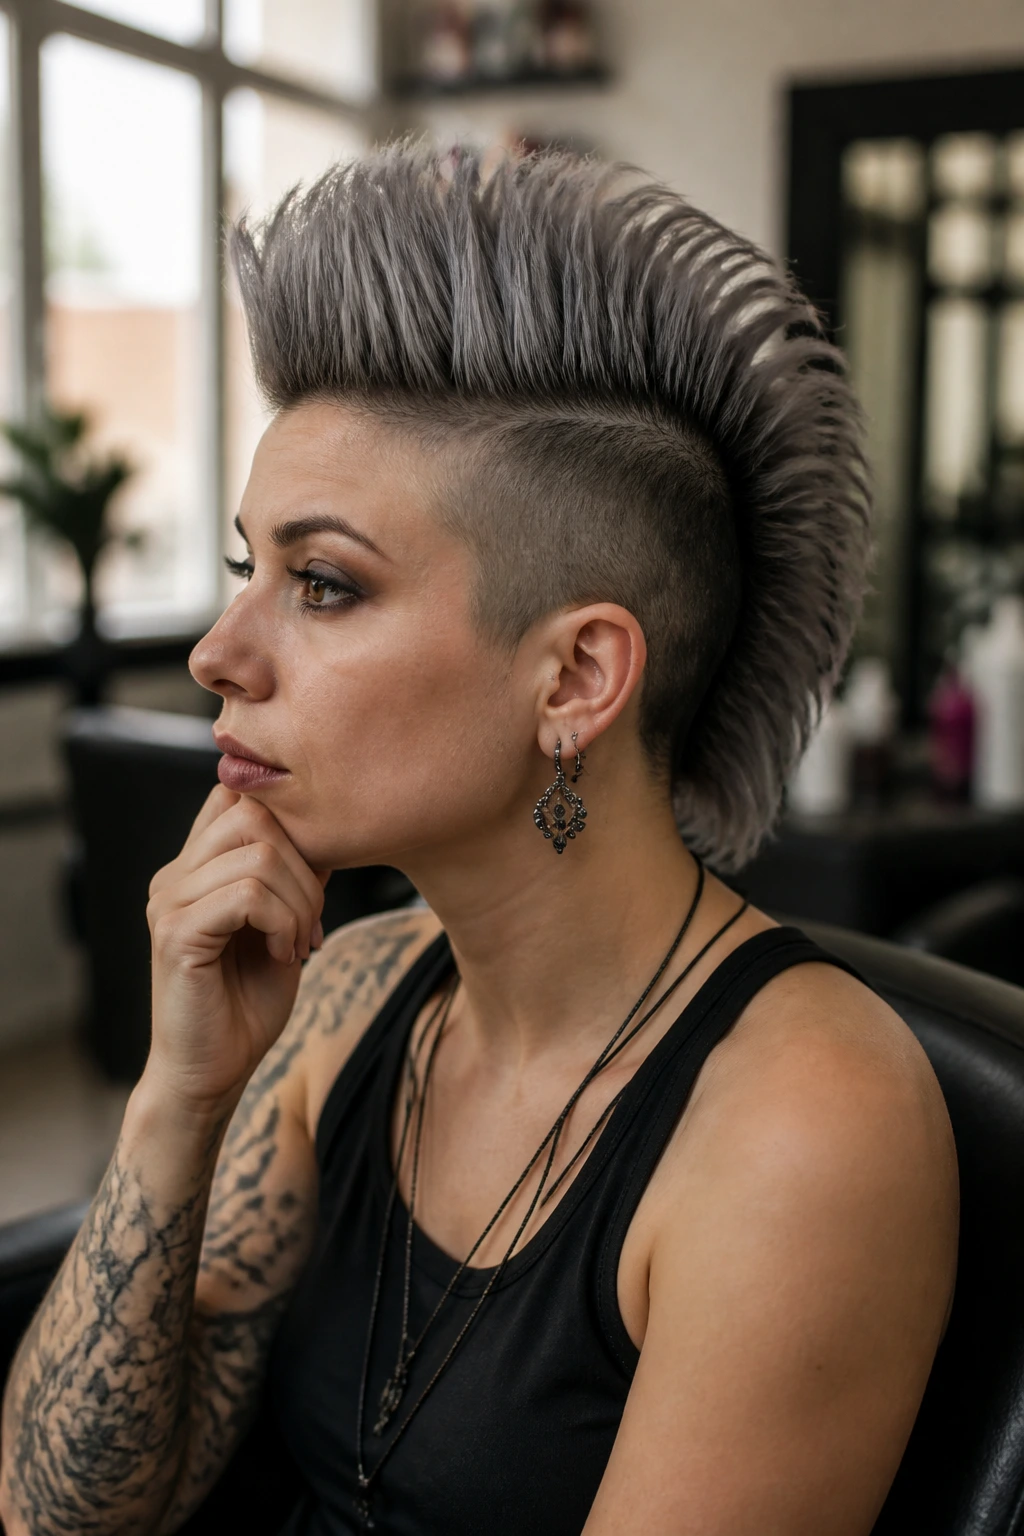
Can you wear a mohawk without shaving the sides?
Absolutely. Faux hawks, braid hawks, twisted crest styles, and pinned-up versions all give you the same silhouette without a permanent cut. If you want flexibility, start there.
Which mohawk style is easiest for curly hair?
Curly frohawks, twist-outs, flat twists, and picked-out natural versions usually work best because they follow the curl pattern instead of fighting it. A little root lift and moisture make a bigger difference than heavy product.
How do you keep the top from falling flat?
Start with dry roots, not damp ones, and build lift close to the scalp. Teasing, root spray, and strategic pinning do more than piling on hairspray at the end.
Will a mohawk work on fine hair?
Yes, but the style should stay smaller and lighter. Pixie hawks, teased volume hawks, and soft faux hawks usually hold better than thick braid-heavy versions.
How often do shaved sides need maintenance?
Most people touch them up every 2 to 3 weeks if they want the edges to stay crisp. If you let the fade grow out longer, the hawk reads softer and less defined.
Can braids or locs be turned into a mohawk?
They can, and often with less daily styling than loose hair. The key is balance: keep the sides neat and the center ridge supported so the weight doesn’t pull everything down.
What if the style goes flat in humidity?
Use less cream, more texture spray, and add anchors at the roots instead of the ends. Humidity is usually the enemy of softness, so a little grit helps the shape survive.
Is a mohawk too bold for everyday wear?
Not if you choose the right version. Tapered, braided, soft faux, and half-up hawks can look very wearable with clean lines and modest height.
The Shape That Keeps Its Edge
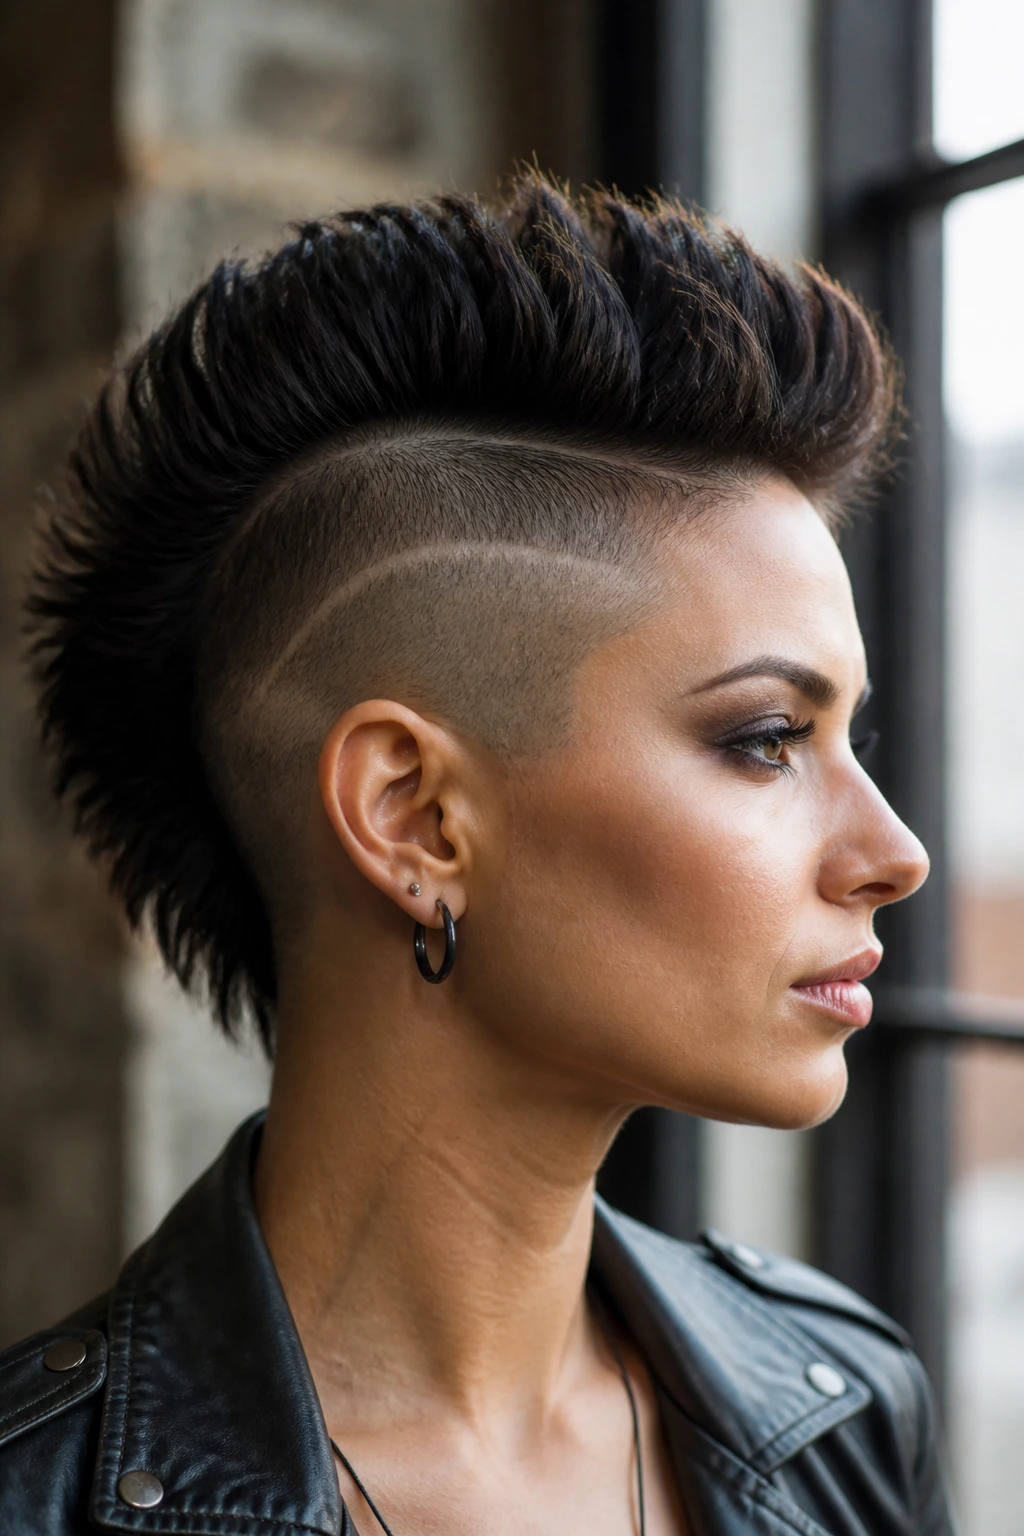
A mohawk does not have to scream to have presence. That is the part I like most about it. The same basic silhouette can look sharp enough for a night out, soft enough for a wedding, or practical enough for a week of low-fuss wear if you choose the right version and keep the sides under control.
The real trick is not chasing height for its own sake. It’s deciding what kind of line you want the head to make, then building around that line with the right texture, the right hold, and a little patience at the mirror. Once you get that part right, the style stops feeling like a statement and starts feeling like a tool.
