



Medium-length hair is the sweet spot for updos, even if it doesn’t always feel that way when you’re staring at the mirror with a handful of pins and a half-formed bun. Hair that falls somewhere between the jaw and the collarbone has enough length to twist, fold, and tuck, but not so much weight that every shape collapses under its own gravity. That balance matters. A lot.
The mistake most people make is trying to force medium hair into a style built for long hair. That usually ends with a lumpy knot, a tail that won’t hide, or a crown that puffs up in the wrong place. Better to work with the haircut you actually have: use the nape, the temples, and the little bits around the hairline as anchors, then let the ends become part of the structure instead of something you’re fighting.
What makes these updos for medium length hair worth keeping in rotation is how flexible they are. Some are polished enough for a dinner out, some look better the second they loosen up, and some are gloriously useful on second-day hair when the roots have a little grit and the ends have stopped pretending to be cooperative. The best part is that none of them ask for waist-length hair or a drawer full of professional tools. A tail comb, a few good pins, and a little nerve go a long way.
Why These Styles Work on Mid-Length Hair
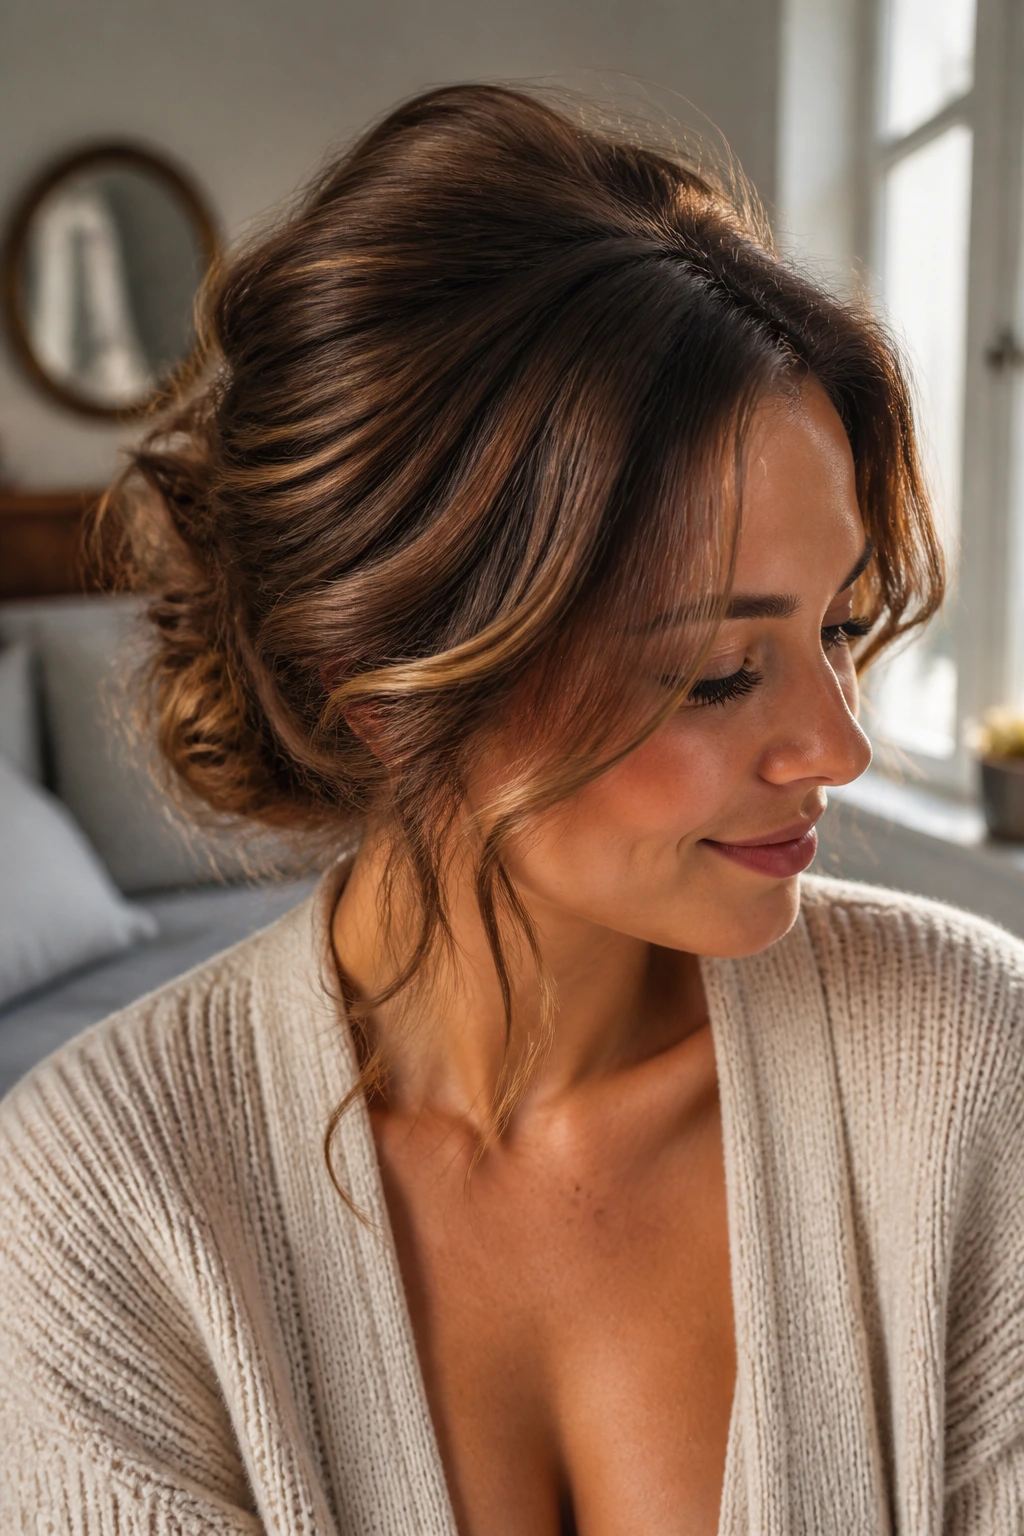
- They use the haircut’s natural weight: Medium hair settles faster than long hair, so the shape holds with fewer pins and less product.
- They make layers useful: Choppy ends and face-framing pieces can add grip instead of hanging out like escape artists.
- They can look neat or loose: The same base can read polished with a center part or softer with a few pulled-out strands.
- They do not need extensions: Most of these styles build their own volume with twisting, braiding, or folding rather than extra hair.
- They travel well from day to night: A low bun can start office-clean and end up a little undone after a few hours, which is often the better look anyway.
Why Updos for Medium Length Hair Hold So Well
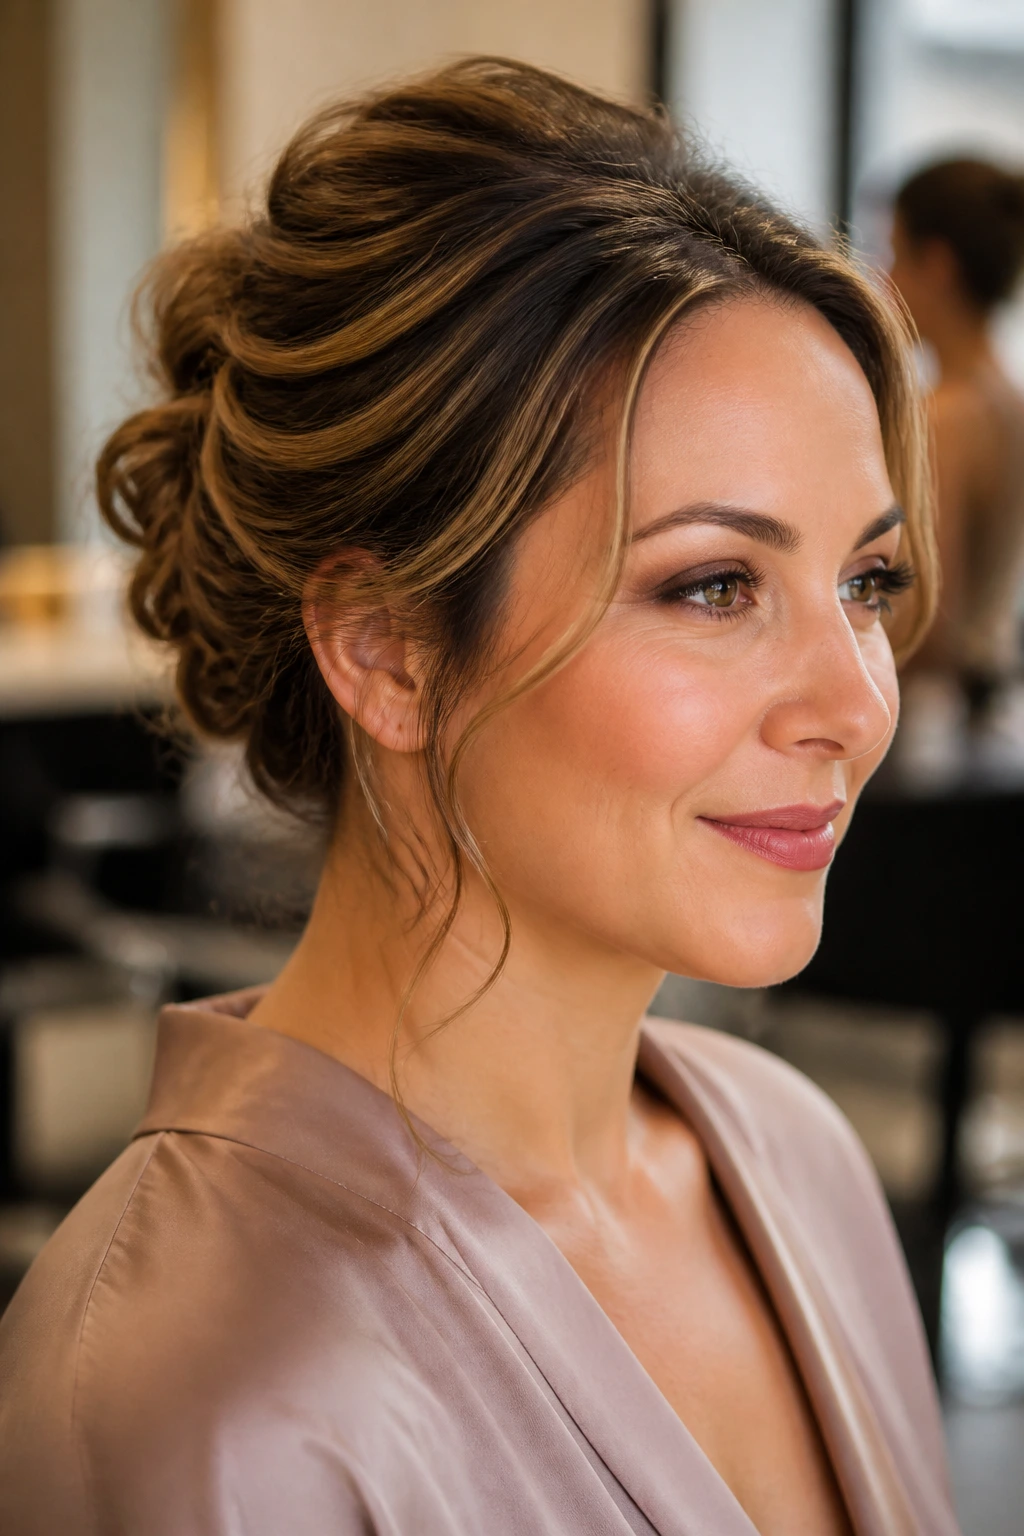
Medium hair has one advantage long hair often loses: the shape can sit close to the head without dragging the whole style down. Once the ends reach the nape, they can be tucked, trapped, crossed over themselves, or wrapped around a base in a way that feels secure without looking bulky. That’s why so many of the best medium-length styles rely on overlapping pieces instead of one giant knot.
Layers matter here, and not always in the annoying way people assume. A few shorter pieces at the front can soften a twisted bun. A slightly uneven end can hide inside a braid or pin curl. Even fine hair has a decent amount of natural spring at this length, which gives you a little lift if you mist the roots with dry shampoo or texturizing spray before you start.
The other thing medium hair does well is hold shape without much fuss. If you smooth it too much, it slips. If you rough it up a touch, it behaves. That small window is where the good styles live.
1. Low Twisted Chignon
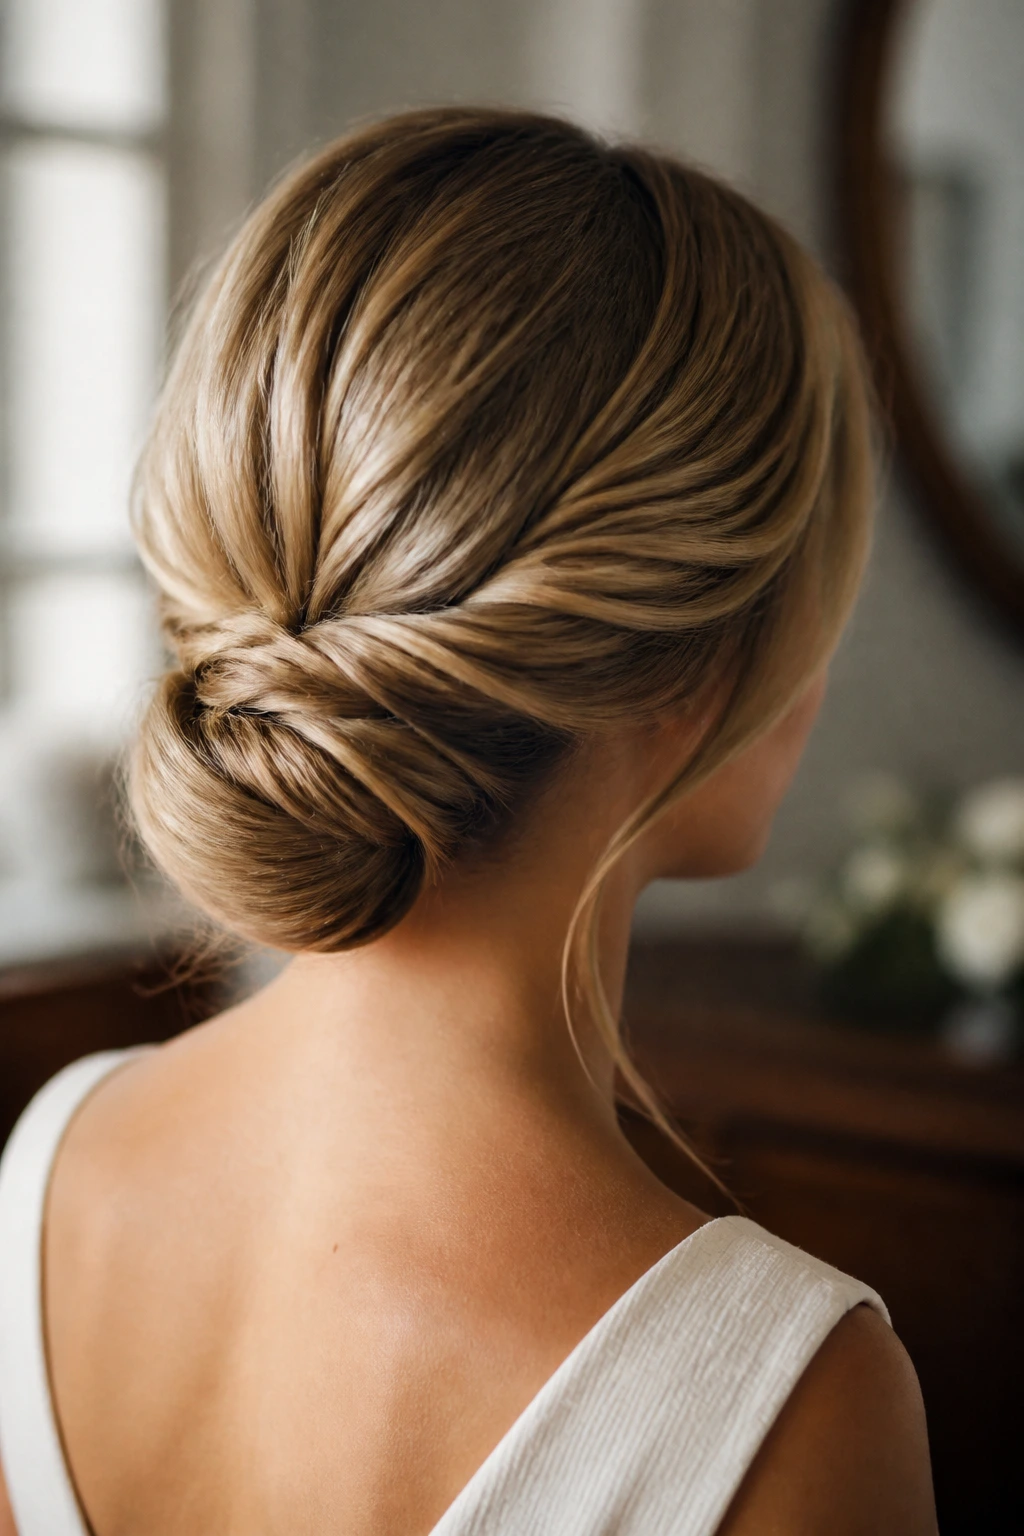
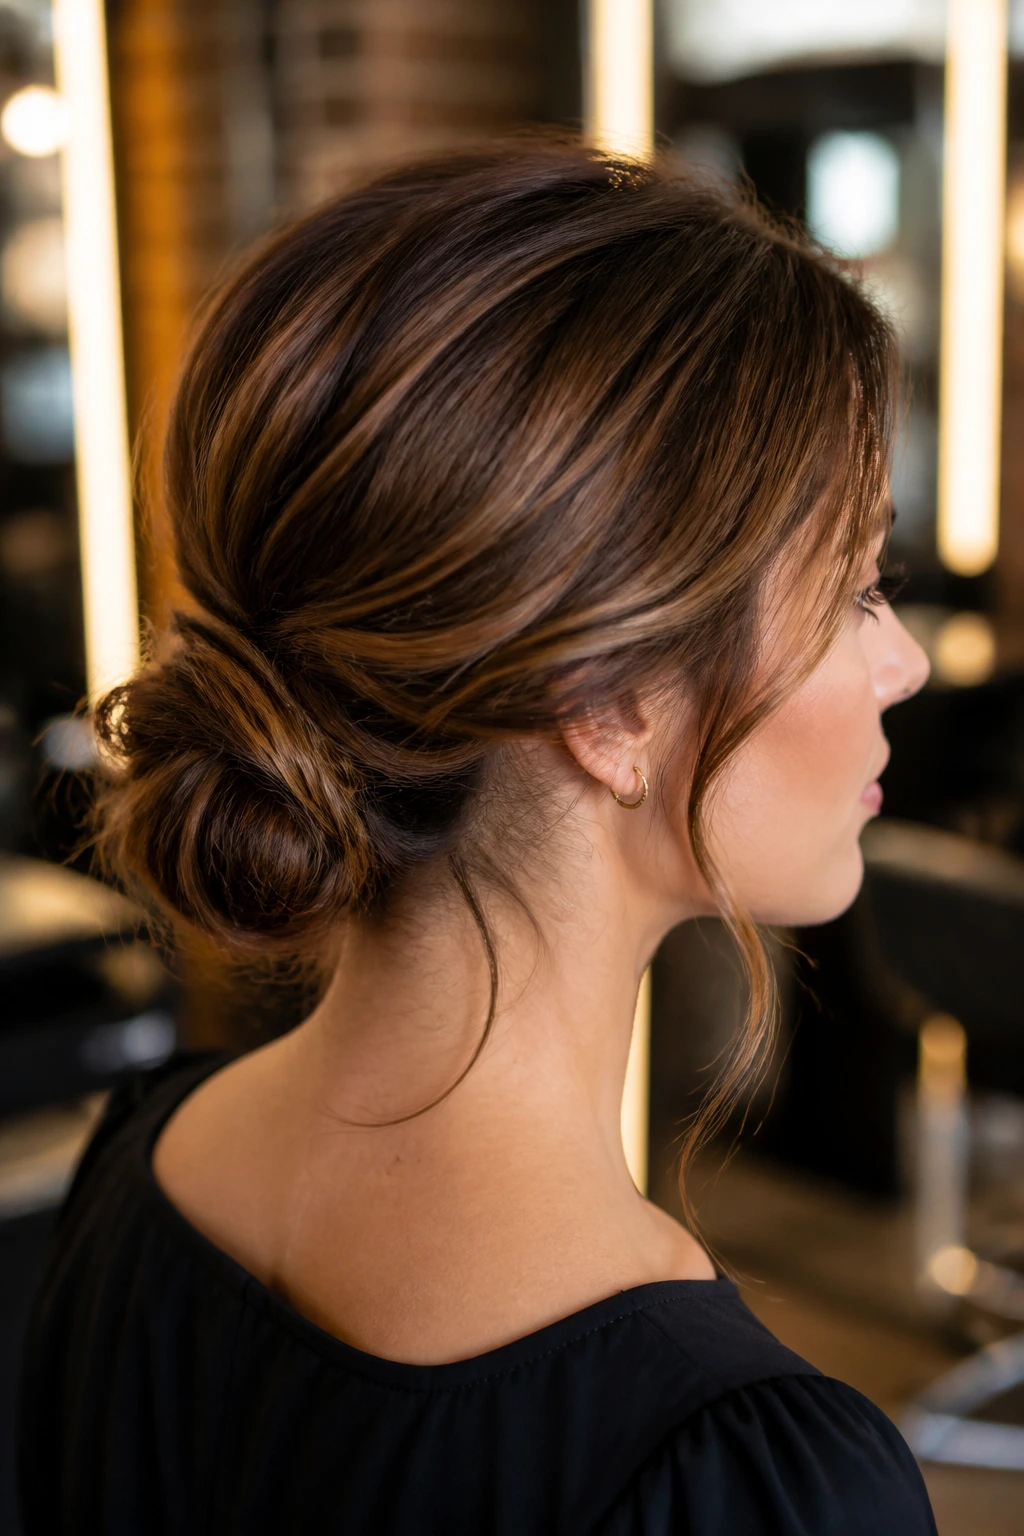
The low twisted chignon is the kind of style that looks more deliberate than it really is. You gather the hair at the nape, split it into two sections, twist each one, then wrap them into a compact coil that sits just above the collar. It’s neat, but not stiff. That matters.
What I like about this version for medium hair is the size. The bun stays small enough to hold, which means you do not need to build a giant structure and then spend ten minutes pinning the sides down. A couple of bobby pins crossed in an X, plus one hidden under the fold, usually does the job.
This is a strong pick for layered hair too. Shorter pieces can be tucked toward the center instead of left to poke out around the edges. If you want a softer finish, tug the twist apart by a few millimeters after pinning. Not much. Just enough to blur the lines.
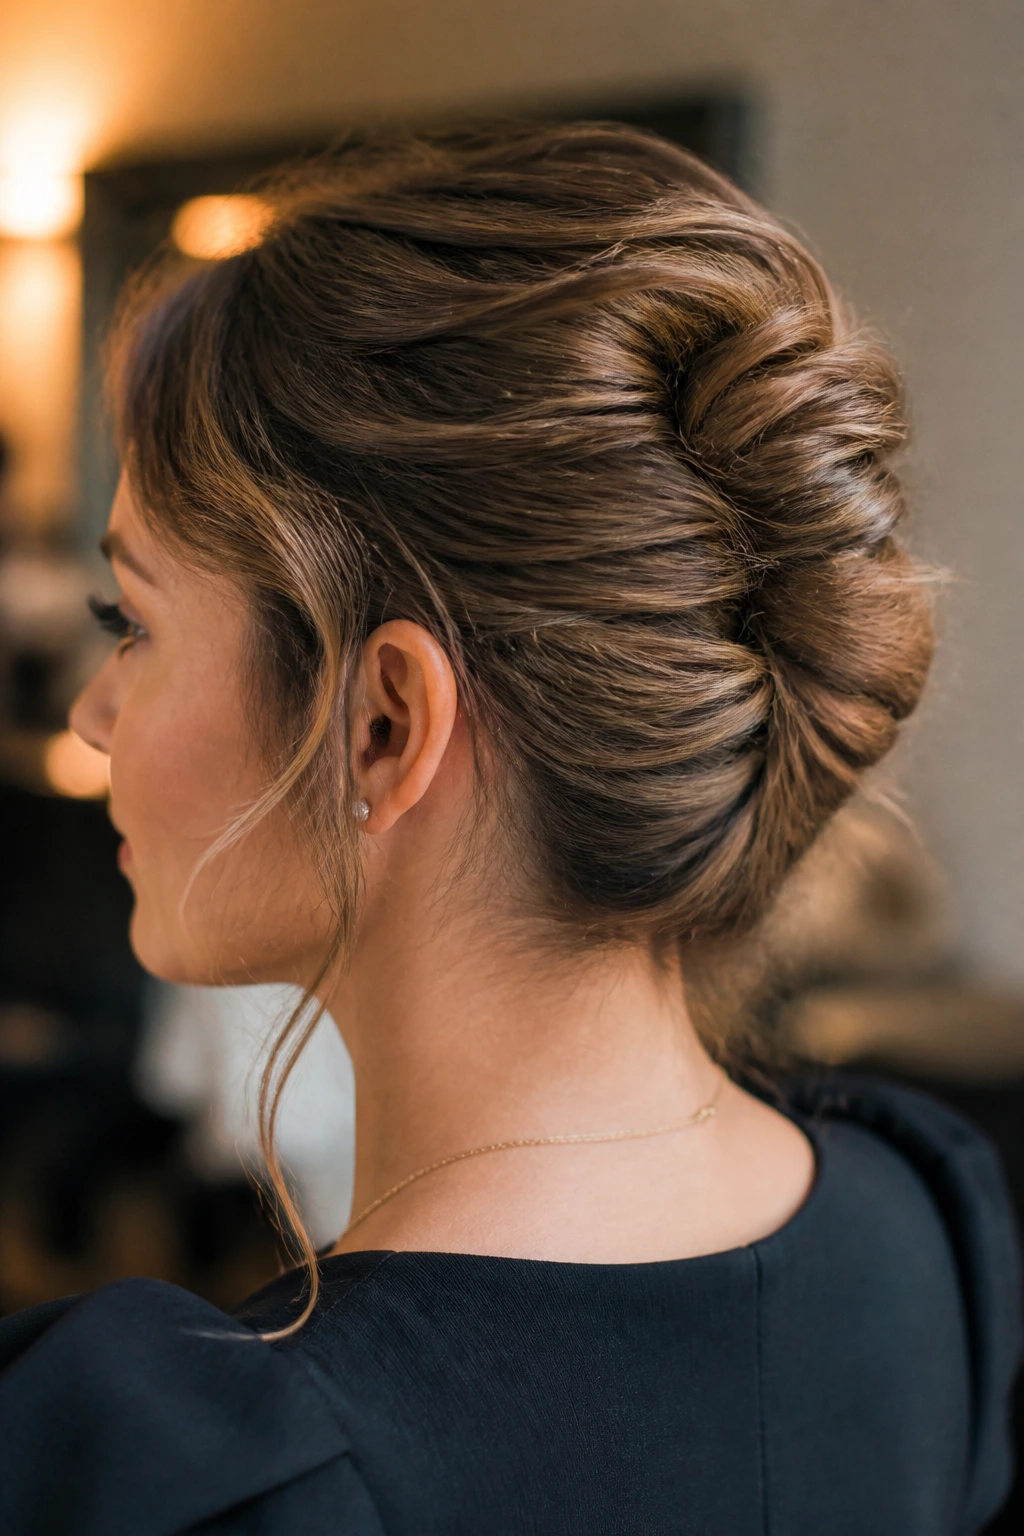
2. Messy French Twist
Why does a French twist work so well on medium hair? Because the style does not need a lot of length; it needs a clean fold. Start by gathering the hair low at the back, twist it upward against the scalp, and tuck the ends into the roll that forms in the center. Then pin the seam from bottom to top so it doesn’t split open halfway through the day.
Where the fold sits
With medium hair, the fold should land closer to the middle of the head than the crown. Too high, and the twist becomes awkward and narrow. Too low, and it slides into a knot. The sweet spot is that narrow vertical line just behind the ear ridge.
This one looks especially good when the surface has a little grit. Day-two hair, or hair misted with texturizing spray, holds the twist more cleanly than silky fresh-washed strands. If you want the “messy” part to feel intentional rather than random, pull one small piece at the temple and one near the ear. That’s usually enough.
3. Rope-Braid Nape Bun
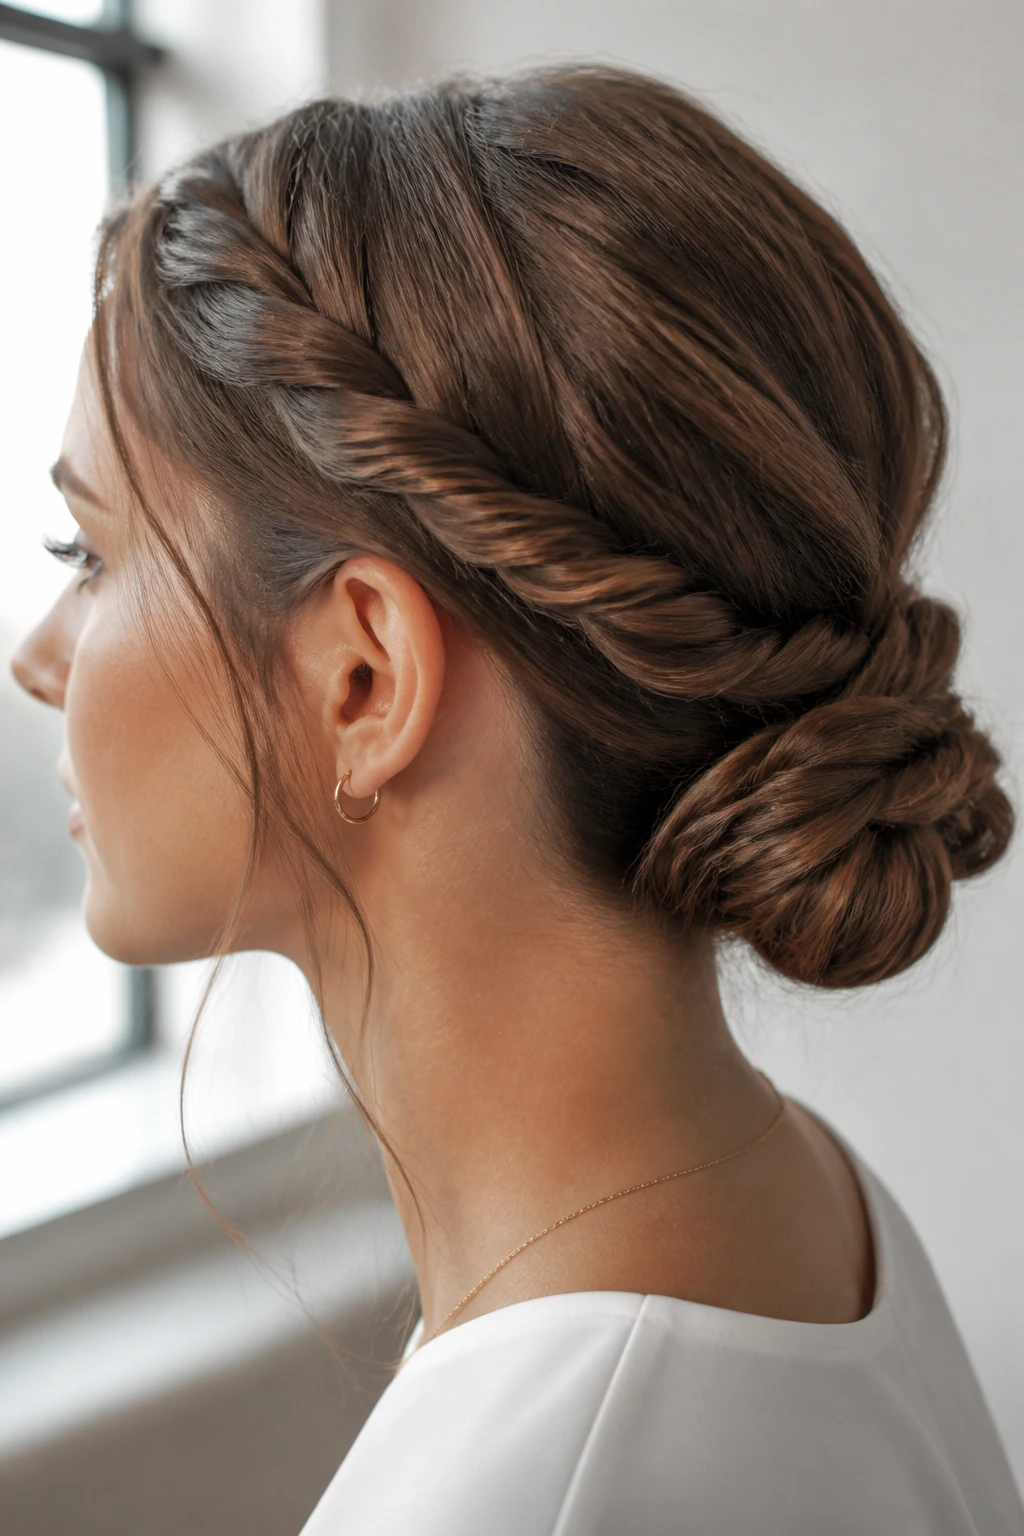
A rope-braid bun has a practical edge that I love. You split the hair into two sections, twist each section in the same direction, then wrap them around each other in the opposite direction so they coil into a rope. Once that rope reaches the nape, you wind it into a bun and pin the end underneath.
It’s especially good if your hair slips. Rope twists grip better than a flat twist because the strands lock into themselves a little more tightly, so the style holds up better on smooth, fine hair. If your ends are blunt, even better. They disappear more easily into the base.
For medium hair, the trick is not to overbuild the bun. Keep the rope narrow and close to the head. The second you make it too loose, it starts looking stringy instead of secure.
4. Half-Up Knotted Bun
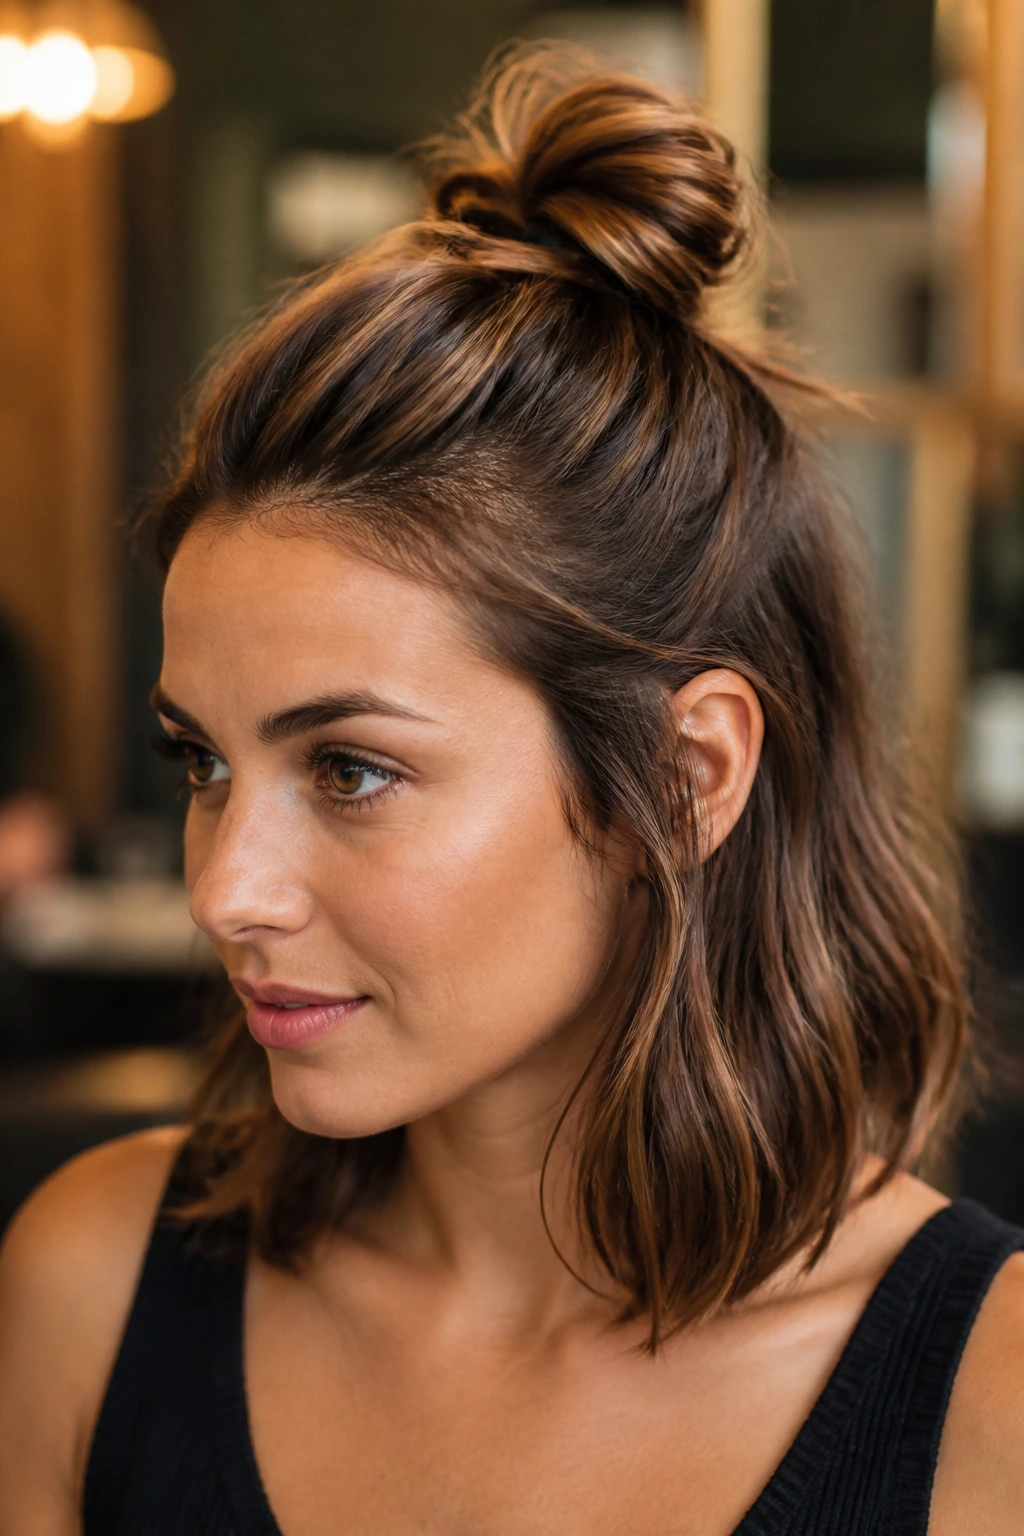
The half-up knotted bun is the style you reach for when you want the face lifted but the rest of the hair left alone. Pull the top half from temple to temple, tie it into a loose knot at the crown, and pin the knot flat so it doesn’t wobble. Leave the rest down and let the contrast do the work.
This one is good for medium hair because it uses the shorter top layers without demanding that all your length disappear into a full updo. If your ends are choppy or your fringe is growing out, that’s not a problem here. In fact, it helps the style feel less severe.
I like this for second-day waves, where the top can be smoothed just enough to look tidy while the lower layers keep their bend. It’s one of those styles that reads casual on purpose. Which is a useful thing to have in the back pocket.
5. Claw-Clip Banana Roll
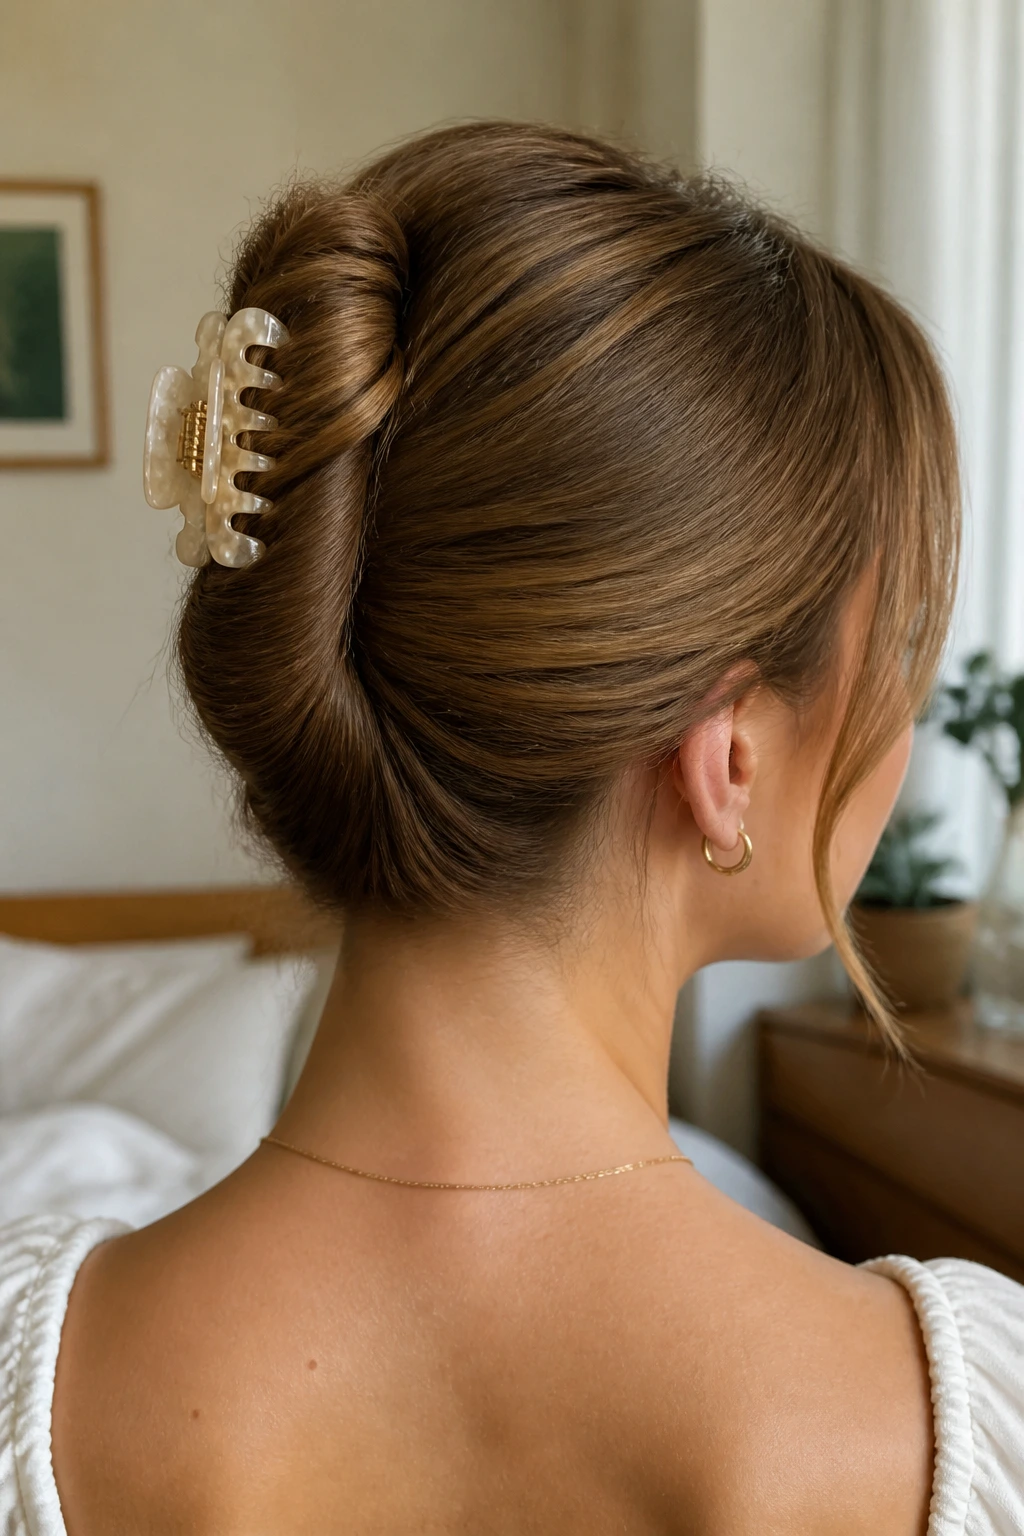
A claw-clip banana roll can be a lifesaver on medium hair, mostly because it doesn’t ask for perfect pinning. Twist the hair upward from the nape, fold the length into a vertical roll, and clip the whole thing along the back of the head so the teeth catch the twist.
Use a clip with actual grip, not the slippery kind that slides off the first time you turn your head. Medium-length hair does best with a medium-sized clip, usually one that matches the width of the gathered twist rather than a giant clip that overwhelms it. If your hair is thick, tuck the ends inward before clipping so they don’t flare out at the bottom.
A banana roll like this looks cleaner if you smooth the outer layer first. Don’t overdo the shine. You want the surface neat, not shellacked.
6. Braided Crown Tuck
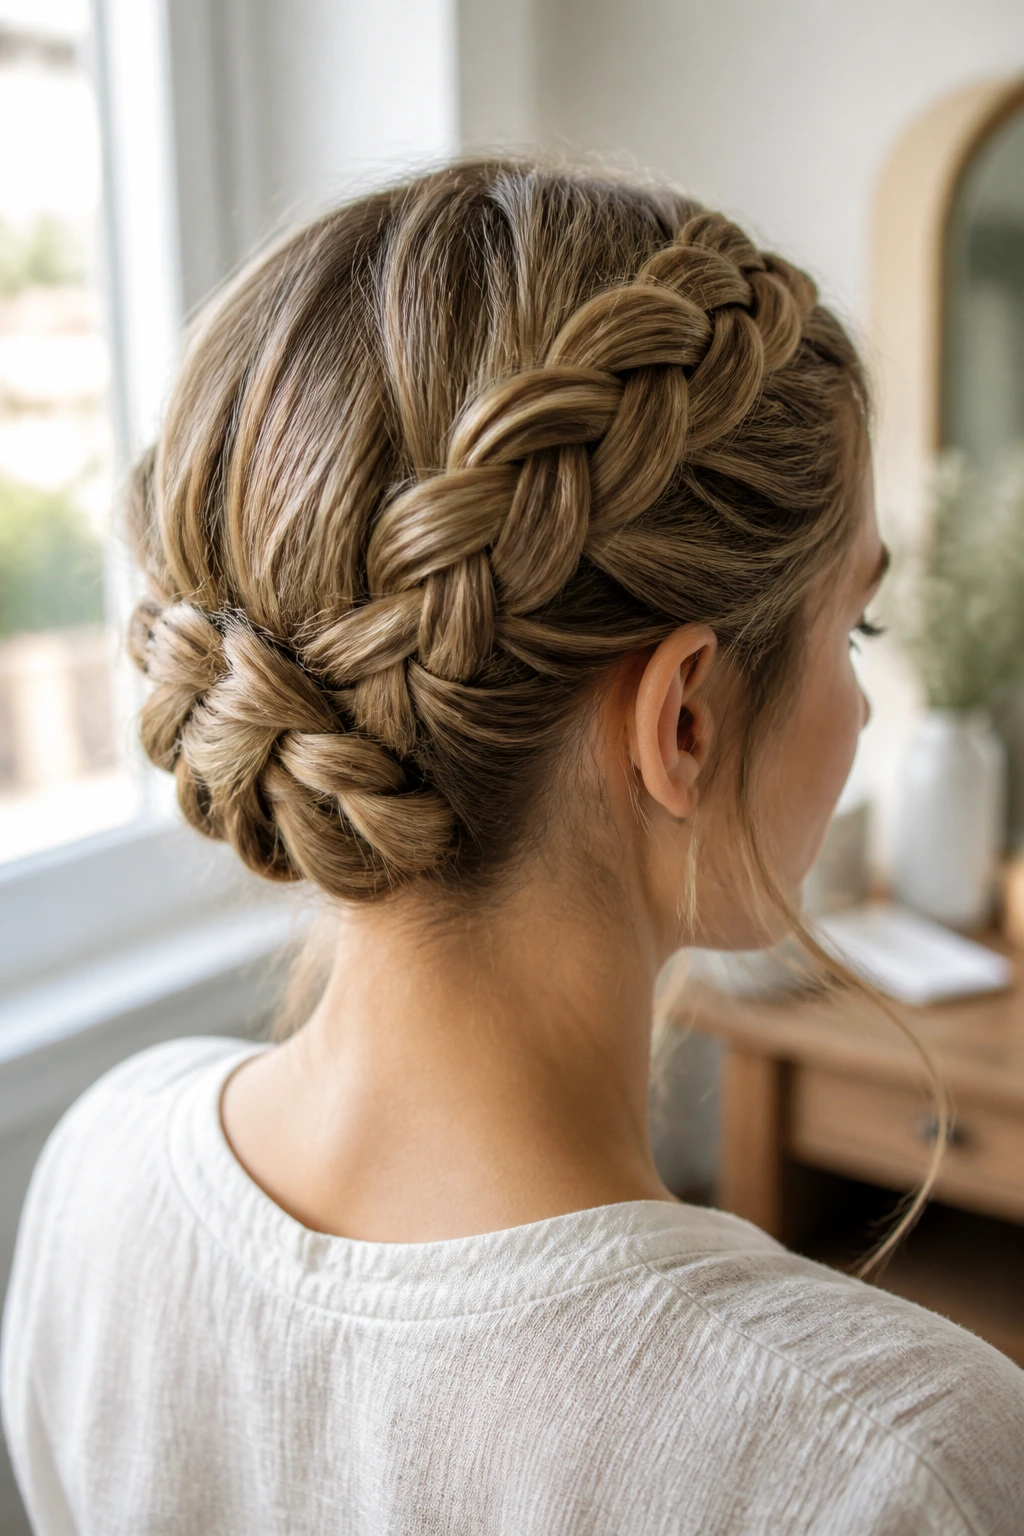
Braided crown tucks are a good answer when you want the front of the hair to stay out of the way without going fully severe. Braid each side from the temple back, bring the braids together at the nape, and tuck the ends underneath the braid line so the finish looks continuous.
The reason this style behaves so well on medium hair is simple: the braids act like rails. They hold the shorter layers in place and keep the shape from swelling at the sides. If your hair has grown-out face framing pieces, this is one of the best ways to make them look intentional instead of unfinished.
What to pin first
Pin the braid ends before you fuss with the crown. If you pin the sides first, the back shifts around and you end up chasing the shape. Two pins at the nape, crossed slightly, usually give the tuck enough backbone.
7. Sleek Center-Part Low Bun
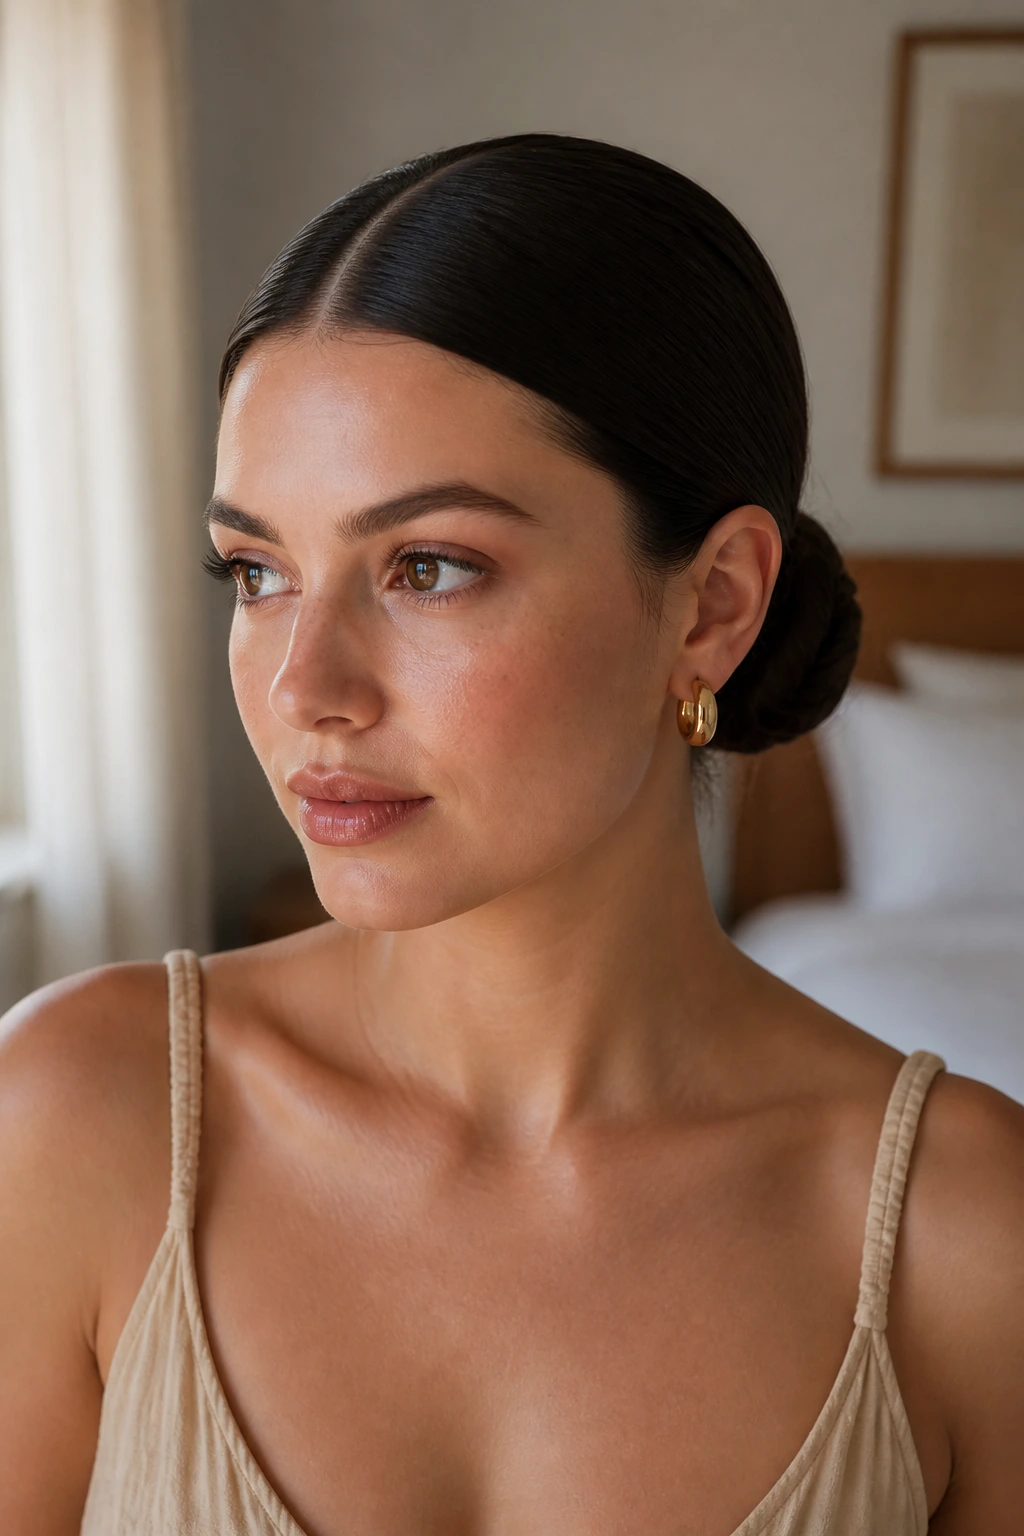
A sleek center-part low bun changes the mood of medium hair fast. The middle part gives the style a sharp line, and the bun itself stays compact, which is the whole point. Brush the hair smooth, apply a small amount of pomade or styling cream at the front, and gather everything low before twisting it into a neat knot.
This is the version I reach for when I want earrings to do some work. The bun stays quiet, the part stays crisp, and the face has room. Fine hair looks especially good like this because the style doesn’t ask for bulk it doesn’t have. Thick hair can wear it too, but the bun should stay flat and centered rather than puffed out.
If your hair tends to frizz at the nape, spray the brush lightly before you smooth that area. Dry brushing just throws the flyaways around.
8. Bubble Ponytail Coil
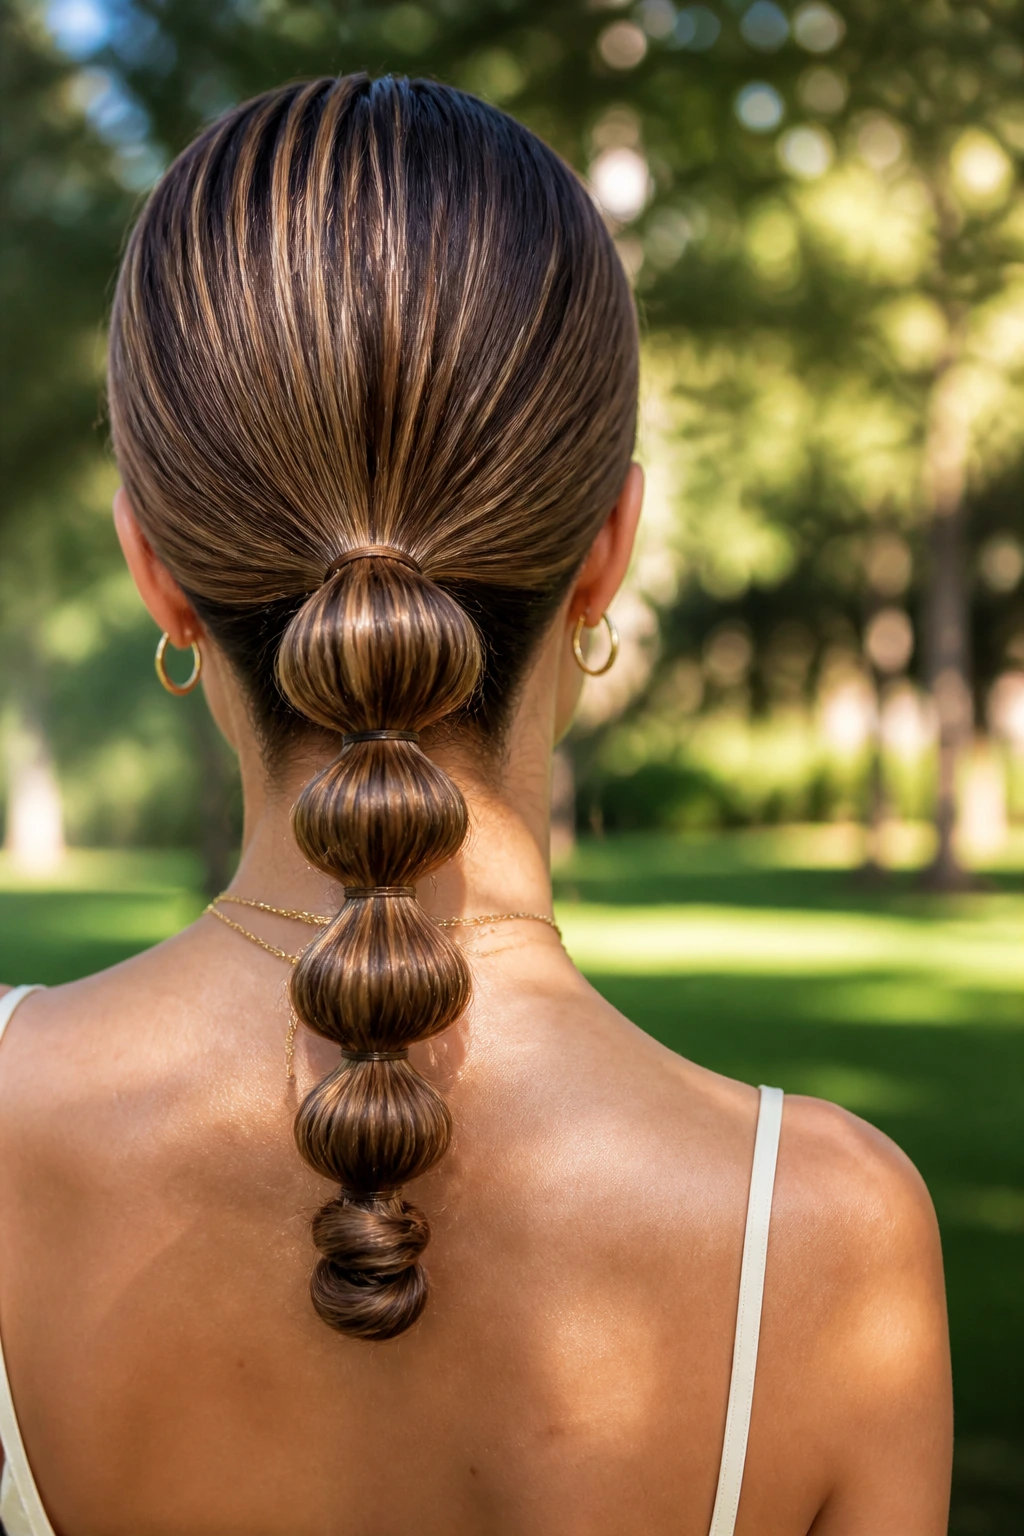
A bubble ponytail coil gives medium hair a little structure without making it feel trapped. Start with a low ponytail, add small elastics every inch or so, then gently tug each section outward to create the bubble effect. Once the tail is segmented, wrap it upward into a coil and pin it near the base, or let the bubbles stay visible if you want a looser finish.
This style works because the elastics create multiple anchor points. Medium hair needs that. One elastic alone can feel weak, especially if the layers are slippery. Three or four smaller ties spread the tension out and stop the tail from sagging.
The look lands somewhere between playful and tidy, which is a useful place to be. If you want it cleaner, wrap a thin strand of hair around the top elastic. If you want it more casual, leave the bubbles slightly uneven.
9. Gibson Tuck
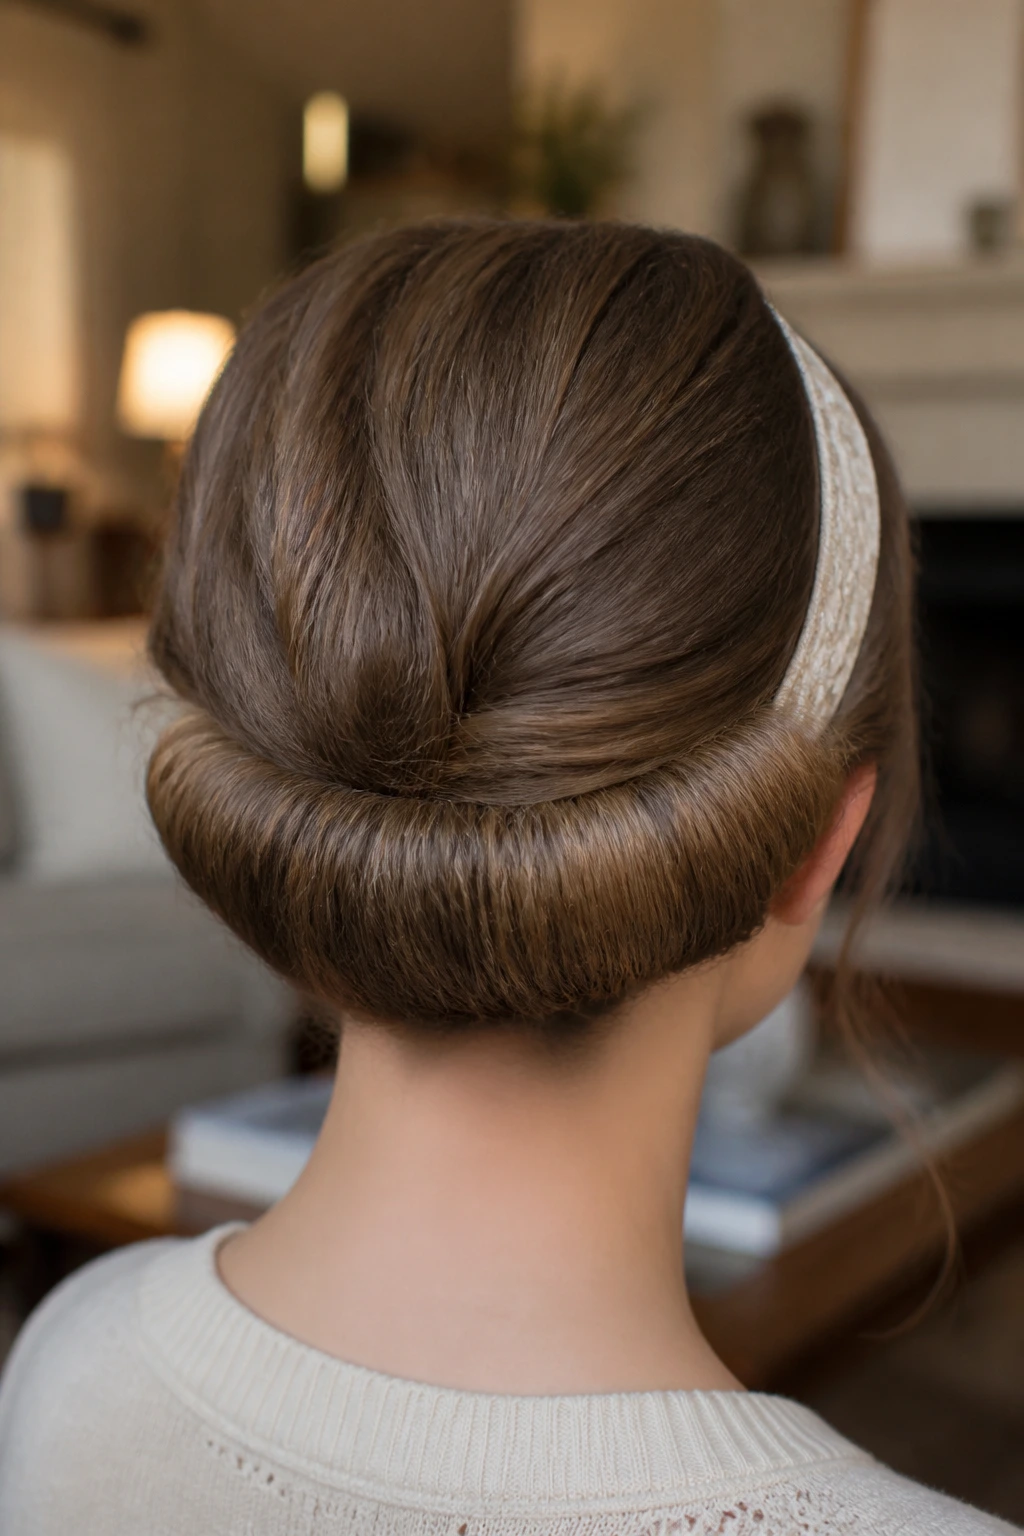
The Gibson tuck has that old-fashioned neatness that never really goes out of style. You roll the hair inward from the nape, tucking the ends into the pocket that forms along the back of the head, then pin the roll flat so it sits like a smooth curve. A soft headband can help guide the tuck, though it isn’t required.
Medium-length hair is made for this shape. It’s long enough to roll, short enough not to create a giant lump, and usually the exact length that settles into the tuck without a fight. If your ends stick out, fold them under in sections instead of stuffing them all in at once.
This is one of the few updos that looks almost better if it isn’t perfect. A tiny bit of volume above the tuck keeps it from looking dated. Too sleek, and it can go a little stiff.
10. Double Mini Buns
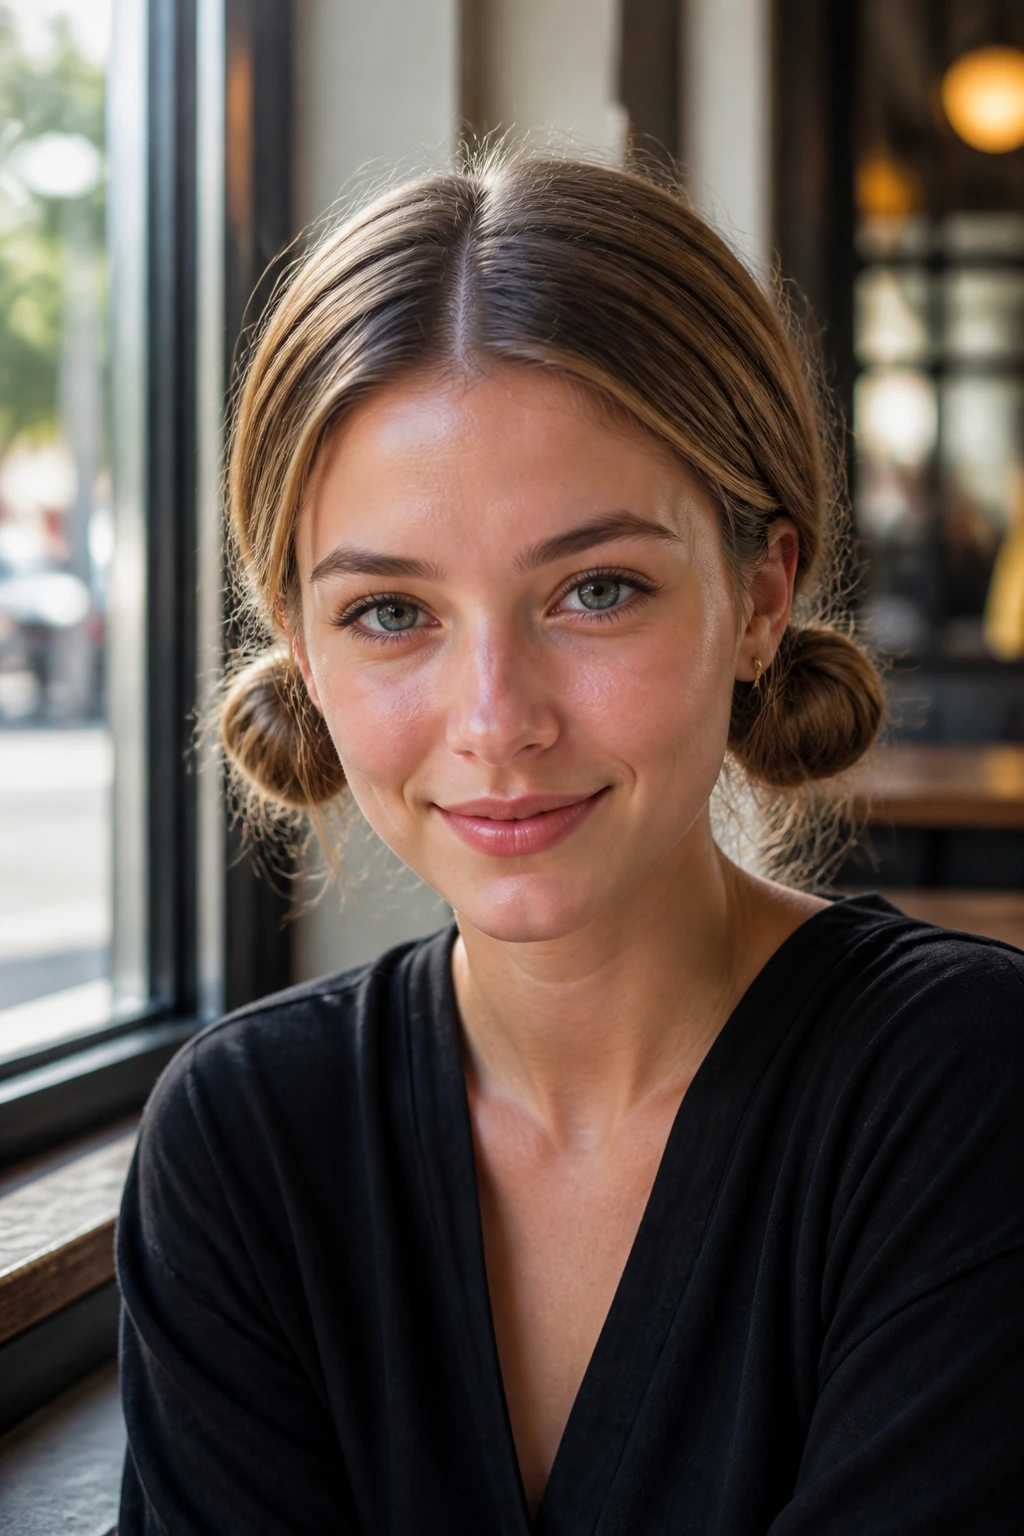
Double mini buns can look playful or polished depending on where you place them. Set them low and close together, and they read chic. Push them higher and they lean more playful. On medium hair, keep both buns small and compact so they don’t start looking like two heavy knots trying to escape the scalp.
The cleanest version starts with a center part. Divide the hair into two equal halves, twist each side into a small bun behind the ears or at the nape, and pin them so the coils sit tight to the head. A little bit of shine cream at the front keeps the part neat.
This style is better than people give it credit for. It works with straight hair, waves, and even a bit of texture from the previous day. The key is size. Tiny buns look intentional. Oversized ones can read lopsided fast.
11. Braided Top Knot with Face-Framing Pieces
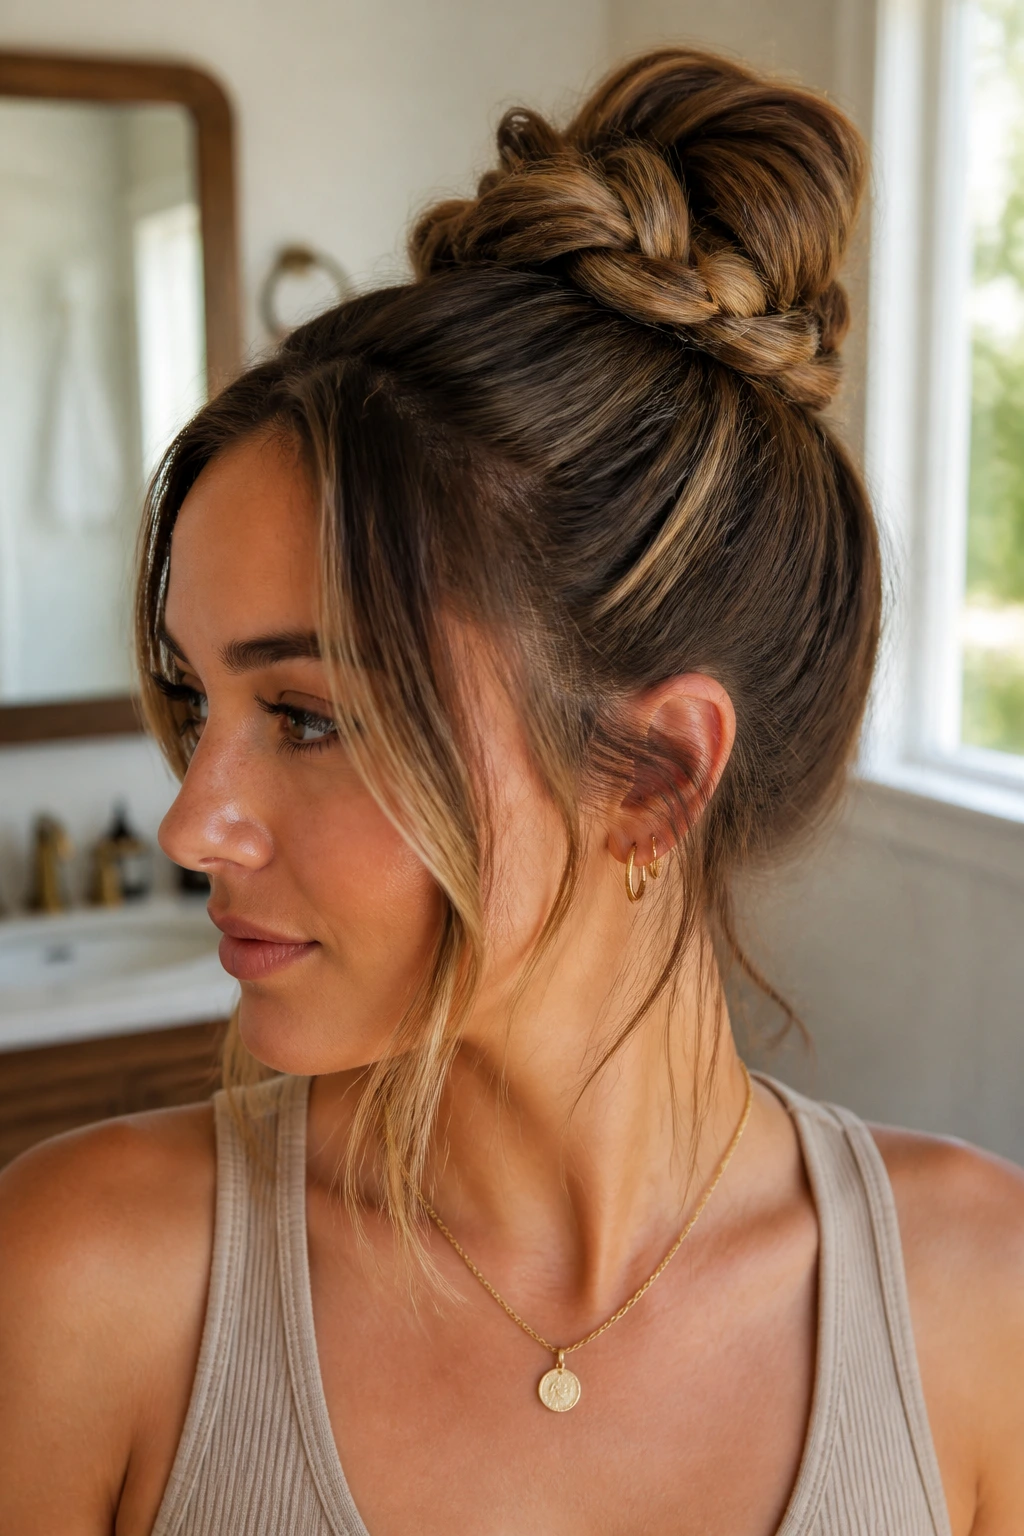
A braided top knot gives medium hair more grip than a plain twist because the braid controls the length before it goes up. Pull the hair into a high ponytail, braid the tail, then wrap the braid around itself into a knot at the crown. Leave two slim front pieces out if you want the shape to feel softer around the face.
How to keep the front soft
The front pieces should be narrow, not chunky. If they’re too wide, they start fighting the bun instead of balancing it. A quick bend with a flat iron or a few seconds around a curling wand gives them just enough curve to fall naturally.
This style is a good fix when medium hair feels too short for a clean top knot. The braid adds length where you need it and keeps the tail from puffing out in odd places. It’s one of the few top-heavy styles that doesn’t need a lot of teasing to hold.
12. Side-Swept Pin Curl Updo
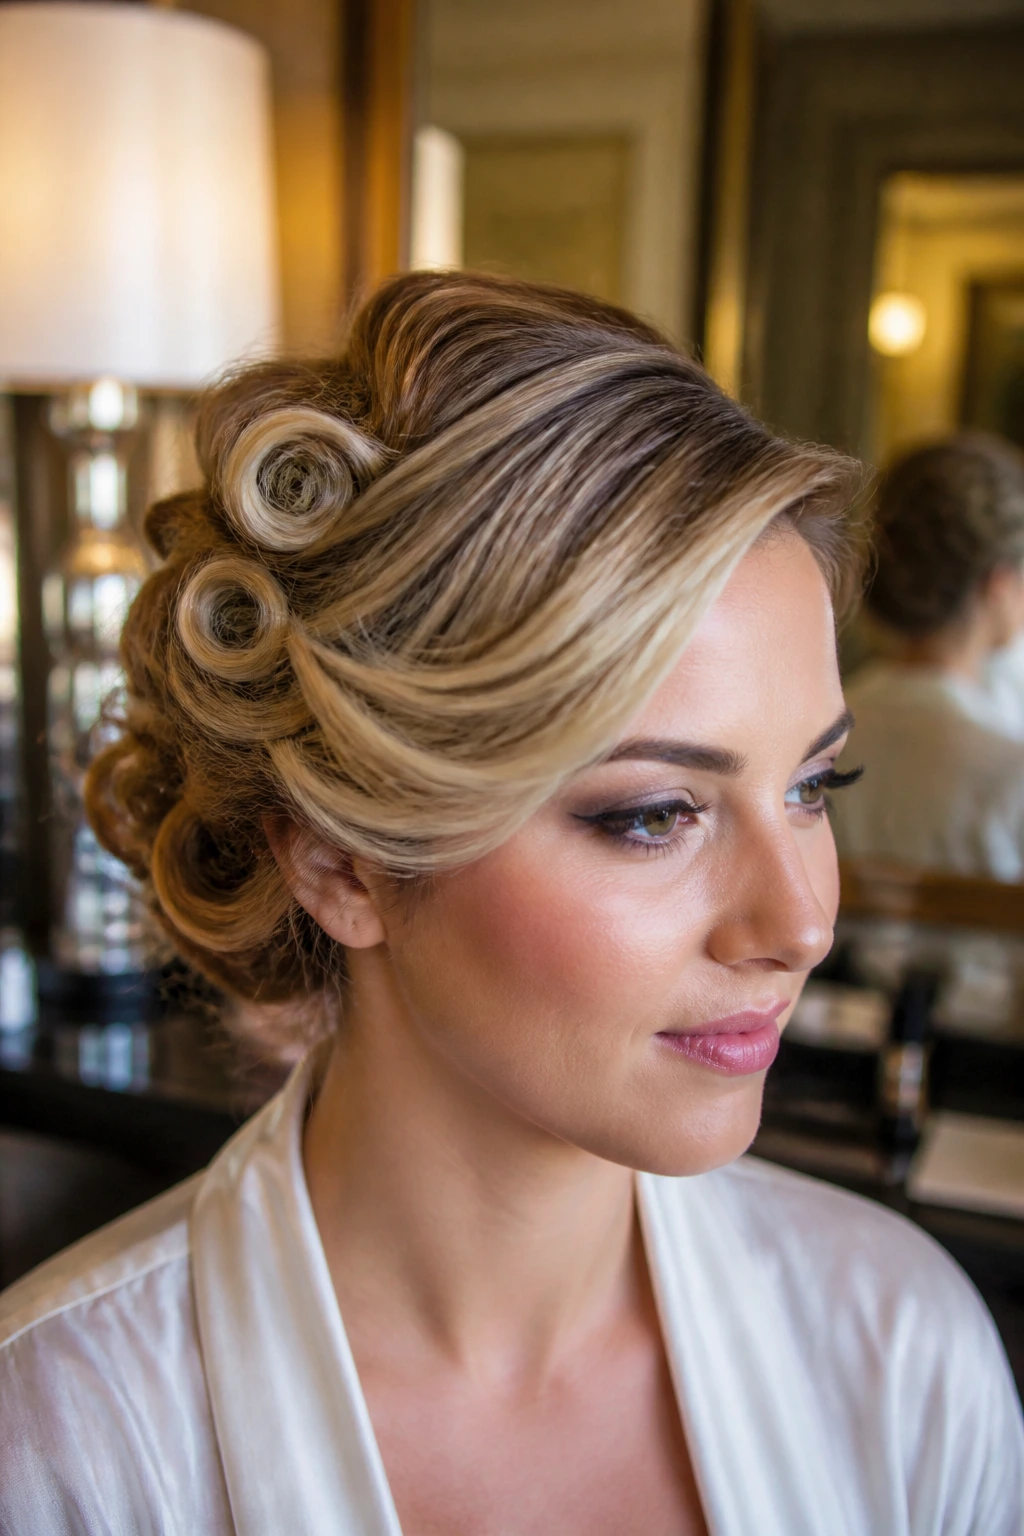
A side-swept pin curl updo has a little vintage drama to it, and medium hair handles that shape well. Sweep most of the hair to one side, roll a few front sections into small loops or pin curls, and secure each loop flat against the head before gathering the rest into a low tuck.
It works best when the hair has a little bend already. You do not want to fight the curl pattern. If anything, shape it. A bit of shine spray on the finished rolls keeps the style from looking fuzzy, which matters because the whole point is a smooth, sculpted side line.
This one is a quiet standout for formal events. It looks more intricate than it is, which is always a nice trick to have. Medium hair gives you enough material for a proper sweep without making the finish bulky.
13. Looped Ponytail Bun
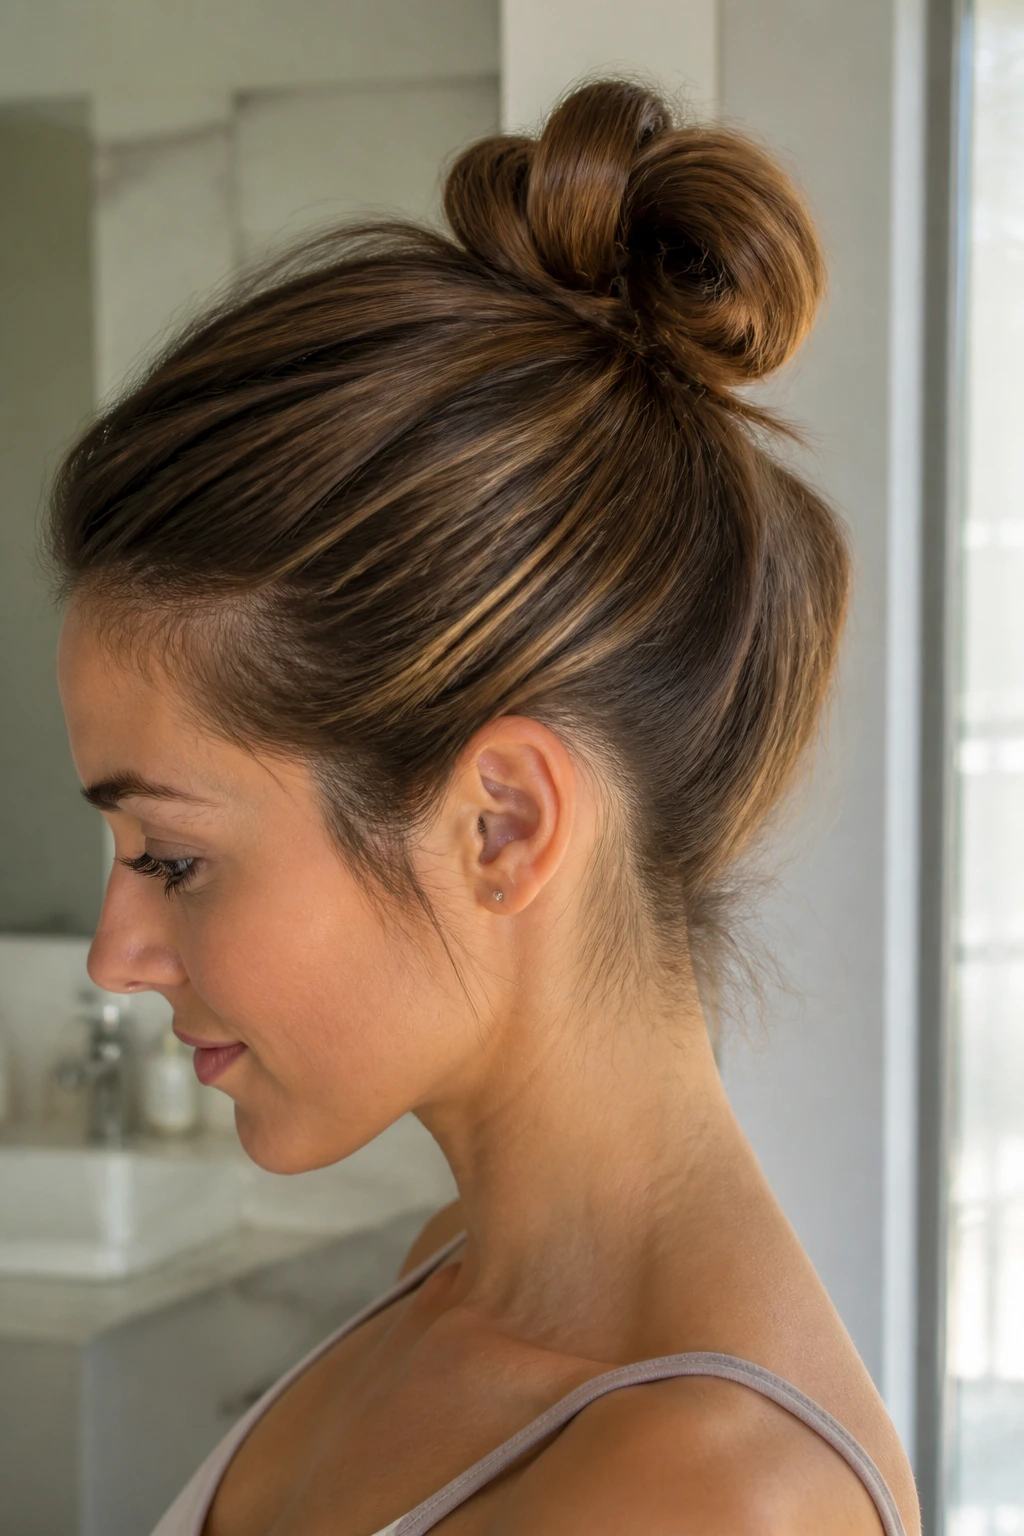
The looped ponytail bun is one of those styles that looks simple because it is simple. Tie the hair into a ponytail, pull the tail only halfway through the final elastic so you create a loop, then wrap the loose ends around the base and pin them underneath. That’s it.
For medium hair, the loop is the interesting part. It creates height without requiring extra length, and it keeps the bun from flattening into a stubby knot. If your layers are short, this is kinder to them than a tight wrap because the ends can hide inside the loop rather than fighting the outside edge.
A few crossed pins at the base make a big difference here. The bun may feel secure when you finish, then loosen once the hair warms up. Pin it before you leave the bathroom.
14. Halo Twist into a Low Bun
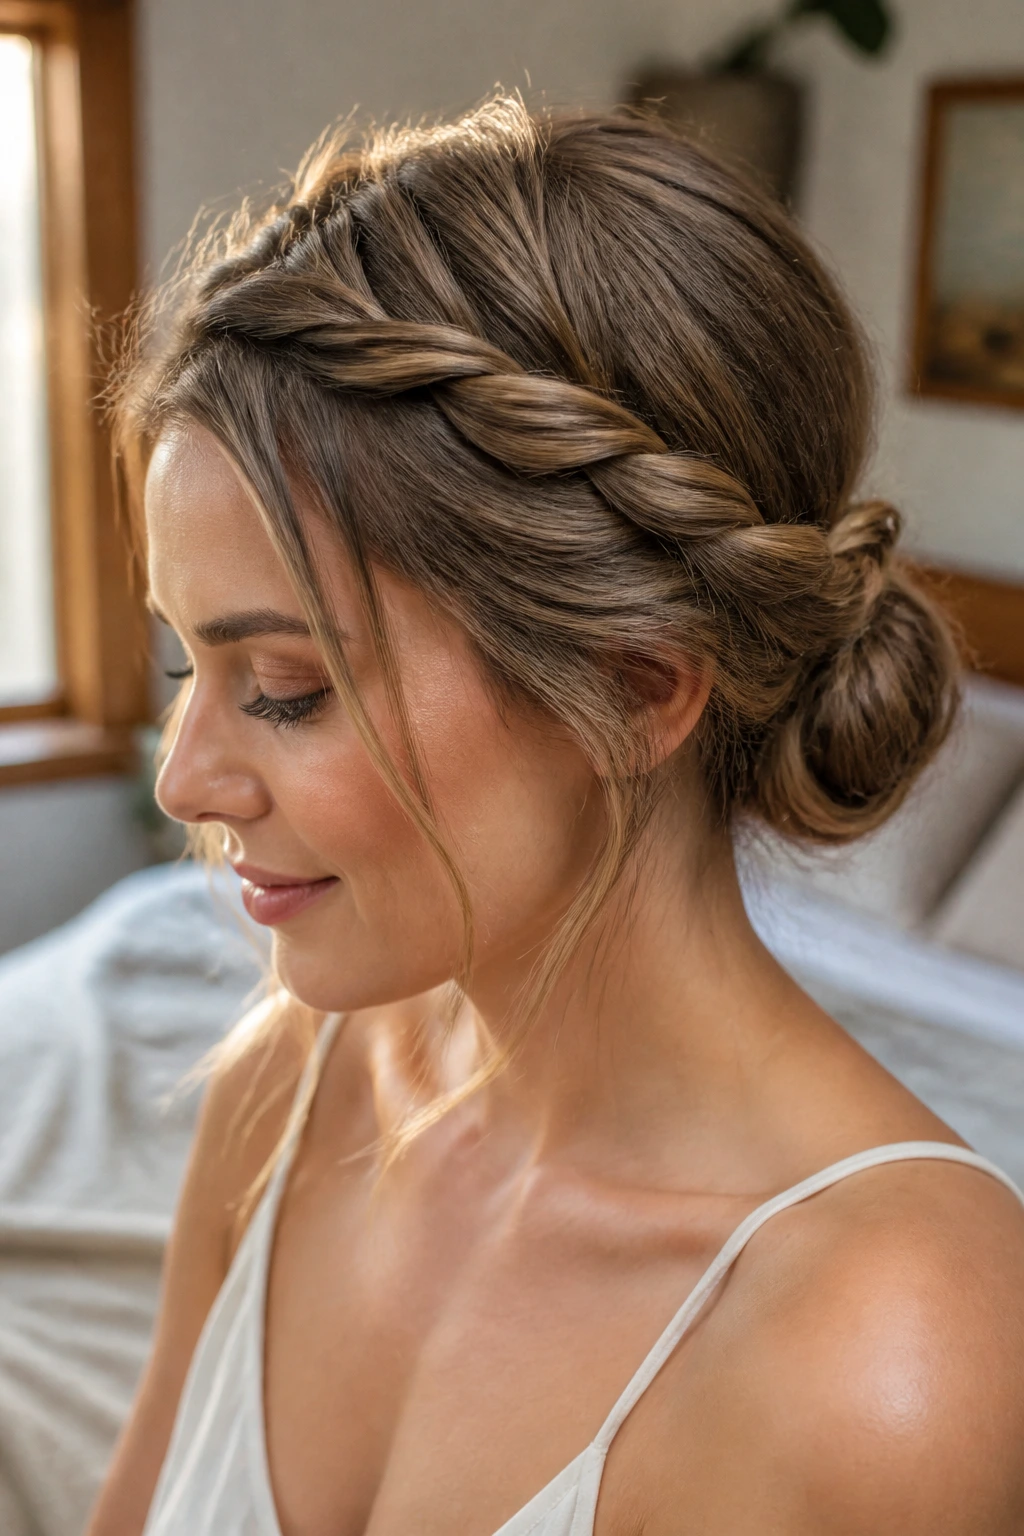
The halo twist is softer than a braid and usually faster to build. Take a section from each temple, twist them backward along the hairline, and bring both sides together at the nape where they can be tucked into a low bun. The front stays open, but the style still has a frame.
I like this on medium hair because it gives you shape without needing a long sweep of hair down the back. The twist lines can be slightly uneven and still look good. In fact, perfect symmetry can make it feel too formal. A few loose pieces near the ears keep the finish alive.
If your hair is wavy, leave some of that texture alone. Over-smoothing the twists tends to make them slide. A little grip is the point.
15. Sock Bun for Mid-Length Hair
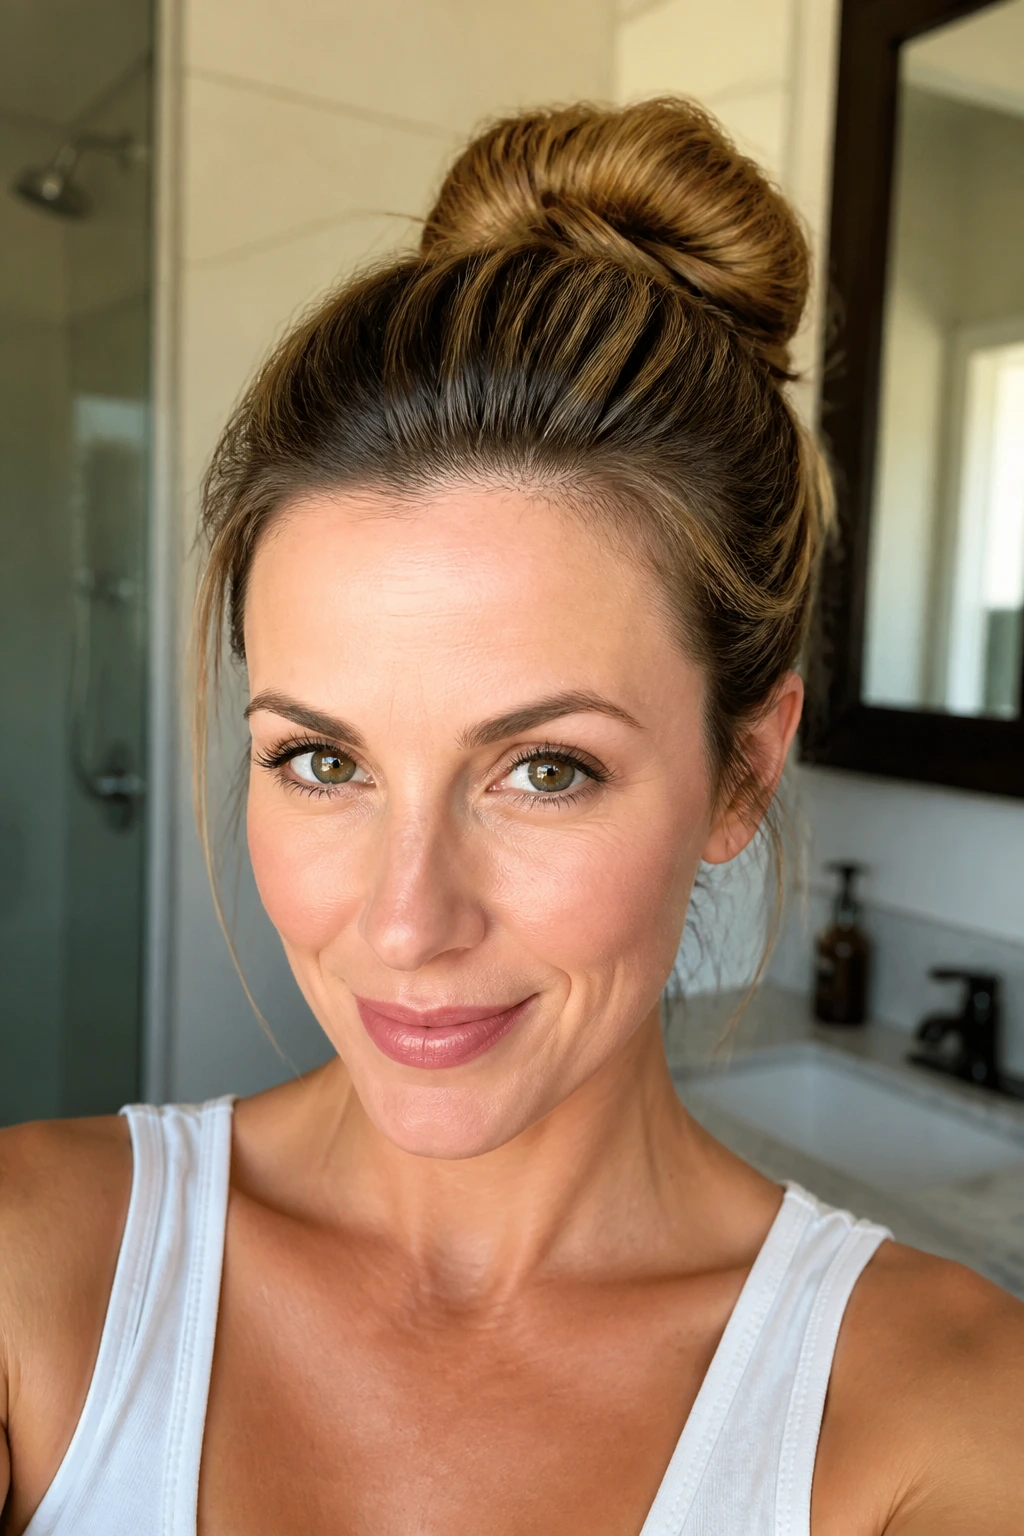
A sock bun or donut bun can work on medium hair, but the size of the form matters. Use a smaller donut than you would on long hair, otherwise the hair may not reach evenly and you’ll end up with thin spots. Wrap the ponytail over the form, smooth the ends under, and pin the edges until the ring disappears.
The trick is to tease the ponytail lightly before wrapping if your hair is fine or layered. Not a huge backcomb. Just enough to give the surface something to cling to. Medium hair often hides the donut well once the outer layer is spread evenly.
This style has a very clean shape, which is useful when you want the bun itself to look polished instead of airy. It’s one of the more formal options in the list, and it usually stays neat for hours once pinned correctly.
16. Twisted Side Bun
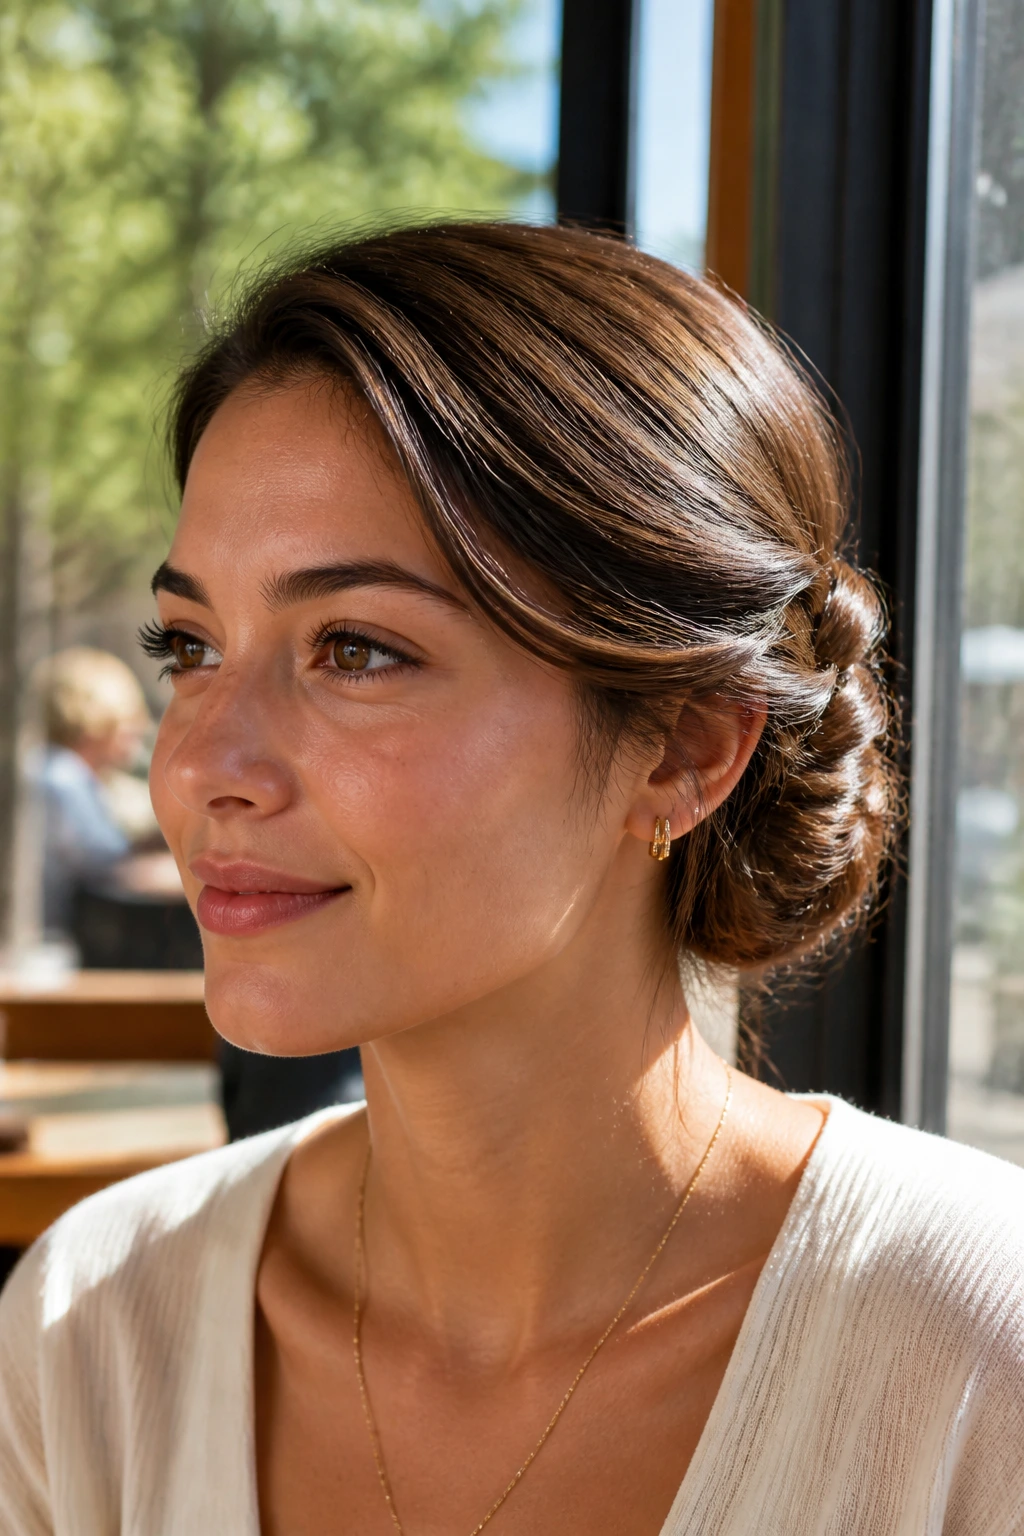
A twisted side bun has a nice bit of asymmetry, which makes it feel less expected than a straight nape bun. Gather the hair over one shoulder line or just behind one ear, twist it upward, and pin the coil into place so it sits slightly off-center. The shape should hug the head rather than float away from it.
This is a good choice if you’re wearing statement earrings or a neckline that needs space on one side. Medium hair gives enough length for the twist without making the side bun heavy. If your hair is thick, split the twist into two smaller sections before coiling them together. That keeps the bun flatter and easier to pin.
A side bun also forgives uneven layers. The eye reads the angle first, not the tiny pieces that want to slip out. That alone makes it useful.
17. Dutch Braid Coil Bun
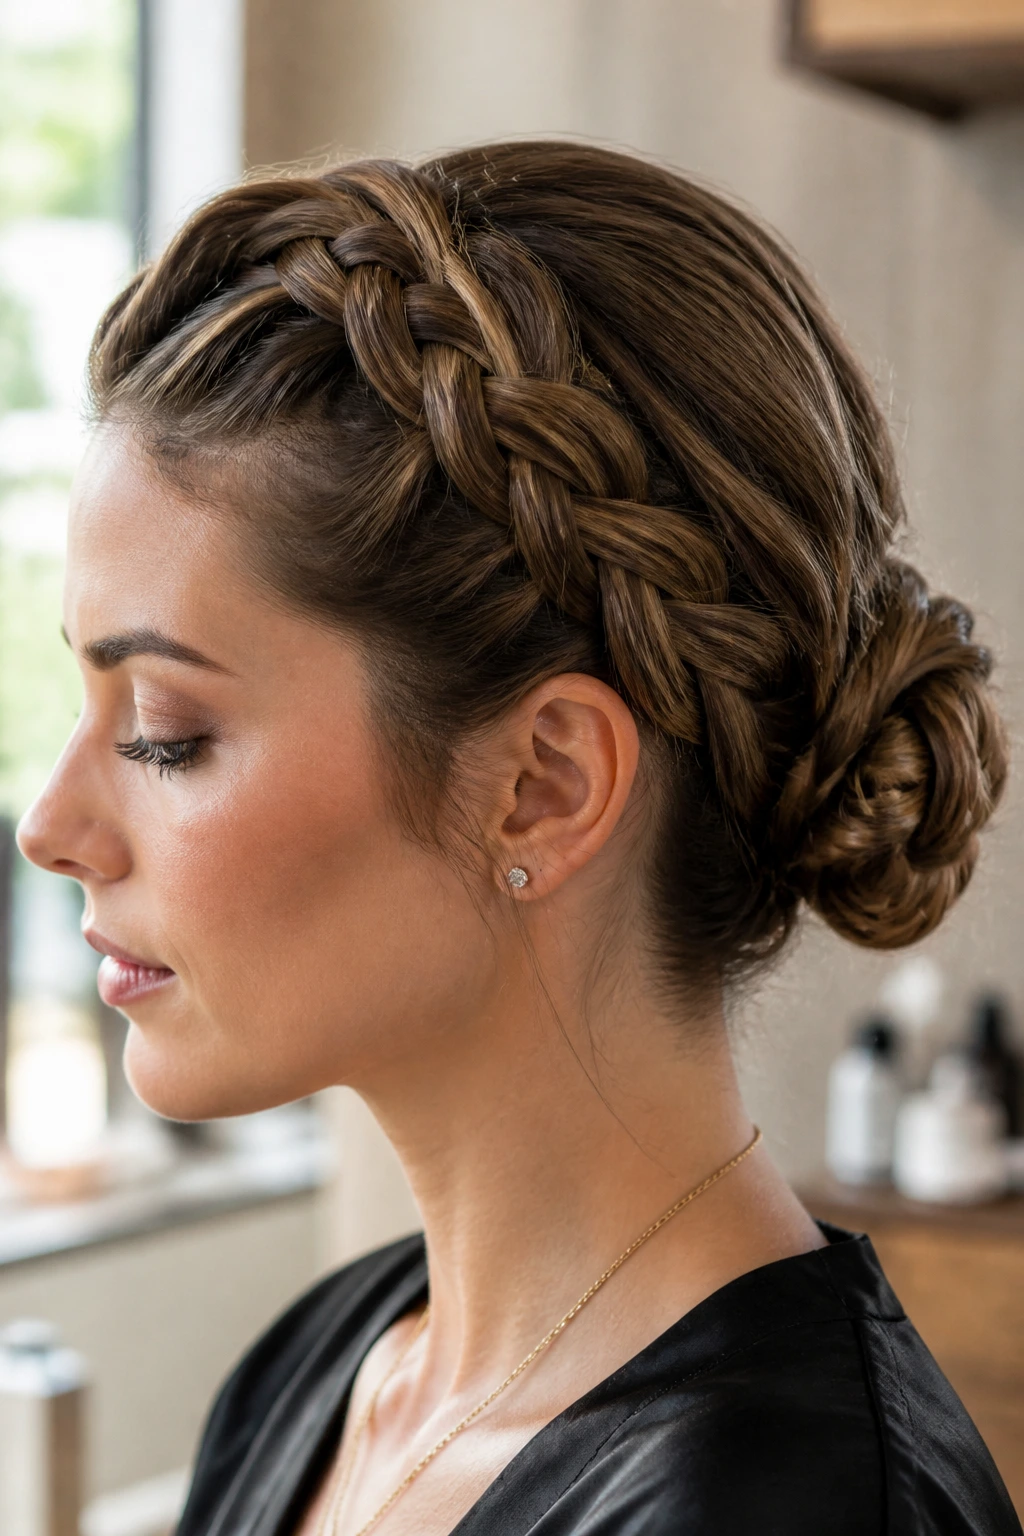
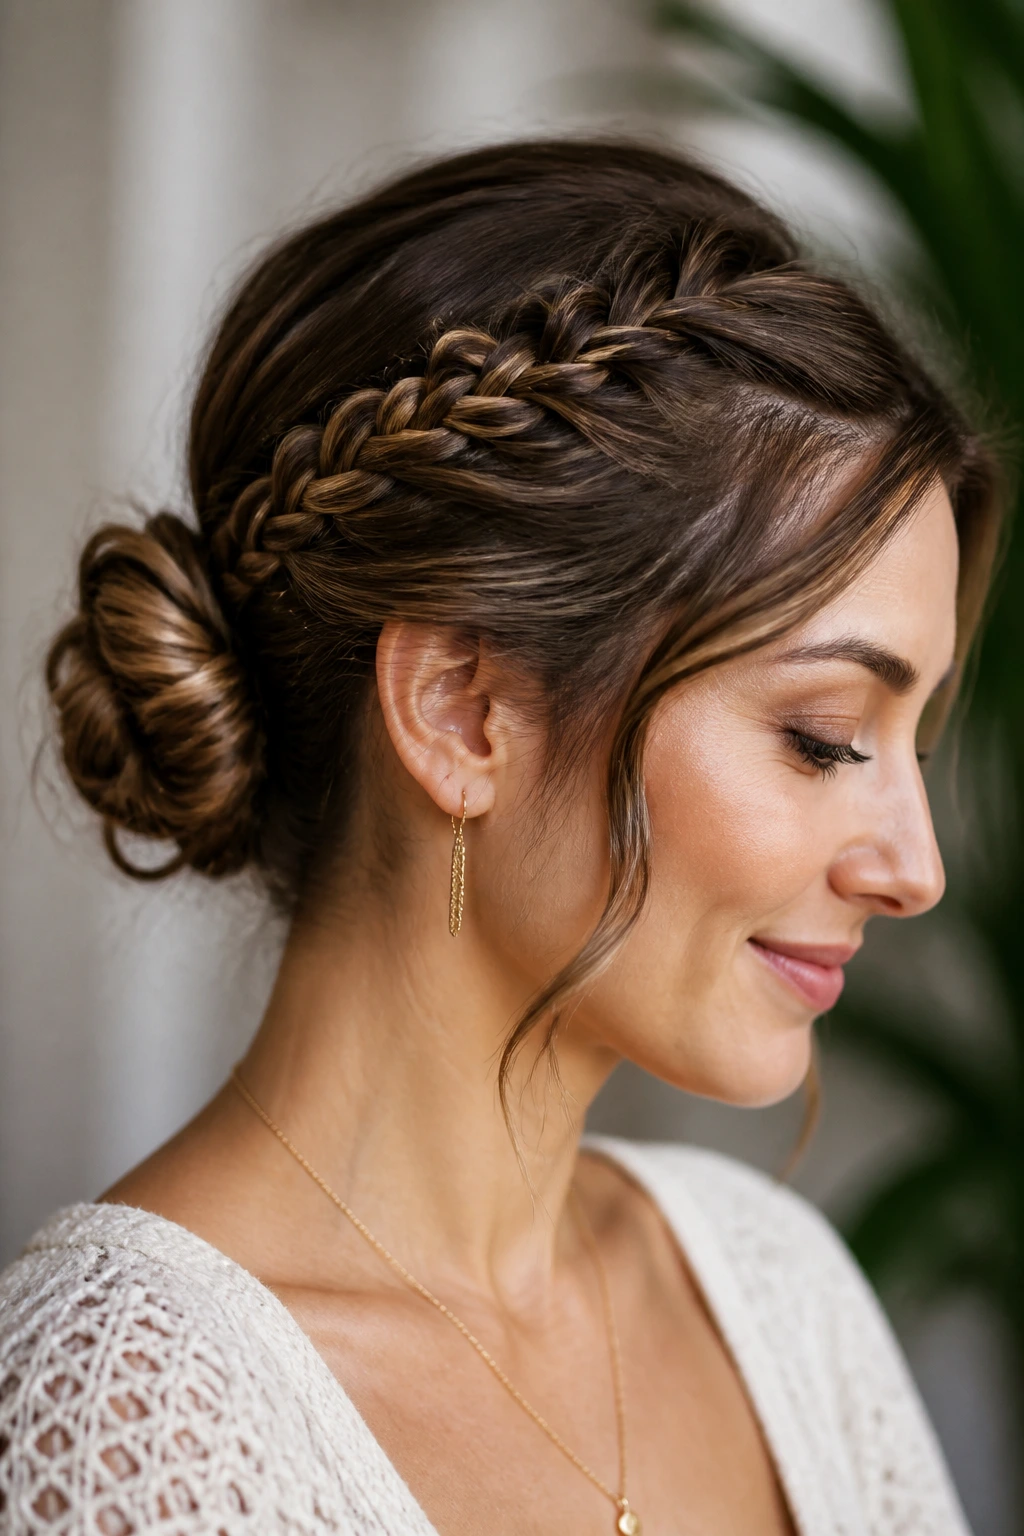
If you need hold more than anything, the Dutch braid coil bun is the workhorse of the group. Start a Dutch braid along the hairline or from one side, braid down toward the nape, then continue the tail and wrap it into a bun at the base. The braid sits raised against the head, which gives the whole style a bit of structure.
This one is especially good for active days, humid weather, or hair that refuses to stay where you place it. Medium-length layers get trapped inside the braid instead of escaping from the surface. That’s the whole appeal.
Best pinning pattern
Cross two pins at the base of the bun, then add one more through the braid seam if the tail feels loose. That three-point hold usually keeps the style from sagging. A small mist of hairspray after pinning helps the braid edges stay crisp.
18. Faux Bob Roll
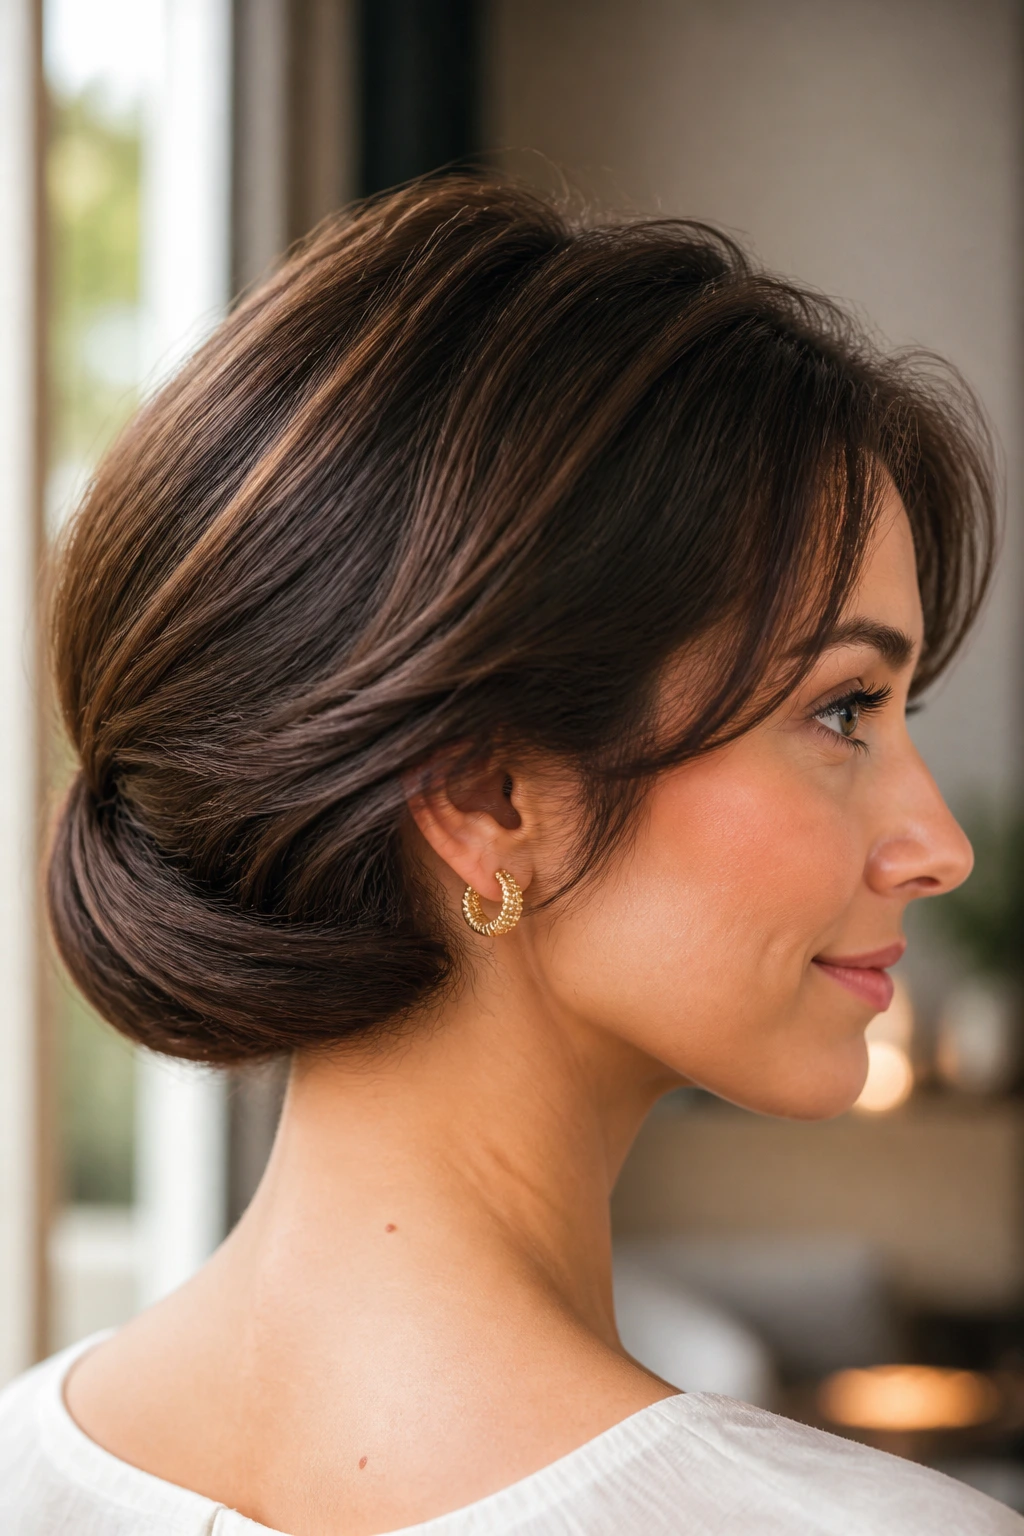
A faux bob roll is for the days when you want the hair to look shorter without actually cutting it. Tuck the ends under at the nape, pin them upward, and let the top layers fall over the hidden roll so the shape sits in a curved line around the neck. If the hair is just barely medium, this can look surprisingly convincing.
What makes it work is the illusion of length. Medium hair has enough body to create the curve but not so much tail that the tucked ends become obvious. A few well-placed pins and, if needed, a light hairnet hidden beneath the bottom layer can help the roll stay smooth.
This style is best when the neckline matters. A backless dress, a square collar, a sharp blazer — all of those sharpen the effect. It has a little theater to it. I like that.
19. Knotted Low Ponytail Bun
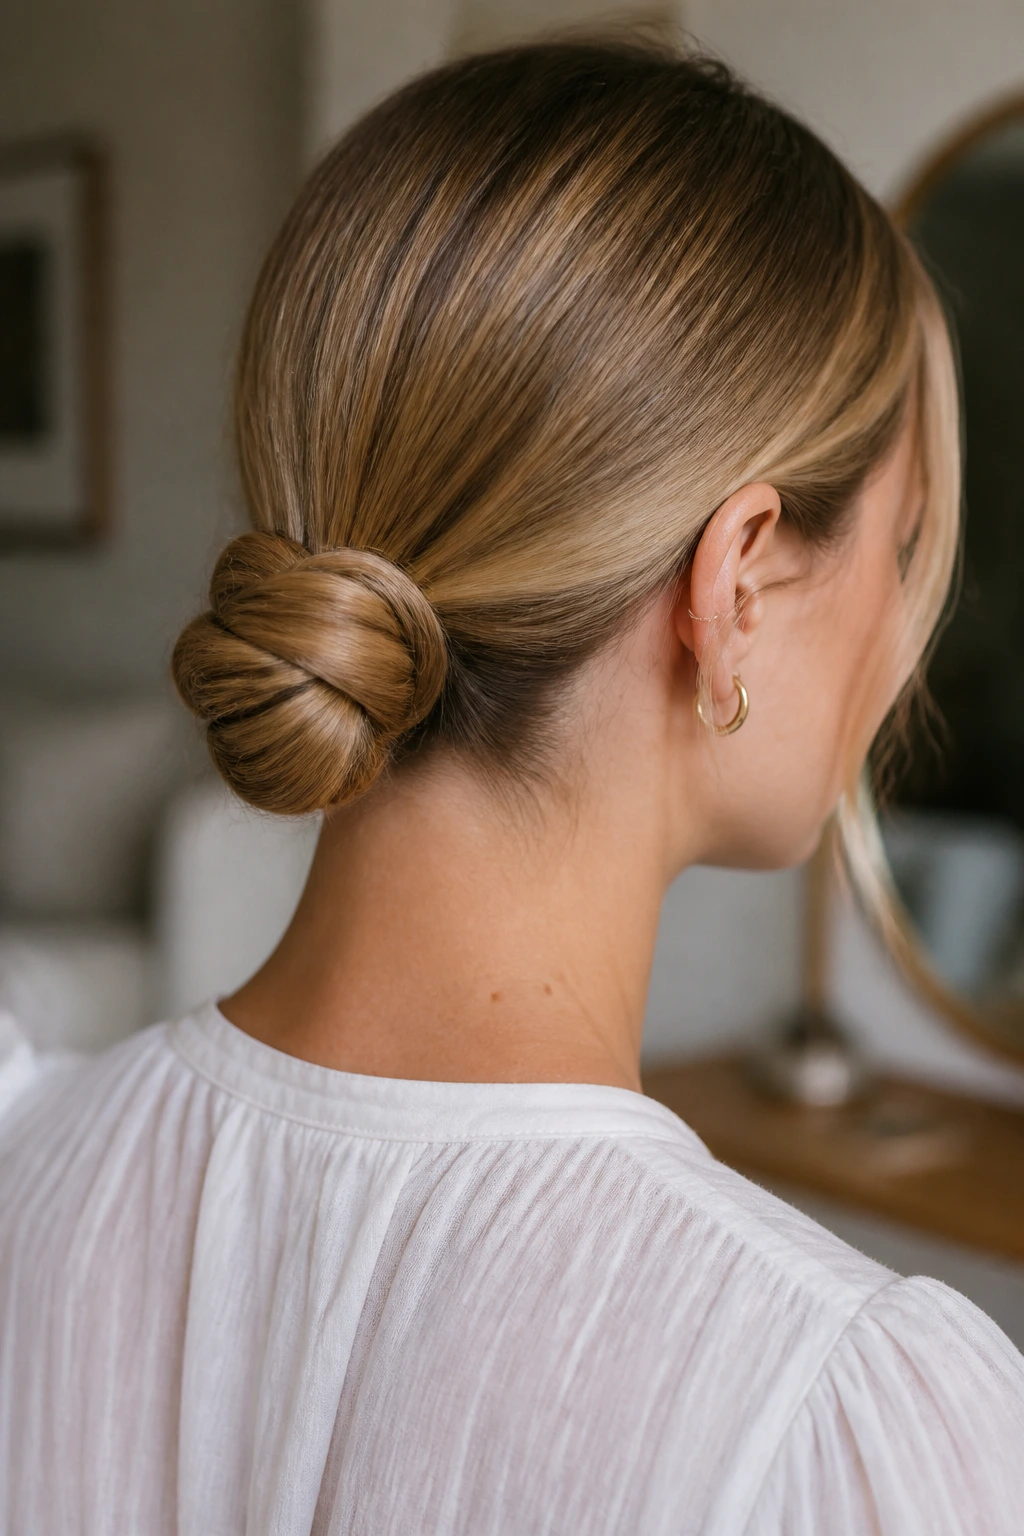
The knotted low ponytail bun is a smart little answer for mornings when time is not on your side. Split the gathered ponytail into two sections, tie them in a simple knot, then tuck the ends underneath and pin them flat against the base. It sounds almost too easy, but on medium hair it gives a clean knot with real structure.
The best thing about this style is that it doesn’t need perfect lengths. If the hair is a little uneven, the knot hides that. If the layers are short, they can be tucked inward. If the hair is fine, the knot still looks full enough without teasing.
This is one of those styles that looks calm even when the rest of the day isn’t. Low effort. Good result. Hard to argue with that.
20. Top Knot with Released Ends
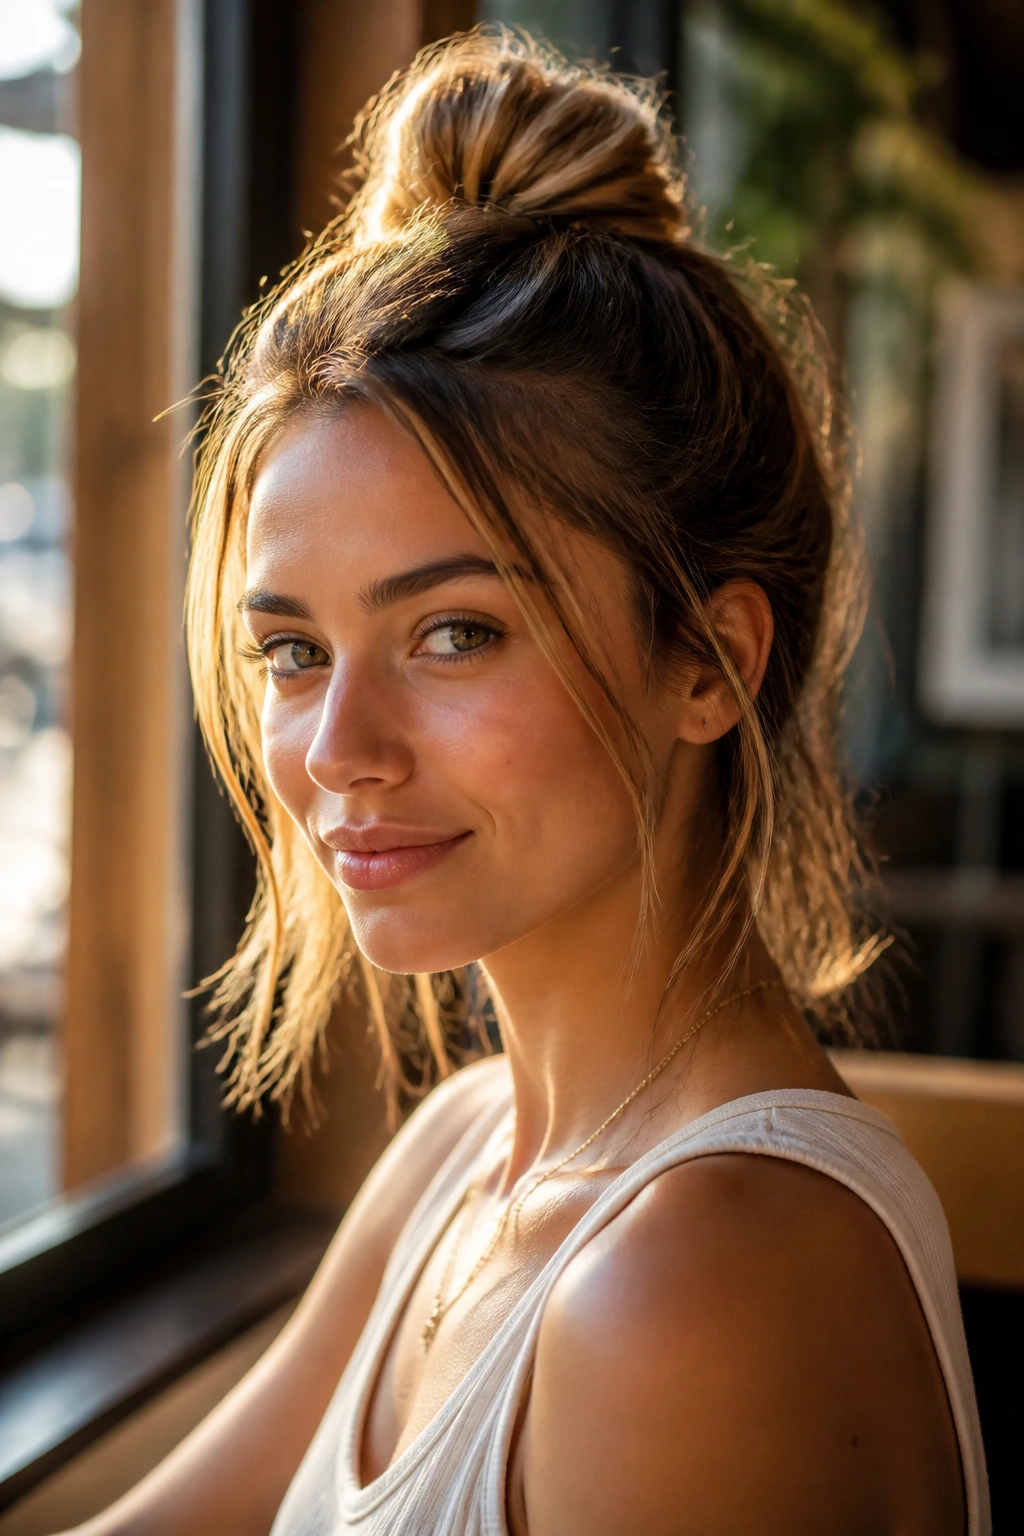
A top knot with released ends is not the super-tight, tiny bun people sometimes force onto medium hair. It’s looser than that. Gather the hair high, twist it into a knot, and leave the last inch or two of the ends out on purpose so the bun has a bit of movement and the length doesn’t look squeezed.
This version works especially well on wavy or thick hair because the released ends keep the top knot from feeling overpacked. Medium hair can start to look cramped if every single strand is forced into the bun. Letting the ends peek out fixes that problem and gives the style a more relaxed edge.
I’d use this when you want the shape visible but not overly neat. It’s less formal than the sock bun, less fussy than a braided knot, and easier to rebuild if the day gets long.
21. Scarf-Wrapped Bun
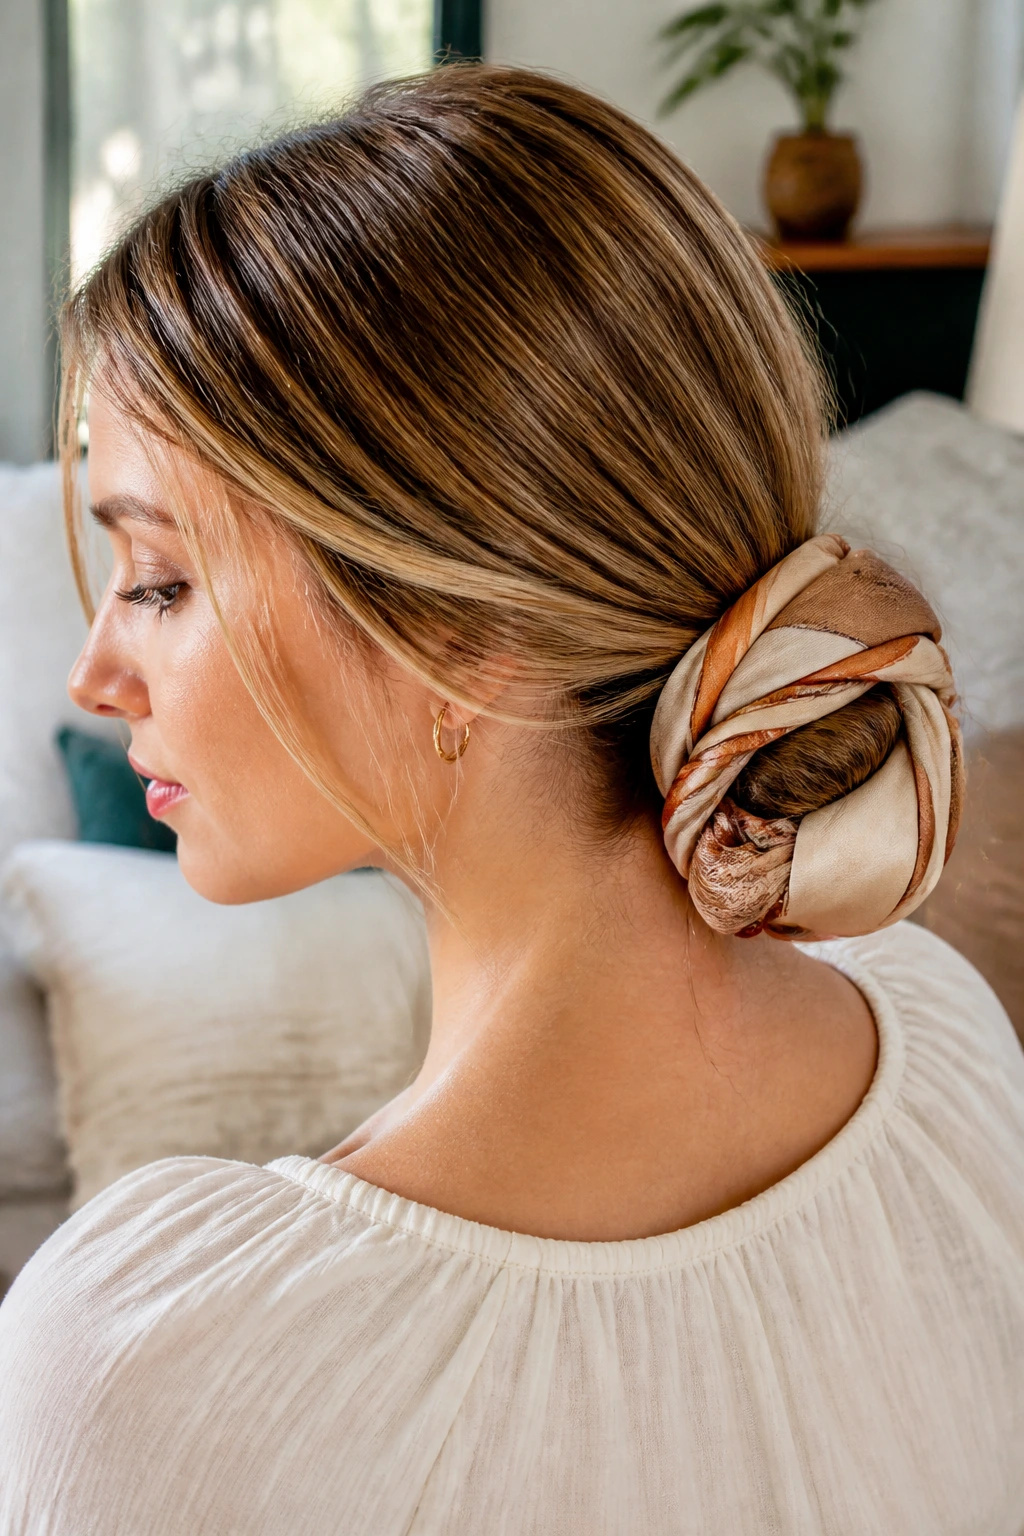
A scarf-wrapped bun is a nice way to make a simple low knot look finished without adding a pile of pins. Tie the hair into a low bun first, then wrap a silk or cotton scarf around the base, knotting it above or just beside the bun so the fabric becomes part of the shape. The scarf can also hide elastic bands and rougher ends.
Medium hair benefits here because the bun doesn’t need to carry all the visual weight by itself. The fabric does some of that work. If your hair is frizzy, a silk scarf smooths the perimeter in a way hairspray never quite does. If your hair is very fine, choose a narrow scarf so the base isn’t overwhelmed.
The result is casual, but not sloppy. It has enough detail to feel styled, which is often all you need.
22. Crown Twist into a Low Bun
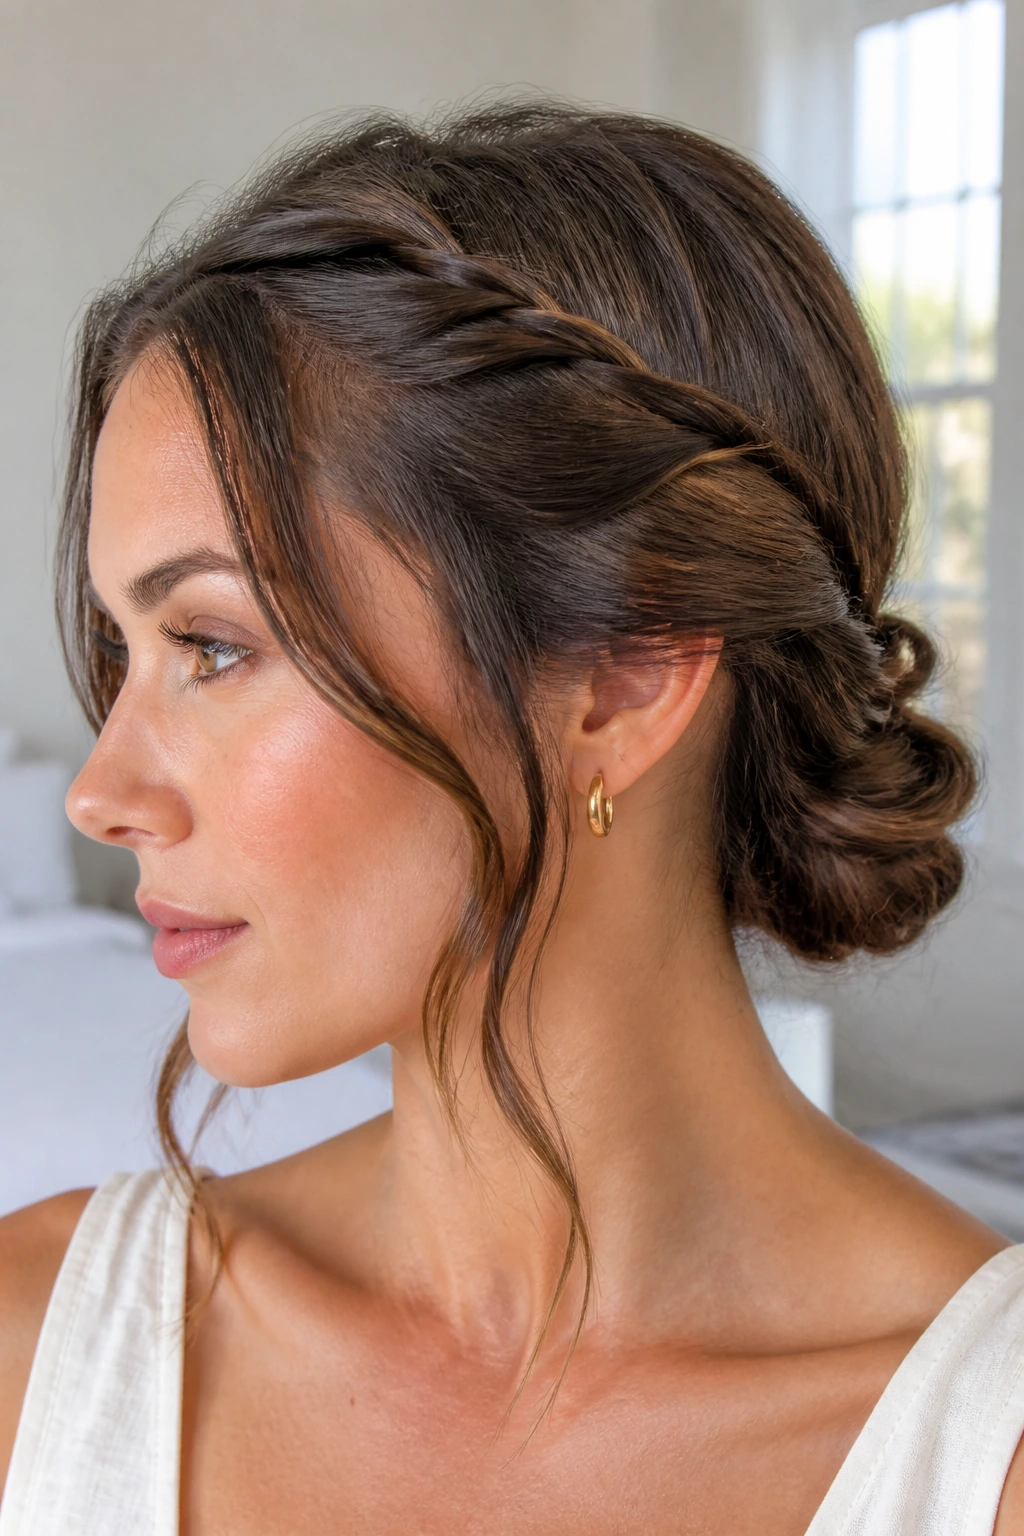
The crown twist into a low bun is the softer cousin of the braided crown. Take a section from each side of the head, twist them backward along the hairline, and join them into a low bun at the nape. The twist keeps the front neat, but it doesn’t lock the hair down the way a braid can.
That makes it a good option for medium hair with movement. If you have loose waves or a little texture, the twist will hold onto them instead of flattening everything into a shell. A few face-framing pieces can stay out too, especially around the temples, where they soften the line.
It’s a fast style, which helps. You can build the whole thing in a few minutes, then adjust the bun shape with one or two hidden pins. No overthinking.
23. Braided Ponytail Wrap Updo
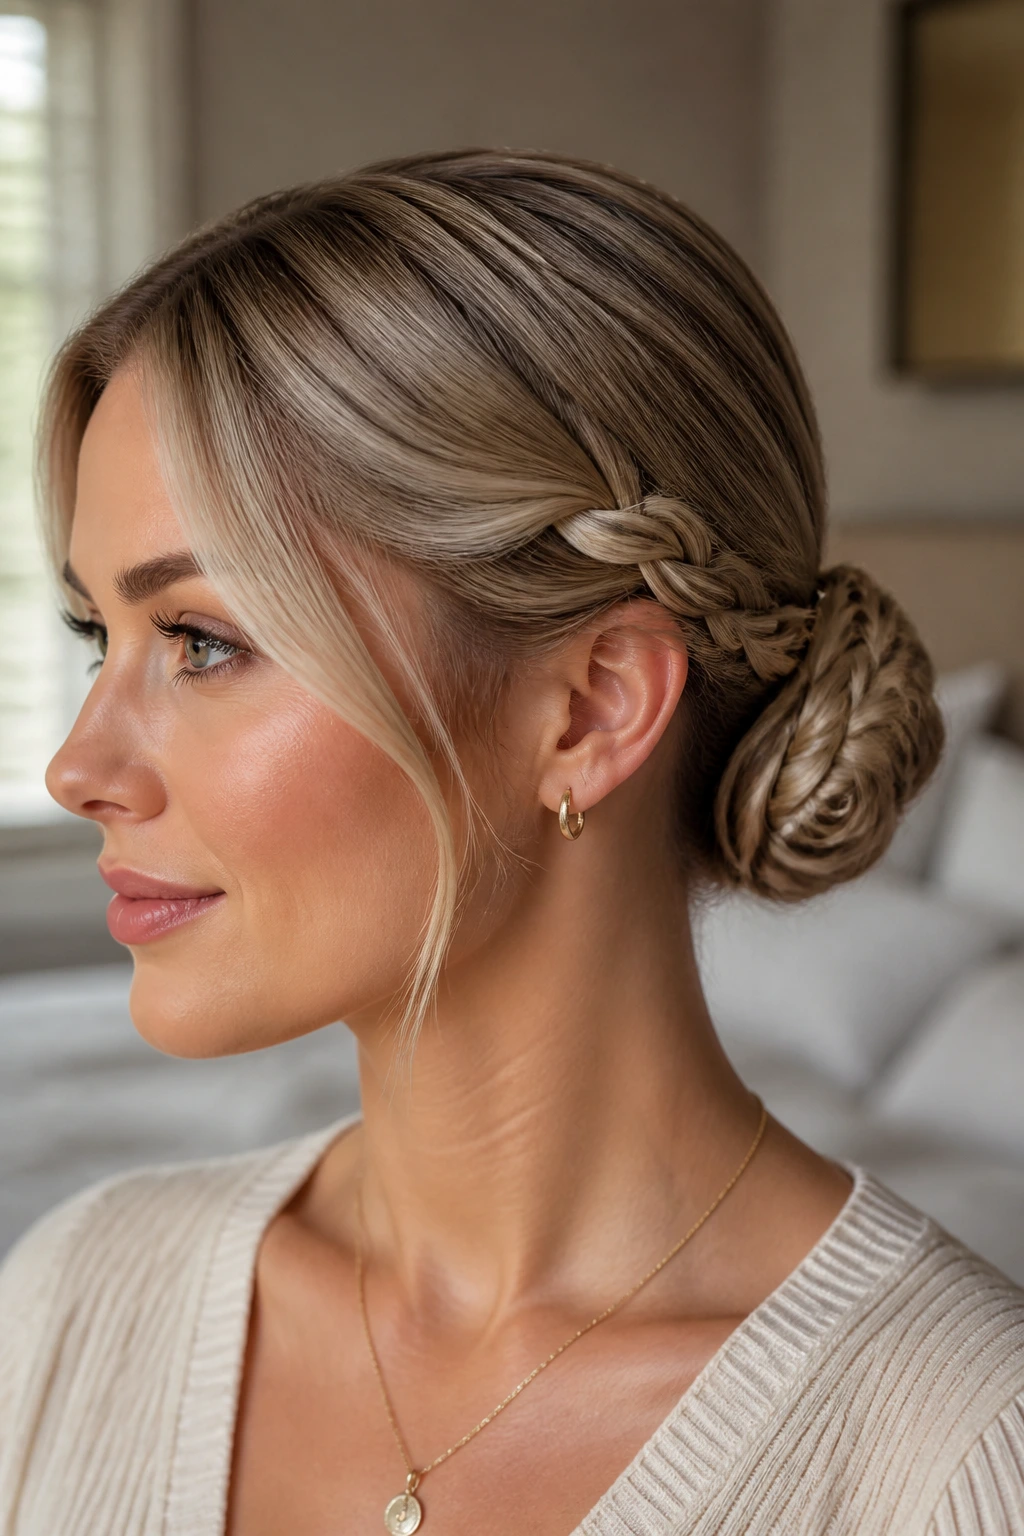
A braided ponytail wrap updo is the sort of style you can count on when you need the ends out of the way and the finish to look deliberate. Make a ponytail, braid the tail, wrap it around the base, and pin it into a compact bun. The braid gives medium-length hair control, and the wrap hides the blunt ends that often make these styles look unfinished.
This works well on hair that’s been worn once already. Slight grit in the roots and a bit of bend through the lengths make the braid easier to handle. If you want the bun smaller, braid tighter. If you want it fuller, pull the braid apart after tying it off, then wrap it a little looser.
It’s one of the best last-minute options in the whole set. Fast, neat, and hard to mess up.
How to Make Mid-Length Updos Stay Put
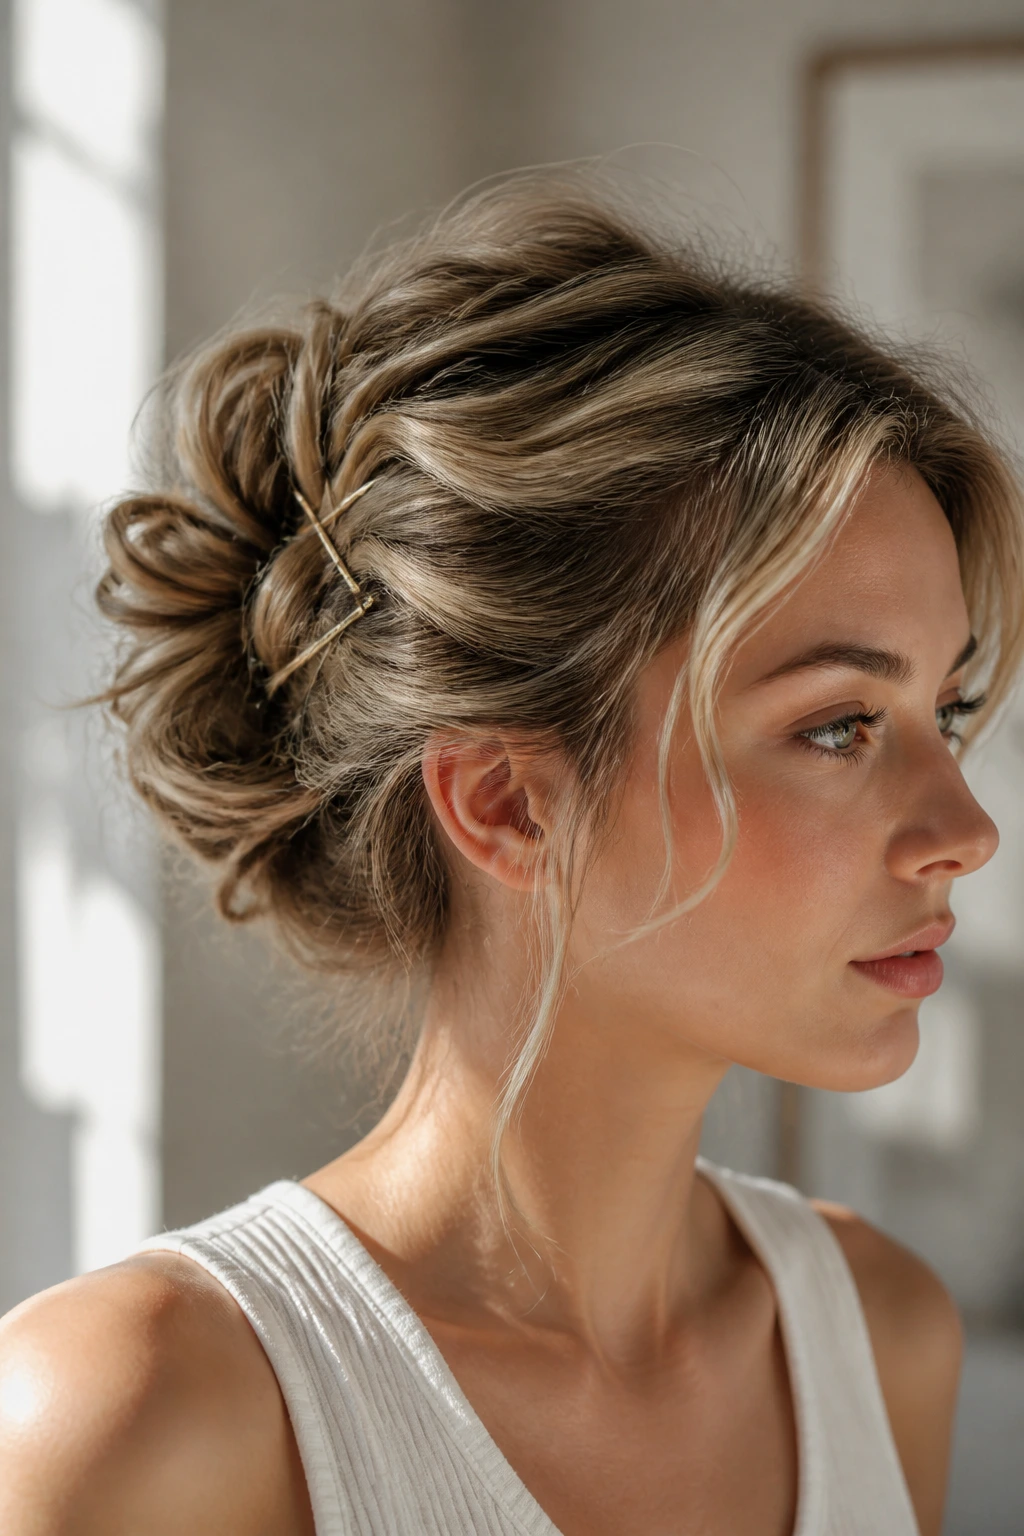
The biggest difference between a style that lasts and a style that slides is grip. Start with some texture in the hair, even if that texture comes from a mist of dry shampoo on clean roots. Freshly washed hair can work, but it tends to be slippery, and slippery hair needs more support than most people expect. Give the roots something to hold onto.
Pinning matters too. Bobby pins should cross over the twist, not sit next to it like decoration. If a bun starts to sag, the pins are usually going into the wrong thing. Aim them into the scalp, then back into the gathered hair. That tiny angle is what keeps a style from peeling away by hour three.
A little restraint helps. Medium hair looks better when the base is compact and the finish has one or two loose pieces, not eight. Too many stray sections make the style collapse visually even if the pins are technically doing their job. Save the looseness for the front, the crown, or one small side detail. The back should stay disciplined.
The Mistakes That Make the Style Fall Apart
The first mistake is trying to build an oversized bun with not enough hair. Medium lengths rarely need that much volume. When the knot gets too big, it loses tension and starts drooping. Keep the shape compact and let the detail come from twists, braids, or pin placement instead.
Another common problem is pinning only through the bun itself. That feels secure for about five minutes. Then the whole thing shifts. Pins need to catch both the gathered hair and a bit of the scalp underneath. Two or three crossed pins will usually hold better than a dozen random ones.
Freshly washed hair can also be a trap. It looks sleek, but it slips. If you need to work with clean hair, rough up the roots with dry shampoo or texture spray before you start. A tiny bit of grip saves a lot of frustration.
And yes, over-spraying before the shape is built is a mistake. Wet hairspray makes strands sticky in the wrong way and can freeze the hair before you’ve finished arranging it. Pin first, spray last. That order matters.
Variations and Adaptations to Try
-
Fine-Hair Grip Edit: Start with dry shampoo at the roots and a light backcomb at the crown before you build any bun or twist. Fine hair holds much better when the base has a little roughness, and small pins tend to disappear more cleanly than big ones.
-
Thick-Hair Weight Split: Divide the hair into two sections before twisting or pinning so the style doesn’t get too heavy in one spot. Thick medium hair often stays put better when the tension is distributed across two anchor points instead of one bulky knot.
-
Curly-Hair Keep-The-Texture Version: Skip the brush and shape the style with your fingers. Curly and wavy hair usually looks better when the texture is preserved, especially in a low bun or crown twist where the bend of the hair helps the shape hold.
-
Shorter Lob Shortcut: Use half-up versions, smaller loops, and tighter braids if your hair sits closer to the shoulders than the collarbone. A lob can still wear an updo; it just needs less length to be tucked and more attention to the front pieces.
-
Formal Finish Upgrade: Add pearl pins, a black velvet ribbon, or a narrow metal clip after the base is secure. Keep the accessory small enough to sit inside the shape rather than on top of it.
Tools That Make These Styles Easier
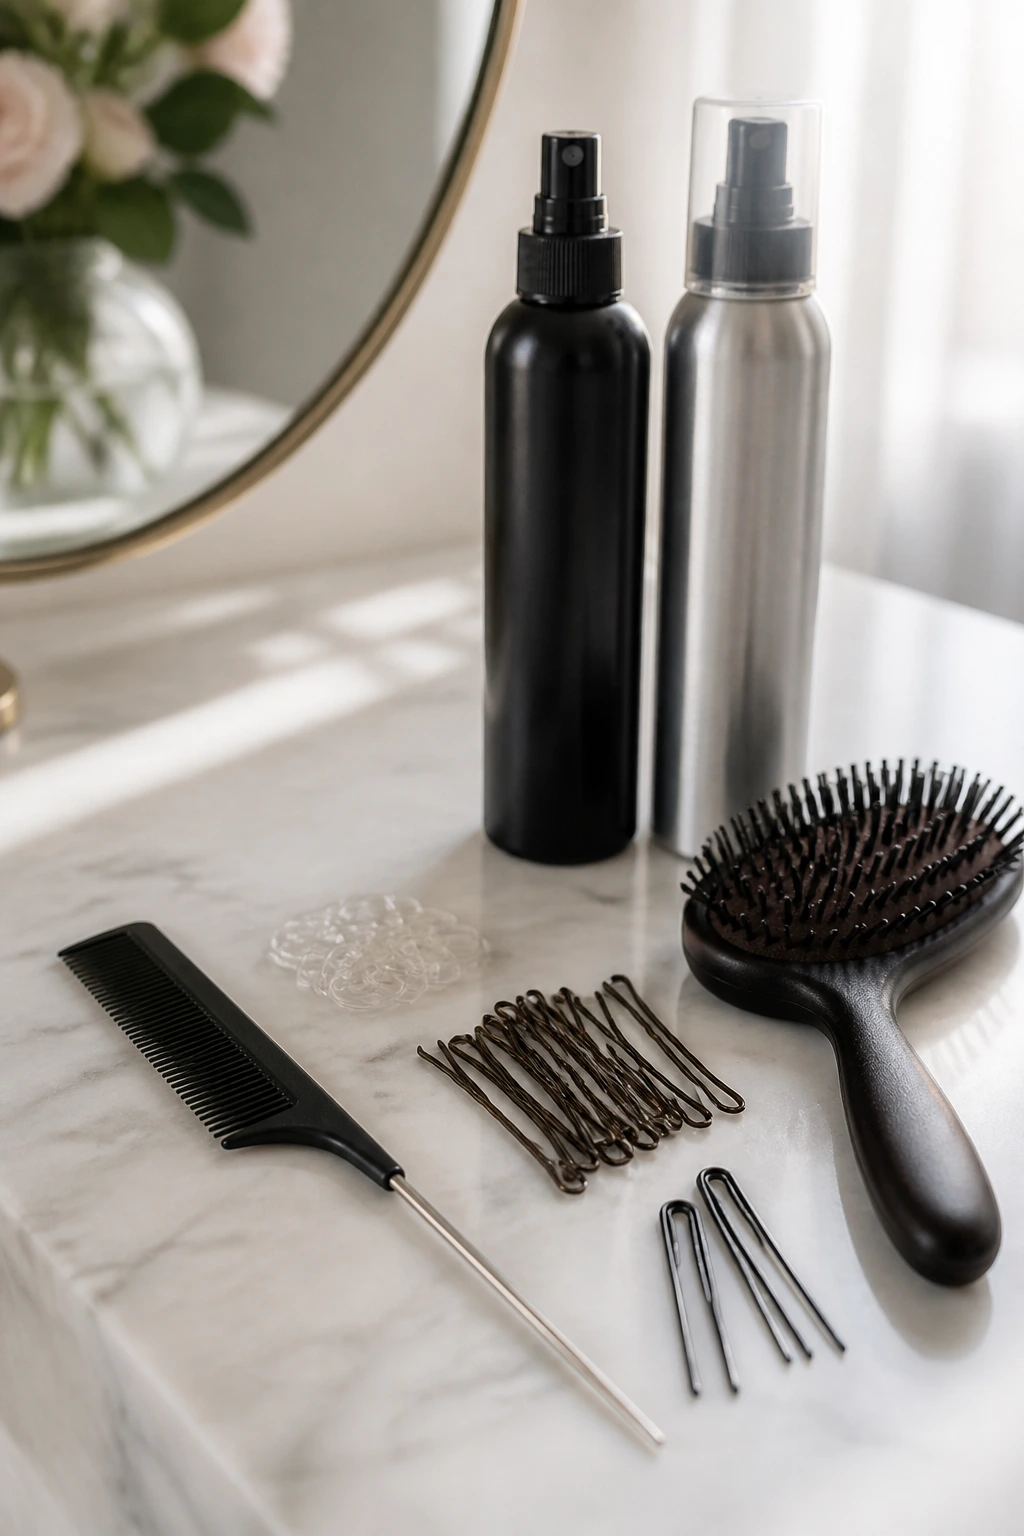
- Tail comb: For clean parts, neat sections, and cleaner twist lines at the crown.
- Bobby pins in two sizes: Standard pins for general hold and smaller pins for short layers or hidden seams.
- U-pins: Useful for buns that need support without visible pin heads.
- Mini clear elastics: Good for bubble ponytails, half-up knots, and tying off small sections before tucking.
- Texturizing spray or dry shampoo: Adds the grip medium hair needs, especially on clean roots.
- Strong-hold hairspray: Best applied after the shape is built, not before.
- Soft brush or boar-bristle brush: Helps smooth the top layer without tearing up the cuticle.
- Hand mirror: Worth it for checking the back of low buns and French twists.
- Optional bun donut or scarf: Handy for sock buns, scarf-wrapped buns, or adding shape when your hair is a little too fine to puff on its own.
Keeping the Shape Overnight and Between Washes
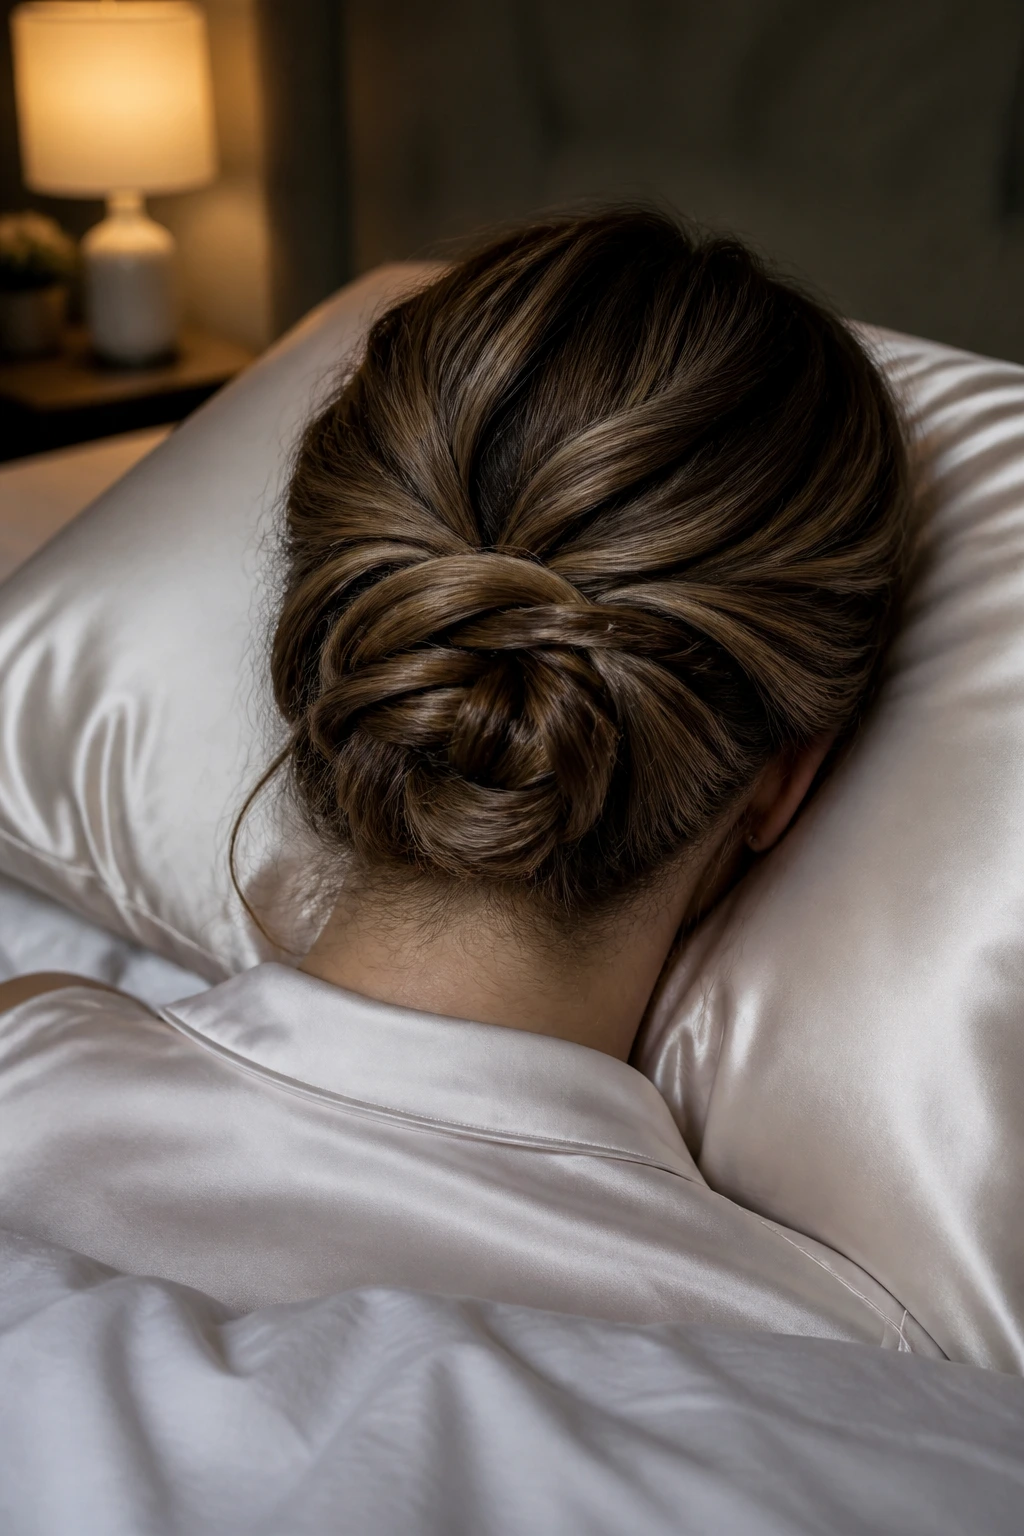
Most medium-length updos are made for a day, but a few can stretch into the next morning if you treat them gently. The safest move is to remove the pins before bed, then re-pin only the shape you want to keep. Sleeping on a silk pillowcase helps the hair glide instead of snag, which matters a lot when the style depends on a smooth nape or a clean twist. A loose silk scarf works too if you like the whole head wrapped.
If you want to refresh the style the next day, start at the roots. A little dry shampoo at the part and around the temples gives the hair a drier, more workable feel. Then check the bun or twist from the back and replace any pins that have lost tension. You do not need to rebuild the entire style unless the base has gone soft.
When a style has product in it, brush it out before washing. Don’t yank the pins free; unhook them slowly so you don’t break the same pieces you spent time smoothing into place. Medium hair can take repeated styling, but the ends still need a little kindness after a tight bun or tucked roll.
Questions People Ask Before They Pin It Up
Can medium-length hair really hold a full updo without extensions?
Yes, if the style is built for the length you have. Low buns, twists, tucks, and braided wraps usually work better than oversized sculpted shapes because they keep the hair close to the head instead of asking it to support too much volume.
Do I need day-old hair for these styles?
Not always, but day-old hair makes the job easier. Clean hair can work if you add dry shampoo, texture spray, or a bit of mousse at the roots. The goal is grip, not grime.
What if my hair is layered and pieces keep escaping?
Use the shorter layers as part of the style instead of trying to erase them. Cross-pin the base, leave a few controlled face-framing pieces out, and choose buns or twists that sit low where the layers can be tucked more easily.
Which styles are best for fine hair?
The sleek low bun, looped ponytail bun, Gibson tuck, and claw-clip banana roll usually behave well on finer strands. They rely more on shape and pin placement than on bulk.
How do I make a bun look fuller on medium hair?
Backcomb the ponytail lightly before wrapping it, or choose a donut bun form. You can also pull the edges of the bun outward a little after pinning so the shape looks wider without becoming loose.
Can I wear these styles if my hair is curly or wavy?
Absolutely. Curly and wavy hair often holds twists and low buns better than straight hair because the texture gives the pins something to catch. The trick is not to brush the curl pattern flat unless you want a sleeker finish.
What do I do if the style keeps slipping at the nape?
The nape is usually where the pins are too shallow. Re-pin at a slight upward angle, use one more pin than you think you need, and add texture spray before rebuilding the base. A smooth nape looks nice, but a grippy nape lasts.
How many bobby pins is too many?
If you can see the pins, you’re probably overusing them in the wrong places. That said, medium hair can need six to ten pins depending on thickness and style. Use fewer visible pins and more hidden support near the seams.
The Styles That Make Medium Hair Cooperate
Medium hair does not need to pretend it is long hair. That’s the whole advantage here. Once you stop forcing the length into oversized knots, the shape gets cleaner, the pins work better, and the style starts looking like something chosen on purpose instead of something rescued at the last minute.
The smartest move is to match the style to the hair’s actual behavior. If it’s slippery, add grip. If it’s layered, let the layers soften the front. If it’s thick, split the weight. Simple rules, but they save a lot of bad buns.
Pick one of these updos for medium length hair the next time you need your hair off your neck and still want it to look finished. Start with the nape-heavy styles if you’re unsure — they’re usually the ones that hold their shape longest.
