



A vintage ponytail can rescue a plain outfit faster than almost anything else. A deep side part, a ribbon tied over the elastic, or a soft bump at the crown changes the whole read of the hair; suddenly it looks chosen, not grabbed on the way out the door.
Vintage ponytail styles have that rare quality of looking polished without demanding a full afternoon in front of the mirror. They borrow from the 1950s, 1960s, and 1970s, but they don’t turn the head into a costume. A little gloss goes a long way. So does one clean section, a few pins, and knowing exactly where to stop with the teasing.
The real charm is how different they can feel with tiny adjustments. A low pony with a satin ribbon feels soft and deliberate. A crown-lifted pony reads more like old Hollywood. A bubble pony with velvet ties has a completely different attitude from a smooth pageant pony, even though both start with the same elastic.
Why These Ponytail Styles Keep Working
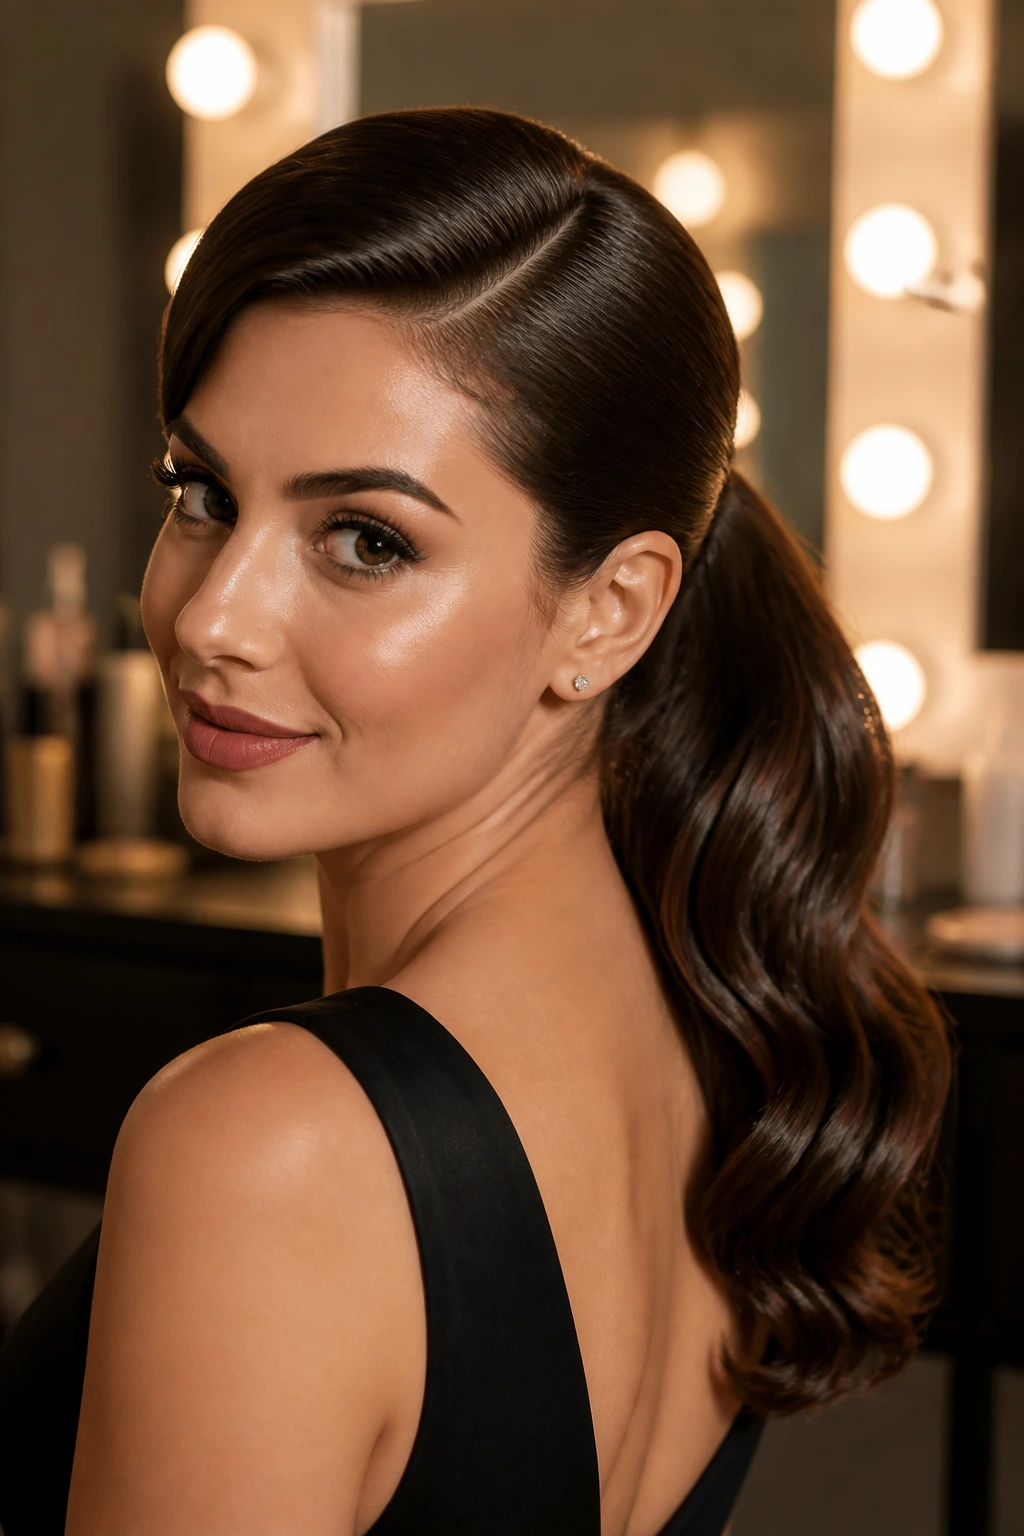
- Root Lift: A small bump at the crown makes the ponytail look like it came from a blowout, not a rushed hair tie-and-run moment.
- Soft Hardware: Ribbons, scarves, headbands, and wrapped elastics hide the plain elastic and give the base some character.
- Face Framing: Side parts, swooped bangs, and loose tendrils soften the hairline and keep these looks from feeling severe.
- Hair-Type Friendly: Fine hair likes texture spray and wrapped bases; thick hair behaves better when the tail is broken into sections or braided first.
- Fast Payoff: Most of these styles need one brush, one elastic, and a handful of pins, which is a better trade than wrestling with a full updo.
- Built-In Flexibility: The same pony can read daytime, dinner-ready, or dressed-up for an event just by changing the part, the accessory, or the finish.
1. Deep Side-Part Hollywood Pony
A deep side part gives the whole ponytail a little movie-star swing. Keep the tail low and behind one ear, then shape the lengths into soft bends instead of tight curls. The point is shine, movement, and a line that feels expensive without acting expensive.
Why It Feels Vintage
The side part does half the work before the elastic even goes in. It creates that 1940s and 1950s profile where the hair sweeps across the forehead first, then falls into a glossy tail. Use a 1.25-inch curling iron, curl away from the face, and brush the waves out once they’ve cooled.
- Best for medium-to-long hair
- Use a tail comb for the part
- Wrap a 1-inch strand around the elastic
- Finish with a light shine spray, not a heavy oil
Best tip: curl the front pieces in the direction that flatters your part, not just in the same direction everywhere.
2. Satin-Ribbon Low Pony
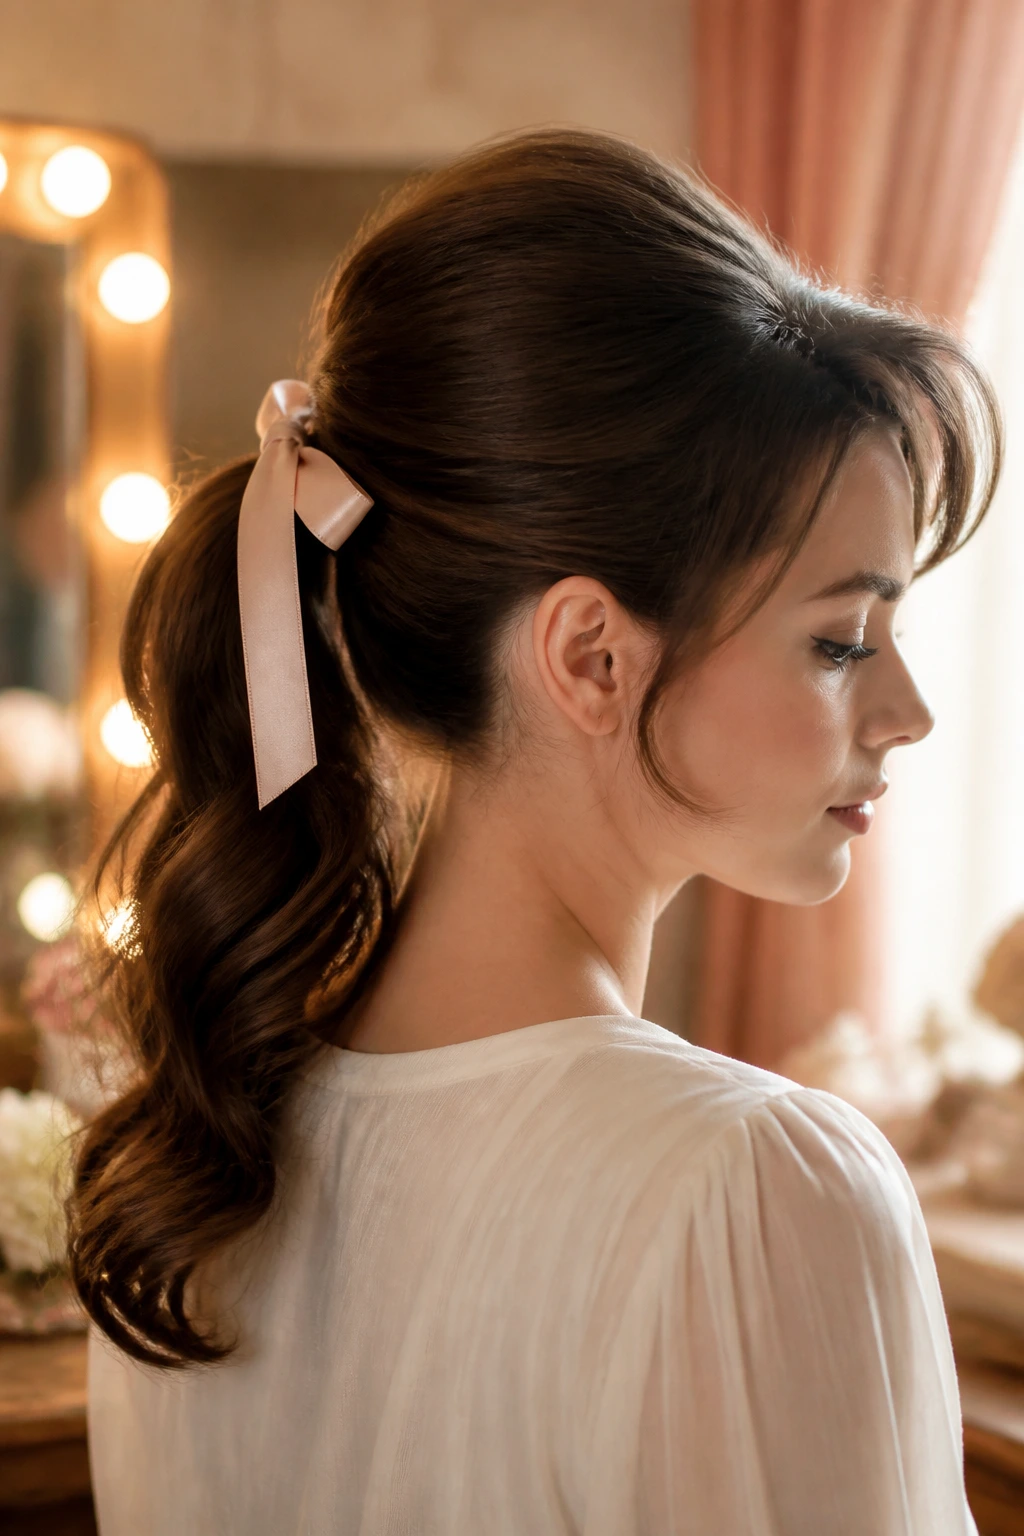
This one is about restraint. The pony sits low at the nape, smooth on top, with a satin ribbon tied over the elastic and left with long tails that brush the back of the neck. It feels neat in the good way, like the hair was meant to be seen from the side.
The ribbon matters more than people think. A narrow ribbon can disappear into the hair; a wider one, about 1 to 1.5 inches, reads much more clearly and gives you that old-school finish. Keep the pony tight enough to hold shape, then tie the ribbon in a bow or a simple knot so the fabric does the decorating.
3. Teased Crown Pony
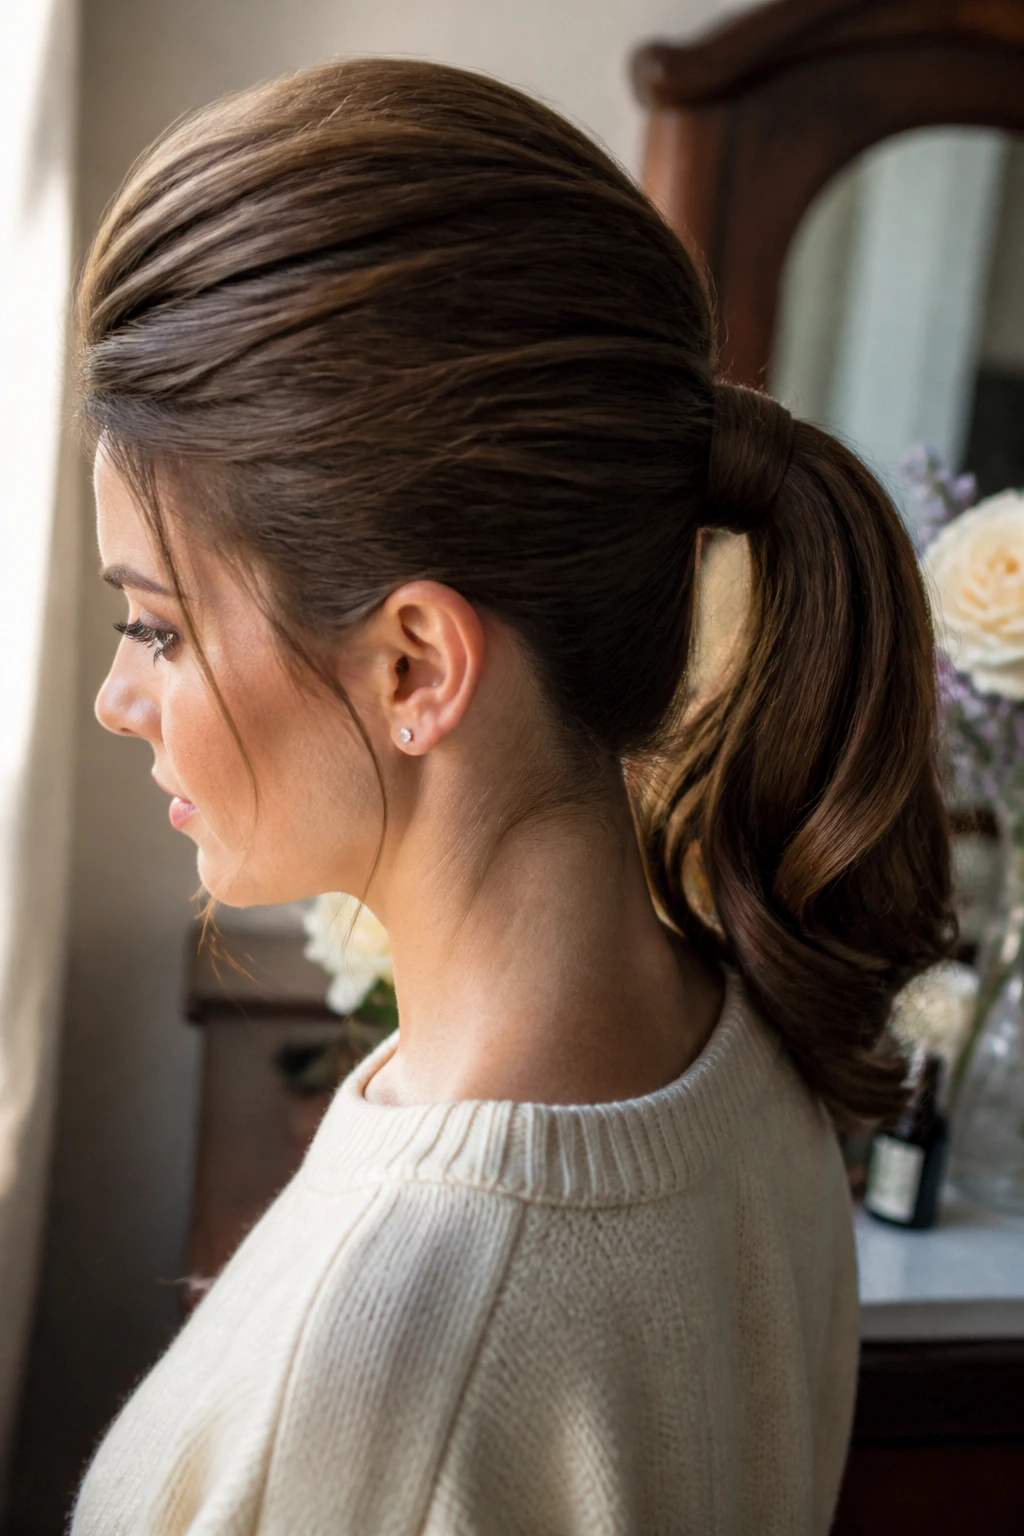
Why does a little crown lift change everything? Because it pulls the eye upward before the ponytail even starts. This is the style that makes thin hair look fuller and makes second-day hair feel intentional instead of tired.
Backcomb a 2-inch strip at the crown, smooth only the top layer, and pin the pony a little lower than you think you should. If the top starts to puff too much, press it down with your palm and a mist of flexible hairspray. You want height, not a helmet.
How to Style It
Keep the ends glossy and the crown softly built. The contrast is what makes it work. A teased crown with a sleek tail reads very 1960s, especially if you wrap a small strand around the elastic and leave one face-framing piece loose.
4. Flip-End High Pony
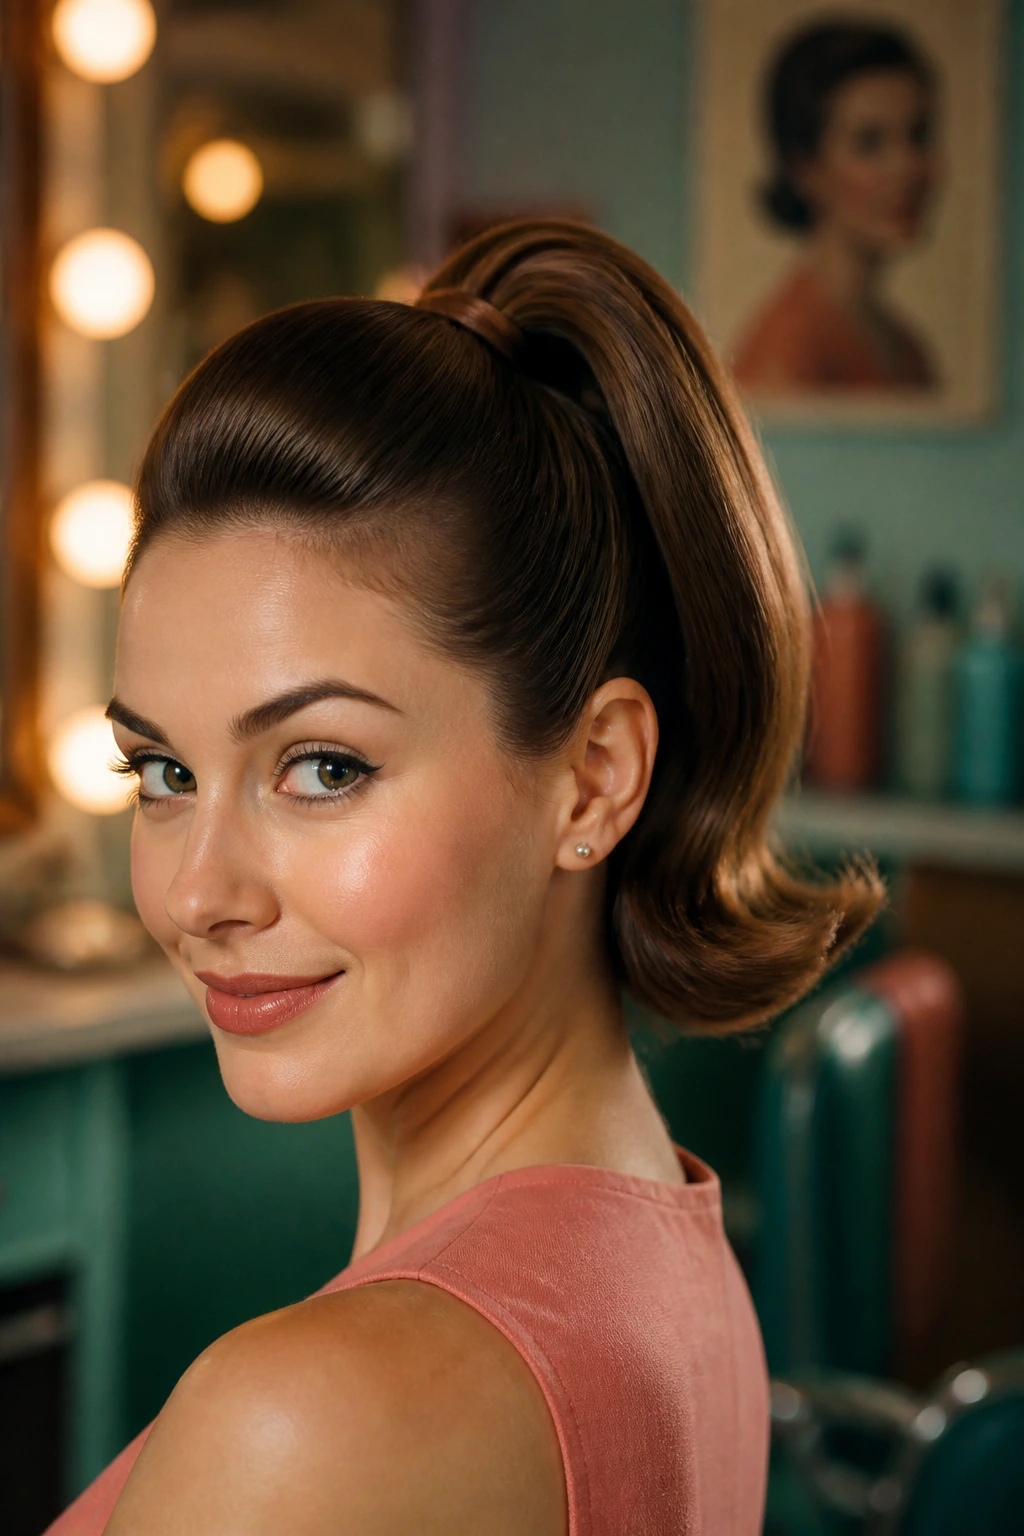
A high pony with flipped ends has a cheerful, mod sort of energy that feels straight out of a mid-century salon photo. The trick is not just height. It’s the bend at the tail, usually turned under or flicked outward with a round brush or a large-barrel iron.
Place the pony at the mid-crown, not all the way at the top of the head, unless you want a cheerier pageant feel. Blow-dry the tail with a round brush or hit the last 4 to 6 inches with a 1.5-inch iron, then brush it so the bend stays soft. It should look like it moves when you do.
5. Bubble Pony with Velvet Ties
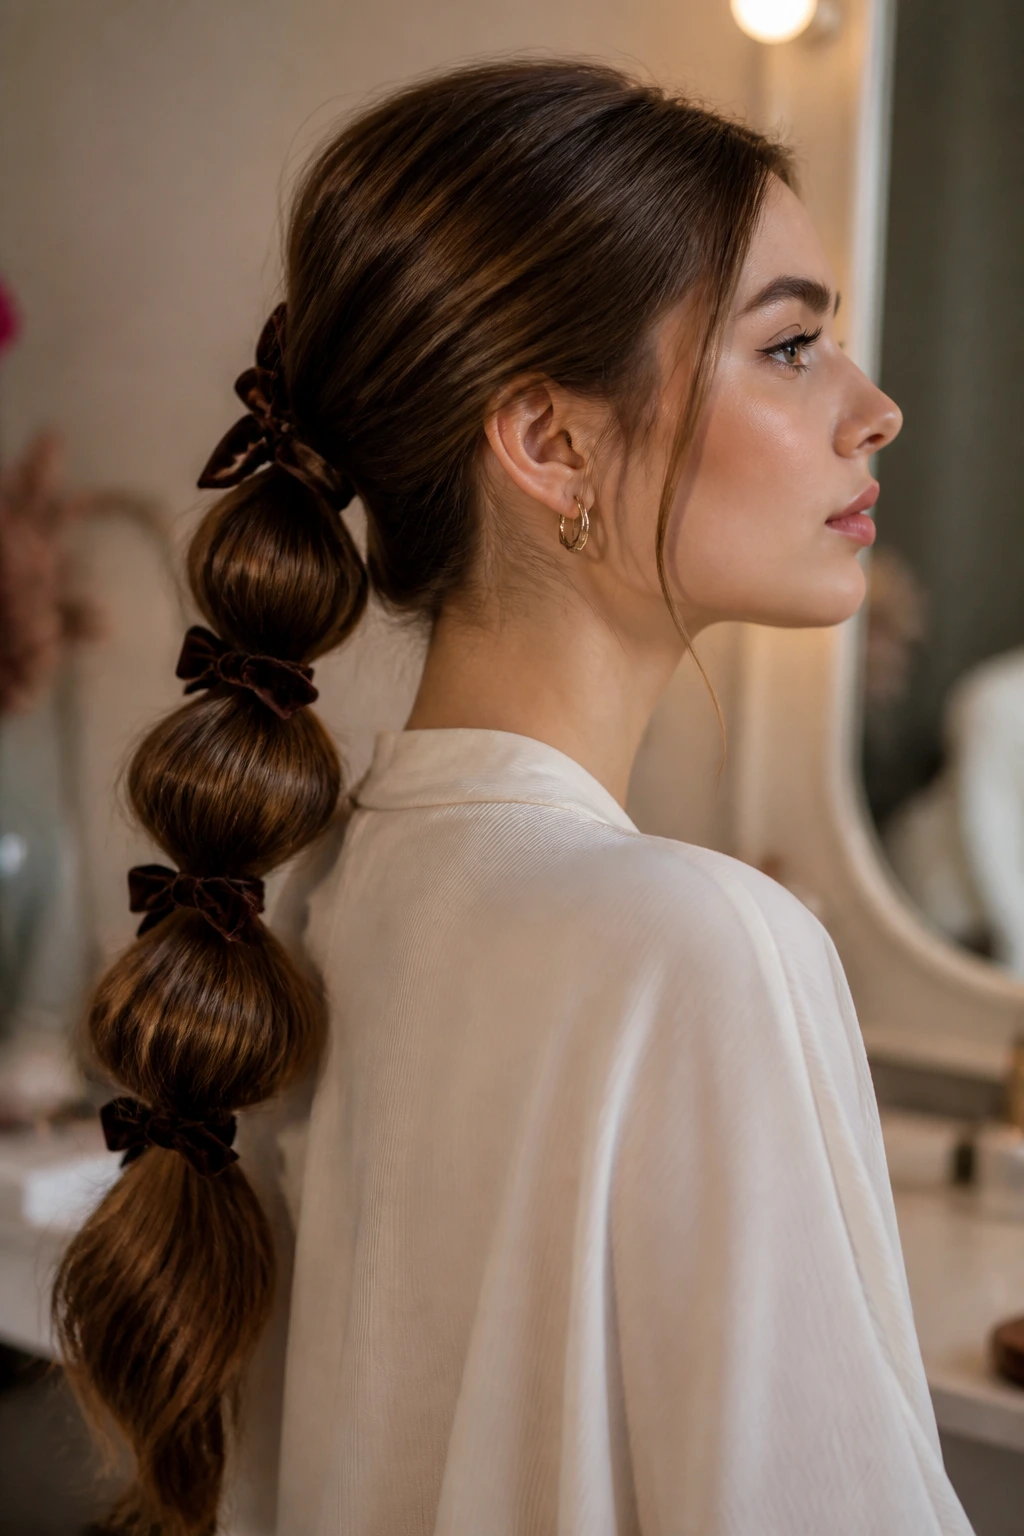
This one looks more complicated than it is, which is one reason I like it so much. Build a standard pony, then add clear elastics every 2 to 3 inches down the tail and gently puff each section outward with your fingers. Velvet ties between the bubbles make it feel more vintage and less playground.
The shape works best on longer hair because the bubbles need room to stack. If your hair is thick, lightly mist each section before puffing it so the bubbles hold their roundness. If your hair is fine, texture spray at the roots and a little dry shampoo through the tail helps the sections stay visible.
6. Audrey Headband Pony
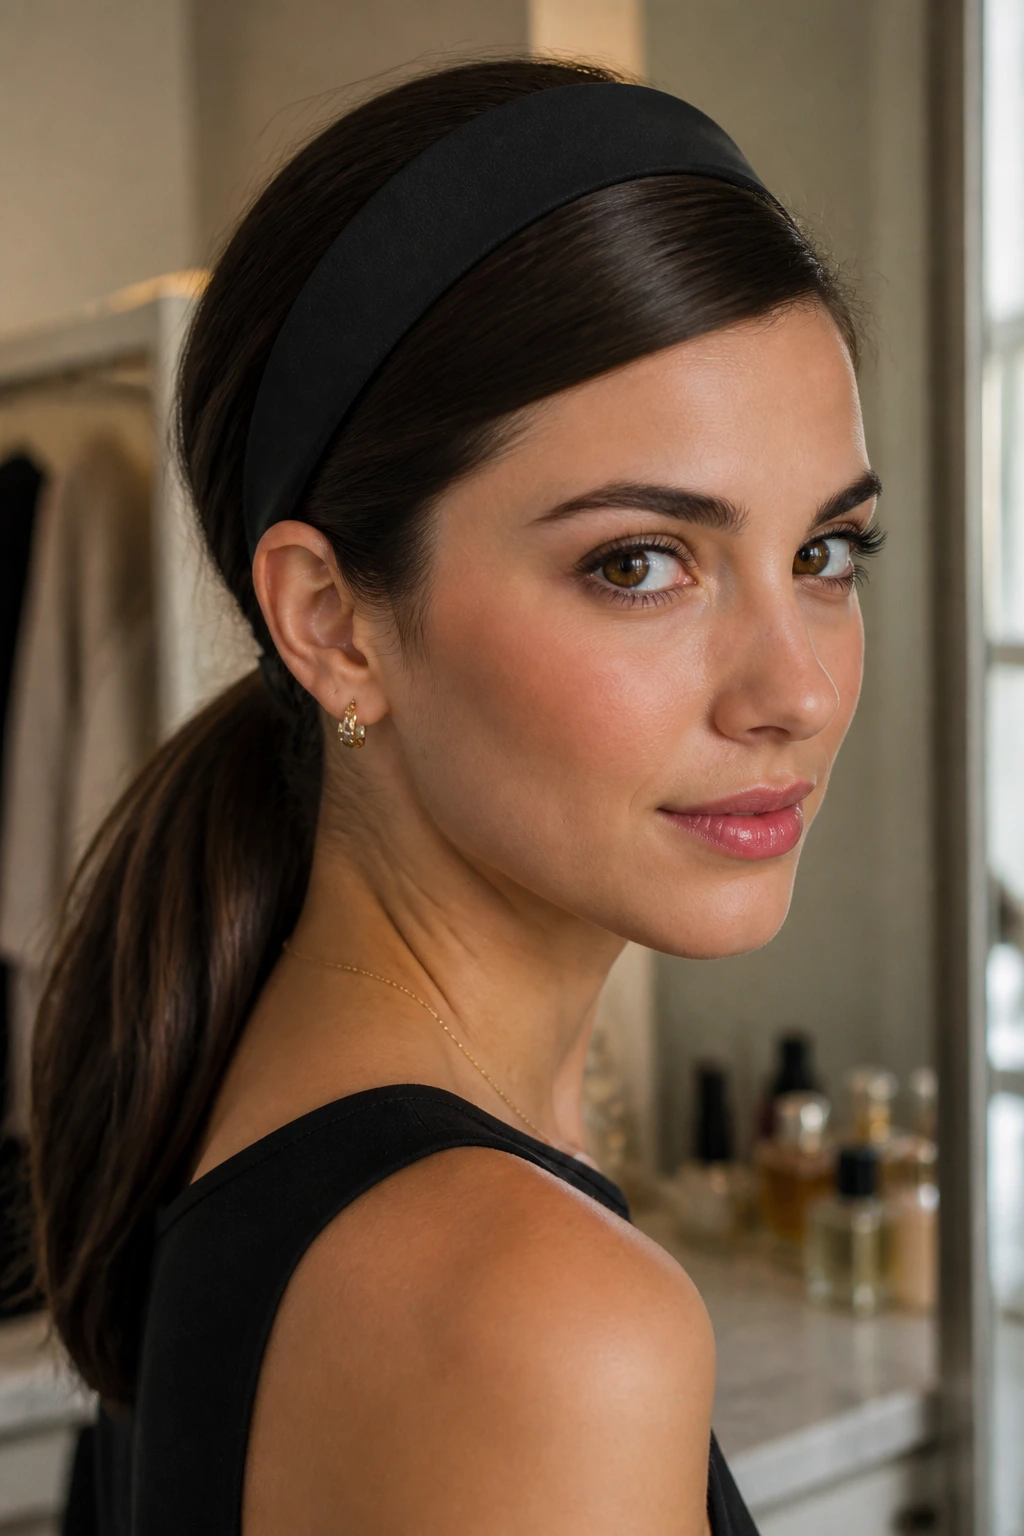
A wide headband changes a ponytail from casual to polished almost instantly. Keep the pony low and tidy, part the hair on the side, and use the band to smooth the front and frame the face. The result nods to Audrey-era neatness without looking stiff.
Choose a headband with enough structure to stay put. Soft fabric bands slide; a band with a little grip or a wrapped core behaves better. Leave the tail sleek or add one soft bend at the end, but don’t over-curl it. The clean line is the point.
7. Victory Roll Pony
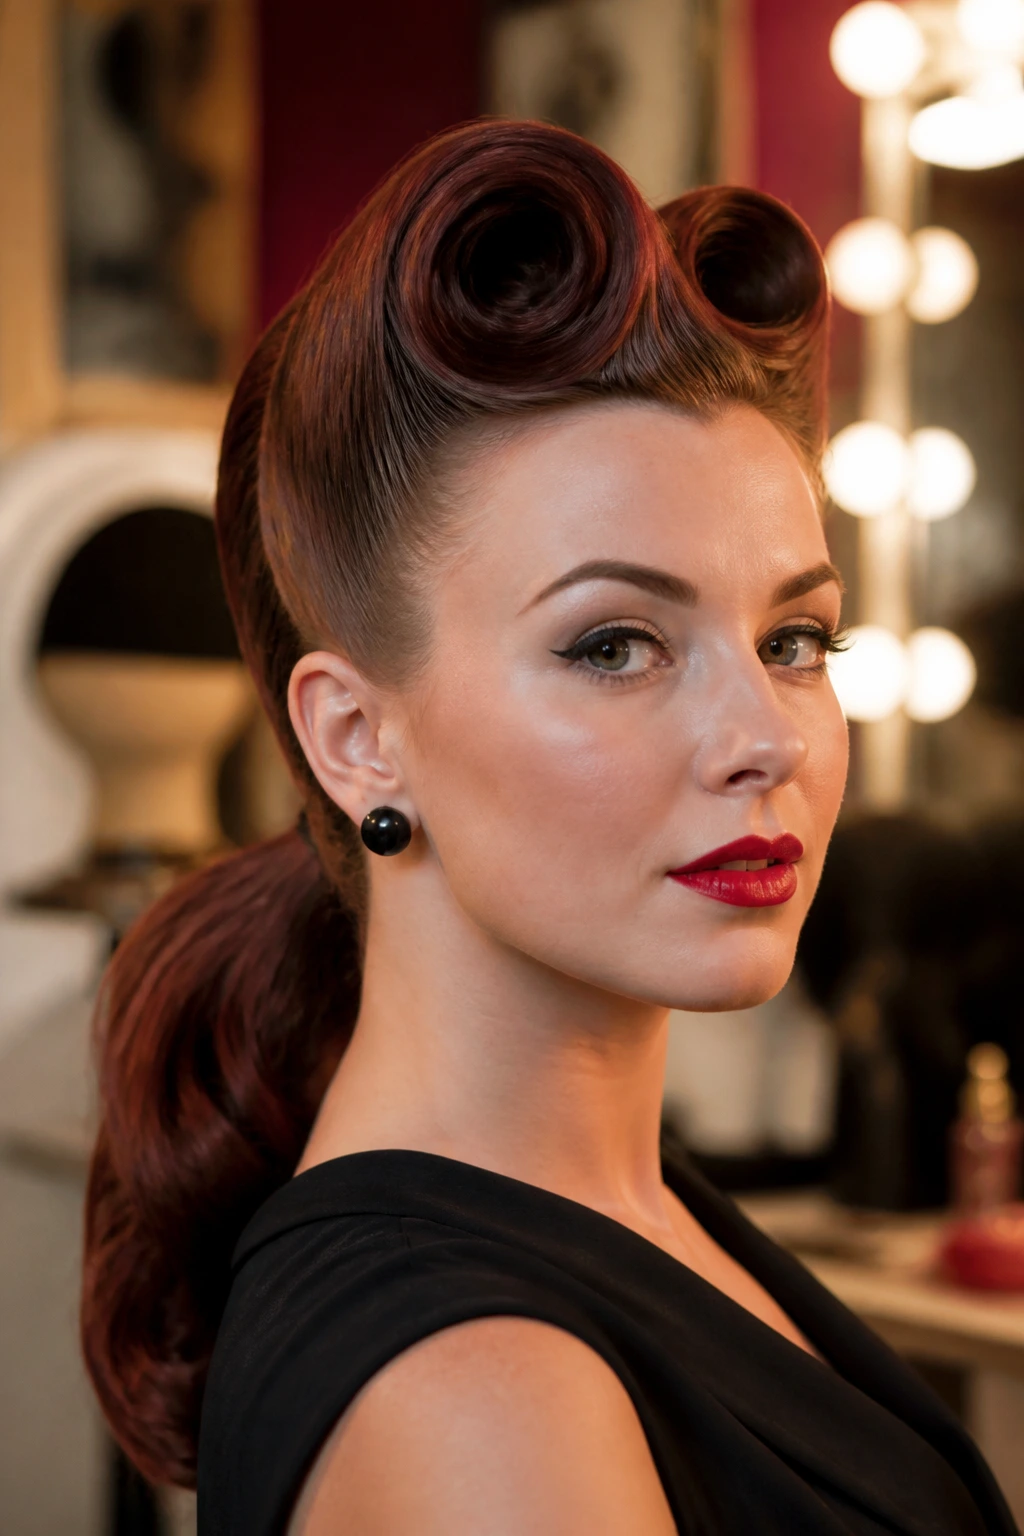
This one brings the drama in the front and keeps the tail practical in the back. Roll the front sections back on themselves, pin them flat, and gather the rest into a ponytail at the nape. It has pin-up energy without asking you to set your whole head in curls.
A little setting spray before the rolls helps a lot. So does waiting until the hair cools after blow-drying or ironing. The rolls should feel secure before you touch the tail, because if the front shifts, the whole style starts to wobble.
Small detail, big payoff
Use 2-inch sections for the rolls, not wider. That keeps the shape neat and gives you a cleaner curve near the hairline.
8. Pin-Curl Low Pony
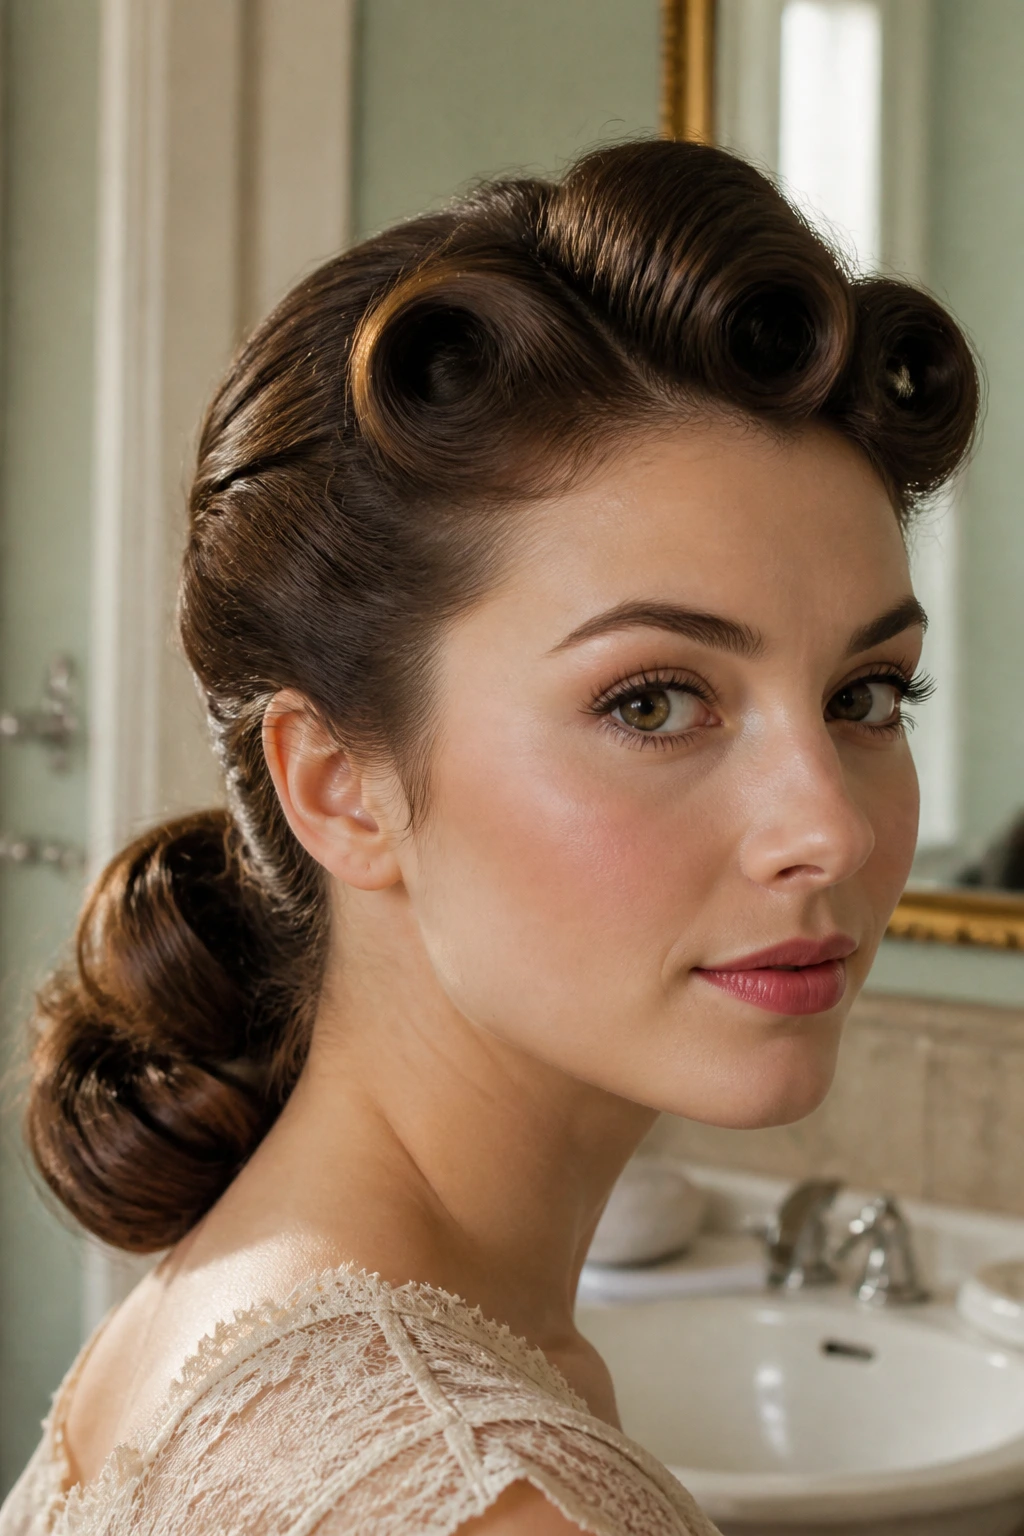
If you like a softer vintage look, pin-curl the front and the ends first, then brush the hair lightly into a low pony. The result has a molded, old-Hollywood softness around the face and a tail that still feels wearable for daytime.
This style is at its best when the curls are cooled all the way before brushing. Warm curls go flat fast. Cool curls keep their shape. I’d also keep the pony at the nape rather than the middle of the head; the lower placement makes the pin-curl work look intentional instead of random.
9. Bardot Bouffant Pony
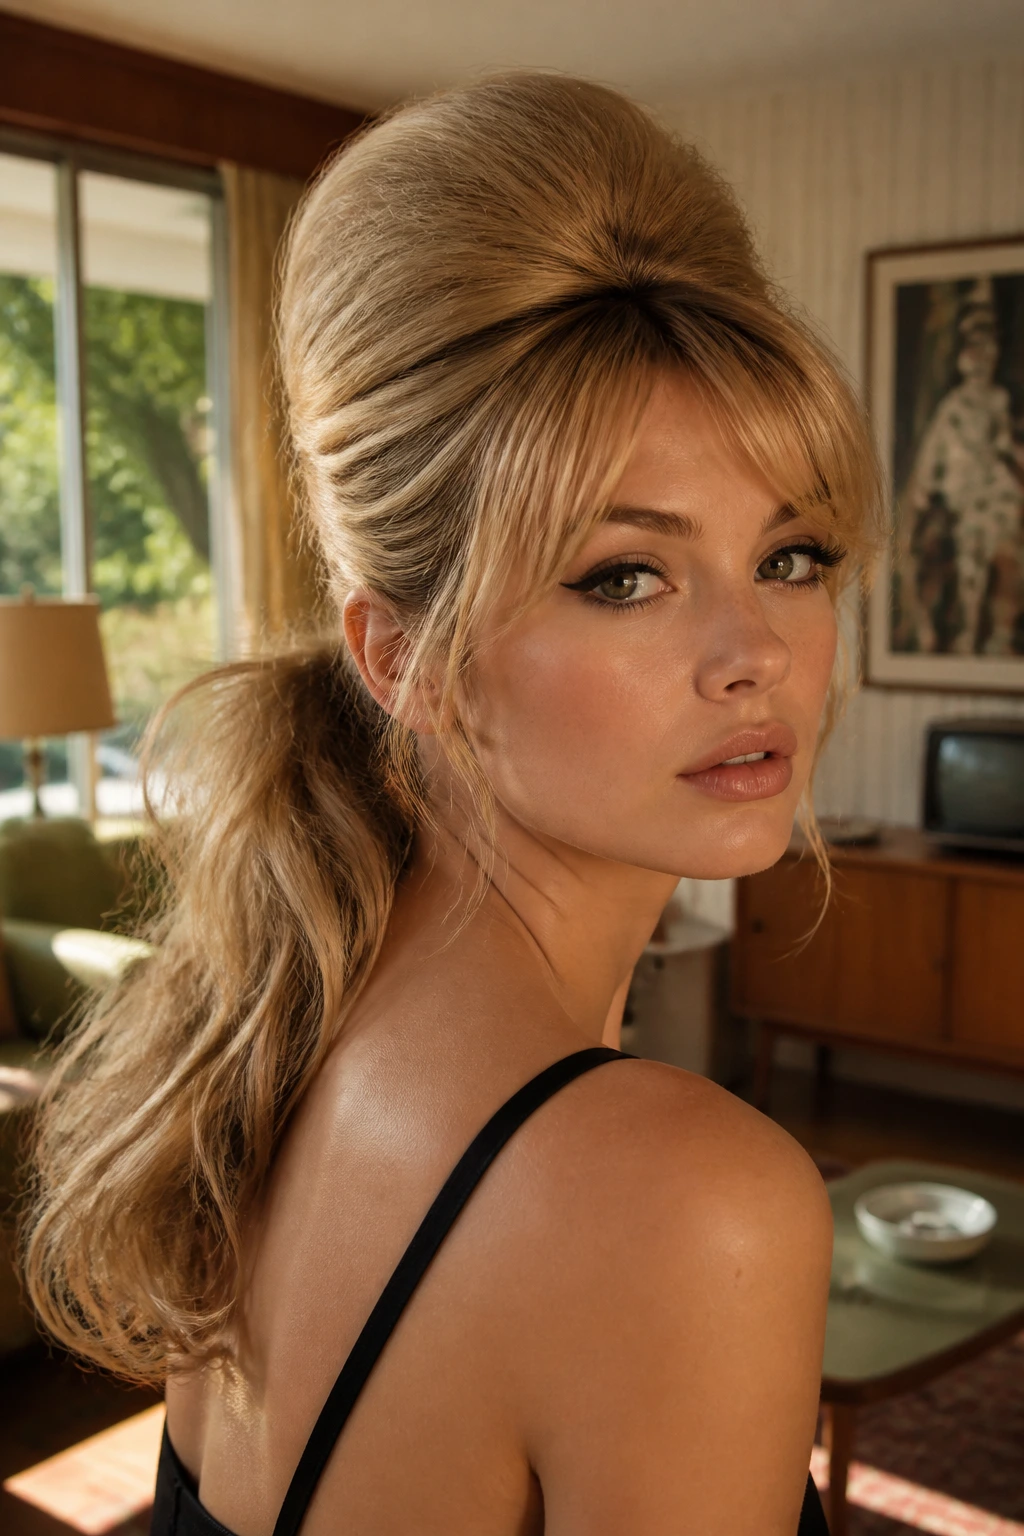
Think crown height, loose lengths, and a little controlled mess near the face. A Bardot-inspired pony wants lift at the top and a slightly undone tail, the kind of shape that looks best when it isn’t flattened down by too much smoothing.
Start with mousse at the roots, blow-dry upward with a round brush, then backcomb the crown in two or three small sections. Smooth the outer layer just enough to hide the teasing. If you want the 1960s feel, let the front pieces fall softly rather than pinning every strand away.
10. Gibson Roll Pony
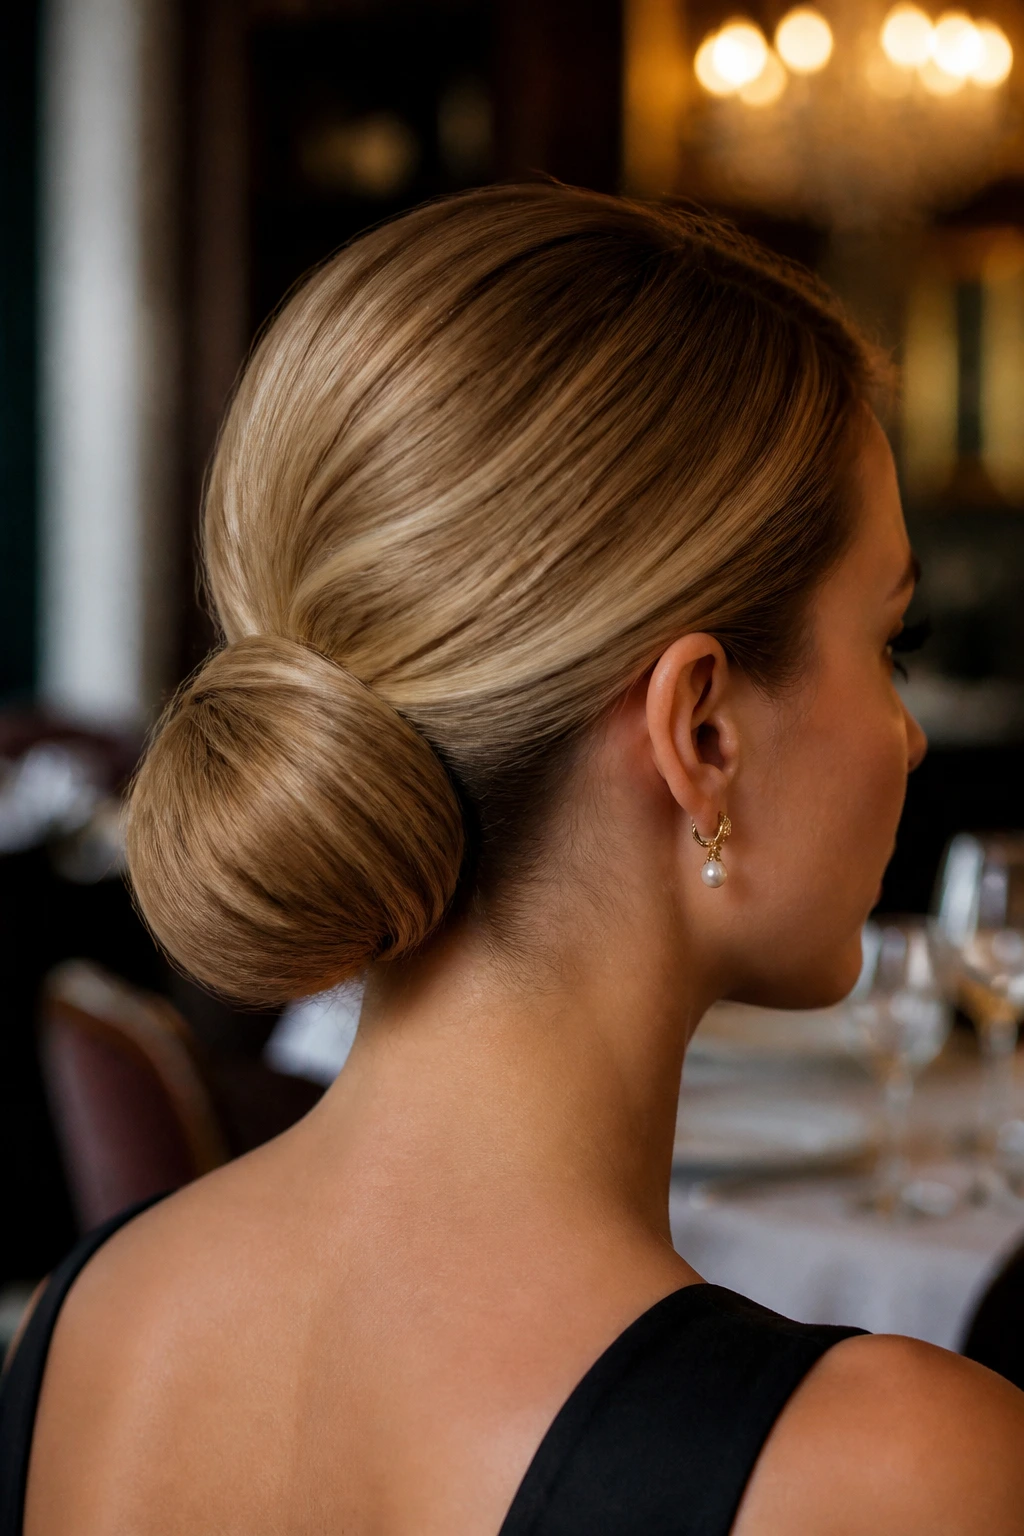
This is a neat one for formal dinners or weddings when you want polish without a bun. Gather the hair into a low pony, then fold the tail upward and under itself so the end tucks in near the nape. It borrows the shape of a Gibson roll but keeps the movement of a pony.
The style works especially well on medium-length hair because the fold stays compact. Longer hair can be tucked and pinned in sections. Use a few U-pins or long bobby pins, crisscrossed, to keep the roll from sagging during the evening.
11. Polished Mid-Century Pony
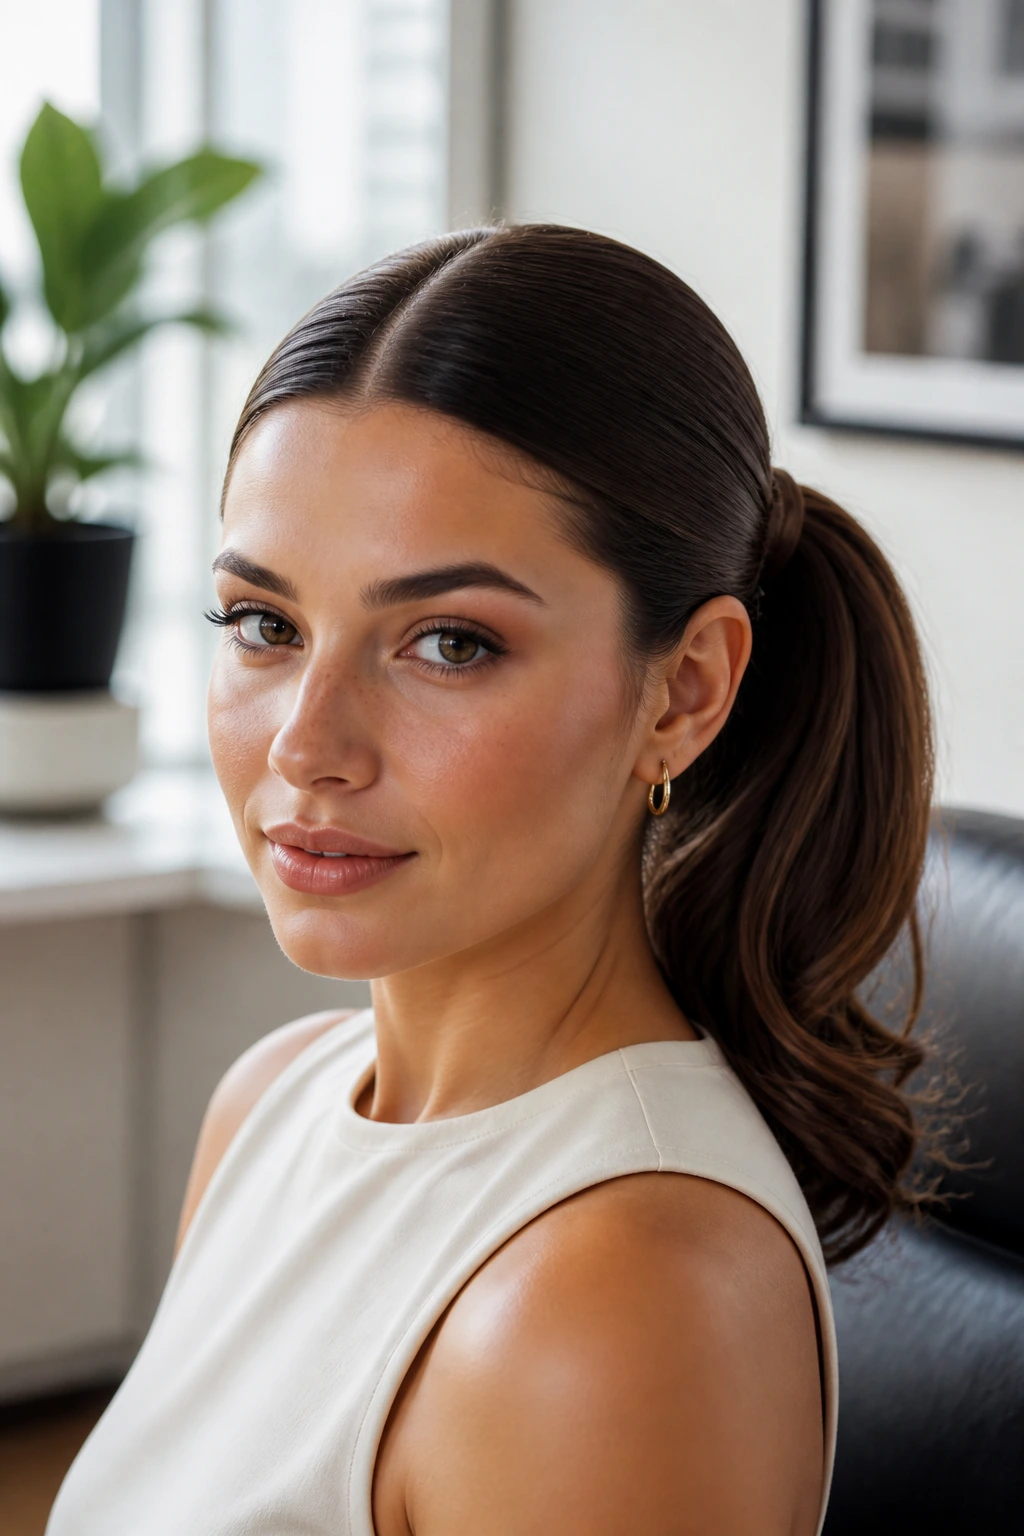
This is the clean, office-to-evening style that never asks for a lot of explanation. A centered or slightly off-center part, smooth roots, and a medium-height pony are enough. Add a wrapped base, and the look suddenly belongs to the era of starched collars and tidy lipstick.
What makes it feel vintage is the restraint. The tail stays neat. The top stays flat and glossy. No beach waves, no crunchy texture, no overdone volume. If your hair is frizzy, work a pea-sized amount of smoothing cream through the mid-lengths only, not the roots.
12. Braided Crown Ponytail
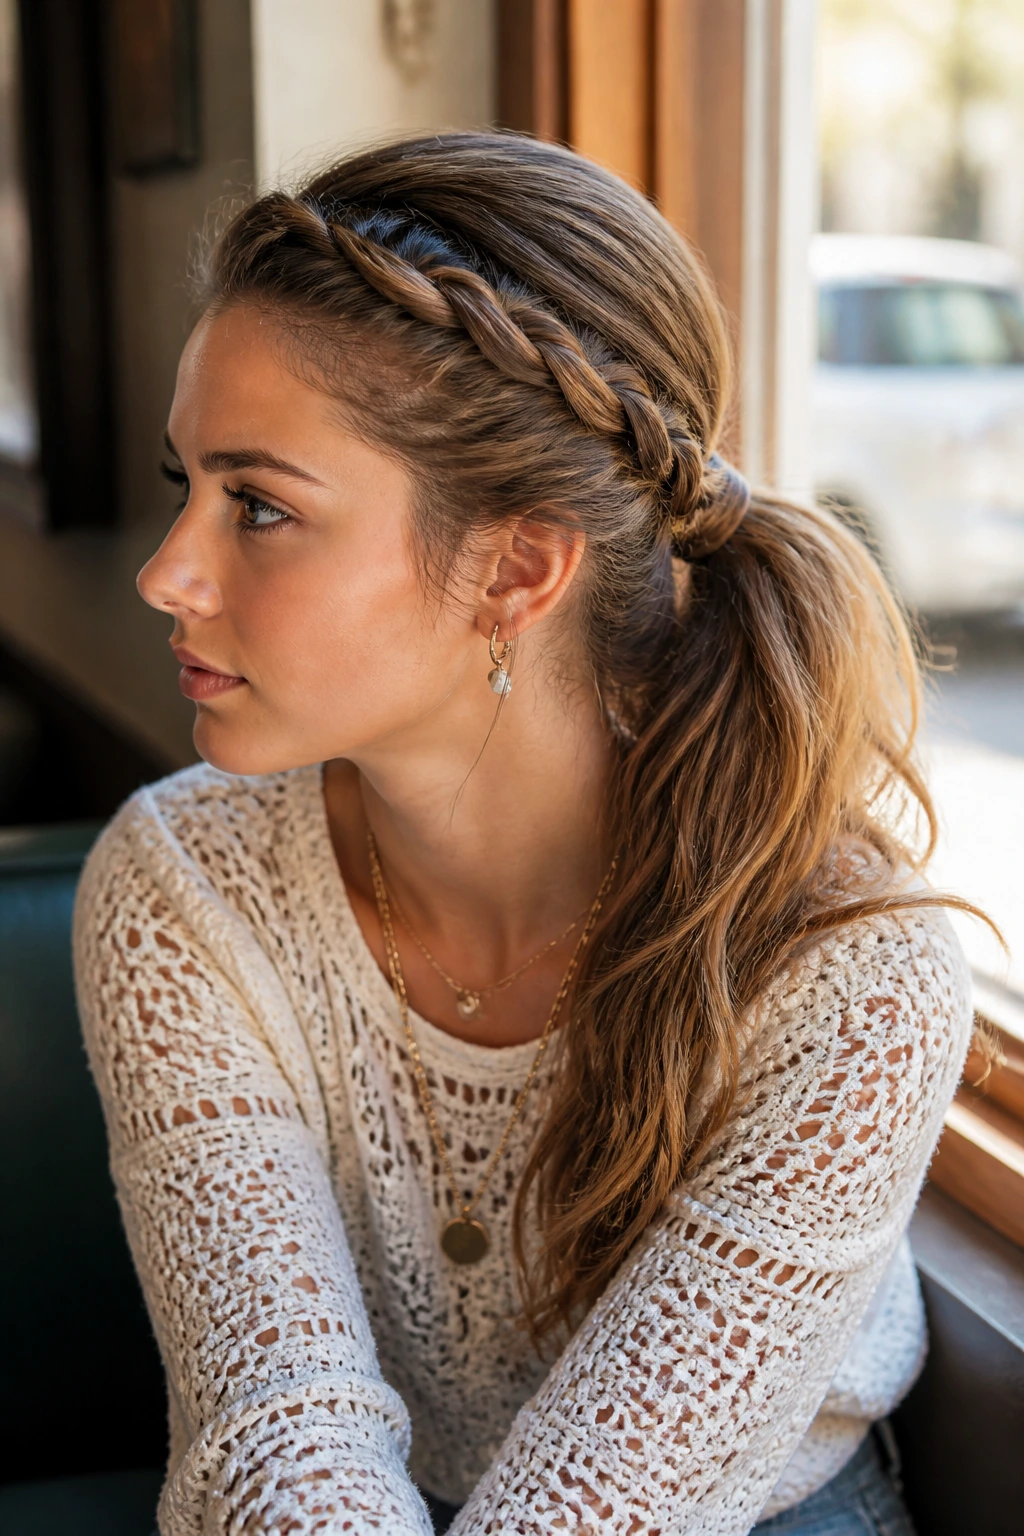
A small braid along the hairline can change the mood of the whole ponytail. You can do one braid on each side, or a single braided crown that feeds into the tail at the back. The result has a retro-festival feel, the kind of look that sits between 1970s sweetness and practical hair control.
Keep the braids narrow so they don’t overpower the pony. Pancake them slightly if you want them to look fuller. If your hair slips, clip the braid ends under the base before tying the tail, then hide the elastic with a wrapped strand.
13. Scarved Pompadour Pony
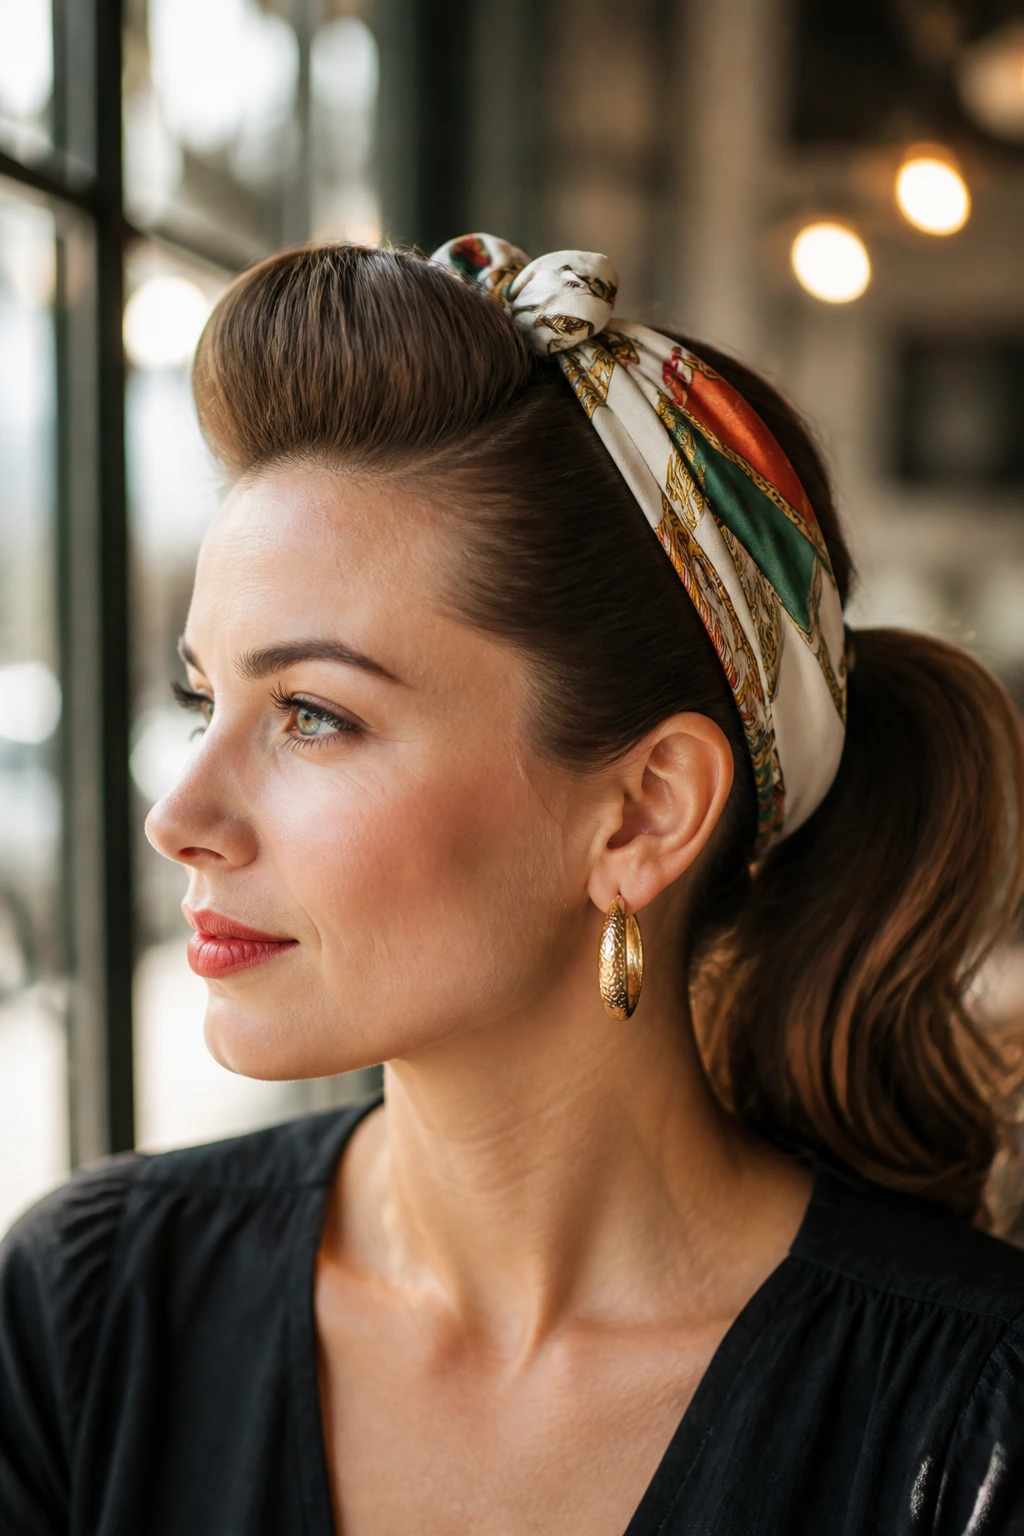
A scarf at the crown gives you height without having to tease the roots to death. Tie a silk or cotton scarf around the head, lift the front hair into a small pompadour, and let the pony sit low behind it. The scarf can either hide the elastic or become the star of the whole look.
The best scarves for this style are long enough to knot securely and soft enough not to fight the hairline. Satin is pretty, but it can slip if the hair is fine. A little texture in the fabric helps. Keep the tail sleek or slightly waved; the front already does the talking.
14. Soft Beehive Pony
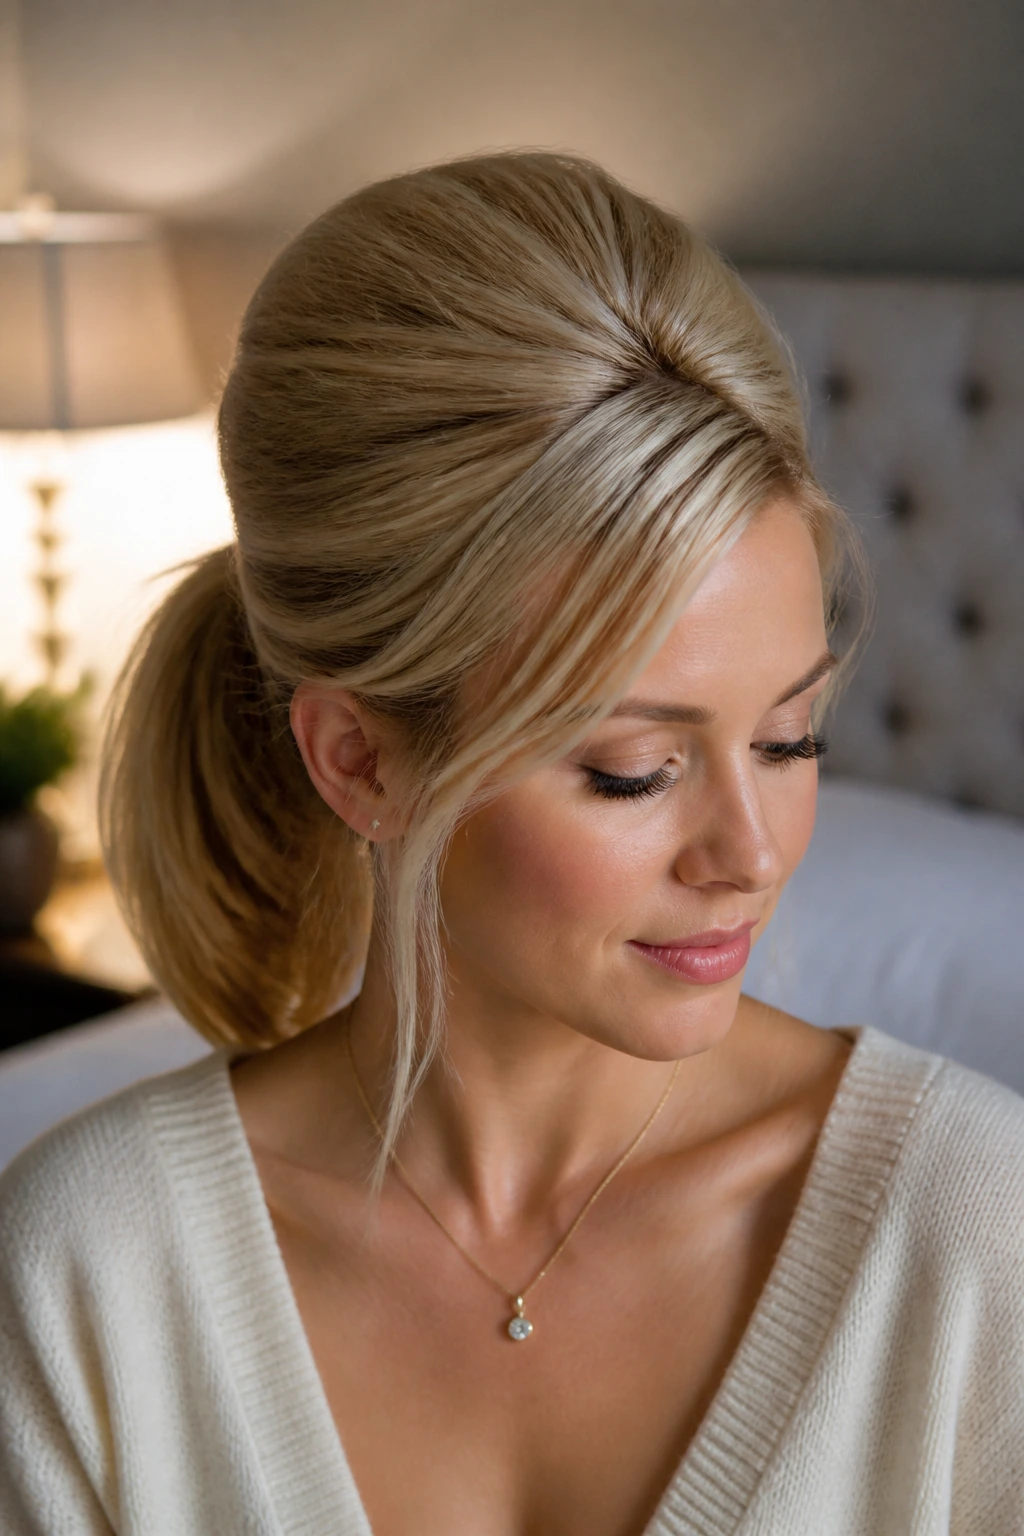
A beehive pony sounds theatrical, but the soft version is more wearable than people expect. You build the volume at the crown, smooth the outer shell, and let the pony drop from the back of that lifted shape. It reads as retro in a way that’s almost architectural.
Work in small sections when teasing. Bigger sections make the crown lumpy. Use a fine comb to smooth the outer layer, then lock it with a flexible spray. The pony itself can stay simple, which is the whole point. The contrast between the lifted top and the plain tail is what gives it shape.
15. Rope-Twist Pony
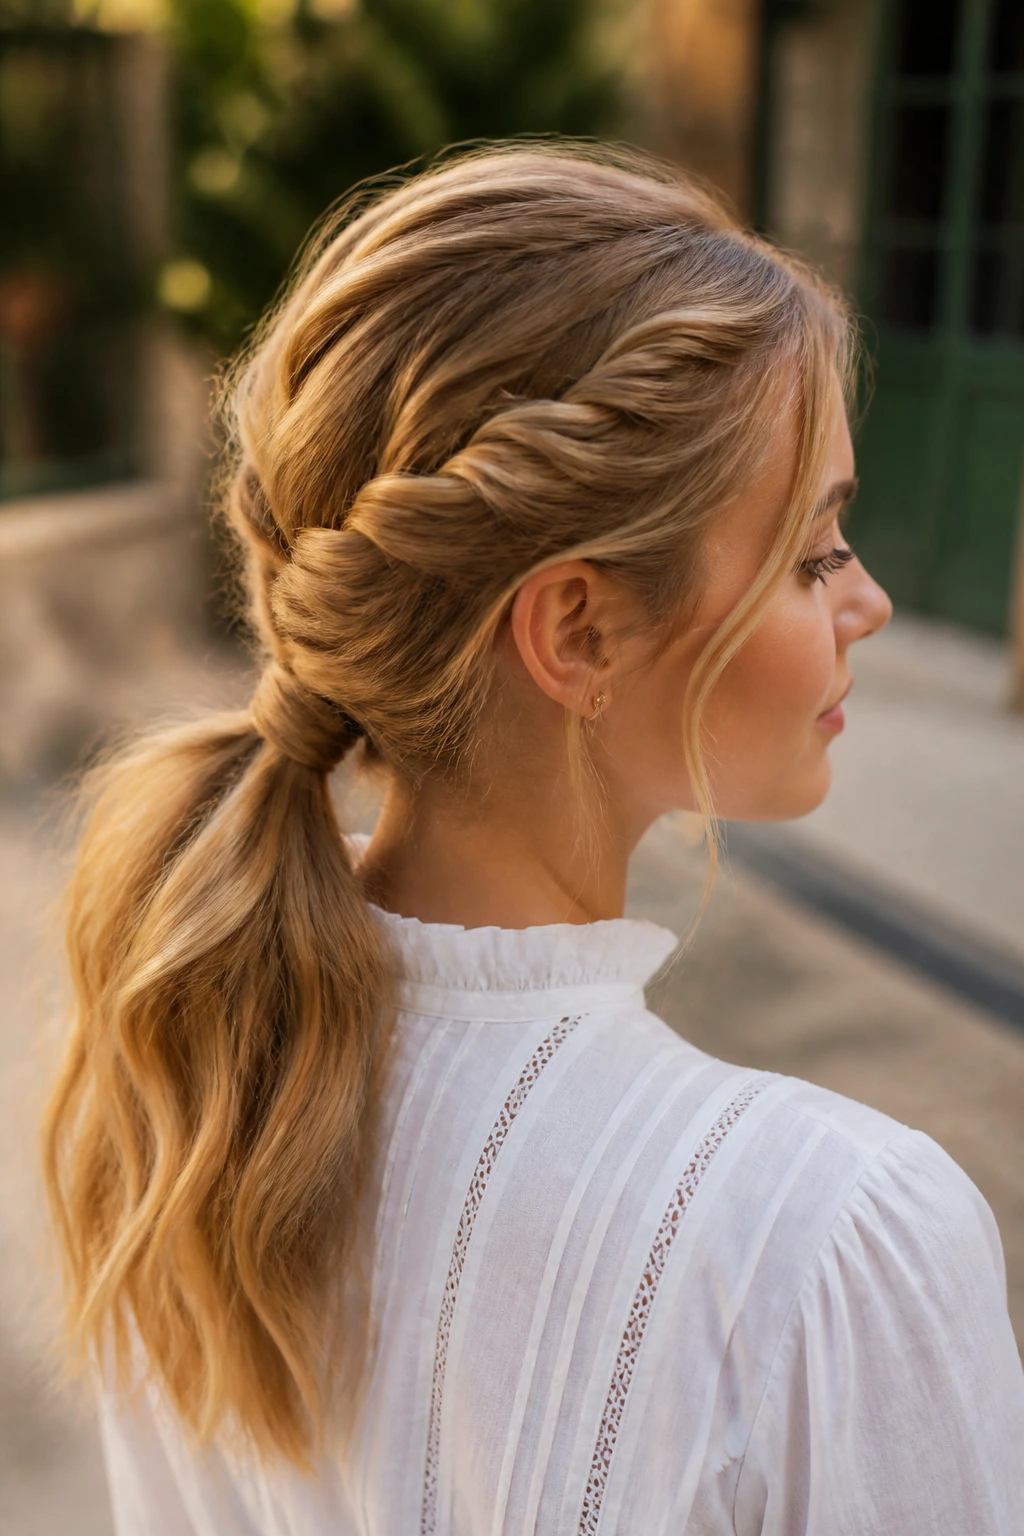
A rope twist adds a little movement without committing to a full braid. Split the hair into two sections, twist each one in the same direction, then wrap them around each other in the opposite direction before tying them into a pony or feeding them into one. The texture looks older than a regular braid and a touch more refined.
This style is good when you want control over layered hair. The twist keeps shorter pieces tucked in better than a smooth pony sometimes does. If the ends start to unravel, secure them with a tiny clear elastic and hide it with a ribbon or a wrapped strand.
16. Bandana Pin-Up Pony
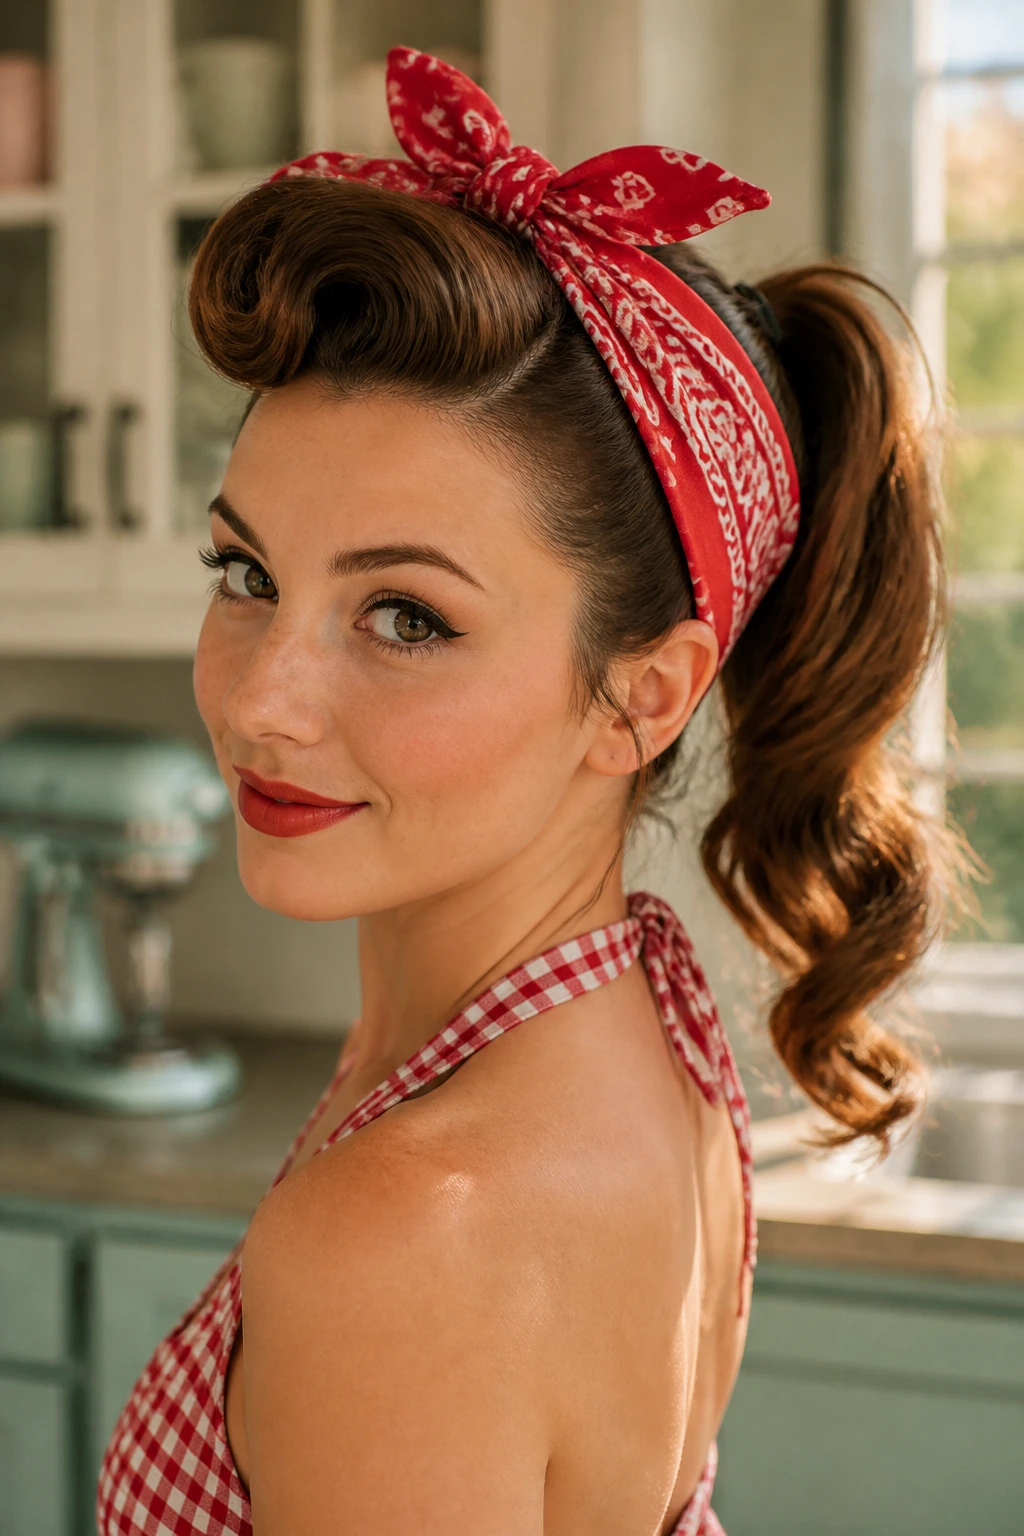
Fold the bandana into a long strip or a triangle, tie it across the crown, and keep the pony either high or low depending on how much pin-up energy you want. This style likes a little curl at the tail, but not tight spirals. Soft bends are enough.
Use the bandana to frame the face and pin the hairline in place. It’s a good answer for day-old hair that needs structure. If the fabric feels slippery, put a couple of hidden bobby pins under the knot so it doesn’t creep backward during the day.
17. Feathered Seventies Pony
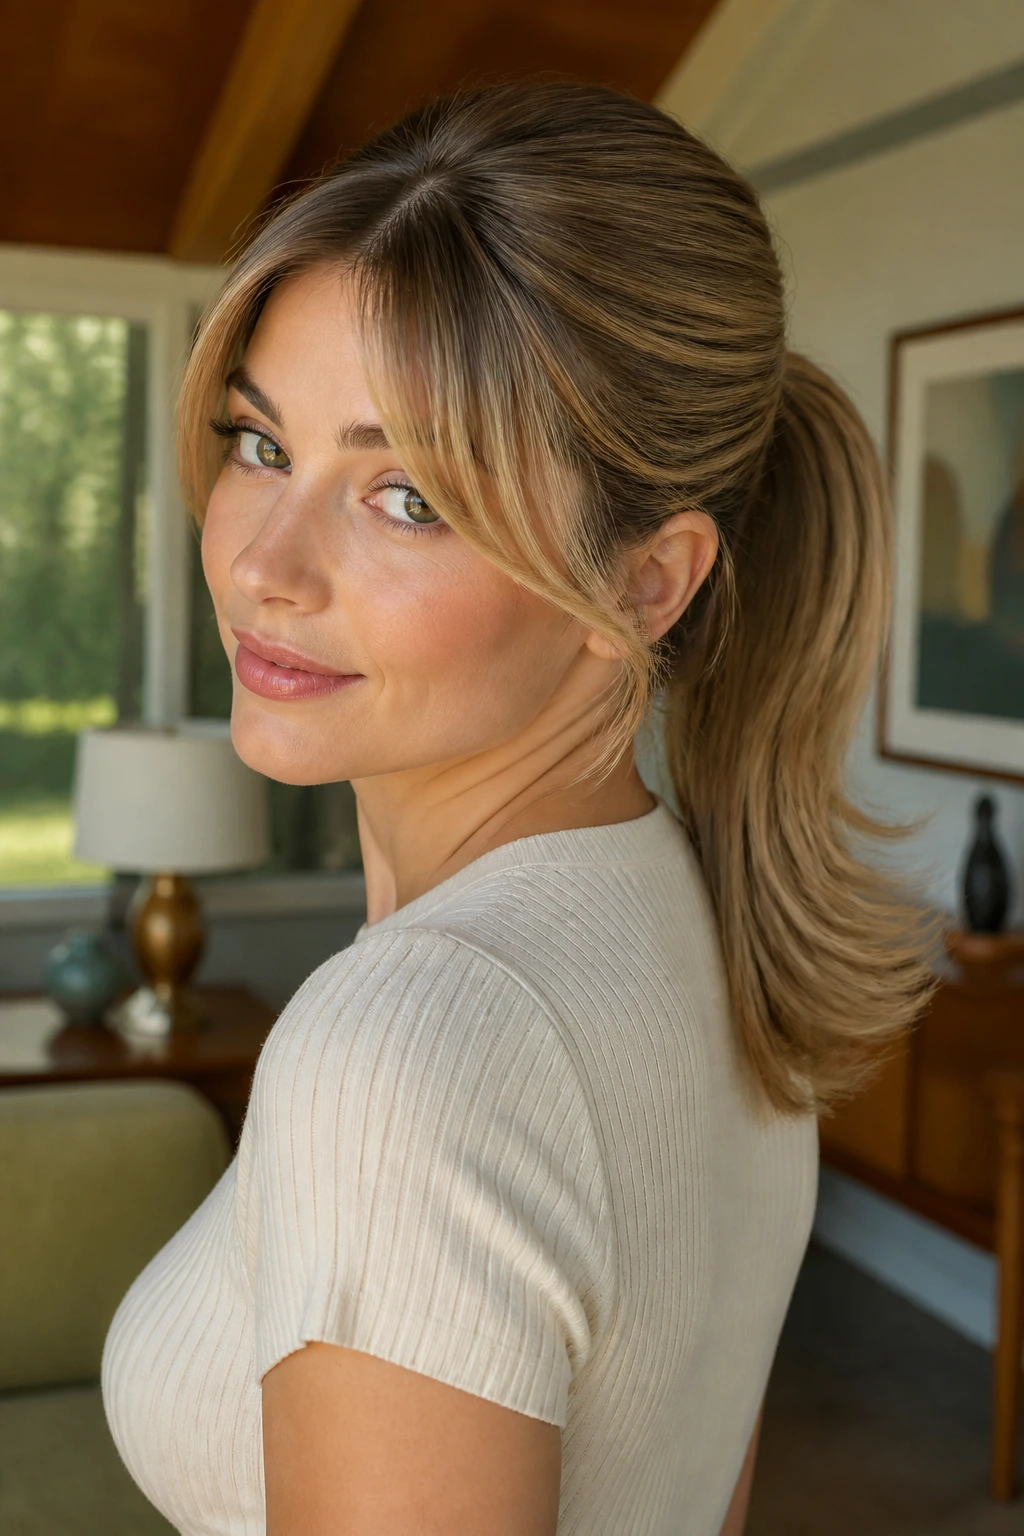
Feathered ends make this ponytail feel a little more laid-back than the earlier styles, with a softer 1970s finish. Blow-dry the hair with a round brush, direct the ends outward, and let a few face-framing layers stay loose. The tail should move when you turn your head.
This style works especially well if your layers already have some shape. If they don’t, a quick pass with a medium-barrel iron on the outer lengths helps. You want airy movement, not stiff ringlets. A light mist of texturizing spray at the ends keeps the feathering visible.
18. Sculpted Side Pony
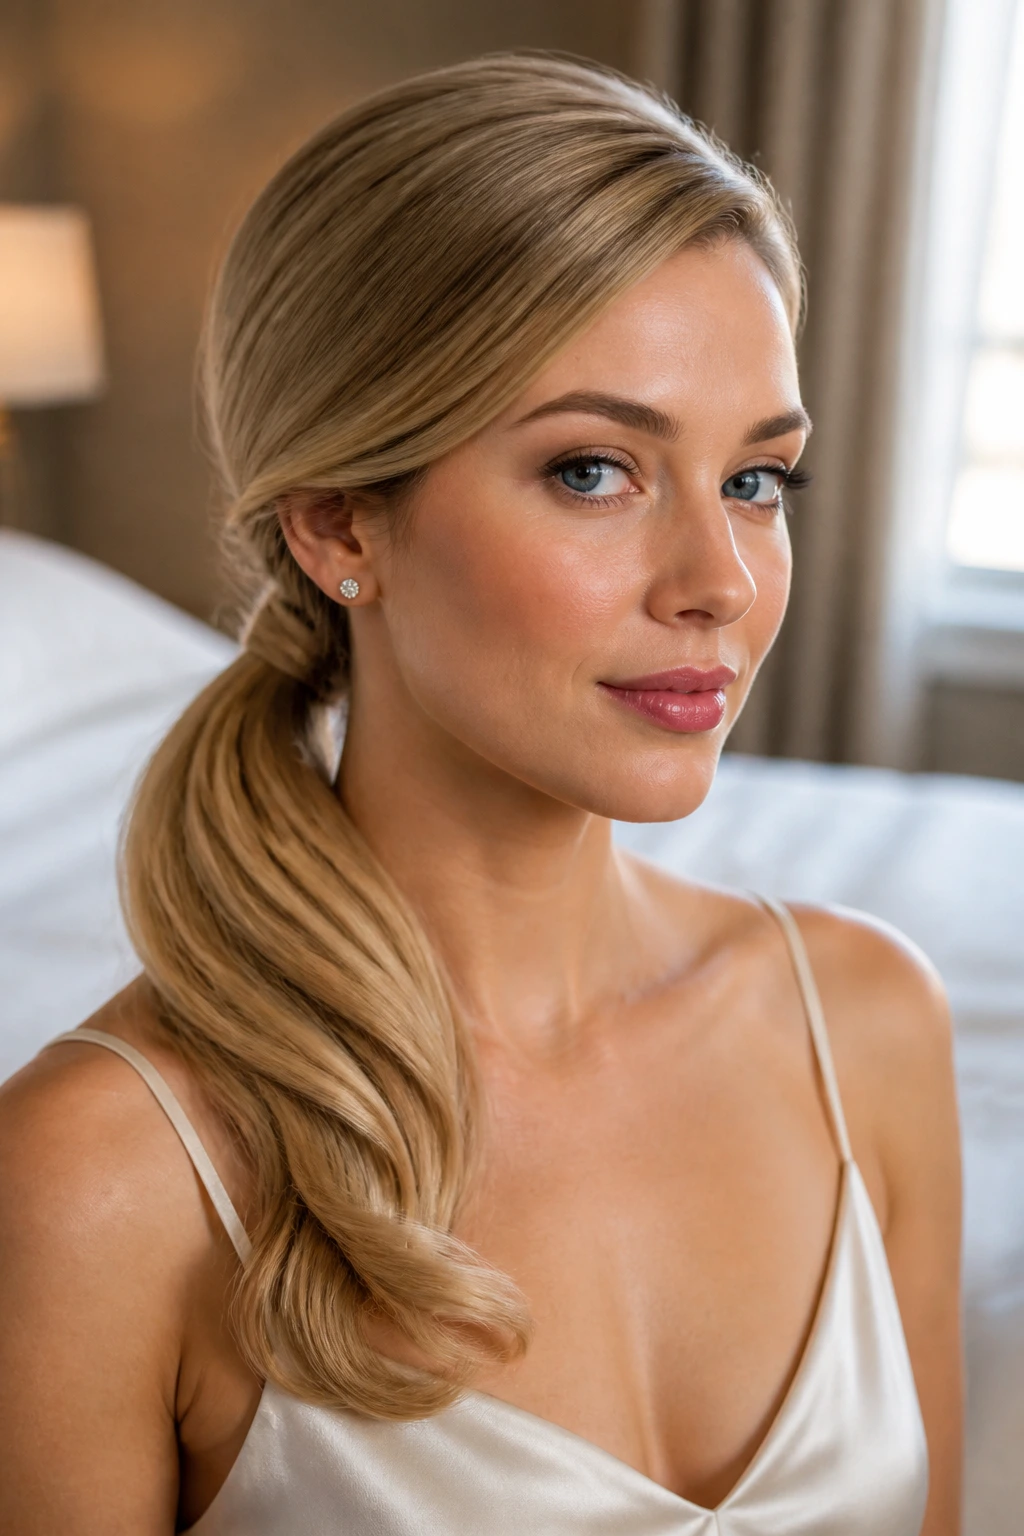
A side pony can look childish if it’s done casually, but a sculpted one has real presence. Move the part low and deep, smooth the top toward one shoulder, and let the tail fall over the collarbone with a little bend near the ends. The line across the head is what makes it feel elegant.
This is one of the best styles for statement earrings because the hair leaves the face open on one side. If the pony falls forward too much, pin a hidden anchor just behind the base so the tail sits where you want it. A soft wave through the lower half keeps it from looking severe.
19. Wrapped Elastic Pony
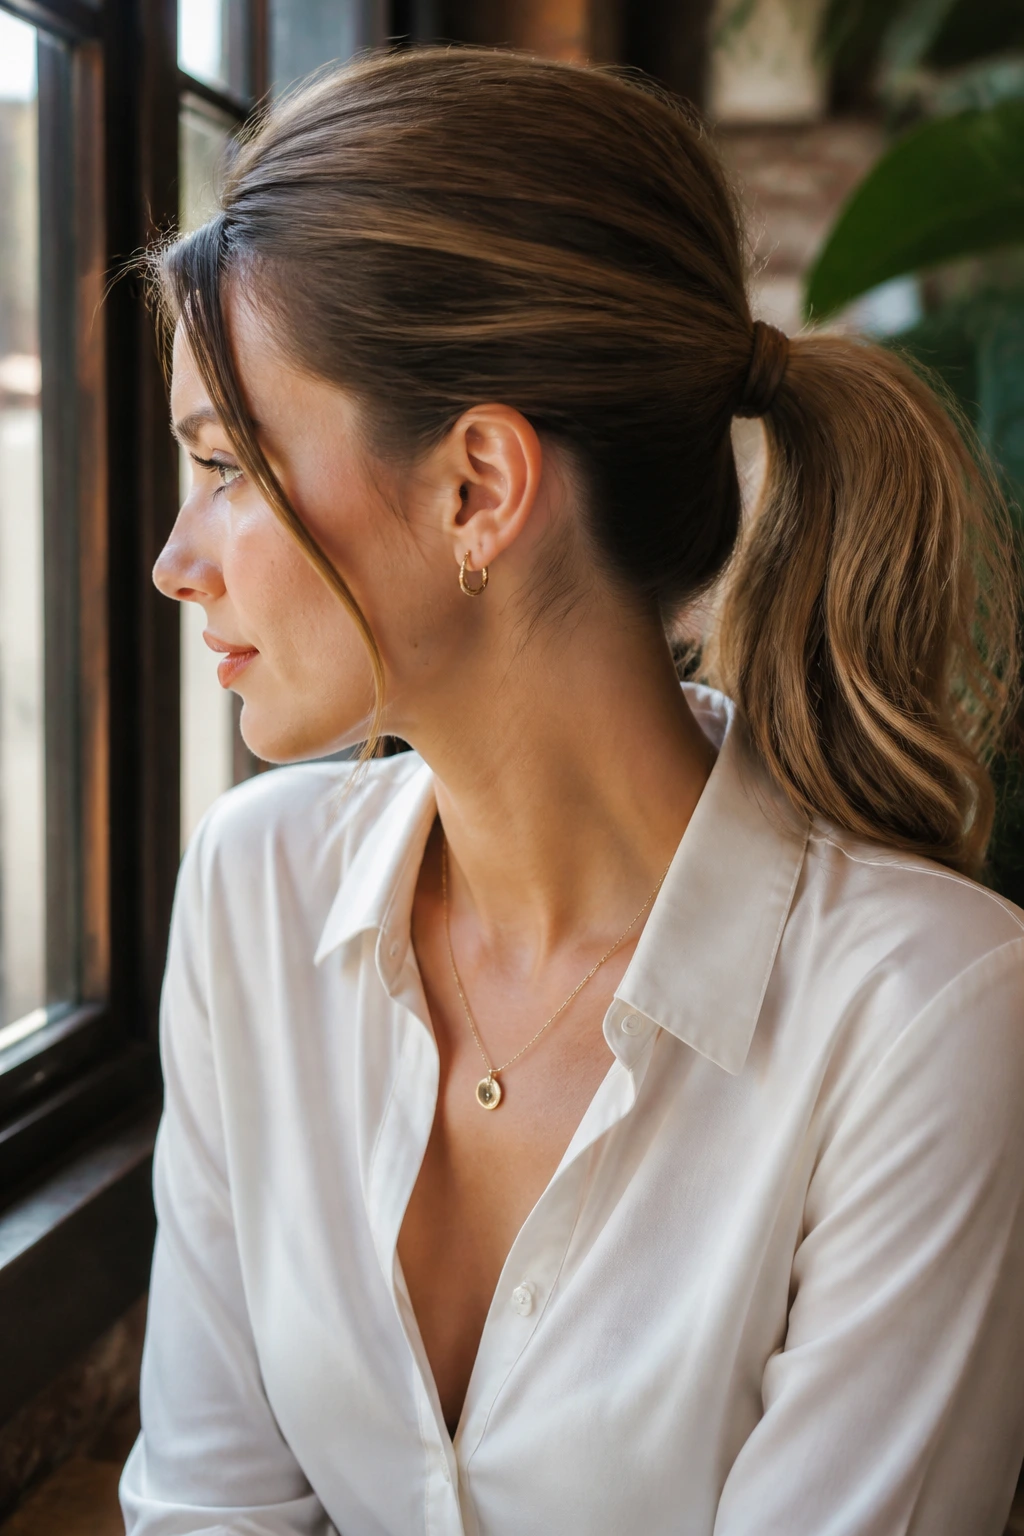
Sometimes the vintage detail is the smallest one. A wrapped elastic pony uses one neat strand of hair to hide the hair tie, and that tiny move makes the whole style look cleaner. Add a little crown lift or a subtle wave through the tail, and the effect moves from basic to deliberate.
I like this style when the rest of the outfit is already doing a lot. A printed dress, bold lipstick, or a strong neckline can all handle the simplicity. Keep the wrapped section tight and secure it underneath with a flat bobby pin. If the wrap loosens, the whole illusion breaks.
20. Rolled Fringe Pony
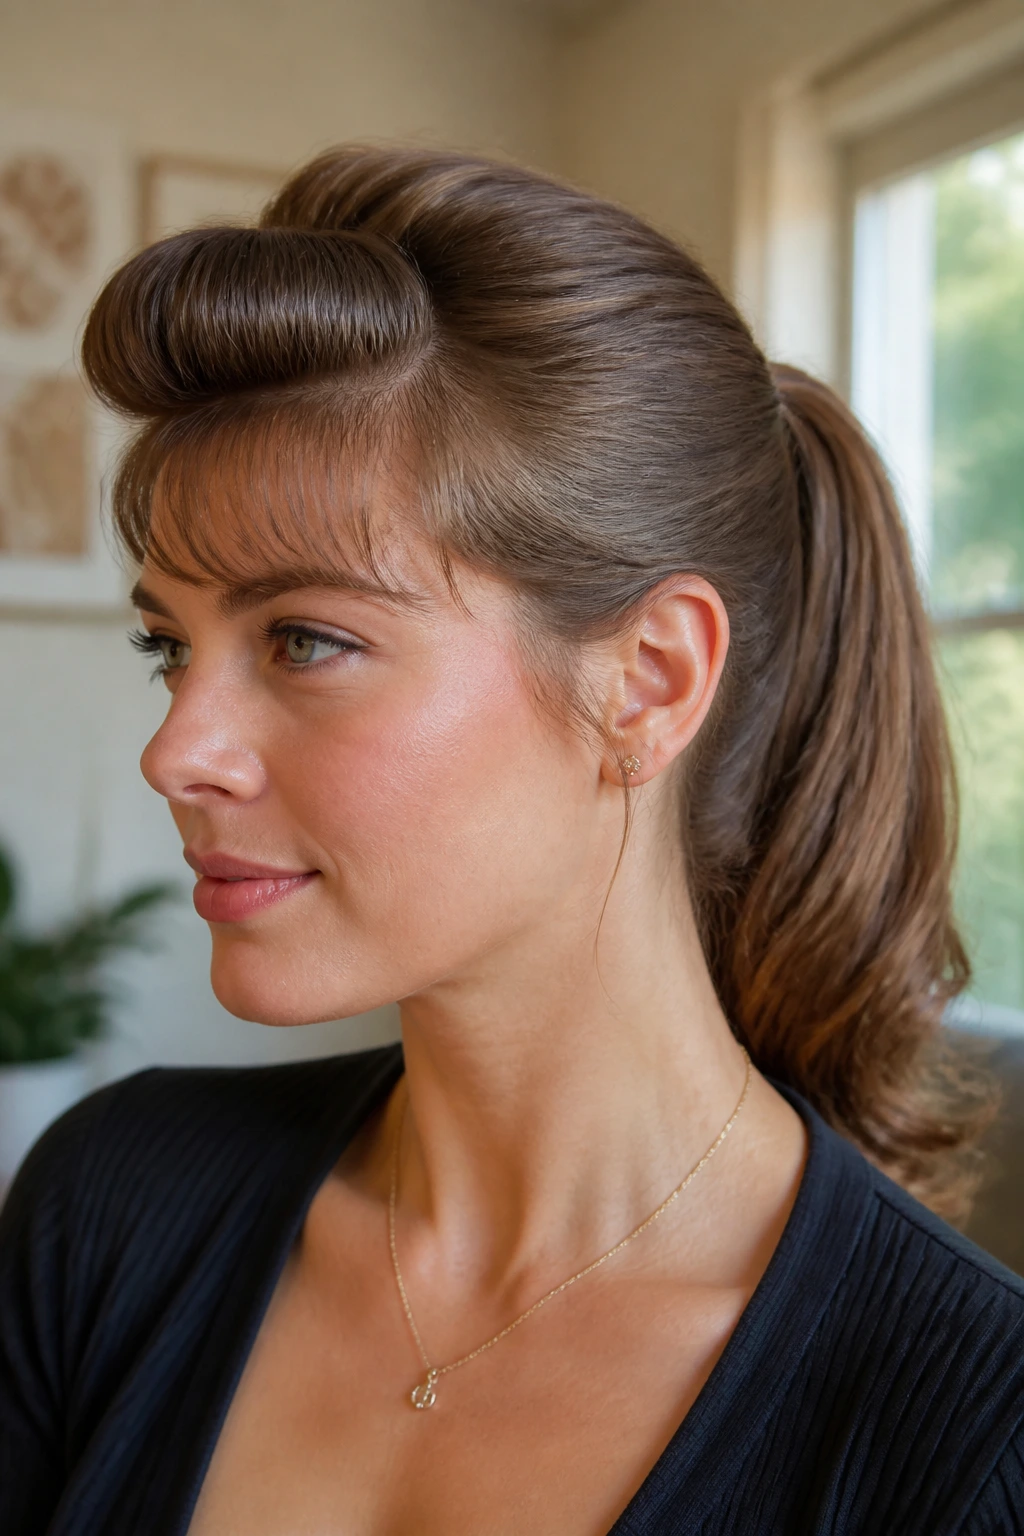
If you have bangs or a long fringe, this one is a gem. Roll the front section back slightly, or brush it forward and then tuck the edge under, so the forehead area feels shaped instead of left alone. Pull the rest into a pony at the nape or mid-head.
The roll doesn’t need to be dramatic. Even a small bend changes the silhouette. Use a round brush and a quick blast from the dryer, then pin while it cools if your fringe is stubborn. The vintage feel comes from that front shape, not from making the pony itself complicated.
21. Glossy Low Knot Pony
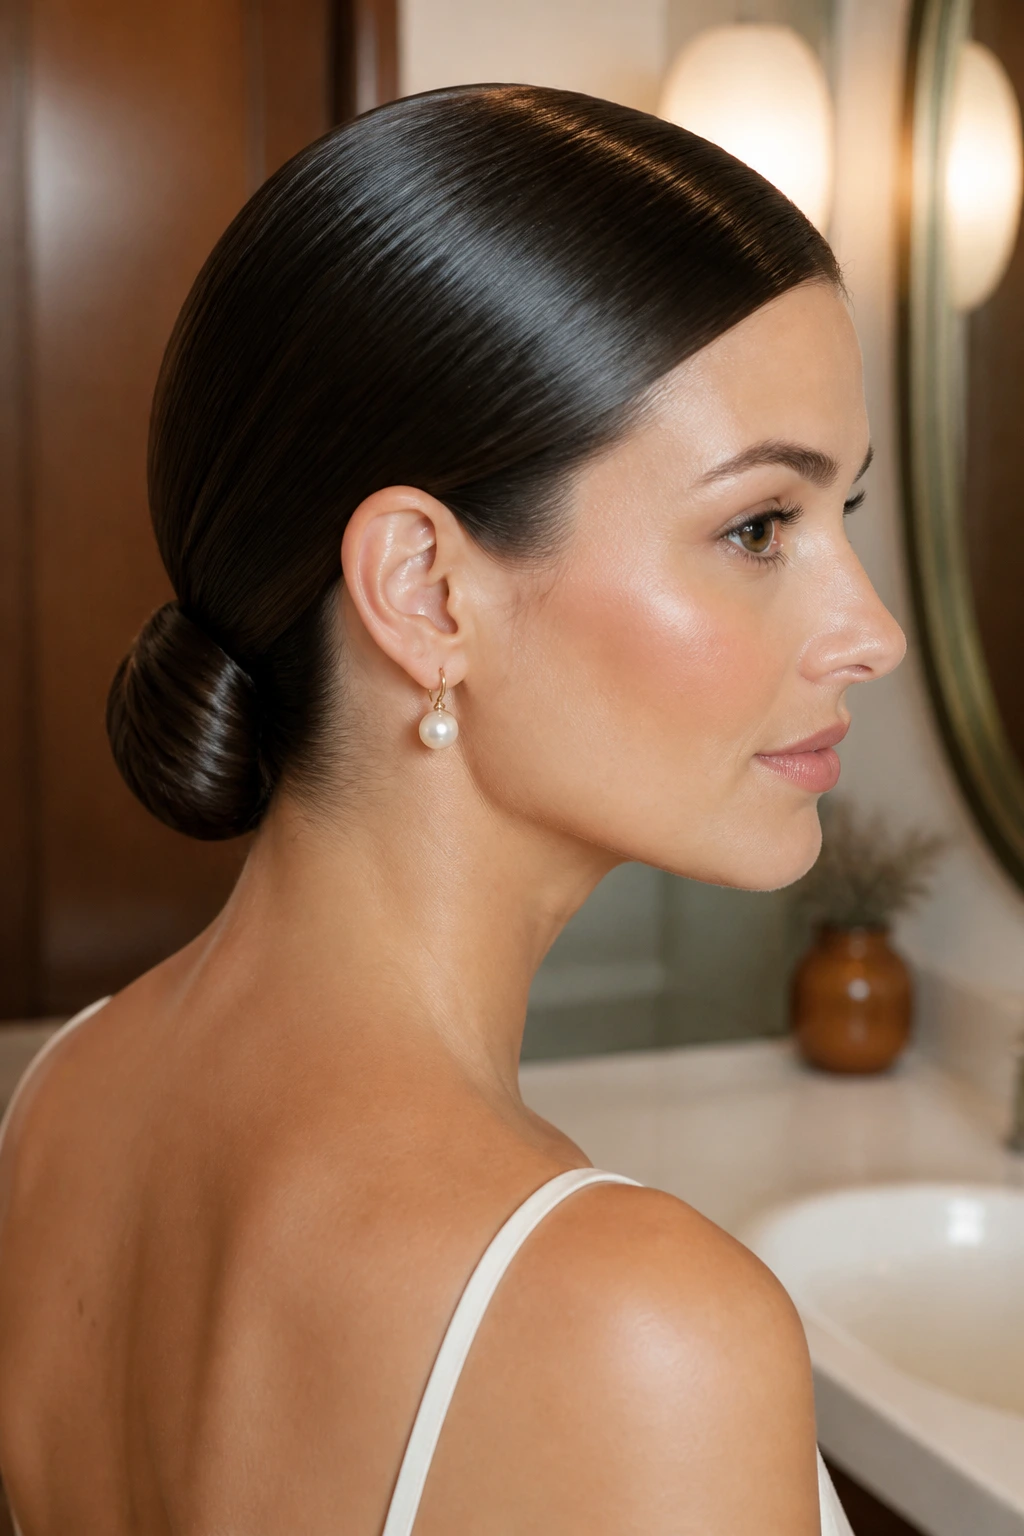
This style sits halfway between a ponytail and a low knot, and that’s why it feels so chic. Secure the hair into a low pony, twist the lengths into a compact knot, then pin the knot flat against the nape while leaving the base visible. It has a restrained, mid-century evening feel.
Gloss matters here. The smoothness of the roots and the shine on the tail are what make it read as polished instead of casual. Use a small amount of serum on the mids and ends, not the top. If your hair is thick, split the tail into two sections before twisting so the knot stays flat.
22. Faux-Chignon Pony
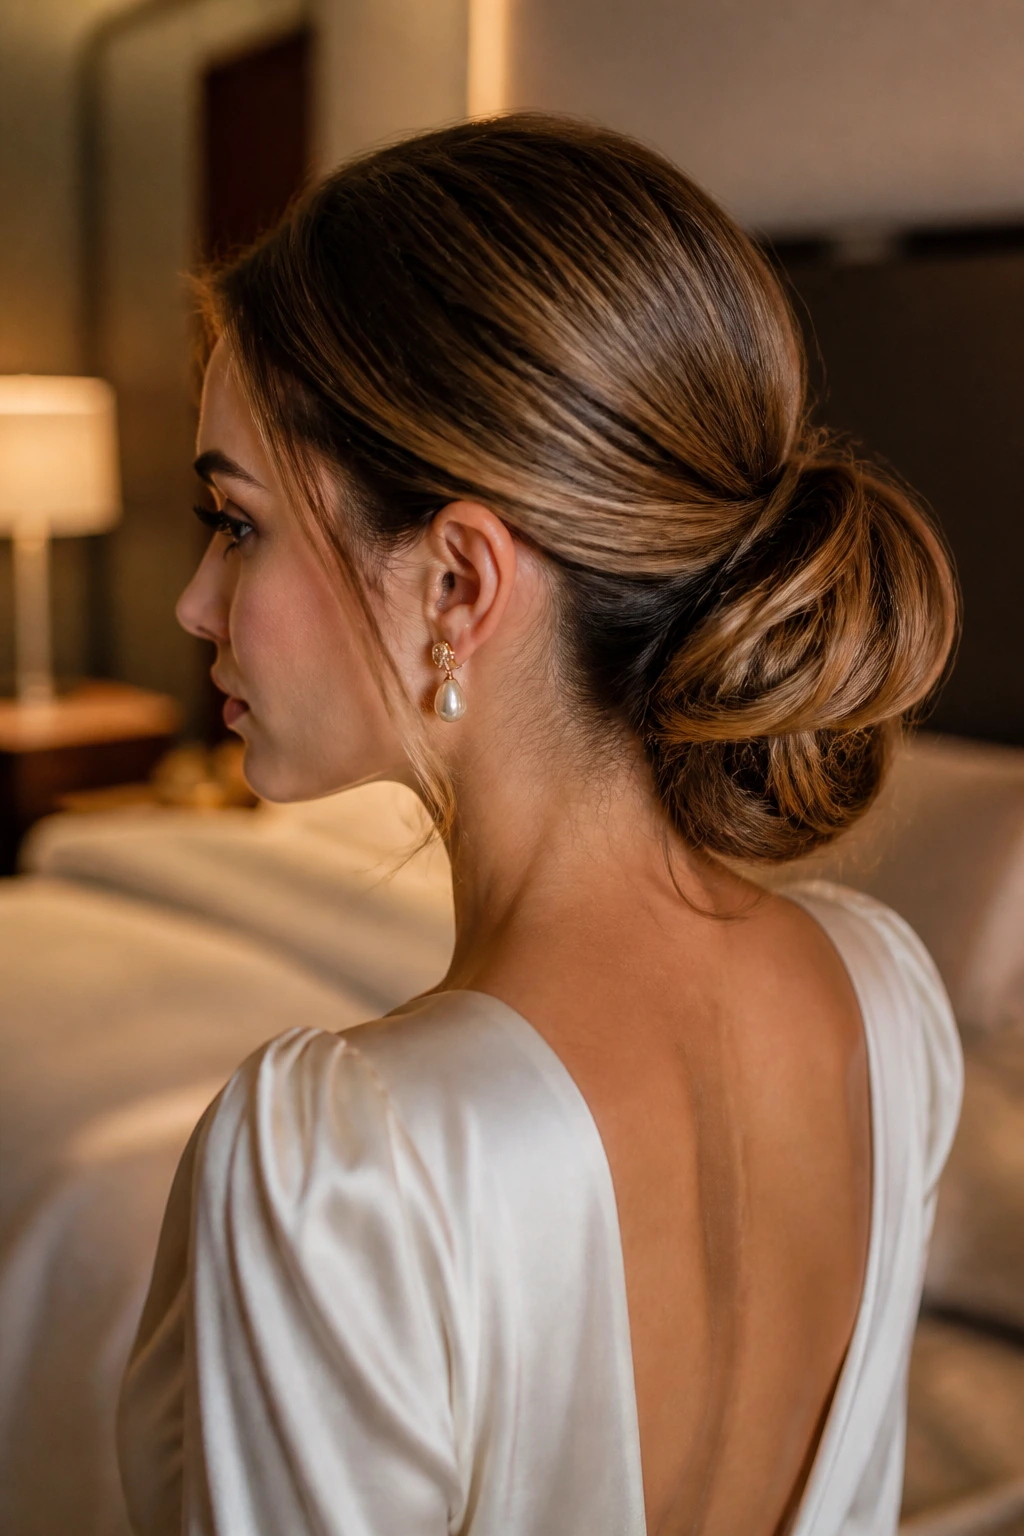
A faux-chignon pony has the grace of a chignon with the easier setup of a pony. Tie the hair low, tuck the tail inward, and pin it so the ends disappear into a rounded shape at the back of the head. It’s a nice choice when you want something formal but not fussy.
The trick is to keep the shape soft. A perfect donut-like circle can look stiff. Let a few ends curve or blur at the edges. If your hair is shoulder length, this is easier than you’d think; if it’s longer, you may need to fold the tail twice before pinning.
23. Pearl-Barrette Pony
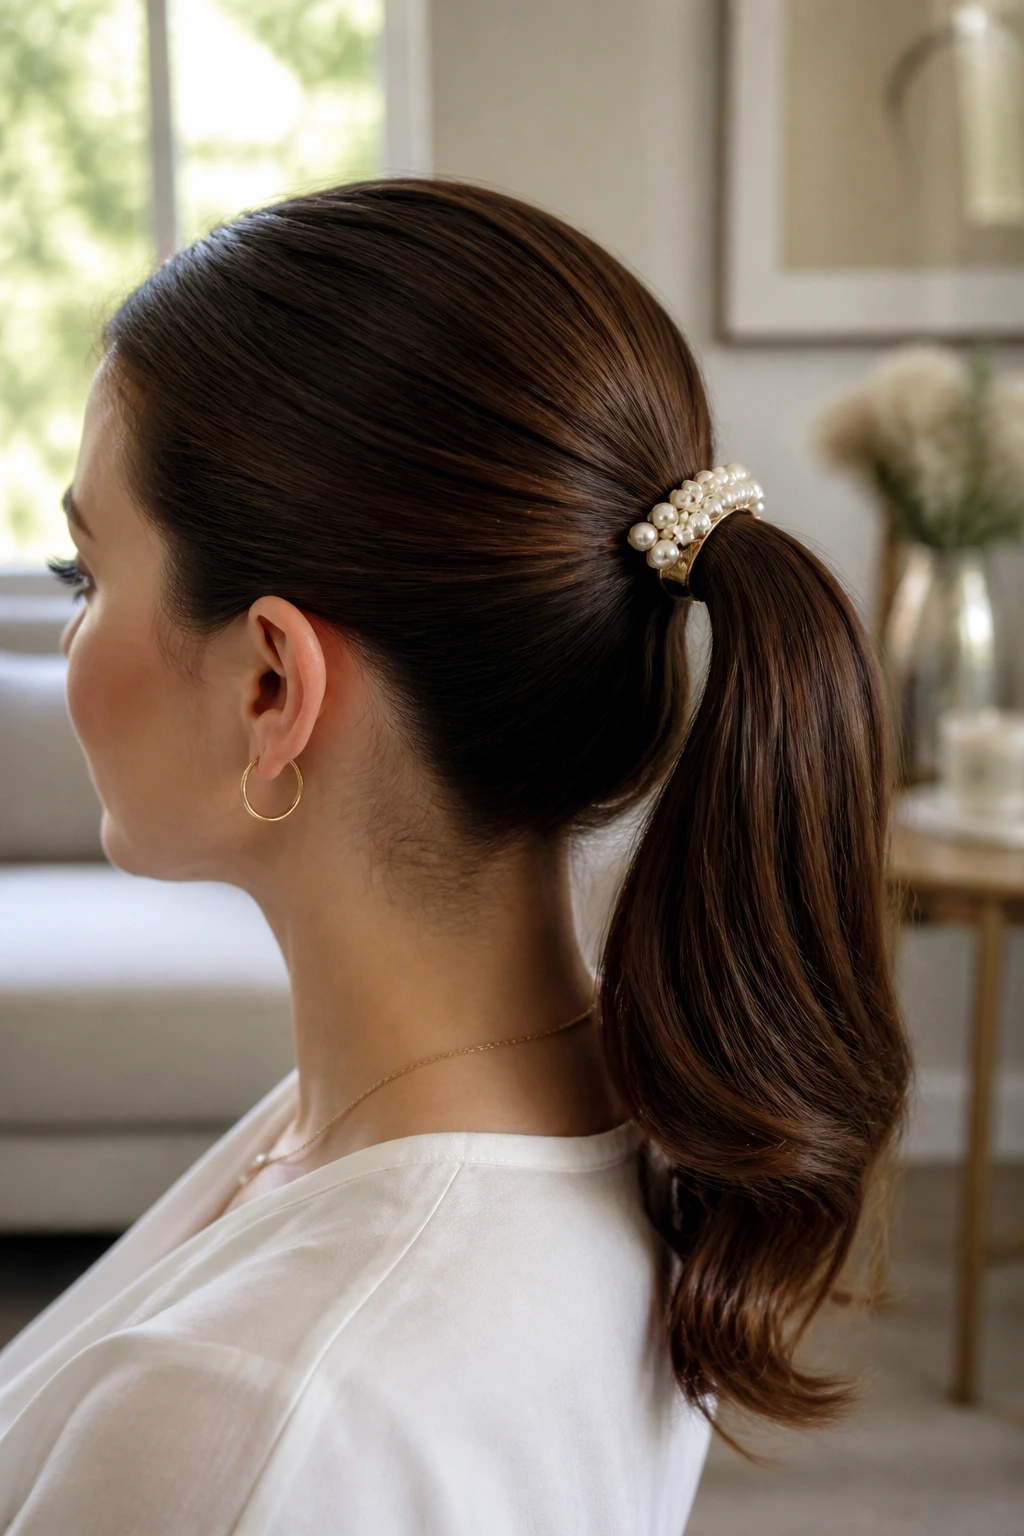
A pearl barrette does the styling work for you. Pull the hair back smoothly, secure the pony at the nape or mid-height, and clip a pearl barrette over the elastic or slightly above it. The accessory adds enough old-fashioned shine that the rest can stay simple.
This is one of my favorite answers for hair that doesn’t hold teasing well. You don’t need volume if the ornament is doing the visual lifting. Keep the tail sleek, or add a single bend at the end. The barrette should look like a deliberate finish, not an afterthought clipped on because the elastic was ugly.
24. Loose Retro Waves Pony
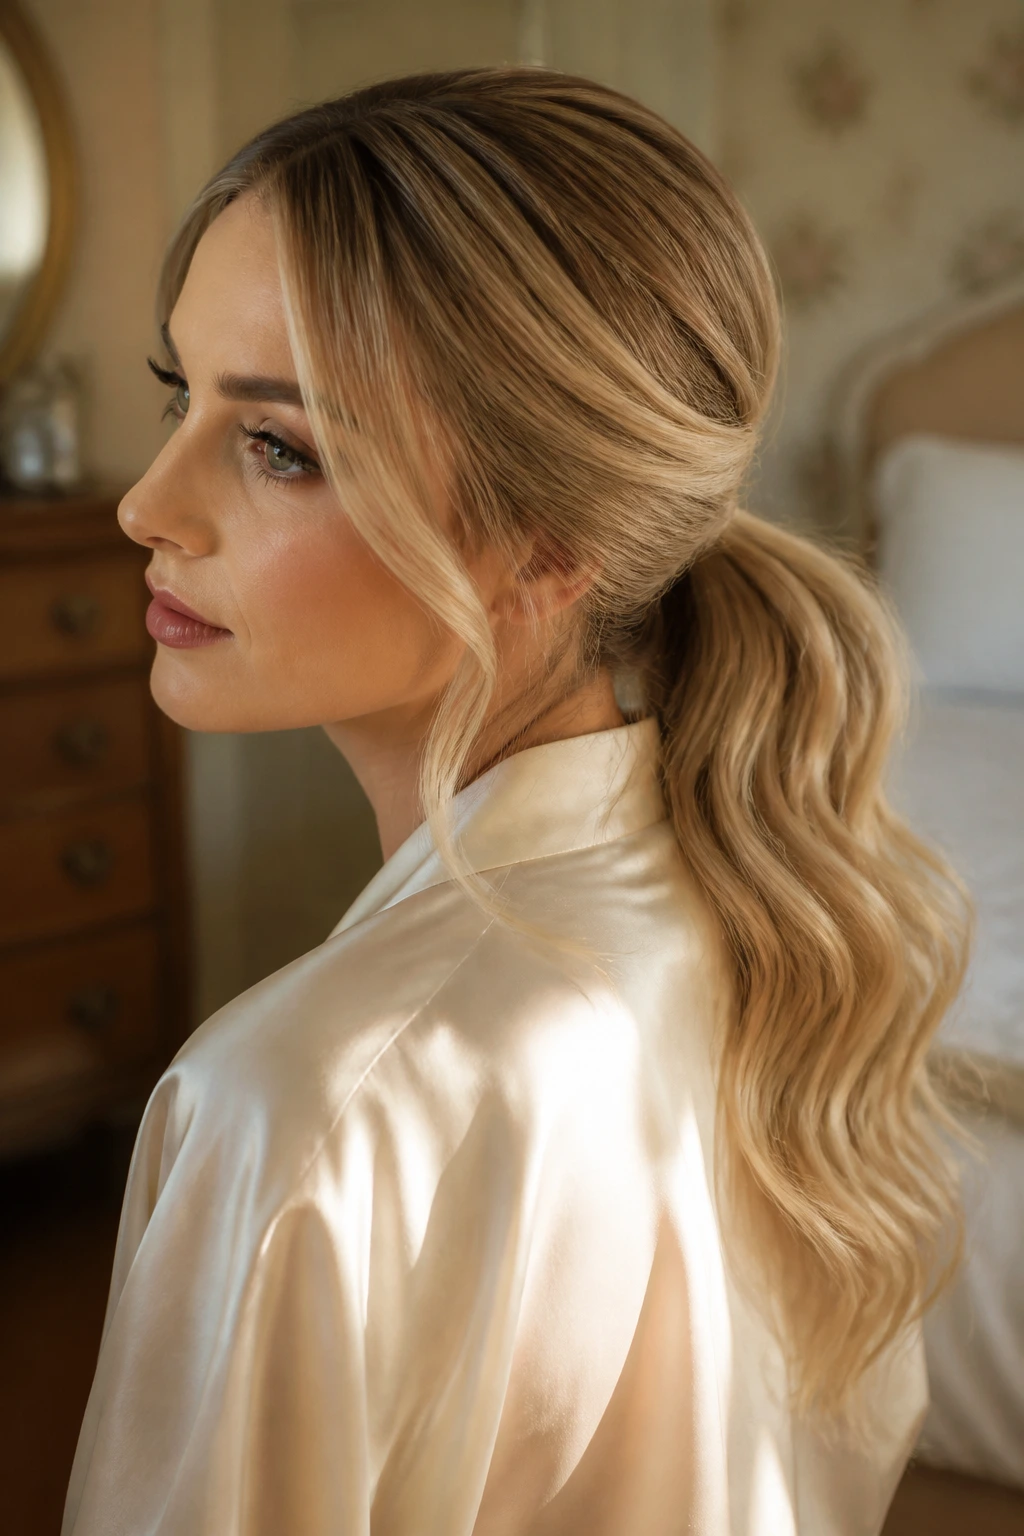
A loose retro wave pony is the one I’d hand to someone who says they don’t have time for anything elaborate. Make a low or mid pony, curl the lengths in broad waves, then brush them out just enough so the shape softens. It keeps the movement of waves but still reads as a ponytail.
The parting matters here. A clean side part or a center part can swing the style in a different direction. Side parts feel more 1940s; center parts read a bit more 1970s. Either way, keep the roots smooth and let the tail do the soft work.
25. High Crown Flip Pony
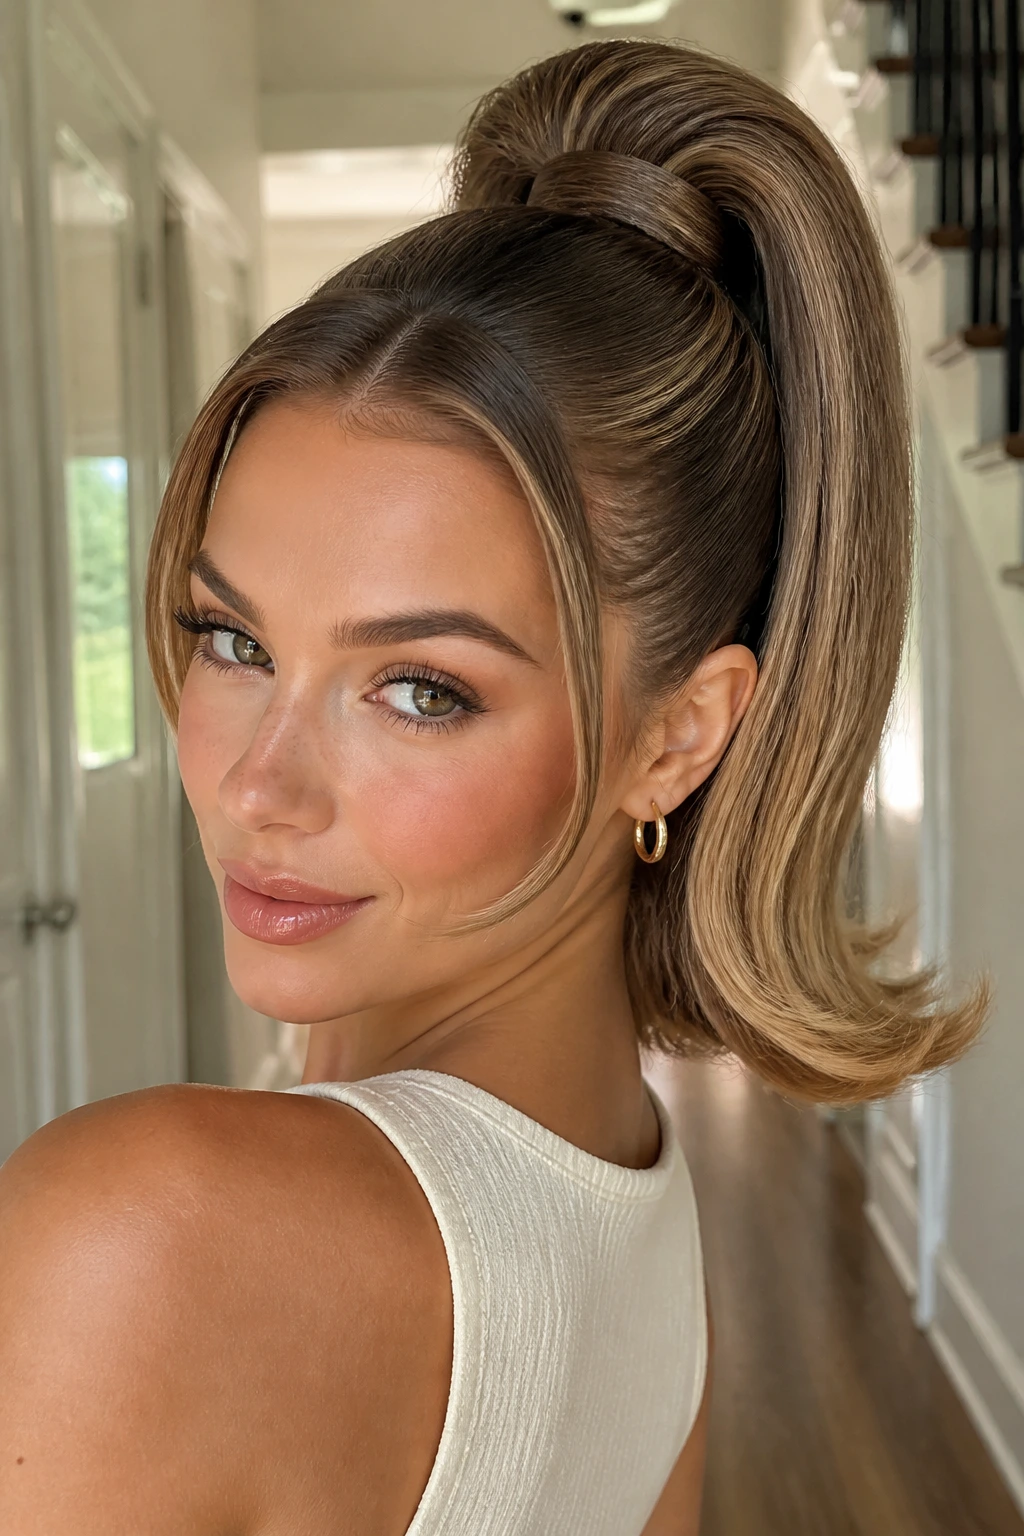
A high crown flip pony is playful, a little glamorous, and much easier than it looks. Build height at the crown, secure the pony higher than mid-head, and flip the ends upward or outward so they bounce instead of hanging straight. It has a pageant-hall edge without going overboard.
The crown lift needs to be smooth, not rough. Tease lightly, then brush the top layer back into place. If your hair is heavy, pin the base from underneath with two crossed bobby pins so the pony doesn’t slide downward by noon. The flip at the end should look intentional, not accidental.
26. Lace-Trim Ribbon Pony
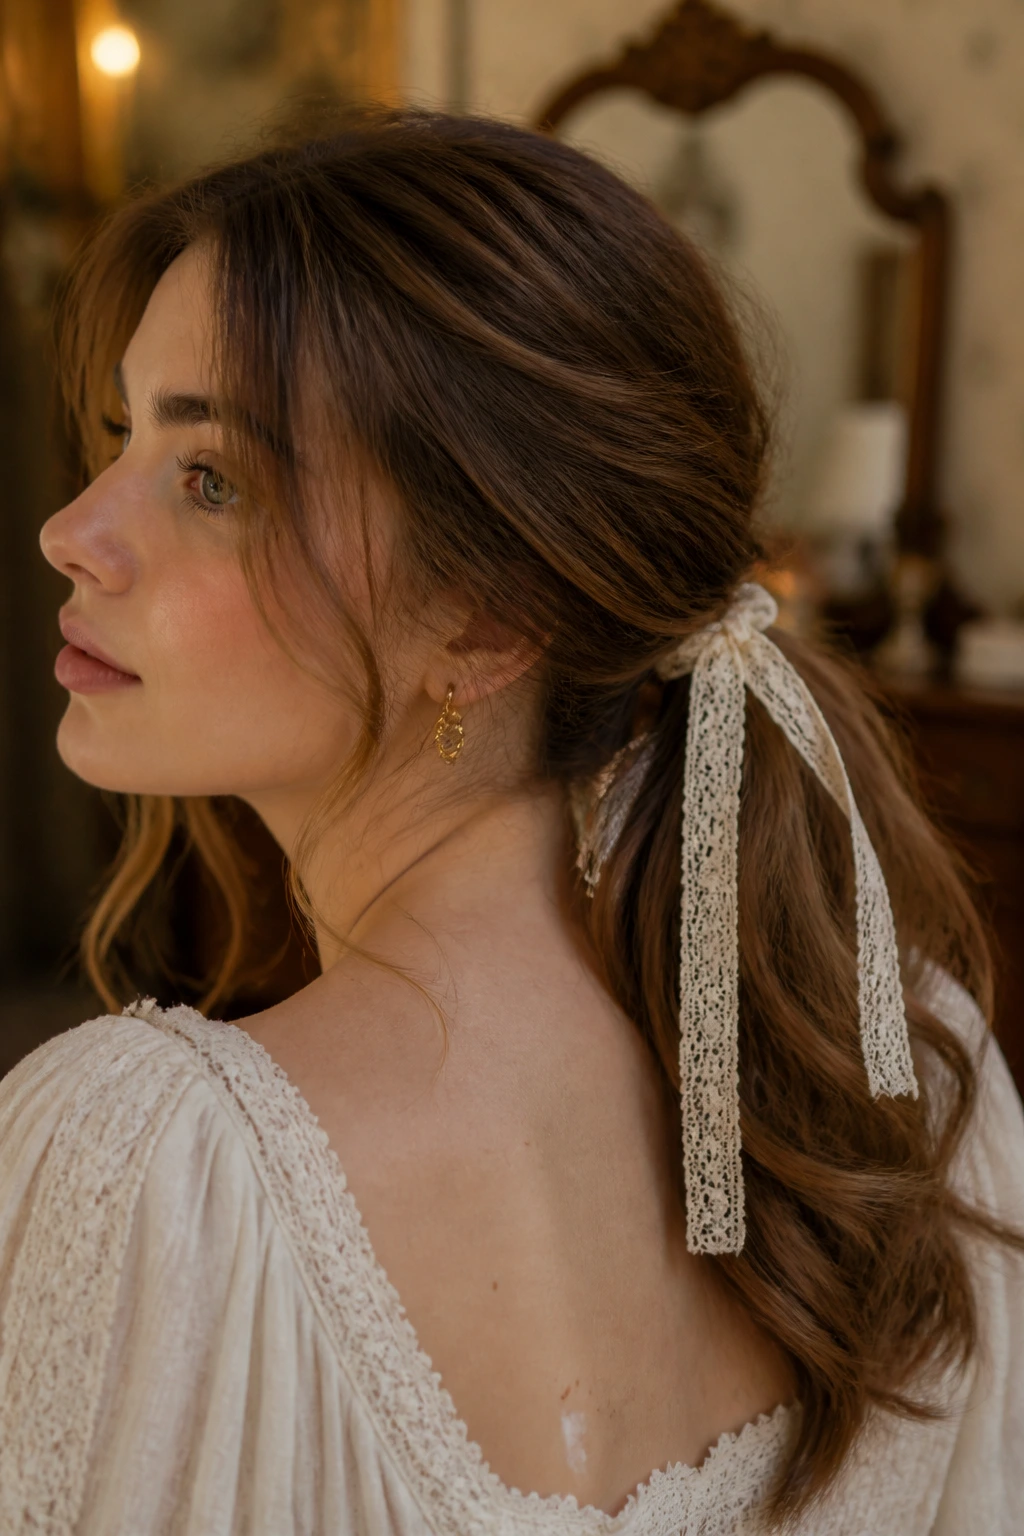
A lace ribbon brings a softer, more romantic version of vintage styling. Tie it around a low pony, let the tails fall over the hair, and keep the rest of the style simple so the lace gets room to show. It feels old-fashioned in the best way, like something borrowed from a dressing table drawer.
Choose lace that’s narrow enough not to swallow the hairline. Wide lace can dominate the style. The pony itself can be sleek or slightly waved; either way, the lace adds texture near the base. If you want it to last all day, tie the ribbon over a small hidden elastic so the fabric isn’t carrying the entire job.
27. Sleek Pageant Pony
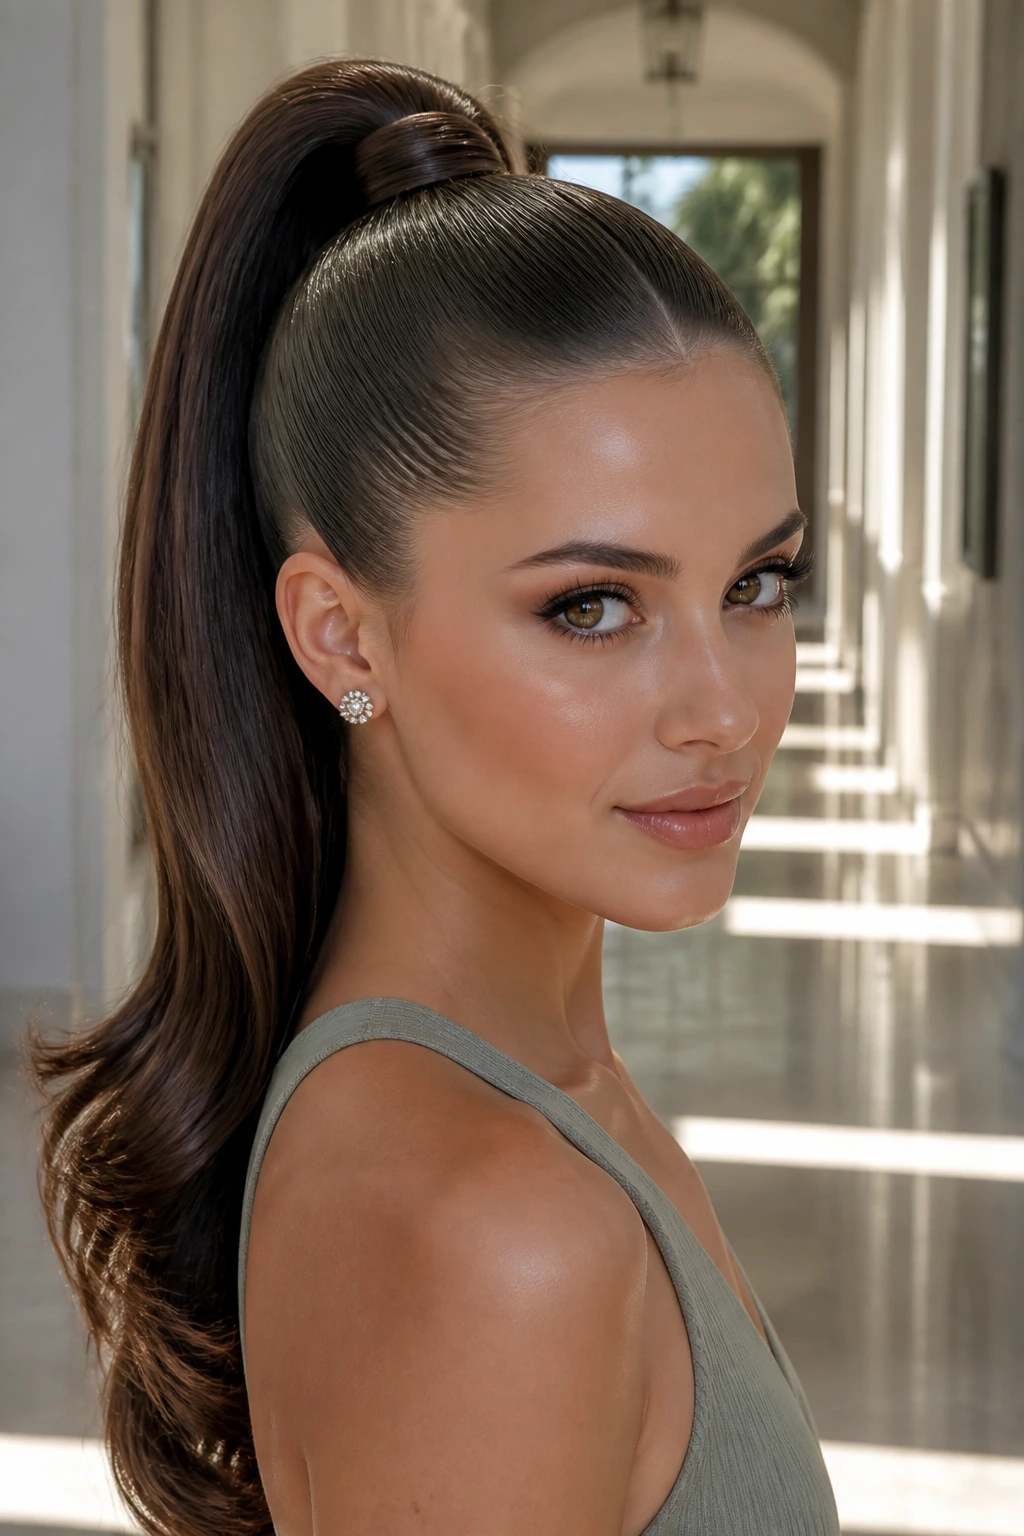
This one is all about shine and control. Brush the hair upward into a high pony, smooth the surface with a boar bristle brush, and finish with enough hairspray to keep flyaways pinned down. The tail should be glossy, dense, and clean-edged, with no fuzzy halo around the crown.
It’s a strong style for long hair because length gives the tail more drama. If your hair is shorter, the same shape still works, but the tail will look more compact. Either way, don’t overload it with product. Too much serum at the roots makes it look greasy instead of sleek.
28. Bump-and-Swoop Pony
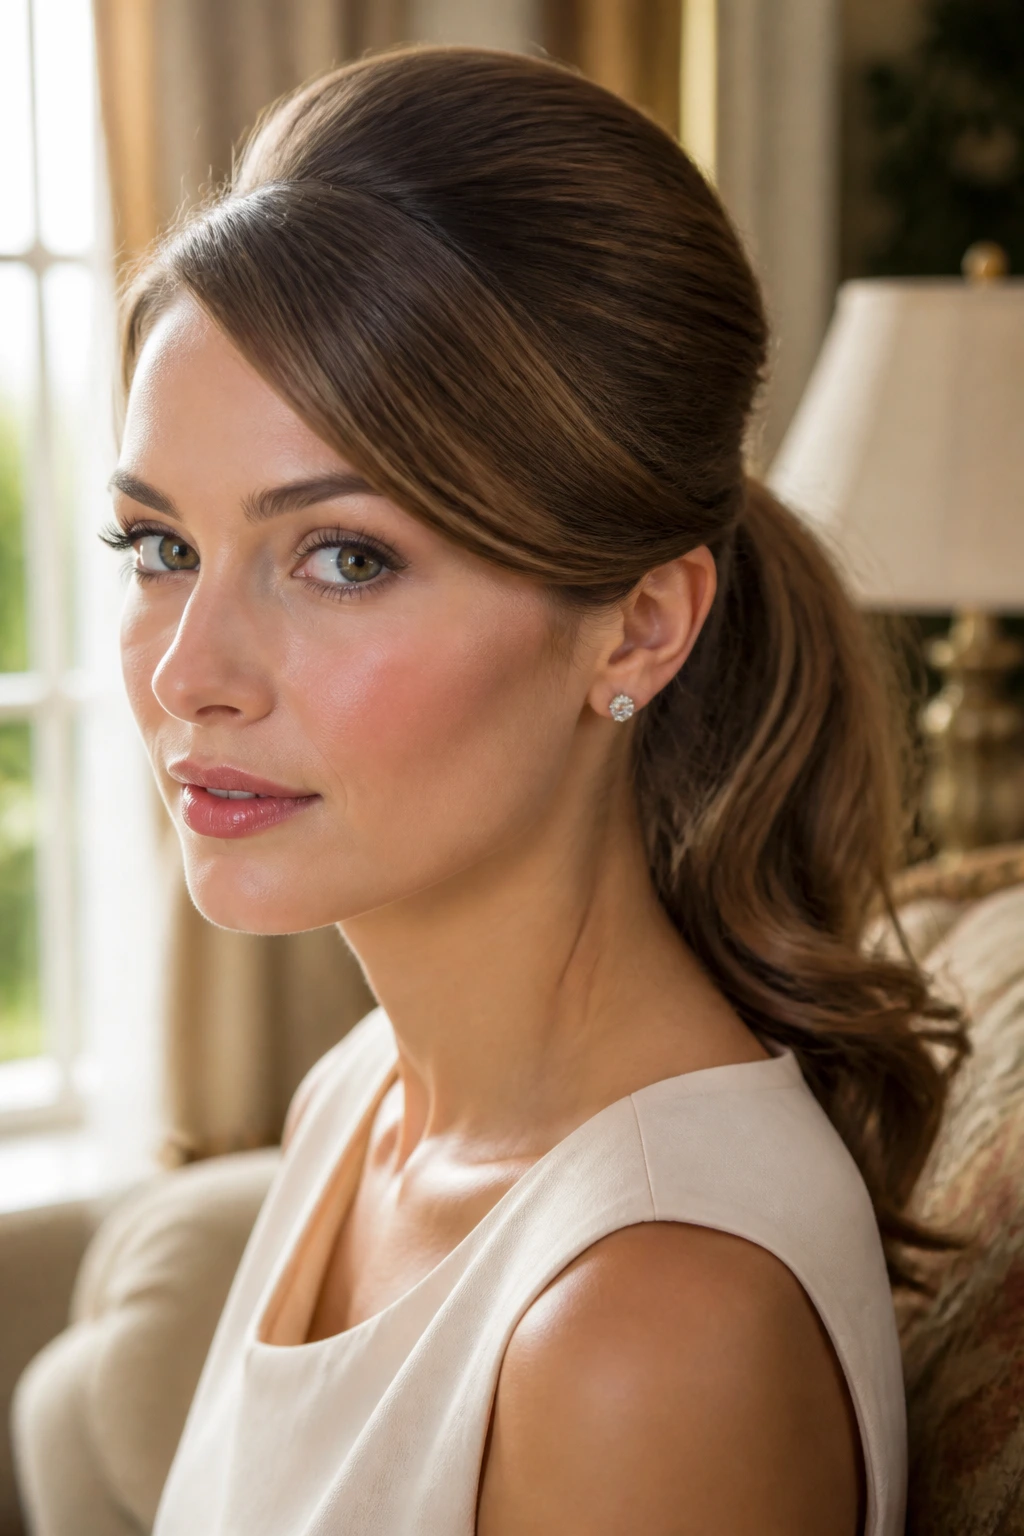
The bump-and-swoop pony is the classic retro shape that never really stopped making sense. Build a soft bump at the crown, sweep the front section to one side, and keep the pony low or mid-height so the silhouette stays balanced. It has that polished, slightly formal shape that works with everything from a cardigan to a satin dress.
The swoop should be smooth and deliberate, not shellacked into place. Use a fine comb to guide it, then pin beneath the surface if it wants to split apart. The crown bump can be small; it only needs enough height to separate this look from an ordinary pony.
Why Vintage Ponytails Hold Their Shape Better Than Loose Waves
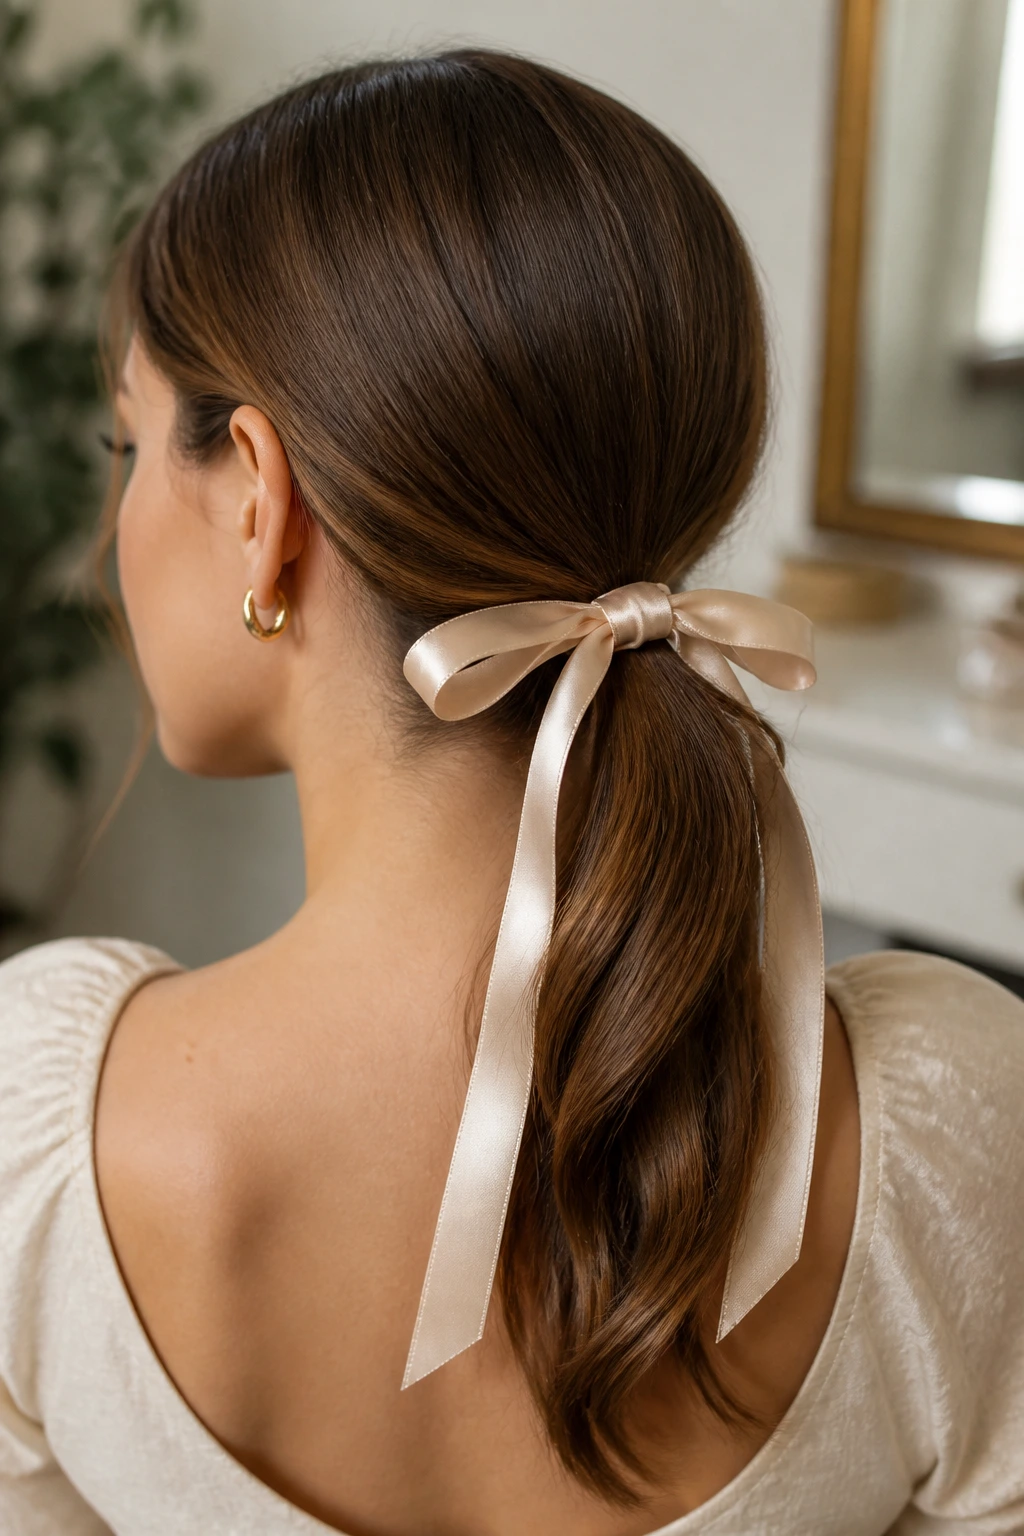
Loose waves are pretty, but they can collapse fast if your hair is fine, layered, or prone to frizz. A ponytail anchors the shape at one point, which means the eye reads the part, the crown, and the base before it ever notices whether the tail is perfect. That’s part of why these retro styles work so well. They make structure do the heavy lifting.
The best vintage ponytails also give you more control over where the hair sits on the head. A low nape pony creates length through the neck. A teased crown adds height where flatness would have been a problem. A wrapped elastic or ribbon hides the plainest part of the style, which is usually the part most people leave exposed.
That’s the quiet advantage here. You do not need every strand to behave. You just need the silhouette to hold, the part to look clean, and the finish to feel deliberate.
Essential Tools for These Looks
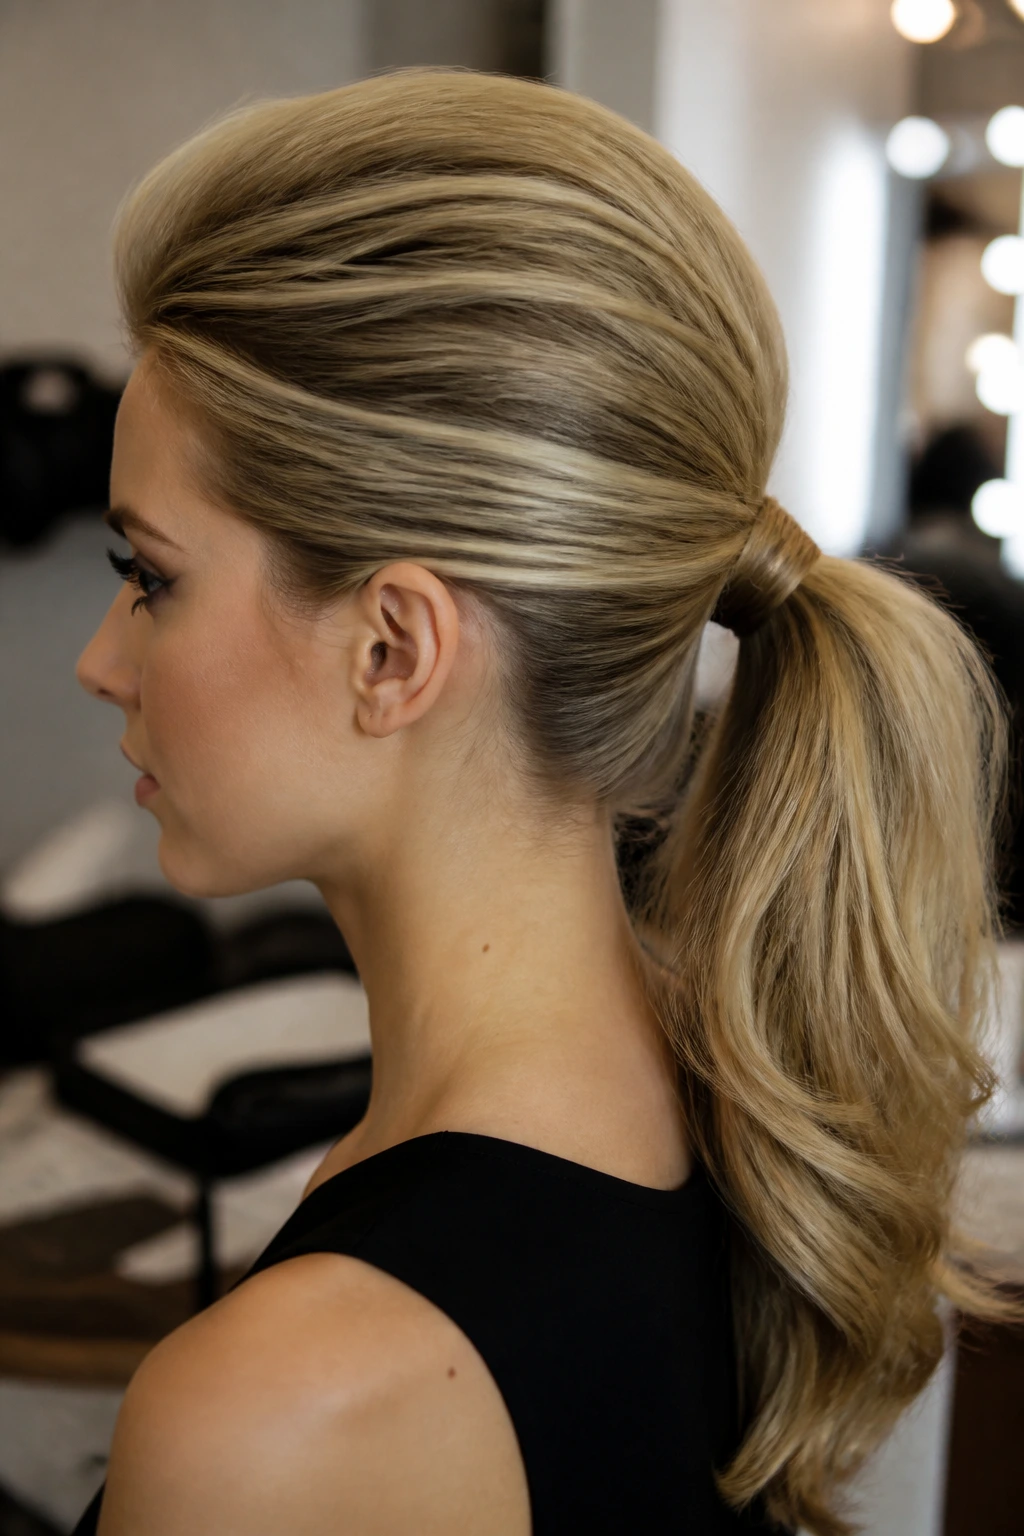
- Tail comb: The pointed end draws a clean part and lifts small sections for teasing or smoothing.
- Boar bristle brush: Best for polishing the top layer and keeping the crown from looking fuzzy.
- Teasing brush or fine comb: Use this for crown height, but work in small sections so the result stays neat.
- 1-inch curling iron: Good for tighter bends, pin-curl sets, and face-framing pieces.
- 1.25-inch curling iron: Better for soft Hollywood waves and brushed-out ends.
- Blow dryer with concentrator nozzle: Helps smooth the roots and direct volume where you want it.
- Heat protectant spray: A non-negotiable if you’re using hot tools on the ends or front pieces.
- Texture spray or dry shampoo: Adds grip at the roots and makes fine hair hold the shape longer.
- Flexible-hold hairspray: Keeps the style in place without making it stiff and crunchy.
- Strong-hold hairspray: Useful for victory rolls, beehive lifts, and other styles that need more structure.
- Clear elastics and snag-free hair ties: Keep the base secure without drawing attention.
- Bobby pins in your hair color: Crisscross them for hidden support under rolls, ribbons, and wrapped bases.
- Ribbon, scarf, headband, or barrette: These are the visible vintage details that change the entire mood of the style.
Smart Product Picks and Hair Prep
The finish starts before the ponytail does. If your hair is fine and slippery, a little dry shampoo at the roots and texture spray through the mids gives the elastic something to hold onto. If your hair is coarse or frizzy, a smoothing cream at the ends and a disciplined blow-dry make the top layer behave without killing volume.
Mousse on damp hair is worth the trouble when you want crown height. Work it through the roots, not the ends, then dry the hair with lift at the scalp. That single step gives styles like the bouffant pony, bump-and-swoop pony, and pageant pony a better base. For glossy styles, keep the oil or serum on the lower half of the hair only. Roots plus heavy product equals collapse.
Accessories matter too. Satin looks dressier, but it slides. Velvet has more grip. Cotton bandanas stay put better than slick silk in humid conditions. A barrette with teeth does more work than one that just sits there and looks pretty.
How to Make the Look Hold Past Lunch
Root Lift: Build the base first. Lift the crown with a round brush while blow-drying, or tease two small sections instead of one giant lump. Small sections hold better and look cleaner under the top layer.
Grip: If the hair is too soft, mist the roots with texture spray and wait 20 to 30 seconds before brushing it through. That tiny pause lets the product grab. Then tie the pony and stop fussing with it. Excess handling breaks the hold.
Smoothing: Use a boar bristle brush or a soft toothbrush for flyaways near the hairline. A little hairspray on the brush does a cleaner job than spraying the whole head and hoping for the best.
Time Saver: Set the front pieces first if the style needs curls or rolls. They take the longest to cool, and if you wait until the end, you’ll rush them. That’s where the shape usually goes wrong.
Finish: Wrap the elastic, pin the wrap from underneath, then add accessories last. If you clip on a ribbon or scarf too soon, you’ll keep moving it around while you style the rest, and the base starts to loosen.
How to Wear Them With Clothes, Makeup, and Accessories
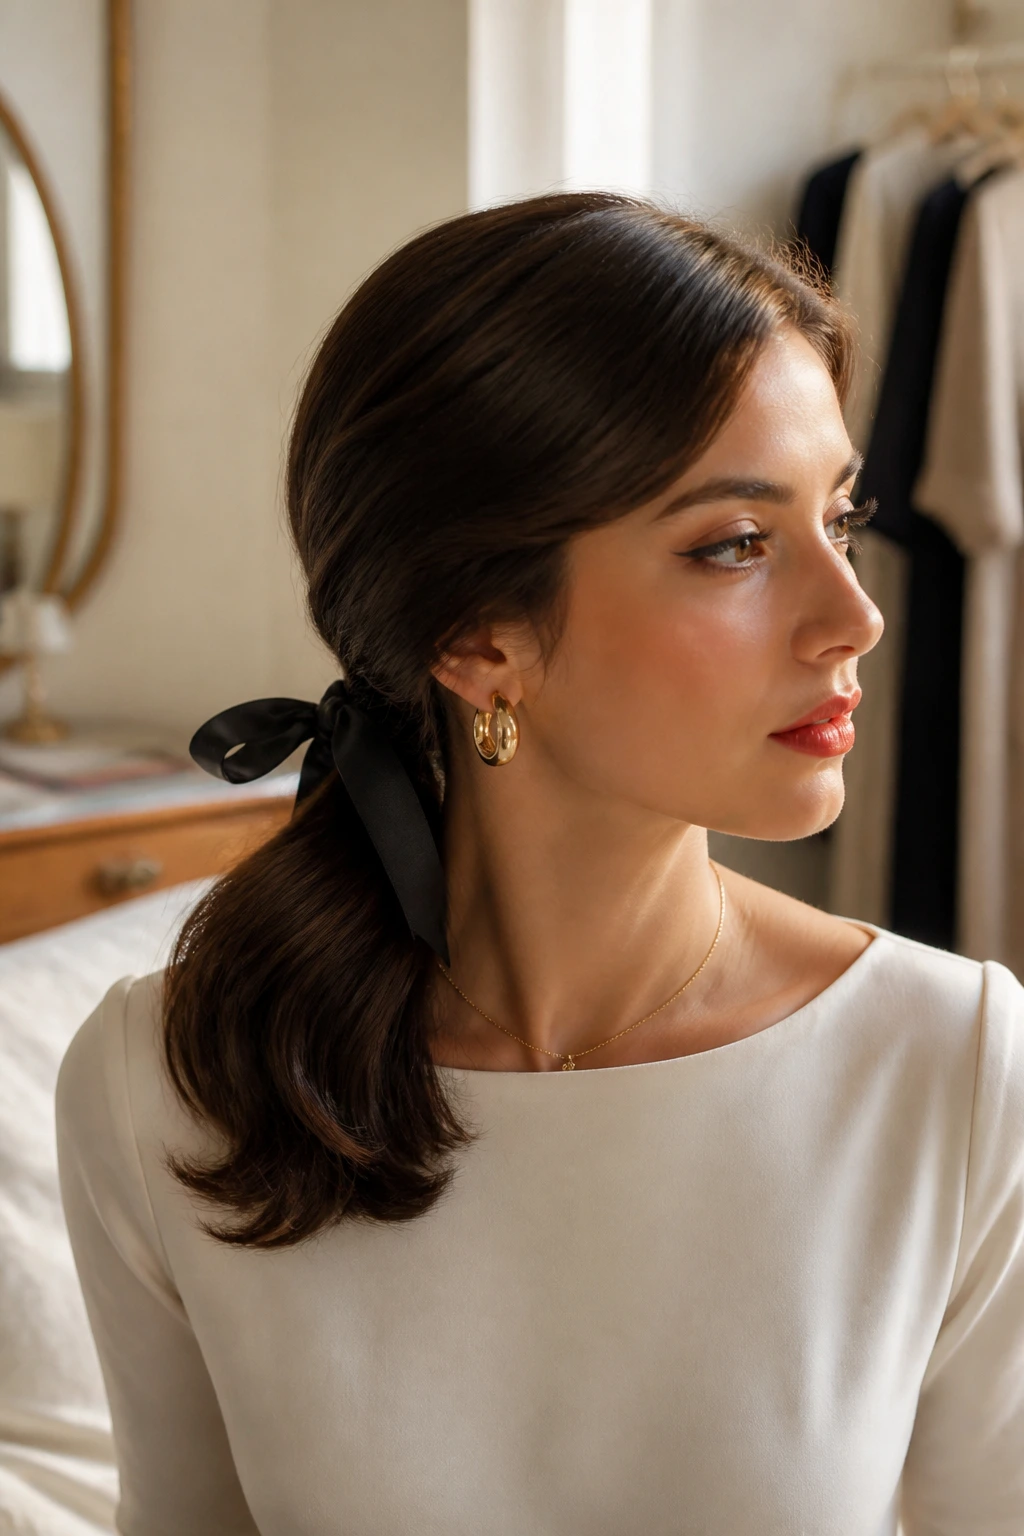
Presentation: Low ponytails with ribbons, scarves, or wrapped elastics look best when the neckline is clean — a boat neck, a scoop neck, a collared shirt, or anything that shows the nape. High crown ponies like sharper shapes: hoop earrings, a blazer, a square neckline, or a structured top. The silhouette matters. If the hair is soft and low, let the outfit echo that softness. If the crown is tall and sculpted, give it something with edges.
Accompaniments: Pearl studs, red lipstick, a cardigan pinned at the shoulder, or a cat-eye liner all fit these looks without feeling costume-y. For the more pin-up styles, a bold earring can stand in for volume. For the polished mid-century versions, keep the makeup crisp and the jewelry tidy. A single barrette can be enough.
Portions: Most of these styles sit best on shoulder-length hair and longer, but shorter hair can still play if you reduce the size of the pony and lean into accessories or front shaping. Fine hair usually does better with lower ponies and wrapped bases; thick hair can handle more height, more braids, or a few extra pins.
Beverage Pairing: A strong coffee makes sense while you’re setting the crown. For a dressed-up evening, an iced tea, sparkling water with citrus, or a glass of something fizzy fits the same easy, polished mood.
Keeping the Style Overnight and Reviving It Tomorrow
A sleek pony with a wrapped elastic or ribbon can usually survive a full day without much trouble, especially if you avoid touching the crown. Teased styles and curled tails need a little more respect. If you’re keeping one overnight, a silk scarf or pillowcase helps more than another round of hairspray ever will.
Take the elastic out before sleeping if the pony is tight or heavy. A loose braid or a soft twist is kinder to the hair than sleeping on a firm tail. In the morning, mist the lengths lightly with water, smooth the crown with your hands, and hit any bent pieces with a quick pass of a curling iron or round brush. It takes less time than rebuilding the whole thing.
If the style depends on rolls, volume, or pin curls, the safest shelf life is usually one day and one evening. After that, the crown starts to lose shape and the front pieces get sleepy. That’s normal. Styles like this are meant to be refreshed, not worshipped until they fall apart.
The Habits That Flatten a Retro Ponytail
- Teasing too much at once: A huge backcombed section turns rough and brittle, then collapses under its own weight. Tease in small layers and smooth the top only after the structure is there.
- Using too much oil near the roots: Shine is good on the mids and ends. Oil at the crown makes the pony slide and the roots separate.
- Placing the elastic in the wrong spot: A pony that sits too low can look limp; one that sits too high can fight the rest of the style. Match the placement to the shape you want before you wrap anything around it.
- Skipping the wrap or pin: A bare elastic looks unfinished on these styles. Wrapping a strand of hair around it or covering it with a ribbon gives the eye a proper stopping point.
- Brushing curls out too soon: Warm curls flatten fast. Let them cool completely before you brush them into the pony or they’ll lose shape by the time you leave the house.
- Ignoring flyaways at the hairline: Retro styles depend on clean edges. A toothbrush with a mist of hairspray handles those little frizzy bits without flattening the whole head.
Variations for Different Hair Types and Lengths
Fine-Hair Lift Edit: Use dry shampoo at the roots, tease only the crown, and keep the pony low or mid-height so the style doesn’t slide under its own weight. Wrapped elastics and ribbons help the base look fuller.
Curly-Hair Satin Edit: Stretch the curls lightly with a diffuser or a twist-out, then gather them into a pony without brushing away all the texture. A satin ribbon or scarf helps the style feel intentional while protecting the curl pattern.
Short-Hair Faux Pony Edit: If the hair barely reaches the nape, build a mini pony with hidden pins and let the front shaping do most of the work. The style reads vintage as long as the crown, part, and accessory are handled well.
Thick-Hair Control Edit: Split the tail into two sections before wrapping or twisting. That keeps the style from bulking up at the base and makes the pony easier to secure with fewer pins.
Heat-Free Set Edit: Use braids, twists, or pin curls the night before, then gather the cooled hair into the pony in the morning. This is the safest route if your hair hates hot tools or if you want softer, less uniform waves.
Frequently Asked Questions
Which vintage ponytail style works best for fine hair?
The teased crown pony, wrapped elastic pony, and satin-ribbon low pony usually give fine hair the most shape without needing a ton of length. Keep the crown lift modest and use texture spray before you secure the base.
How do I hide the elastic without making the pony look bulky?
Take a small strand from under the ponytail, wrap it around the elastic once or twice, and pin the end underneath with a flat bobby pin. Keep the wrapped section smooth and tight; if you twist it too thickly, the base starts to look chunky.
Can curly or coily hair do these styles?
Yes, and some of them look better with natural texture than with brushed-out curls. Styles like the scarf pony, bandana pony, and rope-twist pony work especially well because they respect the shape of the hair instead of fighting it.
What size curling iron should I use for the ends?
A 1-inch barrel gives a tighter vintage bend, while a 1.25-inch barrel makes softer waves that brush out more easily. For pageant-style flips or Hollywood waves, the larger barrel usually looks smoother.
How do I keep the crown from falling flat?
Start with dry hair, add texture at the roots, and tease in small sections. Then smooth only the top layer, not the whole crown. If you brush the height away while you’re finishing the tail, the base will collapse before you leave the bathroom.
What if my layers keep slipping out of the ponytail?
Anchor the shorter layers with a light mist of hairspray and a couple of bobby pins hidden under the elastic. For very layered cuts, low ponies and braided variations usually hold better than ultra-high styles.
Do I need teasing for every style?
No. A ribbon pony, headband pony, or glossy low pony can look vintage without any teasing at all. Teasing is useful when you want height, but it’s not required if the accessory or parting already gives the style enough shape.
Can I wear these styles to a formal event without them looking too casual?
Absolutely. Choose styles with clean lines — the faux-chignon pony, polished mid-century pony, or sleek pageant pony — and add one strong accessory such as pearls, a satin bow, or a structured barrette. The finish matters more than the label.
A Few Pins, A Little Lift
Vintage ponytails work because they know where to stop. They don’t try to do everything at once. A clean part, a small bump, a ribbon, a rolled fringe — one of those details is usually enough to change the whole mood of the hair.
The styles here can look soft, formal, playful, or sharp, and that range is the real gift. Start with the one that matches your hair’s temperament, not the one that looks hardest on a mood board. Then add one older trick — a wrapped elastic, a side part, a touch of crown lift — and let the rest stay simple.
