



Braids do something loose hair rarely manages: they keep their shape after a commute, a scarf, a nap on the couch, and the kind of afternoon where you forget about your reflection until late. When people search for braid hairstyles for women, they usually want the same thing in different words — a style that looks deliberate without eating the whole morning. That’s the sweet spot here.
A good braid can be soft and romantic, sharp and sculpted, or somewhere in between. It can hide second-day roots, hold up through humidity better than a blown-out wave, and still leave enough movement at the ends that it doesn’t look stiff. The trick is not the braid itself. It’s the finish, the tension, the parting, and whether the style matches the hair you actually have instead of the hair you wish you had at 8 a.m.
Some braids are five-minute fixes. Some are salon jobs that deserve a clear calendar and a cup of coffee. Others sit right in the middle: polished enough for work, easy enough for errands, and nice enough that you don’t rip them out the second you get home. That range is the whole point, really. There’s no single braid mood here — only a lot of ways to make one strand pattern do serious work.
Why This Collection Feels Different
-
Short-hair options are included: Not every braid needs waist-length hair; some of the best looks here use the front section, the crown, or a clean side panel and stop right there.
-
Texture isn’t treated like a problem: Fine, thick, curly, coily, stretched, and relaxed hair all show up differently in braids, so the best styles here respect that instead of fighting it.
-
Some are five-minute jobs, some are install styles: A side braid and a feed-in ponytail do not live in the same time universe, and that’s useful to know before you start.
-
The finishing details matter: Ribbons, cuffs, beads, scarf wraps, and a little pancake technique can change the whole mood without changing the braid pattern.
-
Event-friendly and everyday-friendly styles sit side by side: A halo braid and a boxer braid are both braids, but they solve different problems.
-
Low-maintenance doesn’t have to mean plain: A clean part, a tucked end, or a curled finish can make a simple braid look much more considered.
1. Classic Side Braid with a Soft Pull at the Ends
A side braid is the old reliable of braid hairstyles for women. It works because it keeps the hair controlled without flattening the whole head, and it gives you one strong line over the shoulder that reads neat even when the rest of the day does not. I like this best when the top is smooth and the tail is a touch wider than you think it should be. That little bit of looseness makes it feel worn-in instead of severe.
Why it works: The braid sits low and off-center, which helps it flatter most face shapes without needing a lot of product. It’s also a good match for second-day hair because a little texture gives the three strands something to hold. If the ends are thin, curl them once with a 1-inch iron or tuck them under a clear elastic so they don’t look stringy.
- Works best on shoulder-length to long hair
- Takes about 5 minutes once detangled
- Looks better with a slightly loosened tail than a tight finish
Pro tip: After you tie it off, pinch each outer section and tug once or twice. Stop before it turns fuzzy.
2. Loose French Braid with Face-Framing Layers
Want a braid that keeps the front neat without locking every strand into place? A loose French braid does that job. It starts at the crown, gathers hair as it moves down, and keeps the top section tidy while leaving the braid soft enough to read as relaxed. That’s the version I reach for when the hair needs a little order but not a hard, glued-down look.
The smartest move is to leave two slim pieces near the temples out on purpose. Those pieces soften the line around the face and stop the braid from feeling too school-uniform. If the hair is slippery, a tiny mist of texture spray at the roots makes the first few passes easier, and it saves you from over-tightening the crown.
Best for
- Medium to long hair
- Second-day hair with a little bend
- Days when you want the front controlled but the rest of the hair free
Keep this in mind: The braid should sit snug at the scalp, not pull. If your temples ache by lunch, it’s too tight.
3. Dutch Braid Pigtails
Two Dutch braids change the whole mood fast. Because the strands cross under instead of over, the braids sit up off the head and look more sculpted than a French braid pigtail. They’re playful, yes, but they also keep every section in place, which is why I think they work far beyond gym days and weekend errands.
This style loves dense hair. The added width gives the braids a strong shape, and the raised texture looks deliberate even when the parts are a little imperfect. If you want a softer finish, gently pull the edges after braiding and let the ends stay a little loose instead of cinching them into tiny knots.
- Clean center part
- Two even sections from forehead to nape
- Clear elastics or wrapped ends
Good to know: Dutch braids look best when the part is committed and the sectioning is clean. Half-done parting makes the whole style look busy.
4. Sleek Center-Part Twin Braids
There’s a sharpness to twin braids with a straight center part that I always find useful. The style feels tidy without being stiff, and the symmetry gives it a calmer, more polished look than pigtails that wander off in different directions. Keep the braids low and even, and the whole thing looks intentional with almost no extra decoration.
This version works especially well on straight, stretched, or relaxed hair because the smooth surface shows off the parting. A thin layer of styling cream at the roots helps keep the top from puffing out, but use a light hand. Too much product makes the scalp look greasy long before the braids actually need refreshing.
What makes it different
- The clean center part does most of the visual work
- The braids can end at the shoulders or fall lower, depending on length
- It looks neat with or without accessories
My opinion: This is one of the better styles when you want a no-nonsense braid that still feels pretty. It doesn’t need beads or ribbons to do its job.
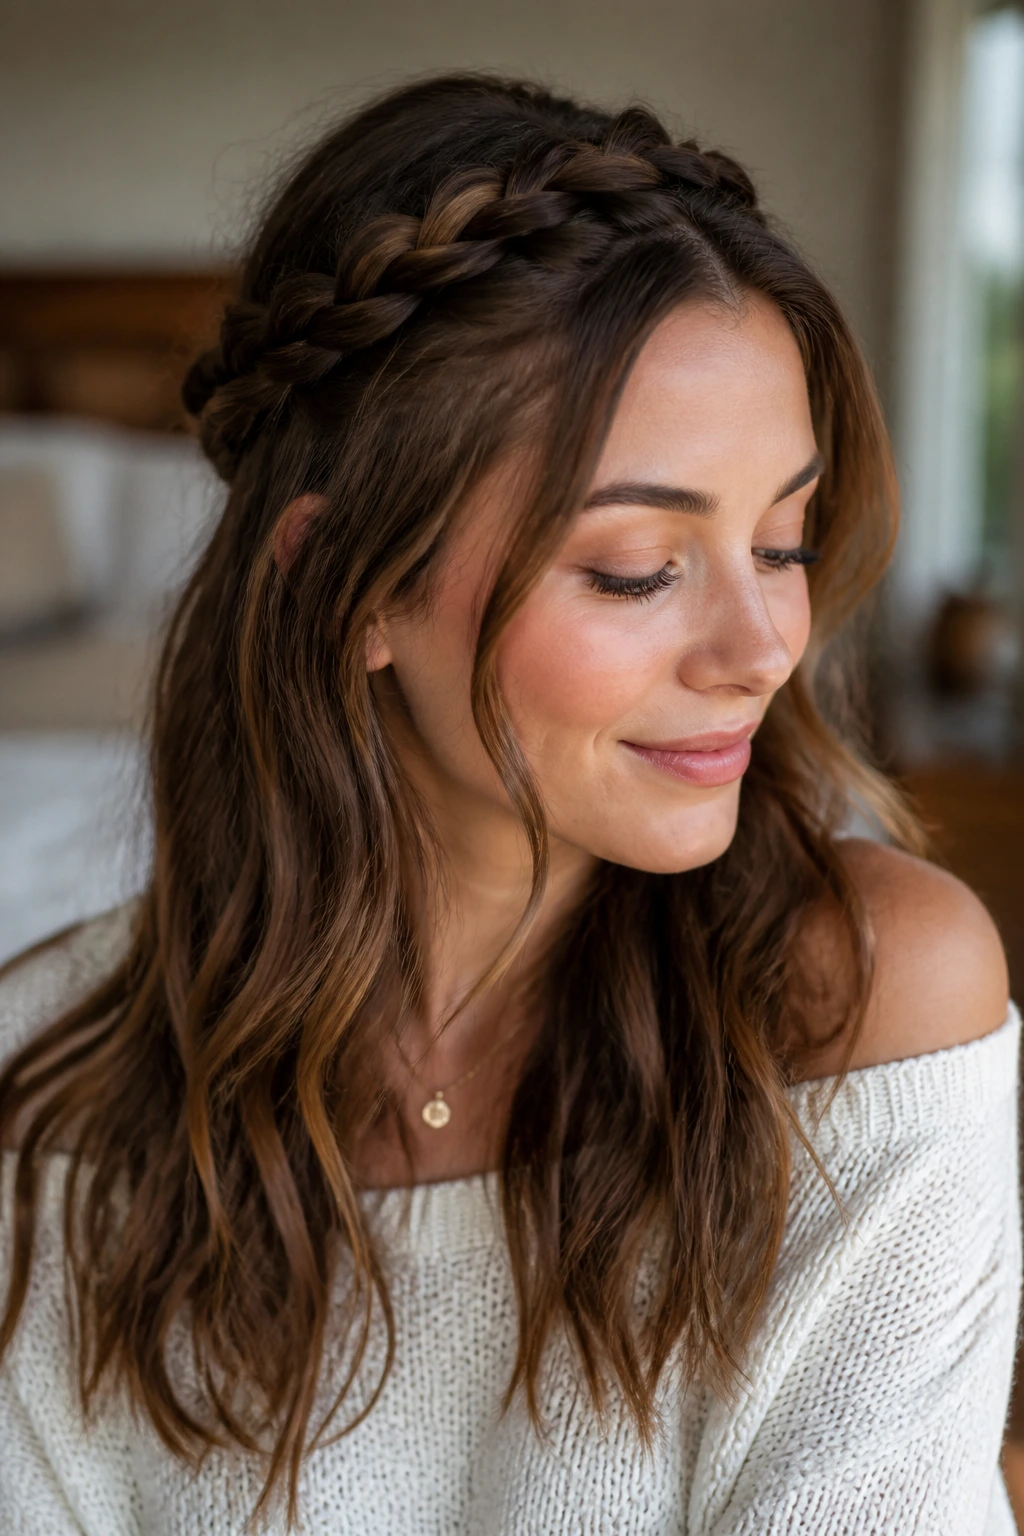
5. Half-Up Braided Crown
A half-up braided crown is one of those styles that looks more complicated than it is. You braid just the top section — often from one temple across the back or as two small braids that meet — and let the rest of the hair stay loose. The result is a soft frame around the face without losing the movement in the lengths.
This one is especially good when the crown needs control and the ends still have life in them. Layers behave better here because they’re anchored by the braid instead of hanging out on their own. If you have a lot of volume, pin the braid with two hidden bobby pins at the center back so it doesn’t slide after an hour.
Best if you want:
- A little lift at the top
- Loose hair below
- A braid that works with waves, curls, or straight ends
Small trick: Curl the loose lengths away from the face. The contrast between the braid and the soft ends makes the whole style feel finished.
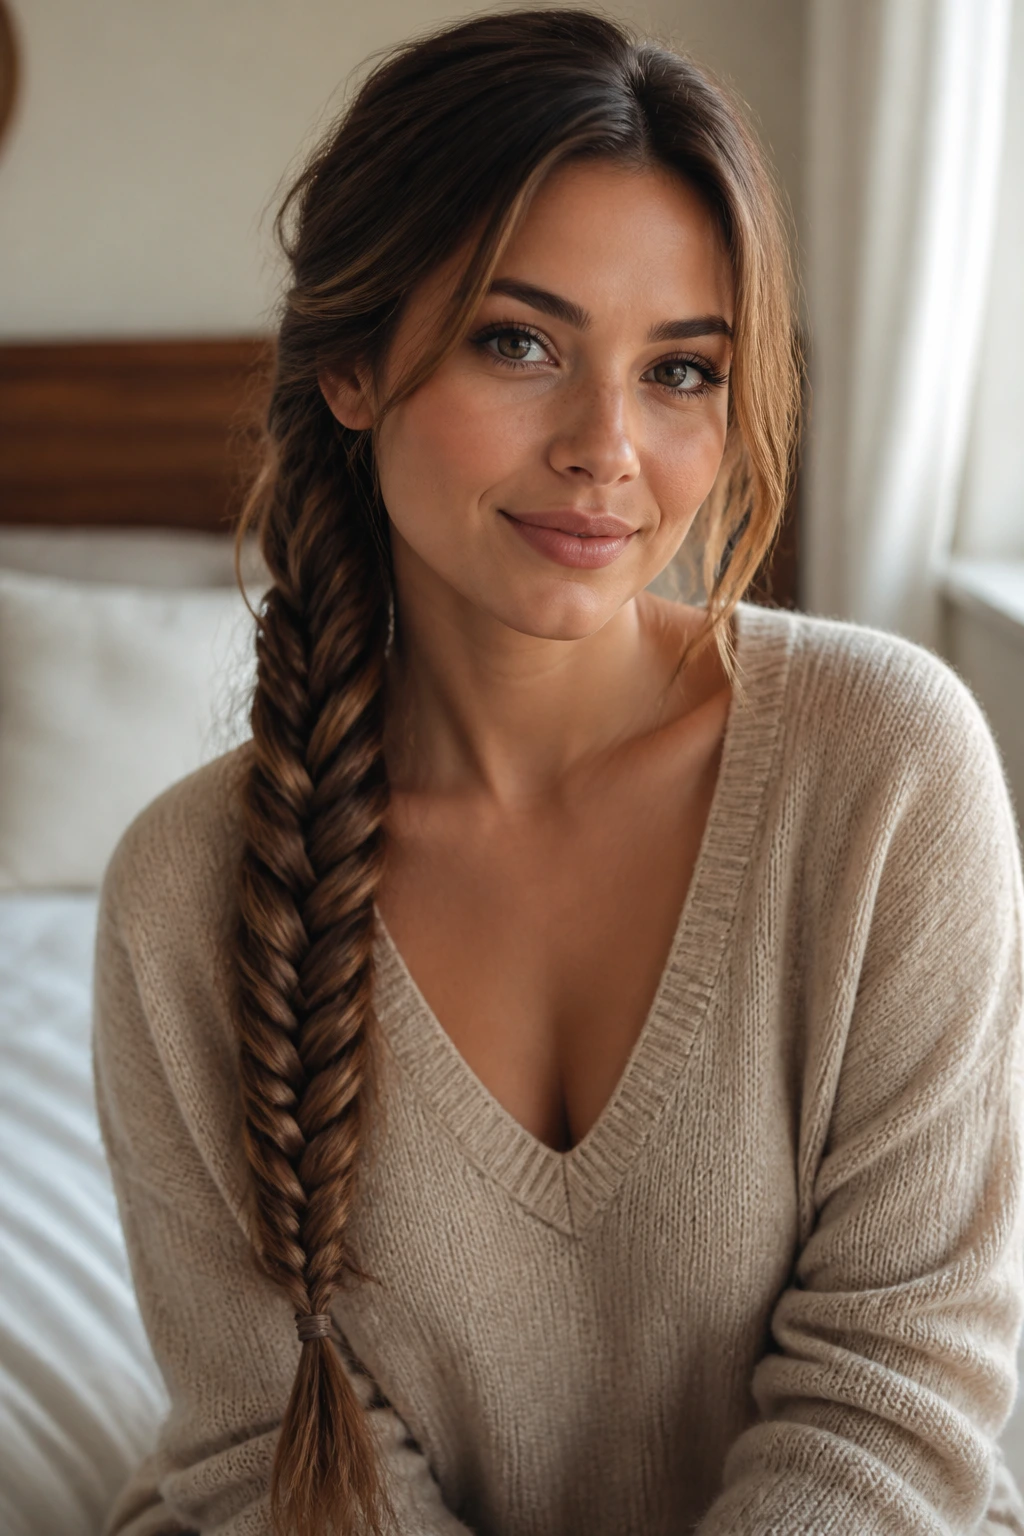
6. Fishtail Braid Swept Over One Shoulder
The fishtail braid has a finer, more detailed look than a classic three-strand braid, and that’s what gives it polish. Because you work with tiny outer pieces from two larger sections, the braid ends up looking woven rather than plaited. Swept over one shoulder, it catches color, highlights, and any natural bend in the hair.
It does take more patience. No way around that. But the payoff is a braid that looks intricate even when the hair itself is simple. If the strands keep slipping apart, start with dry shampoo or a little texturizing powder at the roots; clean, silky hair can be a nuisance here.
How to wear it
- Keep the top smooth and the braid relaxed
- Pull the braid to one side before you finish securing it
- Let the last few inches stay a little undone if you want softness
Good call: This braid flatters long layers especially well because the tiny woven pattern makes the color shifts show up more clearly.
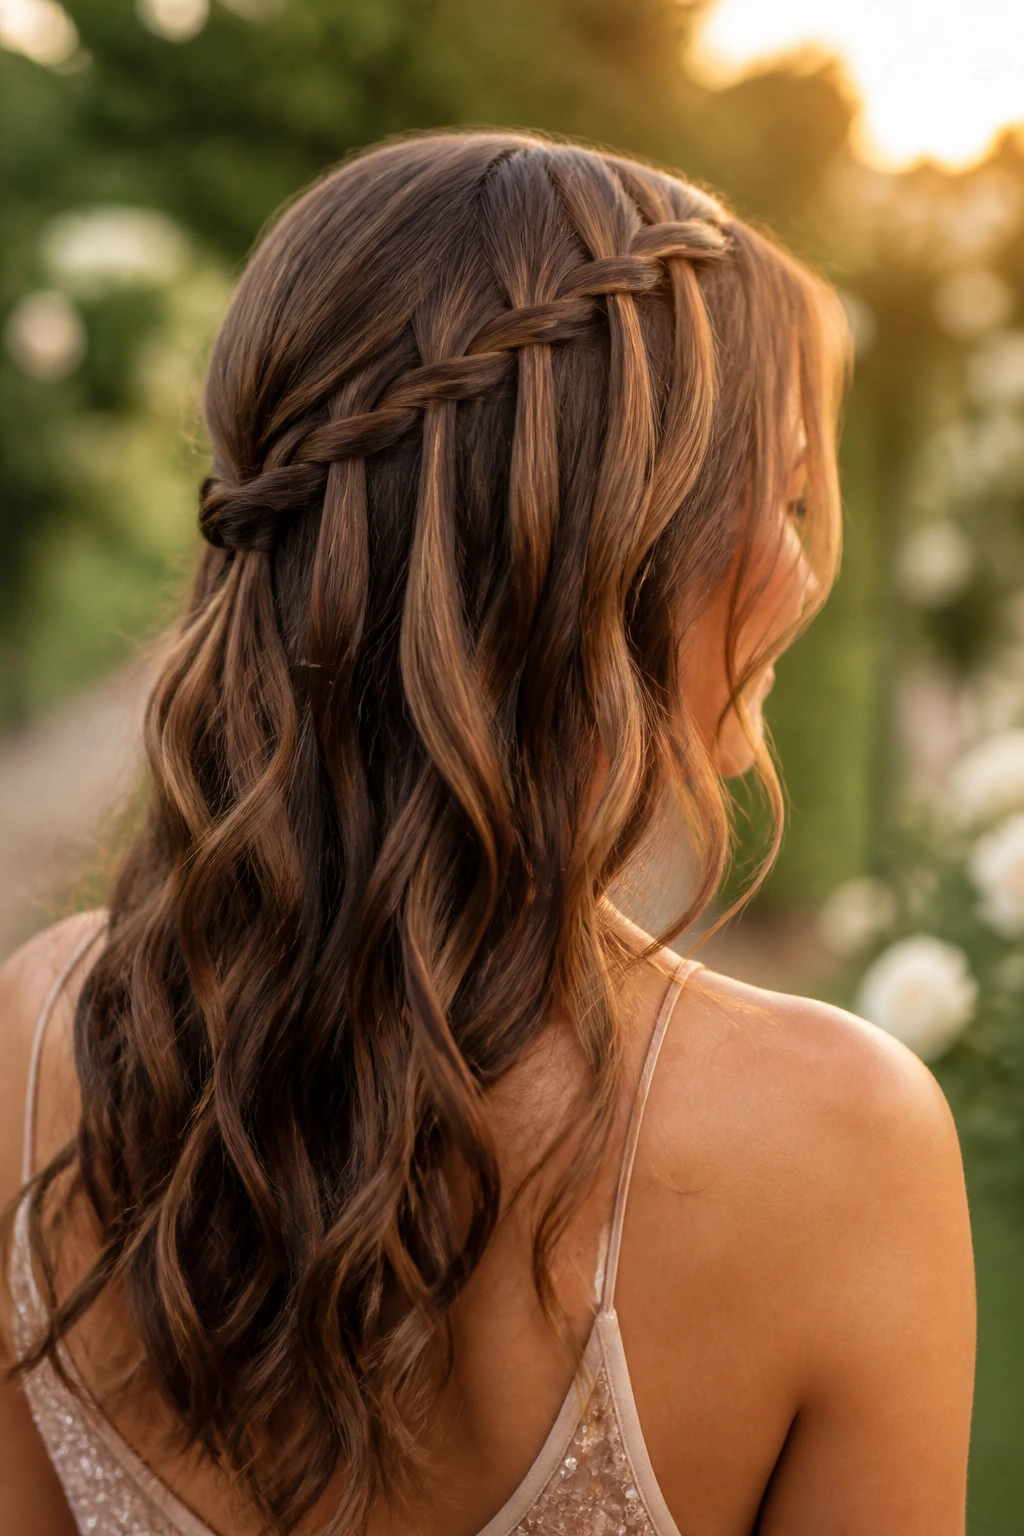
7. Waterfall Braid with Loose Waves
A waterfall braid is pure prettiness, but it’s the kind that needs a little support. The braid drops sections through as it moves, leaving those little “falls” open and letting the rest of the hair stay loose underneath. On soft waves, it looks airy and deliberate. On bone-straight hair, it can fall flat unless you add a bend first.
This is not the braid I’d choose for a day when you need maximum longevity. It’s better for dinners, photos, or any situation where you care more about the view than the wear time. Pinning it cleanly at the back matters more than people think; one loose anchor and the whole thing starts to sag.
- Best on curled or waved hair
- Works well with layered cuts
- Needs a few bobby pins hidden under the top braid
Tip: If your hair is very silky, braid on day-two hair instead of freshly washed hair. It grips better and the braid stays tidy longer.
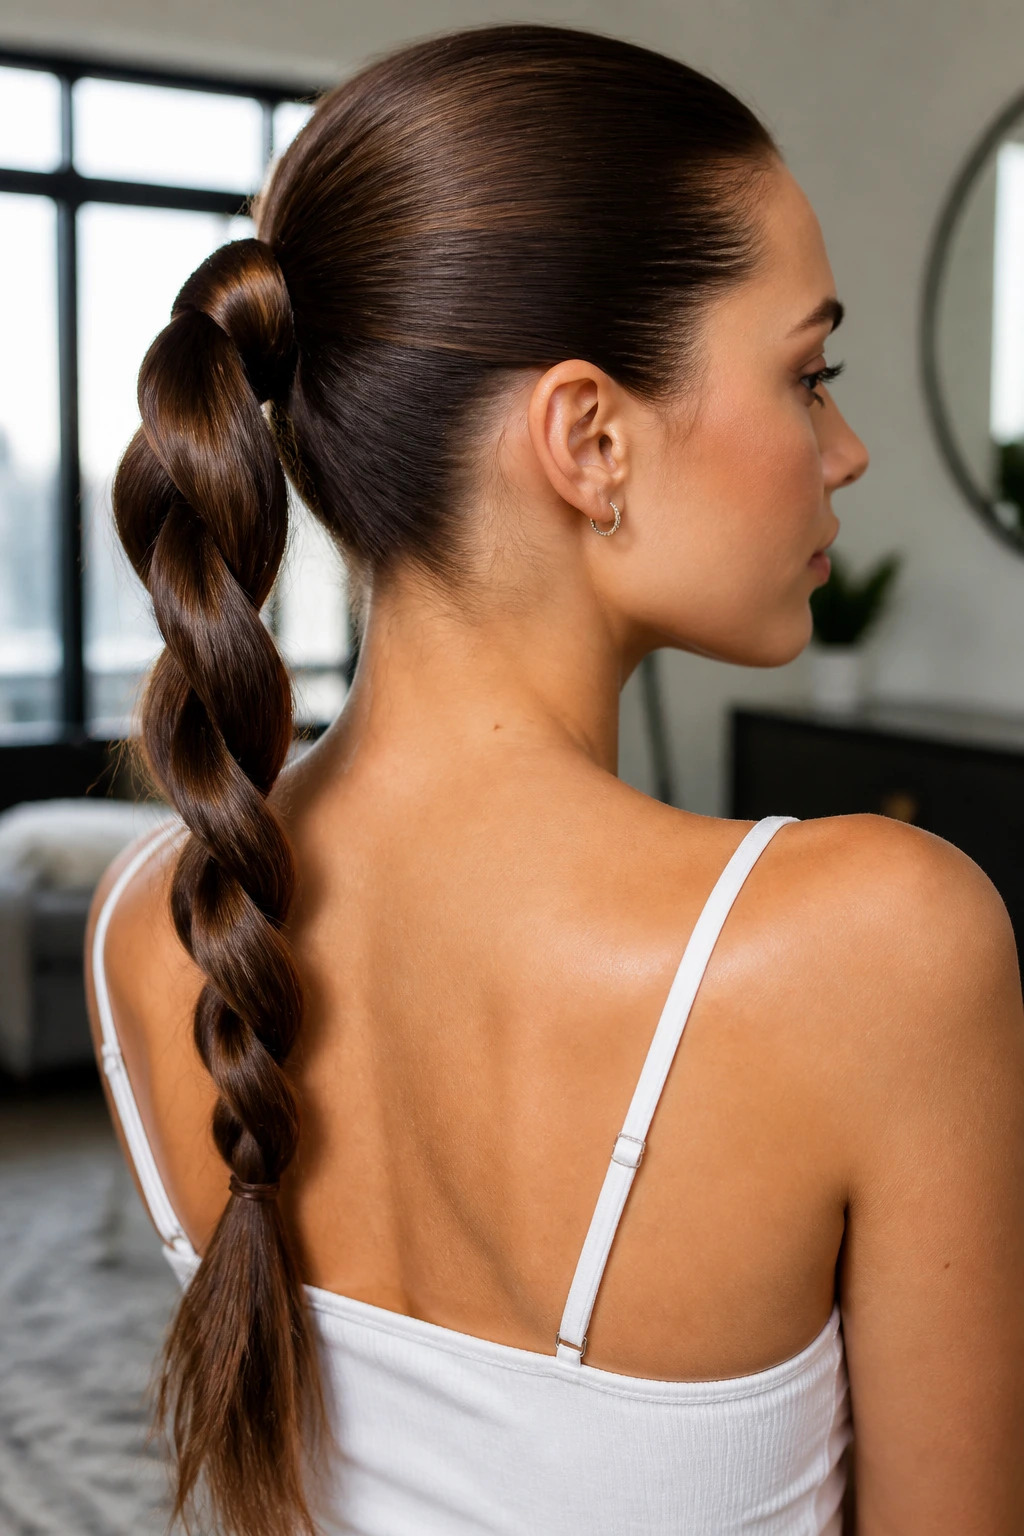
8. Rope Braid Ponytail
The rope braid ponytail is one of my favorite shortcuts because it gives shine and shape without the hand work of a full plait. You split the hair into two sections, twist each section in the same direction, then wrap them around each other in the opposite direction. That counter-twist is what keeps the braid from unraveling.
It’s a smart option when you want something more finished than a basic ponytail but don’t want to sit with your arms lifted forever. The rope effect looks especially crisp when the hair is sleek at the crown and the ponytail is wrapped with a strand of hair at the base. Small detail. Big payoff.
Works best when
- The hair is long enough to twist cleanly
- You want a glossy, dressier look
- You need the style to take under 10 minutes
My take: This braid is underrated. It doesn’t get the same attention as a fishtail, but on clean hair it can look even sharper.
9. Milkmaid Braids
Milkmaid braids have a soft, old-fashioned charm that still feels current because the shape is so clean. Two braids wrap around the head and pin across the crown, leaving the nape open. It’s a style with a clear outline, which is exactly why it reads well in person. The braid sits like a frame.
The trick is not making the braids too bulky. If your hair is thick, use medium sections and keep the braid width modest. Very wide braids can crowd the top of the head and make the style feel heavy. A few hidden pins under the braid line will keep the shape stable without showing.
Best for:
- Medium-length hair
- Soft dresses, crisp shirts, and plain sweaters
- A polished look that doesn’t need a lot of accessories
Practical note: If the front pieces keep slipping, anchor them with a tiny clear elastic before you cross the braids.
10. Bubble Braid with a Braided Base
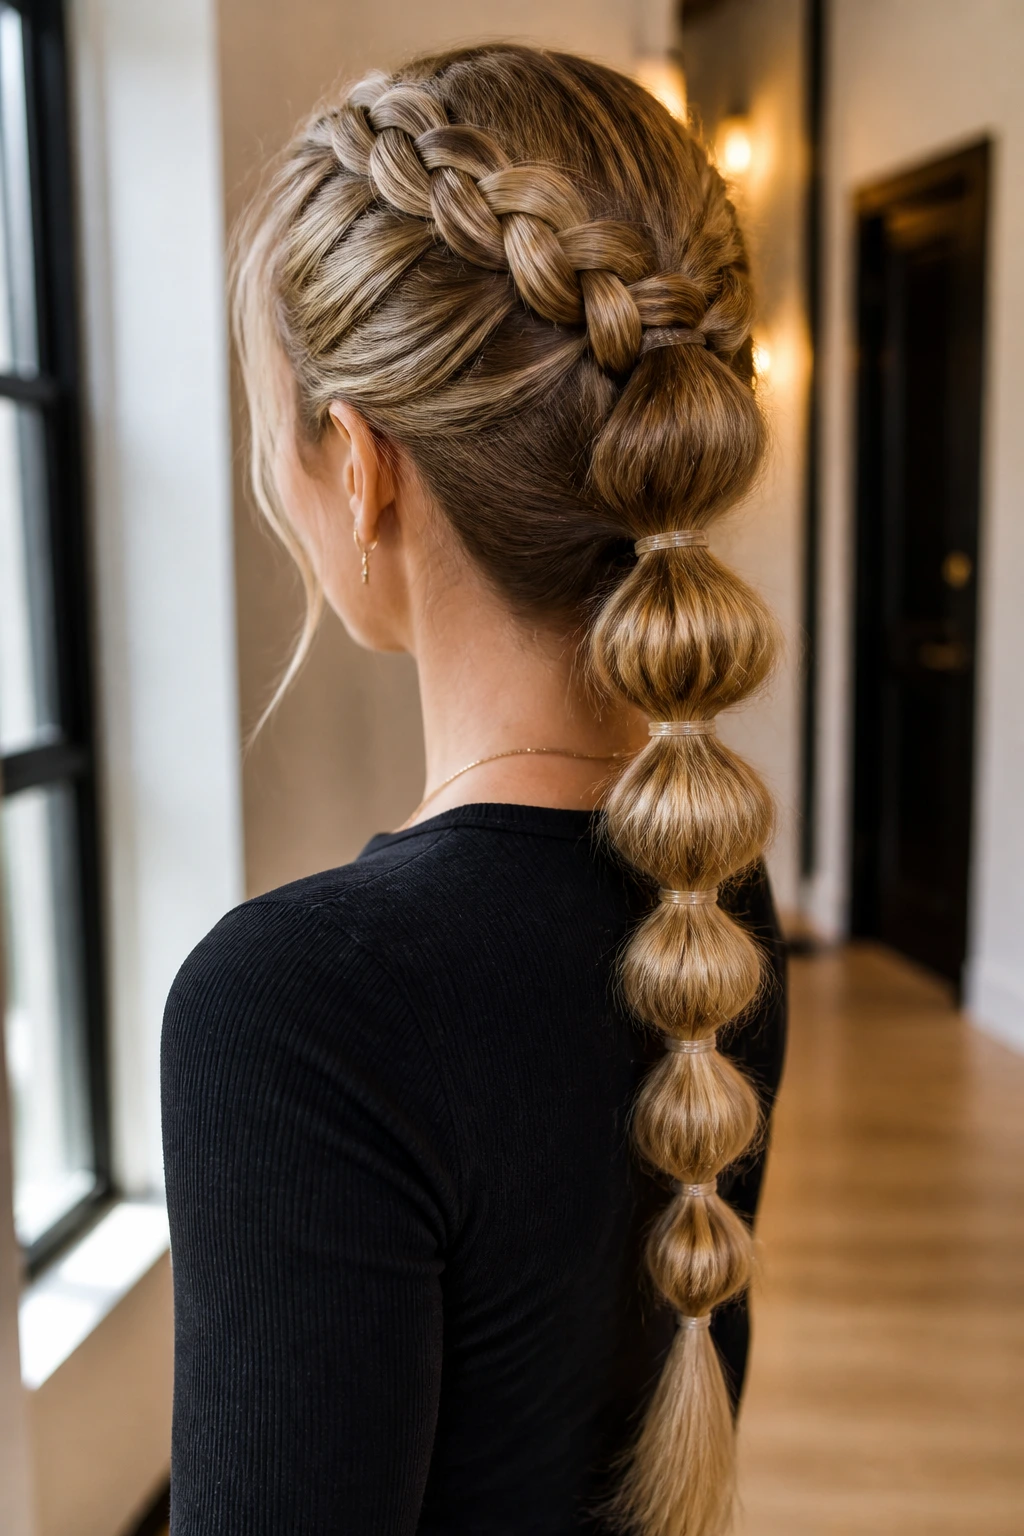
A bubble braid starts with a small braid or a sleek ponytail base, then gets sectioned with elastics every couple of inches so the hair puffs into rounded loops. The result is playful, but not childish if the sections are neat and the bubbles are even. I like the version that begins with a tiny braid at the crown, because it gives the style a more finished root.
You can make the bubbles fuller by gently tugging each section after the elastics are in place. Don’t yank; just widen the hair with your fingers. If your hair is thin or silky, a bit of texture spray before the elastics go in keeps the bubbles from collapsing.
Best if you want
- A style with movement and structure
- Something that looks good on long hair and extensions
- A ponytail that isn’t boring from the back
Small warning: Keep the elastics evenly spaced. Random gaps make the braid look accidental, not styled.
11. Boxer Braids
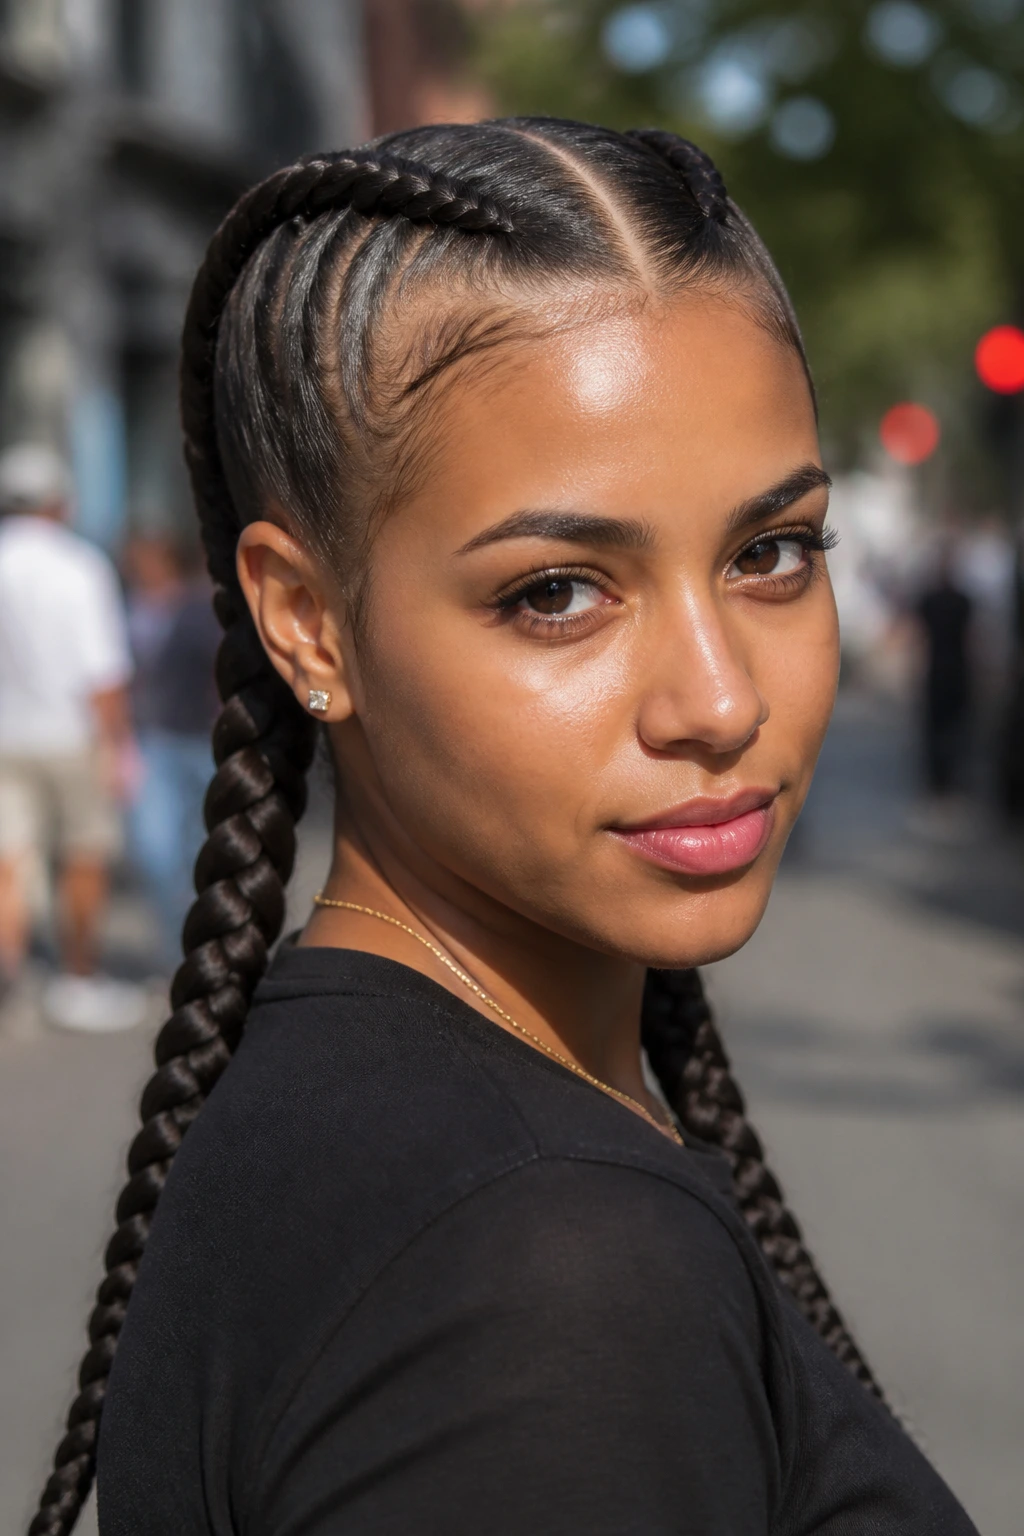
Boxer braids are just two tight Dutch braids, but they have a crispness that makes them stand out. They sit close to the scalp, hold everything in place, and keep the whole face open. That’s why they’re such a solid choice for active days, travel, or any moment where loose hair would turn into a nuisance by noon.
The clean parting matters here. If the center line wobbles, the whole style loses its snap. Use gel or a light edge control along the roots, but don’t drown the hair in product. You want grip, not crust.
- Tight, controlled shape
- Best on medium to long hair
- Can be worn straight down the back or finished in low buns
Pro tip: If your braids puff at the nape, braid the last few inches a little tighter than the top. The ends tend to loosen first.
12. Feed-In Cornrow Ponytail
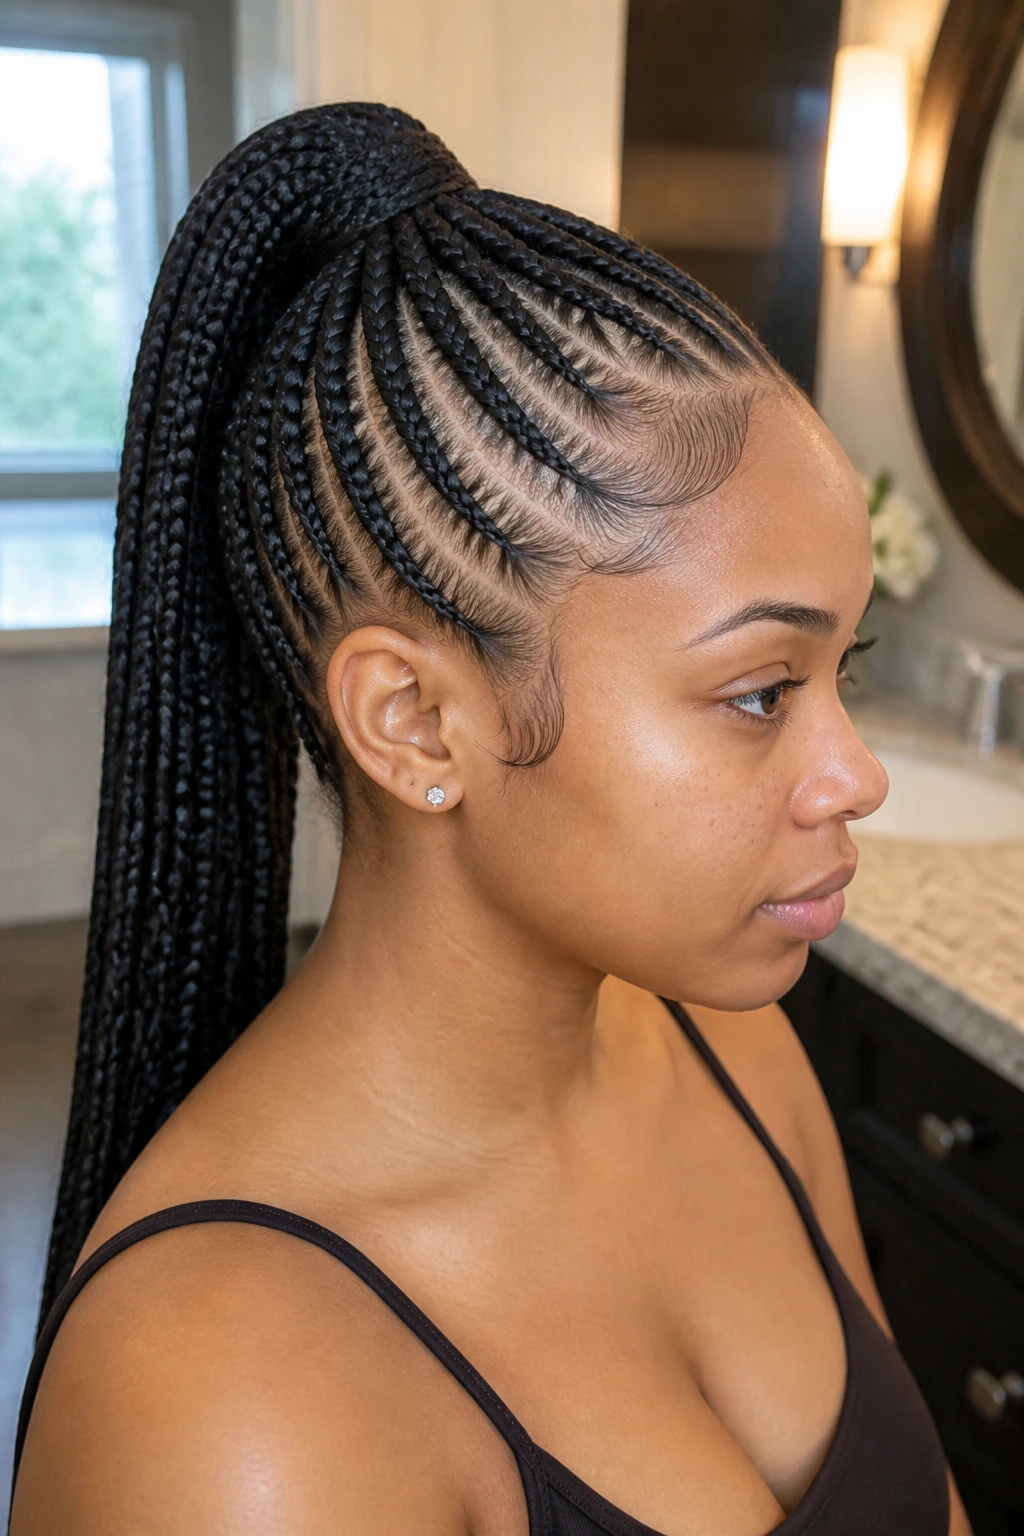
A feed-in cornrow ponytail has a smooth, gradual build that looks polished from the first inch to the last. The braid starts close to the scalp and the stylist adds hair little by little, so the base doesn’t bulge. That clean taper is what makes the style feel sleek instead of heavy.
The ponytail itself can be high and dramatic or low and narrow, depending on the mood. I prefer a high version when the hairline is neat and the edges are softly laid, because the shape has more lift. If braiding hair is added, pre-stretched hair usually blends more cleanly than pieces that are too blunt.
Why it works
- It gives you the look of length without dumping weight at the root
- The gradual feed-in keeps the front comfortable
- It holds a crisp line longer than a loose braid
Keep it honest: If your scalp feels sore after installation, the ponytail is too tight. Braids should sit firm, not bite.
13. Knotless Box Braids Bob
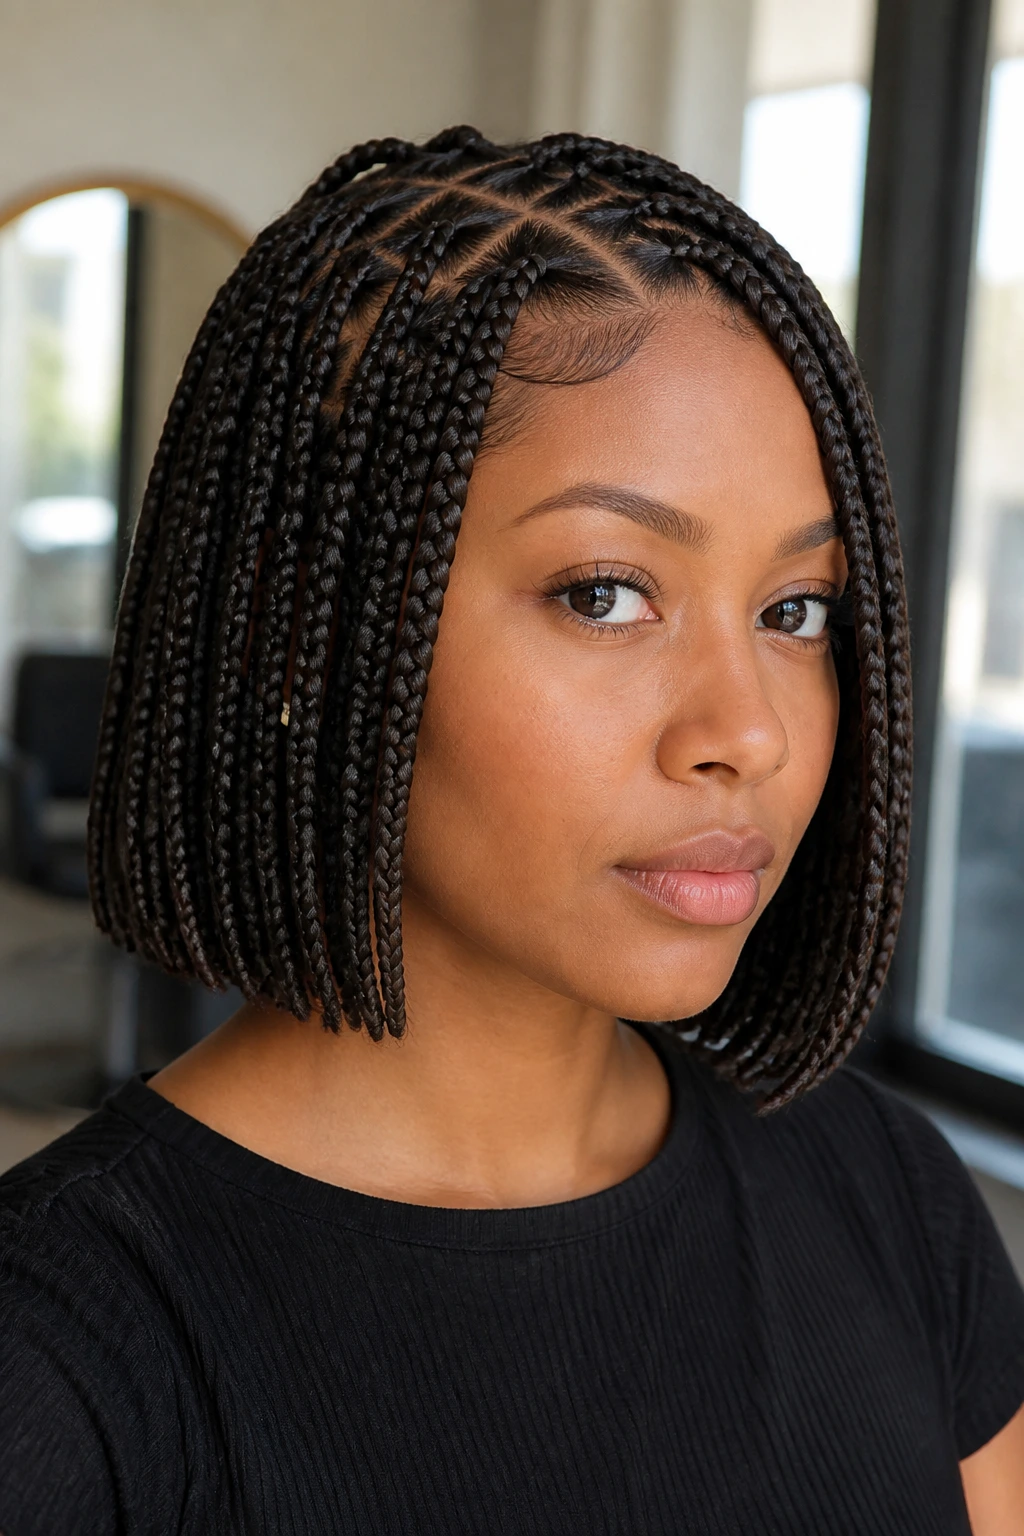
A knotless box braids bob is one of the smartest protective looks in the whole mix. The braids start with your own hair before the extension hair is added, so the root sits flatter and feels lighter. That matters more than people admit. A style can look gorgeous and still wear like a backpack if the base is too heavy.
The bob length keeps the braids swinging at the jaw or collarbone instead of dragging on the shoulders. That makes the style easier to live in, easier to sleep on, and less likely to snag on scarves and coat collars. I like this cut when you want the neat geometry of box braids without the full weight of long lengths.
Best for:
- People who want a protective style with less tension
- Shorter-to-medium lengths
- A clean, face-framing shape
Good to know: If the ends look blunt, add a little curl or a light bead at the bottom of a few braids. It softens the line fast.
14. Jumbo Box Braids
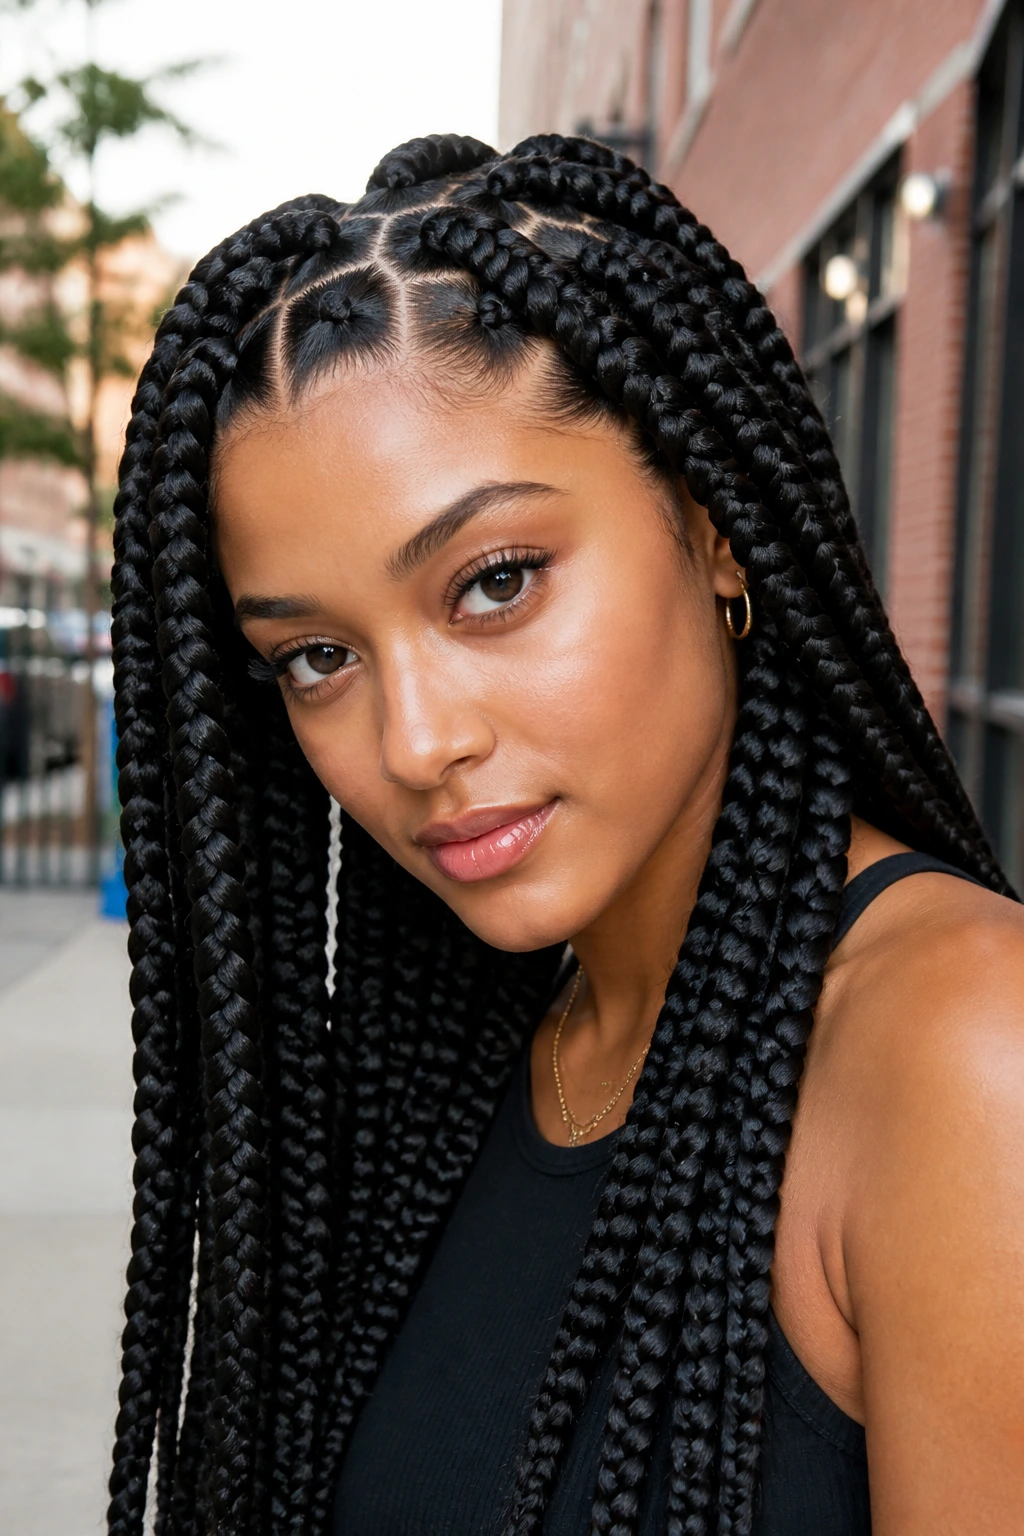
Jumbo box braids make a bold shape without requiring a full head of tiny sections. Because the parts are larger, the install is faster than micros, and the whole look reads more sculptural. The clean scalp grid is part of the appeal, so neat parting matters. Sloppy sections show immediately.
This style works well when you want a lot of braid presence but not a marathon in the chair. It also holds accessories nicely — a few gold cuffs on the front braids, and you’re done. The downside is weight. Big braids can tug if the sections are too heavy, so the roots should be balanced and the braids should not be installed too tightly.
Use this style when
- You want drama with fewer braids
- You like a visible part pattern
- You want a style that feels structured from every angle
My opinion: Jumbo braids are best when they’re neat first and decorative second. If the parting is sloppy, the size only makes that easier to see.
15. Micro Braids with Loose Ends
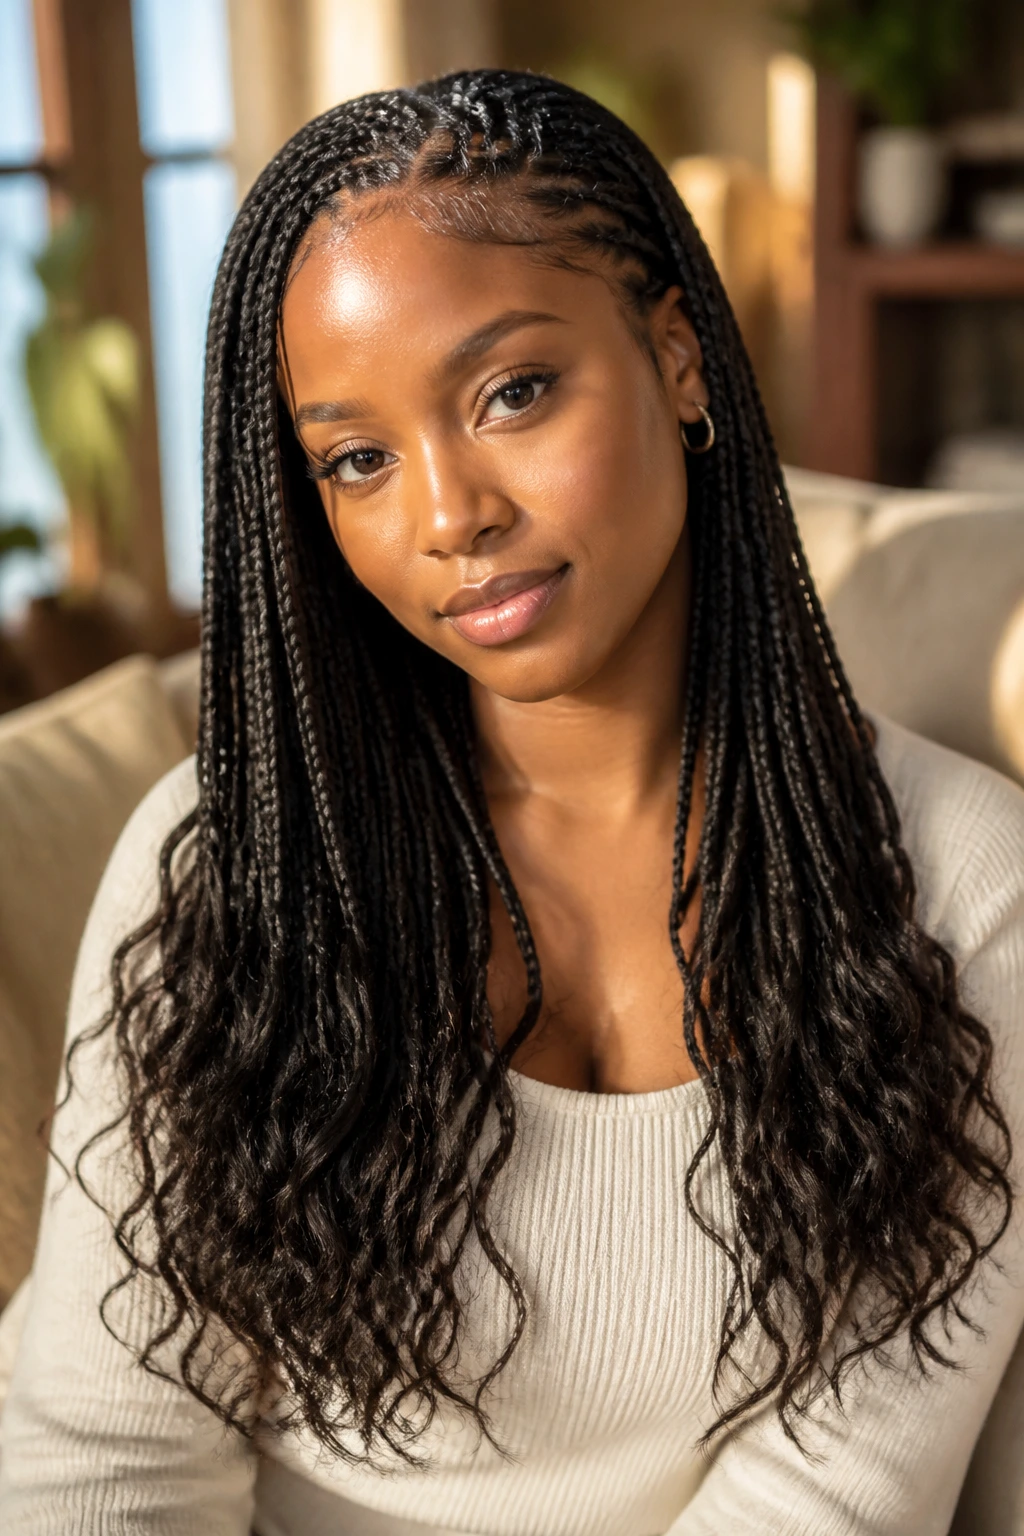
Micro braids are tiny, detailed, and a little bit addictive to look at because the whole head becomes texture. The install takes time. No polite way to dress that up. But once they’re in, the movement is airy and the styling options get broad — ponytails, buns, half-ups, side sweeps, all of it.
Loose ends keep the style from looking too rigid, especially if you want a softer finish. You can leave the ends straight, braid them all the way down, or curl the last inch or two. The scalp care matters more here than with bigger braids because the sections are small and easy to neglect.
- Tiny sections
- Long install time
- Flexible styling after the fact
Tip: Don’t keep micros in so long that the roots matt down. Fresh roots are easier to clean and much easier to remove later.
16. Boho Braids with Curly Tendrils
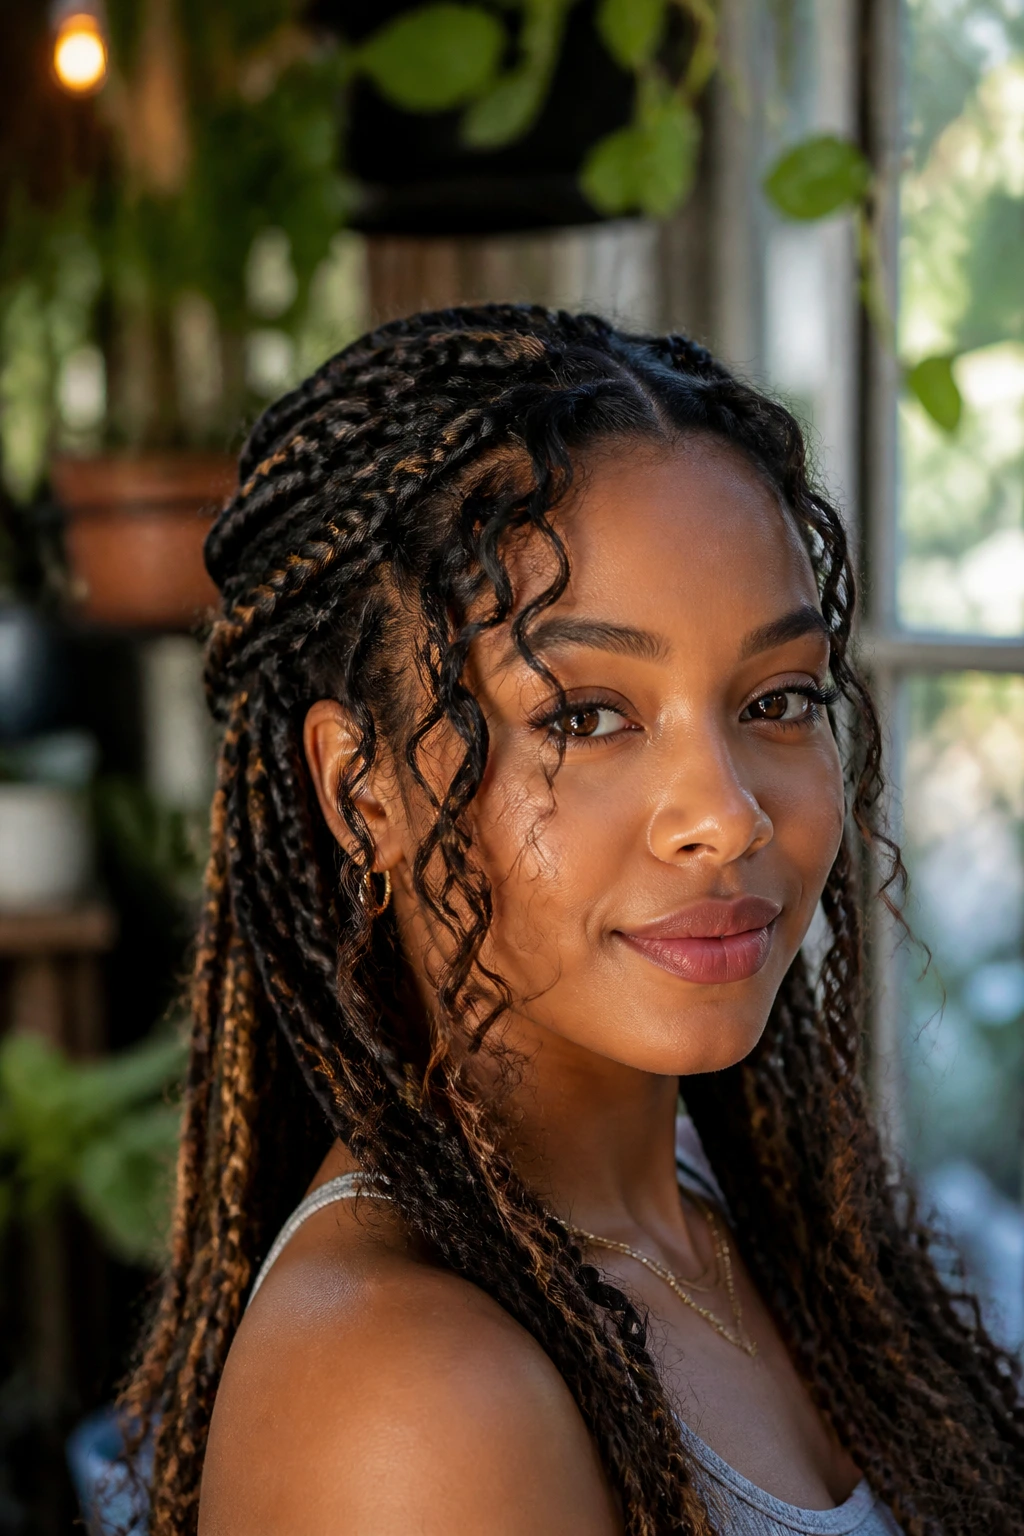
Boho braids are the braid version of soft edges and a little movement around the face. You braid the main sections, then leave out a few curly tendrils or wave pieces so the style doesn’t feel sealed in. The mix of texture is what makes it feel relaxed. Too many loose pieces, though, and the braid loses its shape.
This style is beautiful when you want a softer, less rigid install. It works especially well with knotless braids or box braids, because the braid base stays neat while the curly bits break up the outline. If you’re adding curls, make sure they’re intentional — one loose curl around the cheekbone does more work than six random pieces.
Best for
- Dressier days that still call for softness
- Long braids with some movement at the ends
- People who like a romantic finish without a stiff shell
Small caution: Keep the curly pieces hydrated and detangled. Frizzy tendrils turn the style messy faster than the braids themselves.
17. Ghana Braids in a Straight Back Pattern
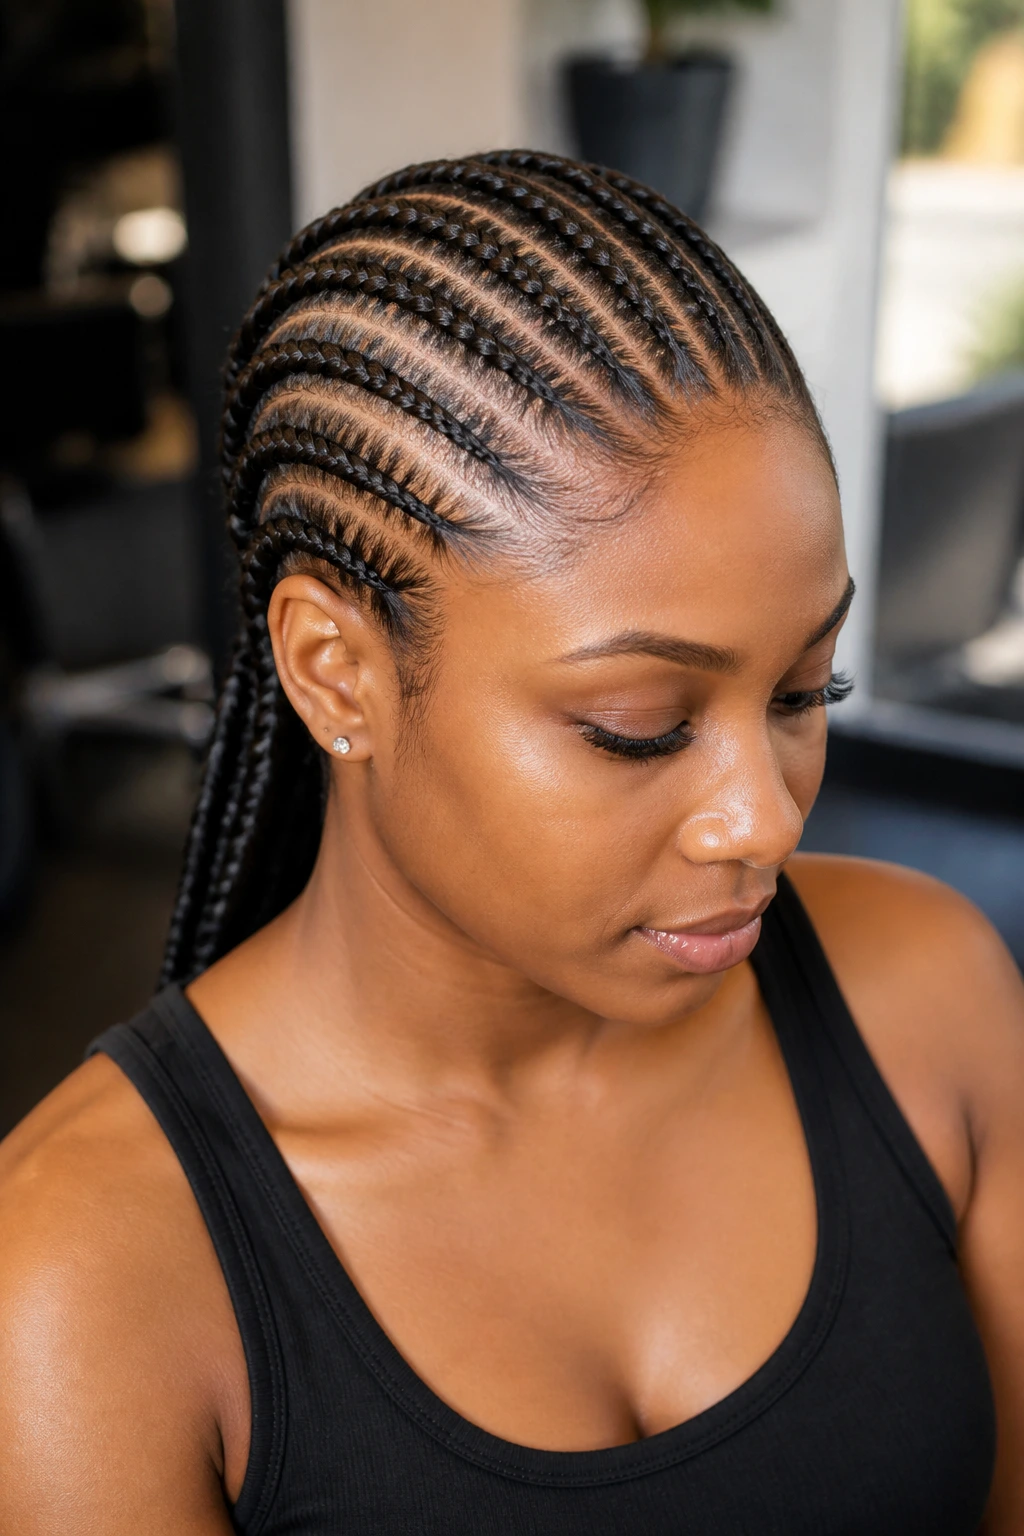
Ghana braids are one of the cleanest ways to make scalp braiding look architectural. The sections start small and feed into thicker rows, which gives the style that smooth, ribbon-like rise from front to back. Straight-back patterns make the face look open and the scalp lines feel organized instead of crowded.
This is a style that benefits from precision. If the rows drift, the whole thing loses its power. It’s also one of the better braid styles for women who want a protective look with visible structure, because the straight-back layout is neat without being fussy.
Works well with:
- Coily, curly, and stretched hair
- Added braiding hair for length
- A smooth finish at the hairline
Keep in mind: Heavy product at the roots can make the neat rows look cloudy. A light touch is better than a pile of gel.
18. Lemonade Braids with a Deep Side Part
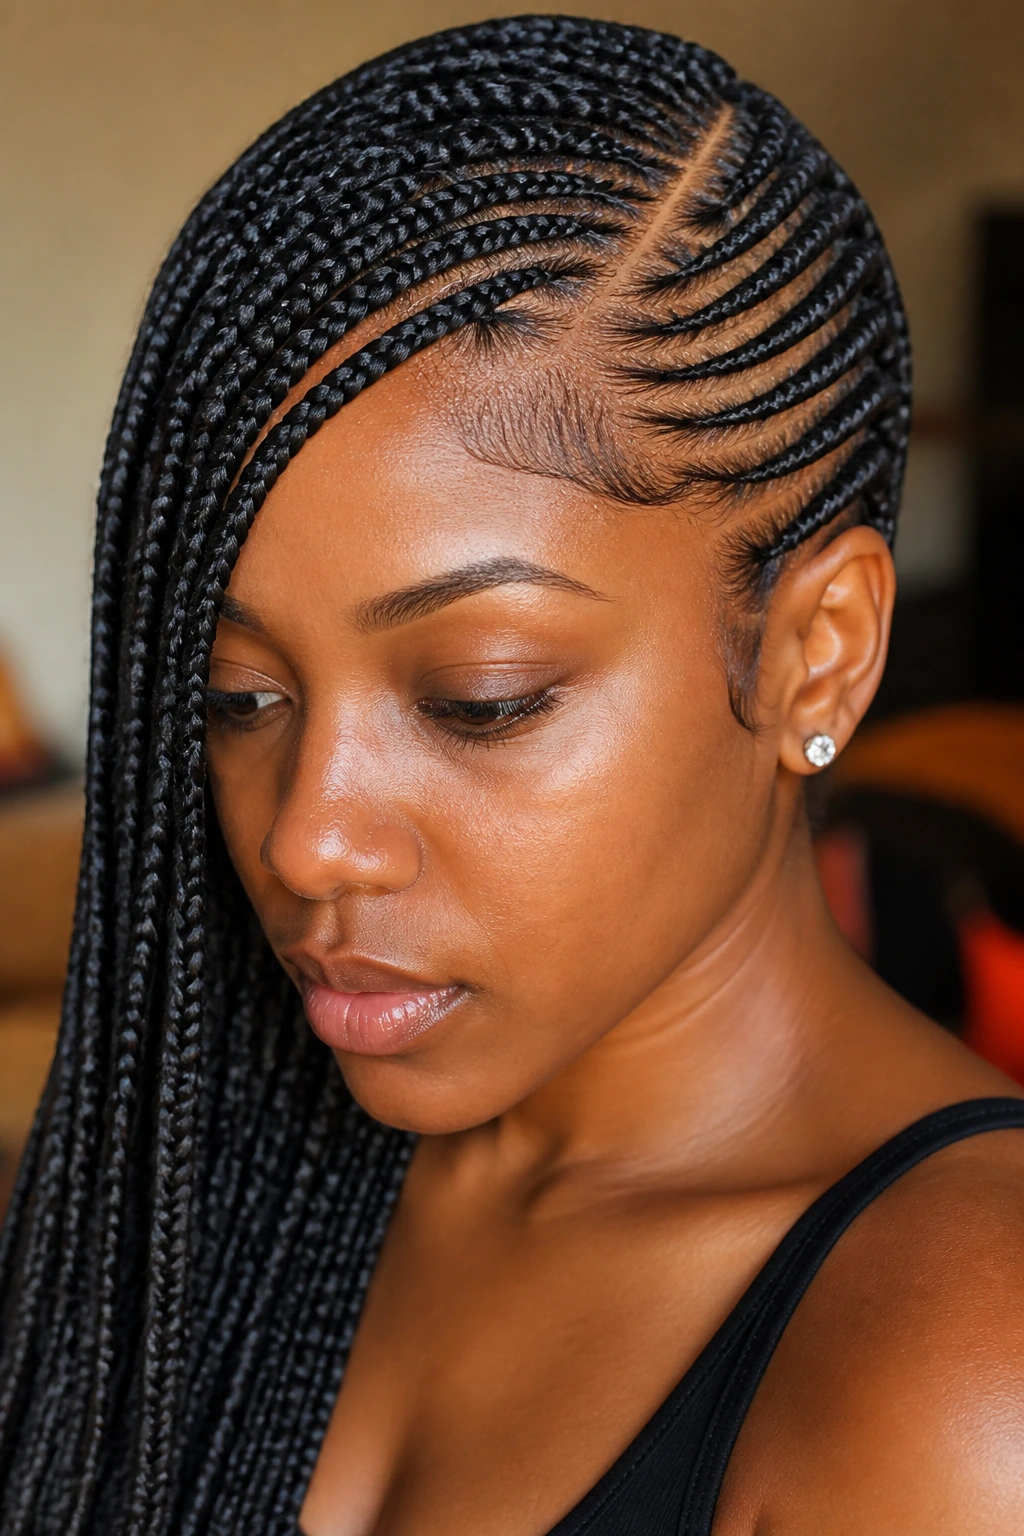
Lemonade braids get their punch from the side part. Everything sweeps one direction, so the face gets a strong diagonal line and the braids feel more styled than symmetrical rows. There’s a confidence to this shape that I like. It doesn’t apologize for itself.
The deep part is doing a lot of work, so make it clean. A jagged part turns the whole style restless. Long extensions help the braids fall with a little weight, but the scalp should still feel comfortable after installation. If it feels too snug near the temple, the angle needs adjusting.
Why they stand out
- The asymmetry makes the style feel sharp
- The side sweep gives room for earrings and makeup
- The braid line looks dramatic without needing extra volume
My preference: Add just one accessory near the face — not five. The parting is already the statement.
19. Stitch Braids into a High Bun
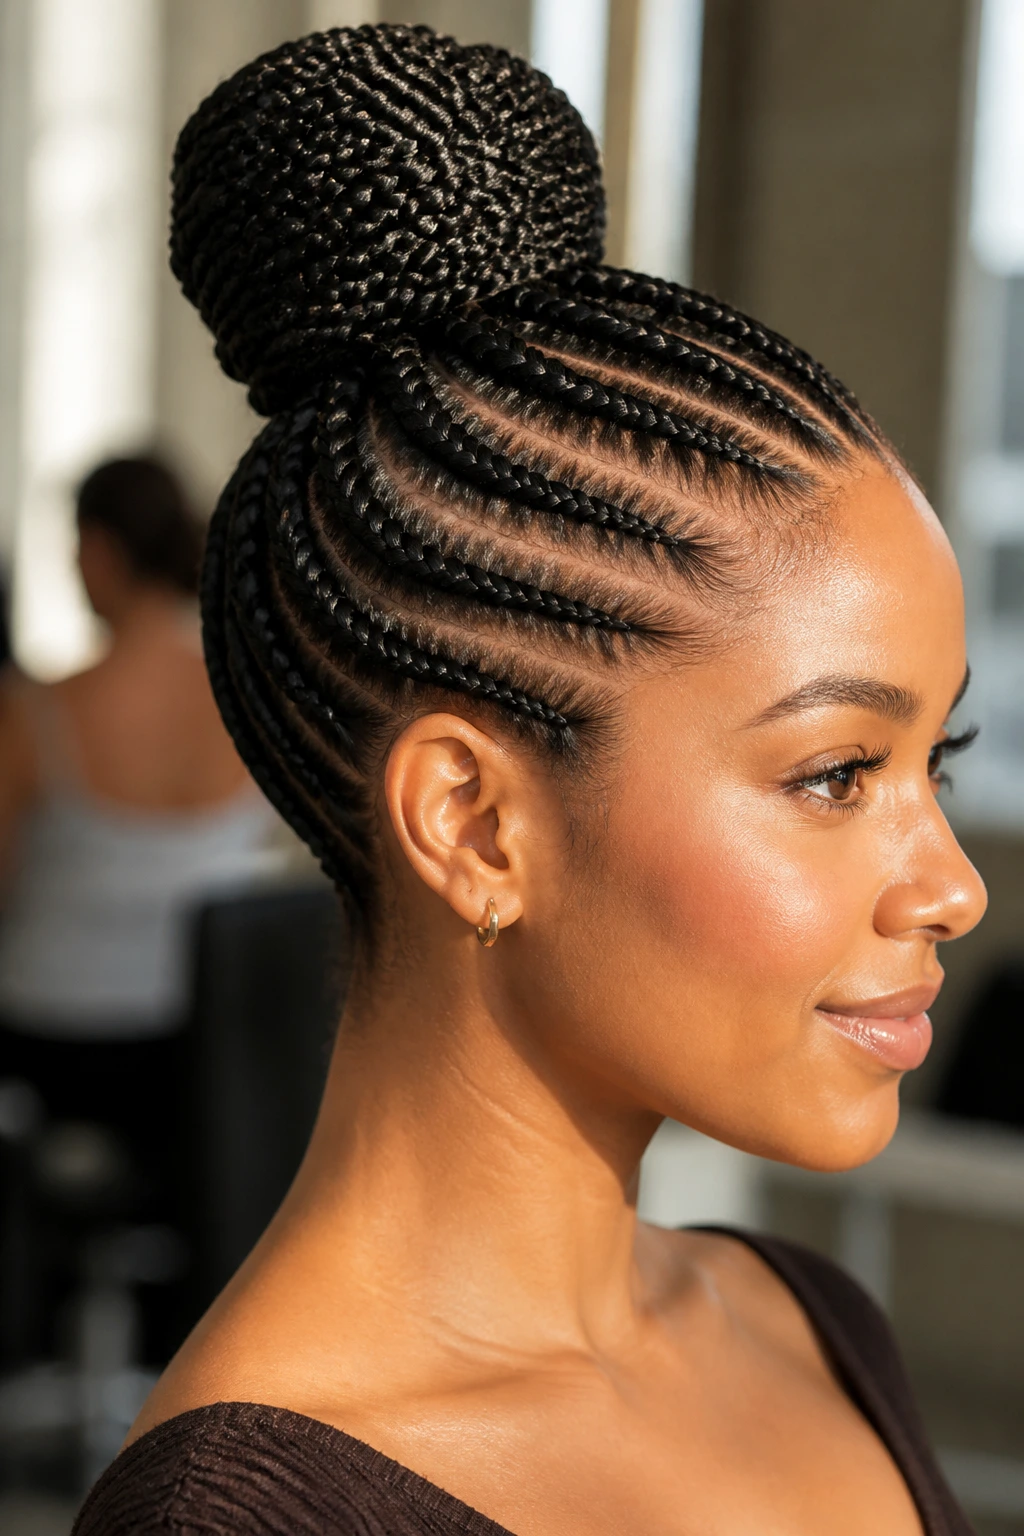
Stitch braids are all about the parting. The clean horizontal sections create a line that looks almost drawn on, and when those braids gather into a high bun, the whole style feels polished and contained. It’s tidy in a satisfying way. Nothing loose, nothing random.
This is the braid I’d pick for a formal event or a hot day when you want your neck clear. The bun at the top gives height, and the stitched rows make the base interesting even before you get to the knot. Keep the bun smooth or tuck in a few ends if you want a more sculpted finish.
- Strong horizontal parting
- High placement for lift
- Works with added hair or natural length
Good tip: Lay the front section down first, then build the bun. That order keeps the braid pattern visible instead of getting swallowed by the knot.
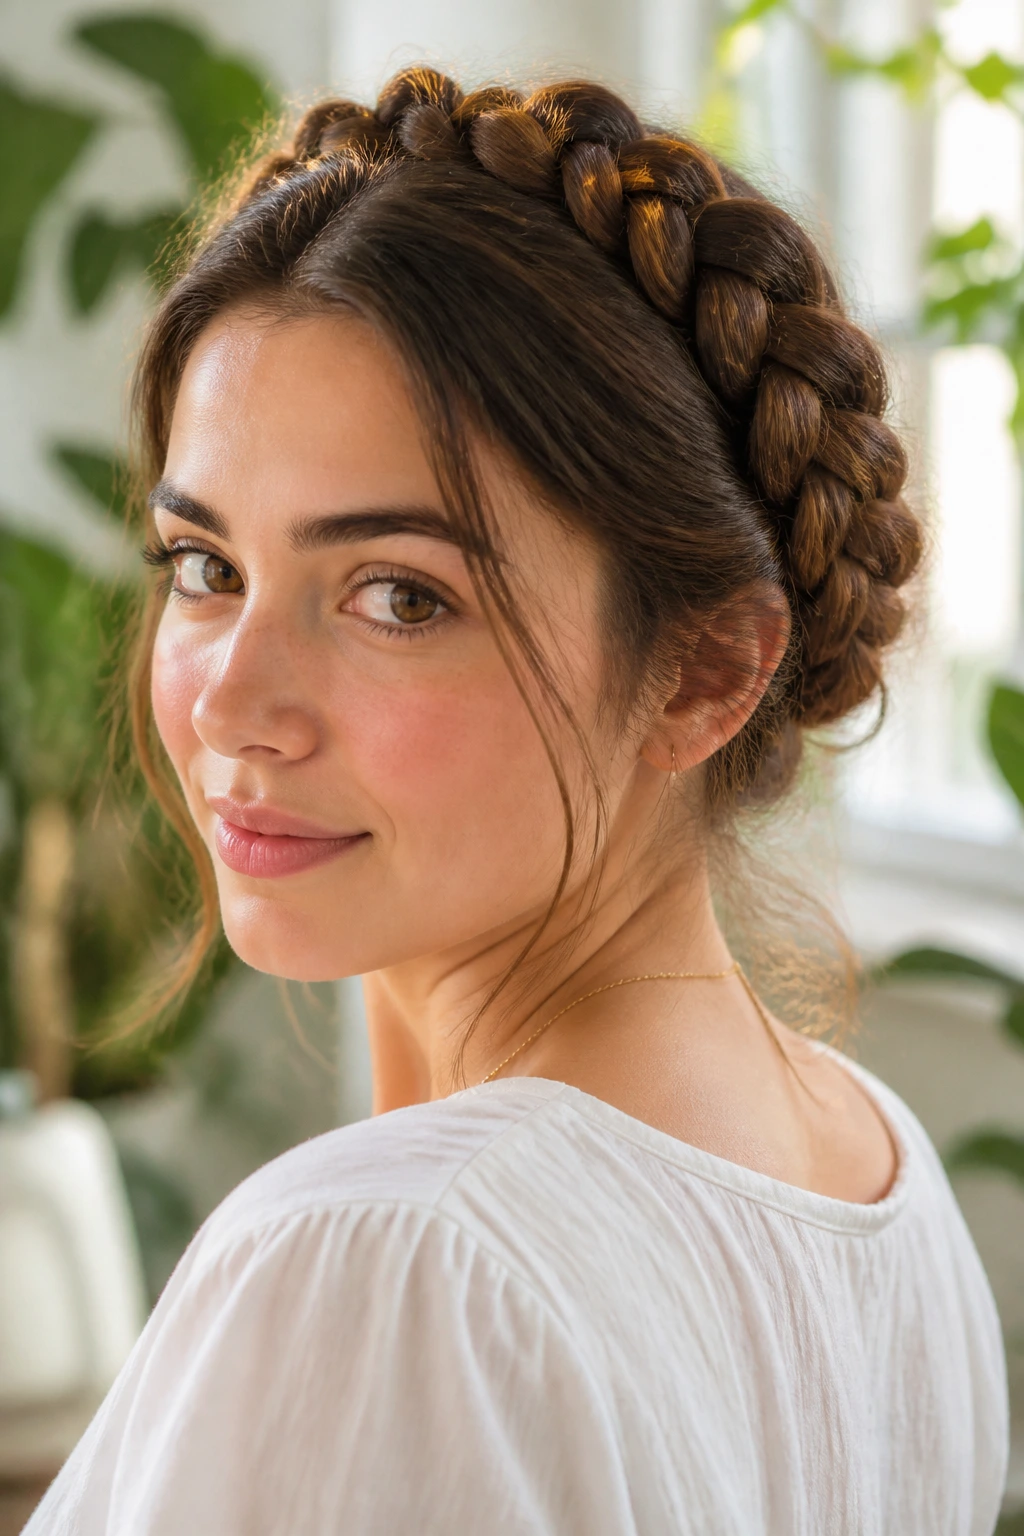
20. Halo Braid Updo
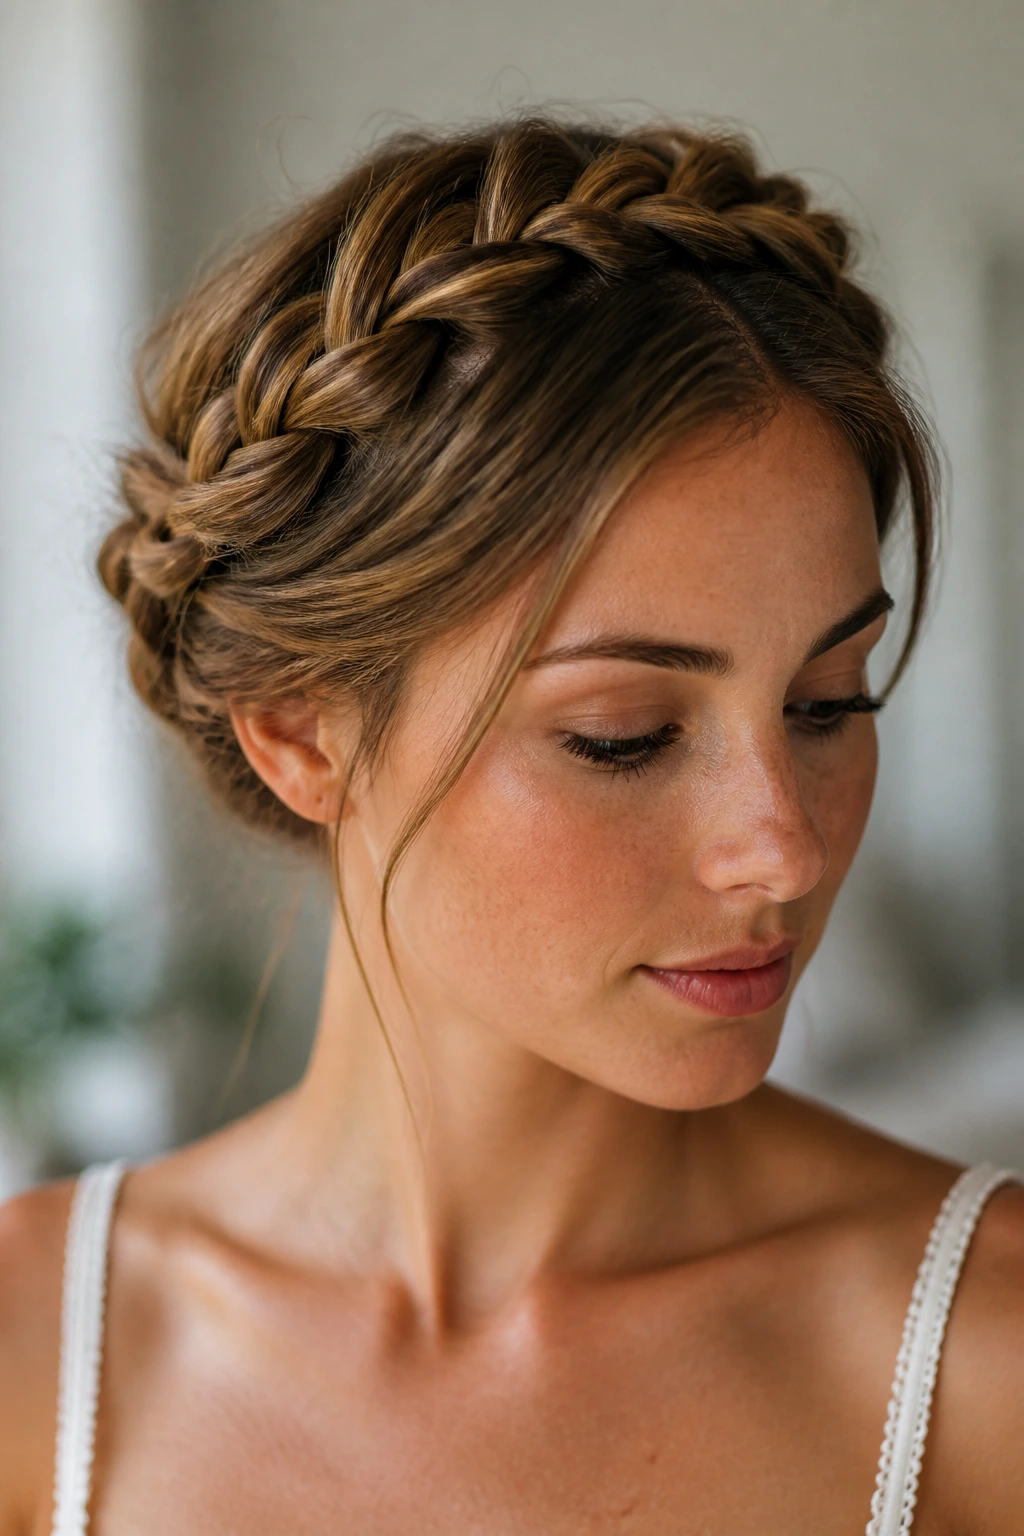
A halo braid wraps around the head like a quiet crown, which is exactly why it works so well. The shape is clean and contained, but it still has a softness at the temples that keeps it from looking severe. On medium to long hair, it can be pinned neatly and tucked so the ends disappear under the braid.
This style has a built-in elegance without acting precious about it. It’s not fragile. It can hold up through a long dinner or a day at the office if the pins are placed well. A little texture at the roots helps the braid grip, especially if the hair is freshly washed and slippery.
Best for
- Medium to long hair
- Dressy occasions
- People who want the face completely open
Small note: Keep the braid width even all the way around. If one side gets thicker, the halo starts to tilt, and you’ll notice it every time you pass a mirror.
21. Braided Low Bun
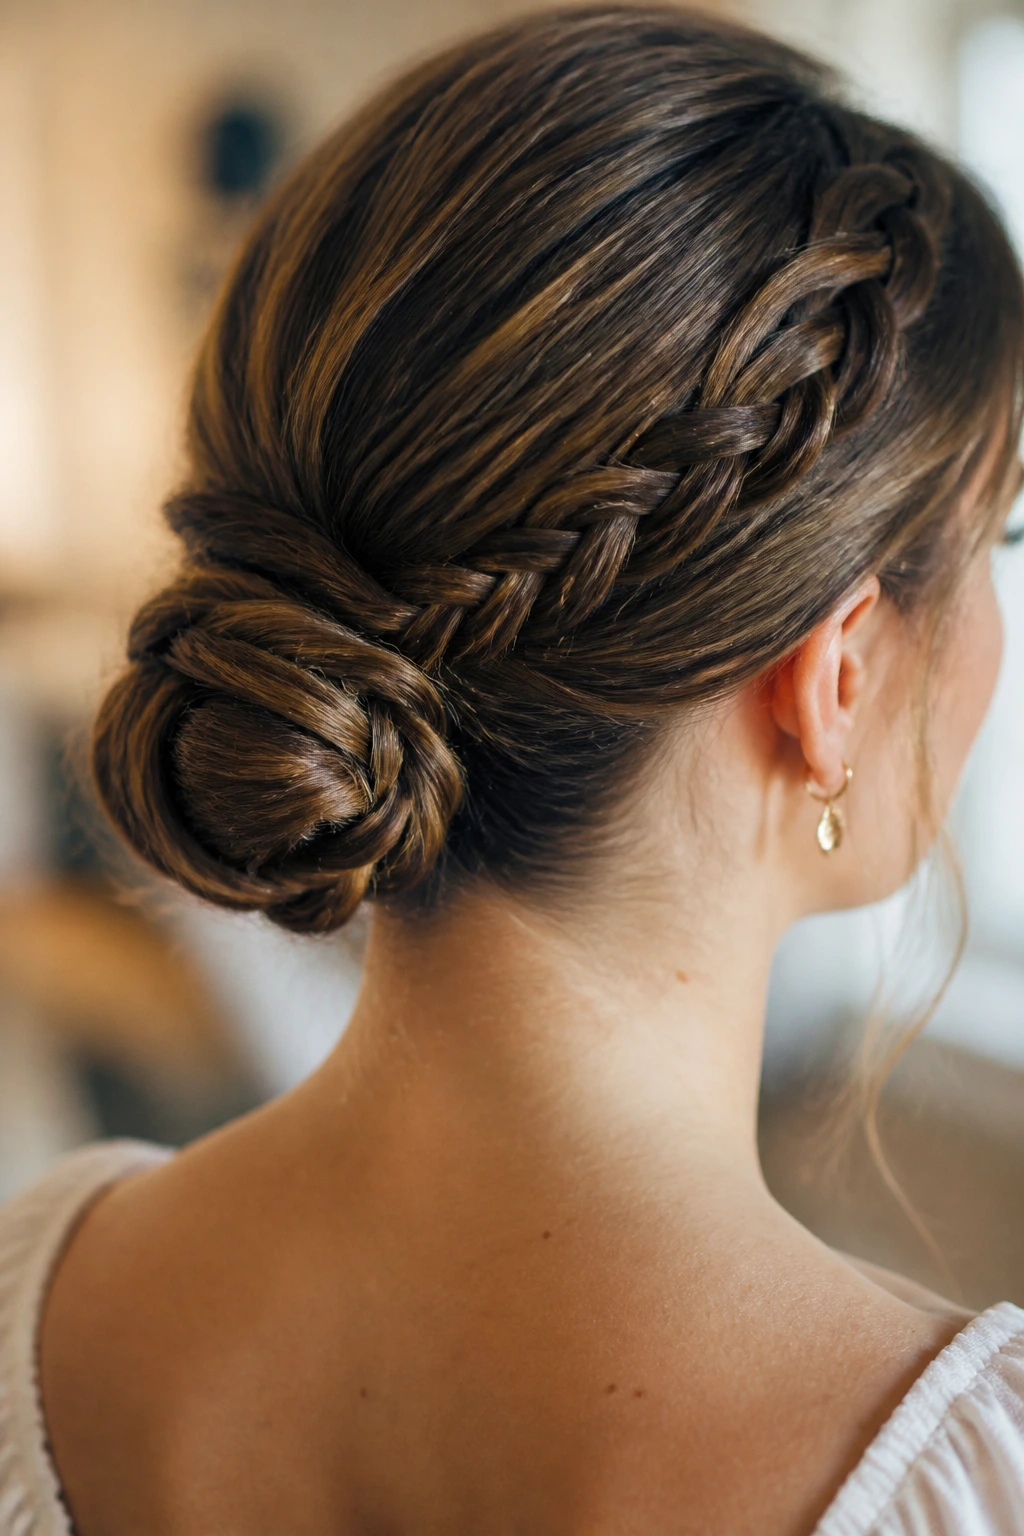
A braided low bun is one of those styles that looks calm on purpose. The braid gathers at the nape and coils into a bun, which gives the neck a clean line and keeps the shape close to the head. It’s more structured than a messy bun and less severe than a tight chignon.
I like this when the outfit already has texture and the hair needs to be the quiet part. The braid in the base gives the bun enough detail that it doesn’t disappear, but the whole style still stays understated. Use pins that match your hair color if you can. They vanish better.
Best if you want:
- An office-appropriate braid
- A style that sits comfortably under a coat collar
- Something that can go from day to evening without a redo
Practical warning: If the bun feels heavy, the braid feeding into it is probably too fat. Reduce the section size next time.
22. Braided Top Knot
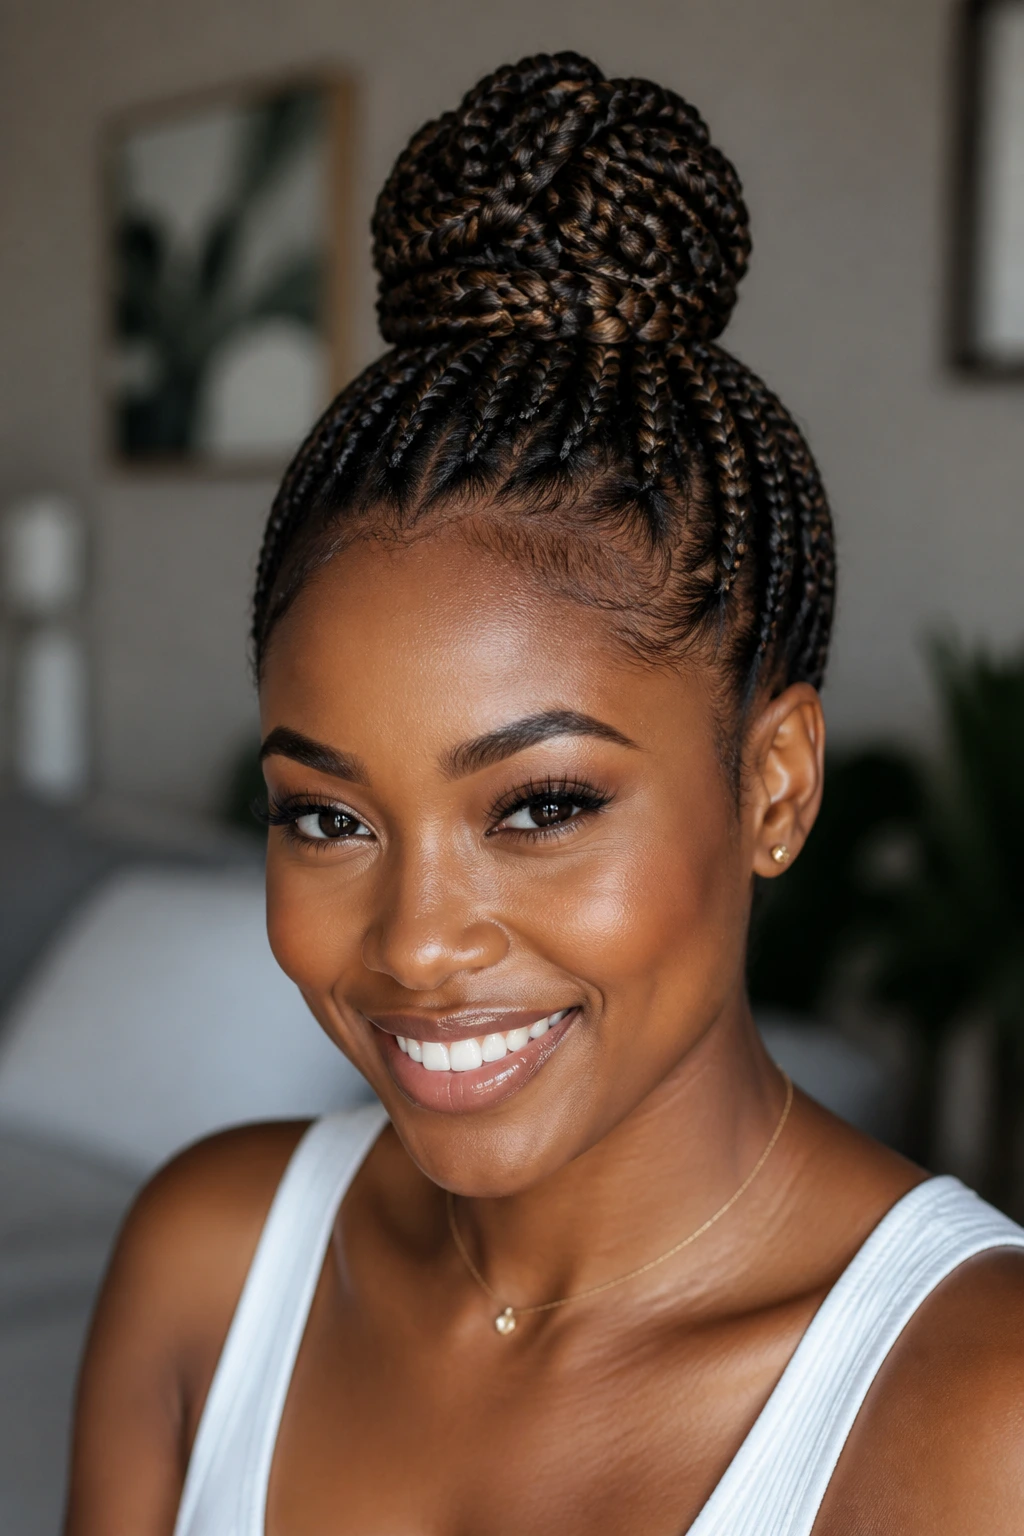
A braided top knot takes the lift of a high bun and adds a little more shape underneath it. Instead of twisting loose hair straight into a knot, you braid the ponytail first, then wrap it. That extra structure makes the knot look deliberate, not random.
This style clears the face and makes the neck feel open, which is useful on busy days. It also works better than a plain top knot on longer hair because the braid helps the ends stay tucked. If you leave out a few face-framing pieces, keep them soft and short enough to move; long wandering pieces can make the top knot look unfinished.
How to wear it
- Sleek the crown for a sharper silhouette
- Leave the bun compact, not giant
- Pin the braid end underneath the knot so it doesn’t stick out
My opinion: This is one of the best “I need to look put together in 10 minutes” styles on the list.
23. Crown Braid with Tucked Ends
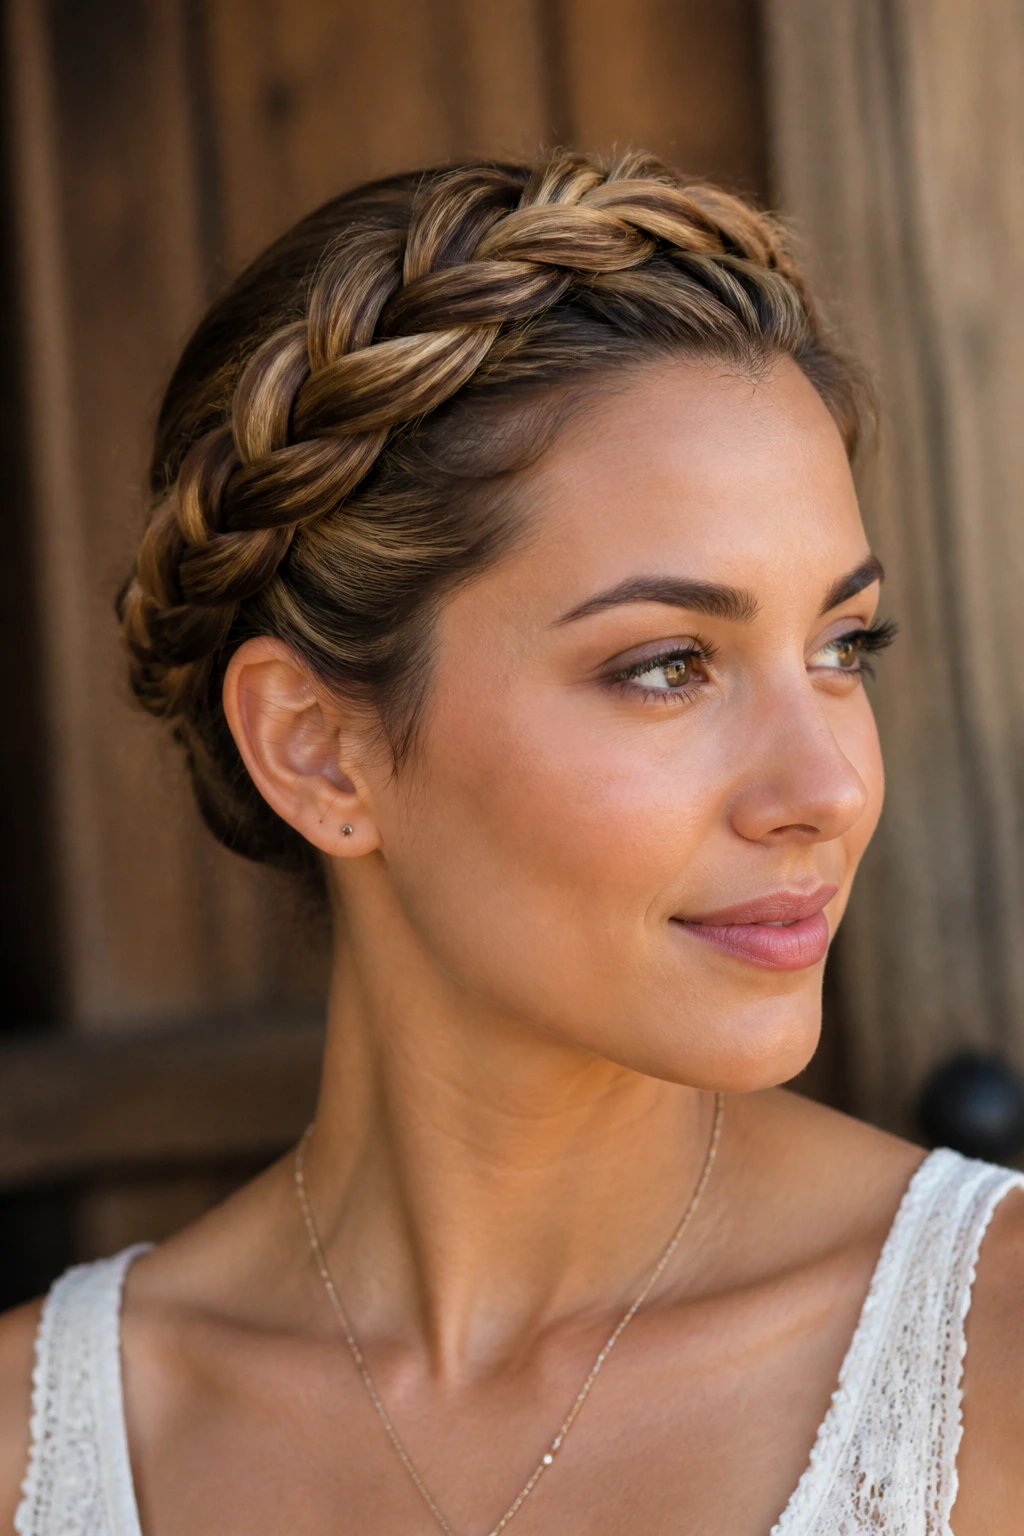
A crown braid and a halo braid are cousins, but this version feels a touch more seamless because the ends get tucked away instead of hanging free. The braid wraps around the head, then disappears into itself or under the base, which gives the style a tidy, closed finish. I like that. It looks thought through.
The style works well when you want an updo without a visible bun or tail. Because the ends are hidden, the line stays smooth around the crown. If your hair is layered, a few hidden pins are worth using to keep the braid from unraveling behind the ear.
- Clean wrapping line
- Ends pinned under the braid
- Good for medium and long lengths
Small tip: Spray the braid lightly before tucking the end. It helps the tucked section stay put instead of creeping back out by dinner.
24. Braided Bangs with a Low Ponytail
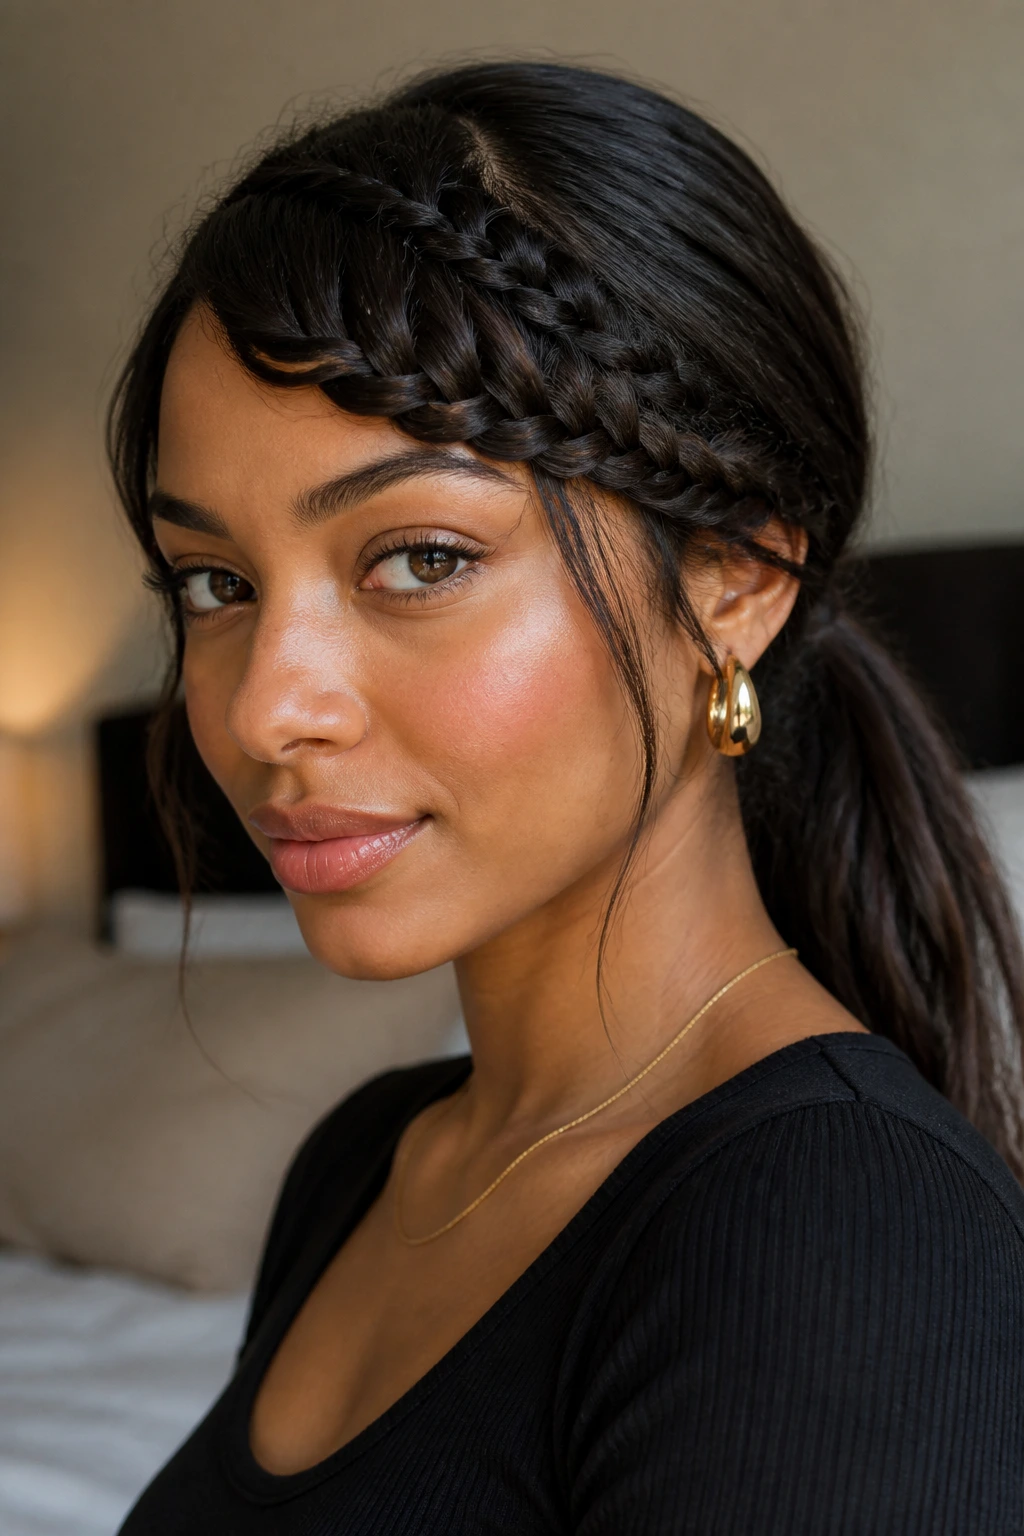
Braided bangs are a neat fix when the front of the hair wants attention and not the good kind. A small braid starts at the hairline and sweeps across the forehead or temple, then the rest of the hair drops into a low ponytail. The effect is subtle, but it changes the face shape more than people expect.
This is especially useful for grown-out fringe. You keep the front controlled without pinning every short piece back. The ponytail keeps the rest of the hair simple, which helps the braid stand out instead of fighting the rest of the style.
Best for
- Fringe, layers, or shorter front pieces
- Low-key everyday wear
- A braid detail without a full updo
Good to know: A tiny amount of styling cream at the front keeps the braid from fuzzing up at the temples, where shorter pieces like to escape.
25. Pull-Through Braid
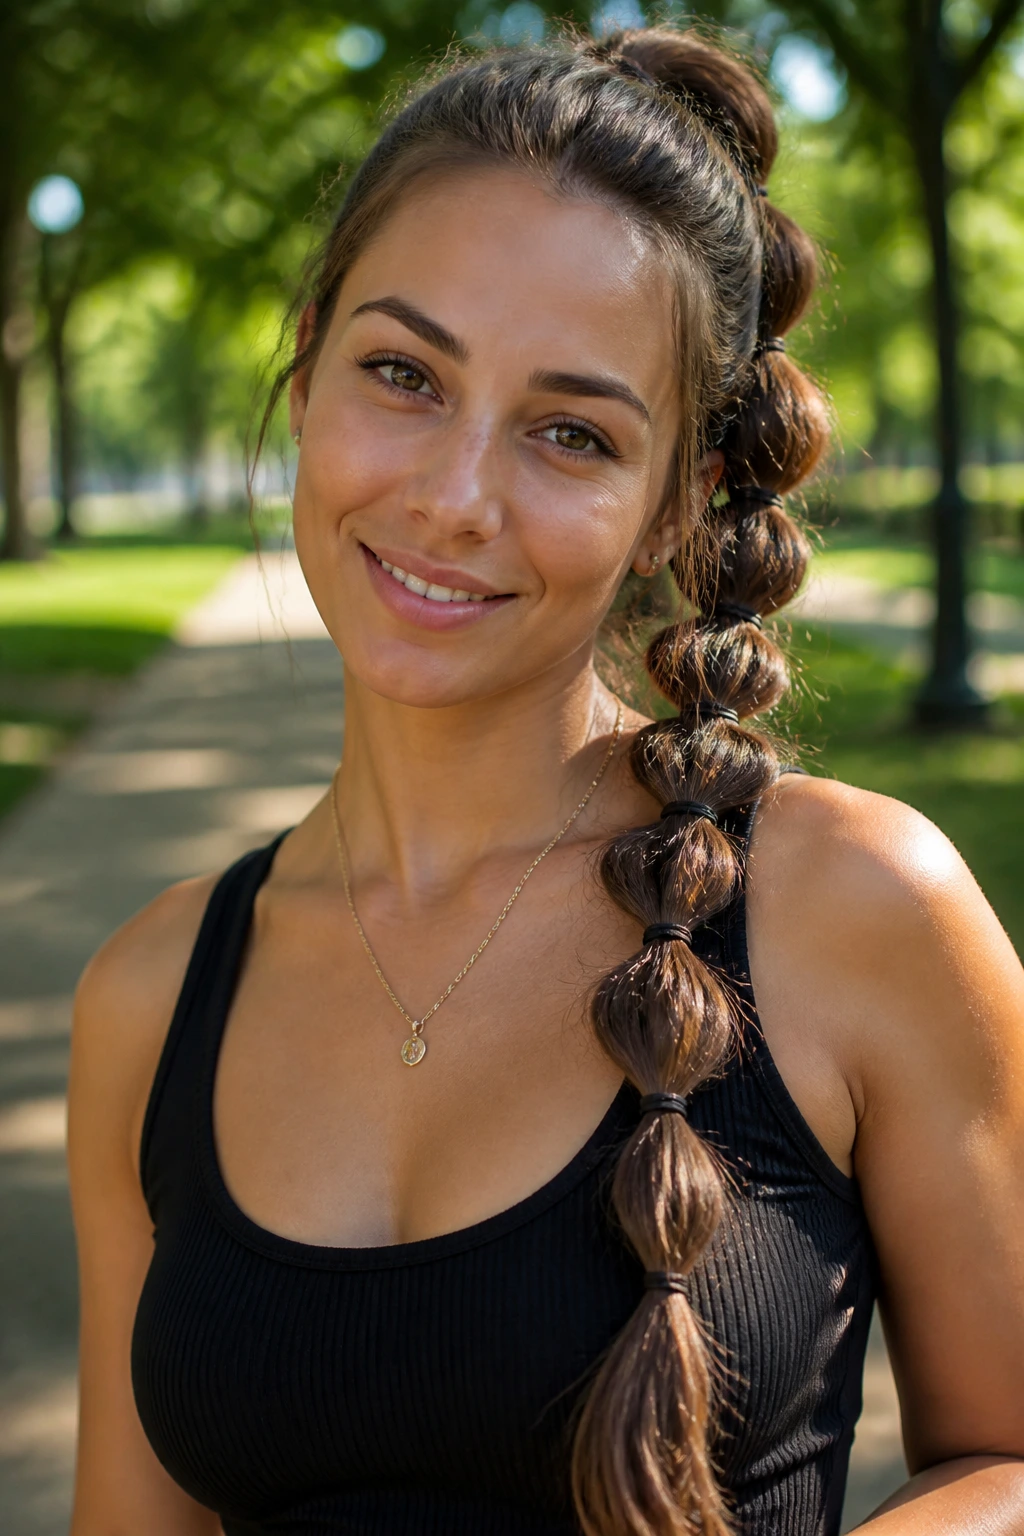
The pull-through braid is not a braid in the old-school sense, and that’s part of the charm. It uses elastic sections stacked one after another so the hair looks woven and full, almost like a thick rope or chain. On long hair, it gives huge visual volume without needing advanced hand work.
This is a smart choice when the hair is layered or slippery, because the elastics do most of the structural work. You can pancake each loop for softness or leave the sections tighter for a cleaner shape. Either way, the braid reads bold from across the room.
- Built with clear elastics
- Great for long or very thick hair
- Easier to keep uniform than a traditional braid if your hands tire easily
My take: If you’ve been frustrated by braids slipping apart, this style is a nice detour. It holds shape because the elastics are doing the holding.
26. Pancaked Dutch Braid
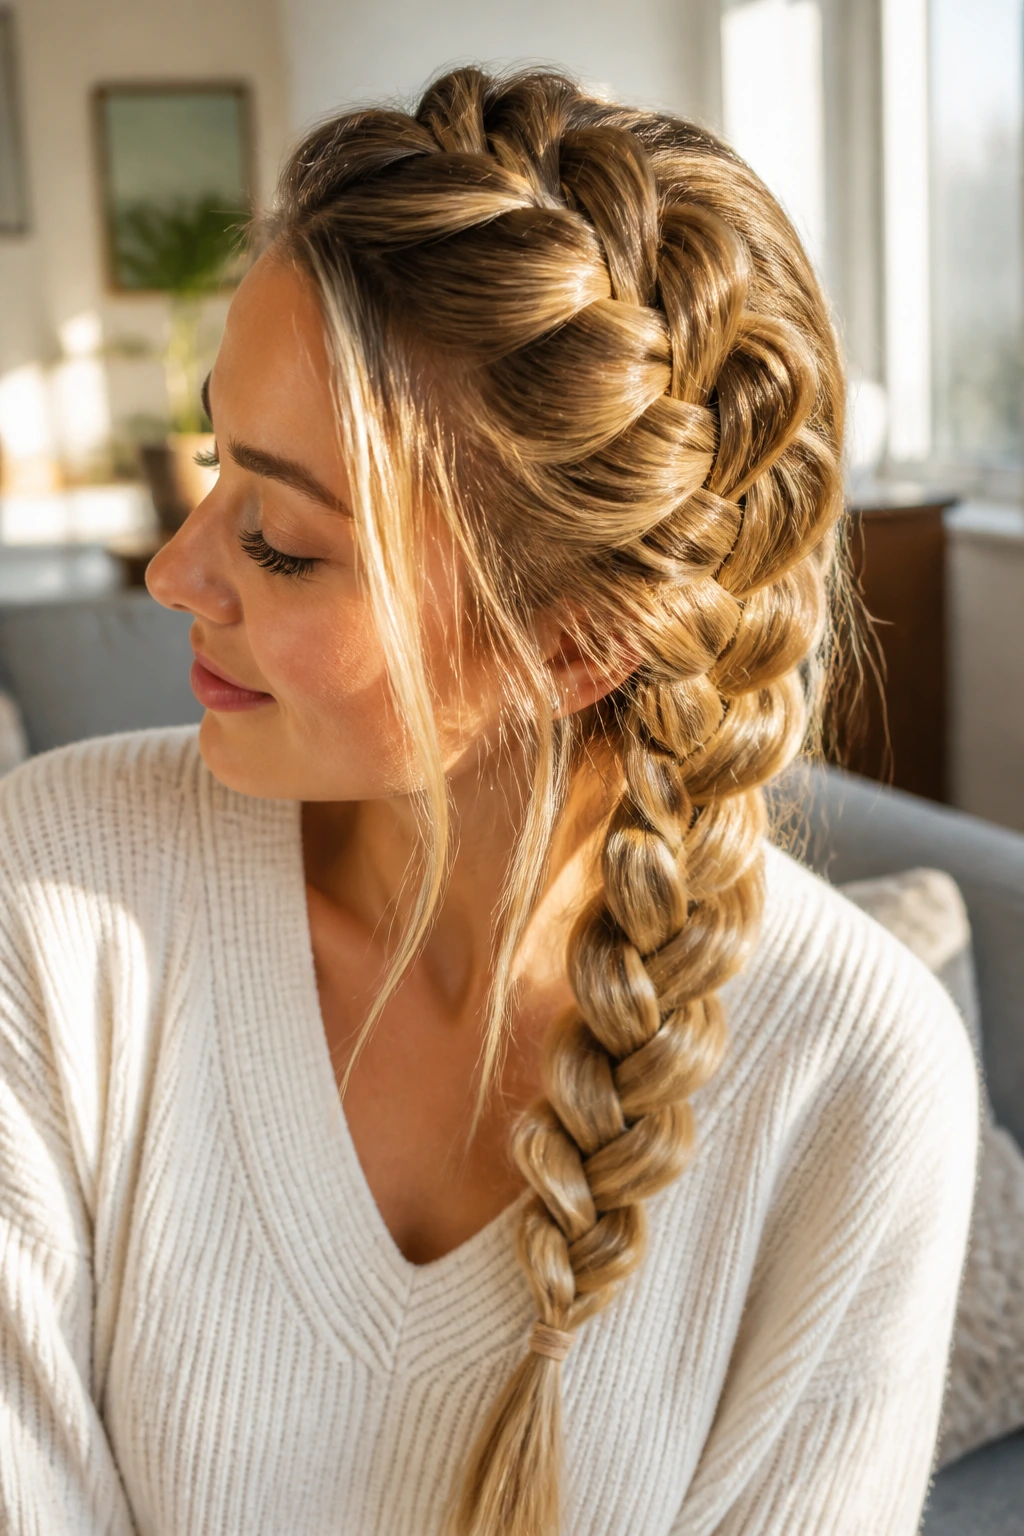
A pancaked Dutch braid is what happens when a standard Dutch braid gets gently widened by hand after it’s finished. That widening — done by pulling the outer edges of each section — turns a tight plait into something soft and full. It changes the whole tone of the braid. Same structure, better mood.
I like this on medium to thick hair because the braid can handle the extra width without falling apart. Fine hair can do it too, but you need a gentler touch or the braid will go wispy fast. The point is to spread the braid, not tear it open.
How to get the look
- Braid the hair firmly first
- Tug the outer loops slowly with two fingers
- Stop when the braid looks full, not frayed
Useful note: Pancaking works best after the braid is secure. If you loosen it while you’re still braiding, the sections get uneven.
27. Four-Strand Braid
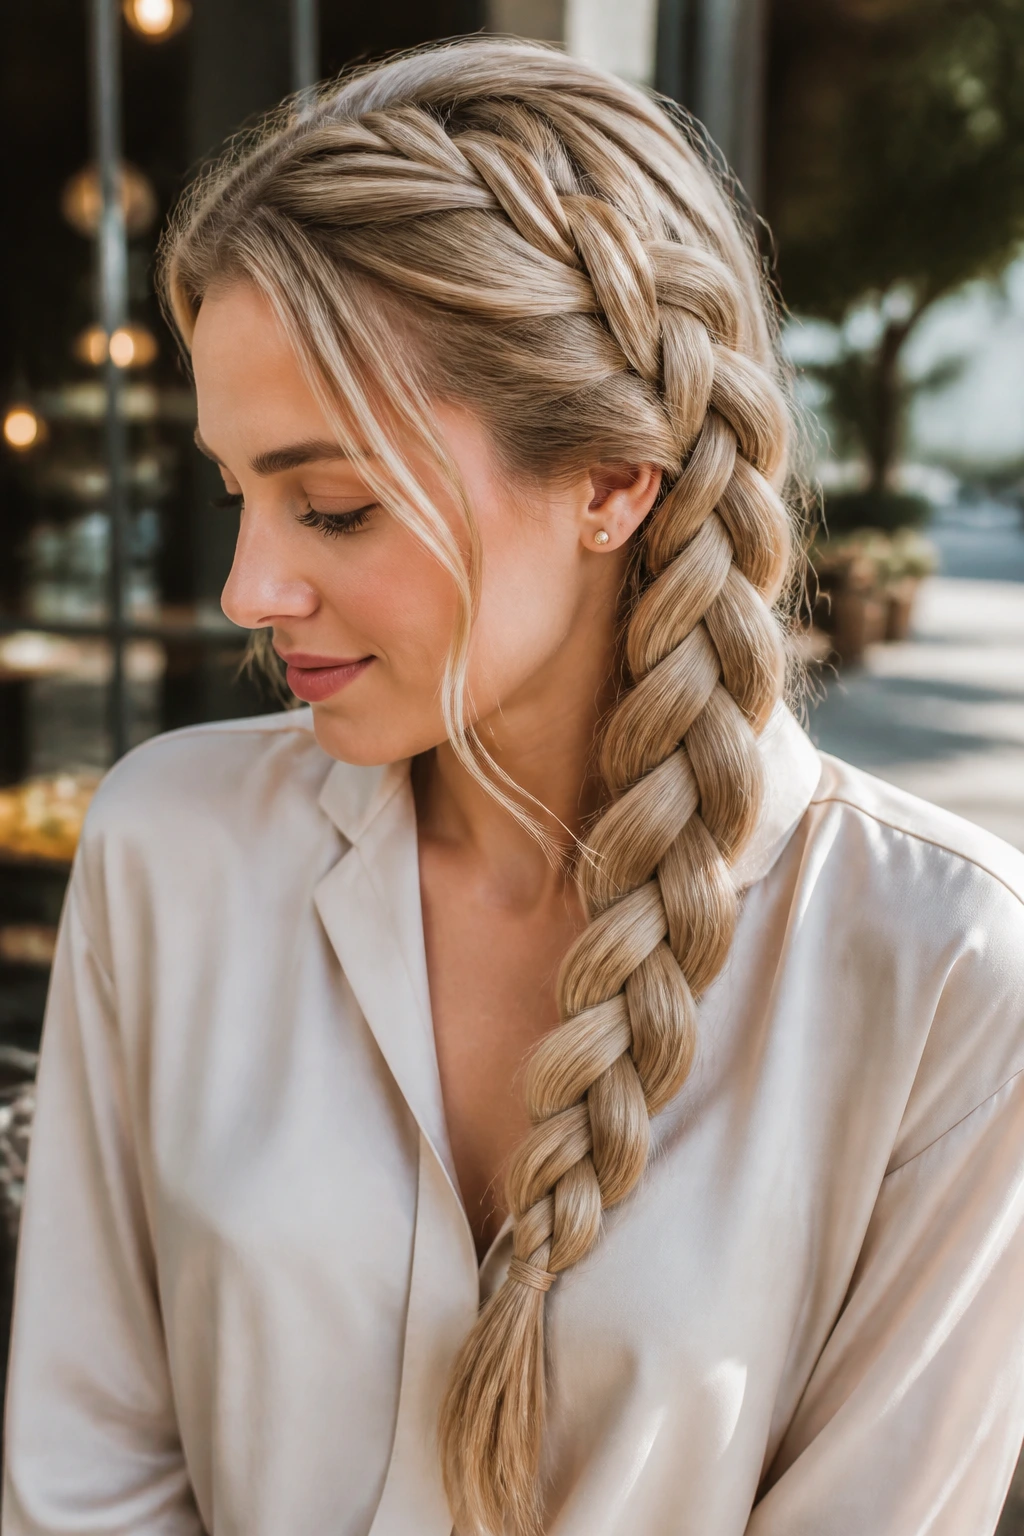
A four-strand braid has a flatter, more ribbon-like finish than a basic three-strand braid. It looks a little more technical, which is why it often reads dressier even when the hair itself is simple. The strand pattern creates a smooth woven surface that catches shine nicely.
It does take concentration. The pattern is easy to lose if you’re rushing, so this is not the braid I’d pick on a morning when the kettle is still boiling and you’re already late. But when you give it the time, the result feels tailored. It’s especially nice on long hair where the braid can show its full shape.
Best for:
- Long lengths
- Smooth, glossy hair
- A more refined braid without accessories
Tip: Use clips to keep the sections separated at the start. Once the rhythm is set, the braid is much easier to finish cleanly.
28. Five-Strand Braid
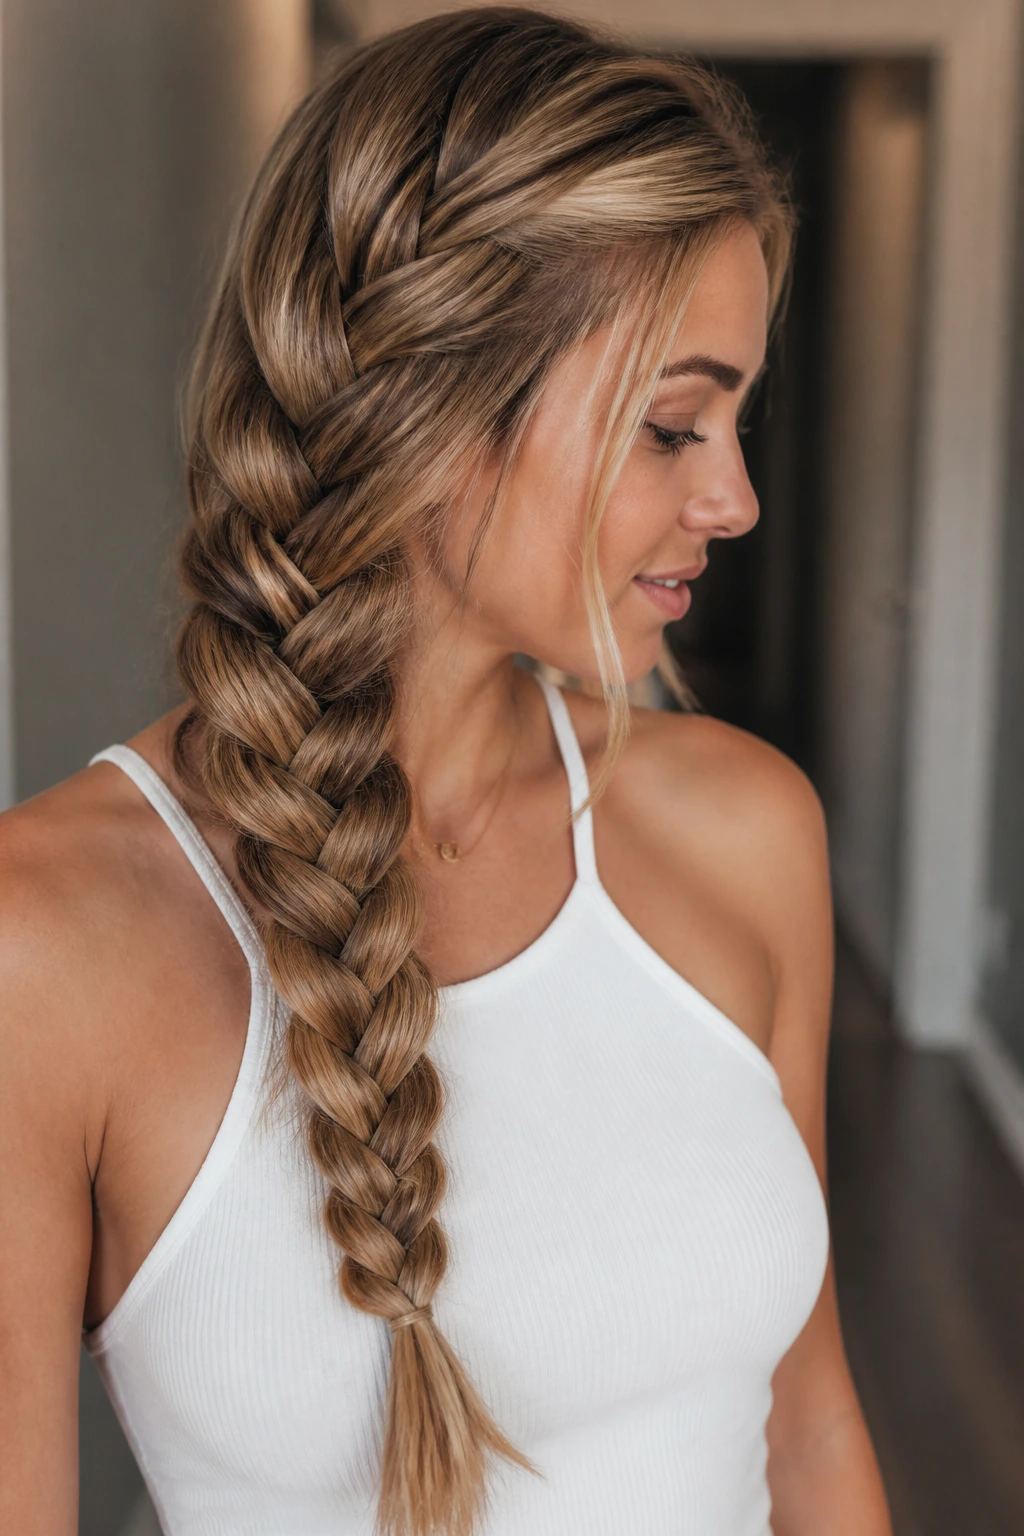
A five-strand braid takes the logic of the four-strand version and gives it more texture. The pattern is denser, the finish is smoother, and the braid can look almost woven from fabric when it’s done well. It’s a braid for someone who doesn’t mind standing still and paying attention.
The upside is that it looks intricate without needing beads or extra accessories. The downside is obvious: if your tension changes from section to section, the braid shows it immediately. So this one rewards patience and decent lighting. Seriously. Try doing it in a dim hallway and you’ll spend twice as long fixing the same strand.
What makes it different
- More strands, more texture
- A smoother, more polished finish
- Best when the hair length is generous
Small reminder: Keep your grip even. If one section is tighter than the rest, the whole braid leans to one side.
29. Pull-Through Mohawk Braid
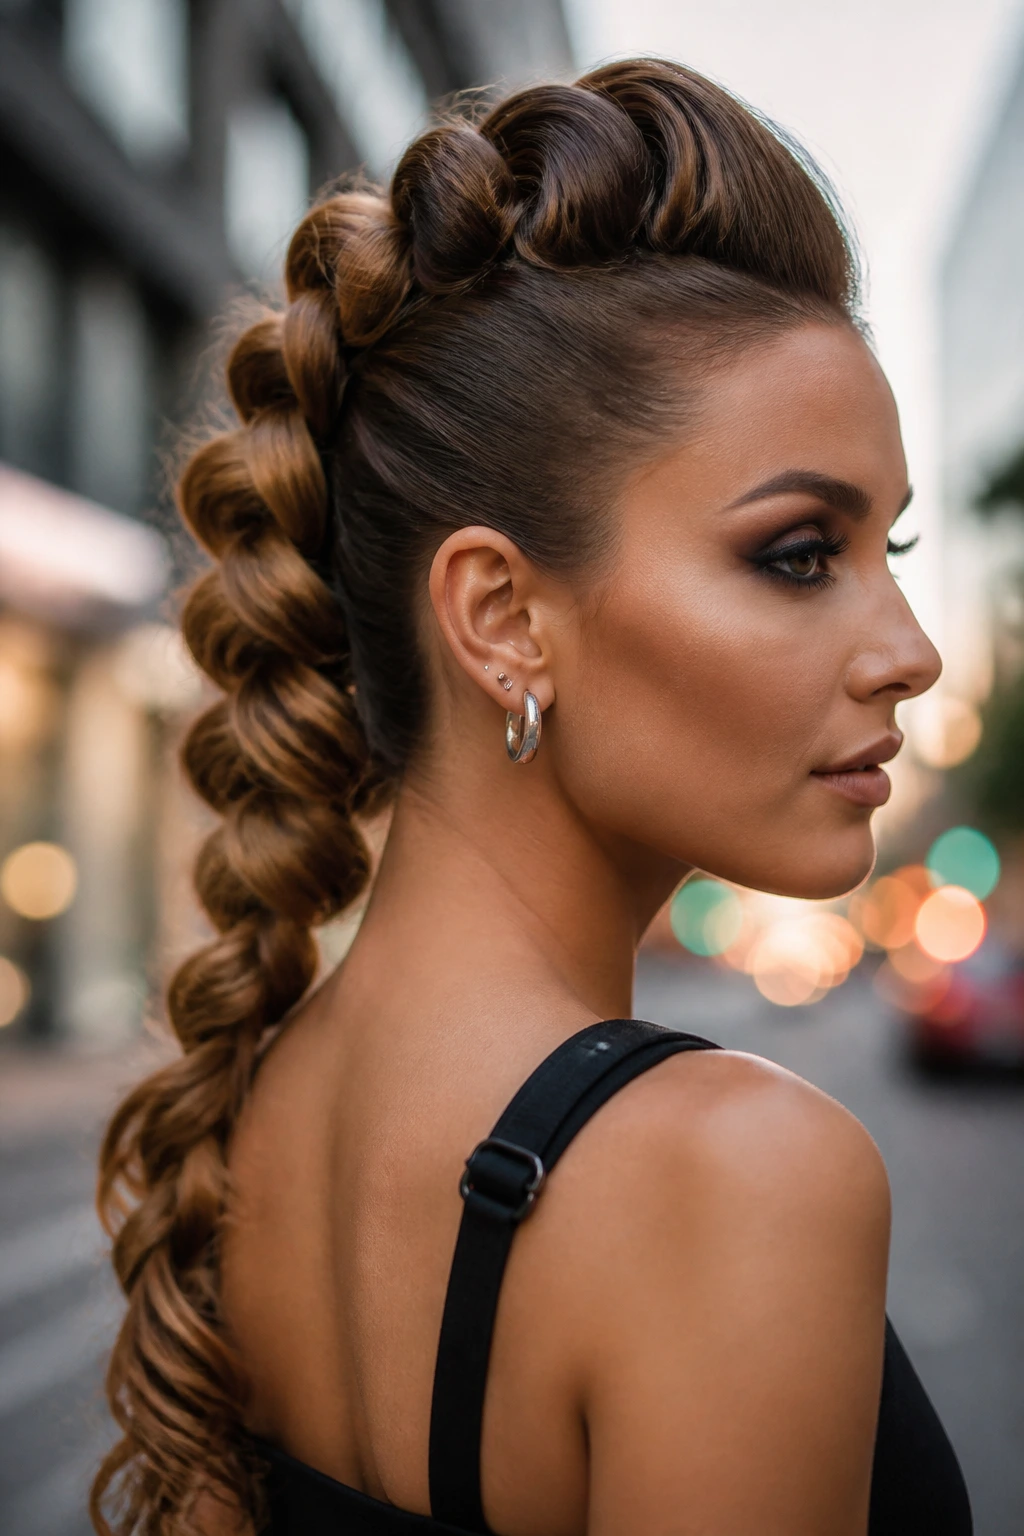
A pull-through mohawk braid gives you height down the center of the head while the sides stay sleek and controlled. That contrast is the whole style. It looks bold without requiring the braider to weave every section into one continuous plait, which makes it a useful workaround for hair that likes structure but not tiny braids.
The center line can be very tight and polished, or a little softer if you want movement. I prefer a slightly looser pull-through on the crown and a neater finish near the nape. That balance keeps it from looking too rigid. If you’ve got long hair, this style can be dramatic in the best way.
- Strong center ridge
- Sides smoothed back
- Great for long hair and statement moments
Good to know: The sections along the mohawk line need to be spaced evenly. If the spacing drifts, the braid loses that clean, architectural feel.
30. Braided Space Buns
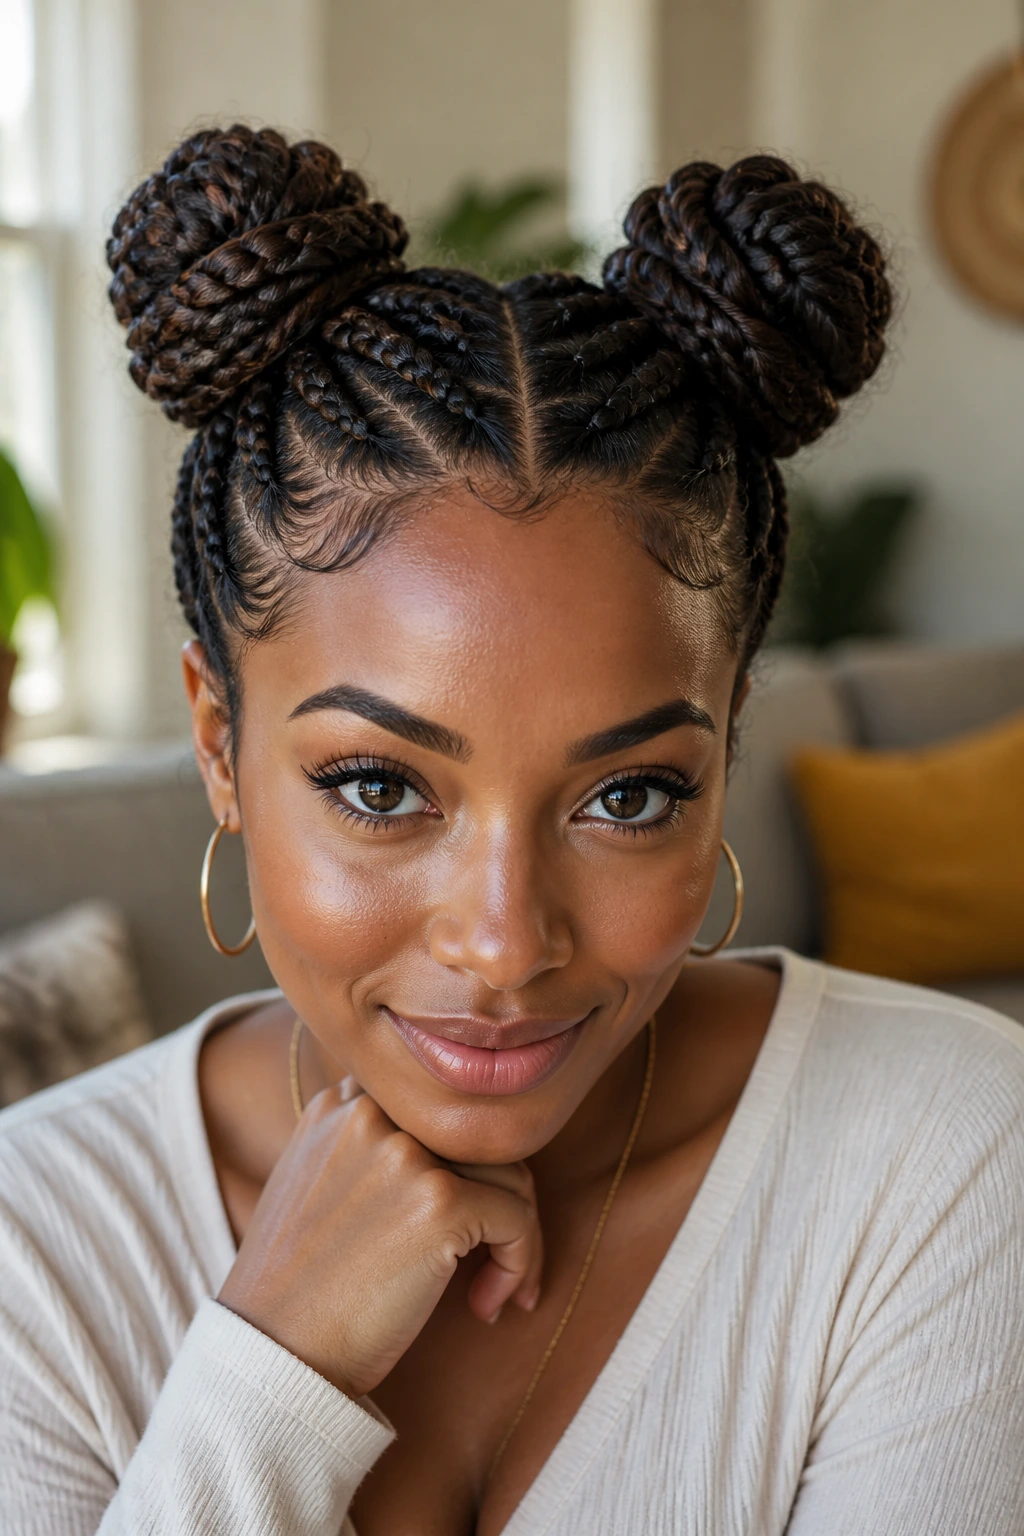
Braided space buns are playful, but they’re not flimsy. The braids add enough texture that the buns don’t look childish or flat, especially if the sections are neat and the buns sit evenly on both sides. They’re useful when you want hair off the neck with a little personality left in the style.
The shape works well for medium-length hair because the braids help hide shorter ends inside the buns. If the buns feel too round, leave the braids a little looser before wrapping. That gives the finished shape a softer outline and keeps it from looking like two hard knots.
Best for
- Casual plans
- Shorter lengths that still need a secure updo
- A braid look that can handle a bit of fun
Tip: Use matching pins or clear elastics so the attention stays on the braid shape, not the hardware.
31. Side-Swept Cornrow Style
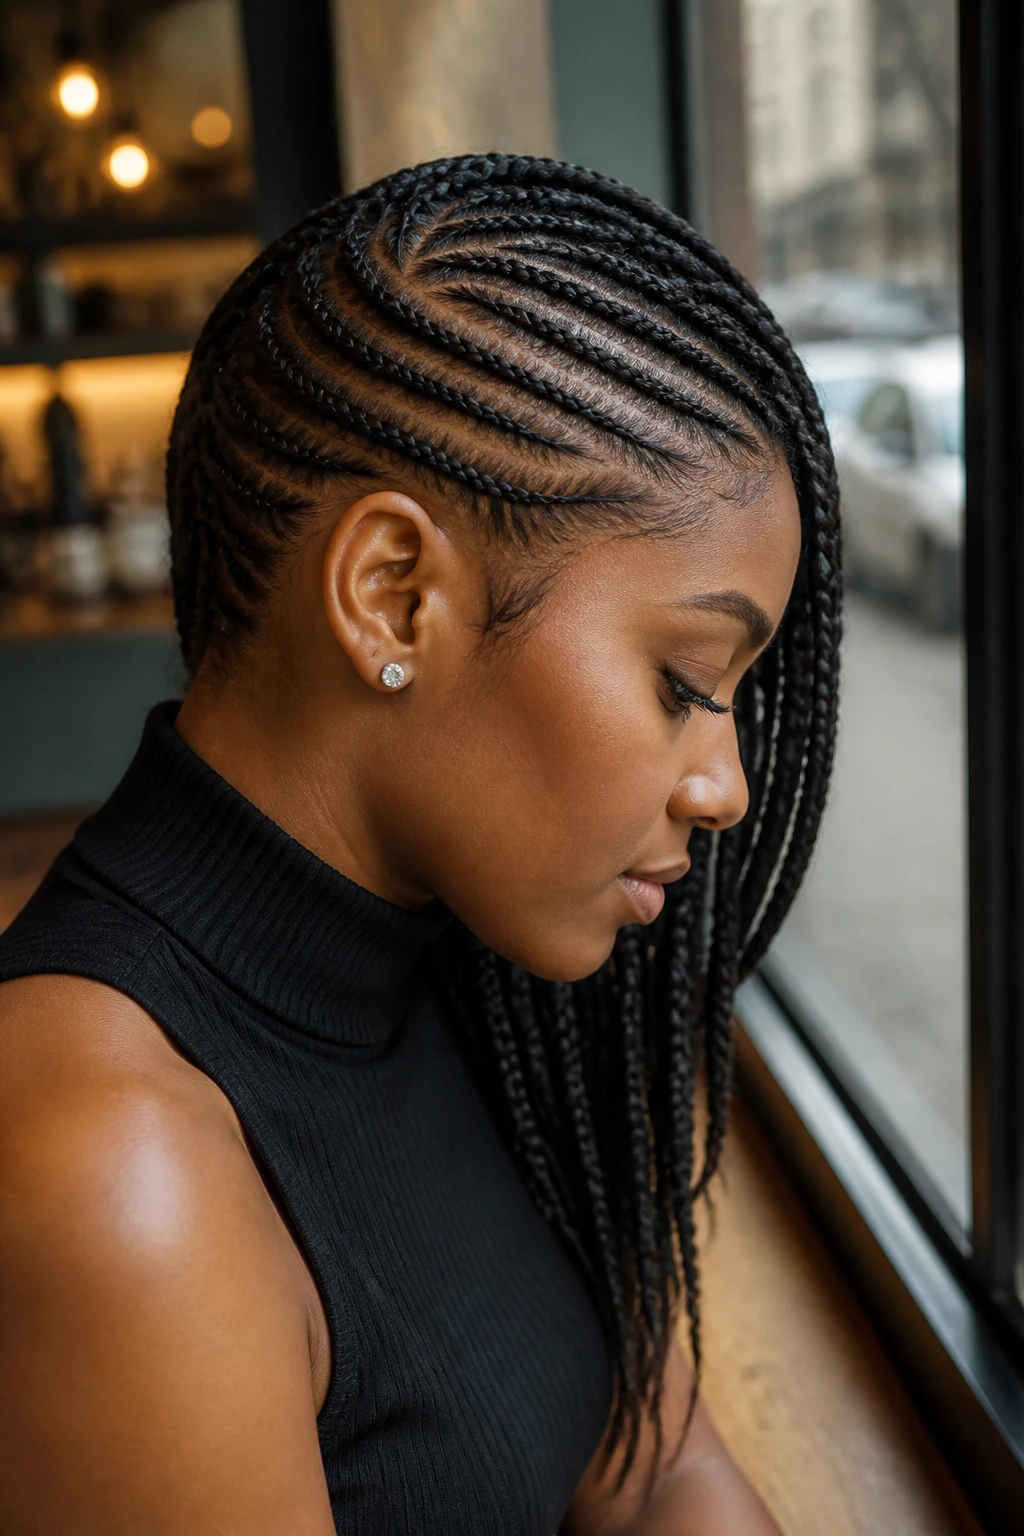
Side-swept cornrows use diagonal lines to move the eye across the head, and that shift gives the style a lot of energy. The rows angle toward one side instead of going straight back, which makes the face look lifted and the whole braid pattern feel a little less expected. It’s a sharp look.
This style does best when the sections are clean and the angle is intentional from the very first row. Don’t wing the direction halfway through. If you want a tail at the end, keep it sleek; if you want to stop at the scalp, tuck the ends neatly so the line doesn’t break.
Why it works:
- Diagonal movement makes the pattern feel dynamic
- The face gets framed without extra pieces
- It’s neat enough for work and bold enough for nights out
My opinion: Side-swept cornrows are one of the few braid styles that can look polished and a little bit dramatic at the same time.
32. Triangle-Part Box Braids
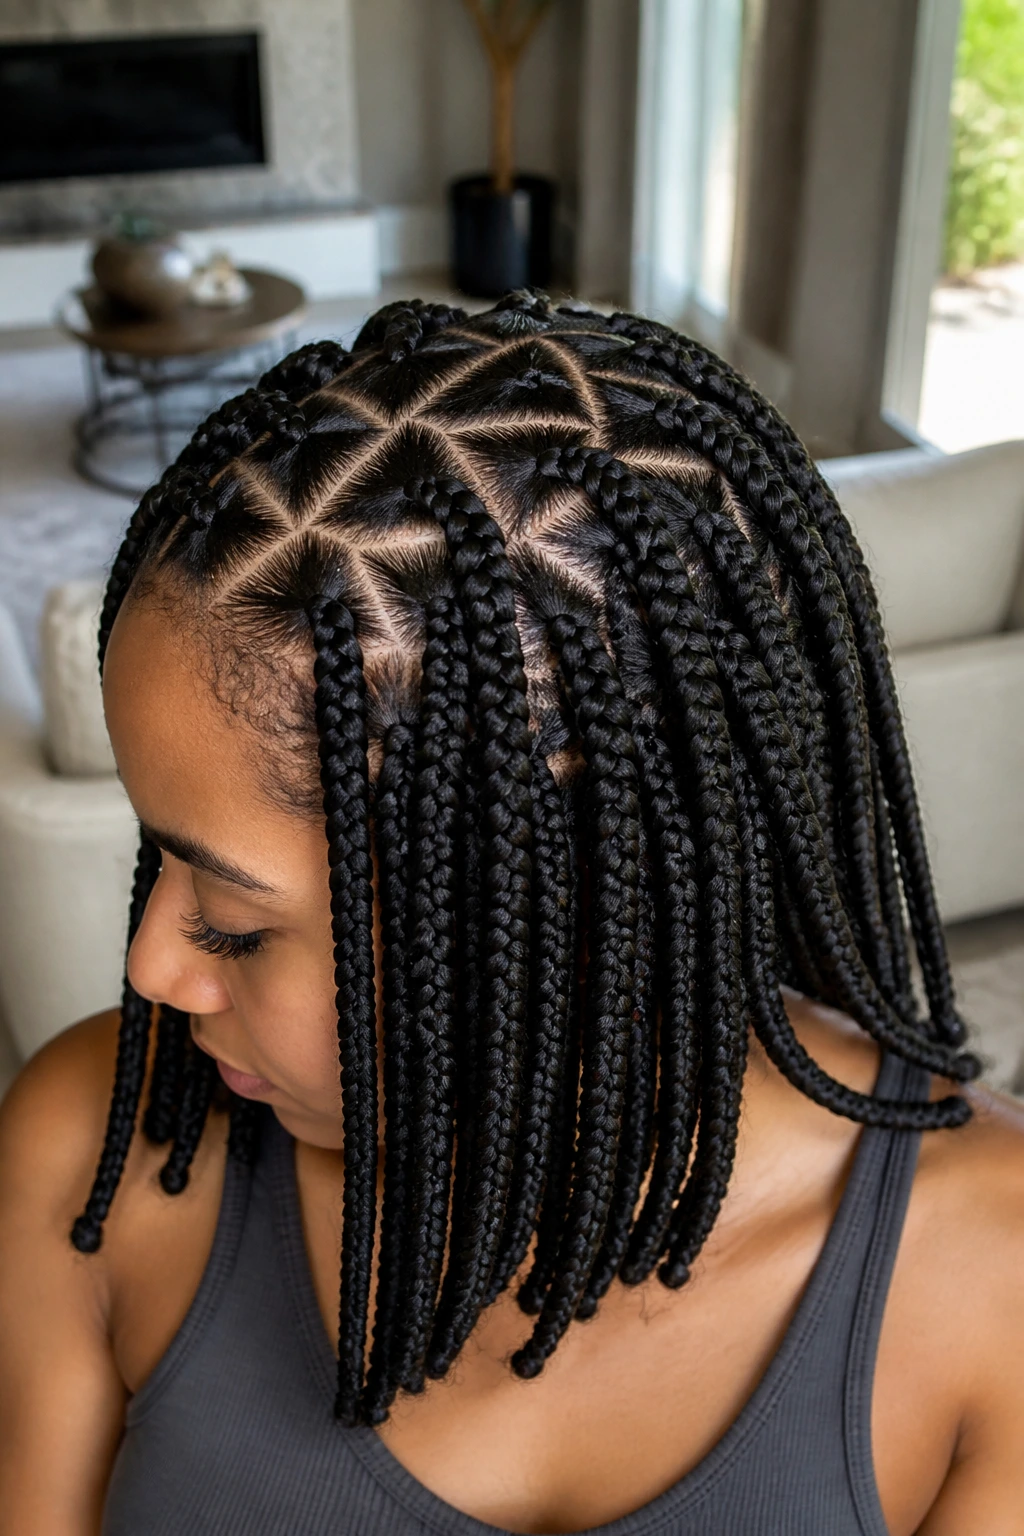
Triangle-part box braids change the look before you even get to the braid itself. Instead of square sections, the scalp pattern uses triangles, which gives the install a geometric feel that shows up clearly when the hair is pulled back or styled into a ponytail. It’s a small shift with a big visual effect.
The braids themselves can be medium or small, but the parting should stay crisp so the pattern reads cleanly. If you’re wearing the hair down, the triangular parts create a nice bit of texture at the root. If you wear it up, they turn into the star of the style.
- Same braid shape, different scalp pattern
- Works well with medium or long extensions
- Great for people who like detail at the root
Small note: Keep the triangles even in size. Random part shapes make the install look unfinished fast.
33. Fulani Braids with Beads
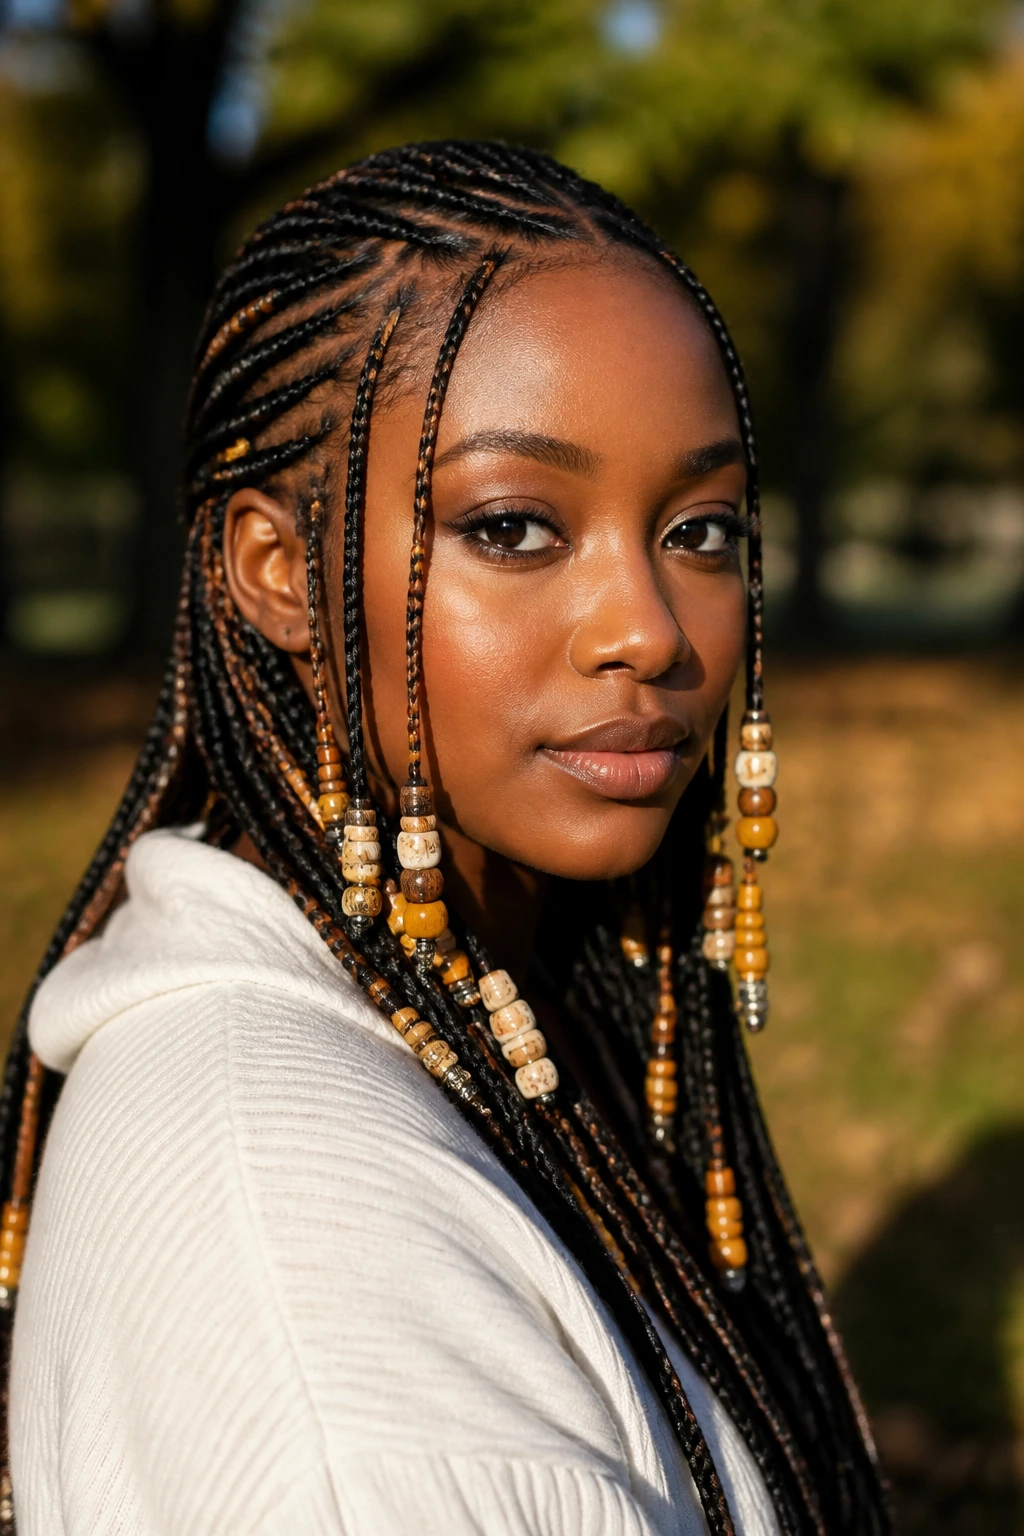
Fulani braids carry a lot of structure: a central braid or set of braids, side pieces that frame the face, and bead accents that move when you walk. The beads are part of the story, so they should feel chosen, not dumped on. A few well-placed beads do more than a whole handful.
This style looks best when the parting is precise and the accessory placement is balanced on both sides. If the beads cluster at one ear and nowhere else, the shape gets visually lopsided. Keep the finish clean and let the movement come from the beads themselves.
Best for
- Medium to long braided installs
- People who want movement and sound in the style
- A braid look that feels finished without extra styling each morning
Good call: Match the bead size to the braid size. Tiny braids with oversized beads can look crowded fast.
34. Goddess Braids
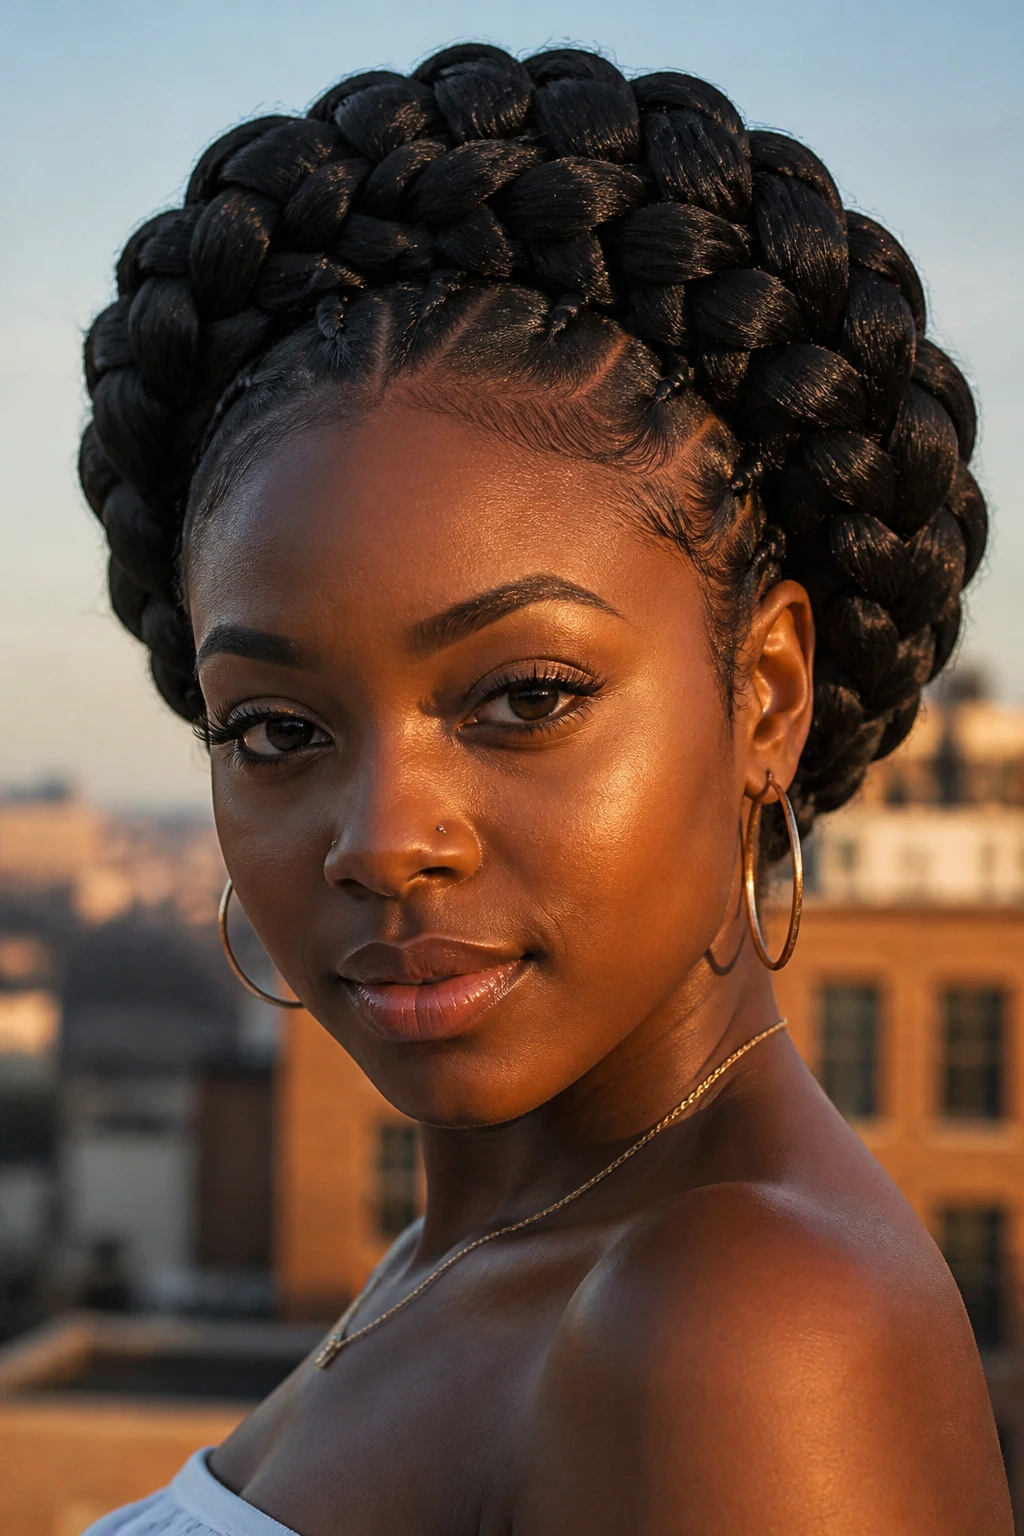
Goddess braids are thick, sculpted braids that make a strong shape all by themselves. They can be worn straight back, curved, or swept into a bun, but the point is the same: bold lines and a full braid body. They hold the head close and give the style a grounded, smooth look.
I like goddess braids because they don’t need much decoration. A clean part and a soft sheen are usually enough. If you want a little extra, wrap a braid cuff around one row or leave a few baby hairs laid at the temples. Don’t overdo it. The braid itself already has presence.
- Thick, defined rows
- Works with added hair or natural length
- Good for protective styling and sharp shapes
My opinion: If you want a braid that looks strong in a plain T-shirt and a blazer, this is one of the best choices on the list.
35. Stitch Braid Ponytail
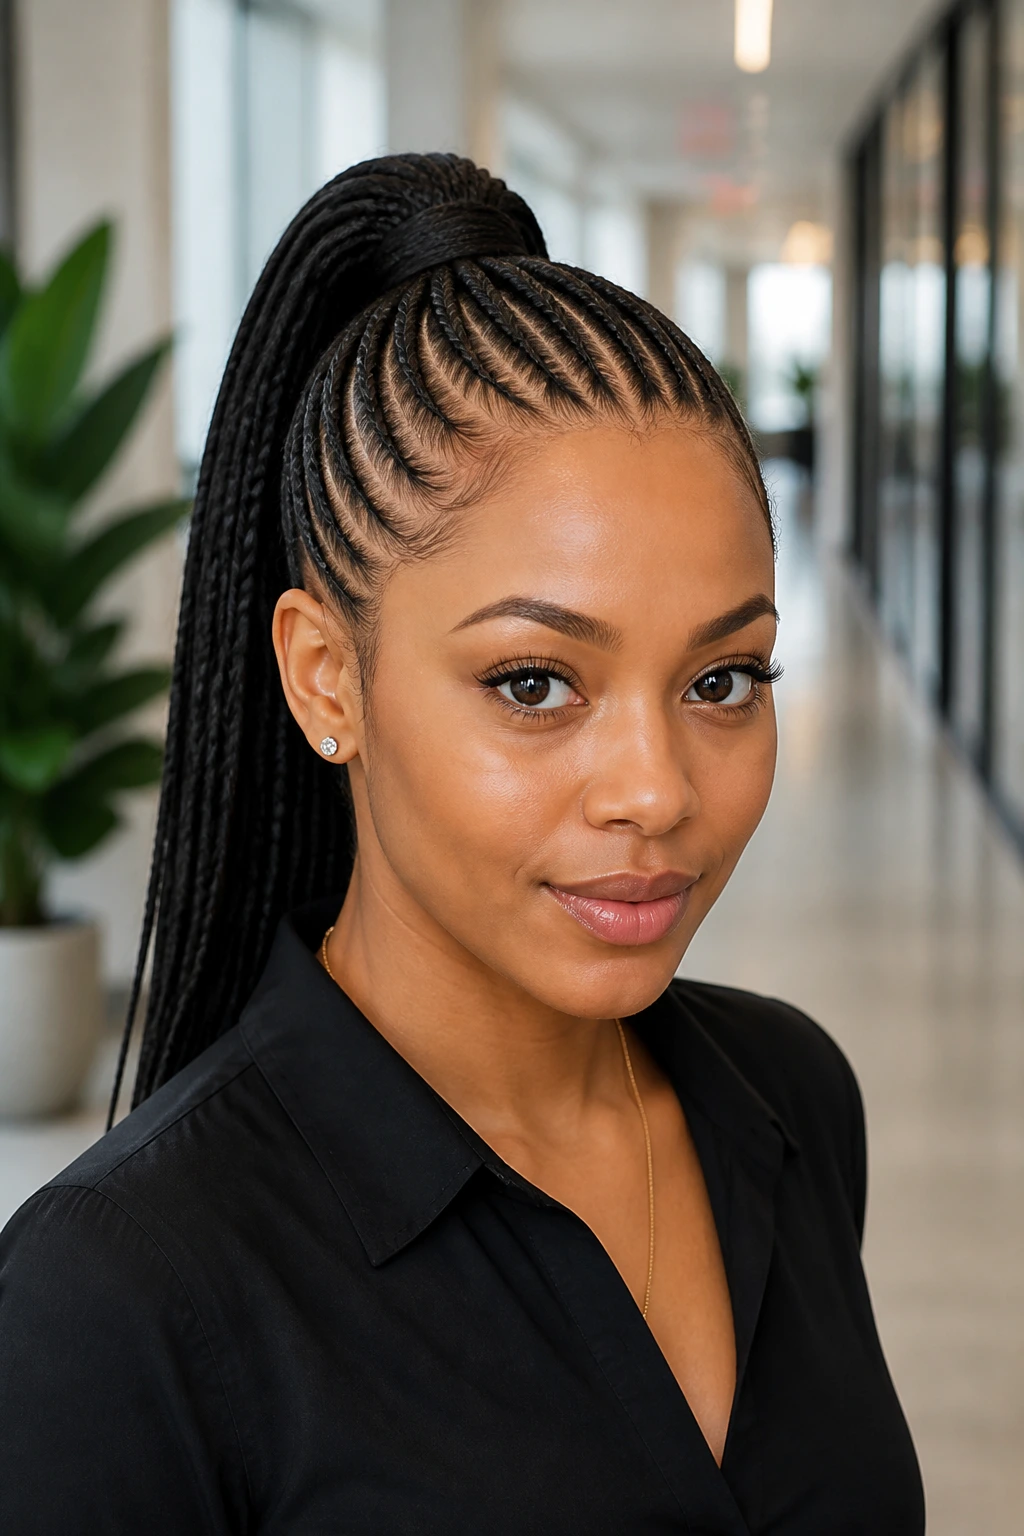
A stitch braid ponytail combines the clean lines of stitched cornrows with the lift of a ponytail. The braid pattern at the scalp is the feature here, and the ponytail just gives it somewhere to land. It’s neat, high-impact, and a little severe in a way that can look very good with earrings or a sharp collar.
The lines between the rows should be even. If the stitch marks shift or blur, the whole style loses that graphic quality. A strong hold at the ponytail base matters too, because any sagging there softens the whole top half of the look.
Why it works
- The braid pattern stays visible even from the front
- A ponytail gives the style height and movement
- It’s a clean option for long wear
Keep it neat: Use a small strand of hair to wrap the ponytail base. That hides the elastic and gives the whole style a cleaner finish.
36. Braided Headband with a Low Chignon
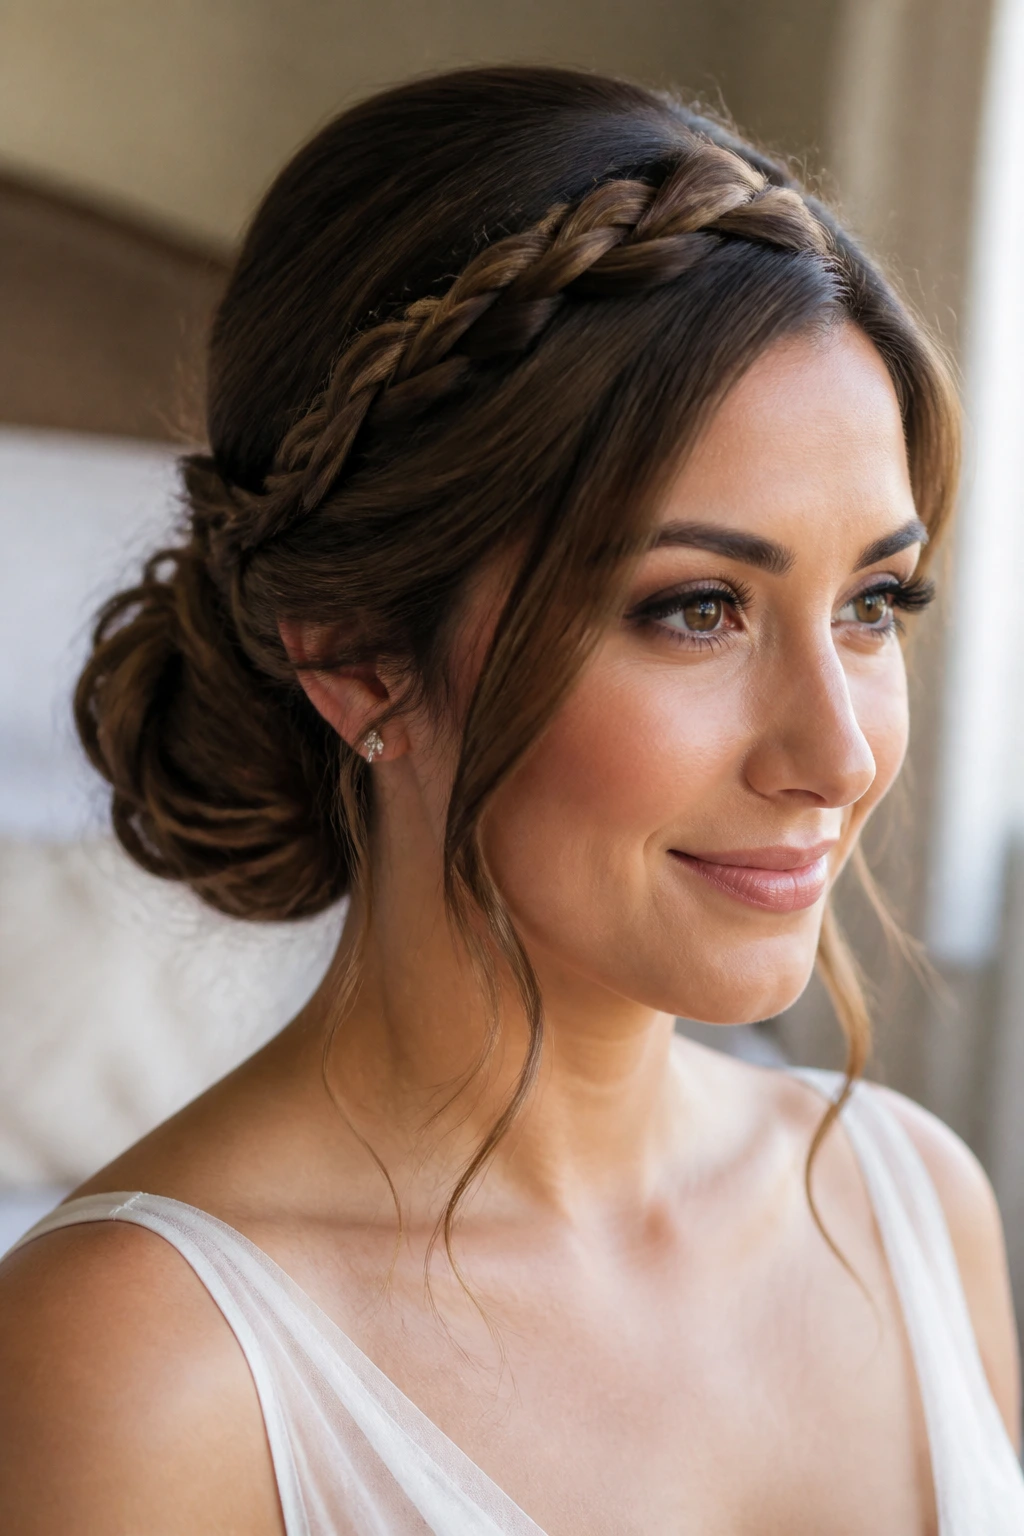
A braided headband is one of the best ways to keep hair off the face without giving up softness. The braid runs across the hairline like a band, and the rest of the hair goes into a low chignon at the nape. The result feels calm and elegant without being fussy.
This style works well when you want control at the front and a compact finish at the back. It’s especially useful with layered hair because the braid can corral the shorter pieces that like to float away. Keep the chignon smooth if you want a formal feel, or leave it a touch looser for something softer.
Best for:
- Medium to long hair
- Work events, dinners, or weddings
- Keeping bangs or front layers contained
Small tip: If the braided headband keeps slipping, anchor it with a hidden pin just behind the ear on each side.
37. Accent Braids into Loose Curls
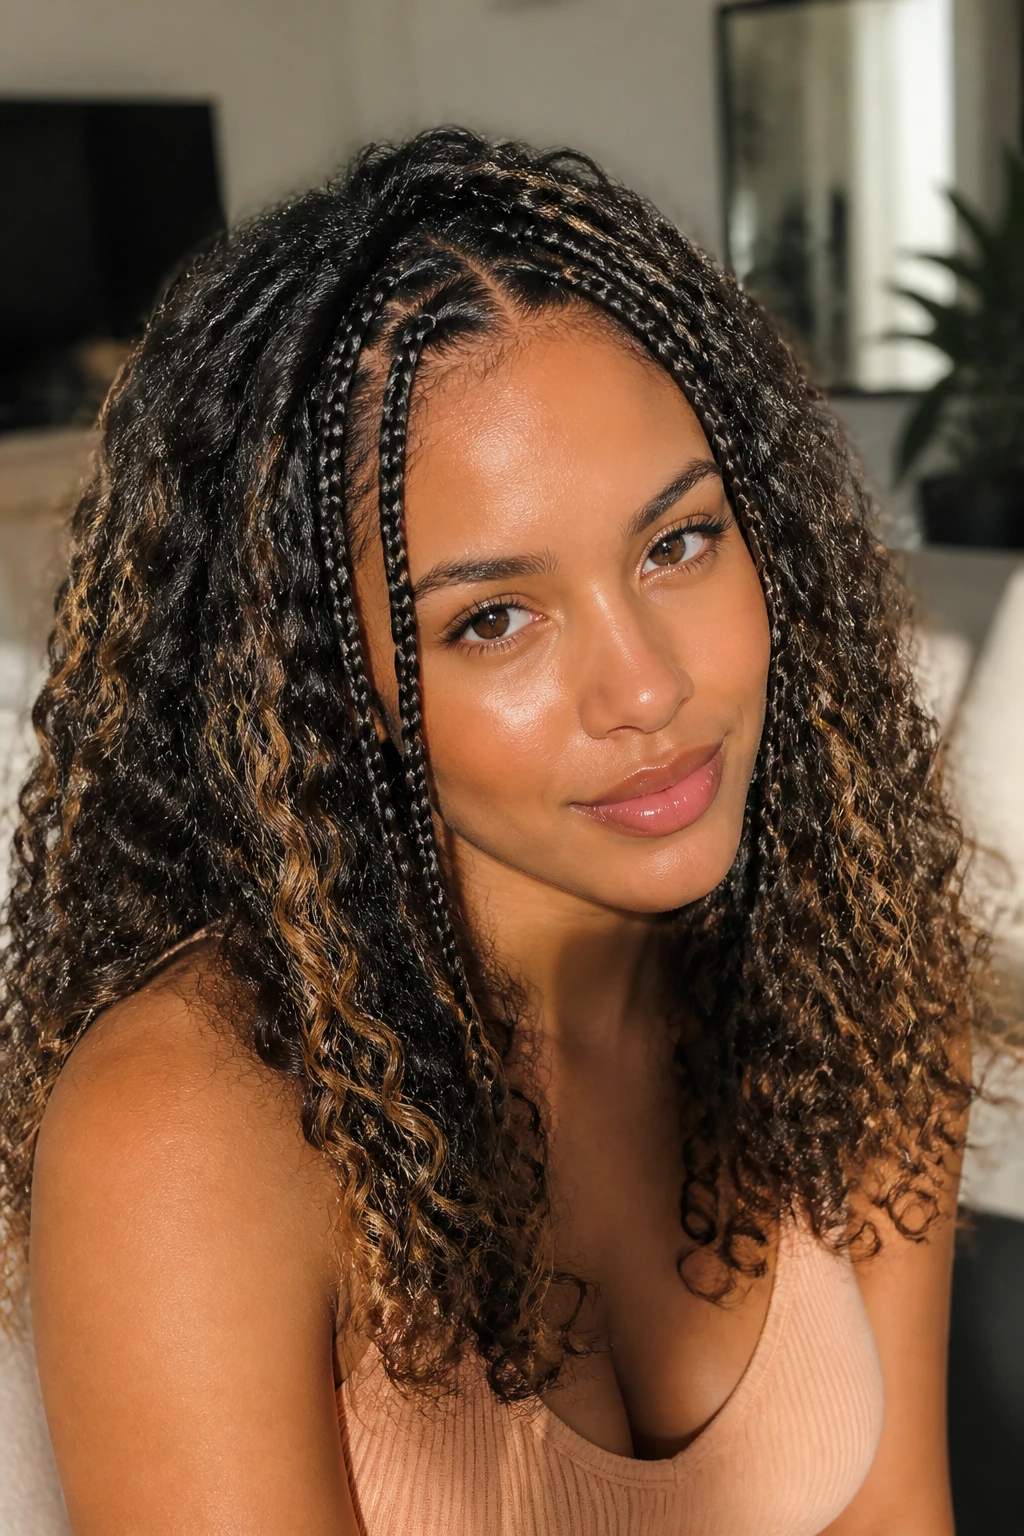
Accent braids give curly or wavy hair a little structure without taking over the whole head. You braid a few slim sections — near the front, around the crown, or tucked into the lengths — and let the rest of the hair stay loose. It’s a nice balance. You get texture from the braids and movement from the curls.
This is the kind of style I like when the hair already has good volume and you don’t want to fight it. A couple of slim braids can break up a big curl pattern in a way that looks deliberate instead of busy. Keep the braids small enough that they read as accents, not a competing texture.
- Works beautifully with curls and waves
- Good for adding detail without a full install
- Easy to refresh by redoing just a few pieces
Good to know: The braid pieces should be proportionate to the curl size. Tiny braids disappear in very dense curls, while bulky braids can overwhelm fine waves.
38. Two Braids into a Low Ponytail
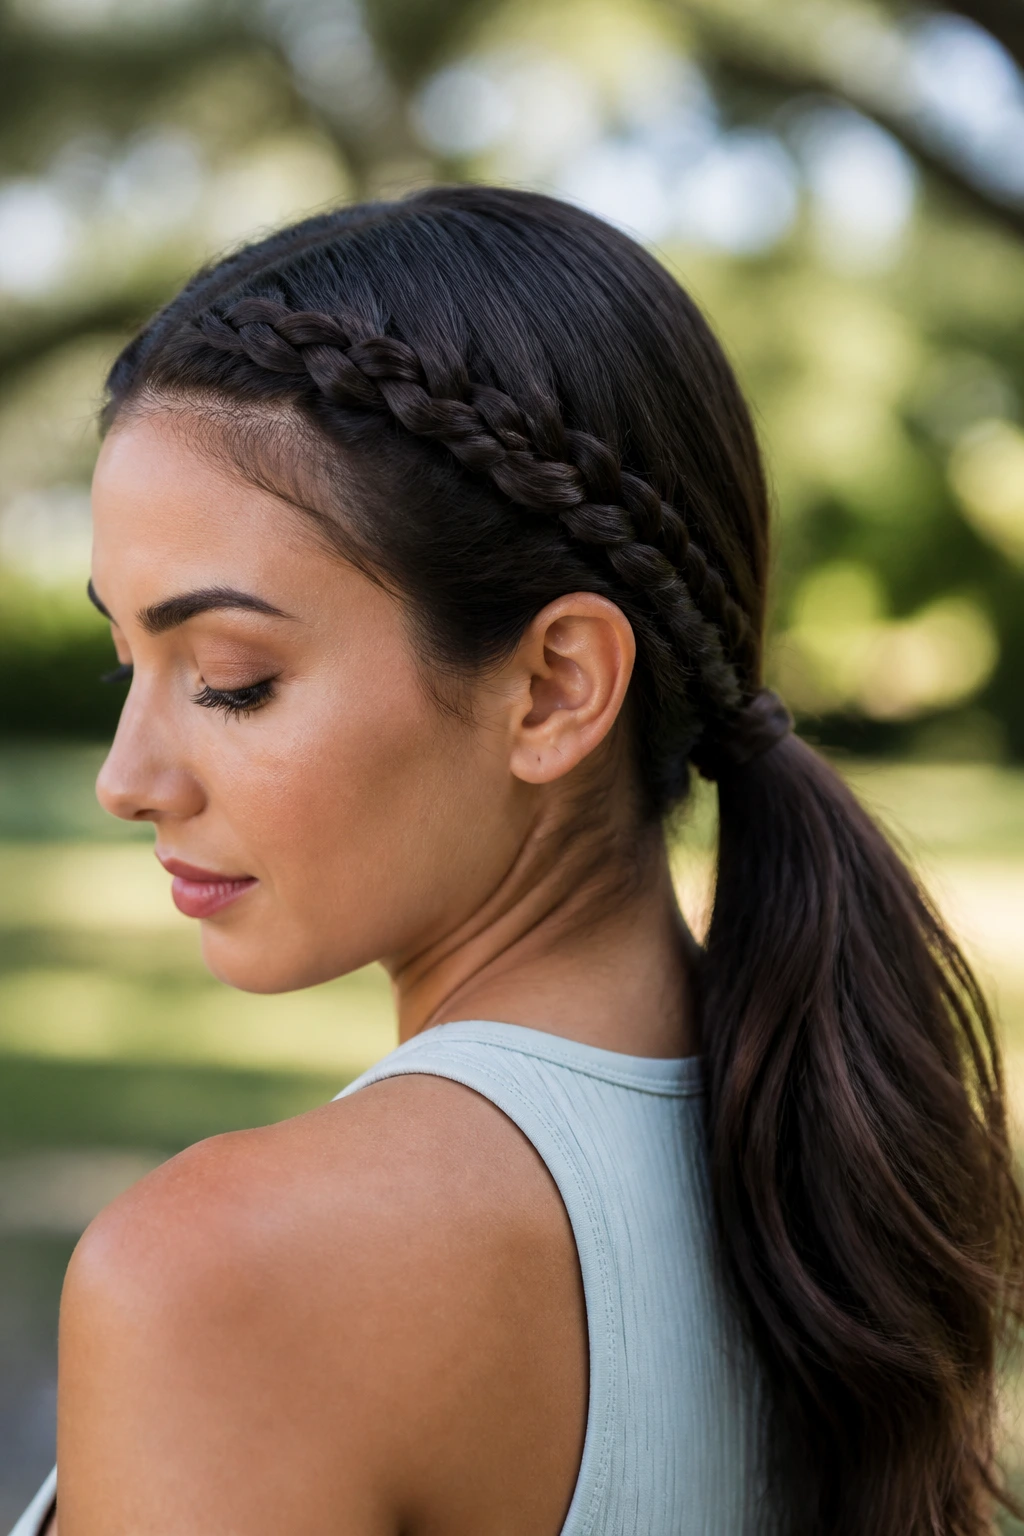
Two braids into a low ponytail sits in that useful middle ground between playful and polished. Small braids start near the temples or sides, then meet at the nape and join the rest of the hair in a low ponytail. It gives the front some structure without locking the whole head into a braid.
The shape flatters medium-length hair especially well because the ponytail still has enough weight to sit neatly. If you want a softer version, leave the braids a little loose and tuck a curled piece near each temple. If you want sharper lines, smooth the crown and keep the part clean.
Best if you want
- A quick braid detail
- Hair off the face without a full updo
- Something that works for school, work, or dinner
Tip: Tie the ponytail low enough that the braid anchors actually show. Too high, and the side braids get swallowed by the back.
39. Zigzag-Part Braids
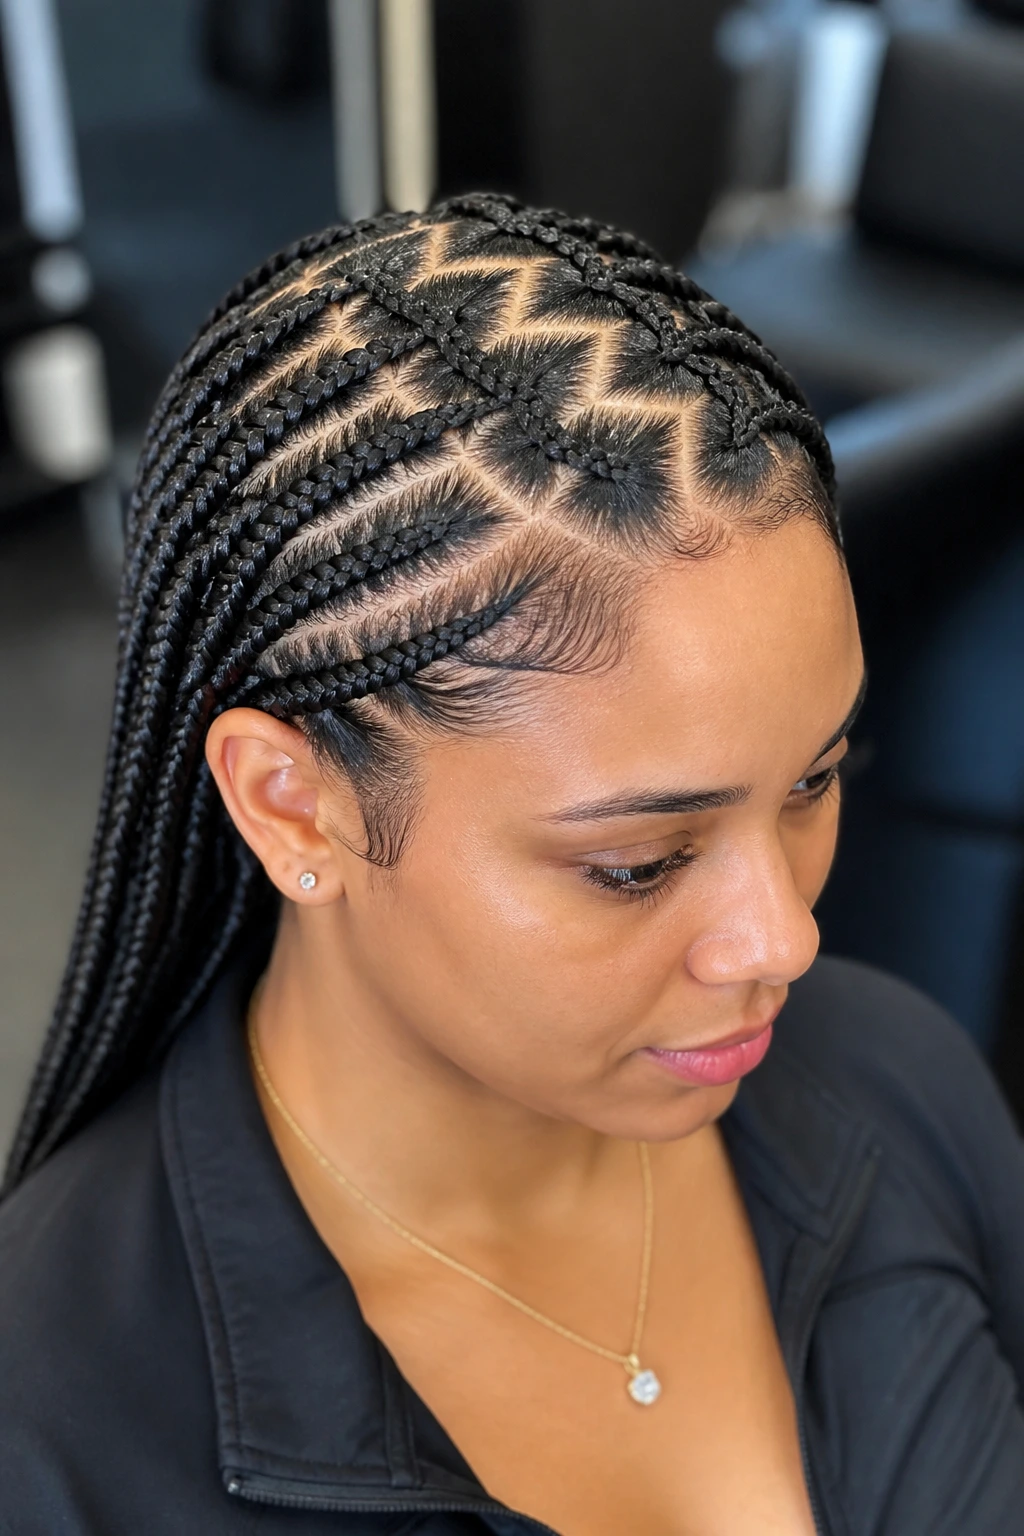
Zigzag parts are proof that the parting can do half the styling work. The braids themselves can be simple cornrows, box braids, or even smaller plaits, but the zigzag scalp design adds motion before the braid starts. It’s a small detail that makes the whole style feel sharper.
This style needs a steady hand, because wobbly zigzags look accidental instead of designed. Use a tail comb and take your time. Once the part pattern is in place, the braids can be straightforward. That’s the beauty of it. The visual interest happens at the scalp, so the braid pattern doesn’t need to be overcomplicated.
- Great for kids, teens, or adults who want a playful edge
- Works on natural hair or with extensions
- Shows best when the parts stay crisp
Small note: Don’t overload the hair with product before parting. Wet, greasy roots make the zigzag line smudge.
40. Braided Bun with a Scarf Wrap
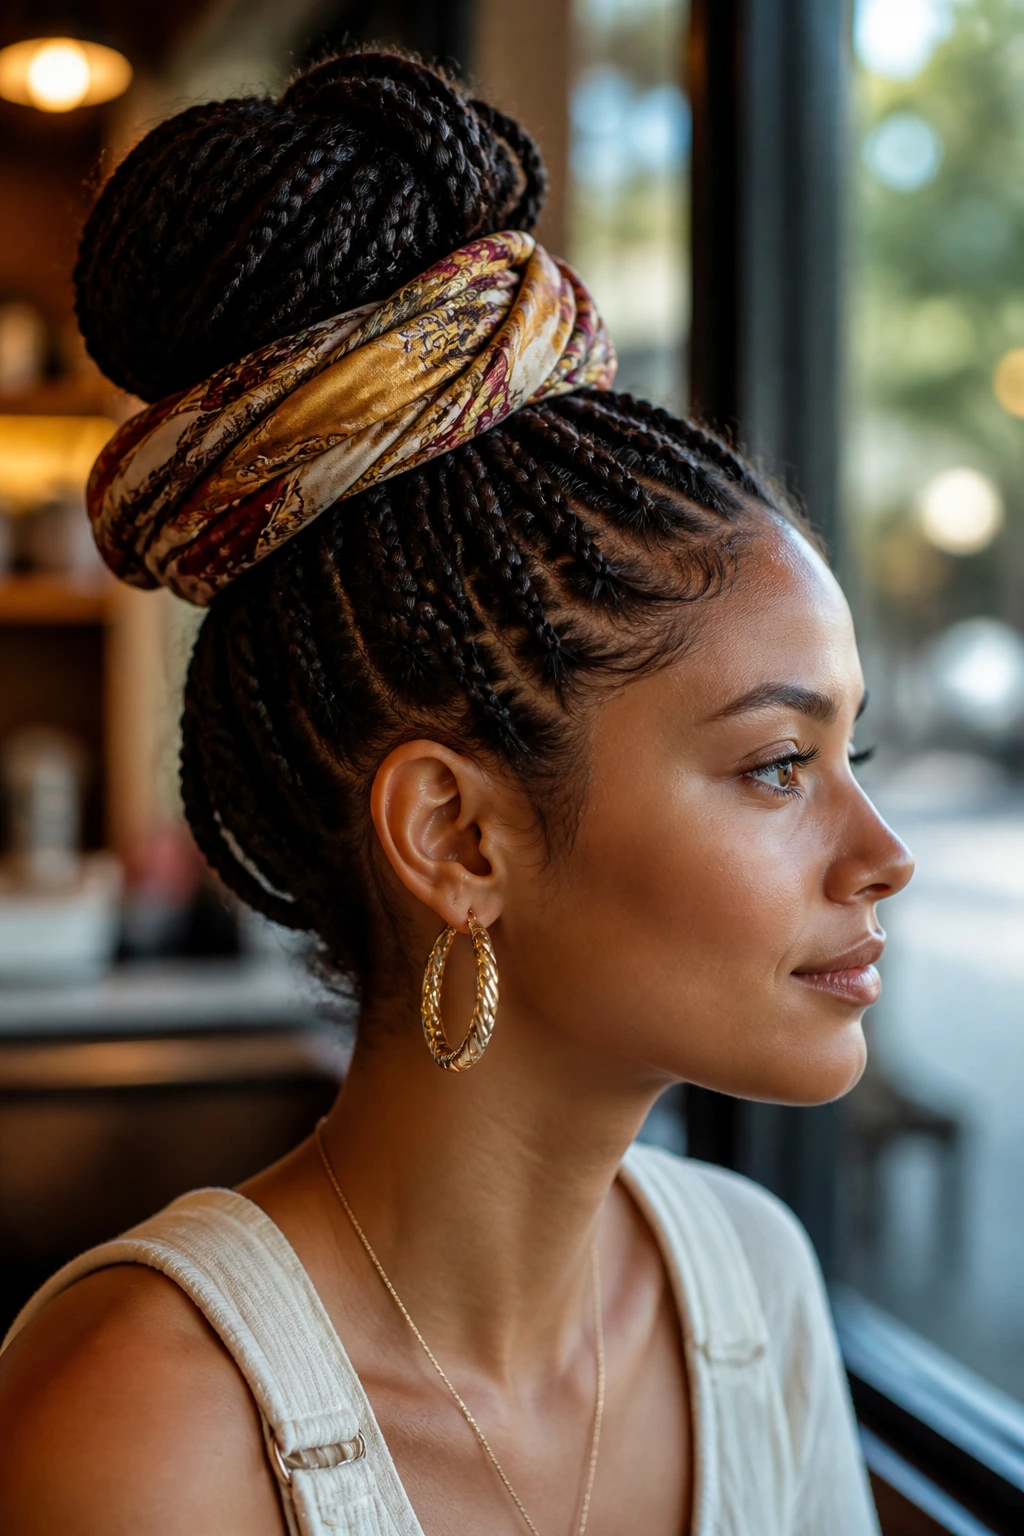
A braided bun with a scarf wrap is one of the easiest ways to make a simple braid feel styled on purpose. You braid the hair into a bun, then wrap a scarf around the base or across the top. The scarf adds color, pattern, and a little softness around the face without changing the braid structure itself.
This is a clever option when the braid is doing the work and the accessories are doing the finishing. A silk scarf sits more smoothly than cotton, and it won’t tug at the braid as much. If you want the look to feel balanced, let the scarf colors echo one detail in your outfit instead of competing with it.
Why it works
- The bun keeps the hair compact
- The scarf adds interest with almost no extra effort
- It’s easy to refresh or change out during the day
My opinion: This is the fastest way to rescue a plain braid when you need it to look more intentional.
41. Braided Lob with Curly Ends
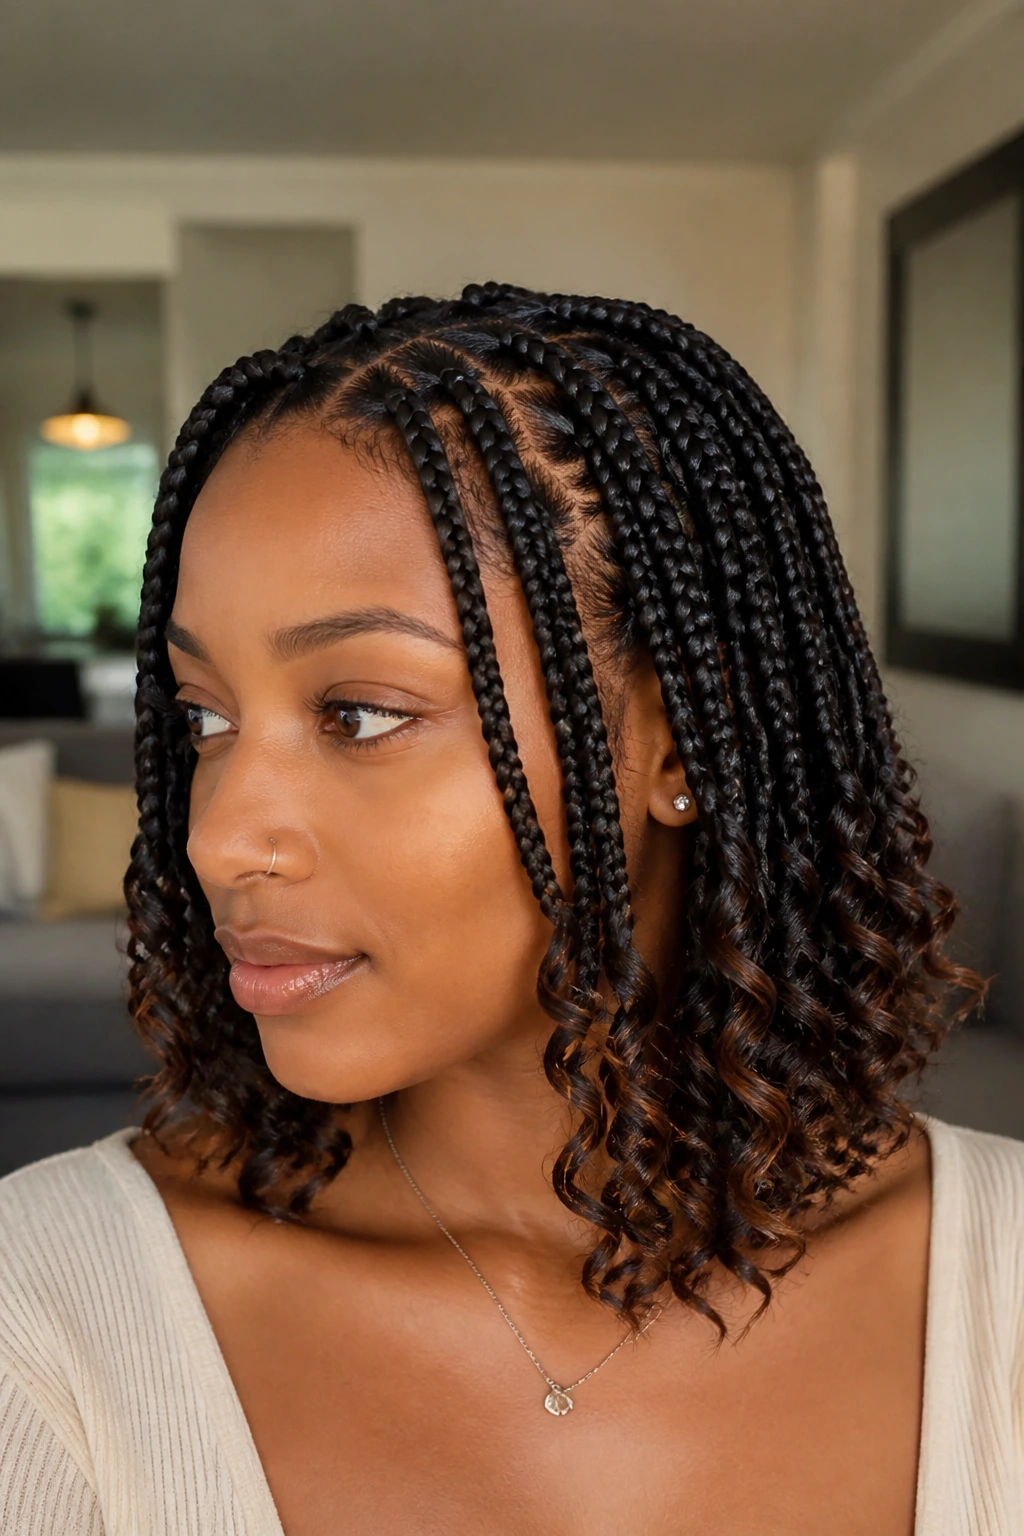
A braided lob gives you the shape of a medium-length cut with the structure of a braid, and that combination can be very flattering. The braid stops around the collarbone or just above it, then the ends finish in soft curls or bends. That keeps the look light. Long braids can pull the face down; this length stays airy.
It’s a smart choice if you like braids but don’t love the weight of a longer install. The shorter length makes the braid feel modern and easier to manage, especially with layers. Curling the ends adds a little swing and keeps the finish from looking blunt.
- Collarbone length or slightly longer
- Soft, wearable shape
- Good for people who want less weight on the neck
Tip: Keep the ends moisturized but not oily. Too much product makes the curled finish separate and droop.
42. Braided Mohawk Updo with Loose Pieces
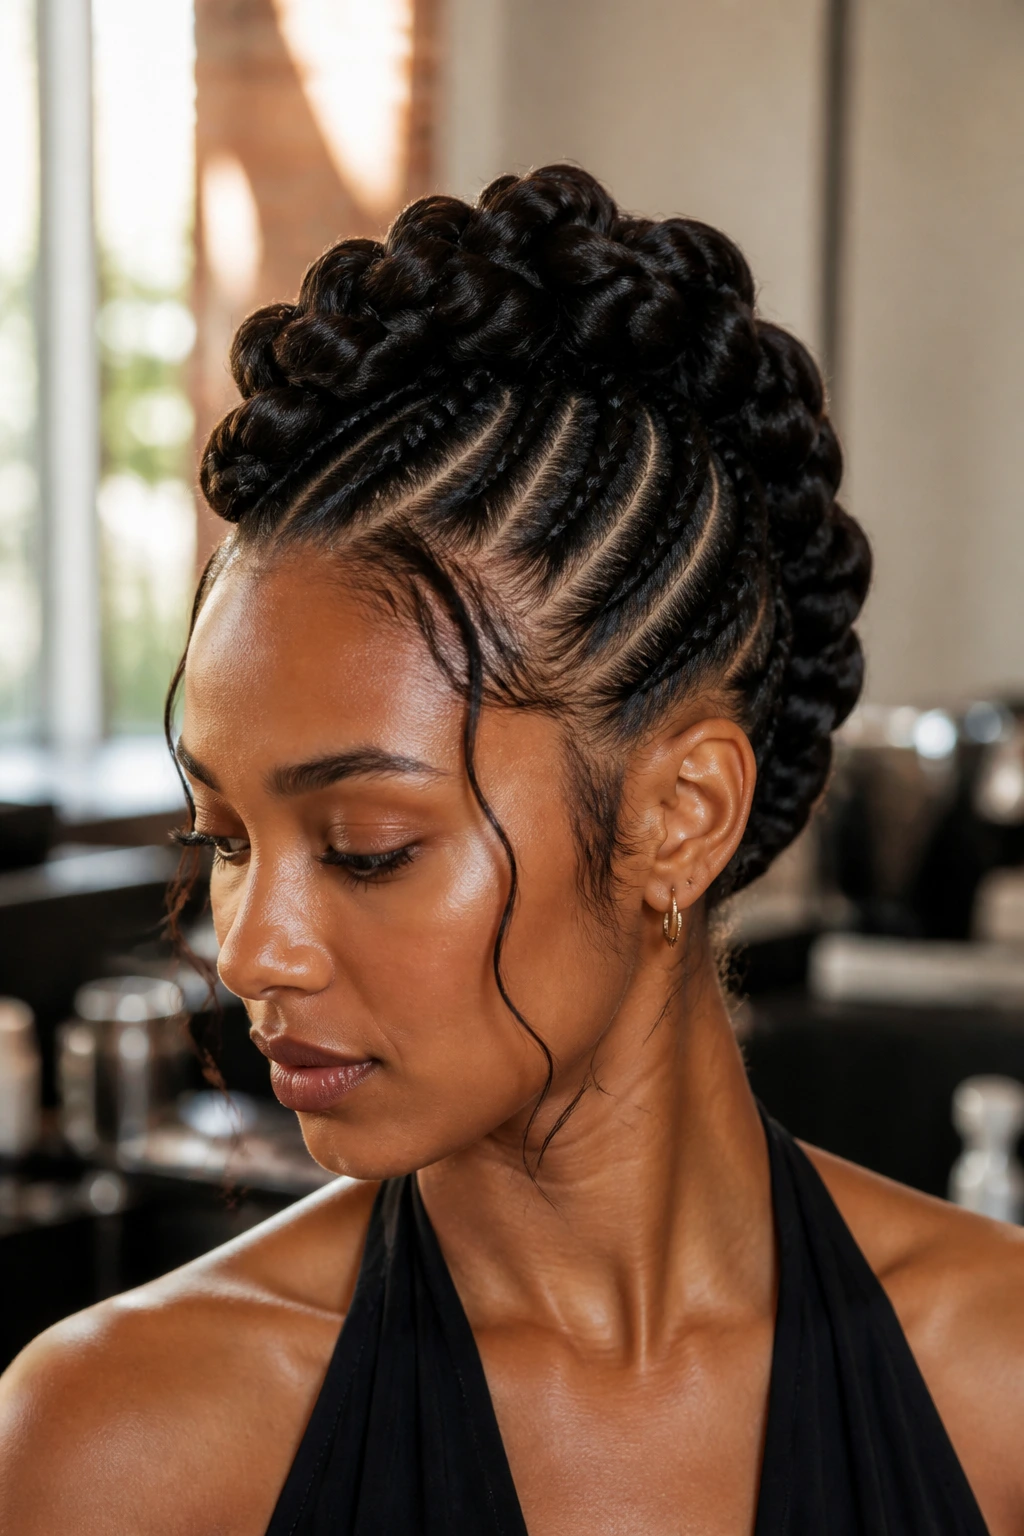
A braided mohawk updo takes the drama of a center ridge and softens it with a few loose pieces near the temples or nape. The braid or braid panels run through the middle, while the sides stay tighter and smoother. It has edge, but it doesn’t need to feel hard. That balance is what makes it interesting.
This version looks especially good when you want a style that reads bold from the front and detailed from the side. Keep the loose pieces intentional — two face-framing strands are enough for most people. Any more, and the mohawk shape can get lost in the fluff.
Best for
- Long hair or braided extensions
- Nights out, parties, or statement days
- People who want height without a full top knot
Keep it clean: The side smoothing matters here. If the sides are frizzy, the whole updo loses the contrast that makes it work.
Why Braid Hairstyles for Women Hold Their Shape So Well
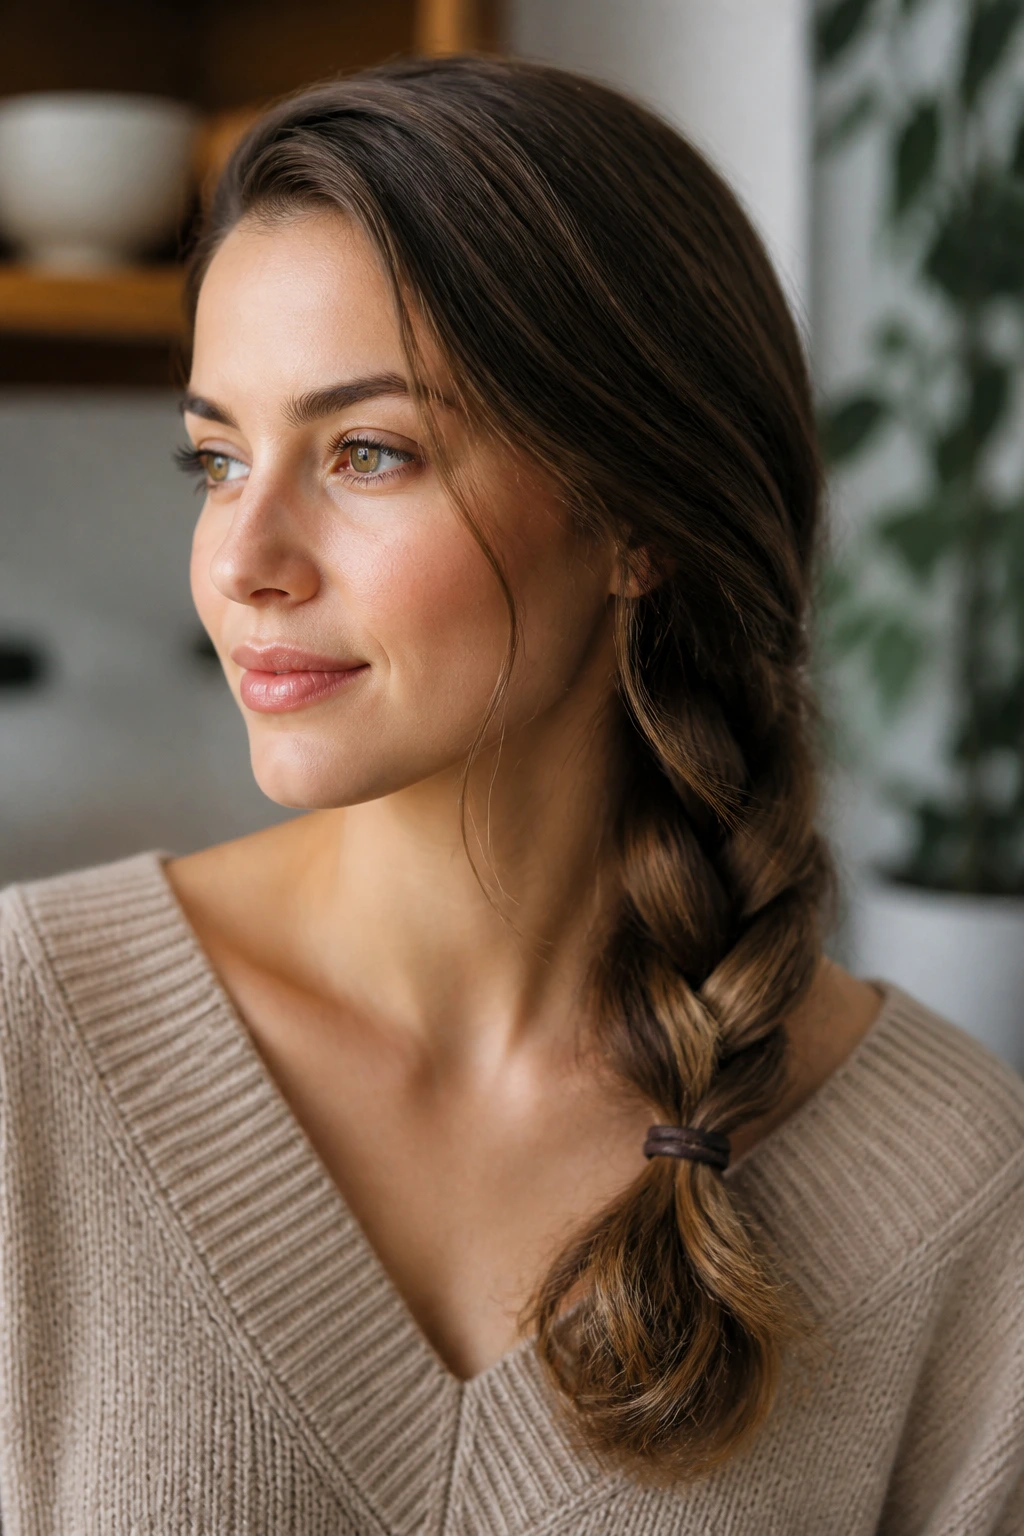
Braids stay useful because they build structure into the style itself. Once the hair is sectioned and crossed, the shape has a spine. Loose curls can collapse under a scarf, a collar, or a hot afternoon. A braid usually keeps its outline, even when the ends get a little soft. That’s why braid hairstyles for women turn up everywhere from the office to the gym to weddings with a strict dress code.
Parting and tension do more work than most people think. A clean line at the scalp gives the braid a place to sit, and the first inch near the hairline decides whether the style looks polished or fuzzy by lunchtime. On silky hair, a little texture spray or mousse helps the braid hold. On coarse or coily hair, too much product can make the sections sticky and hard to adjust later. The sweet spot is controlled, not crusted.
The best braid is the one that matches the kind of day you’re having. A soft side braid will survive errands and a dinner reservation. A feed-in cornrow ponytail or knotless install can hold for longer stretches if you protect it at night. Different tools, different wear time. That’s not a flaw in the style. It’s the reason braid people keep coming back to braids.
How to Choose Braid Hairstyles for Women by Hair Length and Texture
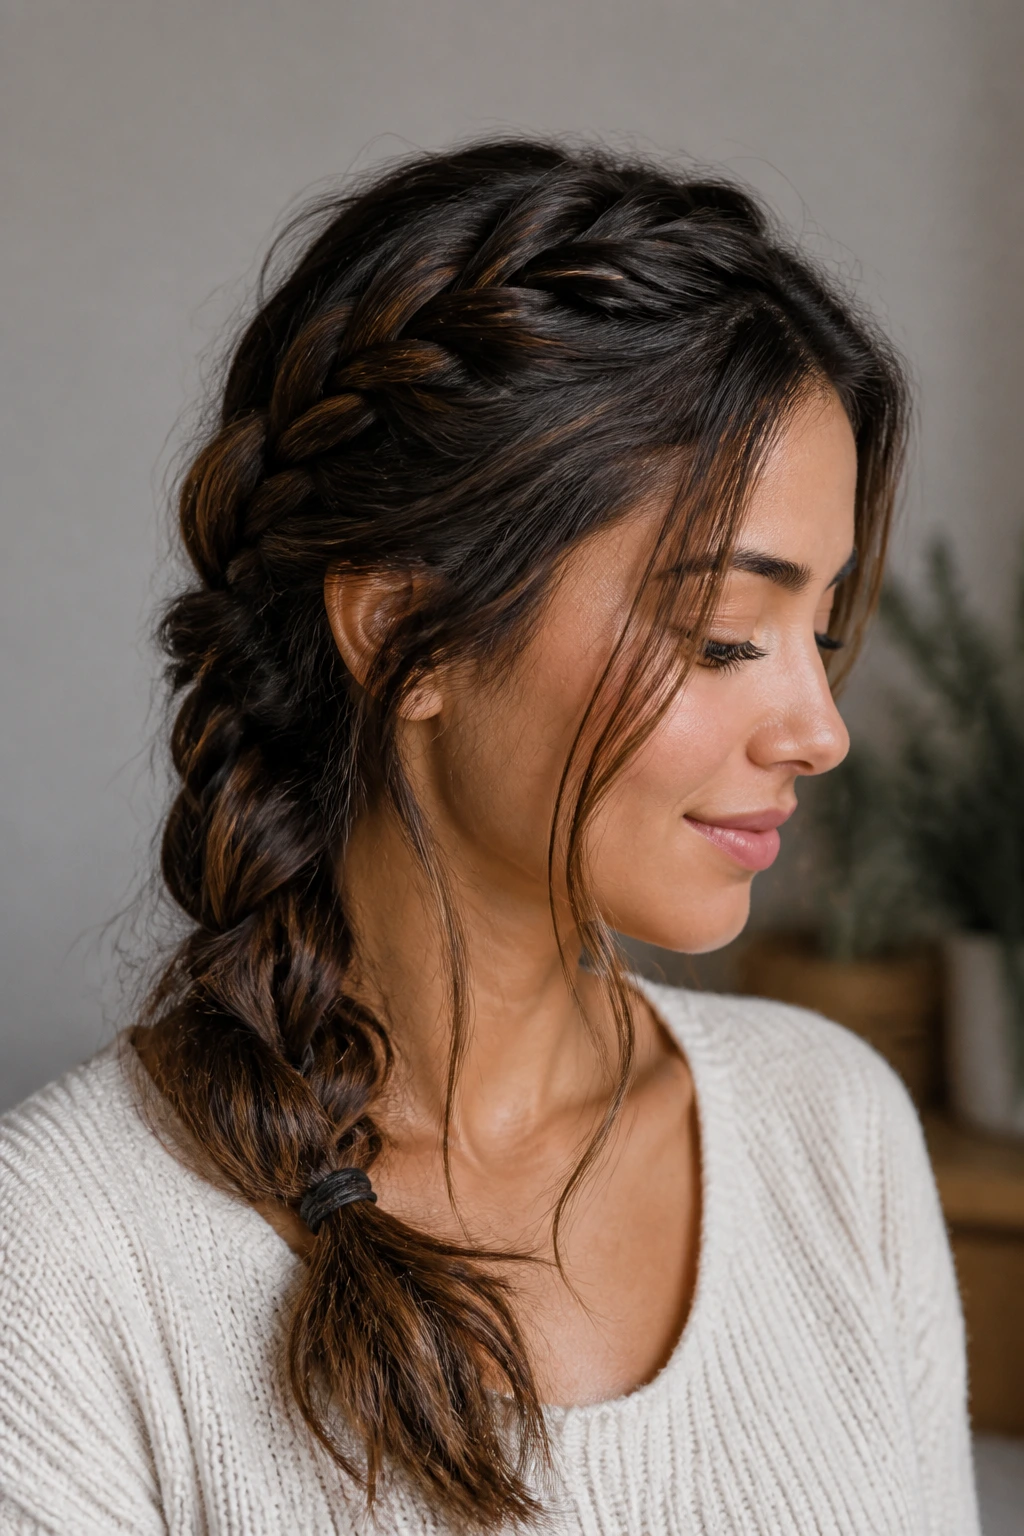
Short Hair
Short hair works best with braids that use the front, crown, or one side rather than trying to force a full-length plait where there isn’t enough hair. Accent braids, braided bangs, a headband braid, and side-swept cornrows all make sense here. Keep the braid small enough that the ends can disappear into a pin or a tiny elastic without poking out.
Shoulder-Length Hair
This is the sweet spot for milkmaid braids, fishtails, rope braids, bubble braids, and braided low buns. The hair is long enough to hold shape, but not so long that the style gets heavy before noon. If the ends look thin, curl them, tuck them, or tie them under a wrapped section so the finish feels deliberate.
Long Hair
Long hair can carry more dramatic styles: pull-through braids, four-strand and five-strand braids, halo braids, braided top knots, and full protective installs. There’s enough length to pancake, coil, wrap, and still keep the line readable. That said, long hair can also get bulky fast, so sectioning matters more than sheer volume.
Curly or Coily Hair
Start with stretched hair if you want crisp parts. The braid does not have to be pin-straight, but it does need grip at the root. A little leave-in cream or light gel on the part helps keep flyaways from puffing out too soon. For fuller styles, like goddess braids or Fulani braids, the natural texture becomes part of the finished look instead of something to hide.
The Tools That Make Parting Cleaner
-
Rat-tail comb: The pointed end makes parts cleaner and helps you trace straight or zigzag lines without tearing through the hair.
-
Wide-tooth comb: Use it before you braid. Knots left in the hair will show up later as bumps and uneven tension.
-
Sectioning clips: These keep the rest of the hair out of the way while you braid one panel at a time.
-
Smoothing brush or boar-bristle brush: Helpful for slicked-back styles, ponytail bases, and any braid where the top needs to lay flat.
-
Clear elastics: Small, cheap, and useful. They keep the ends secure without drawing attention away from the braid itself.
-
Edge brush: Good for smoothing the hairline and taming the first half-inch around the temples.
-
Texture spray or dry shampoo: Adds grip to silky hair and helps a braid hold longer without sliding.
-
Light gel or braiding cream: Tames frizz at the root. Use enough to control the flyaways, not enough to coat the scalp.
-
Silk scarf or bonnet: Necessary if you want the braid to look fresh the next day.
-
Optional braiding hair, ribbon, beads, or cuffs: Useful when you want extra length, color, or a more finished look.
Small Styling Moves That Make Braids Look Intentional
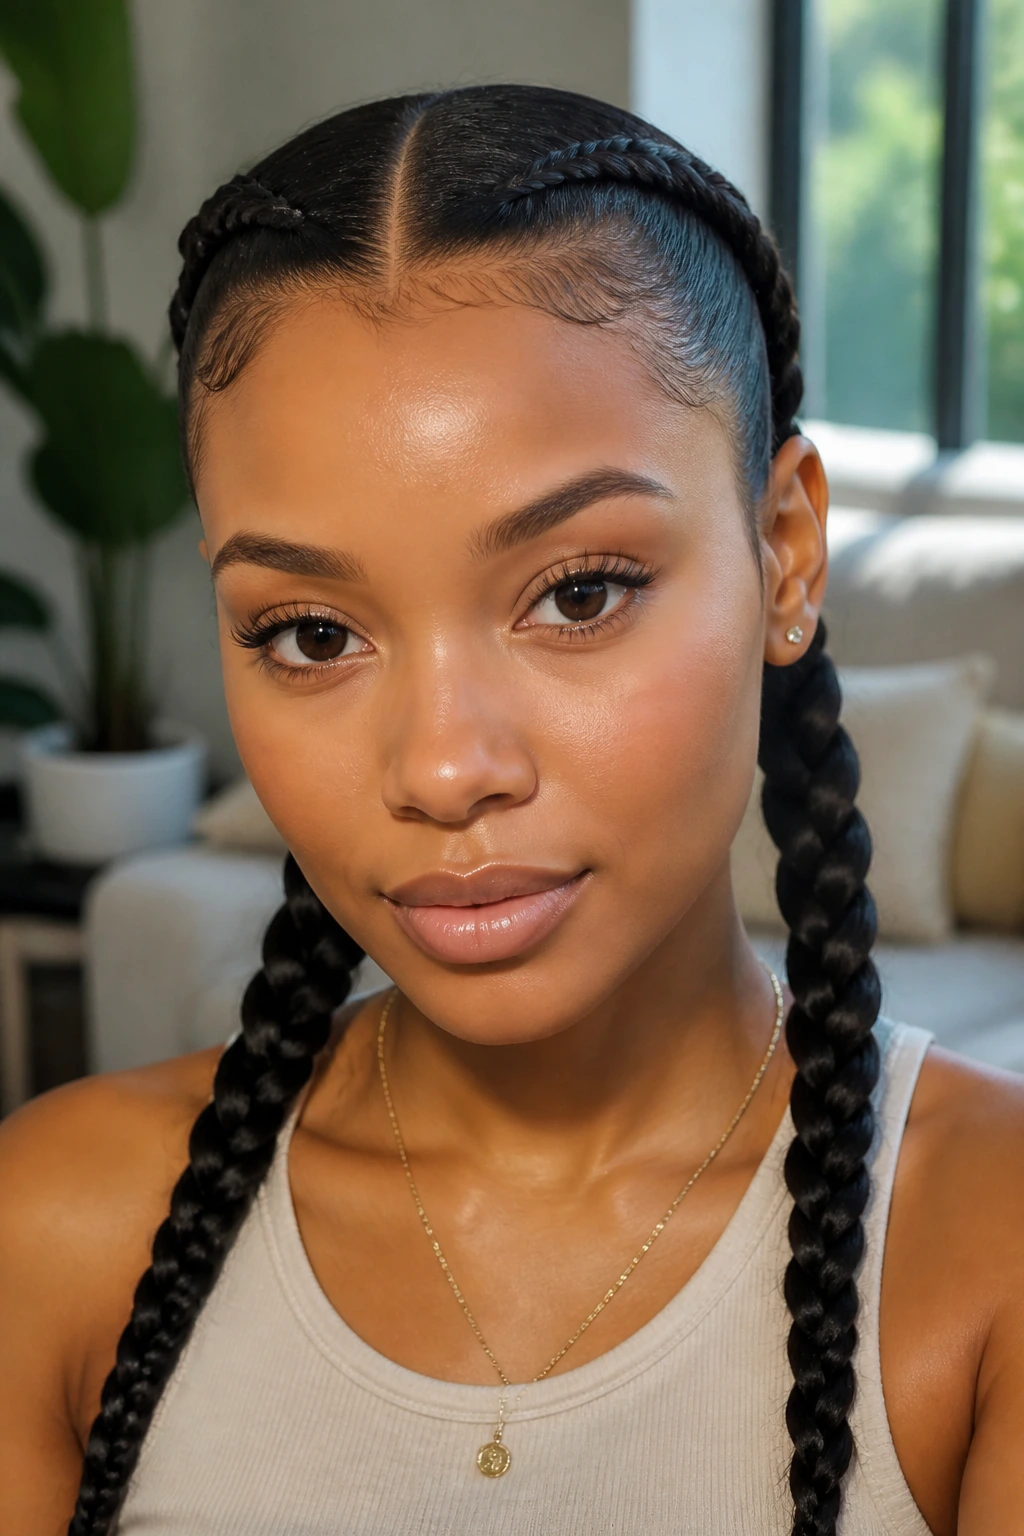
Parting: Clean parts do a huge amount of visual work. A straight center line, a deep side part, or a crisp triangle section can make even a simple braid feel planned. If you’re parting on textured hair, clip each finished section out of the way so the line doesn’t blur while you work.
Tension: Start snug, not painful. If the braid is pulling at the temples, the style is too tight and will look harsh by the end of the day. A braid should sit firm against the scalp without making you think about it every ten minutes.
Pancaking: Gently widening the outer loops changes a braid from thin to full. Do it after the braid is secured, using your thumb and forefinger, and stop when the braid looks soft rather than frayed. This works best on Dutch braids, side braids, and pull-through styles.
Finish: A tiny wrapped elastic, a tucked end, or one bead at the tip can make the style look complete. In a braid, the last inch matters more than people think.
Common Mistakes That Make Braids Look Flat or Hurt the Hairline
The first mistake is starting on tangled hair. You can sometimes get away with it on loose styles, but braids expose every knot. The fix is plain: detangle from ends to roots with a wide-tooth comb before you part anything.
The second mistake is over-tightening the front. A braid that feels “secure” at the hairline can still be too tight by lunch. If your scalp aches, if the skin at the temples feels shiny and stretched, or if tiny bumps show up along the part, loosen the tension next time. No style is worth that.
Heavy product is another common trap. Too much gel, edge control, or oil can make the hair slippery at the root and gummy at the base. That gives you frizz later, not less. Use a small amount and build only if you need it.
People also pick the wrong braid size for their hair density. Thin hair can disappear inside a giant braid. Very thick hair can turn a tiny plait into a puffball. Match the section size to the amount of hair you actually have.
And then there’s the ends. Blunt, fuzzy, unfinished ends make even a nice braid look rushed. Secure them neatly, curl them, bead them, or tuck them. Pick one.
Variations and Alternative Approaches
Soft Weekend Version: Keep the braid loose at the crown, leave two face-framing pieces out, and pull the outer loops wider after it’s secured. This version suits errands, brunch, and any day where you want the hair to feel relaxed instead of formal. It works especially well on side braids, French braids, and milkmaid braids.
Sleek Office Version: Use a center part, smooth the roots with a light cream, and keep the braid tighter and narrower. Don’t add a lot of accessories. A clean braid and a low finish usually look sharper than a decorated one in this setting.
Protective Install Version: Add braiding hair or choose knotless, feed-in, Ghana, or Fulani styles when you want a longer wear window. The key is balanced tension and clean parting. If the roots hurt after installation, the style needs to come out sooner rather than later.
Accessory-Heavy Version: Swap in ribbon, cuffs, beads, or a scarf wrap when you want the braid to feel more dressed up. One strong accessory usually beats three tiny ones. Pick a focal point and let the braid stay the main event.
Heatless Waves Version: Braid slightly damp hair into one or two loose braids before bed, then take them down in the morning for soft bends. This is less about the braid staying in place and more about what the braid leaves behind. It works best on hair that holds wave easily.
Keeping Braid Hairstyles for Women Fresh Overnight and Beyond
Loose braids, braided buns, and braided ponytails do best when they sleep under a silk scarf or in a satin bonnet. Cotton pillowcases rub the outer strands and leave the top fuzzy by morning. If your scarf keeps slipping, a satin pillowcase gives you backup without adding a lot of fuss.
For installed styles like box braids, cornrows, Ghana braids, or Fulani braids, the scalp needs regular but gentle care. A few drops of oil or a light scalp tonic every three or four days is usually enough for most people. More than that can make the roots look greasy and attract lint. If the scalp feels dry, focus the product on the part lines, not the whole head.
Wash installed braids every one to two weeks if you’re wearing them for a long stretch. Use diluted shampoo on the scalp, then rinse carefully and dry thoroughly. Damp braids can hold onto a stale smell fast, and that’s a problem nobody wants. A hooded dryer or a cool blow-dry setting can help the inside of the braids dry all the way through.
Most protective braids should not stay in forever. Six to eight weeks is a common wear window for larger installs, sometimes less for smaller or tension-heavy styles. When the roots get matted, the style stops protecting the hair and starts fighting it. Take it down before that point.
Frequently Asked Questions
Which braid is easiest if I’m just learning?
A classic side braid or a simple three-strand braid over one shoulder is the easiest place to start. It gives you a feel for sectioning and tension without demanding perfect symmetry. Once that feels steady, a rope braid or loose French braid is the next step.
What braid lasts the longest?
Protective styles like knotless box braids, Ghana braids, feed-in cornrows, and Fulani braids usually last the longest because they’re installed close to the scalp and protected at night. The exact wear time depends on hair growth, scalp comfort, and how well you maintain them, but the structure gives them a clear advantage.
Can I braid freshly washed hair?
Yes, but it can be slippery. Freshly washed hair often needs a little blow-drying, stretching, or texturizing product so the strands grip each other instead of sliding apart. If you want a cleaner braid, day-two hair is often easier.
How do I keep layers from sticking out of the braid?
Start with a small anchor braid at the crown or use a light styling cream on the shorter pieces before you braid them in. For very layered cuts, a tighter base and a looser tail usually keep the shape cleaner. Tiny bobby pins can also rescue the front pieces if they keep escaping.
Are braids bad for thin hair?
They can be if the braid is too heavy or too tight. Thin hair does better with smaller sections, lighter accessories, and less pulling at the hairline. A pull-through braid or a loose French braid often looks fuller without asking the hair to do too much.
How tight should braids feel?
Snug, not painful. If the scalp feels sore, the edges burn, or the braid tugs when you turn your head, the tension is too high. A good braid stays put without reminding you it exists every few minutes.
What if my braid looks flat?
Loosen the outer sections after it’s secured, or start with more root texture next time. A little dry shampoo, texture spray, or a rougher base can give the braid more body. Flatness is often a prep issue, not a braid issue.
Can I wear braids to a formal event?
Absolutely. Halo braids, crown braids, braided low buns, and stitch braid updos all work well with dressier clothes. Add one accessory — a pin, bead, or scarf — and the style shifts fast from everyday to event-ready.
Braids That Fit the Day Ahead
The braid that gets worn most is rarely the fanciest one. It’s the one that fits your hair, your schedule, and the kind of day you’re actually having. Some mornings call for a side braid and done. Others want a protective install, a clean part, and a scarf at night so the whole thing holds together.
That’s the real pleasure of braid hairstyles for women: they can be tidy or soft, simple or sculpted, and still feel like they belong to the same family. Pick the shape first, then adjust the tension, finish, and accessories until it feels like yours. The right braid has a way of making the rest of the outfit look more deliberate, even if the outfit itself is a plain T-shirt and jeans.
